Blog by Dal Stanton
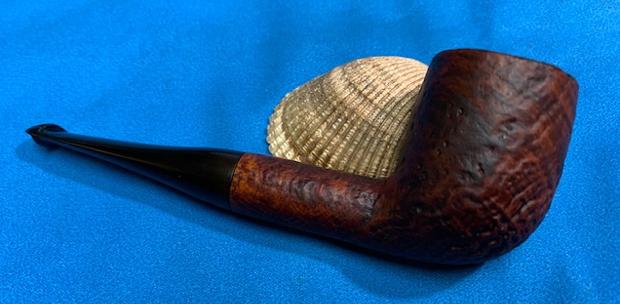
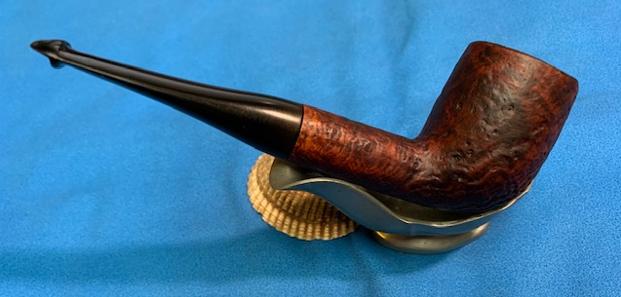
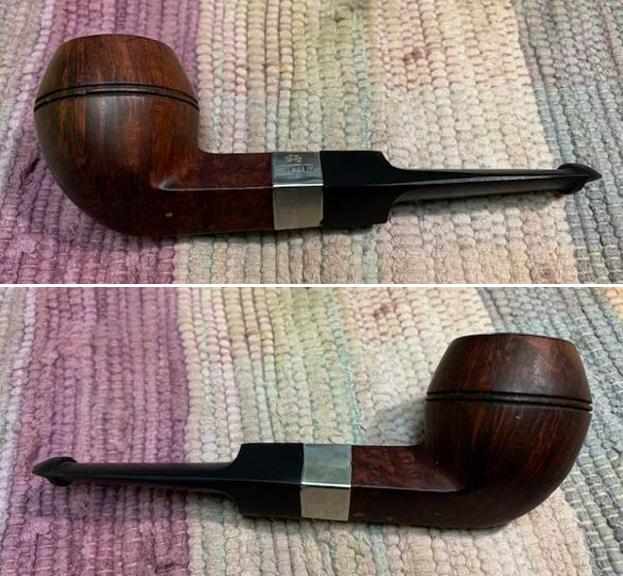
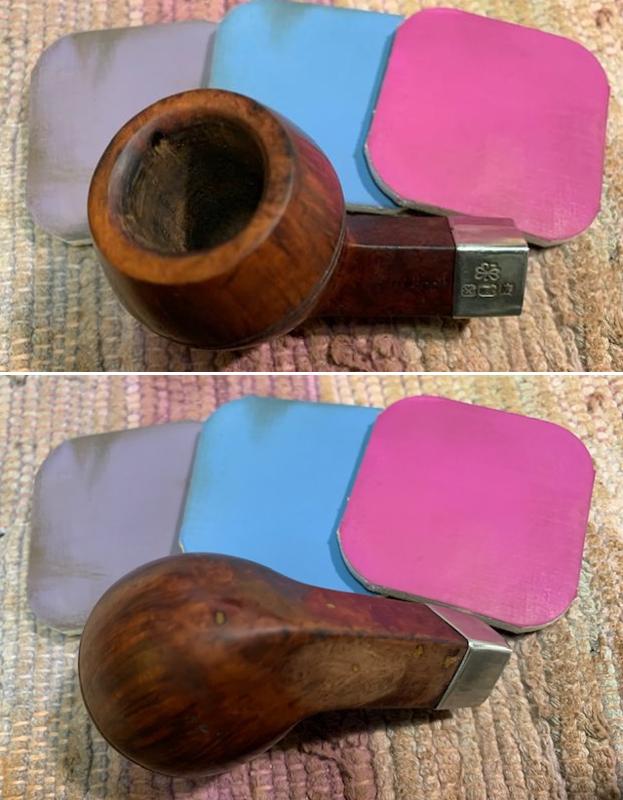
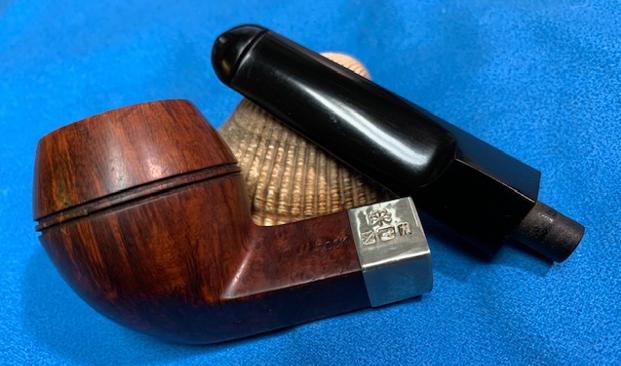
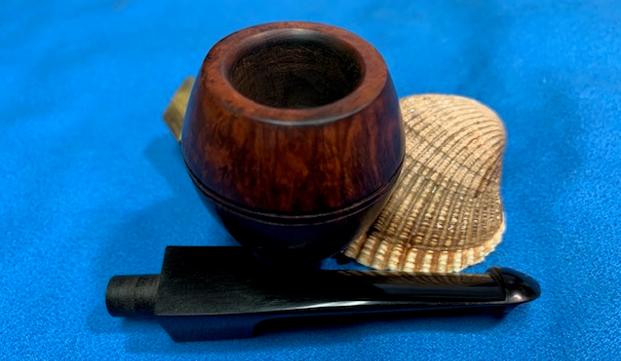
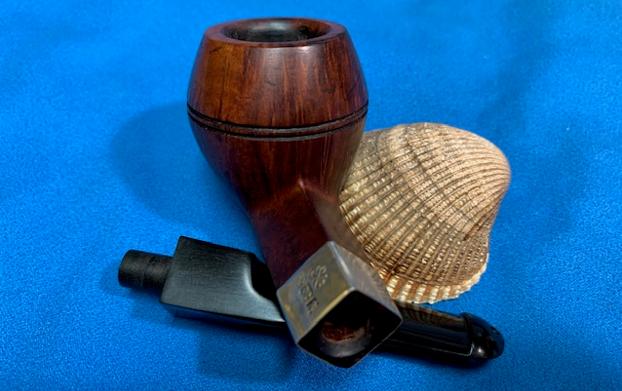
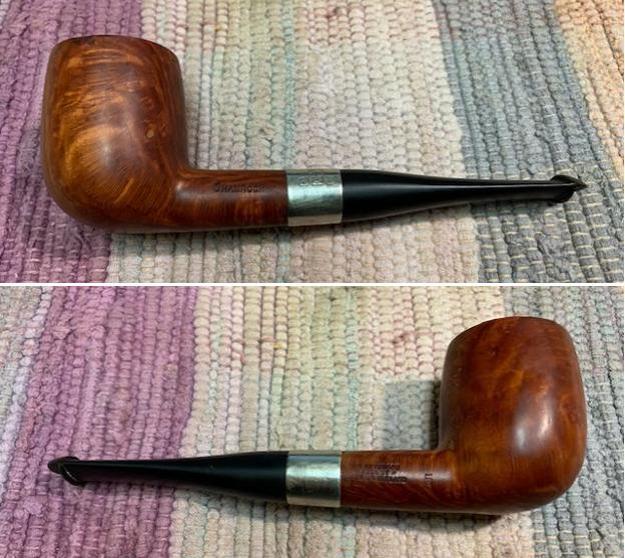
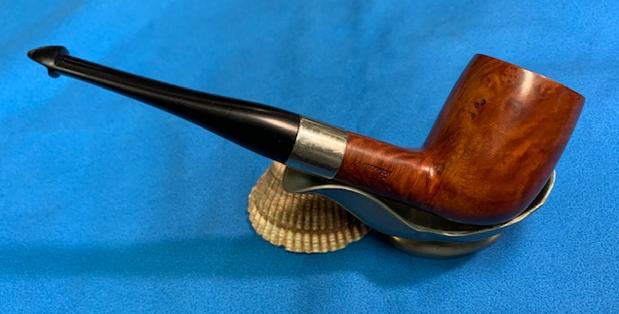
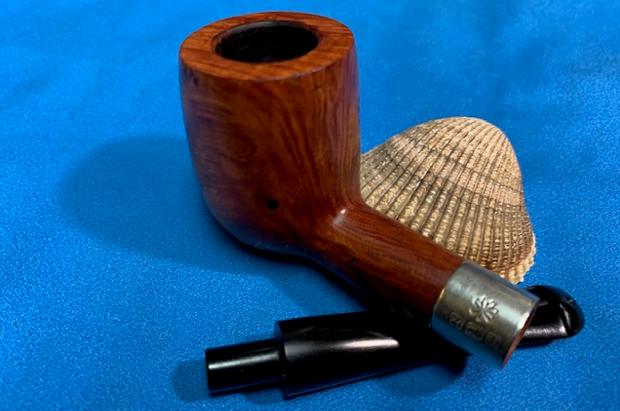
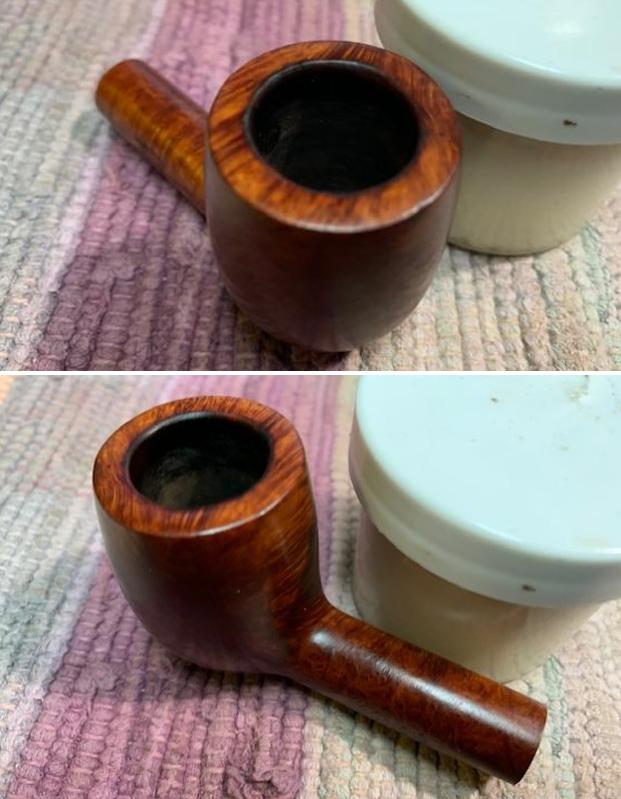
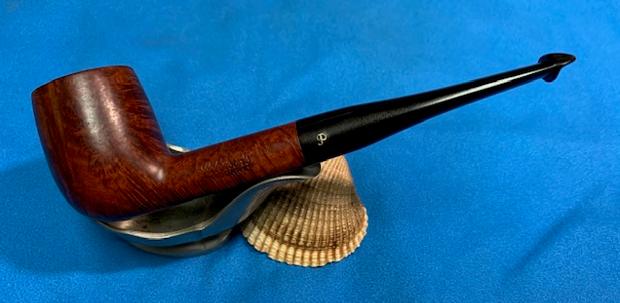
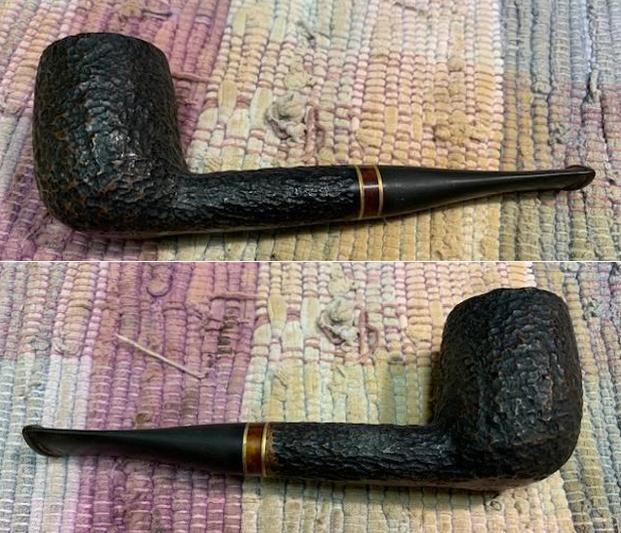
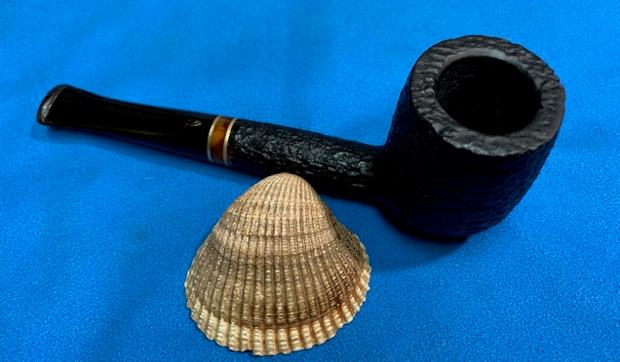
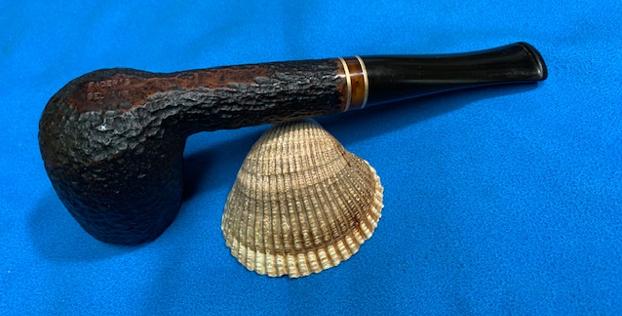
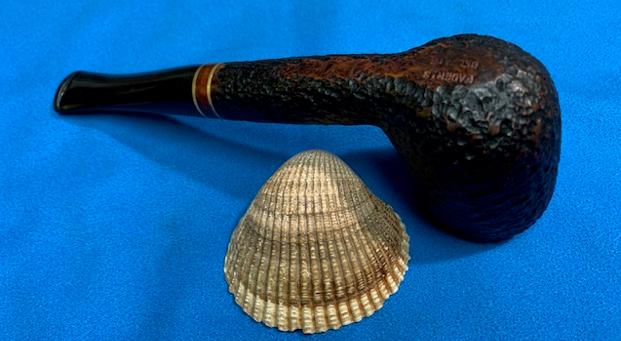
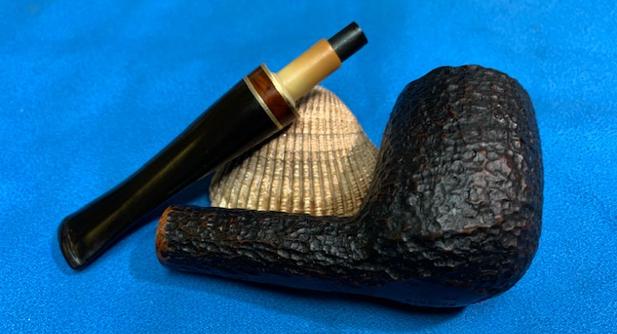
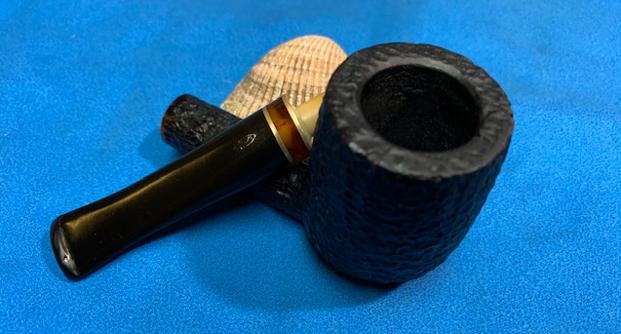
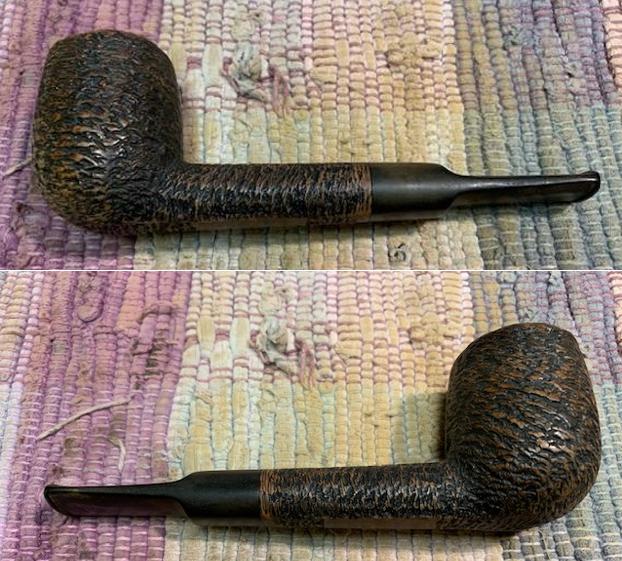
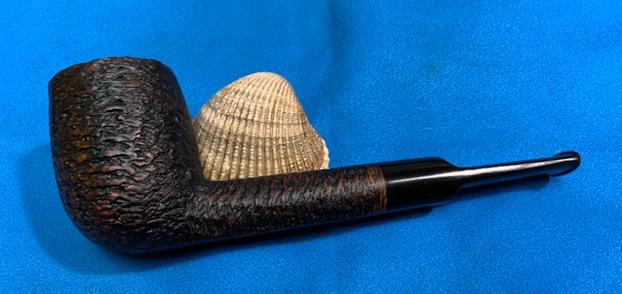
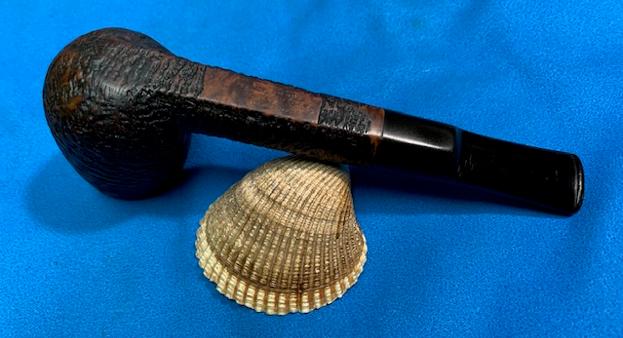
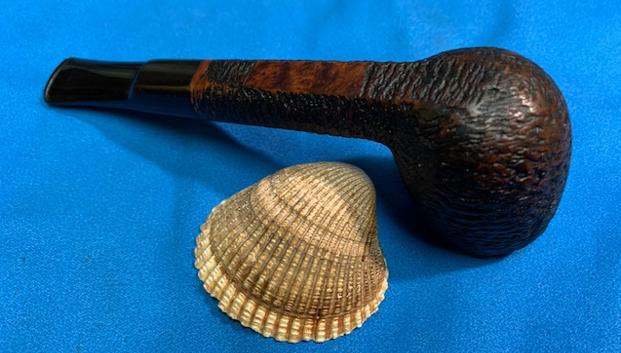
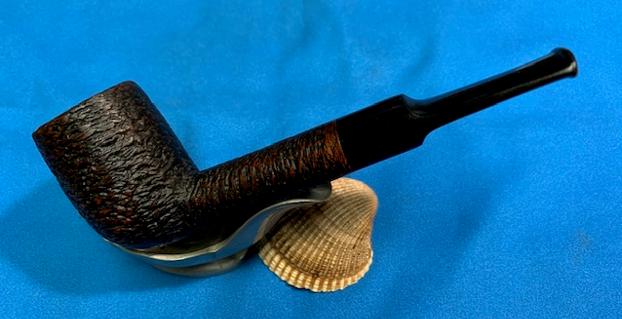
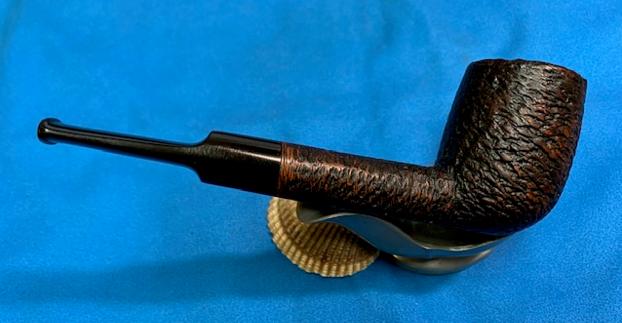
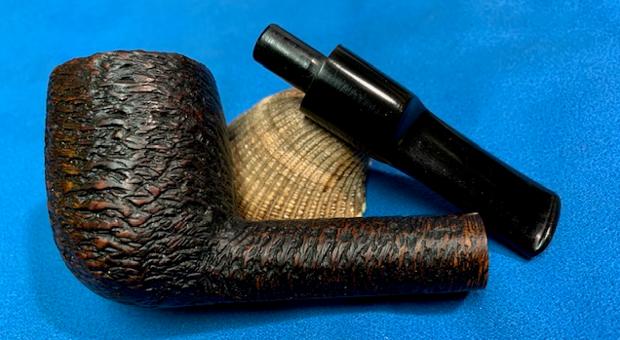
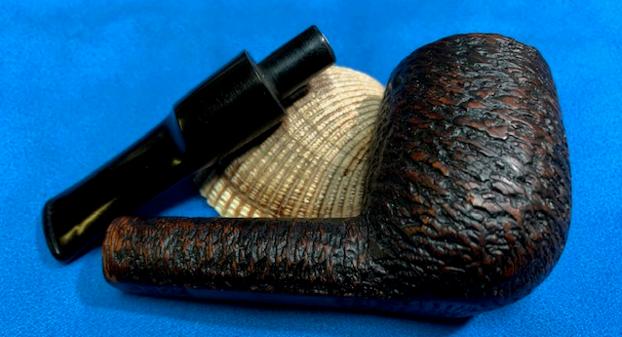
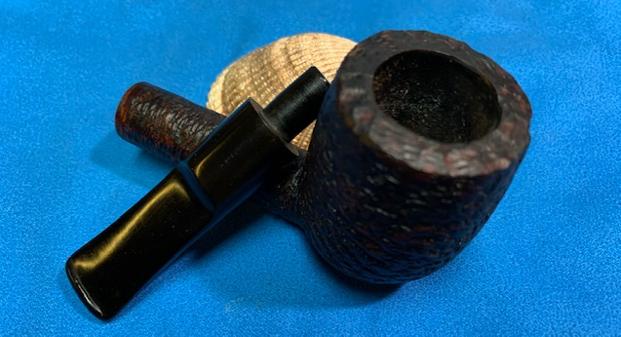
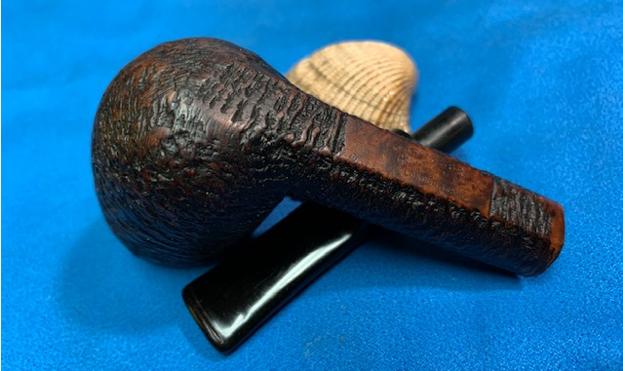
 This Butz-Choquin Costaud came to me from the auction block in January of 2017 as one in a Lot of 13 pipes from a seller in Nevada. Several of these pipes have already found their way to new stewards who found them in online ‘Help Me!’ baskets in the ‘For “Pipe Dreamers” Only!’ collection. It was in the ‘Dreamers’ section that Craig spied the BC Costaud 1597 and reached out to me about commissioning the BC. The BC Costaud is at the 12 o’clock position in the picture below.
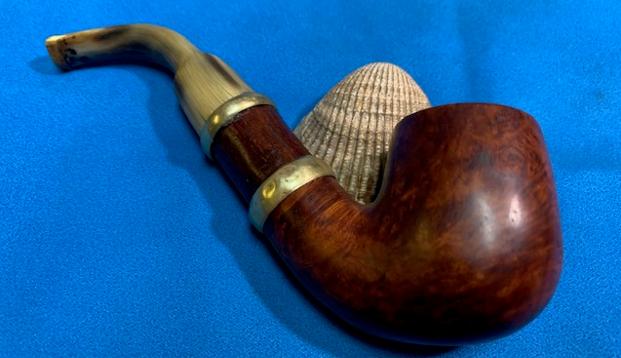
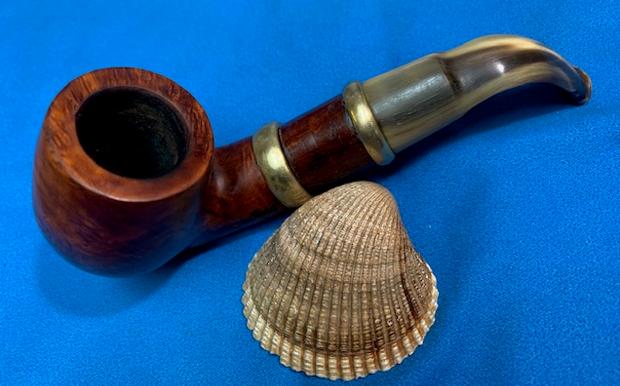
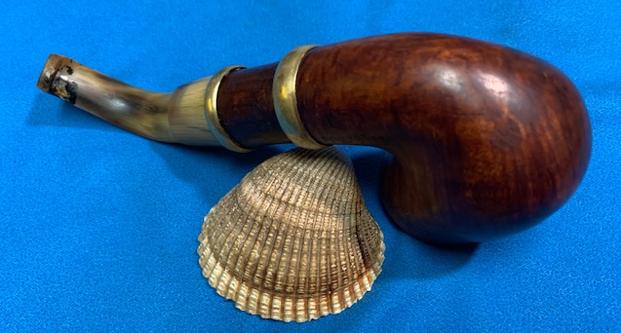
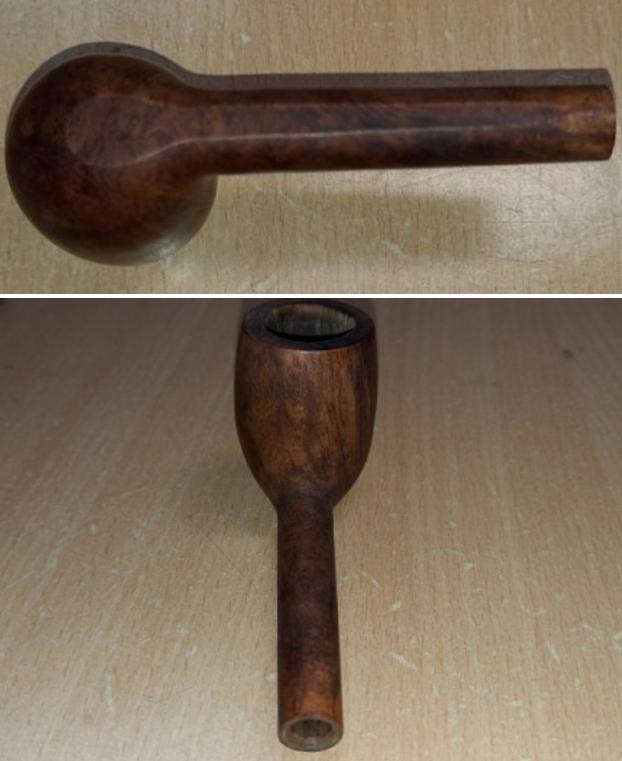
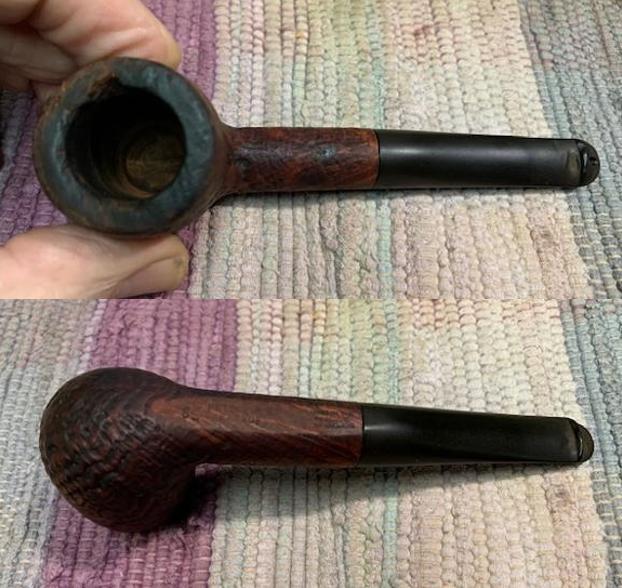
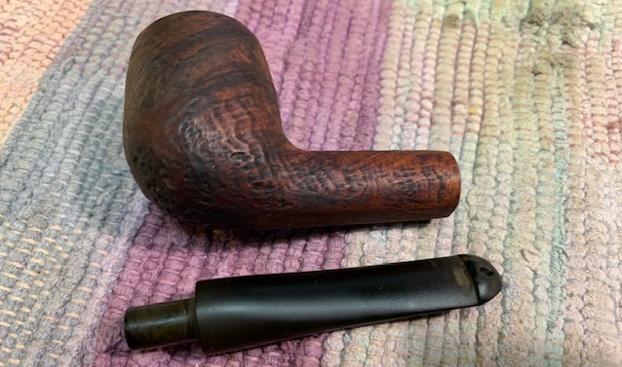
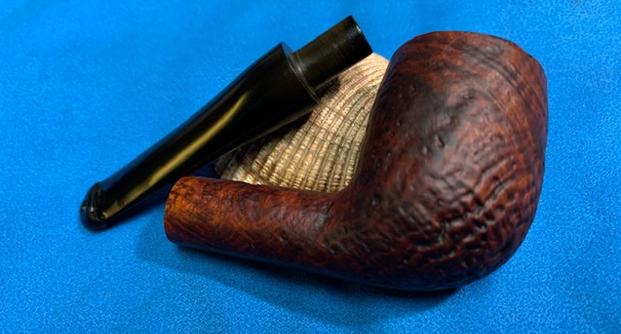
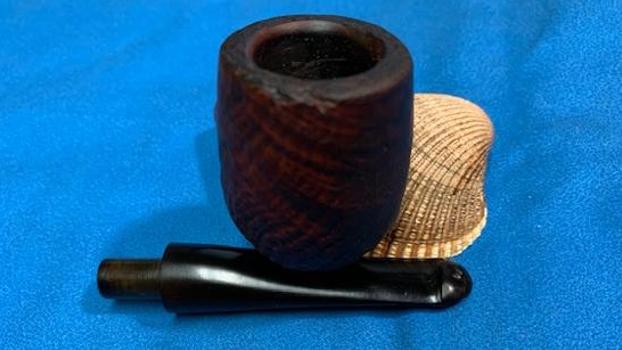
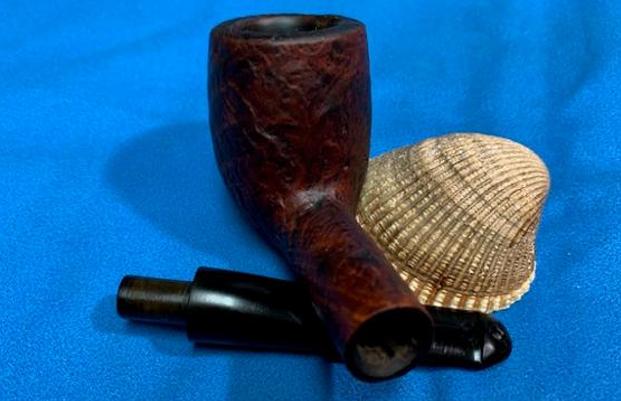
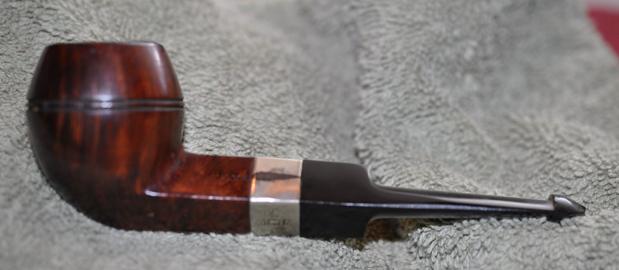
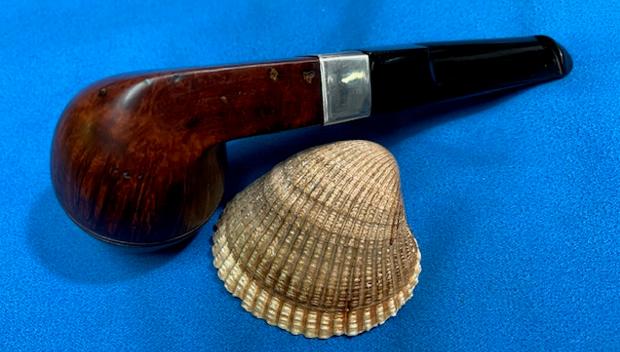
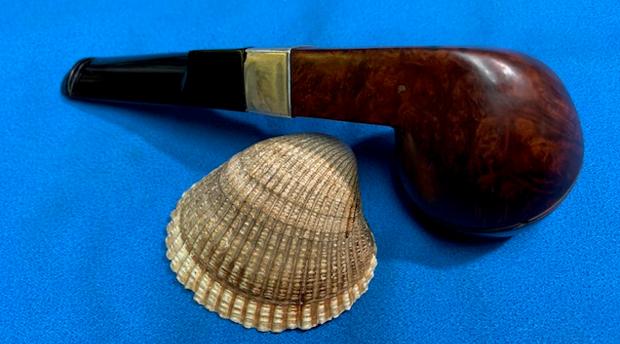
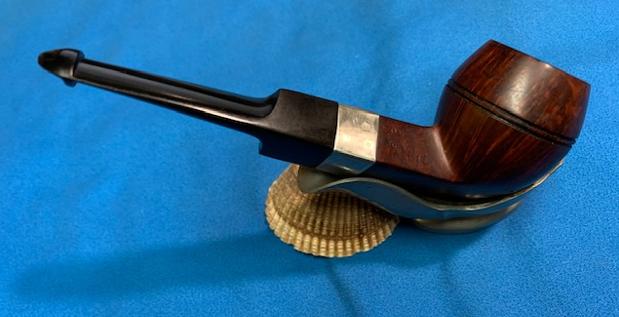
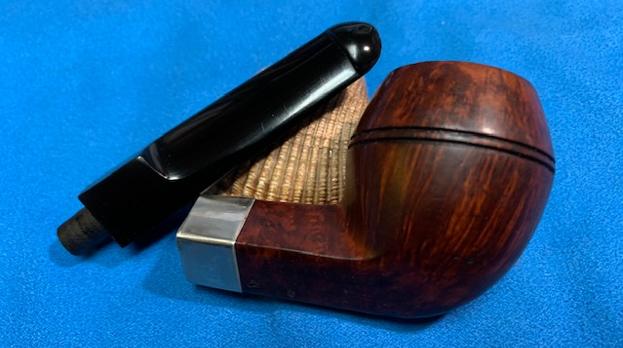
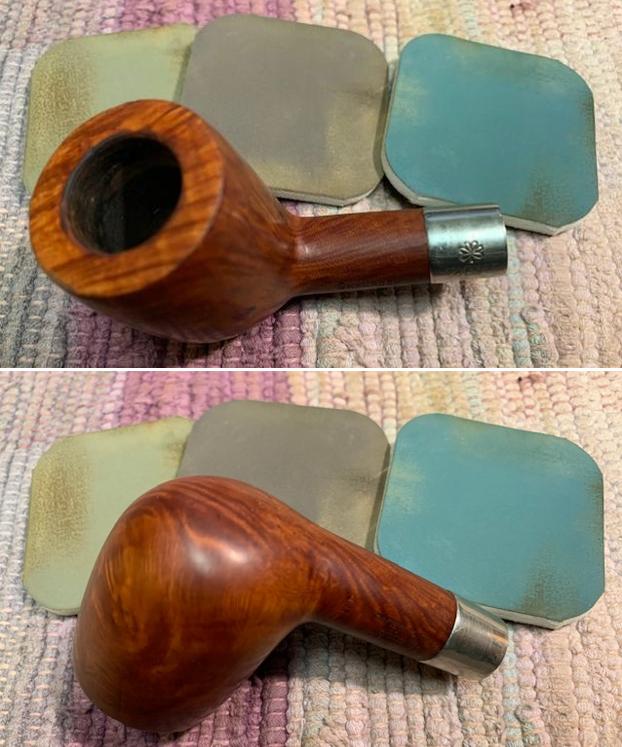
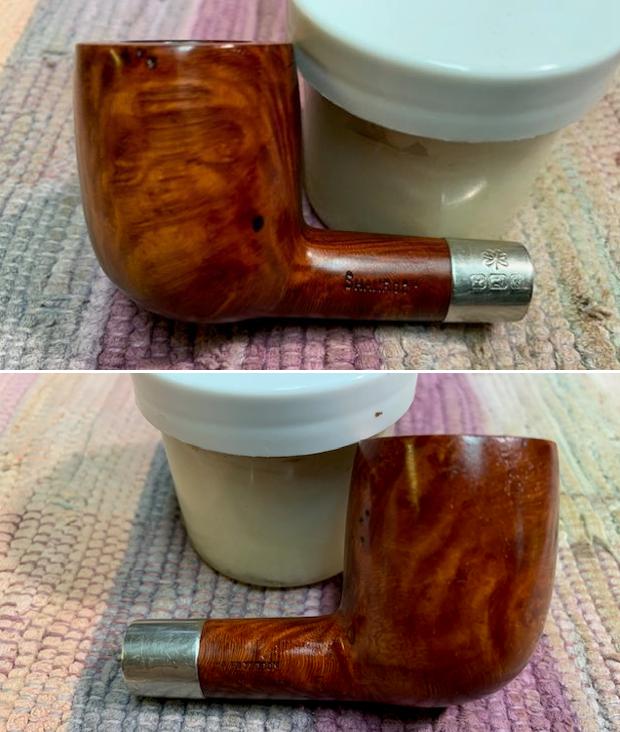
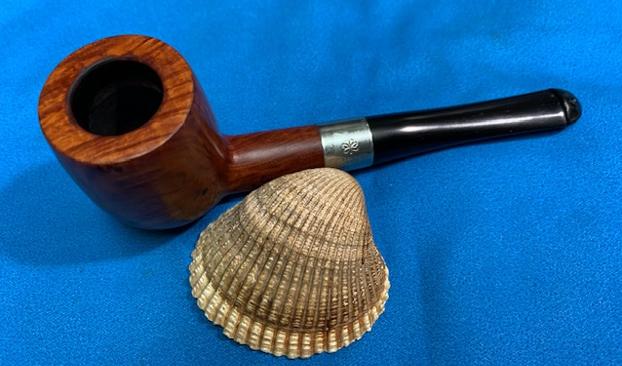
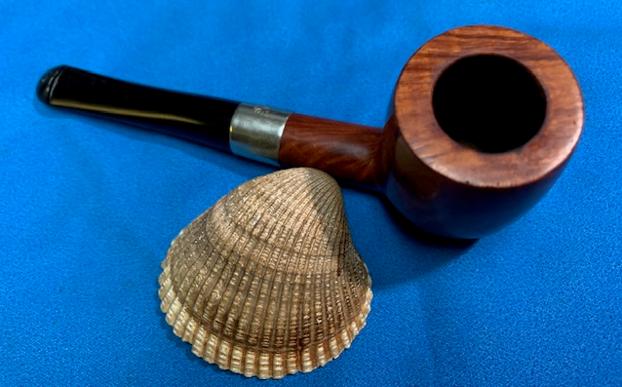
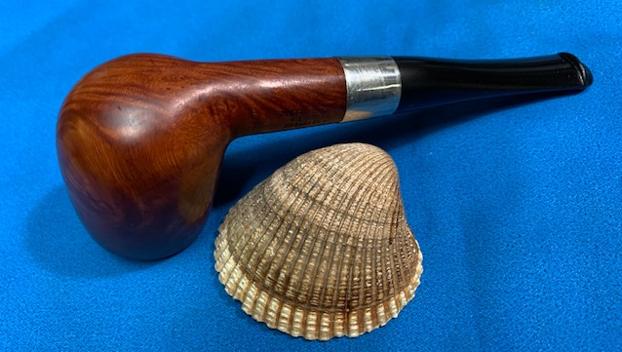
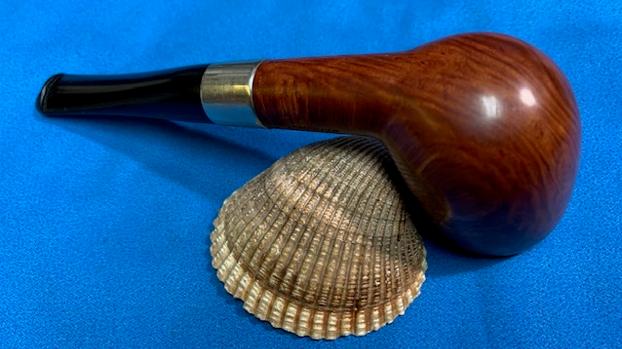
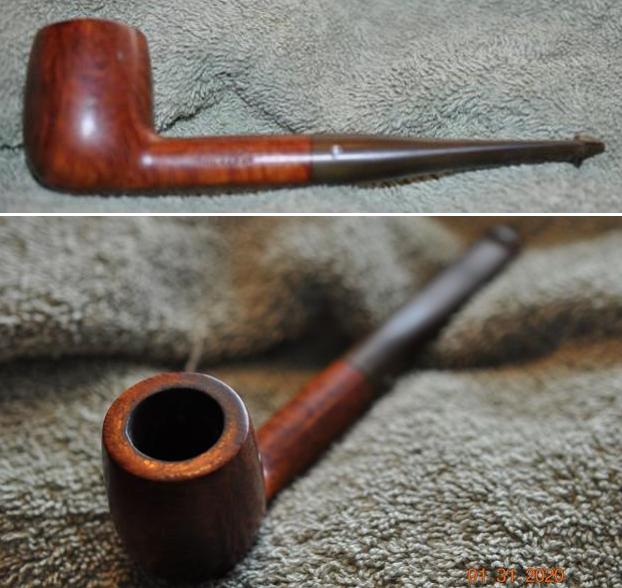
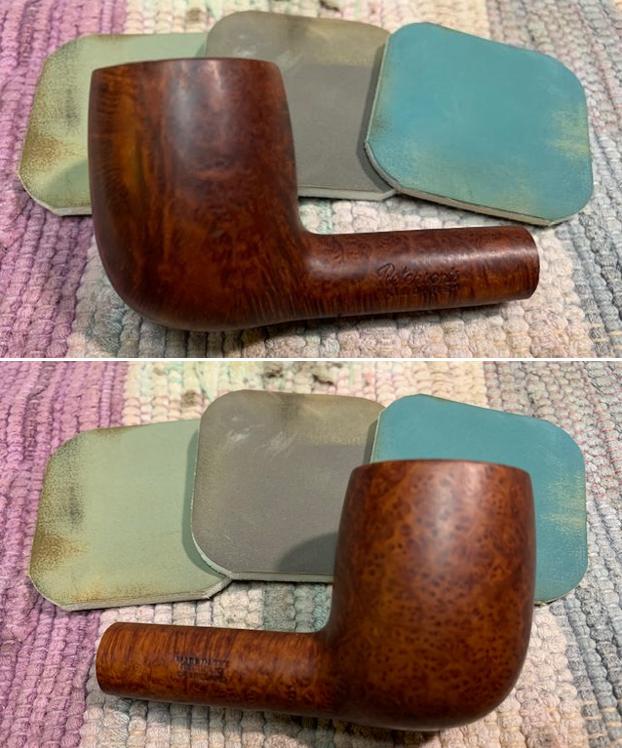
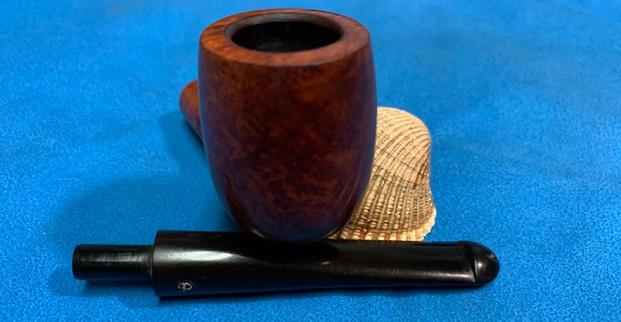
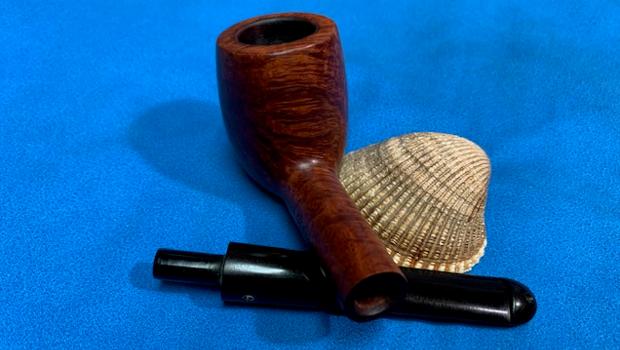
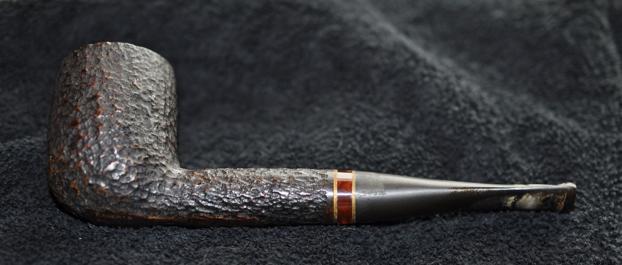
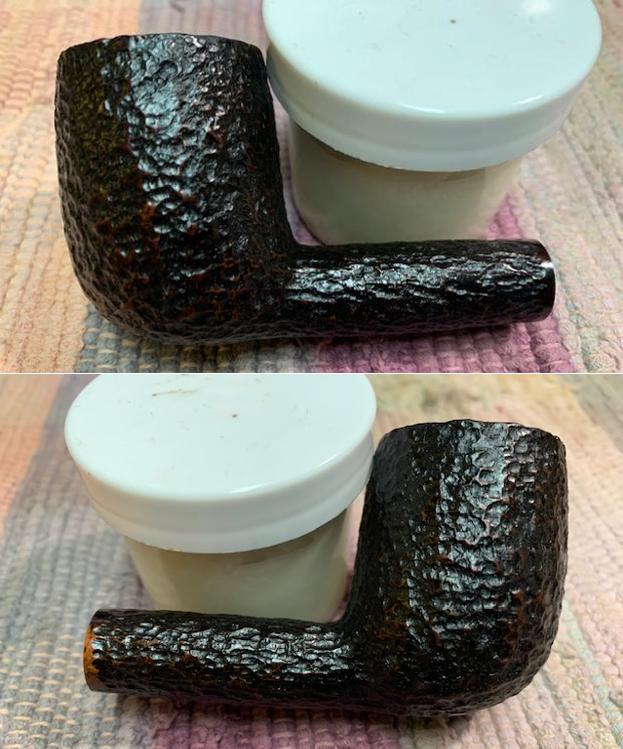
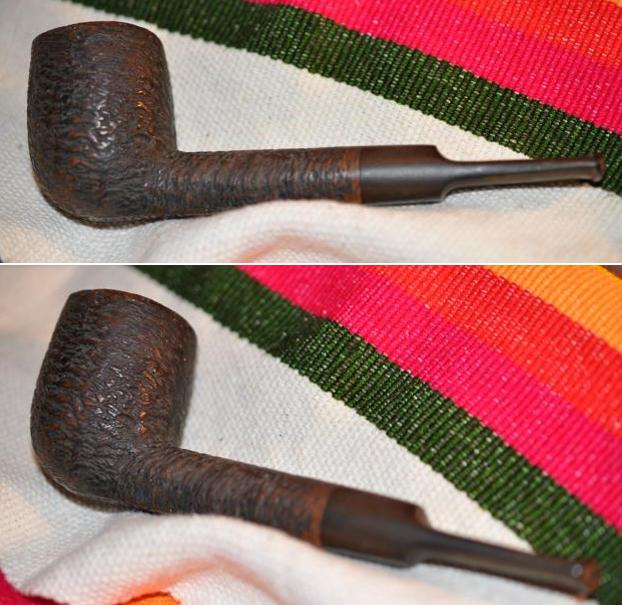
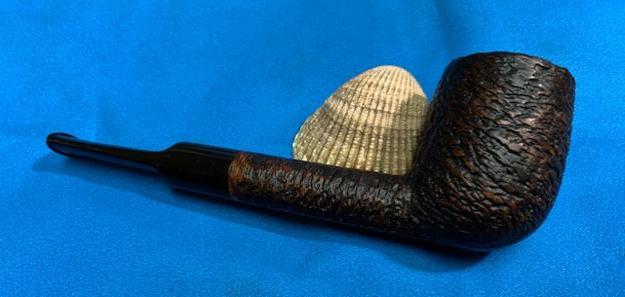
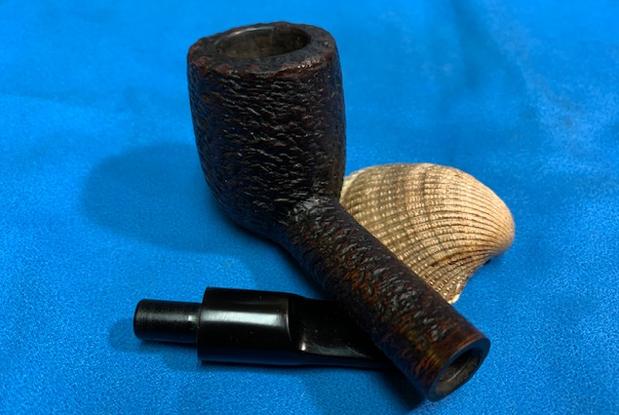
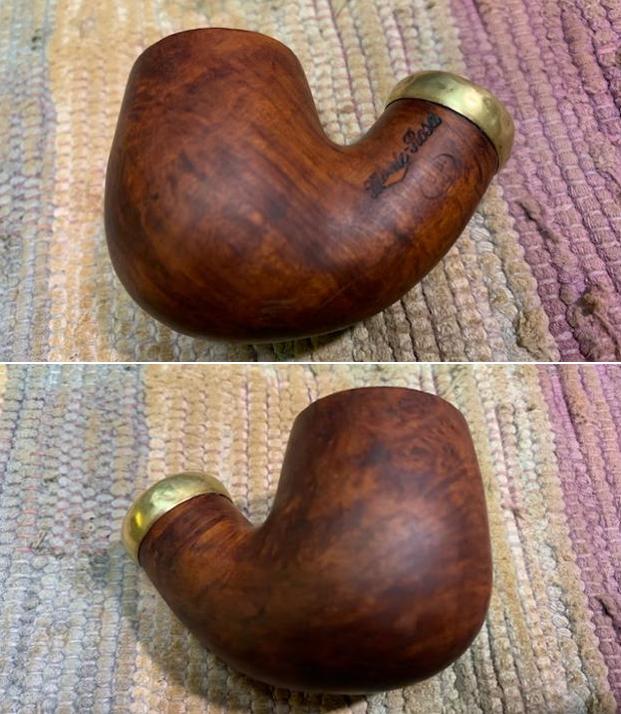
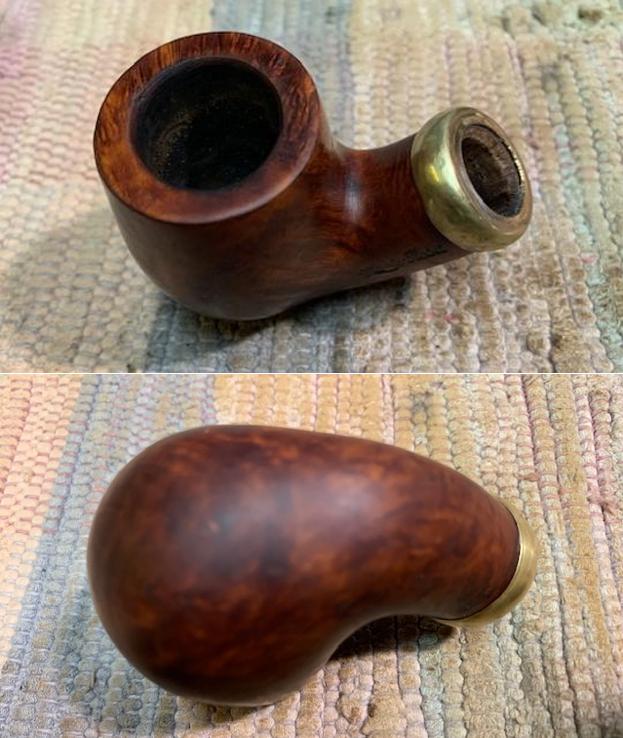
I was interested to find out from Craig later that he lives in Chattanooga, Tennessee, where I also met a young woman at Covenant College atop Lookout Mountain, who in time, became my wife – I married up! Few in the US haven’t seen signs, bird houses and barn sides with the famous, ‘See Rock City’ or ‘Ruby Falls’ both of which are located on Lookout Mountain overlooking Chattanooga. I was interested to hear that Craig was also an automotive engineer at the Volkswagen plant in Chattanooga and along with enjoying pipes he races cars on the weekends! I appreciate Craig’s patience and the pipe he commissioned is now on the worktable. Here are some pictures of the attractive Butz-Choquin Costaud: 

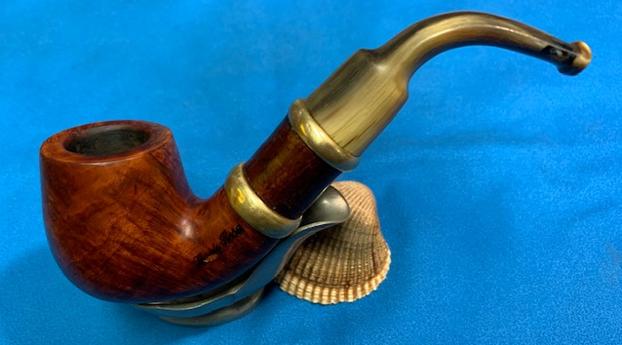
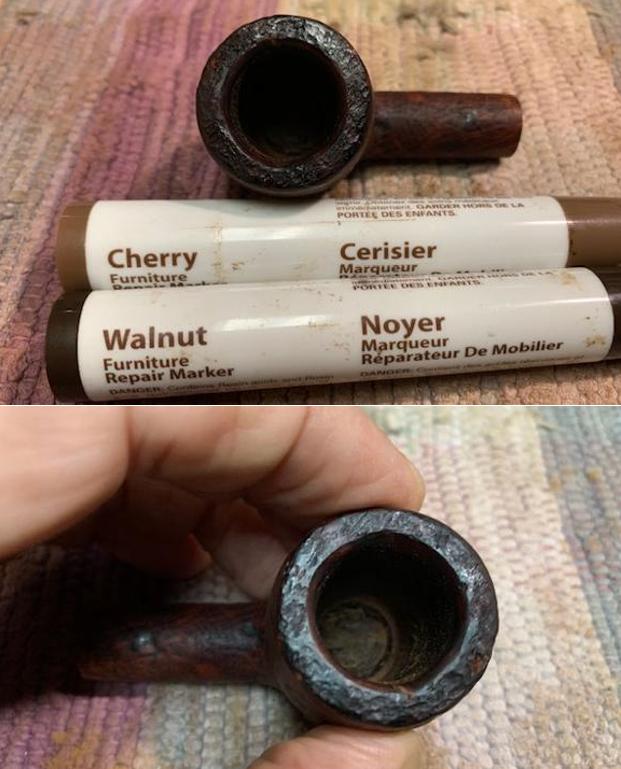
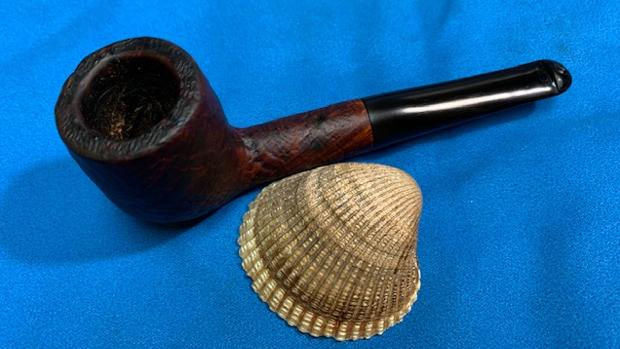
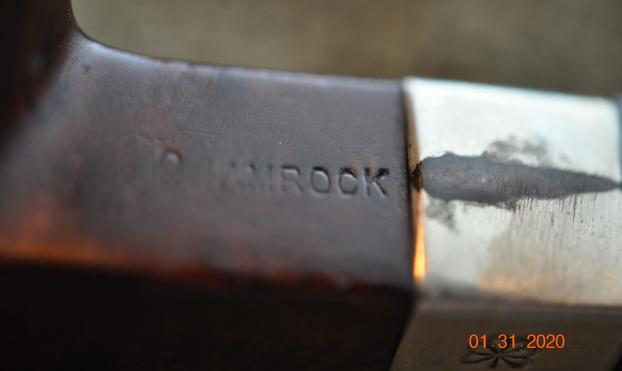
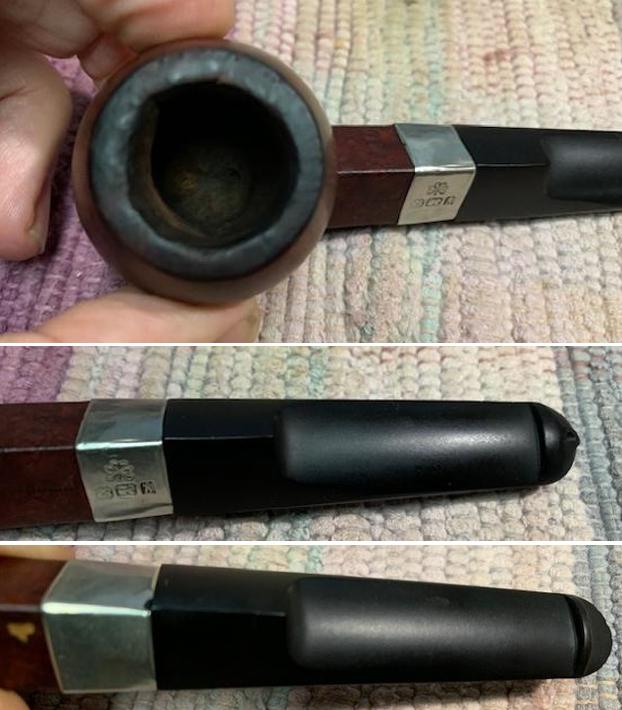
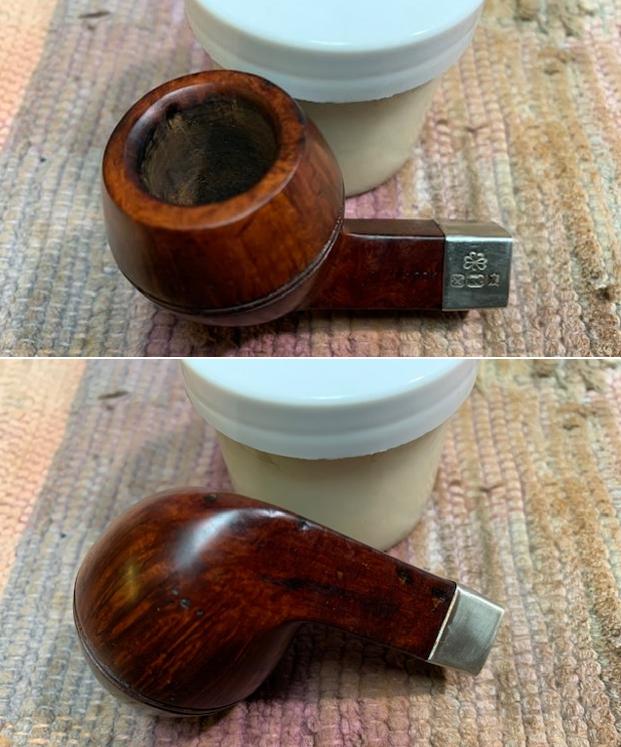
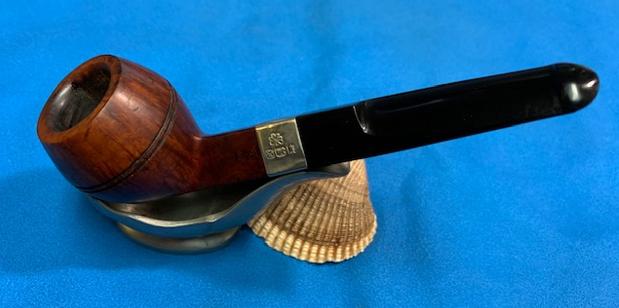
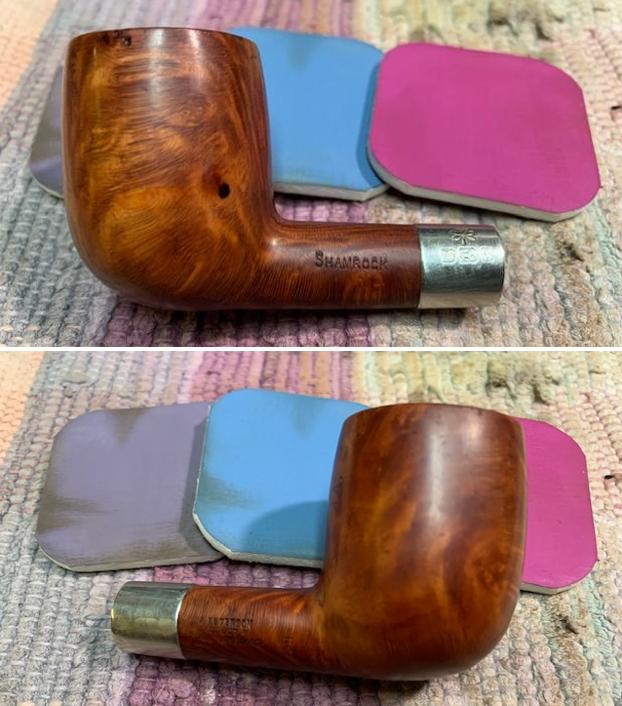
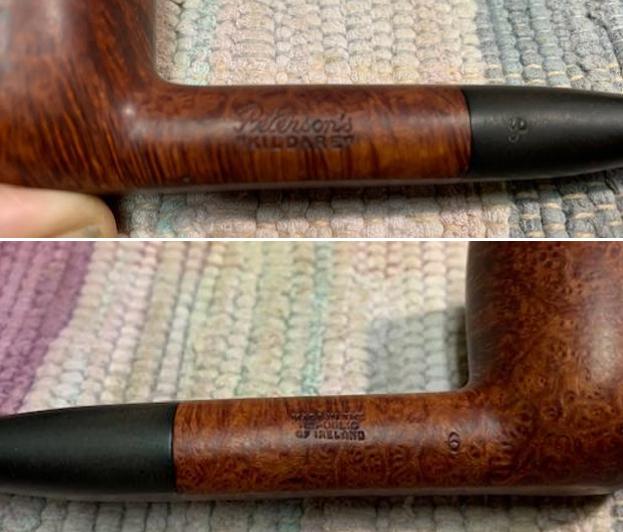
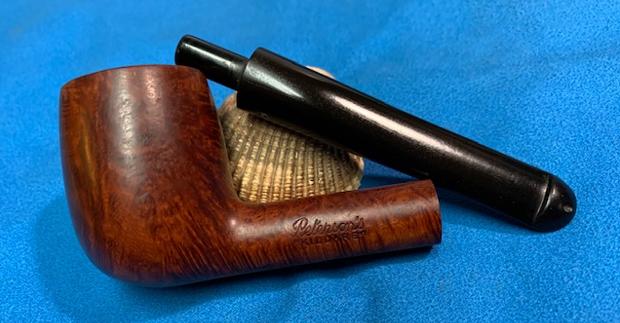
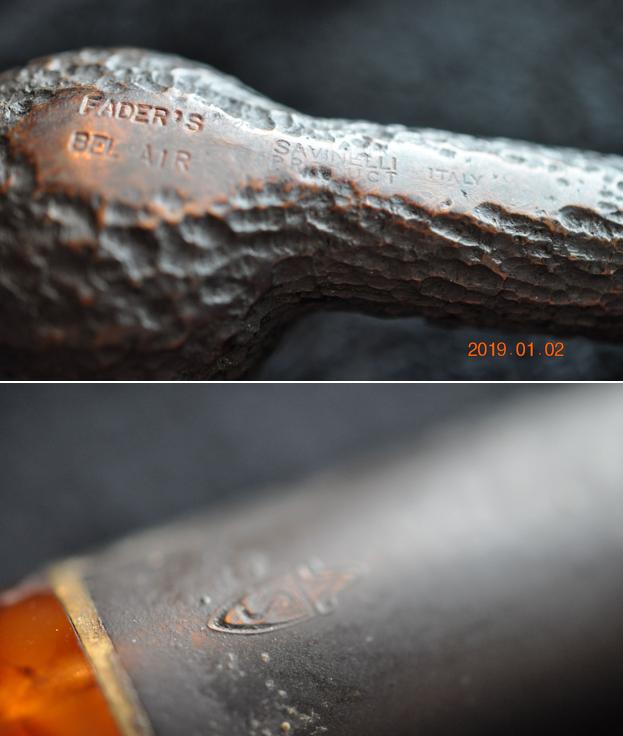
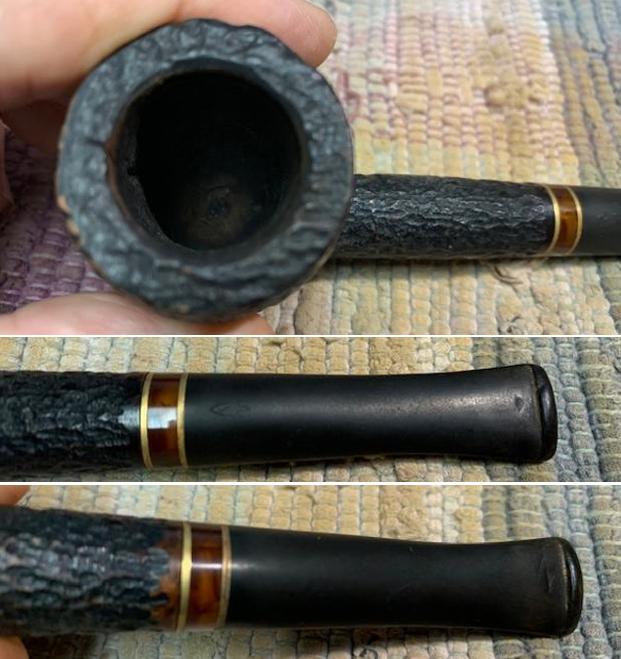
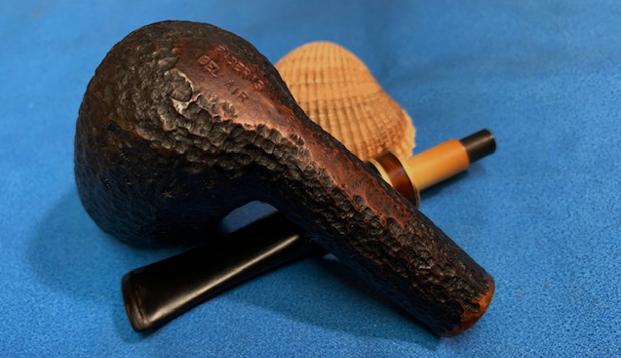
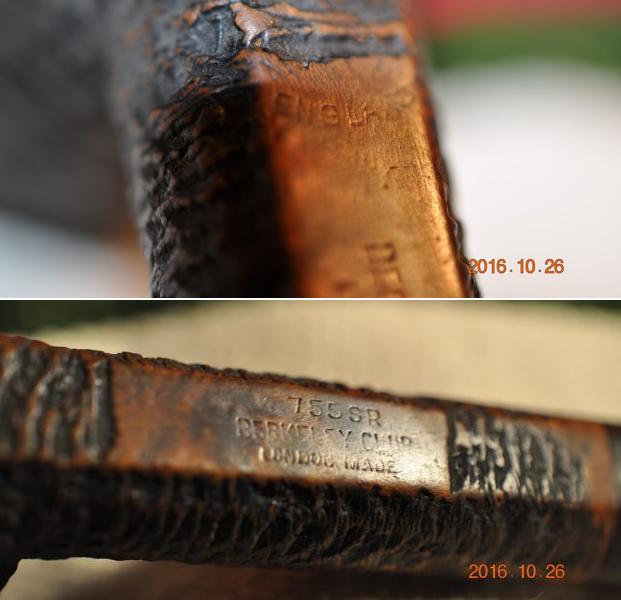
 The nomenclature is stamped on the underside shank panel. The chiseled cursive, ‘Butz-Choquin’ is stamped over ‘Costaud’. Below this is stamped a very ghosted, ‘ST. CLAUDE-FRANCE’. A quick look in Google Translate renders ‘Costaud’ as ‘Strong’ in English. I liked the other adjectival renderings offered: beefy, hefty, husky, and strapping. The pipe’s deep, rustic, carved style fits this name.
 If one does a quick search of the BC Costaud line, one discovers quickly that this line was offered by the French pipe maker in many different shapes and each with the very distinctive carved rustication and the same acrylic shank cap. Here are a few examples from the search results.
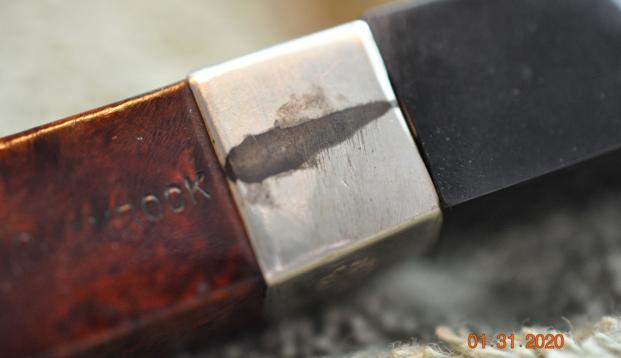
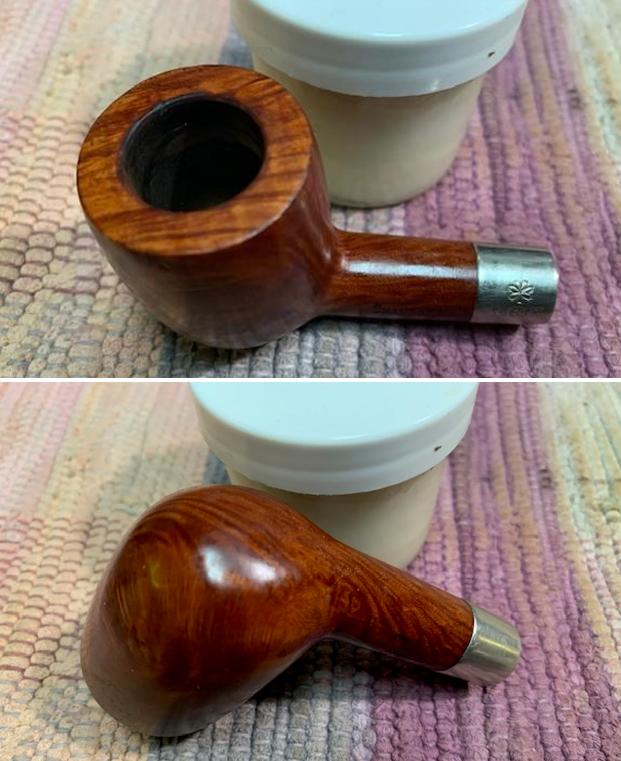
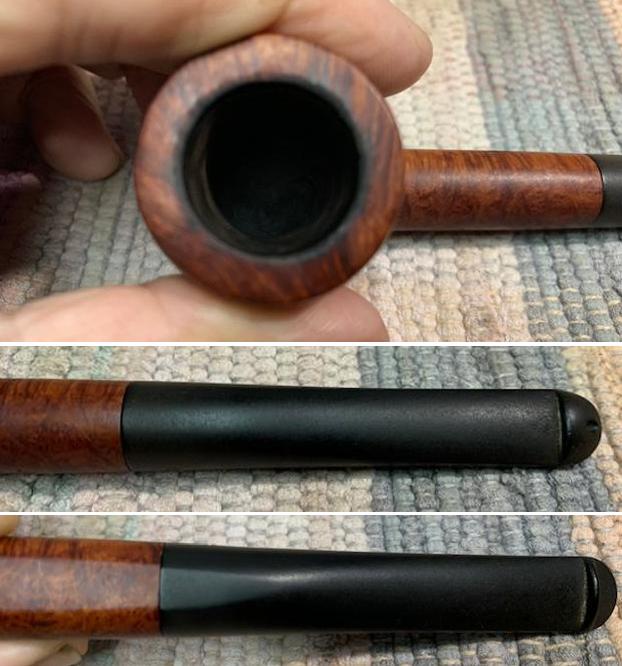
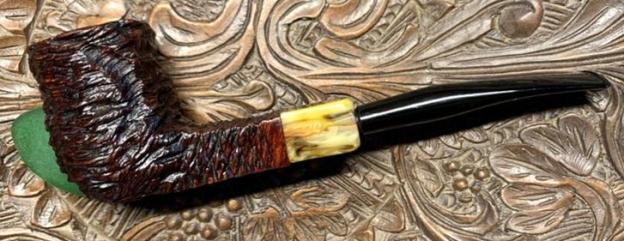
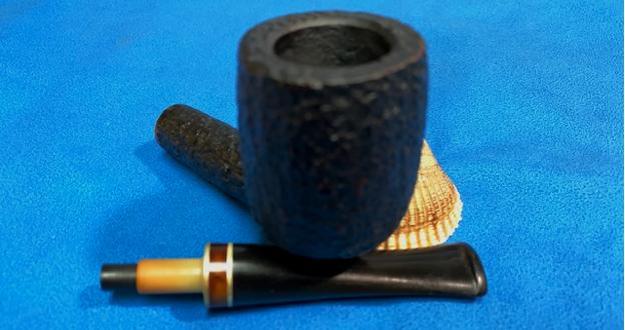
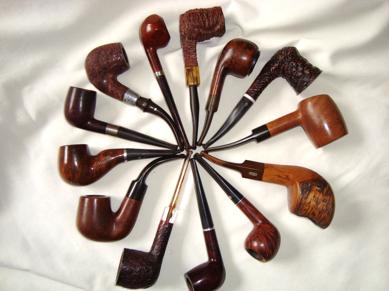
  The shape number is listed in a picture of BC pipes in the Pipedia Butz-Choquin article. The 1597 is an attractive, stout square shanked paneled Billiard with a saddle stem friction mounted. The only difference in the general 1597 shape with the Costaud is that the Costaud’s stem is a friction mounted fishtail.
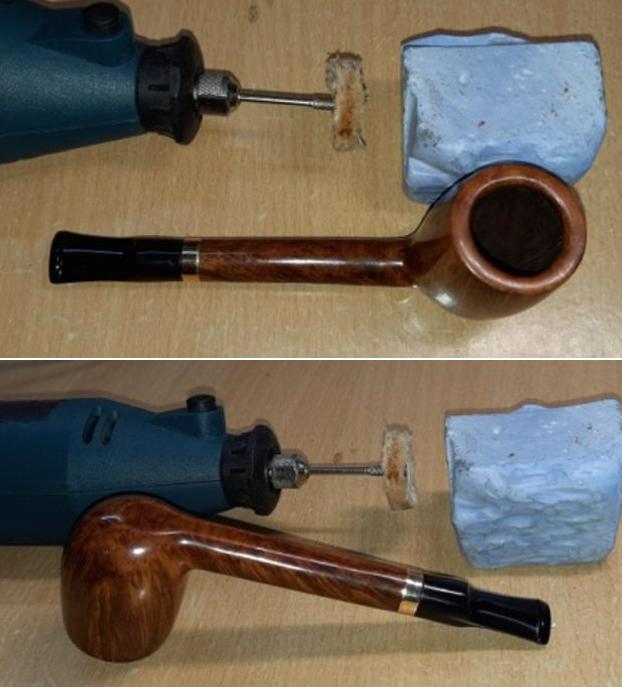
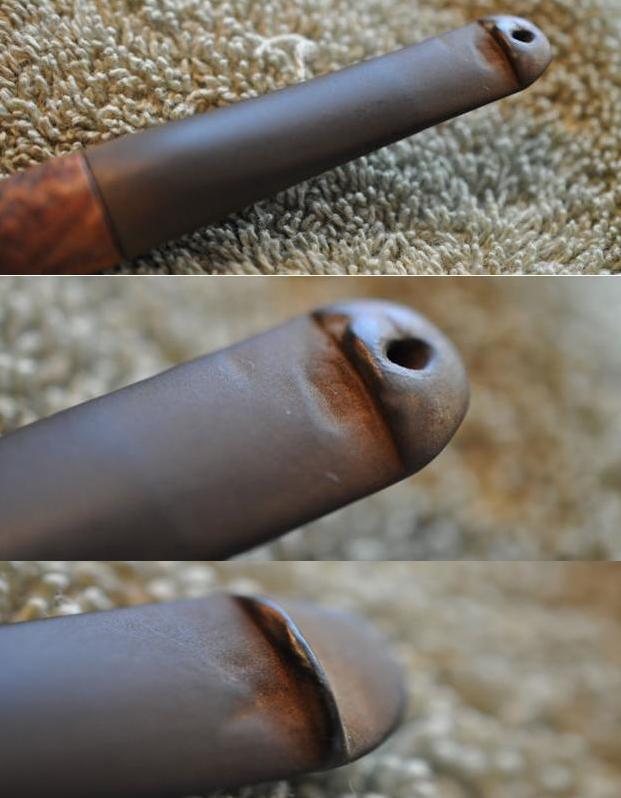
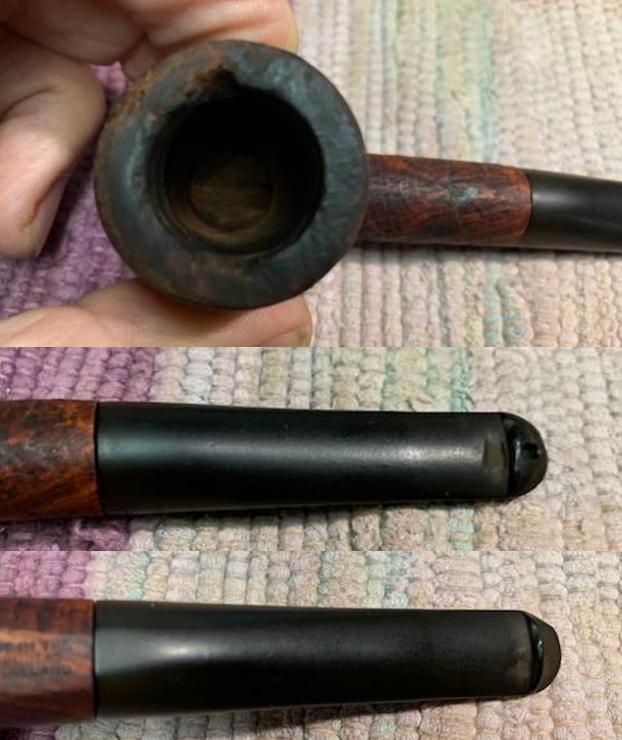
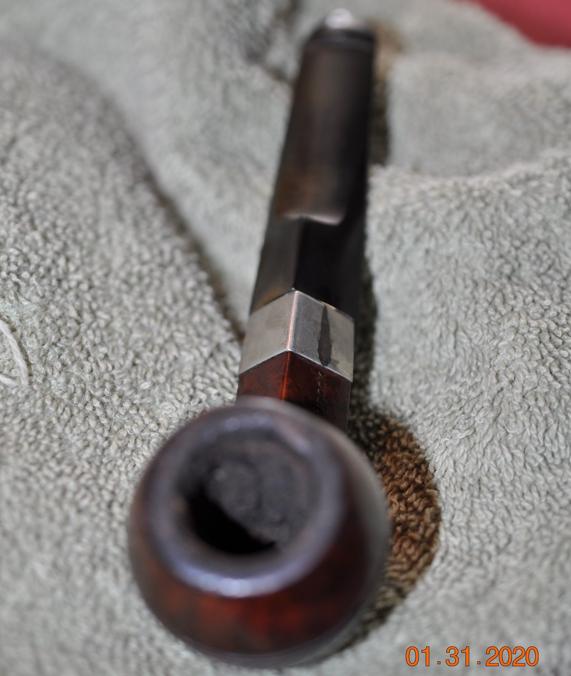
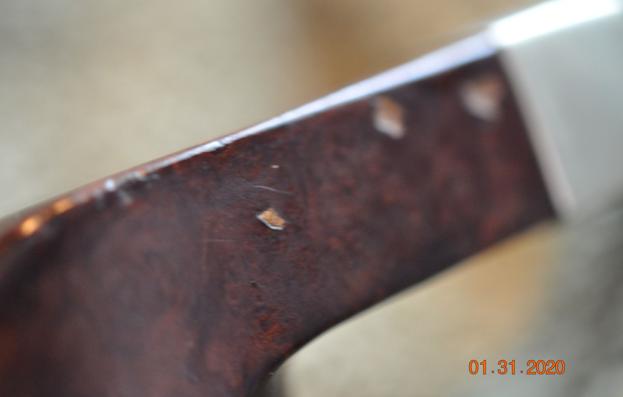
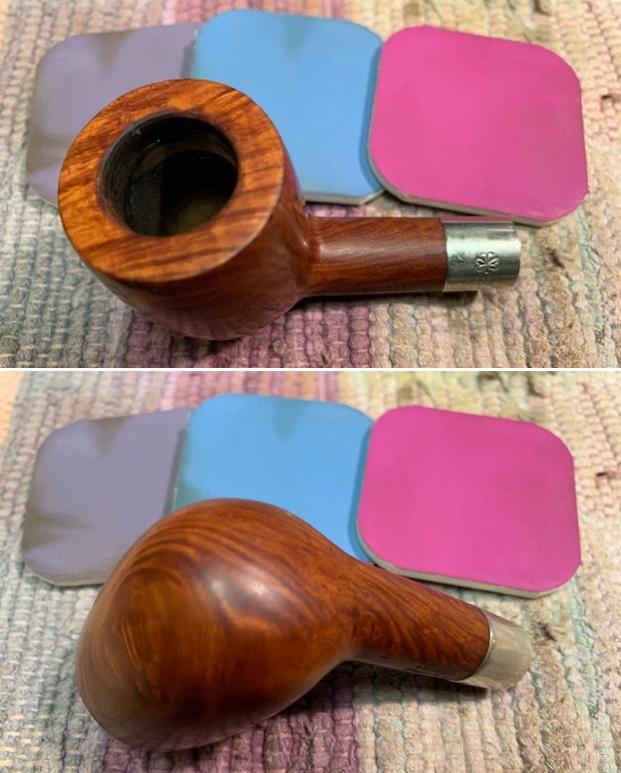
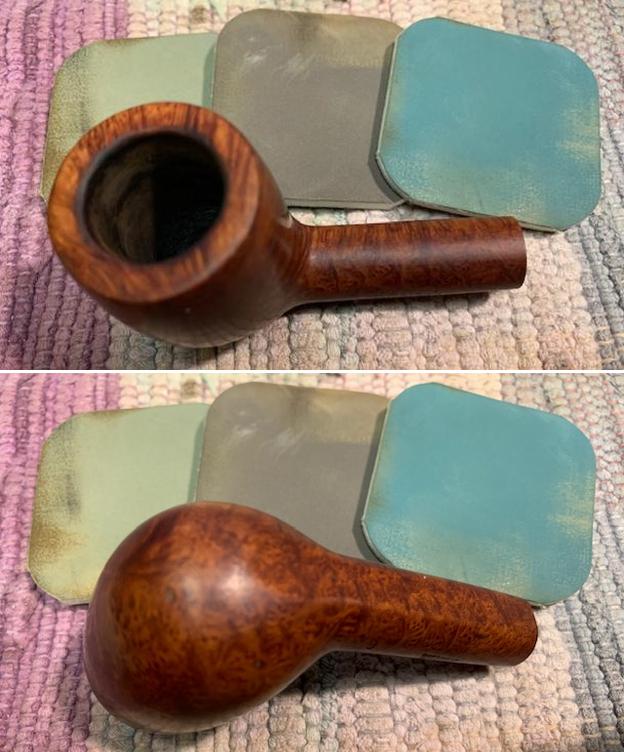
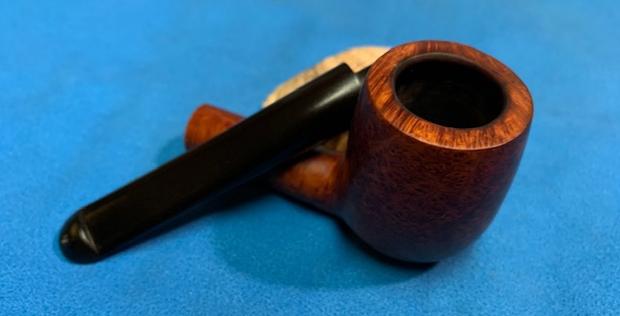
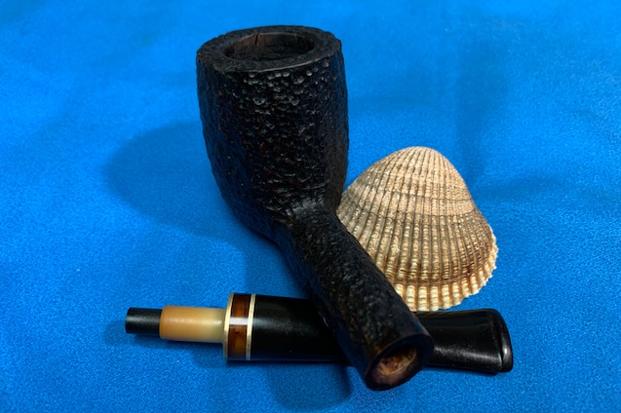
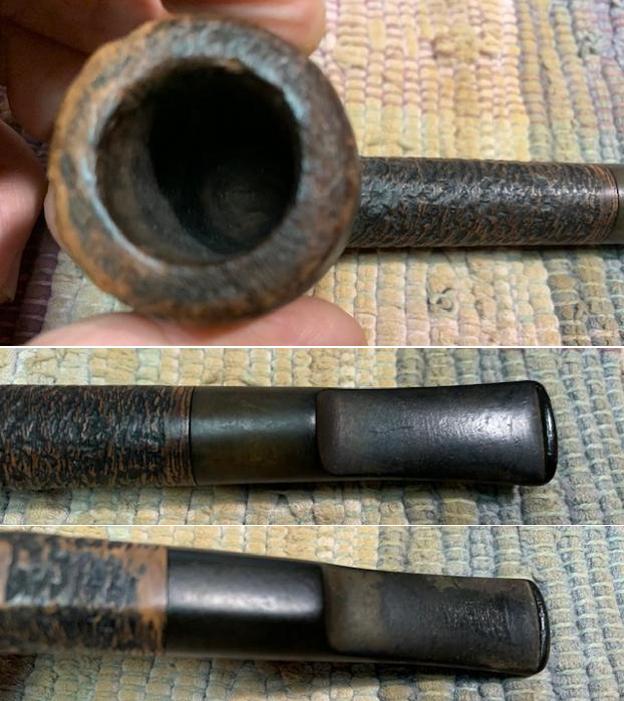
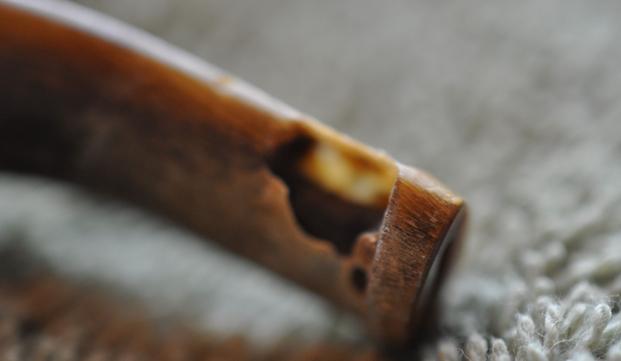
 Looking at the condition of the BC Costaud, the obvious elephant in the room is the cracked acrylic ferrule or shank cap. The crack appears to be a trauma that opened on the left side of the cap and followed the bottom of the ‘BC’ stamping perfectly. My guess is that the break was caused by the stem hanging on something and the force on the acrylic snapped it. It is only on the left side and I want to keep it that way!
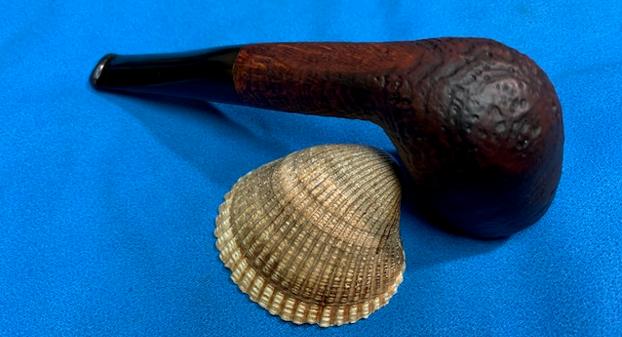
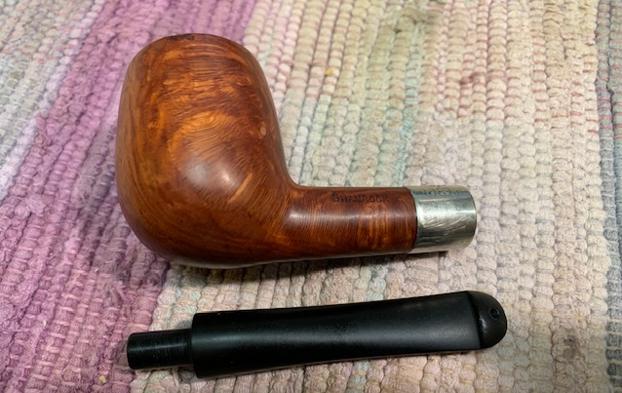
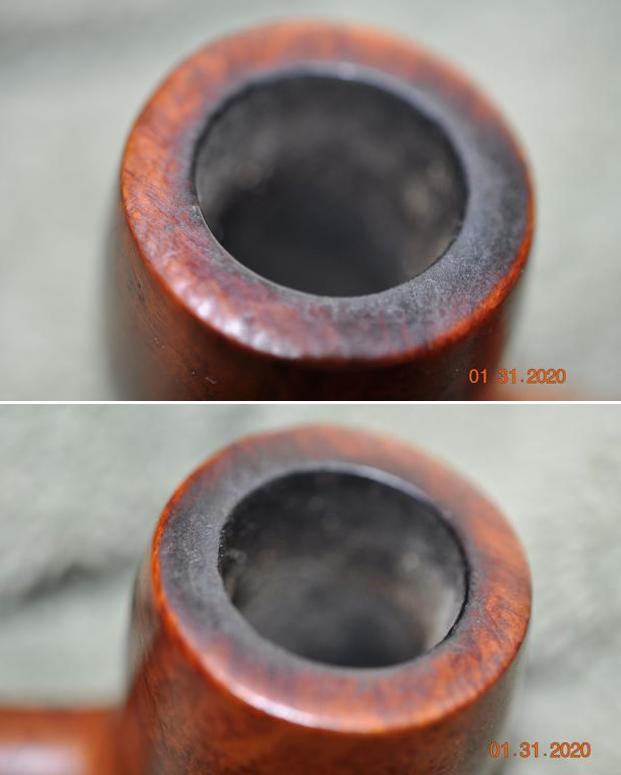
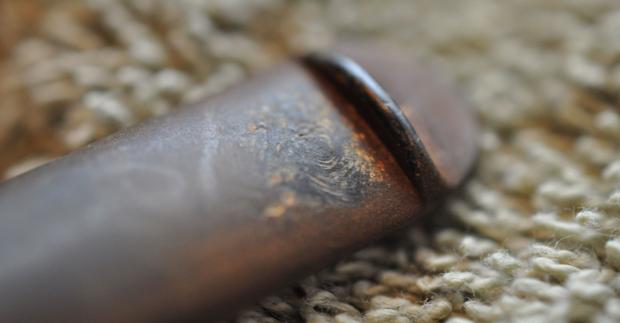
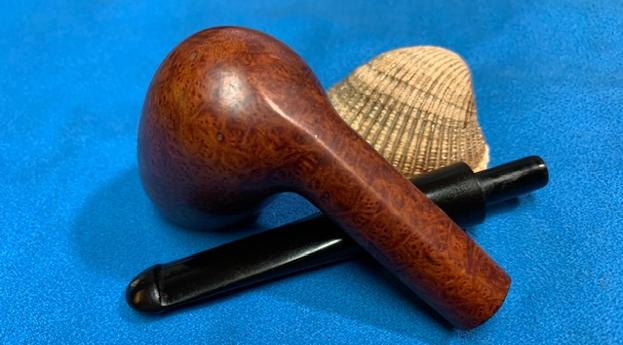
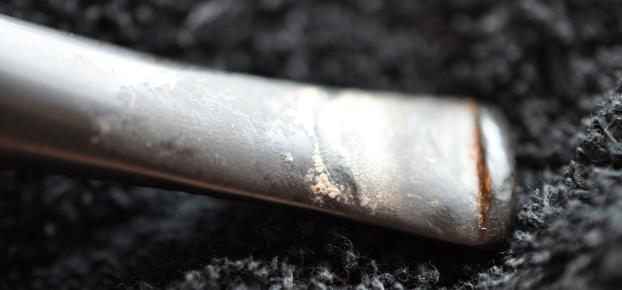
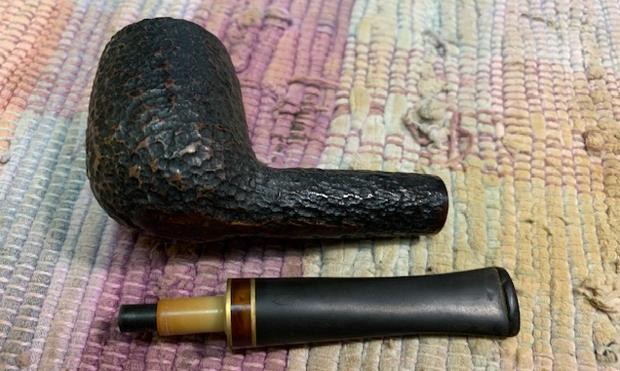
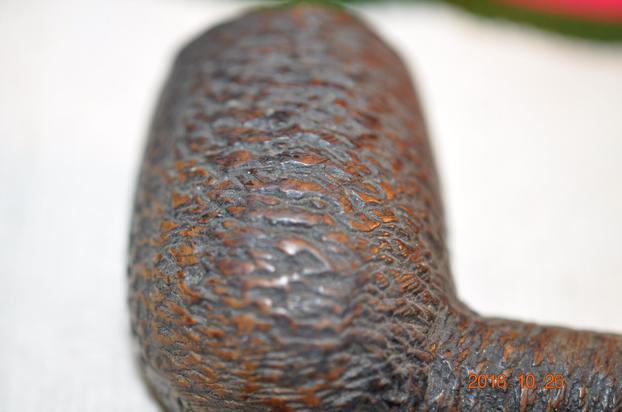
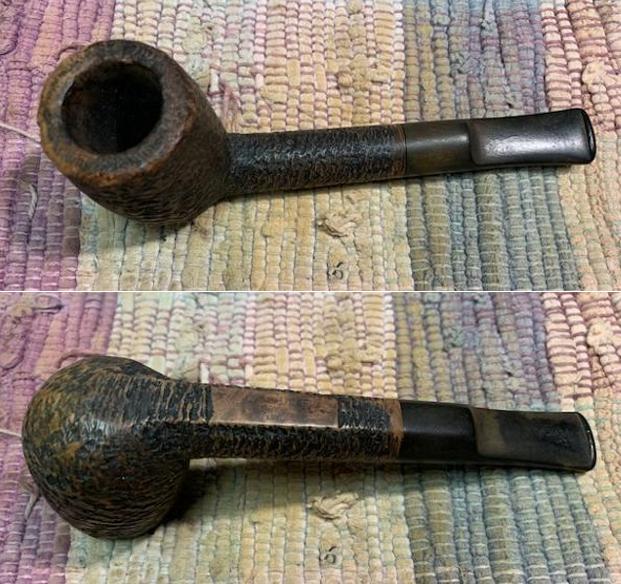
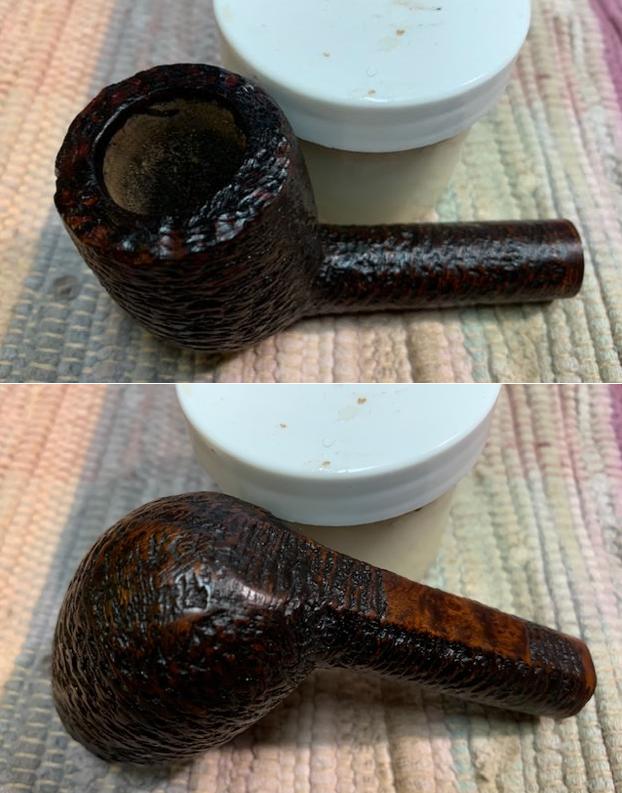
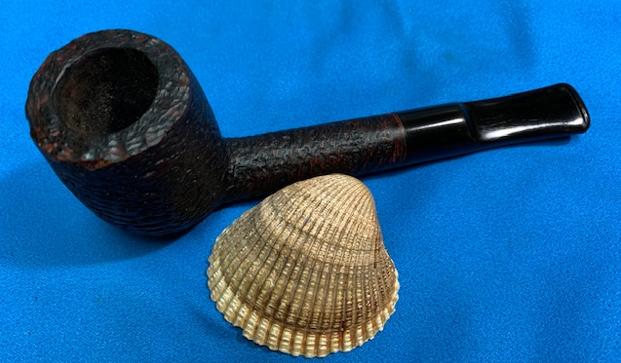
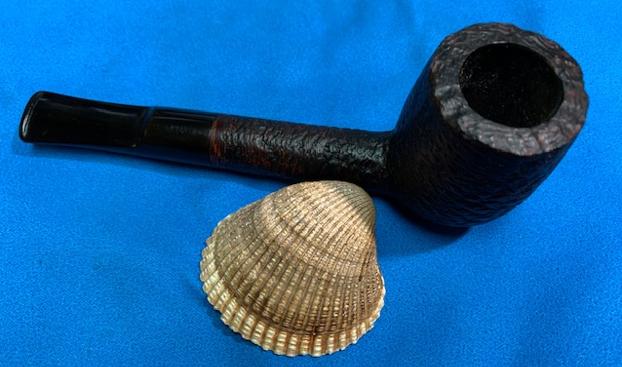
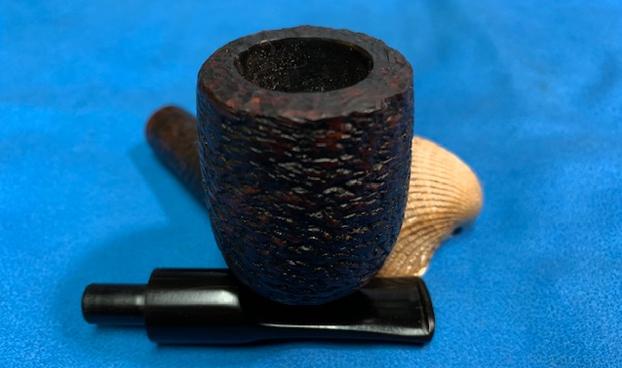
 Craig commissioned a striking pipe. The cracked acrylic ferrule gets the attention quickly and overshadows other issues. The chamber needs to be cleaned of the cake buildup and the rusticated rim has blackened lava overflow that needs cleaning. The rusticated stummel is eye catching but needs cleaning in the deep crooks and crevasses of the briar surface. The fishtail stem has light oxidation and tooth chatter on the upper and lower bit.
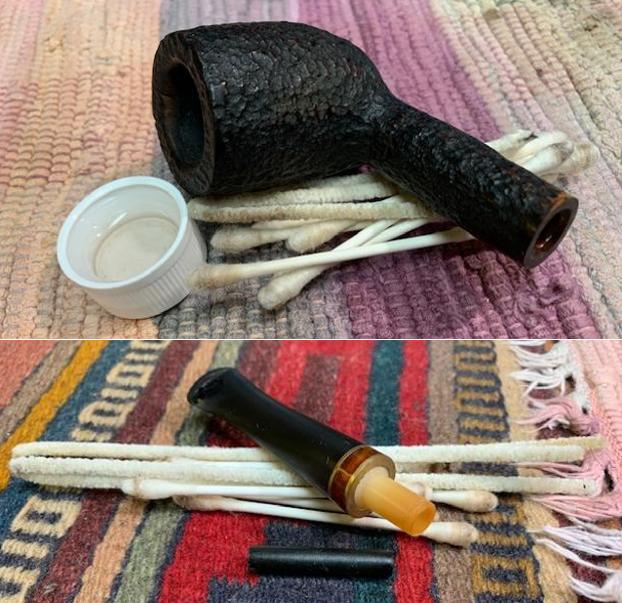
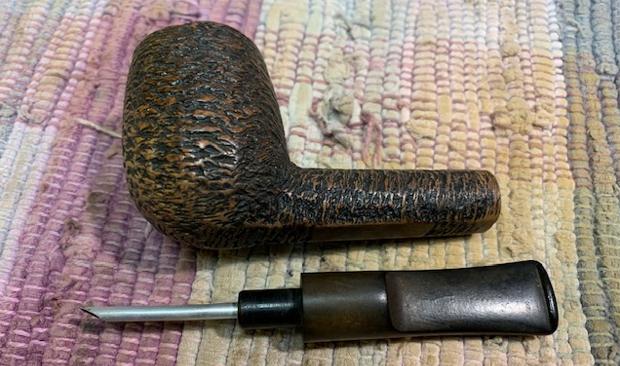
  To begin the restoration of this Butz-Choquin Costaud, I start with the fishtail stem. The airway is cleaned using a pipe cleaner wetted with isopropyl 99%.
 To begin working on the light oxidation in the vulcanite stem, 0000 grade steel wool scrubs the surface with Soft Scrub. I do this in preparation of putting the stem in a soak of Before & After Deoxidizer.
 Next, after rinsing the stem with water, the Fishtail is put in the Deoxidizer with other pipes in the queue. The stem is left in the Deoxidizer for several hours.
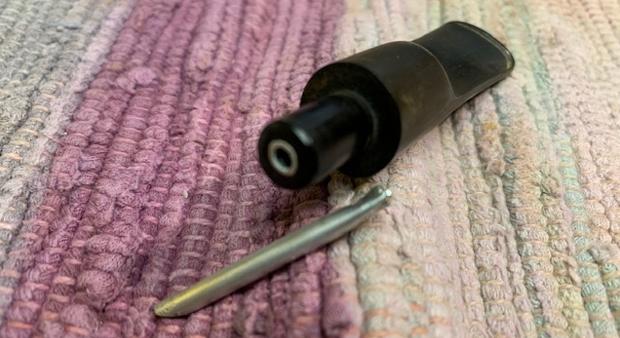
 After the stem has soaked for some time, a stiff wire helps to fish out the Fishtail stem and drain the excess Deoxidizer. I also squeegee the fluid off the stem using my fingers.
 A pipe cleaner wetted with isopropyl 99% is run through the airway to push out the fluid and to clean. I cotton pad wetted with alcohol is used to wipe off the raised oxidation from the stem surface.
 Finally, to help condition the vulcanite, paraffin oil, a mineral oil, is applied to the vulcanite rubber stem. The stem is then put to the side to absorb the oil.
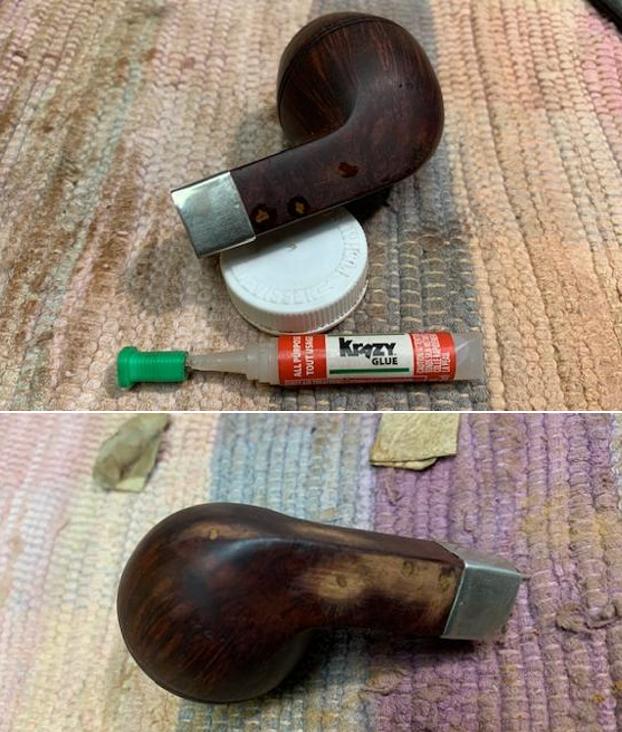
 Before going through the process of cleaning the stummel, I decide to move forward with repairing the acrylic ferrule. I’m doing this first because what often is the case is that during the cleaning process, which uses water, the briar wood in the mortise expands. I don’t know for certain if this would be the case with the shank during the cleaning process, but I would rather repair the shank cap now than risk a more difficult fix because of a changed environment. The cap has separated or moved down the shank. The result is that there is a large gap between the external shank edge and the acrylic shank cap.
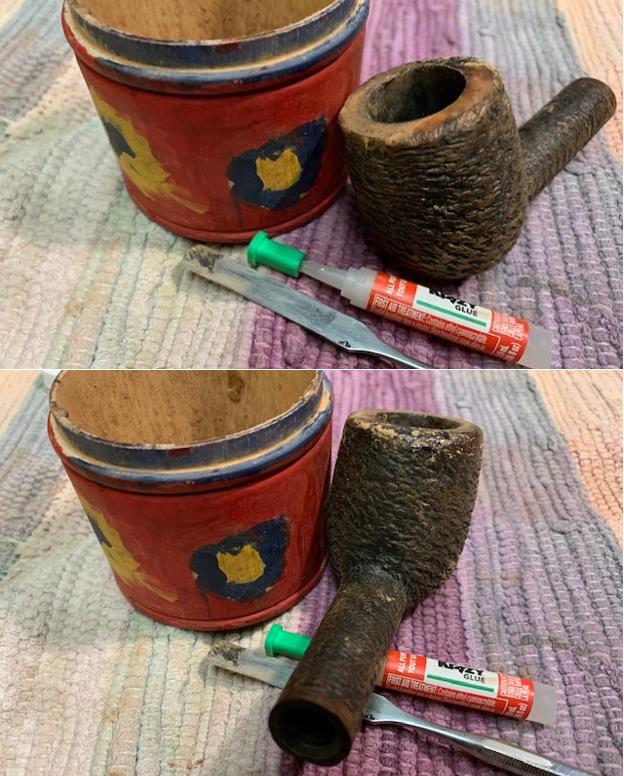
  The first thing needed is to remove the shank cap from the shank. I need to be careful because I don’t want to put too much pressure on the acrylic as I’m trying to remove it. I don’t know if old glue used when the cap was originally seated may be hindering an easy removal. My first attempts to pull and then hand-twist the cap off were unsuccessful. It feels like it’s glued – no movement at all. The next thing I try is to wedge first a flat dental spoon into the gap and gingerly try to pry loose the acrylic cap. Next, the sharp edge of a pocketknife was wedged into the gap to apply gentle even pressure to break the cap loose. This was not easy avoiding damage to the briar shank and further carnage to the shank cap!
 As I puzzle and pull and puzzle more, another mystery is birthed. With the gap between the briar and acrylic, my assumption is that the cap has partially become unseated – perhaps someone was trying to remove it and that caused the acrylic to break? I would guess that there would also be a gap internally – between the acrylic and the beginning of the briar mortise. To test my assumption on a second gap, a sharp dental probe is inserted into the mortise and the internal surface is scraped with the point I am expecting to detect another gap indicating that the ferrule had shifted down. I find no internal gap. The surface between briar and acrylic is smooth. This is important because I had been thinking, if I’m unable safely to remove the shank cap then I could try to reseat the shank cap by pressing it back into place on the shank and doing my best to close the gap from the acrylic break. Yet, if there is no internal gap, there’s no room for any movement of the shank cap to be reseated flush with the shank. It’s hard to believe a BC pipe left the Saint Claude workshop with a gap that large between the cap and the briar shank….
  Three ideas begin to float in my mind regarding removal of the ferrule. First, to put the stummel in the freezer. This is a general method of unsticking things that are stuck. When the material cools, it contracts and often loosens stuck things. The second idea, if the freezer method doesn’t help, is to drip some acetone in the gap and the crack. If the shank cap is stuck because of being glued, acetone can help break down the glue. This might help, but I’m doubtful. The third idea is that the acrylic could be heated with a hot air gun and made more pliable – like vulcanite. This might avoid another break.
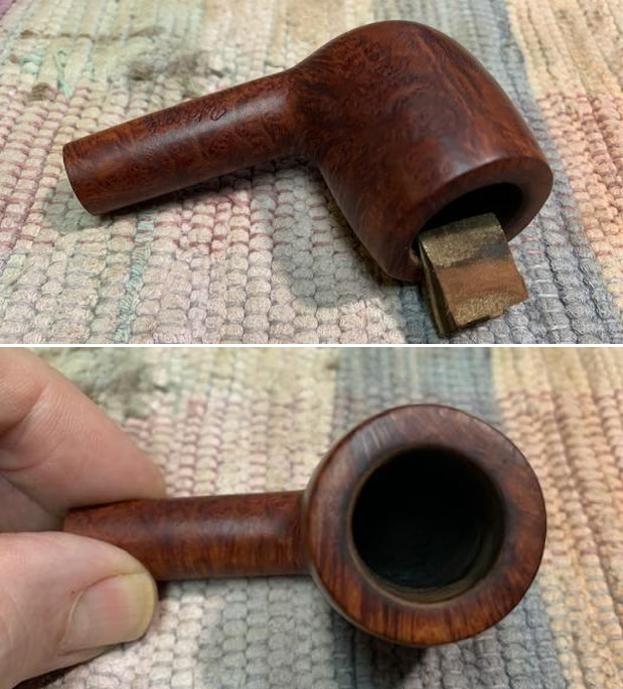
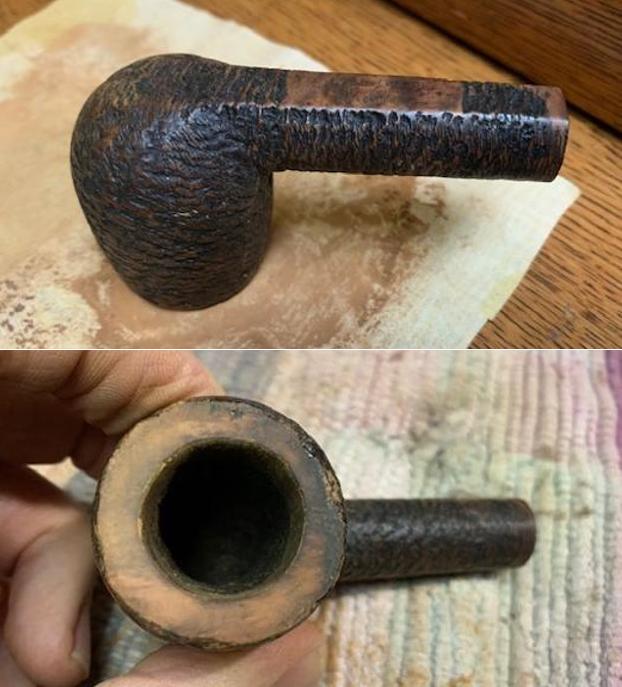
First, into the freezer and we’ll see what happens. Well, the next morning arrived and I was hopeful that the shank cap would break free after cooling and contracting. To keep the cap stable, I wrap it in a felt cloth and put it in the vice with a gentle snugness. With the stummel extended, I very gingerly apply a twisting pressure on the shank with hope that the acrylic cap will break free. Much to my chagrin, the cap did not break free but instead the wood shank insert broke off. Oh my…. I look at the following pictures of the carnage as one is often drawn to look at a car crash on the interstate….
 What to do? After recovering from the initial nauseated feeling, my first thoughts were to drill out the wood inside the now freed shank cap, to repair the acrylic crack and then figure out the next step. It did not take long after these initial thoughts to realize I needed to reach out to Steve with pictures to get his feedback and direction – the Sage of rebornpipes! I recall writing a few years ago in the ‘Helps for Newbies’ section of The Pipe Steward website, that mistakes often are the best way to learn and recording mistakes or mishaps in the writeups helps others and expands one’s abilities in the pipe restoration world. I have not tackled anything like this before, so the opportunities are there to learn! Recording the troubleshooting thought processes I believe, are helpful to learn as well. Here is my initial email to Steve with the above pictures outlining the challenges as I saw it:
Hey Steve,
Ran into a bit of a snag and need your advice. This pipe came to me with the cracked acrylic shank cap. My attempts to remove it from the shank obviously failed with me breaking off the briar portion inserted into the cap. Now I’m looking at cleaning out the wood glued in the cap and setting an insert into the shank that will form the new ‘post’ for the cap. This is something I’ve not done before and reaching out to you and Charles was the first step. Of course, I need to clean the wood out of the cap and close and repair the cap. To connect – I have the acrylic or Delrin(?) push/pull tenons on hand, but that doesn’t seem like the right configuration. I know that you and Charles have used Delrin – but I’m not sure what this process is. Another thought is to take an old stem and flatten the shank facing and counter sink holes in the briar to seat a new mount of sorts for the cap…. Any thoughts to steer me in the right direction – an old write up? Thanks!
Dal
Steve’s response came quickly:
Not sure what Charles would do but my process is simple.
- DO NOT Clean out the wood from the shank extension.
- I would take one of your tenons and shape it with your dremel to provide a tube or you can use stainless.
- Once you have that glue it in the shank end and let it set.
- Give the extending end a coat of glue (epoxy probably is best.)
- Put glue on the cracked ends and clamp it together and let it cure
- Fill in the split in the extension with super glue. Once it is filled in smooth out the shank extension and reshape it
Steve
My response and further questions to hone in on a path forward:
Thanks, Steve. So, you would NOT remove the wood in the shank cap to try to close the acrylic crack gap? Also, there’s a gap between the extension and the shank before I broke it. You would leave that?? Essentially, you would not have tried removing the cap to do these repairs. I’m not sure how the cap would have come off cleanly having been glued on. Fill the acrylic crack and leave the gap?
Dal
I appreciate Steve’s experience which provides an important component in dealing with the myriad of problems and possibilities that are ‘part and parcel’ of pipe restoration: improvisation. With more information and thought, Steve was able to help me bring into focus the options:
Dal…. one thought since you mentioned the gap is to flatten out the broken piece on the shank and extension to smooth out the fit to the shank.
If you want to try to bind the crack in the shank extension since it is already off you could drill out the wood and try gluing and clamping the cracked shank extension.
On the Danish ones with the joint is typically done with a threaded tenon in the shank and the piece can be wiggled free and unscrewed… This did not allow for that.
As something completely different you could take a nice piece of smooth hardwood (walnut) and make a similar piece drill and anchor it to the shank as noted before. That would look really good and be your own touch.
My thought processes continue – I had already contemplated flattening the shank facing to remove that gap as Steve suggests. The last option that Steve put forward of fashioning a piece of walnut or another hardwood and seating it into the shank would probably be the classiest repair but I’m not sure my tools are precision enough to drill out the shank to create the counter sink space for the hardwood ‘plug’. Steve also mentioned removing the wood from the cap and repairing the acrylic gap, which was my first inclination. This approach would also necessitate then, fashioning a wood plug to then seat the friction mounted Fishtail stem.
The bottom line is that I cannot suffer leaving the acrylic break there and not try to repair it! – especially since this was the primary reason for trying to remove the cap in the first place. With Steve’s input, the course that I will follow is to fashion a hardwood joint. Whether I simply drill a counter-sink hole in the shank or attempt the Danish method of threading the joint, I will continue to consider. I do have a tap & die set that I’ve never used, and this would be a great opportunity perhaps! The question between these two approaches – counter-sink hole along or threaded – has to do with how much wiggle room there will be when cementing the joint in the shank making sure the cap seats flush against the shank facing and not again, leave gaps. Whichever way I end up proceeding, the first step is to drill out the briar wood that remains in the cap.
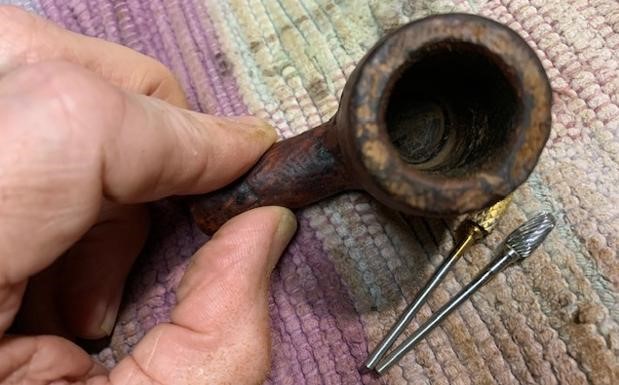
To remove the briar remains from the shank cap, I begin the process with drill bits. Using a bit just larger than will freely pass through the airway, I hand turn the bit to ream out the wood a little at a time. I then graduate to two larger bits, hand turning and expanding the bite each time and removing a little more briar. I also used different burrs mounted on the rotary tool to fine tune the clearing. The following picture is after quite a bit of time of gradually removing the briar without further damaging the shank cap. You can see just a small amount of wood left against the acrylic lip marking the beginning of the mortise where the stem is seated.
 These next pictures show all the tools used for the mini-project and the finished job. Success with the first phase.
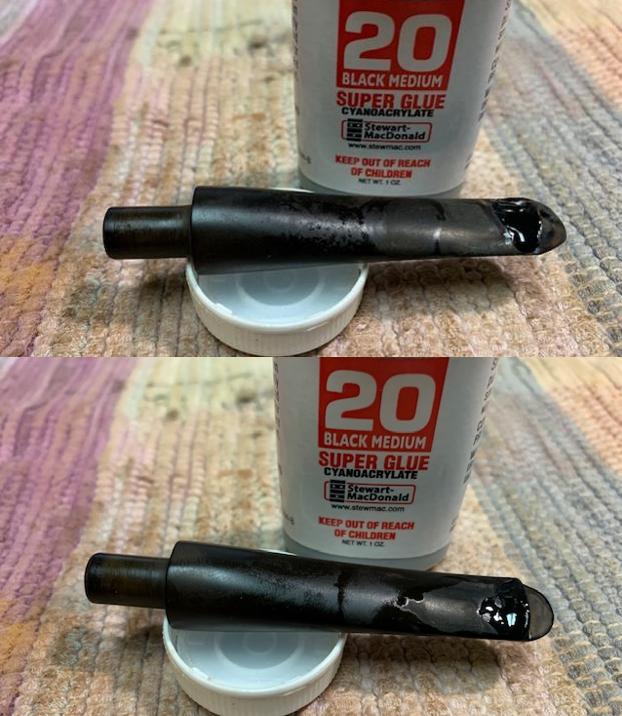
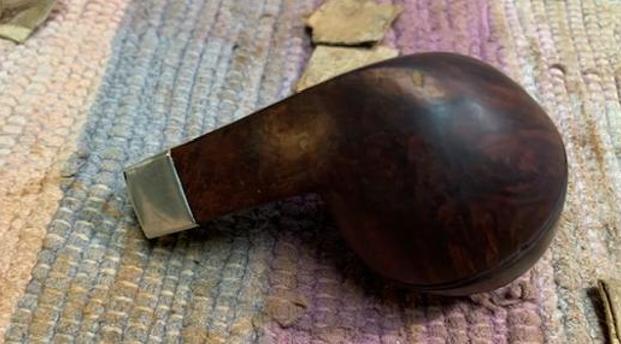
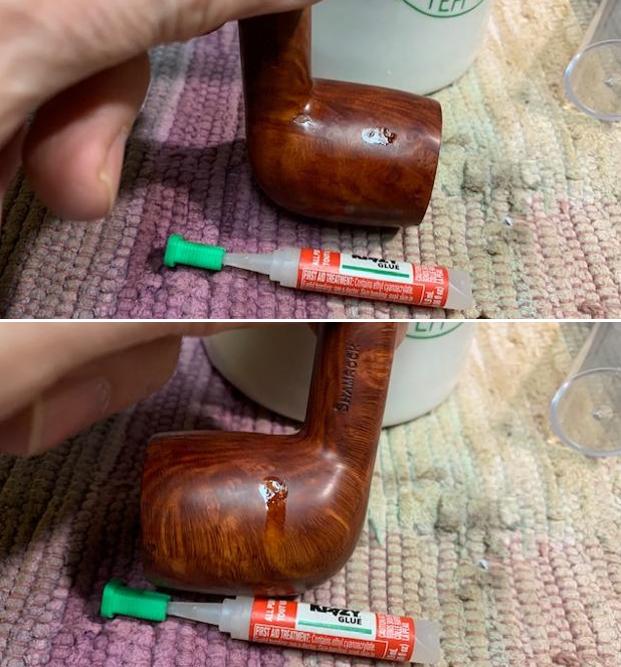
 Next, the crack in the acrylic needs to be glued. The acrylic shank cap is placed in a small desk vice cradled by two cotton pads to protect the acrylic. The vice will provide constant pressure to allow the CA glue to cure fully through the night.
 The cap is situated lower in the grips. I do this so that the press of the vice will focus on the top of the cap to close the gap and not put pressure on the entire cap.
 I use Loctite Precision Pen semi-gel CA glue to lay a line down the crack to avoid too much excess on the acrylic. Then a toothpick is used to push down and spread the CA glue on the crack edge to get maximum coverage and hopefully, effect.
 The vice is then gently closed to close the gap. I’m careful not to put too much pressure on the cap with the vice – I don’t want it to crack again! The day has come to an end and the lights go out allowing the glue to fully cure through the night.
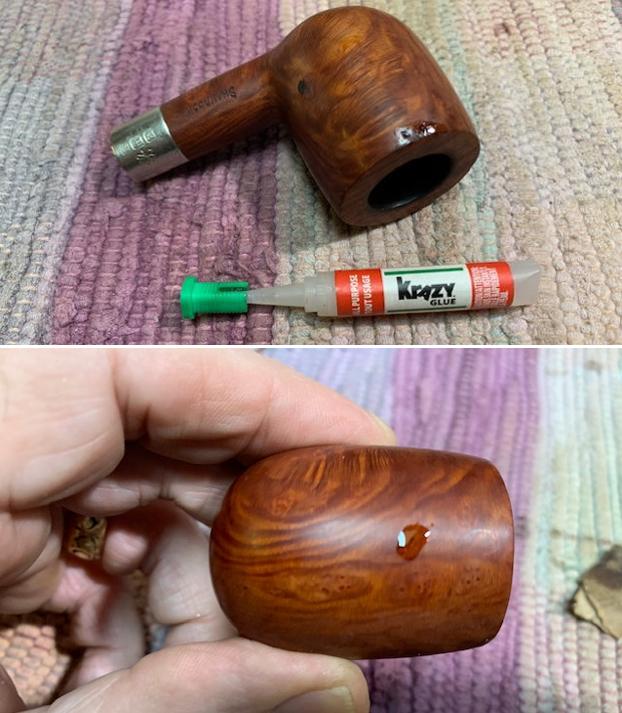
  The next morning, I am anxious to release the vice and hopefully, the acrylic cap won’t snap open! As hoped, the cap repair is successful – yes!
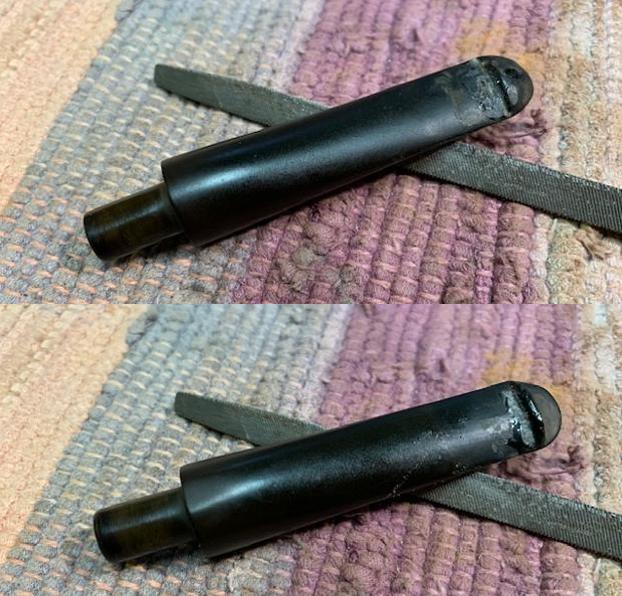
  Next, 240 sanding paper is used to surgically remove the excess glue from the acrylic surface. My caution is to do hopefully little damage to the ‘BC’ cap stamp removing the glue. After beginning to remove the excess patch material sanding with 240 paper, I noticed a separation in the crack. It seems that the extended time the acrylic cap was cracked, the acrylic was memorizing the expanded orientation. The excess glue over the crack was serving as reinforcement for the patch and when removed, the patch faltered.
 I may need to transition from CA glue to using an epoxy. While the patch is still half-way holding, the thought came to mind about possibly relieving the expanded memorized orientation by heating the acrylic. The cap is positioned in the vice with the crack away from the hot air gun. The opposite side of the crack needs to relax. With the vice gently closed on the crack side, the opposite side is heated. If the theory is correct, as the tight side of the cap heats, the acrylic becomes more supple and relax and hopefully will un-memorize the broken condition – like a splint. After heating for some minutes, the cap cools.
 Amazingly, this works like a charm! The gap has closed, and the expansion torque has been released. I wish I had thought of this before applying the patch. Now, I may need to redo the patch but the complication with that is cleaning away the old patch material. I’ll continue sanding with 240 to remove the excess and see how it looks.
 I continue to remove the old patch material with 240 grade paper trying to salvage as much of the BC stamping as possible – though I know that it will not remain unscathed. The good news now is that with the torque issue resolved, when the cap is mounted on a newly fashioned briar plug later, there should be no stress on the acrylic. The cap will simply go over the plug like a glove and glued in place. The mounting and the glue on the inside will again reinforce the patch. So, the crack repair doesn’t necessarily need to be uber strong but becomes more of a cosmetic issue – in theory!
 The sanding with 240 paper is complete and I continue sanding over the patch with 600 grade paper and then 0000 grade steel wool.
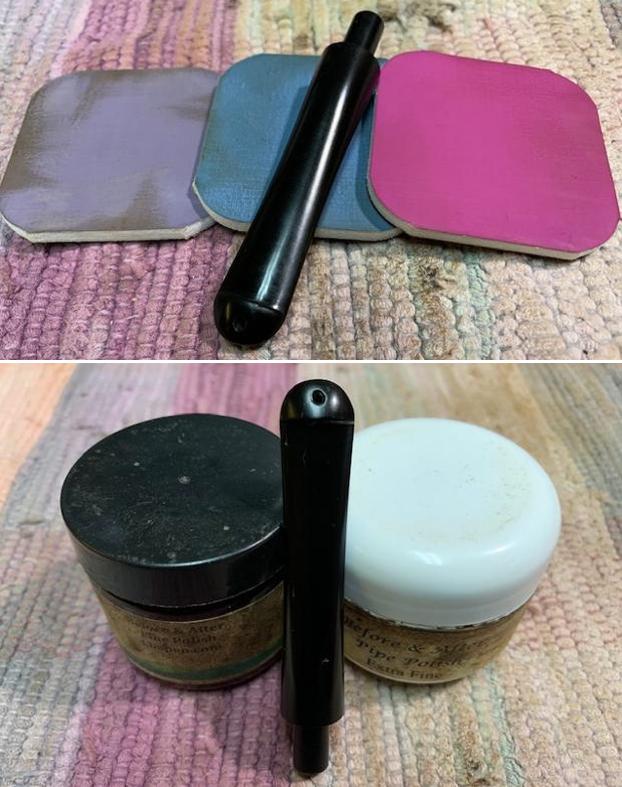
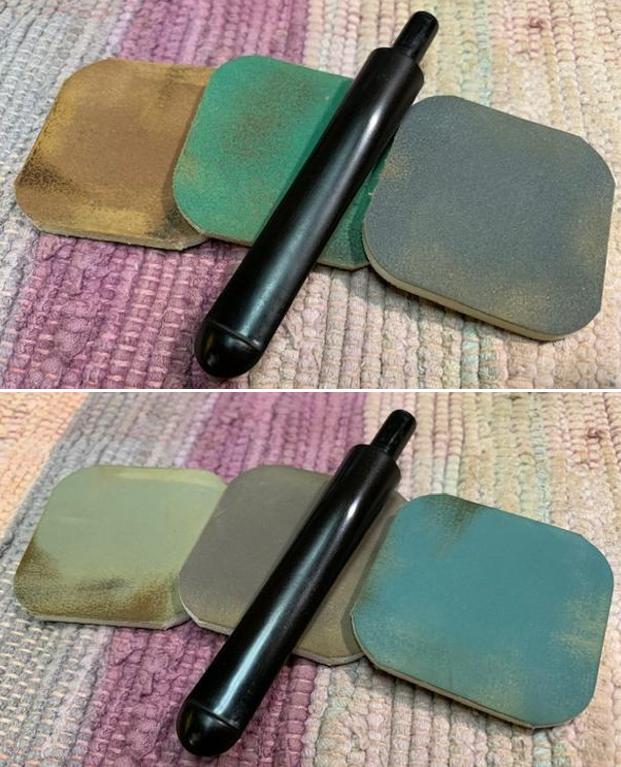
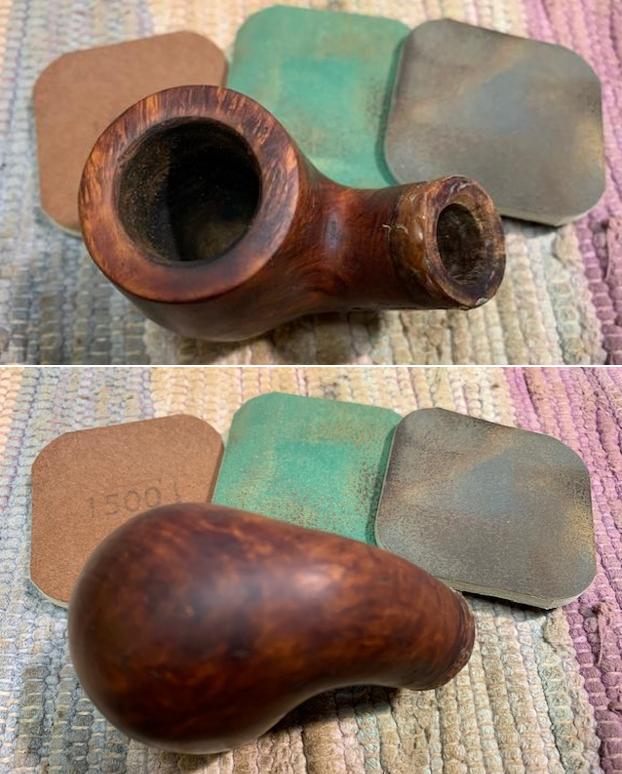
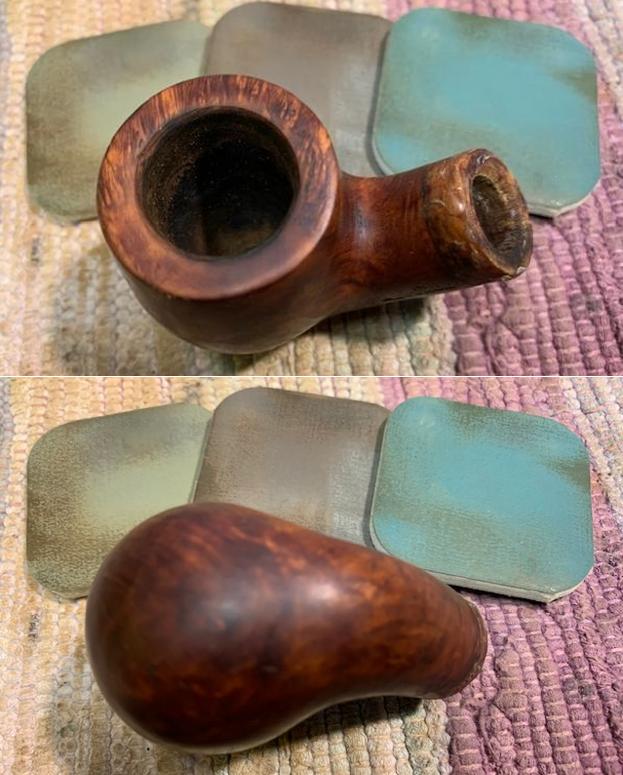
 Next, the entire acrylic ferrule is sanded with the full regimen of micromesh pads – from 1500 to 12000.
 Putting the cap aside for now, I use a sanding drum mounted on the rotary tool to remove the excess briar protruding out of the shank after the break.
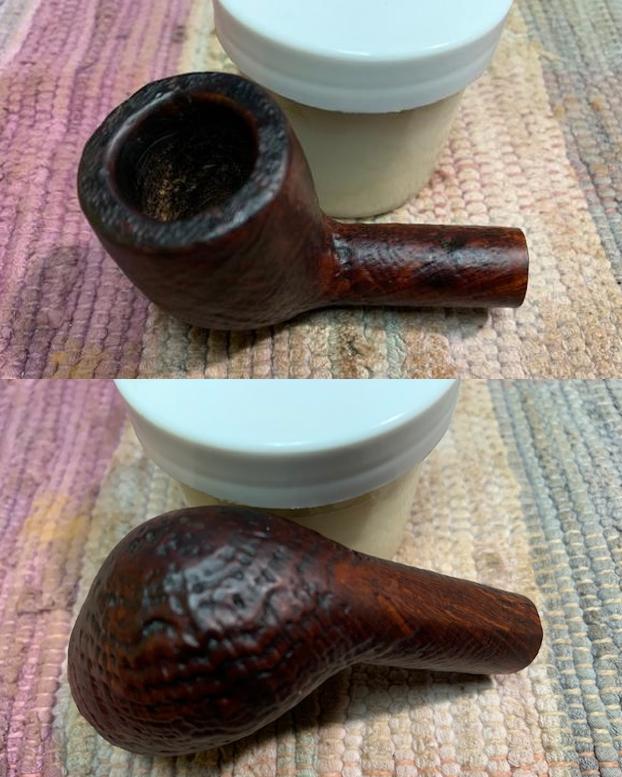
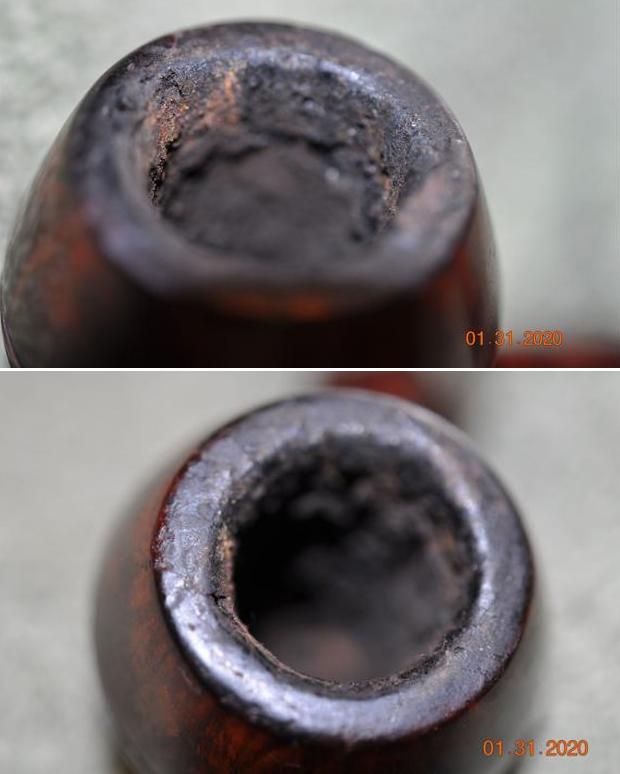
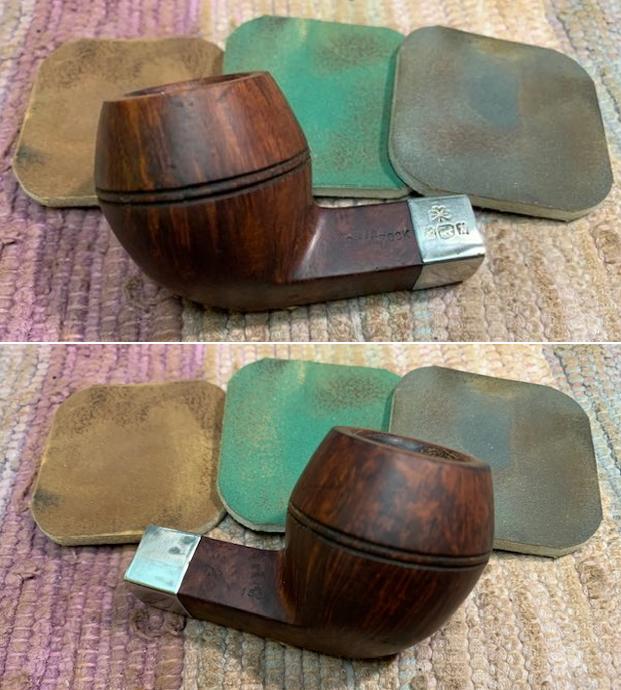
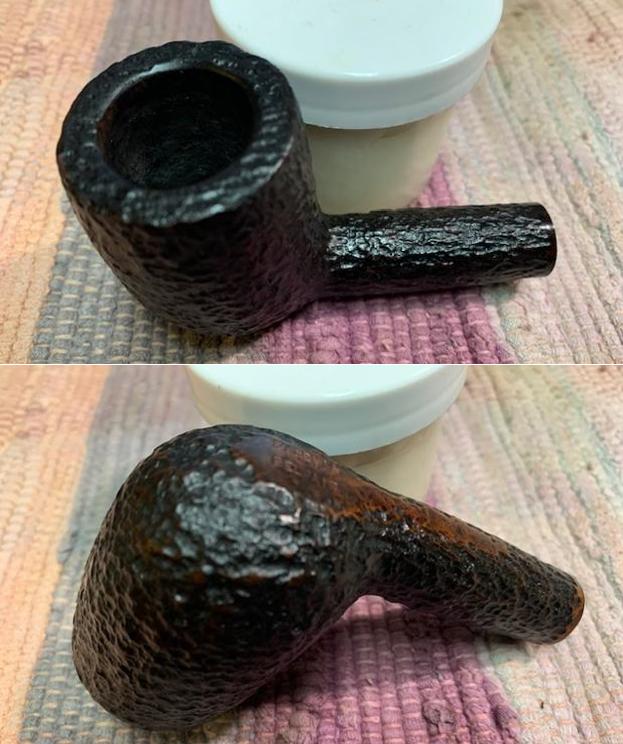
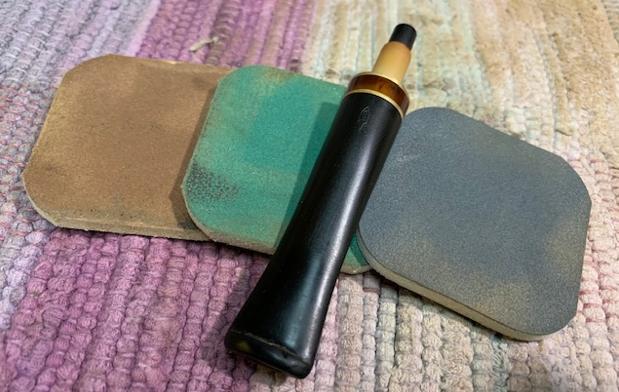
 Even though it’s a bit anti-climactic, before continuing with the shank repair, I want to clean the stummel first. After the shank cap is remounted, the last thing I’ll want to do is backtrack and start cleaning! The chamber has carbon cake build up and to give the briar a fresh start, the chamber is reamed with the Pipnet Reaming Kit. After taking a fresh picture of the chamber, reaming starts with the smallest of the blade heads and then the next larger one. After this, the chamber walls are scraped with the Savinelli Fitsall Tool and then sanded with 240 sanding paper wrapped around a Sharpie Pen for leverage.
 After wiping the bowl, and inspection of the chamber reveals healthy briar.
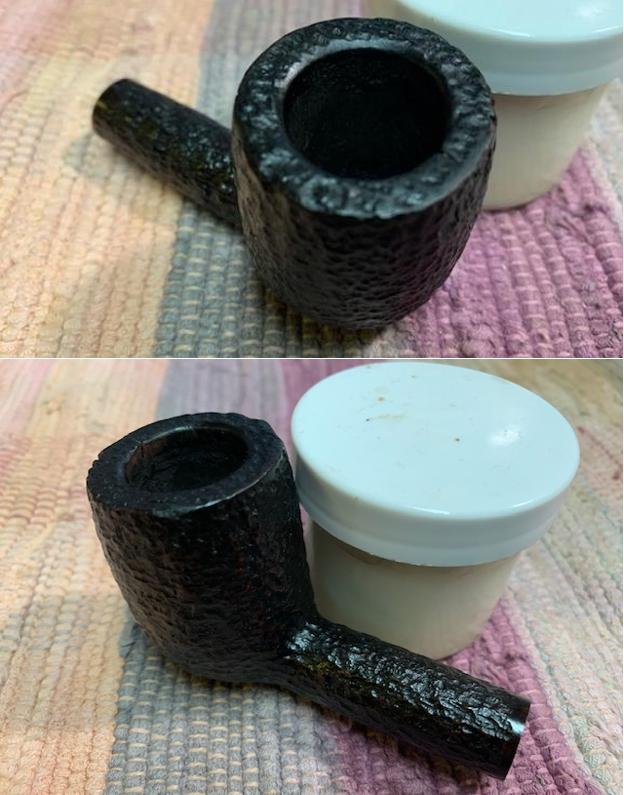
 Next, undiluted Murphy’s Oil Soap is used to scrub the rusticated stummel and rim surface. The rim has some lava flow and the distinctively carved BC Costaud stummel will undoubtedly have grime and dirt in the cracks and crevasses.
 A bristled toothbrush is used to get in the nooks and crannies and a brass bristled brush also assists with cleaning the rim.
  The stummel then goes to the sink where shank brushes continue the cleaning in the mortise with warm to hot water using anti-oil liquid dishwashing soap. After the stummel is thoroughly rinsed the results of the cleaning are examined.
 The rim cleaned to a degree. There remains dark charring on the internal rim edge.
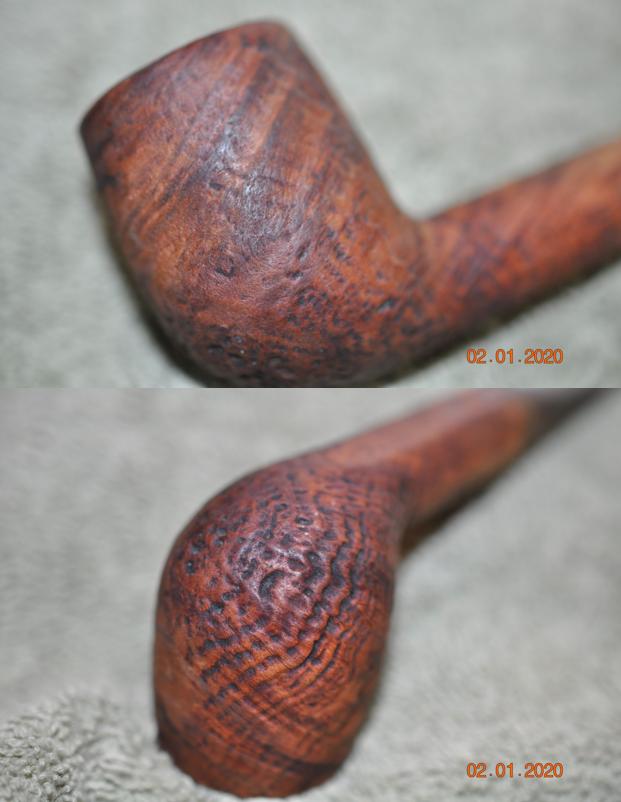
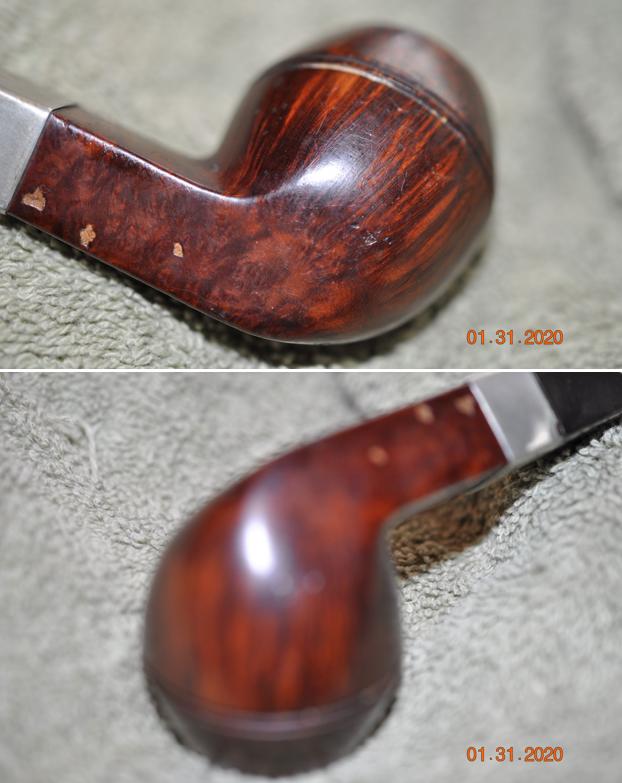
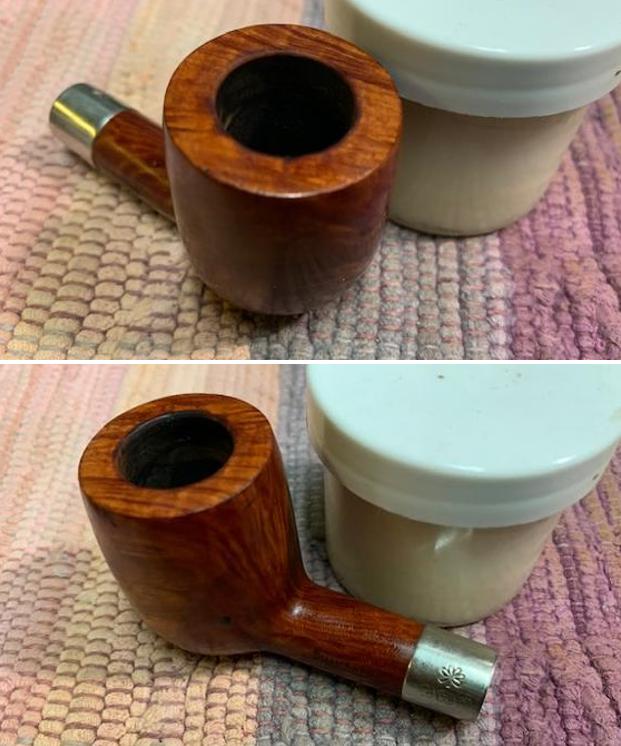
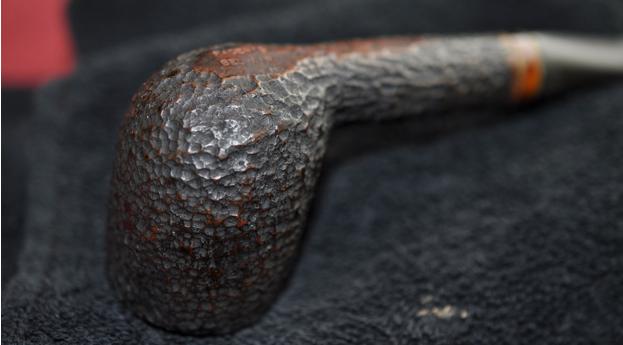
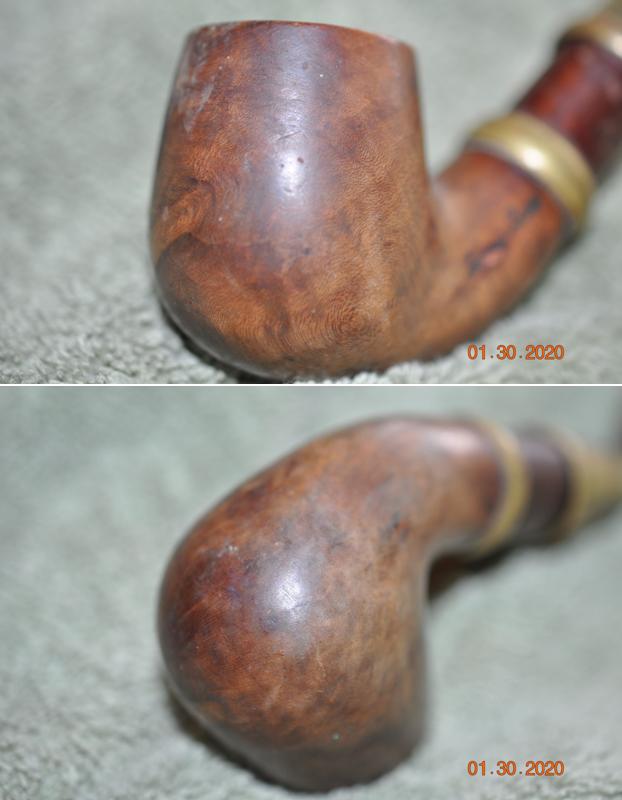
 The briar seems parched throughout the rusticated surface. With this much carving, it’s difficult to tell if the finish has disappeared for the most part. It does look a bit ragged. The third picture below of the nomenclature on the underside of the stummel seems to indicate this is true with the splotchiness.

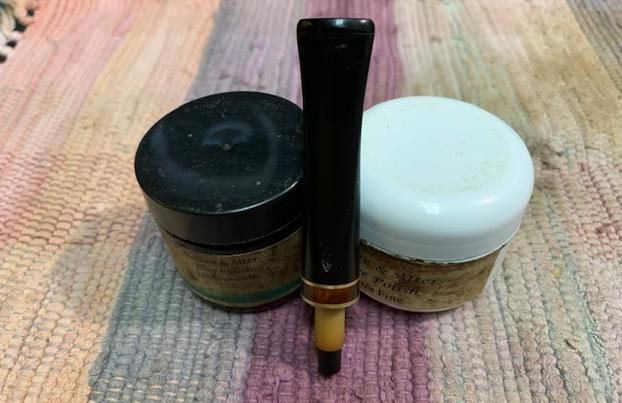
 Before contemplating adding dye to the mix, I decide to apply Mark Hoover’s Before & After Restoration Balm to the stummel to see how the dry briar responds. The Balm does amazing things to smooth briar and the rough surface on the Costaud bowl may perk up nicely. To apply the Balm, I put Balm on my finger and work it into the crevasses. I think this pipe has won the award for the most Balm needed to do the job! After the Balm is thoroughly applied, I allow the stummel to sit for a time to allow the Balm to do its thing (pictured below). When I have this ‘liquid gold’ (Mark’s price isn’t cheap 😊), none is wasted. I grab a blasted billiard off my own pipe rack and work the excess Balm in. There seems to be a smile on the Billiard’s face!
 After 15 minutes or so, the stummel is buffed with a microfiber cloth to remove the excess Balm. It takes a bit of work, but the bowl looks better; and for now, I will think about adding any additional coloring. I move on.
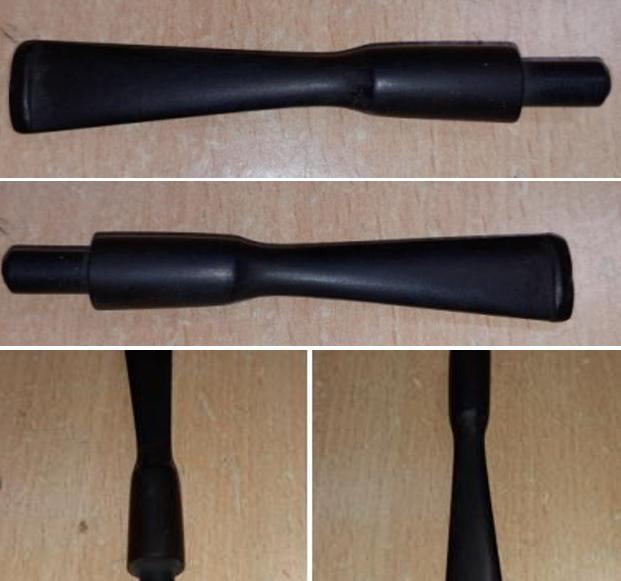
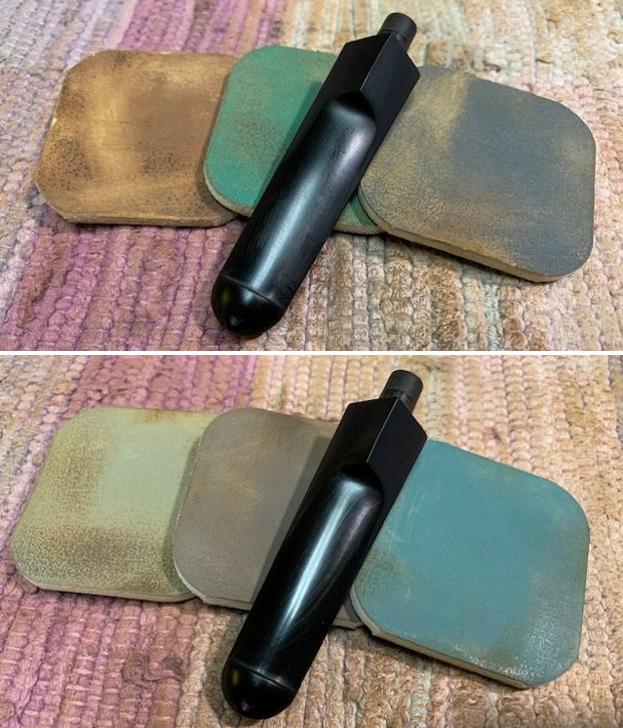
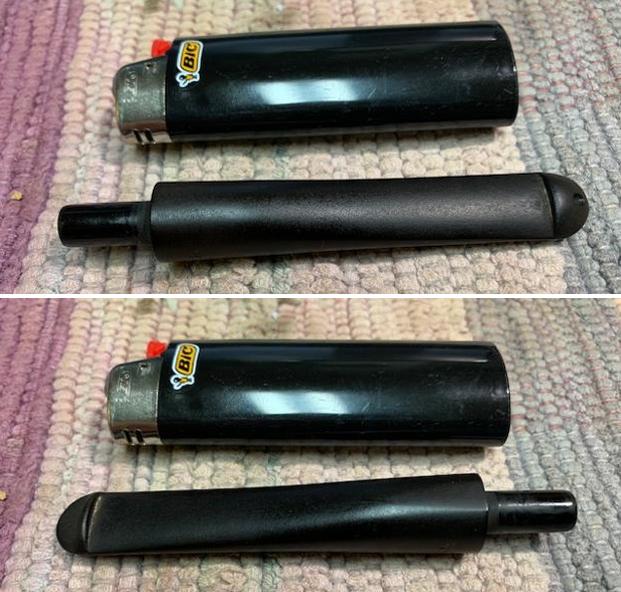
 Earlier, the Fishtail stem went through a Before & After Deoxidizer soak. The stem looks good with no apparent residual oxidation. The upper and lower bit have tooth chatter, and the vulcanite surface is rough. To address the chatter, I use a Bic lighter and paint the bit with the flame to heat and expand the rubber compound. As the vulcanite heats, it also expands reclaiming its original disposition or at least in part. The before and after pictures show the results. This stem responded well which means that sanding will now be less.
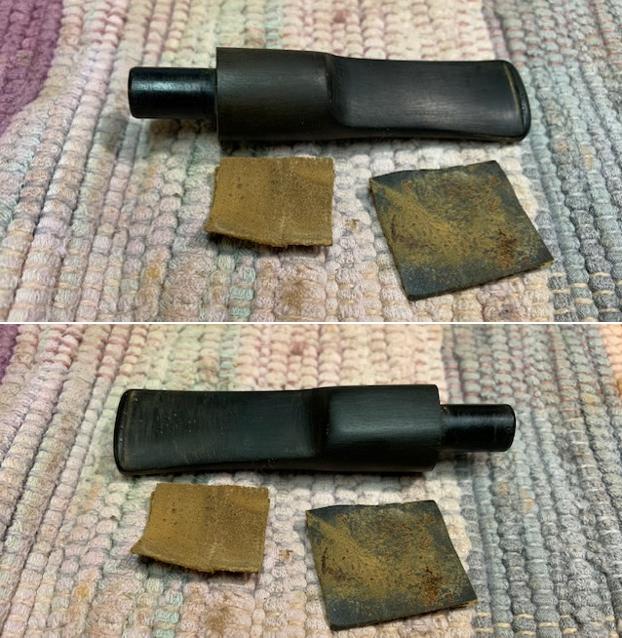
 Next, the entire stem is sanded with 240 grade paper with a special focus on removing any residual roughness on the bit from tooth chatter.
 The 240 sanding is followed by wet sanding with 600 grade sanding paper and then 0000 grade steel wool is applied.
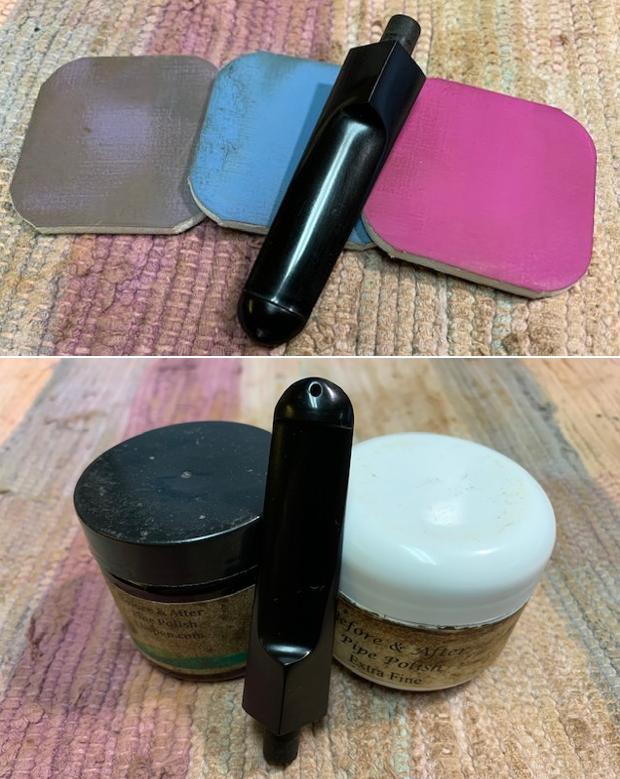
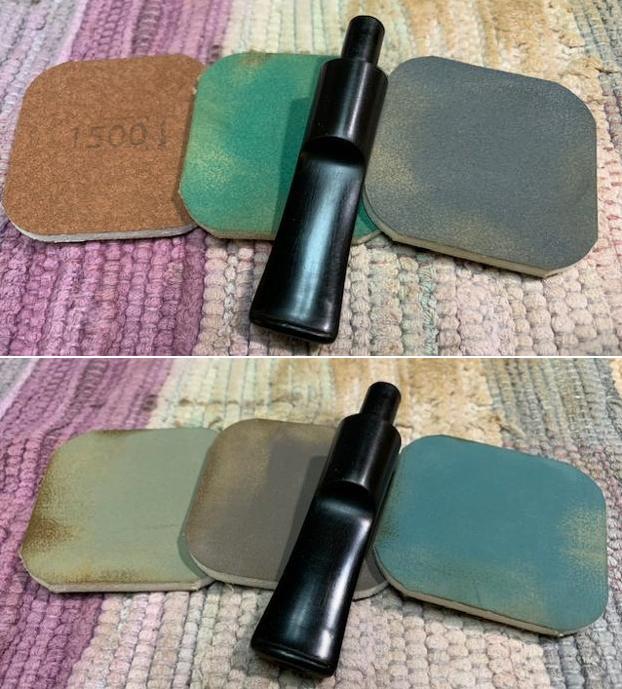
 Next, the full regimen of 9 micromesh pads is used starting with wet sanding with pads 1500 to 2400. Following the wet sanding is dry sanding with pads 3200 to 4000 and 6000 to 12000. I apply Obsidian Oil between each set of 3 pads to further condition the stem and to guard the vulcanite from developing oxidation.
 While restoring the stem, I’ve had more time to consider the next steps in the shank cap repair. Since this is my maiden voyage doing this kind of repair, the brain has been ticking through the process one step at a time weighing the logical sequential steps. To get a frame of reference, I measure the width of the former joint or ‘plug’ and the corresponding internal width of the shank cap with the result of 7/16 inches or 11mm. The standard airway is 3/16 inches, and this airway corresponds.
 The depth of the internal cavity of the shank cap where the joint plug would be seated is 9/16 inches or 15mm. If this length were to be generally doubled to the depth of the countersink hole to be drilled into the shank, the total length of the joint would be about 1 1/8 inch or 30mm.
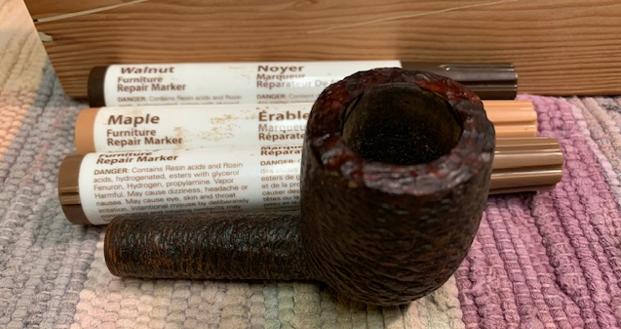
 In Steve’s earlier email, he suggested using walnut as the joint material or a hardwood of some sort. I do not have walnut on hand, but I do have another hardwood – cherry. The cherry wood is a flat piece serving as a shelf end on my worktable! It used to be an extender of a cherry wood table that became my worktable!
 I cut a piece off the end of the piece which should give me enough ‘meat on the bone’ for a small margin of error in drilling the airway through the center.
  I set the block of cherry in the table vice, and eyeball the drill hoping for the best!
 The exit hole is about 1/16 inch off center, but I think there’s enough margin to make this work.
 With the airway drilling ‘good enough’ for now, with enough excess cherry to make it work, the next step is to sand off the corners of the block to form the rough cylinder that will more easily mount on the PIMO Tenon Turning Tool. To do this I use a sanding drum on the rotary tool.
 The following pictures show the corner-by-corner progression of rounding the block.
 This should do! Progress!
 The closest thing in my tool chest to a lathe is the PIMO Tenon Turning Tool I acquired from Vermont Freehand. I have only used the tool to fashion vulcanite tenons mainly for fashioning Churchwarden stems for repurposed bowls. I’m hopeful that I can make the PIMO work for this application on cherry wood. The challenge will be holding the wood firmly and having to do a flip-flop in order to cut both ends. The reach of the carbide cutting arm is only 5/8 of an inch which means the joint for the Costaud will need to be reversed and cut from both sides to do the job. The length of the joint now will mean that as I cut, a ‘donut’ of uncut wood will be left in the middle. My thinking is that as I cut both sides to establish the drilled airway as the center axis point, then I can shorten the joint a bit to be able to remove the ‘donut’. The key, as in most everything about pipe restoration, is patience in the shaping process. The picture shows the flip-flop issue – the short reach of the cutting arm.
 The carbide cutter arm is adjusted to barely contact the cherry wood and tightened. The target diameter is about 7/16 inches or 11mm – the diameter of the acrylic shank caps interior.
 After a few cuts and flip-flops, the anticipated donut is forming.
 I discovered that using a pair of pliers to hold the end of the joint work better than with my hand.
 After several more flip-flop cuts the donut is fully formed and the airway now is the center axis point. The ‘meat on the bone’ cherry wood, has equalized the slightly off centered airway drilling. You can see in the picture below that the donut is almost flat/flush on the bottom side, but the top side is fat. The cutting from the PIMO Tool stayed true to the center axis point and removed the uneven wood (or meat on the bones!) around it.
 As I mentioned above, at some point I would shorten the joint so that the donut could be removed. That time is now. 30mm or 1 1/8 inches is about the target length of the needed joint (sorry for going back and forth between the metric and the standard systems! After living in Europe over 25 years the metric is more usable and precise to me!).
  With the mark made and after mounting the cutting blade onto the rotary tool, the excess is removed.
  A few more cuts with the PIMO Tool and the donut is removed and now I am working with a uniform dimension.
 Flip-flop cuts continue until I’m down close to the width of 11mm. I cut a test cut and measure. The measurement is right at 11mm.
  I finish the cut after measuring and the fit is perfect in the shank cap. It has a slight amount of wiggle room which is what I want to not put outward pressure on the repaired acrylic and to allow a little fudge factor when it is permanently attached later.
 The next step is to expand the joint airway to match the airway diameter of the Costaud. That diameter measures 3/16 inches. I hand turn the drilling by gripping the drill bit end in the vice and turning the joint plug. I start with a drill bit slightly larger than the current hole and turn. It takes a bit of time to hand turn the drilling. I carefully used pliers when the drill bit was advanced in the hole and became difficult to turn.
 It took 3 drill bits to arrive at the 3/16 inches. Using metric drill bits too gave a half-step between sizes that made it a little easier between steps.
 The length of the joint is long now. I’ll deal with that later after drilling the counter sink hole in the shank. I’m nervous about this next step. The diameter of the joint is a bit less than the diameter of the original looking at the shank, but I’m ok with this. The picture below shows the narrowness of the outer shank structure. I’ll stay a little bit more on the safe side as I drill a counter-sink hole.
 Starting with a drill bit that is a bit larger than the airway, the end of the bit is clamped in the vice and the stummel is rotated. I hand turn the stummel allowing the bit to follow the airway’s path of least resistance. The depth I’m aiming for is about 1/2 inch and I mark off drill bit with tape. The most difficult part is starting the drill bit making sure it’s as straight as possible and avoiding wobbles. Once the bit starts tracking down the airway it becomes easier.
  Ten drill bits later, I reach a comfortable diameter as the counter-sink hole moves closer to the outer shank edge. I haven’t cracked the shank yet and I want to keep it that way! The hole is a bit small, but I transition to sanding the joint for custom fit.
  To sand down the shank side of the joint, a coarse 120 grade paper is used. The paper is pinched around the joint and rotated. This keeps the joint in round. In time the joint begins to make its way into the shank and finally about 1/2 inch is inserted. Success! The pipe cleaner confirms continuity through the airway. What a relief.
 The next step is to sand down the stem side of the joint so that the acrylic shank cap fits over the joint and is flush with the shank. With the joint seated a half-inch in the shank, the picture shows the excess length – about 1/16 inch.
 A sanding drum is used to do this. After mounting the sanding drum on the rotary tool, the end of the joint is gradually sanded down to a good length. The progress is checked along the way to make sure too much isn’t removed.
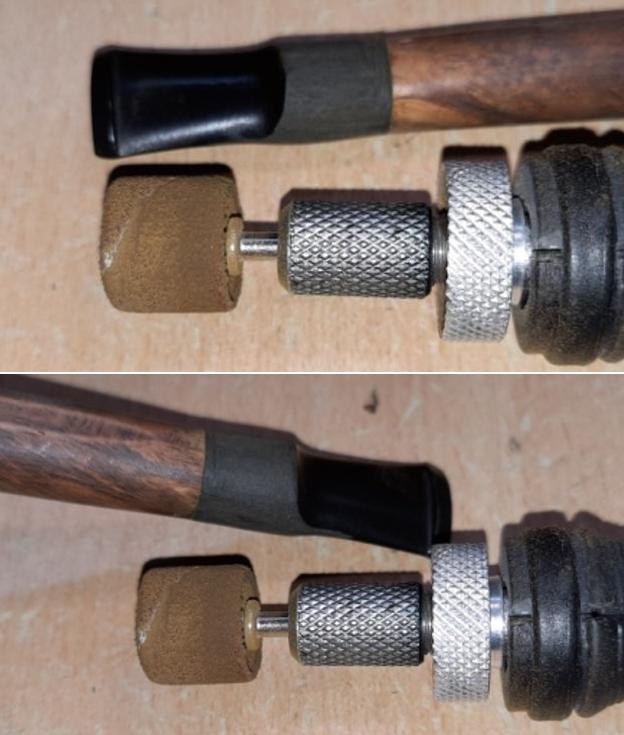
  The pictures show the alignment of the joint airway. As I’m looking at the airway, I begin to think about how the military mount fishtail stem will fit into the shank cap.
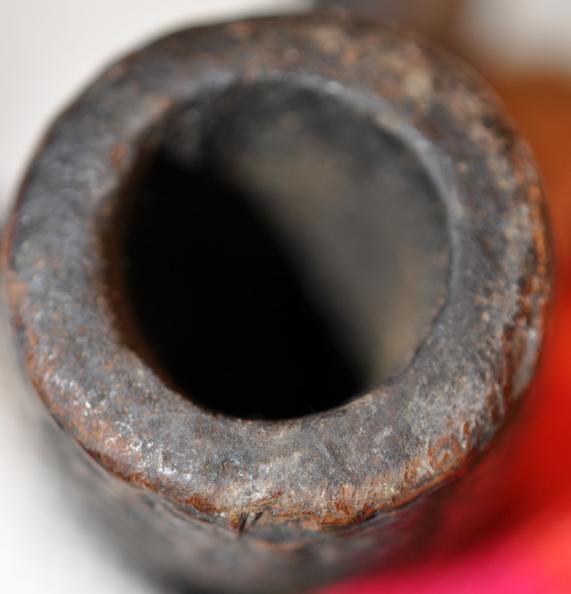
 I size up the stem’s tenon with the now repaired shank cap opening and another puzzle unfolds but another puzzle is possibly solved. The tenon simply does not fit. Nor did it ever fit this shank cap. The opening of the cap is 1/4 inch wide. The tenon is 1/16 inch larger.
  I don’t believe the stem is the original BC Costaud stem but apparently a replacement stem that’s a good match, but had been previously used. A quick look at the internet shows that this replacement stem looks BC authentic by comparing with other Costauds (LINK). This is good news indeed.
  The puzzle that is possibly solved now is the cause of the acrylic cap’s break – the original stem was lost, and the replacement stem was forced into the shank cap mortise without proper sizing and there just wasn’t enough room to accommodate the oversized tenon and the acrylic gave way. After this possible scenario played out fully in my cerebral cinema the question that came to mind was, ‘Why didn’t I catch this earlier?’ The answer followed – when the acrylic crack was wide open, of course it fit! After fixing the crack and closing the gap, my assumption of the stem fit was grandfathered in. But looking back at earlier pictures, the stem was not fitting – the tenon was not fully engaged seated in the mortise. This I HAD assumed, too. This earlier picture shows that the tenon was simply hanging out on the entry lip of the acrylic cap, not seated in the briar mortise inside the cap.
 The pathway forward is to glue the joint in the shank making sure that it lines up with the acrylic cap. After this the acrylic cap is permanently attached. The mortise needs to be drilled out to be flush with the cap opening and deep enough to receive the tenon. The tenon of the stem then needs to be custom resized to be able to friction mount the mortise so that the tenon facing is flush with the shank cap opening.
In seating the joint in the shank, it’s important that there’s a bit of play in the fitting so that the joint can be adjusted after the glue is applied. To increase the hold of the CA glue, I use a burr to cut some channels in the joint.  Thick CA glue is then applied around the base of the joint and then inserted into the shank counter-sink hole. I use thick glue because thin CA glue is absorbed while thick spreads. I want the glue to spread fully around the joint. While the glue is still pliable, the cap is mounted onto the joint to guide the orientation for the joint so that the airway is centered, and the shank cap is flush with the shank facing.
  I let the stummel sit for several hours to allow the joint’s position to become permanent as the CA glue fully cures.
  With the glue fully cured, seating the joint into the shank, the next step is to attach the acrylic cap. Again, the joint is scored several times with the burr to increase the gripping of the CA glue.
 Thick CA glue is then applied around the joint and the shank cap is mounted onto the joint and while the glue is still pliable, I make sure the cap is lined up with the shank. Thankfully, the airway is centered in as well!
 To complete the structural issues, the replacement fishtail stem’s tenon needs to be properly sized to navigate safely the mortise. To do this, the tenon diameter is decreased and the mortise is expanded to accommodate the resized tenon. I use a coarse 120 grade sanding paper to sand down the tenon. I do this by pinching the paper around the tenon and rotating the stem.
 The mortise is also expanded to match the diameter of the acrylic shank cap’s diameter. A burr is carefully used to expand the mortise.
 To deepen the briar mortise – gradually, a drill bit is hand turned.
 The process was a dance between sanding the tenon to shape it and drill and smooth the mortise – testing a lot! The goal is to seat the tenon so that the tenon facing is almost flush with the acrylic ferrule. This picture shows a large gap between the tenon facing and the acrylic.
 After a lot of slow work, the tenon is seated without placing too much stress on the repaired acrylic shank cap. The structural repair to the BC Costaud is done – I move on!
 What remains is now the cosmetic restoration – I am not finished yet! The charred inner ring of the chamber needs to be cleaned. To do this, 240 sanding paper is used to sand the upper chamber edge.
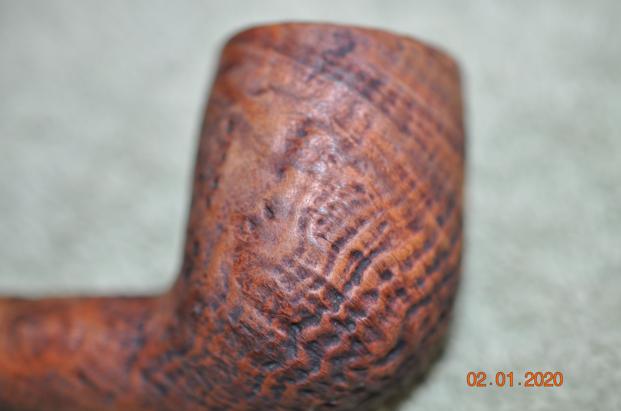
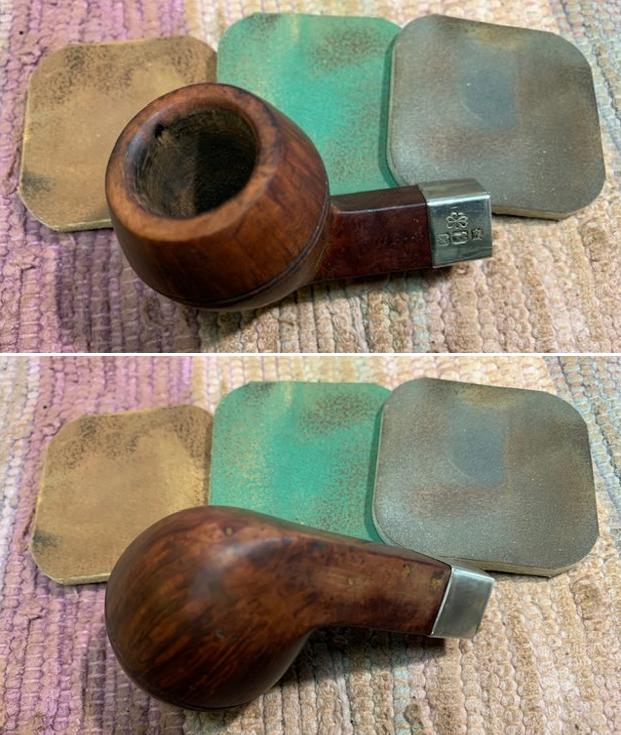
 Looking again at the condition of the rusticated surface of the bowl, after applying the Before & After Restoration Balm earlier, I had hoped that that would be sufficient. Looking now at the briar’s condition, it is apparent the finish is gone in places giving a light dried look. The nomenclature panel on the underside shows an uneven splotched finish.

 The decision comes easily to apply a dye to refresh the stummel hue. After wrapping the acrylic shank cap with painter’s tape, Fiebing’s Light Brown Leather Dye is used. To begin, the stummel is heated to help to absorb the dye.
 With the deep rusticated surface, I do not fire the aniline dye as I would with a smooth briar pipe because it would be difficult to remove the resulting crusted shell and the Red Tripoli compound used to remove the crust. Instead, the stummel is simply painted with the dye using a pipe cleaner. After the dye is thoroughly applied to the rough, crevassed surface, I let the stummel to rest through the night to set the dye.
 The next morning, a cotton pad wetted with alcohol and used to wipe down the newly dyed stummel to remove excess dye and to blend.
  A microfiber cloth in then used to hand buff the stummel rigorously to remove additional excess dye.
 Next, with a clean felt wheel mounted on the rotary set at about 40% full power, the rustication is further buffed and cleaned of fresh dye. The reason for all this buffing is to prevent dye from leaching after it’s put into service. It’s difficult not to have some dye on the hand when the stummel is fired up the first time, but these steps help to minimize this leaching.
 Next, to create an attractive contrasting in the rusticated surface, the 1500 grade micromesh pad is employed to sand the peaks of the rusticated peaks. This creates a reddish fleck contrasting that I like in a rusticated surface.
 Again, the surface is buffed up with the felt buffing wheel.
 One last effort to avoid dye leaching. To emulate a bowl in service, the stummel is heated with the hot air gun and again buffed with the microfiber cloth to remove the leached dye.
 The home stretch – Using a cotton cloth buffing wheel on the rotary tool set at 49% full power, Blue Diamond compound is applied to the stem, acrylic ferrule, and smooth briar shank underside. Compound is not applied to the rusticated surface because it would clog the wood crevasses and be a bear to clean. A felt cloth is used to wipe off the compound dust where applied. Not pictured, after applying the Blue Diamond compound, another cotton cloth wheel is mounted on the rotary tool and carnauba wax is applied to the pipe. The wax is very lightly applied to the rusticated surface with the speed of the rotary tool a bit faster – at about 60 full power. I do this to create more heat which helps the wax to dissolve and not get stuck in the crevasses. Using the rotary tool buffing wheel helps as well as the bowl is rotated around to allow the wheel to go with the valleys and contours.
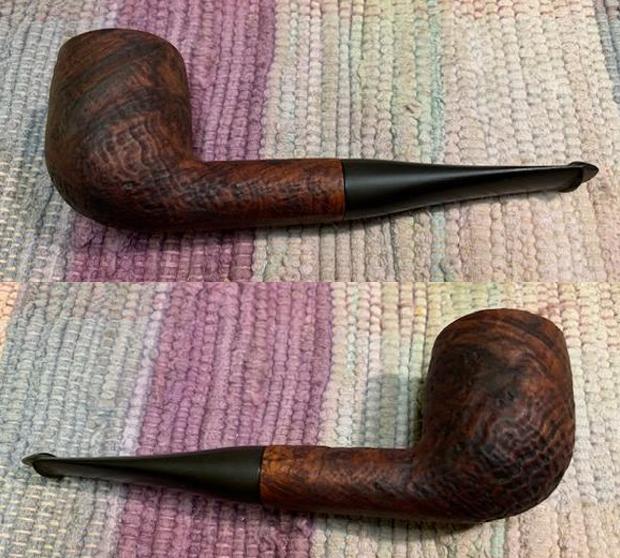
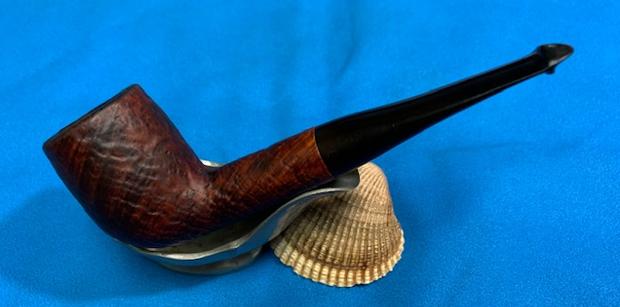
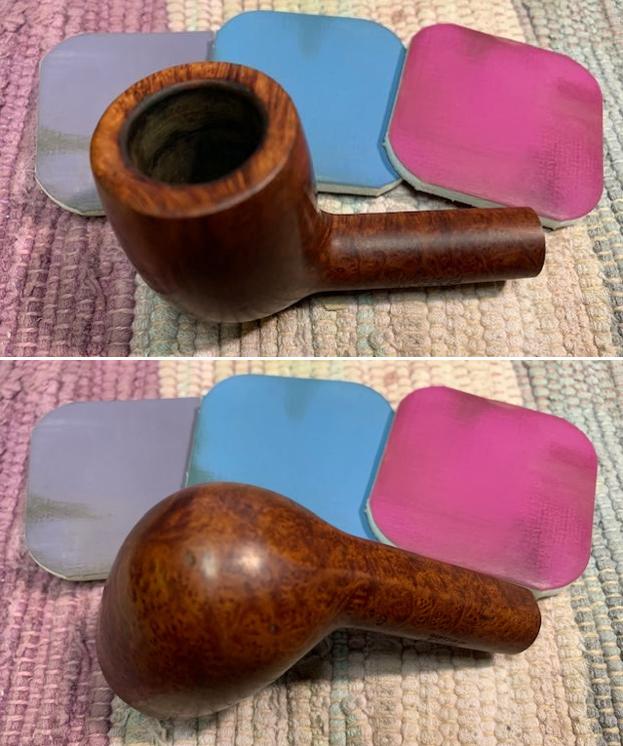
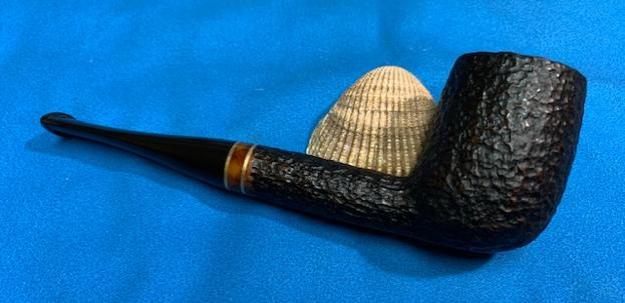
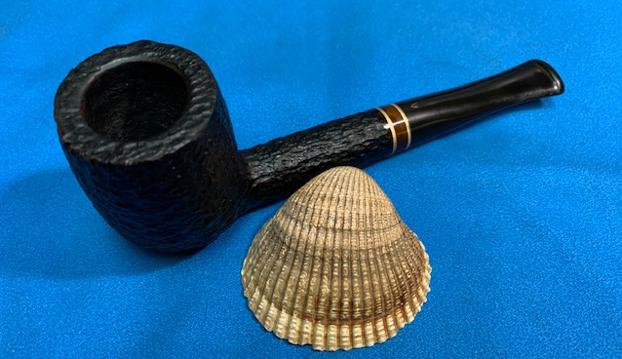
  Wow! This was perhaps the most involved restoration that I’ve done to date. There were a lot of moving parts, processes and structural issues to resolve to put this pipe back into service. I’m pleased with the results and the opportunity to learn some new techniques. The rusticated surface of the Butz-Choquin Costaud is now the focus of this handsome, stout pipe – as it should be. The rustic feel of the bowl looks great with the bright contrasting of the acrylic ferrule. The slightly bent stem adds a gentle class to the overall bold appearance of a gentlmen’s pipe. As the commissioner, Craig will have the first opportunity to acquire the Costaud from The Pipe Steward Store which benefits the Daughters of Bulgaria – helping women and girls who have been trafficked and sexually exploited. Thanks for joining me!


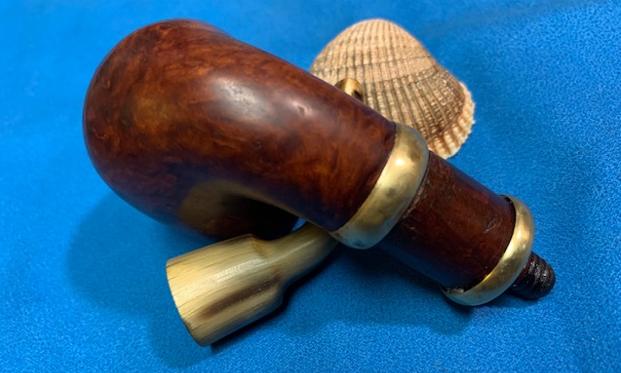
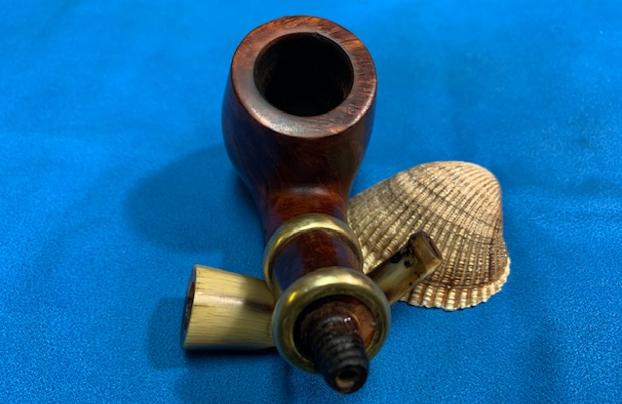
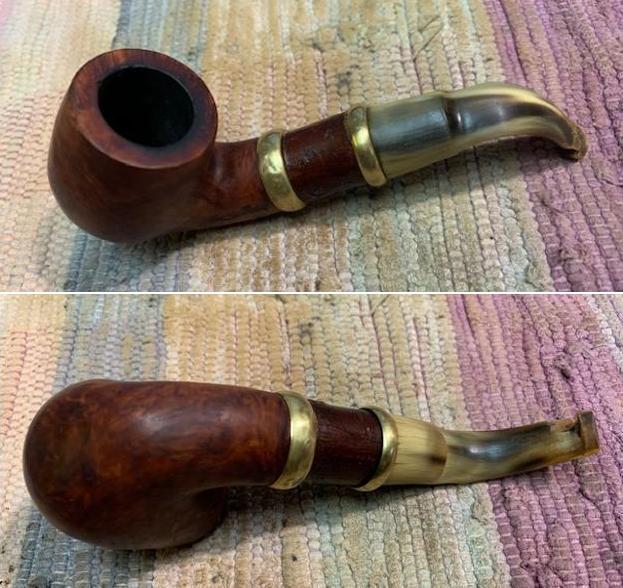
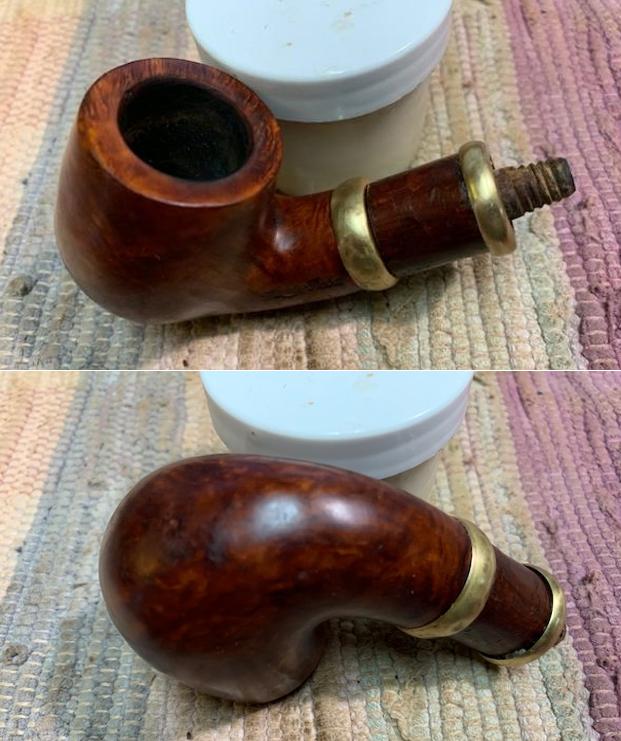
 Jeff took photos of the bowl, rim top to show the thickness of the cake in the bowl and the lava on the rim top. This pipe was obviously a great smoking pipe and a favourite. I am hoping that the thick lava coat protected things underneath it from damage to the edges and top. Cleaning it would make that clear! The cherry wood insert was damaged as well with scratches in the bark. He took photos of the top and underside of the stem showing the damage and worm holes in the horn stem material on the left side of the button. The horn stem was a mess.
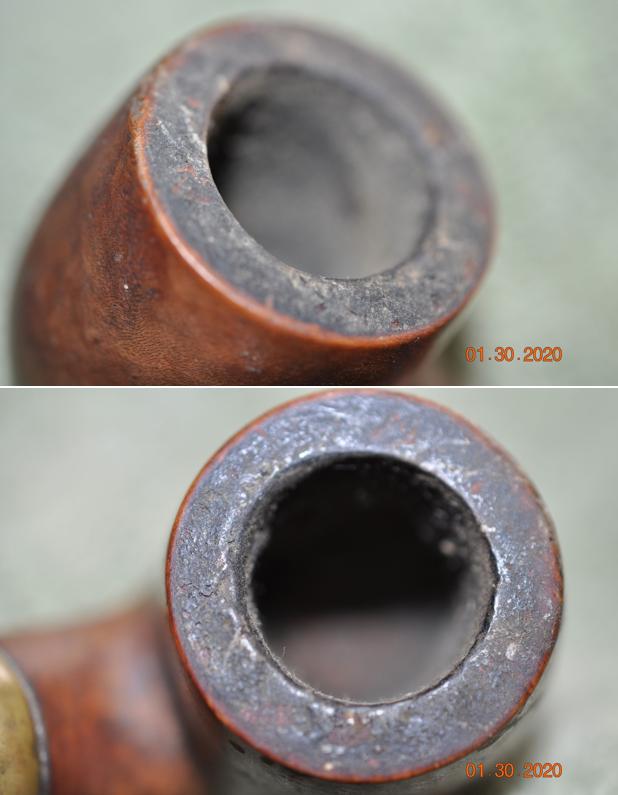

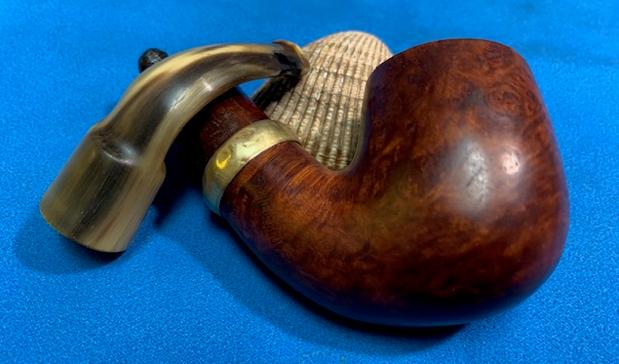
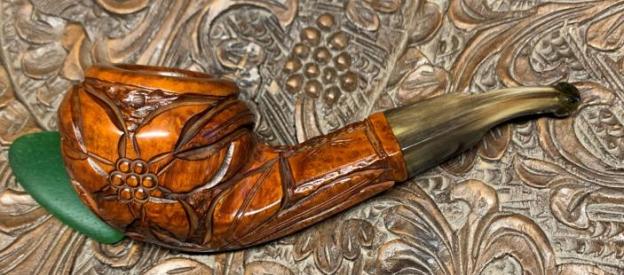
 Jeff took photos of the sides and heel of the bowl to show the condition of the briar. You can see the beautiful shape and the grain on the bowl even through the dirt and debris of many years. The brass bands on the shank end and the cherry extension end. At this point in the process it certainly looks its age.
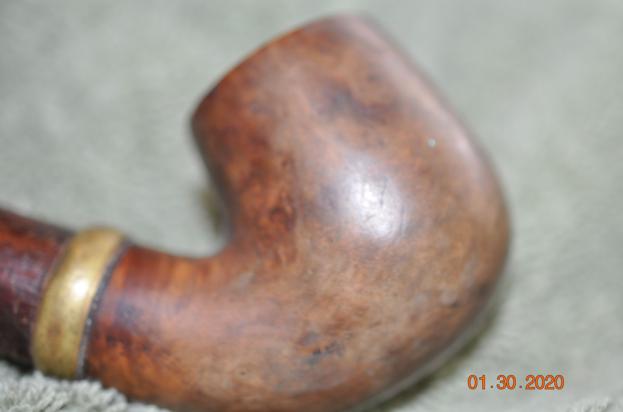
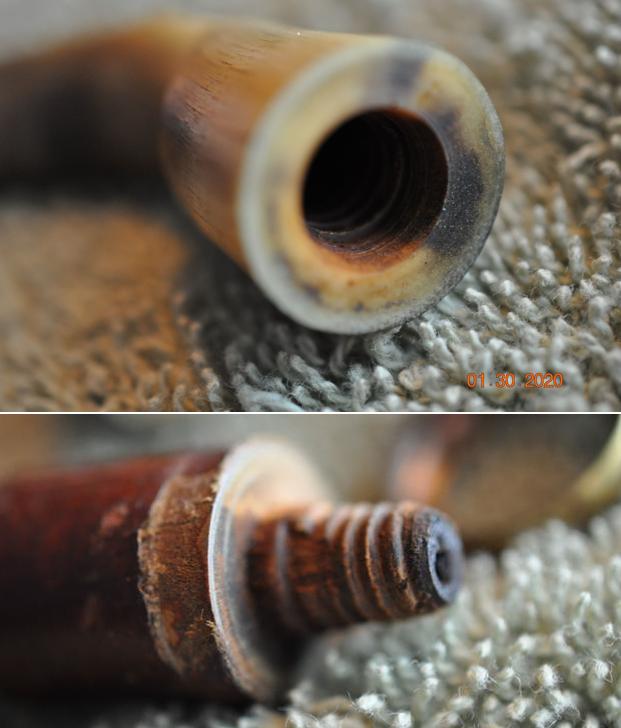
 Jeff took photos of the bands and the damaged cherry wood extension. It is a bark covered piece of cherry. The end that fits in the shank of the briar is made of cherry just like the extension. The tenon end that the stem fits on is threaded to receive the threaded stem.
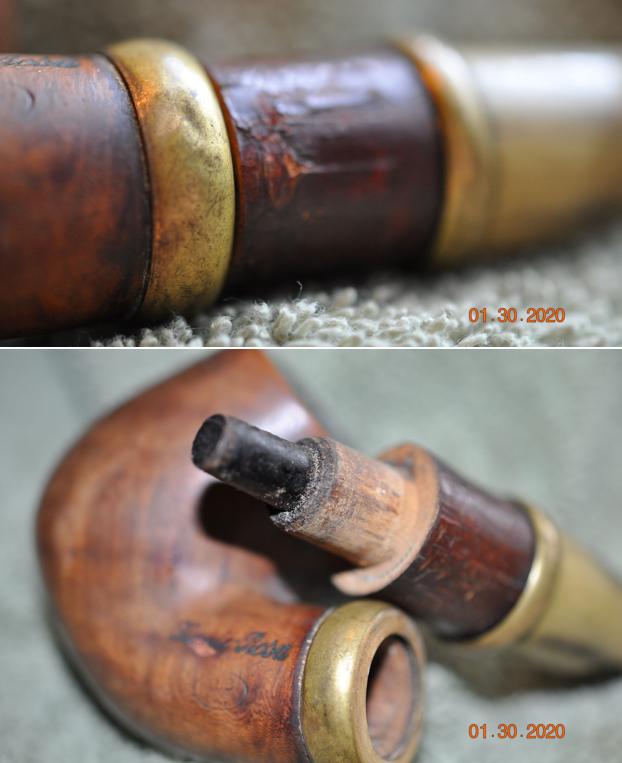

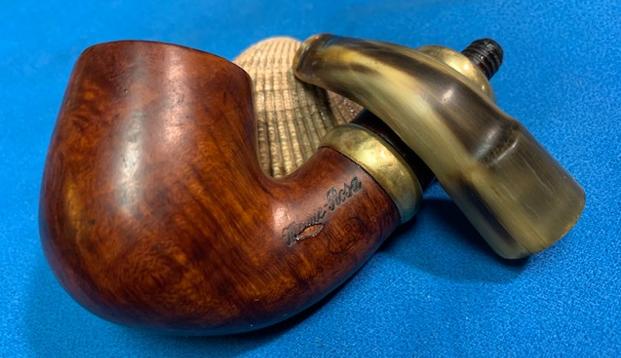
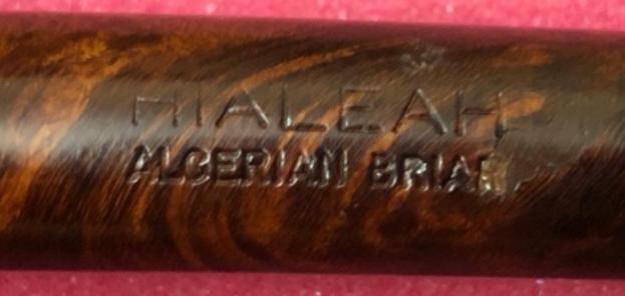
 The stamping on the left side of the shank read Marte-Rosa and underneath that it is stamped with an oval with the letters B.B. [over] K. On the right side it was stamped The stamping is hard to read on the left side as it has a fill in the middle of the brand name and is faint underneath. The right side is stamped Racine de Bruyere diagonally on the shank which translates as Root Briar or Briar Root.
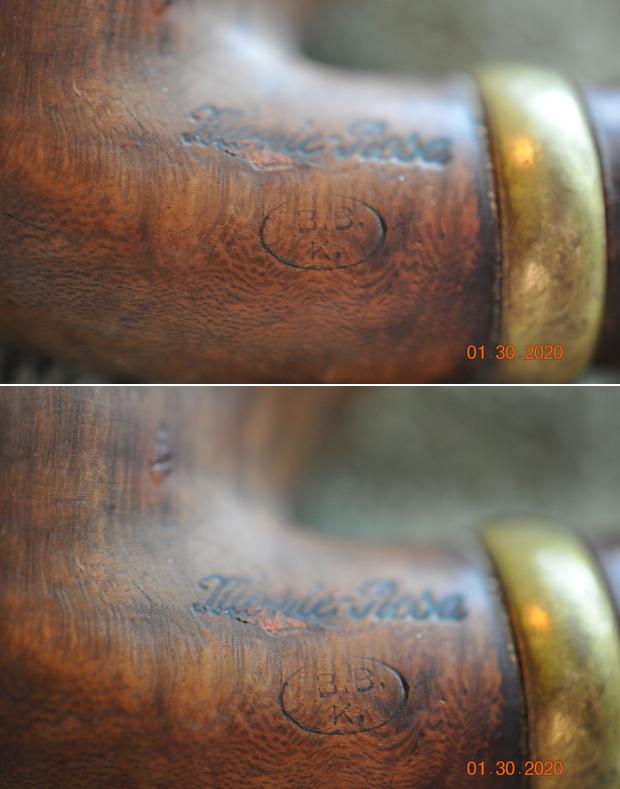 Through the years I have cleaned up several BBK pipes. One of them was a reporter/hunter pipe like this one (https://rebornpipes.com/2016/08/26/an-old-timer-horn-stem-cherrywood-shank-and-briar-bowl-bbk-bosshardt-luzern/). It had a windcap that is a difference from the current pipe I am working on. I quote from that blog below:
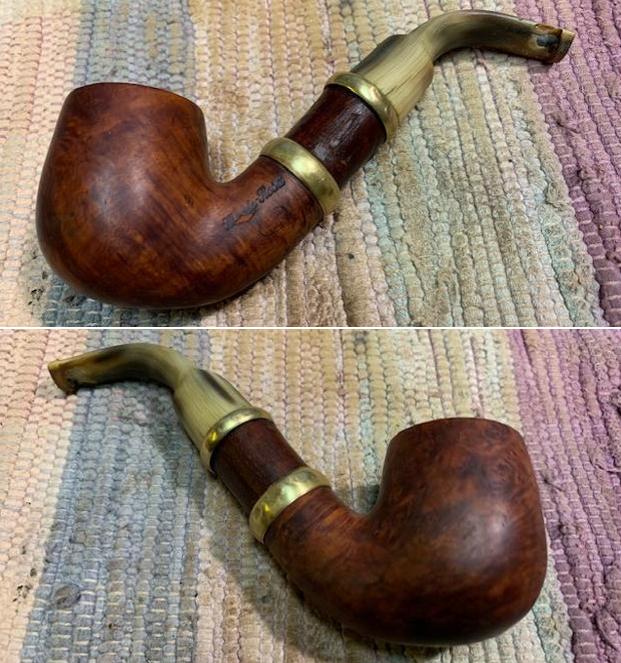
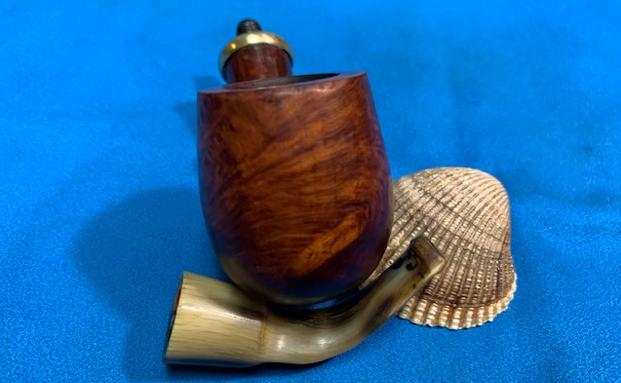
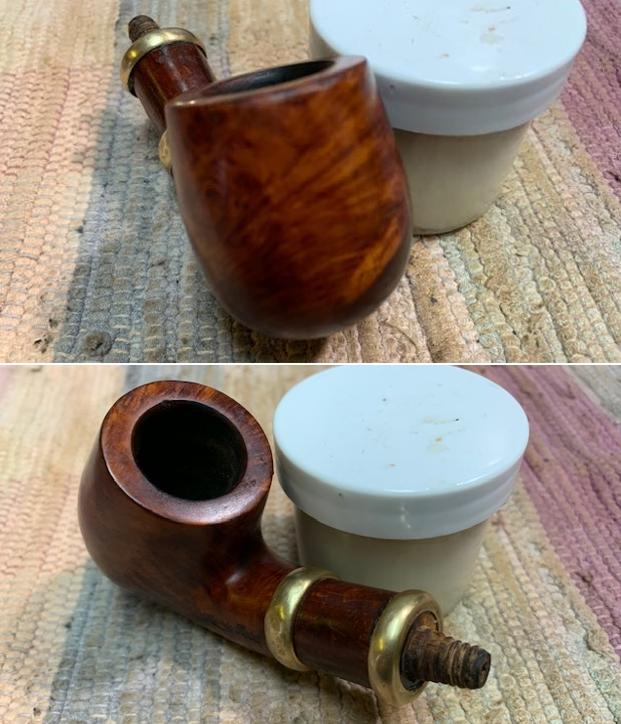
 I took a close up photo of the rim top to show the condition of the rim top. It had a few nicks in it and the inner edge of the rim had damage and darkening. I took photos of the stem to show the damage to surface on both sides.
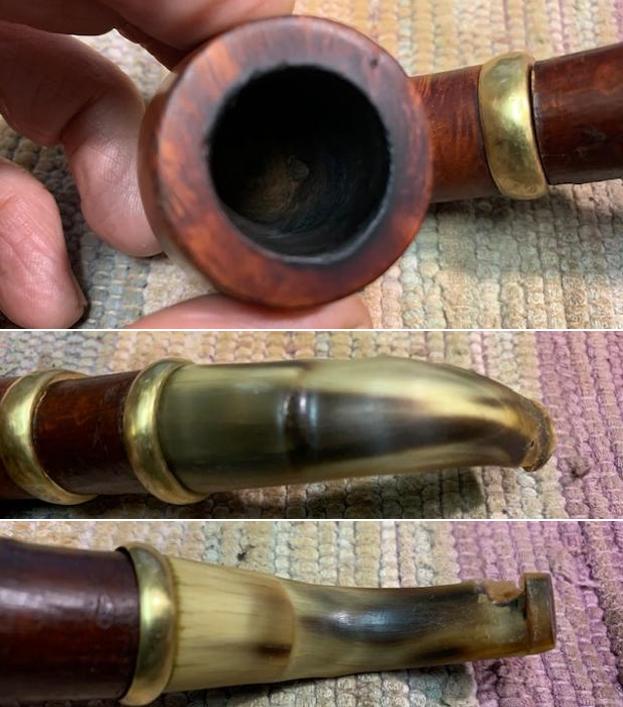 I took the pipe apart to show the various components of the pipe. The cherry wood extension in the centre of the photo has a tapered end that fits into the shank and a threaded end that the stem screws onto. The cherry extension has some damage on the sides. There is also a fill that is shrunken on the left side of the shank and in the middle of the stamping.
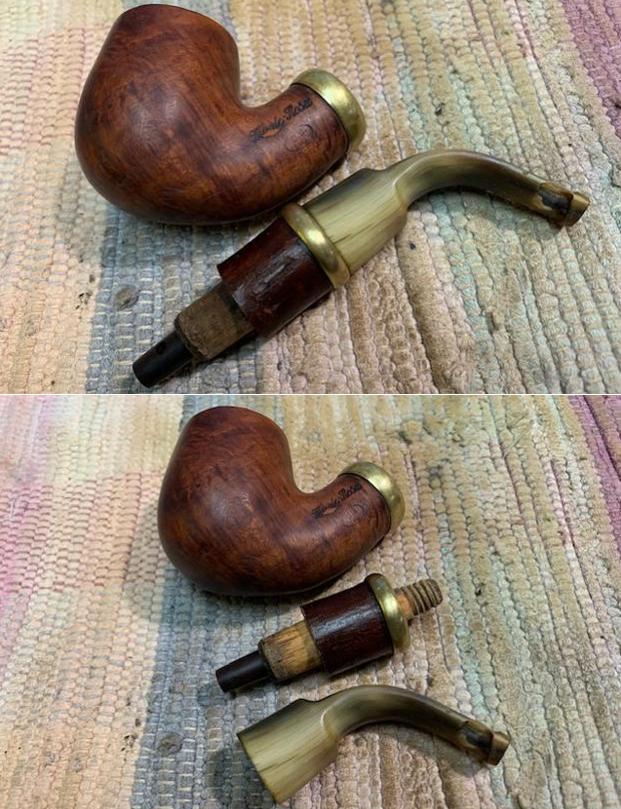
 I took photos of the stamping on both sides of the shank. You can see it is readable but damaged.
 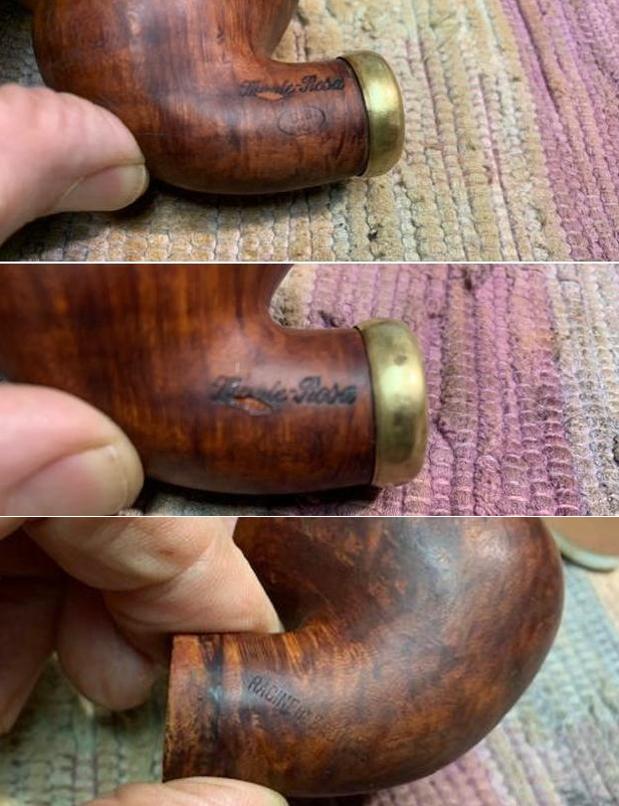 I cleaned up the inner edge of the rim with a folded piece of 220 grit sandpaper. I brought the bowl back to round. I did not take a photo of the rim top but it is visible in the polishing photos that follow.
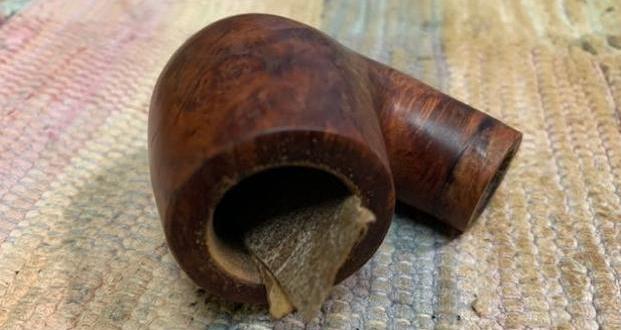 I glued the band on the shank but the glue did not hold so I removed it. I polished the briar with micromesh sanding pads – dry sanding it with 1500-12000 grit pads and wiping it down after each pad to remove the dust.

 I spread white all-purpose glue on the shank end and pressed the band on the shank. This time I used more than the first time and set it aside to cure. Once it cured I took photos of the pipe with the band on the shank.
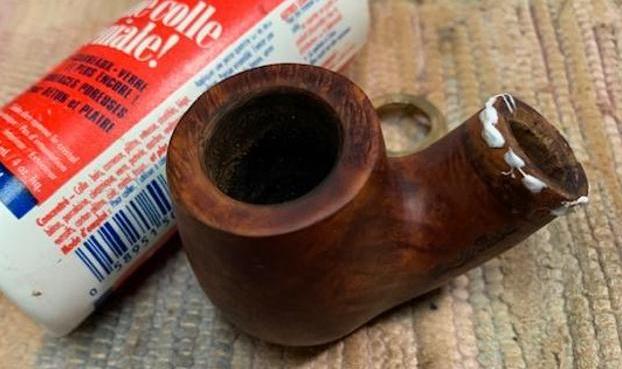
 I set the bowl aside and turned my attention to the cherry wood shank extension. I filled in the splits in the bark with clear CA glue. Once the repairs had cured I sanded them smooth with 1500-2400 grit micromesh sanding pads.
 I used a dental spatula to spread the white all-purpose glue on the end of the extension and pressed the brass band onto the extension. I set it aside to allow the glue to cure. I took a photo of the band on the shank end and on the cherry wood shank extension. The bands look very good.
 I rubbed the cherry wood down with some Before & After Restoration Balm to protect, clean and enliven the wood. It worked very well. I let it sit for 15 minutes and buffed it off with a soft cloth.
  I greased the end of the wooden tenon on the cherry wood shank extension with Vaseline. It made the fit in the shank smooth and snug.
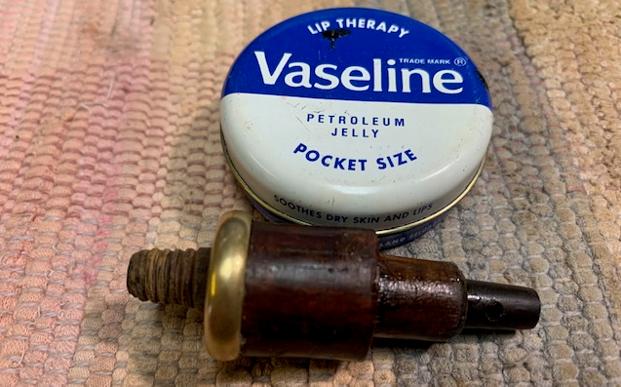 I put the extension back in the shank and rubbed the bowl down with some Before & After Restoration Balm to protect, clean and enliven the wood. I worked it into the surface of the briar with my fingertips. I set the bowl aside and let it sit for 15 minutes. After it had been sitting I buffed it off with a soft cloth.
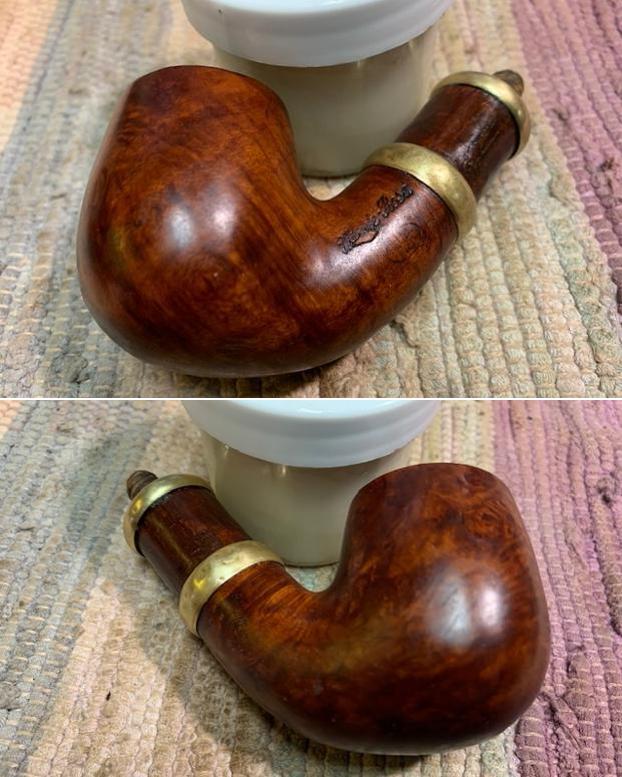
 I set the bowl and shank extension aside and turned my attention to the stem. I greased a pipe cleaner with Vaseline and inserted it in the shank. I wanted to protect the airway when I filled in the damaged area with super glue.
 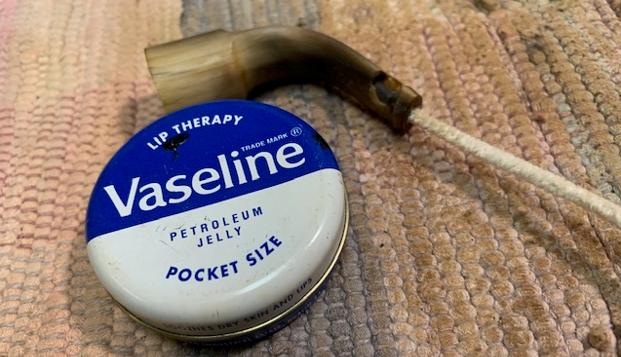 I filled in the worm damage with clear super glue. I layered it in with several fills. While it was curing I read Dal Stanton’s blog on mixing in a sprinkling of charcoal powder with the glue to help blend the repair into the horn. I mixed some in and layered more and more glue on top of it. The black of the charcoal did not really blend in well. It migrated together and left a black spot on the top of the stem and a black ring on the underside. In the past I did not use the charcoal and certainly will not do so again. I sprayed the repairs with accelerator to speed the hardening process of the repair.
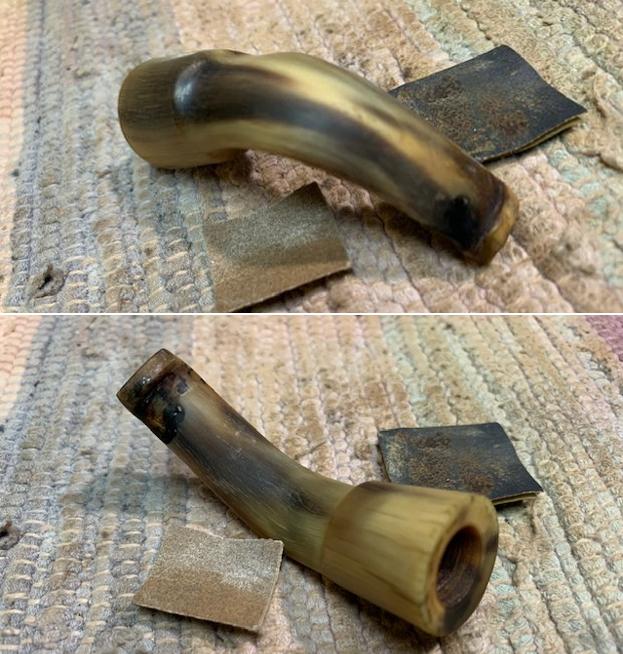
 I used a pair of files to flatten out the repairs and to reshape the button on both sides of the stem. Once I had reshaped the button I sanded the stem surface with 220 grit sandpaper and started polishing the stem with 400 grit wet dry sandpaper.
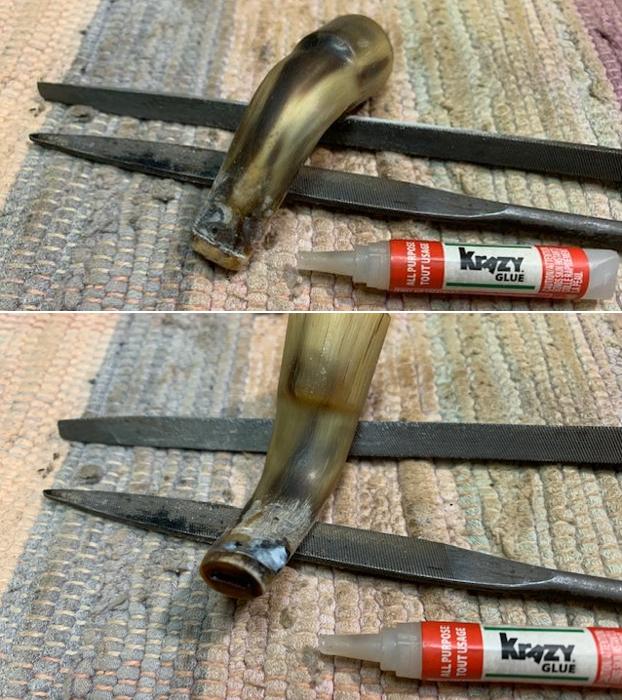
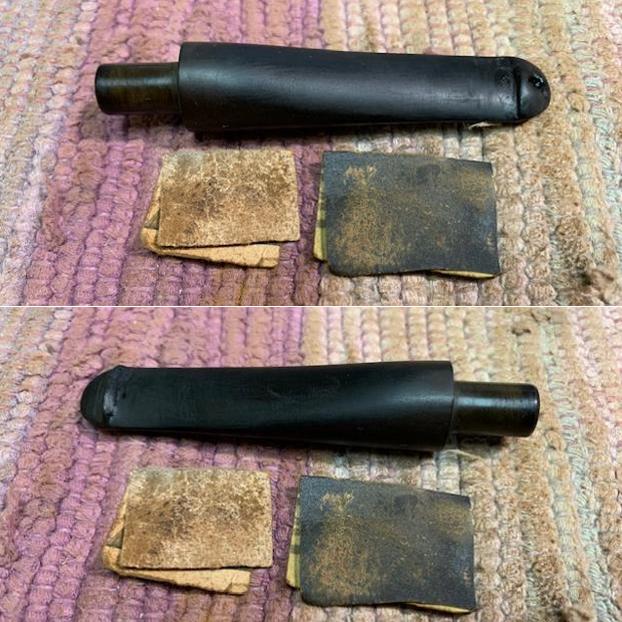
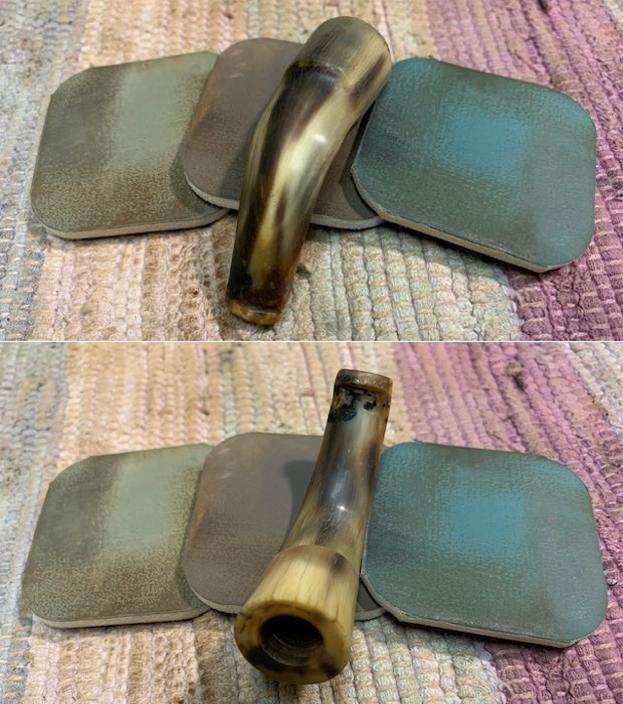
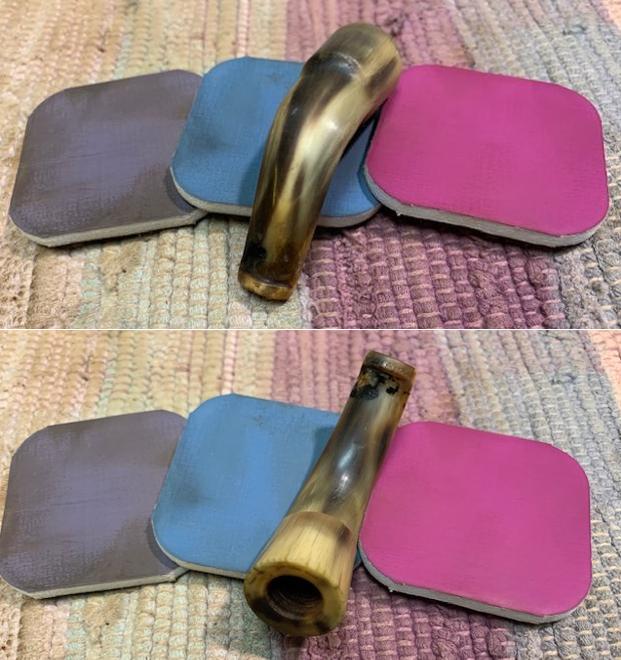
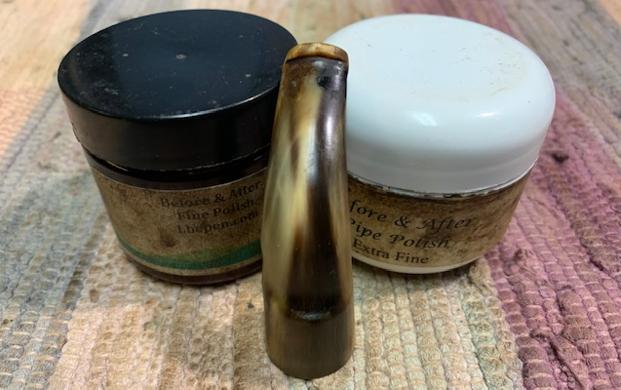
 I polished the horn stem with micromesh sanding pads – wet sanding with 1500-12000 grit pads. I rubbed the stem down with Obsidian Oil between each set of three pads. I polished it with Before & After Polish – both Fine and Extra Fine. I gave it a final rubdown with Obsidian Oil to protect it.
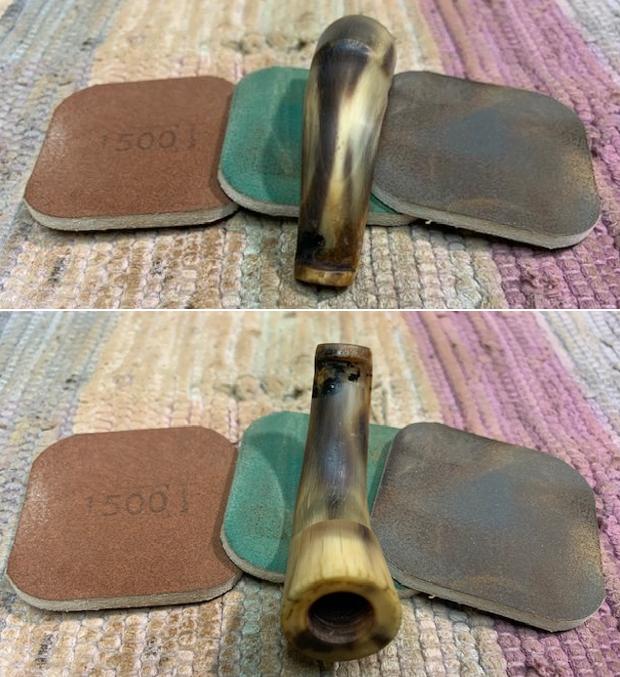
 I gave the threads on the shank end tenon a coat of Vaseline to make it easier to turn the threaded stem onto the end of the shank.
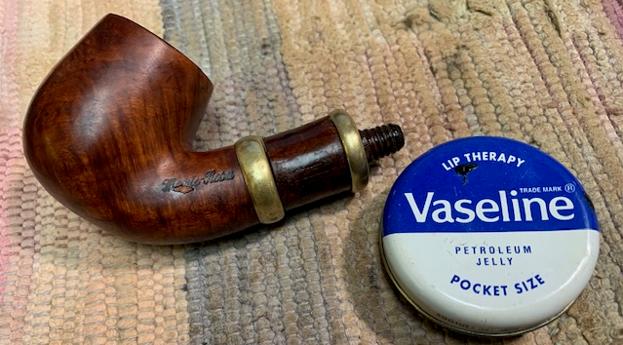 With everything finished I put the BBK Marte–Rosa Racine de Bruyere Reporter Pipe back together and buffed it by hand with a microfibre cloth and polished the metal with a jeweler’s cloth. The finished pipe is shown in the photos below. I love the way the grain just pops on this old pipe. The cherry wood shank extension adds not only length but also a touch of rustic to the pipe, though this particular piece of cherry wood has bark that is quite smooth. The dark striations of the horn stem also go well with the wood. The brass bands at the stem and the shank give this old timer a real look of class. The finished pipe is shown in the photos that follow. The repair to the button while not invisible is smooth and solid and should last a long time. It is a beautiful pipe to my eyes. The dimensions are Length: 5 ½ inches, Height: 2 inches, Outside diameter of the bowl: 1 ¼ inches, Chamber diameter: 7/8 of an inch. The weight of the pipe is 70grams/2.47oz. I will be putting it on the rebornpipes store shortly. If you are interested in adding it to your collection let me know. Thanks for walking through the restoration with me as I worked over this pipe. Thanks to each of you who are reading this blog.