Blog by Dal Stanton
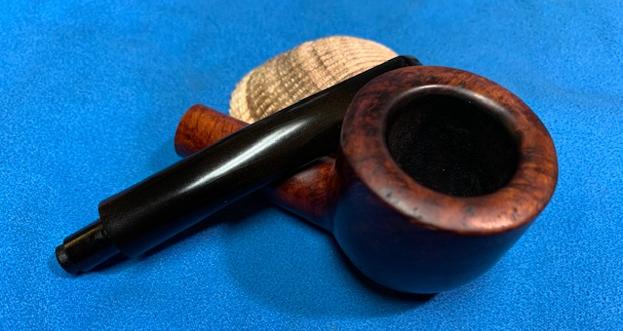
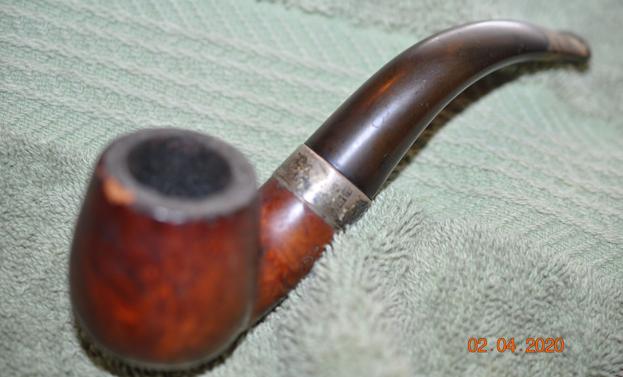
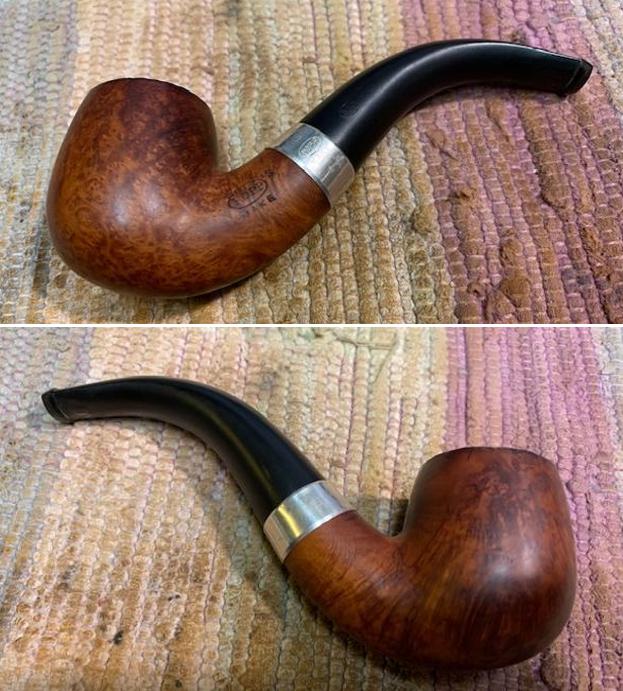
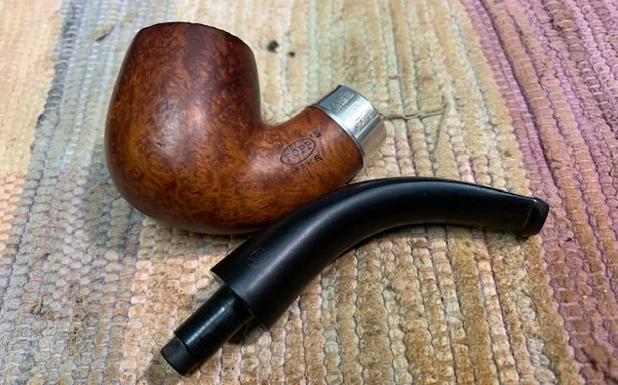
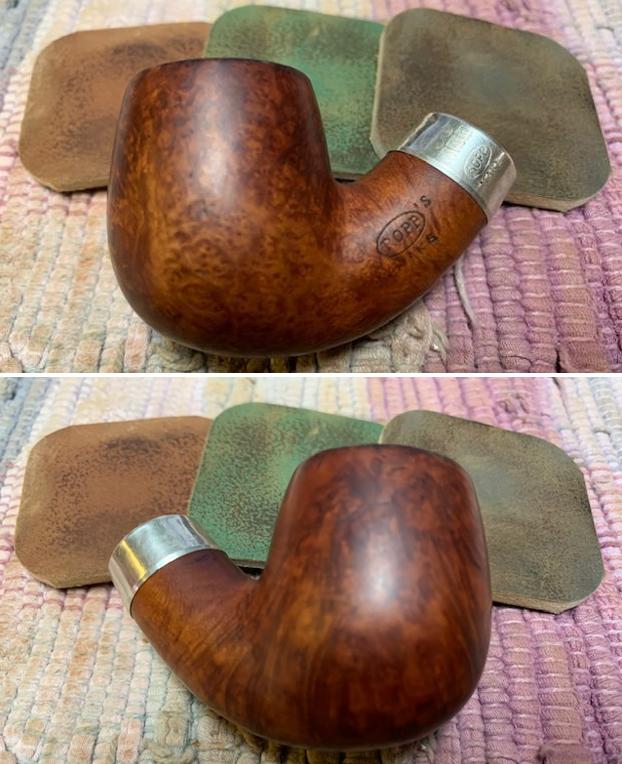
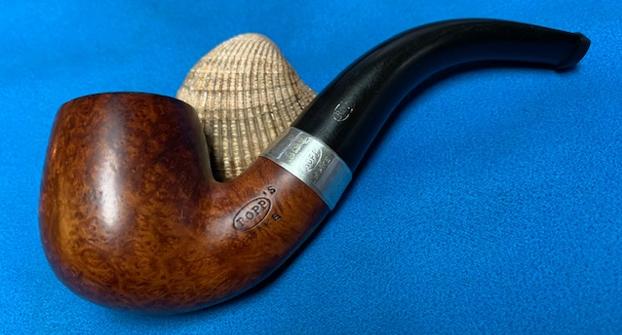
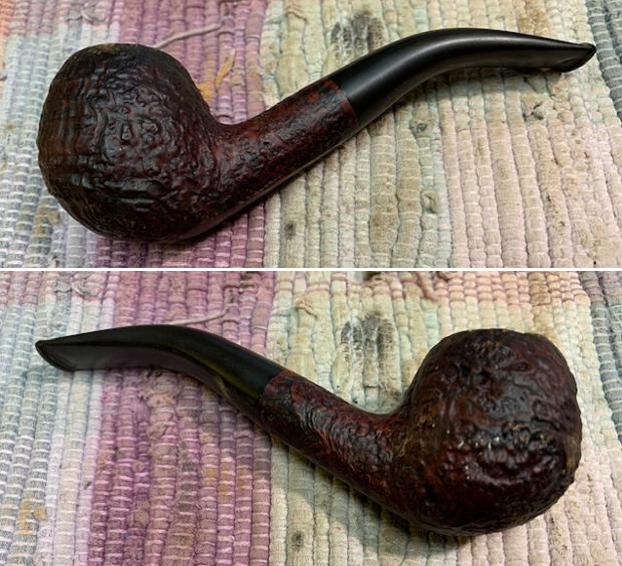
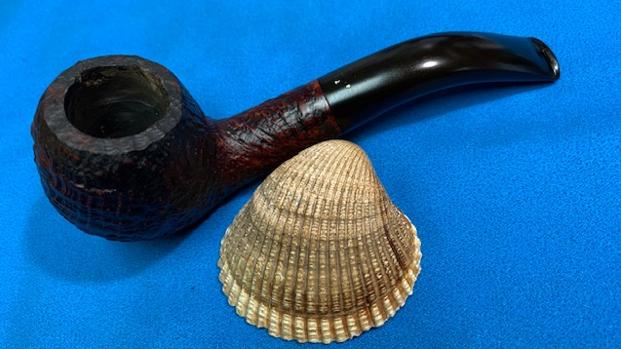
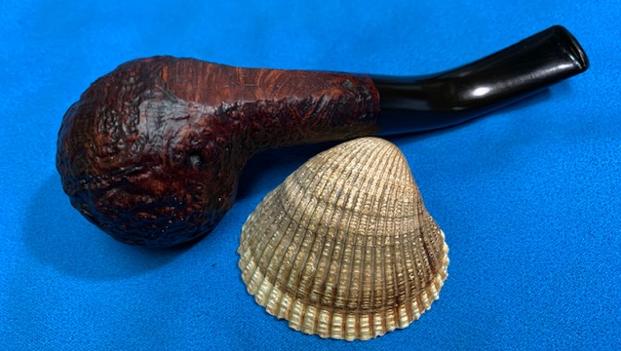
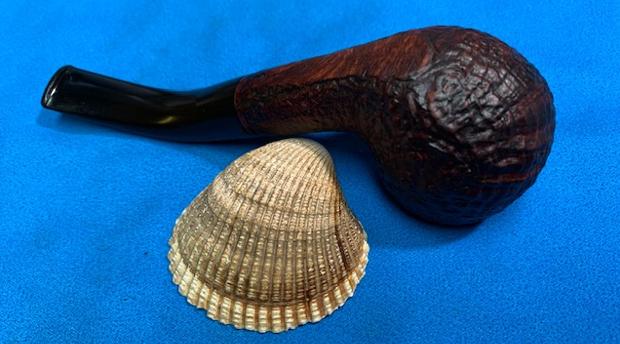
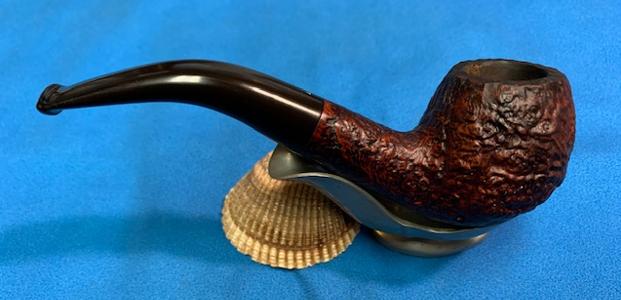
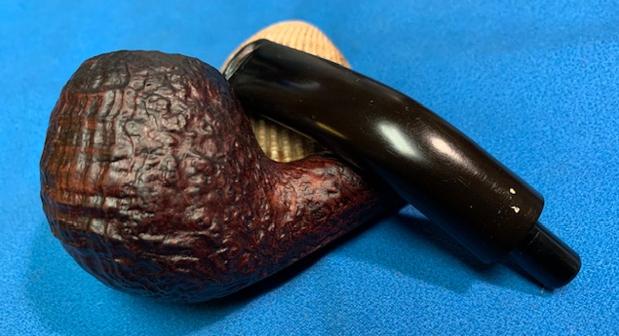
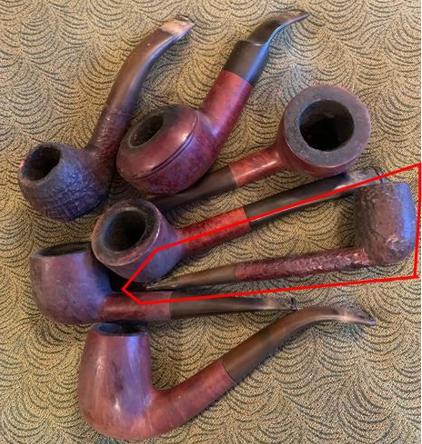
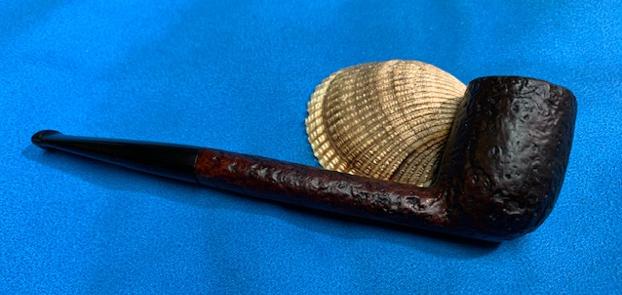
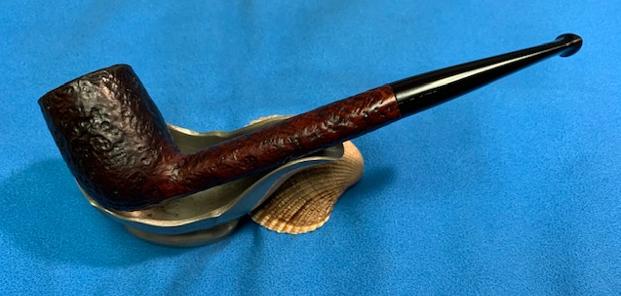
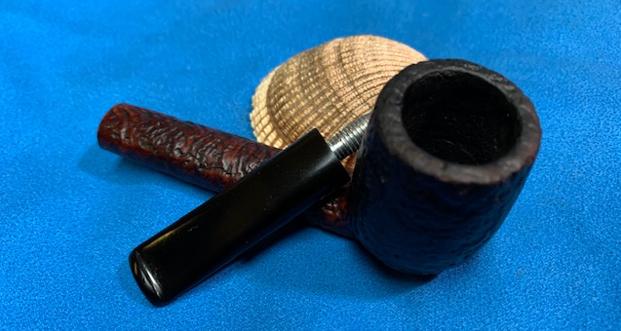
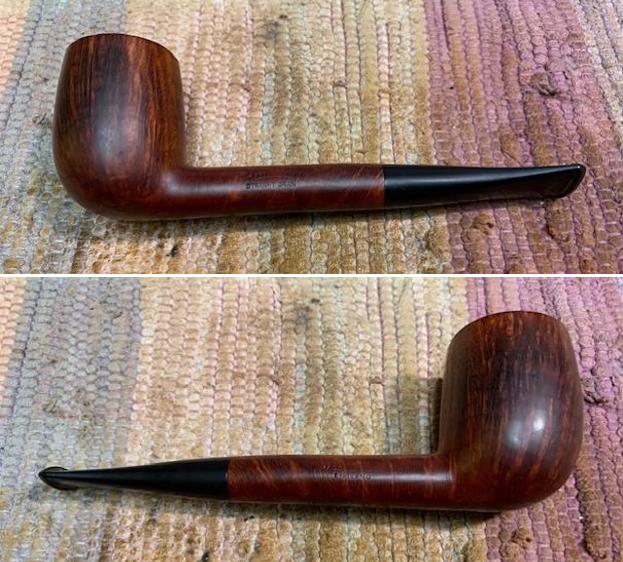
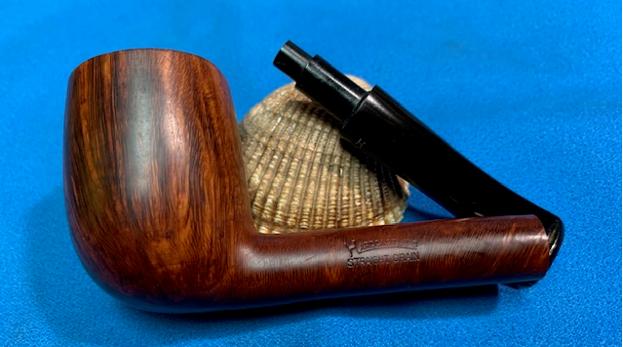
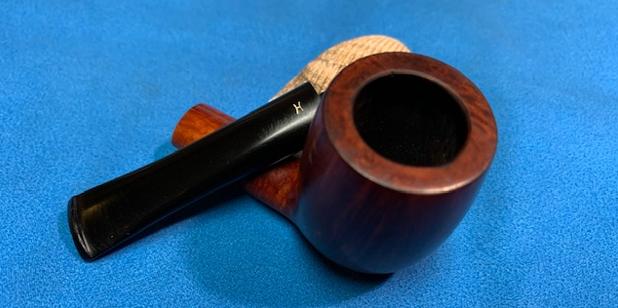
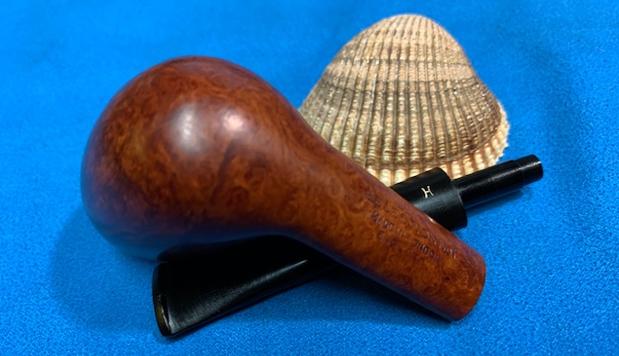
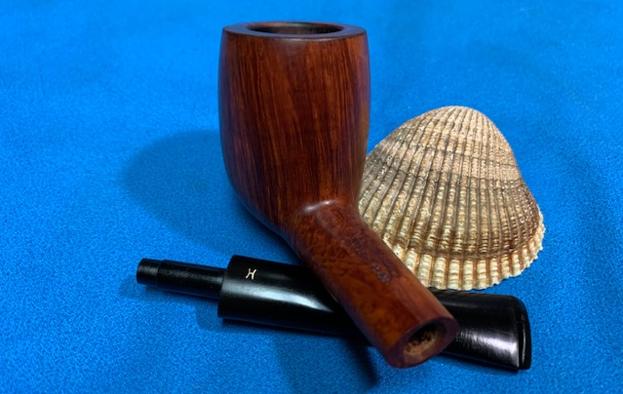
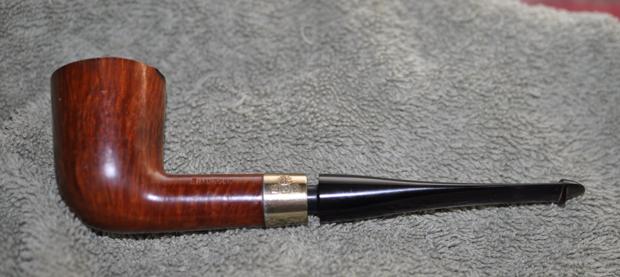
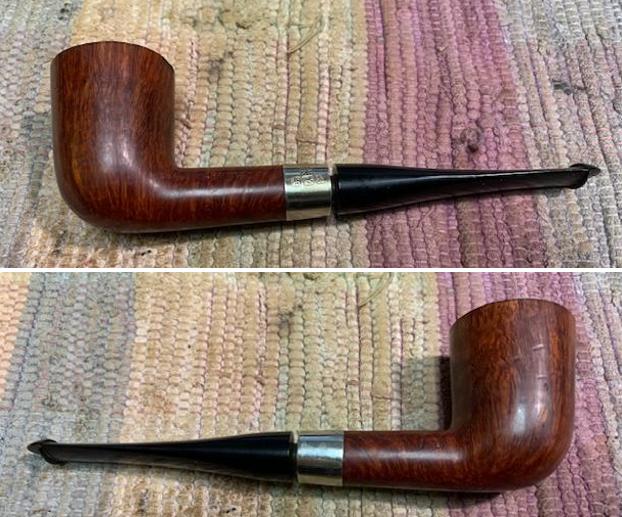
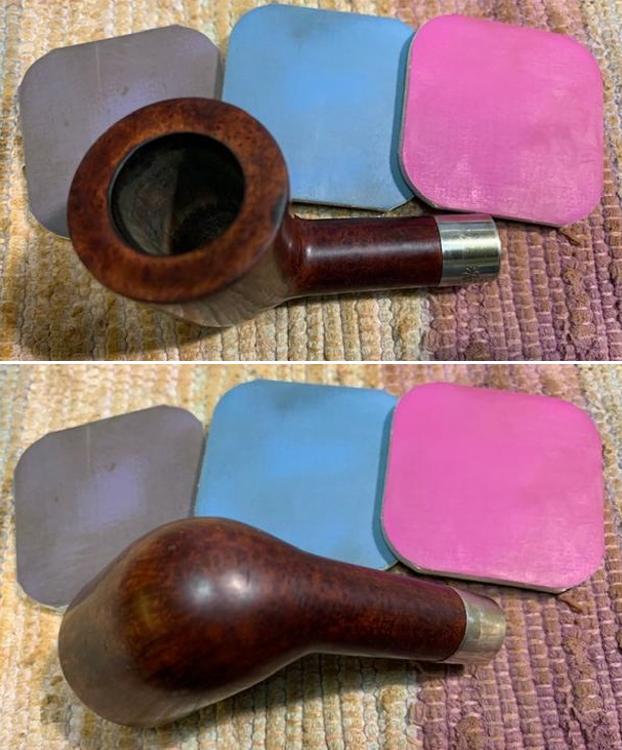
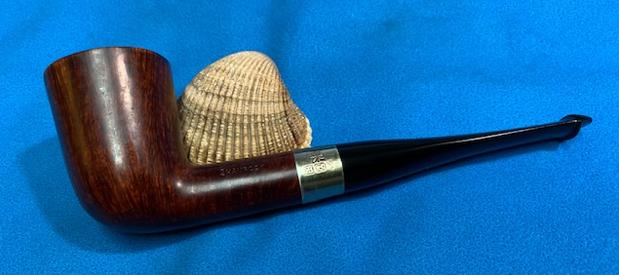
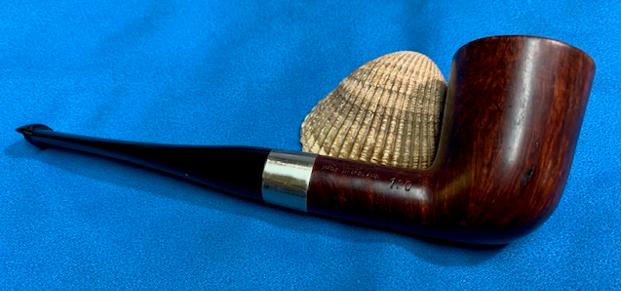
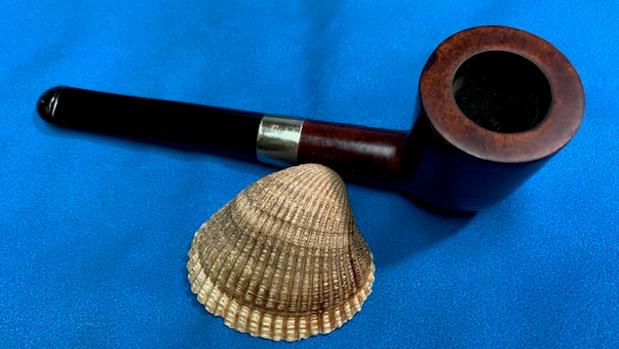
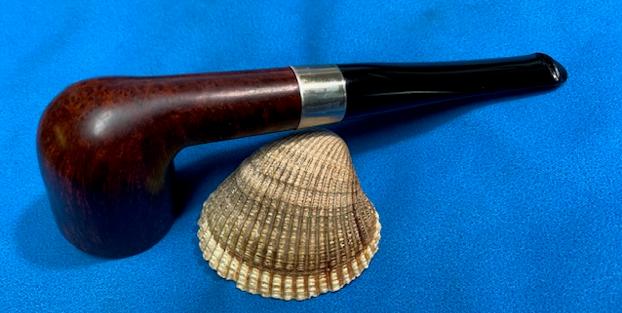
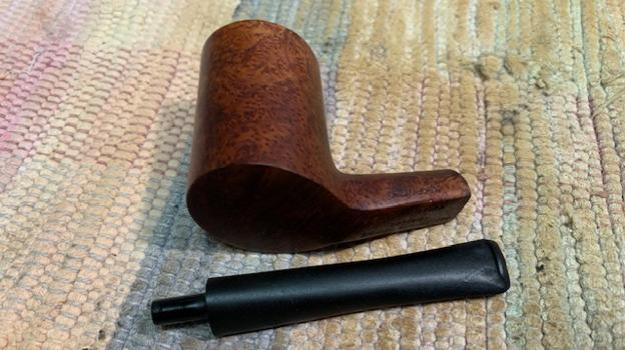
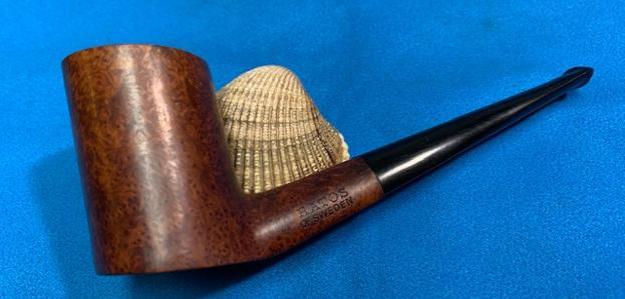
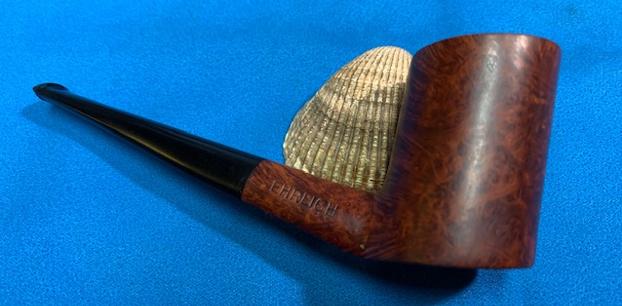
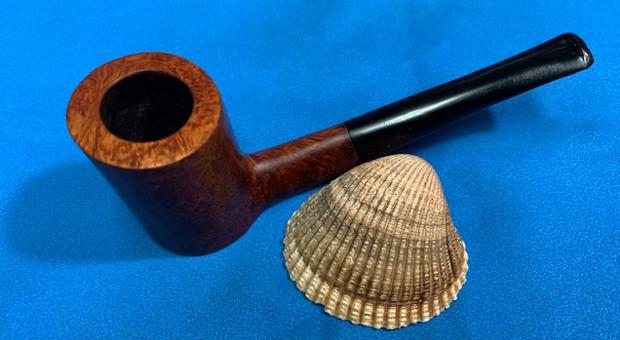
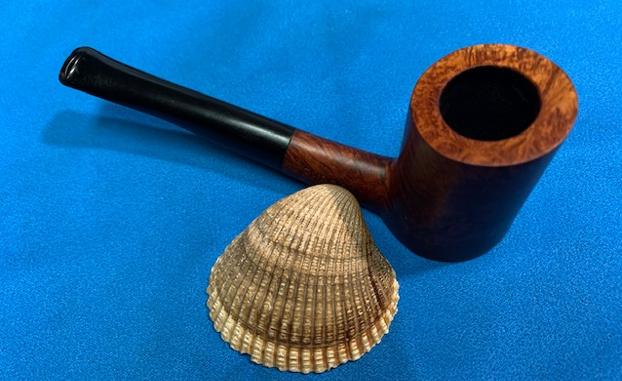
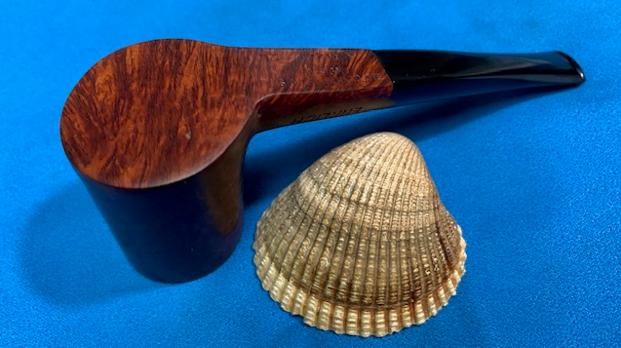
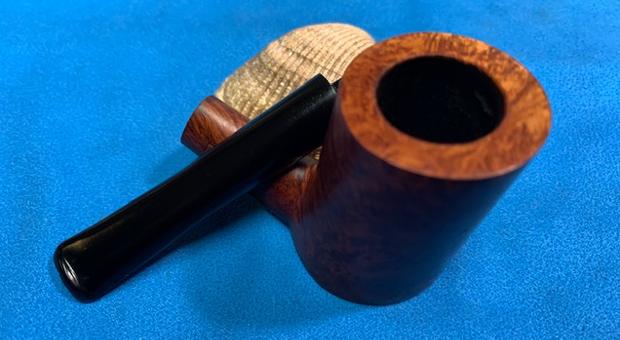
The large Apple now on the worktable came to me in September of 2017 in a Lot of 66 pipes from a seller in Georgetown, Texas. The lot had belonged to a pipe man which had been donated by his family after his passing to a charitable organization to auction. I was privileged to add these pipes to the For “Pipe Dreamers” Only! collection for other pipe men and women to commission benefitting another good cause close to my heart, the Daughters of Bulgaria – helping women and girls who have been trafficked and sexually exploited. Many of these ‘66’ have made it to the collections of new stewards all over the world. One pipe man, Nat, who is from South Florida, saw the St. Regis De Luxe and reached out to me about it. Some years ago, I had met Nat briefly in my mother’s church in Stuart, Florida, and Nat had mentioned that he was the brother-in-law to one of my fellow work colleagues in Europe and my colleague (from Europe) had mentioned to Nat (in Florida) about The Pipe Steward and that Nat should have a look. I love the fellowship of pipe men around the world! Here are pictures of the St. Regis Nat commissioned. 

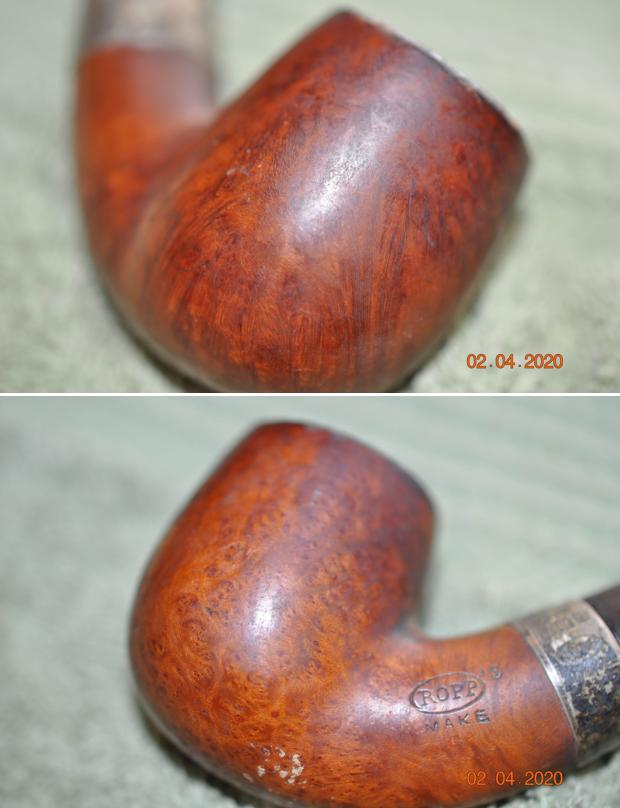
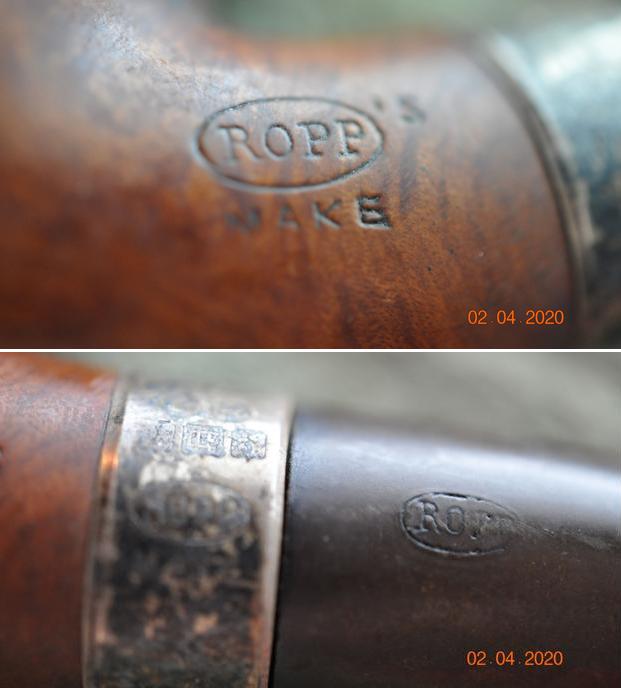
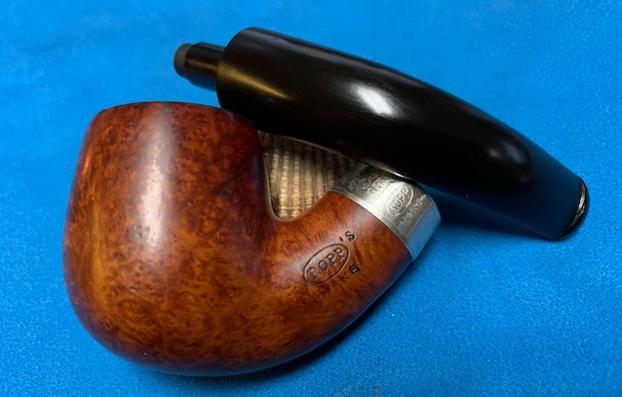
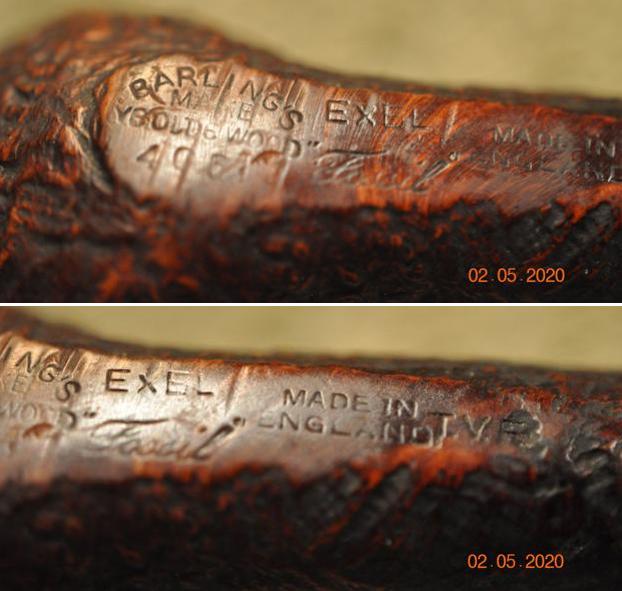
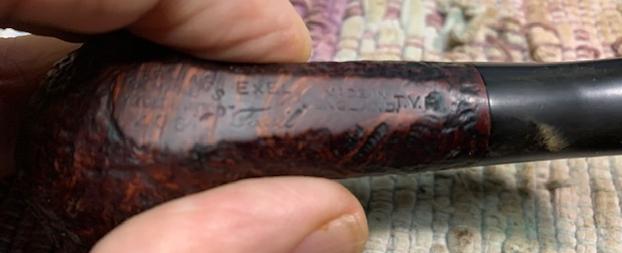
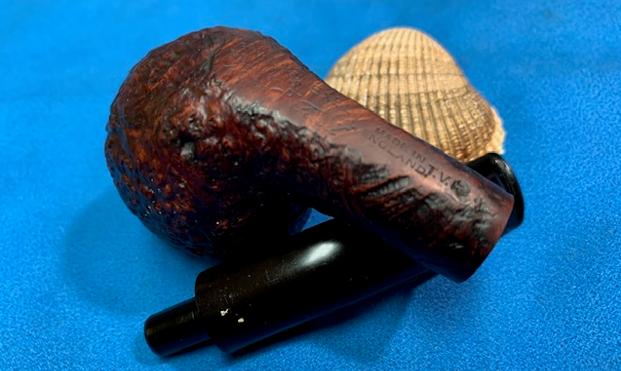
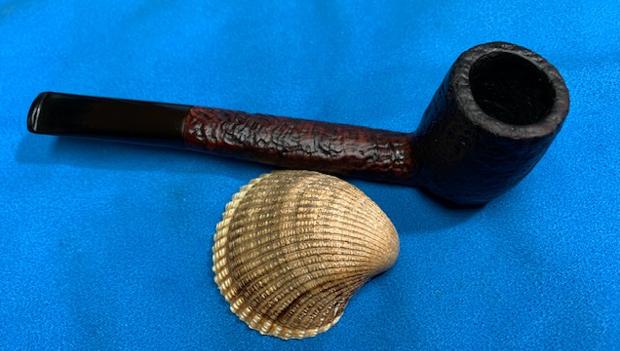
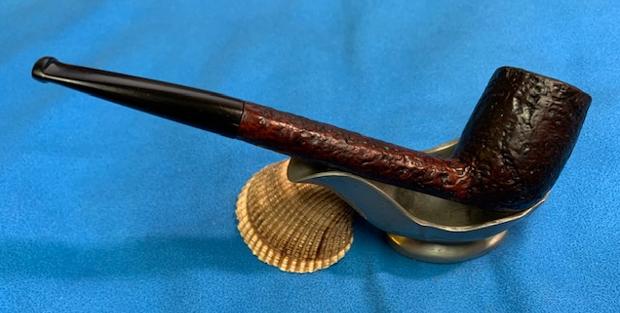
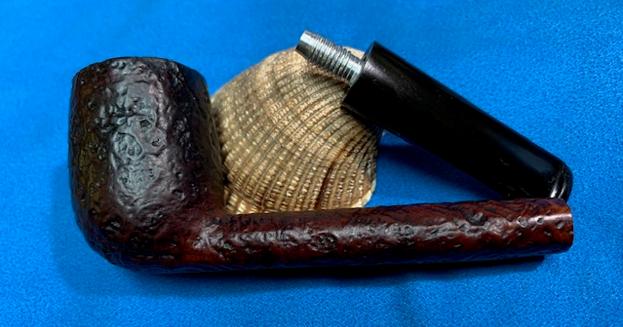
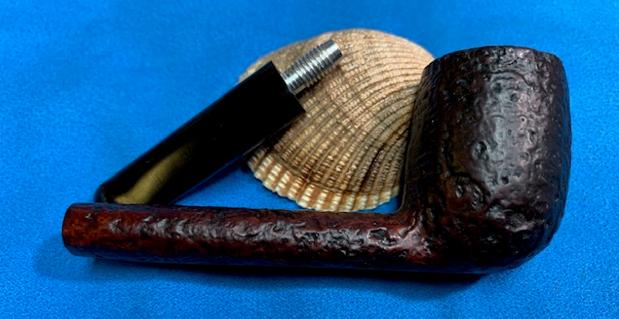
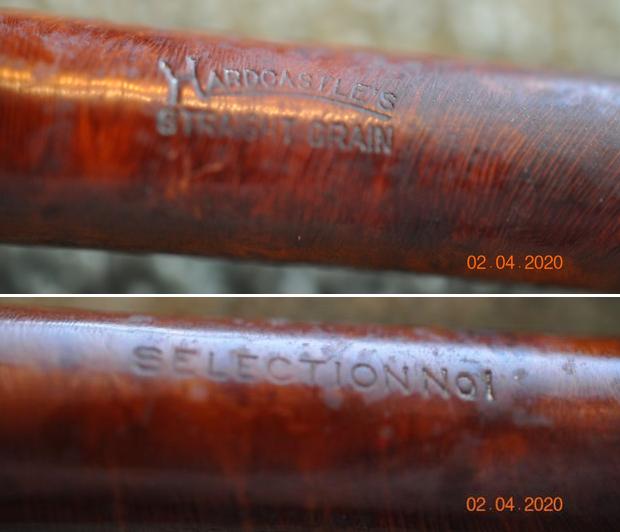
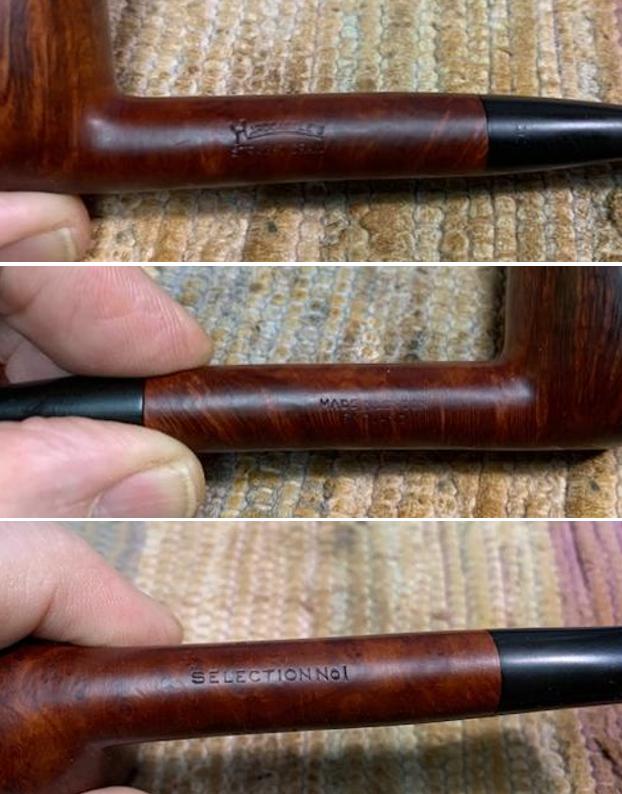
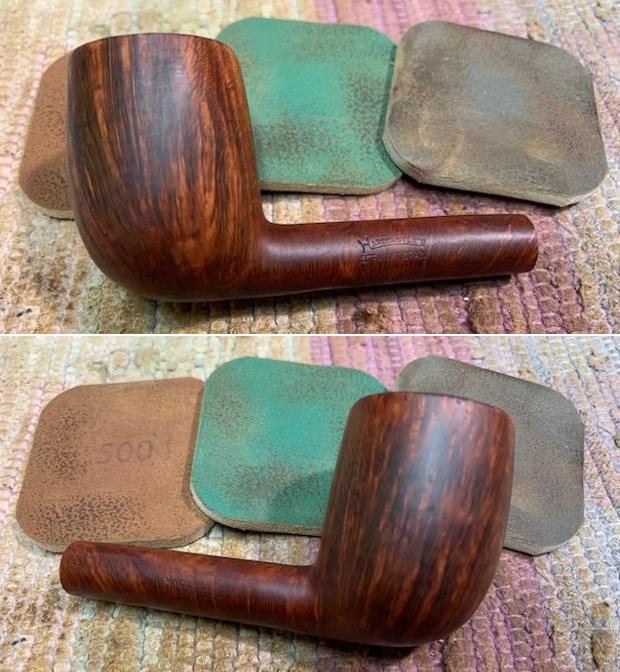
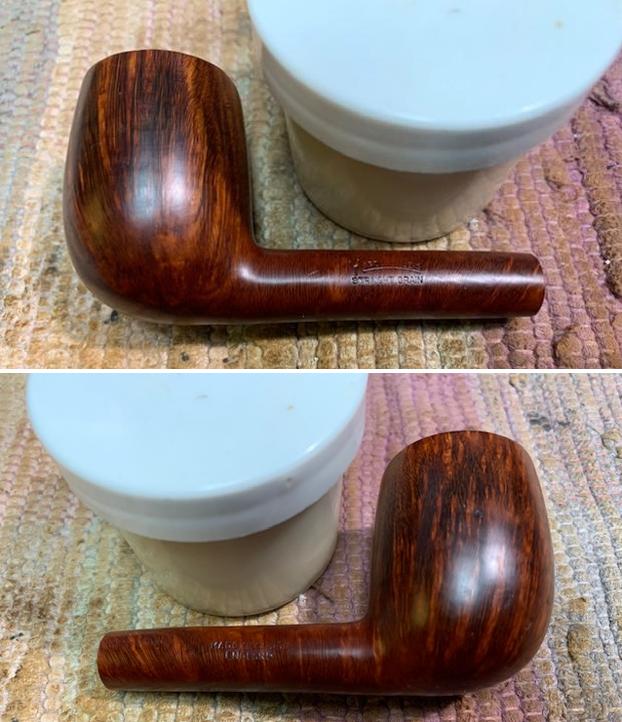
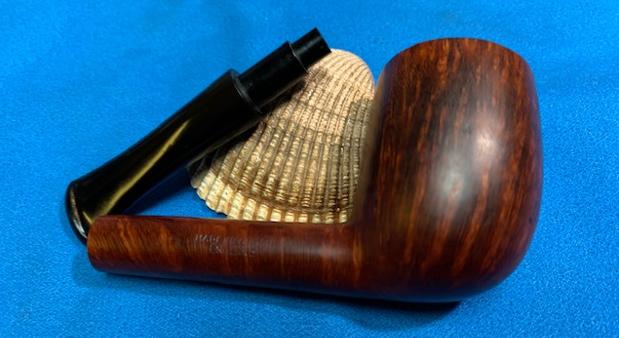
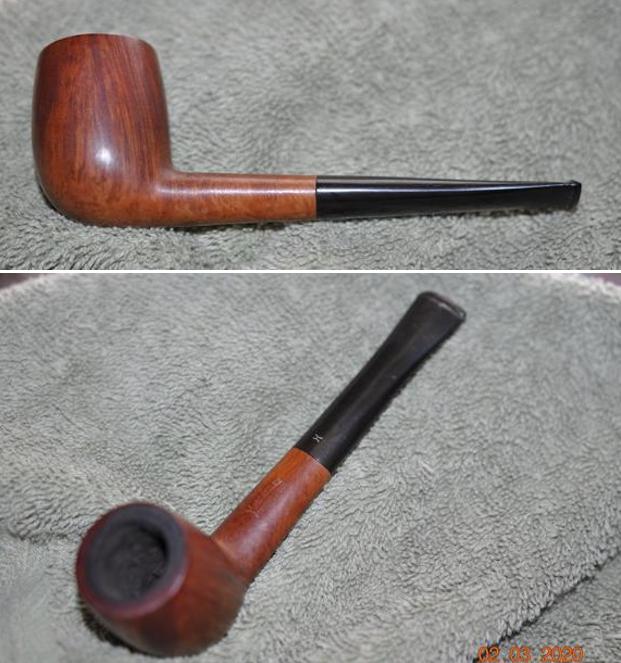
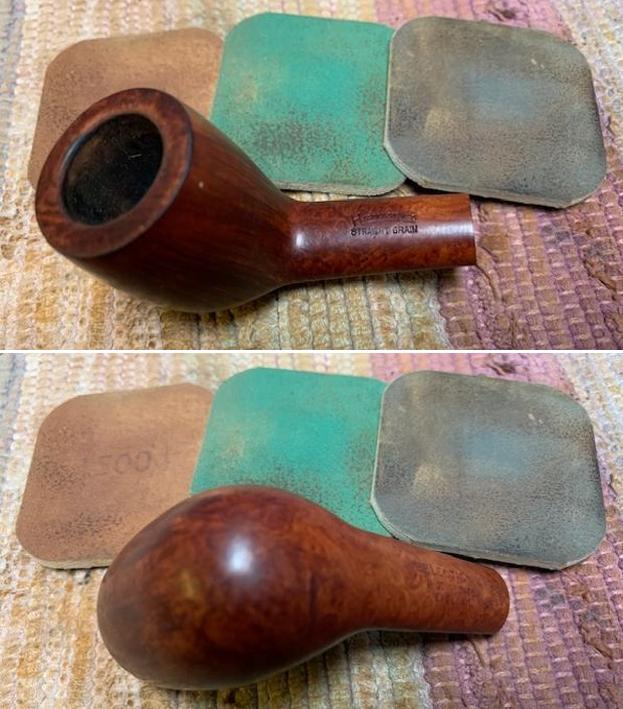
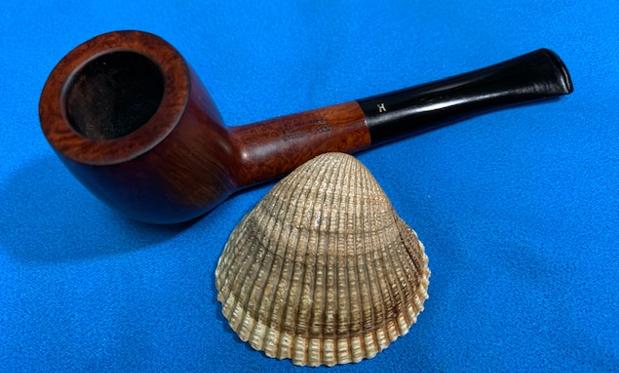
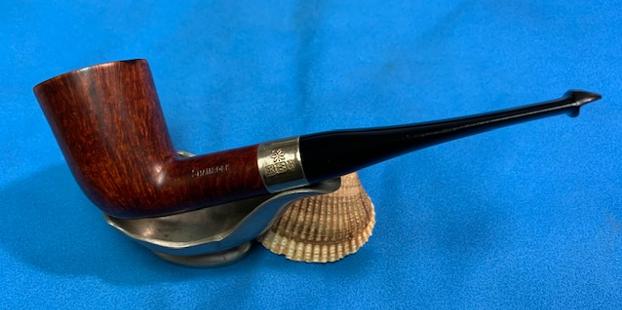
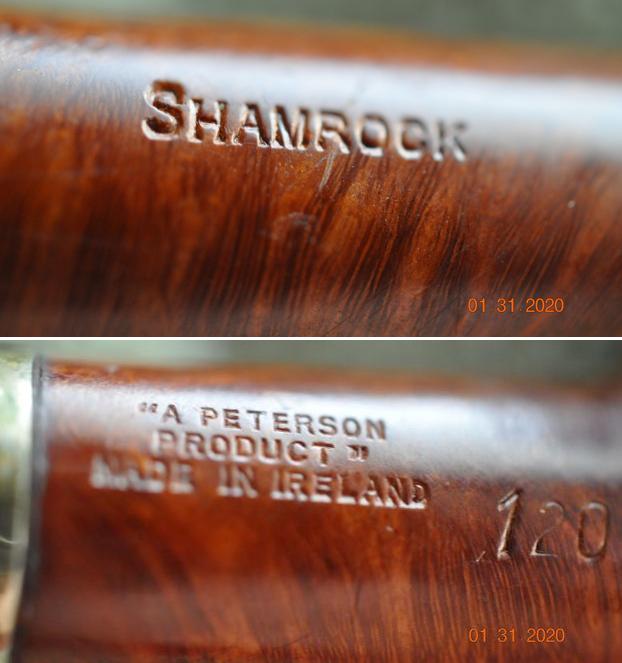
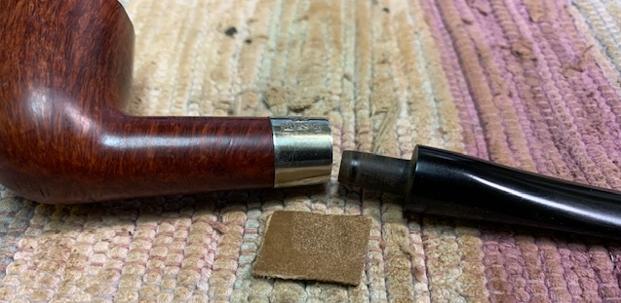
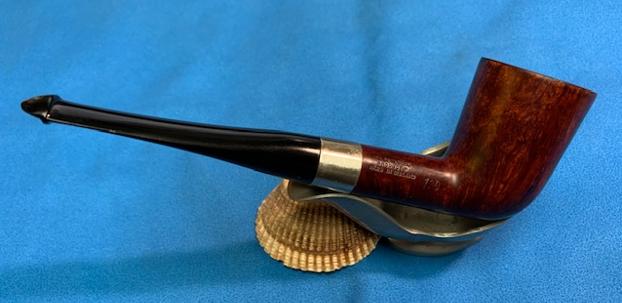
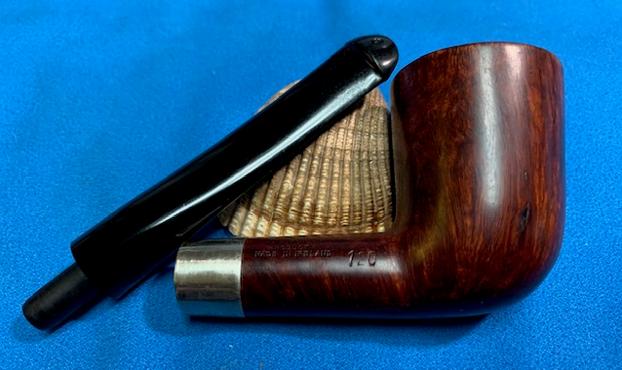
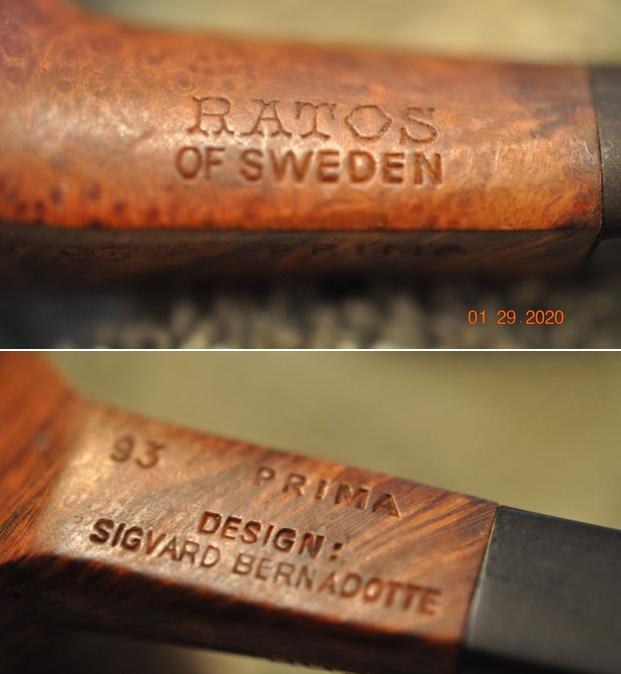
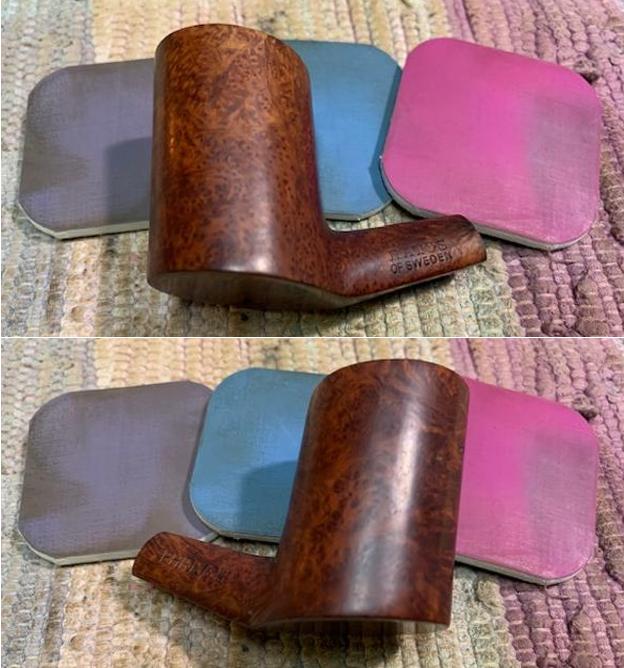
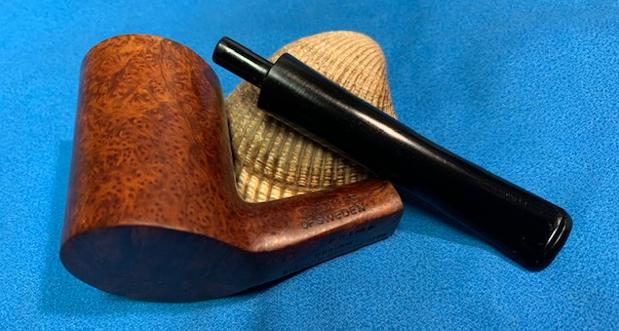
 The nomenclature stamped on the left flank of the shank is, ST. REGIS [over] DE LUXE. The right side of the shank is stamped the COM and shape number: MADE IN LONDON [over] ENGLAND and to the right is, 483.
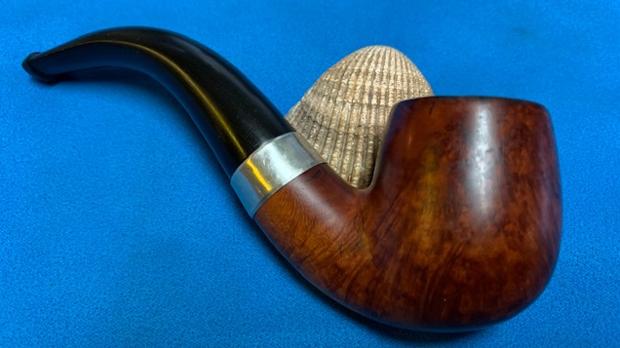
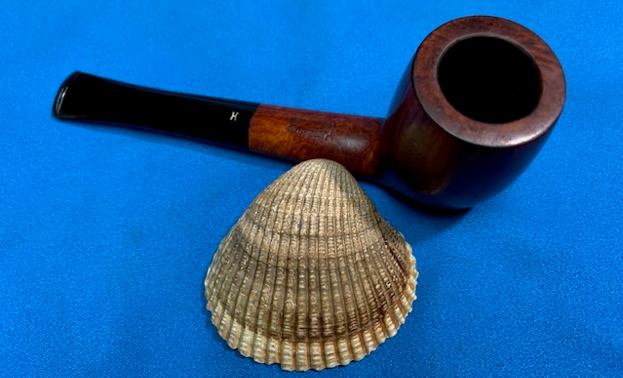
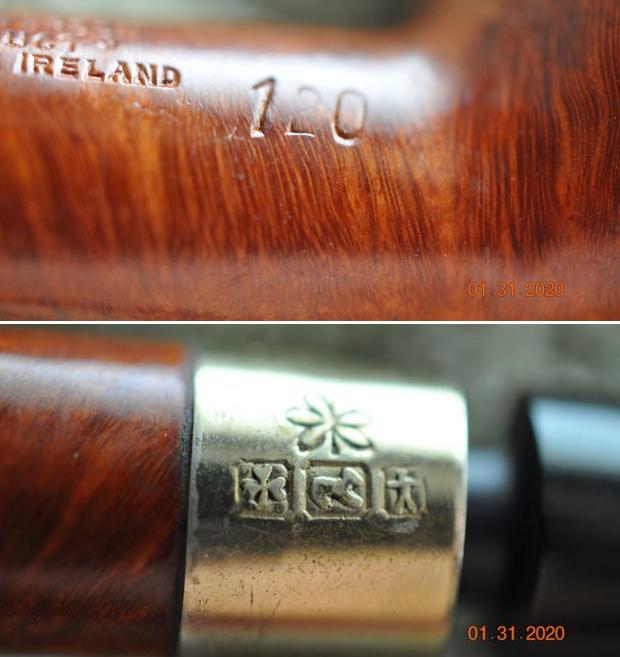
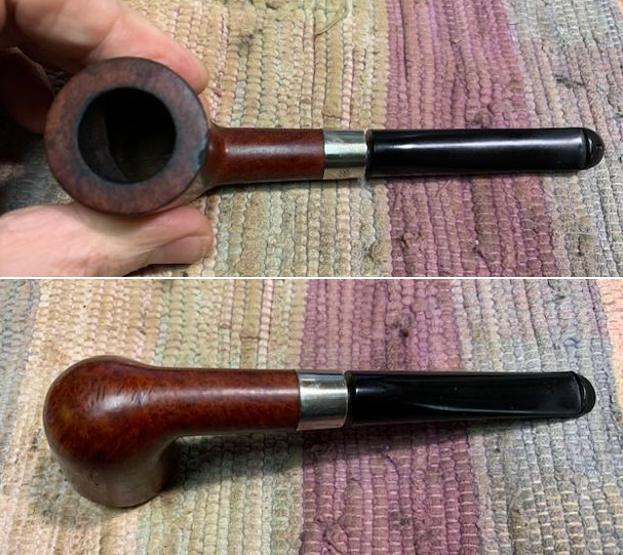
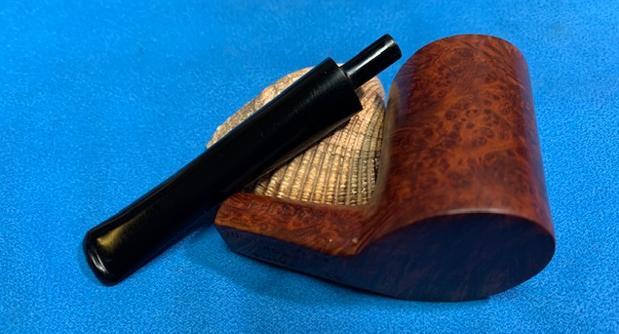
 The saddle stem has a stamp with an ‘S’ encircled which I assume is referencing the ‘S’ of Saint.
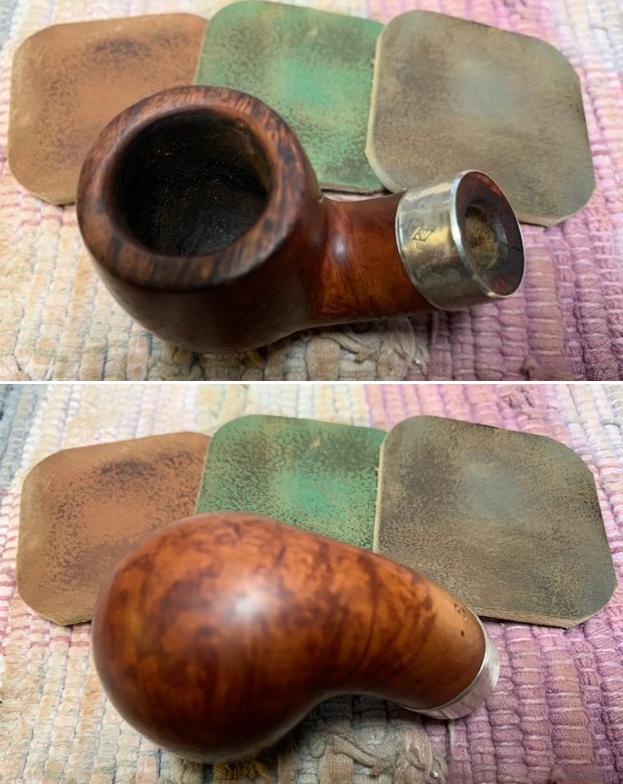
 I have never worked on a St. Regis before this, and my research begins at all the normal places which offers nothing regarding a St. Regis line of pipes. My normal beginning places, Pipedia and Pipephil.eu rendered nothing. I looked at a variation of simply, ‘Regis’ without the ‘St.’ and still no traction. Next, my ‘go to’ pipe bible, ‘Who Made That Pipe?’ by Herb Wilczak & Tom Colwell gave a listing for St. Regis, but it was attributed to a now-defunct Waldorf Pipe Company in the USA. I discovered that it was a pipe factory in 1939 located in Chicago that was referenced as selling metal pipes at the same Chicago address attributed to another pipe company – Challenger Pipe Company located at 549 North Randolph Street. An interesting trail, but for the St. Regis on my worktable with a Made in London England county of origin – Chicago was a rabbit trail. Next, I did some ‘Hail Mary’ searches on the internet looking for a St. Regis pipe line – nothing.
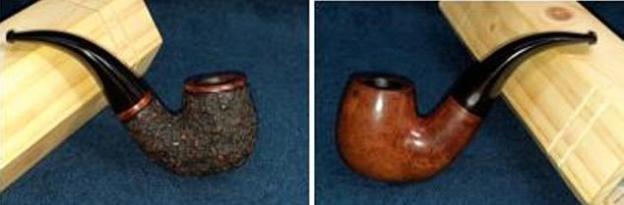
In forensic research one must stay with the information at hand. The next step in the research trail looking for some traction on the origins of the St. Regis De Luxe was the shape number. The look and feel of the English pipe on my table takes my guessing back to at least the 1960s – just a guess. I decided to look at the pipe shapes of English pipe makers to see if I could find a hit where the shape number 483 lined up with an Apple shape. I looked at BBB, GBD and Ben Wade during this general period. No hits – no ‘483s’ could be found in any of those shape lists. I finally hit something that showed some promise – Comoy’s. I have all these shape lists in virtual files on my computer for easy access. The Comoy’s Shape List comes from Pipedia’s article (see: LINK). This is a clipping of the 483-shape described as a ‘Globe’. The ‘S’ following the ‘globe’ designation points to a saddle stem which is straight (‘str.). ‘L’ is Comoy’s ‘large’ designation. When I first saw the ‘globe’ listing my question was, is this how the Apple shape was described when this list was compiled? I went back to Pipedia’s page and found the picture of the basic Comoy’s shapes and hit confirmation pay dirt.
 Comparing the St. Regis De Luxe to the Comoy’s 483 Large Apple – Saddle looked like a positive match. At this point, I’m thinking that St. Regis is most likely a second of Comoy’s. The listing of Comoy’s seconds is found on Pipedia’s main Comoy’s article (see: LINK) which I’ve listed here:
Seconds made by Comoy’s
Academy Award, Ace of spades, Ancestor, Astor, Ayres, Britannia, Carlyle, Charles Cross, Claridge, Coronet?, Cromwell, Damman?, Dorchester, Dunbar, Drury Lane, Emerson, Everyman, Festival of Britain, Golden Arrow, Grand Master, Gresham, Guildhall, Hamilton (according to Who Made That Pipe), Kingsway, Lion’s Head, Lord Clive, Lumberman, Hyde Park, Lloyds, Mc Gahey, Moorgate, Newcastle, Oxford, O’Gorman, Rosebery Extra, Royal Falcon, Royal Guard, Royal Lane, Scotland Yard, St James, Sunrise, Super Sports, Sussex, The Academy Award, The Golden Arrow, The Mansion House, The Exmoor Pipe, Throgmorton, Tinder Box Royal Coachman, Townhall, Trident, Trocadero, Westminster, Wilshire
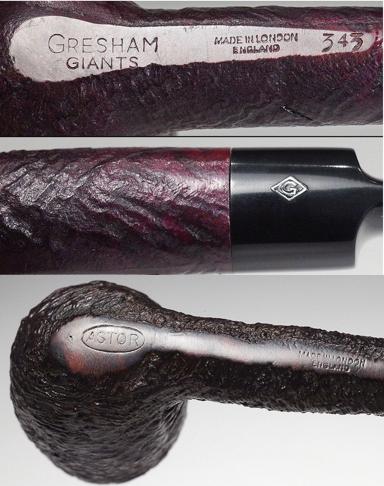 The closest listing is ‘St. James’ – no St. Regis. These ‘seconds’ lists often give a disclaimer that the list is not exhaustive, so my thoughts are that this is a Comoy’s second that didn’t make this list. To add further confirmation that the St. Regis was made by Comoy’s was to look at the COM stamping. All line Comoy’s COMs are stamped with either an arched (very early), circular or rugby shape – ‘Made in England’ or ‘Made in London England’ – depending on period. The COM on the St. Regis is a straight – ‘Made in London’ over ‘England’. Not a rounded Comoy’s COM. Yet, looking through the myriad of examples of pictures of seconds of Comoy’s in the same Pipedia article, the COM designs run the gamut. All I wanted to do is find a second of Comoy’s COM to match the St. Regis’ COM design to be able to have confidence that Comoy’s did produce seconds with this COM design. Two Comoy’s seconds, ‘Gresham’ and ‘Astor’, provided that confidence.
At this point, I am sure I have found the ‘Lost Second of Comoy’s of London’ and I’m thinking about writing to Pipedia to add this information to the archives. Instead, I send Steve a note describing the process of research I used, the evidence I found and my question whether the St. Regis could be a Comoy’s second? Steve’s response came quickly and hit a home run!
Hey Dal
There are St. Regis Hotels in many locations. I am wondering if the pipe was not made by Comoy’s for a smoke shop in one of these Hotels. In days past most of the quality hotels had smoke shops in their facilities
Steve
 Of course! I could almost feel the nostalgia in Steve’s words! I wrote back to Steve and described how when I did my earlier ‘Hail Mary’ online searches for ‘St. Regis’, the only thing that came up was information about hotels and destinations…. The most likely missing piece of the puzzle was already trying to get my attention and Steve’s email brought the puzzle into focus. Oh, for the days when hotels had ‘smoke shops’ and one wasn’t concerned about political correctness and getting canceled for blowing smoke rings in public as is the case in today’s world! It makes sense that the St. Regis De Luxe was a pipe made by Comoy’s of London for these luxury hotels to make available to their patrons.
This is the current St. Regis Hotel in London and a picture of a lounge area – perhaps back in the day can one imagine pipe smoke wafting….
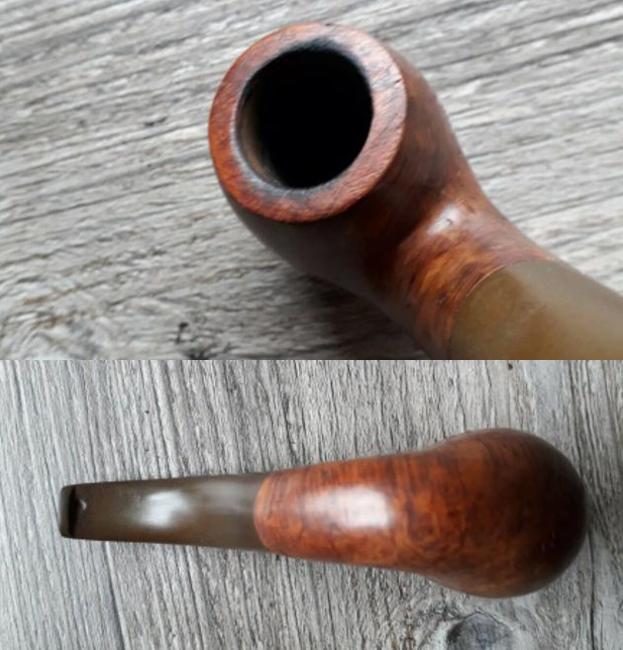
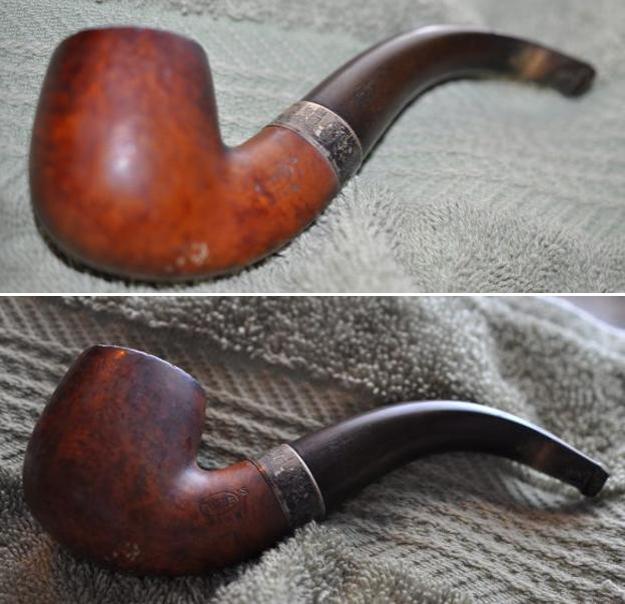
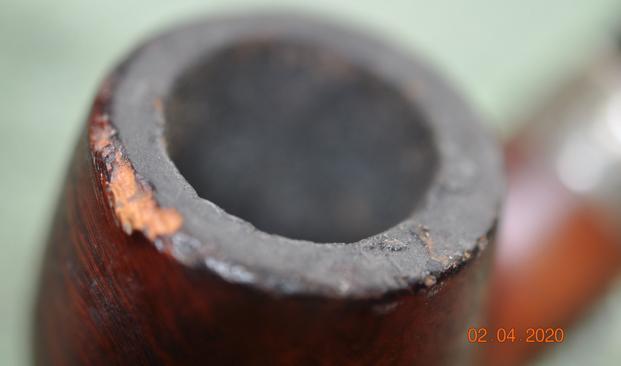
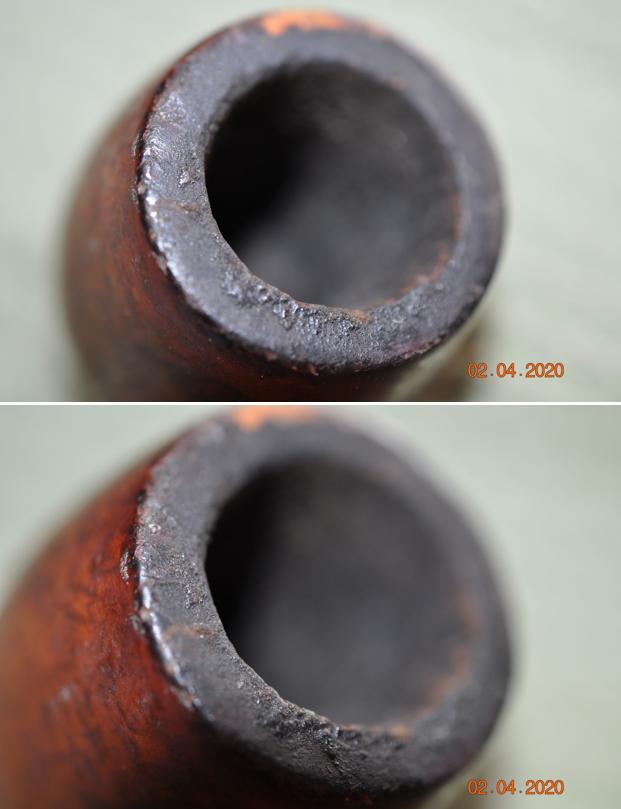
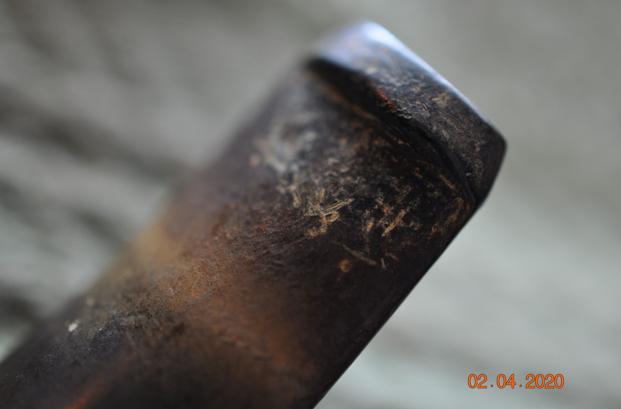
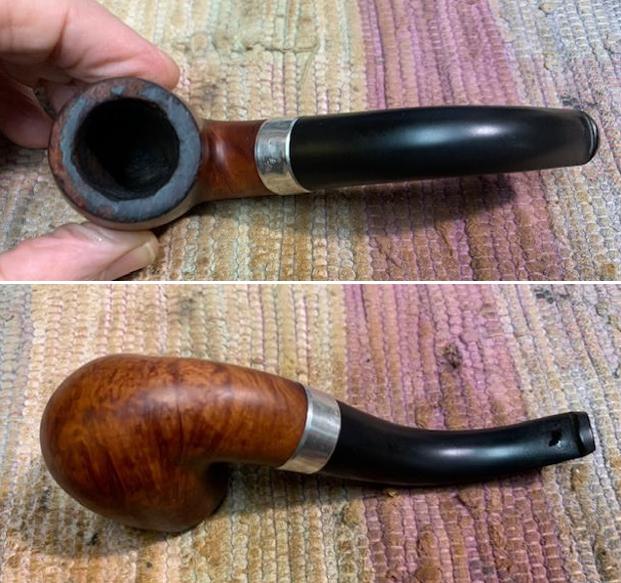
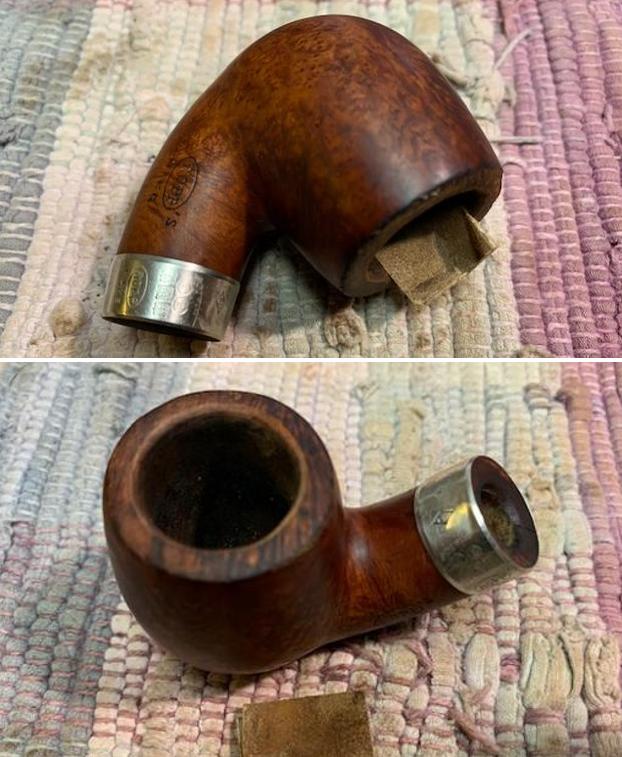
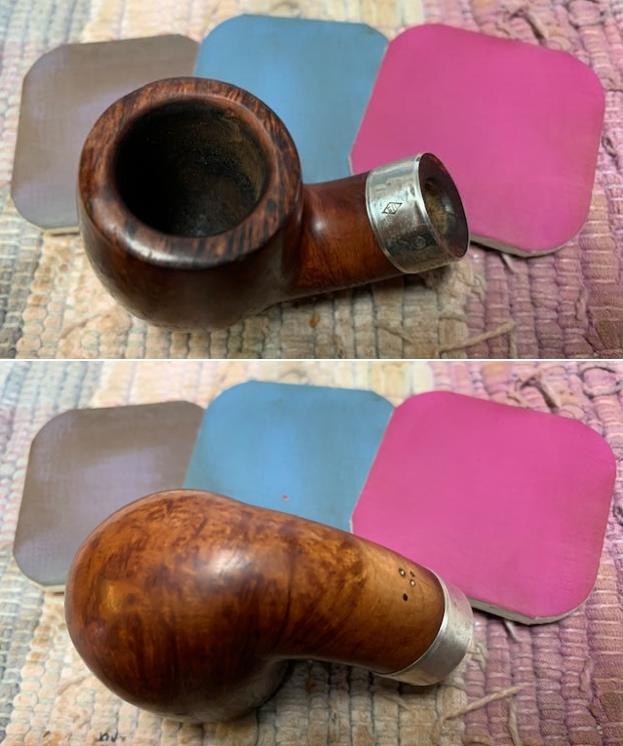
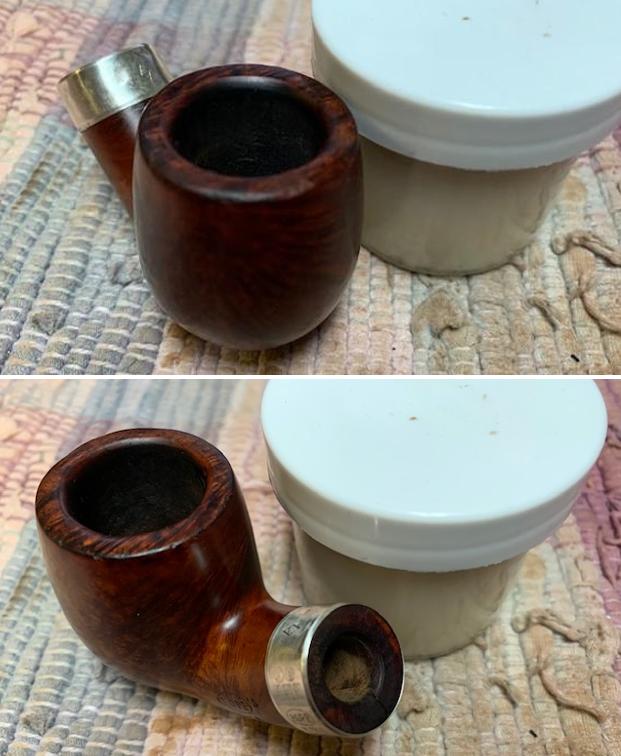
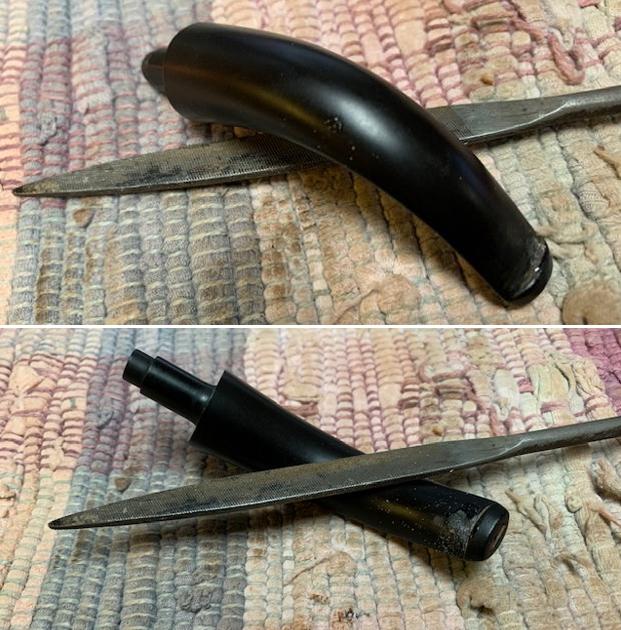
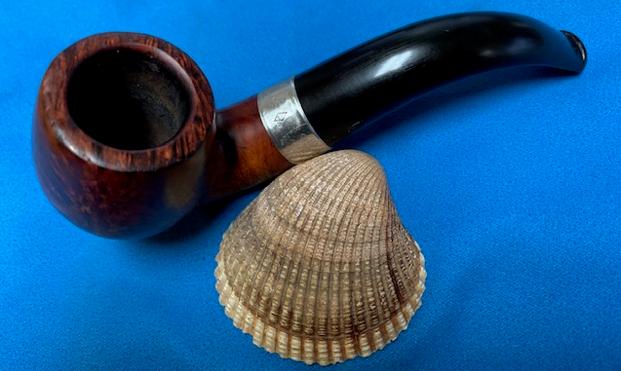
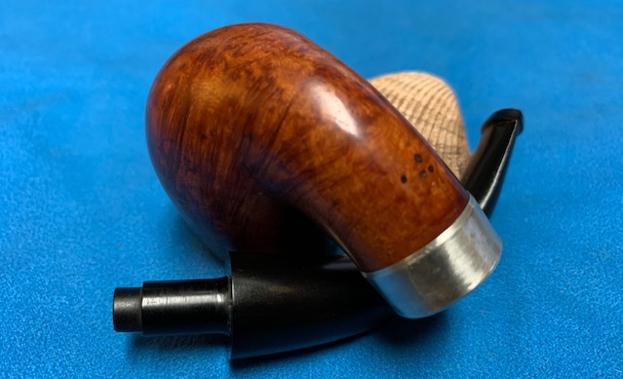
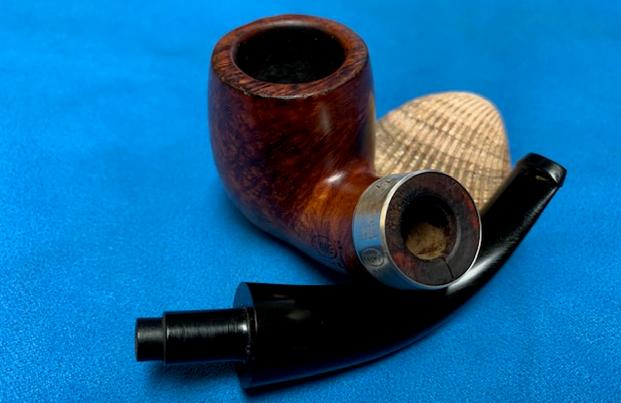
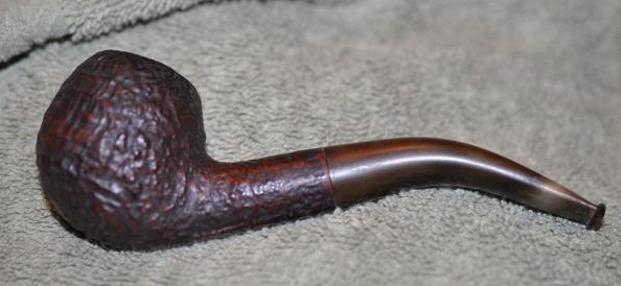
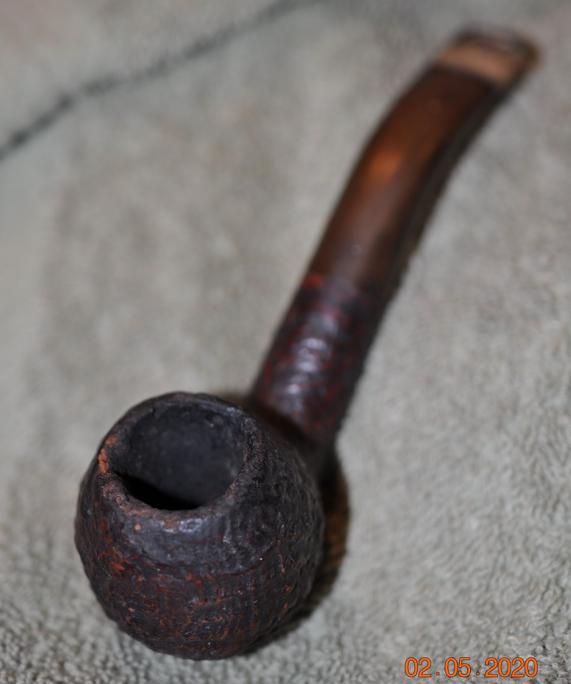
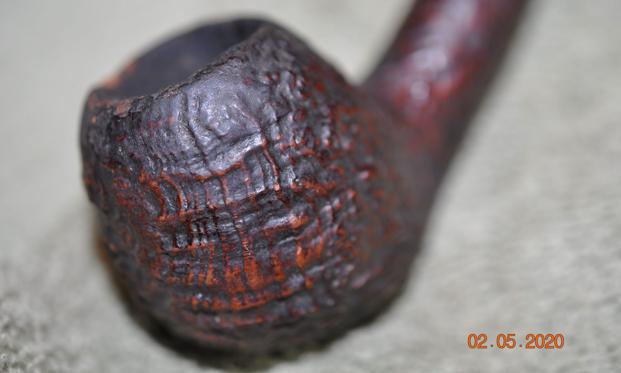
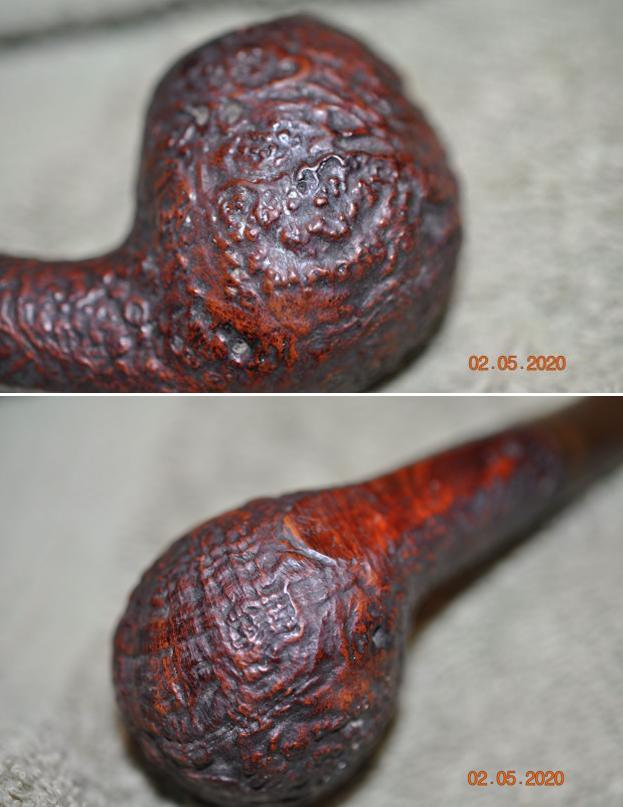
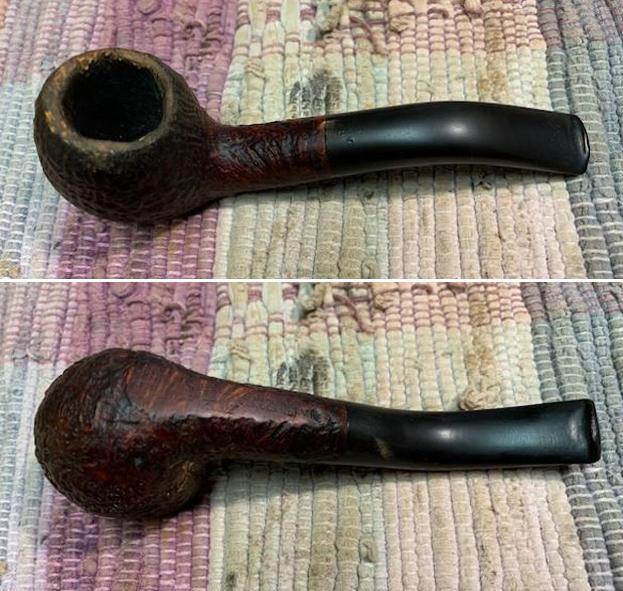
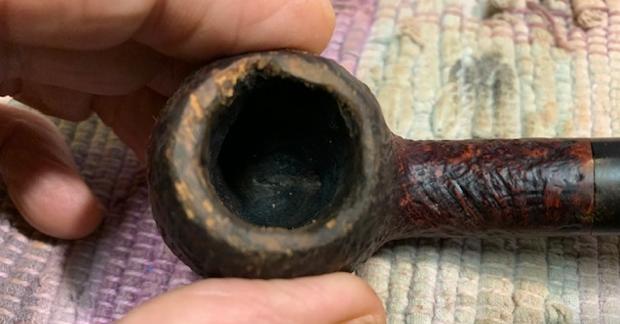
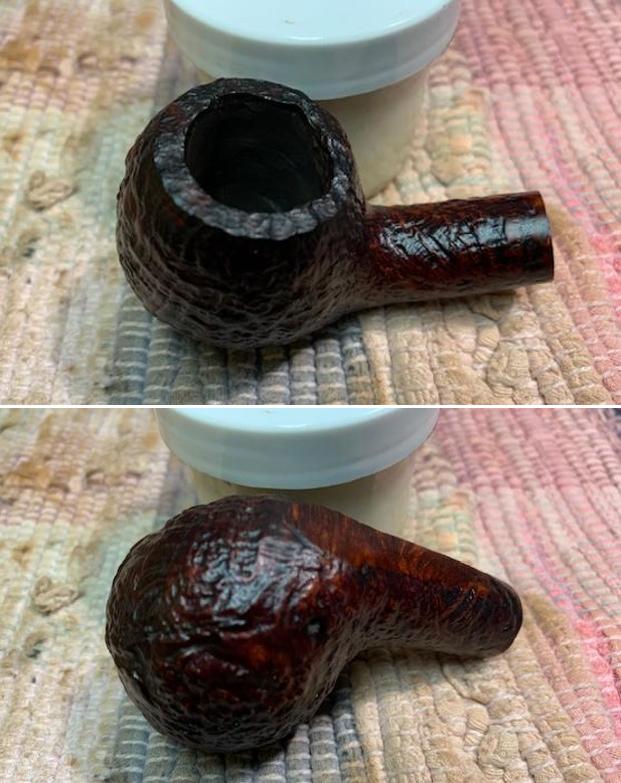
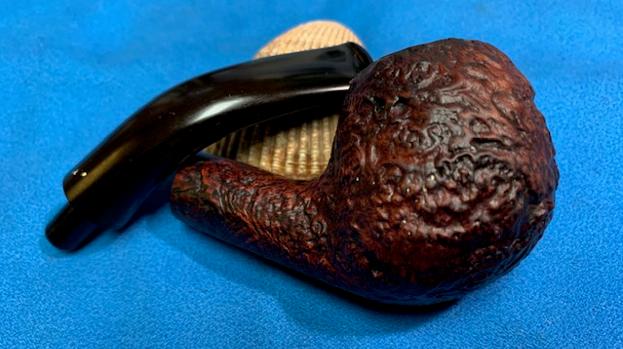
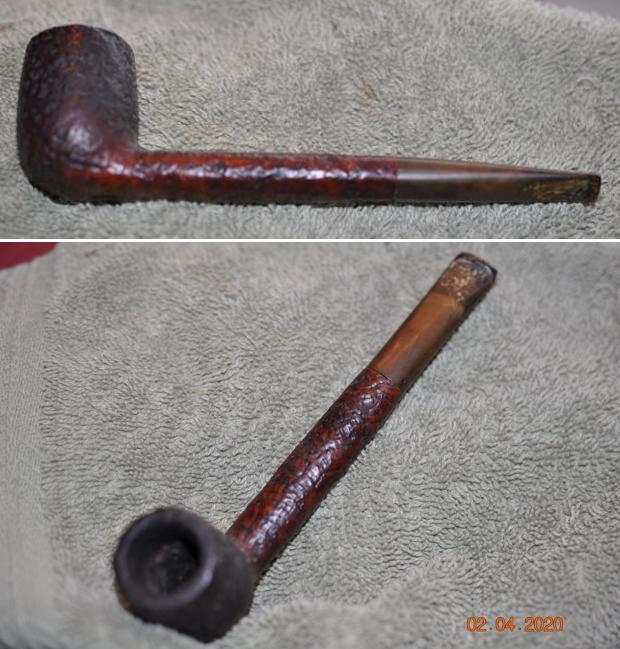
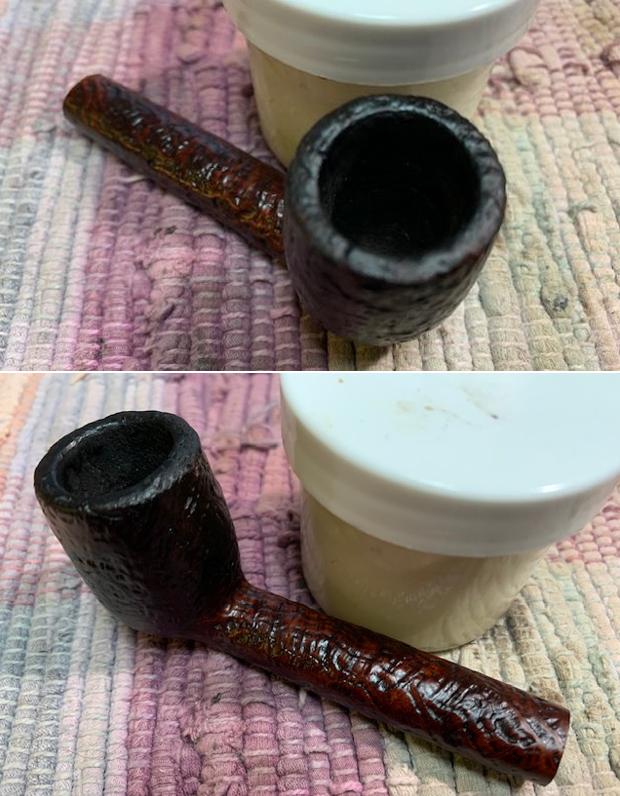
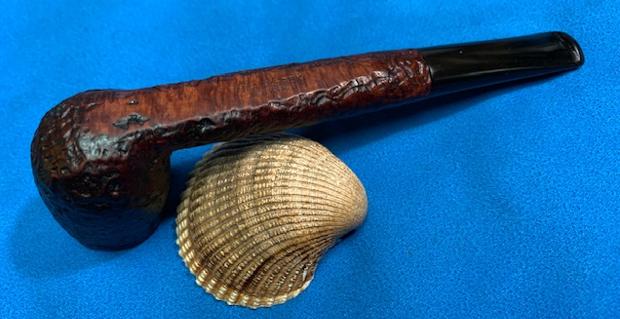
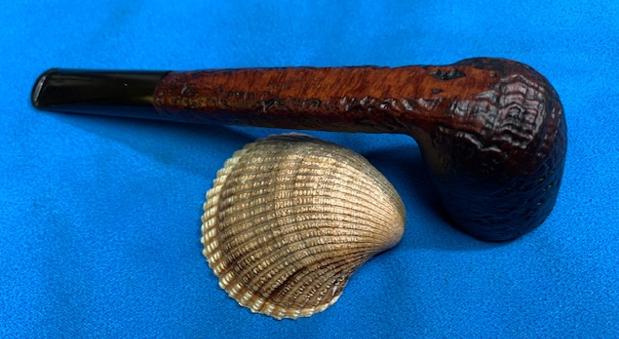
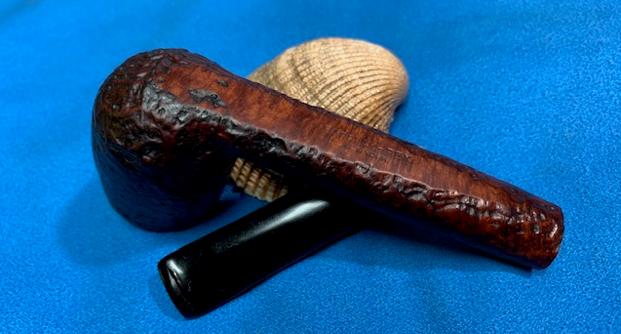
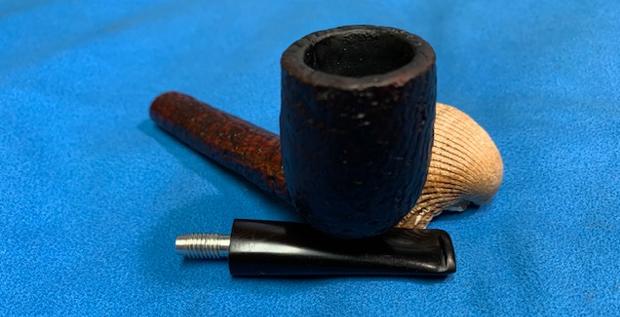
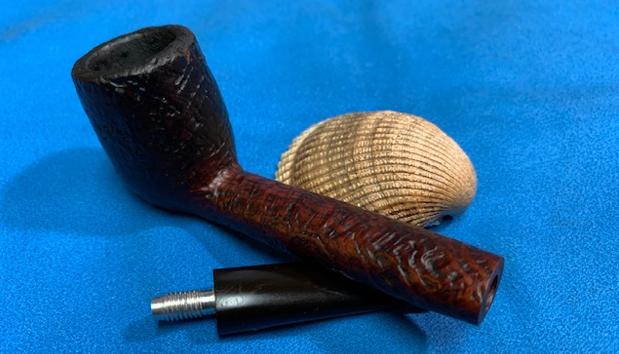
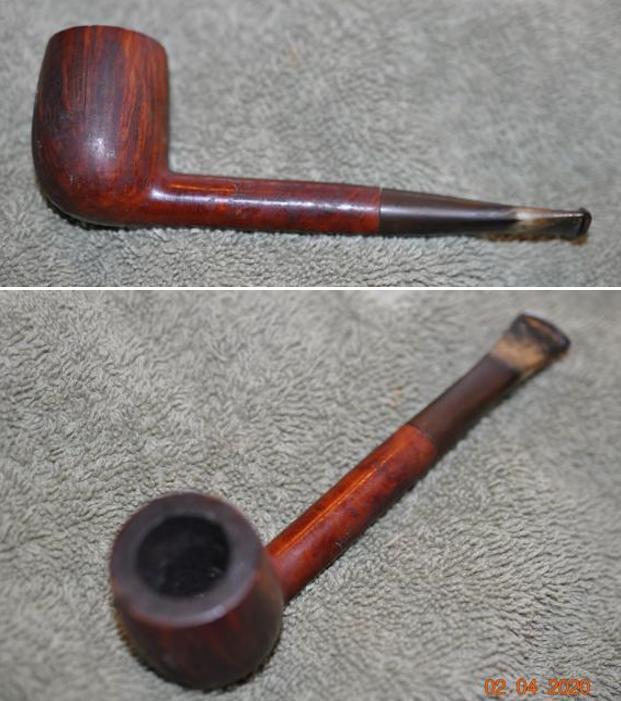
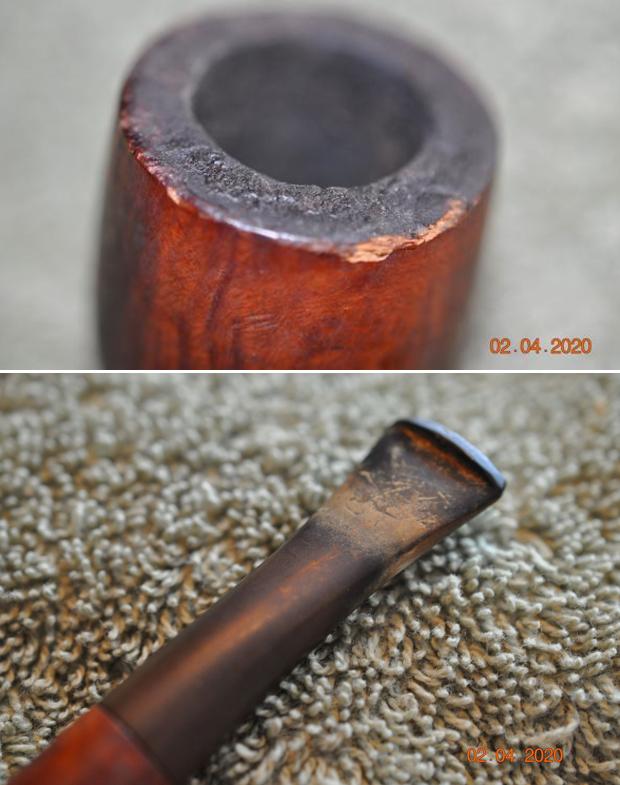
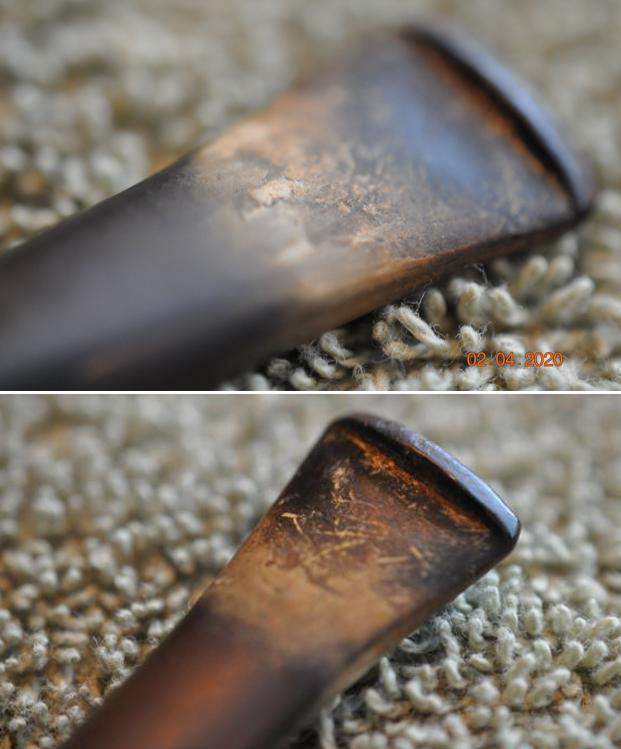
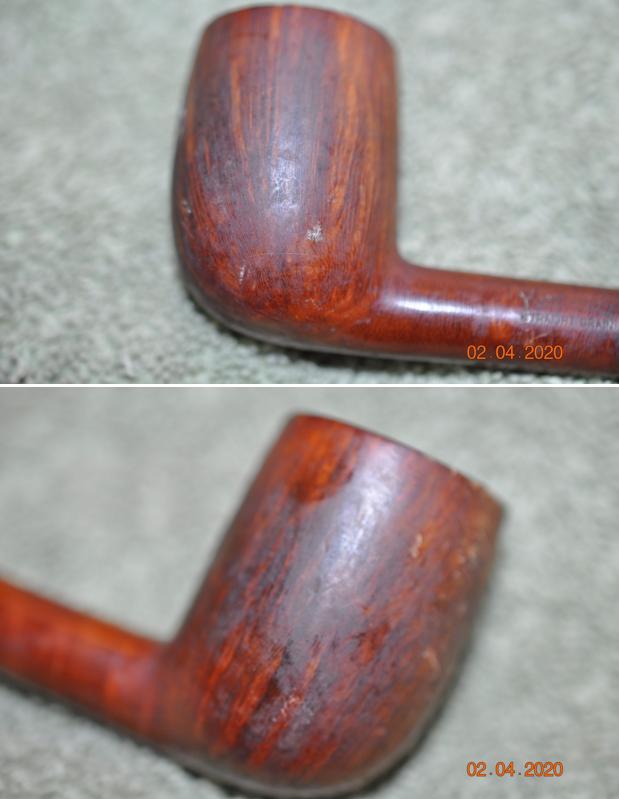
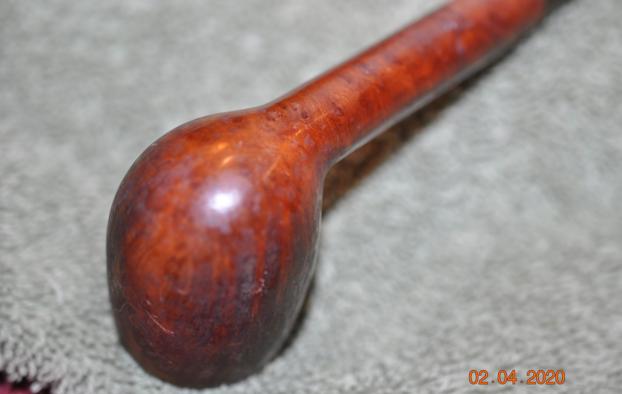
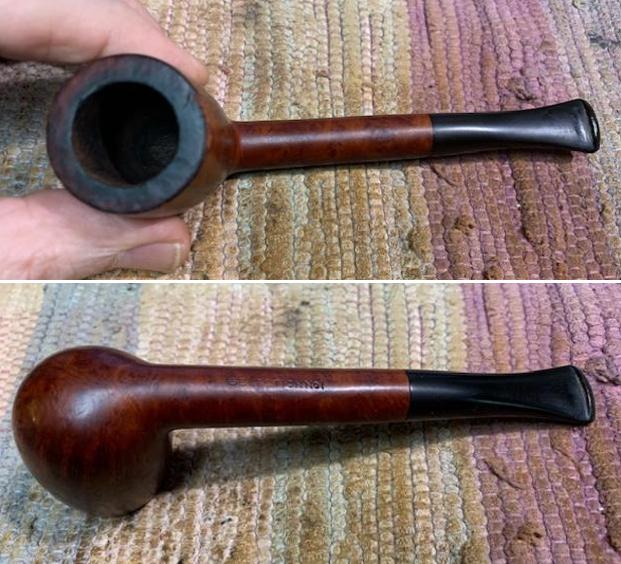
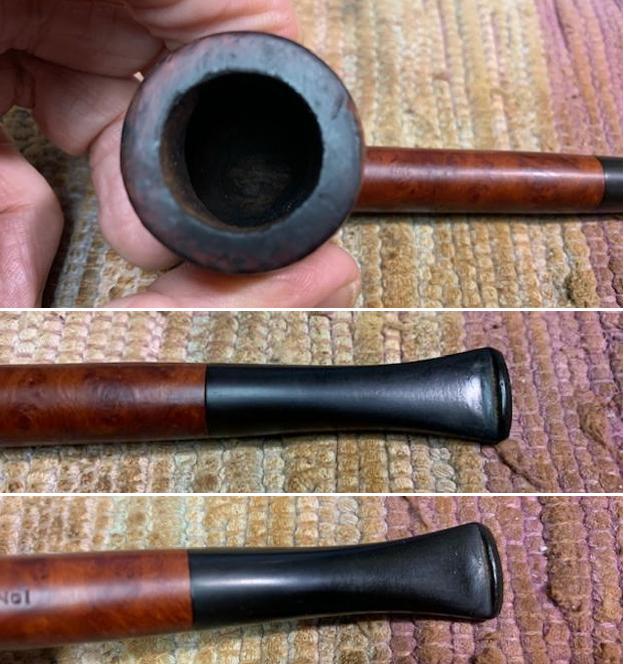
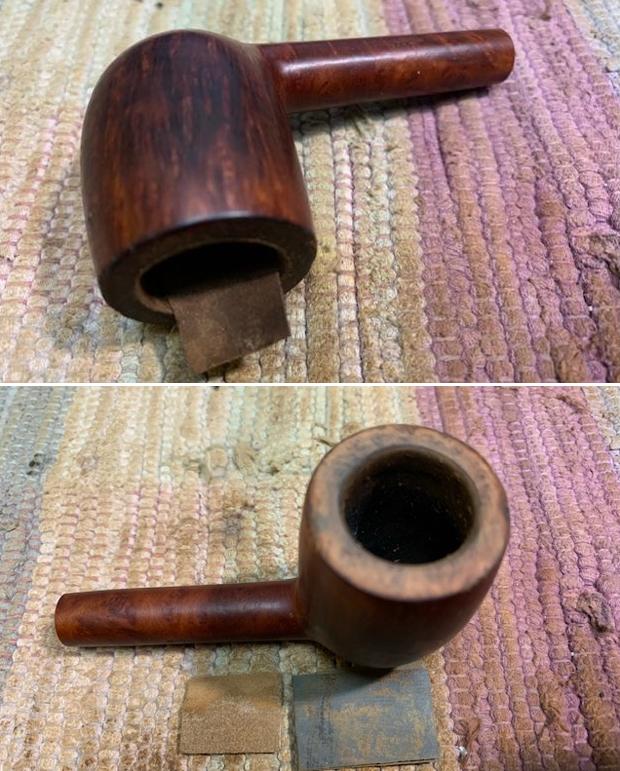
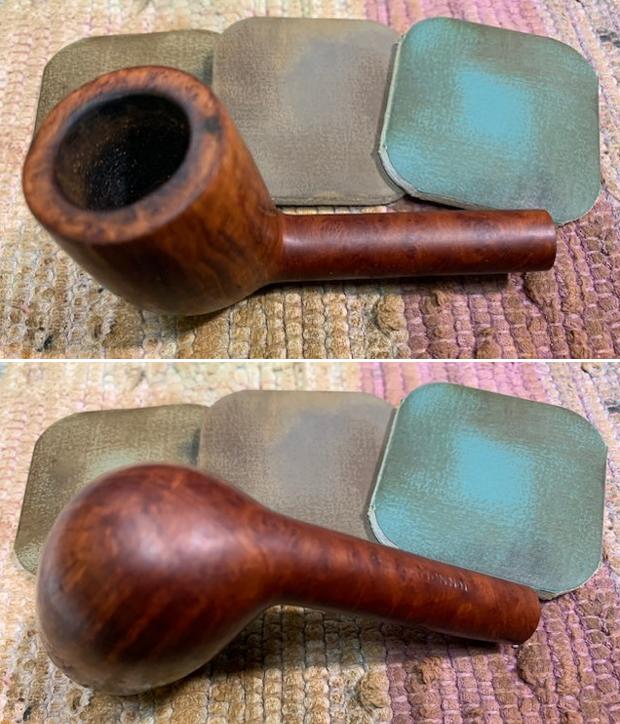
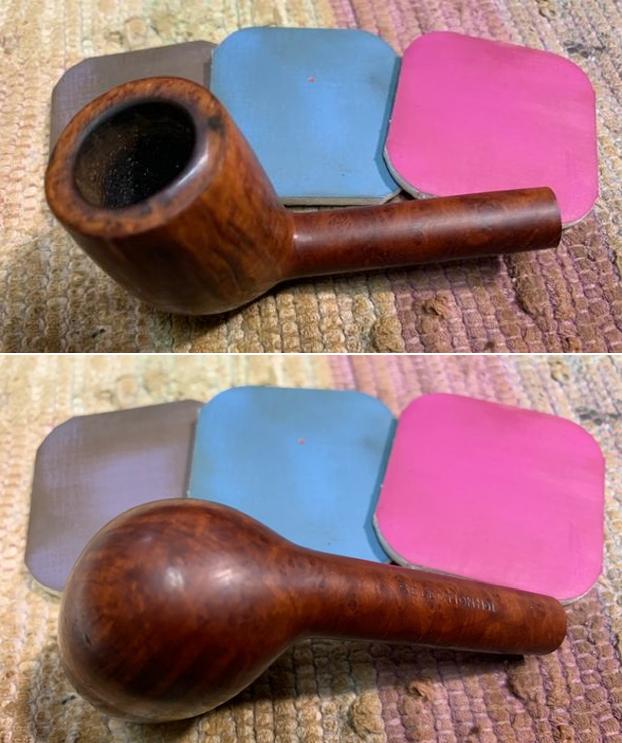
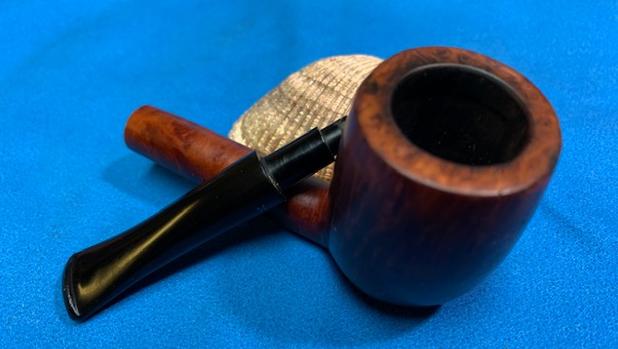
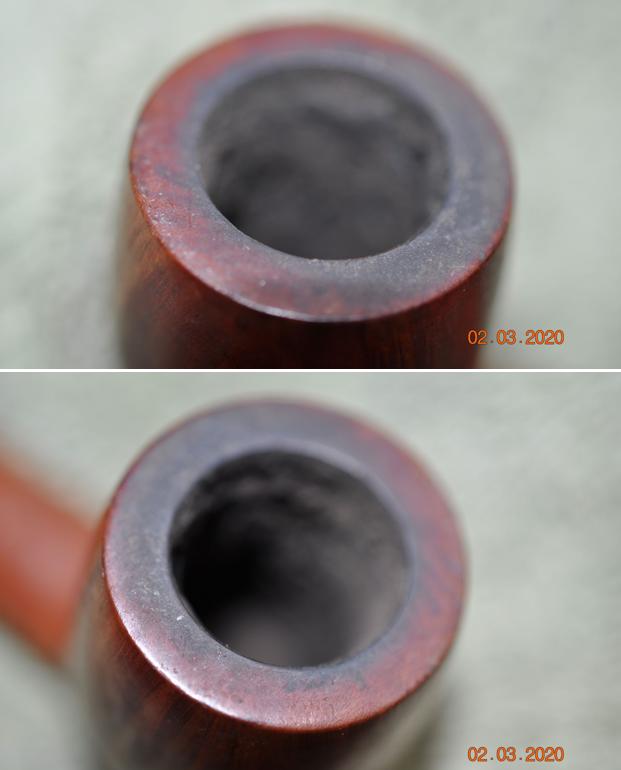
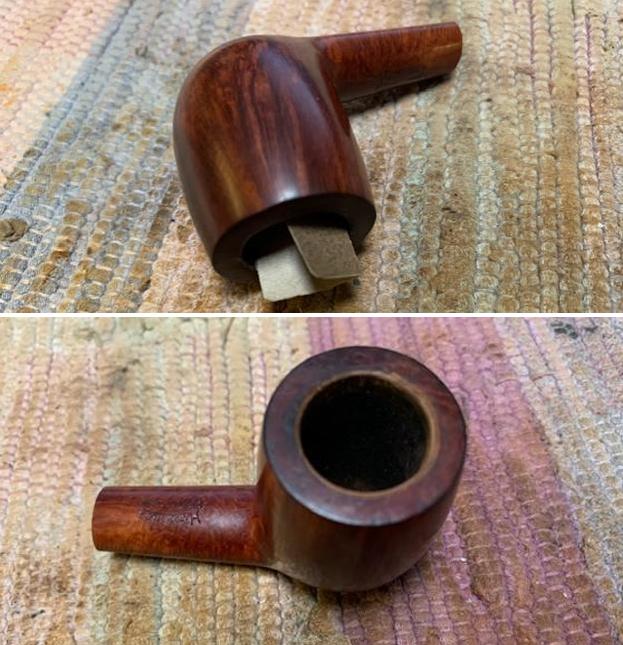
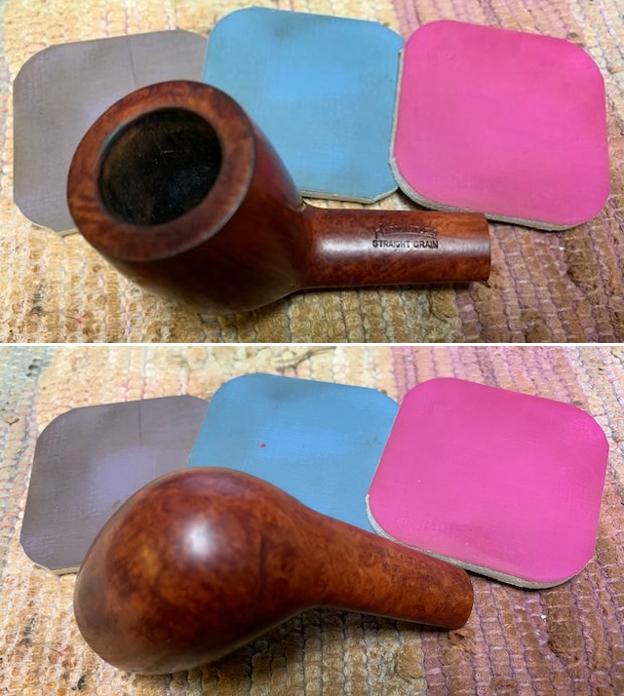
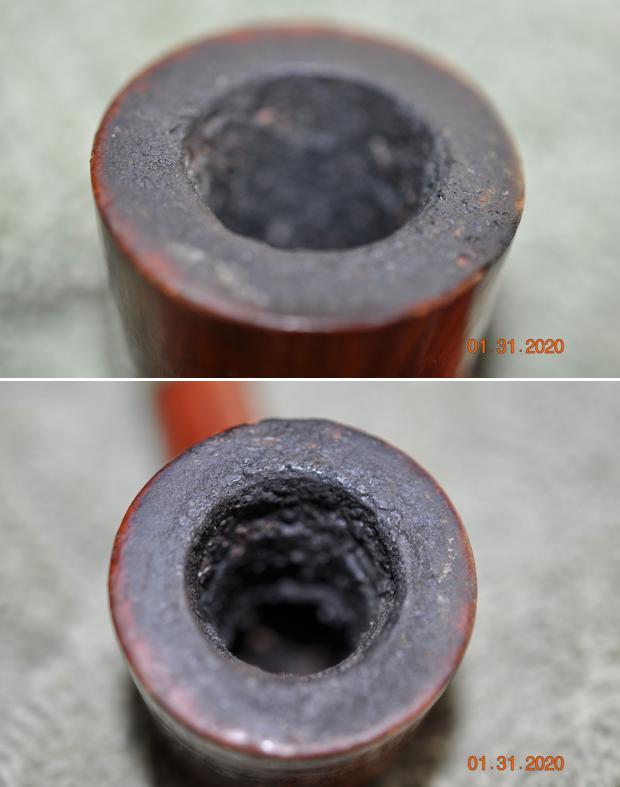
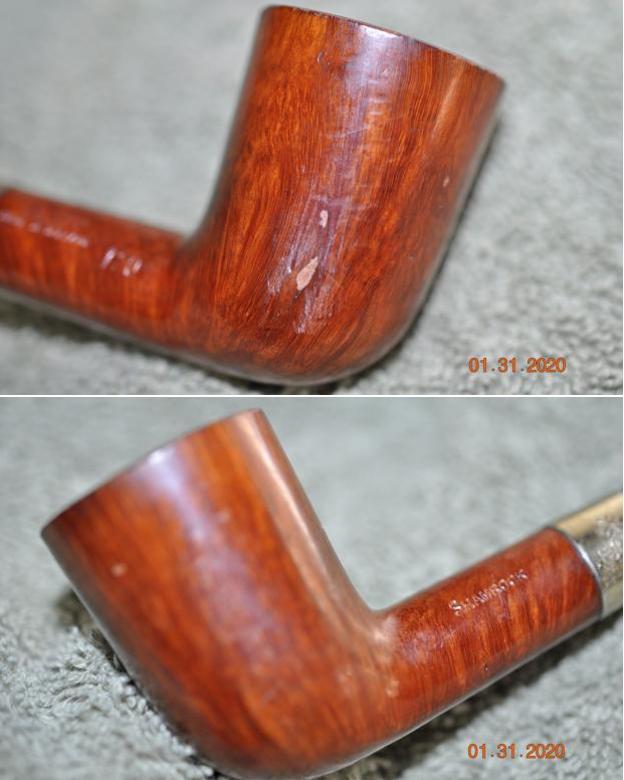
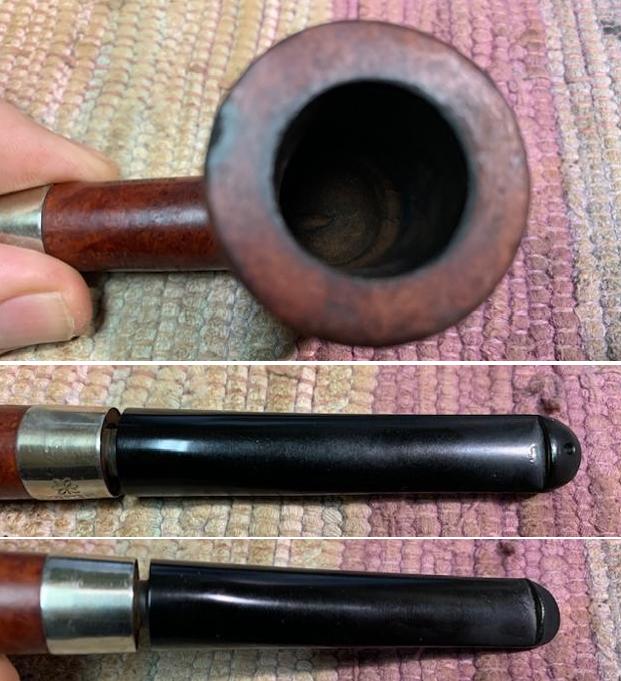
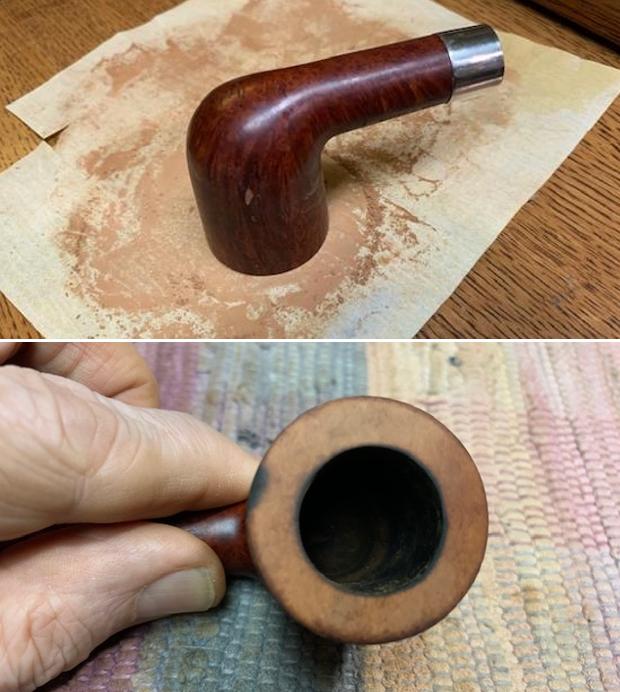
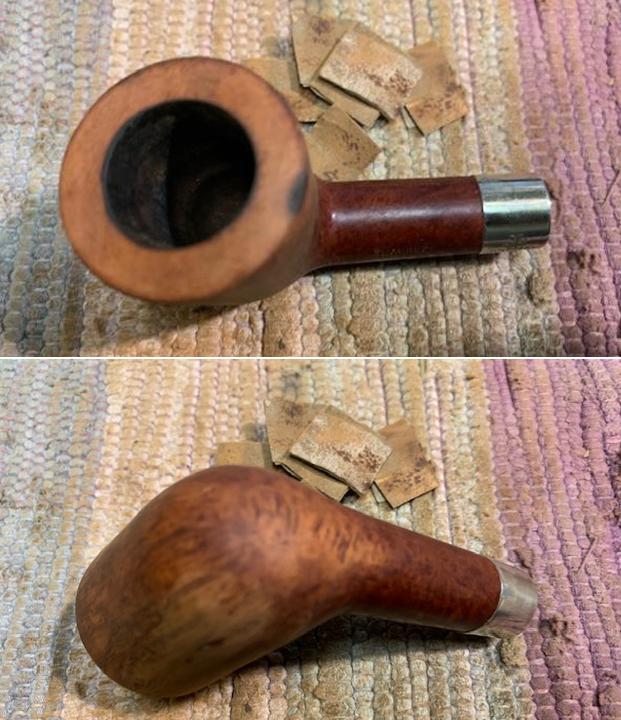
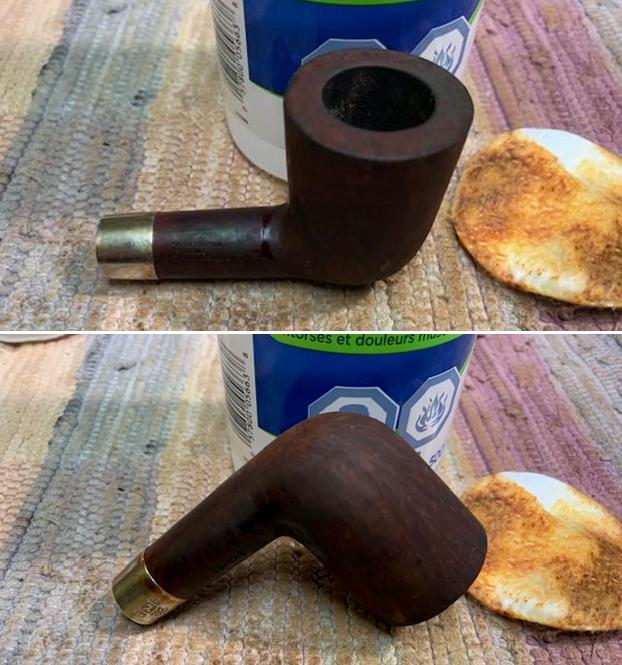
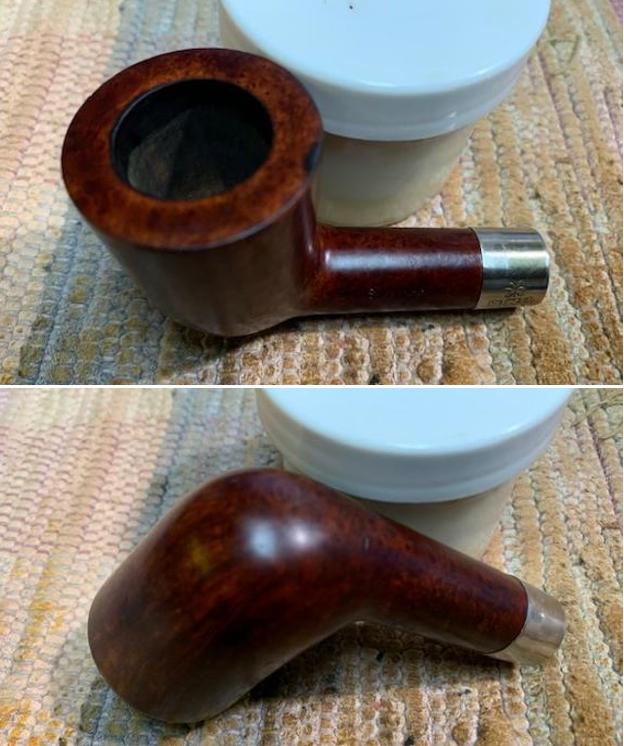
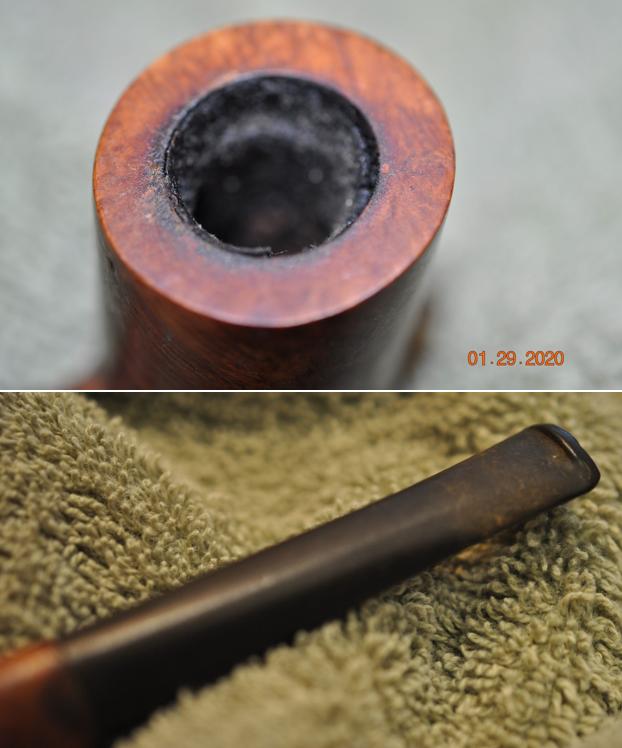
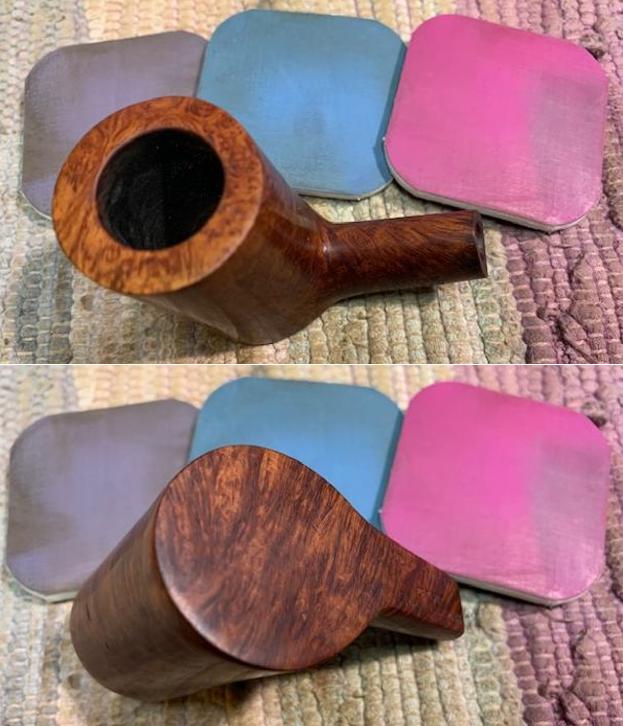
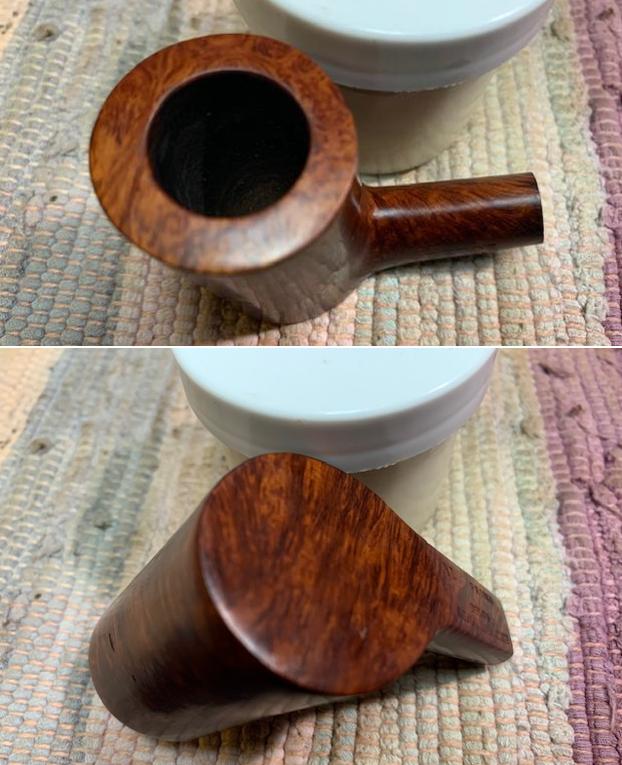
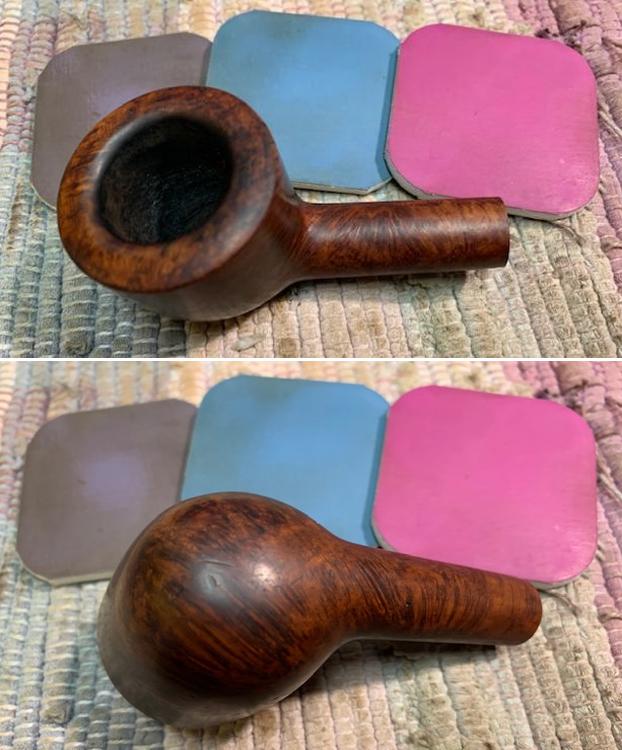
With a better understanding of the Comoy’s origins of the St. Regis De Luxe Large Apple, I take a closer look at the condition of the pipe now on the worktable. The pipe was well loved but apparently, not too well treated. He’s in pretty rough shape. The cake is very thick in the chamber with a good bit of damage to the rim and crusting. Most of the damage is on the back side of the rim where the briar is scraped and worn down – most likely the flame lighting side.  The dip in the rear rim quadrant can be discerned from this angle. What is also evident is that the upper quadrant of the bowl is significantly darkened around its circumference. This possibly points to heating problems and the need of a close inspection of the chamber underneath the thick carbon buildup.
 The bowl is darkened from heating as well as grime on the surface that needs cleaning. There are also several small fills which will need a closer look after cleaning the surface.
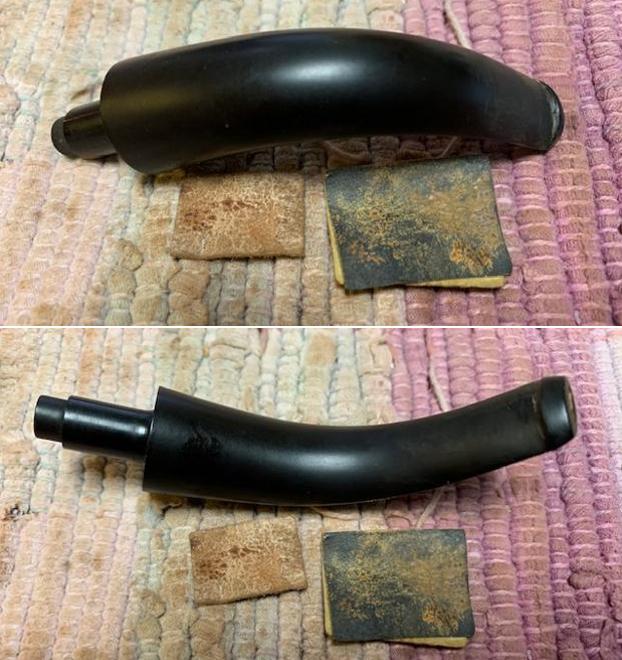

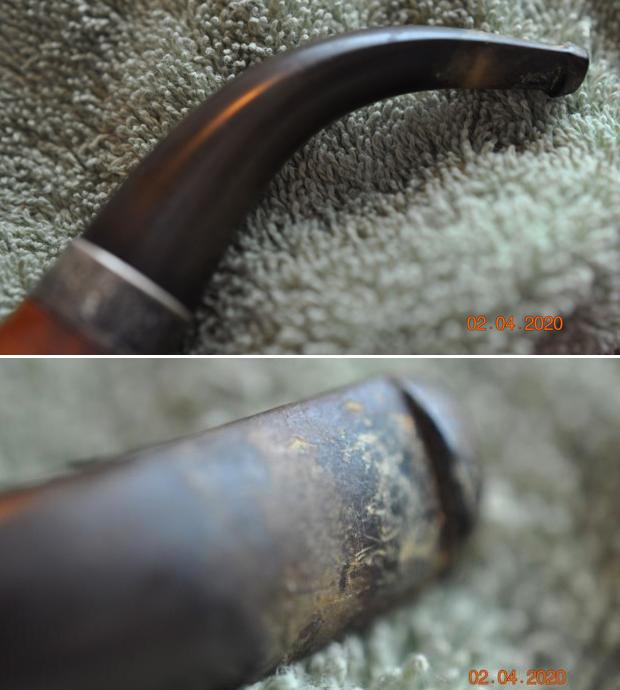
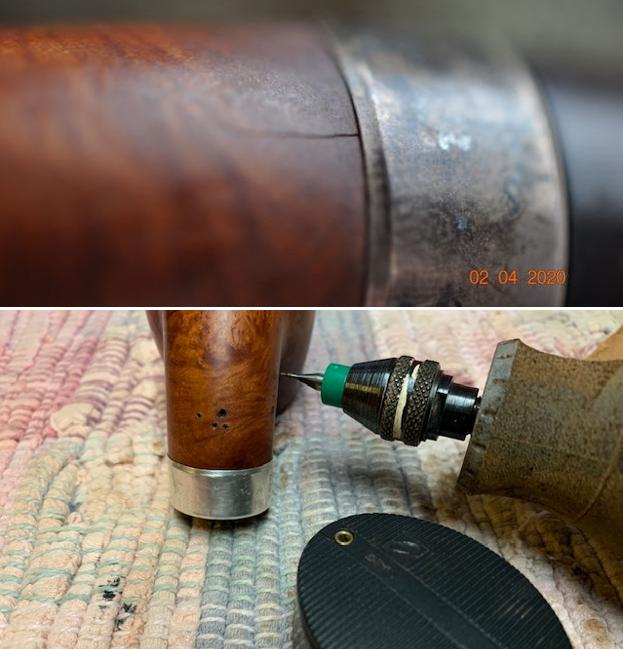
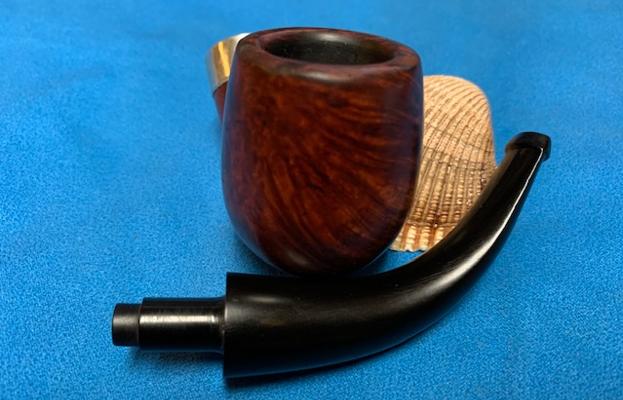
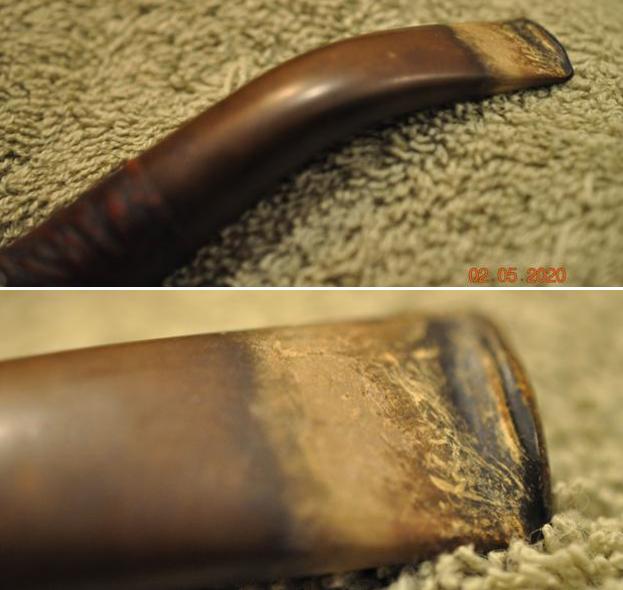
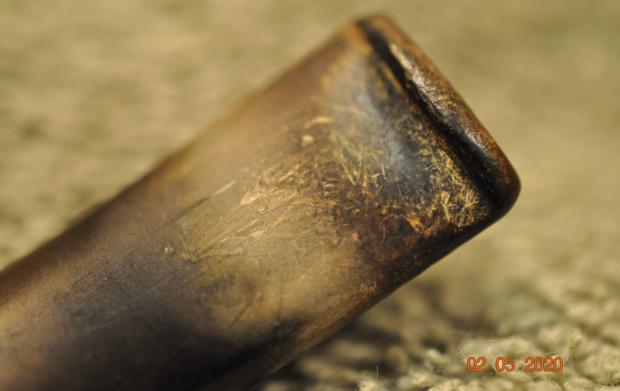
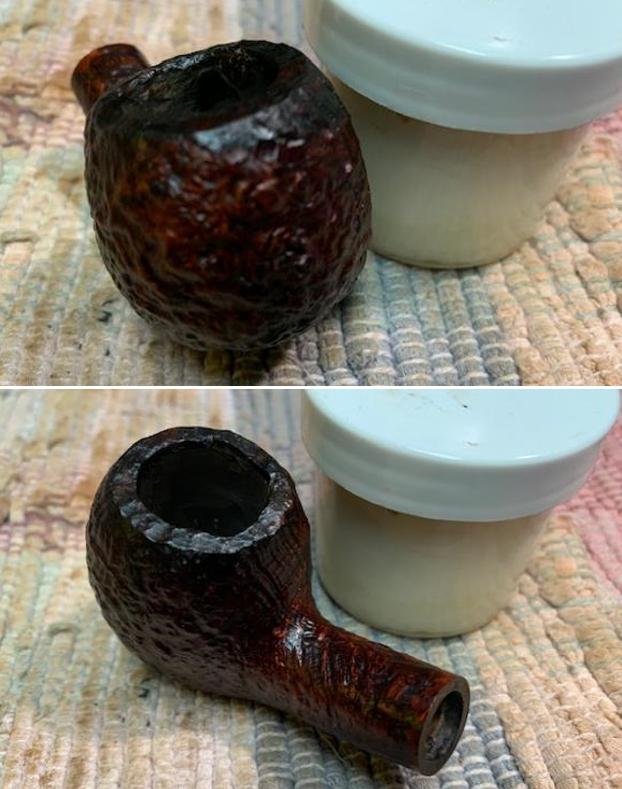
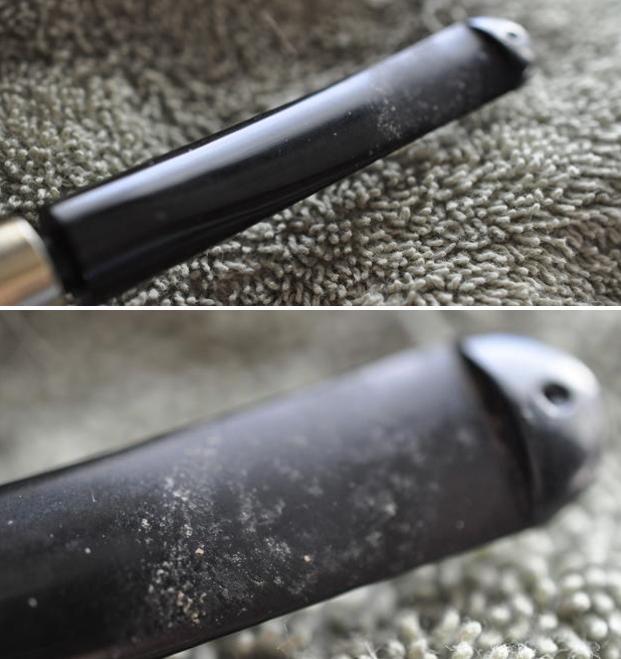
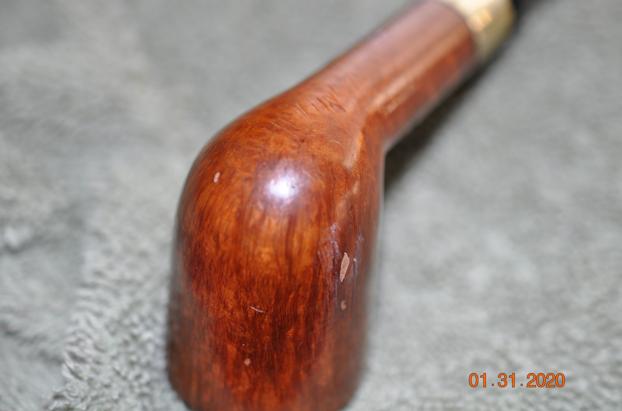
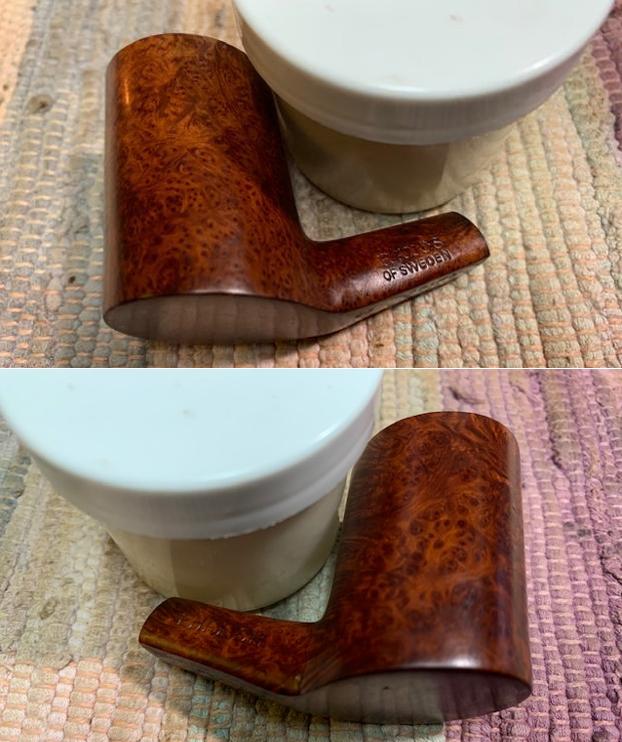
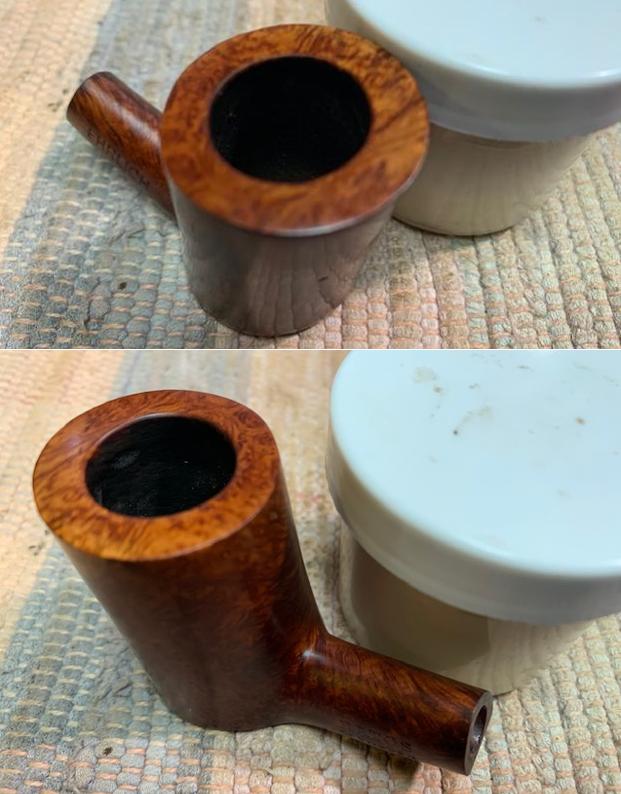
 The shank also shows several small fills. One fill is in the center of the COM. This should be fun.
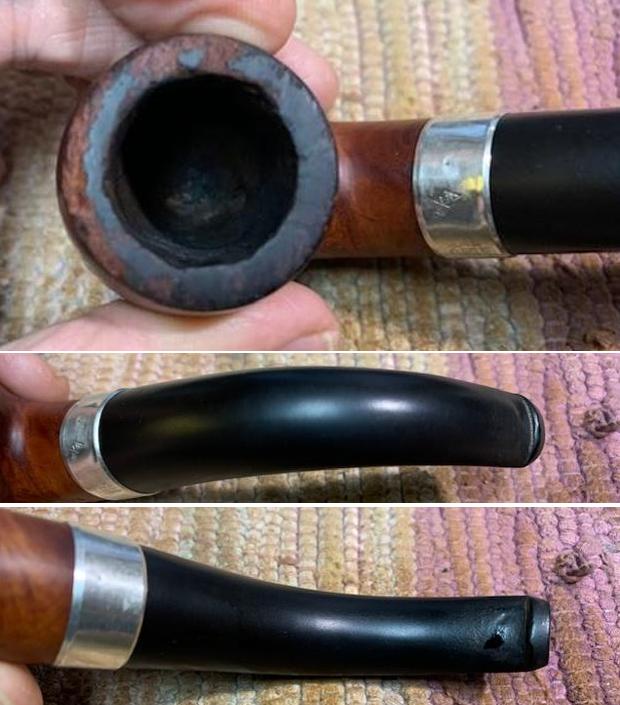
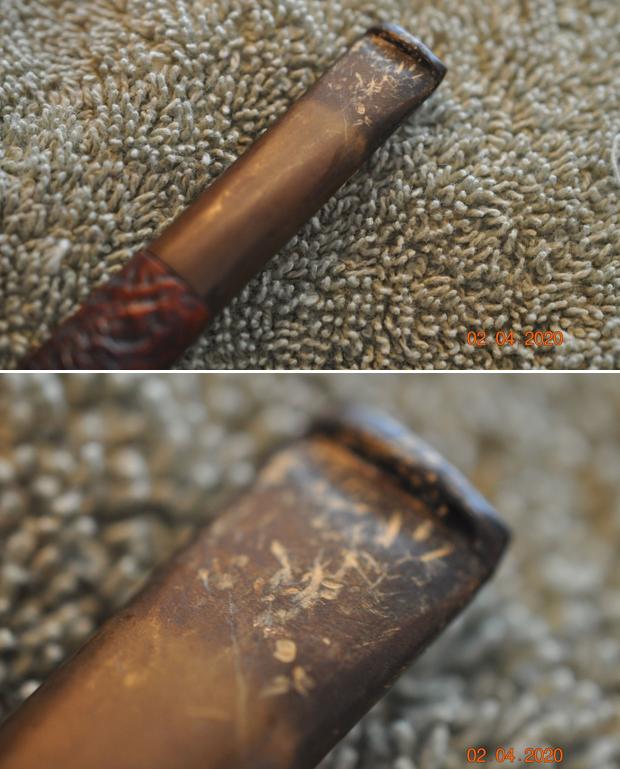
 The stem has heavy oxidation as well as calcium build up on the bit. The bit looks like it’s been chewed pretty well. The upper and lower bit has clinch marks, and the button has been worn down.
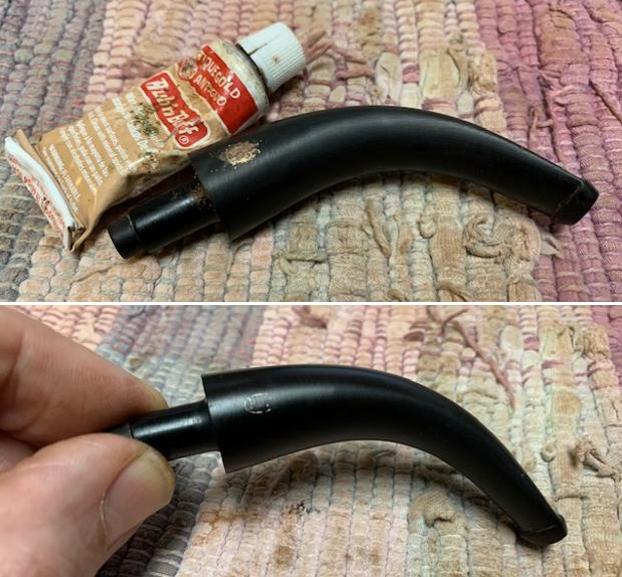
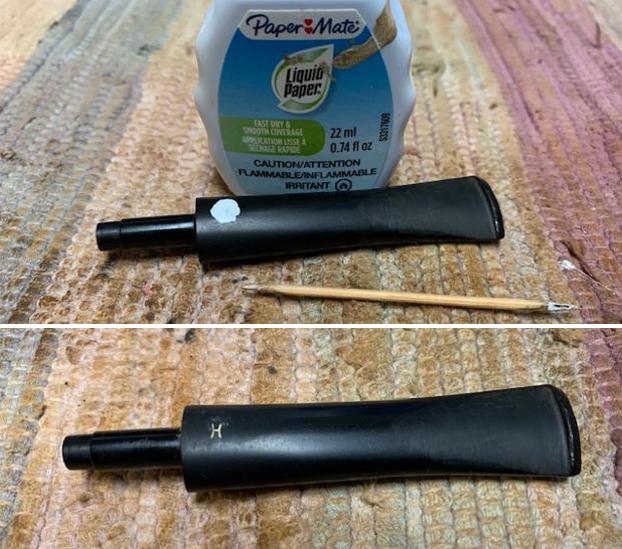
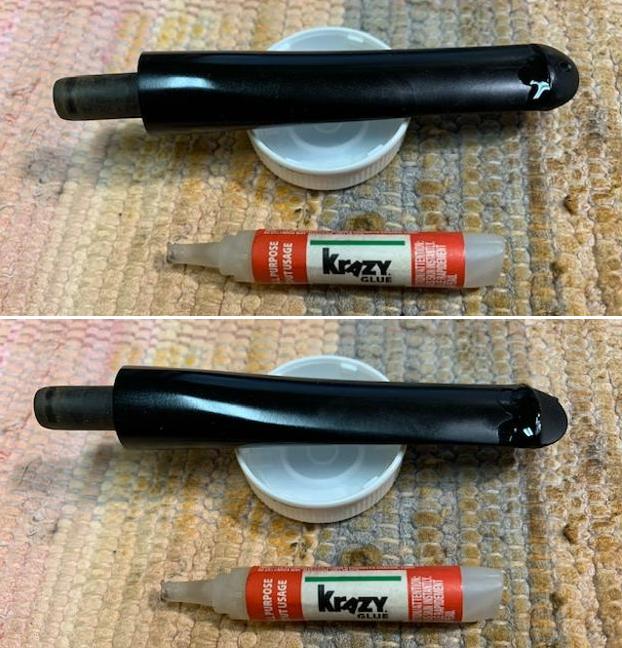
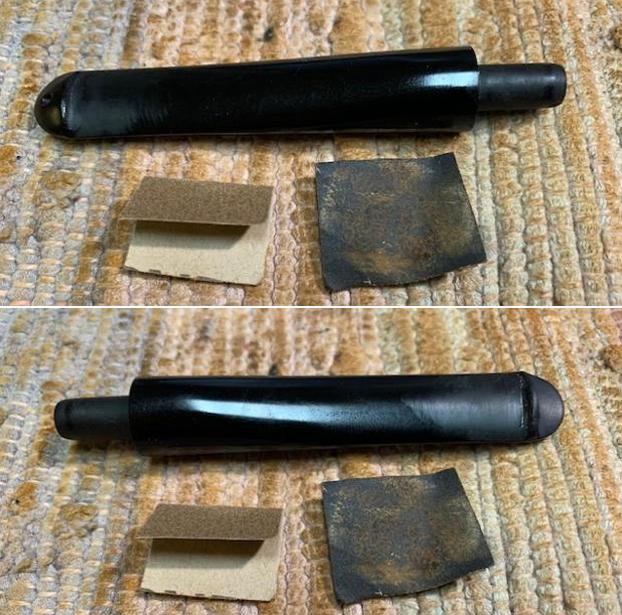
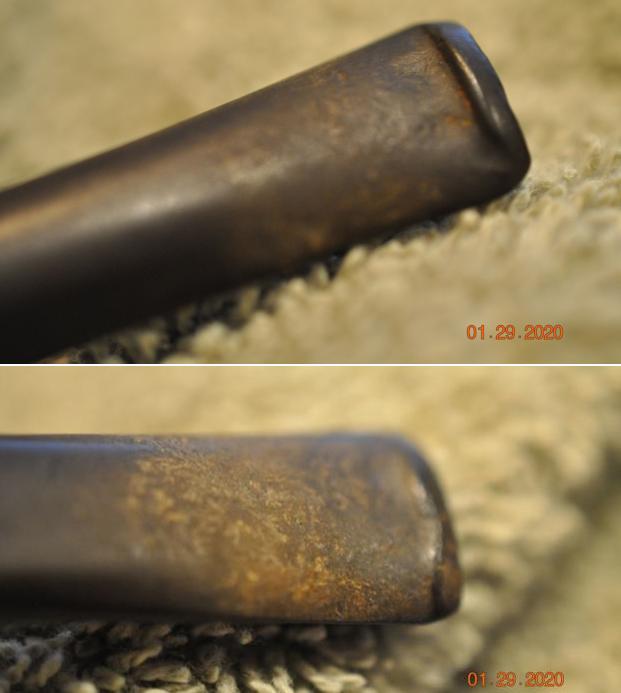
 To begin the restoration of the St. Regis De Luxe, I start with the stem. The first step is to deal with the deep oxidation which is seen in the pictures above. Before working on the oxidation, the stem’s airway is cleaned using several pipe cleaners dipped in isopropyl 99%.
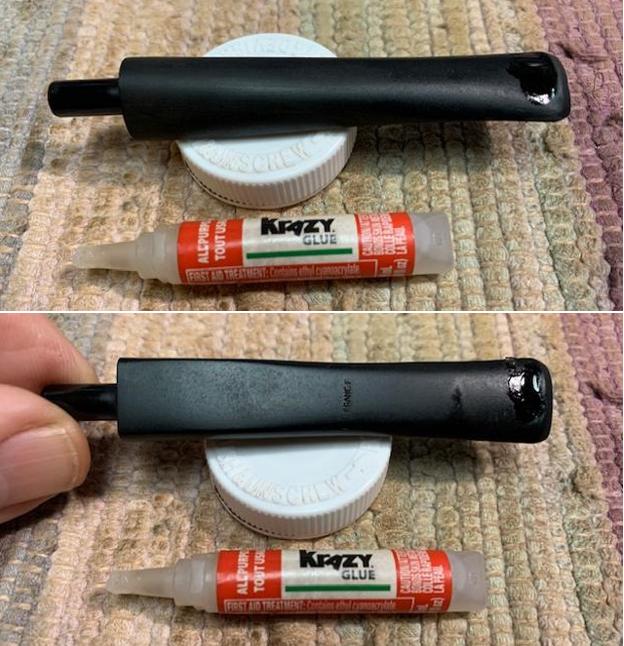
 In my last write up of the Dr. Grabow Blasted Sculptura Bulldog, I tried for the first time a new product from www.Briarville.com called, ‘Pipe Stem Oxidation Remover’. The St. Regis stem joined the Dr. Grabow stem to test the new product.
  The stems were put in the solution, which the smell reminded me of mouthwash, for the maximum period described in the directions on the label – 2 to 24 hours. I wanted the stems to get the full impact of the Oxidation Remover, whatever it was.
 After the 24 hours, the St. Regis stem was removed and was first scrubbed with a dry cotton pad to wipe the residue that resulted through the deoxidation process. The dry cotton pad was followed by a cotton pad wetted with alcohol to remove more raised oxidation.
  The stem was then conditioned using paraffin oil and set aside to dry. Overall, I’m pleased with the result of the Briarville product and will continue to use it to see how it performs in the long term.
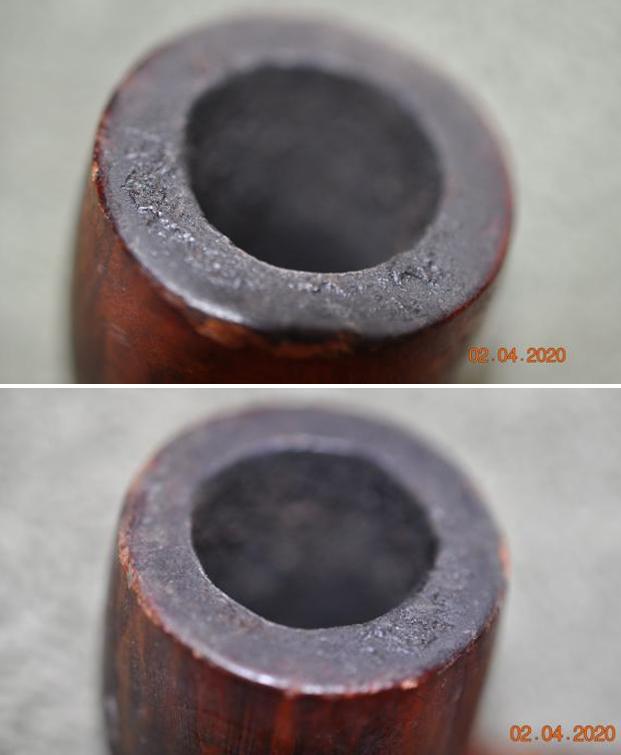
 With a bit of fear and trepidation, I turn now to the stummel. The first step is to clear the thick carbon cake build up in the chamber. I take a fresh picture of the thick cake to mark the starting point.
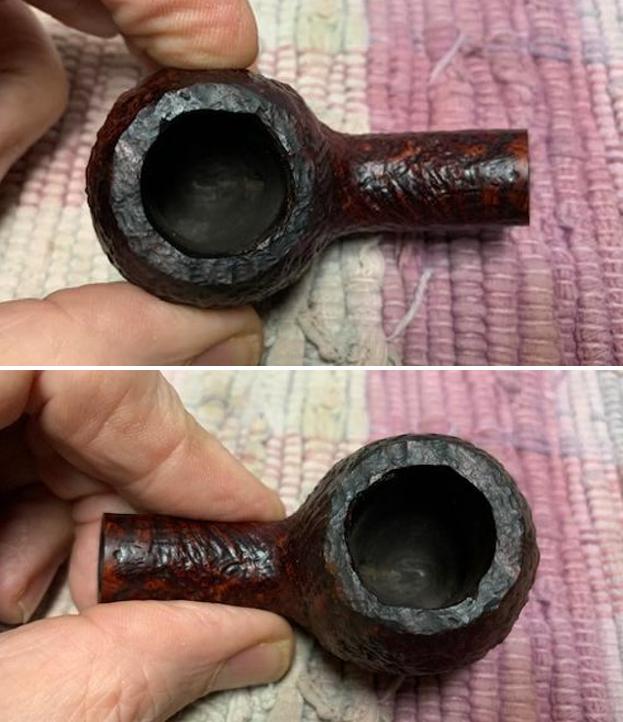
 The chamber is reamed with the Pipnet Reaming Kit using 3 of the 4 blade heads available. Following this, the chamber walls are scraped with the Savinelli Fitsall Tool and finally sanded with 240 paper. I’m wondering if this chamber has ever been reamed before this?
 I would be dishonest to say that I wasn’t surprised to find what was found after inspecting the chamber. I expected to find heating veins and possibly fissures in the chamber wall. Instead, I happily find what looks like healthy briar underneath the cake. I’m thankful for this surprise!
 Next, turning to the cleaning of the rim and the briar surface, undiluted Murphy’s Oil Soap is used on a cotton pad to begin the scrubbing. A starting picture is taken as a reminder of the dark, grimy surface.
 The grime on the surface was thick and a brass wired brush was used additionally to work on the rim.
 The stummel was then taken to the sink along with shank brushes and the internal mortise walls were scrubbed with the brushes and anti-oil liquid dishwashing soap and warm to hot water. After a thorough rinsing, the stummel returned to the worktable. The next picture reveals that the finish was nonexistent after the cleaning. The darker upper part of the bowl that I thought indicated heating problems was removed during the cleaning.
 To continue the internal cleaning, cotton buds and pipe cleaners wetted with isopropyl 99% waged a fierce war against the thick gunk that had built up no telling how long! A small dental spoon also excavated oils and tars off the mortise walls. After a lot of effort, a truce was declared after the buds began to emerge lighter. I will continue the internal cleaning later at the end of the day with a kosher salt and alcohol soak through the night.
 Turning now to look more closely at the briar surface after the cleaning, it is no surprise that there is little if any of the old finish remaining. The damage to the aft side of the bowl is evident and will need to be addressed.
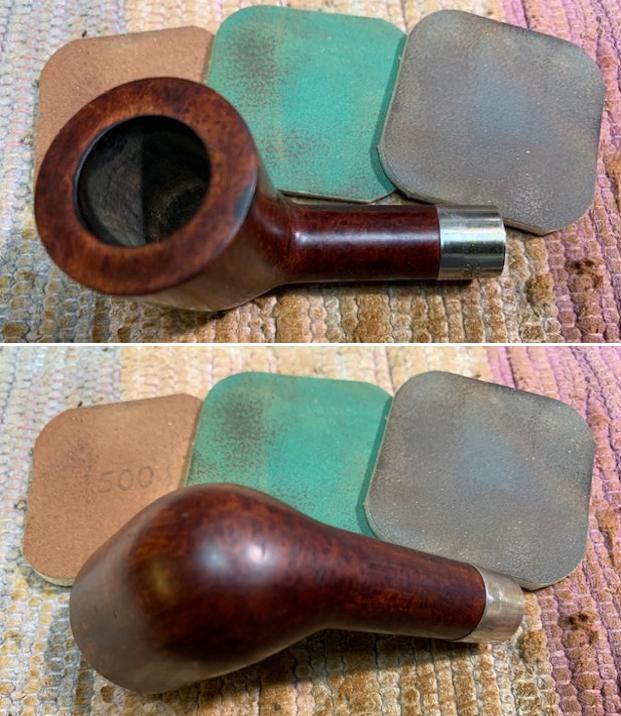
 The dark shadow which I feared was darkening of the briar because of overheating turned out not to be the case. The scrubbing generally removed the darkened area, but blotches remain on the surface.
 There are several small pit fills on the briar surface. They seem to be solid after testing and probing them. I’ll keep my eye on these as I clean the surface.
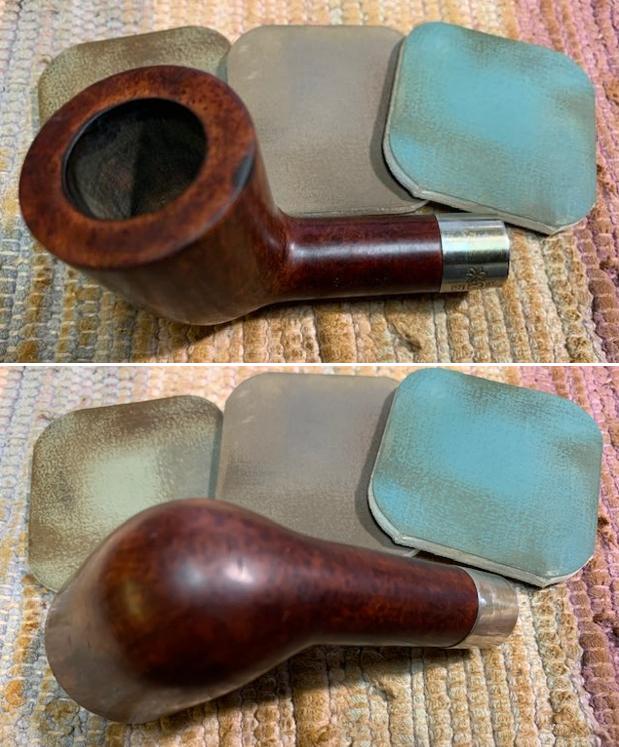
 One other thing that the cleaning reveals is that the chamber does have fine heating veins which are not problematic. With the development and maintenance of a proper cake of a dime’s width, this should not develop into something worse.
 Next, to begin the restoration of the stummel, I begin with the rim and work downward.
  The following angle shows the area worn down as the rim dips on the back section of the rim. To relevel the rim, topping will be necessary to sand down the high part of the rim to gain alignment with the dipped area.
  Using a chopping board and my portable topping board, a sheet of 240 sanding paper is placed on it. With the stummel inverted, I start the process of rotating the stummel over the paper to sand down the rim to become even. The tricky part is to keep the rim level and not to tip into the ‘soft’ dip as the stummel is rotated.
 After only a few rotations I stop to check the progress. I can tell that I’m staying true to the plane of the rim because the paper is making contact only with the high briar and low dip remains out of reach of the sanding in the initial stages.
 The process continues slowly with a few rotations and checking to see the progress shown in the following pictures.

 I come to the point where the removal of more briar has diminishing returns. The dip has been removed through the topping and the chamber is close to a good round. The remaining dark area on the back right of the rim should be removed with the introduction of a bevel.
 To smooth the 240 sanding on the topping board, the paper is changed to a 600 grade paper and the stummel is rotated a few more times. The finer sanding reveals the residual damage to the back of the rim. There is a small fault briar running laterally in the rim.
  There is also a chip on the inner rim edge that is too deep for the topping to remove without taking off too much briar.
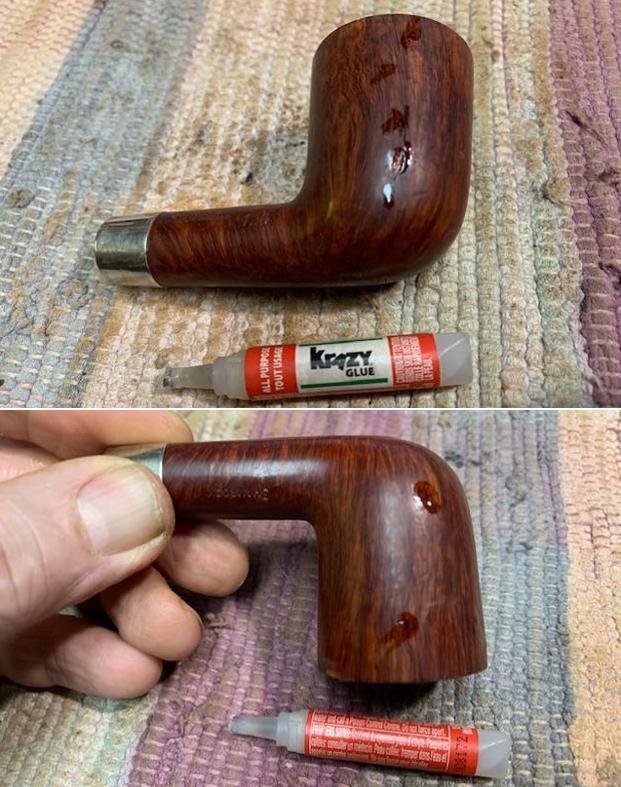
 Next, 240 paper is used to sand a bevel on the inner rim edge. The bevel helps to remove the charred briar on the edge as well as defining more crisply the chip on the inner lip which helps in the patching process.
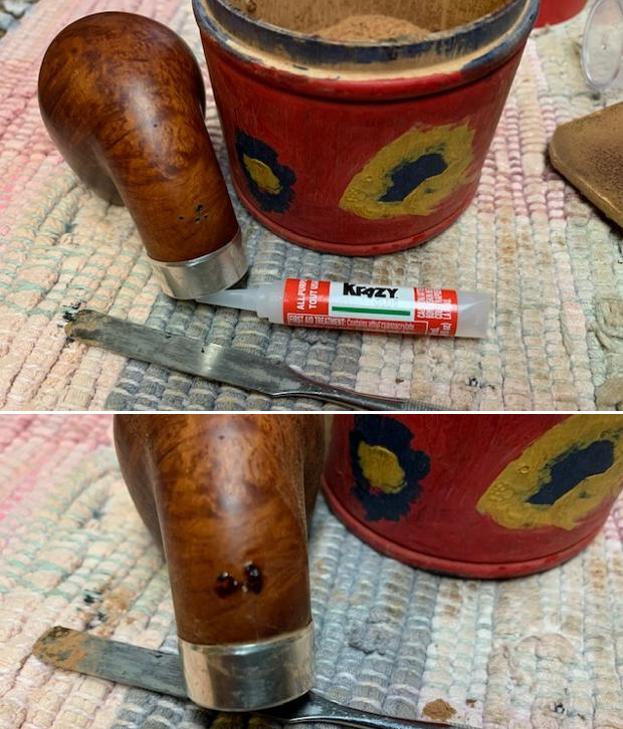
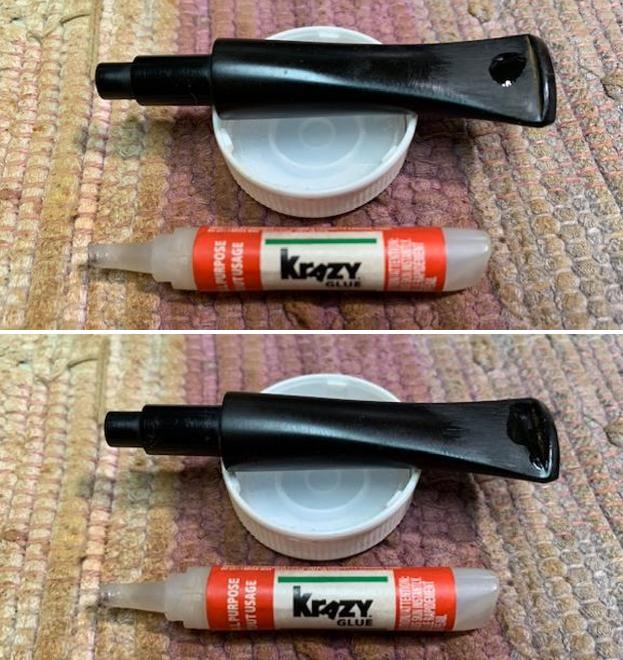
 To address this chip, I apply briar dust putty. Using a small amount of briar dust, it is mixed with regular CA glue on a piece of paper I have topped with scotch tape, so the glue is not absorbed. I add a small amount of CA next to the briar dust and mix the briar dust in until it gets to the consistency of molasses.
  I then use the toothpick to trowel a small amount of putty onto the chip to fill it. A small amount is applied on the rim top to fill the small crevasse running on the rim.
 I put the stummel aside for a few hours to have dinner – my wife just called – and to allow the patches to cure.
 After dinner and a few episodes on TV of our favorite, I return to the worktable and the rim patches are cured. Using a half circle needle file, the patches are filed down flush with the briar – using the curve in the file to round the chamber side of the chip patch.
  Following the filing, 240 paper followed by 600 paper smooths and blends the chip patch as well as the rim top patch. It looks good.
 With the day ending, the internal cleaning is continued with a kosher salt and alcohol soak. I use kosher salt because it doesn’t leave an aftertaste as does the regular iodized salt. Using a cotton ball, after stretching and twisting it to form a wick, it is then guided down the mortise to the draft hole with the help of a stiff wire. The cotton wick helps to draw out the tars and oils from the internal briar.
 After the bowl is filled with salt, the stummel is placed in the egg crate to keep it stable and at the right angle – top of the bowl and the end of the shank are close to level.
  Isopropyl 99% is then placed in the bowl with a large eye dropper until it surfaces over the salt. After about 10 minutes, the alcohol is topped off after it is absorbed into the salt and cotton wick. I put the stummel aside and turn out the lights.
 The next morning the soiling of the cotton wick and salt are indications that the soak process was at work. After removing the expended salt and tossing it in the waste, the bowl is wiped with a paper towel and I blow through the mortise to make sure all the salt crystals are removed.
 To make sure that the internals are clean, and no residue is left behind, a pipe cleaner and 2 cotton buds dipped in isopropyl 99% are good indicators that all is clean and fresh for the new steward. I move on.
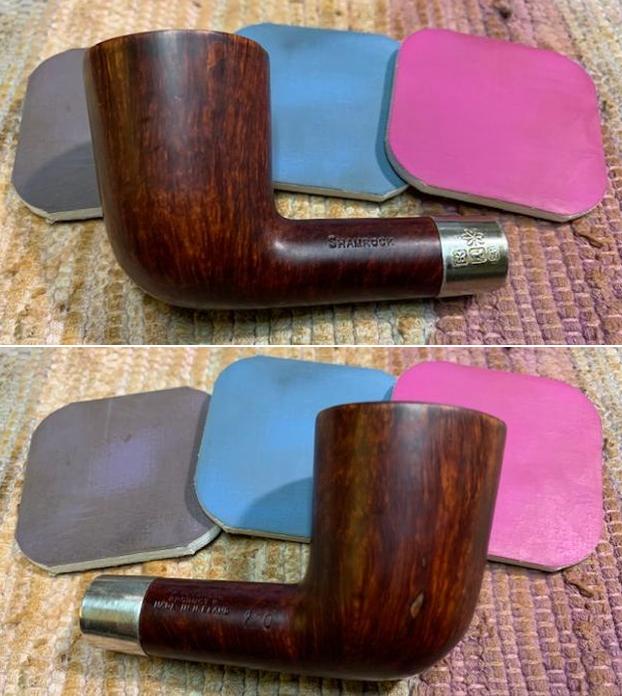
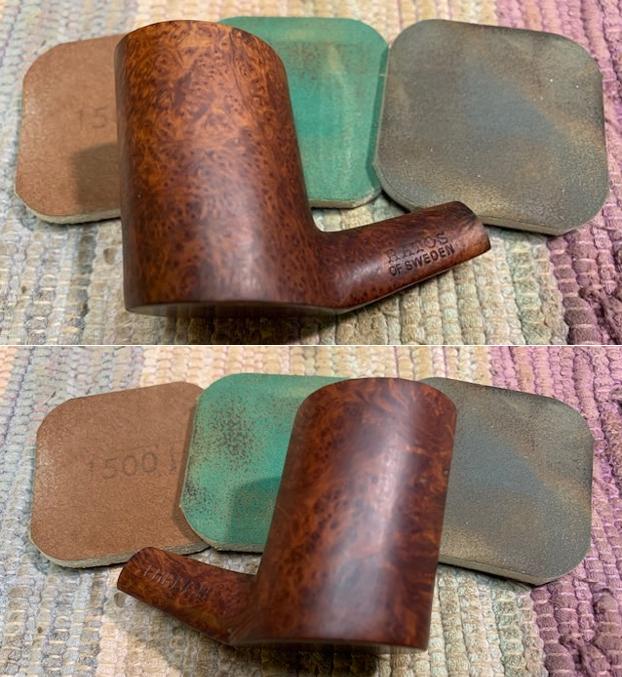
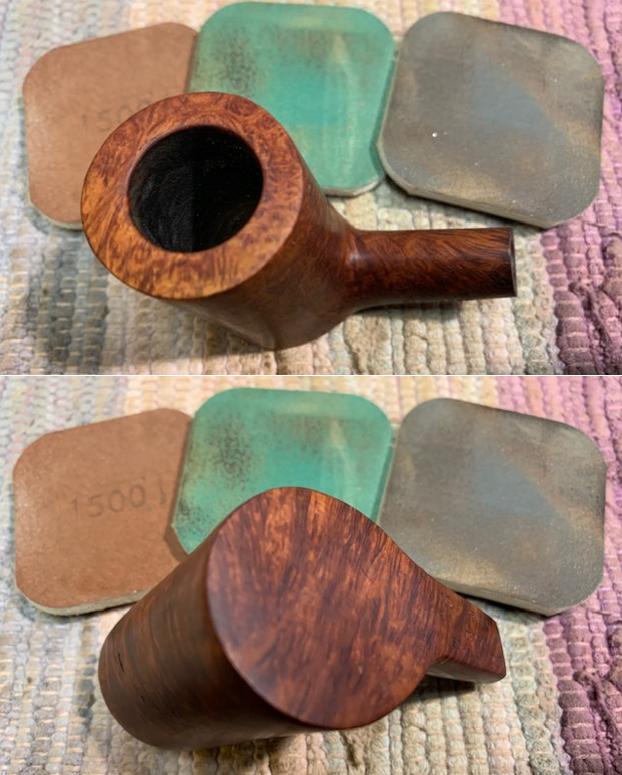
 Looking now to the stummel briar surface, I will use sanding sponges to clean the myriad of nicks and stains. To guard the very thin stampings, especially on the COM side, both shank stampings are covered with painter’s tape.
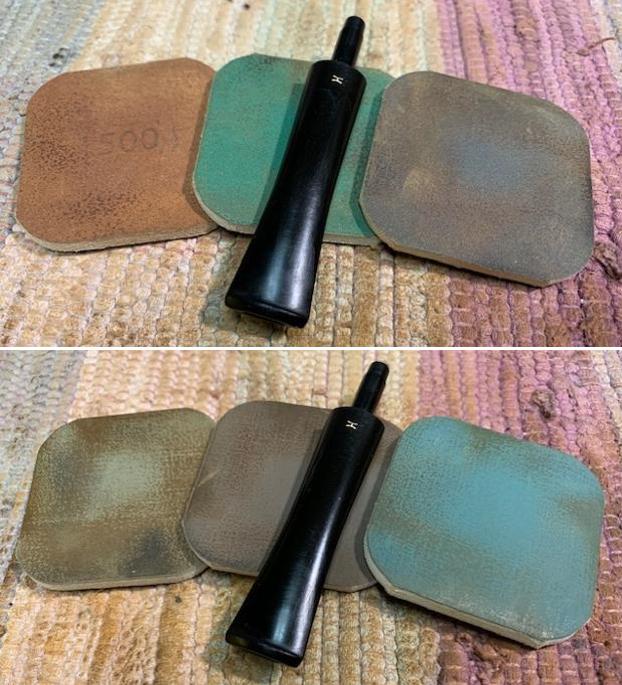
  I then use 4 sanding sponges starting with a coarser grade moving to a medium and then finer sponges. The results are good. The grain begins to emerge through the sanding process and the surface is clearing of the nicks and dents.
 After the sanding sponges, I take another close look at the various small fills that are on the briar surface to make sure they are still looking good. They are solid and I move on to using micromesh pads to continue the sanding process. Starting with pads 1500 to 2400, the stummel is wet sanded. Following this is dry sanding with pads 3200 to 4000 and 6000 to 12000. After using 5 pads in the process, the tape over the nomenclature is removed to help blend the resulting spot. At this stage of sanding, I’m not concerned that it will cause additional deterioration to the nomenclature. The grain is coming through very nicely.
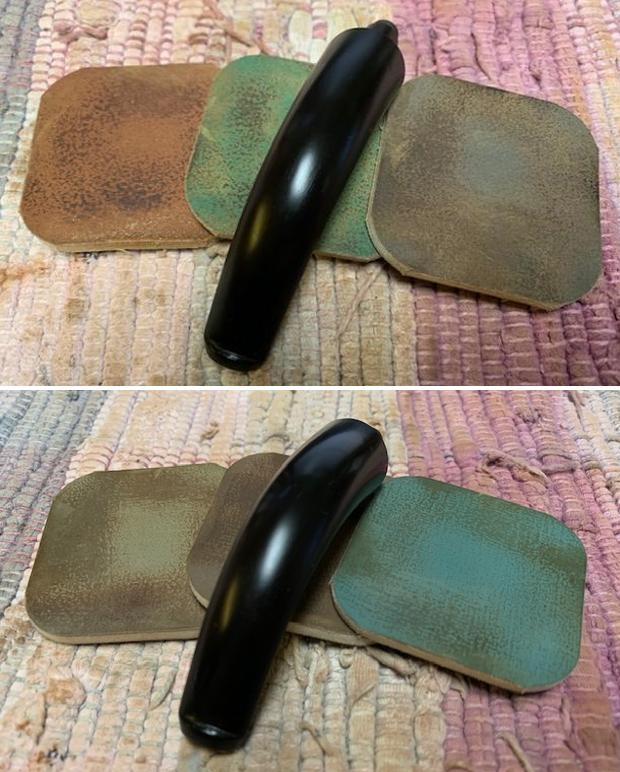
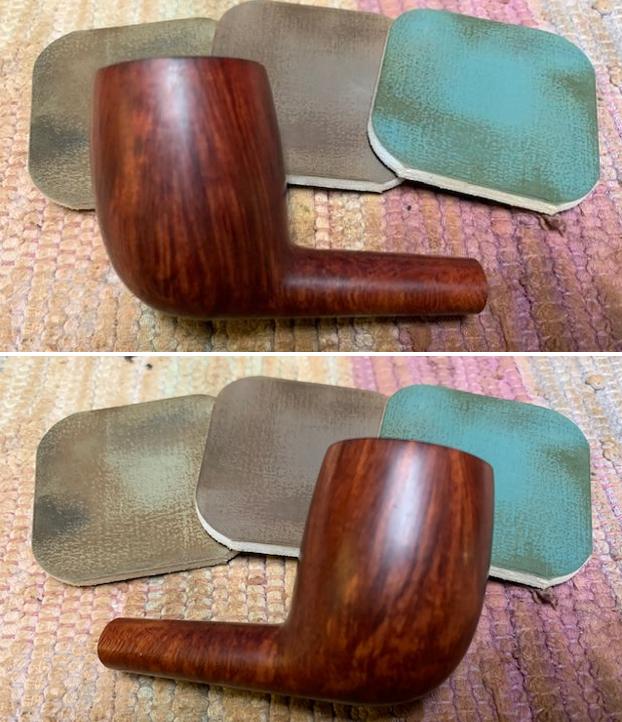
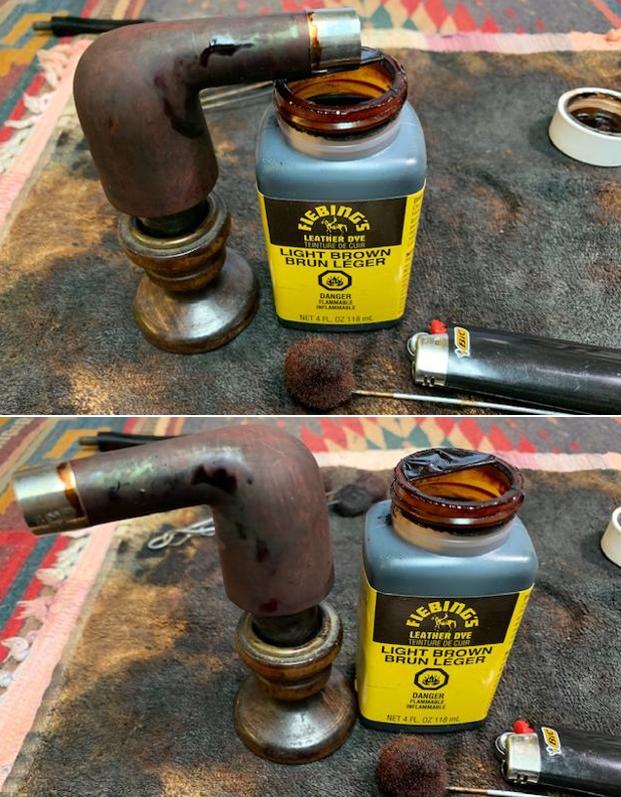
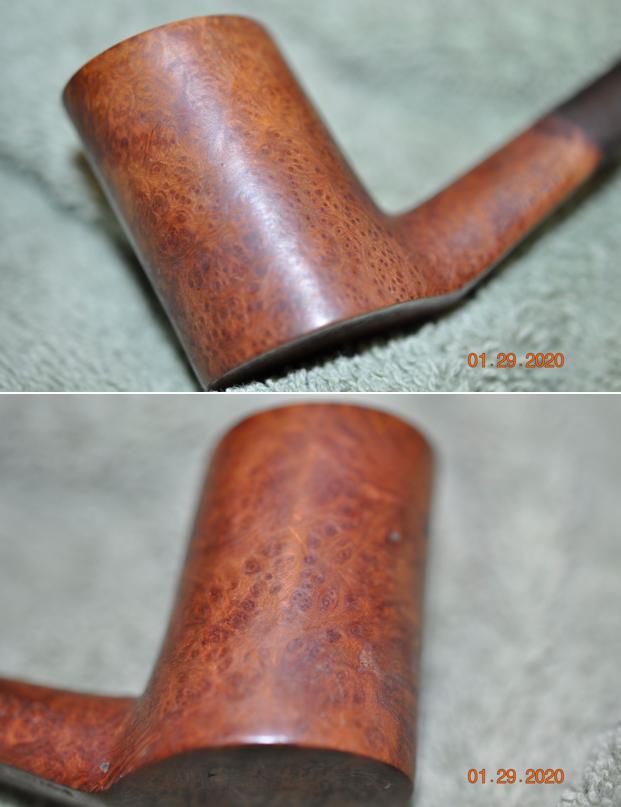
 The next step in the process of the restoration of this Comoy’s St. Regis is to apply a dye to the stummel. With all the fills and rim repair and with the shank spots left from the taping over the nomenclature, the decision to darken the stummel was not difficult. I will use Fiebing’s Mahogany Leather Dye to do the job. I decide to try Mahogany which has a slight lighter and more reddish tone than my usual approach in using Dark Brown. I picked up the Mahogany to add to the dyes I have on hand and would like to see how it behaves. After assembling the components needed to stain the stummel, the stummel is heated using a hot air gun. This expands the briar grain and encourages the grain to be more receptive to the hue of the dye.
 With the stummel heated, the dye is applied in patches with a folded pipe cleaner. A cork makes a good handle. The aniline dye is then ‘flamed’ with a lit candle which immediately combusts the alcohol in the dye. This combustion then sets the dye pigment into the grain. After methodically painting and flaming the entire stummel, the stummel is put aside for several hours allowing the new dye to settle in.
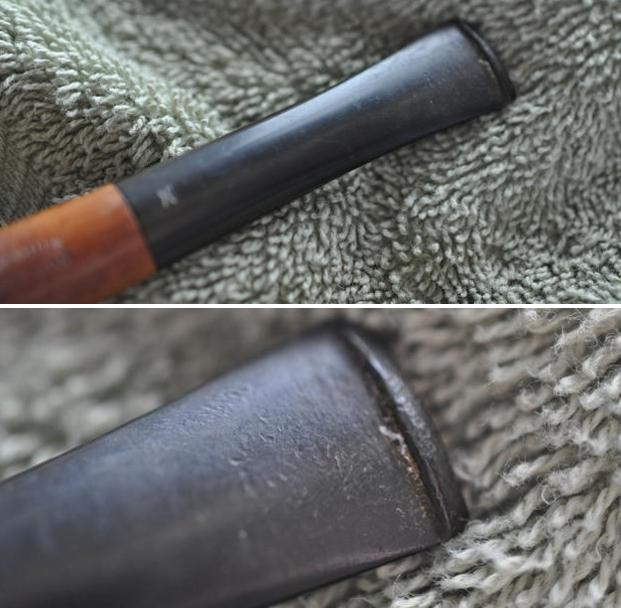
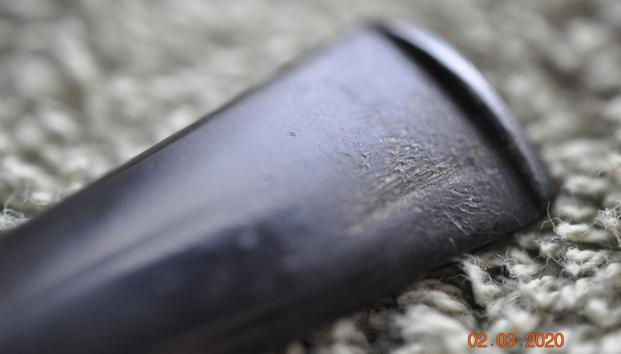
 With the stummel on the side resting, I turn now to the stem and take a close look. The Briarville Oxidation Remover seems to have done a good job with no oxidation that I can see now. The upper and lower bits have bite compressions and the vulcanite over the stem is rough. The vestiges of the circled ‘S’ stamp are remaining, and care is needed in protecting this.
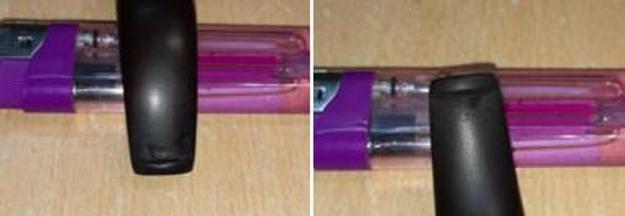
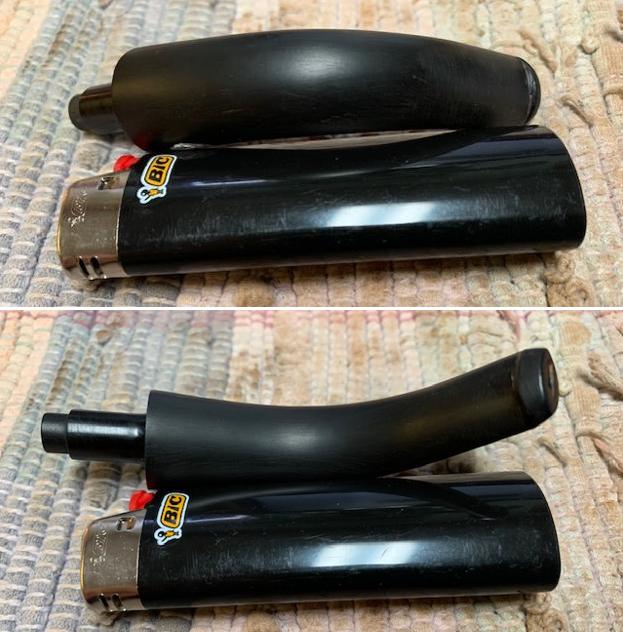
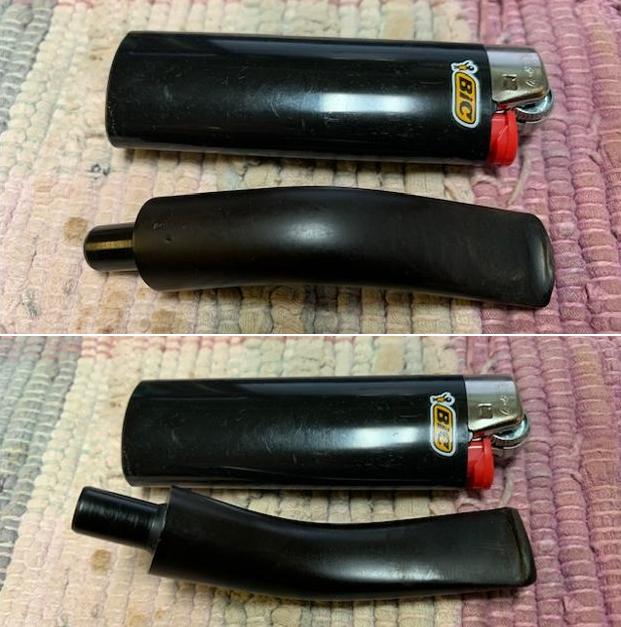
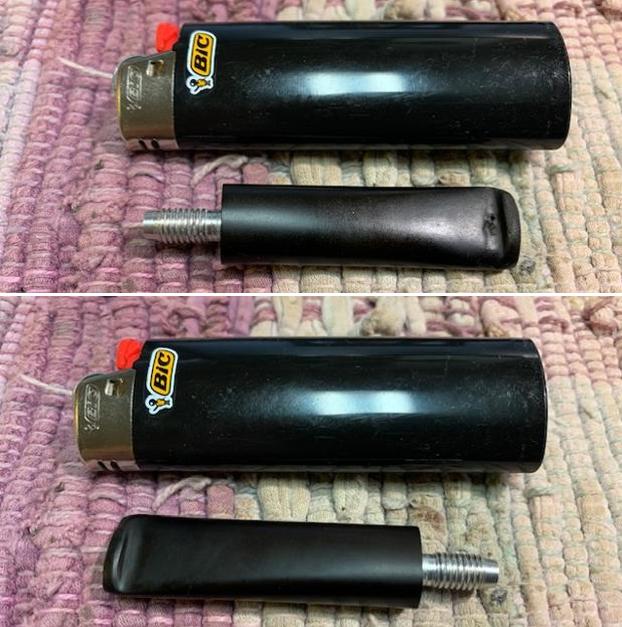
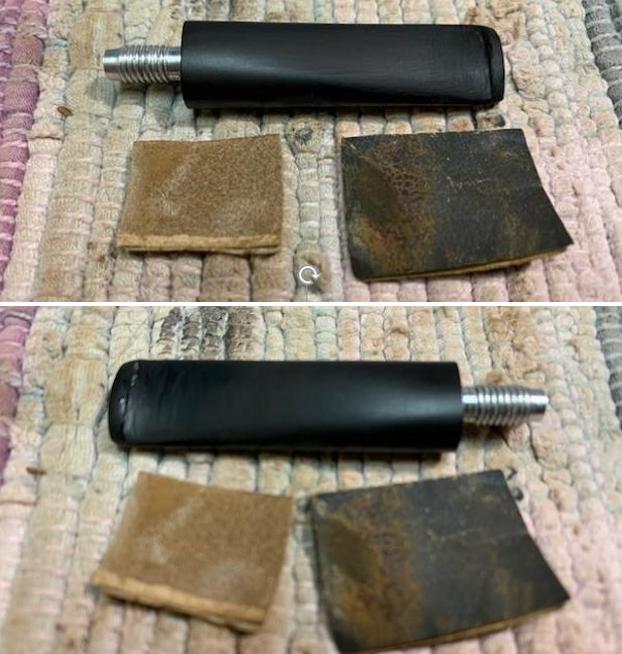
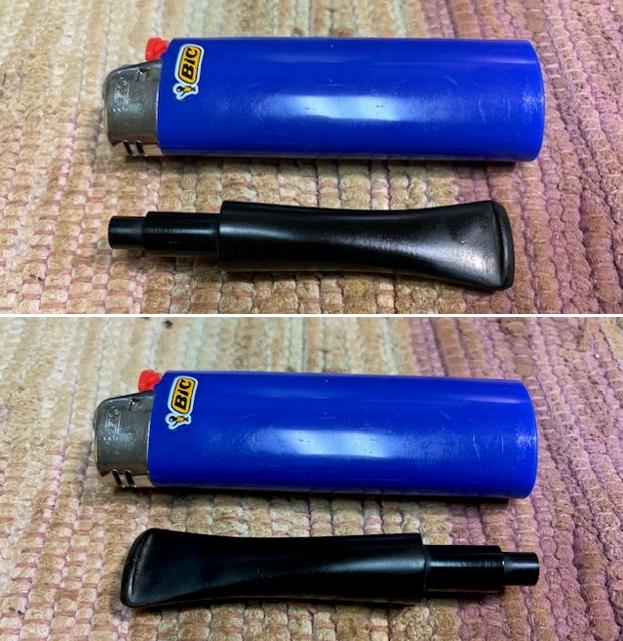
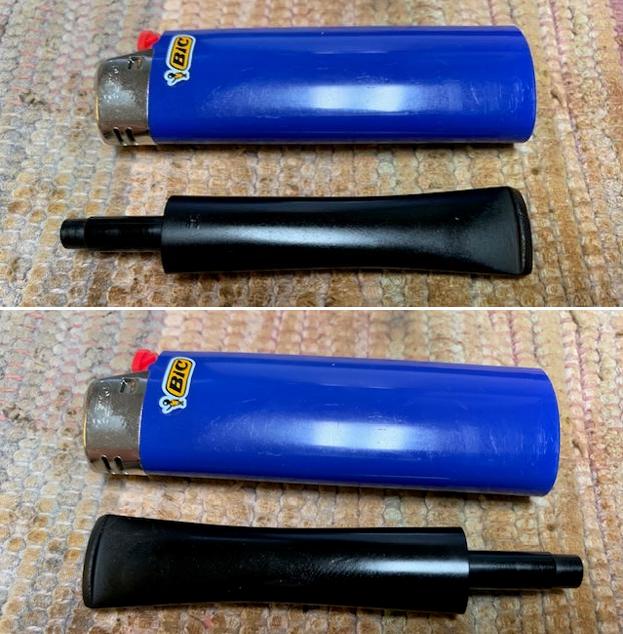
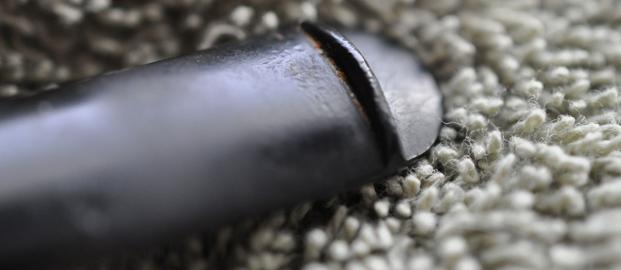
  The first step to repairing the stem is to use the heating method to expand the vulcanite allowing it to regain its original condition – or closer to it. A Bic lighter is used to paint the vulcanite surface with flame. The comparison pictures of before and after show the results. The bite marks on the upper and lower bit are remarkably similar. The heating did not erase the compressions, but I believe that sanding alone will do the job – without having to patch the indentations with CA glue.
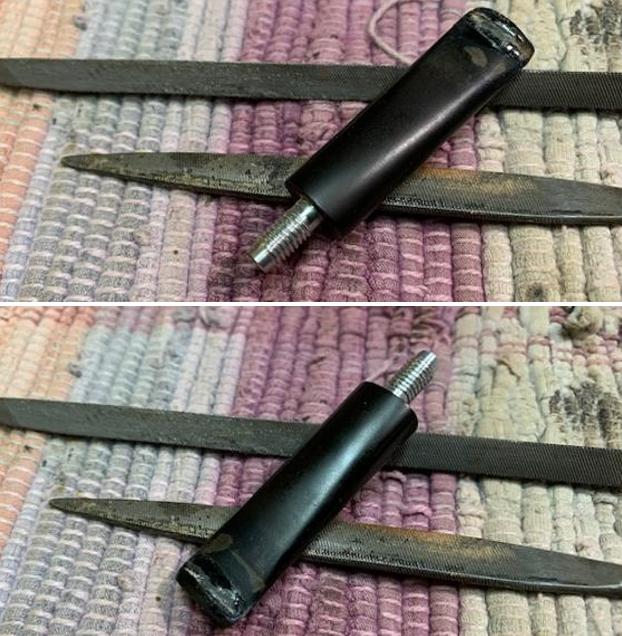
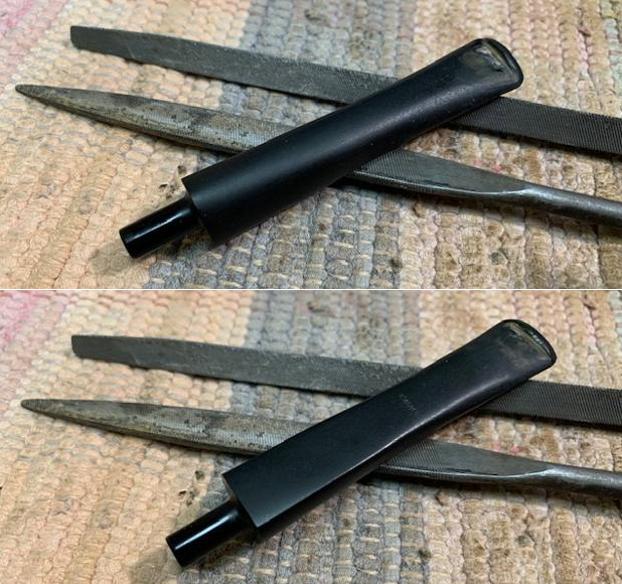
 A flat needle file is used first to redefine and refresh the button lips – upper and lower.
 Next, 240 grade paper sands out the remaining compressions in the upper and lower bit.
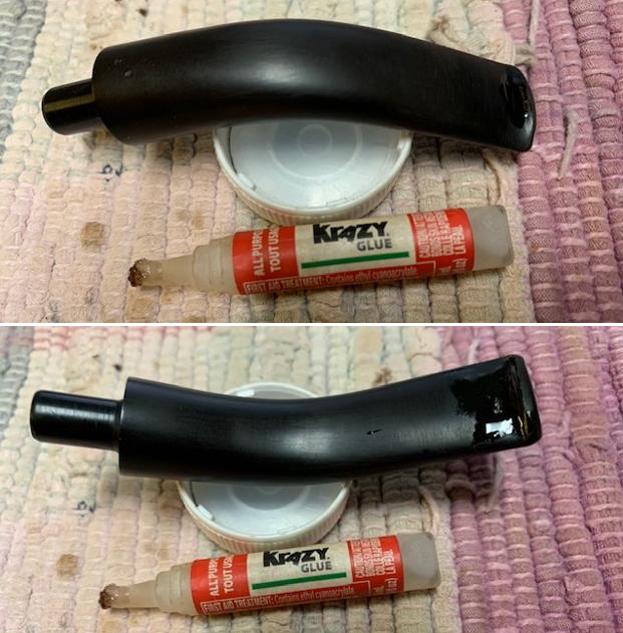
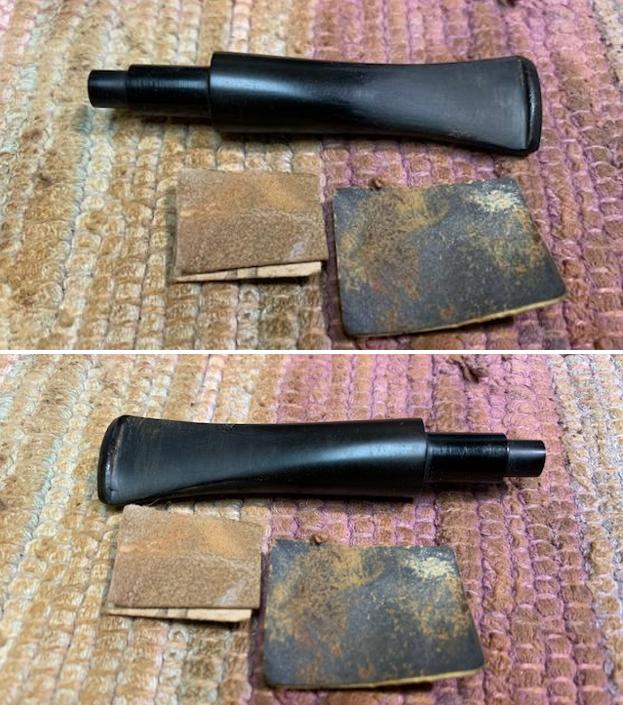
 To smooth the vulcanite, the sanding is expanded to include the entire stem. I sand around the logo stamping and use a plastic disk to guard from shouldering the stem facing.
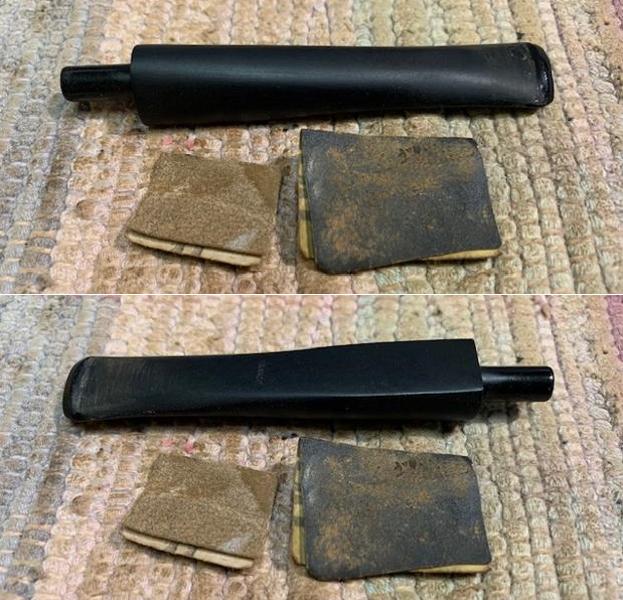
 Next, the sanding transitions to wet sanding with 600 grade paper and then applying 0000 grade steel wool.
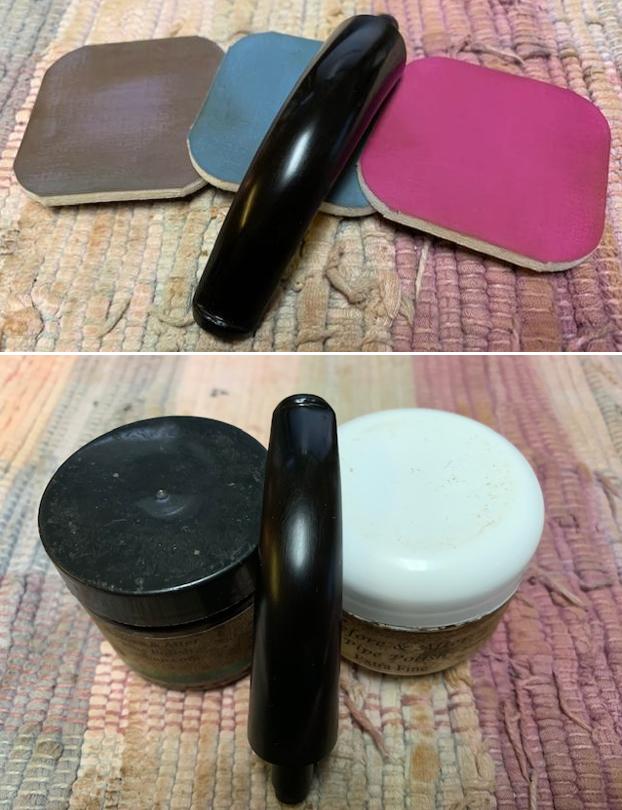
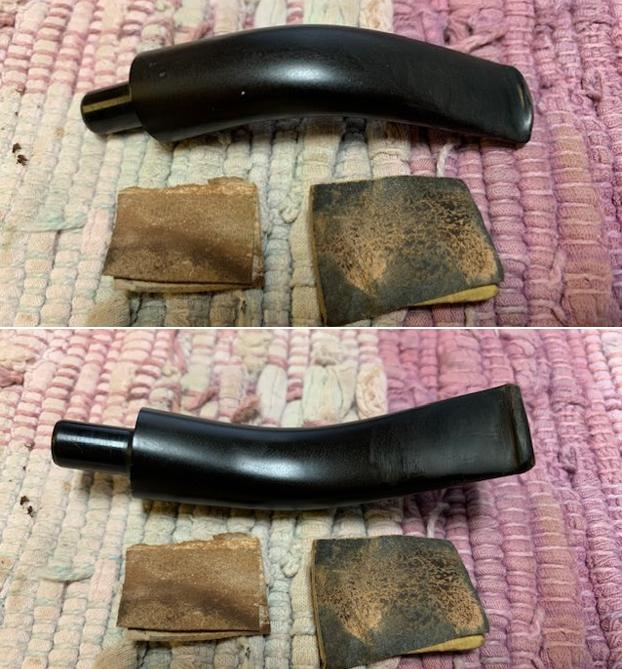
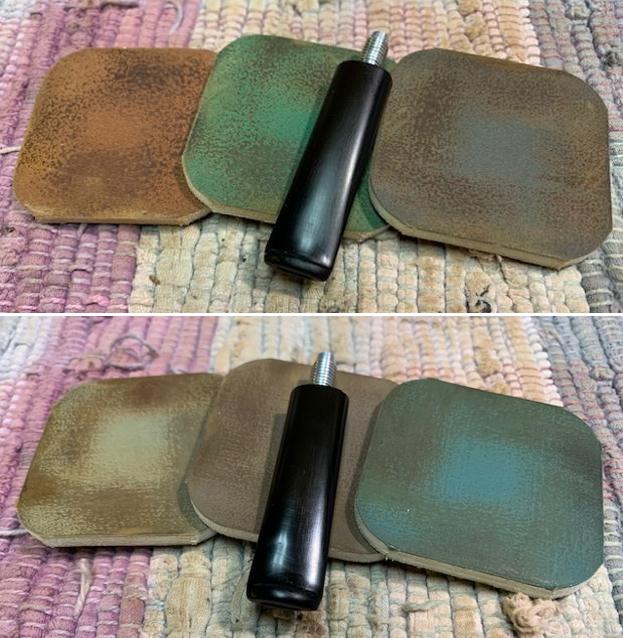
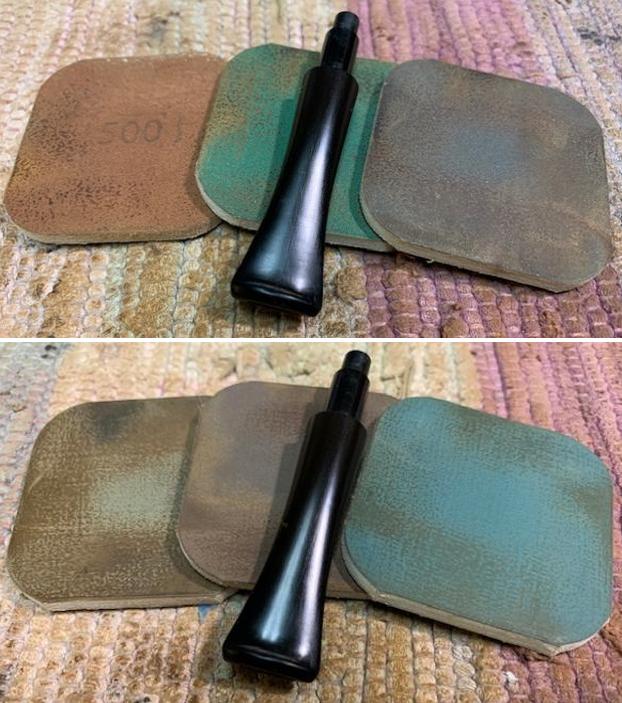
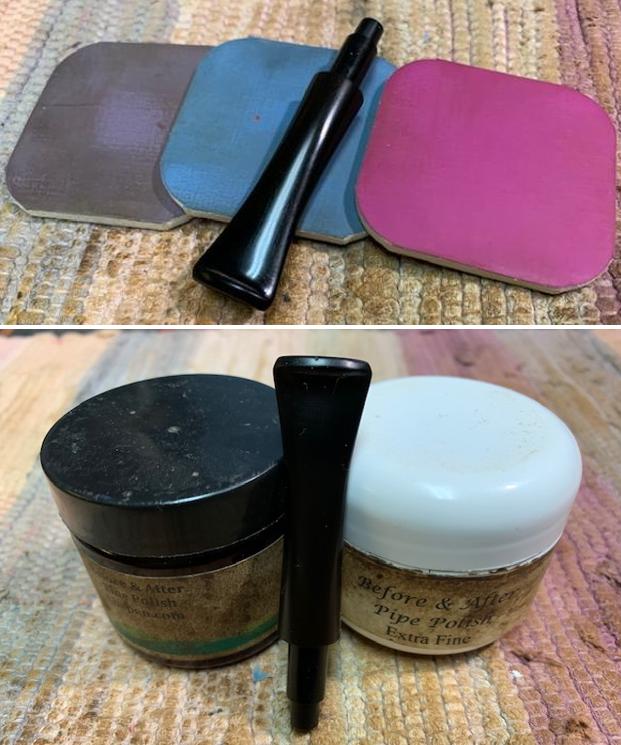
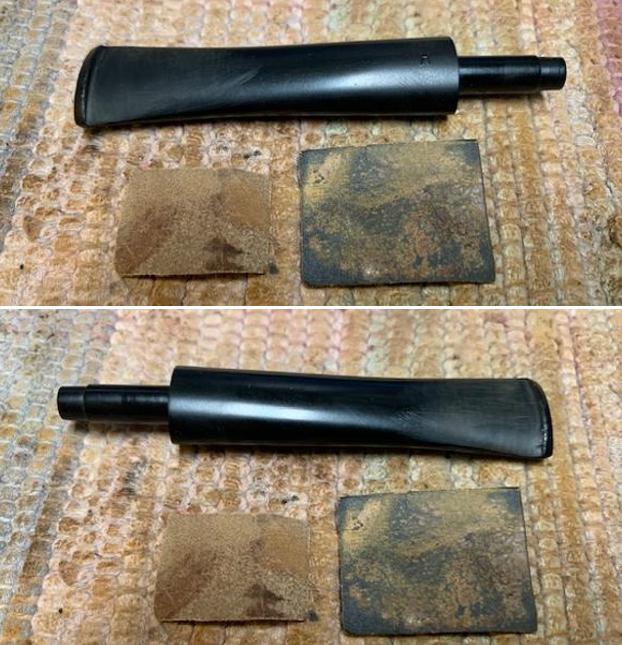
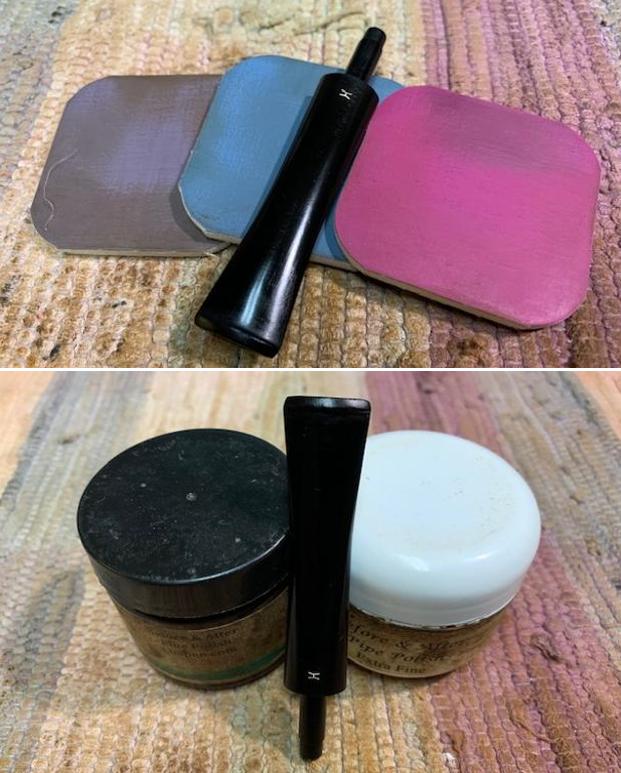
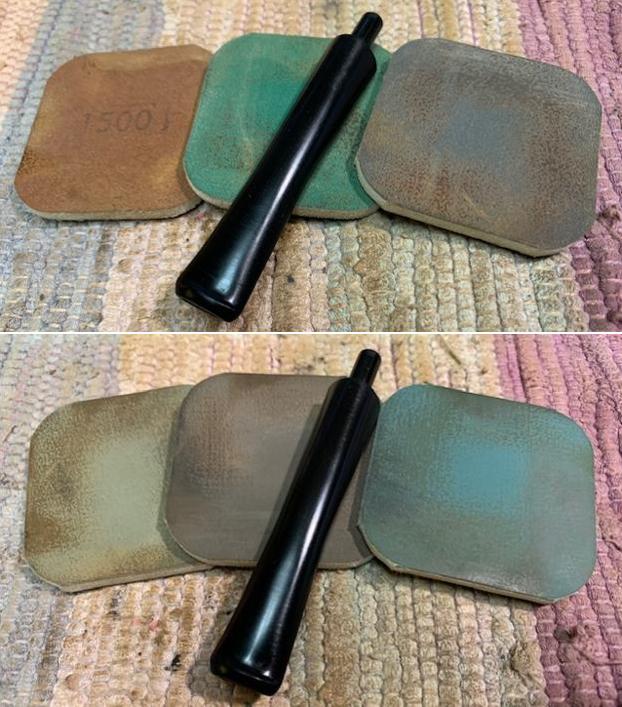
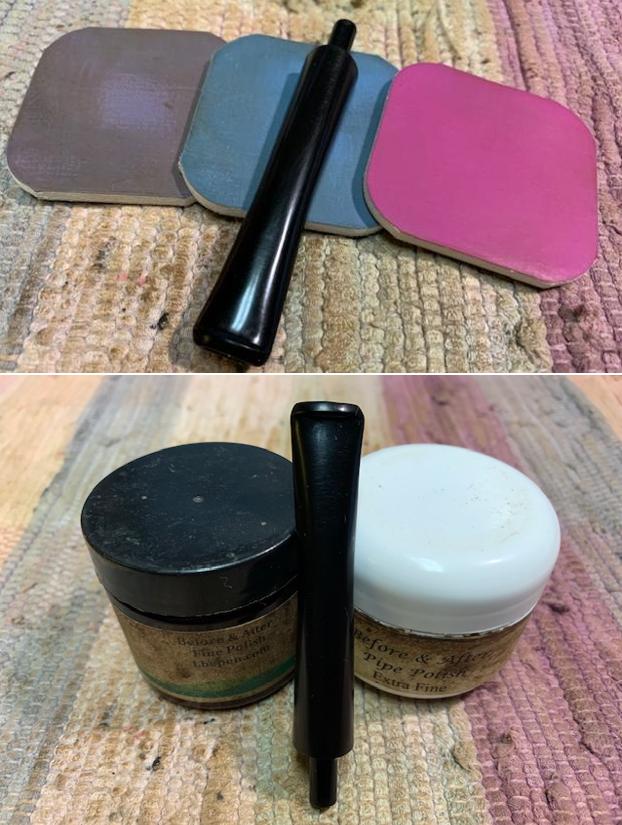
 Next, the full application of micromesh pads is utilized starting with wet sanding with pads 1500 to 2400. Following this, with pads 3200 to 4000 and 6000 to 12000, the stem is dry sanded. Between each set of 3 pads, Obsidian Oil is applied to the stem to condition it and to guard against future oxidation. I like the glassy pop resulting from the process.
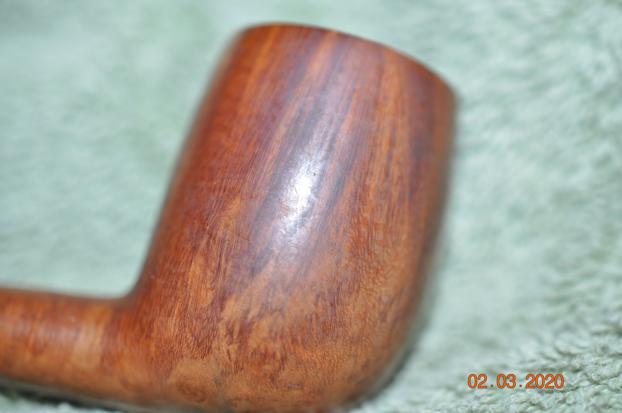
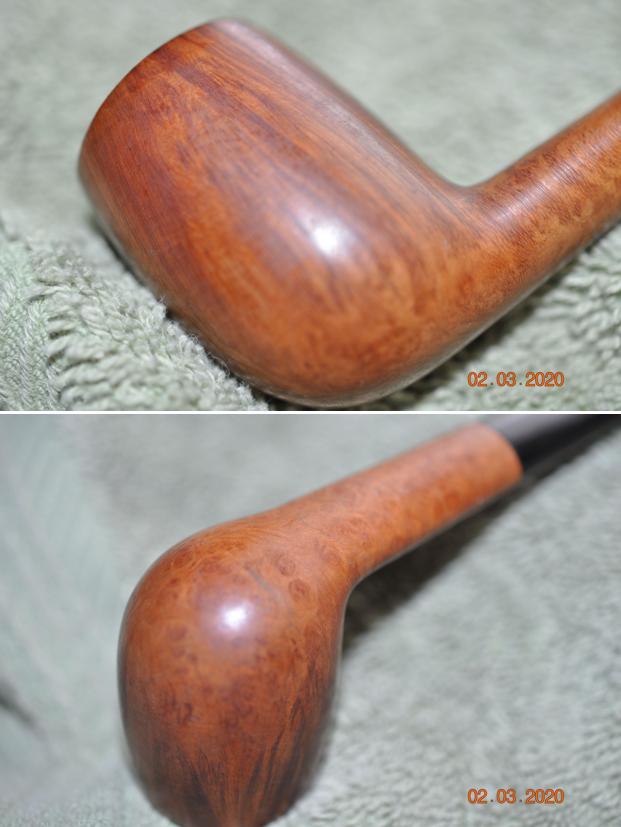
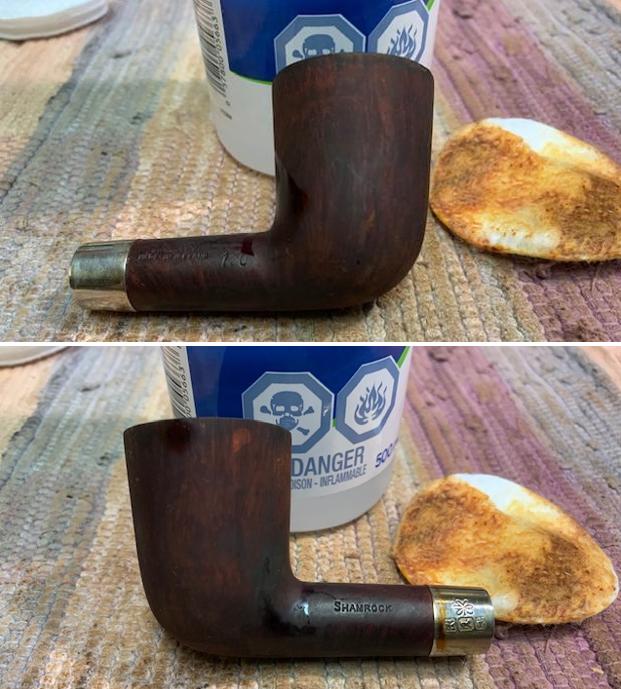
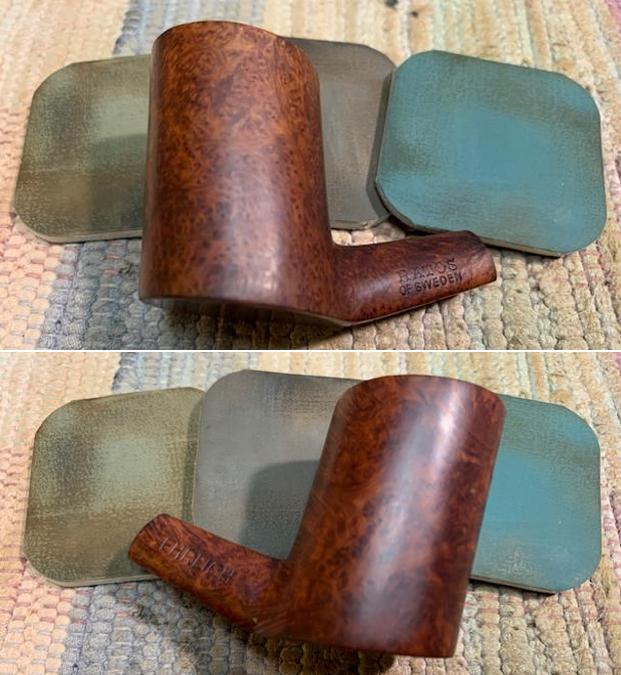
 With the stem now waiting in the wings, I turn back to the stummel which has been resting for several hours after the application of Fiebing’s Mahogany Leather Dye. This is the first time I have used Mahogany and I’m curious to see how it will render grain definition after ‘unwrapping’ the flamed crust. Using Red Tripoli compound with a felt buffing wheel mounted to the rotary tool, the process of removing the crust of flamed dye is done with a slower speed – about 30% full power rather than my usual 40%. I do this to reduce the heat buildup happening with the more abrasive compound and felt wheel combined together ‘bulldoze’ the surface.
 I enjoy the unwrapping process to watch the newly dyed grain appear. I expected the Mahogany to have a slightly redder hue than straight dark brown and what I see looks good. A few pictures show the process. The veins of the grain have absorbed the dye giving a luminescent quality to the briar as the Mahogany-darkened grain contrasts with the lighter soft briar. As the felt buffing makes progress very slowly, it is purged often on a hard edge to clean it of the crusted dye collected and to soften it.
 Again, using Tripoli compound, a cotton cloth buffing wheel is mounted, and the speed is increased to about 50% full power and I give another round of buffing to remove more excess dye which sharpens the grain definition. The cotton wheel is also able to reach into the crook of the shank/bowl junction to remove excess dye crust better not as accessible as well with the less flexible felt wheel.
 Following the Tripoli compound the bowl is wiped with a cotton pad wetted with alcohol. This is done not so much to lighten the dye but to remove more excess and to blend the new dye.
  After rejoining the stem with the stummel, another cotton cloth wheel is mounted on the rotary maintaining 40% full power speed. Blue Diamond compound is then applied to the pipe to achieve an even more brilliant shine with the lesser abrasive compound.
 After the Blue Diamond is applied, the entire pipe is buffed with a felt cloth. This is done to remove the compound dust from the surfaces before application of the wax.
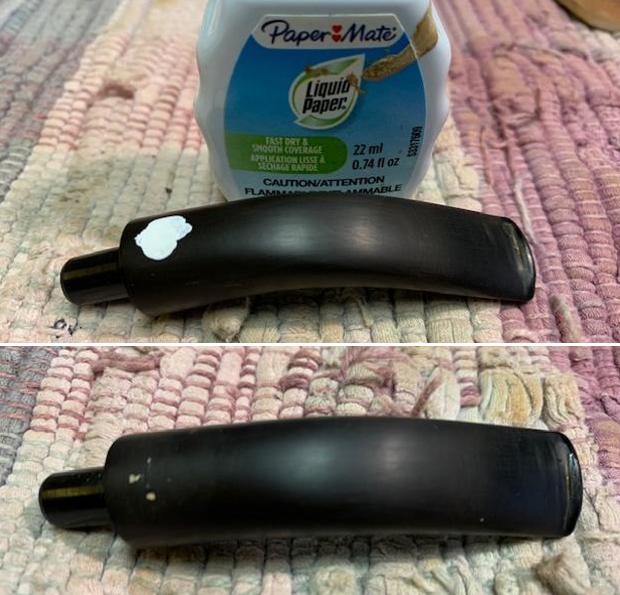
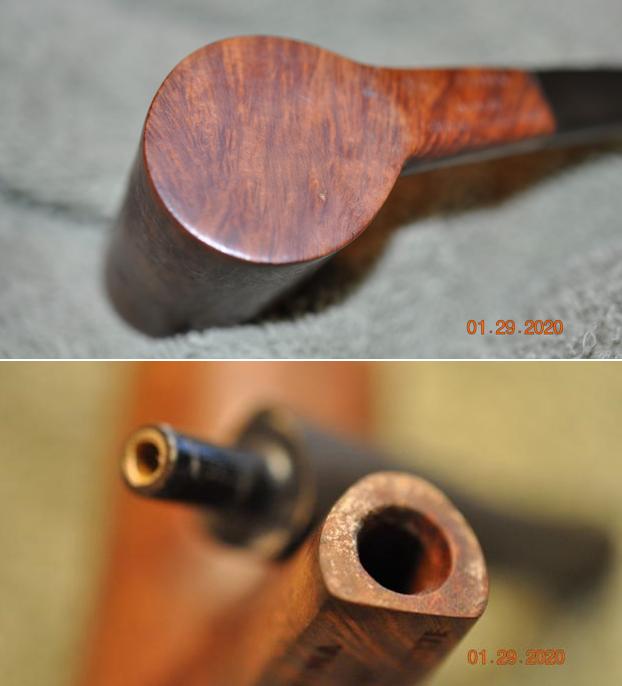
  Before applying the wax, the stem logo needs refreshing. By the looks of the logo, I can already tell that the left side of the logo has worn away too much and will most likely not hold the acrylic paint.
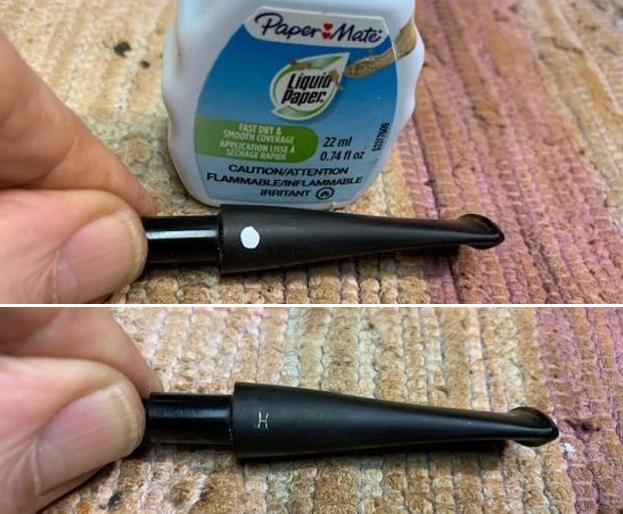
  Using white acrylic paint, a drop of paint is placed over the circled S.
 The paint is then daubed with a cotton pad to absorb the excess and dry the paint.
 The side of the pointed cotton bud is used to lightly scrape over the logo removing the excess surface paint from the stem surface. What is left is what I expected – a logo not fully intact but showing some of its former condition.
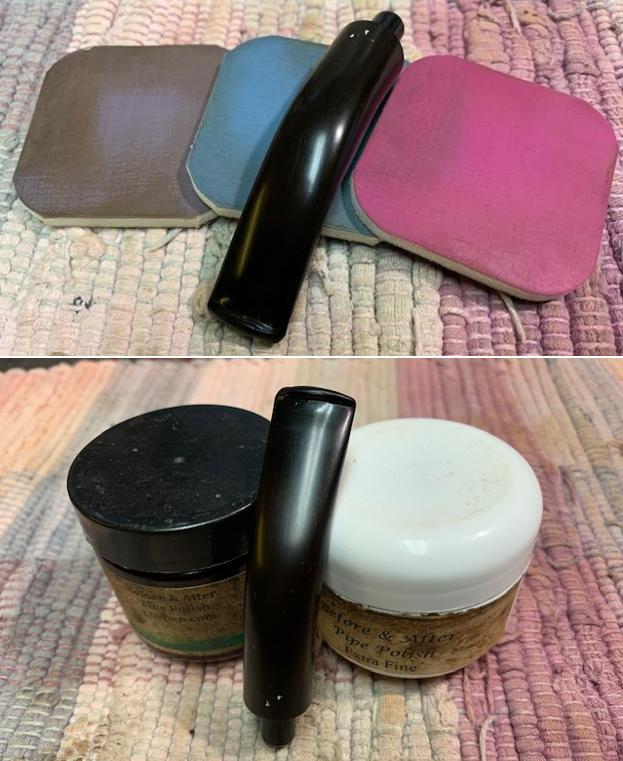
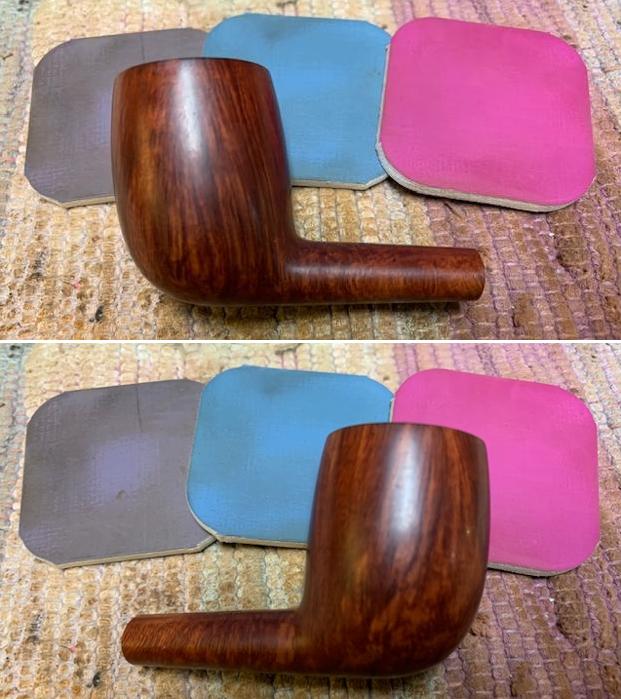
 The home stretch! Another cotton cloth buffing wheel is mounted on the rotary tool at 40% speed. Carnauba wax is applied to the pipe. After application of the wax, the pipe is given a hearty hand buffing with a microfiber cloth to raise the shine further and to disperse and excess waxy residue.
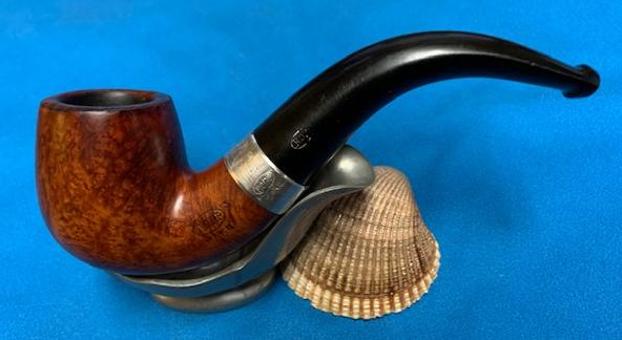
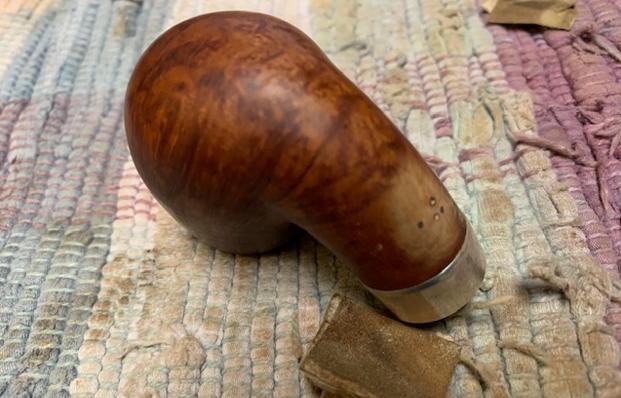
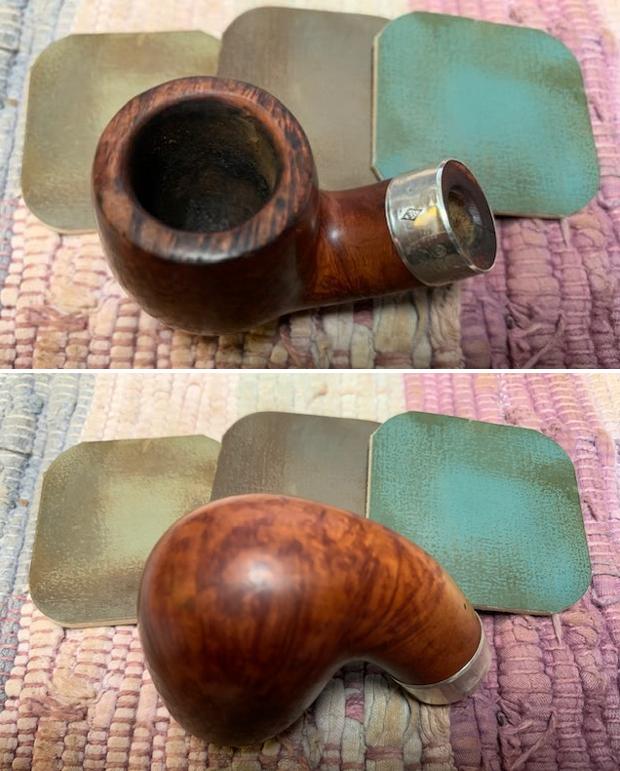
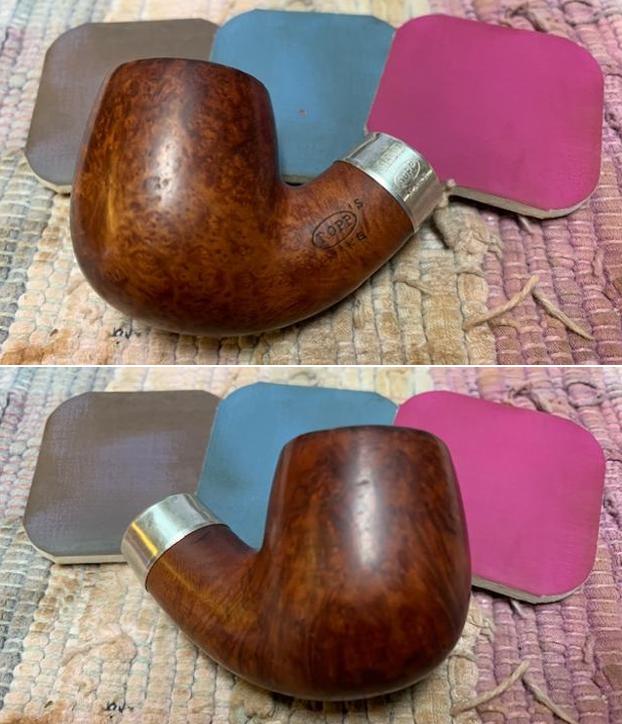
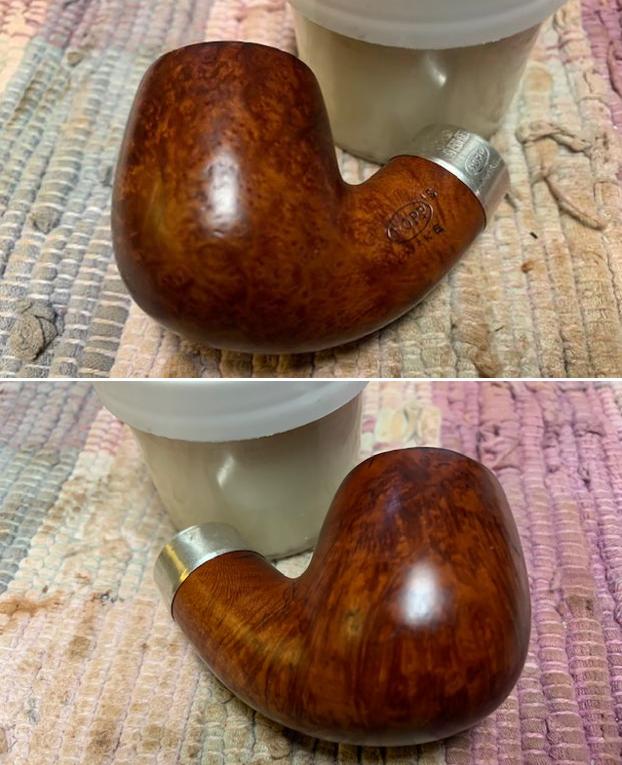
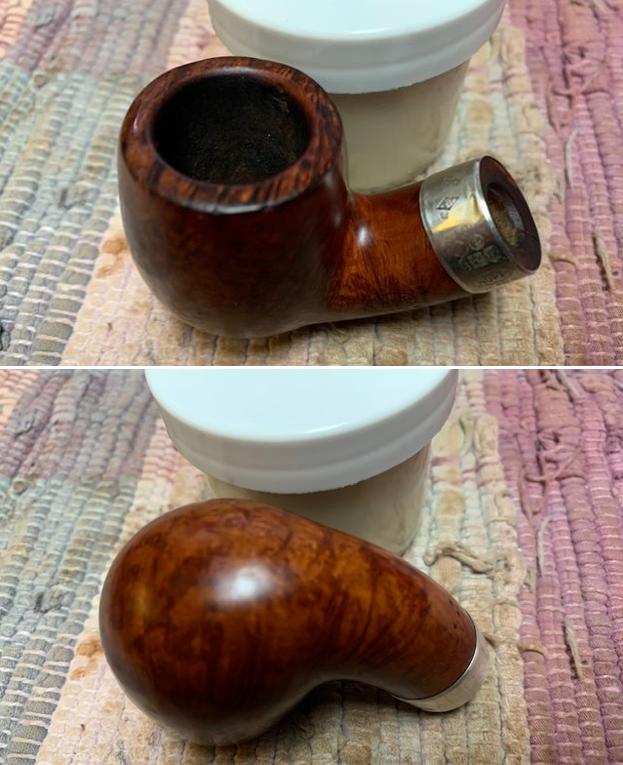
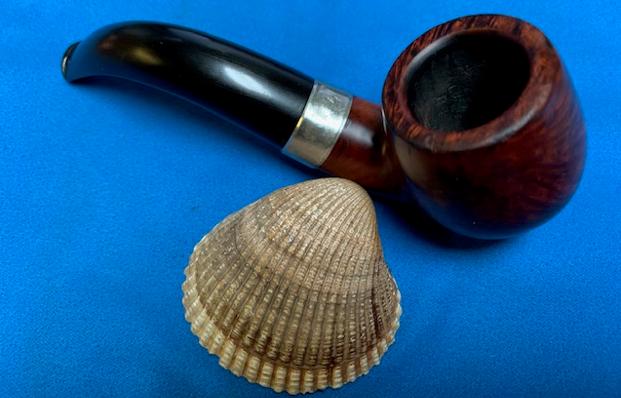
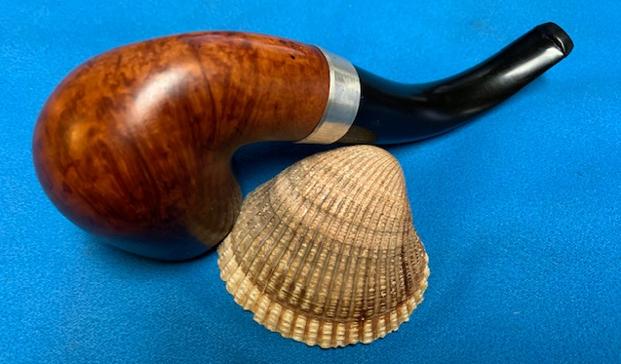
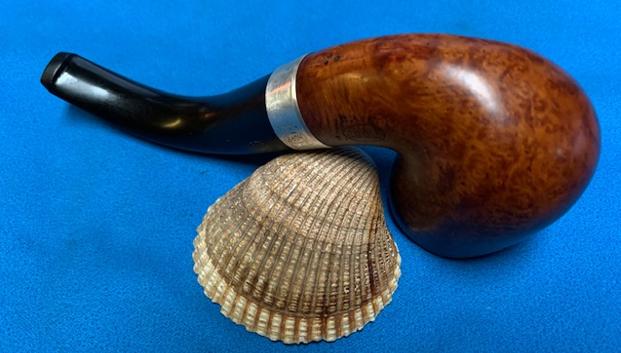
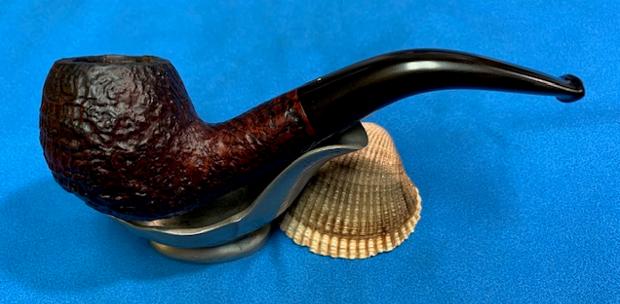
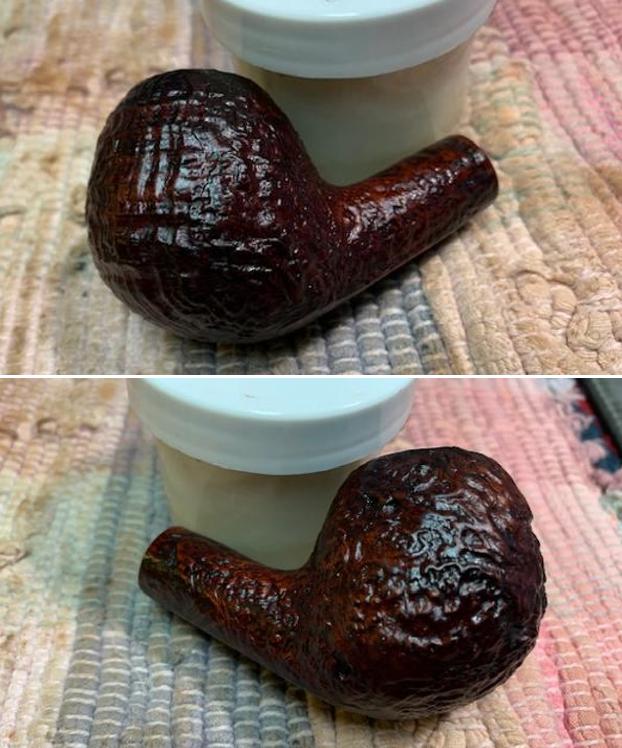
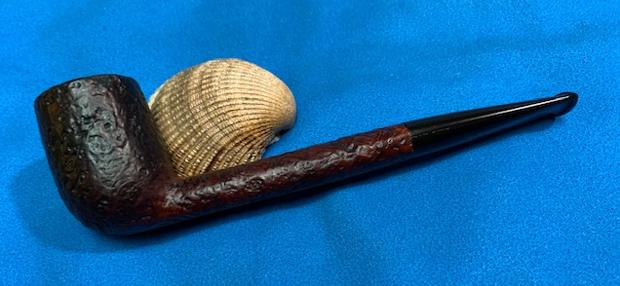
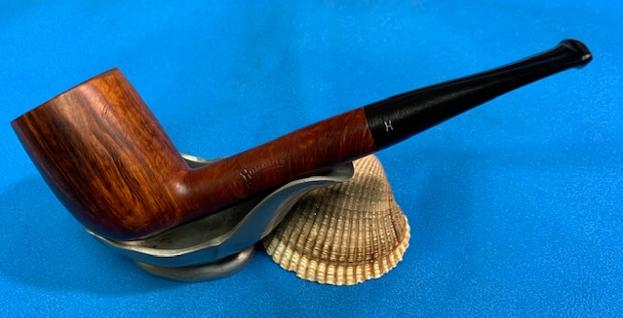
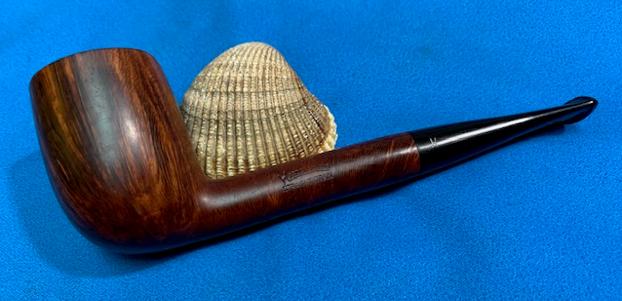
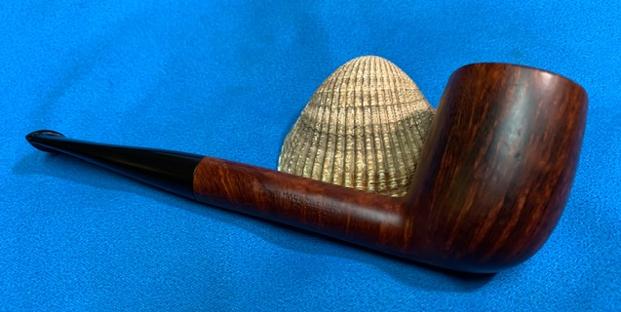
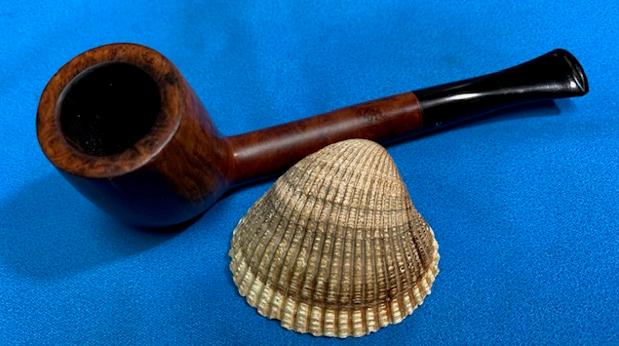
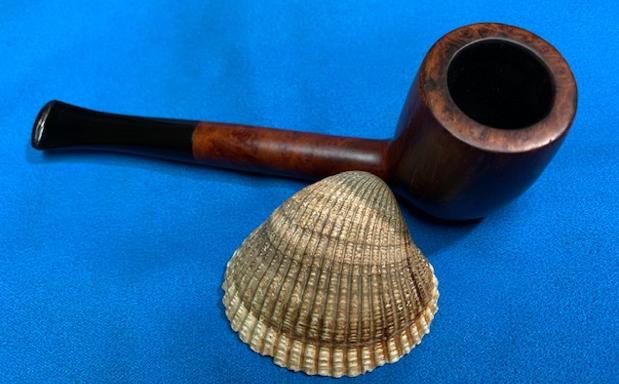
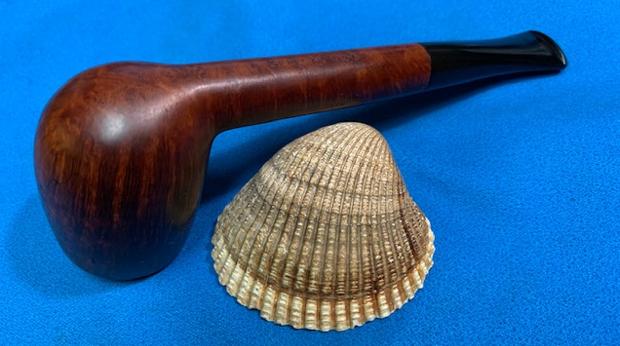
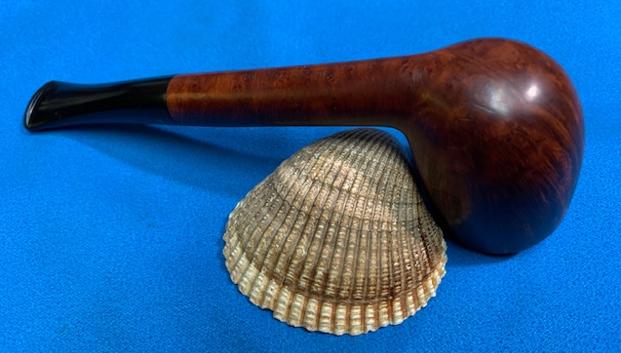
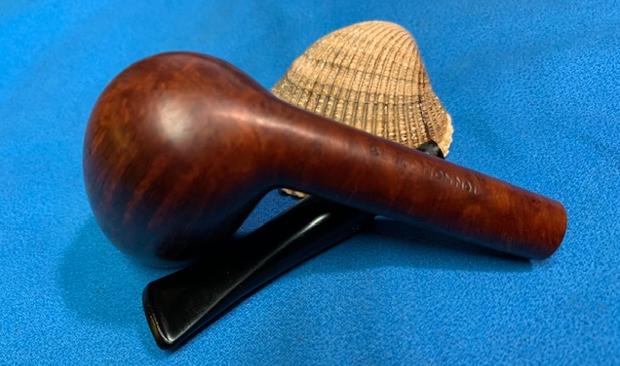
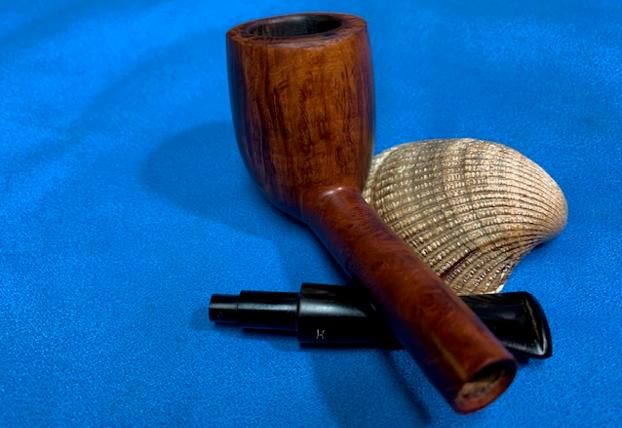
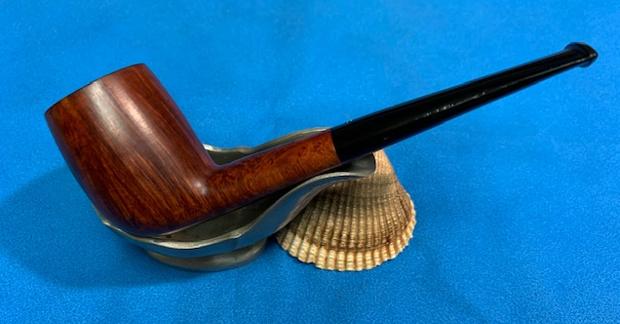
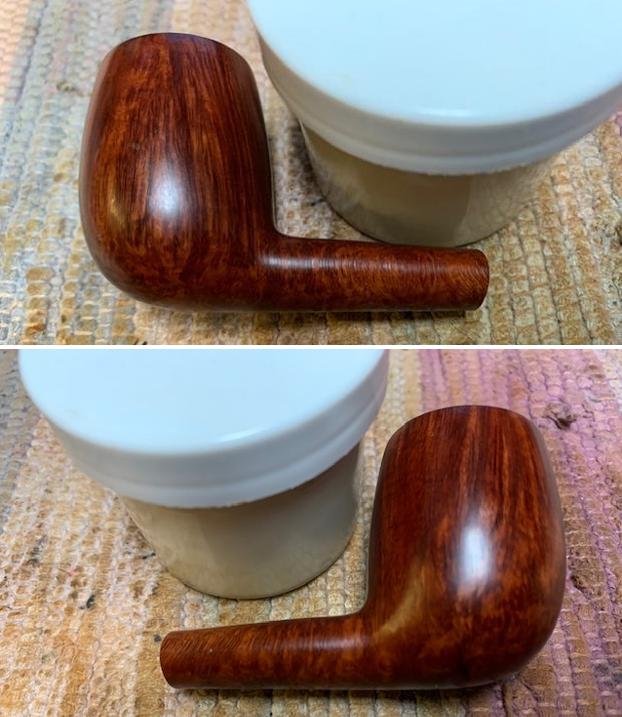
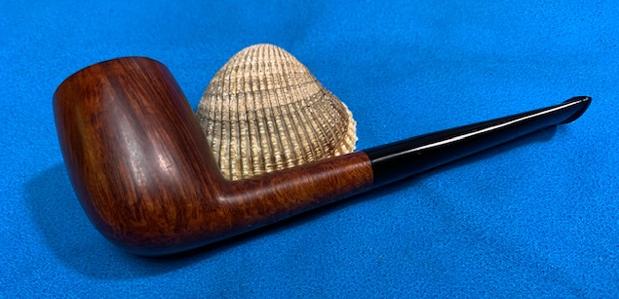
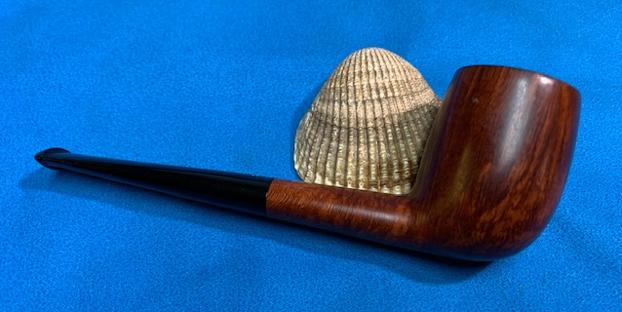
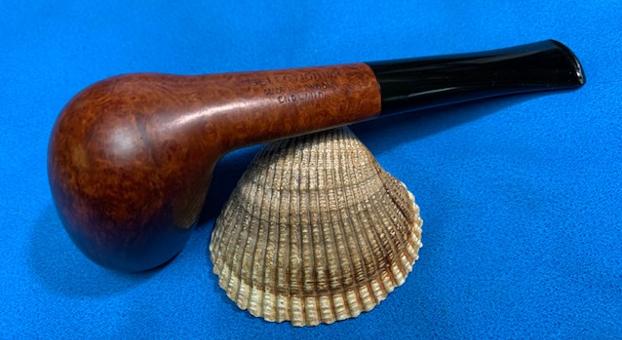
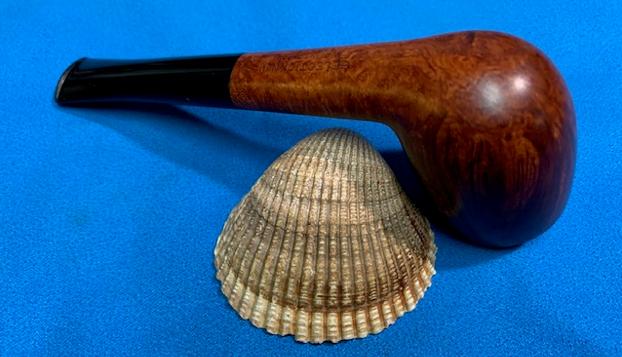
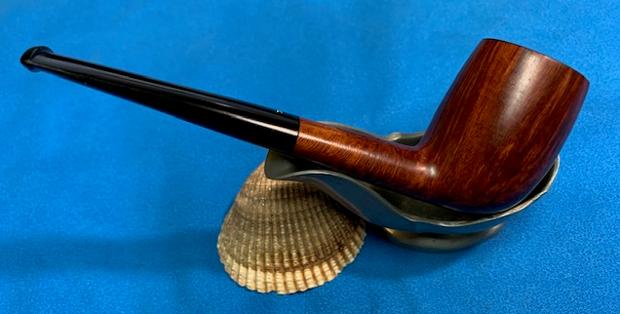
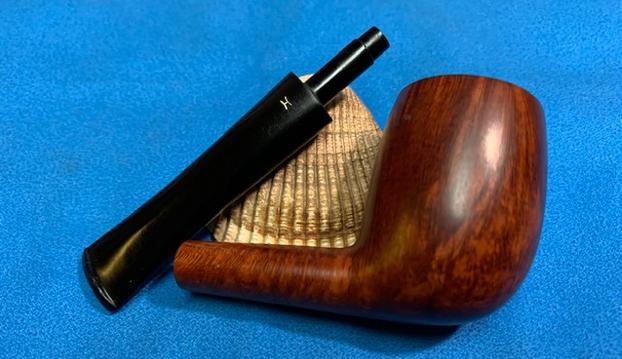
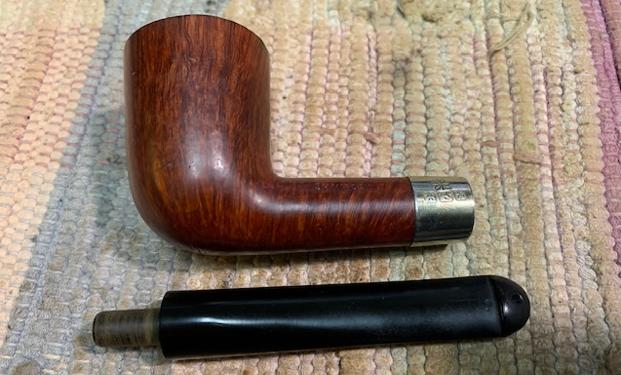
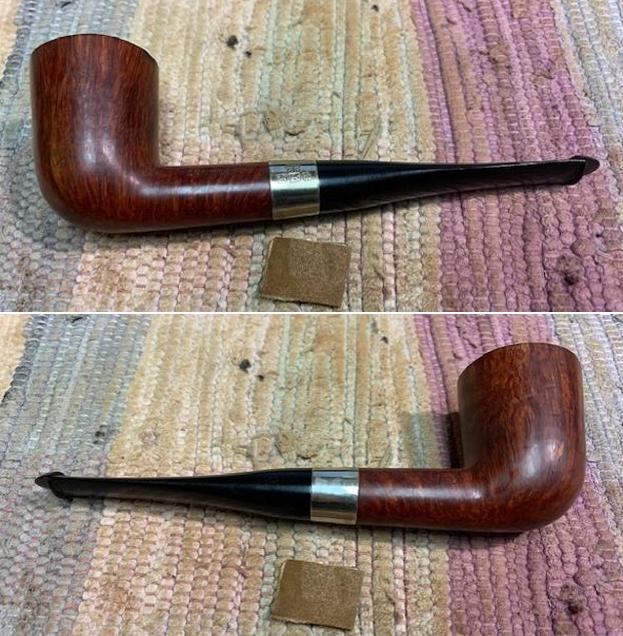
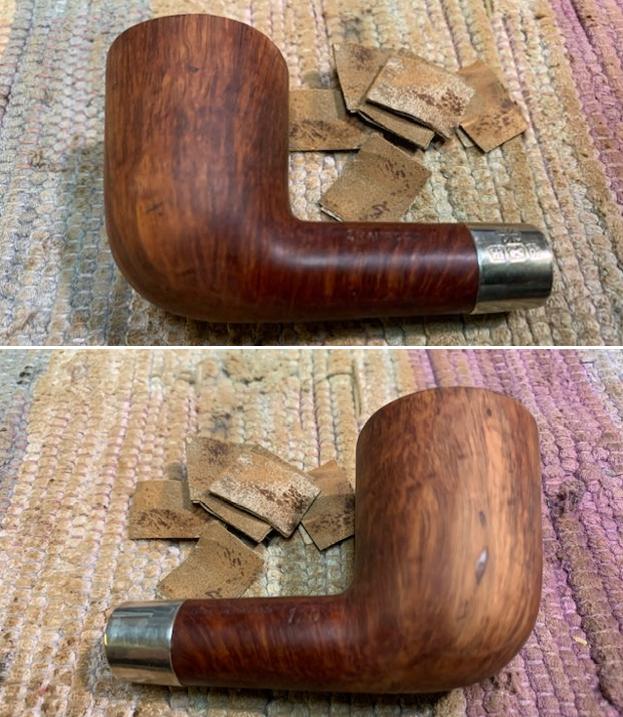
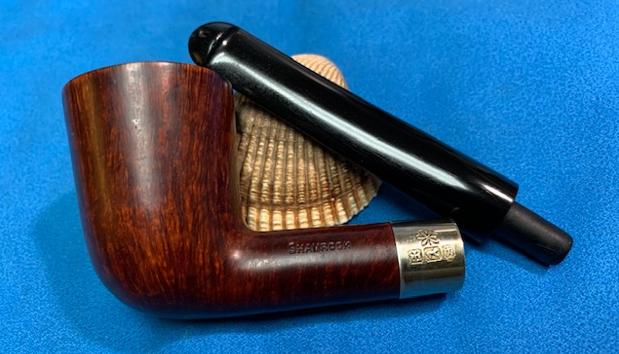
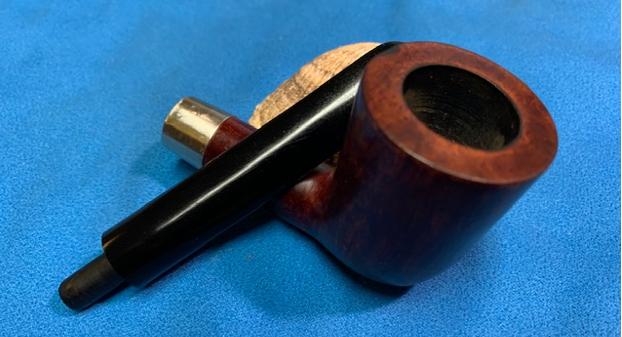
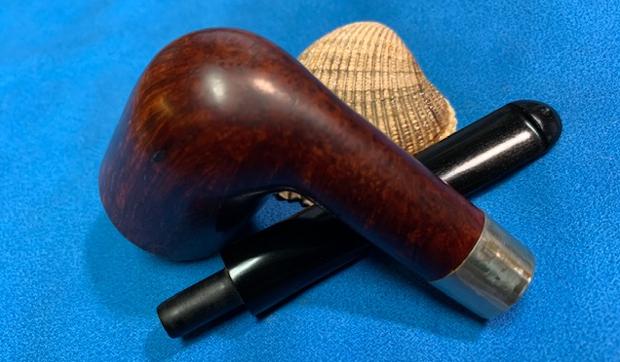
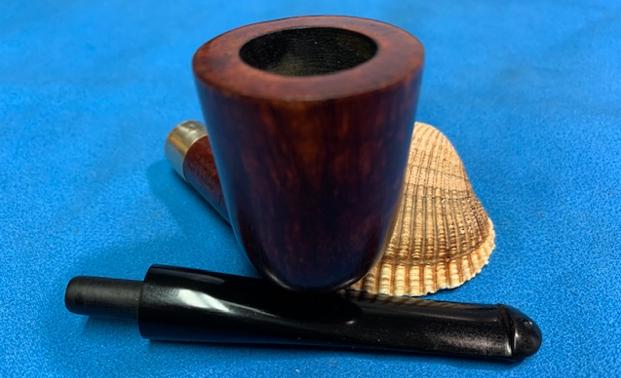
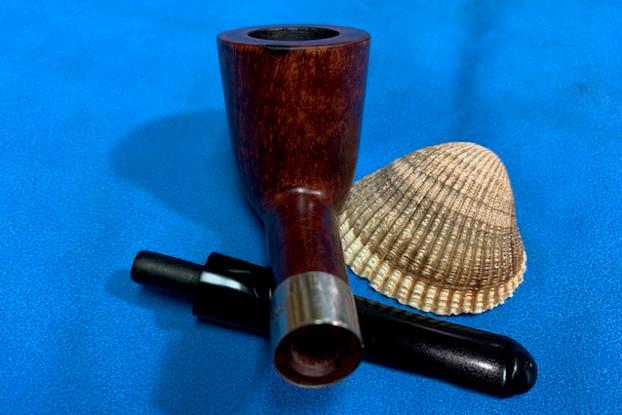
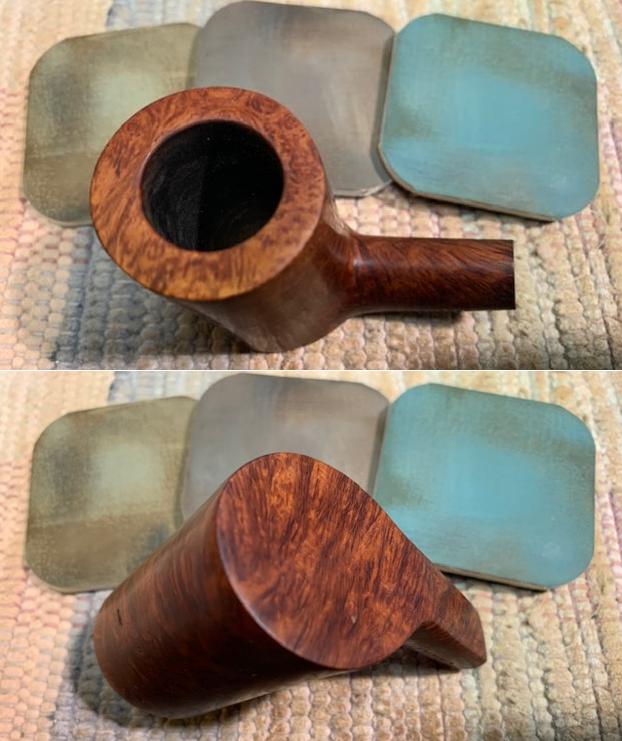
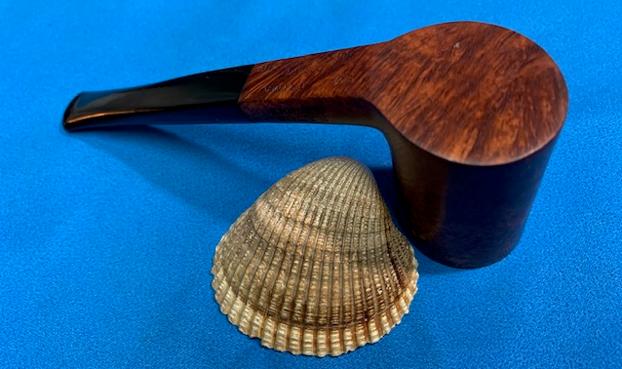
 This Comoy’s St. Regis De Luxe Apple certainly made a surprising reappearance! If he could only talk! Steve and I believe he was made by Comoy’s for the luxury hotel chain, St. Regis, back in the day when quality hotels had their own tobacconist shops catering to the customers’ needs – pipe men and cigar aficionados situated in leather chairs with drinks of choice adding to the pampered moment. A day gone by 😊. Nat commissioned the Comoy’s St. Regis Made in London, England, and will have the first opportunity to claim him from The Pipe Steward Store benefitting the Daughters of Bulgaria – helping women and girls that were trafficked and sexually exploited. To recall just how far this Comoy’s St. Regis has come, a ‘before’ picture starts us off! Thanks for joining me!


 It seems like just a few weeks ago I was contacted by an older gentleman about purchasing his pipe collection. He sent me the photos and I was amazed at what I saw. He had Dunhill pipes, BBB pipes, Orlik pipes, Barclay Rex Pipes, a couple of Meerschaums and a whole lot of other pipes. All I could say as I looked at the pipes was what a collection it was. We negotiated a deal and I think we both walked away quite happy with the exchange.
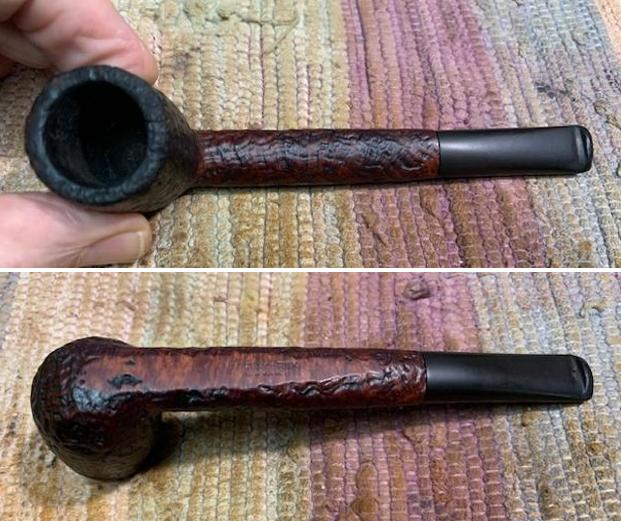
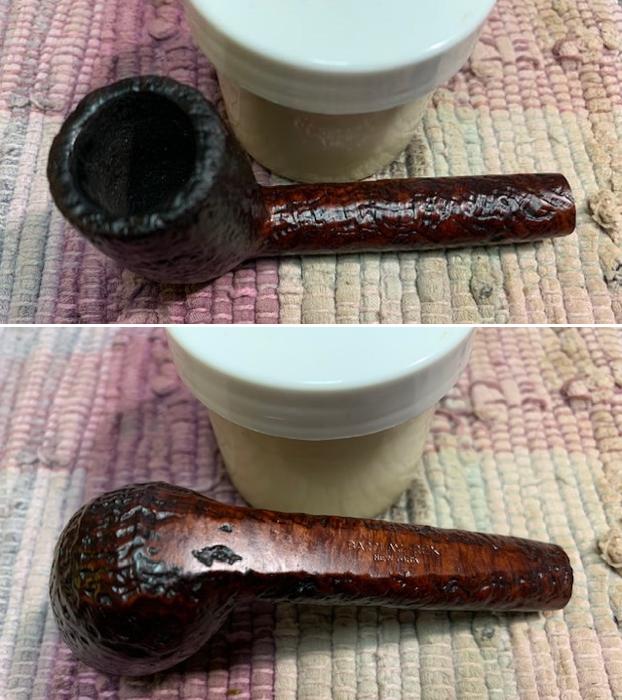
 Jeff took photos of the bowl, rim top to show the thickness of the cake in the bowl and the thick lava on the rim top. There is some damage to the outer edge of the rim that is visible in the photos. He took photos of the top and underside of the vulcanite stem showing the oxidation, calcification, tooth marks, chatter and wear on the stem and button.

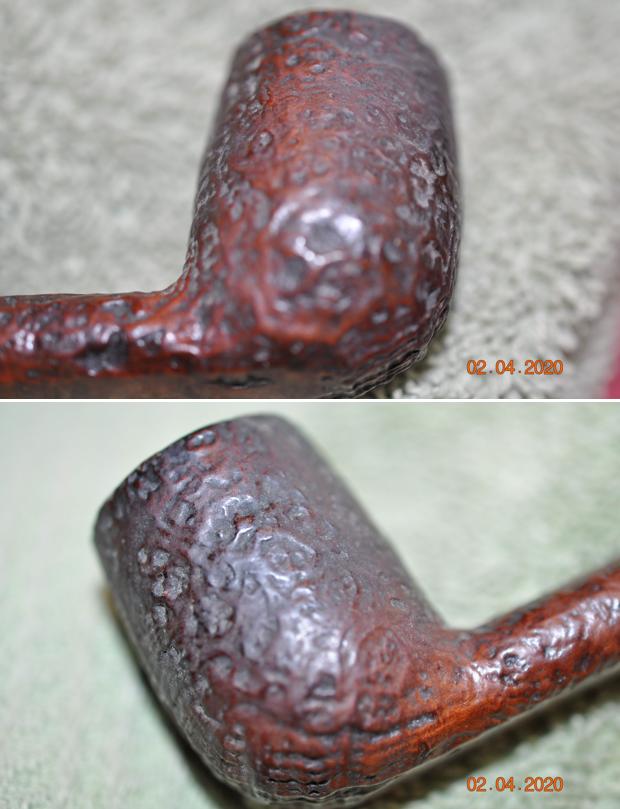
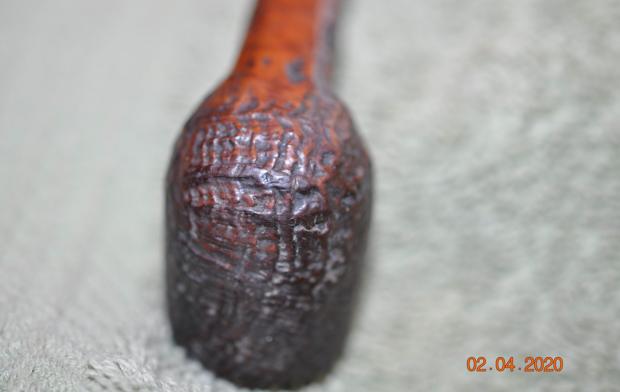
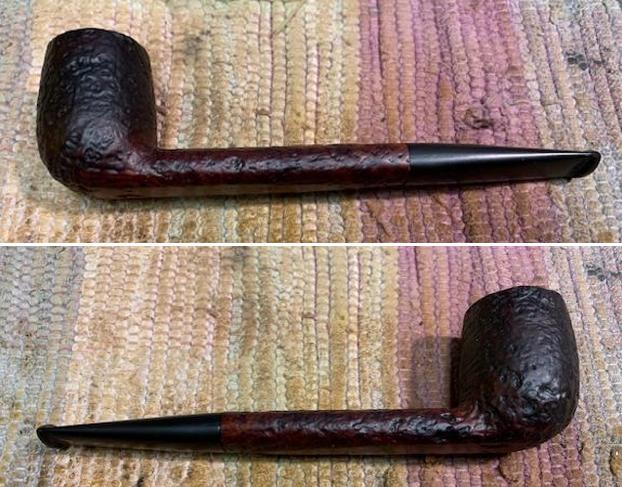
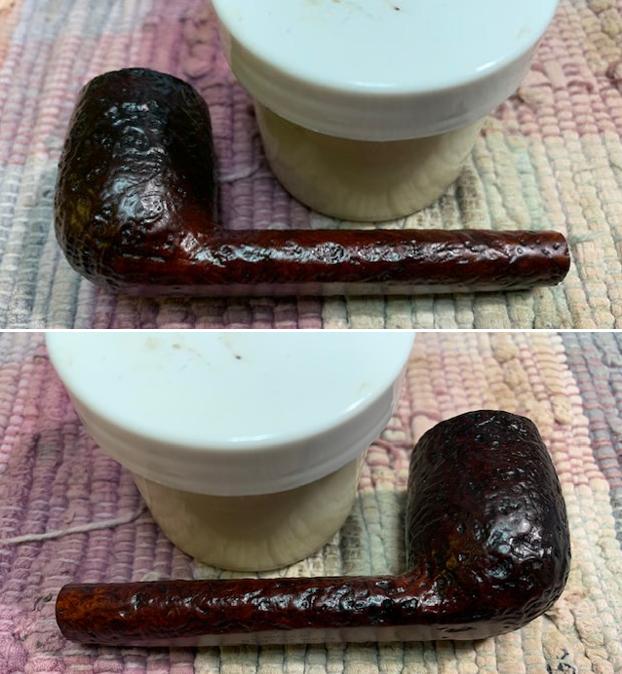
 Jeff took photos of the sides and heel of the bowl to show the condition of the briar. You can see the beautiful shape and the grain on the bowl even through the dirt and debris of many years.
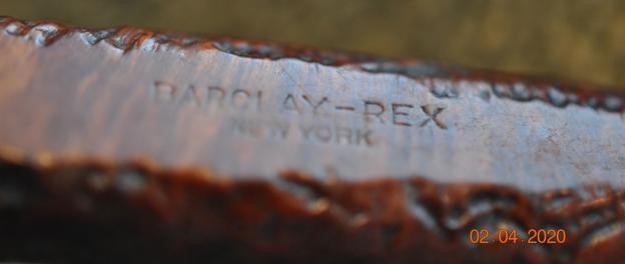
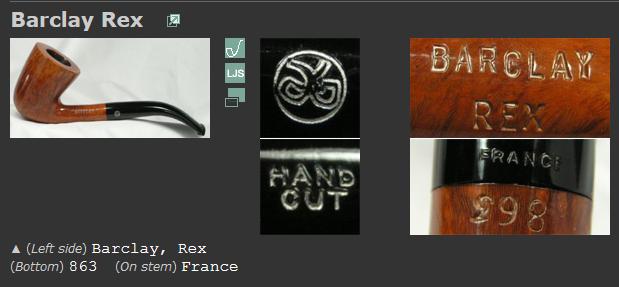
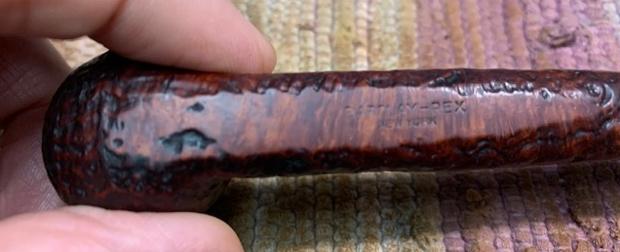
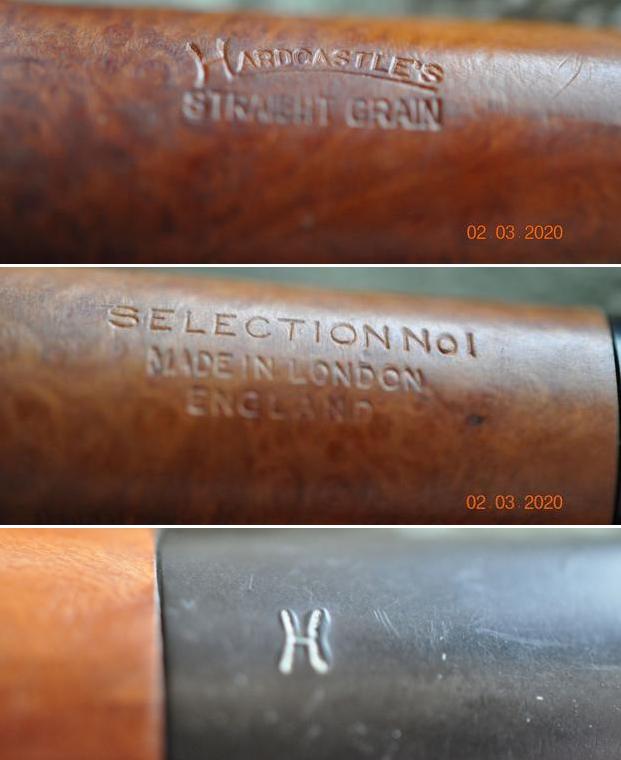
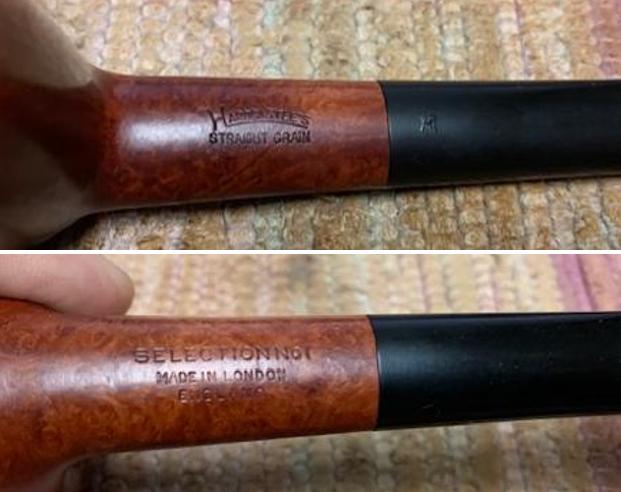
 Jeff took a photo of the stamping on the underside of the shank. You can see that it is faint but readable as noted above.
  I turned to Pipephil’s site to see what I could learn about the Barclay-Rex brand and particularly the sandblast one I was working on (http://pipephil.eu/logos/en/logo-b1.html). I have included a screen capture of the information that is shown there.
 I quote from the sidebar on the site below as it gives a good summary of information.
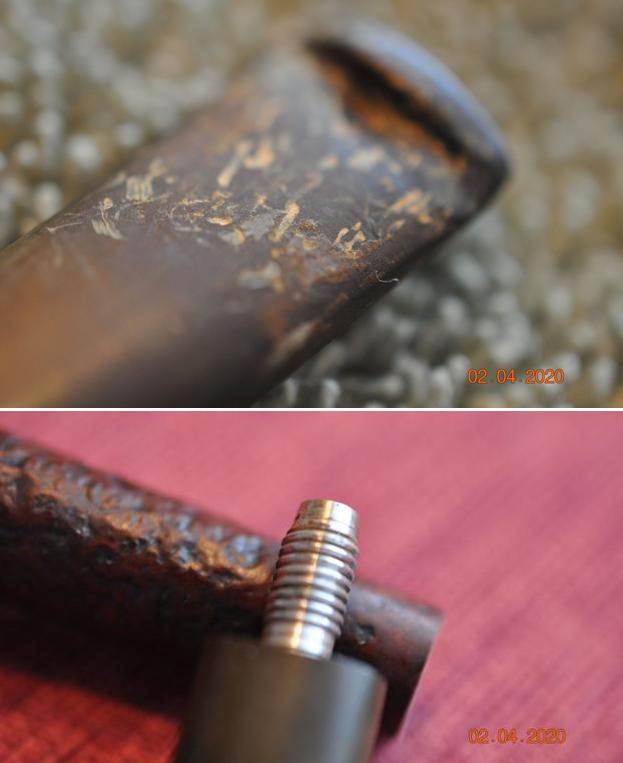
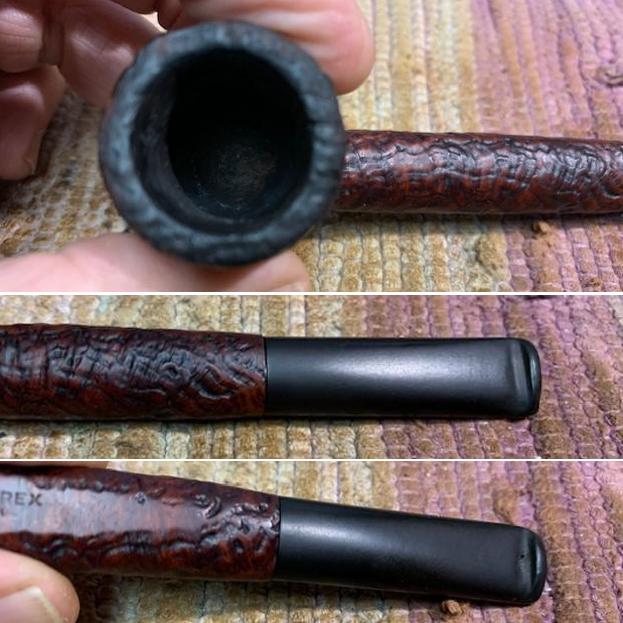
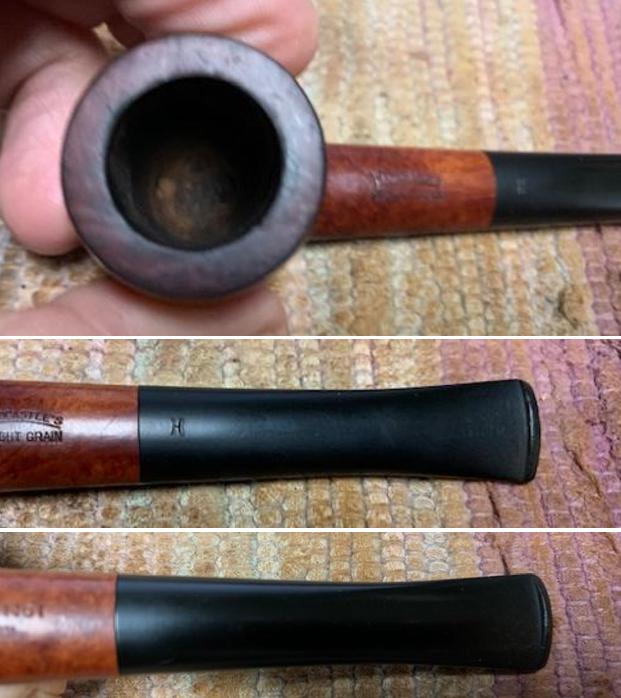
 I took some close up photos of the rim top and the stem surface. The inner edge of the rim had some nicks and burn damage on the bevel. The outer edge had some chips and nicks. There was some darkening on the rim top that would need to be cleaned up. I took close up photos of the stem to show the condition of the surface and button.
  I took a picture of the stamping on the underside of the shank and it was faint but readable as noted above.
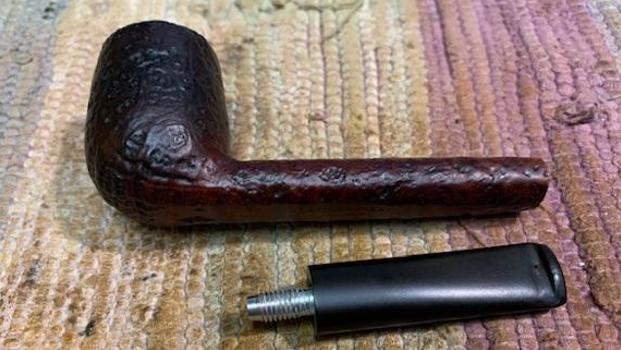
 I removed the stem from the shank and took a photo of the parts of the pipe. The metal tenon is in excellent condition and the threaded shank also looks very good.
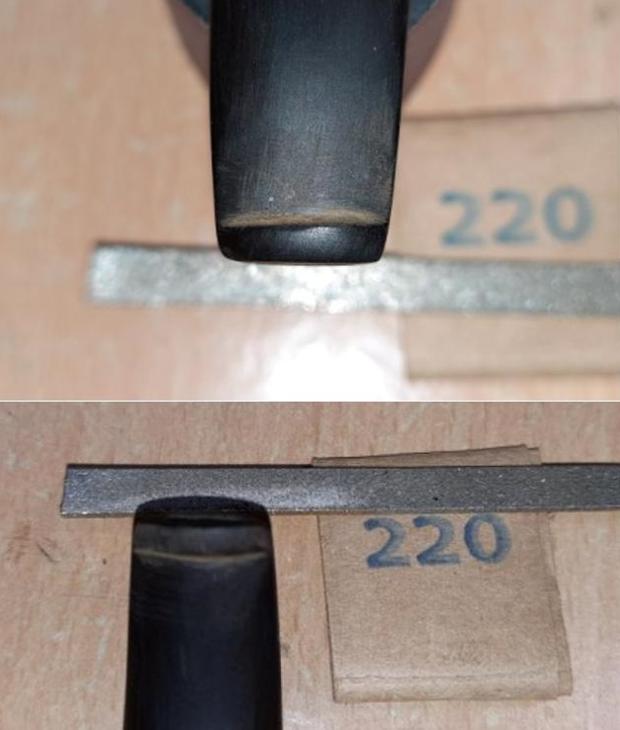
 I started my work on the pipe by addressing the darkening on the rim top and the damage on the edges of the bowl. I used a folded piece of 220 grit sandpaper to work over the inner and outer edge to smooth out the damage and to remove the darkening on the rim top as well.
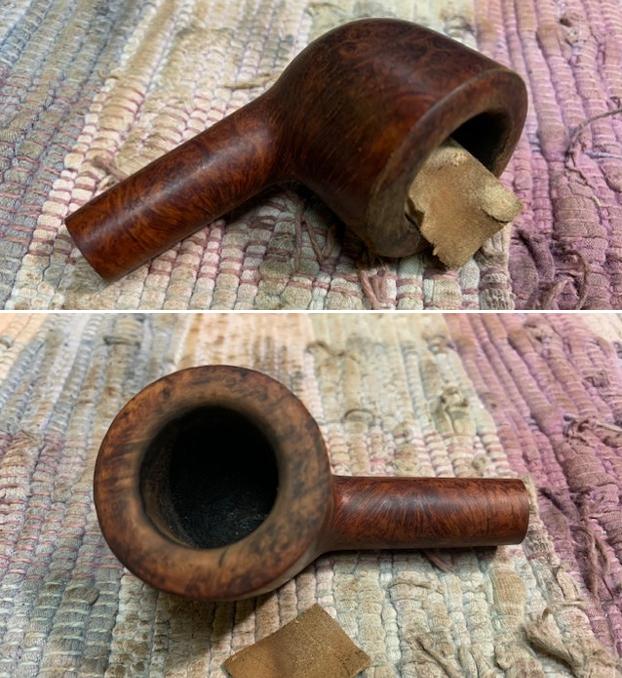 I polished the briar with micromesh sanding pads – dry sanding with 1500-12000 grit pads. I wiped the briar down with a damp cloth after each pad.


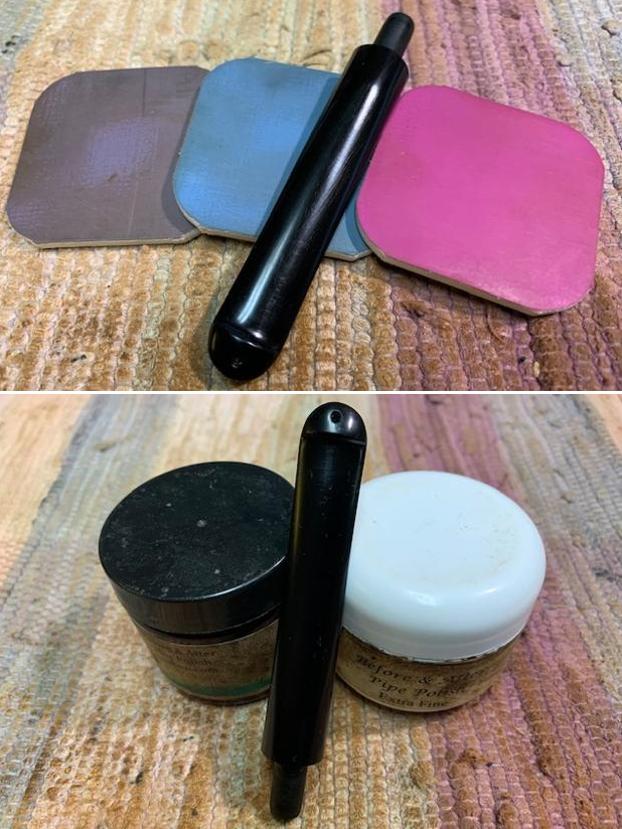
 I worked some Before & After Restoration Balm into the surface of the bowl and shank with my fingertips to clean, enliven and protect the briar. I let the balm sit for 15 minutes and then buffed with a cotton cloth to raise the shine. The photos show the bowl at this point in the restoration process.

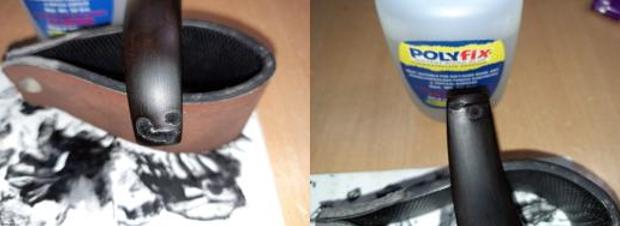
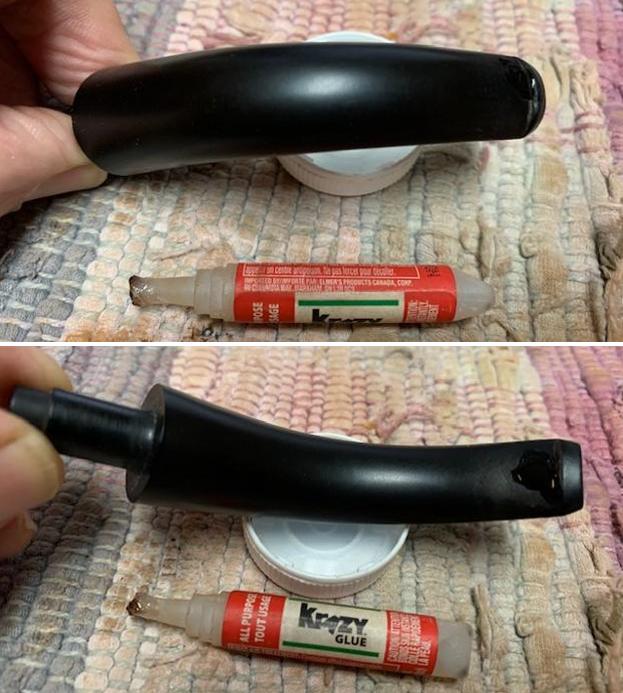
 I set the bowl aside and turned my attention to the stem. I “painted” it with the flame of a Bic lighter to lift the tooth dents in the surface of the vulcanite. I was able to lift the majority of them and interestingly the small pin hole on the topside sealed off. I filled in the remaining marks with clear CA glue. Once the repairs cured I sanded them smooth with a folded piece of 220 grit sandpaper to blend them in the rest of the stem surface. I started polishing the stem with 400 grit wet dry sandpaper.

 I polished the stem with micromesh sanding pads – dry sanding with 1500-12000 grit sanding pads. I wiped it down after each sanding pad with Obsidian Oil. I polished it with Before & After Pipe Stem Polish – both Fine and Extra Fine. I gave it a final coat of Obsidian Oil.
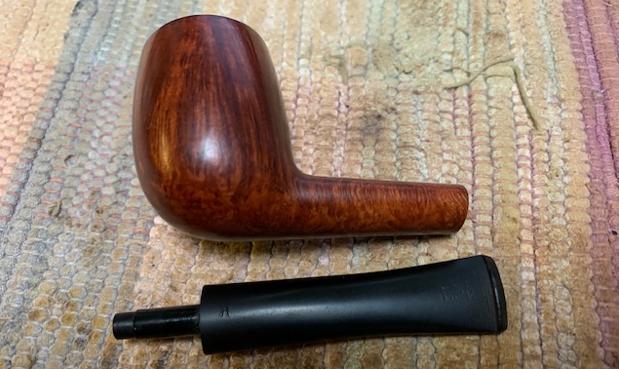
 With the bowl and the stem finished I put the beautiful Barclay-Rex New York Crowned Rim Pot back together and buffed it on the wheel using Blue Diamond to give it a shine. I gave the bowl and the stem multiple coats of carnauba wax on the wheel. I buffed it with a clean buffing pad to raise the shine. I hand buffed it with a microfiber cloth to deepen the shine. It really is a great looking pipe. The dimensions of the pipe are – Length: 6 inches, Height: 1 ½ inches, Outside diameter of the bowl: 1 ½ inches, Chamber diameter: 1 inch. The weight of this large pipe is 1.34 ounces /38 grams. This Barclay-Rex Pot is another great find in this collection. It is much more beautiful in person than these photos can capture. I will be putting it on the rebornpipes store soon. If you would like to add it to your collection let me know. This is another pipe that has the possibility of transporting the pipe man or woman back to a slower paced time in history where you can enjoy a respite. Thanks for walking through the restoration with me.