Blog by Paresh Deshpande
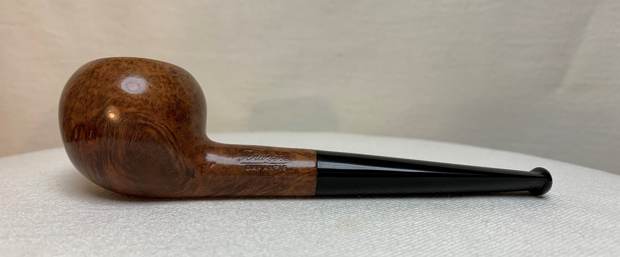
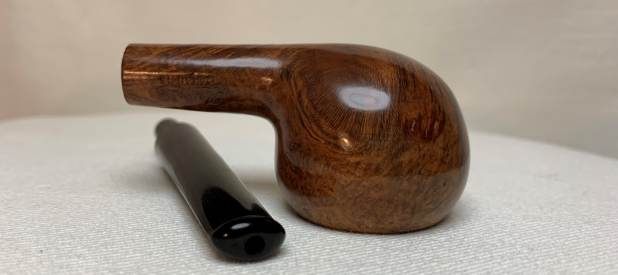
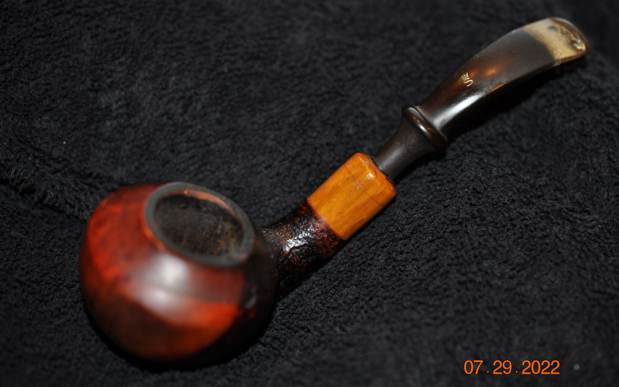
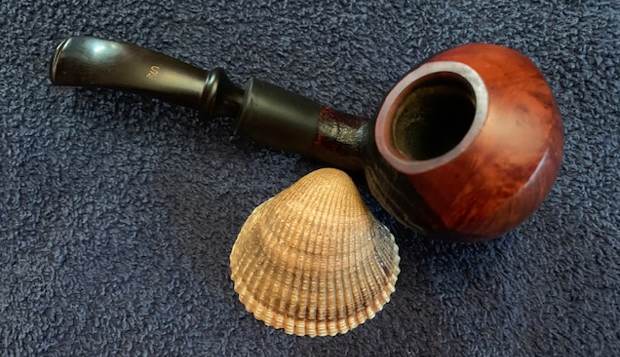
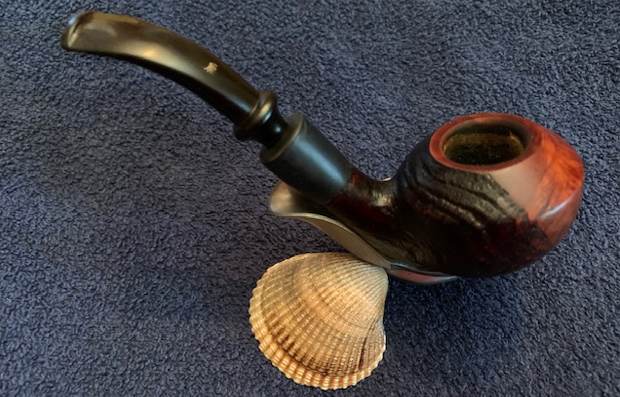
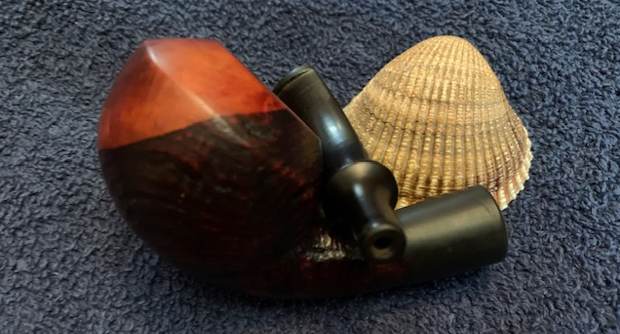
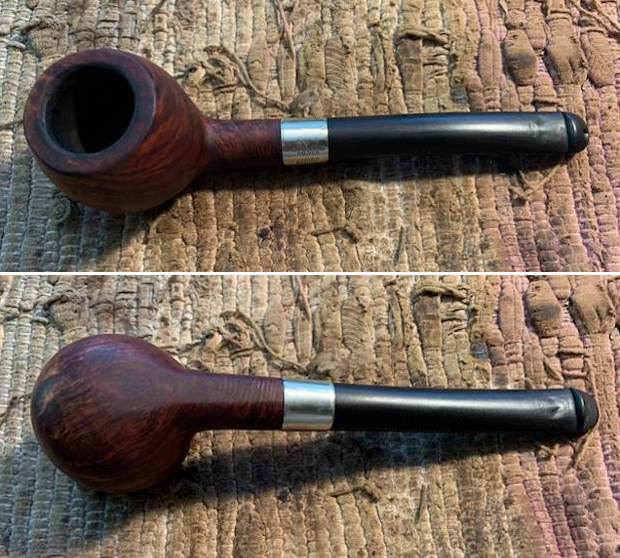
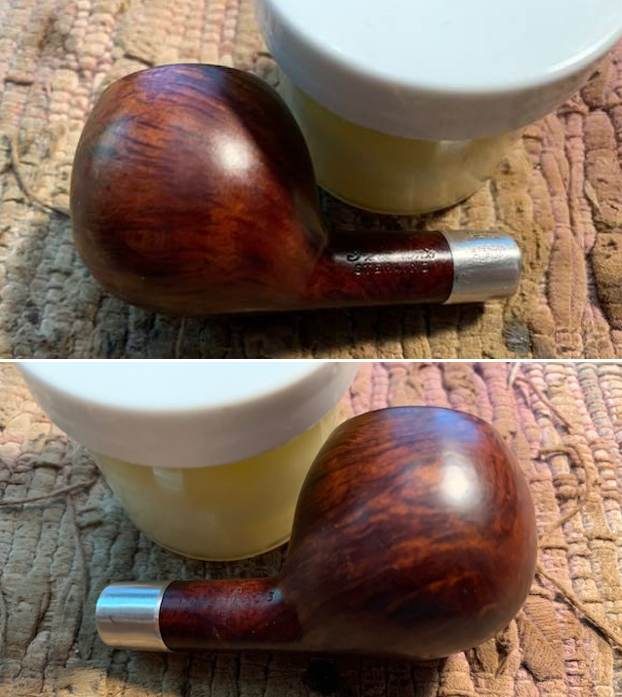
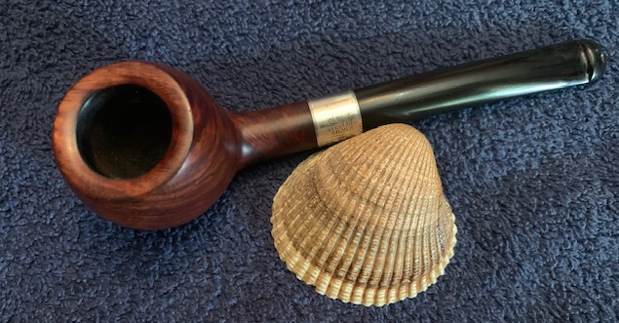
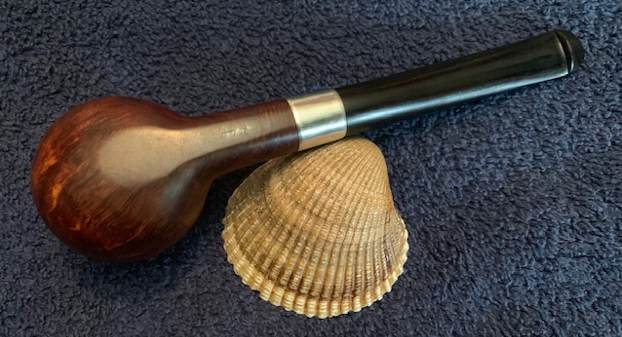
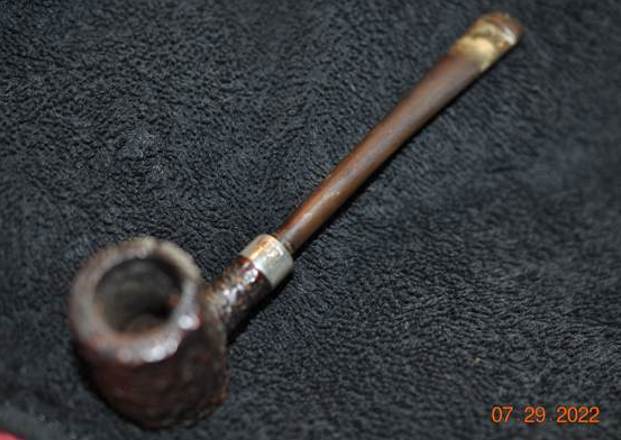
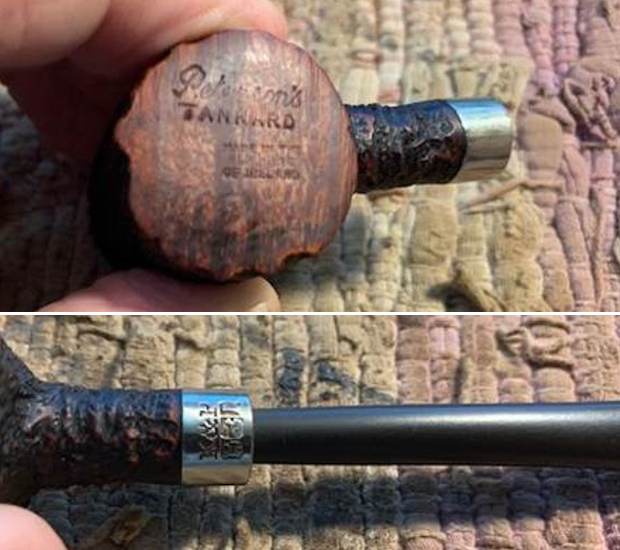
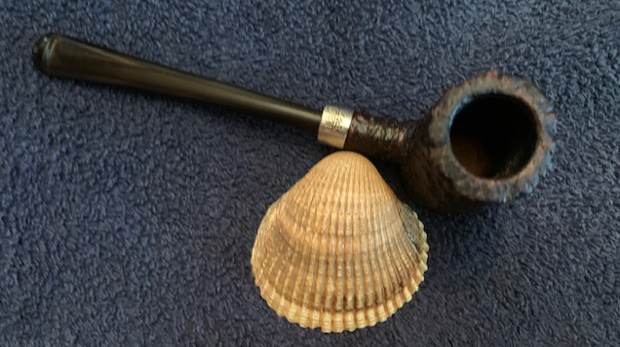
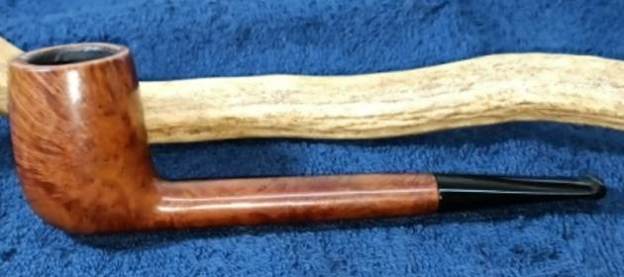
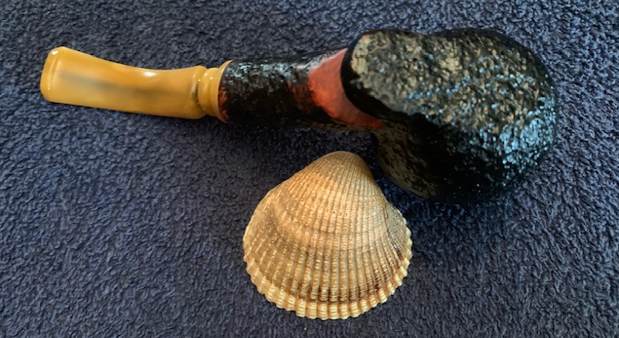
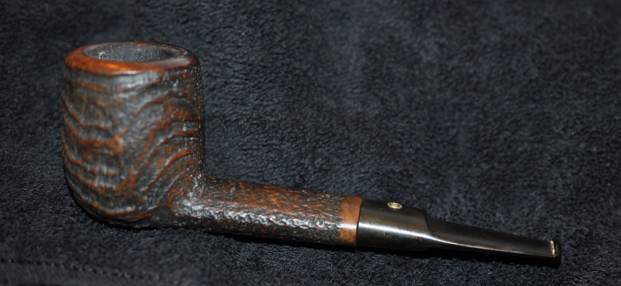
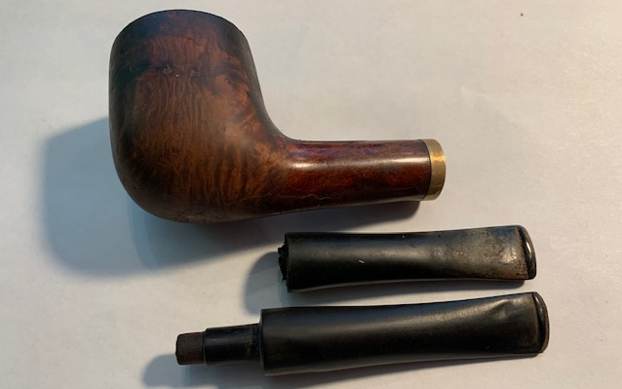
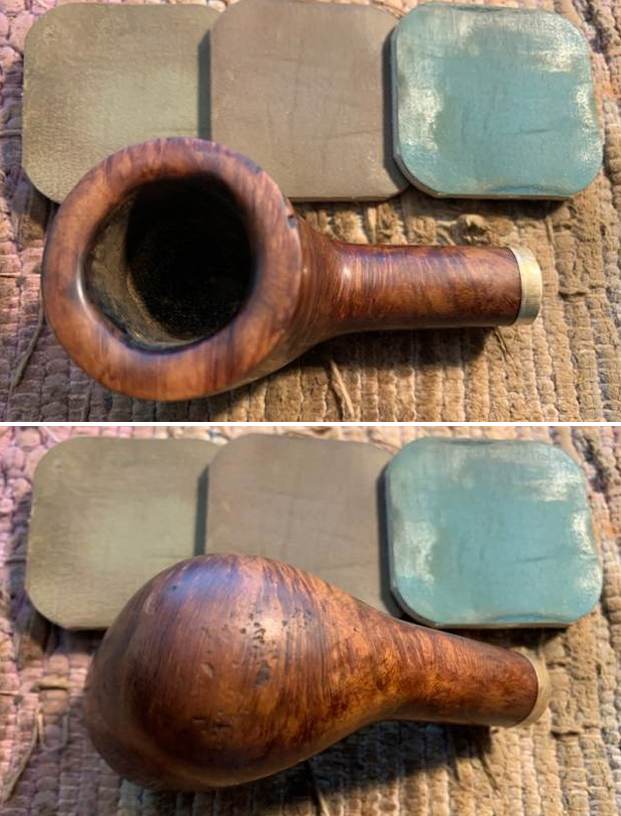
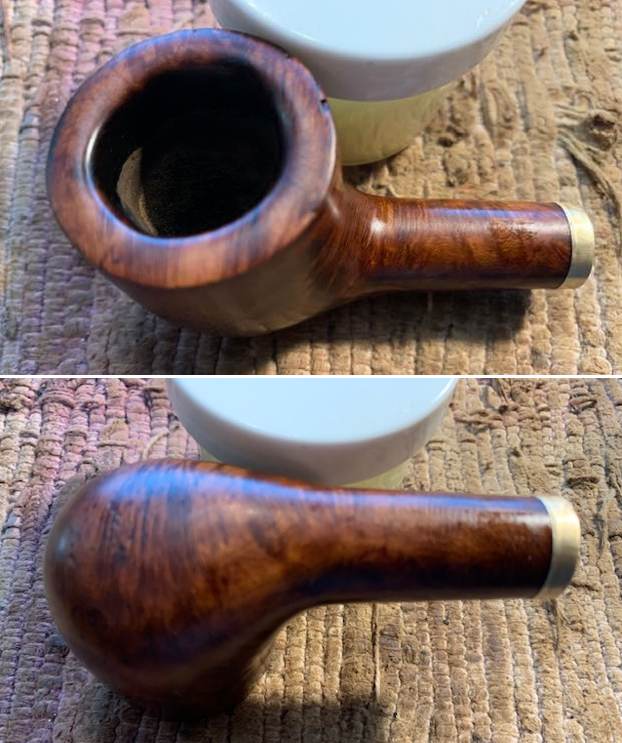
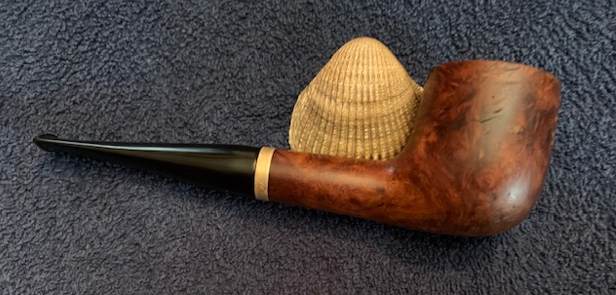
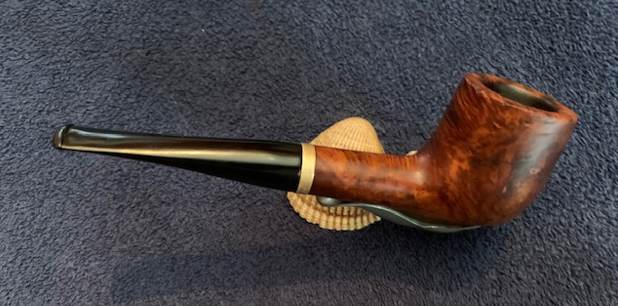
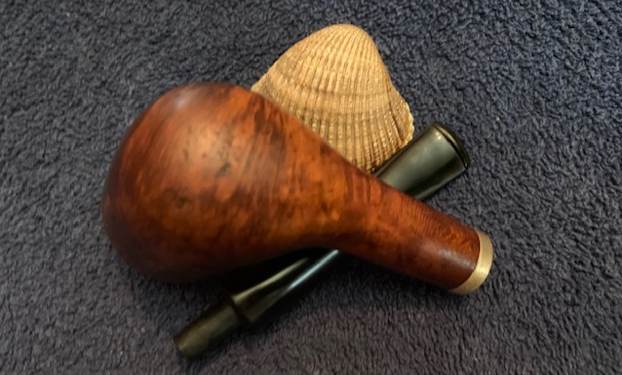
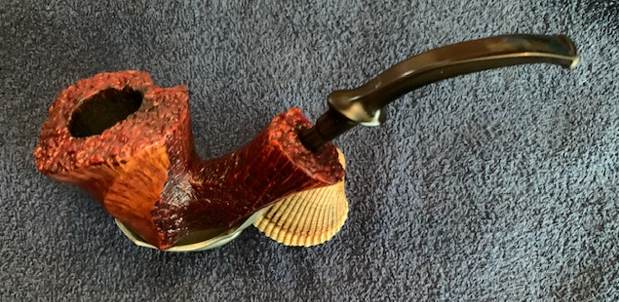
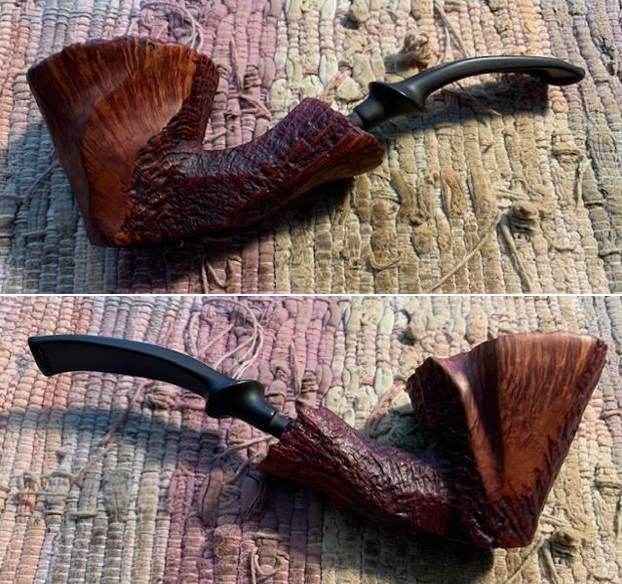
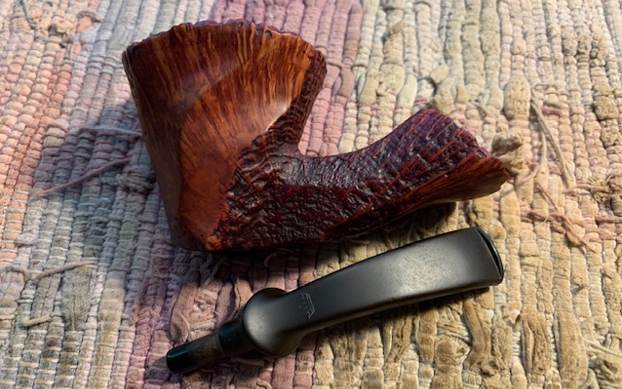
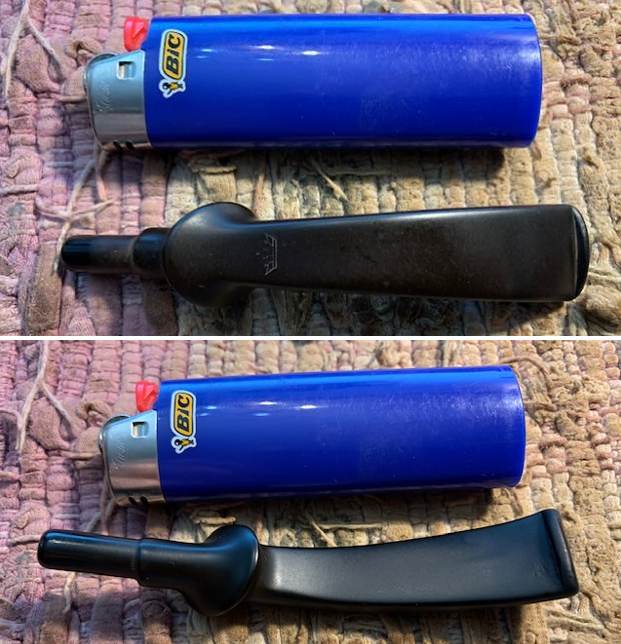
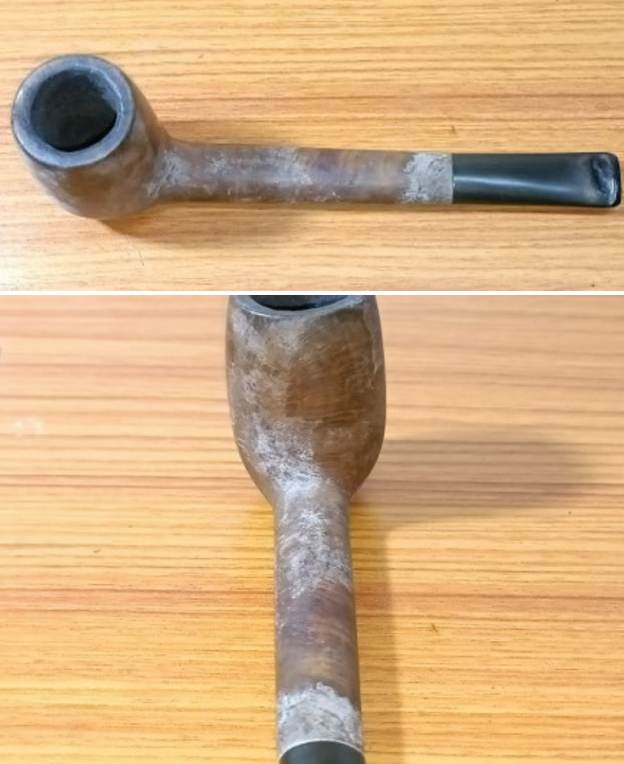
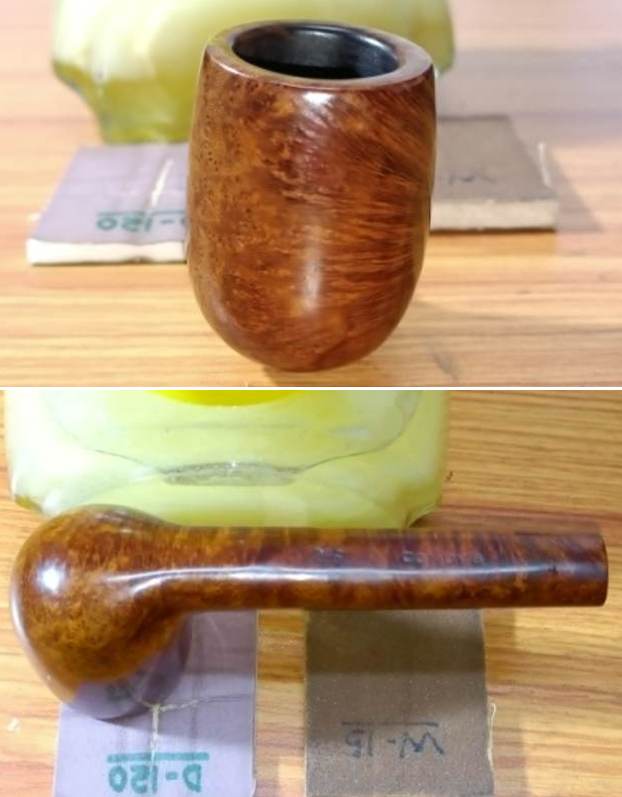
It’s been a while that I had worked on any of my inherited pipes and decided to fish out one from the last remaining large box that I had received a few years back. The pipe that I selected to work on is a very sad and tired looking Canadian with an oval shank that just shouted as being an English made pipe.
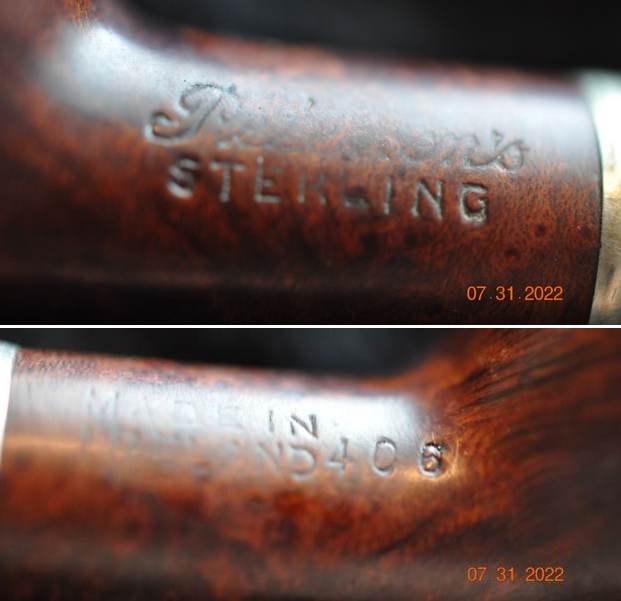
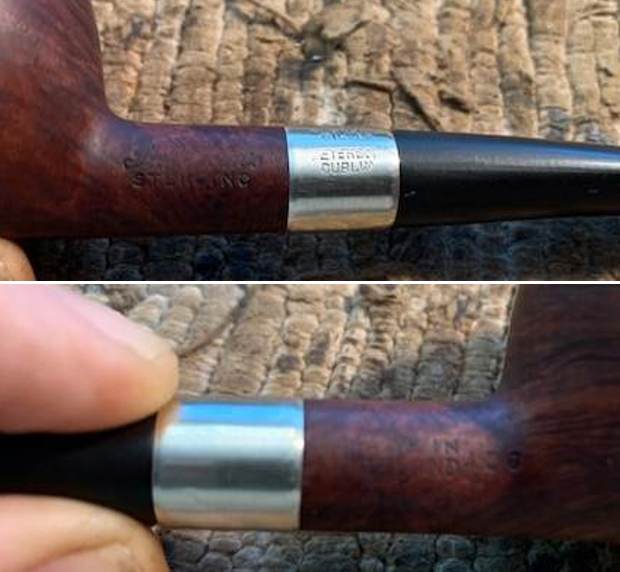
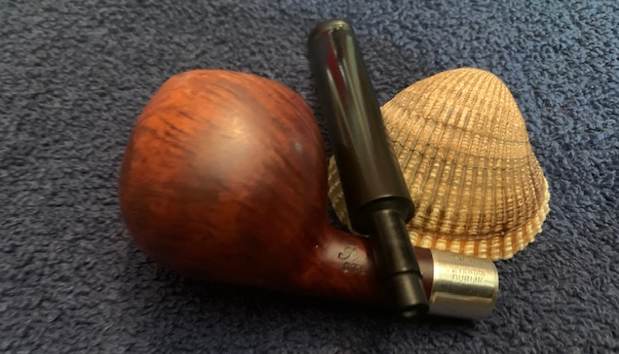
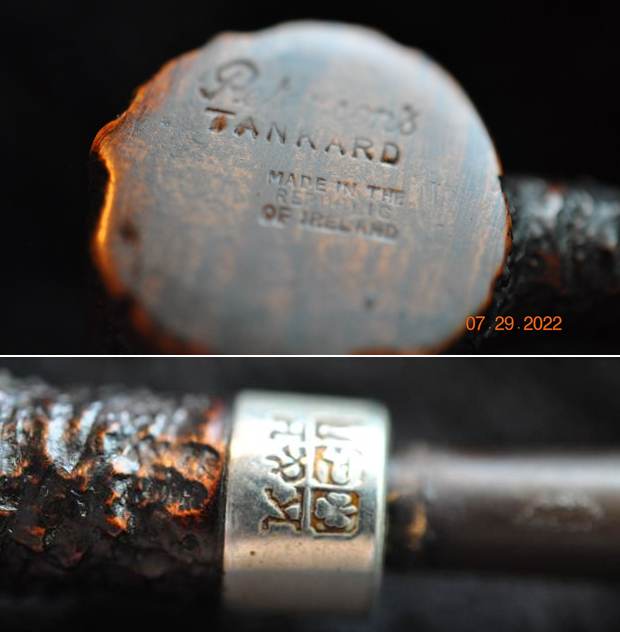
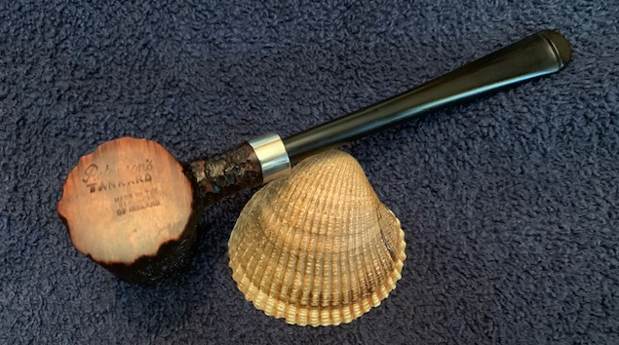
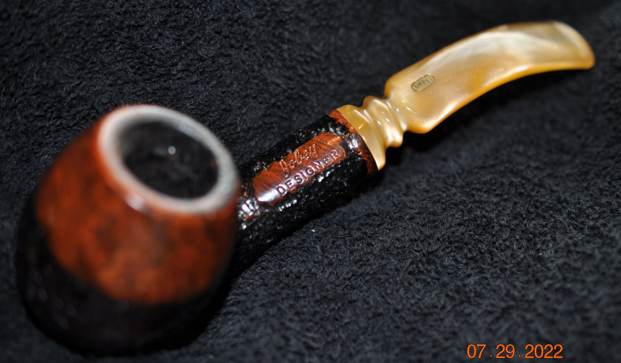
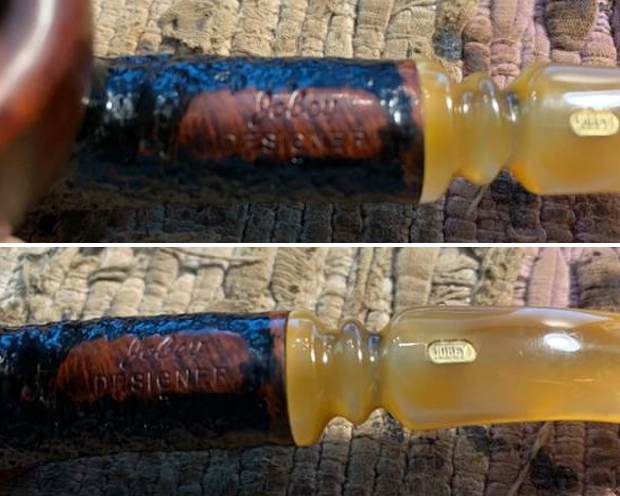
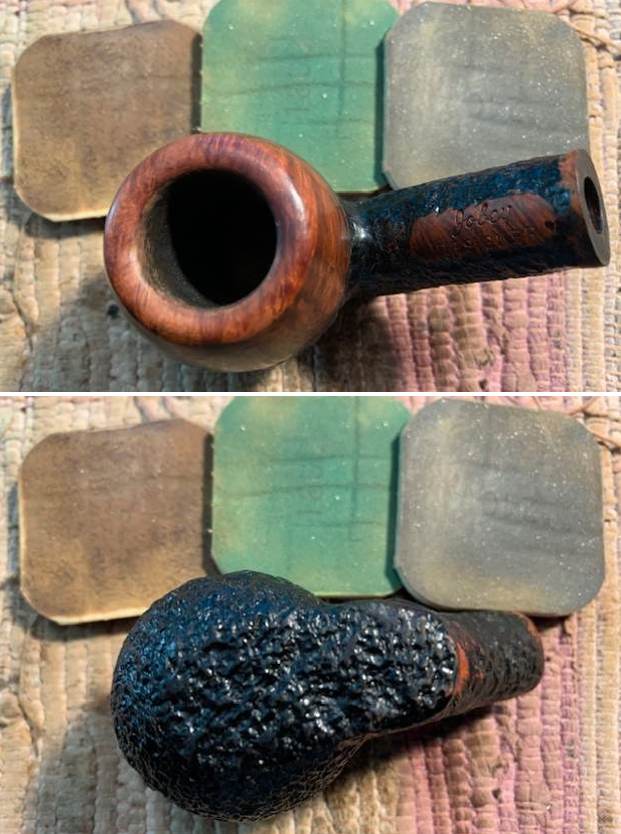
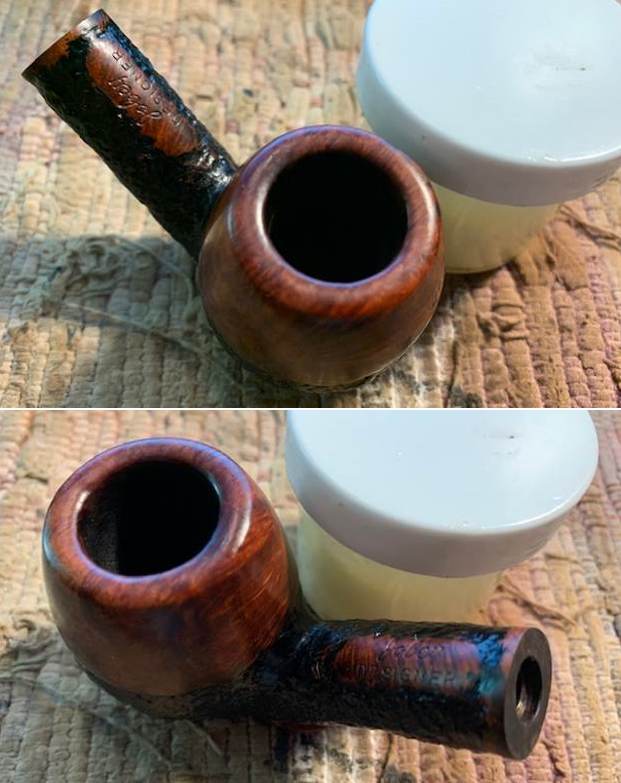
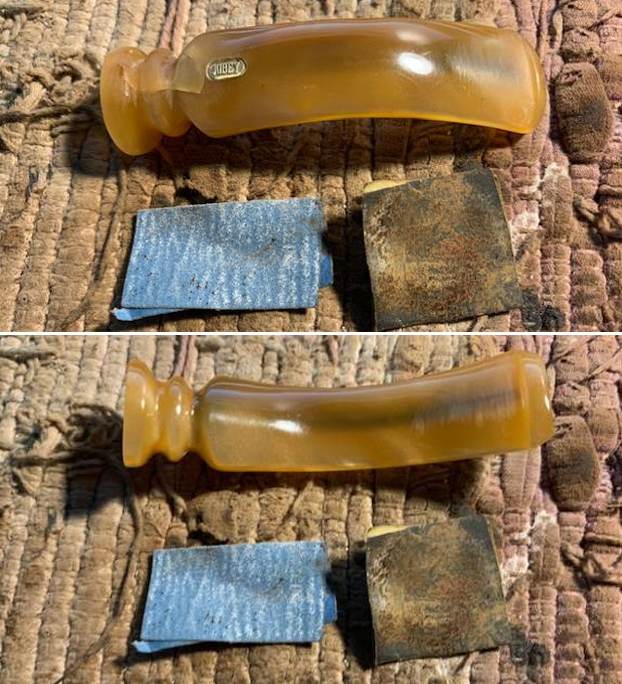
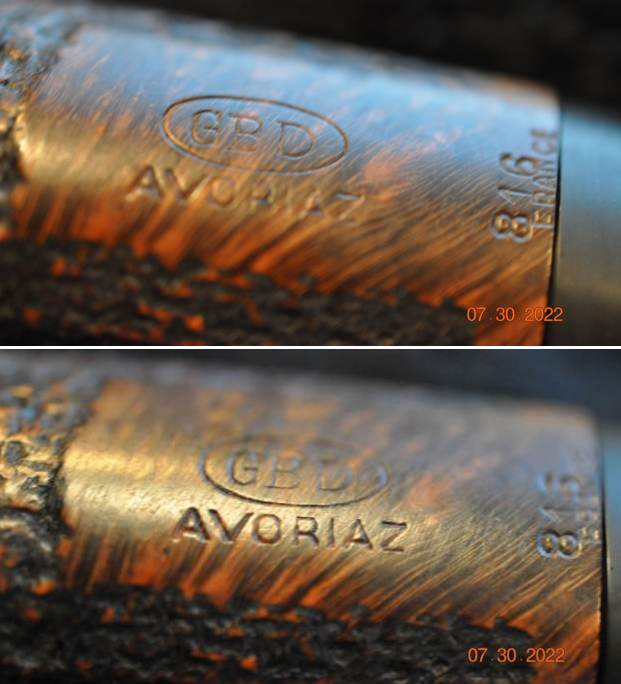
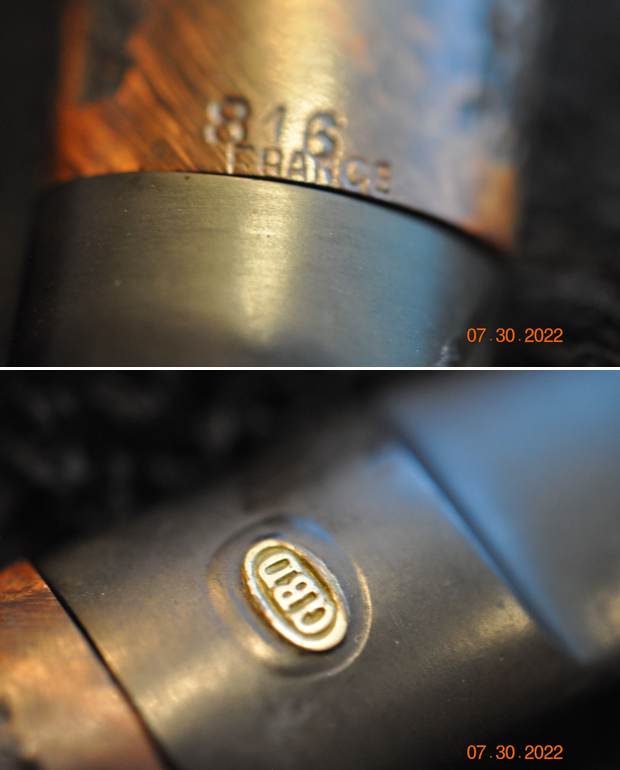
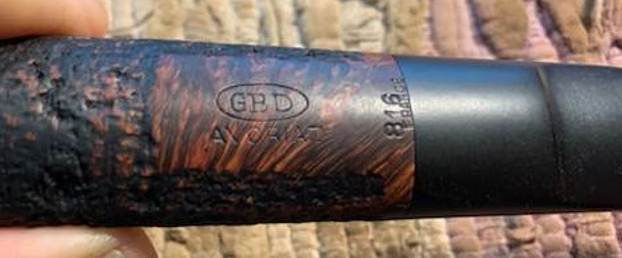
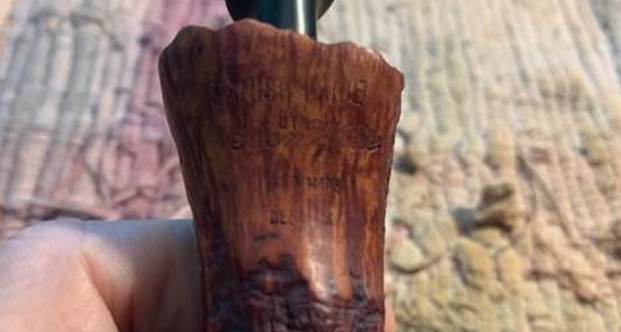
The entire stummel is covered in dull grey patches of water stain, dust and grime through which some great cross grains over the front, aft and shank surface, awaits exposure. The pipe is stamped upper flat surface of the oval shank as “The” over “GOLDEN ARROW” over “LONDON PIPE”. The underside of the shank is stamped, starting from bowl end to shank end, with shape code “296” followed by “MADE IN ENGLAND” over “BY” over “COMOY’S”. The COMOY’S stamp is in simple block letters without serif, letter C is the same size as the rest of the letters and with an apostrophe before letter S. The stem is without any stem logo.  I have a keen interest in studying and collecting English made pipes and in this quest, I have read up as much material as I could lay my hands on and still continue on this path till date. Pipedia.org has detailed information on the origins of Comoy’s brand; it’s dating guidelines and shape chart, all aspects well supported with pictures of pipes, stampings and old flyers/ catalogues. Here is the link to the article (https://pipedia.org/wiki/Comoy%27s)
After refreshing my knowledge and based on the stamping on the pipe, I know that I am working on a Comoy’s Seconds from the 1950-1960s. This is based on the way COMOY’S is stamped, firstly, the stamp is in simple block letters without any serifs, secondly, the letter C is the same size as the rest of the letters and lastly, presence of an apostrophe before the letter S.
Furthermore, G L Pease, in his research on Comoy’s states that “Sometime in the 60’s, it the serifs were returned to the “COMOY’S” lettering, though, as mentioned above, the typeface is not as fancy as the earlier one”. (http://www.glpease.com/Pipes/Comoy.html)
At the end of the article on Comoy’s on pipedia.org, is a link to Comoy’s shape number chart. The chart tells me that the shape # 296 as seen on this pipe corresponds to a large straight Canadian with oval shank/ stem.
With the provenance of the pipe now established, I moved ahead with my initial visual inspection.
Initial Visual Inspection
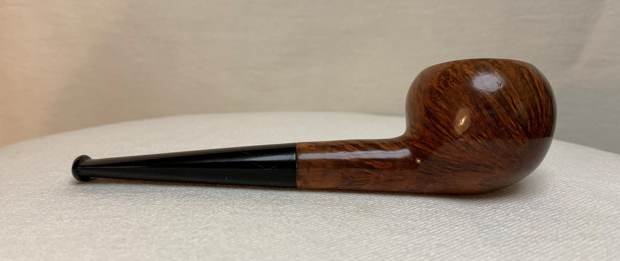
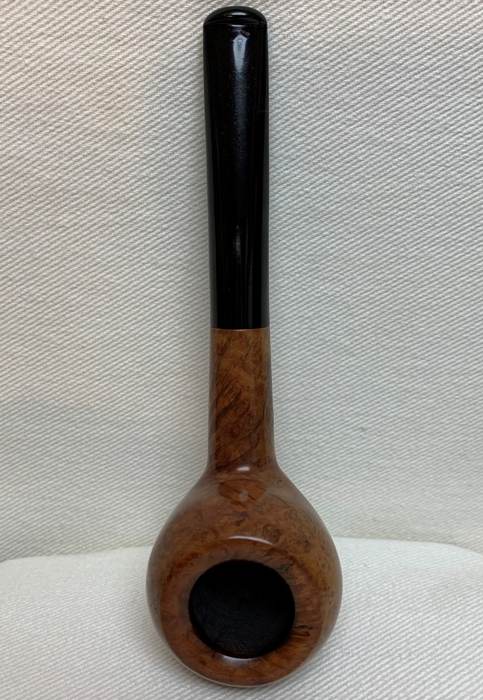
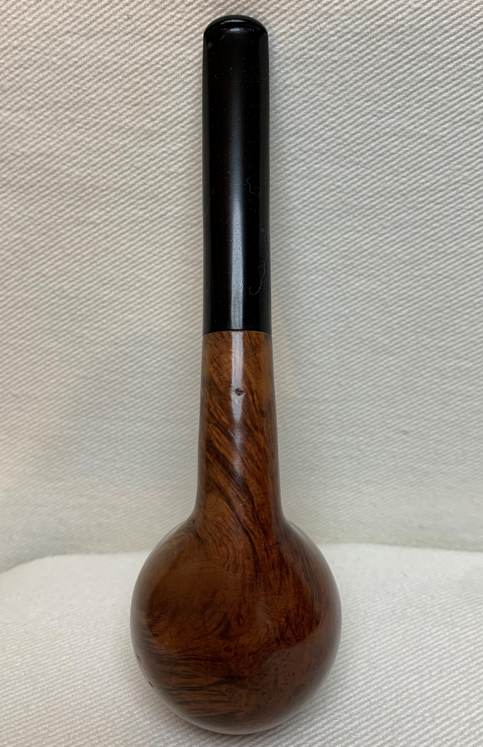
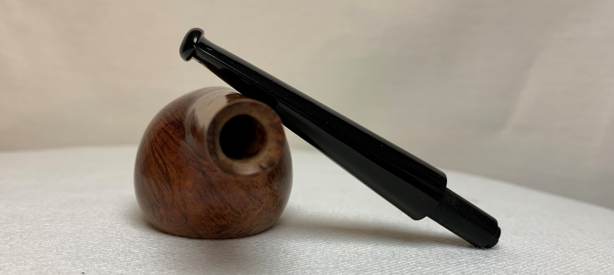
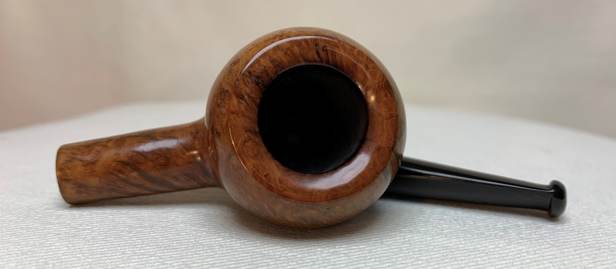
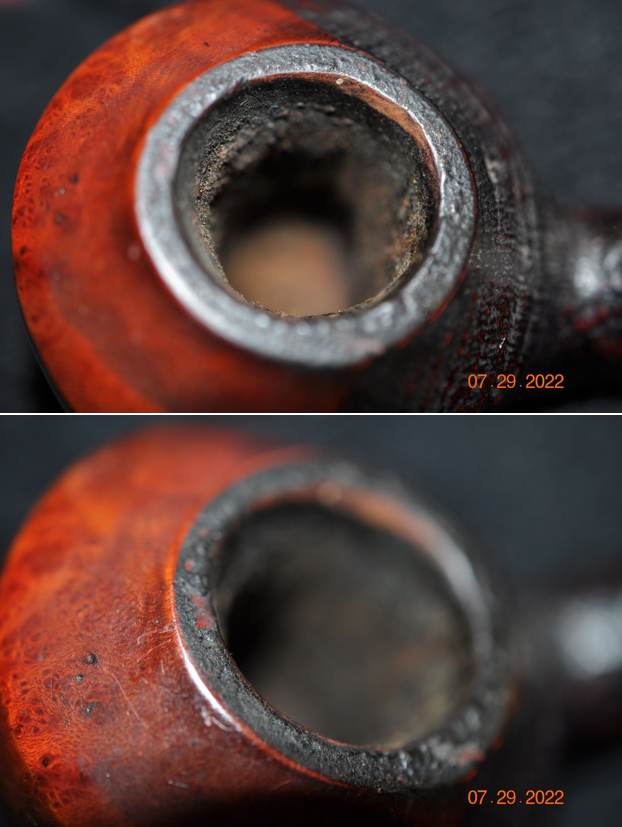
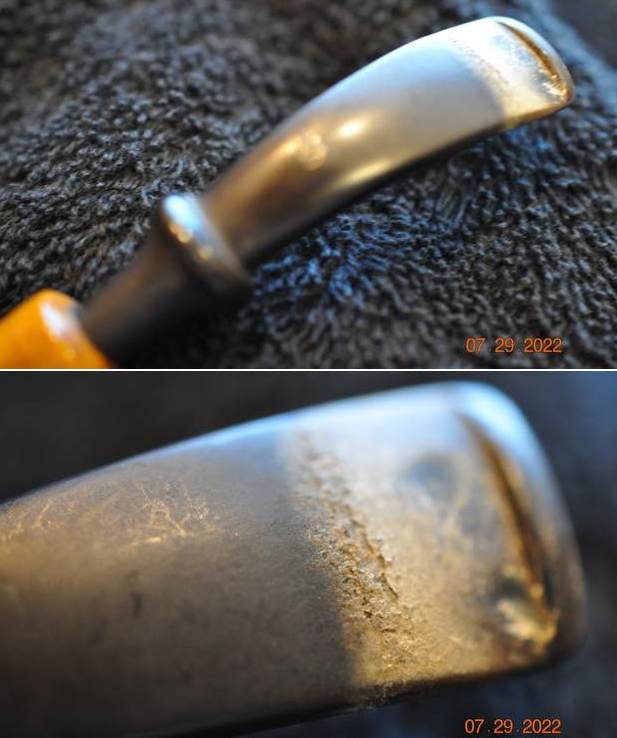
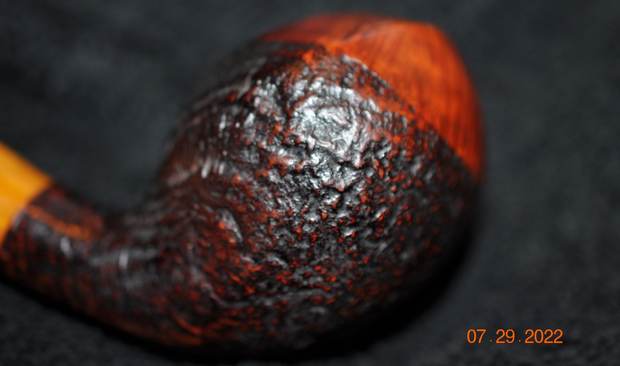
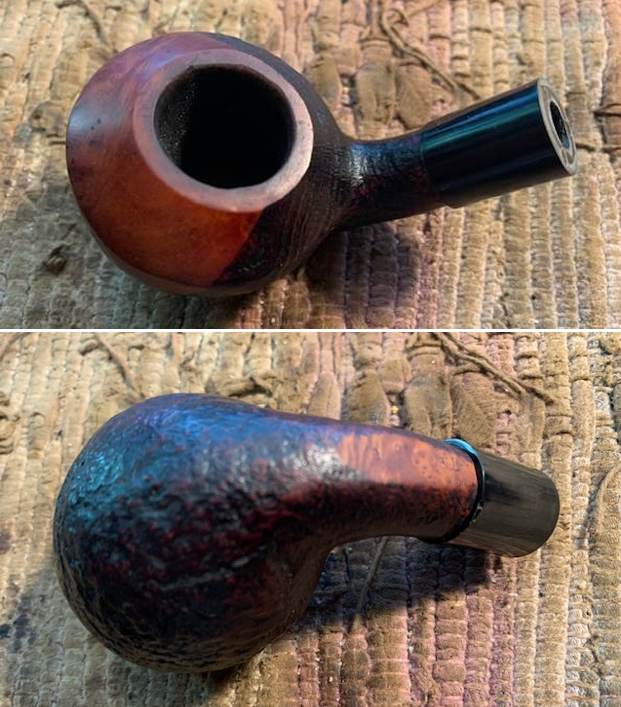
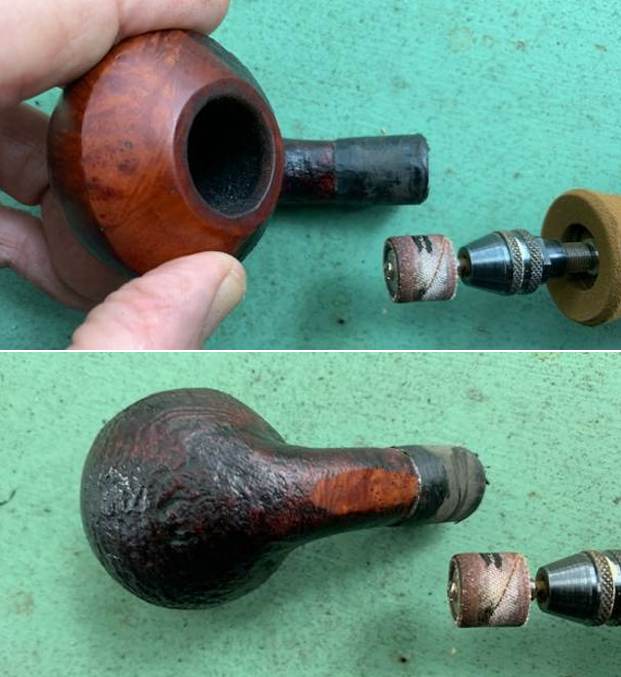
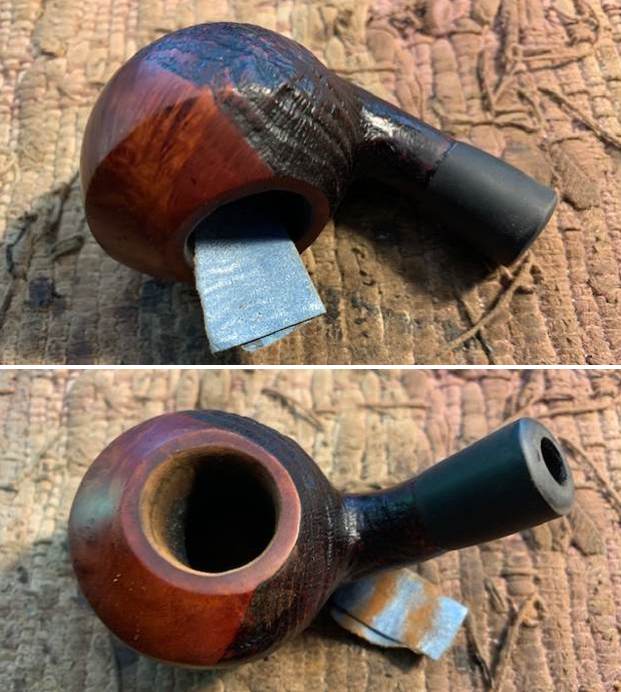
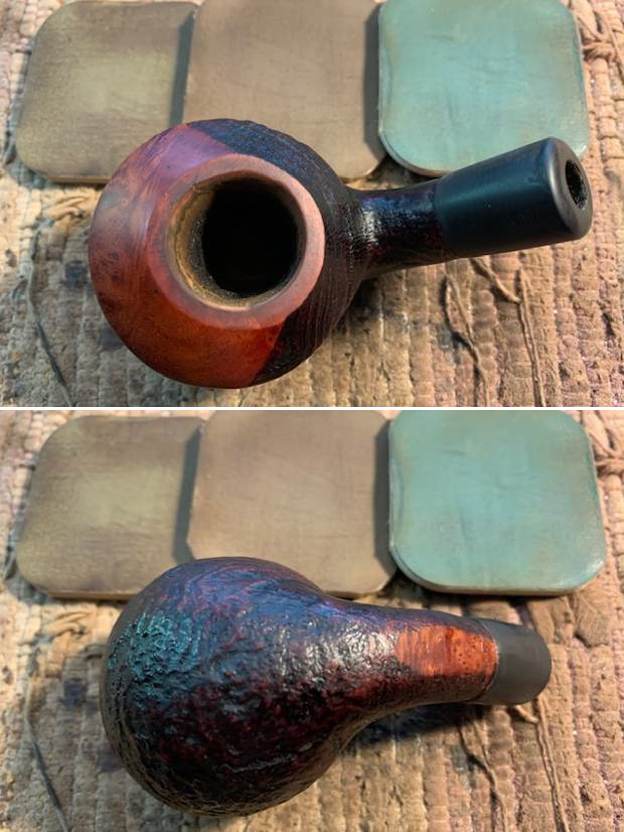
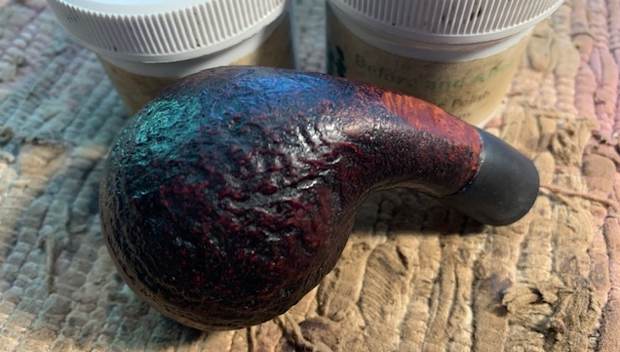
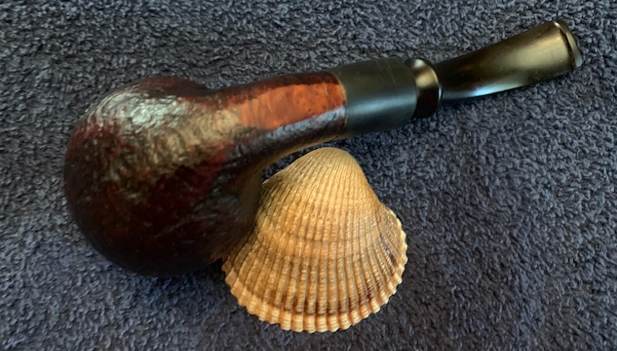
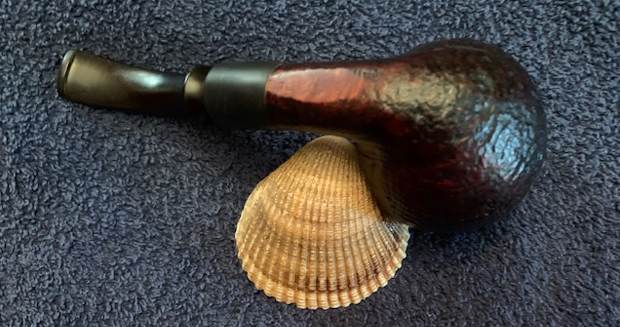
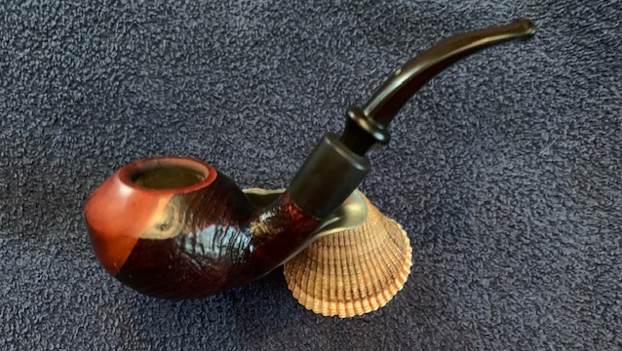
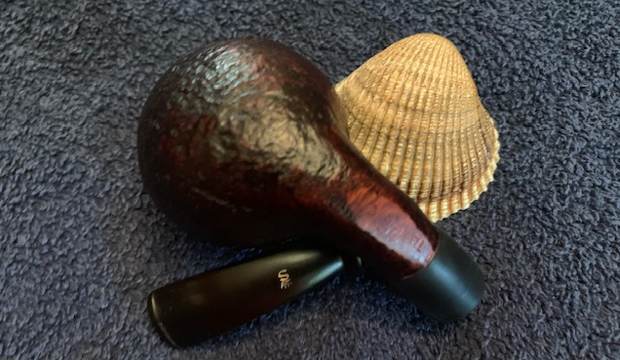
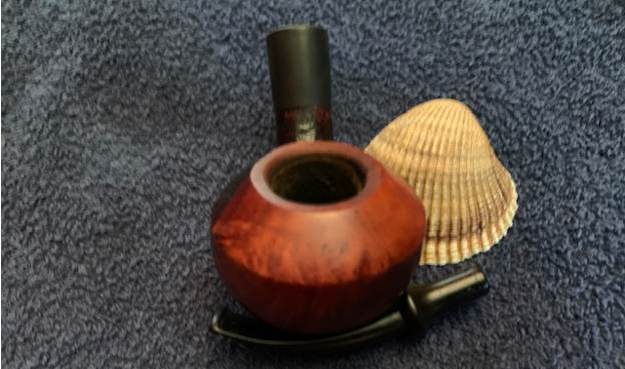
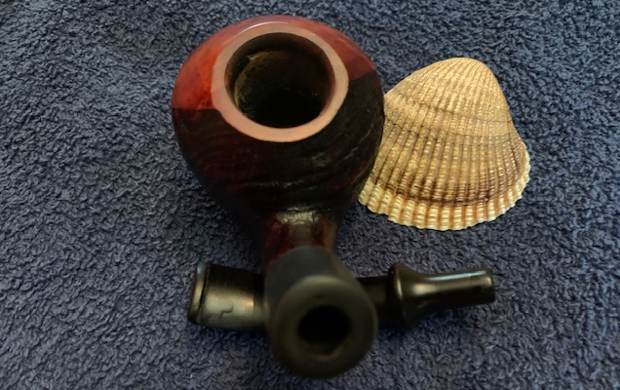
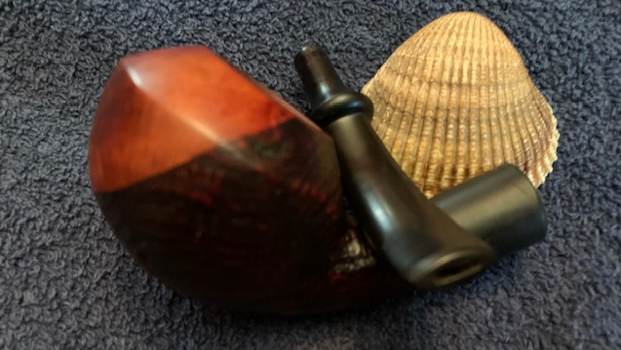
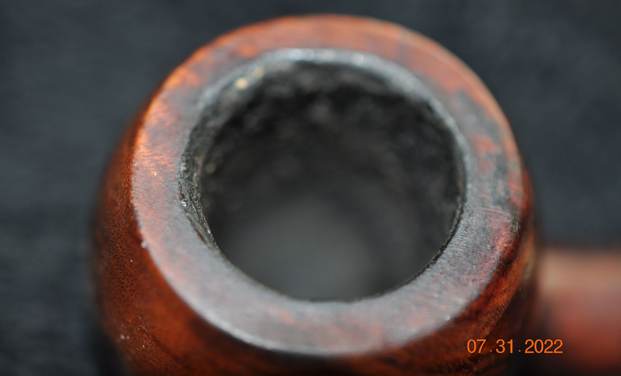
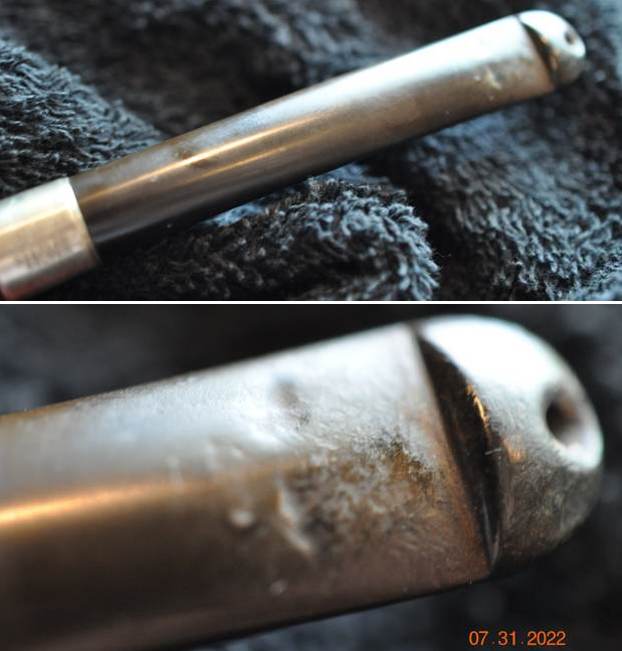
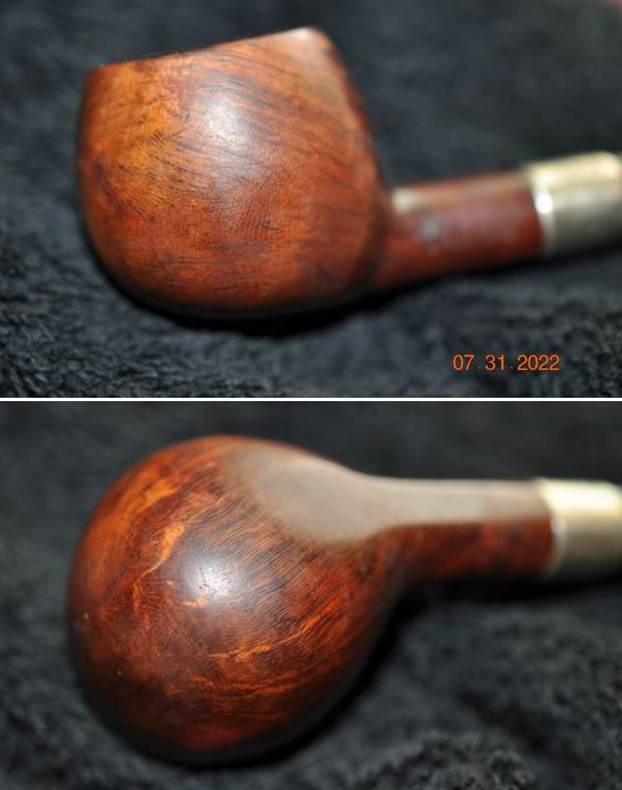
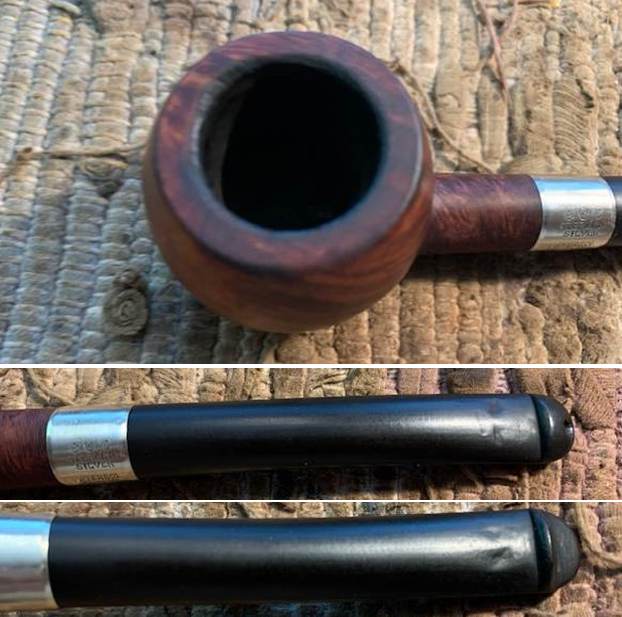
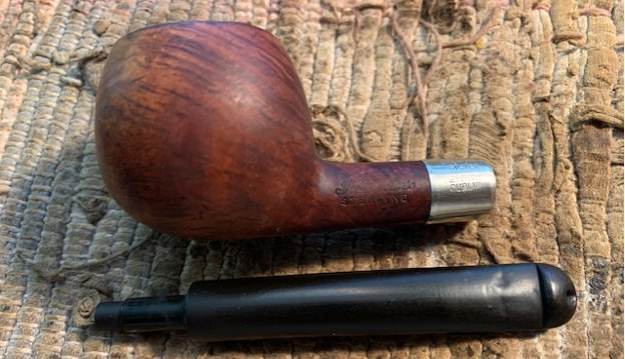
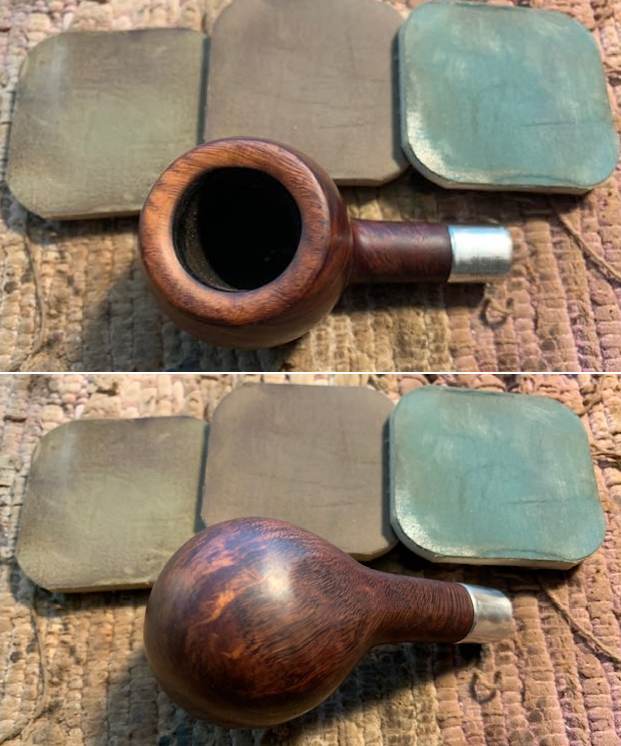
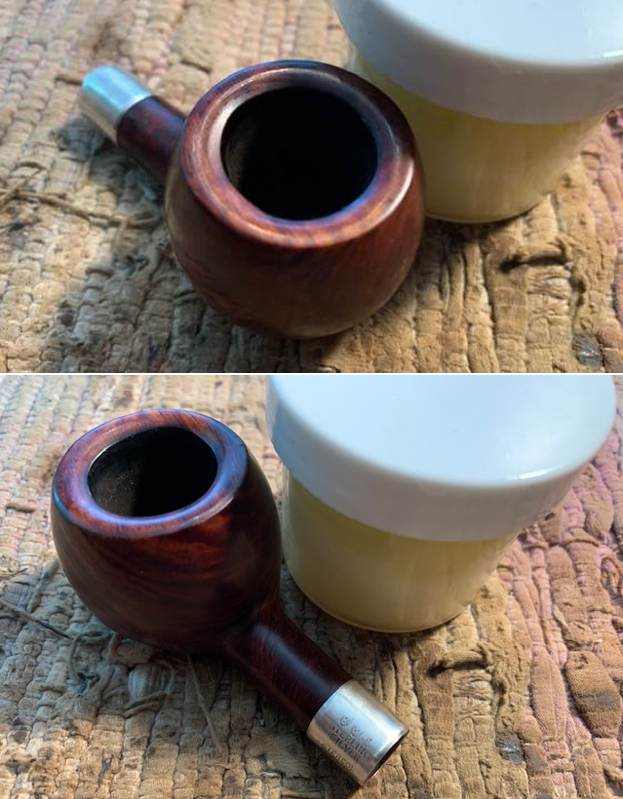
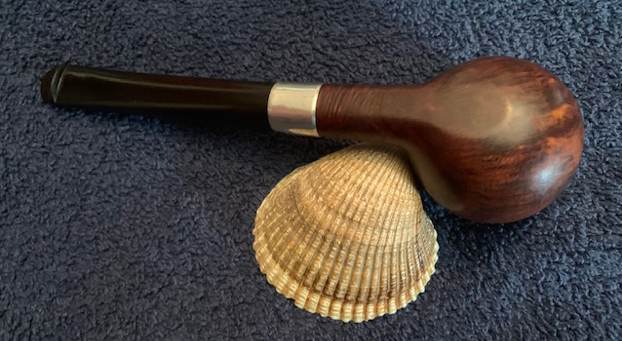
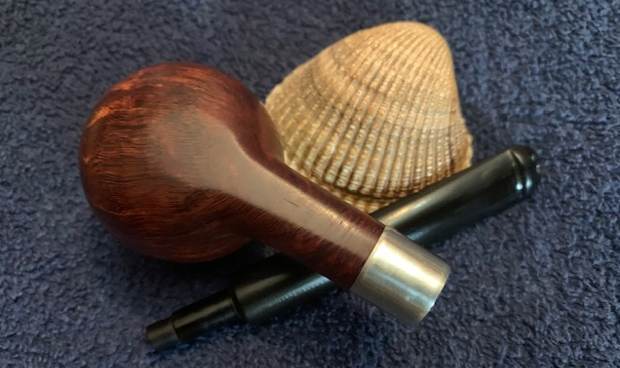
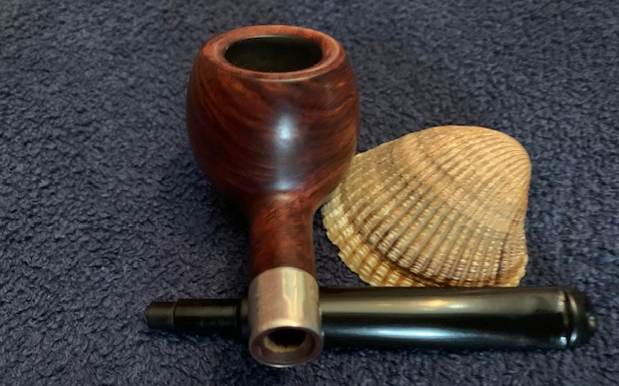
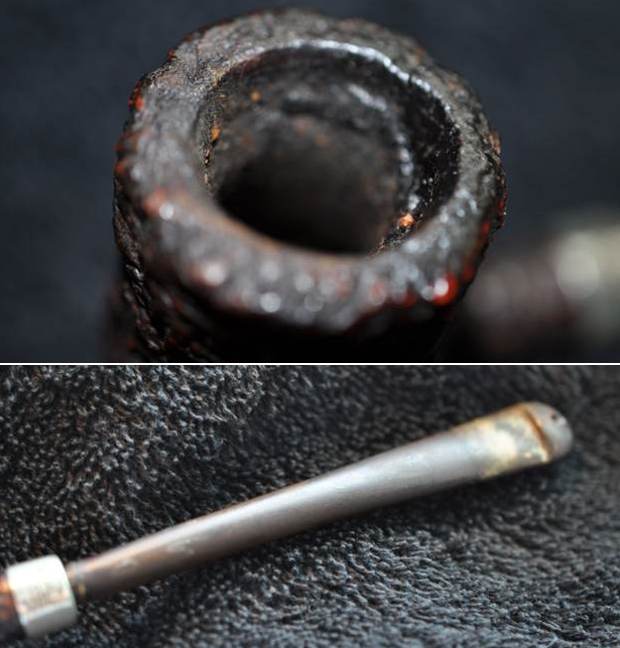
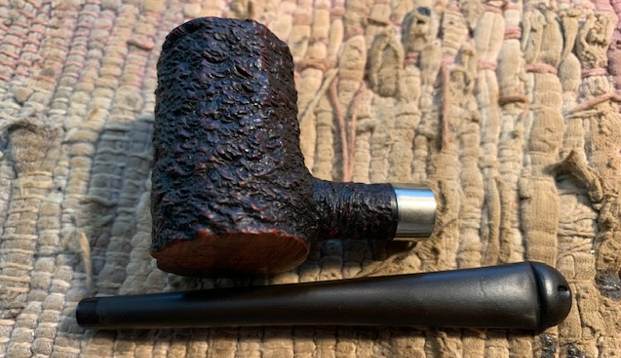
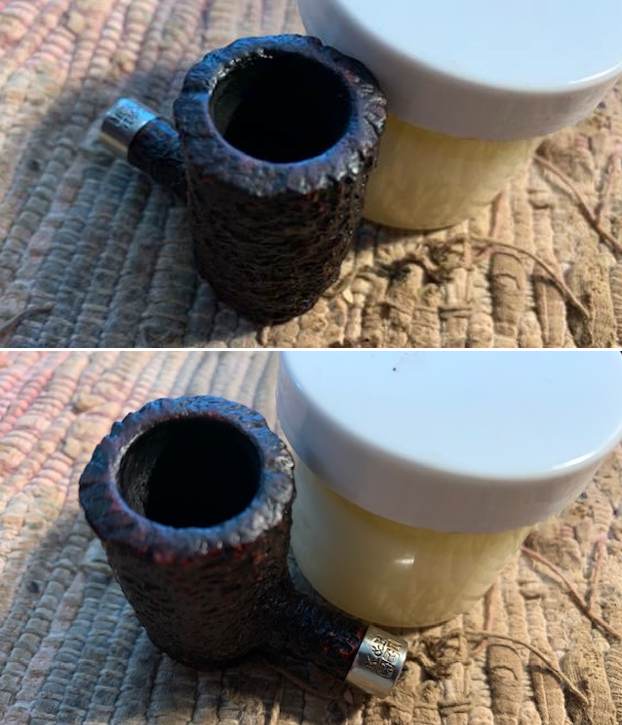
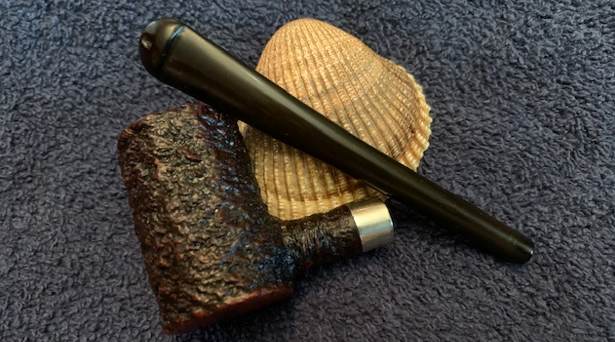
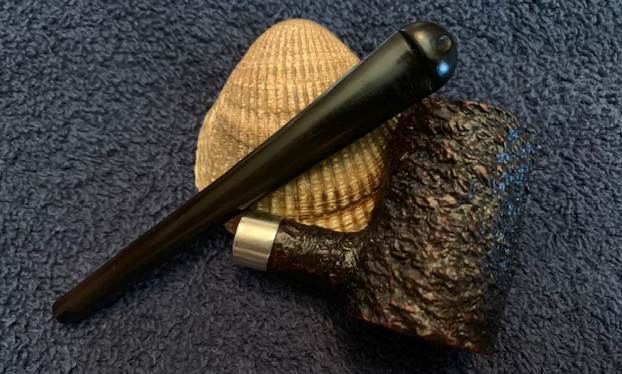
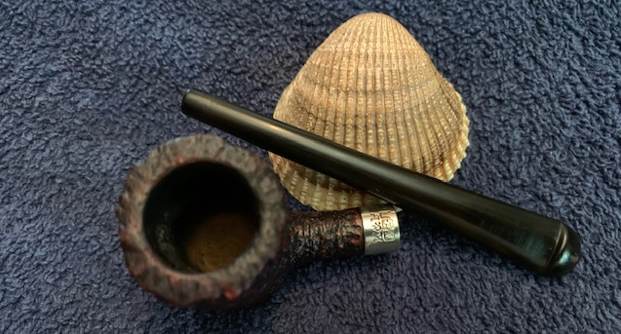
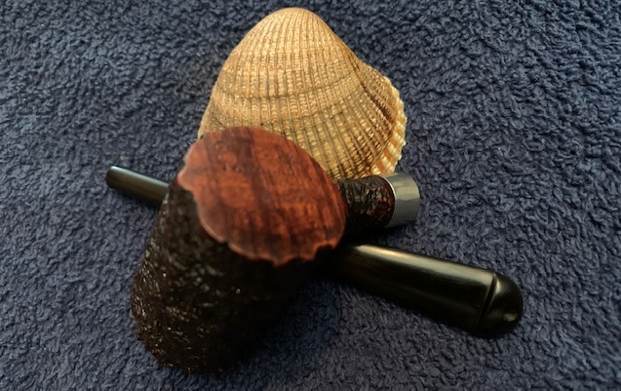
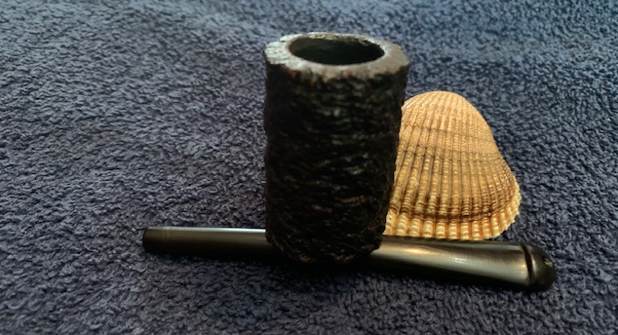
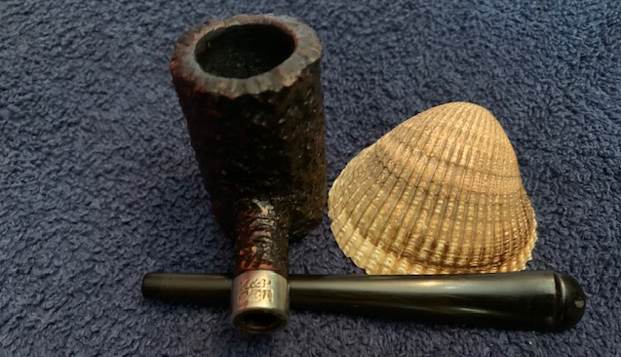
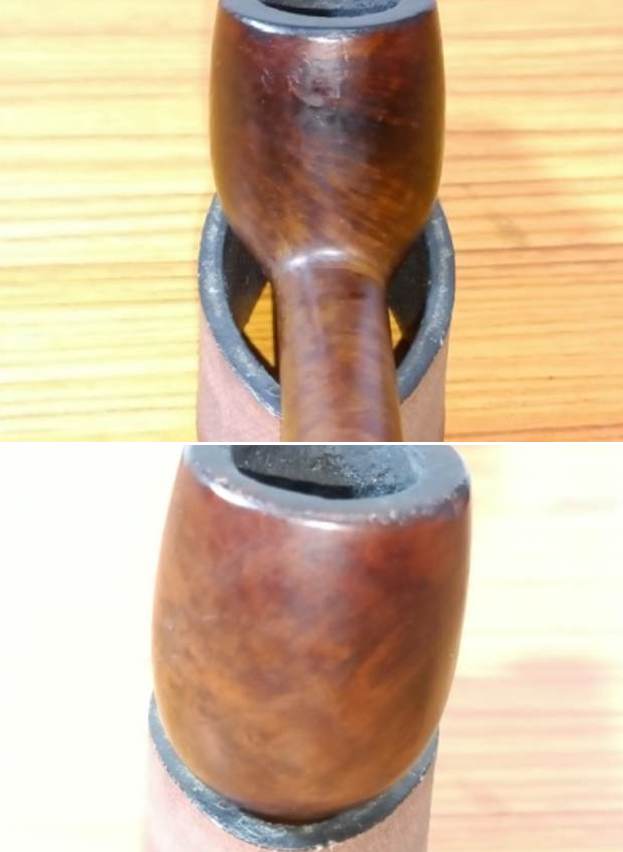
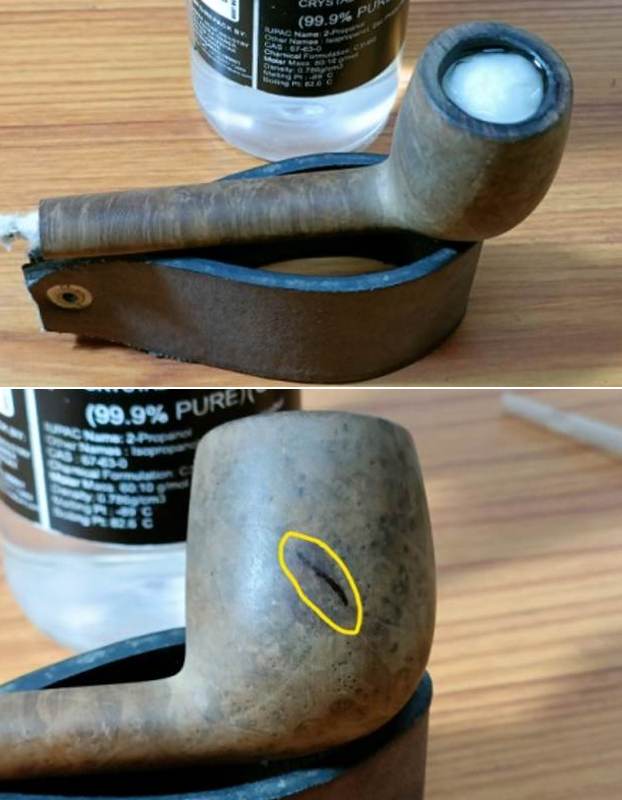
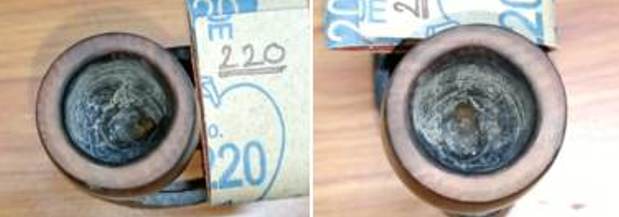
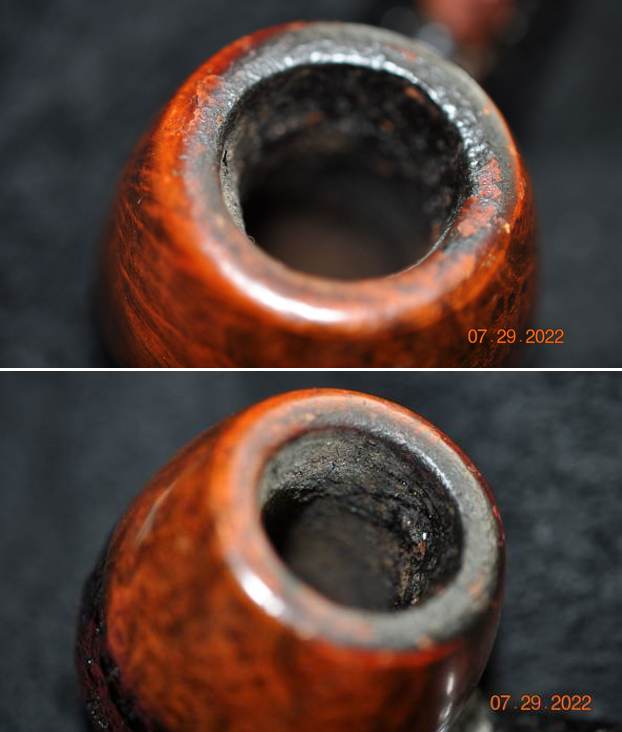
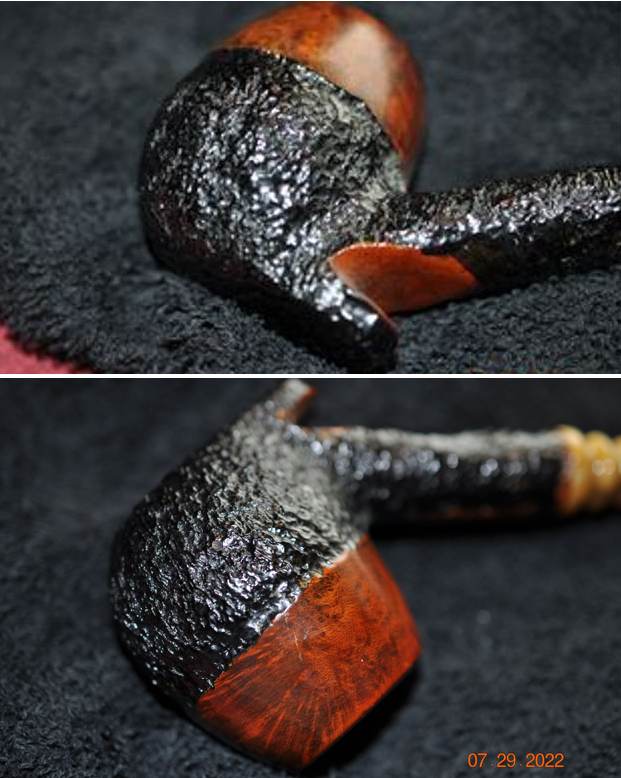
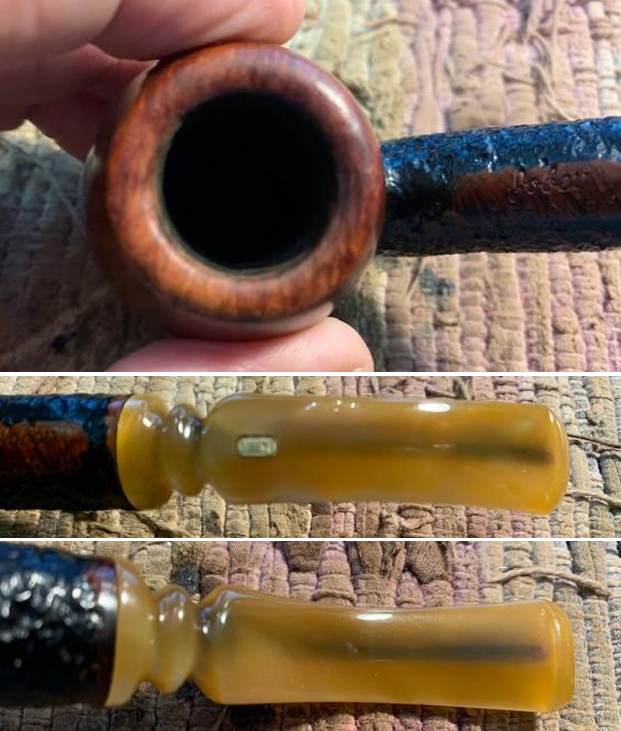
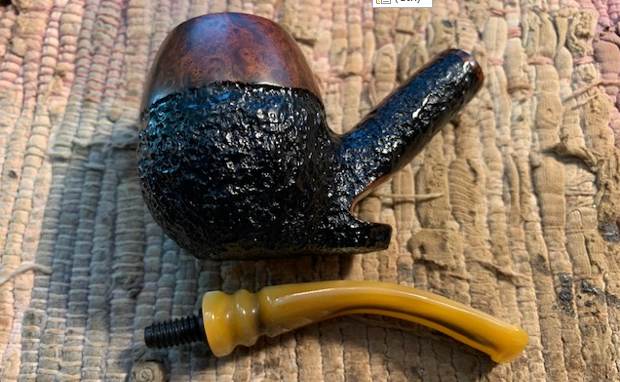
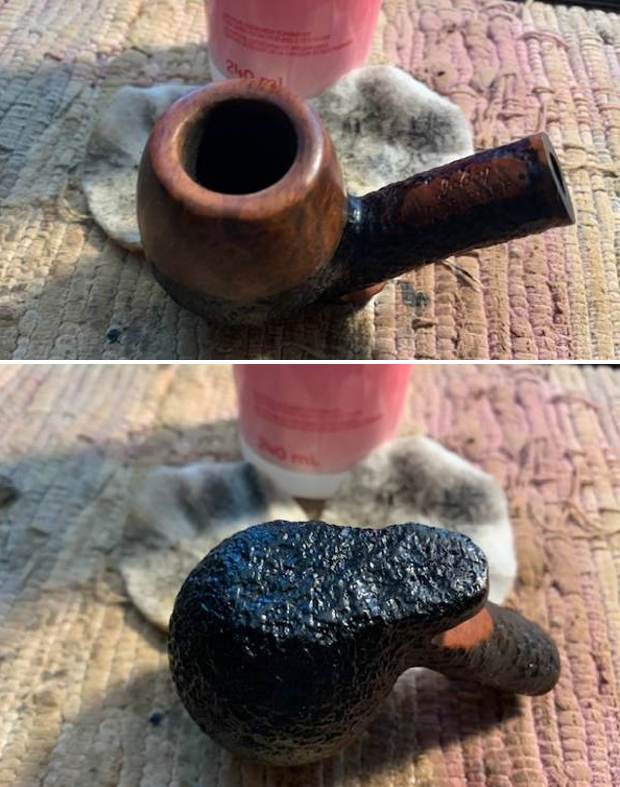
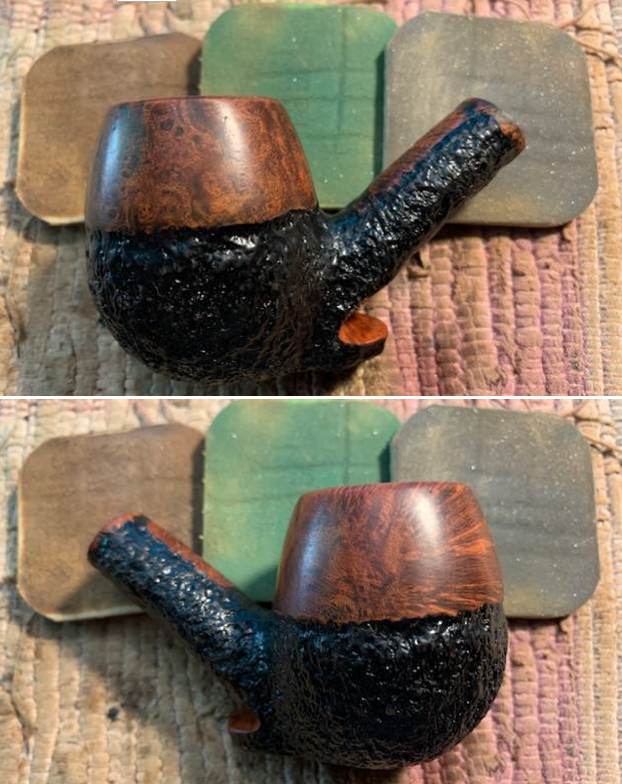
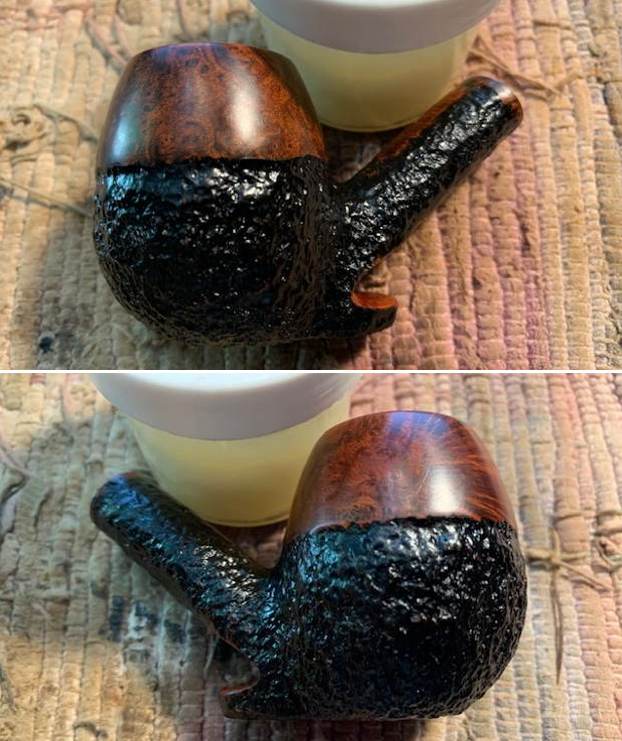
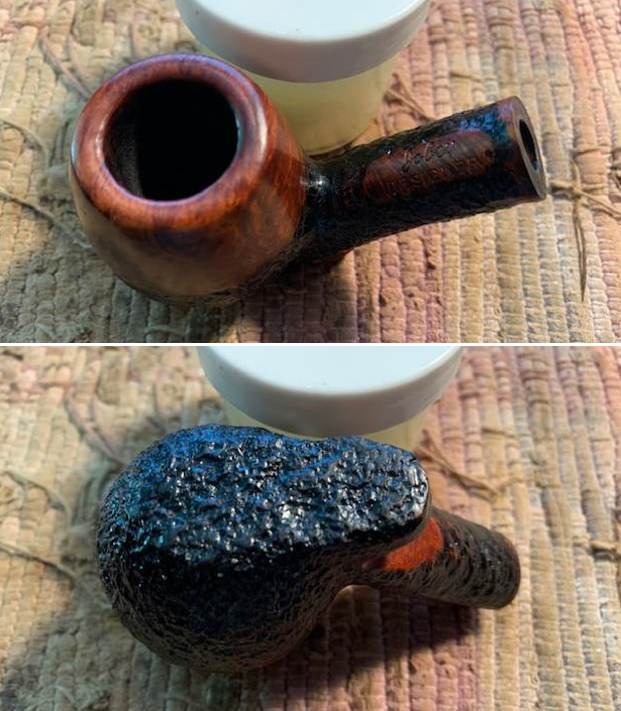
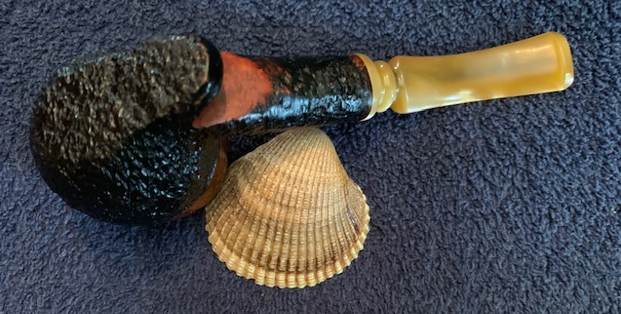
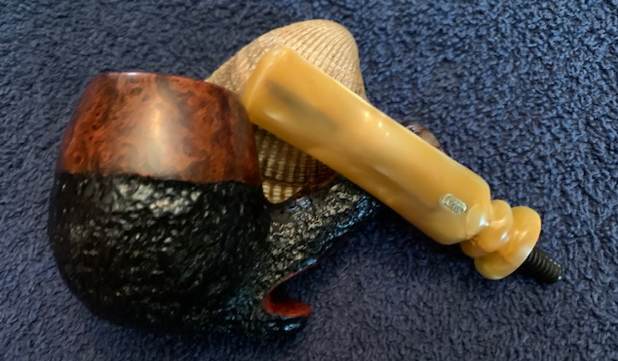
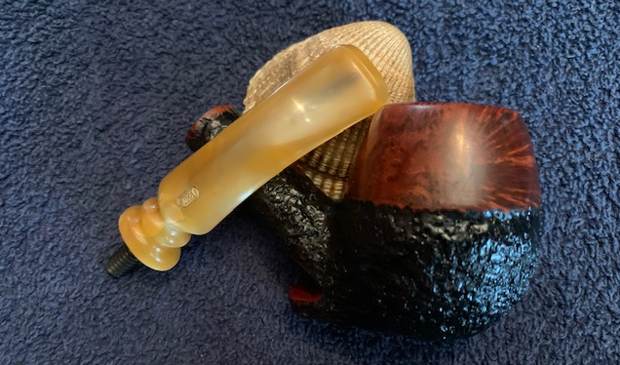
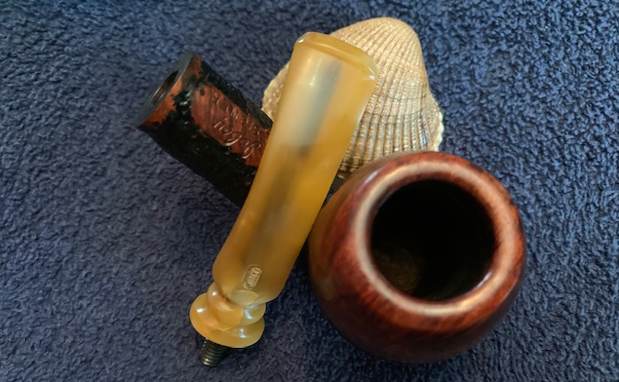
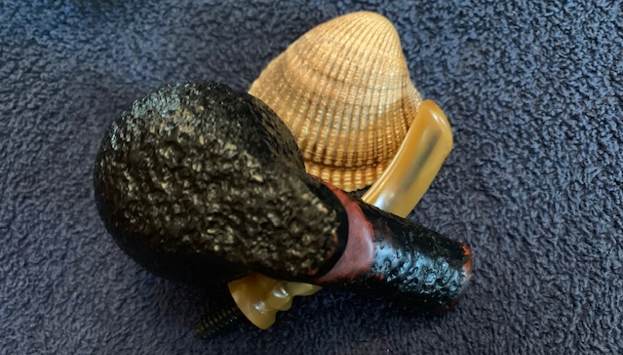
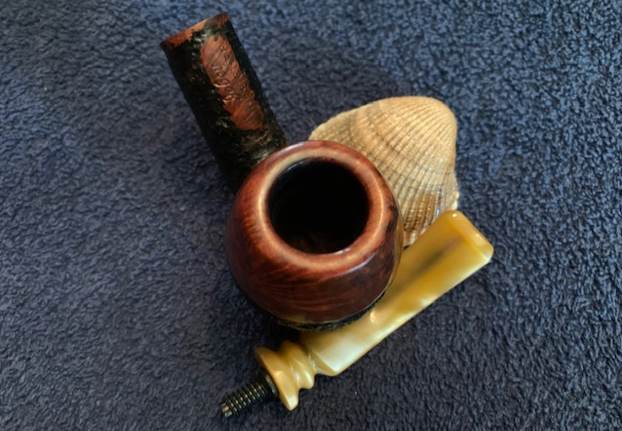
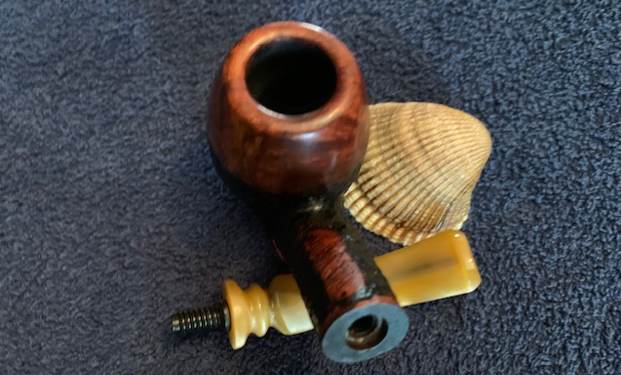
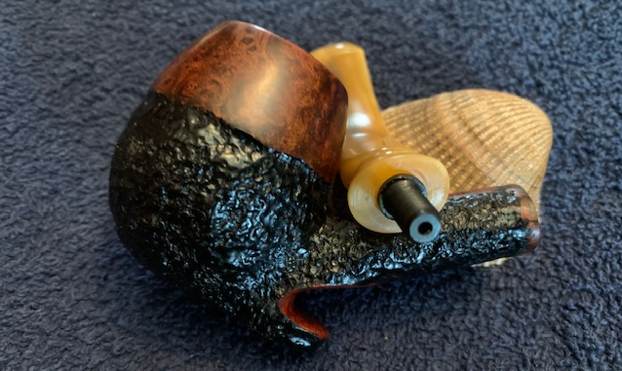
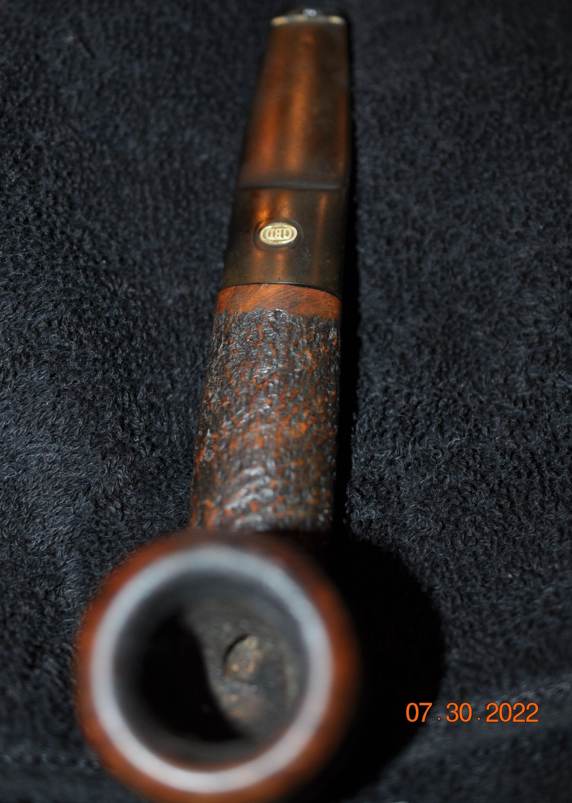
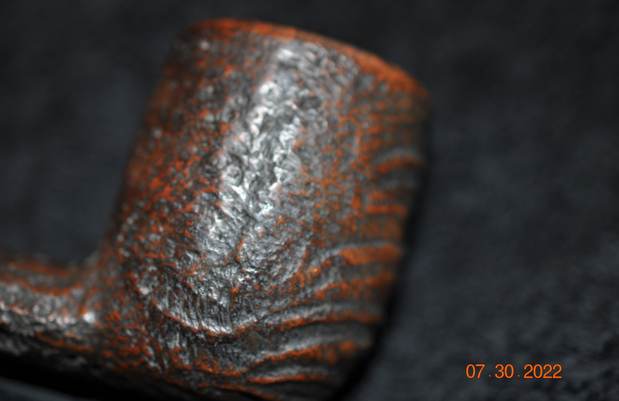
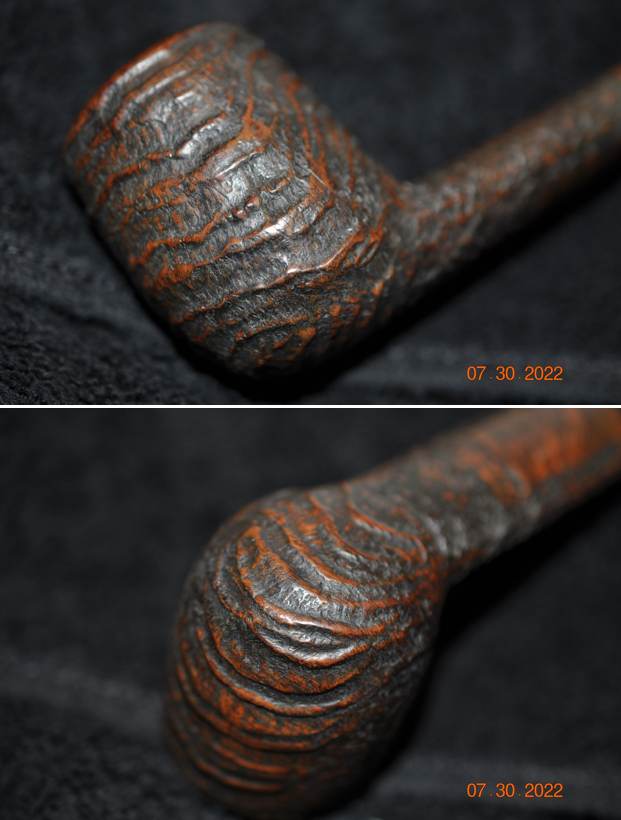
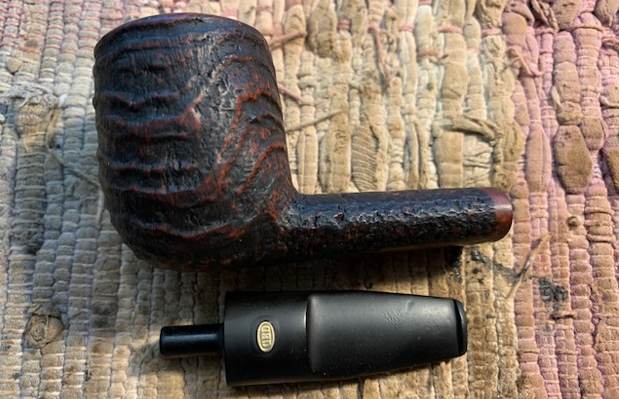
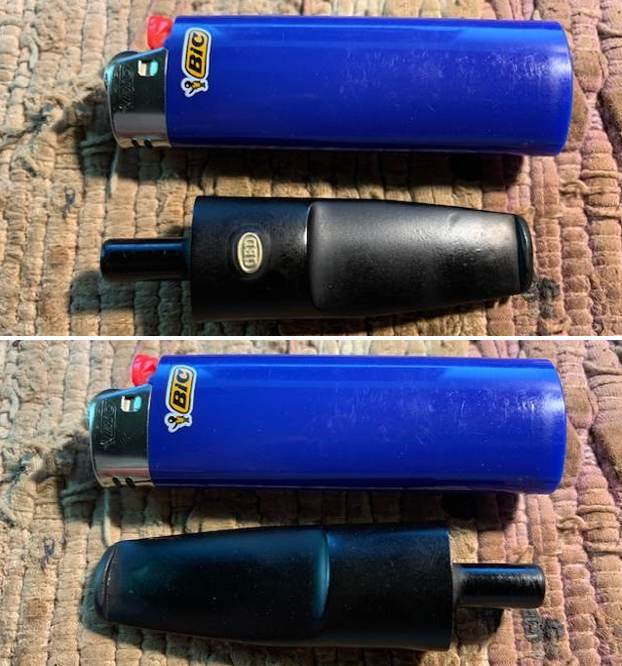
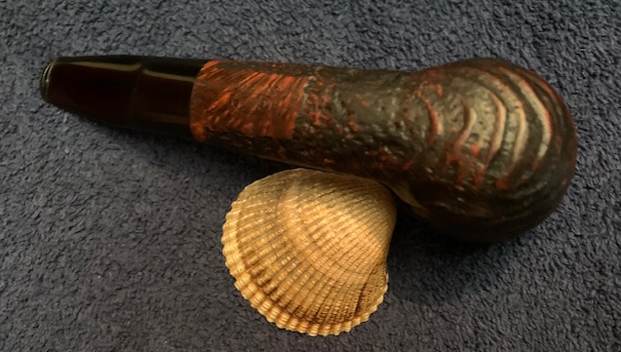
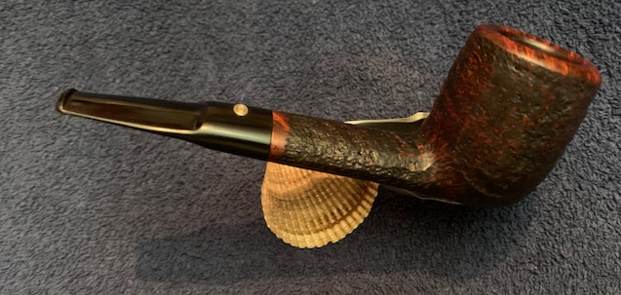
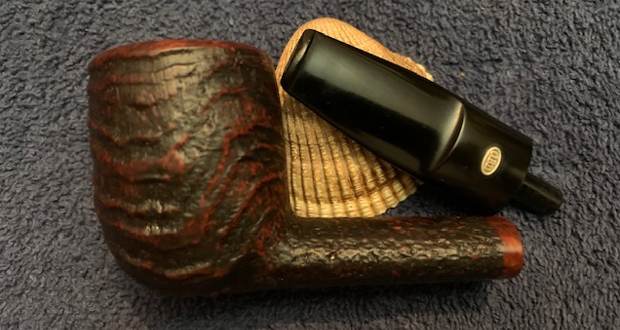
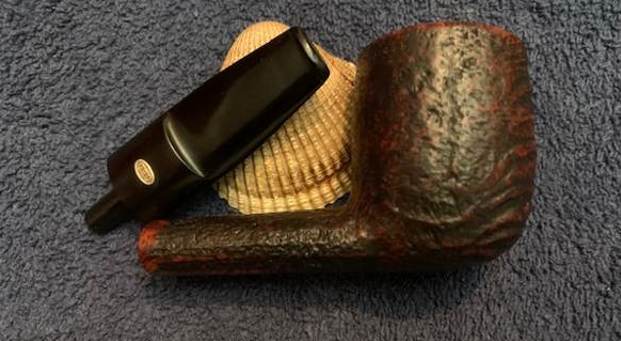
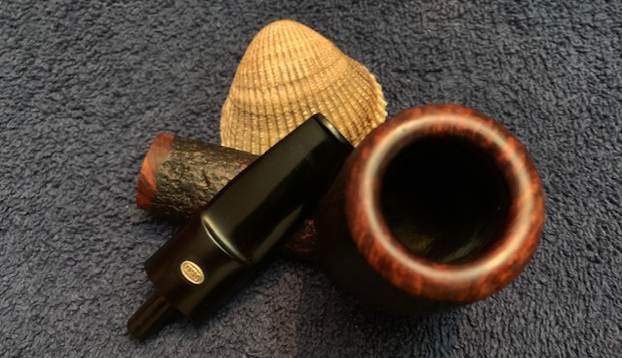
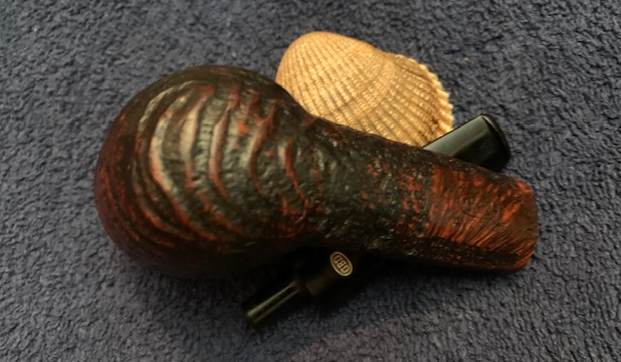
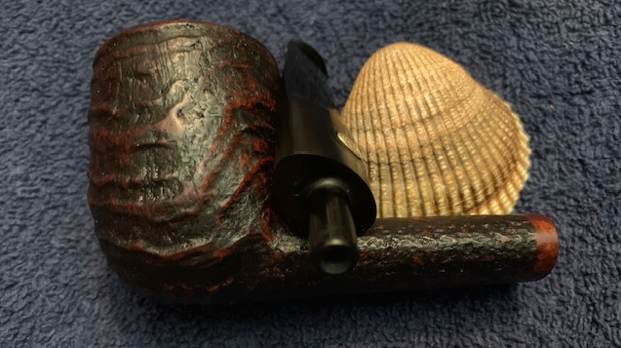
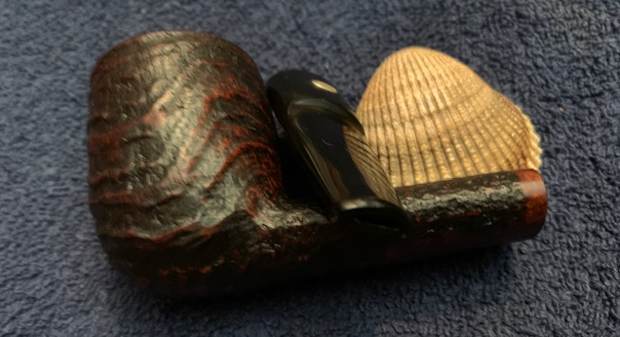
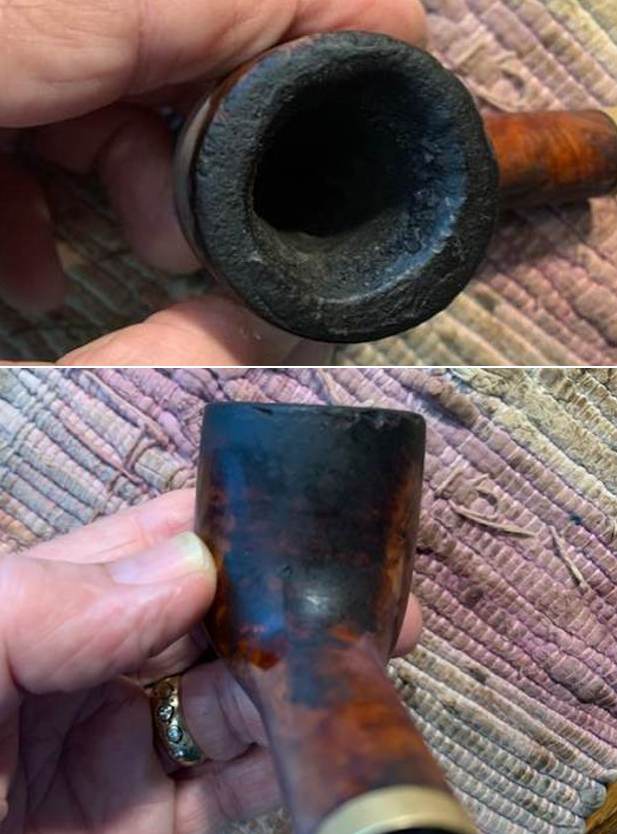
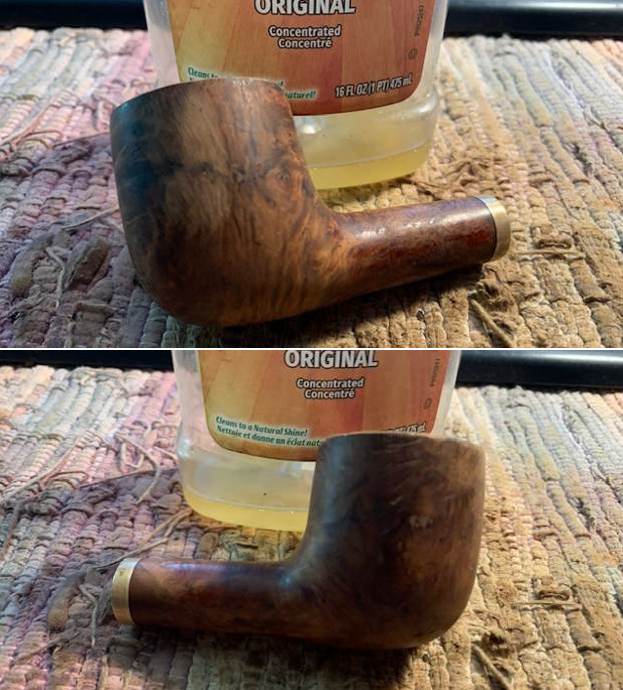
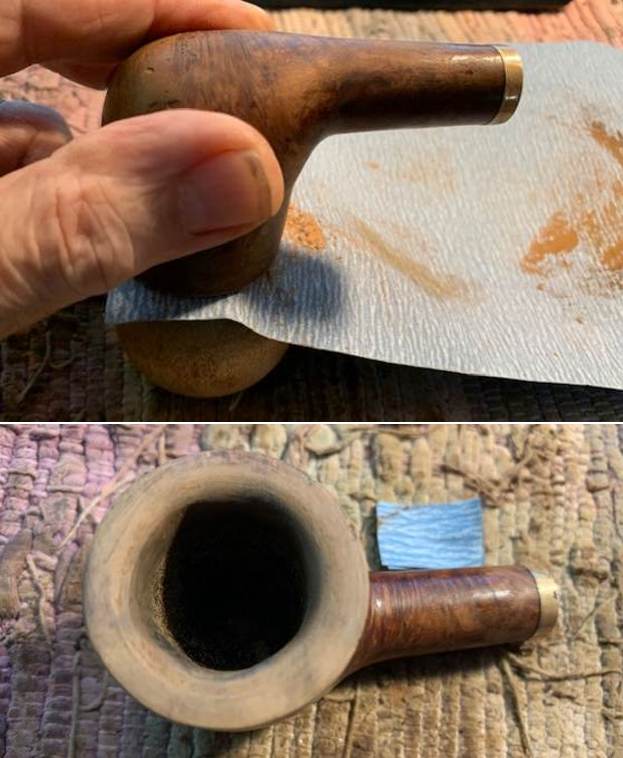
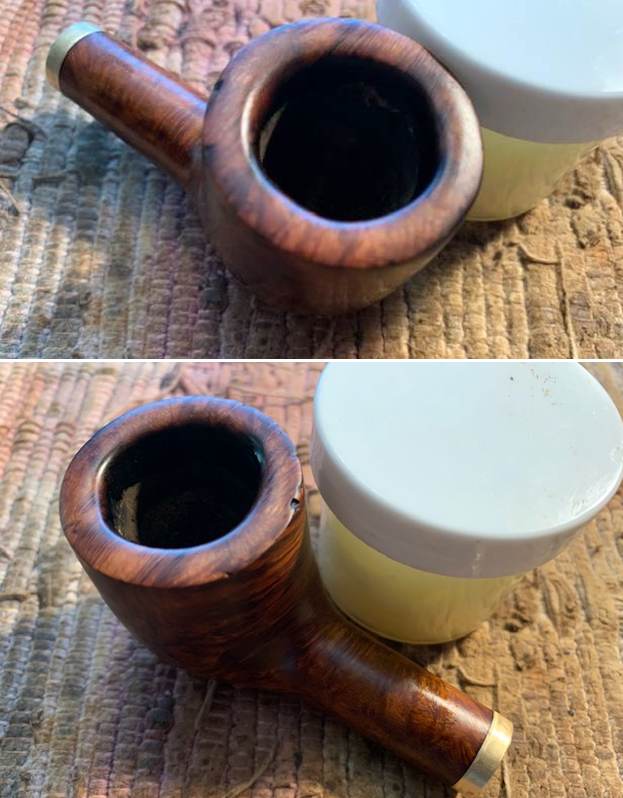
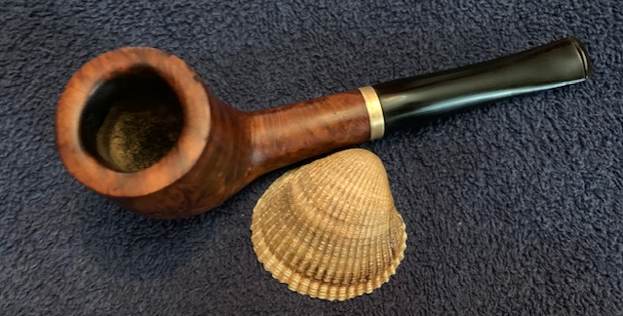
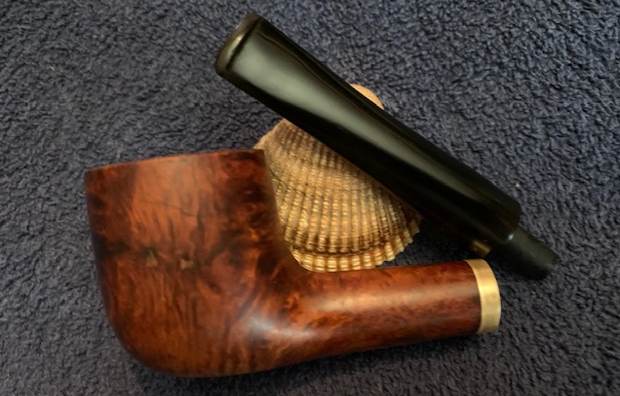
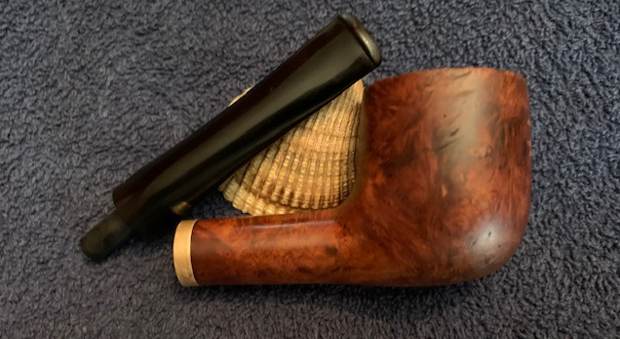
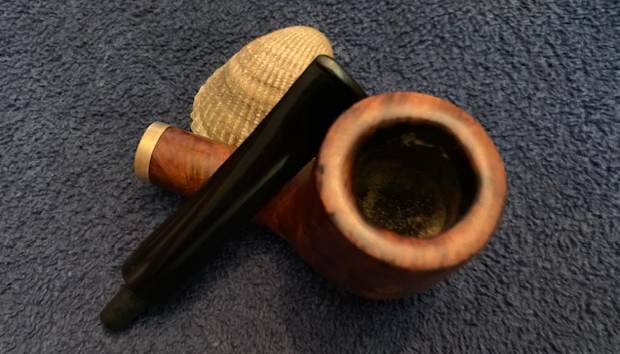
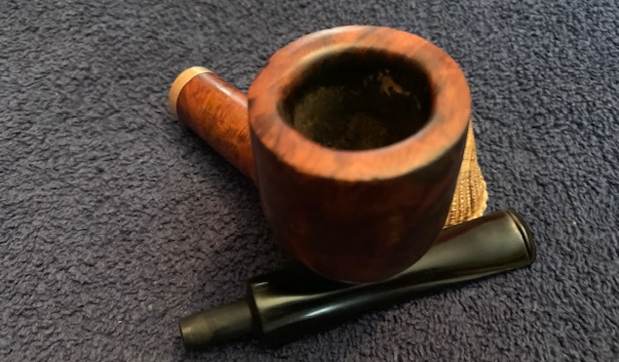
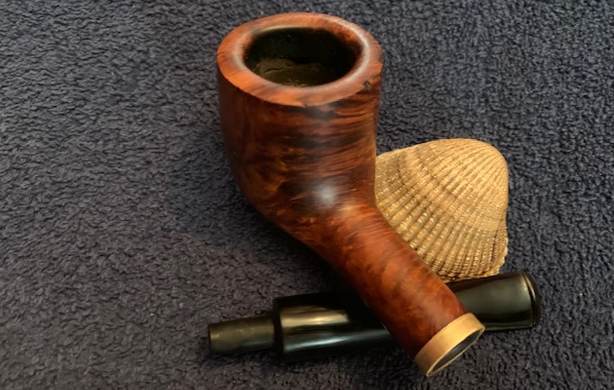
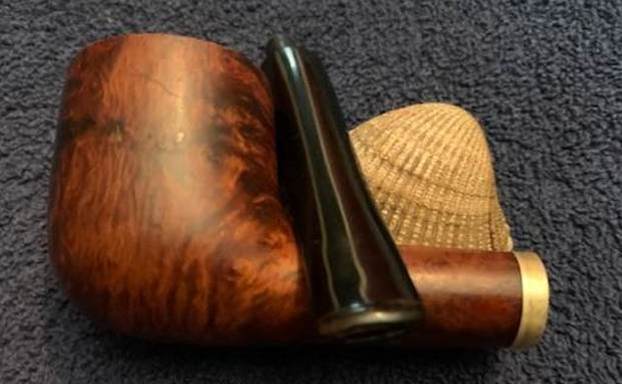
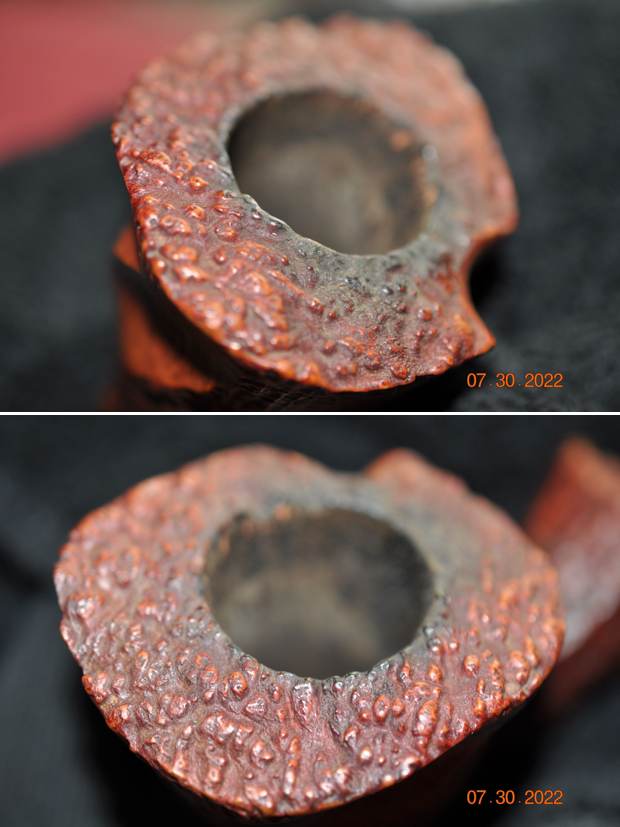
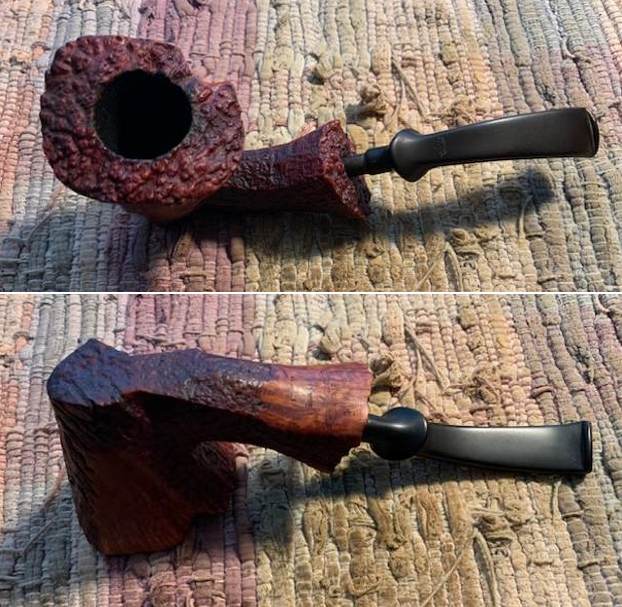
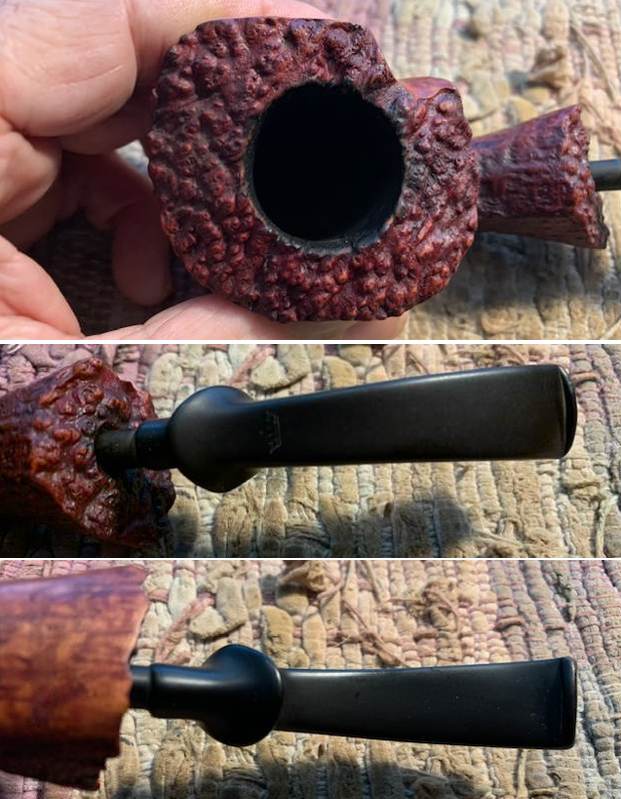
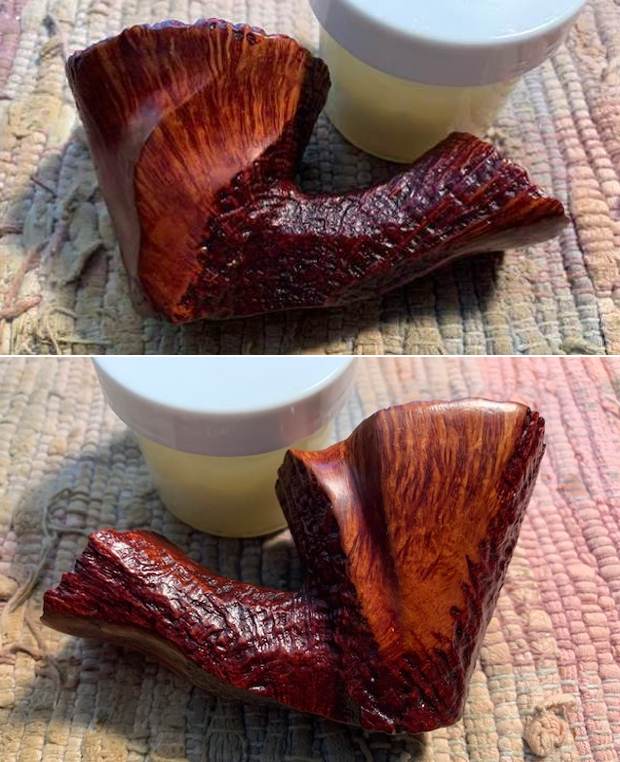
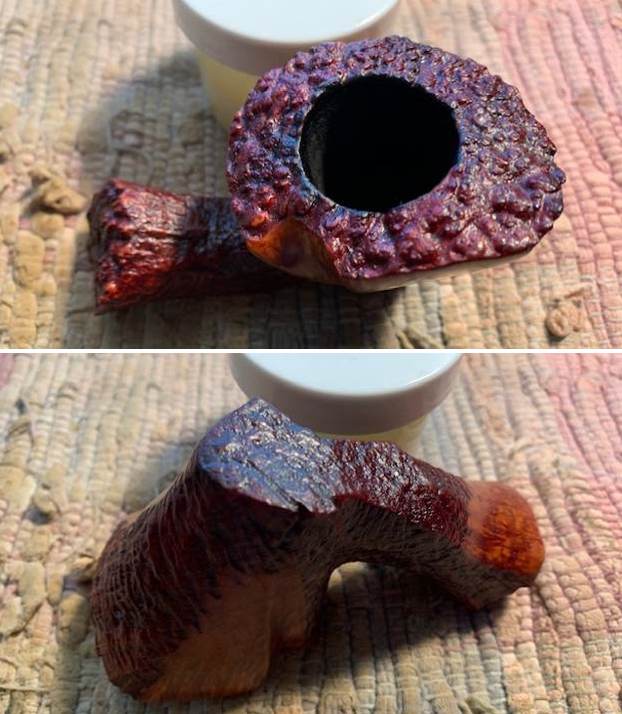
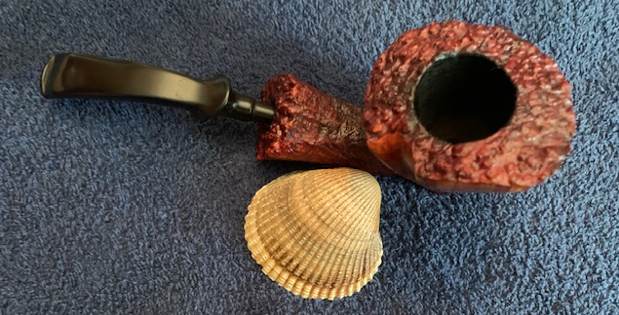
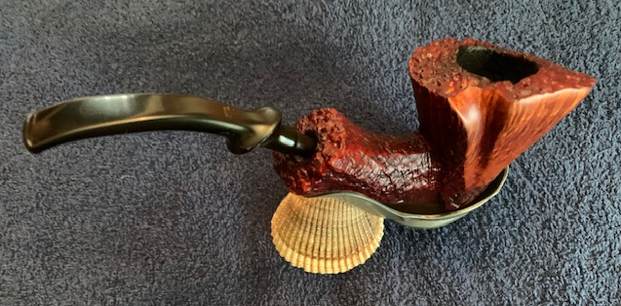
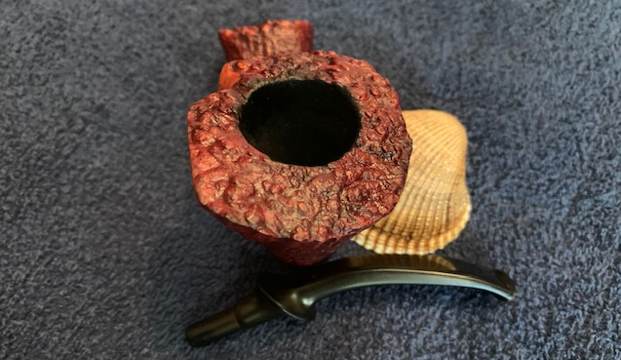
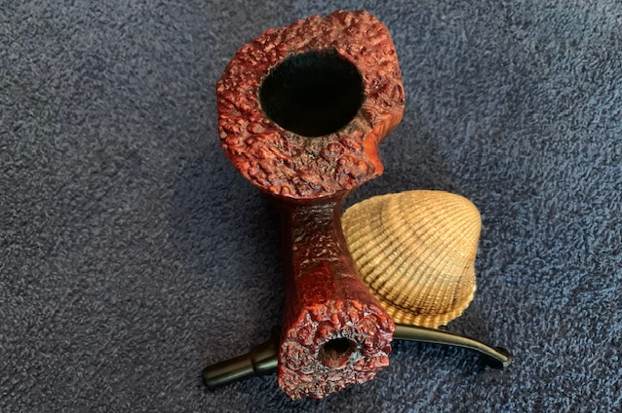
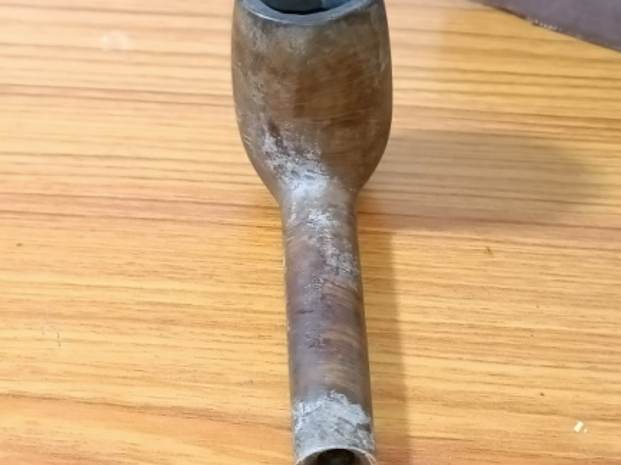
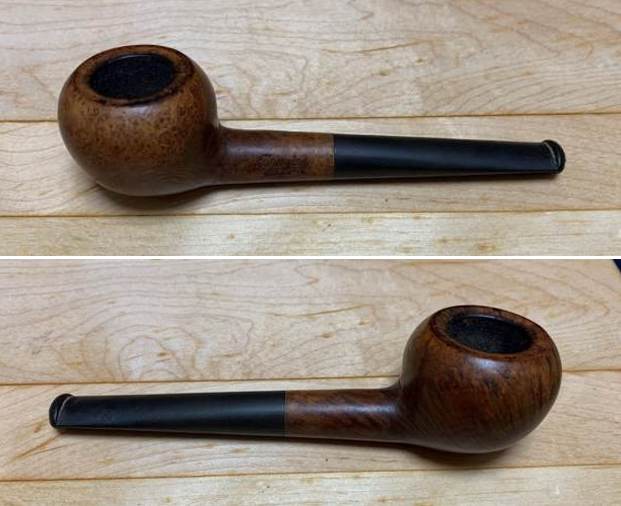
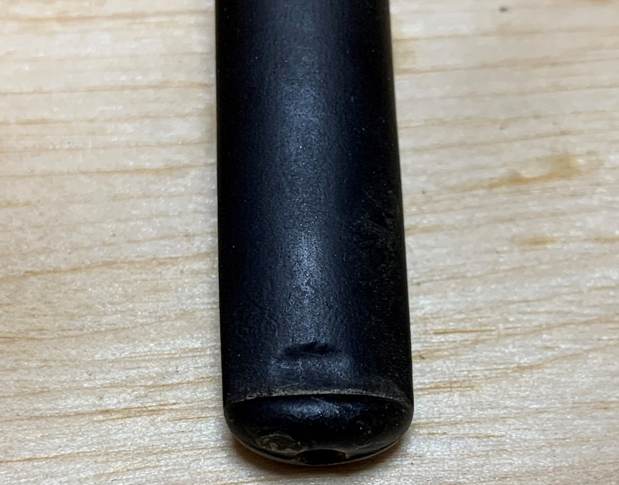
The stummel is covered in dirty grayish white water stains and the surface appears dull and lifeless. The first look would dissuade anyone from even considering it for restoration. However underneath all that grime and stains, lurked a solid beautiful 60/ 70 year old English pipe. The stummel surface has a couple of scratches and dings/ dents. The chamber has a decent layer of uneven carbon cake with the lava overflowing over the rim top surface. Under the coat of lava, the rim top surface appears uneven. The inner rim edge appears uneven and charred. The mortise is filthy and shows accumulation of ash and oils and gunk. The smells of old tobacco inside the chamber and mortise are strong and acrid. It seems that my grand old man was out to prove to the world that the tapered vulcanite bite proof stem was anything but bite proof. The stem has some seriously deep tooth indentations on either surface in the bite zone. The stem would require major efforts to reconstruct the bite zone, including the buttons. Following pictures will give you a general idea of the condition of the pipe before I start my work on resurrecting the pipe.
 Detailed Inspection
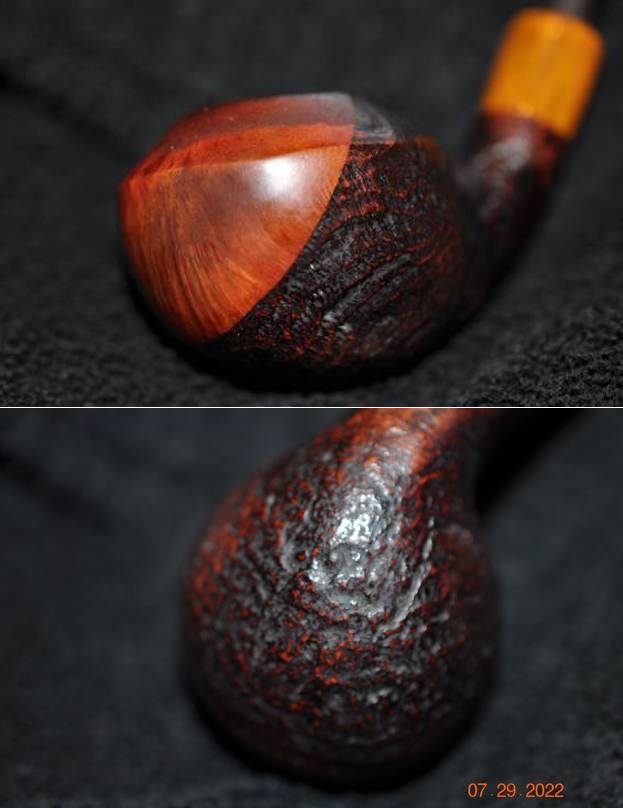
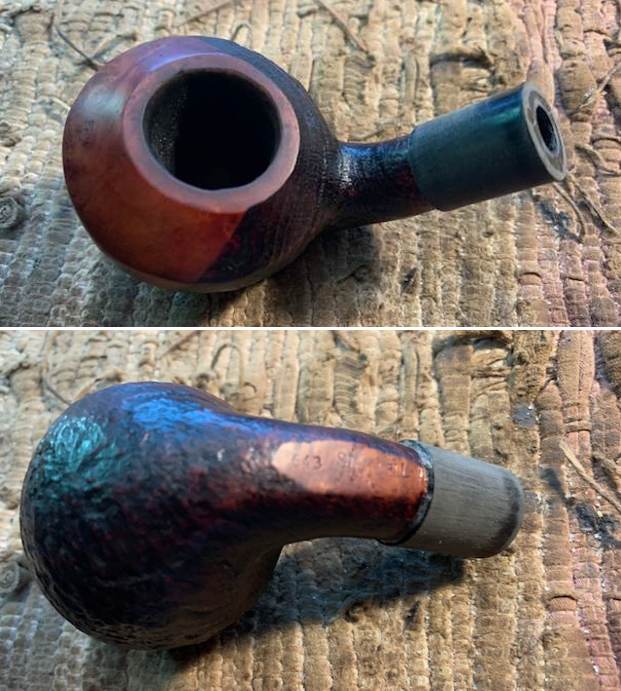
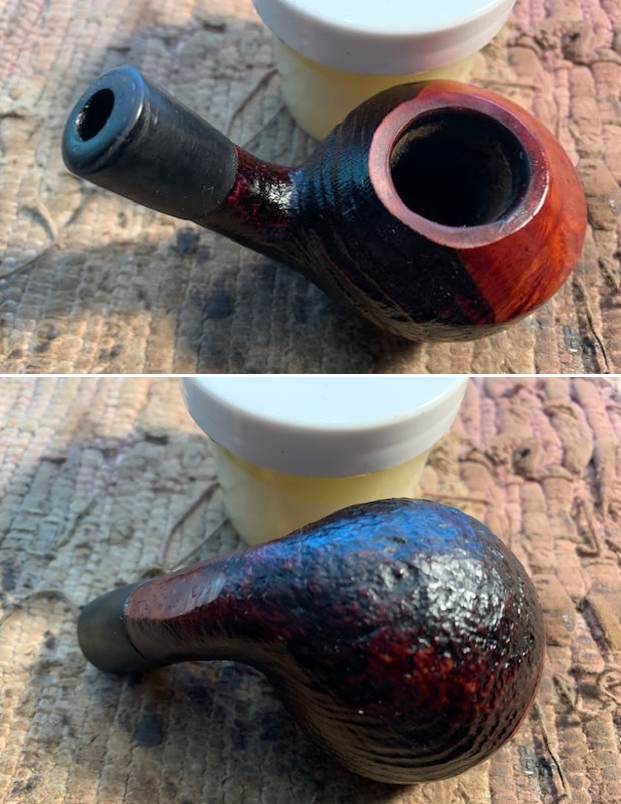
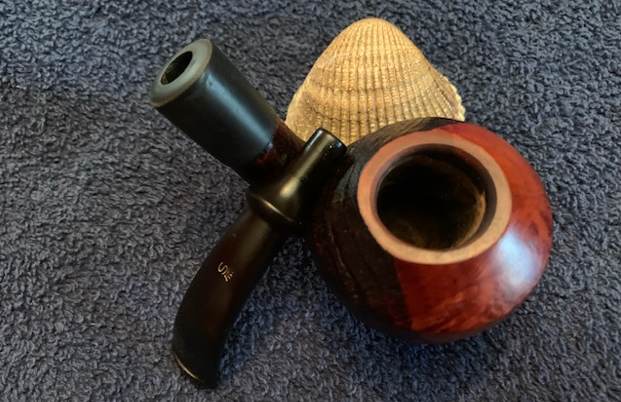
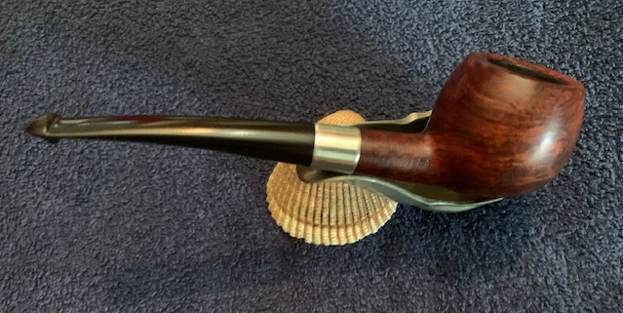
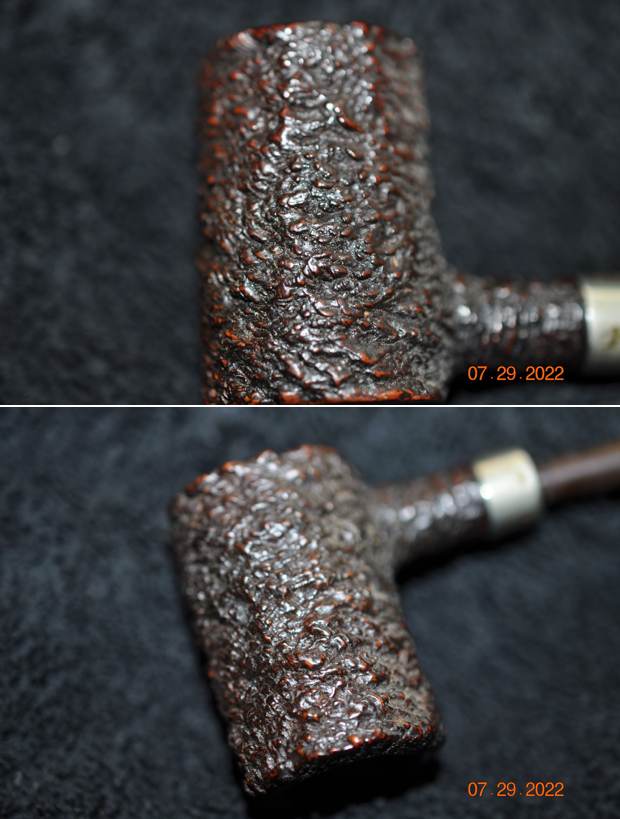
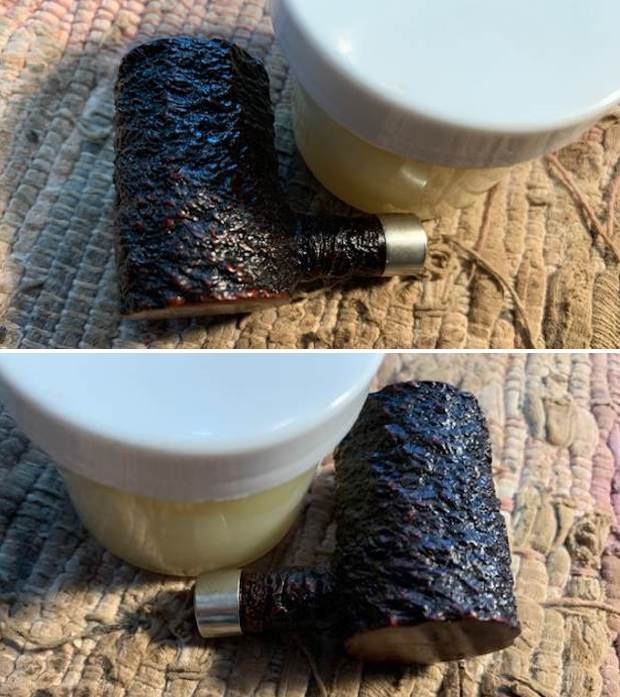
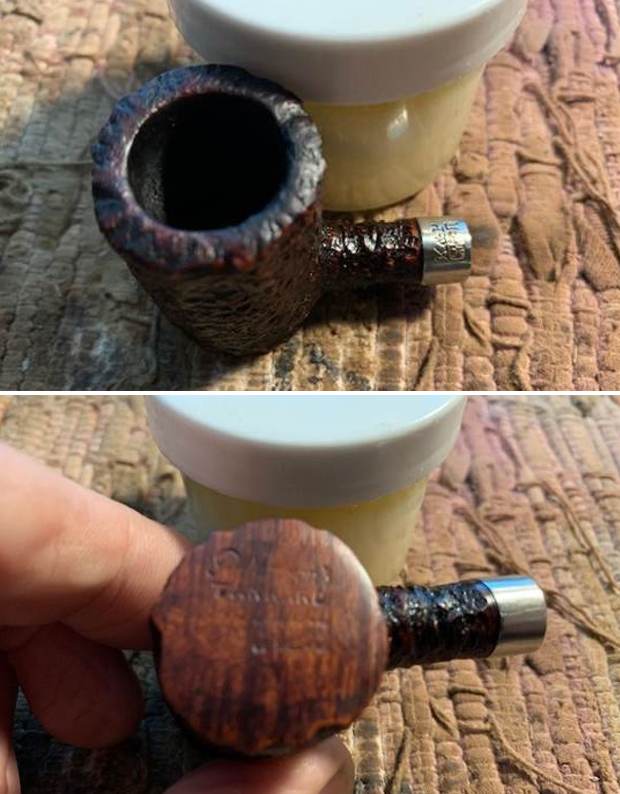
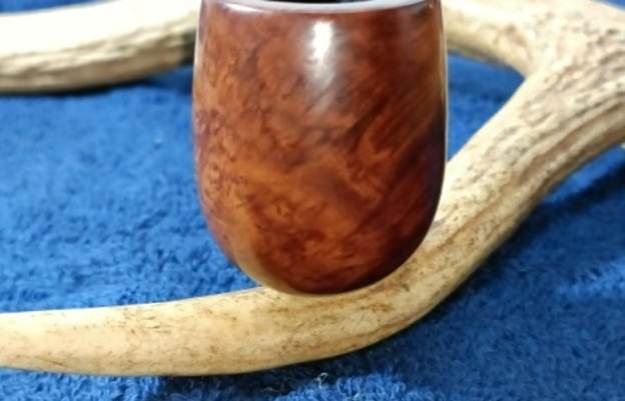
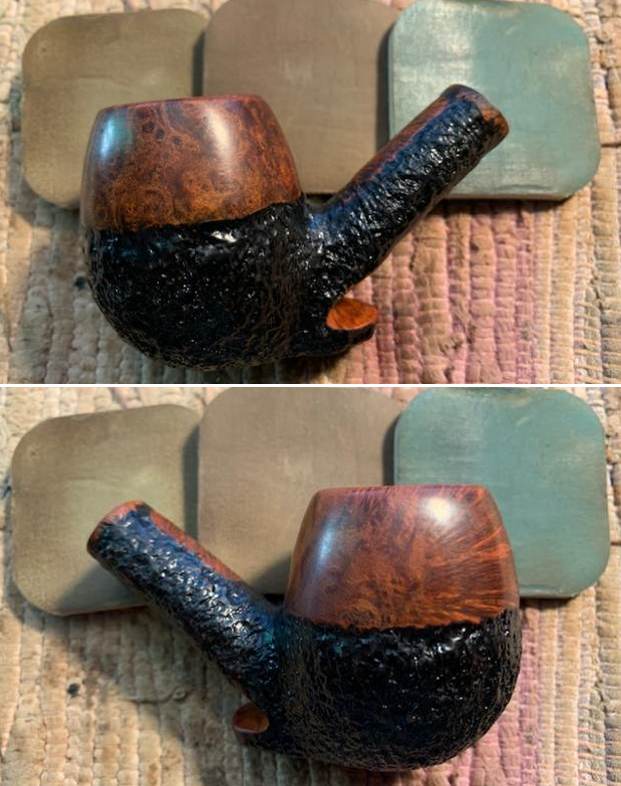
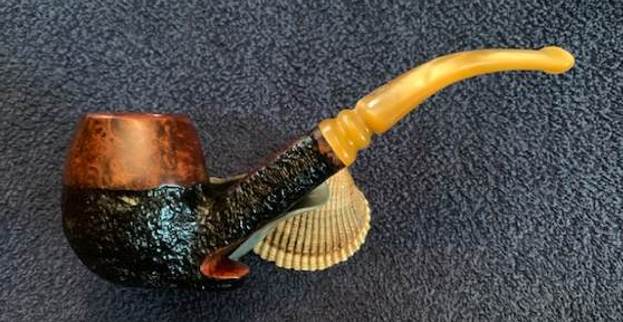
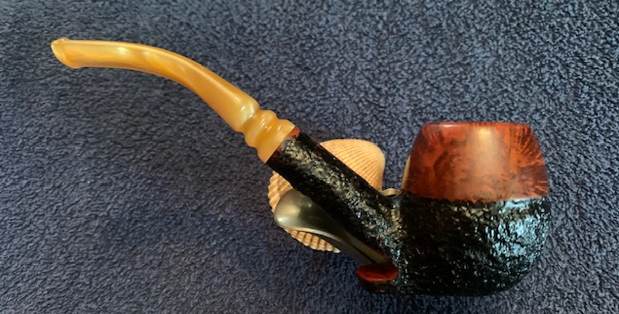
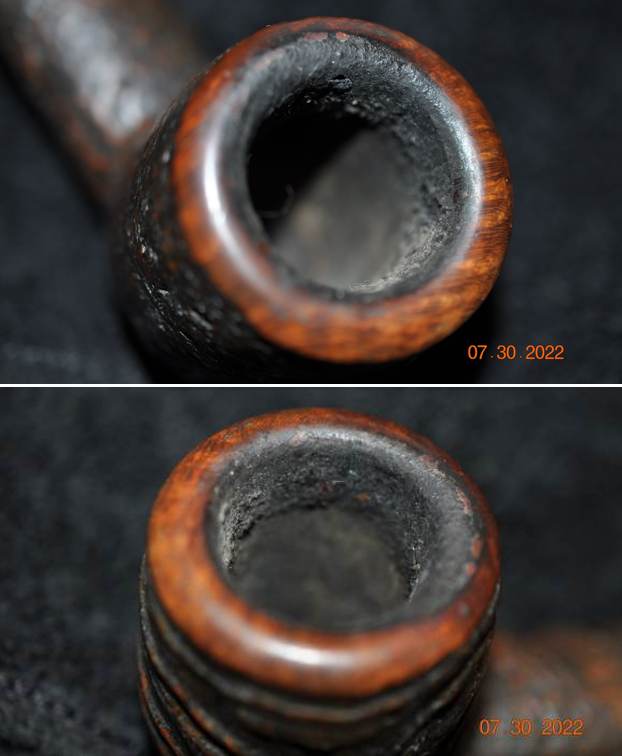
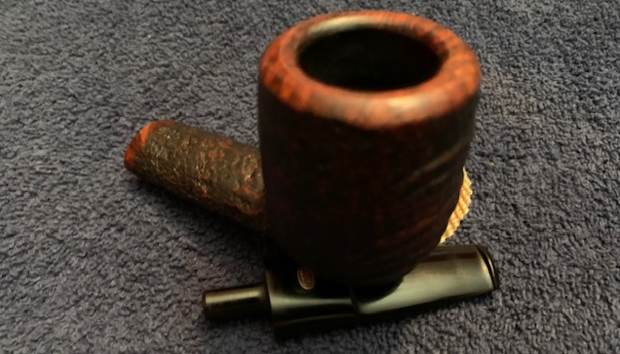
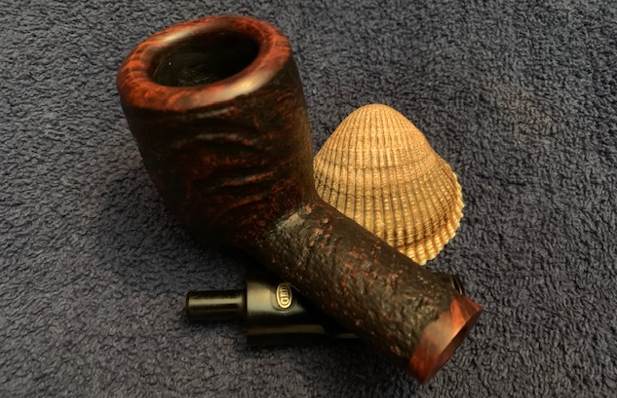
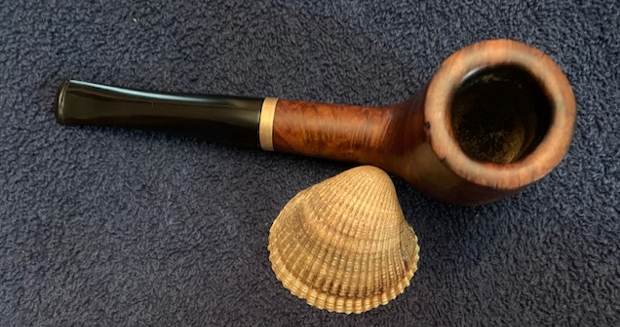
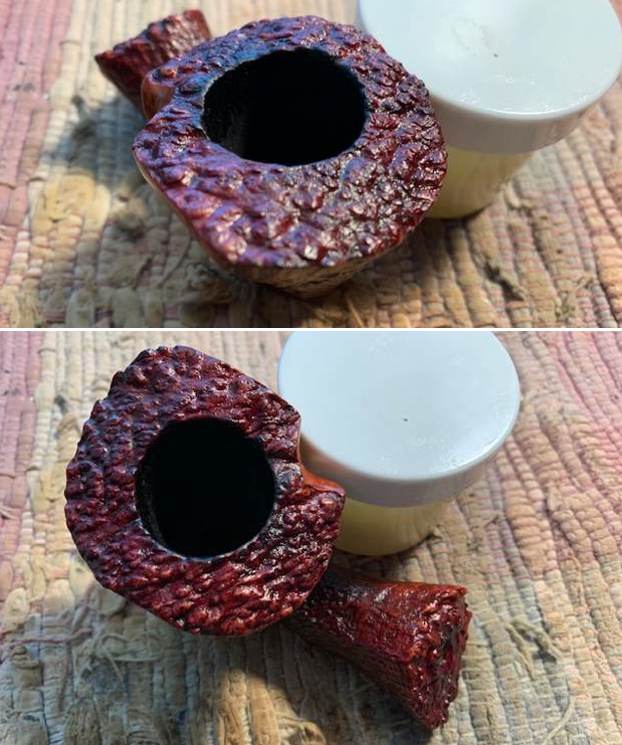
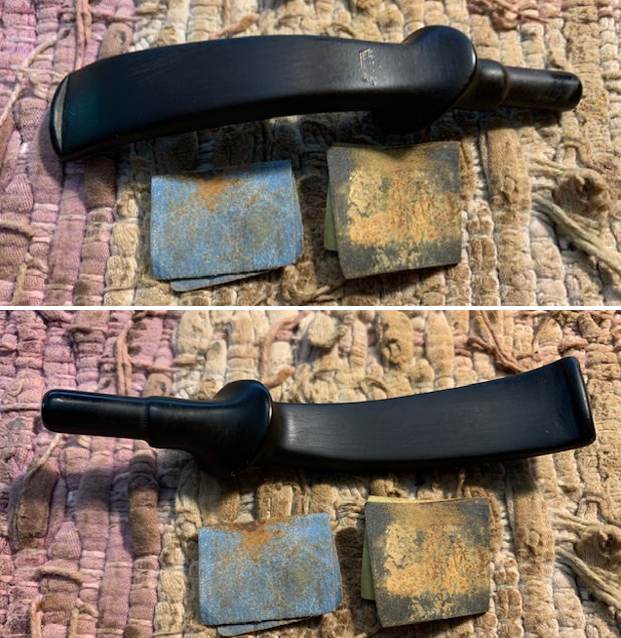
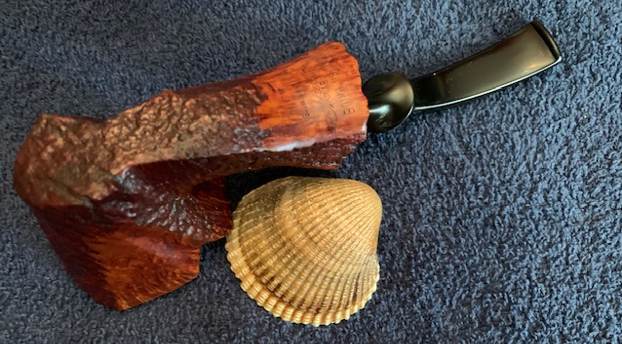
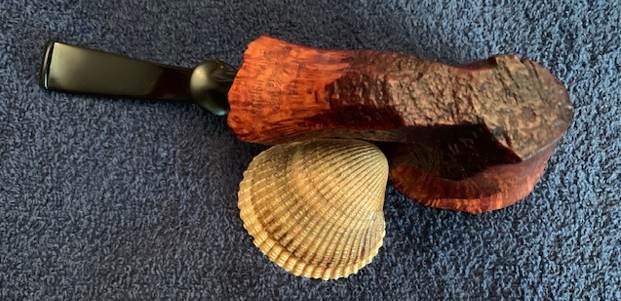
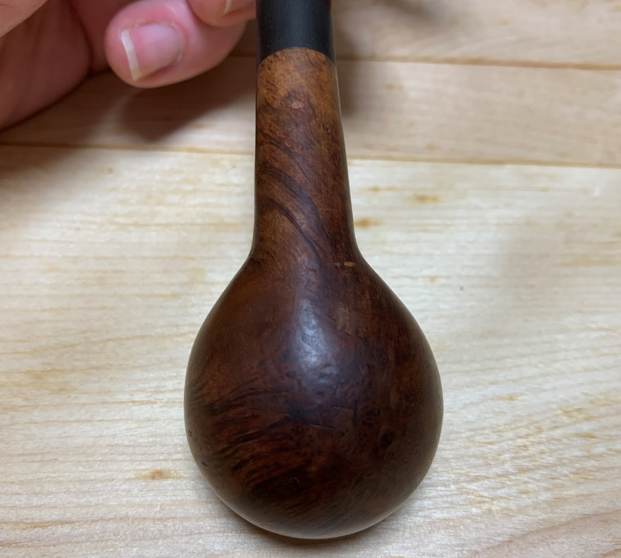
The chamber has a decent layer of cake that is even all around. The condition of the walls of the chamber will be ascertained once the cake has been evened out. Given the solid feel and even color of the stummel, the probability of serious damage like a burn out or deep heat fissures to the walls is a distant possibility. The rim top surface is uneven and signs of having been knocked against hard edges is evident at 12 o’clock and 4 o’clock directions where the surface is chipped (enclosed in green). The beveled inner rim edge appears charred in 12 o’clock to 9 o’clock and 4 o’clock to 6 o’clock direction (enclosed in red) and is uneven along the complete edge. The outer rim edge has a few minor dings and chipped surfaces and should be easily addressed by sanding. The smells of old tobacco are pretty strong and would need to be addressed.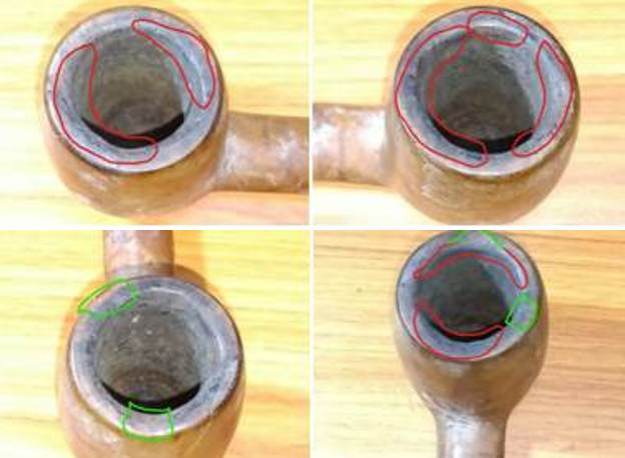 The entire stummel is covered in dirty grey white water stains and grime, a result of the pipe being stored in some damp place for years. The stummel appears to be dull and lifeless beneath all the grime and water stains. However, beautiful cross grains can be seen along the surface underneath the grime. There a number of small scratches and road rash marks on the surface can be seen, notably over the left side of the bowl (marked in yellow). The shank is dirty and clogged with old ash, oils and tars.
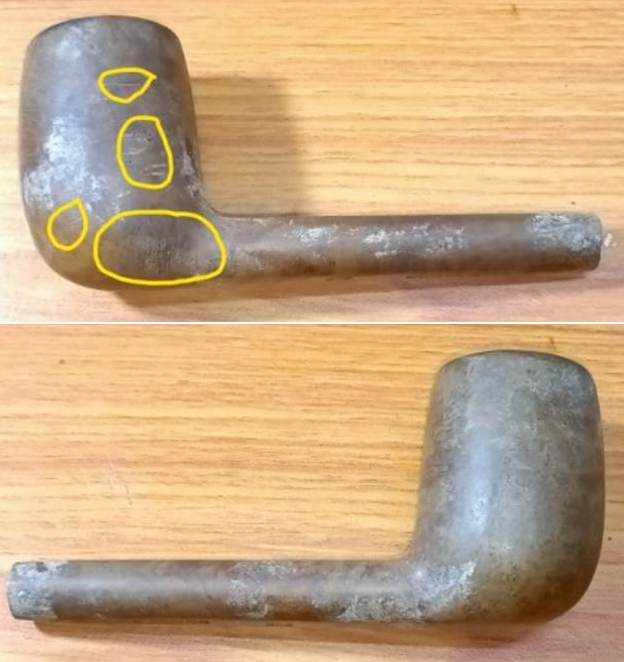

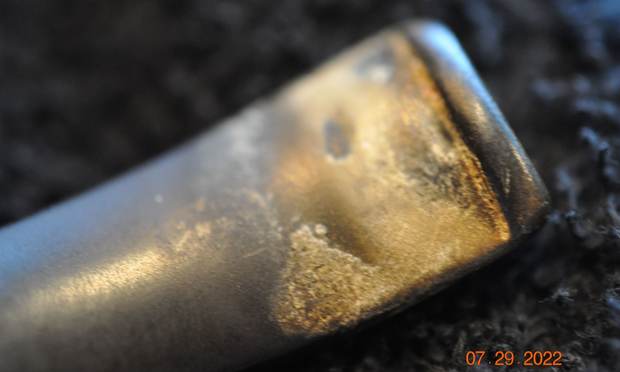
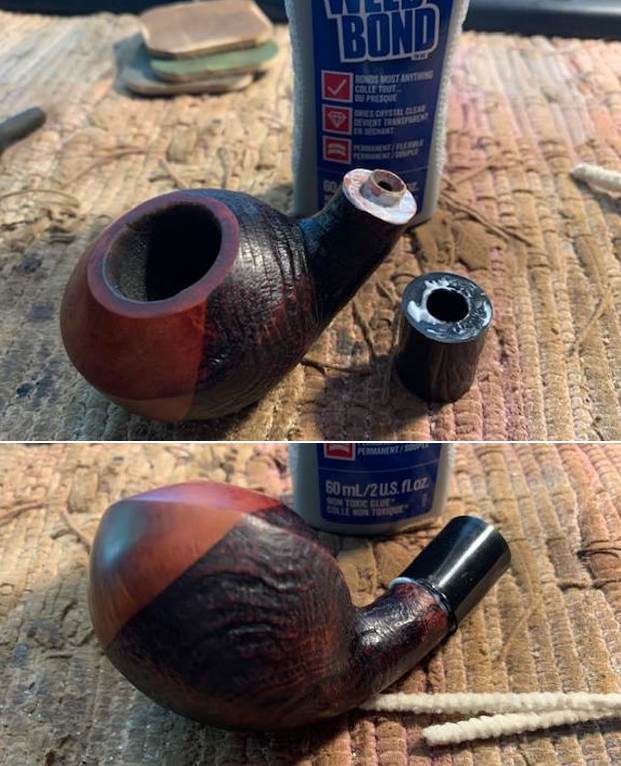
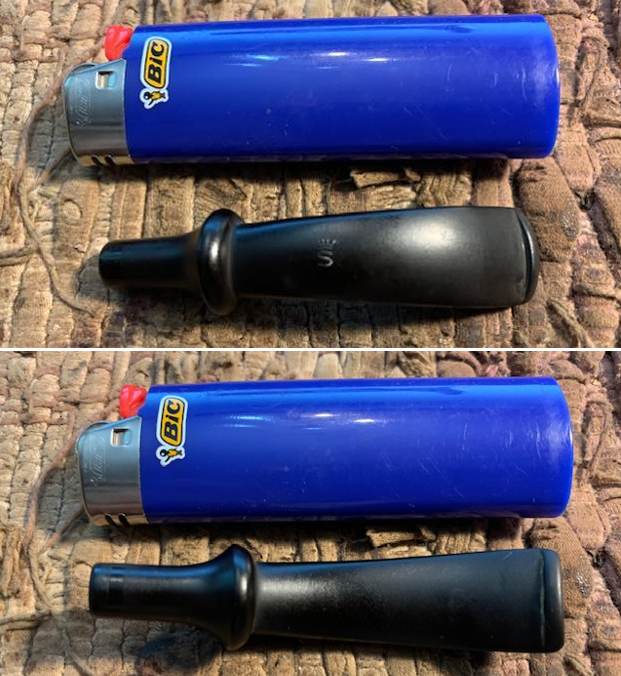
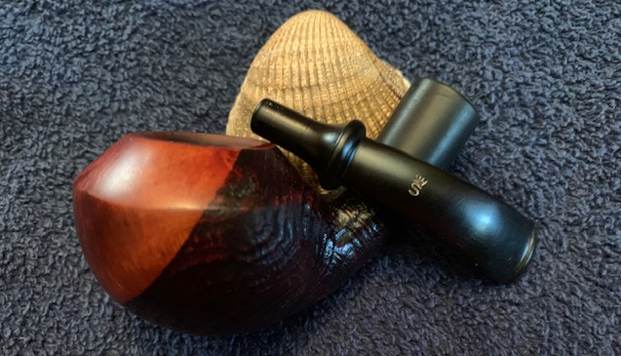
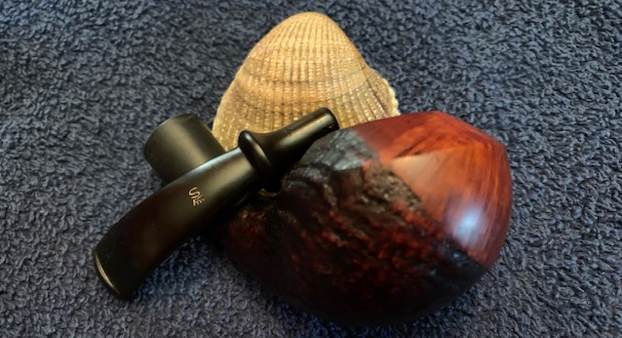
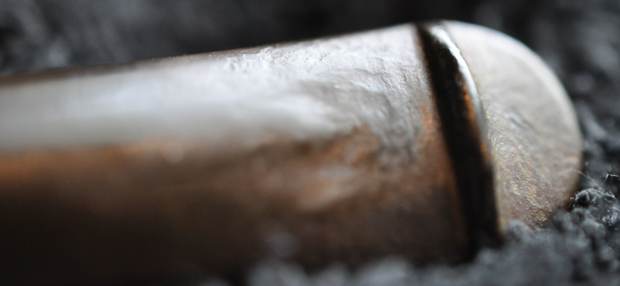
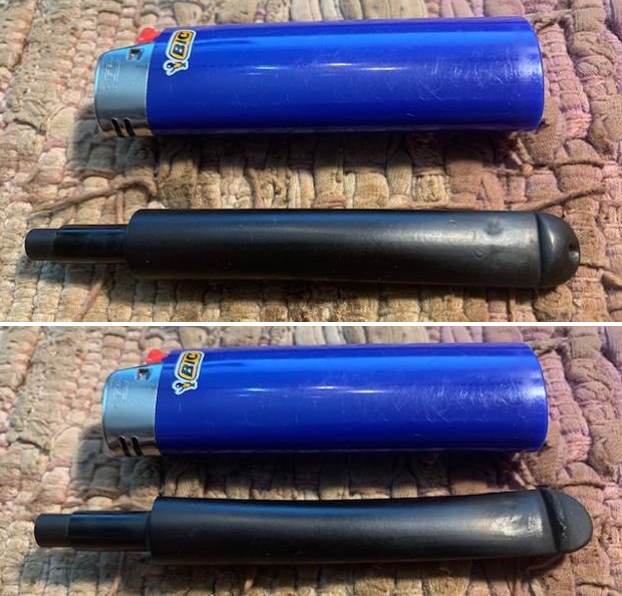
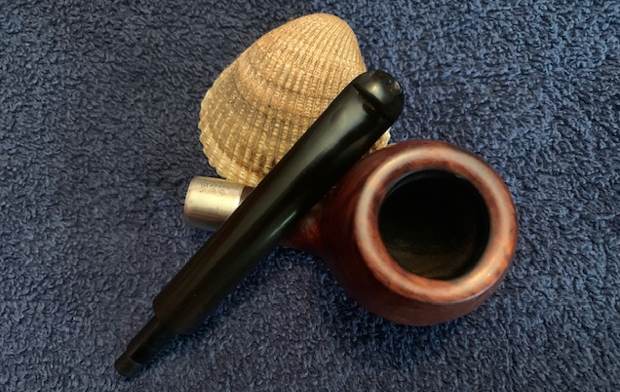
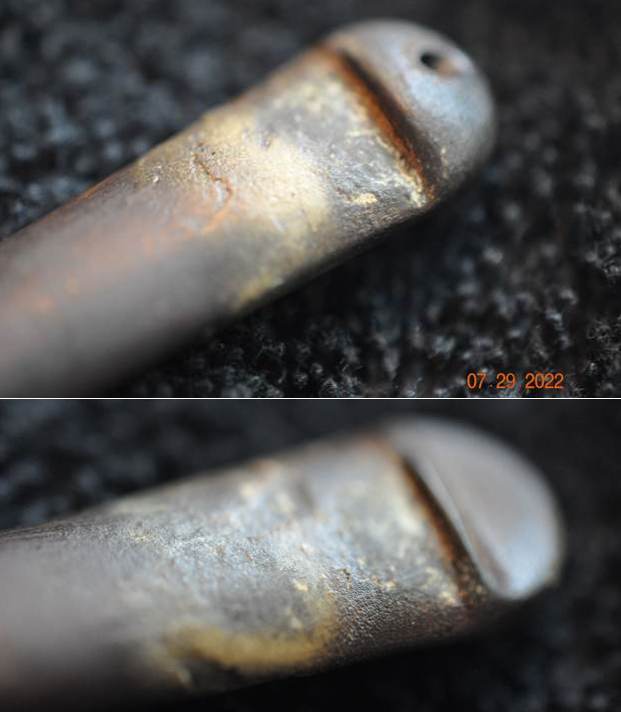
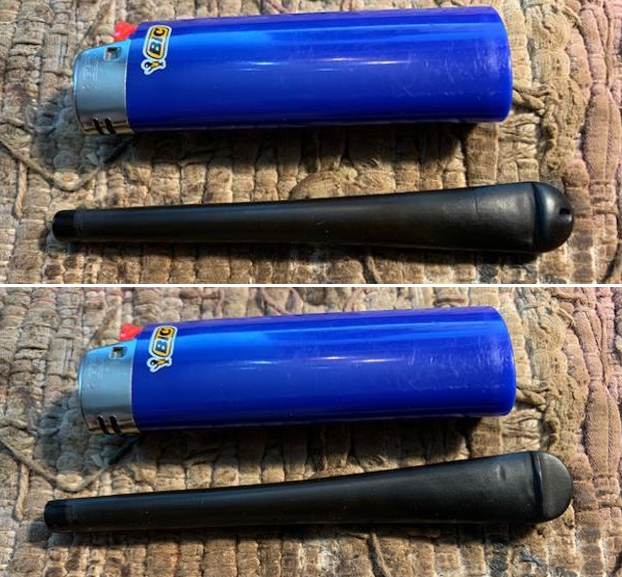
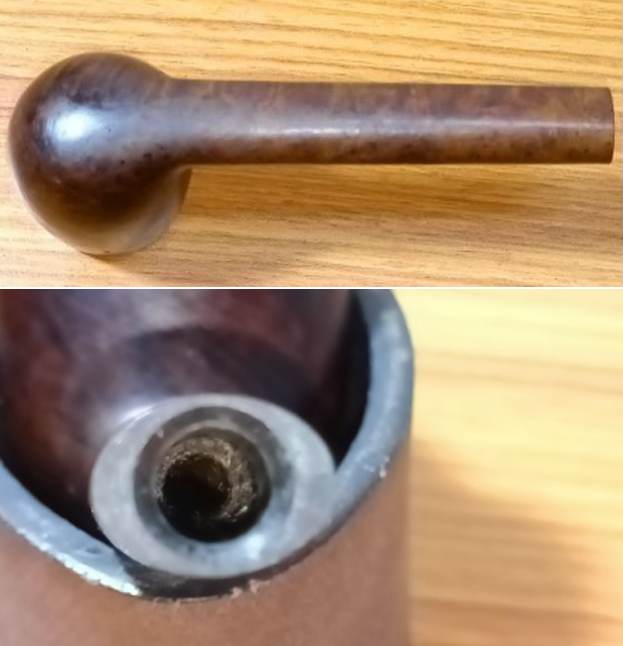
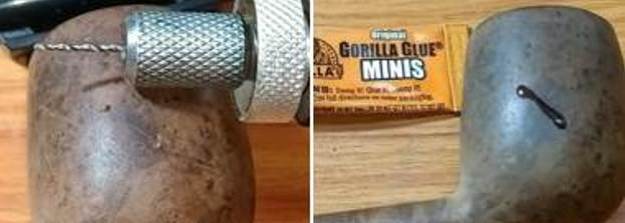
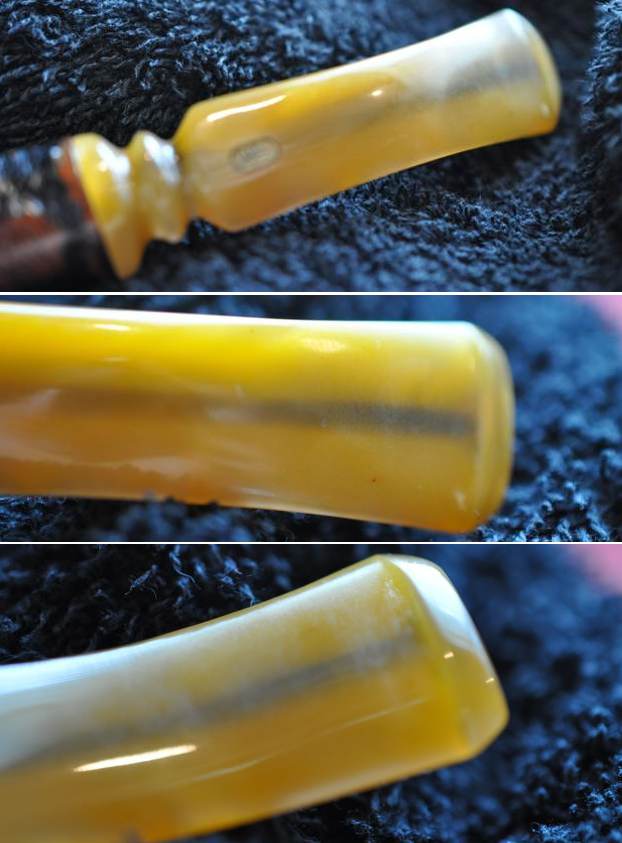
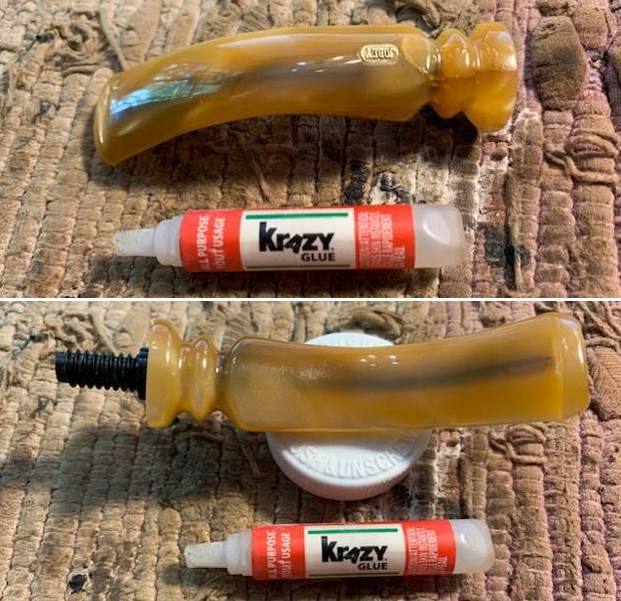
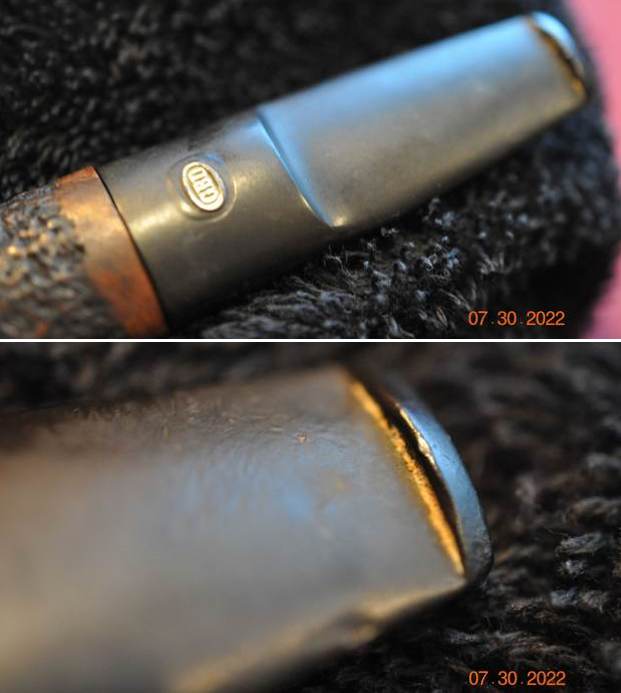
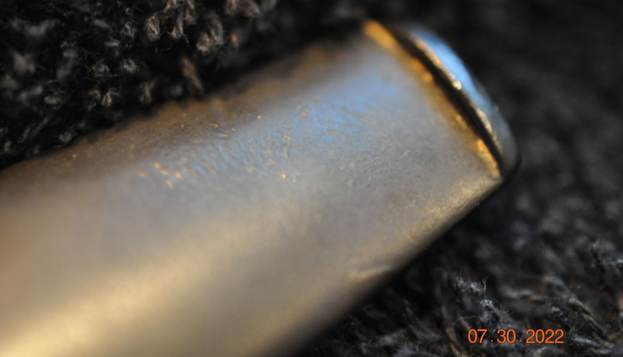
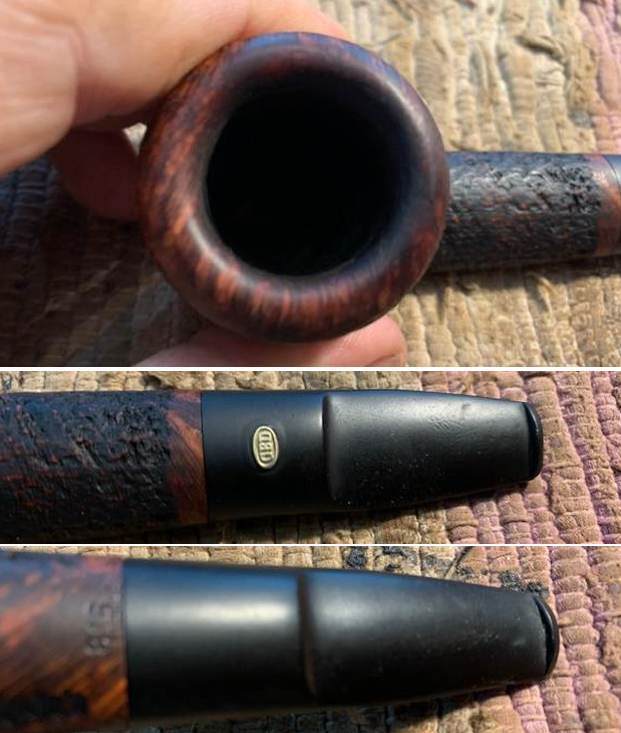
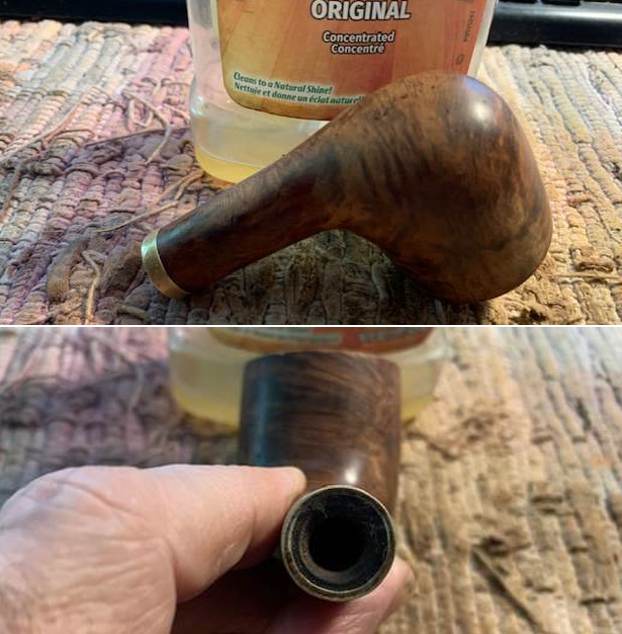
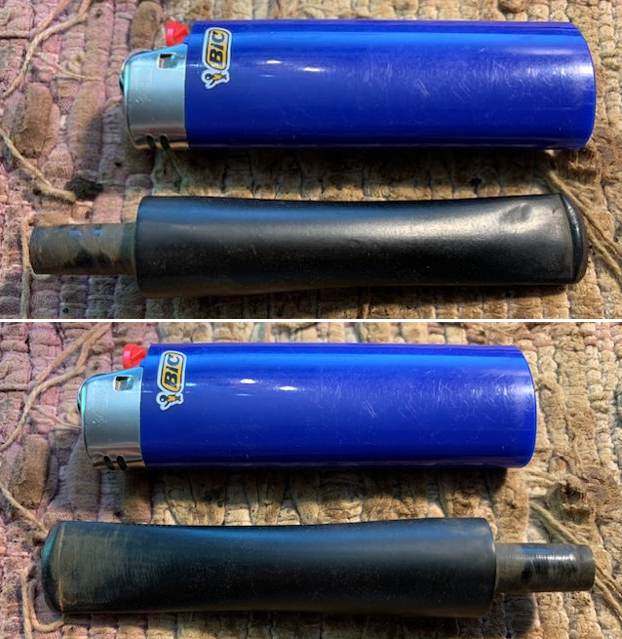
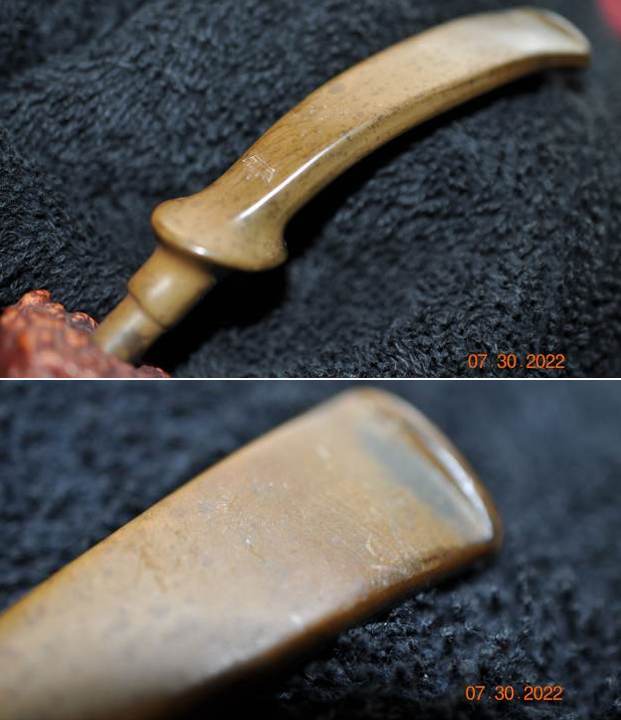
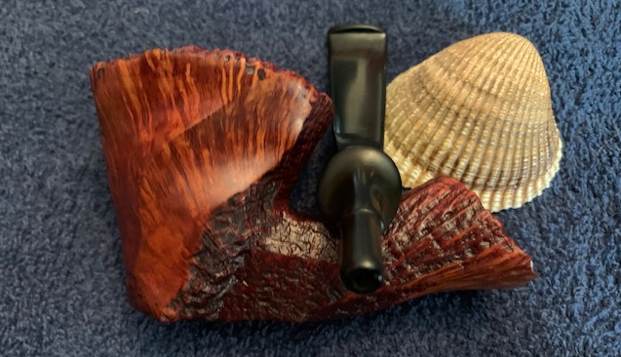
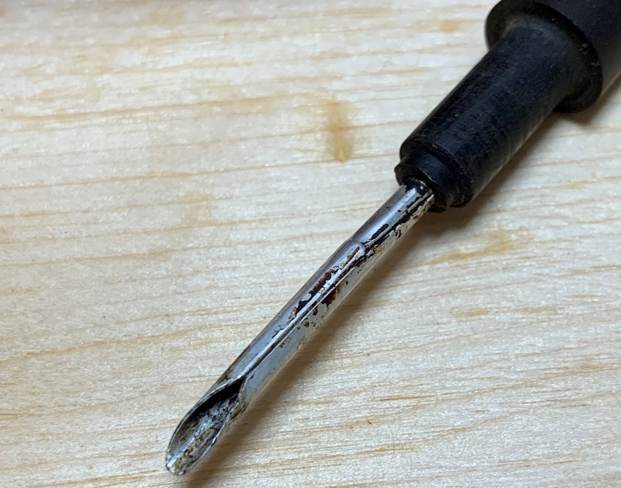
 The twin bore tapered vulcanite stem is deeply oxidized and has significantly deep bite marks on both upper and lower surfaces of the stem. The buttons too are damaged and rendered out of shape due to the bite marks. The airflow through the stem is laborious and could be either due to the compression of the airway due to the bite marks or could be due to accumulation of old oils, tar and gunk in the airway. I have purchased GORILLA CA glue as I had read rave reviews about it and am excited to try it out.
  The Process
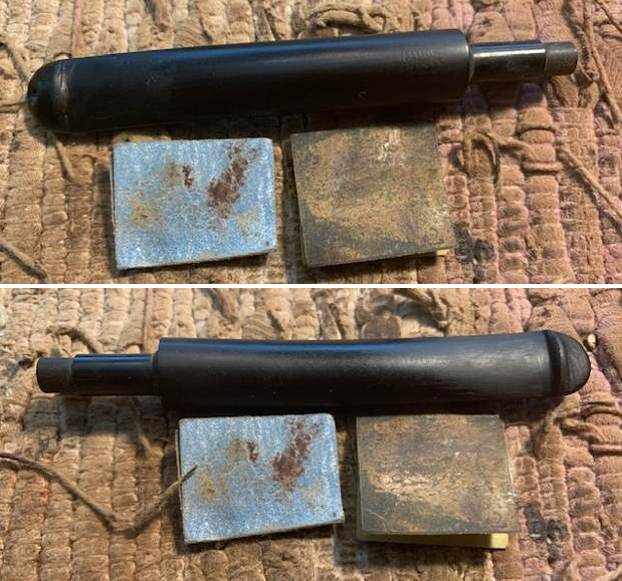
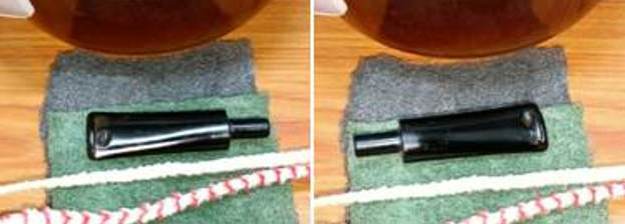
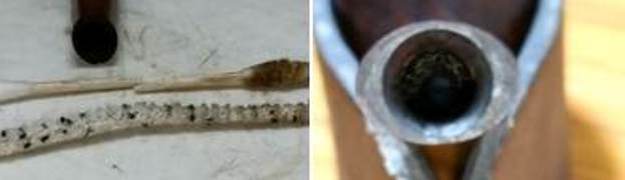
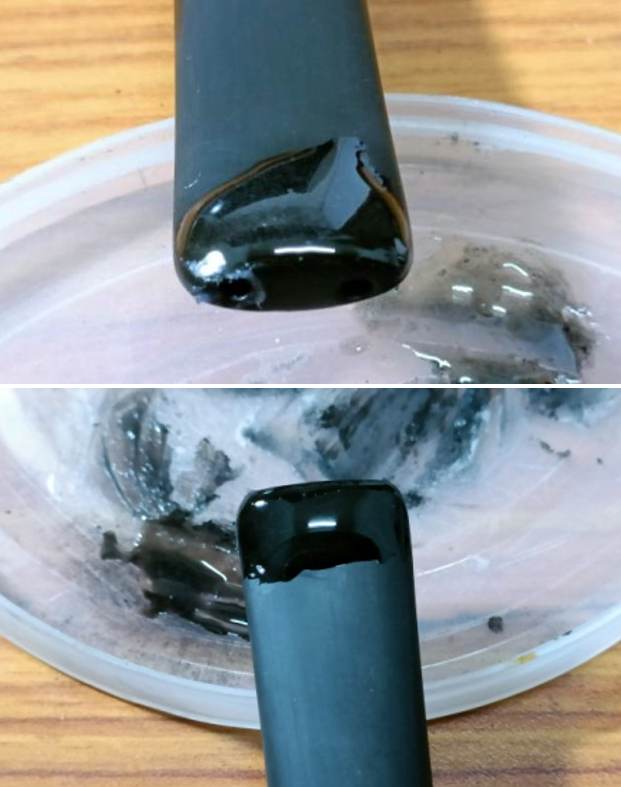
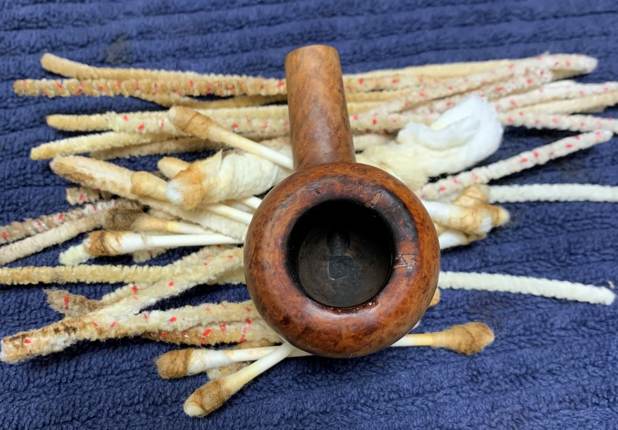
The first repair that I decided to tackle was the damaged stem. Before I could proceed with actual repairs, I cleaned the stem internals first. Using a thin shank brush and anti-oil dish washing soap, I cleaned the stem airway. The airway was filthier than I had imagined as can be judged from the following pictures. I took me a considerably long time, but eventually the airway was clean. I ran a couple of pipe cleaners through the stem to confirm that the airway was clean and also to dry it out.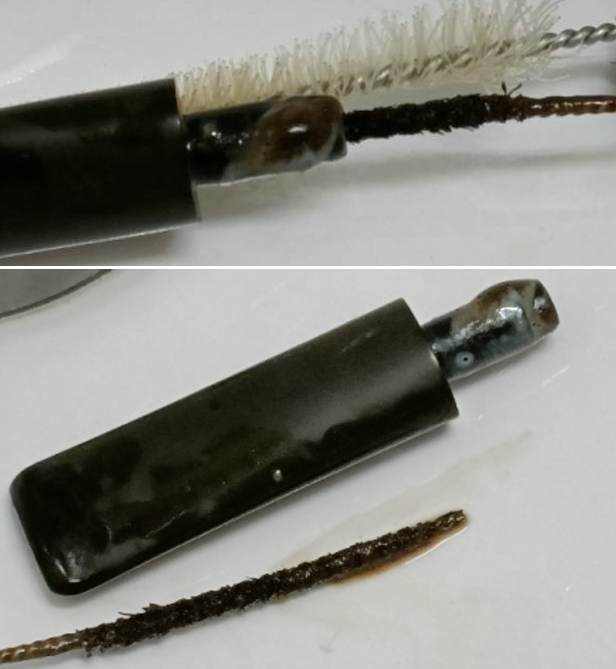
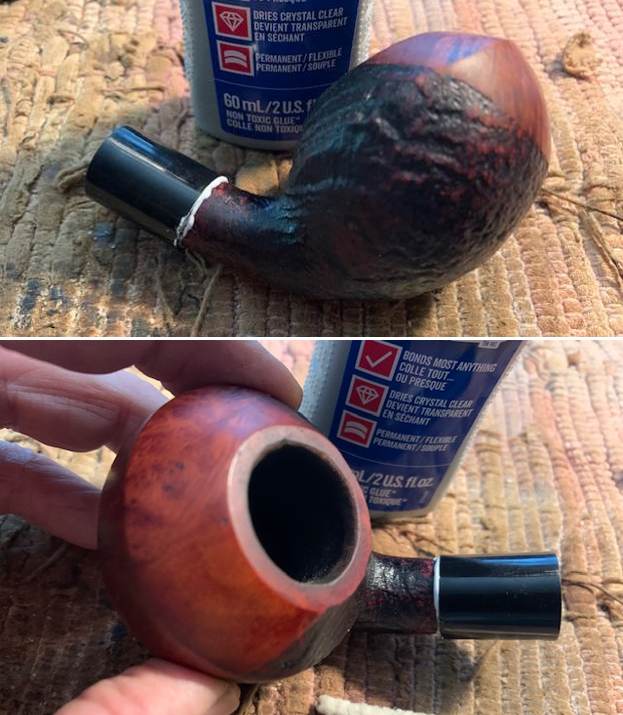
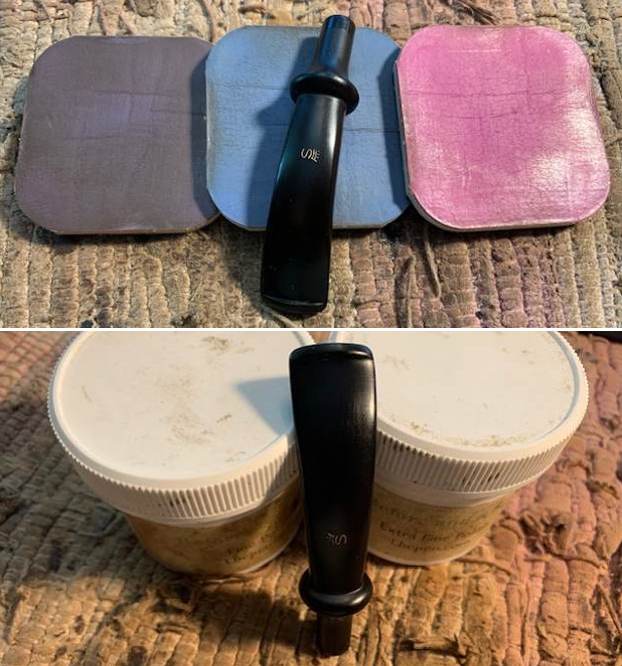
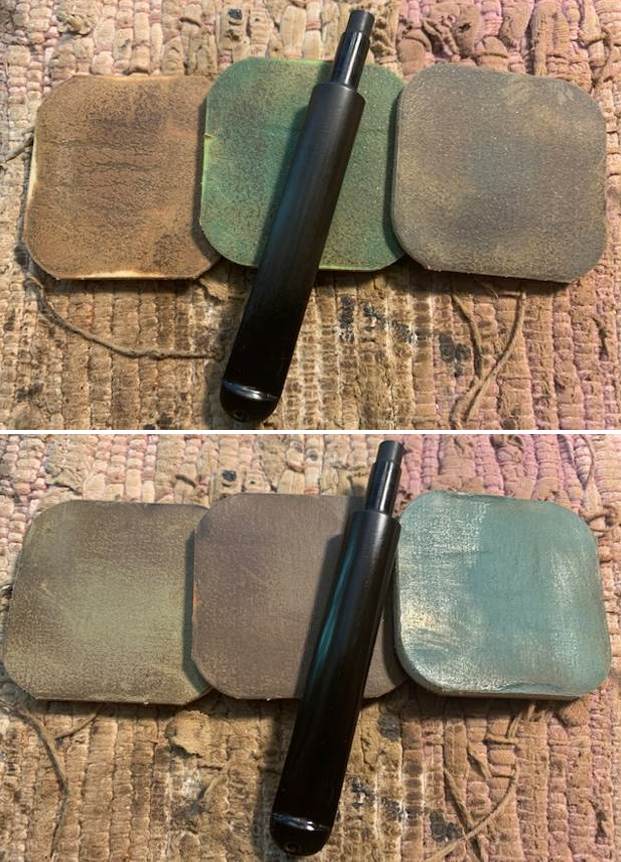
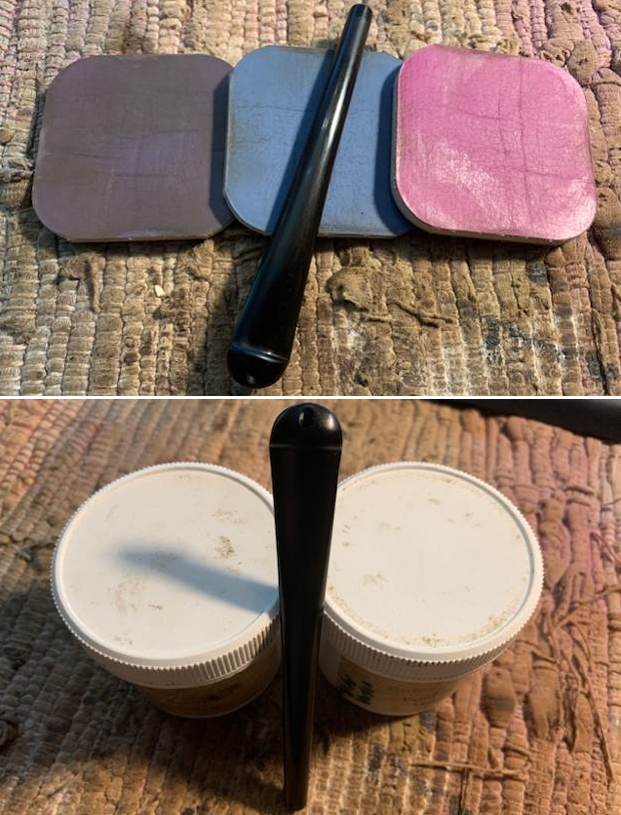
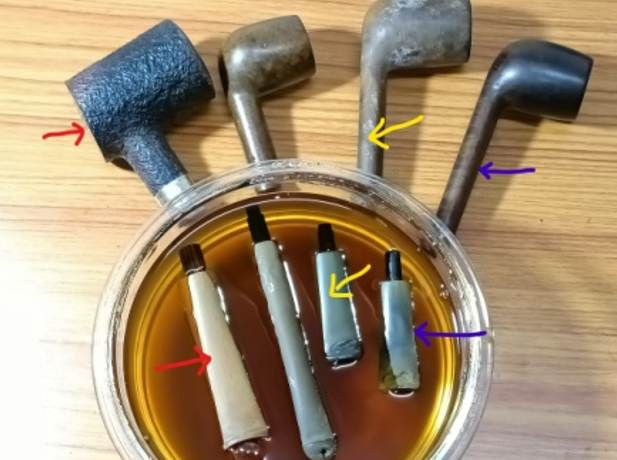
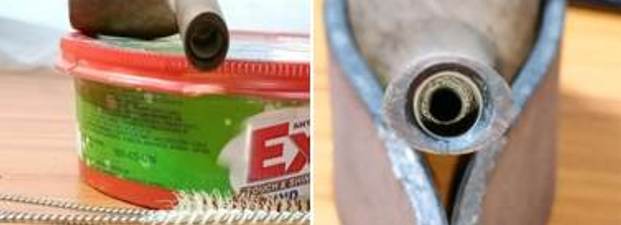
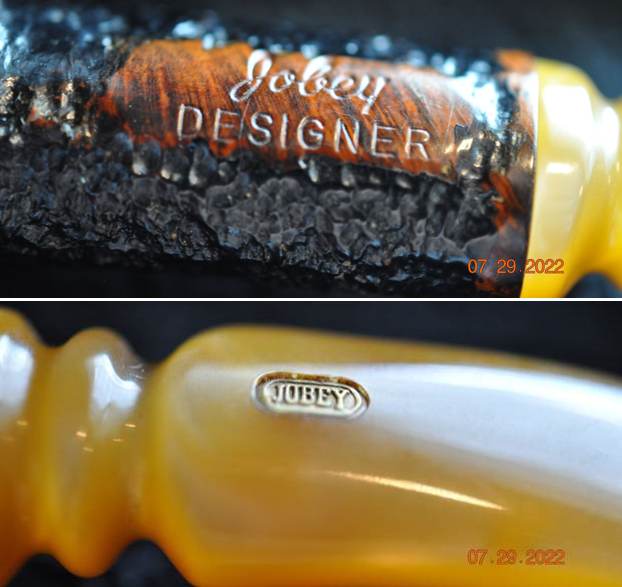
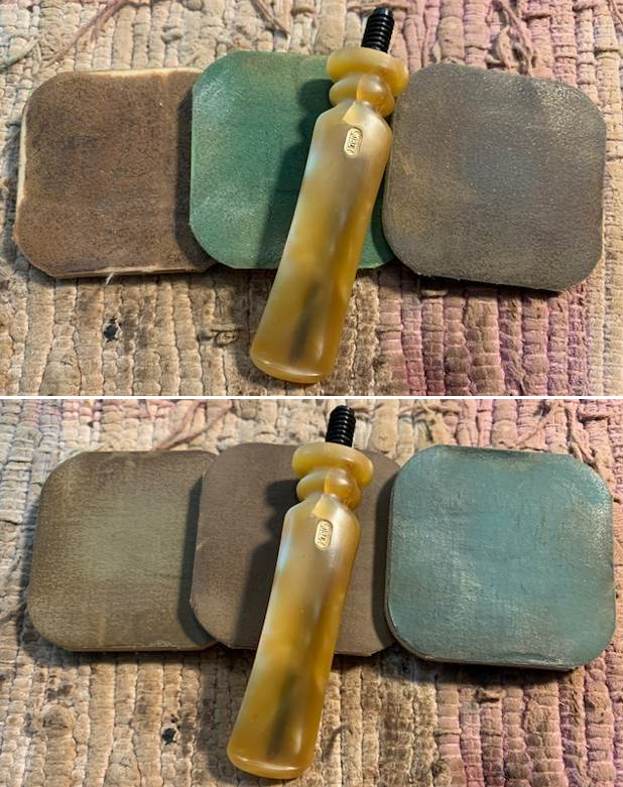
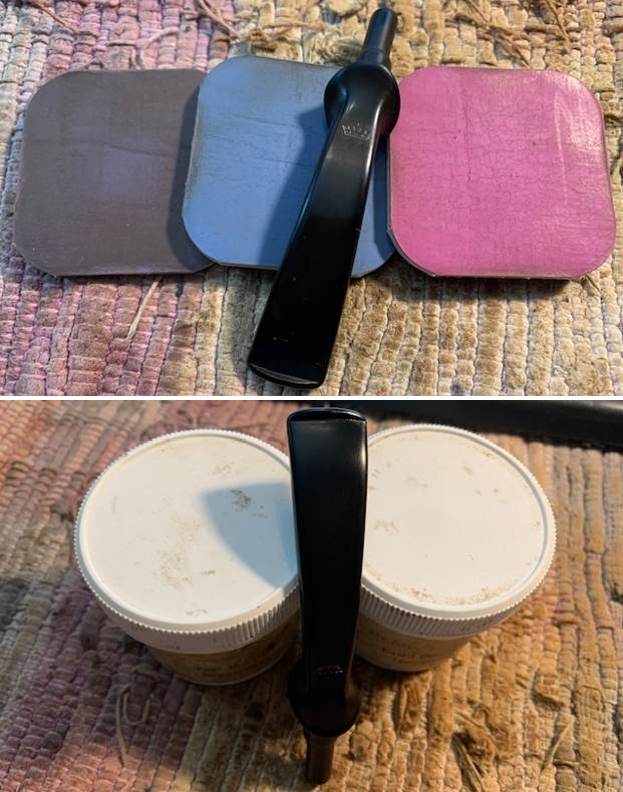
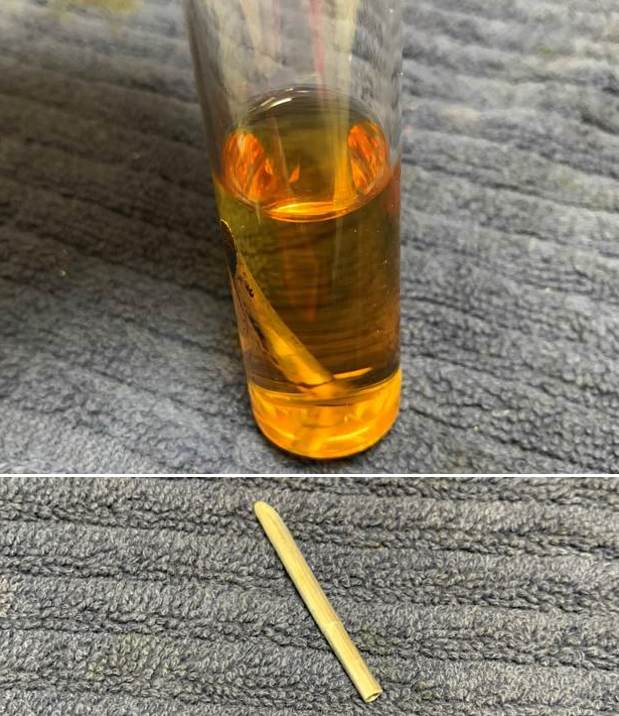
 With the stem internals now clean, I moved to external cleaning of the stem surface by dunking the stem into “Before and After Deoxidizer” solution developed by my friend Mark Hoover. The solution helps to draw out heavy oxidation to the surface making it’s further removal a breeze, while the minor oxidation is eliminated to a very great extent. I usually dunk stems of 5-7 pipes that are in-line for restoration and the THE GOLDEN ARROW is marked in yellow arrow. I generally allow the stems to soak in this solution overnight for the solution to do its work.
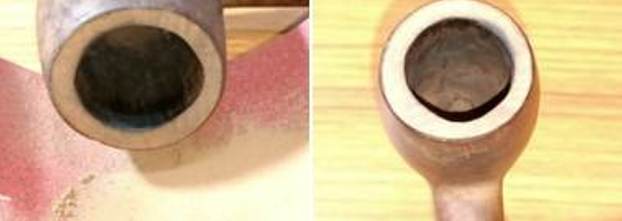
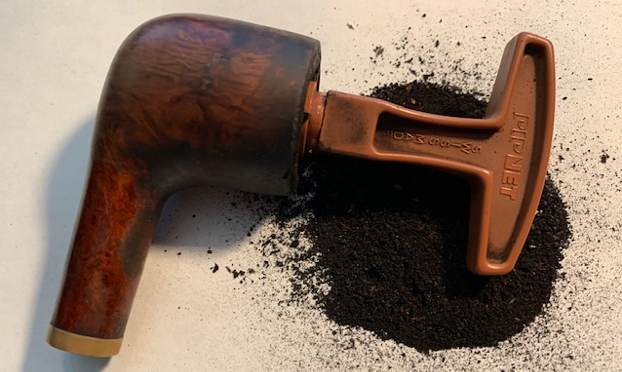
 With the stem soaking in the deoxidizer solution, I moved on to reaming the chamber with my PipNet pipe reamer. I started the reaming process with head size 2 of the PipNet reamer blade and progressed through to head size 3. I used my fabricated knife to remove cake from areas inaccessible to the reamer blades and completed the process of removing the cake by sanding the walls smooth with a folded piece of 180 grit sandpaper. I wiped the chamber with a cotton swab wetted with alcohol to clean the residual carbon dust. The chamber walls are solid and a few minor thin heat veins are visible on the aft and right side of the walls of the chamber. I shall give the chamber a bowl coating as a precautionary measure against future damage.
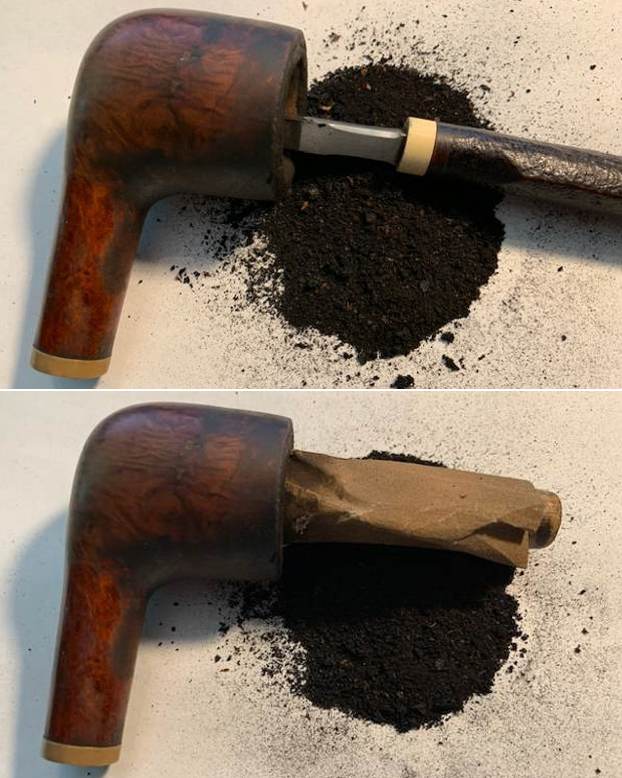
  Next, I cleaned the mortise by scraping out all the dried oils and tars from the walls with a dental tool. I further cleaned the mortise using bristled and regular pipe cleaners dipped in alcohol.
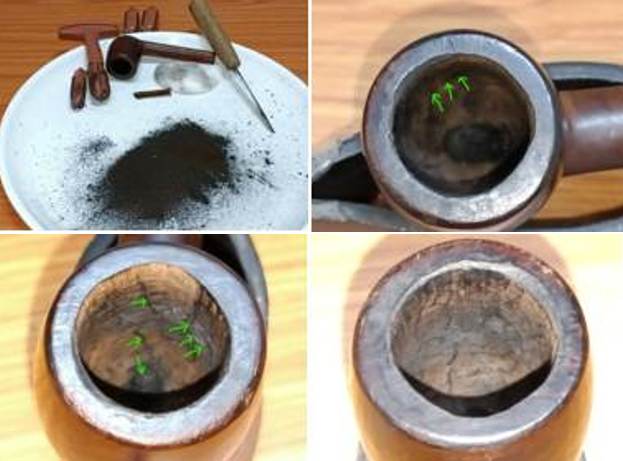
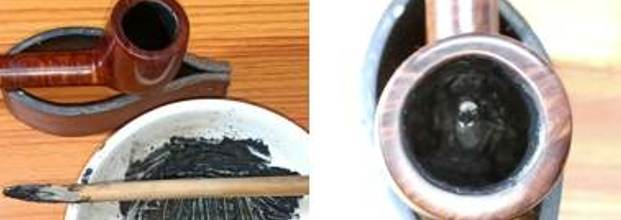
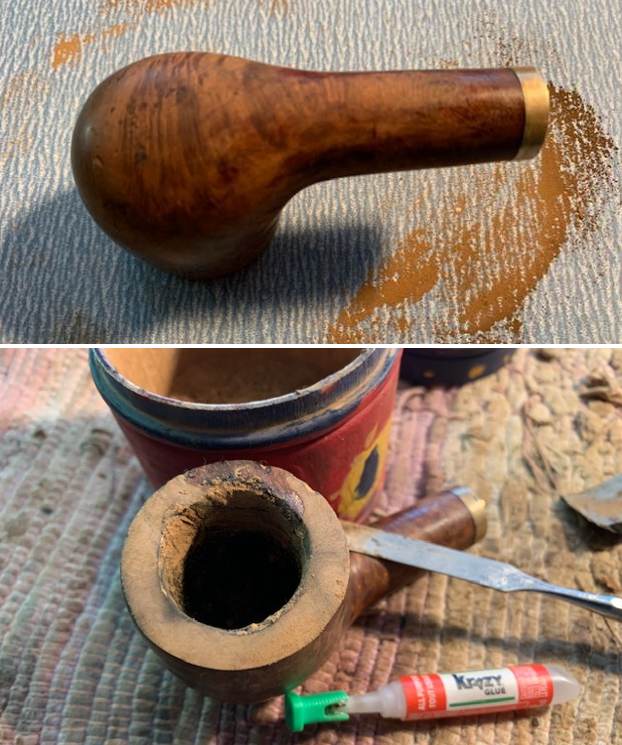
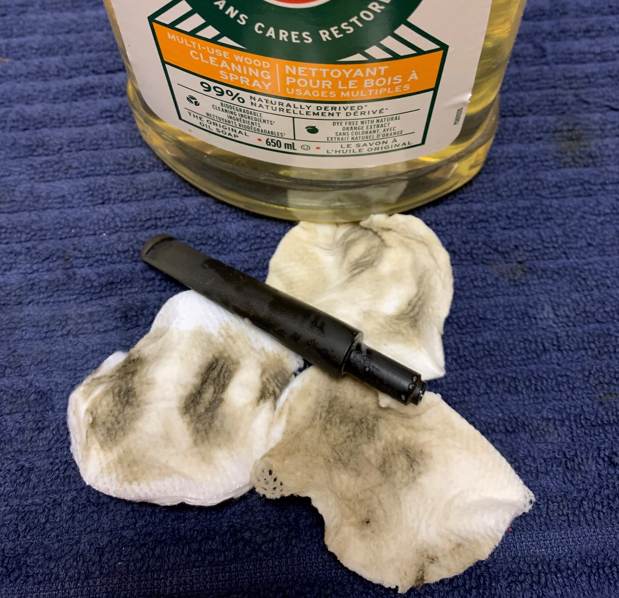
 Continuing with the internal cleaning of the chamber and mortise, I subjected it to a salt and alcohol bath. I used cotton balls which is an at par substitute as I have realized over the years. I drew out a wick from the cotton and along with a folded regular pipe cleaner; inserted it into the mortise and through the draught hole and further into the chamber. Thereafter, I packed the chamber with cotton balls to about quarter of an inch below the rim inner edge and soaked the cotton balls with isopropyl alcohol up to the brim. About half an hour later, the level of alcohol had gone down, having being absorbed by the cotton. I topped it up once again and set it aside overnight. By next afternoon, the cotton and alcohol had drawn out all the remaining oils/ tars from the chamber and mortise and loosened out any residual cake and tar build up, fulfilling it’s intended task. I removed the cotton balls and ran pipe cleaners through the mortise to clean out all the loosened tars and gunk. Using my fabricated tool, I scraped out the entire loosed gunk from the mortise and further cleaned it with alcohol and q-tips. The large blobs of now moistened gunk that was removed from the mortise should give the readers an idea of how filthy the mortise was when I started the process of cleaning. The chamber now smells clean and fresh. I set the stummel to dry out naturally.
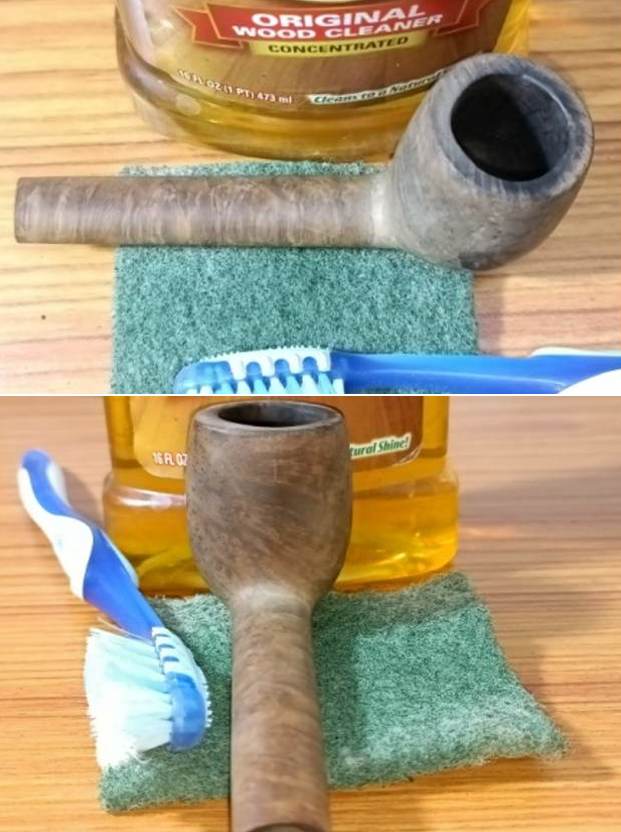
 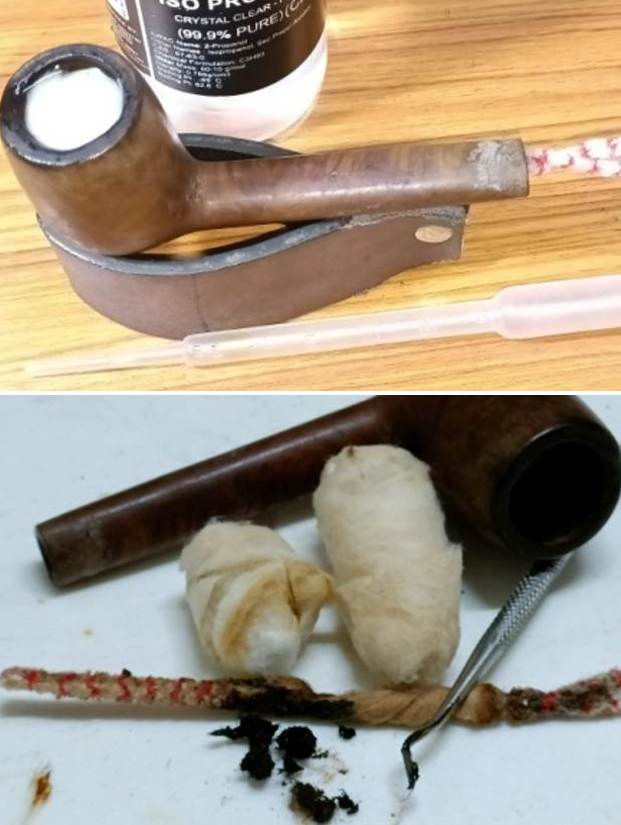 I cleaned the external surface of the stummel with undiluted Murphy’s oil soap and a hard bristled toothbrush. I cleaned the smooth rim top surface with the soap and Scotch Brite pad. The prominent dip on outer rim edge in the 12 o’clock direction is now clearly visible (marked in red).
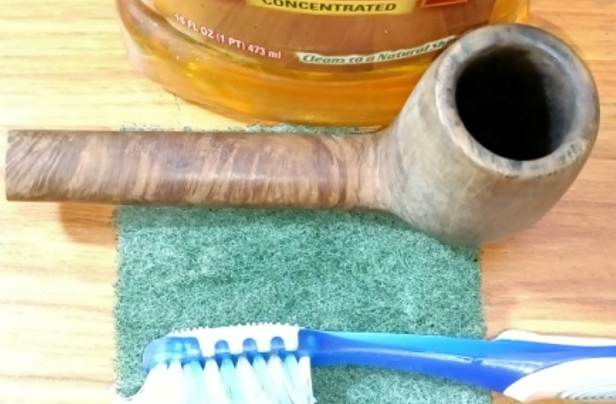
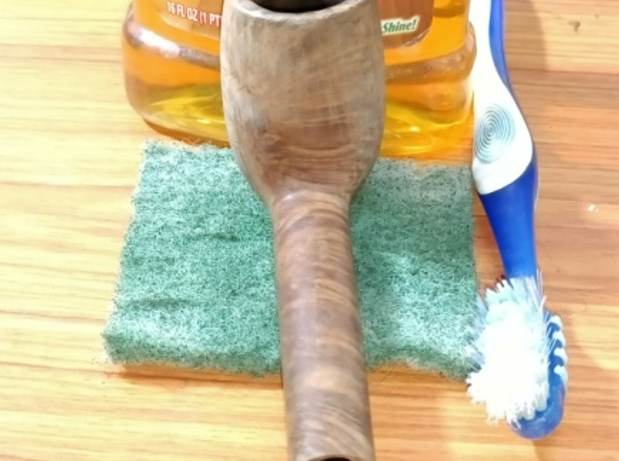
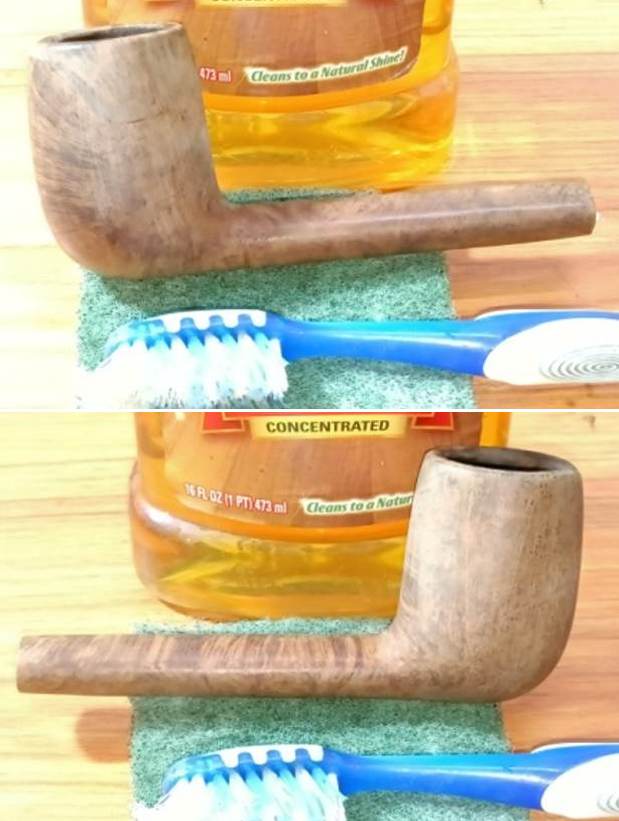
 I thoroughly cleaned the mortise with shank brush and anti-oil dish washing soap. The mortise is now thoroughly cleaned and fresh.
  With the internal and external surface of the stummel now nicely cleaned, I fished out the stem that had been soaking in the Before and After deoxidizing solution for nearly 24 hours. I first scrubbed the stem surface with a Scotch Brite pad. I followed this scrubbing with a nice cleaning of the surface using a 0000 grade steel wool. I rinsed the stem under running water to rid the stem of the thick solution. I ran a couple of pipe cleaners to remove the deoxidizer solution from the airway.
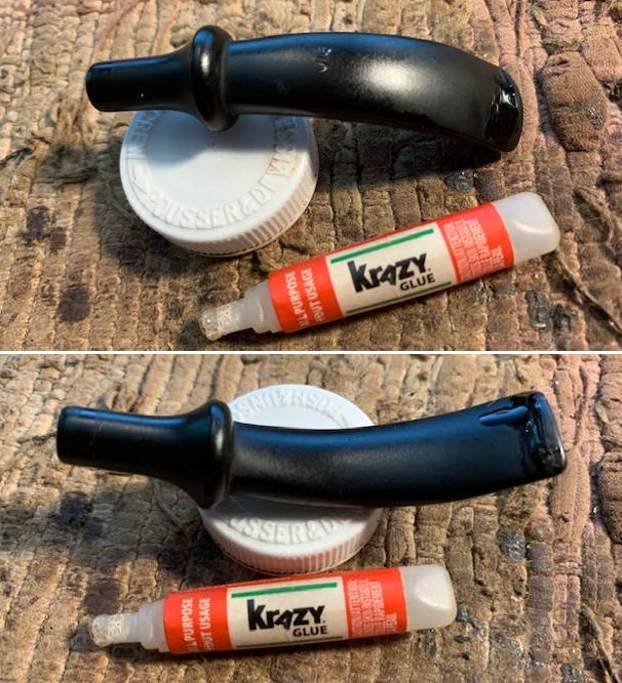
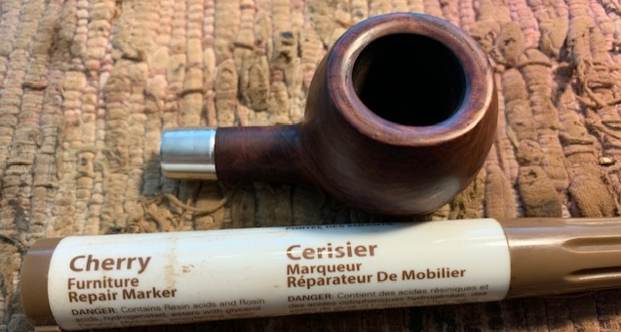
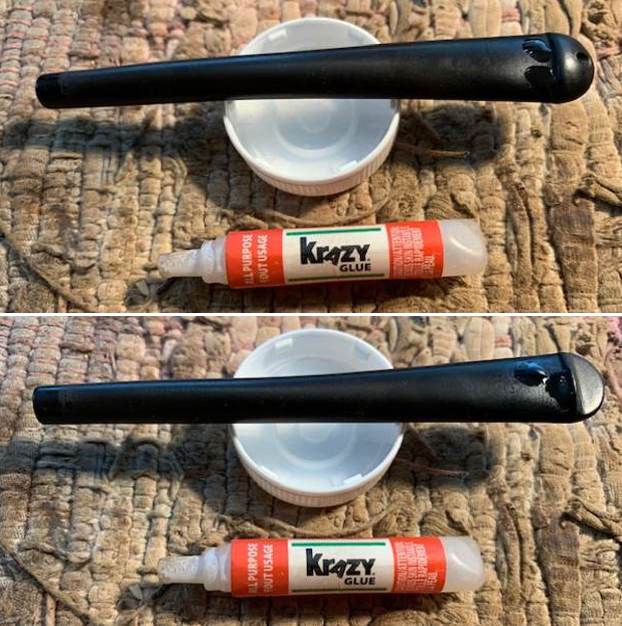
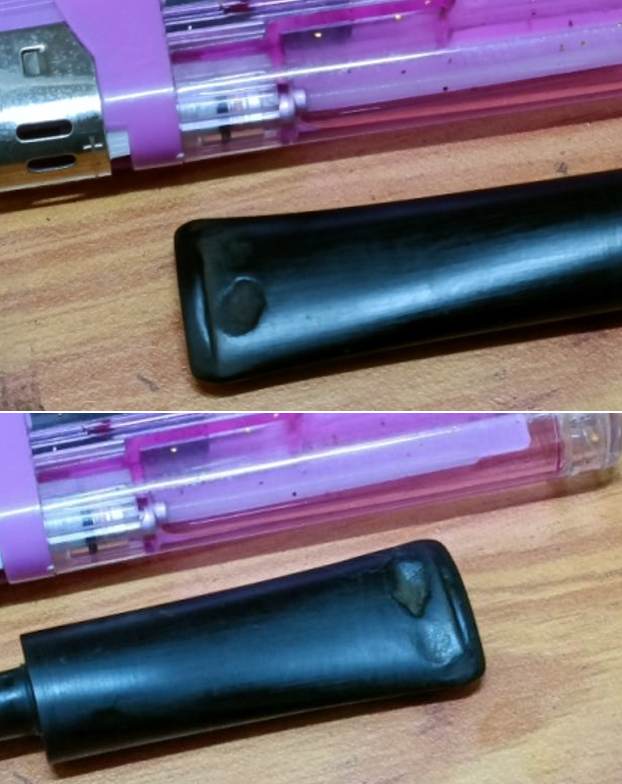
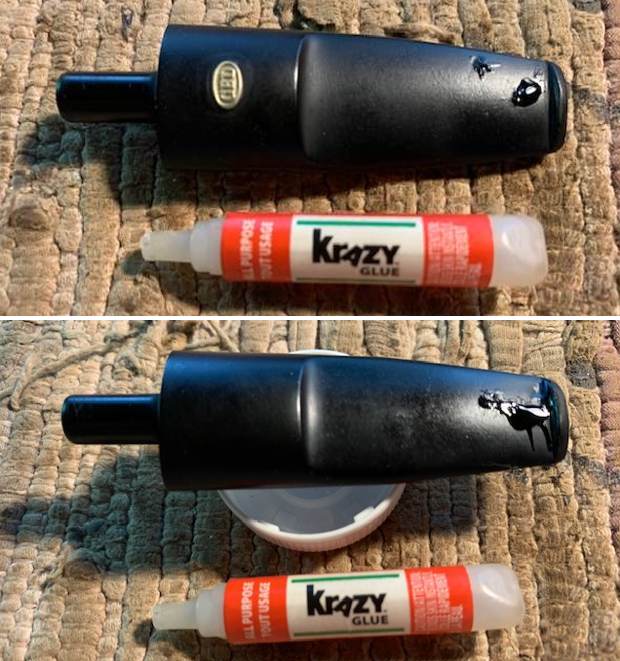
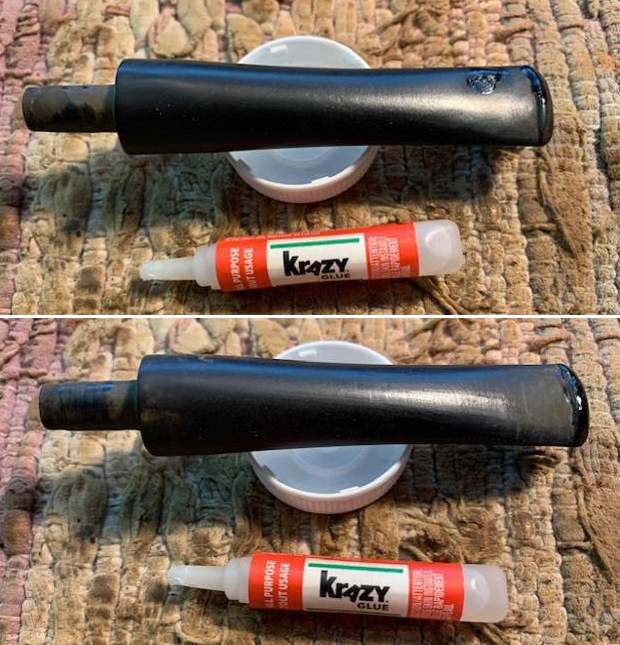
 Continuing with the stem refurbishing, I heated the bite zone with the flame of a lighter to raise the tooth indentations to the surface. Though the results were not what were expected, the vulcanite was raised a little. The button edges and deeper tooth indentations on either surface of the stem were filled with a mix of CA superglue and activated charcoal powder and set aside for the fill to cure. I would like to bring out here that I had purchased a new tube of Gorilla Superglue gel after reading rave reviews and it was this glue that I had used to prepare the mix to fill in the tooth indentations. That this was a bad purchase for me personally became amply evident later during the restoration process.
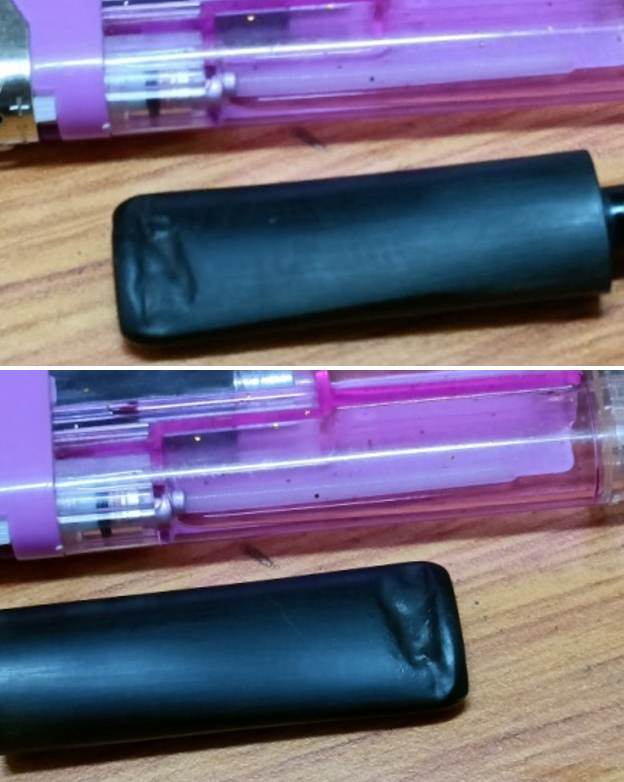
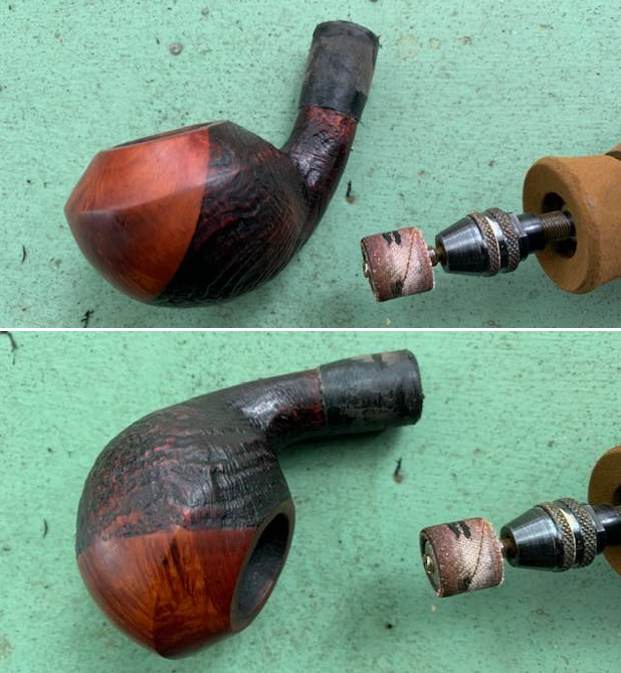
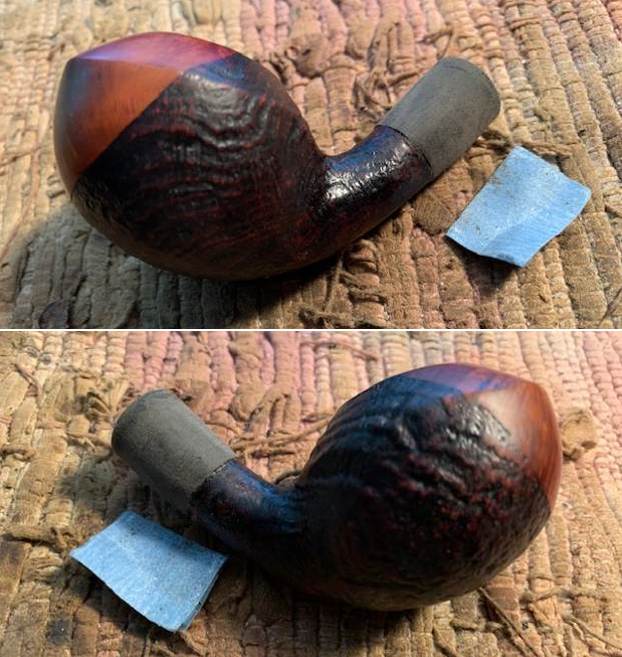
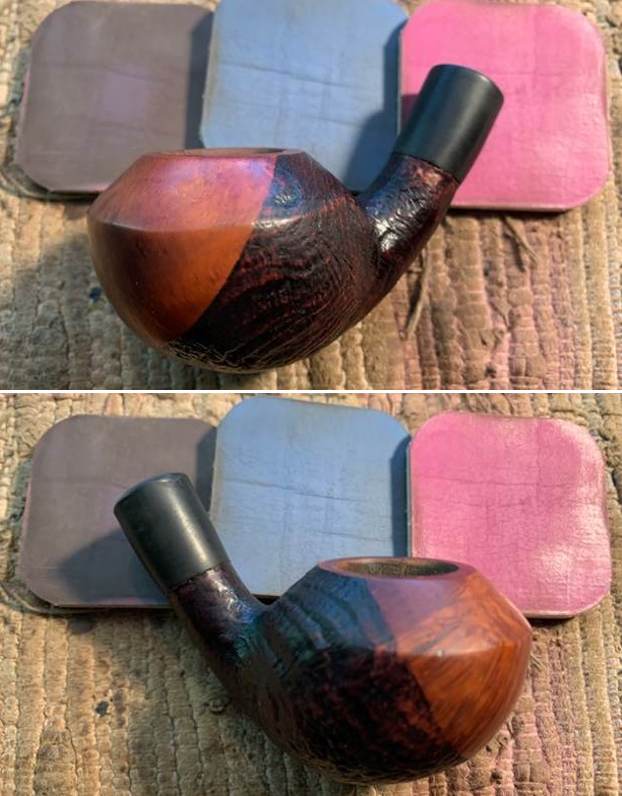
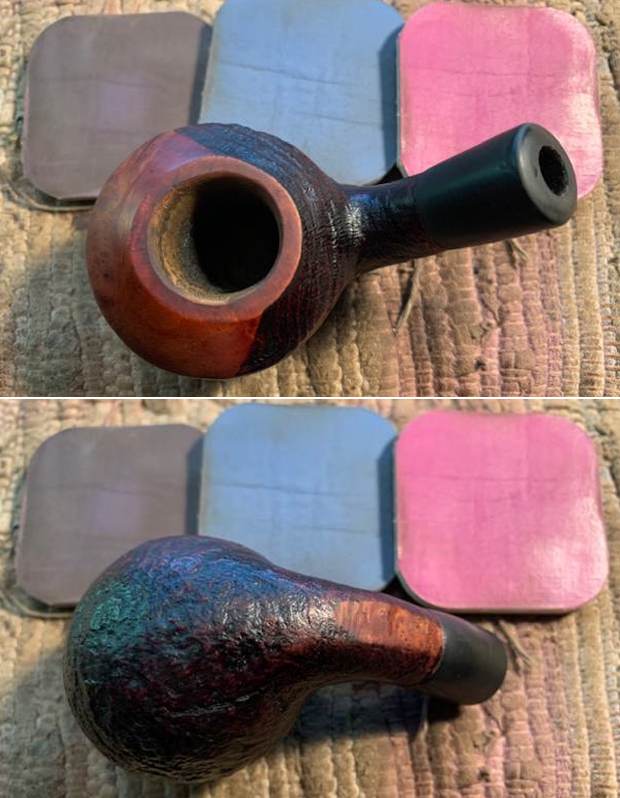
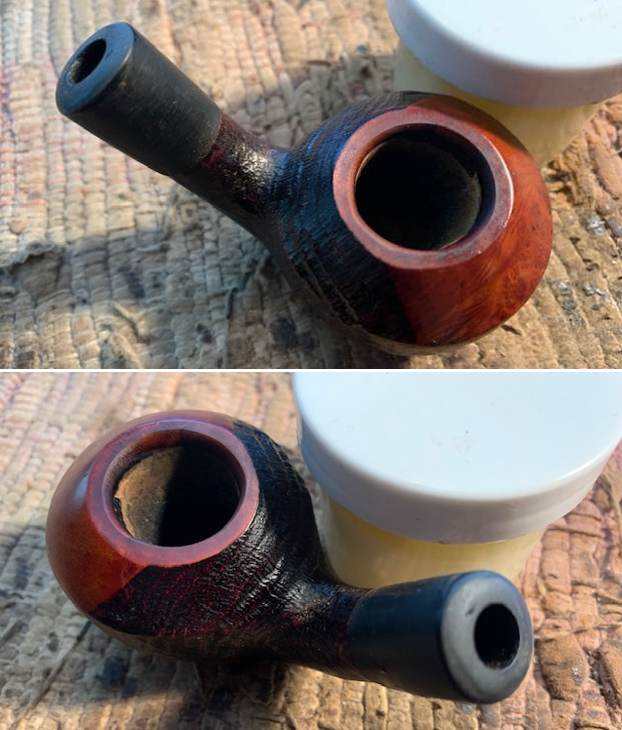
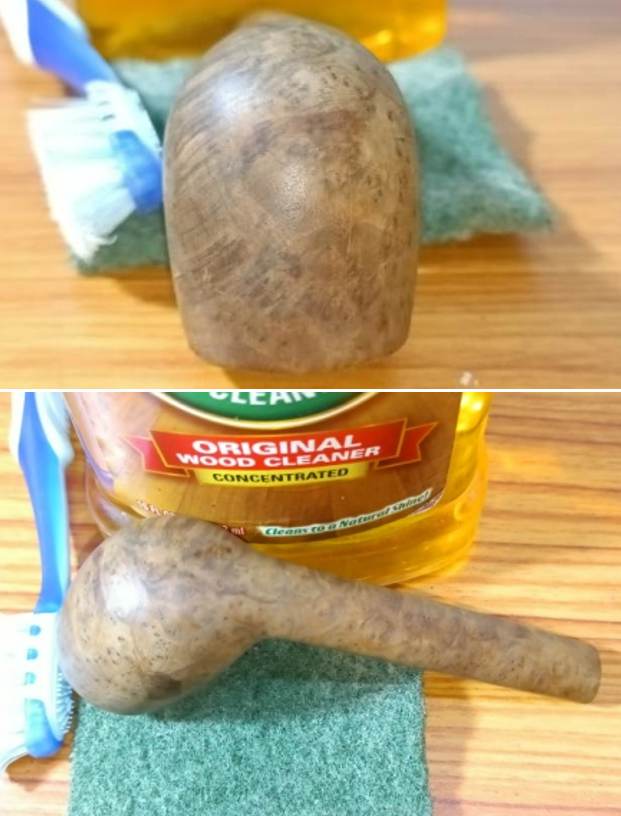
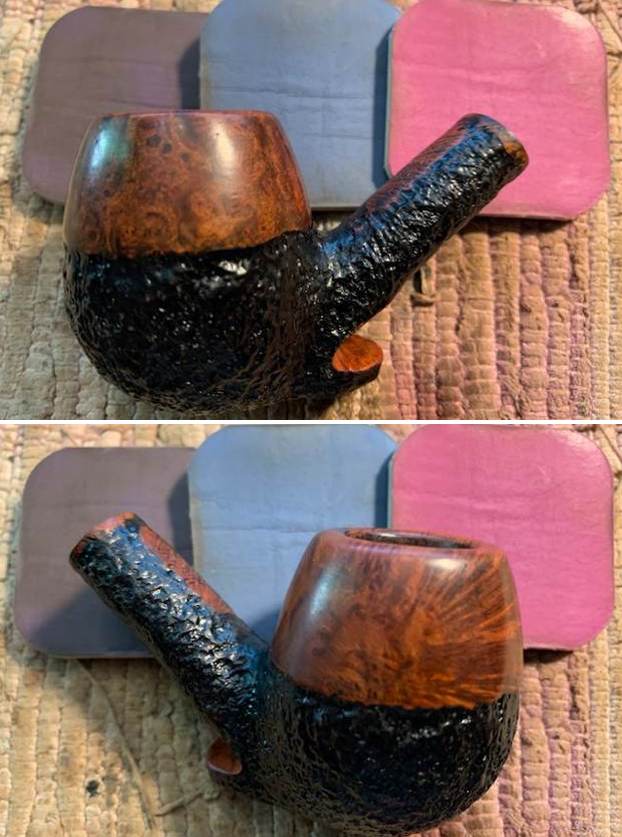
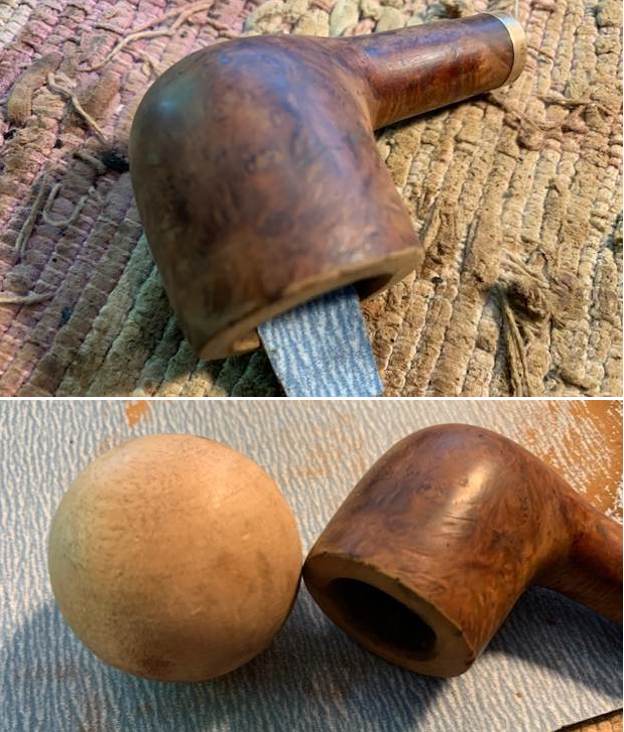
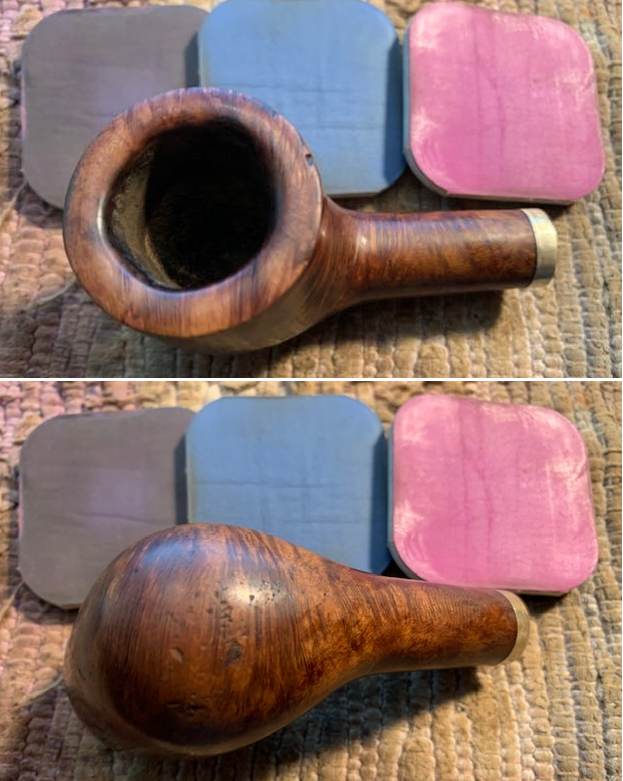
 While the stem fills were set aside to cure, I addressed the damage to the rim top surface of the stummel by topping it on a piece of 220 grit sandpaper. I frequently checked the progress being made as I had no desire to lose any briar estate than was absolutely necessary. Once satisfied with the result, I wiped the rim top surface with a moist cloth. The uneven darkened rim top had been addressed completely, however, the beveled inner rim edge was still dark and the chamber was still slightly out of round (though greatly reduced) with slight charring visible in the 12 o’clock direction. I addressed this issue by simply running a piece of 220 grit sand paper along the inner rim edge bevel, till the darkening was eliminated.
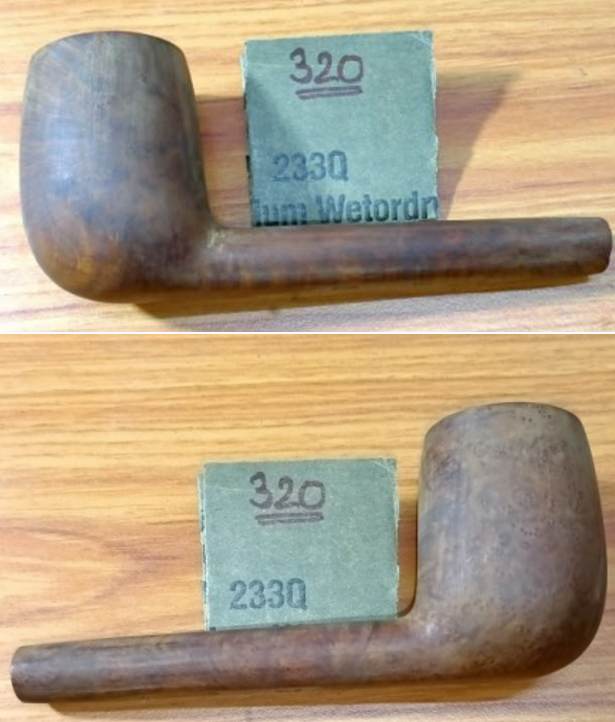
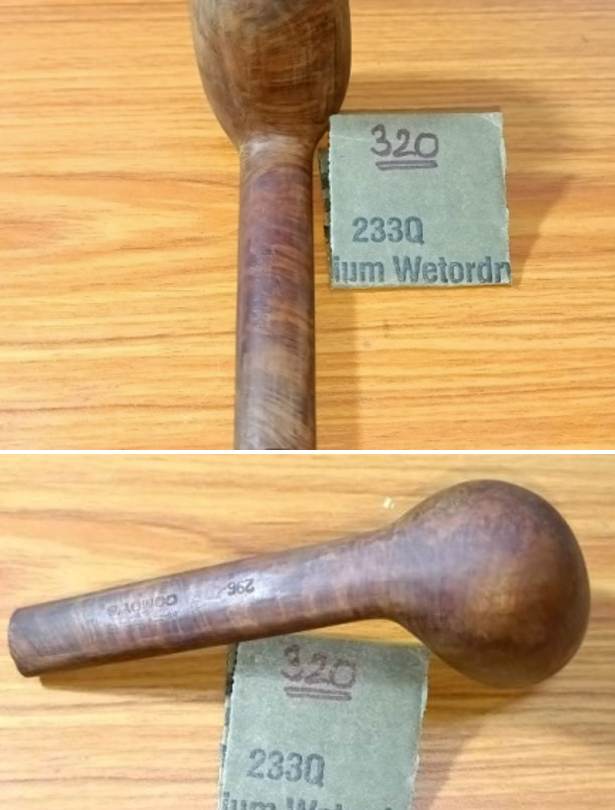
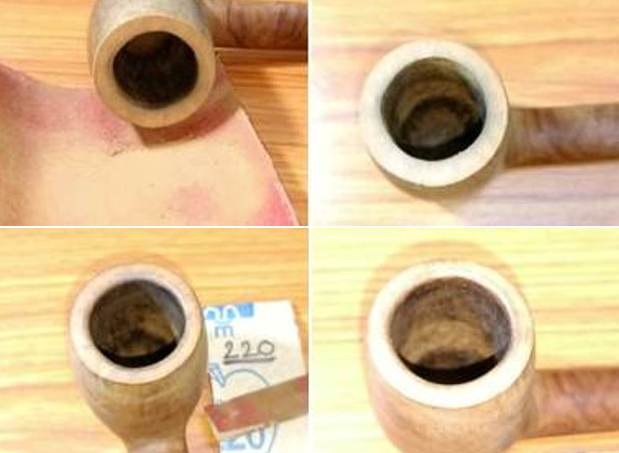 Next, I addressed all the dings over the stummel surface by steaming them out by heating my fabricated knife on a candle and placing it on a wet towel covering the dents. The generated steam pulls the dents to the surface leaving behind a slightly discolored and uneven patch. I evened out the discoloration and stummel surface by sanding the entire surface with a piece of 320 grit sandpaper.
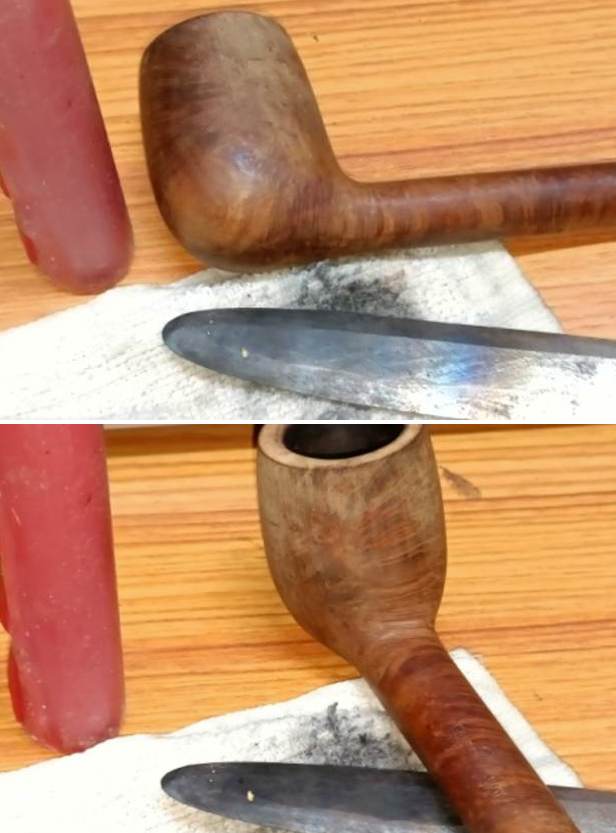
 At this stage in restoration, I turned over the stummel to Abha, my wife, for her to work her magic in polishing the stummel while I turned my attention to the stem repairs.
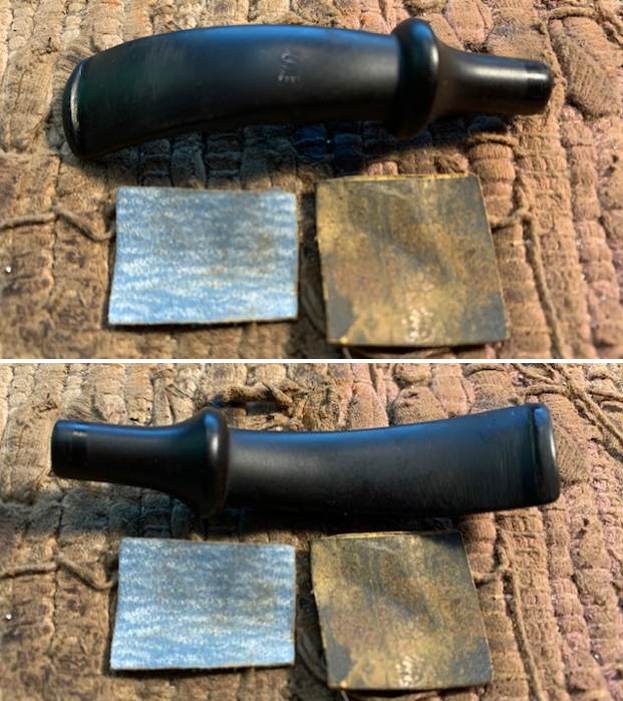
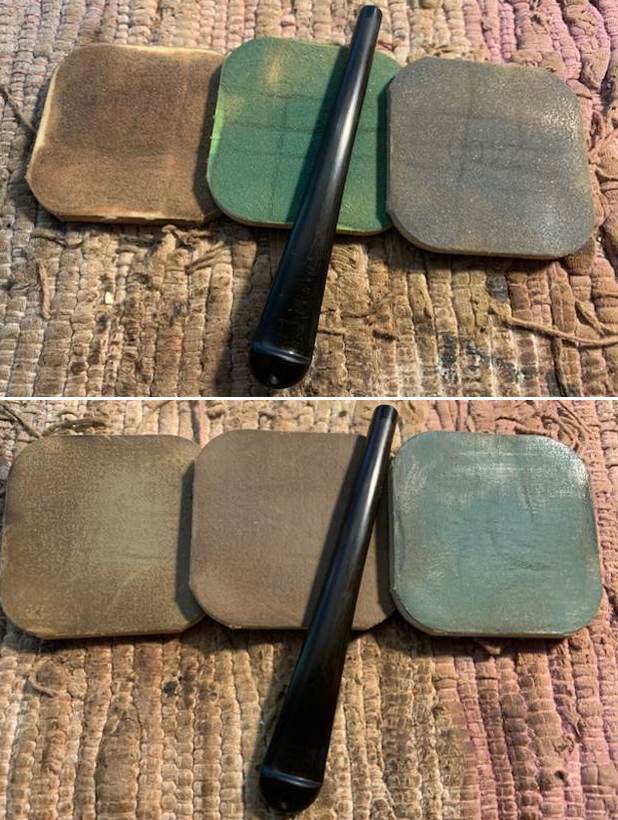
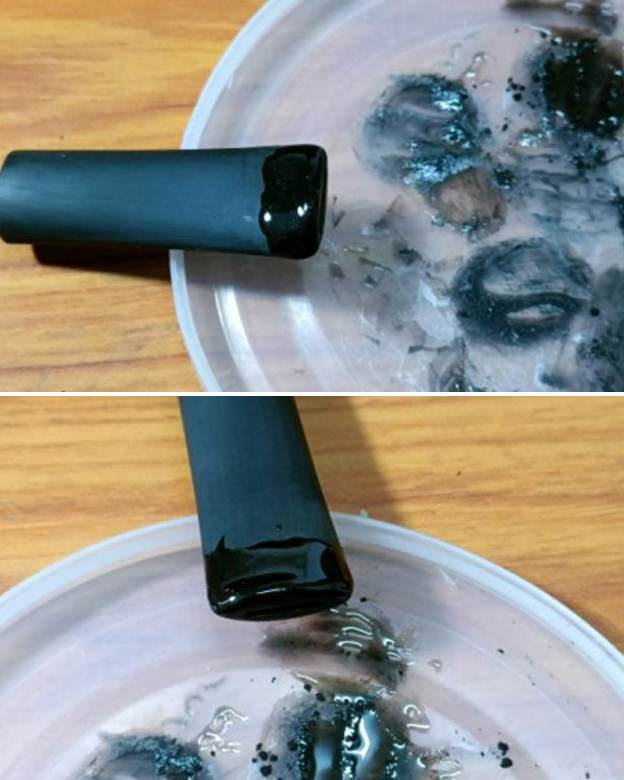
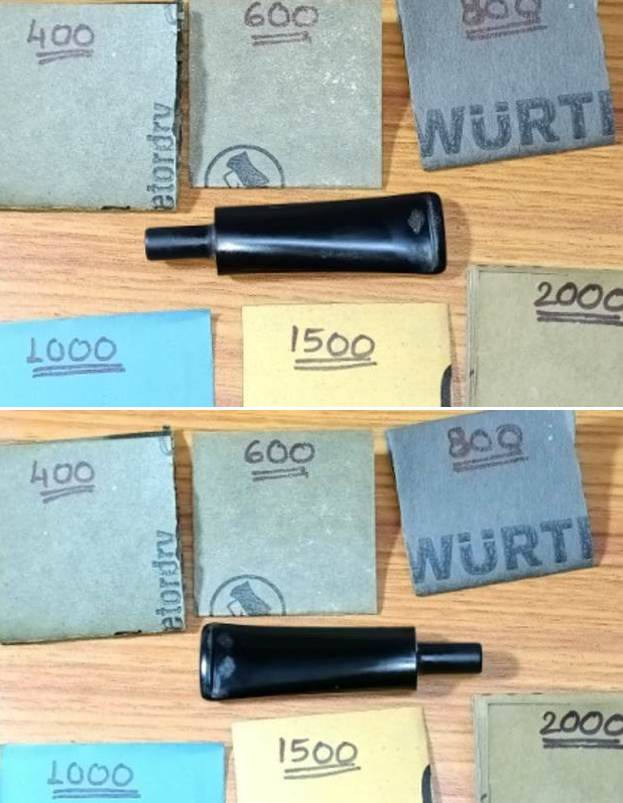
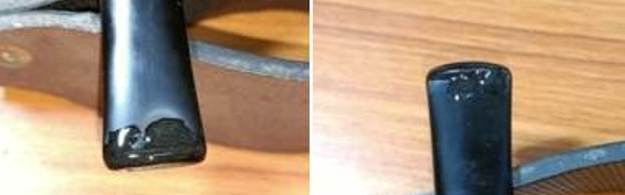
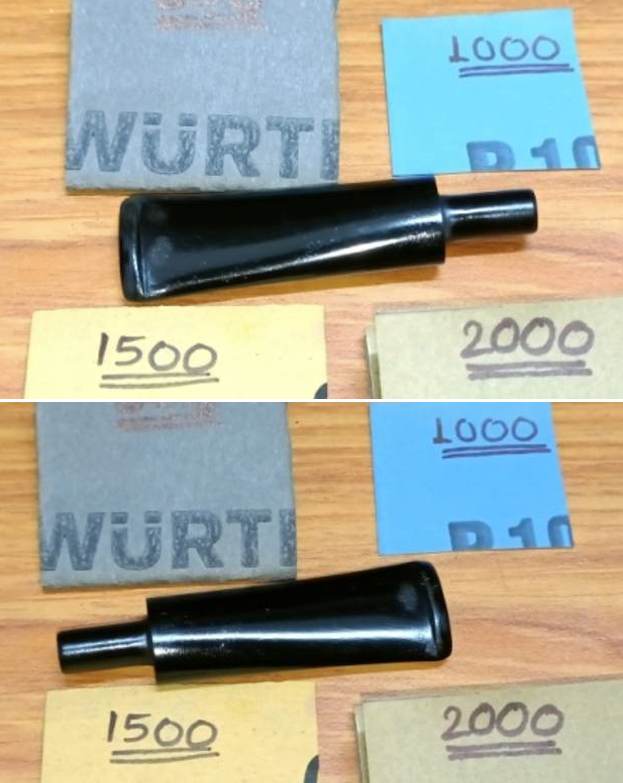
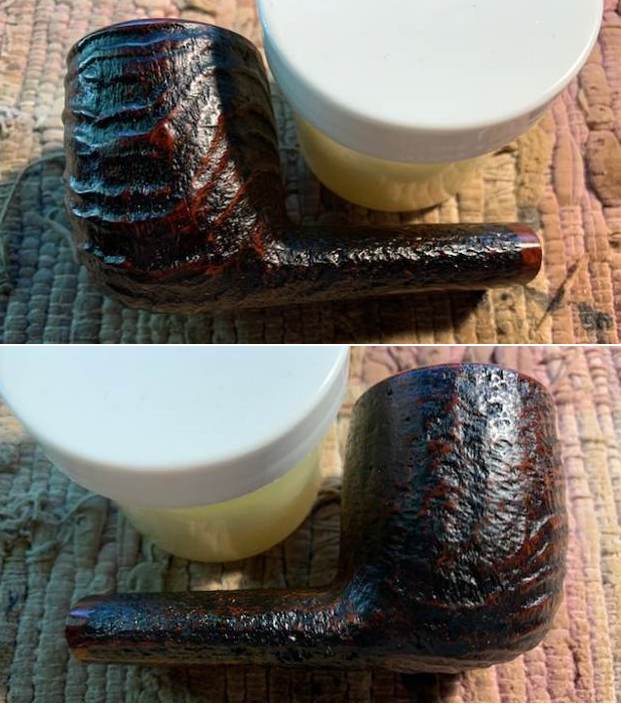
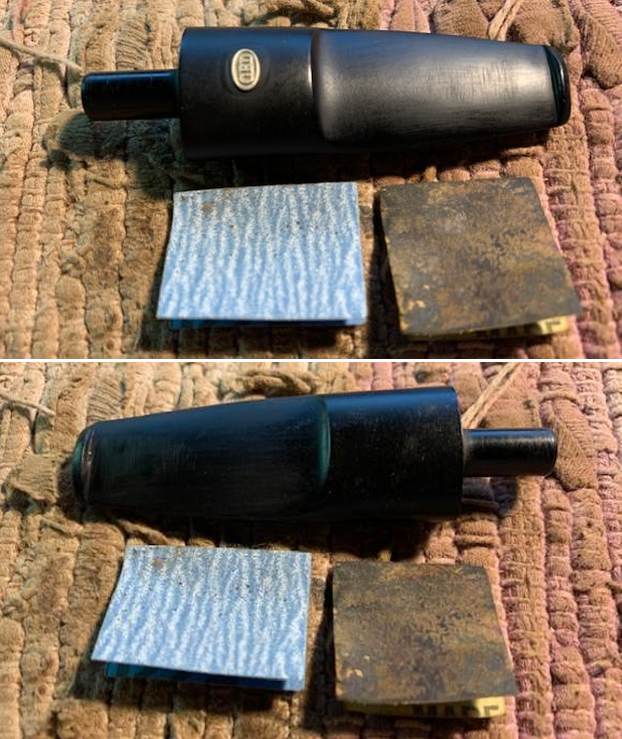
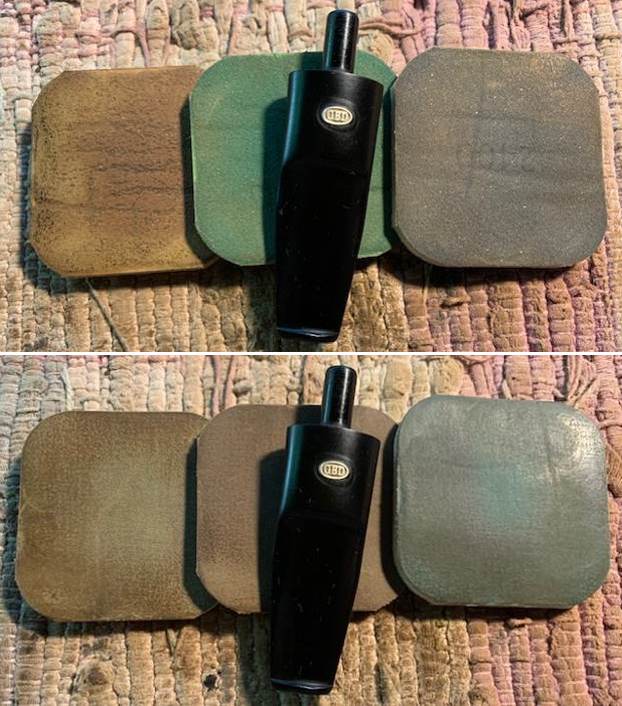
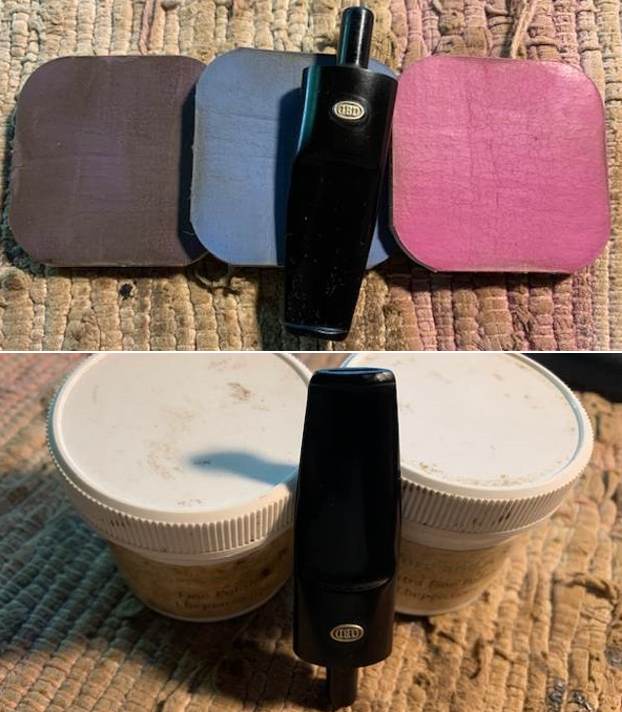
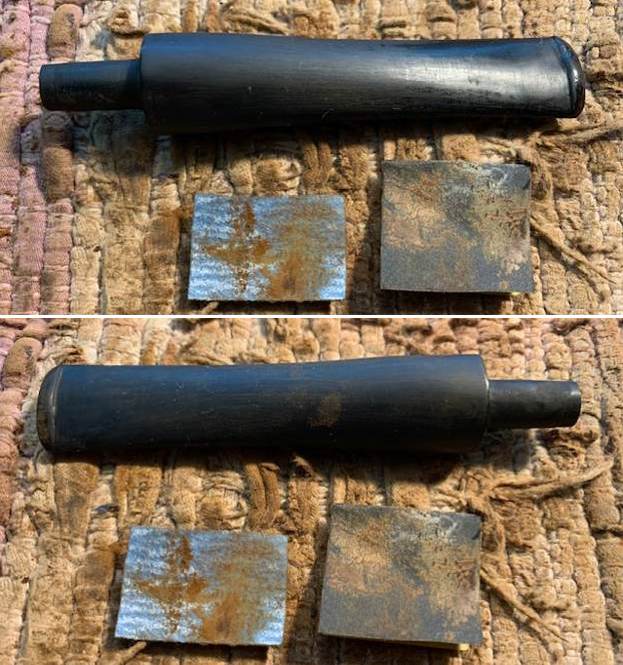
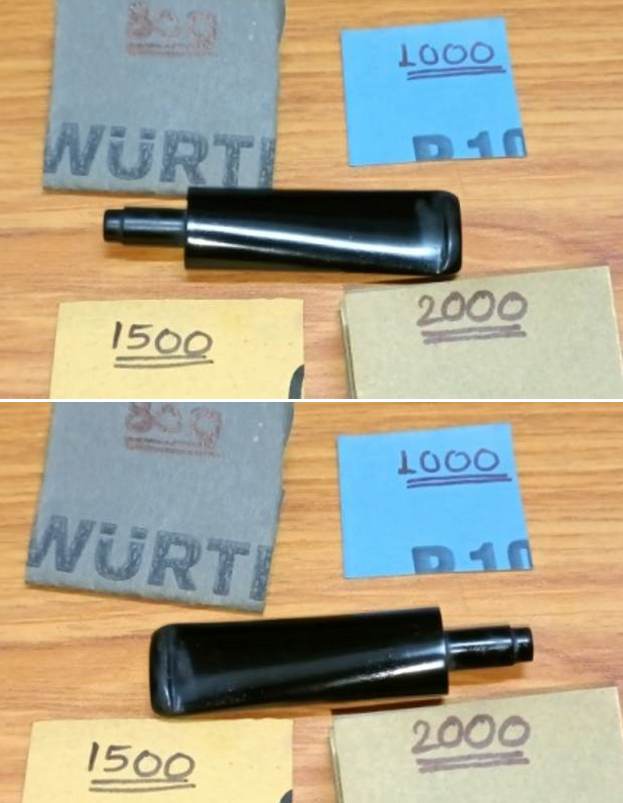
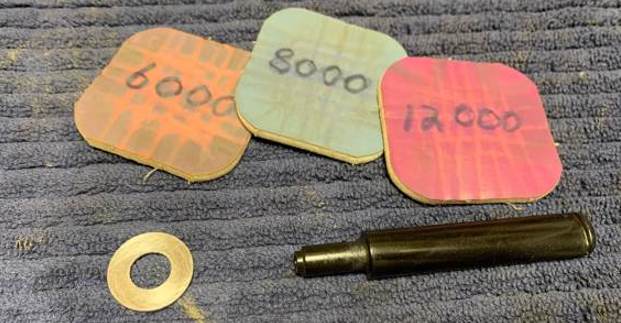
The stem repair fills had cured nicely and I moved ahead with the process of filing and shaping the button end with a flat head needle file. For a better blending, I further sanded the entire stem with 220. At this stage, the fills appear as ugly grey patches that are very uneven. I hoped that further sanding with progressively higher grit sandpapers would help in blending of the repairs. I continued to dry sand the entire stem with a folded piece of 400 followed by 600 and 800 grit sandpaper and further progressed to wet sanding with 1000, 1500 and 2000 grit sand papers. However, the fills still appear dirty grey and a closer look showed the entire filled surface peppered with numerous tiny air pockets. I refilled the patches with a fresh mix of CA superglue gel and activated charcoal and set the stem aside.
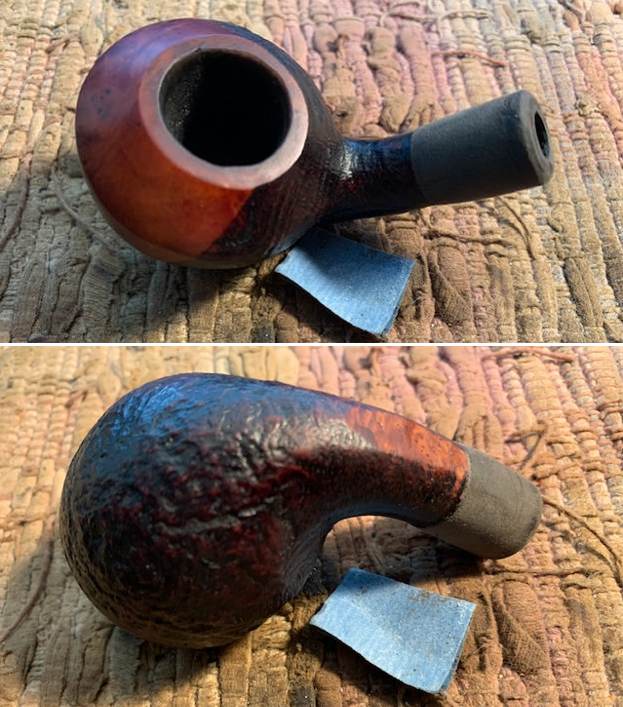
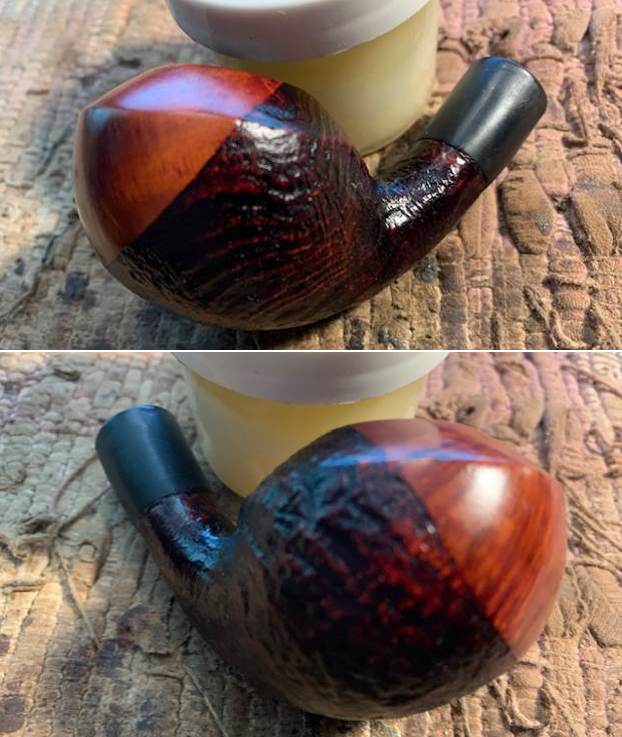
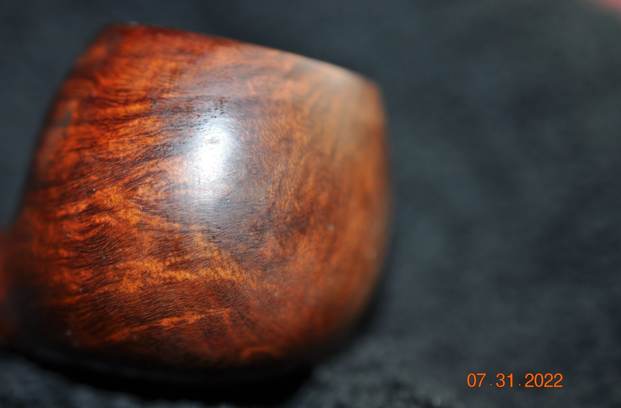
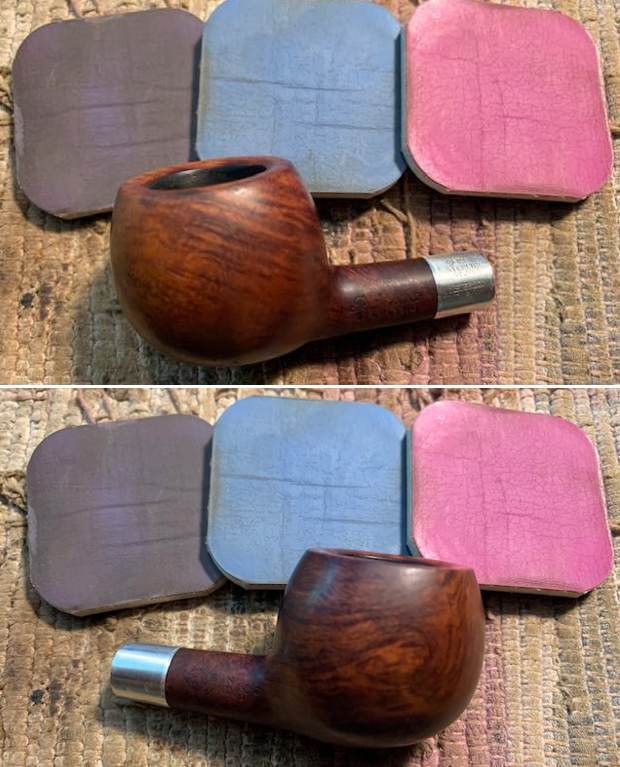
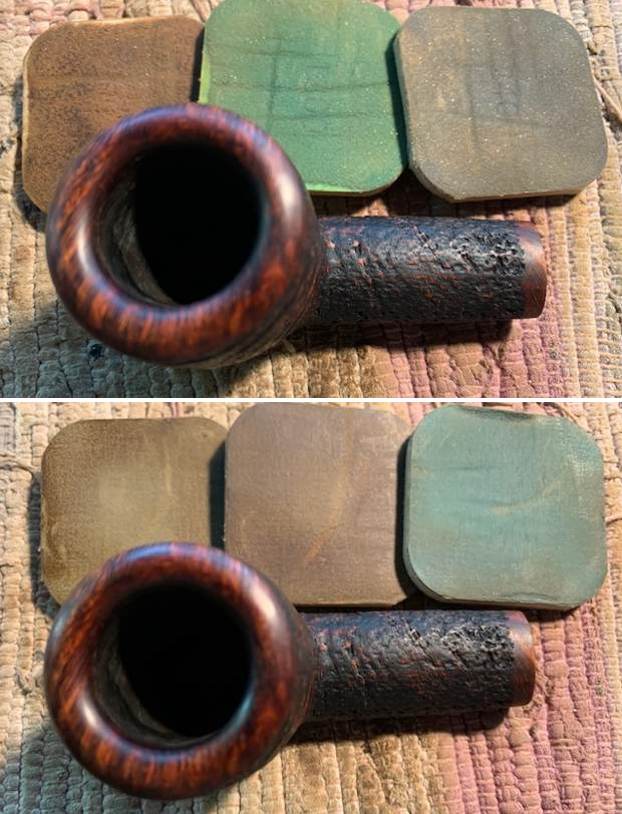
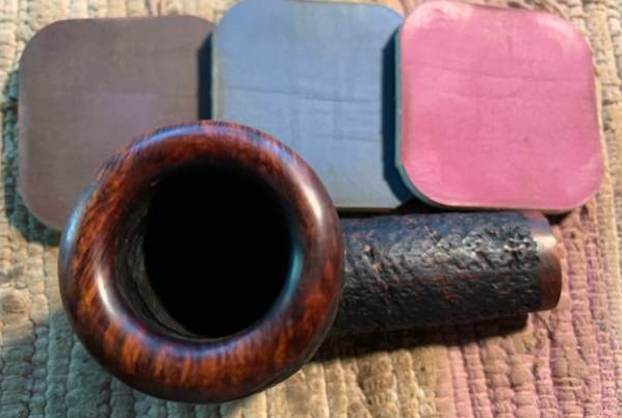
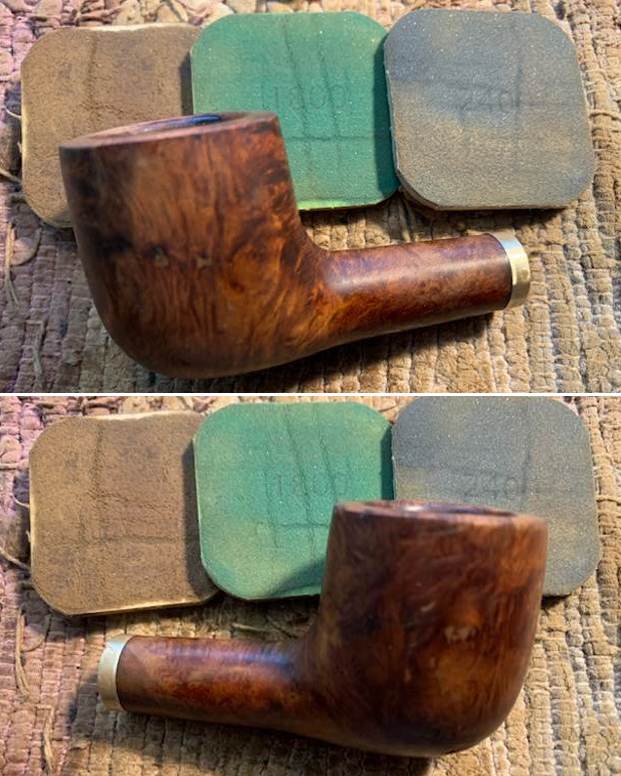
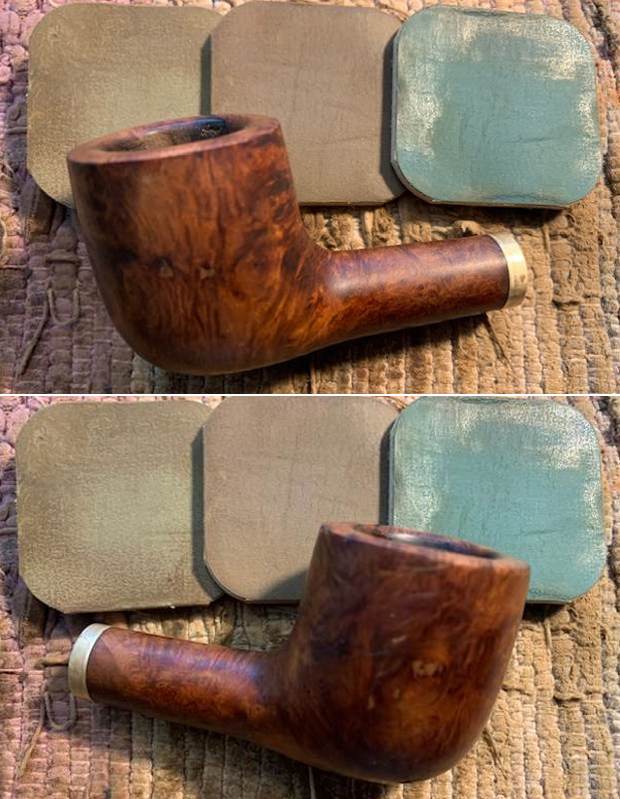
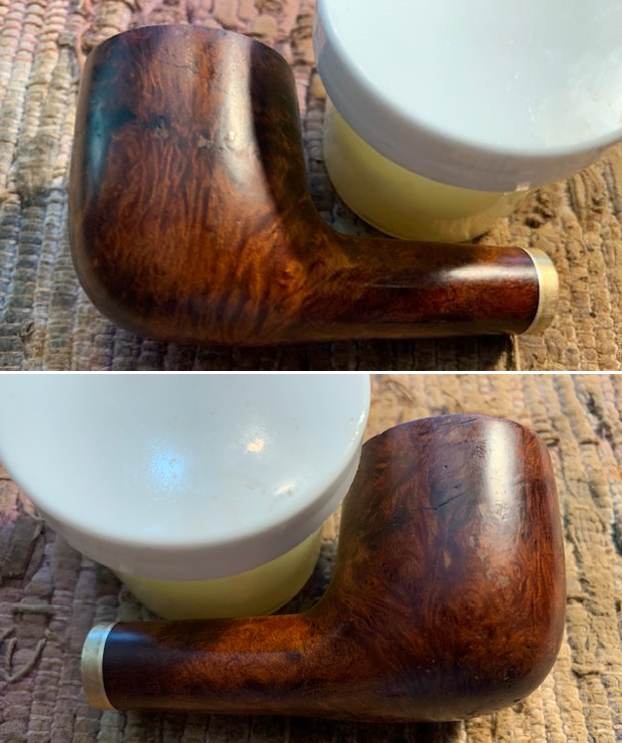
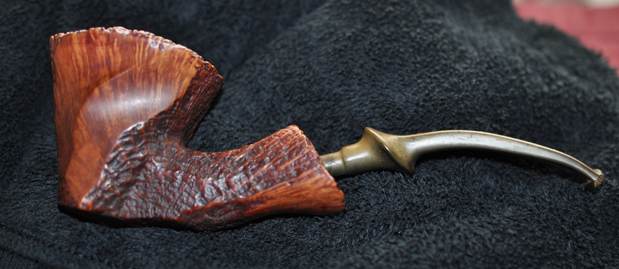
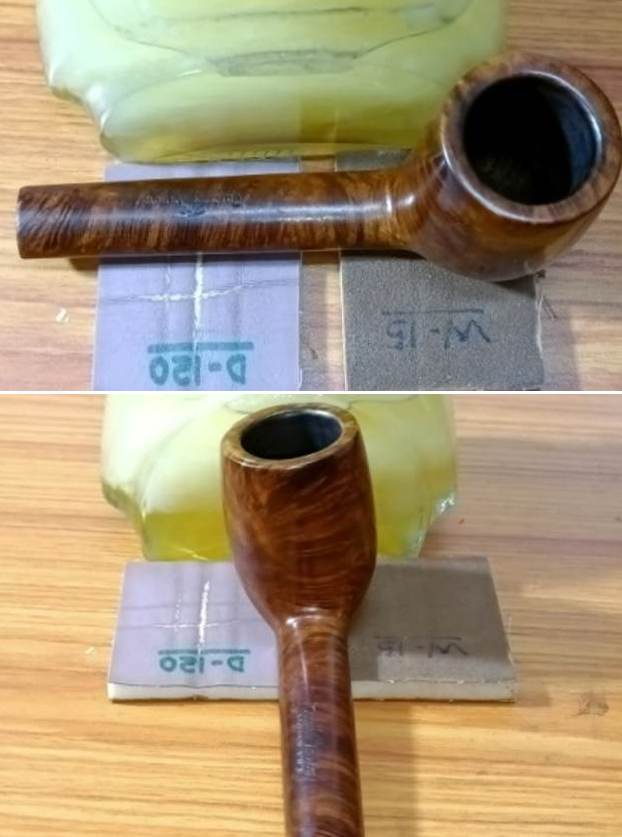
 During the time that I was struggling with the stem repairs, Abha completed the polishing of the stummel by wet and dry sanding the surface with 1500 to 12000 grit micromesh pads. She massaged a small quantity of B & A Restoration balm and set it aside for 10 minutes for the briar to rehydrate. Thereafter, she gave a rigorous hand rub using a microfiber cloth. The appearance of the stummel at this point is truly satisfying.
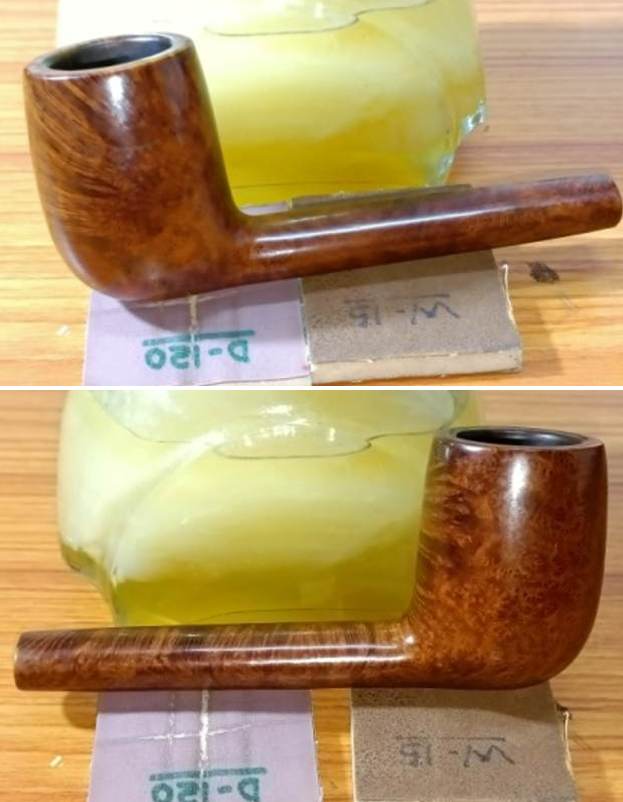
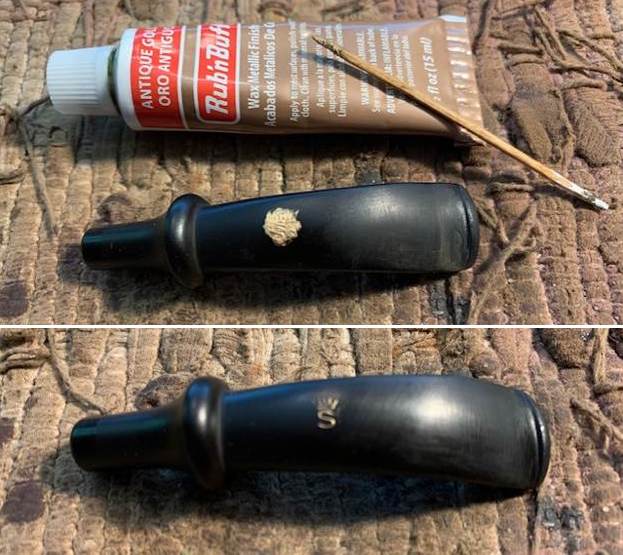
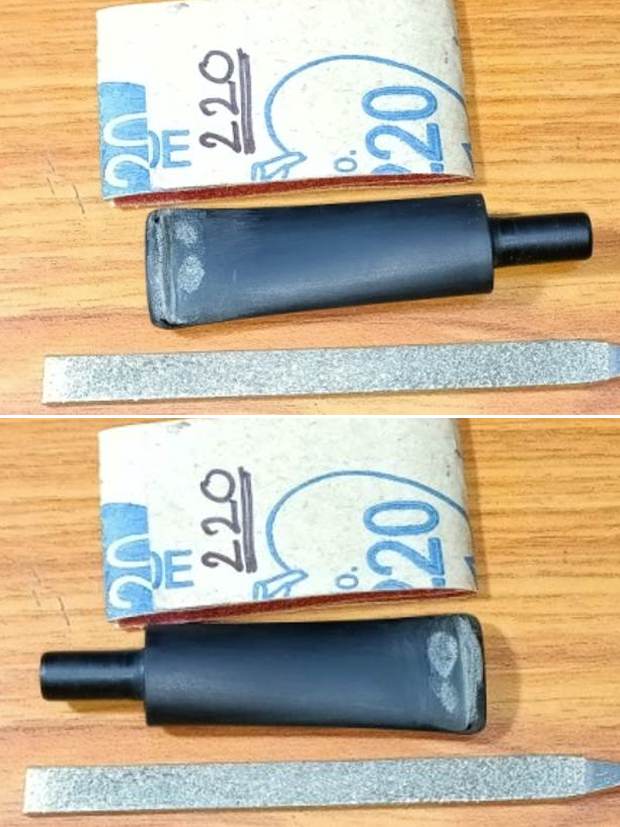
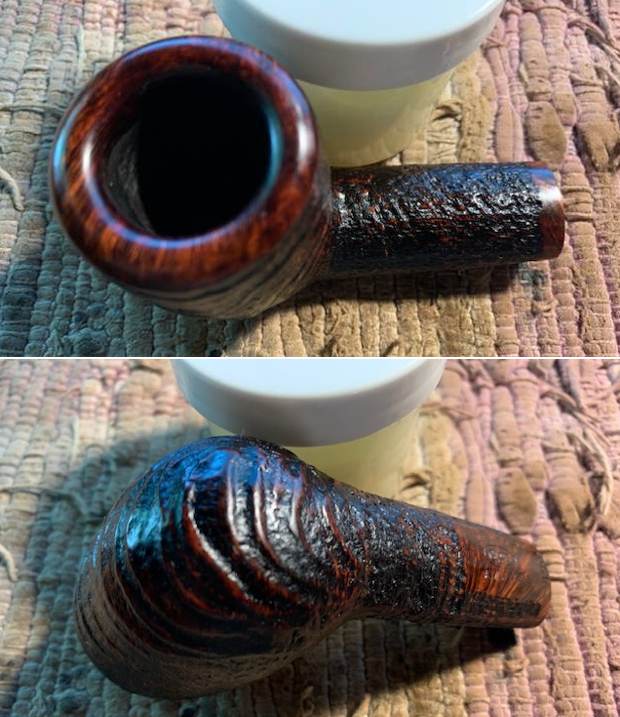
 Once the stem refills had cured completely, I went through the complete process of sanding and shaping the fills using a needle file followed by sanding with sandpapers as described above. Though the finish is better this time around, the coloration of the patch still remains a light shade of grey and easily discernible against the rest of the stem surface. I would like to inform our esteemed readers that I had to go through the complete repairs six times before this attempt and for the sake of brevity, I deliberately kept it short. Yet, the results are not what I expected and have been achieving consistently with other brands of superglue.
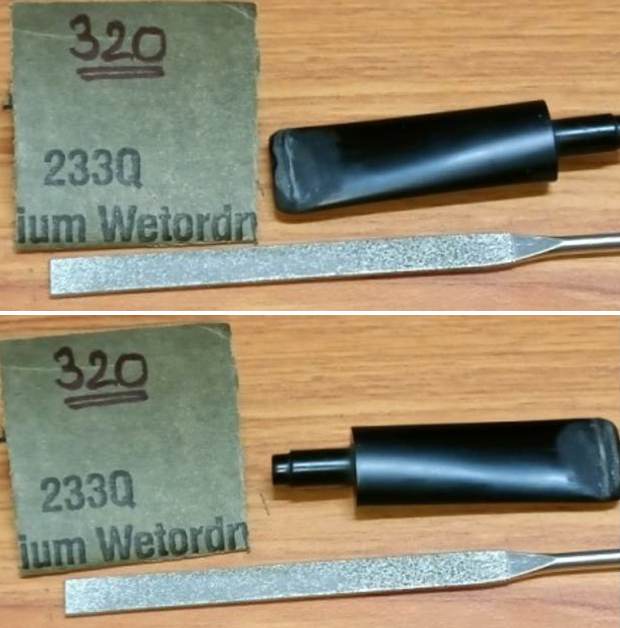
 There was only one more issue that needed to be addressed and one that could not be ignored, being a functional issue. After I had reamed and sanded the chamber walls, I had observed very minor and superficial web of thin heat fissures/ pits all along the chamber walls. I addressed this by mixing activated charcoal and plain yogurt to a thicker consistency, just enough that it would spread easily and applied it evenly all along the chamber walls after inserting a folded pipe cleaner through the draught hole to keep it open. Once dry and set, this will not only protect the walls but also aid in faster buildup of cake.
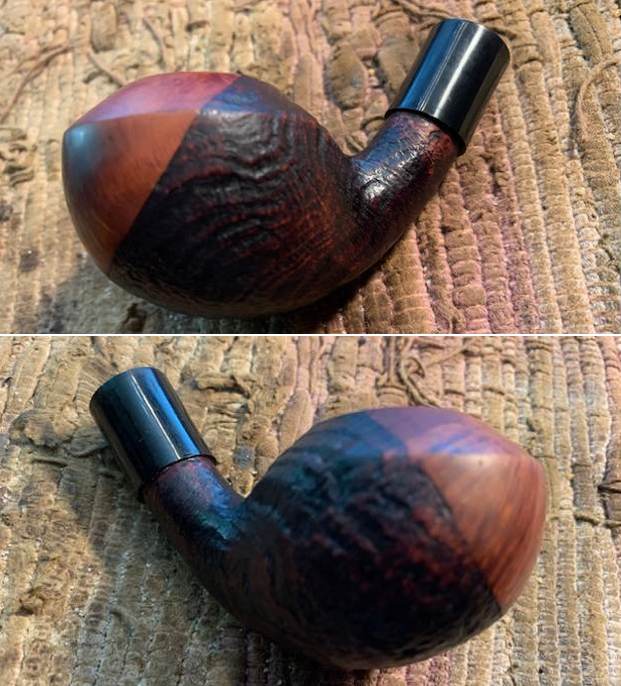
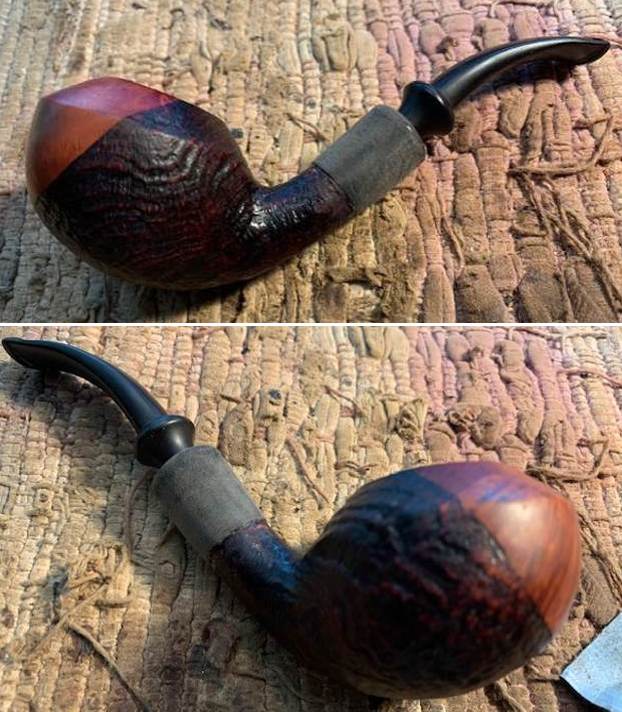
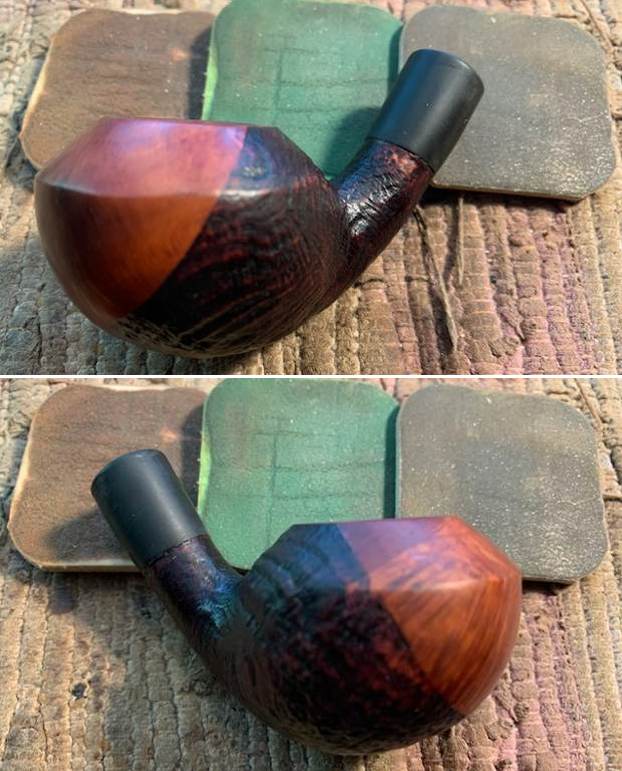
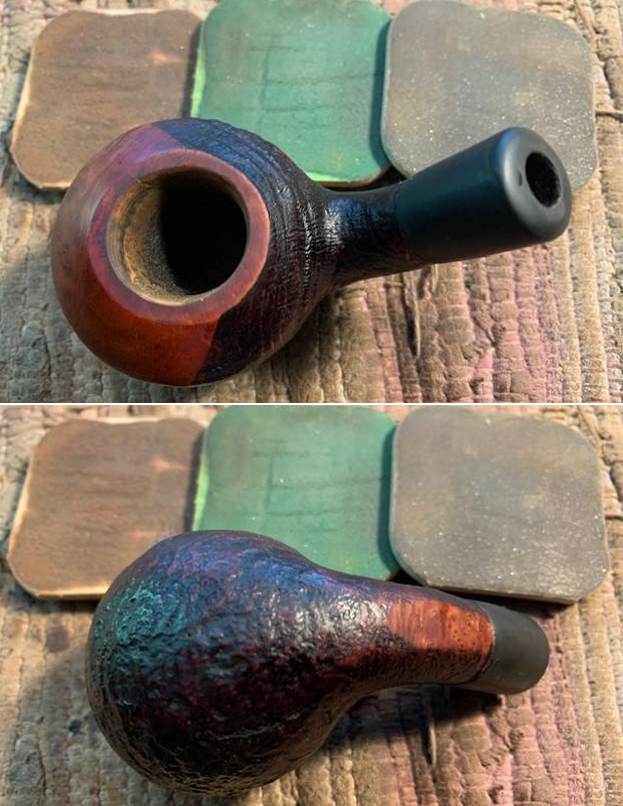
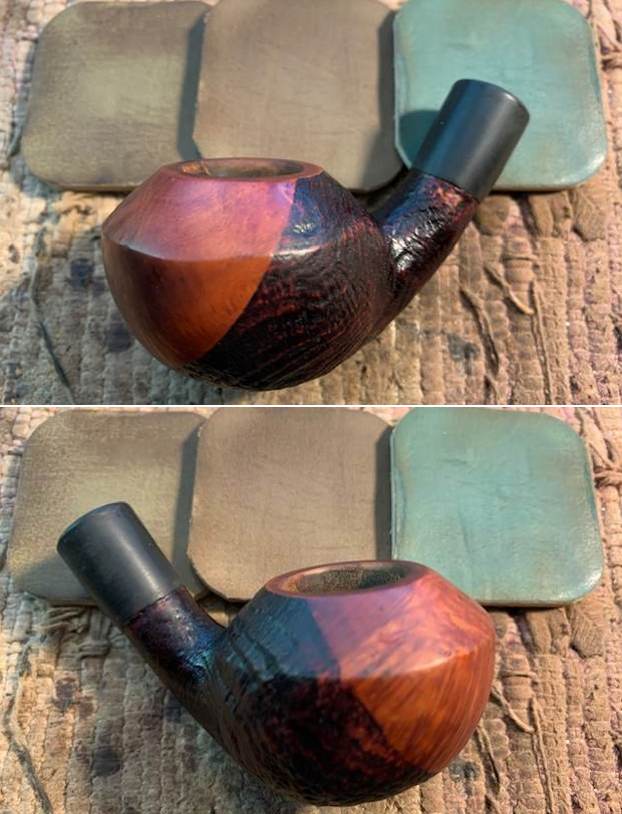
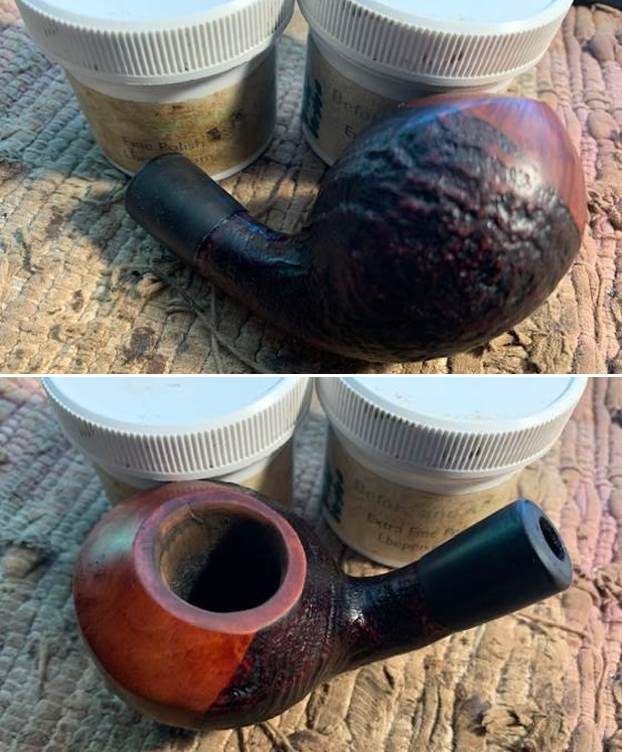
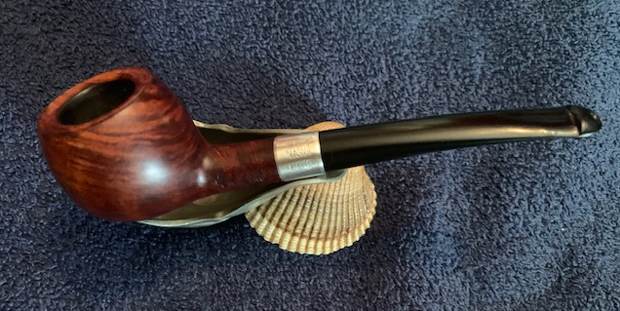
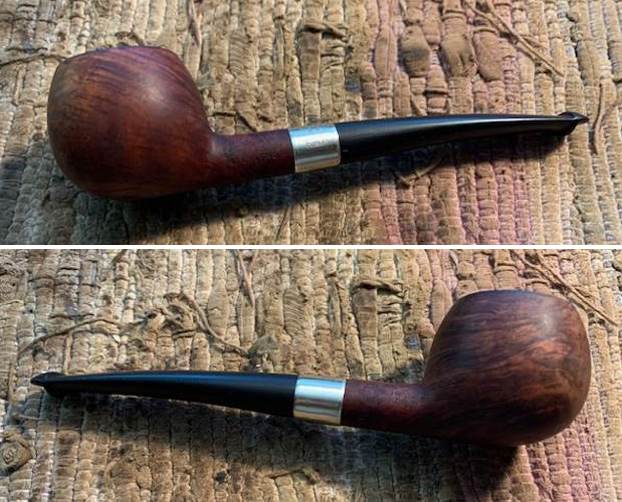
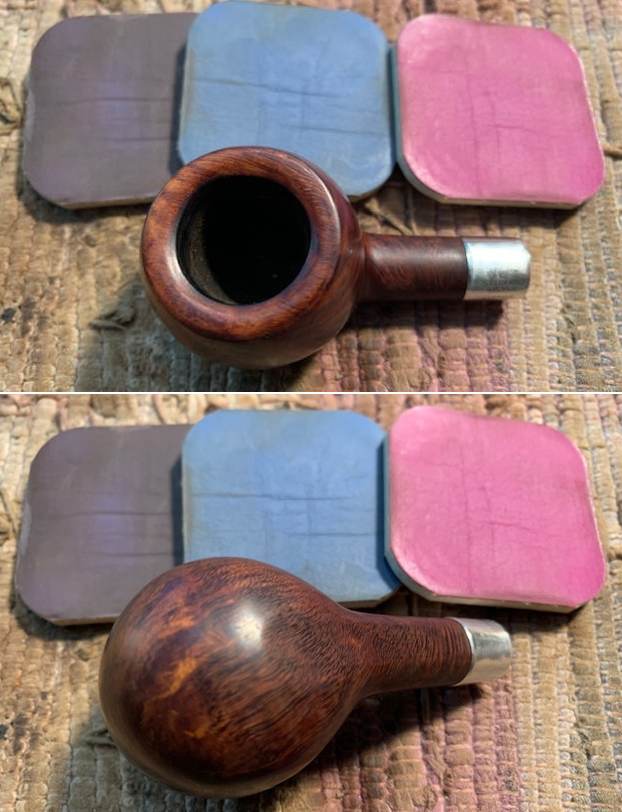
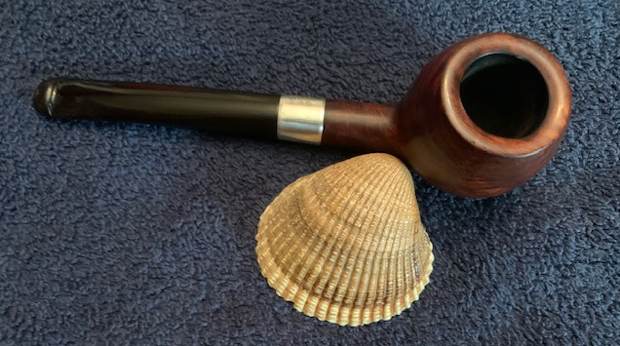
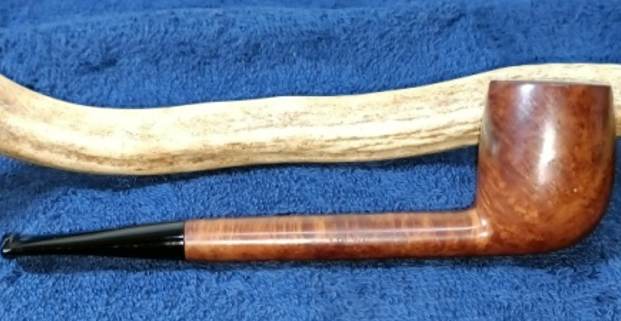
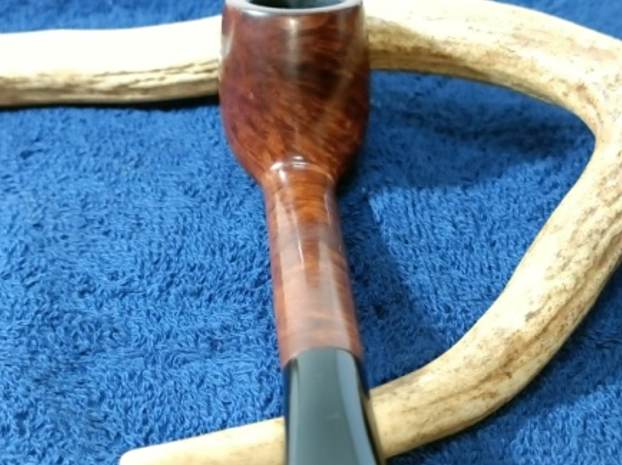
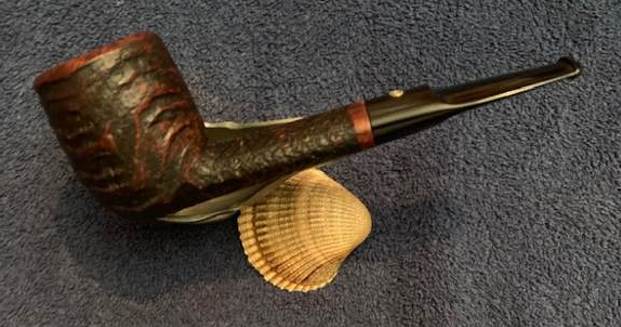
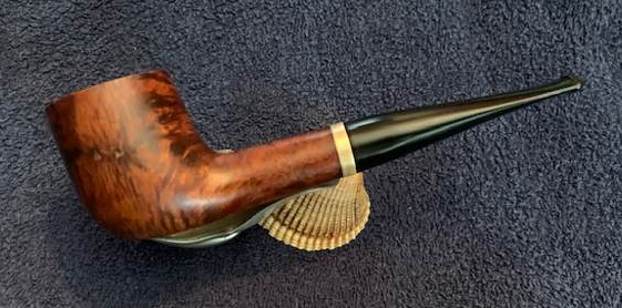
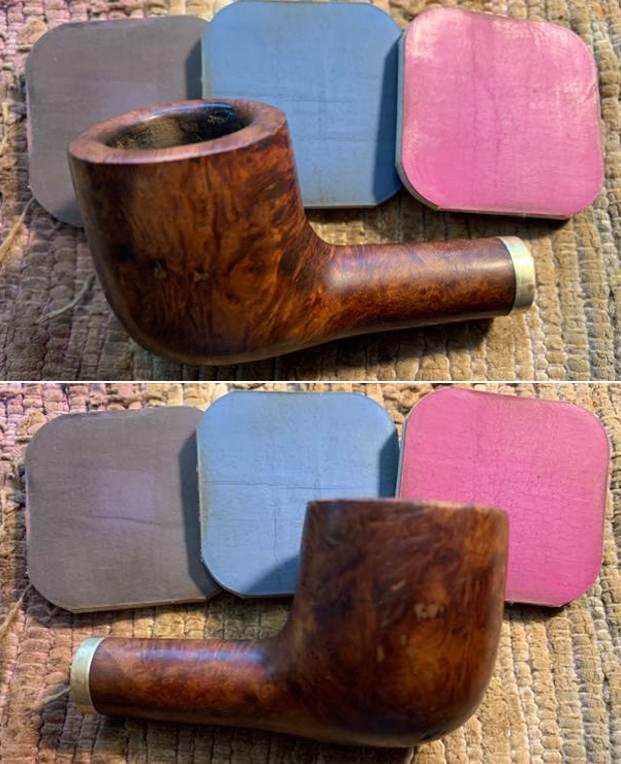
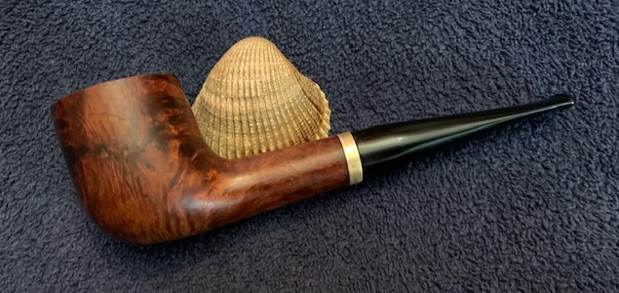
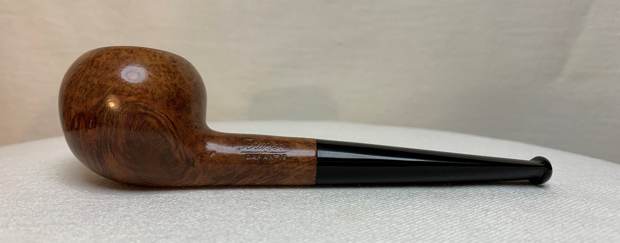
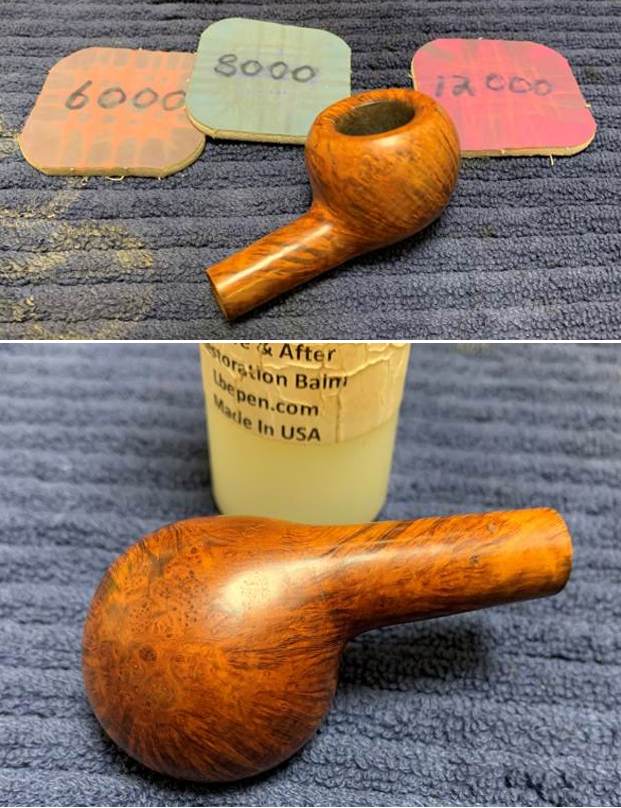
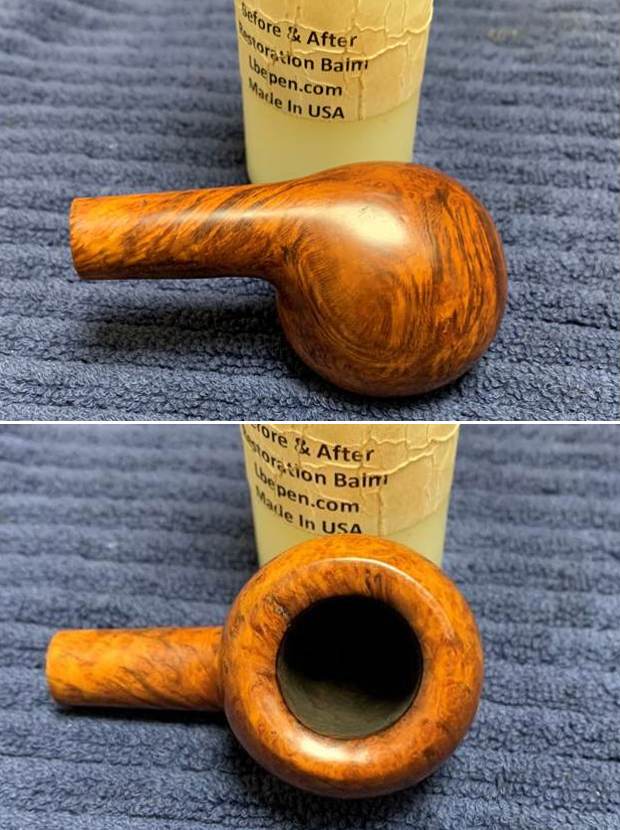
 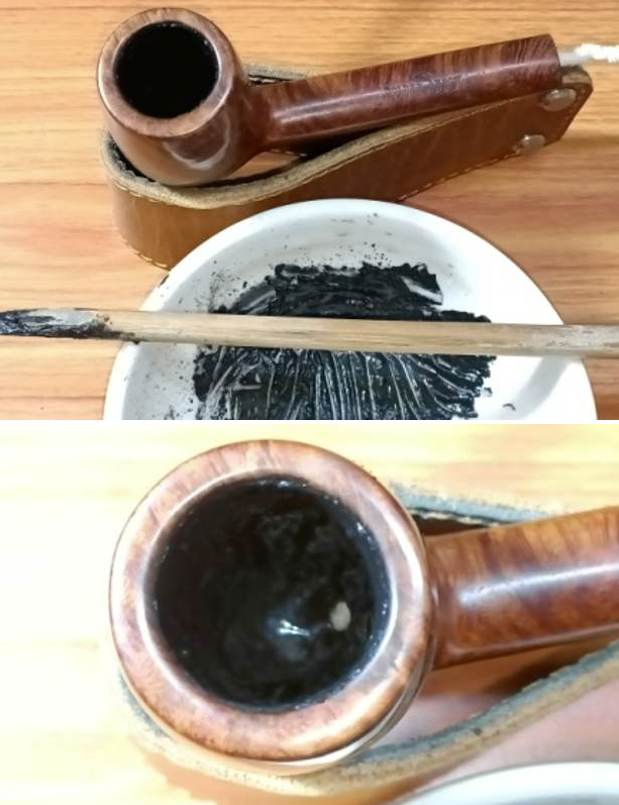 To apply the finishing touches, I mounted a cotton cloth buffing wheel on to my hand held rotary tool and applied a coat of Blue Diamond to the stummel and the stem to polish out the minor scratches. With a cotton buffing wheel that I use for carnauba wax, I applied a coat of carnauba wax and continued to work on it till the complete coat of wax had been polished out. I mounted a clean cotton cloth buffing wheel and gave the entire pipe a once over buff. I finished the restoration by giving the entire pipe a rigorous hand buffing using a microfiber cloth to raise the shine further. The finished pipe looks beautiful and is ready to be added to my collection of inherited pipes. Thanks to all readers of rebornpipes who have spared a moment of their invaluable time in reading through this write up and as is always, your suggestions and advice are always welcome.


 P.S. – The opinion that I have expressed about the Gorilla CA superglue Gel is my personal opinion based on my personal experience. There are definitely others who have had fantastic results using this product, but not me.
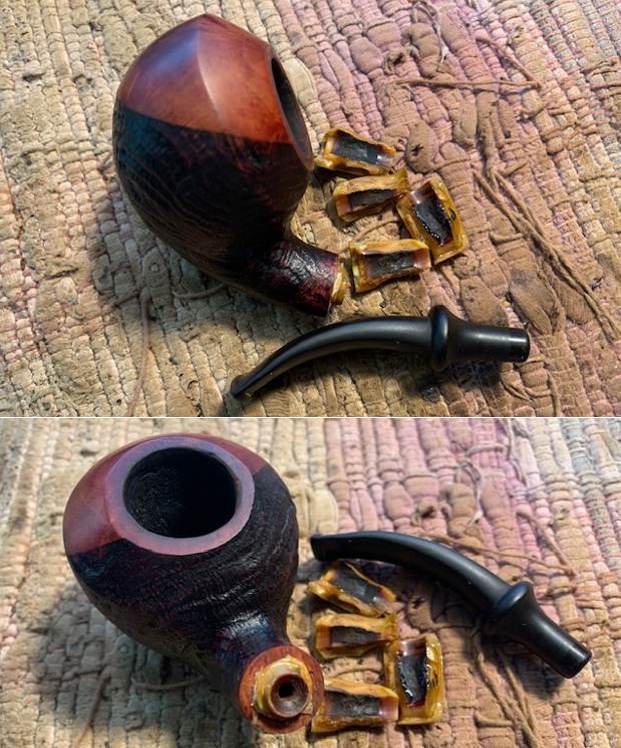
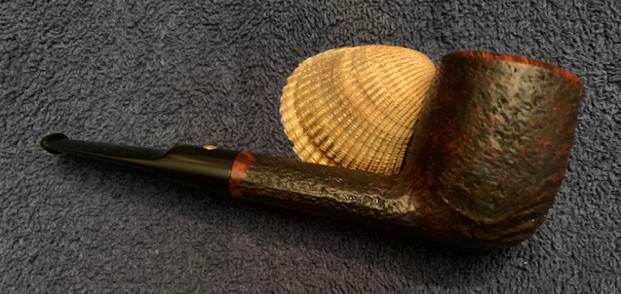
 Clearly, it had been well-loved, as it arrived with a dirty inner tube, plenty of dents, marks and a burn on the rim. Interestingly, this pipe had an orific button at the end of the stem, a feature that apparently disappeared by the 1930s, so it must be around a hundred years old. For more information on the orifice button, take the time to read Steve’s interesting article on the subject.
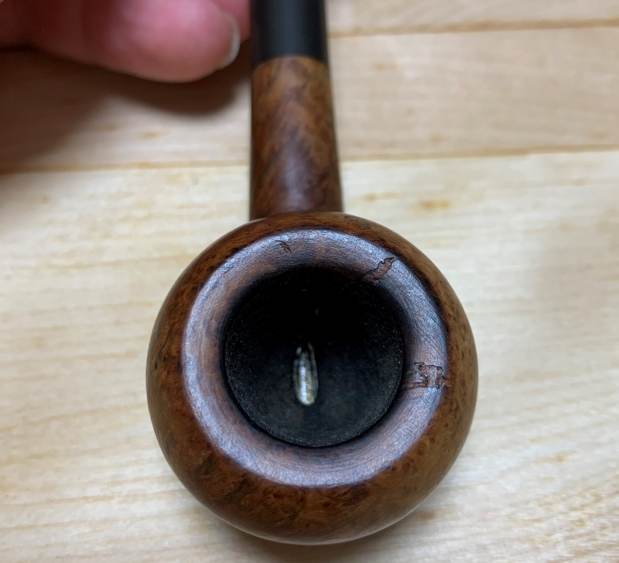


 The only markings were on the left side of the shank: Bruyère [over] Garantie which translates to ‘Genuine Briar’. The words Bruyère Garantie on a pipe are the bane of my pipe restoration existence. They are found on a plethora of different pipes, usually without any other identification. Ugh. One comment on the old Pipes Magazine forums confirms exactly what my meagre research has uncovered:
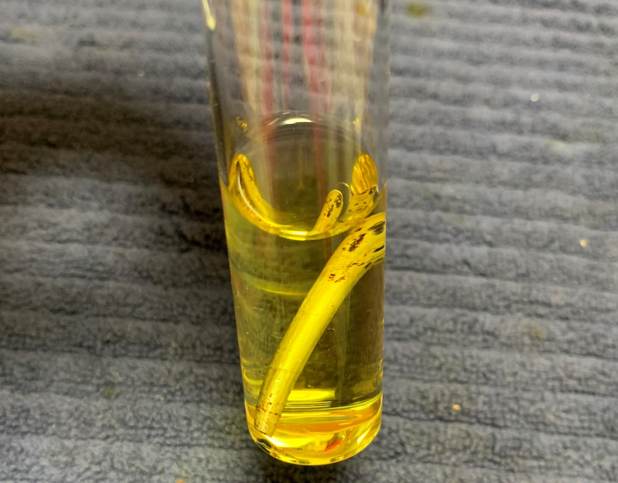
 Next, I wiped the stem with Murphy’s Oil Soap on some cotton pads, then took a BIC lighter and ‘painted’ the stem with its flame to lift the bite marks. This did scarcely anything to fix the damage, but I would worry about that later. Then I cleaned out the inside with pipe cleaners and isopropyl alcohol. Fortunately, it wasn’t overly dirty, and it only needed a handful of pipe cleaners.
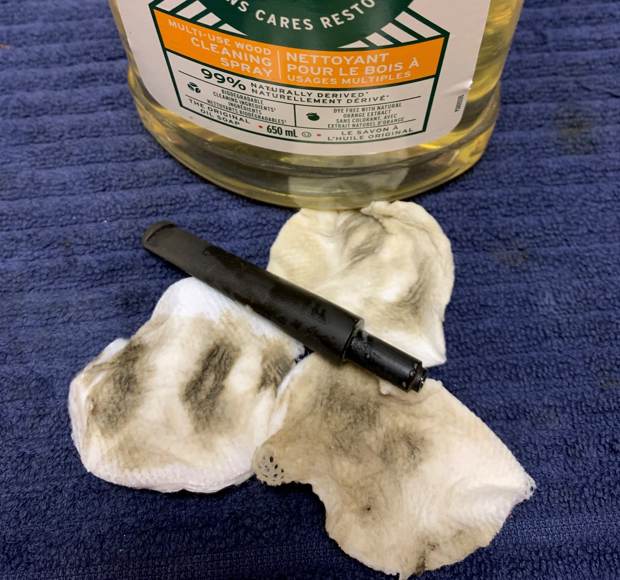
 Next, the stem went for an overnight soak in the Pipe Stem Oxidation Remover. The following day, I cleaned all of the de-oxidizing mess off with alcohol, pipe cleaners, et cetera. The oxidation had migrated to the surface and would be fairly straightforward to remove. I scrubbed with SoftScrub on some cotton pads to remove the leftover oxidation.
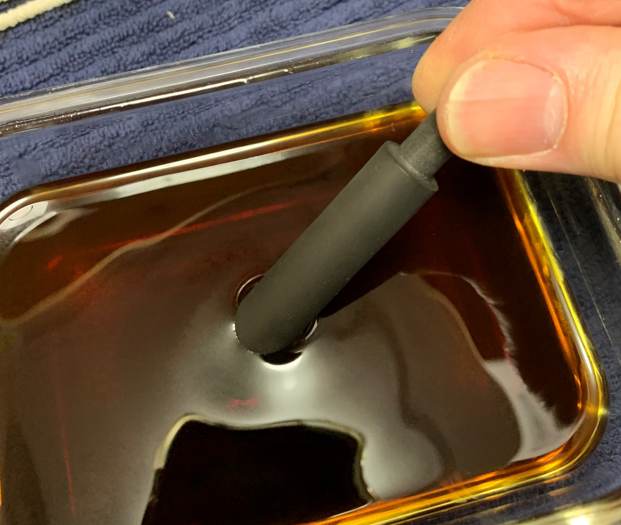
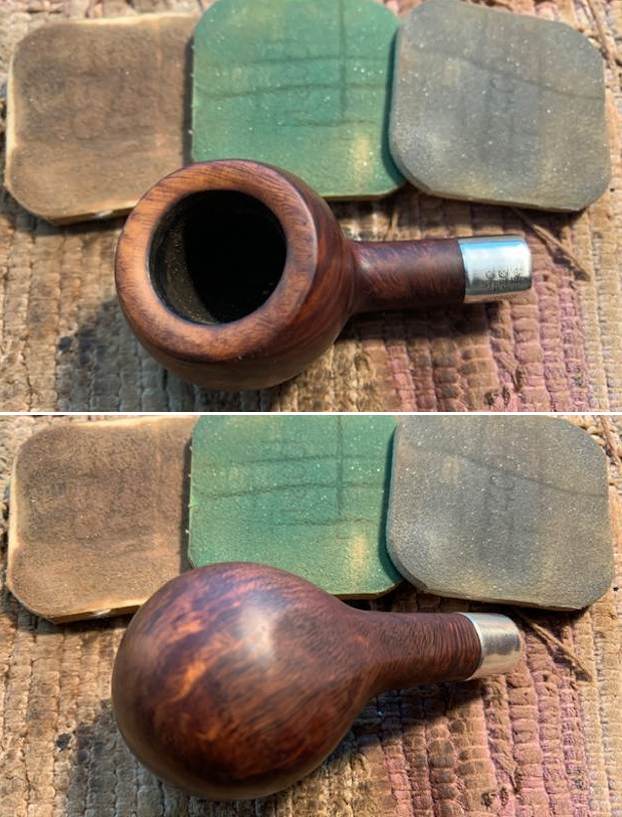
 I built up the bite marks on the stem with black cyanoacrylate adhesive and let them fully cure. Following that, I sanded the adhesive down with 220- and 400-grit sandpapers to meld seamlessly into the stem. I then used all nine Micromesh pads (1,500 through 12,000 grit) to bring out the lovely black lustre on the stem, with some Obsidian Pipe Stem Oil in between each pad scrubbing.
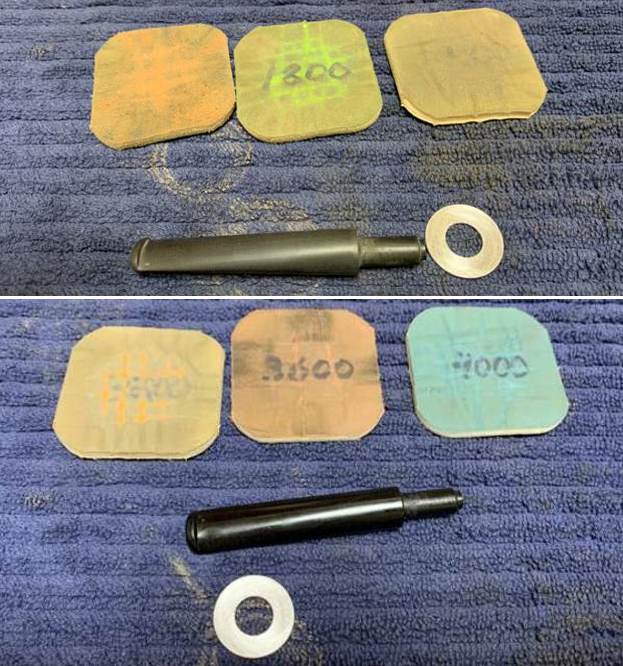
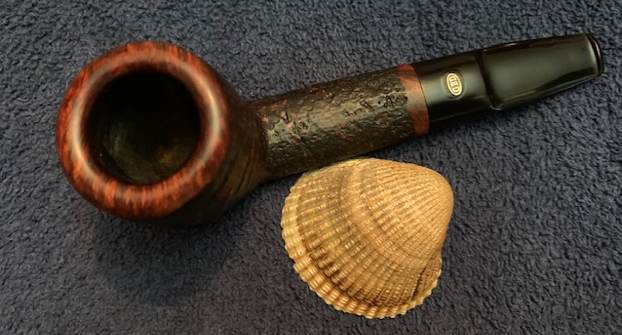
 Now for the stummel. Firstly, I decided to ream out the bowl. I used the PipNet Reamer to remove the built-up cake and followed that with 220-grit sandpaper taped to a dowel to eliminate as much as I could. I took the chamber down to bare briar, as I wanted to ensure there were no hidden flaws in the wall. I also took this opportunity to wash the stummel with Murphy’s Oil Soap and remove as much grime as I could. Following this, of course, I cleaned out the insides with the requisite pipe cleaners and isopropyl alcohol.
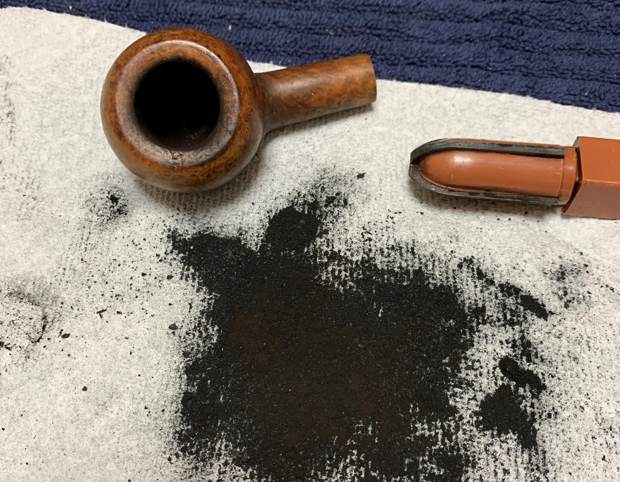

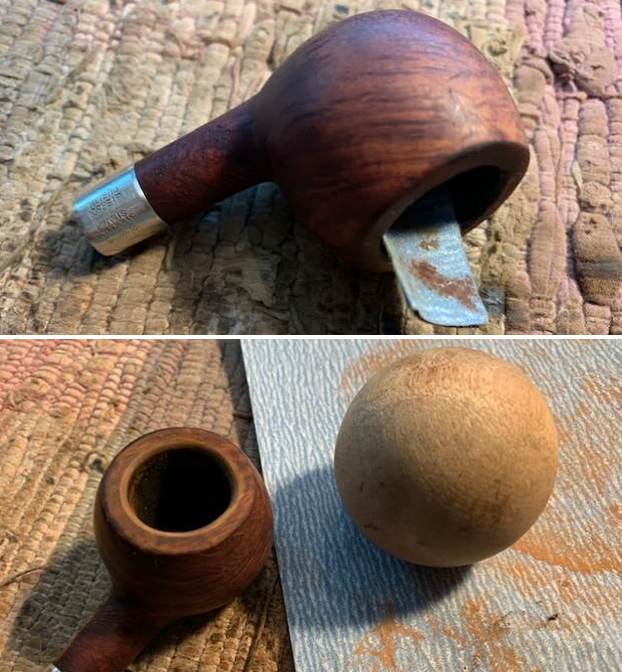
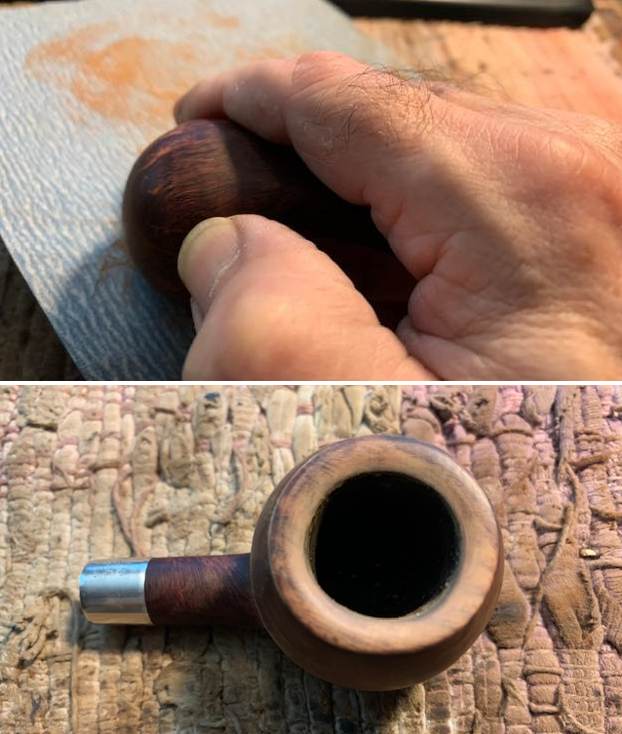
 Now I could address the burn on the rim. I took some oxalic acid, used several Q-tips, and rubbed. The burn improved slightly, but it needed some more help, so I took a solid wooden sphere, wrapped a piece of 220-grit sandpaper around it, and sanded the inner edge of the rim. This helped to both remove the burn and maintain the beveled edge of the rim. The top edge of the rim was sufficiently even, so no extra sanding (topping) was needed.
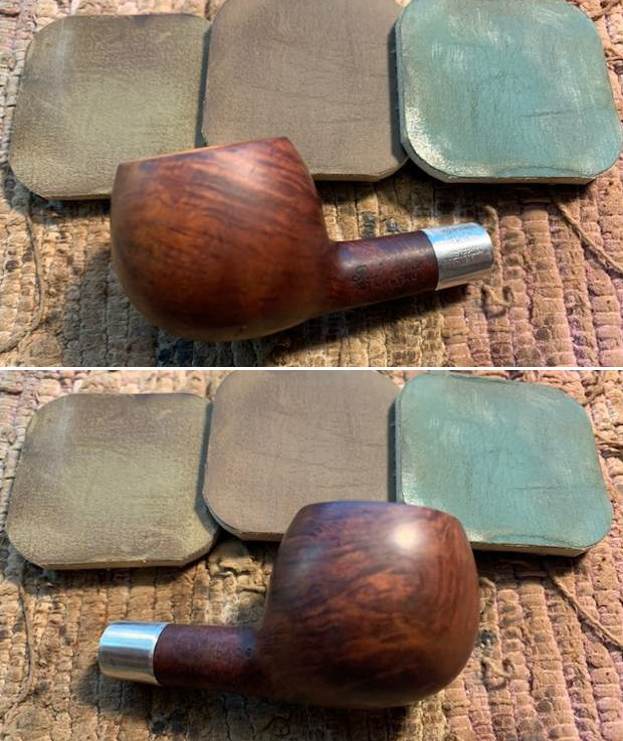
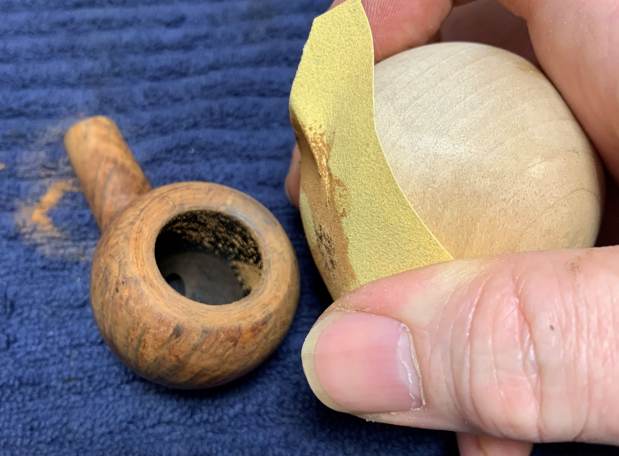 The century-old patina was nice enough that it didn’t need a new stain so I simply finished it up by sanding with my Micromesh pads (1,500 through 12,000 grit). Then applying some Before & After Restoration Balm added that je ne sais quoi which brings out the wood’s beauty.
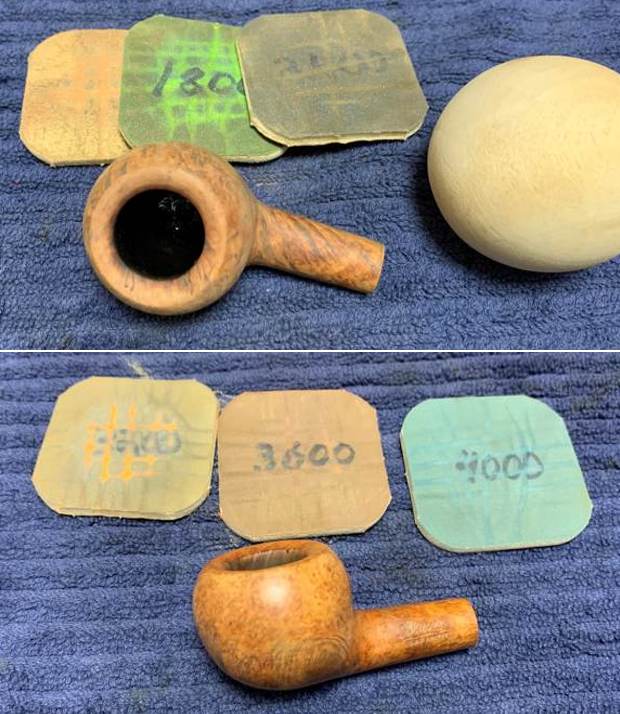
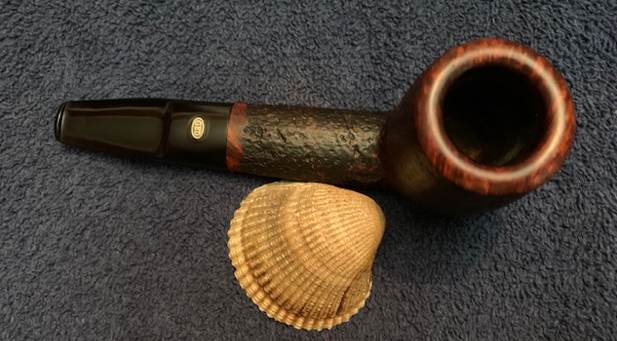
 In fact, the photo above shows a bit of burn remaining on the inner edge of the bowl. Although I don’t have photos, I did address this and the final product was much improved.