Tag Archives: Stem repairs

Restemming an Old Diamond Shank Meerschaum Bent Billiard


Blog by Steve Laug

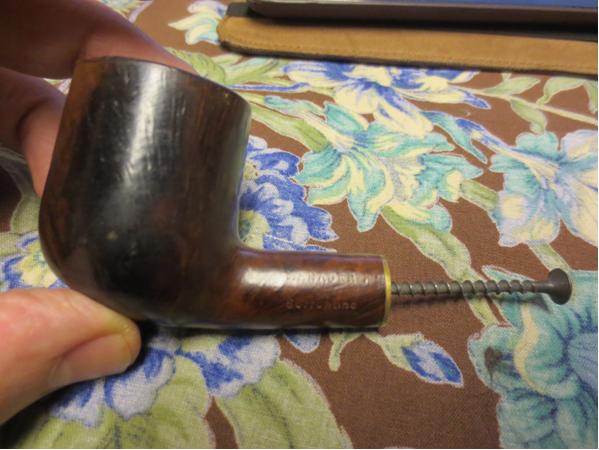
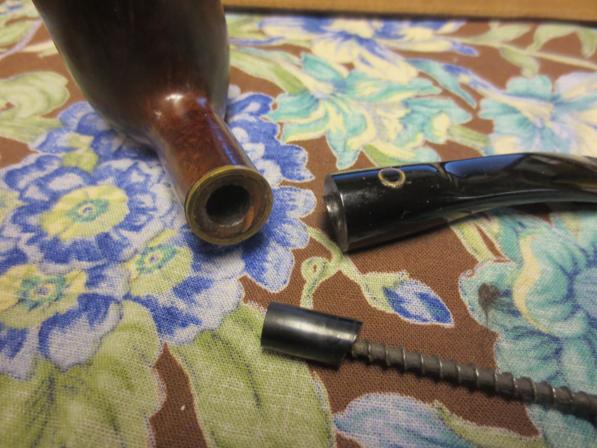
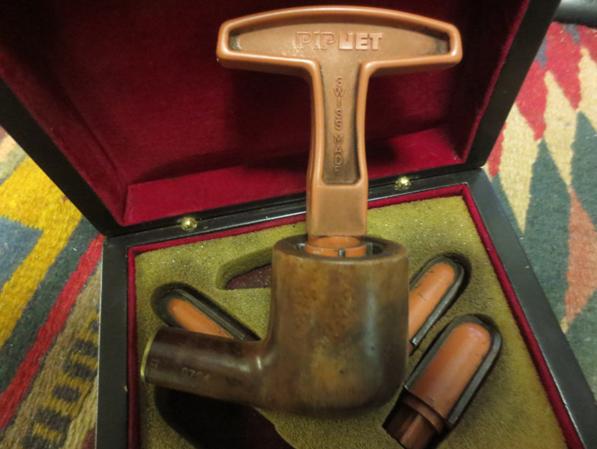
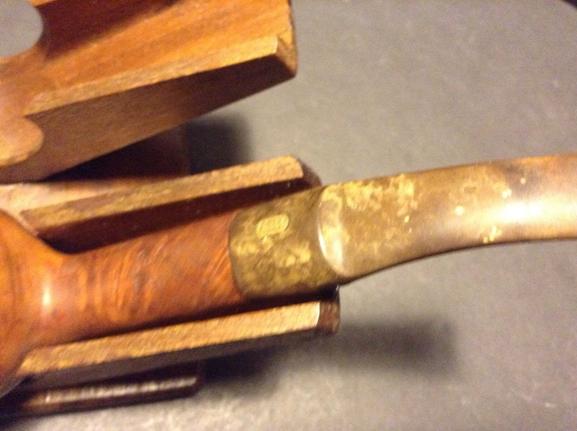
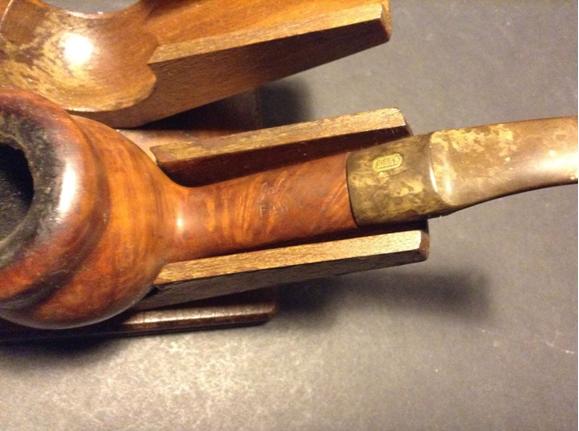
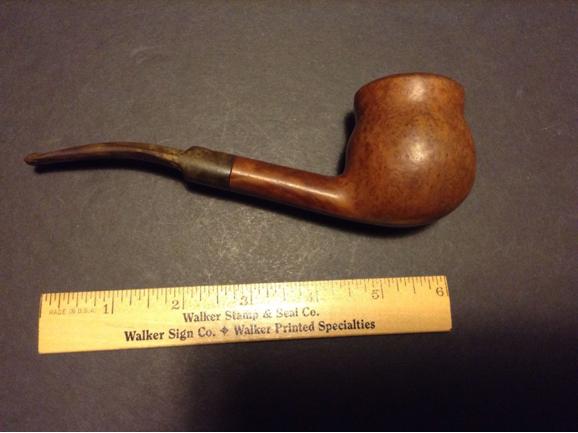
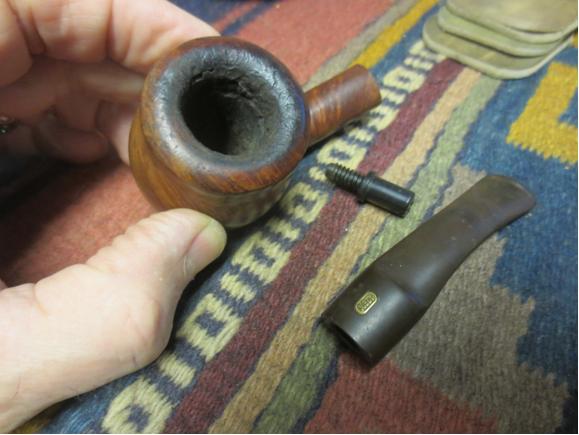
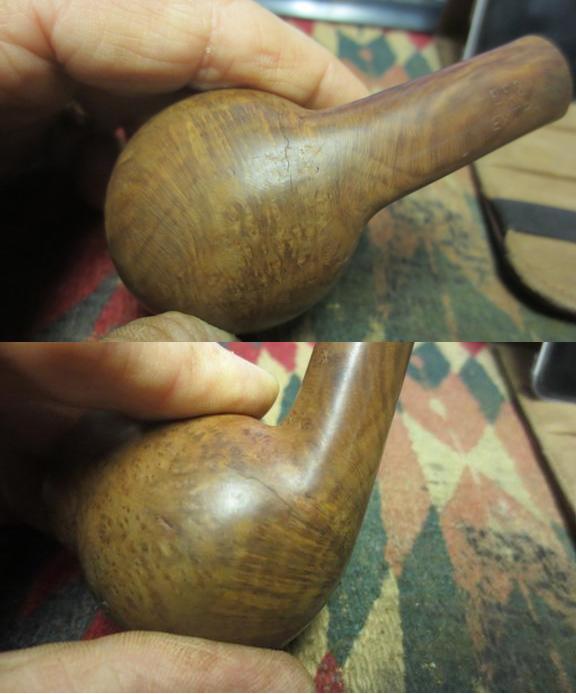
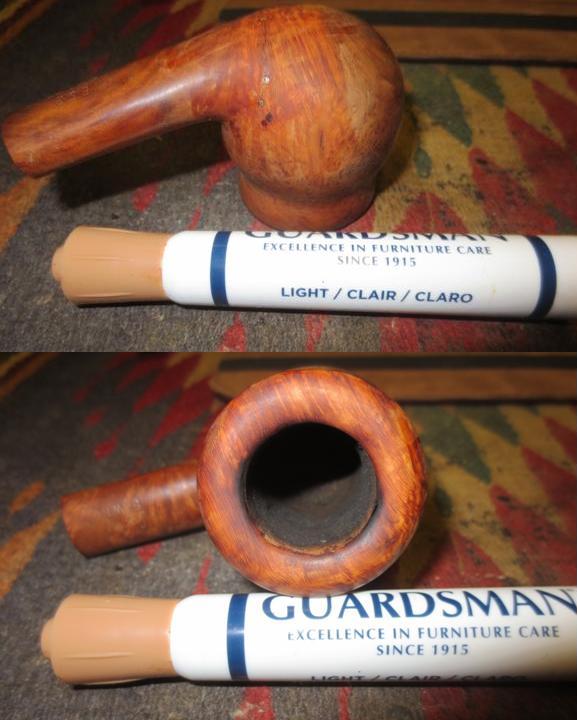
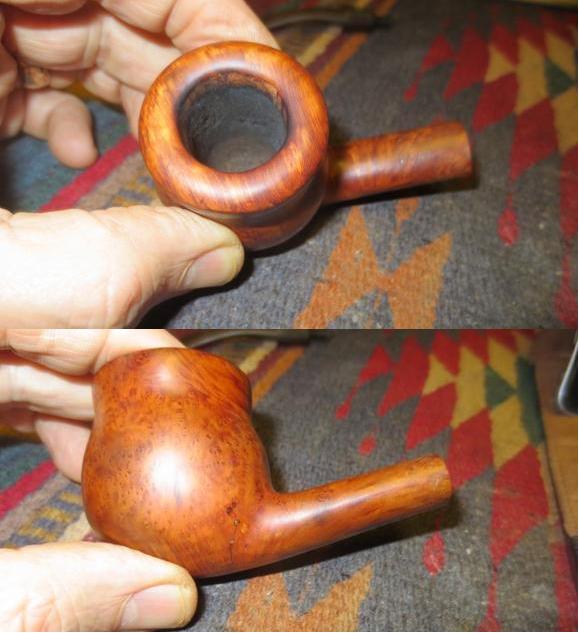
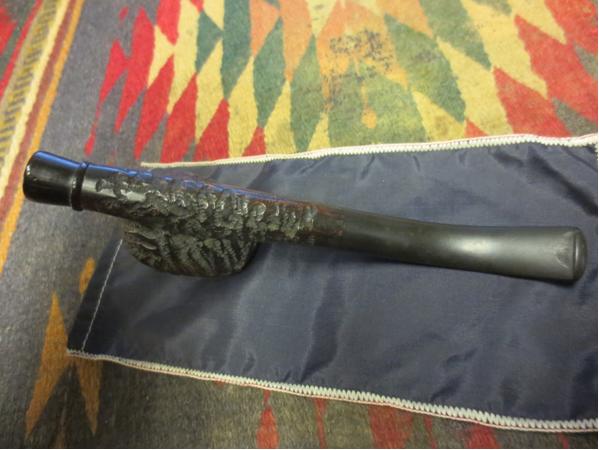
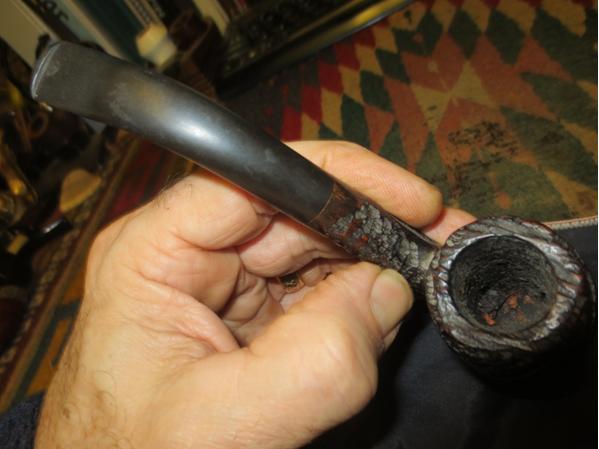
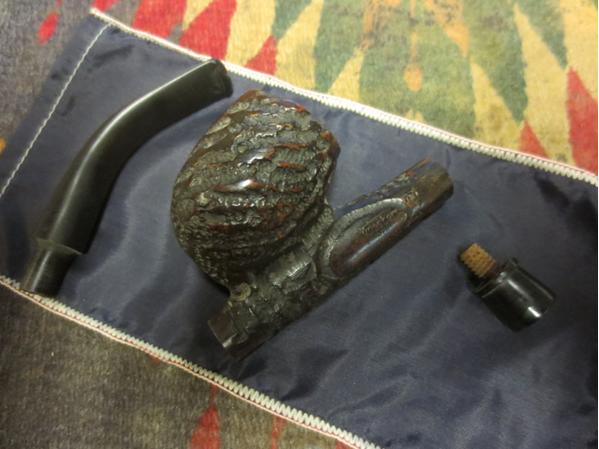
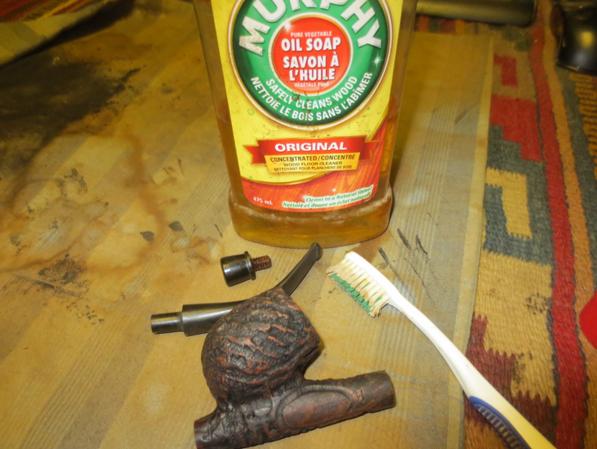
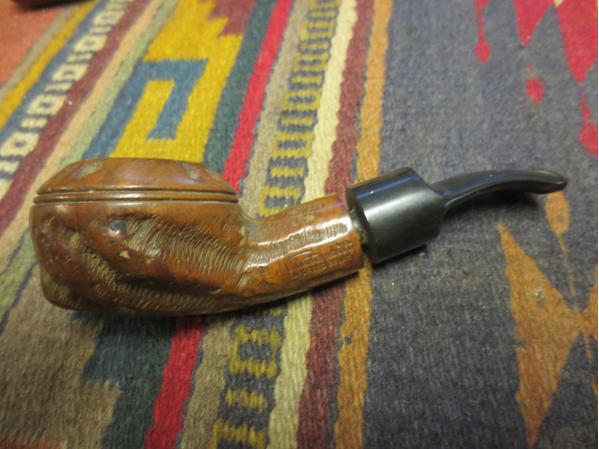
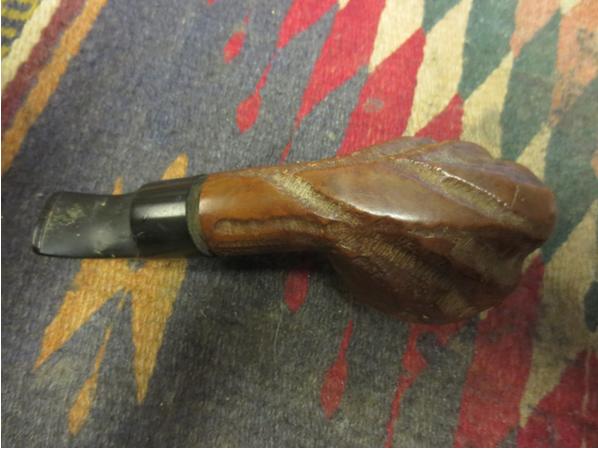
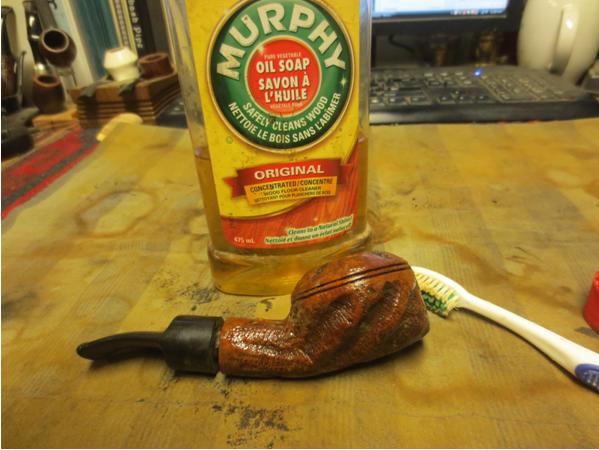
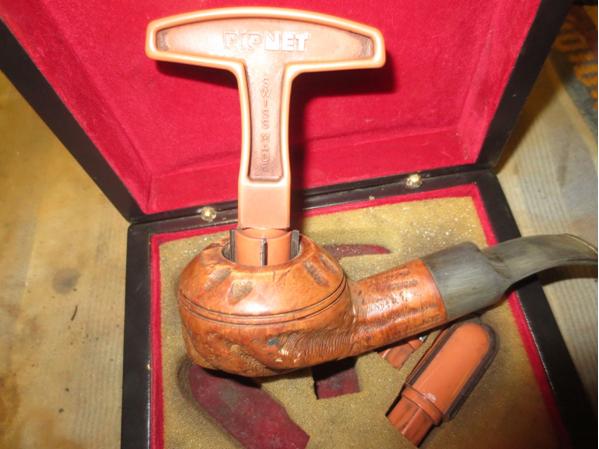
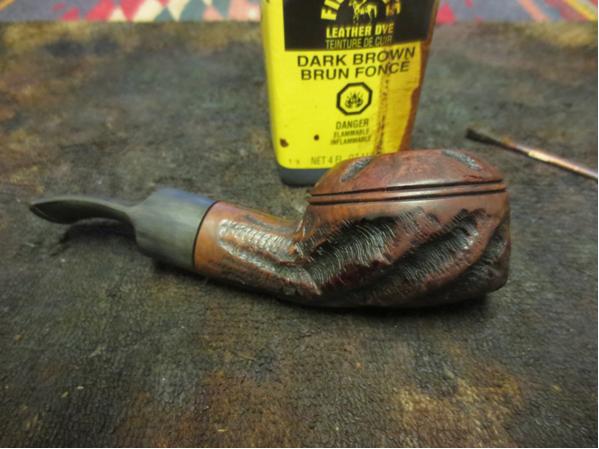
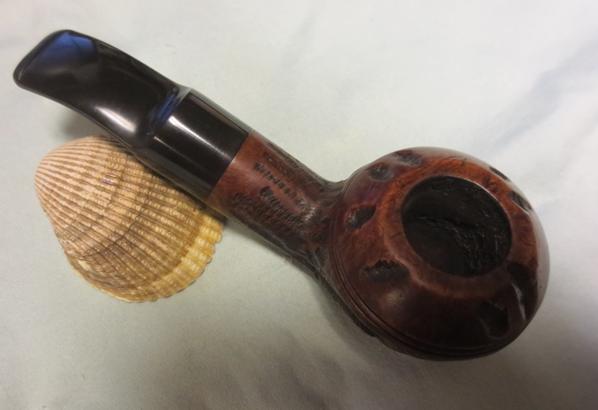
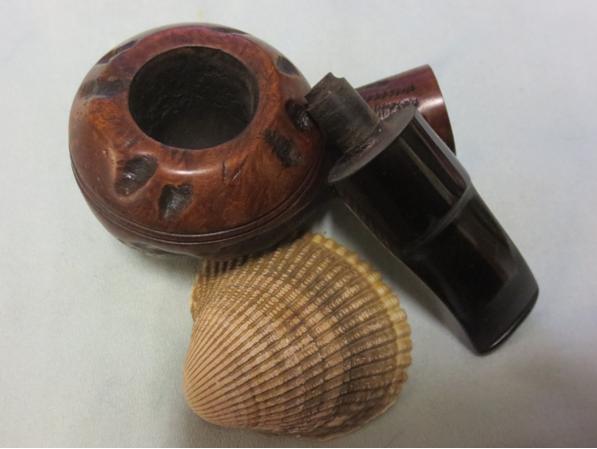
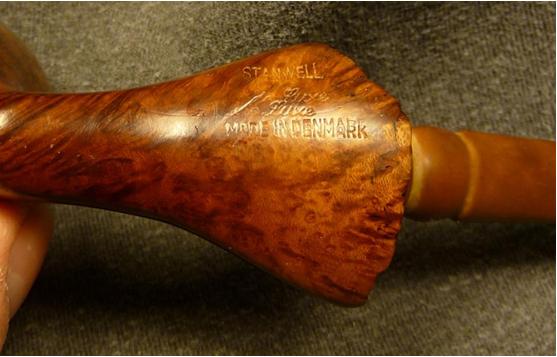
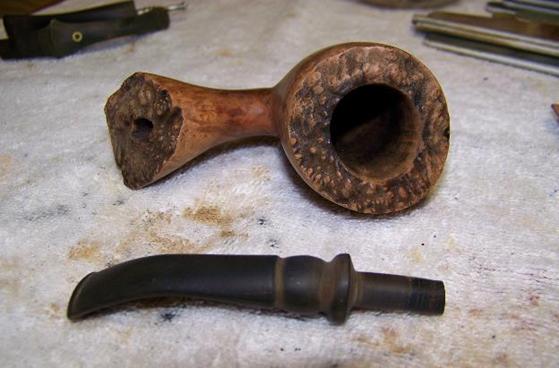
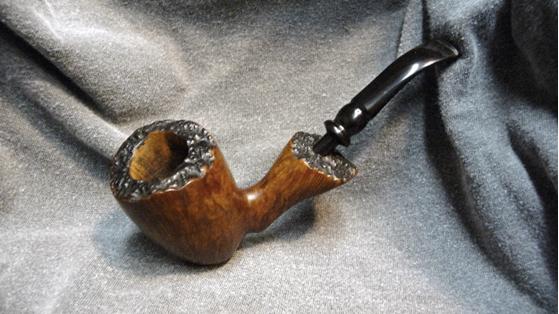
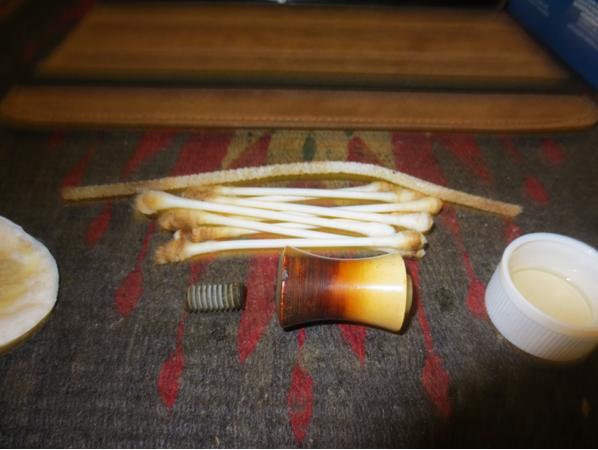
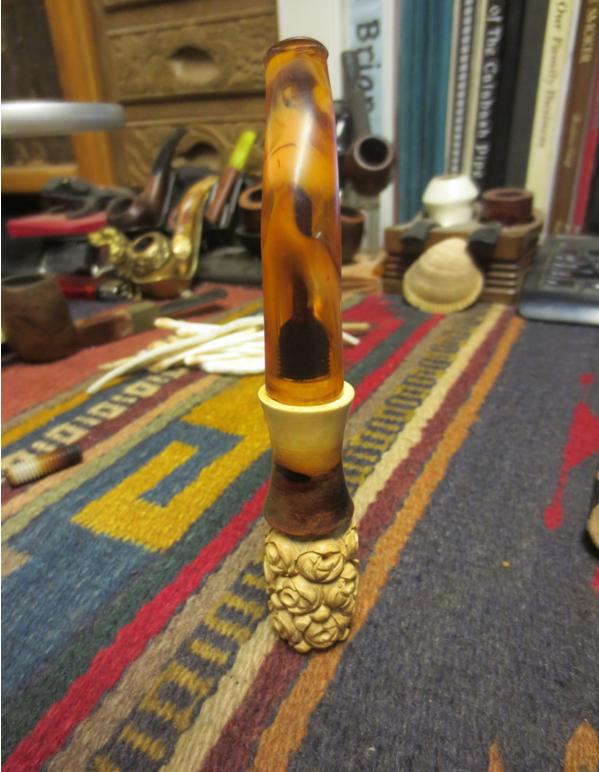
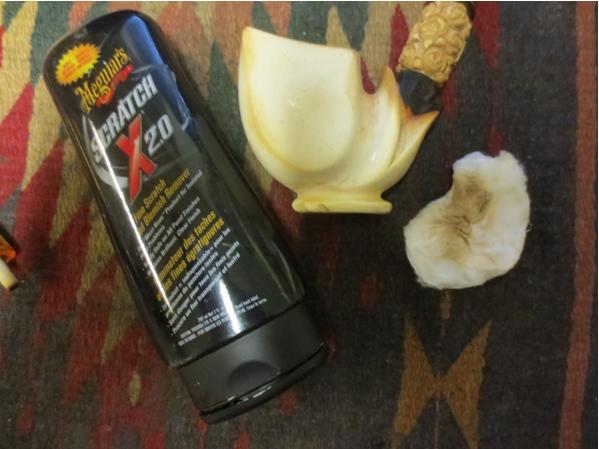
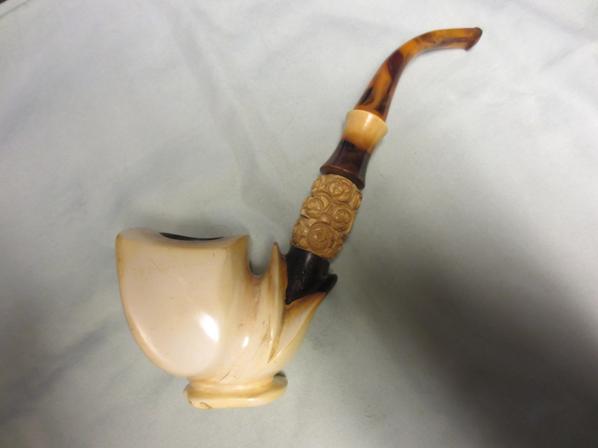
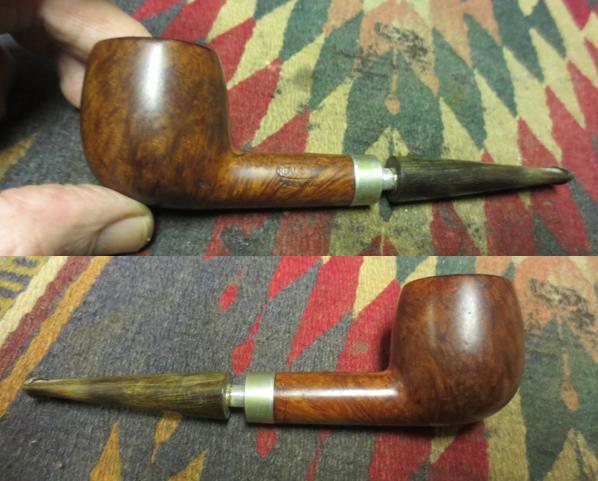
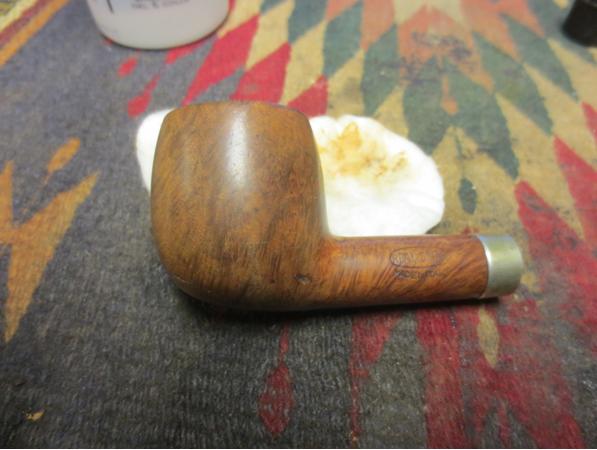
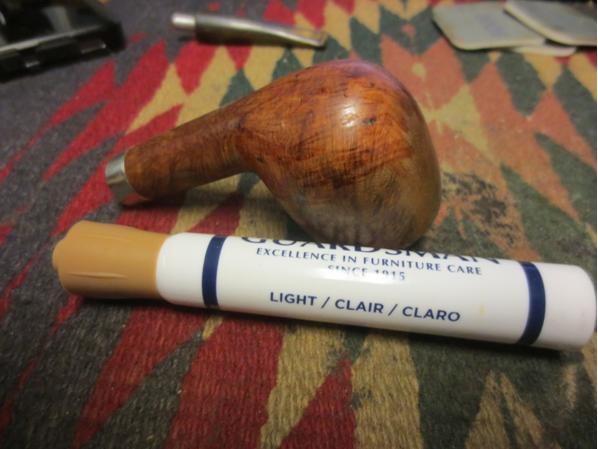
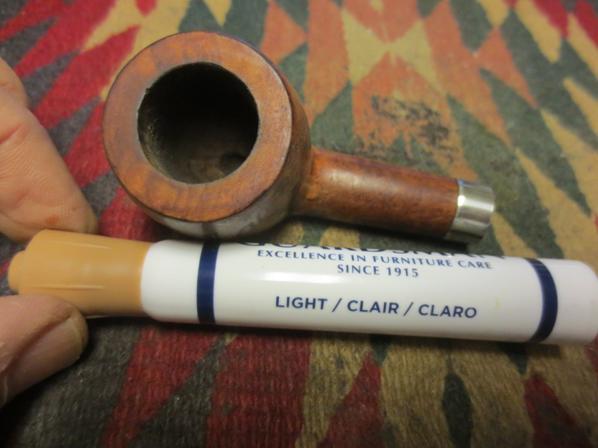
The second pipe sent to me for work was a nice older style diamond shank meerschaum. The bowl was clean with some grime on the outside and some lava on the rim top. The bowl was quite clean. The stem was Bakelite and was missing a lot of the parts to connect the two broken pieces. The tenon connecting the stem to the bowl was stuck in the shank but I was able to unscrew the broken stem from the tenon. The silver band was marked Sterling and was badly tarnished. I would clearly need to restem this pipe as the original stem was unusable.Bake1 Bake2 Bake3 Bake4
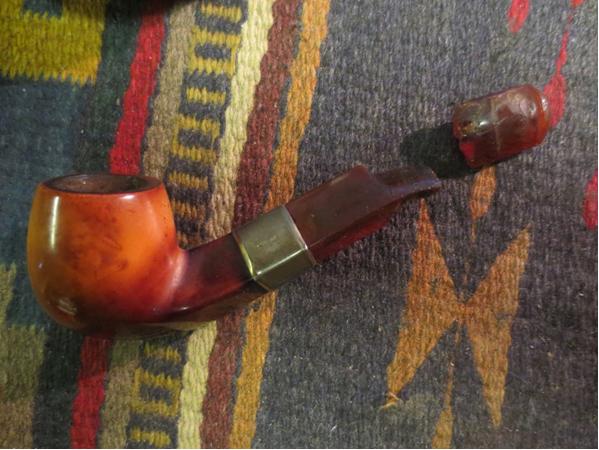
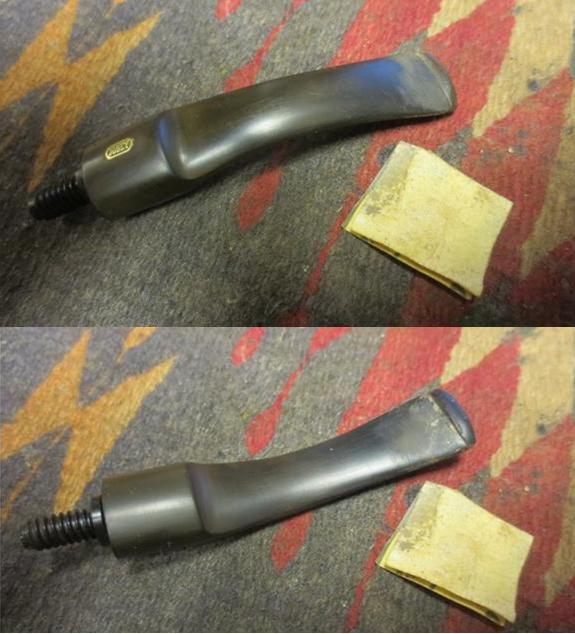
I went through my can of stems and found a likely candidate for the new stem. I did not have any Bakelite stems so I would have to use vulcanite and shape and drill it to fit. I had one stem that was slightly longer than the broken stem but the shape was right. The sides of the saddle were larger than the original as well so I would need to shape it to fit.Bake5
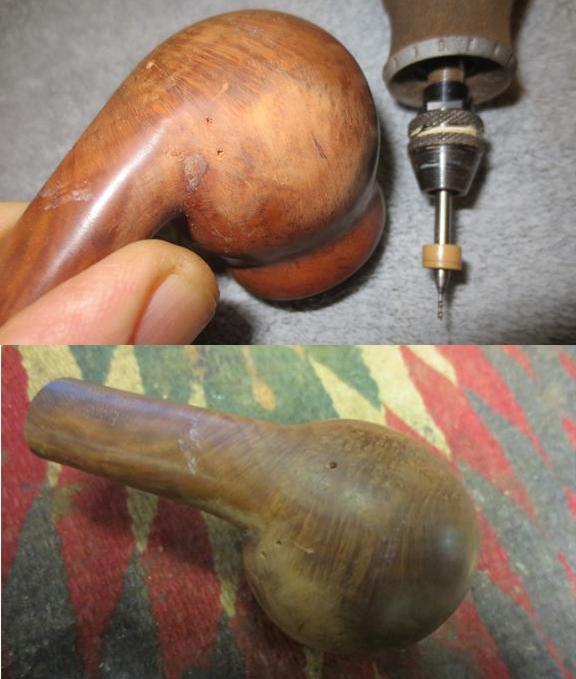
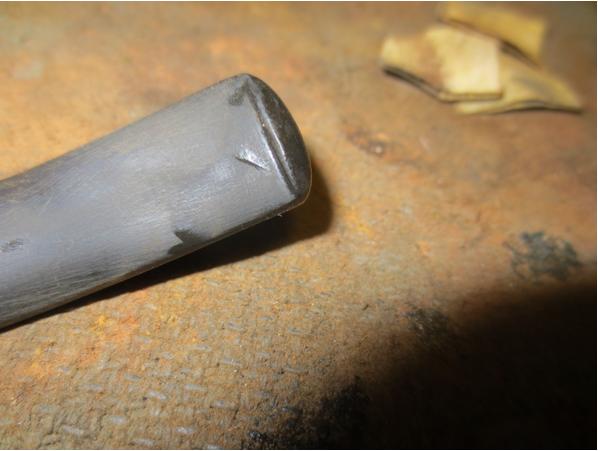
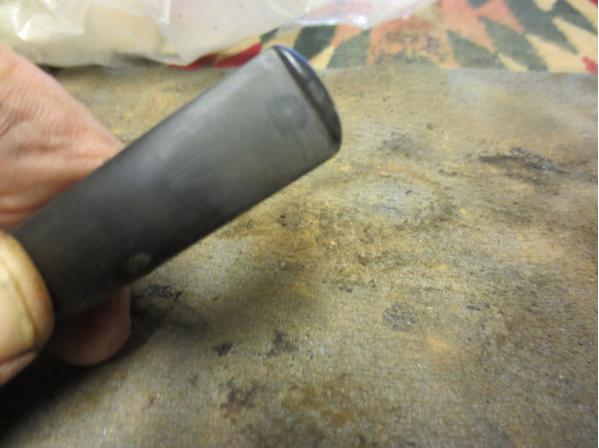
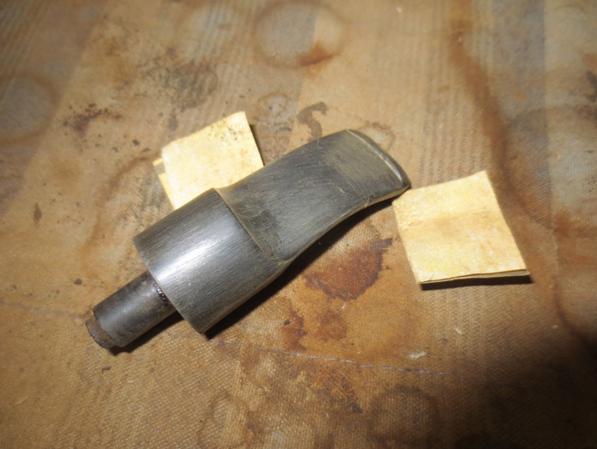
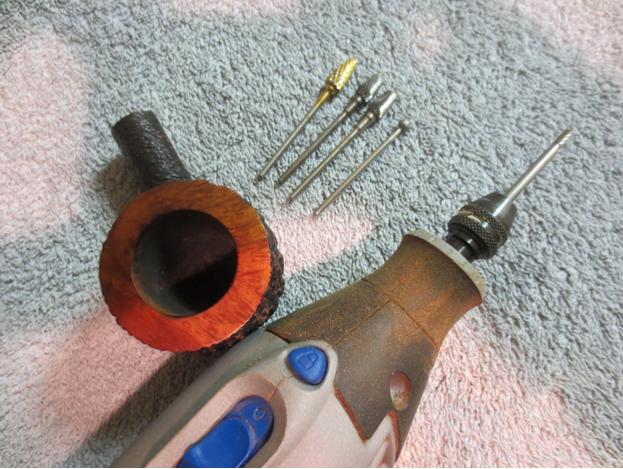
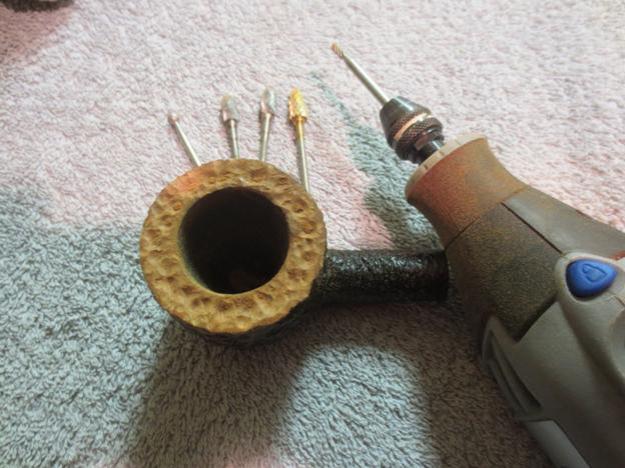
I used the Dremel to remove the tenon from the new stem and flatten the end. I used the topping board to smooth out the end of the stem. Once I had it faced I used a drill bit to drill out the airway. I started with one slightly larger than the airway and hand turned the stem onto the bit. I changed the bit to one that was the same size as the tenon and repeated the process. Bake6
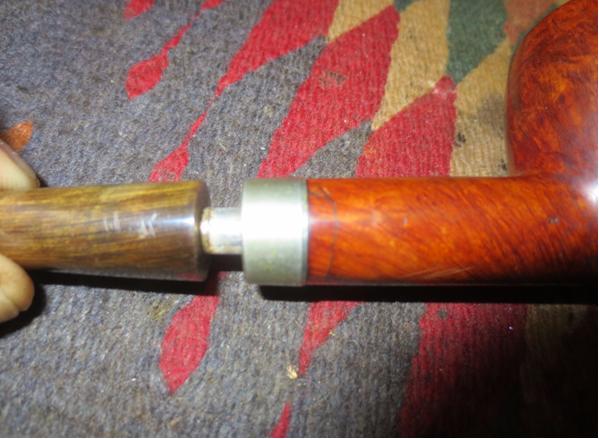
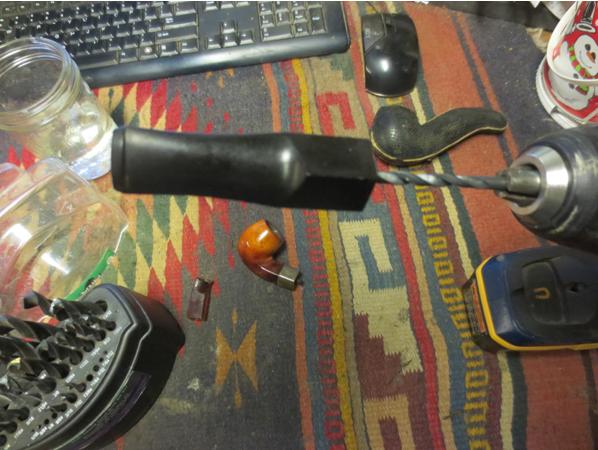
I was able to twist the stem onto the tenon and it cut threads into the vulcanite. I thought I was set at this point as the stem fit pretty well. I would need to sand the sides and the points of the diamond to get a fit that matched the shank and band but it looked like it was going to work out well. Bake7 Bake8 Bake9 Bake10
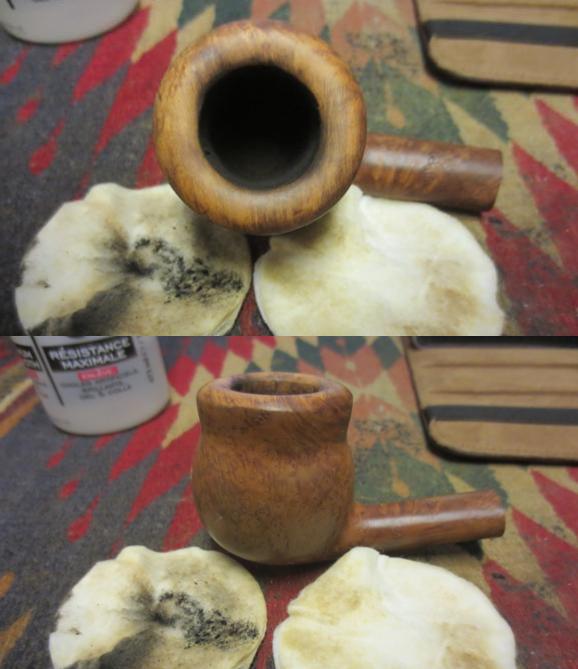
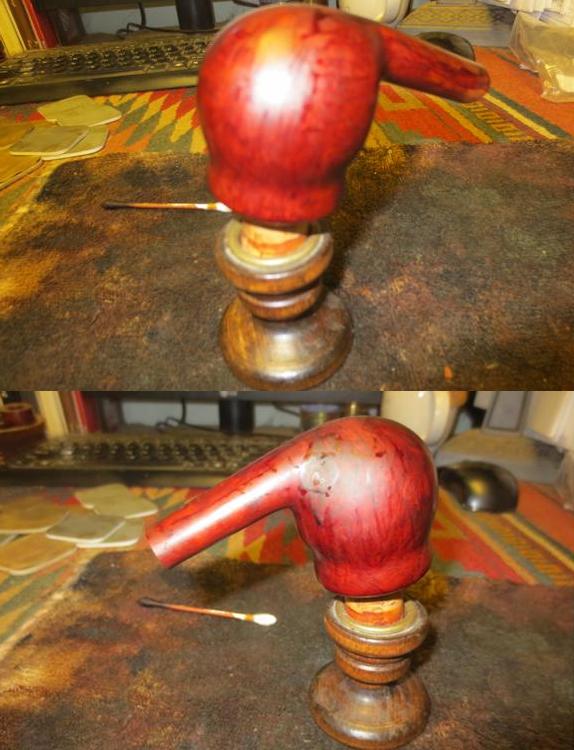
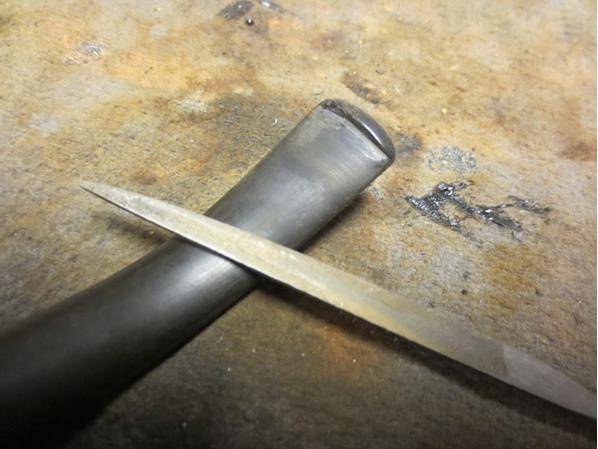
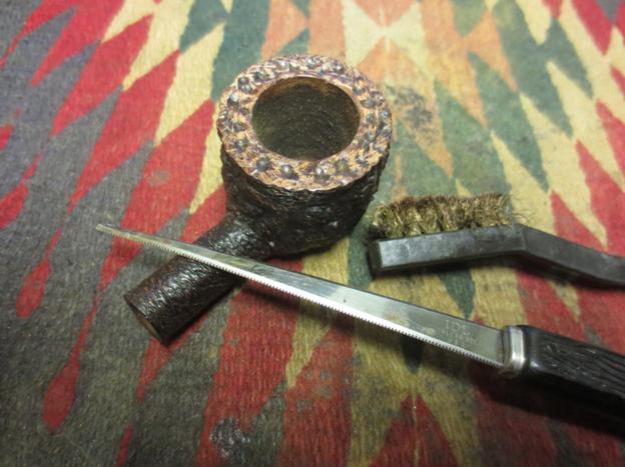
I used the Dremel and sanding drum to remove the excess material on each side of the diamond, trying to get as close as possible without damaging the silver band. I would need to finish it by hand but I wanted to minimize the work that needed to be done by hand. I sanded it with 220 grit sandpaper to smooth out the marks left behind by the Dremel and to further reduce the sides of the diamond.Bake11
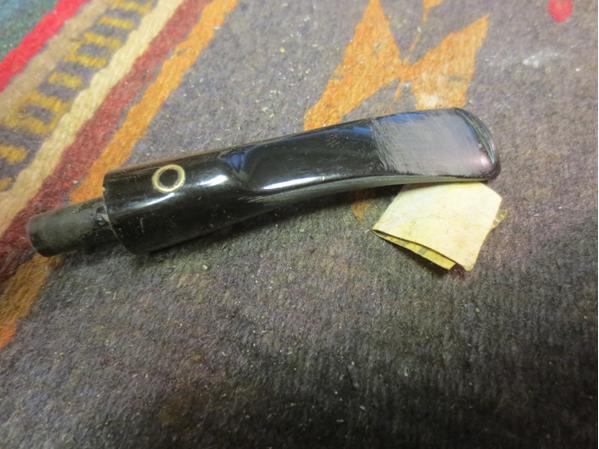
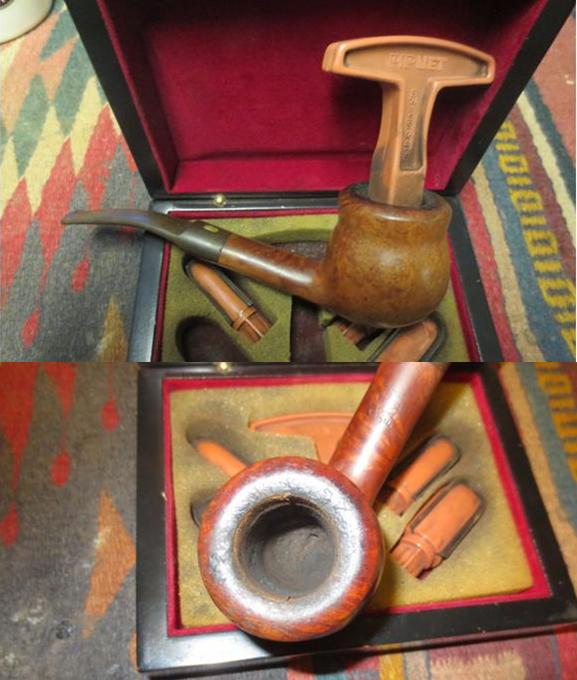
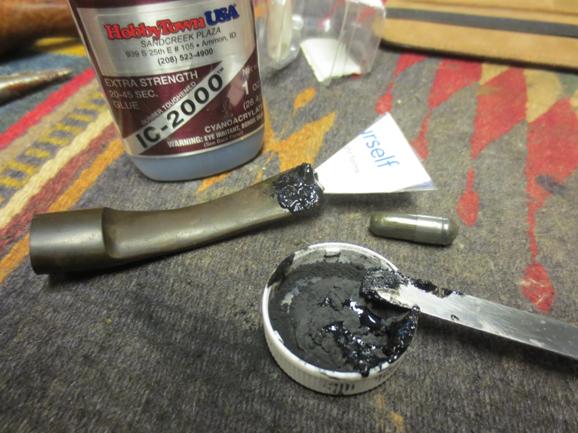
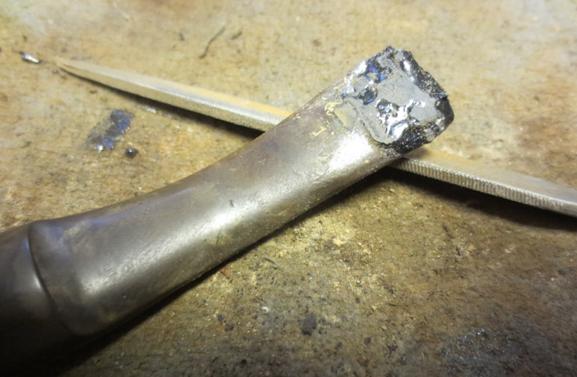
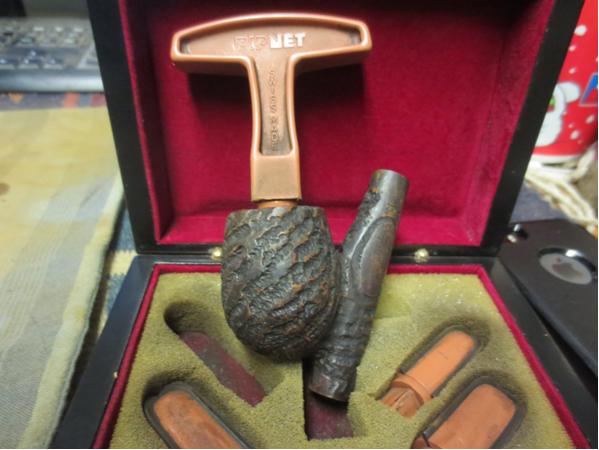
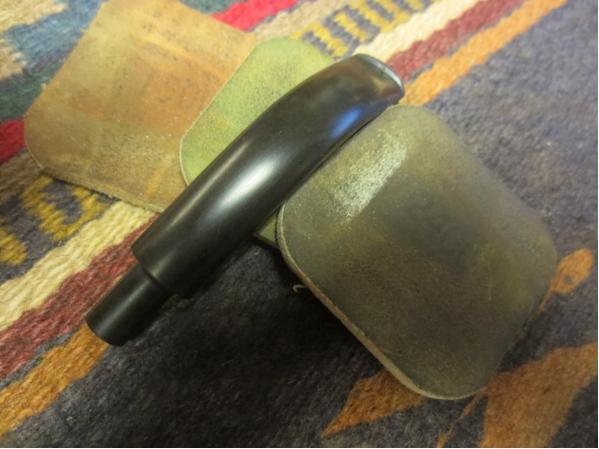
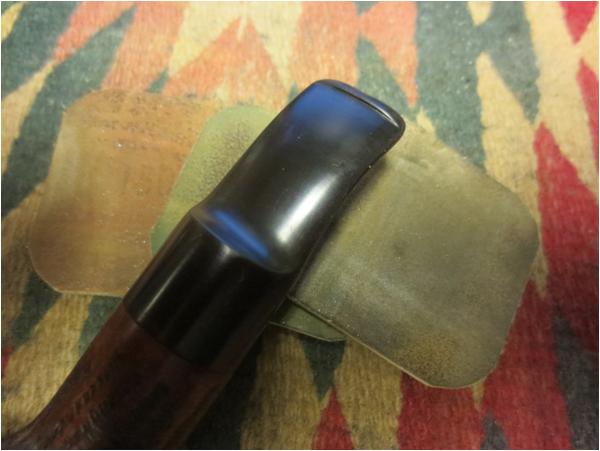
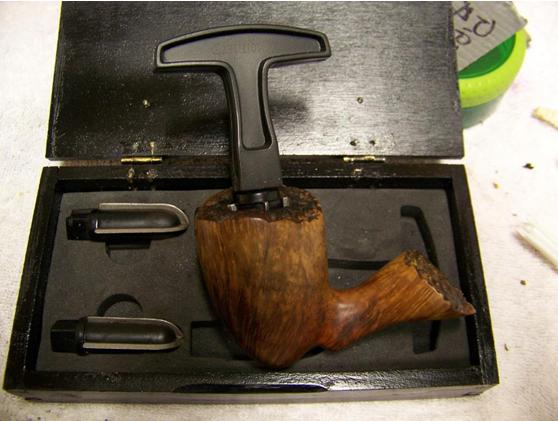
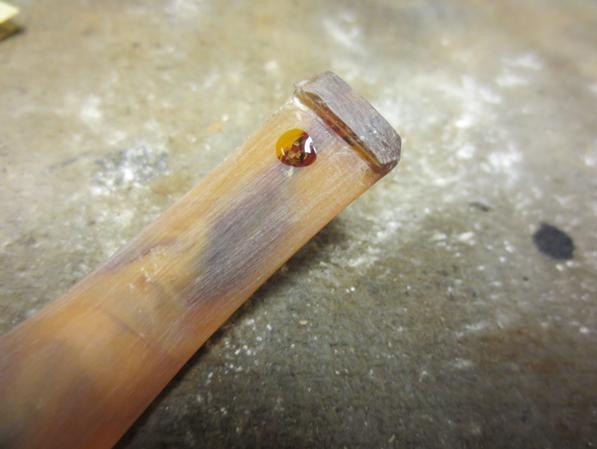
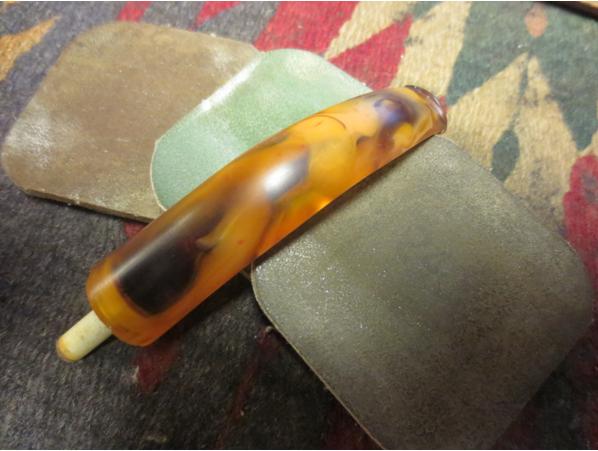
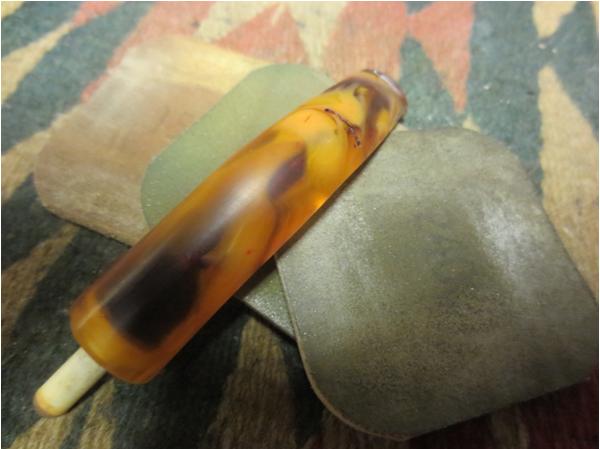
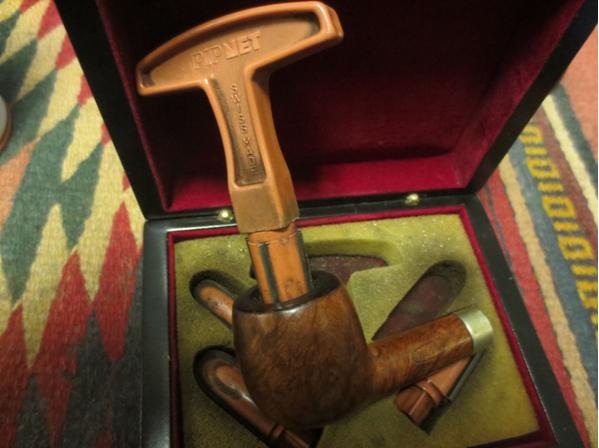
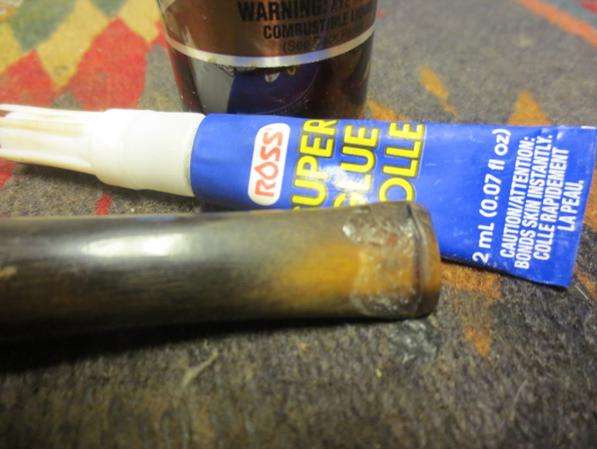
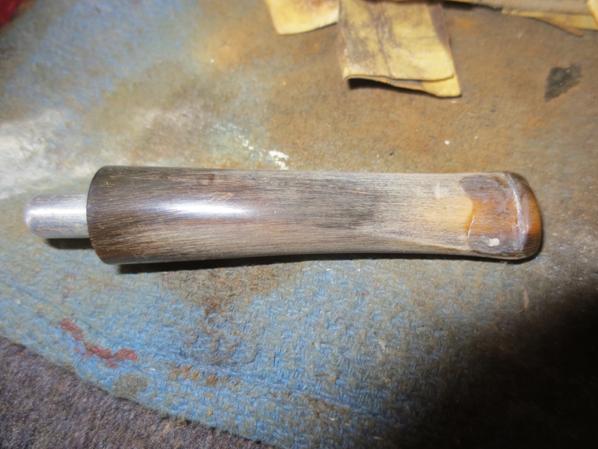
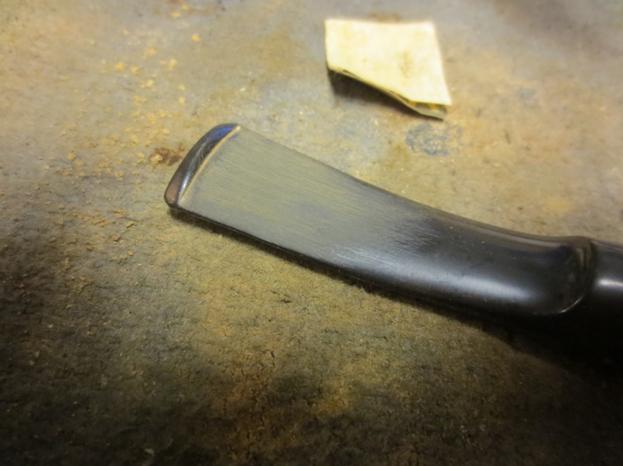
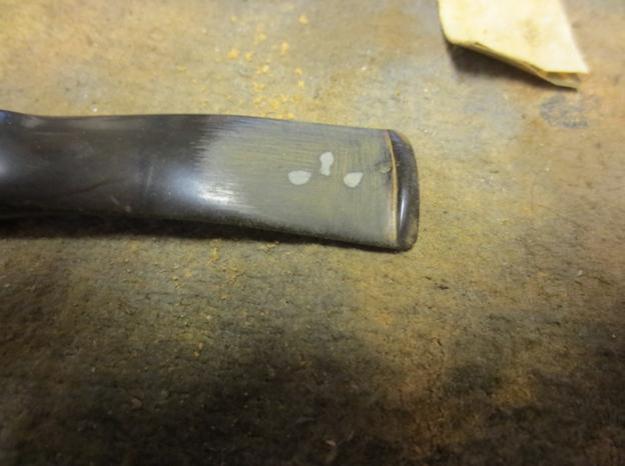
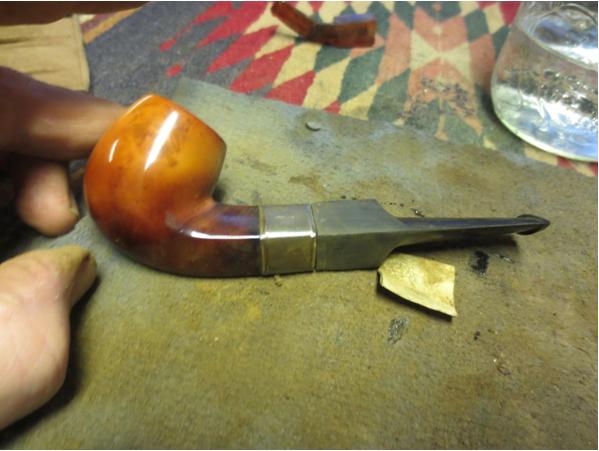
I put a drop of super glue on the Bakelite stem to get an idea of the angle of the bend in the stem. I figured I would use it along with the case as a template for the new stem. While it dried I sanded the surface of the new stem with 220 grit sandpaper and used the topping board to reduce the length of the stem. You can see that the vulcanite is cleaning up very nicely and the scratches are gone.Bake12 Bake13
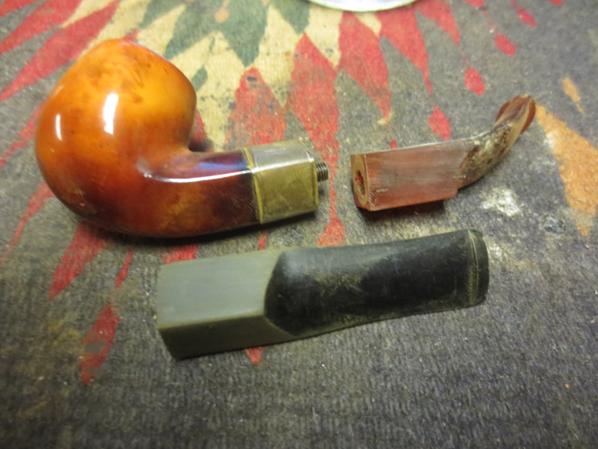
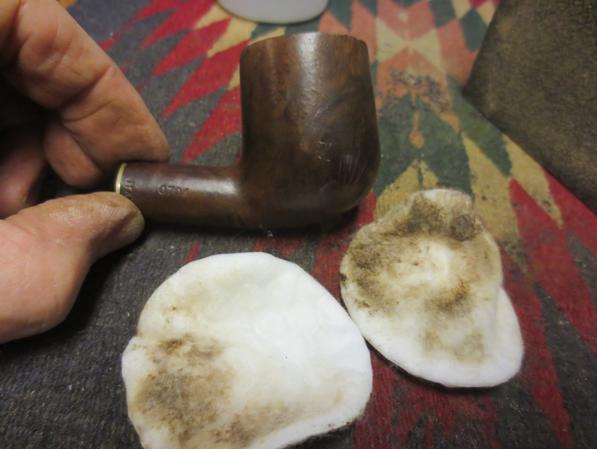
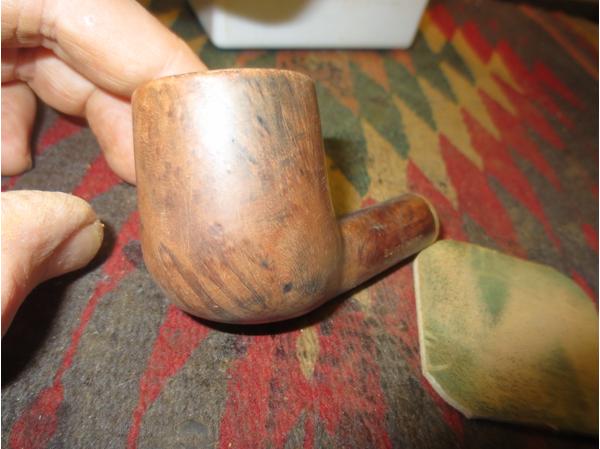
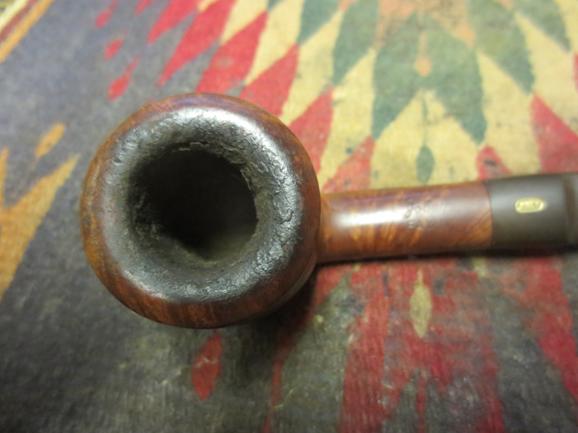
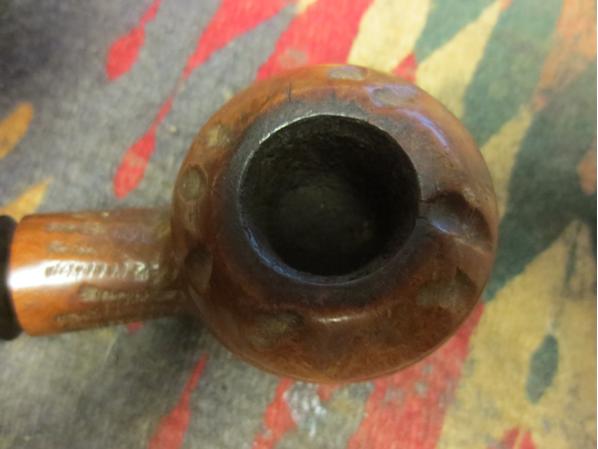
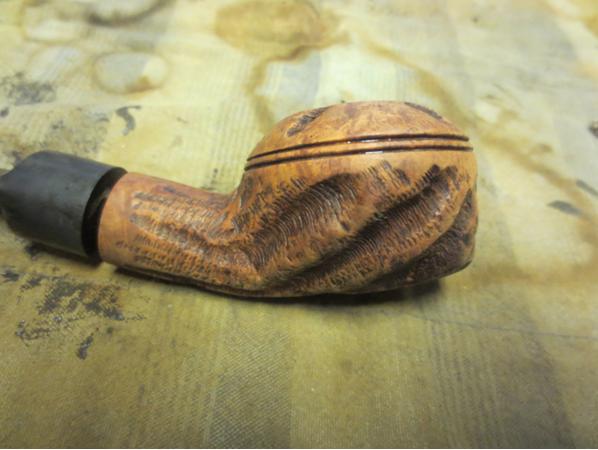
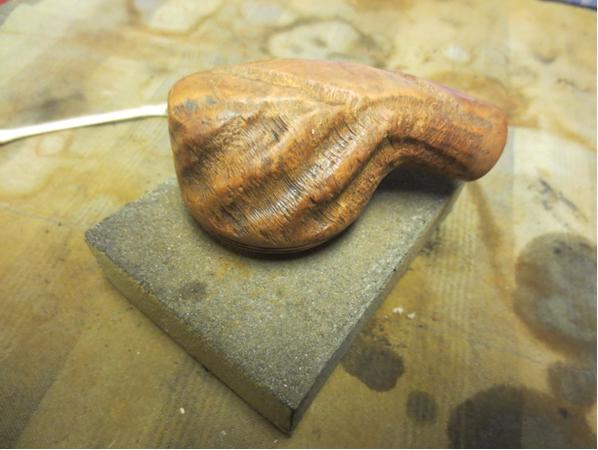
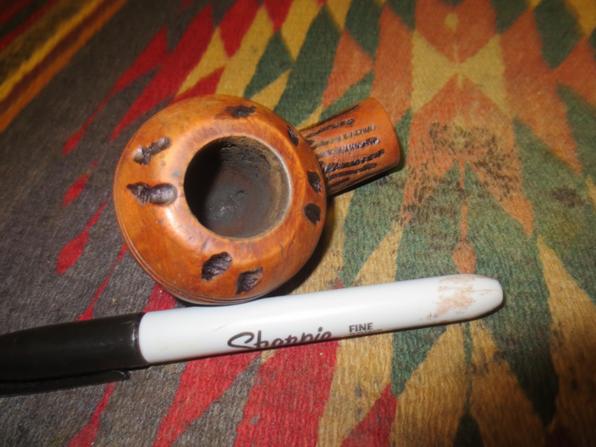
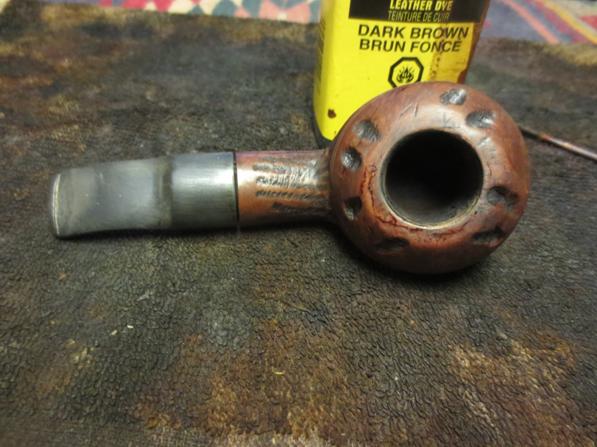
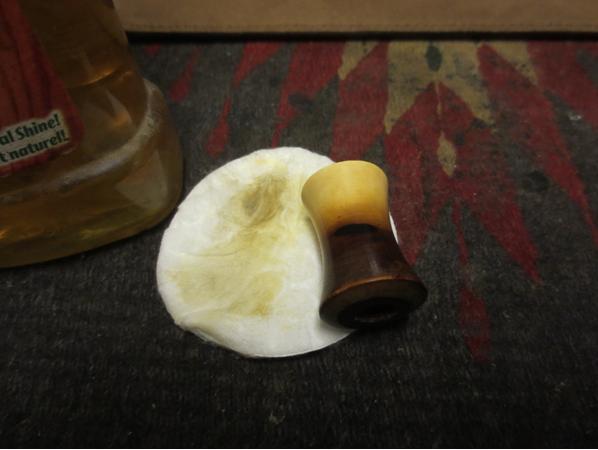
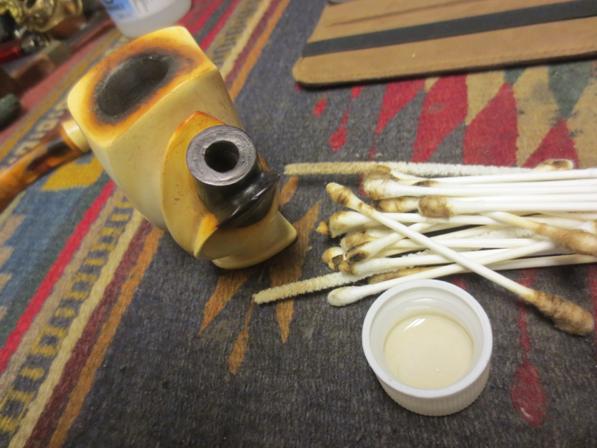
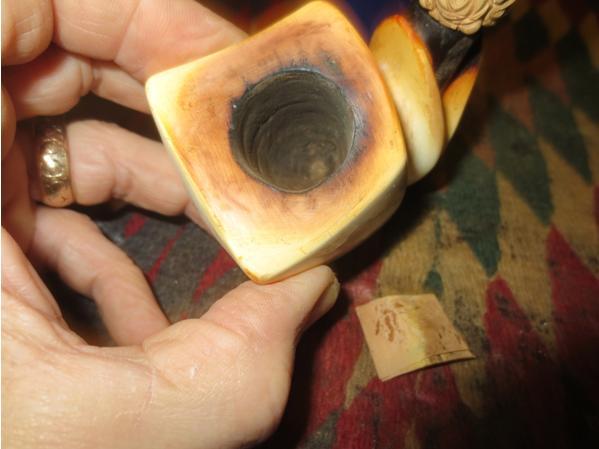
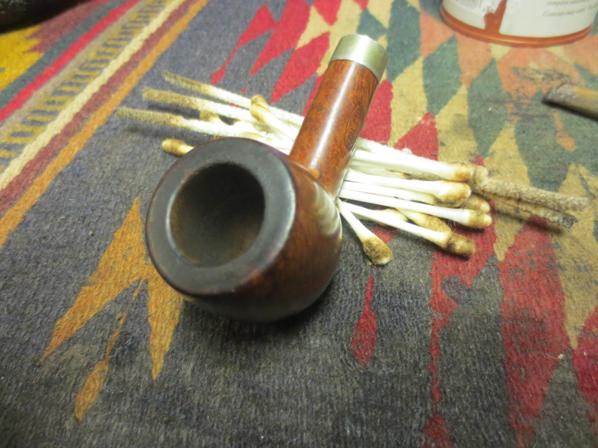
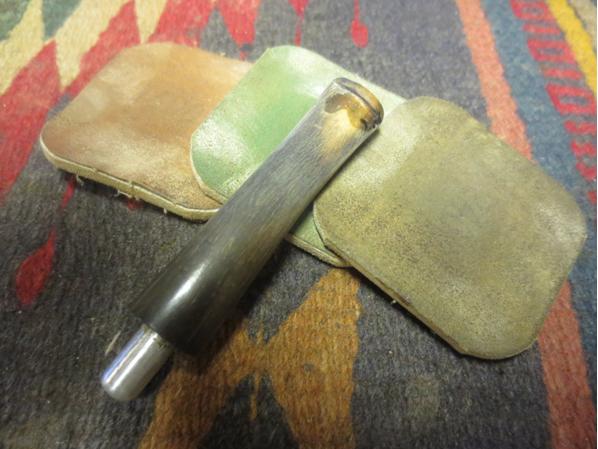
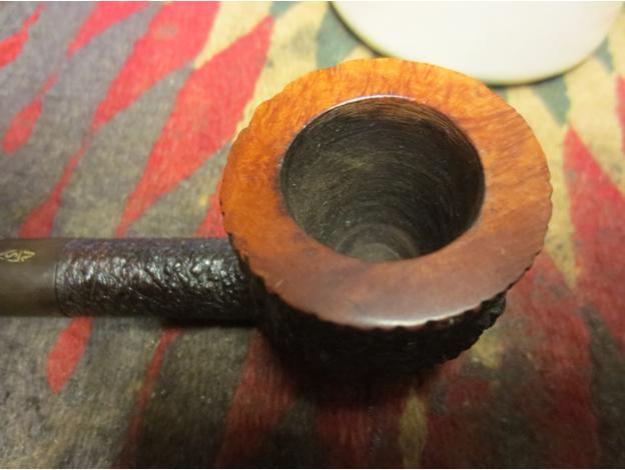
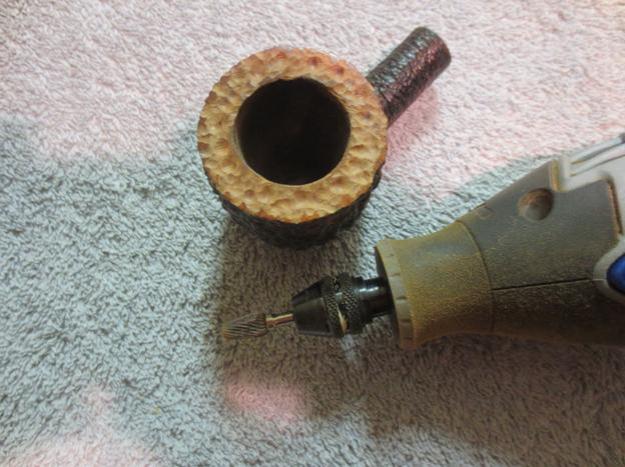
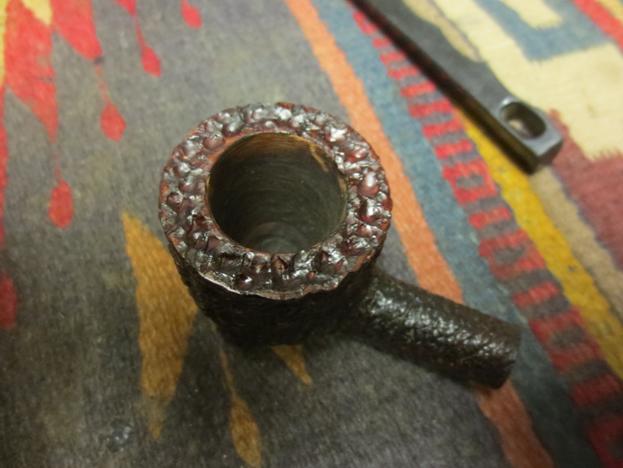
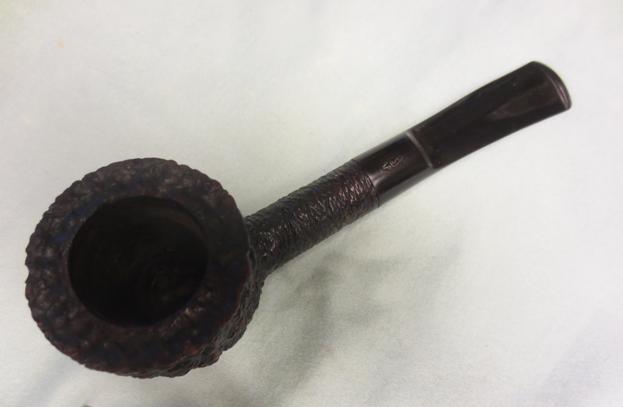
I used a ragged piece of sanding sponge to sand the lava on the top of the rim. I was able to remove all of it without harming the patina on the rim or bowl.Bake14
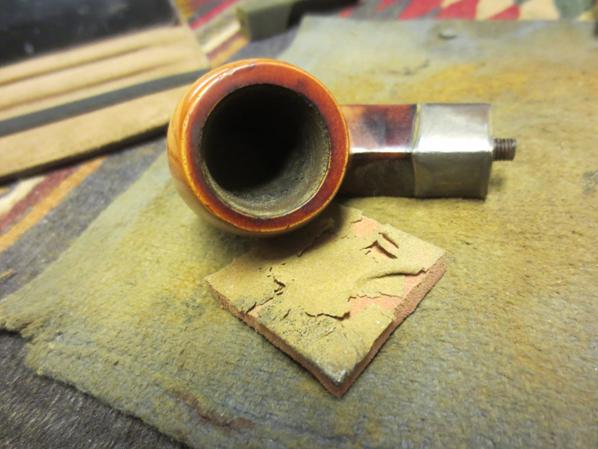
I polished the silver band with a jeweler’s cloth to remove the tarnish.Bake15 Bake16
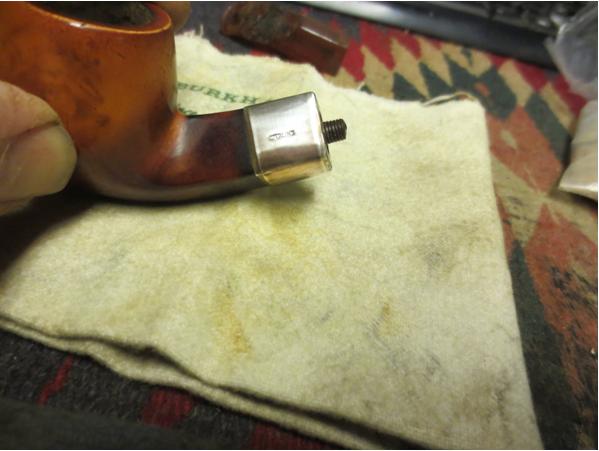
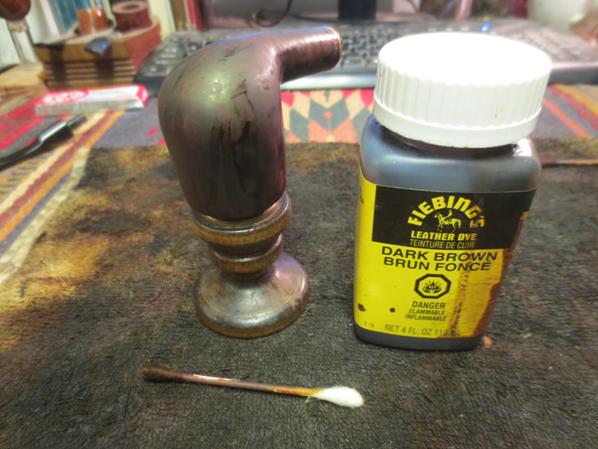
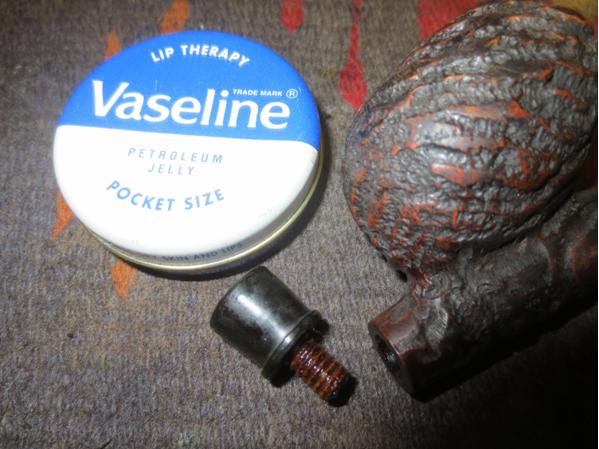
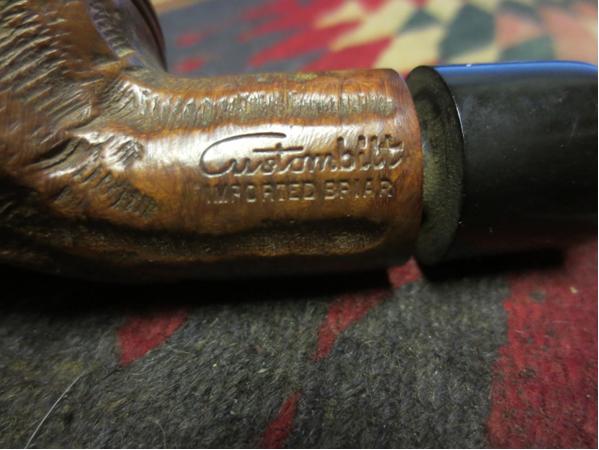
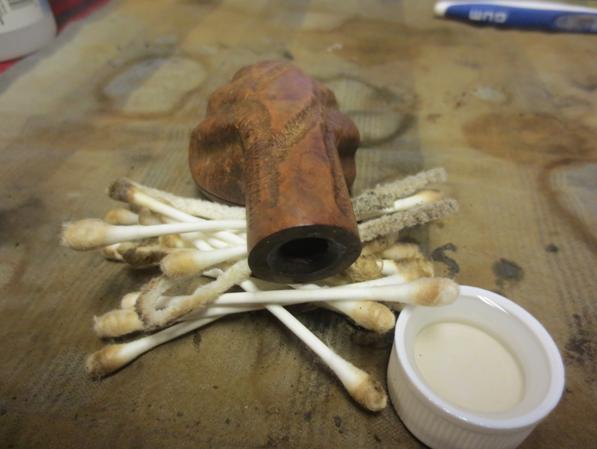
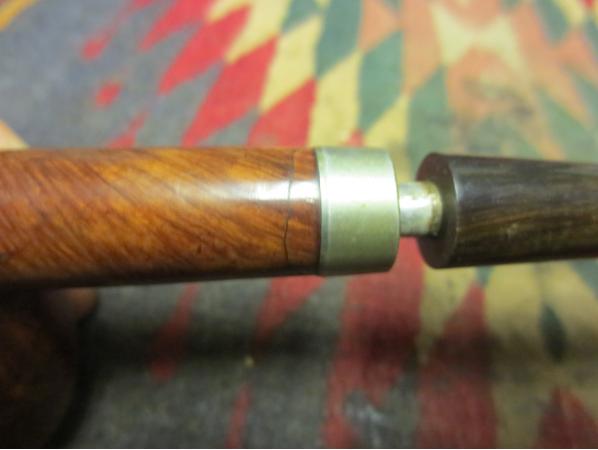
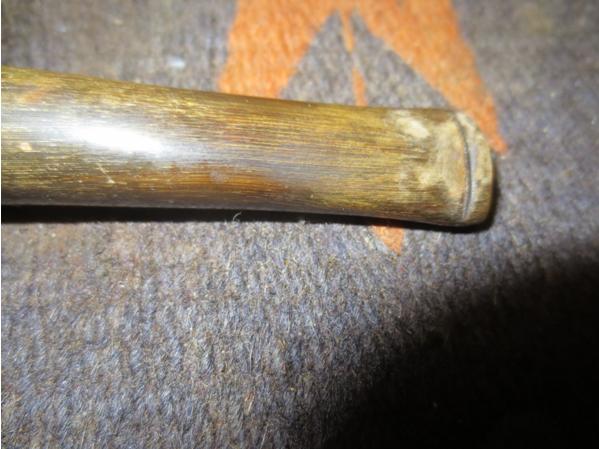
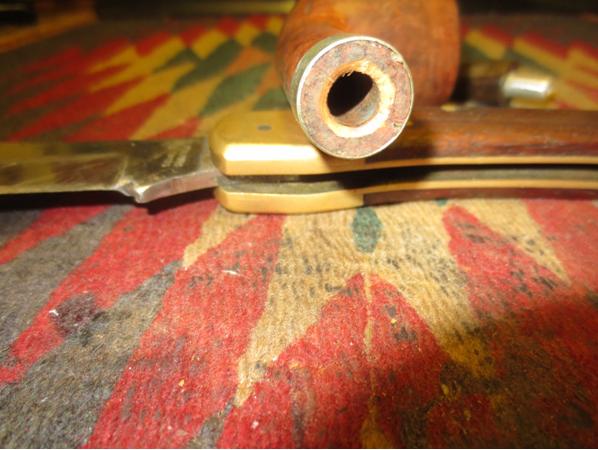
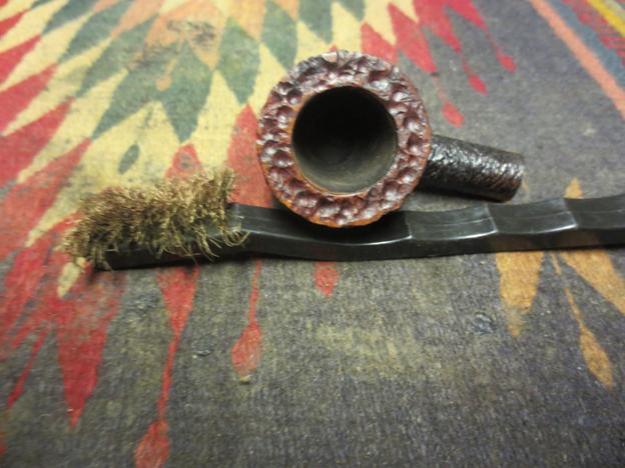
I was able to remove the bone tenon from the shank of the pipe and clean out the inside of the shank before putting in a replacement tenon that I got from Tim at JH Lowe. The fit was perfect in both the shank and the stem. The new tenon was not brittle like the old one so it would last and give better durability to the pipe.Bake17
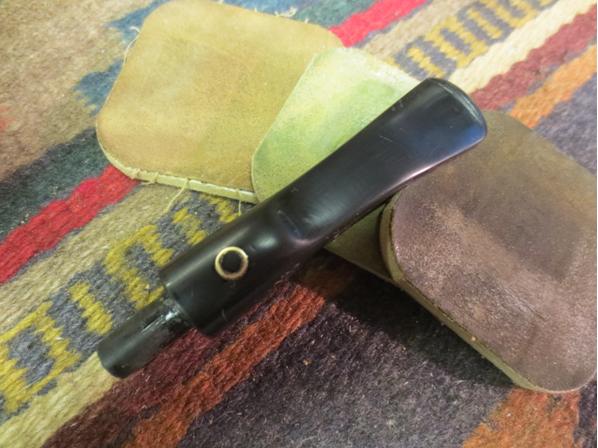
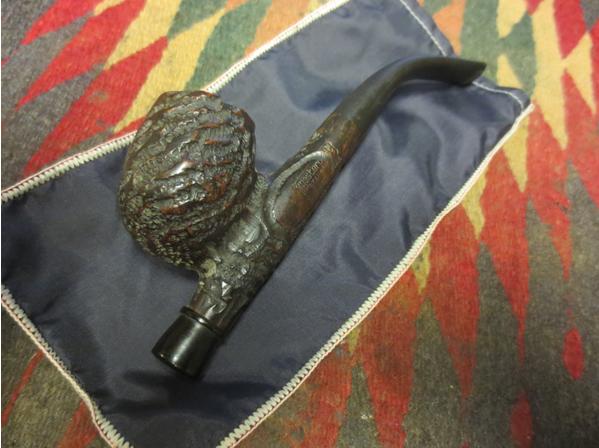
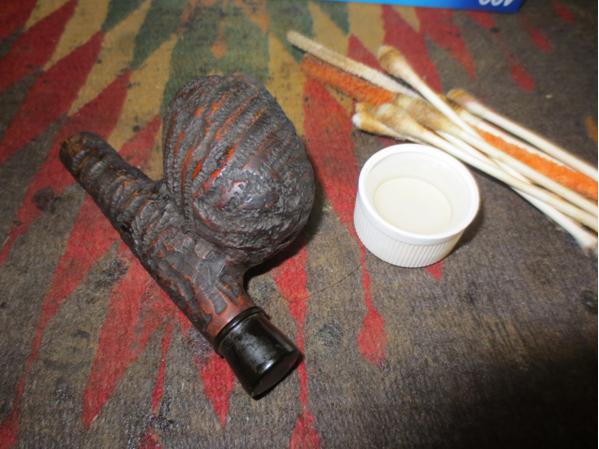
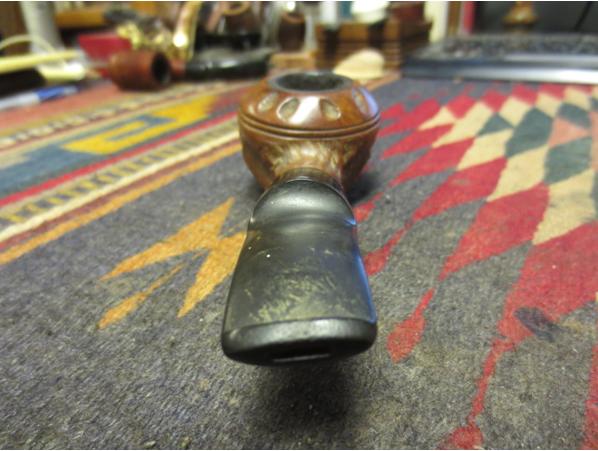
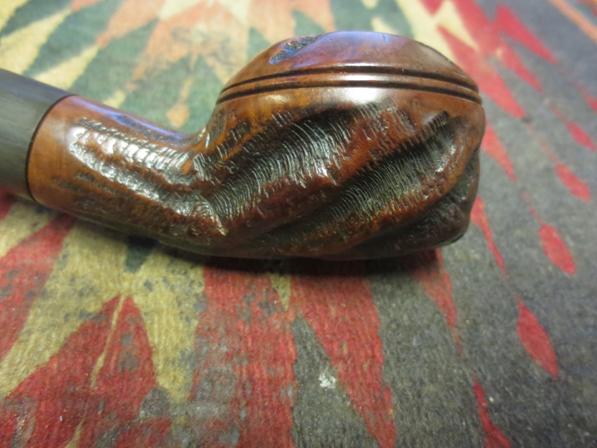
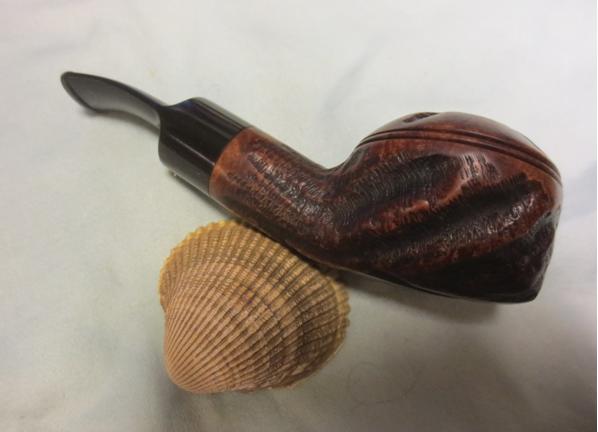
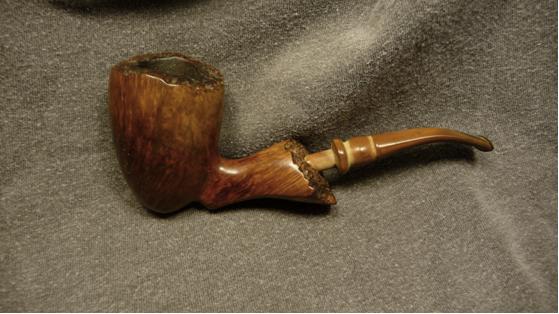
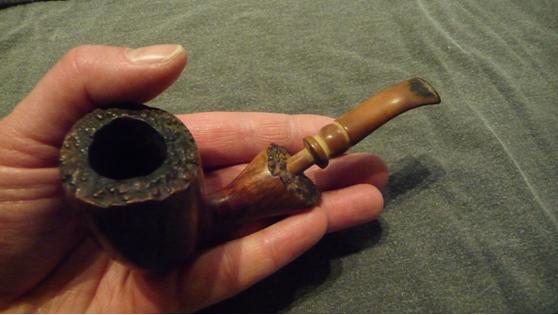
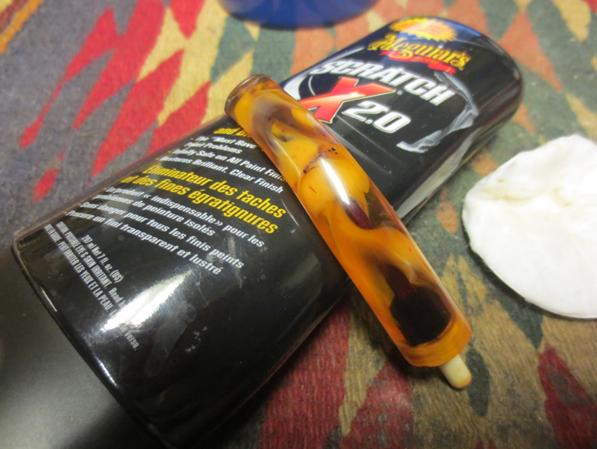
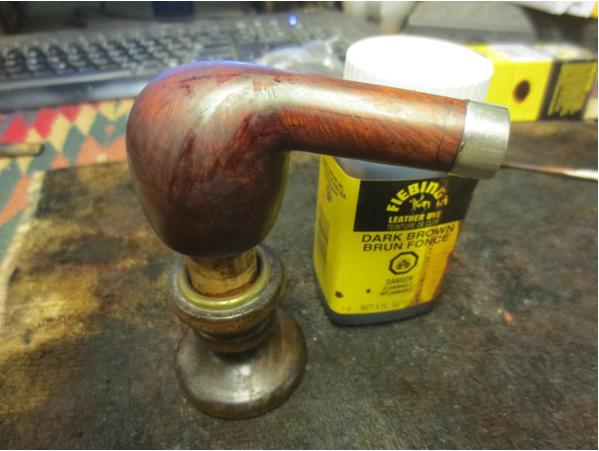
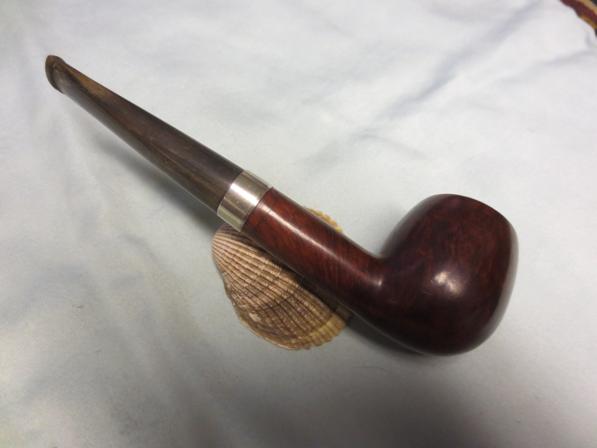
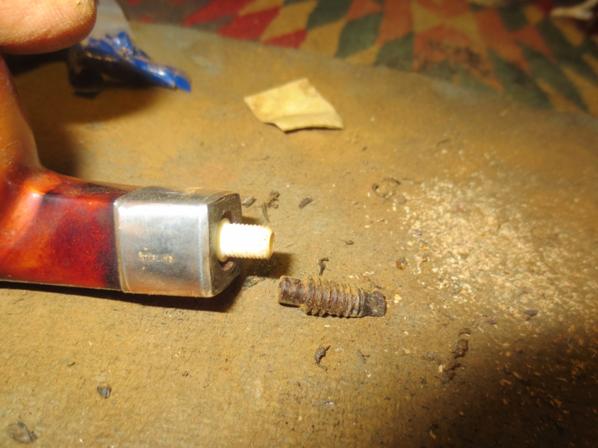
I set up my heat gun and heated the stem until it was pliable. Using the old broken stem as a template I bent the new stem to match. I sanded the stem with a 1500 grit micromesh sanding pad to remove more of the scratching and then put it on the pipe to check the fit. I really like the look of the new stem. The black vulcanite goes well with the patina of the old meerschaum.Bake18 Bake19 Bake20 Bake21
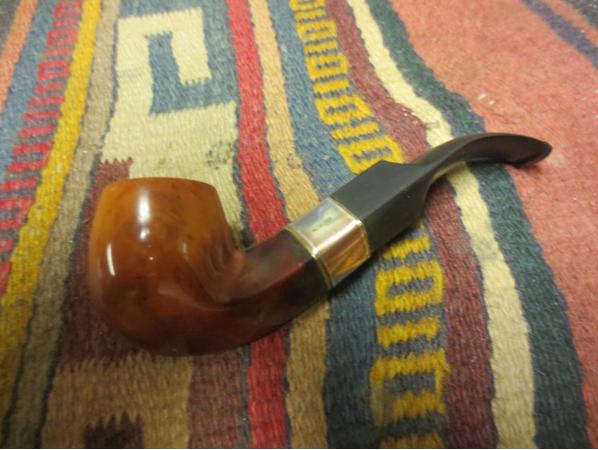
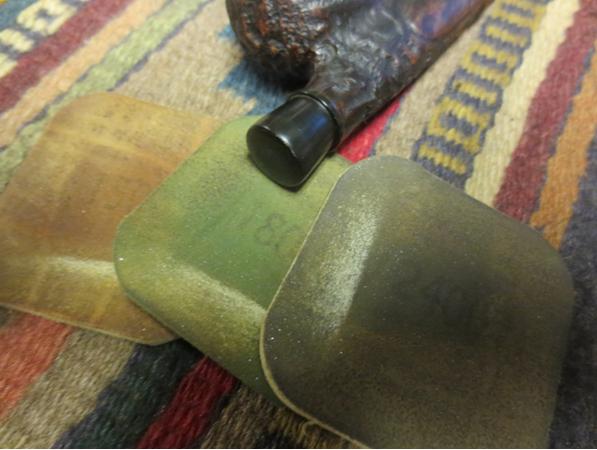
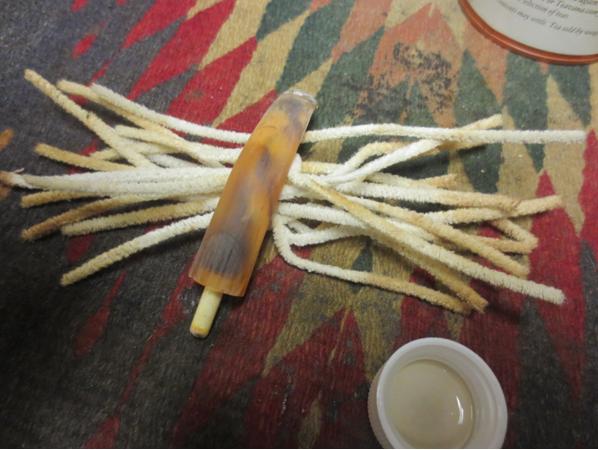
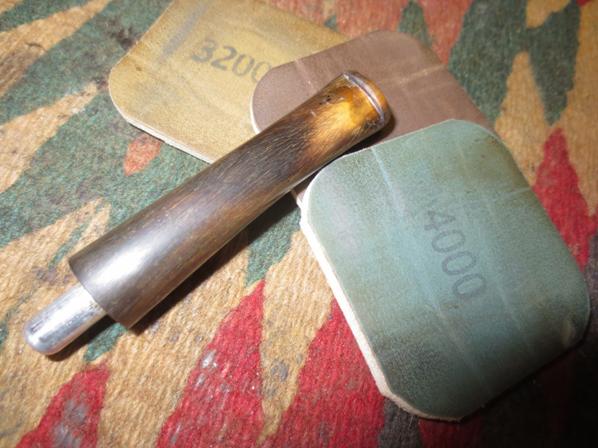
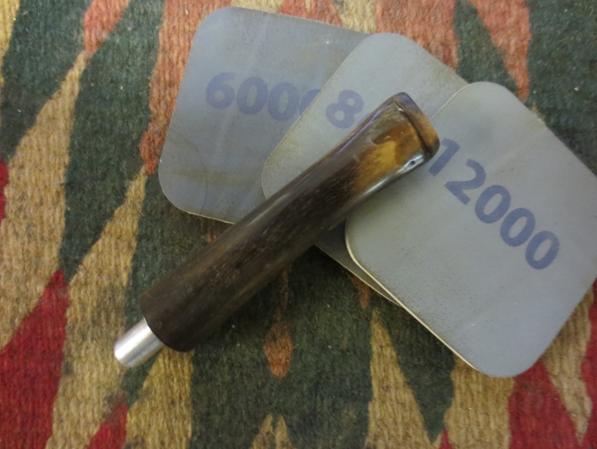
I wet sanded the stem with 1500-2400 grit micromesh sanding pads and then gave it a coat of Obsidian Oil. I am sure by now you know my drill by heart but just in case – I sanded it with 3200-4000 grit pads, another coat of oil and final sand with 6000-12000 grit pads. I gave it a final coat of Obsidian Oil and let it dry.Bake22 Bake23 Bake24
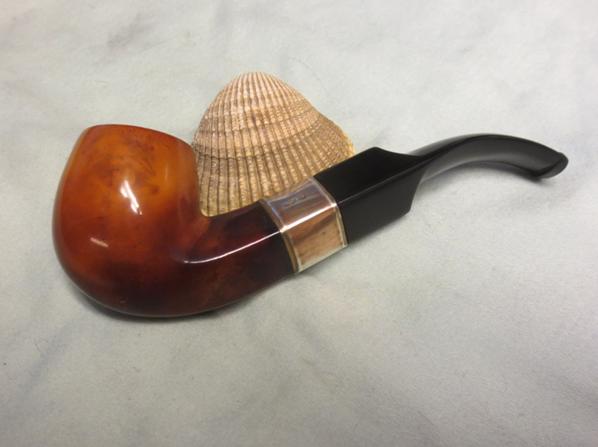
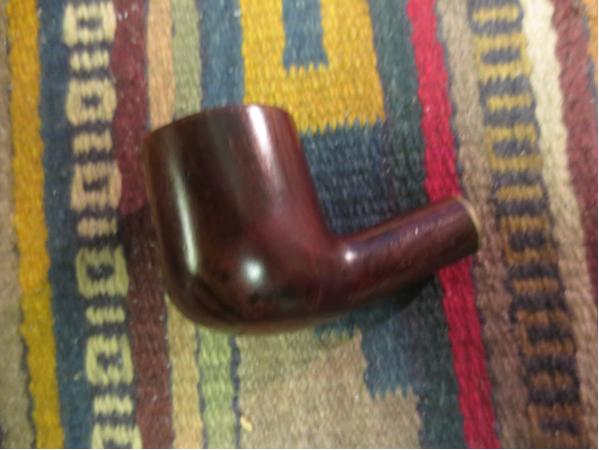
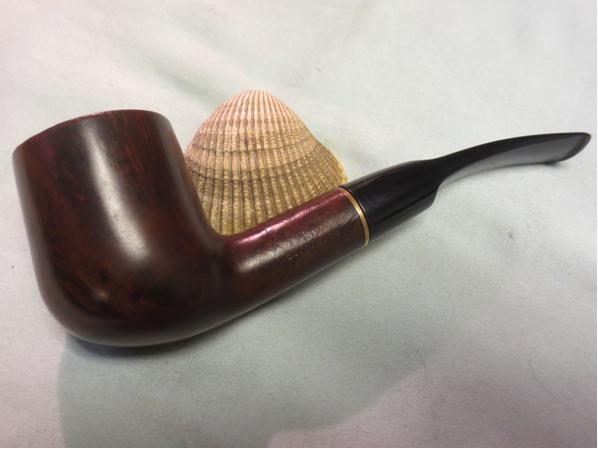
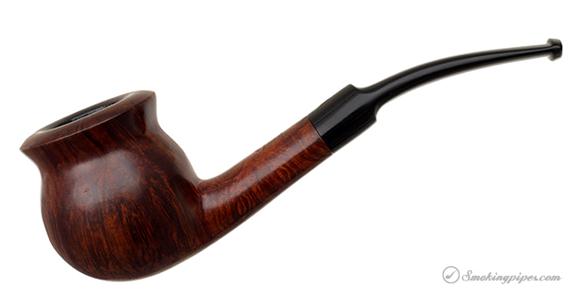
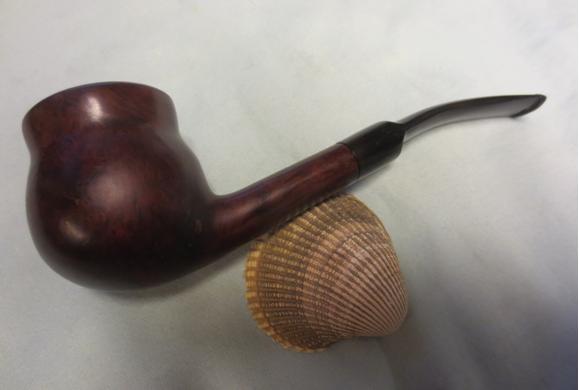
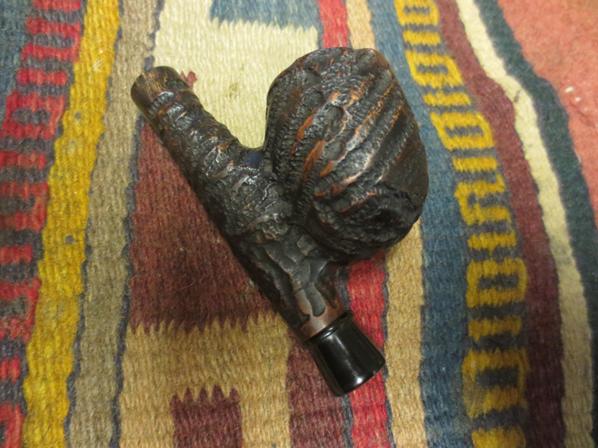
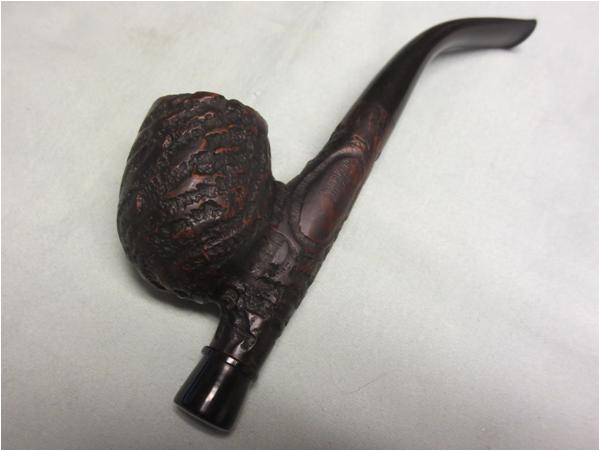
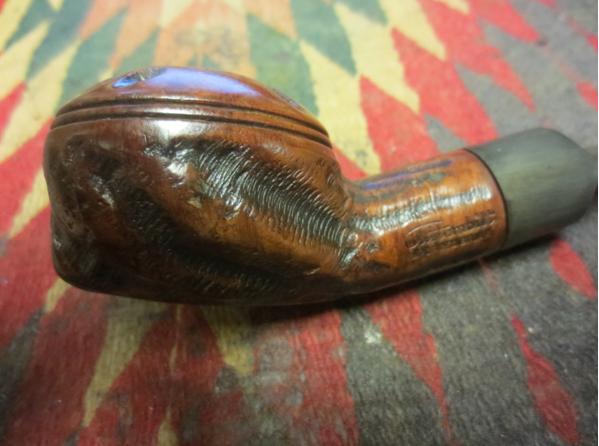
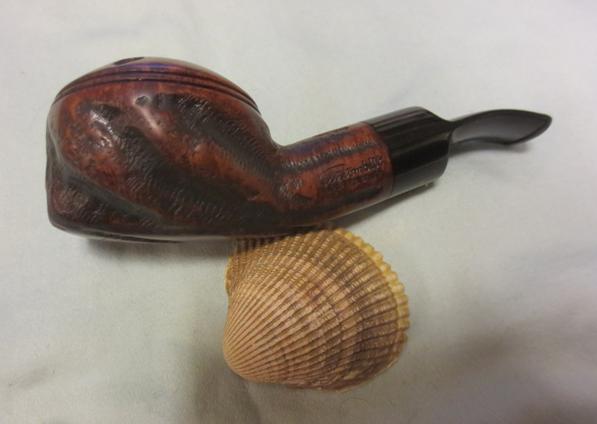
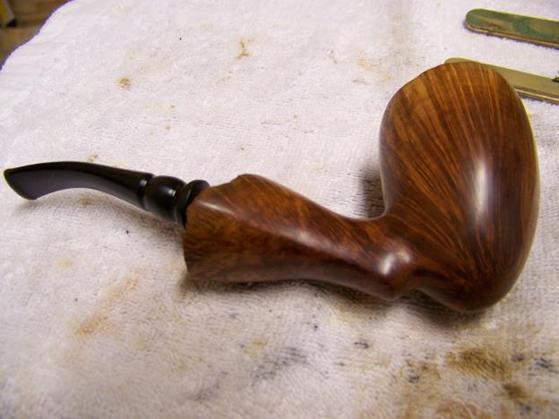
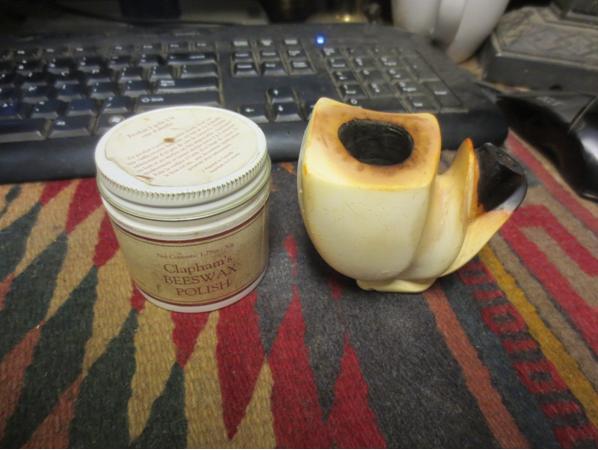
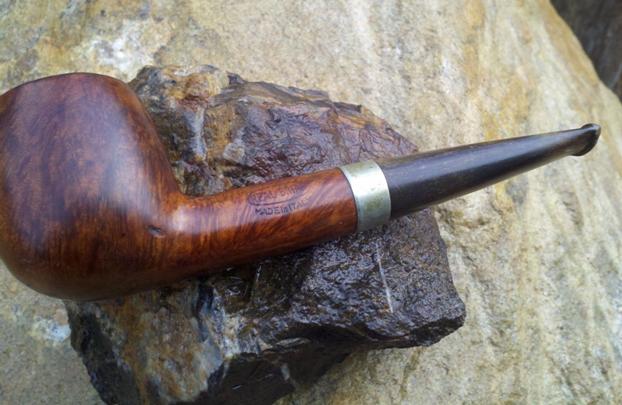
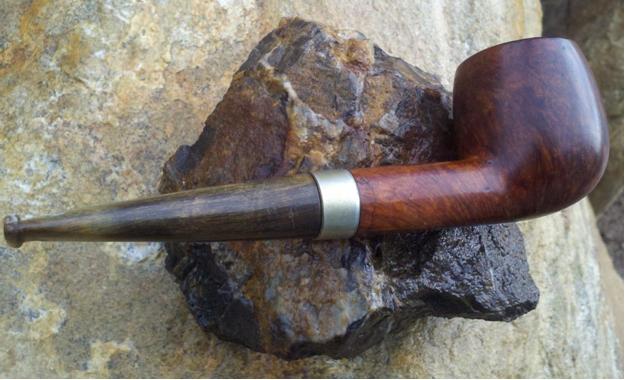
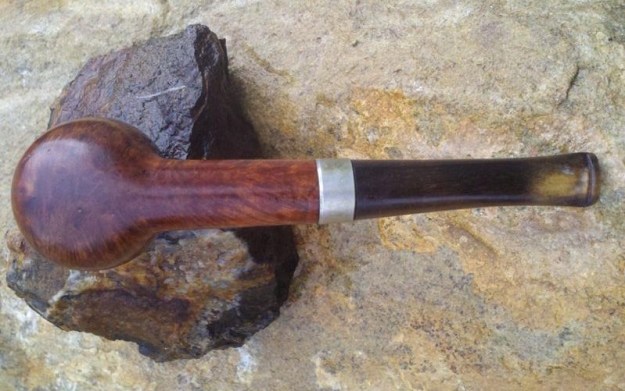
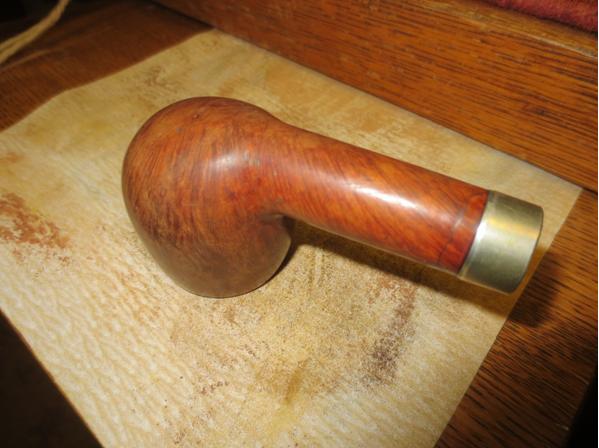
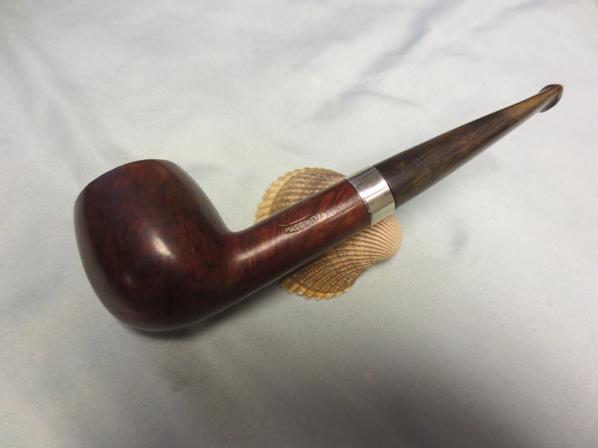
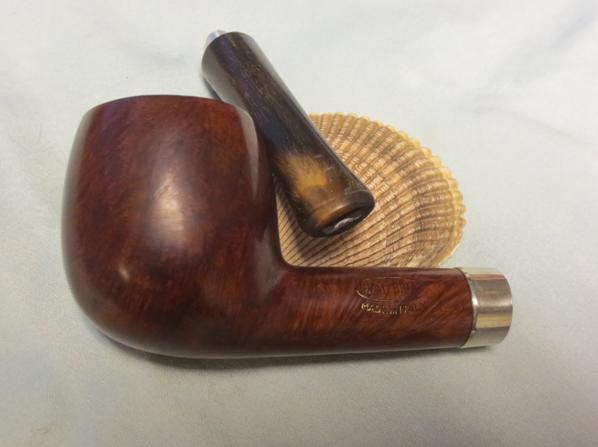
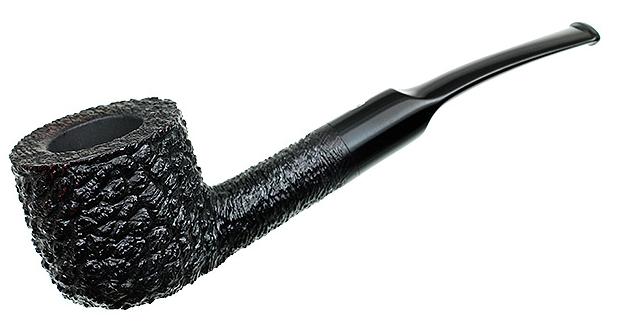
I buffed the stem with Blue Diamond on the wheel and then gave it multiple coats of carnauba wax. I buffed the stem with a clean buff and then put it back on the bowl. I finished buffing the pipe with a microfibre cloth. The finished pipe is shown in the photos below. I like the way the black shiny vulcanite stem sets off the colours of the bowl. I hope the pipeman who sent it to me for a new stem will be pleased with the result. Thanks for looking.Bake25 Bake26 Bake27 Bake28 Bake29 Bake30 Bake31

Replacing a Tenon and Doing a Restoration on a Sorrentino Manager 0704


Blog by Steve Laug

I received this one from a fellow who wanted the tenon replaced but being the way I am I could not just replace the tenon and leave the pipe looking tired and worn so I wrote and offered to clean it up for him. It took more work than I had originally thought it would but the added effort made for a beautiful looking pipe. It is stamped on the left side of the shank MANAGER over SORRENTINO. On the right side it says 0704 which is the shape number and Italy. The briar was really in need of some work. The left side was stained with a dark patch that ran from the top to the bottom of the bowl. The finish was also rough to the touch over that section. On the bottom, front and right side of the bowl there was a lot of dents and dings like the pipe had been dropped. The rim had a coat of lava and the bowl had a very uneven cake with more on the left side of the bowl than the right. The finish was basically shot. The stem came with lots of tooth chatter and a broken tenon. The tenon snapped right at the shank and was stuck in the shank. The brass band on the shank was loose. The pipe was tired and needed some TLC. Here is what it looked like when I started.Briar1 Briar2 Briar3In the photos above I had already turned the wood screw into the broken tenon. I use that to pull a broken tenon and it never disappoints in effectiveness. Note the state of the bowl in the photos.Briar4I used a Dremel and sanding drum to flatten out the remnant of the broken tenon on the stem. Once it was flat it was time to drill the stem to take the new tenon. I started with a bit slightly larger than the airway to center the drilling and turned the stem onto the bit by hand. I find that though it is harder to do it by hand, turning it by hand and not drilling it gives me more control of the stem. I worked my way up to a ¼ inch bit and then cleaned it out with a needle file. I had a Delrin tenon I purchased from Tim at JH Lowe and I roughed up the surface of the portion that would go into the stem and gave it a coat of two part slow drying epoxy to hold it in place.Briar5 Briar6 Briar7I lined up the stem in the shank and then set it aside to let the epoxy cure over night. While it dried I worked on the bowl. I stripped off the remaining finish with acetone and cotton pads. I sanded the dark stain mark on the left side of the bowl with 220 grit sandpaper to remove the damaged briar and smooth things out. I scrubbed that side with acetone to finish.Briar8 Briar9I reamed the bowl with a PipNet reamer to even out the cake that had been there. I decided to strip it back to bare wood. I wanted to check out the inside of the bowl walls. The interior was sound and there was no damage on the bowl walls. Briar10 Briar11I sanded the bowl with 1500-2400 grit micromesh sanding pads to clean up the scratches left behind on the briar by the sand paper and by the wear and tear of age. The stripped and sanded bowl was looking pretty good.Briar12 Briar13 Briar14I sanded the inner bevel of the rim to clean it up and prepare the bowl for staining. I wiped it down a final time with isopropyl alcohol. I stained the bowl with a dark brown aniline stain. I flamed it and restained it with a second coat of the stain. I flamed it again.Briar15 Briar16Before setting the bowl aside to dry I wiped it down with alcohol on a cotton pad to smooth out the stain and lighten it slightly. I wanted the grain to show through.Briar17I buffed the bowl with Blue Diamond on the buffing wheel and gave it several coats of carnauba wax to seal and preserve the finish. I buffed it with a clean buffing pad to raise the shine. (Forgive the poor focus on the first photo below. It is blurry but still gives you an idea of how the dark area had been reduced.)Briar18 Briar19 Briar20 Briar21With the bowl finished I set it aside and worked on the stem. I sanded the tooth marks and chatter on the stem with 220 grit sandpaper until they were smoothed out. I was able to easily remove most of the tooth damage to the stem. There was one small tooth dent on the top of the stem that I left as it is minimal and I did not want to thin the stem.Briar22 Briar23I wet sanded the stem with 1500-2400 grit micromesh sanding pads. I dry sanded it with 3200-4000 grit pads. I finished with 6000-12000 grit pads. I buffed the stem with Blue Diamond on the wheel.Briar24 Briar25 Briar26 Briar27I put the pipe together and lightly buffed it with some more carnauba wax to finish it. I hand buffed it with a microfibre cloth for the final buffing. The photos below show the finished pipe. Hopefully when it is returned to the pipeman who owns it he will be pleased with the finished pipe. Thanks for looking.Briar28 Briar29 Briar30 Briar31 Briar32 Briar33 Briar34

An LHS Purex Patented Lovat that showed promise


Blog by Steve Laug

My brother showed me a link on eBay that showed this older LHS Lovat. It was stamped LHS in a diamond. Next to that was stamped PUREX over the patent number, PAT.No1587048. Under that was stamped REAL BRIAR. The shape number 12 was stamped on the underside of the shank. LHs2The pipe looked decent. There was some damage to the rim but the bowl was nice other than the usual dirtiness and dents. The shank also looked good. There did not appear to be any fills in the bowl or shank. There was very little cake in the bowl and it appeared that it had been recently reamed. The finish was in okay shape though there were paint flecks on the sides of the bowl near the rim. lhs3 LHS4 LHS5The seller included a close up photo of the rim to show the extent of damage. It looked to me that the outer rim was the roughest. It was rounded and the defined sharp edge was gone. The front edge had more damage than the back. The inner edge showed damage and would take some work to round it out. The top of the rim was pretty beat up from what I could see in the photos.LHS6The stem was in rough shape with lots of tooth chatter and wear. It was oxidized and also had a thick coat of some substance that appeared to be flaking or peeling. The dots on the stem were probably white and red though the photos showed the white dot as almost yellow. I was pretty sure that the coat on the coat on the stem accounted for that.LHS7 LHS8I weighed the work it would take to bring it back to life and we put in the only bid on the pipe. It did not take too long for the seller to send it to my brother and for him to send it to me. Even with the double postage it is cheaper to send it to him in the US and then to me in Canada than to ship it directly to Canada. When the pipe arrived in Canada I was able to see that the seller’s photos had shown the condition of the pipe very well. The only thing not shown was that the stem was quite plugged from the slot to the metal threaded tenon. I was not able to push a pipe cleaner through it. The other thing was that the patented stinger apparatus was missing. I have included a picture of the missing apparatus from the patent information.LHS1I went through my collection of tenons and I did not have one like the one shown in the drawing above. I took the next photos to show the state of the pipe from my perspective before I started on the refurb.LHS9 LHS10 LHS11 LHS12I found that the stem was slightly underclocked and needed to be rotated. The first photo below shows the turn of the tenon when it arrived. I heated the tenon with a Bic lighter to soften the glue in the stem. Once it was softened I was able to turn the stem straight. The second photo shows the corrected stem.LHS13 LHS14I took a close up photo of the rim and the bowl interior. There was still some cake in the bowl that needed to be scraped off.LHS15I reamed the bowl with the PipNet reamer and took out the remaining cake.LHS16 LHS17I cleaned out the shank with pipe cleaners, cotton swabs and alcohol. This was one dirty shank and mortise. I would need to use the retort to clean it out. I cleaned out the airway in the stem. It was clogged so I used a dental pick to open the slot area and then I was able to push a thin pipe cleaner through the airway. It took quite a few pipe cleaners to open the airway. I scrubbed the metal tenon with a brass bristle brush and then with alcohol and cotton pads. It was stained but all of the debris was cleaned.LHS18 LHS19I set up my retort, filling the test tube with isopropyl alcohol and then putting the stopper in place in the tube. I put a cotton ball in the bowl and the slid the rubber end of the retort over the stem. I lit a candle and heated the alcohol to boil through the bowl and shank. I boiled two test tubes of alcohol through the airway in the stem and shank before the alcohol came out clean. Once it was finished I ran pipe cleaners and cotton swabs through the mortise and airway to clean out the remaining alcohol and debris. Once I was finished the pipe smelled clean.LHS20 LHS21It was time to address the rim top. I topped it on the topping board using 220 grit sandpaper to remove the damage to the surface and sharpen the inner and outer edges of the rim. Fortunately I did not need to remove much of the surface to clean up the rim surface and edges.LHS22 LHS23I scrubbed the finish with acetone on cotton pads to remove the sticky surface of the finish and the dirt and grime of the years.LHS24 LHS25I sanded the stem with 220 grit sandpaper. I removed the “varnish” coat or whatever the substance was as well as the oxidation and tooth marks.LHS26 LHS27Once I had the surface clean of oxidation and tooth marks I wet sanded it with 1500-2400 grit micromesh sanding pads. I gave the stem a rub down of Obsidian Oil. I dry sanded it with 3200-4000 grit pads and gave it another coat of oil. I finished by sanding it with 6000-12000 grit pads and then gave it a final coat of oil.LHS28 LHS29 LHS30I sanded the rim with 1500-3200 grit micromesh sanding pads to smooth out the scratches left behind when I topped the bowl. I used a light brown stain pen to match the rim to the rest of the finish. I gave the pipe a light wipe down with olive oil and then buffed it with Blue Diamond plastic polish on the wheel. I gave it multiple coats of carnauba wax and buffed it with a clean buffing pad. I took it back to the table and gave it a final hand buff with a microfiber cloth. The finished pipe is shown in the photos below. I have no idea how old the pipe is but the patent number at least gives me a post 1926 date as a starting point. I don’t know how long LH Stern included the Pat.No. stamping on the shank but my thinking is that the pipe is from the mid to late 30s. Thanks or looking.LHS31 LHS32 LHS33 LHS34 LHS35 LHS36 LHS37 LHS38 LHS39

More than met the eye: Would I be able to bring this Jobey Fawn Cauldron back to life?


Blog by Steve Laug

My brother sent me the Ebay link to this Jobey Cauldron and I was hooked. It was in pretty worn shape in terms of the finish and the rim. There was a thick cake in the bowl and some serious lava had overflowed the rim. There were nicks around the outer edge of the rim and the bevel on the inner edge was pretty well covered with lava. There were scratches in the sides of the bowl and it was truly filthy. The stem was oxidized and spotty on the stop side and the saddle. Underneath it was missing a large triangular chunk from the button forward. It was a Jobey so it had the Jobey link tenon that screwed into the shank and the stem fit over the tenon. It was made for a quick and easy replacement. The photos below are from the Ebay seller and clearly show the state of the pipe he was selling. We bid on it and won. Little did I know that what I saw in terms of issues with this pipe were only part of the problems that I would need to deal with in restoring it. Cauldron1 Cauldron2 Cauldron3The seller included a few close up photos to show some of the damage to the pipe. The oxidized and spotty stem is shown in the first photo and the second shows the state of the rim and bowl.Cauldron4 Cauldron5The next two photos show the stamping on the pipe. The top of the shank is stamped Jobey in script over FAWN. The underside is stamped E52 over EXTRA.Cauldron6 Cauldron7The seller also included the following photos to give a clear picture of the profile of the pipe and the damage to the underside of the stem. He gets full props for full disclosure of the issues with this pipe (at least those that were visible through the grime and build up on the briar and stem).Cauldron8 Cauldron9 Cauldron10I went online and searched for a photo of what the pipe had originally looked like and found this one on Smokingpipes.com. Looking at it gave me hope for the repairs and restoration of the one we purchased.Cauldron11When the pipe arrived I put it in my box of pipes to be refurbed and it sat for several months. When I took it out and looked it over I found that the stem was not aligned. I tried to unscrew it from the shank and it would not turn. I tried to wiggle the stem free from the shank and in the process heard that awful cracking sound which refurbishers the world over have come to dread. The tenon snapped off. Great! Now I added one more issue to the refurbishing process on this old pipe. Fortunately, I was able to clear the broken end out of the stem with very little problem but the one in the shank took a bit more ingenuity. I finally was able to remove it by hand turning a drill bit into the broken end and then turning it free of the shank. I cleaned out the shank with pipe cleaners, cotton swabs and alcohol, and then put the parts aside. Since I had no Jobey Link tenons in my kit I would need to wait until I could get some. I called Tim West at JH Lowe and put in an order for tenons. Even that turned out to be far more of an issue than I expected – they came in five sizes and the one I had was so shattered that I was unable to get the measurements. I could estimate the measurements but not get an accurate diameter on either the threaded end or the insert. So I had to order one of each of the three sizes that Tim had in stock. I was hoping that when they arrived that one of them would fit the stem and the shank. Now I would have to wait for their arrival.

It did not take too long of the package to come from Tim. I took out the various Jobey Links that he included and breathed a sigh of relief when the middle sized link was a perfect fit in the shank. The end of the tenon is slotted so that it can be screwed into the shank and unscrewed with a slotted screw driver. In this case it turned into the shank with no issues. The stem did not fit over the end of the tenon but the measurements were correct so I cleaned out the end of the stem and was astonished at the amount of grit that came out of it. I used cotton swabs and alcohol to scrub it clean. Once it was clean the stem fit snuggly over the end of the tenon and all parts aligned perfectly.Cauldron12 Cauldron13 Cauldron14 Cauldron15With the stem fit completed and the new tenon in place it was time to clean up the pipe and see what I was dealing with underneath the grime and dirt. I took some close up photos of the bowl and the stem issues and a complete set of photos of the pipe from multiple angles to show what it looked like when I started.Cauldron16 Cauldron17 Cauldron18 Cauldron19The bowl on this pipe is quite large. I reamed it with the two largest cutting heads on the PipNet pipe reamer and took the cake back to bare briar. I cleaned up the ridges and edges of the broken cake shown in the second photo below with a pen knife and the bowl inside was smooth and clean.Cauldron20I lightly sanded the rim with 220 grit sandpaper to cut through the thick lava on the rim and the inner edge of the bowl. I was able to remove most of it with the sandpaper and finished by scrubbing the bowl down with acetone on cotton pads. The next photo shows the beauty of the rim that lay beneath the lava flow.Cauldron21Once I had removed the grime and the finish I examined the bowl to look for issues that I would need to deal with. Sadly I found that there was a hairline crack where the shank connected to the bowl. It was on the underside of that junction and went up the left side. It was about an inch long. This Jobey Cauldron was turning out to be far more work than I originally imagined when my brother and I had looked at the Ebay photos.Cauldron22This crack, though not deep and pretty cosmetic at this point, would need to be dealt with so that it would not become a bigger issue. I used a micro drill bit on the Dremel and drilled both ends of the crack. I examined it with a lens and saw that it went a little further than I had expected originally and redrilled the end of the crack on the side of the bowl.Cauldron23I decided to also drill some small holes along the crack to make sure that I could seal it further.Cauldron24I pressed some briar dust into the drill holes with a dental pick and then put drops of super glue into the filled holes. I pressed some more briar dust into the surface of the holes to deal with expected shrinkage as the patches dried. At this point the repair always looks ugly and over done but I have found if I skip the last step I have to repeat the process to ensure that the holes are filled.Cauldron25I sanded the repairs with 220 grit sandpaper and then with a medium and fine grit sanding sponge.Cauldron26I stained the repair area and the top of the rim with a light brown stain pen to blend it into the colour of the bowl and shank. This would not be the final colour of the bowl but I wanted to minimize the difference between the sanded areas and the rest of the bowl and shank when I gave it a final stain coat.Cauldron27

I buffed the bowl with Blue Diamond to even out the stain. While the repairs showed through the stain at this point I intended to darken the stain later and it would blend in the repairs a bit more.Cauldron28 Cauldron29With the bowl basically finished at this point I worked on the stem. The missing chunk in the stem end was the expected major repair that needed to be addressed. I mixed up a batch of black super glue and activated charcoal powder to make a paste. I put a wedge of cardboard wrapped in packing tape in what remained of the slot in the stem and applied the paste to the hole in the stem with a dental spatula. At this point I was more interested in getting a good thick coat of the paste in place than in making it look pretty. Shaping and smoothing would be done once it cured.Cauldron30 Cauldron31Once the patch had cured I used a file to define the edge of the button and to smooth out the surface of the stem. I used the topping board to smooth out the end of the stem.Cauldron32It took a lot of filing with needle files to clean up and define the button and then sanding with 220 grit sandpaper to blend the patch into the surface of the surround stem. I used a round, an oval and a flattened oval needle file to open up and shape the slot on the bottom side to match that of the top side.Cauldron33I continued to sand the stem surface with 220 grit sandpaper to shape the blade and the button. The stem was beginning to take shape. The new button and the repair to the bottom of the stem were complete.Cauldron34I wanted to make sure to stain the bowl before I called it a night so I set the stem aside for a bit and stained the bowl. I gave it several coats of dark brown aniline stain and flamed it between to set the colour in the briar. The darker colour would bring the pipe to a similar colour to the one that I found on Smoking pipes.com (shown above).Cauldron35In the morning I worked some more on the stem. I wet sanded it with 1500-2400 micromesh sanding pads. I gave it a coat of Obsidian Oil and then dry sanded it with 3200-4000 grit pads. I gave it another coat of oil and then finished sanding it with 6000-12000 grit pads. I gave it a final coat of Obsidian Oil and set it aside to dry. Cauldron36 Cauldron37 Cauldron38At this point in the process you can see the scratches on the underside of the stem. No matter how much I sanded them with the micromesh pads these still remained. I started over the process of sanding with the pads – beginning with 1500 grit I worked my way through them until I had finished with 12000 grit. Finally I was able to remove the scratches. I buffed the stem and bowl with Blue Diamond on the wheel and then gave both the bowl and stem several coats of carnauba wax. I buffed it with a clean flannel buff and then with a microfiber cloth before taking the photos below. The finished pipe is shown in the photos below. The repairs to the hairline crack and the stem repair though still visible under scrutiny blend in well with the rest of the bowl and stem. The darker stain covers the repairs on the bowl and look quite natural. The bowl has been brought back to life and I like the rich colour of the buffed and polished dark brown stain. Thanks for looking.Cauldron39 Cauldron40 Cauldron41 Cauldron42 Cauldron43 Cauldron44 Cauldron45 Cauldron46

Breathing New Life into an old Mastercraft Standard Cavalier


Blog by Steve Laug

I have always wondered what it would be like to work on a Cavalier shaped pipe. There was something intriguing about working on a long shank with an end cap and a bowl carved coming out of the side of the shank. The look of the pipe and the dapper appearance may well have contributed to the name of the shape. It is made to hang from the mouth of the pipe smoker and be clenched as he is doing other things. This one is another of the pipes that came to me from my brother Jeff.Cavalier1

Cavalier2 It is a great example of the shape. It is a rusticated Cavalier that has brown and dark contrasting colours over a worm trail like rustication. The end cap is a hard rubber and has a bone tenon connecting it to internal threads in the bottom of the shank. The stem is also a good quality rubber as it is not even oxidized. There are tooth marks on the bottom and the top of the stem near the button left behind by the clencher that smoked it. Cavalier3 The rim of this one is in great shape no damage. The amazing thing was that there was unsmoked tobacco in the bottom of the bowl. There was also a thick cake on the walls of the bowl. It did not extend to the bottom of the bowl but ended shortly above the entrance of the airway at the bottom of the bowl.Cavalier4

Cavalier5 The pipe came in its own satin bag which is why the pipe was in such good shape. The finish was dirty and dusty in the grooves but that was the extent of the issues with it. This would be an easy clean up. I took it apart and took the photo below of the parts of the pipe.Cavalier6 It is stamped on the left side of the shank with the words Mastercraft over Standard over Imported Briar. All words are in upper case on the shank. It appears that the stamping was to be done in a smooth oval on the shank but it missed the oval by about a ¼ inch and sits over the rustication on the shank.Cavalier7 I scrubbed the bowl and the threads on the end cap with Murphy’s Oil Soap and a tooth brush. I rinsed off the pipe with running water and dried it off. The cleaned finish looked very good. I would not need to do much with the finish on this pipe.Cavalier8 I removed the tobacco remnants from the bowl and then reamed the bowl with a PipNet reamer. I took the cake back to bare briar.Cavalier9

Cavalier10 I cleaned off the threads on the end cap – it was a bone tenon – with a brass bristle wire brush. One it was clean I put a coat of Vaseline on the tenons and screwed it back in place.Cavalier11 Before I put the end cap in place I cleaned out the inside of the shank from end to end with pipe cleaners, cotton swabs and alcohol. Once it was clean I put the end cap in place. I also cleaned out the airway in the stem at the same time.Cavalier12

Cavalier13 The deep gouges in the top and bottom sides of the stem needed to be cleaned up. There was a lot of tooth chatter around the deep gouges so I sanded out the tooth chatter with 220 grit sandpaper. The sanding work left two gouges on the underside and one on the top side of the stem that would need some work.Cavalier14

Cavalier15 I cleaned out the divots with alcohol and dried it off. I filled them in with black super glue until there was bubble over the surface. I let the glue cure.Cavalier16

Cavalier17 While the stem patch cured I worked on the end cap. I wet sanded it with 1500-2400 grit micromesh sanding pads and rubbed it down with Obsidian Oil. I dry sanded it with 3200-4000 grit pads and gave it another coat of oil. I finished sanding it with 6000-12000 grit pads and gave it a final rub down of the oil. I let it dry.Cavalier18

Cavalier19

Cavalier20 When the end cap was dry I rubbed down the bowl with a light coat of olive oil to bring some life back to the dry briar. At this point the pipe is beginning to look really good. The contrast stain of the black and the dark brown gives depth to the rusticated finish of the bowl.Cavalier21

Cavalier22

Cavalier23

Cavalier24 Once the glue dried on the stem I used a needle file to sharpen the edge of the button and clean it up. I flattened the repair on the blade of the stem as well.Cavalier25 I sanded the repaired areas on the stem and the newly made file marks with 220 grit sandpaper. I worked until the repair was blended into the surface of the blade. The repair on the top stood out more at this point in the process. That would change as I worked on it longer.Cavalier26

Cavalier27 I sanded the stem with micromesh sanding pads – wet sanding with 1500-2400 grit pads and rubbed the stem down with Obsidian Oil. I dry sanded it with 3200-4000 grit pads and gave it another coat of oil. I finished with 6000-12000 grit pads and gave it a final coat of oil. I let the oil dry before taking the pipe to the buffer.Cavalier28

Cavalier29

Cavalier30 I buffed the stem with Blue Diamond and lightly buffed the bowl. Care had to be exercised to not get build-up in the rustication. It takes a very light touch to keep that from happening. I gave the stem several coats of carnauba wax. I used Conservator’s Wax on the bowl and hand buffed the bowl with a shoe brush. I hand buffed the pipe with a microfibre cloth to add some depth to the shine. The finished pipe is shown in the photos below. It is a beautiful pipe and I love the feel of it in my hand. It was an enjoyable restoration. Thanks for looking.Cavalier31

Cavalier32

Cavalier33

Cavalier34

Cavalier35

Cavalier36

Cavalier37

This one was a labour of love – A Custombilt Bullmoose


Blog by Steve Laug

My brother sent me a pipe that is a shape I have had two previous times and always sold or gifted. It is a Bullmoose or a Scoop shape. Tracy Mincer did a great job with this shape and it is one I have never seen repeated as chunky as he did them. This one was stamped on the right side of the shank with the words Custombilt over Imported Briar.CB1 The pipe was solid but dirty. The stem would not push into the shank and the grooves and trails in the briar were dusty. The bowl had a thin, uneven cake in it and the lava overflowed slightly onto the rim leaving a thin coat of tars and oils. There were some dings and dents in the smooth parts of the pipe and the finish was worn. There were some fills in the grooves that showed through the worn finish. Overall it was in good shape. The stem had tooth chatter on the top and bottom sides with a few deeper tooth marks near the button. The photos below show what the pipe looked like when I started working on it.CB2CB3CB4CB5 I took a few close-up photos of the bowl rim, front and back views and the stem to show what I had to deal with in the restoration of this one.CB6CB7CB8CB9CB10 The stamping gave me a bit of information on the date of the pipe. The one word Custombilt stamping rather than the Custom-Bilt stamping would help to pin down the date a bit. I decided to pause a few moments and do a bit of reading to help narrow down the date. I looked on one of my go to resources – Pipedia.org. I also have Bill Unger’s book but it is packed away at the moment and this article on pipedia quotes extensively from the book. Here is the link to the article: https://pipedia.org/wiki/Custom-Bilt

Under the heading, Custom-Bilt History is the following information.

“The book (Bill Unger’s Book, my comment) opens up with an intriguing statement that unfortunately is never fully followed up: Before beginning this history, I need to emphasize an important fact and to ask the reader to keep it firmly. Spelling-Custom-Bilt, Custombilt, and other variations-is extremely important to the various aspects of the following discussions. It was not, however, important to many people in the company’s early days. [Emphasis mine] {Page 9}.”

“Tracy Mincer started the original Custom-Bilt pipes it appears in 1934. Bill meticulously details the start of the Company, how it was financed, the changes in the original ownership, how the company distributed its product, the manufacturing process, certain patented items, and other interesting stuff… In 1946, the name was changed to Custombilt after Mincer began an association with Eugene J. Rich, Inc. (my emphasis). There were some big changes in advertising and distribution. The slogan “AS INDIVIDUAL AS A THUMBPRINT” began at this time as well.”

“In the early 1950’s, Tracy Mincer developed severe financial problems that caused him to stop making the Custombilt, and he lost the name. In 1953, Leonard Rodgers bought the company and emphasized tobacco pouches and butane lighters. (However, it appears Mincer was working on his new pipe, the Doodler.) In 1968, Rodgers sold the Company to Consolidated Cigars. In the early 1970s, Wally Frank Co. bought the Custombilt trademark and began to produce their version of the pipe in 1974 or 1975. Hollco Rohr owned the Weber pipe factory, located in New Jersey, and produced the Custombilt pipes there. In 1987, the pipes were made out of the Butz-Choquin factory (France) and then Mexico until the late 1990s. Currently, the Custombilt name is owned by Tobacalera of Spain.”

From this information I am pretty sure my pipe is made after the change in 1946 and before Tracy Mincer lost the name in the early 1950s. It has the characteristic Mincer like rustication patterns and shape. It could very well be from the Rich era of the brand.

I went to work cleaning up this old timer. I scrubbed the bowl with a toothbrush and Murphy’s Oil Soap. I was able to clean out the rustication and the grooves with this method. I rinsed the bowl under warm water to remove the soap and the grime. The first picture shows the soap on the bowl and the second through the fifth picture that follows show the cleaned and dried bowl. You can see the putty fills in the grooves. Fortunately all of them were in the grooves and not in the smooth portion of the bowl.CB11 cb12 cb13 CB14 CB15I scrubbed out the airway in the shank, mortise and stem with alcohol, pipe cleaners and cotton swabs until they came out clean. I thought about using the retort but chose not to on this pipe as it smells sweet and clean.CB16 CB17To clean up the scratches and lava on the rim of the bowl I used a medium grit sanding sponge and “topped” the bowl on it. I find that this sponge removes the grime and leaves the rim intact with no briar removed. I worked it on the sponge until it was clean and then used a cotton swab and alcohol to clean up what remained.CB18 CB19I sanded the stem with 220 grit sandpaper to remove the tooth chatter and deeper tooth marks as well as the small gouges and oxidation on the vulcanite.CB20 CB21With the internals of the shank and mortise cleaned I was able to put the stem back in place. I reamed the bowl with a PipNet pipe reamer and took the cake back to briar.CB22 CB23I used a Black Sharpie Permanent Marker to stain the rustication patterns on the bowl and shank. Once I finished with that I wiped the bowl down with alcohol to soften the black and prepare the surface for the contrast stain.CB24 CB25 CB26 CB27 CB28 CB29 cB30I warmed the briar with a blow dryer and then stained it with Feibings Dark Brown that I had thinned with alcohol 1:1. I applied the stain and then flamed it with a lighter to set it. I repeated the process until I got good coverage.CB31 CB32 CB33 CB34I buffed the pipe with Blue Diamond on the wheel to give it a shine and even out the stain coat. The next photos show the bowl at this point in the process. The contrast of the dark in the grooves with the brown really gives the briar a bit of pop.CB35 CB36 CB37 CB38I was careful with buffing around the stamping as I did not want to damage the pristine stamping on this pipe.CB39With the bowl done I turned my attention to the stem. I wet sanded with 1500-2400 grit micromesh sanding pads until the majority of the scratches left behind by the sandpaper were gone. I rubbed the stem down with Obsidian Oil. I dry sanded it with 3200-4000 grit micromesh pads and gave it another coat of oil. I finished by sanding it with the 6000-12000 grit micromesh pads and giving it a final coat of oil. I set it aside to dry while I worked on another pipe.CB40 CB41 CB42I buffed the pipe with Blue Diamond to raise the shine and then gave the stem multiple coats of carnauba wax. I gave the bowl several coats of Conservator’s Wax and then buffed both the bowl and stem with a clean flannel buff. I hand buffed the pipe with a microfibre cloth to deepen the shine. The finished pipe is shown in the photos below. I love the finished look of this old timer and the feel of the hefty bowl in the hand. In my opinion it turned out to be a beautiful pipe. Thanks for looking.CB43 CB44 CB45 CB46 CB47 cb48

Simple Restoration of a Stanwell Freehand


Blog by Aaron Henson – 2/20/16

I have had my eye on this pipe for several months. It has been languishing in a local antique shop since last summer and was priced as if it were fully restored. To my surprise it was still there at the end of January and the shop had lowered the price. I talked with the owner for a while and eventually got his rock bottom price (which was my top end price). After all, it is a beautiful piece of briar.Stan1

Stan2 This is big pipe: the chamber is 7/8” (22 mm) diameter and 1¾” (45 mm) deep and the walls are more than 3/8” (10mm) thick.Stan3 Inspecting the pipe I did not find much wrong. The stem was heavily oxidized and had very little tooth chatter. The briar was free from dent, gouges and the like. A few minor scratches and the worn stain was all that needed to be addressed. And there was only a light cake in the bowl. As for markings, there were none on the stem and some double markings on the bottom of the shank. It read STANWELL over de Luxe (double stamped) over MADE IN DENMARK (also double stamped). From what I could find, I estimate this pipe was made sometime in the 1970’s. If anyone can date it better please let me know.Stan4 I set the stem to soak in an Oxyclean solution and began working on the stummel. I cleaned the outside of the briar with a tooth brush and Murphy’s oil soap, rinsing with water then quickly drying with a paper towel. I repeated the process on the plateaux several times. Next I reamed the chamber back to bare wood and inspected the internals. Then the internals of the shank cleaned up easily with cotton swaps and bristled pipe cleaners.

All-in-all, other than a micro crack on the outer surface, the briar was in great shape. There was one long scratch near the stamping but I didn’t want to touch that and risk damaging the stamps. I wanted a very smooth finish so I sanded the outside of the pipe with 1500 – 3200 micromesh pads and set it aside.Stan5

Stan6 Returning to the stem, I scrubbed off the oxidation with a green pad and scrubbed the airway with a series of alcohol soaked pipe cleaners – bristled then soft. The tooth chatter was raised with heat from a lighter and the deepest tooth mark was filled with black superglue. When cured, the stem was sanded and polished with 1500 – 12000 micromesh pads. I wet sand with the first six pads and dry polish with the last three. A little mineral oil between sets of three pads seems to help too.Stan7

Stan8 Next the pipe was assembled and taken to the alcohol retort. Even thought I had scrubbed the internals thoroughly, it took 3 test tubes of Everclear until I no longer smell the ghosts of the previous owner’s tobacco.Stan9 In my research of the Stanwell pipes, I found that Stanwell used a walnut stain. This was consistent with the remnants of stain that I found on this pipe and I wanted to restore the original look. I began by applying and undiluted Feibing’s dark brown. After it set I realized that Feibing’s brown dye have too much of a red base and it was not direction I wanted to go.

I wiped as much off as I could with an alcohol soaked cotton pad and sanded the surface with the 2400 micromesh pad again to remove a bit more. Returning to my local Tandy Leather, I searched for a walnut stain. After looking at stain samples on leather (which responds much differently than briar) I placed my bets on Eco-Flo’s Bison Brown. This time the results were much more like what I had seen in pictures of similar Stanwell pipes. I applied the stain at full strength and flamed it. After the second coat dried I wiped the excess off with an alcohol soaked pad.

With the smooth surfaces done I stained the plateaux with Feibing’s black dye. Once it dried, I wiped the entire wipe down with mineral oil then set it aside to soak in. It was two days later that I found time to return and take the pipe to the buffing station. I buffed the entire pipe with red diamond then applied three coats of carnauba.

Thanks for reading and I would like to hear your comments.Stan10

Stan11

Stan12

Stan13

This one was a challenge for me – a 1981 CAO Bekler A La Rodin No. 7 of 100


Blog by Steve Laug

A fellow Canadian contacted me about working on a Bekler that he had picked up. He said it was pretty rough. He sent me these photos for a quick look. I loved the look of this pipe. It is stamped CAO Bekler on the darkened shank. On the foot it is stamped ’81 over A La Rodin no. 7 of 100. Above the darkened shank is an insert of carved roses. Above that is a bi-colour spool. The stem was pushed into the spool. There are threaded connectors between each piece of the shank. Bekler1 Bekler2When the pipe arrived it was in worse shape than I had expected. Joe had said that the stem needed work but I did not expect the mess that came. Someone had hacked the stem with files and left behind an uneven surface with many deep file marks and scratches. Some of the flaws were raised and some were indents. It looked as if they had tried to thin the mouthpiece down and narrow the width of the stem. The button was intact but had file marks. The file marks went every direction across the stem. The slot in the end of the stem was off centre with the drilling in the slot slightly to the left. The stem itself was twisted to the left as well. The inside of the stem had a dark sludge in it that pretty well hid the tortoise shell look of the Lucite. The bowl and shank were badly scratched and the rim was a mess. The bowl was out of round and the same person had used the file on the rim leaving behind deep gouges in the top of the rim. On top of the scratches there was a thick coat of lava that covered the top from the inner edge out to about the middle of the top. The foot had some nicks out of it. This would take some tedious work to clean up.

I took some photos after I initially sanded the stem. I wanted to document the condition of the pipe.Bekler3 Bekler4 Bekler5 Bekler6 Bekler7 I sanded the stem with 220 grit sandpaper to smooth out all of the cuts and file marks. It took a lot of sanding and shaping to smooth out the stem surface. I found that under the file marks there were some tooth marks in the underside of the stem. I sanded that surface smooth and wiped it clean. I used a clear super glue to fill in the divots.Bekler8 Once the glue dried I sanded the entire stem once again and blended the patch into the surface of the Lucite. I reshaped the button and the edge with the sandpaper and cleaned up the slot with needle files.Bekler9

Bekler10 Once the surface was smooth I cleaned out the inside of the stem with pipe cleaners and alcohol. I scrubbed the interior with both smooth and bristled pipe cleaners. I was able to clear out the darkening and tar in the airway.Bekler11 With the stem cleaned up and the surface smooth I took a picture of all of the parts on this pipe. The connectors look rough but upon examination I found that they were solid and needed to be cleaned up. You can also see the file marks on the top of the rim and the tars and lava that filled them.Bekler12

Bekler13 I scrubbed the spool insert with Murphy’s Oil Soap and then rinsed it off with water.Bekler14 I cleaned out the inside of the spool and the threaded connector with alcohol, cotton swabs and pipe cleaners. I used a topping board to clean up the ends of the connector as it was poorly done. It looked like someone had shortened it with a pair of cutters and left the residual chips and flakes on the connector. The tars had caught on them giving the end a rough look. The threads were also caked with tars and oils.Bekler15 I scrubbed the next shank insert, the carved rose piece with the Oil Soap and a tooth brush and rinsed it with water. I cleaned out the interior with pipe cleaners, cotton swabs and alcohol. I also cleaned the longer connector inside and out. I used a dental pick to clean out the threads. I also used the topping board to smooth out the ends.Bekler16

Bekler17 The next photo shows the two shank inserts joined together with the smaller of the two connectors. I gave them a light coat of Conservator’s Wax and buffed them with a shoe brush to raise a shine.Bekler18 I decided to work on the stem with the micromesh pads to see what the surface looked like with some shine. I find that the first three grits of micromesh pads – 1500-2400 – tell a lot. I could see the spots that I needed to still work on but I could also see the lovely tortoise shell Lucite beginning to show its colours.Bekler19 I put the stem on the two inserts to get a feel for the look of this part of the pipe. I took the next two photos to show the progress. The stem was getting there. I still needed to heat it and straighten out the twist in the bend and bend it slightly more as it did not fit snugly in the case. Before I heated the stem I examined it carefully. There was a small flaw in the swirls of the material on the top surface of the stem at the bend so I would need to be careful in the heating and bending. Fortunately the flaw did not go too deeply into the stem material but sat on the surface. I heated the tip of the stem and straightened out the twist in it as I bent it slightly to match the case. I repaired the flaw with super glue and sanded it with 20 grit sandpaper to smooth out the repair.Bekler20

Bekler21 I cleaned the interior of the bowl and shank with pipe cleaners, cotton swabs and alcohol.Bekler22 I set the bowl aside to dry out and I sanded the stem with micromesh sanding pads. I wet sanded with 1500-2400 grit pads and rubbed the stem down with Obsidian Oil. I dry sanded it with 3200-4000 grit pads and gave it another coat of oil. I finished with dry sanding it with 600-12000 grit pads and gave it one last coat of oil.Bekler23

Bekler24

Bekler25 I polished the stem with Meguiars Scratch X2.0 and then gave it several coats of wax.Bekler26 I scrubbed the surface of the bowl with the Scratch X2.0 and hand buffed it with a cloth.Bekler27 I sanded the file marks on the rim to bring it back to smooth. The deep gouges were blackened and took quite a bit of sanding to remove them. I started sanding with 220 grit sandpaper and worked on the surface of the rim. I was careful to not change the profile of the bowl or the angles of the rim.Bekler28 I sanded the rim with micromesh pads from 1500-12000 grit to smooth out the surface and give it a shine. I gave the bowl several coats of Clapham’s Beeswax Polish and buffed it by hand with a cloth.Bekler29

Bekler30

Bekler31

Bekler32 With the buffing the bowl began to shine. The carving on the foot of the bowl stood out clearly. The rim surface looked far better than when I began.Bekler33

Bekler34 I lightly buffed the bowl with Blue Diamond on the wheel being careful around the blackened shank. The shine rose in the meerschaum and the pipe looked good. Though there were still nicks and scratches they now looked like marks of honour and age rather than abuse. To me it is always a fine balance between restoring a pipe and reworking a pipe. On a beautiful pipe like this one I opted to work on the big issues and leave some of the war wounds on the sides of the bowl. To me the pipe has been around long enough to earn those marks. I want a pipe that is finished to look better than when I started but I am not aiming at making a 35+ year old pipe look new. I want it to look cared for and well smoked. The finished pipe is shown in the photos below.Bekler35

Bekler36

Bekler37

Bekler38

Bekler39

Bekler40

Bekler41

Bekler42

Bekler43

Bekler44

Bekler45

Bekler46

Bekler47

More Work than I thought – A Real Briar Billiard with a horn stem


Blog by Steve Laug

When I saw this pipe on eBay when my brother and I were searching for pipes in the estate pipe area I thought it would be a simple restoration. The briar appeared to be in decent shape and the finish looked very good. The rim was dirty but looked undamaged under the grime and tars. The horn stem did not look too damaged and should also be an easy repair. When the pipe arrived at my brother’s home he took the following photos and sent them to me to have a look at the pipe. It still looked pretty straight forward to me.RB1

RB2

RB3

RB4

RB5 When the pipe arrived here in Canada I was in for a surprise. It definitely looked good but the more I dug deeper the more issues that I found. The rim was tarred and covered with lava and underneath the outer edges were rounded over. The bowl had a light cake at the top and half way down and a deep groove had been cut in the bottom of the bowl by aggressive insertion of the pipe cleaner. The groove or pit was below the airhole entry to the bowl. The shank had been repaired and the crack that I noted in the pictures had been well repaired and the band put in place to strengthen the shank. It would not take much to clean it up. The finish which at first glance looked good had deep gouges in the bottom of the bowl and on the left side of the bowl near the shank union. These were sharp cuts and could not be steamed out. There was a large fill on top of the shank where it met the bowl. It appeared to be pink putty but it was solid and tight. The stem was also nicked quite a bit on the top mid stem and on the left side near the band. The top and bottom sides had some deep tooth marks on them that I could not see from the photos. The stem was very tight in the shank and took some persuasion to remove.RB6

RB7 The next two photos show the repair work on the underside of the shank. It was very well done and would not need to be further dealt with. The third photo shows the rim with the rounded outer edge.RB8

RB9

RB10 I removed the stem from the shank with a bit of pulling and found that the metal tenon was covered with tar and had been stuck in the shank by the tars.RB11 I reamed the bowl back to bare wood to bring the rest of the bowl in line with the bottom half. I used a PipNet reamer with the second cutting head. In the second photo you can see the deep pit in the bottom of the bowl.RB12

RB13 I cleaned out the stem and the tenon with alcohol, cotton swabs and pipe cleaners.RB14 The next two photos show the tooth marks on both sides of the stem. They are quite deep and they will need to be repaired.RB15

RB16 I wiped down the stem with a cotton pad and alcohol and then put drops of super glue in the tooth marks. I sprayed them with accelerator.RB17

RB18 I scrubbed out the mortise, shank and bowl with alcohol, pipe cleaners and cotton swabs. I scrubbed until the pipe cleaners and cotton swabs came out clean.RB19 I topped the bowl to remove the damage to the bowl top and to clean up the round outer edge of the rim. Once again, note the deep pit in the bottom of the bowl that is visible in the second photo.RB20

RB21 I scrubbed the exterior of the bowl with cotton pads and acetone to remove the finish and the grime that was ground into the briar. I was going to need to do some work on the gouges on the bowl sides and bottom so I wanted it clean.RB22

RB23 The stem never sat completely tight against the shank so I beveled the inner edge of the mortise to accommodate the tenon/stem junction.RB24 With the externals cleaned I decided to do the repairs on the gouges on the bowl side and bottom. I put a drop of clear super glue in the divot and then pressed briar dust into the hole with a dental spatula. I pressed the dust deep into the glue to get a good fill. The second photo below shows the bowl side and bottom with what looks like a pox. The briar dust and glue fills are dry at this point and ready to sand. I sanded them with 220 grit sandpaper and then with 1500-2400 grit micromesh sanding pads.RB25

RB26

RB27

RB28 I used a light brown stain pen to give the fresh sanded briar on the bowl bottom and the rim an initial coat. I then stained the entire bowl with a dark brown aniline stain, flamed it and repeated the process. I set it aside to dry for about 30 minutes before buffing with Blue Diamond on the wheel.RB29

RB30

RB31

RB32 I mixed a batch of pipe mud (cigar ash and water) to fill the pit in the bottom of the bowl. I put a pipe cleaner in the airway with just the tip extending into the bowl. I used the spatula to put the mud in the bottom of the bowl and pressed it into the pit with the hand of the spatula. I added the pipe mud until the bowl bottom was level.RB33 I set the bowl aside to so that the pipe mud would cure and worked on the stem. I sanded the stem with 220 grit sandpaper to smooth out all of the nicks and scratches as well as blend in the super glue fills. It took a lot of sanding to smooth out the stem surface and remove as many of the scratches and dents as I could and still keep the profile. The super glue dried hard and the clear glue looks shiny and raises colour in the horn so it is very visible at this point.RB34

RB35 When I had smoothed out the surface of as many flaws as possible I worked on it with micromesh sanding pads. I wet sanded it with 1500-2400 grit pads. The repairs are starting to blend in. They will never be invisible but they are smooth. I rubbed the stem down with Obsidian Oil before continuing.RB36

RB37 I wet sanded the stem with 3200-4000 grit micromesh and then dry sanded with the same grit pads. I gave it another coat of the oil.RB38

RB39 I finished by dry sanding the stem with 6000-12000 grit micromesh sanding pads and then buffing the stem with Blue Diamond on the wheel. I gave it a final coat of Obsidian Oil and set it aside to dry.RB40

RB41 I polished the silver band with silver polish and brought the parts together. I gave the pipe a final buff on the wheel and gave it multiple coats of carnauba wax. I buffed it with a clean buff and the with a microfibre cloth to raise the final shine. The finished pipe is shown in the photos below. While the patches in the stem still show they are shiny and smooth to the touch and will give protection to the stem. The repairs to the cuts and gouges in the bowl look really good and virtually disappear under the stain and the polish. The pipe should live through at least another life time before it needs this kind of attention again.RB42

RB43

RB44

RB45

RB46

RB47

RB48

RB49

RB50

Putting the Rusticated Rim back on a Savinelli Capri 121 Pot


Blog by Steve Laug

One of the gift pipes received from a friend when I repaired his pipe was a beautiful little Savinelli Capri 121 Pot. I love the finish on the Capris. There is something about the rusticated finish that adds a tactile dimension to the pipe that I thoroughly appreciate. This pipe was no exception. The finish on the bowl was in excellent condition though at some point in its life it had been topped. The typical rustication on the rim surface had been sanded smooth and the rim had been stained with a reddish brown stain. The internals of the pipe were very clean. The bowl had been reamed and the airway in the mortise was spotless. The stamping on the bottom of the shank was sharp and legible – it reads Savinelli Capri over Root Briar and the Savinelli shield and next to that the shape #121 over Italy.

The stem had seen better days but it was still repairable. It was oxidized and the gold stamping was faint on top of the saddle. There were tooth marks on the top and the bottom of the stem. The ones on top had been repaired and filled with a white looking epoxy. It was hard and smooth but it was white and it looked really bad with the brown oxidation on the stem. These would need to be removed and repaired when I worked on the stem. The tooth marks on the underside of the stem were not as deep and could easily be remedied by sanding the stem. The inside of the stem was also very clean. I took the following photos when I brought the pipe to the work table.Capri1

Capri2

Capri3

Capri4 I took some close-up photos of the rim and the stem to show the condition of both. The topping job on the rim actually was very well done. The refinish on it was impeccable – no scratches or grooves, just a clean smooth surface. The stem shows the story I mentioned above. The top side view shows the repairs and the underside view shows the dents.Capri5

Capri6

Capri7 Taking care of the dents on the underside of the stem was an easy matter. They were not too deep so I sanded the stem with 220 grit sandpaper and they disappeared.Capri8 The top of the stem was another matter. I wanted to remove the white repairs. I sanded the stem until they were four distinct repairs. Then I used the dental pick to pick away at the white epoxy repair until it was pitted and gave me a new divot to work with. I used some black super glue to refill the divots and cover the white that had been present before.Capri9

Capri10 I sprayed the glue with an accelerator and then sanded the repair with 220 grit sandpaper to blend it into the surface of the stem. In the next photo you can see that the white no longer was visible. The trick would be to keep it that way!Capri11

Capri12 Now it was time to address the rim. I was not sure about rusticating it because it actually looked quite fine the way it was. I went online and found a photo of a Capri that was the same shape and the rim was rusticated. I liked the look of the rim blending into the finish of the bowl. The decision was made. Now I had to work to get a similar look.Capri13 took out my Dremel and my assortment of burrs. I was pretty certain that I would use them all in the process of rusticating the rim with a deep and pebbled look.Capri14 I started with a simple cylindrical burr to carve some random swirls across the rim. I did this lightly at first and then deepened them. At this point I kept to the middle of the rim as I had ideas about rusticating the edges a little differently.Capri15 I followed that by using the ball burr to deepen the swirls and work on the inner and outer edges of the rim. At this point the surface was beginning to look good. But too me it was not rustic enough for the Capri finish on the bowl – it was too tame looking.Capri16 I used cone burr next with a cross hatch pattern to randomize the pattern even more and deepen the grooves in the surface and edges.Capri17 I next moved onto another cone burr with a spiral pattern and continued to work on the rim pattern. It was getting close to the point I was aiming for.Capri18 I used the last cone burr that had a swirl pattern in the opposite direction and went over the rim again to further accent the roughness.Capri19 I used the cylindrical burr to cut some of the lines between the divots and edges of the bowl and make it more craggy looking.Capri20 At this point in the process I was finished with the burrs and I put a coat of medium brown stain on the high points in the rustication using a stain pen. I followed that up with using a black Sharpie pen to fill in the divots and low spots on the rustication.Capri21

Capri22 I scrubbed the newly stained rim with a brass bristle brush to knock off some of the high spots and get a more burnished look like the bowl sides. I still was not happy with the stain so I used the sharpie again to darken the low spots and grooves. I then restained the rim with the dark brown stain pen. The colour was very close to the sides of the bowl.Capri23

Capri24

Capri25 I could have probably stopped there but I did not. I studied the photo of the rim above and noted that there were some striations or cuts in the surface of the rim that connected all the rustication and gave it a distressed look. I have a serrated edge letter opener here that I thought might work to give me more of that look. I cut the surface from every direction with the edge of the letter opener and carved and hacked it to distress it. I used the brass brush once again and then recut the rim with the opener.Capri26 I restained the rim with the black Sharpie and the dark brown pen. And then gave it a light buff on the wheel with Blue Diamond. I say light because if I had pressed any harder the polishing material would have gone into the grooves and made a mess. The rim looked good to me. The finish was done and all that remained was to wax it with some Conservator’s Wax.Capri27 I gave the bowl and rim several coats of Conservator’s Wax (works like Halcyon II on rusticated finishes) and buffed it with a shoe brush to polish and give a shine. I wet sanded the stem with 1500-2400 grit micromesh pads to begin the polishing process. It was tricky around the stamp on the shank so I had to work carefully with the pad to get as much of the oxidation as possible.Capri28

Capri29 I buffed the stem with White Diamond to further polish it and then sanded it with 4000 grit wet dry sandpaper to really work on the oxidation at the shank. It is a finicky part of the process because of the weak stamping. I rubbed the stem down with Obsidian Oil and then progressed to 3200-4000 grit micromesh pads. Another coat of oil preceded the final sanding with 6000-12000 grit pads. I gave the stem a final coat of oil and set it aside to dry.Capri30

Capri31 I buffed the pipe with a shoe brush and then with a microfibre cloth. I gave it several more coats of the Conservator’s Wax and polished it to a shine. I buffed the stem with Blue Diamond and gave it several coats of carnauba to protect it and then buffed the stem with a clean buff to raise the shine. I hand buffed the entirety one final time with a shoe brush and then took the finished photos below. This was a fun project. You can see that the white stem repairs have disappeared and the rustication on the rim fits the overall look of the pipe far better than the smooth finish that was there before. Thanks for looking. Capri32

Capri33

Capri34

Capri35

Capri36

Capri37