Tag Archives: Stem repairs

Restoring a Lovely Rhodesian by John Calich


Blog by Steve Laug

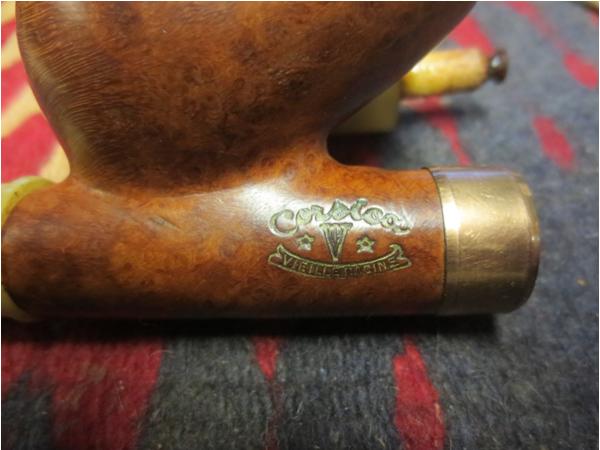
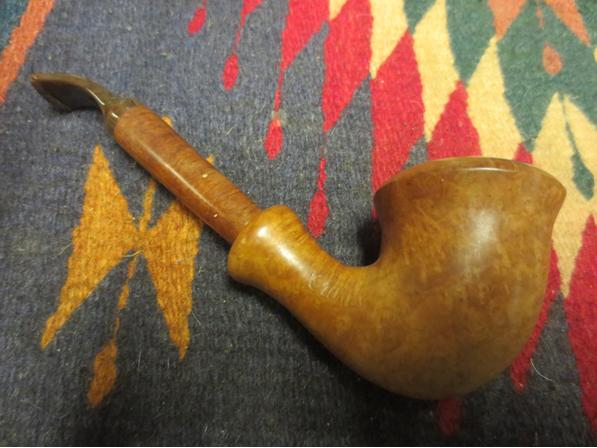
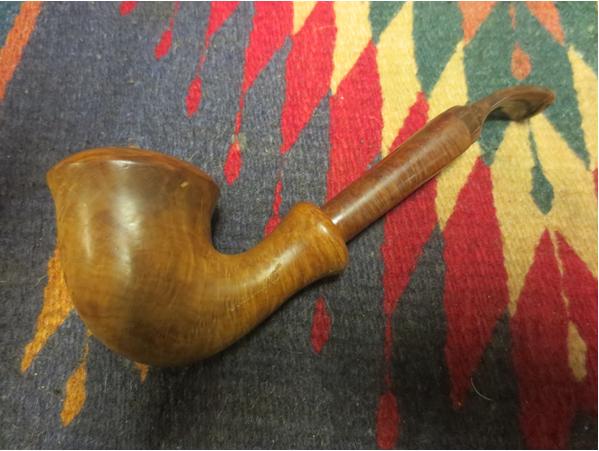
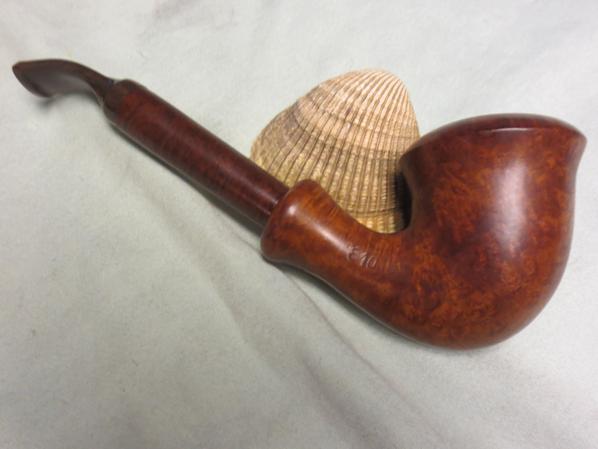
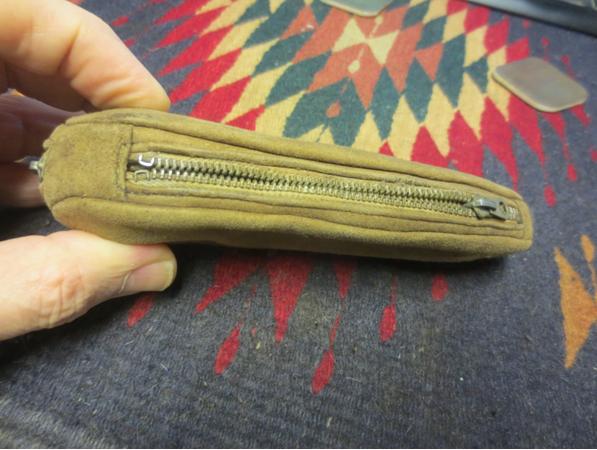
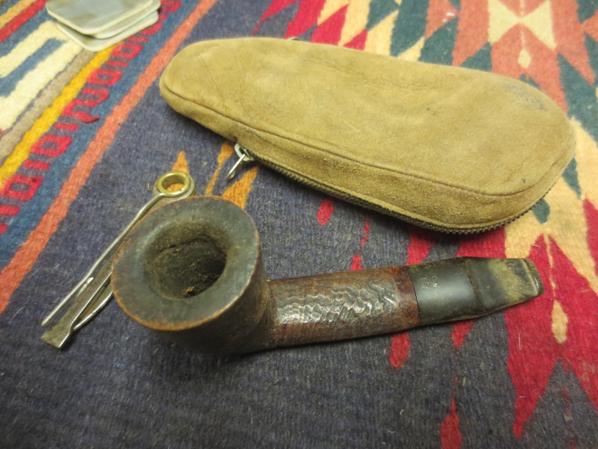
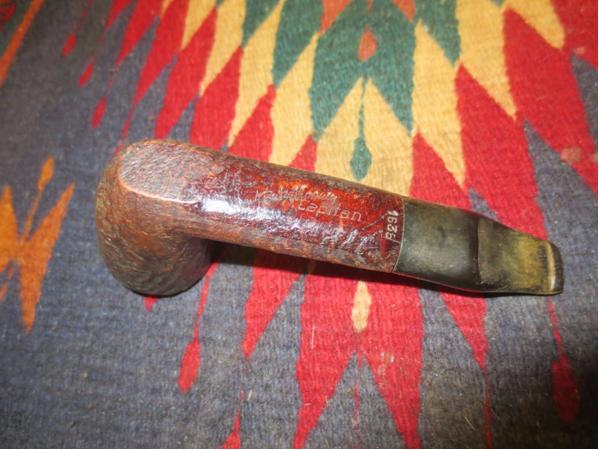
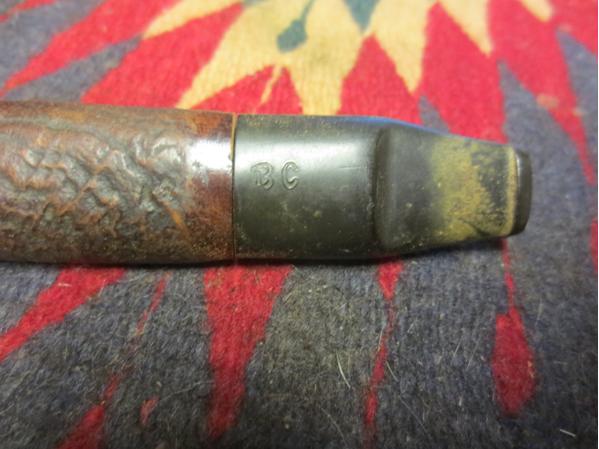
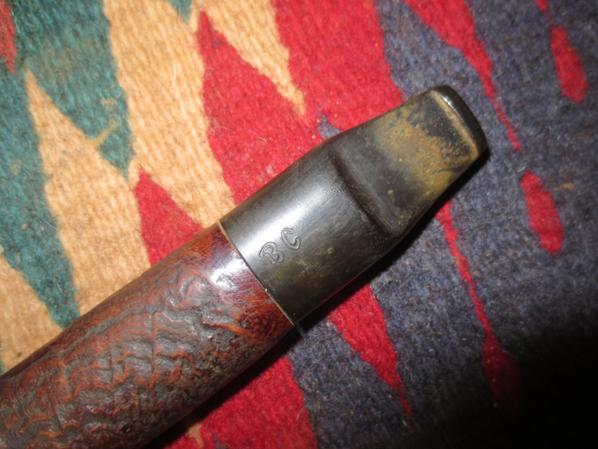
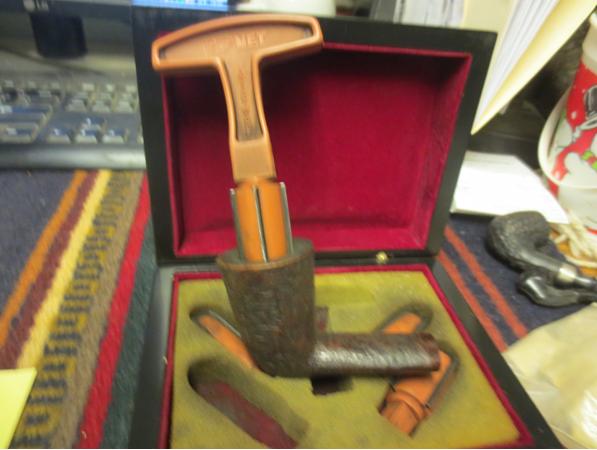
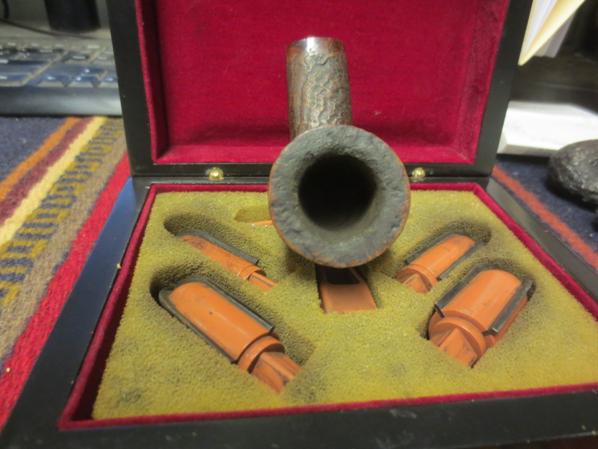
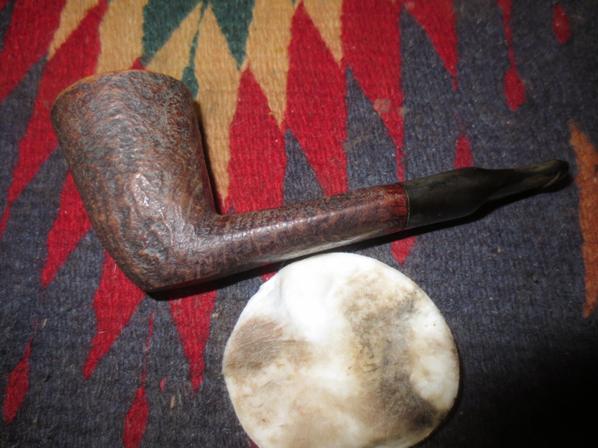
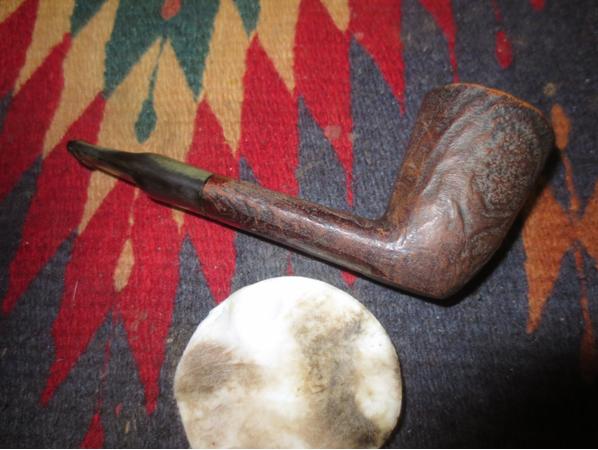
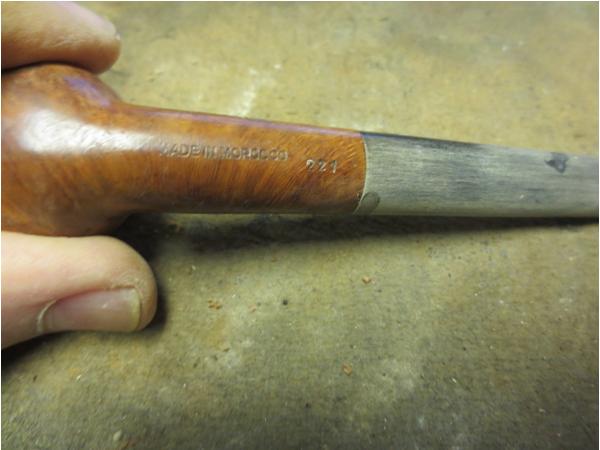
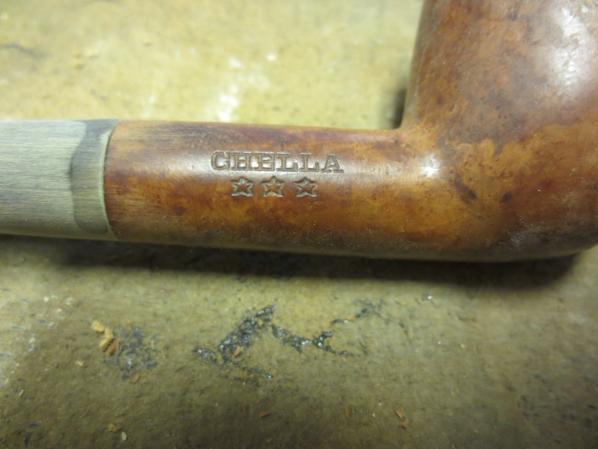
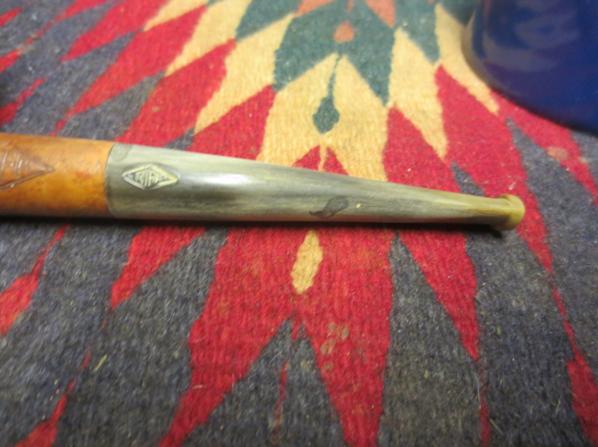
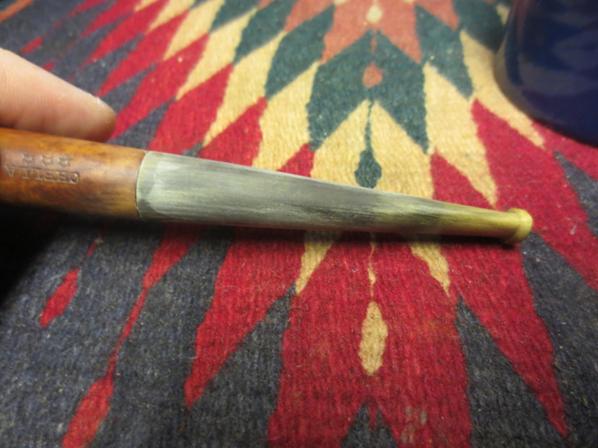
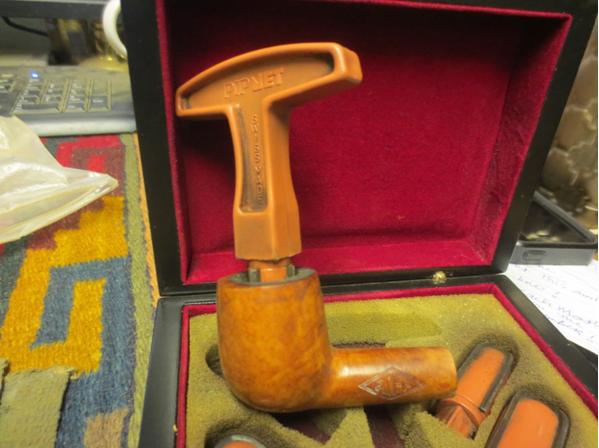
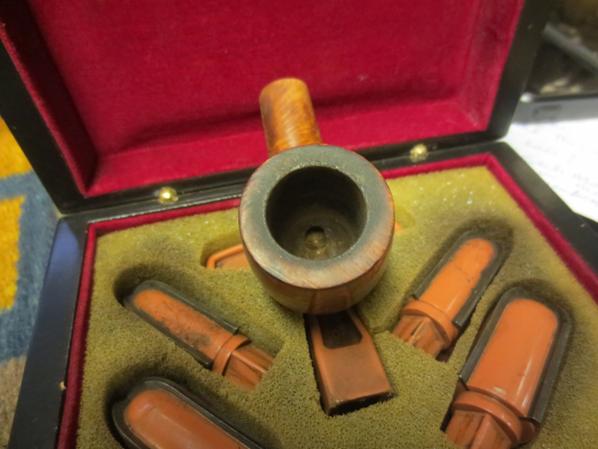
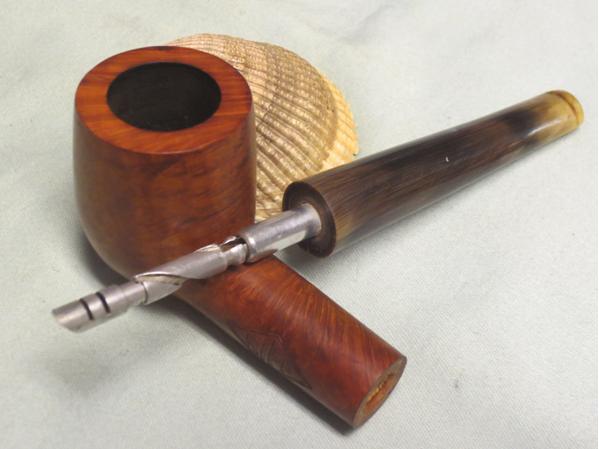
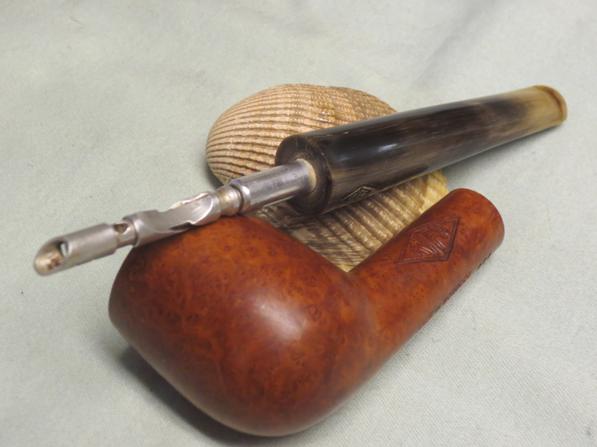
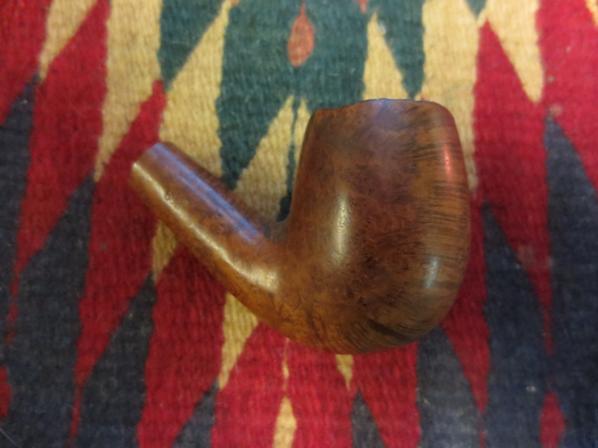
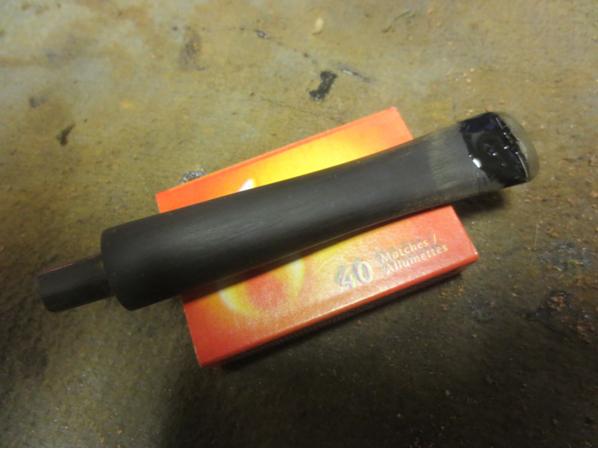
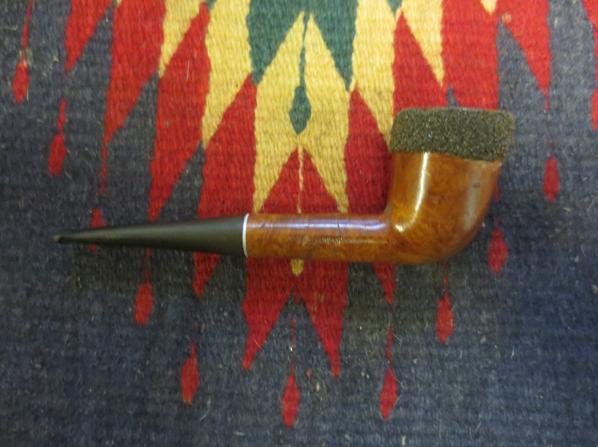
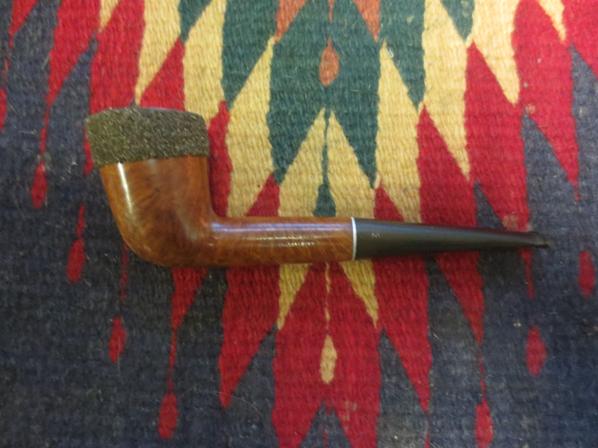
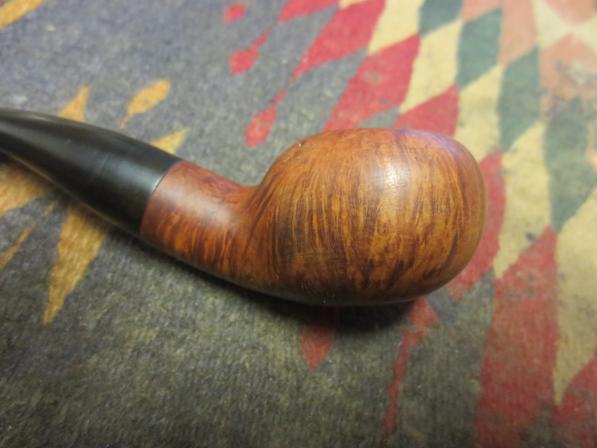
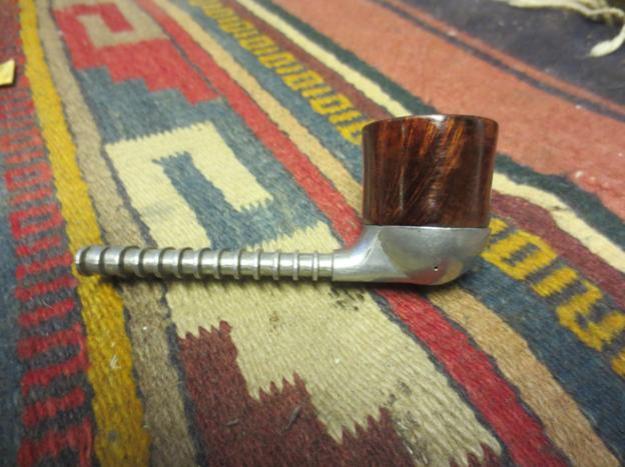
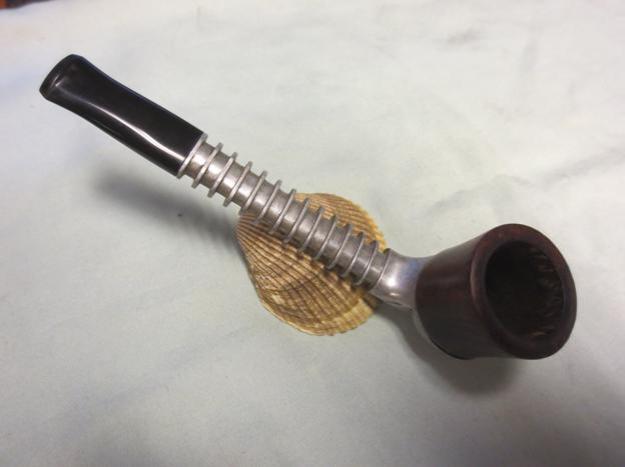
I have had a thing for Calich pipes since John made a new stem for a bowl I bought on Ebay for one of his pipes. It was a labour of love and one which led to several phone conversations and correspondence with John. He was a great guy and a definite loss to the Canadian pipe smoking community. Whenever I come across one of his pipes in need of work I try to purchase it and restore it. The pipe I am writing about at this time is a Calich Hand Made Rhodesian that is stamped that way on the underside of the shank. It also has a 04 stamping. The photos below were shown by the eBay seller. The bowl appears to be in great shape. The stem is slightly oxidized and the seller noted that there was a hole in the top side of the stem at the button. I knew what I was getting into when I purchased this pipe – or so I thought.Calich1
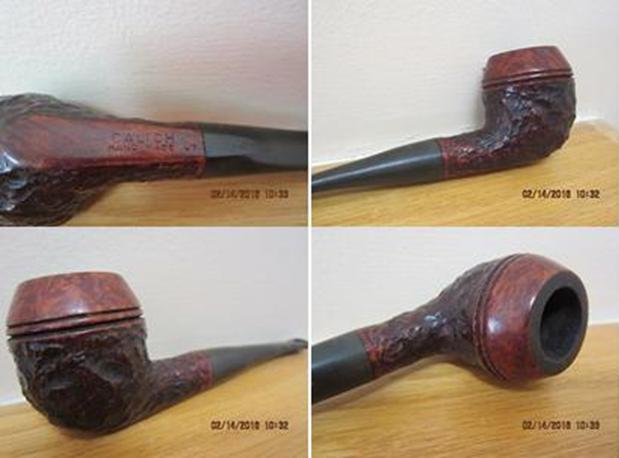
I have written several blogs about Calich pipes that help give an idea of the age of the pipe. While I waited for the pipe to arrive I reread those pieces to refresh my memory on the stamping. I have included the links to the blogs below.

https://rebornpipes.com/2015/03/03/one-of-my-john-calich-pipes-a-calich-ee-billiard/

I summarize the dating information from those blogs now: From my research and conversations I learned that John’s pipes were graded 3E – 8E. The retail prices for them ranged from $145.00 to $500.00. Each pipe was stamped “CALICH” and given an E grade. His earlier pipes were graded from 3-14 and had a single, tiny silver dot applied to the top of the stem. More information can be found at the Pipedia website by clicking on this link. http://pipedia.org/wiki/Calich This information told me as expected that the pipe I had was an earlier one.

I vaguely remembered that I had found further information but could not remember it so I read the next blog I wrote. https://rebornpipes.com/2014/03/21/reflecting-on-my-collection-of-john-calich-pipes/ There the information honed in on the date more closely. I quote from that blog now: I did find out some further information on the dating of Calich pipes as the information on Pipedia was not complete. What I found was very helpful. His early pipes were graded with numbers from 3 – 14. By the late 1980’s Calich introduced 15, 16, and even one 17. In the mid-90’s the grade system changed employing a number of E’s. The more EE’s the higher the grade. From that information I knew that the pipe I had was not only an earlier one but came from early in the 1980s.

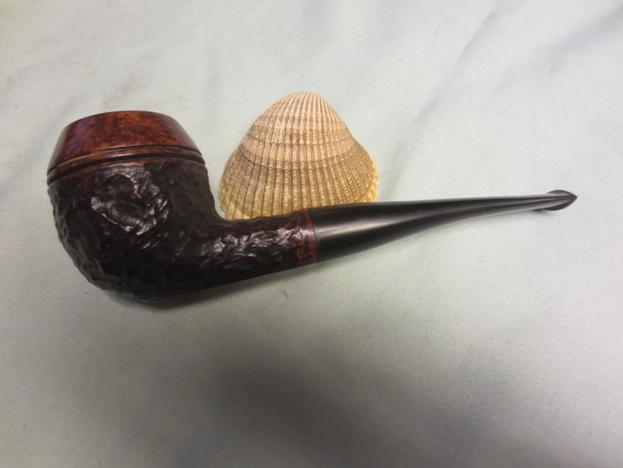
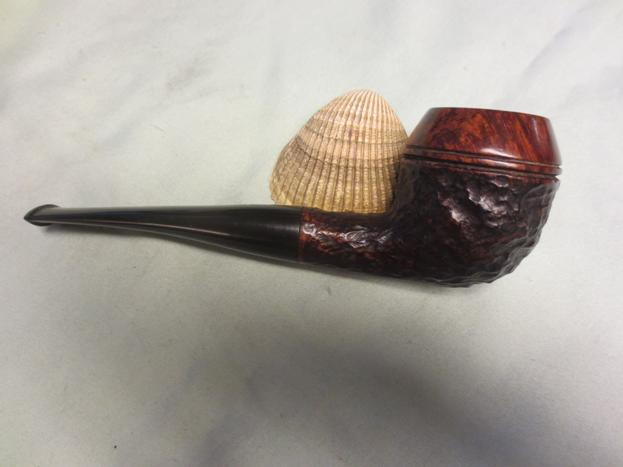
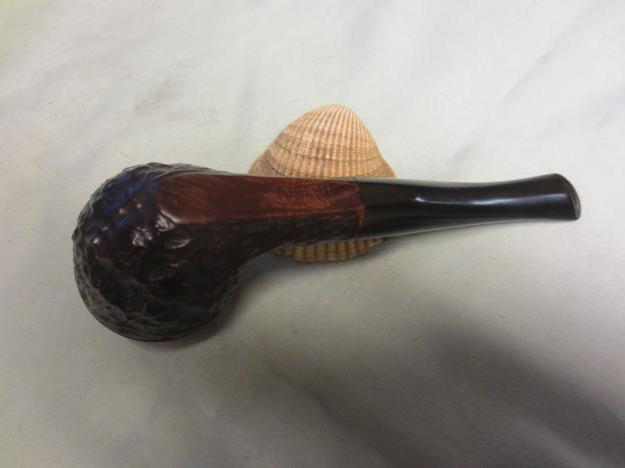
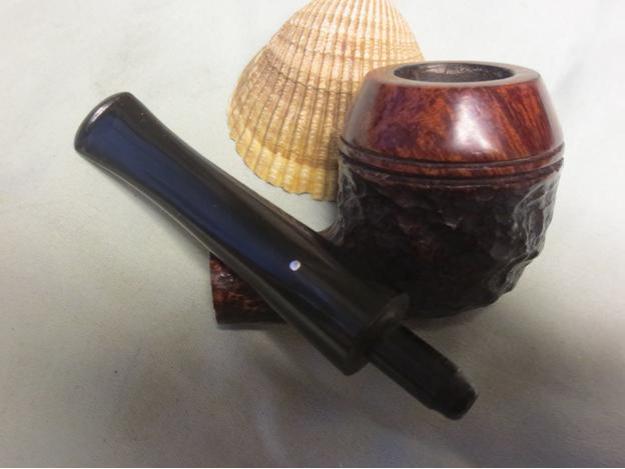
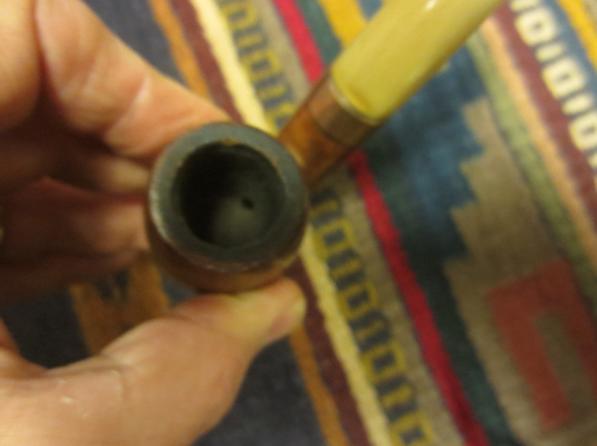
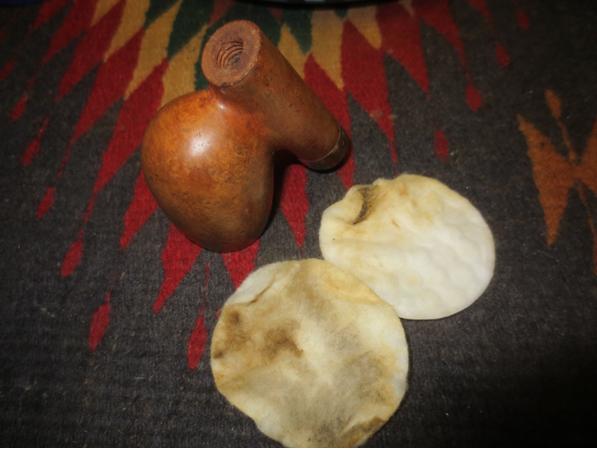
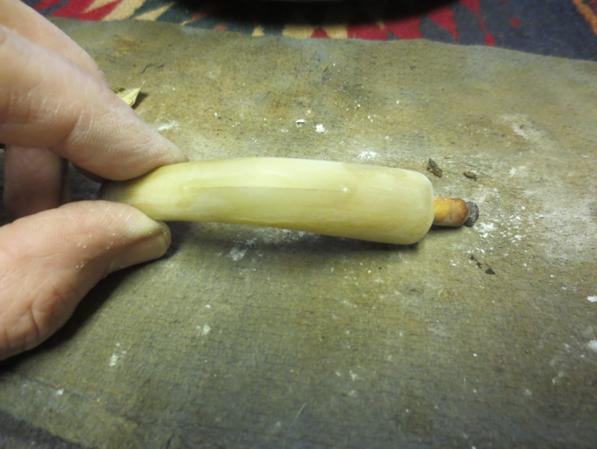
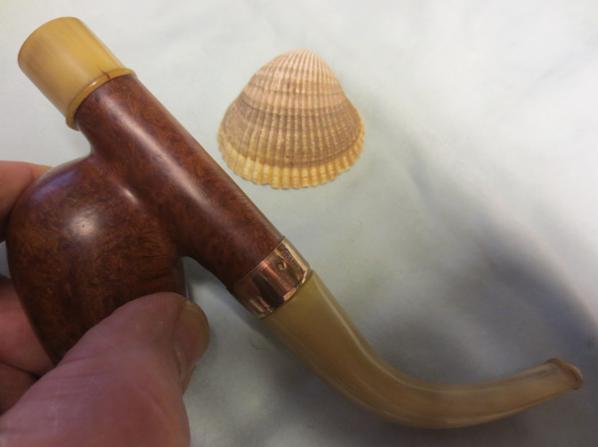
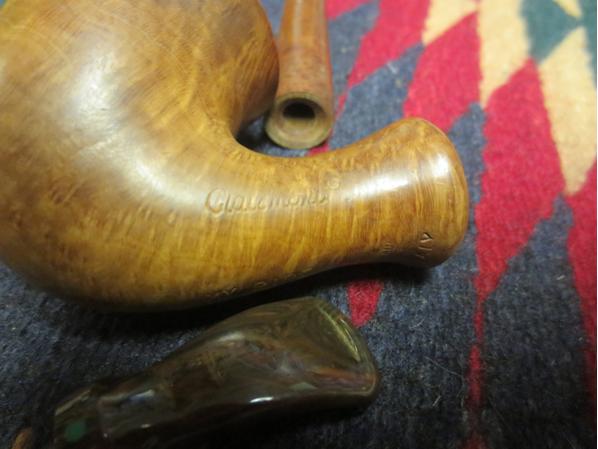
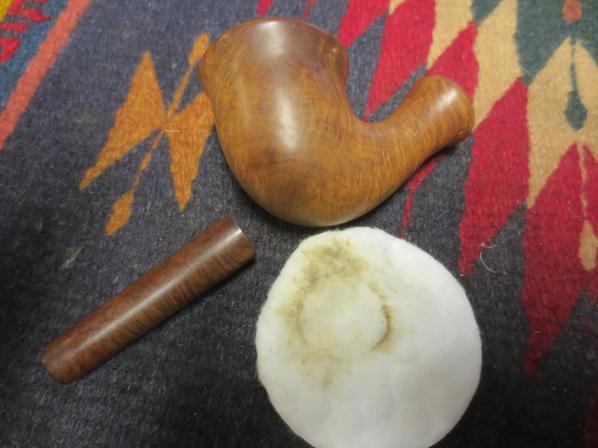
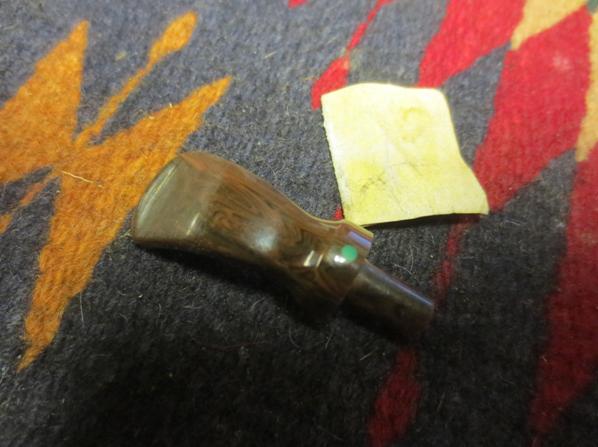
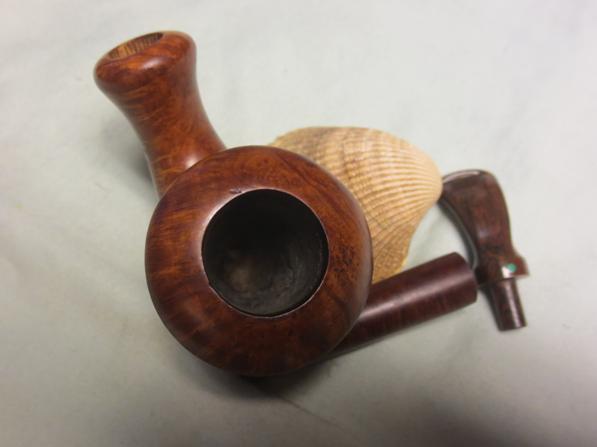
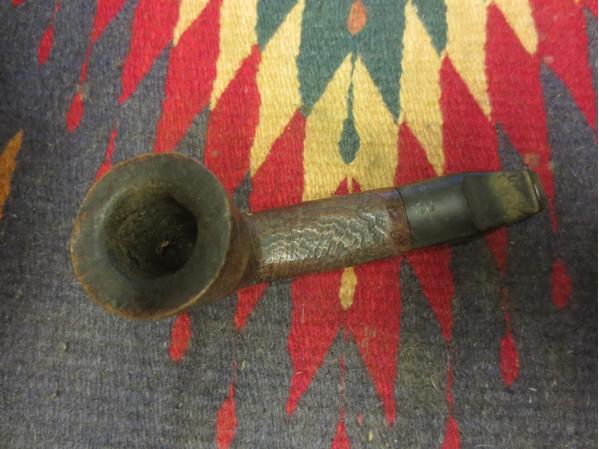
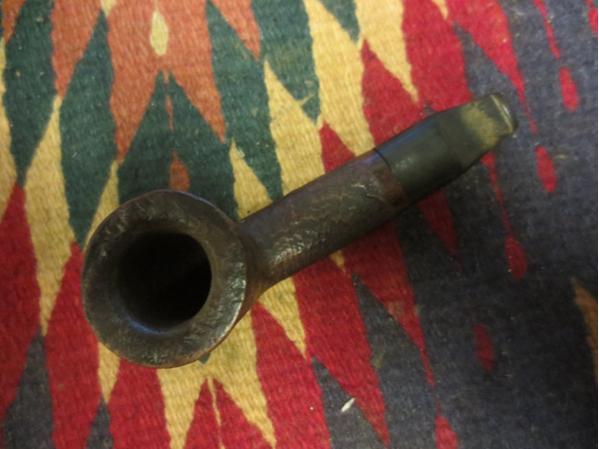
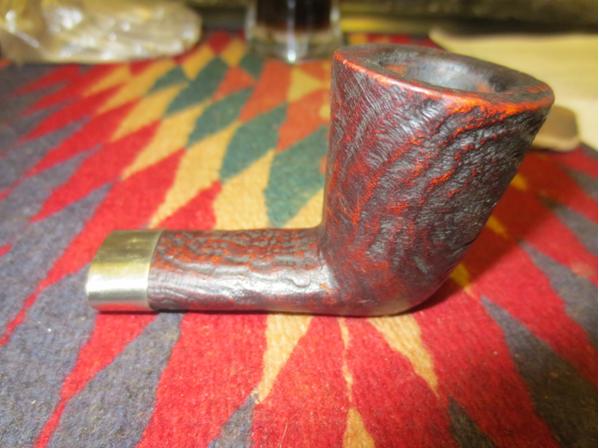
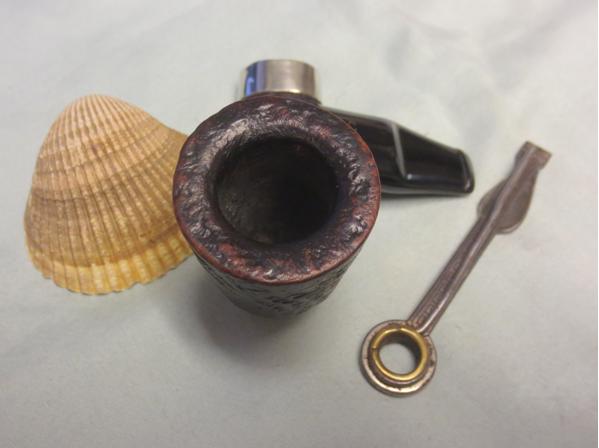
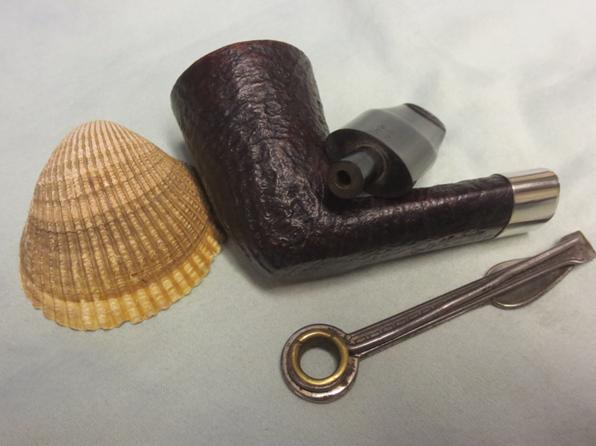
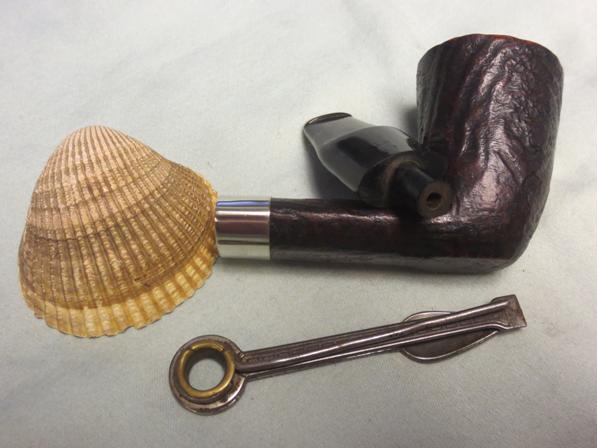
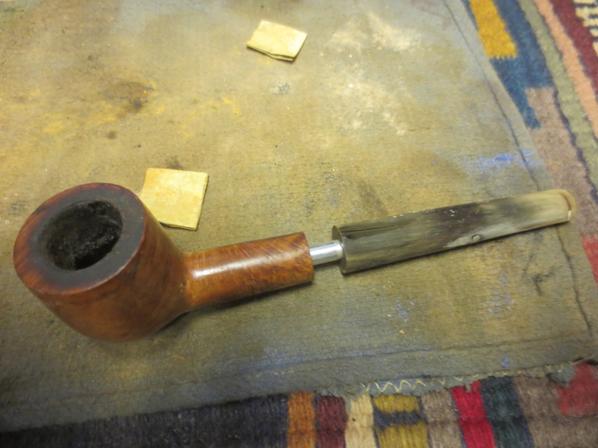
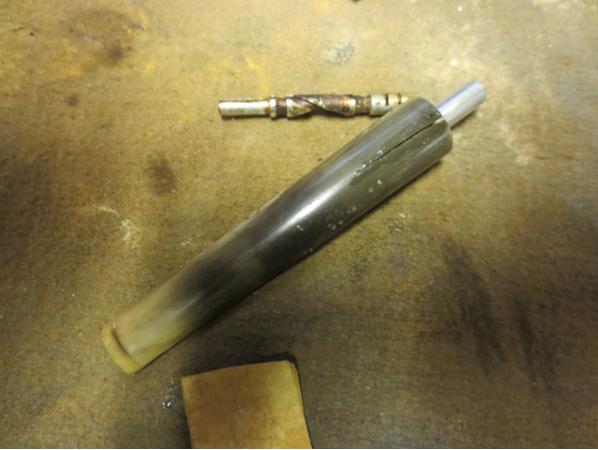
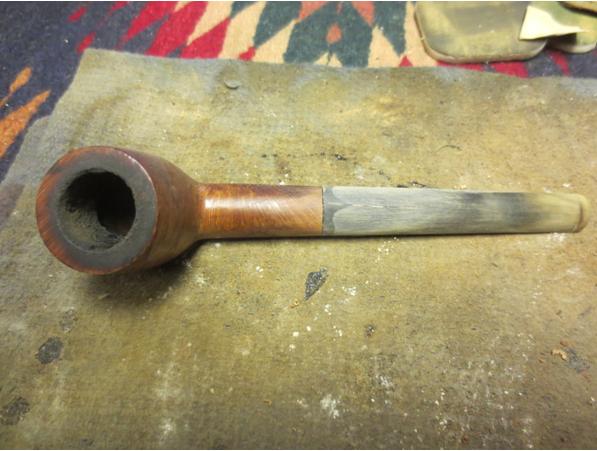
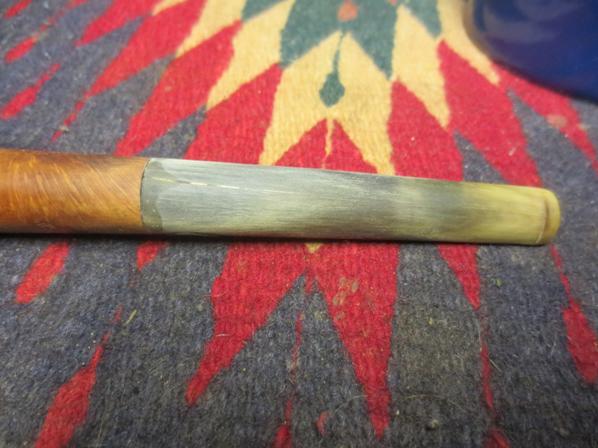
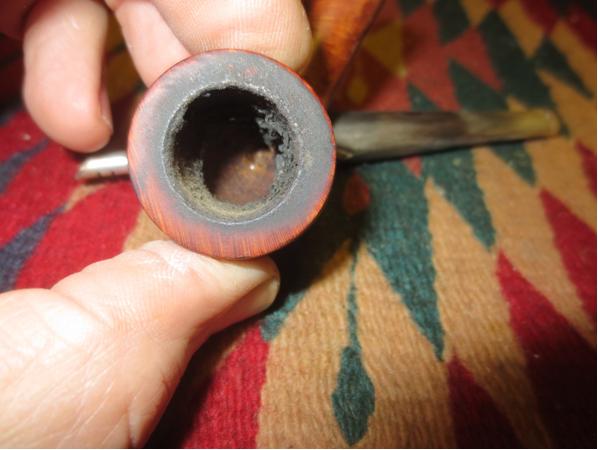
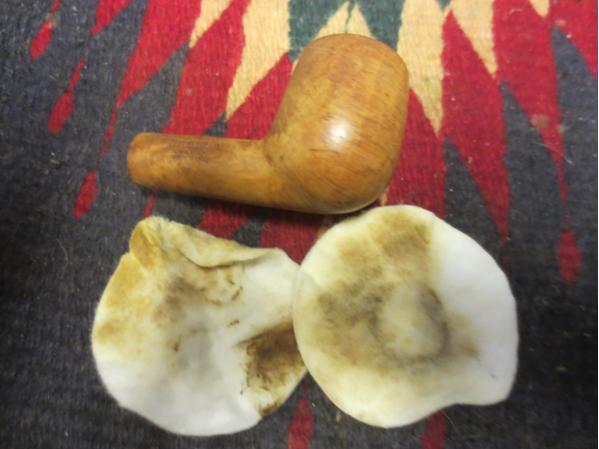
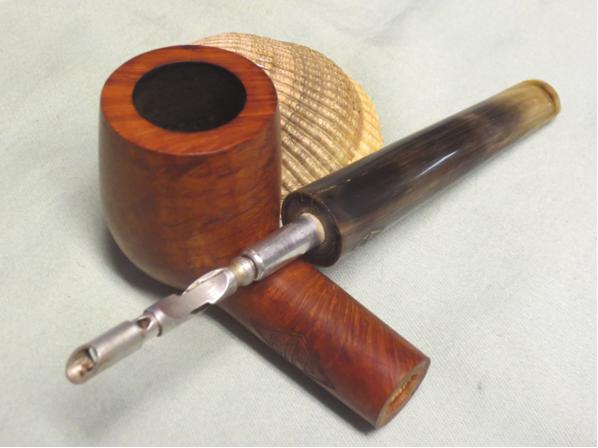
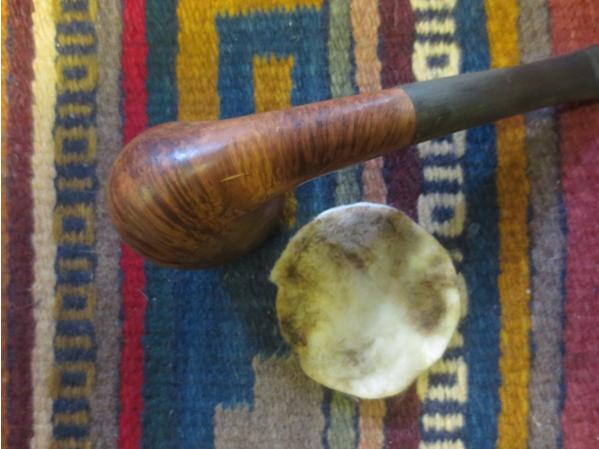
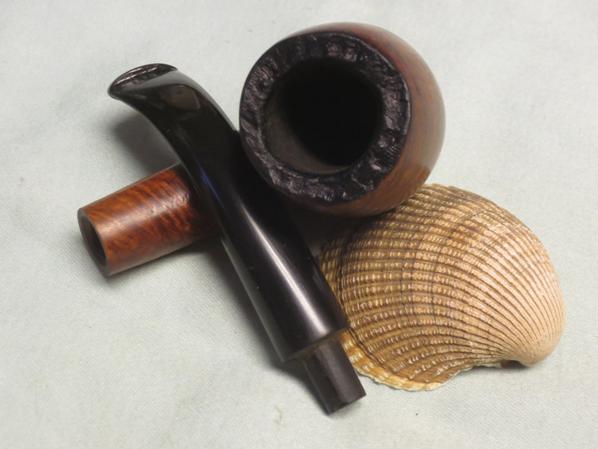
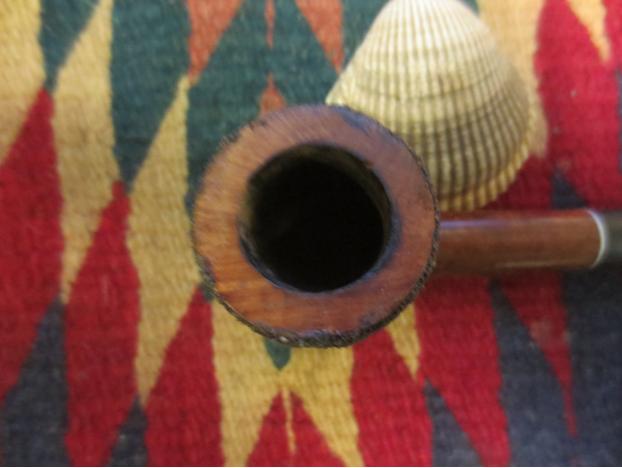
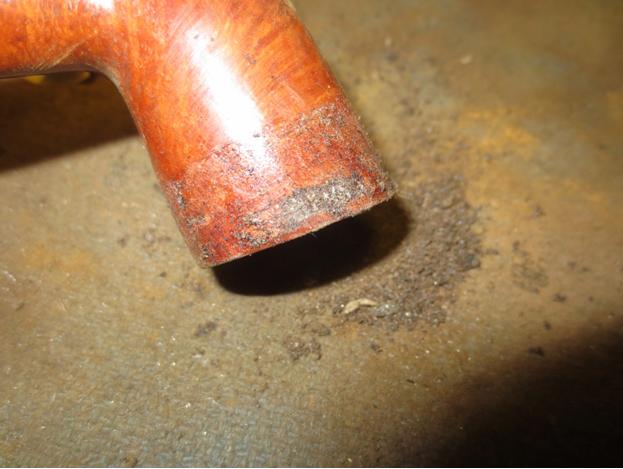
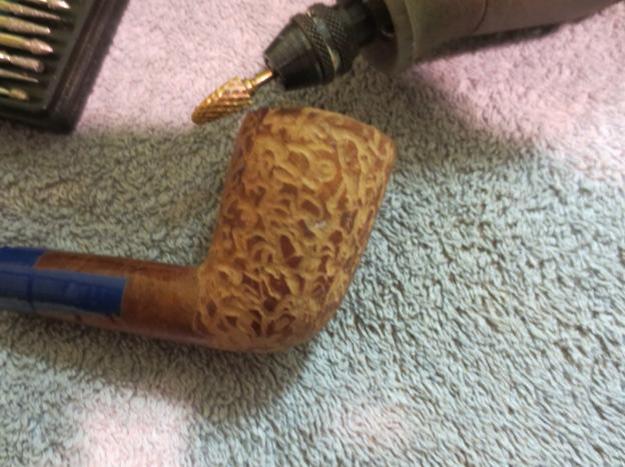
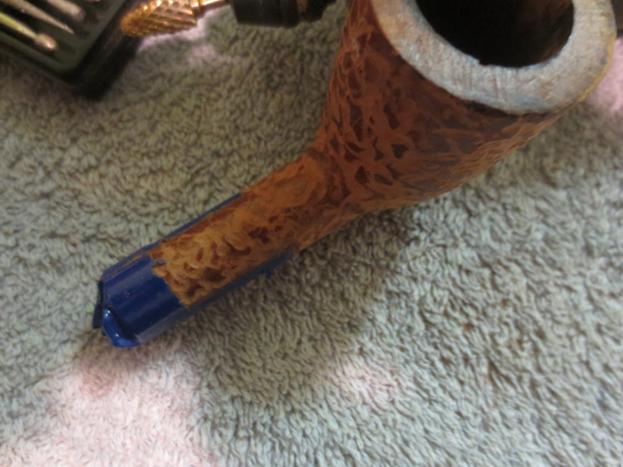
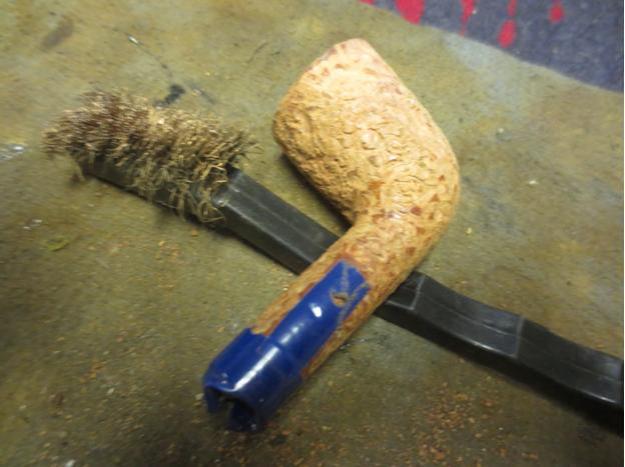
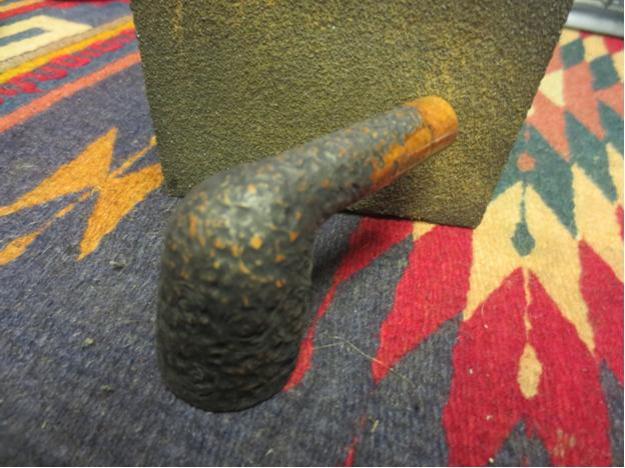
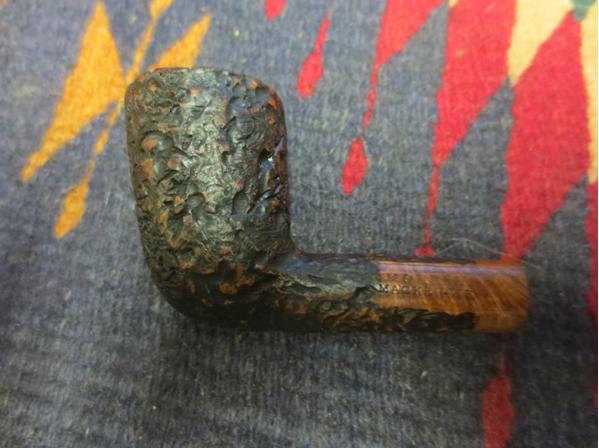
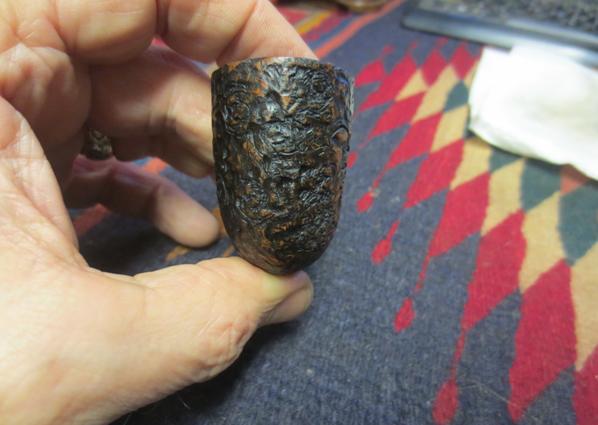
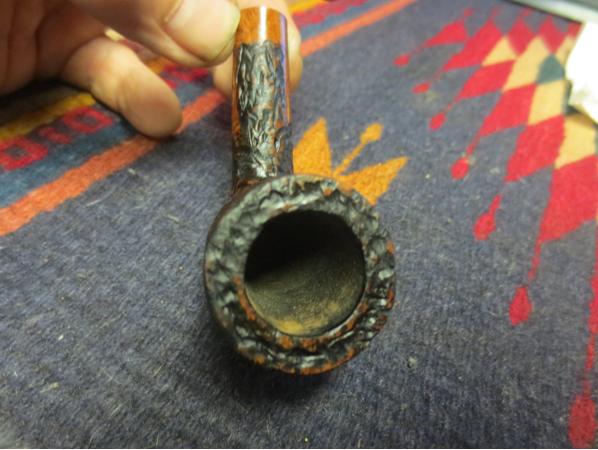
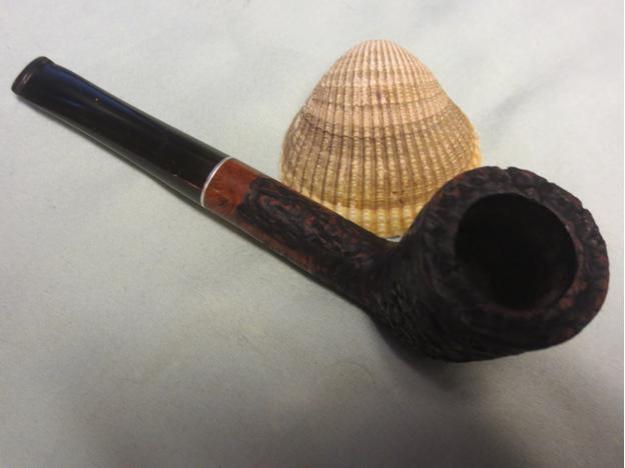
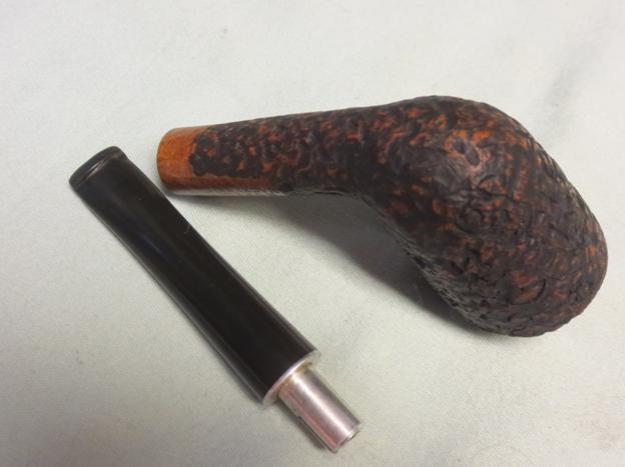
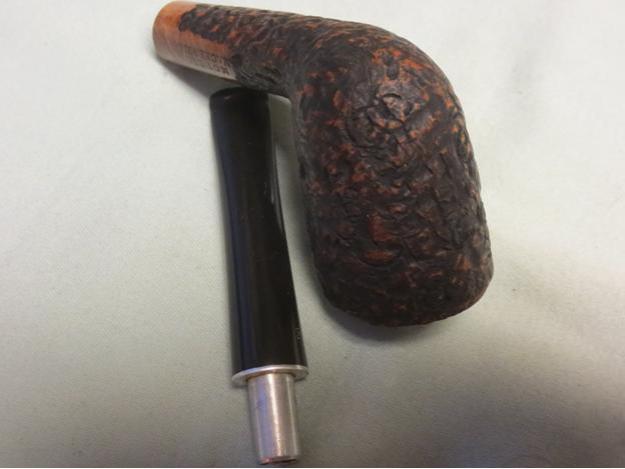
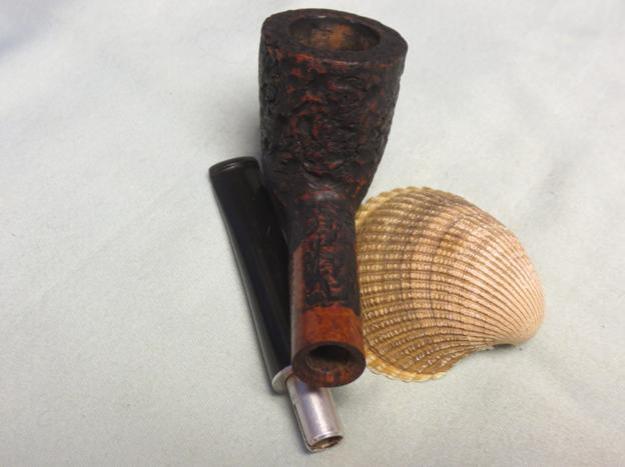
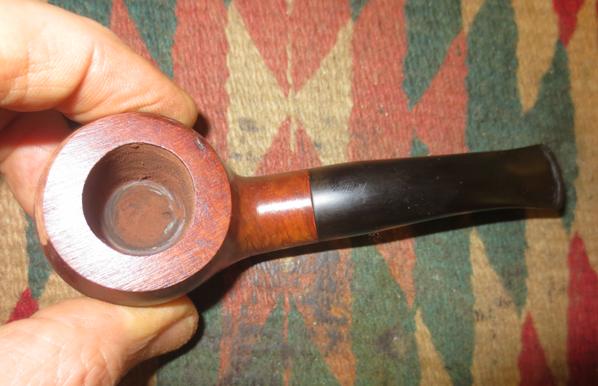
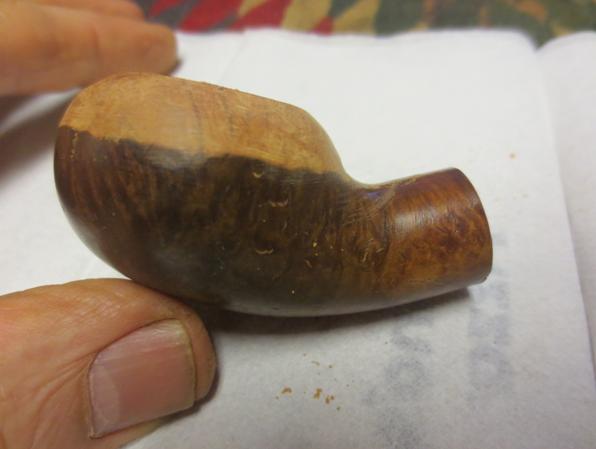
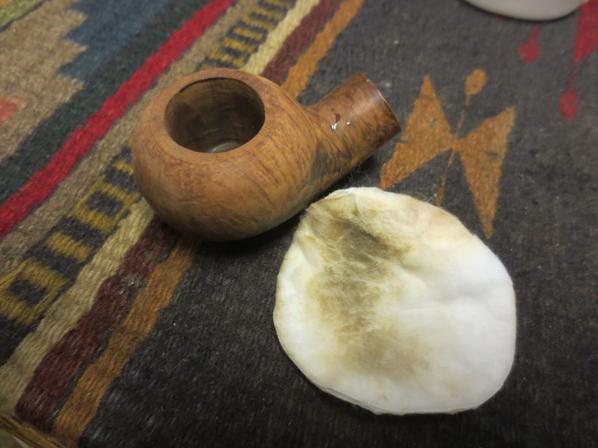
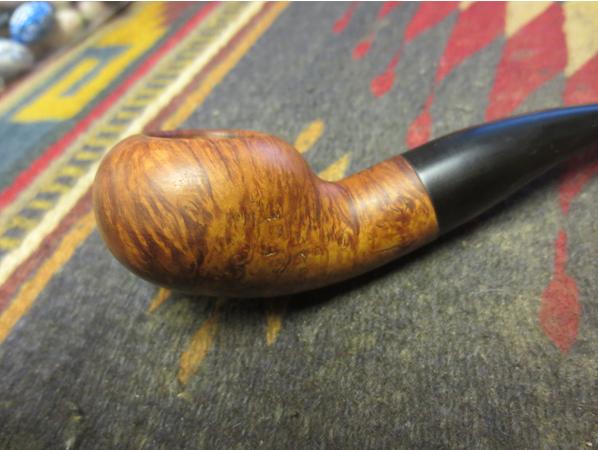
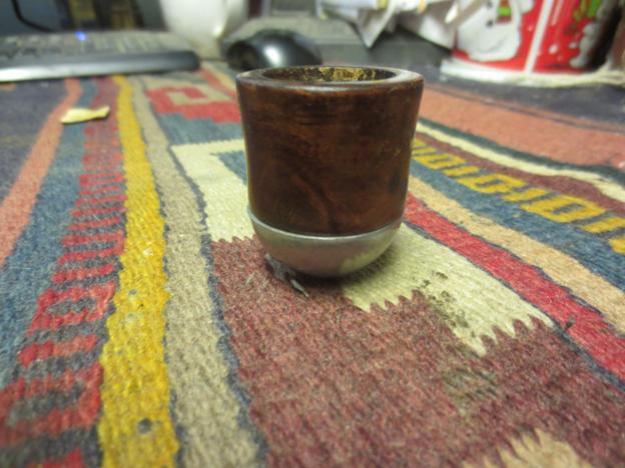
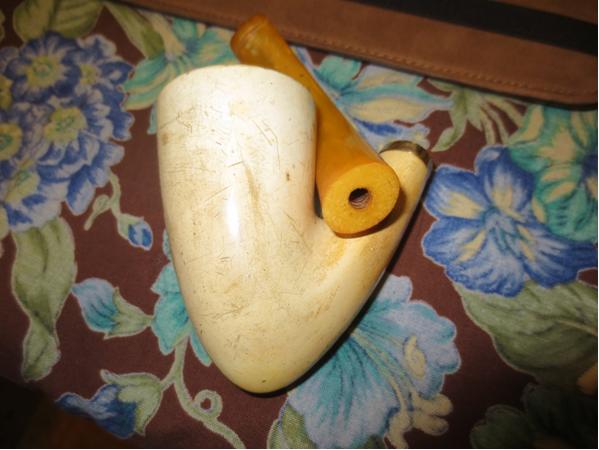
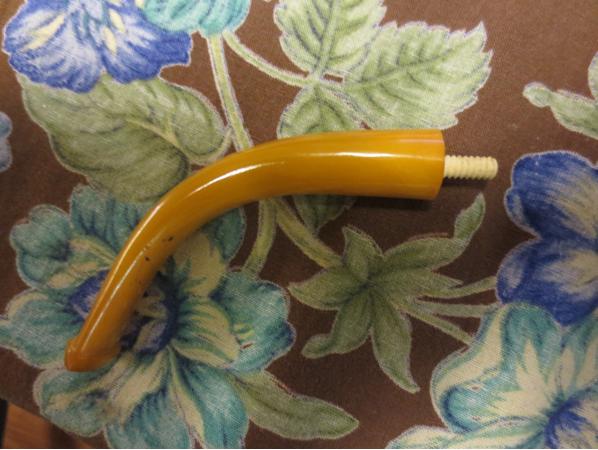
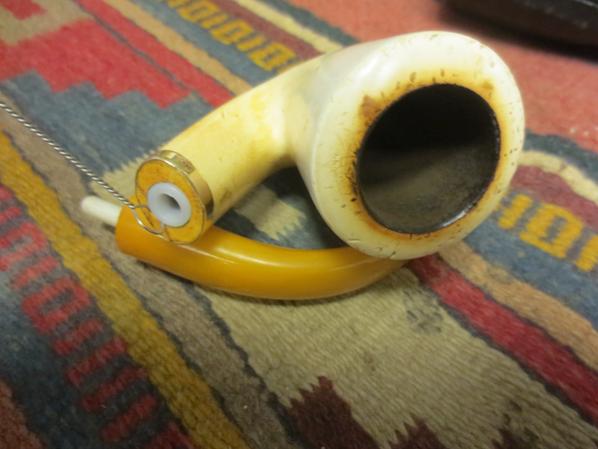
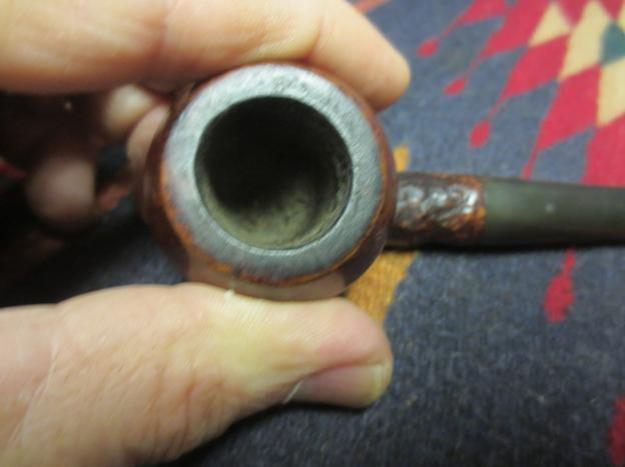
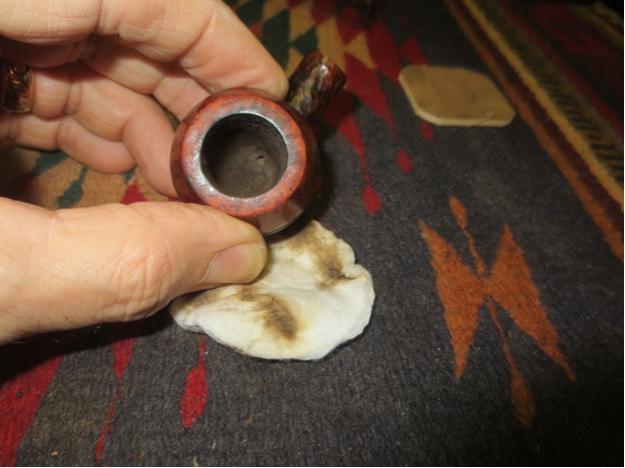
When the pipe arrived I took some photos of it to give a clear picture of what I was going to have to deal with in the restoration of this pipe. The stem was more oxidized than the seller’s photos showed and the finish also showed more debris in the rustication and the double rings around the bowl cap than had appeared in the photos. The rim top looked about the same – there was a thin build up of lava on the flat surface but the inner and outer edges were undamaged.Calich2 Calich3
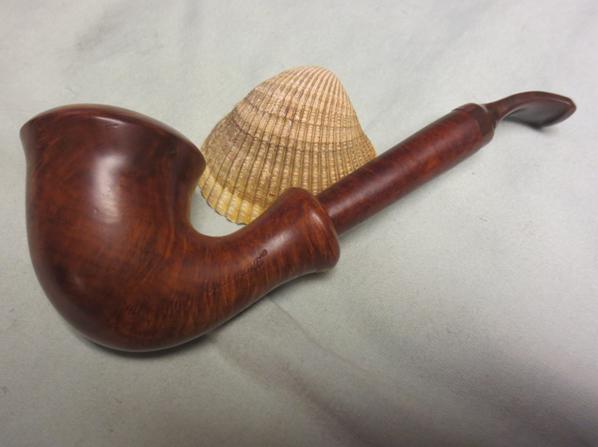
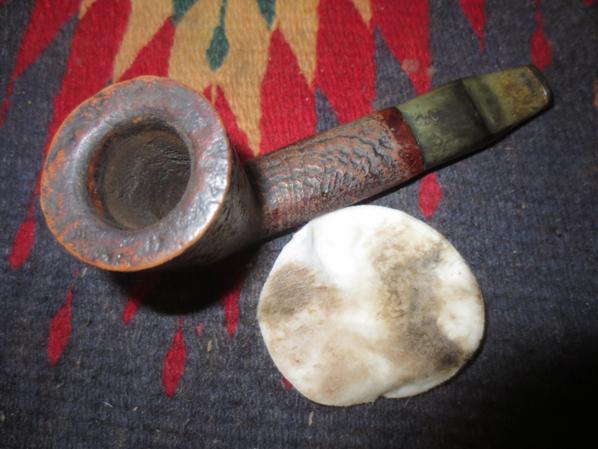
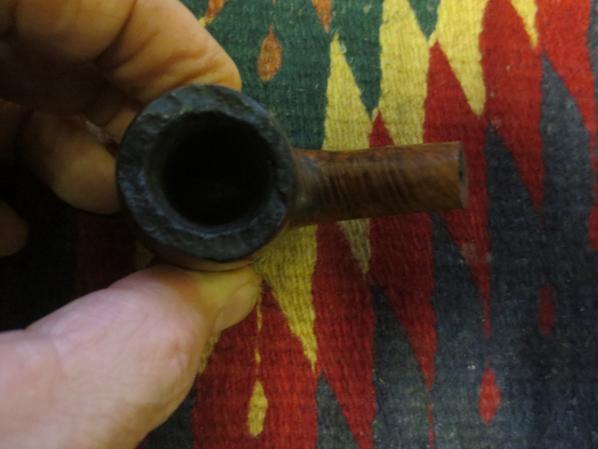
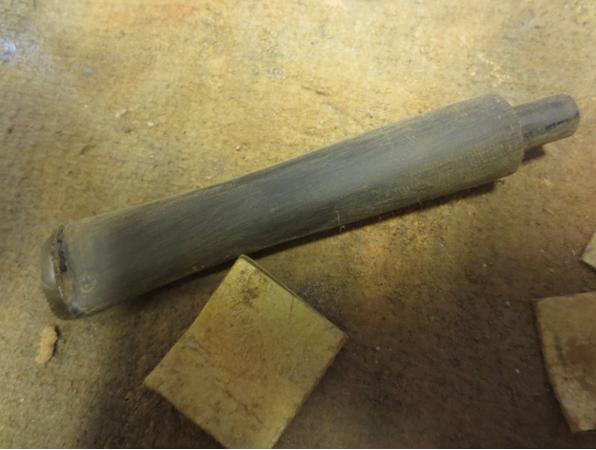
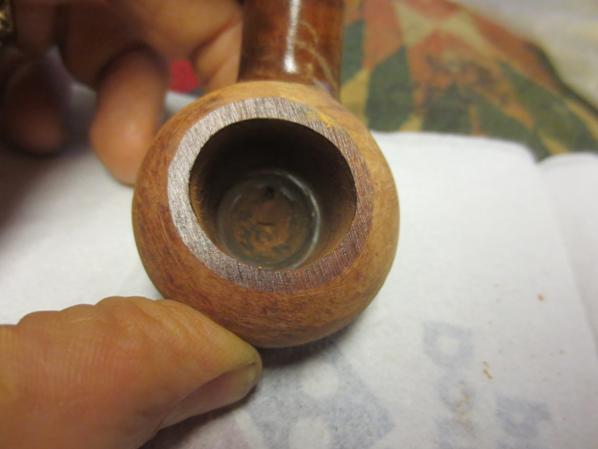
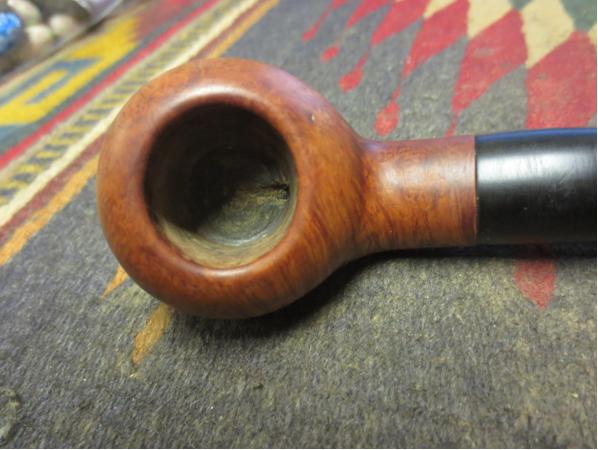
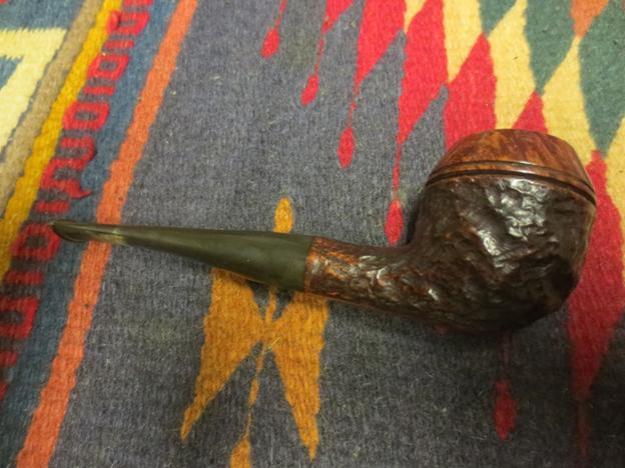
The bowl had a light cake in it and would be easy to deal with. There was no damage to the inner bowl. As I looked over the surface of the bowl it was clear that under the grime the pipe was in pretty decent shape. The big issue was the hole in the top side of the stem at the button.Calich4 Calich5 Calich6
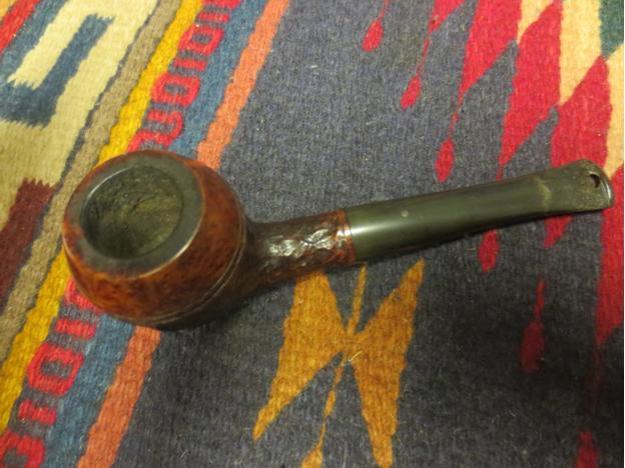
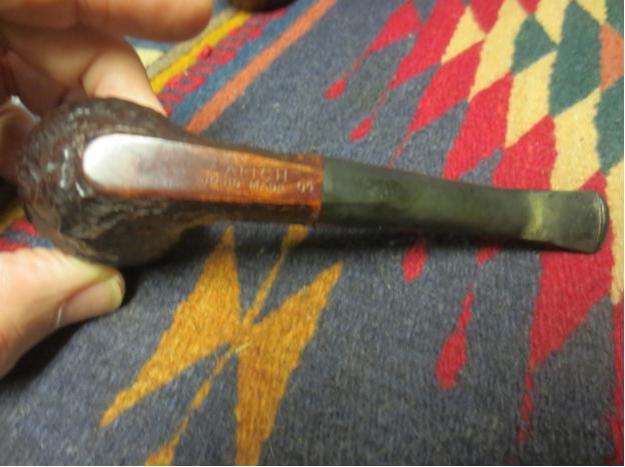
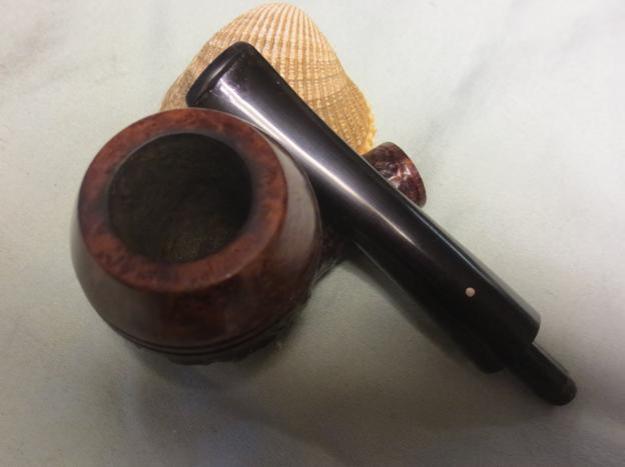
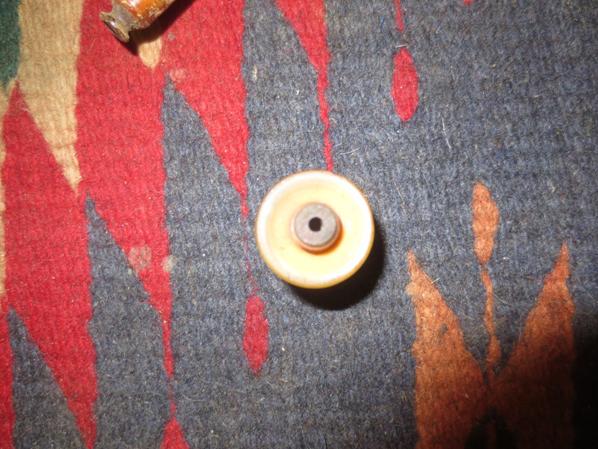
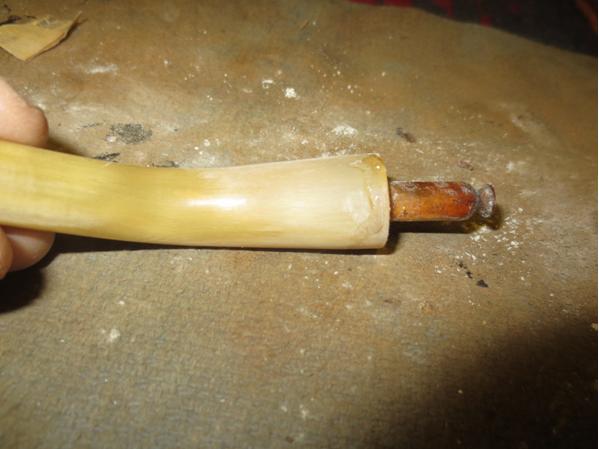
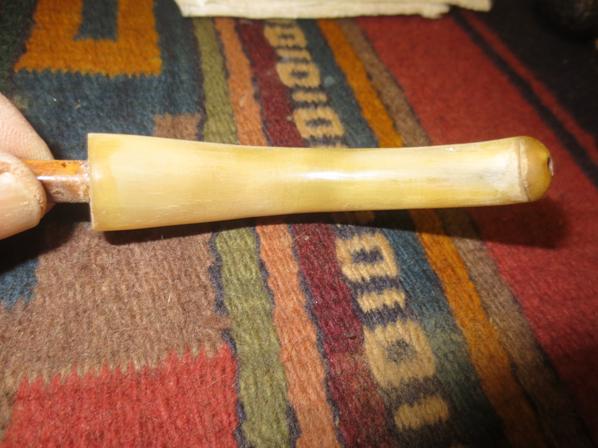
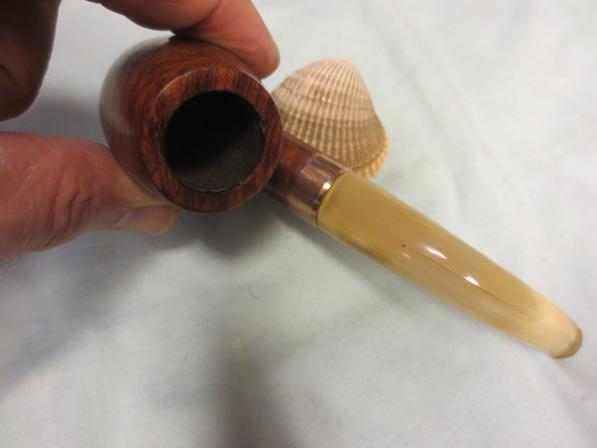
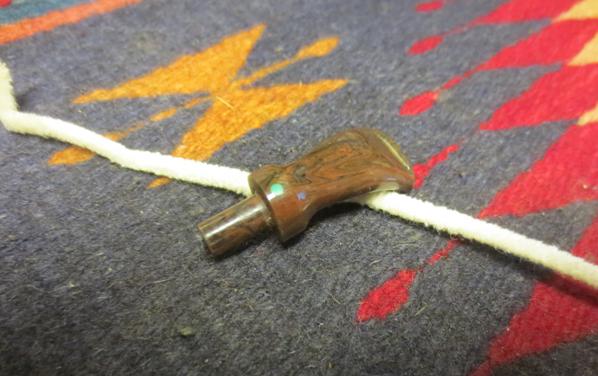
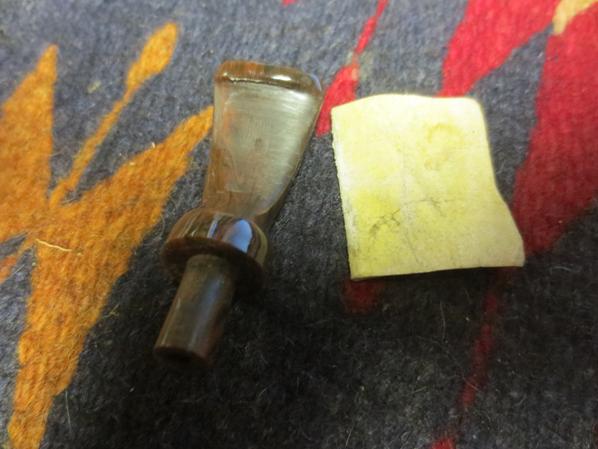
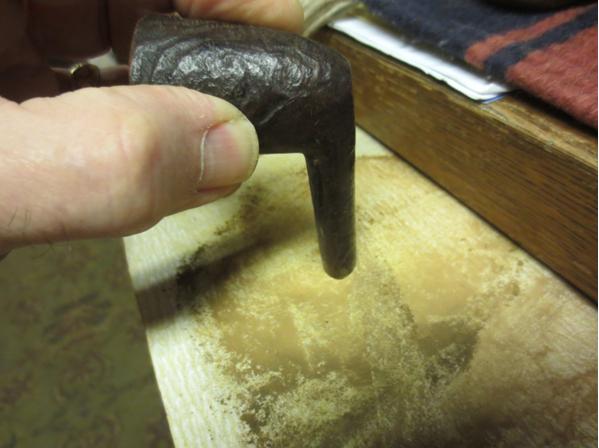
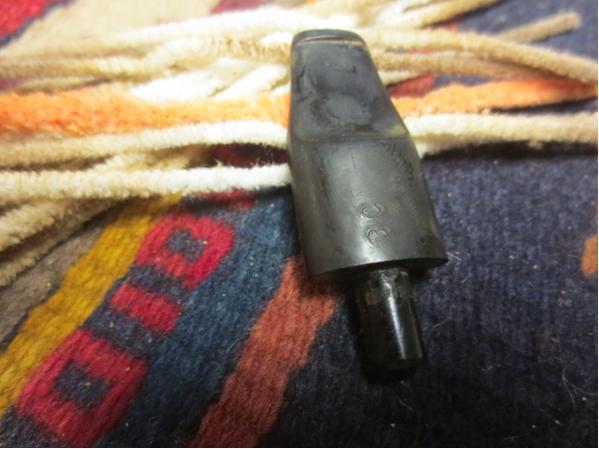
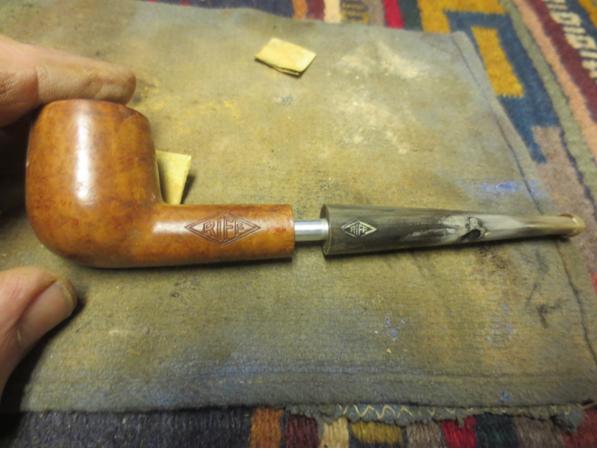
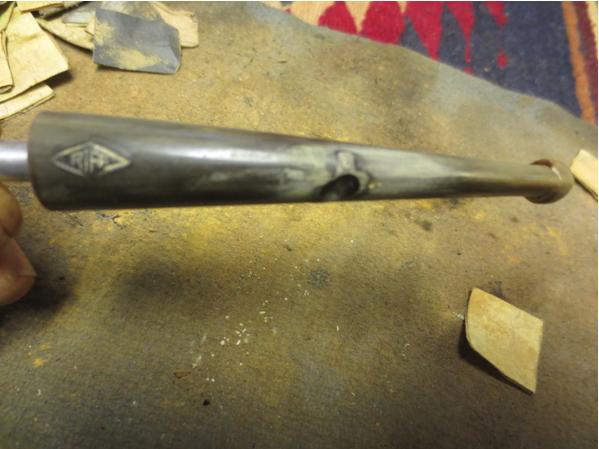
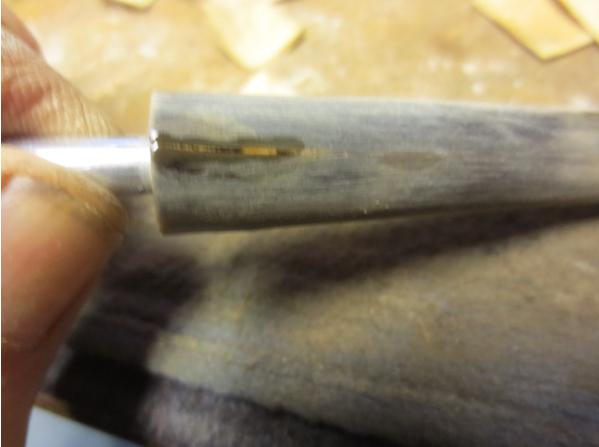
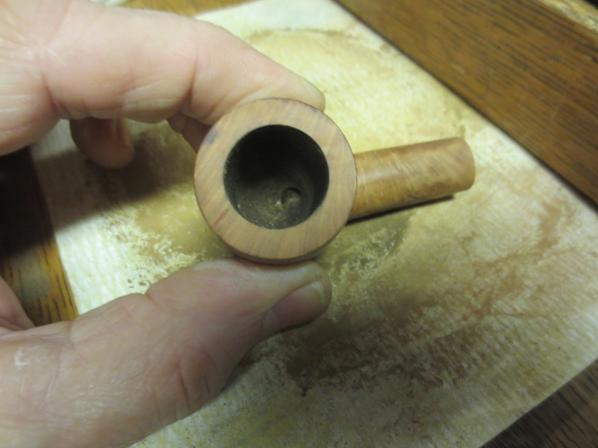
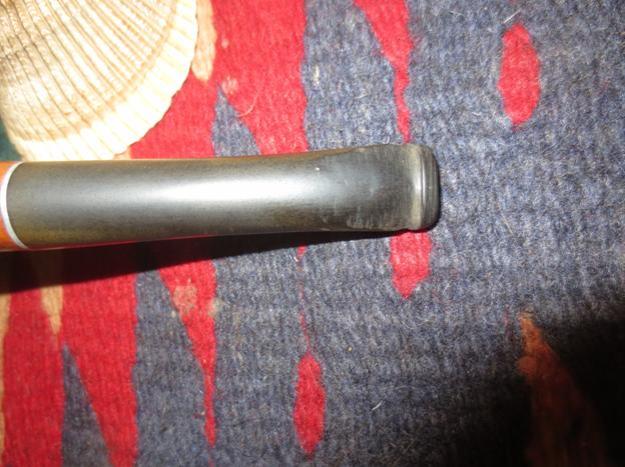
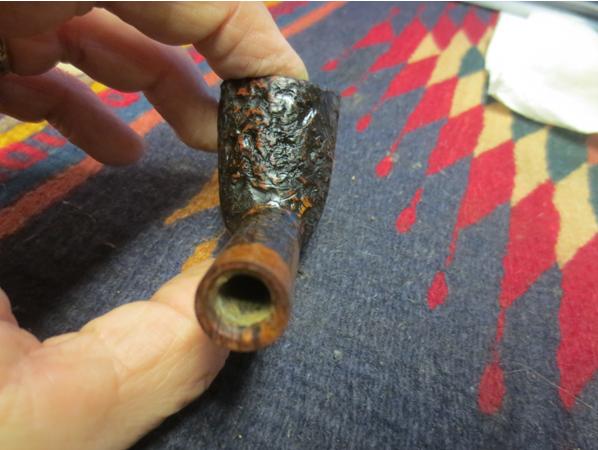
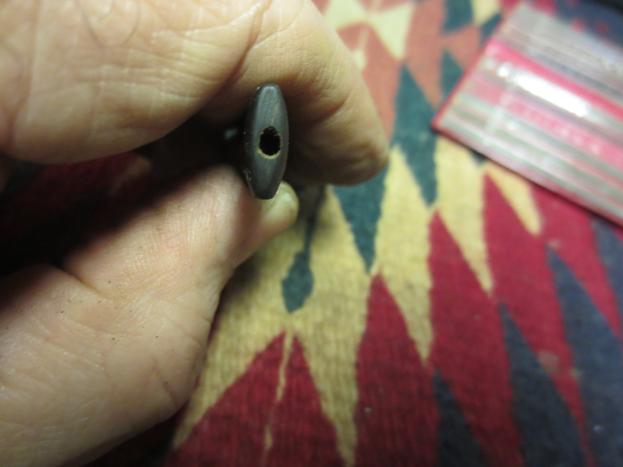
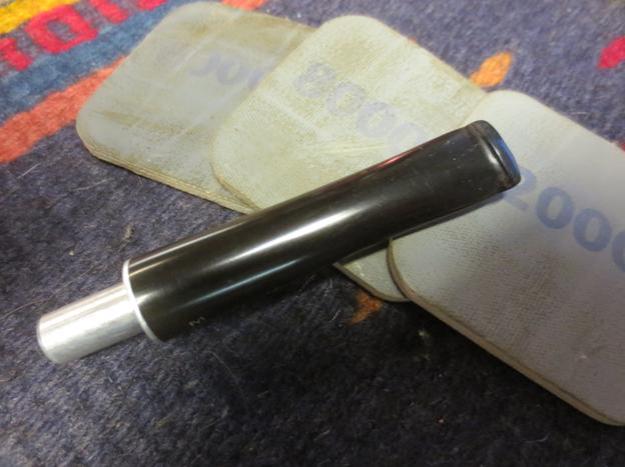
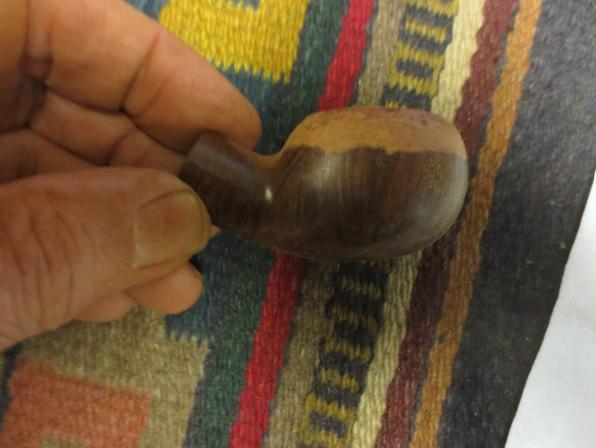
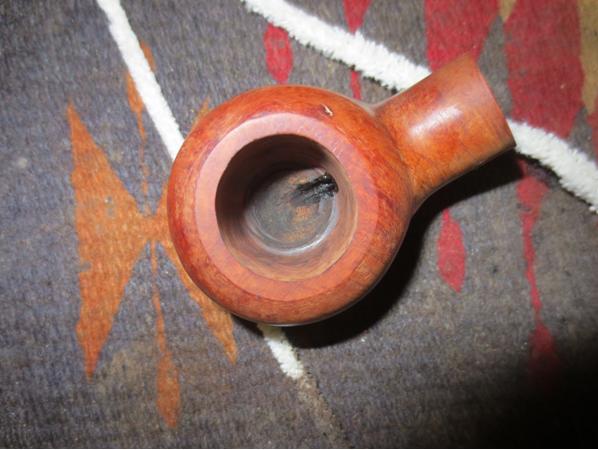
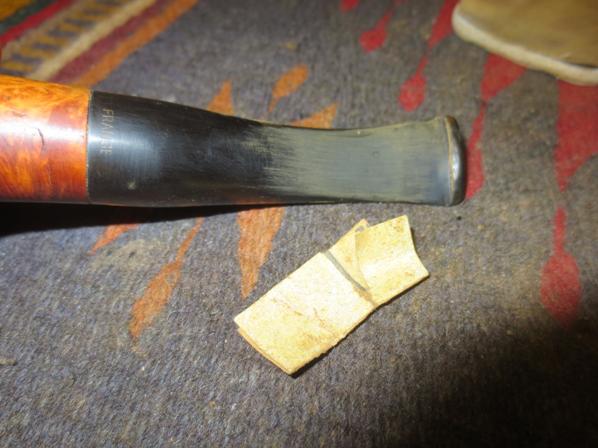
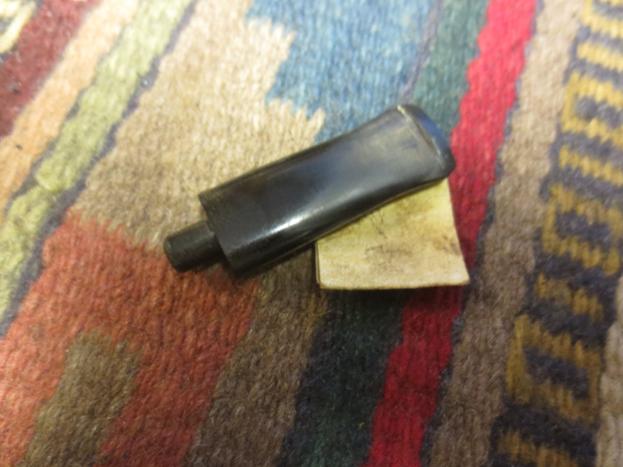
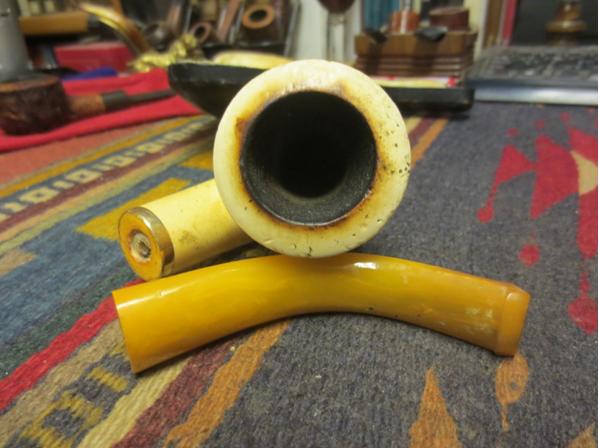
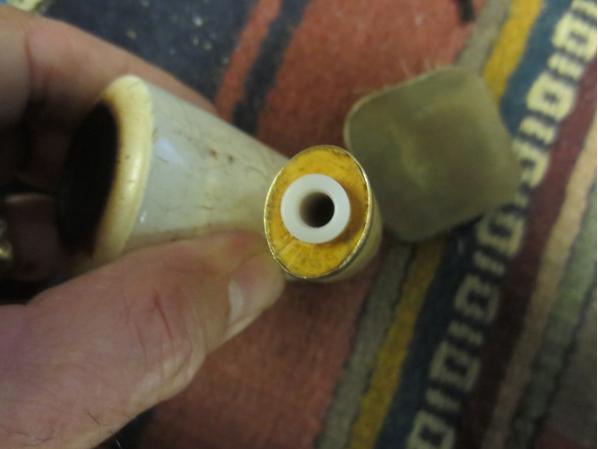
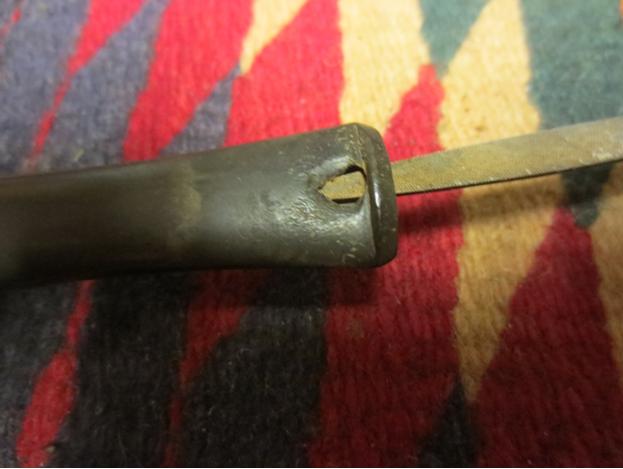
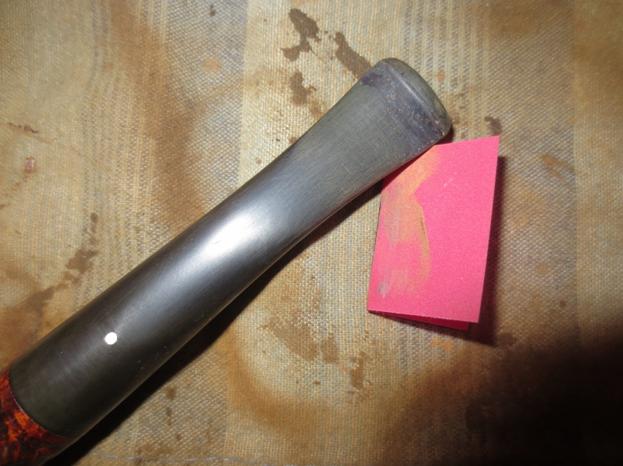
I took a photo of the bite through to show the extent of the damage. The edges of the bite through were also pushed down into the airway on the stem constricting the airway so that a pipe cleaner would not pass through. The topside of the button was also thinned down considerably and would need to be built up. Calich7 Calich8
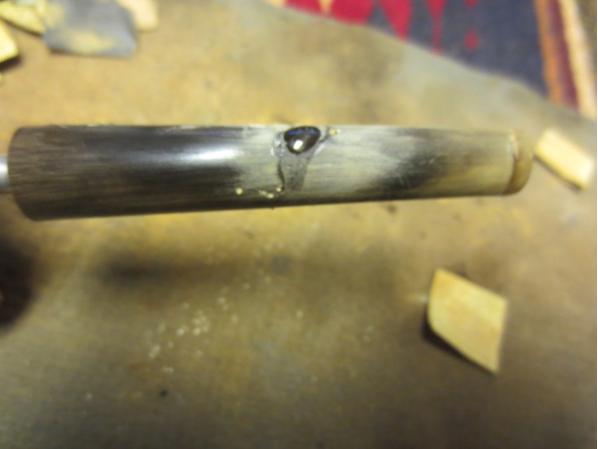
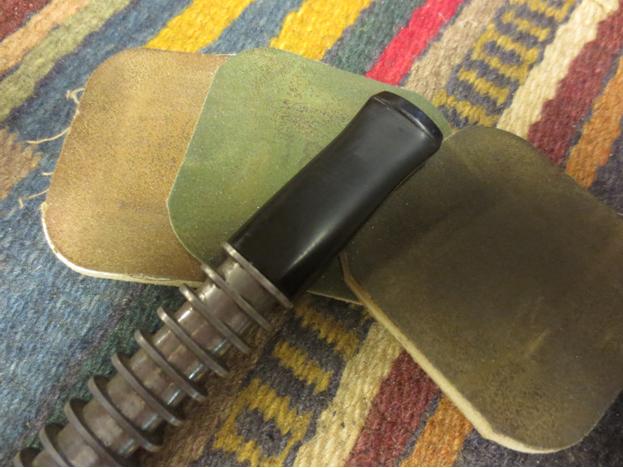
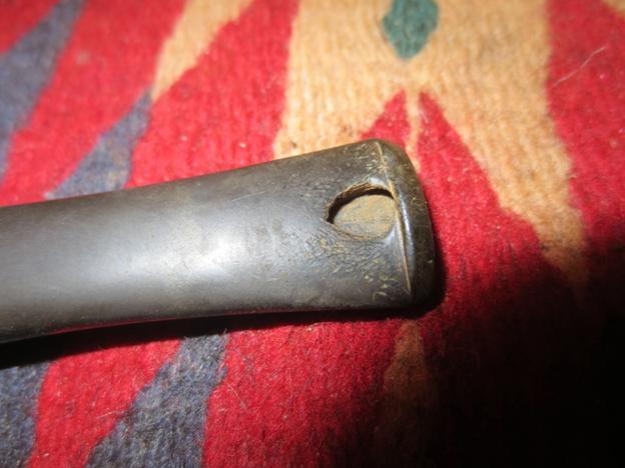
I used needle files and a dental pick to open up the airway and clean up the crushed edges of the bite through. It enlarged the hole but the airway was wide open when I finished. I also roughed up the edges of the cleaned up hole with the needle files to give a rough surface for the repair to bond to.Calich9 Calich10 Calich11
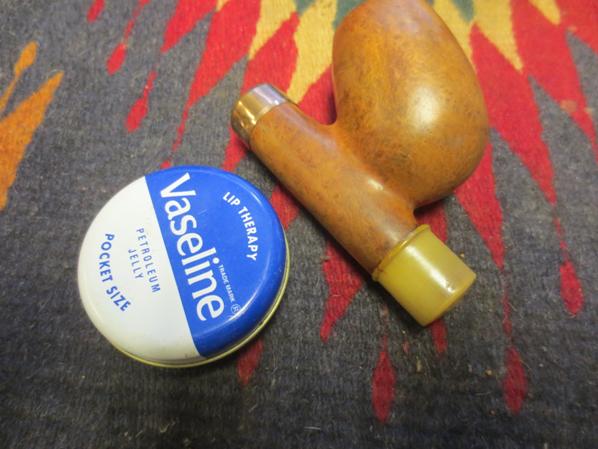
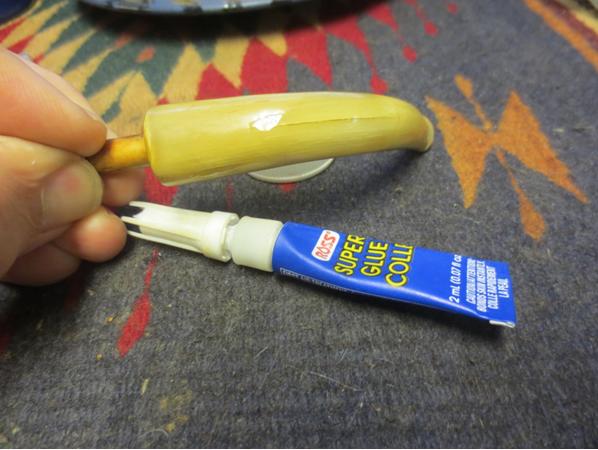
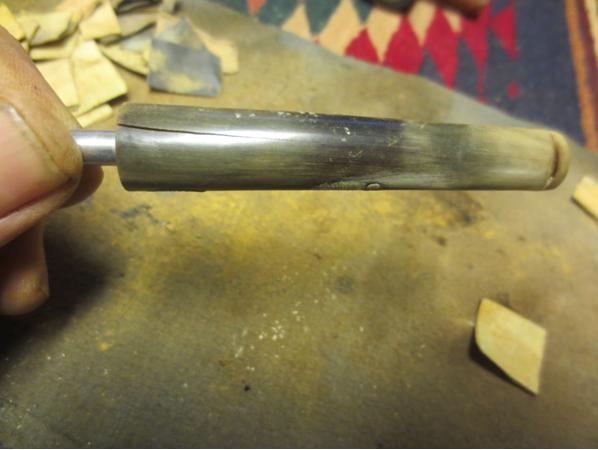
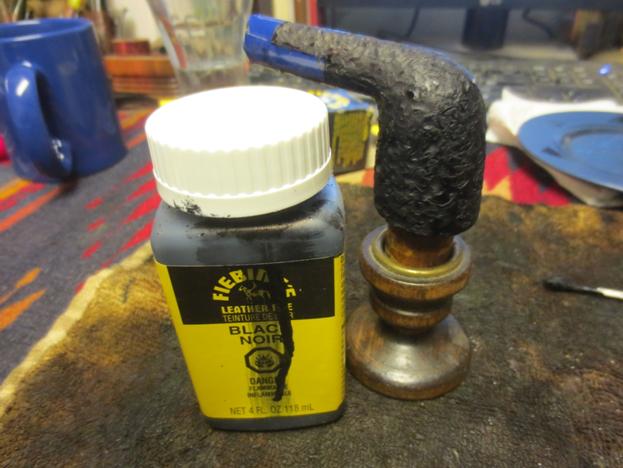
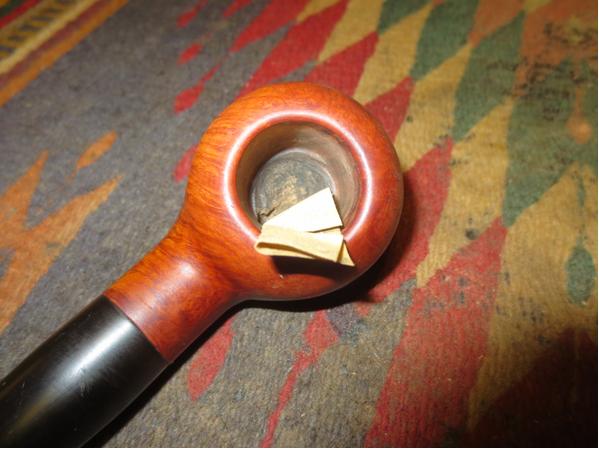
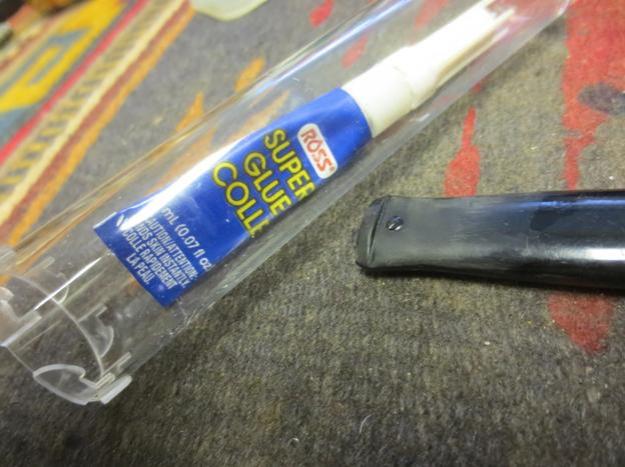
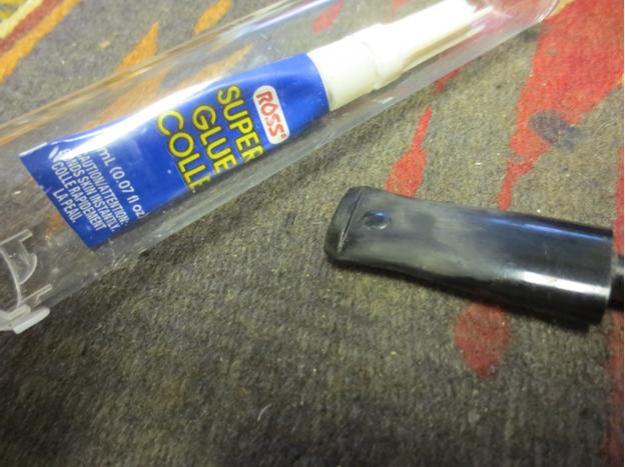
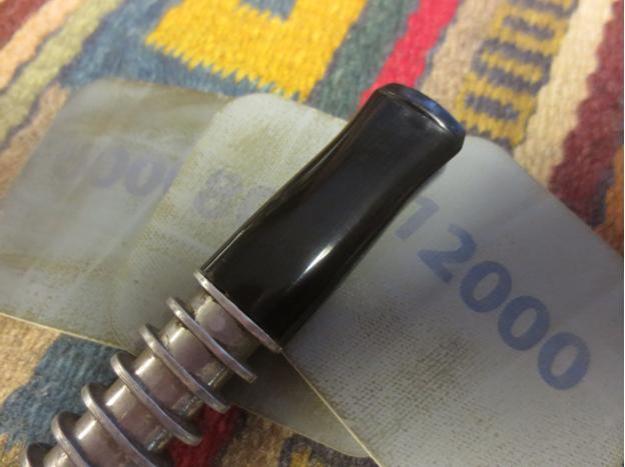
With the stem hole cleaned up I was ready to begin the repair. I cut a wedge of cardboard and covered it with clear tape to make a surface that the glue would not stick to. I inserted it into the airway under the hole and wedged it in place. I mixed a batch of activated charcoal powder and black super glue to make a patching mortar and using a dental spatula applied the material to the hole and the top of the button to build it up. I sprayed it with some accelerator to harden the surface so I could continue to work on the pipe and removed the cardboard wedge.Calich12 Calich13
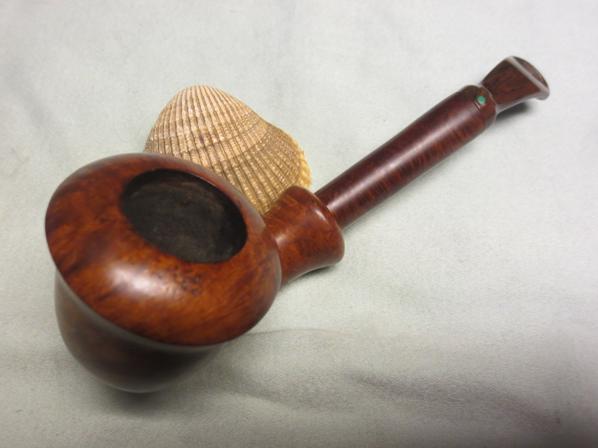
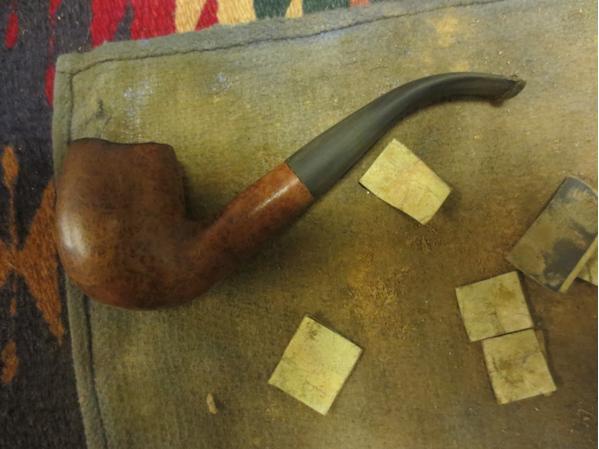
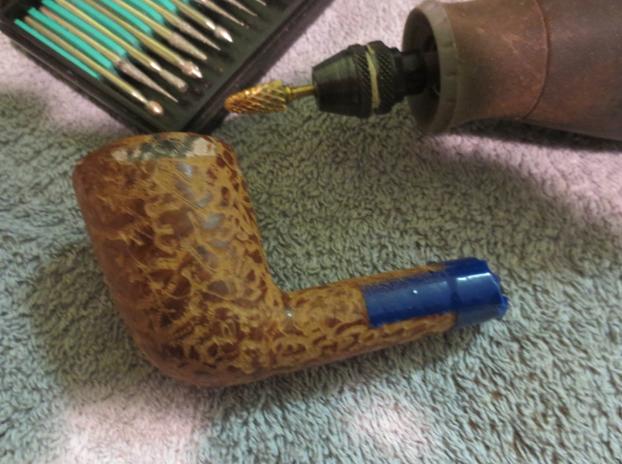
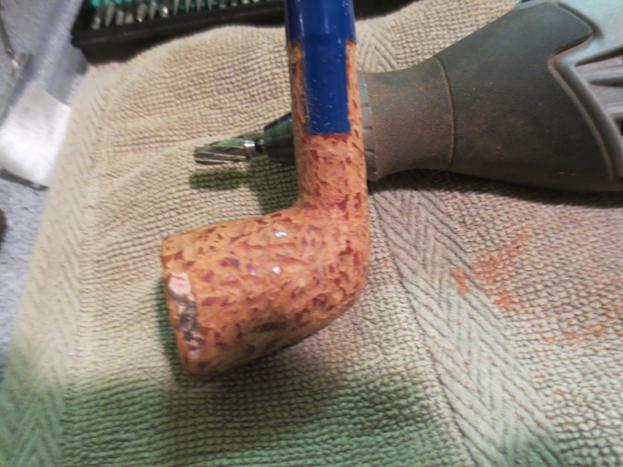
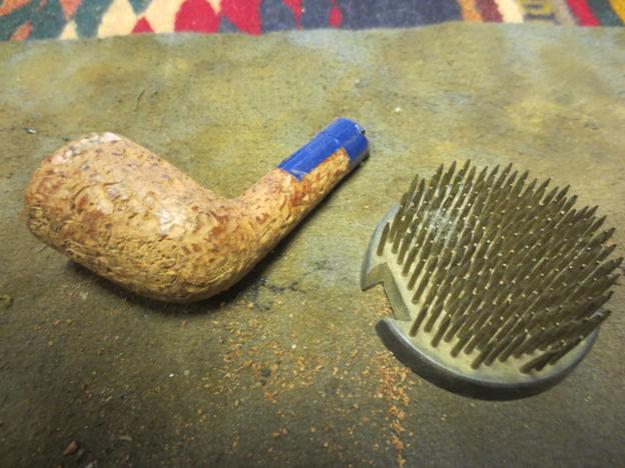
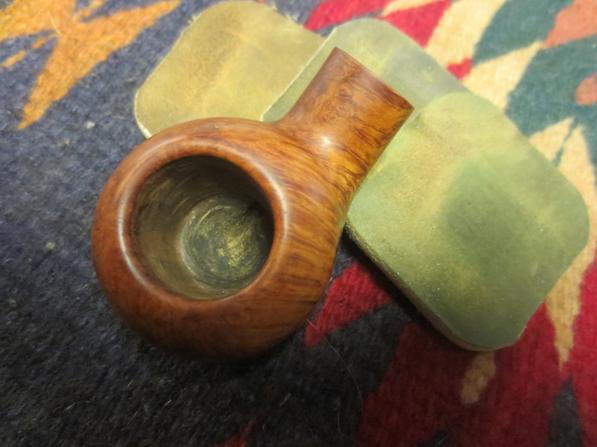
I reamed the bowl with the Savinelli Pipe Knife to clean out the thin cake. You can see from the photo that there was not much of a build up so it was quick job.Calich14
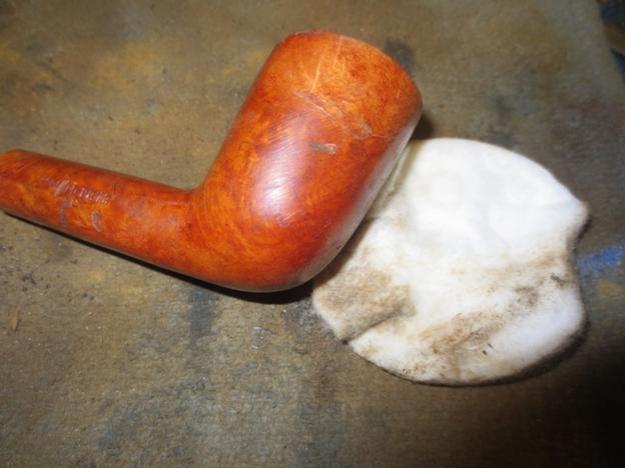
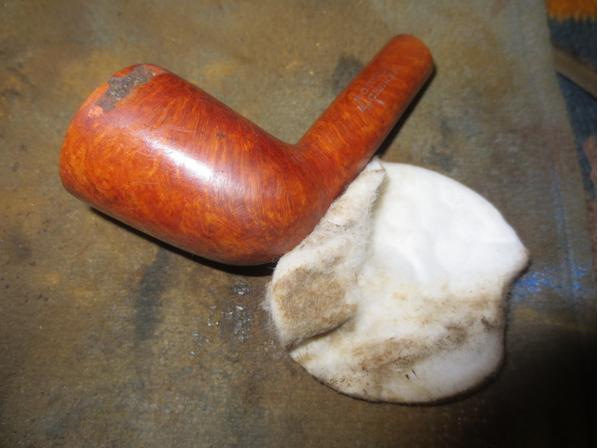
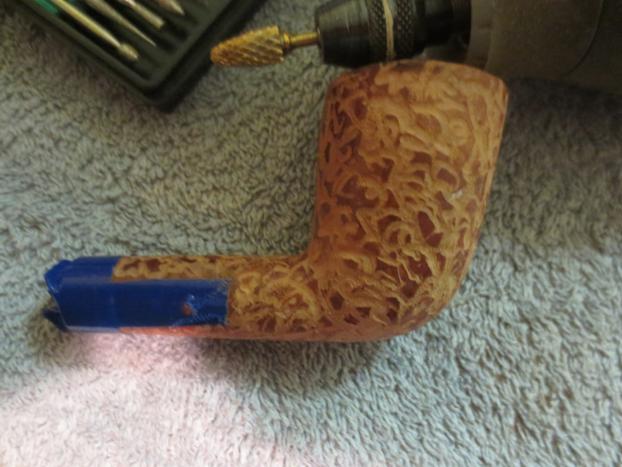
I set the stem aside and used a dental pick to clean out the rings around the bowl cap. I scrubbed the rustication with some Murphy’s Oil Soap to clean up the dust in the grooves and crevices of the finish.Calich15
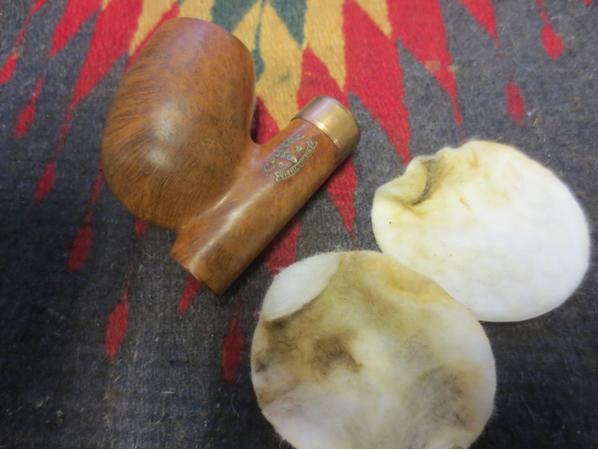
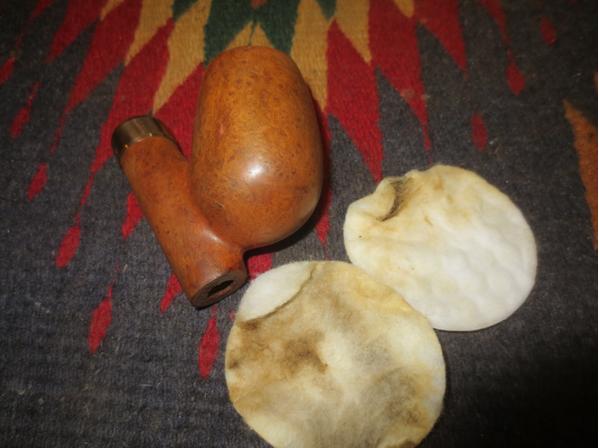
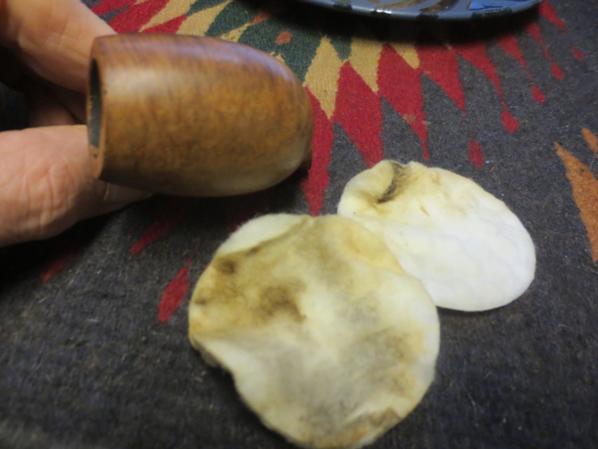
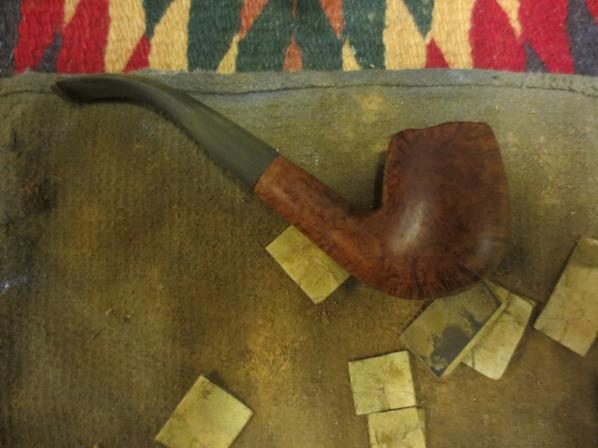
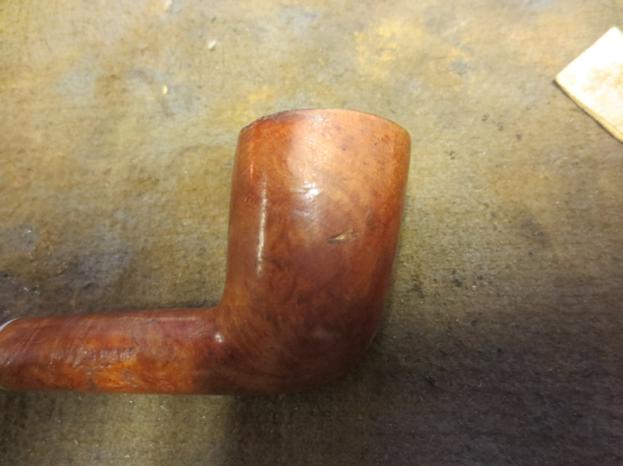
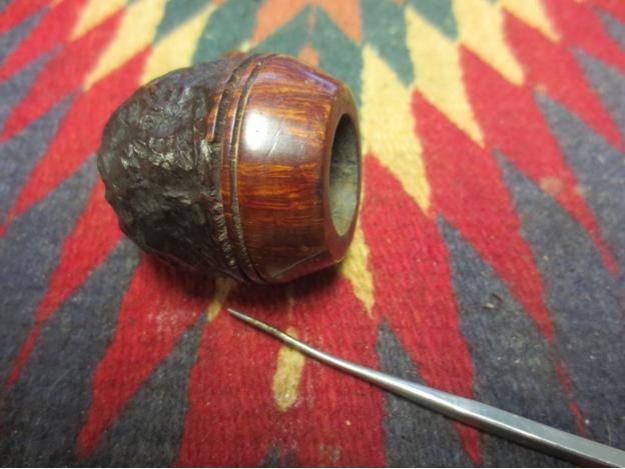
I scrubbed the top of the rim with saliva and cotton pads and was able to remove the lava on the surface without harming the finish on the bowl top.Calich16 Calich17
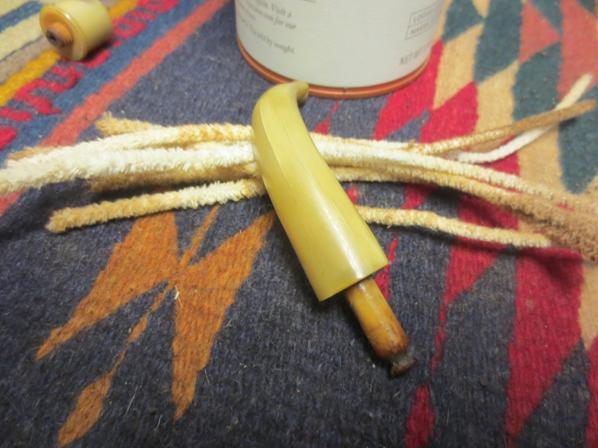
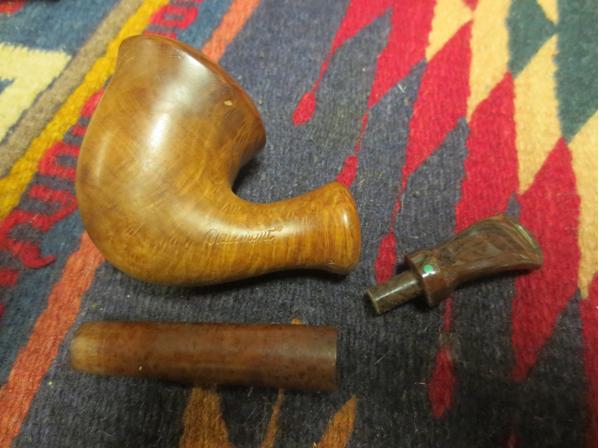
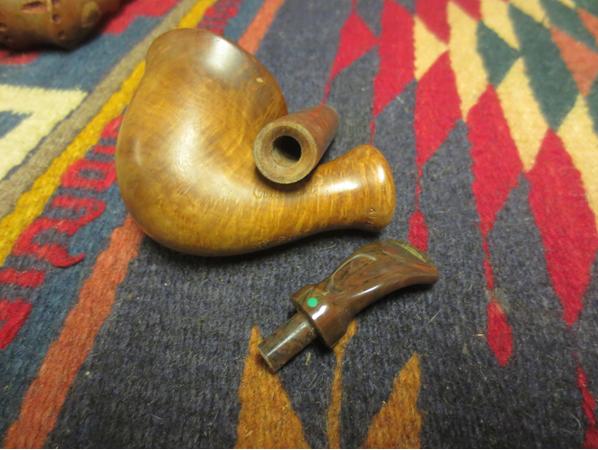
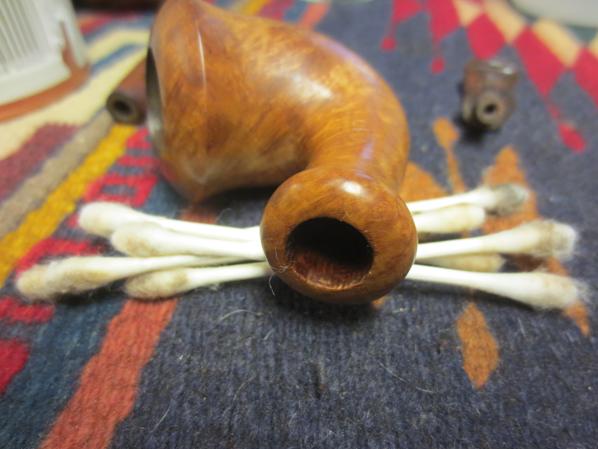
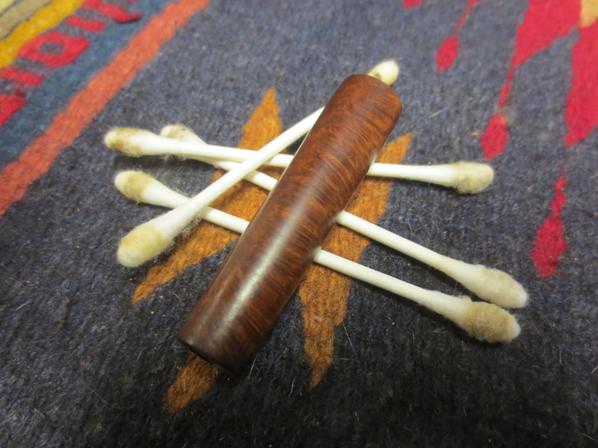
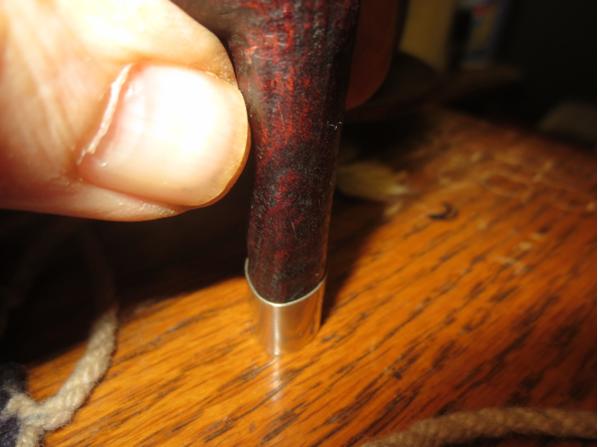
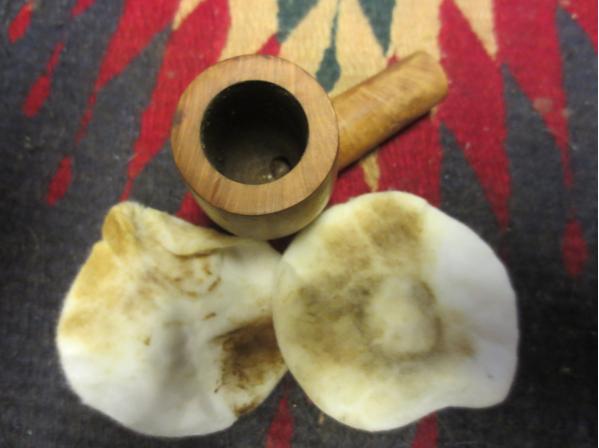
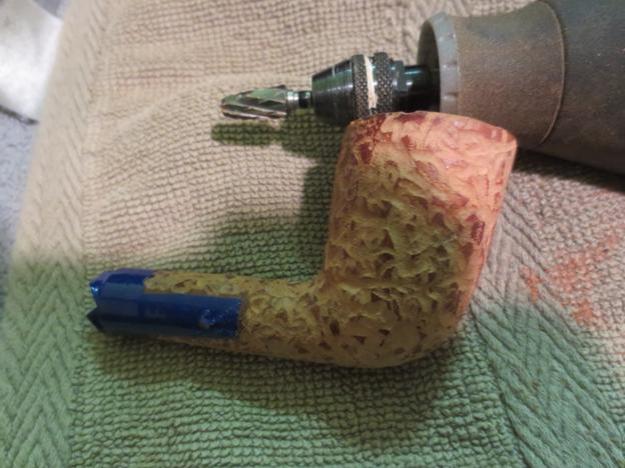
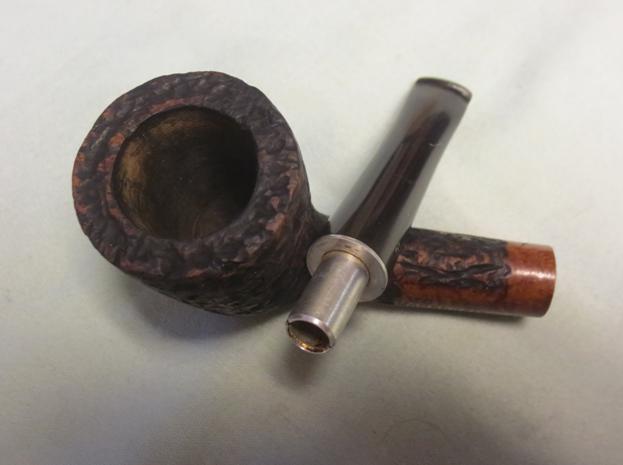
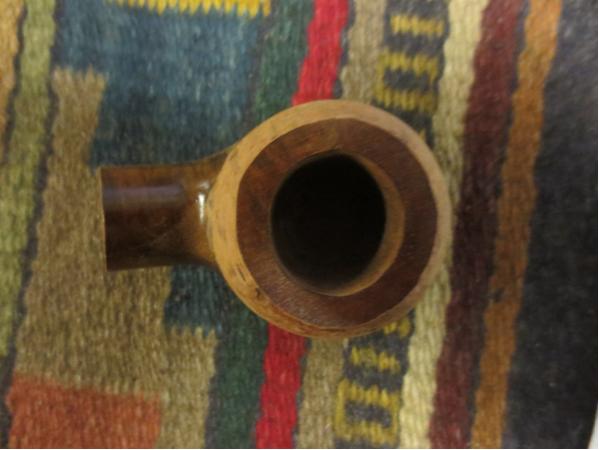
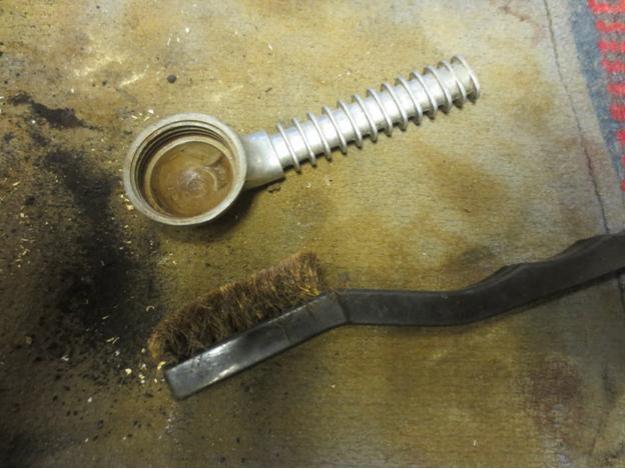
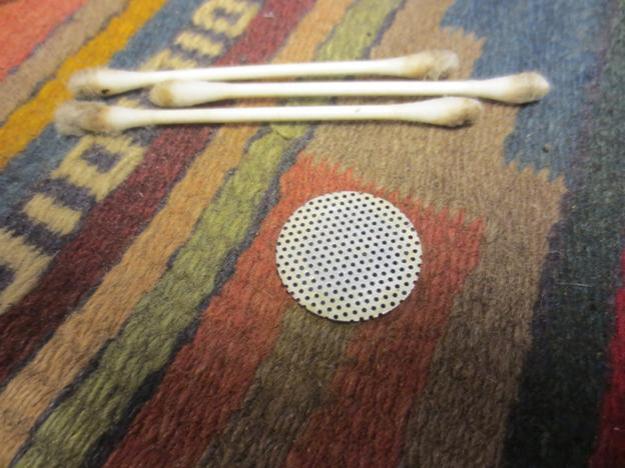
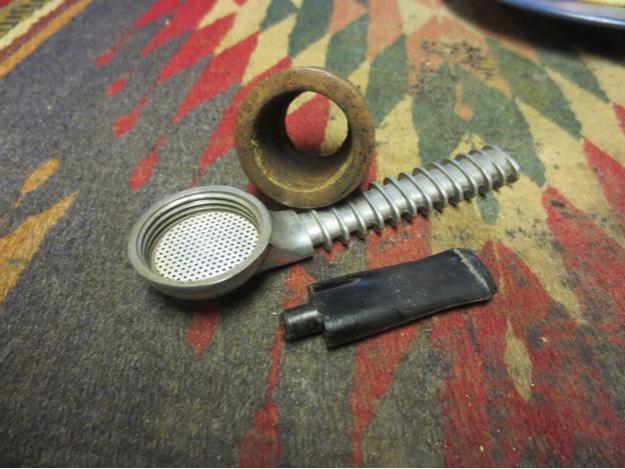
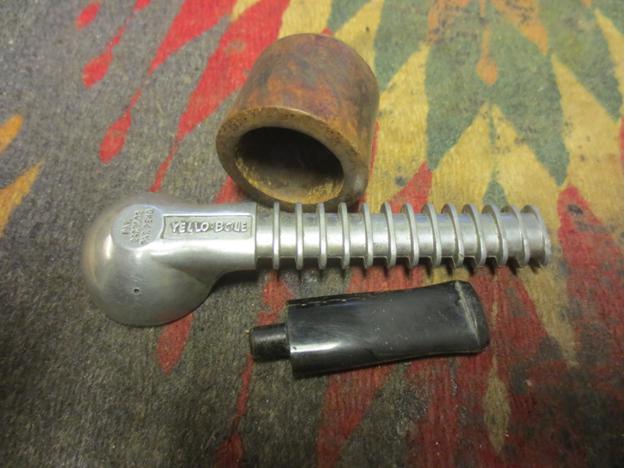
I cleaned out the inside of the mortise and shank with cotton swabs, pipe cleaners and alcohol.Calich18
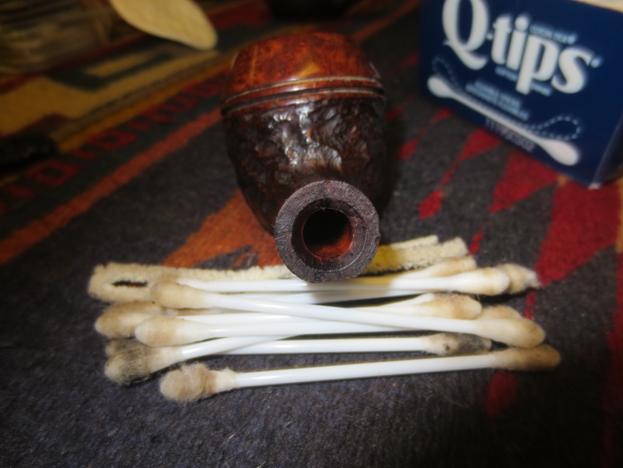
By that time I was also able to clean out the inside of the stem with pipe cleaners and alcohol. The pipe cleaners went through with little issue and the stem was clean.Calich19
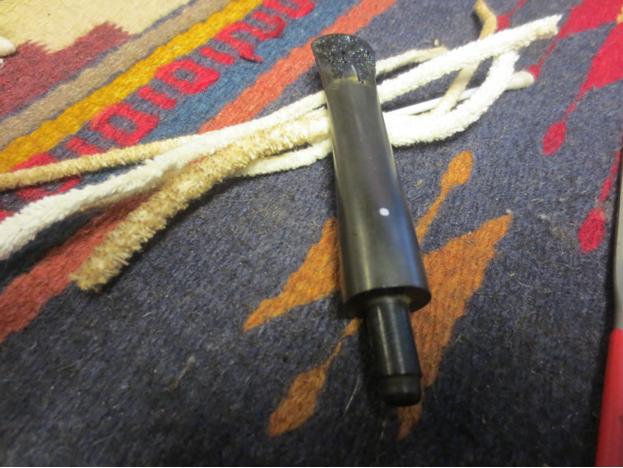
The next morning after the glue had cured overnight I worked on the stem. I needed to reshape the slot to facilitate easy cleaning so I used needle files to clean up the entrance of the airway.Calich20
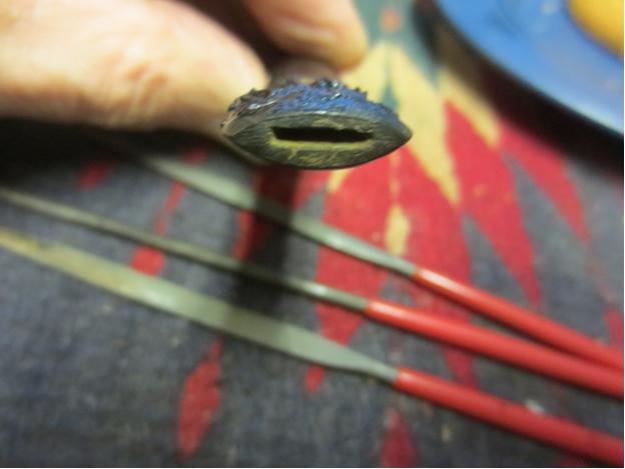
I sanded the stem repair and the surface of the button top with a sanding board to begin the process of reshaping the surfaces of both.Calich21
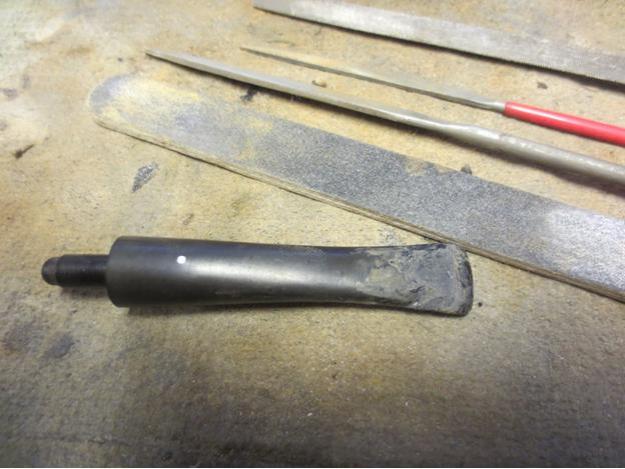
I cleaned up the edge of the button and shaped the surface of the button with needle files until the edge was sharp the surface matched that of the underside of the button.Calich22
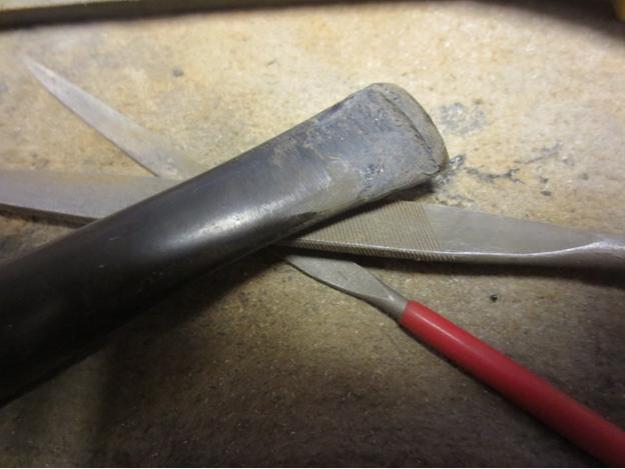
With all of the hard shaping done it was time to begin the tedious process of sanding the repairs. I started with 220 grit sandpaper to smooth out the surface and the transition to the rest of the stem.Calich23
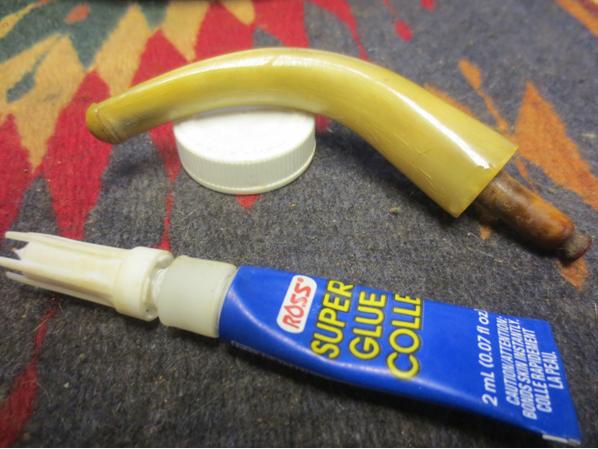
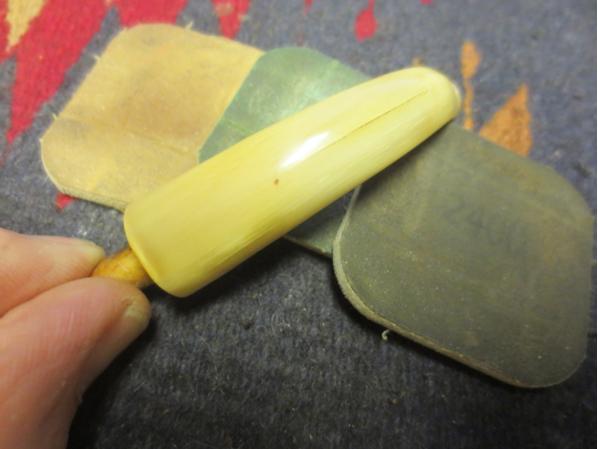
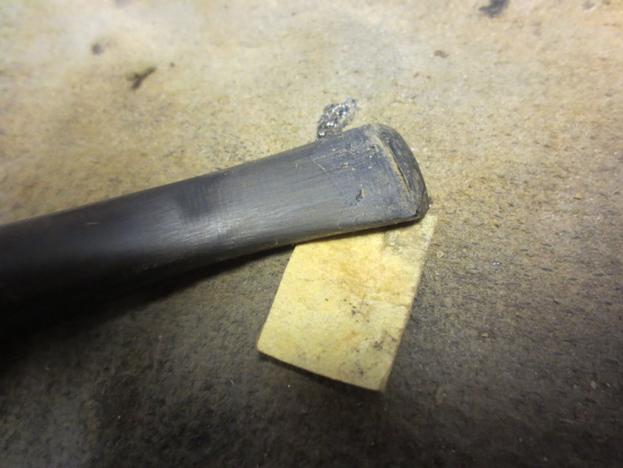
There were still some small holes around some spots on the fill. I used a clear super glue to fill these in and smoothed out the patch with a spatula.Calich24 Calich25
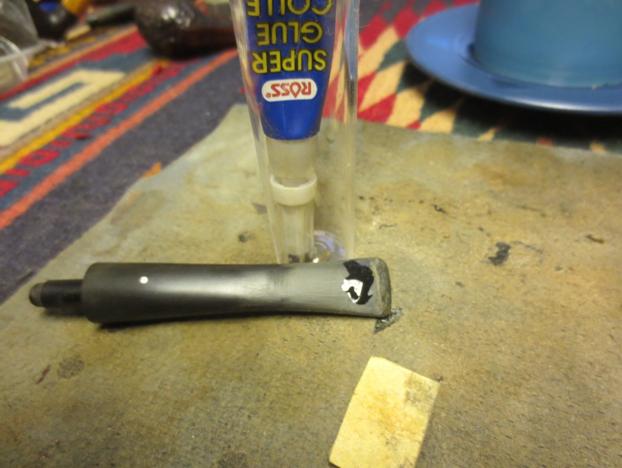
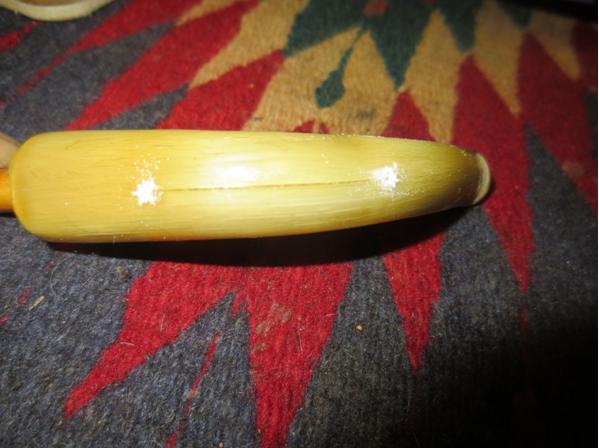
When the repair had dried I sanded it with some finer grit sand papers until the surface was smooth.Calich26 Calich27 Calich28
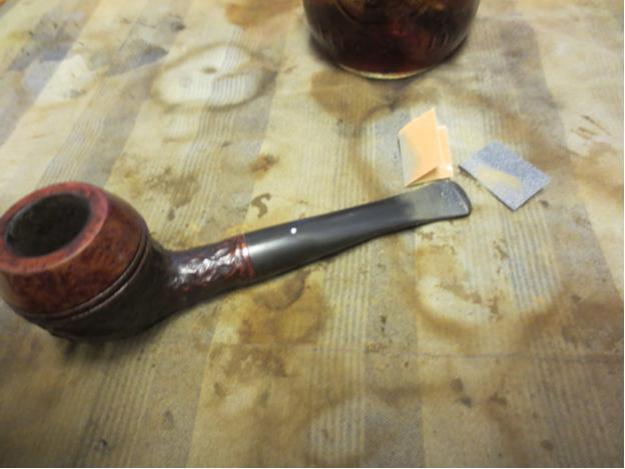
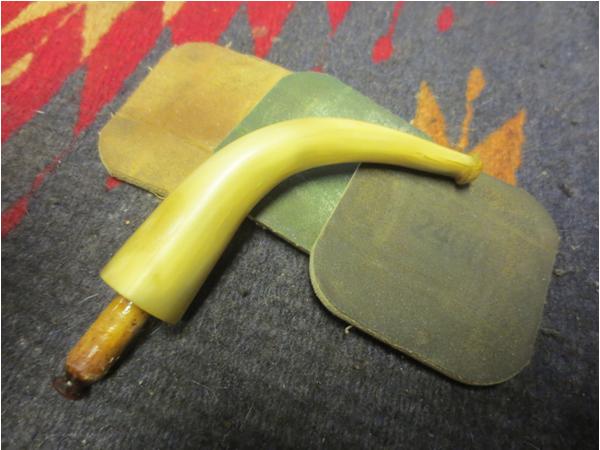
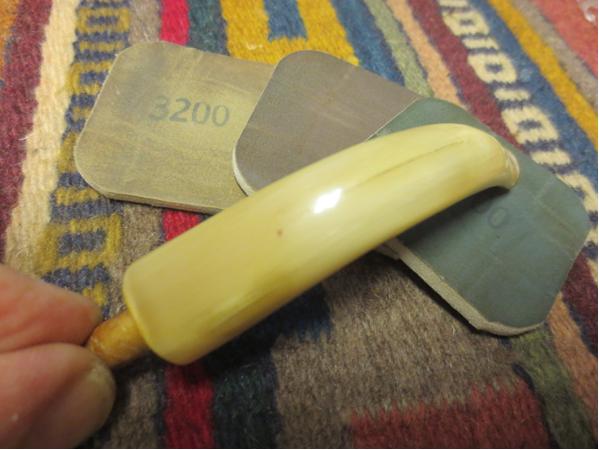
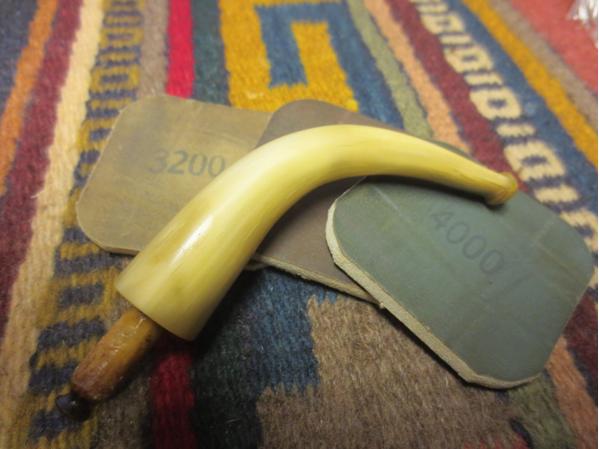
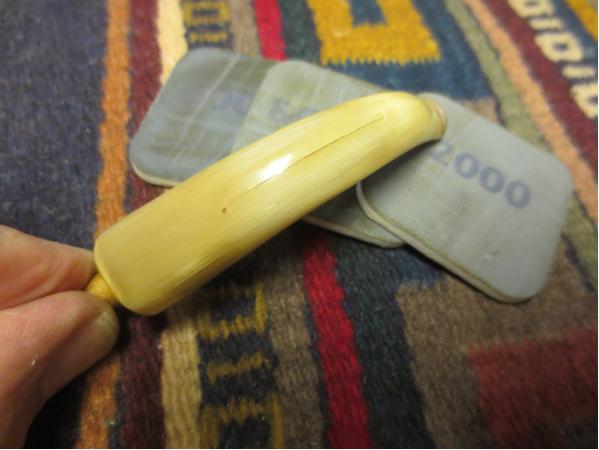
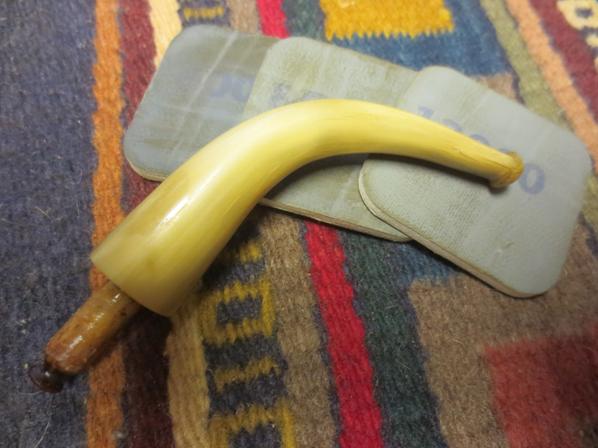
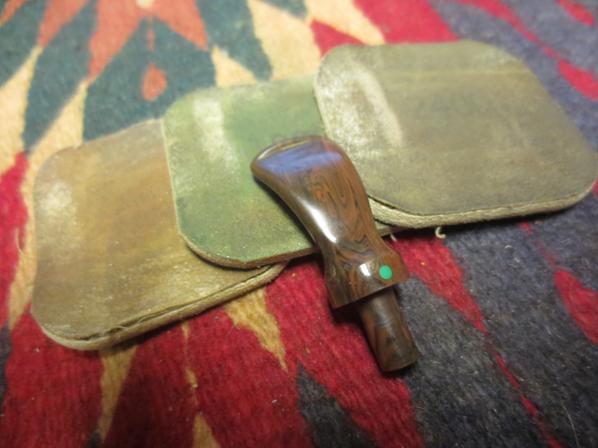
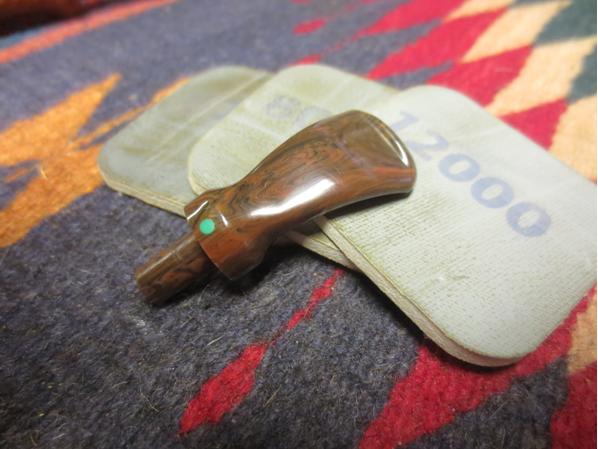
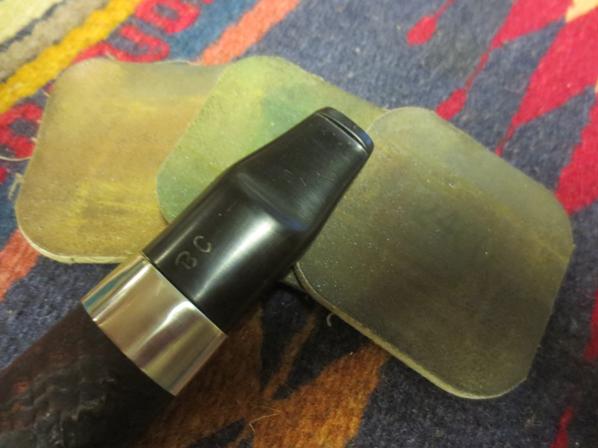
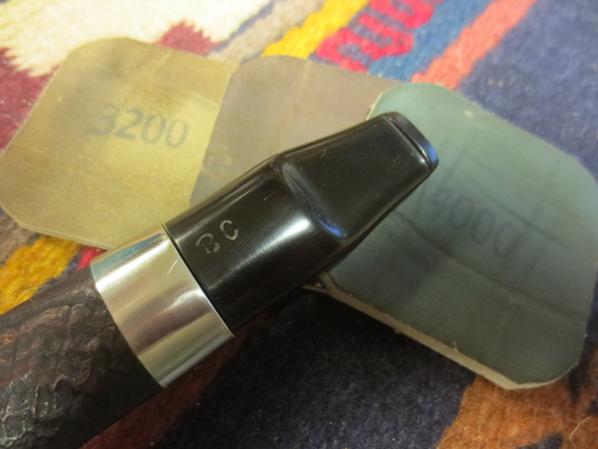
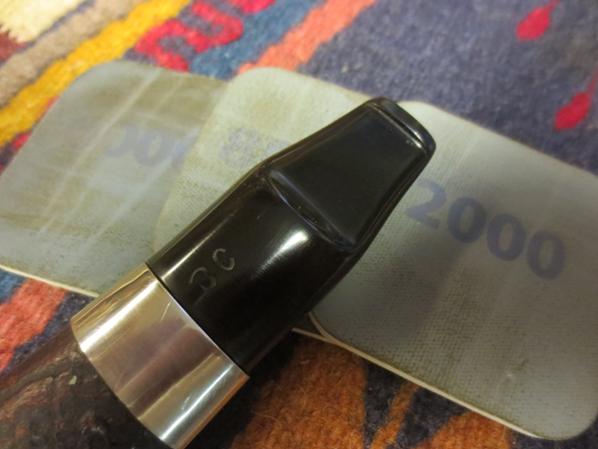
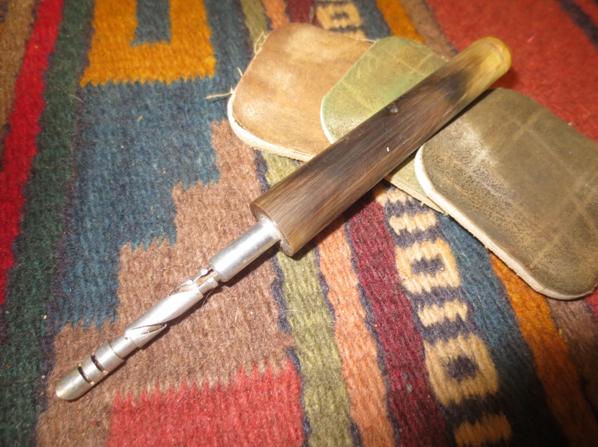
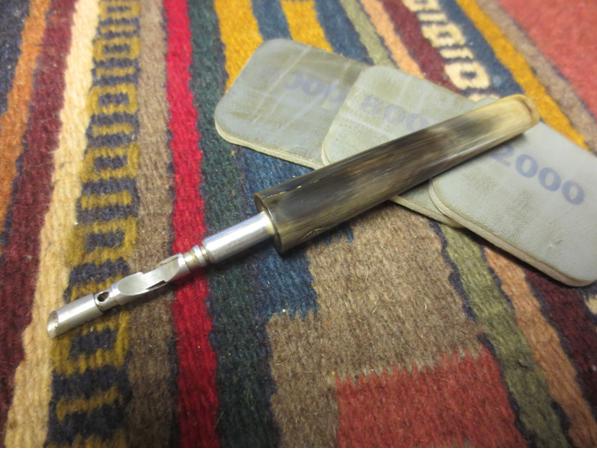
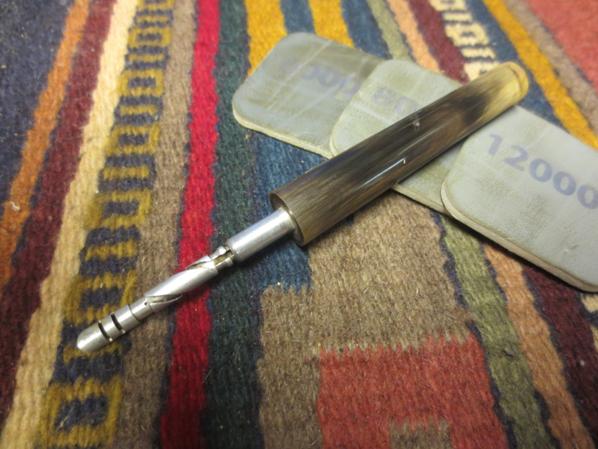
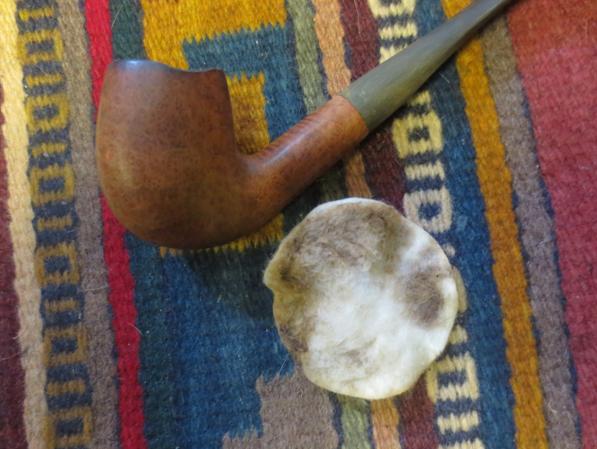
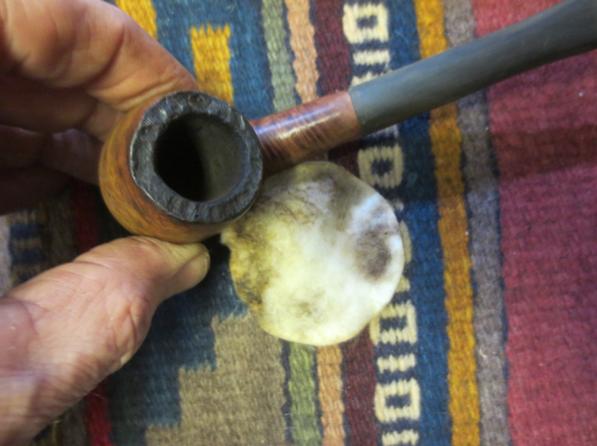
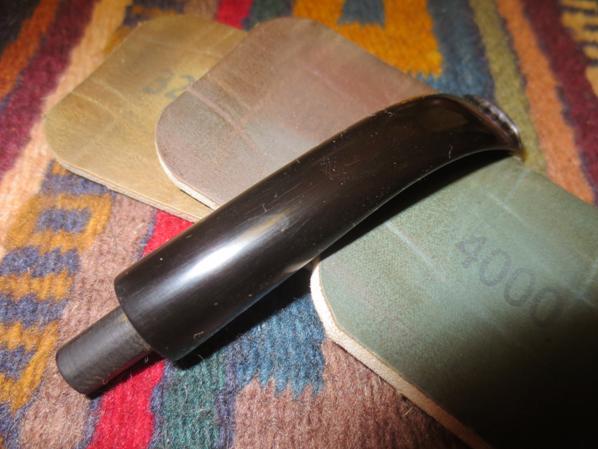
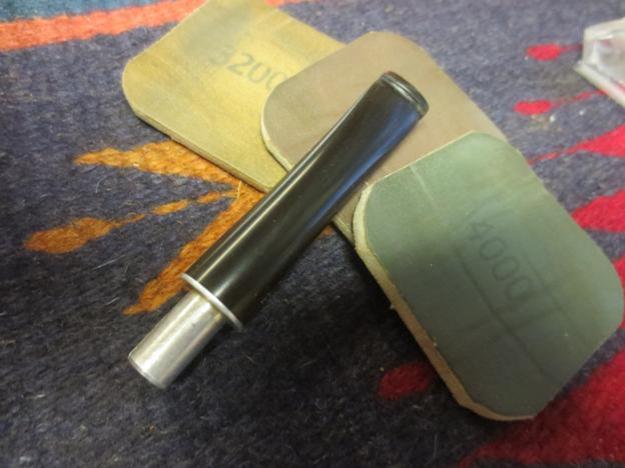
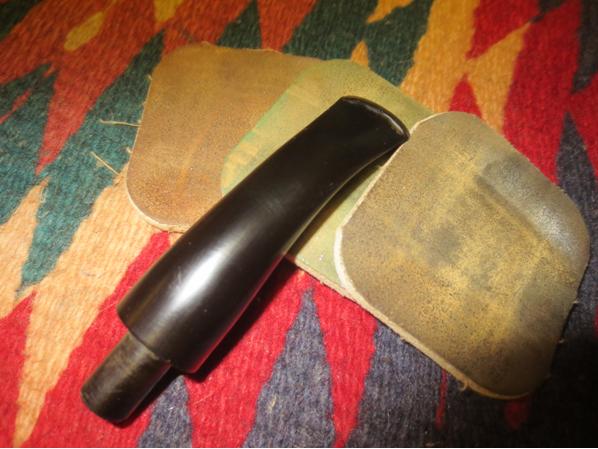
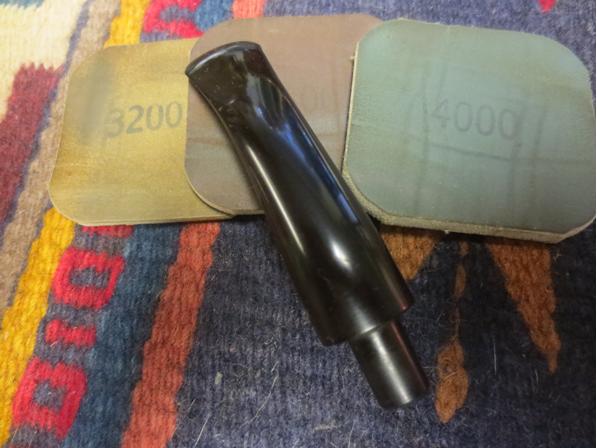
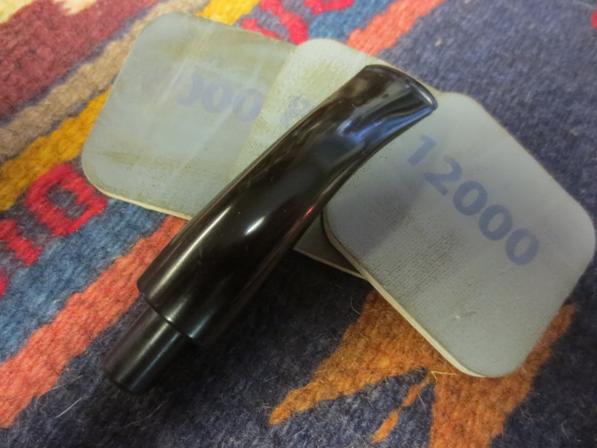
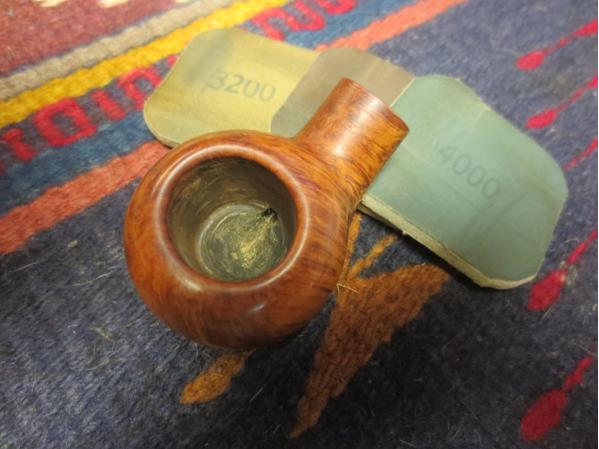
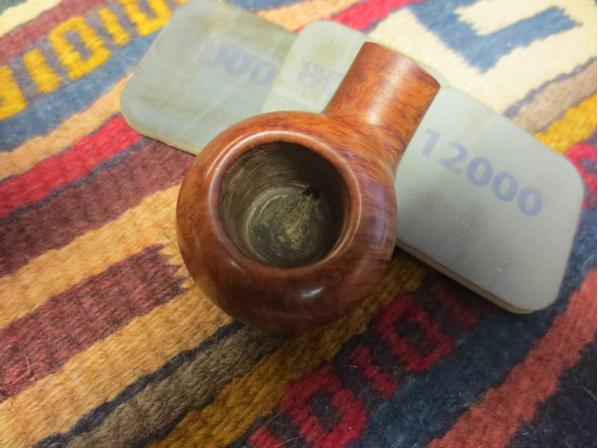
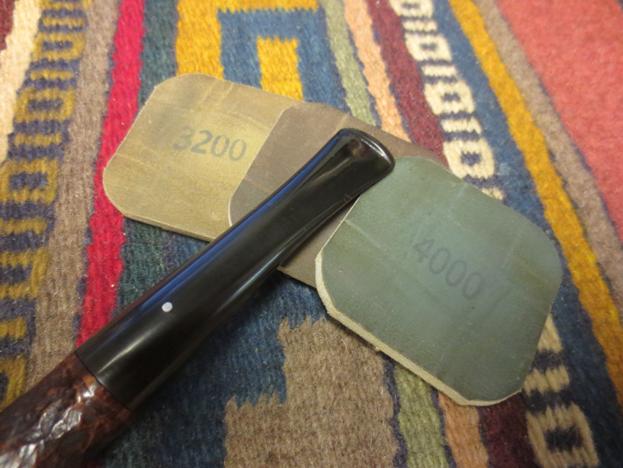
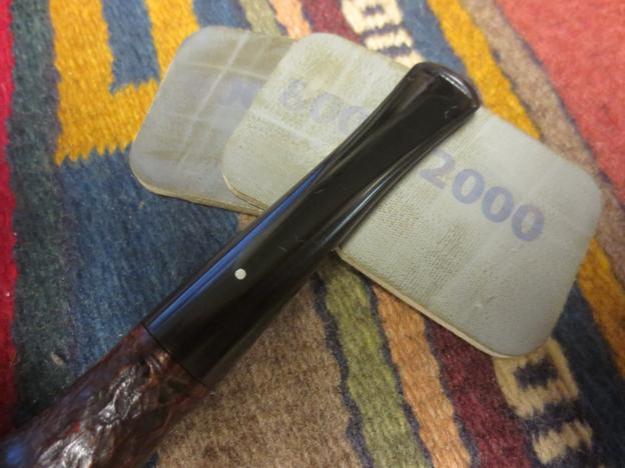
I moved on to sand the stem with micromesh sanding pads – wet sanding it with 1500-2400 grit pads and then giving it a coat of Obsidian Oil. I dry sanded with 3200-4000 grit pads and gave it another coat of oil. I finished by sanding it with 6000-12000 grit pads and giving it a final coat of oil. I let the oil dry before buffing the pipe.Calich29 Calich30 Calich31
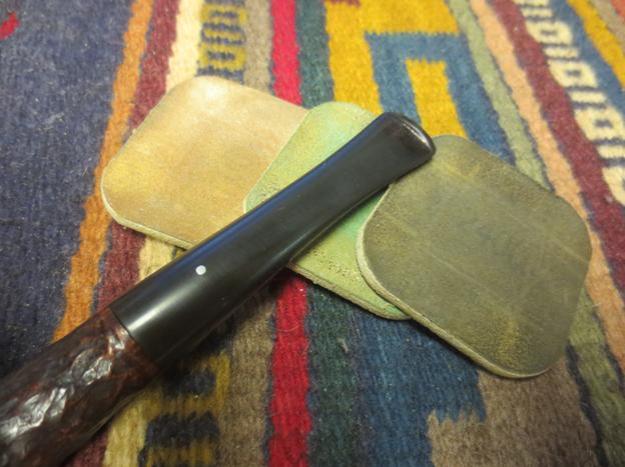
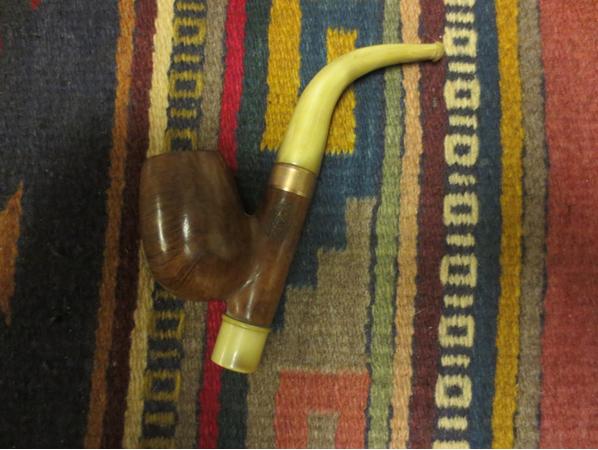
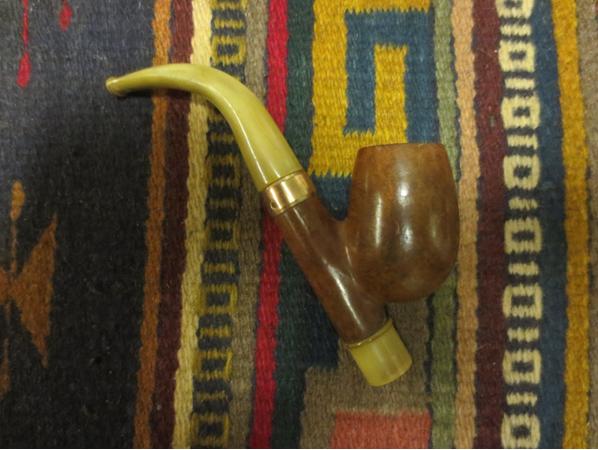
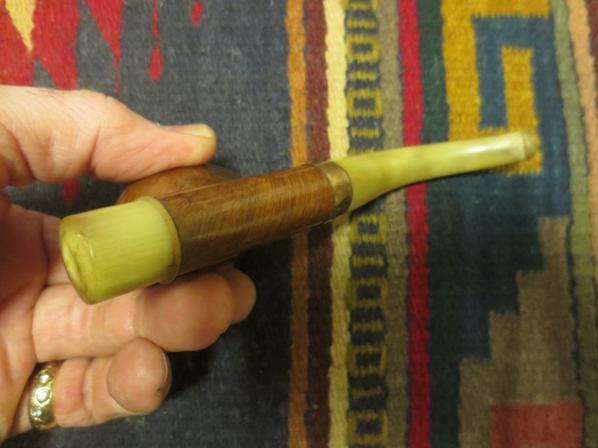
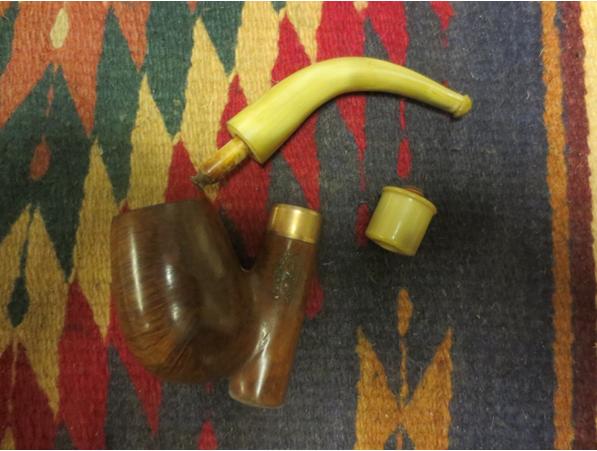
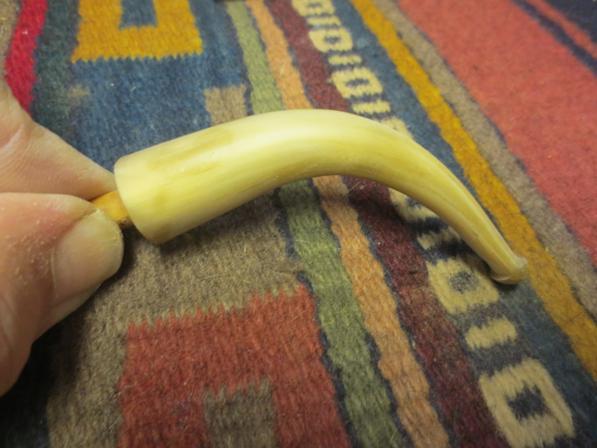
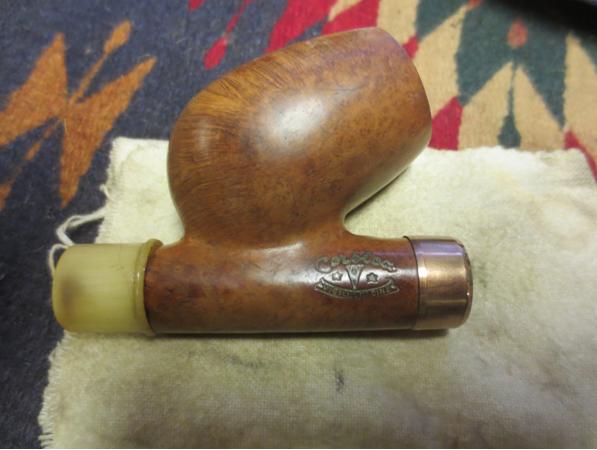
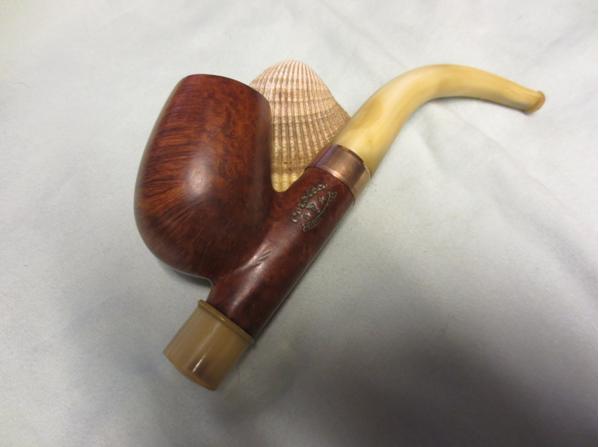
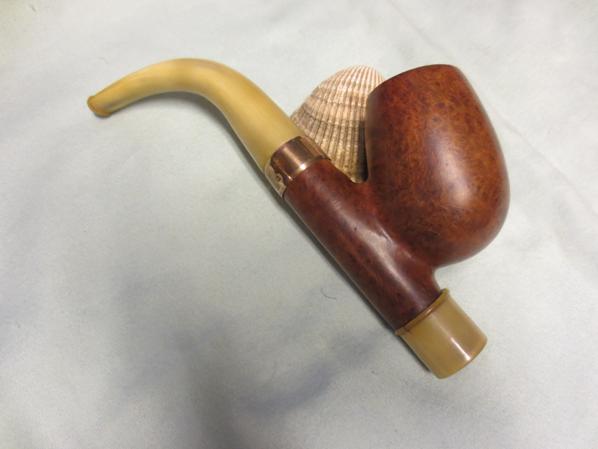
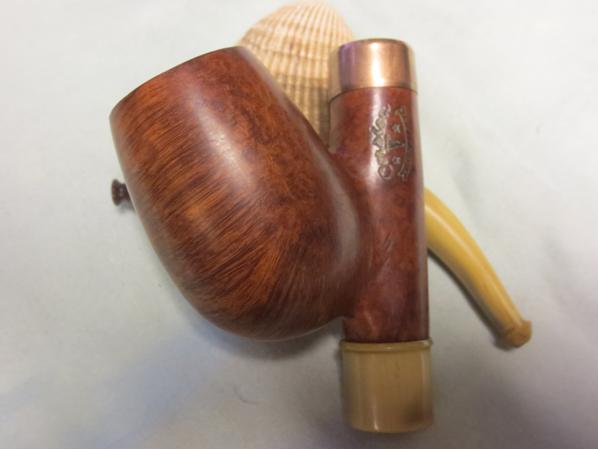
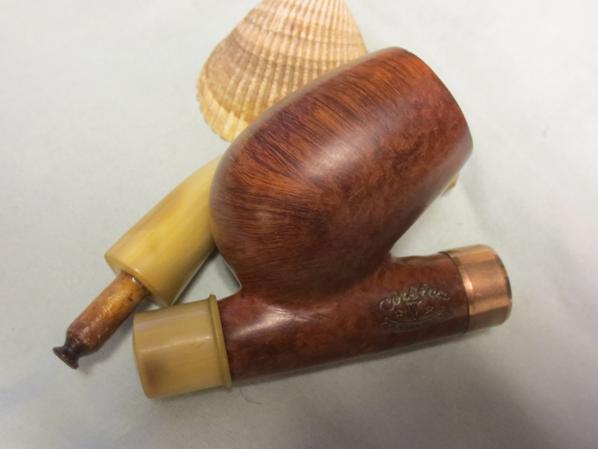
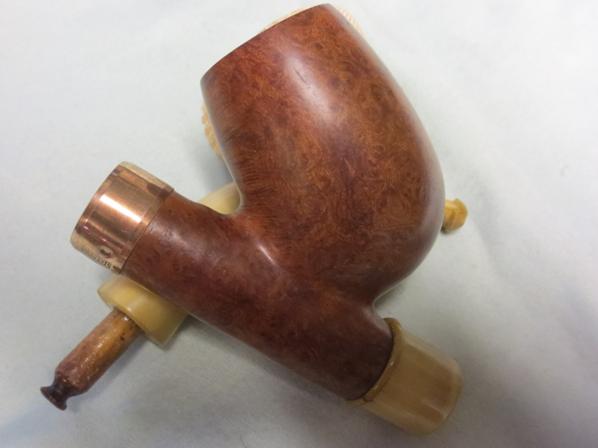
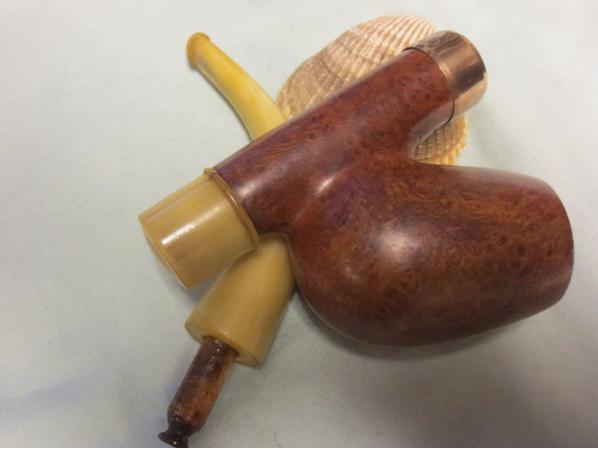
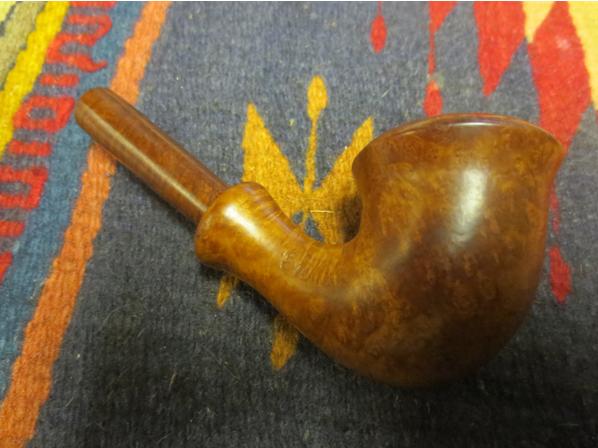
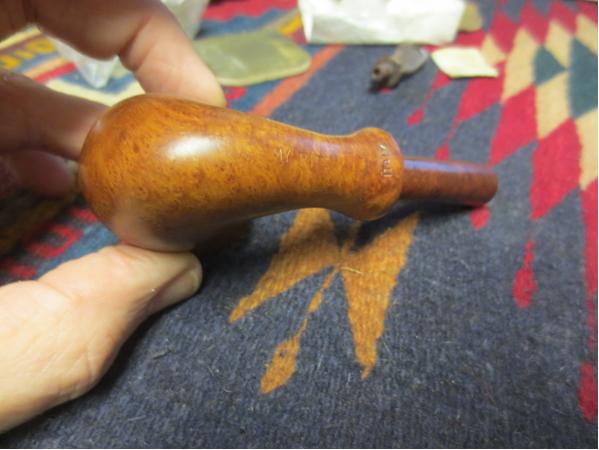
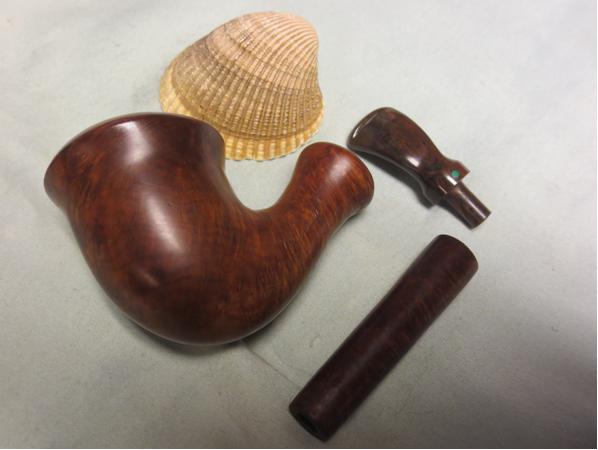
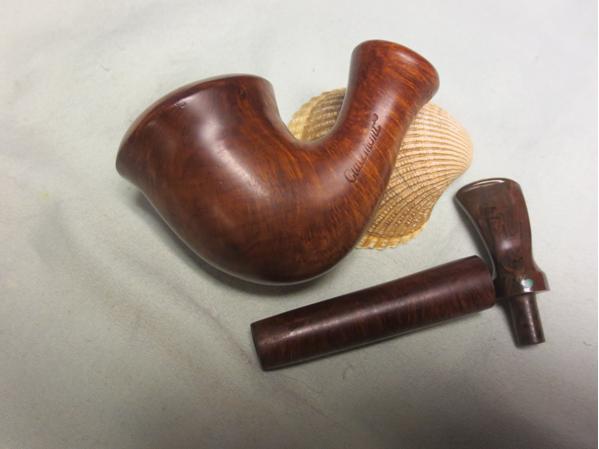
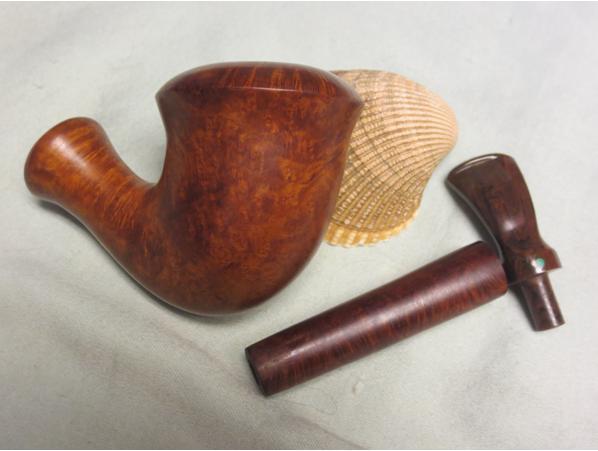
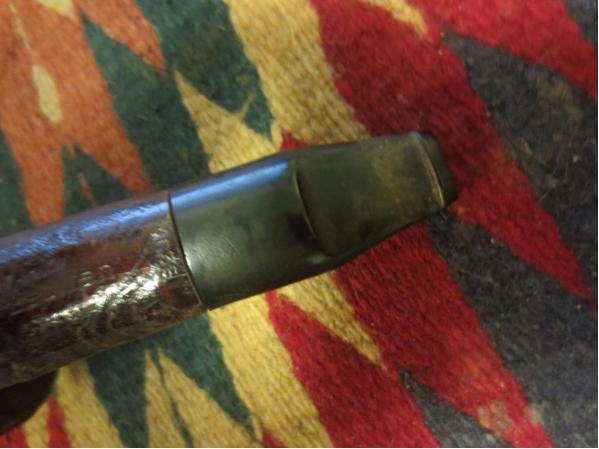
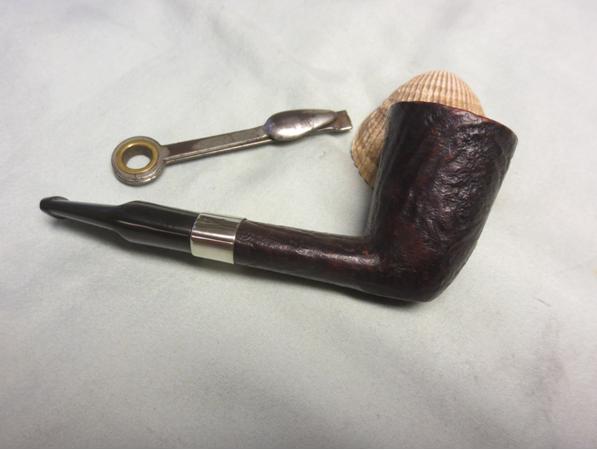
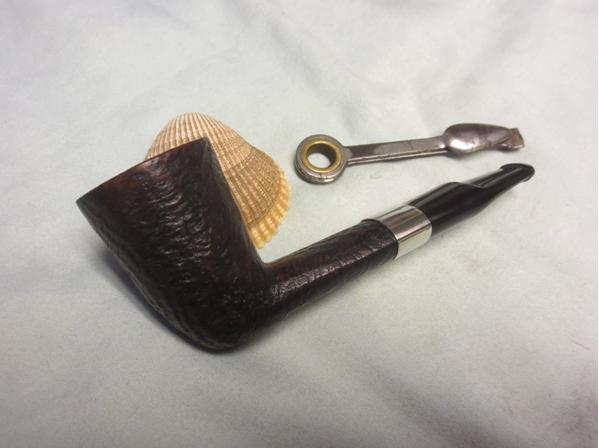
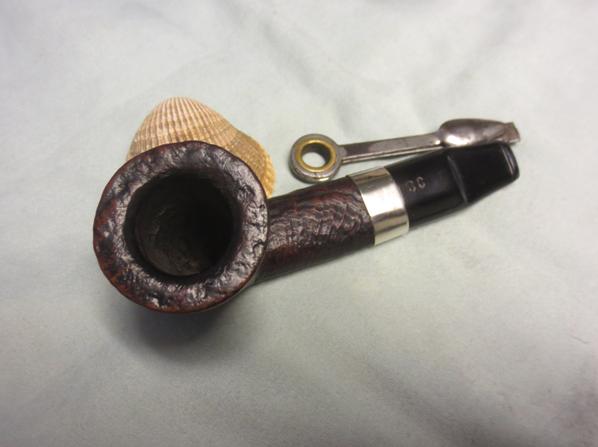
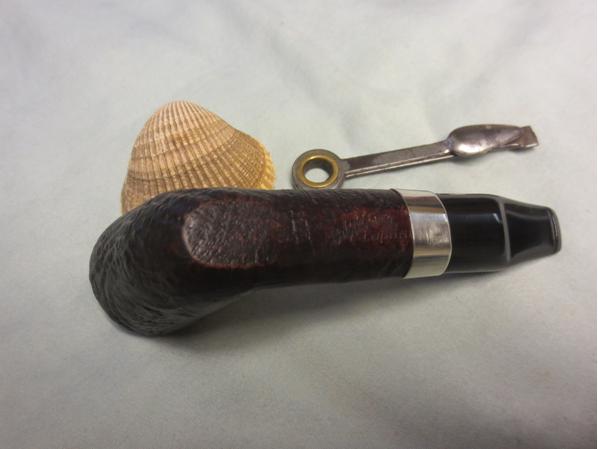
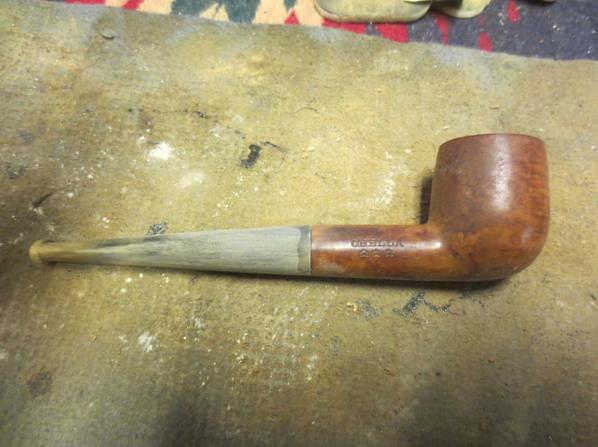
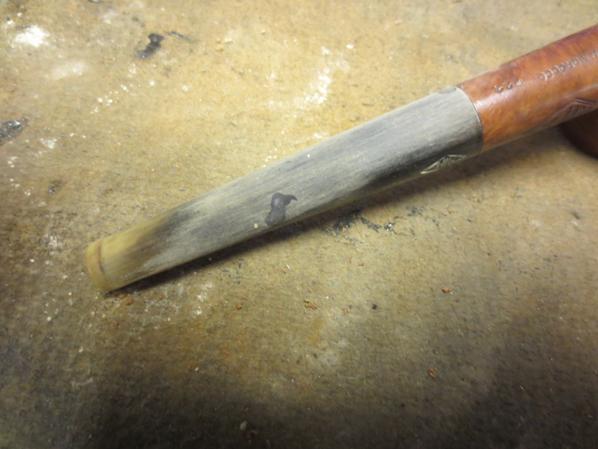
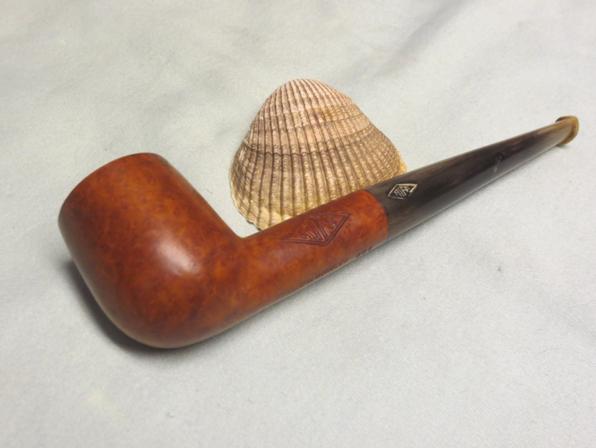
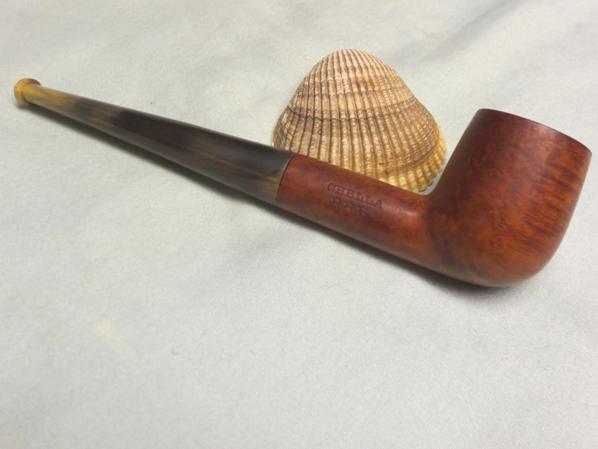
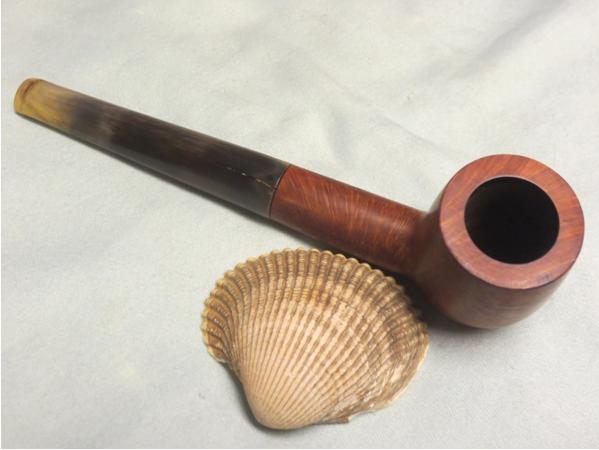
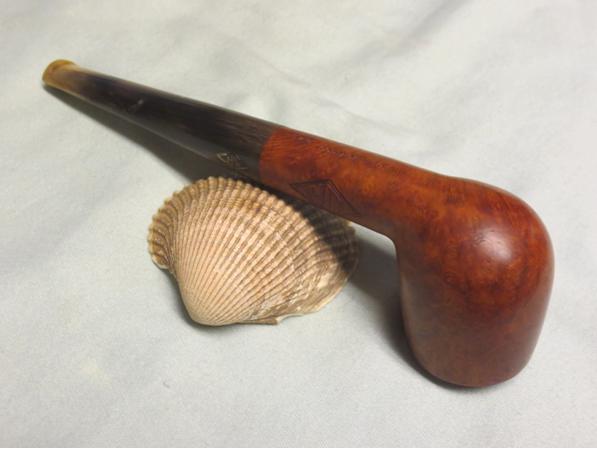
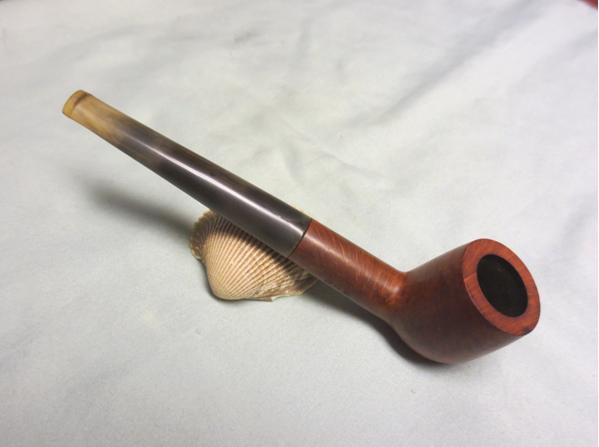
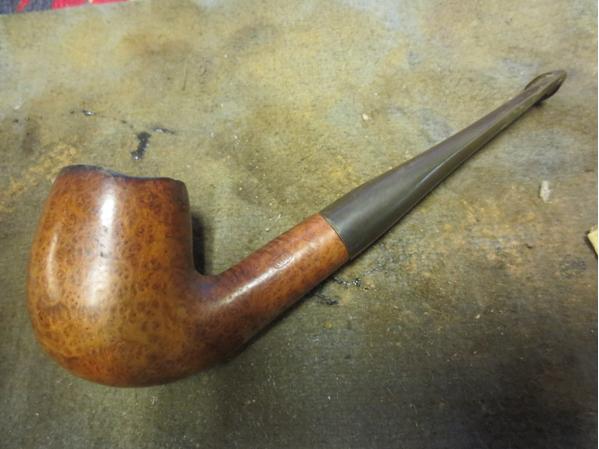
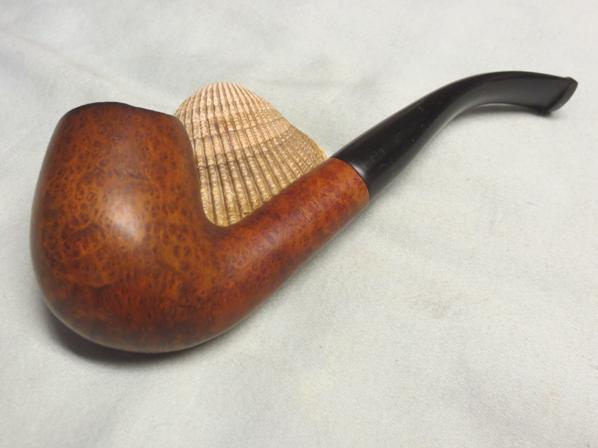
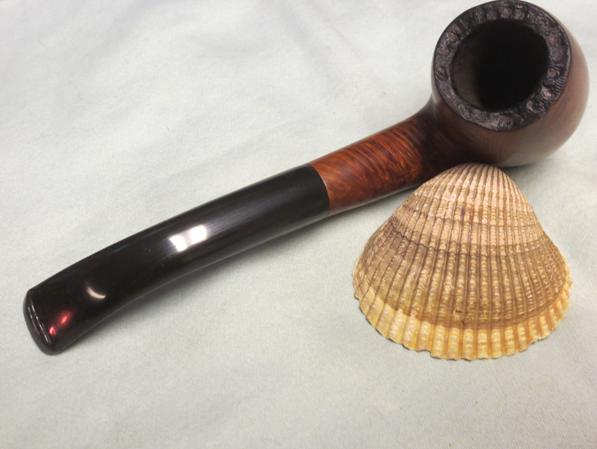
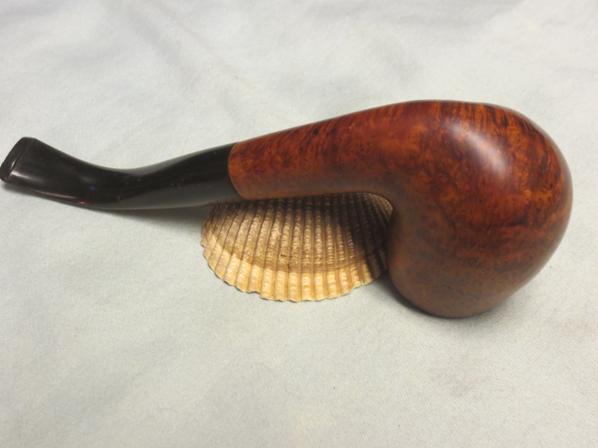
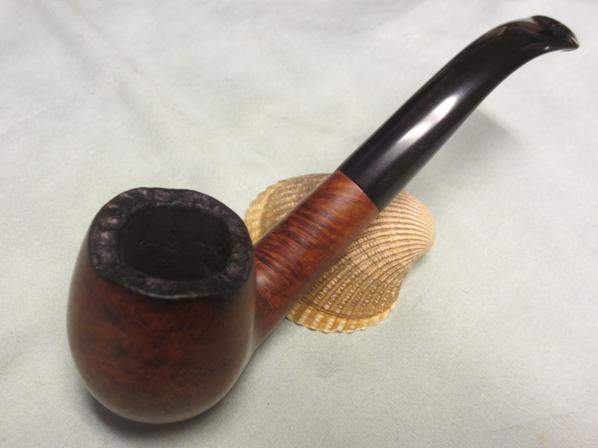
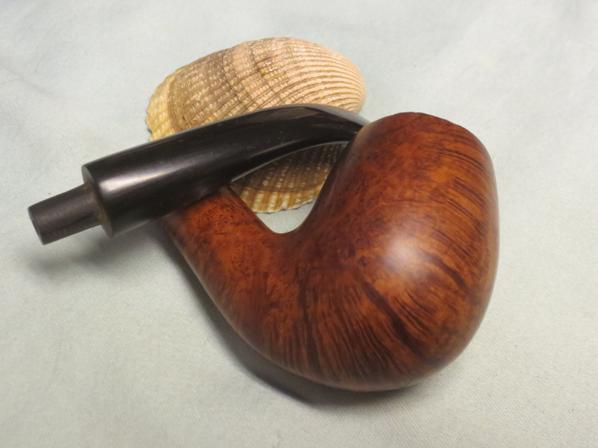
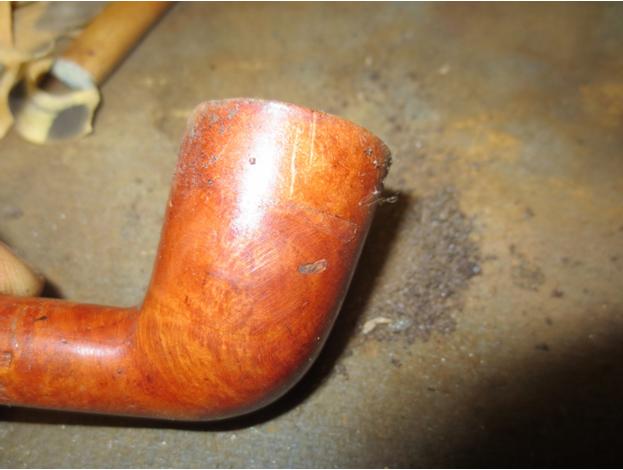
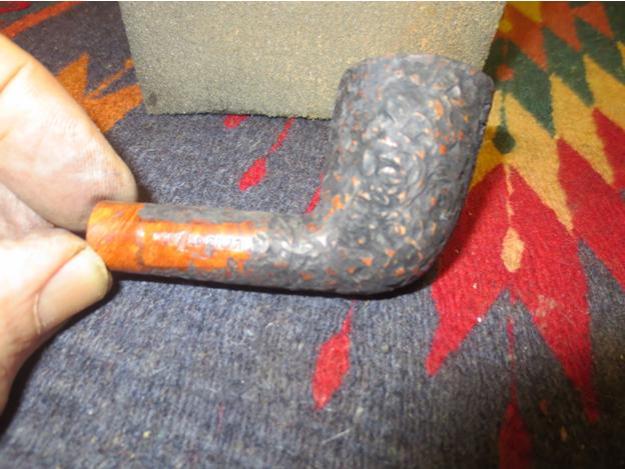
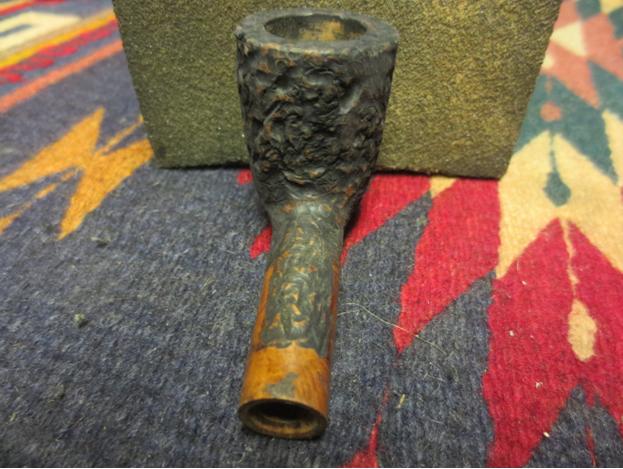
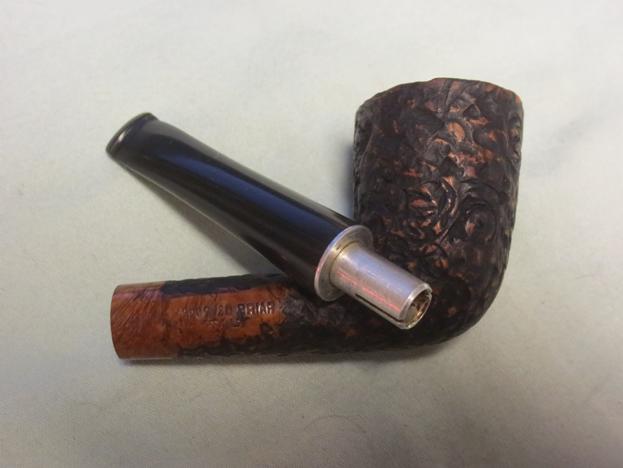
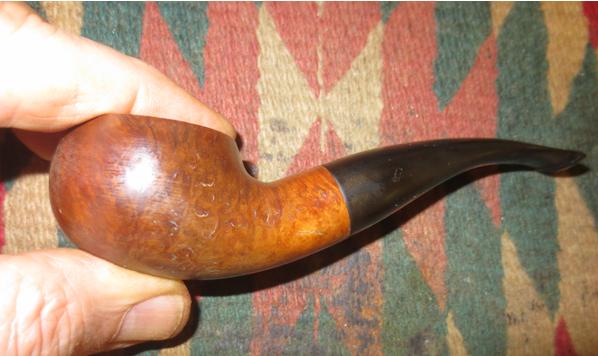
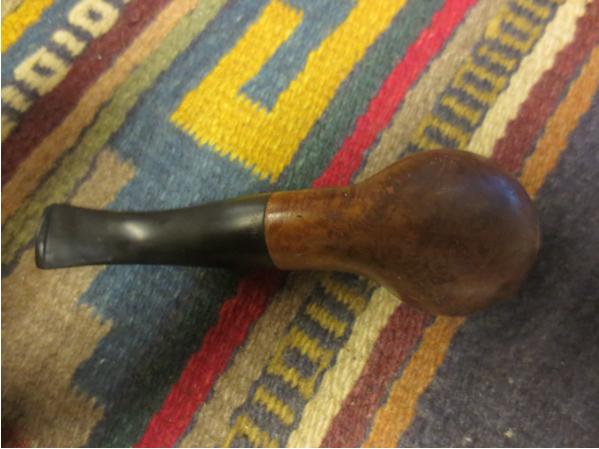
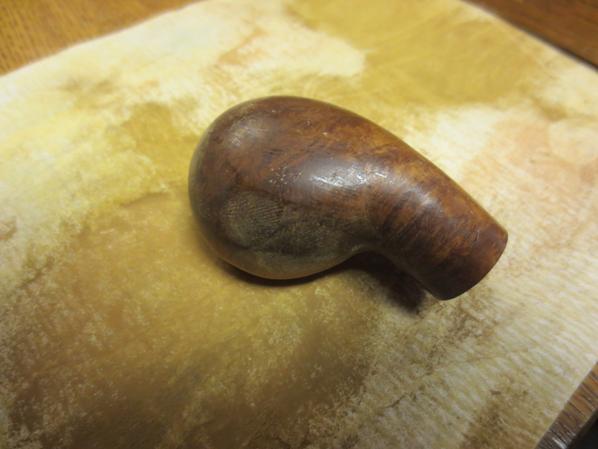
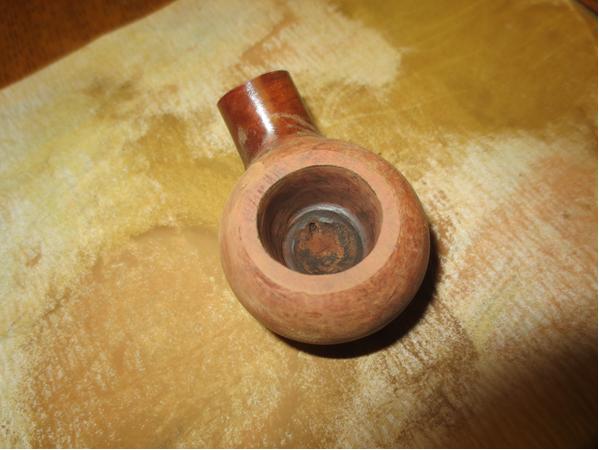
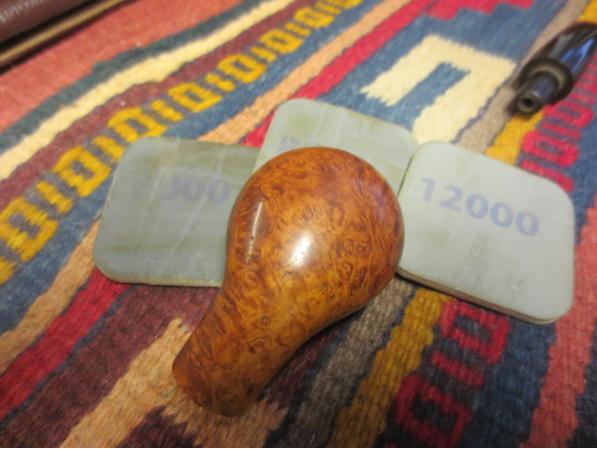
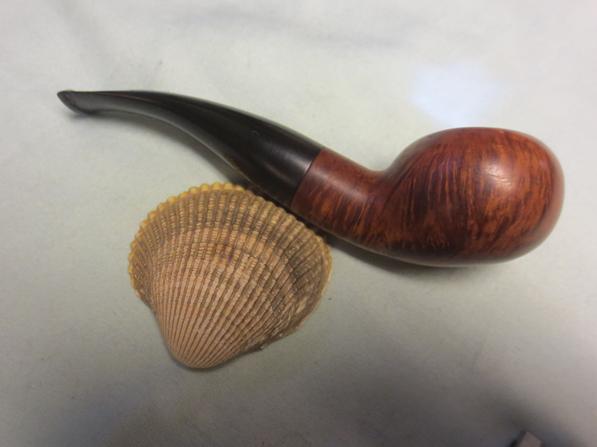
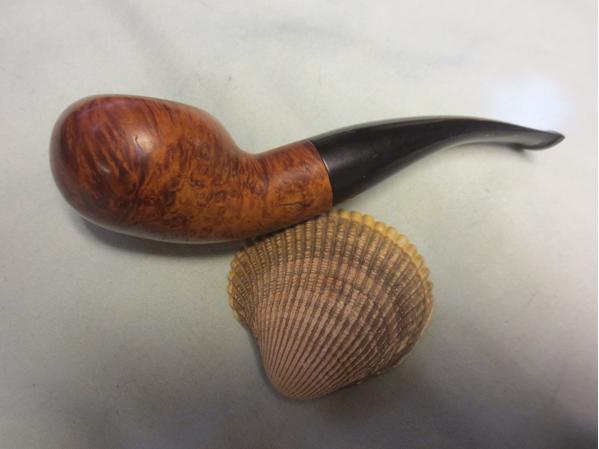
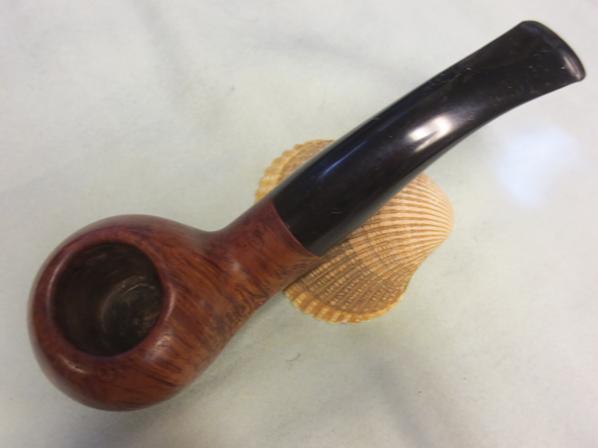
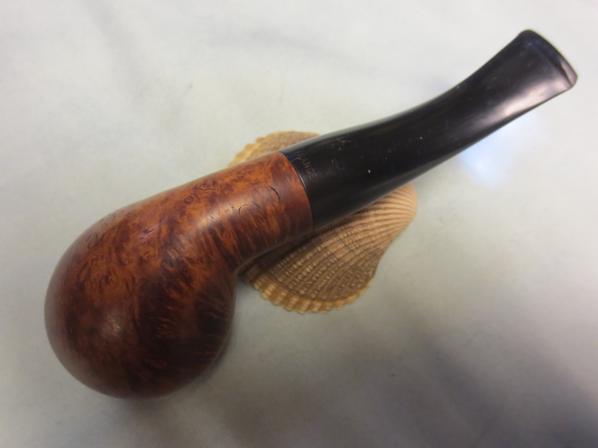
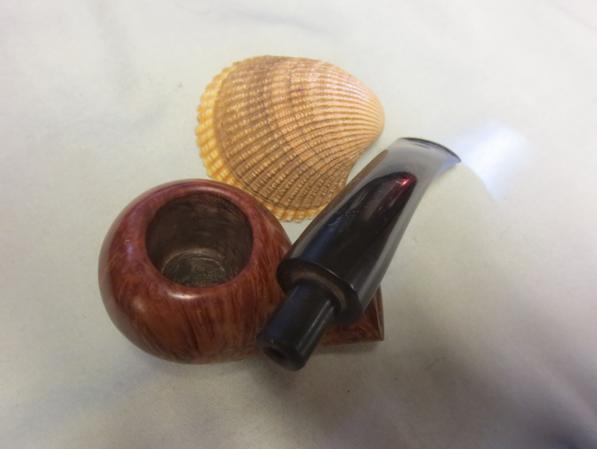
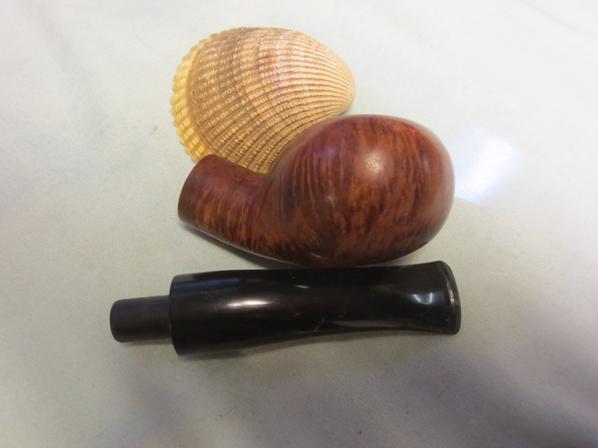
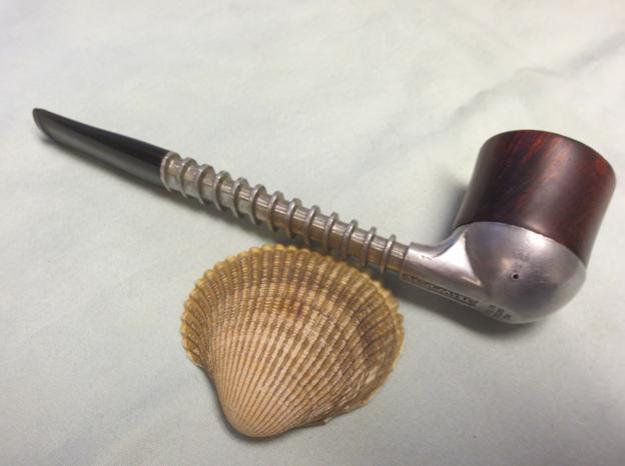
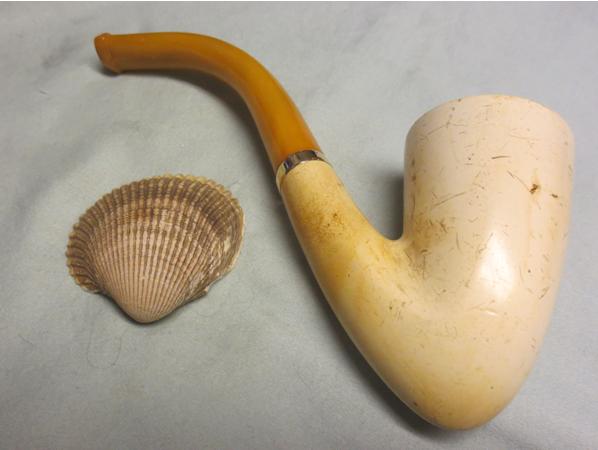
I buffed the pipe and stem with Blue Diamond on the wheel and then gave the stem several coats of Carnauba wax. I buffed the stem with a clean buffing pad. I gave the bowl several coats of Conservator’s Wax and hand buffed it with a shoe brush. The finished pipe is shown in the photos below. The stem repair is solid and though visible to me as I have looked at it so long, it is not obvious. The pipe is useable and looks as close to what it must have looked like when John shipped it out from his shop in the 80s. Thanks for looking.Calich32 Calich33 Calich34 Calich35 Calich36 Calich37 Calilch36

An Amazing Find – A Corsica Cavalier with a Horn Stem and End Cap


Blog Steve Laug

This is yet one more of my brother’s amazing finds. It is a beautiful Cavalier with a horn stem and end cap. It is stamped in classic late 19th Century fashion with gold leaf on the left side of the shank. It reads CORSICA in and arch over two stars around a capital V with what looks like an elongated 0 in the middle of the V. Underneath the *V* is VIEILLE RACINE stamped in a reverse arch. The words form and oval. It is my understanding that the Vielle Racine stamp translates literally as Old Root. The band is stamped 14K and is almost a rose gold. It is fitted to the shank and also is beveled inward covering the shank end. The horn end cap has a threaded short bone tenon that screws into the briar. It has a large bowl.

When the pipe came to me it was dirty but the bowl had been reamed. The rim had a slight build up and the inner edge had been slightly damaged when it had been reamed. The gold band was tarnished. The finish was dirty and spotted with sticky dark spots on the end cap and in the bend at the top of the shank bowl junction. The bowl had been coated with shellac that was spotty and cloudy in places. The stem looked really good at first glance but I would have to examine it more closely once I started cleaning it up. The grain on the briar was beautiful and I could not wait to clean it up and see what lay beneath the grime and the shellac.Cor1 Cor2 Cor3 Cor4I took several close-up photos to highlight different aspects of the pipe. The first of these is the state of the rim and bowl. The rim photo is a bit blurry but gives a pretty good idea nonetheless of the state of the bowl and the tars on the rim. The second photo is of the stamping on the left side of the shank. It still had the gold leaf in the stamping to highlight it.Cor5 Cor6I took the pipe apart and photographed the parts. I also took a photo of the end cap so that the bone tenon in visible.Cor7 Cor8The horn stem looked really good but looking at it up close I could see a crack along the top of the stem following the curve and a small group of them on the right side of the stem. There were also a few chips missing on the underside of the stem near the shank junction. The tenon had a unique look to it – almost a nipple on the end of it. It was coated with a little varnish as well so it much have someone’s attempt to tighten it as it was currently quite loose in the shank.Cor9 Cor10Before I started to work on it I decided to do a bit of research to fill in the gaps on another pipe brand that had not heard of before seeing this one. I was familiar with briar coming from Corsica but had not run across the pipe brand of that name. I resorted to the pipephil site to see if he had any information on the pipe and who may have made it. The site did have the brand listed. It turns out that Corsica is a brand of Henri Vuillard of Saint Claude, France. This Vuillard was not to be confused with E. Vuillard & Cie also of Saint Claude. Reading that information helped me to make sense of the large *V* in the centre of the stamping on the pipe that I am working on. Here is the link to the information: http://www.pipephil.eu/logos/en/infos/hvuillard-en.html. The site included the following photos of several pipes in this line. The cursive form of the Corsica stamp is very similar to the stamping on my pipe.Cor11The link also included a sub link to a secondary page on the history of the brand. The following is an abstract of the information that I found regarding the maker of this pipe. At the end of the 19th century the Vuillard house managed by Paul Vuillard and established at Chemin de la Coupe (Saint Claude) produced match boxes and cases for spectacles. At the beginning of the 20th century on Henri’s (son of Paul Vuillard) initiative the factory is converted to the production of briar pipes which were marketed under the “Corsica” brand.

From that information along with the materials and the design of the pipe I am pretty confident in saying that it was made in the early 20th century when the company was managed by Paul Vuillard who took the initiative to start making pipes. An interesting note is that from 1914-1918 The Henri Vuillard Factory produced pipes for the French Army. The article says that at that time they had between 170-180 employees.

Armed with this new knowledge and an estimate of the age of the pipe I began to clean it up. The cake had been reamed already so I just cleaned up the walls of the bowl with the Savinelli Pipe Knife. I had removed the stem and the end cap so it was easy to hold the bowl and ream it.Cor12I cleaned the shank from the mortise to the end cap with pipe cleaners, cotton swabs and alcohol. The oils and tars that came out were not very dark and they did not smell like tobacco. It was almost as if they were the stain from the outside of the bowl. It did not matter though it took quite a few before the shank was clean all the way through.Cor13I cleaned the airway in the stem as well. It also was dirty. But as I cleaned off the exterior the cracks became more noticeable, particularly the one on the topside.Cor14I scrubbed the exterior of the bowl with acetone on cotton pads to remove the shellac coat. I was careful around the gold leaf in the stamping as I did not want to damage that area of the bowl.Cor15 Cor16 Cor17 Cor18I put Vaseline on the threads of the bone tenon on the end cap and carefully turned it into the end of the shank. I polished the bone of the end cap with 1500-4000 grit micromesh sanding pads to smooth it out. I rubbed it down with some Obsidian Oil and let it dry. Cor19In the photo below you can see the fine cracks in the stem near the tenon end. This is also where the chips were. I drilled a tiny hole at each end of the crack on the top of the stem with a micro drill bit. I filled the holes and the crack with clear super glue. I used the clear super glue to also stabilize the other cracks on the sides of the stem and to build up the chipped areas on the underside of the stem.Cor20 Cor21 Cor22When the glue dried I sanded the stem with 220 grit sandpaper to smooth out the repairs and to begin to polish the stem.Cor23 Cor24 Cor25 Cor26 Cor27Once the repairs were smooth I wet sanded the stem with 1500-2400 grit micromesh sanding pads and gave the stem a coat of Obsidian Oil. I dry sanded it with 3200-4000 grit pads and gave it another coat of oil. I know the oil is made for vulcanite but I wanted to bring a little life to the horn. I finished sanding the stem with 6000-12000 grit pads and gave it a final coat of oil.Cor28 Cor29 Cor30 Cor31 Cor32 Cor33I polished the gold band on the shank end with a jeweler’s cloth until it shone. I gave the briar several coats of Conservators Wax and hand buffed the bowl with a shoe brush when it dried. Cor34 Cor35I decided not to buff this pipe on the wheel because I did not want to damage the gold leaf or the horn. I hand buffed it with a microfibre cloth and polished it until it shone. The finished pipe is shown in the photos that follow. It truly is a beautiful old pipe. I only wish that the horn was more perfect. The stem glows but I see the repaired cracks. Ah well it is better than having the stem splinter apart while using it. It should be good for another hundred plus years now. Thanks for looking.Cor36 Cor37 Cor38 Cor39 Cor40 Cor41 Cor42 Cor43 Cor44 Cor45

Refreshing a Beautiful and Unusual Clairmont Pipe


Blog by Steve Laug

Once again my brother Jeff scored a beautiful and unusual pipe. It is stamped Clairmont on the left side of the shank. On the underside it is stamped MY PIPE and Handmade Italy. On the right side it bears the stamping 810 (it appears to be double stamped). The briar is naturally finished with no stain. There are some small fills on the shank extension and one on the left side of the bowl on the underside of the outer rim lip. They are small but visible at this point. The bowl had a slight cake in it that was uneven and there were some tobacco remnants on the bottom of the bowl. The top of the rim was dirty as was the rest of the finish. The Cumberland stem was in good shape but there were some light tooth marks on the top and underside next to the button edge. The slot in the end of the stem was rough and uneven. There was some red (maybe Tripoli) in the edges of the slot.Spanu1 Spanu2 Spanu3 Spanu4I took the pipe apart and photographed the parts. The shank insert is pressure fit in the mortise of the bowl. It is a good snug fit with no looseness. The stem fit in the other end is also very snug and clean. The green dot on the Cumberland stem looks good. The tenon on the stem is integral to the stem. The finish on the stem is dull.Spanu5 Spanu6 Spanu7While I really liked the looks of the pipe and knew it was Italian handmade I had no idea who made the brand. The stamping MY PIPE on the underside still has me mystified. I don’t know if the maker stamped it that way or if the first owner had it stamped that way. I will probably never know that but I wanted to know who made this pip as I had never seen this brand. Like always I begin the hunt for information at one of my favourite websites Pipephil’s Logos and Stamping site. It did not take long and I found the information at this link: http://www.pipephil.eu/logos/en/logo-c5.html.

The site showed a nice looking full bent pipe with a Lucite stem that had the green dot on the top side just as the stem I had did. The stamping was the same in terms of the script Clairmont. The Sardinian Briar * stamp was not present on mine. I found out that the brand was created by Alberto Paronelli in the 1970’s. I found that the pipes were usually crafted by Tom Spanu. Both of those names were familiar to me so that help. I have one of Tom’s Olivewood pipes and love it. The link gave information on the name. It turns out that “Clairmont” is a Francization of “Chiaramonti” which is the birthplace of Tom Spanu.Spanu8Now I knew that I was dealing with a 1970’s era pipe made by Tom Spanu and named after his birthplace. For me this solidified the connection to Spanu. It was time to work on his pipe. As I worked on it I wondered if the MY PIPE stamp on the bottom was stamped by Tom and this was one of his own pipes. I cleaned up the internals of the pipe, reaming the bowl with the Savinelli Pipe Knife and scrubbing out the airways from button to bowl with alcohol, pipe cleaners and cotton swabs. Spanu9 Spanu10 Spanu11 Spanu12I scrubbed down the exterior of the bowl with acetone on cotton pads to remove the grime and oils that were dirtying the natural finish of the bowl and shank extension. I was able to get quite a bit of the rim darkening off this way. The crowned rim top is beautiful.Span14 Spanu13I thought it was fitting to rub down an Italian natural finish pipe with a light coat of olive oil. I rubbed down each of the briar parts of the pipe and put it back together. The olive oil brought life back to the briar and the grain began to shine through. This is a beautiful piece of briar.Spanu14 Spanu15 Spanu16 Spanu17I set the bowl and shank aside and worked on the stem. I sanded the surface of the stem with 220 grit sandpaper to remove the tooth marks and smooth out the flat surfaces.Spanu18 Spanu19I sanded the end of the button to clean up some of the nicks and damage there. I also used a needle file to clean up the inside of the slot and smooth out the lines.Spanu20I wet sanded the stem with 1500-2400 grit micromesh sanding pads to smooth out the scratches. I dry sanded with 3200-12000 grit micromesh pads to progressively polish the stem and bring the depth of the Cumberland back to life.Spanu21 Spanu22 Spanu23I buffed the pipe and stem with Blue Diamond on the wheel and then gave the entire pipe several coats of carnauba wax. I buffed it with a clean buffing pad to raise the shine. I hand buffed it with a microfibre cloth to add depth to the shine. The finished pipe is shown in the photos below. I like this one a lot so I think it will probably stay in my collection. Thanks for looking!Spanu24 Spanu25 Spanu26 Spanu27 Spanu28 Spanu29 Spanu30 Spanu31

Unzipped an old Pouch and found a Butz Choquin Oval Shank Capitan 1635


Blog by Steve Laug

My brother sent me another box of pipes that he had picked up on eBay and in different shops. Included in this lot was a suede leather pipe pouch. It was dried out and worn with a zipper on the top and a zipper on the bottom. I unzipped the top area and found that it was canvas lined and had an old 3 way pipe tool inside. I unzipped the bottom and found a small compact Dublin pipe. It was a mess and looked well smoked and poorly cared for. The finish was worn and dirty but had an interesting sandblast poking through. The rim was caked with lava and it was hard to see any of the blast on the surface. The bowl had a very thick, hard cake inside that would need to go. The pipe was stamped Butz Choquin over Capitan on the underside of the shank. At the stem shank union it had the shape number 1635. The mouthpiece did not sit against the shank. There was a gap on both sides with the stem touching in the middle. When held up the light this gap was angled and large. It was also wider on the underside of the stem than the topside. The stem was oxidized and dirty. The slot in the button was closed to the size of a small thumb tack.Butz1 Butz2 Butz3I took some pictures of the pipe before I started working on it (I remembered to do that once again!). You can see the issues that I pointed out above as you look at the photos.Butz4 Butz5 Butz6 Butz7I took some close up photos of the rim/bowl and the stem to try to capture how dirty this pipe was when I removed it from the pouch. In the photo of the stem you can see the gap I mentioned at the stem shank union.Butz8 Butz9I decided to try a variety of methods to try to tighten up the fit of the stem. I started by carefully facing the shank on a topping board. I have had success in the past with this and was hoping that it would solve the issue.Butz10I also used a sharp knife to bevel the end of the mortise thinking that it would better accommodate the rise around the tenon.Butz11But none of these measures solved the issue of the fit against the shank. The fit was better but the gap remained. I would need to come up with another solution.Butz12 Butz13I laid that issue aside and reamed the bowl with a PipNet reamer.Butz14 Butz15After reaming I used a brass brush to clean off the buildup on the rim. I was able to get rid of the thick tars and reveal the sandblast that was underneath.Butz16I scrubbed the finish on the bowl with acetone and cotton pads to remove the grime and grit in the crevices of the blast.Butz17 Butz18 Butz19 Butz20The more I looked at the pipe the more I wondered if someone had not cut off the end of the shank to shorten it or to remove damaged areas. The number stamping was really close to the stem even before I faced it. I worked on the stem to clean it up. I used a dental pick to open the slot on the end and then used pipe cleaners and alcohol to clean out the tars and oils.Butz21I cleaned out the shank at the same time with pipe cleaners, cotton swabs and alcohol. While I was at it I thought a band might look good on the pipe and give me a clean edge to fit the stem against. I went through my box of bands and found a round one that was the correct diameter. I squashed it to the shape of the shank and heated it with a lighter. I pressed it onto the shank. It covered the shape number but did not affect the rest of the stamping.Butz22I liked the classic look of the nickel band on the shank of the Dublin and figured that once I had polished it and the stem I would have a good looking pipe.Butz23 Butz24I sanded the stem with 220 grit sandpaper to clean up the bite marks, the tooth chatter and the build up around the button. It also loosened the oxidation. I wet sanded it with 1500-2400 grit micromesh sanding pads and gave it a rub down with Obsidian Oil. I dry sanded it with 3200-4000 grit micromesh pads and then gave it another coat of oil. I finished sanding it with 6000-12000 grit pads and gave it a final coat of oil. I let the oil dry.Butz25 Butz26 Butz27I buffed the pipe with Blue Diamond on the buffing wheel to raise the shine on the stem and the band. I lightly buffed the bowl so as not to damage the sandblast. I gave the bowl a light coat of carnauba wax and the stem several coats of wax. I buffed it with a clean buffing pad and then by hand with a microfibre cloth to deepen the shine. The finished pipe is shown in the photos below. I think the band gave this particular pipe a touch of class. The pipe is a beautiful example of this shape. Thanks for looking.Butz28 Butz29 Butz30 Butz31 Butz32 Butz33 Butz34

A New Brand for me – A Riff 221 Horn Stem Billiard


Blog by Steve Laug

This was a new pipe brand for me. It is stamped RIFF in a double lined diamond on both the left side of the shank and on the horn stem. On the right side it is stamped CHELLA over *** (3 stars). On the underside of the shank it is stamped Made in Morocco and the shape number 221. This has to be the first Morocco made pipe that I have worked on. It was in pretty decent shape in terms of the bowl. There was a shiny shellac coat over a natural finish. The rim had some tars and oils built up on the back top side but inner and outer edge was in perfect shape. There was a slight burn mark on the front right top of the rim. The bowl had a slight cake that was uneven around the inside. The problem lay in the stem. There was a large crack in horn on the top that traveled half way down the stem. There was also a large chunk of horn missing on the underside of the stem. It was a very smooth scooped shape chunk that made me wonder how it had happened. When I pulled the stem out of the shank there was a large stinger apparatus that extended the length of the shank and ended in the bottom of the bowl. The tenon was metal. The internals of the shank and stem were quite clean.Chell3 Chello1 Chello2I was jazzed to work on this stem as it provided several challenges to me. I forgot to take pictures before I started but caught myself just after I started to work on the underside of the stem. I wiped the stem down with a cotton pad and alcohol to clean off the surface. I began to fill in the edges of the missing chunk with clear super glue. I layered the glue in place on the area until it was filled. Once it had cured overnight I would sand it down smooth with the surface of the stem.Chello4 Chello5I cleaned out the crack with a dental pick. I drilled a tiny hole with a micro-drill bit at the end of the crack – toward the button. I filled in the crack and the drill hole with clear super glue and squeezed the crack together. I repeated the fill process until it formed a ridge along the crack. Once it cured I would sanded it smooth as well.Chello6 Chello7 Chello8 Chello9While the repairs on the stem dried I worked on the stinger. I used the brass bristle brush and alcohol to scrub off the oils and tars.Chello10In the morning I sanded the stem with 220 grit sandpaper. I had built up the edge that faced on the shank to fill in the gap caused by the crack. In the photo of the top view of the stem it is the darkened band around the edge of the stem next to the shank. I sanded the stem smooth and blended the repairs into the surface of stem.Chello11 Chello12 Chello13 Chello14I took some close-up photos of the stamping to show it to you. It was unique to me. The first photo shows that the underside of the shank reads Made in Morocco 221. The second photo shows the stamping on the left side and the horn stem – RIFF in a double diamond. The third photo shows the stamping on the right side of the shank – CHELLA ***. At this point you can see the repairs have blended into the surface quite well. They are darker than the stem material but most of that will disappear as the stem is polished. The stem is smooth on the top and the bottom and the crack and the missing chunk are no long detectable to touch.Chello15 Chello16 Chello17I continued to sand the stem until the repairs were very smooth.Chello18 Chello19 Chello20 Chello21With the initial work done on the stem I worked on the bowl. I reamed it with a PipNet reamer and took the cake down to bare wood.Chello22 Chello23 Chello24The rim top was damaged with heavy tarring and a small burn mark on the front right side. I topped it lightly with a topping board to remove the damage and the build up.Chello25 Chello26I scrubbed the shellac off the bowl with acetone on cotton pads to get down to the natural briar.Chello27 Chello28 Chello29I cleaned the stem with pipe cleaners and alcohol and the shank with the same using cotton swabs along with the pipe cleaners. It did not take much to remove the grime on the inside.Chello30 Chello31I wet sanded the stem with 1500-2400 grit micromesh sanding pads to begin to polish it. The first photo below shows the top of the stem and the second shows the underside.Chello32 Chello33I rubbed it down with Obsidian Oil and then dry sanded with 3200-4000 grit pads. The cracked area on the top of the stem is visible when you look for it but it is smooth to touch. It is interesting to see the striations begin to show in the polished horn.Chello34I gave it another coat of oil and then finished sanding it with 6000-12000 grit micromesh pads. The crack is definitely less visible on the top side of the stem (first photo below) and the filled in area on the underside is almost invisible (second photo).Chello35 Chello36I rubbed the briar down with a light coat of olive oil and then buffed the stem and bowl with Blue Diamond on the wheel. I gave the pipe multiple coats of carnauba wax and buffed it with a clean buffing pad. I had buffed it with a microfibre cloth. The finish pipe is shown in the photos below. I tried to give a variety of photos and angles so that you can see the repaired areas. Chello37 Chello38 Chello39 Chello40 Chello41The photo below shows the underside of the stem and the repaired area mid stem near the spot in the photo.Chello42The next two photos below show the repaired crack in the top side of the stem from various angles. While it is visible to the eye it is smooth to the touch. The crack has been stabilized and the drilled spot at the far end has stopped it from spreading further. I am happy with the finished pipe. Thanks for looking.Chello43 Chello45

Restemming a GBD International London Made – 508 Bent Billiard


Blog by Steve Laug

Quite a while ago now my brother Jeff picked up a handful of pipes from an antique shop in Montana. There were quite a few GBD pipes in the lot. One of them was this GBD International bent billiard. It came with a gnawed off stem that was irreparable. The bowl was caked and dirty and the rusticated/plateau top was filled with grime to the point that it was almost smooth. The bowl looked good under the grime and the finish looked salvageable. The pipe was stamped GBD in an oval over International over London Made on the left side of the shank. On the right side it was stamped with London England over the shape number 508. I failed to take photos of the bowl before I cleaned it up as I was on a roll with about four bowls going at the same time. Here is what it looked like after I had wiped it down with alcohol. I scrubbed the plateau top with a brass bristle brush and some Murphy’s Oil Soap. I rinsed it down with cool water and dried it off. It is in very good shape. I had reamed the bowl with a PipNet reamer and cleaned out the shank and the bowl. GBD1 GBD2 GBD3 GBD4I went through my stem can and had several potential stems there. I chose one that was slightly larger in diameter than the shank. I had to shorten the tenon as it was too long to sit correctly in the shank.GBD5 GBD6With the tenon shortened the stem fit nicely in the mortise. The diameter was close and I would adjust it to fit.GBD7The stem was a used one that I recycled and it had one deep bit mark on the top side near the button. I sanded it smooth and cleaned it before I filled it in with black super glue. Once the glue cured I sanded the repair with 220 grit sandpaper to smooth it out.GBD8 GBD9I used the Dremel and sanding drum to reduce the diameter of the stem. I sanded it with 220 grit sandpaper until the transition was smooth. I wiped down the bowl with acetone on cotton pads to clean off the remaining grime before restaining the rim with a Black Sharpie.GBD10 GBD11 GBD12 GBD13I heated the stem over a heat gun until it was pliable and bent it to the proper angle. I set the bend with cold water. I sanded the stem with 220 grit sandpaper to remove the scratches left behind by the Dremel and smooth out the flow of the stem.GBD14 GBD15I sanded the stem with micromesh sanding pads – wet sanding with 1500-2400 grit pads. I rubbed the stem down with Obsidian Oil and then dry sanded it with 3200-4000 grit pads. I gave it another coat of oil and then finished sanding it with 6000-12000 grit pads. I gave it a final coat of oil and let it dry.GBD16 GBD17 GBD18I buffed the bowl and stem with Blue Diamond on the buffing wheel and then gave the pipe multiple coats of carnauba wax. I buffed it with a clean buffing pad and then hand buffed it with a microfibre cloth. The finished pipe is shown in the photos below. The grain on this pipe is spectacular – great birdseye on the sides and cross grain on the front, back and bottom. The plateau or rustication on the rim that I stained black gives it a unique look. I think it is a beauty! Thanks for looking.GBD19 GBD20 GBD21 GBD22 GBD23 GBD24 GBD25 GBD26 GBD27

The Transformation of a Second Ugly Duckling – Can it be done a second time?


Blog by Steve Laug

This afternoon I took on the second ugly duckling from the eBay “hackster” who had ruined the pipe that I transformed into a swan earlier. This one is stamped Morell over Mackenzie on the left side of the shank and Imported Briar over Italy on the right side. The Morell was a filter pipe so it was made to accommodate a Medico style paper filter. The pipe was a mess. Picture with me what it looked like. It had been painted with a band of coffee grounds (?) around the rim going down the sides of the bowl about a ¼ inch. The rim had been roughly sawn off and the tooth marks of either the file or saw were still present. The shank had damage that was ignored. The entire pipe had then been coated with a thick, runny coat of shellac that had rippled over the surface and given the pipe an obscene shininess that highlighted the atrocities that had been done to it. The stem was original but the “hackster’s” hand had not missed it either. It was cut off and a poorly cut button was carved into the stem. No care of thought was taken to account for the angles of the stem to the button and nothing had been done to open a slot in the end of the button. If you cannot picture it in your mind’s eye here are some photos.Dublin1 Dublin2 Dublin3 Dublin4I took some close up photos of the rim and stem. The rim photo is a little out of focus but you can see what I was talking about above. It was a mess. The issues with the stem are pretty self evident.Dublin5 Dublin6 Dublin7 Dublin8I scraped the coffee grounds off of the bowl edge with a sharp pen knife. In doing so I found a large pink/white fill on the left side of the bowl across the top just below the rim edge. In the next two photos you can see the coffee grounds on the cloth I put on the work table to collect them when I scraped them off. The bowl was pretty full of fills all the way around.Dublin9 Dublin10I scrubbed off the shellac with acetone on cotton pads until I had removed all the thick, runny coat that covered the bowl.Dublin11 Dublin12I took a close up photo of the fill area on the left side to give you an idea of the size of it. It was large and ugly. The other side of the bowl also had several and one larger one mid bowl.Dublin13 Dublin14I took a photo of the rim to show the detail of the file or saw marks.Dublin15With fills this large and a pipe this ugly something had to be done with it or it would end up looking worse than it did when I started. The ugly duckling would just be a duck of another colour. There would not be any swan emerging unless I took some drastic measures. I taped off the stamping on the bowl and a band around the shank stem union with some electrical tape to protect it during the rustication and the staining. I used a series of burrs on the Dremel to cut a random rustication pattern on the sides of the bowl. Different burrs gave a different effect so follow the photos until the end of the rustication to get a full idea of how each burr worked.Dublin16 Dublin17 Dublin18 Dublin19 Dublin20 Dublin21 Dublin22 Dublin23When I finished with a series of five different burrs I then used the rustication tool that was gifted to me and tore up the finish even more. I wanted to cut some deep gouges in the briar to give it heavy rustication.Dublin24I followed that up with a flower frog (see picture below) to further rusticated the finish.Dublin25Once finished with the serious weapons I used a brass bristle brush to knock of the loose particles of briar and smooth things out a bit.Dublin26My next step in the transformation process was to stain the bowl. I chose an aniline black stain to go into the grooves of the rustication because of the large fills. The black stain would penetrate even the white stain in the grooves I cut into it. I applied the stain and flamed it to set it in the briar.Dublin27 Dublin28When the stain dried I removed the tape from the smooth areas. I sanded the high points on the rustication with a sanding block to remove the black from those areas. I wanted to have a contrast that blended well with the smooth areas. I chose on this bowl to also rusticate the rim because of the amount of damage that the “hackster” had done to that area of the pipe. With the sanding done you can see the contrast beginning to show.Dublin29 Dublin30 Dublin31 Dublin32After I sanded the bowl and rim I rubbed it down with a light coat of olive oil to enliven the briar. I let is absorb into the wood before I hand buffed the pipe with a shoe brush.Dublin33 Dublin34 Dublin35 Dublin36 Dublin37With the bowl finished it was time to tackle the damage done to the stem. It had been clipped off and then sloppily tapered to the hand cut new button. I worked on the taper with a flat file and a sandpaper until the transition on both sides of the stem matched. I also cleaned up the button as it was wider on the top than the bottom. I also shaped the button so that it was uniform. The button was pinched and there was an indentation on both sides of the stem in front of the button. I sanded the sides of the stem to remove that indentation.Dublin38The end of the stem was left with a raw air hole. I used needle files to clean up the shape of the button from the end and also to cut and shape a slot.Dublin39 Dublin40The photo above shows the general shape of the slot. I still needed to flatten the face of the button and to clean up the slot but you get the idea. I also used some tiny spots of superglue to fill in the areas on the left side of the stem near the button where the “hackster” had cut back too much material. Once it dried I sanded it with 220 grit sandpaper to smooth it out and blend it into the surface of the stem.Dublin41With the reshaping and tapering done to the stem I went on to use my usual array of micromesh sanding pads. I wet sanded with 1500-2400 grit pads and gave it a coat of Obsidian Oil. I dry sanded with 3200-4000 grit pads, another coat of oil and then finished with 6000-12000grit pads. I gave it a final coat of oil and let it dry.Dublin42 Dublin43 Dublin44I buffed the bowl and stem with Blue Diamond – making sure to use a light hand on the bowl. Then I gave the stem several coats of carnauba wax. I gave the bowl a coat of Halcyon II wax and hand buffed the bowl with the shoe brush. I gave the entire pipe a final buff with a microfibre cloth. I think the ugly duckling once again became a swan. What do you think? I may well have to make a new stem for it one day. Dublin45 Dublin46 Dublin47 Dublin48 Dublin49 Dublin50 Dublin51 Dublin52 Dublin53

There has got to be a Swan in there somewhere – doesn’t there?


Blog by Steve Laug

Sometimes you are handed an ugly pipe. This one came to me from my brother and was part of a lot from an eBay seller who claims to be restoring estate pipes. Let me tell you, this guy should be shot for what he does to old pipes. My brother picked up four of his pipes. From his photos they appeared to be okay. But when they arrived they were absolutely awful. He had a lovely Stanwell sandblast billiard that he hacked the blast off of. He had a nice looking Dublin shape that he glued what appears to be coffee grounds around the rim from the top down about ¼ inch of the side. The third was butchered as well. Then there was this one – it must have been a nice Rhodesian but he had sawed it off below the rings and then left a very rough rim. He had drilled out the bowl and left it rough and out of round. To my thinking this one had been a GBD Rhodesian. The stem was stamped with the characteristic FRANCE across the joint of the shank and stem. There were remnants of a shape number on the right side that was illegible. There was also a very faint part of the oval on the left side of the shank. He had ruined a very sought after pipe. Added to that he had not even bothered to open the airway as it was plugged with thick black tars and I could not blow any air through it.

To top it all off he even pictures the final insult – in his sales he shows a can of shellac and proudly says he coats all of his work with shellac. Well the amount of dried, runny shellac on these bowls was astonishing. Under the shellac there were even hairs and dust permanently encased in a coat of the thick shiny mess. They all looked awful. The dried runs, the scratches and grooves left much to be desired. Even the stem had not escaped his savage attempts at restoration. There were sanding marks and large dings along the surface of the top and the bottom. The tooth marks that had been there were still evident. A large part of me wanted to throw them all away. But there is always that part of me that wants to see if I can reclaim these hack jobs and make something useful and beautiful out of the guy’s mess. I decided to tackle the cut off Rhodesian first. Time would tell if I could redeem the pipe and make it usable and beautiful once more.

Here is what it looked like when it arrived. Understand that the photos do not begin to give an idea of what the pipe looked and felt like I person… the best that they can do is give you a sense of what was there.Author1 Author2 Author3The first thing I decided to do after looking at it was to reshape the bowl. I used a Dremel and sanding drum to round the edges of the top to make it look more like a prince. It was a lot of sanding with the Dremel to reshape the bowl. The photos below show the process of shaping from the beginning. The first two photos show the first steps in the removal of briar to give the pipe some shape. Was the swan starting to appear? Not sure at this point.Author4 Author5I gave the sides of the bowl more of a curve toward the rim and reduced the size of the rim with the Dremel and sanding drum as shown in the next photos.Author6 Author7 Author8At this point I decided to top the bowl and get rid of the deep scratches on the rim top. The bowl after topping was beginning to take some stately shape. Maybe the swan was beginning to appear.Author9 Author10There was still too much width on the rim and not enough curves to the sides of the bowl for my liking. I sanded the bowl with 220 grit sandpaper to further shape it. I used acetone to remove the shellac and the messy finish on the remaining part of the bowl and shank. The pipe was quickly becoming mine rather than the work of the “hackster”.Author11I tried in vain to blow through the shank. The airway was blocked. I used an unfolded paperclip to break through the thick blockage. I poked and probed until I was able to blow through the airway. Once it was opened I used the drill bit on a KleenReem pipe reamer to unblock the airway. It took a bit of pushing and twisting to get it through the hard tars that lined the airway. Finally I was able to break through. I cleaned the shank and airway with pipe cleaners, cotton swabs and alcohol.Author12 Author13 Author14I put the pipe away for the night. In the morning I was still not pleased with the curvature of the bowl top so I used the Dremel and sanding drum on it once again and gave the bowl more of an upward slant toward the rim. I reduced the width of the rim top to almost nothing. Once I had the bowl shape better defined I sanded the bowl with 220 grit sandpaper to shape it further. I then went to work on the rim. I decided to bevel the rim inward to try to clean up the shape of the bowl. I folded a piece of 220 grit sandpaper and worked on the rim until I had a nice rounded top and beveled inner edge.Author15I sanded the bowl with a medium and a fine grit sanding block to remove the scratches. To me the swan is finally emerging. This piece of briar has some beautiful grain that was hidden beneath the dirty finish and the overcoat of shellac. I am liking the look of the pipe more and more.Author16 Author17 Author18 Author19The stem was actually more of a mess than I had initially thought. In sanding out the bite marks as much as the hack had done he has changed the slope of the stem. Now the angles of each side were different and the marks he had left behind were quite deep. I sanded the stem with 220 grit sandpaper to remove the marks and to try and reclaim the shape of the stem. Author20 Author21Once I had the shape of the stem repaired I sanded it with micromesh sanding pads – wetsanding with 1500-2400 grit pads and then rubbing it down with Obsidian Oil. I dry sanded with 3200-4000 grit pads and gave it another coat of oil. I finished with 6000-12000 grit pads and gave it a final coat of oil.Author22 Author23 Author24I sanded the bowl with micromesh sanding pads at the same time. Each successive grit pad from 1500-12000 gave the bowl a deeper shine.Author25 Author26 Author27 Author28I finished by buffing the pipe on the wheel with Blue Diamond polish and giving it multiple coats of carnauba wax. I buffed it with a clean buffing pad and then gave it a final hand buff with a microfibre cloth. The finished pipe is shown below. The grain on this old timer that has been given a new life is amazing. What do you think did the swan emerge from this ugly duckling? I think so but I am curious as to what you think. Thanks for looking.Author29 Author30 Author31 AUTHOR32 Author33 Author34 Author35

Bringing New Life to a Yello-Bole Metal


Blog by Steve Laug

My brother found this older Yello-Bole metal pipe. It is a lot like the older Grabow Vikings but the bottom of the bowl is different from the Grabow. Between the bowl and the metal base there is a flat perforated screen or disk that the tobacco sits on. It acts as the bottom of the bowl. The wooden bowl itself is a threaded tube that screws into the base. There are two pin holes on the sides of the base (one on each side about mid base below the bowl). These serve as openings to draw air into the bowl. This one was in decent shape and would take a little work to clean up. The photos below were provided by the eBay seller and show the state of the pipe. From the first two photos below you can see the wear on the stem and the white calcification that generally builds up under a rubber softee bit. The finish on the bowl is shot. There is nothing but bare briar showing. The outer edge of the rim looks good. YB1 YB2The next two photos give a top and underside view of the pipe. You can see the ring of cake in the bowl around the middle and lighter on the top and bottom edges. You can see the metal disk in the bottom of the bowl. I have purchased a few of these over the years and almost all of them were missing the metal disk that sat in the base between the bowl and base. The stem shows some tooth marks on the top and underside.YB3 YB4The final photo included by the seller showed the stamping on the underside of the base. It read Yello-Bole horizontally along the bottom of the shank. It also gave the patent number on the bottom of the base. It read PAT. over 2467002 over PAT. PEND. That was enough data to do a patent search on the US Patent Information site. http://www.uspto.gov/patents-application-process/search-patents. From there I copied the patent drawing and included it below.YB5The diagram and the accompanying documents show the conceptual and descriptive narrative of what the pipe was about and what its maker hoped to achieve with his design. The inventor was a Samuel Laurence Atkins of New York. He filed his patent application on July 14, 1945. The patent was granted April 12, 1949. The pipe that I have is stamped Patent Pending thus it is easy to extrapolate that it was made between the dates July 14, 1945 and April 11, 1949 which are the dates before the patent was granted. That makes this pipe between 67-71 years old. It is in pretty decent shape for a pipe of that age.YB6 YB7I took the following photos when the pipe arrived. The seller’s photos were pretty good at showing the issues with the pipe. All the things noted above were correct.YB8 YB9 YB10 YB11The pipe was quite easy to take apart. I unscrewed the bowl and tapped out the disk in the base. The stem came out of the shank with little effort. I took the photo below to show the parts. The second photo shows the cake in the bowl.YB12 YB13I started the clean up with reaming the bowl. I used the PipNet reamer and the largest cutting head to ream from the top of the bowl. I used the second head to ream the bowl from the bottom. I reamed it back to bare briar. There was still some of the signature Yello-Bole bowl coating showing near the top just below the rim.YB14 YB15I scrubbed the bowl base with a brass bristle brush to loosen up the dried tars and oils in the base. I used a dental pick to clean out the threads. I also scrubbed the disk with the brush. YB16 YB17I used pipe cleaners, cotton swabs and alcohol to clean the surface of the disk and the inside of the base and airway.YB18 YB19

I scrubbed the interior and exterior of the stem with alcohol and pipe cleaners to remove the build up on the outside and the oils on the inside.YB20With the cleanup finished I set the parts on the table and took a few photos of the cleaned up pipe. Now it was time to restore it.YB21 YB22I wiped down the bowl with cotton pads and acetone to remove the grime and the remaining finish on the bowl.YB23

I stained the bowl with a dark brown stain pen.YB24 YB25I buffed the bowl with red Tripoli to spread and polish the stain. I buffed it with Blue Diamond and rubbed the bowl down with a light coat of olive oil. At this point in the process the bowl and the metal base was complete. I took the following photos to show the state of the progress thus far.YB26 YB27 YB28 YB29 YB30I cleaned the stem and used a clear super glue to repair the deep tooth marks in the top and underside of the stem near the button.YB31 YB32I sanded the repairs with 220 grit sandpaper to blend it into the surface of the stem. YB33 YB34I worked on the stem with micromesh sanding pads. I wet sanded with 1500-2400 grit sanding pads and then rubbed the stem down with Obsidian Oil. I wet sanded with 3200-4000 grit pads and gave it another coat of oil. I finished by dry sanding with 6000-12000 grit pads. I gave it a final coat of oil and let it dry.YB35 YB36 YB37I buffed the bowl and stem with Blue Diamond on the wheel and then gave both multiple coats of carnauba wax. I buffed it with a clean buffing pad and then by hand with a microfiber cloth. The finished pipe is shown in the photos below. Thanks for looking.YB38 YB39 YB40 YB41 YB42 YB43

Replacing a Threaded Mortise/Tenon system with a Push Mortise/Tenon System in a Meerschaum Pipe


Blog by Steve Laug

When I received this meerschaum pipe the sender said that it needed to have the tenon replaced. It looked like it would be a simple repair so I left it until last. I restemmed the other little meerschaum that I posted earlier and put a new tenon on an Italian pipe for him and figured that this would be an easy fix. I unscrewed the stem from the broken tenon – it was split and half of it was missing. The stem came off with no problem. I had a perfect replacement tenon available to me so I screwed it into the stem and then looked at the broken tenon in the shank. Still the problem seemed quite simple. I used my wood screw and threaded it into the airway and tried to pull the tenon – either unscrewing it or at least wiggling it free. It did not move at all. I looked at it with a lens and saw that there were remnants of epoxy around the portion of the tenon that showed. Now I was in trouble. What had originally been an easy fix now was complicated.Meer1Meer2Meer3 Meer4Before I drilled out the tenon I took a few photos of the bowl to show the condition of the meer. It was worn and scratched but had some beauty that shown through the grime and the scratches. The rim was dirty and pitted but the edges were sharp. The bowl interior was lightly caked and the pipe smelled of strong aromatics.Meer5 Meer6 Meer7 Meer8I drilled out the tenon in the shank of the pipe starting with a bit slightly larger than the airway. No problem with that first step. I increased the size of the bit and drilled it again. It was my hope to have the glued tenon break free with the drilling. I increased the size of the bit yet again, this time to almost the same size as the threaded tenon. No luck. The tenon was absolutely stuck to the insert in the shank. I increased the bit size once more and this time the tenon broke. I tried to pick out the remaining pieces but they were solidly glued in place. I looked at the insert with a lens and could see that the glue and tenon had damaged the internal threads on the insert. This was turning into a real pain. I would have to drill out the entire insert and replace it. Once I had the tenon free I figured this would be easy as well. Again I was wrong. The insert was also glued in place. I increased the size of the bit several times until I had removed the insert itself. This old pipe was turning into a head ache.

I finally was able to remove the insert. I examined the inside of the shank. The original drilling of this pipe was fascinating. It was obviously drilled in several stages stepping down the mortise to the airway. I wrote to the owner and asked if it would be okay to replace the threaded tenon and mortise set up with a push tenon. I figured why complicate things. He confirmed that he was okay with that replacement. I started work on the stem and shank for that set up. I drilled the airway on the stem slightly bigger to take the push tenon. I cleaned out the inside of the stem to remove the debris and the tars. I checked the fit of the tenon in the stem and it was a good fit. I would need to countersink the airway to accommodate the rim on the tenon.Meer9 Meer10 Meer11I cleaned out the shank and airway on the bowl as well. I fit the insert in the shank. The fit was good but I would also need to countersink it to make a flat surface for the stem to sit against.Meer12I used a slightly larger drill bit to create the countersink on the shank and pushed the insert in place. The fit was perfect. Due to the damage on the shank from all of the glue I would need to use glue to hold the insert in place but I wanted to clean up the fit before I set the glue in place. In the photo below the new system can be seen. The mortise insert is in place and the push tenon is on the stem.Meer13I cleaned out the shank one more time and then mixed a two part epoxy for the insert. I applied the mixture to the insert and pressed it into place. I aligned the airway and the stem so that things would be straight once it dried and set the bowl aside so the epoxy could cure.Meer14I used a drill bit to countersink the rim on the tenon into the stem. I threaded it in place to make sure the fit was correct.

I sanded the bowl with micromesh sanding pads to smooth out the roughness and bring back some of the shine of polished meer. I wet sanded it with 1500-2400 grit pads and was able to bring back a lot of the life in the meerschaum. I dry sanded with 3200-4000 grit pads to polish it further. The photos below show the pipe after I had sanded it. When I am working on an older meerschaum I do not like to remove all of nicks and scratches as they add character to an old pipe. They are like battle scars and each of them has a story to tell. I clean up the surface damage and highlight the patina but leave the pipe clean but looking its age.Meer15 Meer16 Meer17I let the epoxy set over night and then this morning pushed the stem into the new mortise. The fit was a little tight and I could see some light between the stem and the shank end. I needed to finesse the fit of the stem and shank.Meer18 Meer19 Meer20 Meer21I carefully sanded the end of the mortise with the Dremel to make sure the insert was flush against the meerschaum end of the shank. I also worked on the countersink of the tenon in the stem with a sharp knife to give it a wider and sharper bevel to accommodate the rim around the middle of the tenon. I polished the newly sanded and cut areas with micromesh sanding pads to smooth out the fresh work. I polished the stem and the bowl lightly with some soft white Beeswax and then buffed the pipe by hand with a microfibre cloth to raise the shine. The finished pipe is shown in the photos below. Soon I will pack up the threesome of pipes and send them back to the pipe man who sent them to me. They are all functional now and to me actually look and work better than they did before. Thanks for looking.Meer22 Meer23 Meer24 Meer25 Meer26 Meer27 Meer28 Meer29