Blog by Steve Laug
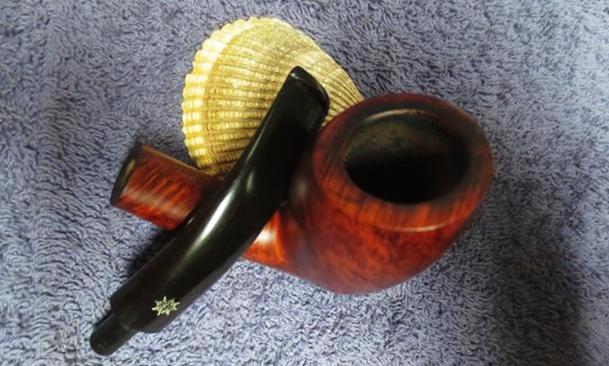
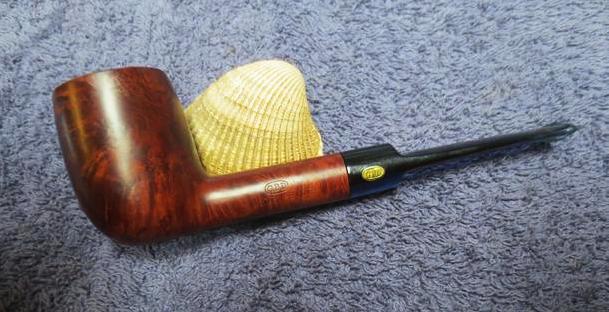
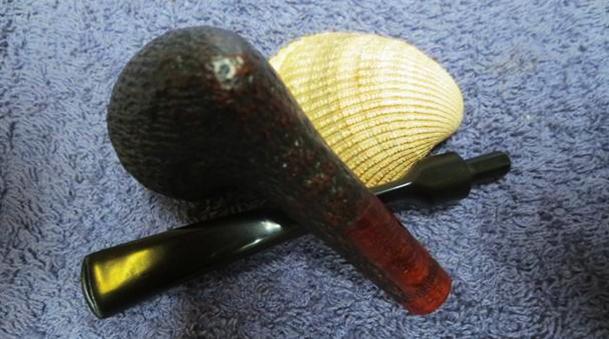
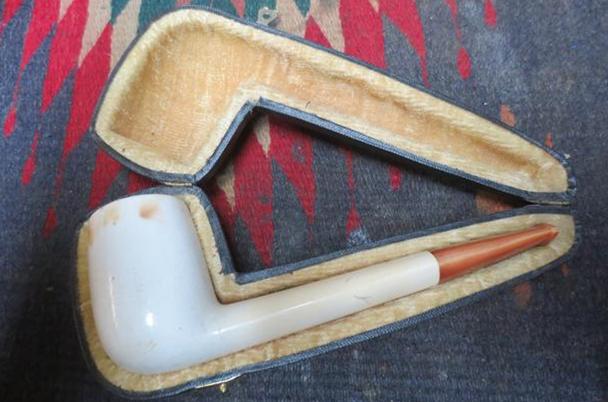
Not long ago I got an email from Mark, who had been reading the rebornpipes blog. He said that he had seven pipes that had belonged to his uncle that he was wondering if I would be interested in restoring. He said that the pipe were in good condition in terms of the bowls (though in looking at them they were in need of a good cleaning). The finishes were in decent shape – just dirty. He said that the stems all had issues and he was right with that. Some were worn with tooth marks on the stem on both the top and underside at the button. Some had been chewed off. All were oxidized to varying degrees. He sent me the following photos of the pipes for me to have a look at and we talked back and forth via email. About a week ago or so they arrived here in Canada. He had done an amazing job packing the lot. Each one was packaged in its own baggy with the stem separated for shipping. They were nicely wrapped in bubble wrap and boxed with the return mailing address inside! Very nicely done package.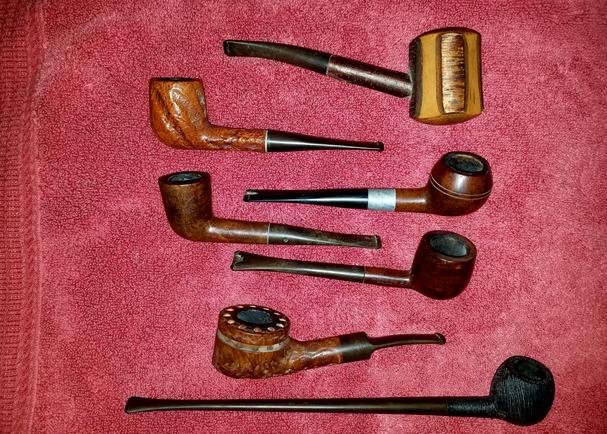
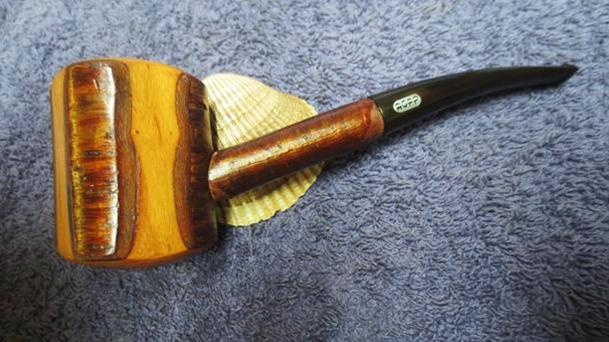
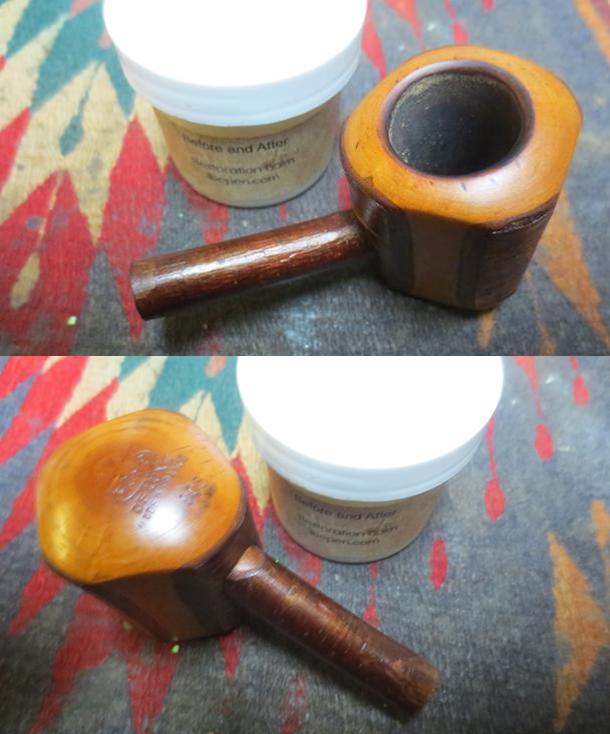
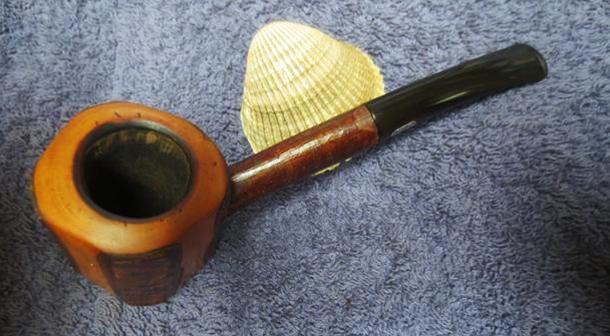
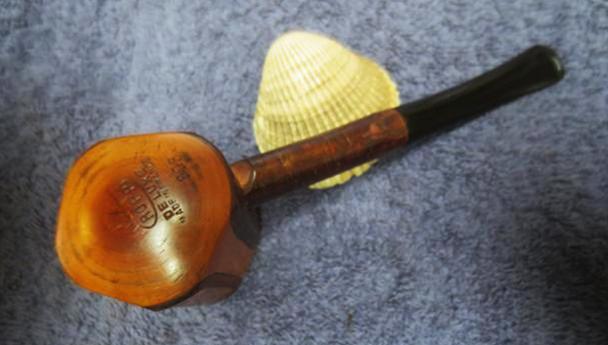
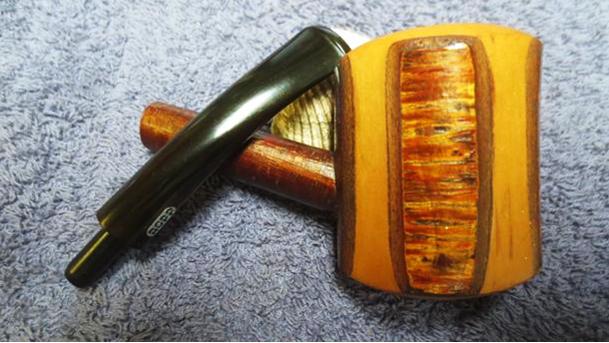
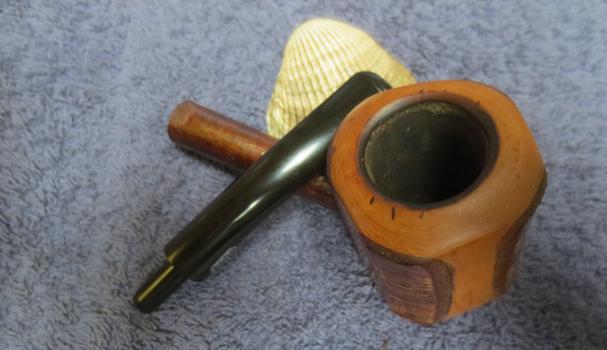
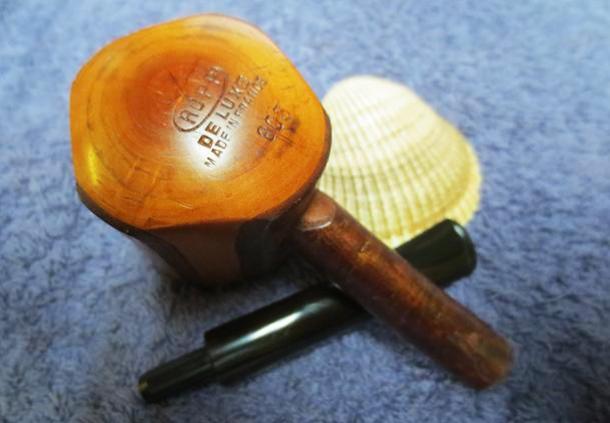
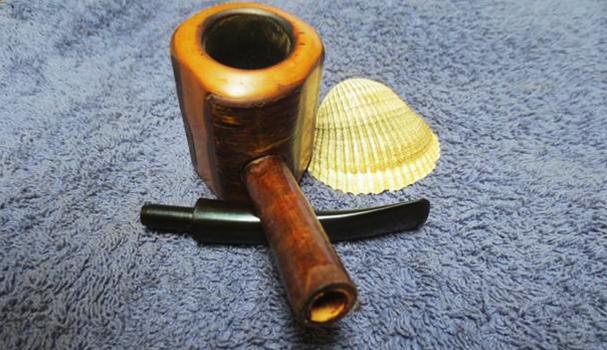
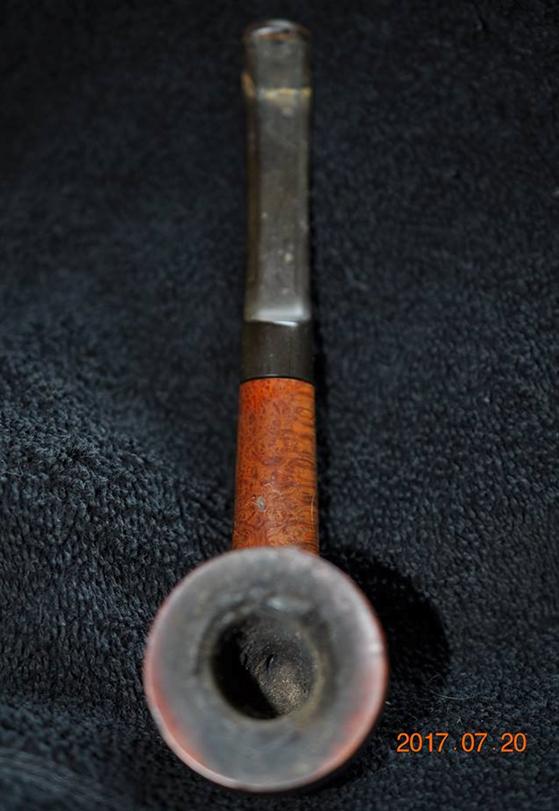
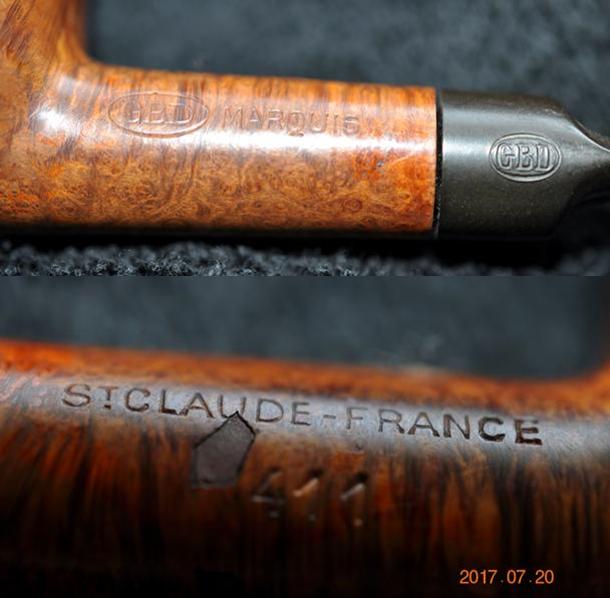
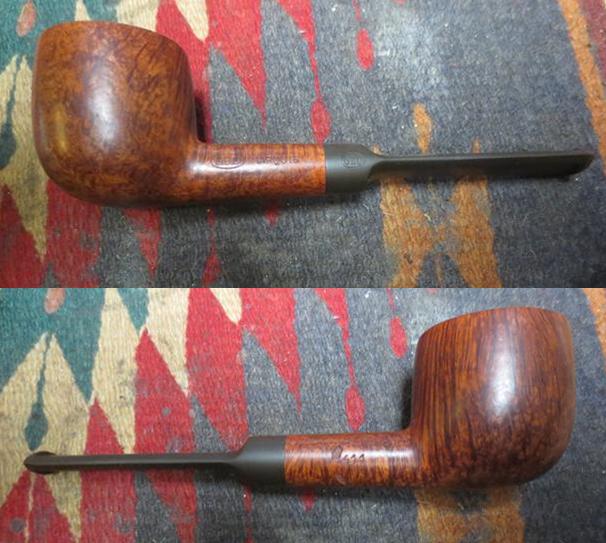
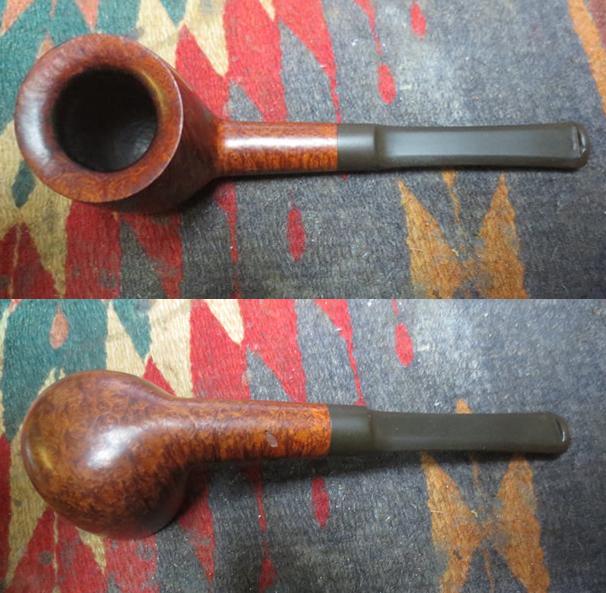
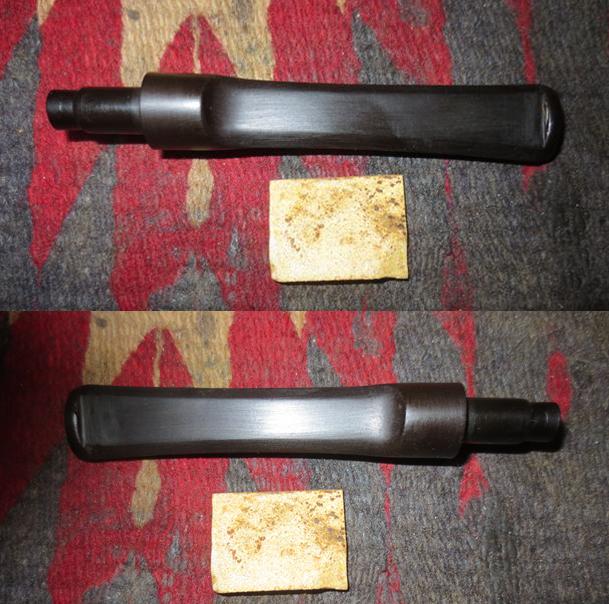
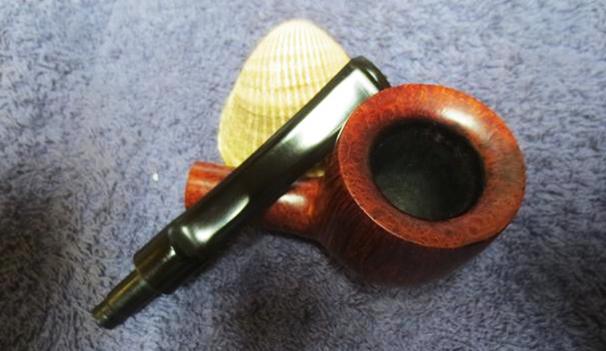
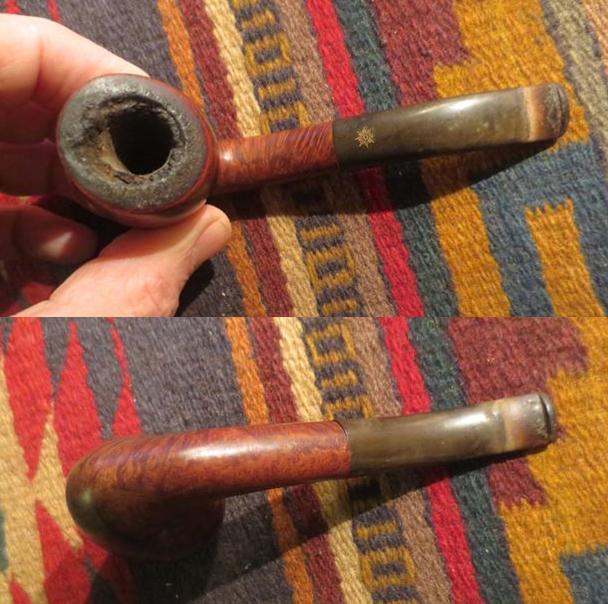
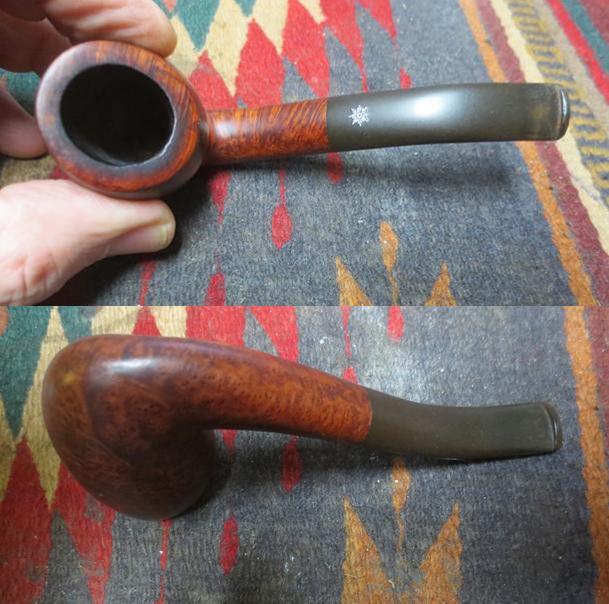
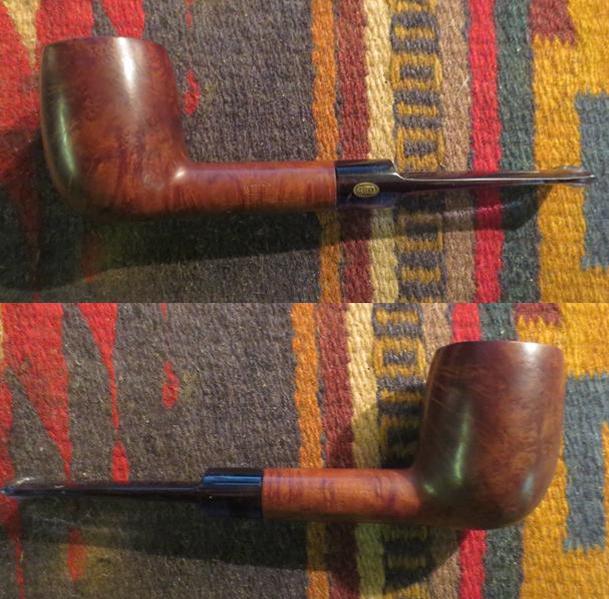
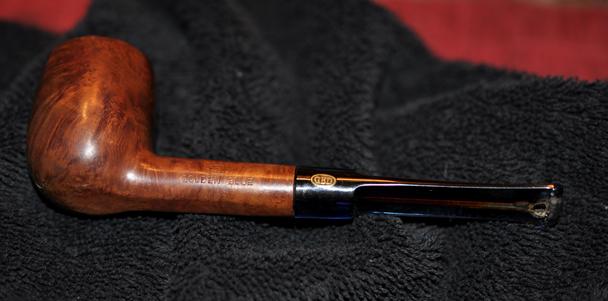
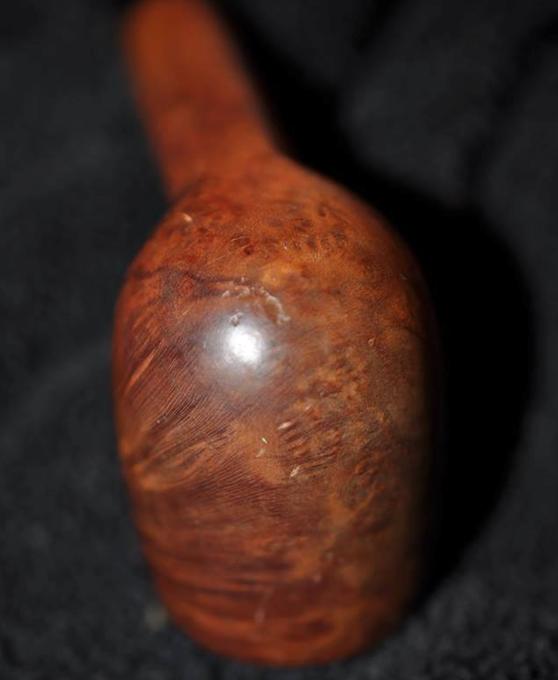
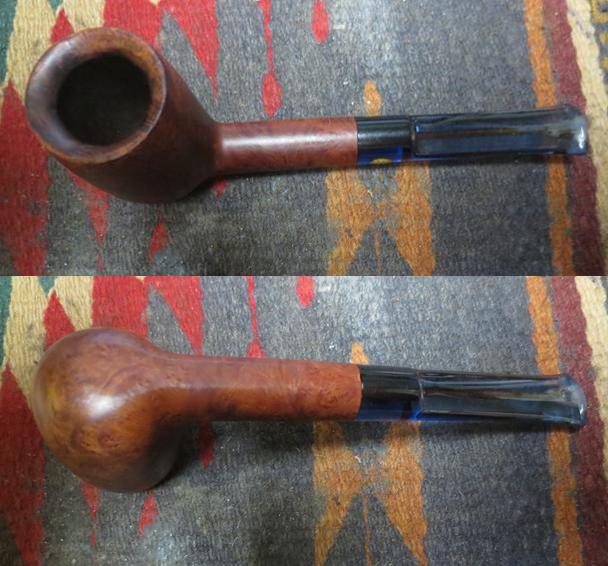
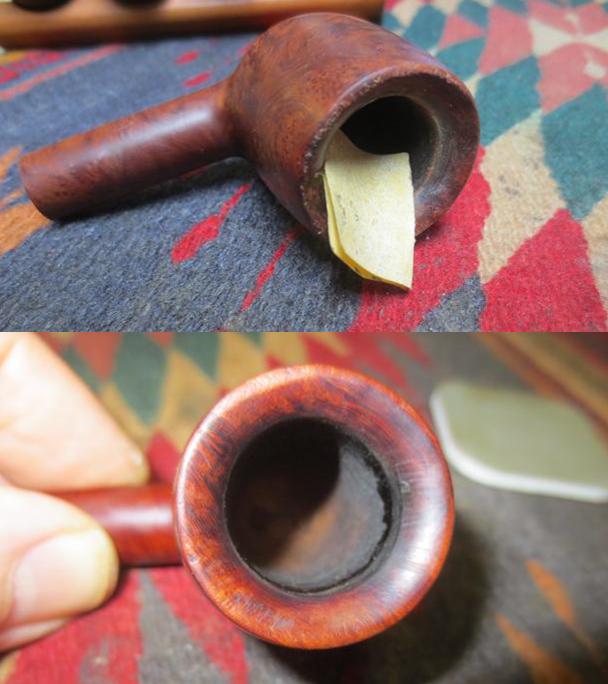
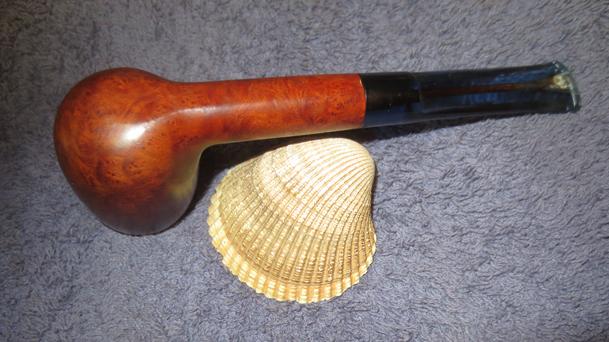
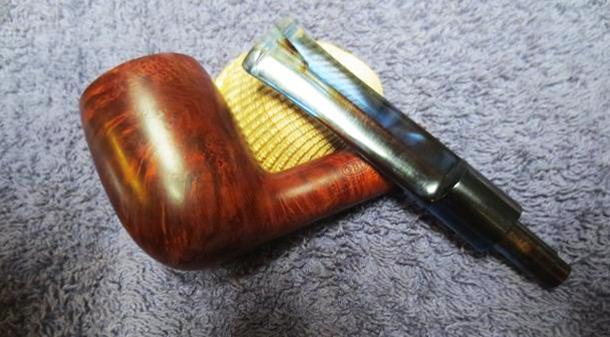
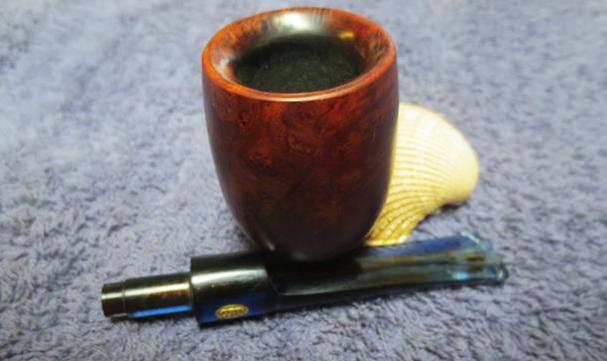
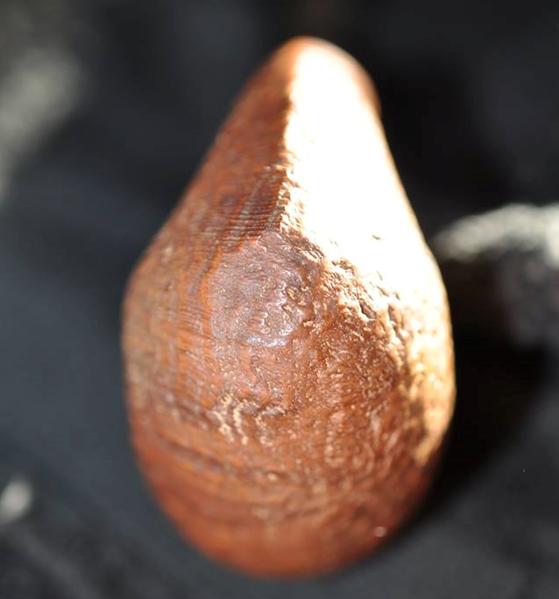
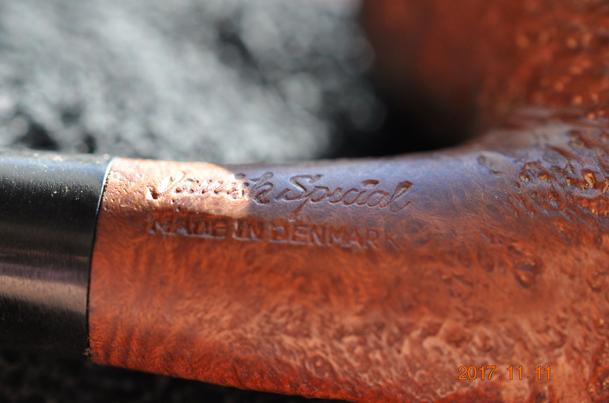
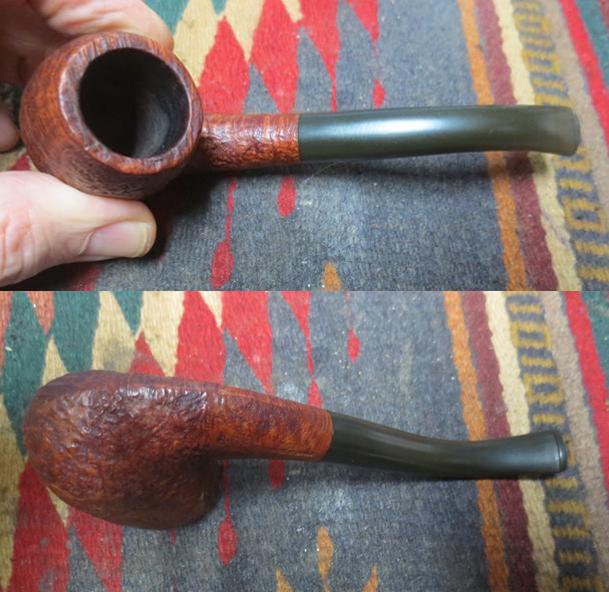
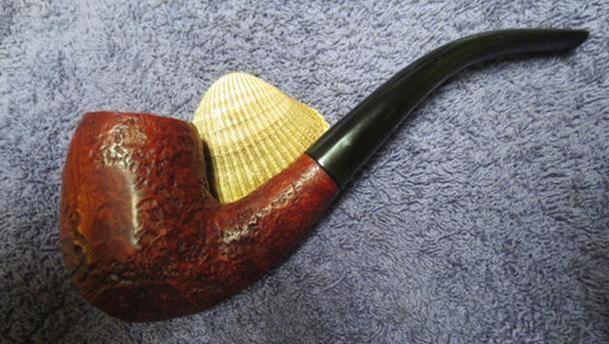
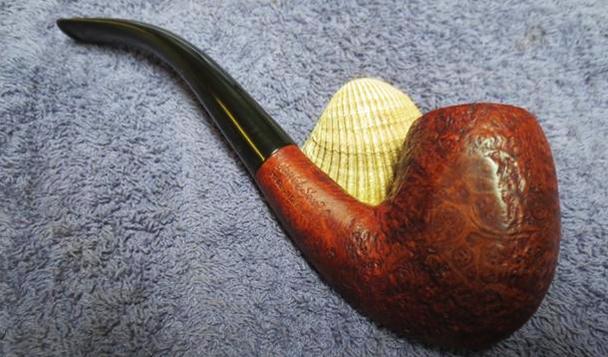
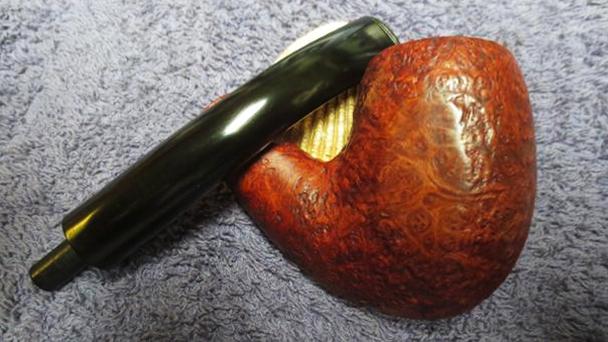
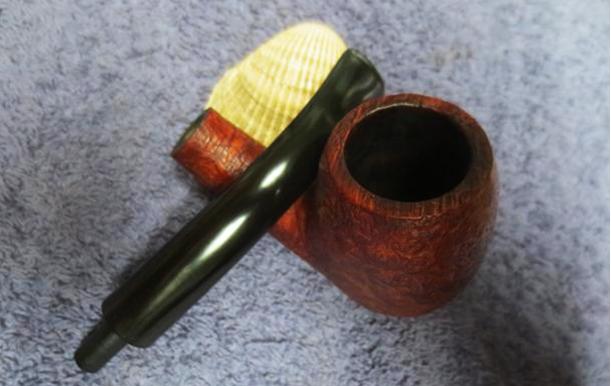
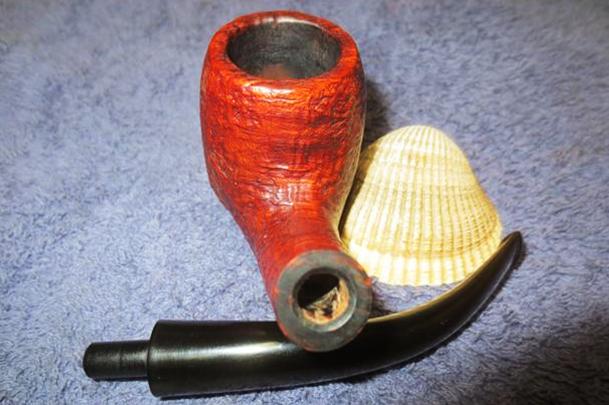
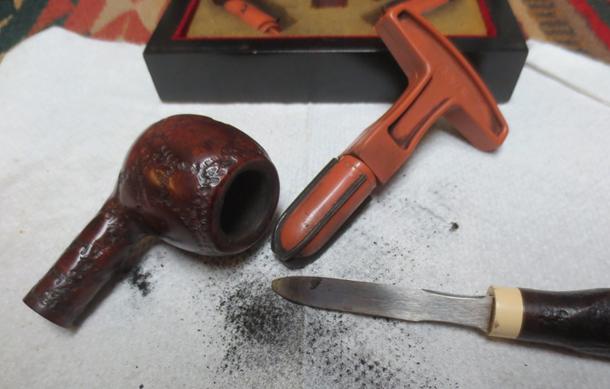
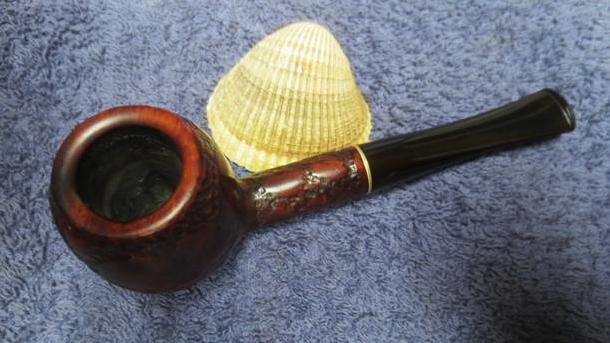
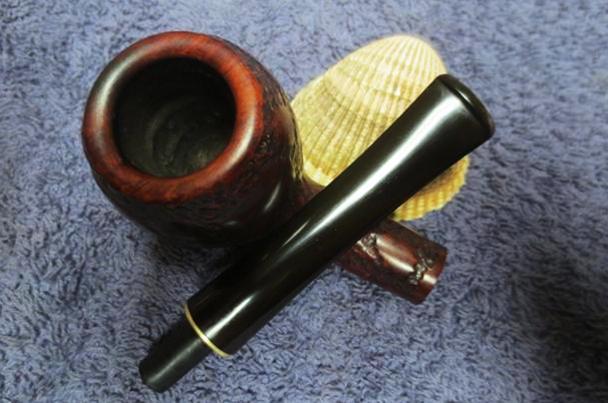
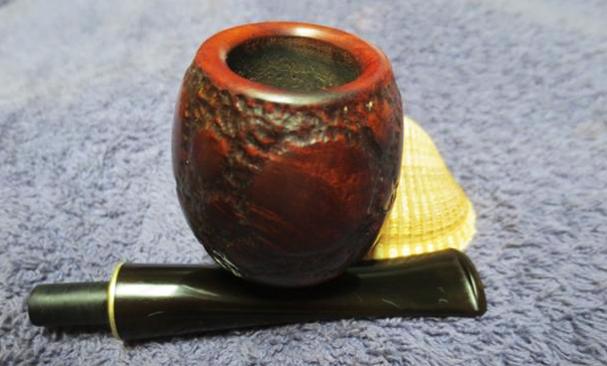
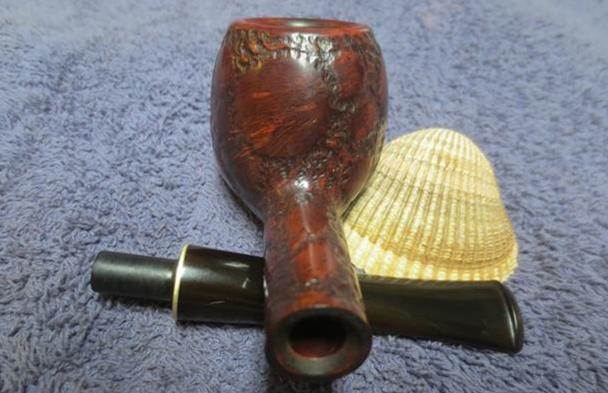
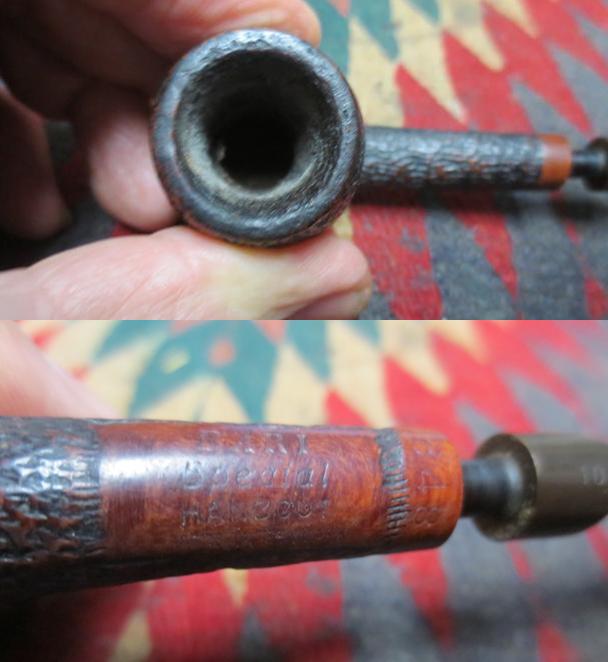
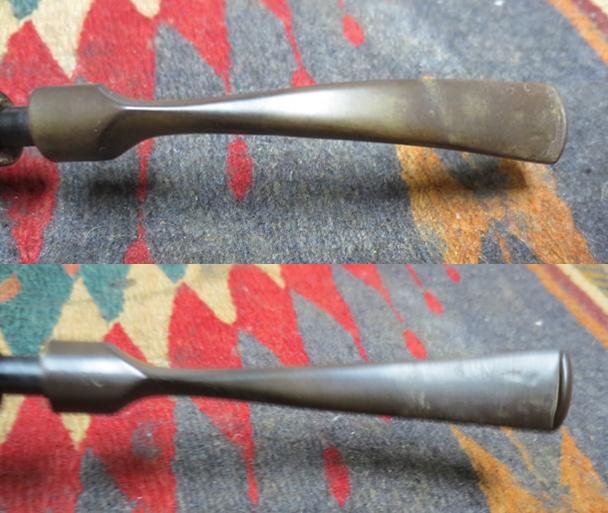
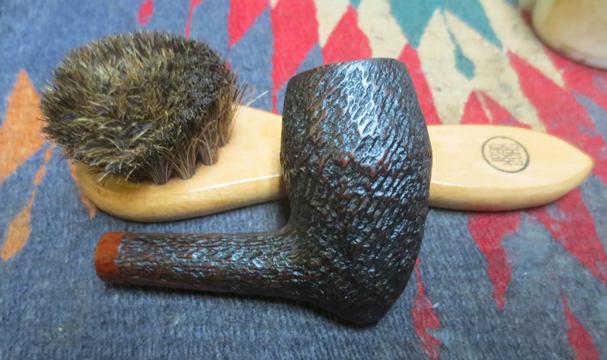
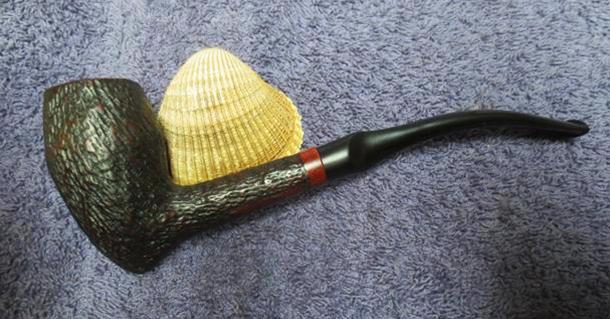
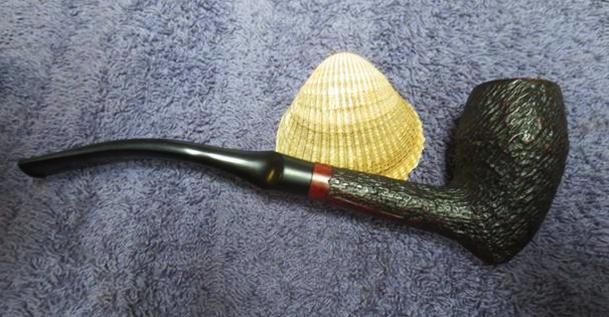
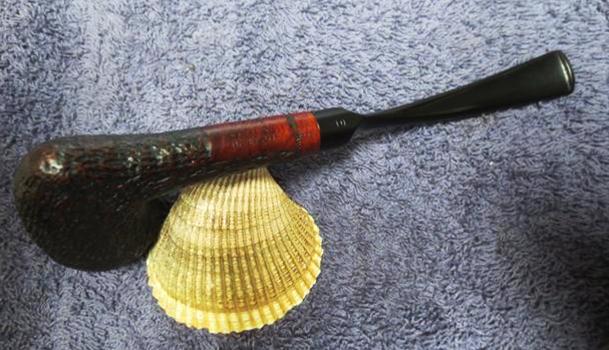
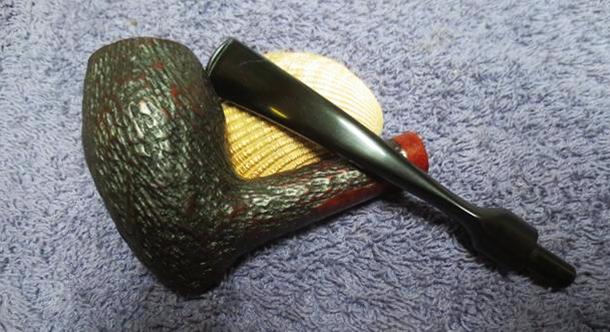
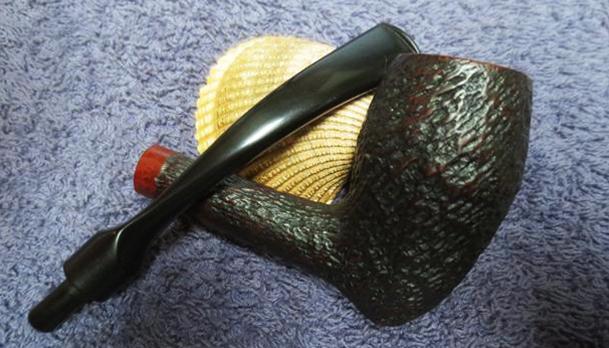
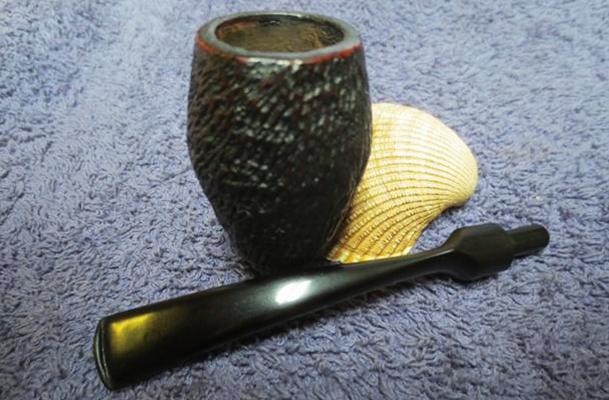
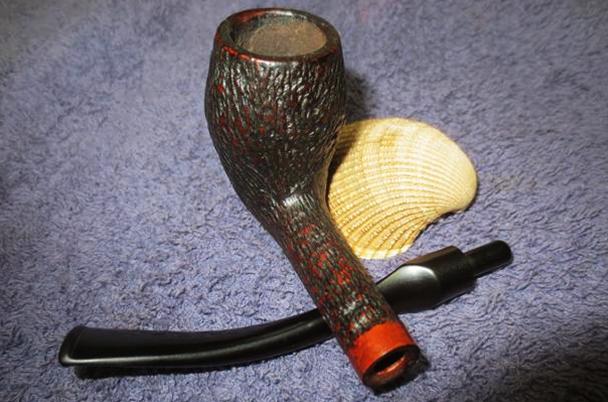
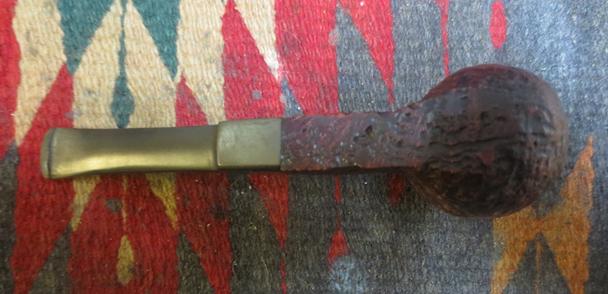
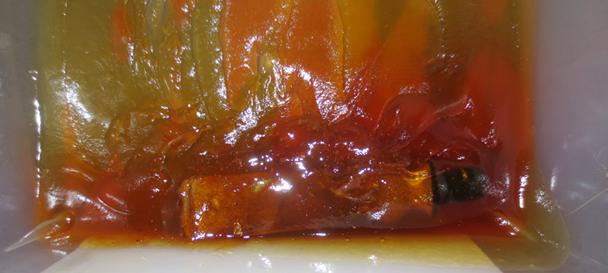
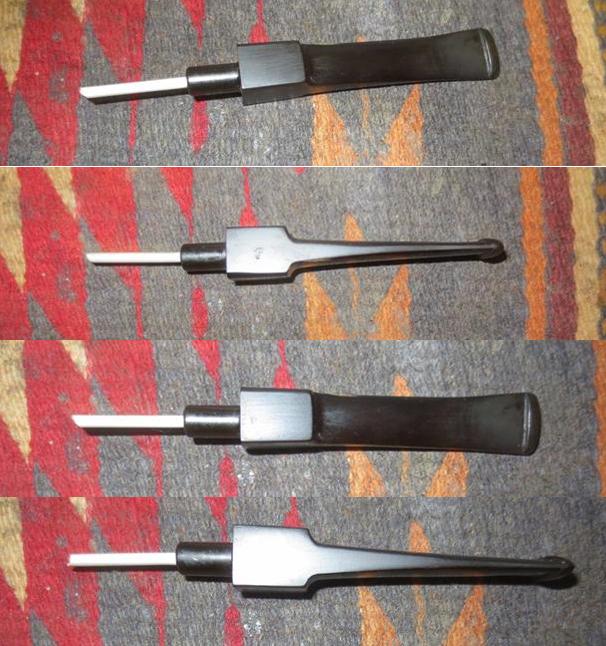
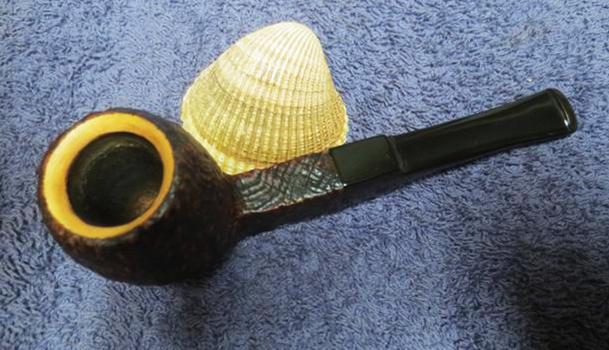
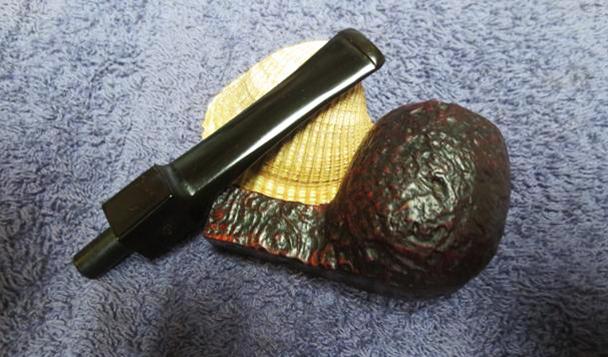
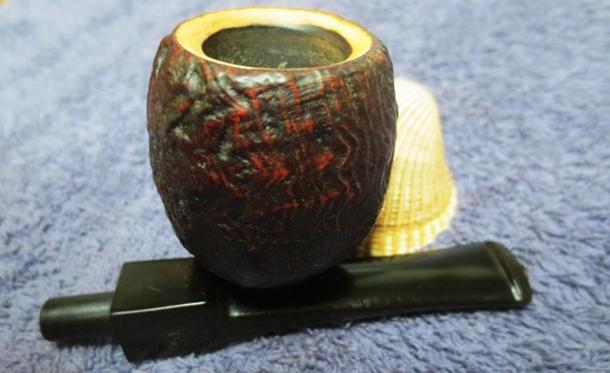
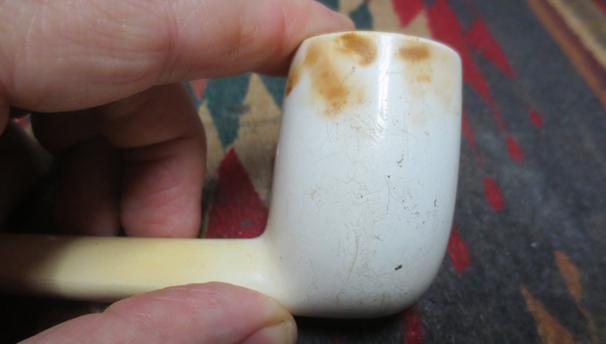
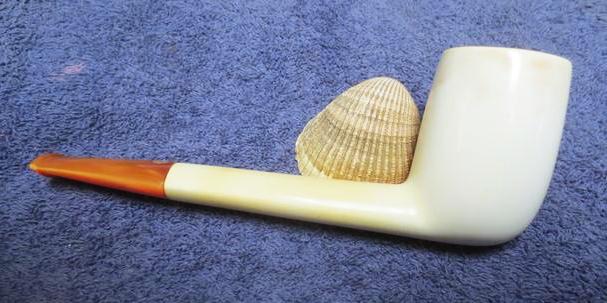
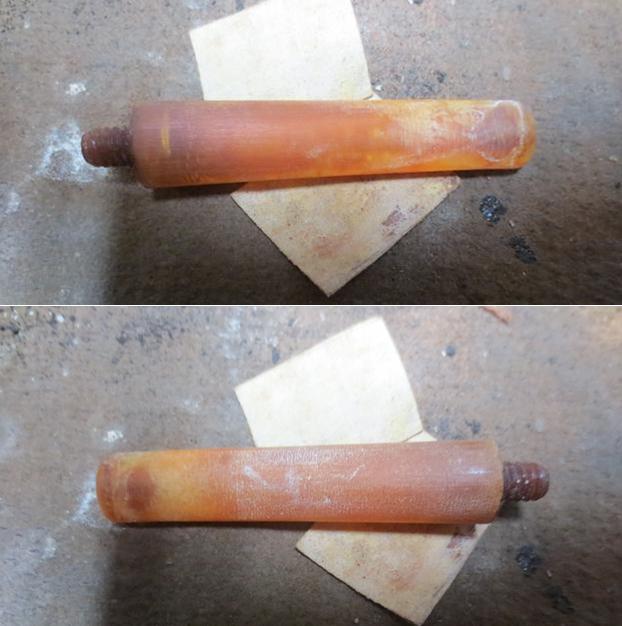
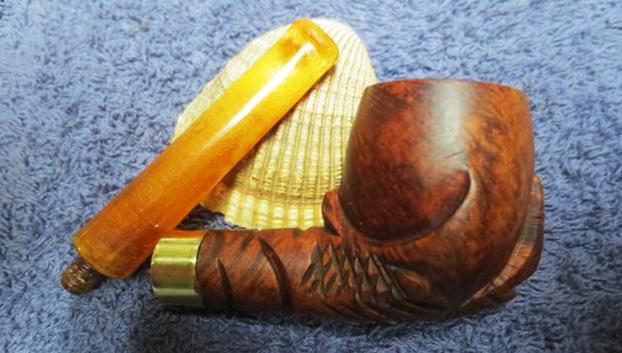
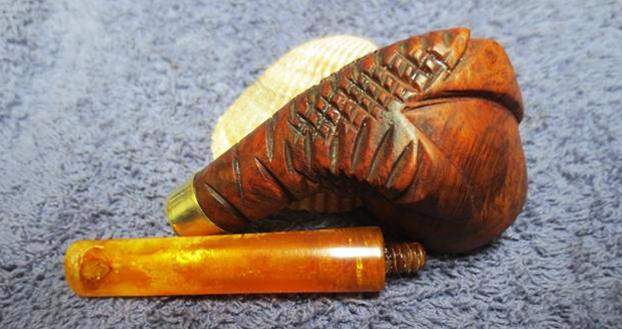
 I opened the box and unpacked each pipe. I went over them carefully to assess what was needed in terms of repair. I chose to work on the Cherrywood pipe at the top of the first photo and on the far left of the second photo. It is a nice looking Cherrywood pipe with panels. The high points on the bowl all had bark on them with stripes without the bark. The shank also had bark on it. The bowl had a light cake in it. The rim top had a thick overflow of lava on it that had overflow from the bowl. There were also some light nicks in the rim top. The underside of the bowl was dirty but it was stamped ROPP over De Luxe over Made in France. Underneath that what the shape number 805. The stem had tooth marks and tooth chatter on the top side of the stem with some deep marks on the underside. The stem surface was oxidized. It had the ROPP oval on the left side of the stem. I took the following photos before I started to clean up the pipe.
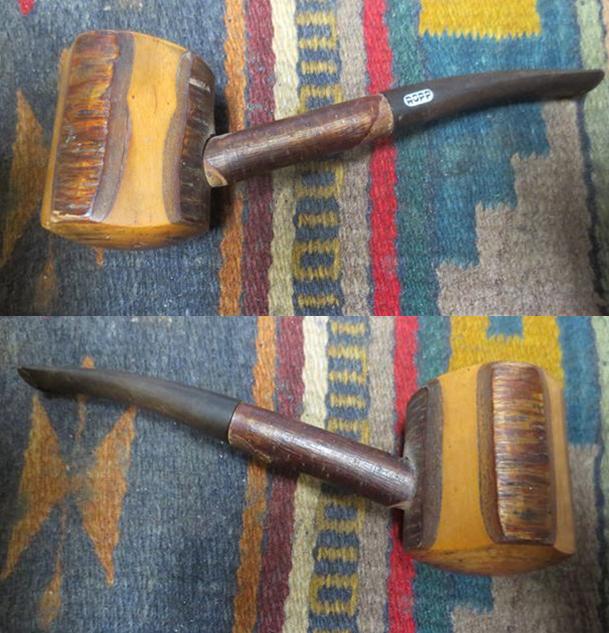
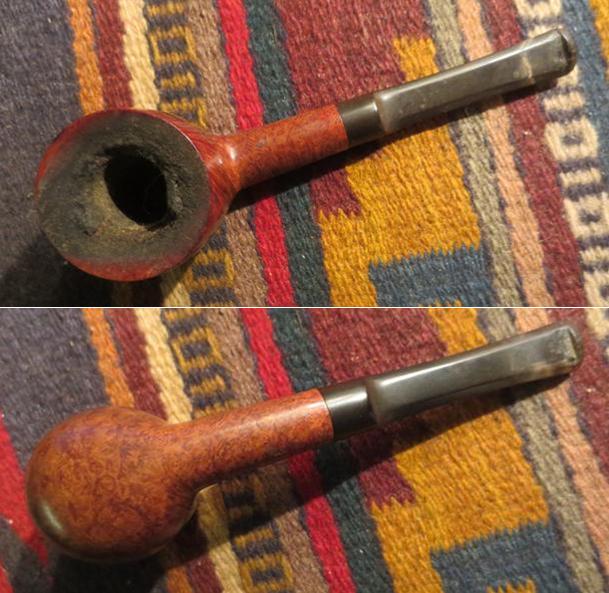
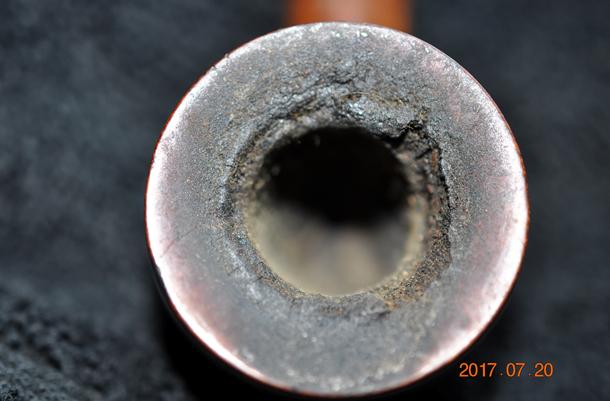
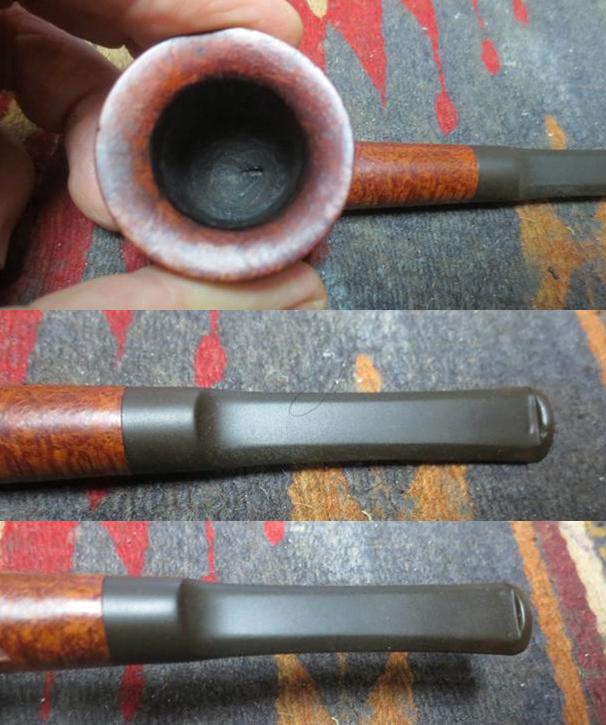
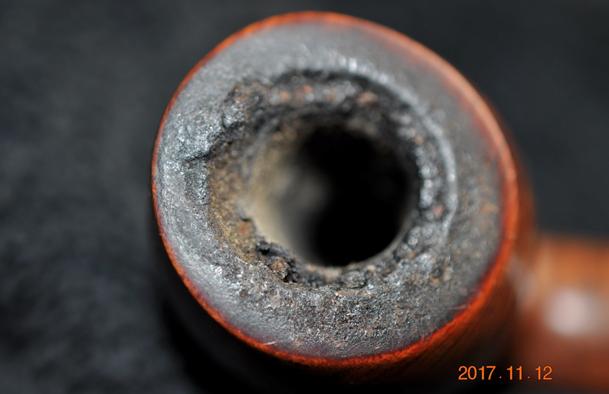
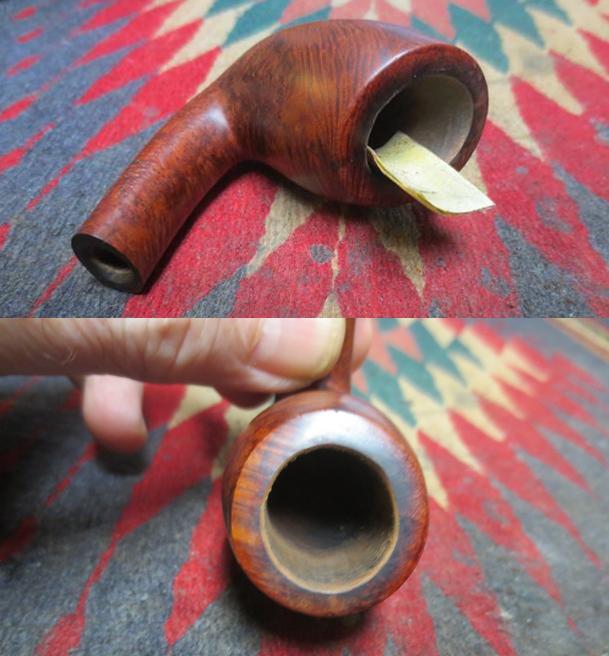
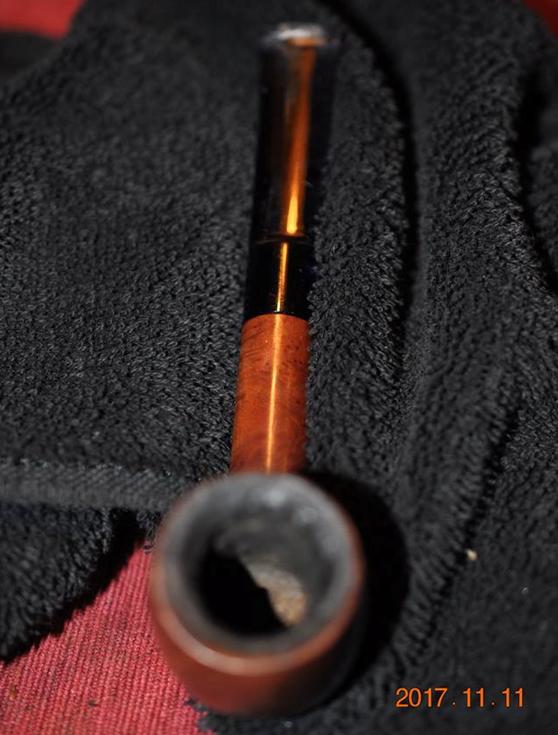
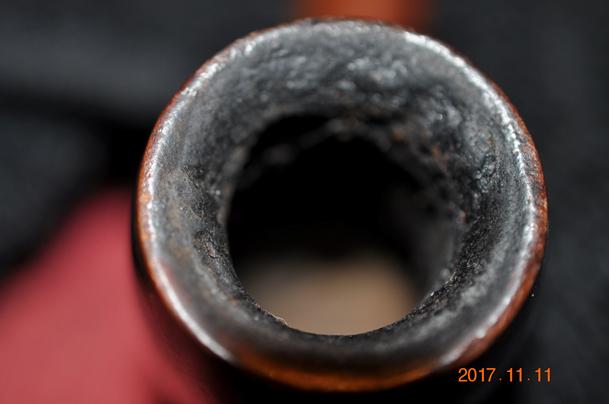
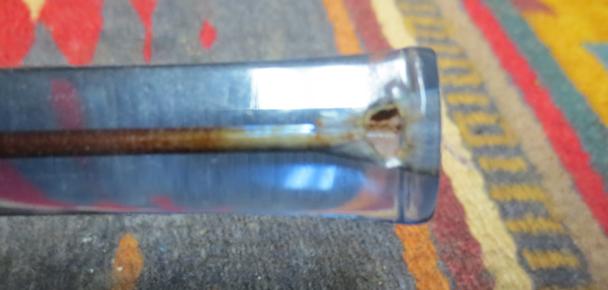
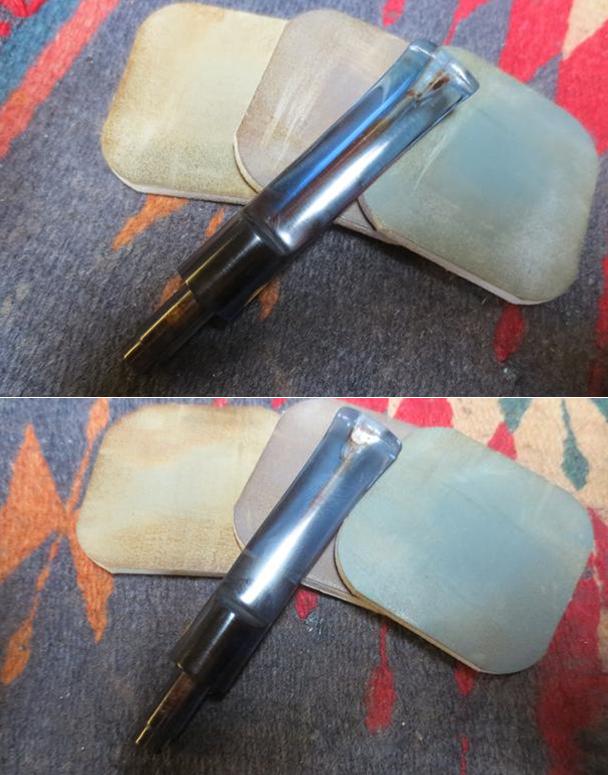
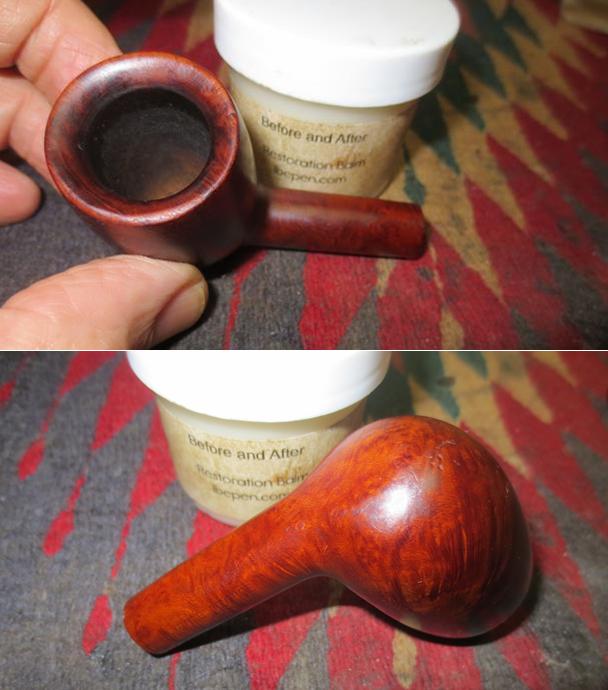
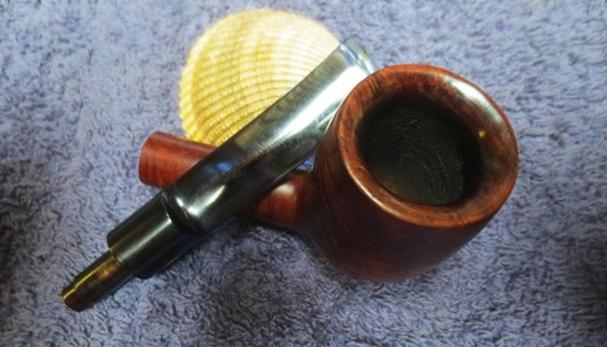
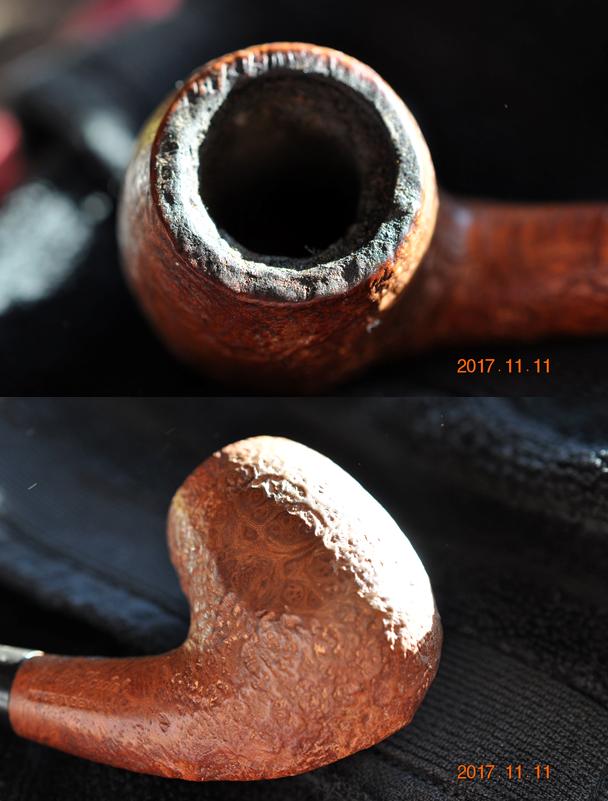
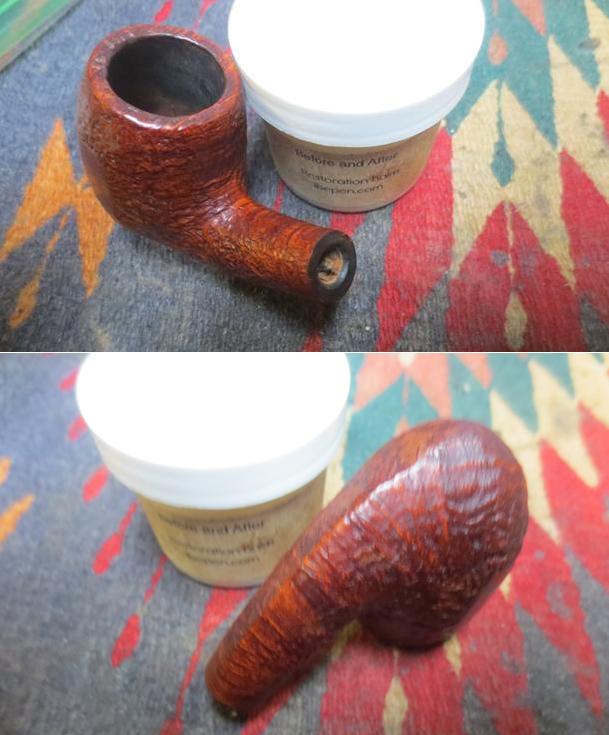
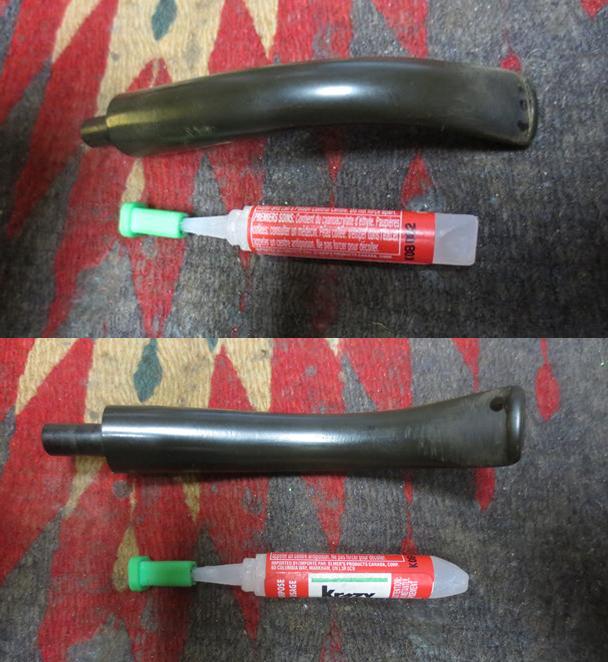
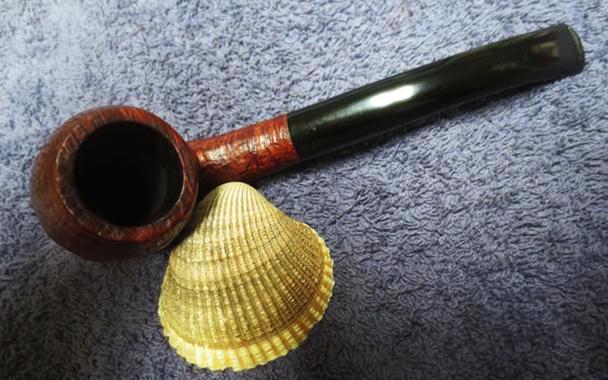
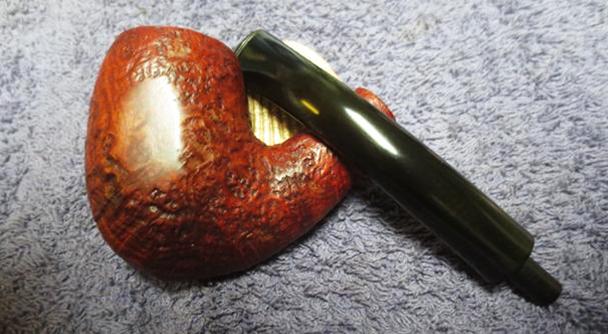
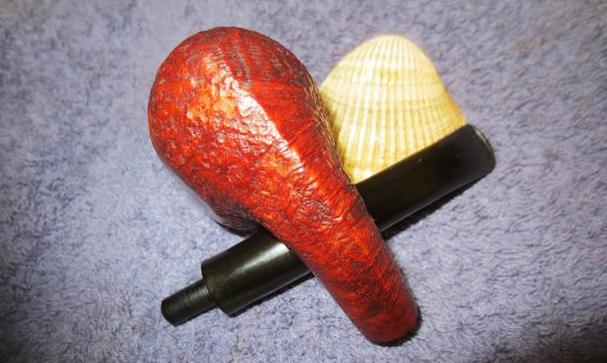
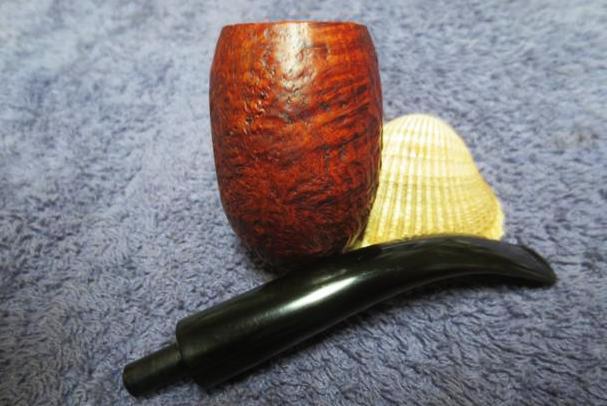
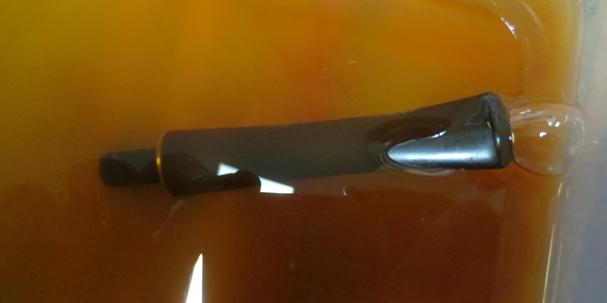
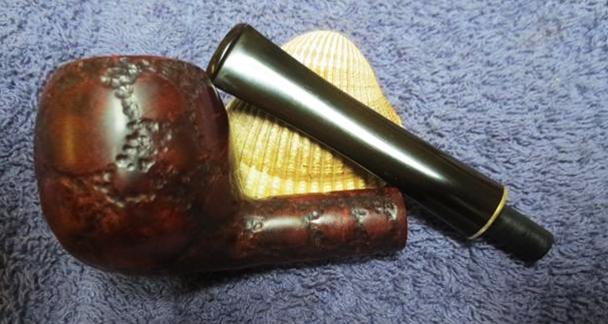
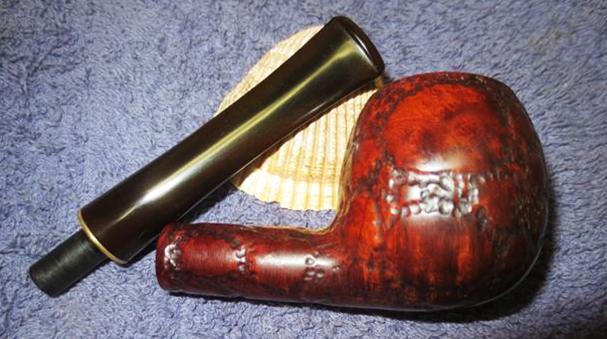
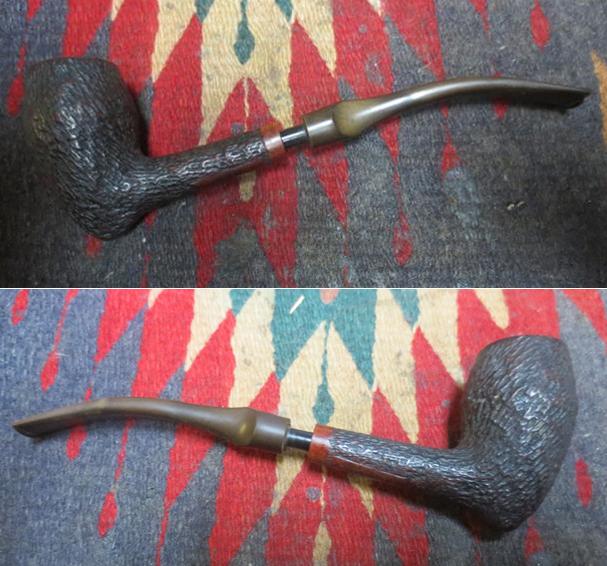
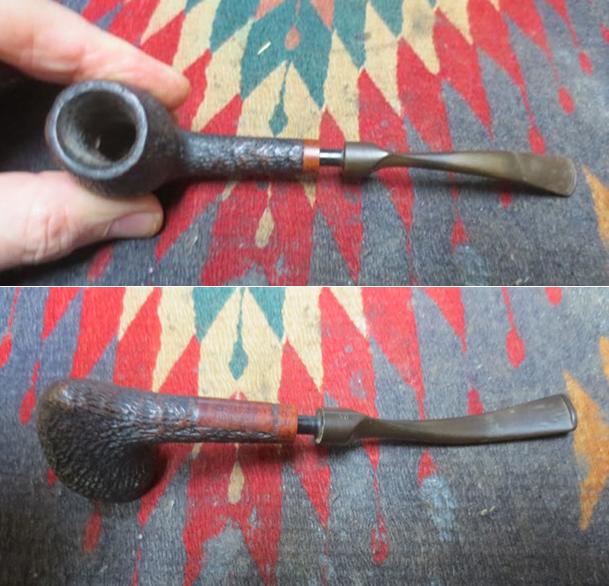
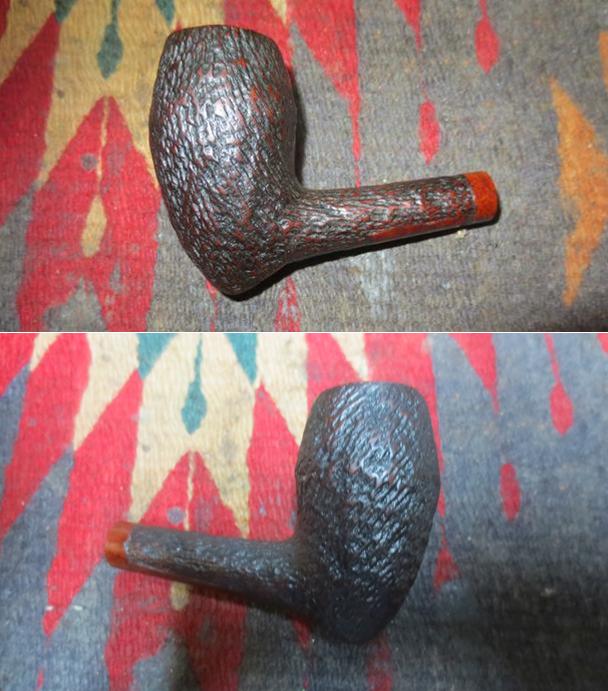
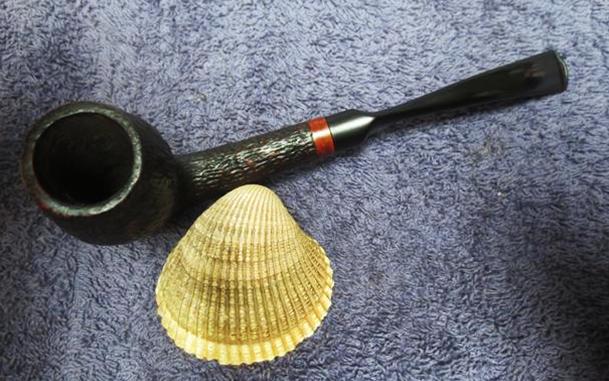
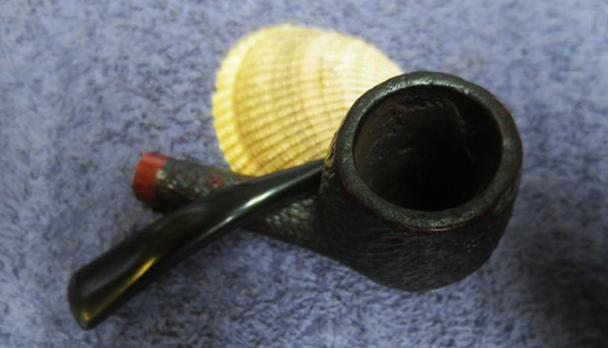
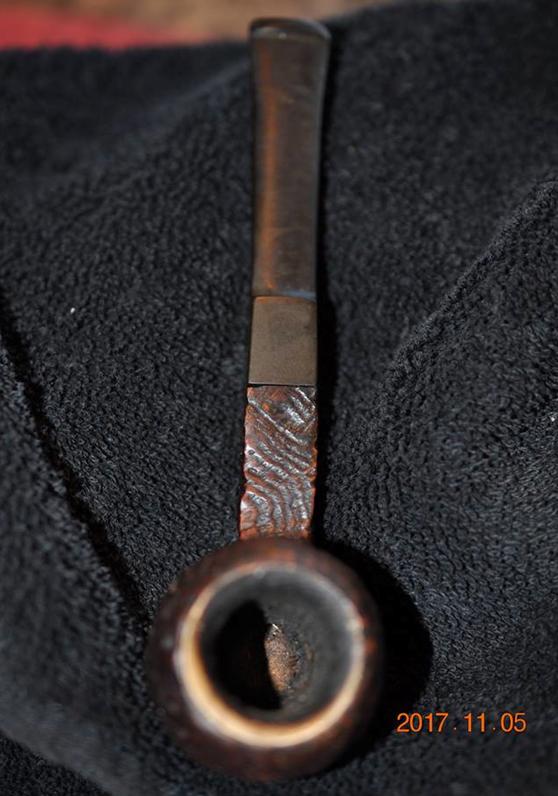
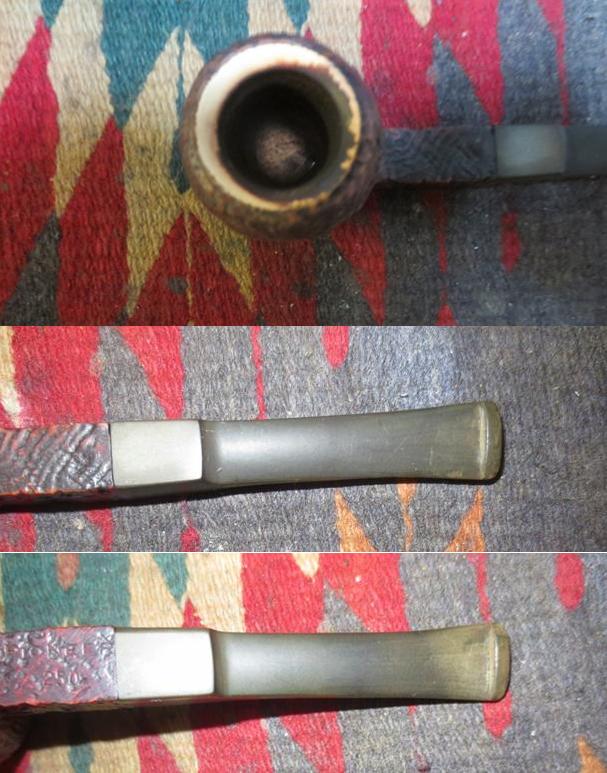
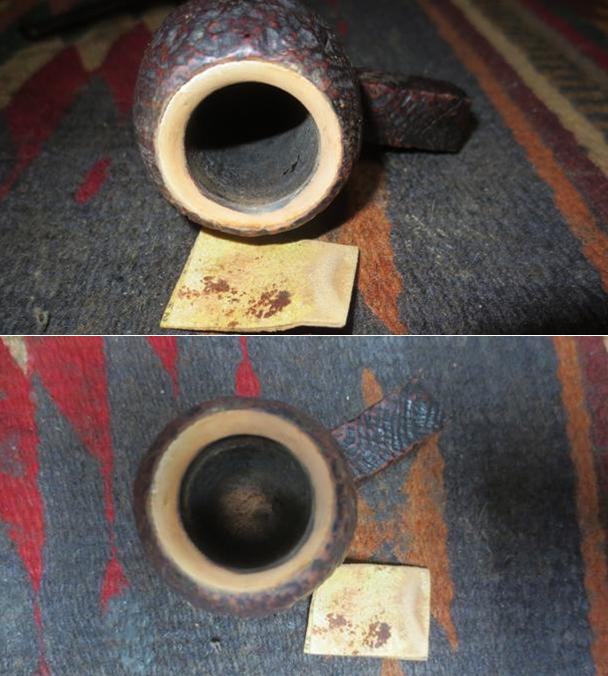
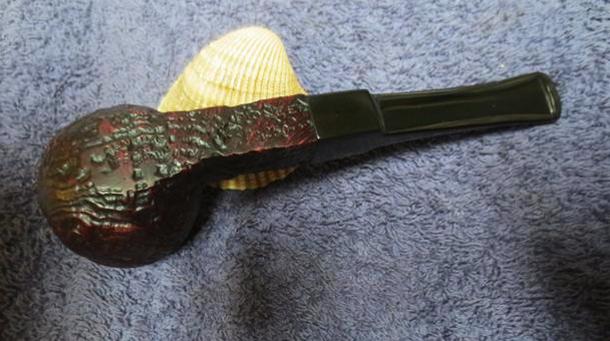
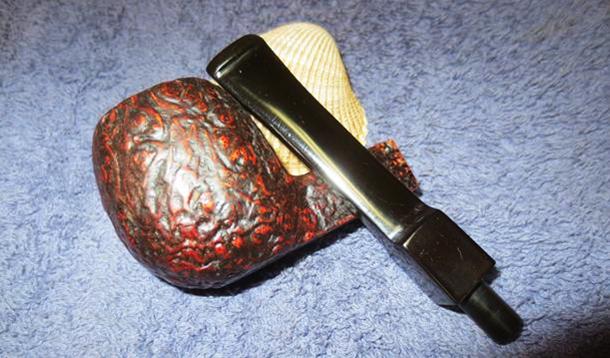
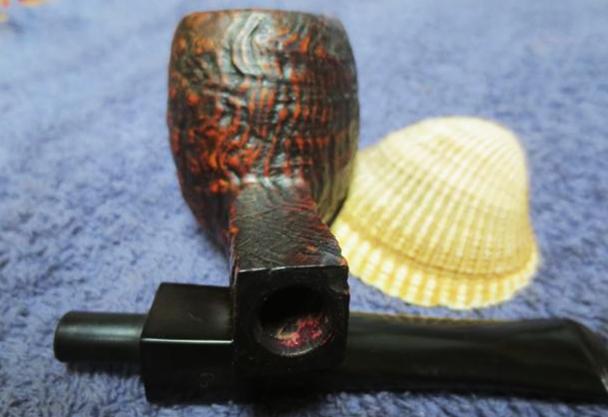
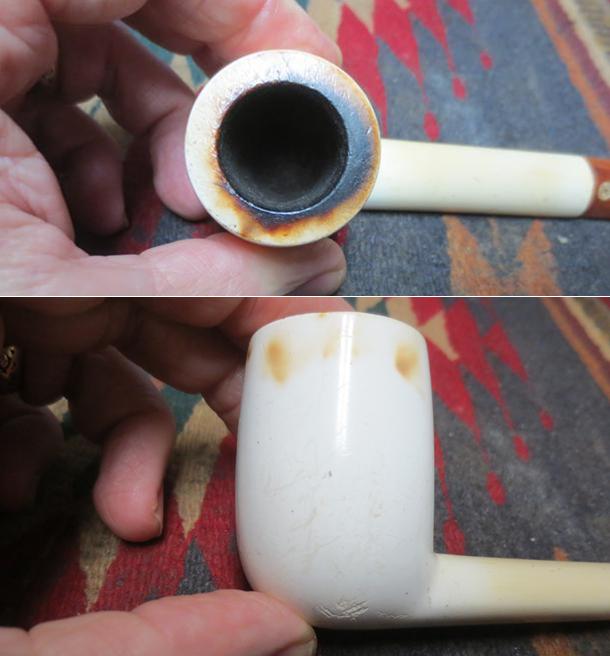
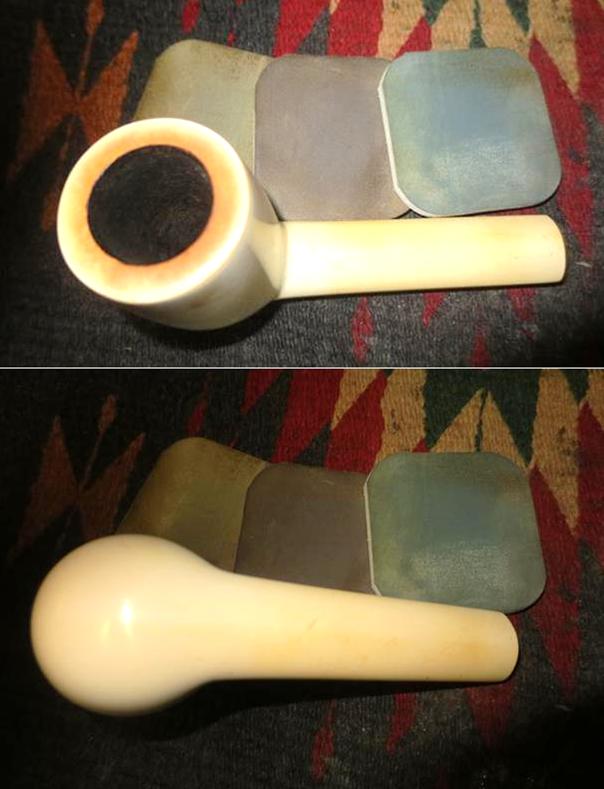
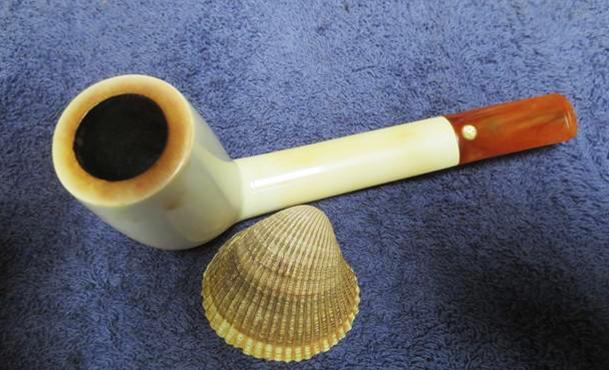
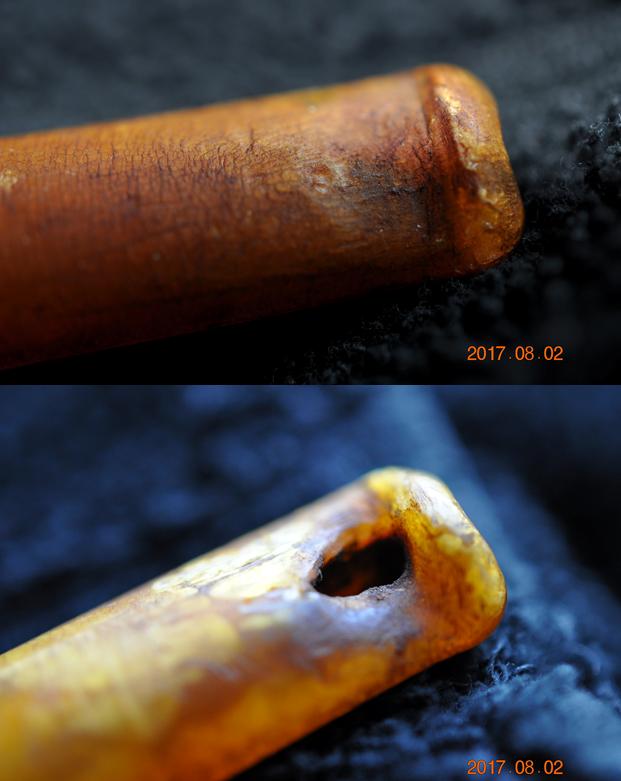
 I took a close up of the rim top to show the lava build up and the cake in the bowl. It appeared that the bowl had been reamed before I received it but there were some remnants of the cake in the bowl. I took some close up photos of the stem to show the condition of both sides.
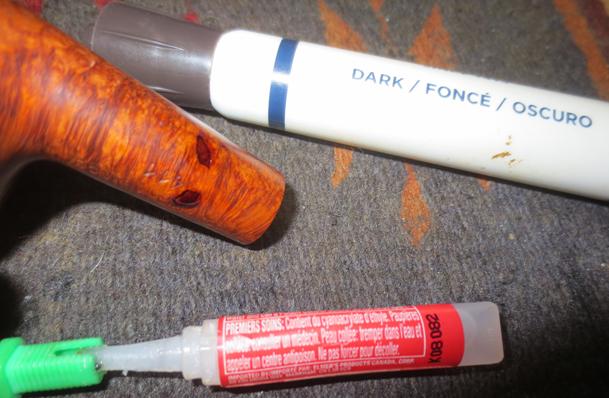
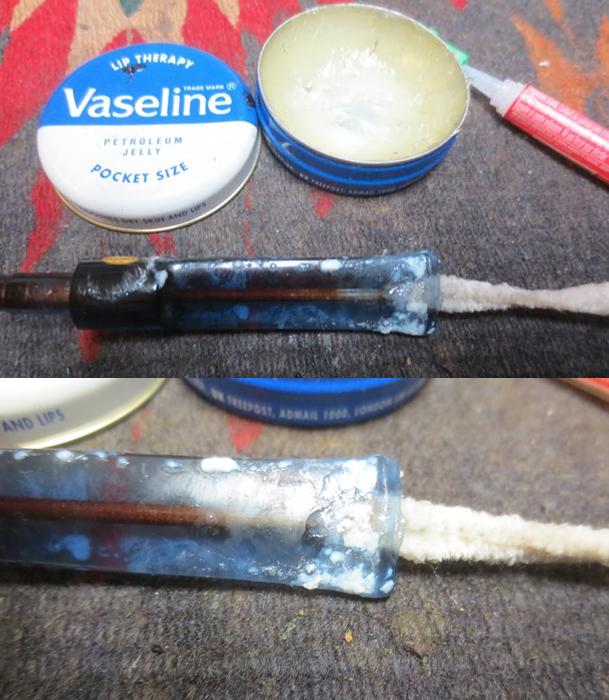
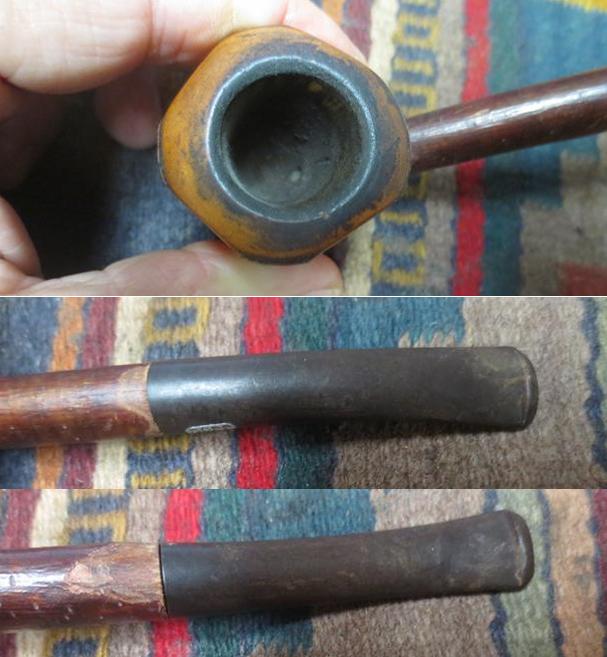 I chose four of the pipes to work on first and put the stems in the Before & After Pipe Stem Deoxidizer. I pushed them under the solution and left them to soak overnight.
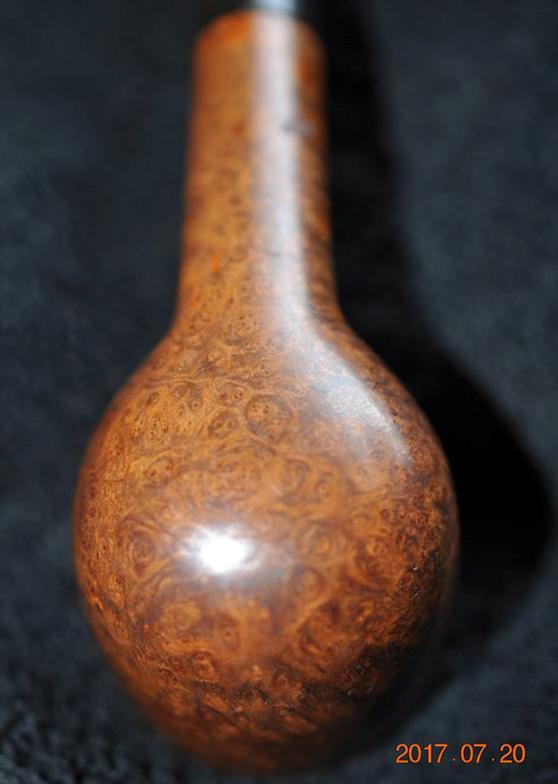
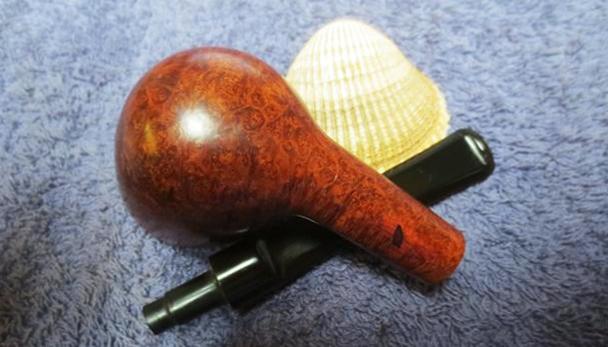
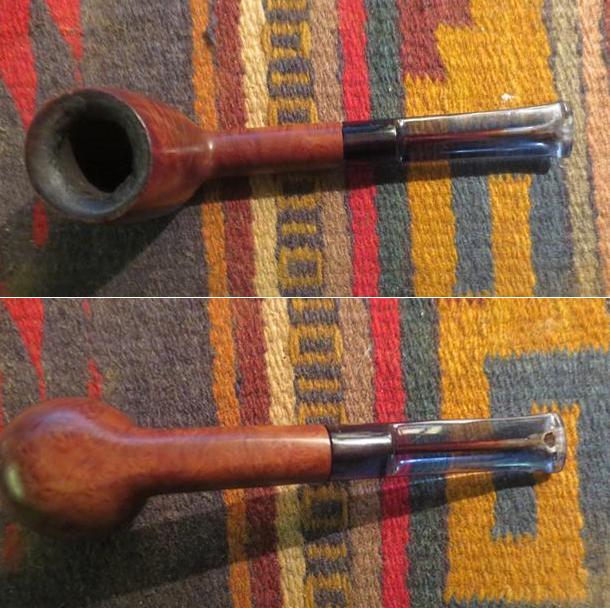
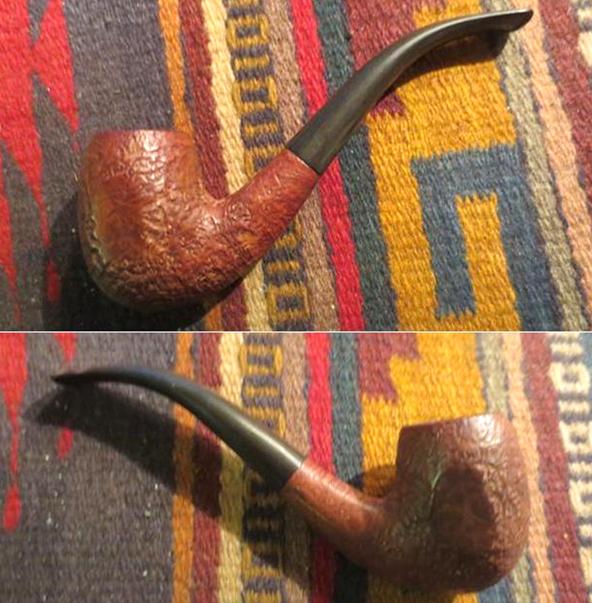
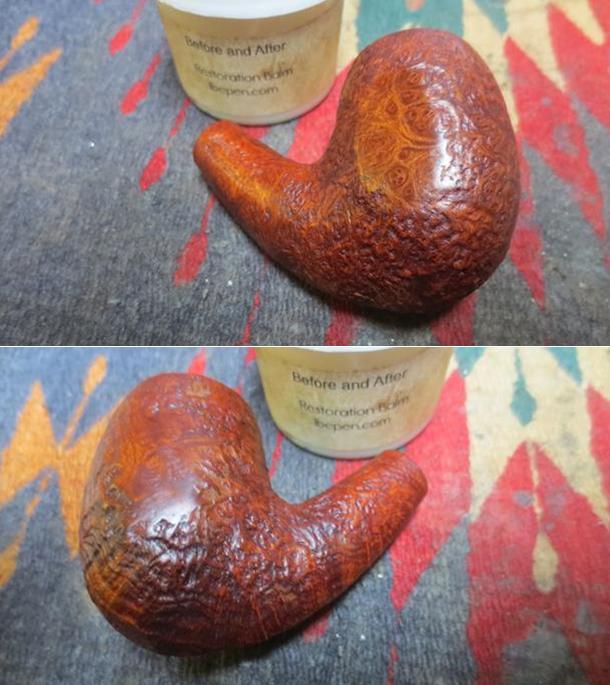
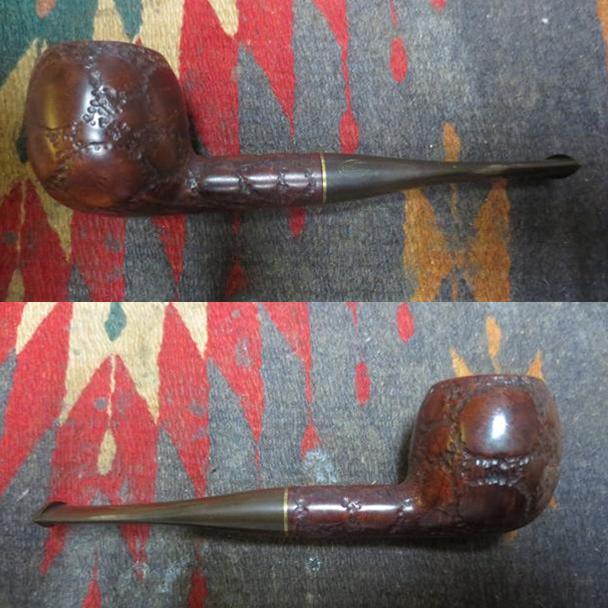
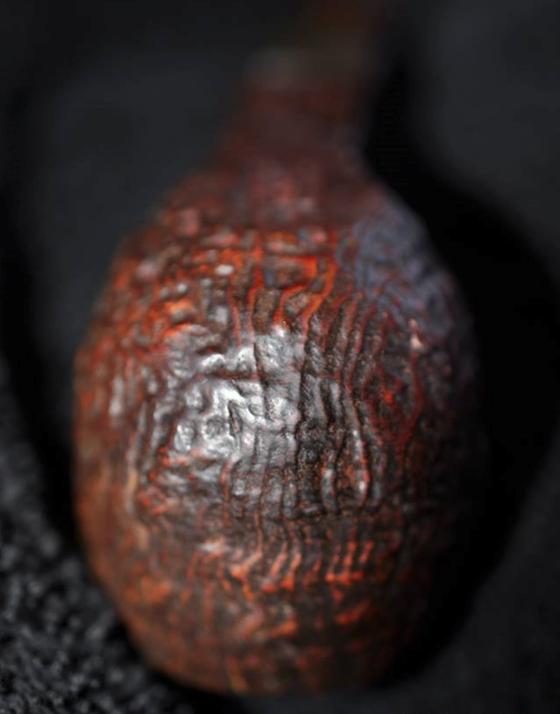
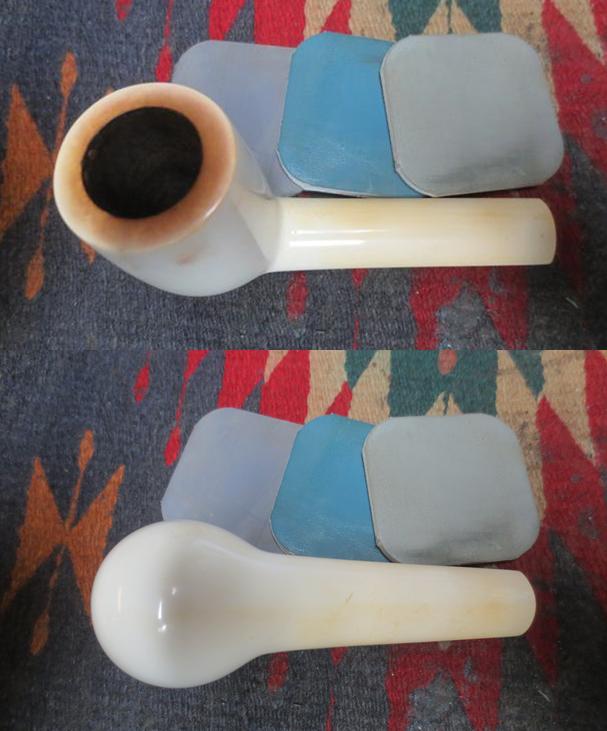
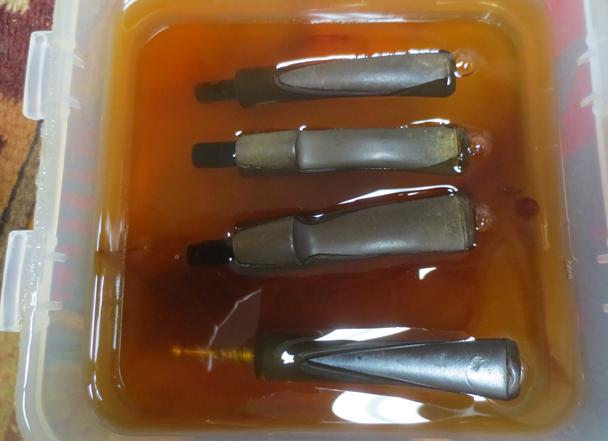 While the stems were all soaking I turned my attention to the bowl. I scrubbed the surface of the Cherrywood with Murphy’s Oil Soap to clean off the dust and grime that sat on the surface. There were also some paint flecks that needed to be addressed as well. I scrubbed the surface with a tooth brush and rinsed it off with running water. I dried the bowl and shank off with a soft cotton towel to make sure I did not damage the bark. I took photos of the cleaned Cherrywood bowl. It actually looked really good. The rim top still needed work but it looked better.
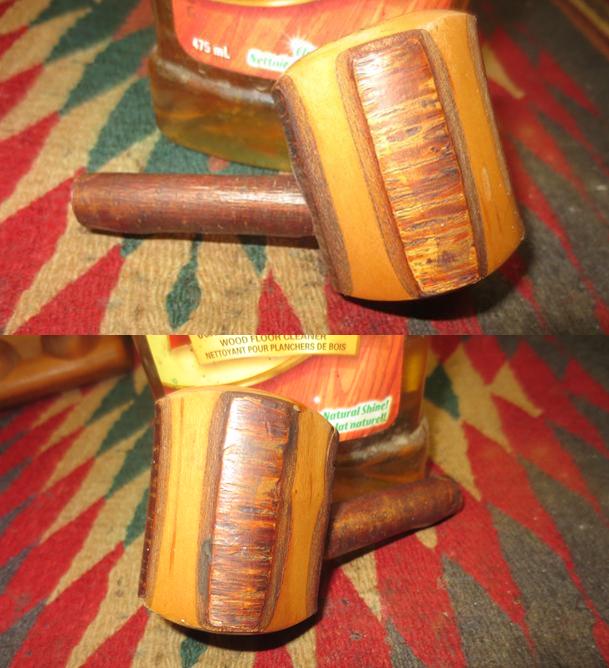
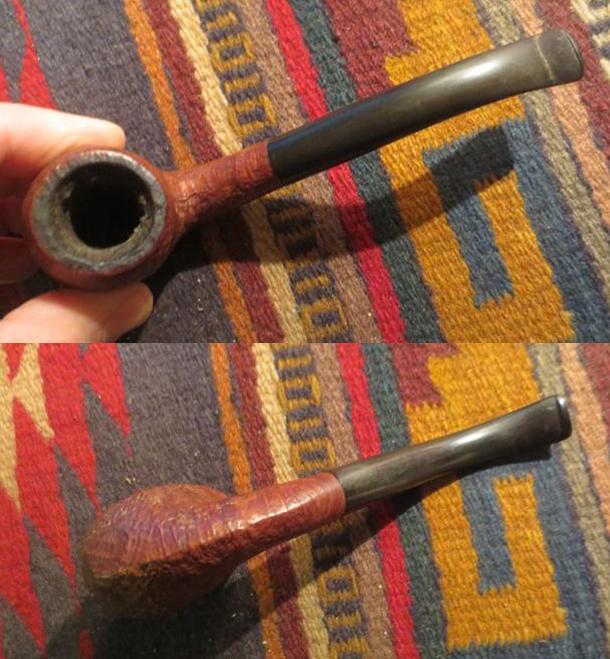
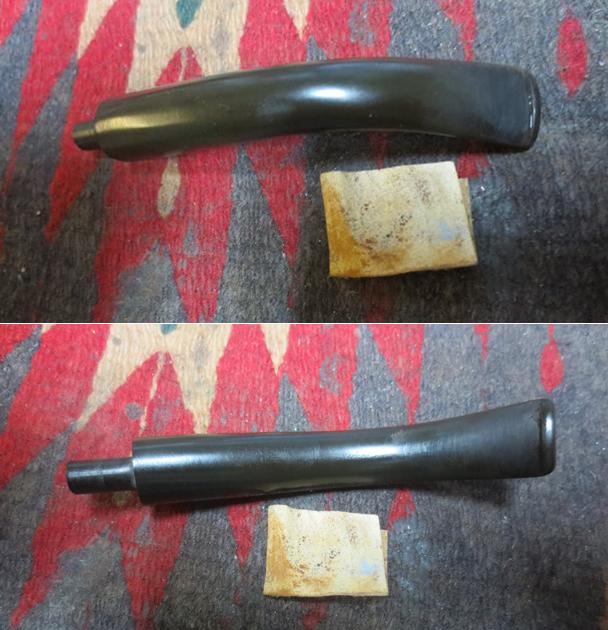
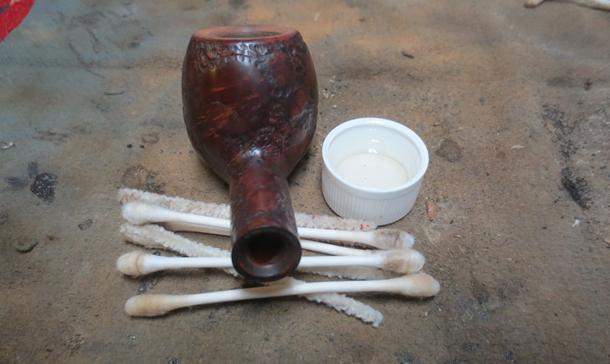
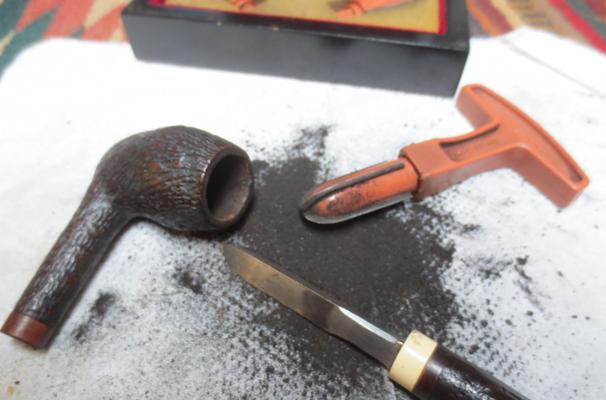
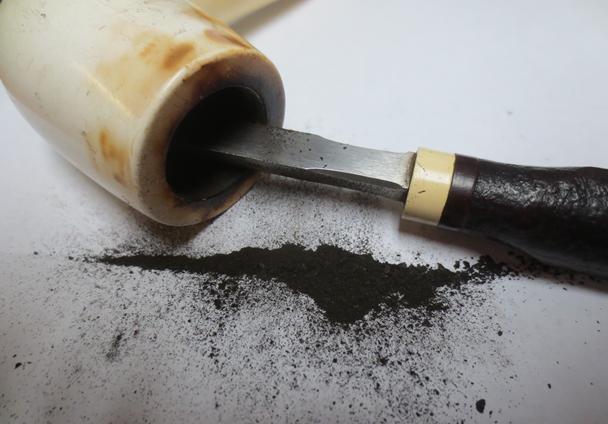
 I cleaned up the inside of the bowl to remove the remaining bits of cake on the walls and the bottom of the bowl with a Savinelli Fitsall Pipe Knife.
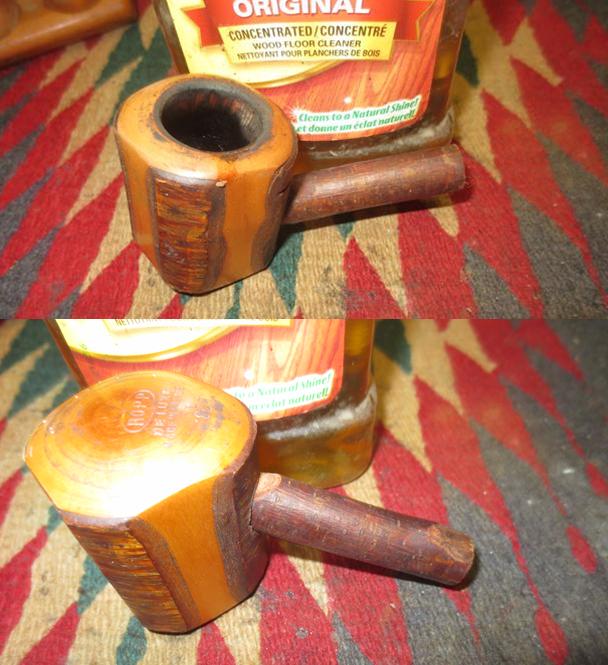
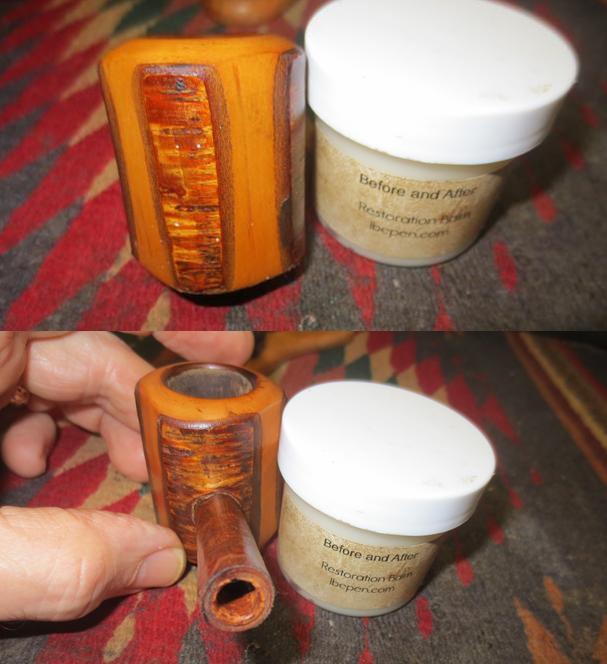
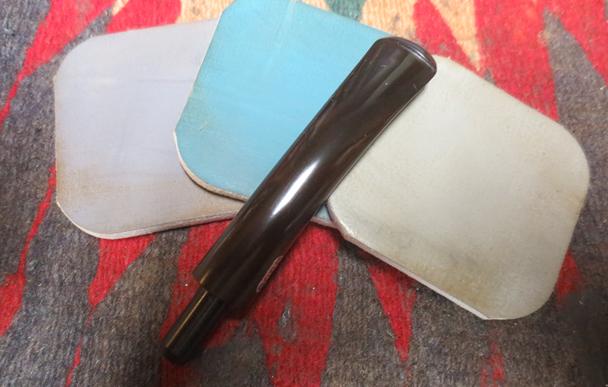
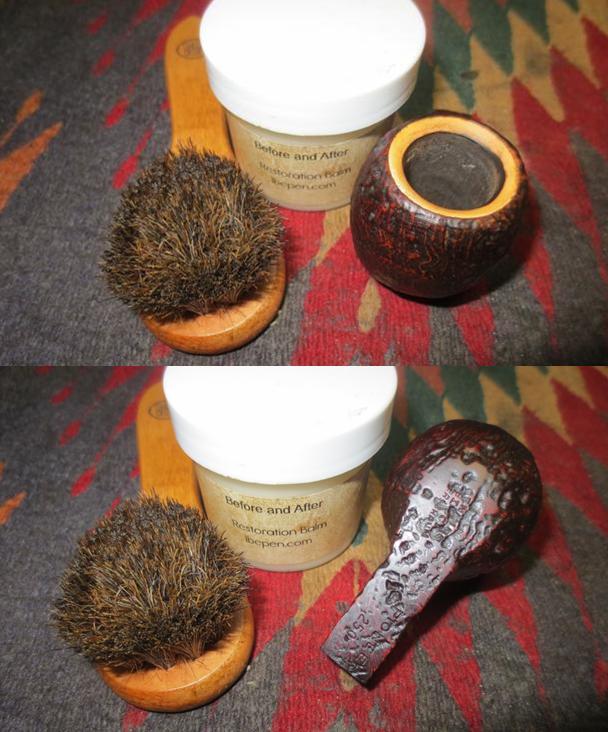
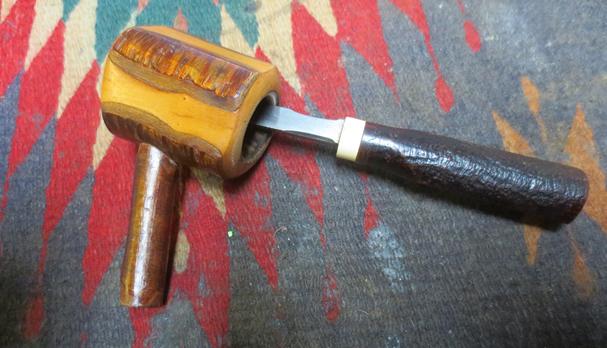 I used a folded piece of 220 grit sandpaper to sand off the remaining thick lava on the rim top and the damaged areas as well. I worked on it to smooth out the surface and then polished it with 1500-4000 grit micromesh sanding pads. I cleaned up the inner edge of the rim with a folded piece of sandpaper and removed the damaged areas there as well.
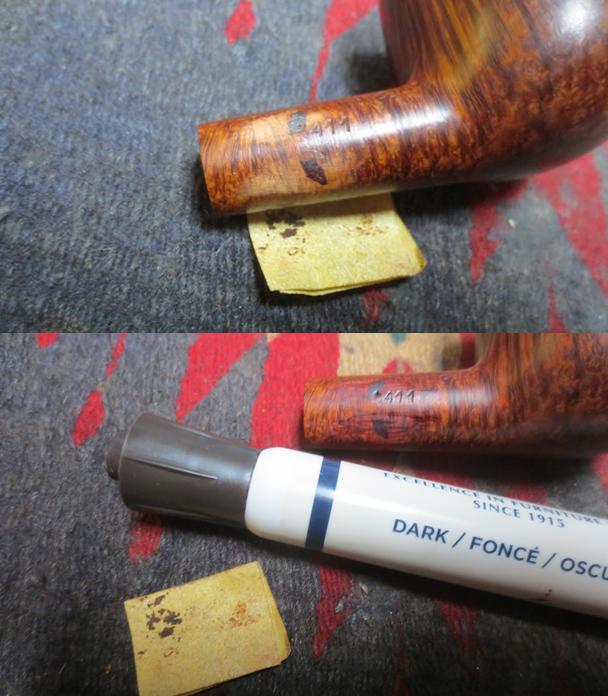
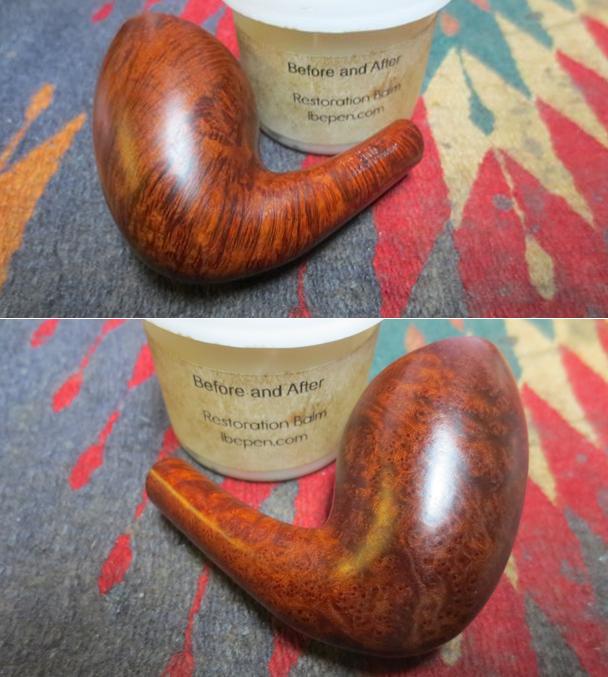
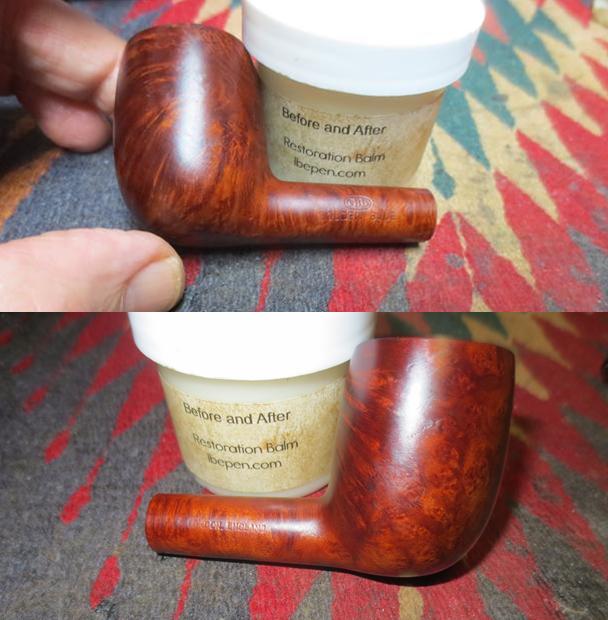
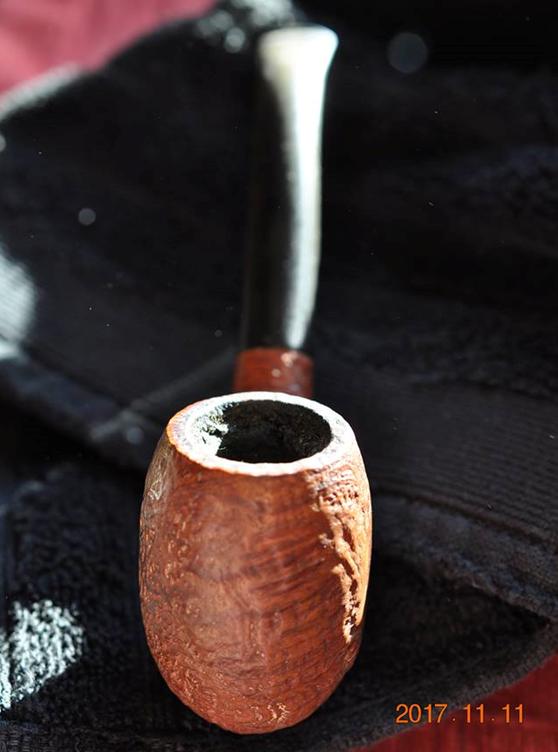
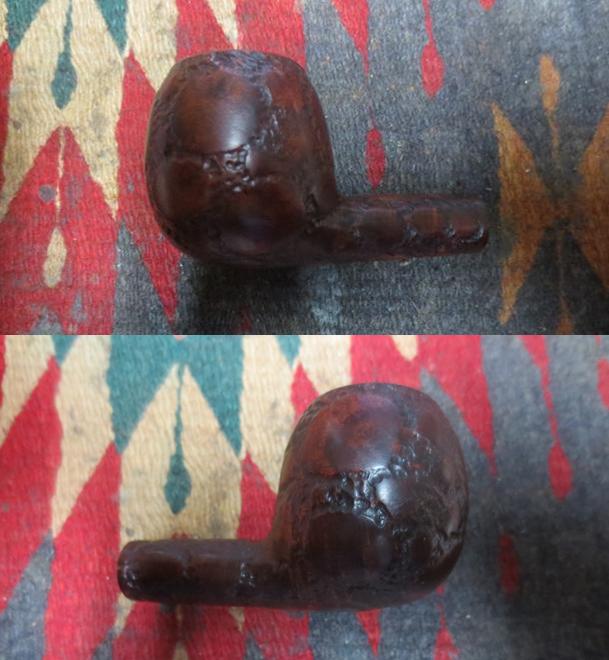
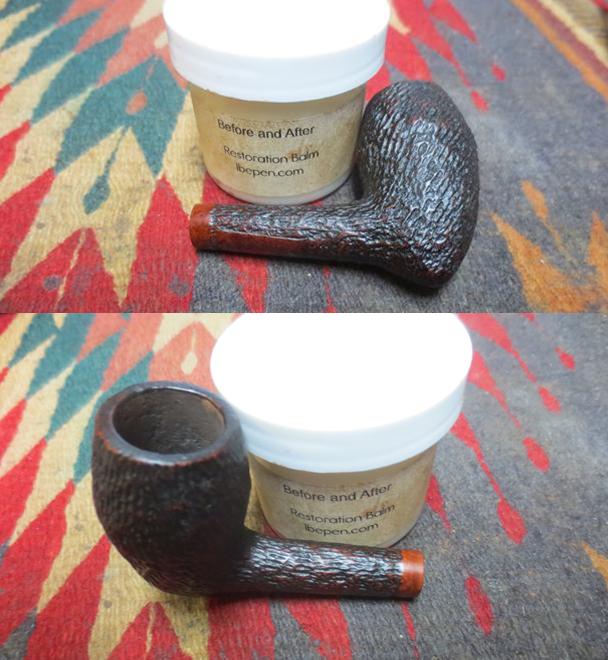
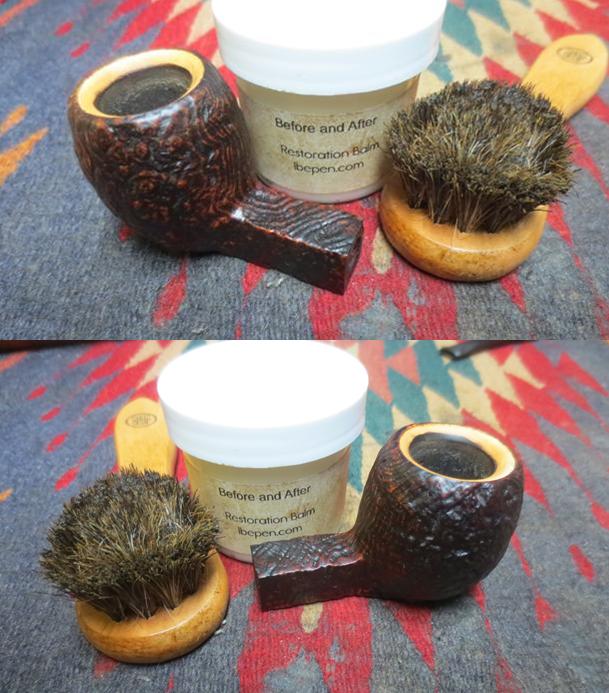
 I worked some Before & After Restoration Balm into the surface of the Cherrywood and the bark with my finger tips to deep clean the finish, enliven and protect the wood. I let it sit for a few minutes and then buffed it with a cotton cloth. The wood came alive and really had begun to show through at this point and there was a rich shine to the bark as well. I took some photos of the bowl at this point to mark the progress in the restoration.
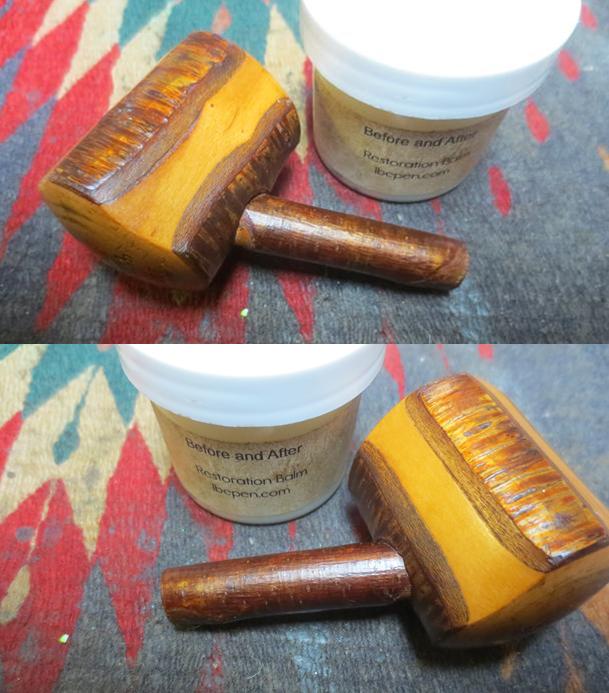
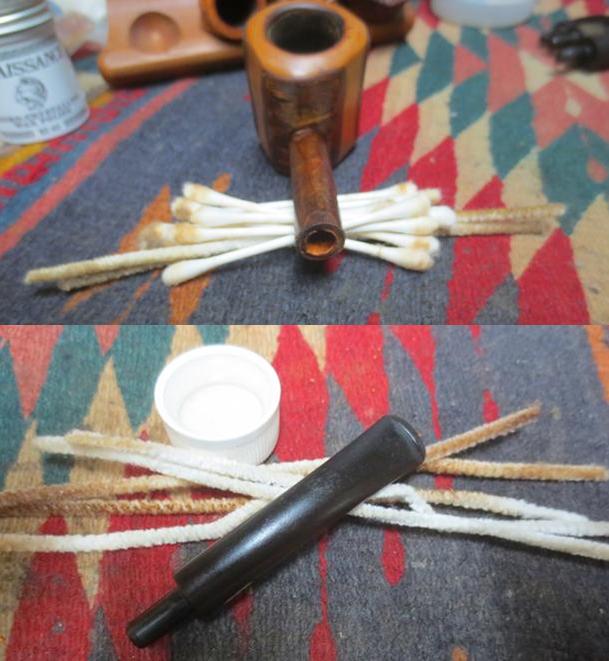
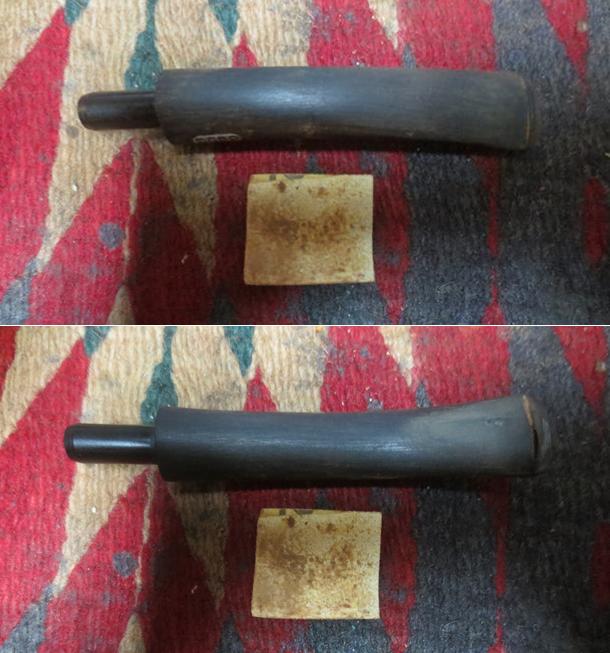
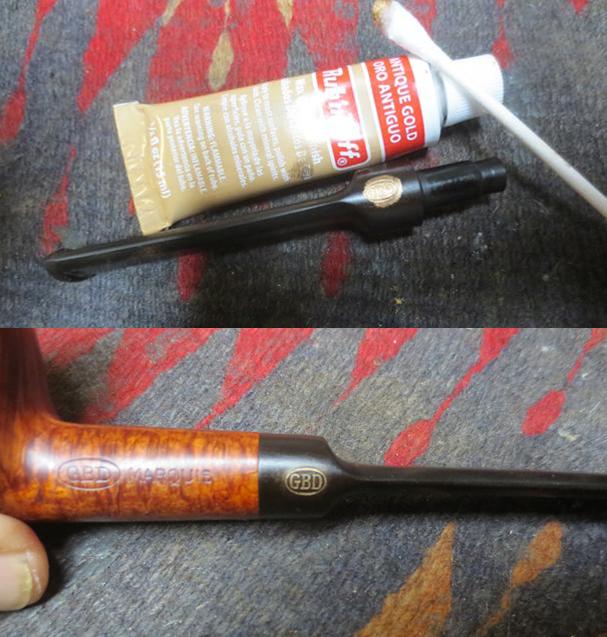
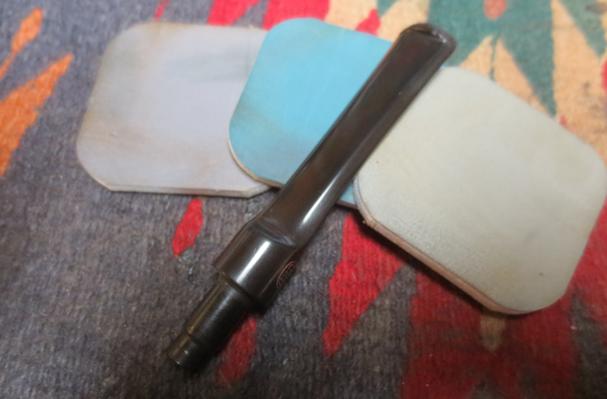
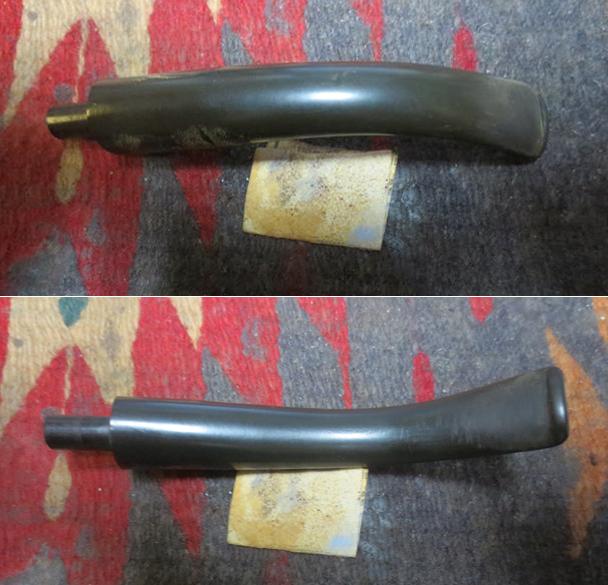
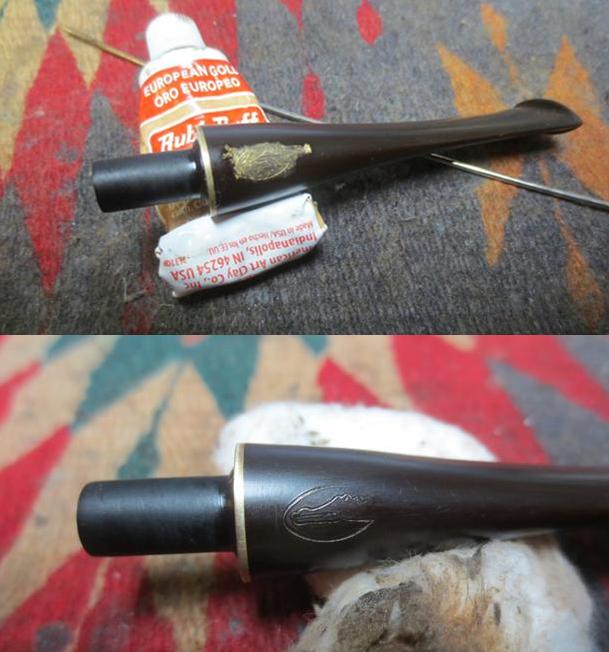
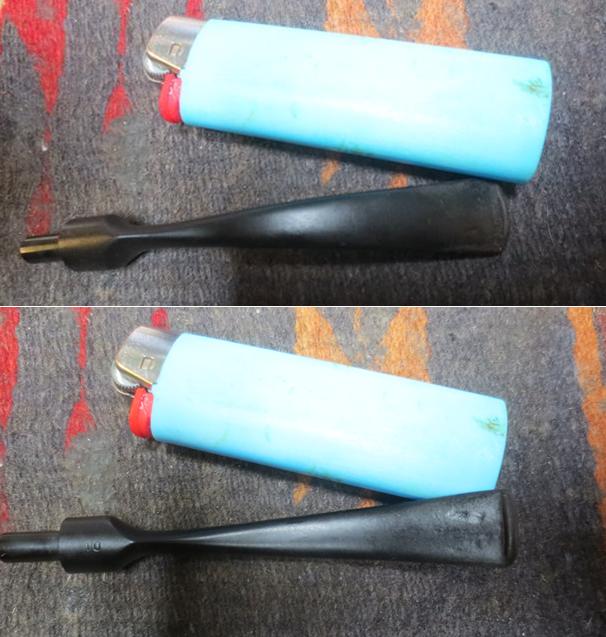
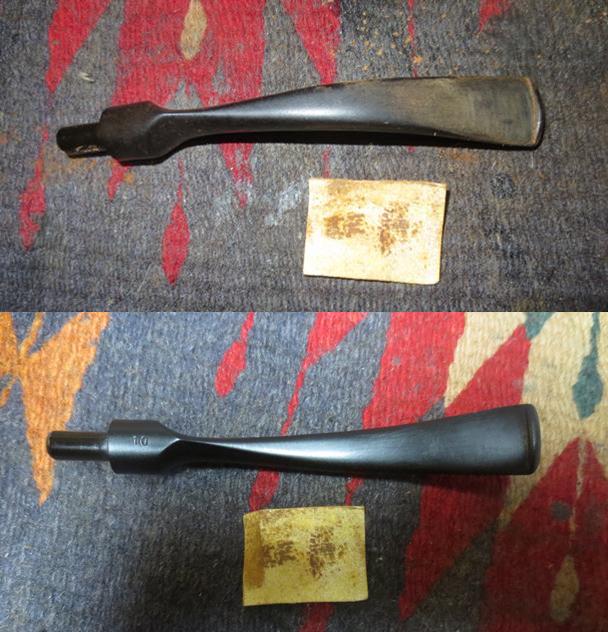
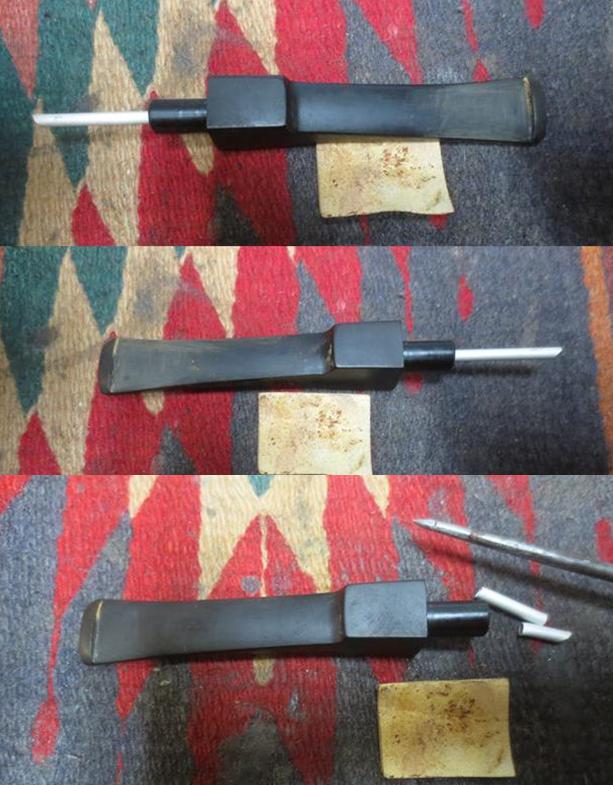
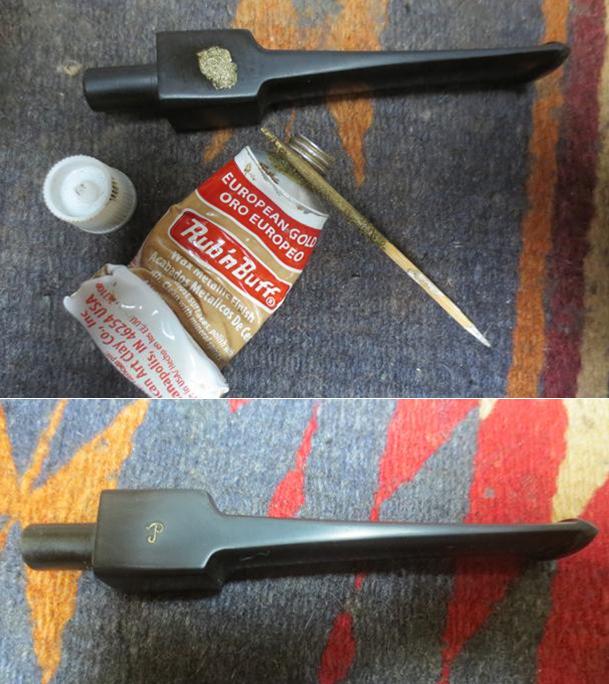
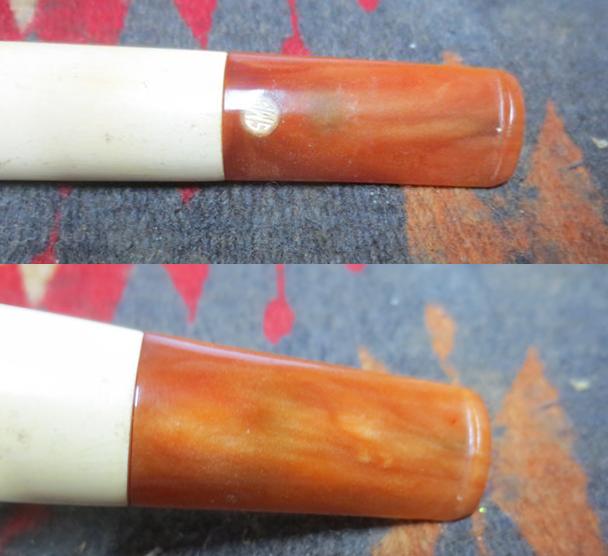
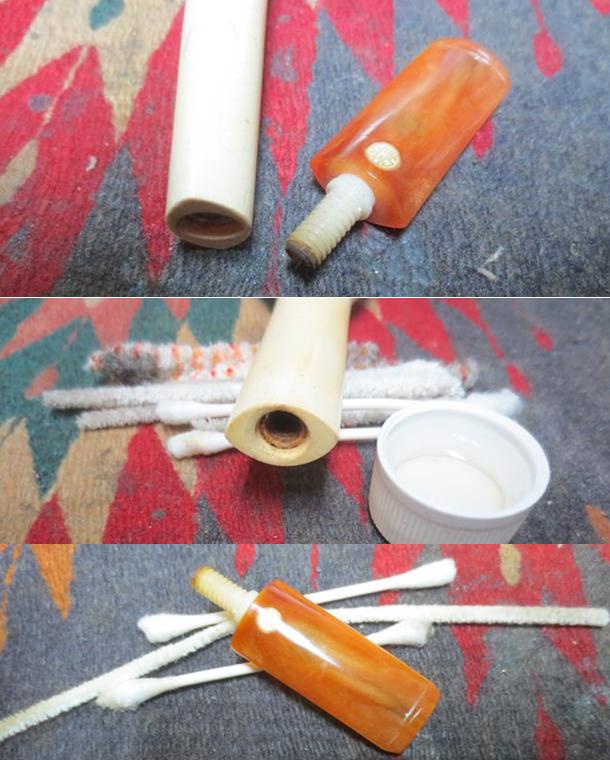
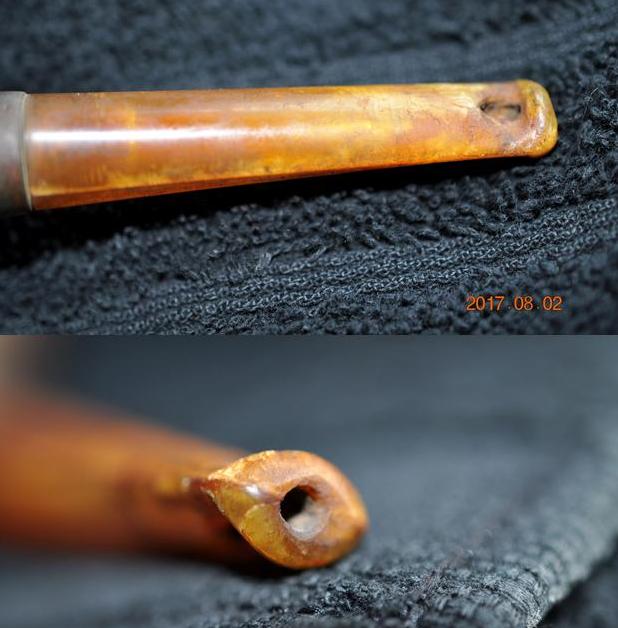
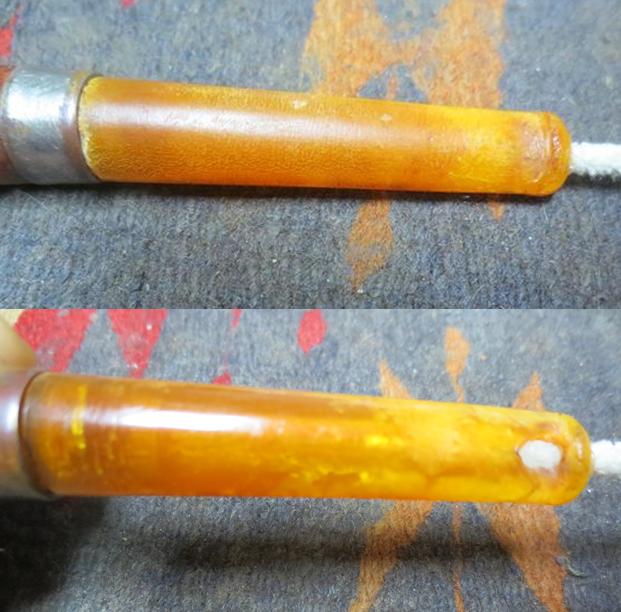
 I set the bowl aside and called it a night. The bowl was ready other than touching up the cleaning of the shank. In the morning. In the morning I removed the stem from the Before & After Stem Deoxidizer and wiped it off with a paper towel to remove the remaining oxidation and bath. I cleaned out the airway with pipe cleaners and alcohol until it was clean. I cleaned out the shank with alcohol, pipe cleaners and cotton swabs at the same time to remove any debris that remained inside. The stamping on the stem looked good. The stem was clean and black with the scratching, tooth marks and an odd red tint in the vulcanite visible on the left side. It was ready for repairs to the tooth marks and polishing.
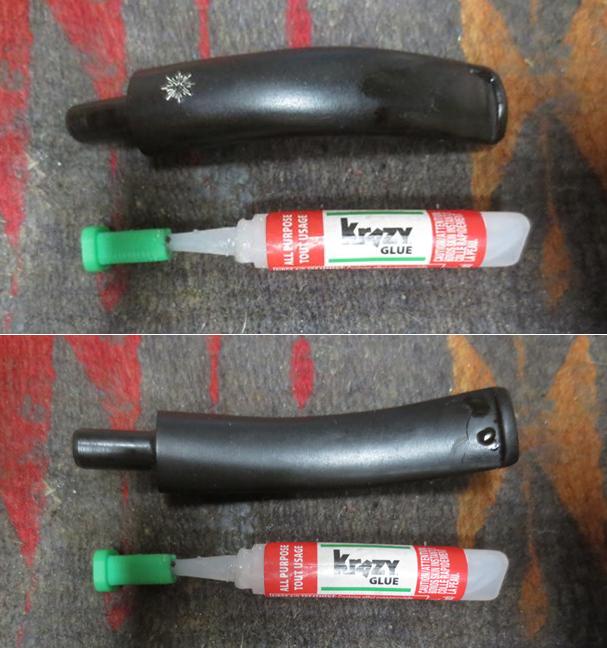
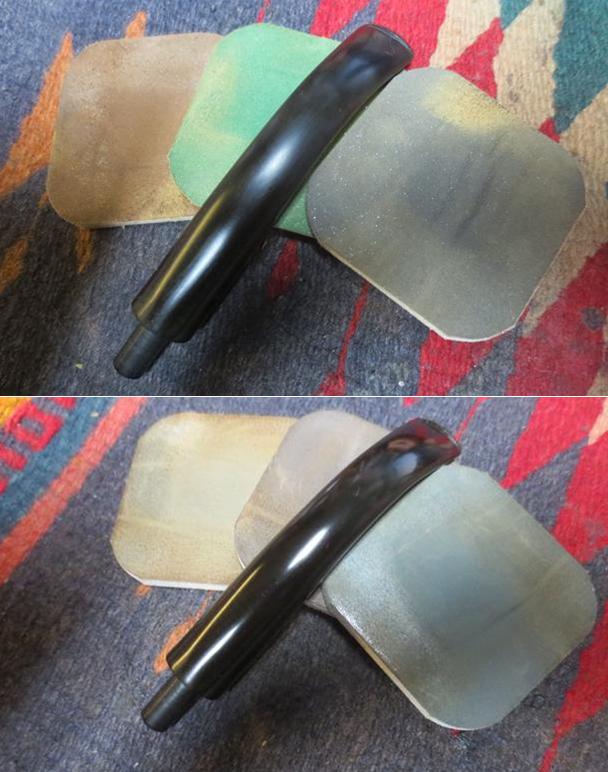
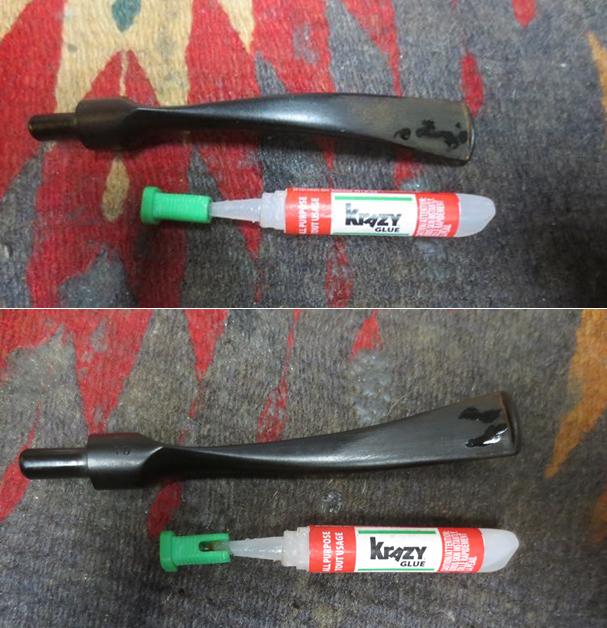
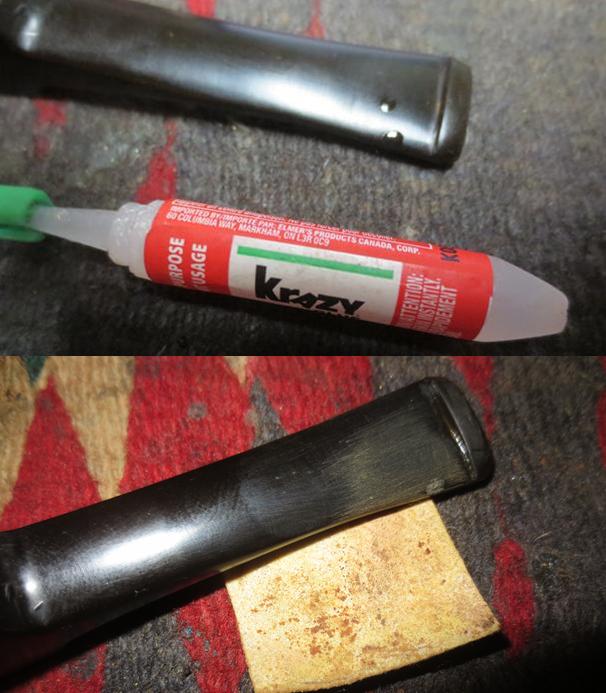
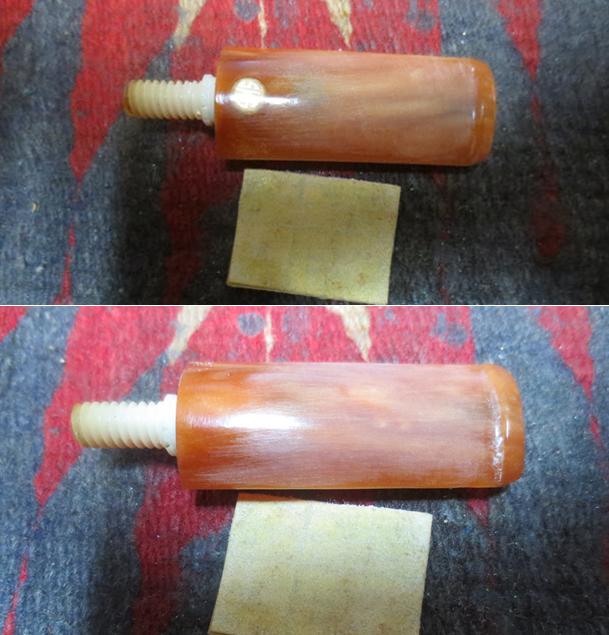
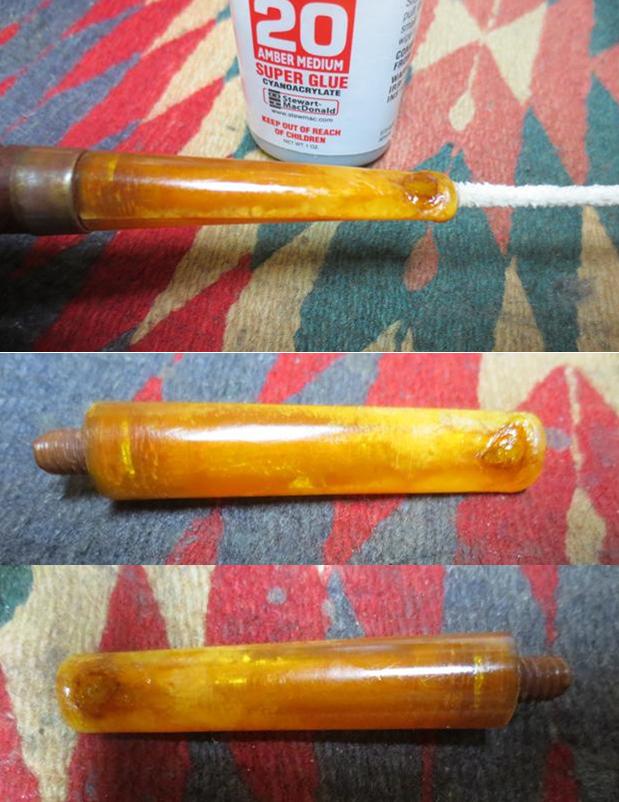
 I lightly sanded the stem to remove the scratching and tooth chatter. I heated the stem with a Bic lighter to lift some of the tooth marks. Once that was done I built up the edge of the button on the underside and filled in the two remaining tooth marks on the underside of the stem with clear super glue. Once the repair had dried I sanded the repaired areas with 220 grit sandpaper to blend them into the surface of the stem. I sanded the rest of the stem as well working on getting rid of the red tint on the left side.
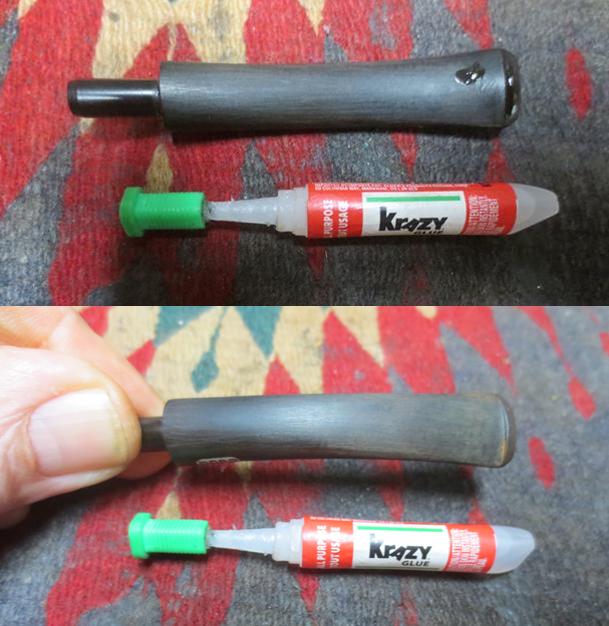
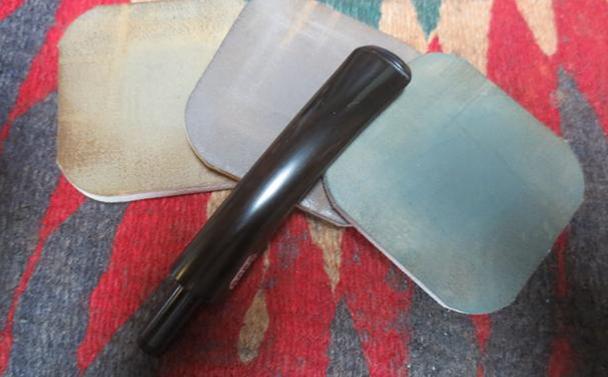
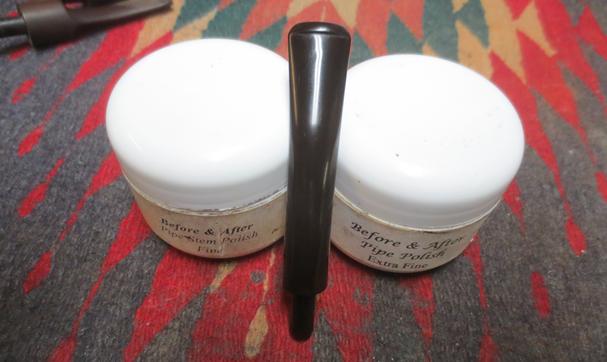
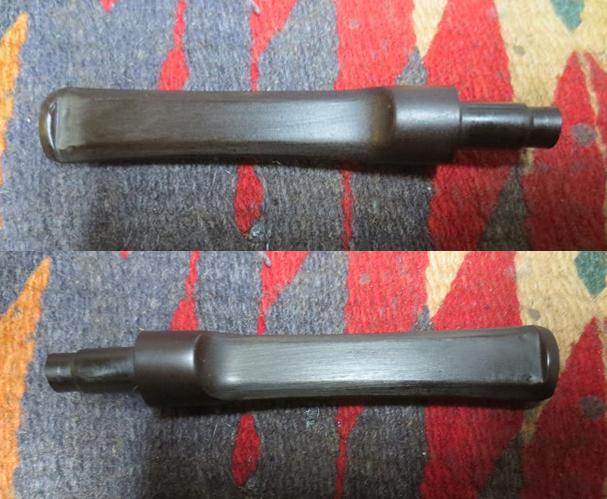
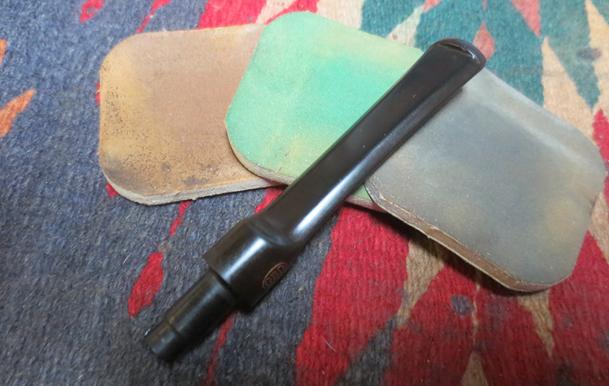
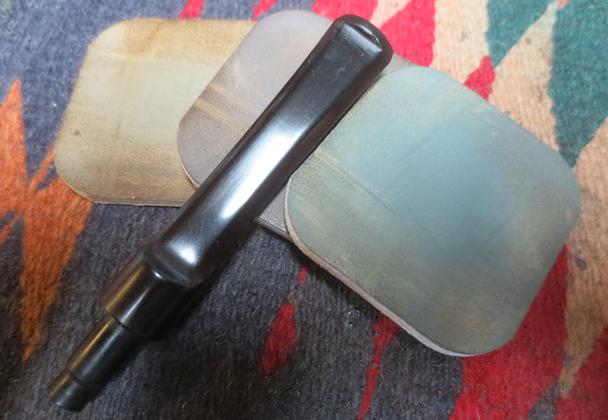
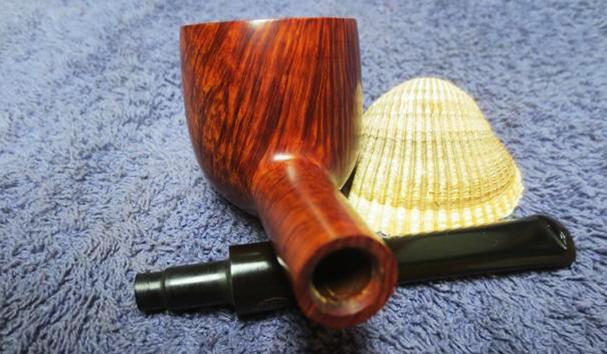
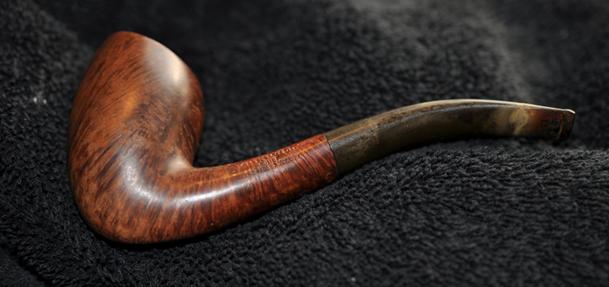
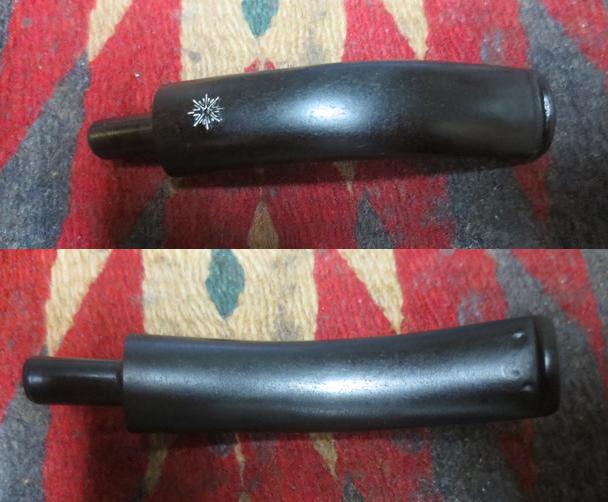
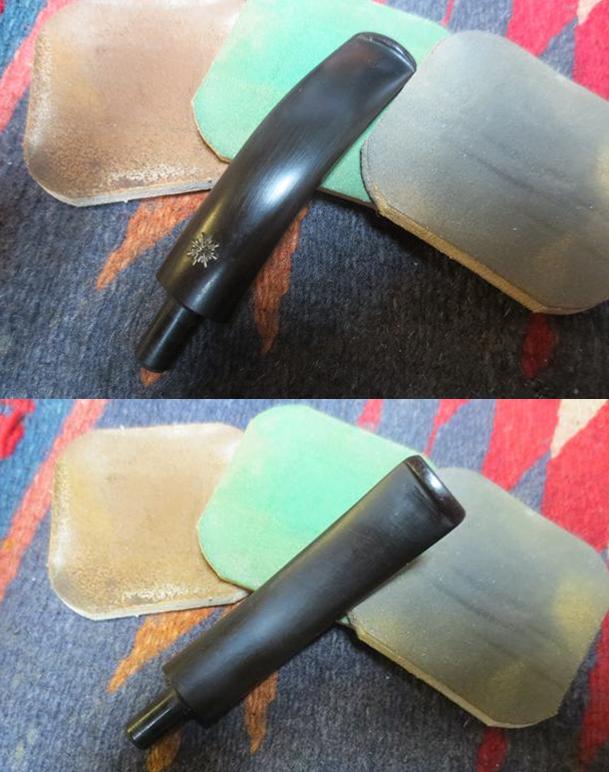
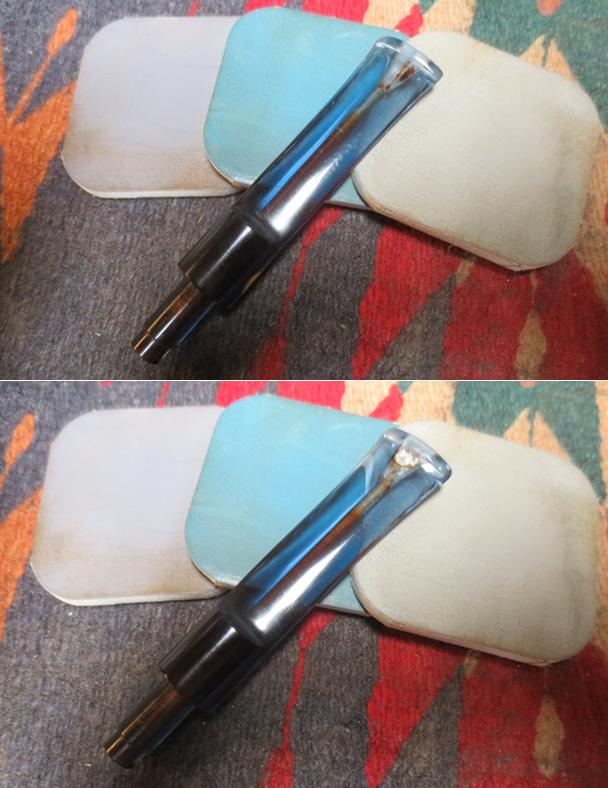
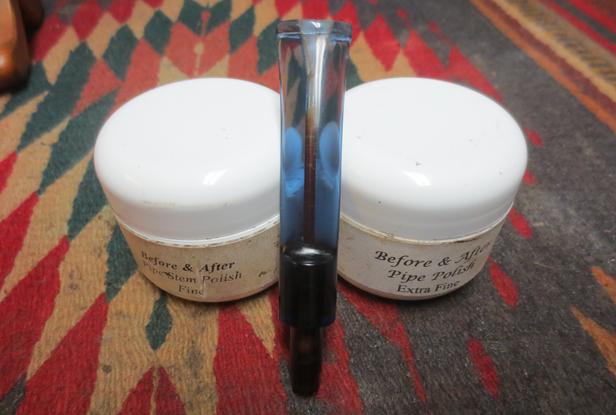
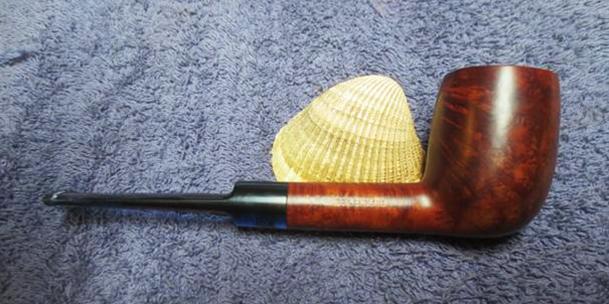
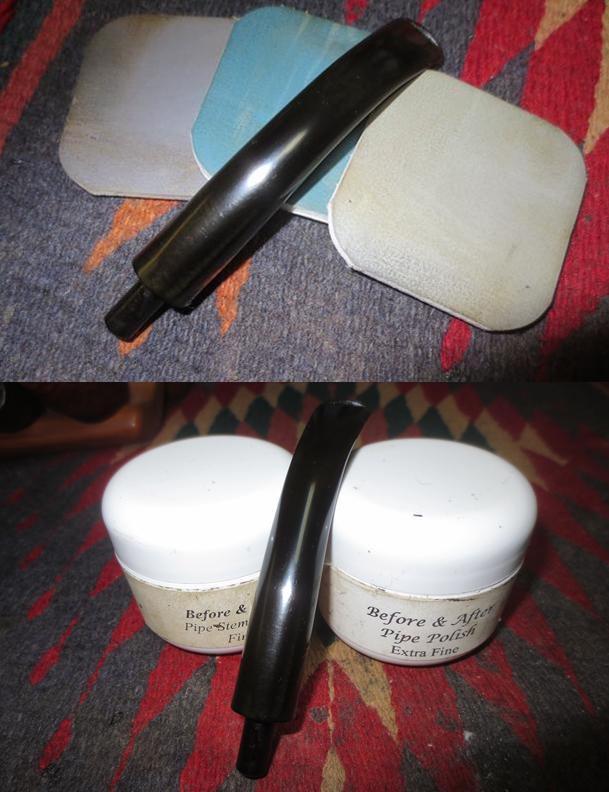
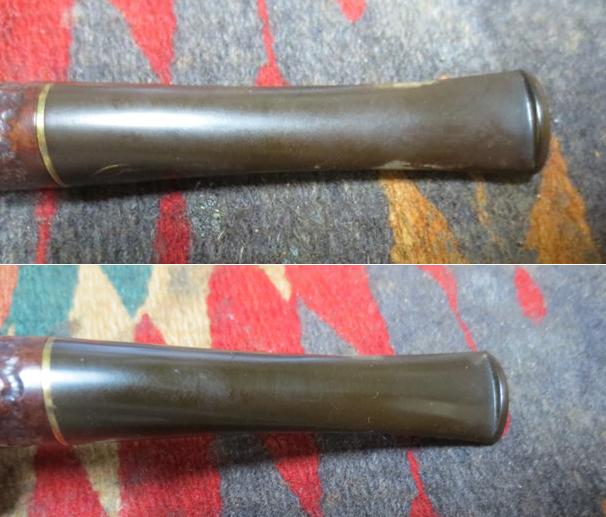
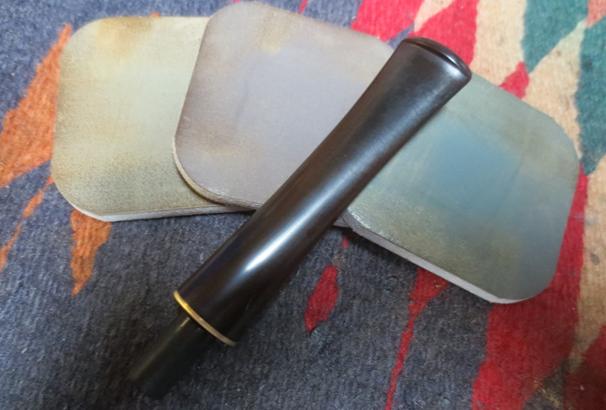
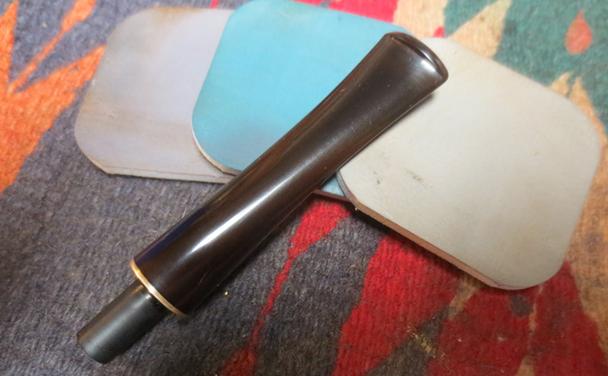
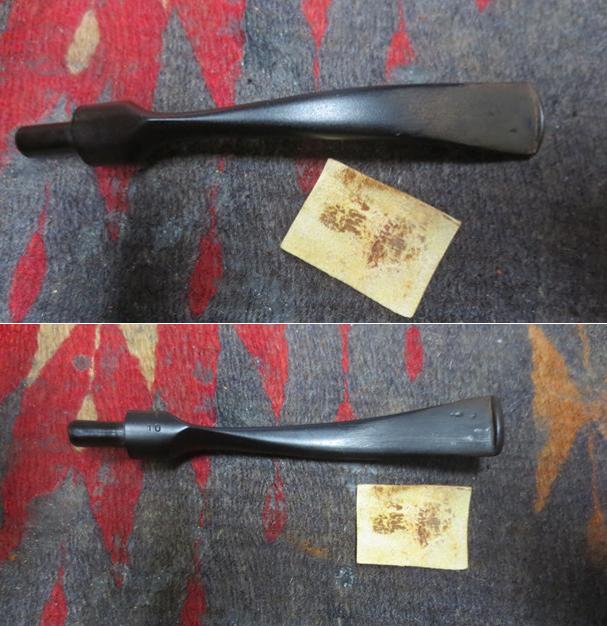
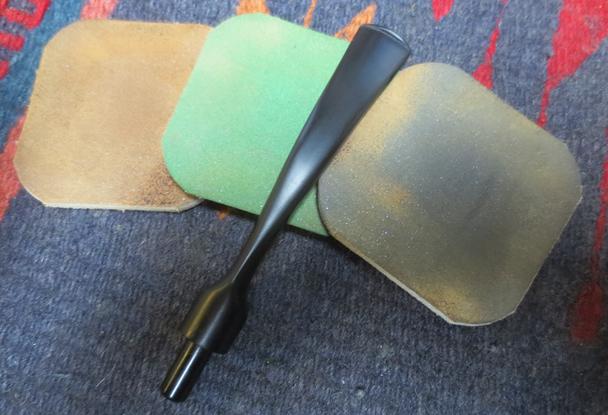
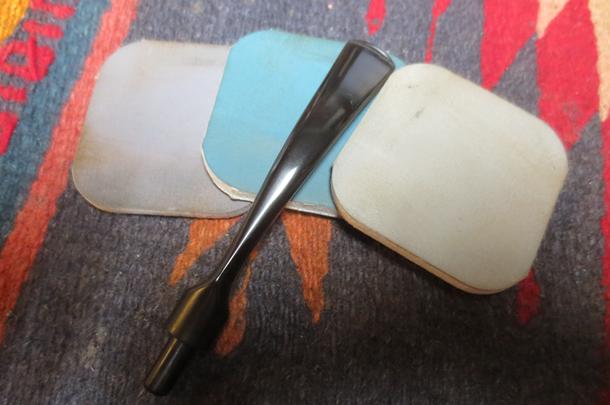
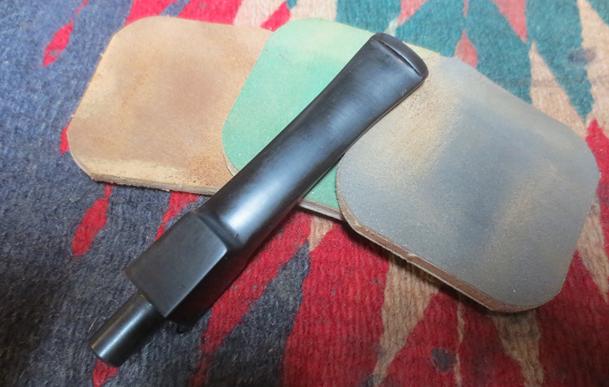
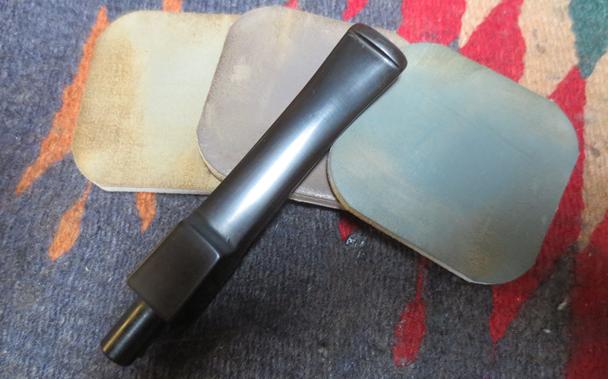
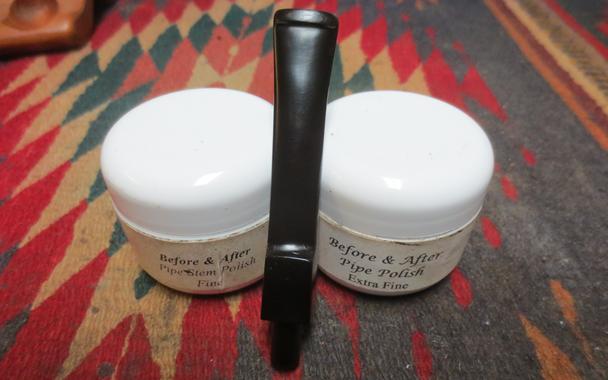
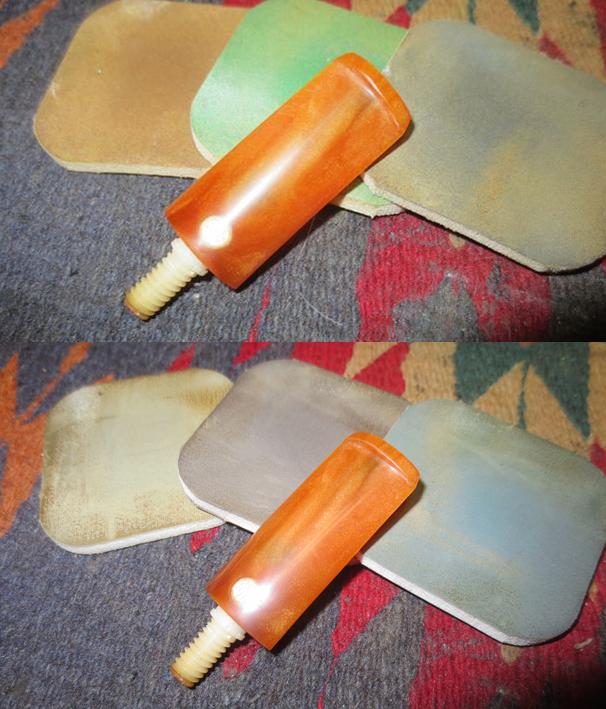
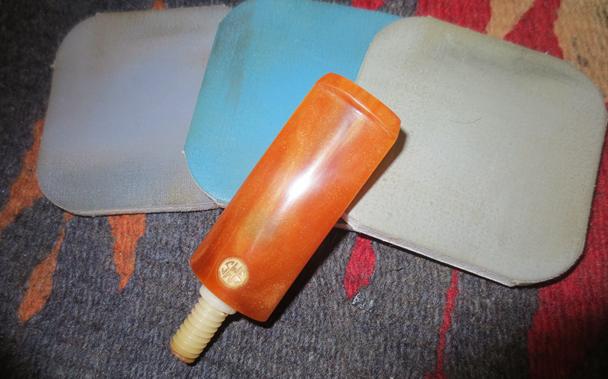
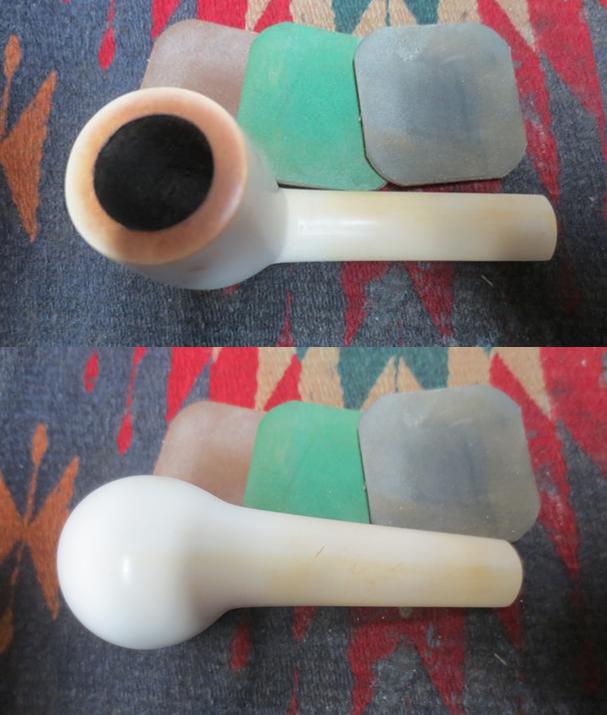
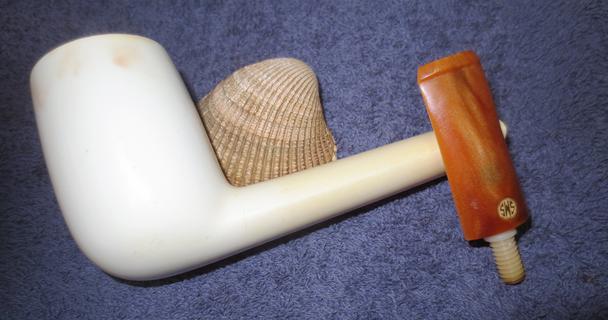
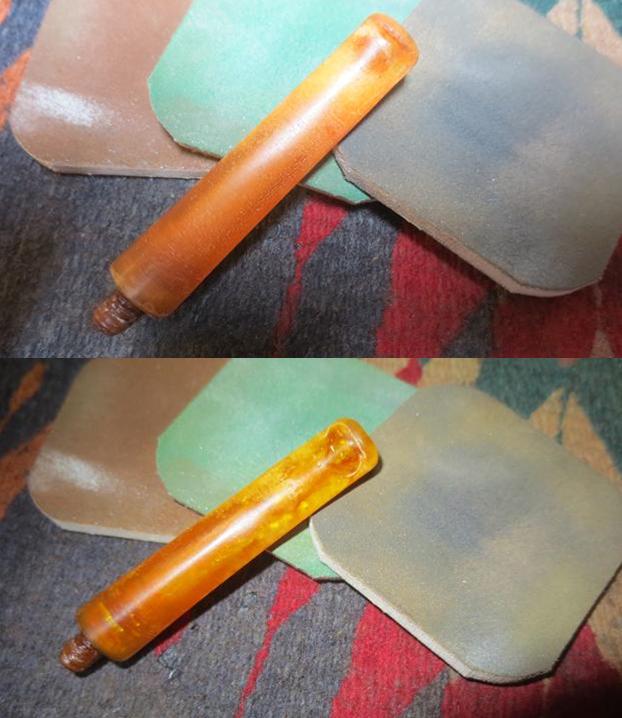
 I worked over the stem with micromesh sanding pads. I polished out the sanding scratches and marks in the vulcanite – wet sanding it with 1500-2400 grit pads and dry sanding it with 3200-12000 grit pads and wiped it down with Obsidian Oil after each one. When I finished with the 12000 grit pad I gave it a final coat of oil and let it dry. Once it had dried, I polished it with Before & After Pipe Stem Polish Fine and Extra Fine. I rubbed it down with final coat Obsidian Oil and took the following picture.
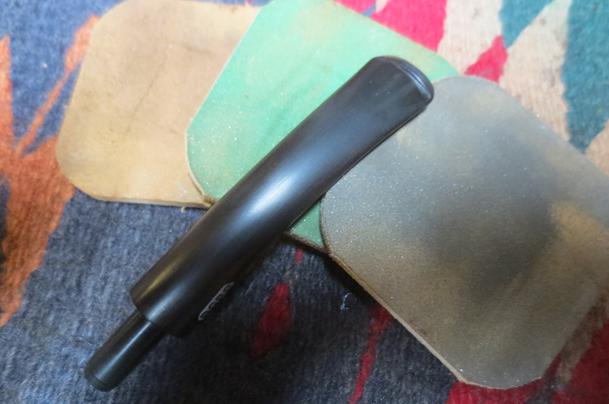
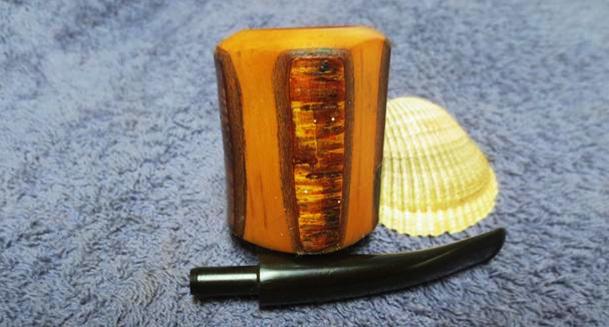
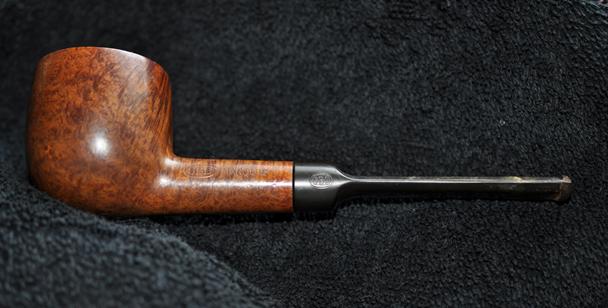
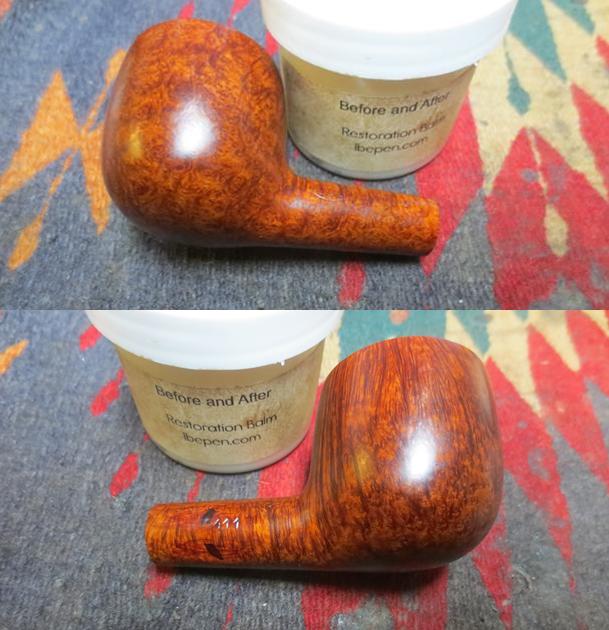
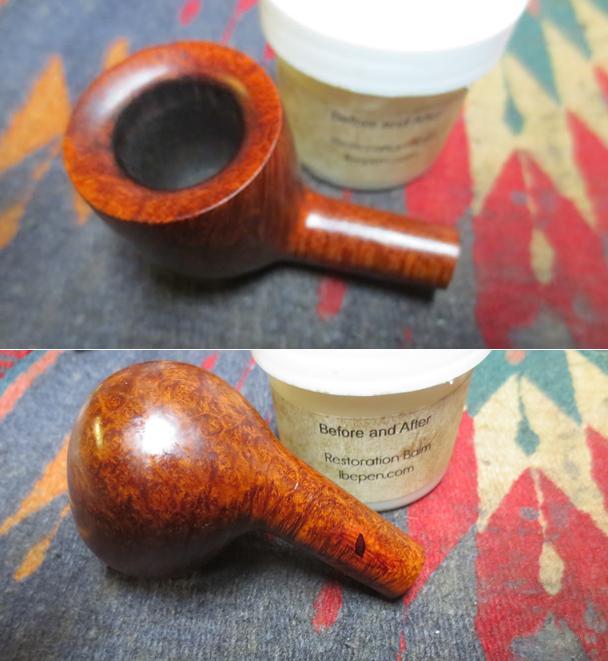
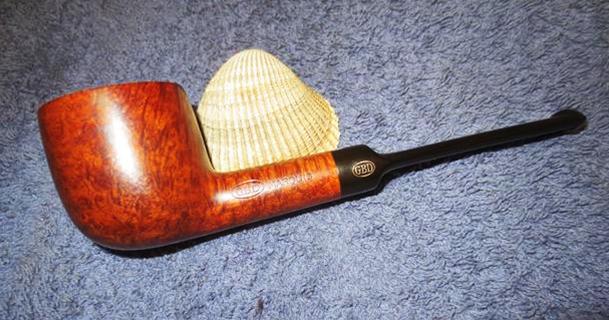
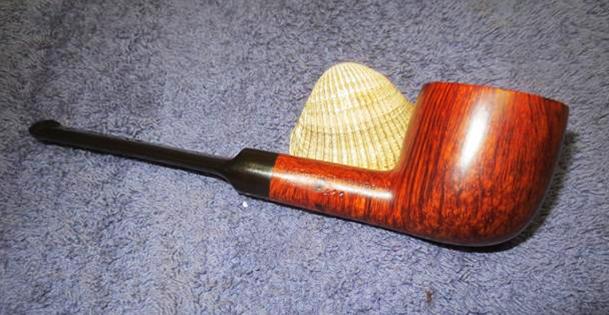
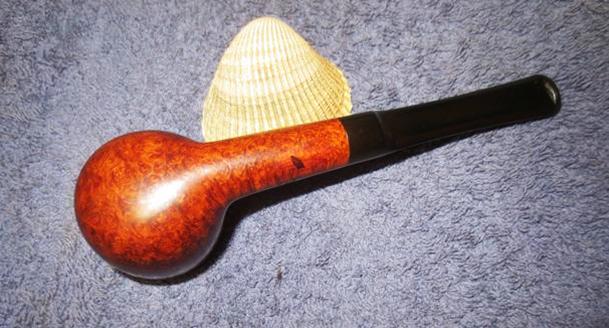
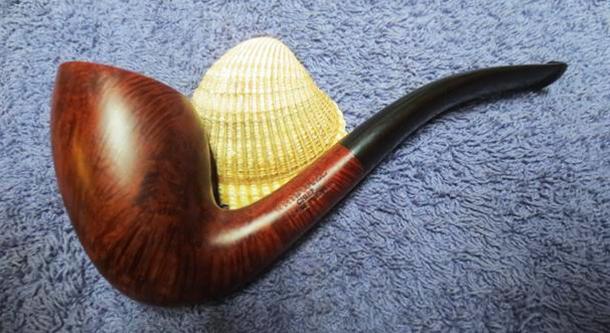
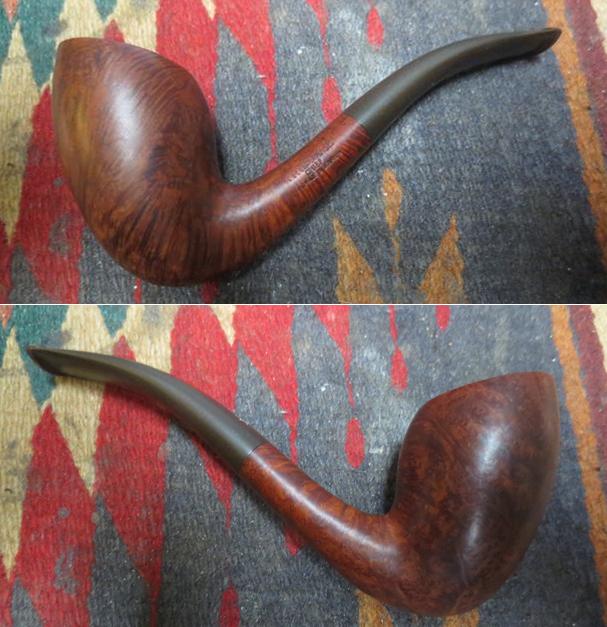
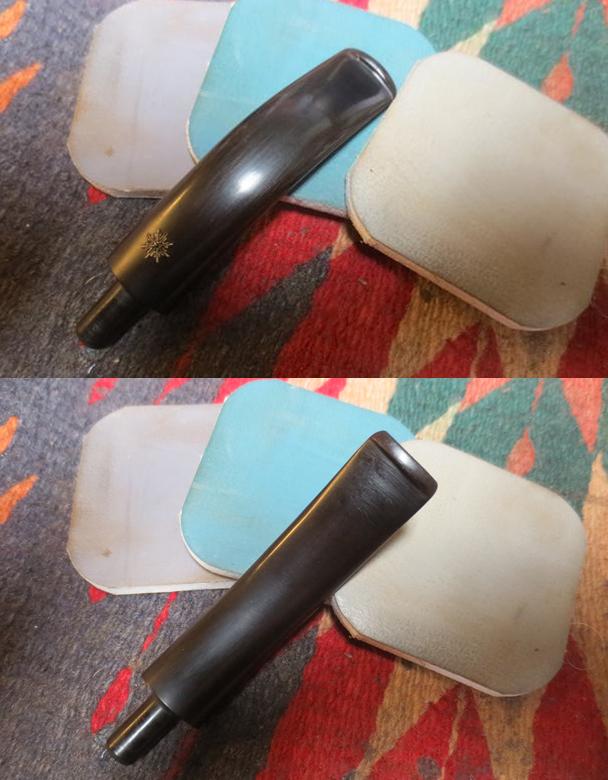
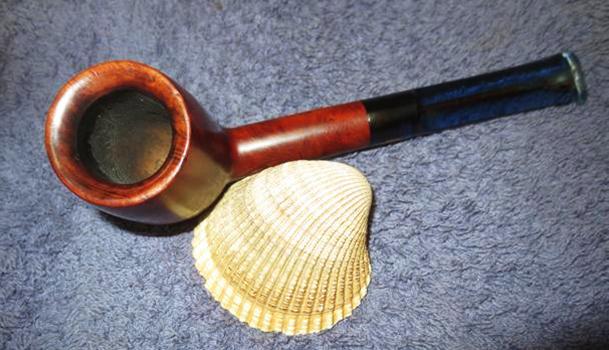
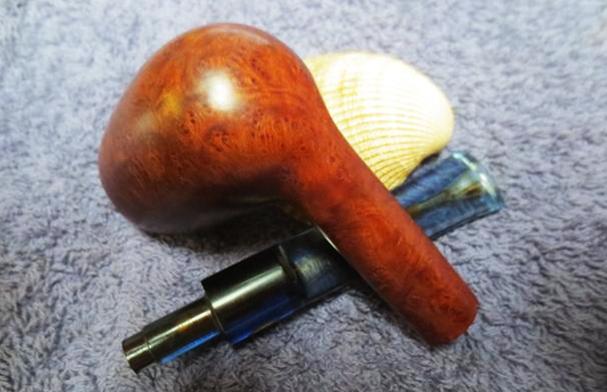
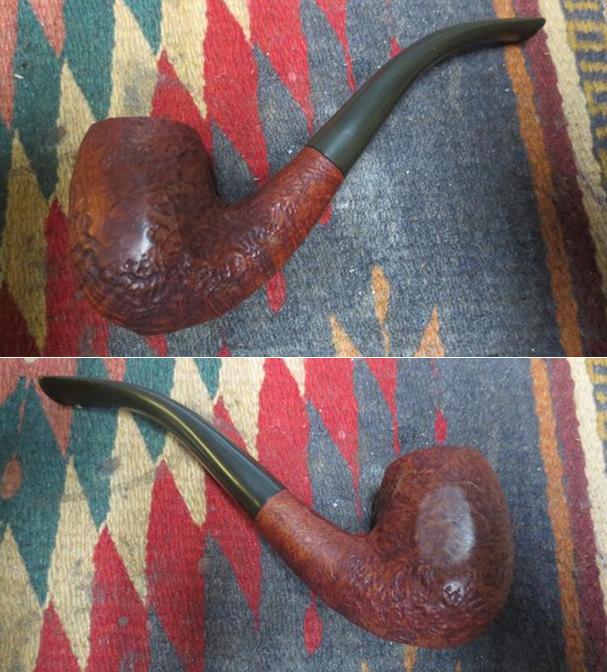
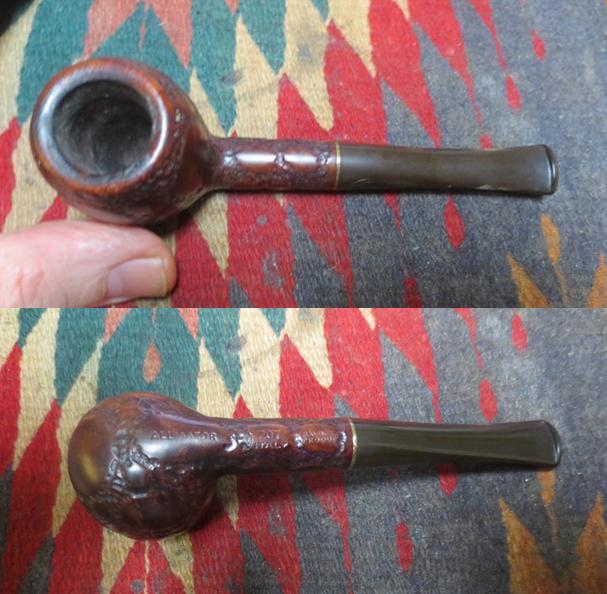
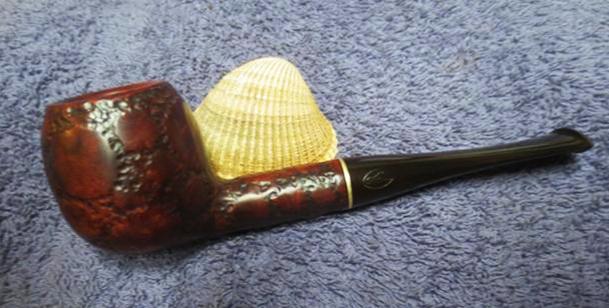
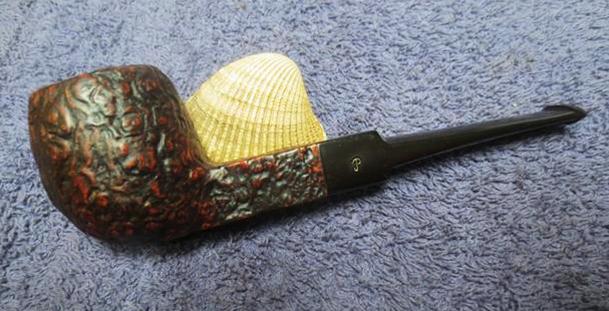
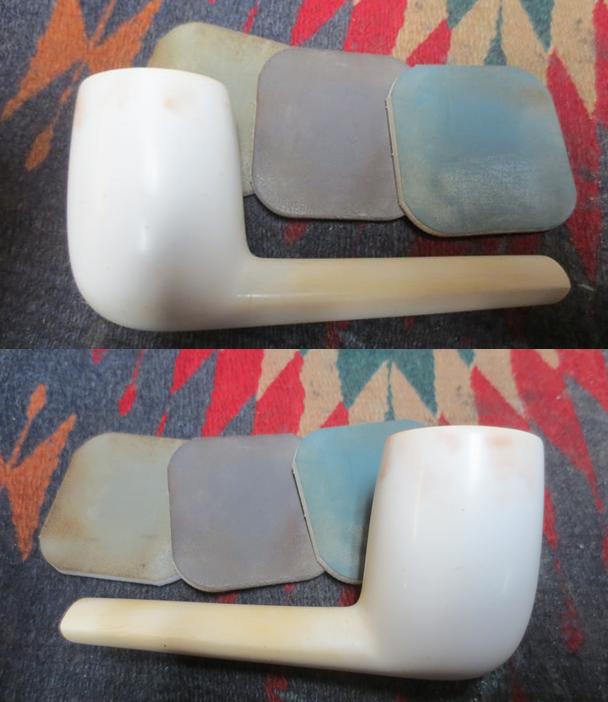
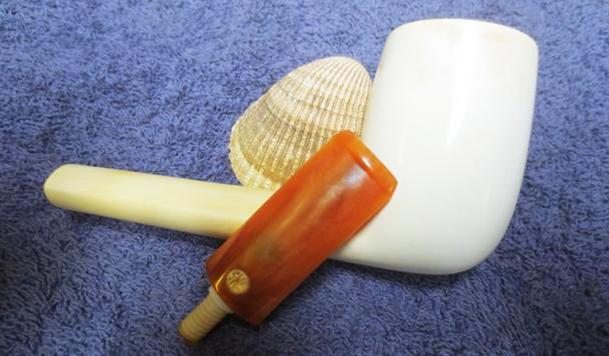
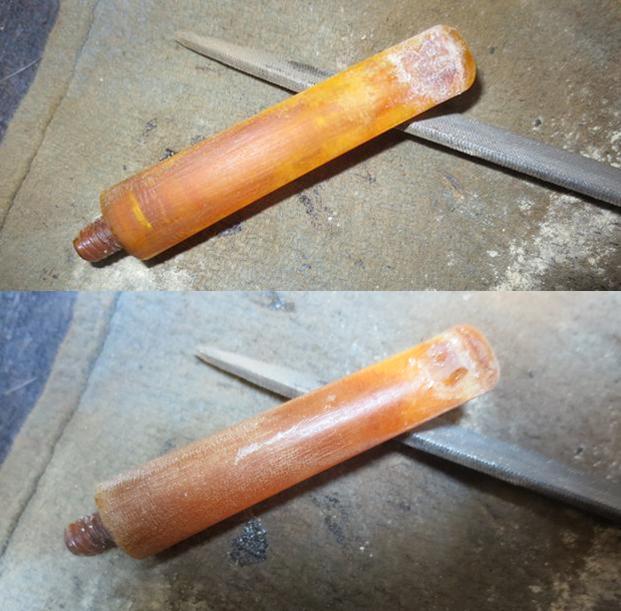
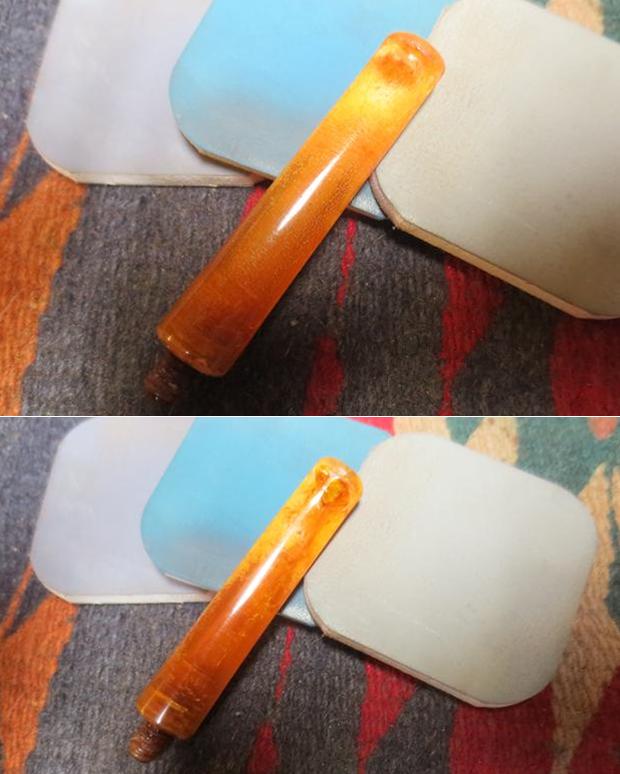
 I put the stem back on the bowl and took the pipe to the buffing wheel to work it over. I carefully buffed the bowl and shank with Blue Diamond. I did not want to damage the bark on the bowl or shank so I used a very light touch. I worked on the stem with Blue Diamond to polish it. I gave the bowl multiple coats of Conservator’s Wax and hand buffed it with a shoe brush. I gave the stem multiple coats carnauba wax. I buffed the entire pipe with a clean buffing pad to raise the shine. I hand buffed it with a microfiber cloth to deepen the shine. The finished pipe is shown in the photos below. The bark now has a rich glow to it and the peeled areas of the Cherrywood bowl look rich as well. The shank looks good. The hard rubber/vulcanite stem came out quite nice with a shine to the ROPP oval on the left side. The pipe came out really well. Now I have six more of the uncle’s pipes to finish up and then I will pack these back in their well packed box and send them back to the US to carry on life for the nephew of the pipe man who left them to him. Thanks for looking.


