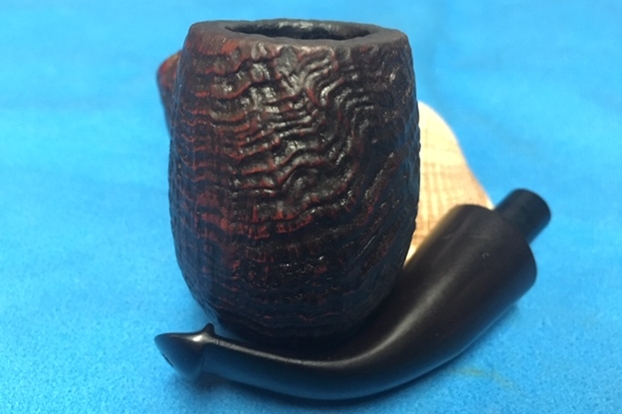
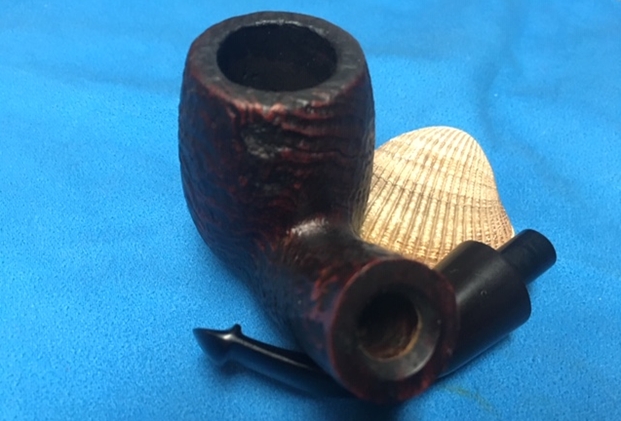
Tag Archives: stem repairs

Breathing New Life into a BBB Gourd Calabash with an Ambroid Stem


Blog by Steve Laug

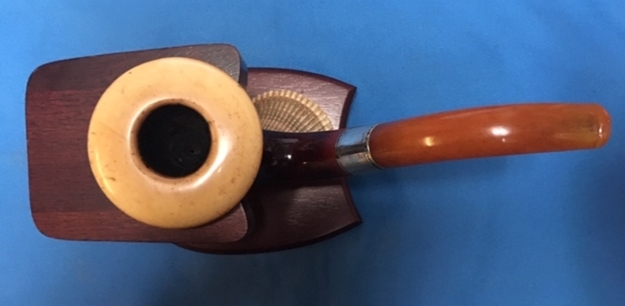
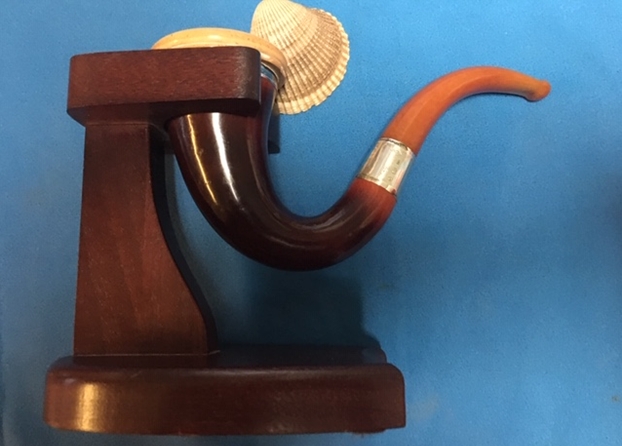
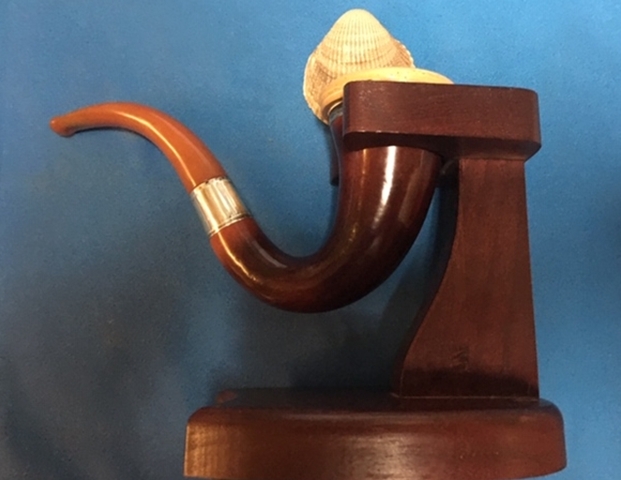
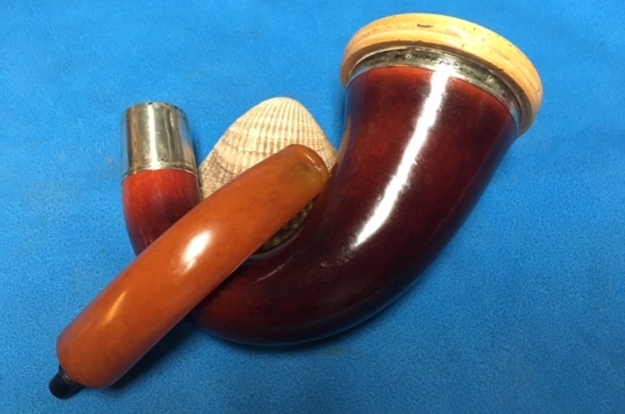
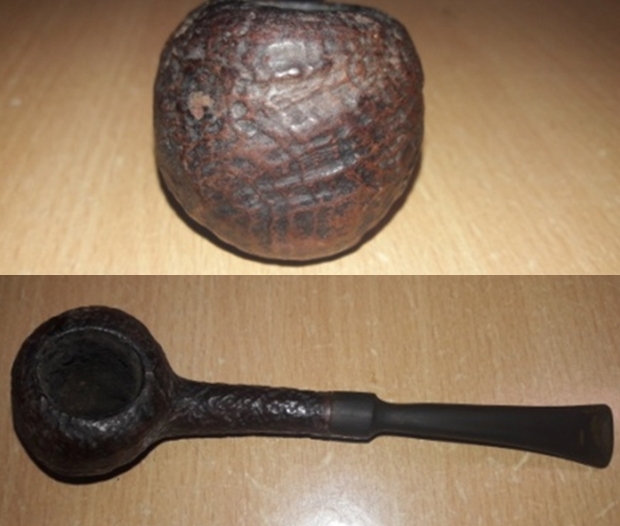
Not long ago I received an email from a lady named Pat on Vancouver Island about some pipes that she had that had belonged to her late husband as well as an old Gourd Calabash with a Meerschaum bowl that had belonged to her Great Grandfather. She sent me photos of the pipes and they were definitely interesting to me. There were some John Calich pipes and three other lower end pipes from her late husband and the cased Gourd Calabash. I was hooked and ready to be reeled in! After a few email exchanges we made a deal that was acceptable to us both. The payment was e-transferred to Pat and the pipes were shipped to me in Vancouver. Pat sent me two photos of the pipe before she shipped them to me.

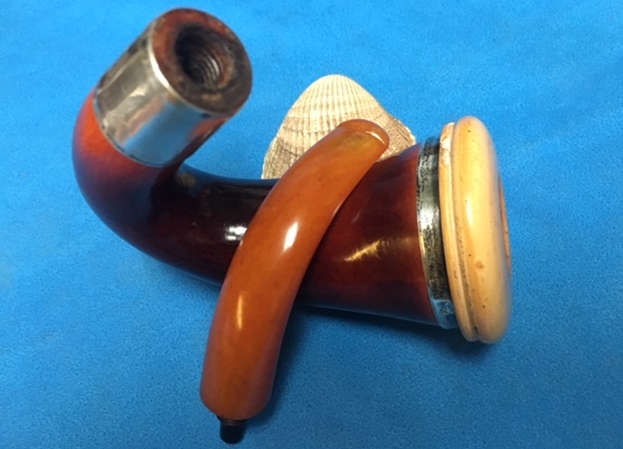
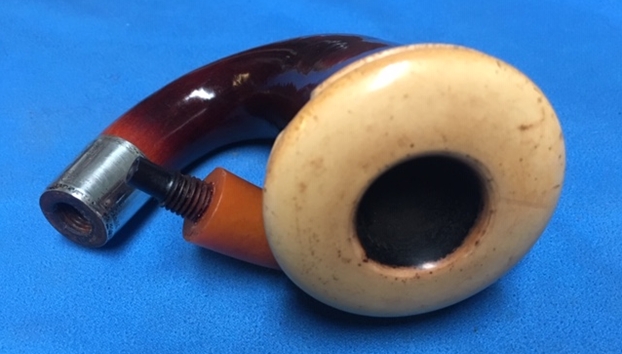
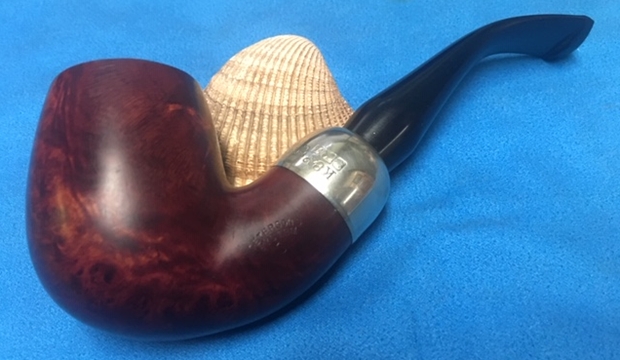
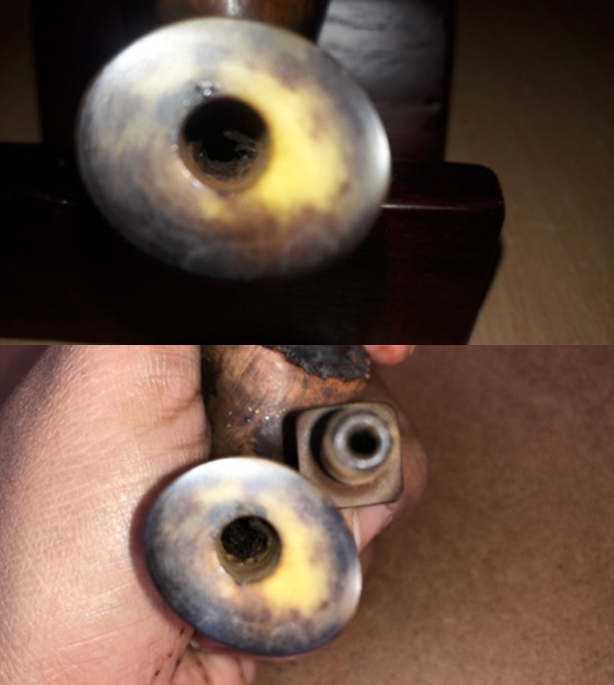
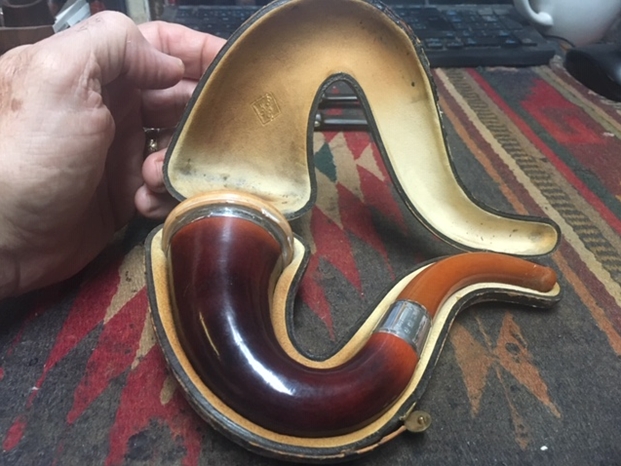
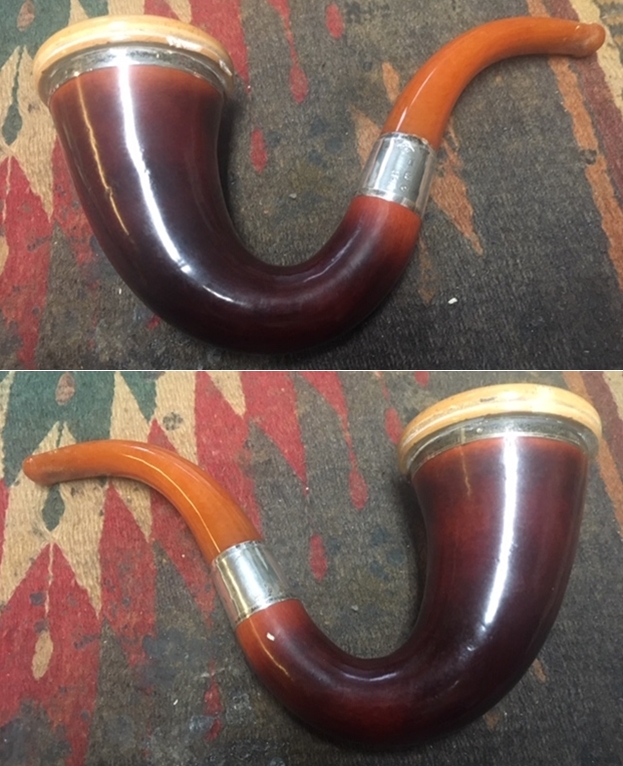
The first photo shows the cased pipe. The Gourd Calabash was a BBB as can be seen by the triangle stamped in gold on the cover of the case and the silver band in the photos below. The Gourd had some beautiful patina and had turned a rich reddish brown colour. There was a silver band on the shank with what looked like hallmarks. There was also a silver band around the top of the gourd under the meerschaum bowl insert. The bowl had a lot of colour and it had a ring around the meerschaum bowl. There were a couple of chipped areas on the lower ring of the bowl. The amber coloured stem looks intact and does not show any obvious damage. The colour of the stem and the cloudiness of the material makes me wonder if it truly amber or some form of ambroid. I will know soon enough.

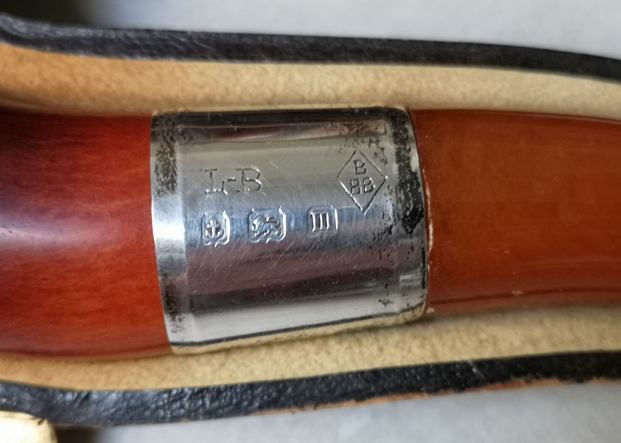
The second photo is a close up that shows the silver band on the shank of the pipe. It is in good condition and lightly tarnished. The stamping is very readable and it clearly showed the following marks: L-B and BBB in a triangle. There were also three hallmarks on the band. The first was an Anchor (which is the symbol for the Birmingham Assay Office). The second was a rampant lion (which is the symbol for .925 silver). The third one was the lower case letter “m” (which is the date letter that I would use to date the pipe as I worked on it). I did some searching through the British Silver Hallmark Charts that are online. I went through them comparing them to the “m” stamp on the band. I found two possible dates for the stamp. On the shape charts that I use most of the time when I am looking for information on the date stamps there was a lack of clarity as to whether the “m” stamp pointed to 1853 or to 1911. I wanted to see if I could get any clarity from others who were familiar with silver bands on BBB pipes.

I sent a quick message to a Facebook Messenger Group that I am part of that includes others who collect BBB pipes. I posted a picture of the band with the hallmarks that I included above on the group. Both Paresh Deshpande and Victor Nadeo immediately answered that the pipe was from 1911 from the charts that they use. I responded with my question as to the shape of the cartouche (the frame) around the “m”. Pretty quickly after that Victor sent me the link to the chart that he uses and included a screen capture of the list from 1900-1917 shown to the left (http://www.silvercollection.it/englishsilverhallmarksBIR.html).

I quote Victor’s response: I think the frame (cartouche) is only slightly erased. But I’m pretty sure it’s really 1911. They’d hardly miss anything like that, as they passed an Assay Office, such a serious government agency. And in view of the frame around the other hallmarks, I think they leave no doubt that it’s a 1911.

That set the date for me. It also worked well with the L-B stamp which stood for Louis Blumfeld. That L-B stamp fits that time frame perfectly. Now I knew that the pipe was hallmarked to 1911 and that it was an old timer. I could not wait to see it once it arrived in Vancouver.

While I waited for Canada Post to deliver it I did a bit of reviewing on the history of the brand from Pipedia (https://pipedia.org/wiki/BBB). I quote some of the pertinent parts of the article below:

The initials once stood for Blumfeld’s Best Briars after Louis Blumfeld, who took over the management of the Adolph Frankau Company in 1856. After his death, the BBB gradually became known as Britain’s Best Briars. Soon to be the oldest English trademark in current use and the first pipe ever to have a registered trade mark. “Britain’s Best Briars”, often called BBB, is one of the oldest brands still in production and has always been the most popular foreign brand in Denmark. Earlier pipes included a metal rondel with a diamond shape including BBB imbedded in the stem top, and later post-Cadogan went to a stamped on logo, similar to the GBD pipes…

…Adolph Frankau & Co Ltd In 1847, Adolph Frankau arrived in London and quickly understood opportunities that the market of tobacco presented, in full expansion. He created the company “Adolph Frankau & Co” and became an importer of meerschaum pipes and supplies in connection with the tobacco. It takes under its wing young a 14 year old boy, Louis Blumfeld. The business thrives quickly until the death of Adolph Frankau in 1856. His widow prepares to sell the company.

Enter in scene Thomas Carlyle (1795-1881), author of “Hero and worship of the heroes”. This last advises with Mrs. Frankau not to sell, but to entrust the future of the company to the hands of the young person Louis Blumfeld, then 18 years old. Carlyle was to have a very high opinion of the Louis young person, and this confidence was justified by its assumption of responsibility of the business, its enthusiasm and its inexhaustible energy. Louis realizes quickly, like others, great potential of briar, from which the interest comes to be recognized.

Louis Blumfeld develops from the very start of important international trade, with a particular success in Canada, in Australia, in Zealand News, India and in the extrème Is Europe, in Switzerland and, with a special mention, in Denmark…

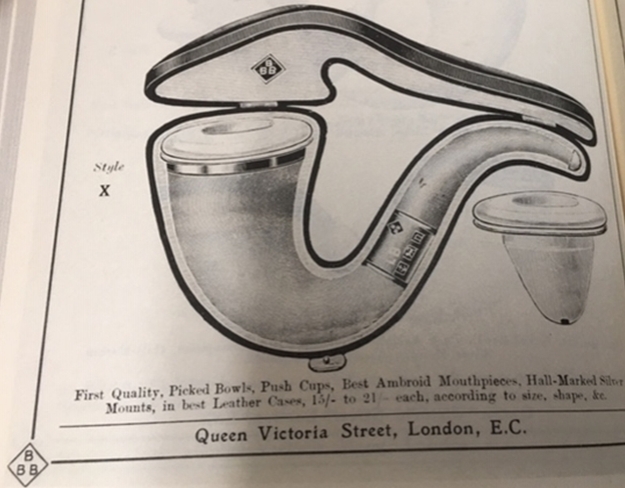
I took out my Briar Books Press reproduction of the Adolph Frankau & Co. BBB Catalogue XX from 1912 and did a bit of reading to see what I could find out from the source. Sure enough I found the pipe in the catalogue. It is marked as a Style X Genuine South African Calabash Pipe. Underneath the print of the pipe it reads First Quality, Picked Bowls, Push Cups, Best Ambroid Mouthpieces, Hall-Marked Silver Mounts in best Leather Case. You can see the two rings around the bowl insert, the silver band around top of the gourd and the silver band on the shank. It is also clear that the stem is marked as an Ambroid mouthpiece. The leather case is the same one as the one I am working on with the BBB logo on the top side of the case and the same latch setup as the case I have.I now had a verification that the L-B stamp stood for Louis Blumfeld as I expected. He took over the company at the death of Adolph Frankau in 1856. He took the brand to its zenith as BBB (Blumfeld’s Best Briars and later Britain’s Best Briars). That time table fit the dating of this pipe very well. The 1912 Pipe Catalogue has the same pipe for sale. Now it was time to work on the pipe itself.
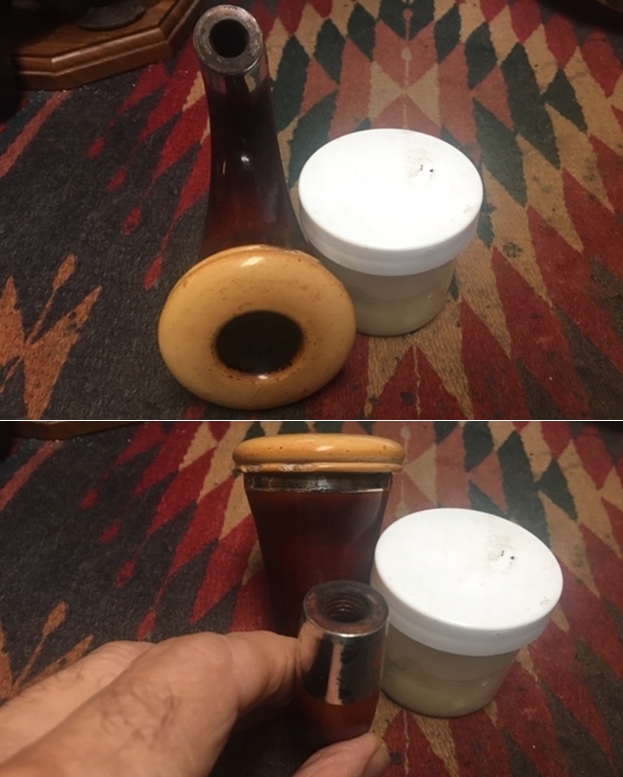
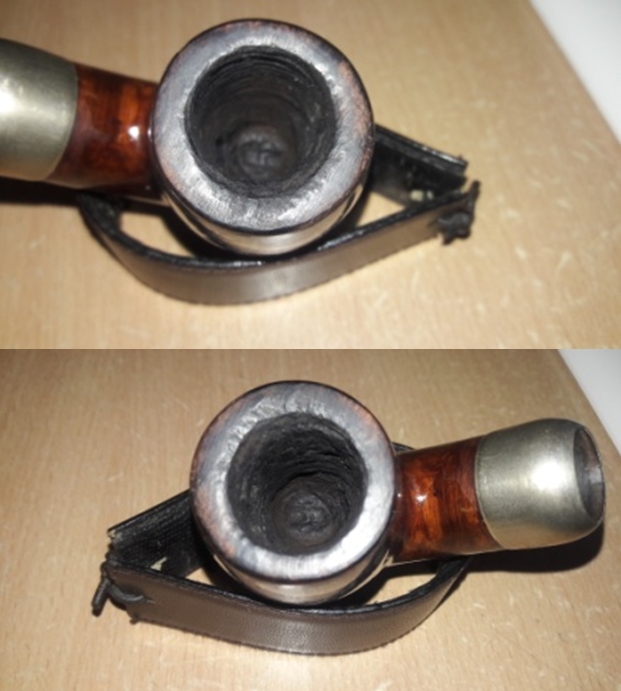
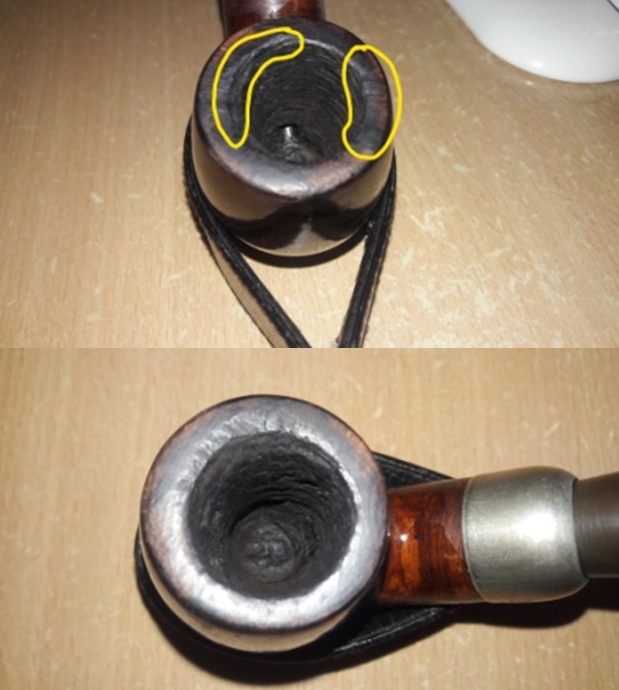
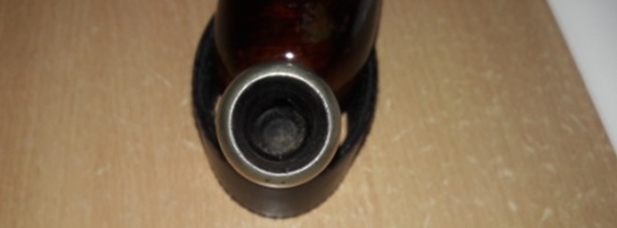
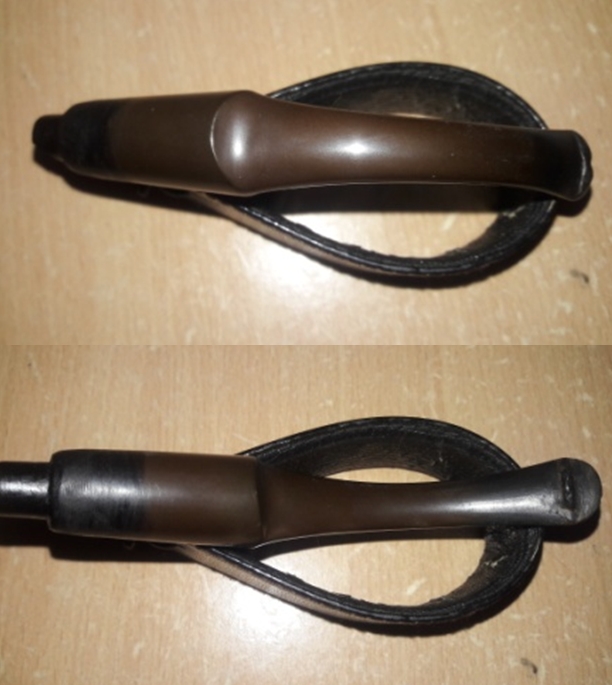
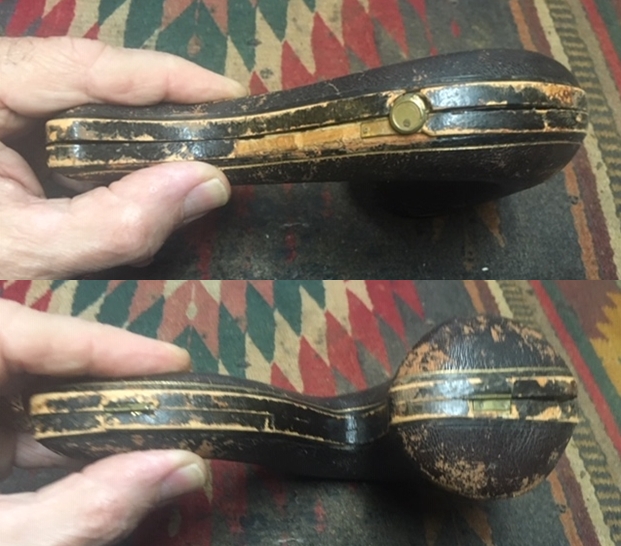
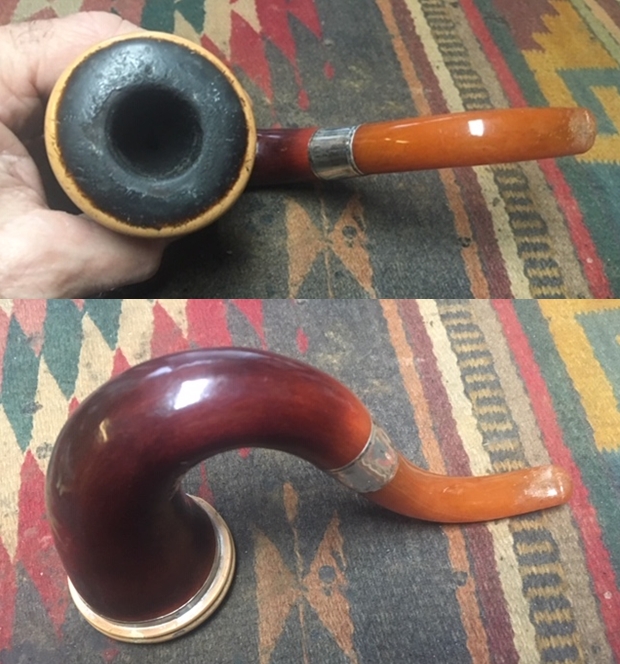
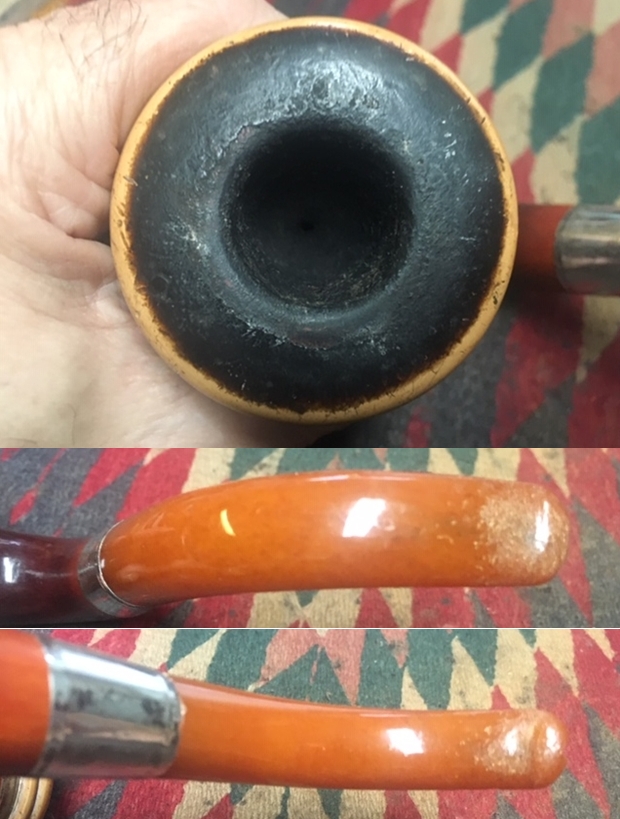
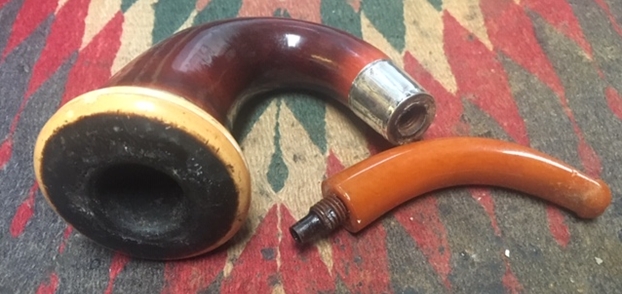
I brought the worn leather clad case to my work table and took some photos of it before I opened it and took out the pipe. It was worn but well made. Some of the leather was peeling but the brass hinges on the back edge and the flip clasp on the front were all in good order. I took photo of the unopened case to give you a sense of my own expectancy. I opened the case and took a photo of the pipe in the case. You can see the gold embossed stamp on the inside of the case – a triangle with BBB against the cream coloured lining.I took the pipe out of the case and did a quick assessment of the condition of the pipe. The gourd calabash was in excellent condition and showed a patina of solid use for the 100+ years that it has been in Pat’s family. The silver band around the top of the gourd and the band on the shank are clean but oxidized. The one around the rim top is more oxidized than the shank band. I think the shank band was polished for the photo that Pat sent me. The edges of the meerschaum cup looked very good except for two chipped areas on the bottom ring of the bowl. The upper edges of the bowl appeared to be in very good condition. The stem is in good condition other than tooth marks and chatter on the top and underside near the button. The rest of the stem is in excellent condition. As I examine the stem I am becoming convinced that it may not be amber.    I took photos of the top of the bowl. There was a thick cake in the bowl that overflowed onto the rim top. It appears to me that the bowl was never cleaned during life of the pipeman who held in trust. The buildup of lava on the rim top was very thick and extended to the downward curve of meer cup on the edges. You can also see the tooth marks on the top and underside of the stem.I took some close up photos of the bowl and rim to show the thickness of the cake and the lava on the rim top. The lava top was thick and you can see the layers and flakes on the top photo below. I also took close up photos of the stem to show the tooth marks and chatter in the surface of the stem. There is also some serious wear on the button edge. The look of the damage on the stem surface made me more uncertain that it was amber. I unscrewed the stem from the shank and took a photo. The threaded bone tenon was anchored in the stem and screwed into the shank. The threads tenon was in excellent condition even though they were darkened from the tars of the tobacco.Once I had the date figured out and had a chance to look the pipe over I wrote a quick note to Pat and asked her if she would be willing to write a brief piece on her Great Grandfather. She was quick with her answer and sent me brief sketch, a photo and an article about her Great Grandfather. I include those now.
Hi Steve,

My great grandfather’s pipe was always a mystery. No one ever smoked it after he died, yet it got passed down through the generations. I always imagined it had magical powers like Sherlock Holmes’s pipe. When I was young, it sat beside my bed as I read The Hound of the Baskervilles. It has journeyed with me until your received it.

My great grandfather, John Milne Senior, immigrated to Canada from Scotland around 1875. He had a good sized farm on the edge of Toronto, Ontario in Weston (now a suburb), where he farmed and raised prize winning livestock, and raised 6 children. He was generous with extended family and neighbours supplying food during hard times in depression, and fresh garden produce for the local hospital during Second World War.

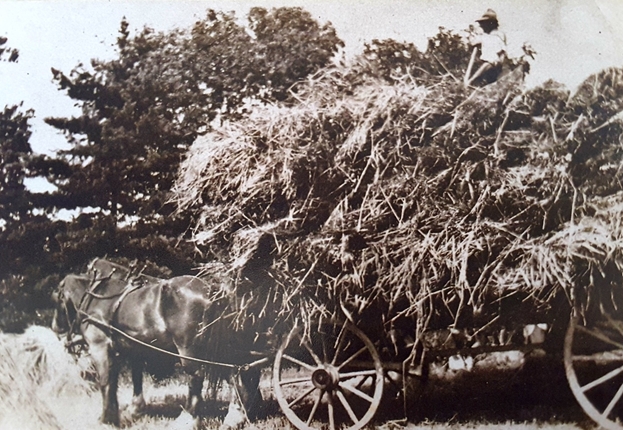
Attached is the only photo I have of him on top of his hay wagon on the farm. Also attaching an article written during the Second World War with details about the air show beside his farm, and his and my grandmother’s first flights in their 80’s. From all accounts he was a good hearted man that didn’t shy away from adventure.

Cheers,

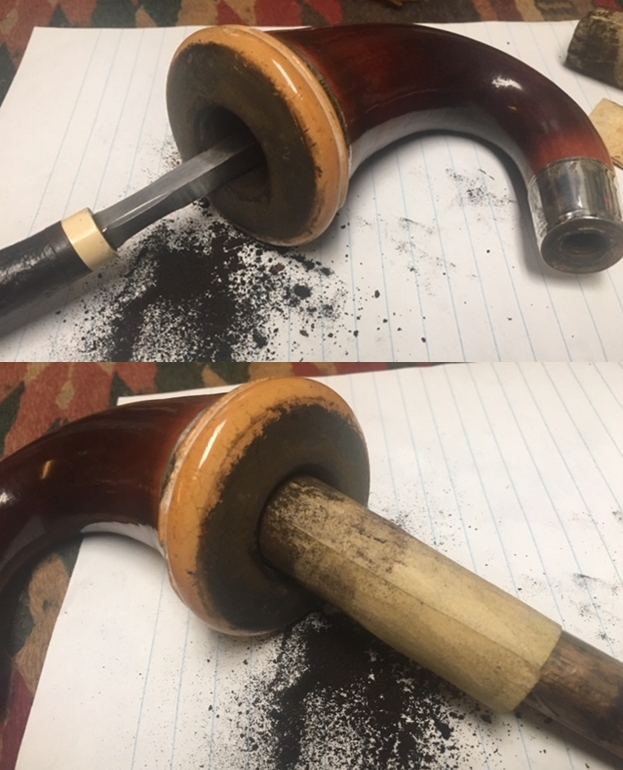
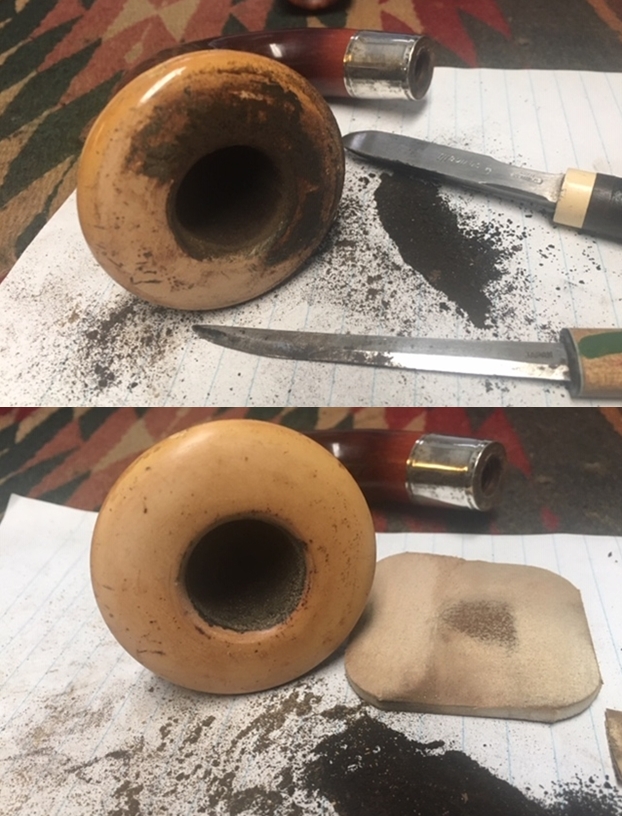
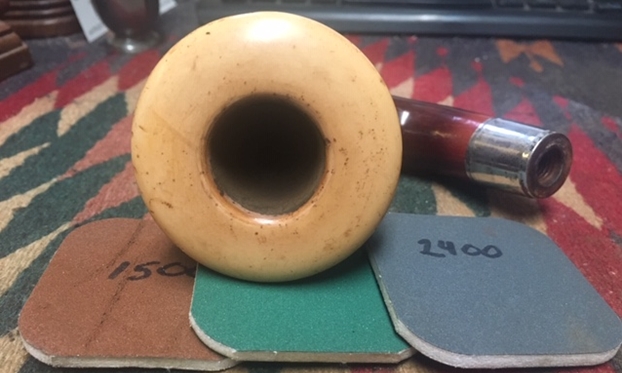
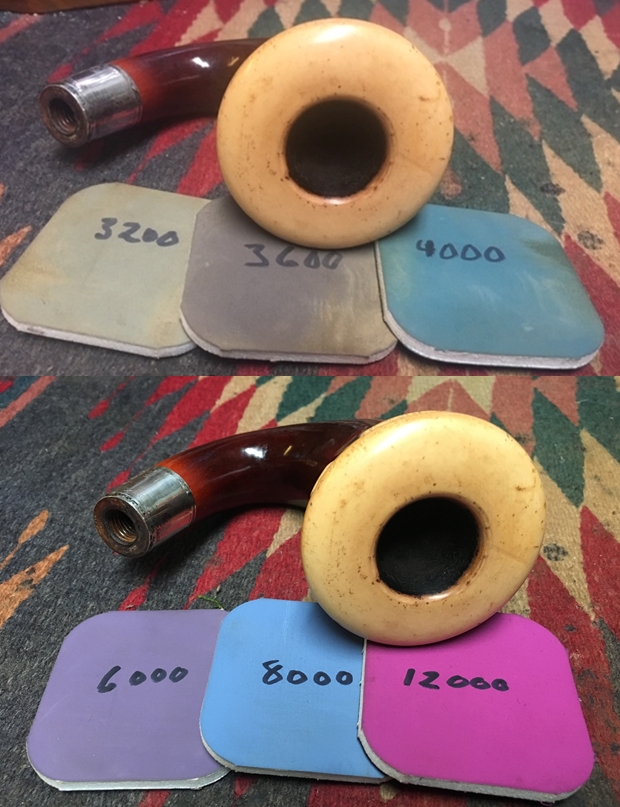
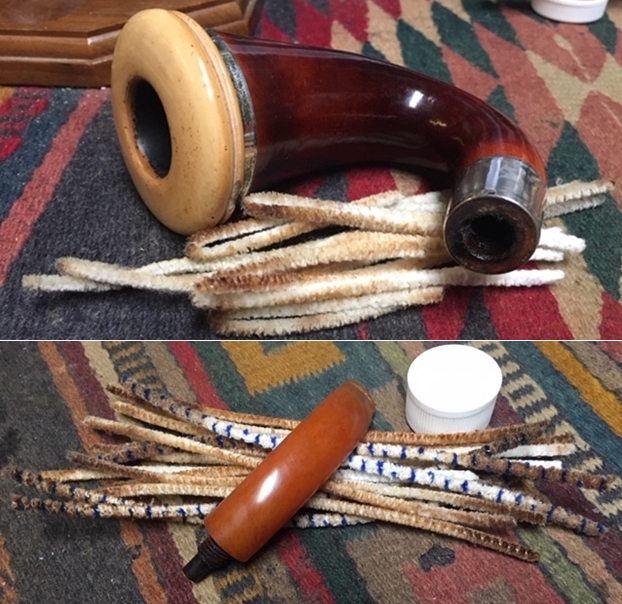
Pat Now that I had a pretty clear picture of John Milne Senior I was ready to start working on his pipe. As noted above in Pat’s email the pipe had been sitting unsmoked since his death. It was time to bring it back to life. I carefully reamed the bowl with a Savinelli Fitsall Pipe Knife. I scraped the cake back to the bare walls. I sanded the walls with a piece of dowel wrapped with 220 grit sandpaper to smooth out the interior of the bowl.I carefully scraped the rim top with the edge of the Savinelli Fitsall Pipe Knife and a sharp pen knife. It took a while to scrape back the cake until I got to the meerschaum cap. I followed that up with a 1500 grit micromesh sanding pad to remove the remaining bits that were left on the top of the rim.  I scrubbed the cap of the bowl with Before & After Briar Cleaner. I have used it in the past on meerschaum and found that it does a great job removing the grime but leaving the patina in good condition. I polished the cap and edges of the meerschaum bowl with micromesh sanding pads – wet sanding it with 1500-12000 grit pads. Each successive grit pad gave the meerschaum finish more of a shine. There were some nicks and scratches in the meer that I decided to leave as they are fitting of a pipe of this age. I rubbed the Gourd Calabash bowl down with Before & After Restoration Balm. I worked it into the surface of the gourd with my fingertips to clean, enliven and protect it. I let the balm sit for a little while and then buffed with a cotton cloth to raise the shine. Mark Hoover’s Balm is a product that I have come to appreciate on a variety of bowls – briar, meer and gourd. I polished the silver on the rim of the gourd and the silver band on the shank with a jeweler’s polishing cloth until it removed the black tarnish that had built up around the silver. There are small silver brads holding the band around the top of the gourd.   With the externals cleaned it was time to work on the internals. I was not able to remove the meerschaum bowl so I left it in place and cleaned the gourd through the hole in the bottom of the bowl and up the shank. I used alcohol and pipe cleaners to remove the grime that was built up and worked on it until the cleaners came out clean and the gourd smelled fresh.The more I handled and worked on the stem the more I was certain that I was dealing with something other than amber. From the BBB Catalogue from 1912 I knew that I was dealing with Ambroid which is in essence manmade amber. My first thought was that the Ambroid was Redmanol so I turned Pipephil to have a look at that product to see if they made material for BBB (http://www.pipephil.eu/logos/en/logo-r3.html). I found in a note below the photos said that BBB used Redmanol stems. I have included a screen capture of the section on pipephil’s site.I also noted there that L&H Stern used Redmanol as well. I turned to an article on Pipedia about about LHS pipes (https://pipedia.org/wiki/LHS). I found a picture of the exact stem colour as the BBB that I was working on. I quote:
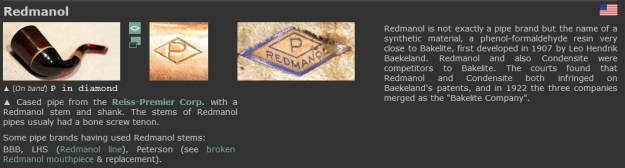
LH Stern is known to every important wholesaler and jobber in the country. LHS manufactures a complete line of briar pipes. Ginmetto wood pipes are also made, as well as Redmanol goods, the man-made amber. The first substitute for amber. Everything, even down to the sterling silver and other metal trimmings are made under one roof.
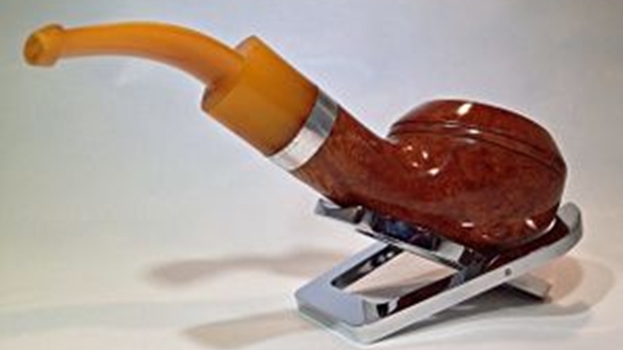
Example with Redmanol Stem (man-made amber)

I checked the dates on Redmanol and it was developed and was linked to an article on Bakelite on Wikipedia (https://en.wikipedia.org/wiki/Bakelite).

Bakelite (/ˈbeɪkəlaɪt/ BAY-kəl-eyet; sometimes spelled Baekelite) or polyoxybenzylmethylenglycolanhydride was the first plastic made from synthetic components. It is a thermosetting phenol formaldehyde resin, formed from a condensation reaction of phenol with formaldehyde. It was developed by the Belgian-American chemist Leo Baekeland in Yonkers, New York, in 1907.

Bakelite was patented on December 7, 1909. The creation of a synthetic plastic was revolutionary for its electrical nonconductivity and heat-resistant properties in electrical insulators, radio and telephone casings and such diverse products as kitchenware, jewelry, pipe stems, children’s toys, and firearms.

It seems that the inventor of Bakelite ended up merging his company with Redmanol who developed a similar product. I now knew that the stem I was working on was Redmanol/Bakelite. The more I worked on it the more apparent it became that I was dealing with a manmade product rather than natural amber.

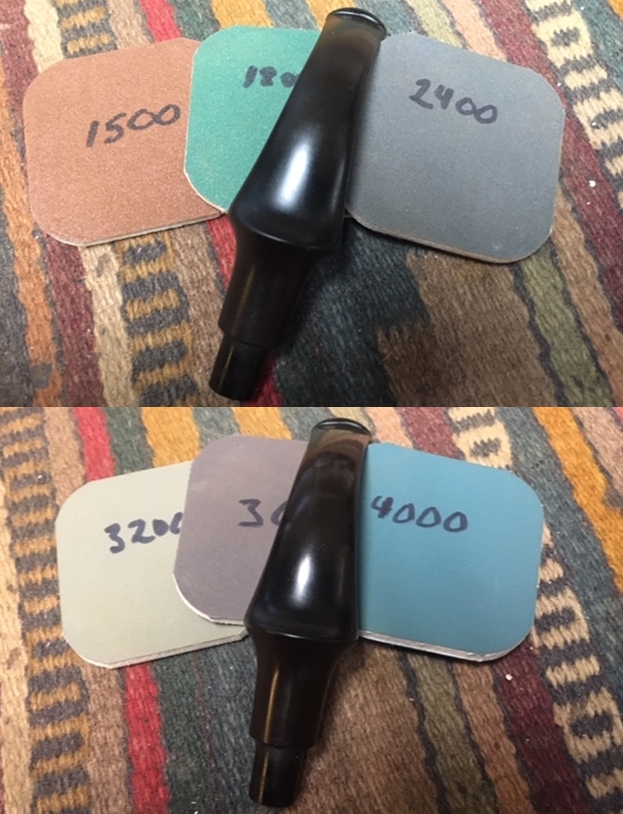
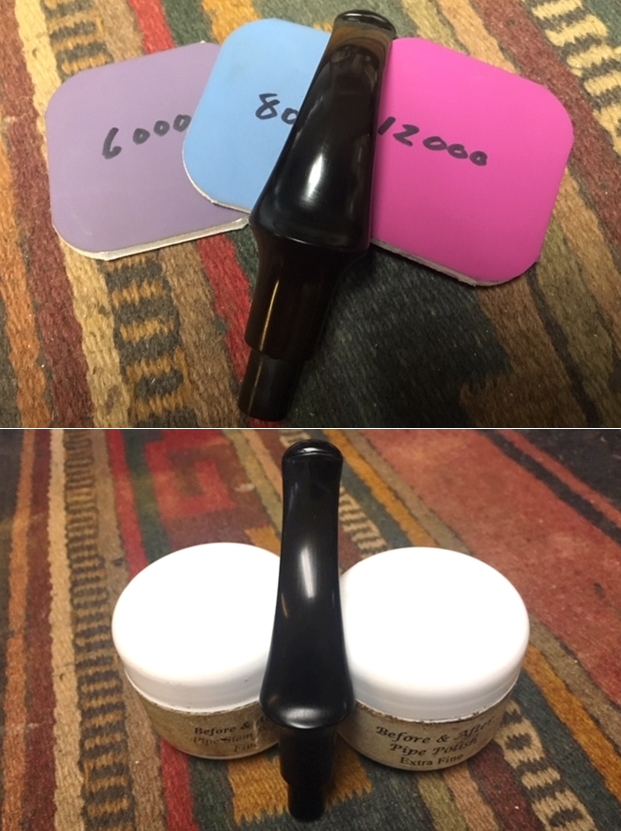
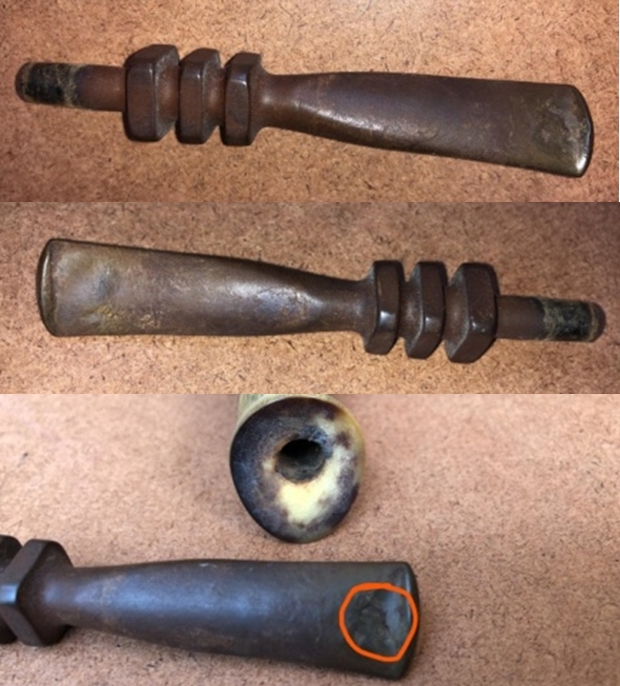
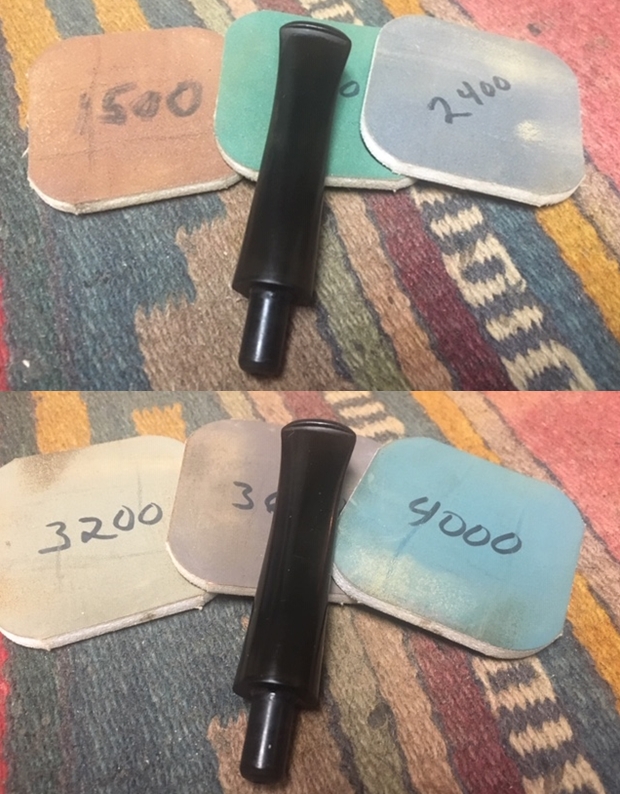
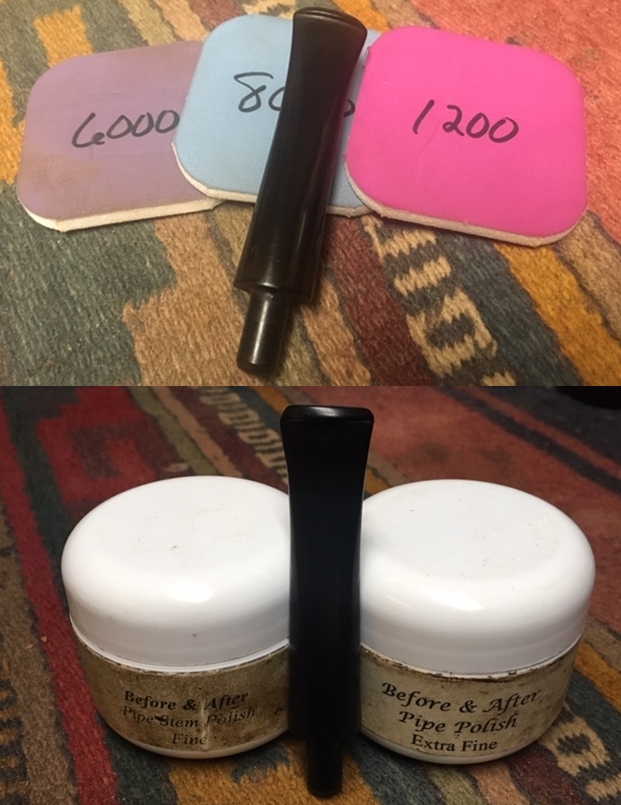
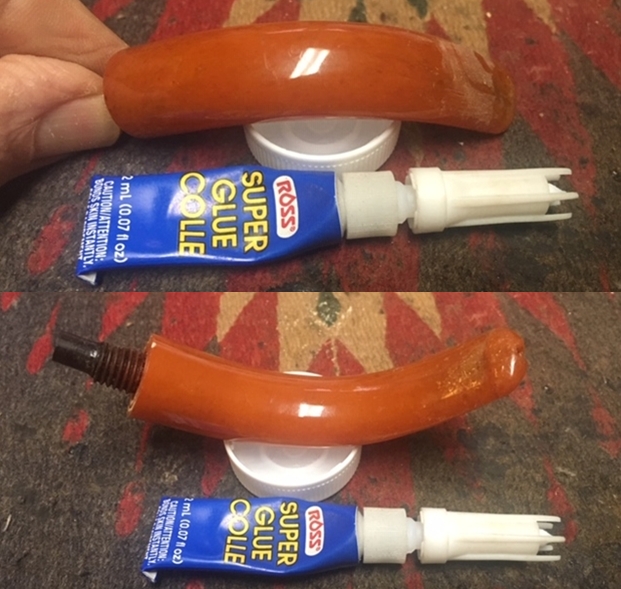
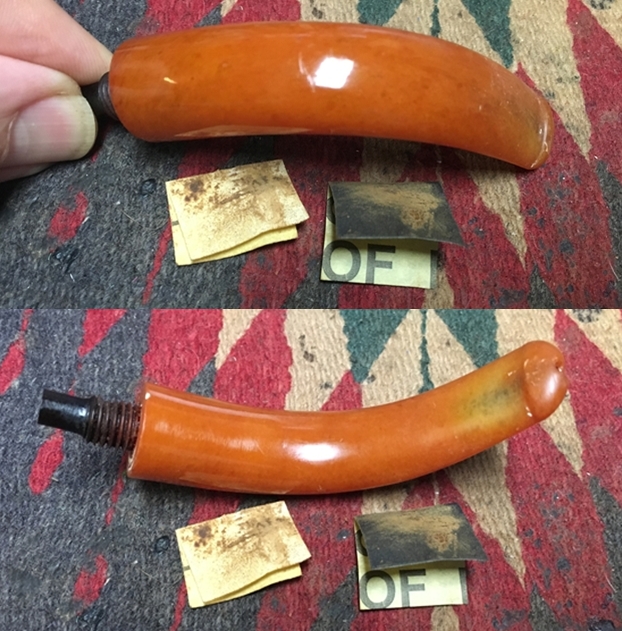
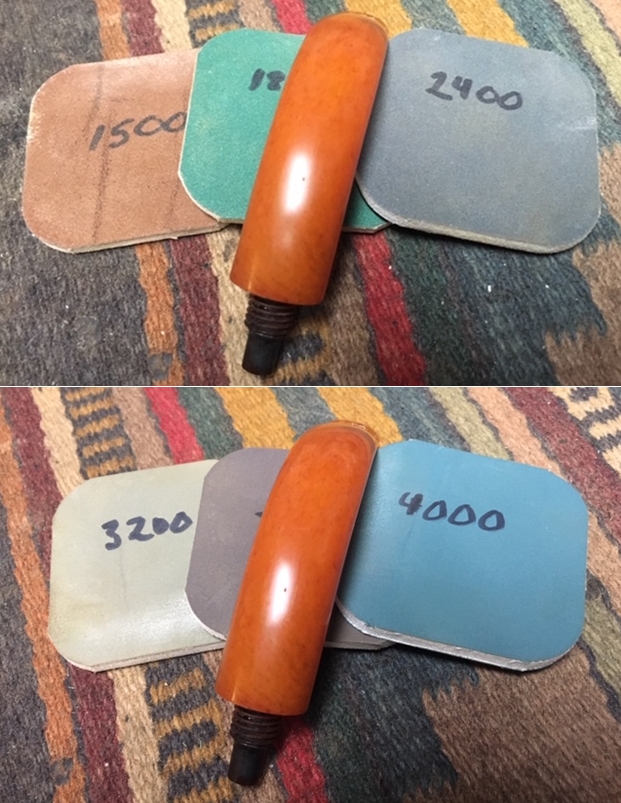
Armed with that information I turned my attention to the stem. I wiped the stem surface down with soap and water to remove any oils on the stem surface. I filled in the tooth marks with clear super glue and set the stem aside until the repairs had cured.When the repairs had cured I sanded them smooth to blend them into the surface with 220 grit sandpaper and polished it with 400 grit wet dry sandpaper.     You can see the discolouration of the stem material from the sanding. It is pretty typical of Redmanol and Bakelite stem… I went on to polish the stem with micromesh sanding pads – wet sanding 1500-12000 grit sanding pads. I wiped the stem down after each sanding pad with Obsidian Oil. I gave it a final coat of Obsidian Oil after the last sanding pad.  BBB pipes have always been a favourite of mine. I love firing up a bowl in one and I love feel and craftsmanship that went into each of them. This 1911 Gourd Calabash is a beautiful example of the craftsmanship that went into each of the pipes that came out of Louis Blumfeld’s BBB factory. These calabash pipes put together the gourd from South Africa with a meerschaum cup from Turkey and a stem supplied by Redmanol. It is truly an international pipe that ended up in Canada on the farm of a Scottish immigrant and lived far beyond his life time in the hands of his granddaughter who cherished it and cared for it. I am honoured to carry on the trust of this noble calabash. I put the bowl and stem back together.
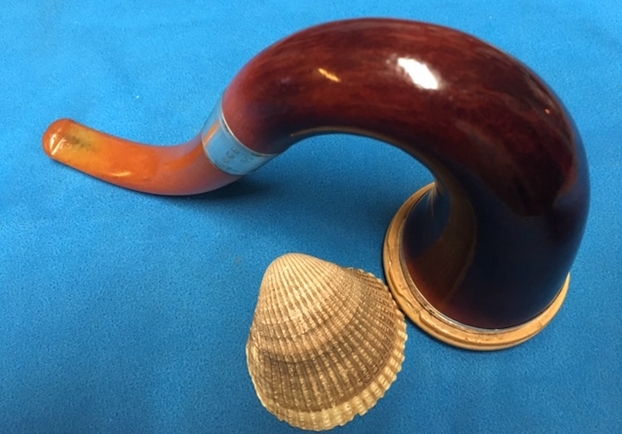
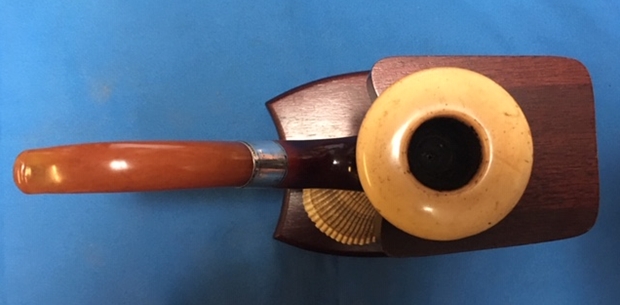
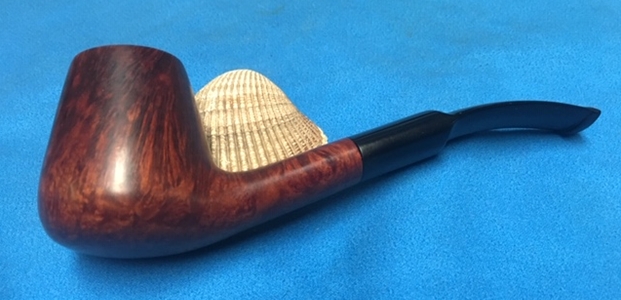
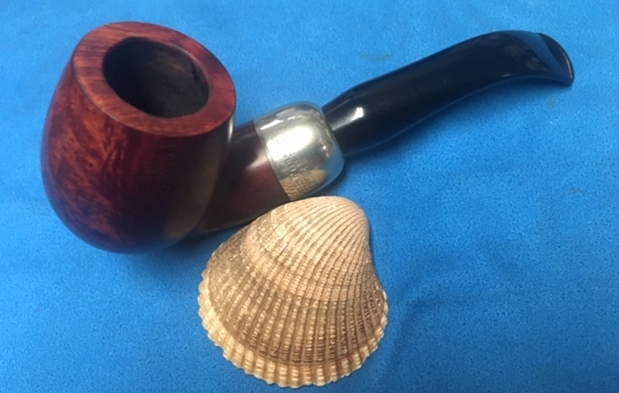
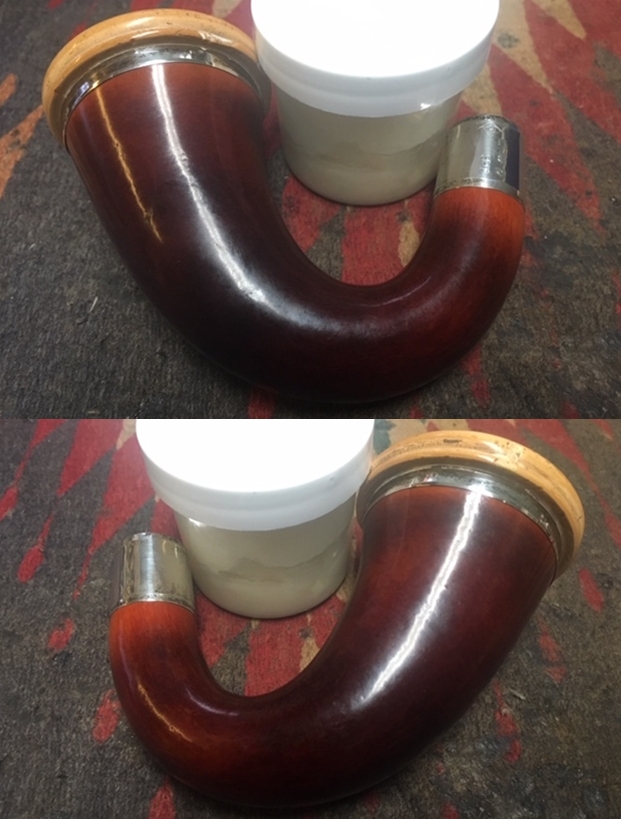
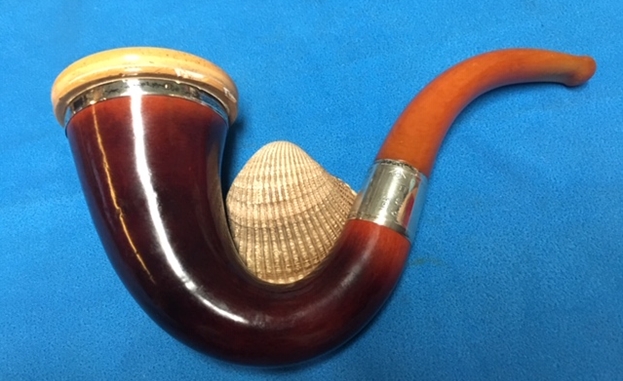
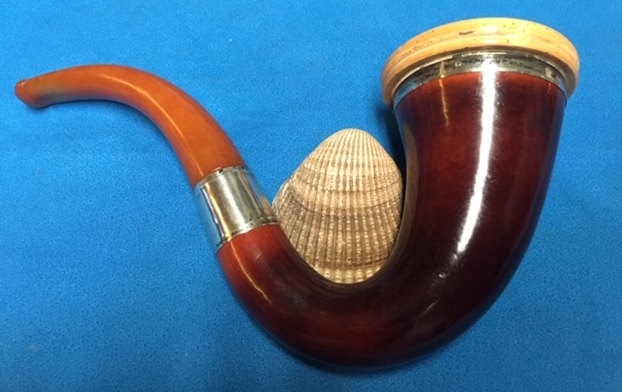
I carefully polished the bowl, the meer cap and stem with Blue Diamond to polish out the scratches in the briar and the vulcanite. I gave the gourd and stem multiple coats of carnauba wax. I buffed the pipe with a clean buffing pad to raise the shine. I hand buffed it with a microfiber cloth to deepen the shine. The pipe polished up pretty nicely. The rich reddish brown patina of the gourd, the shine of the aging meer, the silver band and ring and the Redmanol stem really popped with buffing showing the contrast colours of the pipe. The polished Redmanol stem went really well with the colours of the bowl. The rim top, though slightly damaged looked very good. This old BBB Gourd Calabash was another fun pipe to work on. It is an old timer that will hold a place in my BBB collection. The finished pipe is shown in the photos below. The dimensions of the pipe are Length: 7 inches, Height: 4 inches, Outside diameter of the bowl: 2 ¼ inches, Chamber diameter: ¾ of an inch. Thanks to John Milne Senior for his care of his pipe. Thanks to Pat for her care of it through the years and for passing it on to me to hold in trust as the next pipeman to own it. Thanks for reading this blog and my reflections on the pipe while I worked on it. This is an interesting estate to bring back to life. 
Restoring a Danmore Deluxe Volcano from Bob Kerr’s Estate


Blog by Steve Laug

The next pipe I chose to work on from Bob Kerr’s estate is part of his collection of Danish made pipes. I have worked on the restoration of others in this collection including a Stanwell Jubilee Shape 118 (https://rebornpipes.com/2019/08/11/another-bob-kerr-estate-a-stanwell-jubilee-1942-1982-shape-118/); a Stanwell de Luxe Shape 812 (https://rebornpipes.com/2019/08/10/back-to-bob-kerrs-estate-changing-up-and-working-on-a-danish-made-stanwell-de-luxe-812-billiard-regd-no-969-48/); a WO Larsen (https://rebornpipes.com/2019/01/13/restoring-pipe-17-from-bob-kerrs-estate-a-w-o-larsen-super-15-bent-stack/) and a Danish Sovereign Bulldog variation (https://rebornpipes.com/2019/08/11/another-bob-kerr-estate-a-danish-sovereign-305-bulldog-variant/).

To this list of Danish pipes I am adding the next  – a Danmore Handmade in Denmark Deluxe Volcano. Like the others it is part of Bob’s estate that the family asked me to clean up and move out to others who will carry on the trust that began with Bob. In the collection there were BBBs, Peterson’s, Dunhills, Comoy’s and Barlings as well many others – a total of 125 pipes. This is the largest estate that I have had the opportunity to work on. I created a spread sheet to track the pipes, restoration and sales. This job would take a fair amount of time to clean up. I could not pass up the opportunity to work on these pipes and help the family.

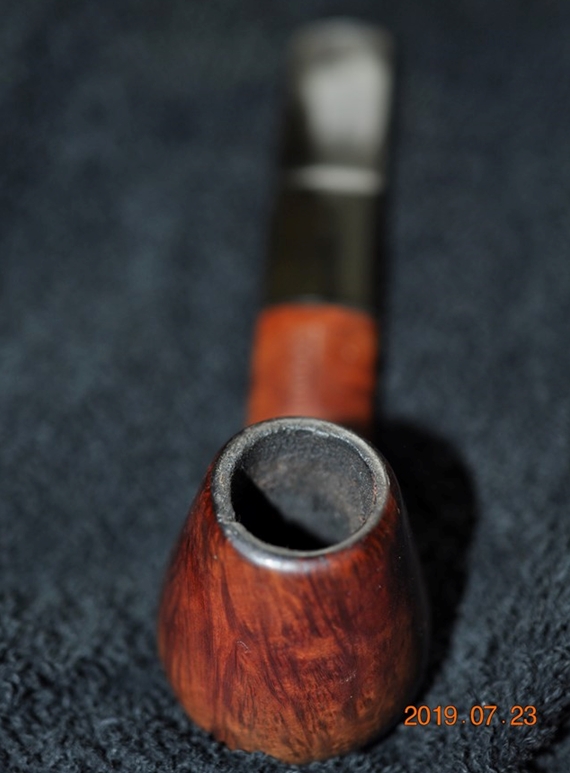
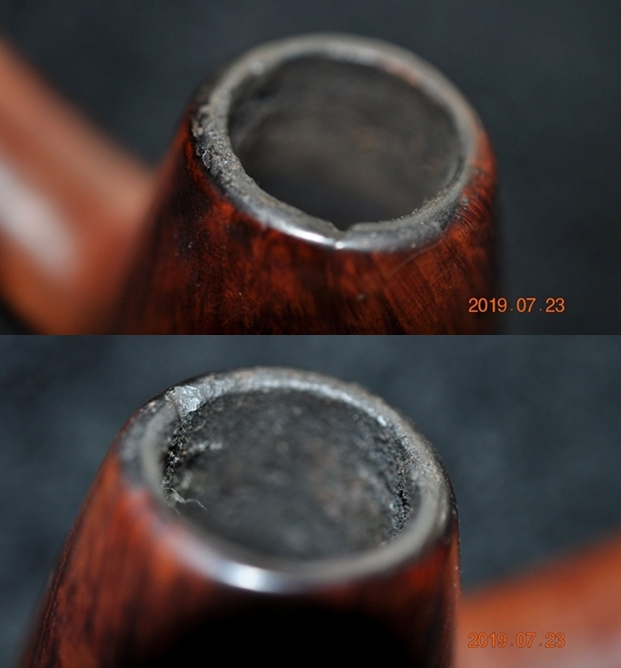
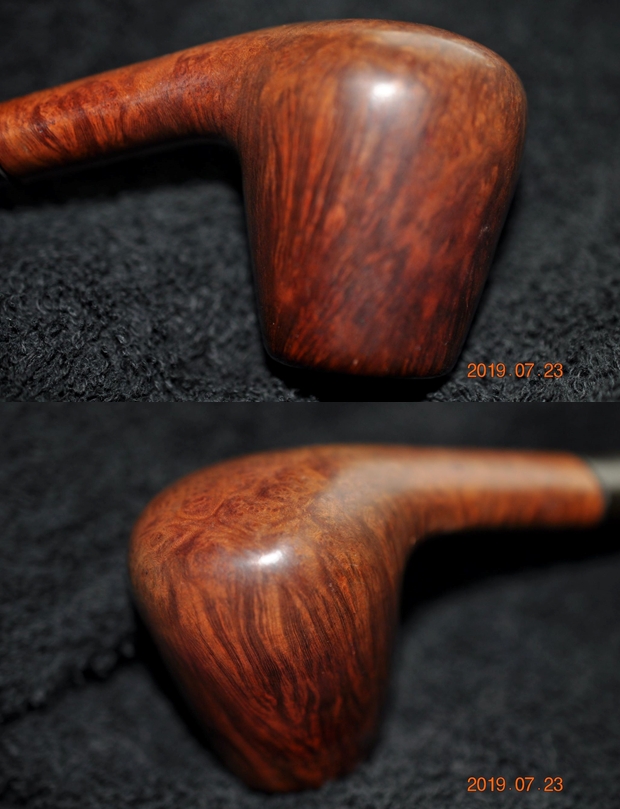
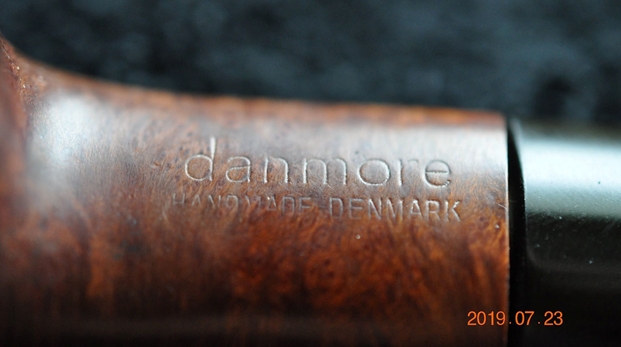
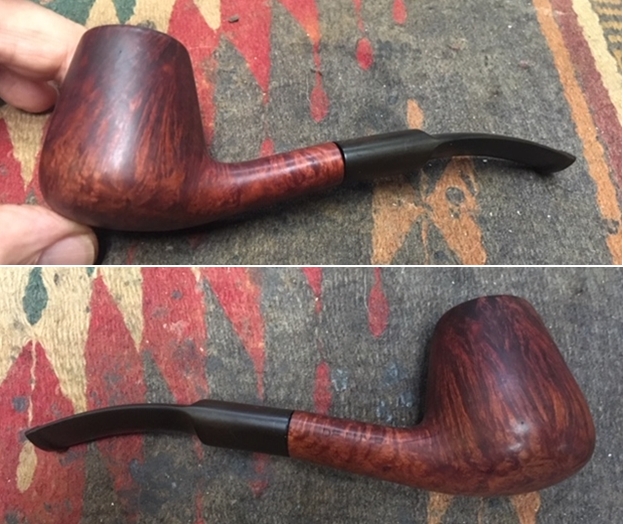
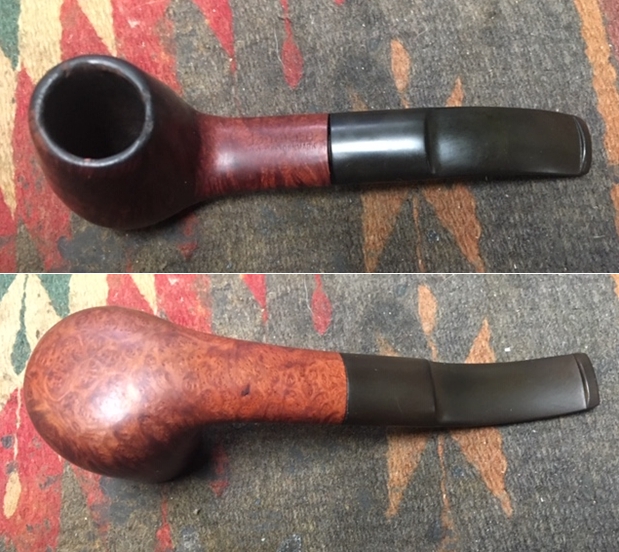
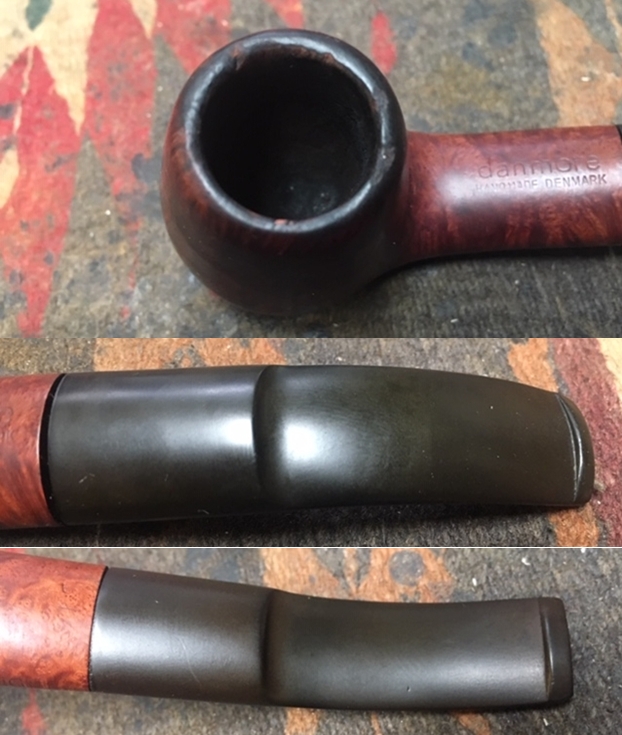
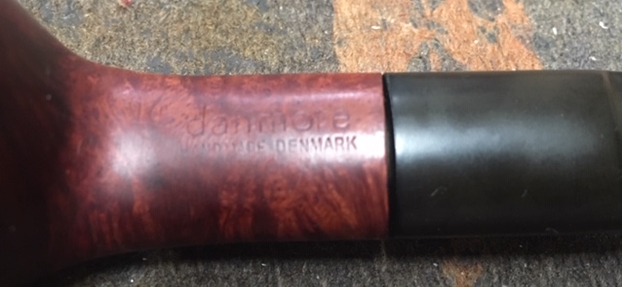
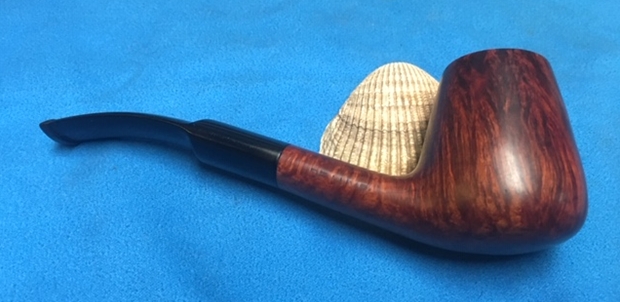
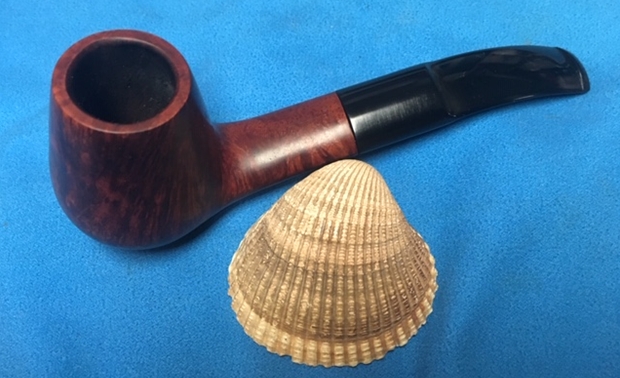
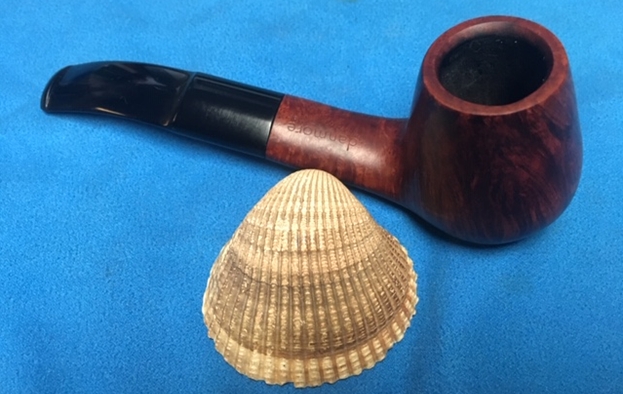
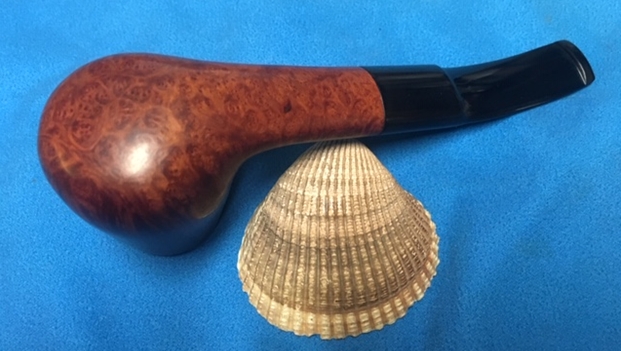
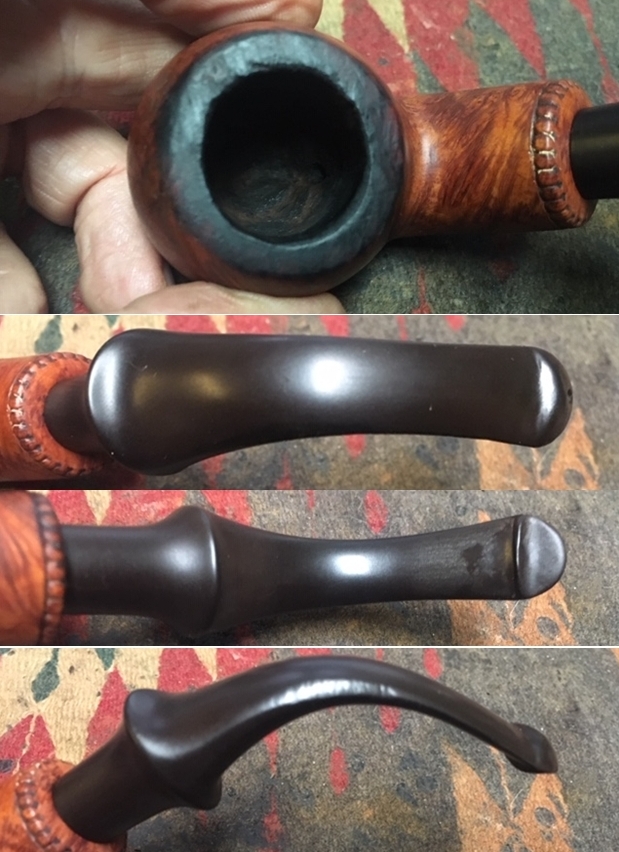
When I took the Danmore out of the box of cleaned up pipes that Jeff sent back I could see that it was stamped Danmore Handmade Denmark on the topside of the shank and Deluxe on the right side of the shank. It has straight and flame grain around the bowl and the oval shank and birdseye on the heel of the bowl and shank. The finish was dirty like the rest of the pipes in this estate. There was a thick cake in the bowl with remnants of tobacco stuck on the walls. There was an overflow of lava on the rim. The top and edges of the rim were dirty and there appears to be a deep chip on the front of the bowl edge. I could see a beautiful pipe underneath all of the grime and buildup of years of use. The stem was oxidized with tooth chatter on both sides. Surprisingly it had none of the deep tooth marks that I have come to expect from Bob’s pipes. Jeff took photos of the pipe before he started his cleanup work on it. Jeff took photos of the bowl and rim top to show the thick, hard cake in the bowl and the lava build up on the top of the rim and the edges of the bowl. You can see the chip on the rim top and inner edge of the bowl on the right side. There is some lava flowing down the outside of the bowl.   Jeff took photos of the sides and heel of the bowl to show the condition of the finish. You can see the beautiful mix of straight, flame and birdseye grain underneath the dirt and debris of the years. The birdseye grain on the heel was beautiful.    Jeff took photos of the stamping on both sides of the bowl and shank. The stamping on the topside was readable as you can see from the photos. It read danmore over Handmade Denmark. The stamp on the right side read Deluxe but Jeff did not take a photo of that stamp. You can see that the fit of the stem in the shank is off which tells me that the tenon is bent. Jeff took photos of the top and underside of the stem showing the tooth chatter, scratching and oxidation on the stem surface and wear on the edges of the button.    I turned first to Pipephil’s site to remind myself of the background of the Danmore brand. There was little information to be found there other than the factory was closed and third parties were making the pipes. I then turned to Pipedia’s article on the brand to see what I could garner from that information (https://pipedia.org/wiki/Danmore). I quote from there in full:

Danmore was founded by Hans Sørensen in the early 1970s, and produced pipes from that time until the early 1980s, at one point having up to 30 employees. The pipes were sold in the first Dan Pipe catalog. In the early 1980’s, however, production ceased in Denmark due to labor costs, and the company’s production was outsourced to Italy and Spain, and they began to also make pipecleaners and smokers articles.

Sørensen focused on the pipecleaner side of the concern, and eventually bought a share in the factory in the Far East making them. Today the company, owned by Hans’ sons Jesper and Lars Sørensen, no longer makes pipes, and instead makes only pipe cleaners under the name Danmore Hobby Aps, selling only to hobby and craftshops in Denmark and Scandinavia.

Hans Sørensen passed away in 2012. The Sørensen family continues to own the trademarks for the use of the Danmore name in relation to pipes, matches, and tobacco.

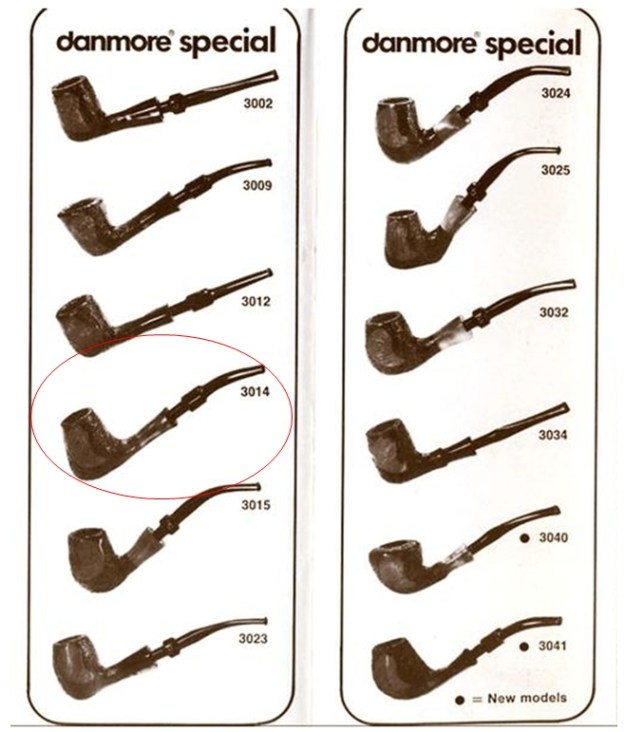
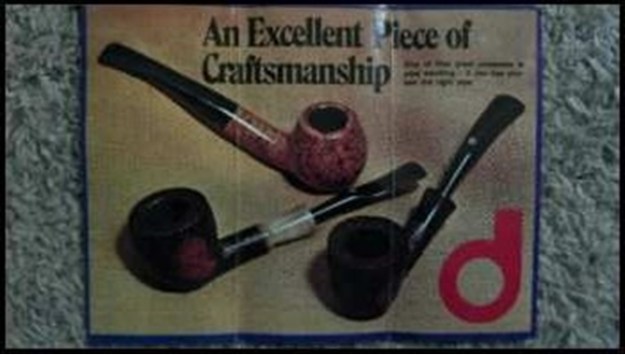
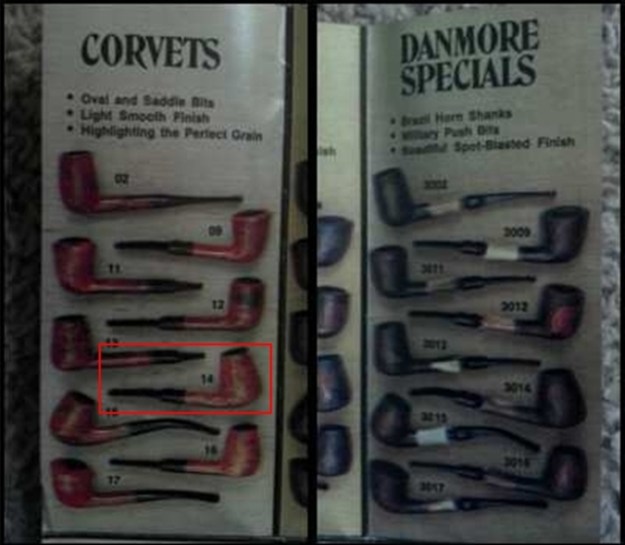
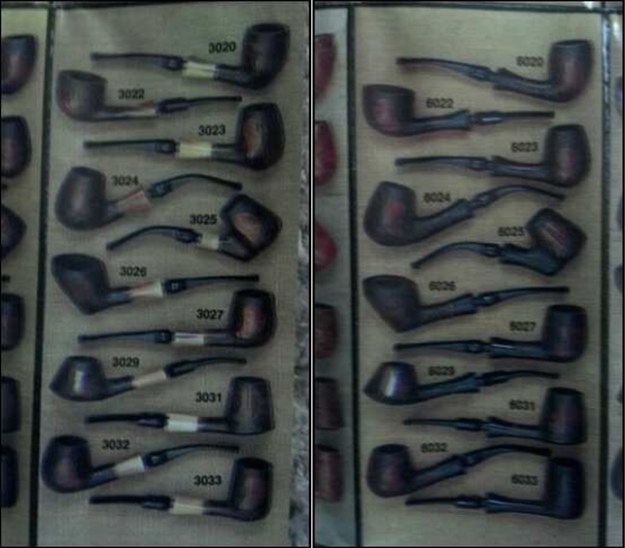
The article also included a Shape Chart that was courtesy of Doug Valitchka. I include that below as well. The shape of the pipe that I am working on is a variation on the 3014. It has a classic oval saddle stem rather than the more freehand looking one below. It also does not have the shank extension (https://pipedia.org/wiki/File:DanmoreCat.jpg). I have circled the shape in red to show which one is similar.I did a bit more searching online and found a copy of a brochure that was included in a box with a Danmore pipe on Redit in the archives. I was able to copy the photos of the pages of the brochure and have included them below. Have a look (https://www.reddit.com/r/PipeTobacco/comments/vclaj/does_anyone_know_much_about_danmore_pipes/). The Danmore I am working on is on the page labeled CORVETS. I have boxed in the pipe in red that I am working on. With that information in hand I knew what I was dealing with in terms of the stamping on the pipe. The pipe I have is the same shape as the one boxed in red – shape number 14 under section labeled CORVETS. The pipe was made for just a ten year period between early 1970s and the early 1980s. It seems that they have also been made since then by a third party. I believe this pipe was one from the original 10 year period by Hans Sørensen. Now it was time to work on the pipe.

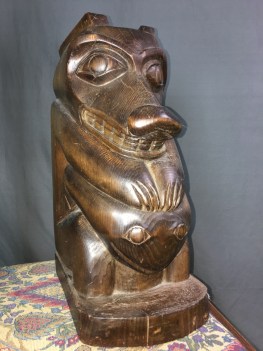
With over 125 pipes to clean from Bob’s estate I am very glad for Jeff’s help cleaning them. He cleaned this filthy pipe with his usual penchant for thoroughness that I really appreciate. This one was a mess and I did not know what to expect when I unwrapped it from his box. He reamed it with a PipNet pipe reamer and cleaned up the reaming with a Savinelli Fitsall Pipe Knife. He scrubbed out the internals with alcohol, pipe cleaners and cotton swabs until the pipe was clean. He scrubbed the exterior of the bowl with Murphy’s Oil Soap and a tooth brush to remove the grime and grit on the briar and the lava on the rim top. The finish looks very good with great looking grain around the bowl and shank. Jeff soaked the stem in Before & After Deoxidizer to remove the oxidation on the rubber. When the pipe arrived here in Vancouver for the second stop of its restoration tour I was amazed it looked so good. I took photos before I started my part of the work.   I took some close up photos of the rim top and also of the stem surface. I wanted to show what an amazing job Jeff did in the cleanup of the rim top. I also wanted to show that the damage to the rim top was more extensive than I had originally thought. The thin rim top was burned and darkened with a few large nicks on the top and inner edge. The rim top was a nightmare of issues. I also took close up photos of the stem to show the lack of tooth marks and the light oxidation on the stem surface. You can also see gap between the stem and the shank end due to a bent tenon.        One of the things I appreciate about Jeff’s cleanup is that he works to protect and preserve the nomenclature on the shank of the pipes that he works on. The stamping on this one was very faint to start with so I was worried that it would disappear altogether with the cleanup. He was not only able to preserve it but it is clearer than shown in the earlier photos. I took some photos to show the clarity of the stamping. I have noticed that many restorers are not careful to protect the stamping in their cleaning process and often by the end of the restoration the nomenclature is almost destroyed. I would like to encourage all of us to be careful in our work to preserve this as it is a critical piece of pipe restoration! Since this is another pipe Bob’s estate I am sure that some of you have read at least some of the other restoration work that has been done on the previous pipes. You have also read what I have included about Bob Kerr, the pipeman who held these pipes in trust before I came to work on them (see photo to the left). Also, if you have followed the blog for long you will already know that I like to include background information on the pipeman whose pipes I am restoring. For me, when I am working on an estate I really like to have a sense of the person who held the pipes in trust before I worked on them. It gives me another dimension of the restoration work. I asked Brian if he or his wife would like to write a brief biographical tribute to her father, Bob. His daughter worked on it and I received the following short write up on him and some pictures to go along with the words including one of Bob’s carvings. Once again I thank you Brian and tell your wife thank you as well.

I am delighted to pass on these beloved pipes of my father’s. I hope each user gets many hours of contemplative pleasure as he did. I remember the aroma of tobacco in the rec room, as he put up his feet on his lazy boy. He’d be first at the paper then, no one could touch it before him. Maybe there would be a movie on with an actor smoking a pipe. He would have very definite opinions on whether the performer was a ‘real’ smoker or not, a distinction which I could never see but it would be very clear to him. He worked by day as a sales manager of a paper products company, a job he hated. What he longed for was the life of an artist, so on the weekends and sometimes mid-week evenings he would journey to his workshop and come out with wood sculptures, all of which he declared as crap but every one of them treasured by my sister and myself. Enjoy the pipes, and maybe a little of his creative spirit will enter you!

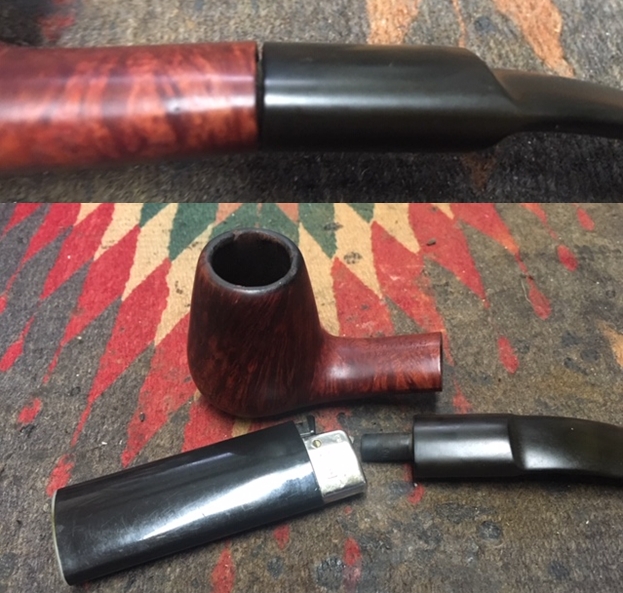
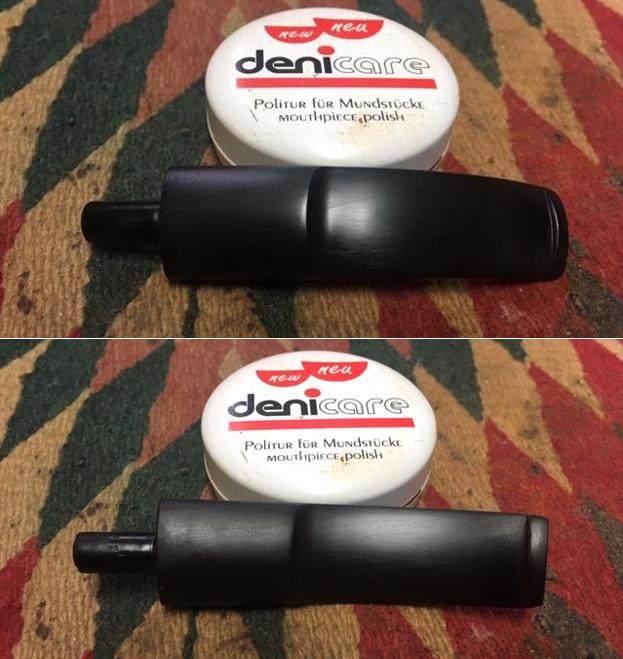
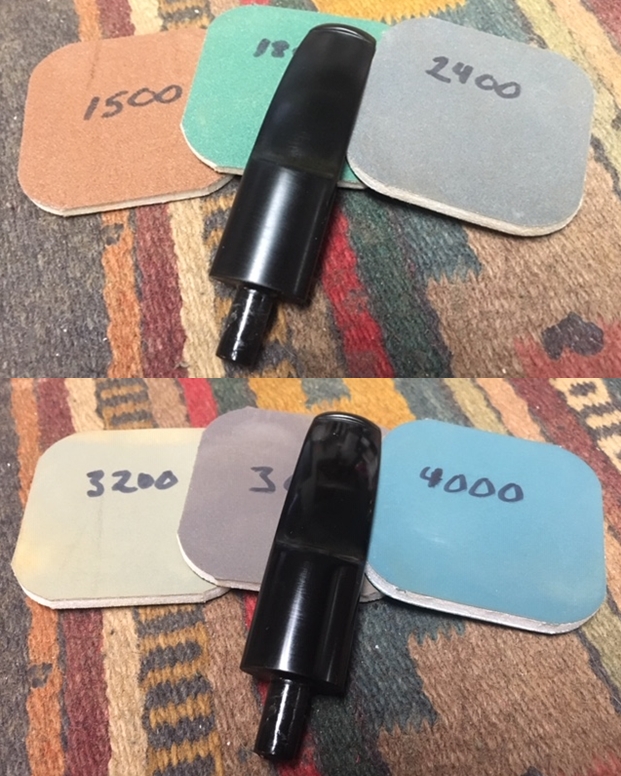
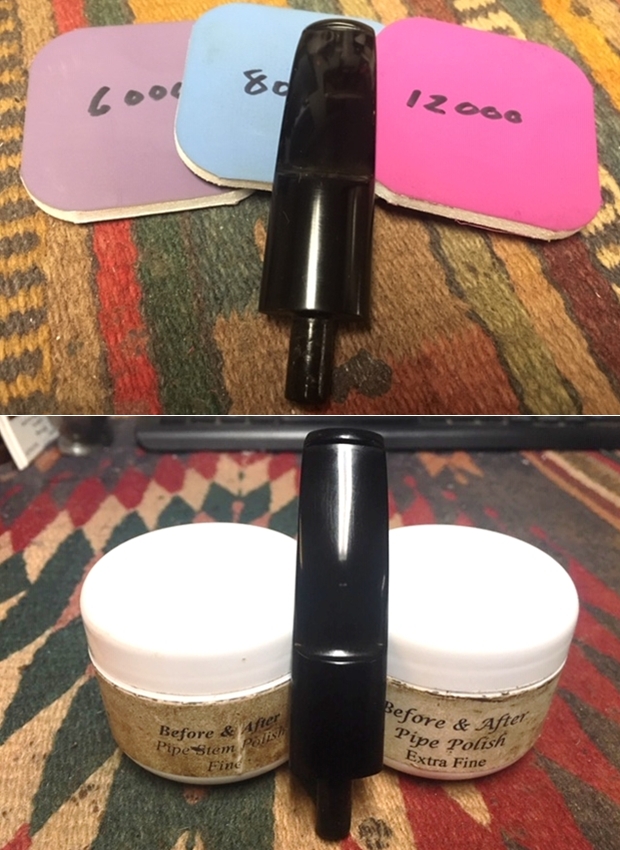
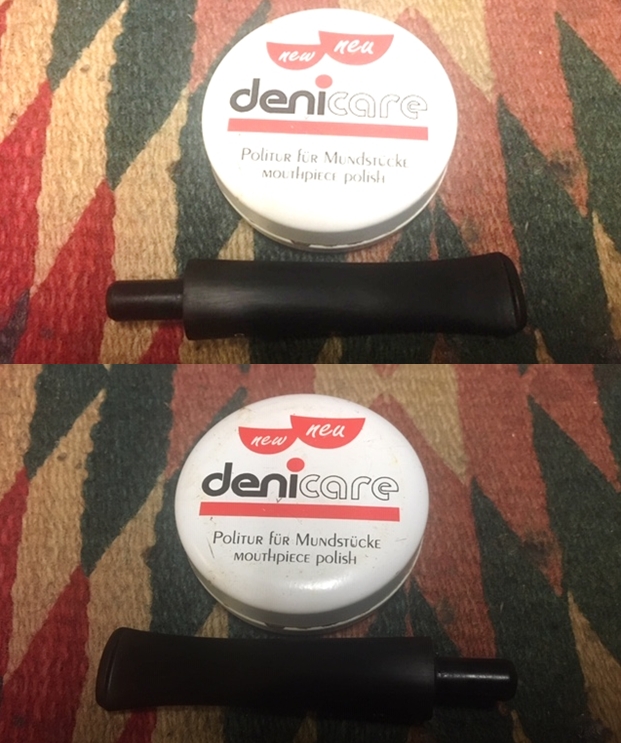
Now, on to the rest of the restoration of this beautifully grained Danmore Deluxe Volcano/Brandy. It was great that I did not need to clean the pipe. I decided to start the restoration process by addressing the poorly seated tenon. The first photo below shows the gap. I could see that the tenon itself had been bent and that caused the gap between the shank end and the face of the stem. I heated the tenon with a Bic lighter until the rubber was slightly flexible and then carefully inserted it in the mortise and adjusted the bend and fit. I held it in place until it cooled down. The fit was perfect. I took photos of the stem from the top and the side to show the repair.  I took the newly repaired stem off the shank and worked on the damage to rim top and the inner edge. From the extent of damage to the inner edge of the rim and the top of the bowl I decided I would need to top the bowl to remove as much of this damage as possible to restore the rim top back to a more pristine condition and bring the bowl back to round. I topped it on a topping board using 220 grit sandpaper. The photos show the topping process and the rim top after I had topped it to an acceptable point where the condition of the top and edges was good.  With the top cleaned up and repaired I moved on to address the inner edge surface itself. I used a folded piece of 220 grit sandpaper to bevel the edge inward to take care of the damage and thin the rim edge to its earlier dimensions. I followed that by sanding the rim top and edge with 400 grit wet dry sandpaper.I cleaned the briar with Mark Hoover’s Before & After Briar Cleaner to remove the debris left behind by the sanding of the rim top and to blend the repairs into the briar. I rubbed it into the surface of the briar and let it sit for 10 minutes. I rinsed the bowl off with warm running water to remove the product and the grime. The grain really began to stand out clearly. It was a beautiful piece of briar.  I stained the rim top and edges with a Cherry Stain pen to match the colour of the stain on the bowl. Once it was polished with micromesh sanding pads and Before & After Balm the stain would blend perfectly.I polished the briar with micromesh sanding pads to blend in the stain and to polish the briar and remove the scratches in the surface of the bowl, heel and shank. I wet sanded with 1500-12000 grit pads and wiped the bowl down between each pad with a damp cloth. I rubbed down the bowl with Before & After Restoration Balm. I worked it into the surface of the briar with my fingertips to clean, enliven and protect it. I let the balm sit for a little while and then buffed with a cotton cloth to raise the shine. Mark Hoover’s Balm is a product that I have come to appreciate and one I use on every pipe I have been working on. I set the bowl aside and worked on the stem. I sanded the stem with 220 grit sandpaper to break up the remaining oxidation and smooth out the file marks. I started the polishing with 400 grit wet dry sandpaper to remove the scratching. It is starting to look good.I have been using Denicare Mouthpiece Polish after sanding with 400 grit wet dry sandpaper for a while now as the grittiness of the product works to polish out the minor scratches in the vulcanite. I also have a few of these tins knocking around that I want to use up so it works for me to use it at this point.I polished the stem with micromesh sanding pads – wet sanding with 1500-12000 grit pads. I wiped the stem down after each sanding pad with Obsidian Oil. I polished it with Before & After Pipe Stem Polish – both Fine and Extra Fine. Once I had finished the polishing I gave it final coat of oil and set it aside to dry.   As usual at this point in the restoration process I am excited to be on the homestretch. I look forward to the final look when it is put back together, polished and waxed. I put the bowl and stem back together. I polished the bowl and stem with Blue Diamond to polish out the scratches in the briar and the vulcanite. I gave the bowl and the stem multiple coats of carnauba wax. I buffed the pipe with a clean buffing pad to raise the shine. I hand buffed it with a microfiber cloth to deepen the shine. The pipe polished up pretty nicely. The straight and flame grain really pop with the wax and polish. The shiny black vulcanite saddle stem is a beautiful contrast to the browns of the bowl. This Danmore Deluxe Volcano was another fun pipe to work on thanks to Jeff’s cleanup work. The pipemaker followed the grain in laying out this pipe to maximize the glory of the briar. The flow and feel of the pipe is appealing. The finished pipe is shown in the photos below. The dimensions of the pipe are Length: 5 ¾ inches, Height: 1 7/8 inches, Outside diameter of the bowl: 1 inch, Chamber diameter: ¾ of an inch. This beautiful pipe will be going on the rebornpipes store if you would like to add it to your collection and carry on Bob’s legacy. If not, I have a lot more of Bob’s estate to work on of various brands. Perhaps one of those will catch your attention. Thanks for reading this blog and my reflections on the pipe while I worked on it. This is an interesting estate to bring back to life.
Restoring a Peterson’s Dunmore 70 Bent Apple Sitter from Bob Kerr’s Estate


Blog by Steve Laug

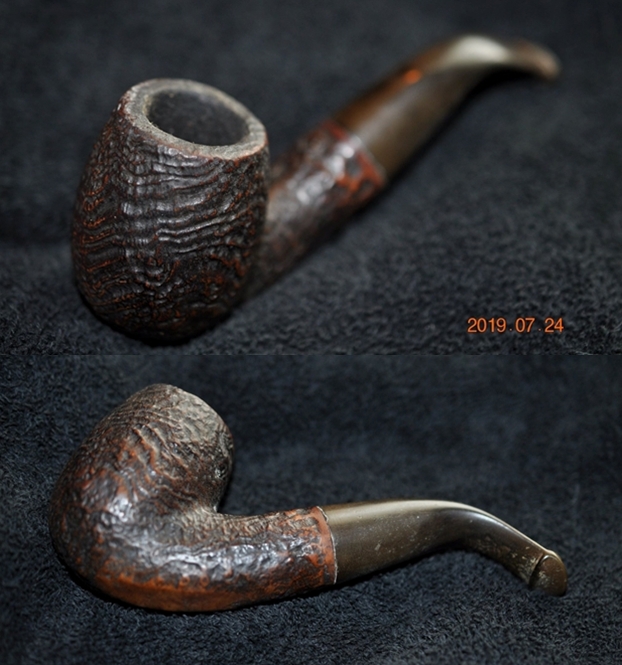
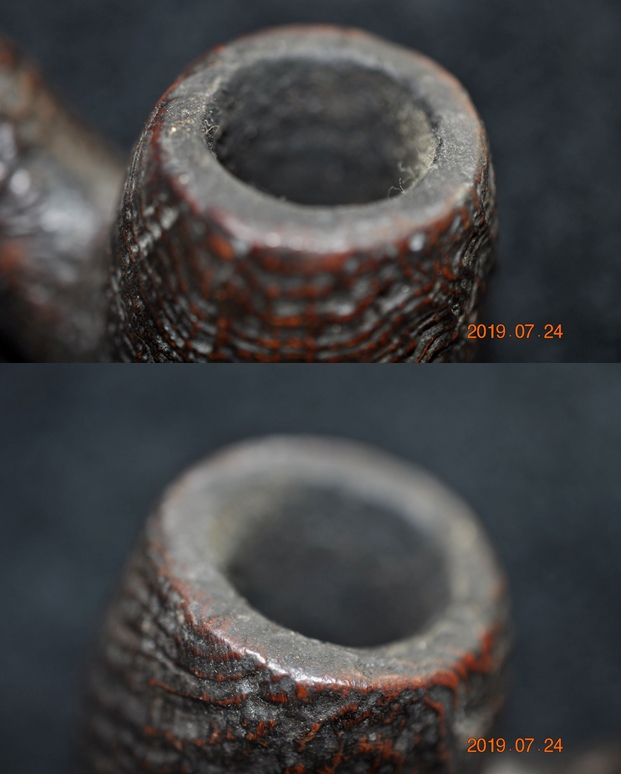
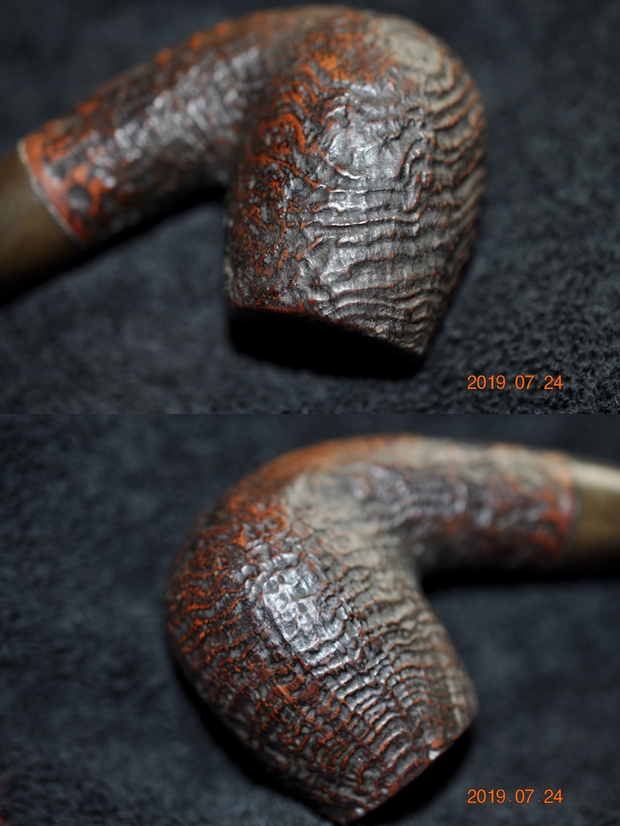
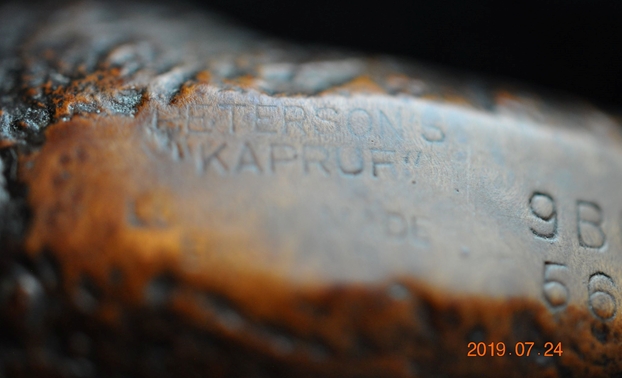
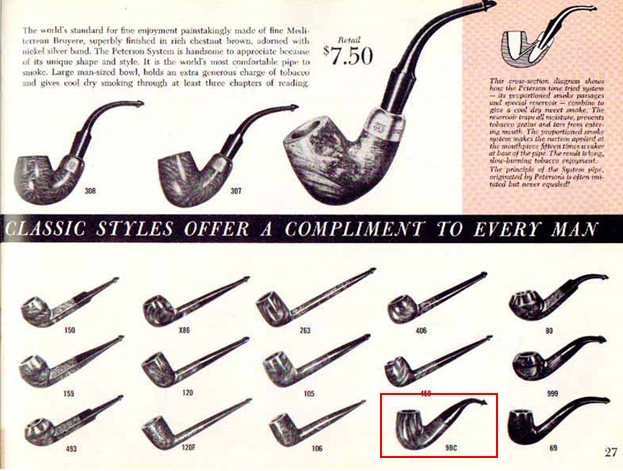
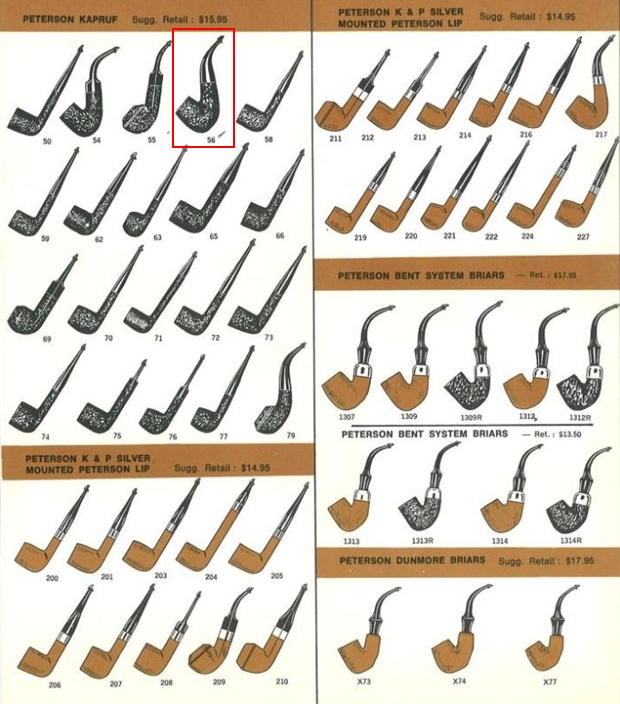
The next pipe I have chosen to work on from Bob Kerr’s estate is another one of his unique Peterson’s. I have restored two of the Canadian Imports from his estate – a Kapruf 54 sandblast bent billiard (https://rebornpipes.com/2019/08/09/back-to-bob-kerrs-estate-another-canadian-import-petersons-kapruf-a-54/) and a Kapruf 9BC 56 (https://rebornpipes.com/2019/08/09/back-to-bob-kerrs-estate-linking-petersons-kapruf-9bc-with-the-56-shape-number/). These were interesting in that they both had a unique numbering system for Peterson’s pipes that were specifically brought to Canada by the Canadian importer, Genin, Trudeau & Co. of Montreal, Quebec (https://rebornpipes.com/2016/09/13/petersons-pipes-brochure-from-genin-trudeau-co-montreal-quebec/). I restored an English Made Peterson’s System ‘0’ 1307 bent billiard a  (https://rebornpipes.com/2019/08/17/an-english-made-petersons-system-0-1307-bent-billiard-from-bob-kerrs-estate/) and a Republic Era Peterson’s Flame Grain Bent billiard with a fishtail stem (https://rebornpipes.com/2019/08/16/a-petersons-flame-grain-x220s-bent-billiard-from-bob-kerrs-estate/).

The next one on the table is of interest because it is a uniquely shaped Dunmore Bent Apple Sitter. It is part of the estate that I am cleaning up for the family and moving them out into the hands of pipemen and women who will carry on the trust that began with their father, Bob. In the collection there were 19 Peterson’s pipes along with a bevy of Dunhills, some Comoy’s and Barlings as well as a lot of other pipes – a total of 125 pipes along with a box of parts. This is the largest estate that I have had the opportunity to work on. I put together a spread sheet of the pipes and stampings to create an invoice. I was taking on what would take me a fair amount of time to clean up. I could not pass up the opportunity to work on these pipes though. They were just too tempting.

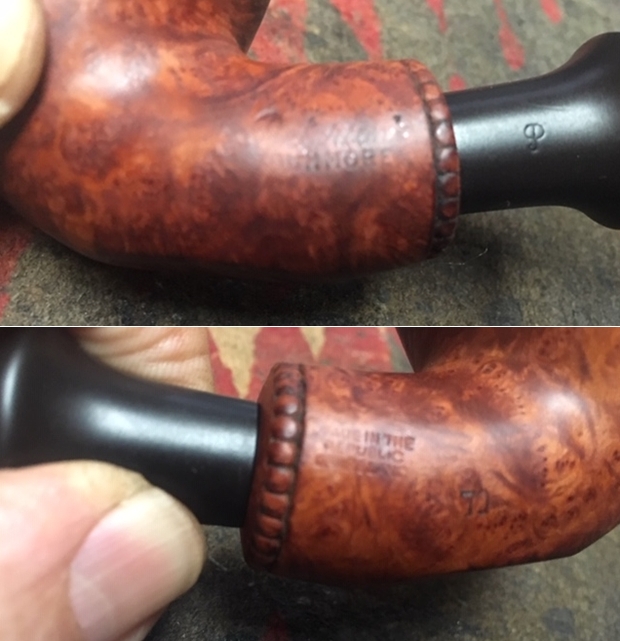
I really am enjoying working on the Peterson’s in the estate. This was another unique one. When I took it out of the box of cleaned up pipes that Jeff sent back I could see that it was stamped Peterson’s over Dunmore on the left side of the shank and Made in the Republic of Ireland followed by the shape number 70 on the right shank. It has some stunning grain around the bowl and shank under the thick grime and tarry spots. The shank is quite thick and the finish is probably the dirtiest of Bob’s pipes so far. There was a thick cake in the bowl with remnants of tobacco stuck on the walls. There was a fair lava overflow on the rim. The top and edges of the rim are dirty. I think that there was a beautiful pipe underneath all of the grime and buildup of years of use. The stem was oxidized and calcified toward the end with some hack marks on the left side mid stem. Again, surprisingly did not have the deep tooth marks that I have come to expect from Bob’s pipes but the button edges were worn. Jeff took photos of the pipe before he started his cleanup work on it.   Jeff took photos of the bowl and rim top to show the thick, hard cake in the bowl and the lava build up on the top of the rim and the edges of the bowl. It was hard to tell if there was any damage to the inner edge of the rim as it had a thick cake lining it. Hopefully it protected it. The lava flows down the outer edges so it will need to be cleaned in order to assess their condition.  Jeff took photos of the sides and heel of the bowl to show the condition of the finish. You can see the beautiful mix of swirled, flame and birdseye grain underneath the dirt and debris of the years. The cross grain on the heel was beautiful.    Jeff took photos of the stamping on both sides of the bowl and shank. The stamping on the left side was faint but readable as you can see from the photos. It read Peterson’s over Dunmore. The stamp on the right side read Made in the Republic of Ireland followed by the shape number 70. You can see that the beading around the shank end is almost filled in with the grime on the briar. Jeff took photos of the top and underside of the stem showing the tooth chatter, scratching and oxidation on the stem surface and wear on the edges of the button.    I turned first to Pipephil’s site to remind myself of the background of the Dunmore line. Unfortunately there was no information to be found there. I then turned to Pipedia’s article on Peterson pipes to see what I could garner from that information. It is a great read in terms of the history of the brand (https://pipedia.org/wiki/Peterson) but nothing specific to the Dunmore line of pipes.

I then turned to the book I should have consulted first, The Peterson Pipe, by Mark Irwin and Gary Malmberg. On page 298 there is an entry for Dunmore pipes. It reads as follows:

Dunmore (1971-c.1984 2006-10). Appeared first as Iwan Ries & Co. exclusive line “Dunmoor,” a Premier-grade in light-brown smooth or rustic red in all System shapes, with beading at the shank. Documented in the Associated Imports Catalog from 1973. Classic Range Dunmore shapes from ’78. A third Dunmore line (’06-10) featured standard and some B shapes, with beading around bowl instead of at shank-face, produced for European market.

On page 268 there is a shape chart that does comparison of the shapes in the various lines. There I found the following information:

In the Standard and Premier System it was shape 302. In the De Luxe System it was shape 25. In the Dunmore System (1977-1983) it was shape 70. In the Classic Lines it was shape 02/XL02. The production still continues. It is a Peterson Extra Large Size and was named an Extra Large Apple.

On page 165 there were also photos of pages from a catalogue with the  description: The unmounted Dunmore Premier debuted in both System and Classic Range shapes circa 1973 with a final appearance in the 1981 catalogue.

The information blurb on each page read: “Dunmore Briars.” Beautifully grained best quality briar in light-brown, matt or rustic finish. Often described as “Petersons Unmounted System” has all the advantages of the system range. Ten models each fitted with the Peterson Lip mouthpiece.

With that information in hand I knew what I was dealing with in terms of the stamping on the pipe. It is a Late Republic era pipe. It showed up in Peterson Catalogue in 1973 and from what I have learned about Bob’s other pipes this date fits well. Now it was time to work on the pipe.

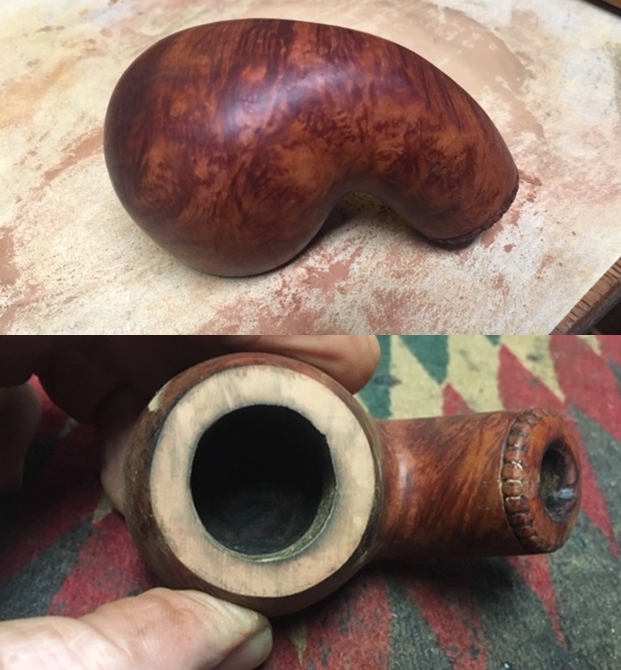
With over 125 pipes to clean from Bob’s estate I am very glad for Jeff’s help cleaning them. He cleaned this filthy pipe with his usual penchant for thoroughness that I really appreciate. This one was a real mess and I did not know what to expect when I unwrapped it from his box. He reamed it with a PipNet pipe reamer and cleaned up the reaming with a Savinelli Fitsall Pipe Knife. He scrubbed out the internals with alcohol, pipe cleaners and cotton swabs until the pipe was clean. He scrubbed the exterior of the bowl with Murphy’s Oil Soap and a tooth brush to remove the grime and grit on the briar and the lava on the rim top. The finish looks very good with great looking grain around the bowl and shank. Jeff soaked the stem in Before & After Deoxidizer to remove the oxidation on the rubber. When the pipe arrived here in Vancouver for the second stop of its restoration tour I was amazed it looked so good. I took photos before I started my part of the work.     I took some close up photos of the rim top and also of the stem surface. I wanted to show what an amazing job Jeff did in the cleanup of the rim top. I also wanted to show that the damage to the rim top was more extensive than I had originally thought. The rim top was burned and darkened with nicks and notches around the inner edge. There was some darkening that ran down the front of the bowl as well. The rim top was a nightmare of issues. The outer edge of the bowl looks very good other than the burning and darkening. I also took close up photos of the stem to show the lack of tooth marks and the light oxidation on the stem surface. You can also see the wear to the button. The third stem photo shows the hatch marks on the left side of the stem. One of the things I appreciate about Jeff’s cleanup is that he works to protect and preserve the nomenclature on the shank of the pipes that he works on. The stamping on this one was very faint to start with so I was worried that it would disappear altogether with the cleanup. He was not only able to preserve it but it is clearer than shown in the earlier photos. I took some photos to show the clarity of the stamping. I have noticed that many restorers are not careful to protect the stamping in their cleaning process and often by the end of the restoration the nomenclature is almost destroyed. I would like to encourage all of us to be careful in our work to preserve this as it is a critical piece of pipe restoration! Since this is another pipe Bob’s estate I am sure that some of you have read at least some of the other restoration work that has been done on the previous pipes. You have also read what I have included about Bob Kerr, the pipeman who held these pipes in trust before I came to work on them (see photo to the left). Also, if you have followed the blog for long you will already know that I like to include background information on the pipeman whose pipes I am restoring. For me, when I am working on an estate I really like to have a sense of the person who held the pipes in trust before I worked on them. It gives me another dimension of the restoration work. I asked Brian if he or his wife would like to write a brief biographical tribute to her father, Bob. His daughter worked on it and I received the following short write up on him and some pictures to go along with the words including one of Bob’s carvings. Once again I thank you Brian and tell your wife thank you as well.

I am delighted to pass on these beloved pipes of my father’s. I hope each user gets many hours of contemplative pleasure as he did. I remember the aroma of tobacco in the rec room, as he put up his feet on his lazy boy. He’d be first at the paper then, no one could touch it before him. Maybe there would be a movie on with an actor smoking a pipe. He would have very definite opinions on whether the performer was a ‘real’ smoker or not, a distinction which I could never see but it would be very clear to him. He worked by day as a sales manager of a paper products company, a job he hated. What he longed for was the life of an artist, so on the weekends and sometimes mid-week evenings he would journey to his workshop and come out with wood sculptures, all of which he declared as crap but every one of them treasured by my sister and myself. Enjoy the pipes, and maybe a little of his creative spirit will enter you!

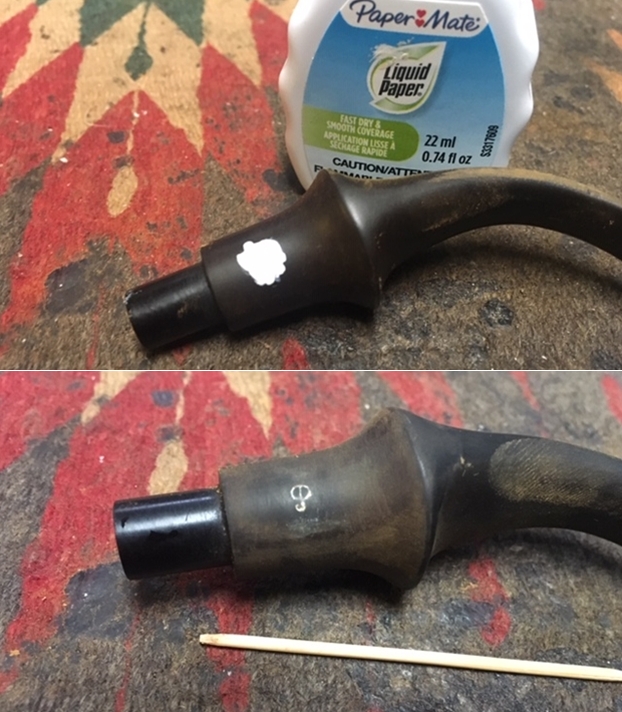
Now, on to the rest of the restoration of this beautifully grained Peterson’s Dunmore 70 Large Bent Apple. It was great that I did not need to clean the pipe. I decided to start the process by addressing the damage to rim top and the inner edge. From the extent of damage to the inner edge of the rim and the top of the bowl I decided I would need to top the bowl to remove as much of this damage as possible to restore the rim top back to a more pristine condition and bring the bowl back to round. I topped it on a topping board using 220 grit sandpaper. I took photos to show the slow process of repairing that damage. The photos show the topping process and the rim top after I had topped it to an acceptable point where the condition of the top and edges was good.    With the top cleaned up and repaired I moved on to address the inner edge surface itself. I used a folded piece of 220 grit sandpaper to remove the damage and bring the bowl back to round. I followed that by sanding the rim top and edge with 400 grit wet dry sandpaper.  I also sanded the darkening on the front of the bowl edge.   The bowl surface was quite smooth so I decided to forego polishing it with micromesh sanding pads. I cleaned the briar with Mark Hoover’s Before & After Briar Cleaner to remove the debris left behind by the sanding of the rim top and to blend the repairs into the briar. I rubbed it into the surface of the briar and let it sit for 10 minutes. I rinsed the bowl off with warm running water to remove the product and the grime. The grain really began to stand out clearly. It was a beautiful piece of briar. I stained the rim top and edges with an Oak Stain pen to match the colour of the stain on the bowl. Once it was polished with the Before & After Balm and buffed with a microfiber cloth the stain would blend perfectly.After the stain had cured, I rubbed it down with Before & After Restoration Balm. I worked it into the surface of the briar with my fingertips to clean, enliven and protect it. I let the balm sit for a little while and then buffed with a cotton cloth to raise the shine. Mark Hoover’s Balm is a product that I have come to appreciate and one I use on every pipe I have been working on. I decided to touch up the “P” stamp on the left side of the shank. I use PaperMate liquid paper for doing this. I worked it into the stamp with a tooth pick. Once the material had hardened I used the tooth pick to scrape off the excess material.  I reshaped the edge of the button and top of the P-Lip with a needle file to get a more defined shape and edge. Once I had the shape more defined I sanded the stem with 220 grit sandpaper to break up the remaining oxidation and smooth out the file marks. I started the polishing with 400 grit wet dry sandpaper to remove the scratching. It is starting to look good.   I polished the stem with micromesh sanding pads – wet sanding with 1500-12000 grit pads. I wiped the stem down after each sanding pad with Obsidian Oil. I polished it with Before & After Pipe Stem Polish – both Fine and Extra Fine. Once I had finished the polishing I gave it final coat of oil and set it aside to dry. As usual at this point in the restoration process I am excited to be on the homestretch. I look forward to the final look when it is put back together, polished and waxed. I put the bowl and stem back together. I polished the bowl and stem with Blue Diamond to polish out the scratches in the briar and the vulcanite. I gave the bowl and the stem multiple coats of carnauba wax. I buffed the pipe with a clean buffing pad to raise the shine. I hand buffed it with a microfiber cloth to deepen the shine. The pipe polished up pretty nicely. The grain really pops with the wax and polish. The bead around the shank looks very good. The shiny black vulcanite stem is a beautiful contrast to the browns of the bowl. This Peterson’s Dunmore 70 Large Bent Apple was another fun pipe to work on thanks to Jeff’s cleanup work. The beading around the shank gives this Peterson’s “Unmounted System” a unique look without the silver or nickel ferrule. It really is a quite stunning piece of briar whose shape follows the flow of the briar. The thick/chubby shank makes it a very comfortable pipe to hold in the hand. The finished pipe is shown in the photos below. The dimensions of the pipe are Length: 6 ½ inches, Height: 1 ¾ inches, Outside diameter of the bowl: 1 ½ inches, Chamber diameter: 7/8 of an inch. This beautiful large pipe will be going on the rebornpipes store if you would like to add it to your collection and carry on Bob’s legacy. If not, I have a lot more of Bob’s estate to work on of various brands. Perhaps one of those will catch your attention. Thanks for reading this blog and my reflections on the pipe while I worked on it. This is an interesting estate to bring back to life.

An English Made Peterson’s System “0” 1307 Bent Billiard from Bob Kerr’s Estate


Blog by Steve Laug

The next pipe I have chosen to work on from Bob Kerr’s estate is another one of his unique Petersons. I have restored two of the Canadian Imports from his estate – a Kapruf 54 sandblast bent billiard (https://rebornpipes.com/2019/08/09/back-to-bob-kerrs-estate-another-canadian-import-petersons-kapruf-a-54/) and a Kapruf 9BC 56 (https://rebornpipes.com/2019/08/09/back-to-bob-kerrs-estate-linking-petersons-kapruf-9bc-with-the-56-shape-number/). These were interesting in that they both had a unique numbering system for Petersons pipes that were specifically brought to Canada by the Canadian importer, Genin, Trudeau & Co. of Montreal, Quebec (https://rebornpipes.com/2016/09/13/petersons-pipes-brochure-from-genin-trudeau-co-montreal-quebec/). I also finished restoring a Flame Grain X220S that was very nice https://rebornpipes.com/2019/08/16/a-petersons-flame-grain-x220s-bent-billiard-from-bob-kerrs-estate/). This next one is of interest because it is a large System 0 1307 bent billiard with a fishtail stem. It is part of the estate that I am cleaning up for the family and moving them out into the hands of pipemen and women who will carry on the trust that began with their father, Bob. In the collection there were 19 Peterson’s pipes along with a bevy of Dunhills, some Comoy’s and Barlings as well as a lot of other pipes – a total of 125 pipes along with a box of parts. This is the largest estate that I have had the opportunity to work on. I put together a spread sheet of the pipes and stampings to create an invoice. I was taking on what would take me a fair amount of time to clean up. I could not pass up the opportunity to work on these pipes though. They were just too tempting.

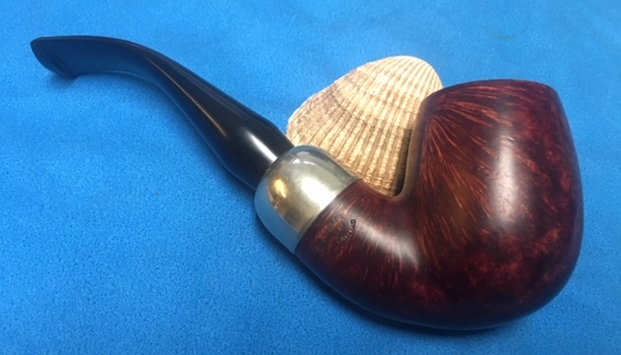
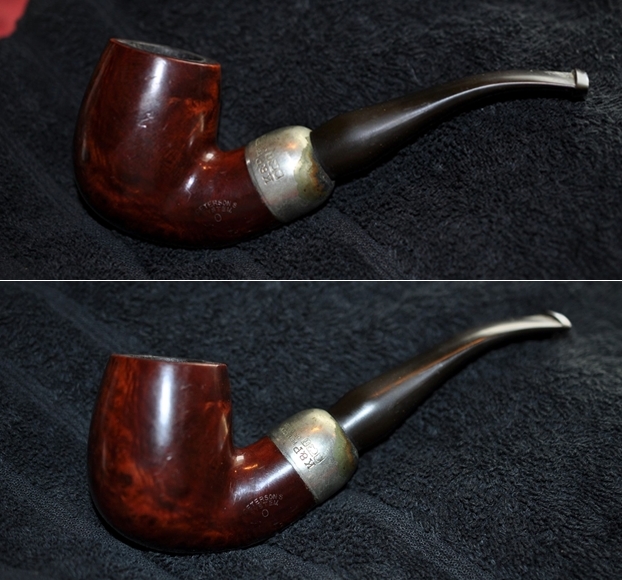
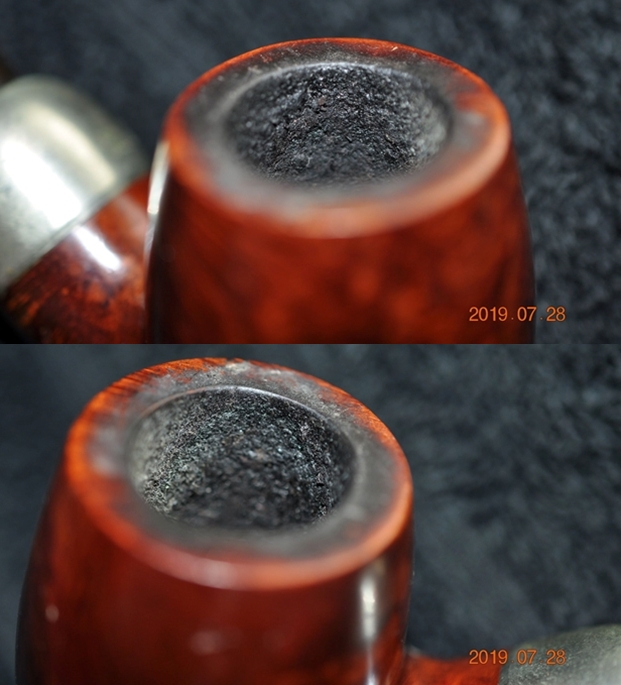
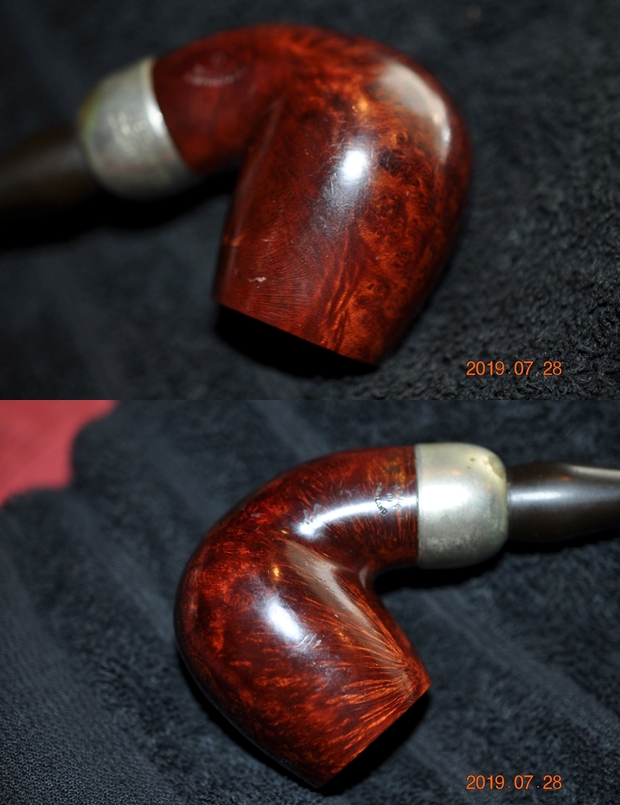
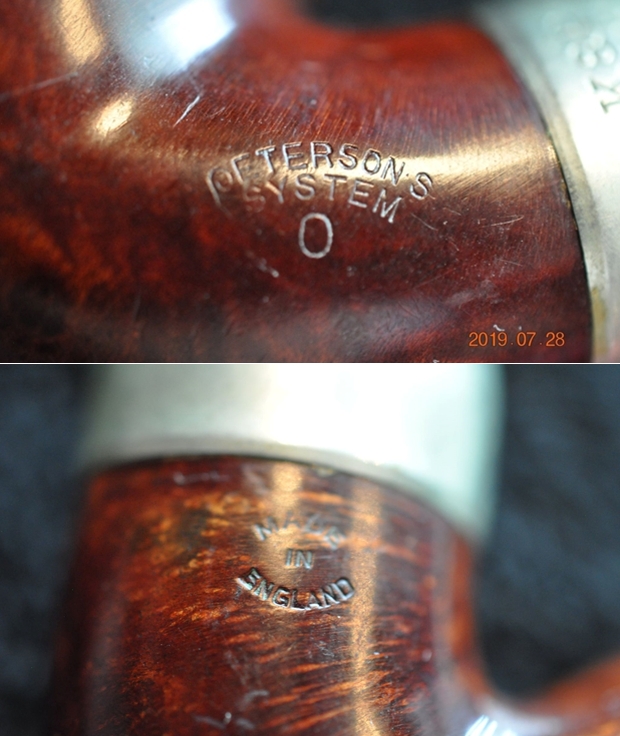
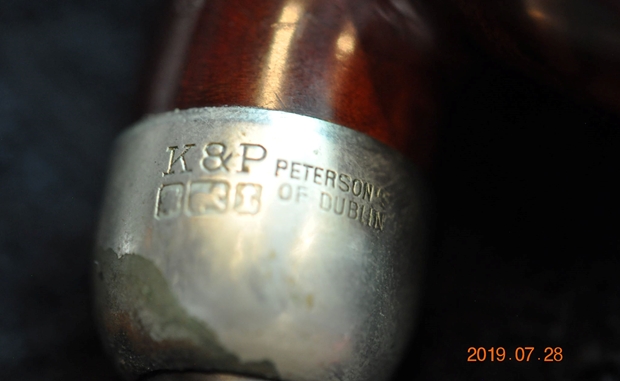
I really am enjoying working on the Peterson’s in the estate. This was another unique one. When I first looked at it when it came I wondered if the stem was a replacement. However, the shape and the fit of the stem makes me wonder if it was not original. When I took it out of the box of cleaned up pipes that Jeff sent back I could see that it was stamped Peterson’s System 0 on the left side of the shank and Made in England in a circular shaped stamp on the right side. The shape number 1307 is stamped on the underside of the shank just next to the nickel ferrule. It has some interesting grain around the bowl and shank under what appears to be a thick varnish coat. The shank is quite thick and the finish very dirty.  There was a thick cake in the bowl with remnants of tobacco stuck on the walls. There was a fair lava overflow filling in the blast on the rim. The edges of the rim and top are dirty but they looked pretty good under the grime. It was another beautiful pipe that was dirty and tired looking. The stem was oxidized and calcified toward the end. Again, surprisingly did not have the deep tooth marks that I have come to expect from Bob’s pipes. Jeff took photos of the pipe before he started his cleanup work on it. Jeff took photos of the bowl and rim top to show the cake in the bowl and the lava build up on the edges of the bowl. It was thick and hard but it was hard to tell how the inner edge looked under the lava. The outer edges looked okay but there were some nicks there as well.   Jeff took photos of the sides and heel of the bowl to show the condition of the finish. You can see the beautiful mix of grain underneath the varnish, dirt and debris of the years.    Jeff took photos of the stamping on both sides of the bowl and shank. The stamping on the left side was readable as you can see from the photos. It read Peterson’s arched over System over 0. The stamp on the right side read Made in England. The nickel ferrule was stamped K& P Peterson’s of Dublin with three hallmarks. Jeff took photos of the top and underside of the stem showing the tooth chatter, scratching and oxidation on the stem surface.   I turned first to Pipephil’s site to get a quick idea of the Flame Grain line. Unfortunately there was no information to be found there. I then turned to Pipedia’s article on Peterson pipes to see what I could garner from that information. It is a great read in terms of the history of the brand (https://pipedia.org/wiki/Peterson). I quote a pertinent portion of the article below:

1969/70 – The ‘Made in England’ stamp was discontinued with the closing down of the London based factory. Although Peterson has always prided itself in being an Irish made pipe, Peterson had also maintained a pipe factory in London since 1899.

English made Peterson pipes actually spanned the period between the pre Republic and Republic eras.

In 1899, Peterson opened the first in a series of several successive shops in London, England, that lasted until the late 1960’s/70s.

  • 1899 – 53, New Broad St. E.C.
  • 1910 – 7, Hills Pl., Oxford St. W.
  • 1915 – 21, Mortimer St. W.
  • Finally moving to 74/77 White Lion Street until 1970.

So the English Era, for a simplified date, will be from 1899 through to around 1970. The stamps Peterson used in London are:

  • Made in England block format
  • Made in England circle format
  • Made in London
  • Made in London England
  • Simply, London England
  • London Made over England block format
  • Great Britain

I also looked at the article that the late Mike Leverette wrote on pipedia to see if the above information matched (https://pipedia.org/wiki/A_Peterson_Dating_Guide;_A_Rule_of_Thumb). I quote a portion of that as well.

 English made Peterson pipes actually spans between the pre-Republic and Republic eras. In 1895, Peterson opened a shop in London England that lasted until the late 1950s or early 1960s. So the English Era, for a simplified date, will be from 1895 through 1959. The stamps Peterson used in London and that we have seen are;

  • Made in England – block format
  • Made in England – circle format
  • Made in London
  • Made in London England
  • Simply, London England.
  • Great Britain

Though there are a couple of more, the above will give one the general idea. We believe the earliest stamp of this era was the “Made in England” in a block format since Peterson was using the “Made in Ireland” block format at about the same time on their Irish production pipes. The “Made in England” circle format was used during the same time frame as the “Made in Eire” and “Made in Ireland” circle formats.

I looked also on pipesmagazine forum to see if I could find any information on the 0 grade stamp on the shank (http://pipesmagazine.com/forums/topic/petersons). Here is what I found in a quote from Chuck.

On to your query about grading.

  • A System 0 would be the same as today’s Supreme grade.
  • A 1 would be a Deluxe.
  • A 2 would be a Premier.
  • A 3 would be a Standard.

I have a 4 and a 5 grade which I assume were lesser grades and have been discontinued or will simply have re-graded as Standards in today’s market.

With that information in hand I knew what I was dealing with in terms of the stamping on the pipe. It is an English made Peterson and was made before the factory closed in 1969 or early 1970. The System 0 stamp would be the same as a current Supreme grade System pipe. From what I have learned about Bob’s other pipes this fits well. Now it was time to work on the pipe.

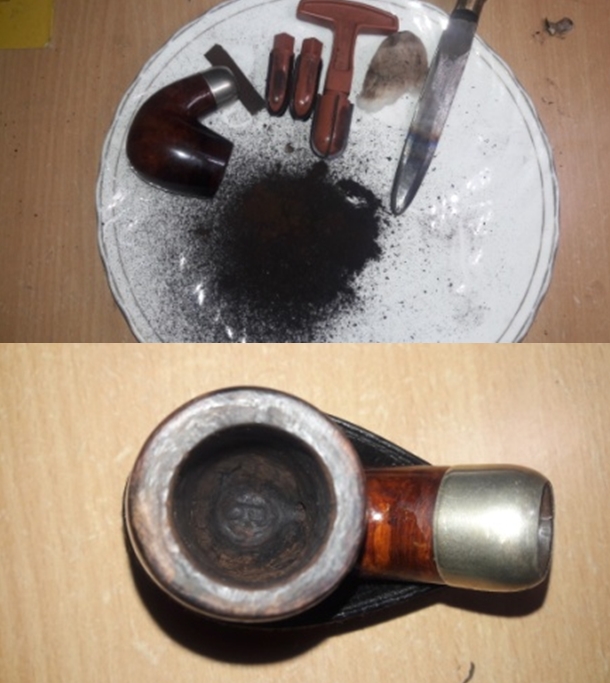
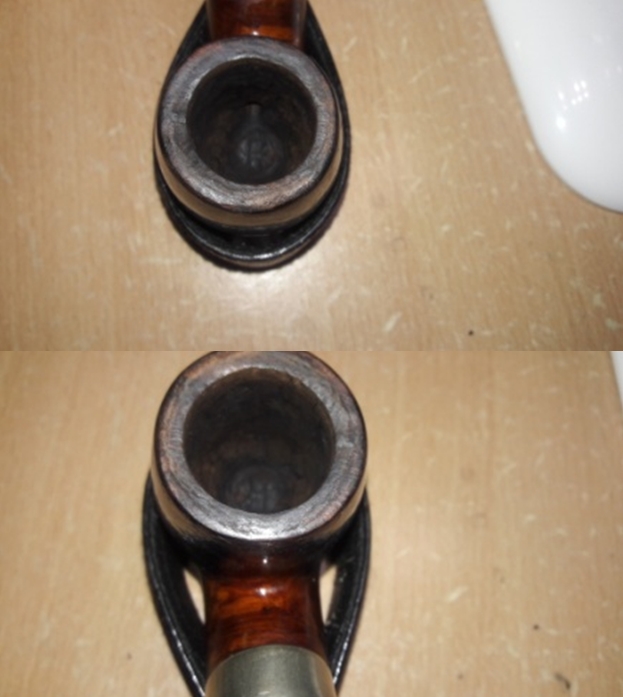
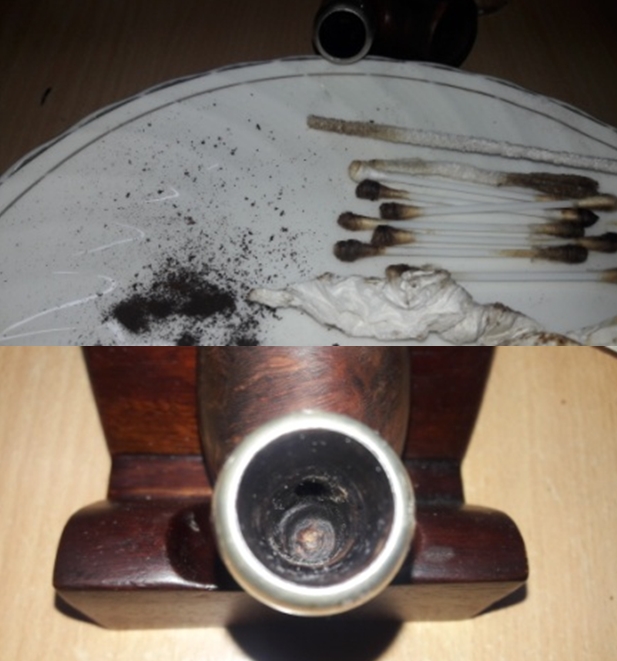
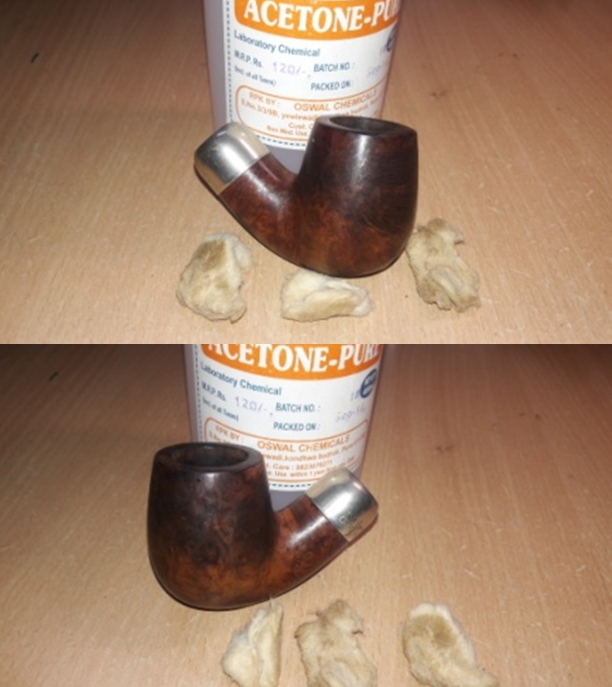
With over 125 pipes to clean from Bob’s estate I took a batch of them to the states with me on a recent visit and left them with Jeff so he could help me out. Jeff cleaned the pipe with his usual penchant for thoroughness that I really appreciate. This one was a real mess and I did not know what to expect when I unwrapped it from his box. He reamed it with a PipNet pipe reamer and cleaned up the reaming with a Savinelli Fitsall Pipe Knife. He scrubbed out the internals with alcohol, pipe cleaners and cotton swabs until the pipe was clean. He scrubbed the exterior of the bowl with Murphy’s Oil Soap and a tooth brush to remove the grime and grit on the briar and the lava on the rim top. Wiping it down with acetone on a cotton pad enabled him to get rid of the varnish top coat. The finish looks very good with great looking grain around the bowl and shank. Jeff soaked the stem in Before & After Deoxidizer to remove the oxidation on the rubber. When the pipe arrived here in Vancouver for the second stop of its restoration tour it looked very good. I took photos before I started my part of the work.   I took some close up photos of the rim top and also of the stem surface. Jeff did a great cleaning job on the rim top. The inner edge looked pretty good. There is a small burn mark on the right front inner edge of the bowl but it is minor. The outer edge of the bowl looks very good. I also took close up photos of the fishtail stem to show the lack of tooth marks and the remaining oxidation on the stem surface.    Since this is another pipe Bob’s estate I am sure that some of you have read at least some of the other restoration work that has been done on the previous pipes. You have also read what I have included about Bob Kerr, the pipeman who held these pipes in trust before I came to work on them (see photo to the left). Also, if you have followed the blog for long you will already know that I like to include background information on the pipeman whose pipes I am restoring. For me, when I am working on an estate I really like to have a sense of the person who held the pipes in trust before I worked on them. It gives me another dimension of the restoration work. I asked Brian if he or his wife would like to write a brief biographical tribute to her father, Bob. His daughter worked on it and I received the following short write up on him and some pictures to go along with the words including one of Bob’s carvings. Once again I thank you Brian and tell your wife thank you as well.

I am delighted to pass on these beloved pipes of my father’s. I hope each user gets many hours of contemplative pleasure as he did. I remember the aroma of tobacco in the rec room, as he put up his feet on his lazy boy. He’d be first at the paper then, no one could touch it before him. Maybe there would be a movie on with an actor smoking a pipe. He would have very definite opinions on whether the performer was a ‘real’ smoker or not, a distinction which I could never see but it would be very clear to him. He worked by day as a sales manager of a paper products company, a job he hated. What he longed for was the life of an artist, so on the weekends and sometimes mid-week evenings he would journey to his workshop and come out with wood sculptures, all of which he declared as crap but every one of them treasured by my sister and myself. Enjoy the pipes, and maybe a little of his creative spirit will enter you!

Now on to the rest of the restoration on this English Made Peterson’s System 0 1307 bent billiard. I did not need to clean the pipe. I decided to start the process by addressing the damage to the inner edge of the rim. I used a folded piece of 220 grit sandpaper to remove the damage and bring the bowl back to round. I followed that by sanding the rim top and edge with 400 grit wet dry sandpaper. The photos below show the process and the results of the sanding. I polished the bowl and rim top with micromesh sanding pads – wet sanding with 1500-12000 grit pads and wiping the bowl down after each pad with a damp cloth.   I decided to clean the briar with Mark Hoover’s Before & After Briar Cleaner to clean up the sanded surface of the briar and blend the repairs into the briar. I rubbed it into the surface of the briar and let it sit for 10 minutes. I rinsed the bowl off with warm running water to remove the product and the grime.   After I dried the bowl off, I rubbed it down with Before & After Restoration Balm. I worked it into the surface of the briar with my fingertips to clean, enliven and protect it. I let the balm sit for a little while and then buffed with a cotton cloth to raise the shine. Mark Hoover’s Balm is a product that I have come to appreciate and one I use on every pipe I have been working on.   I set the bowl aside and turned my attention to the stem. I decided to give the stem a proper bend first. I heated the stem with a heat gun until the vulcanite was flexible and then bent it to match the angle of the bowl. The photos tell the story.   I sanded the stem with 220 grit sandpaper to break up the remaining oxidation. I started the polishing with 400 grit wet dry sandpaper to remove some of the scratching. It is starting to look good.     I have one more tin of Denicare Mouthpiece Polish left from a few that I have picked up over the years. It is a coarse red pasted that serves to help remove oxidation. I polished the stem with that to further smooth out the surface of the vulcanite (and to be honest – to use it up).    I polished the stem with micromesh sanding pads – wet sanding with 1500-12000 grit pads. I wiped the stem down after each sanding pad with Obsidian Oil. I polished it with Before & After Pipe Stem Polish – both Fine and Extra Fine. Once I had finished the polishing I gave it final coat of oil and set it aside to dry.    I am excited to be on the homestretch with yet another one of Bob’s pipes and I look forward to the final look when it is put back together, polished and waxed. I put the bowl and stem back together. I polished the bowl and stem with Blue Diamond to polish out the scratches in the briar and the vulcanite. I gave the bowl and the stem multiple coats of carnauba wax. I buffed the pipe with a clean buffing pad to raise the shine. I hand buffed it with a microfiber cloth to deepen the shine. The pipe polished up pretty nicely. The grain really pops with the wax and polish. The shiny black vulcanite stem is a beautiful contrast to the rich reds and browns of the bowl. This Peterson’s “System 0” 1307 shaped bent billiard was another fun pipe to work on thanks to Jeff’s cleanup work. It really has the stunning look of a well-made Peterson’s System pipe with the polished nickel ferrule. The thick/chubby shank makes it a very comfortable pipe to hold in the hand. The finished pipe is shown in the photos below. The dimensions of the pipe are Length: 5 ½ inches, Height: 2 inches, Outside diameter of the bowl: 1 ¼ inches, Chamber diameter: ¾ of an inch. If you want to carry on Bob’s legacy by adding this pipe to your collection let me know as it will soon be on the rebornpipes store. I have a lot more of Bob’s estate to work on of various brands. Perhaps one of those will catch your attention. Thanks for reading this blog and my reflections on the pipe while I worked on it. This is an interesting estate to bring back to life.

Restoring a “Made in England” Peterson’s System 3 # 357 from the Mumbai Bonanza Lot


Blog by Paresh Deshpande

I have quite a few inherited Peterson’s System pipes ranging from the period 1915 to 1947 to present!!! I also have these pipes in System Standard, System 0 and System 3. So when Abha, my wife, sent me pictures of pipes that I had purchased from a Mumbai trash collector, I saw two distinct Peterson’s System pipes, one large and the other very small!! When Abha confirmed the COM stamping on both these pipes, I knew that I had Peterson’s System pipes from the 1930s-40s. Another two vintage Peterson’s System pipes added to my collection, I say. And I am not complaining, mind you readers!!

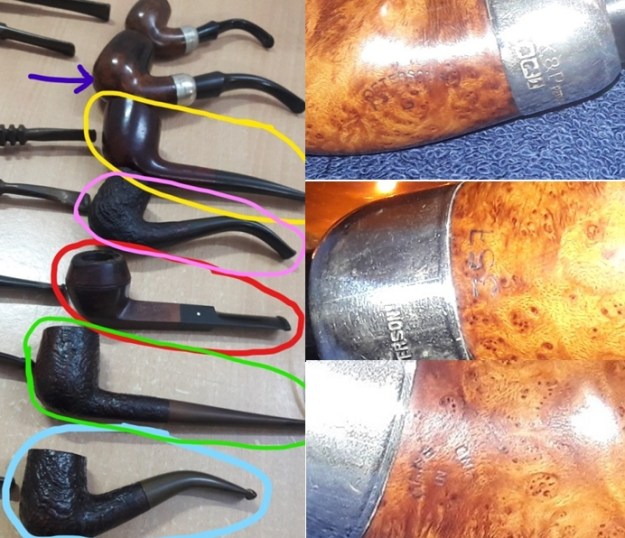
I was fortunate enough to have heeded the advice of my dear friend and mentor, Steve, and struck a deal with a junk collector from Mumbai. He did not know what he was selling and I did not know what I was buying as we reside in different cities!!!!! The argument that Mr. Steve presented was that if not anything, I shall at least have some spares and this was logical. I struck a deal and here are pictures of the pipes that I received in this lot.       This lot contains some very nice collectible pipes, a few well known brands and some mediocre brands. Overall, with seven Dunhill pipes, a Preben Holm #1 FH, a couple of “Made in England” Pete System pipes, a couple of  Charatan’s Belvedere, Custom-Bilt, Stanwell and other assorted pipes, I would say that I had struck a decent haul!!! This is indeed my “Mumbai Bonanza”.

This 15th pipe that I decided to work on from this find is a large Peterson’s System 3 pipe with a nickel ferrule and is indicated in indigo color arrow. It is stamped on the left of the shank towards the shank end as “PETERSON’S” in an arch in block capital letters over arched “SYSTEM” in block capital over “# 3”. The tail of the P in Peterson’s is forked. The right side of the shank is stamped with COM stamp “MADE IN ENGLAND” in a circle format with “Made” and “England” in a circle with the “in” located in the center of the circle. Stamped at the bottom of the shank, very close to the ferrule is the shape number “357”. All the stampings are crisp and easily readable. The ferrule has the usual three cartouche with first having Shamrock, the second a Prone Fox and lastly a Stone Tower. Stamped above the cartouche are the letters “K & P” followed by “PETERSON’S” all in a straight line. The stem is devoid of any logo.In my earlier restoration of my inherited Peterson’s System 31, I had extensively researched the dating of these old Peterson’s and I can say with certainty that this pipe is from the period 1938 to 1940/ 41. Also the forked tail of “P” in Peterson’s with the inward coiling upper part corroborates the vintage of this pipe.

I reconfirmed and refreshed my learning by visiting pipedia.org and my memory has served me right. Here is the link to dating Peterson’s pipes: https://pipedia.org/wiki/A_Peterson_Dating_Guide;_A_Rule_of_Thumb

For further understanding of System Standard/ 0/ 3 etc, I referred to the main article on Peterson’s, but came out cropper. There is nothing substantive and clear information about this grading of these System pipes. Any source of information may please be shared with us on rebornpipes.com.

But nonetheless this is a Peterson’s System pipe from the 1938-40/41 vintage and sure is staying with me.

INITIAL VISUAL INSPECTION
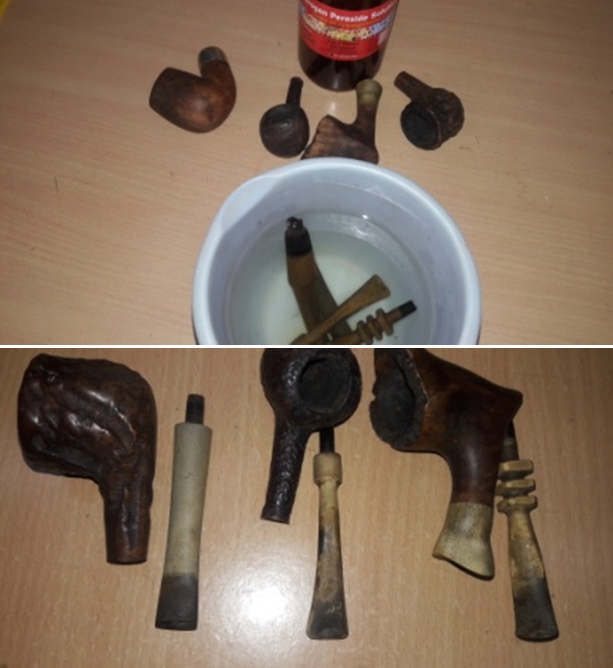
The first and foremost thing that struck me as awful was that the smooth stummel is coated with a coat of lacquer!!! To top it, the coat has disintegrated in patches giving it a very sorry appearance. The icing on the cake is that half way up towards the rim, the stummel is stained black!! Why would they do that?  Well, the long and short of the above is that both the lacquer and the black stain will be removed and whether the finish is to be kept natural or be stained will be decided later. To be honest with you, being a grade 3 System pipe, there is nothing much to boast about the grains on the stummel. It has a smattering of cross grains and swirls all around the shank and stummel. The stummel surface is covered in grime giving the stummel a dirty appearance which is further accentuated by the patches of peeled lacquer coat. The stummel surface is peppered with a number of dents and ding on the foot and front of the stummel. A couple of fills are noticeable on either side near the shank and stummel junction and shown with yellow arrows. These will be clear when the stummel is cleaned of all the grime. In spite of all these flaws, the pipe has a nice size, heft and feel in the hand. It does have a quality which is seen on vintage pipes, but difficult to explain in words. And not to forget, this is nearly an 80 year old pipe!! A thick and uneven layer of cake can be seen in the chamber. The rim top surface has suffered the maximum damage and is uneven. It is covered in thick overflow of lava, dirt, dust and grime. The condition of the inner walls of the chamber and rim top surface will be known once the cake has been taken down to bare briar and the rim top crud has been scraped off completely. The bowl is out of round with the left half being thinner than the rest of the rim top. The inner rim is uneven with suspected burn/ charred surfaces in 9 o’clock and 3 o’clock direction (marked in yellow circle). Only once the stummel has been thoroughly cleaned that I can be sure of my initial appreciation. The outer rim edge too has dents, chips and dings, but not very severe, likely caused due to knocking against the hard surface. In spite of the thick cake, the chamber odor is, surprisingly, not strong and should be addressed once the cake has been taken down to the bare briar and the shank internals have been thoroughly cleaned The shank end is adorned with a nickel ferrule. The ferrule has oxidized a fair bit but should polish up nicely. The sump shows a heavy deposition of accumulated dried gunk, adversely affecting the airflow.The P-lip vulcanite stem is heavily oxidized and has calcification deposits towards the button end. There are deep tooth marks on the lower and upper stem surface in the bite zone and appears that the previous owner has literally chomped on the bite zone of the stem. The button edges also have bite marks, in fact, they are badly worn out. The tenon end has a major chunk missing and shows heavy accumulation of oils and tars. The part of the stem that seats in to the mortise is heavily scratched. Along with the stems of other pipes in line for restoration, I immersed the stem of this Peterson’s System 3 pipe in a mix of one part Hydrogen Peroxide 20% with one part hot water after I ran a couple of pipe cleaners dipped in alcohol through the stem air way. A couple of hours later, the stem oxidation on all these stems were raised to the surface.After I had fished out the stem from the Hydrogen Peroxide bath, I scrubbed it with Magiclean sponge and followed it up with a wipe of cotton swab and alcohol. I further scrubbed the stem surface with 0000 grade steel wool. The loosened and superficial layer of oxidation was easily removed and revealed the condition of the stem. There are deep bite marks in both the upper and lower bite zone. The bite marks are deep enough to cause significant thinning of the surface and complete disfigurement of the button edges. The deeper oxidation that was pulled to the surface would require more abrasive techniques.

THE PROCESS
I started the restoration with the stem repairs as this would take the maximum of my time to clean, repair and spruce up the stem. I flamed the damaged button edge and the nicks and dents with the flame of a lighter. This helps the vulcanite to rise to the surface as it has an inherent property to regain its original shape when heated. At this stage, I could clearly make out the extent of damage to the lower surface and the extent of the crack in the bite zone. This was further accentuated due to heating with the flame of a lighter. The upper surface too has a couple of deep tooth marks. I cleaned the internals of the stem using hard and normal bristled pipe cleaners and isopropyl alcohol. The heap of pipe cleaners tells the sordid tale of the stem condition. With a pointed dental tool, I scraped out the entire dried gunk from the tenon end. I addressed the deeper oxidation by sanding the entire stem with a folded piece of 150 and followed by 220 grit sand paper. This also helps to address minor tooth chatter and prevents the fills turning brown once polished. Once the oxidation was completely removed, I wiped the surface clean with a cotton swab and alcohol and rubbed a little Extra Virgin Olive oil to hydrate the stem. Just for the information of statistically oriented reader, to get the stem to this stage it took better part of the afternoon and well past mid night!! Continuing with the stem repair, I tightly wrapped a scotch tape around one end of a pipe cleaner so that I had achieved a snug fit of the pipe cleaner in the small rounded slot of the P-lip stem. At the tenon end, I folded a pipe cleaner till the fit was snug in to the wide tenon and after applying generous coat of petroleum jelly, I inserted it in to the tenon end of the stem. Both the scotch tape and petroleum jelly prevents the mix of charcoal and superglue from sticking over the pipe cleaners and keeps the slot and tenon open. Thereafter, I mixed superglue and activated charcoal powder and generously applied it over the bite zone on either side, including over the button, over the chipped tenon end and set it aside to cure.  With the stem fill set aside to cure, I started with cleaning of the stummel as I was keen to know the condition of the walls of the chamber. With size 1 head followed by head size 2 and 3 of a PipNet pipe reamer, I took the cake down to bare briar. With my sharp fabricated knife, I removed the cake from the chamber where the reamer head could not reach and thereafter, using a folded piece of 180 grit sand paper, I sand out the last traces of cake and expose the walls of the chamber. I wiped the chamber with a cotton pad dipped in isopropyl alcohol to remove the carbon dust left behind by all the reaming and sanding process. Once the chamber walls were cleaned out, I was pleased to note a pristine chamber with no signs of heat fissures/ lines/ pits. With the same sharp knife, I gently scraped off the lava overflow from the rim top surface. The charred and uneven rim surface and damaged inner and outer rim edges is now clearly seen and should be addressed with simple topping of the bowl. Next, I cleaned out the internals of the shank and mortise. Using my dental tool, I scraped out all the dried oils, tars and gunk that had accumulated in the draught hole, airway and sump. The amount of crud that was scrapped out and the condition of the pipe cleaners that were used leaves no surprise why air flow through it was restricted. I finished the cleaning by running a few pipe cleaners dipped in isopropyl alcohol. I also wiped the sump with cotton buds and alcohol. I gave a final cleaning to the sump with a paper napkin moistened with isopropyl alcohol. With this cleaning, all old smells in the pipe are history. The pipe now smells clean and fresh.  All this time that I was handling cleaning of the internals of this pipe, the patchy lacquer coating and the black stain to the upper half of the stummel was irritating me no end. The more I looked at it, the more convinced I was that this needs to be removed completely. Using cotton balls dipped in pure acetone; I worked the entire stummel and got rid of the lacquer as well as the black stain. The cleaned stummel revealed a couple of more flaws in the briar, but that is fine by me. I was prepared to handle a couple of fills and a couple more does not perturb me.  Next, I cleaned the external surface using a hard bristled toothbrush and Murphy’s Oil Soap. With a soft bristled brass wired brush, I removed the overflowing lava from the rim top surface and cleaned the internals of the shank with a shank brush and dish washing soap to remove what little crud remained in the shank. I rinsed it under running tap water and wiped the stummel dry with an absorbent soft cotton cloth.   Once I had wiped the stummel dry with paper towels and soft cotton cloth, the exact extent of damage to the rim top and edges could be clearly gauged. Now I had a fair idea of the extent of topping the rim surface. I top the rim on a piece of 220 grit sand paper to even out the rim surface dents and dings and also to reduce the charred rim surface. I addressed the out of round inner edge by creating a light bevel to inner edge with a folded piece of 220 grit sand paper pinched between my thumb and index finger. With a folded piece of 220 grit sand paper, I sand the entire stummel surface and addressed the minor pits and flaws that were revealed when the lacquer coat was removed. To further smooth out the scratches left behind by the abrasive 220 girt sand paper, I top the rim surface on a piece of 400 grit sand paper. I had hoped that further sanding with a 400 grit paper will address the minor dings that remained on the outer edge, but that was not to be. Thus, with a folded piece of 220 grit sand paper pinched between my thumb and index finger, I created a light bevel over the outer edge. I am very happy at the way the chamber and rim top surface appears at this in restoration. The old fills observed earlier during initial inspection and those revealed once the lacquer coat was removed, were next that I addressed. Very carefully and painstakingly, I completely removed the old fill with a pointed dental pick. I cleaned the fill of all the debris of old fill material, wiped it with alcohol and refreshed the fill with a mix of briar dust and CA superglue in each fill and set it aside to cure overnight.By next day, the fill was nice, hard and well set. Using a flat head needle file, I sand these fills to achieve a rough match with the stummel surface. With a folded piece of 220 grit sand paper, I worked the fill till I had achieved a nice blend with the rest of the stummel surface. At this stage, the dreaded air pockets revealed itself (marked with red arrows) in one of the fills. I spot fill these air pockets with CA superglue. I repeated the sanding with a piece of 220 grit sand paper again once the glue had hardened. It turned out much better than I had anticipated. I further sand the entire stummel surface again with the same grit sand paper to further smooth the stummel surface in preparation for a polish by micromesh pads. I subjected the stummel to a complete cycle of micromesh polish, wet sanding with 1500 to 12000 grit pads. I paid greater attention to polish the rim top surface and the bevels created on the inner and outer rim edges. I wiped the stummel with a moist cloth after every grit pad to remove the sanding dust left behind by the pads. This also helps in monitoring the progress being made and provides an opportunity to take early corrective action, if required. I am happy with the progress being made till now. Next, I rub a small quantity of “Before and After Restoration Balm” in to the briar with my finger tips and worked it deep in to the surface and let it rest for a few minutes. The balm almost immediately works its magic and the briar now has a nice vibrant appearance with the beautiful swirl grain patterns on full display. The contrast of the dark browns of the grain with the light hues of the rest of the stummel adds an interesting dimension to the appearance of the stummel. I further buffed it with a horse hair brush to further deepen the shine. Turning my attention to the stem repairs in my home stretch, using a flat head needle file, I reshaped the button and roughly matched the fills with the rest of the stem surface. I sand the tenon end on a piece of I sand the fill with a piece of folded 220 grit sandpaper to even it out. With a round needle file, I smooth out the jagged tenon opening. A sanding with a flat head needle file of the buttons and bite zone to achieve a rough match, revealed air pockets on the upper and lower portions of the P-lip. I painted these air pockets with a permanent marker and spot filled it with clear superglue. Once the fill had cured, I sand the fills with a piece of folded 220 grit sand paper and followed it up by further sanding the stem with 320, 600 and 800 grit sand papers to achieve a perfect blending of the fills with the stem surface and a build a crisp button edge on either side of the P-lip. The repairs look good and the stem should polish up nicely. In my exuberance to cross the finish line and start on the new project, I completely missed out on taking pictures of this last step in stem restoration. My sincere apologies for this miss…. Using the micromesh pads, I completed the polishing cycle by wet sanding the surface with 1500 to 3200 girt pads. I had read that White diamond polish is between 3600 and 4000 grit of micromesh pads and best used between these two. I decided to give this a try to see if there is any difference in the final stem finish. I mount a fresh cotton buffing wheel on to my hand held rotary tool and apply white diamond polish and buffed the stem. I wiped the stem with microfiber cloth and go through the remaining pads, dry sanding with 4000 to 12000 grit pads. The stem looks great with the fills nicely matched with the rest of the surface. I gave a final rub with “Before and After Extra Fine” stem polish compound from Mark to remove fine scratches from the stem surface. I rub a little quantity of Extra Virgin Olive oil in to the stem surface and set it aside to be absorbed by the vulcanite. The stem polished up nicely and appears as good as when new. To complete the restoration, I mount a cotton cloth buffing wheel on to my hand held rotary tool and applied several coats of carnauba wax. I finished the restoration by giving the entire pipe a rigorous hand buffing using a microfiber cloth to raise the shine further. I vigorously buff the nickel ferrule with a jeweler’s cloth and bring it to a nice shine.I mount a clean cotton cloth buffing wheel and give the entire pipe a once over buff. The finished pipe with a natural finish to the briar looks amazingly beautiful and is now ready for its long second innings with me. The dark spots of the fills, though visible, are not addressed as the pipe looks beautiful as it is. I only wish it could share with me its life story of the past years while I enjoy smoking my favorite Virginia blend in it or maybe an English blend!! P.S. I earnestly would like to request all the readers to help me with information as to what does Standard/ 0/ 3 on these System pipes denote/ signify. The only thing that is confirmed is that this is definitely not one of the high grade System pipes from Peterson’s what with the fills that were seen on the stummel, but nevertheless, it’s a vintage Peterson’s!!

With this write up, I am through with all my pending works and look forward to work on my next project to restore a pipe which my dear friend and mentor, Steve, had sent me about a year back with the intention of providing me an opportunity to test my own skills. This pipe is close to my heart for other reasons too which I shall bring out in the write up after I have completed the restoration. Suffice to say at this point that this pipe is in a very very sad state and that it’s a DUNHILL!! I wish to thank each one for sparing their valuable time to read through this write up and sharing this journey with me.


Refurbishing a Tired Preben Holm #1 from the Mumbai Bonanza Lot


Blog by Paresh Deshpande

I am a big fan of Free Hand pipes!!! I love the way these pipes fit in to the hand and the creativity of the carver can be really appreciated in these pipes. And a freehand pipe made by the renowned Danish pipe carver, Preben Holm, is my dream come true. To be very honest to you all, the PH estate pipes that are available nowadays on eBay are very expensive and well nigh out of my reach. So when Abha, my wife, sent me pictures of the Mumbai Bonanza lot, I was immediately attracted to one free hand pipe that screamed PREBEN HOLM and when she confirmed that it was indeed one, I knew I was lucky. I say lucky because of the circumstances in which I made a purchase of this lot of 30 pipes and thereafter, the pipes that I received in this lot. I have given a gist of this purchase in the paragraph below. Well, the PREBEN HOLM is finally on my work table now!

I was fortunate enough to have heeded the advice of my dear friend and mentor, Steve, and struck a deal with a junk collector from Mumbai. He did not know what he was selling and I did not know what I was buying as we reside in different cities!! The argument that Mr. Steve presented was that if not anything, I shall at least have some spares and this was logical. I struck a deal and here are pictures of the pipes that I received in this lot. This lot contains some very nice collectible pipes, a few well known brands and some mediocre brands. Overall, with seven Dunhill pipes, a Preben Holm #1 FH, a couple of “Made in England” Pete System pipes, a couple of  Charatan’s Belvedere, Custom-Bilt, Stanwell and other assorted pipes, I would say that I had struck a decent haul!!! This is indeed my “Mumbai Bonanza”.

This 14th pipe that I decided to work on from this find, is a smallish Free Hand pipe with a bone shank extension and is indicated in yellow colored arrow in the picture below. It is stamped on the bottom of the shank towards the shank end as “PREBEN HOLM” in block capital letters over “HAND CUT” in a fancy script over “COPENHAGEN” over “DENMARK” again in block capital letters. The left side of the shank is stamped with an encircled numeral “1”. All the stampings are crisp and easily readable. The stem is devoid of any logo.To research this brand and line/ model in specific, I referred to pipedia.org in an attempt to date this pipe and understand the significance of the numeral # 1, if it was a shape code or grading code. However, there is nothing on this numbering system, except on Preben Holm “Private Collection” where the grading system starts with 101, 202 up to 808 in ascending order. And this is definitely not from “Private Collection” line!! I even visited rebornpipes.com in the hope that I would be able to unravel the mystery shrouding this pipe, but to no avail.

But nonetheless this is a PREBEN HOLM and is staying with me. Any reader who has any information or knowledge about this pipe is earnestly requested to share it with us on rebornpipes!

INITIAL VISUAL INSPECTION
The smooth stummel has some beautiful straight grains on the front, back and sides of the stummel. On either side of the stummel, is an elegantly contoured elevation which makes for a nice and comfortable hold with the thumb and the middle finger while smoking. The front of the stummel rises above the back making for a downward sloping rim top surface. The upper portion of the rim top flares out in a typical PH design and adds a distinct feature to the appearance of the pipe. The stummel surface is covered in dirt and grime giving the stummel a dull and lackluster appearance. There are a one/ two likely fills, noticeably on either side near the shank and stummel junction and another couple near the foot. These will be clear when the stummel is cleaned of all the grime. A thick layer of cake can be seen in the chamber. The backwards sloping plateau rim top surface has nice knobby raised portions and the portion of crevices formed, is covered in thick overflow of lava, dirt, dust and grime. The condition of the inner walls of the chamber and rim top surface will be known once the cake has been taken down to bare briar and the rim top crud has been scraped off completely. The inner rim condition appears to be in good condition with no burn/ charred surfaces. Only once the stummel has been thoroughly cleaned that I can be sure of my initial appreciation. In spite of the thick cake, the chamber odor is, surprisingly, not strong and should be addressed once the cake has been taken down to the bare briar and the shank internals have been thoroughly cleaned. The draught hole is dead center at the bottom of the chamber and should be a great smoker. The shank end is adorned with a horn shank end extension which is pinched in the middle and then flares outwards matching in profile with the rim top. The shank extension is dry and has darkened nicely due to absorption of all the oils over the years of smoking. This will add a nice classy touch to the overall appearance of the pipe once cleaned and hydrated. The shank extension end and mortise are blocked with accumulated dried gunk, adversely affecting the airflow. The fancy vulcanite stem is heavily oxidized and has calcification deposits towards the button end. There are deep tooth marks on the lower and upper stem surface in the bite zone and appears that the previous owner has literally chomped on the bite zone of the stem. The lower stem surface is cracked near the button edge and is circled in red. The button edges also have bite marks, in fact, they are badly worn out. The tenon and horizontal slot shows accumulated oils and tars. The oxidation in the space between the three squares, in descending size from the tenon end to slot end, is going to be a bear to get rid of but once nice and shiny will elevate the appearance of the overall pipe manifold times. Along with the stems of other pipes in line for restoration, I immersed the stem of this Preben Holm in a mix of one part Hydrogen Peroxide 20% with one part hot water after I ran a couple of pipe cleaners dipped in alcohol through the stem air way. A couple of hours later, the stem oxidation on all these stems were raised to the surface. The pictures below show the stem after it was removed from this bath. The appearance is definitely not for the fainthearted, to say the least!!After I had fished out the stem from the Hydrogen Peroxide bath, I scrubbed it with Magiclean sponge and followed it up with a wipe of cotton swab and alcohol. I further scrubbed the stem surface with 0000 grade steel wool. The loosened and superficial layer of oxidation was easily removed and revealed the condition of the stem.. There are deep bite marks in both the upper and lower bite zone. The bite marks are deep enough to cause significant thinning of the surface and complete disfigurement of the button edges. The deeper oxidation that was pulled to the surface would require more abrasive techniques.

THE PROCESS
I started the restoration with the stem repairs as this would take the maximum of my time to clean, repair and spruce up the stem. I cleaned the internals of the stem using hard and normal bristled pipe cleaners and isopropyl alcohol. The heap of pipe cleaners tells the sordid tale of the stem condition. With a pointed dental tool, I scraped out the entire dried gunk from the slot. I addressed the deeper oxidation by sanding the entire stem with a folded piece of 150 and followed by 220 grit sand paper. Once the oxidation was completely removed, I wiped the surface clean with a cotton swab and alcohol and rubbed a little Extra Virigin Olive oil to hydrate the stem. I flamed the damaged button edge and the nicks and dents with the flame of a lighter. This helps the vulcanite to rise to the surface as it has an inherent property to regain its original shape when heated. At this stage, I could clearly make out the extent of damage to the lower surface and the extent of the crack in the bite zone. This was further accentuated due to heating with the flame of a lighter. The upper surface too has a couple of deep tooth marks. Just for the information of statistically oriented reader, to get the stem to this stage it took better part of the afternoon and well past mid night!! Continuing with the stem repair, with a dental spatula, I probed the area around crack from inside the slot end with the aim of dislodging only the thin and loosened stem surface. Once the thin and loose stem surface was removed, I was certain that the rest of the stem surface around the crack was solid. I inserted a triangulated index card covered in transparent tape in to the slot. The tape prevents the mix of superglue and charcoal from sticking to the index card. I mixed superglue and activated charcoal powder and generously applied it over the bite zone on either side, including over the button and set it aside to cure.While the stem fill was set aside to cure, I started with cleaning of the stummel as I was keen to know the condition of the walls of the chamber. With size 1 head followed by head size 2 of a PipNet pipe reamer, I took the cake down to bare briar. Using a folded piece of 180 grit sand paper, I sand out the last traces of cake and expose the walls of the chamber. I wiped the chamber with a cotton pad dipped in isopropyl alcohol to remove the carbon dust left behind by all the reaming and sanding process. Once the chamber walls were cleaned out, I was pleased to note a pristine chamber with no signs of heat fissures/lines/pits. Next, I cleaned out the internals of the shank and mortise. Using my dental tool, I scraped out all the dried oils, tars and gunk that had accumulated in the shank airway and mortise. The amount of crud that was scrapped out and the condition of the pipe cleaners that were used leaves no surprise why air flow through it was restricted. I finished the cleaning by running a few pipe cleaners dipped in isopropyl alcohol. I also wiped the shank with cotton buds and alcohol. With this cleaning, all old smells in the pipe are history. The pipe now smells clean and fresh.With the internals of the stummel now clean, I cleaned the external surface using a hard bristled toothbrush and Murphy’s Oil Soap. I diligently scrubbed the rim top surface to remove the entire dust, dirt and lava overflow that was embedded in the crevices of the plateau rim top surface. With a soft bristled brass wired brush, I removed the overflowing lava from the rim top surface and cleaned the internals of the shank with a shank brush and dish washing soap to remove what little crud remained in the shank. I rinsed it under running tap water and wiped the stummel dry with an absorbent soft cotton cloth. Once I had wiped the stummel dry with paper towels and soft cotton cloth, I saw a couple of small and superficial fills on the left side of the bowl, near the bowl and shank joint and one at the foot of the stummel. These fills are marked in yellow circle. Very carefully and painstakingly, I completely removed the old fill with a pointed dental pick. I cleaned the fill of all the debris of old fill material, wiped it with alcohol and refreshed the fill with a drop of clear CA superglue in each fill and set it aside to cure overnight. By next day, the fill was nice, hard and well set. With a folded piece of 220 grit sand paper, I worked the fill till I had achieved a nice blend with the rest of the stummel surface. It turned out much better than I had anticipated. I further sand the entire stummel surface with the same grit sand paper to address the minor scratches and further smooth the stummel surface in preparation for a polish by micromesh pads. The plateau rim top surface still did show areas where the overflow of lava was still embedded in the crevices. With a dental pick, I diligently scraped each and every spot to remove the deposit of lava. I am now pleased with the cleaning of the rim top surface.I subjected the stummel, including the bone shank extension, to a complete cycle of micromesh polish, wet sanding with 1500 to 12000 grit pads. I wiped the stummel with a moist cloth after every grit pad to remove the sanding dust left behind by the pads. This also helps in monitoring the progress being made and ensures early corrective action. I am happy with the progress being made till now. Next, I rub a small quantity of “Before and After Restoration Balm” in to the briar, the bone shank extension and the plateau rim top surface with my finger tips and work it deep in to the surface and let it rest for a few minutes. The balm almost immediately works its magic and the briar now has a nice vibrant appearance with the beautiful straight grain patterns on full display. The contrast of the dark browns of the grain with the light hues of the rest of the stummel adds an interesting dimension to the appearance of the stummel. I further buffed it with a horse hair brush to further deepen the shine. I was slightly perturbed by the dark coloration taken on by the bone shank extension and shared pictures of the same with my mentor, Steve, who reassured me that this phenomenon is normal and should be good when the balm has been completely absorbed and polished subsequently. With this assurance, I move ahead with the stem repairs.

Using a flat head needle file, I reshaped the button and roughly matched the fills with the rest of the stem surface. I sanded the fills with a folded piece of 180 grit sand paper and followed it up by further sanding the stem with 320, 600 and 800 grit sand papers to achieve a perfect blending of the fills with the stem surface and a crisp button edge on either side of the stem. In my exuberance to cross the finish line, I completely missed out on taking pictures of this stage in restoration. My sincere apologies for this miss….

Using the micromesh pads, I completed the polishing cycle by wet sanding the surface with 1500 to 3200 girt pads. I had read that White diamond polish is between 3600 and 4000 grit of micromesh pads and best used between these two. I decided to give this a try to see if there is any difference in the final stem finish. I mount a fresh cotton buffing wheel on to my hand held rotary tool and apply white diamond polish and buffed the stem. I wiped the stem with microfiber cloth and go through the remaining pads, dry sanding with 4000 to 12000 grit pads. The stem looks great with the fills nicely matched with the rest of the surface. I rub a little quantity of Extra Virgin Olive oil in to the stem surface and set it aside to be absorbed by the vulcanite.To complete the restoration, I mount a cotton cloth buffing wheel on to my hand held rotary tool and applied several coats of carnauba wax. I finished the restoration by giving the entire pipe a rigorous hand buffing using a microfiber cloth to raise the shine further and remove any residual wax from in between the plateaus of the rim top surface. The finished pipe looks amazingly beautiful and is now ready for its long second innings with me. I only wish it could share with me its life story of the past years while I enjoy smoking my favorite Virginia blend in it or maybe an English blend!! P.S. I earnestly would like to request all the readers to help me with the grading and dating this pipe. The only thing that is confirmed is that this is definitely not one of the high grade pipes from Preben Holm what with the fills that were seen on the stummel, but nevertheless, it’s a PH!!!!

There is only one more pending write ups which I shall be tackling before I undertake to restore a pipe which my dear friend and mentor, Steve, had sent me about a year back with the intention of providing me an opportunity to test my own skills. I wish to thank each one for sparing their valuable time to read through this write up and sharing this journey with me.

Restoring an Interesting Acorn # 7472 from Stanwell


Blog by Paresh Deshpande

One of the pipes in my Mumbai Bonanza lot which intrigued me no end was a small Acorn shaped pipe from the Danish pipe maker, Stanwell. I prefer large pipes and so this pipe was always being relegated to the next-in-line project status. Finally I decided to break the shackles of resistance and brought it to my work table as the next project. It’s a Stanwell pipe with shape code # 7472.

I was fortunate enough to have heeded the advice of my dear friend and mentor, Steve, and struck a deal with a junk collector from Mumbai. He did not know what he was selling and I did not know what I was buying as we reside in different cities!! The argument that Mr. Steve presented was that if not anything, I shall at least have some spares and this was logical. I struck a deal and here are pictures of the pipes that I received in this lot. This lot contains some very nice collectible pipes, a few well known brands and some mediocre brands. Overall, with seven Dunhill pipes, a Preben Holm #1 FH, a couple of “Made in England” Pete System pipes, a couple of  Charatan’s Belvedere, Custom-Bilt, Stanwell and other assorted pipes, I would say that I had struck a decent haul!!! This is indeed my “Mumbai Bonanza”.

This, then, is the 13th pipe that I decided to work on from this find and is an Acorn shaped pipe indicated in blue colored arrow in the picture below. It is stamped on the bottom middle half of the smooth surface of the shank as “# 7472” over “MADE IN DENMARK”. Towards the shank end, it is stamped as “STANWELL” in its trademark inverted arch in block capital letters. The stem bears a plain “S” logo on the left side of the stem.Now coming to the research of this brand and line/ model in specific, I referred to pipedia.org and as expected there is an extensive research on this pipe and even has a separate page on Stanwell Shape numbers and Designers, a study compiled by Stanwell collector and an undisputed authority on these pipes, Basil Stevens. However, there is nothing on this particular shape and number, in fact, this shape and number does not find any mention. I even visited rebornpipes.com in the hope that I would be able to unravel the mystery shrouding this pipe, but to no avail.

The only input I received was from Steve was that this is most likely a Sixten Ivarsson carved pipe, but nothing to date and confirm. Any reader who has any information or knowledge about this pipe is earnestly requested to share it with us on rebornpipes!

INITIAL VISUAL INSPECTION
The stummel has beautiful sandblast patterns on the uniquely shaped stummel with a short neck and a nice flow to the shape profile of the pipe. The sandblasted stummel is covered in dirt and grime of yesteryear. This should clean up nicely. The stummel surface is solid with no damage to the external surface. The dark browns of the raised sandblast contrast beautifully with the black stain of rest of the stummel. A thick layer of cake can be seen in the chamber. The sandblasted thin and inward curving rim top surface is covered in thick overflow of lava, dirt, dust and grime. The condition of the inner walls of the chamber and rim top surface will be known once the cake has been taken down to bare briar and the rim top crud has been scraped off completely. The inner rim condition appears to be in good condition with no burn/ charred surfaces. Even the outer rim edge appears to be in a decent condition. Only once the stummel has been thoroughly cleaned that I can be sure of my initial appreciation. In spite of the thick cake, the chamber odor is, surprisingly, not strong and should be addressed once the cake has been taken down to the bare briar and the shank internals have been thoroughly cleaned. The draught hole is dead center at the bottom of the chamber and should be a great smoker. The shank end and the mortise are blocked with dried gunk, adversely affecting the airflow.The delicate vulcanite saddle stem is heavily oxidized and has calcification deposits towards the button end. There are deep tooth marks on the lower and upper stem surface and appears that the previous owner has literally chomped on the bite zone of the stem. The button edges also have bite marks, in fact, they are badly worn out. The horizontal slot shows accumulated oils and tars.Along with the stems of other pipes in line for restoration, I immersed the stem of this Stanwell #7472 in a mix of one part Hydrogen Peroxide 20% with one part hot water after I ran a couple of pipe cleaners dipped in alcohol through the stem air way. A couple of hours later, the stem oxidation on all these stems were raised to the surface. After I had fished out the stem from the Hydrogen Peroxide bath, I scrubbed it with Magiclean sponge and followed it up with a wipe of cotton swab and alcohol. I further scrubbed the stem surface with 0000 grade steel wool. The loosened and superficial layer of oxidation was easily removed and revealed the condition of the stem. It was not as horrifying as I had imagined it to be during the initial inspection. There are deep bite marks in both the upper and lower bite zone. The bite marks are deep enough to cause significant thinning of the surface and complete disfigurement of the button edges. The deeper oxidation that was pulled to the surface would require more abrasive techniques.THE PROCESS
I started with cleaning of the stummel as I was keen to know the condition of the walls of the chamber. With size 1 head followed by head size 2 of a PipNet pipe reamer, I took the cake down to bare briar. Using a folded piece of 180 grit sand paper, I sand out the last traces of cake and expose the walls of the chamber. I wiped the chamber with a cotton pad dipped in isopropyl alcohol to remove the carbon dust left behind by all the reaming and sanding process. Once the chamber walls were cleaned out, I saw very minor and superficial beginnings of heat fissures/ pits all along the chamber walls. I shall address this issue by a simple bowl coat. I used my smaller of the two fabricated knife to gently scrap away at the overflow over the rim top surface while being careful not to damage the sandblast on the rim top. I was pleased to find the inner and outer edge of the rim intact and without any burn or char marks. Next, I cleaned out the internals of the shank and mortise. Using my dental tool, I scraped out all the dried oils, tars and gunk that had accumulated in the shank airway and mortise. The amount of crud that was scrapped out and the condition of the pipe cleaners that were used leaves no surprise why air flow through it was restricted. I finished the cleaning by running a few pipe cleaners dipped in isopropyl alcohol. I also wiped the shank with cotton buds and alcohol. With this cleaning, all old smells in the pipe are history. The pipe now smells clean and fresh.With the internals of the stummel now clean, I cleaned the external surface using a hard bristled toothbrush and Murphy’s Oil Soap. I diligently scrubbed the stummel to remove all the dust and dirt that was embedded in the crevices of the sandblast. With a soft bristled brass wired brush, I removed the overflowing lava from the rim top surface and cleaned the internals of the shank with a shank brush and dish washing soap to remove what little crud remained in the shank. I rinsed it under running tap water and wiped the stummel dry with an absorbent soft cotton cloth. Once I had wiped the stummel dry with paper towels and soft cotton cloth, I thought I saw a fill on the left side of the bowl, near the bowl and shank joint. It was perfectly matched and blended with the sandblast on the stummel and stained in dark as seen on other surfaces of the stummel. It is marked in yellow circle. My fears were confirmed when I probed it with a dental pick. Very carefully and painstakingly, I completely removed the old fill with a pointed dental pick. I cleaned the fill of all the debris of old fill material, wiped it with alcohol and refreshed the fill with a mix of clear CA superglue and briar dust and set it aside to cure overnight.By next day, the fill was hard and well set. With a folded piece of 220 grit sand paper, I worked the fill till I had achieved a nice blend with the shape and contours of the stummel. It turned out much better than I had anticipated. With a soft wire brass brush, I again cleaned out all the debris that lodged itself in the sandblast surface as a result of all the sanding and use of briar dust.Next, I rub a small quantity of “Before and After Restoration Balm” in to the briar with my finger tips, work it deep in to the sandblasts and let it rest for a few minutes. The balm almost immediately works its magic and the briar now has a nice vibrant appearance with the beautiful sandblast patterns on full display. The contrast of the dark browns of the raised sandblast with the dark black of the rest of the stummel adds an interesting dimension to the appearance of the stummel. I further buffed it with a horse hair brush. The last picture is of the side that had the refreshed fill and even the most discerning reader will be hard pressed to accurately pin point the fill. With the stummel nearly completed, I turned my attention to the stem repairs. I masked the stem logo “S” with a whitener pen to protect it during the sanding process. I cleaned the internals of the stem using hard and normal bristled pipe cleaners and isopropyl alcohol. With a pointed dental tool, I scraped out the entire dried gunk from the slot. I addressed the deeper oxidation by sanding the entire stem with a folded piece of 220 grit sand paper. Once the oxidation was completely removed, I wiped the surface clean with a cotton swab and alcohol. I flamed the damaged button edge and the nicks and dents with the flame of a lighter. This helps the vulcanite to rise to the surface as it has an inherent property to regain its original shape when heated. At this stage, I noticed that the bite zone on the upper stem surface has a crack which extends over to the button. This was further accentuated due to heating with the flame of a lighter. Continuing with the stem repair, I inserted a triangulated index card covered in transparent tape in to the slot. The tape prevents the mix of superglue and charcoal from sticking to the index card. I mixed superglue and activated charcoal powder and generously applied it over the bite zone, including over the button and set it aside to cure. Once the mix had cured, I removed the index card from the slot.Using a flat head needle file, I reshaped the button and roughly matched the fills with the rest of the stem surface. However, things rarely happen as you want them to happen and in this case, a few air pockets were revealed. With a permanent black marker I darkened the air pockets and spot filled them with clear superglue. Once the superglue had cured (I had set it aside overnight), I sanded the fills with a folded piece of 180 grit sand paper. I followed it up by further sanding the stem with 320, 600 and 800 grit sand papers to achieve a perfect blending of the fills with the stem surface and a crisp button edge on either side of the stem.Using the micromesh pads, I completed the polishing cycle by wet sanding the surface with 1500 to 3200 girt pads. I had read that White diamond polish is between 3600 and 4000 grit of micromesh pads and best used between these two. I decided to give this a try to see if there is any difference in the final stem finish. I mount a fresh cotton buffing wheel on to my hand held rotary tool and apply white diamond polish and buffed the stem. I wiped the stem with microfiber cloth and go through the remaining pads, dry sanding with 4000 to 12000 grit pads. The stem looks great with the fills nicely matched with the rest of the surface. I rub a little quantity of Extra Virgin Olive oil in to the stem surface and set it aside to be absorbed by the vulcanite. To complete the restoration, I mount a cotton cloth buffing wheel on to my hand held rotary tool and applied several coats of carnauba wax. I finished the restoration by giving the entire pipe a rigorous hand buffing using a microfiber cloth to raise the shine further and remove any residual wax from in between the sandblasts.The finished pipe looks amazingly beautiful and is now ready for its long second innings with me. I only wish it could share with me its life story of the past years while I enjoy smoking my favorite Virginia blend in it or maybe an English blend!! P.S. There was only one more issue that needed to be addressed and one that could not be ignored, being a functional issue. After I had reamed and sanded the chamber walls, I had observed very minor and superficial beginnings of heat fissures/ pits all along the chamber walls. I addressed this by mixing activated charcoal and plain yogurt to a thicker consistency, just enough that I would spread easily and applied it evenly all along the chamber walls after inserting a folded pipe cleaner through the draught hole to keep it open. Once dry and set, this will not only protect the walls but also aid in faster build up of cake.There are two more pending write ups which I shall be tackling before I undertake to restore a pipe which my dear friend and mentor, Steve, had sent me about a year back with the intention of providing me an opportunity to test my own skills. I wish to thank each one for sparing their valuable time to read through and once again request you for any inputs or advice on dating and designer of this pipe.

Restoring a Custom-Bilt Small Pot from my ‘Mumbai Bonanza’


Blog by Paresh Deshpande

It seems that my grandfather loved Custom-Bilt pipes!! I say this with certain amount of conviction as there are quite a few of them in his collection that I have inherited. All the Custom-Bilts in his collection have, apart from the trademark rustications developed and mastered by Tracy Mincer, large size (more like humongous, I say!). Thus, when Abha, my wife sent me pictures of the Mumbai Bonanza lot, I instantly recognized a Custom-Bilt. I confirmed from Abha on Face time that the stamp was spelt with a hyphen between Custom and Bilt confirming the vintage. I was surprised to say the least, not at the fact of finding a Custom-Bilt in the lot (which incidentally contains many collectible pipes), but surprised at the size which stared back at me!! It was small, but small when compared to the size of the other Custom-Bilts that I have inherited. This is the pipe that is now on my work table, my first restoration work after rejoining my work place.

For those readers who have missed out on my previous work, I was fortunate enough to have heeded the advice of my dear friend and mentor, Steve, and struck a deal for 30 pipes with a junk collector from Mumbai. He did not know what he was selling and I did not know what I was buying as we reside in different cities!! The argument that Mr. Steve presented was that if not anything, I shall at least have some spares and this was logical. I struck a deal and here are pictures of the pipes that I received in this lot. This lot contains some very nice collectible pipes, a few well known brands and some mediocre brands. Overall, with seven Dunhill pipes, a Preben Holm #1 FH, a couple of “Made in England” Pete System pipes, a couple of  Charatan’s Belvedere, Custom-Bilt, Stanwell and other assorted pipes, I would say that I had struck a decent haul!! This is indeed my “Mumbai Bonanza”.

The 12th pipe that I decided to work on from this find Custom-Bilt small pot shaped pipe and is indicated in magenta colored arrow in the picture below. It is stamped on the left side of the shank as “Custom-Bilt” in sentence form with a hyphen between Custom and Bilt. The pipe or stem is devoid of any other stamping.Now coming to the research of this brand and line/ model in specific, I referred to pipedia.org and as expected there is an extensive research on this pipe. I searched the internet for information in order to date this pipe. Pipedia has a lot of information about this pipe and just typing in Custom-Bilt in the search bar of the site will reveal the required information. There is an interesting review given by Richard Esserman on a book written by William E. Unger, Jr., PhD, which deals with the study of Custom-Bilt pipes. The author authoritatively states, after a lot of research and study that the stamp as seen on this particular pipe dates it from between 1938 – 1946!With the dating of this pipe confirmed, I move on to the next step of carrying out initial inspection of the pipe as it appears. This not only provides me with an opportunity to closely look at the pipe (more like ogle at it!) and identify the issues that need to be addressed but also plan on the sequence and processes that would be required in restoring the pipe.

INITIAL VISUAL INSPECTION
The pipe has deep and large vertical rustications along the entire length of the shank and height of the bowl. Within these large vertical rustications are very thin, closely stacked horizontal lines which give this pipe its unique appearance and are its trademark!!! The deep large rustication on the stummel is covered in dirt, oils, tars and grime of 70 plus years of its existence. At this stage, the briar looks filthy, dry and lifeless, but this should clean up nicely. However, there are two issues which may prove to be a challenge to address. On the front left side of the bowl, there is a dark burn mark, probably scorched by a burning cigarette lying in the same ashtray (marked in a yellow circle). The second issue is also towards the left side of the stummel, but at the back. There is significant darkening in that area as compared to the rest of the stummel, and is marked in a yellow circle. The exact nature of this darkening will be known once the stummel surface has been cleaned. A thick layer of cake can be seen in the chamber. The rim top is covered with the same thin, closely stacked lines as seen between the large vertical rustications and is covered in thick overflow of lava, dirt, dust and grime. The condition of the inner walls of the chamber and rim top surface will be known once the cake has been taken down to bare briar and the rim top crud has been scraped off completely. With the inner rim, I suspect burn/ charred surface at the back in 6 ‘O’ clock direction and is encircled in red. The extent and severity of the damage, if present, can be ascertained once the cake has been removed and the rim top is cleaned. The outer rim edge appears to be in a decent condition. Only once the stummel has been thoroughly cleaned that I can be sure of my initial appreciation. In spite of the thick cake, the chamber odor is, surprisingly, not strong and should be addressed once the cake has been taken down to the bare briar. The mortise is blocked with dried gunk, adversely affecting the airflow. A thorough clean up with alcohol and pipe cleaners should address this issue.The vulcanite stem is heavily oxidized and has calcification marks for about an inch over the bite zone, probably a result of using a rubber bit. The stem surface on either side is peppered with nicks and dents along the entire surface. There is one deep bite mark on the button edge on the upper surface. The tenon is covered in dried oils and tars and ash. The air way in the stem will need to be cleaned for a free and smooth draw.THE PROCESS
Along with the stems of other pipes in line for restoration, I immersed the stem of this Custom-Bilt in a mix of one part Hydrogen Peroxide 20% with one part hot water after I ran a couple of pipe cleaners dipped in alcohol through the stem air way. A couple of hours later, the stem oxidation on all these stems were raised to the surface. After I had fished out the stem from the Hydrogen Peroxide bath, I scrubbed it with Magiclean sponge and followed it up with a wipe of cotton swab and alcohol. The loosened and superficial layer of oxidation was easily removed and revealed not one but two tooth marks on the upper button edge and the nicks and dents on the surface are now more apparent. However, the deeper oxidation that was pulled to the surface would require more abrasive techniques.Staying with the stem, I cleaned the internals of the stem using hard and normal bristled pipe cleaners and isopropyl alcohol. I addressed the deeper oxidation by sanding the entire stem with a folded piece of 220 grit sand paper. Once the oxidation was completely removed, I wiped the surface clean with a cotton swab and alcohol. I flamed the damaged button edge and the nicks and dents with the flame of a lighter. This helps the vulcanite to rise to the surface as it has an inherent property to regain its original shape when heated. I spot filled the damaged spots with clear CA superglue and set it aside to cure overnight. Thereafter, I started with cleaning of the stummel as I was keen to know the condition of the walls of the chamber. With size 3 head of a PipNet pipe reamer, I took the cake down to bare briar. Using a folded piece of 180 grit sand paper, I sand out the last traces of cake and expose the walls of the chamber to ascertain that there are no cracks/ heat fissures. I wiped the chamber with a cotton pad dipped in isopropyl alcohol to remove the carbon dust left behind by all the reaming and sanding process. I was happy to note that the walls of the chamber are in pristine condition without any heat fissures or pits. I used my smaller of the two fabricated knife to gently scrap away at the overflow over the rim top surface while being careful not to damage the thin wired rustications on the rim top. I was pleased to find the inner and outer edge of the rim intact and without any burn or char marks which I had feared to be lurking under the heavy overflow of lava. Next, I cleaned out the internals of the shank and mortise. Using my dental tool, I scraped out all the dried oils, tars and gunk that had accumulated in the shank airway and mortise. The mortise was so clogged with the old accumulations of gunk that I had to use the drill piece which comes in the Kleen Reem pipe reamer!! The amount of crud that was scrapped out and the condition of the pipe cleaners that were used leaves no surprise why air flow through it was restricted. I finished the cleaning by running a few pipe cleaners dipped in isopropyl alcohol. I also wiped the shank with cotton buds and alcohol. With this cleaning, all old smells in the pipe are history. The pipe now smells clean and fresh.With the internals of the stummel now clean, I cleaned the external surface using a hard bristled toothbrush and Murphy’s Oil Soap. I diligently scrubbed the crevices formed by the sandblast to remove all the dust and dirt that was embedded in the large vertical rustications and thin wire rustications between them. With a soft bristled brass wired brush, I removed the overflowing lava from the rim top surface and cleaned the internals of the shank with a shank brush and dish washing soap to remove what little crud remained in the shank. I rinsed it under running tap water and wiped the stummel dry with an absorbent soft cotton cloth. However, I was not very satisfied with the way the rim top surface had cleaned up. There were visible traces of the lava overflow embedded in the rustication giving it a dirty and unclean appearance. I vigorously cleaned the rim top surface again with the brass brush, following the direction of the thin rustications till the overflow of lava was greatly reduced. What little grime that remained was carefully scraped out with a sharp dental pick. Another scrub with a toothbrush dipped in oil soap and I was very pleased with the way the stummel had cleaned up. The stummel looks absolutely gorgeous. At this point in restoration, I observed tiny specs of white. They appeared to be paint flakes but I am not sure. Very carefully and painstakingly, I removed each spot with the pointed dental pick.The other thing which highlighted itself was the burn mark and darkened surface at the front and slightly at the back of the stummel respectively. I cleaned the burned spot of all the charred briar with the sharp end of the dental spatula until I reached solid briar surface. The spot has lightened considerably. Next, with a pointed dental pick, I tried to pick in to the remaining darkened surface and was surprised to find that the area had been filled and that the old putty now came away easily (shown by a red arrow). Having discovered one fill, I closely checked the entire stummel surface for any other fills. Sure enough, there was a small fill at the shank end, just below the stamping (red arrow mark). I cleaned out the loose fills with a dental pick. I refreshed these fills with a mix of briar dust and superglue and set it aside to cure.While the stummel fills were set aside to cure, I worked the stem fills which had by now cured sufficiently. Using a flat head needle file, I reshaped the button and roughly matched the fills with the rest of the stem surface. I followed it up by further sanding the stem with 320, 600 and 800 grit sand papers to achieve a perfect blending of the fills with the stem surface and a crisp button edge on either side of the stem. Using the micromesh pads, I complete the polishing cycle by wet sanding the surface with 1500 to 12000 girt pads. The stem looks great with the fills nicely matched with the rest of the surface. I rub a little quantity of Extra Virgin Olive oil in to the stem surface and set it aside to be absorbed by the vulcanite. Once I was finished with the stem repairs, I turned back to the stummel fills which had cured. With the edge of a flat head needle file, I roughly matched the fill with the rustications on the stummel. Thereafter, using a tightly folded piece of 150 grit sand paper, I worked the fills to a perfect match with the rest of the rustications. I used a sharp dental tool and tried to roughly carve out the thin wire like rustications in to the fills, though without resounding success. But it turned out quite okay to my eyes.Next, I rub a small quantity of “Before and After Restoration Balm” in to the briar with my finger tips, work it deep in to the sandblasts and let it rest for a few minutes. The balm almost immediately works its magic and the briar now has a nice vibrant appearance with the beautiful sandblast patterns on full display. I further buff it with a horse hair brush. To complete the restoration, I mount a cotton cloth buffing wheel on to my hand held rotary tool and applied several coats of carnauba wax. I finished the restoration by giving the entire pipe a rigorous hand buffing using a microfiber cloth to raise the shine further. The finished pipe looks amazingly beautiful and is now ready for its long second innings with me. I only wish it could share with me its life story of the past 70 plus years while I enjoy smoking my favorite Virginia blend in it!! P.S. I was not very pleased with the appearance of the front of the stummel, what with the ugly burn mark now all the more visible. I discussed with my mentor, Steve, and he suggested that a little oxalic acid diluted with water when applied over the burn mark should significantly reduce the black mark. This will be applied in practical once I am back on leave to my home town. I shall post an update on the end result of this process.

There are three more pending write ups which I shall be tackling before I undertake any new restoration. I am eagerly waiting to start my next project, which I wish to assure readers, is going to be an interesting one. It’s a pipe which my dear friend and mentor, Steve, had sent me about a year back with the intention of providing me an opportunity to test my own skills. I wish to thank each one for sparing their valuable time to read through and any inputs or advise is always welcome.


Back to Bob Kerr’s Estate – Changing Up and Working on a Danish Made Stanwell de Luxe 812 Billiard Regd. No. 969-48


Blog by Steve Laug

I am changing up my work on Bob Kerr’s estate a bit by taking on this Stanwell de Luxe 812 sandblast billiard. This is the first of his Stanwell pipes that I am working on. I am cleaning them for the family and moving them out into the hands of pipemen and women who will carry on the trust that began with Bob and in some pipes was carried on by Bob. In the collection there were 19 Peterson’s pipes along with a bevy of Dunhills, some Comoy’s and Barlings as well as a lot of other pipes – a total of 125 pipes along with a box of parts. This is the largest estate that I have had the opportunity to work on. I put together a spread sheet of the pipes and stampings to create an invoice. I was taking on what would take me a fair amount of time to clean up. I could not pass up the opportunity to work on these pipes though. They were just too tempting. This beautiful Stanwell is a great break. It is a shape that is interesting and unique. It will go on the rebornpipes store.

I really like the sandblasts that the Danish Stanwell Company did. This one also has a rugged, swirling sandblast finish with lots of nooks and crannies in the briar. It is a beauty! The pipe is stamped Stanwell over Regd. No. 969-48. That is followed by the line which is de Luxe and the shape number 812. The valleys and ridges of the sandblasted grain showing through the grime and dirt are a mixture that leaves a rich texture. It had a rich dark and medium contrasting brown stain that does not look too bad. There was a thick cake in the bowl with remnants of tobacco stuck on the walls. There was a fair lava overflow filling in the blast on the rim. The edges of the rim and top are dirty but look pretty pristine under the grime. It was a beautiful pipe that was dirty and tired looking. The stem was oxidized and calcified toward the end. Again, surprisingly did not have the tooth marks that I have come to expect from Bob’s pipes. Jeff took photos of the pipe before he started his cleanup work on it.   Jeff took photos of the bowl and rim top to show the cake in the bowl and the lava build up on the edges of the bowl. It was thick and hard but hopefully it had protected the rim and edges from damage. The edges look pretty good.Jeff took photos of the sides and heel of the bowl to show the condition of the finish. You can see the beautiful swirls of the sandblast. There is a lot of dust and grime filling in the valleys. Jeff took photos of the stamping on the smooth panel on the underside of the bowl and shank. The stamping was readable as you can see from the photos. It read Stanwell Regd. No. 969-48. That is followed by de Luxe and the shape number 812. Jeff took photos of the top and underside of the stem showing the tooth chatter, scratching and oxidation on the stem surface and wear on the edges of the button. The “S” on the stem was in very good condition. Interestingly it did not have the crown over the “S”. I turned first to Pipephil’s site to get a quick idea of when this pipe was made by reference to the Regd. No. on the underside of the shank (http://www.pipephil.eu/logos/en/logo-stanwell.html). I quote what I found there. Logo without crown. The “Regd. No.” stamping discontinued in late 1960s to very early 1970s.

I also turned to Pipedia’s article on Stanwell but it did not add any further information. It is a great read in terms of the history of the brand (https://pipedia.org/wiki/Stanwell).

Talking with Chris van Hilst on Facebook Tobacco Pipe Restorers Group he helped me understand that the crown was introduced mid- to late 50’s. Before that they didn’t have a stem logo.

With that information in hand I knew what I was dealing with in terms of the stamping and the age of this pipe. I knew from the information from Pipephil that the Regd. No. stamping was discontinued in the late 60s to very early in the 70s. I learned from Chris that the crown was added late in the 1950s so this one is most probably an early 1950s pipe. Most of Bob’s pipes were purchased between the 50s and late 60s so my guess is that this pipe fits that time frame. Now it was time to work on the pipe.

With over 125 pipes to clean from Bob’s estate I took a batch of them to the states with me on a recent visit and left them with Jeff so he could help me out. Jeff cleaned the pipe with his usual penchant for thoroughness that I really appreciate. This one was a real mess and I did not know what to expect when I unwrapped it from his box. He reamed it with a PipNet pipe reamer and cleaned up the reaming with a Savinelli Fitsall Pipe Knife. He scrubbed out the internals with alcohol, pipe cleaners and cotton swabs until the pipe was clean. He scrubbed the exterior of the bowl with Murphy’s Oil Soap and a tooth brush to remove the grime and grit on the briar and the lava on the rim top. The finish looks very good with good looking grain around the bowl and shank. Jeff soaked the stem in Before & After Deoxidizer to remove the oxidation on the rubber. When the pipe arrived here in Vancouver for the second stop of its restoration tour it looked very good. I took photos before I started my part of the work. I took some close up photos of the rim top and also of the stem surface. I wanted to show what an amazing job Jeff did in the cleanup of the rim top. The rim top looks very good. The sandblast finish is very nice. The bowl looked very good. I also took close up photos of the stem to show the lack of tooth marks and the remaining oxidation on the stem surface.Since this is another pipe Bob’s estate I am sure that some of you have read at least some of the other restoration work that has been done on the previous pipes. You have also read what I have included about Bob Kerr, the pipeman who held these pipes in trust before I came to work on them (see photo to the left). Also, if you have followed the blog for long you will already know that I like to include background information on the pipeman whose pipes I am restoring. For me, when I am working on an estate I really like to have a sense of the person who held the pipes in trust before I worked on them. It gives me another dimension of the restoration work. I asked Brian if he or his wife would like to write a brief biographical tribute to her father, Bob. His daughter worked on it and I received the following short write up on him and some pictures to go along with the words including one of Bob’s carvings. Once again I thank you Brian and tell your wife thank you as well.

I am delighted to pass on these beloved pipes of my father’s. I hope each user gets many hours of contemplative pleasure as he did. I remember the aroma of tobacco in the rec room, as he put up his feet on his lazy boy. He’d be first at the paper then, no one could touch it before him. Maybe there would be a movie on with an actor smoking a pipe. He would have very definite opinions on whether the performer was a ‘real’ smoker or not, a distinction which I could never see but it would be very clear to him. He worked by day as a sales manager of a paper products company, a job he hated. What he longed for was the life of an artist, so on the weekends and sometimes mid-week evenings he would journey to his workshop and come out with wood sculptures, all of which he declared as crap but every one of them treasured by my sister and myself. Enjoy the pipes, and maybe a little of his creative spirit will enter you!

Now on to the rest of the restoration on this Stanwell de Luxe 812 Billiard. Since Jeff had done such an amazing clean up job on the bowl it was very easy for me. I only had to rub the bowl down with Before & After Restoration Balm. I worked it into the surface of the briar with my fingertips and a horsehair shoe brush to clean, enliven and protect it. I let the balm sit for a little while and then buffed with a cotton cloth and shoe brush to raise the shine. Mark Hoover’s Balm is a product that I have come to appreciate and one I use on every pipe I have been working on. I set the bowl aside and turned my attention to the stem. I sanded the stem with 220 grit sandpaper to break up the oxidation. I started the polishing with 400 grit wet dry sandpaper to remove the scratching. It is starting to look good. I rubbed the stem down with Denicare Mouthpiece Polish. I have a few tins of this laying around so I am trying to use them up. It does a pretty good job polishing the stem. I polished the stem with micromesh sanding pads – wet sanding with 1500-12000 grit pads. I wiped the stem down after each sanding pad with Obsidian Oil. I polished it with Before & After Pipe Stem Polish – both Fine and Extra Fine. Once I had finished the polishing I gave it final coat of oil and set it aside to dry. I am excited to be on the homestretch with this pipe and I look forward to the final look when it is put back together, polished and waxed. I put the bowl and stem back together. I polished the bowl and stem with Blue Diamond to polish out the scratches in the briar and the vulcanite. I gave the bowl multiple coats of Conservator’s Wax and the stem multiple coats of carnauba wax. I buffed the pipe with a clean buffing pad to raise the shine. I hand buffed it with a microfiber cloth to deepen the shine. The pipe polished up pretty nicely. The valleys and ridges of the sandblast looked good with the polished black vulcanite. This Stanwell de Luxe 812 billiard was another fun pipe to work on thanks to Jeff’s cleanup work. It really has that classic Stanwell sandblast finish that catches the eye. The combination of various brown stains really makes the pipe look attractive. It is a comfortable pipe to hold in the hand. The finished pipe is shown in the photos below. The dimensions of the pipe are Length: 5 ¾ inches, Height: 2 inches, Outside diameter of the bowl: 1 ½ inches, Chamber diameter: ¾ of an inch. If you are interested in carrying on Bob’s legacy with this pipe send me a message or an email. I have a lot more to work on of various brands. Perhaps one of those will catch your attention. Thanks for reading this blog and my reflections on the pipe while I worked on it. This is an interesting estate to bring back to life.

Back to Bob Kerr’s Estate – Linking Peterson’s “Kapruf” 9BC with the 56 shape number


Blog by Steve Laug

With this Peterson’s “Kapruf” 9BC I am turning again to work on a few more pipes from Bob Kerr’s estate. This is the first of the Peterson’s that I am working on. I am cleaning them for the family and moving them out into the hands of pipemen and women who will carry on the trust that began with Bob and in some pipes was carried on by Bob. In the collection there were 19 Peterson’s pipes along with a bevy of Dunhills, some Comoy’s and Barlings as well as a lot of other pipes – a total of 125 pipes along with a box of parts. This is the largest estate that I have had the opportunity to work on. I put together a spread sheet of the pipes and stamping to create an invoice. I was taking on what would take me a fair amount of time to clean up. I could not pass up the opportunity to work on these pipes though. They were just too tempting. I decided to take a break from working on his Dunhills to work on a few of the other pipes. The first of them is a really nice Peterson. It is a shape that is one of my favourites so this one will probably stay with me.

I love these older Peterson’s 9BC shapes and find that the sandblast versions really are a favourite of mine. This one has a rugged sandblast finish with lots of nooks and crannies in the briar. It is a beauty! The pipe is stamped Peterson’s “Kapruf” over London Made England. That is followed by the shape number 9BC over 56. The valleys and ridges of the sandblasted grain showing through the grime and dirt are a mixture that leaves a rich texture. It had a rich reddish brown stain that does not look too bad. There was a thick cake in the bowl and lava overflow filling in the blast on the rim. The edges of the rim and top are dirty but look pretty pristine under the grime. It was a beautiful pipe that was dirty and tired looking. The stem was lightly oxidized with the typical tooth marks and chatter on both sides that I have come to expect from Bob’s pipes. He obviously loved the Peterson’s as much as he did his Dunhills. The P-lip button had some light damage to the top surface. Jeff took photos of the pipe before he started his cleanup work on it.Jeff took photos of the bowl and rim top to show the cake in the bowl and the lava build up on the edges of the bowl. It was thick and hard but hopefully it had protected the rim and edges from damage. The edges look pretty good. Jeff took photos of the sides and heel of the bowl to show the condition of the finish. You can see the beautiful undulations of the sandblast. There is a lot of dust and grime filling in the valleys. Jeff took photos of the stamping on the smooth panel on the underside of the bowl and shank. The stamping was readable as you can see from the photos. The London Made over England stamp is faint but readable under a light. The pipe also bears the same 9BC over 56 stamp that Al Jones (upshallfan) noted on the on his previous blog and had called a mystery pipe (https://rebornpipes.com/2019/07/25/peterson-shape-56-mystery/).Jeff took photos of the top and underside of the stem showing the deep tooth marks and scratching, oxidation on the stem surface and wear on the edges of the button. The “P” logo on the stem is long gone but the robust p-lip button is in very good condition.Al Jones had written a couple of blogs on the Peterson’s Kapruf 9BC so I turned to rebornpipes to refresh my memory through Al’s blogs (https://rebornpipes.com/2015/06/03/peterson-9bc-kapruf-pre-59/). I quote from there and also include some of the catalogue pages from the blog.

I didn’t know much about the Kapruf line. It is described in a 1960’s catalog as: “A fine sandblast finish distinguishes this range of light natural grained pipes with their distinctive red colouring. Very popular with sportsmen.”

The second page shows the 9BC shape.  I have boxed the shape in with a red box for quick reference. Al had also written a blog about another “Kapruf” 9BC he had picked up that was not stamped with the 9BC stamp but with a shape number 56. Interestingly the one I am working on is stamped with both numbers. I quote from a pertinent section of that blog on the shape number (https://rebornpipes.com/2019/07/25/peterson-shape-56-mystery/).

Well, the Shape 56 mystery is now resolved…Well, further sleuthing from the world’s foremost Peterson authority yielded an answer – which came directly from a blog entry here on rebornpipes, by our very own Steven Laug. In 2015, Steve posted a catalog from Canadian importer, Genin, Trudeau & Co. which shows their unique numbering system. I even comment that the Shape 56 looks like a 9BC! So, all the while, the answer was hiding on this blog! Below is that brochure page showing the Shape 56. Steve comments that the postal code used in the address dates the brochure to between 1962 and 1969. I guess not many Canadians appreciated the shape, so they are pretty uncommon. Thanks to Mark Irwin for his superior memory and to Steve for making this type of ephemera available, you never know when it will come in handy.

I have included both the link to the document for you to check out and a page from it that shows the 9BC/56 connection Al noted above (https://rebornpipes.com/2016/09/13/petersons-pipes-brochure-from-genin-trudeau-co-montreal-quebec/). I have put a red box around the shape number to make identifying it simpler. Be sure to check out the document as it is very informative.I turned to an article on Pipedia by a good friend, the late Mike Leverette entitled A Peterson Dating Guide (https://pipedia.org/wiki/A_Peterson_Dating_Guide;_A_Rule_of_Thumb). While the one I have in hand is slightly different in terms of stamping it is an English made Peterson that bears the stamp London Made England. I quote from the section by Mike on the English pipes.

English made Peterson pipes actually spans between the pre-Republic and Republic eras. In 1895, Peterson opened a shop in London England that lasted until the late 1950s or early 1960s. So the English Era, for a simplified date, will be from 1895 through 1959. The stamps Peterson used in London and that we have seen are:

  • Made in England – block format
  • Made in England – circle format
  • Made in London
  • Made in London England
  • Simply, London England.
  • Great Britain

I went to the full article on Peterson pipes after this to try to pin things down a bit more clearly (https://pipedia.org/wiki/Peterson). I believe the pipe is from the Republic Era – 1950 – 1989. I quote the pertinent section of that article below:

1969/70 – The ‘Made in England’ stamp was discontinued with the closing down of the London based factory. Although Peterson has always prided itself in being an Irish made pipe, Peterson had also maintained a pipe factory in London since 1899.

English made Peterson pipes actually spanned the period between the pre Republic and Republic eras.

In 1899, Peterson opened the first in a series of several successive shops in London, England, that lasted until the late 1960’s/70s.

1899 – 53, New Broad St. E.C.

1910 – 7, Hills Pl., Oxford St. W.

1915 – 21, Mortimer St. W.

Finally moving to 74/77 White Lion Street until 1970.

So the English Era, for a simplified date, will be from 1899 through to around 1970. The stamps Peterson used in London are:

    • Made in England block format
    • Made in England circle format
    • Made in London
    • Made in London England
    • Simply, London England
    • London Made over England block format
    • Great Britain

With that information in hand I knew what I was dealing with in terms of the stamping and the age of this pipe. I knew from the information from both Mike’s Pipedia article and the longer article that the pipe was made during the Republic Era prior to the closer of the London based factory. My thinking is that it came from the final factory location on 74/77 White Lion Street which closed down in 1970. That fits the time frame of many of the pipes from Bob Kerr’s estate.  I also knew that the pipe was brought into Canada by the Canadian importer, Genin, Trudeau & Co. in Montreal, Quebec. Noting above that the catalogue postal code puts it in the late 60s early 70s which also fits the story. Now it was time to work on the pipe.

With over 125 pipes to clean from Bob’s estate I took a batch of them to the states with me on a recent visit and left them with Jeff so he could help me out. Jeff cleaned the pipe with his usual penchant for thoroughness that I really appreciate. This one was a real mess and I did not know what to expect when I unwrapped it from his box. He reamed it with a PipNet pipe reamer and cleaned up the reaming with a Savinelli Fitsall Pipe Knife. He scrubbed out the internals with alcohol, pipe cleaners and cotton swabs until the pipe was clean. He scrubbed the exterior of the bowl with Murphy’s Oil Soap and a tooth brush to remove the grime and grit on the briar and the lava on the rim top. The finish looks very good with good looking grain around the bowl and shank. Jeff soaked the stem in Before & After Deoxidizer to remove the oxidation on the rubber. When the pipe arrived here in Vancouver for the second stop of its restoration tour it looked very good. I took photos before I started my part of the work. I took some close up photos of the rim top and also of the stem surface. I wanted to show what an amazing job Jeff did in the cleanup of the rim top. The rim top looks very good. The sandblast finish is very nice. The bowl looked very good. I also took close up photos of the stem to show the deep tooth marks on the top and underside. The “P” logo on the stem was long gone though I could see a faint ghost of it on the left side. I took a photo of the stamping and was able to capture all of it. Even the illusive London Made over England portion shows up. Since this is another pipe Bob’s estate I am sure that some of you have read at least some of the other restoration work that has been done on the previous pipes. You have also read what I have included about Bob Kerr, the pipeman who held these pipes in trust before I came to work on them (see photo to the left). Also, if you have followed the blog for long you will already know that I like to include background information on the pipeman whose pipes I am restoring. For me, when I am working on an estate I really like to have a sense of the person who held the pipes in trust before I worked on them. It gives me another dimension of the restoration work. I asked Brian if he or his wife would like to write a brief biographical tribute to her father, Bob. His daughter worked on it and I received the following short write up on him and some pictures to go along with the words including one of Bob’s carvings. Once again I thank you Brian and tell your wife thank you as well.
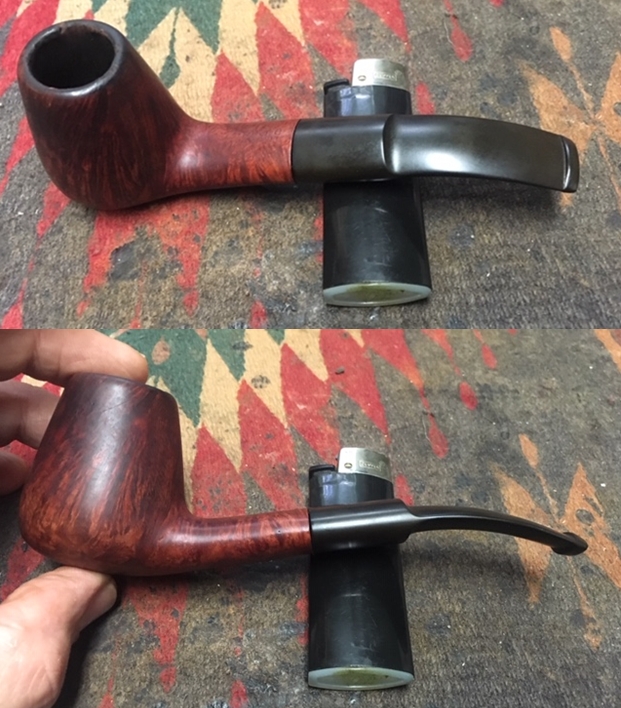
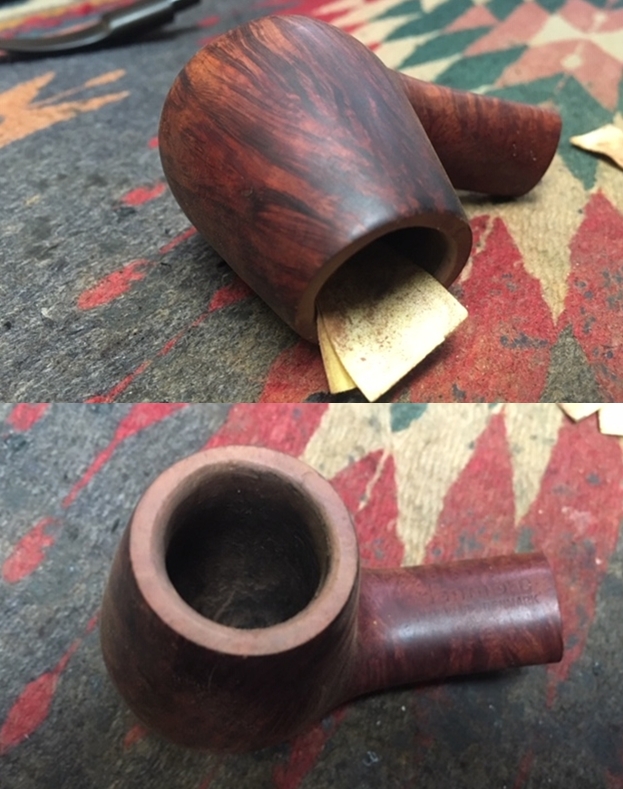
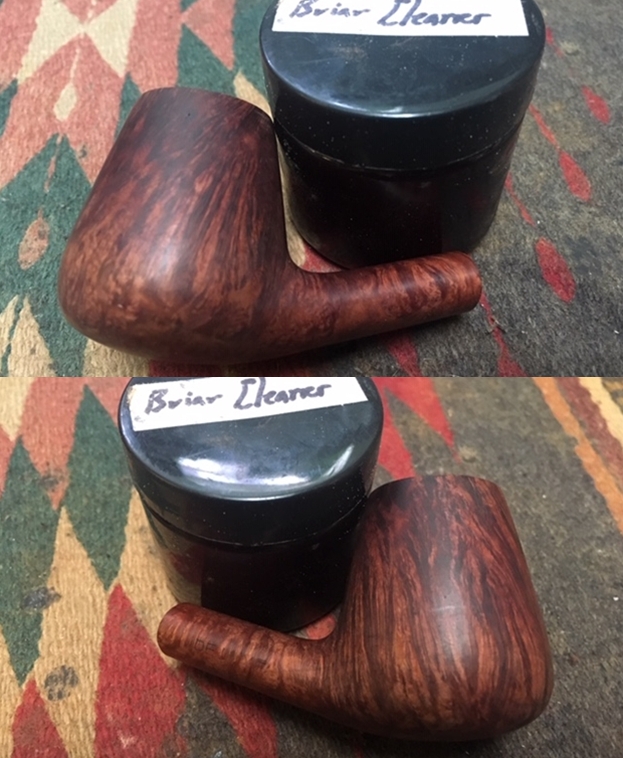
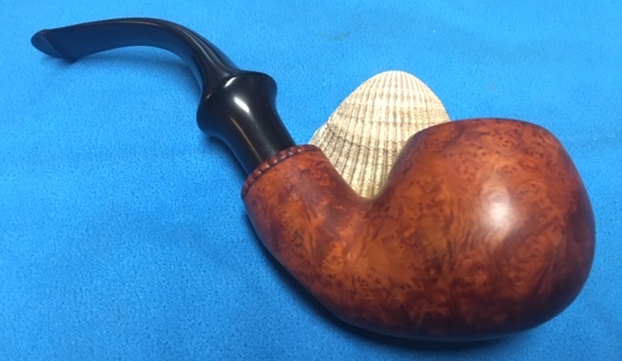
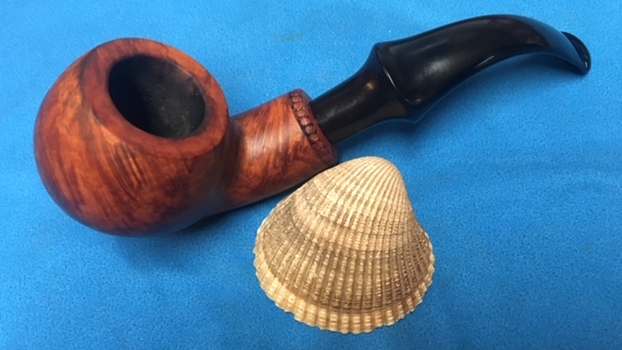
I am delighted to pass on these beloved pipes of my father’s. I hope each user gets many hours of contemplative pleasure as he did. I remember the aroma of tobacco in the rec room, as he put up his feet on his lazy boy. He’d be first at the paper then, no one could touch it before him. Maybe there would be a movie on with an actor smoking a pipe. He would have very definite opinions on whether the performer was a ‘real’ smoker or not, a distinction which I could never see but it would be very clear to him. He worked by day as a sales manager of a paper products company, a job he hated. What he longed for was the life of an artist, so on the weekends and sometimes mid-week evenings he would journey to his workshop and come out with wood sculptures, all of which he declared as crap but every one of them treasured by my sister and myself. Enjoy the pipes, and maybe a little of his creative spirit will enter you!

Now on to the rest of the restoration on this pipe that links the two shape numbers that Al referred to – the 9BC and the 56. Since Jeff had done such an amazing clean up job on the bowl it was very easy for me. I only had to rub the bowl down with Before & After Restoration Balm. I worked it into the surface of the briar with my fingertips and a horsehair shoe brush to clean, enliven and protect it. I let the balm sit for a little while and then buffed with a cotton cloth and shoe brush to raise the shine. Mark Hoover’s Balm is a product that I have come to appreciate and one I use on every pipe I have been working on. I set the bowl aside and turned my attention to the tooth marks in the stem. I painted the surface of the stem with the flame of a Bic style lighter. Since vulcanite has “memory” heat will lift much of the tooth damage. The photos show the marks that remain after the heat treatment.To repair these deeper tooth marks, I filled them in with clear super glue and set the stem aside to dry. Once the glue cured it would be a matter of blending the repairs into the surface of the stem with sandpaper.Once the repairs had hardened I also sanded them to blend them into the surrounding vulcanite with a folded piece of 220 grit sandpaper. I followed the 220 grit sandpaper with 400 grit wet dry sandpaper to minimize the scratching. The two papers combined do a great job in blending the repairs. I wiped the stem down with Obsidian Oil and set it aside to dry.  I polished out the scratches with micromesh sanding pads – wet sanding with 1500-12000 grit pads. I wiped the stem down after each sanding pad with Obsidian Oil. I polished it with Before & After Pipe Stem Polish – both Fine and Extra Fine. Once I had finished the polishing I gave it final coat of oil and set it aside to dry. I am on the homestretch with this pipe and I really look forward to the final look when it is put back together and polished and waxed. I put the bowl and stem back together. I polished the bowl and stem with Blue Diamond to polish out the scratches in the briar and the vulcanite. I gave the bowl multiple coats of Conservator’s Wax and the stem multiple coats of carnauba wax. I buffed the pipe with a clean buffing pad to raise the shine. I hand buffed it with a microfiber cloth to deepen the shine. The pipe polished up pretty nicely. The valleys and ridges of the sandblast looked good with the polished black vulcanite. This 1969/70 Peterson’s “Kapruf” 9BC/56 Bent billiard was a fun pipe to work on thanks to Jeff’s cleanup work. It really has that classic Peterson look in a sandblast “Kapruf” finish that catches the eye. The combination of various brown stains really makes the pipe look attractive. It is a comfortable pipe to hold in the hand and I think that as it heats with smoking that over time the finish will darken and look even better. The finished pipe is shown in the photos below. The dimensions of the pipe are Length: 5 ½ inches, Height: 2 inches, Outside diameter of the bowl: 1 3/8 inches, Chamber diameter: ¾ of an inch. This one is staying with me as I carry on Bob’s legacy each time I fire up a bowl. I have a lot more to work on include 18 more Petersons. Perhaps one of those will catch your attention. Thanks for reading this blog and my reflections on the pipe while I worked on it. This is an interesting estate to bring back to life.