Blog by Dal Stanton
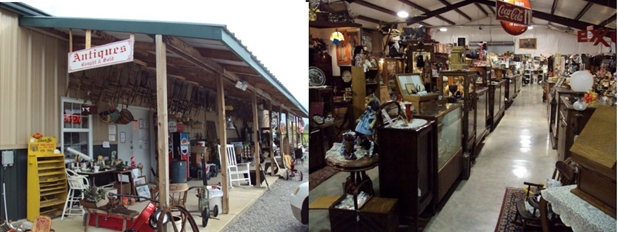
A few years ago I landed a large lot of pipes on the eBay auction block from a seller in Georgetown, Texas. The seller was actually a charitable organization called the Georgetown Caring Place operating some thrift stores mainly manned by volunteers – elderly. I liked it from the start! The description on the ‘Lot of 66’ said it all:
Huge Lot Of 66 Smoking Pipes, Pre-Owned, Loved, Pre-Smoked, Many different makers styles and Brands, We will not be able to list specifics on these pipes, We are not pipe people, You are buying one person’s collection
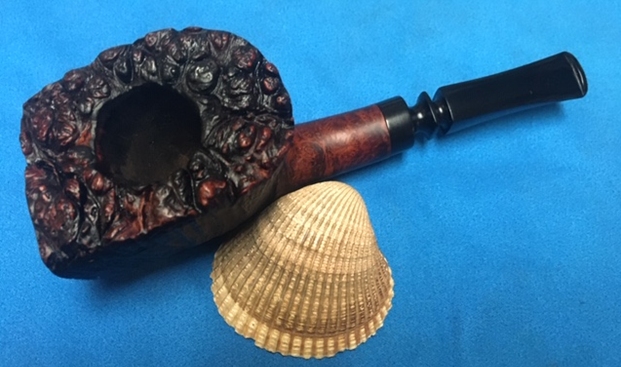
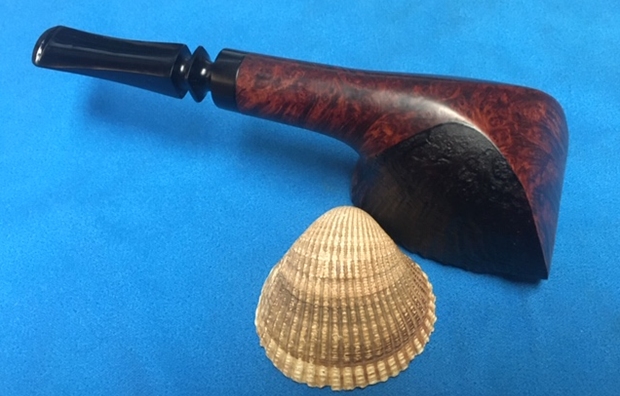
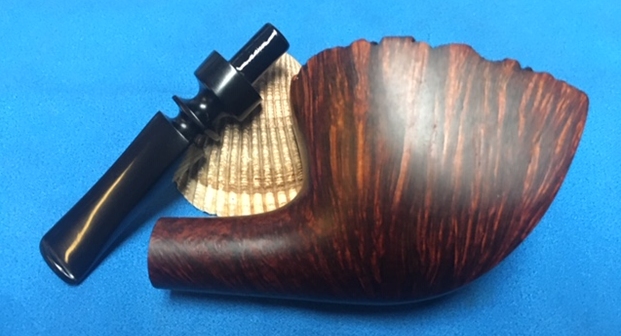
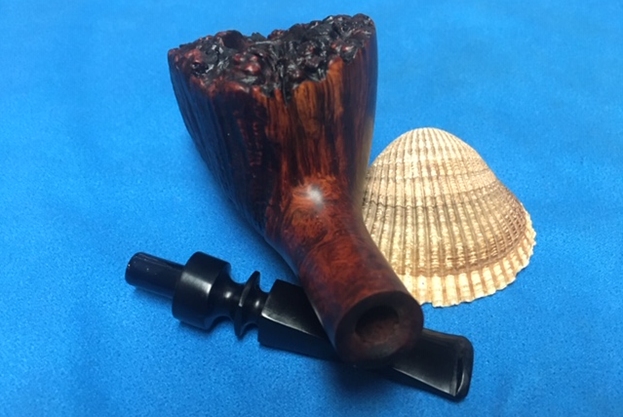
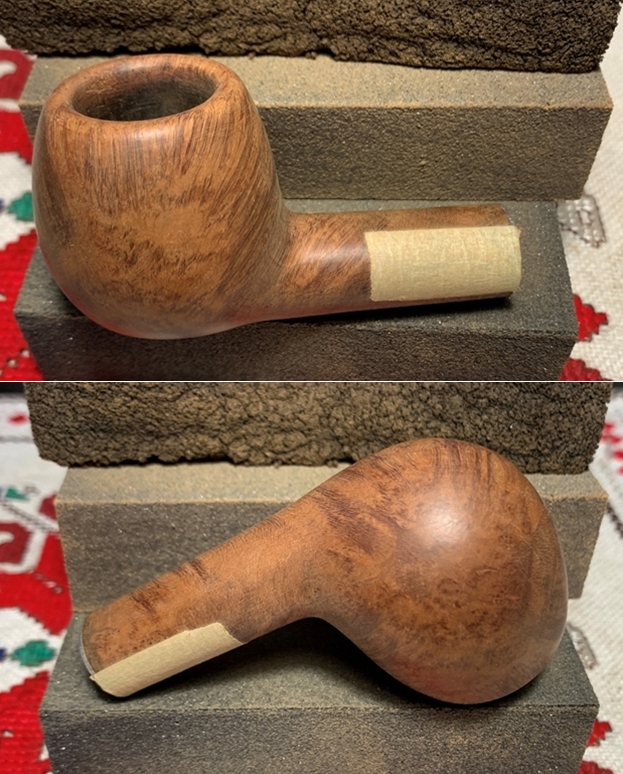
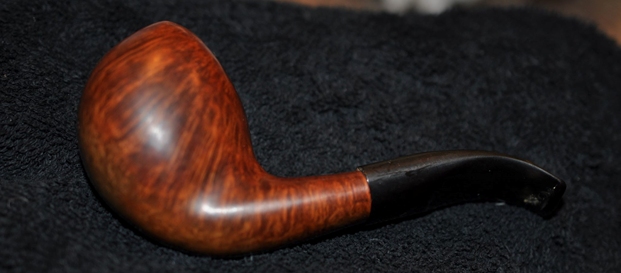
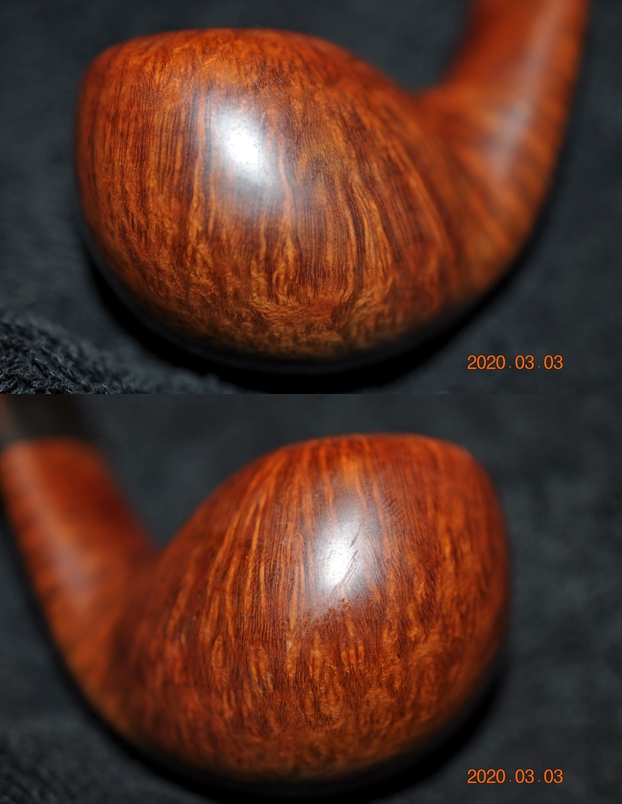
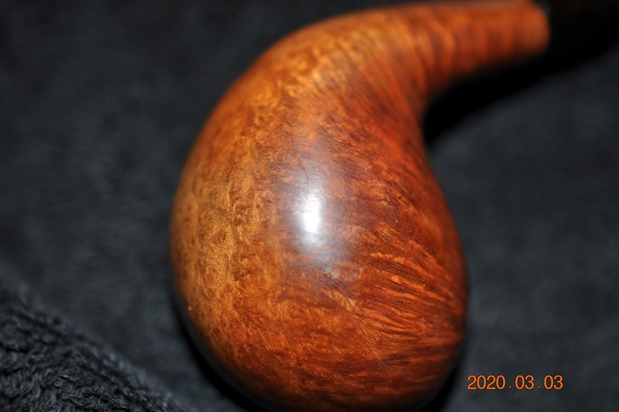
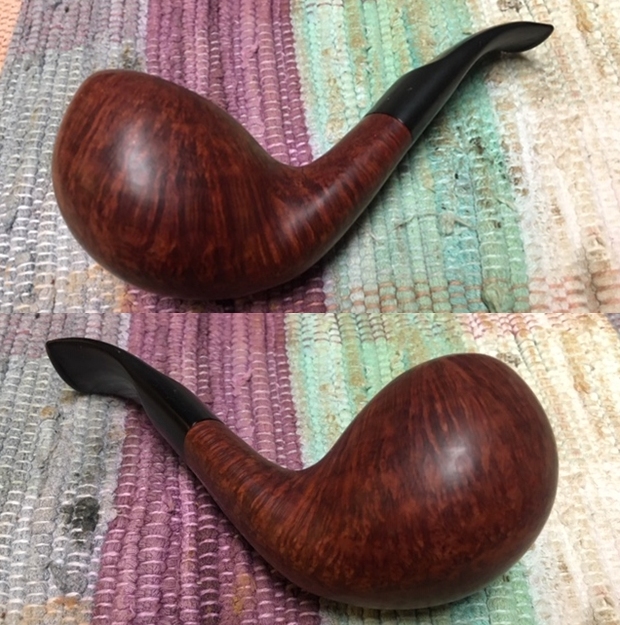
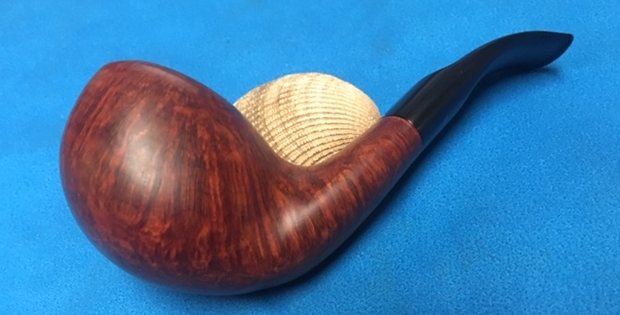
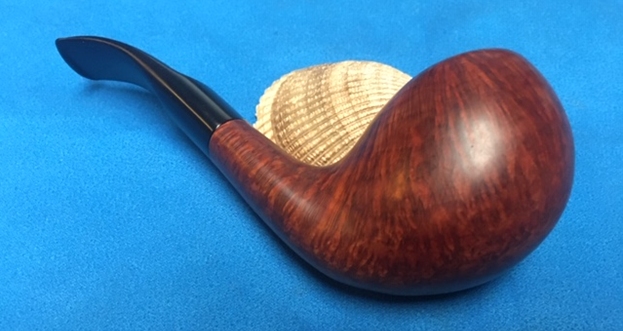
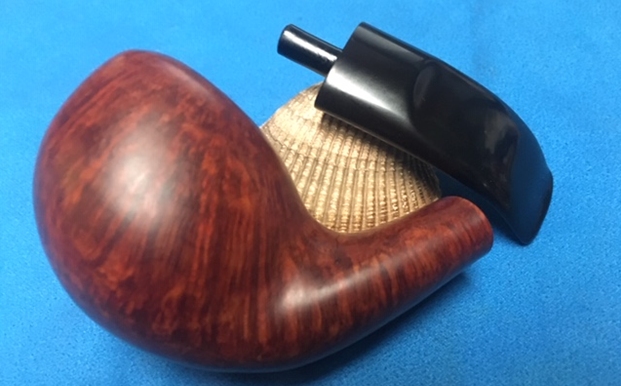
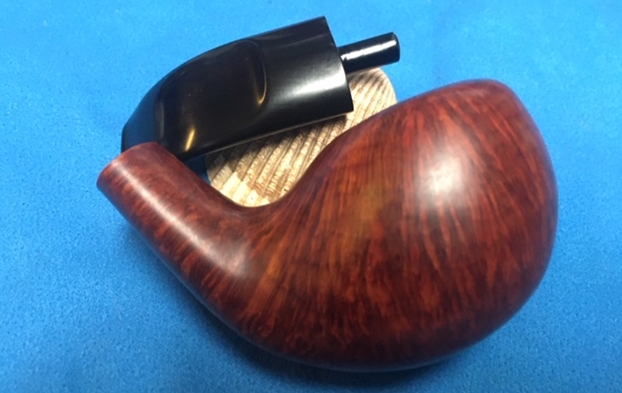
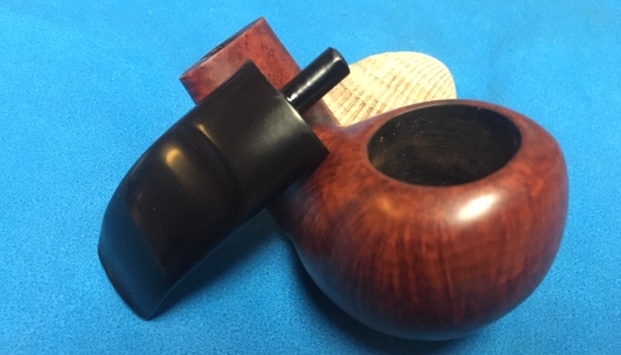
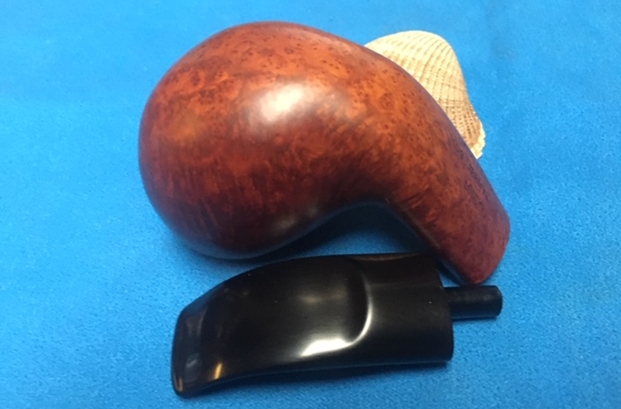
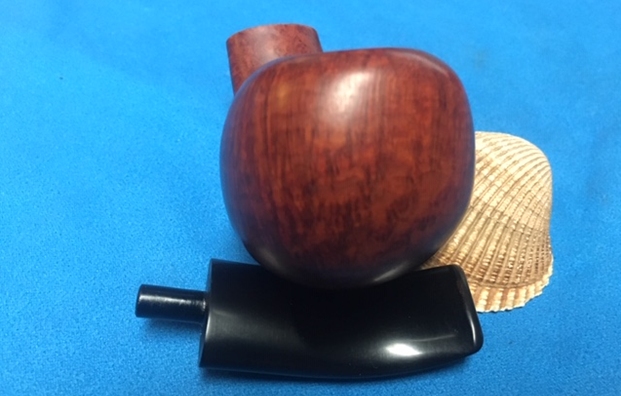
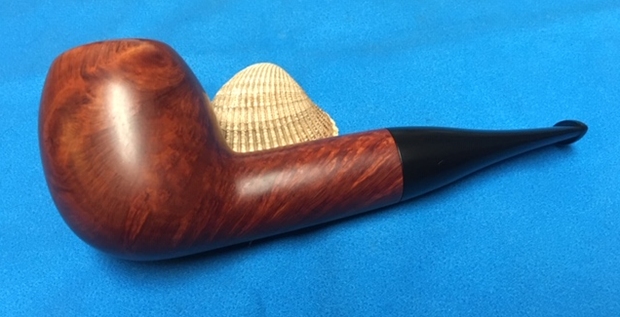
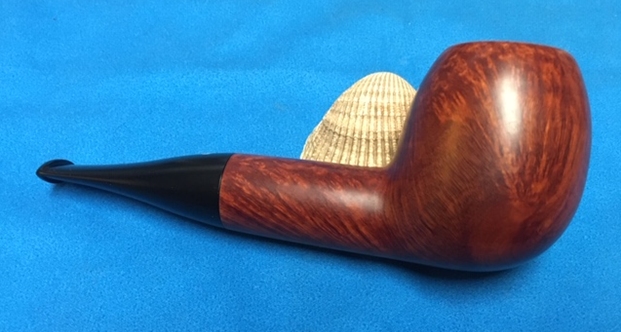
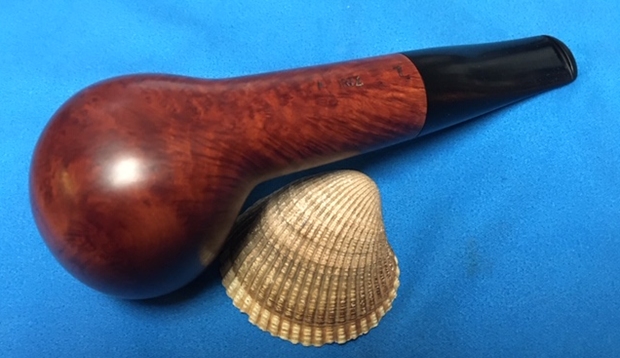
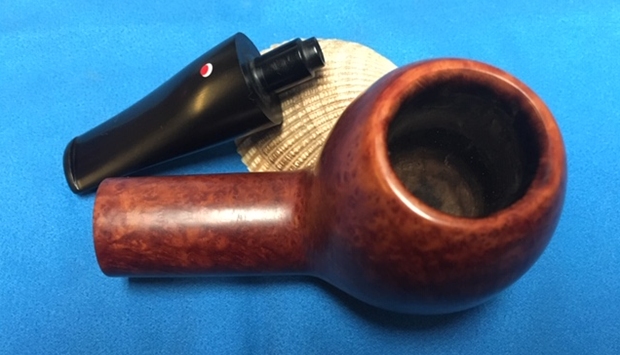
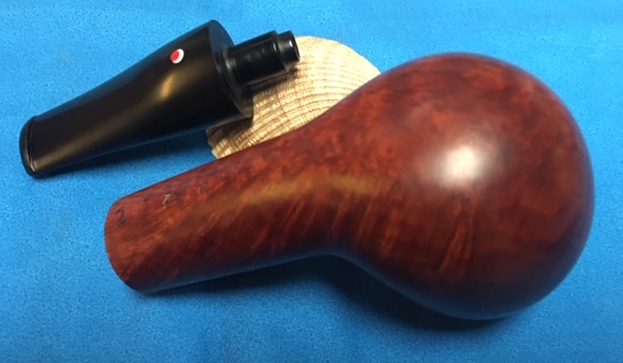
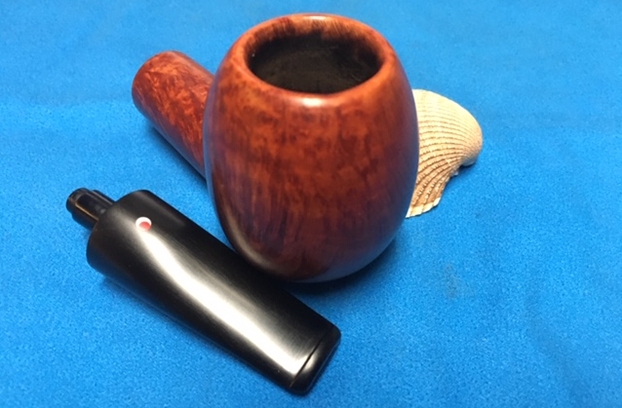
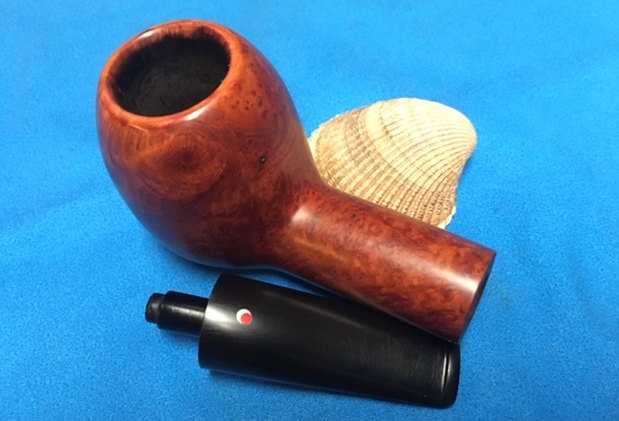
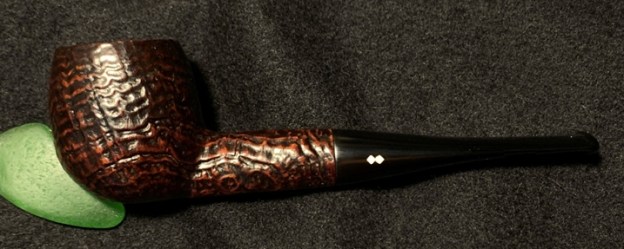
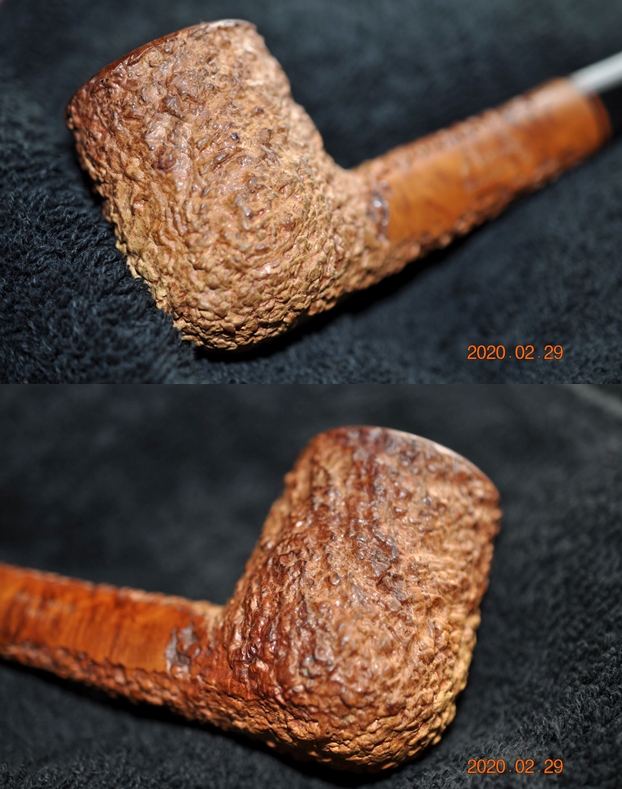
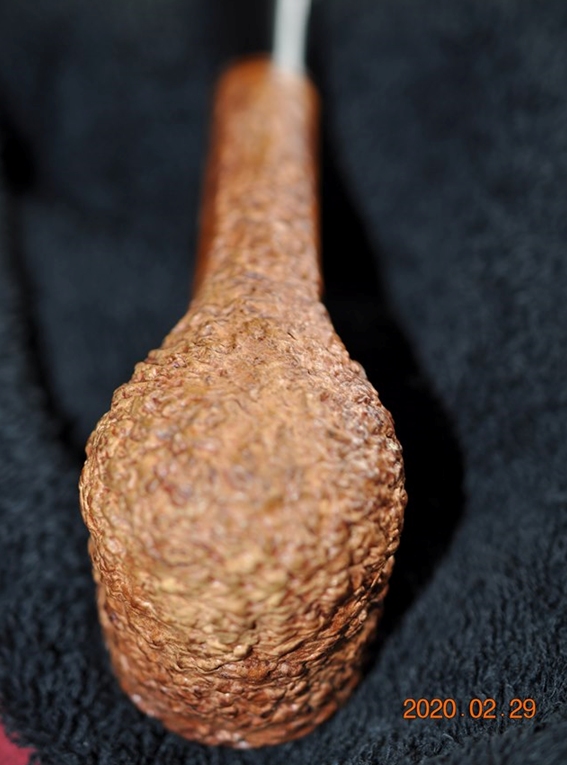
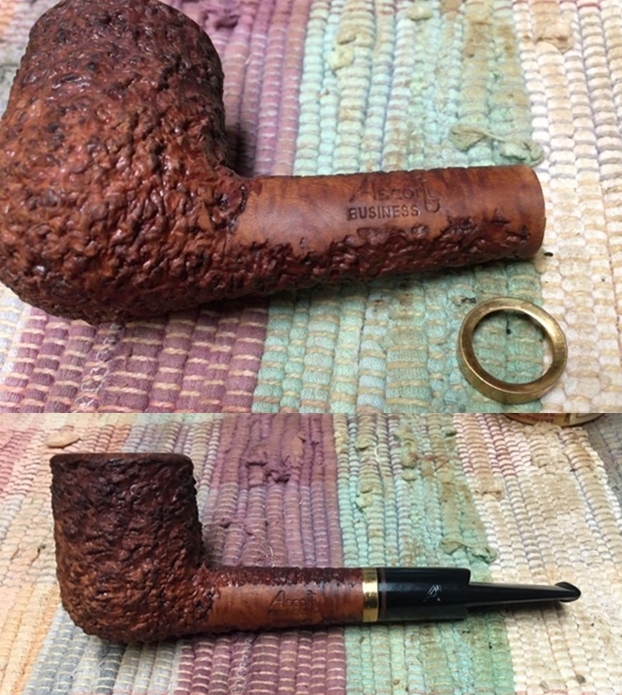
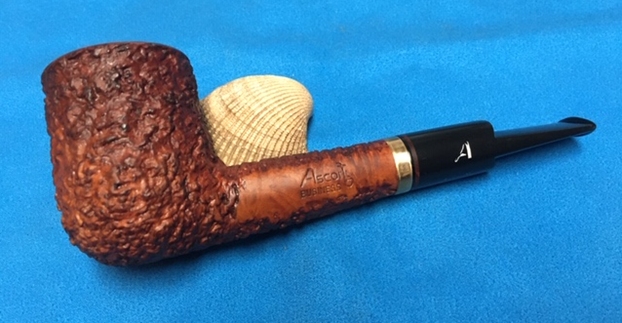
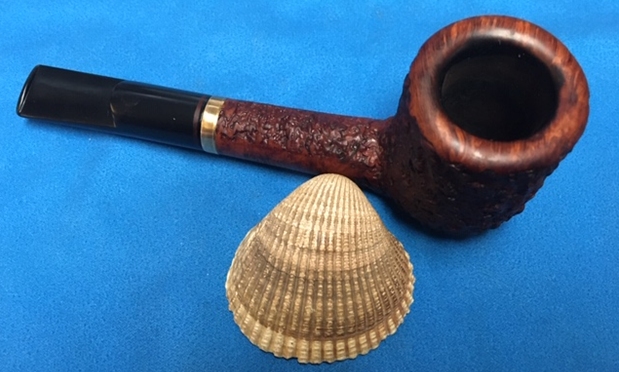
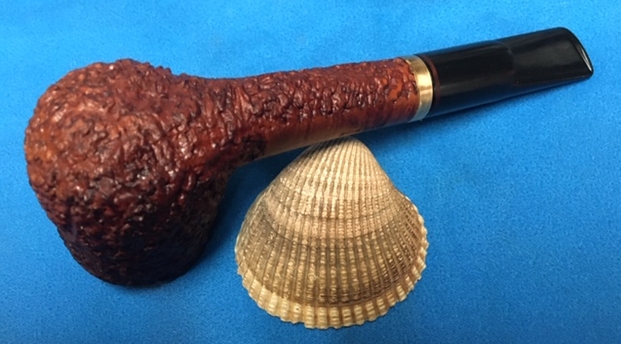
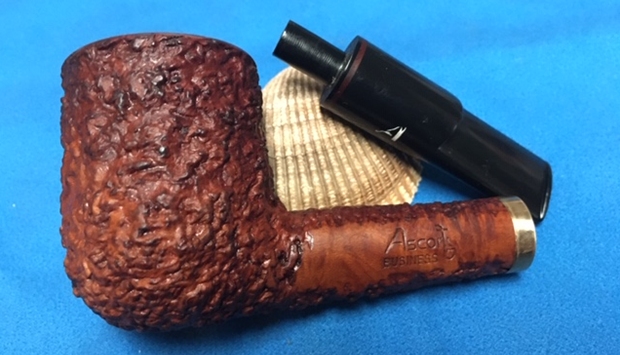
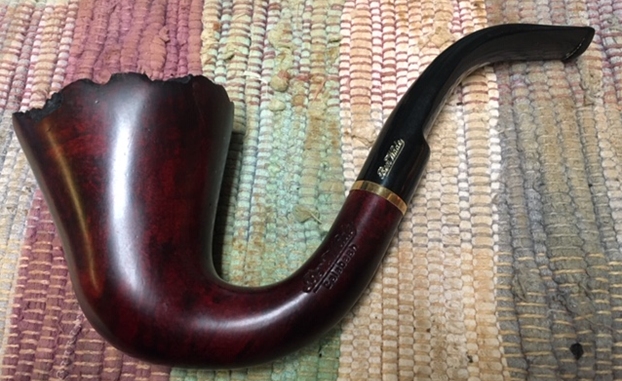
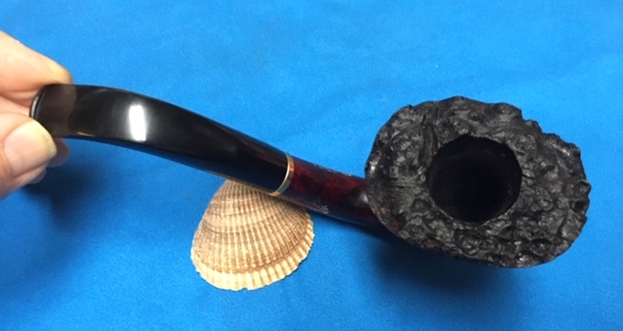
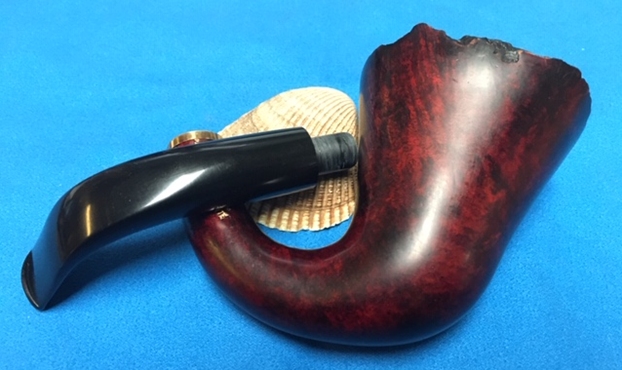
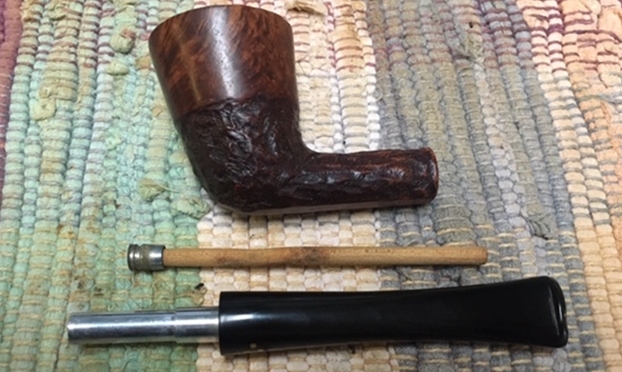
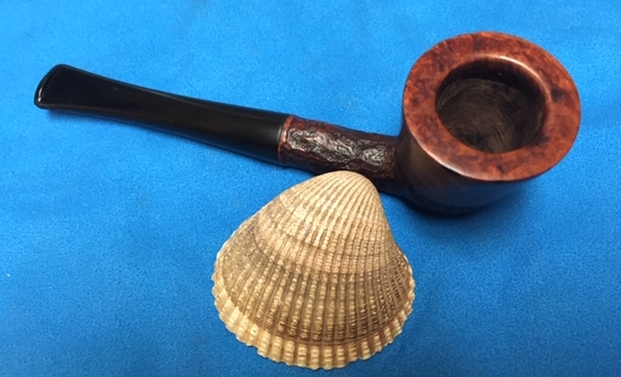
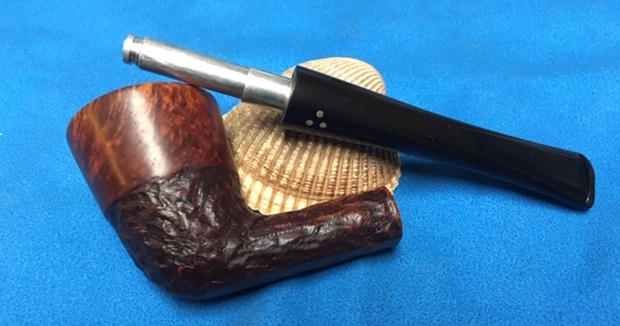
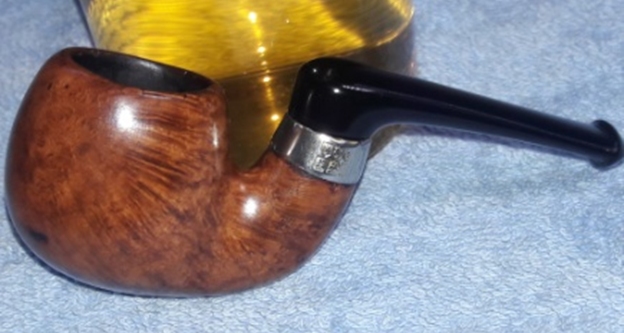
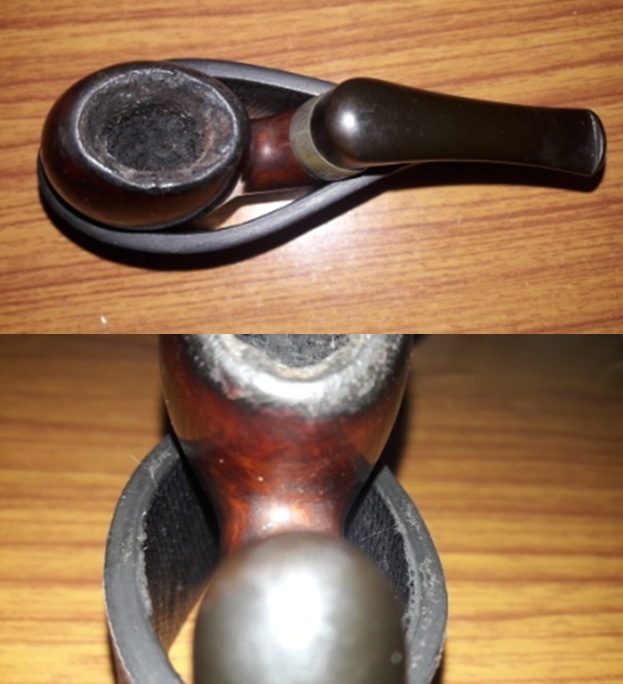
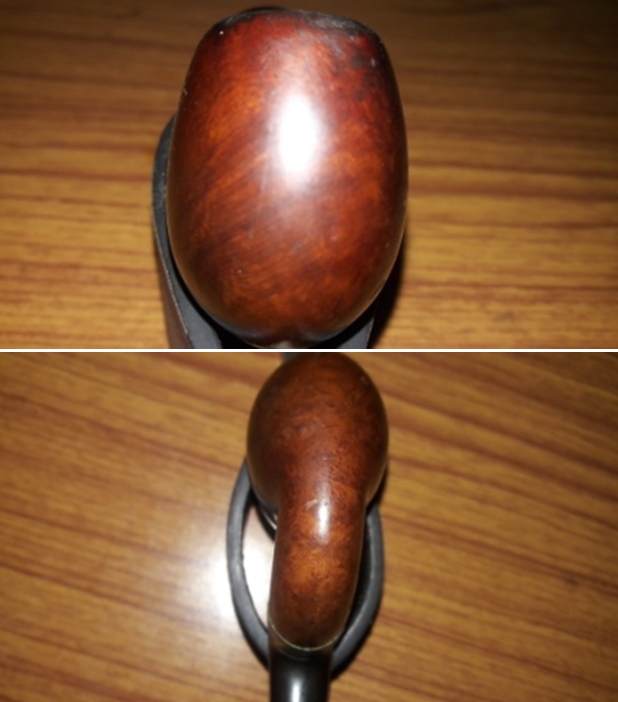
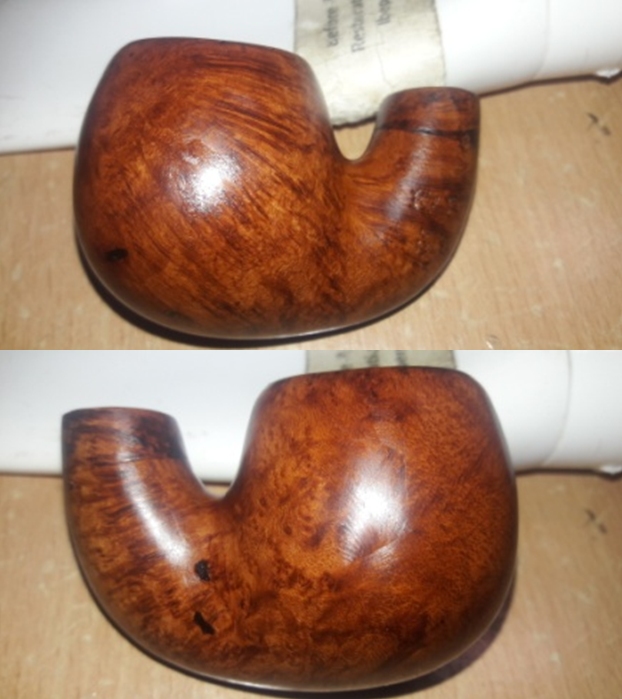
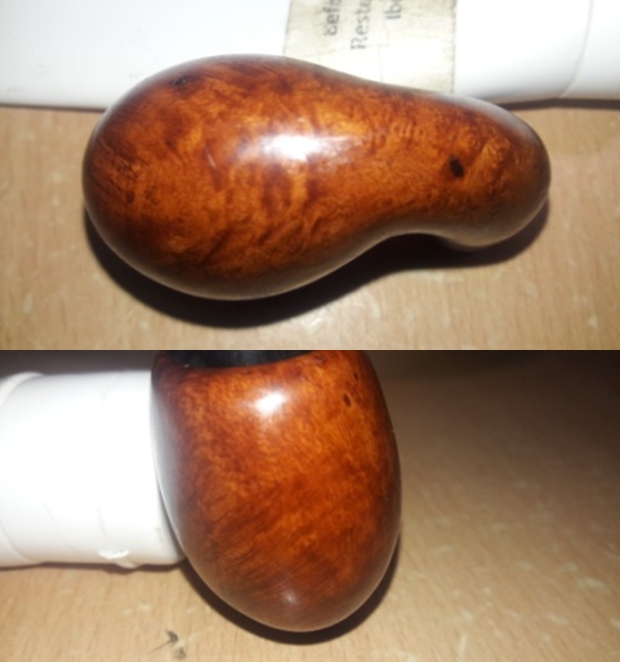
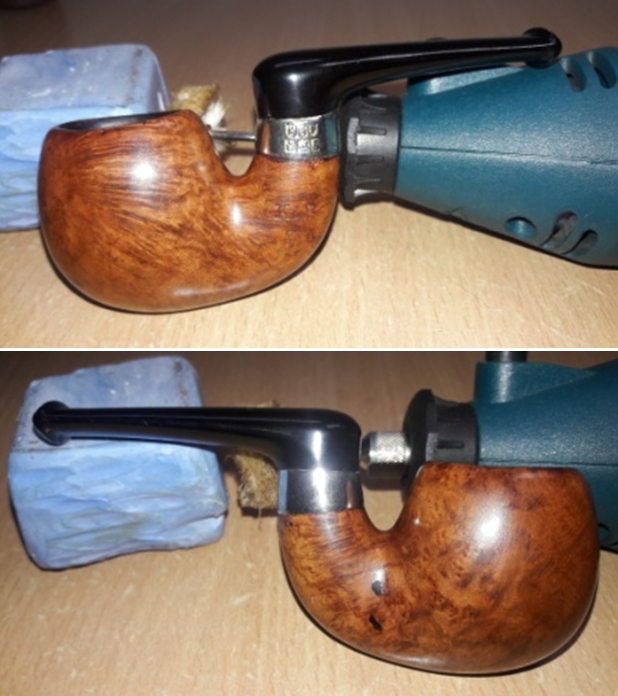
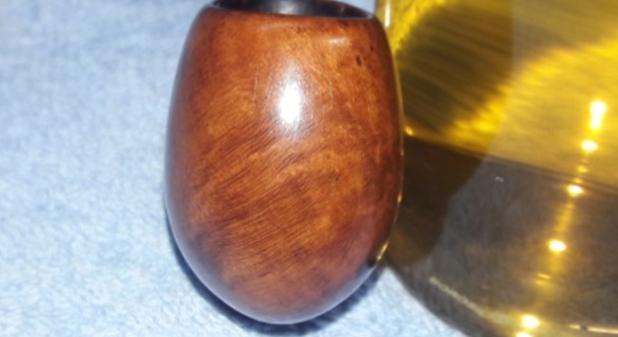
Undoubtedly, an estate collection of a pipe man’s collection that the family donated to benefit the Caring Place. My bid won the Lot of 66 and helped a good cause. It also placed the former steward’s pipes in my charge, and it has been a joy for me to discover many treasures in the Lot of 66 and to enable these pipes to continue to serve many new stewards for years to come. Here’s the Lot of 66 that I saw on eBay. Pipe man Todd, who has commissioned and received several pipes from The Pipe Steward before, all benefiting the Daughters of Bulgaria, saw one of the Lot of 66 waiting, an unassuming ‘Heritage Blasted Apple’ listed in my online inventory called For “Pipe Dreamers” Only! and he commissioned it along with 2 others (See: Borge Mortensen of Denmark and Ehrlich Special Chimney of Boston). Todd has a knack for seeing good pipes with ‘Pipe Dreamer’ eyes! Here are the pictures he saw that got his attention despite the cardboard presentation background!
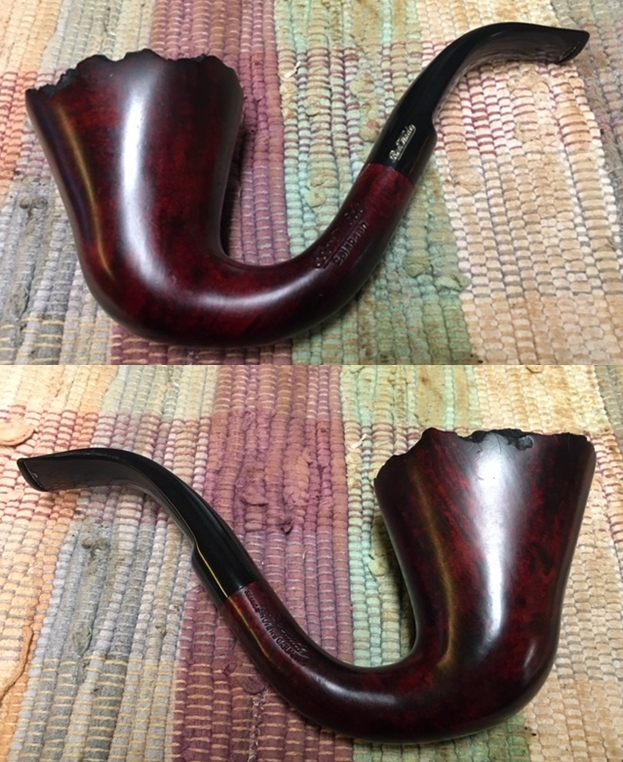
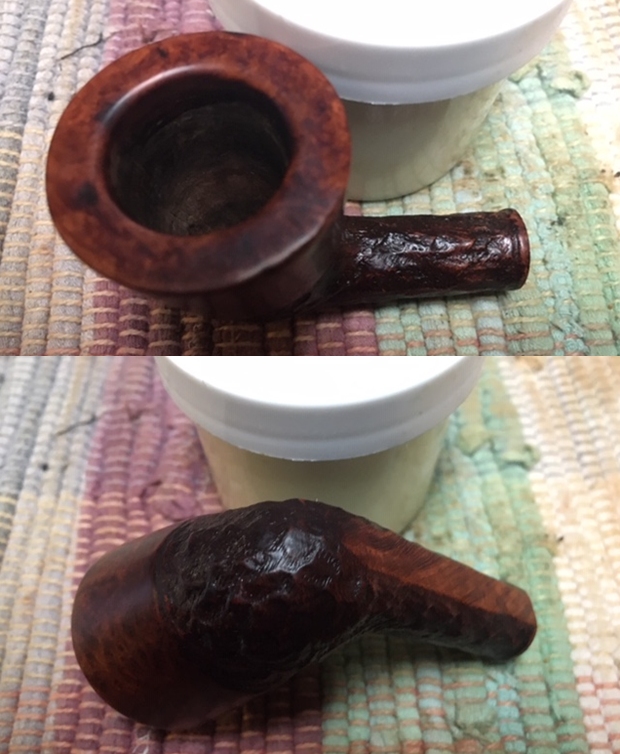
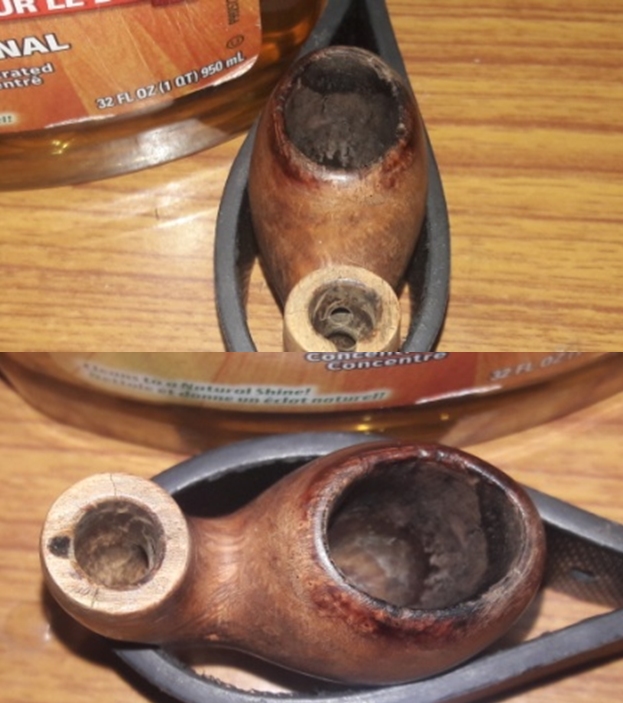
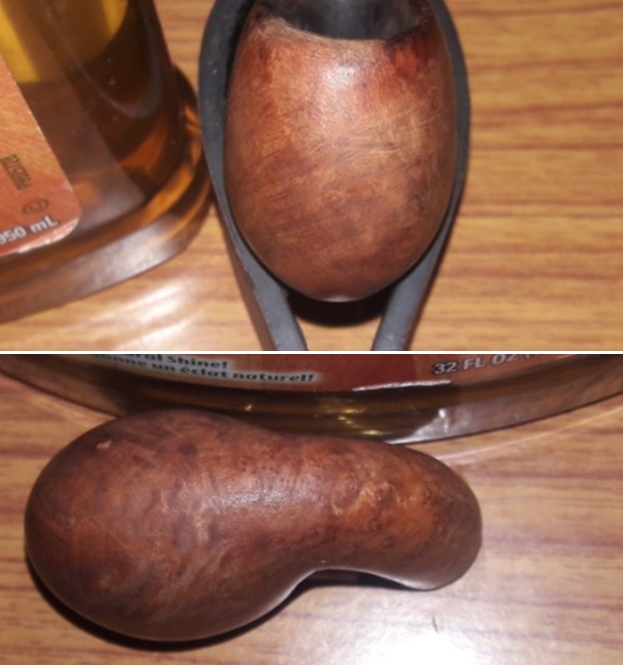

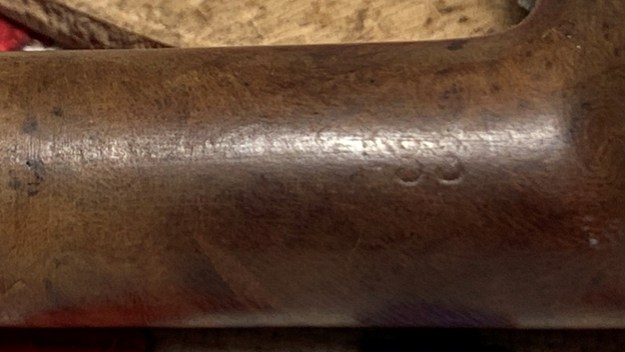
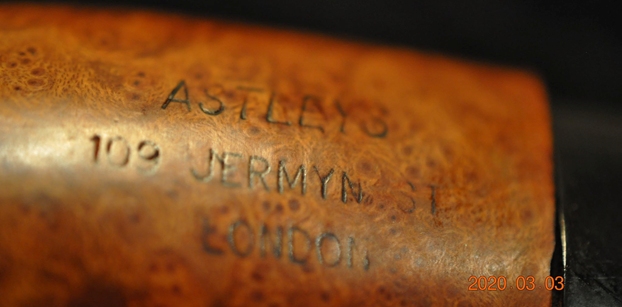
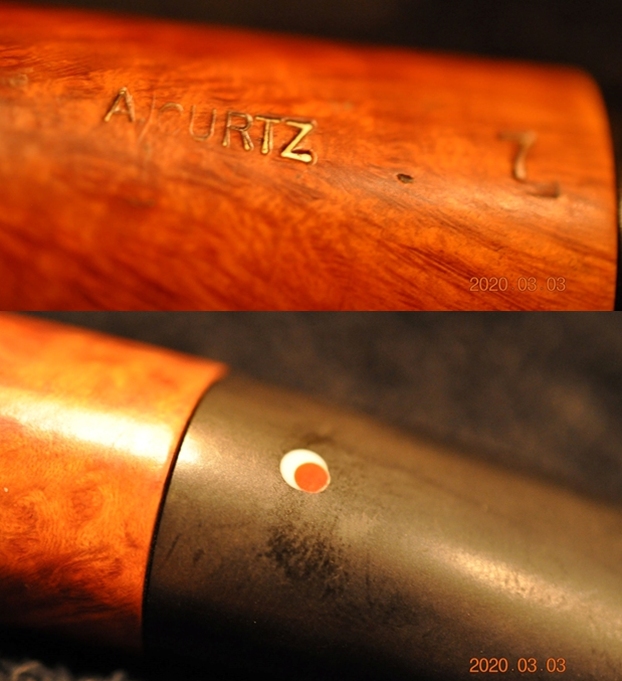
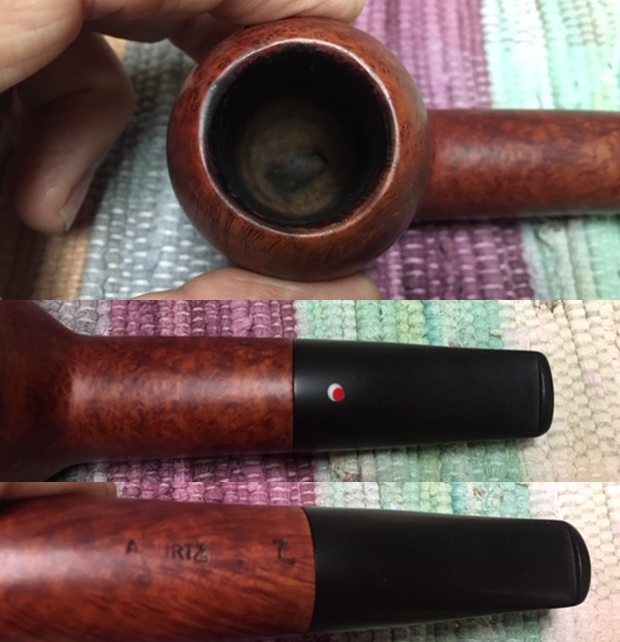
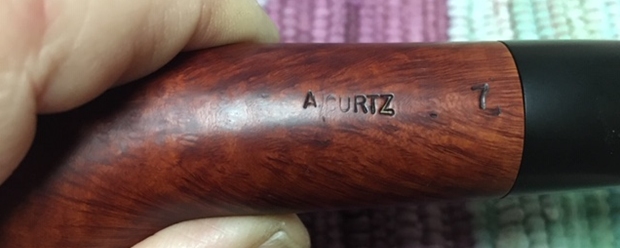
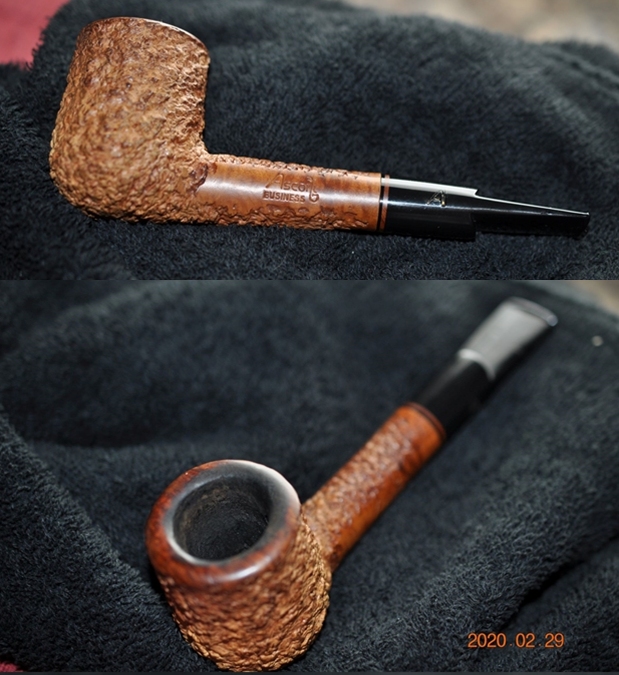
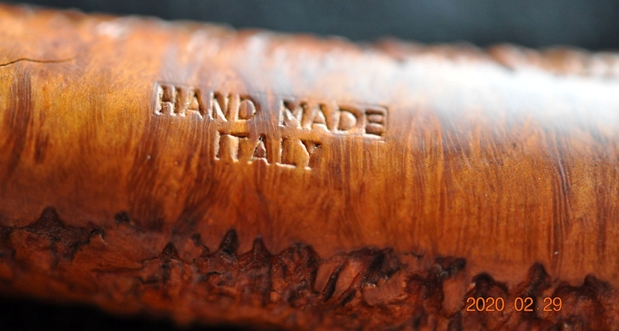
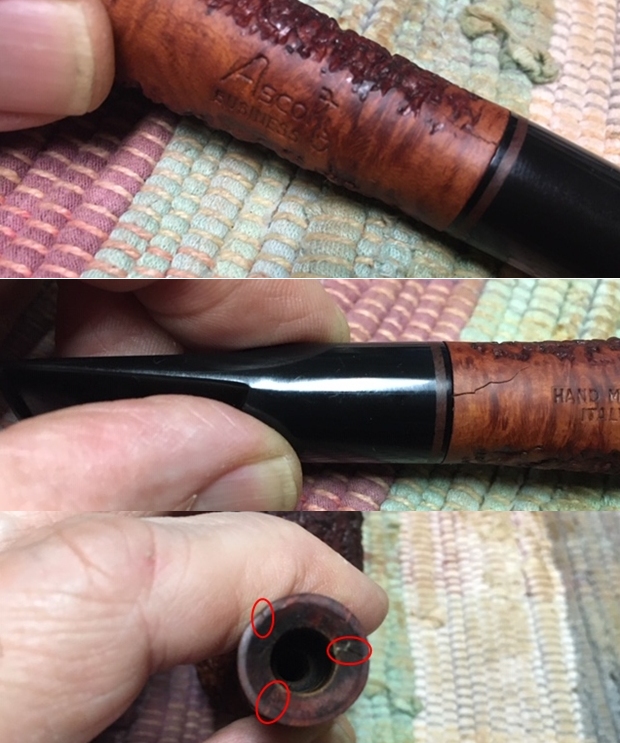
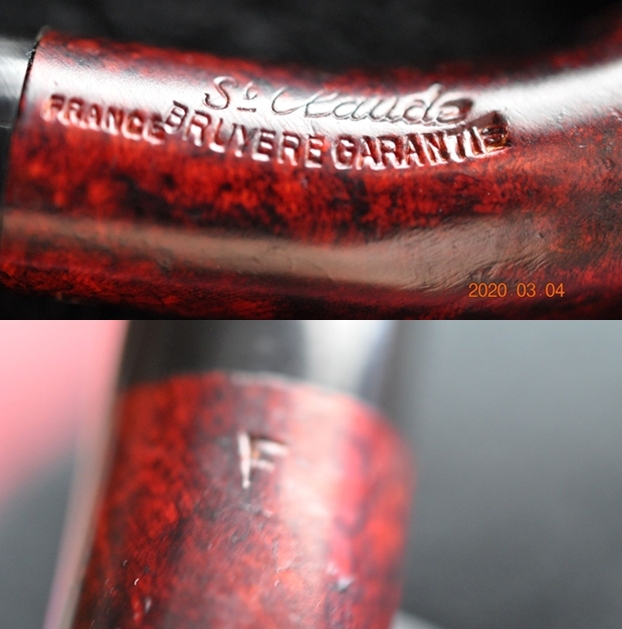
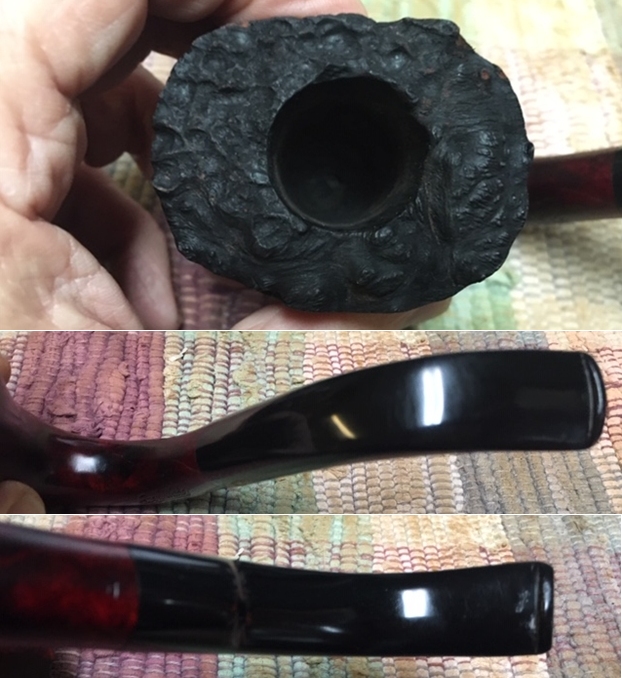
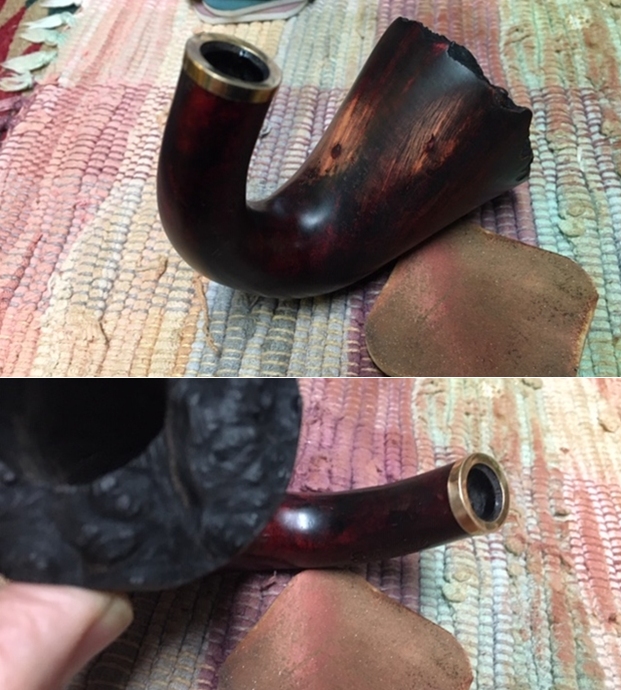
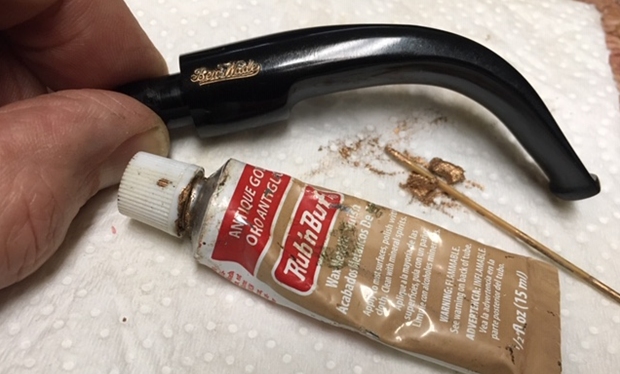
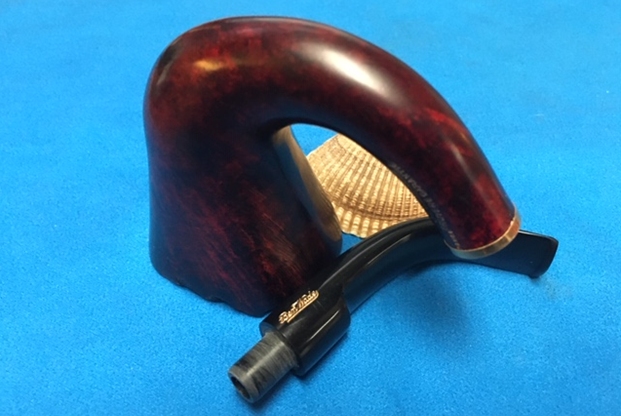
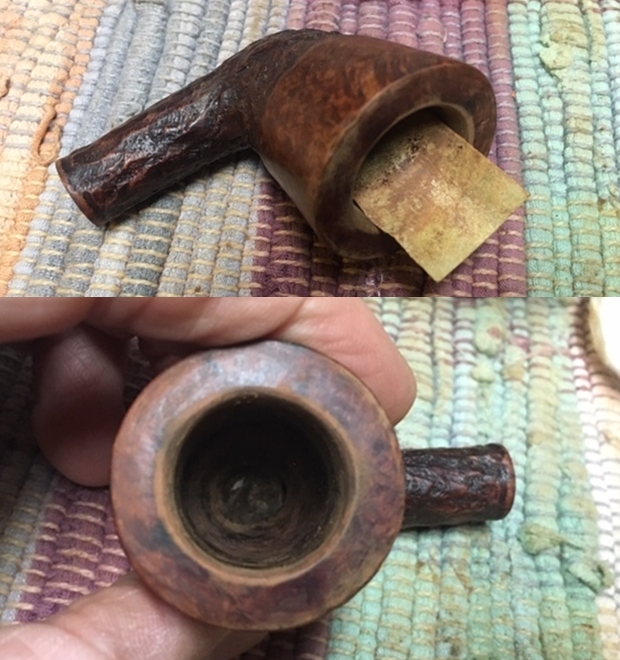
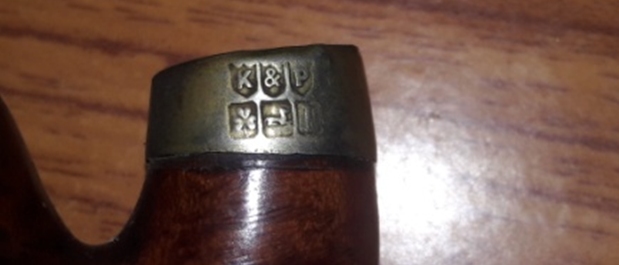
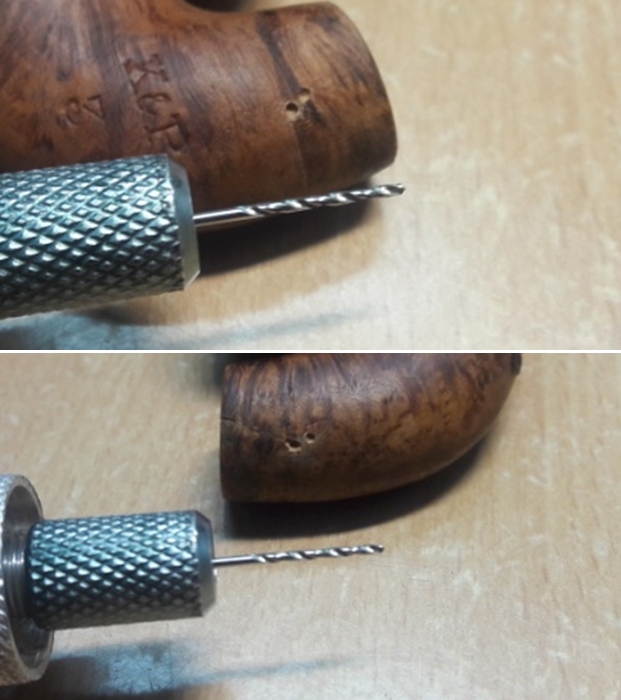
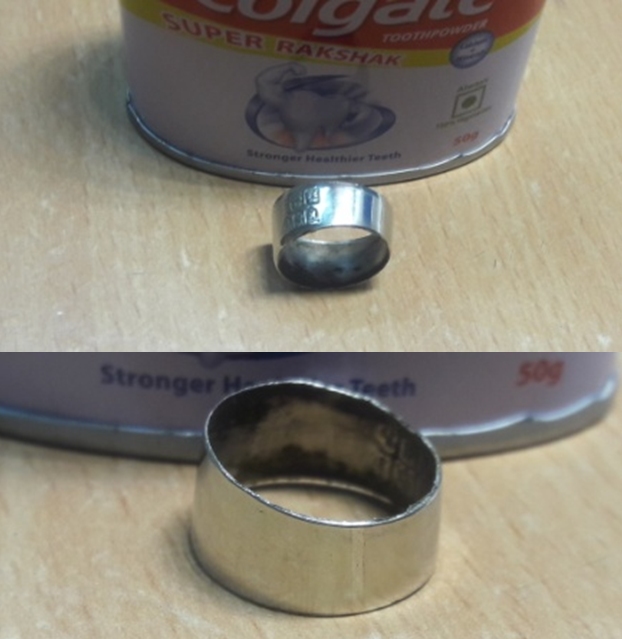
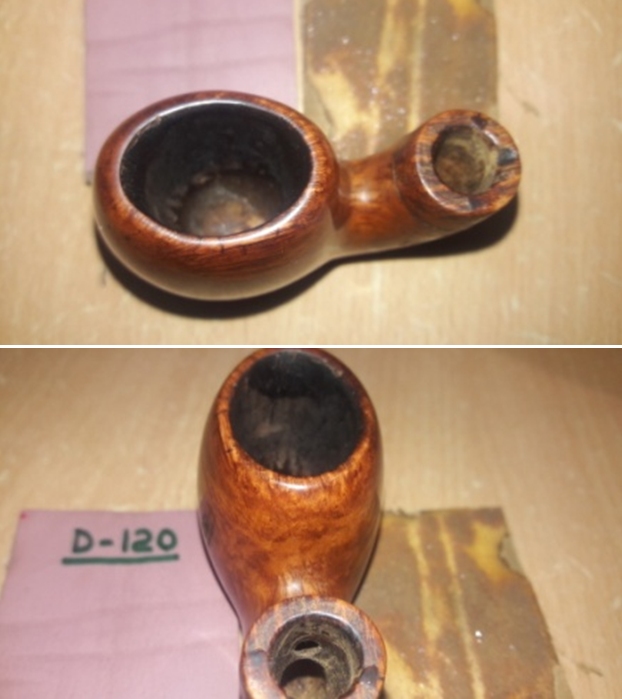
 The nomenclature, what there is, is/would be located on the bottom panel. My initial pictures held little promise of identifying any markings. In this picture, ‘86’ is discernible – a shape number.
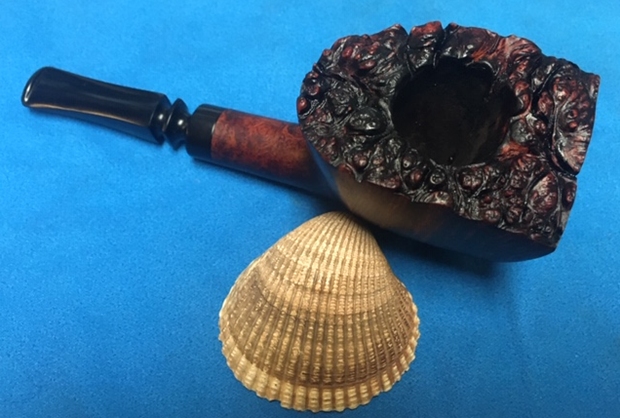
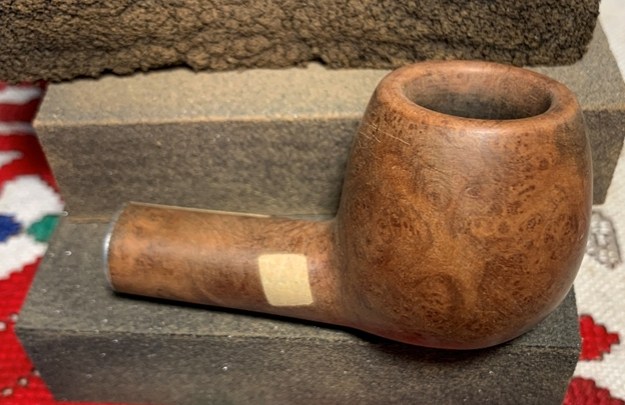
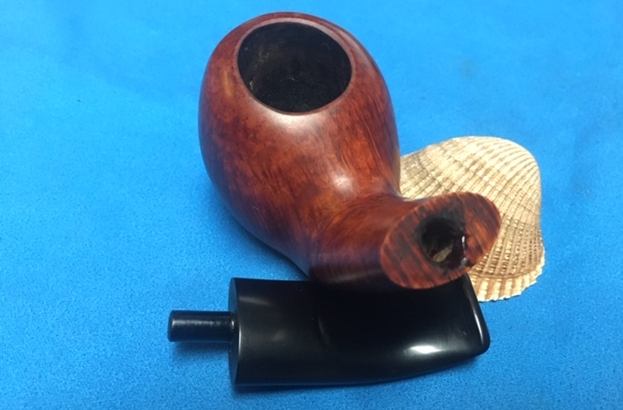
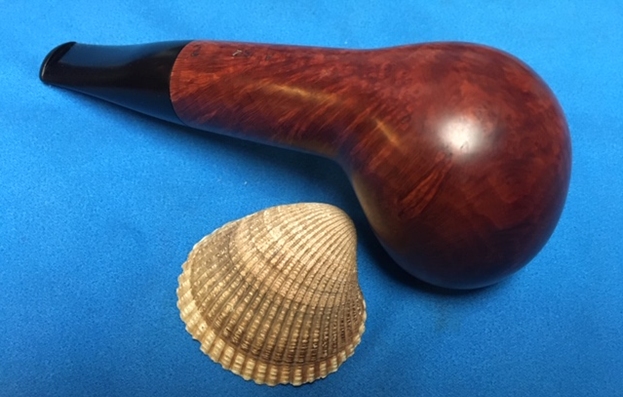
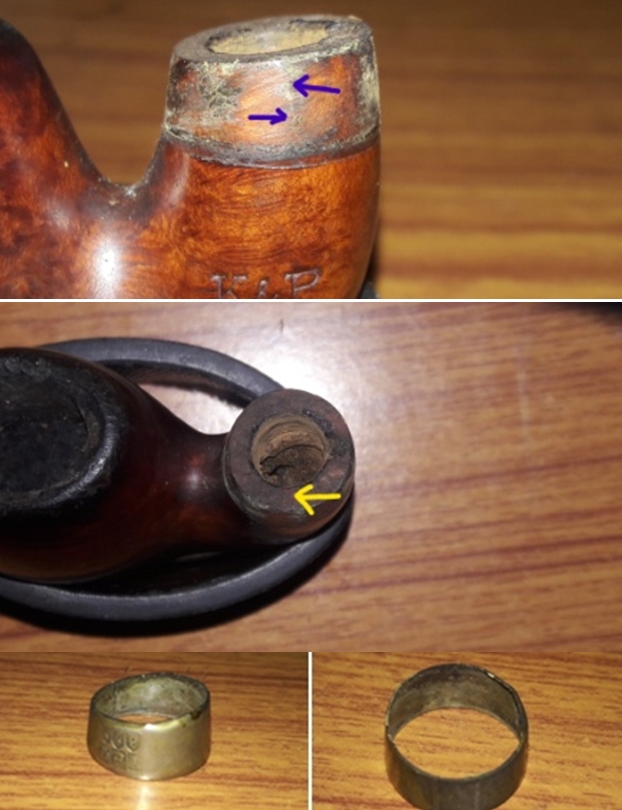
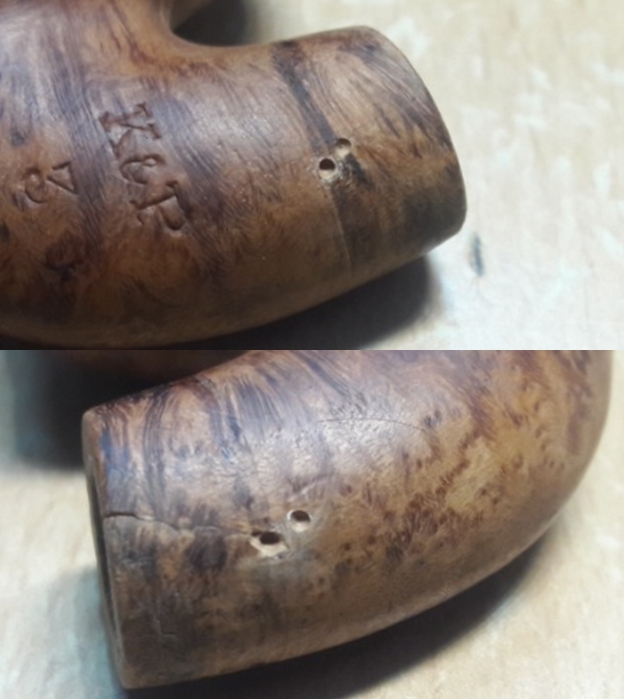
  The next picture, which is a picture I recently took to get a better look, ‘ANTIQUE’ is discernible on the lower part of the panel. When I first looked at these pictures, I wanted to see lettering all over the panel, but most would be phantom suggestions. Yet, above ‘ANTIQUE’ I want to see more lettering on a diagonal, but nothing is discernible without question.
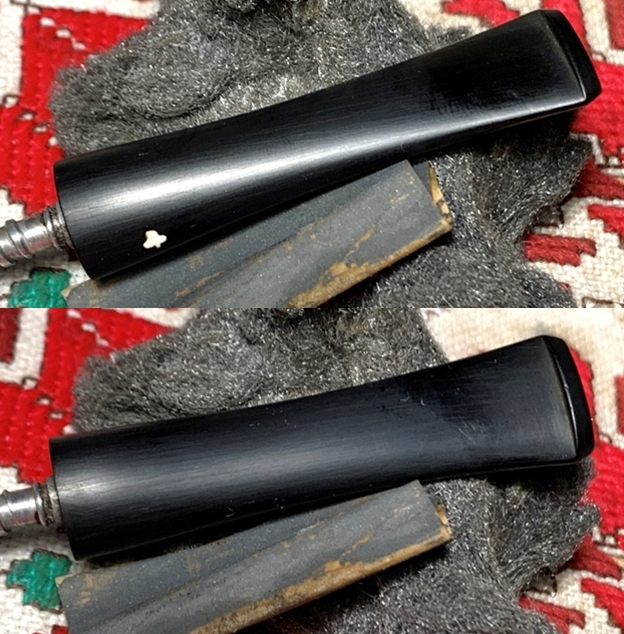
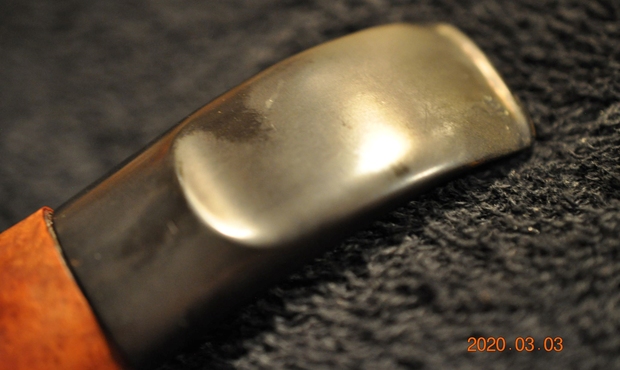
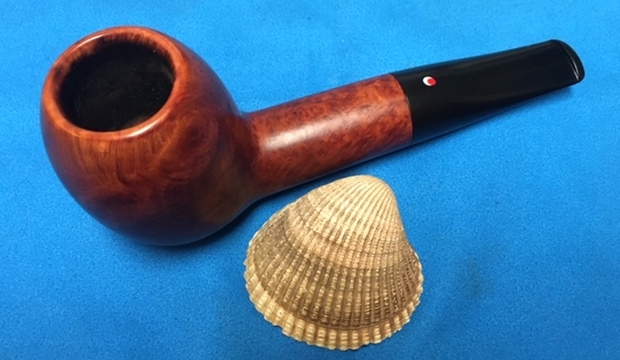
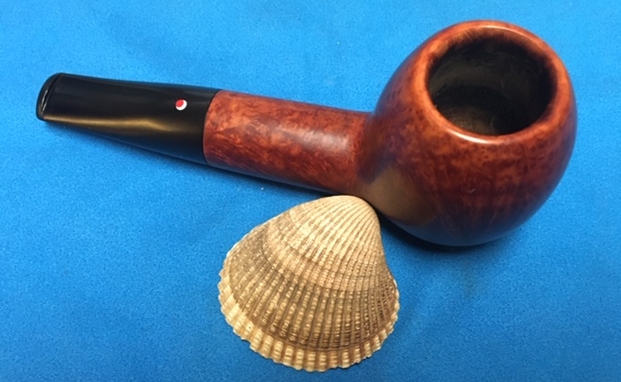
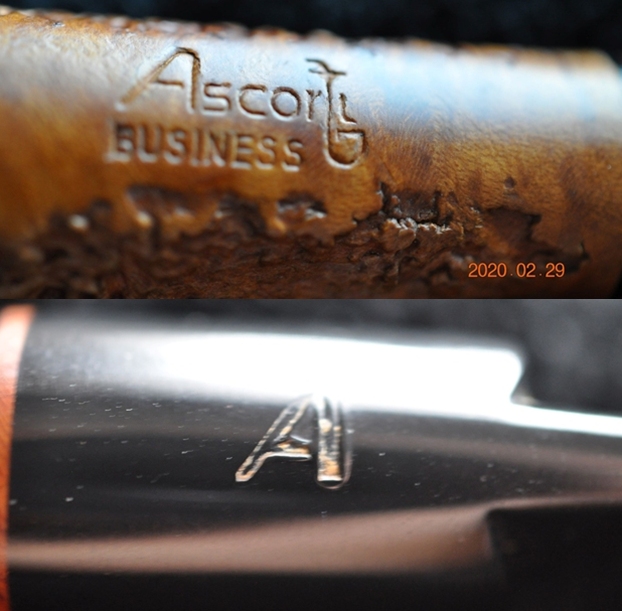
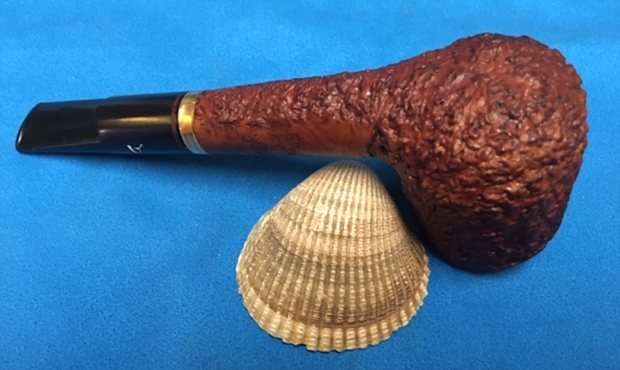
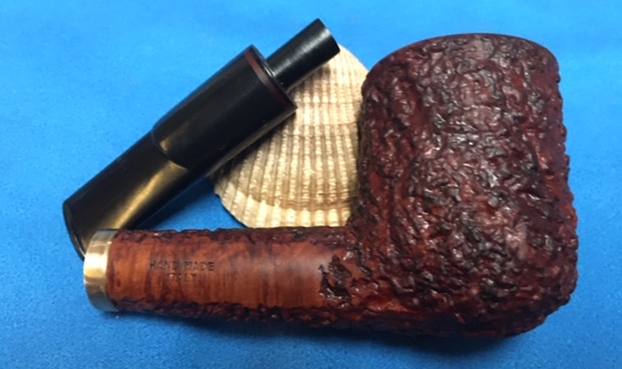
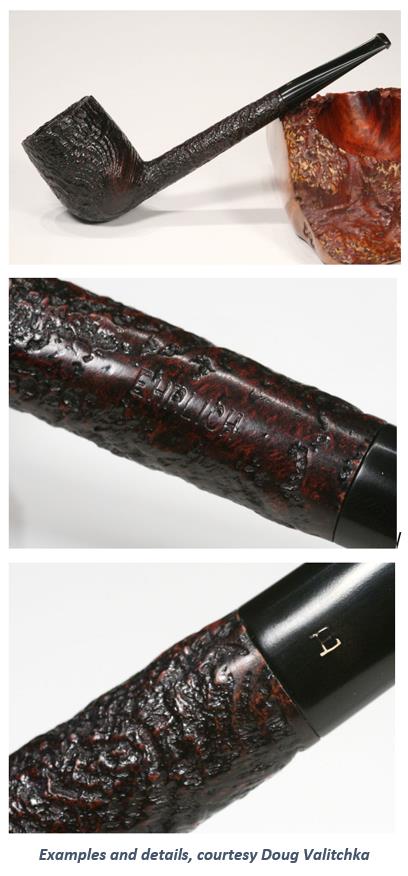
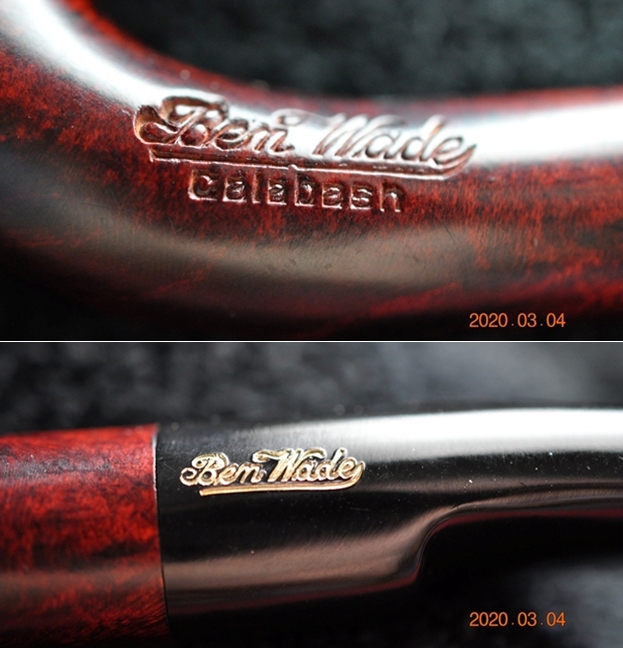
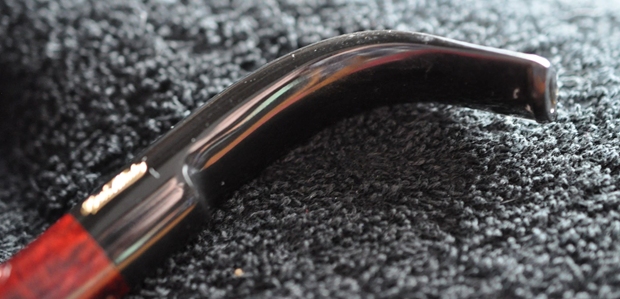
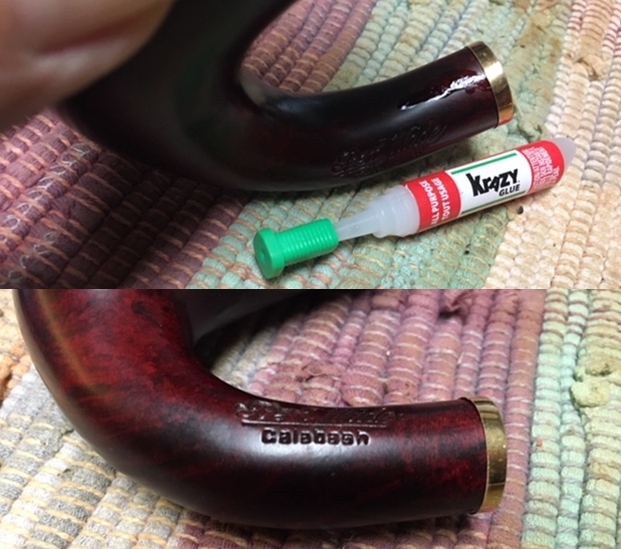
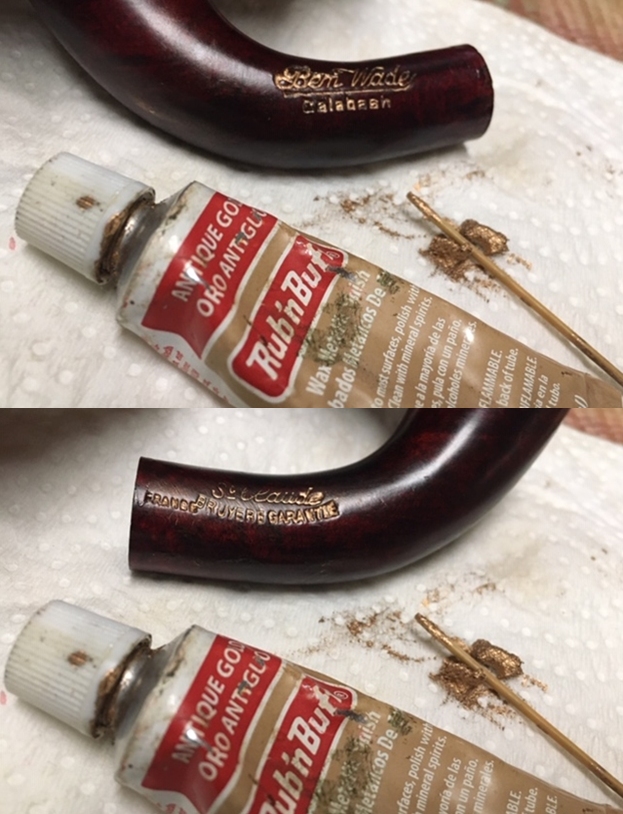
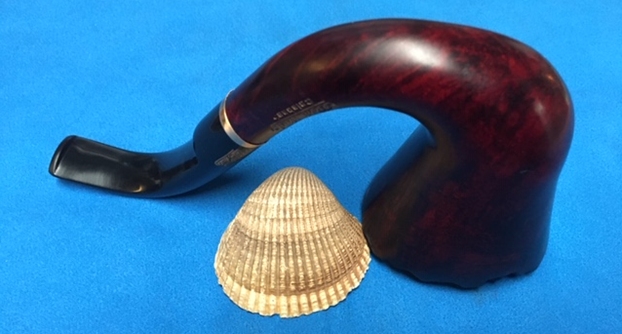
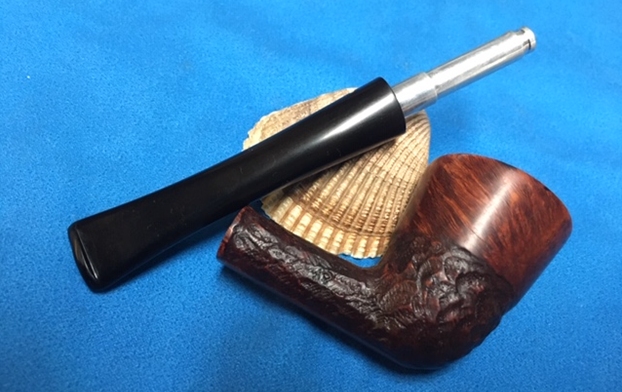
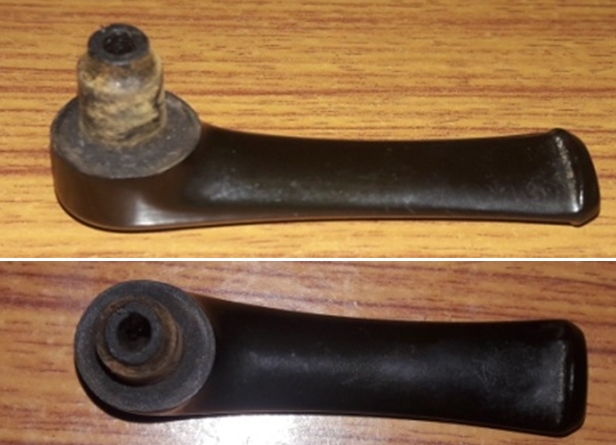
 The stem provides the first strong clue of identifying this mystery ‘Antique’ Blasted Apple. A quick trip to Pipephil.eu identifies the double diamond inlay as a ‘Heritage’.
  The panel information identified a ‘Heritage Pipe Inc.’ which had closed in 1971 as a submark of the S.M. Frank pipe conglomeration. The double diamond stem inlay was a match.
 The next stop at Pipedia brought more clarity to the Heritage name and origins. In the ‘Collector’s Guide to Kaywoodie Pipes’ (LINK) there was a section devoted to “Other” Kaywoodie Pipes which provides great information. I include the introductory paragraph and then the information related directly to the ‘Heritage’ brand.
NOTES ON “OTHER” KAYWOODIE PIPES
Kaywoodie Stembiter and Chinrester, courtesy ChrisKeene.com
The previous sections of this Chapter summarize information taken from eight Kaywoodie Catalogs from the period 1936 to 1969. Because of the gaps in the catalogs, it is highly likely that many “holes” exist in the material presented in this monograph. This section presents a brief overview of some Kaywoodie Pipes that did not appear in any of the catalogs consulted in this research. The information on these pipes was provided by W.R. “Bill” Lowndes (a well-known Kaywoodie Collector from California).
Heritage. Lowndes suggests that the Heritage pipes were introduced in the 1960’s to compete with Dunhill. No fitments. Smooth finish called “Heirloom”, sandblast called “Antique”. Lowndes notes that there was a carved Heritage similar to Barling Quaints. Pipes were not marked “Kaywoodie”, and logo on bit is a double diamond. Lowndes notes that the Heritage pipes in his collection are small to medium-size pipes and have Kaywoodie shape numbers. Lowndes suggests there may have been a special Heritage catalog.
I love it when research begins to back up the forensics of the pipe on your worktable! “Antique”, which I could barely make out on the lower panel is the sandblasted line of Heritage pipes, a line introduced by Frank to compete with Dunhill. Not a bad aspiration!
The article provided by Pipedia on the S. M. Frank & Co. adds more information:
The history of S. M. Frank & Co. spans nearly a century and half of pipe making, supporting its claim as the “oldest pipe house in America.” S. M. Frank, as it exists today, is a combination of some of the biggest names in pipe making from the early part of the 20th. century. The pipe names Kaywoodie, Yello-Bole, Reiss-Premier, William Demuth Company, Medico, Heritage (Heritage Pipes Inc.), and Frank are familiar to generations of pipe smokers.
 In May of 1960, S. M. Frank started a subsidiary company called Heritage Pipes. The Heritage pipes were an upscale line of push bit pipes meant to compliment the Kaywoodie line. Although not hugely successful, Heritage produced some fine pipes that are still in the collections of many pipe smokers. This company was dissolved on December 31, 1971.
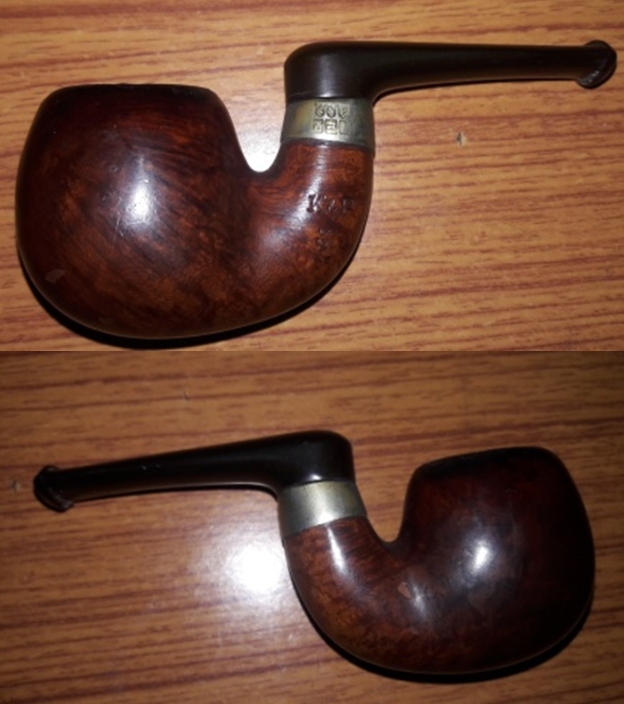
The article references an article about Heritage Pipes Inc. does not add new information but has examples of Heritage pipes which give a clue to the nomenclature and the marking design of the Blasted Apple on my table. The picture on the top shows the way ‘Antique’ was below the fancy script ‘Heritage’ above it and diagonal – as I was trying to make out on the panel of the Blasted Apple. The shape number to the left, beneath the bowl proper, is the design which I’m seeing – or, barely seeing. The upscale Heritage pipe subsidiary of Frank was started in May of 1960 and the company closed its doors in December of 1971. The look and feel of the pipe on my table I would guess ranges toward the early of these years. The look and wear it has endured, with much dignity, gives it an older cast to me.
As if frosting were needed on the Heritage Antique cake, the reference to ChrisKeene.com. In the introductory paragraph to the “Collectors Guide to Kaywoodie Pipe” was a reference to Chris Keen’s Pipe Pages. This site has been down for some time and I miss the information that was on this site. Here’s the paragraph:
This is an ongoing effort to adapt information from the Collector’s Guide to Kaywoodie Pipes into Pipedia articles. The Guide was first compiled by Chris Keene for his pipe pages at ChrisKeene.com. Chris used source material from Robert W. Stokes, Ph.D and additional support materials from Bill Feuerbach III, of the S.M. Frank Co.. Many thanks to these dedicated pipemen for their work in compiling this material.
Without expecting too much, I followed the ChrisKeene.com link to see what I might find. What I found appears to be links to ALL the information that was formerly compiled in the now defunk Pipe Pages site. Oh my! There are 100s of links to catalogues and brochures listed. They are not categorized but the links gives some identifying information. I went down the long list of links and pulled out four pictures that had ‘Heritage’ referenced. A brochure of ‘Heritage – Briar Pipes of Rarest Beauty’ emerged with great information about this line of pipes – included is the ‘Antique’ line and the shape number of 86 – a large Apple. I enjoyed the motto given for the ‘Double-Diamond’: “Symbol of FINEST, RAREST PIPES of IMPORTED BRIAR”. 


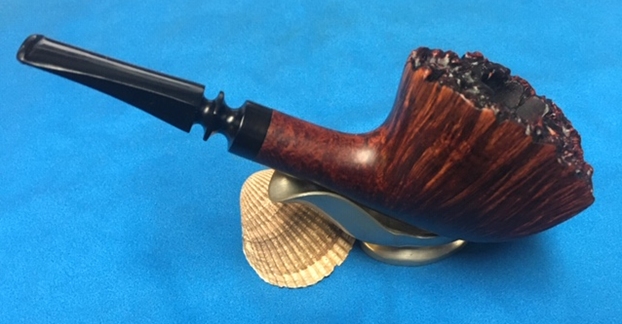
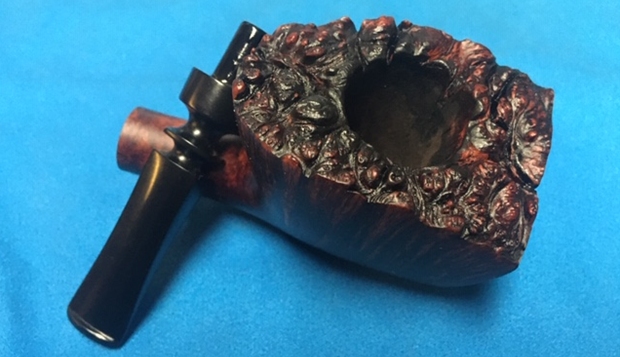
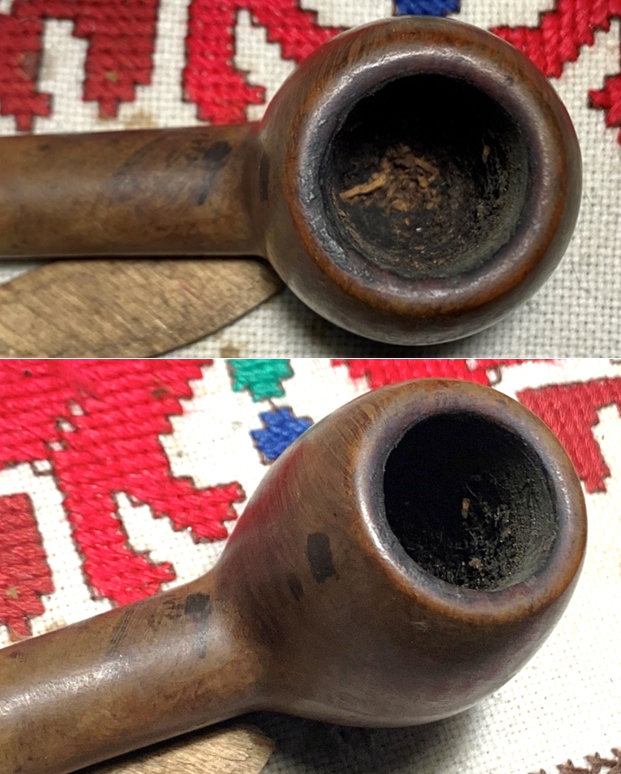
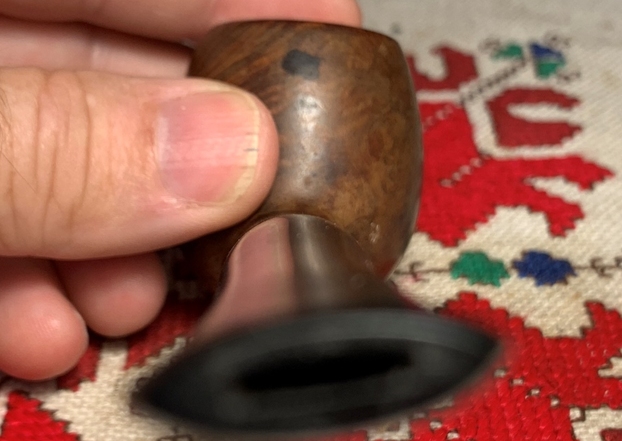
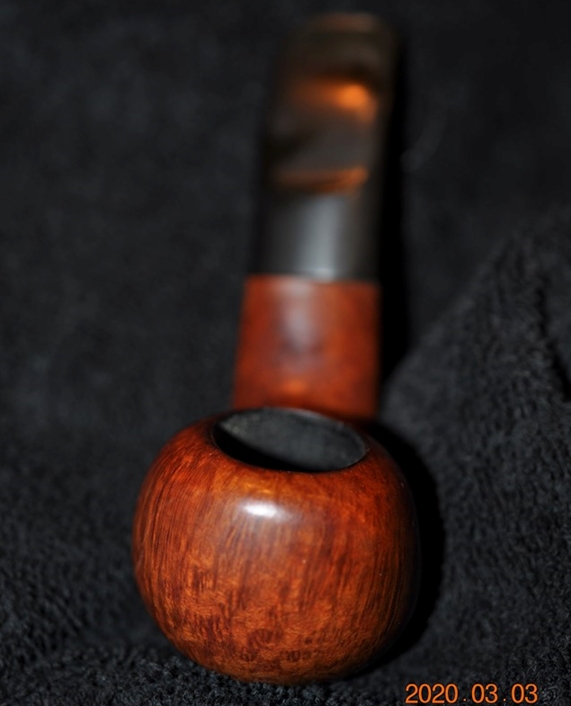
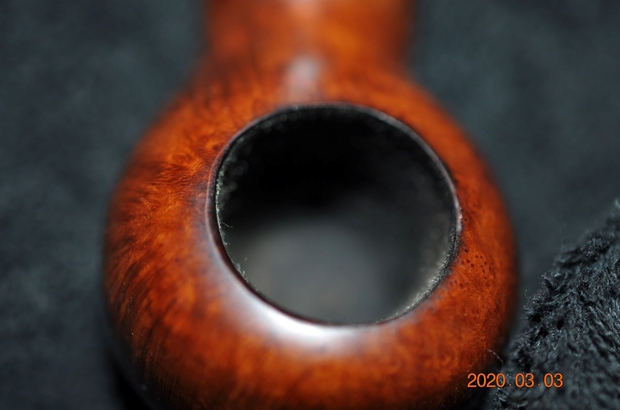
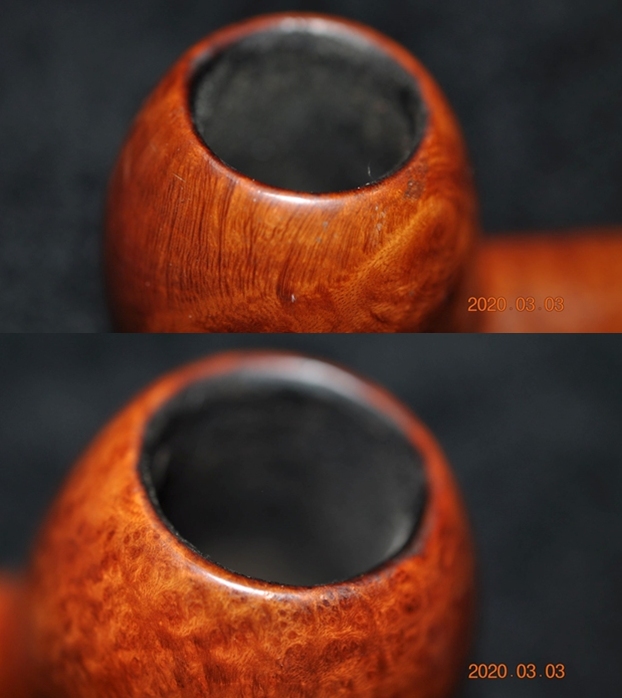
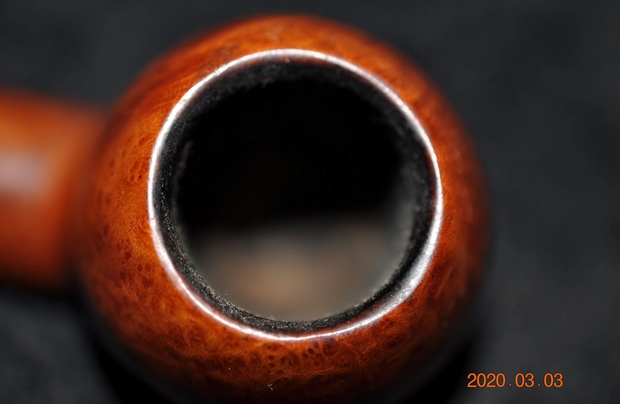
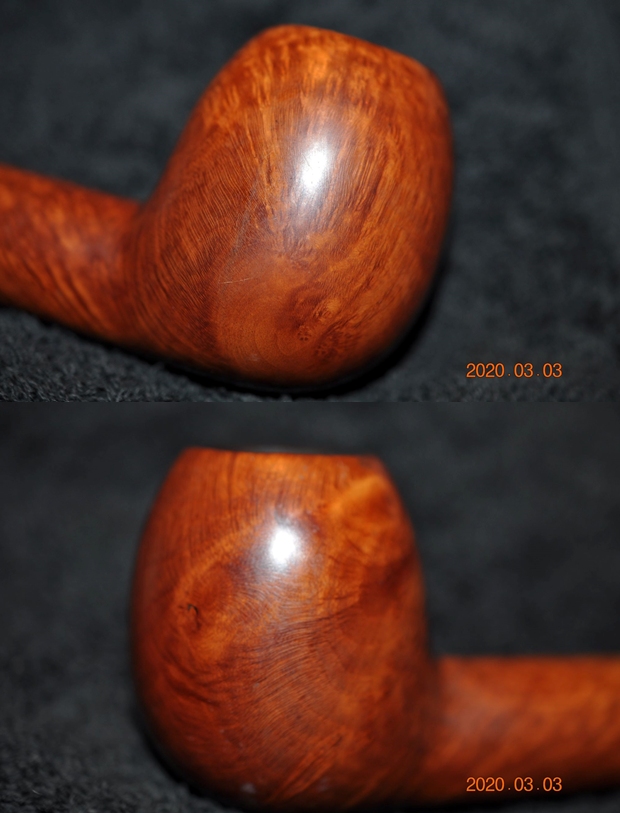
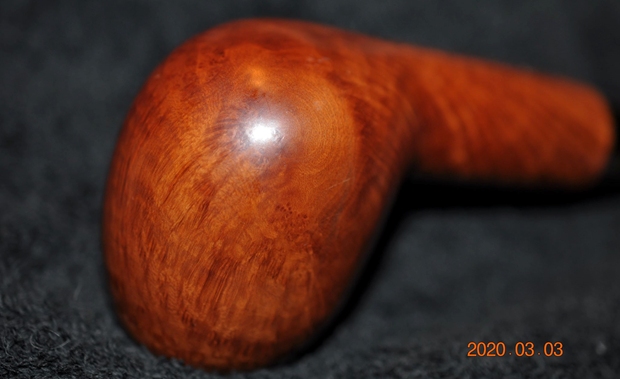
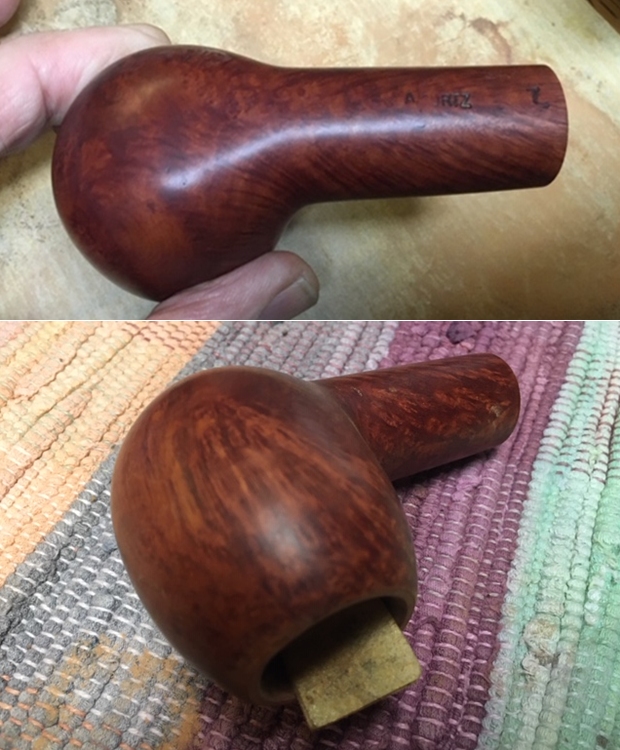
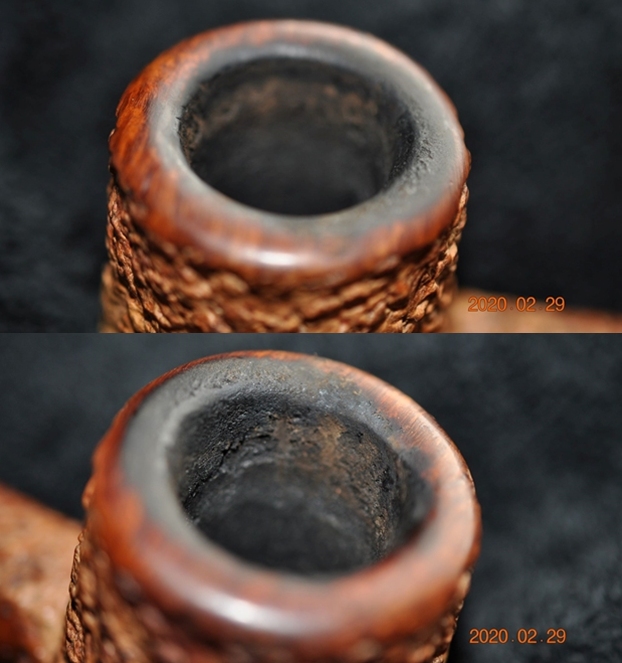
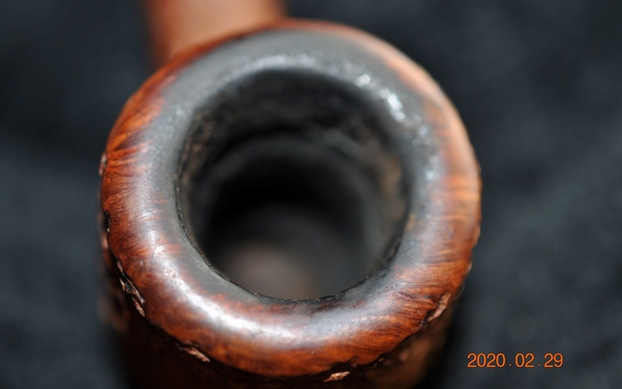
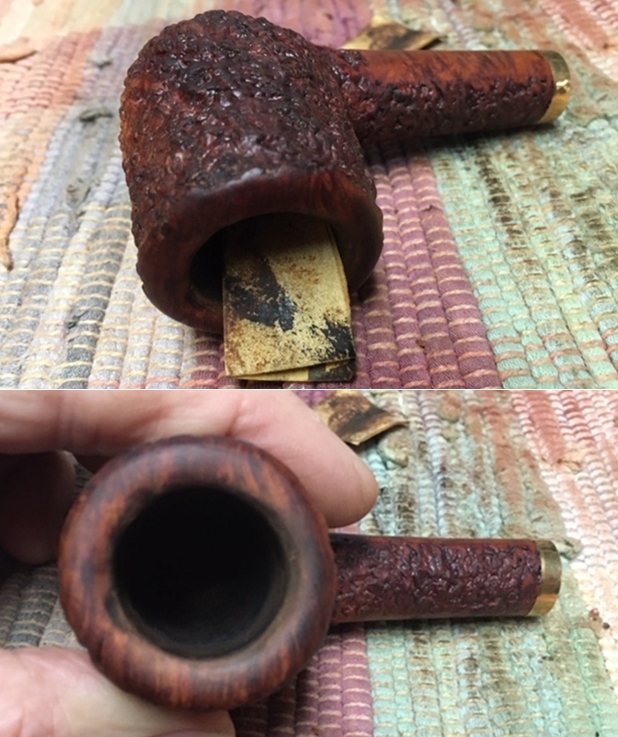
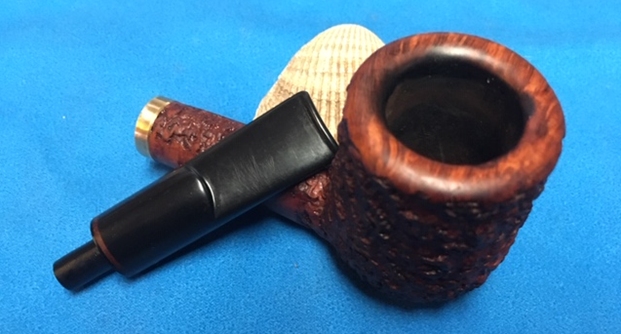
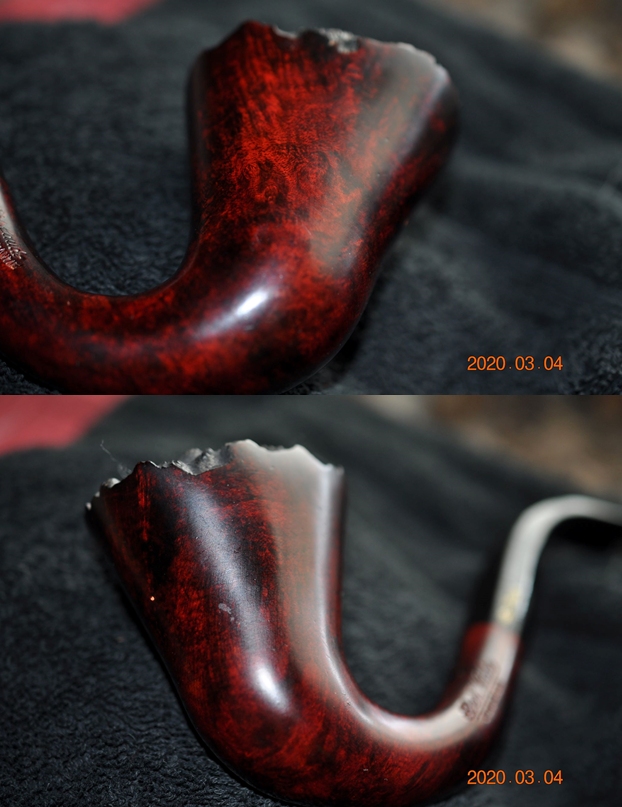
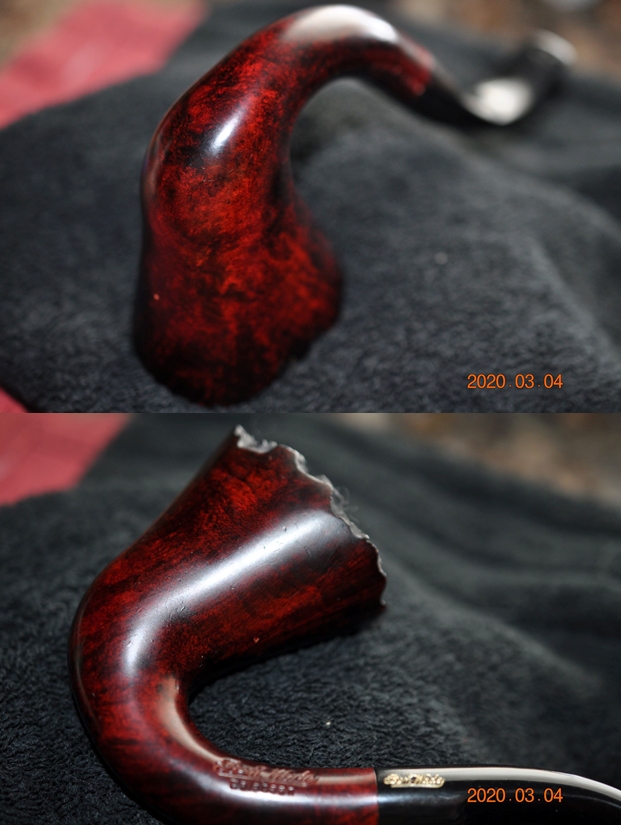
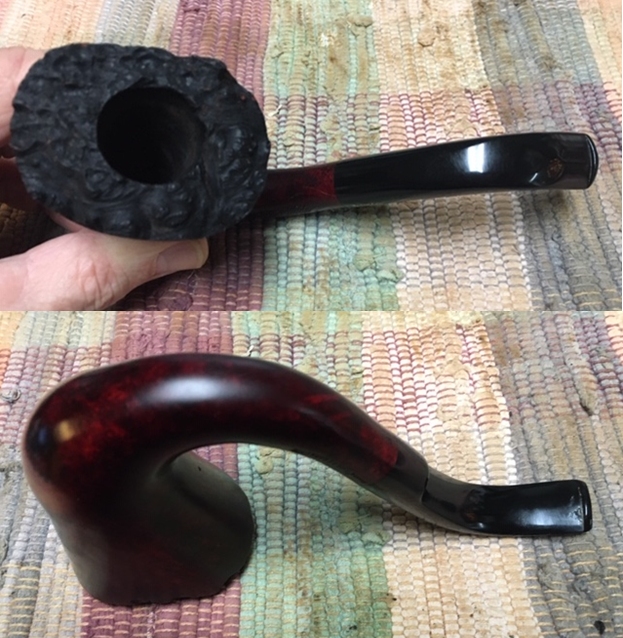
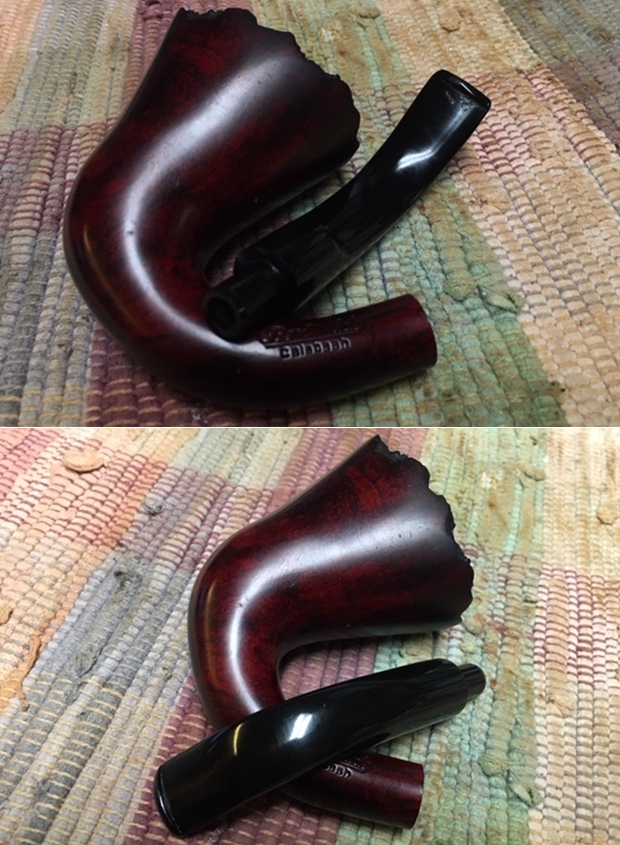
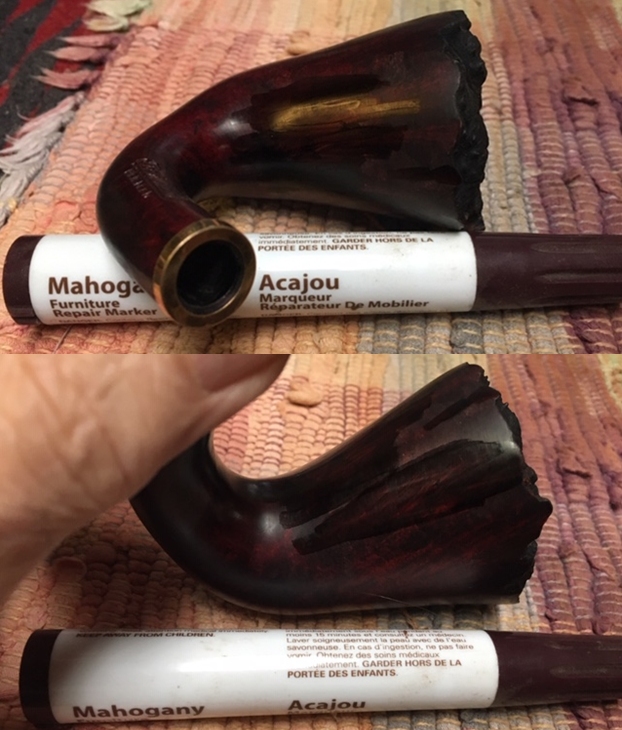
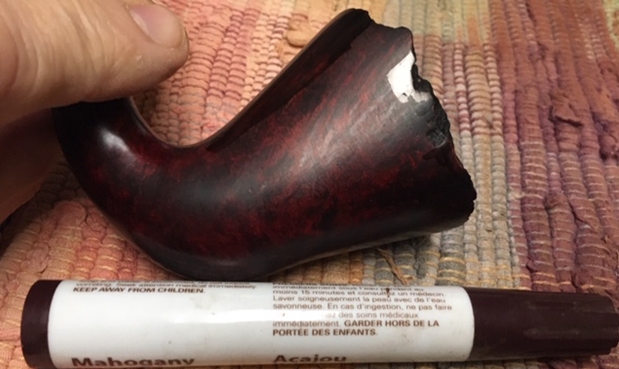
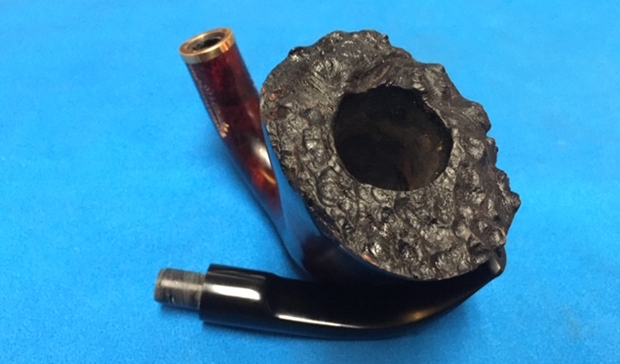
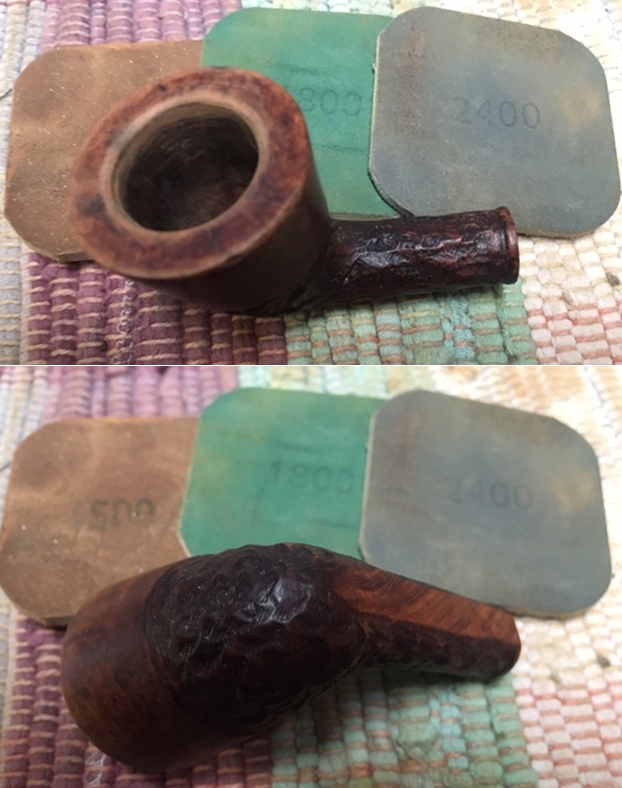
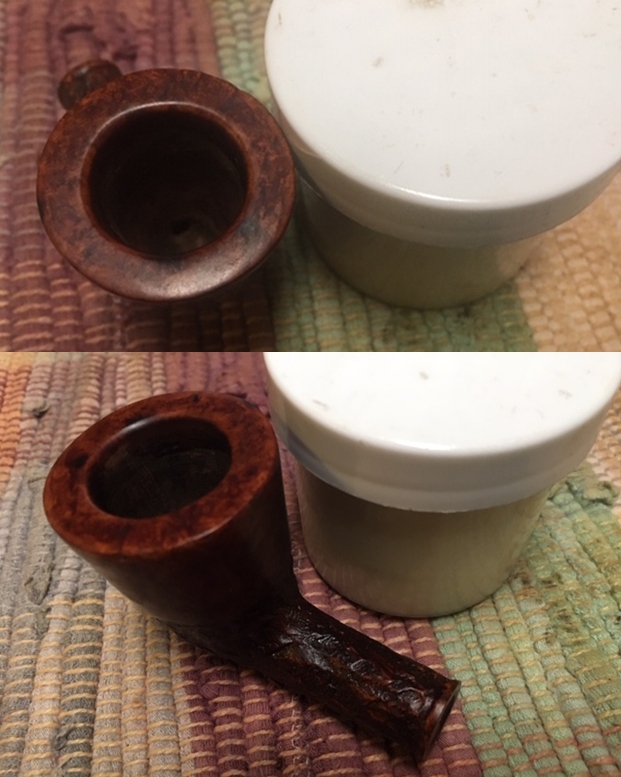
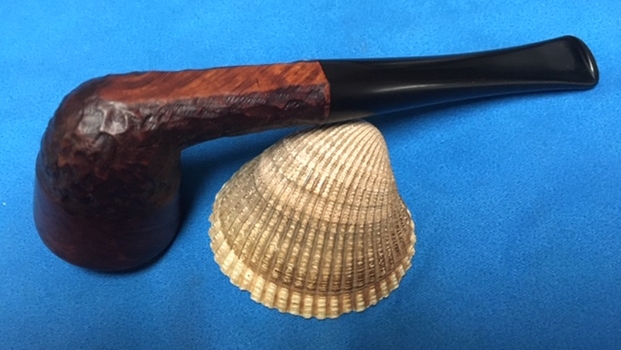
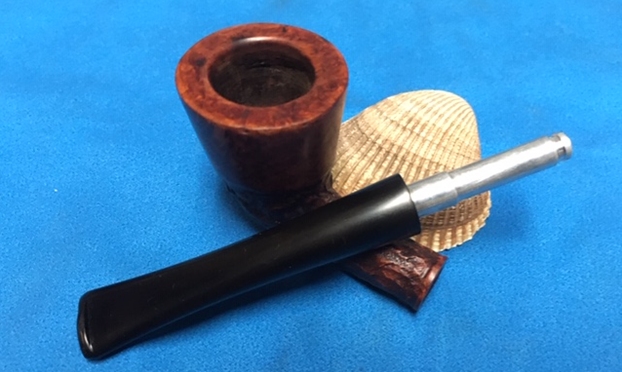
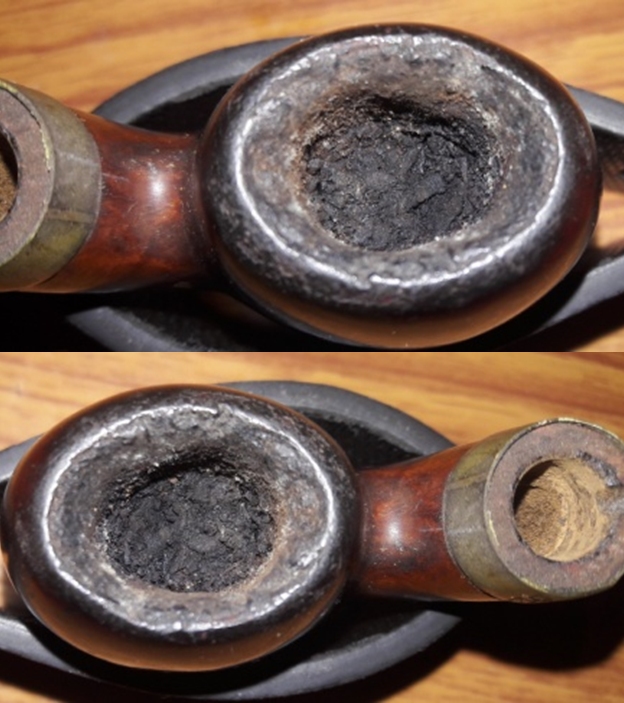
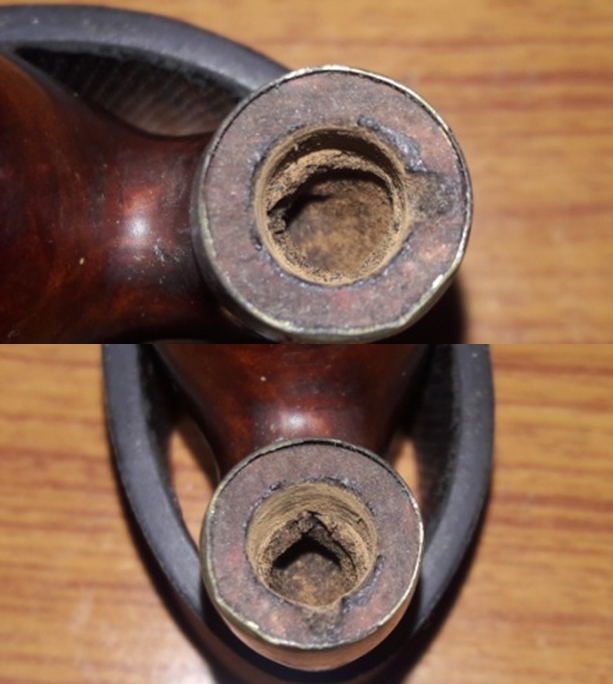
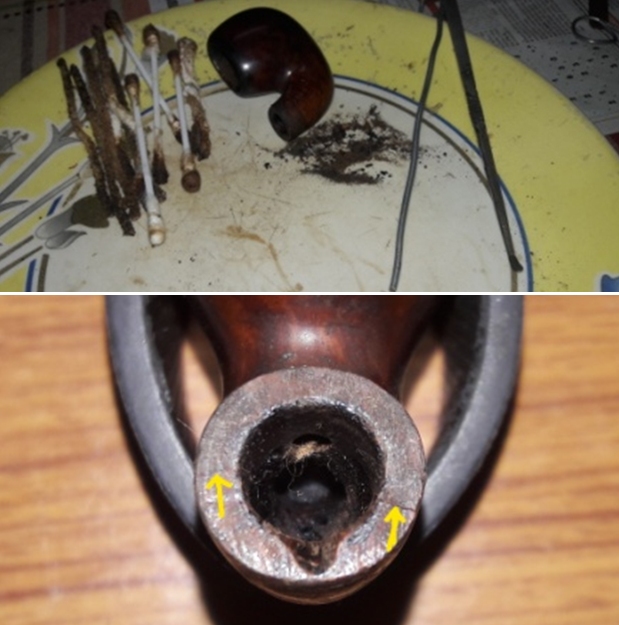
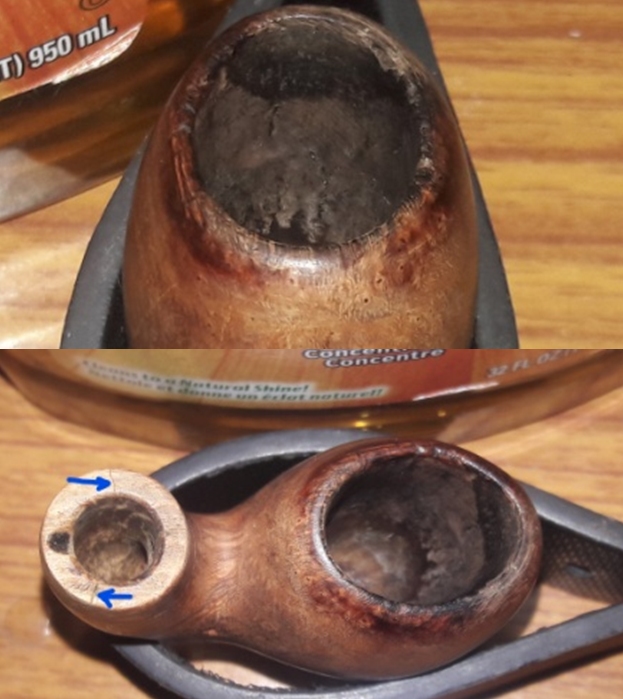
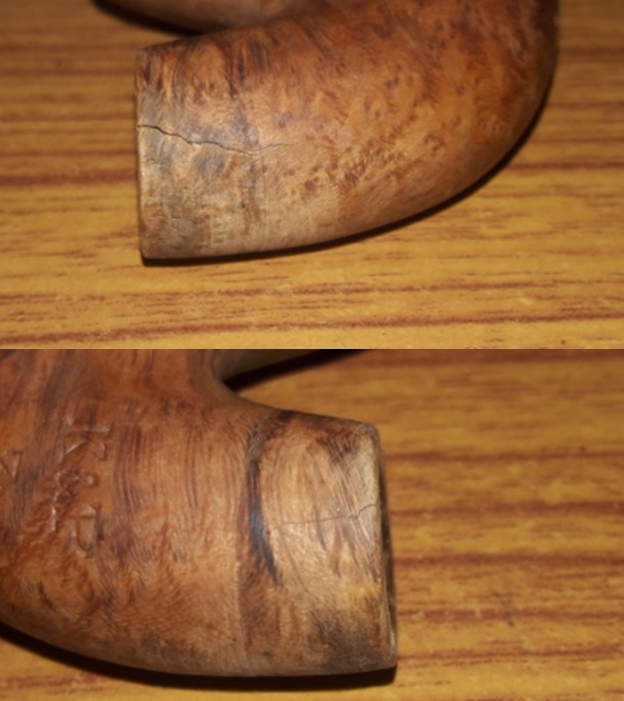
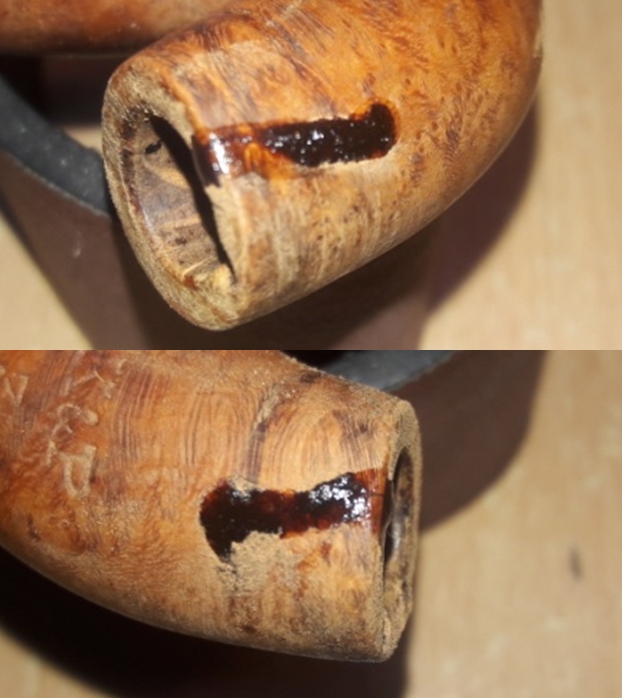
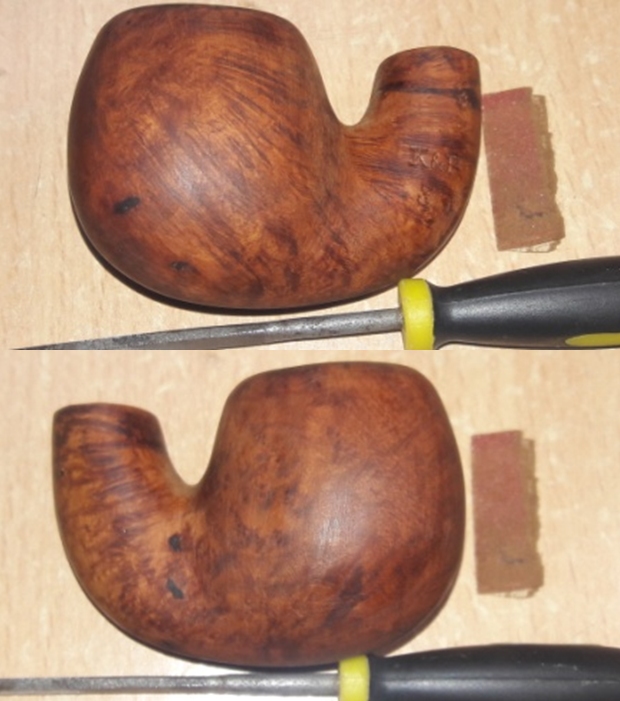
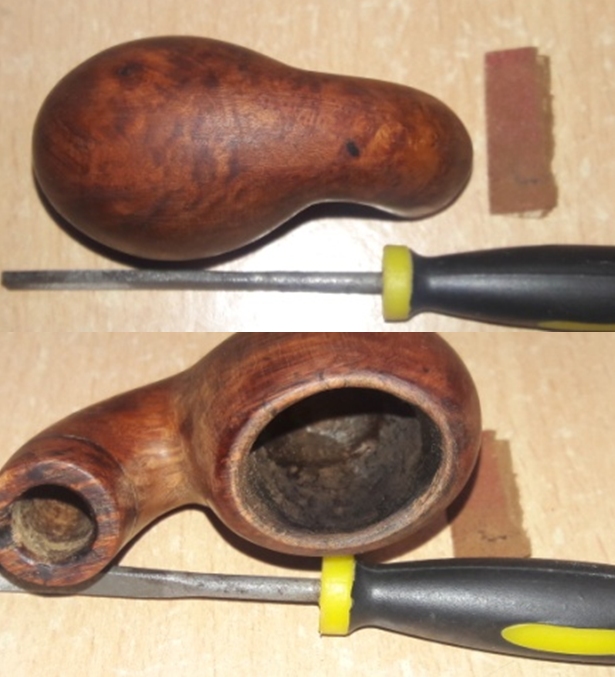
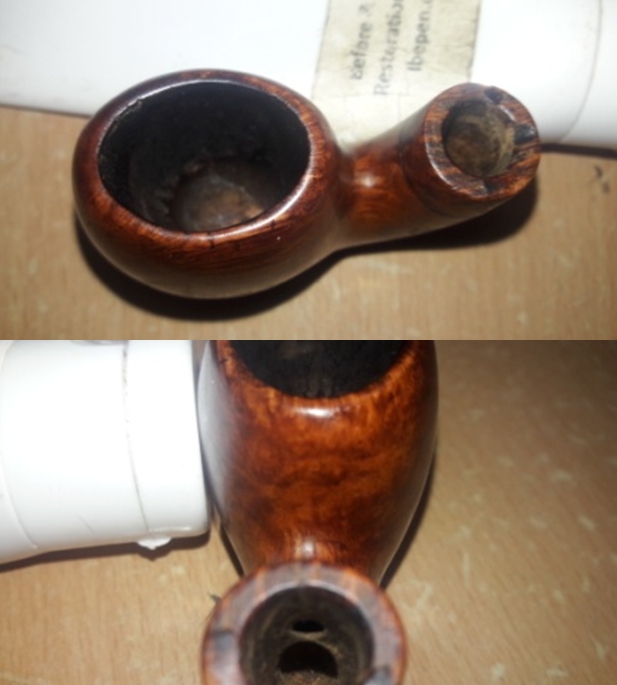
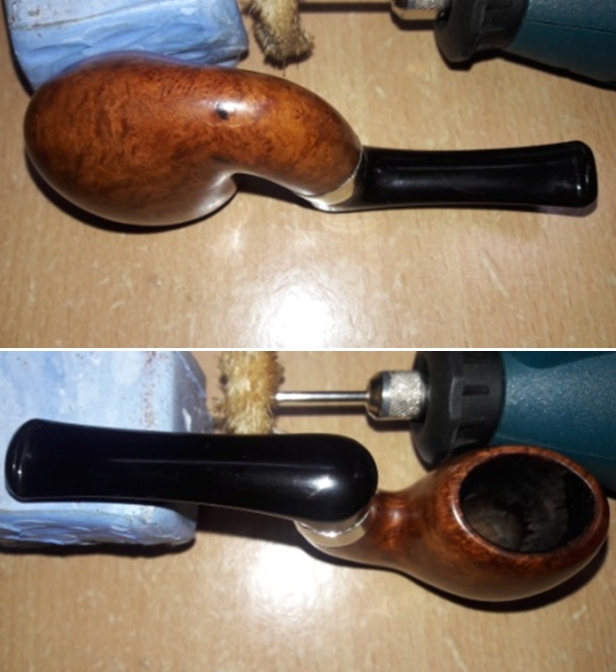
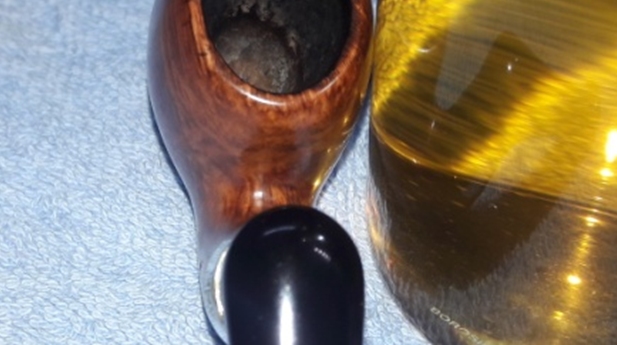
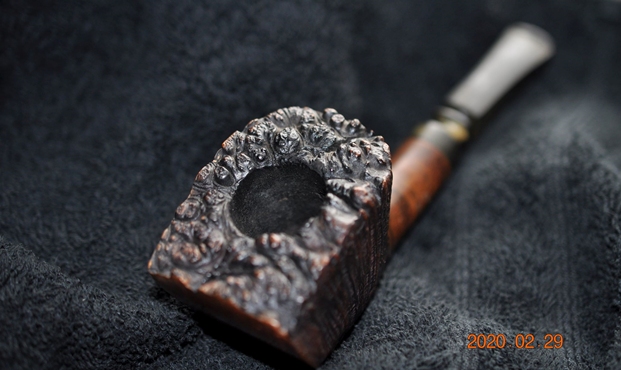
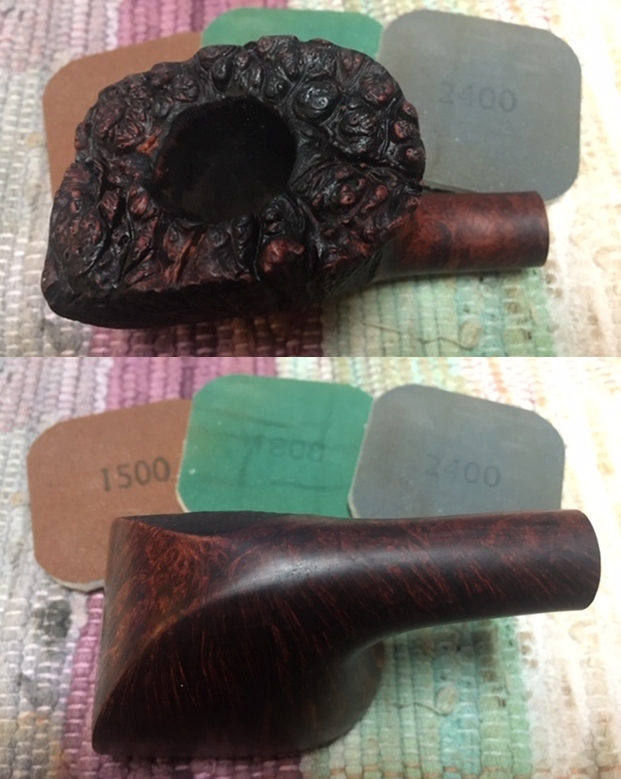
I love historic brochures and catalogs! With a better understanding of the Heritage Antique name and history, I take a closer look at the Blasted Apple on my worktable. The chamber has moderately heavy cake build up which needs to be removed to give the briar a fresh start. The rim has grime as you would expect, but most notable are the divots out of the internal rim lip. The damage to the rim is significant. The left-aft quadrant of the rim is in especially poor shape where it appears that lighting practices caused the chamber wall to deteriorate so that it’s now thinner at this point. The blasted briar surface is dirty and has grime build-up, but the blasted surface has a look of quality about it.
  The stem has oxidation and the bit has biting. There are compressions on the upper and lower bit, but the button appears to be in good shape. Interestingly, the left side of the stem has a cut where a wedge of vulcanite has been removed.
 I start the restoration of this Heritage Antique Blasted Apple by cleaning the stem’s airway using a pipe cleaner wetted with alcohol.
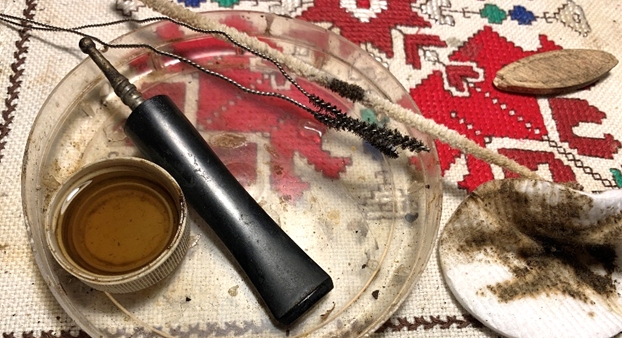
  To address the oxidation, I use a soak of Before & After Deoxidizer along with the Ehrlich stem. I leave the stems in the soak for a few hours.
 After fishing out the Heritage stem, I squeegee the liquid off with my fingers and run a pipe cleaner wetted with alcohol through the airway to clean it of the Deoxidizer. I use cotton pads wetted with isopropyl 95% to wipe off the raised oxidation. The Deoxidizer did a good job dealing with the oxidation.
 To help rejuvenate the vulcanite stem, paraffin oil is applied with a cloth for that purpose.
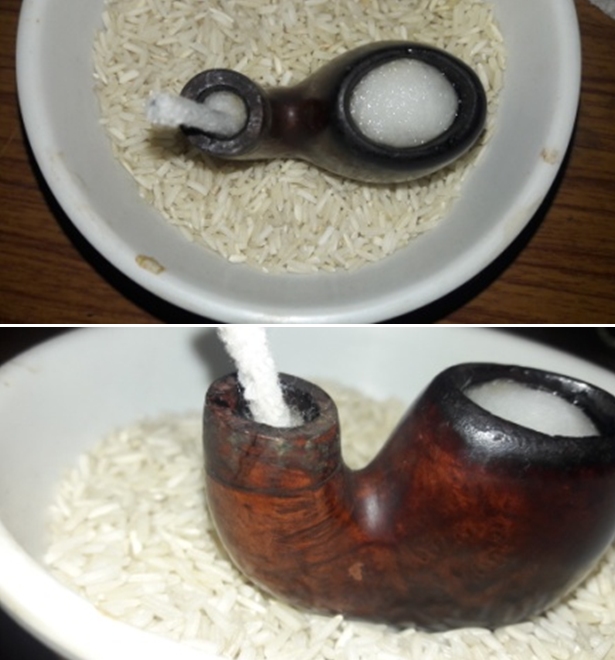
 Turning now to the stummel, to ream the chamber I use the Pipnet Reaming Kit. After putting paper towel down for easier cleanup, I use the two smaller blade heads of the four available. I follow the reaming by scraping the chamber wall with the Savinelli Fitsall Tool and then sanding by wrapping 240 grade paper around a Sharpie Pen. Finally, after wiping the bowl with a cotton pad wetted with alcohol, an inspection reveals a healthy chamber.
 Continuing with cleaning, using undiluted Murphy’s Oil Soap, the external blasted surface is cleaned using a cotton pad and bristled toothbrush. For the rim, I employ the brass wire brush to clean it of minor lava flow.
 Next, taking the stummel to the kitchen sink, I use shank brushes to clean the mortise with anti-oil dish soap. After rinsing well, I return to the worktable.
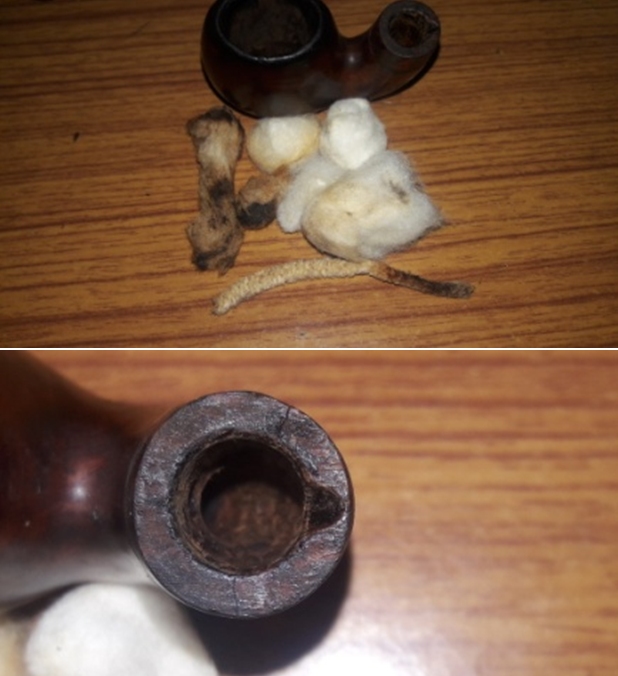
 Continuing with the internal cleaning, I find that it is clean and pipe cleaner and cotton bud wetted with isopropyl 95% are not soiled indicating that the internals are clean.
 After the cleaning is completed, I look at the stummel. The old finish has been removed during the cleaning process. I’ll need to give some consideration to how to proceed down the path regarding re-staining the blasted surface. With the original coloring emulating the Dunhill look – S. M. Frank’s marketing strategy, I hope to oblige. I decide to send my fellow restorer and good friend in India, Paresh, an email asking for advice. I know that in his past restorations of Dunhills, he has worked on techniques in restoring the Dunhill hue. With an email written including pictures, I’ll await Paresh’s advice.
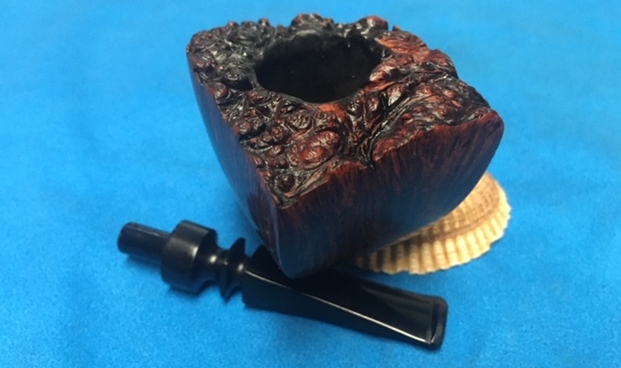
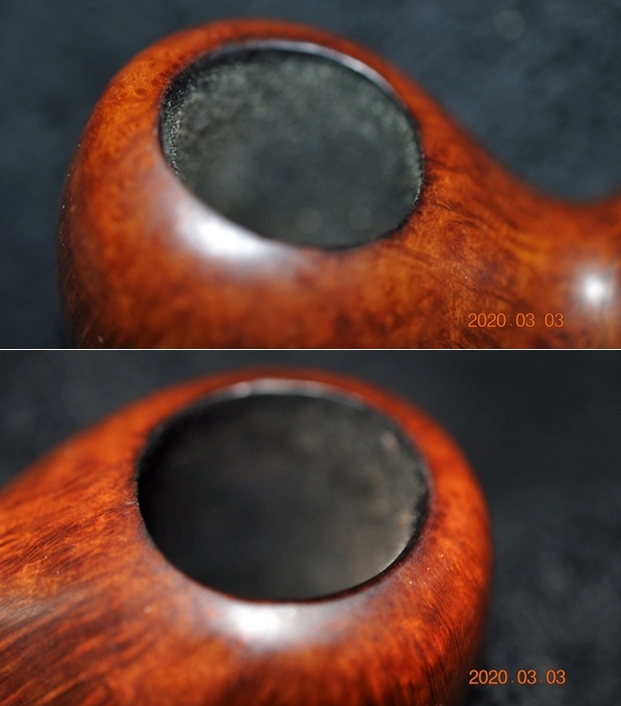
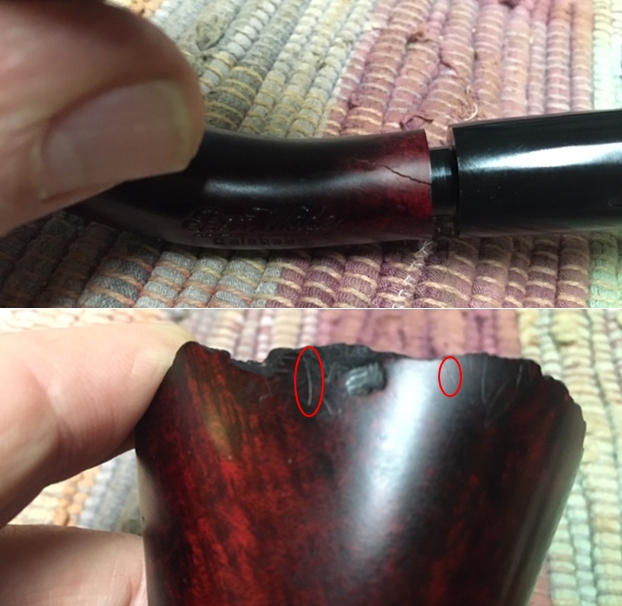
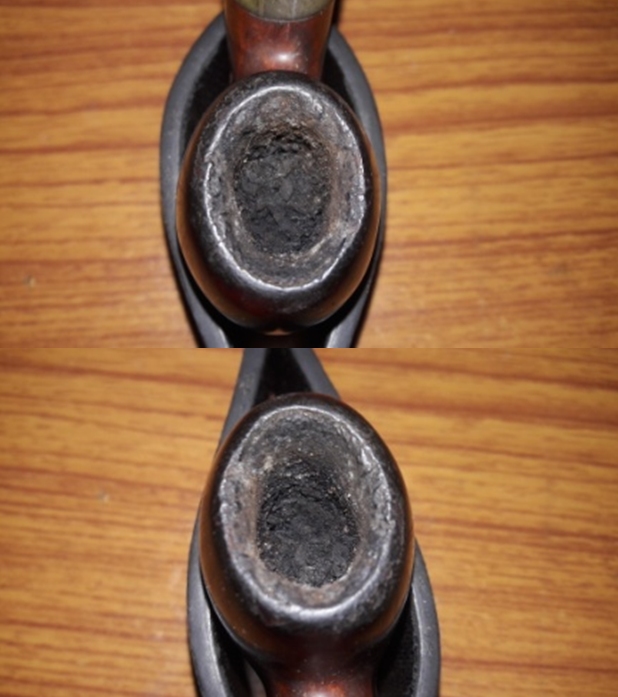
 Turning now to the rim, it’s in bad shape. There are some significant divots out of the internal rim edge. In the picture below with 12 o’clock being up, a small divot is at 12 o’clock, and larger divots at 3:30, 4:30 and 5:30. The 2 o’clock region suffers from some burning degradation with a slight compression in the rim plane because of it. The questions in my mind focus on restoring this Heritage close to its original design – a challenge to Dunhill! The coloring is an issue and the remnants of blasting on the rim are evident especially at the 4 o’clock region. I have not done much in the way of rustication processes to emulate the blasting and to repair the rim will undoubtedly mean topping it and therefore, removing the blasting on the rim as a result. The question would then be how to restore it? With this question in my mind, I send an email off to Steve with the full weight of rebornpipes.com experience behind him, to see what light he could shed on an approach.
 As I await responses from my fellow restorers, I move forward with the structural issues of the rim that must be addressed either way. As I look at it, there is no way around having to top the bowl to provide a new rim foundation from which to work. Starting with 240 grade paper on the chopping board, I give only a few rotations.
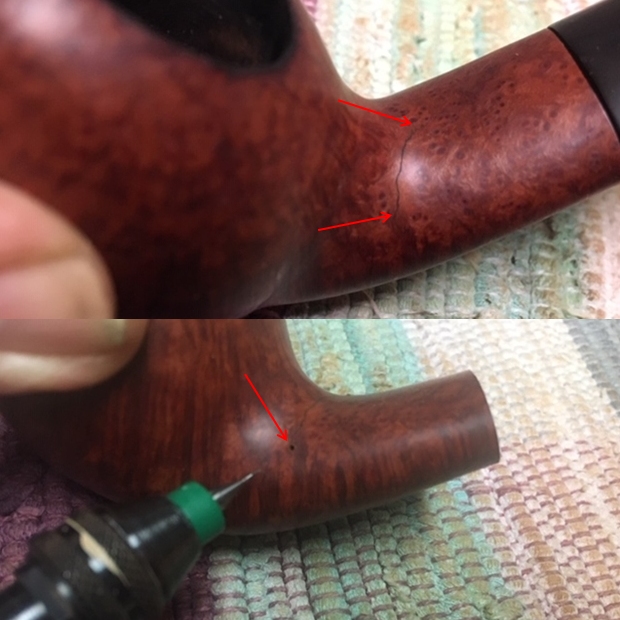
  The picture below reveals the contouring in the rim with the flat surface of the topping board not touching the areas that are compressed. The upper (in the picture) area that I referenced above is compressed. The divots are more distinctly defined as well.
  After several more rotations on 240 grade paper, the compression is minimized. The divots from 3:30 to 5:30 are also growing less distinct.
 I come to the terminal point in using 240 grade paper. I only take off what is needful because we can’t replace briar! My goal was to erase the degraded area at the 1 to 2 o’clock area. That has been done. In the process, the major divots no longer appear as divots but areas of the rim that are thinner.
 After replacing the 240 paper with 600 grade paper, the stummel is rotated several more times to smooth and erase the scratching of the 240 papers.
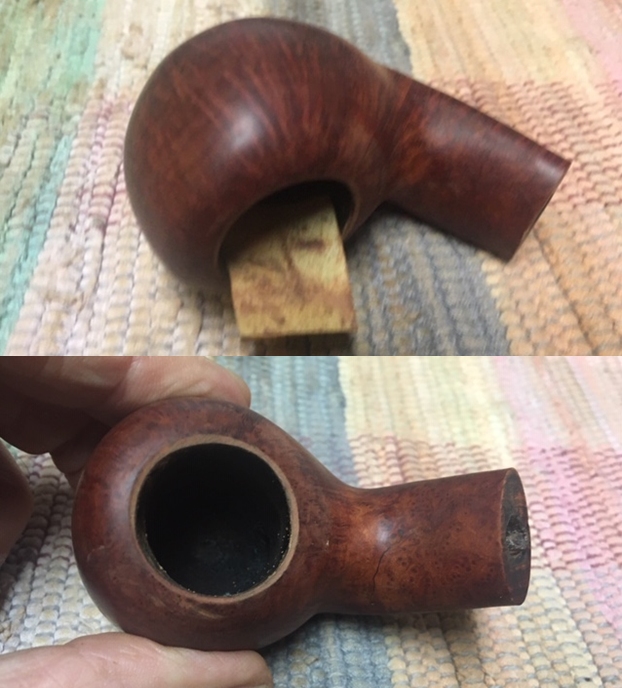
  With the topping completed, the small divot at the top should be dispatched with sanding. On the lower quadrant, from 3:30 to 7 o’clock, the rim is noticeably thinner.
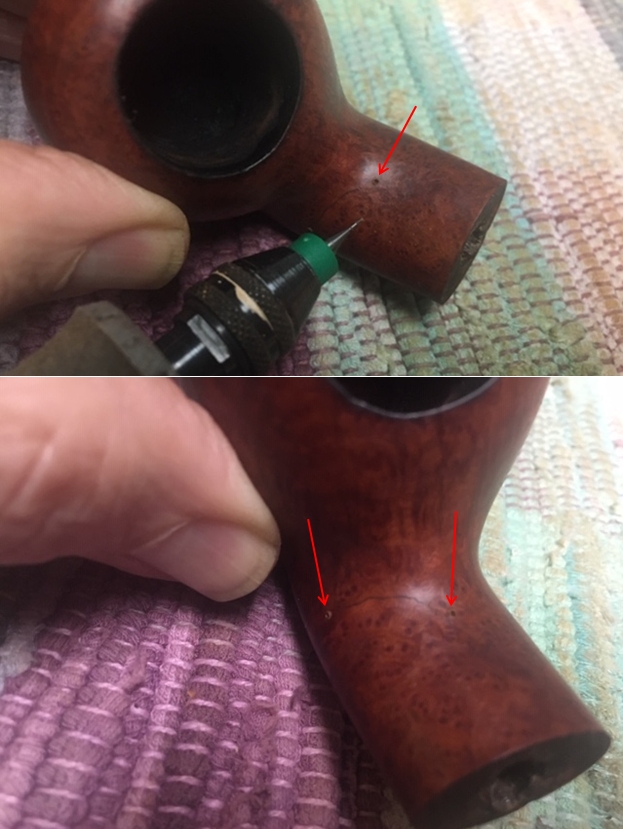
  To see the lower quadrant from different angles to demonstrate what I can see, I take a few more pictures looking from the left, then the right. As I see it, I have two options of approach. First, to even out the entire circumference of the rim internal edge and to blend the thinning on the lower quadrant in the pictures, I can sand the entire circumference of the internal rim to smooth to even out the different rim depths. Or, secondly, I can build up the lower quadrant with briar dust putty and sand it down to blend with more balance with the entire rim.
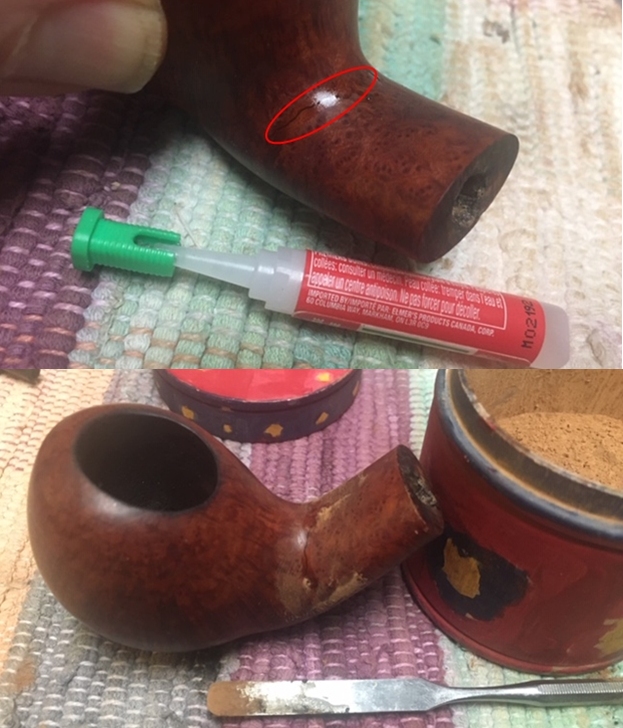
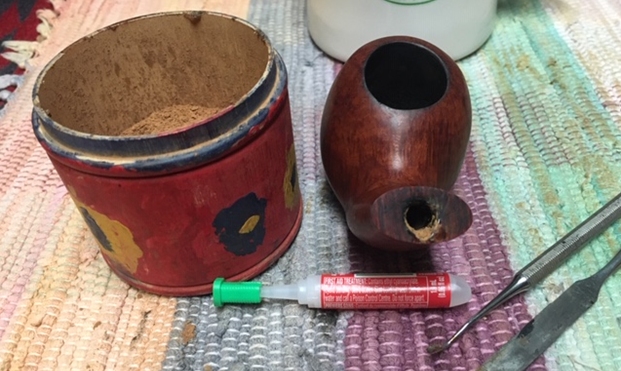
 I decide to do the latter – seek to build up the thinning area with briar dust putty. Since the application will be only on the very upper part of the chamber, I’m not concerned about issues of heating. I use the plastic disk that serves as a mixing pallet and cover a portion with scotch tape to ease the cleanup. I scoop a small mound of briar dust on the pallet.
  Following this, I place next to the briar dust a small puddle of Extra Thick CA glue and with a toothpick, I pull briar dust into the glue.
 As briar dust is pulled into the glue, it is mixed with the developing putty. I aim for the thickness of molasses – not runny and if it gets too thick, it will set up and harden spontaneously – with a little smoke for excitement! The putty needs to be pliable enough to adhere to the chamber/rim edge. When it’s thick enough, I trowel the putty onto the target area.
 I set the bowl aside to allow the briar dust putty to cure thoroughly. It looks good. In the picture below you can see how it adheres to the contours of the damaged area.
 After a few hours, the briar dust putty is ready to go. The process of removing the excess patch material and shaping starts with a half circle needle file focusing on the center of the patch to shape out the curved pitch of the rim.
  After a few minutes of filing, I remember that I have a Dremel and attach a sanding drum! With the speed set to low, the Dremel quickens the job of removing the excess and shaping the curve. I do go slowly and patiently not to take off too much too quickly.
 After the sanding drum does its job, I switch back to filing to fine tune the removal of excess patch and shaping.
 When the needle file brings the patch down near to flush to the briar chamber, I switch and use 240 grade paper wrapped around a Sharpie Pen. This works well to continue a nice curve and to give more leverage to removing excess patch material. My goal is to feel no transition from the patch to the chamber wall.
 This is achieved after the sanding. I like what I see.
 Transitioning now to the rim surface, using a flat needle file the patch excess is removed and smoothed to blend with the rim surface.
 After using the file, I use 240 then 600 grade paper to fine tune. I also sand around the full circumference of the rim to remove other smaller nicks.
 I’m pleased with the progress of the rim’s restoration. The rim rebuild with briar dust putty will be invisible after the rim is dyed and I figure out an approach to introduce an emulated blasted surface on the rim!
 Well, I received Steve’s response regarding his thoughts about how to approach the rim. His counsel was not to top the stummel and to blend repairs and blemishes using burrs from the Dremel. His counsel arrived a bit late but using burrs to emulate a ‘blasted’ rim surface is the direction I’ll take. Since I’ve not had a lot of experience with the use of burrs and what effects they produce, I practice on a discarded stummel destined for the briar dust container.
 After testing different burrs and saw what they do, I chose an approach and apply it to the Heritage’s rim. I start with a cylindrical burr and finish with a sharper, cone-like burr to get the effect that I practiced.
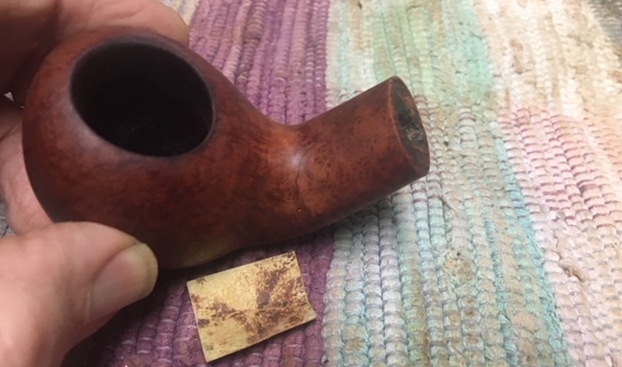
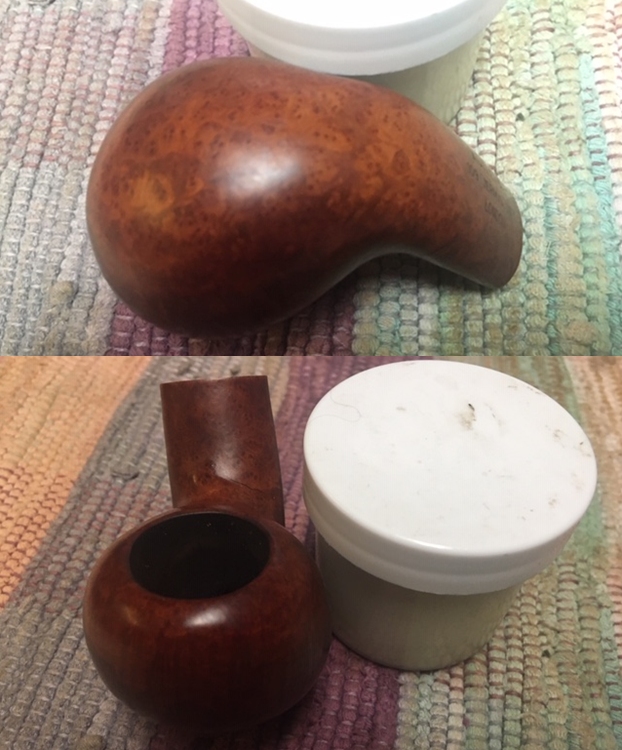
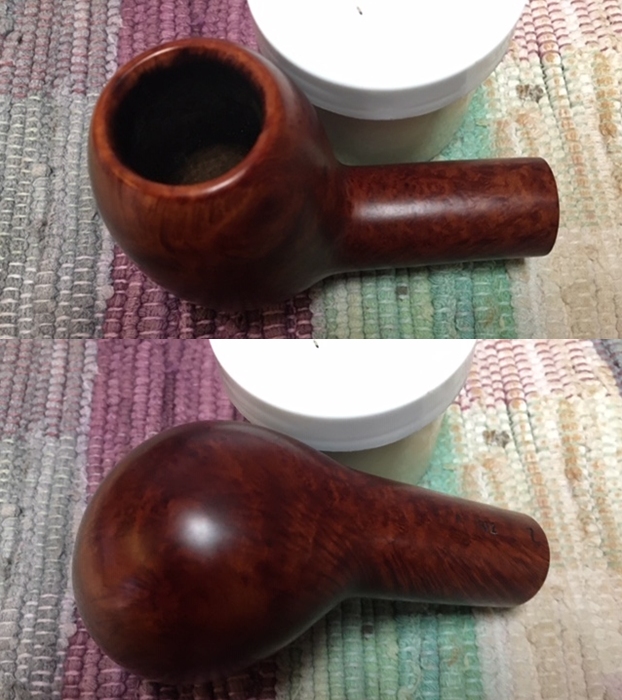
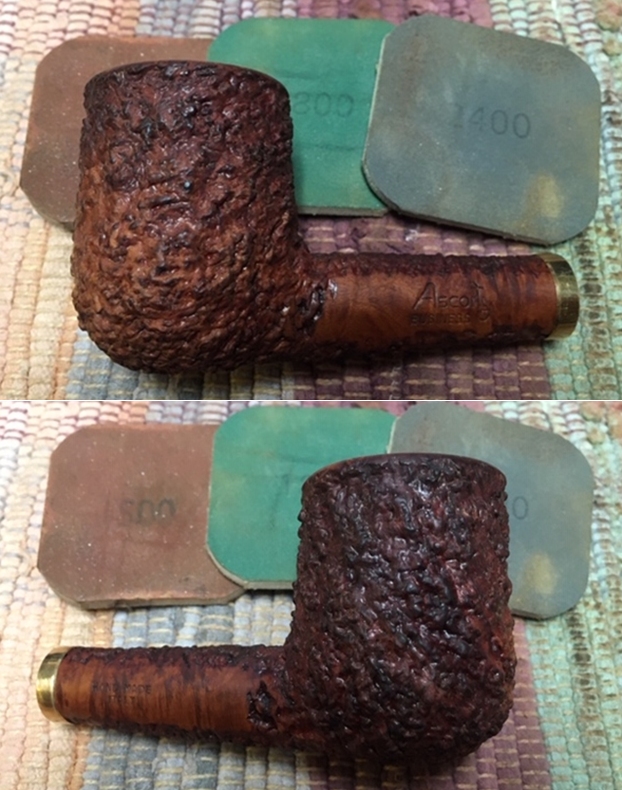
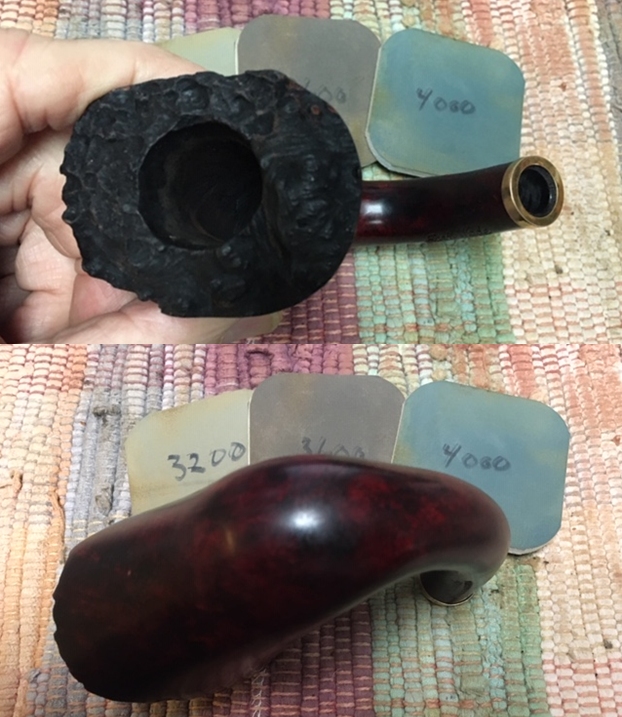
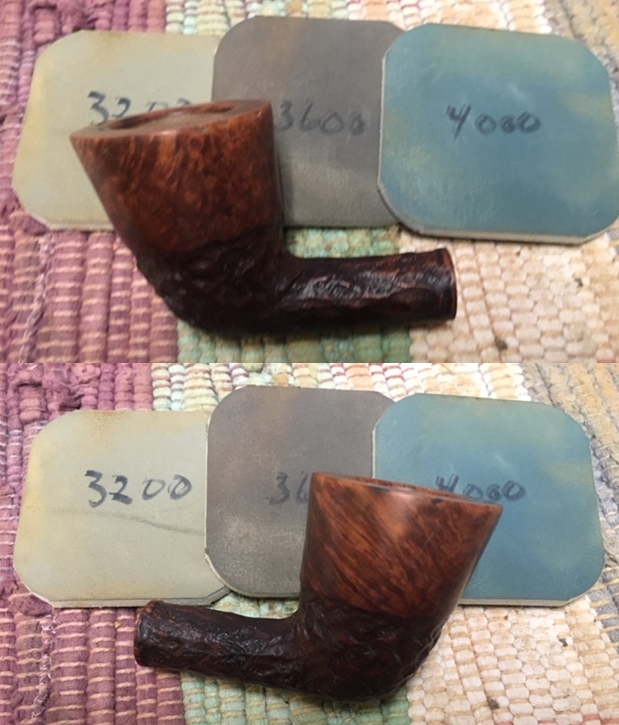
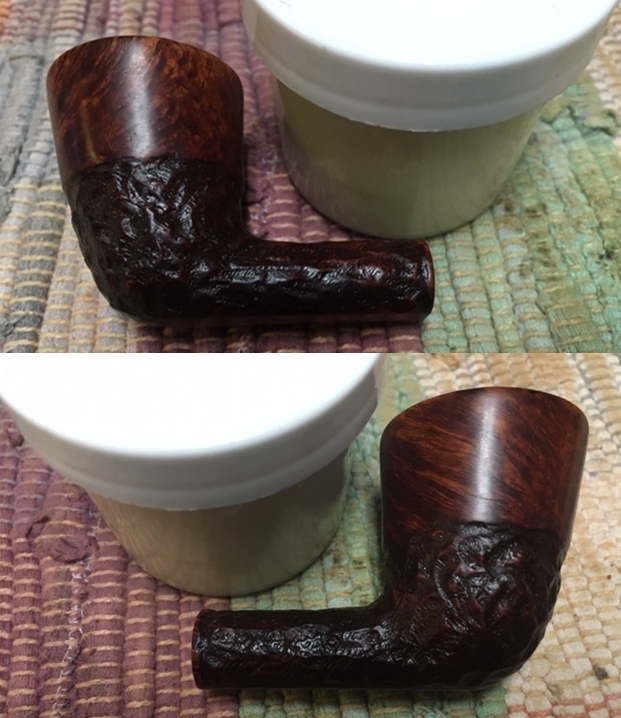
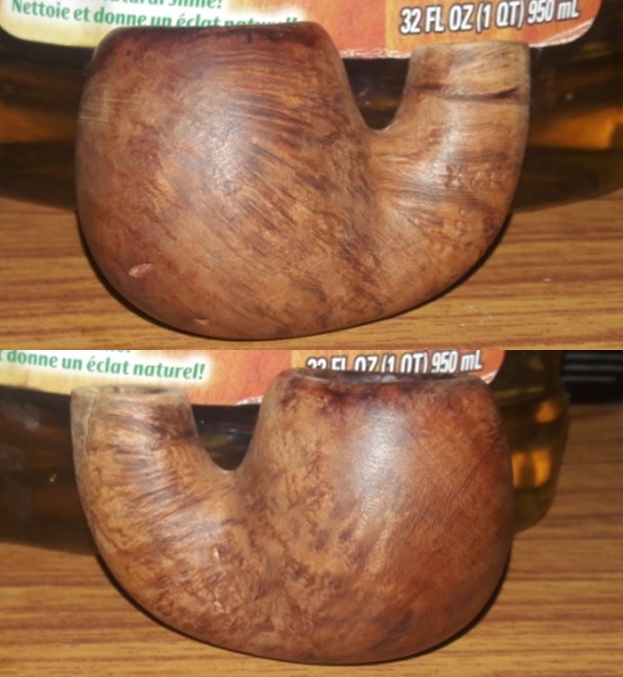
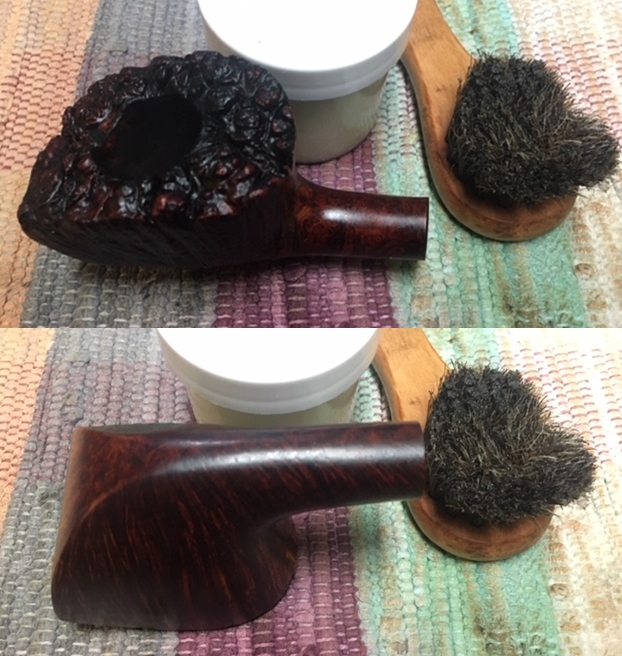
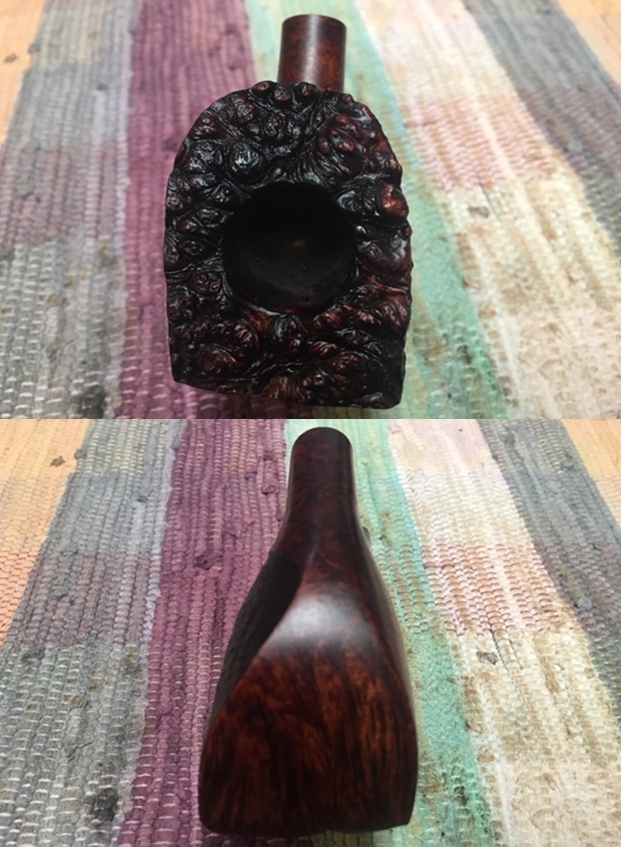
 Still not sure if I will stain or leave the stummel as it is, I decide to hydrate the stummel as well as get a sneak peek at what the stummel would look like more in a finished state. I apply paraffin oil to the stummel, not the rim. The stummel darkens nicely, but the finish is uneven – patches of lighter on the lower side which darkens going up. Still thinking….
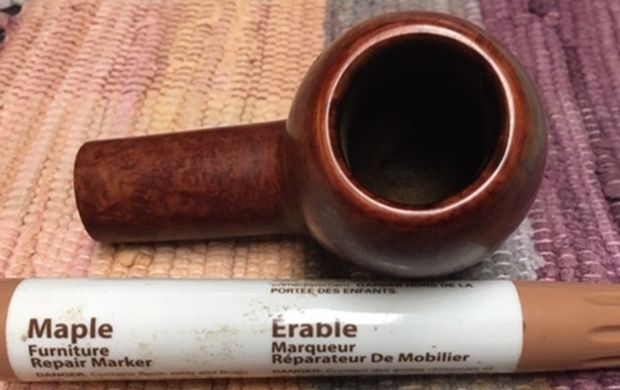
 With the stummel darkened, I need to darken the raw rim briar to match where the stummel is.
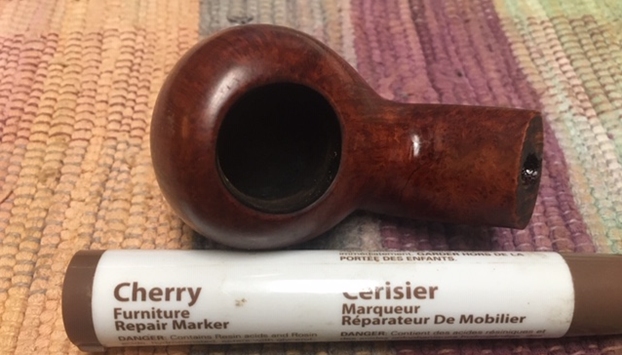
  I use two dye sticks to do the job. The under coat is with a walnut stain, then over that, a mahogany. Then, in order to give the new fresh rim surface a more weathered look, I use three mid-range micromesh pads and lightly sand the rim.
 I heard back from my good friend, Paresh in India, about his approach to achieving a Dunhill color tone. His basic approach is to apply a dark brown undercoat in the normal way – flamed and then ‘unwrap’ after several hours. Then, the key part of the process is when Paresh stain washes with a cherry red dye, applying with cotton pad and immediately wiping until the hue that is wanted is reached. He also sent a link to his great write up on rebornpipes describing the process: A Project Close to My Hear: Restoring a Dunhill From Farida’s Dad’s Collection. With Paresh’s encouragement, I decide to give Paresh’s approach a try with this Dunhill minded Heritage Antique Blasted Apple. Not long ago, thankfully, I acquired some red concentrated dye solution that I’ll be able to employ for the first time. To start, I assemble my desktop staining ensemble.
  After wiping the bowl with a cotton pad wetted with alcohol to clean, I warm the stummel using a hot air gun. This has the effect of expanding the briar and helping it to be more receptive to the dye.
  Using a fashioned cork as a handle, I then apply Fiebing’s Dark Brown Leather Dye, per Paresh’s directions. I use a folded over pipe cleaner to do this. After ‘painting’ a section, I immediately ‘flame’ the alcohol-based dye with a lit candle. The combustion burns off the alcohol leaving behind the embedded hue absorbed into the briar.
  After completing this process with a thorough painting and flaming of the entire stummel, I put it aside for several hours for the new dye to rest. This helps to solidify the new dye.
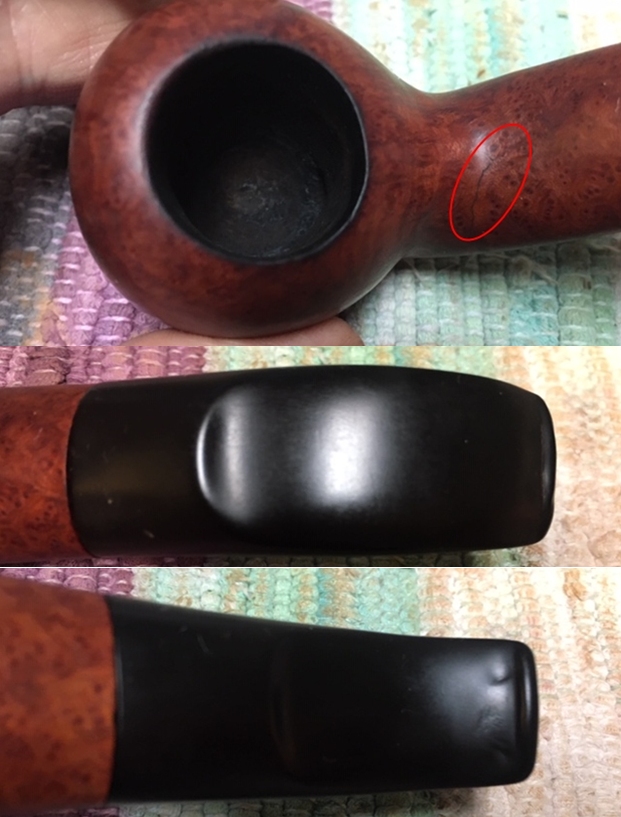
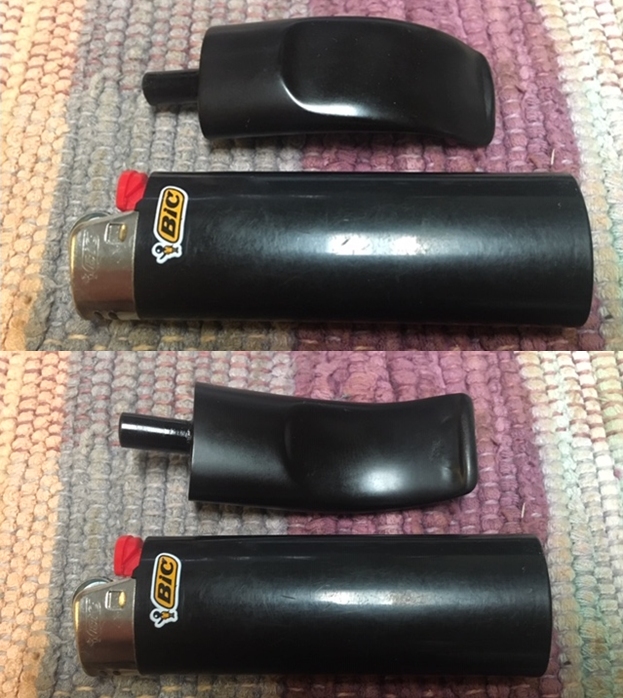
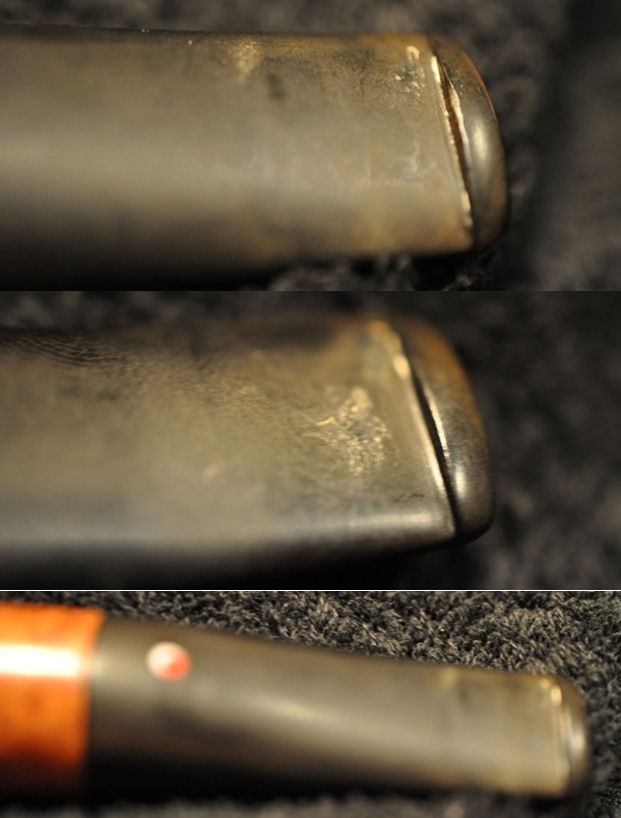
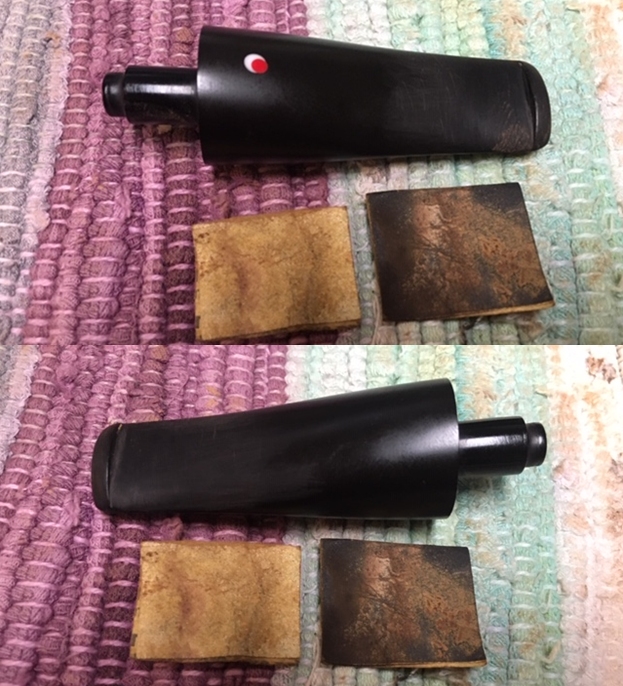
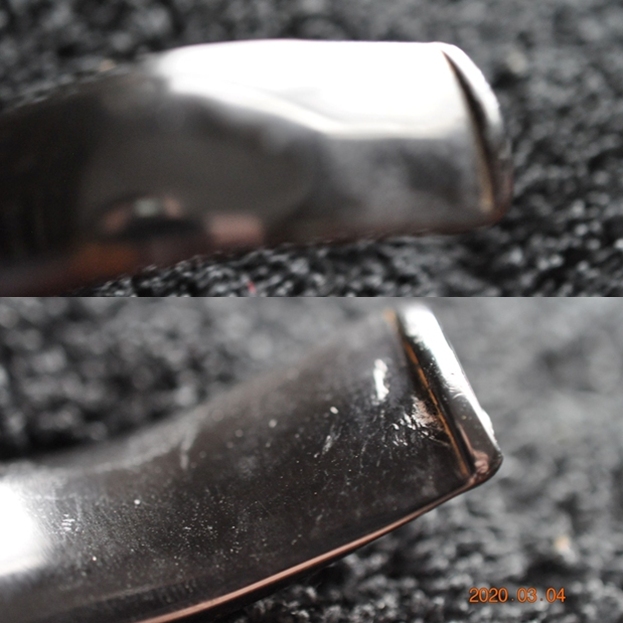
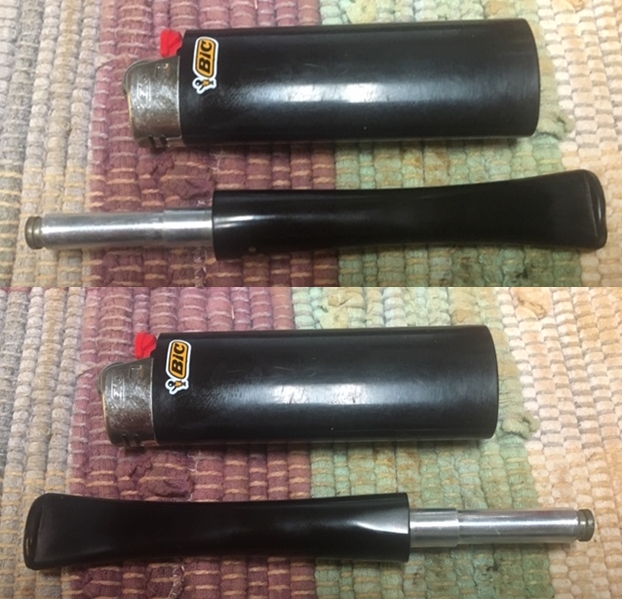
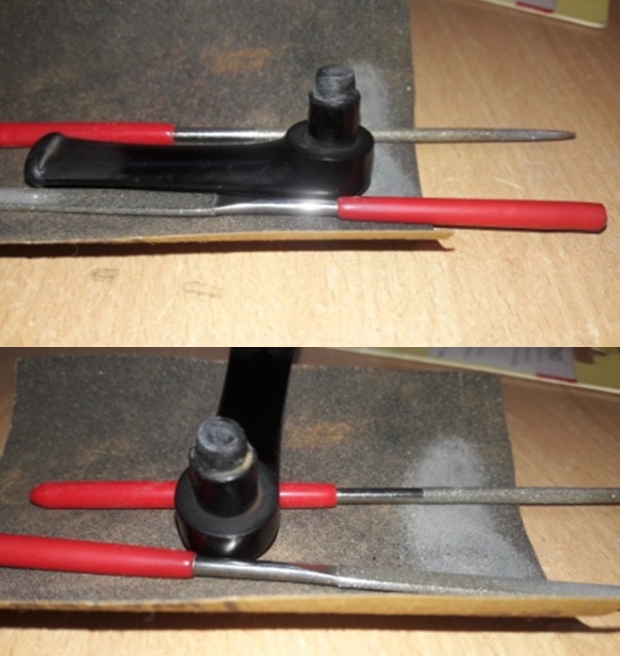
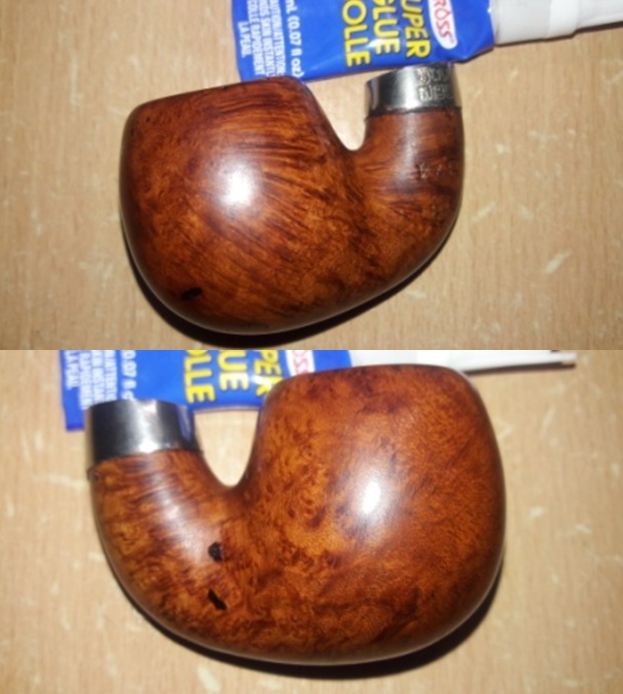
 With the newly dyed stummel resting, I turn my attention to the stem. Taking a closer look, the compressions on the upper bit and lower bit are significant. There is also a divot of vulcanite sliced off the left side of the stem. I’m not sure how something like this would happen – perhaps a lit match? I’ll work on blending this in by sanding. First, using the heating method, I paint the compressions with the flame of a Bic lighter. This heats and expands the rubber helping it to regain its original disposition – or closer to it. The goal is to raise the compressions sufficiently enough so that simple sanding will then be all that is needed to erase them – hopefully avoiding patching. Before and after pictures of upper and then lower show the results. First, the upper:
  And the lower:
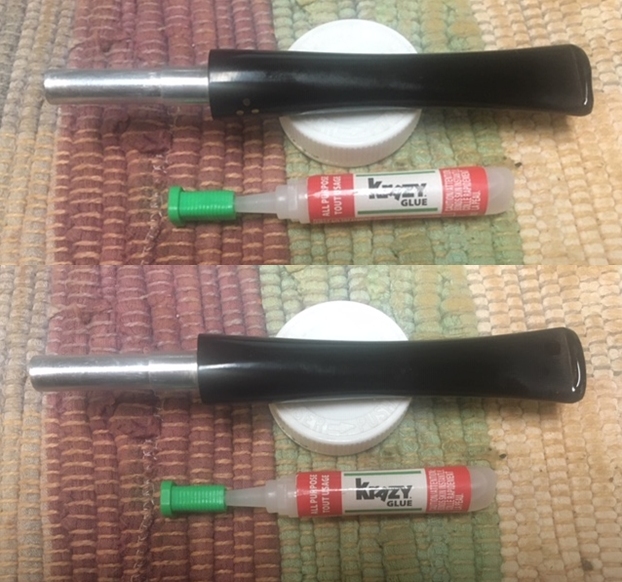
 I believe that the lower bit may now be sanded out. I’m not so sure about the upper bit – the compression next to the button is still significantly deep. Before sanding, I fill this compression with black CA glue to be on the safe side and fill up against the button. When the patch cures, this will make sure that the compression is addressed in conjunction with the button lip edge.
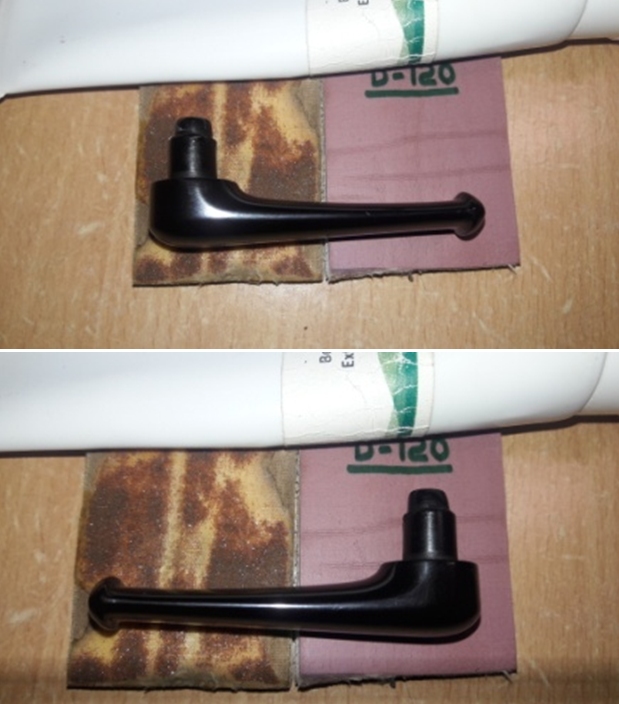
 After the patch cures, a flat needle file goes to work on bringing the excess CA glue down to the stem’s surface level on both the upper and lower sides. The change in the background is explained by me moving out onto my 10th floor balcony ‘Man Cave’ to enjoy the warmth of the day!
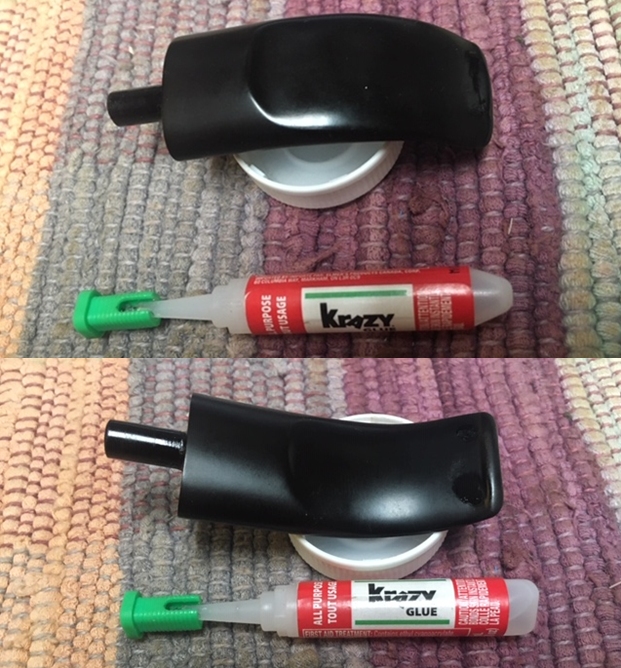
 As I was filing the lower side, it became apparent that the compression was too pronounced for filing and sanding to remove. It would require too much to dig that deep. Switching gears, I decide to detour a bit and fill the compression with black CA glue.
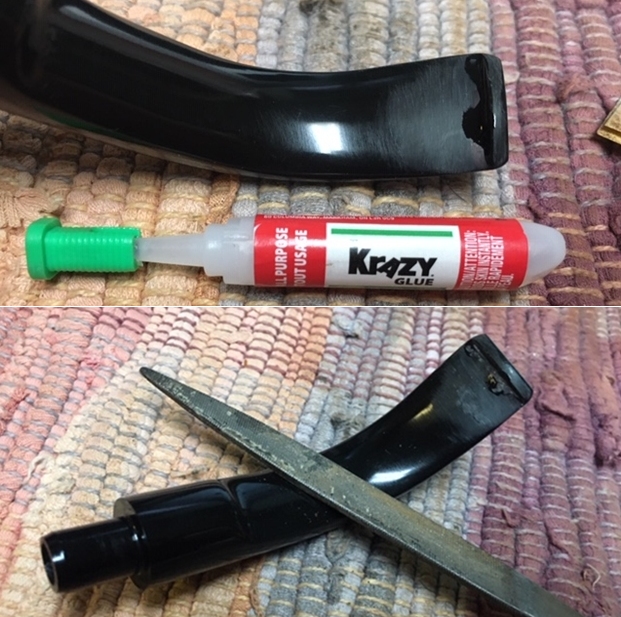
 After cleaning it with alcohol, I place a drop of black CA glue on the lower side compression.
 What I missed taking a picture of was that during the detour, I also decided to apply some black CA glue to the wedge on the left side of the stem. I used an accelerator to hold the glue in place and to quicken the curing time.
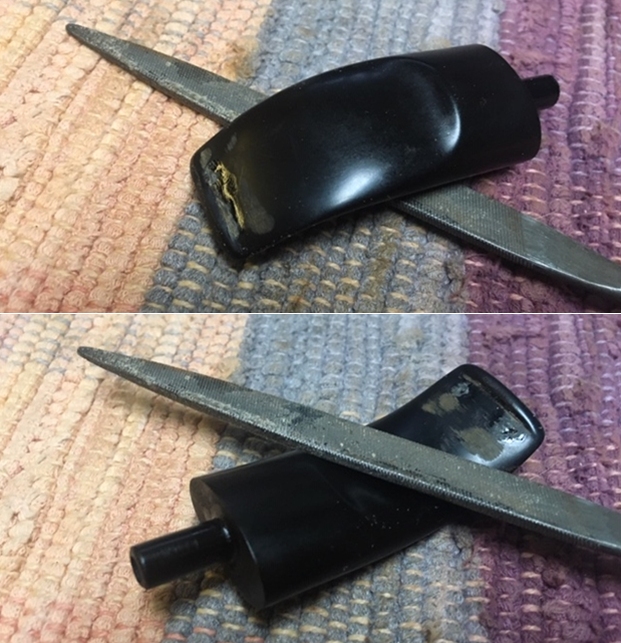
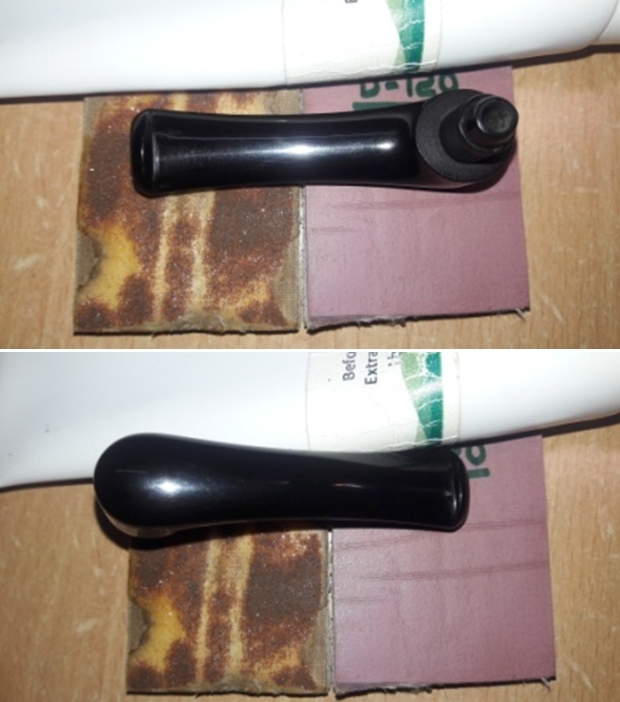
 After both of the ‘tour patches’ cure, I used the flat needle file on both to remove excess and to bring the patches down to stem level.
 After filing, the sanding continues with 240 grade paper on the upper and lower.
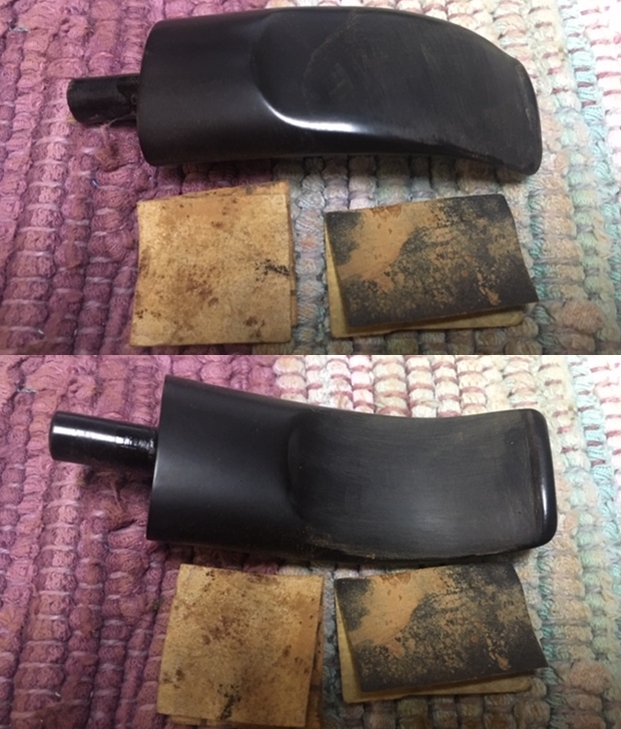
 Sanding is continued after the 240 grade paper with wet sanding using 600 grade paper on the entire stem along with applying 000 grade steel wool.
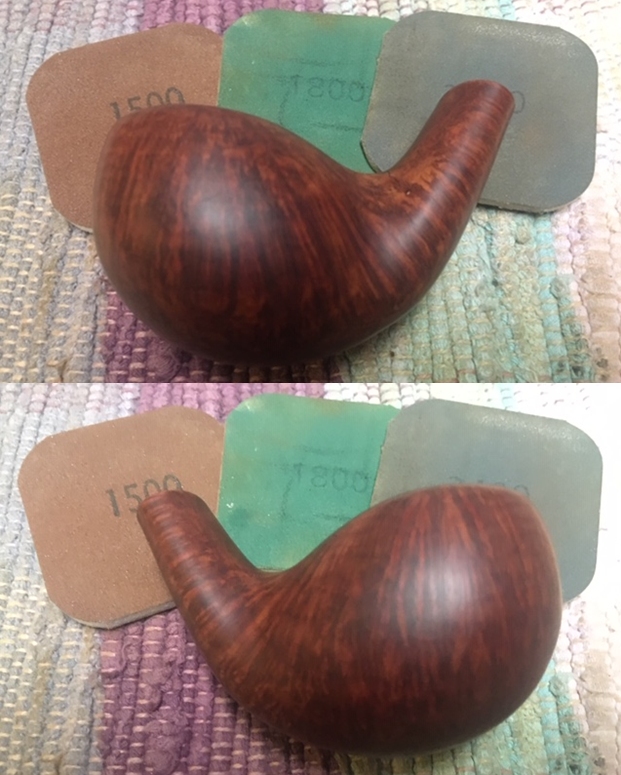
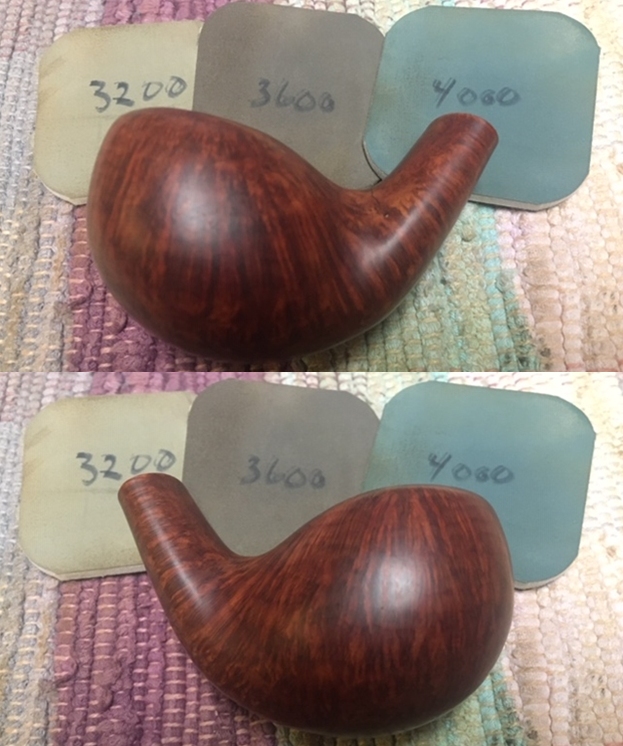
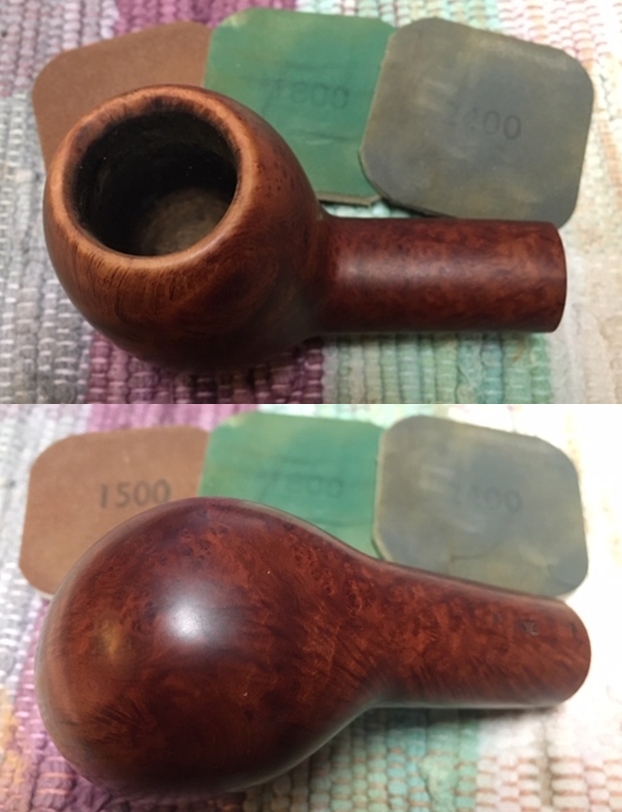
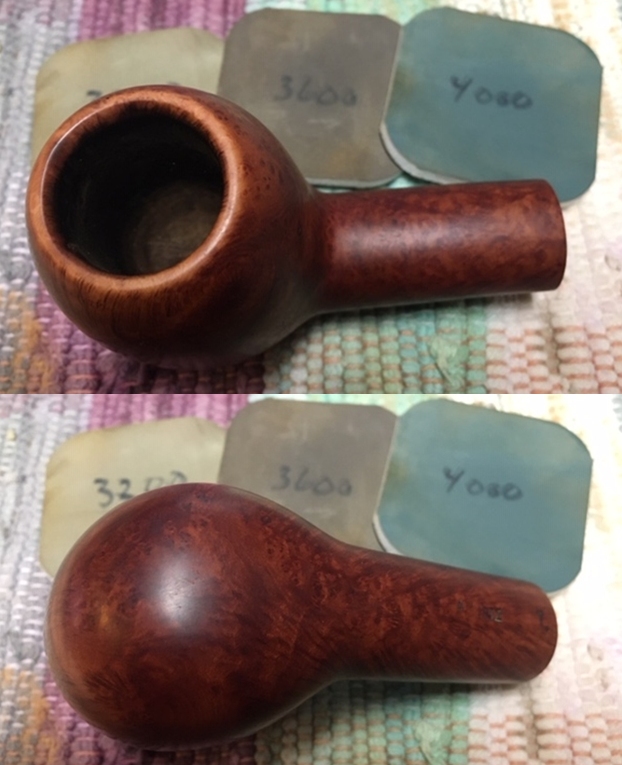
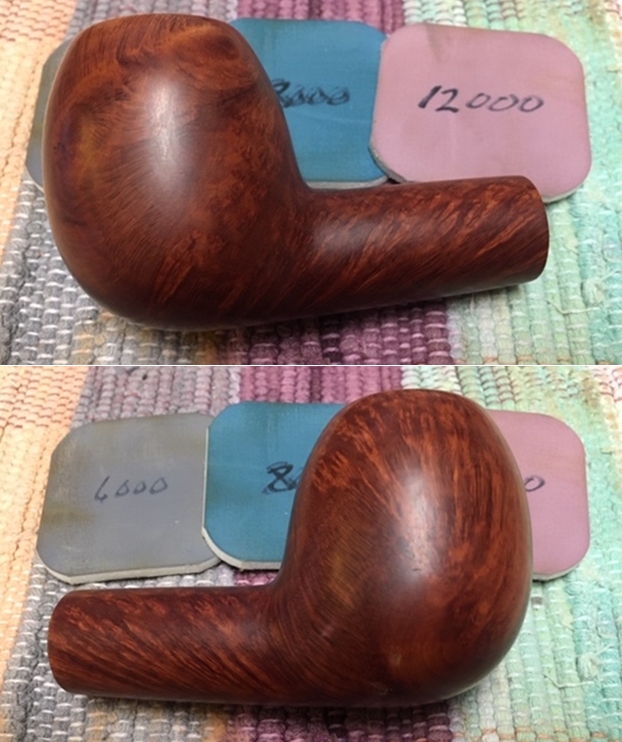
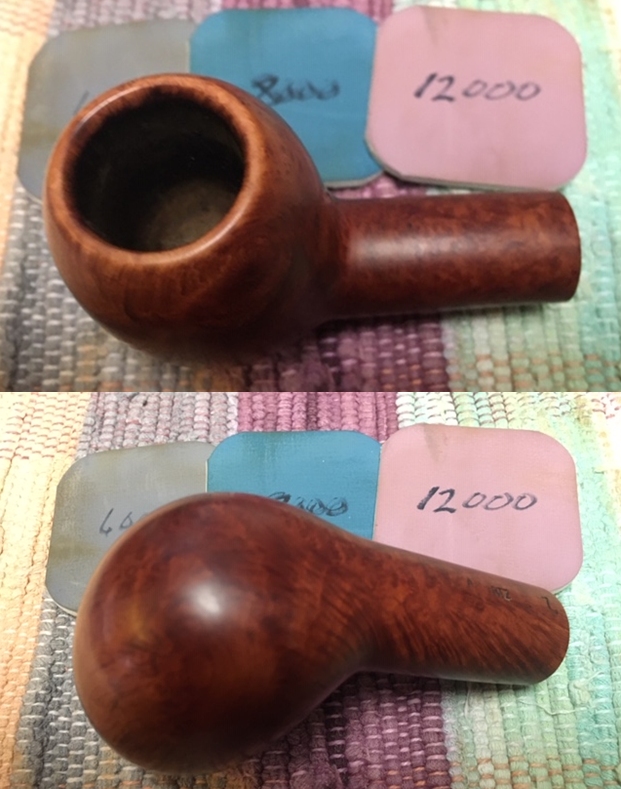
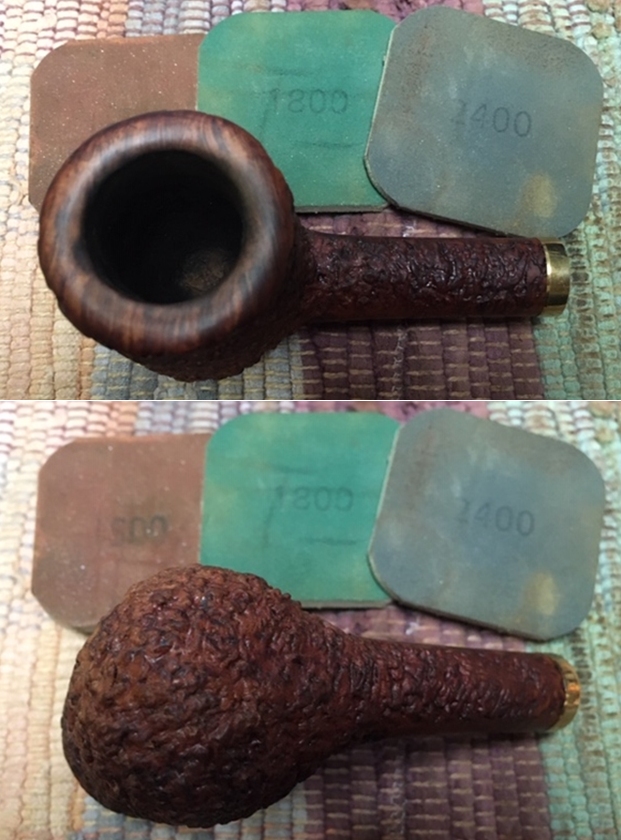
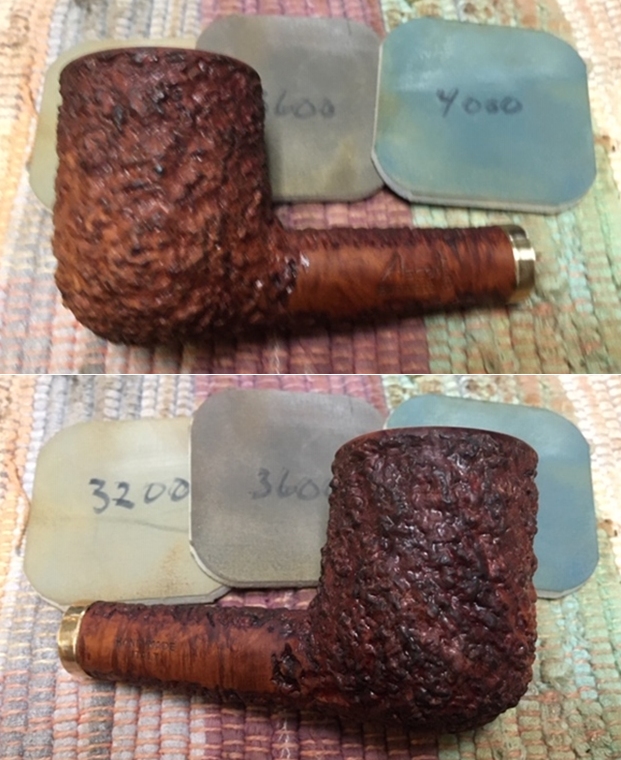
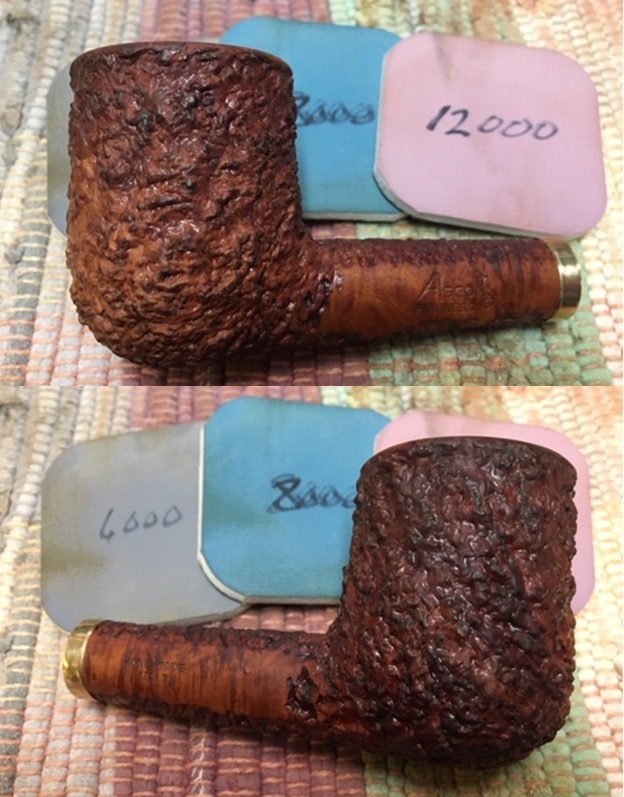
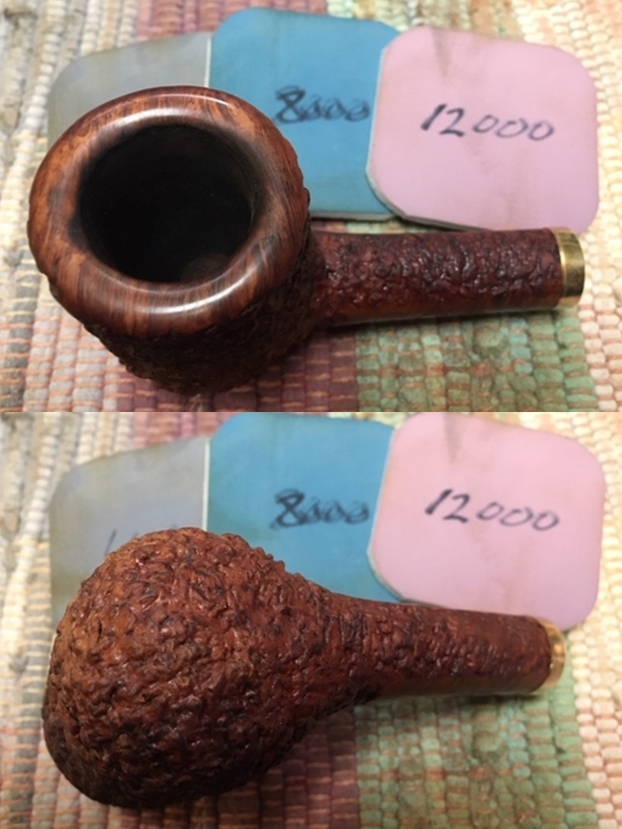
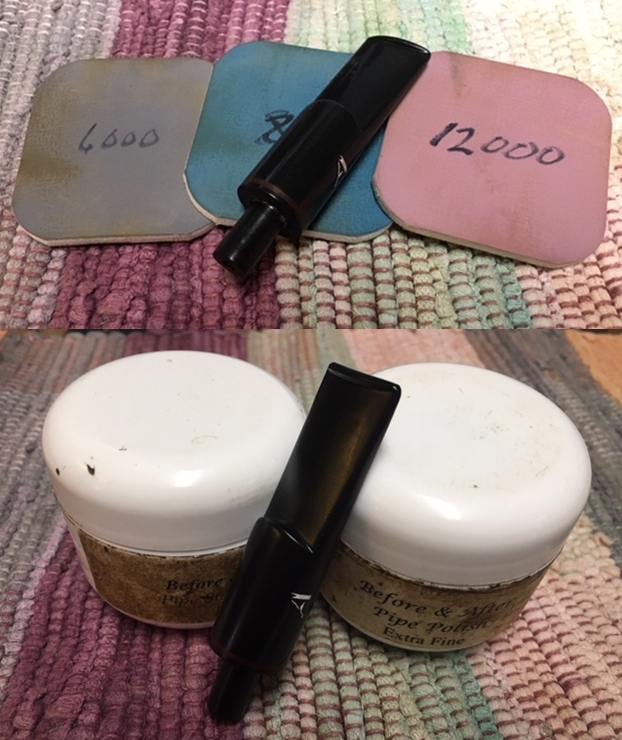
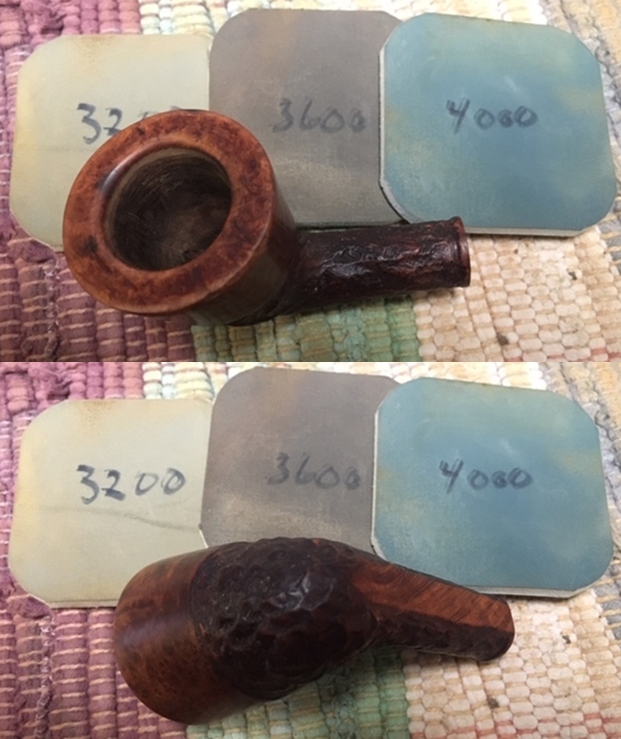
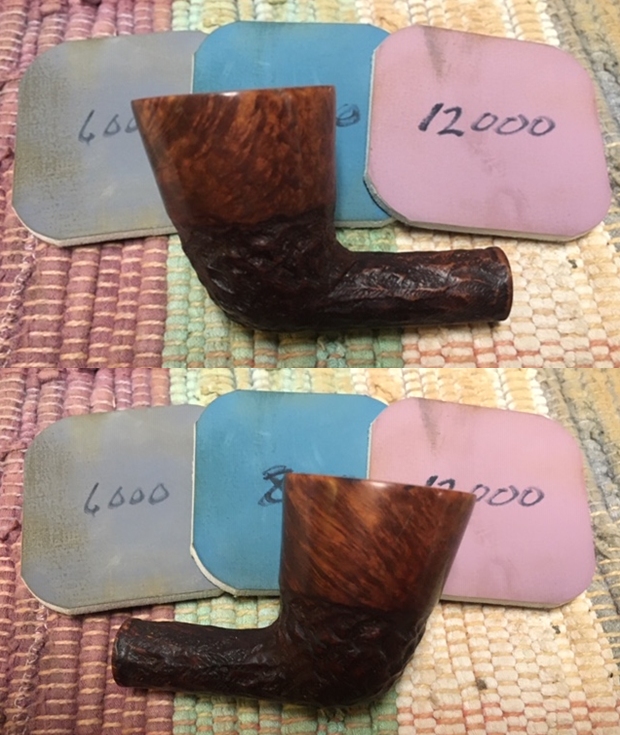
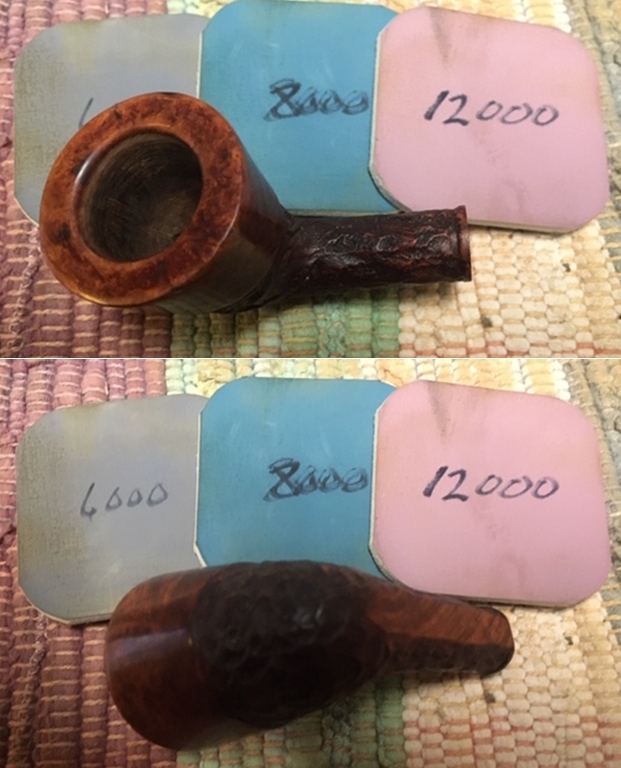
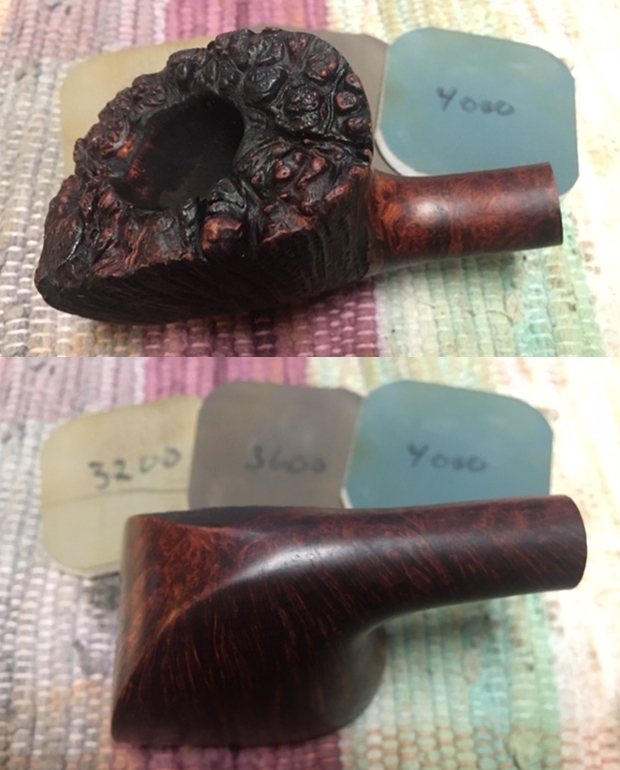
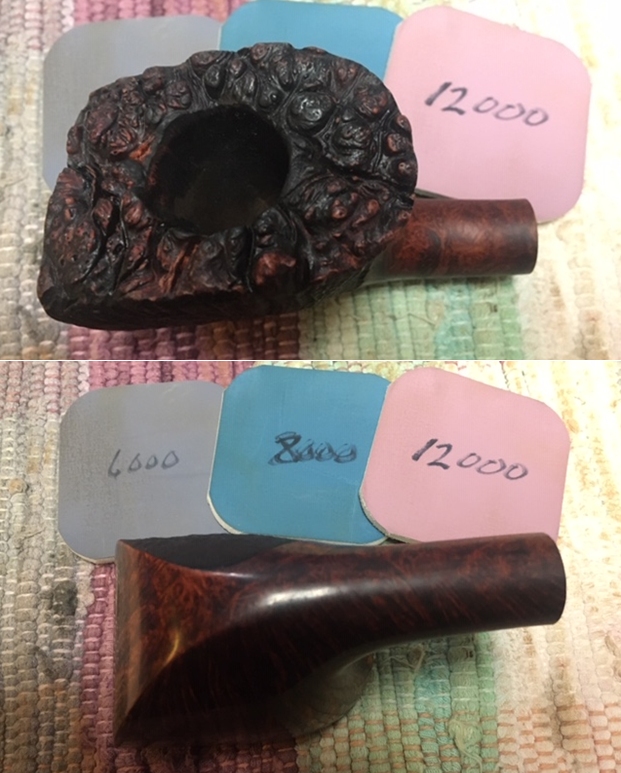
 Continuing to the micromesh process, I wet sand with pad 1500 to 2400 and dry sand with pads 3200 to 4000 and 6000 to 12000. Between each set of three pads Obsidian Oil is applied to freshen as well as to protect the vulcanite against oxidation. I’m pleased with the repairs. The large fill on the upper side is solid but still visible. We still live in an imperfect world!
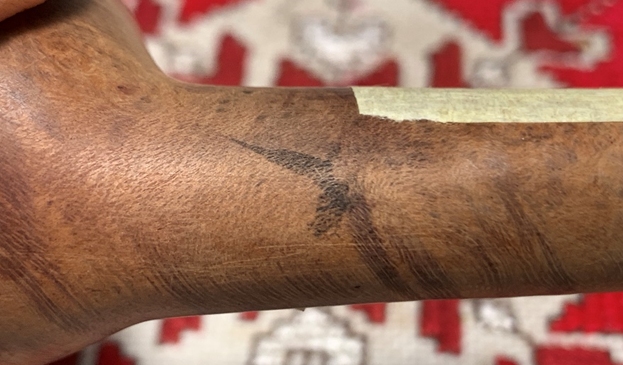
 Turning back to the newly stained stummel, it has been resting now for several hours and it’s time to ‘unwrap’ the flame crusted surface.
  To remove the crusted surface, a felt buffing wheel is mounted onto the Dremel with the speed set almost to the slowest to avoid excess heating with the friction created by the felt on the briar surface. With the felt wheel, the coarser Tripoli compound is applied to the blasted briar surface. With my wife’s help taking some pictures while my hands are full, it shows the ‘unwrapping’ process. The second close-up shows the line between the crusted part and the unwrapped part.
 The stummel has been unwrapped revealing the dark brown undercoat. Next, the stain wash with a red dye applied until the desired hue is reached – hopefully!
 The red dye concentrate I acquired not long ago prescribes a ratio of 1 fluid ounce per quart of either water or alcohol. For my smaller purposes of application, I pour some isopropyl 95% in a small jar – about 1/3 filled and add several drops of the red tint concentrate until it looks good.
  Then, using a folded pipe cleaner, I wash the stummel with the red dye and wipe it with a cotton pad. Since I haven’t done this before, I’m going by the ‘seat of my pants’ to see how the briar takes the wash and what the effect will be.
 Satisfied at this point, not sure whether I’m achieving the ‘Dunhill’ look, I set the stummel aside to rest for several hours through the night.
 The next morning, the red dye wash has had time to settle. The next step to unwrap the stummel a second time. For this, I mount the Dremel with a softer cotton cloth buffing wheel, set at the normal 40% speed, and apply the lesser abrasive compound, Blue Diamond. Again, my wife assists with a picture of this process.
 DISASTER AVOIDED! When I reached for the stem to rejoin it to the stummel to apply Blue Diamond to it, I noticed that the double diamond inlay was missing! Oh my! Miracle of miracles, I looked down and amazingly saw the diamonds. To remedy this near disaster, using a toothpick, I dab a bit of CA glue in the diamond cavities on the stem and with tweezers replace the double diamond inlay. The process was not as easy as it sounds as small as the double diamonds are and not getting excess CA glue on the finished stem surface….
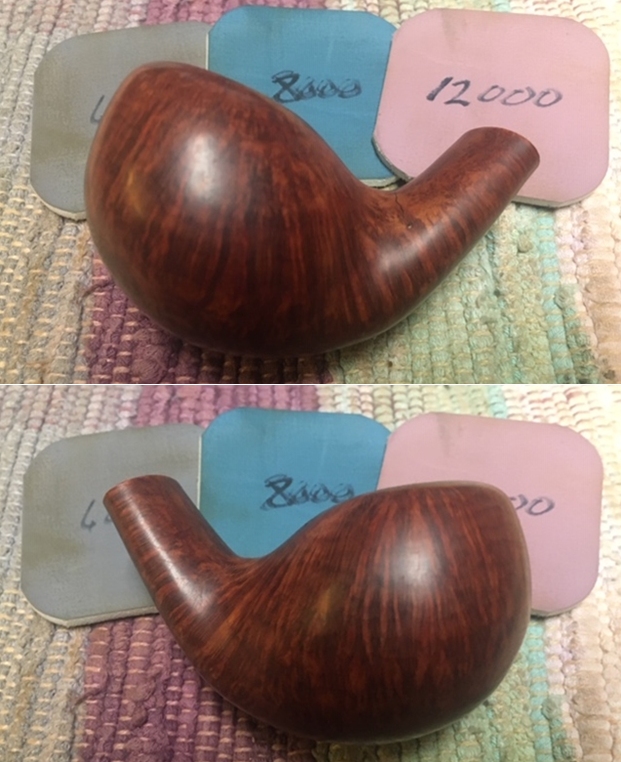
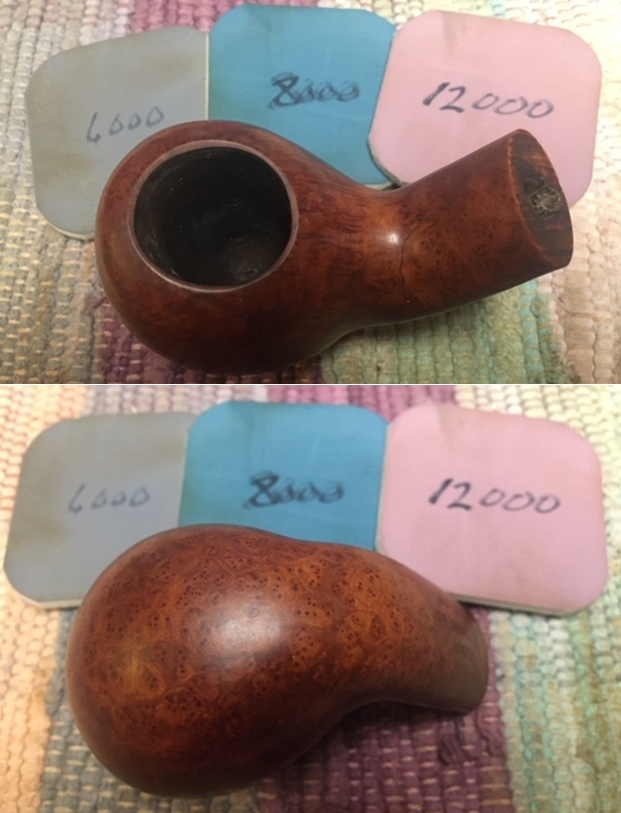
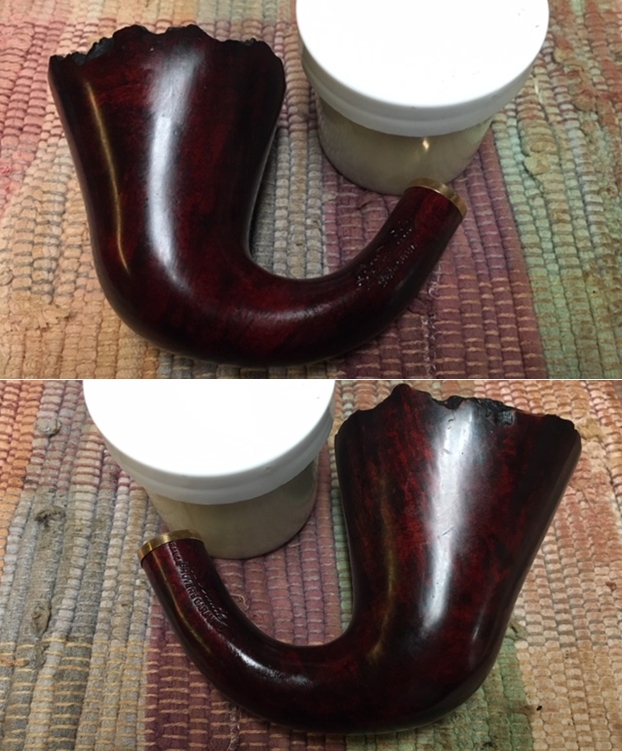
 With Double Diamonds reattached, and the stem and stummel reunited, I continue the application of Blue Diamond compound to the stem. I do change buffing wheels because of the dye unwrapping.
 Before applying wax, I do a ‘heat’ buffing. To help minimize dye leaching off on the hands of the new steward, I use the heat gun to warm the stummel, emulating the heating of a pipe in service, and use a cotton cloth to wipe it during the heated state. This helps to stabilize the new dyed briar surface.
 After reuniting stem and stummel, I mount another cotton cloth buffing wheel to the Dremel, set at 40% full power, and apply carnauba wax to the pipe. When completed, a microfiber cloth provides a rigorous hand buffing to raise the shine.
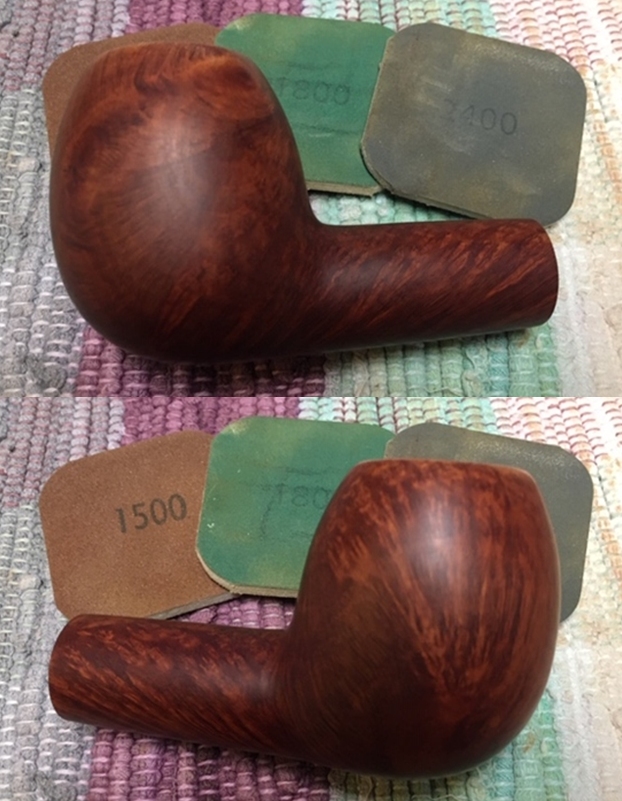
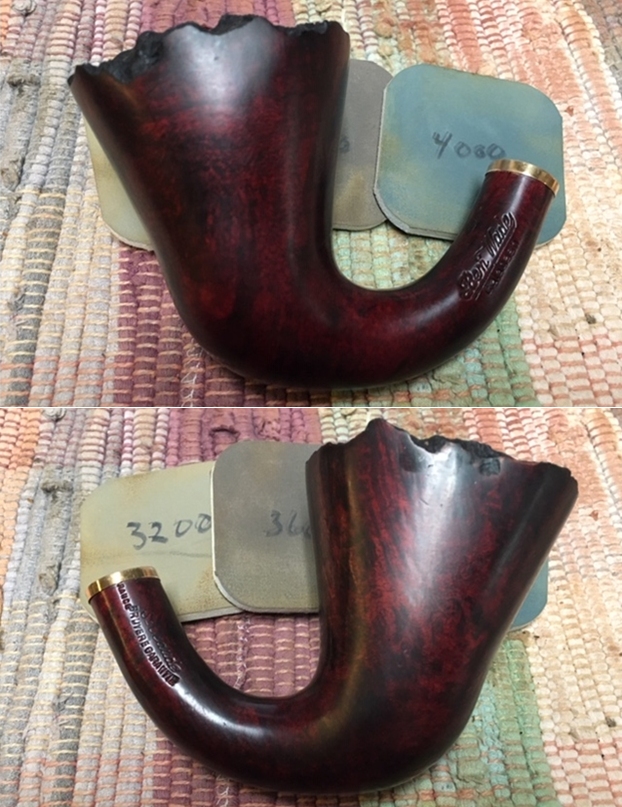
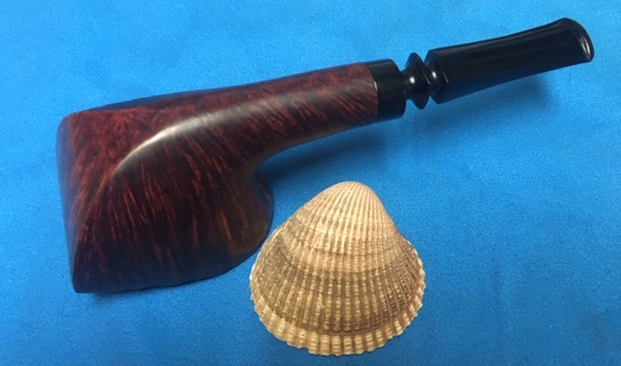
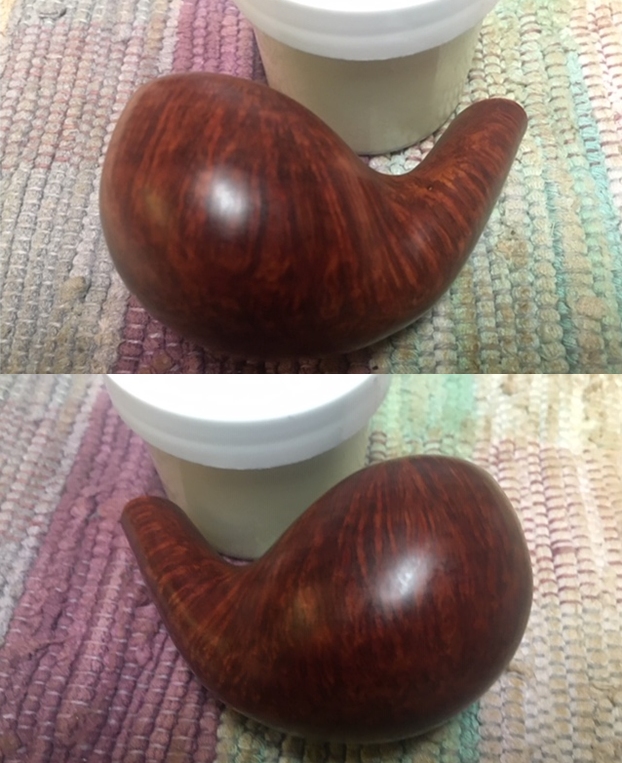
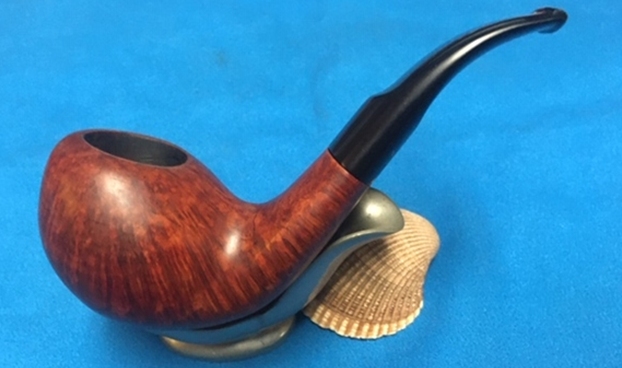
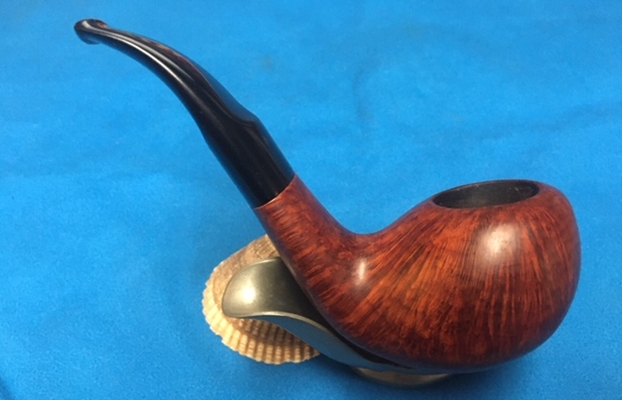
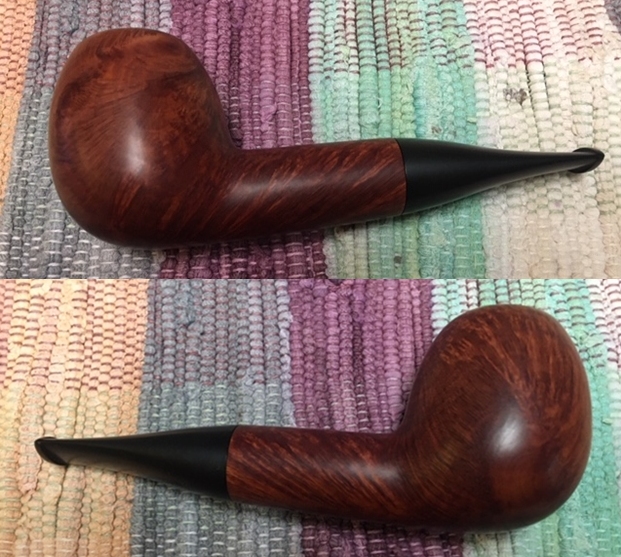
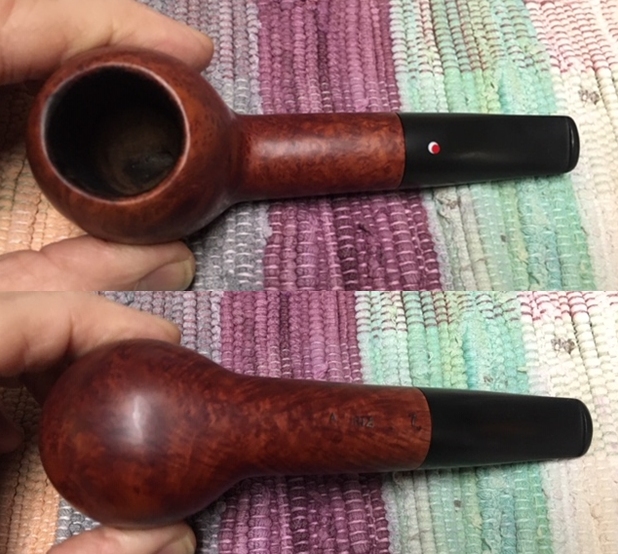
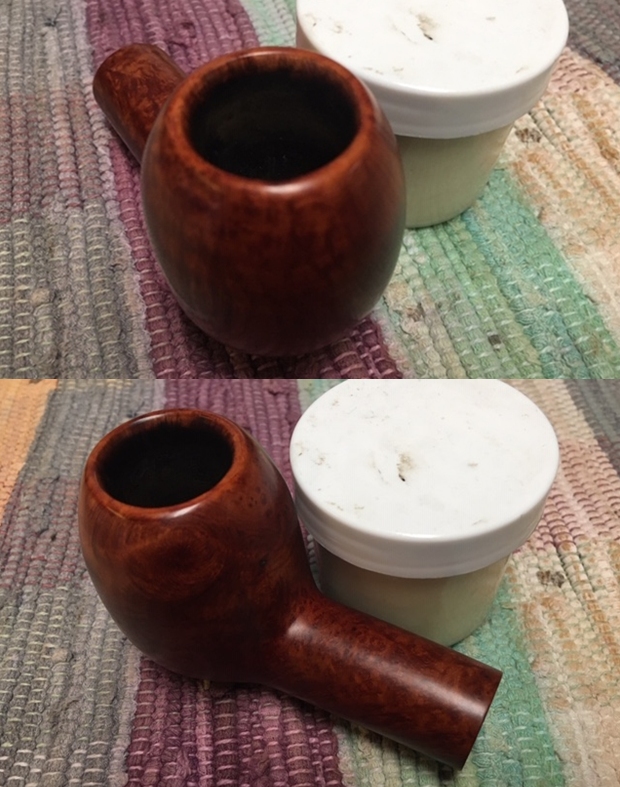
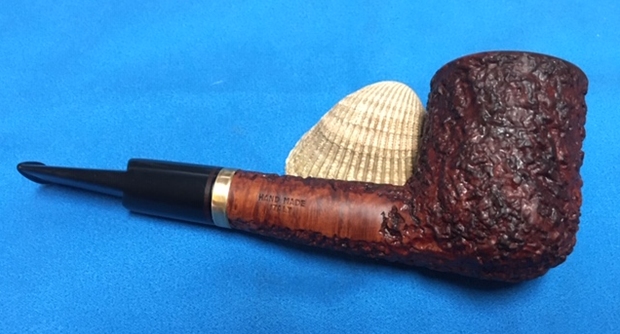
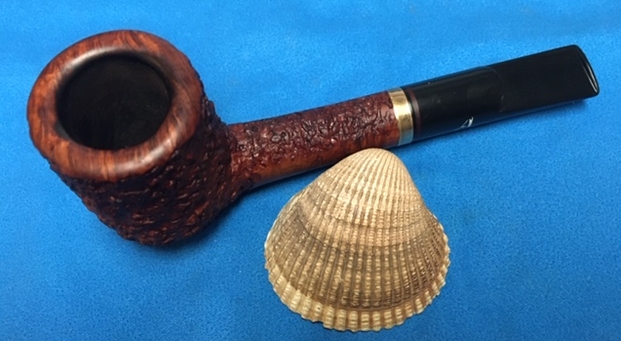
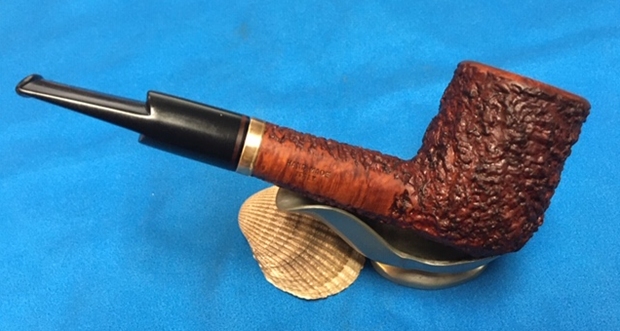
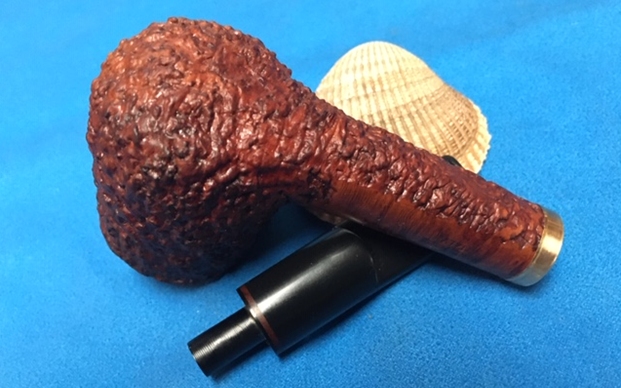
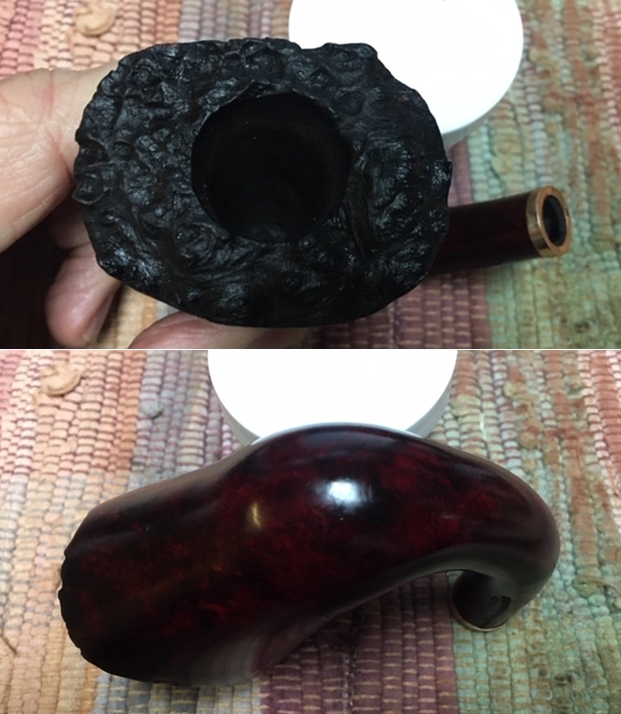
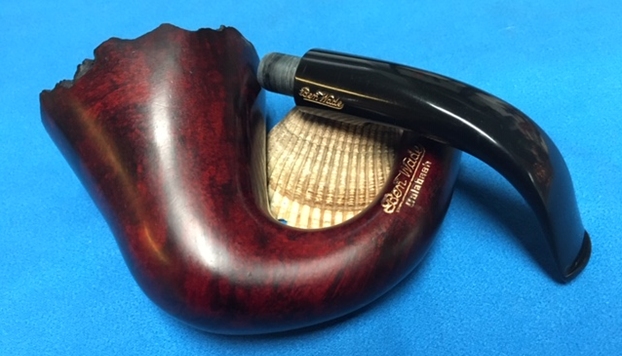
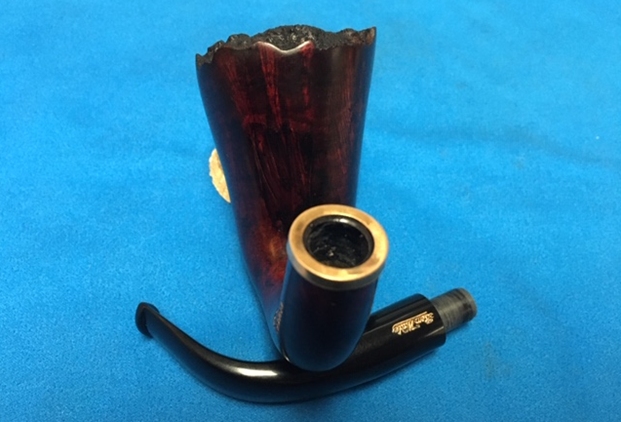
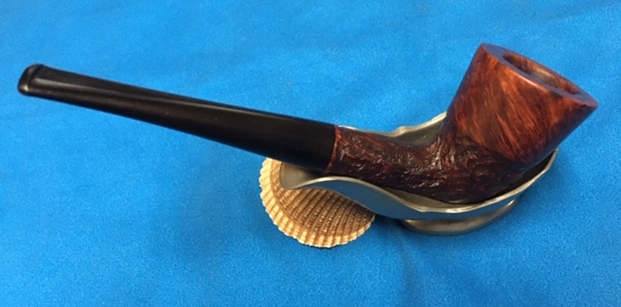
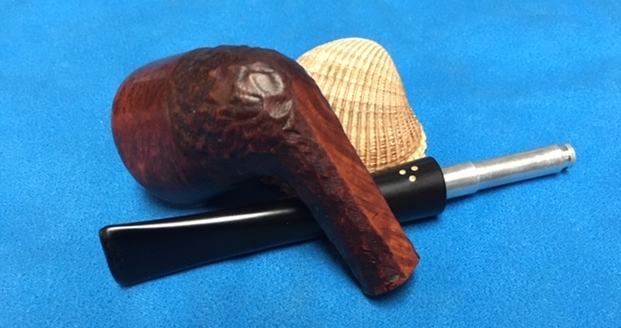
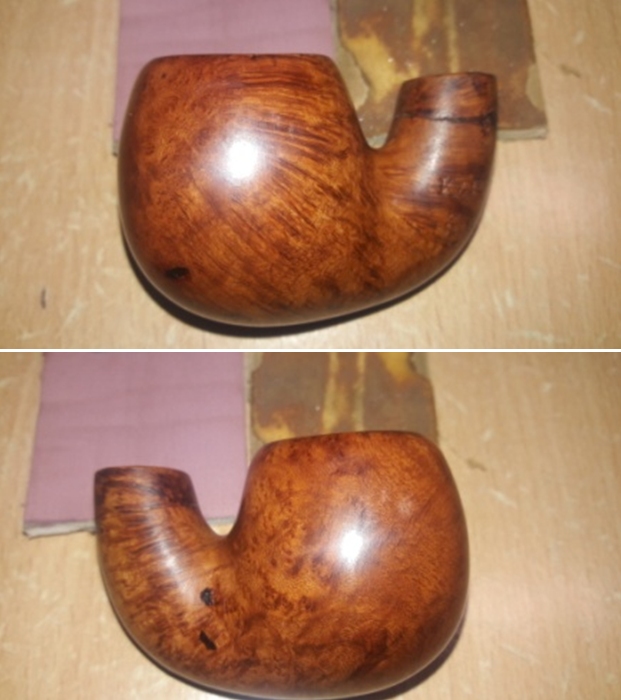
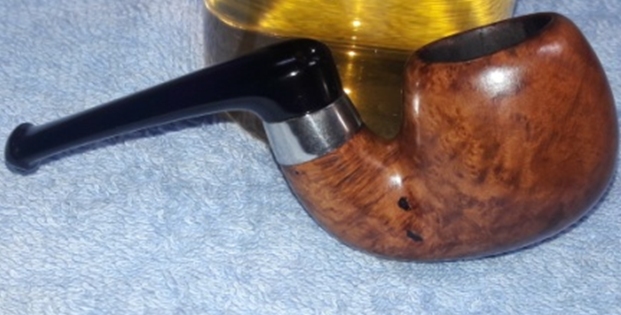
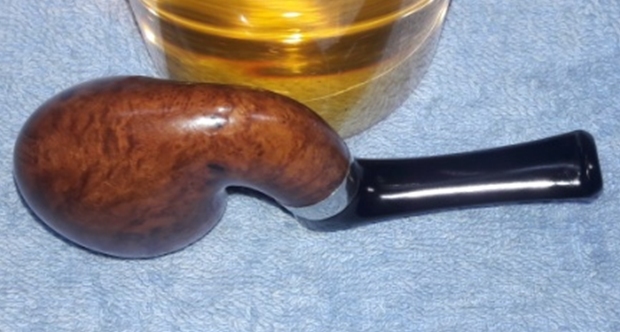
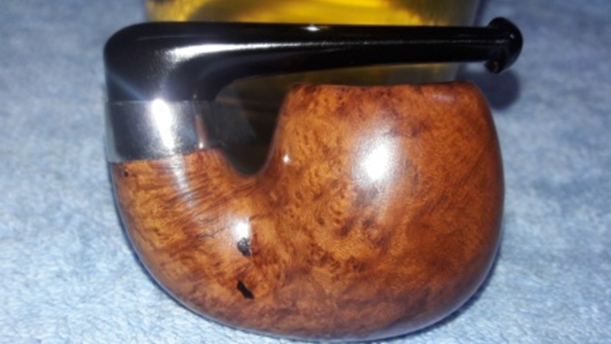
Wow! With Paresh’s help, I think I nailed it! The depth and richness of this blasted finish has that ‘Dunhill’ look to it I believe. Thanks, Paresh! The blasted landscape of this Heritage Antique Blasted Apple jumps out with the 3-dimensional contours of the briar grain contours. I can’t get over the red notes in the finish – it gives it a depth and richness that is something to enjoy. The technical challenges with the rim repairs and stem patches turned out great. I’m pleased with this restoration and Todd, who commissioned it, will have the first opportunity in The Pipe Steward Store to acquire the Heritage Antique benefiting the Daughters of Bulgaria – women and girls who have been trafficked and sexually exploited. Thanks for joining me!


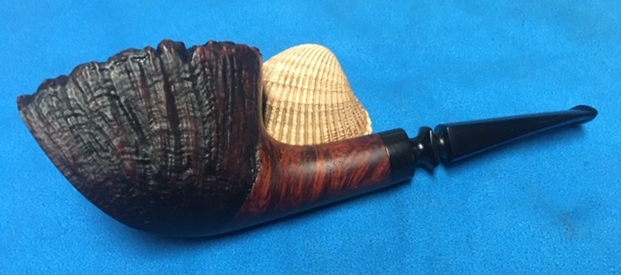
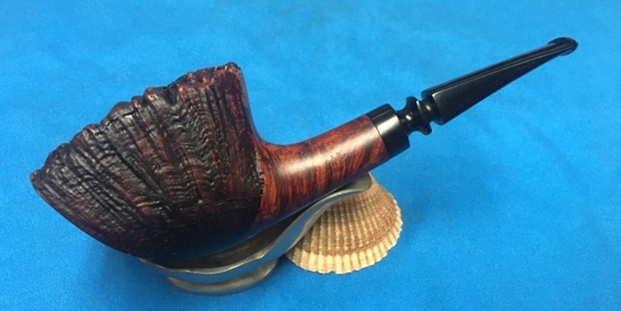
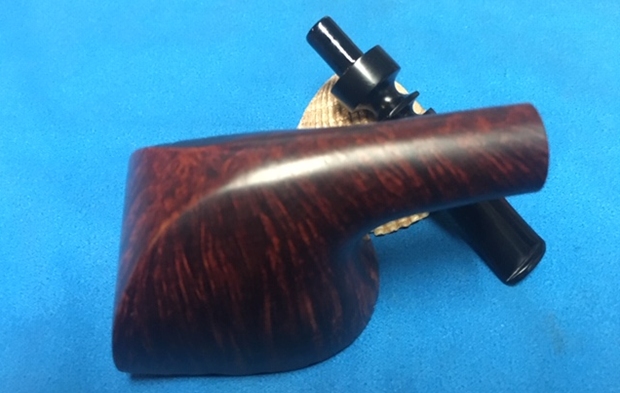
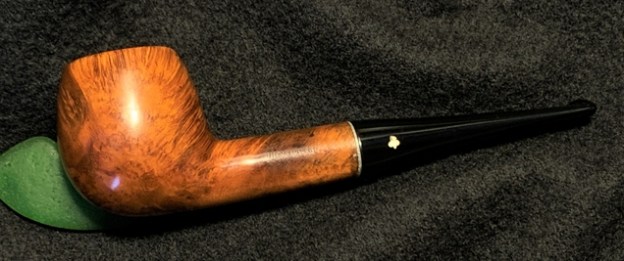
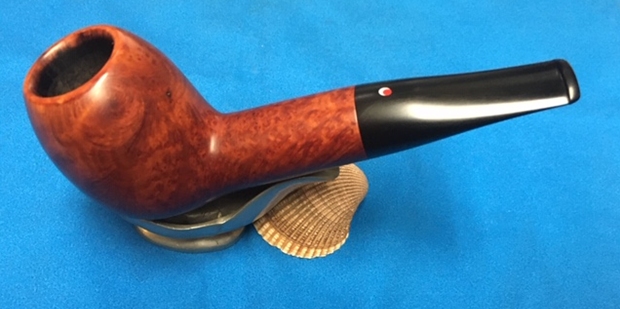
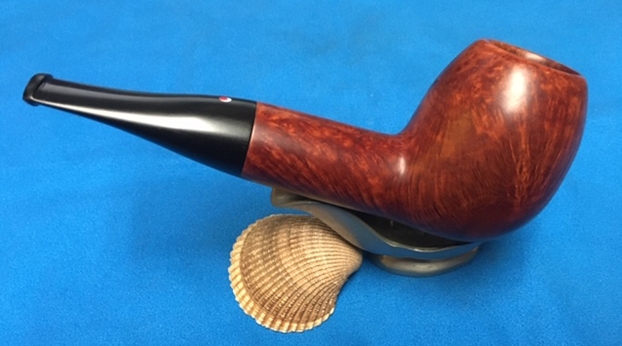
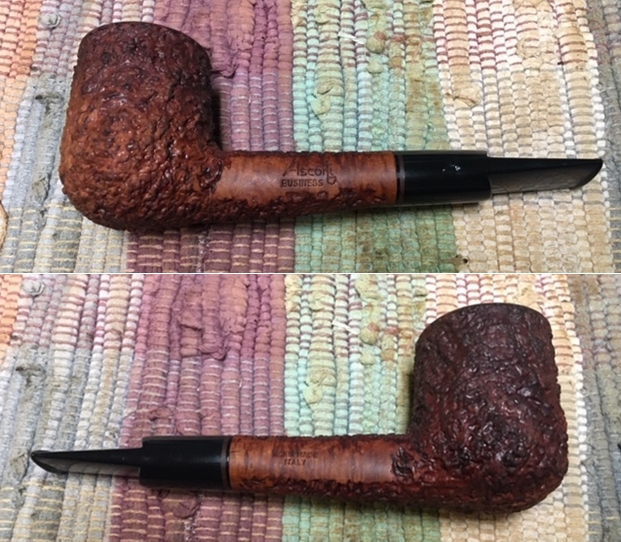
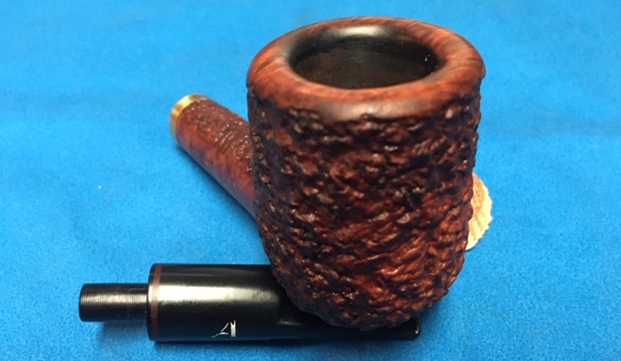
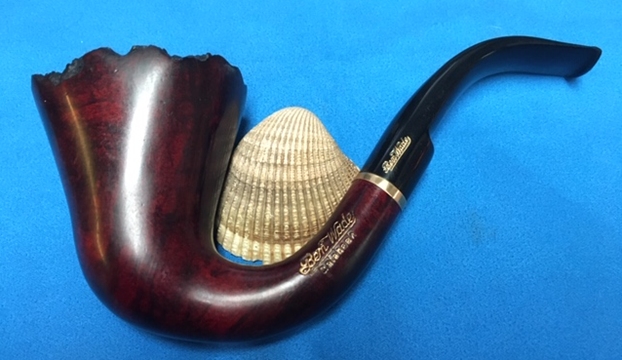
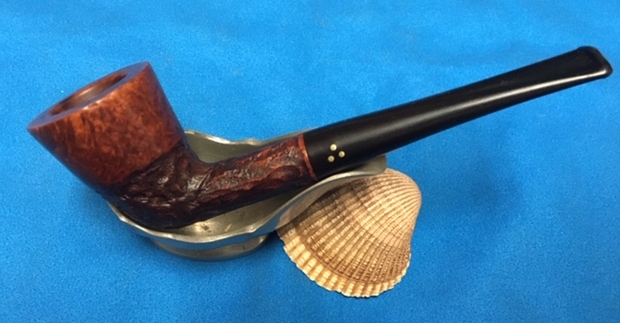
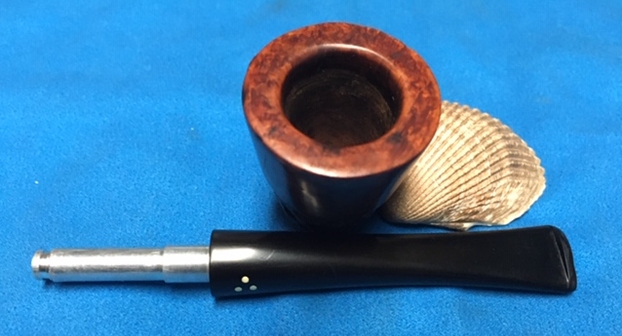
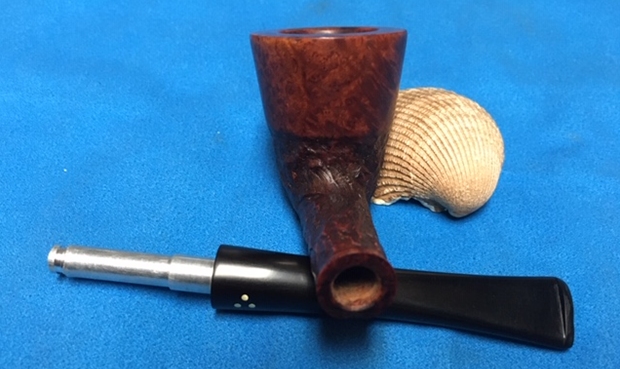
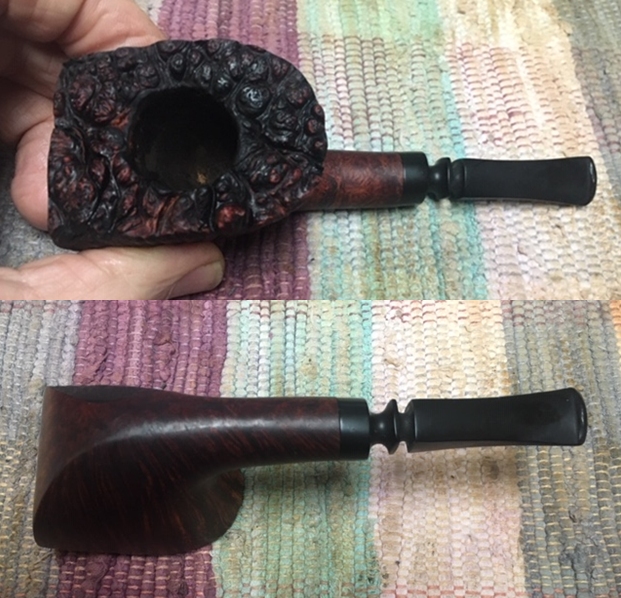
 The next pipe on the work table is a pipe that came to me from Joe in Georgia. He was selling an estate for a family and sent me a list that had a Bari Matador pipe listed. I had him send me some photos of the pipe so I could see what it looked like. I was initially interested in the pipe and once I saw it we struck a deal and the pipe was on its way to Jeff. Often when I buy pipes from the US I have the sellers send them to Jeff and he cleans them for me before sending them up to me for the rest of the restoration work. It was an intriguing pipe with a combination of sandblast and smooth finishes. The left side of the bowl is sandblasted and the rest of the bowl is smooth. The rim top of the bowl is a plateau finish. The stem was a fancy turned stem with a paneled taper.
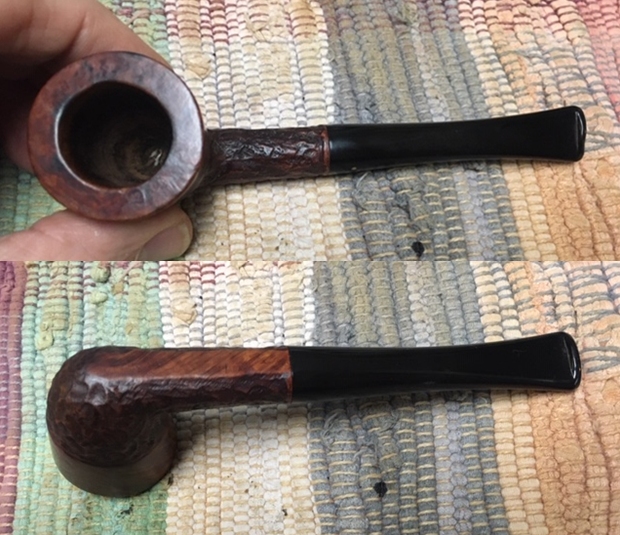
 This Freehand shaped Bari is interesting in that it borders on being a panel. The front and sides are flat making the pipe rectangular while the shank is round. The panel idea follows through to the stem after the fancy turning. The blade of the stem is square. It is stamped on the left side of the shank and reads Bari over Matador in a football shape. On the right side it reads Handmade In Denmark. The finish is smooth on three sides of the pipe (right, front and back) and is sandblasted on the left side of the bowl. It has some great grain around the smooth sides of the bowl and shank. The blast is deep and rugged with some great grain as well. The rim top is plateau and is craggy. The pipe was dirty and the finish flat. There were some dings and scratches in the briar but otherwise it was in good condition. The bowl was lightly caked and the inner edge of the rim looked to be in good condition. The fancy saddle stem was vulcanite and had tooth marks and chatter on both sides near the button. It was oxidized and had some calcification on the end. Jeff took some photos of the pipe to show the general condition of the pipe before he started his clean up.
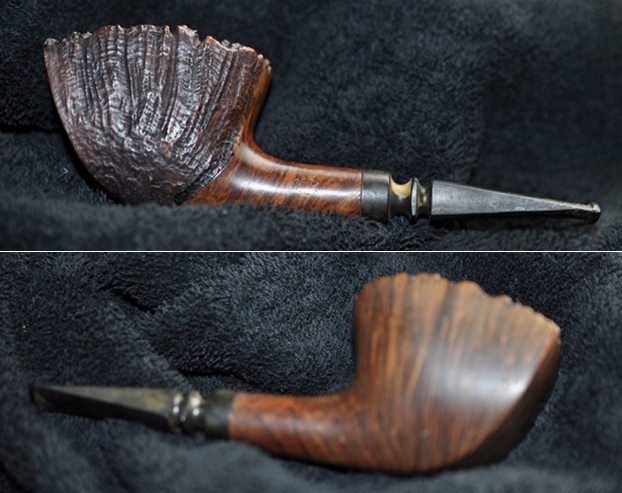
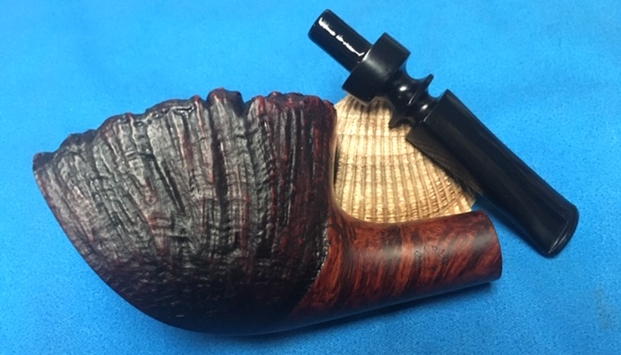
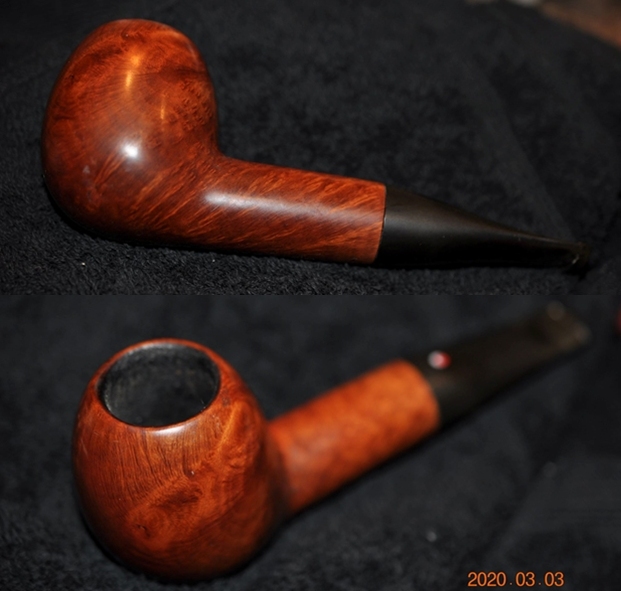
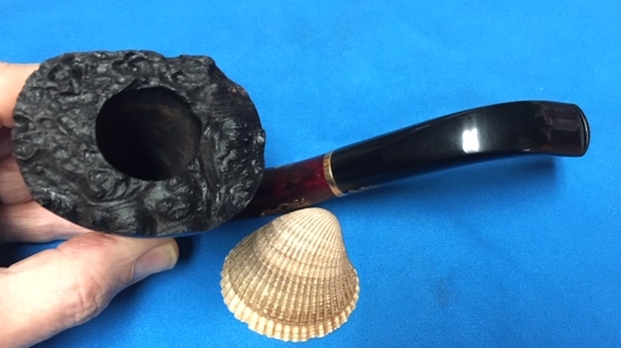
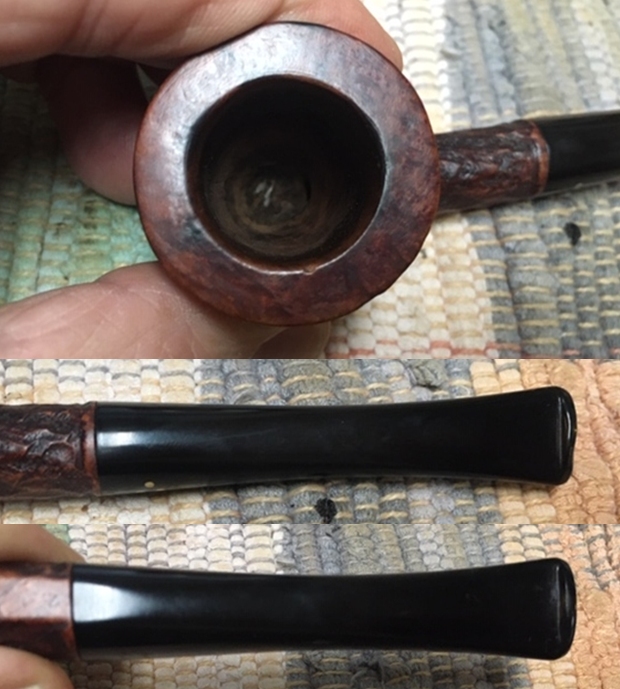
 Jeff took some close-up photos of the rim top and bowl to show the overall condition. There is some light lava in some of the grooves but overall it is just dusty. The edges look very good.
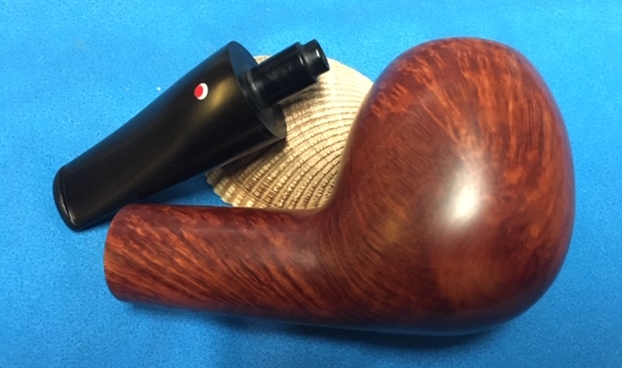
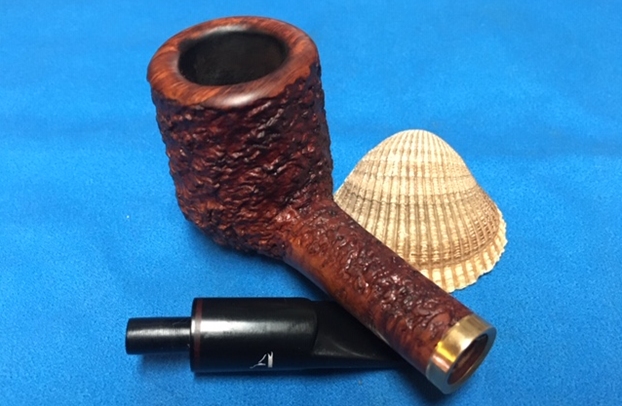
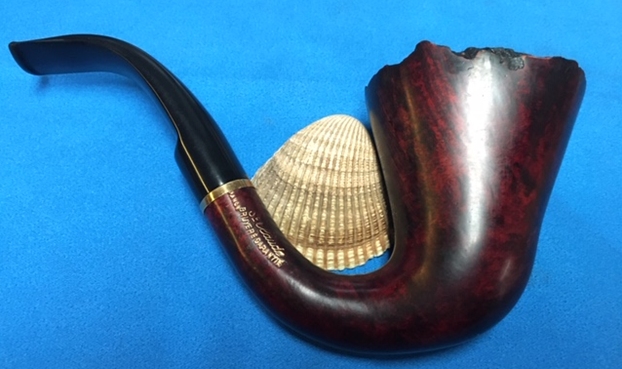
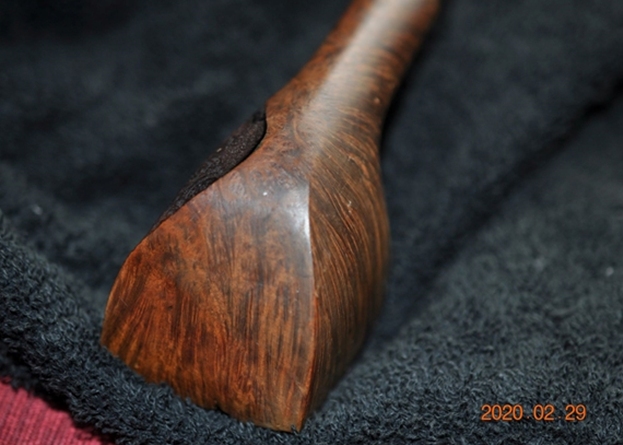
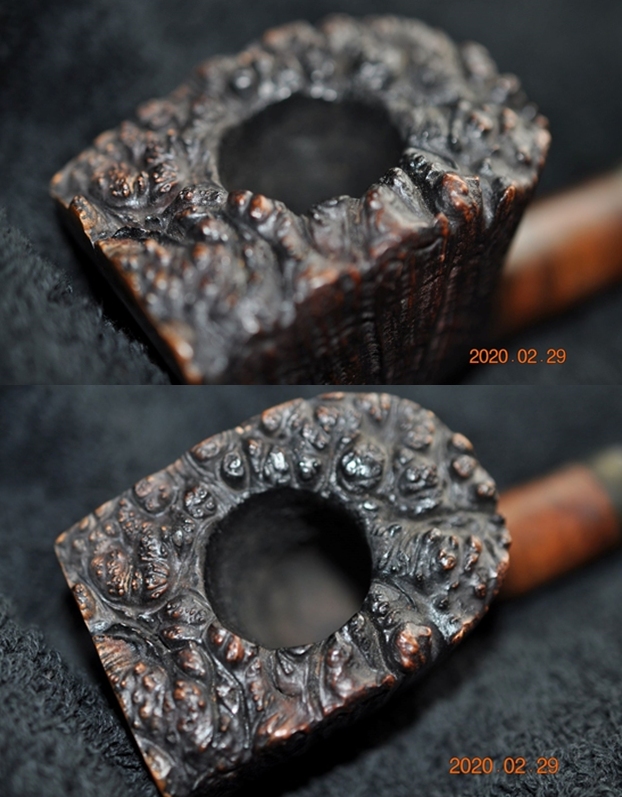 Jeff took some photos of the sides and heel of the bowl to show the condition of the finish on the pipe. The photos show the beautiful grain around the bowl. Under the dust and grime it was a nice looking bowl. I think it will be a beautiful Freehand pipe once it is restored.
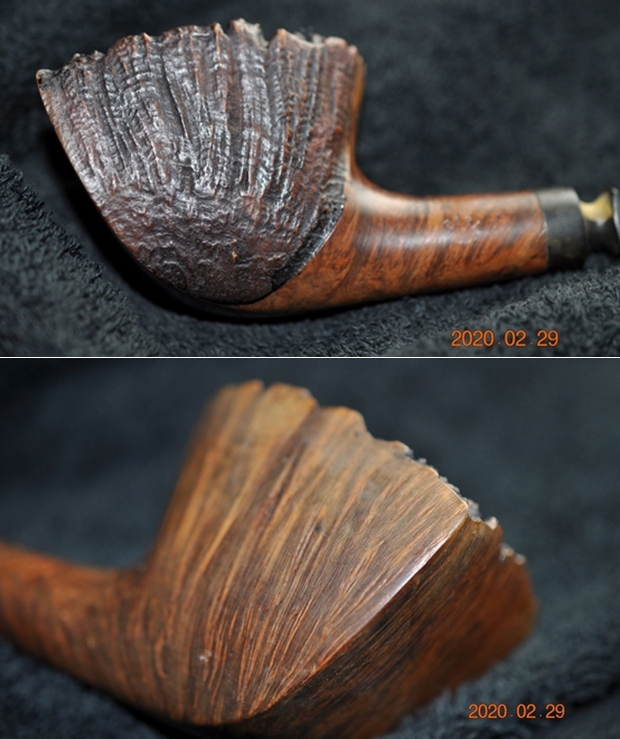
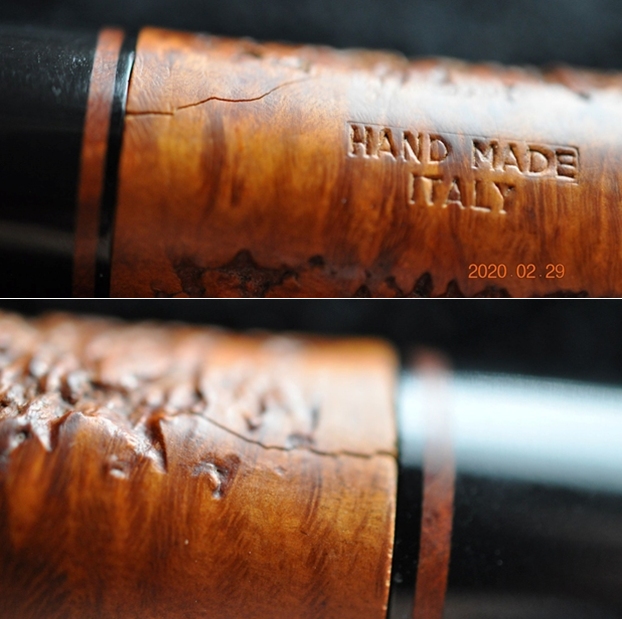
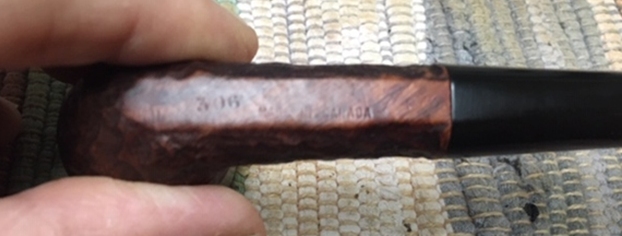
 He took a photo of the stamping on the left side of the shank. On the shank it was stamped Bari over Matador in the football shape as noted above. In my examination of the pipe when it arrived I could see that it was also stamped on the right side Handmade in Denmark but it was very faint.
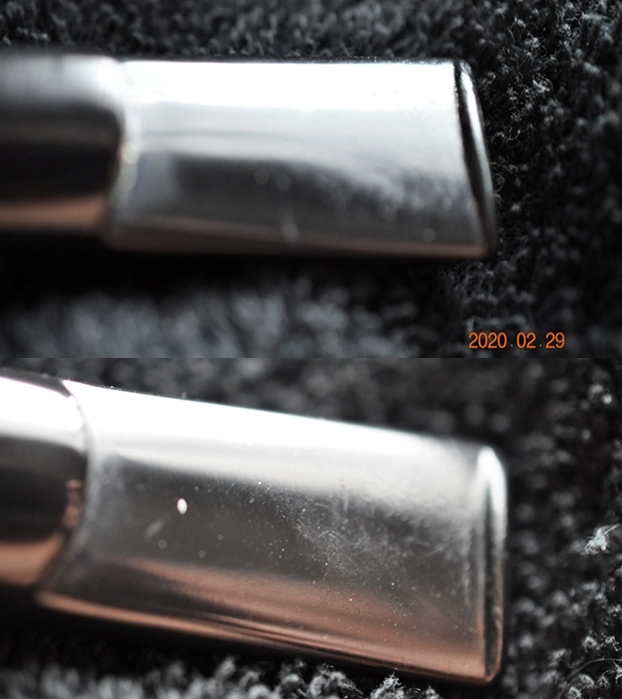
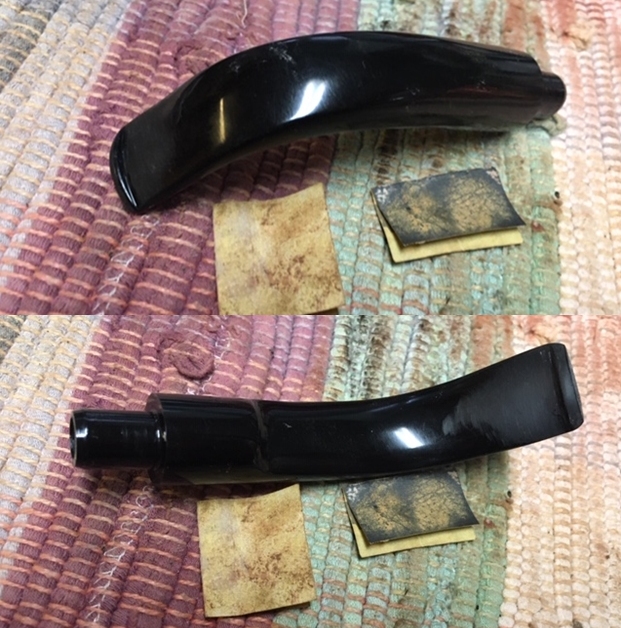
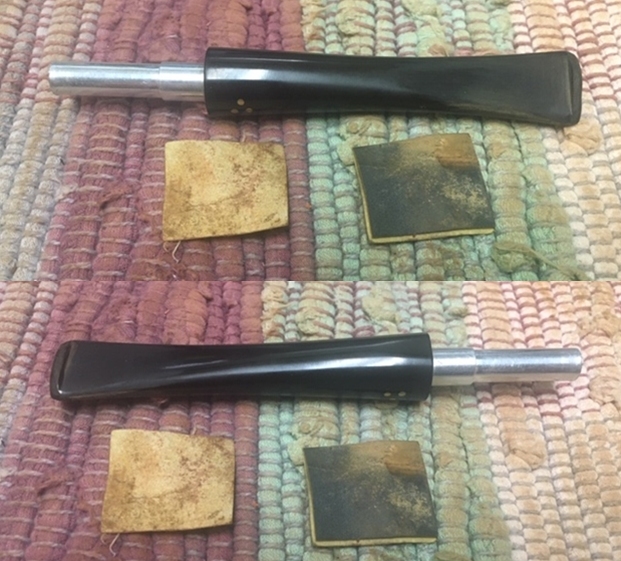
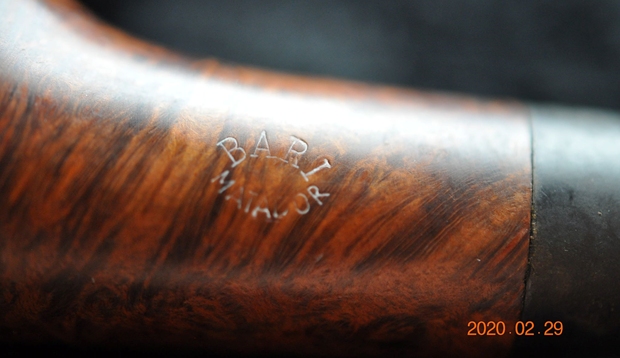 The next two photos show the top and underside of the stem. It is dirty and has calcification on both sides at the button. There is also some tooth chatter and some light tooth marks with some damage to the button edge. The third photo shows the fancy turning on the shank end of the stem.
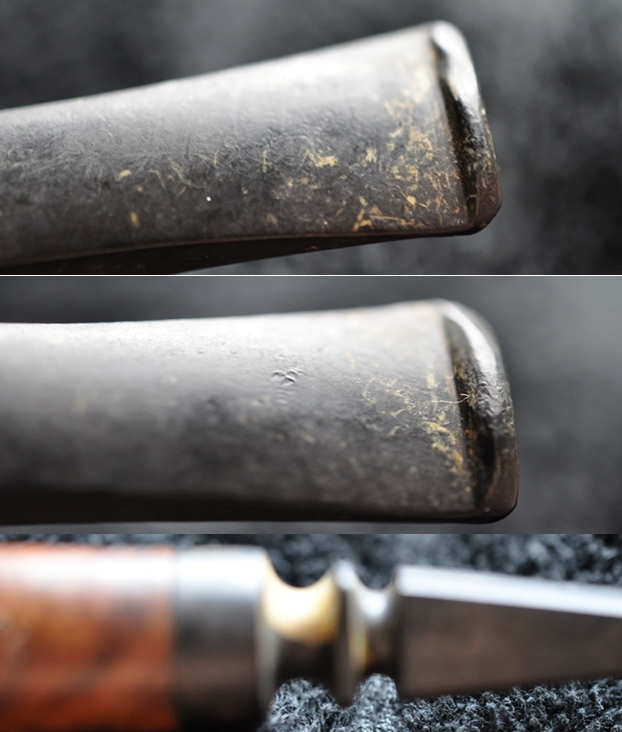 Paresh has restored a similar Bari Matador and written about it on a blog. It is an informative piece so I have included the link to it here (https://rebornpipes.com/2019/05/15/a-simple-refurbishing-of-a-bari-matador/).
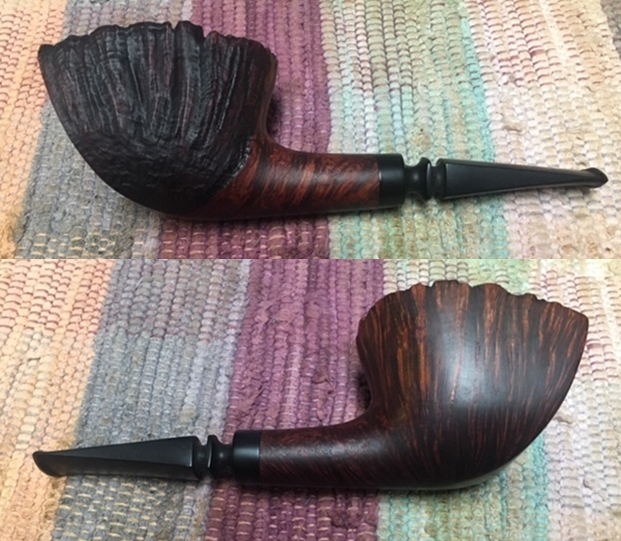
 I took a close up photo of the plateau rim top to show how clean it was. The inner edge of the rim and the ridges and valleys of the plateau looked good. The stem looked good just some light tooth chatter and several deeper tooth marks on the button.
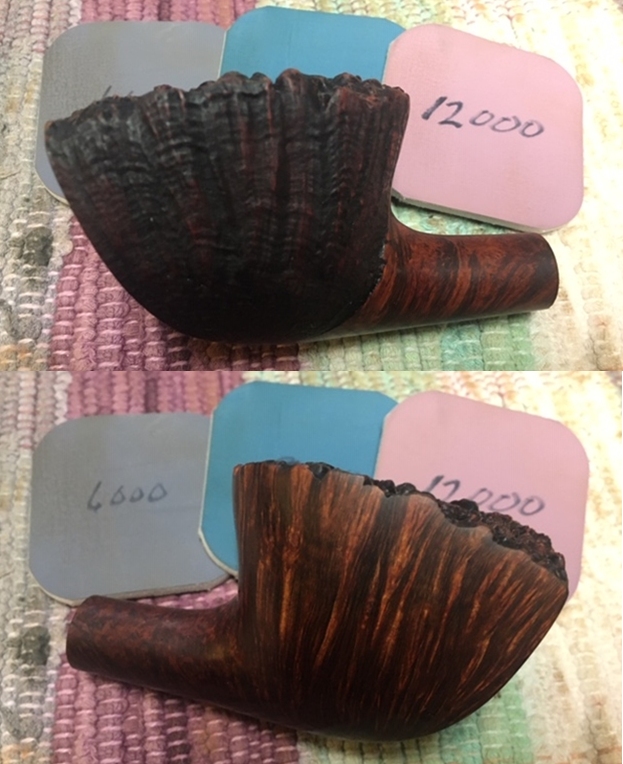
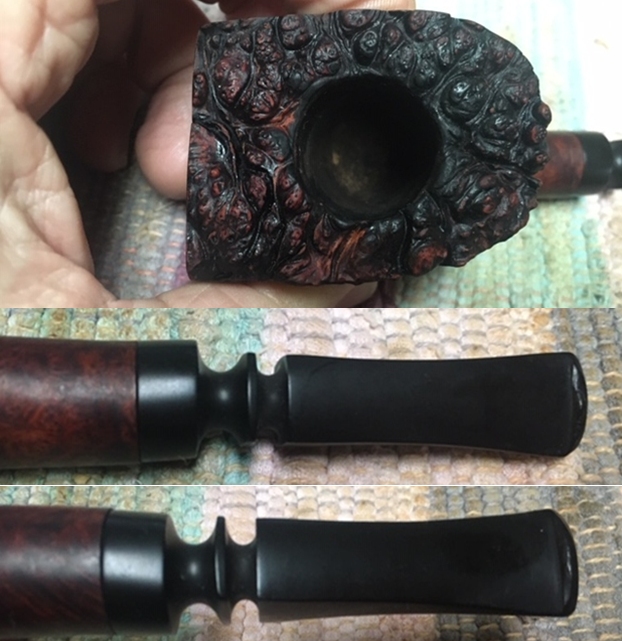 The pipe was in decent condition so I started with the bowl. I polished the smooth portions of the briar with micromesh sanding pads – wet sanding with 1500-12000 grit pads and wiping down the briar after each sanding pad with a damp cloth. The briar began to shine.
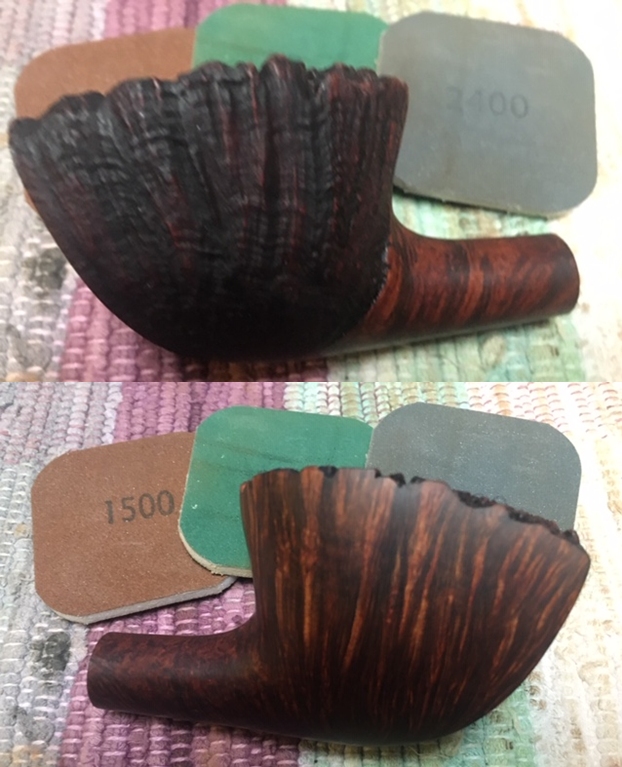

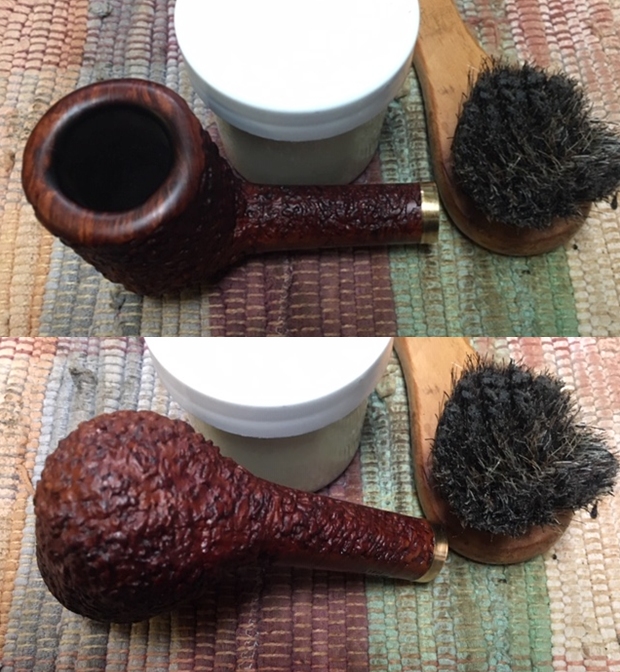
 I worked some Before & After Restoration Balm into the smooth briar with my fingertips and the plateau and sandblasted side with a horsehair shoe brush. The product is a great addition to the restoration work. It enlivens, enriches and protects the briar while giving it a deep glow. I appreciate Mark Hoover’s work in developing this product.
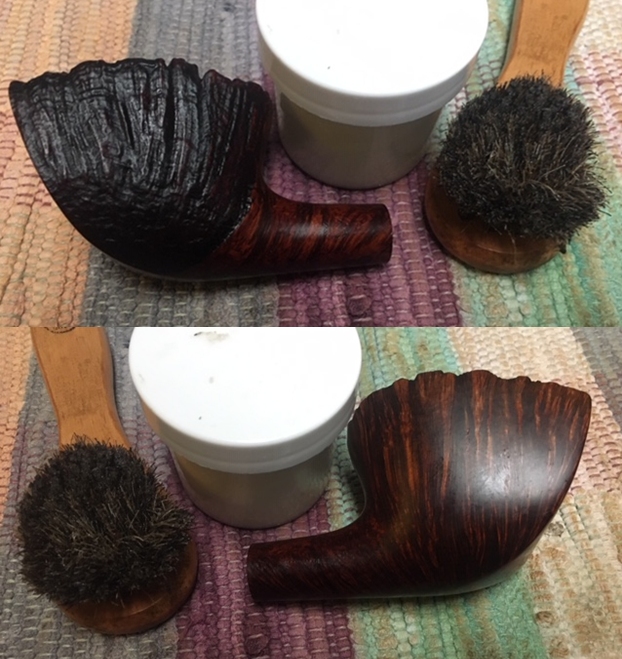
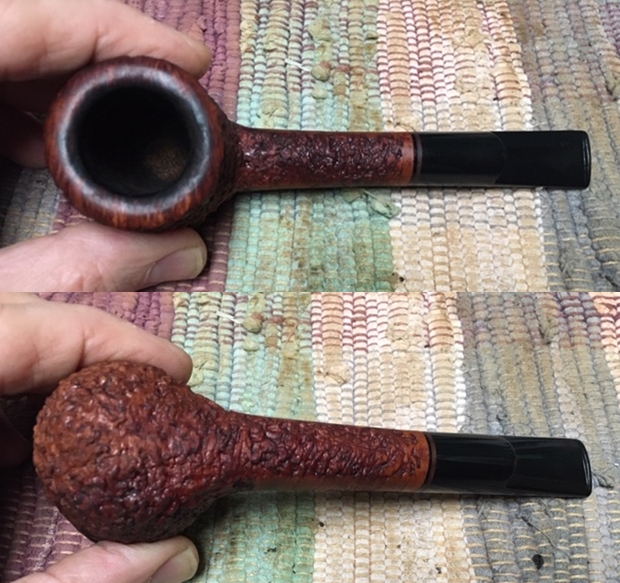
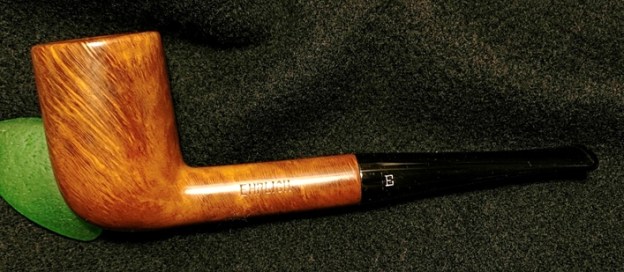
 I buffed the pipe with a micro fiber cloth to raise the shine and took photos of it at this point it the process. It is a beautiful looking pipe.
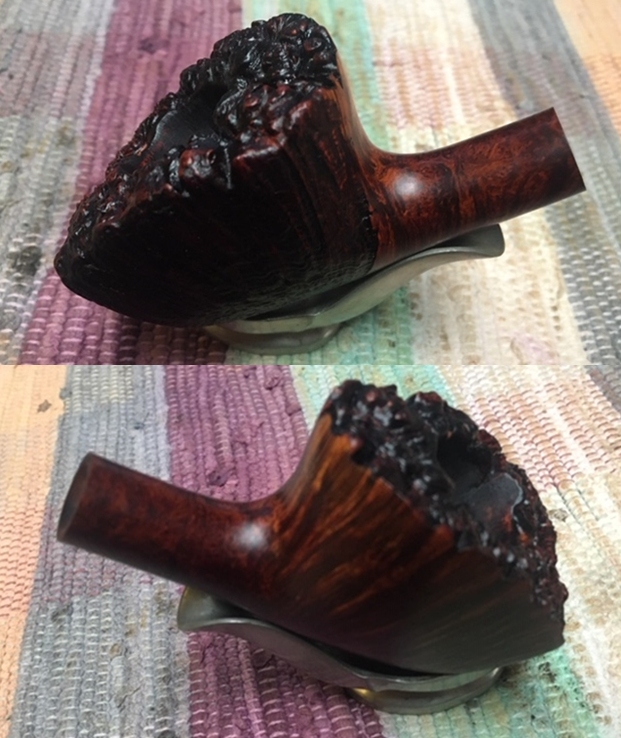
 I set the bowl aside and turned my attention to the stem. I “painted” the tooth marks with the flame of a Bic lighter to try and raise them a bit. Remember vulcanite has “memory” and if the marks are not sharp edge the heat well raise them. In this case while they came up some on the blade so that none remained. The damage on the button edge came up a little but it would need to be repaired.
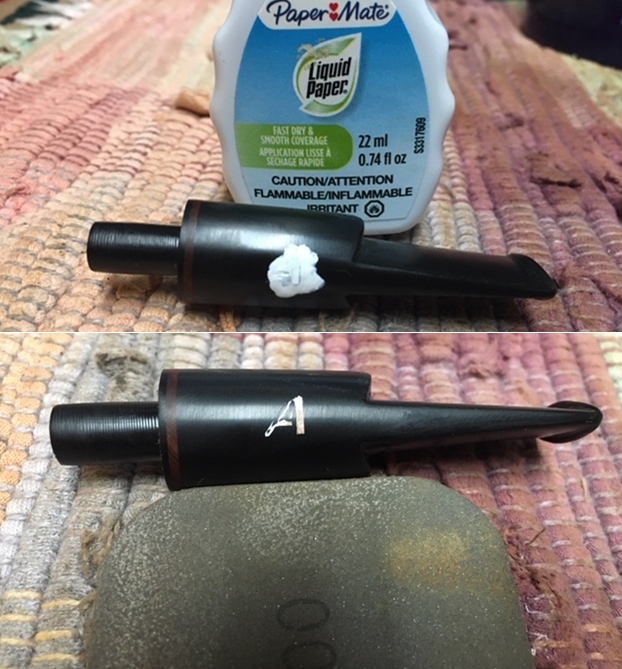
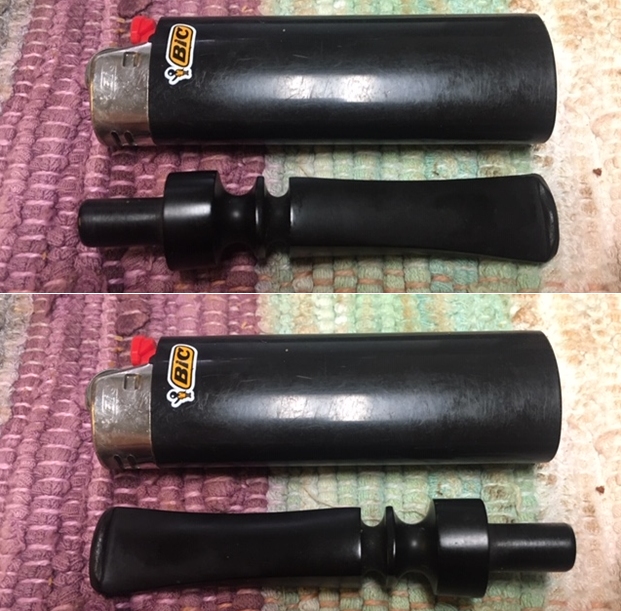 I filled in the remaining tooth marks on the button edge with clear CA glue and set the stem aside to dry.
 Once the repairs cured I used a needle file to flatten them out and recut the sharp edge of the button.
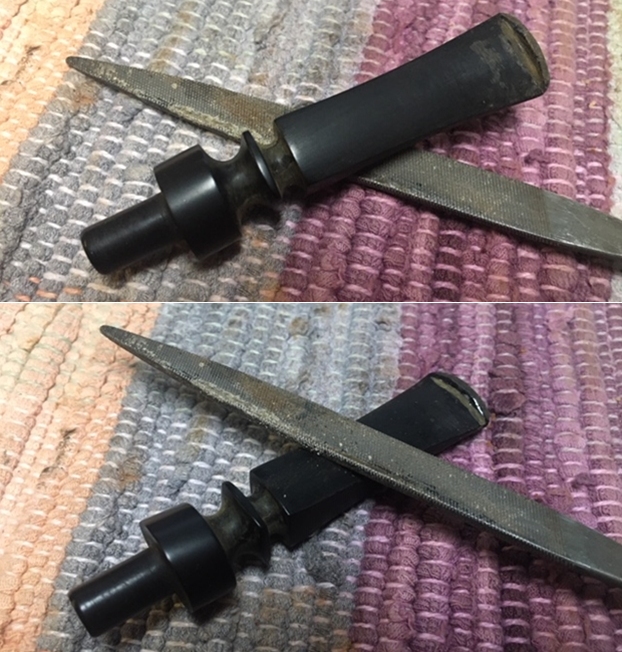 I sanded the surface of the stem with 220 grit sandpaper to further blend in the repairs. I started the polishing process with 400 grit wet dry sandpaper.
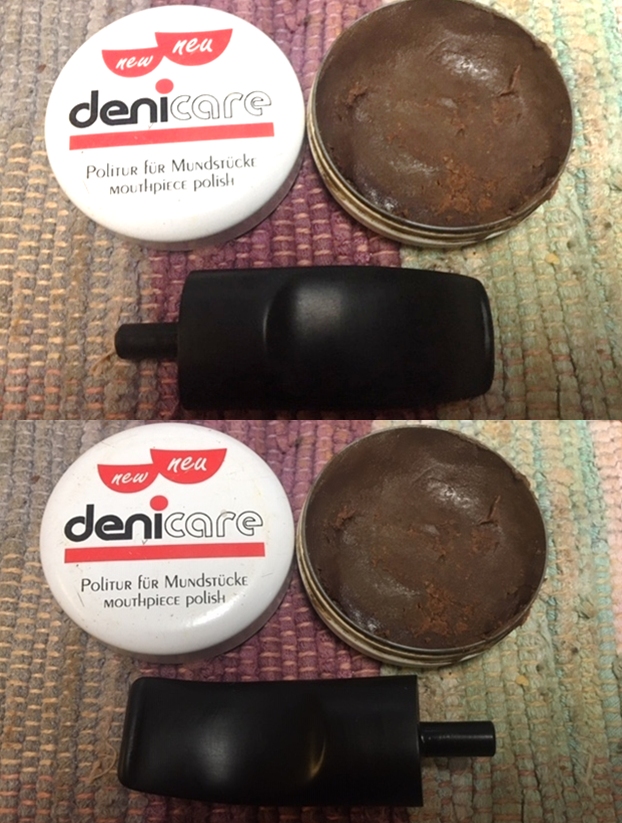
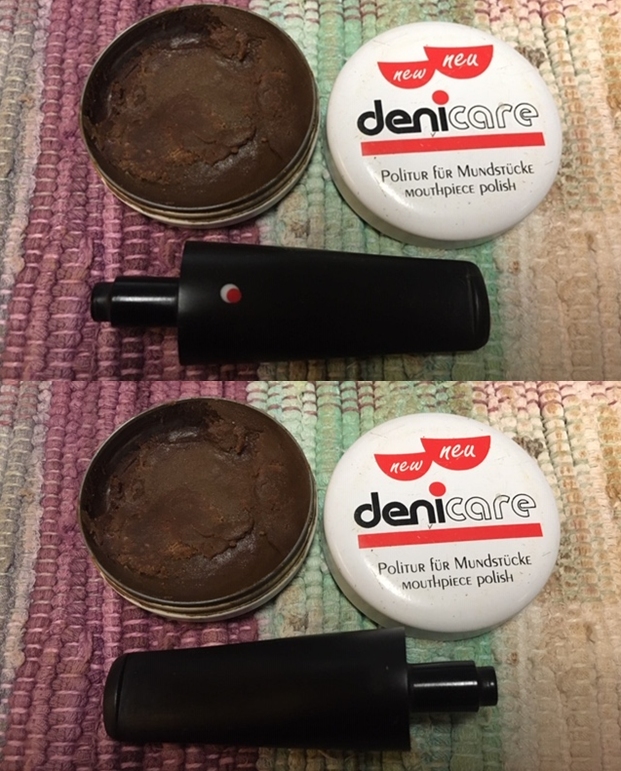
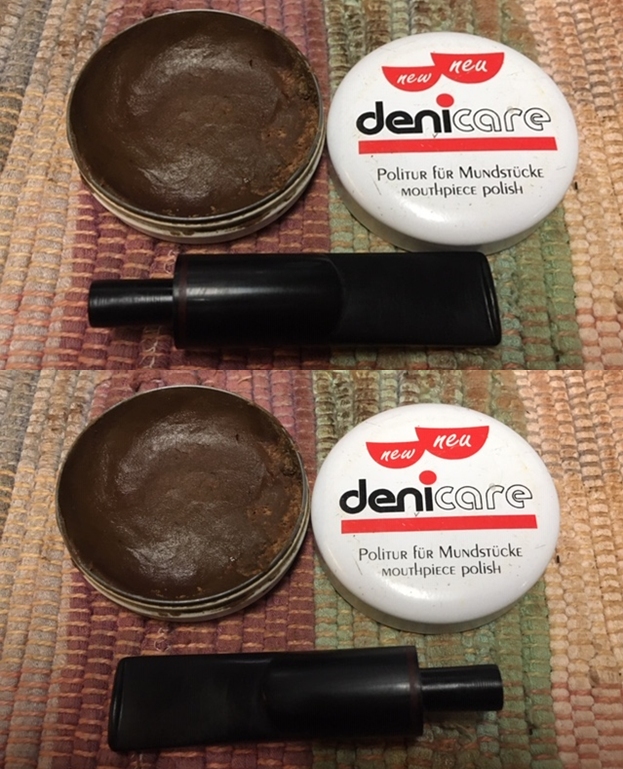
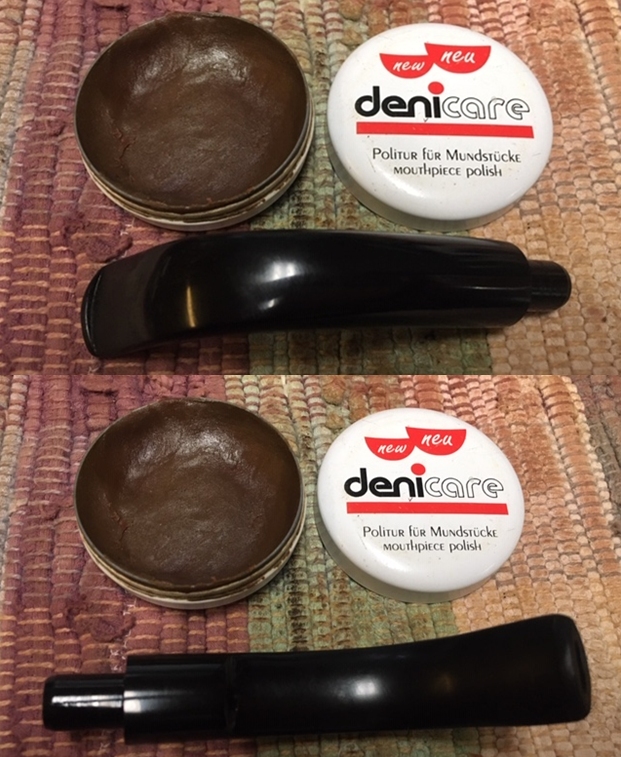
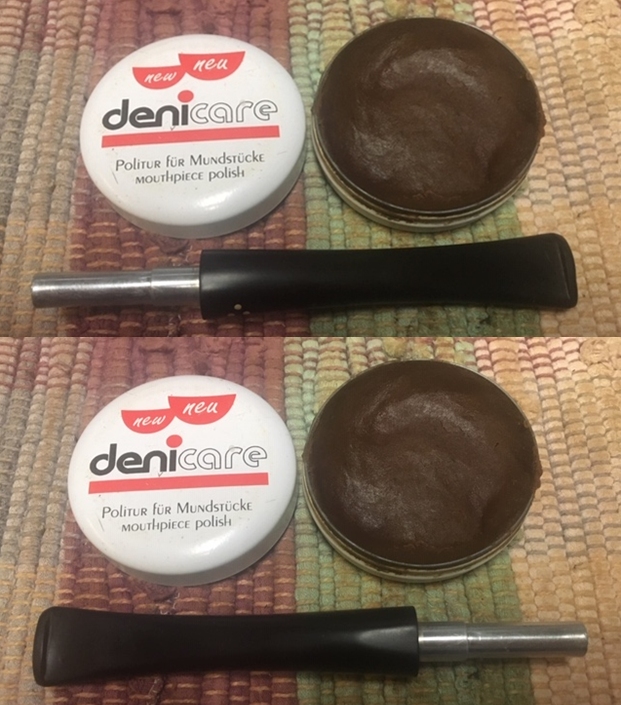
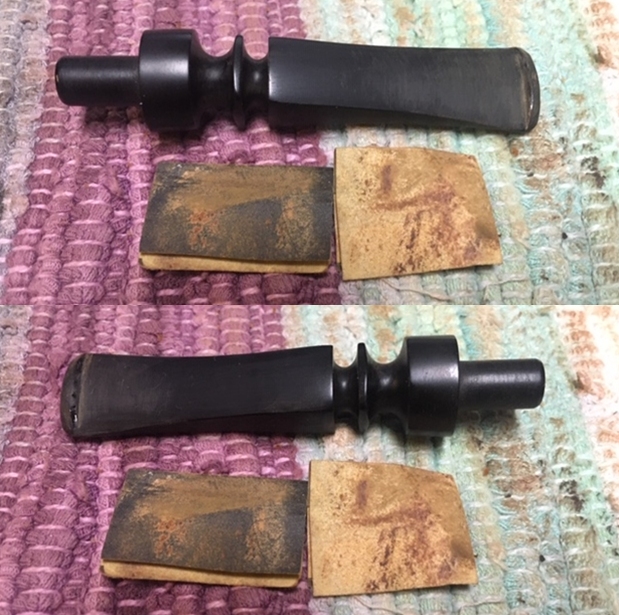 I polished the stem with Denicare Mouthpiece Polish from a tin of it I have in the drawer here. It is a gritty red paste (similar in grit to red Tripoli) that I rub on with my finger tips and work it into the surface of the stem and button and buff it off with a cotton pad. It gives me a bit of a head start on the polishing work.
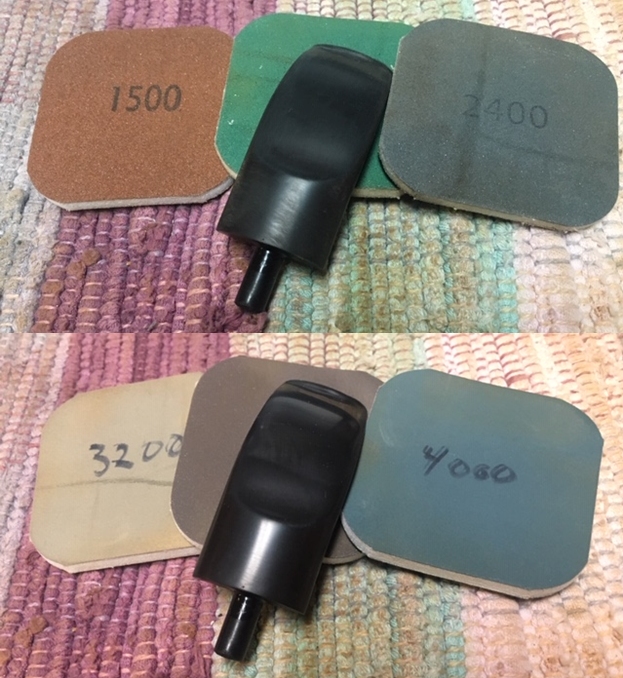
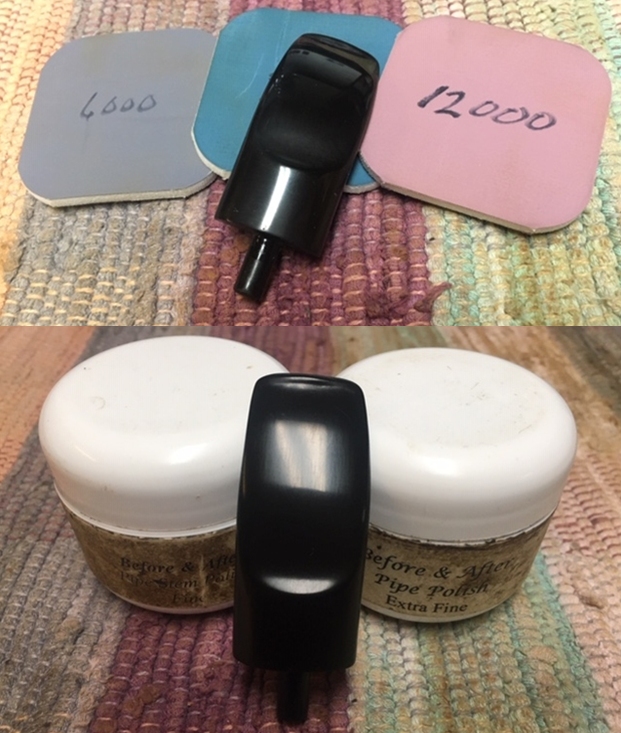
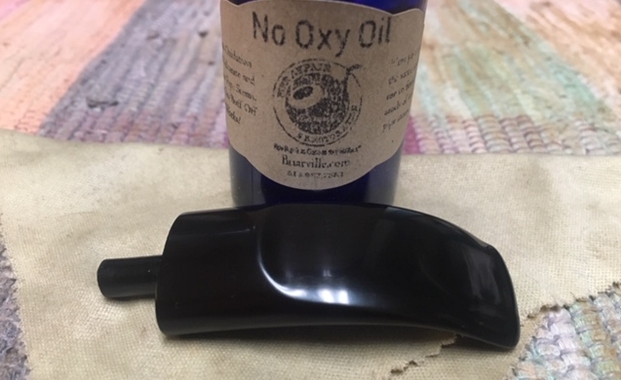
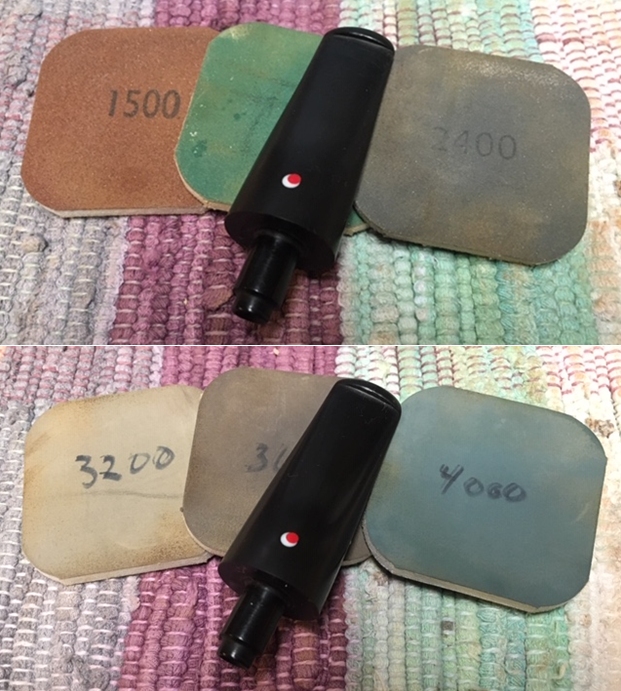
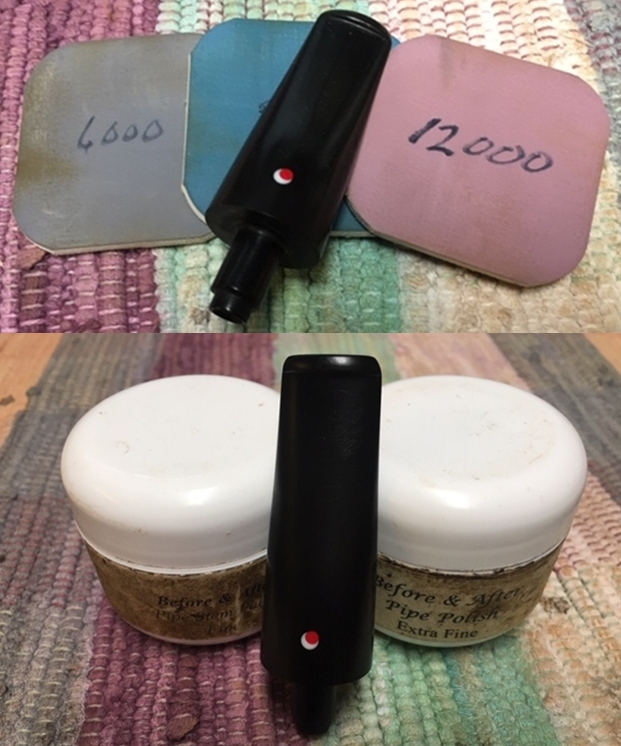
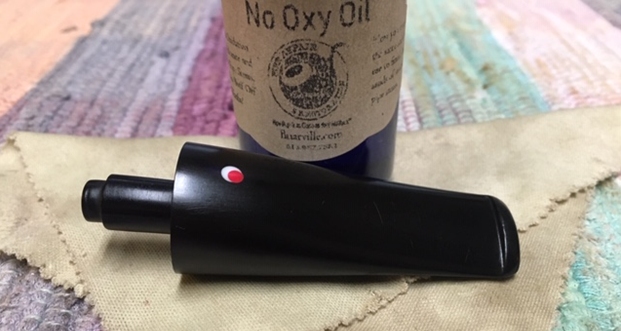
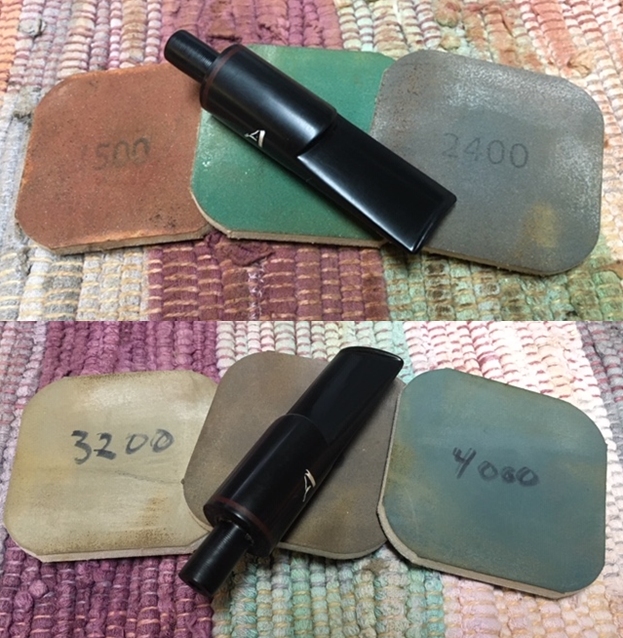
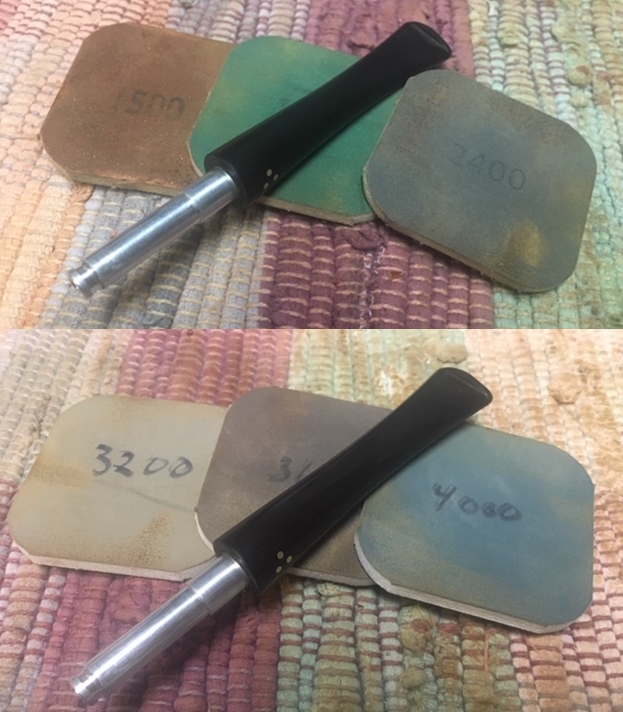
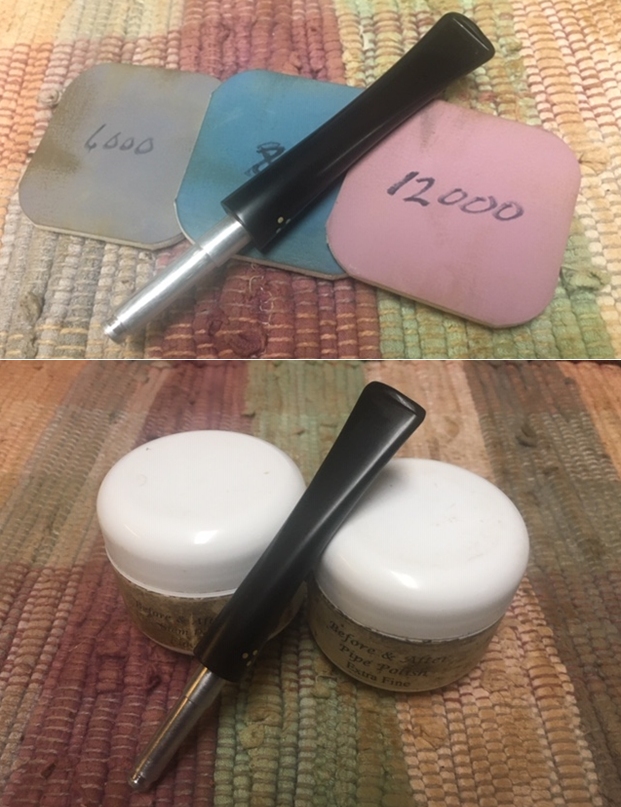
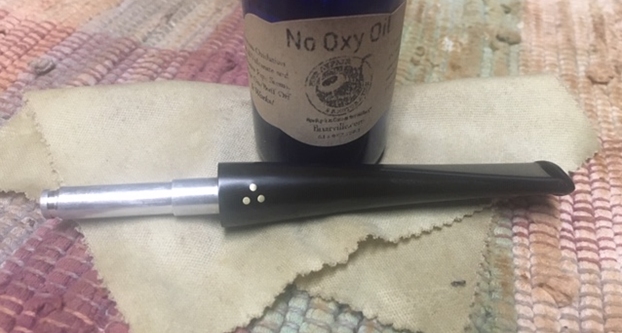
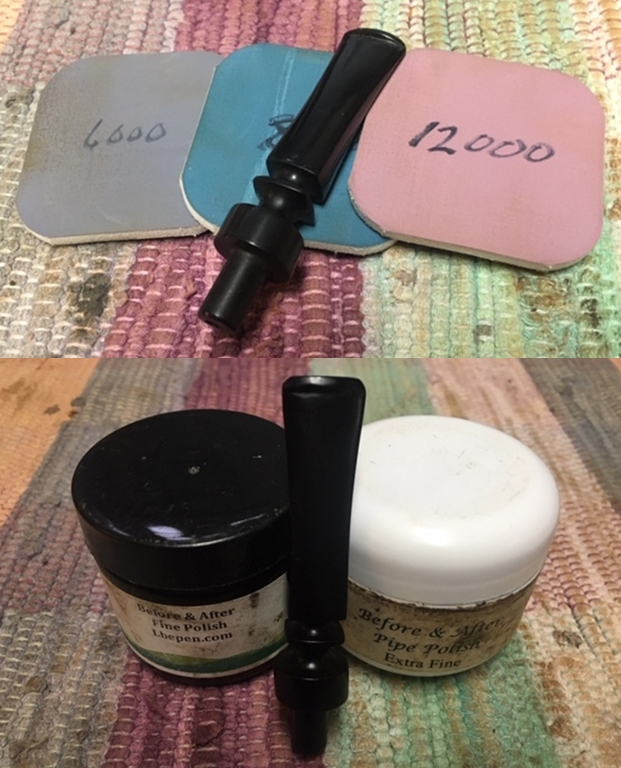
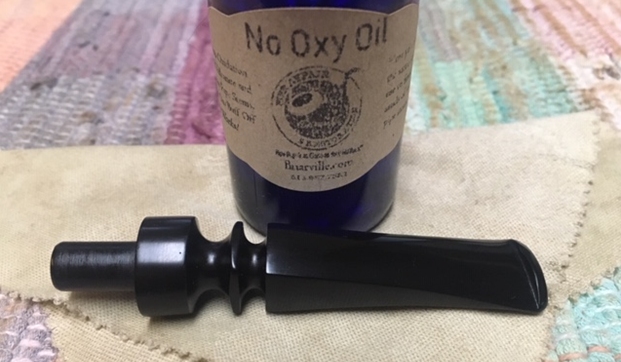
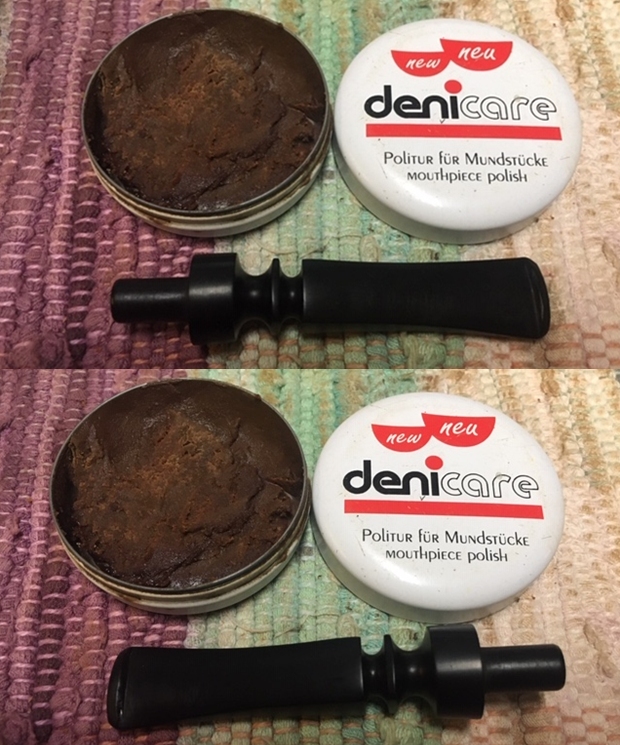 I polished the stem with micromesh sanding pads – wet sanding with 1500-12000 grit sanding pads. I wiped it down after each sanding pad with Obsidian Oil. I polished it with Before & After Pipe Stem Polish – both Fine and Extra Fine. I buffed the stem with a soft cloth to raise the shine. I wiped the stem down with Briarville’s No Oxy Oil to preserve and protect the stem surface.
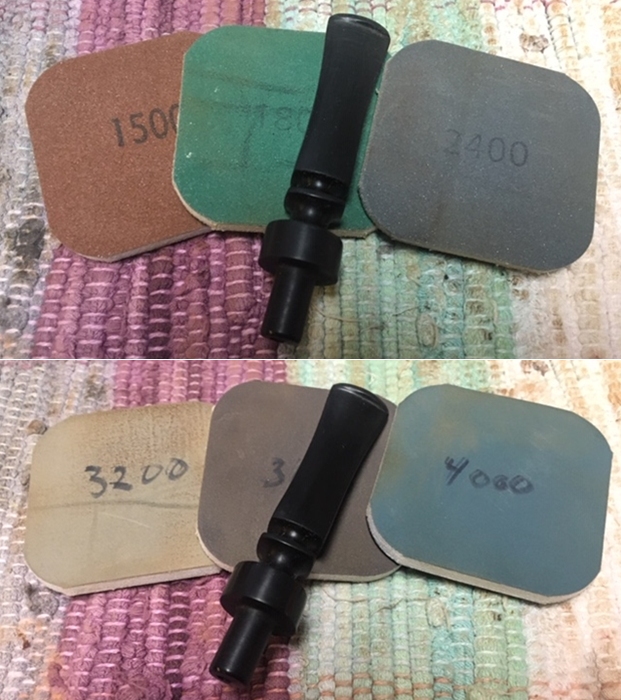
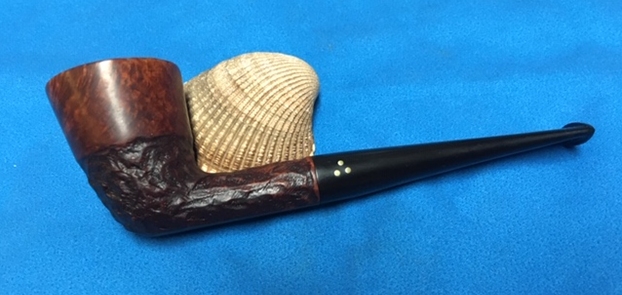
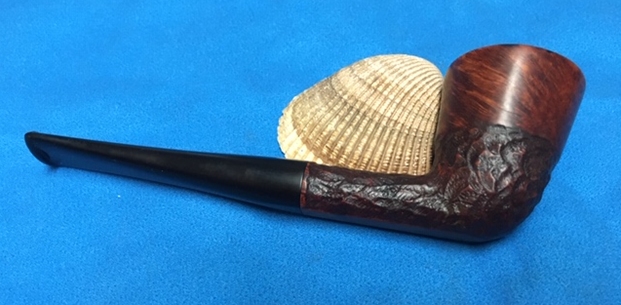
 I am on the homestretch with this Bari Matador! As always I am excited to finish a pipe that I am working on. I put the pipe back together and buffed it with Blue Diamond on the buffing wheel. I used a gentle touch on the sandblast portion of the bowl. I gave the bowl and the stem multiple coats of carnauba wax. I buffed the pipe with a clean buffing pad and hand buffed it to raise the shine. It is fun to see what the polished bowl looks like along with the polished vulcanite stem. This Bari Matador is a nice looking pipe. It is quite comfortable in hand and should be so when smoking. It is quite light and well balanced. Have a look at it with the photos below. The dimensions are Length: 6 inches, Height: 2 inches, Outside diameter of the bowl: 2×2 1/2 inches, Chamber diameter: ¾ of an inch. It is another beautiful pipe and one that will be on the rebornpipes store soon. You can find it in the section of Pipes by Danish Pipe Makers. If you are interested in adding it to your collection let me know. Thanks for walking through the restoration with me as I worked over this pipe. Thanks to each of you who are reading this blog.