by Steve Laug
Early February I received an email from Blake regarding two pipes he wanted me to have a look at. I have included that email below
Hello, I have two pipes that are in need of restoration. I was just curious if you take on projects from others. One is a Charatan Perfection Dublin, the other is a Dunhill 710 Group 4 Root Briar Billiard. Both pipes need the standard ream/clean/deoxidize, however they also have small cracks. The Charatan has two cracks in the bowl, which I do not believe go all the way through (also the previous owner tried to put wood glue over them). The Dunhill has a crack in the shank, however it has been banded so I do not know if it needs any additional work on it. Any help you could provide would be greatly appreciated. Thank you so much.
Sincerely, Blake
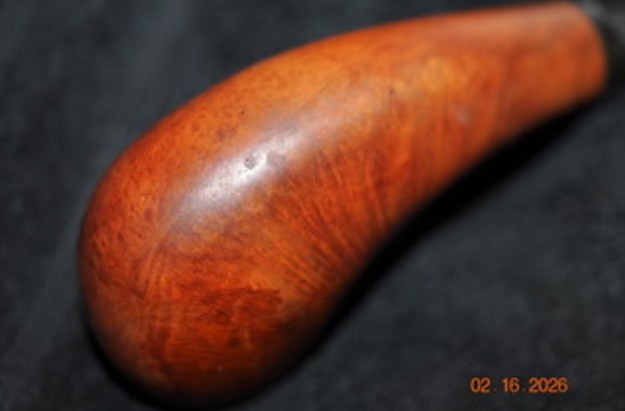
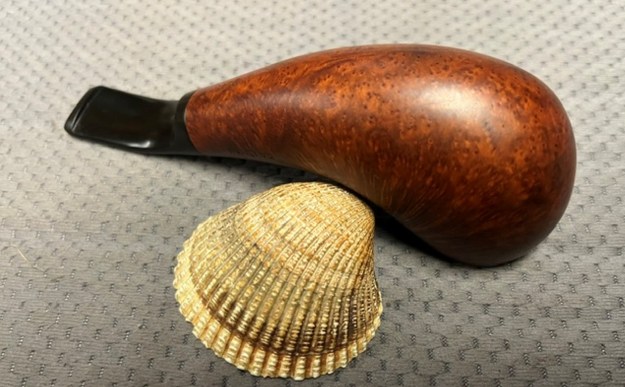
As I usually do, I wrote him back and asked for photos of the pipes. He sent a few photos of them both. I have inserted the photos below of the Dunhill he sent. The bowl was typical of older pipe finds, thick cake, lots of grime in the finish, oxidized silver band and stem. The shank had a crack in the top left side that extended from the shank end up the shank about an inch. The silver band was the repair that had been done to the pipe quite a few years back. This Dunhill had some rugged beauty under all the grime. To me it was worth a restoration to see what was happening internally and externally under the grime of the years.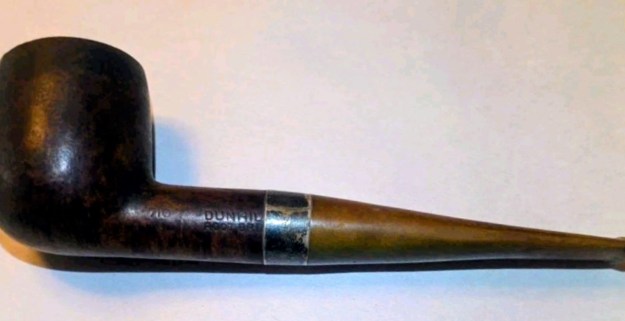
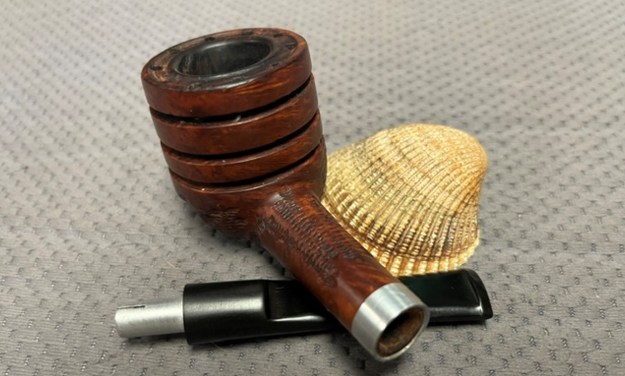
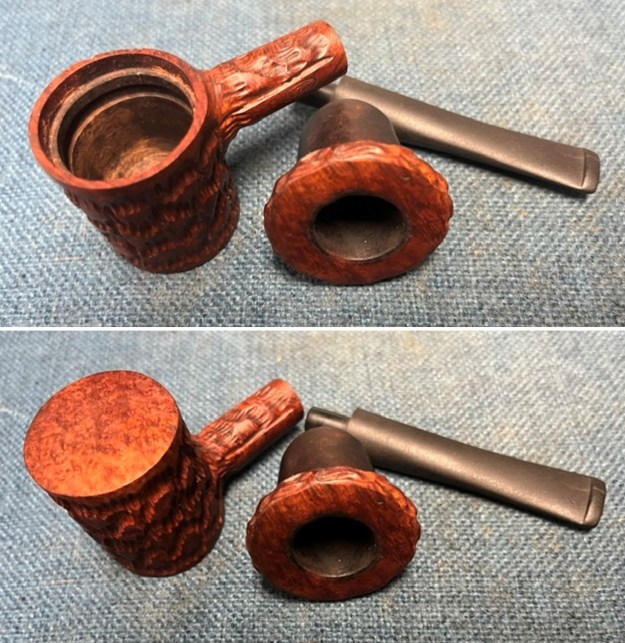
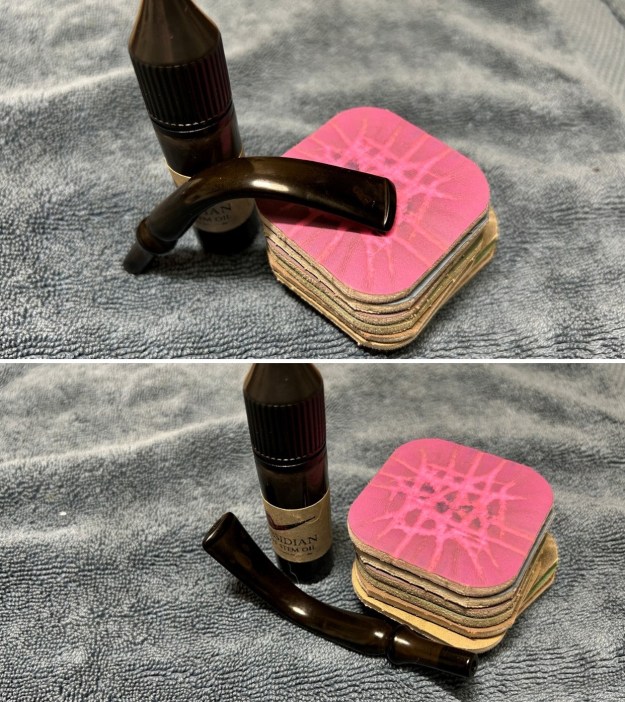
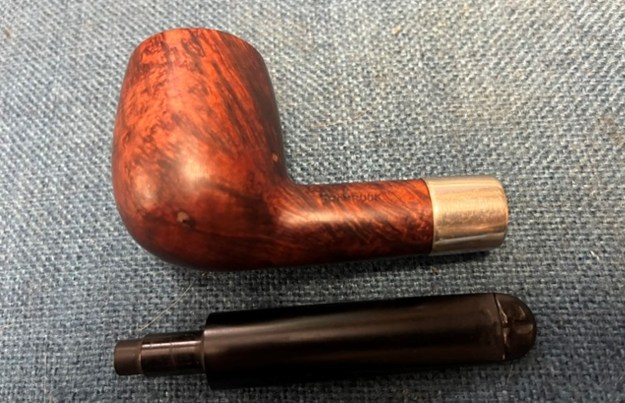
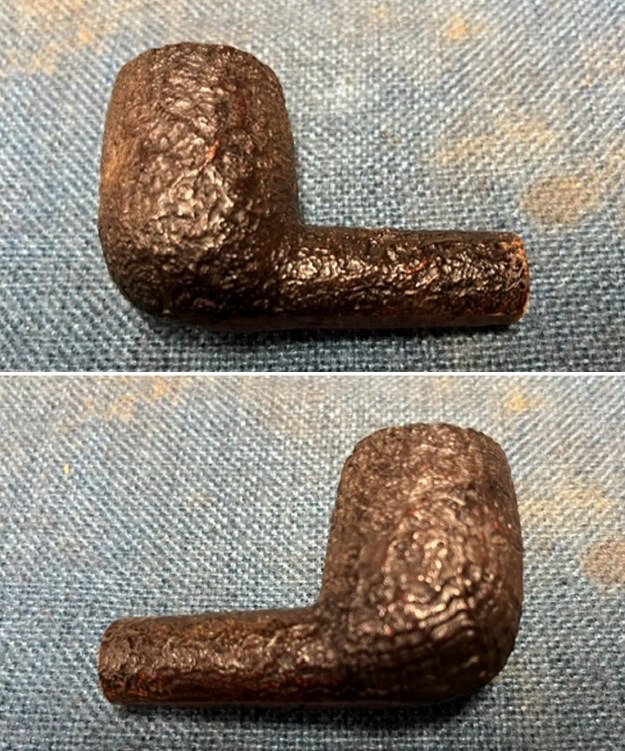
 I wrote and told him to send them to me. It took a while but they arrived yesterday afternoon. I unpacked them and took a photo of the pair to show what they looked like when they arrived. I would take more photos of each pipe as I worked on it but this one gives you a sense of what I saw as I took them out.
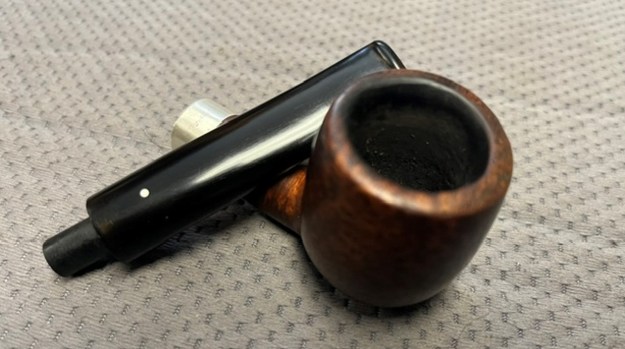
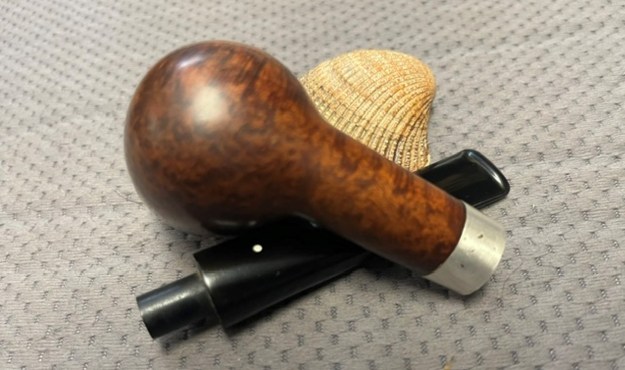
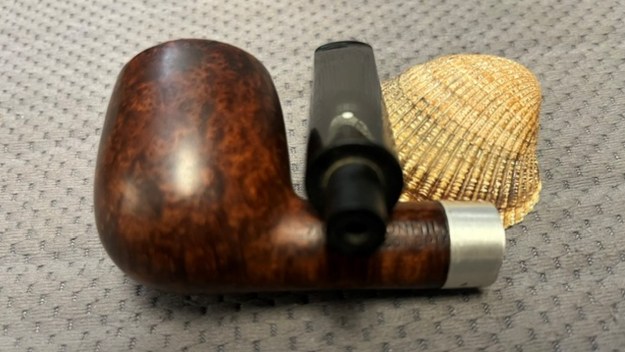
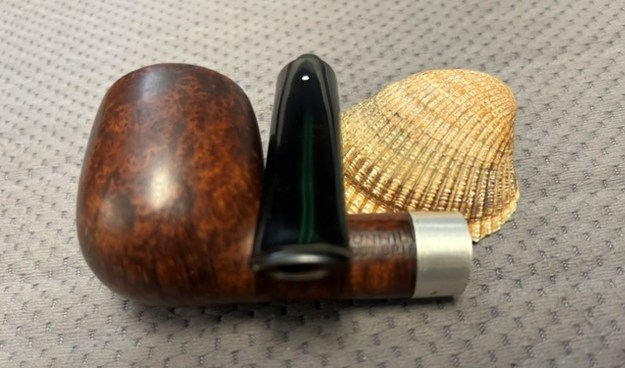
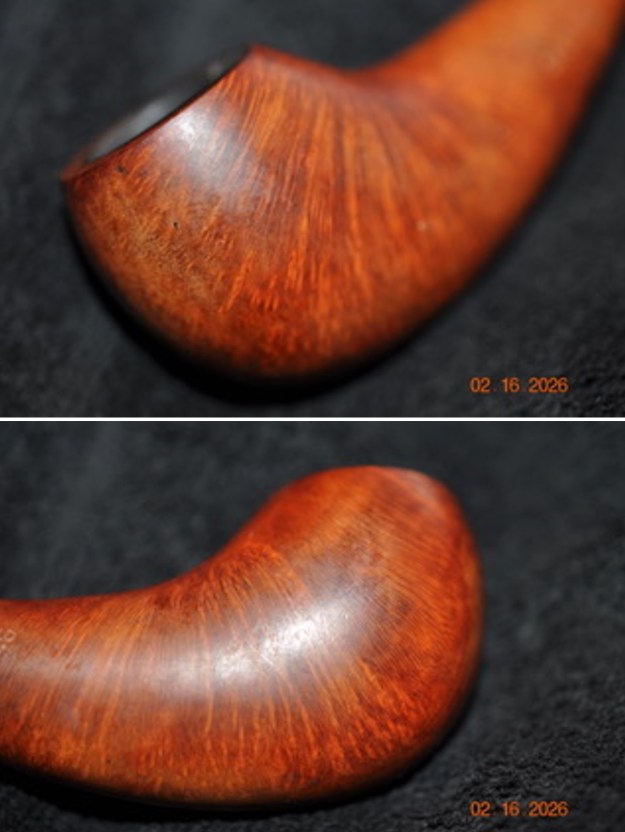
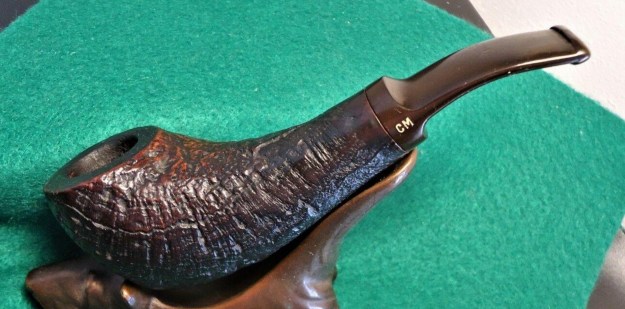
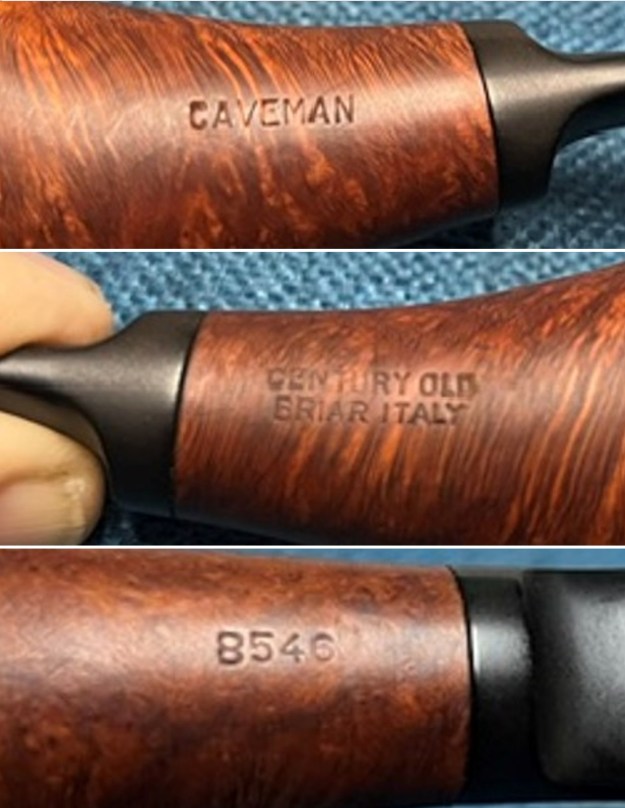
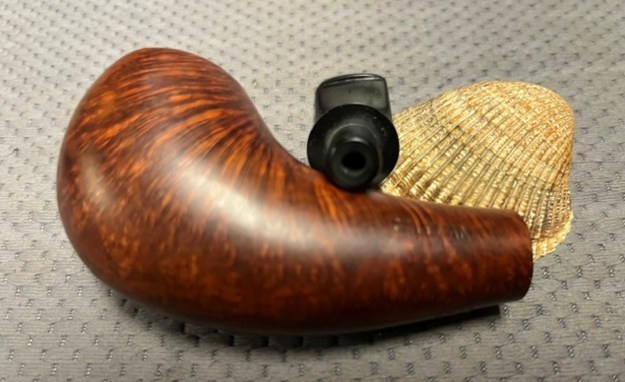
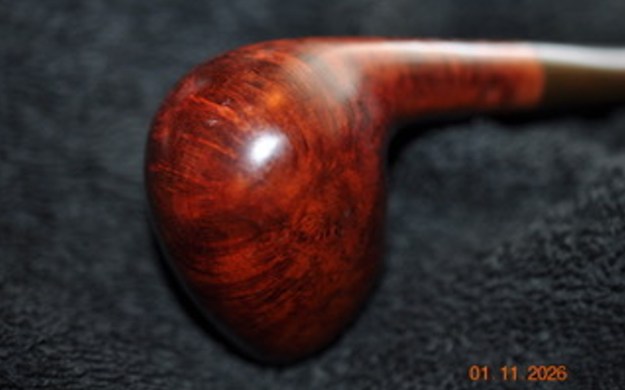
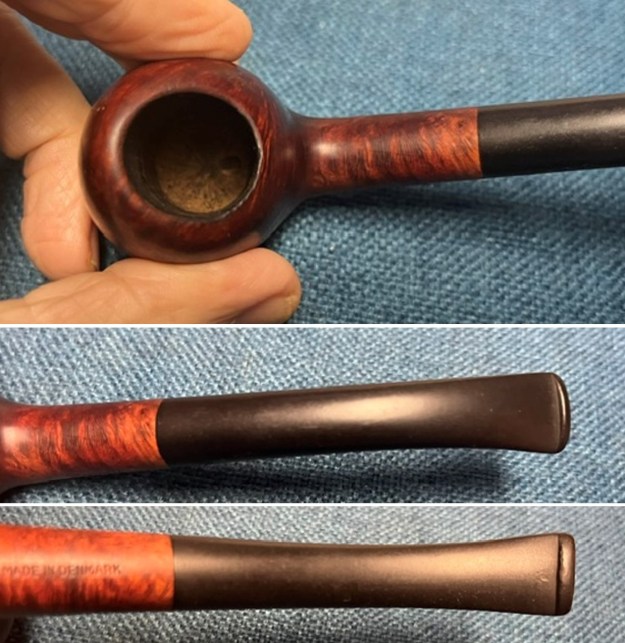
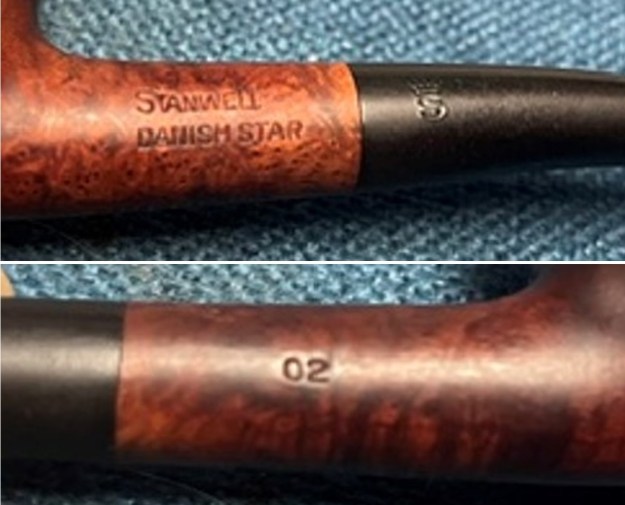
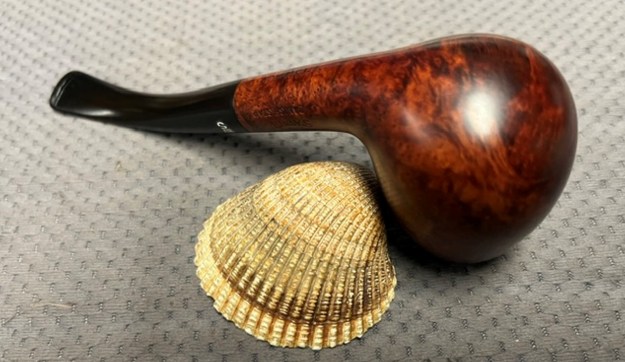
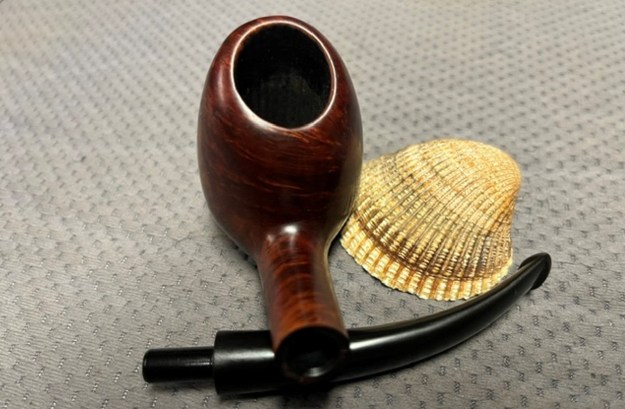
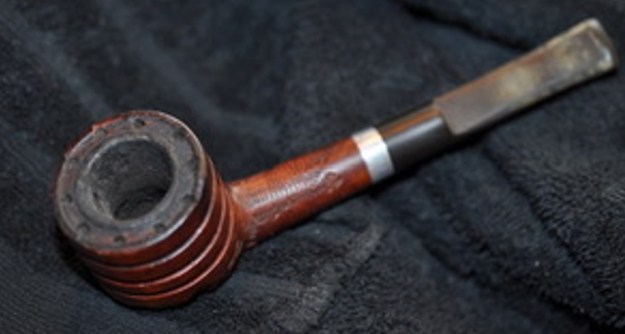
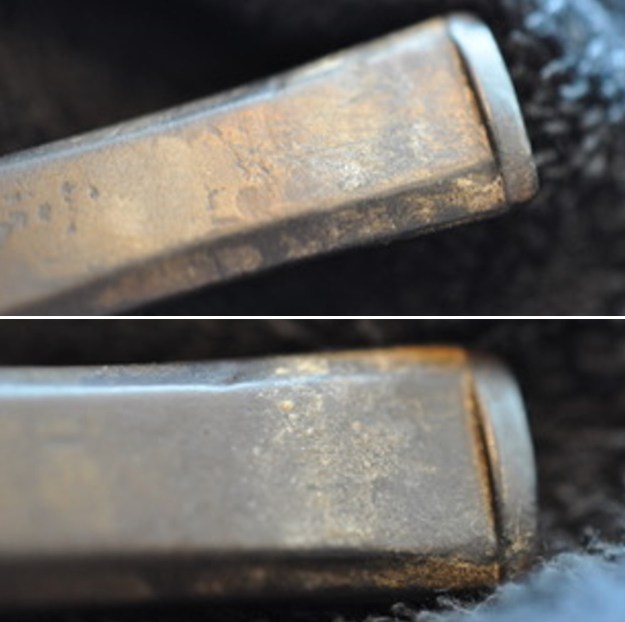
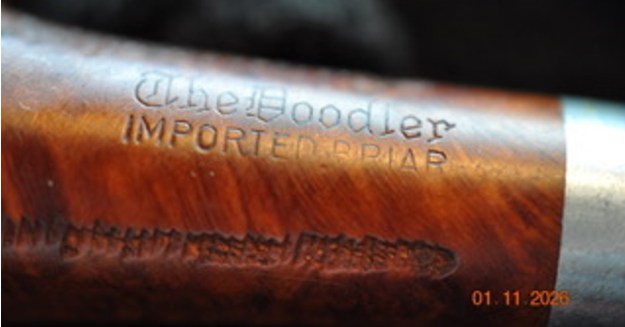
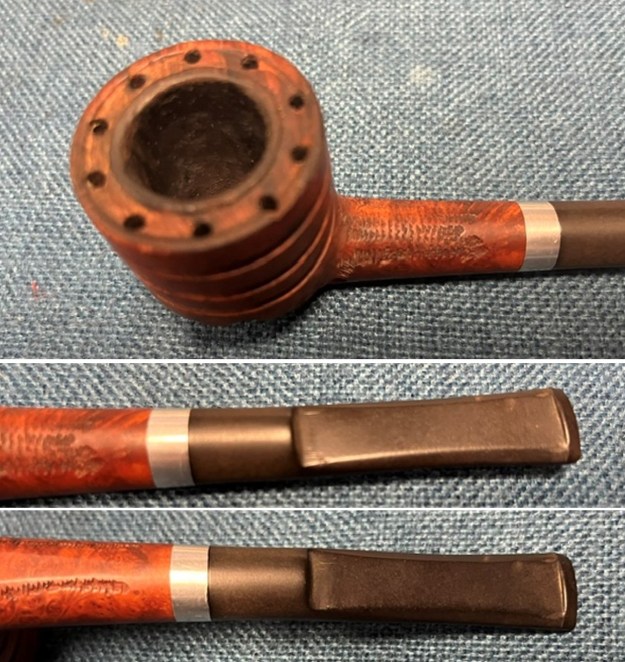
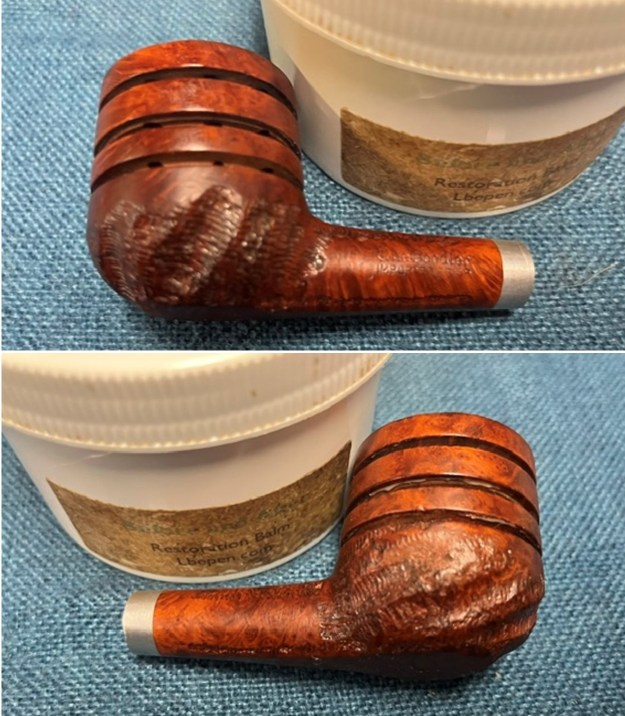
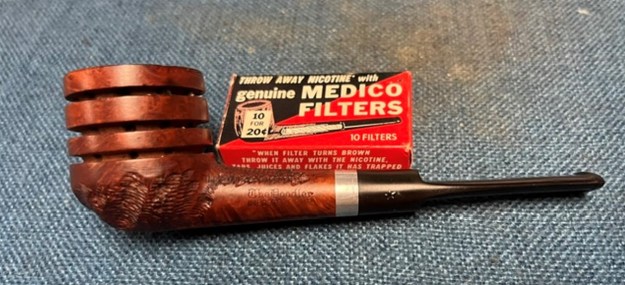
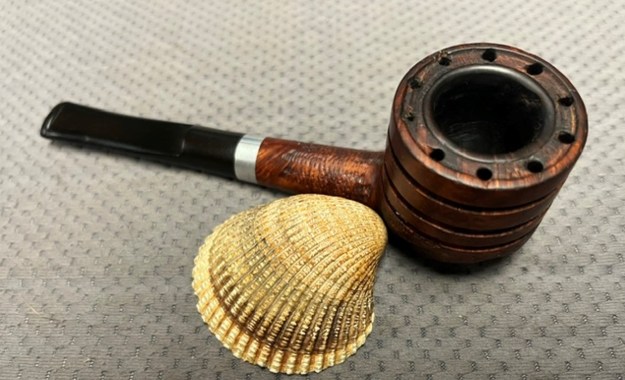
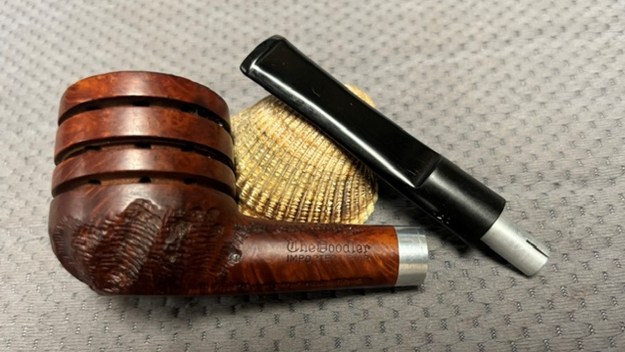
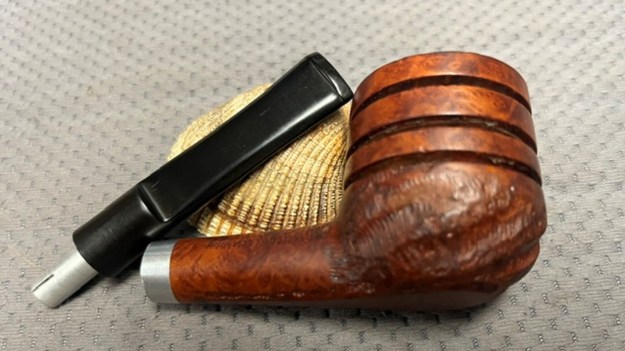
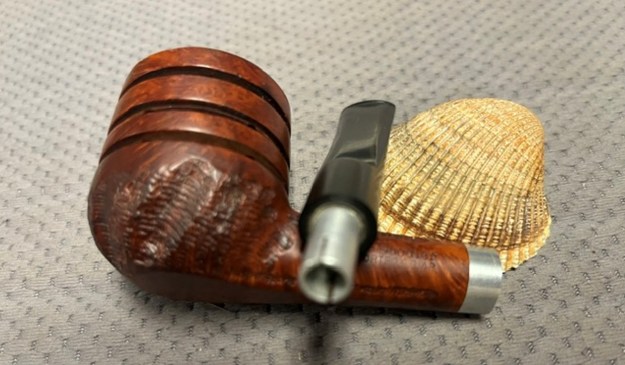
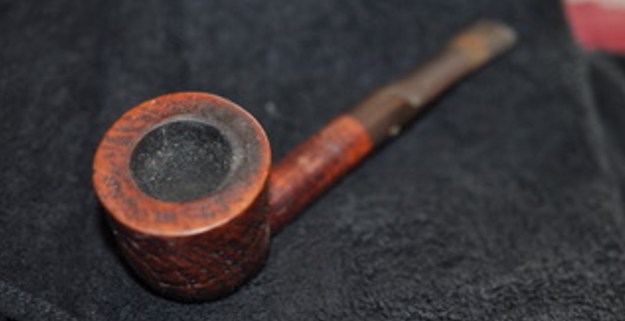
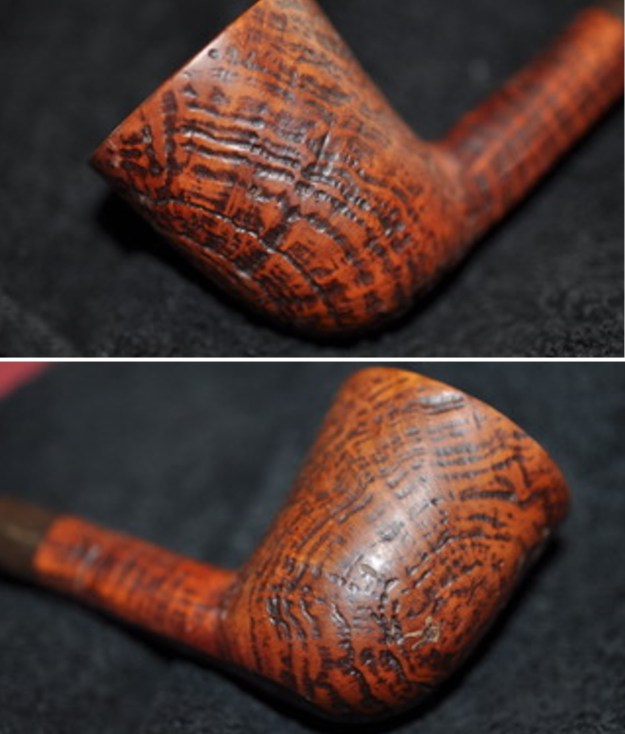
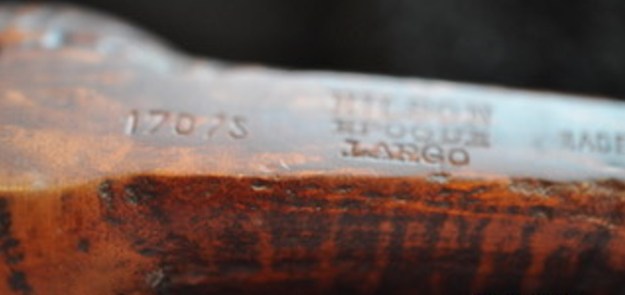
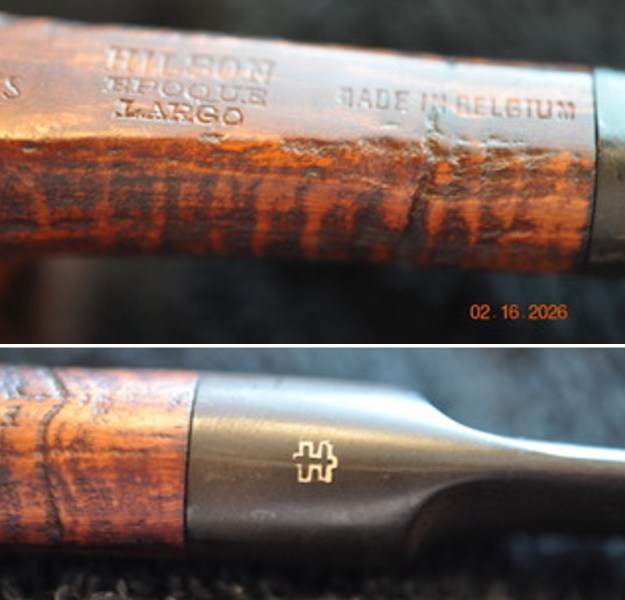
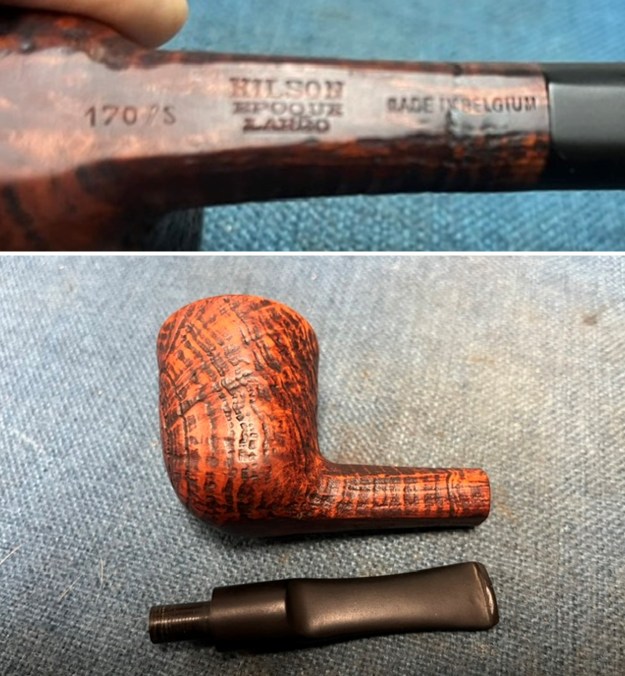
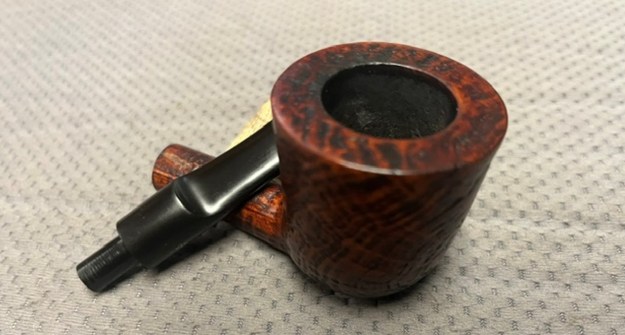
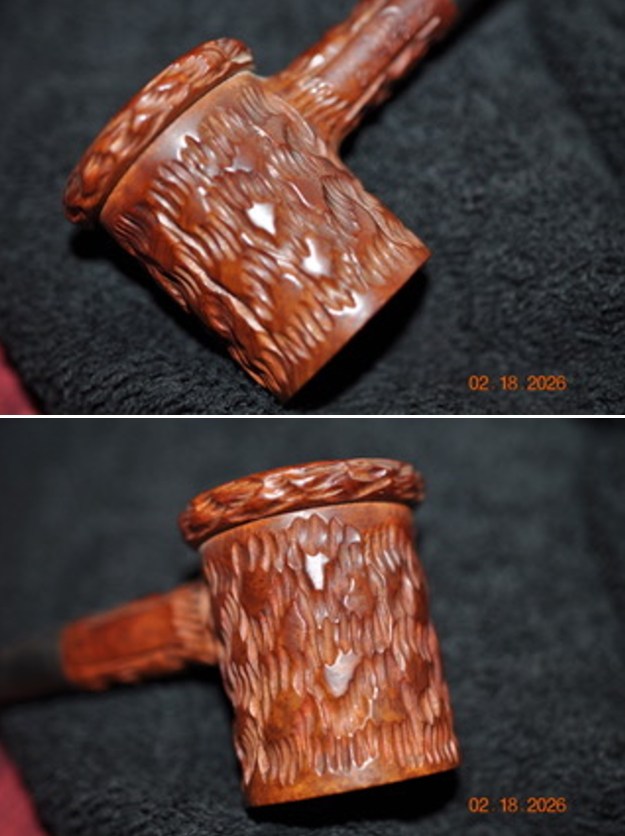
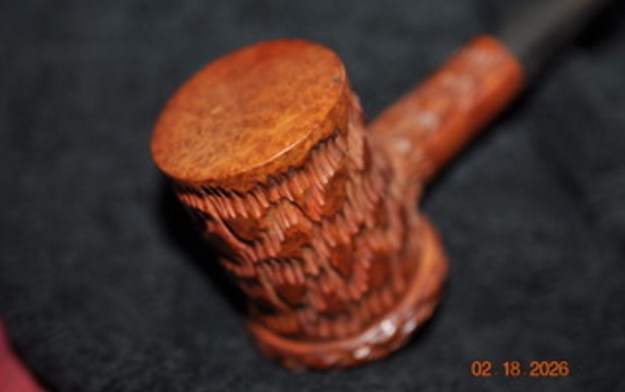
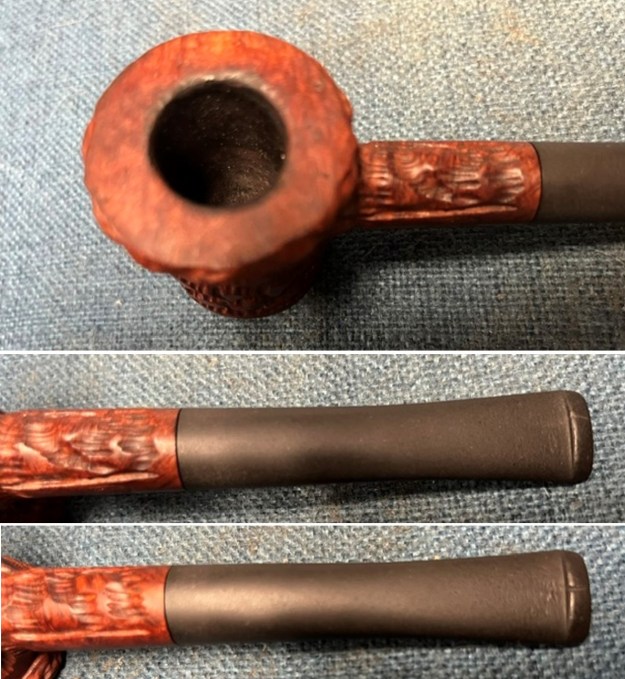
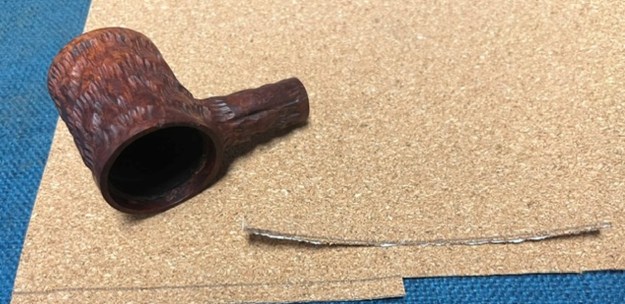
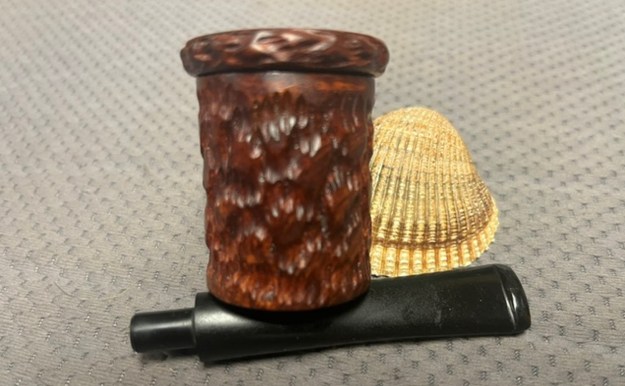
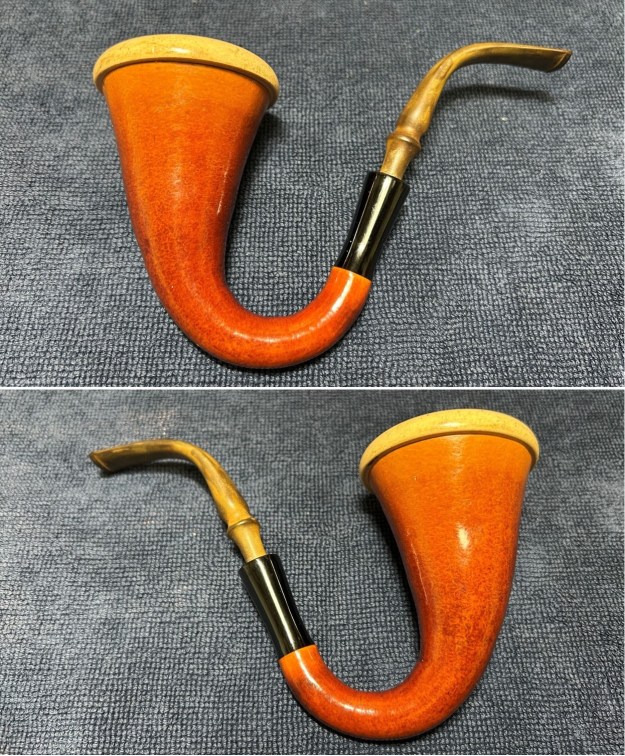
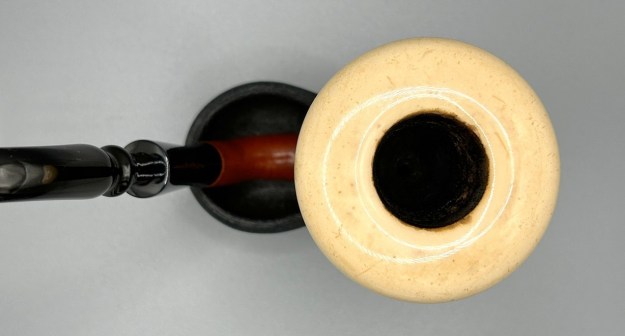
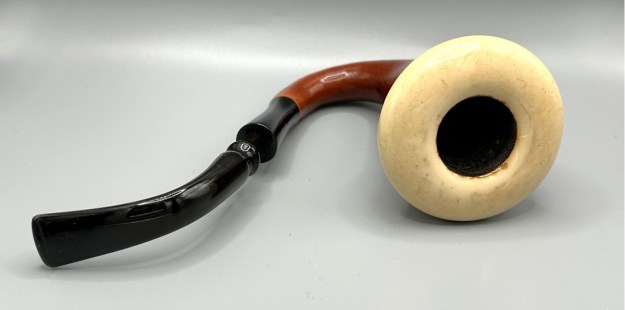
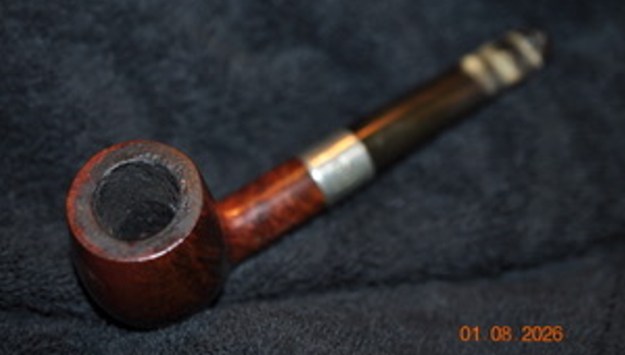
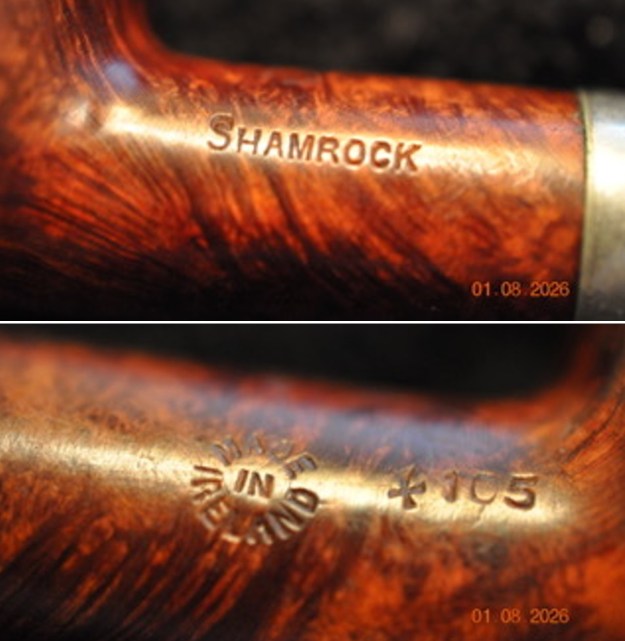
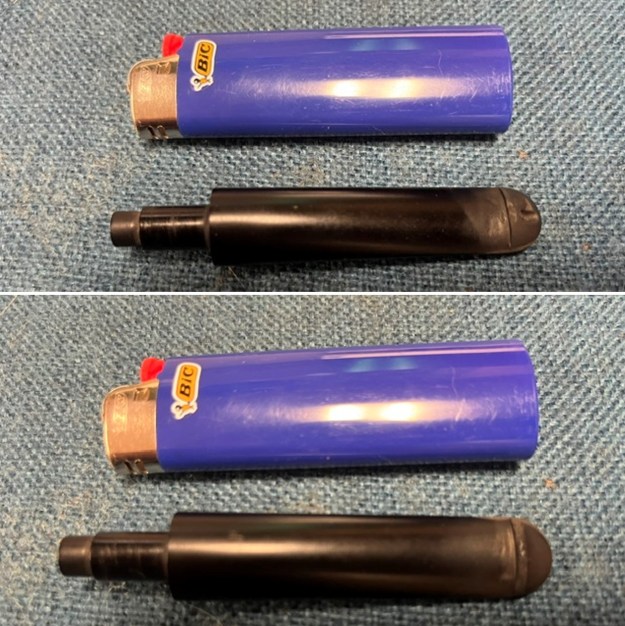
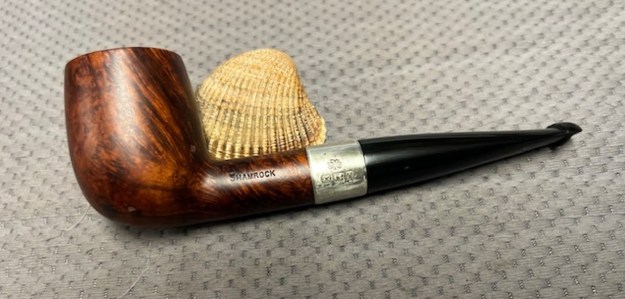
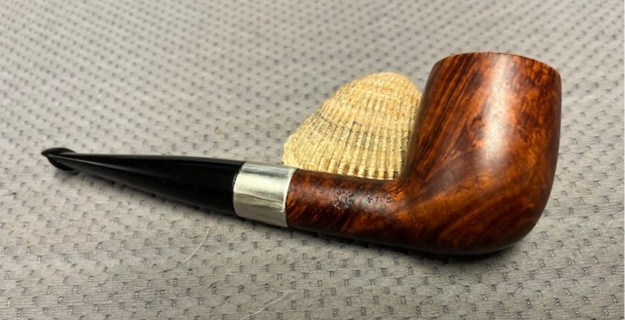
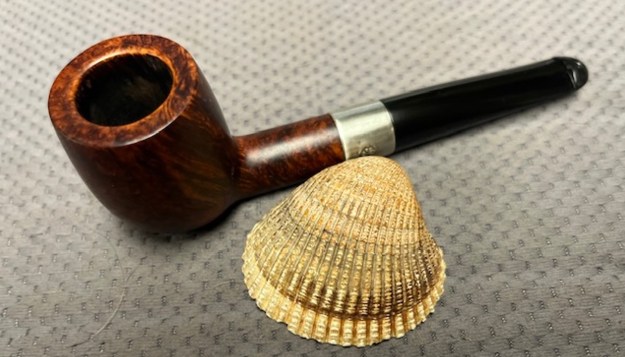
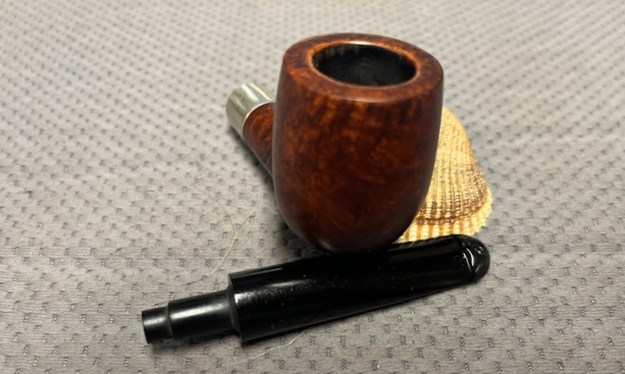
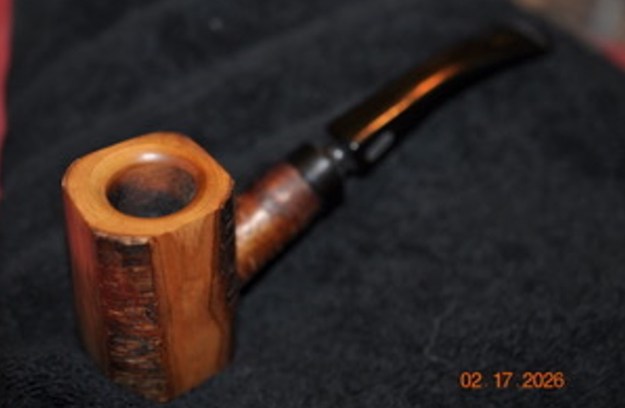
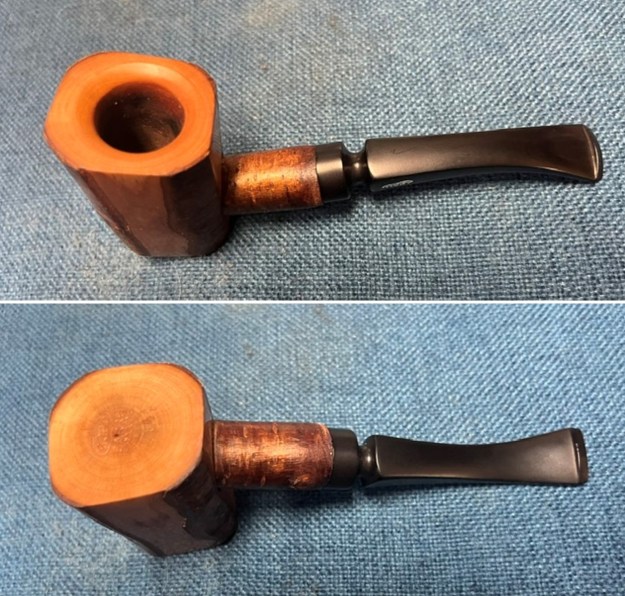
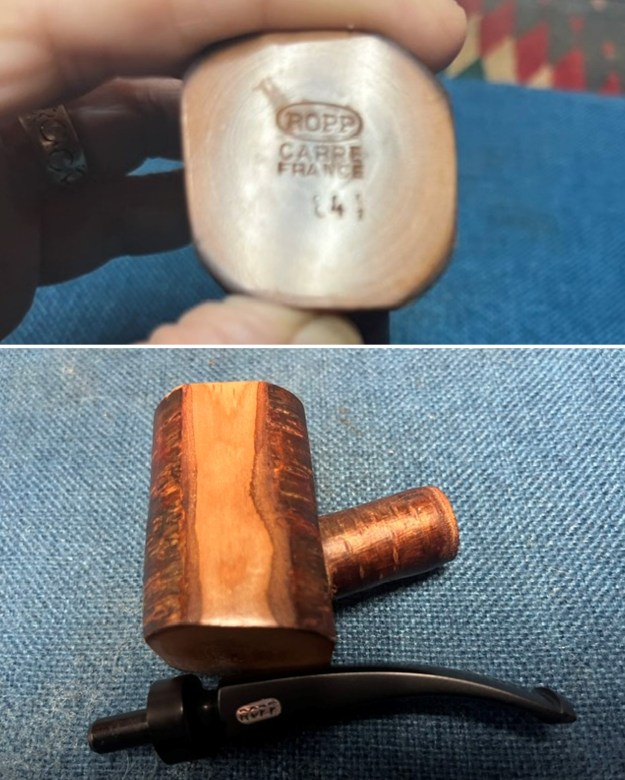
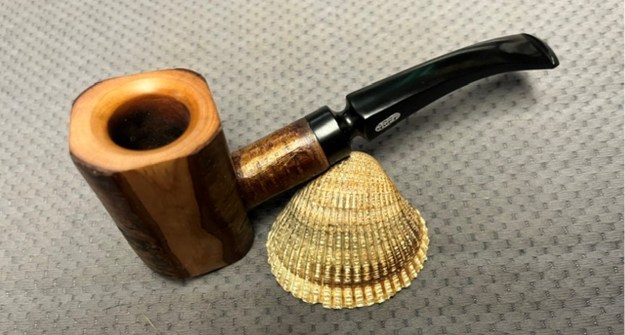
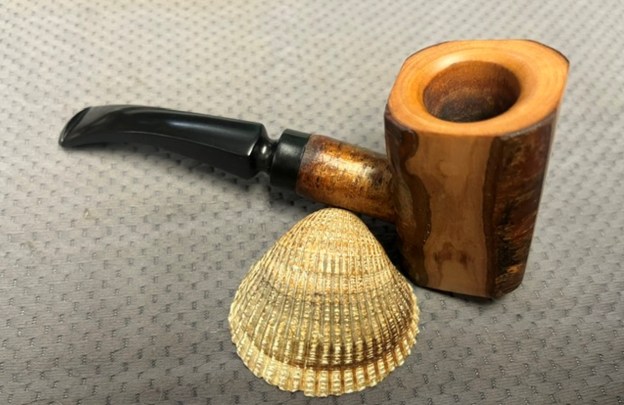
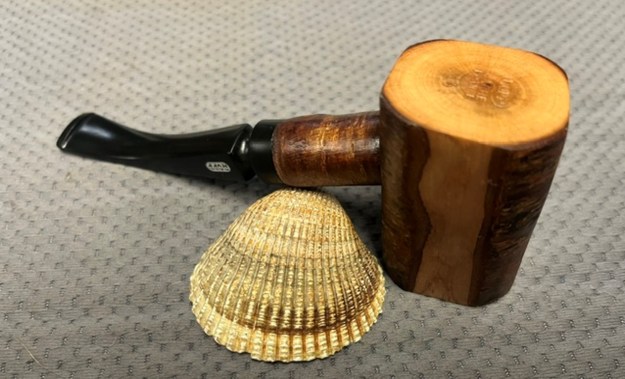
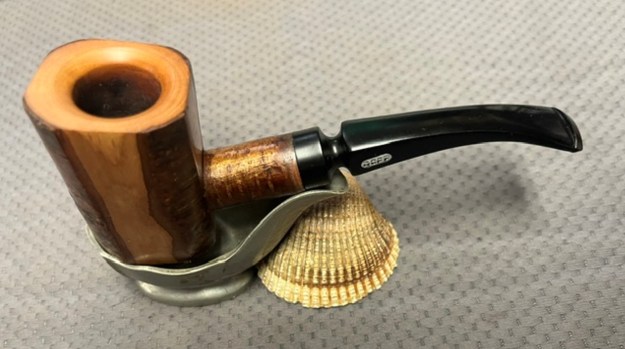
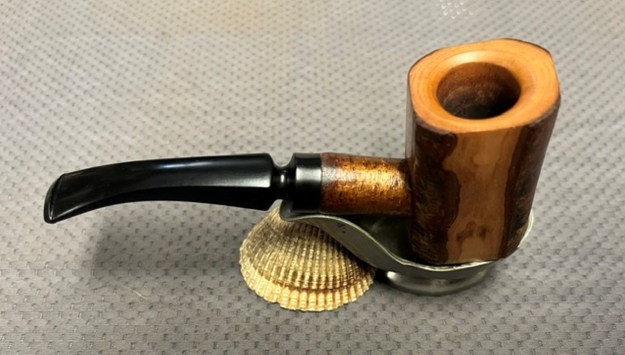
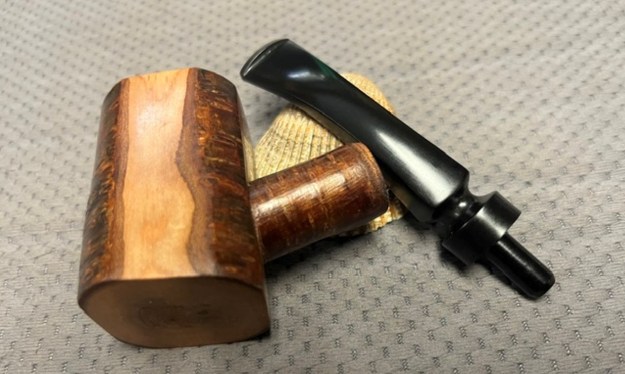
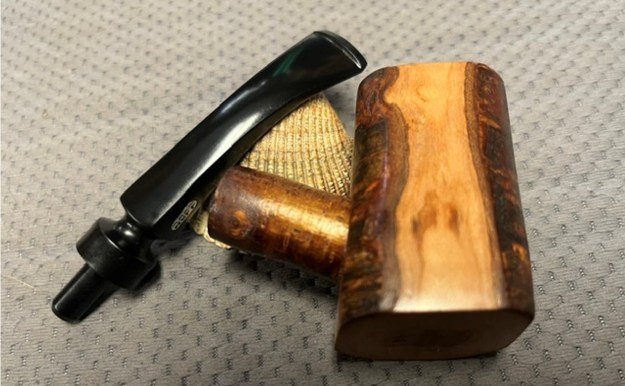
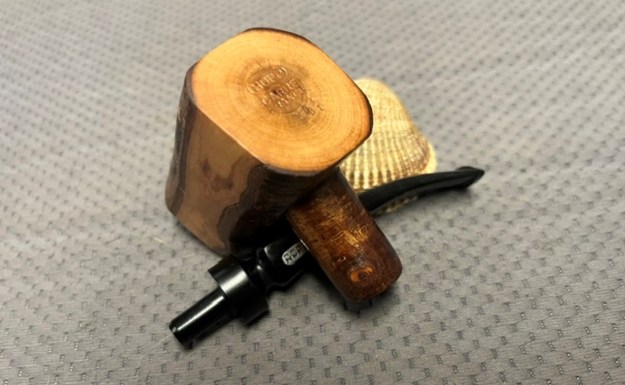
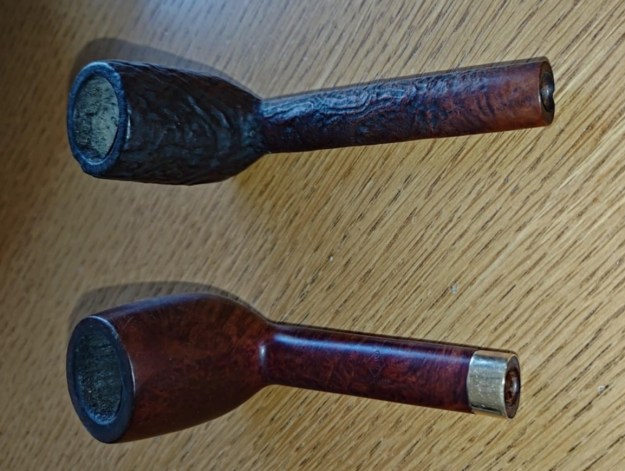
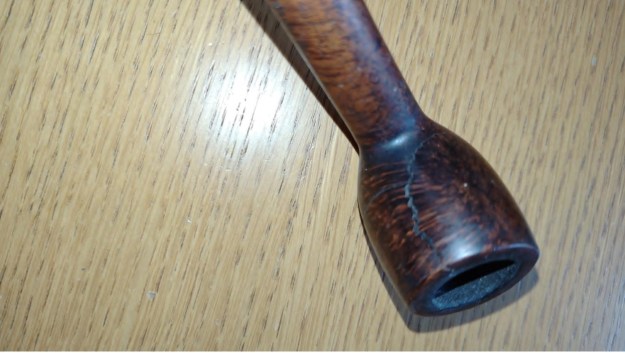
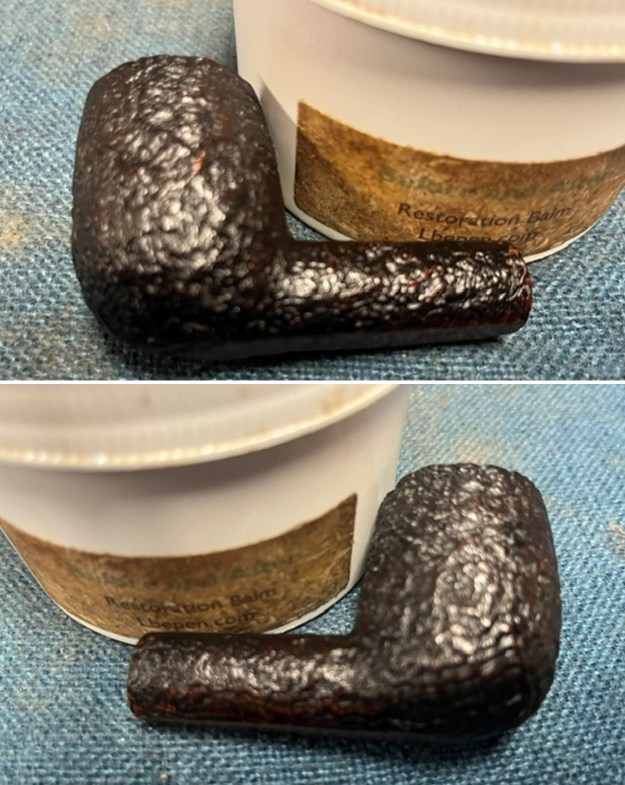
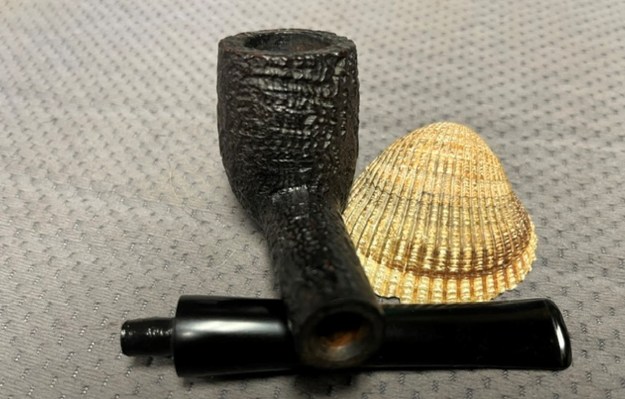
 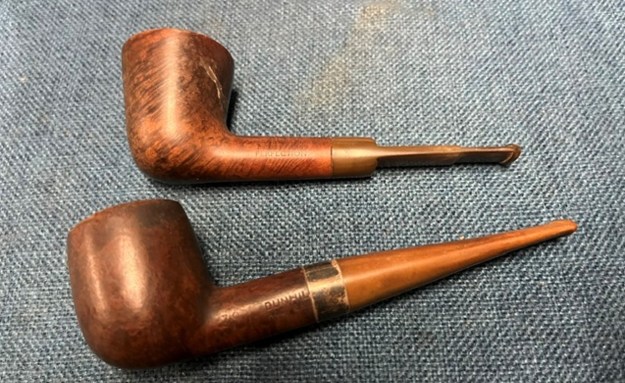 I chose to work on the Dunhill Root Briar next. It is a Group 4 sized Dunhill Billiard with a vulcanite taper stem. It is in dirty condition and has a repaired crack on the top left side of the shank. It is stamped on the left side of the shank next to the bowl/shank union with the shape number 710. That is followed by Dunhill [over] Root Briar [over] Perfection. On the right side of the shank it bears the stamping Made In [over] England followed by 4 in a circle and an R. There is what looks like an underlined 1 at an angle under and to the right of the D in England. The pipe was dusty, scratched and dirty with grime ground into the finish. The bowl had a thick cake. The rim top had a lava coat on the top and inner edge. There was some damage on the inner edge of the rim and some heavy lava on the smooth rim top. The original Dunhill White Spot Taper stem was dirty and oxidized with light tooth marks and chatter on both sides. The crack in the top of the shank on the left side is bound together with a very tarnished silver band. I took photos of the pipe to show what it looked like before I started working on it.
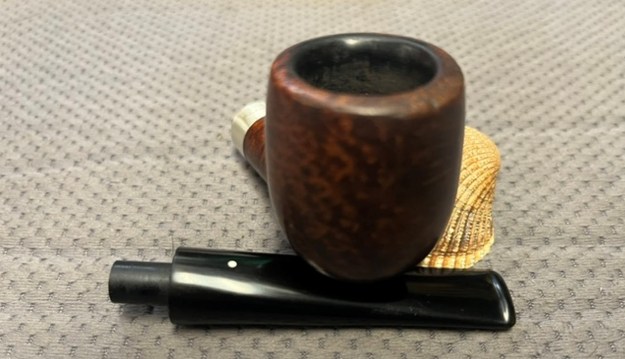
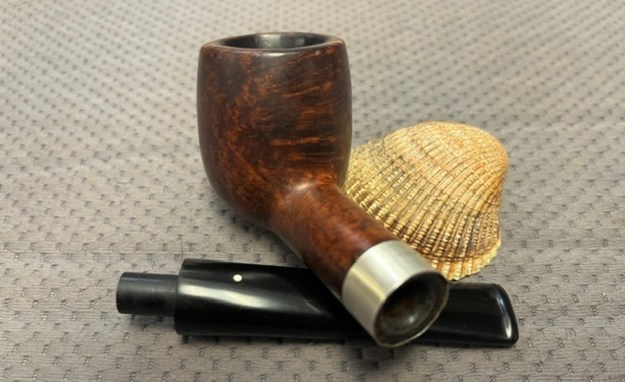
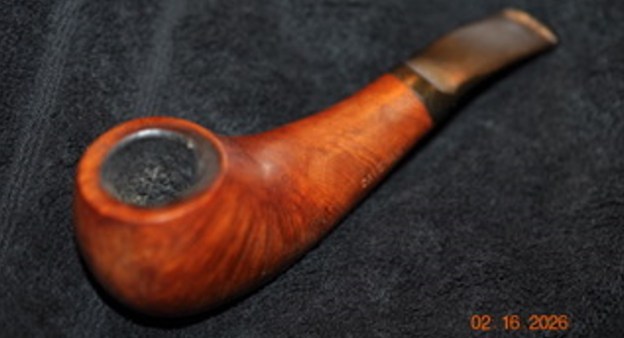
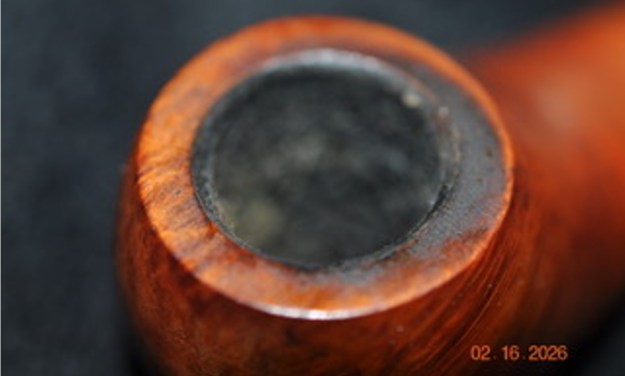
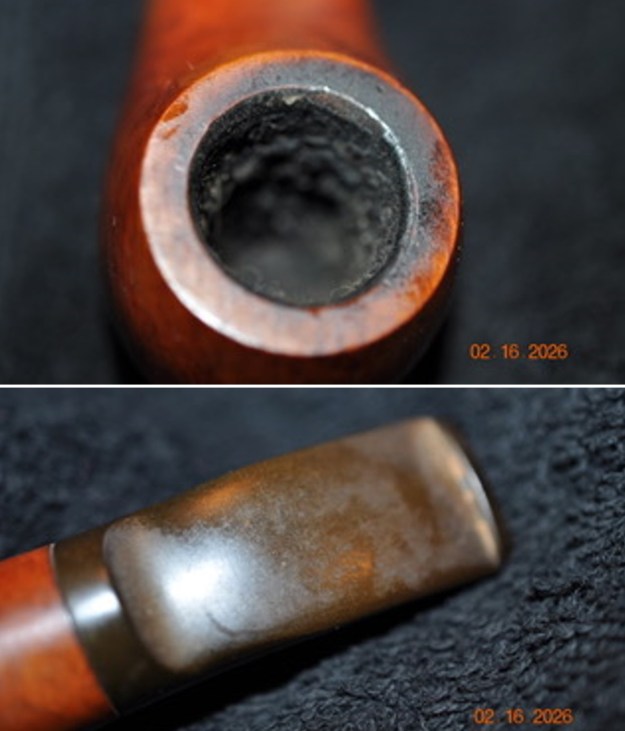
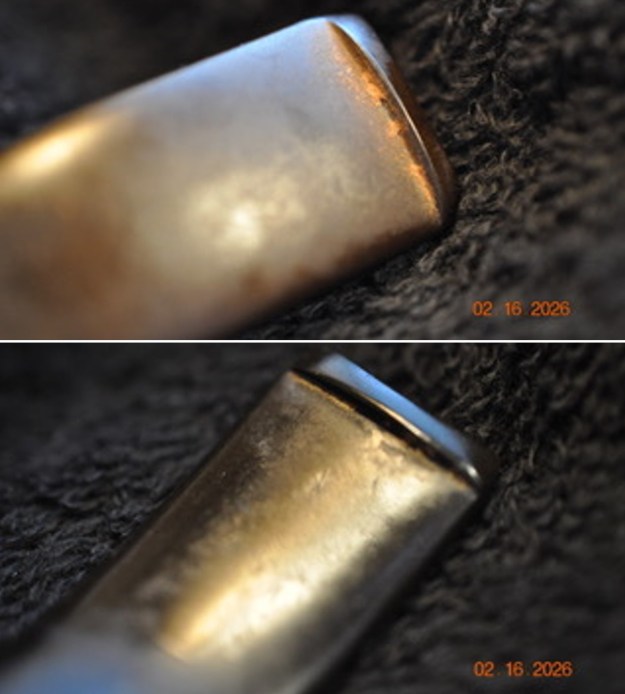
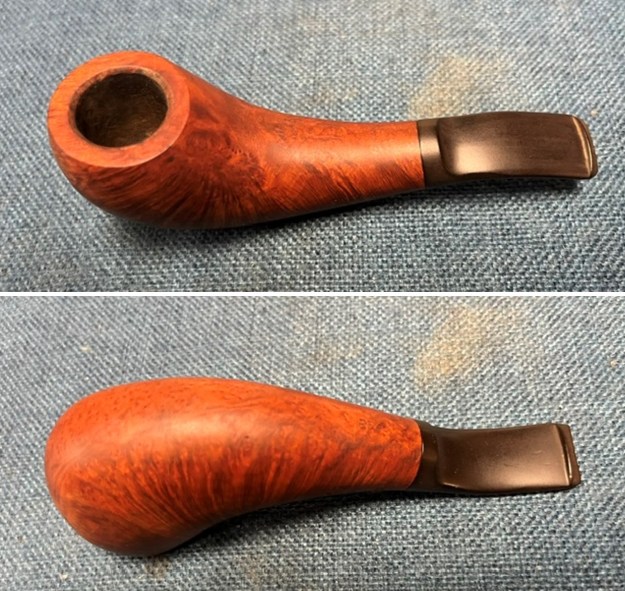
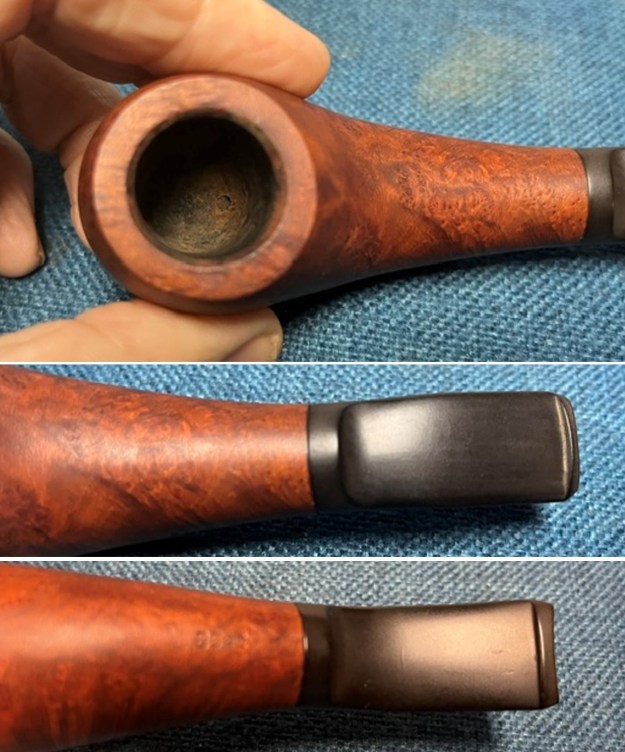
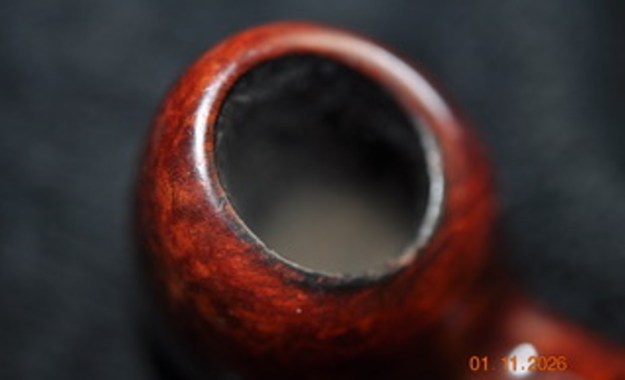
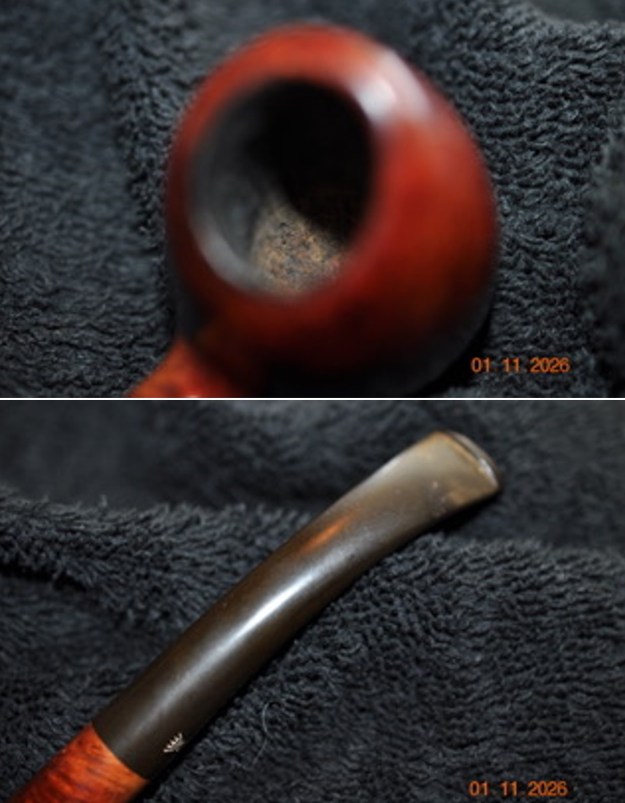
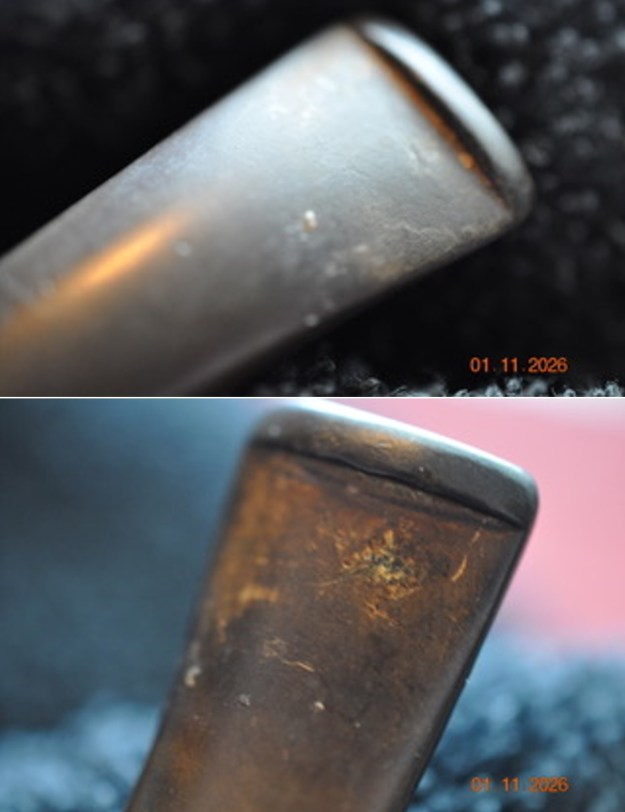
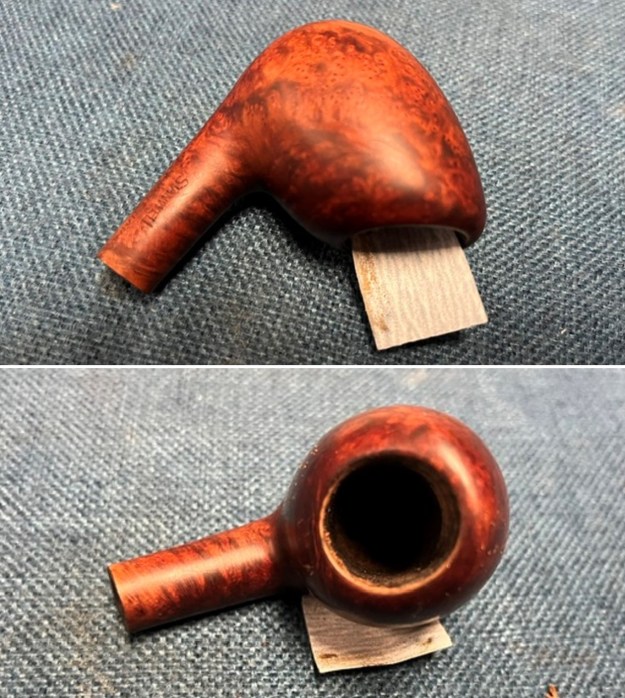
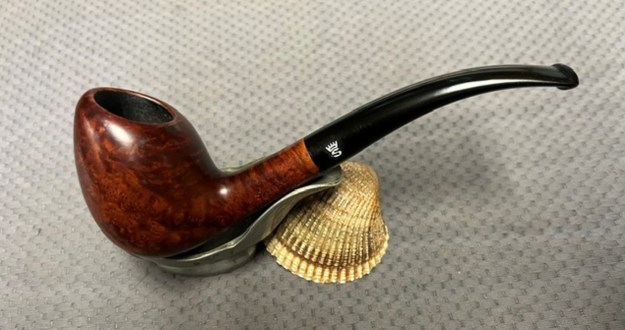
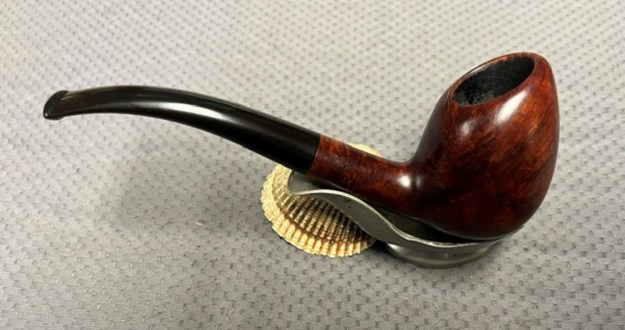
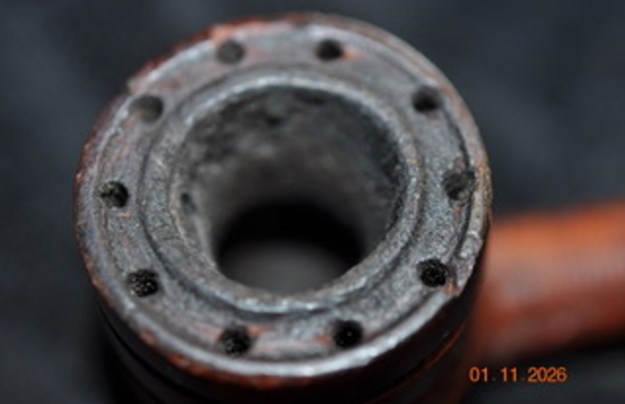
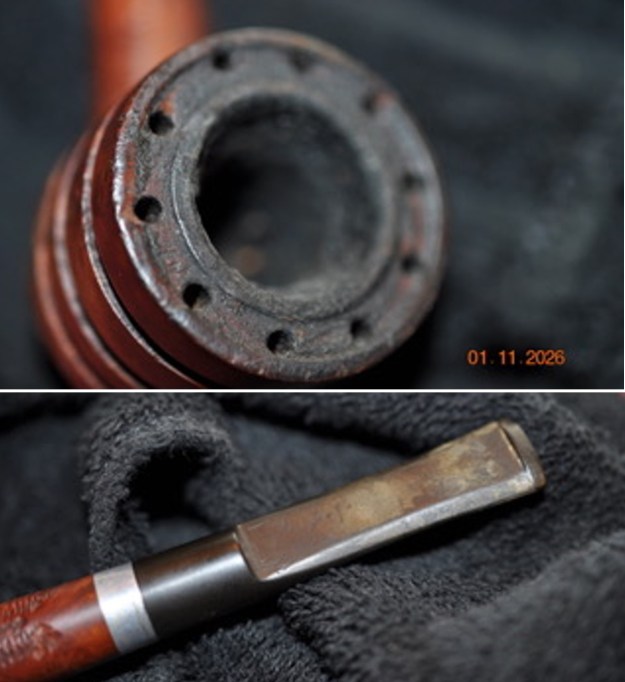
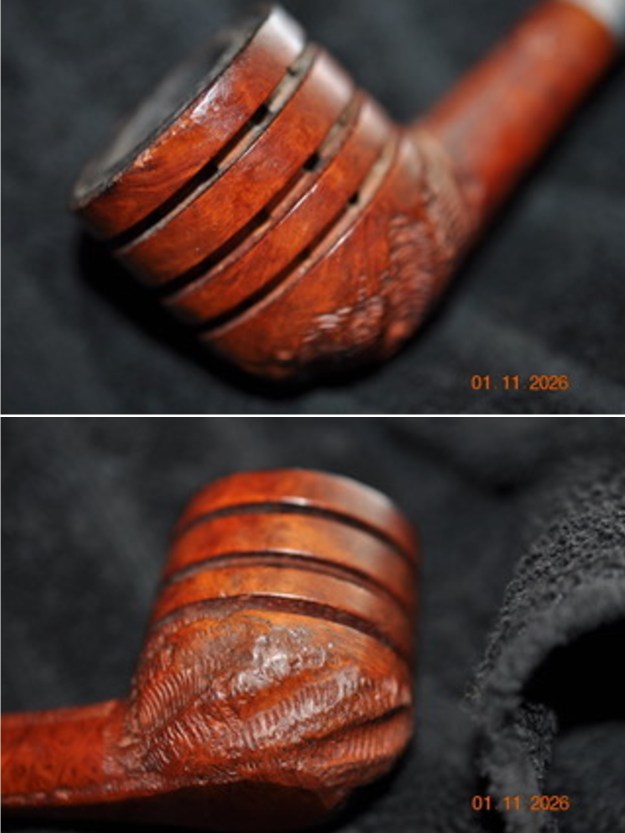
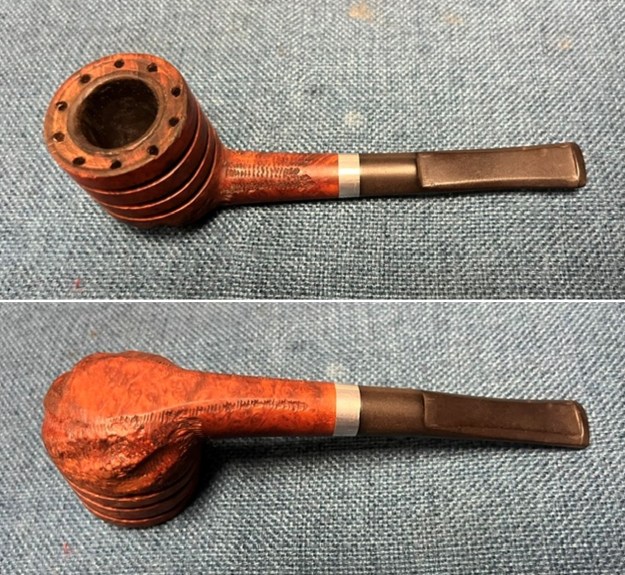
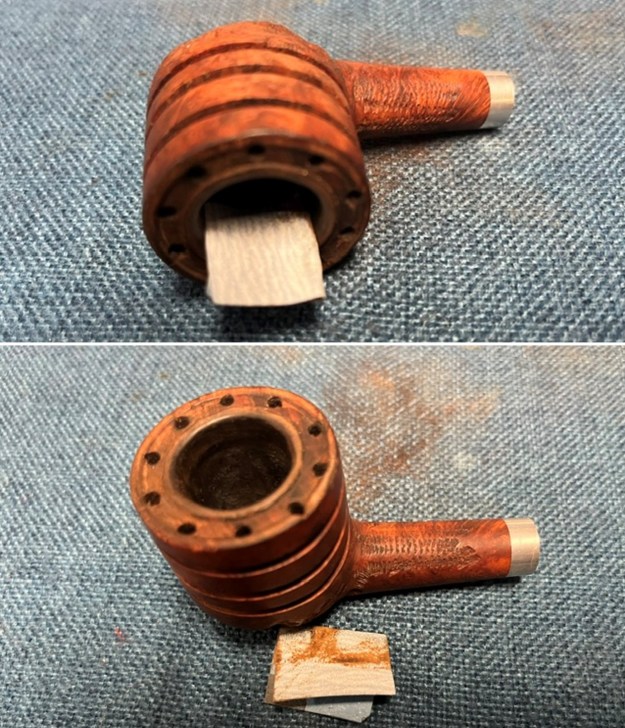
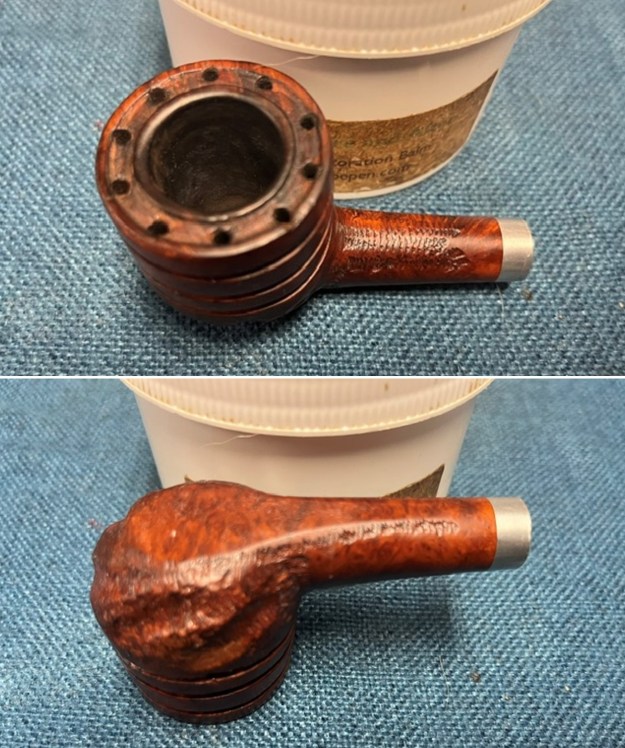
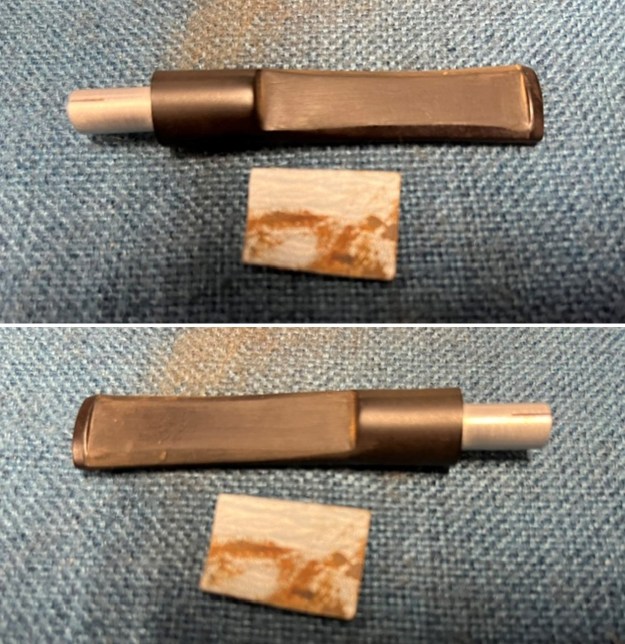
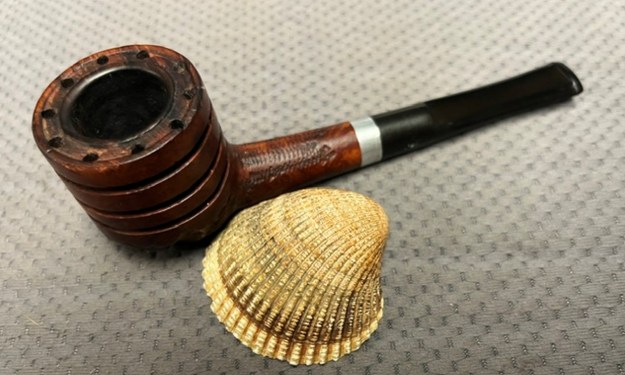
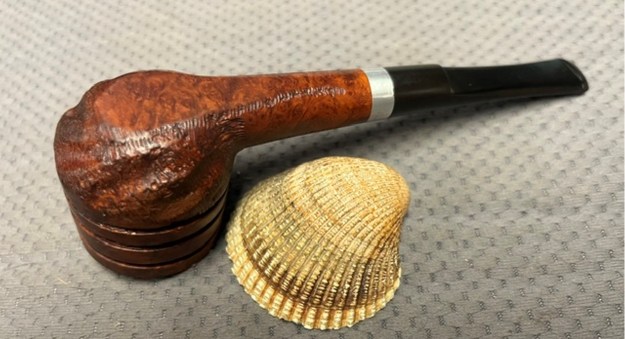
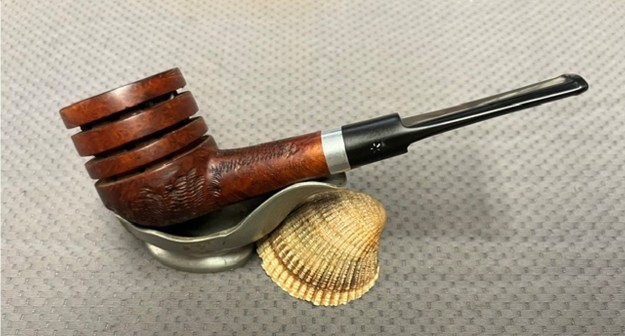
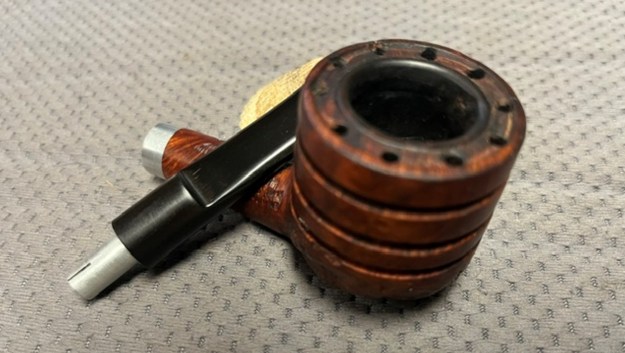
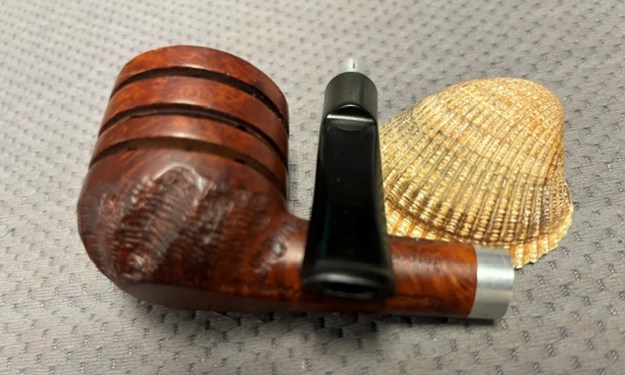
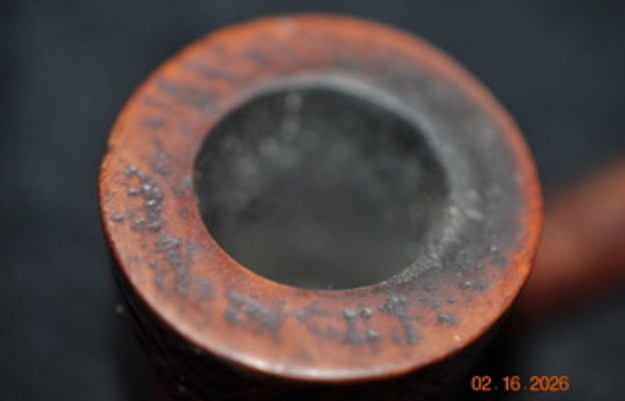
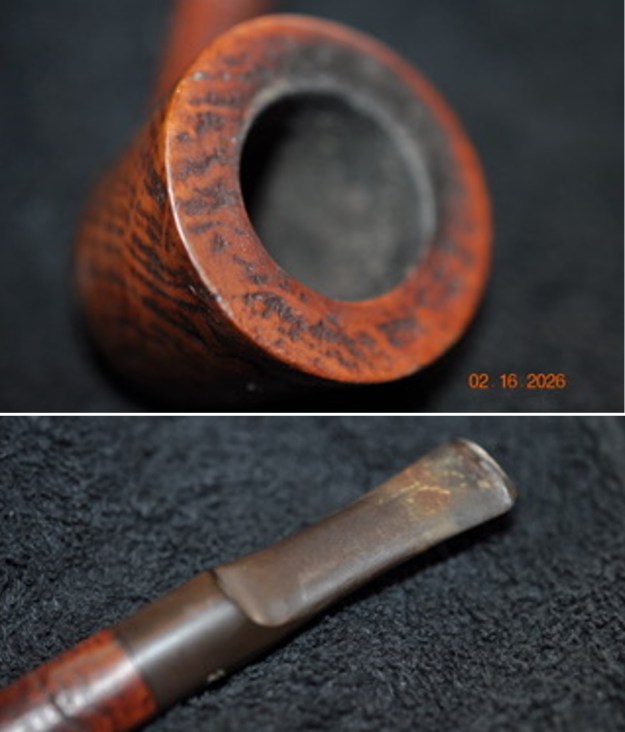
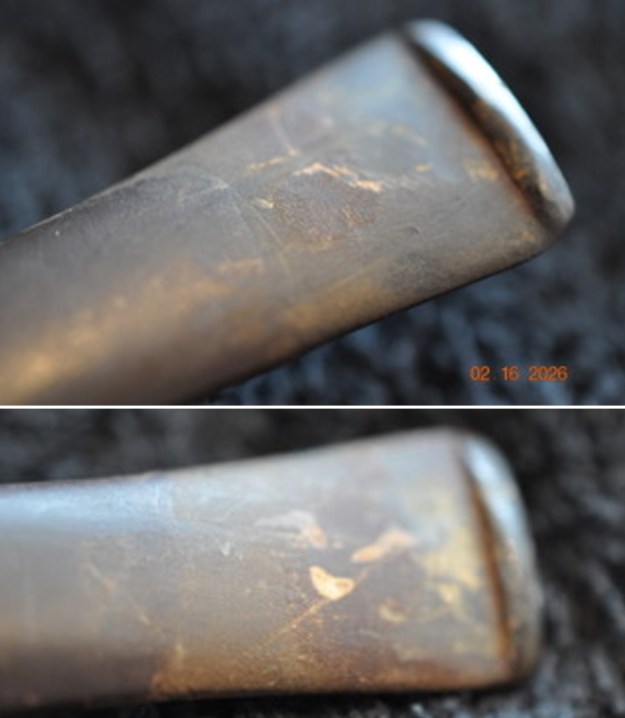
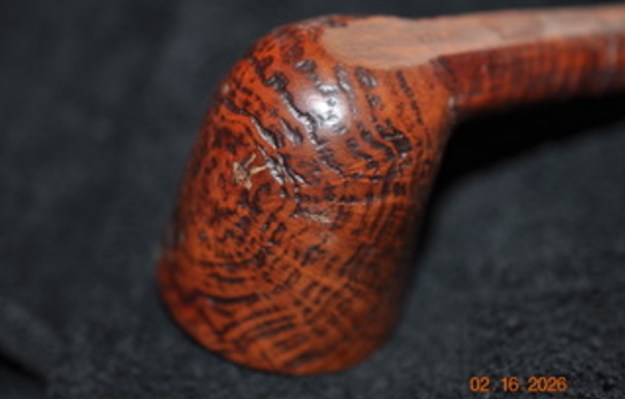
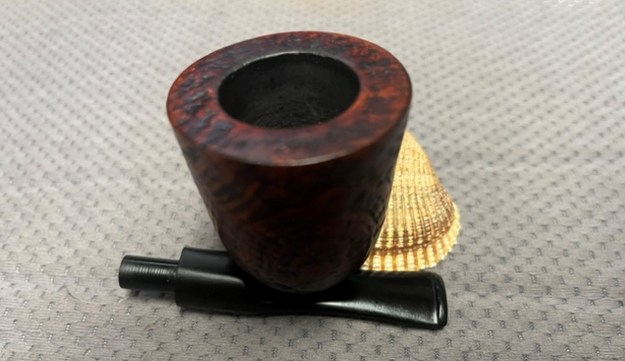
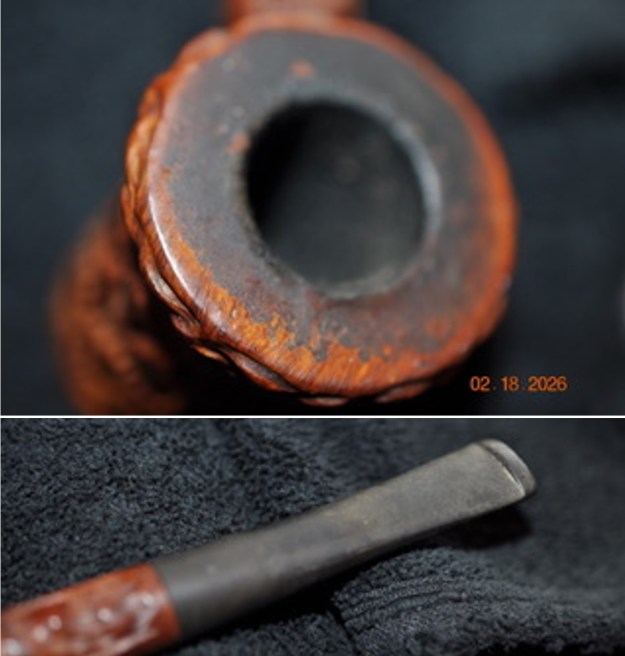
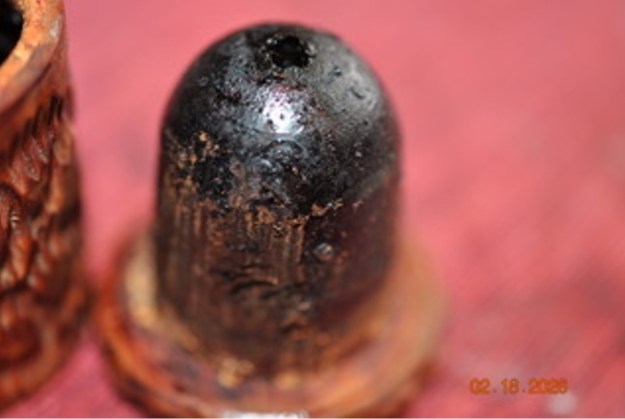
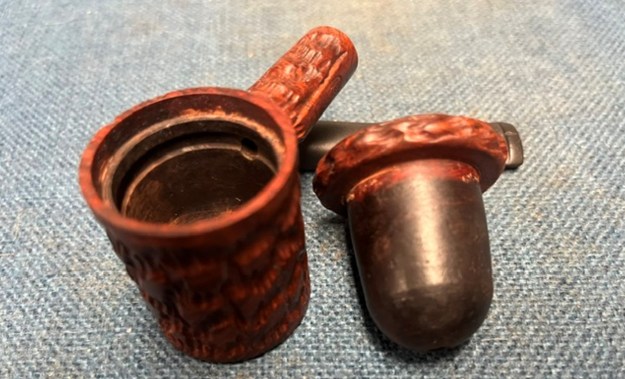
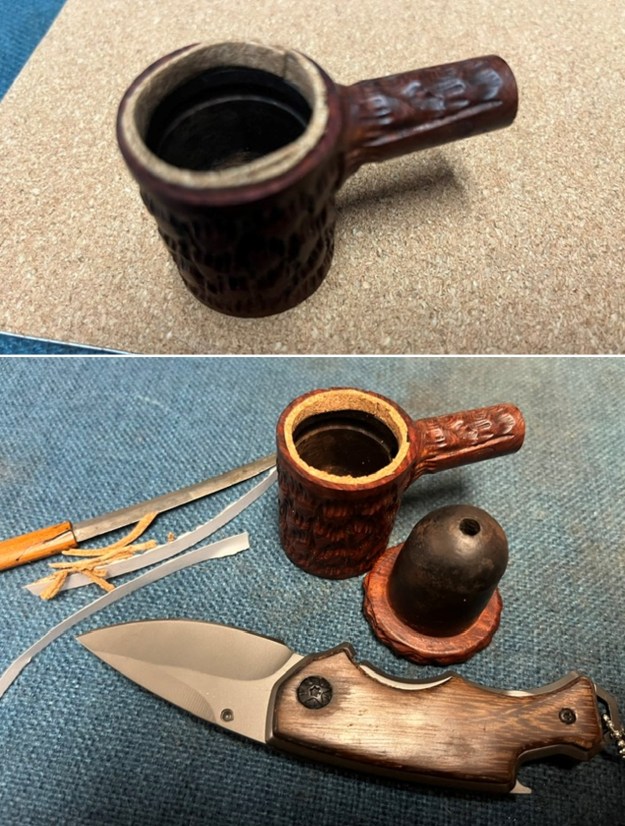
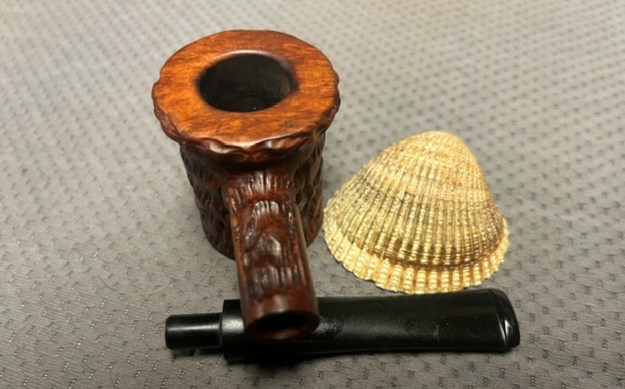
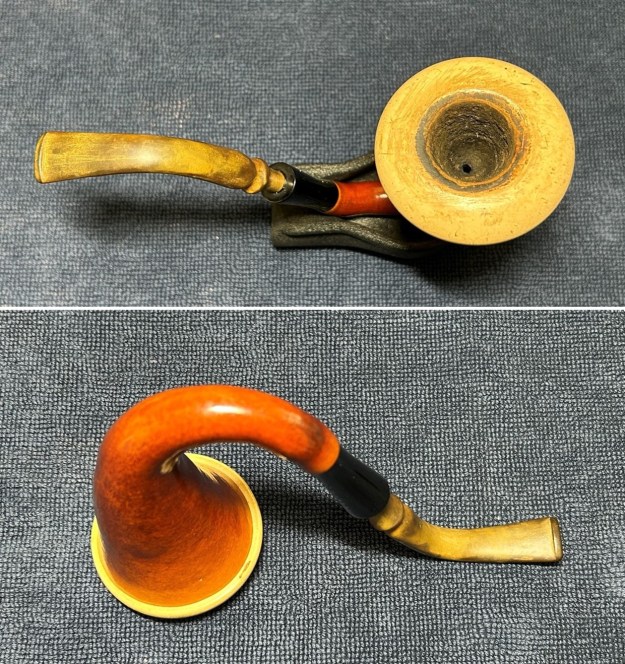
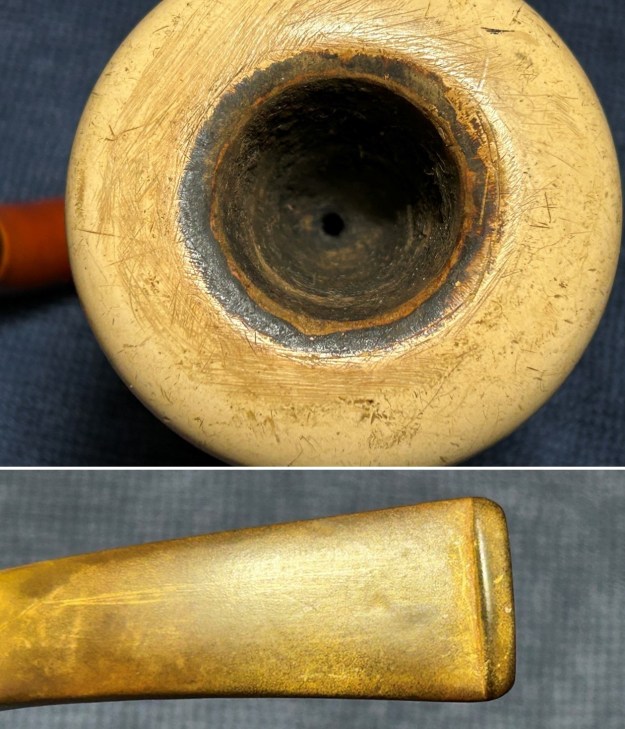
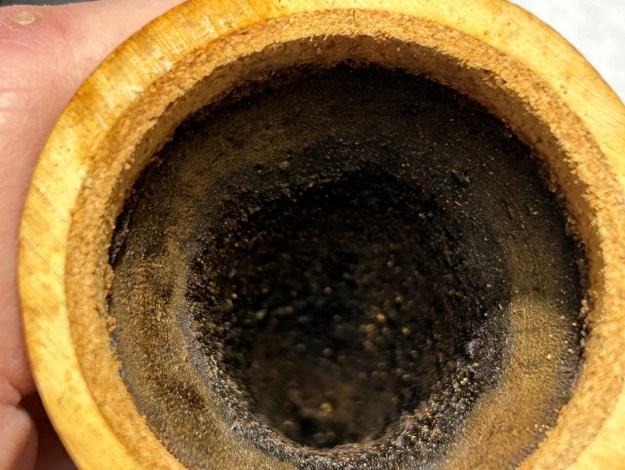
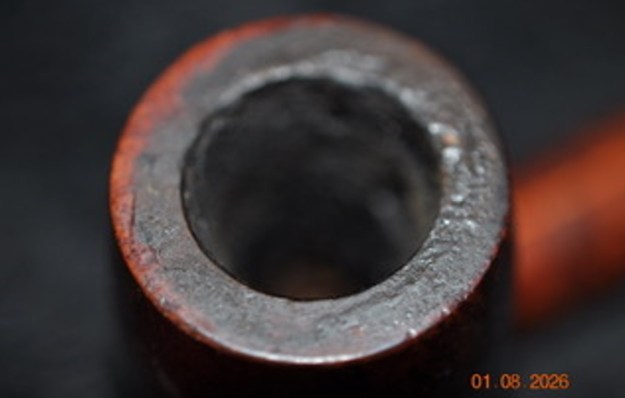
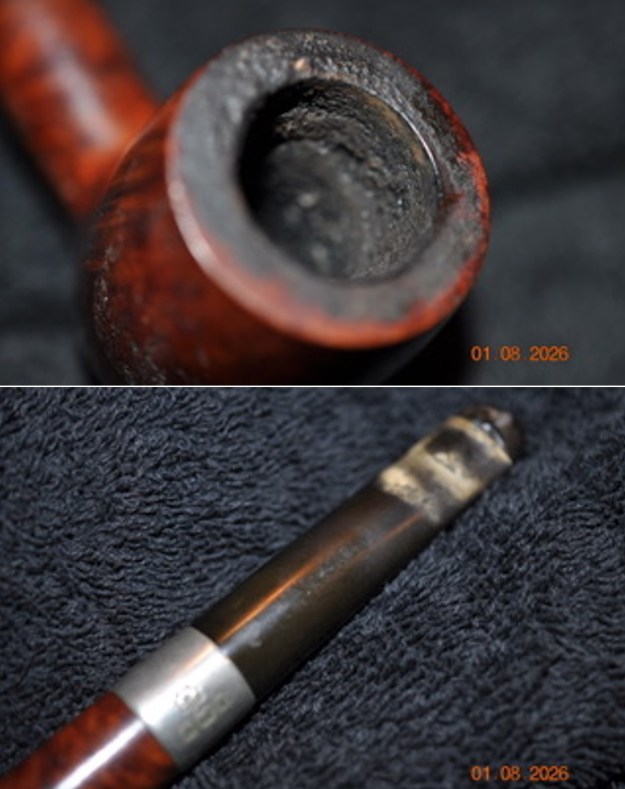
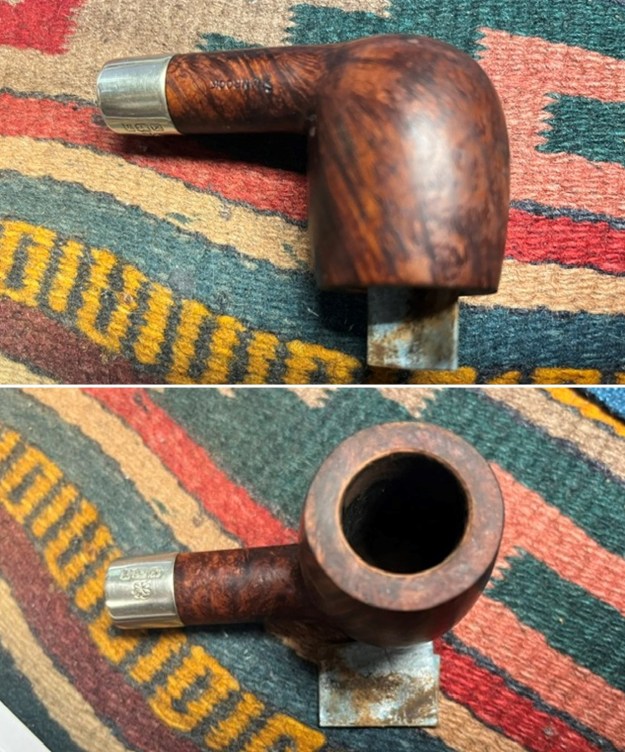
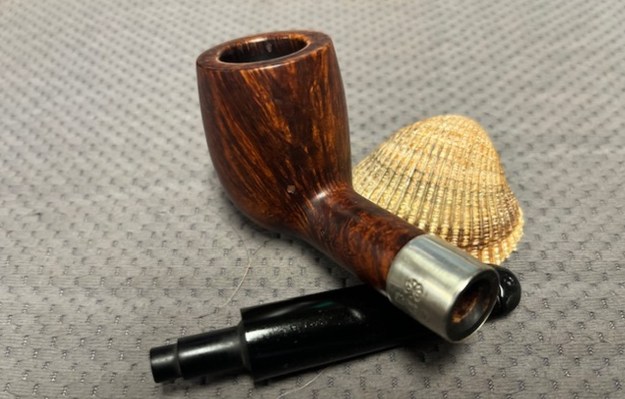
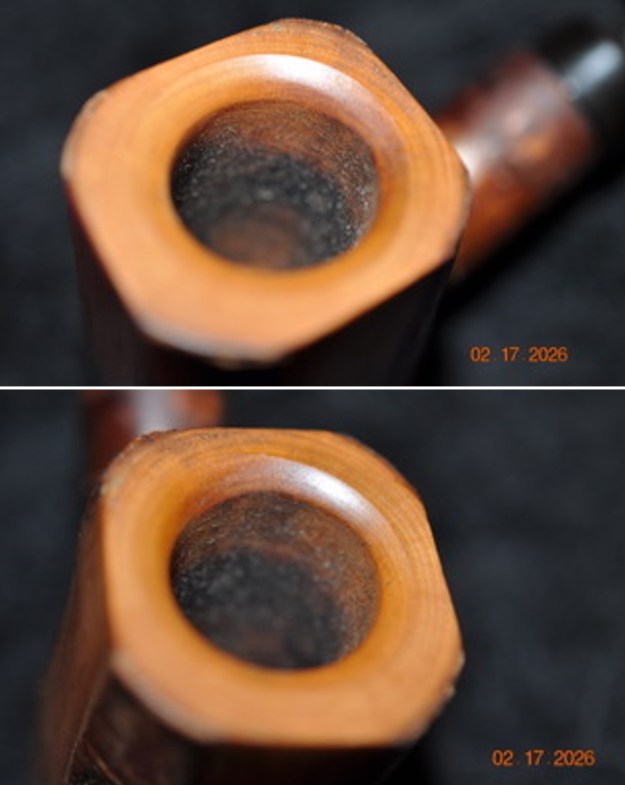
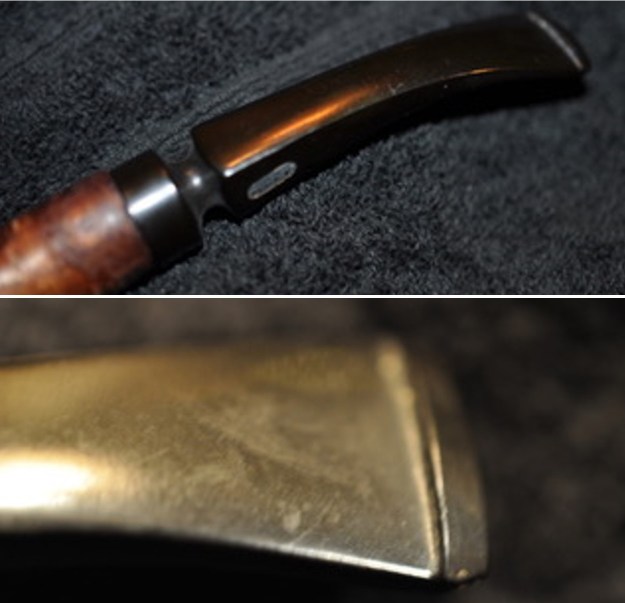
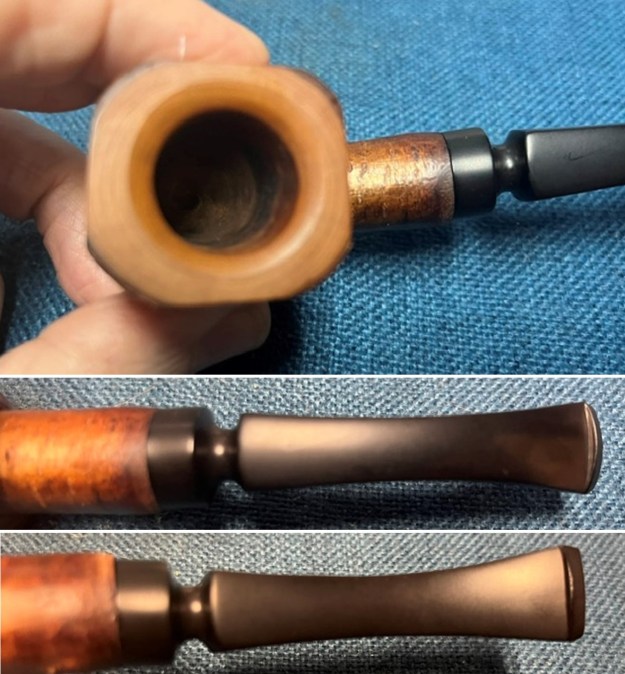
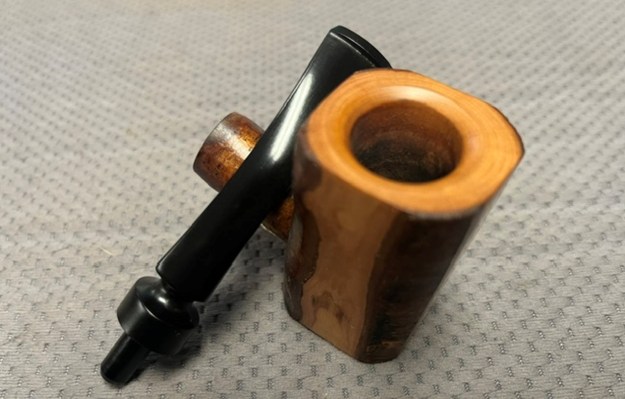
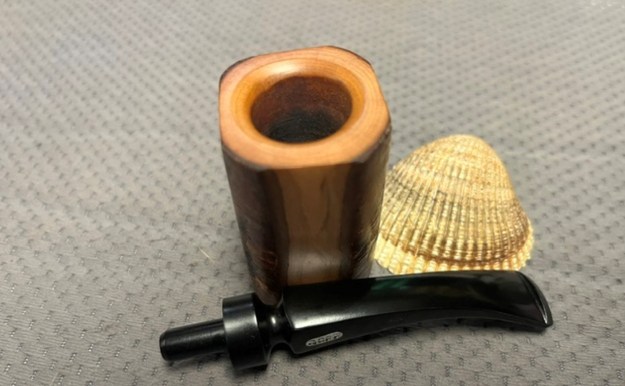
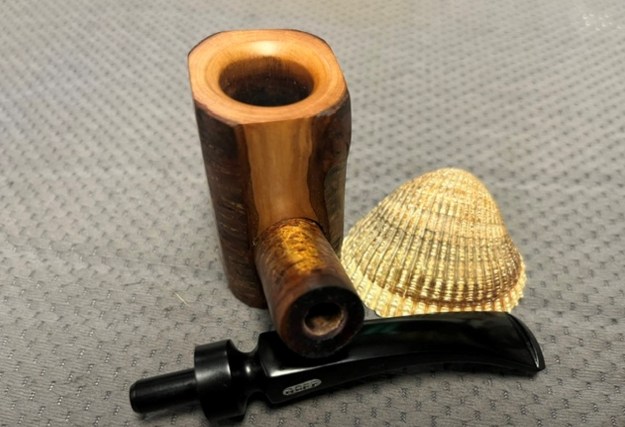
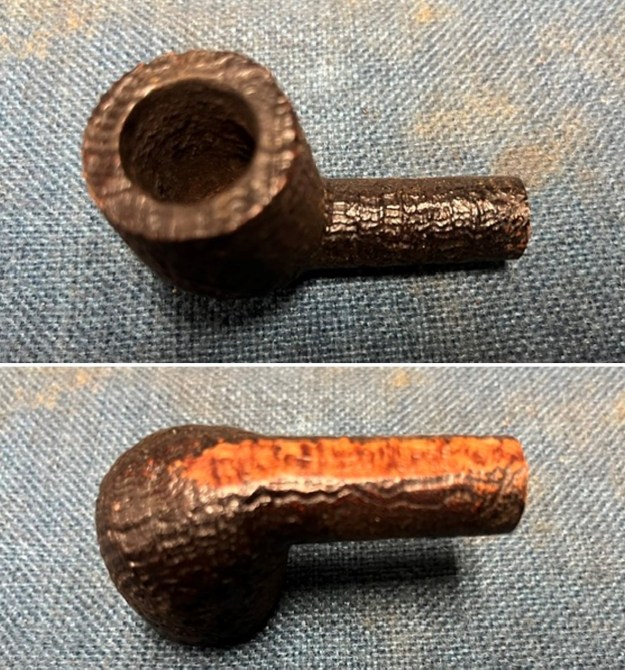
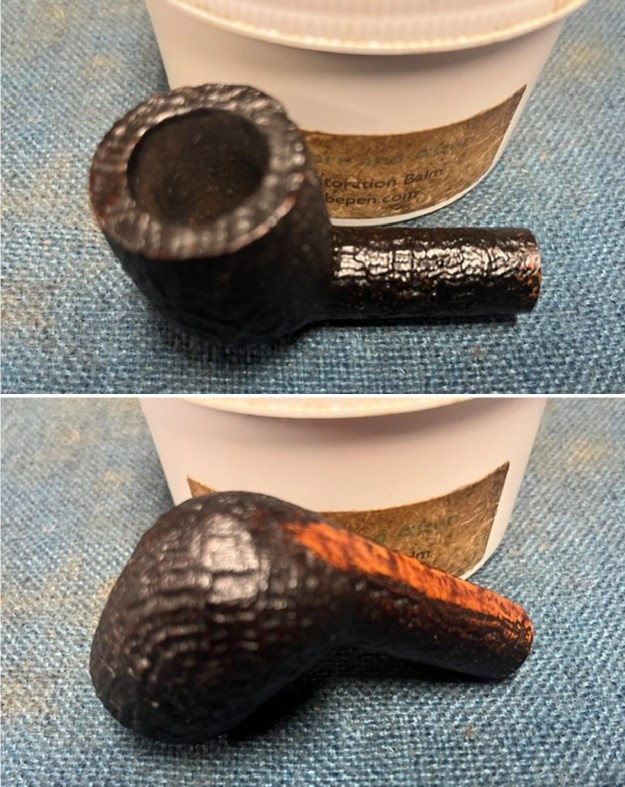
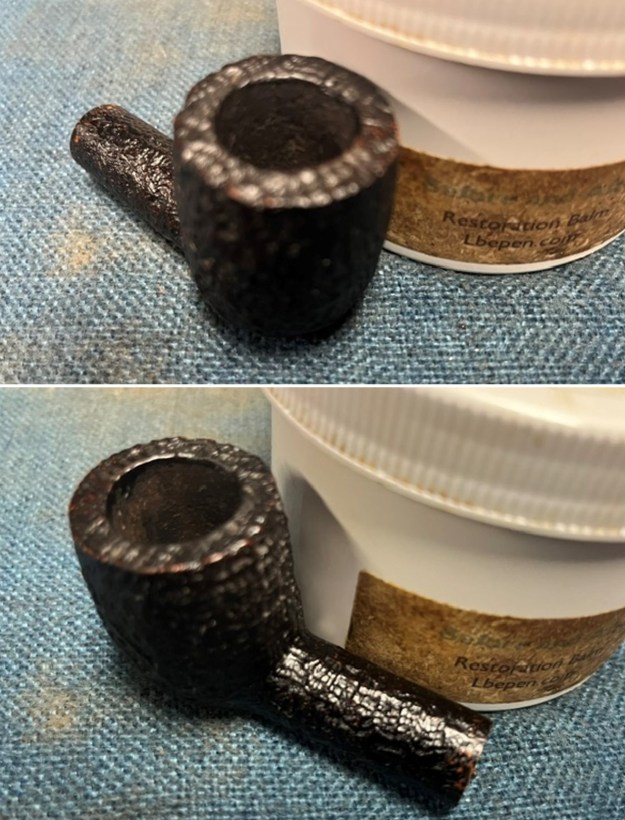
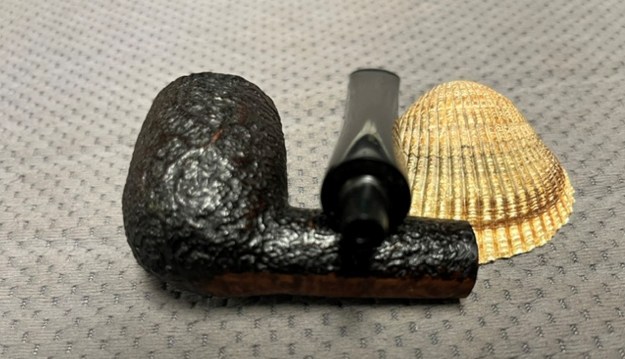
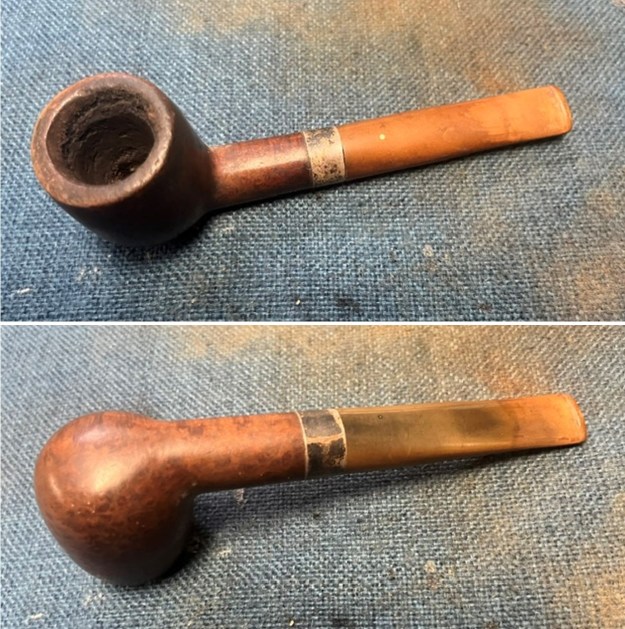 I took a photo of the bowl and rim top to show the thickness of the cake and the condition of the rim top. You can see the band of hard cake mid bowl. The stem photos show the condition of the stem ahead of the button.
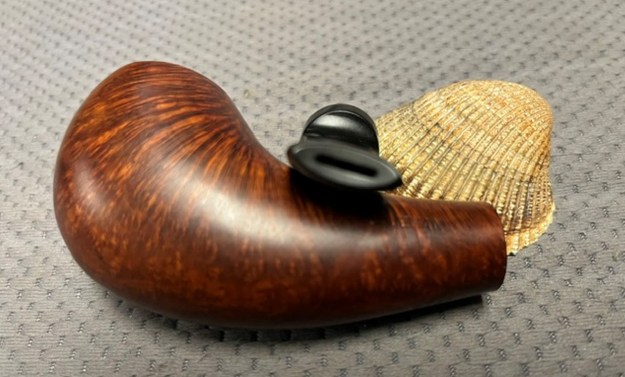
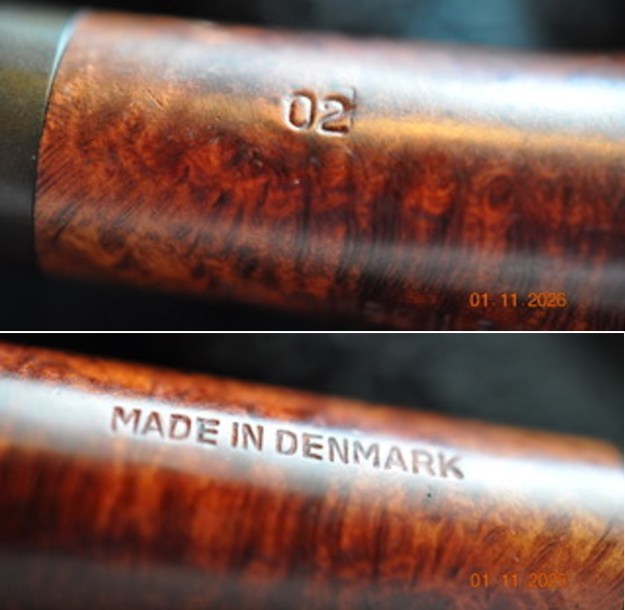
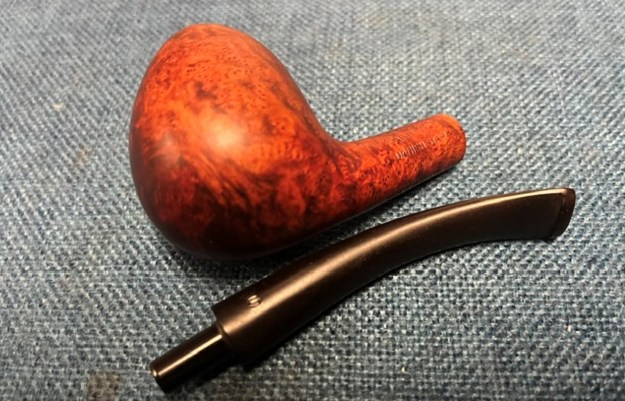
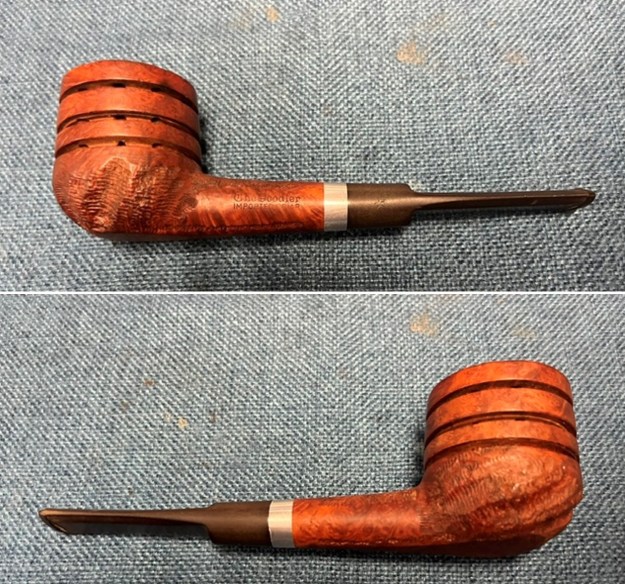
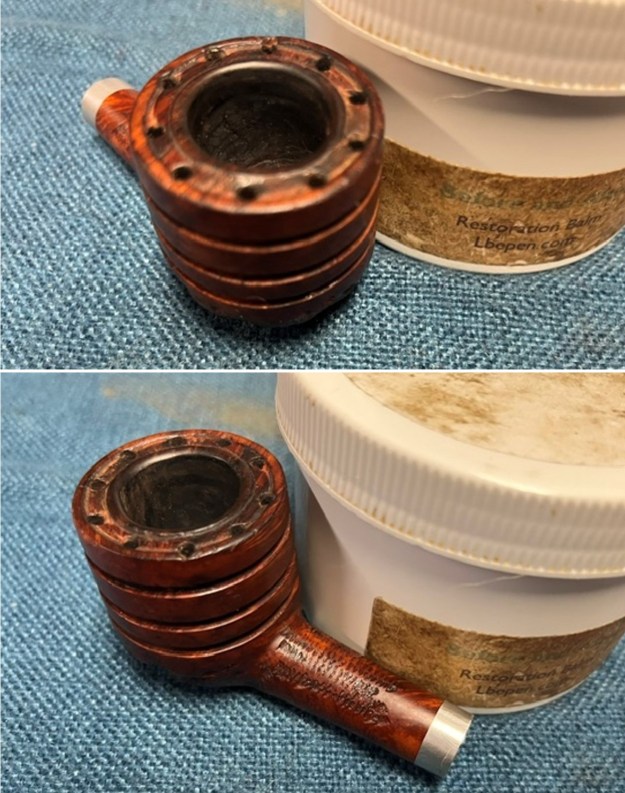
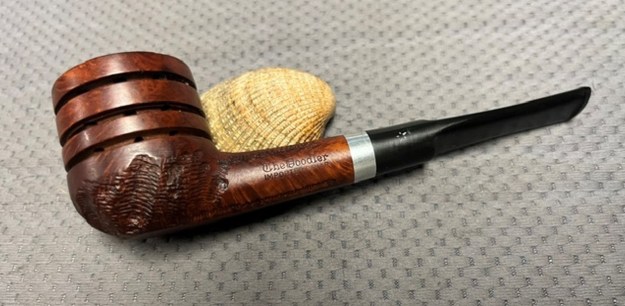
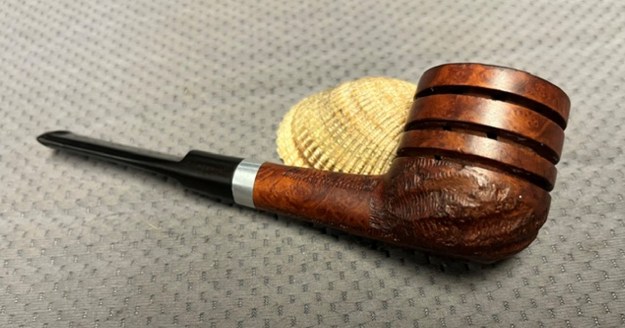
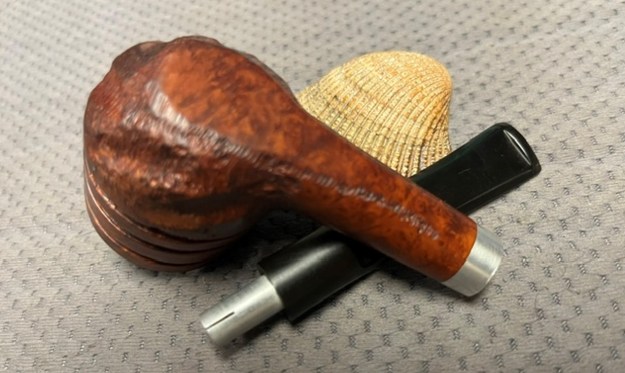
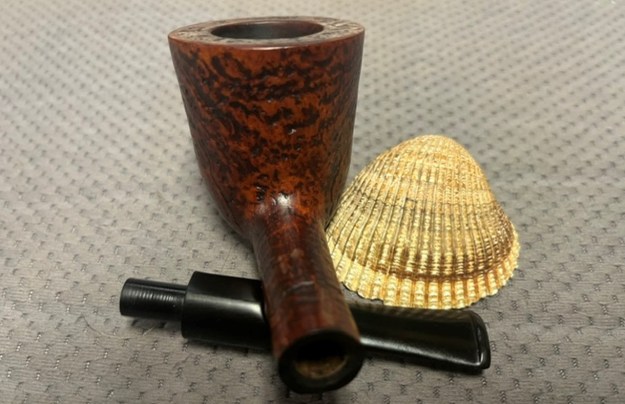
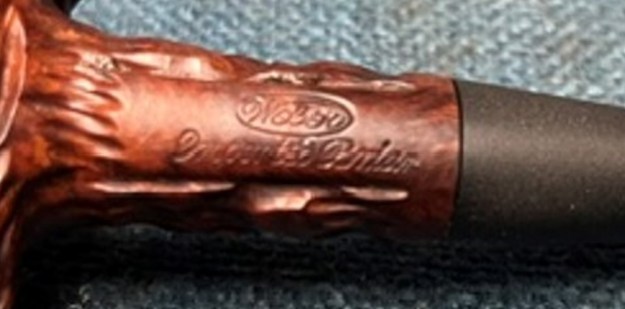
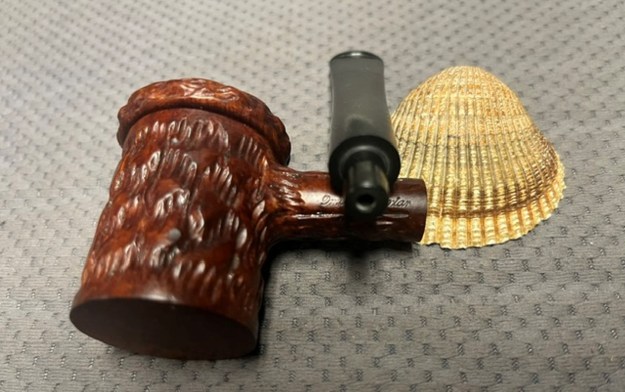
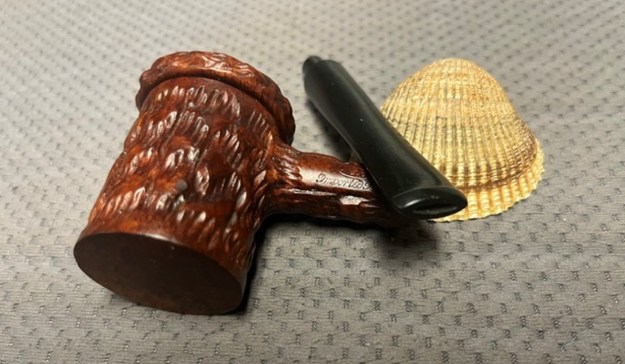
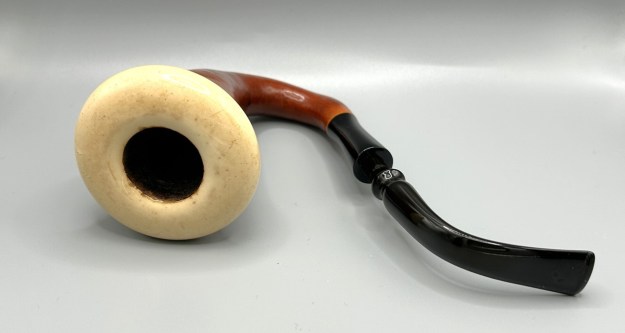
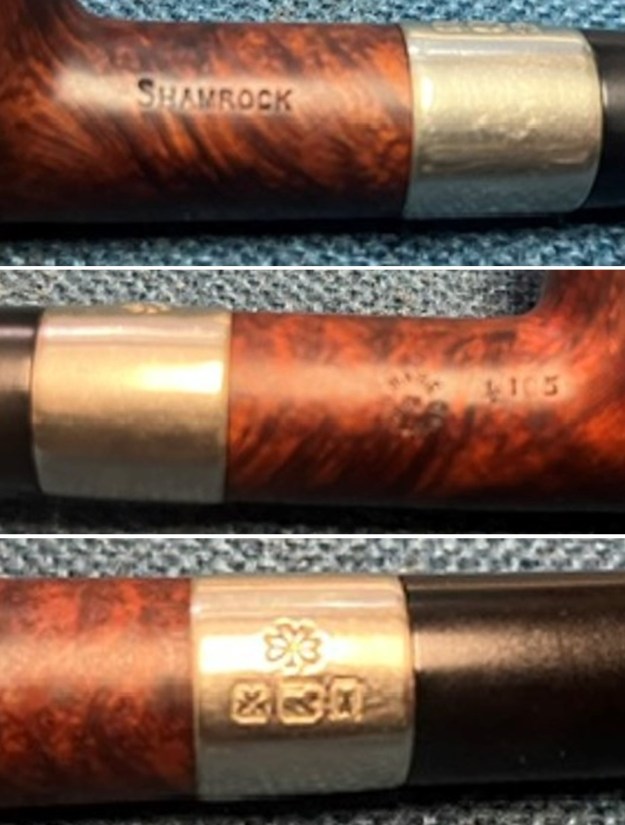
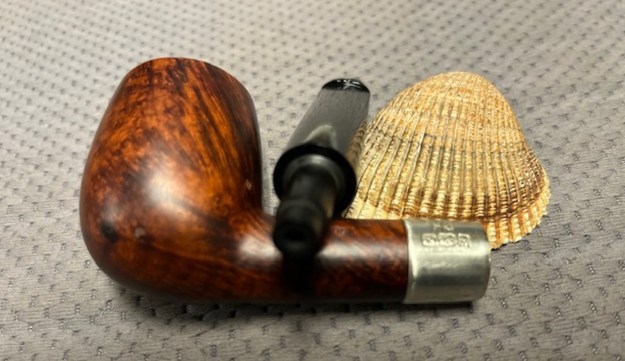
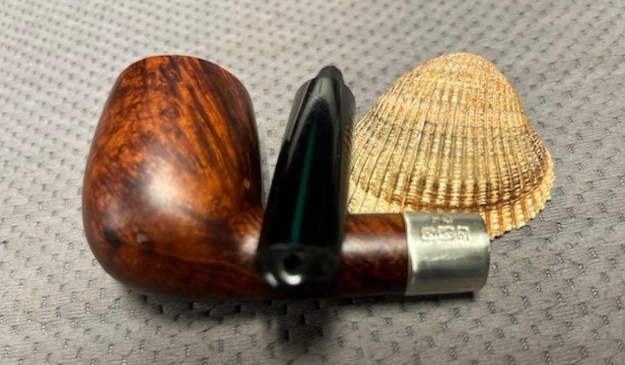
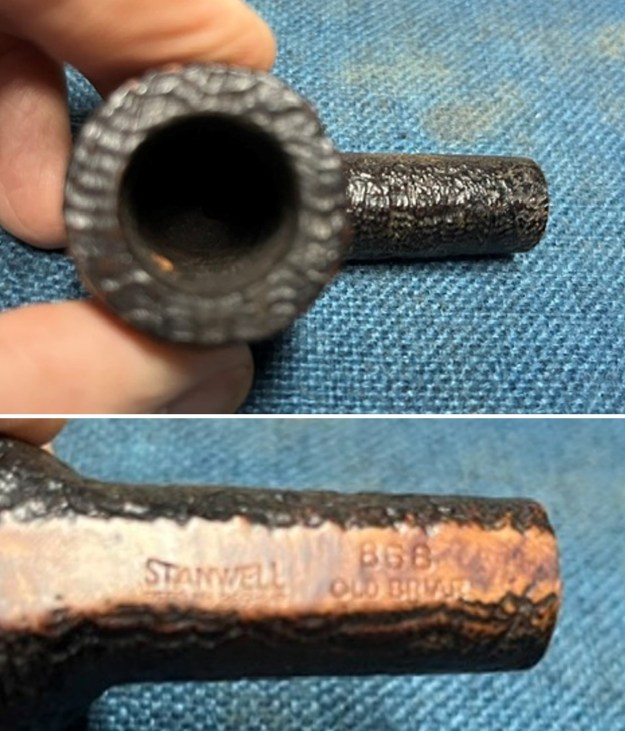
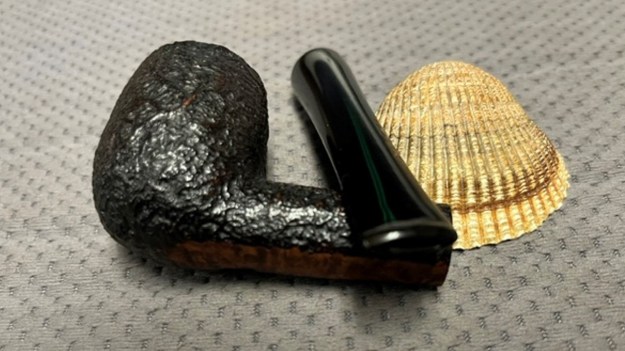
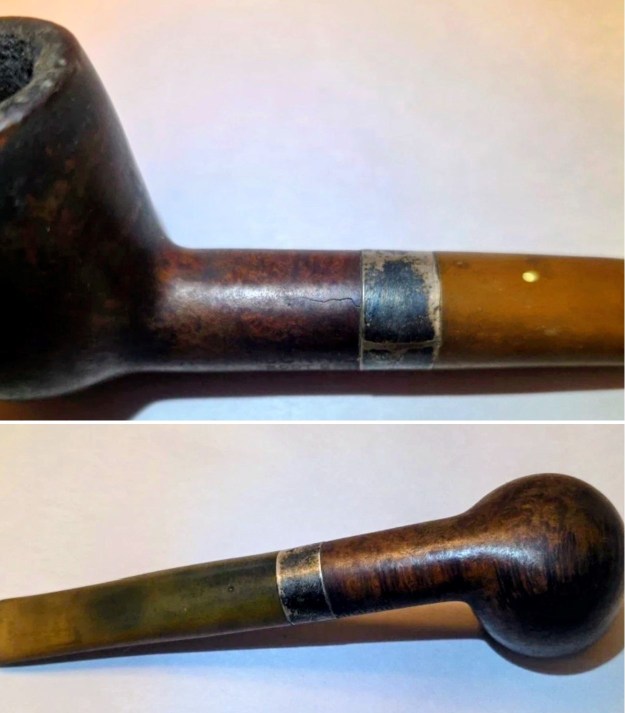
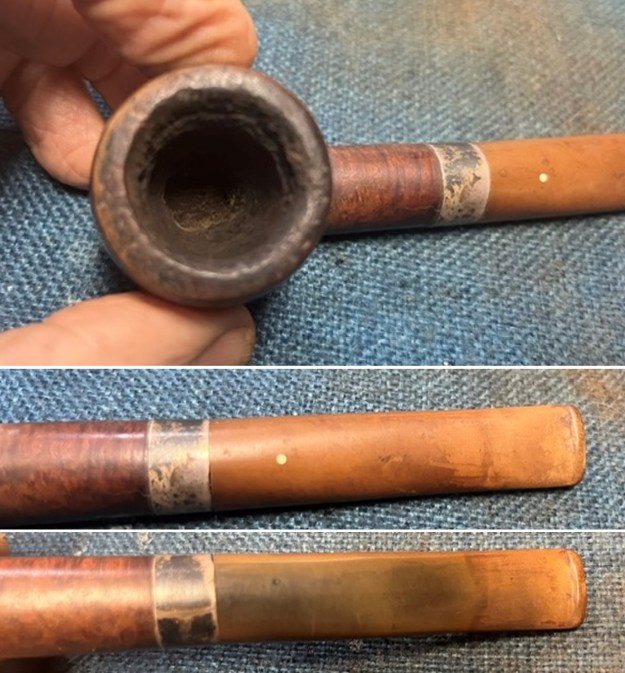 The stamping on the sides of the shank is faint in spots. I took a photo with the band and with the loose band removed. Overall it is clear and readable as noted above. I took a photo of the pipe with the stem removed to give a sense of the proportions of the pipe. Under the grime it is a real beauty.
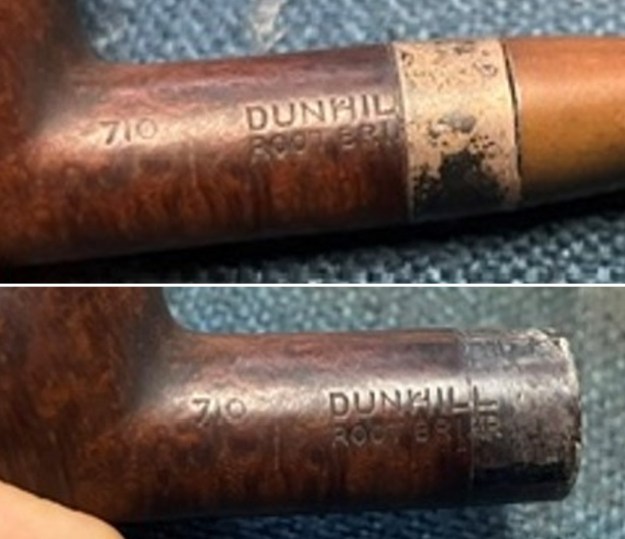
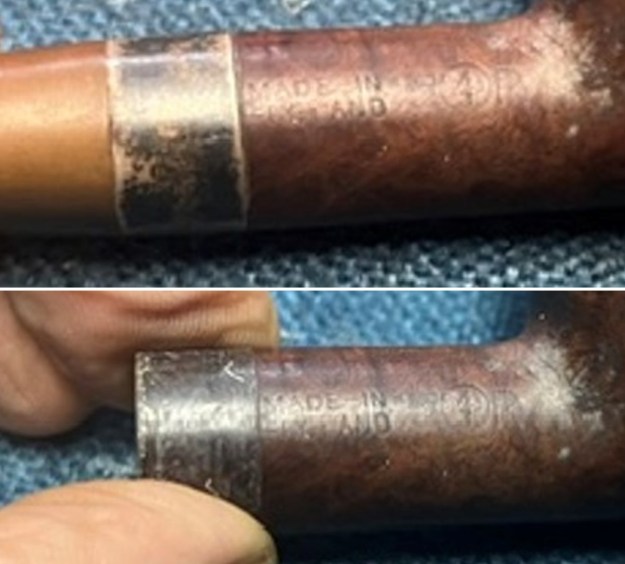
 One of the first things I like to do is to unpack the stamping and understand each element in it. I turned to Pipephil’s helpful site (http://pipephil.eu/logos/en/dunhill/shell-briar1.html). The stamping is interpreted as follows: The 719 is the shape of the pipe which is a Billiard. The Dunhill Root Briar is the finish. Following the Made In England there does not appear to be any date number. Below the D and to the right there is an underlined 1which gives the year that the pipe was made.
From there I wanted to pin down the date stamp 1. I have included Page 2 of the Dunhill Dating Key (http://www.pipephil.eu/logos/en/dunhill/cledat-en1a.html). Following that it takes me to the box with 1960+suffix. That tells me that the pipe is a 1961 pipe.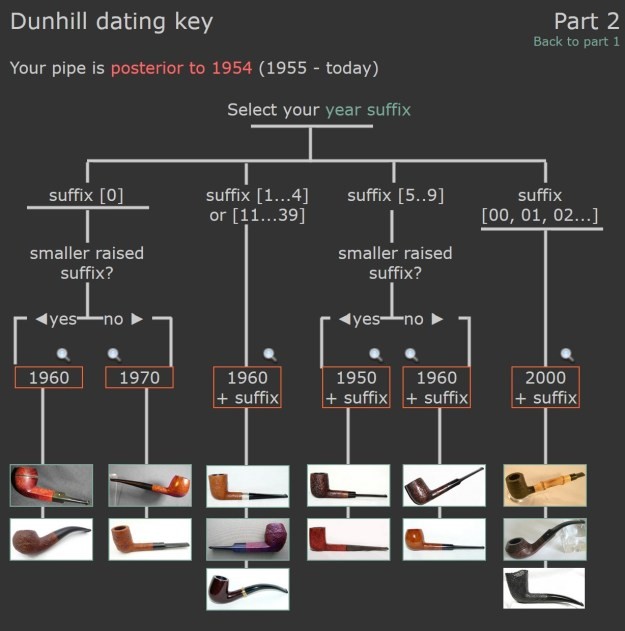 I wanted to know more about the Root Briar finish and when it was introduced by Dunhill. I turned to a listing on Pipedia that gave me the information I was looking for (https://pipedia.org/wiki/Dunhill).
Root Briar
Dunhill introduced its third major pipe finish, the Root Briar, in 1931. The new line was developed specifically to showcase briar with a particularly beautiful and pronounced grain. To this end, it was made exclusively from Corsican mountain briar, a wood characteristically prized for its fine grain, a practice that continued into the 1960s.
The pipe was finished with a light, natural stain to allow the beauty of the wood to show through. A particularly distinctive feature of the early Root Briar was its unique mouthpiece — a marble-grained, brown vulcanite bit — that became known to collectors as the ‘bowling ball’ bit. This style, however, was discontinued with the onset of the Second World War.
Because the Root Briar finish requires a perfectly clean bowl with exceptional graining, it has always been one of Dunhill’s rarer and more expensive lines, typically available only at the company’s own stores or through its principal dealers. Its nomenclature was identical to that of the Bruyère, except for the use of an ‘R’ stamp instead of an ‘A’. Straight-grained versions were graded on various scales over the years, evolving into the modern ‘DR’ one-to-six-star system.[122][123]
Now I knew that I was working on a Dunhill Root Briar 710 Billiard with a taper stem that was probably made in 1961.
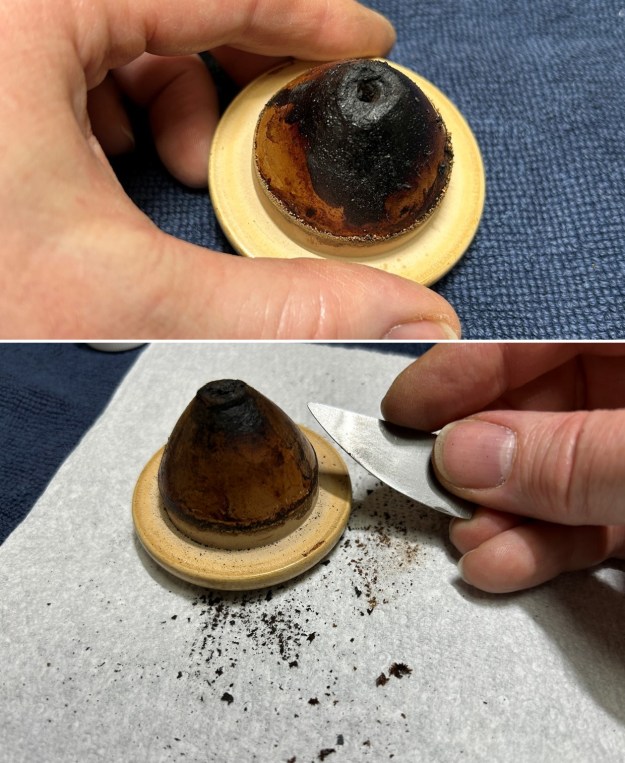
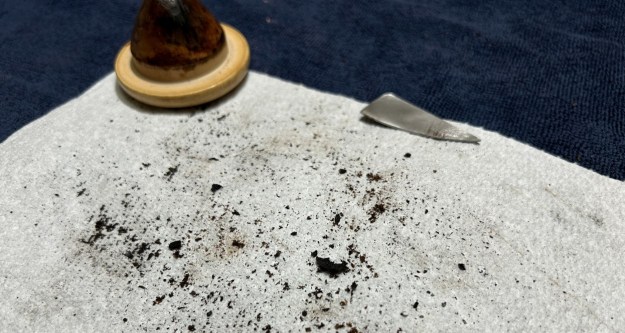
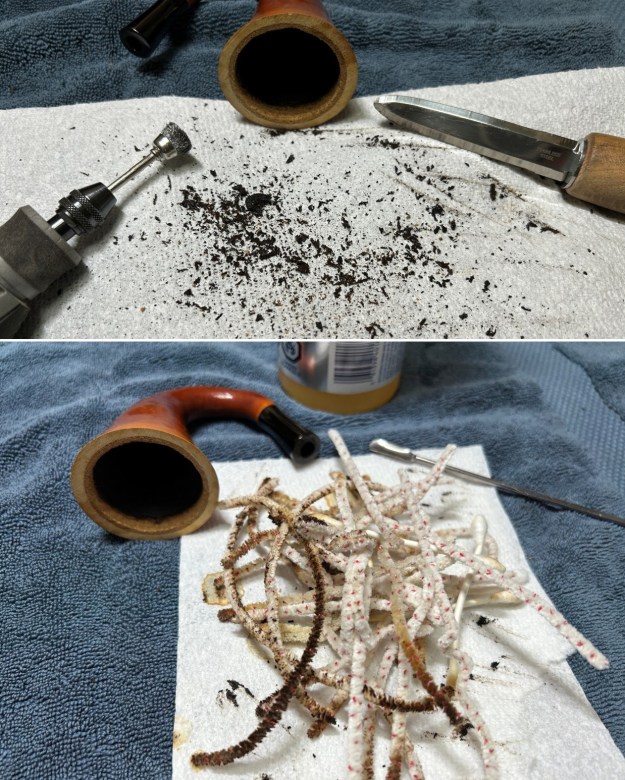
I turned to work on the pipe itself. I reamed the bowl with a PipNet pipe reamer using the cutting heads 2 and 3. I finished the reaming with a Savinelli Fitsall Pipe Knife. I sanded the walls of the bowl with 220 grit sandpaper wrapped around a piece of dowel. 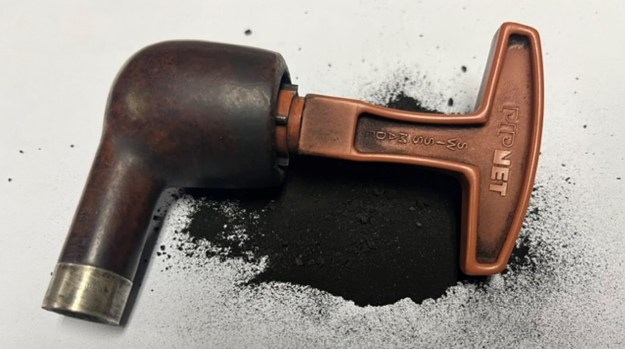
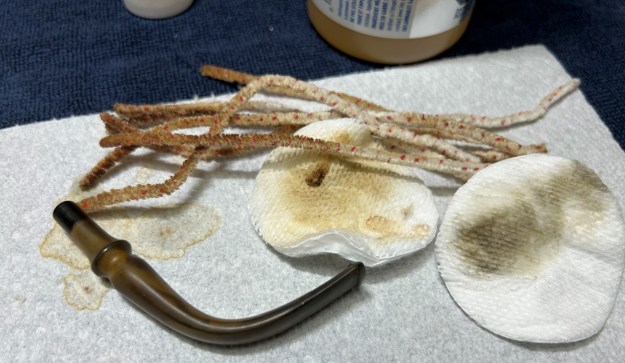
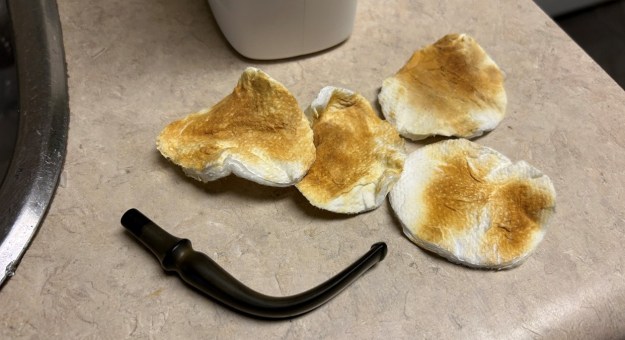
 I cleaned out the inside of the shank and the airway in the stem with alcohol, cotton swabs and both bristle and regular pipe cleaners.
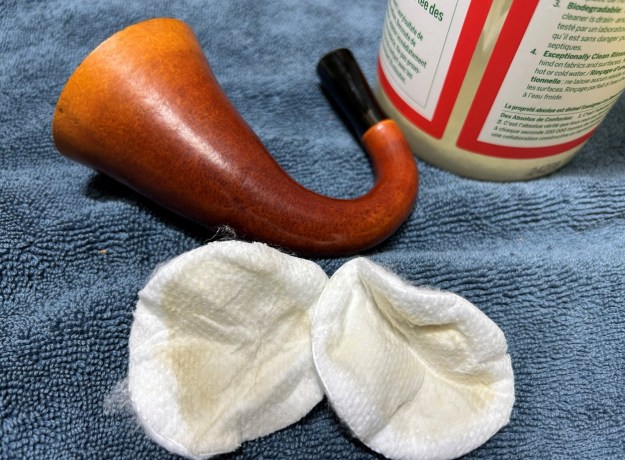
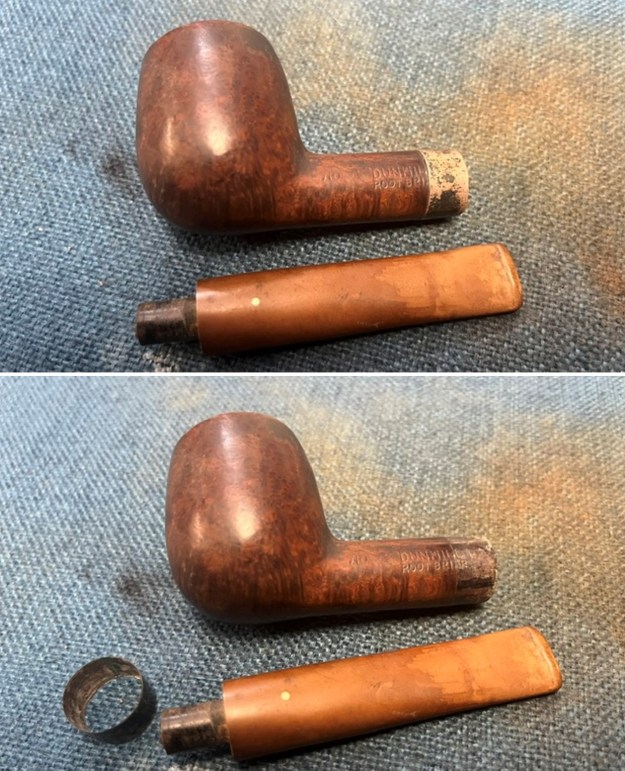
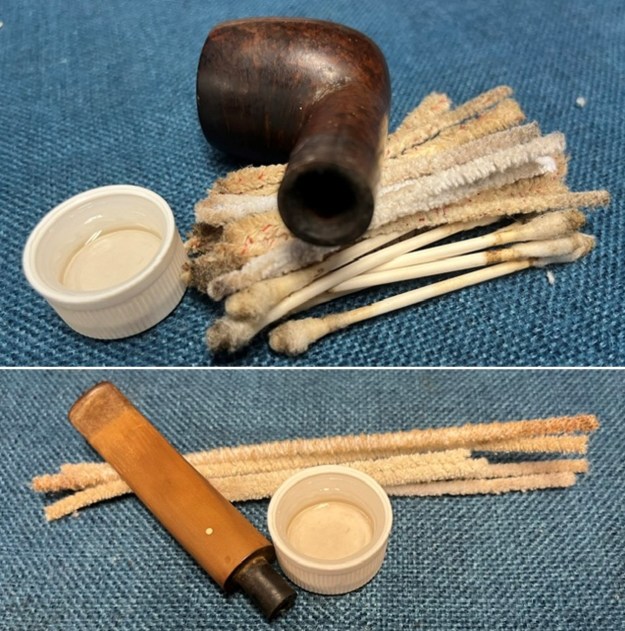 I removed the Sterling Silver Band from the shank and scrubbed the bowl and shank with a tooth brush and some undiluted Murphy’s Oil Soap. I rinsed it off with warm water to remove the dust and soap from the finish. I dried it off with a soft cloth and it looked much better.
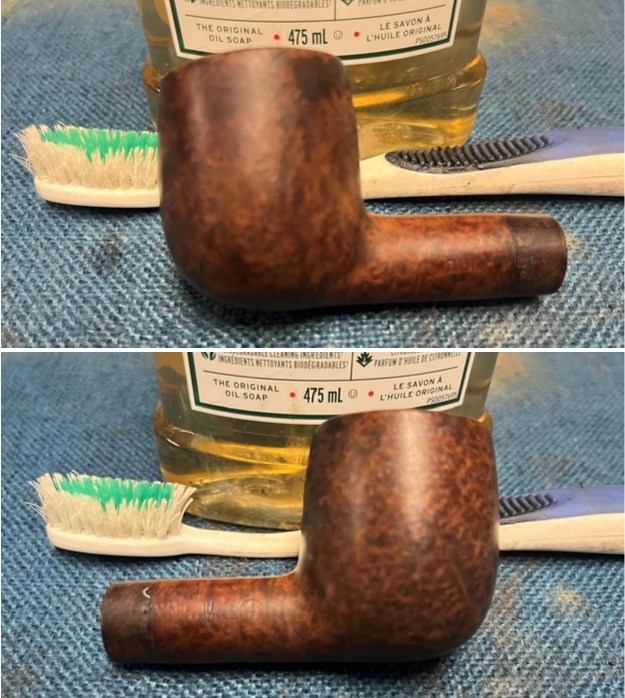
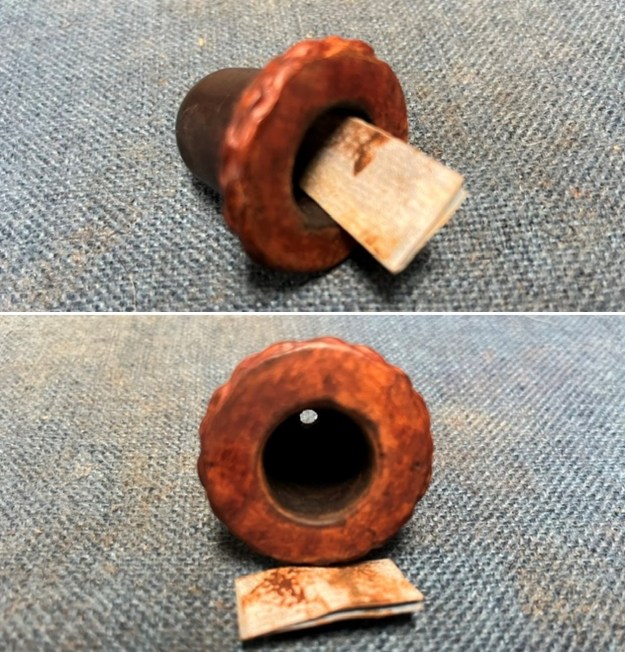
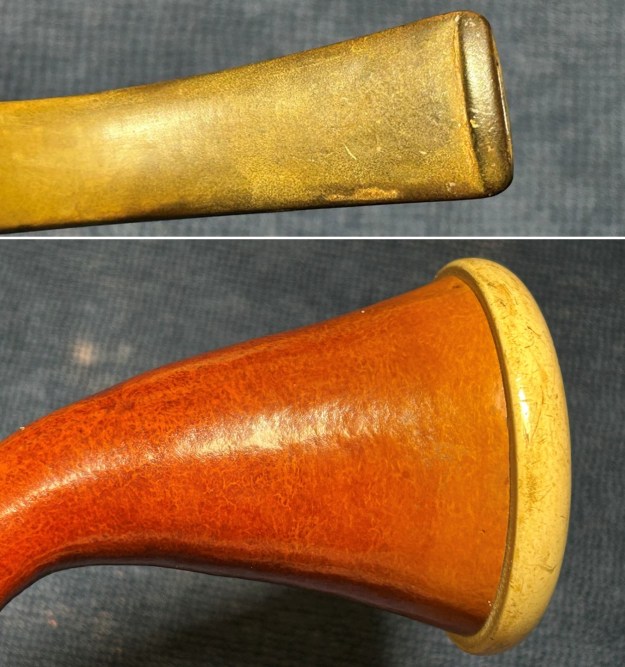
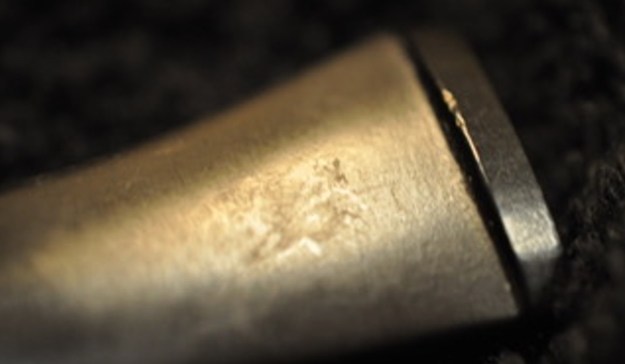
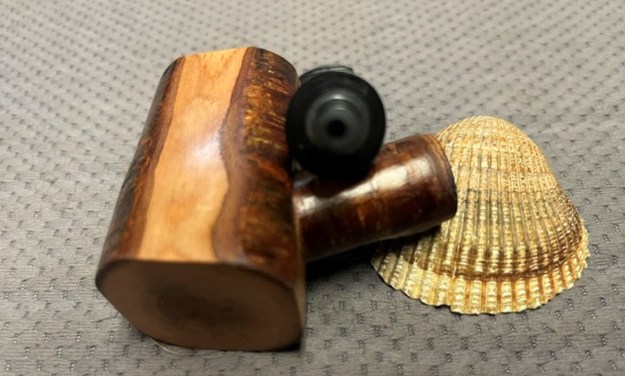
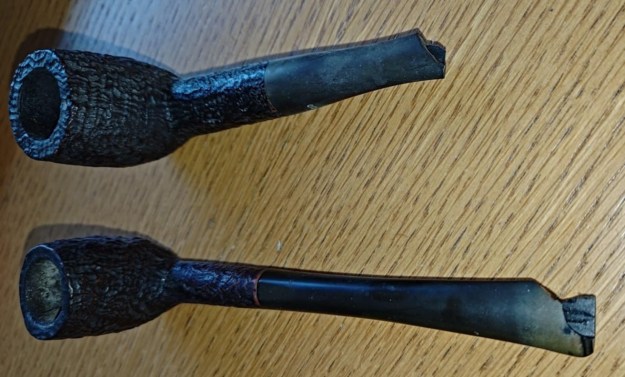
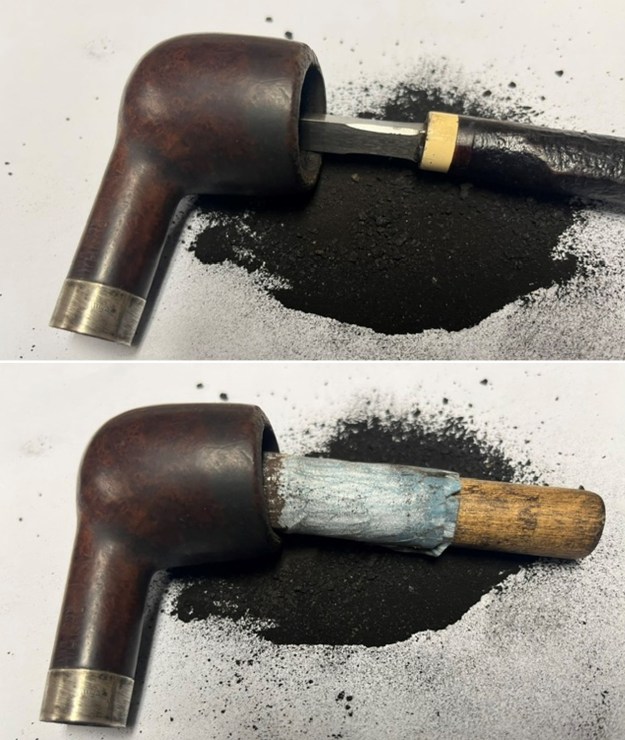
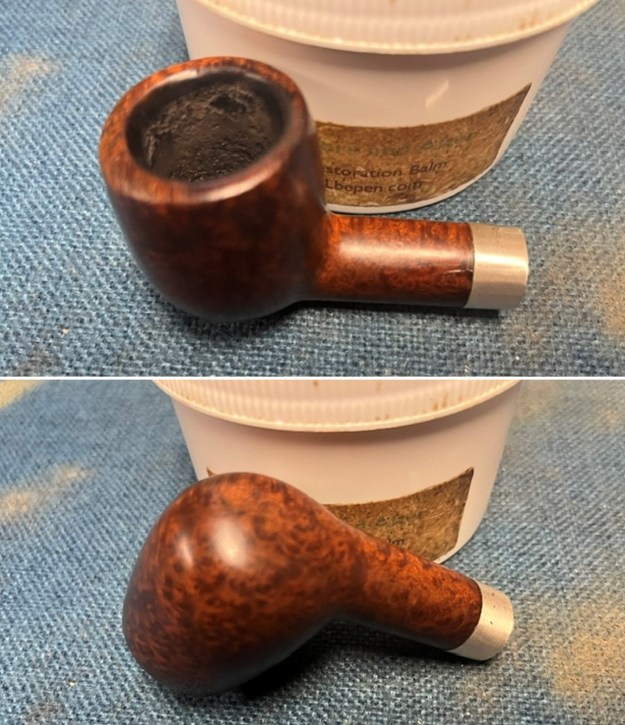
 Once I cleaned up the externals of the bowl and shank I found a metal repair piece pressed into the top of the shank to repair what must have been another crack in the shank.
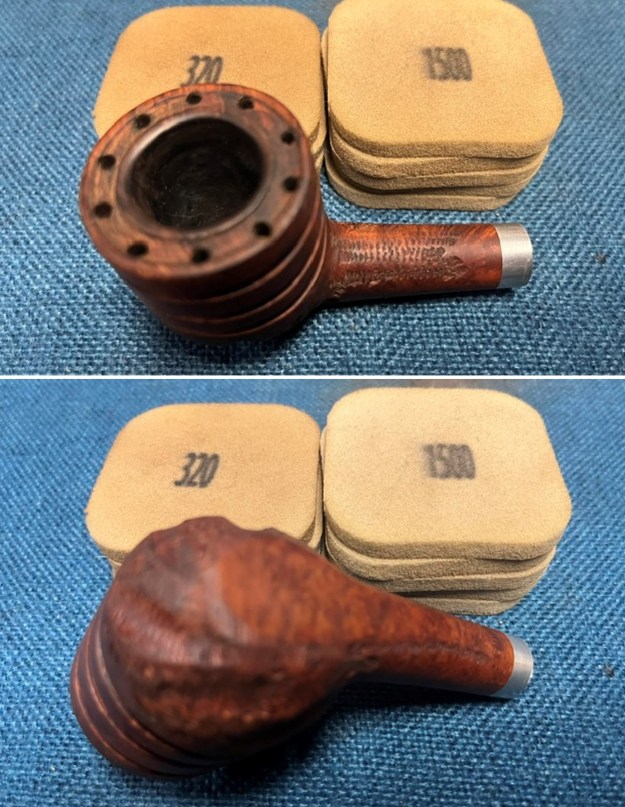
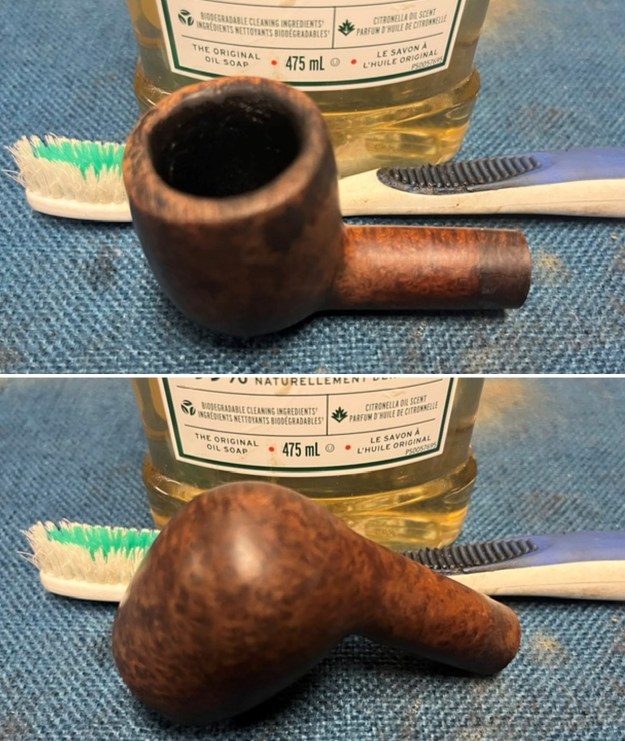
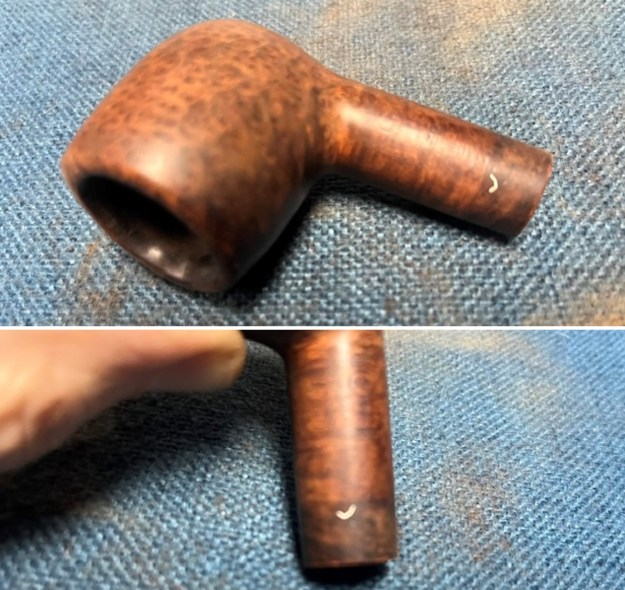 I used a folded piece of 220 grit sandpaper to clean up the inner edge of the bowl and the rim top and minimize the damage. It looked significantly better.
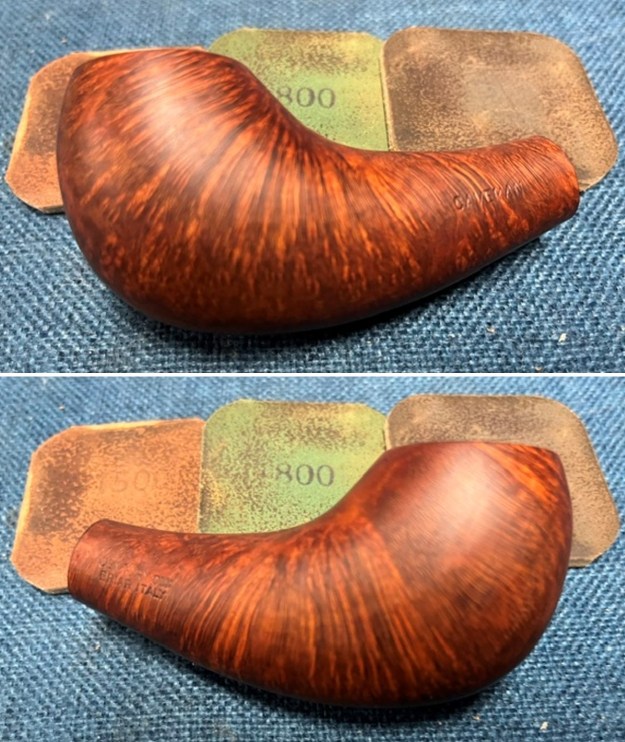
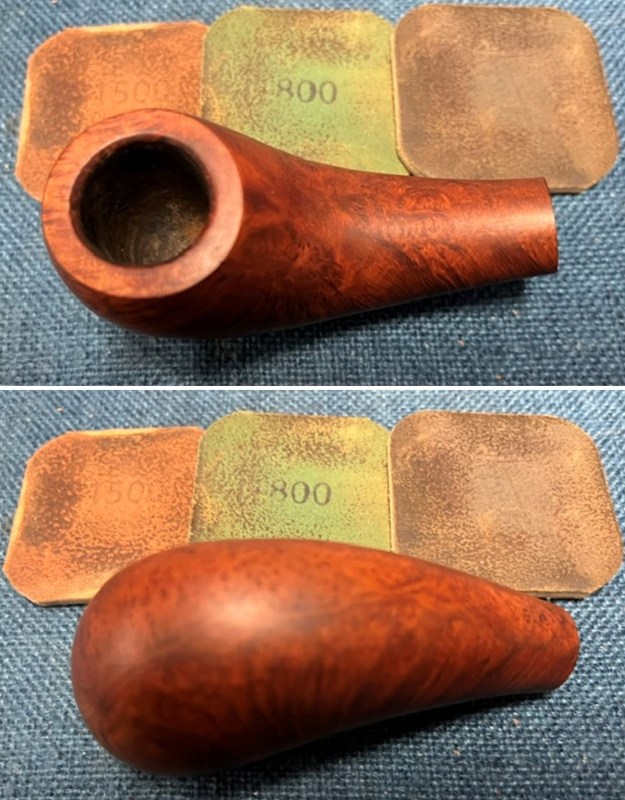
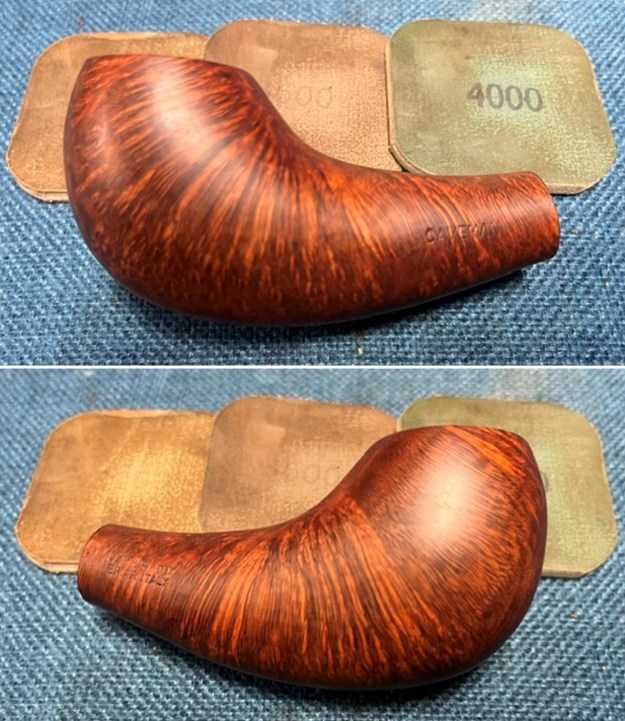
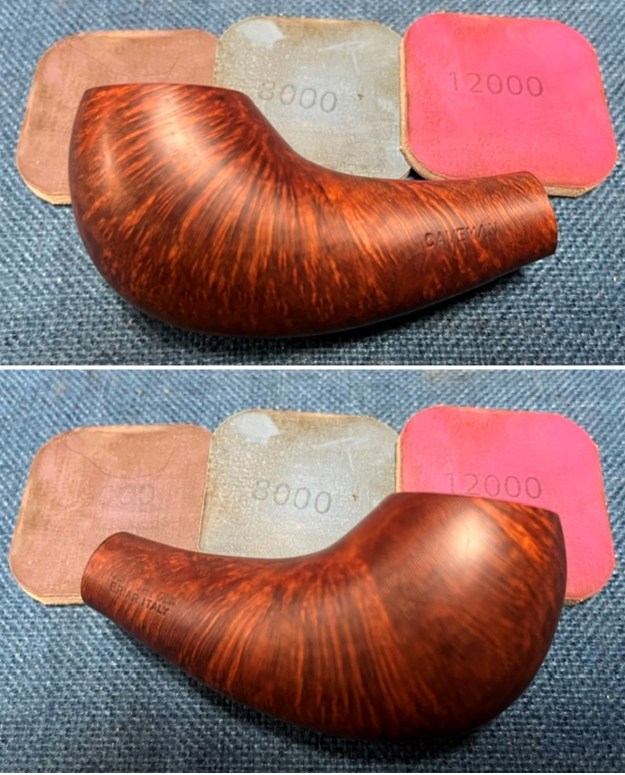
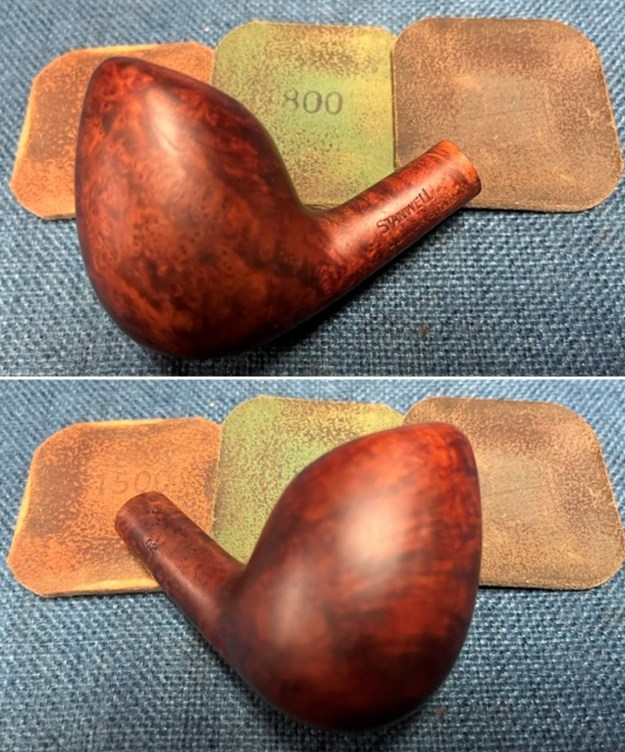
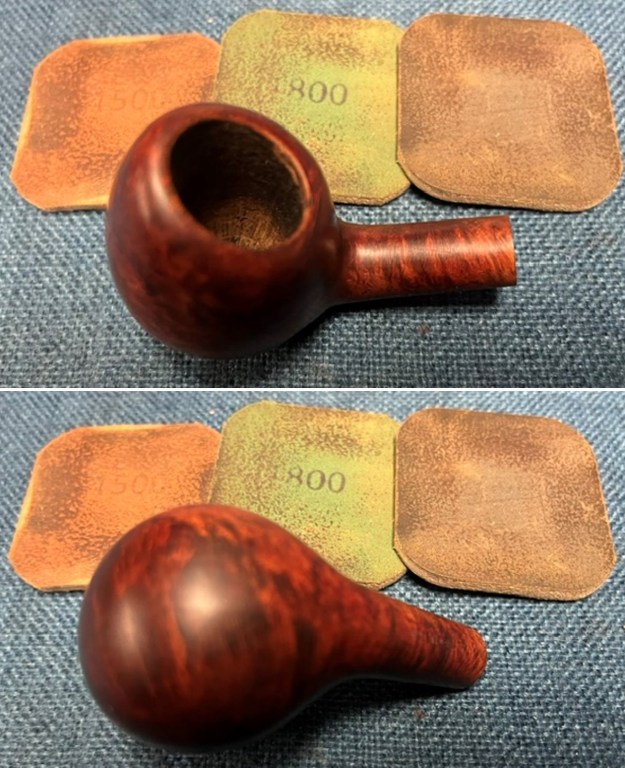
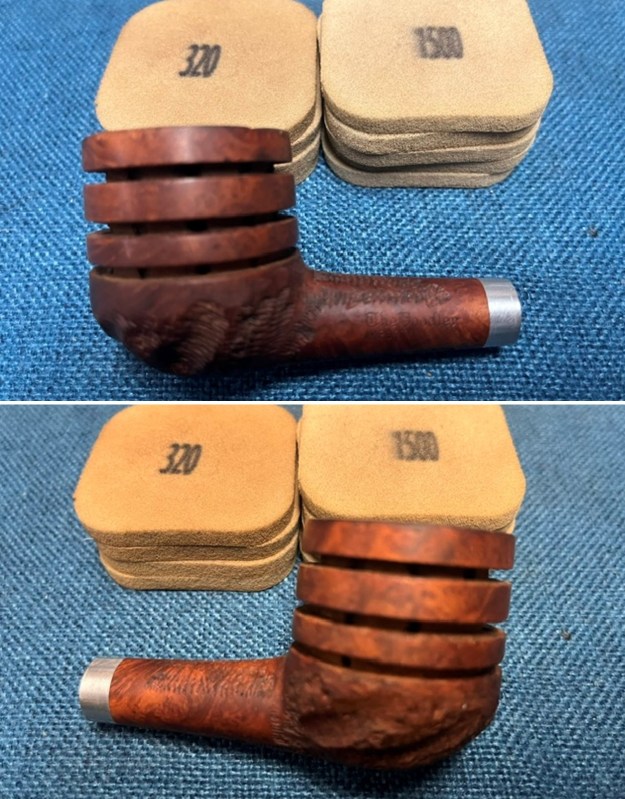
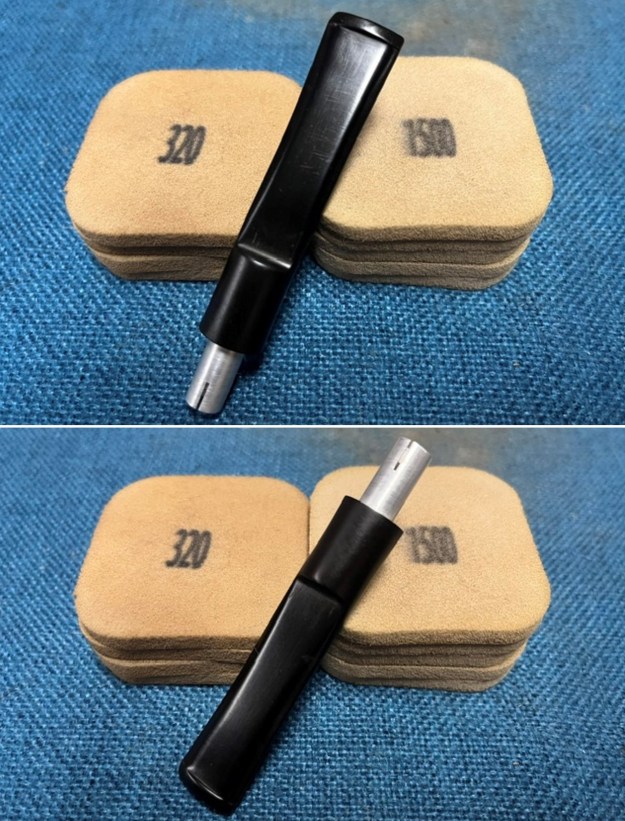
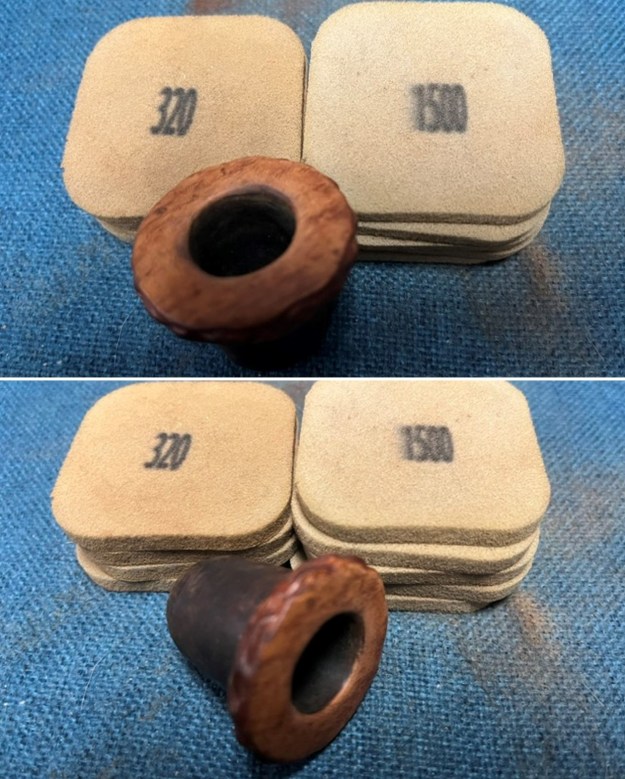
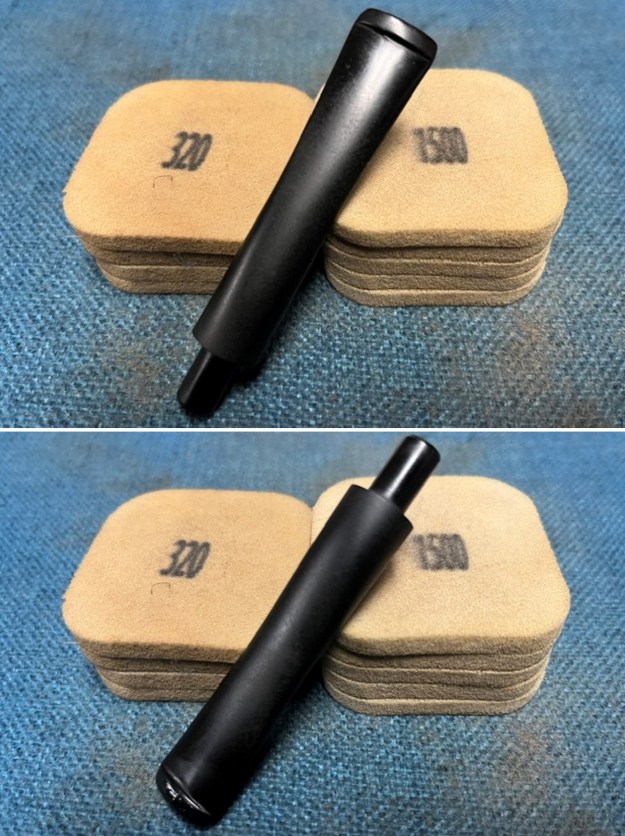
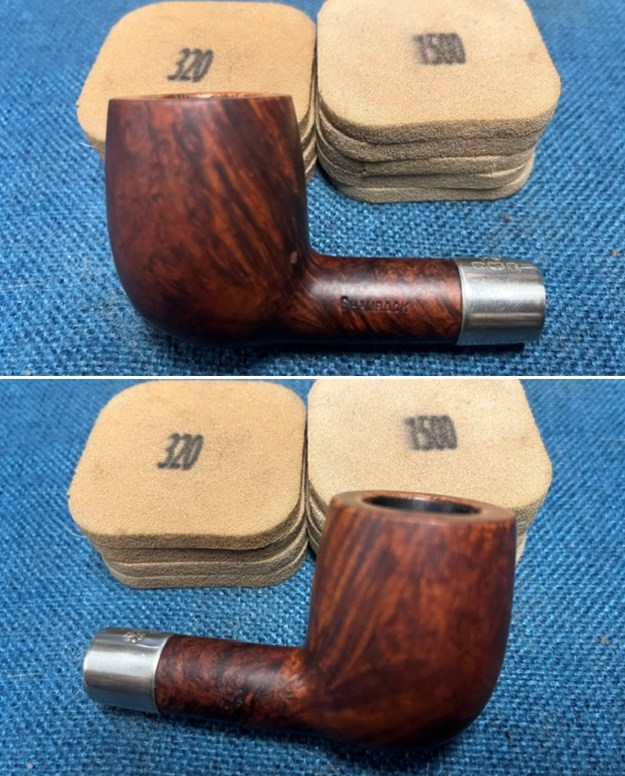
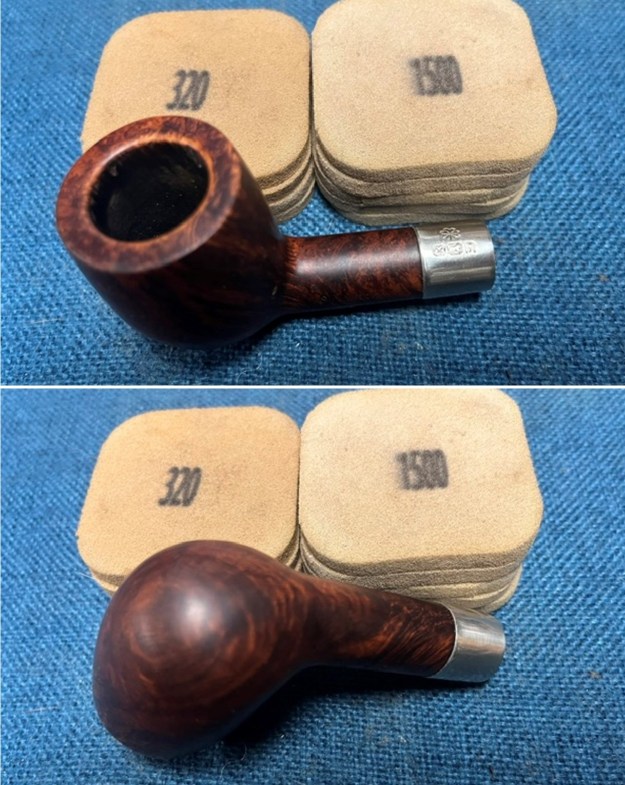
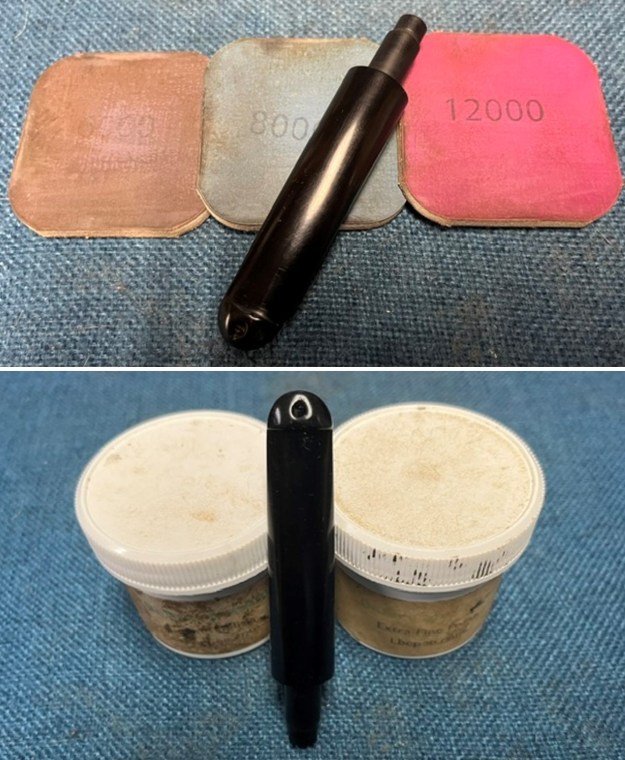
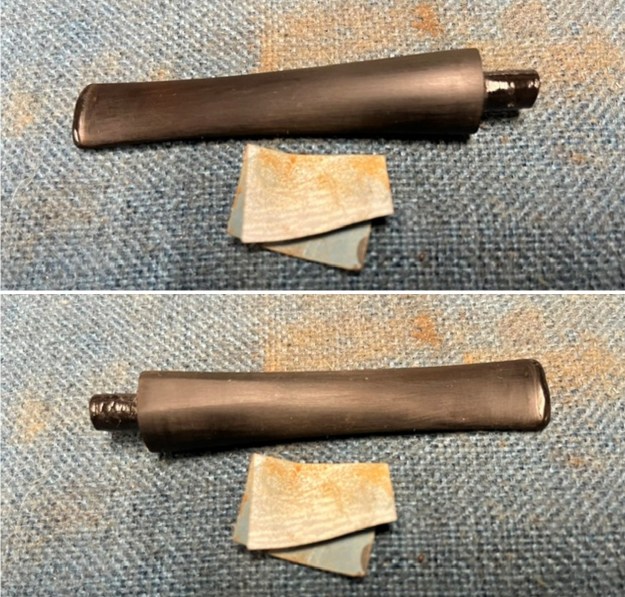
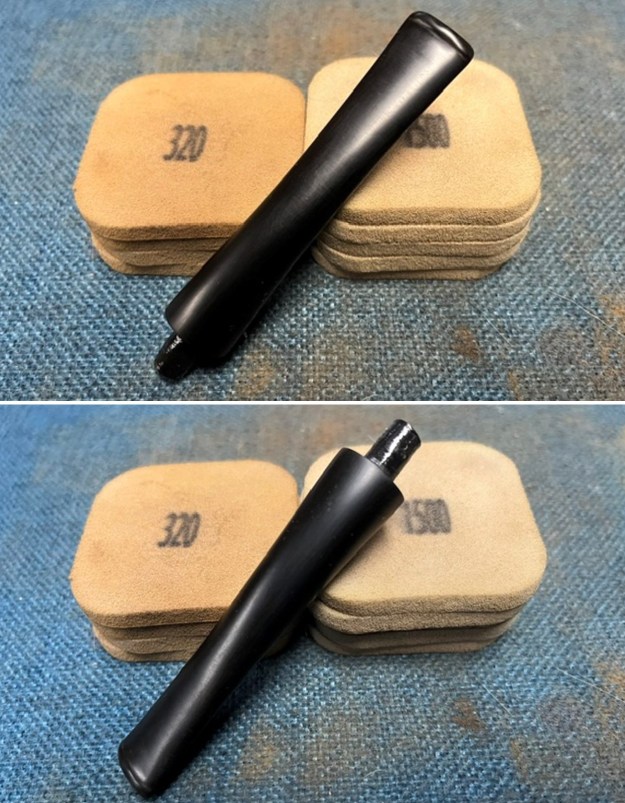
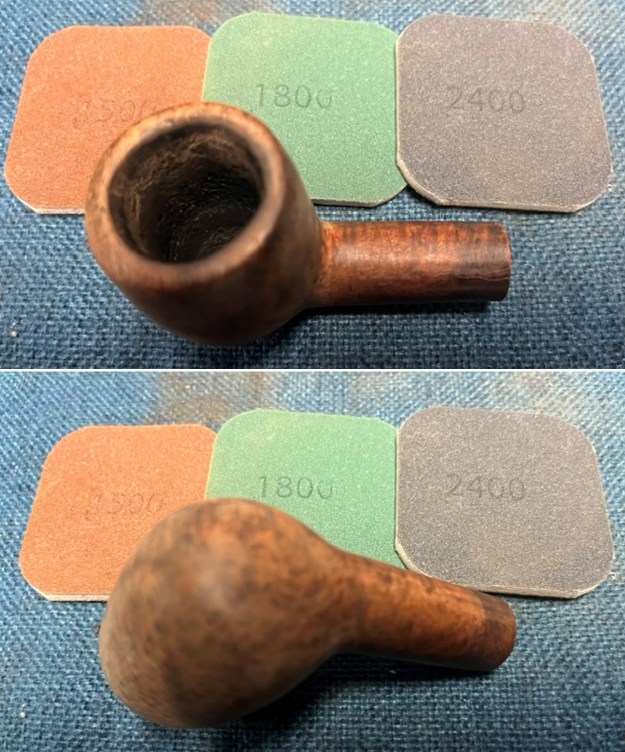
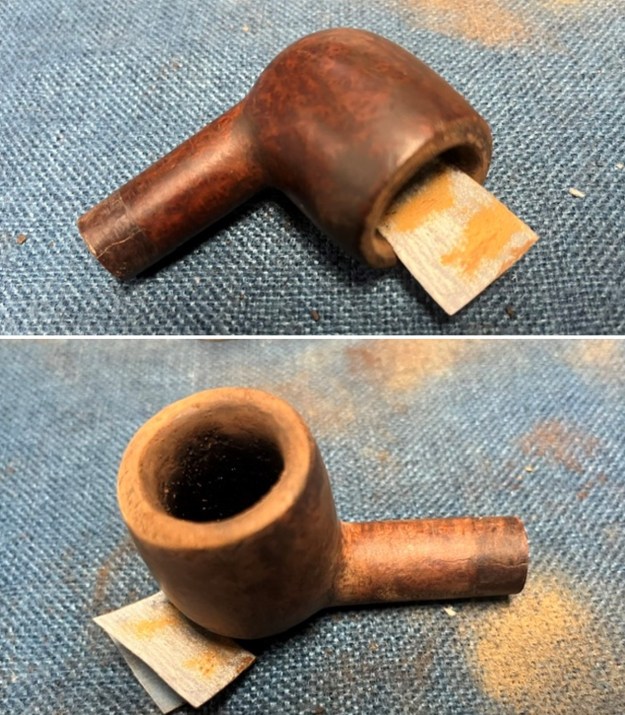 I sanded the exterior of the bowl with 320-3500 grit 2×2 inch sanding pads to remove the scratching in the finish. I wiped the bowl down with a damp cloth after each sanding pad. It really began to look much better.
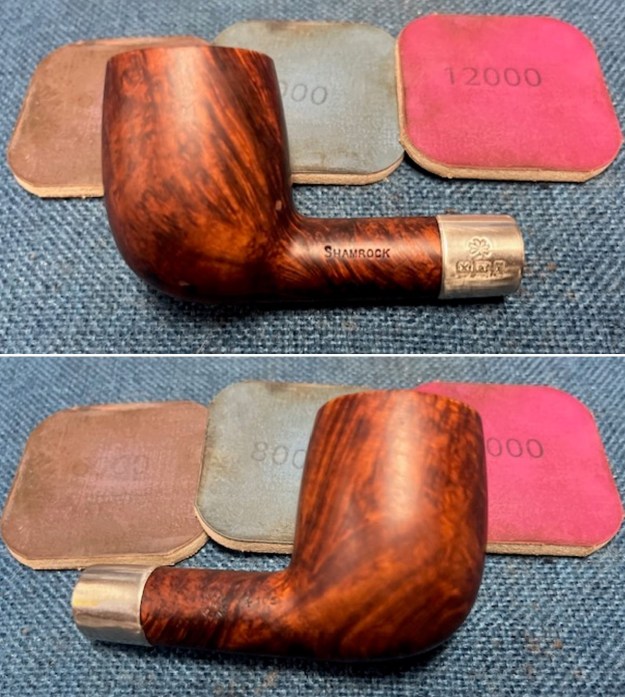
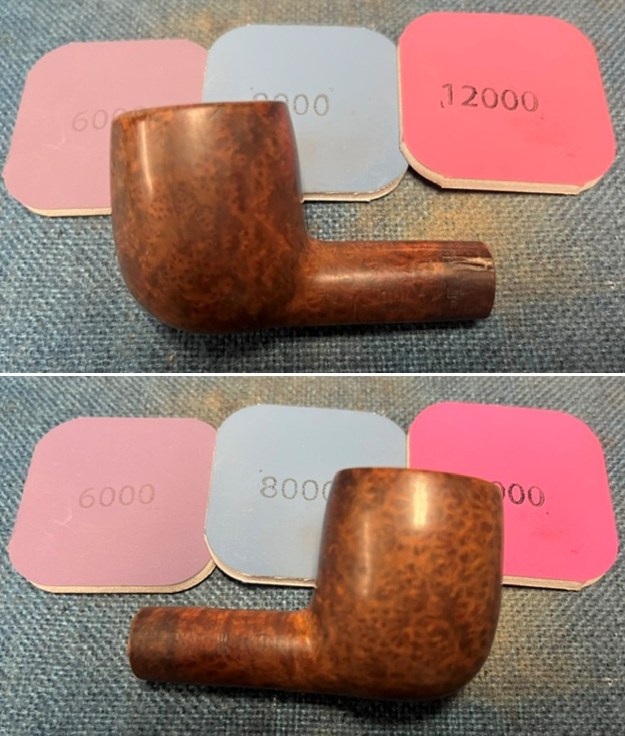
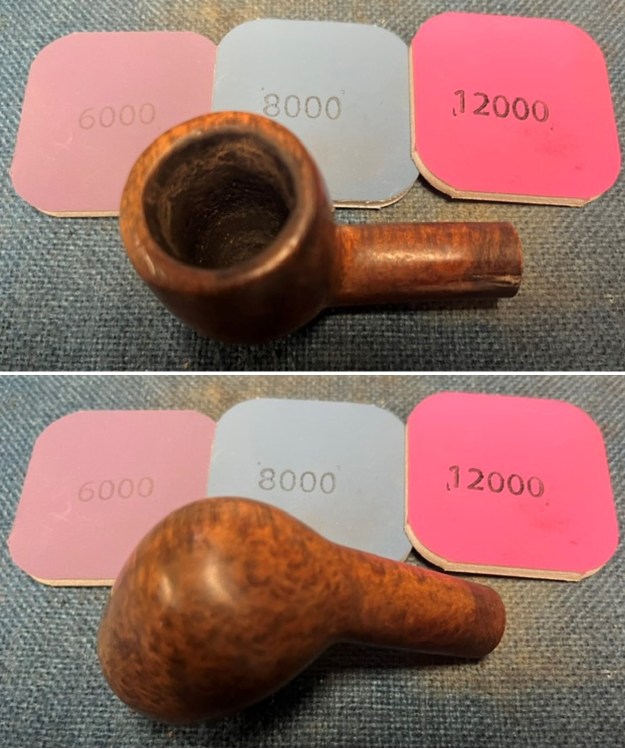
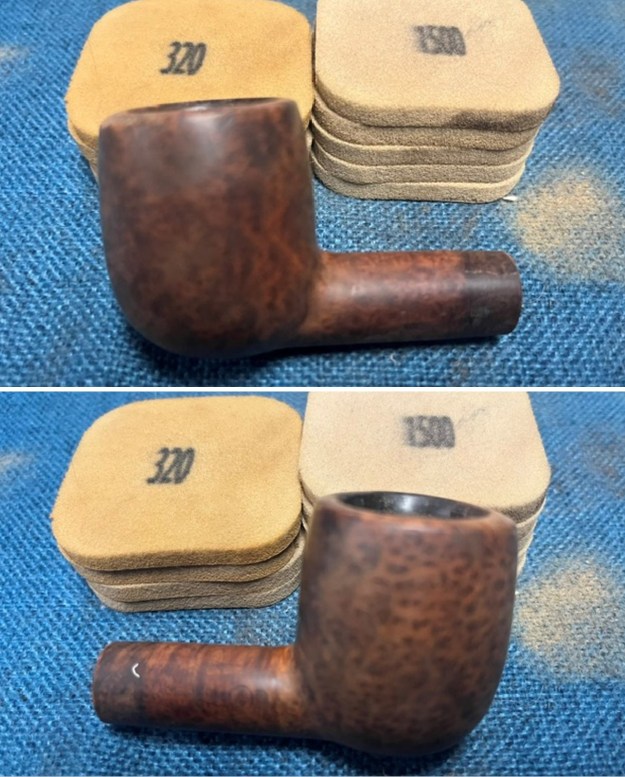
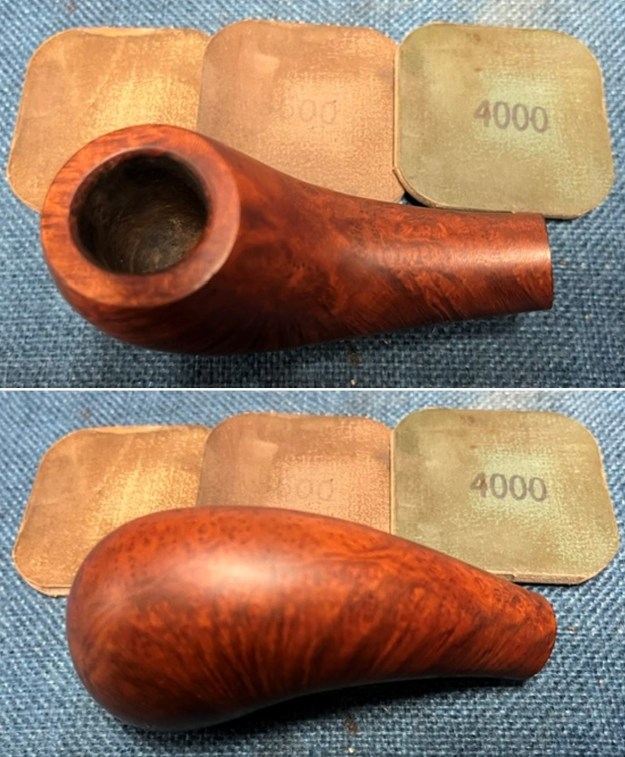
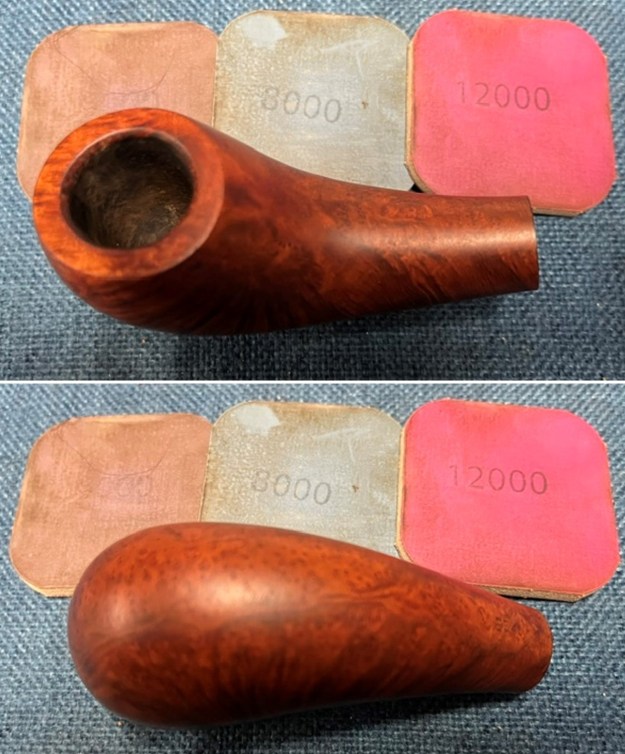
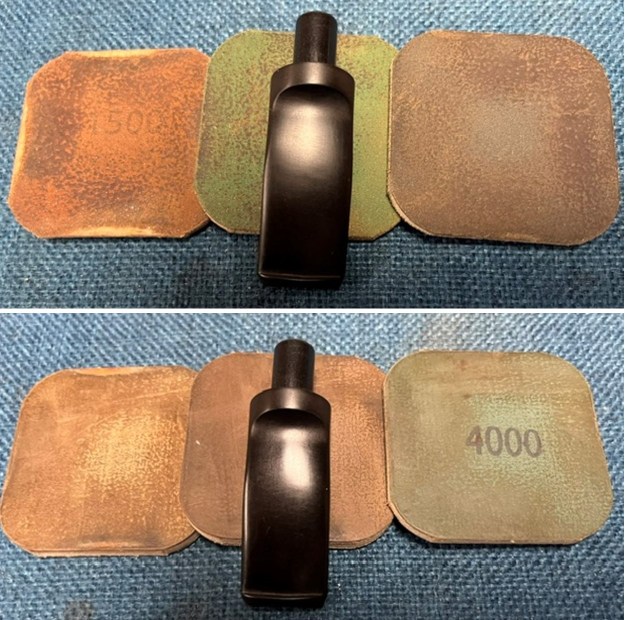
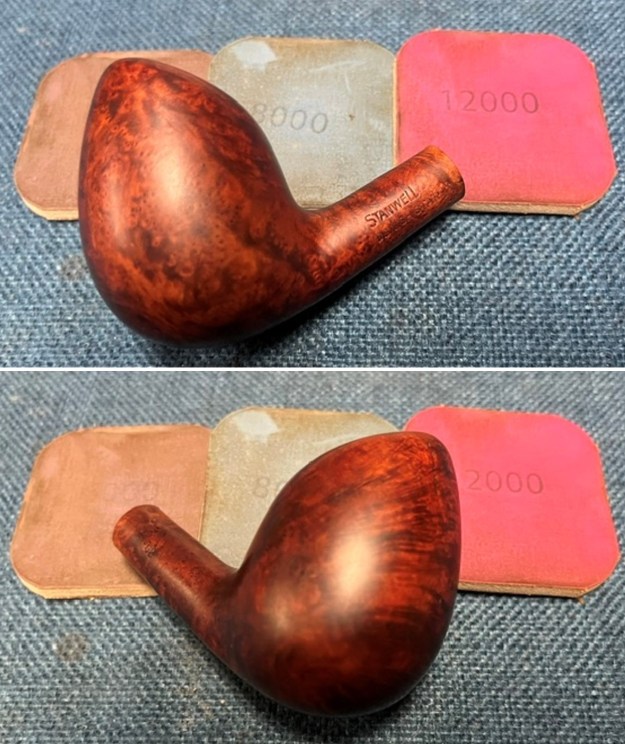
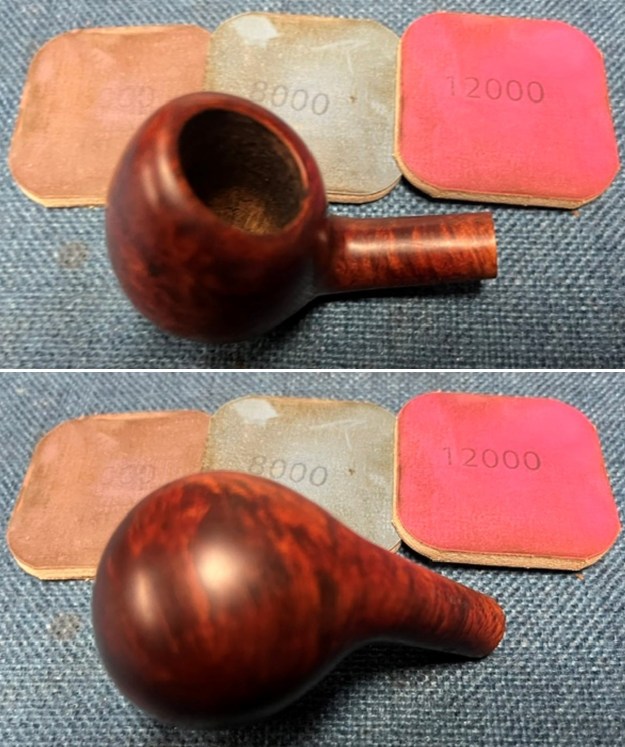
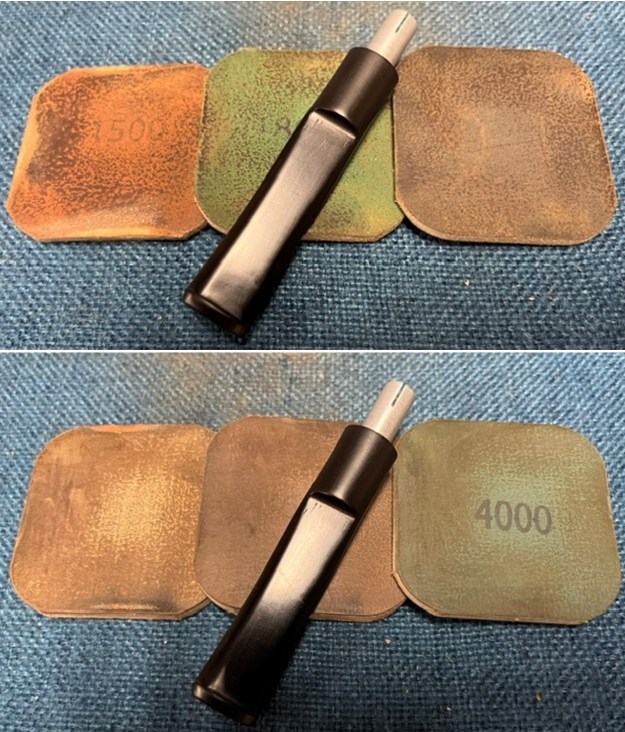
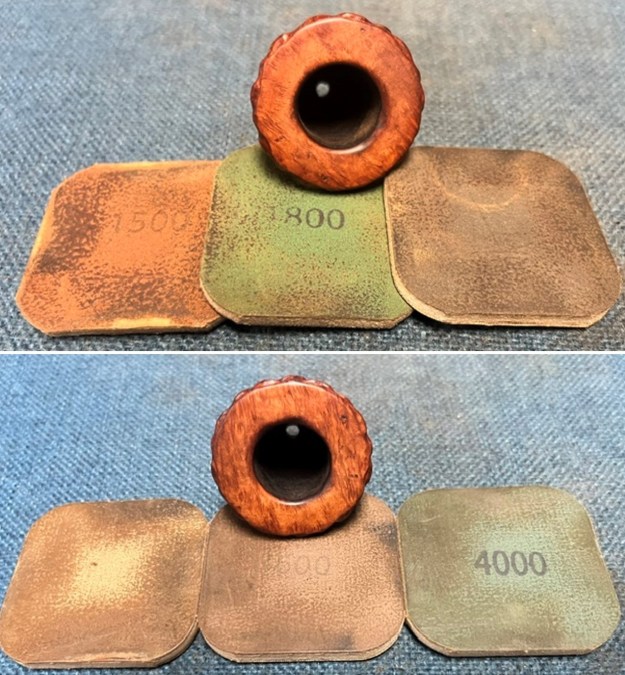
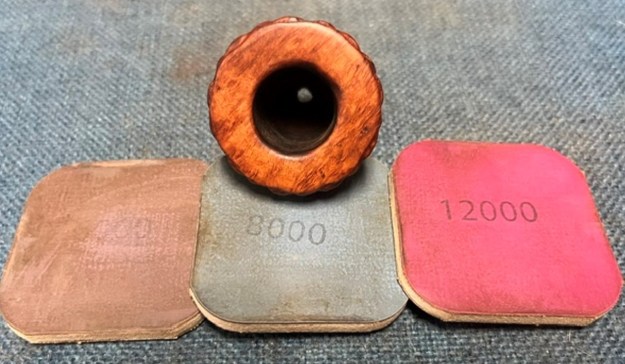
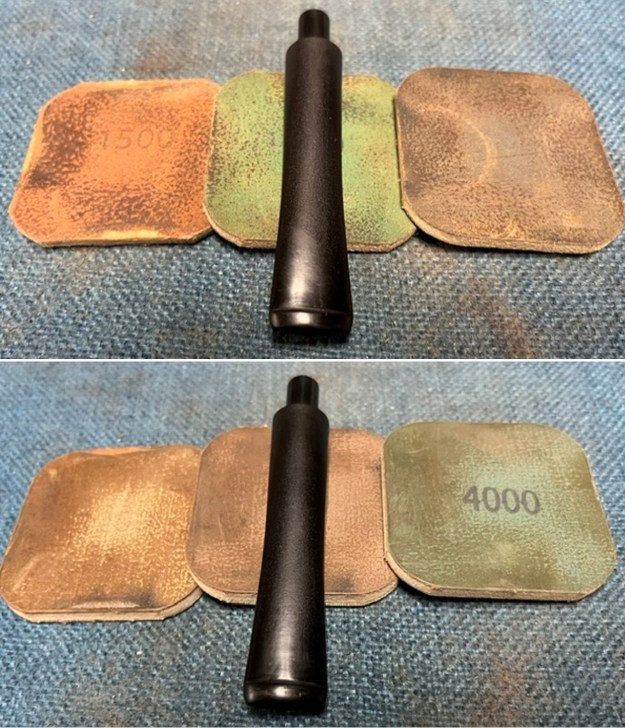
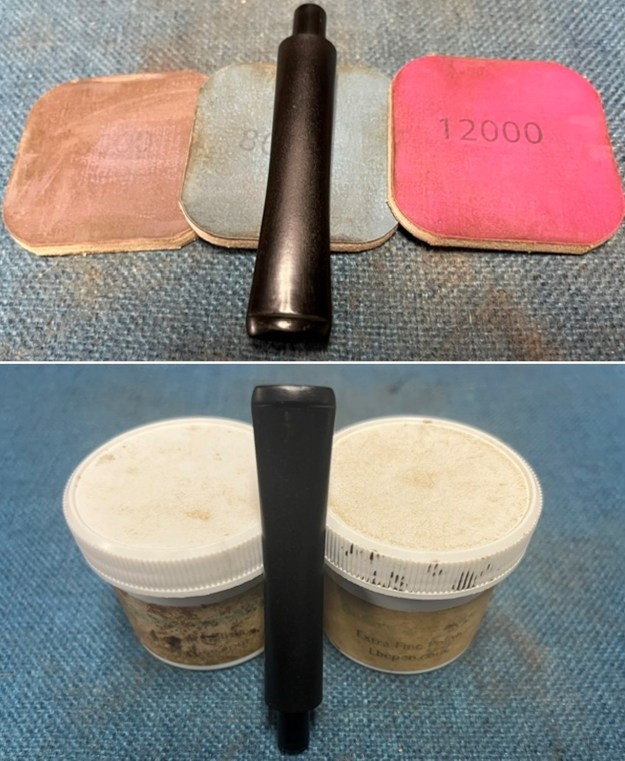
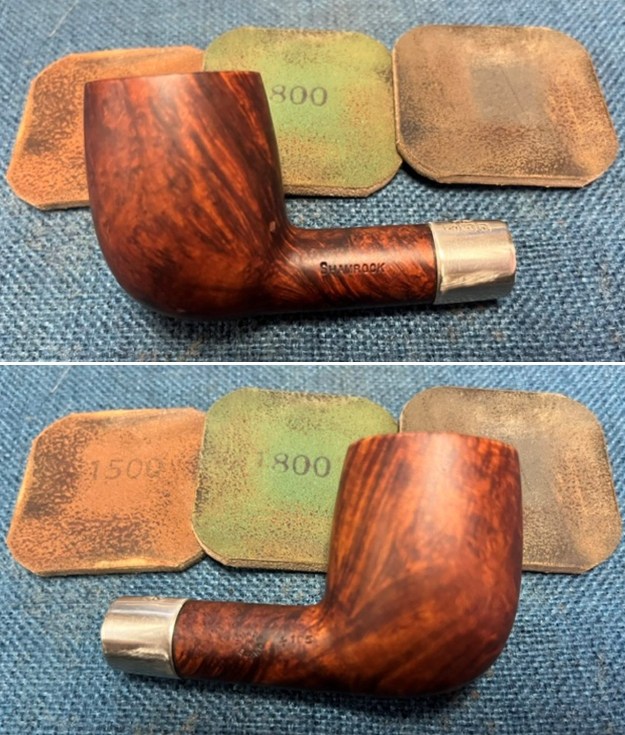
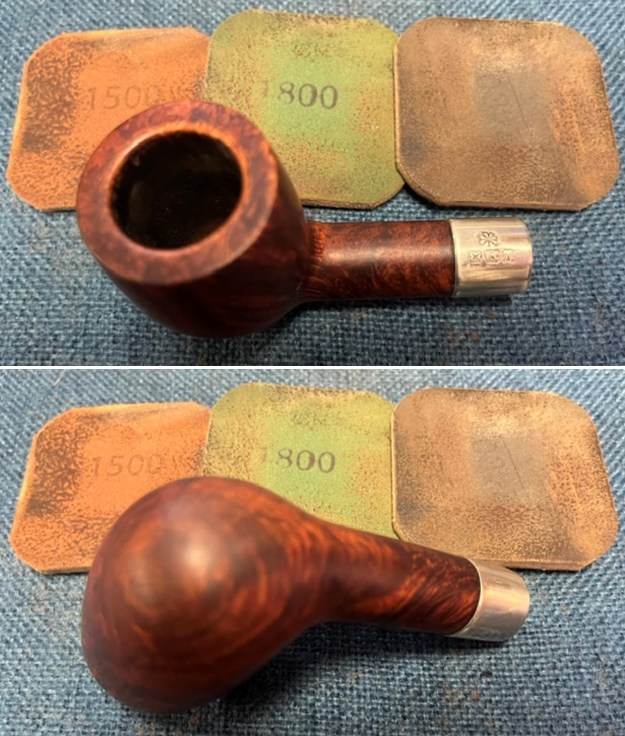
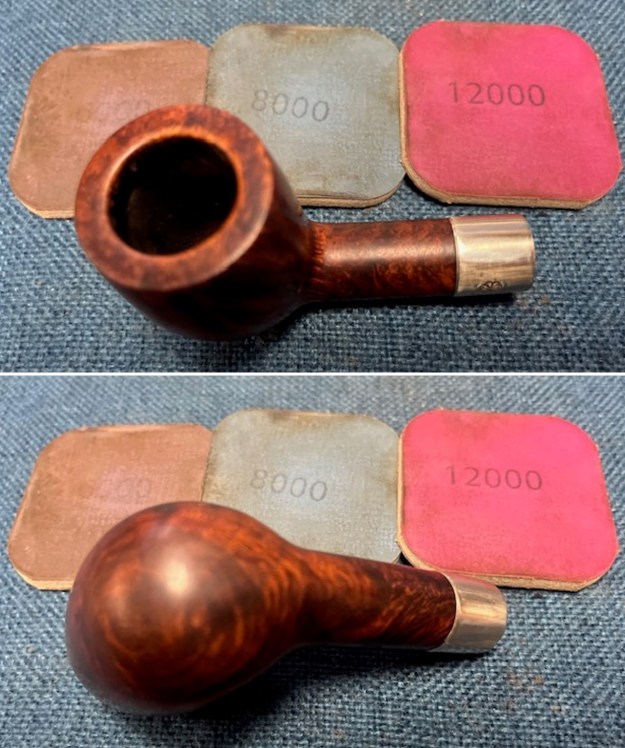
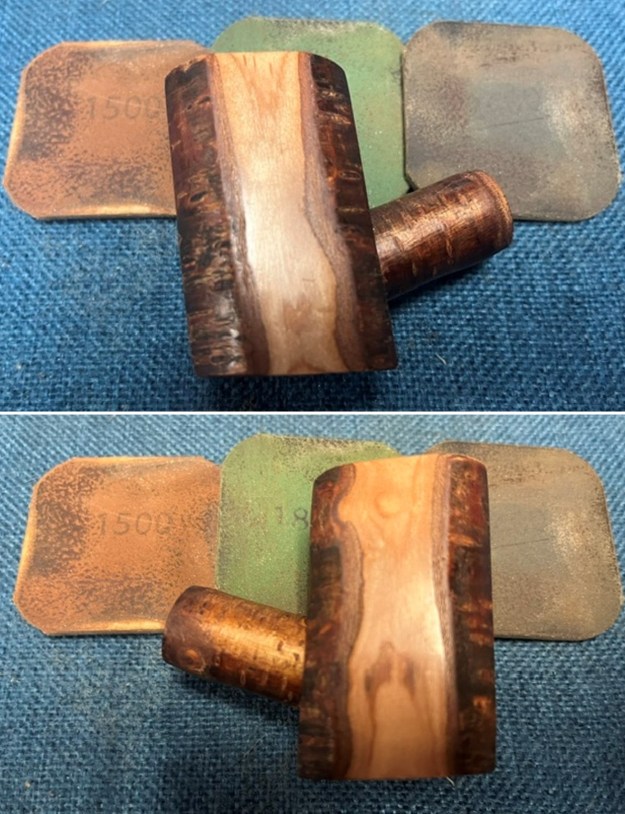
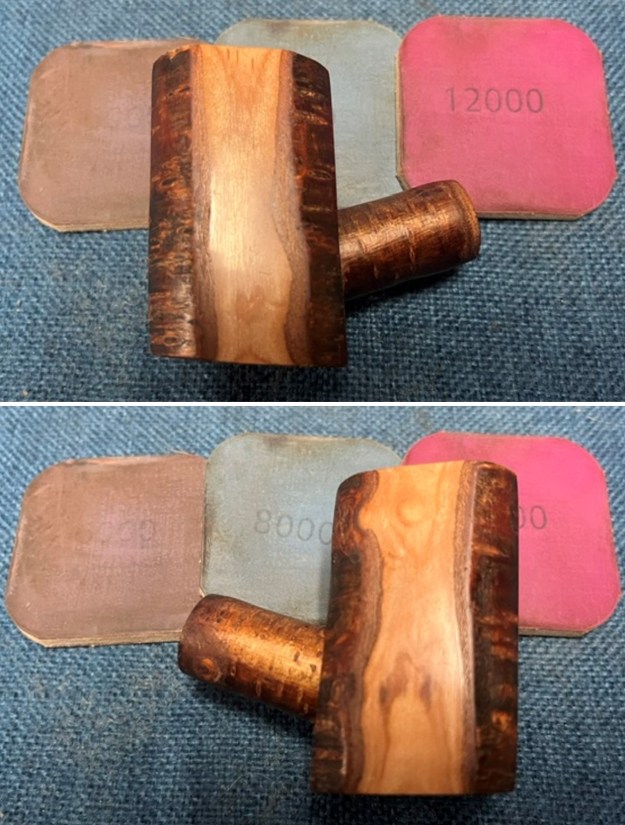
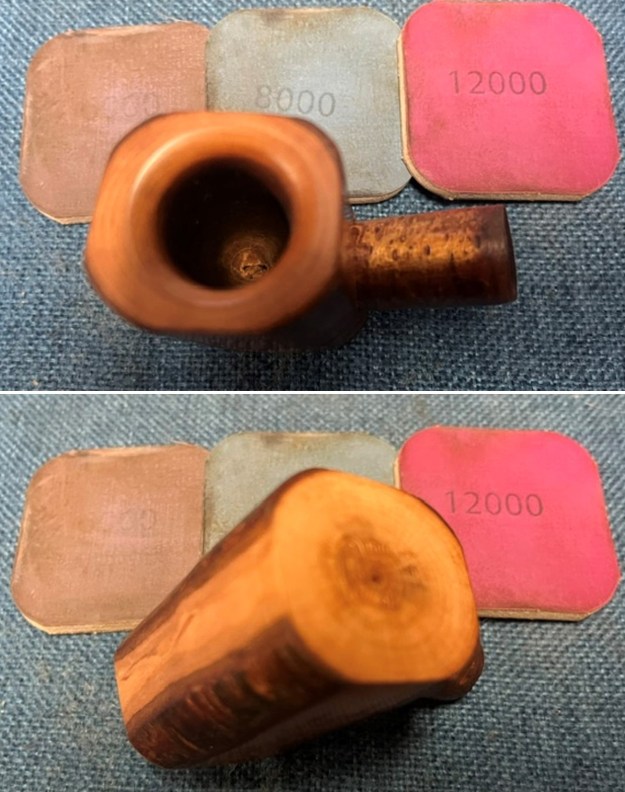
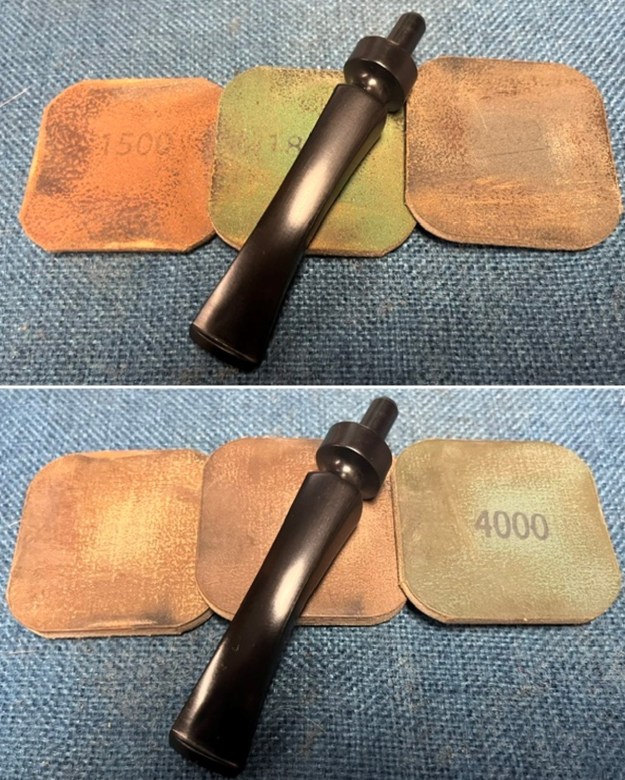
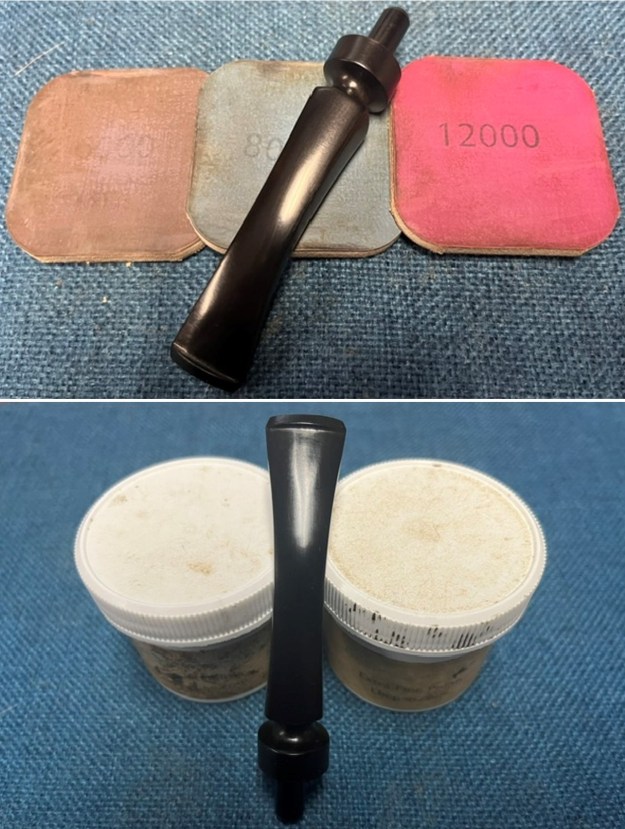
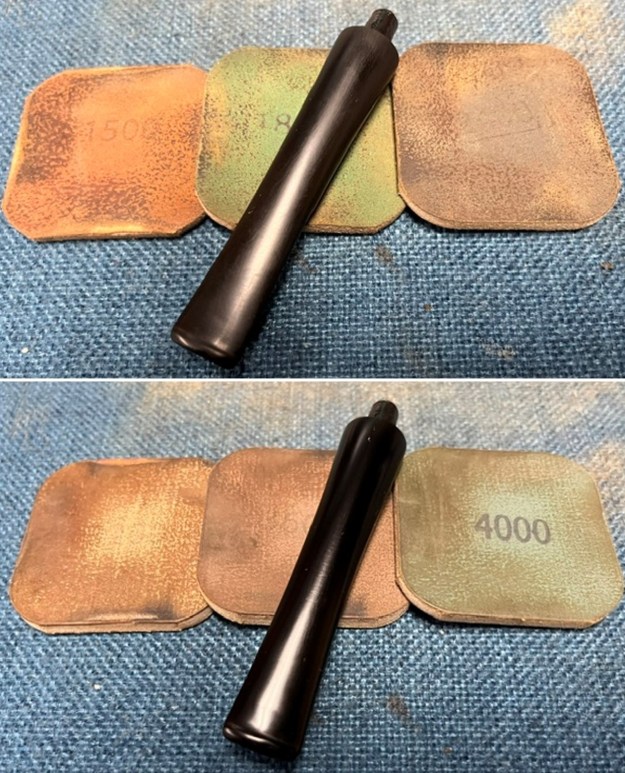
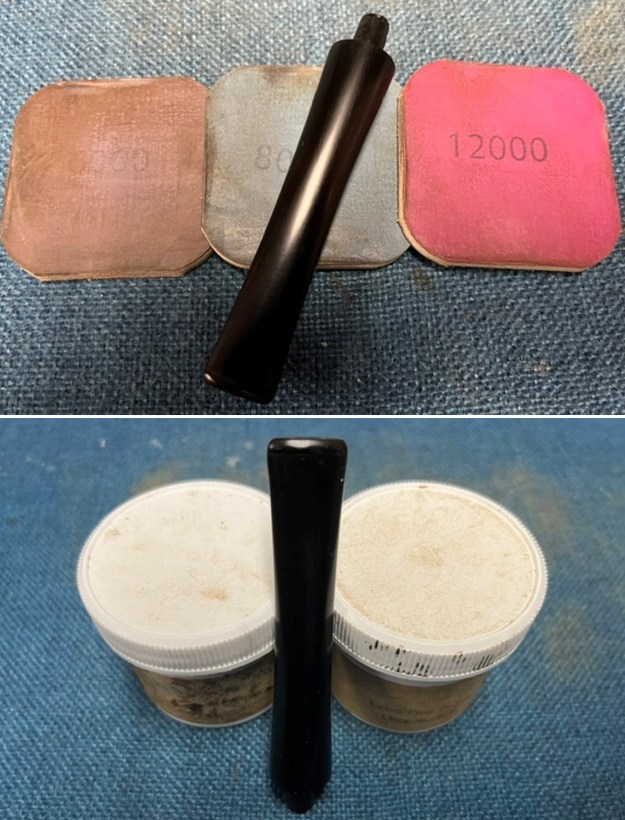
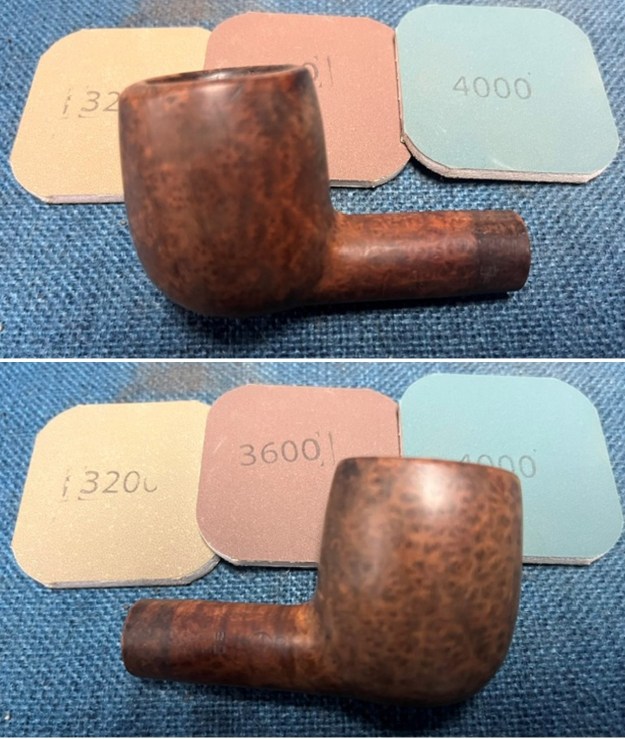
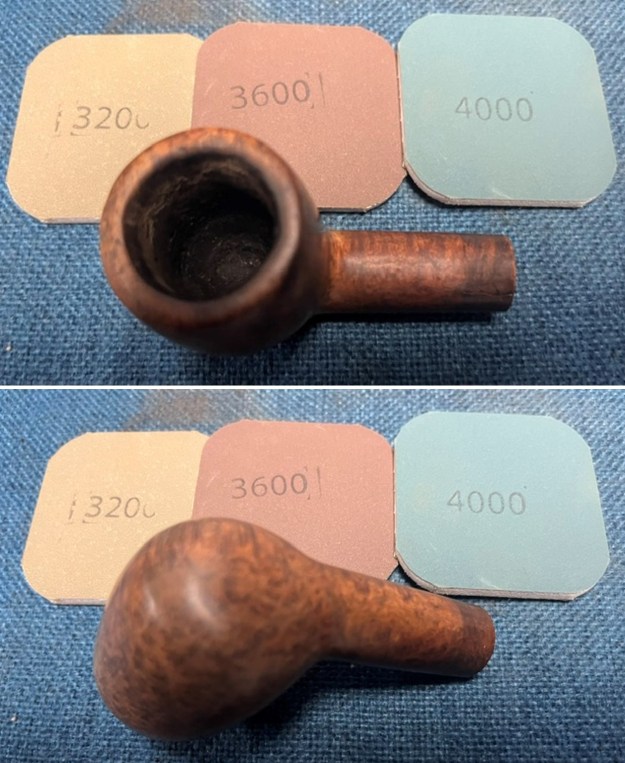
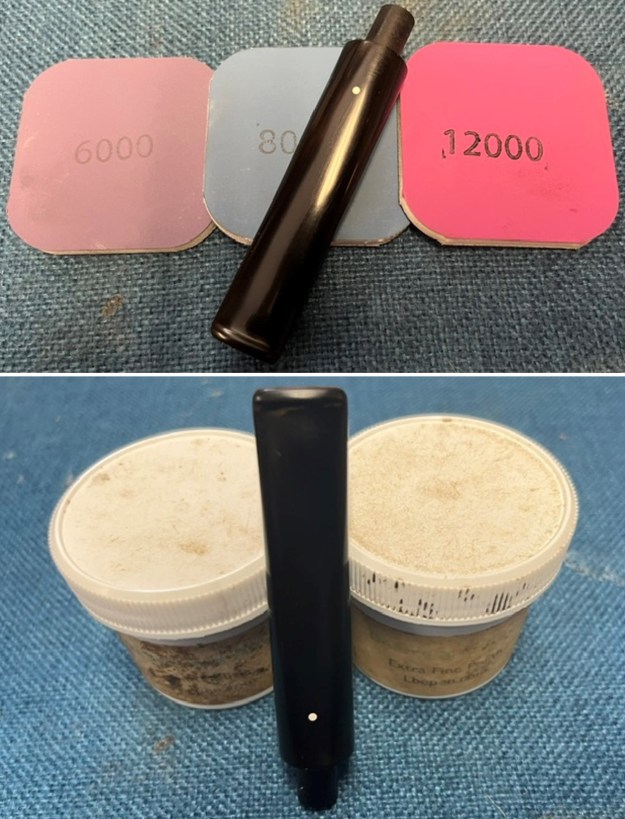
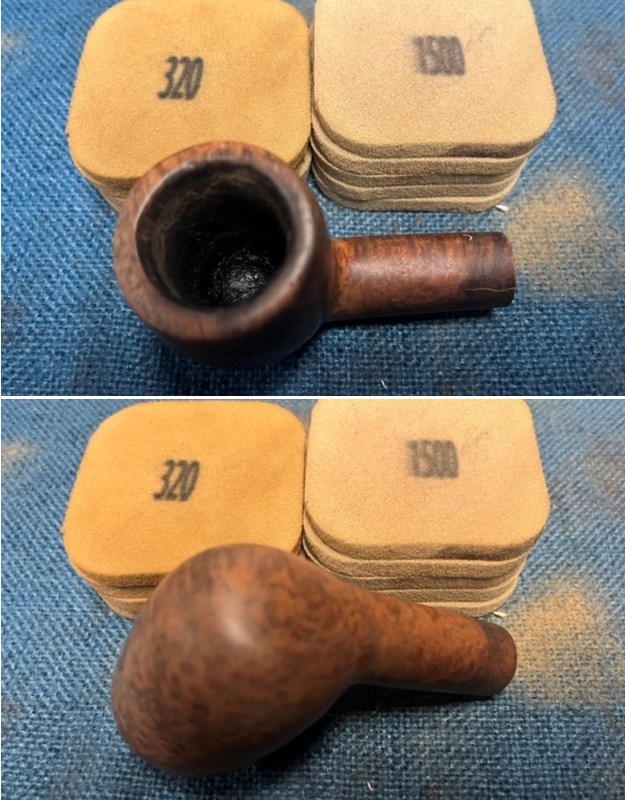 I polished the briar with 1500-12000 grit micromesh sanding pads to develop the shine. It began to look very good. It had a rich shine in the finish.
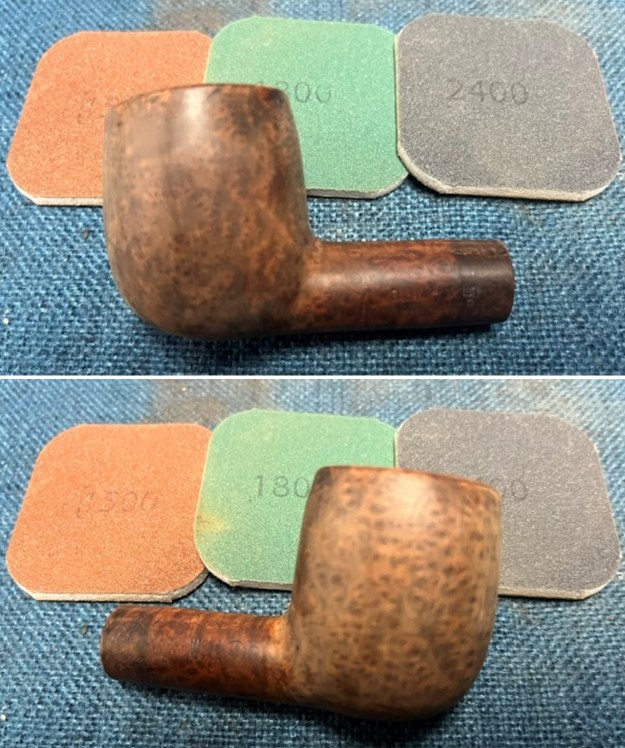
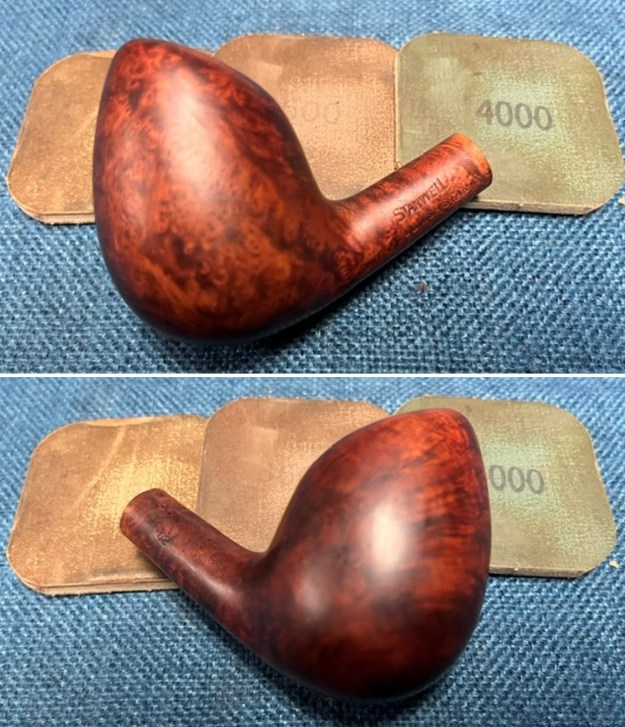
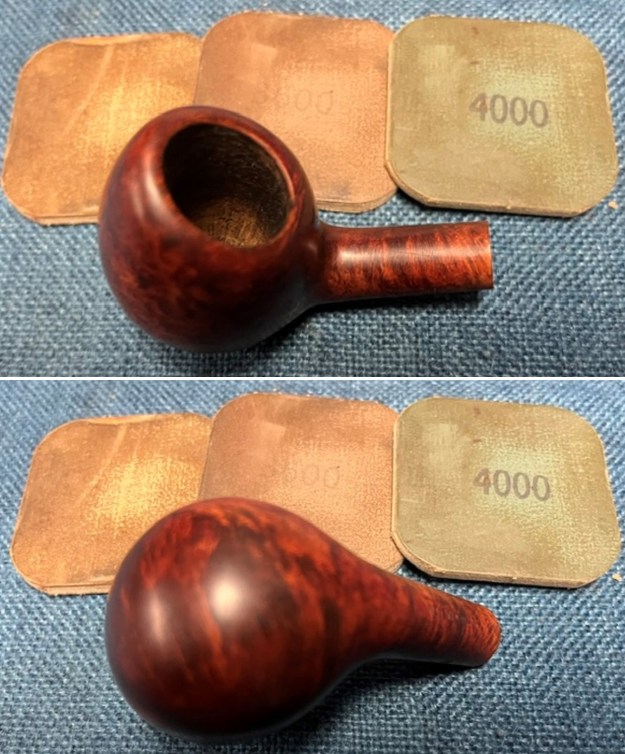
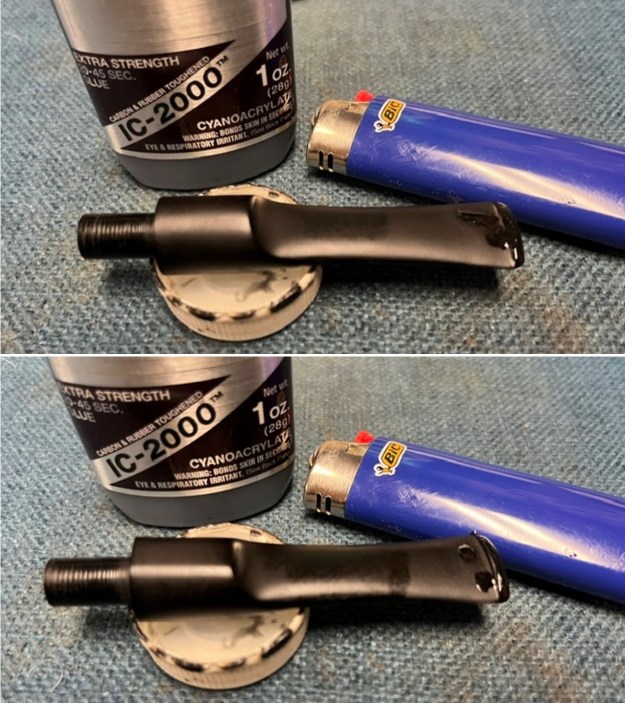
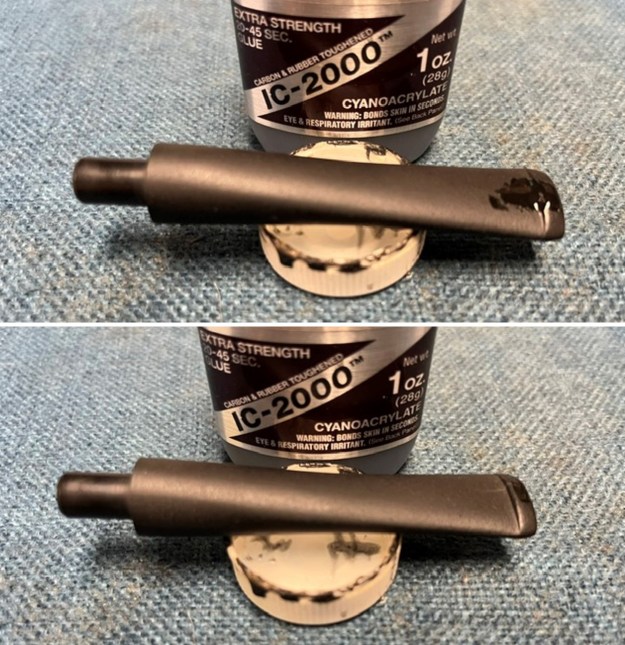
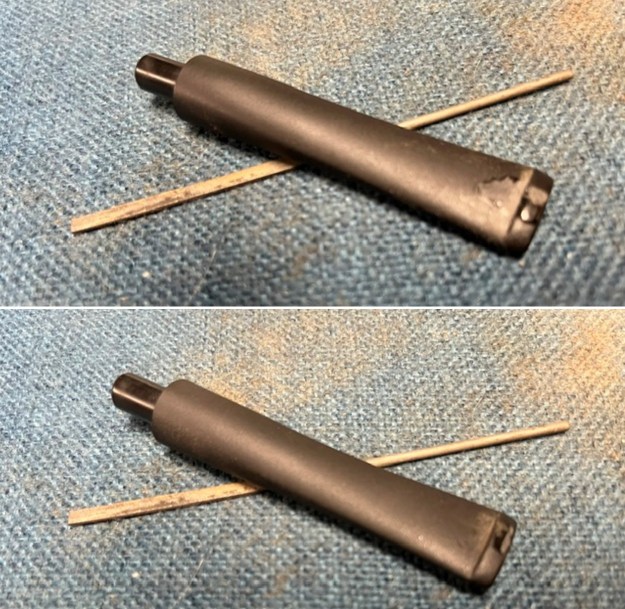
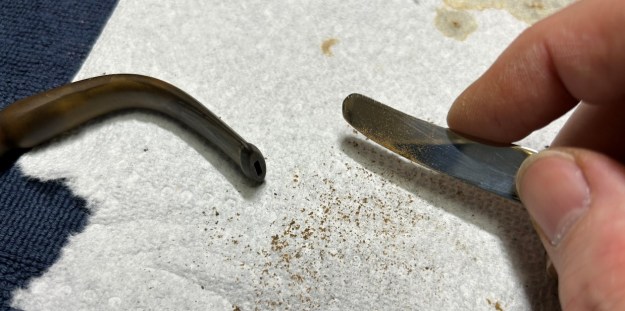
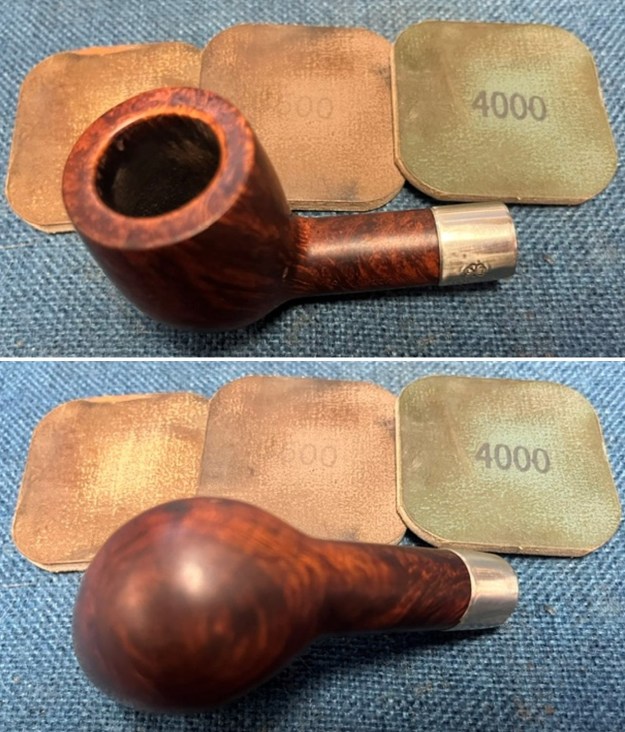
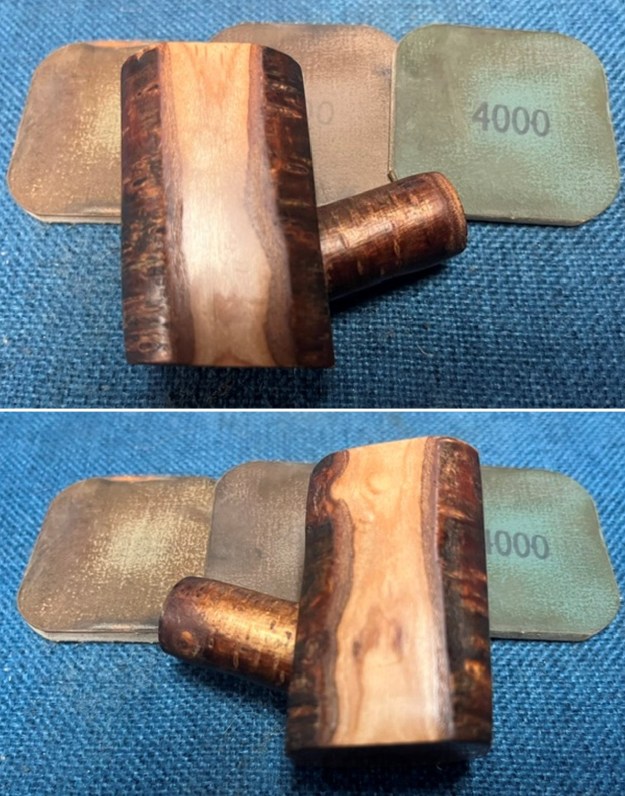
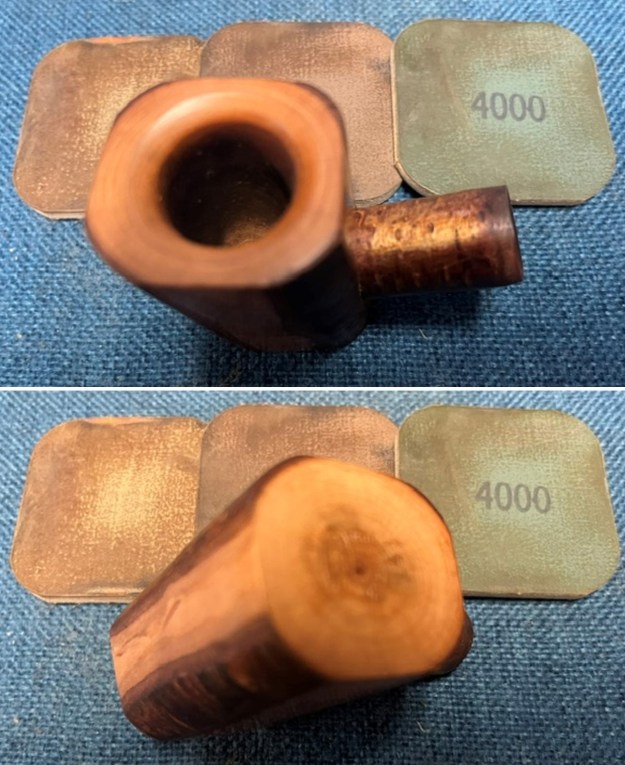
 I paused the polishing of the bowl and shank after the 4000 git sanding pad. I repaired the crack in the top left side of the shank with clear CA glue and a tooth pick. I ran it the length of the crack and pressed it back together. I held it until the repair cured. Once it cured I ran the other sanding pads over the surface to smooth out the patch. I started sanding it again with the 6000 grit sanding pad.
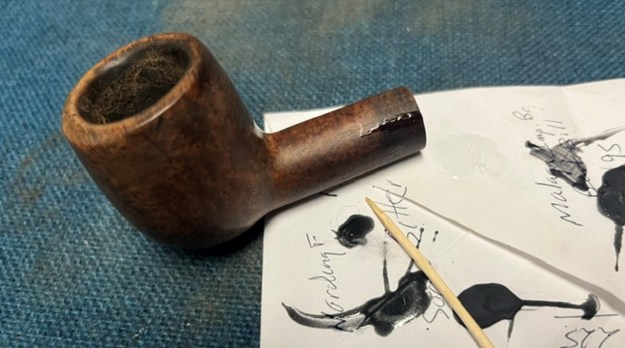
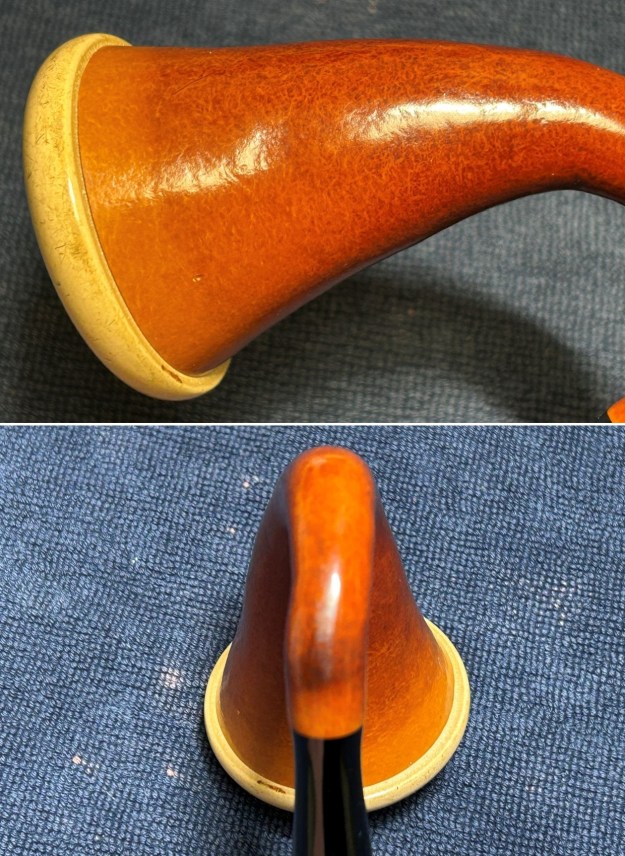
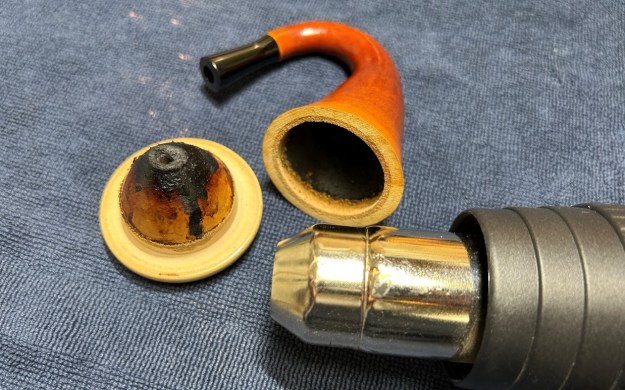
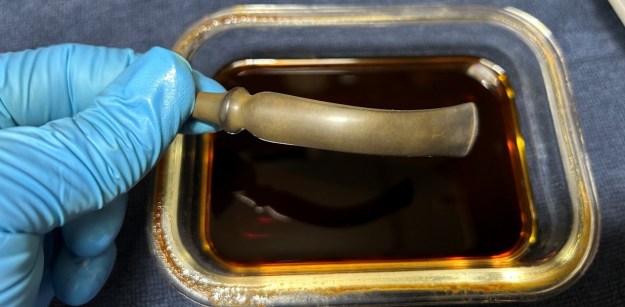
 Once it was solid and the polishing with micromesh was finished I gave the shank end a light coat of white all purpose glue and pressed the band onto the shank.
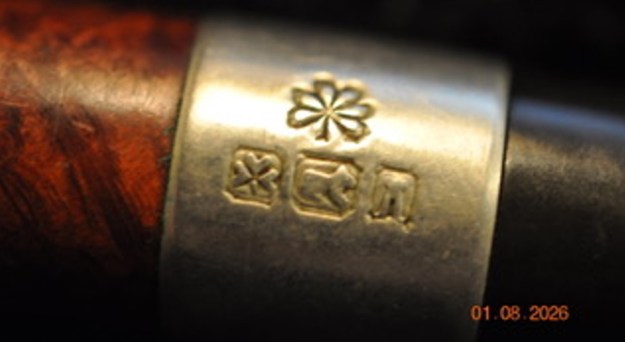
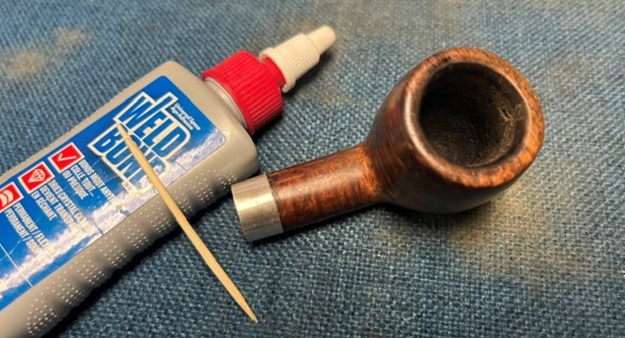 I polished the Sterling Silver (Faintly stamped on the topside Sterling in an arch) with micromesh sanding pads to remove the tarnish and polished further with a jeweller’s cloth to give it a final shine and protect it.
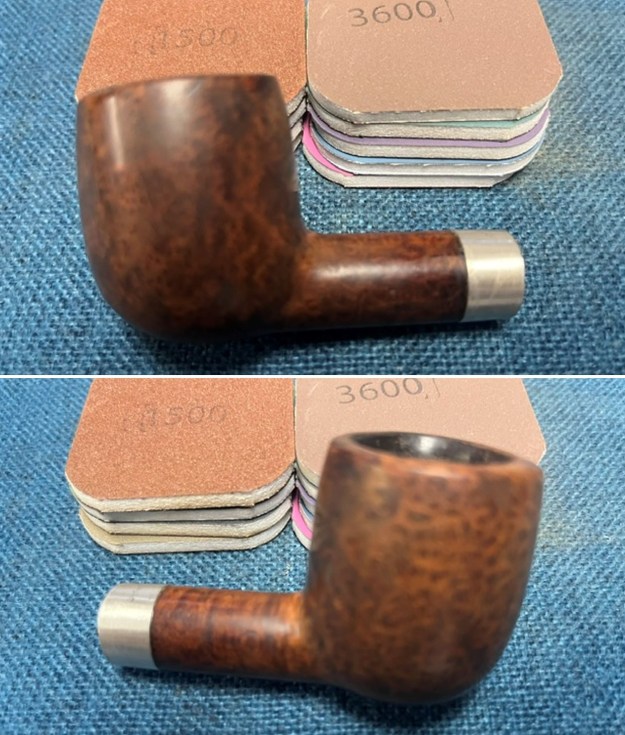

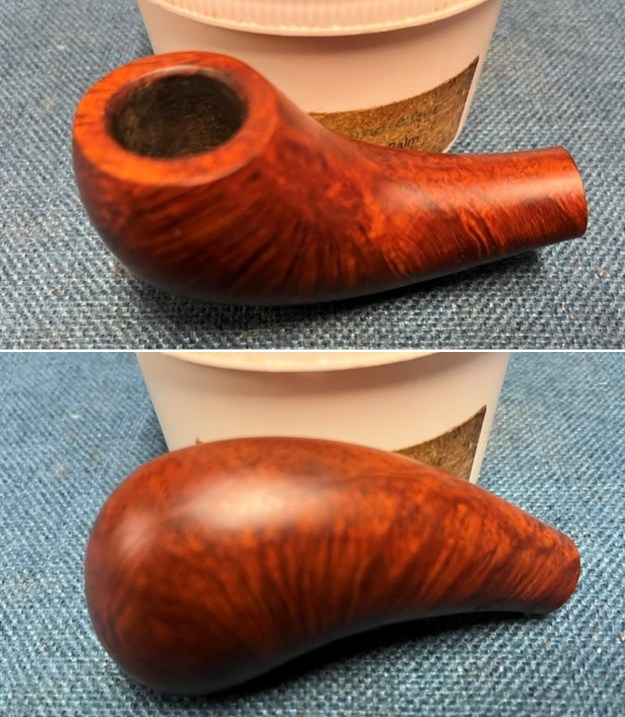
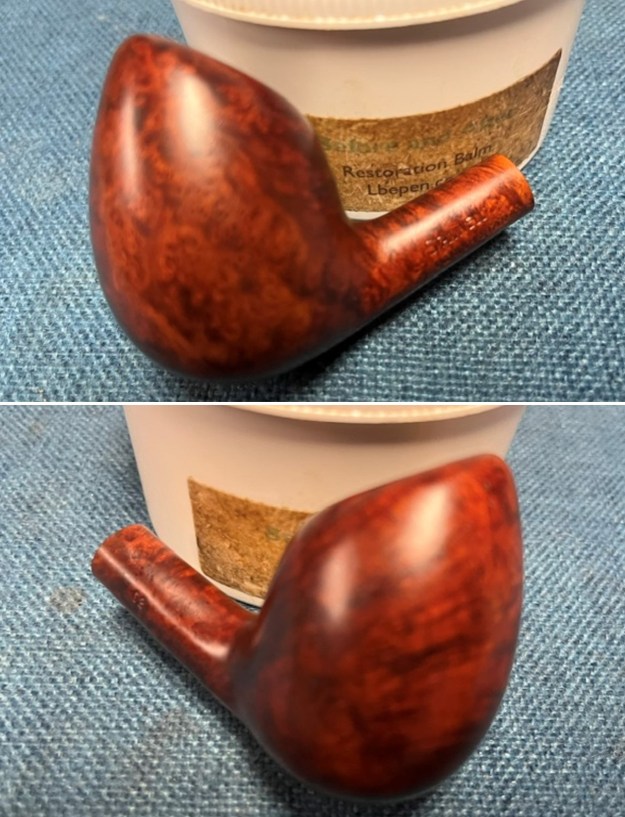
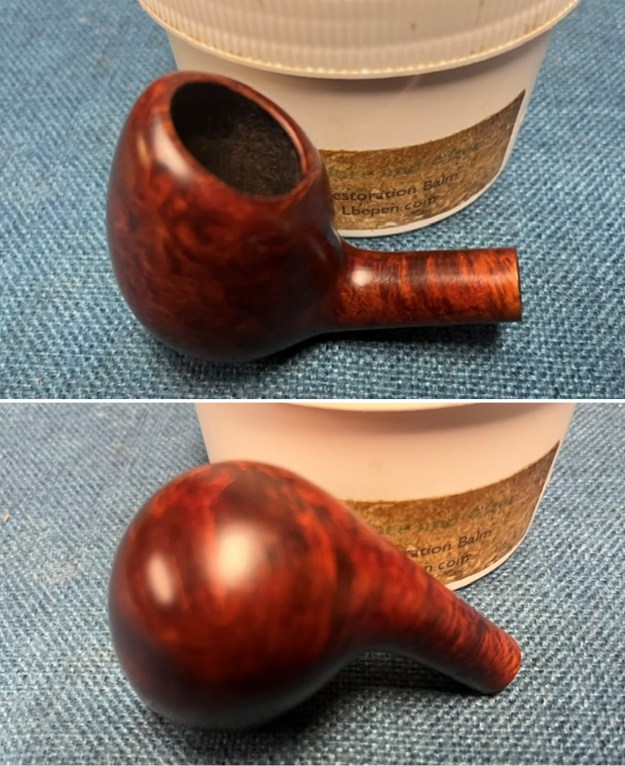
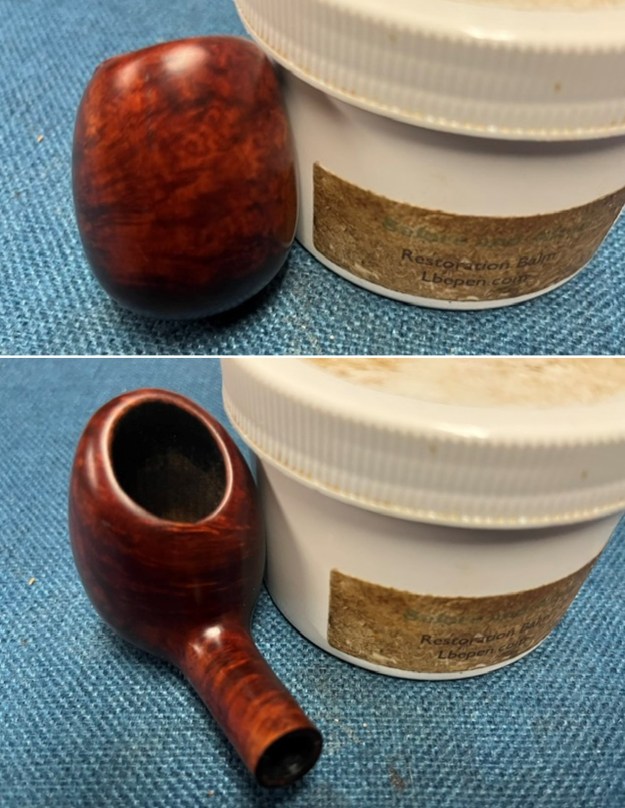
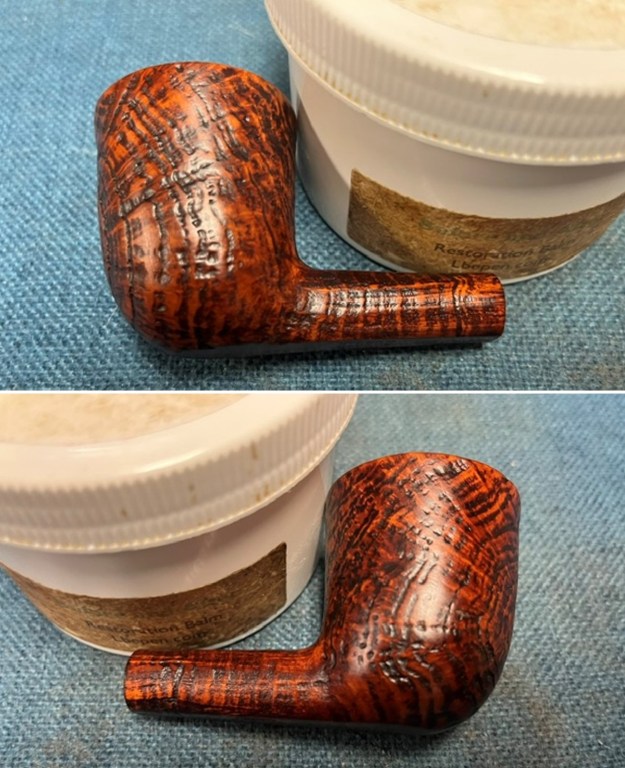
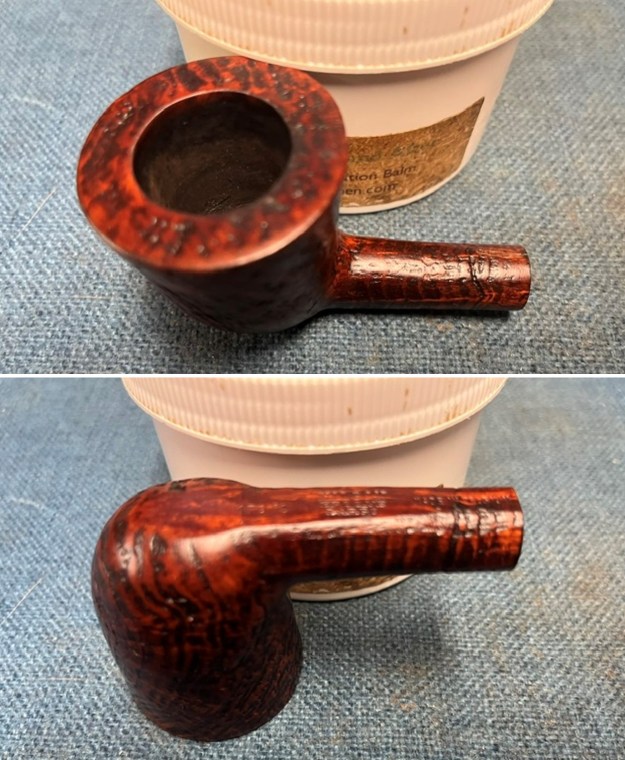
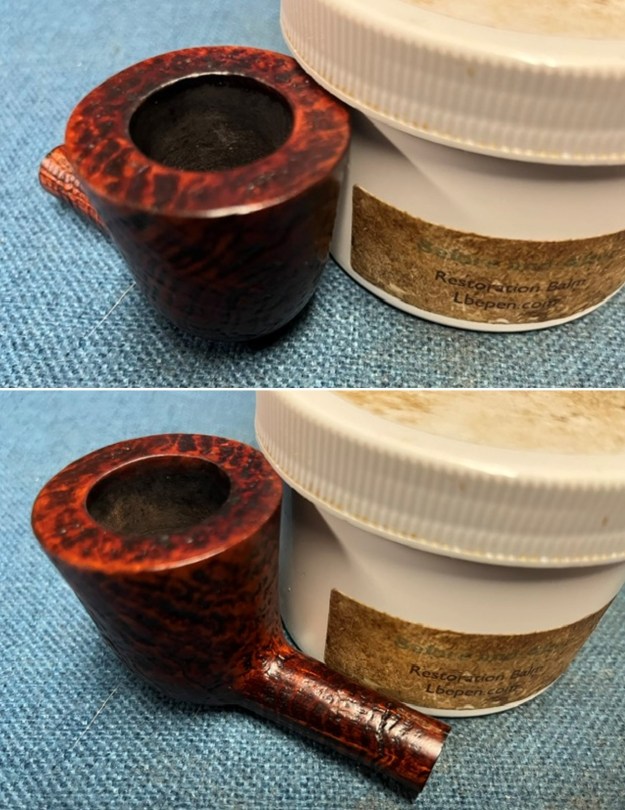
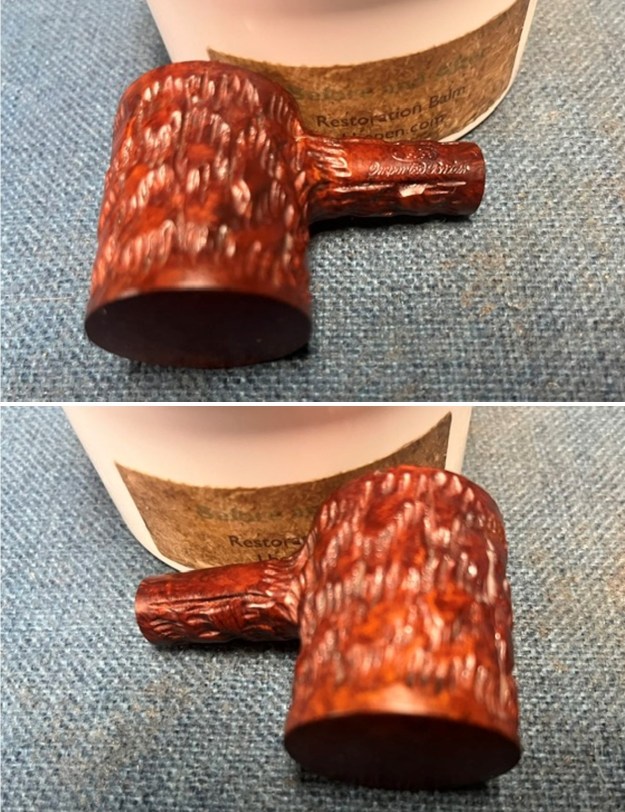
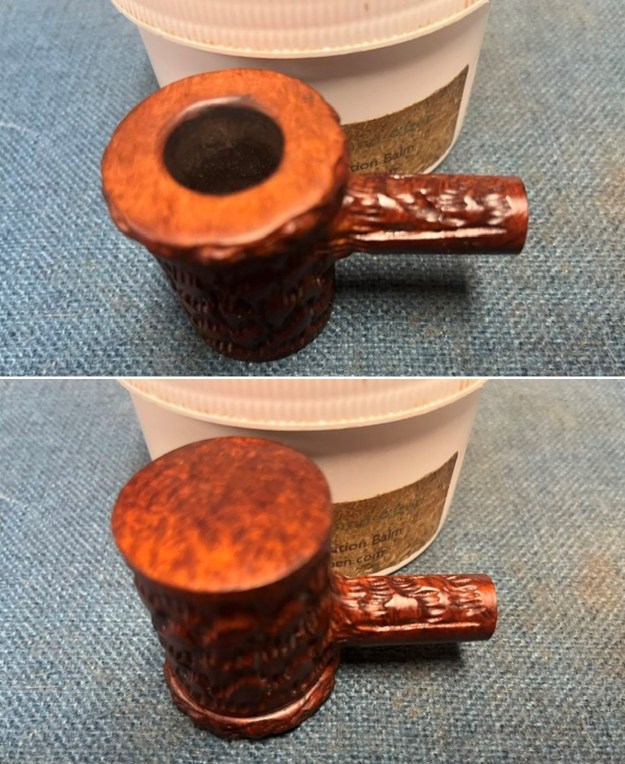
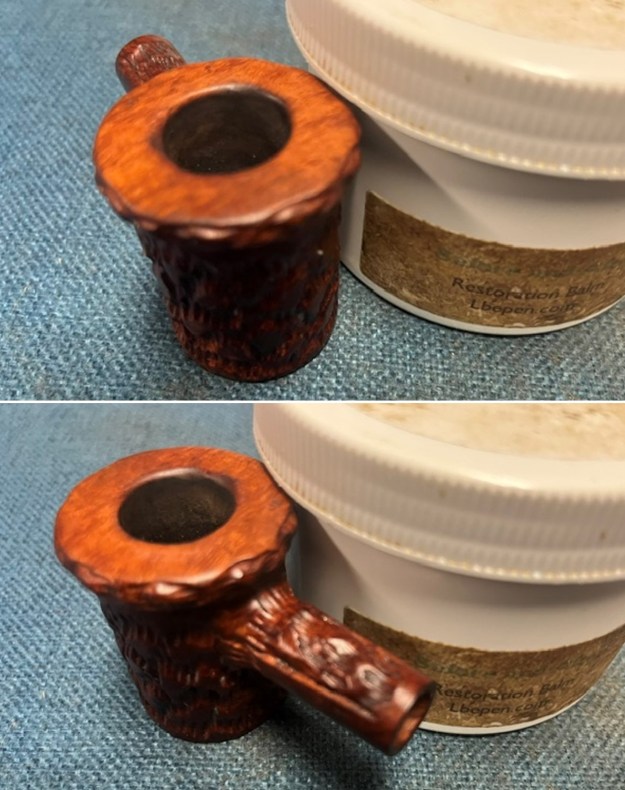
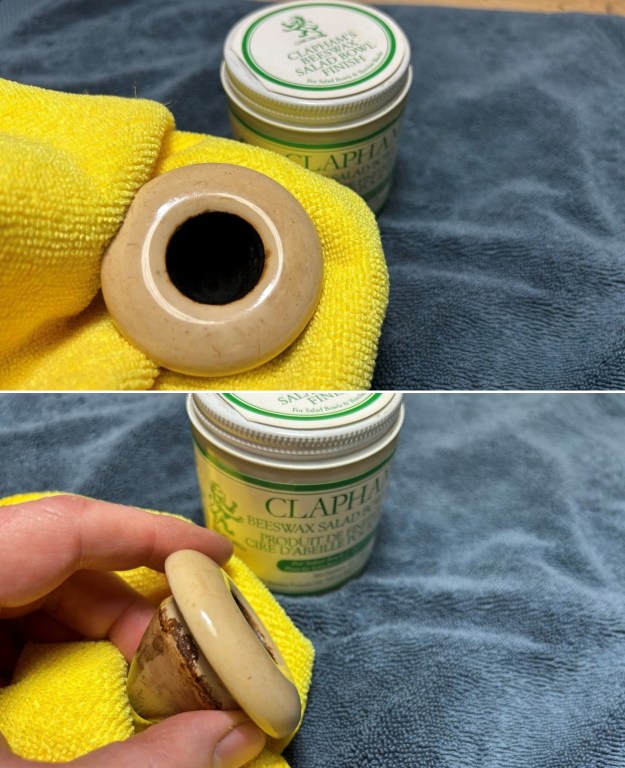
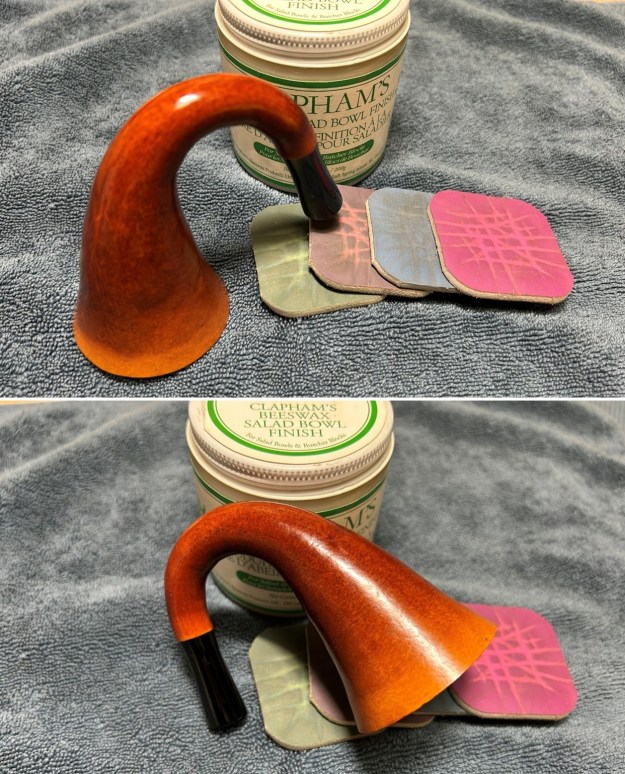
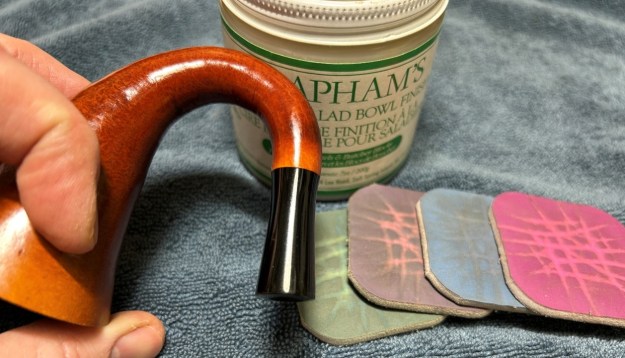
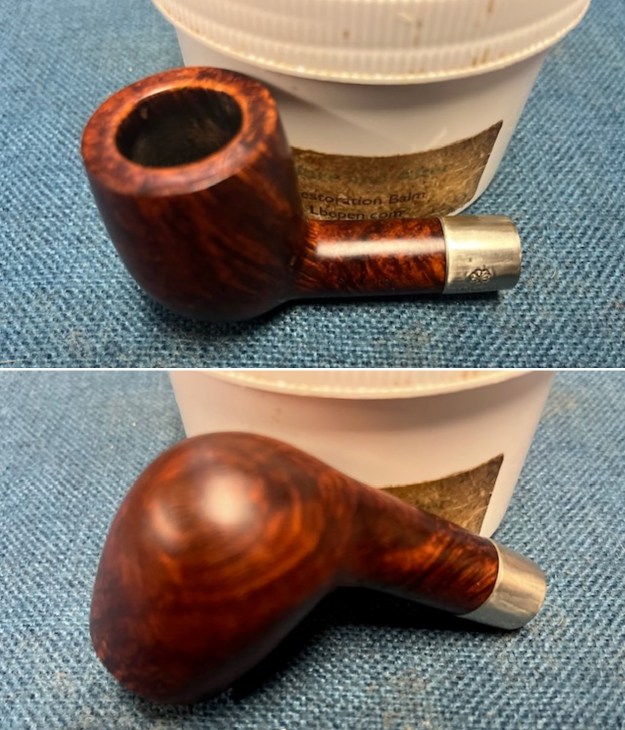
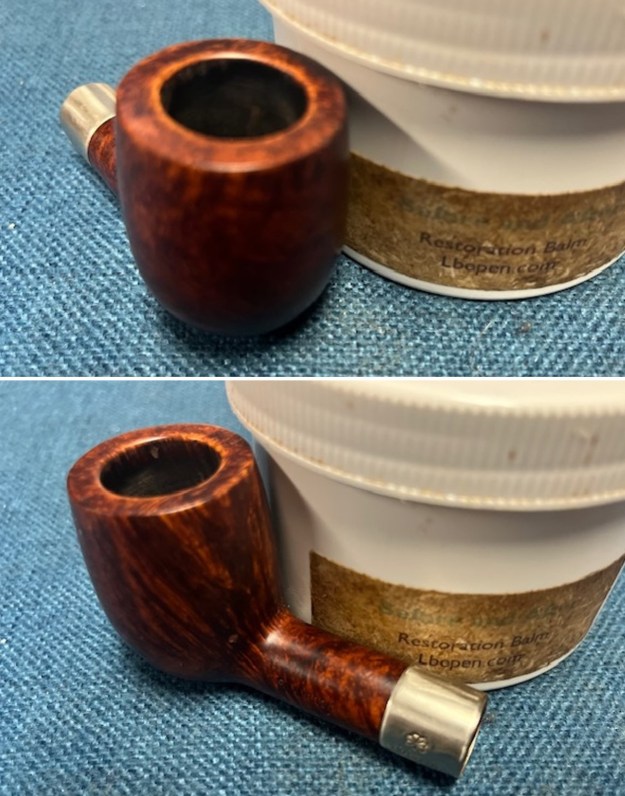
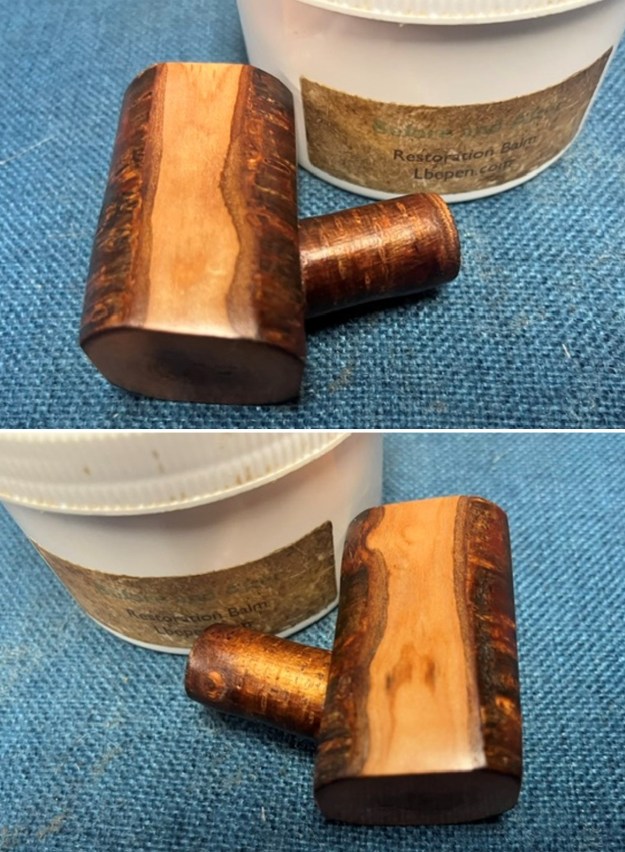
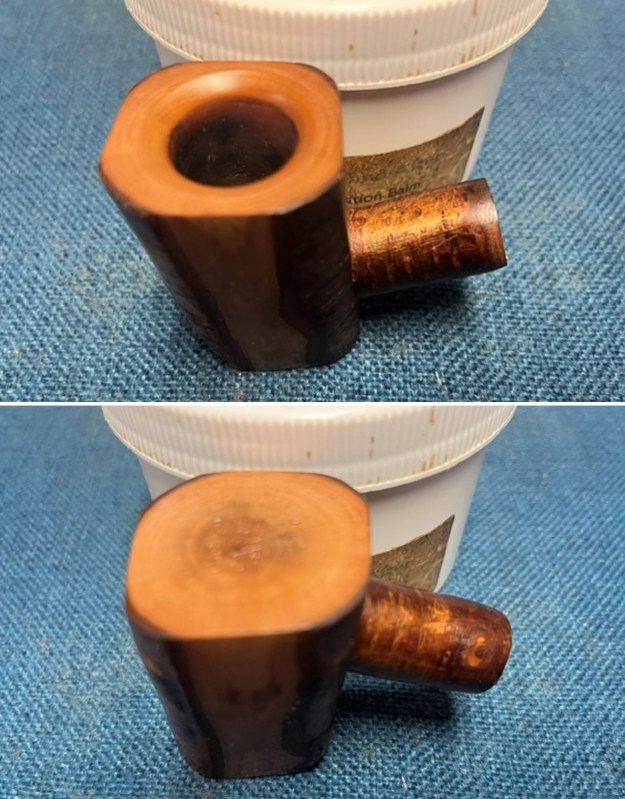
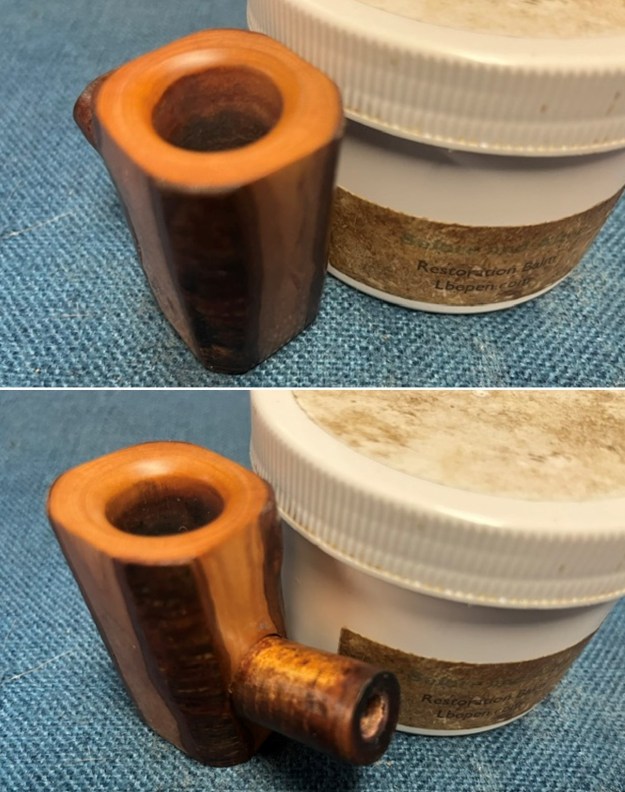
 I rubbed the briar down with Before & After Restoration Balm. I worked it into the briar with my fingertips to work it into the finish. The product works to clean, enliven and preserve the briar. I let it sit for 10 minutes then I buffed it with a cotton cloth to deepen the shine. The briar really comes alive with the balm.
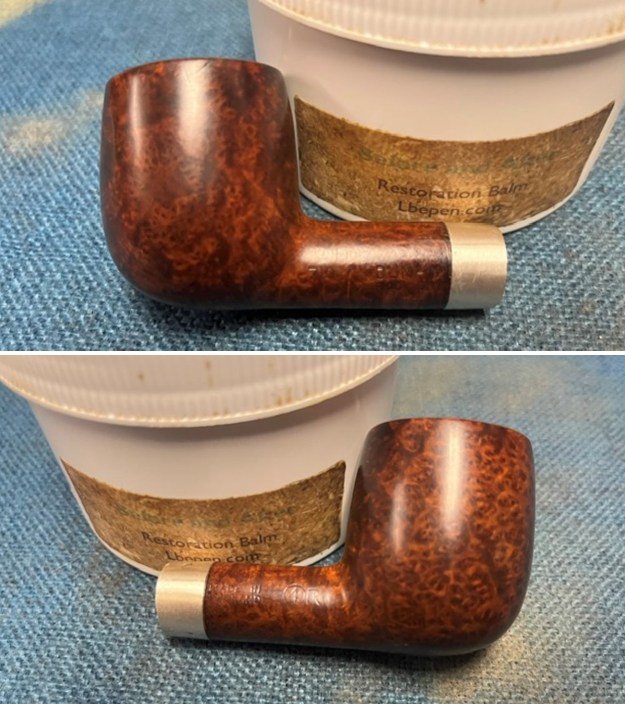
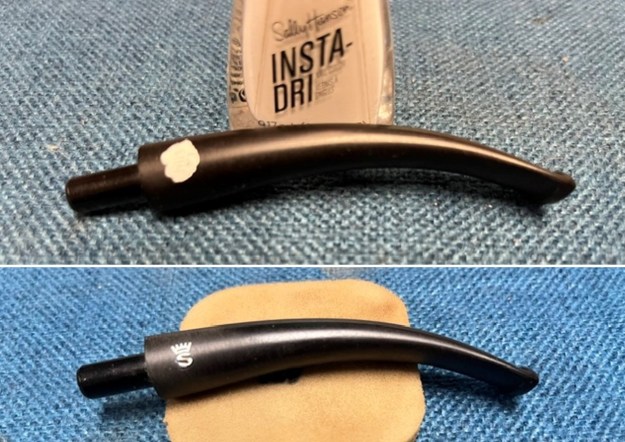
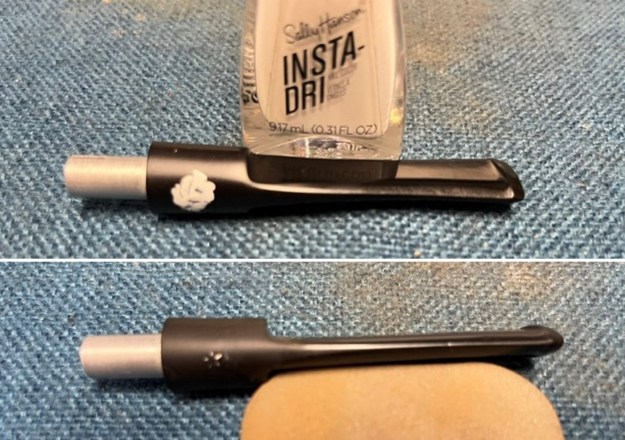
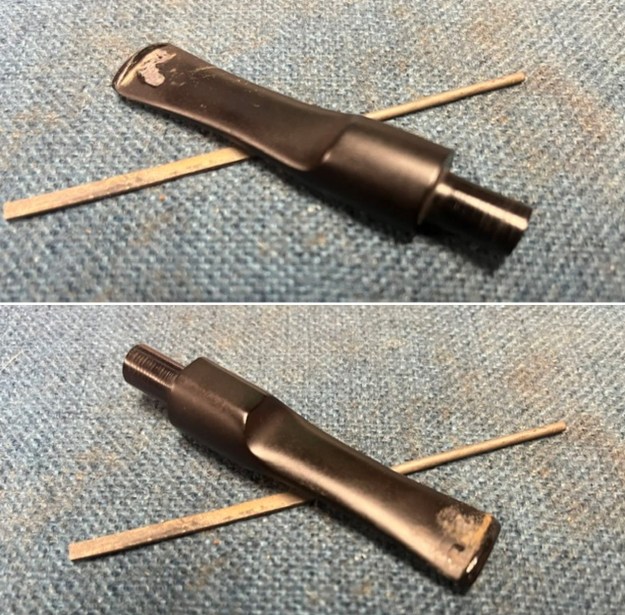
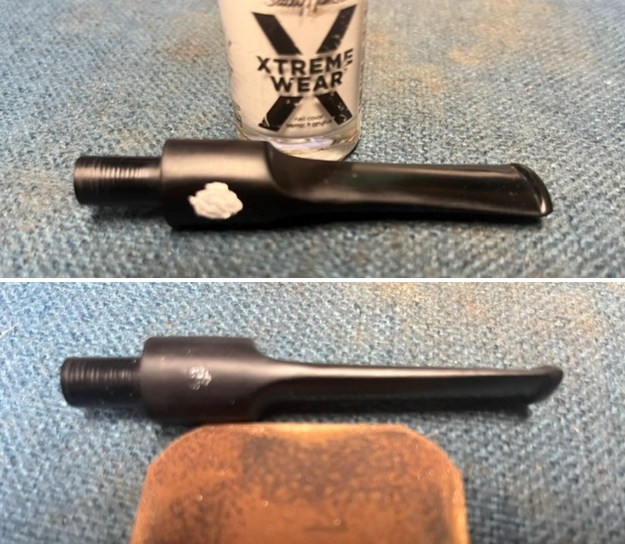
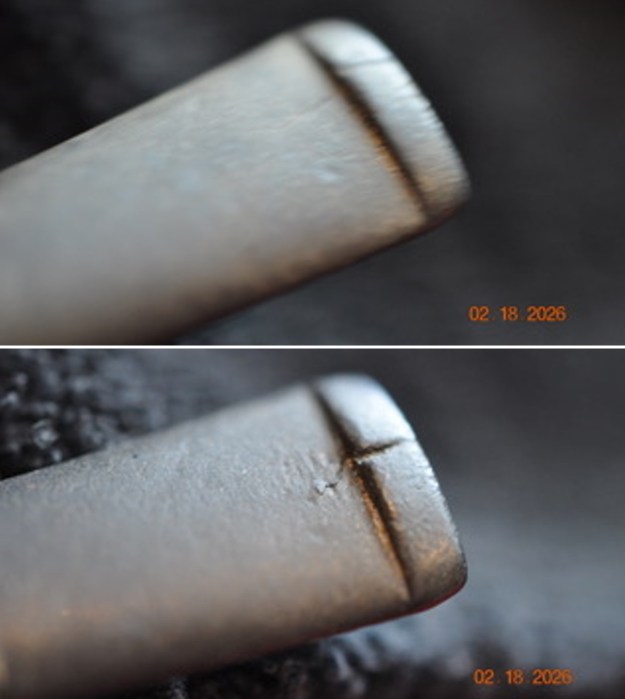
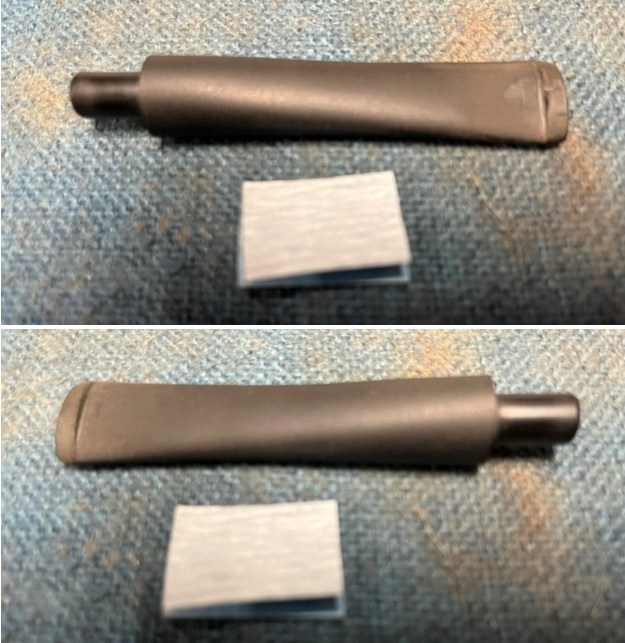
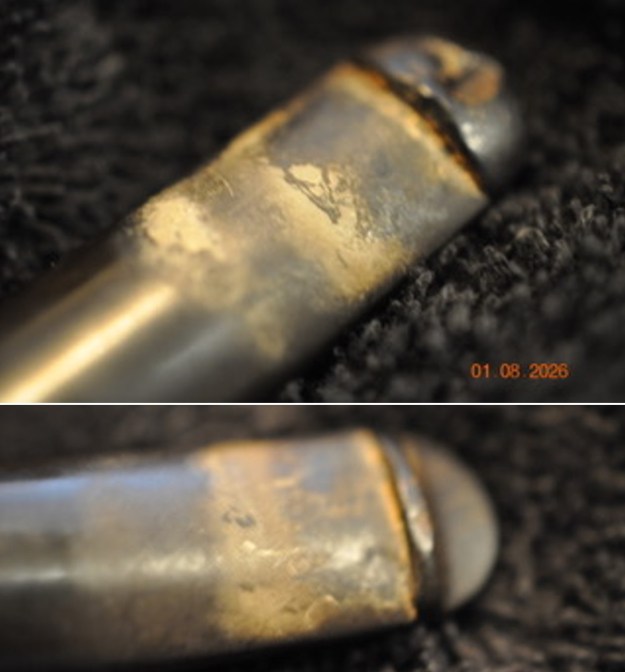
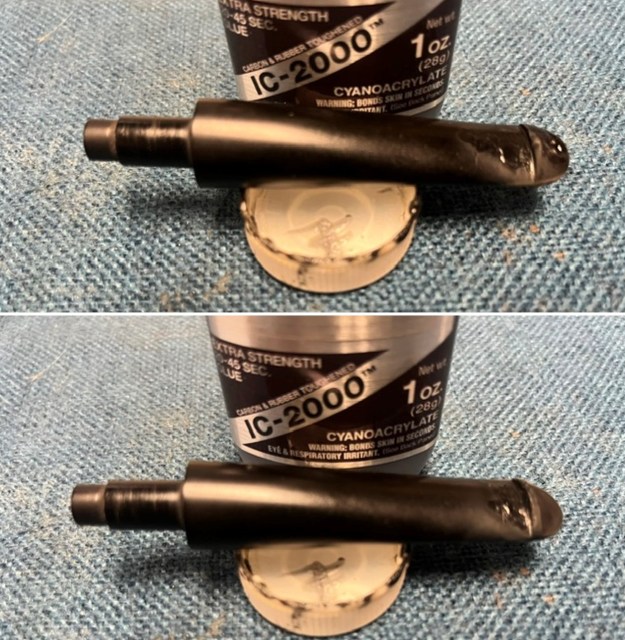
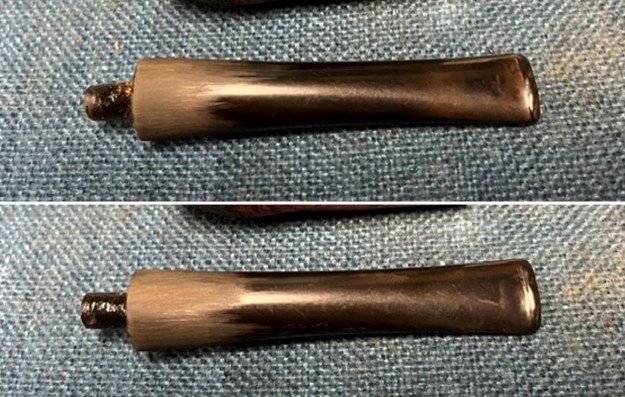
 I set the bowl aside and worked on the stem. I “painted” the tooth m arks in the stem with the flame of a lighter to lift them. I was able to lift them significantly. I figured that sanding the surface would blend them into the surrounding vulcanite.
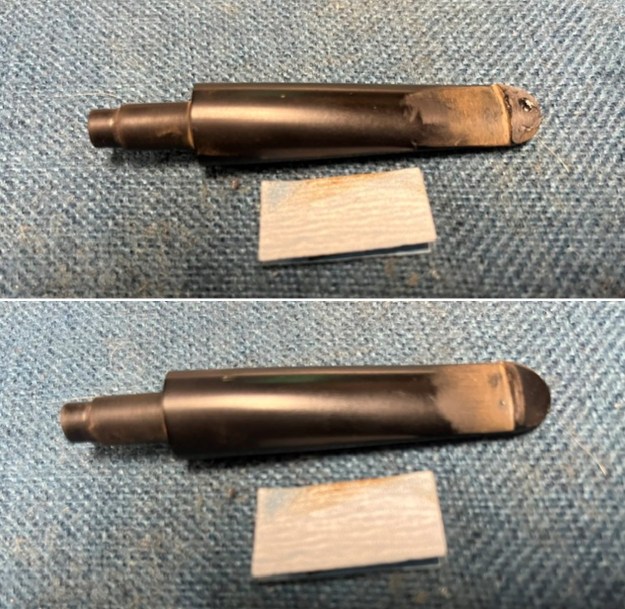
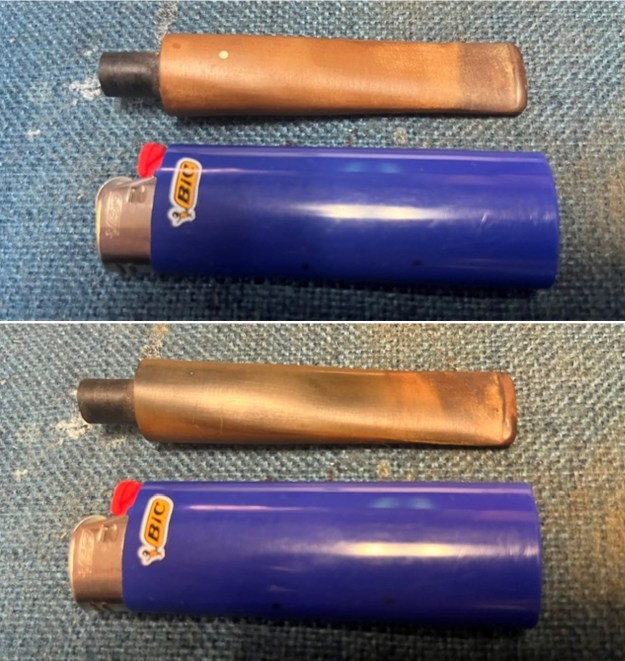 I scrubbed the stem with Soft Scrub and a paper towel to loosen and remove the oxidation. Then I sanded the button surface and edges along with the remaining oxidation with a folded piece of 220 grit sandpaper to blend in the tooth marks and chatter as well as remove the oxidation and spots on the surface of the stem. It was a lot of work and hard sanding to get rid of it. It felt like I would never win the battle.
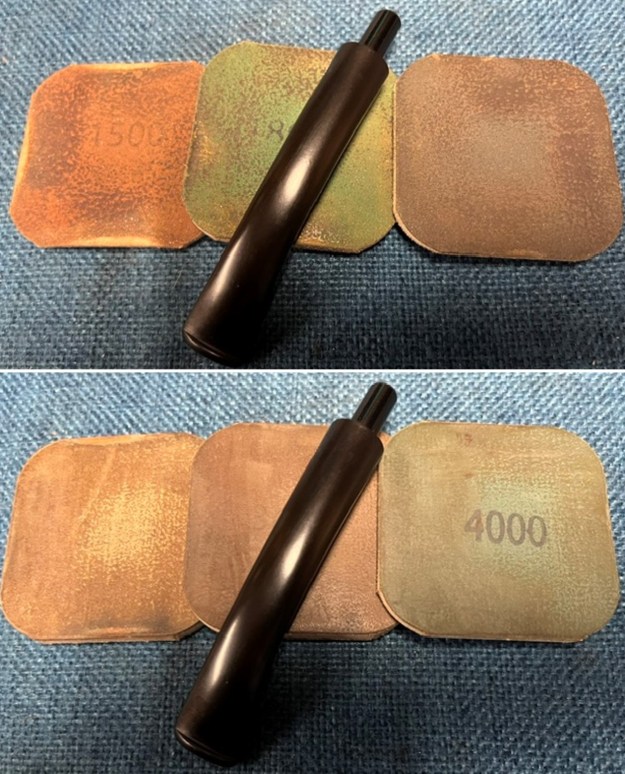
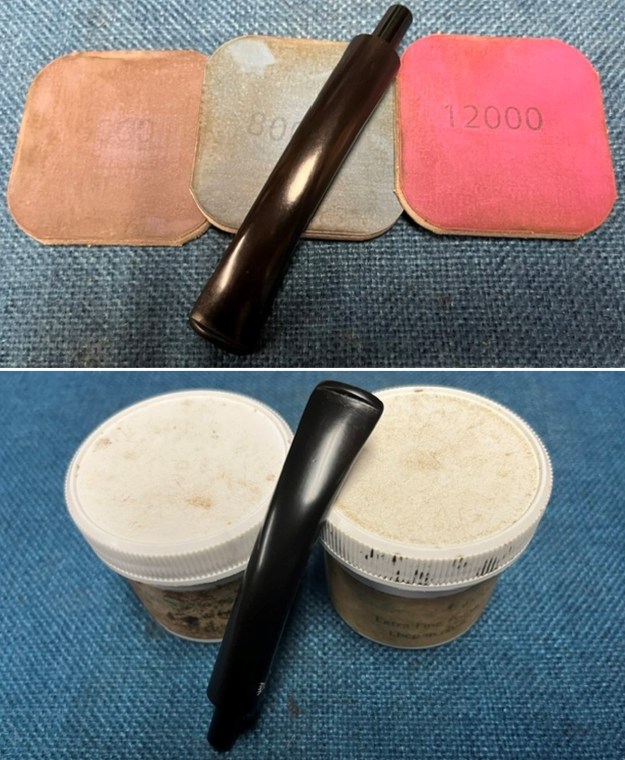
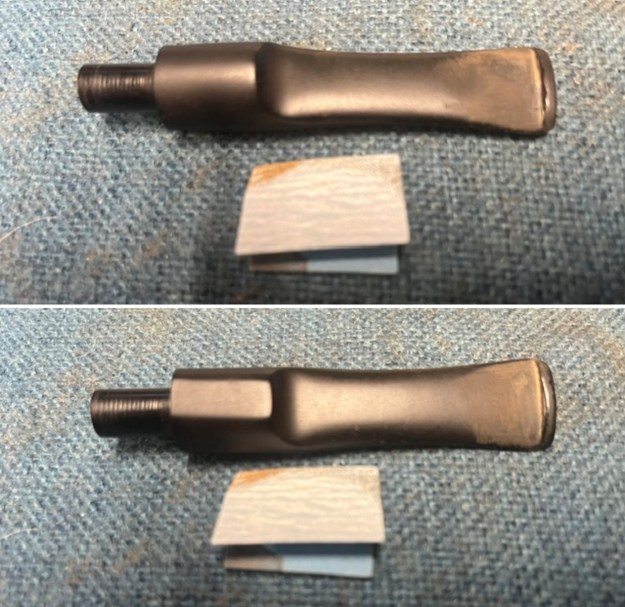
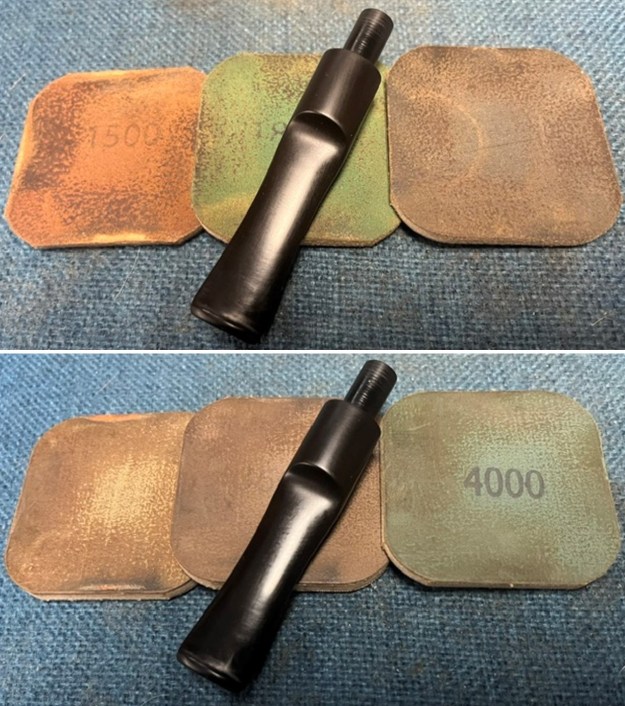
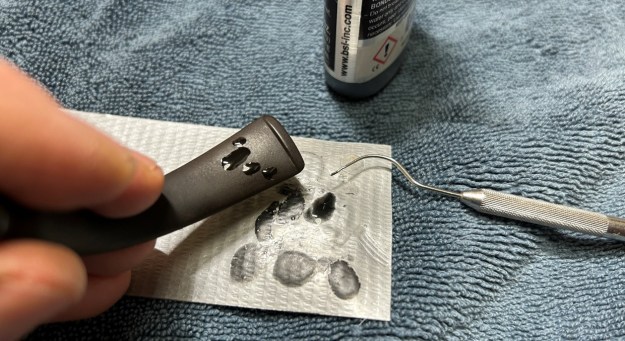
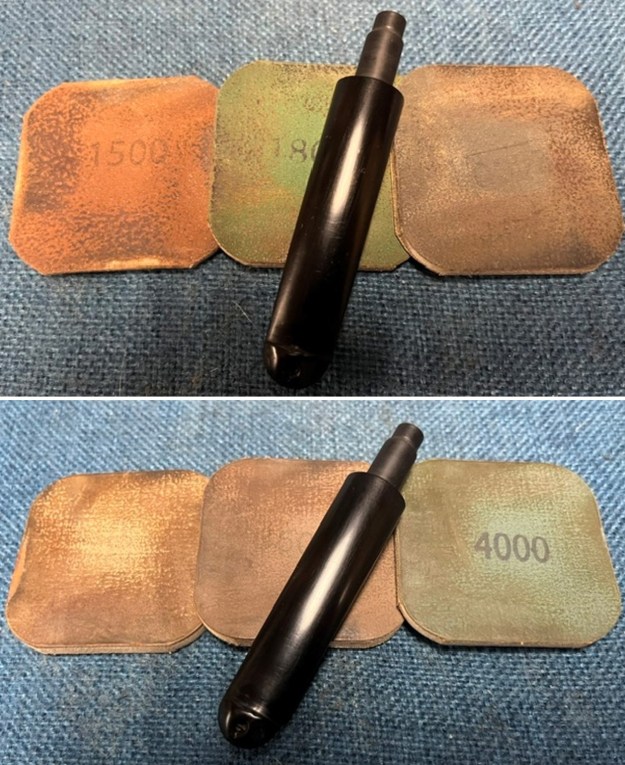
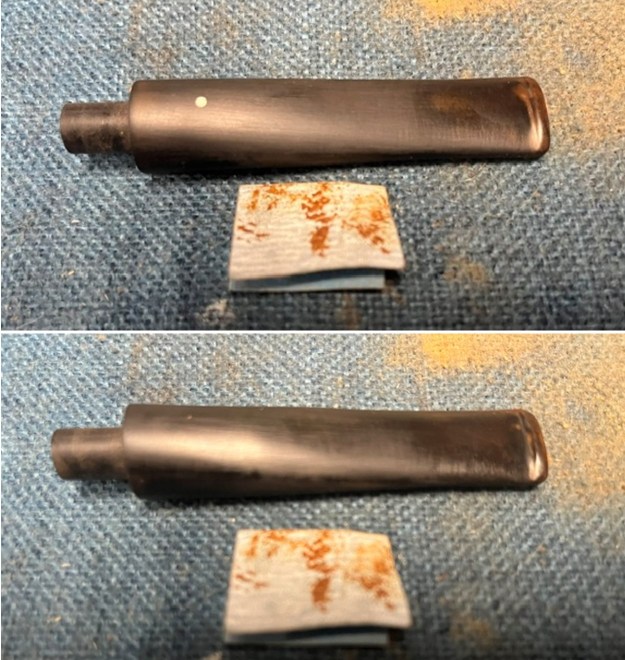 I sanded the stem with 320-3500 grit 2×2 inch pads. I wiped the stem down with an Obsidian Oil cloth after each sanding pad.
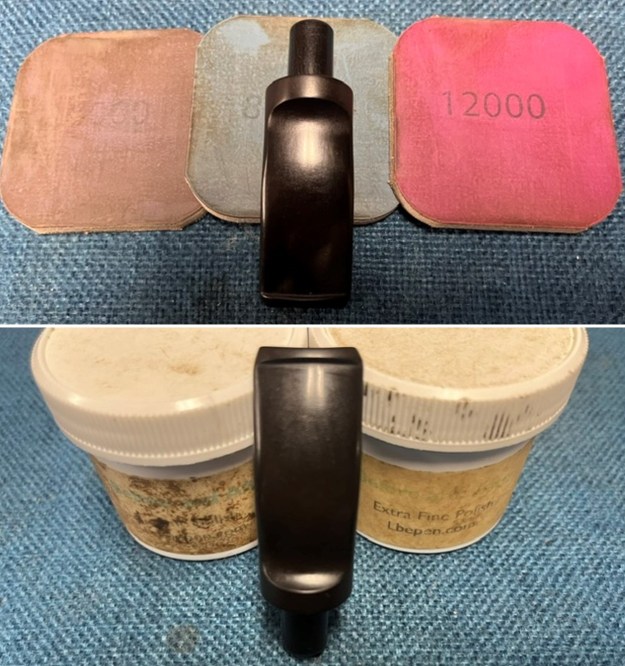
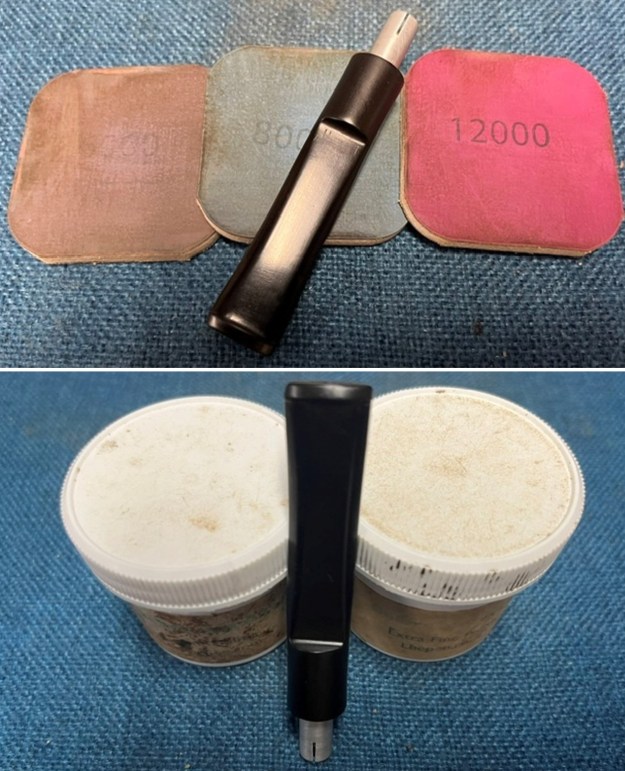
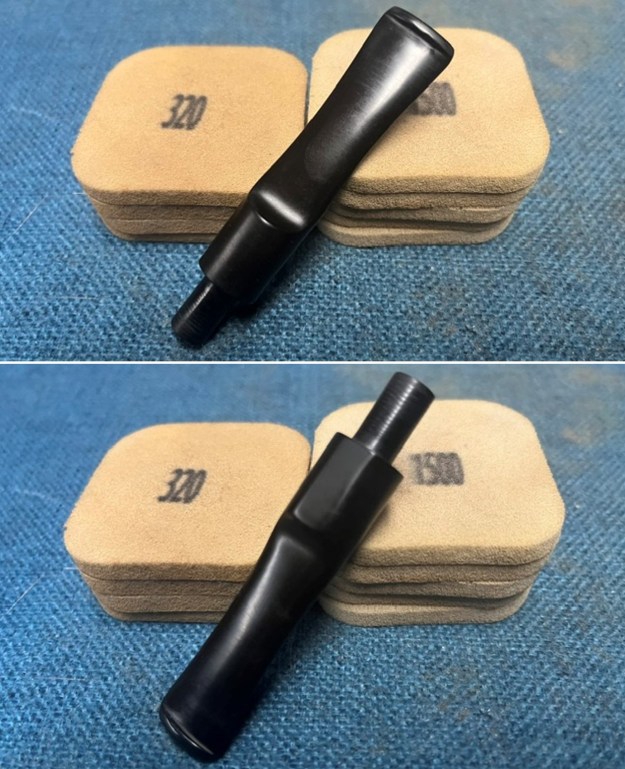
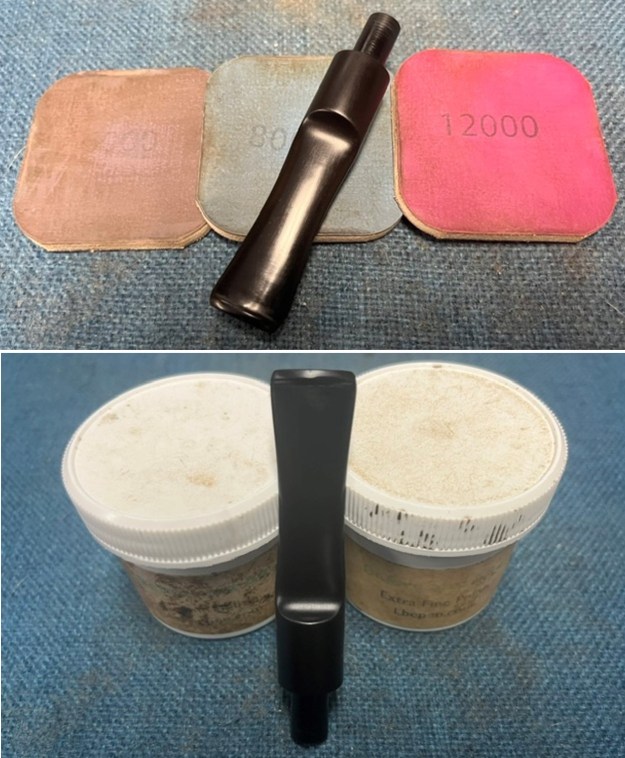
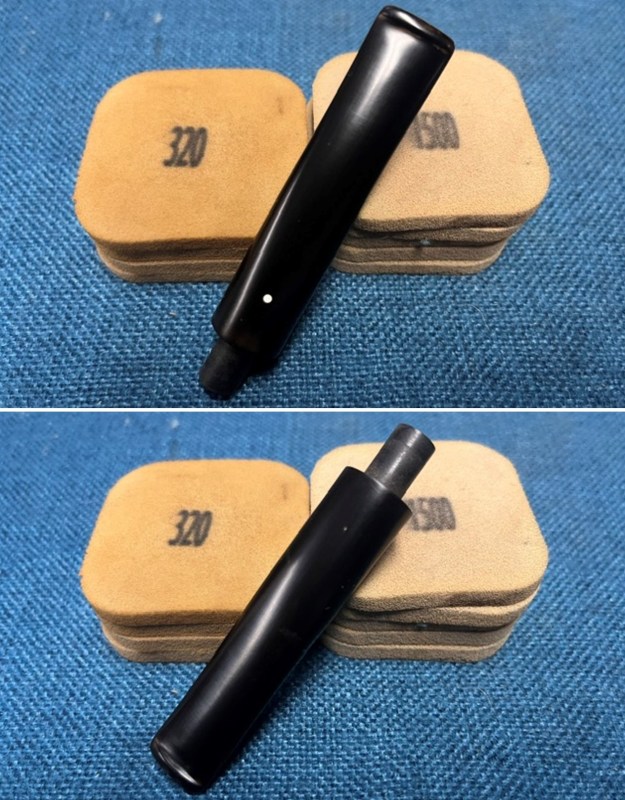 I polished the vulcanite with micromesh sanding pads – 1500-12000 grit pads. I wiped it down with Obsidian Oil after each sanding pad. I used Before & After Pipe Polish – both Fine and Extra Fine to further polish the stem.
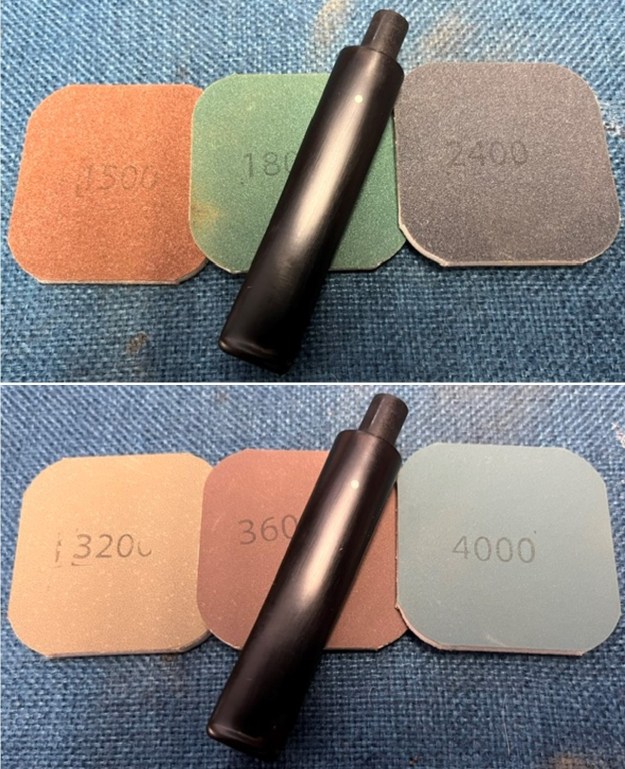
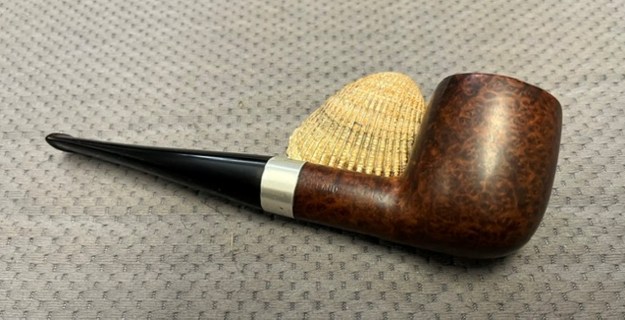
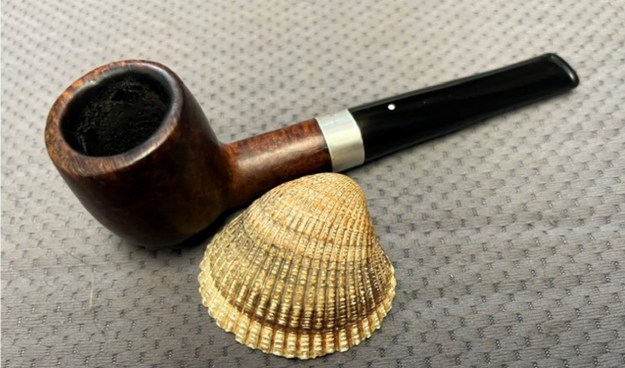
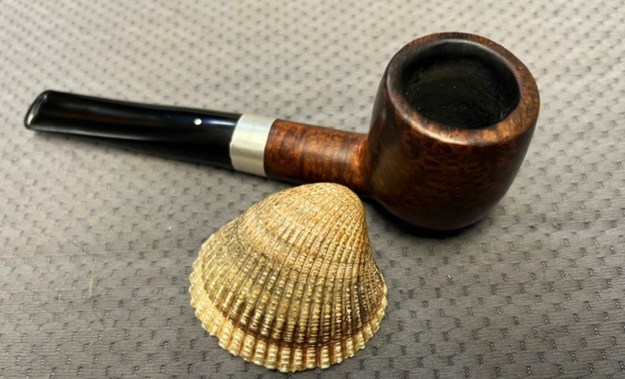
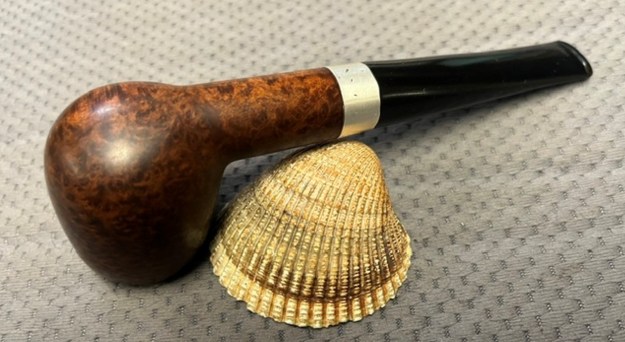
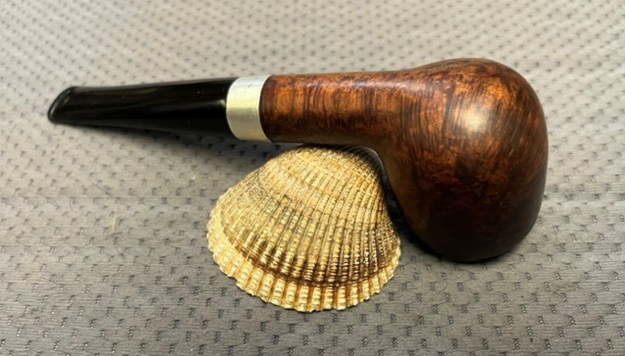
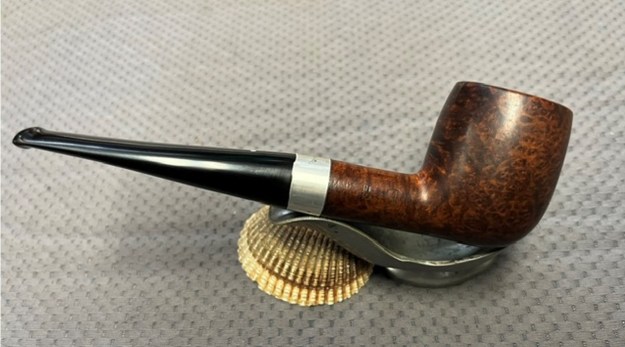
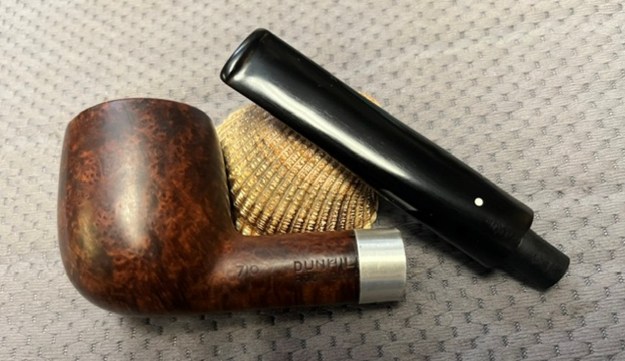
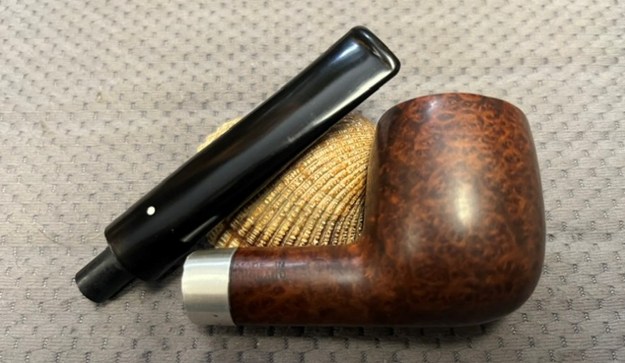
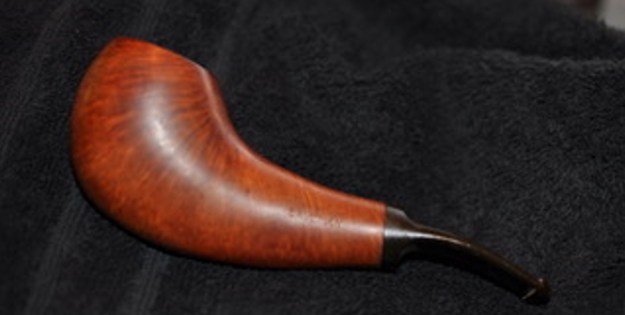
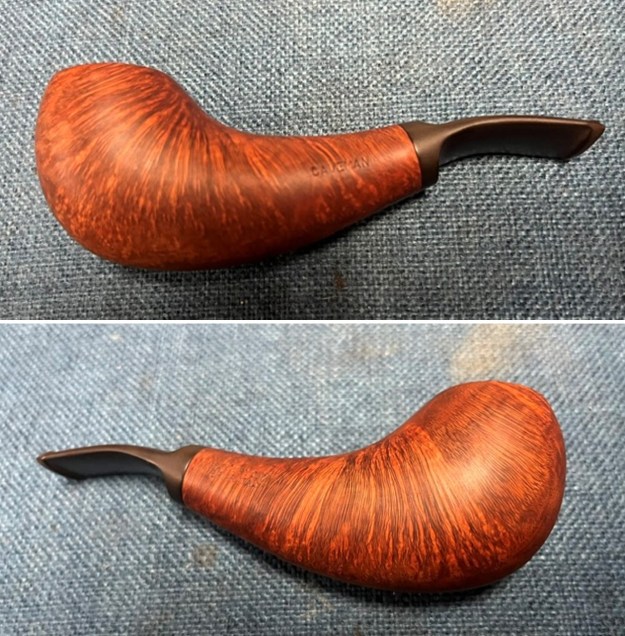
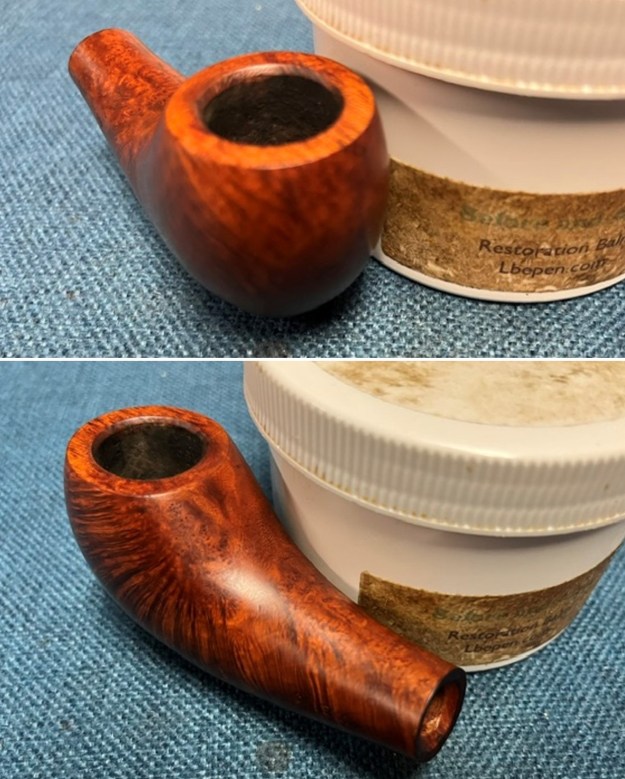
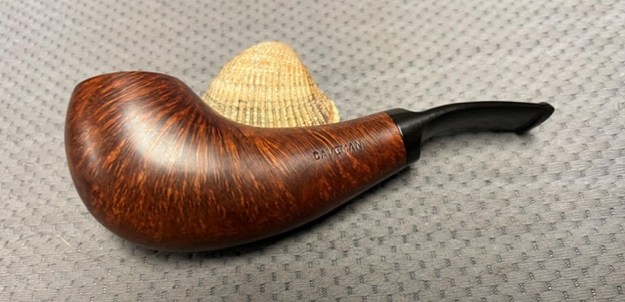
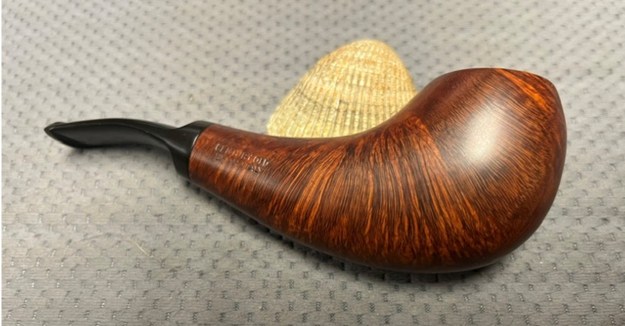
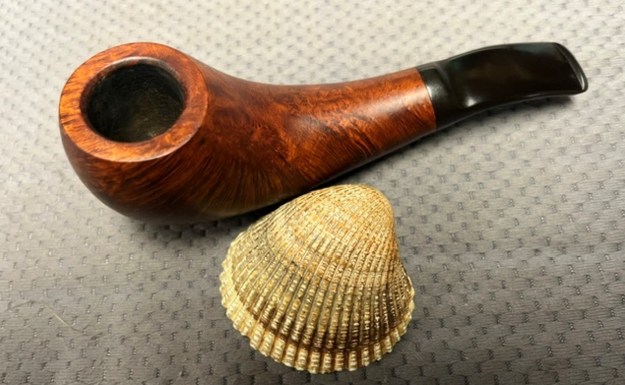
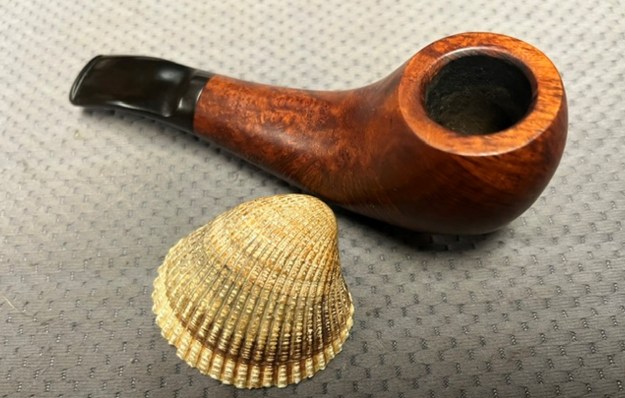
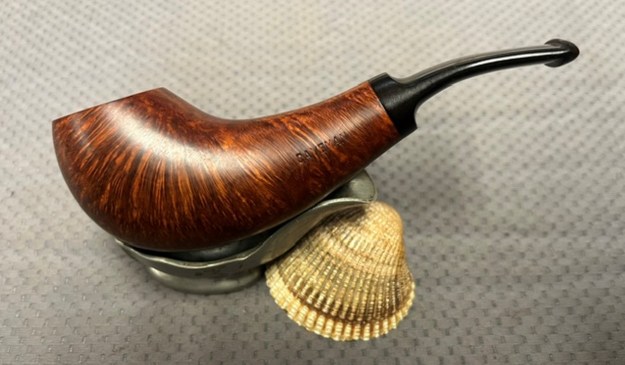
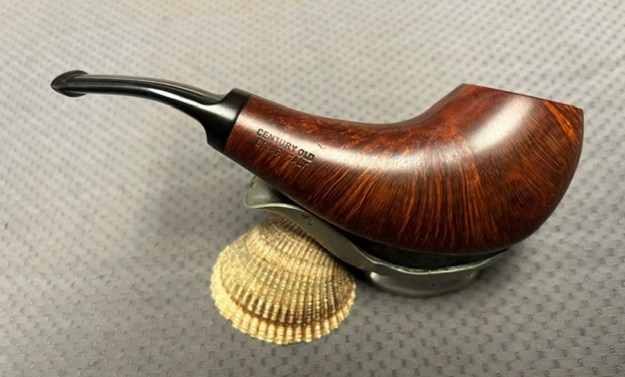
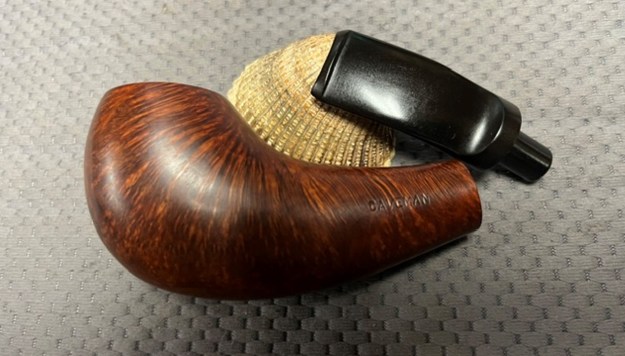
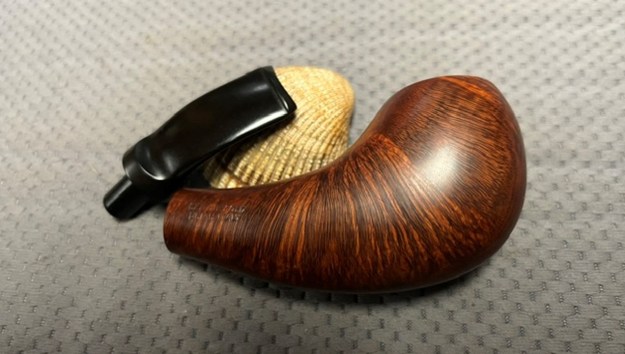
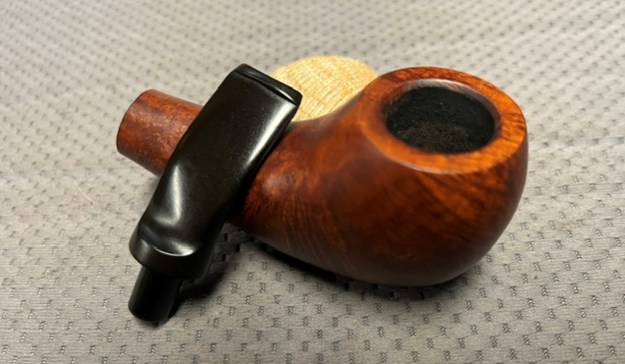
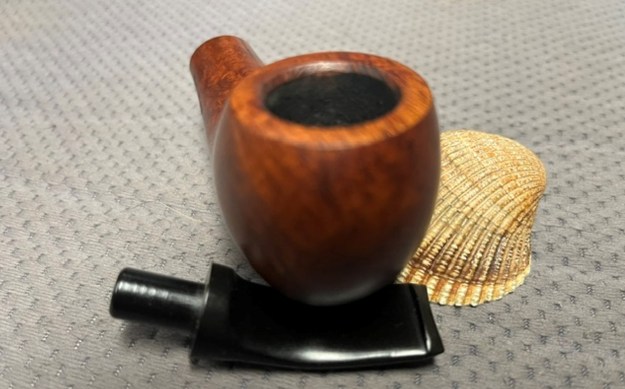
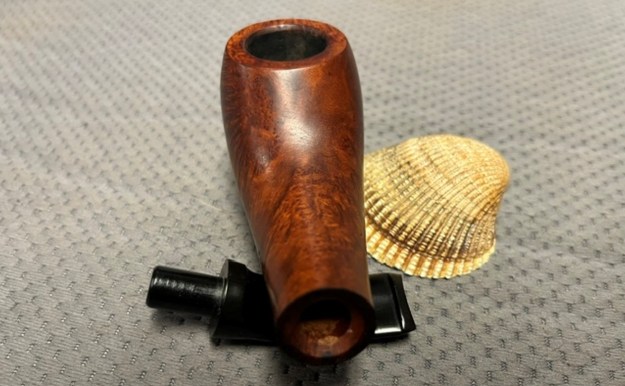
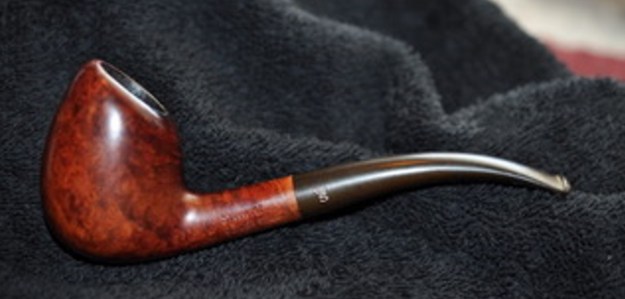
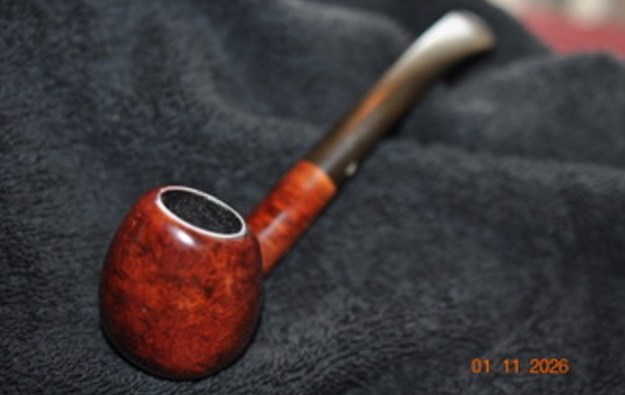
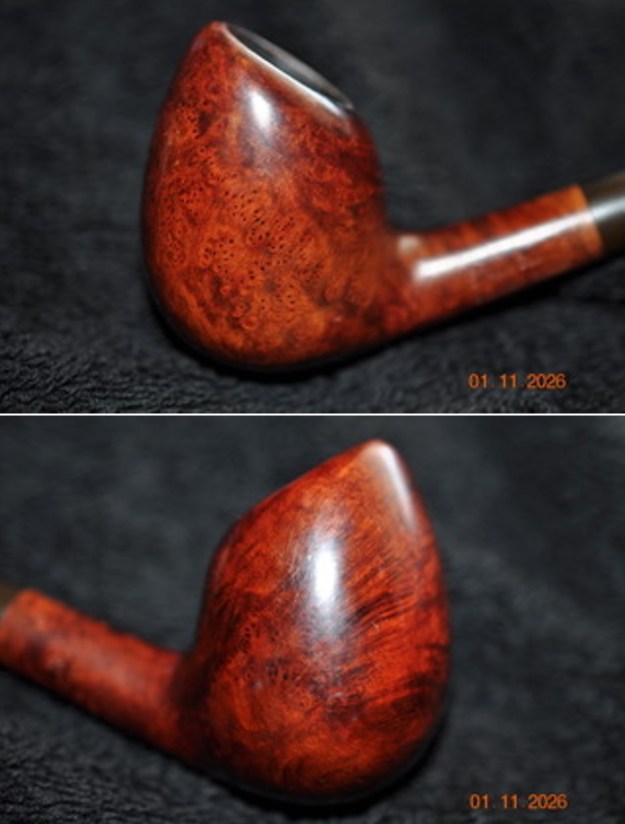
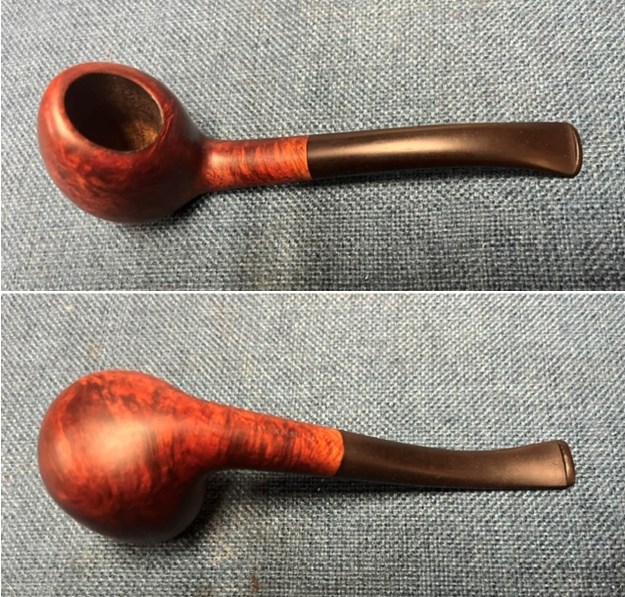
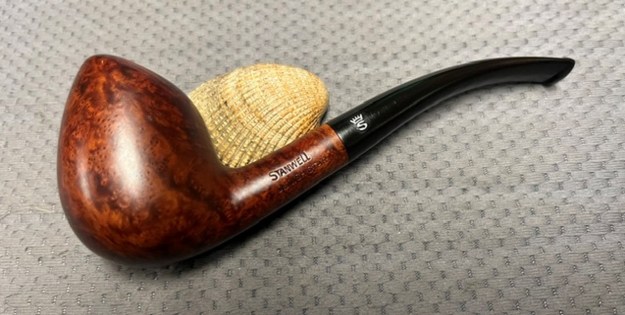
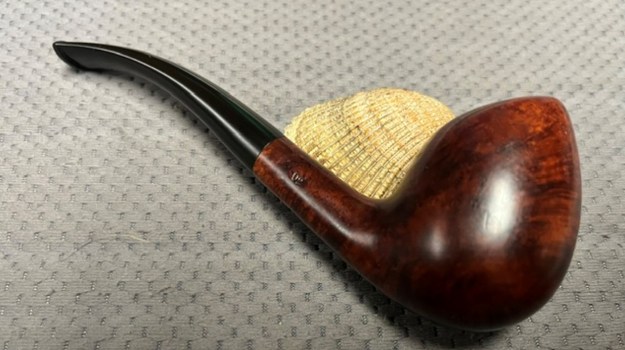
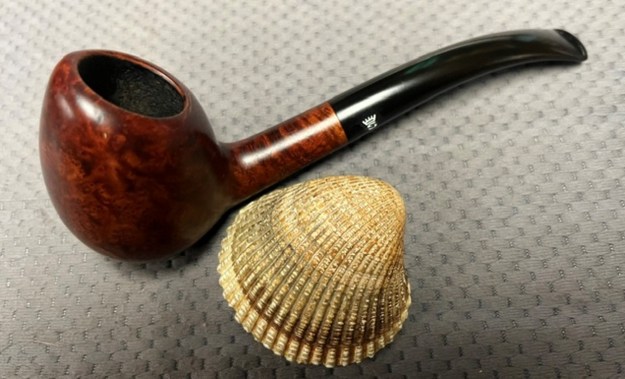
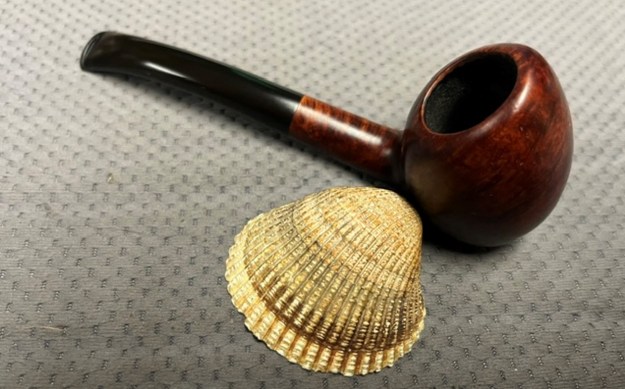
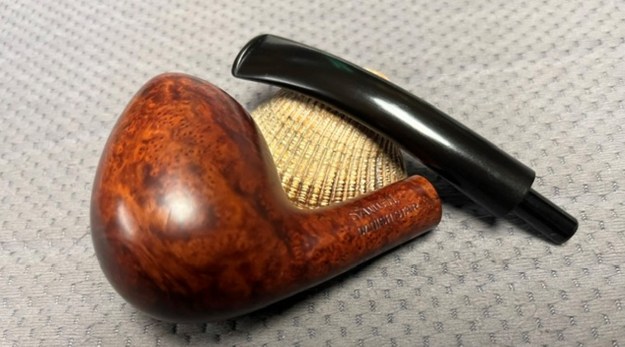
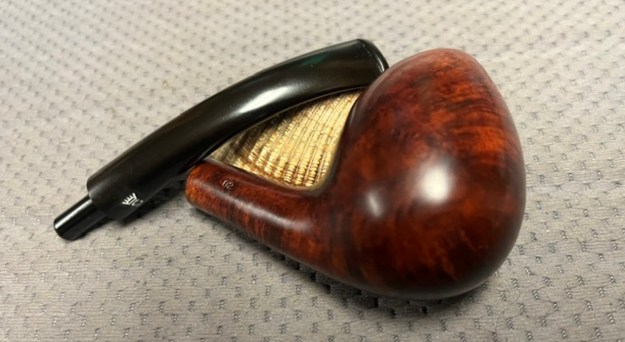
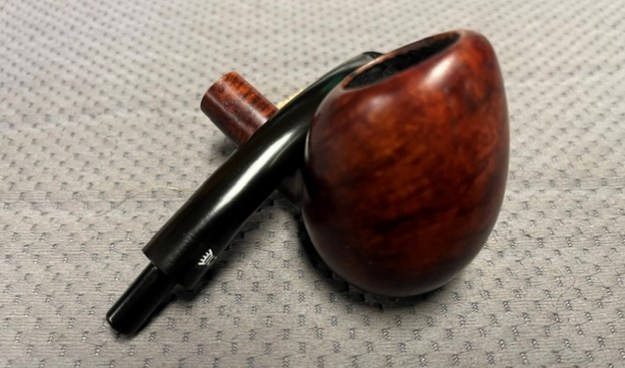
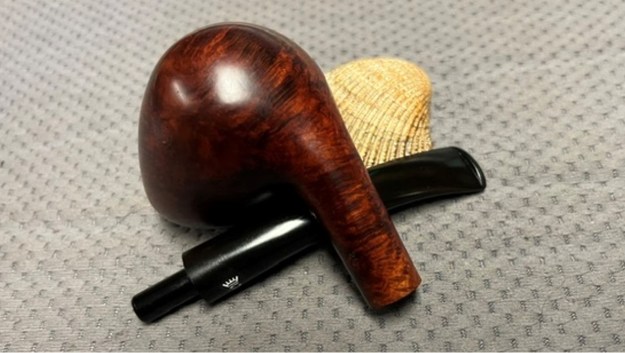
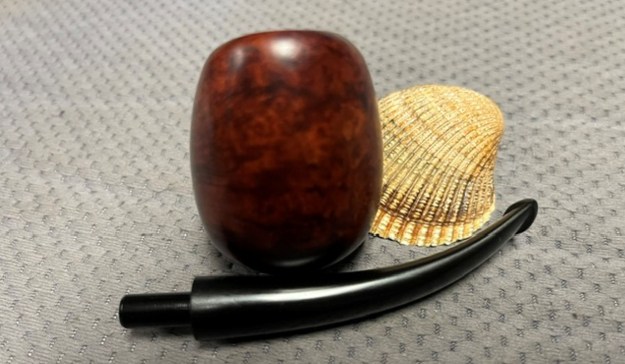
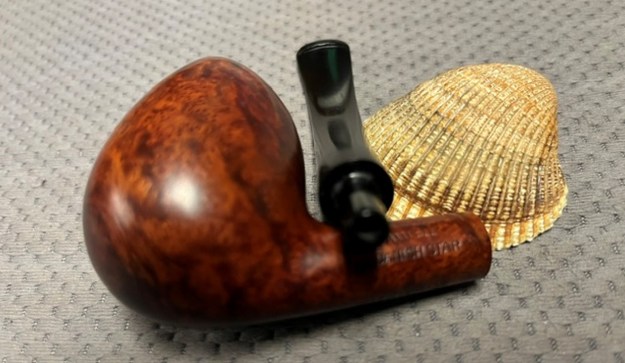
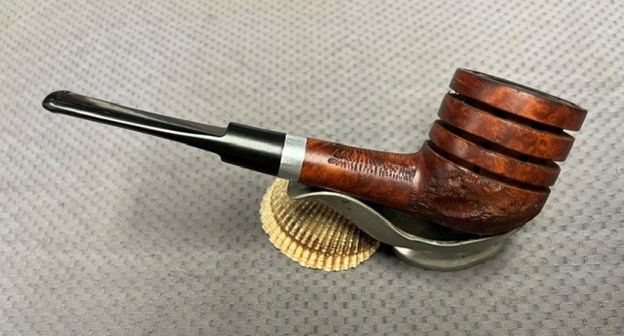
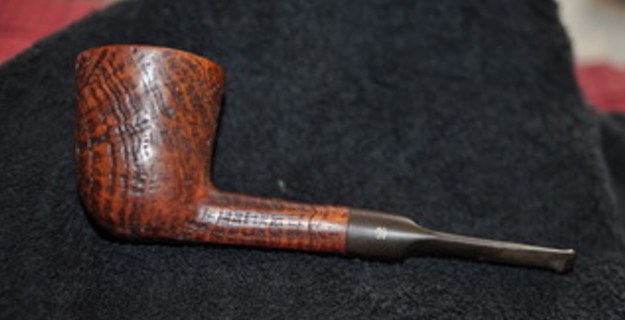
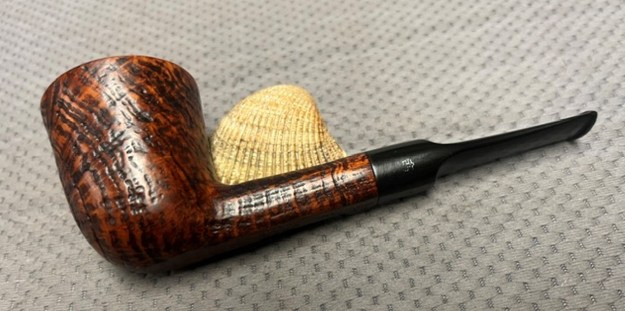
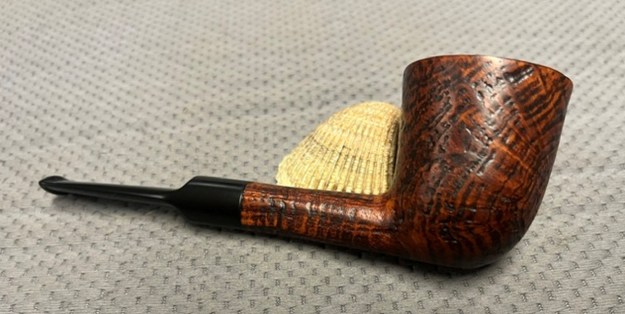
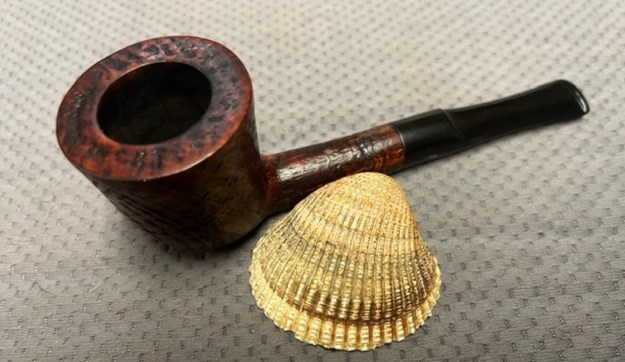
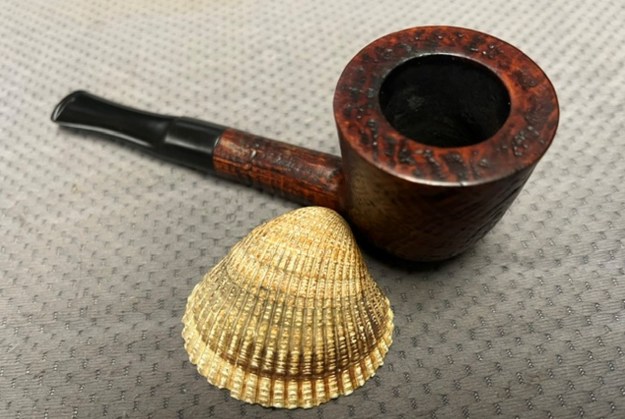
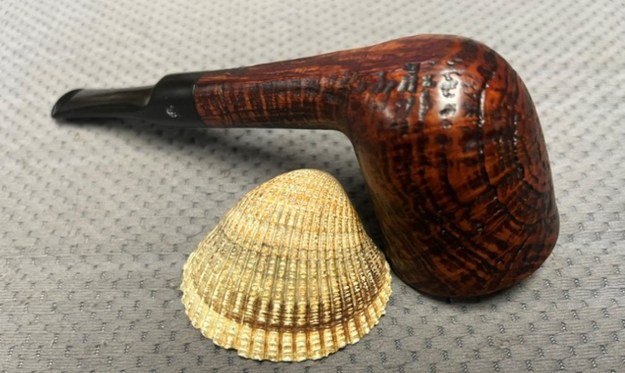
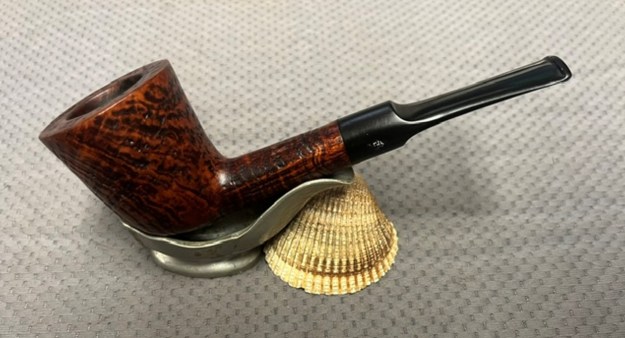
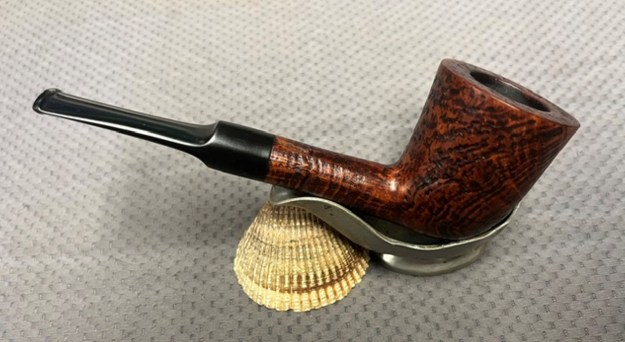
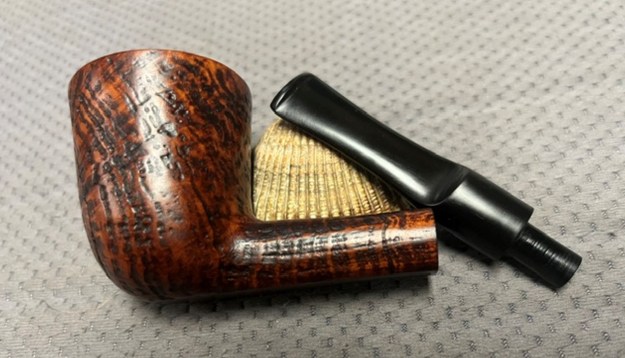
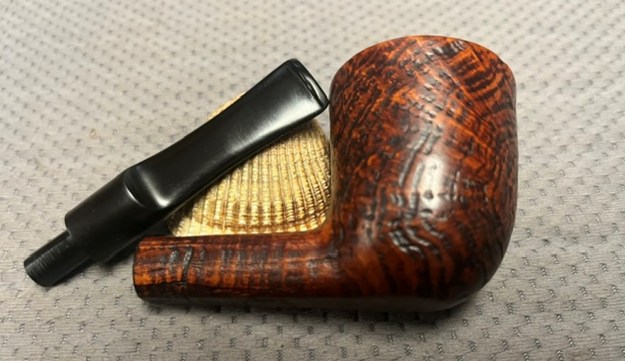
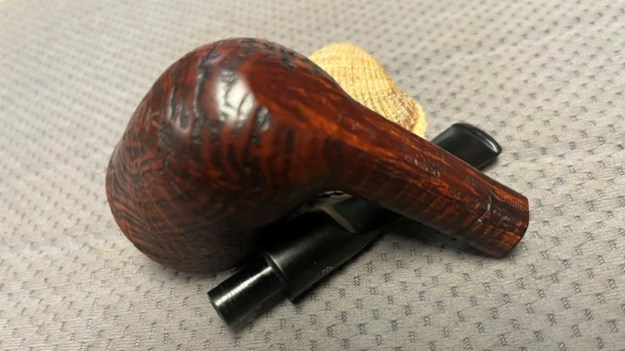
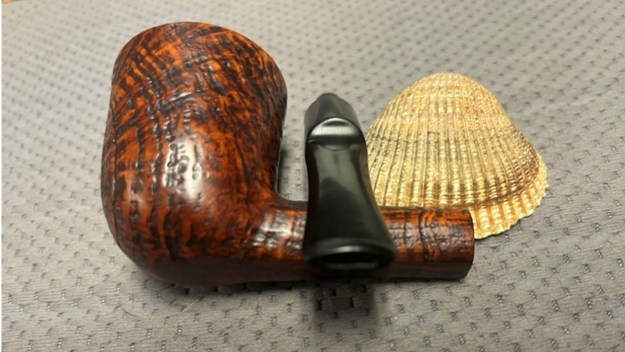
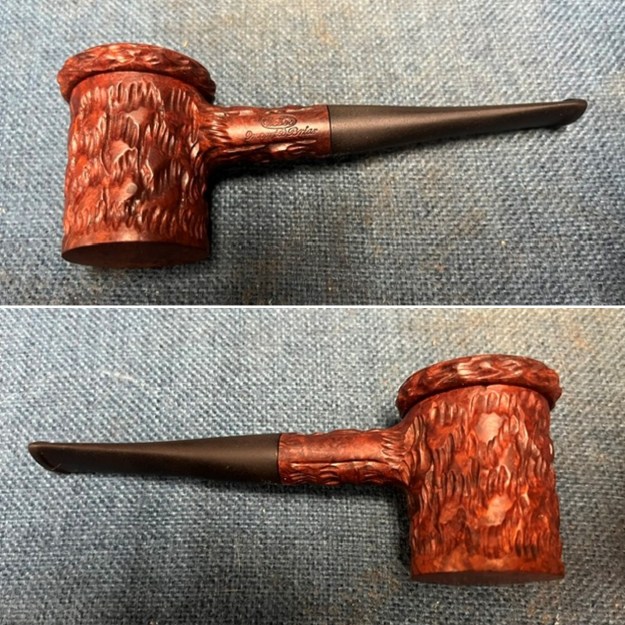
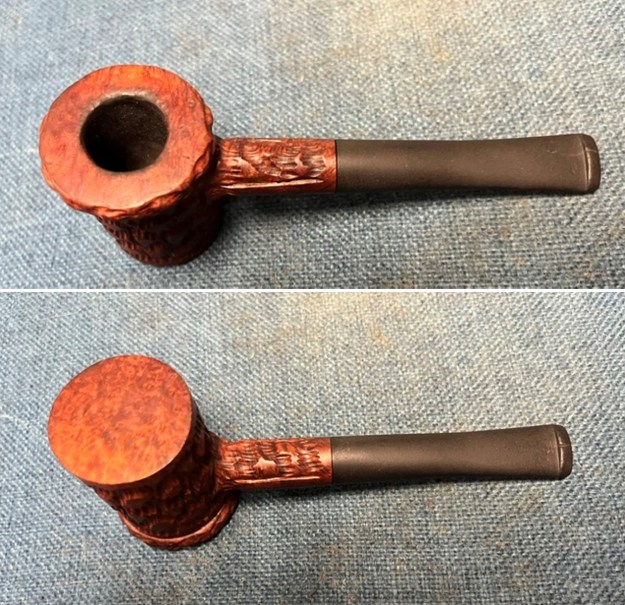
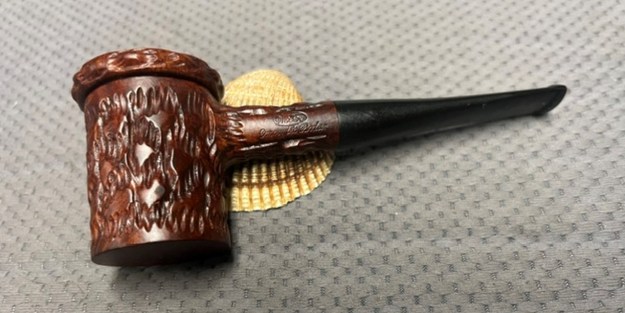
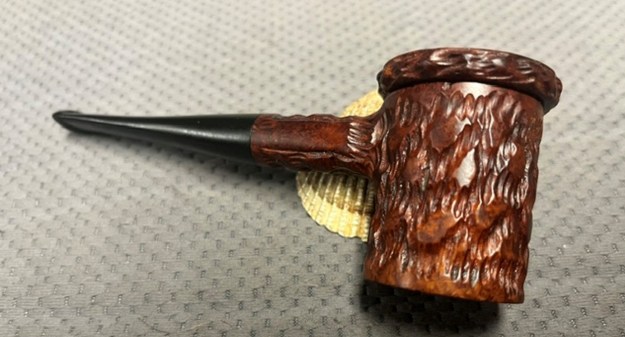
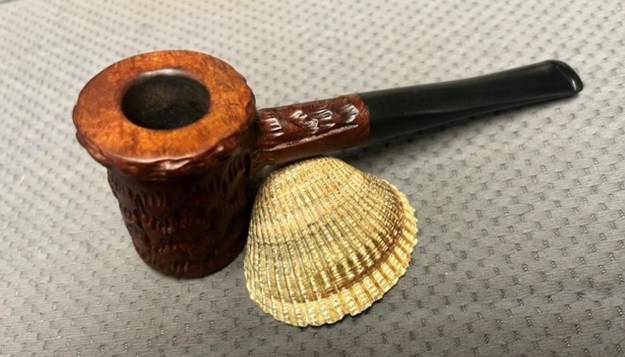
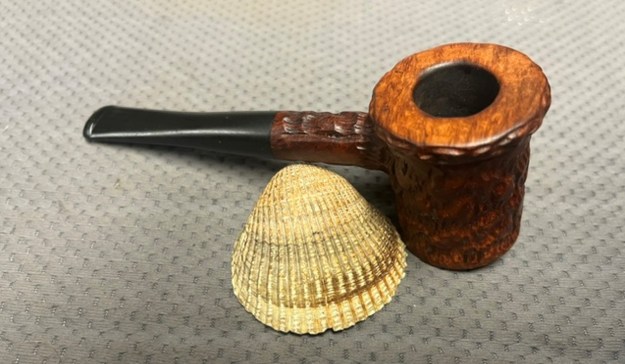
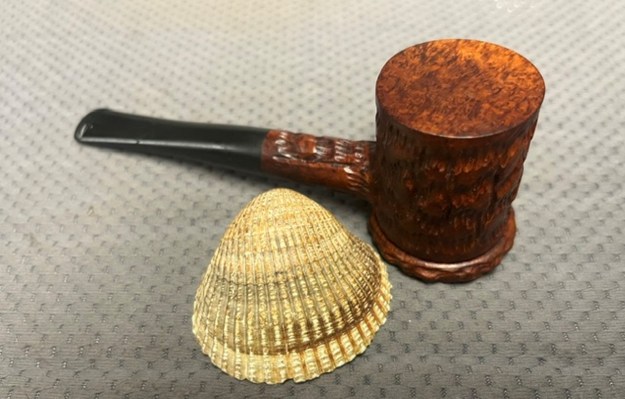
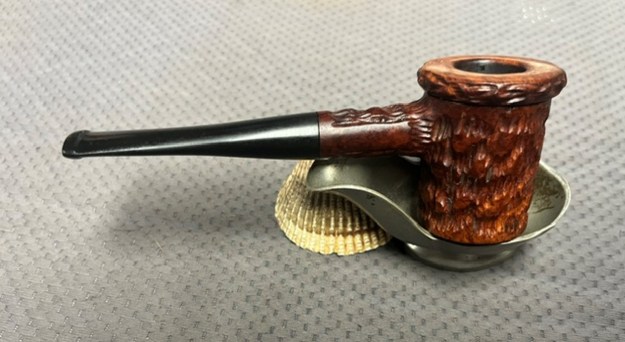
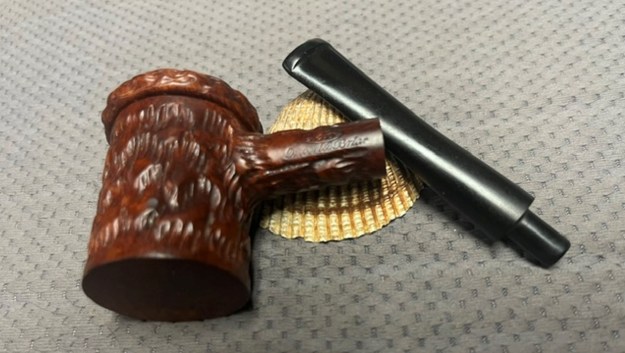
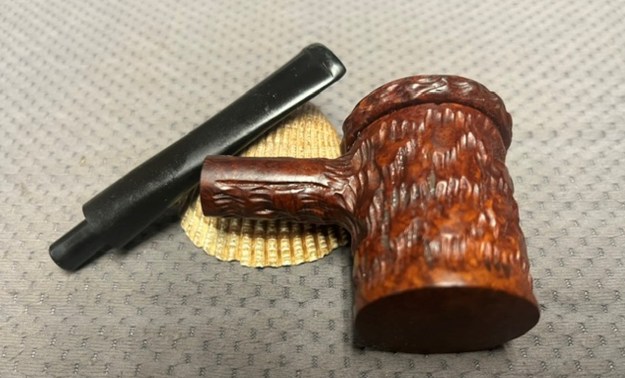
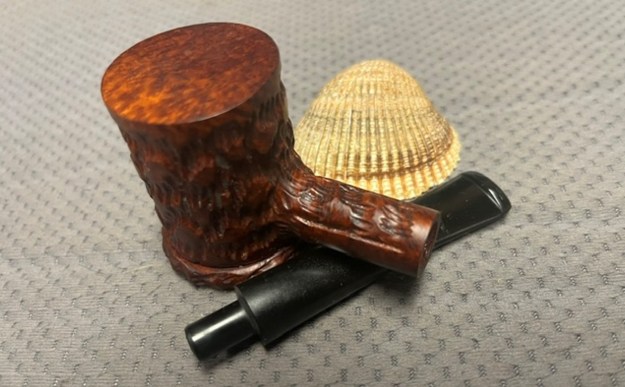
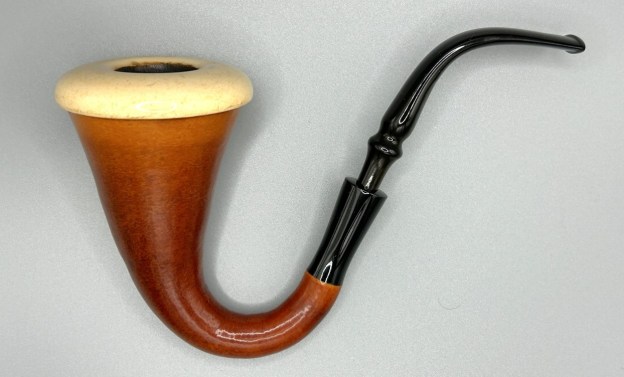
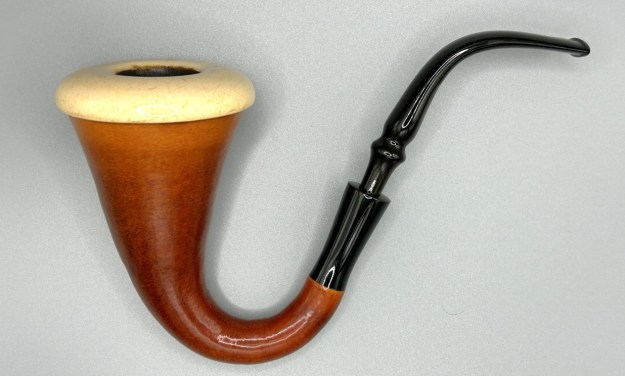
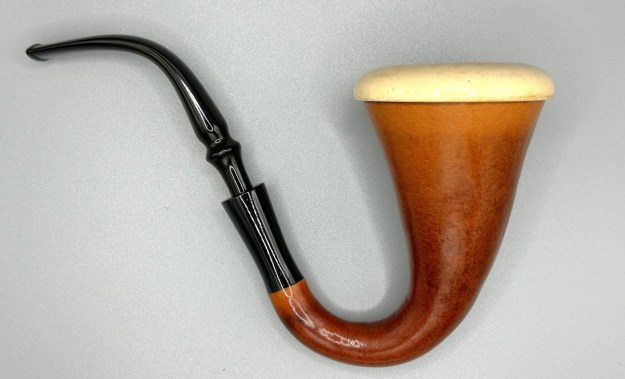
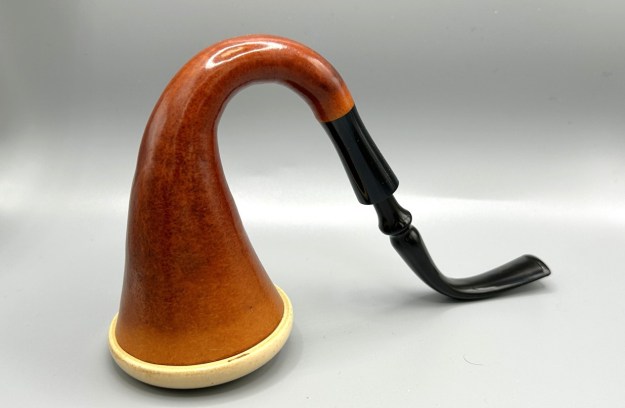
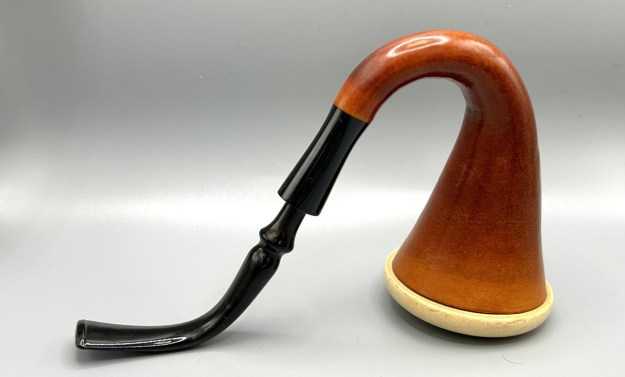
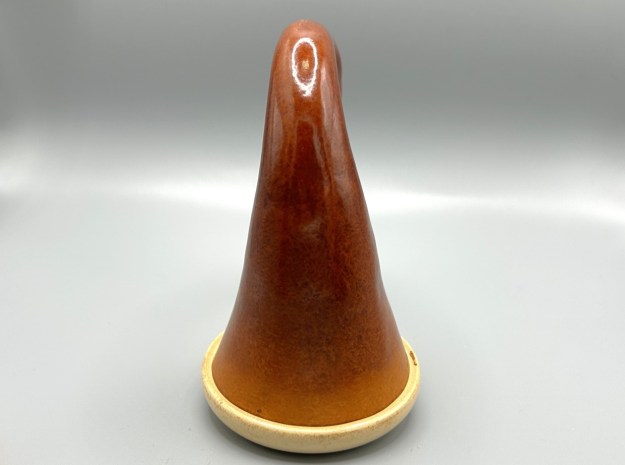
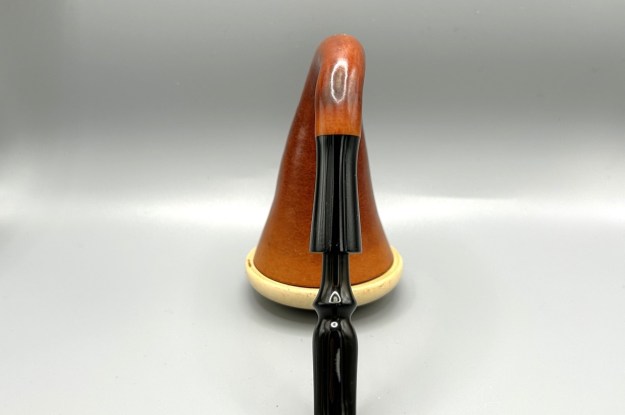
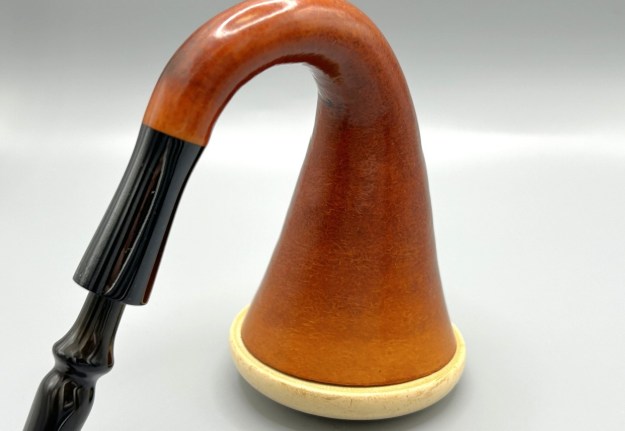
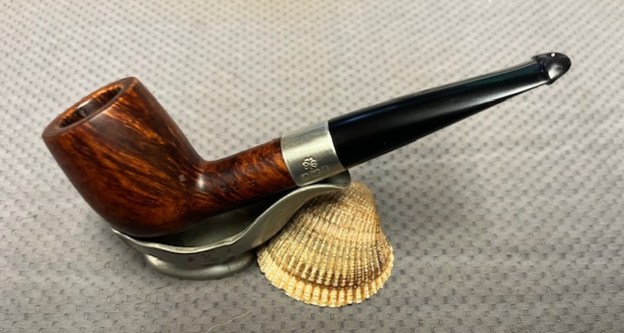
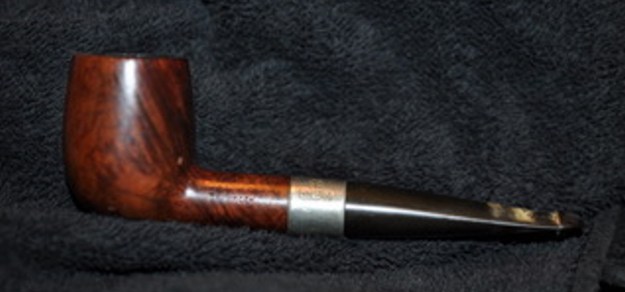
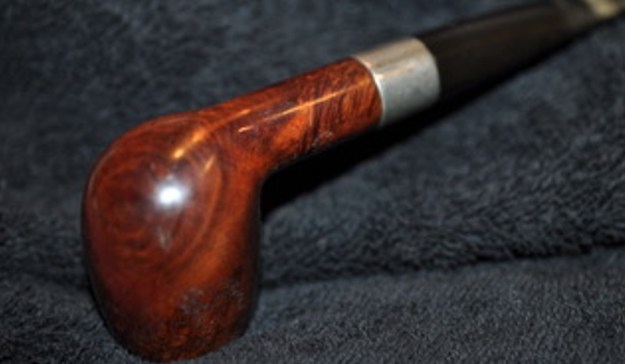
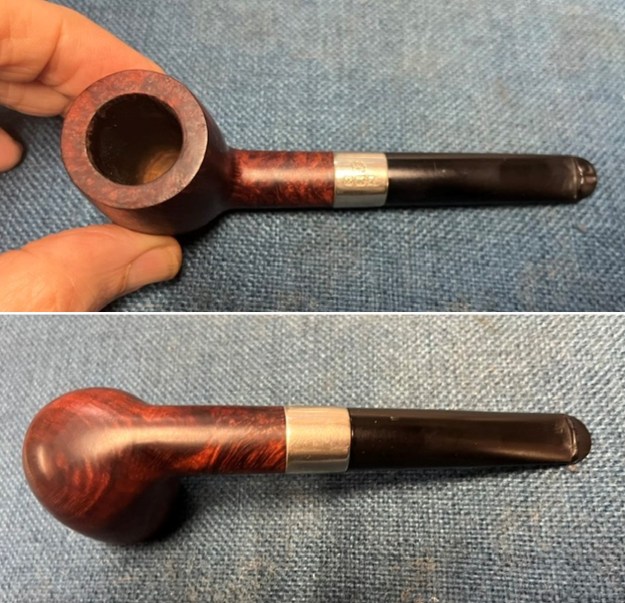
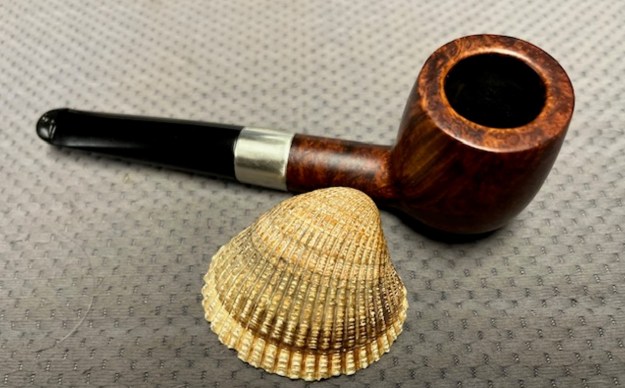
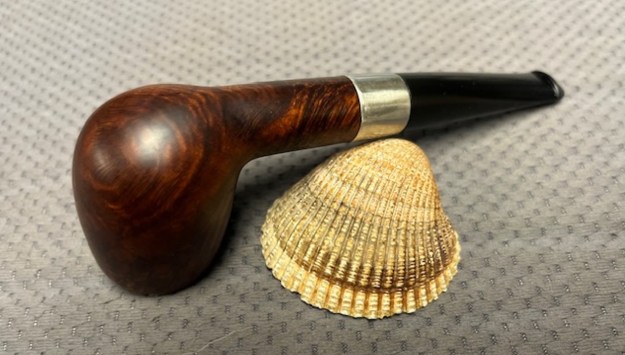
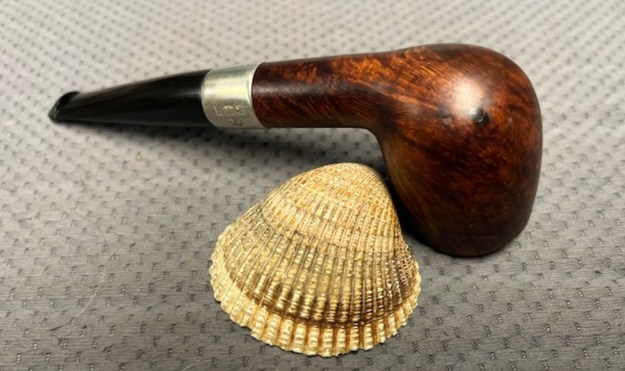
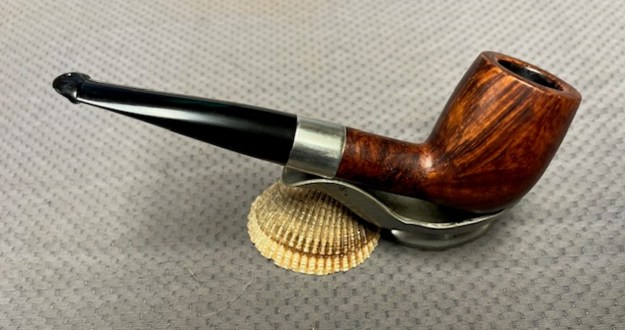
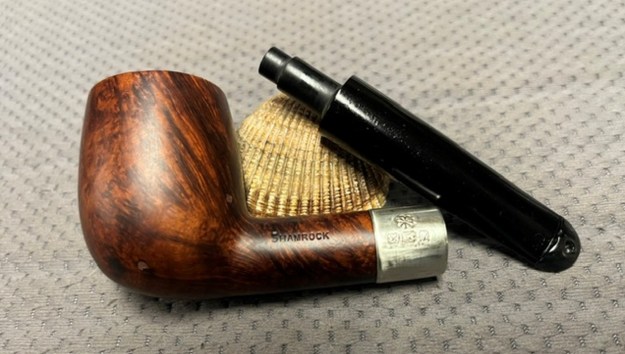
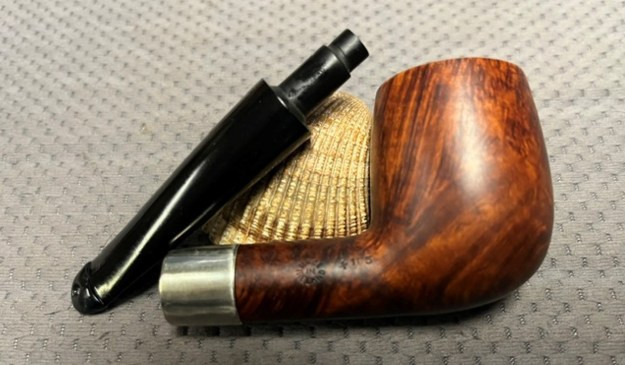
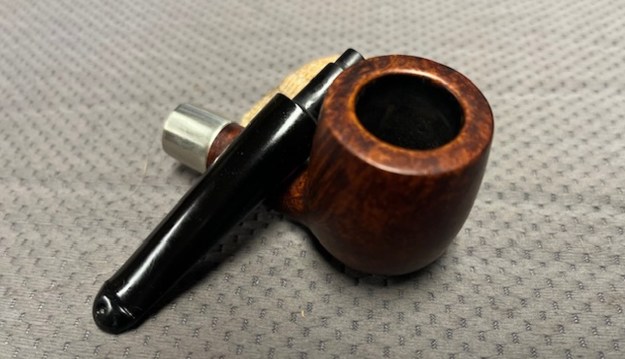
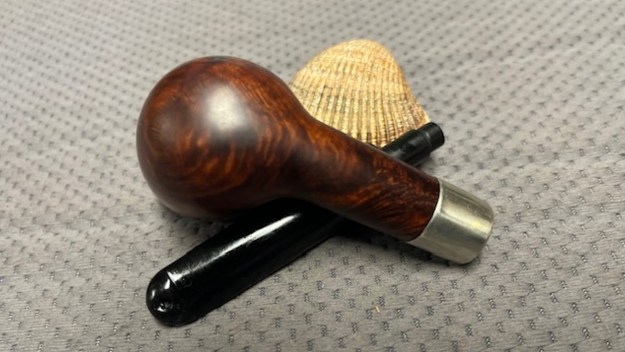
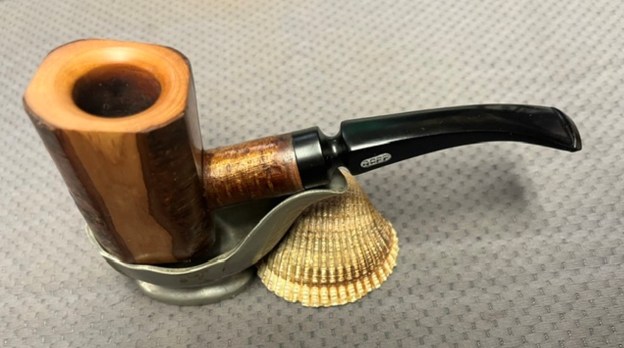
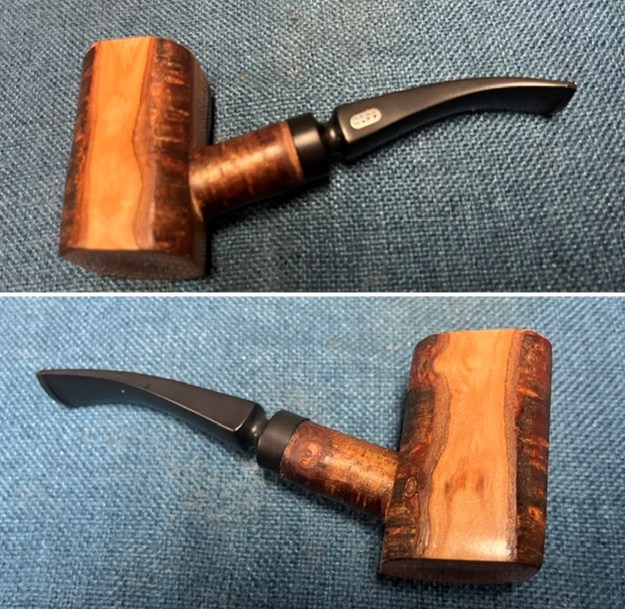
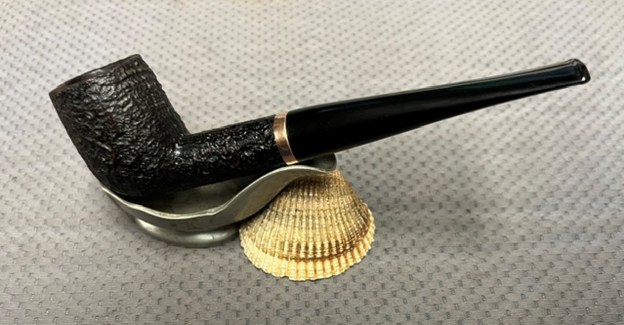
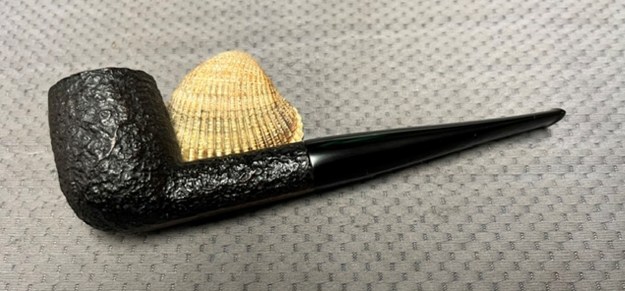
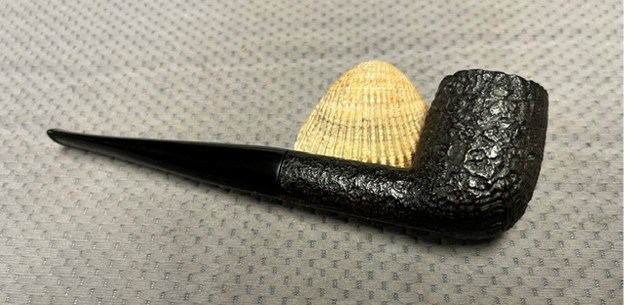
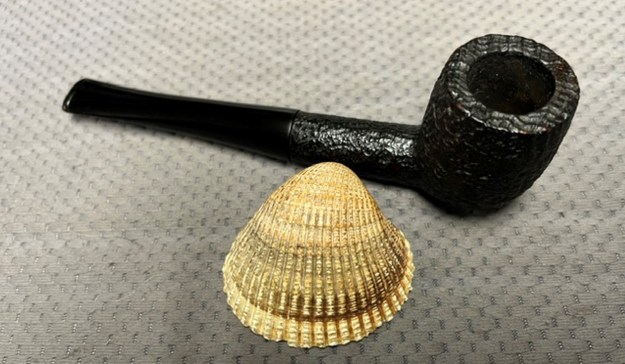
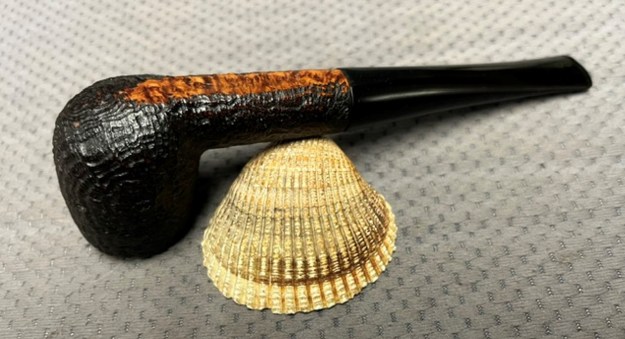
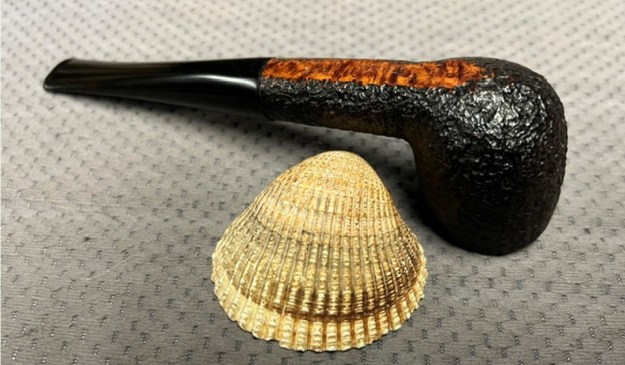
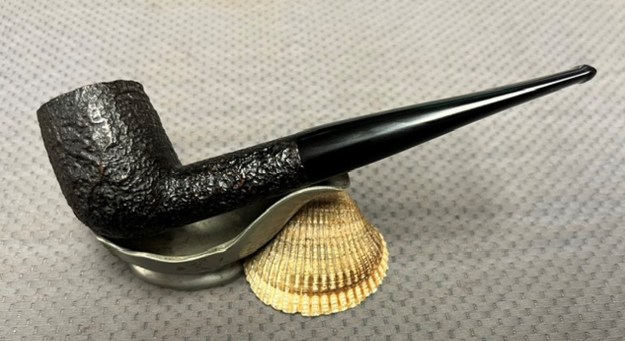
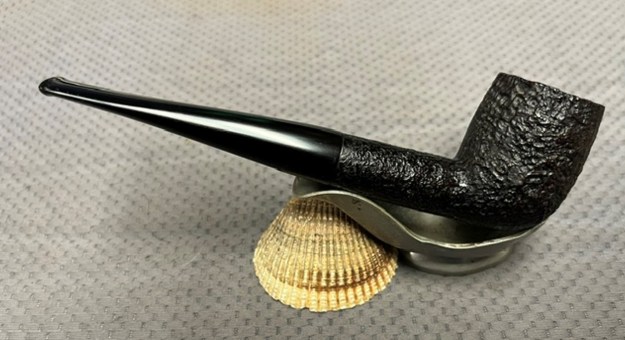
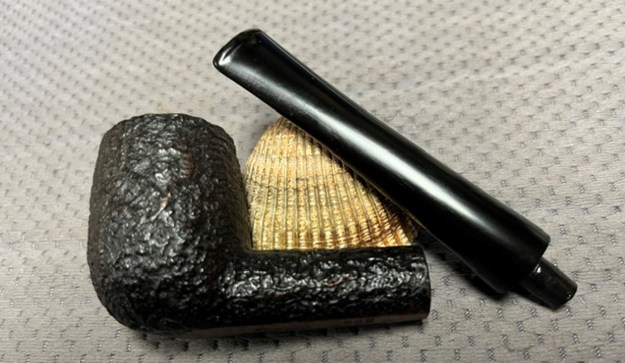
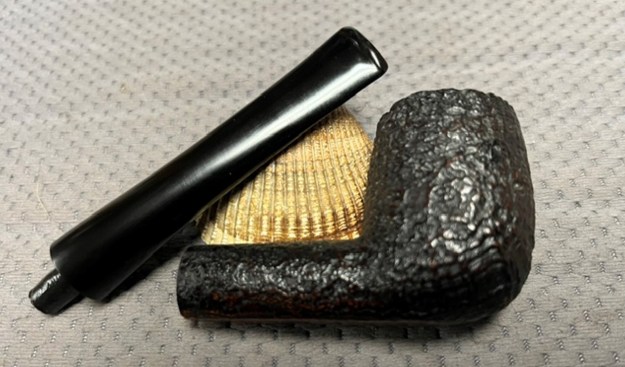
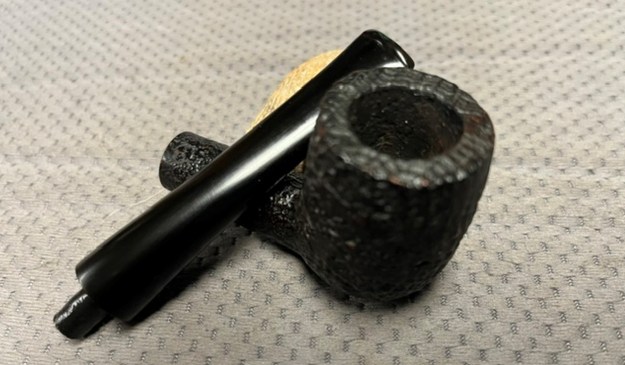
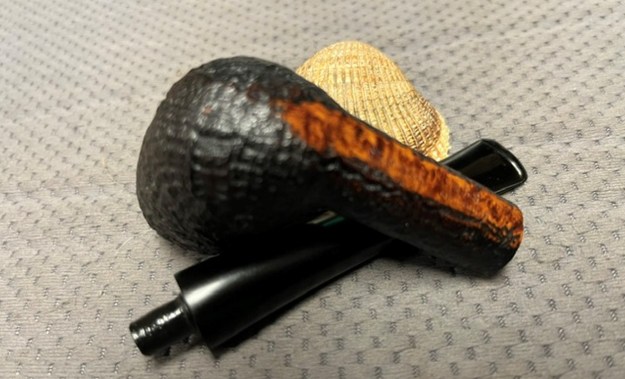
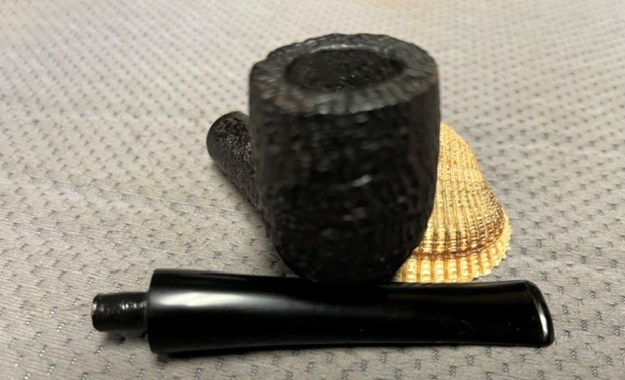
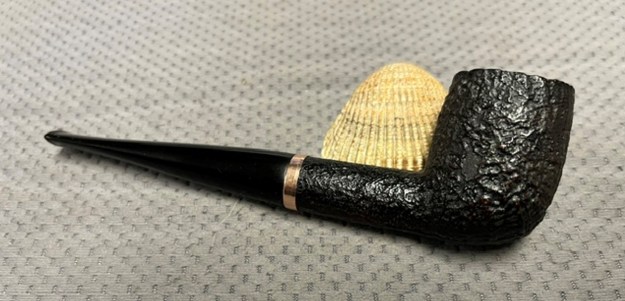
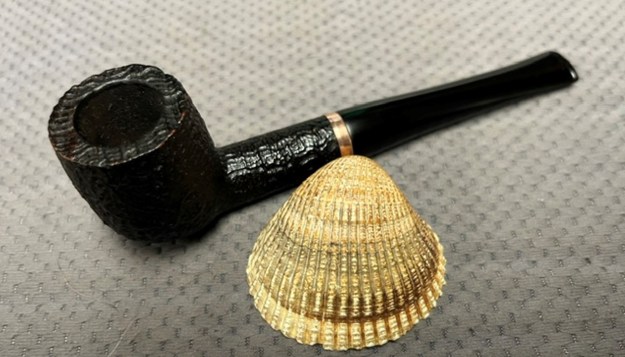
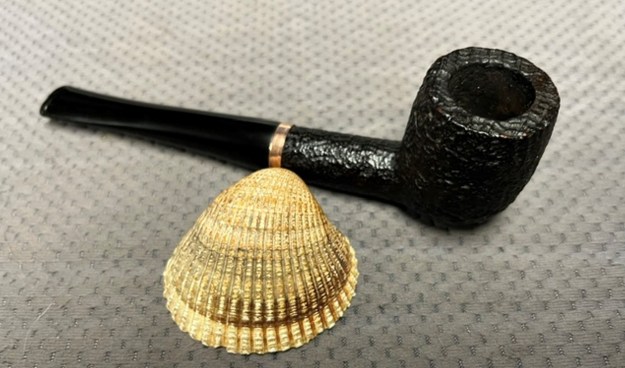
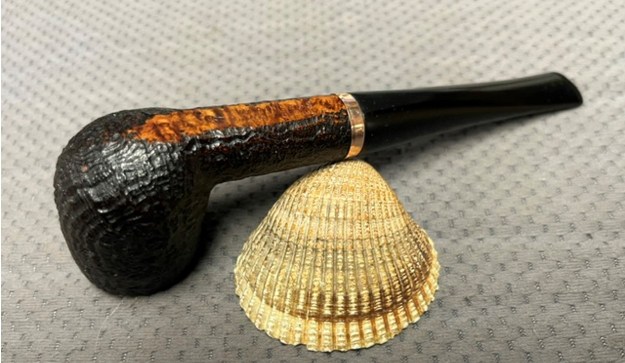
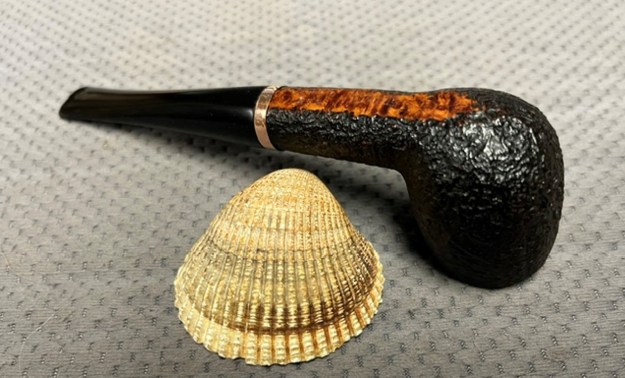
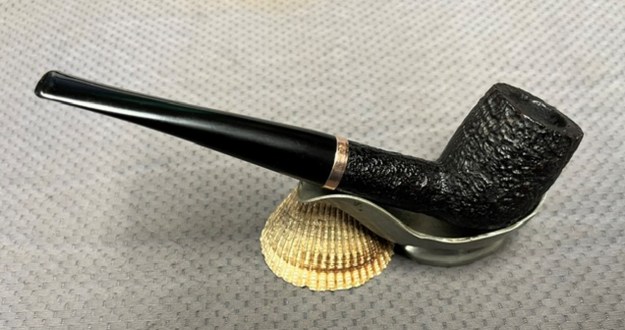
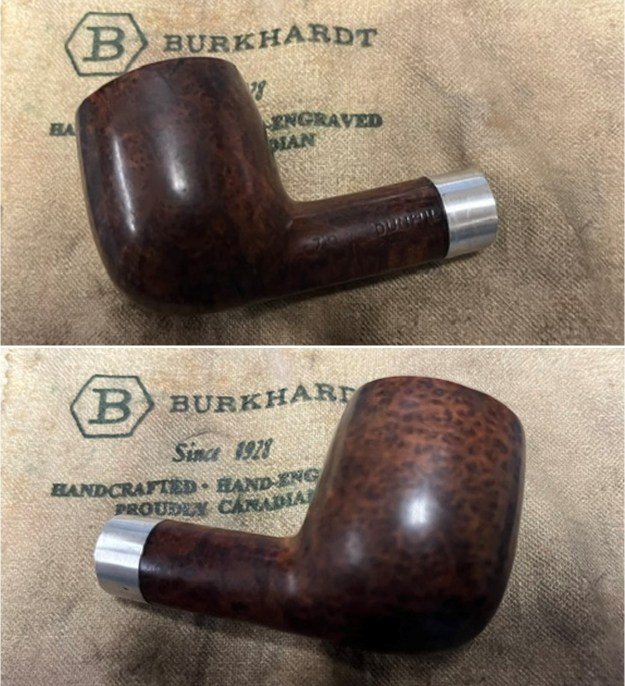
 I the polished vulcanite saddle stem and the 1961 Dunhill Root Briar 710 Billiard bowl with Blue Diamond to polish out the remaining small scratches and raise the shine. I gave the vulcanite stem and the bowl several coats of Carnauba Wax then buffed the pipe with a clean buffing pad to raise the shine. I hand buffed it with a microfiber cloth to deepen the shine. The pipe polished up pretty nicely. This turned out to be a beautiful Dunhill Root Briar 710 Taper Stem Billiard. The finished pipe is shown in the photos below. The dimensions are Length: 5 ¾ inches, Height: 1 ¾ inches, Outside diameter of the bowl: 1 ¼ inches, Chamber diameter: ¾ of an inch. The weight of the pipe is 1.48 ounces/43 grams. Thanks for walking through the restoration with me as I worked this beautiful little Dunhill Root Briar. I will be packing it up with the Charatan’s Make Perfection that I repaired and send it back to Blake later this week. Thanks for following the work on the pipe.