Tag Archives: staining

ANSWERS TO QUESTIONS: How do I strip a finish from a pipe?


Blog by Steve Laug

I have been asked how to strip a finish from a pipe more times than I can tell you. So this Answers to Questions blog is written to talk about how I remove the finish from a pipe. On first glance this seems like a very easy thing to do. You just need to sand the bowl until the finish is removed correct? That answer is certainly describes one method that has been used with success. But there are other ways to do the job that are less intrusive and less damaging to the bowl and shank. When sanding the pipe it is easy to damage the stamping and modify the shape. Both of these are undesirable in restored pipe. So how do I go about doing the job? I want to take time to present the options for removing finishes. I will differentiate between smooth, rusticated and sandblast bowls in the process of explaining each method. (I know that opinion varies on each of these coats and I only speak from my personal tastes and experience.)

Removing stain from the briar/wood bowl.
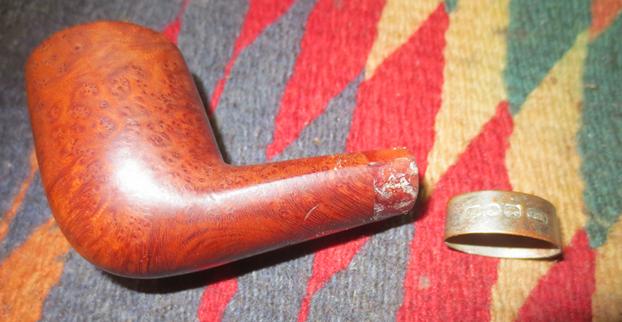
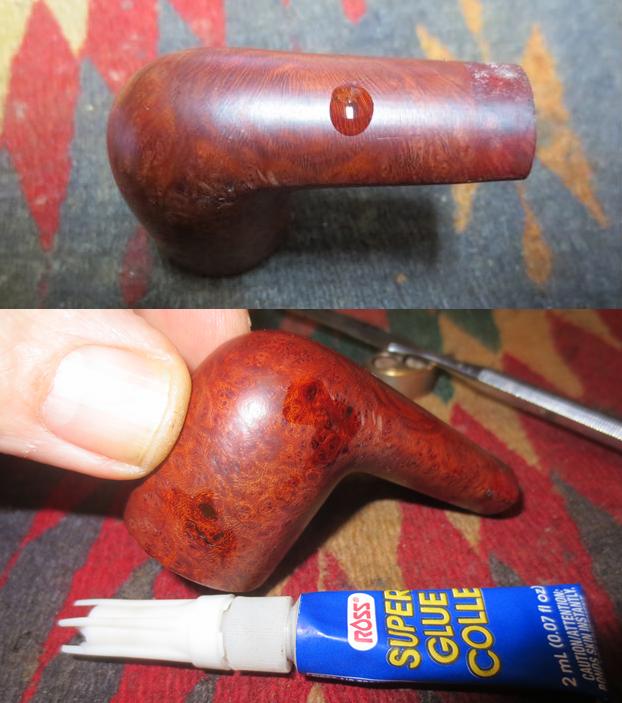
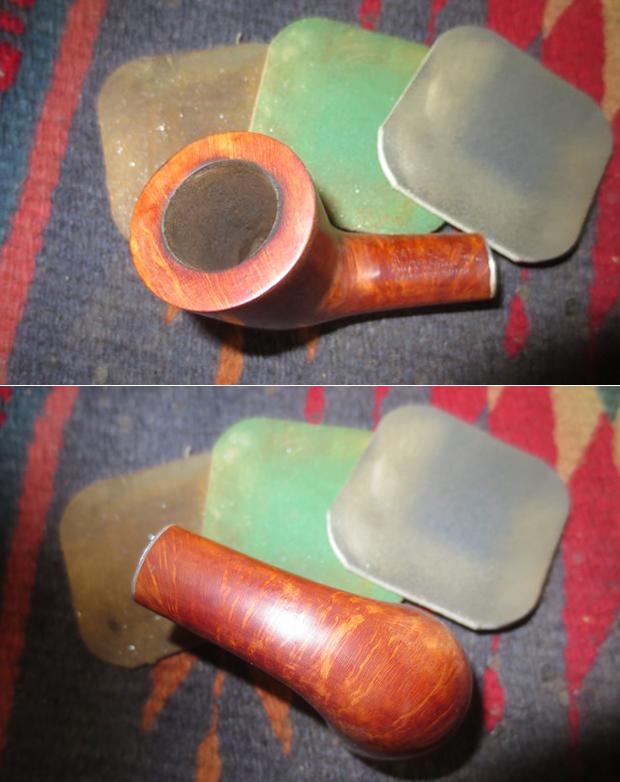
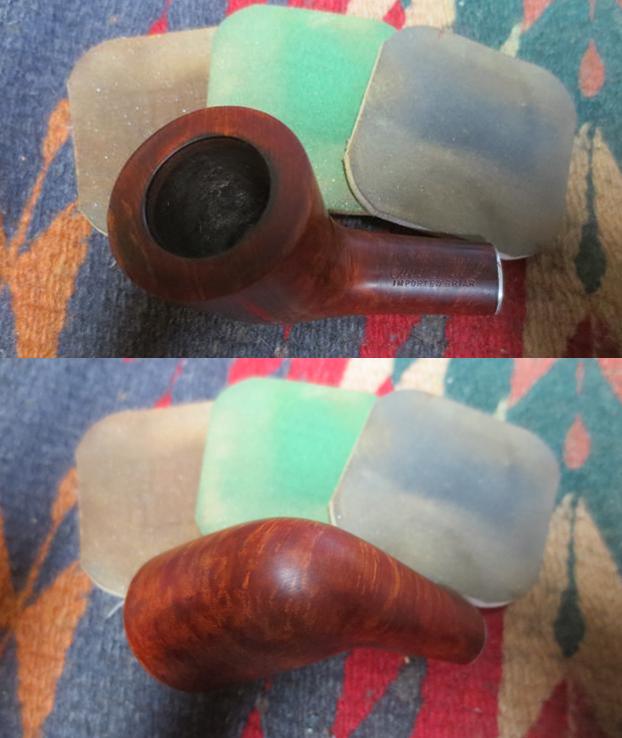
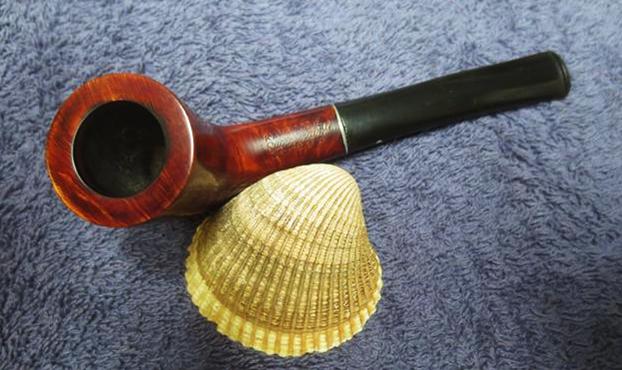
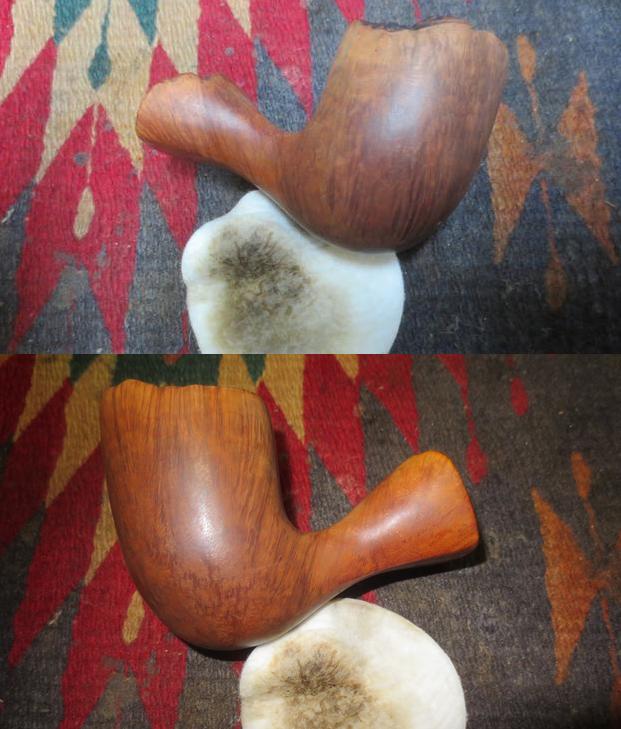
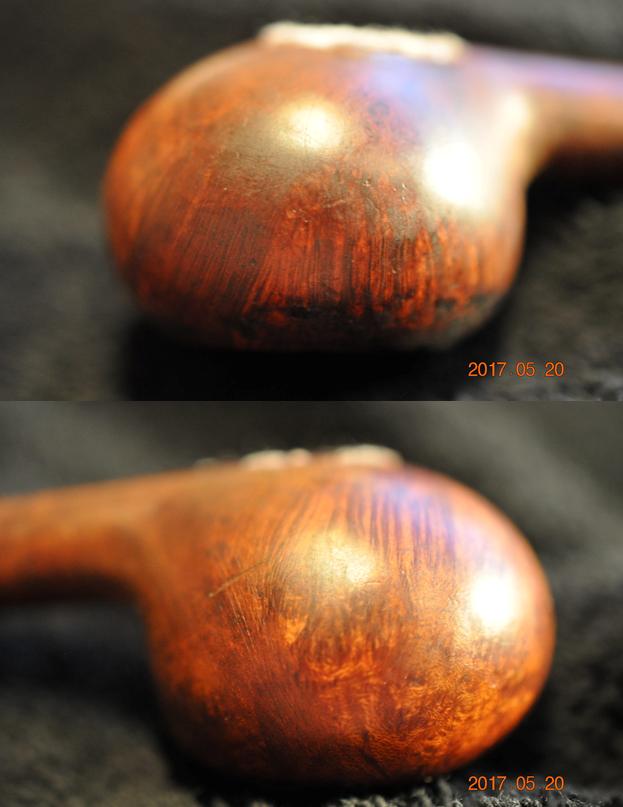
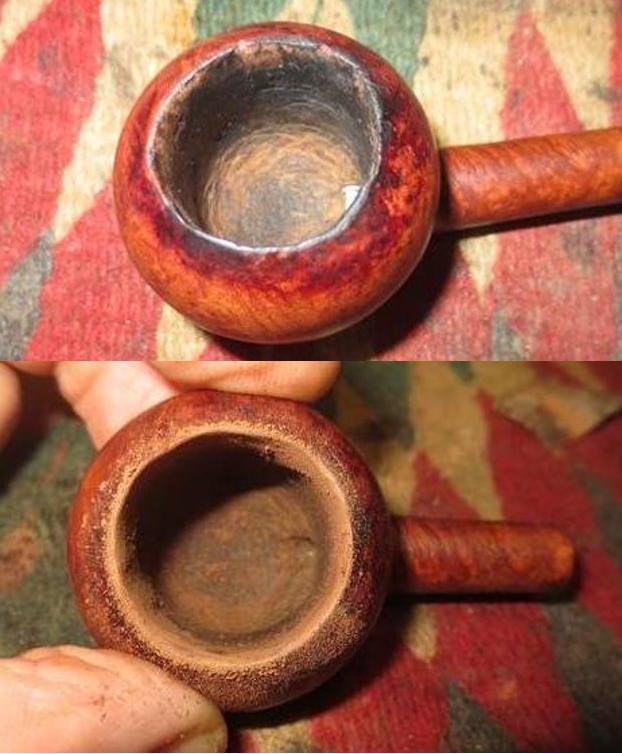
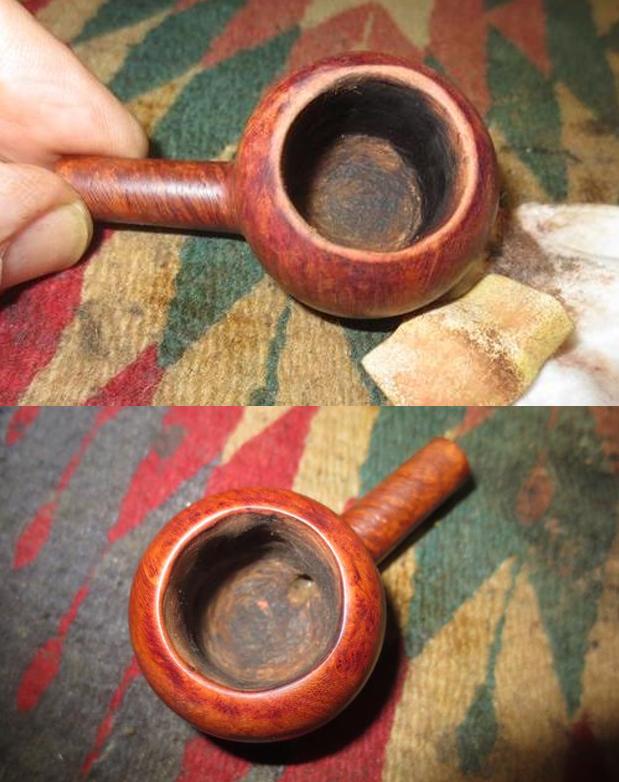
1. Removing stain from a smooth finish is actually quite straight forward. You need to understand that once you remove the stain you may well reveal more issues – fills, flaws and less than perfect briar. You have to be okay with taking that chance because you never know what you will find under the stain. To carefully observe what is underneath the stain coat I wipe the bowl down with isopropyl alcohol. I find that the alcohol makes the stain more transparent and blends the colours together in a way that is much more conducive to seeing the grain. Wiping off the stain may well reveal fills underneath the stain. They will need to be dealt with but that does not bother me too much. I really like a more transparent stain so it is worth the extra effort.

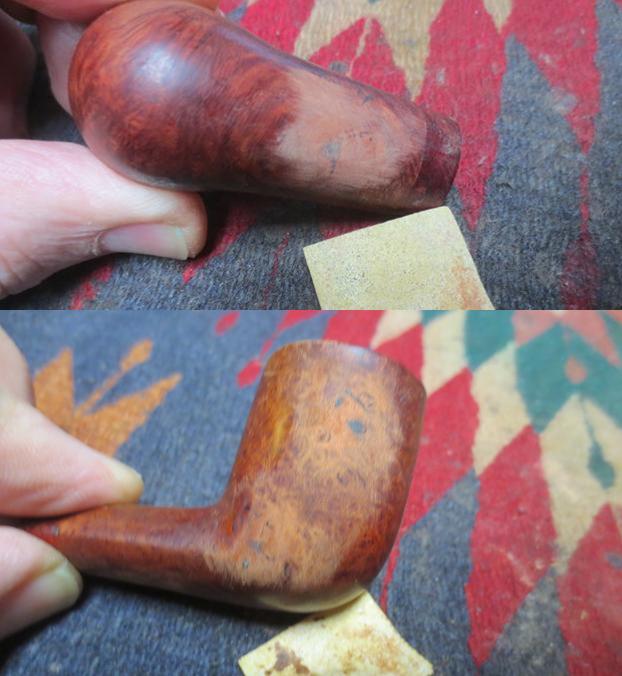
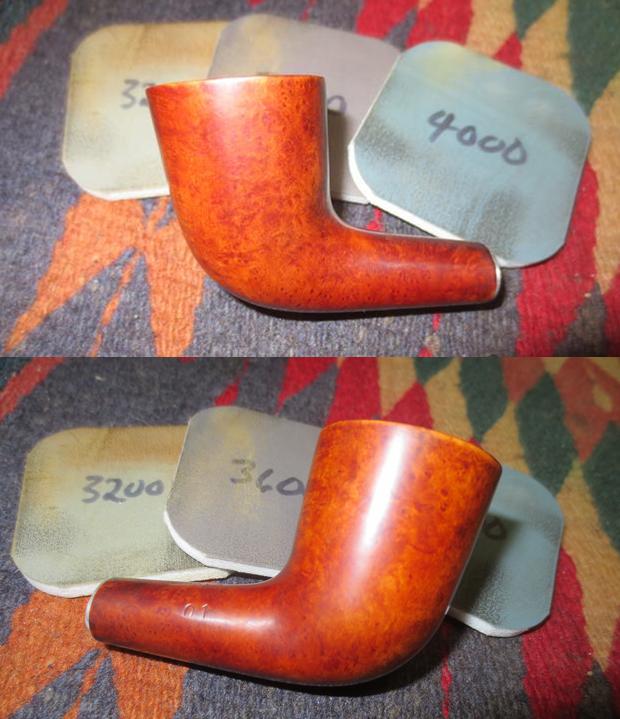
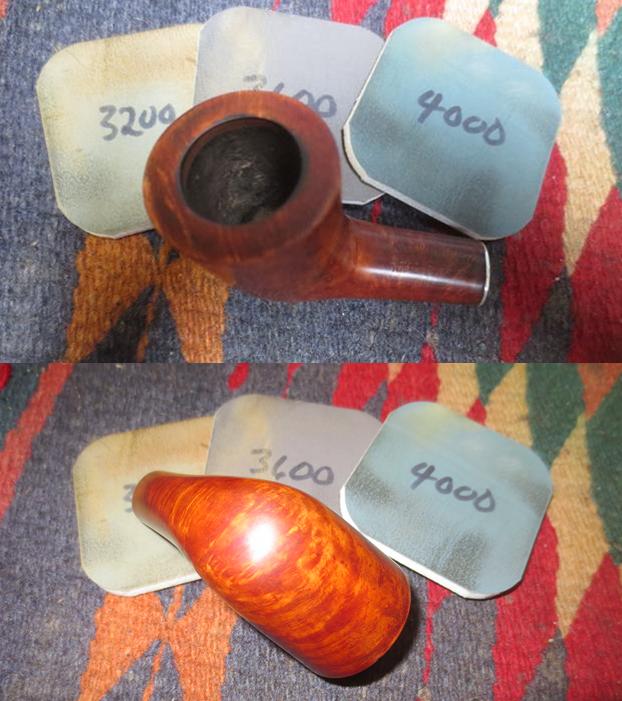
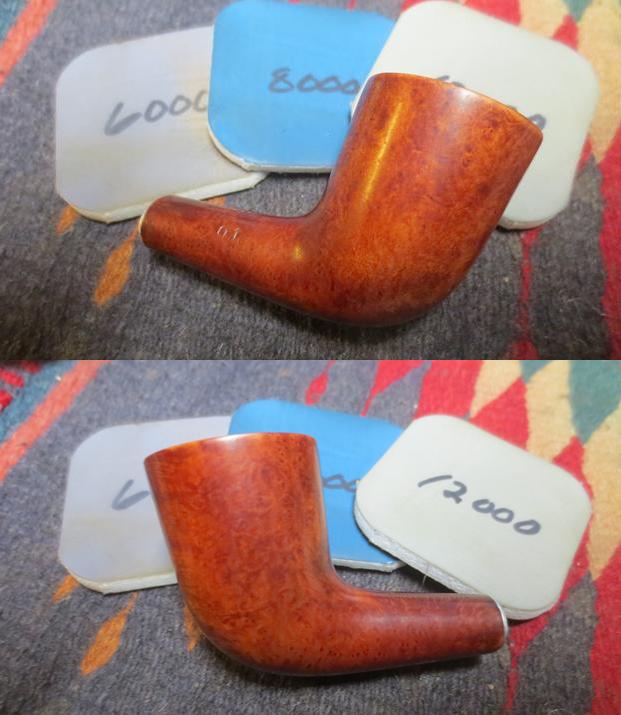
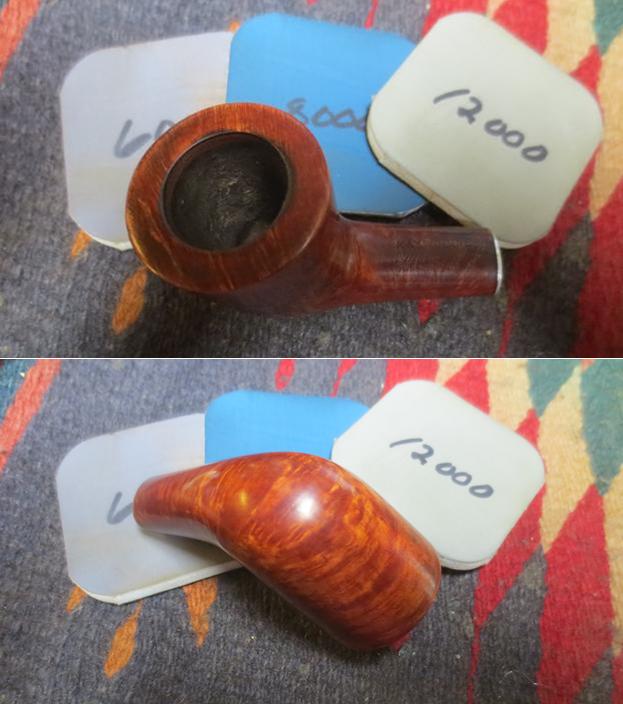
If I want to strip the stain from the bowl I wipe it down with acetone. Some have used fingernail polish remover which contains acetone and this works very well. However, I like to use a product that contains 100% acetone that I buy in the nail polish removal area of my local pharmacy. Acetone strips the finish back to almost bare briar. Repeating the process will bring more and more of the stain to the surface of the briar. Once the pipe is clean it can be restained and polished with micromesh sanding pads and/or a buffing wheel.

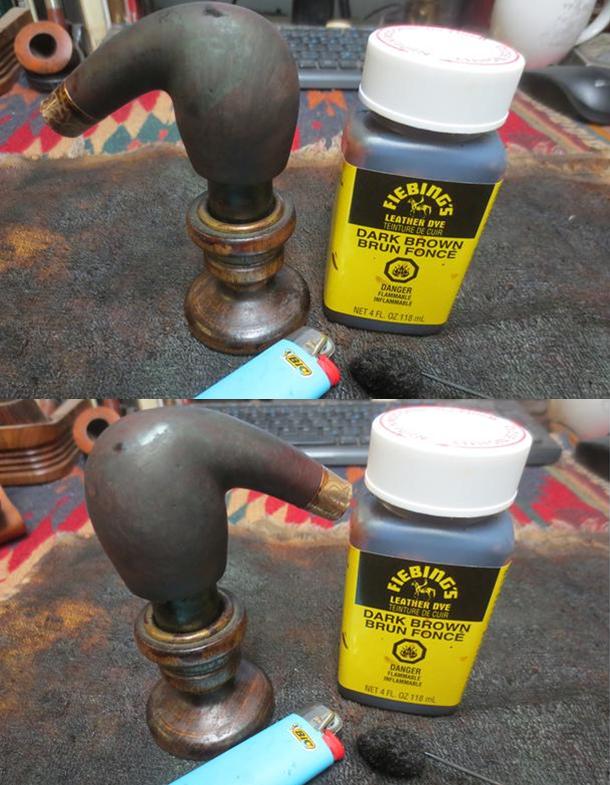
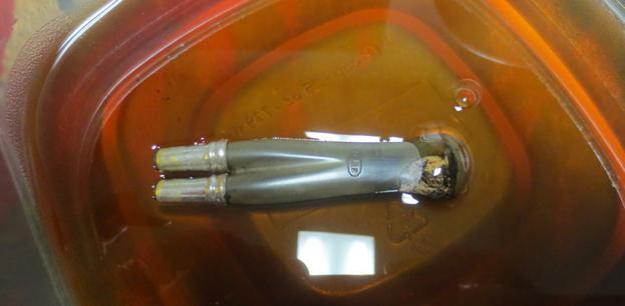
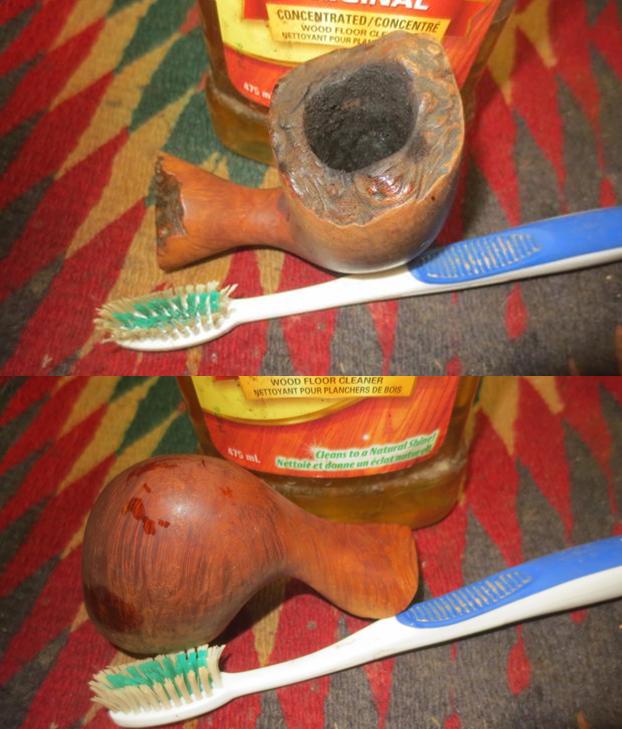
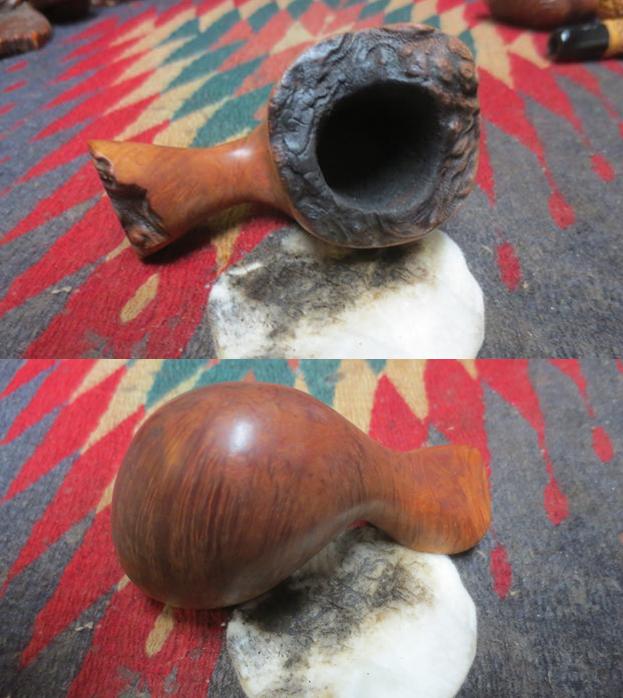
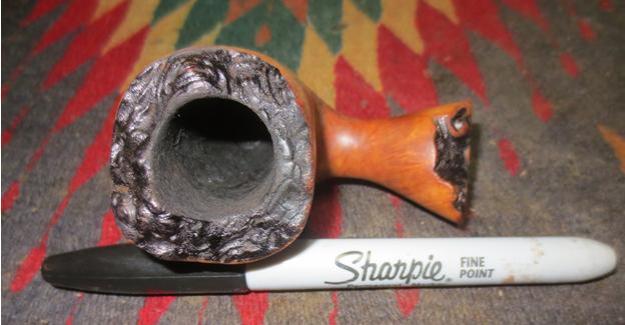
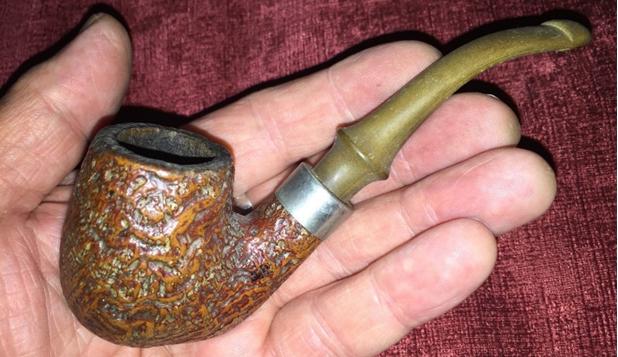
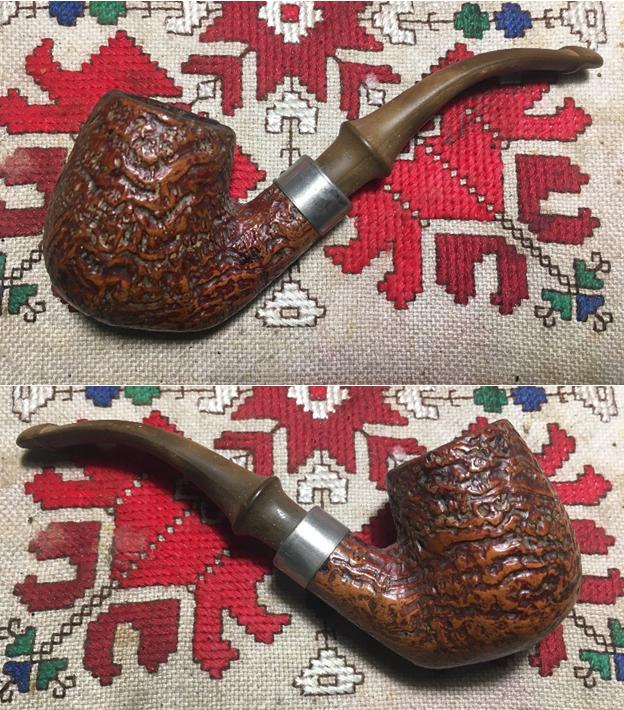
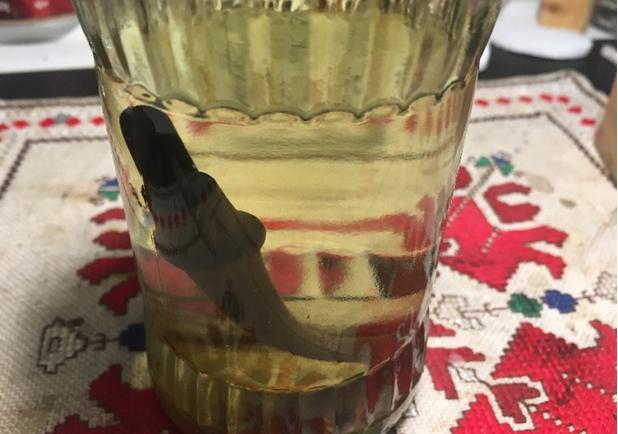
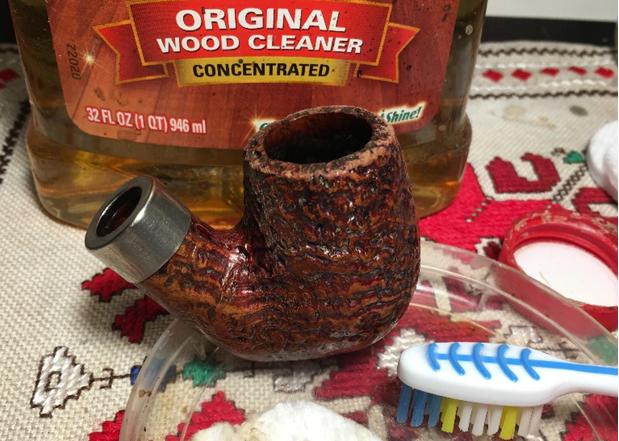
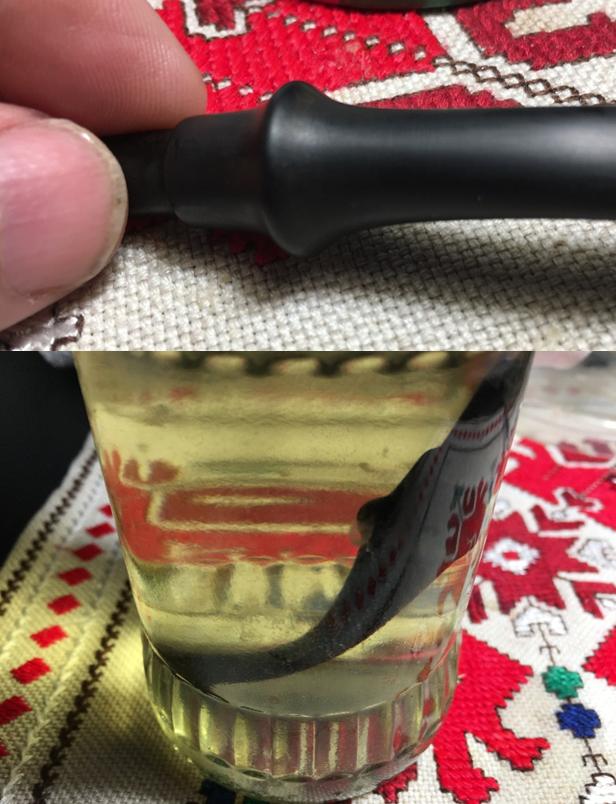
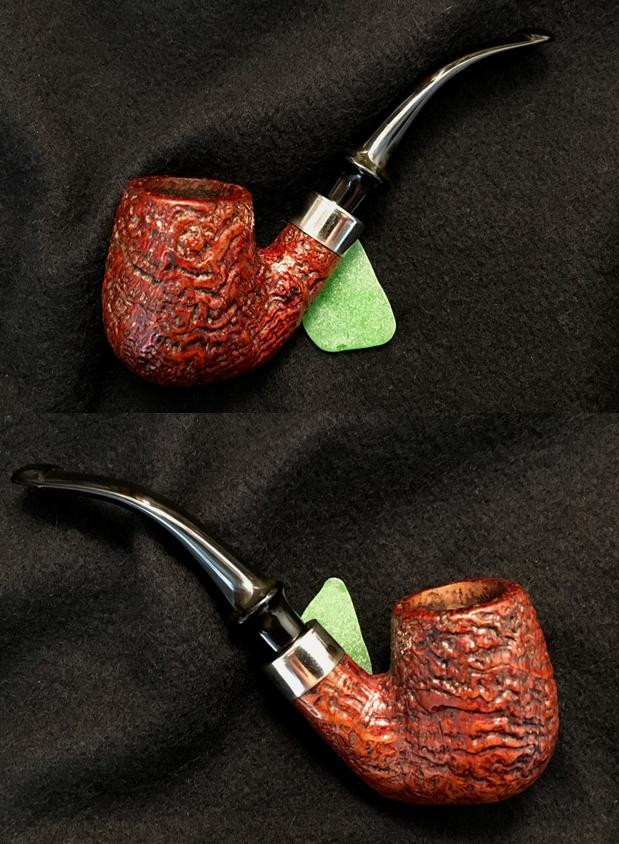
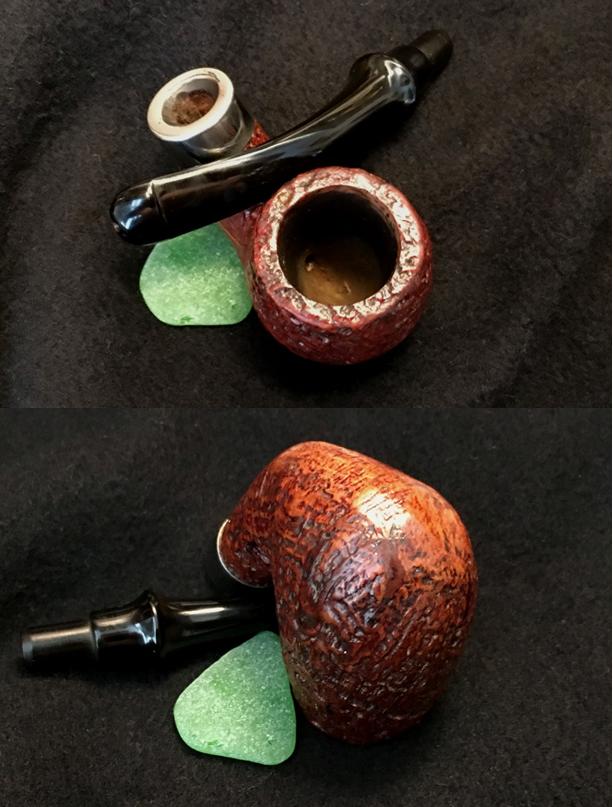
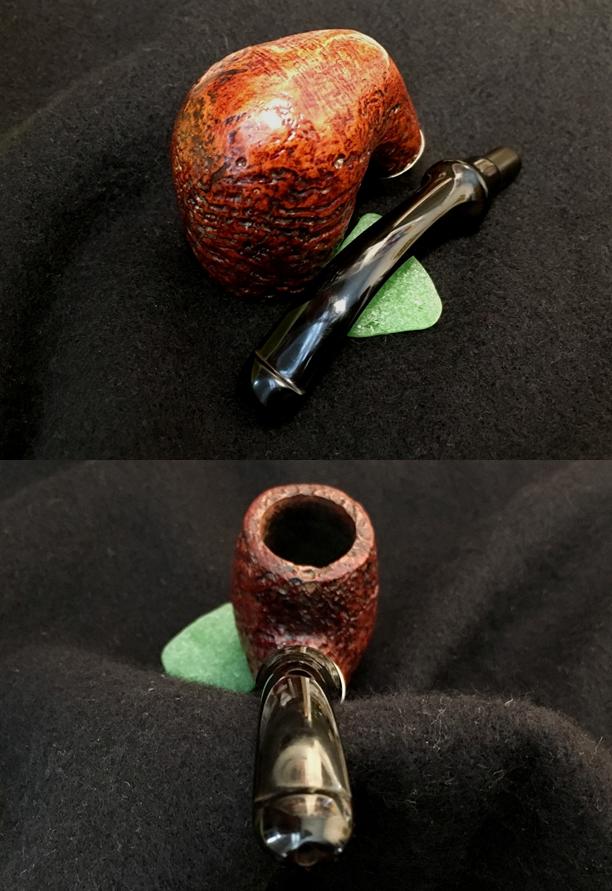
2. Removing stain from a rusticated or sandblast finish is different from removing it from a smooth finish. Alcohol works very well but needs to be almost washed over the bowl. I have used an alcohol bath to remove the finish. I fill an airtight container with isopropyl alcohol and drop the bowl into the bath overnight or at least for 3-4 hours. I find that it removes the finish very well from both sandblast and rusticated bowls. If you are reticent to soak the bowl, remember the isopropyl alcohol I use is 99% alcohol and evaporates very quickly. It does not stay in the briar. Besides that, you will be thoroughly cleaning the pipe afterwards.

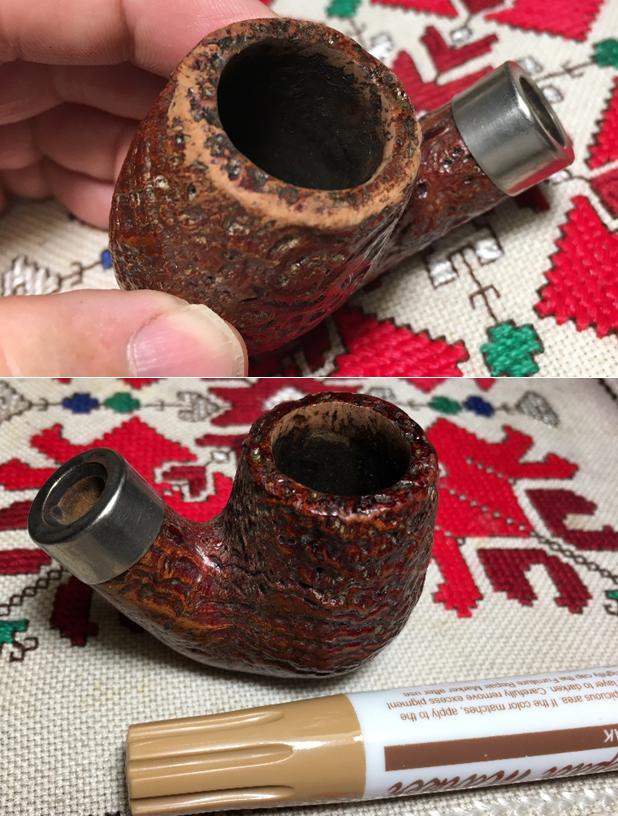
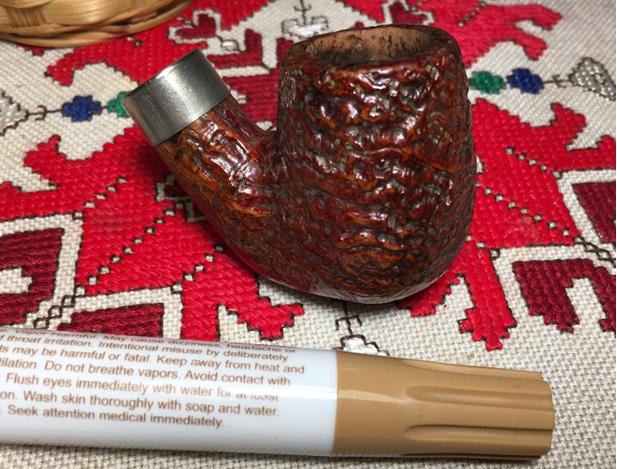
You can also wipe the outside of the bowl down with very wet cotton pads that are almost dripping alcohol. It has the same effect. Remember you want the alcohol to reach down into the grooves, nooks and crannies of the finish. An interesting effect can be obtained by merely wiping down the high spots on the finish and leave the depths untouched. You can then restain it with a contrasting colour and get some beautiful finishes.

Removing shellac from the briar bowl.
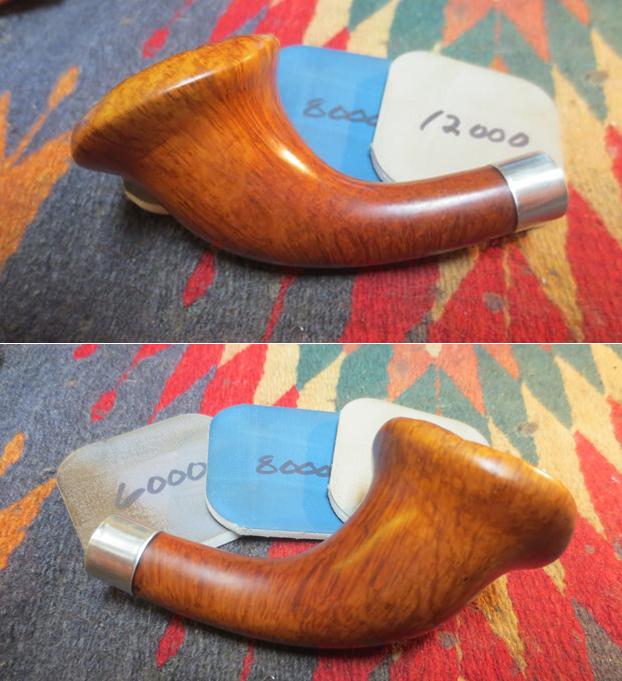
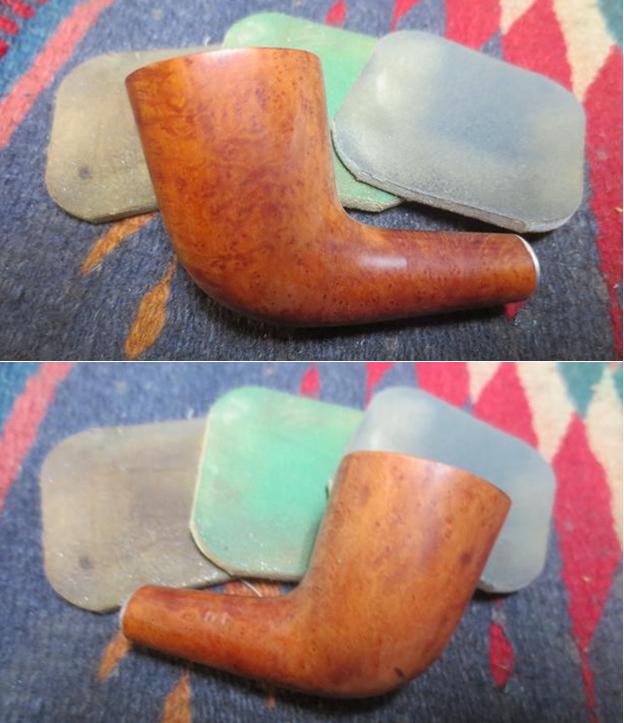
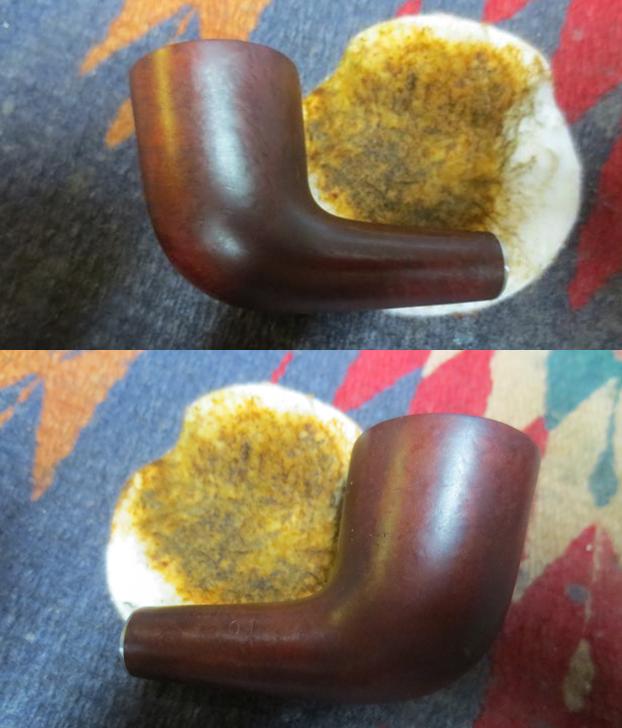
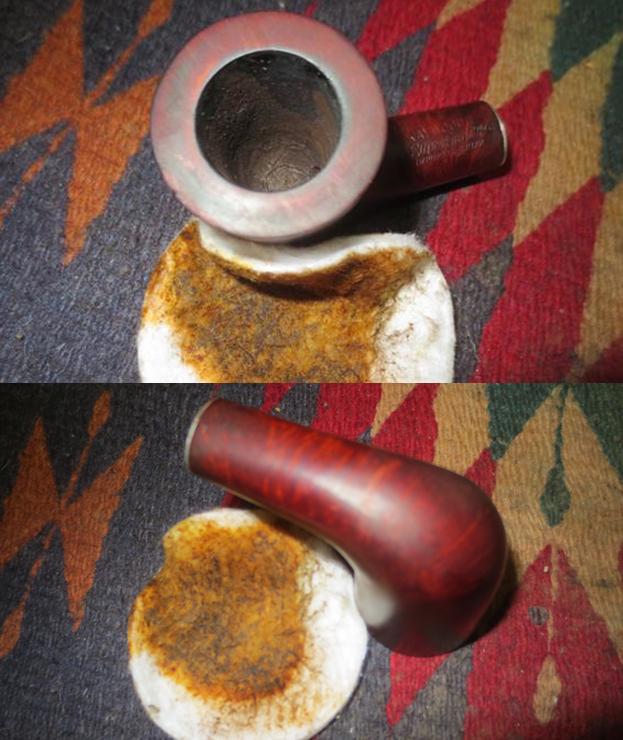
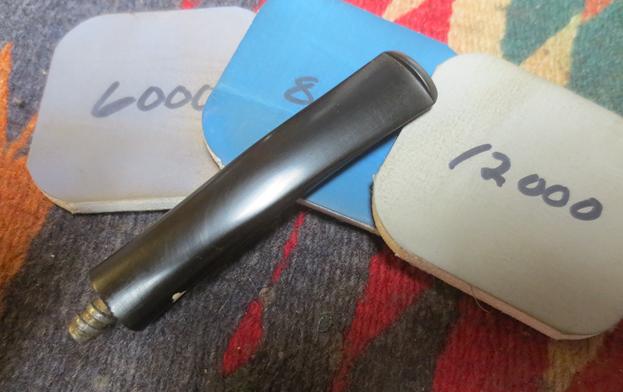
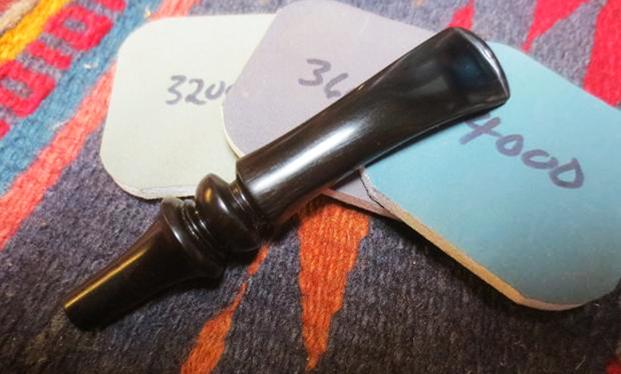
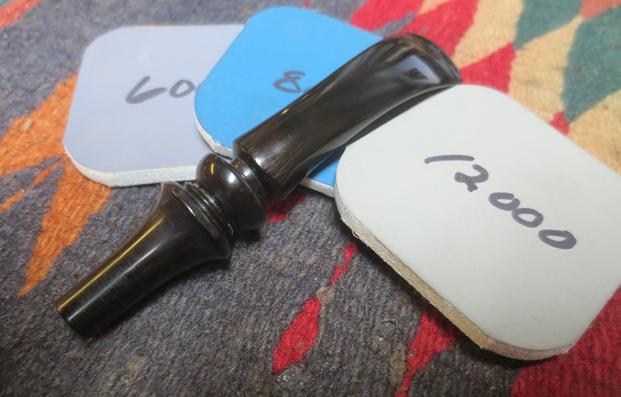
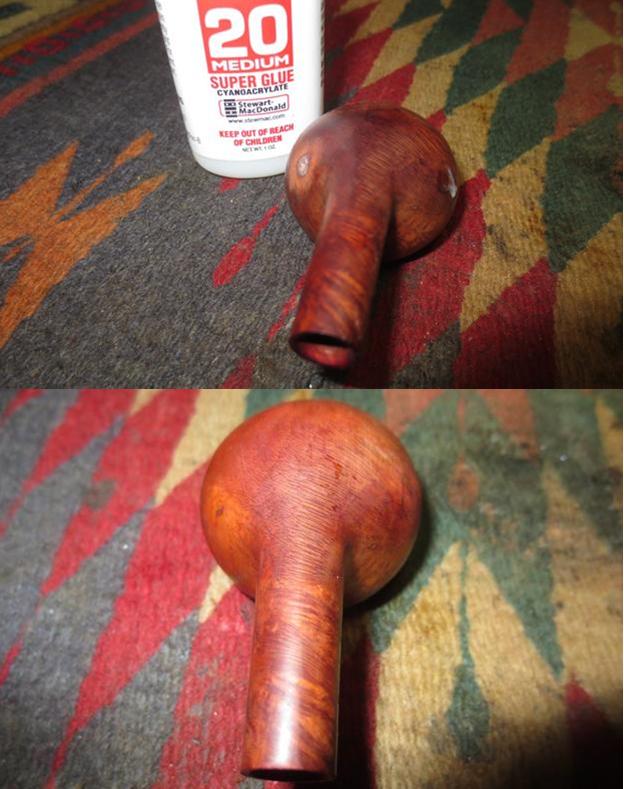
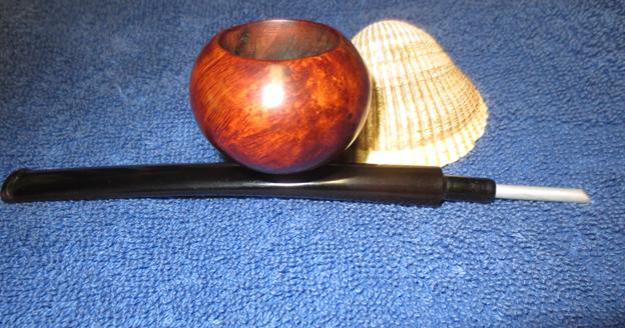
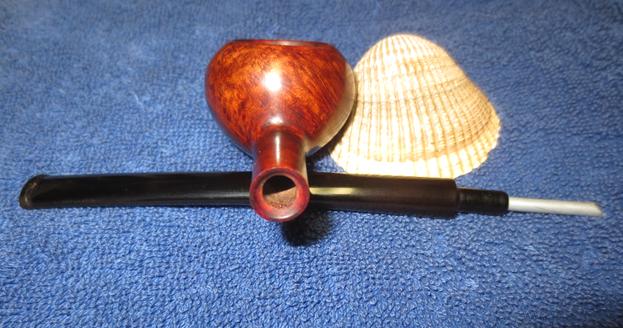
1. Shellac is a shiny top coat that is often applied by a pipe maker or manufacturer to give a pipe a permanent shine. It is much easier to remove than the other topcoats that follow. On a smooth finish, it is very simple. Wipe the bowl down with isopropyl alcohol on a cotton pad. I repeat until the shine is dull once the bowl dries. I touch up the shiny spots with more alcohol. If you want to restain the pipe afterwards then you can wipe it down with acetone instead of alcohol. Both do the job but acetone also strips more of stain coat than alcohol. I finish the pipe with several coats of carnauba wax buffed to a shine with a clean buffing pad.

2. Removing shellac from a rusticated or sandblast finish is done in exactly the same way as removing stain from this finish spelled out above. I use either an alcohol bath or a very wet cloth of alcohol and wipe the finish down. Both work very well as they work deep in the grooves and nooks and crannies of the finish. The idea for me is to remove the shiny coat because to be honest I really don’t like it. I have had it come off on my hands when the pipe heats up. Therefore, the shellac coat has to go.

Removing varnish from the briar bowl.
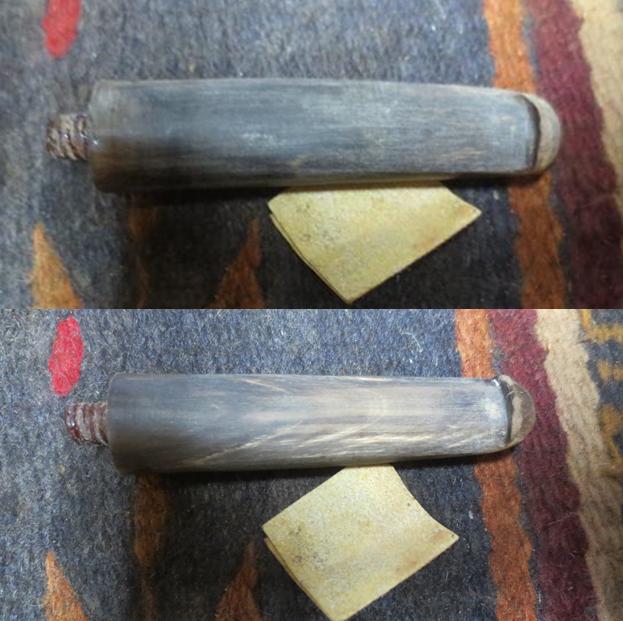
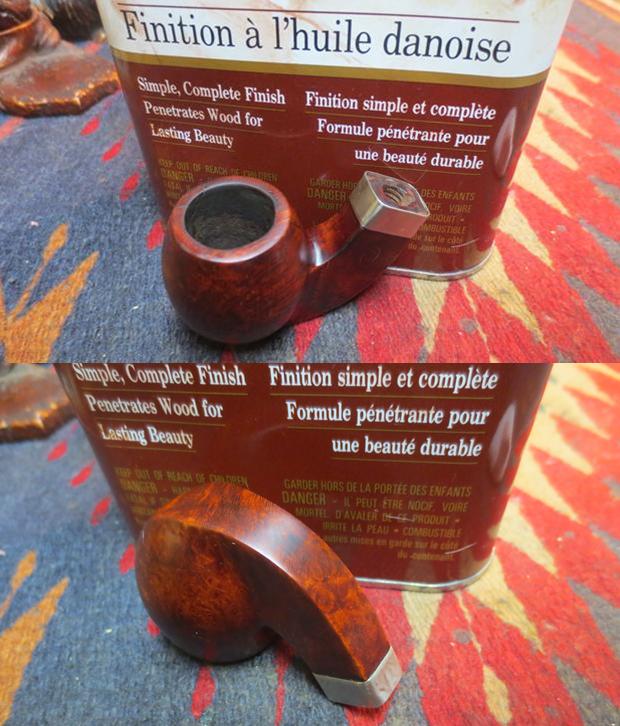
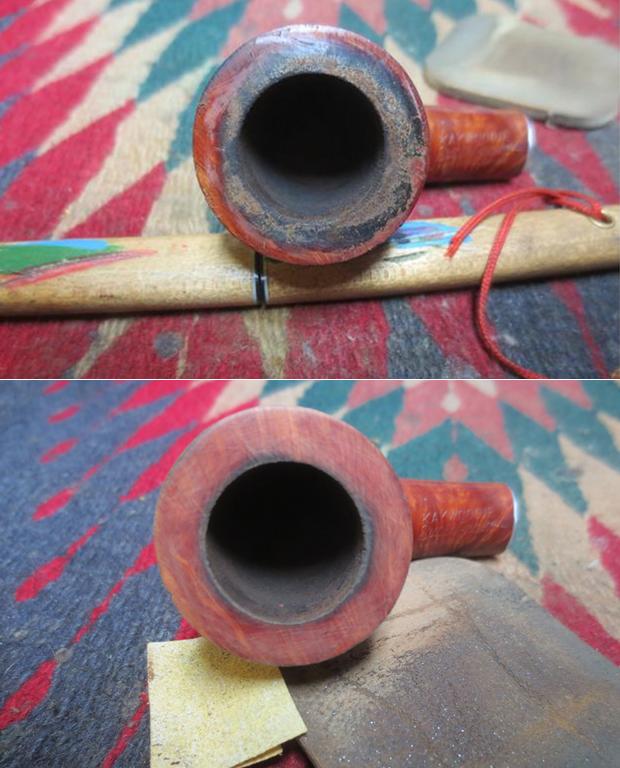
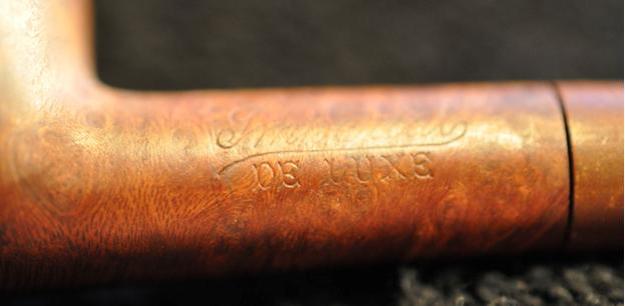
1. Varnish is more resistant to alcohol than the other top coats I have talked about so far. For smooth finished pipes, I tend to use acetone on cotton pads to remove the varnish finish off. It takes some scrubbing to remove it but it will come off. I scrub the bowl until there is no more shine once it dries. Check carefully in the junction of the bowl and shank and in the stamping on the shank as the varnish in those spots can be very stubborn. Wipe down the end of the shank as it is often varnished. I don’t worry about using acetone on the exterior of a pipe as it also evaporates very quickly into the air leaving the bowl dry. Once the finish is flat, it can be waxed and buffed.

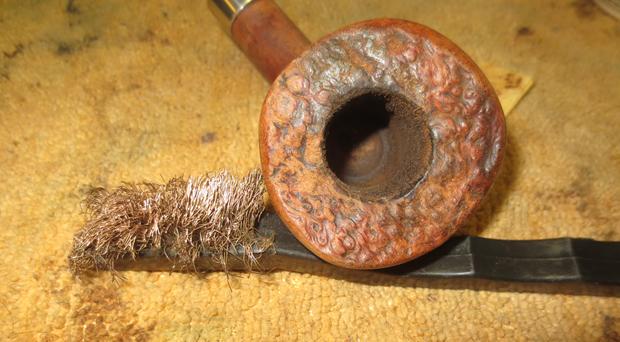
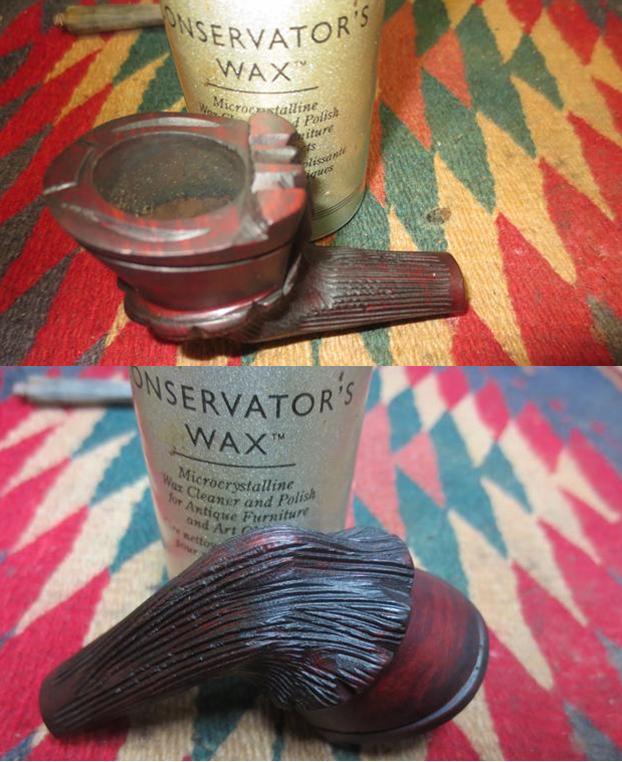
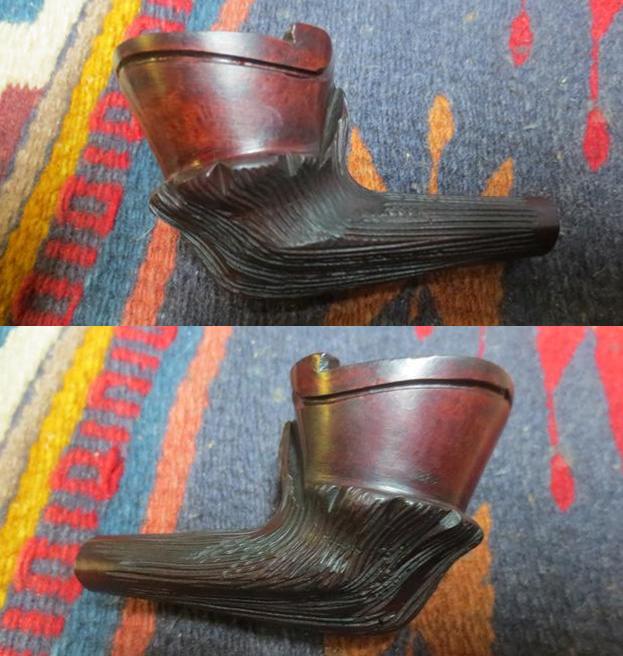
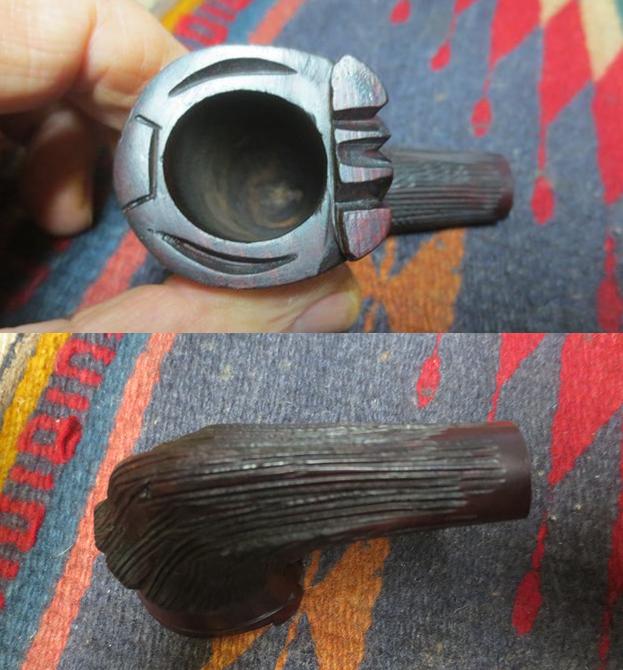
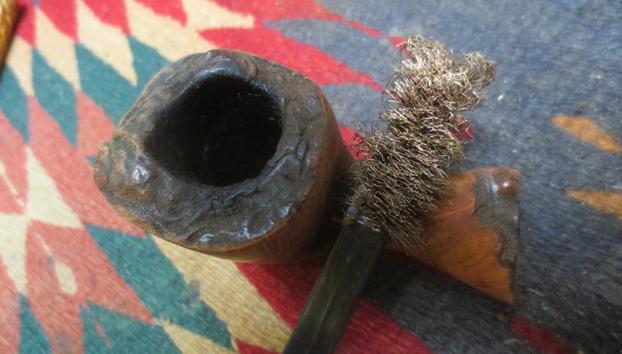
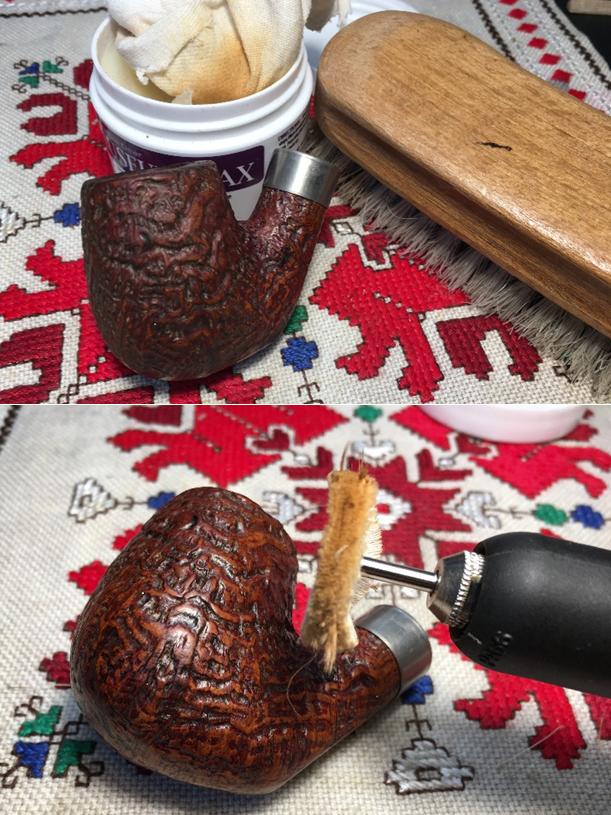
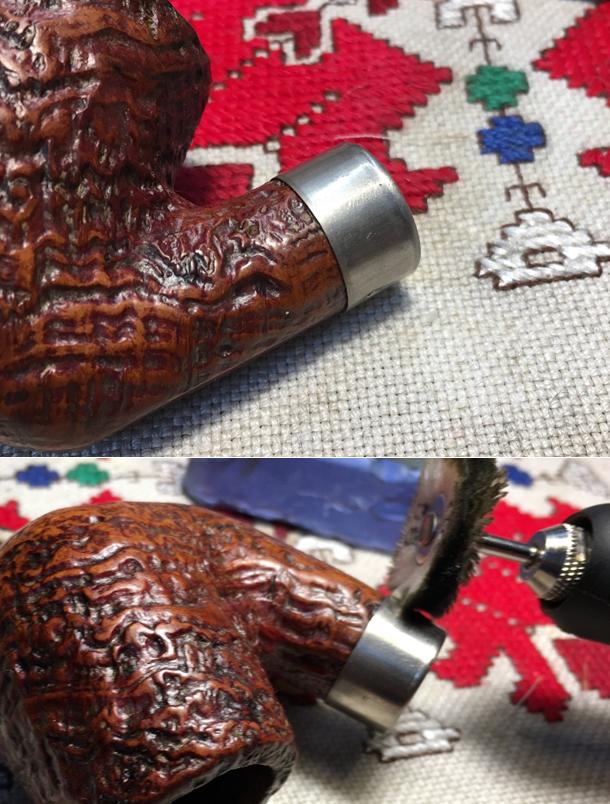
2. Removing varnish from a rusticated or sandblast finish is harder. I use a brass bristle wire brush (it has soft bristles and is available in auto parts stores or Walmart type stores). I work over the entire bowl, carefully working around the stamping and any smooth portions. I find that the soft brass bristles loosen the varnish in the grooves and crevices of the finish. I wipe it down afterwards with acetone on a cotton pad making sure to get the acetone deep into the grooves. Sometimes I have to repeat the process to remove all of the ‘offending’ varnish. Once it is gone I wax the bowl with Conservator’s Wax and polish it with a horsehair shoe brush. I find the method works well for me.

Removing lacquer from the briar bowl.
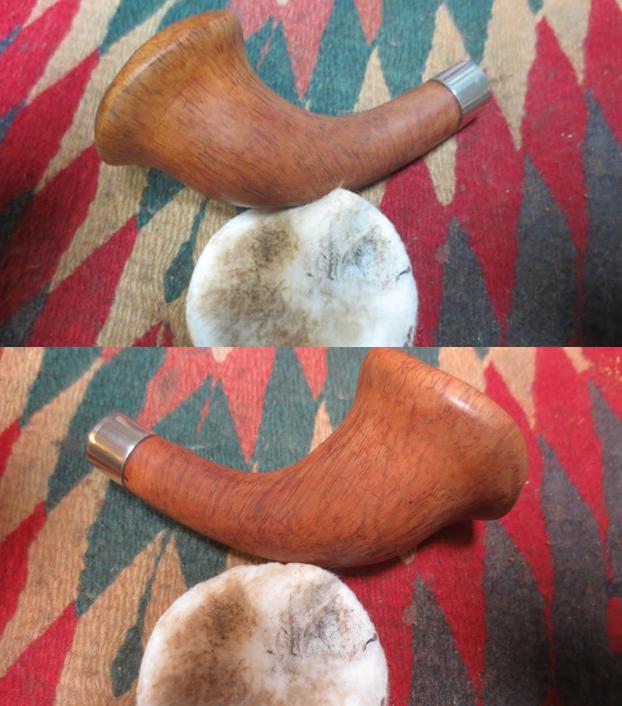
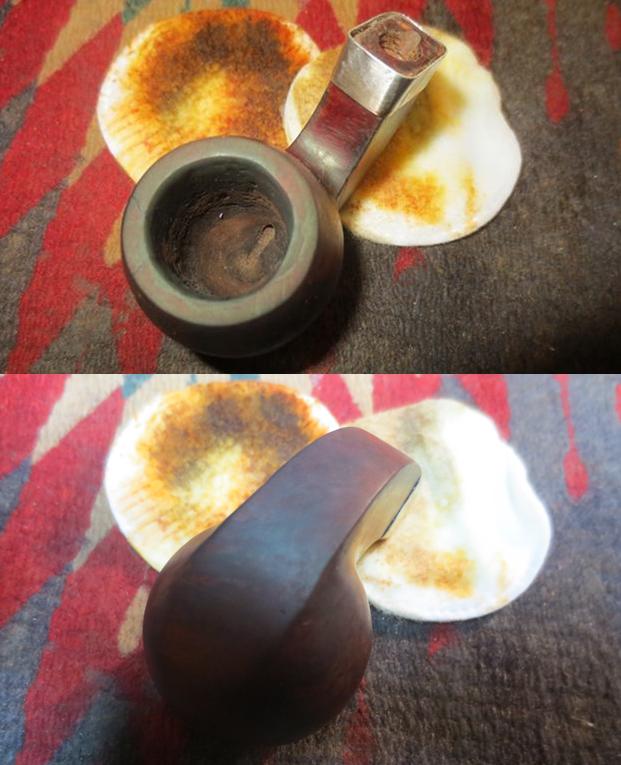
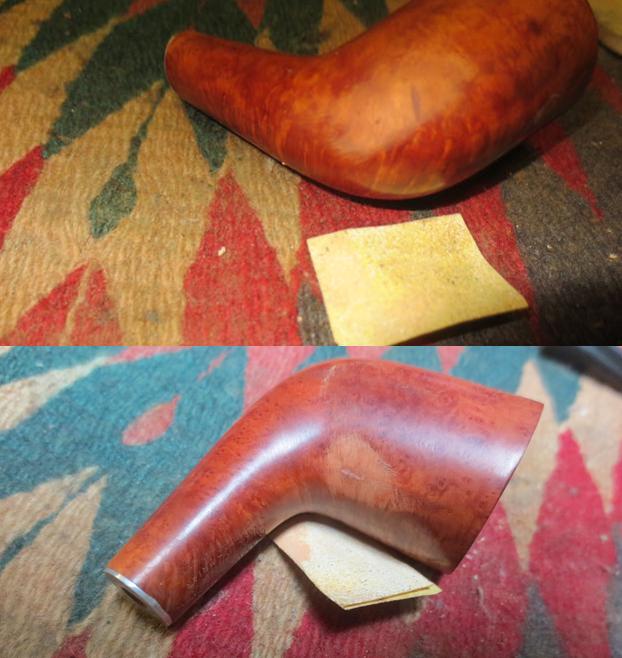
1. Removing lacquer from a smooth finished bowl is quite straightforward. I have removed it quite easily with both lacquer thinner and with acetone. It comes off quite easily and without a lot of fuss. I have found that lacquer has to be scrubbed slightly harder than the varnish coat because of its resilience but it does come off. I use cotton pads to apply the thinner or acetone to the finish and scrub it until it is gone. I find that the makeup removal pads available at most drug stores or pharmacy work really well. They are white so the finish shows up well on the pad as it is removed.

2. Removing it from a rusticated or sandblast finish is harder. It is like the process I use to remove varnish coats. I begin by using a brass bristle wire brush (it has soft bristles and is available in auto parts stores or Walmart type stores) to work over the finish and try to loosen things. I work carefully around the stamping and any smooth portions. The soft brass bristles loosen the lacquer in the grooves and crevices of the finish as I methodically work them over with the brush. I wipe it down afterwards with acetone on a cotton pad making sure to get the acetone deep into the grooves. Often I repeat the process to remove all of the lacquer from the bowl. Afterwards I wax the bowl with Conservator’s Wax and polish it with a horsehair shoe brush. This method has worked over time as I have fine tuned it.

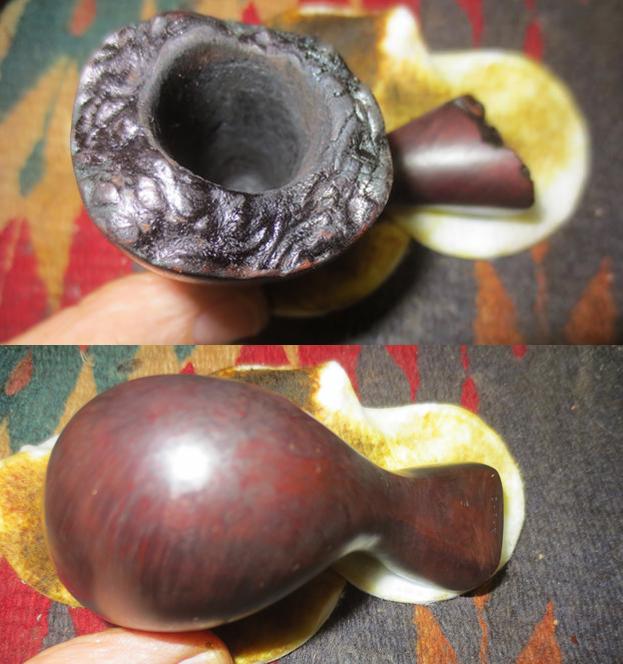
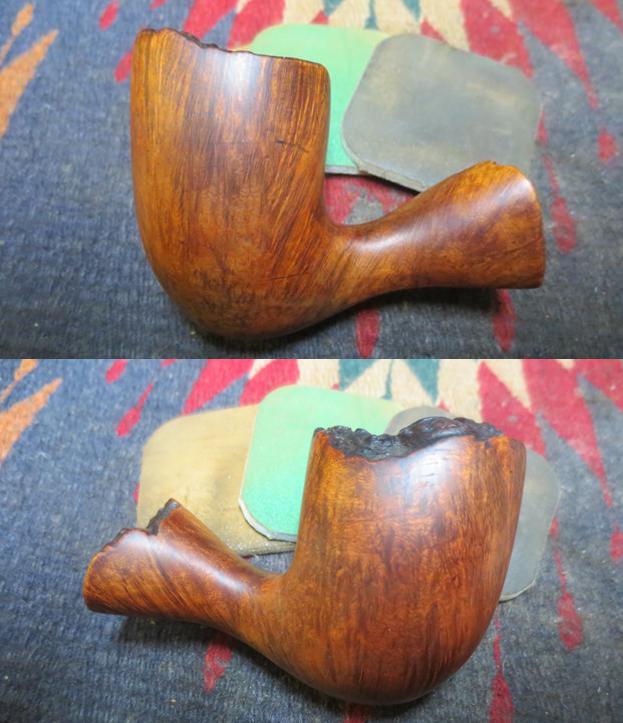
Removing urethane products from the briar bowl.
I have to say that I find this finish the hardest to remove from pipes. I do not even pick up rusticated or sandblast pipes that have been coated with urethane products. I am hesitant even to take on smooth finished pipes. I really don’t like the product on pipes. It is recognizable in that it is a shiny and plastic looking coating that comes in varying thicknesses. It goes by a variety of names – Varathane, Urethane, Polyurethane but all have the same resistance to both alcohol and acetone. The finish seems to be impervious to all attempts to break through with these products. I know others have used a paint stripping product to remove this finish but I really don’t like using this stripper product. The chemicals in the stripper require a lot of ventilation and are really hard on my hands so I try to avoid them.

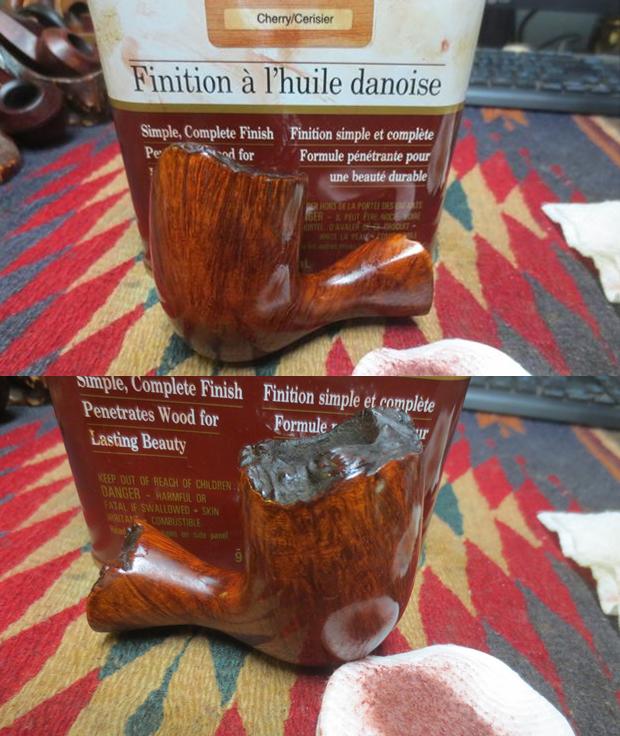
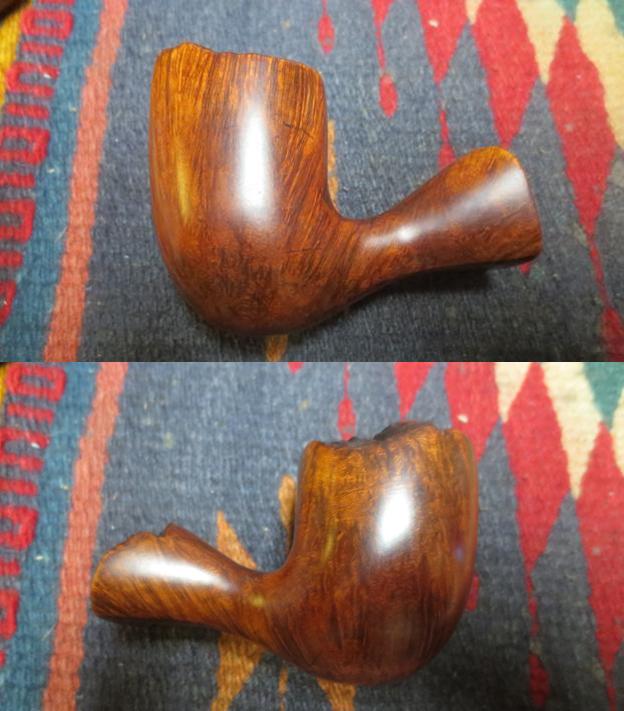
In place of using the stripper I have resorted to my own method with some degree of success. Sometimes I question the worth or value of doing this when there are so many really good pipes out there that I can work on without having to deal with urethane. But when I do have to, I break through the shine with either a brass bristle wire brush or with a piece of 220 grit sandpaper. Once I have broken through the top of the finish I can wipe it down with acetone and have limited success. It really is a matter of sanding or wire brushing and wiping it down – repeatedly until the finish is gone. I have seen folks sand off the coat but I find that if I can strip it there are less scratches to deal with in the refinishing process. Best case scenario when I find a urethane coated pipe is I clean it up the best I can and give it away.

Removing paint from the briar bowl.
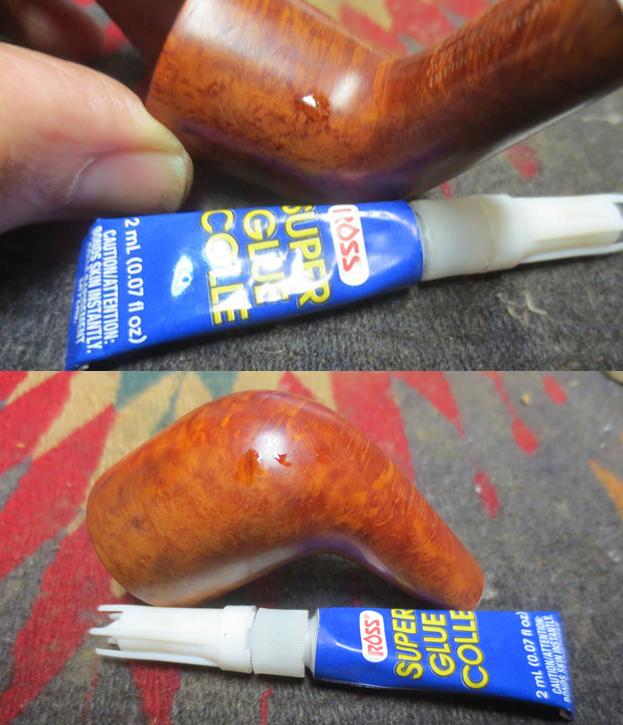
Next to a urethane finish painted finishes is next on my list of dislikes for finishes on pipes. I do not like painted finishes. I actually avoid purchasing them because I have learned the hard way that they are impossible to bring back to the kind of finish I like on a pipe. If there are dents and chips in the finish they are impossible to repair or touch up. I have tried almost every kind of paint out there and not been able to get a match or if I get close, the minute pipe is lit and heated the repairs bubble.

Others have taken a different tactic and sand the paint off the rims and stain the rim to give the painted pipe a bit of contrast look. But to be honest I really don’t like the look. To deal with my own irritation I have resorted to stripping the bowl of all of its paint. I have used a variety of methods to remove paint. I have sanded the bowl down to remove the finish. I have used a paint stripper but I have spoken about my dislike of that above. I think that at times sanding the bowl down is the best choice. It is up to you whether you sacrifice the stamping in the sanding process or whether you strip that area. I have had limited success breaking the shine and wiping the paint down with acetone. It seems that once the seal is broken the acetone does the job but it is really labour intensive.

To top it off once the painted finish is removed I have found that the paint hid a multitude of flaws in the briar that have been filled and masked by the paint coat. It is generally a disappointment to me after all the work on the briar to get to that point. Instead, if I am left with a damaged painted pipe I generally rusticate it and thus remove the issue. I know that the solution may not be acceptable to all of you but it is what I do with this problem.

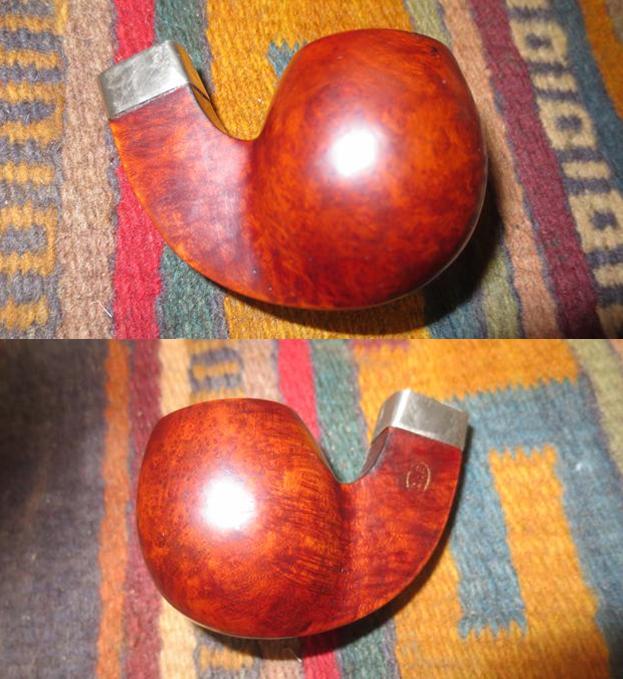
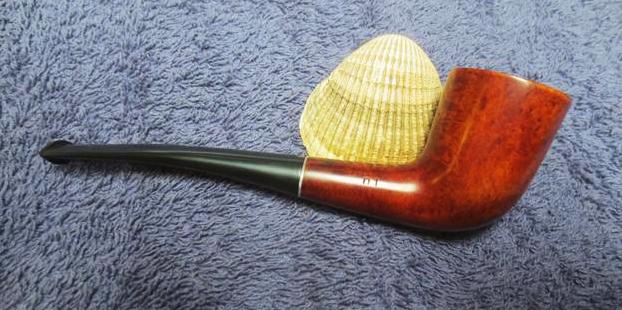
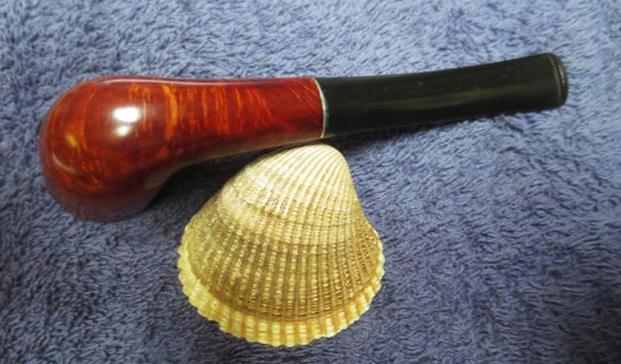
Conclusion: You can tell from the processes that I have developed to remove top coats from briar pipes that I really do not like them. I like the briar to breathe as I found that without the various top finishes the pipe smokes cooler. I like to finish my pipes with carnauba wax for smooth finishes and with Conservator’s Wax on rusticated or sandblast finishes. When I buy a new pipe this is one of the first things I look for. It is not a deal breaker but the shape has to be one I really like and want before I buy it. Then when I get home the first thing I do before smoking it is to remove the top coat and wax the bowl.

On estate pipe purchases I note which sellers on eBay give the bowls a coat of varnish or worse yet urethane and refuse to purchase pipe from them. Too often, I have bought pipes that have had the varnish coat slopped over the grime on the bowl and even into the bowl itself. It is easier just having to deal with that added issue. When it is a part of the original finish, that is another story and I address it as it comes. When I buy from antique malls and dealers, I specifically talk to them about not putting any shiny coats on the pipes they sell. It may make them look better to sell but it really is an old used pipe so why wreck it with these ministrations.

I think that is it for now. I hope that this series of Answers to Questions blogs is providing information that you find useful. If you have other methods for the various things that I am posting please feel free to comment or contact me. I am well aware that in each case these are my own opinions and that they are not shared by all. I raise a pipe to each of you who enjoy this hobby of ours. Cheers.

Rode Hard & Put Away Wet – MLC Redmanol French Briar Bent Billiard


Blog by Steve Laug

This older MLC bent billiard is a turn of the 20th century pipe. According to Pipedia, (https://pipedia.org/wiki/M._Linkman_%26_Co) the initials stand for M. Linkman Company which was thought to mean Mary Linkman Company. They were a Chicago based company that produced both briars and meerschaums. The company was named for the mother of the same Linkman who branded pipes under that same name and then eventually became the Dr. Grabow pipe manufacturer with which we are familiar. Pipephil’s site gave a little more information at this link (http://www.pipephil.eu/logos/en/logo-l4.html). M. Linkman and Co. was established by Louis B. Linkman and August Fisher in 1898. The company closed down in the 1950s and the Dr Grabow branch was sold to Henry Leonard and Thomas Inc. There was also a note that early Linkman’s pipes were stamped MLC in an oval.

If you have followed this blog for a while you have come to know that I love really old pipes and this one fits into that category of pipes. It is stamped MLC in an oval over Redmanol over French Briar on the left side of the shank. There are no other stampings on the pipe. The band is brass and is etched with a pattern of vines and flower around the entire band. The band was a mess on the shank end. It was bent and dented and no longer round. It was loose on the shank and would need to be straightened out before it was reglued. It is a small bent billiard and definitely sporting the wrong stem. It should have had a Redmanol stem to go with the stamping on the shank of the bowl.

I have written a bit more about the MLC brand on several early blogs (https://rebornpipes.com/2016/11/12/an-interesting-the-nuvo-mlc-italian-briar-hidden-in-a-wdc-case/ https://rebornpipes.com/2017/08/17/restoring-a-sad-old-mlc-bent-billiard/).

Jeff took the photos that follow before started the cleanup. You can see from the photos the condition of the pipe. The bowl exterior was absolutely filthy. It is the first time I have seen the lava that usually is on the rim flow over the top and down the sides of the bowl. The lava on the outside edge of the bowl and the thick cake in the bowl made it hard to know what the condition of the rim edges. The incorrect stem and the condition of the pipe told me that it was someone’s favourite smoker and when the old stem broke or wore out a convenient replacement was stuck in the shank and it continued to be smoked. The next photos of the bowl, rim and the flow of lava down the outside of the bowl shows how filthy this pipe was before Jeff started his clean up. The bowl is scratched and nicked but even that damage is hard to assess given the condition of the pipe. If you look closely you can see the MLC oval on the next photo of the shank. Below that it reads Redmanol over  French Briar. You can see the tars that have built up on the shank and pushed the band toward the end of the shank. It really was a dirty pipe. The photo of the bottom of the bowl and shank show more of the worn condition of the briar.The next three photos show the condition of the end of the band. It was in rough shape. As the band was pushed off the shank end because of the tars the end that extended beyond the briar of the shank was bent and damaged.The last photo Jeff took showed the condition of the stem. I was not particularly concerned with the stem as I was planning on replacing it with a fitted stem. If I used it in the future I would clean it up.I reread the blogs on the MLC pipes that I had restored previously to refresh the information. Now I was ready to see what I could do with this old pipe. It is really nice working on clean pipes. I have done enough repairs recently that have required me to ream and clean them that I have a greater appreciation for how nice it is to have this done for me. Thanks Jeff for your work and the way it makes my part a bit easier. He worked his usual magic in cleaning up this messy pipe. I really wondered what would lie beneath all of the grime and tars. Jeff reamed it with a PipNet reamer and cleaned up the remnants with a Savinelli Fitsall pipe knife. He scrubbed out the mortise and the airway in the shank and the stem with alcohol, cotton swabs and pipe cleaners. He spent quite a bit of time scrubbing the exterior of the bowl, rim cap and shank with a tooth brush and Murphy’s Oil Soap to remove the build up. He rinsed it under running water. It took a lot of scrubbing to get it free of the tars but it worked well. He dried it off with a soft cloth. Once the grime was removed it was clear that the finish underneath was in rough shape. The briar was quite nice with a mix of straight and birdseye grain around the bowl and shank. I took photos of the pipe to show its condition before I started my work on it. Jeff had done a miracle in removing the thick cake, cleaning the lava on the rim and sides of the bowl. The inner edge was in pretty  decent shape as was the outer one. I was happy to see the condition. There was however a darkening on the rim top and all around the bowl coming down the sides about ¼ inch. At first I thought that it might have been left behind by a rim cap of some sort but there were no small nail holes in the briar on the sides of the bowl. I think that actually it is what is left behind by the greasy hands of the pipe man and the lava that had flowed down the bowl sides.He was also able to remove much of the grime around the band on the shank and leave the stamping undamaged.I removed the stem and carefully slid the band off the shank. I wanted to clean up the end of the shank with alcohol and sandpaper. I also want to smooth out the back edges of the band and see if I could make it smooth and useable once again. I heated the end of an awl/ice pick and pressed it against the damaged areas of the band. The brass was quite thin so it was really quite workable. I was able to remove all of the damaged areas but one that was a compressed area on the bottom side. It would be hidden on the underside of the shank once it was glued back in place.I scrubbed the shank end and the dark area with acetone to remove more of the grime that was on the surface of the briar. I was able to reduce quite a bit of the buildup around the top of the bowl and the rim top with this method. I sanded the end of the shank to smooth it out. I used a dental spatula to spread the all-purpose glue around the shank. I pressed the band back on the shank with the small damaged spot on the underside.I took a photo of the end of the shank to show that the band fit tight on the shank and was even with the shank end. You can see the damaged area on the underside of the shank on the right side of the photo.I looked through my can of stems because I remembered having a bent Redmanol stem that I had picked up somewhere along the way. Sure enough it was there. It was slightly larger in diameter than the shank of the pipe so it would need to be sanded to fit nicely on the shank. It also had a push stem on it that would need to be removed and replaced with a normal tenon. Both of those were relatively easy jobs. I was anxious to get moving on the stem so of course I forgot to take photos of the stem with the meerschaum push tenon. It was loose so I unscrewed it from the stem. I had a small threaded Delrin tenon with the threads that were close to the same and threaded it into the airway on the stem. It worked well so I unscrewed it and glued it in place in the stem. The photos below show the new tenon on the stem.The tenon fit well in the mortise. The fit against end of the shank was nice. I sanded it to remove the excess material and reduce the diameter of the stem to match the shank using 220 grit sandpaper. In the photos below it is getting close to a nice fit. What you can’t see in the photos is that the nice, rich, red colour of the Redmanol lightened with sanding to shades of blood orange. I could not start over so I decided to keep sanding until the fit was correct. At first I did not like the effect on the Redmanol and I was disappointed by the colour shift. Looking at the stem from the drilled airway before I put the tenon in place and the flat end of the stem it appeared that the red was solid all the way through the material so when the oranges and yellows started to show up I was a bit frustrated. Now as I look at it I have to say it is growing on me. It reminds of the Popsicles that we used to by when I was a kid. I stopped sanding the bowl and put the stem on the shank to get a couple of photos so I could look at it on the screen and get the effect. It is almost like flame… kind of a nice variation. It is interesting to see the fine red line between the band and the stem – the flat end still is an even red. I don’t quite understand it but I am resolved to live with it. I am going to stain the bowl so that should also add to the variations of colour on this old pipe.I decided to try to bleach out the darkening on the rim top and first ¼ inch of the bowl all the way around. I wiped it down with bleach on a cotton pad and left it on the dark area to do its work. It worked better on the left side than the right.I stained the bowl with a dark brown aniline stain to try to blend in the dark rim stains. I applied the stain, flamed it and repeated the process. Once it dried I wiped the bowl down with alcohol on cotton pads to make it more transparent and let the grain shine through.  In the process some of the nicks in the briar showed up more clearly. I decided not to fill them in but to leave them as war wounds on this old timer. They tell a story that I wish the pipe could tell us. I polished the briar with micromesh sanding pads. I started polishing with 3200-4000 grit pads and wiped the bowl down after each pad with a damp cloth. I continued to polish with 6000-12000 grit pads and wiped it down after each pad. I hand buffed it with a soft cloth. The dark ring around the top of the bowl is still visible but less than before. The rim looks good. To further blend the darkened top portion of the bowl with the rest of the pipe I gave the bowl a contrast coat of Danish Oil Cherry Stain. I applied it by hand and rubbed it off and repeated the process to get a good smooth coat.I wiped the stain coat off and hand buffed the pipe lightly. The photos below show what the pipe is looking like at this point in the process. The right side still shows darker than the left at top edge of the bowl. I polished the stem with micromesh sanding pads – wet sanding it with 1500-2400 grit pads and dry sanding with 3200-12000 grit pads. I wiped the stem down with Obsidian Oil after each pad. After the final 12000 grit pad I gave it a final coat of oil and set it aside to dry. I put the stem back on the bowl and buffed it with Blue Diamond on the buffing wheel to polish the briar. I gave the pipe multiple coats of carnauba wax and buffed it with a clean buffing pad to raise a shine. I hand buffed it with a microfiber cloth to deepen the shine. The newly variegated Redmanol stem did not too bad with the old pipe. It shines like polished horn and the flow of the colours worked with the colours on the bowl. The way the colours shifted on the parts worked well together to present a beautiful pipe. The dark rim edge almost looks like the way meerschaum pipes were flumed with a dark edge. The pipe looks fresh and new. Later I will need to give it a bowl coating to protect the bowl inside as there are spidering cracks all around the briar. The finished pipe is shown in the photos below. Thanks for looking.


The Rebirth of an Unmarked Horn


Blog by Steve Laug

When my brother sent me photos of this particular pipe I could not see what he saw in it. It was just ugly in my opinion. The shank was crooked, the plateau crown had been sanded slightly, the shank was cracked and missing a chunk of briar, the copper ferrule looked like it fit better under a sink than on the shank and the finish had warts in it all around the bowl. To top it off the stem was clunky, thick Lucite and had lots of divots and tooth marks. It did not look like it belonged at all. The entire pipe looked like a failed shop project to me – one that took its own direction as it was being made. He purchased it and took photos of it before he cleaned it up thinking I might be charmed by it as he was.The next photo from the top shows the bow in the shank. I figured that the drilling would be way off once I got it and took it apart. I was pretty certain this one was going to interesting to work on to see if I could get anything resembling a nice looking pipe out of the concoction that it was in the photos. Note also the thick cake in the bowl and the overflow of lava on the rim filling in the smoothed out plateau. It was hard to know at this point if there was damage to the inner edge of the rim because of the thick cake and lava. Only a thorough clean up would reveal the condition. The next three photos show the warts on the sides of the bowl. The finish was rough. It was hard to tell if these were fills or if the pipe had not been sanded smooth when it was originally finished. In the photos, they look like scratches but they are actually standing above the finish on the briar. Some of them have scratches around the edges on the surface of the bowl. As I looked at the horn, I had to admit there was something strangely alluring to the shape and it was growing on me. The copper fitting is not snug on the shank it rattles around and is only held in place by the stem. You can see the gap between the cap and the shank. The shank under the band is coated with grime and there is a dark oxidized buildup.When the stem is removed the cap falls off and reveals the damaged shank. You can see the crack in the shank end and up the side on the right side of the photo below. The tars and oils that have built up on the end of the shank and in the mortise are quite thick. In the second photo below you can see the missing piece of briar. The third photo is a close up of the shank end. It shows the damage clearly as well as thick tars on the shank  under the cap. The stem is Lucite and in rough condition. It is the thick kind of stem that came out when Lucite first came on the market. It thick and poorly shaped. There are major dents in the surface and many tooth marks and chatter on both sides of the stem at the button. I do not intend to reuse the stem as it is not my kind of stem. I will replace it with a vulcanite stem and fit it to the shank. Jeff did his usual thorough clean up even on this ugly, old pipe. He reamed it with a PipNet reamer and cleaned up the remnants with a Savinelli Fitsall pipe knife. He scrubbed out the mortise and the airway in the shank and the stem with alcohol, cotton swabs and pipe cleaners. He scrubbed the exterior of the bowl and shank with a tooth brush and Murphy’s Oil Soap and rinsed it under running water. He scrubbed the rim on the bowl to clean out the lava on the plateau. It took much scrubbing to get it free of the tars. He dried it off with a soft cloth. The bowl itself was very light weight. It is a good looking piece of briar and has flame grain all around the bowl and shank with some birdseye on the shank top and bottom. He cleaned up the Lucite stem with the oil soap as well and was able to remove much of the debris. There were tooth marks and tooth chatter on both sides of the stem. The freehand style stem had a tapered tenon that sat tightly in the copper end cap. The copper cap was loose and fell off when the stem was removed from the pipe. I spent time turning the pipe over to see if I could find any identifying stamping that would help me know who made it and when it was made. There was nothing there. It was an unstamped pipe by an unknown maker at an unspecified point in time. I took photos of the pipe to show its condition before I started my work on it. Jeff did a great job on the rim top and the bowl. The inner edge of the rim was in good condition with little damage. There was still a little lava on the back side of the rim top that would need to be taken care of.The Lucite stem was clean but looking at it close up I knew that I did not want to keep the stem. I would need to go through my can of stems to find one that would work on this pipe.I removed the stem and the end cap and looked closely at the damage to the end of the shank. Once Jeff had cleaned it up the damage was really clear. The end of the shank had deteriorated and chunks of briar were missing. The surface of the shank end was rough and damaged. There was a large crack on the right side near the underside going from the shank end up the shank for ½ inch. I used a Dremel and sanding drum to remove the damaged shank end. I evened up the end of the shank and took off all of the compromised briar. I cleaned up the end so that a regular stem would work with it. I smoothed out the inside of the mortise. During this cleanup is when I discovered that the mortise and the airway in the shank were drilled at an angle. The airway was high in the end of the mortise and came out at the bottom of the bowl. The mortise itself curved and was poorly drilled in the shank. I cleaned up the briar that had been under the copper band. The briar was black with the colour going deep in the briar. I sanded it smooth and used a microdrill bit to drill a pin hole at the end of the crack to stop it from spreading further. I filled in the hole and the crack with clear super glue and let it cure.When the glue repair had dried, I sanded it smooth and pressure fit a nickel band over the end of the shank. I heated the band with a lighter to expand it and pressed the shank end and band so that the band went up the shank to cover the crack and the repair. I think that the band was a far better look for the pipe than the copper shank cap had been. I scrubbed the plateau top with a brass bristle tire brush to remove the remaining lava in the crevices of the surface. I worked on it until the rim top was clean.I sanded the bowl with 220 grit sandpaper to remove the warts from the surface and smooth out the scratches and dents. I wanted the surface to be smooth the way it should have been when the pipe was made. I worked on it until it was smooth to the touch. When I finished I washed the surface of the bowl and shank with acetone on a cotton pad to remove the last of the dust and the remaining finish from the briar. I buffed the bowl with Blue Diamond to polish it a bit and see where I needed to do some work before the final buff. I hand polished the briar with micromesh sanding pads – wet sanding with 1500-2400 grit pads and dry sanding with 3200-12000 grit pads. I wiped the bowl down with a damp cloth after each buffing pad. I hand buffed it with a microfibre cloth after the 12000 grit pad. The pictures below show the progress of the polishing on the briar. I used a black Sharpie Pen to colour in the crevices on the plateau top. I wanted the smooth high spots to shine through the deep black in the grooves. The contrast would look really good once the pipe was given a finish coat of stain and was buffed and waxed.I stained the briar with a Danish Oil Cherry stain to highlight the red colours in the briar and bring about a contrast with straight grain. I stained the plateau as well to give red hues to the high spots and contrast with the black of the crevices on the top. I hand buffed the bowl with a soft cotton cloth and then with a microfiber cloth to raise the shine. The bowl looks really good and the grain stands out. The straight grain all around the bowl sides looks really good. I chose a vulcanite saddle stem for the replacement for the Lucite stem. I knew it would be a bit of work to get things lined up because of the drilling in the shank. I measured the angles in the shank and figured I would need to bend the tenon at the angle shown in the photo. I heated the tenon and put it in the shank while it was still pliable and set the angle to match the angle of the mortise. The photo below shows the angle on the tenon. Bent at that angle the stem sits tight against the mortise. It gives you a good idea of the how poorly drilled the pipe was and what measures I had to take to line things up. I gave the tenon a coat of clear fingernail polish to make it fit snug in the mortise and let it dry. I roughened it up with the edge of a needle file to give it a bite in the shank. I tried the fit and all was well.I sanded the stem surfaces with 220 grit sandpaper to remove the light oxidation and the tooth marks and chatter on both sides of the stem. I worked on it until it was black and there was no remnant of oxidation or tooth marks.I polished the stem with micromesh sanding pads – wet sanding it with 1500-2400 grit pads and dry sanding it with 3200-12000 grit pads. I rubbed the stem down with Obsidian Oil after each pad to give traction to the next pad and also bring a little life to the vulcanite stem. After the final pad I gave it a last coat of the oil and set it aside to dry. I left the tenon with a few ridges to add bite to the inside of the mortise and hold it firmly in place. Some oxidation showed up on the top side of the stem near the saddle in the photos above so I worked it over in that area once again. When I finished I buffed the pipe on the wheel using Blue Diamond Polish and worked over the stem and bowl to remove any remaining scratches. I buffed the nickel band to give it a shine. I gave the pipe multiple coats of carnauba wax and buffed it with a clean buffing pad to raise a shine. I hand buffed it with a microfiber cloth to deepen the shine. The warts and nicks that I had sanded out were gone and the grain just popped on this old pipe. The new stem, with the angled tenon brought things into line and to me the pipe looked much better. The black of the polished vulcanite and the polished briar work well together to present a beautiful pipe. The finished pipe is shown in the photos below. It really is a beauty. Thanks for looking.

Restoring an Ornate Hand Carved Horse’s Hoof Pipe with a Horn Stem


Blog by Steve Laug

In the box of pipes I just received from my brother there was a pipe that just stood out as one that I would have some fun working on. It was a carved unique shaped piece with a horn stem. The bottom half of the bowl had lines carved into the briar that flowed from the front of the bowl to end of the shank. There was a smooth band around the stem shank union. The top half of the bowl was also smooth with some deep lines carved around the bowl just below the rim top. There were also deep grooves carved in the top of the rim working their way toward the back of the bowl to some deep carving. I was oblivious to the what the shape was until Satu commented below leading to an edit of the blog. The stem was horn and had some amazing stripes and striations in the horn. Jeff took photos of the pipe before he cleaned it. There were no identifying marks on the pipe that were visible to Jeff or to me in the photos. I would give it a more thorough examination once I had it in hand.The bowl had a thick cake that had overflowed onto the rim top. The lava was flaking and dirty. The grooves on the rim top were filled with dust and dirt as well as the lava. The outside front edge of the bowl was chipped and had large piece of briar missing as shown in the top view and front view of the bowl.Jeff took photos of the carved bowl from various angles to show the grain and condition of the pipe. There was something quite fascinating about the carving and the shape of the bowl. You can see the hoof shape in these side view photos. When Jeff removed the stem it looked as if someone had sprayed foam into the shank and then screwed the stem into the shank. It is not even clear if the airway is open or clogged at this point in the process. It was going to take some work to clean out the foam in the shank. It was a real mess that would be an interesting adventure to clean.The stem appeared to be in decent condition with some tooth chatter and light tooth marks on the stem and button on both sides. Jeff did his usual thorough clean up on this old pipe. He reamed it with a PipNet reamer and cleaned up the remnants with a Savinelli Fitsall pipe knife. He scrubbed out the airway in the shank and the stem with alcohol, cotton swabs and pipe cleaners. He scrubbed the exterior of the bowl and shank with a tooth brush and Murphy’s Oil Soap and rinsed it under running water. He dried it off with a soft cloth. The pipe was very light weight. It looks like briar and seems to have the grain of a piece of briar. The grain on the smooth portions really stands out. The carving on shank and the bottom part of the bowl is a series of tight lines that look like the shaggy hair of a horse’s foot coming down over the hoof. The smooth portion is the hoof itself. There are grooves around the bowl and the top of the bowl had some lines and carving in it with some ridges and swirls at the back of the bowl that capture the look of a horse shoe. There was some significant damage to the top and front of the bowl. He cleaned up the stem with the oil soap as well and the striations of the horn looked like swirls. There were tooth marks and tooth chatter on both sides of the stem. The threaded tenon was in great condition but the threads in the mortise were worn smooth. The stem was very loose in the shank and fell off when the pipe was moved. I spent time turning the pipe over to see if I could find any identifying stamping that would help me know who made it and when it was made. There was nothing there. It was an unstamped pipe by an unknown maker at an unspecified point in time. The next photo looking at the pipe from the top down shows the rough edges of the front of the bowl. There are major chunks of briar missing from the curves of the front of the bowl. It almost looked like bit marks were taken out of the front edges of the bowl. The arrows below point out the damaged areas. Now that Satu has identified the shape it is so clear – a horse shoe.The stem was dried out and the tooth chatter and marks are very visible in the surface of the stem at the button on both sides. The striations and marking on the horn stem is actually quite stunning and should polish up very nicely.I decided to build up the damaged areas on the top and front edge of the bowl with clear super glue and briar dust. The combination works well to shape into the curves of the damaged part of the rim. I layered in the glue and the briar dust until it was thick enough to work with. Once it was in place and had dried I shaped it with files and recut the groove on the front, sides and the top of the rim cap with needle files. I smoothed out the repairs with 220 grit sandpaper to blend it into the rest of the bowl. I polished the briar with micromesh sanding pads – wet sanding with 1500-2400 grit pads and dry sanding with 3200-12000 grit pads. I wiped the bowl down after each pad with a damp cotton pad to remove the sanding dust. When I had finished polishing the bowl I stained it with a dark brown aniline stain, flamed it and repeated the process to set the stain in the briar.Once the stain had dried I buffed it on the buffing wheel with Blue Diamond polish to remove the excess stain. I decided to leave it dark on the base and the shank. There would be some natural contrasts between the high spots and the grooves in the briar. I wanted to polish the top part of the bowl – the hoof portion – so that it was lighter than the lower portion of the pipe but matched what showed through. I gave it several coats of Conservator’s Wax and buffed it with a shoe brush to spread the wax all over the bowl evenly. I buffed it with a clean buffing wheel on the buffing to further raise the shine on the pipe bowl and highlight the contrast between the two parts of the bowl. With the bowl finished I turned my attention to the stem. To take care of the loose fit in the shank I painted the tenon threads with clear super glue to build it up to the point that it fit snugly in the shank. I sanded the stem surface with 220 grit sandpaper to smooth out the tooth chatter and the tooth marks. None of them were deep so it was an easy repair. I did not need to fill in the tooth marks so all that was needed was to sand it smooth.I polished the stem with micromesh sanding pads – wet sanding with 1500-2400 grit pads and dry sanding with 3200-12000 grit pads. I rubbed the stem down after each pad with Obsidian Oil and let it soak into the horn. Each successive pad made the stem take on a deeper and richer glow. After polishing the stem with the 12000 grit pad I gave it a final coat of oil and let it dry. I took photos of each side of the stem to show the variations in the colours and striation of the horn. It really is a beautiful piece of horn. I buffed the pipe bowl and stem independently with Blue Diamond on the buffing wheel to polish them both. I worked over the briar around the bowl with the Blue Diamond. I carefully gave the briar several coats of Conservator’s Wax, working it into the hard to reach spots. I buffed the waxed briar with a clean buffing pad to a raise a shine. I buffed the horn stem with Blue Diamond to bring the final shine coat to the horn. There is nothing like polished horn with the undulating colours and stripes in the grain of the surface. It really was looking beautiful. I gave the stem multiple coats of carnauba wax and buffed it with a clean buffing pad to raise the shine. I hand buffed bowl and stem with a microfibre cloth to deepen the shine. I put the stem in the shank and hand buffed it once more. The finished pipe is really quite nice. It is a beautiful piece of briar and the stem picked up a nice shine that brought it back to life. The repairs to the chipped areas on the front and top of the bowl have all but disappeared into the stain coat. The finished pipe is shown in the photos that follow. I am thinking the pipe is probably the same age as all the old C.P.F. pipes that I have been restoring. This is another unique one in the old pipe category. Thanks for putting up with my ongoing obsession with old pipes from another time. Thanks for looking.

ADDENDUM – As pointed out by Satu below this is indeed a horses hoof. The carving on the rim top is the horse shoe and the striated portions are the horses shaggy hair hanging down over the hoof. I took a picture with that orientation to show it more clearly. Thanks Satu. Now to go up and revise the blog.

HOrse1

Restoring a Wreck of a C.P.F. Rectangular Shank Bent Egg


Blog by Steve Laug

This poor old C.P.F. rectangular shank bent egg was in rough shape when it arrived in Vancouver. Not only was the tenon broken but the stem was in pretty damaged. There were tooth marks and chatter on the top and underside of the stem. The sides of the rectangular saddle portion of the stem were very damaged with deep casting marks and gouges. I think the stem is made of Bakelite but it was really a mess. Add to that the condition of the bowl – three cracks running down the front right side from the rim down and across the bowl, a cracked shank, no band, a scratched and damaged finish and you have a clear picture of the condition of the tired old pipe. There was a day when I would have retired this one and moved on to a different pipe but today it is a challenge worth taking and seeing what I can do with it. Jeff took various photos of the pipe to show what it looked like when he picked it up.The rim top was a mess. There was an overflow of lava that had hardened on the rim top. There was an average cake in the bowl that would need to go in order to repair the damaged areas. The inner edge of the rim was probably damaged though it was hard to tell at this point. There were to cracks on the right side of the rim toward the front of the bowl. I have included two photos to show the cracks in the same area from the rim down and across the bowl on the top right side. I have used red arrows to point them out in both photos.The crack in the shank is very obvious in the photo below. It was quite deep and had begun to separate. You can also see the damage to the stem at the stem/shank junction. But even with all of the damage there was still some charm to the briar. The grain was interesting – a combination of birdseye and cross grain all around the bowl. The flat bottom portion had nice cross grain that would stand out once the pipe was restained. The threads in the mortise were in excellent condition. The U-shaped divot at the bottom of the mortise shows how the airway was drilled into the bowl. The threads on the tenon looked good at this point. The next photos show the extensive damage to the sides of the saddle stem. It was rough. It almost looked as if someone had tried to pry it free from the shank rather than unscrewing it. There were some deep tooth marks and a lot of chatter on both sides of the stem in front of the button. Once again when the pipe arrived in Vancouver, I could see that Jeff had done his magic in cleaning and scrubbing it. He had reamed the bowl with a PipNet pipe reamer and a Savinelli Fitsall Pipe Knife. He cleaned up the rim and the exterior of the bowl with Murphy’s Oil Soap to remove the grime and debris on the briar itself. He had exercised care around the gold stamping on the left side of the shank. He had cleaned out the mortise and the airway in the shank and the stem with alcohol, cotton swabs and pipe cleaners. The stem damage was clearly visible and the gouges on the sides of the saddle stem stood out in clarity. There were some deep tooth marks on both sides of the stem at the button. When I brought the pipe to my work table I took some photos of it as I opened the case. It really was a beautiful old pipe. I took a photo of the rim top and bowl to show the issues there. The bowl was very clean. The rim top photo shows the cracks very clearly and the scars on the inside edge of the rim. The right side photo also shows the cracks.The stem has some beauty still, but the deep tooth marks would need a lot of work to bring them back to a smooth condition.This is where some of the issues show up. The tenon had broken when Jeff was cleaning it up. Fortunately it had not broken off in the shank or the stem so it was a clean repair. I would need to fit a new threaded tenon in the shank and stem. The gouges and nicks in the sides of the saddle are very clear in the next photos.Since the stem was such a mess and would take time to work on I started with it. I sanded the sides and top of the stem and filled in the damaged areas with amber super glue. In the next photos you can see the extent of the damage from the size of the glue repairs. I set the stem aside to dry and went for lunch with my wife and daughters. When I returned the repairs would have cured and I could continue. When I returned I used a needle file to smooth out the repaired areas and flatten out the sides of the saddle. I sanded the stem with 220 grit sandpaper to further blend in the repaired areas. I fit a new threaded tenon in the stem and set it in place. I sanded the stem more, to smooth things out. In the first photo below there looks like a crack runs along the middle of right side of the saddle. It was not a crack but a flaw in the stem material. There was still a lot of sanding to do before the stem was acceptable. I sanded the stem surfaces until they were smooth and the repairs were unnoticeable. It took quite a bit of sanding to achieve this. I polished the stem with micromesh sanding pads – wet sanding it with 1500-2400 grit pads and dry sanding it with 3200-12000 grit pads. I rubbed the stem down with Obsidian Oil after each pad to give traction to the next pad and also bring a little life to the Bakelite stem. With the work on the stem complete I set it aside and turned my attention to the issues with the bowl and shank. I decided to address the cracked shank first. I would need to fit a band on the shank. I did not have any brass bands so a nickel one would have to suffice. I used a needle file to work on the shank end to get it ready for the band. I started with the file and finished with the Dremel and sanding drum. Making a band that would fit took some work. I only had round bands so I needed to shape one that would work. I used a small nail hammer and the square edges of the needle file to make the round band rectangular. It was tedious but the finished band is shown in the photo below. I pressed it onto the shank of the pipe. It was still too large and if pressed all the way onto the shank would look awkward. I used the Dremel and sanding drum to cut the height of the band in half. It takes time and care to slowly grind the metal away. I used the topping board to smooth out the sharp edges of the band. I used an all-purpose glue to repair the crack and to anchor the band on the shank. I pressed the band in place on the shank. I took photos of the banded shank to remind myself of what it looked like at this point in the process. I still needed to polish the metal but it was looking better. The bowl still had remnants of the old varnish coat in the angles and on the shank bottom. I wiped it down with acetone on a cotton pad to remove the rest of the finish in preparation for the repairs that I needed to do on the cracks. I topped the bowl to remove the damaged areas on the rim top and to clean up the inner edge damage.I marked the ends of the cracks with a black Sharpie pen and drill the spots with a microdrill bit on my Dremel. I put these pin holes at the end of each crack to stop it from spreading further. I filled in the drill holes with clear super glue and smeared the glue over the cracks themselves. When the repairs dried I sanded them smooth with 220 grit sandpaper to blend into the surface of the briar. I also sanded the inner edge of the rim to minimize the damage there. With the repairs completed it was time to stain the bowl and blend them into the rest of the briar. For me the staining process on this pipe would be done in several steps. I stained the bowl with a dark brown aniline stain, flamed it and repeated the process to ensure an even coverage over the bowl. I wiped the bowl down with alcohol on cotton pads to make the stain more transparent. I sanded the bowl down with 1500-4000 grit micromesh sanding pads to make the grain more transparent and polish it in preparation for the next contrast coat of stain. I wiped it down with alcohol once more and then gave it a coat of Danish Oil Cherry stain for the top coat. I really like the way it brings out the reds in the grain of the briar. I touched up the gold stamping with Rub’n Buff European Gold. I rubbed it on and off leaving it in the light C.P.F. oval logo. It is faint in some places but it is readable. I gave the bowl several coats of Conservator’s Wax and buffed it with a microfiber cloth. The photos below show the renewed stamping and the waxed finish on the bowl. I used the Savinelli Fitsall Pipe Knife to clean up the remnant of the cake on the wall that is shown in the above photos. I buffed the pipe bowl and stem independently with Blue Diamond on the buffing wheel to polish them both. I worked over the briar around the bowl with the Blue Diamond. I carefully gave the briar several coats of carnauba wax and then Conservator’s Wax in the hard to reach spots. I buffed the waxed briar with a clean buffing pad to a raise a shine. I gently buffed the stem with Blue Diamond so as not to melt it or cause damage. I gave the stem multiple coats of carnauba wax and buffed it with a clean buffing pad to raise the shine. I hand buffed bowl and stem with a microfibre cloth to deepen the shine. I put the stem in the shank and hand buffed it once more. I am quite happy with the finished pipe. It is a beautiful piece of briar and the stem picked up a nice shine that brought it back to life. The damage on the stem is almost invisible now and the amberlike Bakelite looks translucent. The repairs to the cracks in the briar on the side of the bowl and the shank have disappeared into the contrast stain. The nickel band works alright with the finished look of the pipe and takes care of the shank damage. The finished pipe is shown in the photos that follow. Thanks for putting up with my passion for these old C.P.F. pipes from another time. Thanks for looking.


Bringing New Life to a C.P.F. Siamese Parallel Twin Stem Billiard


Blog by Steve Laug

Like other older C.P.F. pipes I have in my collection this one has some real charm. It is another pipe on the petite side of things – 4 ½ inches long and 1 ½ inches tall. It is not a bad piece of briar, a mix of grains. The finish was worn with some gouges in the right side and the bottom of the shank and bowl, but the pipe looked like it still had some life in it. This older C.P.F. may well show a bit of the tongue and cheek humour of the era in the name that is stamped on the shank – Siamese = conjoined stems. The top of the shank bears the name Siamese in worn gold leaf over the logo of C.P.F. in an oval. The silver plated ferrule on the shank bears a series of faux hallmarks and the C.P.F. in an oval logo on the top side. The top of the stem is stamped the C.P.F. in an oval logo. The stem is unusual in that it has two silver plated spigot tenons that fit into openings in the silver collar. The conjoined, twin stems match the dual airways in the shank and in the bowl. Looking down the end of the shank I could see both airways all the way to the bottom of the bowl. When I looked in the bowl there were twin holes at the back just above the bottom of the bowl. The stem shares some of the same damage as other pipes that came from the Virtual Pipe Hunt in Montana (https://rebornpipes.com/2017/04/26/a-virtual-pipe-hunt-a-new-way-to-experience-the-joy-of-a-pipe-hunt/). The left side of the twin stem has a large piece of the vulcanite missing that has been replaced by hard putty that is painted black. Jeff took photos of the pipe from a variety of angles to show its uniqueness and condition.The next photo Jeff took shows the overall condition of the pipe from a top view. It gives a clear picture of the conjoined twin stems from which I assume the pipe derives its name.The bowl was thickly caked and there was also a thick lava coat on the top of the bowl rim. It was impossible to see if the inner edge of the rim was damaged because of the cake. More would be revealed once the cake and lava were removed. To me these were signs of a much loved and often smoked pipe. Judging from the other pipes in this collection I would love to have met the pipe man who owned them and worked the repairs on the stems to keep his pipes smokable.The next series of photos show the condition of the sides and the heel of the bowl. There were a few deep nicks and gouges that would need to be repaired. The nicks on the right side of the pipe appeared to have been repaired prior with a coat of glue as can be seen in the first and second photos below. (Note the twin silver end caps entering the ferrule in the photos below.) The next three photos show the identifying stamping on the shank top, silver band and stem. The first shows the top of the shank and the stamping is very readable. The second shows the stamp on the silver band – faux hallmarks that I have come to expect on C.P.F. pipes along with the C.P.F. oval logo. The third photo shows the same logo on the twin stem. The rest of the photos that Jeff took of the pipe before he cleaned it show the condition of the stem. Note the repair on the top left side in front of the button (I have circled the area in red for ease of reference). The third and fourth photos below show the repair quite clearly. The filled in area seems to be hard putty that is then painted black. After the black paint a coat of varnish seems to have been applied to protect the repair. The underside of the stem looks quite good. The twin bore openings in the stem are shown in the last photo. Jeff did a lot of cleaning and scrubbing on the pipe and in the process, we learned that like the earlier C.P.F. Cromwell we had worked on, the repair was a hard putty fill. The top side of the stem had been coated with what appeared to be black paint to hide the repair. On top of the paint a varnish coat had been applied to protect the repair. The oxidation seemed to be on the areas that had not been covered with the varnish coat. That led to some really strange patterns in the oxidation. Jeff reamed the bowl with a PipNet pipe reamer and a Savinelli Fitsall Pipe Knife. He cleaned up the rim and the exterior of the bowl with Murphy’s Oil Soap and removed the grime and debris of the years as well as the glue repair on the right side of the bowl. The silver ferrule on the shank and the metal military style tenon ends looked better. He had cleaned out the twin mortises and the airways in the shank, into the bowl and in the stem with alcohol, cotton swabs and pipe cleaners. I took the following photos of the pipe before I started my work. These photos are kind of a


benchmark for me to compare the finished pipe with the original. The bowl and the rim top were very clean. There was a little damage on the inner edge of the rim toward the back right side and some roughness around the front left edge. The bowl itself was internally in excellent condition.The stem was quite oxidized and the putty repair is very visible now. I checked it with a dental pick and it is very hard. There is no give or softness to the putty. I will probably leave it and work at turning it black to match the stem and smoothing it out. I was glad to see that my initial assessment of the patch being only on the top side of the stem was correct. They underside was solid.The nicks and sand pits in the underside and right side of the bowl were very clear and would need to be addressed. They are obvious in the photos below. There were also some small sand pits on the left side of the bowl as well. I put the stem in the Before & After Pipe Stem Dexodizer bath and left it to soak while I worked on the bowl. I am pretty pleased with the deoxidizer and even after about 35-40 stems it is still working its magic.The band was loose on the shank so I slipped it off before I started to work on the repairs to the sand pits and nicks in the briar.Since the nicks and sand pits were not too deep I decided to use clear super glue and not mix it with briar dust on these repairs. I filled them each with a bubble of super glue and set the bowl aside so the glue could harden. It does not take too long as those of you who use the technique have learned so I did not need to wait long. I decided to leave the small pits on the left side of the bowl as they were and did not repair them. When the glue dried I sanded the repaired areas with 220 grit sandpaper to blend them into the surface of the briar. I have yet to figure out how to avoid the way the glue makes dark spots when it cures. To me it is the price for having a smooth surface. I keep experimenting but have not found the solution. I wiped the bowl down with a damp cloth and dried it off. I applied some all-purpose glue to the surface of the shank where the band would sit. I pressed the band in place and wiped off the excess glue with a damp cotton pad. Before staining the repaired areas I turned to address the damaged areas on the inner edge of the rim. I used a folded piece of 220 grit sandpaper to smooth out the edge. I chose not to bevel it as it was not beveled originally. Once it was smooth I used a dark brown stain pen to colour in the repaired areas on the bowl sides, bottom and rim top. I don’t worry too much about streaks at this point because they will buff smooth when I am finished. I lightly buffed the stained areas of the bowl and gave the entire bowl a coat of Danish Oil Cherry stain to blend the colours to match what was originally there. I really liked the finished look of the contrasting stain. The grain stood out really well and the repairs blended in as well as could be expected. They were smooth to the touch and felt good in the hand. I then used a Rub’n Buff European Gold to touch up the gold stamping on the top of the shank. I applied the product with a cotton swab and rubbed off the excess with a pad.I called it a night and turned off the lights in the shop and went to bed. In the morning I took the stem out of the Before & After bath and dried it off. It had done its magic on the oxidation on the stem and the putty repair was clear and hard. I cleaned out the airway with alcohol and pipe cleaners to remove the deoxidizer from the stem internals.I sanded the surface of the stem particularly around the patch in preparation for repairing it further with black super glue. I wiped off the dust and used a black Sharpie pen to stain the putty black. It was porous so I was hoping that the putty would stay black. I applied a coat of black super glue on top of the stained putty, smoothing it out with the dental spatula. I set it aside to dry and headed out to work. I polished the stem with micromesh sanding pads – wet sanding with 1500-2400 grit pads and rubbing the stem down after each pad with Obsidian Oil. In doing so I learned that the black stain I had put on the putty repair did not work. I had a decision to make at this point. Did I keep the repair as it was or did I remove it and refill it in my own way – that was the question.  I buffed it with Tripoli after that because of the stubborn oxidation in the groove between the twinned stems. In doing so the black was totally removed from the repaired area on the stem. As I looked at it I made my decision. The repair would stand as a memorial to the nameless repair person who had concocted this repair on the stem. It had lasted at least 100 years and it was solid. I decided to leave it alone. I would try to darken it a bit but I was not hopeful. I dry sanded it with 3200-12000 grit pads to polish it even more. After each pad I rubbed it down with Obsidian Oil. After the 12000 grit pad and rubdown I set it aside to dry. I certainly wish that the black stain would have sunk deep into the putty repair on the stem but it did not. I may one day pick it out and replace it but I figured that it is still workable the way it is. I buffed the pipe and stem with Blue Diamond on the buffing wheel. I gave the stem and the bowl multiple coats of carnauba wax to give it a shine. I hand buffed it with a microfiber cloth to deepen the shine. The finished pipe is shown in the photos below. It is really a nice looking pipe. The mixed grain on the bowl and the silver ferrule and tenon caps on the twin military mount stem look good with the black (well almost all black) of the stem. I think this is one that will enjoy. Thanks for looking.


New Life for a Kaywoodie Super Grain Zulu


Blog by Steve Laug

I wrote in the blog just previous to this one – the restoration of the Selected Straight Grain bent billiard – how I had been contacted by Jim in the South Eastern US regarding some pipes that he had found (https://rebornpipes.com/2017/09/22/cleaning-up-a-beautiful-comoys-made-selected-straight-grain-bent-billiard/). He called to tell me about a group of six pipes that he purchased on one of his own pipe hunts. He wanted to know if I could help him identifying what he had found. There were two older Kaywoodies (a bent meerschaum lined billiard and a Super Grain Zulu), a Selected Straight Grain bent billiard, a GBD Sauvage Bulldog, a Henley Club Apple (made by Sasieni), and the last one a Medico Crest Prince.

In our conversation he told me he was going to box up the lot and mail them to me to have a look. When they arrived he said we could talk and make an arrangement regarding the pipes that he wanted to have restored from the lot. He wanted my opinion on the others as well. The box arrived last week and I opened it to have a good look at what Jim had sent to me. As I mentioned in the previous blog, I went through them making notes on what I saw regarding the condition of each pipe. I sent Jim my notes on the pipes and he replied noting the two pipes that he wanted me to work on for him in the lot – the first one was a large Bent Selected Straight Grain Billiard and the second was the Kaywoodie Super Grain Zulu. We fired several emails back and forth talking about the pipes and the decision was made. I would restore the two pipes for him.

When I finished the Selected Straight Grain, I turned my attention to the Kaywoodie Super Grain Zulu. It is a nice piece of briar with straight grain on the front and back of the bowl and birdseye grain on the sides of each bowl. The pipe is stamped on the top of the oval shank with the brand name Kaywoodie over Super Grain over Imported Briar. On the right side of the shank the shape number 01 is stamped. The shape is Zulu with an oval shank and stem with a 1/8th bend to the stem. Like the Selected Straight Grain the Kaywoodie was a nice pipe that showed some nice grain underneath the grime.

The pipe was a typical Kaywoodie sized pipe. There was a flaw in the briar on the left back side of the bowl just above the shank/bowl junction. There was another flaw on the front right toward the bottom of the bowl. Other than these two spot on the bowl, there were no other sandpits or fills in the briar. The bowl had a thick cake in it and there was a thick overflow of lava on the top of the rim. It was not possible to know if there was damage to the inner edge and the top of the rim. The finish was worn and tired but should clean up easily. The stem was lightly oxidized and there was tooth chatter on both sides at the button, but no deep tooth marks. The stem was slightly underturned and when I removed it there was a paper gasket that was glued to the end of the stem to correct the issue. The classic Kaywoodie metal stinger apparatus had been cut off and the airway in the remaining metal tenon was damaged.

I took a series of photos of the pipe to record the condition it was in when it arrived.I took a close up photo of the bowl and rim top to show the condition of the cake in the bowl and the overflow of lava on top of the bowl. The rim and bowl were in rough condition. The photos of the stem show the condition of the vulcanite. The oxidized surface of the rubber was pitted and worn. The light tooth chatter on both sides can be seen in the photos. I unscrewed the stem from the shank and took the following photo. It shows the paper washer that had been glued to the end of the stem to help the alignment of the stem. The clipped stinger is also shown in the photo. I scraped off the glued on gasket with a sharp pen knife and cleaned off the surface with alcohol and cotton swabs. I used a needle file to open up the end of the tenon and remove the damaged edges that had been caused when the stinger was clipped off. I cleaned out the airway with pipe cleaners and alcohol. I heated the tenon with a Bic lighter to soften the glue and put the stem back on the end of the shank and turned it until the stem and the shank were aligned. The photo below shows the newly aligned stem and shank. I reamed the bowl with a PipNet pipe reamer starting with the smallest cutting head and working up to the second cutting head. I took the cake back to bare briar. I cleaned it up with a Savinelli Fitsall Pipe Knife. I scraped the top of the rim with the pen knife to take as much of the lava off as possible. I sanded it with 220 grit sandpaper and a 1500 grit micromesh sanding pad. I used clear super glue to repair the damage on the back and the front of the bowl. I filled in the areas with the glue and set the bowl aside to dry. When the repairs had cured I sanded the areas with 220 grit sandpaper to blend them into the surface of the briar. I polished the areas with micromesh sanding pads – wet sanding with 1500-2400 grit pads. I wiped the bowl down with a damp cloth to remove the sanding dust.I wiped the bowl down with alcohol on a cotton pad to remove the dust in preparation for staining the briar. I stained it with a dark brown aniline stain and flamed it with a lighter. I repeated the process until the coverage was even around the bowl.I wiped the bowl down with alcohol and cotton pads to remove the stain and make the coverage more transparent. I wanted the grain to pop so that finish stood out.The saturation of the stain was perfect for what I wanted to do with the finish next. I polished the briar with micromesh sanding pads. I wet sanded it with 1500-2400 grit pads to polish the briar and bring the grain to the surface. I dry sanded it with 3200-12000 grit pads. After polishing it with the 12000 grit pads I really liked the look of the polished briar. The grain really shows clearly.I sanded the stem with 220 grit sandpaper to remove the tooth chatter and the scratches in the vulcanite. I smoothed out the surface of the stem with the sandpaper and then polished it with micromesh sanding pads – wet sanding it with 1500-2400 grit pads and dry sanding with 3200-12000 grit pads. I wiped it down after each pad with some Obsidian Oil. After the final 12000 grit pad I gave it a final coat of Obsidian Oil and set it aside to dry.I buffed the pipe on the wheel using Blue Diamond Polish and worked over the stem and bowl to remove any remaining scratches. I was careful around the stamping so as not to buff it out and soften it. I gave the pipe multiple coats of carnauba wax and buffed it with a clean buffing pad to raise a shine. I hand buffed it with a microfiber cloth to deepen the shine. The finished pipe is shown in the photos below. It really is a beauty. The black of the polished vulcanite and the polished briar work well together to present a beautiful pipe. Now Jim’s second pipe is finished. In the week ahead the pair will go in the mail. I can’t wait to hear what he thinks of this second one when he has it in hand and fires it up for the first time. Thanks for looking.

Breathing New Life into a CHP-X3 Freehand


Blog by Steve Laug

This old freehand was in the box of pipes that came from my friend Steve in Dawson Creek. It is one of the lot he sent for me to chip away at in my spare time. Today was the day for that chipping away to happen. I pulled out five of the remaining seven pipes and worked on all of them today. This one reminds me of a 70s era freehand. It is a lot like one of the old ones that I had years ago. It is stamped on the underside of the shank next to the stem shank junction with the letters CHP-X over the number 3. It is a large freehand with a chair leg style stem. The bowl is heavily caked and there is overflow of tars and cake onto the plateau of the rim top. The plateau on the top side of the shank is also filled with grime and grit. The finish on the bowl is worn and dirty. I it was originally a virgin finish or if not possibly oiled. The stem is oxidized and has light tooth chatter. From my research this pipe was made in the United States by Michael Kabik before 1973. It was named after Chuck Holiday who was a pipe maker that Kabik bought his shop from. The photos show the condition of the pipe before I began the restoration work. The cake in the bowl and the heavy coat of lava overflowing onto the plateau top of the rim are shown in the close up photo below. It is really a mess at this point.The stem was heavily oxidized and the button on the top side of the stem was worn. There were tooth marks and tooth chatter on both sides of the stem near the button. The grooves of the chair leg stem were very oxidized.I put the stem in the Before & After Pipe Stem Deoxidizer bath to soak with the other stems from Steve’s pipes. While they soaked I worked on the five bowls that went with them.I reamed the bowl with a PipNet Reamer starting with the smallest cutting head and working my way up to the second head which was the same size as the bowl. I cleaned up the reaming with a Savinelli Fitsall Pipe Knife. I took the cake back to bare briar. I used a brass bristle brush to clean up the lava buildup on the rim top. I scrubbed the rim until it was debris free. I scrubbed the exterior of the bowl and shank with Murphy’s Oil Soap and scrubbed the plateau top on the rim and the end of the shank using a tooth brush. I rinsed the bowl under running water and continued to scrub it until it was clean and the plateau was clearly defined. I wiped the bowl and plateau down with alcohol on a cotton pad in preparation for staining the plateau. I use a black Sharpie Pen to colour in the valleys and crevices in the plateau and leave the high spots lighter. I don’t worry too much about staining them as I will buff the top and remove the stain from the high spots before I am finished. To me the briar looked lifeless and the natural colour did not do justice to the beautiful grain that was present on the bowl. I decided to stain it with a dark brown aniline stain and flame it to set it in the briar. I repeated the process until I had an even coverage around the smooth portions of the pipe bowl. I left the plateau areas untouched by the dark brown stain.After the stain had dried for about 30 minutes I wiped the bowl down with alcohol on cotton pads to remove some of the heaviness of the brown and make the colour a bit more transparent. I still need to do a lot more but this was the start of the process. I sanded the smooth portions of the bowl with a medium and a fine grit sanding sponge and followed that with 1500-2400 grit micromesh sanding pads. I wiped the bowl down with alcohol on a cotton pad after each stage of the sanding process. The photos below show the bowl beginning to come to life. To give the grain the kind of pop I wanted and to really set off the dark lines of the straight grain I decided to rub the bowl down with several coats of Danish Oil with Cherry stain. I apply the stain with a cotton pad and rubbed it down over the entire surface of the bowl including the plateau areas. I wanted the reds to penetrate into the nooks and crannies of the plateau to give the surface some flashes of colour and contrast. I buffed it on the wheel and took the following photos to show the condition of the bowl at this point in the process. I took the stem out of the Before & After Pipe Stem Deoxidizer bath and wiped it off with a clean paper towel. The first two photos below show the stem after the 24 hour soak. The stem was very clean and the tooth dents. a potential hairline crack and marks are shown in the photos below. These dents were deep enough that I chose to fill them with clear super glue and set the stem aside to let the repairs cure. The third and fourth photos show the repairs on both surfaces of the stem. When the repair dried I sanded the stem with 220 grit sandpaper to flatten out the glue and blend it into the surface of the vulcanite. I cleaned out the airway and slot in the stem with pipe cleaners and alcohol. There was some Before & After Pipe Stem Deoxidizer from the bath in the airway and debris and tars in it as well. The pipe cleaners took care of that fairly quickly. I used a needle file to recut the sharp edge of the button. During the filing and clean up I noticed what looked like a small crack in the top of the stem. I would keep an eye on it as I cleaned things up and repair it if indeed it is a crack.I sanded the stem surface with 220 grit sandpaper to smooth out the repaired areas and blend it into the surface of the stem. I reshaped the button at the same time. There still appeared to be a small crack on the top left side near the button. It was a very tiny hairline crack and was tight so I filled it in with clear super glue and sanded it smooth.I polished the stem with micromesh sanding pads – wet sanding with 1500-2400 grit pads (I opened a new package for this pipe) and dry sanding with 3200-12000 grit pads. I rubbed the stem down with Obsidian Oil after each pad. After the 12000 grit pad I gave it another coat of oil and set it aside to dry. I put the stem on the bowl and buffed the pipe with Blue Diamond on the buffing wheel. I gave the bowl several coats of carnauba wax and buffed the pipe with a clean buffing pad to raise the shine. I hand buffed it with a microfibre cloth to deepen the shine. The finished pipe is shown in the photos below. It is the third of pipe that I have restored for Steve from this last batch. It is an interesting freehand with some nice grain on it. The stem repair to the hairline crack looks pretty good and should hold up well. I will be putting an extra stem in the package for Steve as well. I think he is going to love this one. Steve, if you are reading this I hope you enjoy this beauty. It will be on its way to you very soon. Thanks for looking.

Restoring a Long Stem Mini Churchwarden Imperial 15 Prince


Blog by Steve Laug

The next pipe on the worktable is a mini churchwarden prince shaped pipe. It has a delicate look to it and is very lightweight. It is petite with a length of 6 ¾ inches, height of 1 1/8 inches, bowl diameter of 1 ½ inches and a chamber diameter of 7/8 inches. The pipe is stamped on the left side of the shank Imperial in script with a flourish underneath. Below the flourish it reads De Luxe. On the right side of the shank it is stamped Made in London over England with a shape number 15. The next photos of the pipe show what it looked like before my brother did his clean up work.The pipe was in rough shape. The finish was worn and crumbling. There were some small sandpits on the bottom left and right sides. The underside of the bowl had a spot of glue and the remnants of something that the pipe had been glued to. I wonder if it had not been in a display box of some sort before being liberated and sold. The bowl had a thick cake but the rim had an overflow of lava on the top and the inner edge was damaged to the point that the bowl was no longer in round. There was an inner tube extending into the bottom of the bowl. The original slant on the tube was ruined and the end of the tube was chewed and damaged. The stem was oxidized and there were deep tooth marks on the top and underside near the button. The underside tooth marks had a small hole that broke through into the airway in the stem. Jeff took some photos of the bowl and rim to show the condition of both. You can see the cake in the bowl and the lava overflow down the sides of the bowl from the surface of the rim. The fact that the bowl did not have a flat rip to but a rather rounded/thin rim top allowed the flow downward on the bowl.The next photo shows the bottom of the stummel and the thick glue/paper coat that is stuck to that part of the bowl. It appears to me that someone had the pipe stuck to some fibre board in a display case of pipe shapes. Possibly, it was a shadow box of “dad’s” or “grandpa’s” and this one was a centerpiece. Following that photo are three different pictures of the inner tube that sat in the bottom of the bowl. The end on these is usually slanted with the longer edge sitting on the bottom of the bowl and the shorter edge ending at the entrance of the airway into the bowl.The bowl has some amazing grain running up the sides of the bowl and I am sure that underneath the debris that is glued to the bottom there will be some nice bird’s eye grain. The finish was worn but the grain popping through the grime.The stamping was readable but it was faint. Care would need to be taken in the clean up so as not to damage it further.The stem had some issues – there were deep tooth marks on both sides from the button forward. On the topside there were nicks mid stem and near the shank/stem junction. The button also seemed worn and there was a possible crack on the underside mid button.I have read different bits of history on the Imperial pipes and trying to put them together is an interesting puzzle. From Pipes, Artisans and Trademarks, by Jose Manuel Lopés’ I found that t he Imperial Tobacco Co. (Imperial Tobacco Ltd.) was founded in 1901 through the merger of several British tobacco companies. In 1902 it went into partnership with the American Tobacco Company to found the British American Tobacco Company. This information was also cited on https://pipedia.org/wiki/Imperial_Tobacco_Co.

I looked further on Pipedia under The Civic Company https://pipedia.org/wiki/Civic. This lead came from a price list/catalogue that I had found in researching information on an earlier Imperial pipe I was working on. Here is the link https://rebornpipes.com/2014/05/11/civic-company-1921-trade-list/. The Pipedia article says Civic was formed in 1921out of the Imperial Tobacco Co. (Fancy Goods Department) Ltd which was located in Fulham Palace Road Hammersmith. The article went on to give a bit more information on the The Imperial Company itself. It repeat that it was formed in 1901 but that it was formed in response to an aggressive take over raid in Britain by American Tobacco and involved the pooling of tobacco retail outlets including closely related items such as briar pipes. Here is the additional information that was not included in Lopés’ – in 1902 Imperial purchased the Salmon & Gluckstein retail empire, which included a section that finished briar pipes, originally made in France, for sale in Britain. It was this unit that became the fancy goods department within Imperial and, ultimately in 1921, the Civic Company. In 1928 Civic was a key element in the merger with other producers and retailers that formed Cadogan Investments, which still trades today.

I did some further searching on Google to try to pin down more information on the brand. I found lots of repetitive information in bits and pieces but nothing that added to what I already knew. I did find confirmation of the above information in a discussion on the pipesmagazine online pipe forum. It contained no new information but it gave the same data I had quoted above.  http://pipesmagazine.com/forums/topic/need-help-to-identify-this-pipe-1.

Jeff has established his own process of thoroughly cleaning pipes for me and he did not vary in his procedure here. He reamed the bowl with a PipNet reamer and tidied it up with a Savinelli Fitsall Pipe Knife. He scrubbed out the mortise and the airway in the shank and the stem with pipe cleaners, cotton swabs and alcohol and cleaned the exterior of the threaded bone tenon with a cotton swab and alcohol. He scrubbed the exterior of the pipe with Murphy’s Oil Soap to remove the grime and grit on the bowl. The top took some special work because of the heavy lava overflow. He scrubbed it with a tooth brush and the oil soap until he removed the majority of the build up. There was still some minor buildup that would need to be dealt with when I worked on the out of round bowl. I took photos of the pipe to show the condition it was in when it arrived in Vancouver. The grain really was quite stunning. I took a close up photo of the rim top and bowl, to show how well he was able to remove the buildup around those areas and down the bowl sides.He had soaked the stem in OxyClean so when it arrived it was clean and the oxidation sat on the surface of the stem. The tooth marks were very evident.The damage to the inner tube was visible and it was ragged and torn. I would need to rework it to smooth things out and restore the angle.I used a Dremel and sanding drum on low speed to sand and shape the angled end of the inner tube and remove the damaged areas. I put a slot on the tube end to match other inner tubes I have on hand and fit the bottom of the bowl once the stem was in place.The next series of photos show the process of repairing the out of round bowl. I used a folded piece of 180 and 220 grit sandpaper to smooth out the inner edges of the bowl and repair the top edge. Once I sanded it smooth I wiped it down with a cotton pad and alcohol to clean off the sanding debris and darkening on the surface. There was still polishing to do but the major portion of the repair was finished. I repaired the two small sandpits on the bottom sides of the bowl with super glue and sanded them smooth with 220 grit sandpaper once the repairs had cured.With all the repairs and reshaping on the rim and bowl finished it was time to stain the pipe. I decided to use a dark brown aniline stain that I mixed 50/50 with isopropyl alcohol to make it more transparent. It will still have the dark stain in the grains but once I wipe it down and sand it with micromesh it will be a rich brown tranparent overcoat with dark highlights. I applied the stain with a dauber and flamed it with a lighter to set it in the briar. I repeated the process until I was pleased with the coverage on the bowl and shank.Once the stain dried I wiped the pipe down with alcohol on cotton pads to remove the thick topcoat and make the stain more transparent. It significantly lightens the colour at this point but the grain won’t stand out until I polish it with micromesh pads. I polished the briar, being careful around the stamping on the shank, with micromesh sanding pads – wet sanding with 1500-2400 grit pads and dry sanding with 3200-12000 grit pads. I wiped the bowl down after each girt with alcohol and cotton pads. With the bowl finished I directed my attention to the stem. I cleaned out the damaged areas with a dental pick and sandpaper and filled them in with black super glue. The photos below show the repairs on both sides of the stem. The third photo shows the repairs further up the topside of the stem.When the glue had cured I used a file to bring the thickness of the repairs down to the surface of the stem. I used to do all this with sandpaper but figured out that the file actually sped things up a bit. I sanded the stem surface and repairs with 180 grit sandpaper after the file to smooth out the surface and remove more of the oxidation. I would need to sand it with higher grits to remove the scratching but it was at least getting better. I used a needle file to reshape the edge of the button and the top and underside surfaces of the button. I sanded the repairs smooth with 220 grit sandpaper and then polished them with 1500-2400 grit micromesh sanding pads. I took a photo of the stem at that point in the process and the oxidation showed up clearly in the bright light of the flash. I poured the Before & After Stem Deoxidizer into a flat container and put the stem in to soak while I worked on other pipes. I removed it from the soak after about 2 hours and polished it with Before & After Pipe Polish. It looked much better than it did when I put it in the bath. I decided to continue polishing it with micromesh sanding pads. I wet sanded it with 1500-2400 grit pads and rubbed it down with Obsidian Oil. I dry sanded it with 3200-12000 grit pads and rubbed it down again with the oil after each pad. I gave it a final rub down with the oil and set it aside to dry. I polished the bowl and stem on the buffing wheel with Blue Diamond to take out the last minute scratches in the briar and vulcanite. I gave the bowl and stem multiple coats of carnauba wax and buffed it with a clean buffing pad to raise a shine. I hand buffed it with a microfibre cloth to deepen the shine. The finished pipe is shown in the photos below. The pipe looks far better than it did when I started. The bowl looks round, the finish looks far better and the repairs on the stem though visible up close blend in well with the black of the vulcanite stem. The aluminum inner tube is shine and smooth with the reshaped angle of the tube looks like it must have when it left the factory. Thanks for walking with me through this refurbishing it was a fun one to work on. Cheers.


Jen’s Trove No. 7 – A Trident Blasted Bent Billiard with a Question of History


Blog by Dal Stanton

This pipe represents the 7th of 8 pipes that Jen rescued from my ‘Help Me!’ baskets.  She’s leaving Bulgaria very soon returning to the US after working with us for a few years.  She is not returning without gifts!  She has chosen a trove of pipes that have garnered her attention to give as gifts to the men in her family.  Each of these gifts has the added benefit of helping the Daughters of Bulgaria, our work here in Bulgaria with women and girls who have been sexually exploited and trafficked in Europe.  My love of restoring pipes as The Pipe Steward is a way of shining a light on the tragedy of those caught in this modern-day slavery.

The ¾ Bent Billiard got Jen’s attention I believe, because of the blasted finish.  The only stamping is under the shank and it is marked, “TRIDENT”.  However, when I saw this pipe from an eBay seller in the UK, my attention was drawn also to the old-style P-Lip military stem and the old vintage feel of the pipe overall.  Here’s what I saw on eBay UK:This seller had other offerings which I also placed bids to take advantage of combined shipping from UK to Bulgaria.  With the Trident, I added a Hardcastle ‘Deluxe’ No. 12, and a Bewlay ‘The General’ to my basket for restoration.  Now, on my work table on the 10th floor apartment of a formerly Communist apartment block, I look at the Trident with the question, ‘Is this pipe actually vintage old or does it just look old?’  I take more pictures to fill in the gap. My first action was to look in my autographed copy of my eBay acquired copy of, ‘Who Made That Pipe?’ by Herb Wilczak & Tom Colwell.  It’s not autographed to me, but still cool!In ‘WMTP?’ the name ‘TRIDENT’ was associated with two names, ‘E Deguingand & Son/ H. Comoy’.  Country of origin, ENGL.  First looking at Pipedia’s article on Comoy’s, I discover that ‘Trident’ is a second made by Comoy’s – one among many!  Looking at PipePhil.eu, I found an example of this Comoy second which still displayed the ‘Comoy’s’ stamping and nomenclature.  The Trident before me carries no other markings and for this reason, I’m dubious of it being from the Comoy’s line of seconds.Then I turn to ‘E Deguingand & Son’ to see what I can find.  Pipedia has a helpful article that collates information about the name.

Deguingand & Son

Emile Deguingand & Son, Ltd. was a briar pipe maker in London at the end of the 19th and beginning of the 20th centuries. Originally they manufactured pipes in London, on Hamsell Street in Cripplegate, but that entire area was destroyed in the fire of 1897. Deguingand began selling at 5 Colonial Avenue, Minories, East London beginning in 1897. That same year Emile Deguingand purchased a pipe factory built by Charles Cayron in 1885 and 1886 at a place called Sur les Etapes in St. Claude, France. The factory in St. Claude was raised and enlarged in 1900 and 1902.

In 1906 Deguingand was granted a patent in France for a pipe consisting of a removable combustion chamber over a lower chamber filled with asbestos into which the airway ran.

In 1910, E. Deguingand & Son, known in France as E. Deguingand et Fils, became S.A. des anciens Etablissements Deguingand et Fils with Francis and Paul Deguingand’s entry into the business. While the plant doubled in size in approximately 1926, it was closed around 1930 and later converted to a commercial warehouse.

One pipe line known to have been sold by Deguingand was the Trident.

The last line is interesting in terms of the exclusivity it seems to imply.  The article is helpful but leaves out much and creates more questions.  When Deguingand opened operation in St. Claude, France, 1897, the same year opening another location in London after the fire of 1897, the assumption I believe, that is true, is that operations continued in both London and St. Claude under the Deguingand name.  The indication is that the operation in France closed in 1930, but there is no indication that operation in London ceased as well.  The challenge I am left with is that I can find precious little about production of Deguingand pipes or ‘Trident’ through the 1900s other than this early century reference by Pipedia.  If theories can be developed from silence, the E. Deguingand & Son Company is NOT listed in the 1949 Tobacco Retailers’ Almanac found at Chris’ Pipe Pages.  Can one deduce from this that pipes were no longer produced under the name?

The only other finding in my research that sheds some light on the E. Deguingand & Son name, comes from ‘Company Search Made Simple’ website. Here I find that E. Deguingand & Sons was incorporated, at least as an English entity, 3/12/1912, and was dissolved 7/30/1996.  The address was listed as 20 VANGUARD WAY, SHOEBURYNESS, SOUTHEND ON SEA, ESSEX, SS3 9RA.  The Director of the corporation was listed a John James Adler, from 8/1/1991 to 7/30/1996 – the same date as the dissolution of the corporation.  Of interest to me, but probably not a surprise for others more informed (!), was when I was trolling around the corporate bones of the corporate umbrellas created to manage sales and acquisitions of pipe names in much of pipedom in England and France – I discovered, Cadogan.  On this site, I compiled this list of well-known names in the pipe world that were started at different times, but all were, 1) dissolved on the same date (7/30/1996, with the exception of Kaywoodie, a few weeks later), 2) who shared the same address (Southend On The Sea) and, 3) had the same Director.  Here’s the list I compiled.What this tells me is that E. Deguingand & Son, Limited, existed at least as a corporate entity in the Cadogan consortium until 1996, but I have no indication that pipes were produced under the corporate name from the 1930s to 1996.  I’m growing in my understanding of the name, but is the Trident before me of a vintage that dates to the early 1900s?  I’m not sure, but one thing about the Trident that creates question – Does the P-Lip Military style stem help place this pipe?  It looks older to me, but my question lingers.

When the well runs dry in my research, I send questions to Steve to help prime the pump.  I share with him some of the research related above and some pictures of the Trident, but my specific question is, “Can a P-Lip stem indicate the age of a pipe – or contribute to its age placement?”  Steve’s first response was helpful in clueing me into the probability that the Trident before me could very well be of an early 1900s vintage.  His response was: “It looks a lot like the Wellington that WDC made in the early 1910-1920s.”  It was not difficult to find these artifacts in Pipedia’s article about the William Demuth Co. and the WDC Wellington – a WDC mainstay over the years. With the uncannily similar Wellington pictured above, courtesy of Doug Valitchka from Pipedia, the Trident lookalike before me could very well be of an early century vintage and a product of E. Deguingand & Son, Limited.

My second inquiry to Steve was how it all worked.  Did WDC make pipes (Wellington styled) for E. Deguingand and E. Deguingand marked them with ‘Trident’ though made by WDC?  Steve’s next response was even more to point questioning the accuracy of attributing the Trident to E. Deguingand.  He said,

I wonder if the E. Deguingand is correct. I wonder if WDC in NYC did not make a Trident pipe. I would do some digging in old WDC catalogues and see if you can’t find it. It has the same style band, same style faux p-lip with the air hole in the end of the button rather than on top. WDC did that I think to avoid issues with Peterson.

I did as Steve recommended and looked at several old WDC catalogs I could find online.  One forum was helpful in providing a WDC Master List.  Unfortunately, no ‘Trident’ listing was evident there or anywhere else I looked indicating a William Demuth Company source. I come up empty finding a direct connection between WDC and the Trident.  If anyone can help solve this mystery, I would be grateful!

I approach the restoration of this Trident as an early vintage 1900s vintage and will seek to maintain that.   Not knowing at this point if this is an early E. Deguingand Trident or a WDC made Trident, I appreciate the fact that I do have an ‘Ole Timer’ and will handle him with care!  The ‘faux’ P-Lip Military style stem is heavily oxidized and this will be addressed.  The chamber has moderate cake and this will be removed to reveal fresh briar.  The rim has some lava but is in good shape overall.  The stummel needs cleaning of the grime and band polished.  With an appreciation for the Trident before me, I begin the clean-up by putting the P-Lip stem into the OxiClean bath to start dealing with the heavy oxidation. With the stummel in hand, the fire chamber has light carbon cake build up.  I use the Savinelli Pipe Knife to ream the chamber.  It does the job very quickly.  I then wrap 240 grit sanding paper around a Sharpie Pen and sand the chamber wall to remove more residue carbon.  I conclude the chamber clean up by wiping with a cotton pad wetted with alcohol to remove residue carbon dust.  The pictures show the progress. With the chamber reamed and cleaned I turn to the internals.  Using cotton swabs, pipe cleaners dipped in alcohol and needle files to scrape the edge of the mortise, I work on cleaning the internals of the stummel.  The internal architecture of the mortise has two internal holes drilled.  The upper hole is the airway leading to the draft hole.  Underneath this, a hole is drilled to create a reservoir for moisture to collect.  I take a picture of this and include a cut-away of a WDC Wellington from The Briar Files discussion of WDC Wellingtons After some effort working on the gunk removal, and with the growing need to attend to other obligations not having to do with pipes or their restorations, I decide to continue the cleaning job using the kosher salt/alcohol soak.  I fill the chamber with kosher salt that leaves no aftertaste, and twist and stretch a cotton ball to insert into the mortise, acting as a wick to draw out the oil and tar.  I use a large eye dropper and fill the bowl with alcohol until is surfaces over the salt.  I set it aside and let it do it work.Later, I remove the very oxidized P-Lip Military stem from the OxiClean bath and the bath did the job of raising the oxidation to the surface.  The stem is now a light grey color not the usual dark olive green.  I go to work removing the oxidation using a barrage of tools.  I wet sand the stem in warm to hot water for about 30 minutes using 600 grit paper!  Oxidation is very stubborn in the edges of the P-Lip orific button lips.  I utilize hard edges to wedge the sand paper in the corners.  I then use 0000 grade steel wool to work over the entire stem including the hard to reach corners and curves.  Finally, I use Mr. Clean MagicEraser to put the oxidation to rest.  This phase looks good – it didn’t come easily!I go directly to cleaning the internals of the stem with pipe cleaners dipped in isopropyl 95%.  It did the job quickly.After some time, I return to the stummel that is having a salt/alcohol soak. The salt has darkened showing that it has done its part.  I remove the expended salt and cotton wick and clean the stummel with paper towel to remove residue salt.  I return to cotton swabs and pipe cleaners, also using long bristled brushes to finish the job. With internals clean, I take another look at the stummel surface.  I use undiluted Murphy’s Oil Soap to remove the grime in the crevices of the blast and on the rim top.  I utilize cotton pads and a bristled tooth brush.  The rim has mild cake and I use a mild kitchen scrub pad to gently clean it.  I also clean and polish the band while I was at it. Because there was normal wear around the rim, the cleaning leaves lightened areas devoid of finish, though the blasted architecture of the rim is intact.  Using the lightest stain stick I have in the basket (Furniture Repair Marker – Oak), I color in the rim.  I like the way it darkened and complimented the texture of the hues.  I decide to use the stick on the stummel as well to highlight and deepen the peaks of the blasted surface.  I like how it turns out overall – nice.  I set the stummel aside to dry thoroughly. I take the stem to begin the micromesh pad cycles and to my chagrin, I see that the oxidation is peeking through – mainly around the curves leading to the crest of the military stem (I’m not sure if there is a technical name for that part of the stem!).  Ugh!  It’s already late so I elect again to put the stem in the OxiClean bath to see if it will do the job.  I heat the OxiClean solution in the microwave until it’s warm and plop the stem back in and turn out the lights!The next morning, I go straightaway to the stem in the bath, fish it out, wet sand the problem, oxidized areas with 600 grit paper then with 0000 steel wool.  I’m hoping that the oxidation is now removed as much as it can be removed.  I move on to wet sanding using micromesh pad 1500 to 2400, then dry sanding with pads 3200 to 4000 then 6000 to 12000.  I follow each cycle with an application of Obsidian Oil to revitalize the once oxidized Military, Faux P-Lip style stem.  I’m pleased with the pop of the vulcanite – it looks good. I put the stem aside to fully absorb the Obsidian Oil and to dry. Next, I apply Museum Wax to the bowl with a small cotton cloth – working the wax in the blasted surface landscape.  Then, I buff the bowl with a shoe brush to assimilate the Museum Wax into the surface and begin the shining process.  Turning to the Dremel, I mount a clean cotton cloth buffing wheel and set at speed 2 (40% full power) and more fully buff the stummel.  The buffing wheel does a good job working the wax in more thoroughly and bringing out a deep, resonate shine.  The pictures show the progress. With the Dremel already in use, I load the cotton cloth wheel dedicated to applying Blue Diamond compound. Using the wheel, I apply the compound to the nickel-plated band to bring out the shine.  As hoped, the buffing does the job well.  The Trident is dressing up well! Taking the stem, I mount the cotton cloth buffing wheel dedicated to applying carnauba wax.  I apply the wax to the stem to bring out the shine and protect it.  After applying a few coats of carnauba wax, I then reunite the stummel with the Military style stem and give the entire pipe a rigorous hand buffing using a microfiber cloth to raise the shine of the Trident even more.

Only two things leave me a bit wanting with the restoration and recommissioning of this Trident Blasted 3/4 Bent Billiard – the distinguished Military stem still holds some small traces of oxidation around the concave curves of the stem’s crown or horn.  Yet, my, my, it looks good mounted on the blasted stummel with its newly polished band!  The other item was not being able to identify clearly the maker of this Trident – whether E. Deguingand according to Wilczak and Colwell or the Wm. Demuth Co. as Steve suspects because of the preponderance of similarities between the Trident and WDC’s mainstay of the same style pipe, the Wellington.  In whatever way this question is ultimately settled, the Trident’s vintage status seems to place him in the 1910 to 1930 age range.  Truly, an ole timer who is now ready for another lifetime serving a new steward – gifted to one of Jen’s family members as she soon returns to the US from Bulgaria.  Her gifting helps to benefit the Daughters of Bulgaria, our work here in Bulgaria with those women and girls who have been sexually exploited and trafficked in Europe.  For more information about this, and why I do what I do, check out my blog at The Pipe Steward.  Thanks for joining me!