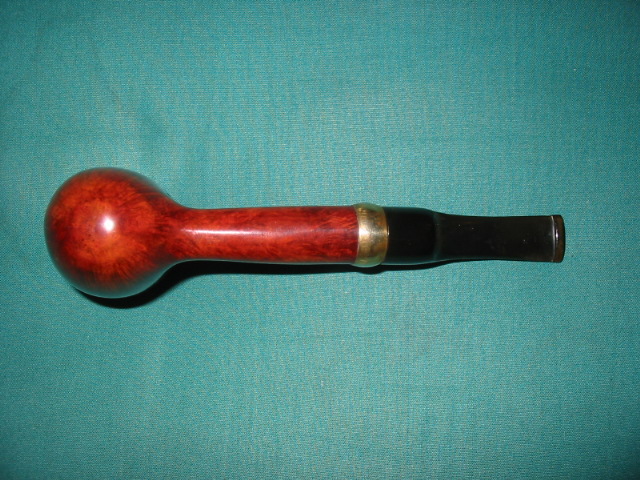
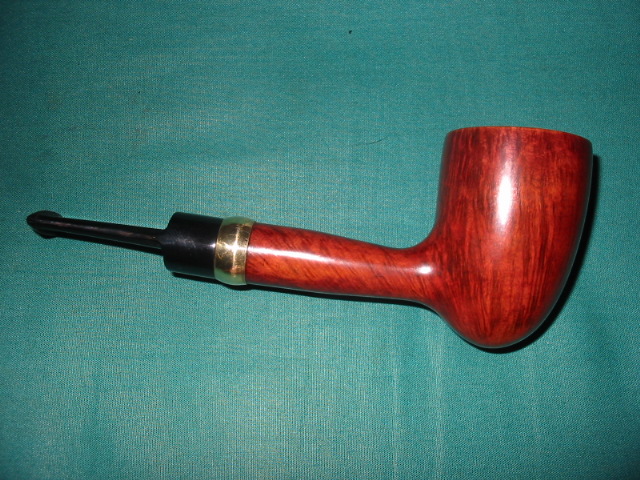
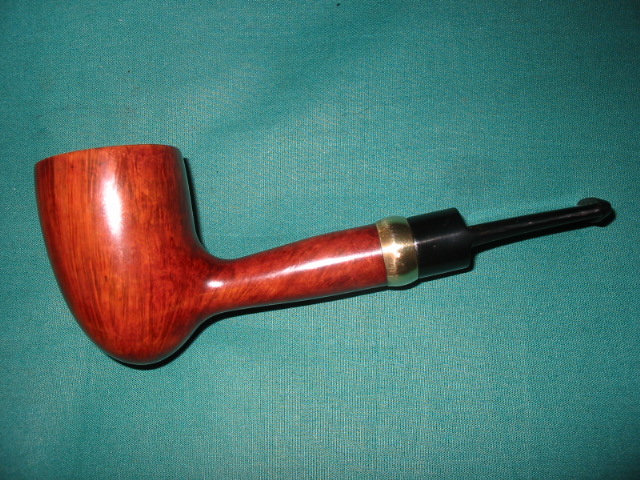
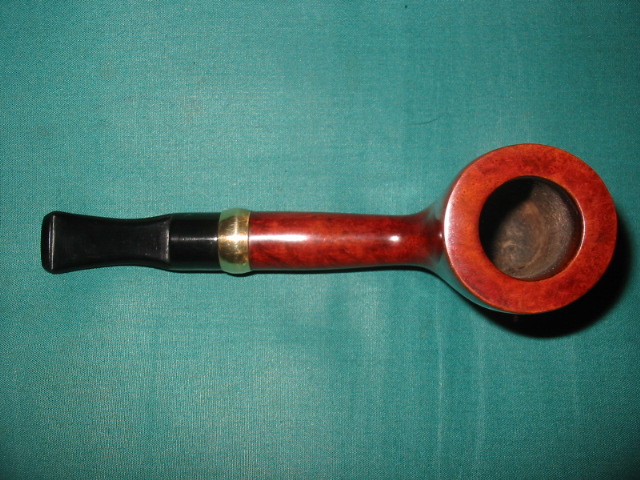
Tag Archives: shaping a stem

Refurbishing and Restemming an Irwin’s Canadian


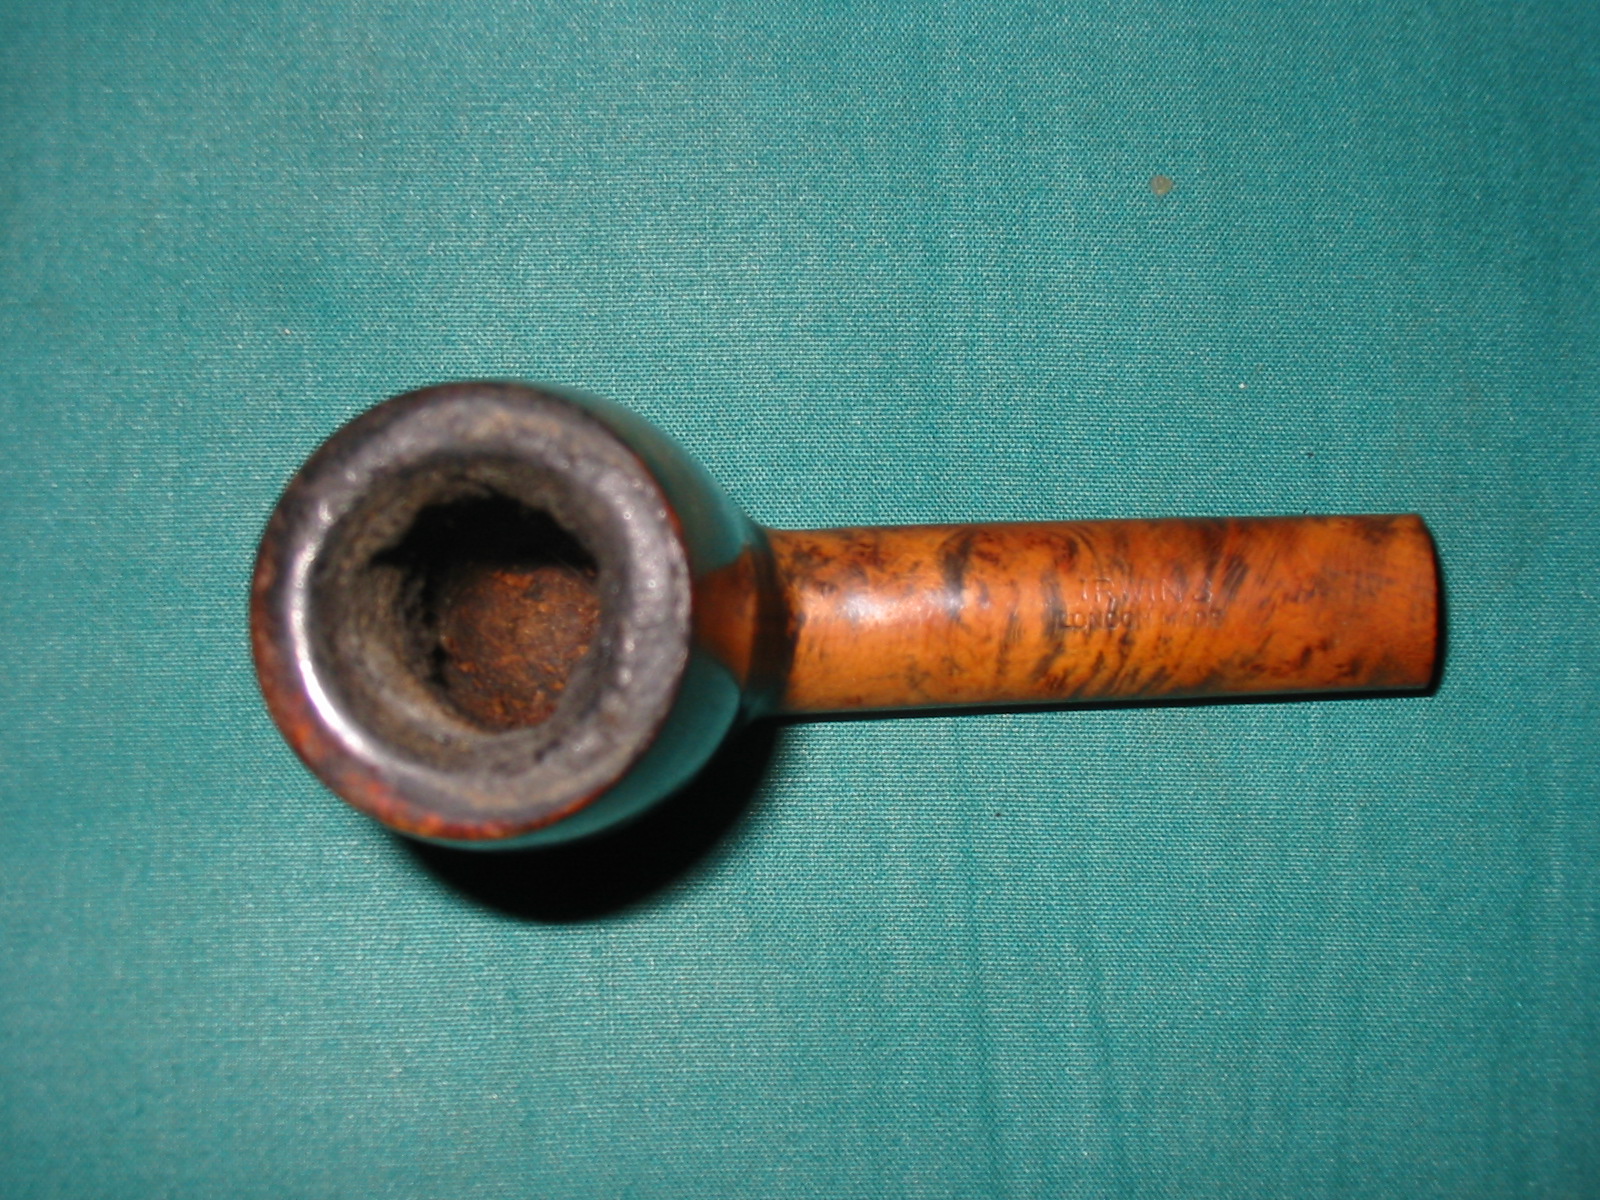
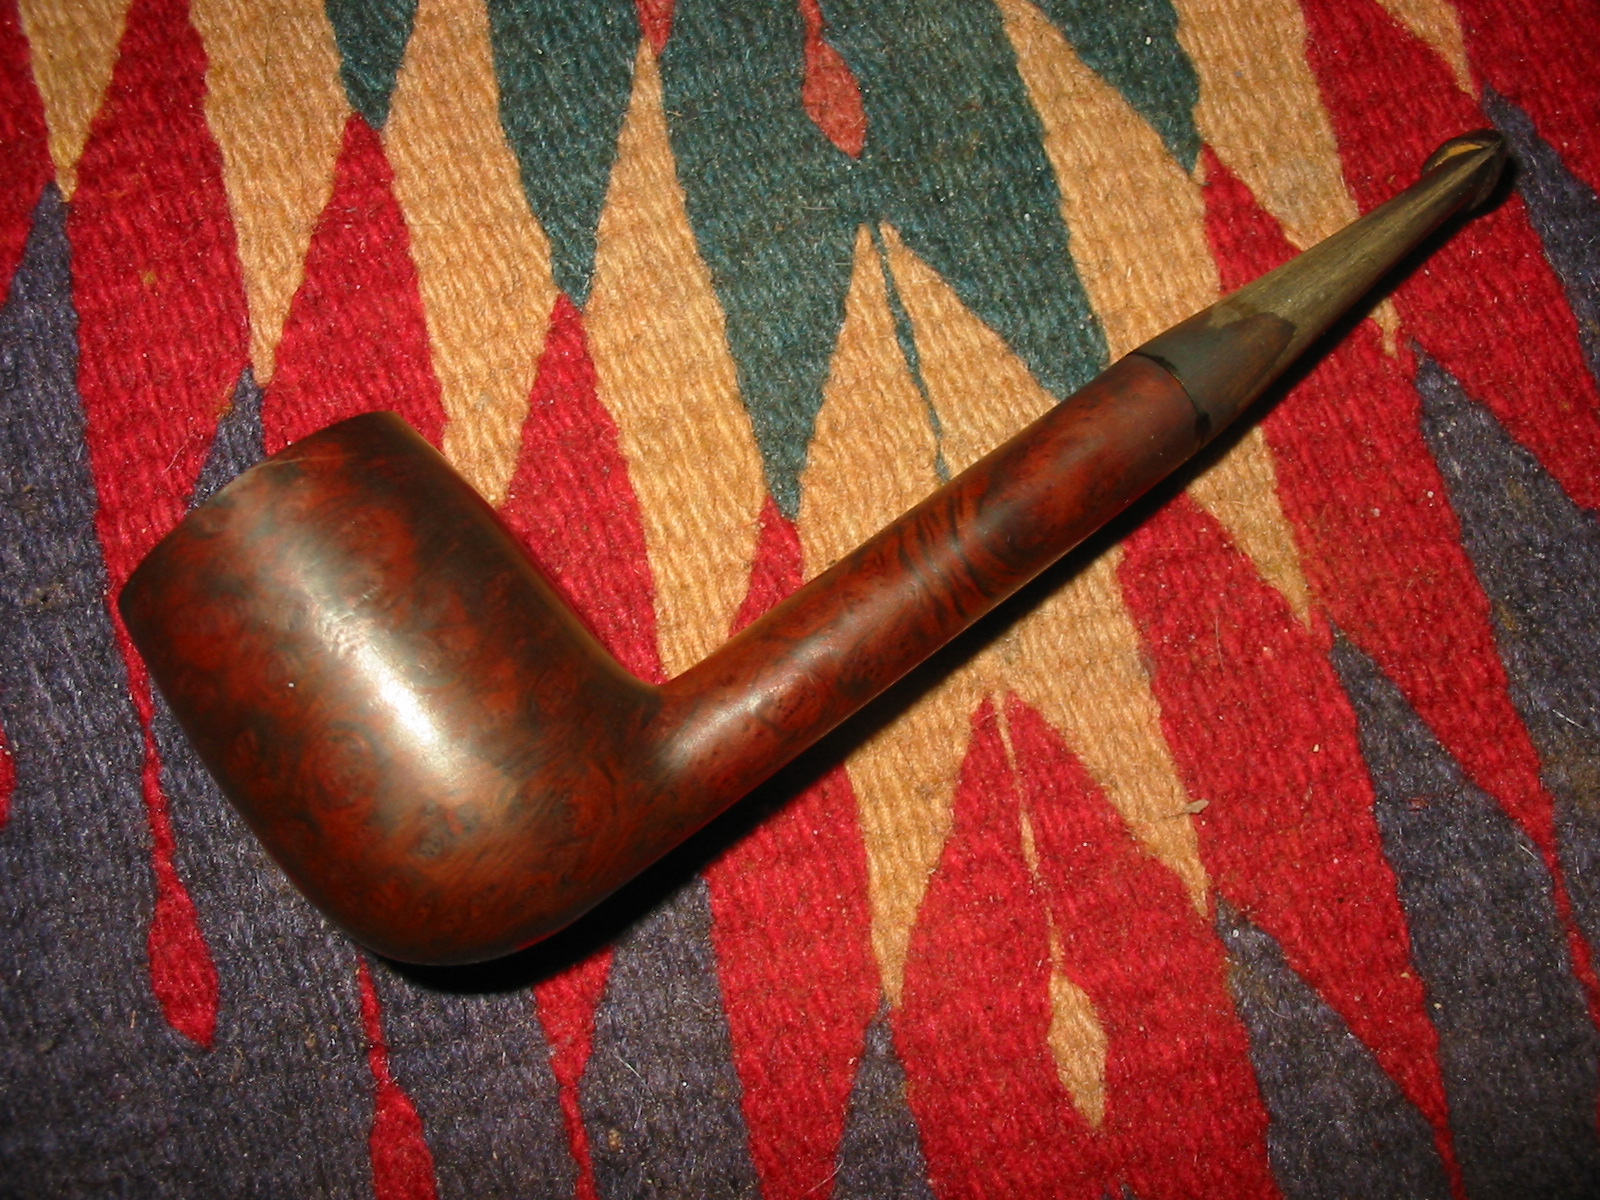
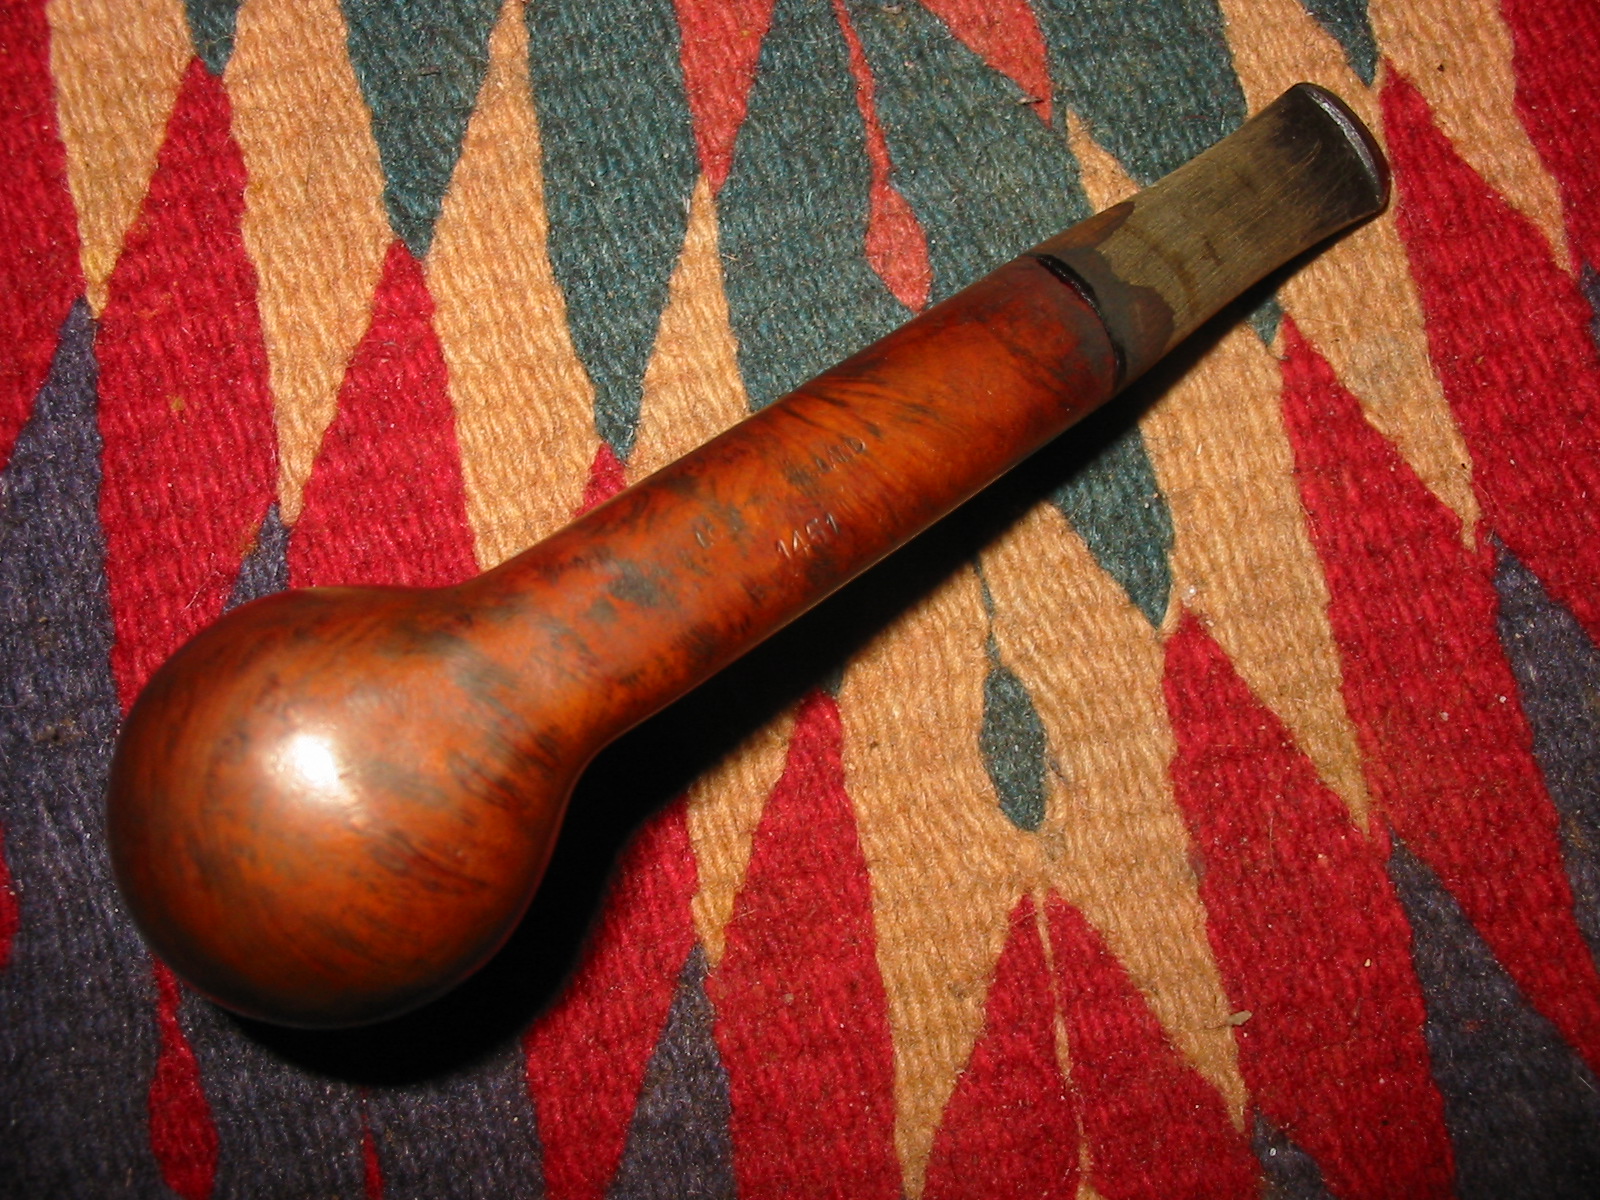
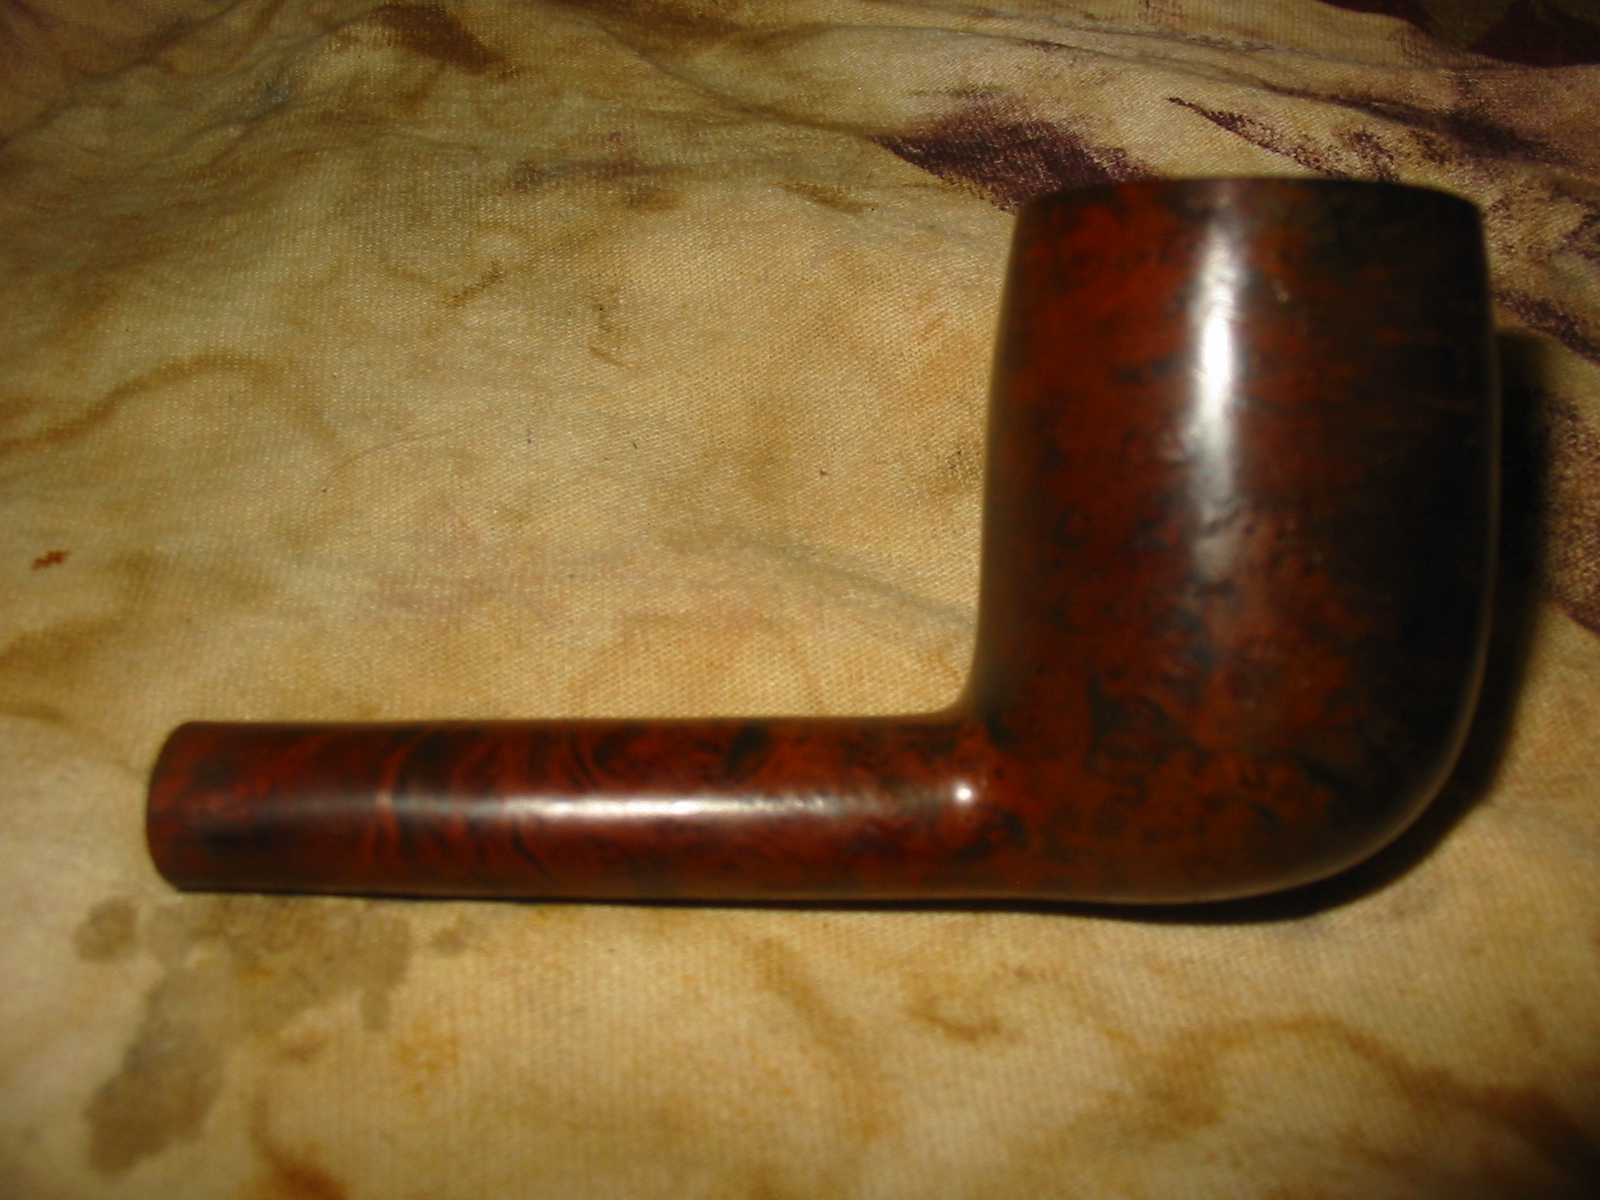
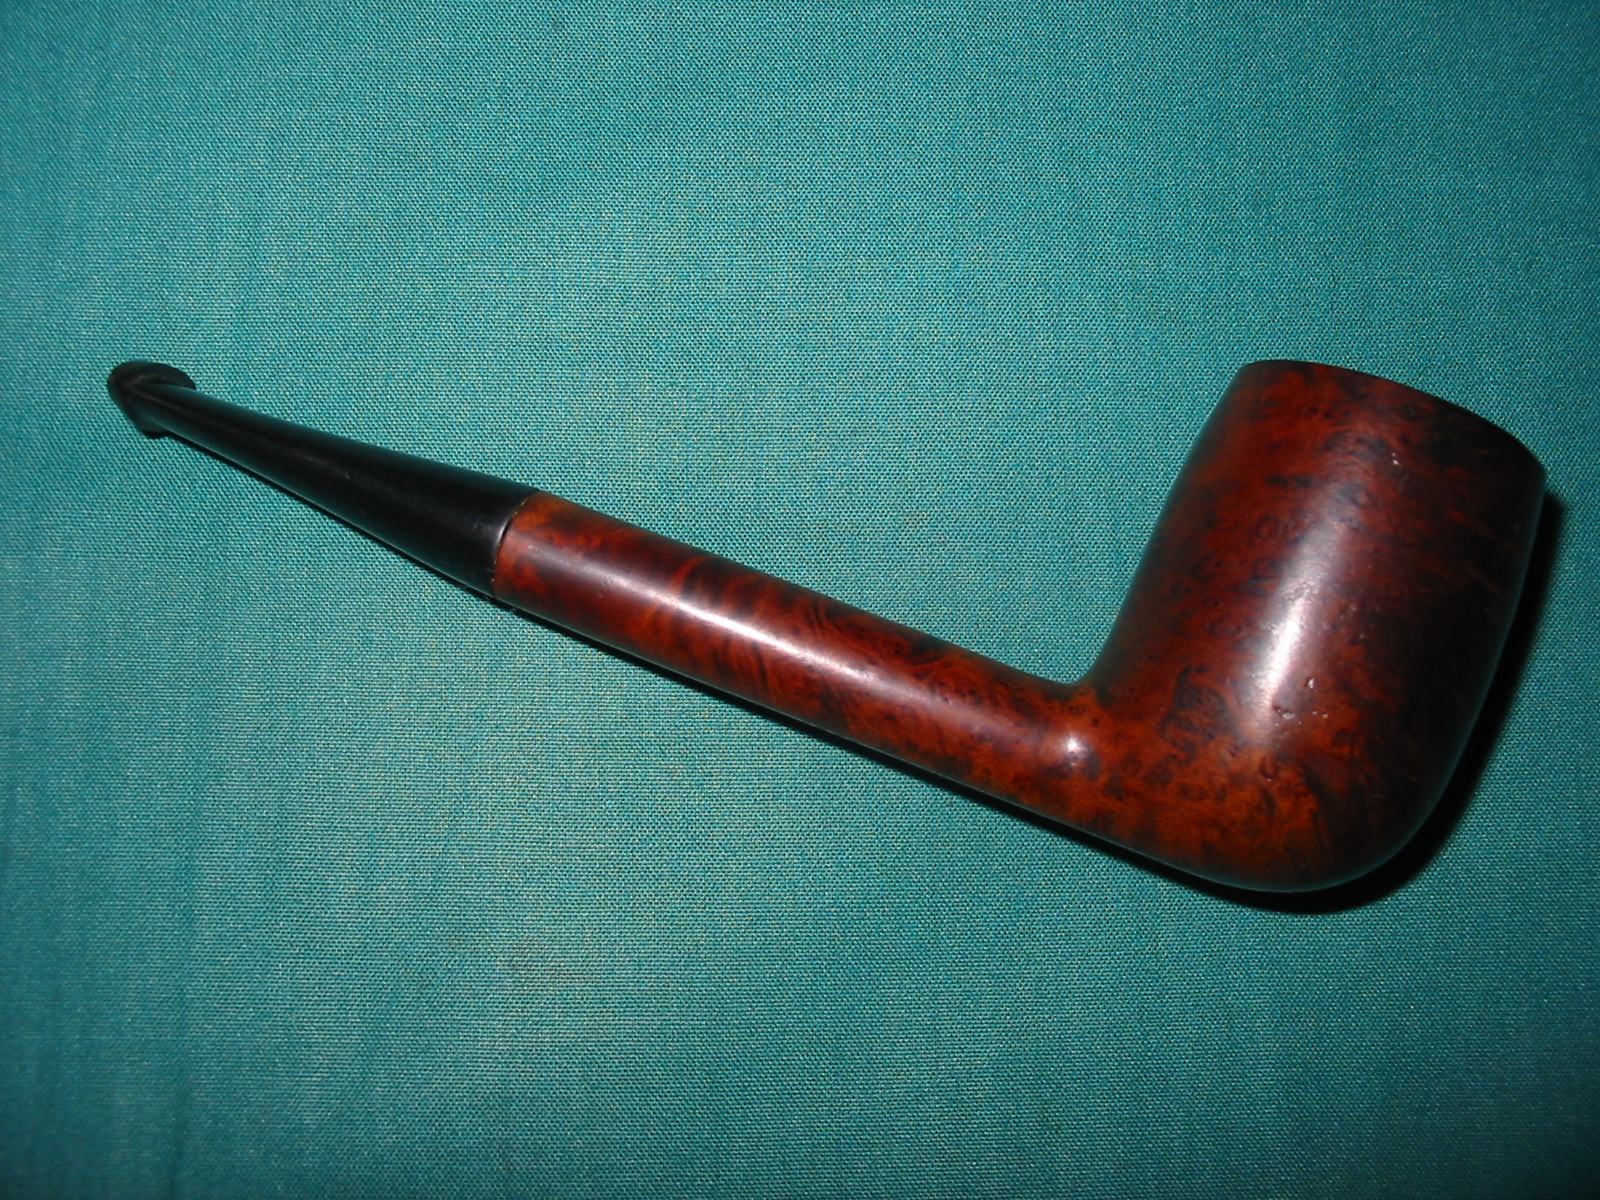
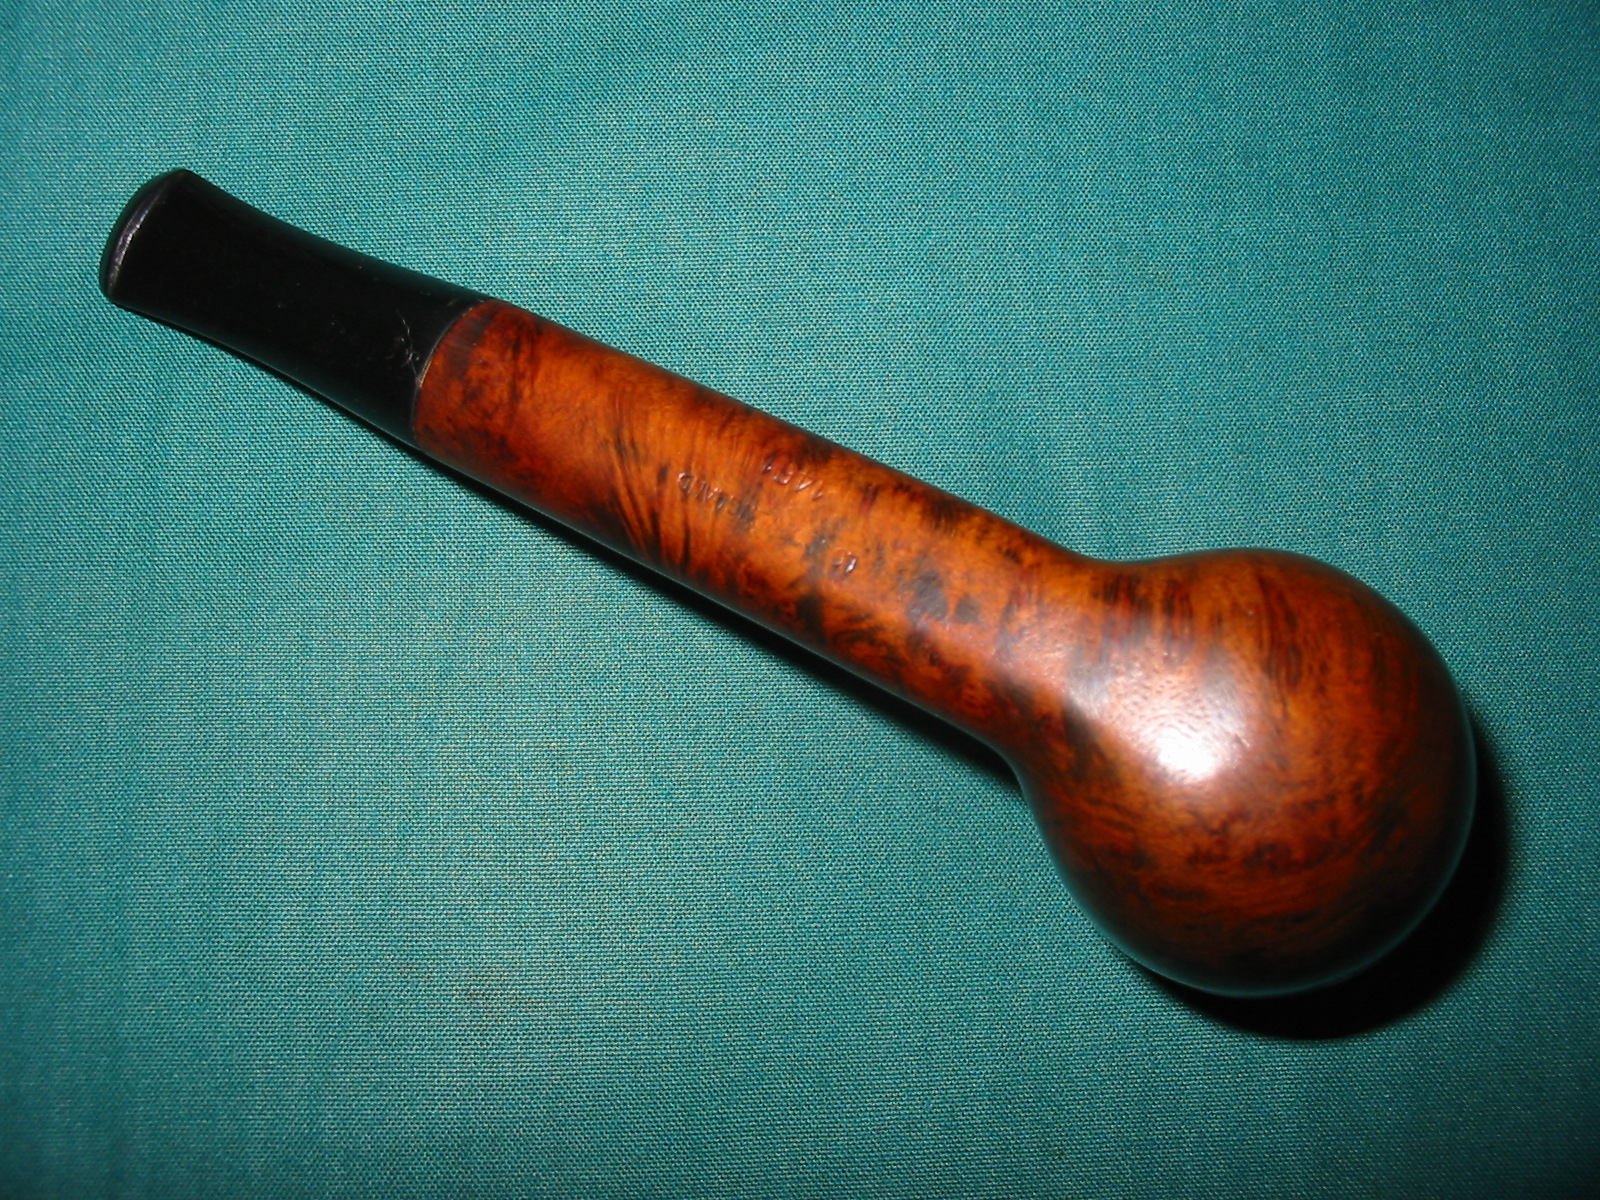
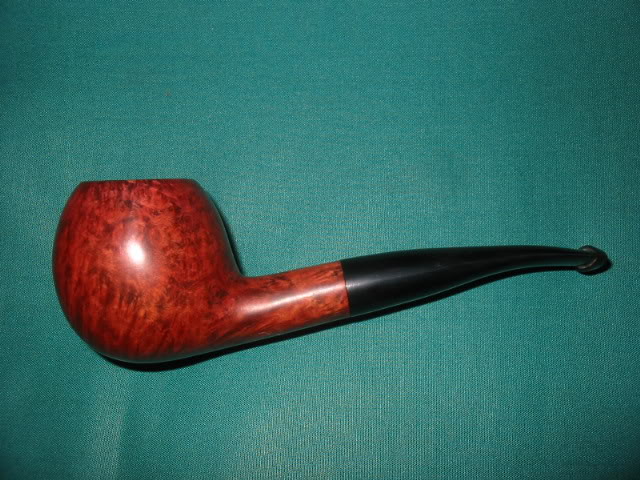
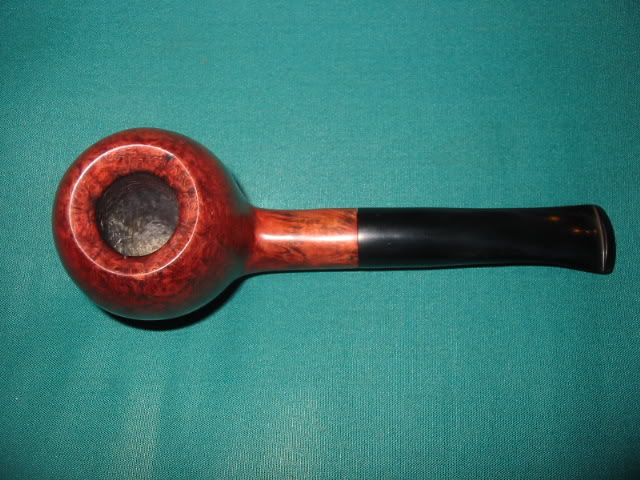
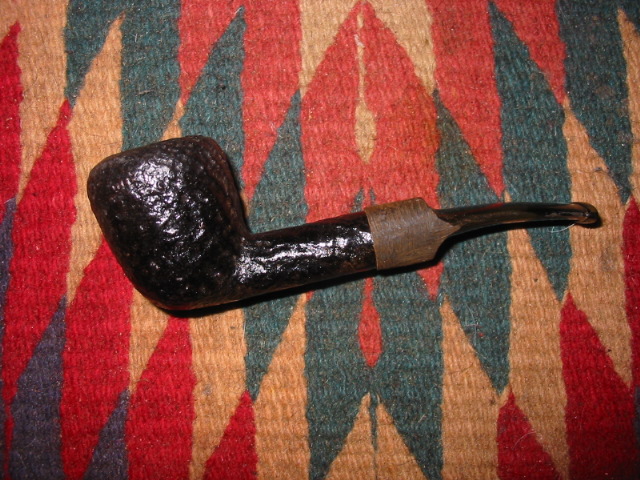
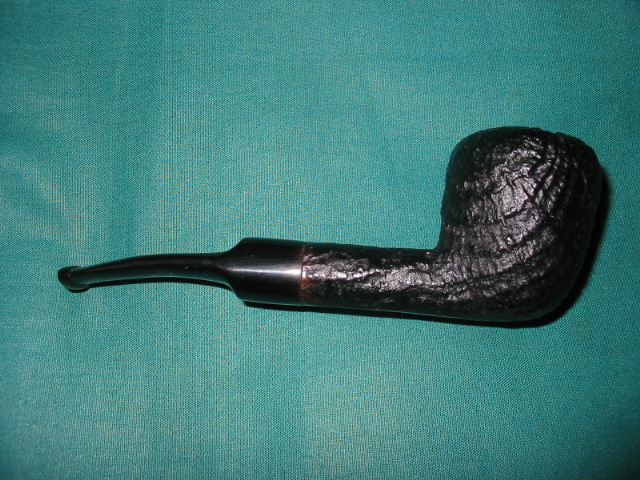
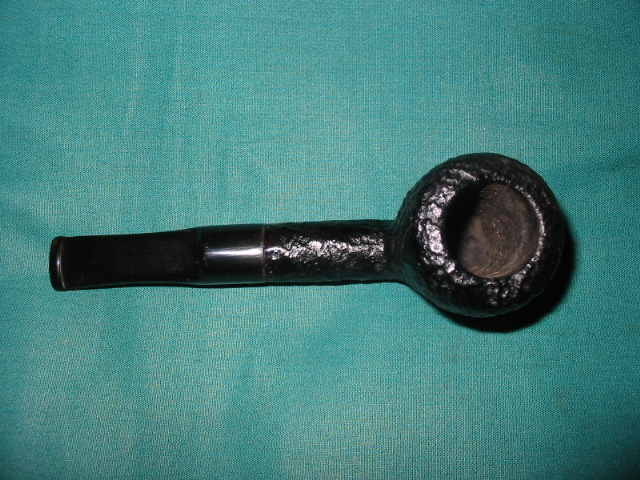
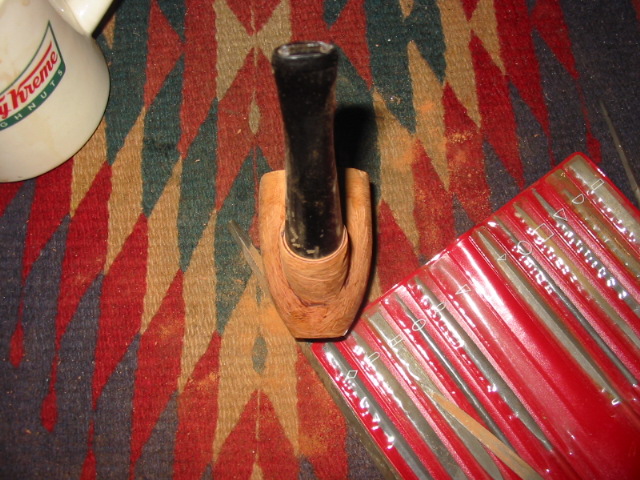
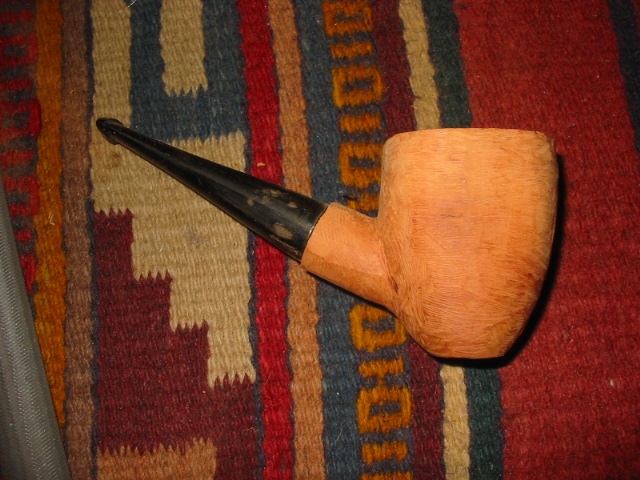
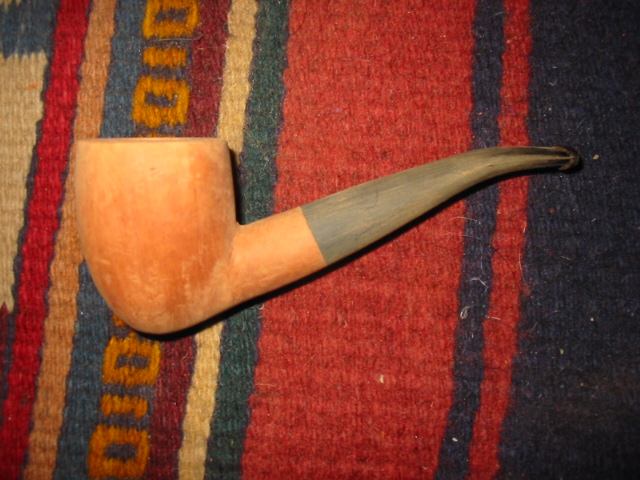
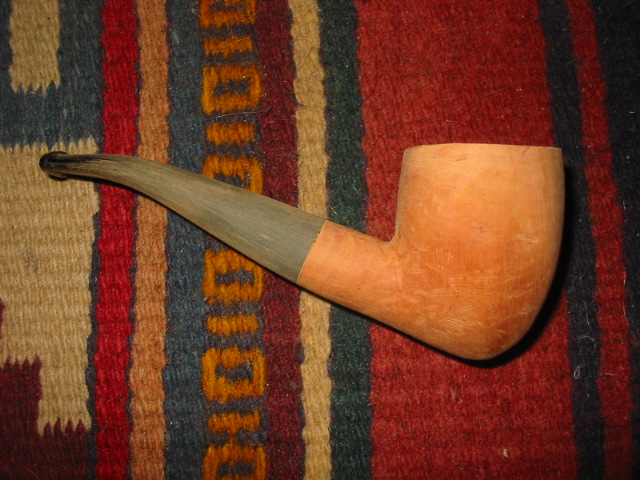
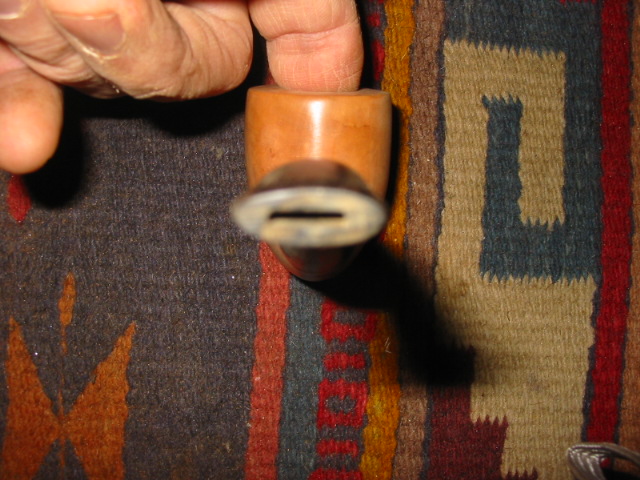
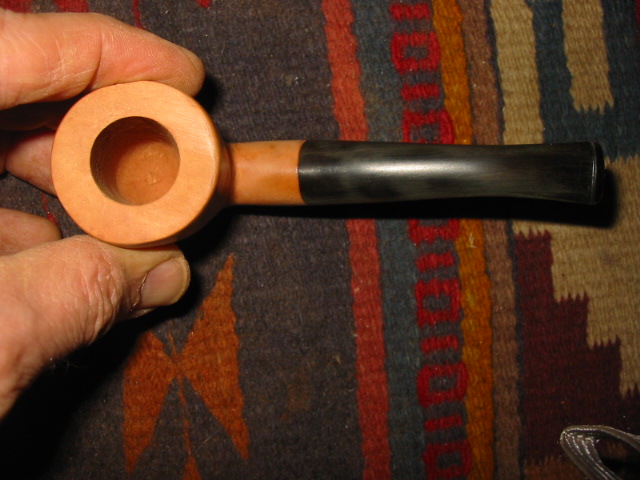
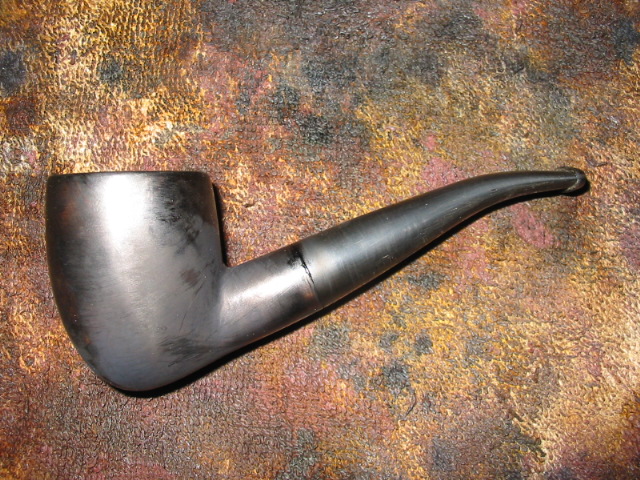
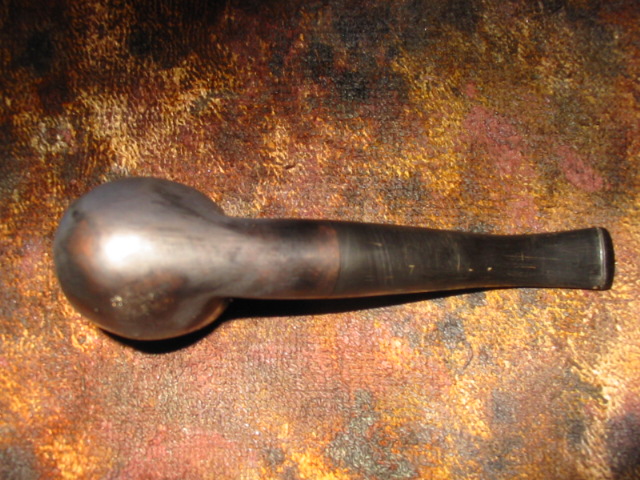
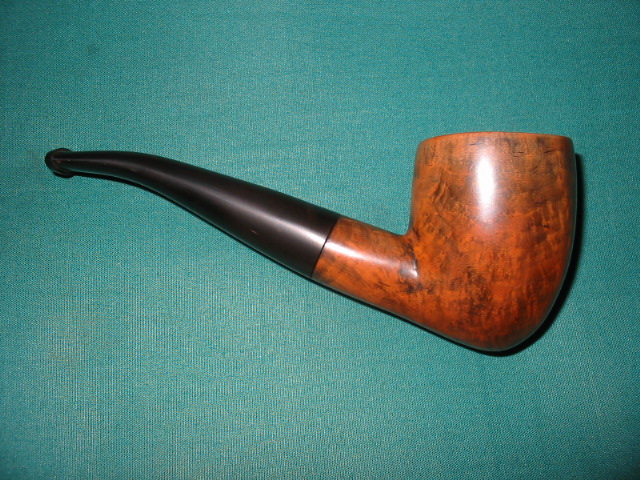
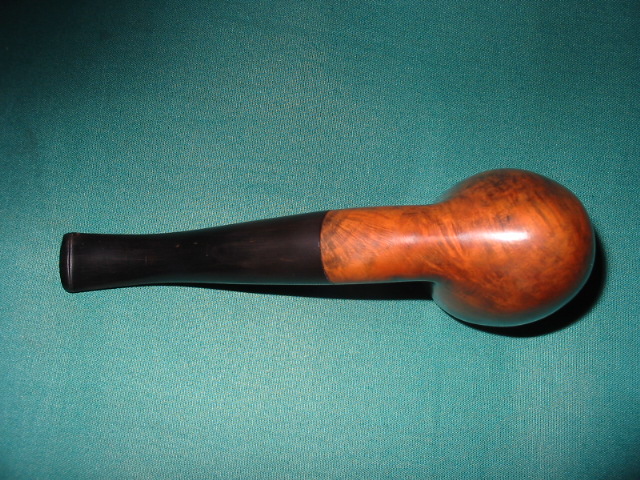
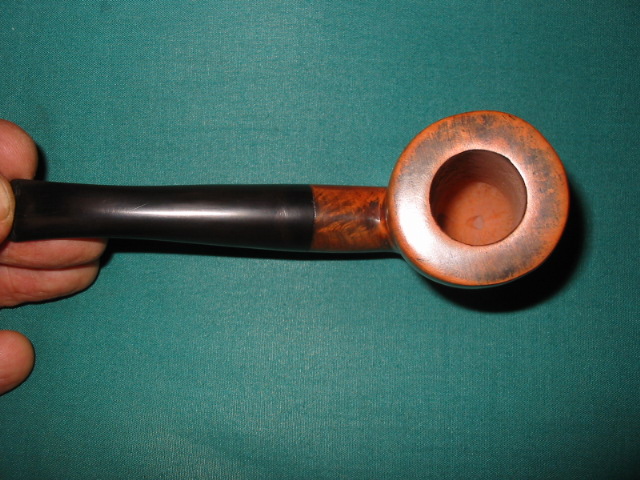
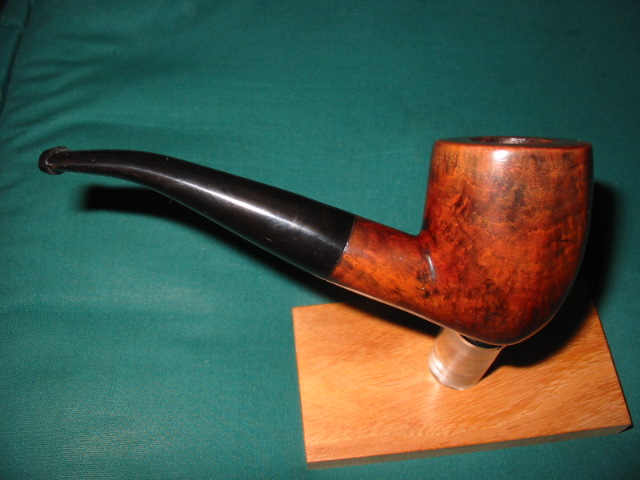
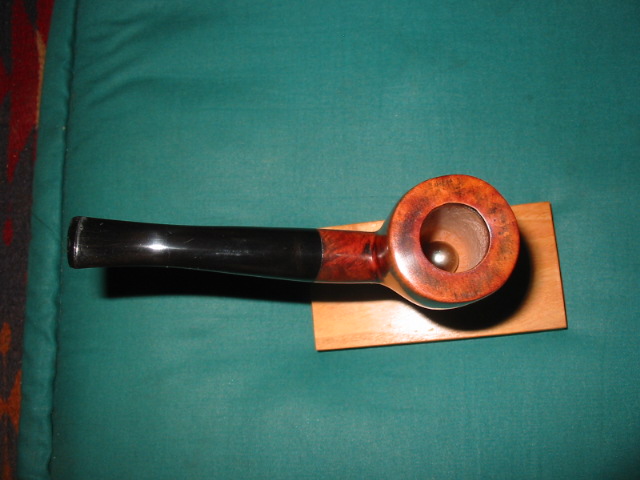
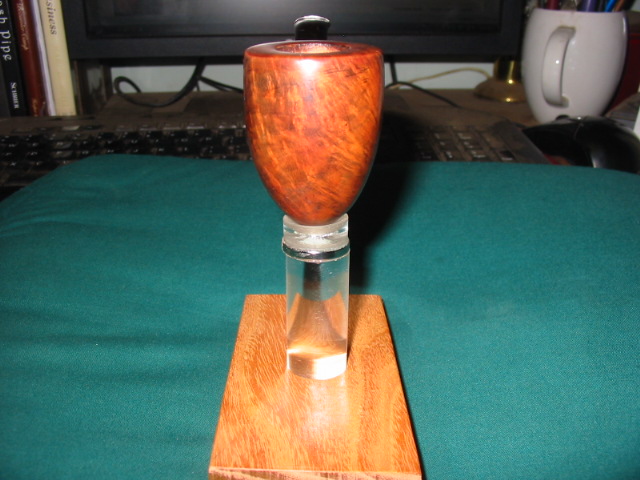
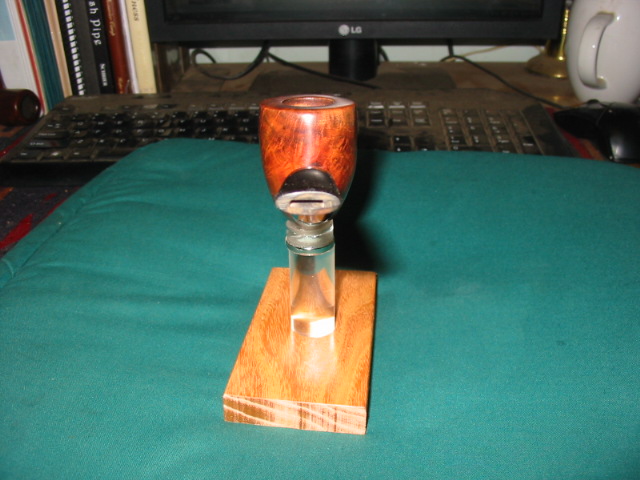
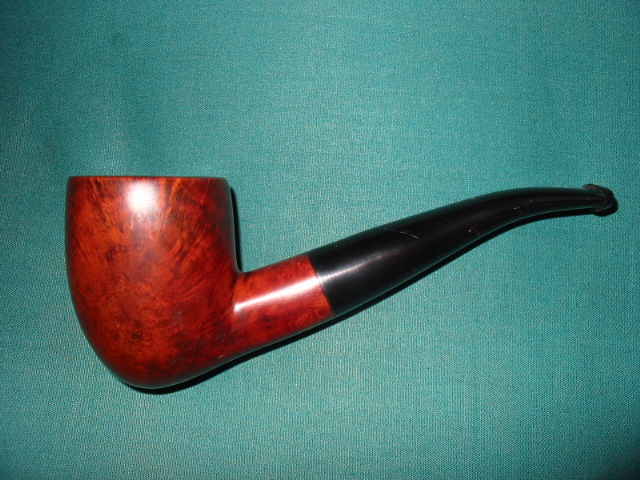
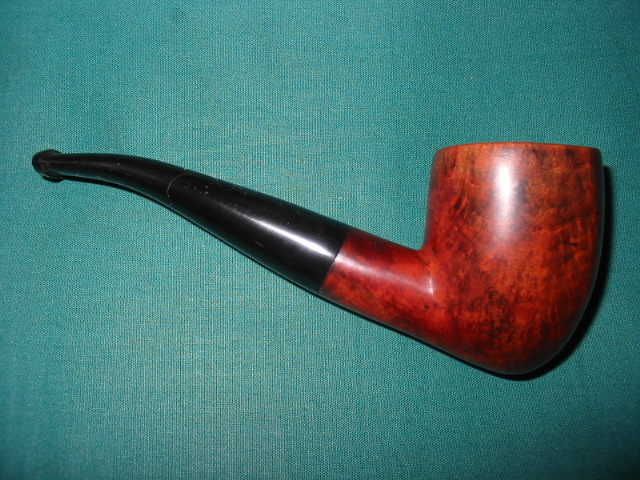
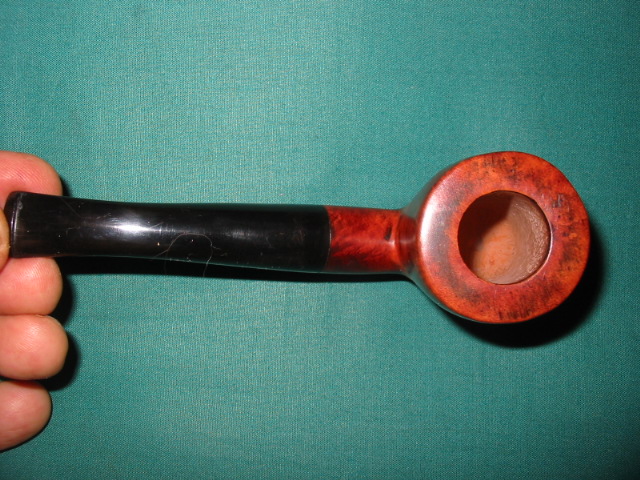
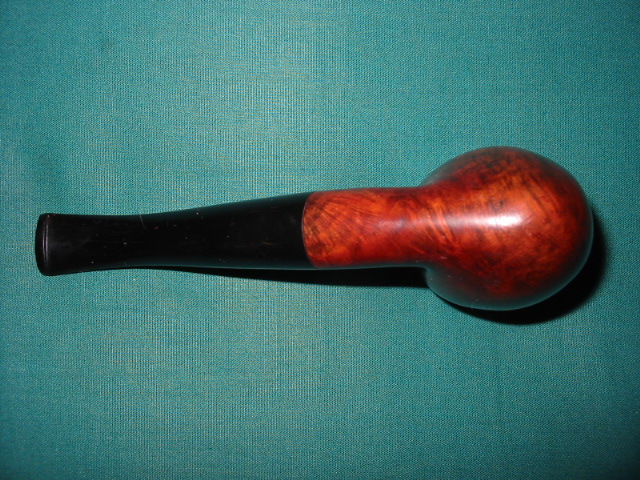
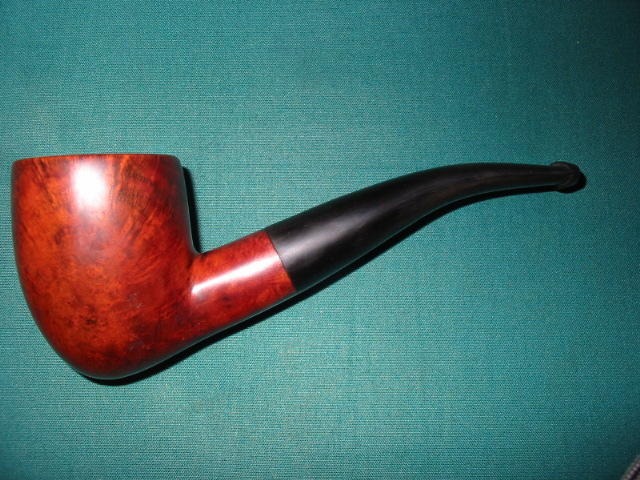
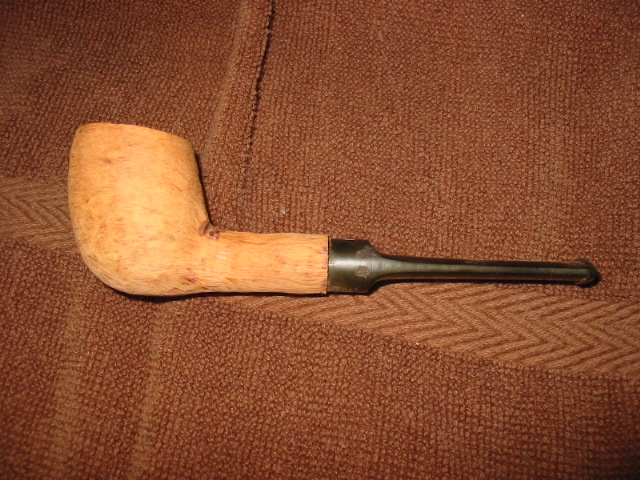
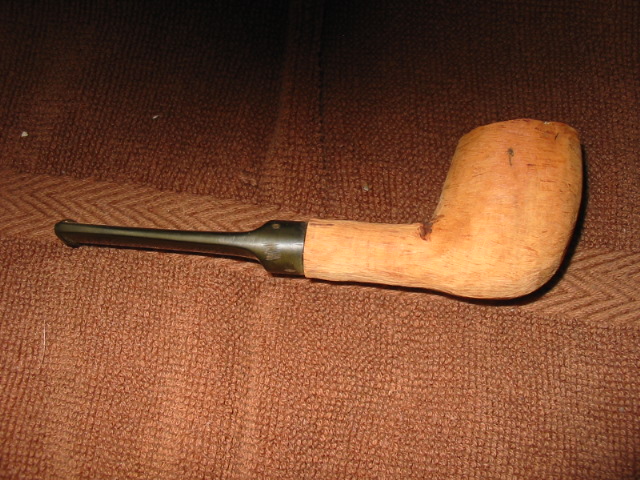
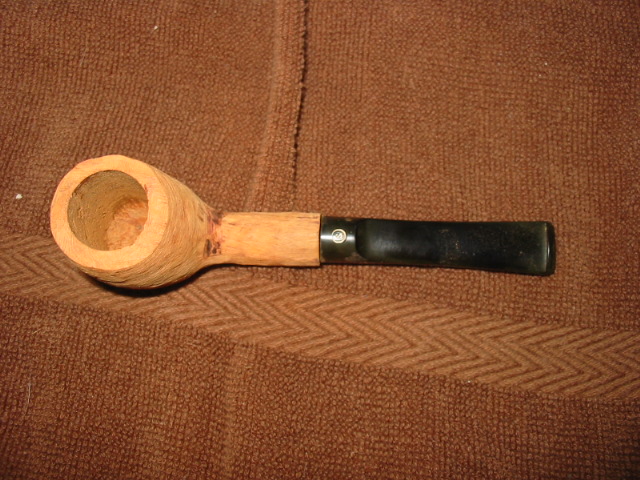
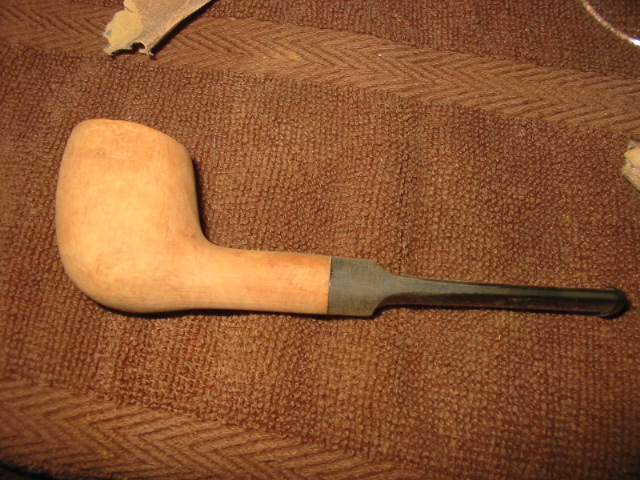
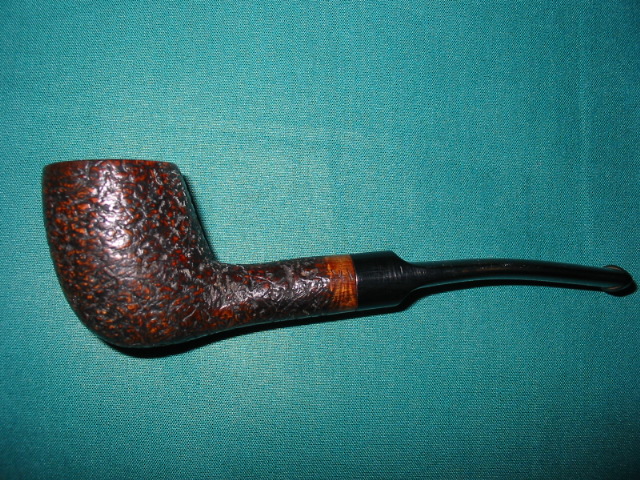
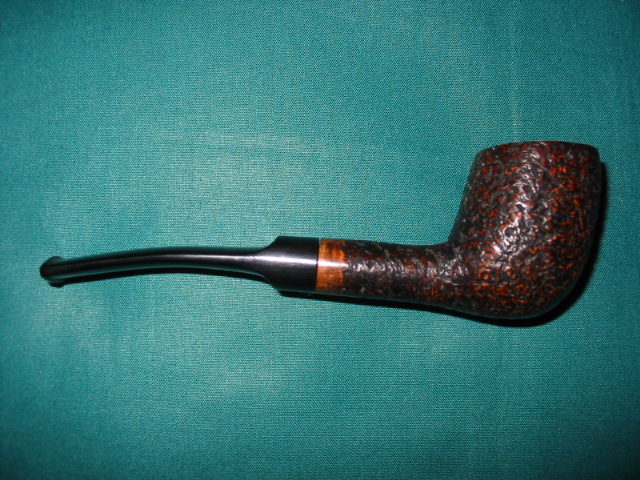
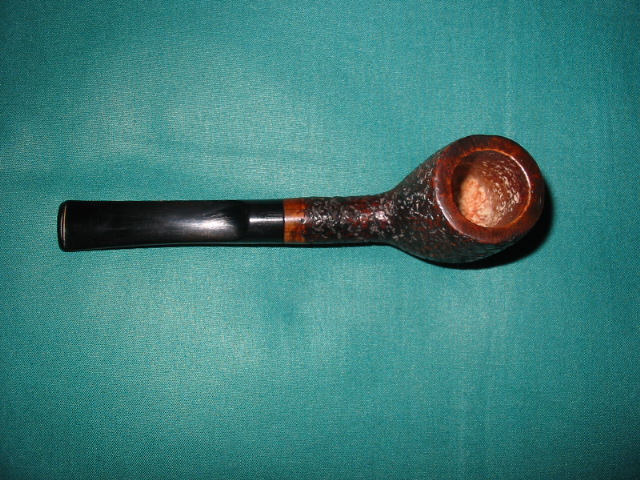
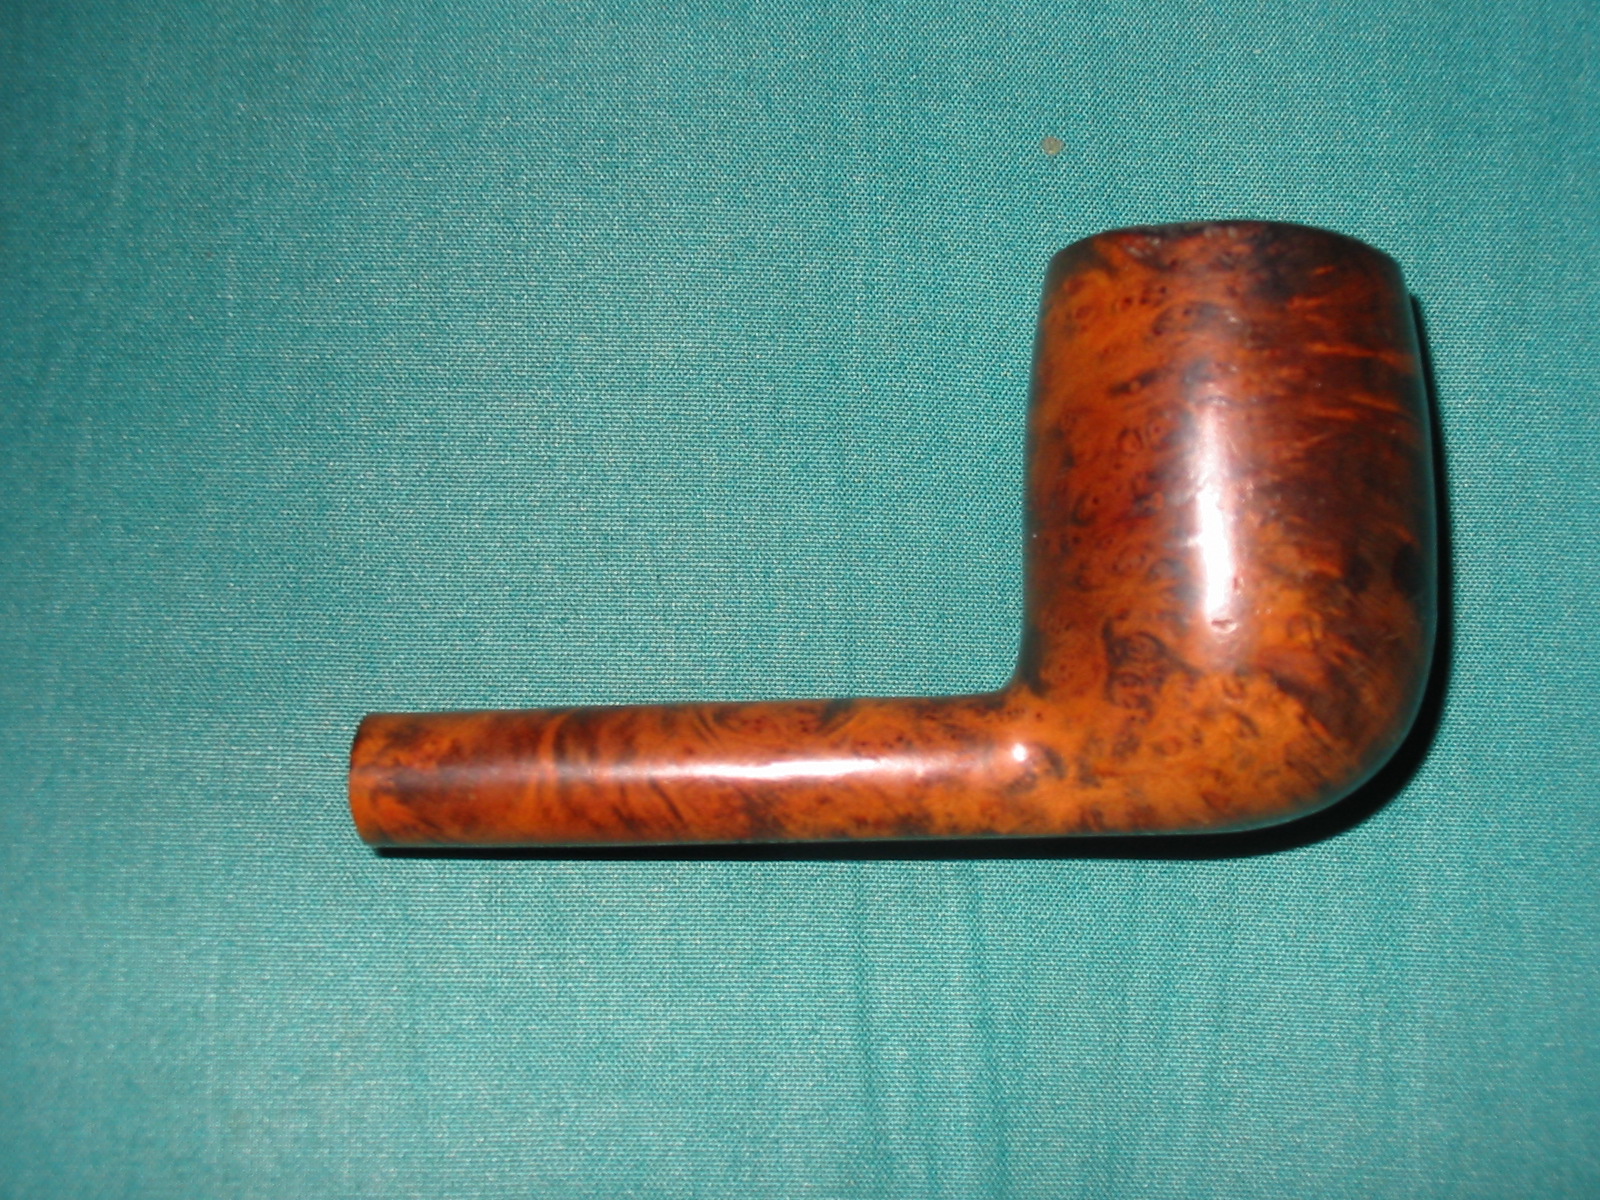
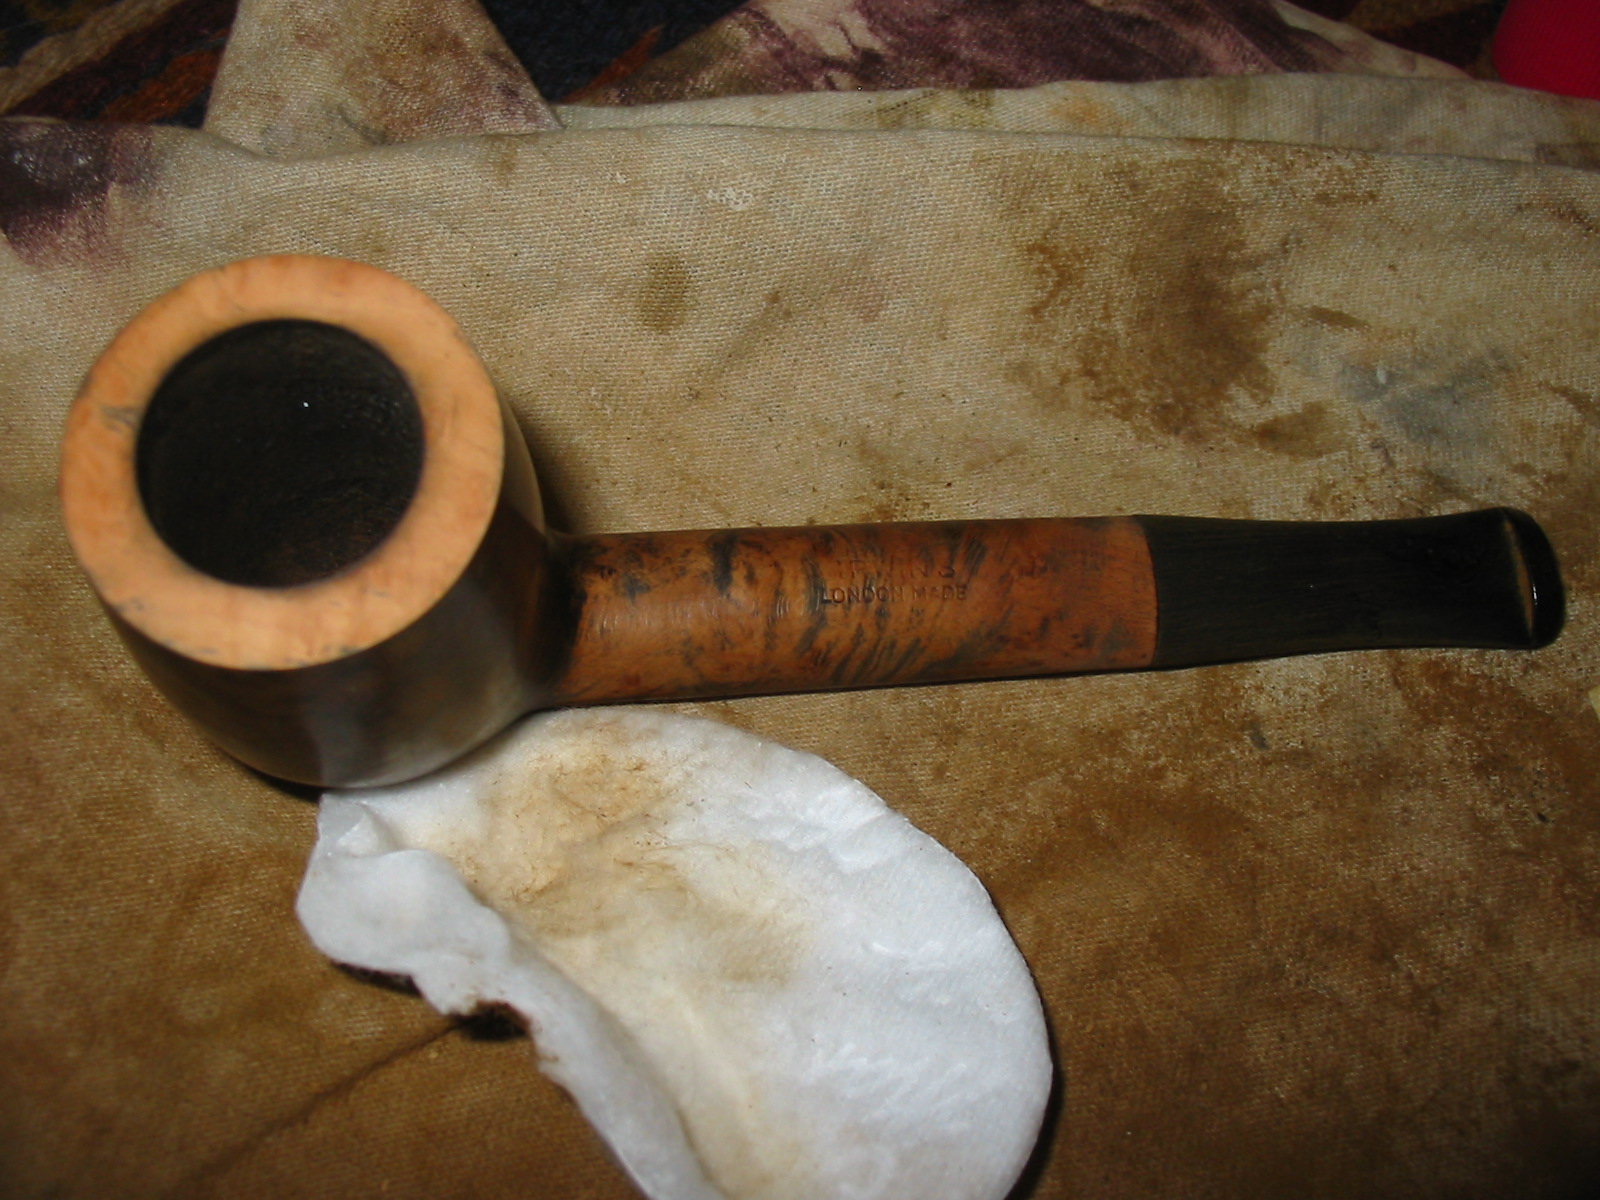
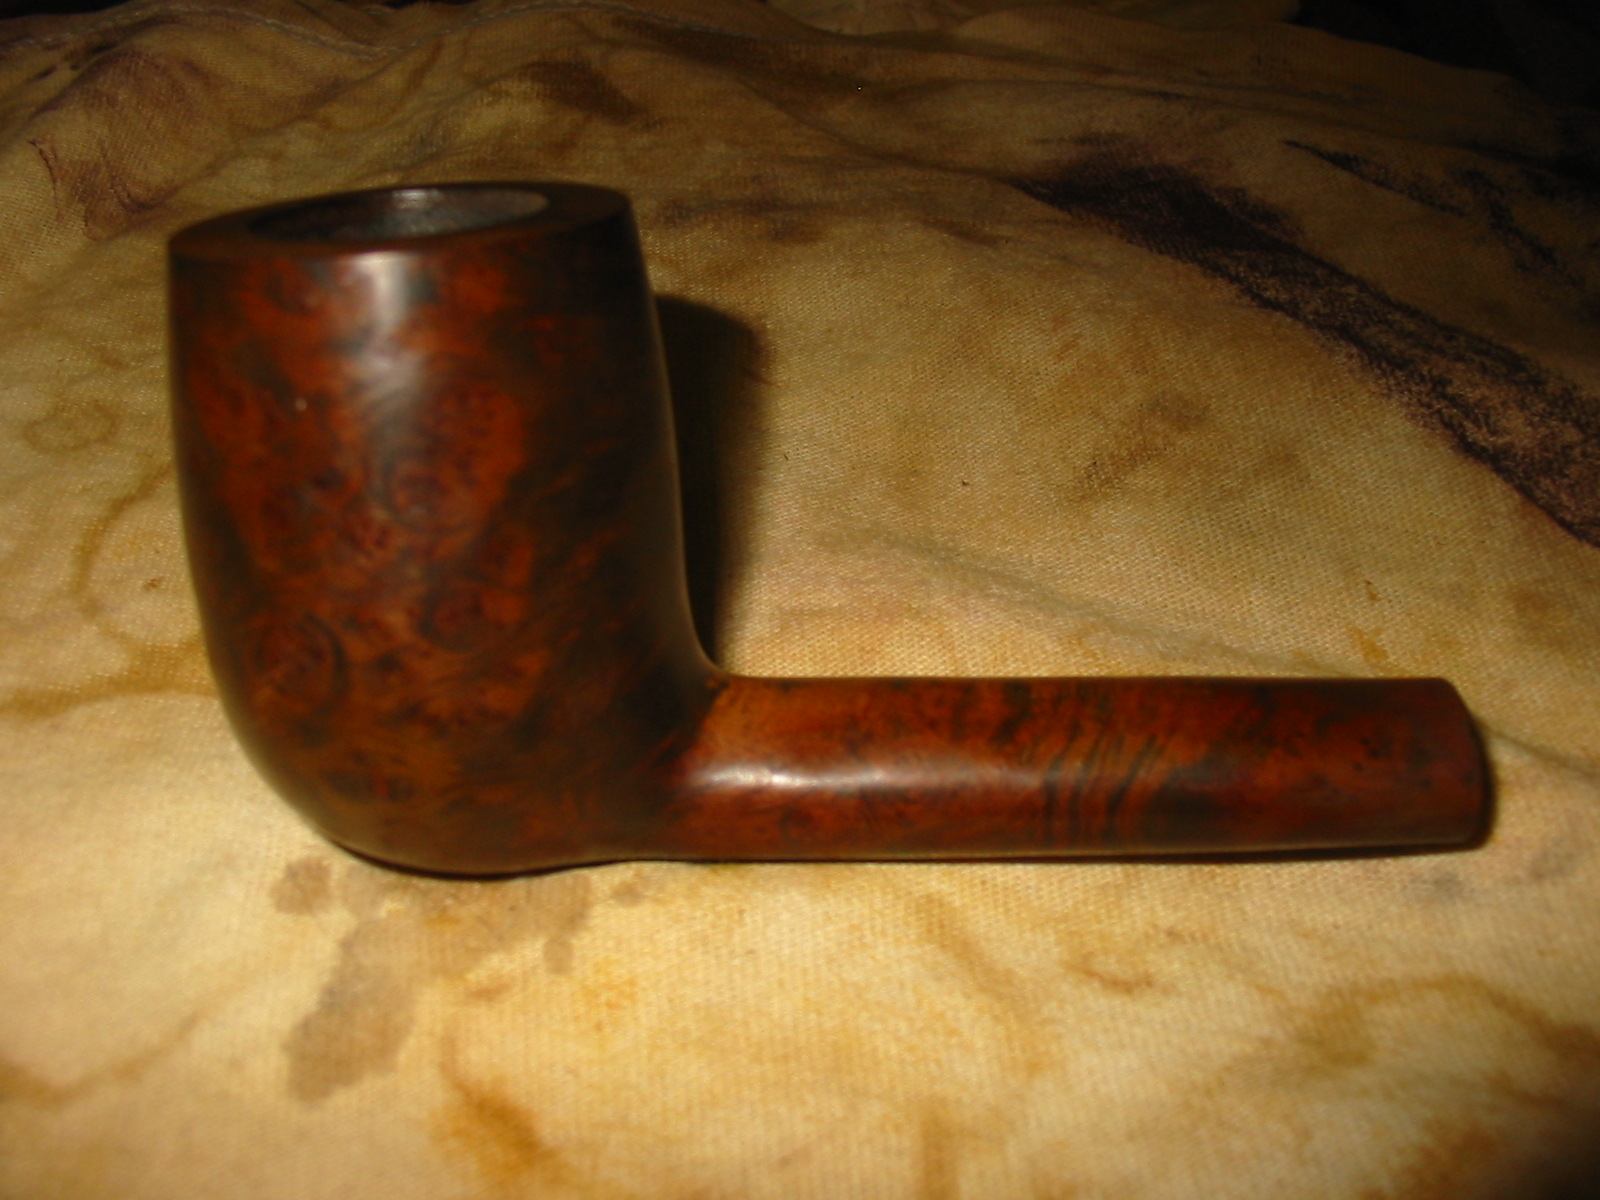
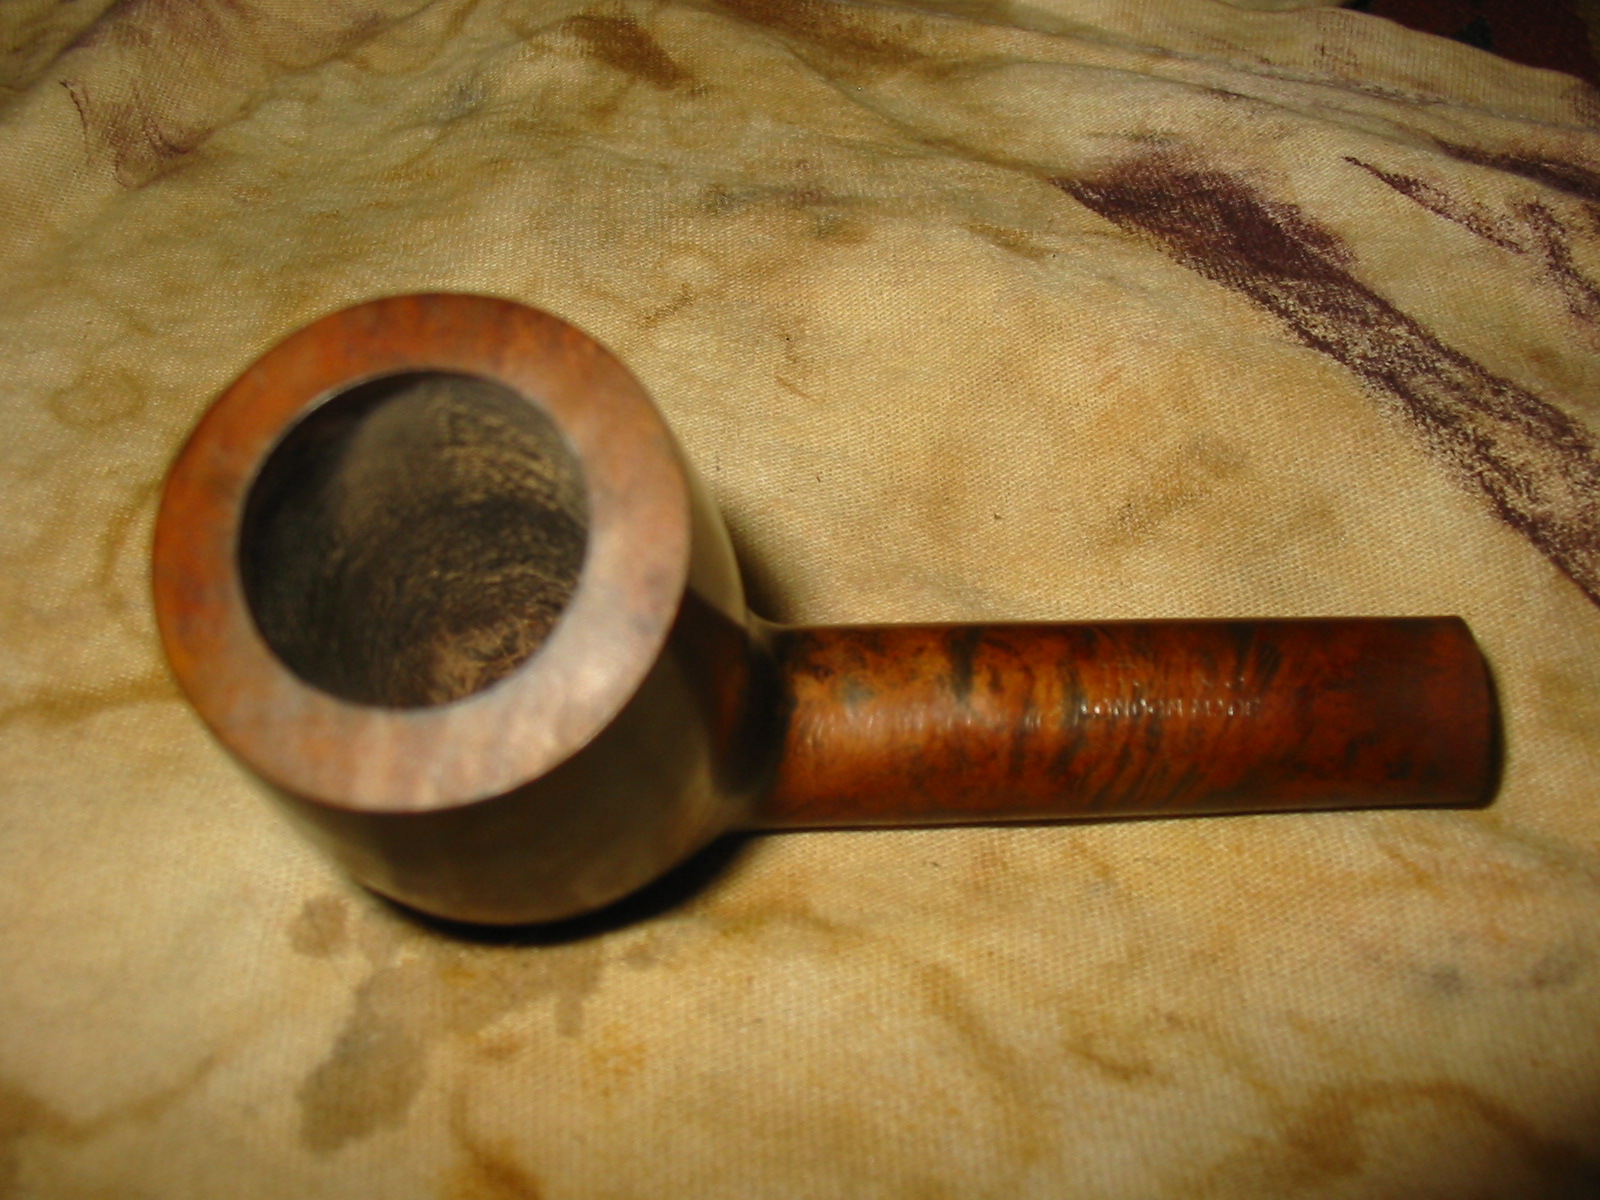
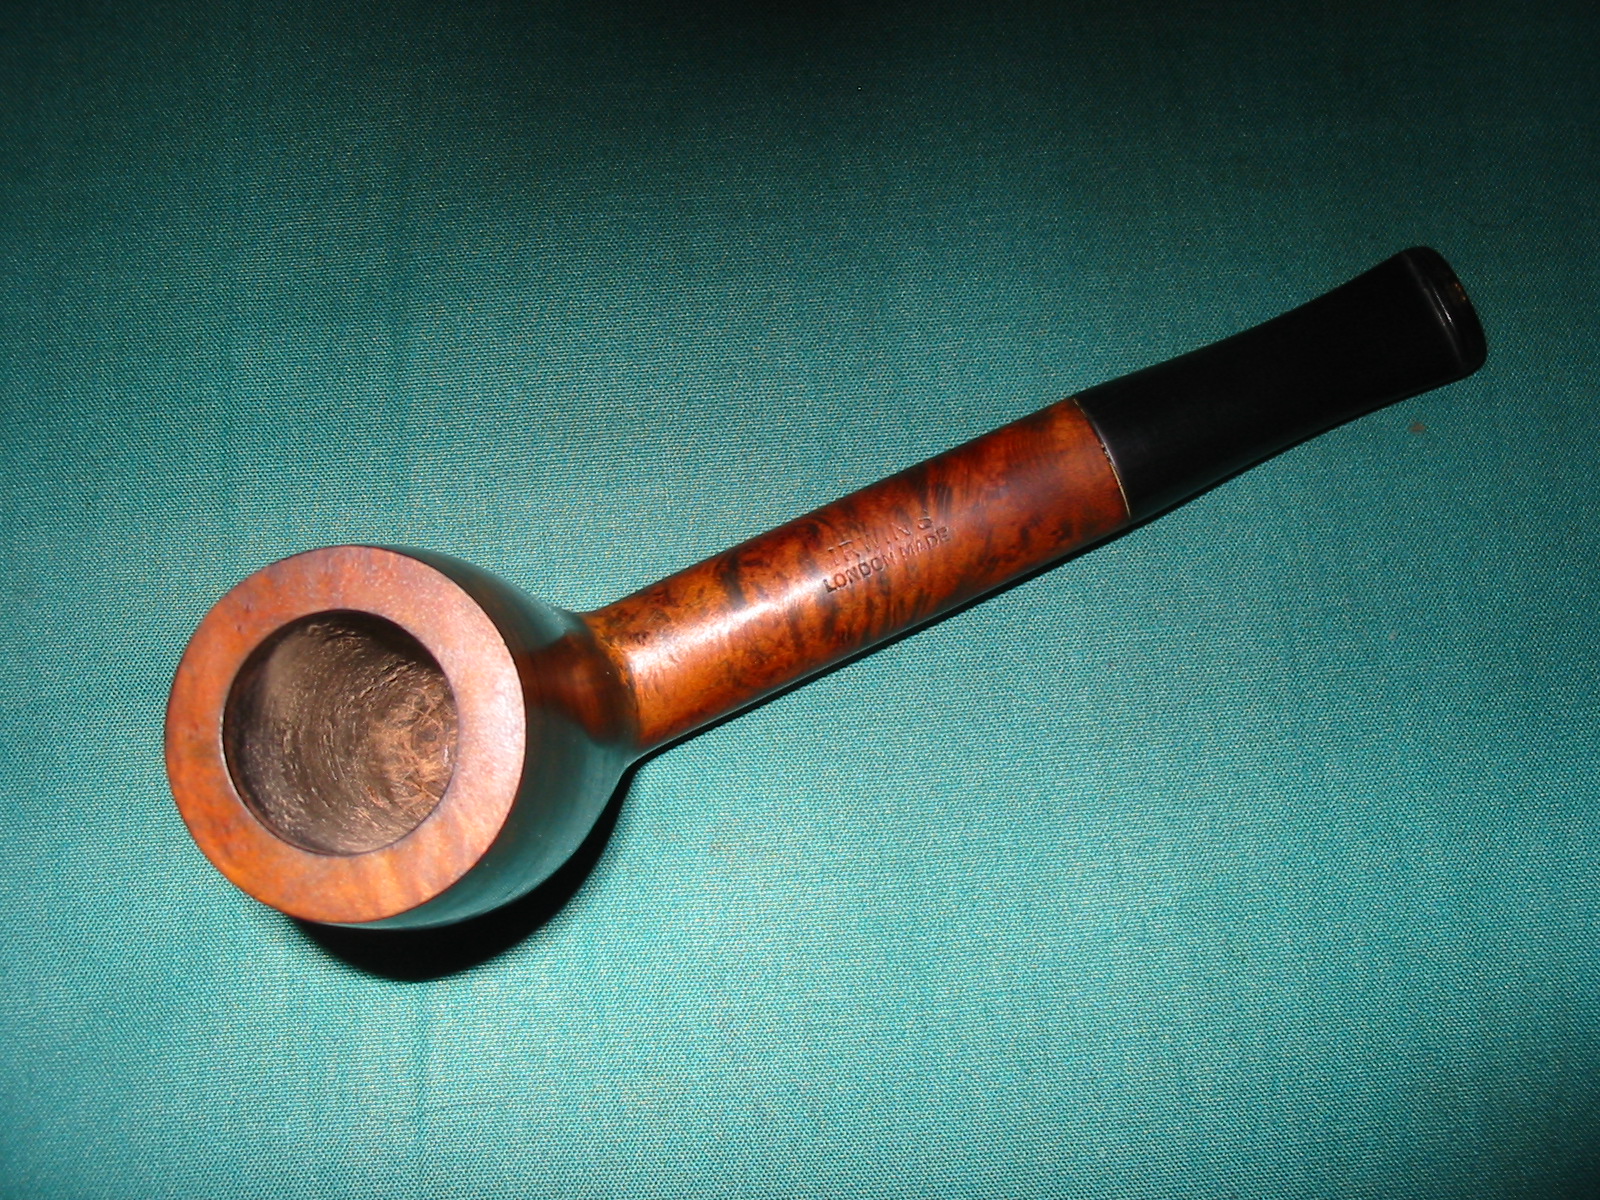
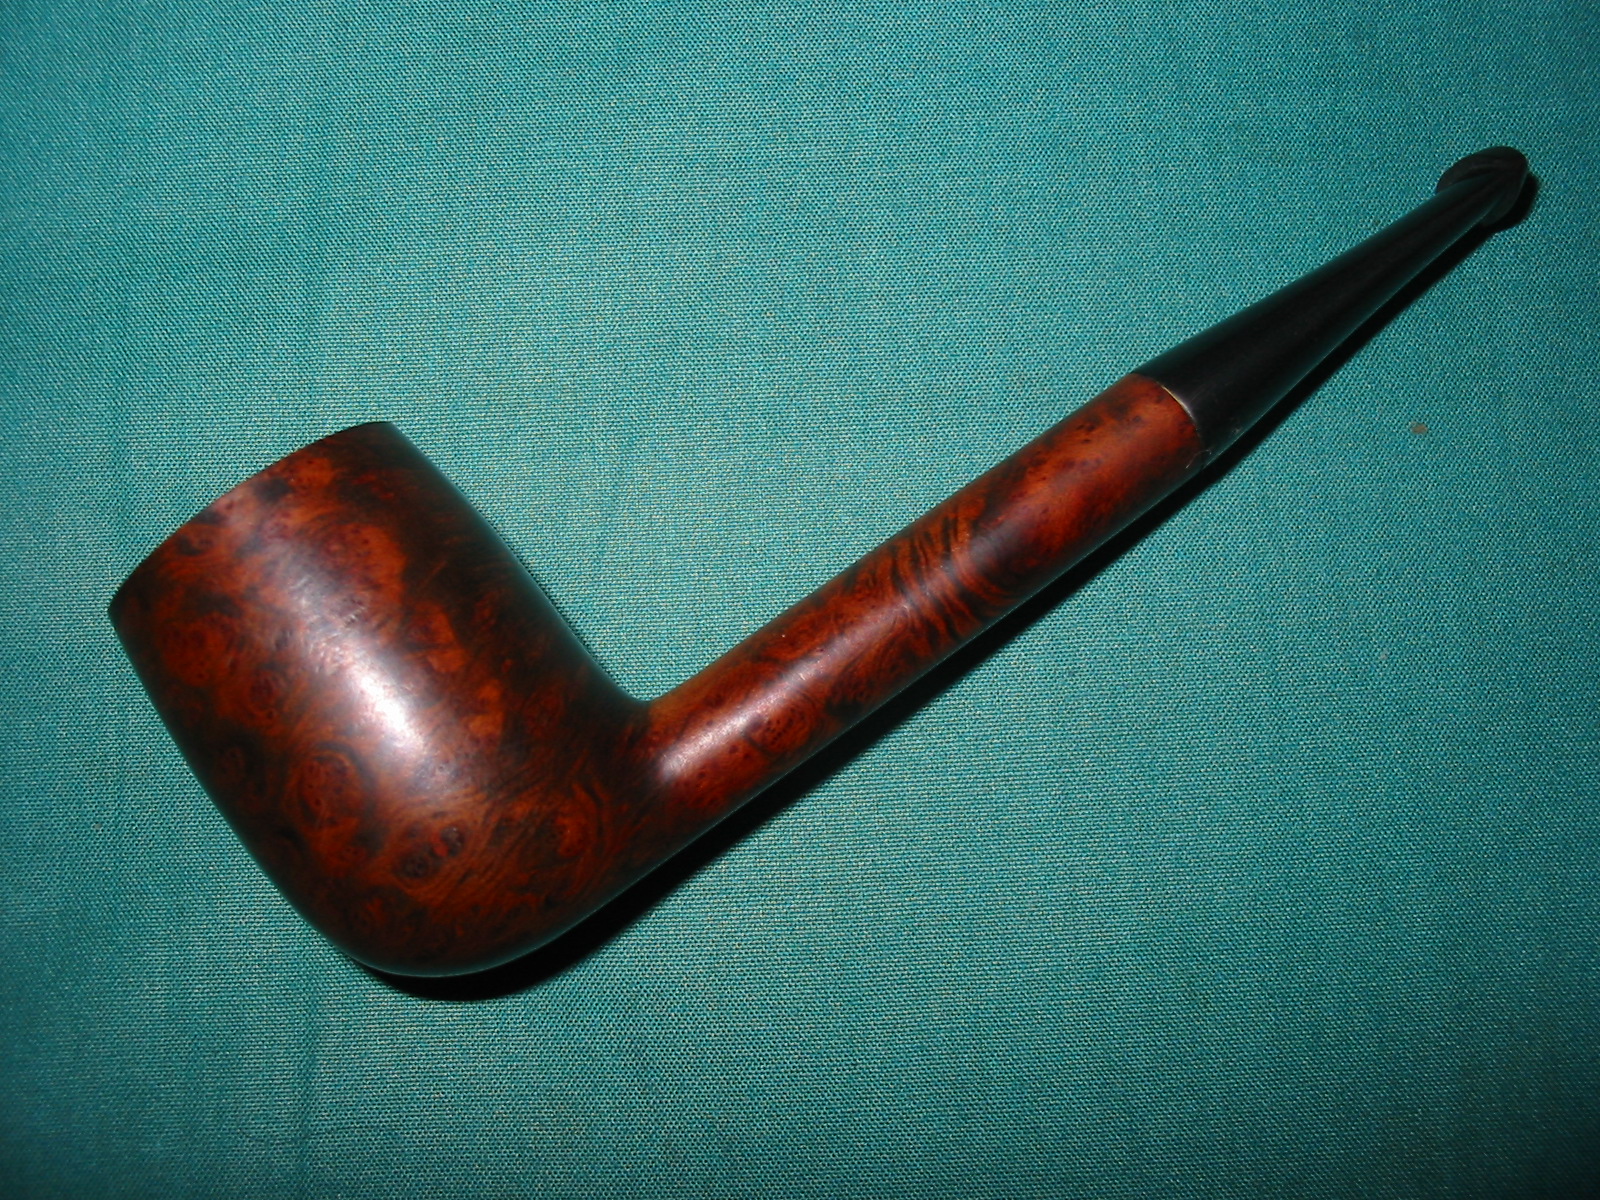
One of the six pipes I picked up in Washington was a Canadian bowl sans stem that is stamped IRWIN’S over London Made on the top of the shank and London England over 1451 on the underside of the shank. It had a tenon still stuck in the shank and the bowl top was rough from beating it out on an ashtray or something. Irwin’s is a GBD line (seconds??? Though this one has no fills or flaws to suggest that). The grain is quite nice and the contrast staining was also well done. It always makes me wonder what makes a pipe move from the first line to a second line. You can see from the series of photos below that the bowl was dirty on the sides and the top was damaged quite severely. There were no cracks in the shank or the bowl so that was a bonus. The bowl was unevenly caked and pretty dirty as well.
ImageImageImage

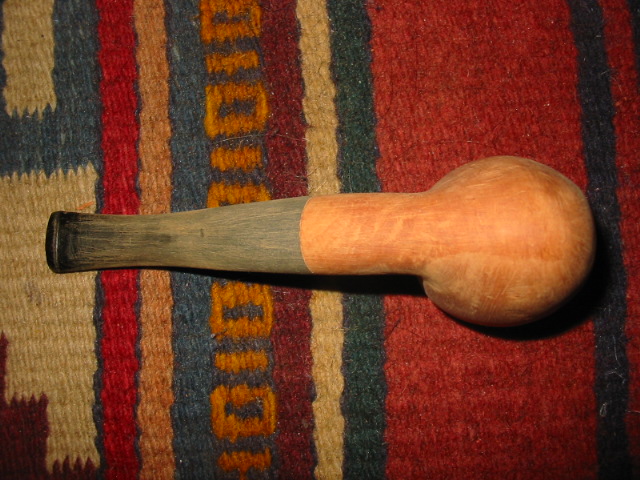
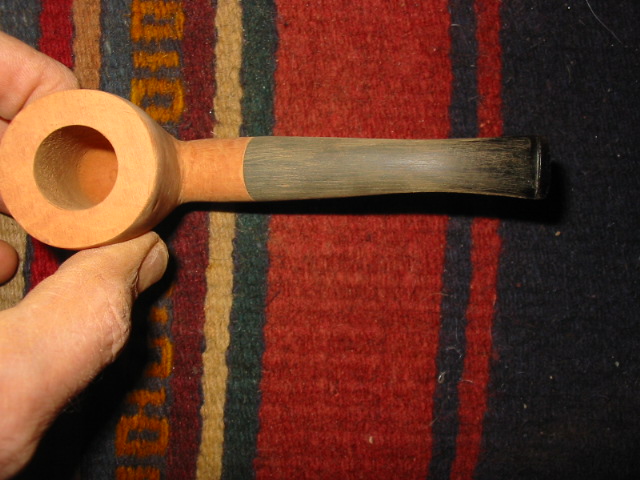
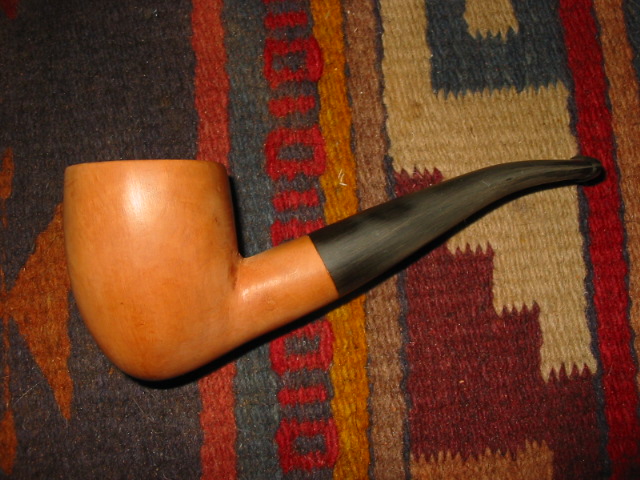
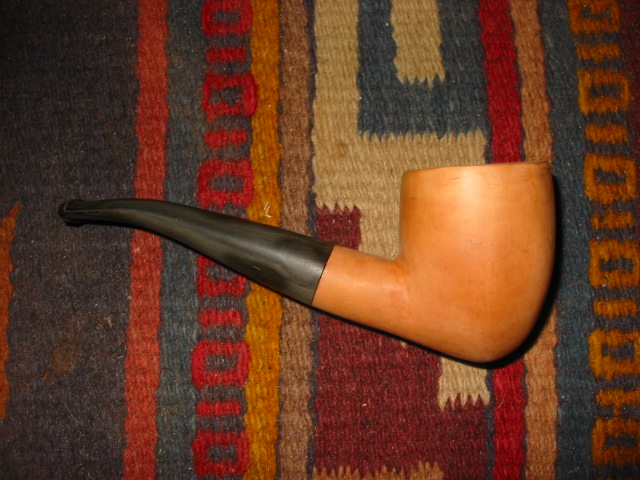
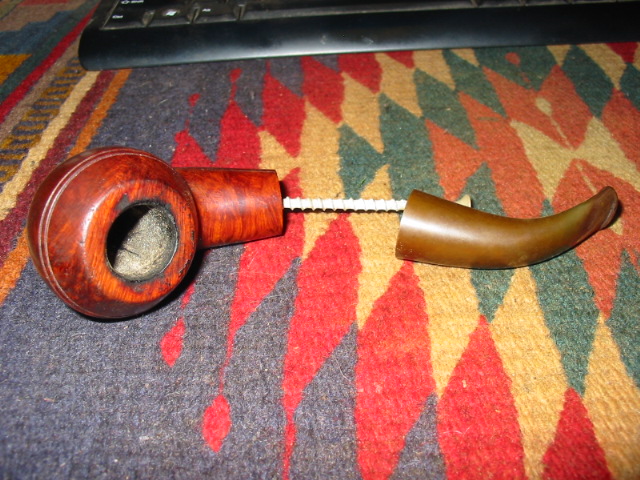
I reamed and cleaned the bowl and then used a screw to pull the broken tenon from the shank. Once I had that removed I cleaned out the shank with pipe cleaners and Everclear. Once the shank was clean I took a stem blank from my jar of stems and turned the tenon with the Pimo Tenon Turner until it was a close fit. Then I hand sanded the tenon until it was a good snug fit. I used the Dremel to take off the excess vulcanite and make a smooth transition between the stem and the shank. I then sanded the stem with medium grit Emery cloth to smooth out the surface of the scratches left behind by the Dremel sanding drum. From there I proceeded to use 220 grit sandpaper and also 340 grit sandpaper to further sand out the scratches. I wiped down the bowl with acetone to remove the dirt and grime and remnants of the top coat of stain. I wanted to prepare the surface for a new stain of diluted dark brown aniline. I also topped the bowl to remove the damage to the surface and clean up the edges of the bowl. The next two photos show the pipe with the stem fitting and the bowl cleaned and topped. It was ready for the staining once I sanded the rim top smooth with the micromesh sanding pads.

ImageImage

I diluted some dark brown aniline stain 3-1 with isopropyl alcohol and stained the bowl and rim. I flamed the stain and then restained it and flamed it again. I stained the rim two more times to darken the surface to match the bowl. I took it to the buffer and buffed the entirety with Tripoli and White Diamond. The four photos that follow show the pipe after staining. It was still too dark in my opinion to highlight the contrast of grains in the pipe so I took it back to my work table to deal with that.
ImageImageImageImage

I wiped the bowl down with acetone to remove some of the stain and lighten the overall look of the pipe. It had to be wiped down several times to get the look I was after. The next series of photos show the bowl after repeated washings. I used a cotton pad soaked with acetone and scrubbed the surface to get the desired look. Once it was done I again took it to the buffer and buffed it with White Diamond.
ImageImageImageImage

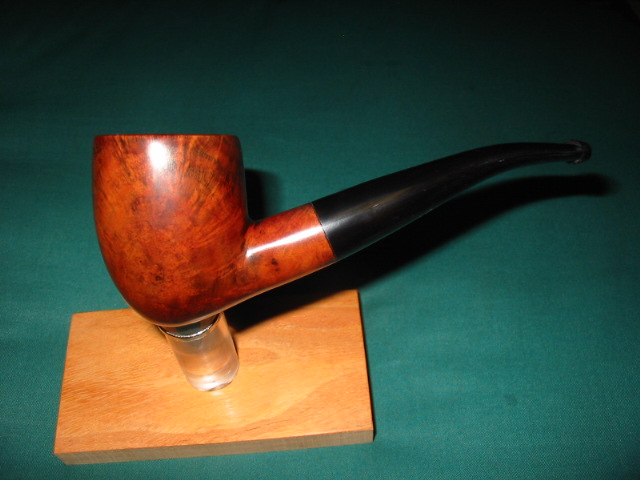
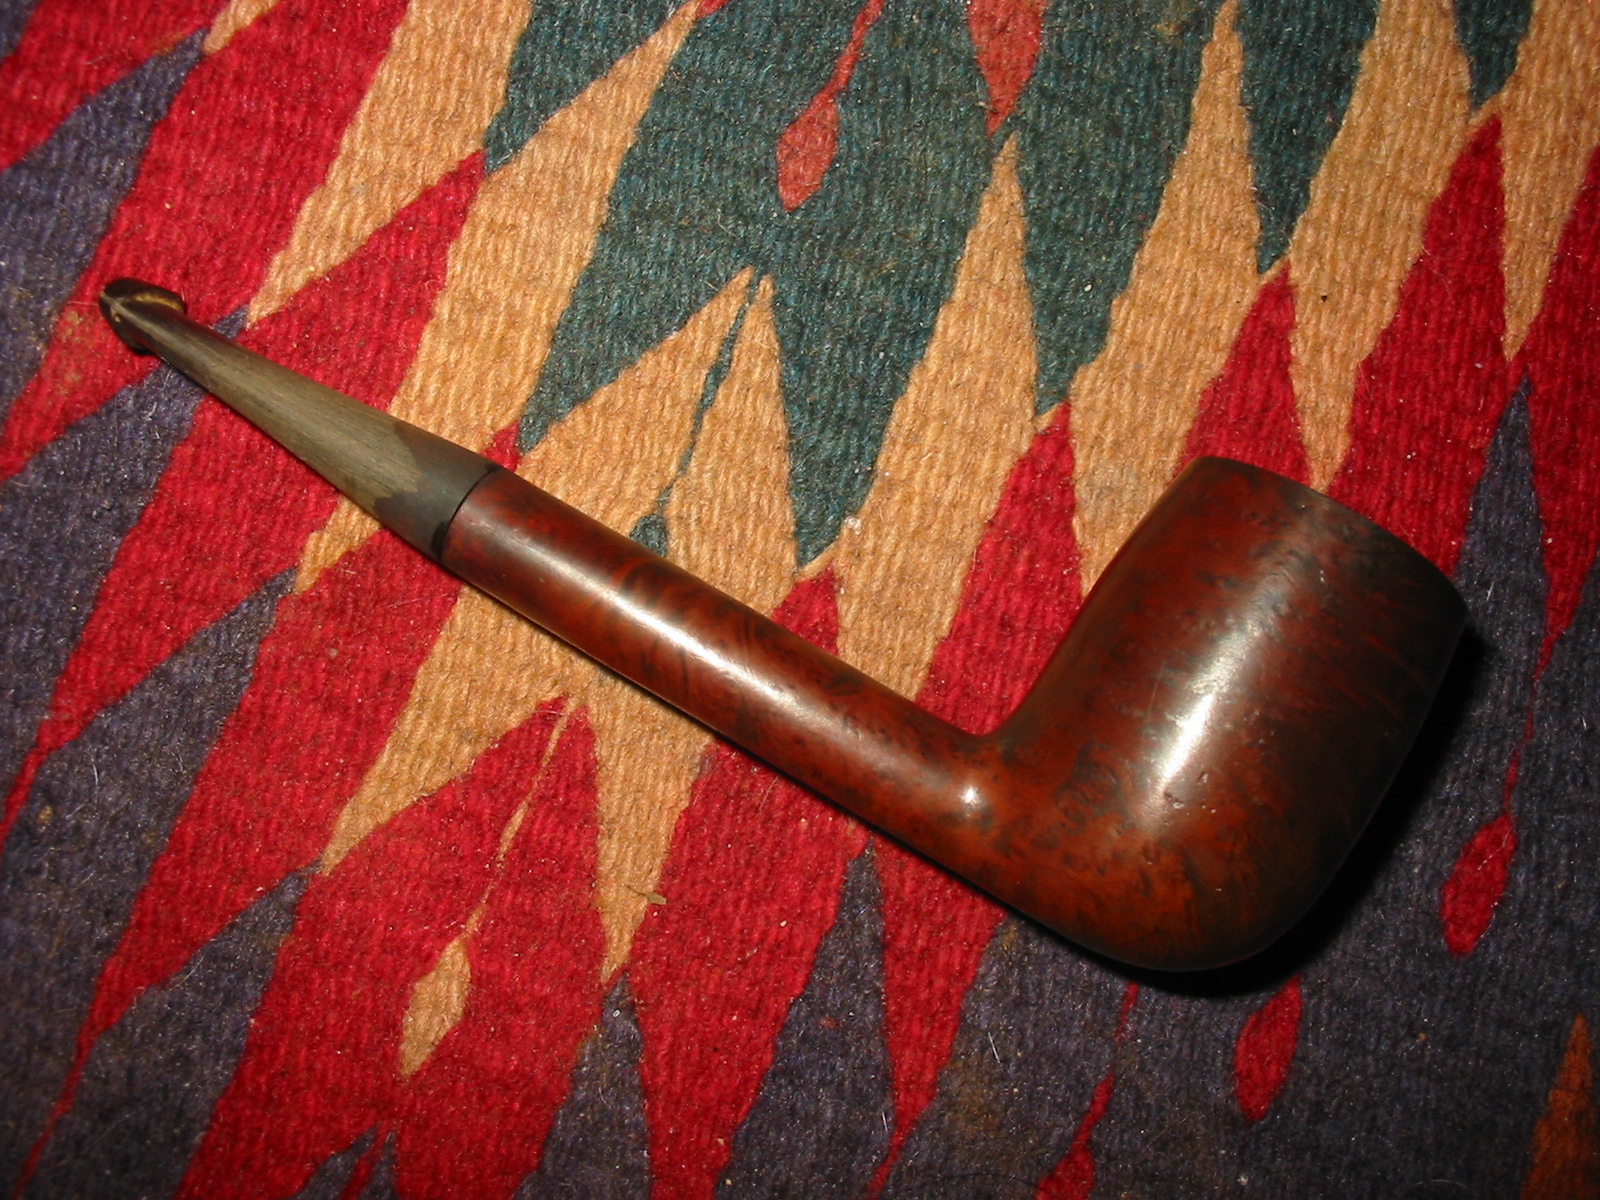
The stem still needed a lot of work to get it to the place of shiny newness. I continued to work on the stem with micromesh sanding pads – 1500-12,000 grit. The first three pads 1500-2400 I wet sanded the stem. The other 6 pads I dry sanded. After sanding with the pads through 4000 I used the Maguiar’s Scratch X 2.0 a second time and finished with the 6000, 8000 and 12000 grit sanding pads. I finished the polishing with a coat of Obsidian Oil and then buffed it with White Diamond a final time. I gave the entire pipe several coats of carnauba wax and buffed the pipe with a soft flannel buff. The next four photos show the finished pipe.
ImageImageImageImage


Refurbished Mastercraft Bulldog


Another old timer, a Mastercraft Bulldog was in my box of bowls without stems. The squat shape of this little bulldog caught my eye.

The bowl pretty rough looking. The finish was gone and the top had been used as a hammer so it was badly dented and the roughening of the wood left a lot of splintering edges. It was also badly caked and still had a remnant of tobacco left in the bowl. Since it was missing its stem I have no idea when the bowl and tobacco got separated from the stem. I have a coffee can in which I keep a wide range of stems that I have picked up and another can of stem blanks that need to be shaped and fit to the new pipe. For this pipe I found an old stem in the can that was a perfect fit once I removed the old stinger type insert. The stem was badly oxidized virtually brown. There were no tooth marks on the stem and no dents that needed to be repaired.

I reamed and cleaned the bowl and shank until the pipe cleaners came white. I use 99% isopropyl alcohol for doing this as I find that it works well and evaporates quickly leaving no residual tastse. The top had been hammered so much that the bowl had to be topped so that it would be smooth again. The trick with this one was not to remove too much of the top and thus change the angles of the bulldog shape. So I removed enough to give me a smooth surface to work with but not enough to change the shape. Once it was topped and sanded I put it in the alcohol bath and left it while I worked on cleaning up the stem.

I had soaked the stem in a mixture of Oxyclean to soften the oxidation and prepare it for the sanding that would be necessary to clean it. Once I remove it from the soak I buffed it with Tripoli to remove the oxidation that had softened and then sanded it with 240 grit sandpaper. Once I had removed the brown surface I used 400 and 600 grit wet dry sandpaper to continue the smoothing and polishing process. I finished the stem with the micromesh pads from 1500 – 6000 grit. Then I set it aside to wait until I had finished bowl and polish the entirety on the buffer.

I took the bowl out of the alcohol bath and sanded it with the micromesh pads to remove the surface scratches and remaining marks in the bowl surface. I steamed out the dents with a damp cloth and a hot knife and then sanded them smooth again. I restained this bowl with a Medium Brown stain. I flamed it to set the stain, inserted the stem and then took it to the buffer and buffed it with White Diamond to polish it. The entirety was then given several coats of carnauba wax. This one found a new home with someone who loved the shape and it is providing a great smoke for them. ImageImageImage

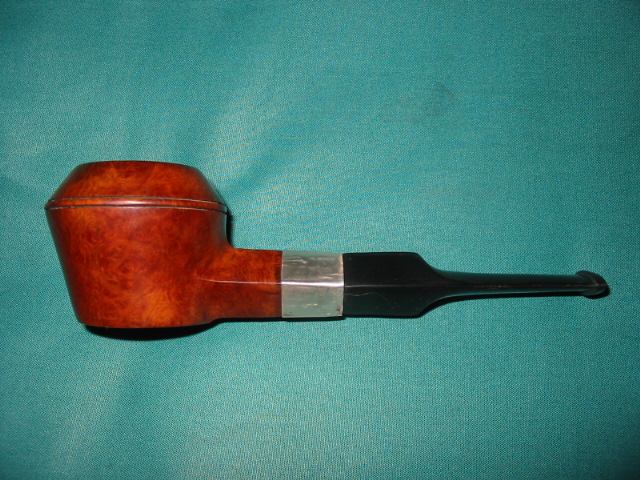
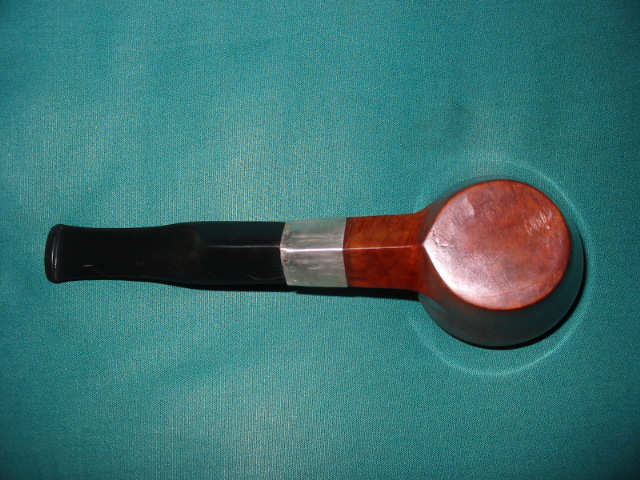
Refurbished and Restemmed this interestingly shaped no name pipe


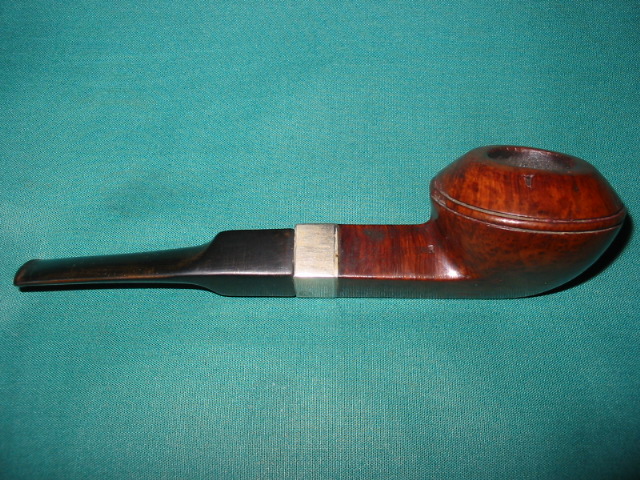
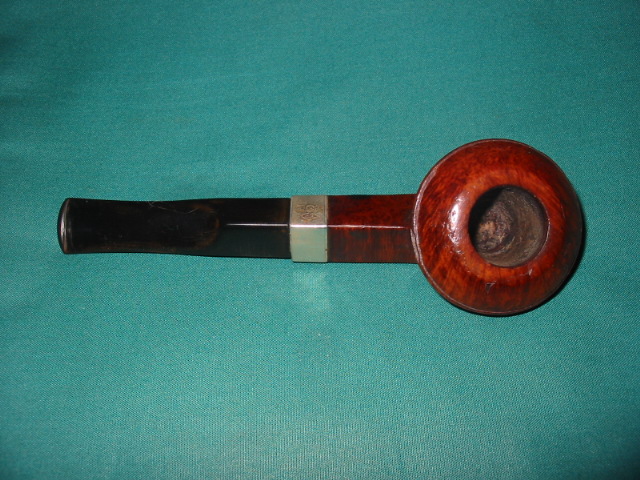
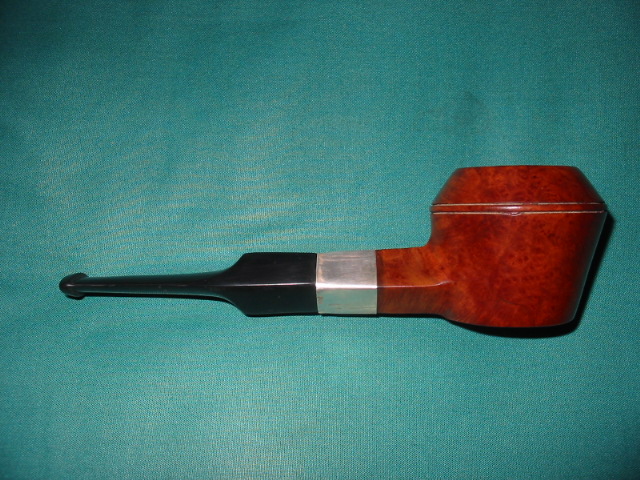
I refurbished this interestingly shaped no name pot/rhodesian/bulldog (?) or you name it shape. I was drawn to it and liked the look of it when I found it in my box of pipes and bowls that I have gathered for refurbishing. It is a box I have that at one point held over 300 pipes that needed work but is slowly shrinking even though I add to it each time I go scavenging. I am pretty much incorrigible about picking up estate pipes and hunting for them. I am getting more picky over the years as to what I want to work on but I pick up ones that will be a challenge to me or that I like the brand or the shape.

This one was truly a mess. I forgot to take pictures of what it looked like when I took it out of the box but I will describe it to you. In many ways it was no different than most of the others that I work on. The bowl was caked to the point of barely holding any tobacco any longer. It was a tarry mess on the rim and running down the sides of the bowl. There were dents and deep “wounds” in the briar of the rim. It also was without a stem. The silver band on the shank was badly beat up and to be honest the pipe was downright ugly. But in its ugliness I saw something that drew me to pick it up and see what I could do with it. So I took it to my work table and it became a project that took me two days.

I did what I call field dressing the pipe the first day. That includes reaming the bowl and cleaning out the grit and grime from the shank and bowl. I washed the bowl down with acetone to remove the overflow from the bowl and rim on the outside of the bowl. I also removed the dirt and grease marking on the bowl. Once it was clean I fit a stem for it. It has a diamond shank, and those have always been a challenge for me to make a proper fit. I find that on these old timers what appears to be a diamond with equal sides never truly is equal. Each side on this one had a different measurement. I used a blank that I had here and shaped it to fit. It is difficult to get each side correct and maintain the shape to fit the shank. I cut the tenon with my Pimo tenon turner and worked the shape for a long time to make it flow with the shank. It took a long time because I would get one side perfect only to lose a bit of the angle on the next side. I finally was able to get the angles right and fit the stem to the shank well. In the finished photos you can get a bit of an idea of the work involved in that.

I then removed the silver band and put the bowl in the alcohol bath while I tried to straighten and smooth out the silver band. I got a lot of the wrinkles and dents out of it but a few still remained even after my work.  I set it aside to reinstall on the shank once it was restained and turned my attention to sanding and polishing the stem. I used 400 and 600 grit wet dry sandpaper as usual to remove the scratches and marks left by the shaping. I then use my normal regimen of 1500-6000 grit micromesh to bring a shine to the stem. When I had it finished and ready for the buffer I put it aside and went back to the bowl.

I removed the bowl from the bath and sanded it with the usual variety of sand papers and micromesh pads. Then I restained it with a cherry stain that I use on some of the older pipes as I have found that it brings out the old colours from the briar and really looks good. I then sanded again with micromesh and put the stem on it before taking it to the buffer to polish it with White Diamond. Once that was finished I gave the bowl and stem several coats of carnauba wax.

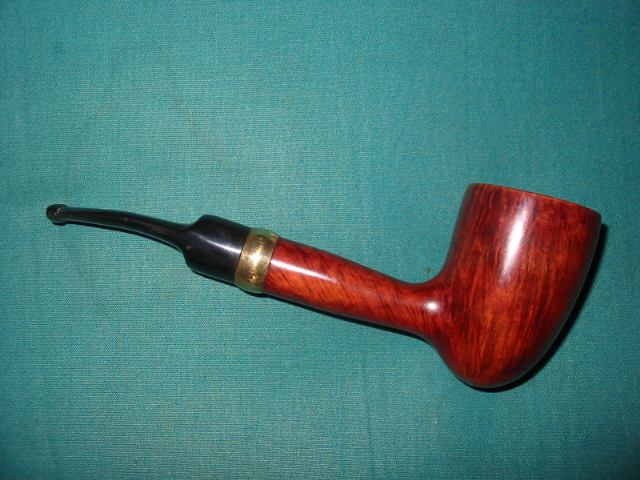
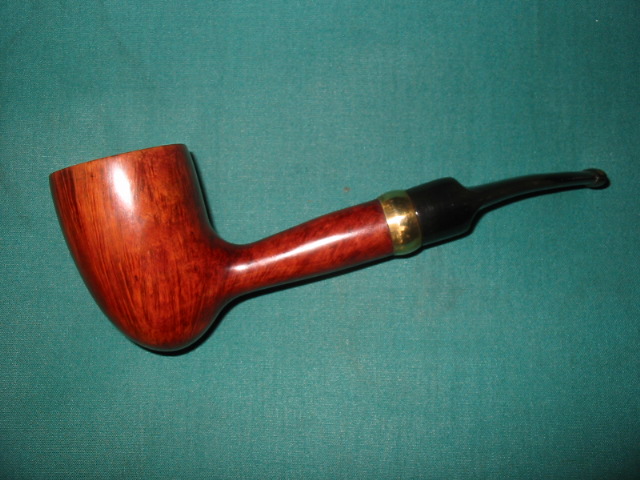
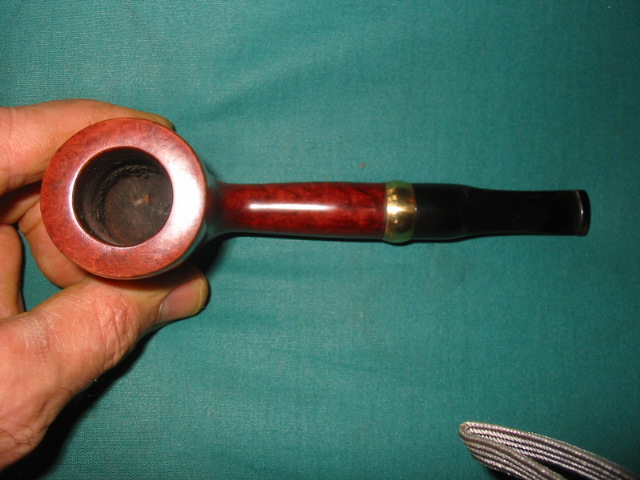
There are no stamping or marking on it all. But the unusual shape continues to attract me in an odd way. It is 6 inches long, bowl height is 2 inches. The chamber diameter is 1 inch and the chamber depth is1 1/4 inches. The rim is chamfered and clean. Anyone have a name for the shape??
ImageImageImageImage

Some of the pipes I have carved over the years


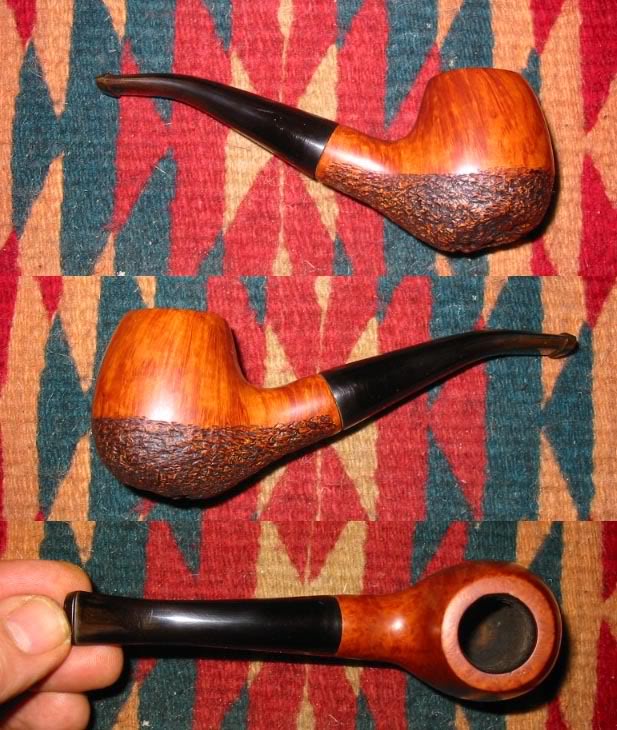
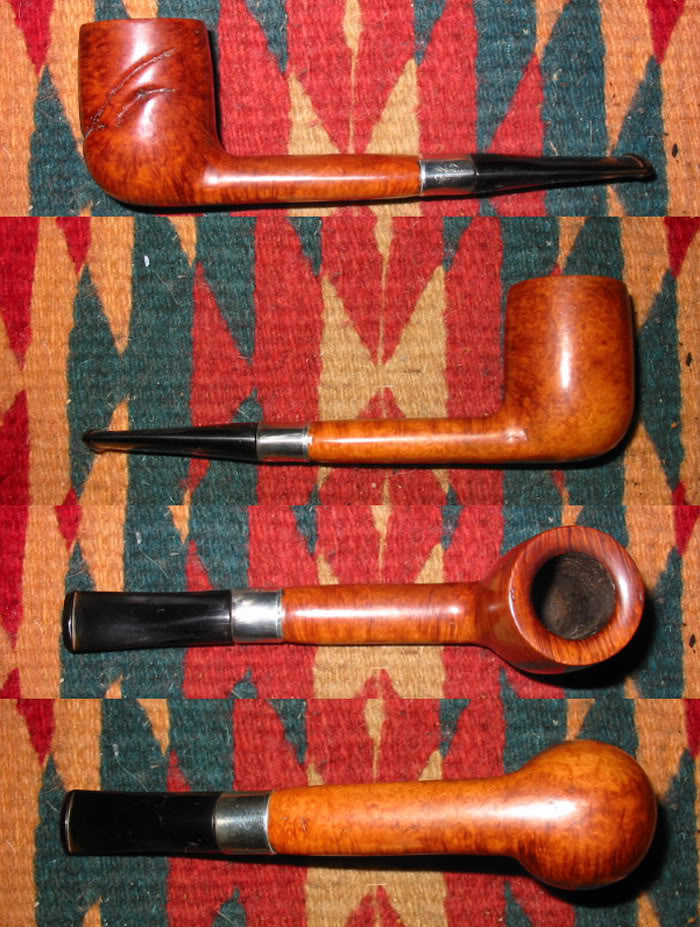
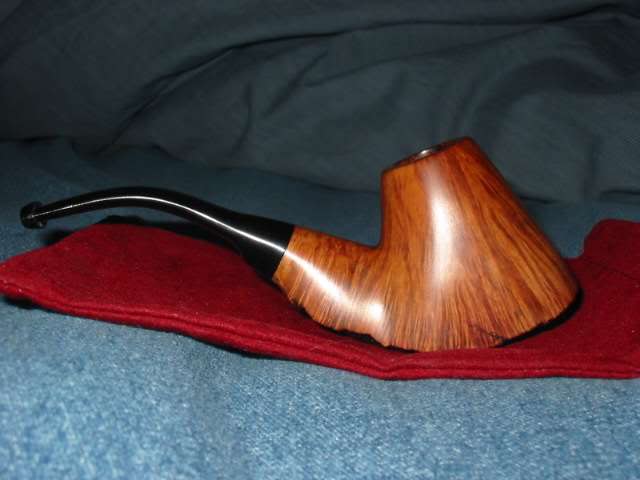
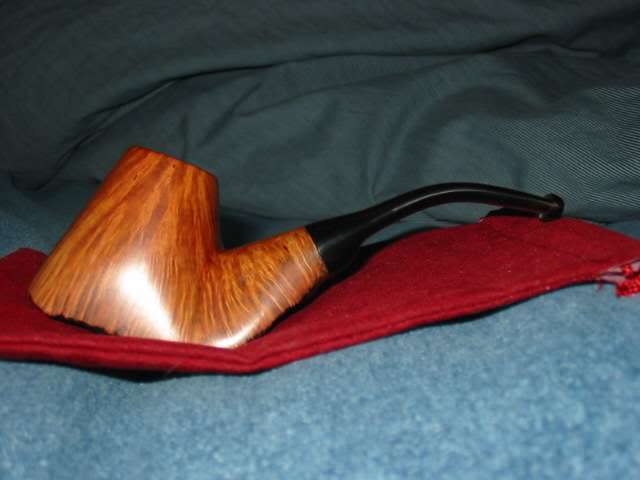
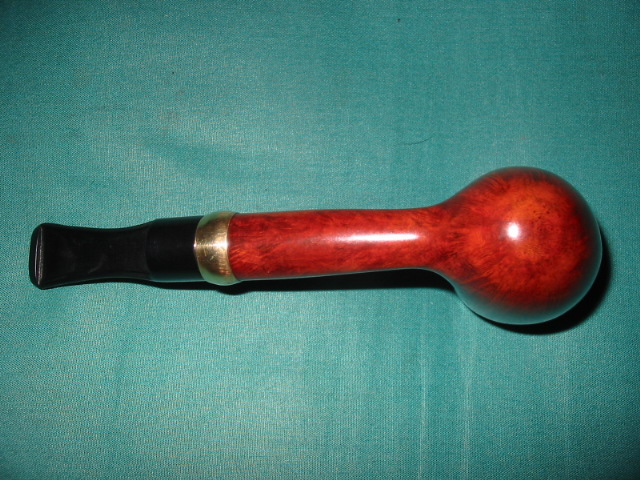
I thought I would post some pictures of the pipes I have carved over the years. Some are better than others and many are no longer in my collection as I have given them to friends. I post them here on the blog to show some of the possibilities with finishes – smooth, rusticated and semi rusticated – and with various stains and also as naturals.

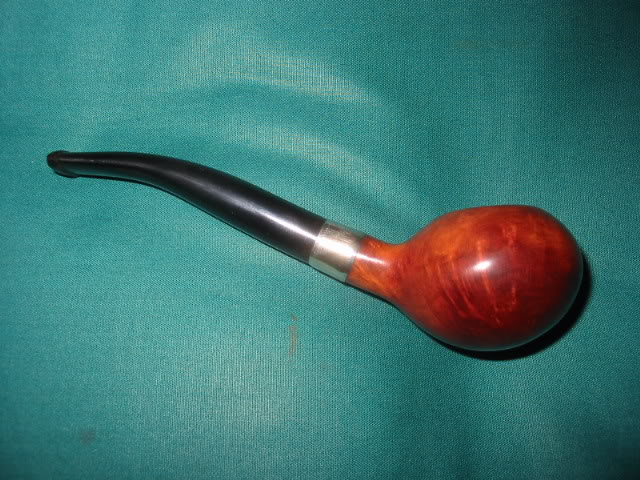
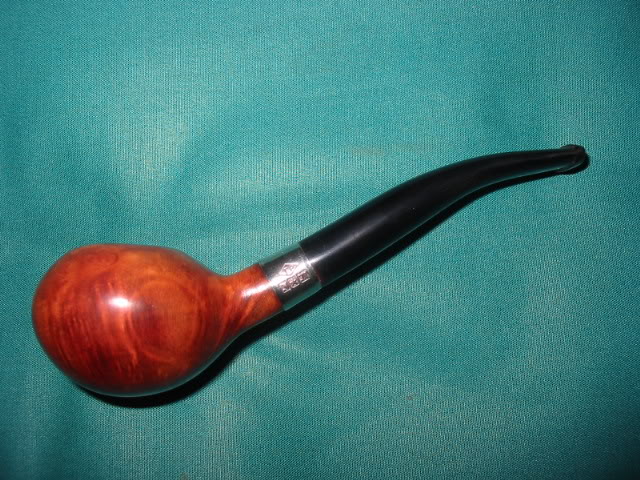
Pipe #1 (only in terms of pictures not in terms of creation). A quarter bent ball or apple with a chamfered rim. The stains include a black under stain and a medium brown over stain.ImageImage

Pipe #2 – A ¼ bent tadpole. This is a great smoker and very light weight. The stains are a contrast of reds and browns.

ImageImage

Pipe #3 – A saddle stem Dublin with a Medium Brown stain

Image

Pipe #4 – a ¼ bent Tomato. This one is rusticated to look like old leather. The undercoat is black stain then it is buffed and given a top coat of Medium Brown stain.Image

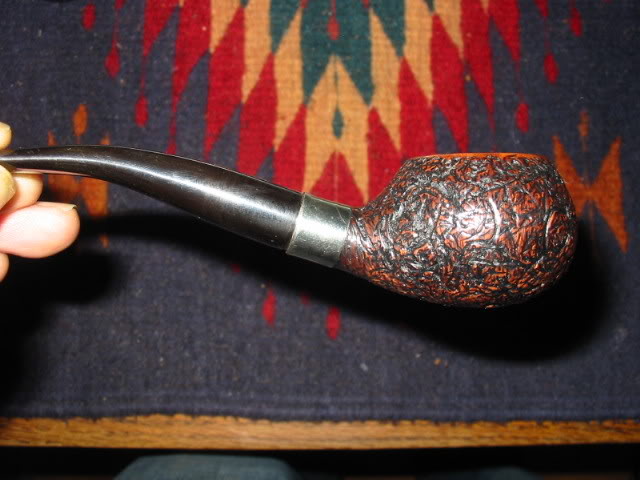
Pipe #5 – A semi rusticated apple. The bottom of this pipe is plateau briar and the rustication carries that theme upward to mid bowl. The rustication has a black understain and a medium Brown top coat. The smooth portion is medium brown. Image

Pipe #6 – A Canadian with a leaf pattern carved over a flaw in the briar. The stain is a Medium Brown.Image

Pipe #7 –a bent Dublin. On this one I used a medium brown stain. I had Stephen Downie help me with the shank extension and work on this one. Image

Pipe #8 – Volcano shape with plateau on the bottom. This one has a black understain to highlight the beautiful grain and then a medium Brown overstain. The stem is a modified saddle.ImageImage

Pipe #9 – ¼ bent egg. This one is stained with a black understain and then a tan overstain. The grain is very interesting on it.Image

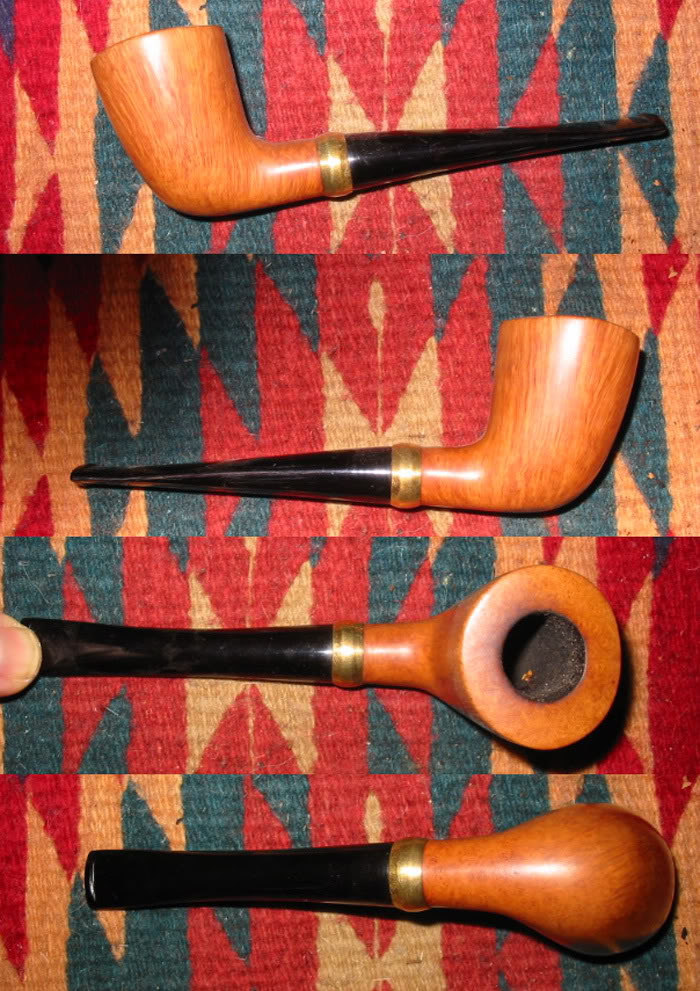
Pipe #10 is a natural Dublin with no stain. Many coats of carnauba wax were applied. The band is a brass pressure fitting that I shaped to give it character. Image

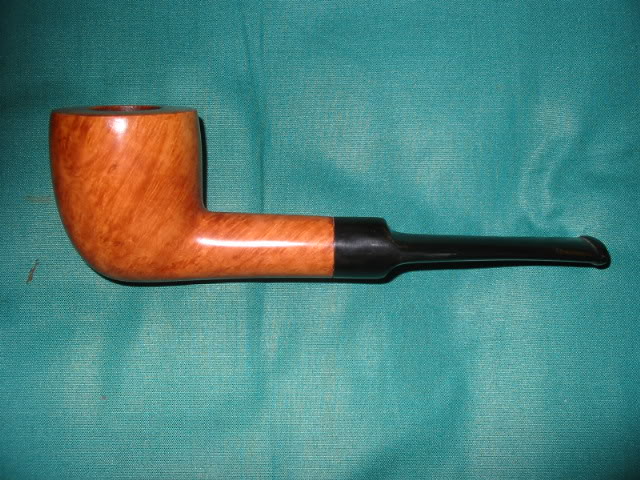
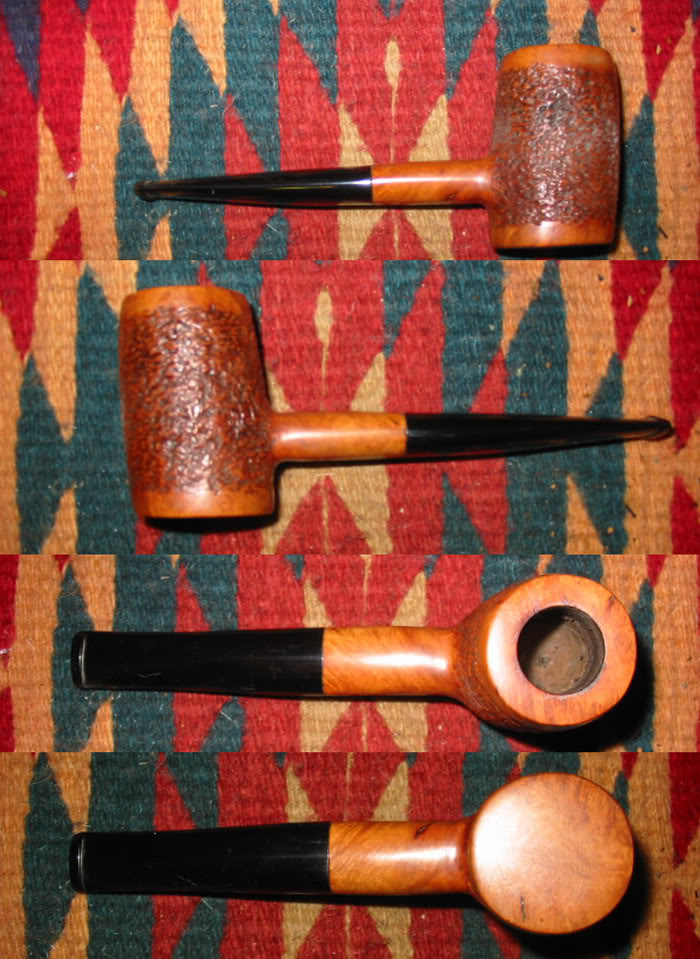
Pipe #11 is a poker with a mix of rustication and smooth. It was stained with a medium brown stain. And waxed with carnauba. Image

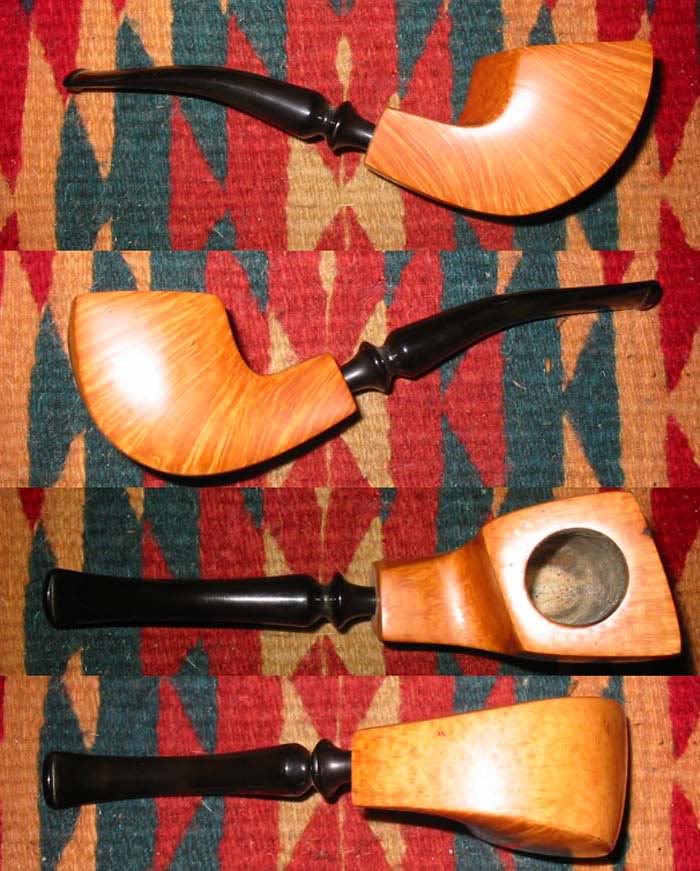
Pipe #12 is a fanciful freehand that I did to highlight the amazing grain that flows along the pattern. This one is also natural in terms of finish – no stains were used. Just wax.Image

Restemming a little nosewarmer


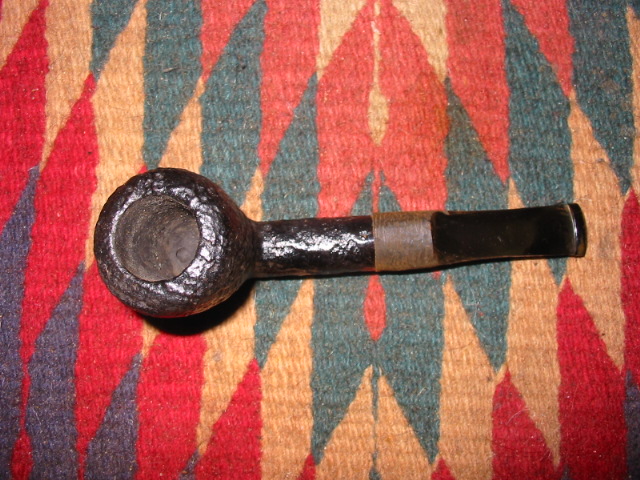
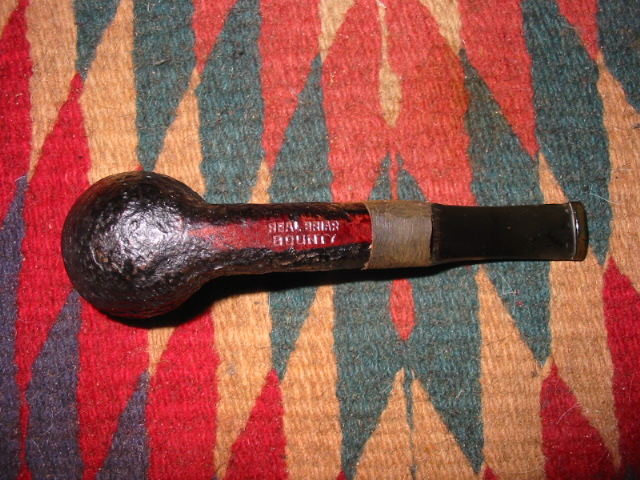
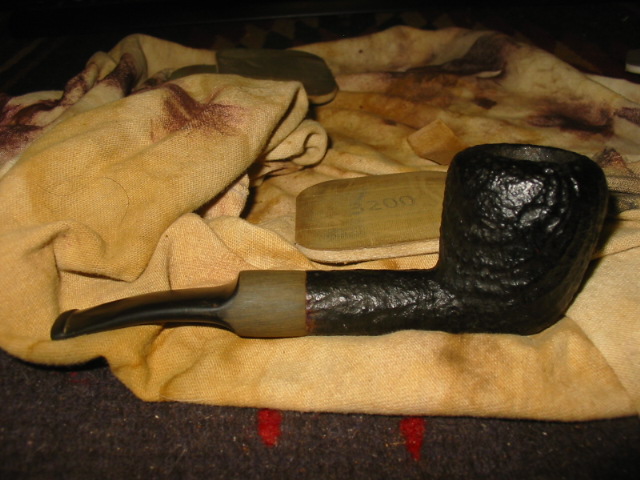
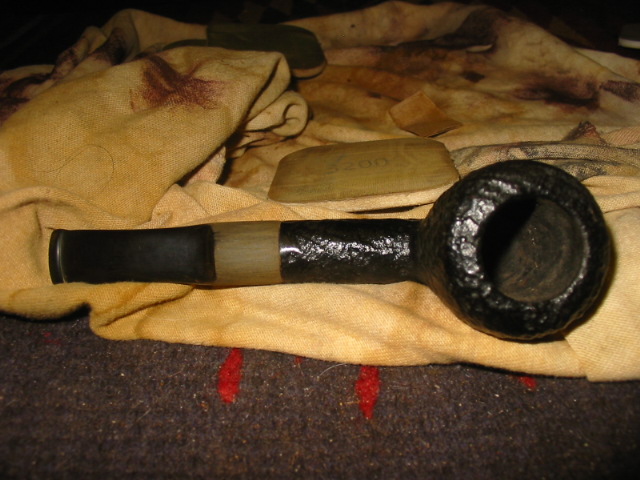
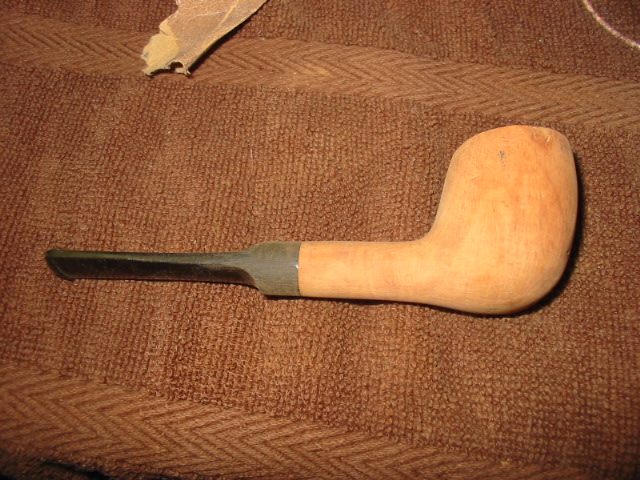
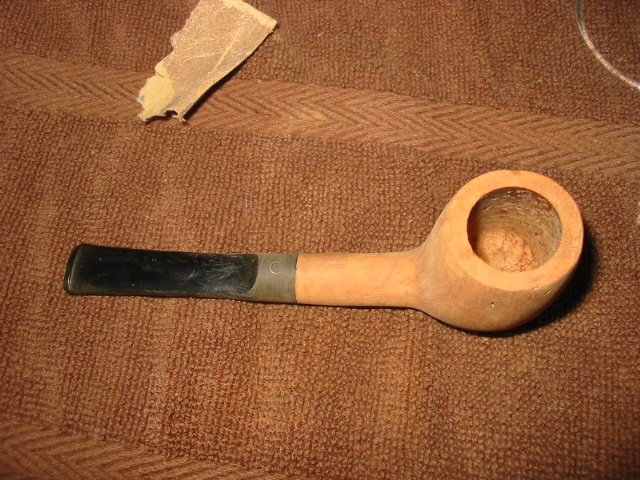
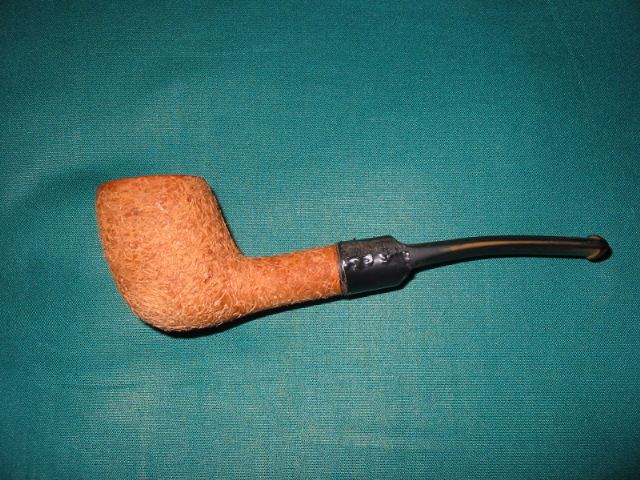
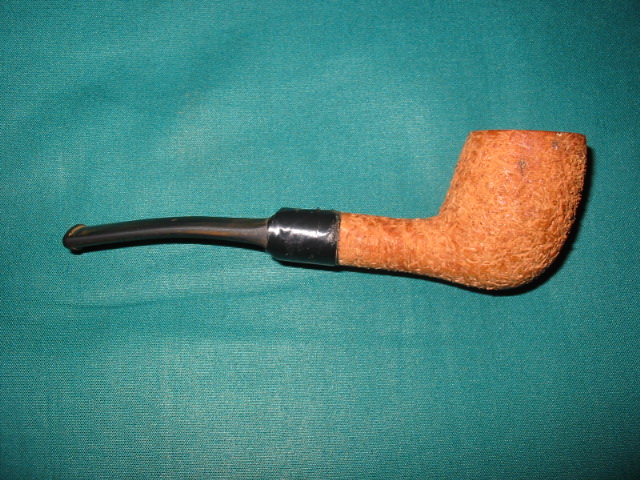
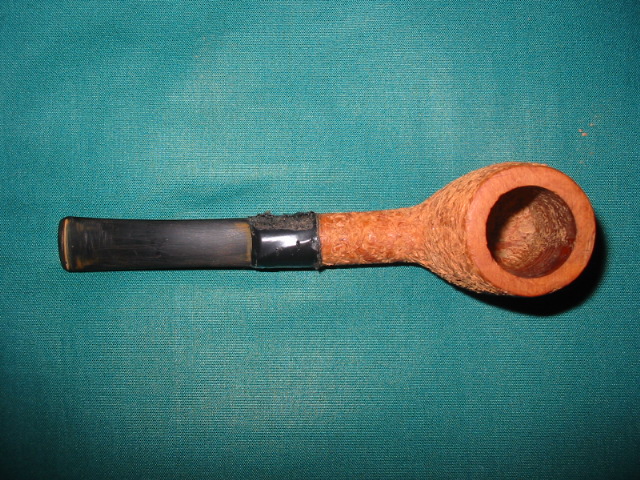
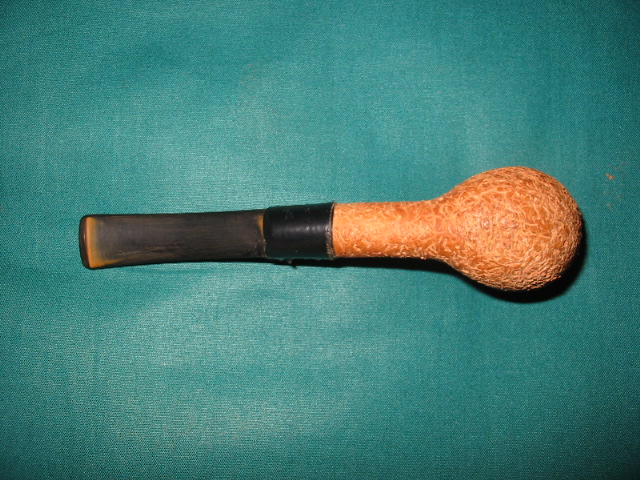
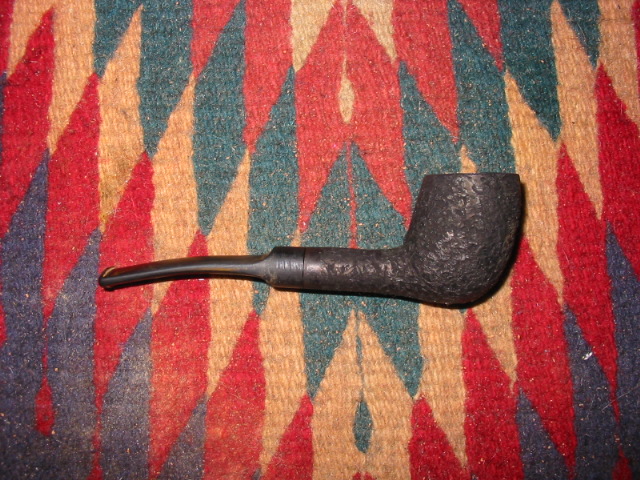
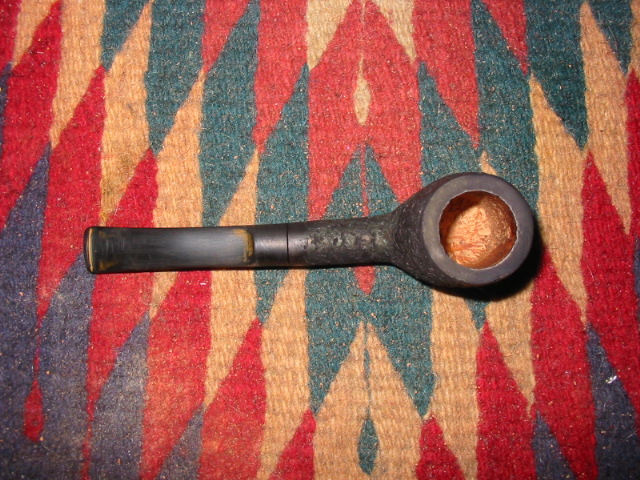
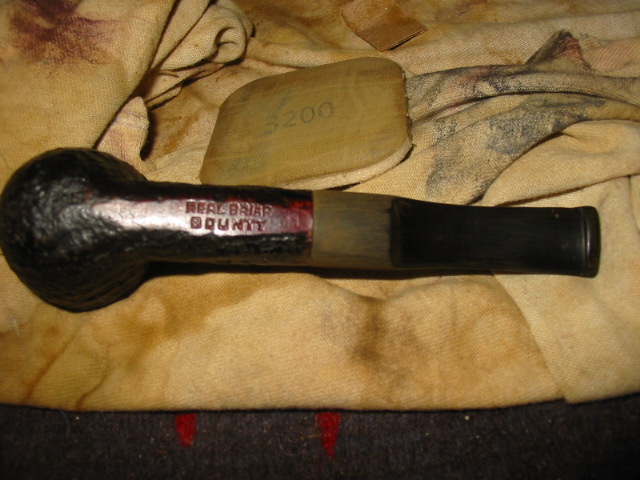
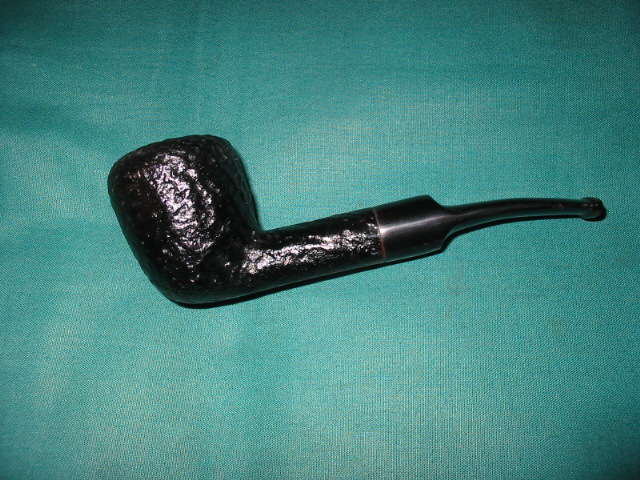
Last evening I finished restemming this little nosewarmer. It is stamped Bounty over Real Briar on the bottom of the shank. It has a nice sand blast finish and is stained black over a red undercoat. It length is 4 ½ inches, height is 1 ½ inches, outer diameter of the bowl is 1 ¼ inches and the chamber diameter is 5/8 inches.

The bowl was in great shape when I got it in a box of stummels needing restemming. When I restemmed the one that I carved I set aside the old stem and yesterday was looking at it and thought it would fit this bowl. I took the bowl out and the stem fit. The tenon was perfect but the diameter of the stem was too big. I used my Dremel and sanding drum to take it down close. The series of four photos below show it when I had finished the first work with the Dremel.ImageImageImageImage

The next series of four photos show the stem fit after sanding with 240 grit sandpaper to remove the remaining vulcanite and bring the stem to a proper fit. This took several trips back to the Dremel for more sanding with the drum and then back to the sandpaper to smooth out the scratches. The photos were taken just at the point I had moved on to sand with the micromesh pads. I started with 1500 and 1800 grits to really work on the scratches and shaping. I use these wet as I find that they work better wet. From there I moved through the micromesh pads from 2400 to 6000 grit with each one polishing the stem more deeply.ImageImageImageImage

The last series of photos show the finished pipe. The stem has a deep shine. I used some 8000 and 12000 grit micromesh for the first time on this one and I have to tell you the difference between the 6000 and the 8000 grit was noticeable in the finish. This morning I buffed the pipe with carnauba wax and it is ready for a smoke!
ImageImageImageresImage

Carved from a kit – a predrilled block and stem


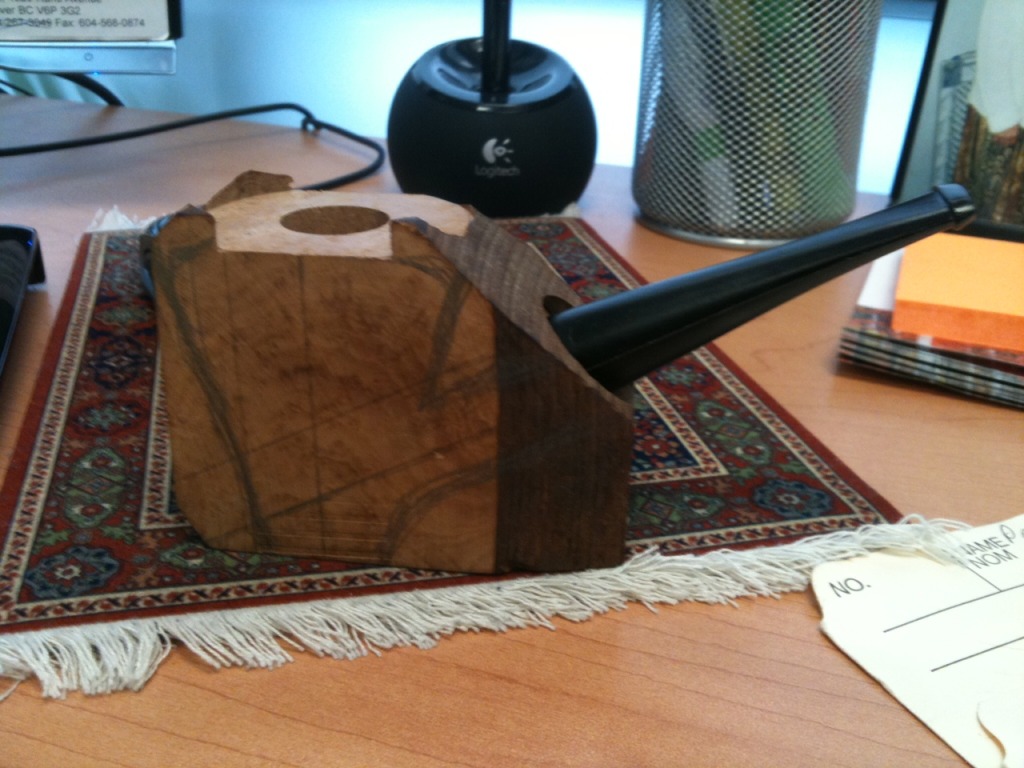
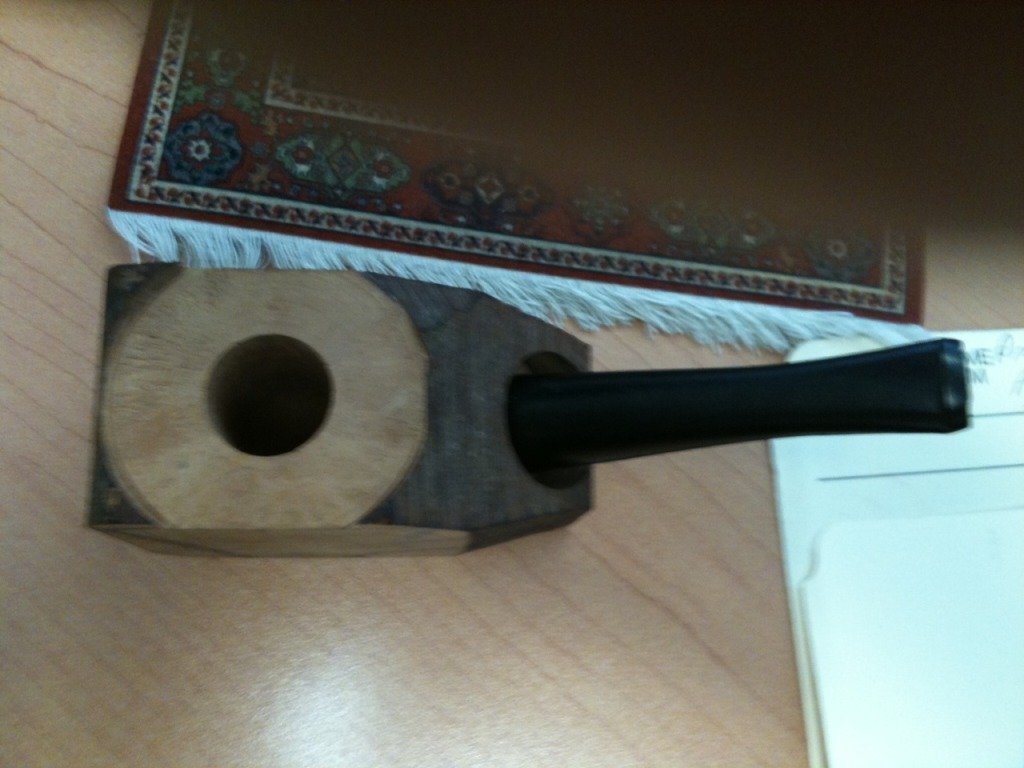
I took this photo essay of a pipe I carved from a pipe kit I purchased from smokindawg (Steve) on Smokers Forums and Pipe Smokers Unleashed. It was a predrilled block of briar and a straight vulcanite stem fit with a Delrin tenon. I actually only had to shape and finish this one. Steve did the hard work in drilling and prestemming it for me. Here is a photo journal of the progress in making the pipe. I used a hand held Dremel with the larger sanding drum to bring the pipe out of the block. At the junction of the bowl and shank I used a wood rasp and a long file to get the angle cut the way I wanted it to be.

Photos 1-3 the block when it arrived (I sketched a potential shape with pencil on both side of the block to give me an idea of where I was going to go)ImageImageImage

Photos 4-5 show the initial sanding to remove material.ImageImage

Photos 6-9 Making more briar dustImageImageImageImage

Photos 10-13 – Making more dust – Shape emergingImageImageImageImage

Photos 14-17 Making more dust – shape is coming. I bent the stem with heat to get an idea of the curve of the stem. Also removed some of the vulcanite on the stem.ImageImageImageImage

Photos 18-23 – The shaping is done. The pipe has been sanded with 240 grit sand paper and then buffed with Tripoli and White Diamond. I then sanded it with 400 and 600 grit wet dry sandpaper.ImageImageImageImageImageImage

Photos 24-27 – Black Stain. After some more sanding I stained the entire bowl with black aniline stain as an undercoat.

ImageImageImageImage

Photos 28-31 – Excess black stain removed. With the buffer and Tripoli I removed the excess of the black undercoat of stain. My goal was to leave it in the grain patterns to highlight them.

ImageImageImageImage

Photos 32-36 – More buffing and sanding. ImageImageImageImageImage

Photos 37-40 – Top stain of Oxblood Aniline for contrast. ImageImageImageImage

Photo 41 – An adjustment to the bend. I reheated the stem and curved the bend a bit more to match the curve of the underside of the bowl.

Image

The ongoing evolution of a handmade pipe


With all the refurbishing and staining I have done lately it is no wonder that when I pulled out this pipe from my rack it seemed just plain dull! This is a pipe I carved probably ten or more years ago and then reworked and thinned down in the past three or four years. It is great to be able to pull out one of my own pipes – carved by me – and rework it as the desire rises. I have no qualms about doing that as they are my creation and I am not changing someone else’s work. I had originally stained this pipe with a black understain and then used a very thin mix of medium brown stain on it. At the moment it looked good to me. But over the years that finish has grown faint and lack lustre. I have buffed it and given it new coats of wax but it still was lacking.

The morning I pulled it out was the day for a makeover. I finished the bowl I was smoking in it and while the briar was still warm I took it to the work table to restain. I decided to give it a coat oxblood aniline stain to liven it up and give it some warmth over the dark understain that had become more prominent with time. I rubbed on a coat of the stain and flamed it and then buffed it off so that the pictures below show its new look. I am enjoying its new look. I know it does not make it smoke better (it always has been a great smoking pipe) but the newness makes me reach for it more often.

I am thinking of restemming it now with a wider blade and tapered saddle but we shall see. These things seem to take a life of their own so truly there is no end to the changes that could be made over the years. Here it is now in its process of development!

ImageImageImageImage

UPDATE!!
Last evening (Aug. 8, 2012) after work I decided to cut a different stem for this pipe. The narrowness of the blade (flat portion of the stem from saddle to button) just did not look right to me. The more I looked at the pictures the less I liked it. I did not have any rod stock so I found a precast stem in my jar of stems that would work for now. I cut the tenon down so that it would fit and also reworked all the casting marks along the edges of the stem. I opened the draw and also reworked the slot and button for more comfort and ease of cleaning. Here are the pictures of how the stem looks now. I think it is better than before. Oh, I also decided not to bend the stem this time.

The stem looks shorter than the previous stem but it is actually the same length. The proportions are thicker and thus give the illusion of a more stubby looking stem.

Carving one of my own


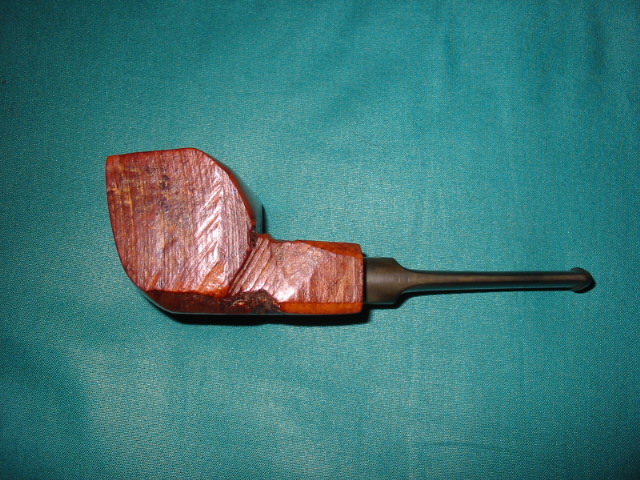
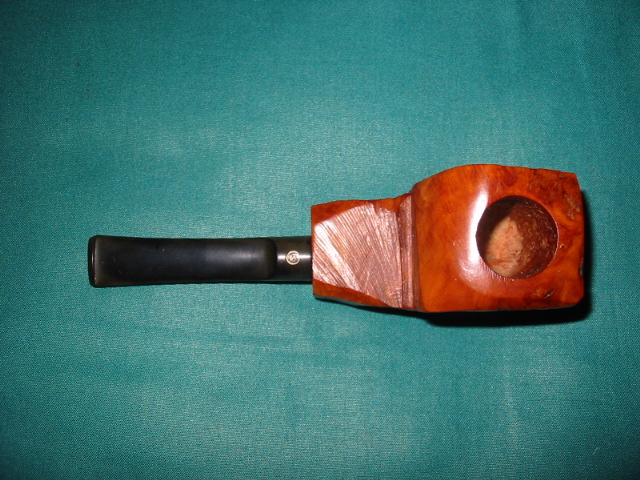
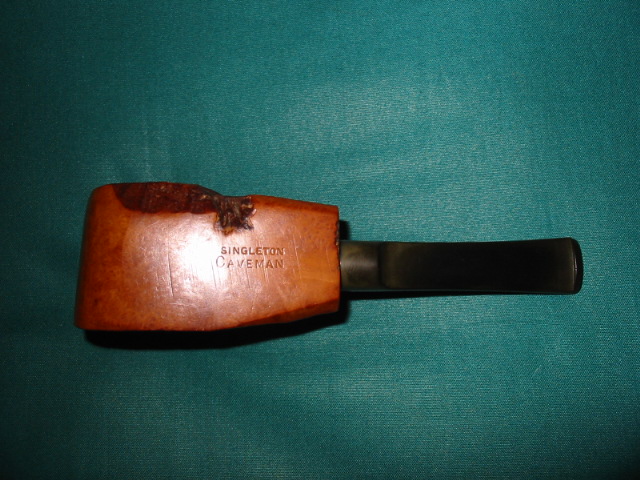
Every so often I get the urge to carve a pipe of my own. I have done it from scratch, drilling the airway and bowl but often it is just as much fun for me to buy a pre-drilled block with its own stem and rework it into something I like. The pictures and essay below will take you through my process with a pipe I picked up off EBay for almost nothing. When you look at it some of you will recognize that for awhile in the 80’s and maybe earlier Singleton sold these pipes as Caveman Pipes. They were rough and were stained and waxed, stamped Singleton Caveman pipes and sold as is. I have always thought that they were ugly and looked unfinished. This one just begged to be reshaped – at least that is the excuse I gave when the package arrived and my wife commented on “yet another pipe”.

The first four photos give a good sense of what it looked like when it arrived at my house. It was a fairly small piece of briar and there was no way of knowing what lay beneath the surface of the block. It was stained and waxed. The stem was oxidized a bit but it did not matter as I was going to reshape it and make it my own. The last photo of the four shows the Caveman stamping I was referring to earlier.

ImageImageImageImage

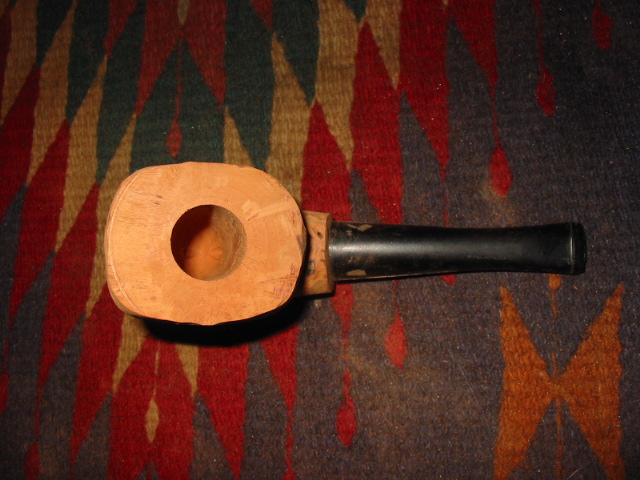
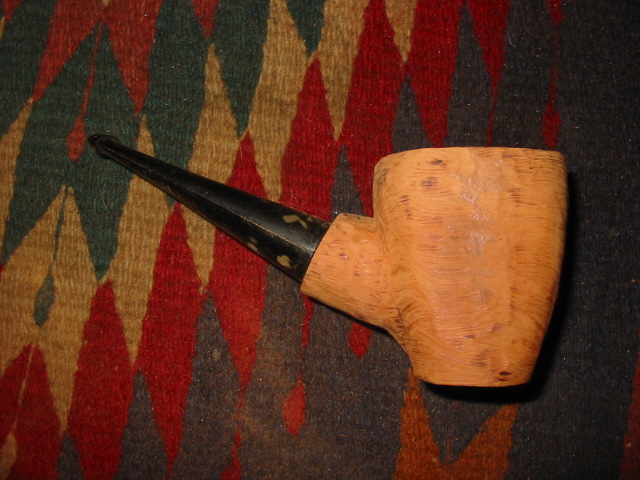
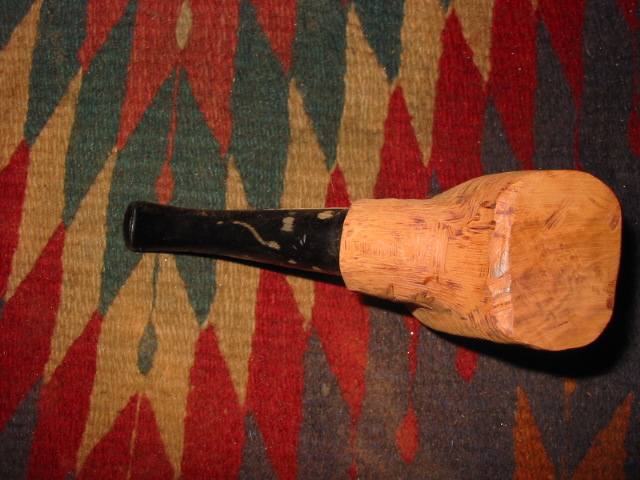
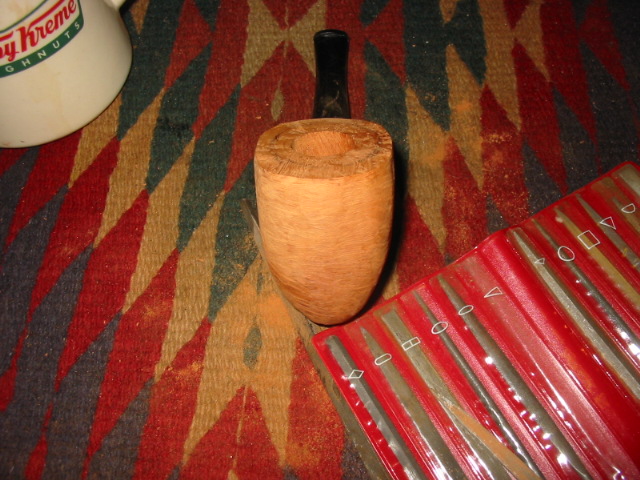
I took out my Dremel with the larger sanding drum, replaced the sandpaper cylinder with a new one and began the process of removing the briar and making a shape that I liked and that I felt the briar held inside. The next three photos show the block with much of the briar removed and a shape is beginning to come out. I bring it to this point in the shaping process with the Dremel and the sanding drum. It works great for me. Some of you may notice the nicks from the Dremel on the saddle of the stem. Those are a pain but I was not worrying too much about it as I planned to shape the stem a bit more as well and those would disappear in the process. Also note, the shank is still not the diameter of the saddle on the stem at this point. From this stage one I do the shaping by hand with 100 grit sandpaper. It makes short work of the remaining excess briar. You will also see some burn marks at the bowl shank junction from the sanding drum – nothing that will not sand off. There are also sand pits and flaws beginning to show up in the surface of the briar.

ImageImage

Image

Much sanding went on before I took the next series of three photos. I used the 100 grit sandpaper to remove much of the excess and then progressed to 220 and 240 grit sandpaper to bring the shape to the stage in these photos. I also sanded the saddle of the stem and the edges of the blade to match the line of the shank. I wanted the flow to be uninterrupted by the juncture of the two materials and I wanted the transition to be smooth. There were many sand pits visible at this time on the sides, top and bottom of the bowl and the shank. It is always a bit of pain to get to this point in the shaping and sanding and not be able to get rid of them. This left me with a bit of a quandary. What should I do to get the best finish on this pipe? I dislike fills and did not want to use putty in any form on this pipe. I figured the next bet would be to rusticate the pipe and give it an interesting texture for the prestained finish.

ImageImageImage

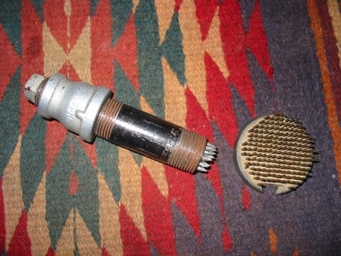
I used a tool that I fashioned out of a fistful of galvanized nails, a piece of steel pipe, a cap and nipple coupling. It looks like the photos below. It is the tool on the left. I also used a florist’s frog (pictured on the right) to give the finished surface a different touch.

ImageImage

Before I used the tool on the surface of the briar, I wrapped the saddle of the stem and a 1/8th inch band with black electrical tape. I wanted to protect the saddle and the small band of briar from being rusticated with the tool. It is a work horse but is not subtle in its deep cuts. I wrap the cap end with a thick towel to protect my hand when I pushed the points of the nails into the briar. I pushed the head into the briar and twisted the tool back and forth to cut the surface of the briar and roughen it. The next series of four photos show the rusticated surface of the pipe after I finished with the nails and also after I rubbed the florist’s frog across the surface to knock off high points. I was aiming for a finish that has the look of aged leather so I wanted no roughness left but I wanted a crinkled, wrinkled look to the briar.

ImageImageImageImage

The next two photos show the pipe after I gave it a black understain. I used black aniline stain and applied it with a dauber. Once the pipe was covered I used a lighter to flame the stain to set it deeply in the briar. My goal was to have the black stain set deeply into the crevices of the rustication once I had buffed it. (I have learned that when I am staining to always start with the darkest stain and work toward the final lighter coat.) Once the stain was dry I took it to my buffer and buffed it with Tripoli. The buffer removed all of the black stain from the smoother, higher surfaces and the band next to the stem and the rim. The only black stain remaining was in the crevices and pits in the briar. At that point I restained the pipe with a medium brown aniline stain and flamed it as well. I took it to the buffer and this time buffed with Tripoli and White Diamond. I wanted the brown to give a top coat and allow the black to show through. I also wanted to smooth the surface a little to make it smooth in the hand.

ImageImage

The final series of photos show the finished pipe. I think I achieved the look of old worn leather I was aiming for with this rustication and staining. I worked on the stem and smoothed it out with 400 and 600 grit wet dry sandpaper and water. Once the scratches were gone I worked through the usual regimen of micromesh pads from 1500 to 6000 grit. These gave the stem a good polished look. I finished it on the buffer with White Diamond and multiple coats of carnauba. The bowl was waxed with Halcyon 2 wax so that I could avoid the wax build up from carnauba in the crevices of the rustication. I gave the entirety a final buff with a clean flannel buffing pad. This one has become a favourite smoker of mine. It is perfect size to fit in my jacket pocket and it is a veritable furnace for good Virginia Flake tobacco.

ImageImageImage

Restemmed Red Point Capped Bent


I picked up this Red Point Old Briar Capped Pipe bowl on Ebay awhile ago. It did not have a stem but seemed to have promising grain. When it came in the mail I cleaned it up a bit and then worked on a stem for it. I decided to use a faux p-lip stem that has the airhole on the end of the stem rather than on the top. I fit the tenon to the shank – that was a bit of a trick as the shank is like a Pete shank in that it narrows/tapers as it descends toward the bowl. I finished fitting and polishing the stem.

Here are some pictures of the bowl when it came. From the second photo you can see that it was barely smoked. It was very clean and needed a few pipe cleaners run through it. The exterior needed to be wiped down with a little oil soap to clean away the grime – I always rub it on undiluted (no water) and quickly wipe it off. I do not leave it to sit. I also polished the silver work on the shank and the cap.

ImageImage

I heated the stem with my heat gun and bent it slightly and took the next three pictures. I have learned that pictures give the true story in terms of bend and overall look of the pipe in a way that is clearer than the naked eye. From the photos I decided that the bend need to be a bit more dramatic and match the curve of the bottom of the bowl and shank. I reheated it and used the rounded edge of my work table to get a proper bend in it.

ImageImageImage

Here is the final product – a proper bend with a curve that matches the bottom of the bowl and shank. The look is like an elongated S. Once it was finished I cooled the stem for a bit and then loaded it with Blue Mountain and smoked the inaugural bowl. Since then I have smoked it several times. It delivers a great smoke.

Image

Pulling a Broken Tenon


Over the years I have had my share of broken tenons to remove. Some of them came from carelessness on my part but others I purchased that way. I took pictures of the process I use on two different pipes recently. The first was a little Barling with a broken tenon and a chewed stem. I ended up restemming this one. The second one was a Peterson 999 with a broken tenon that I hope to reuse the stem by drilling/tapping and inserting a new tenon to refit it.

Image

Image

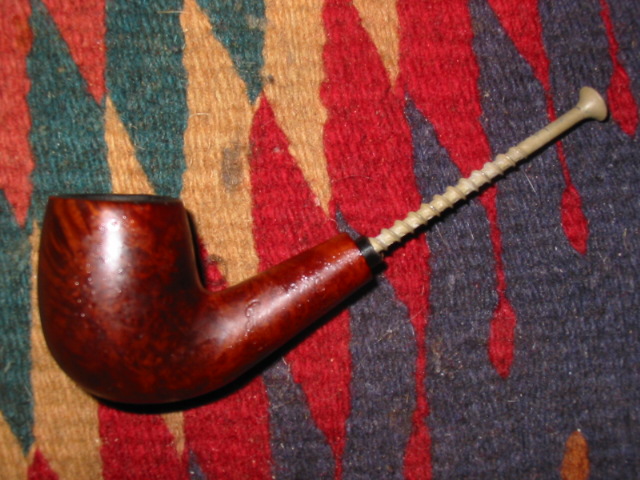
Insert a screw part way into the airway on the broken tenon in the shank of the pipe. I use a dry wall or gyprock screw. I turn the screw in by hand. I do not want to expand the tenon at all I just want the screw to have a little bite to it so that I can use it to pull the tenon out by hand or with a pair of needle nose pliers. In this case in both pipes I was not able to pull out the tenon easily. Many times I am able to pull it out in a matter of seconds using this method. But both of these were exceptionally tight and immovable. I put them both in the freezer for an hour as I know that vulcanite and briar contract at different rates with a change in temperature. After an hour I removed the Barling from the freezer and was able to pull the broken tenon out very easily. I then unscrew the broken piece and lay it aside to use for a match on the new tenon I will cut as a replacement. It helps me to eyeball the fit. I also measure the mortise and set the tenon turner as closely as possible to the measurements. I then take the broken piece and slide it on the tenon turner to check the fit.
The tenon on the Peterson however, still did not budge after an hour in the freezer. I left it in for another half hour. Still it did not budge. I then dripped Isopropyl alcohol into the exposed mortise and hoped that it would work as a solvent to break the tenon free. I repeated this several times and left the pipe sitting with alcohol in it over night. The next morning the tenon still did not move.

ImageImage

I decided to not fiddle around with trying to pull the tenon. I used my small drill bit and began to drill out the tenon. I never start with the exact size of the tenon but rather work with the size of the airway and work my way up. I have found that in the process of working through the bits the tenon inevitably breaks loose or crumbles to pieces. In this case, by the time I got to the third drill bit, when I reversed it the tenon came out with the bit. You will notice that I also flattened the broken portion of the tenon on the stem so that the surface was flat and smooth. I wanted it to be ready for when I would drill it out or tap to receive the new tenon that I have ordered.

ImageImage

As I close this essay I want to just mention a couple of reminders:

  1. Do not turn the screw into the airway to deeply as it does expand the airway and can actually crack the shank on the pipe. BE CAREFUL and go slowly.
  2. Do not use a tool to turn the screw into the airway – do it by hand so you can feel the progress and the bite before damage is done.
  3. If the tenon is stuck and immoveable in the first try put the pipe in the freezer for an hour or more to expand and contract the tenon and mortise. This usually works to break it free.
  4. Should you have to drill it out – use a bit a little larger than the airway to begin the process and work your way up to larger bits. Do not use a drill bit that is the size of the mortise lest you damage the mortise.
  5. Use a T handle hand drill not a power drill to do this as you can easily drill right through the bowl and ruin the pipe.