Tag Archives: sanding a stem

Restored CPF Bent Billiard – A Reclamation Project


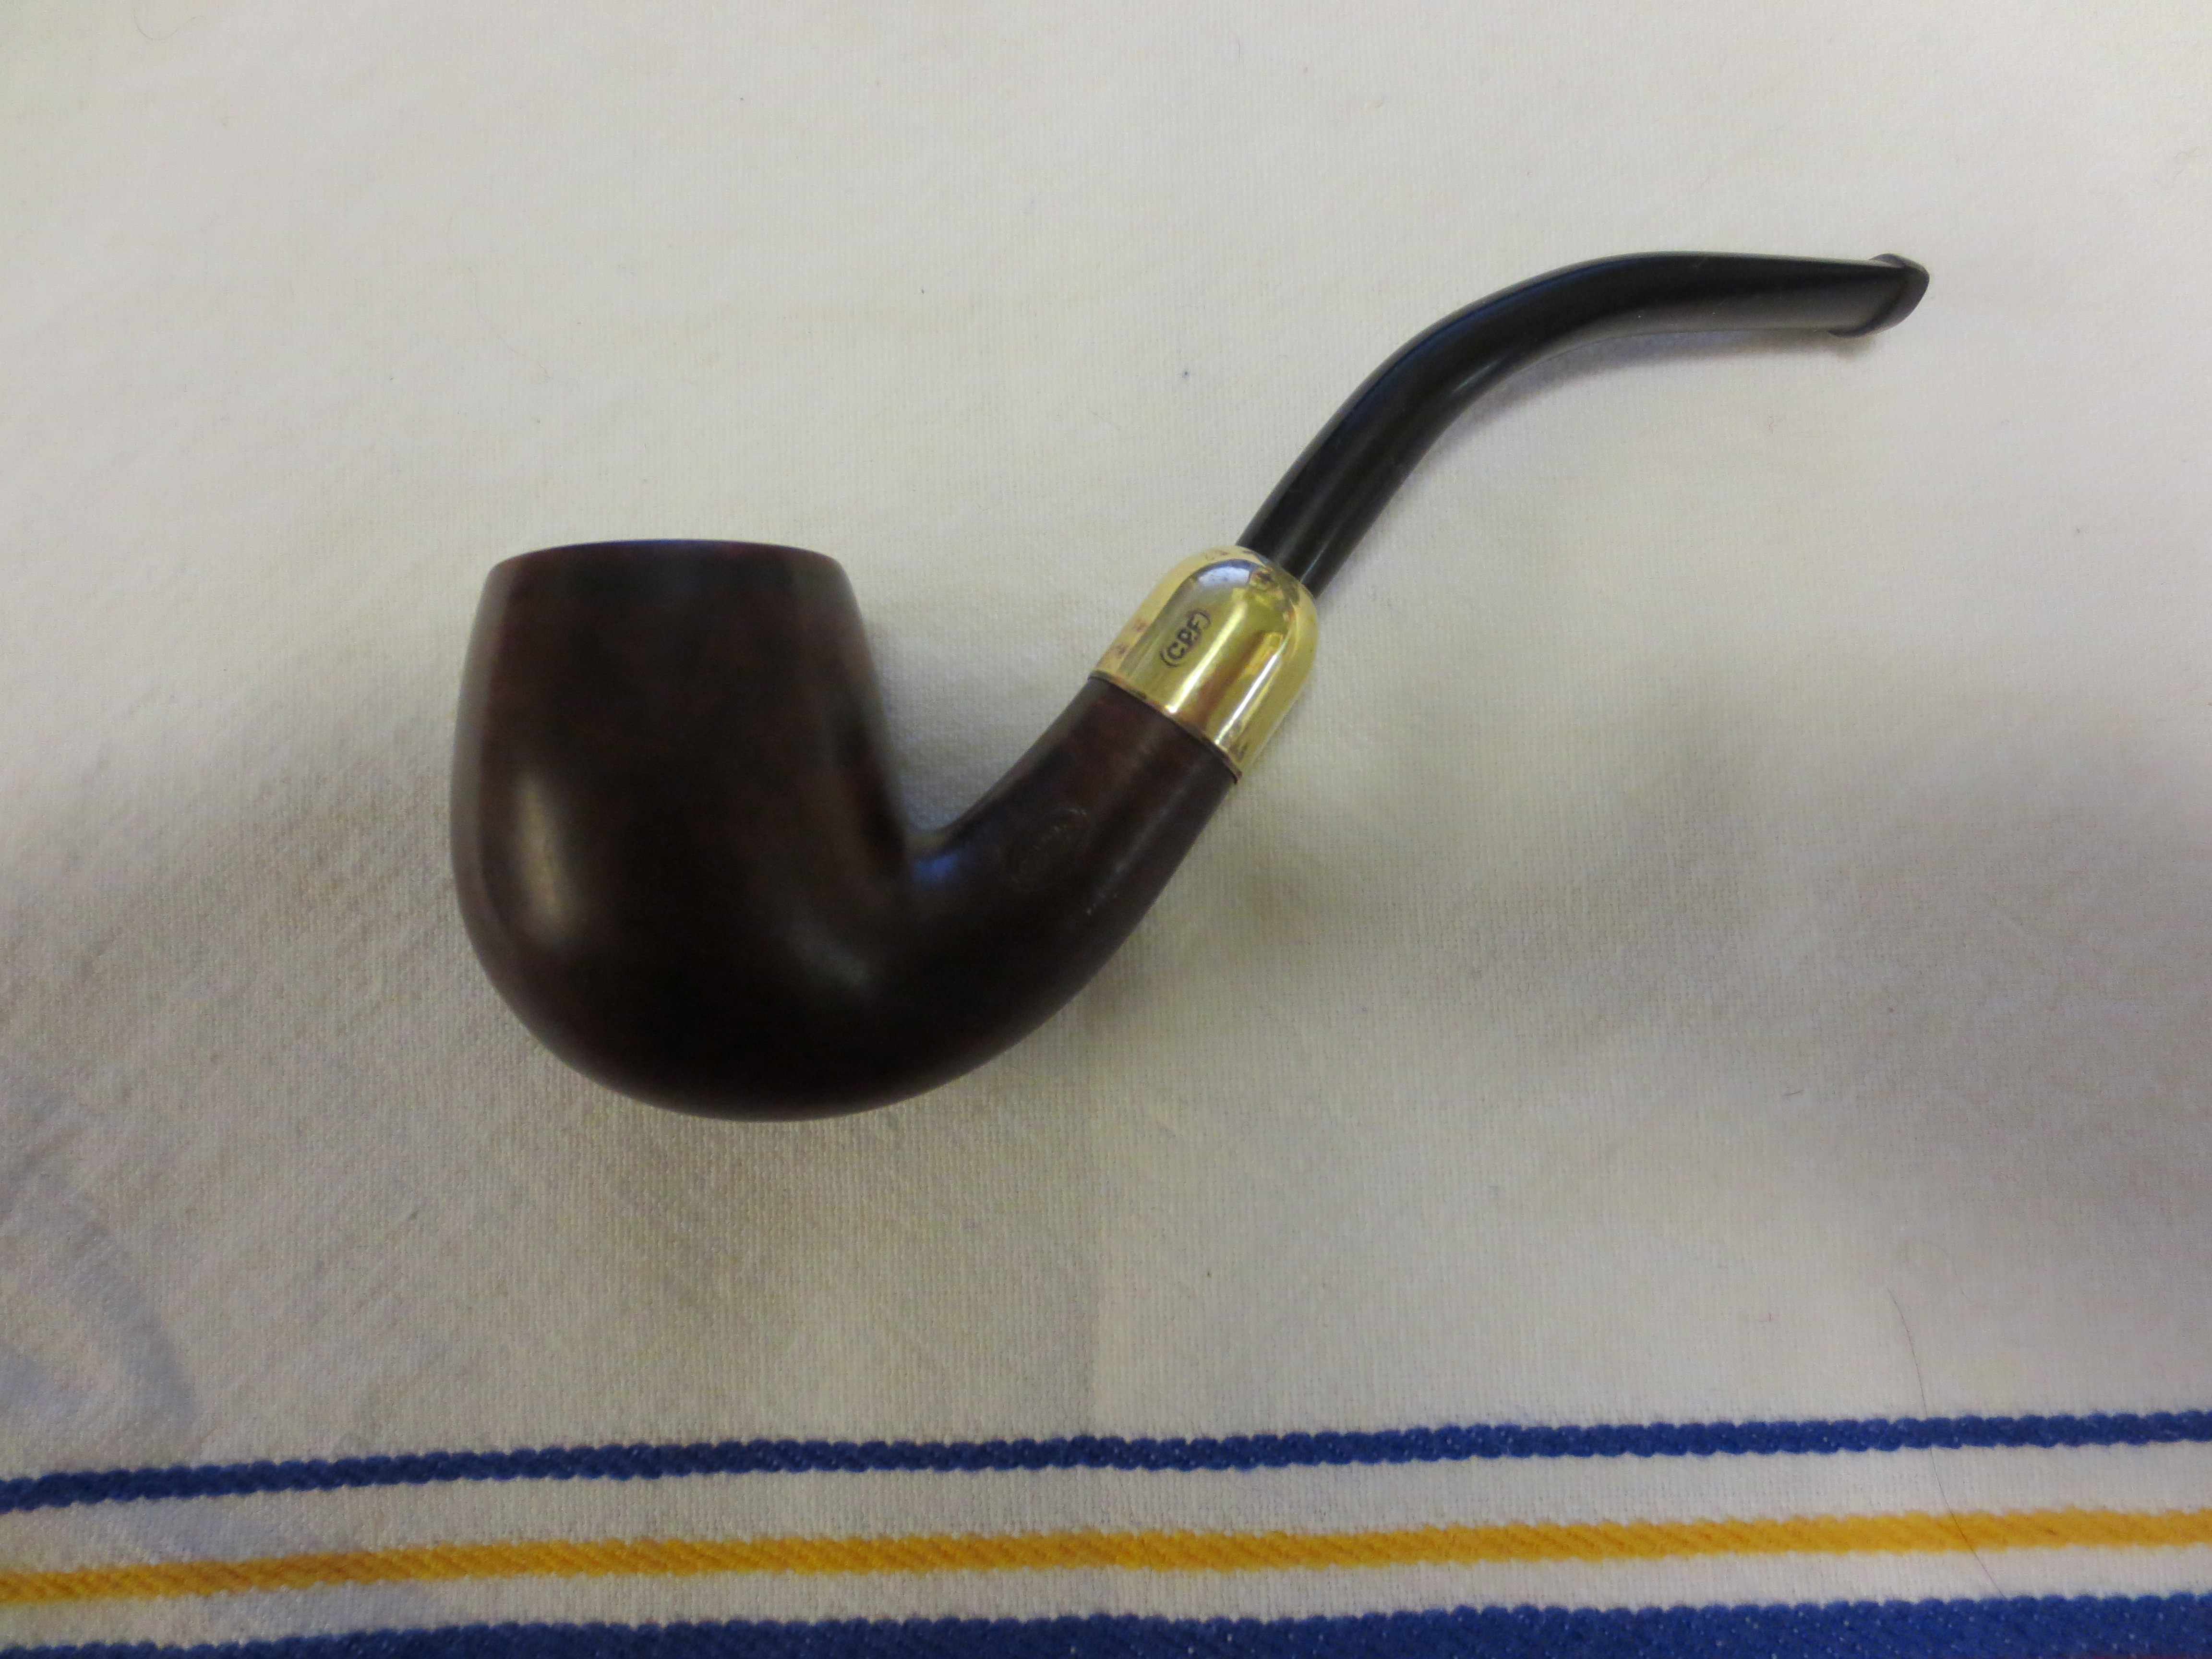
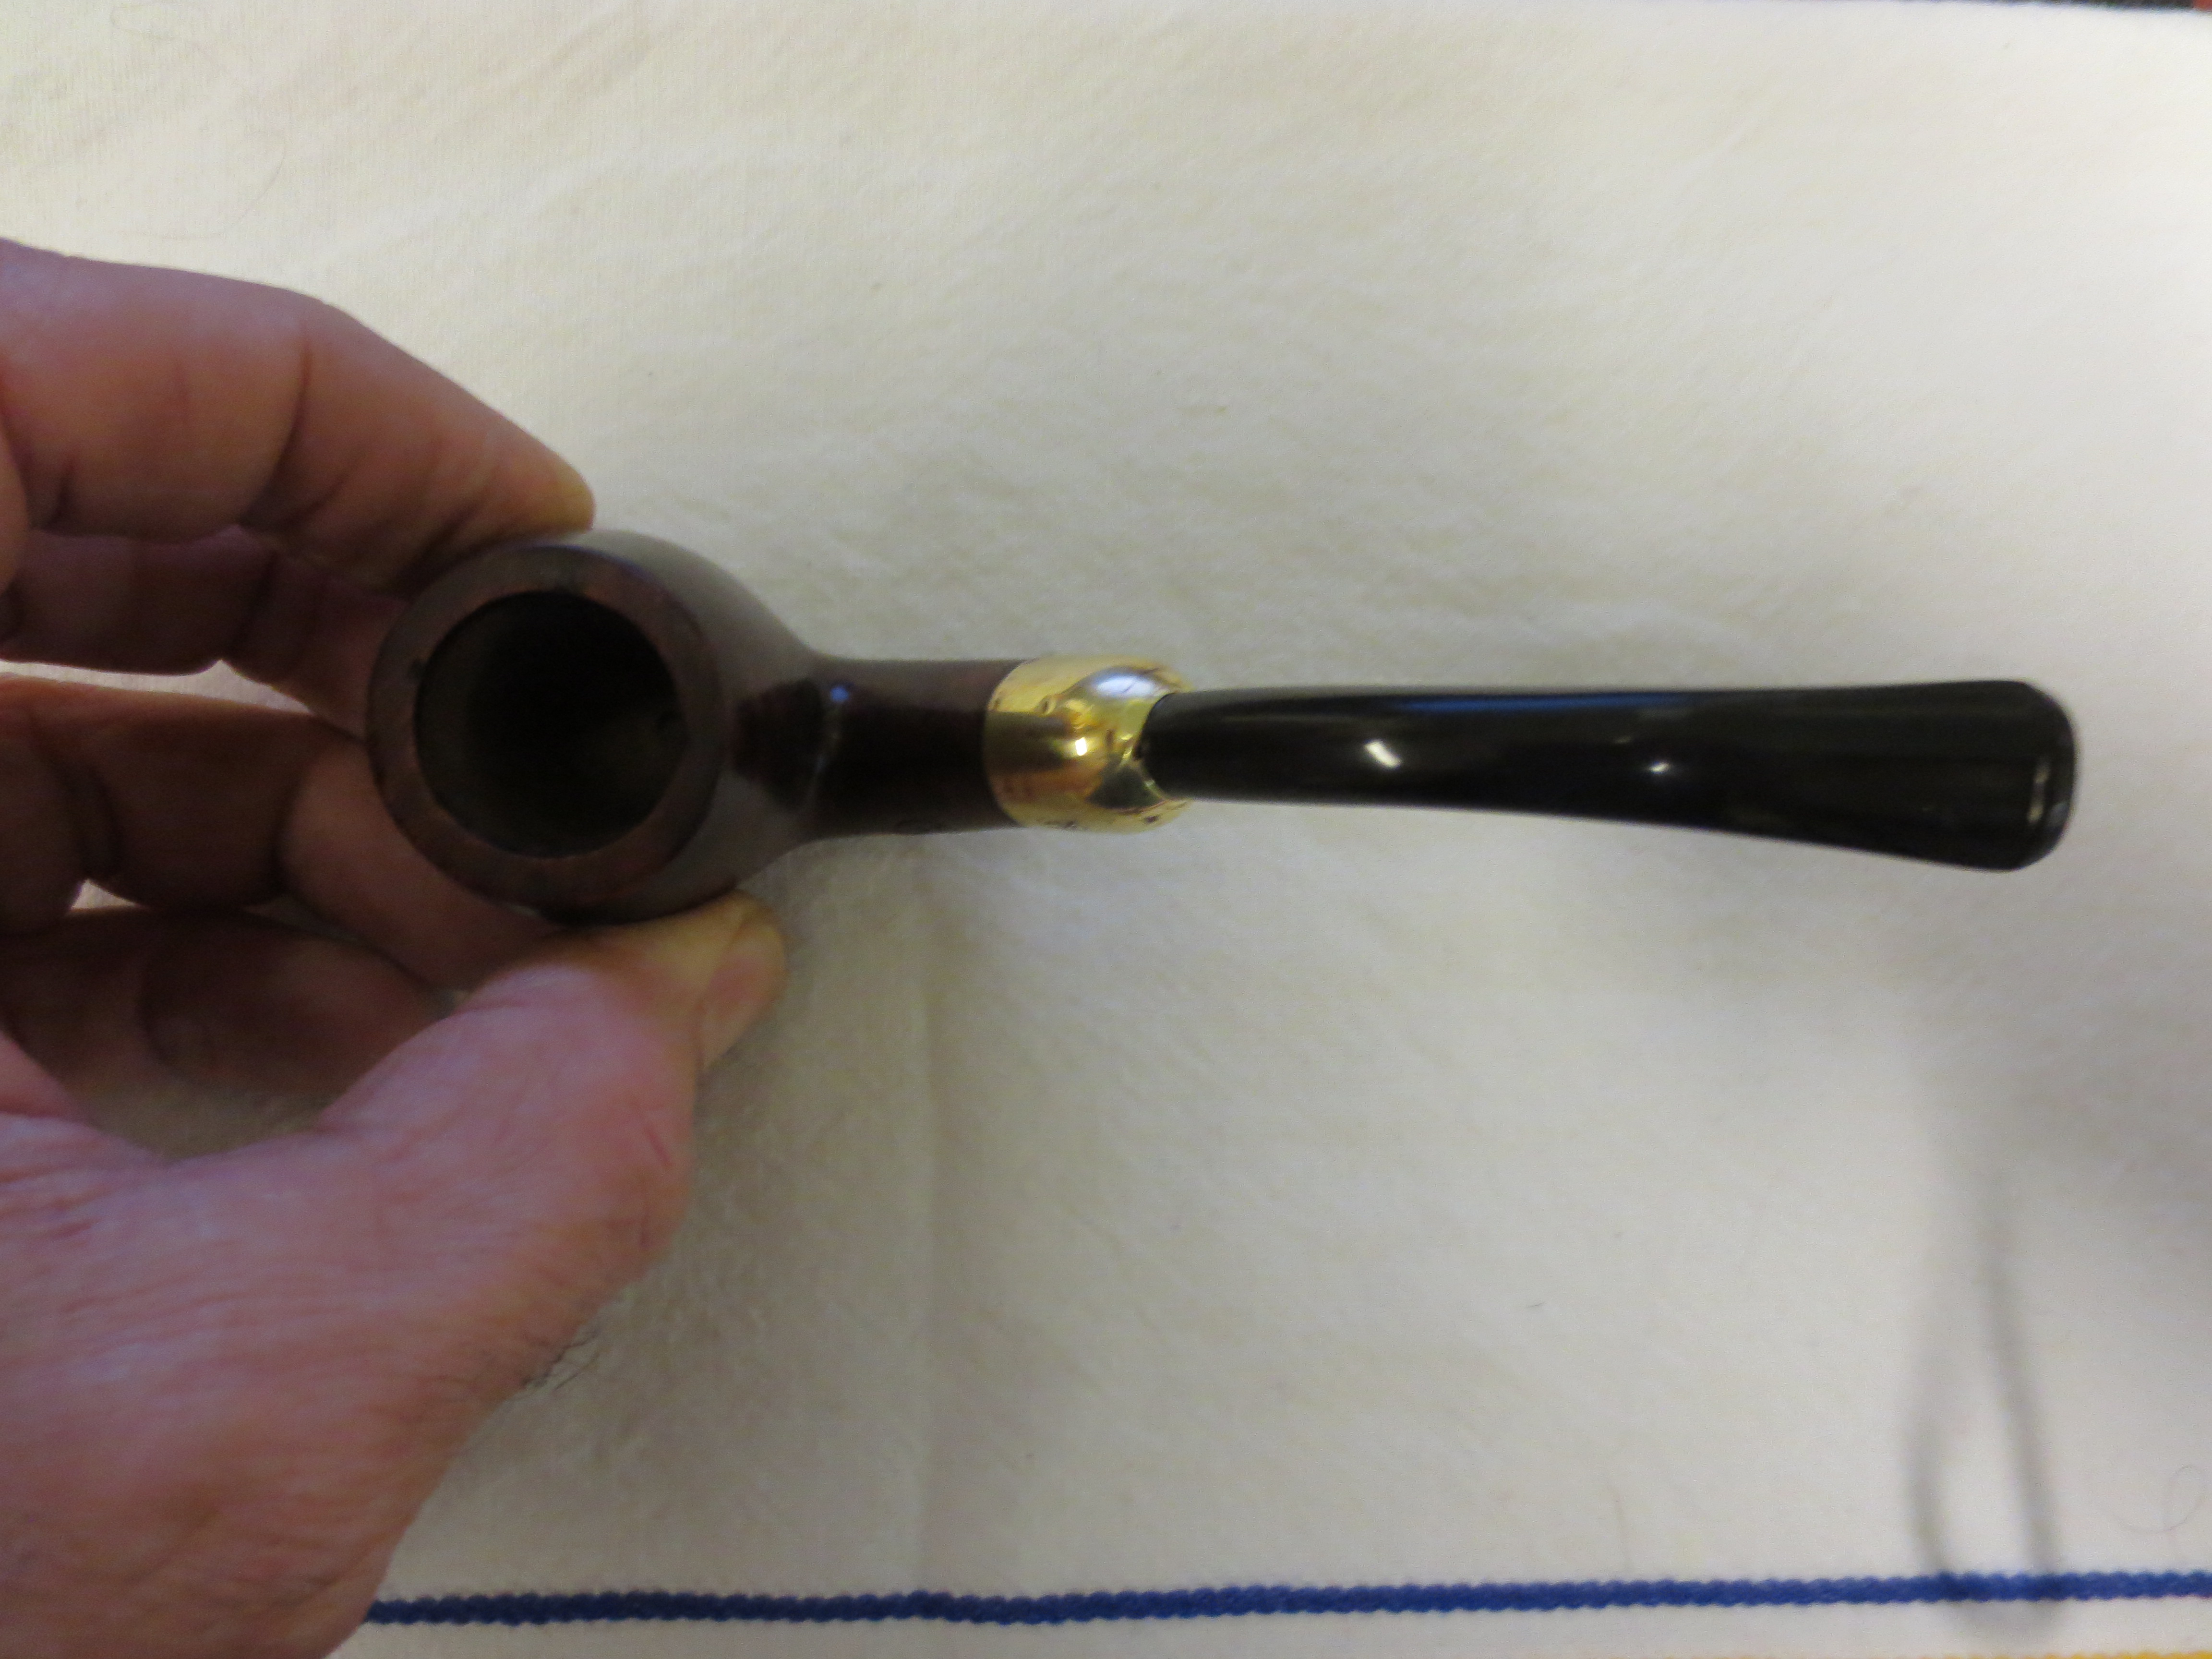
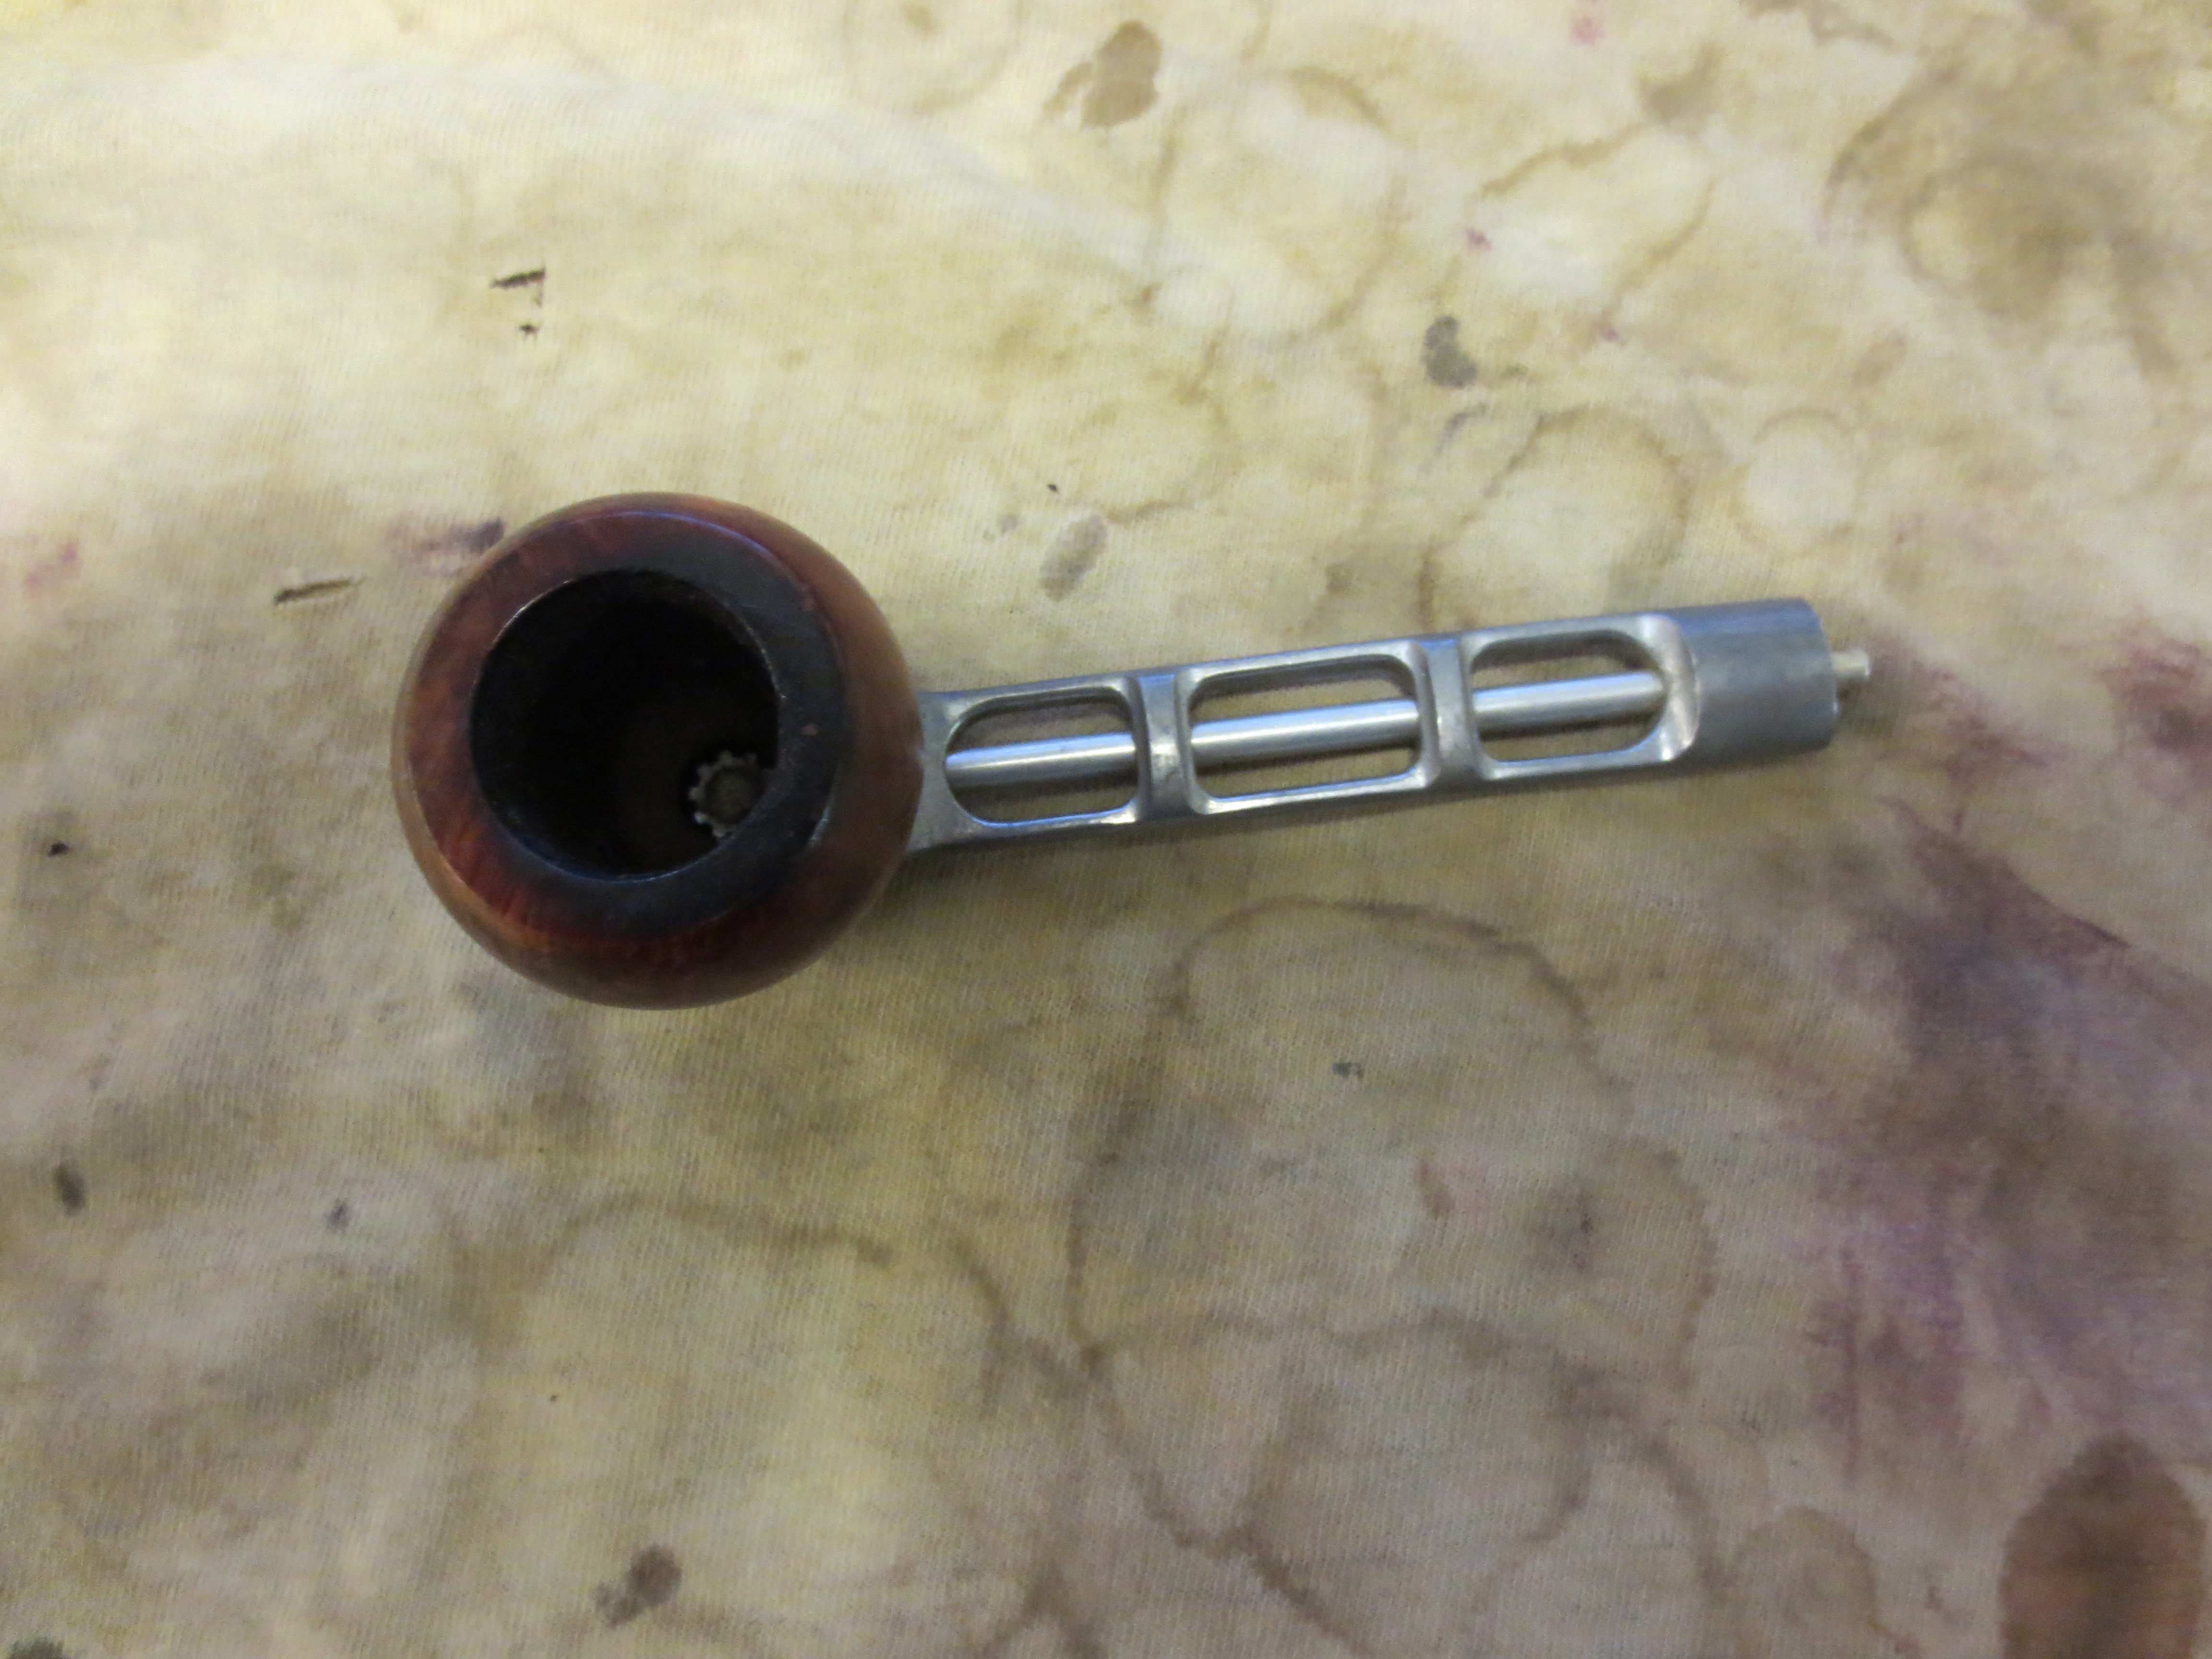
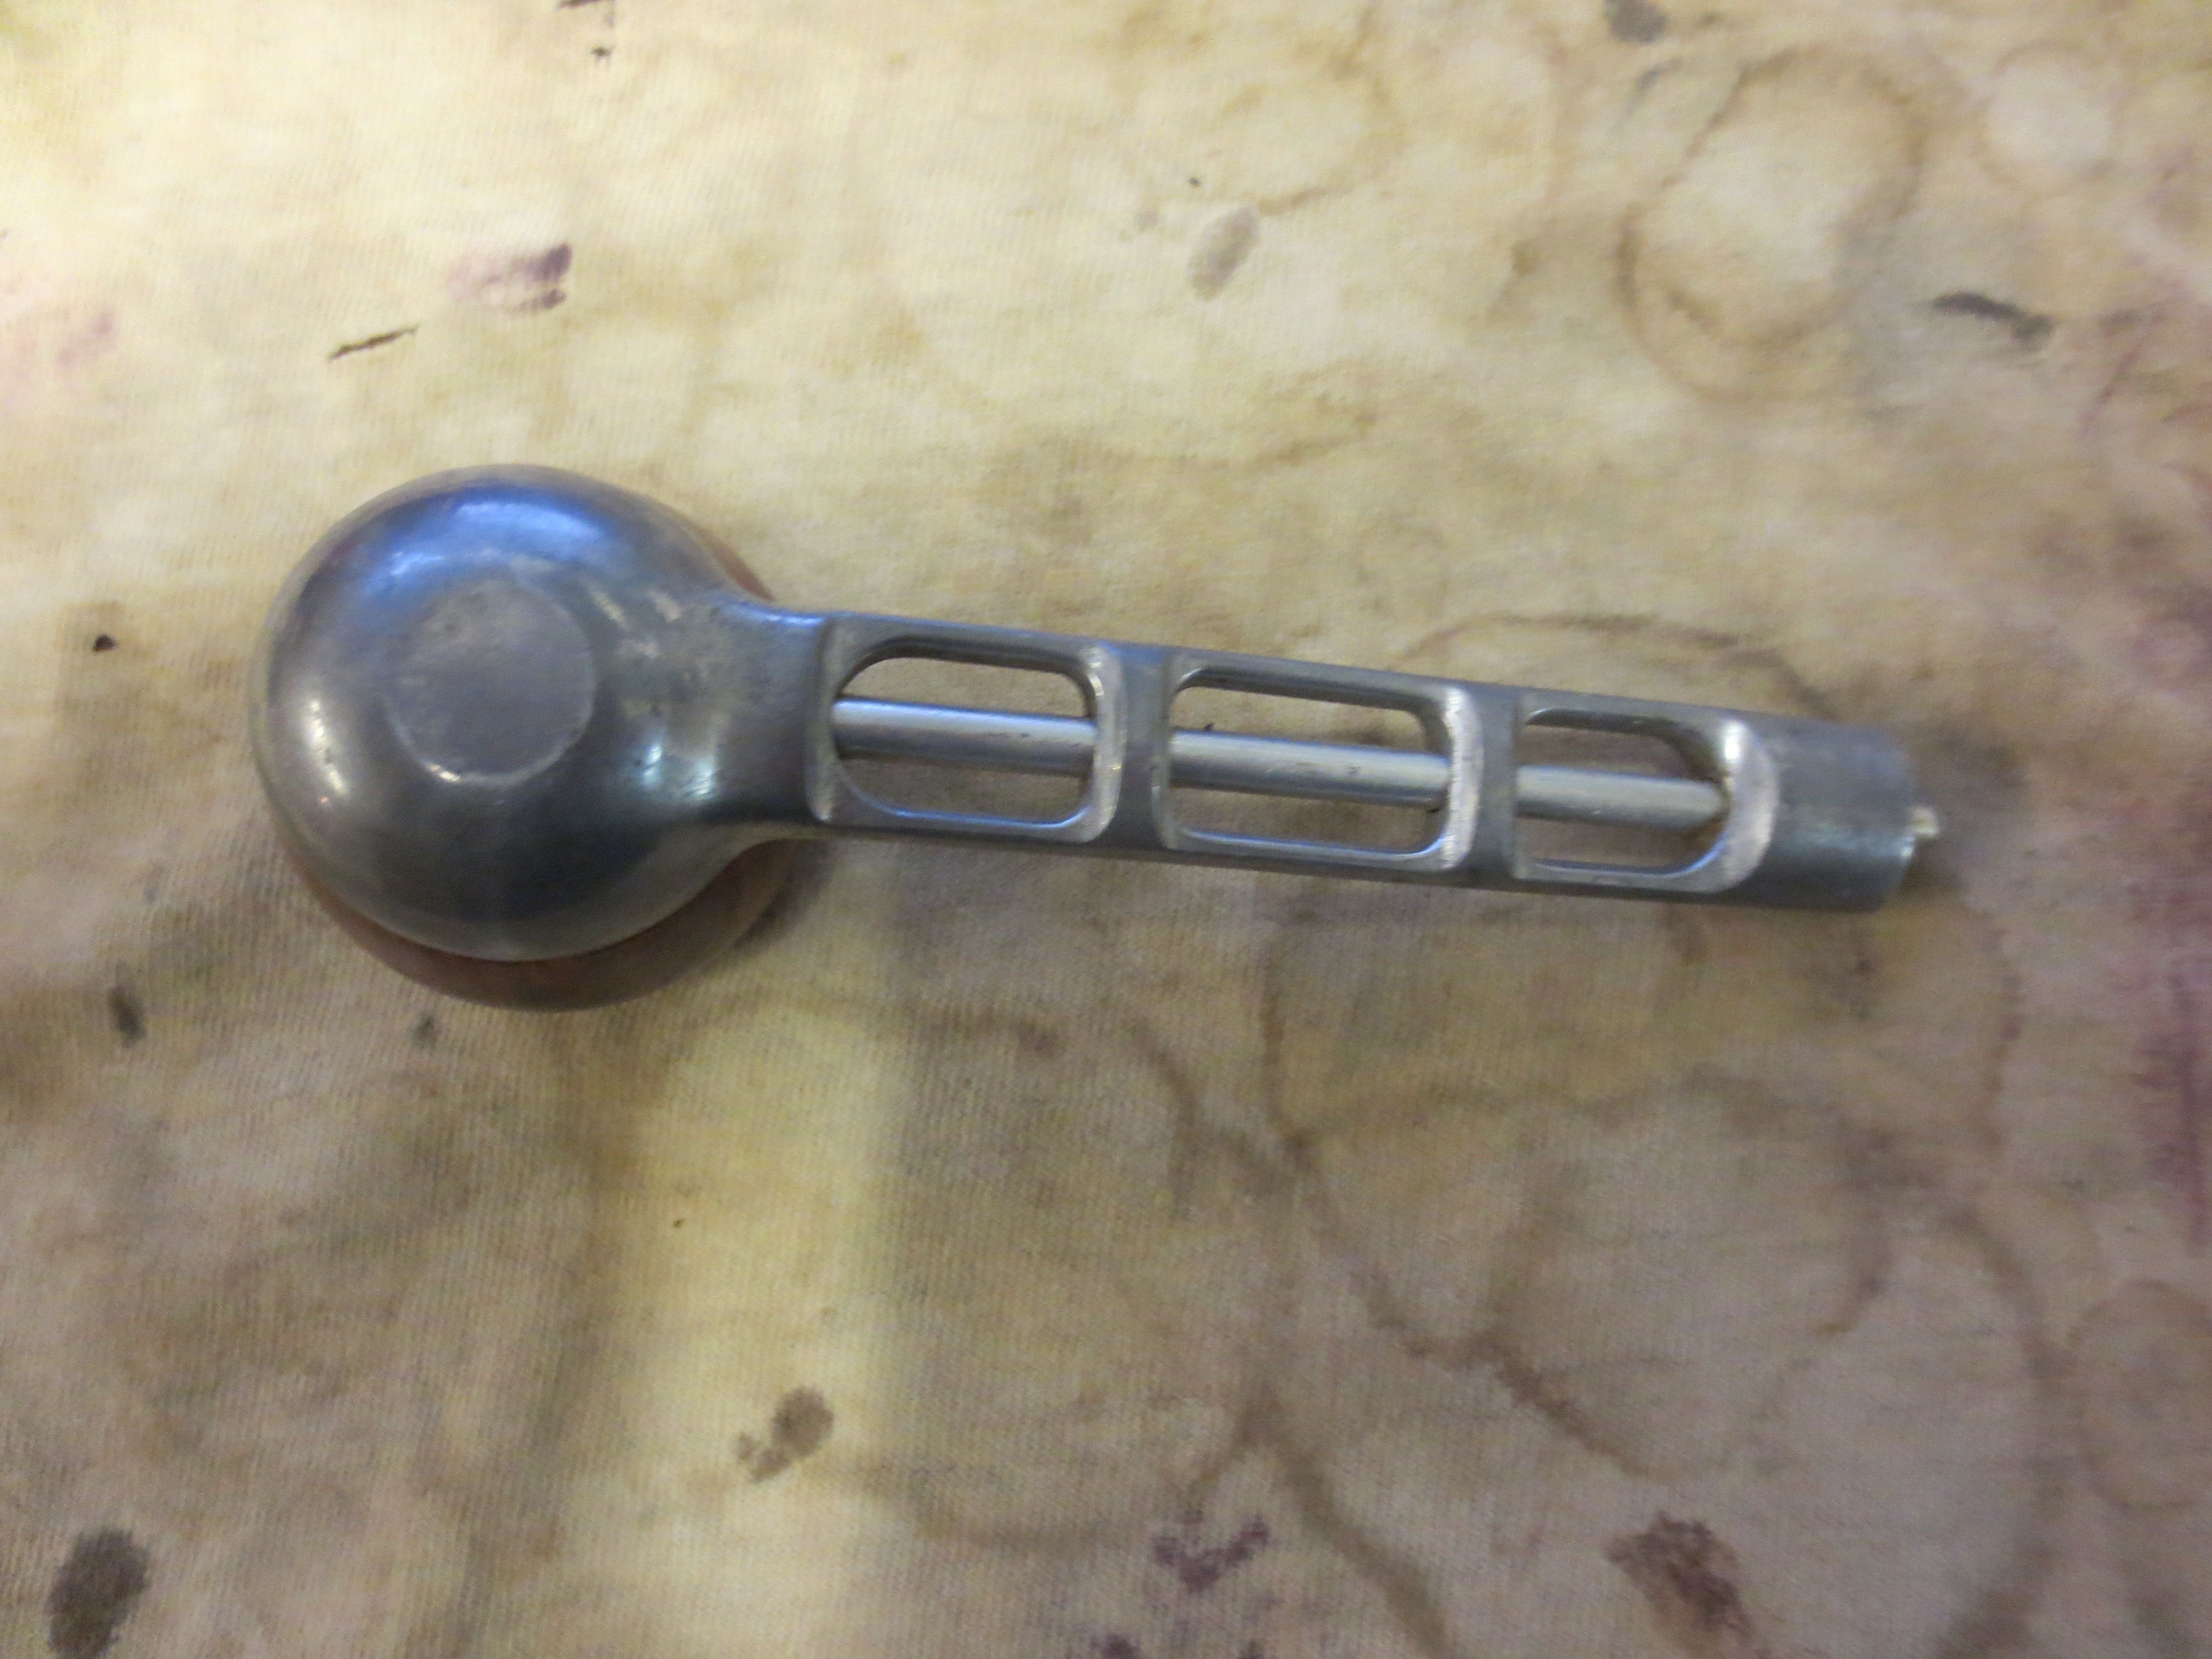
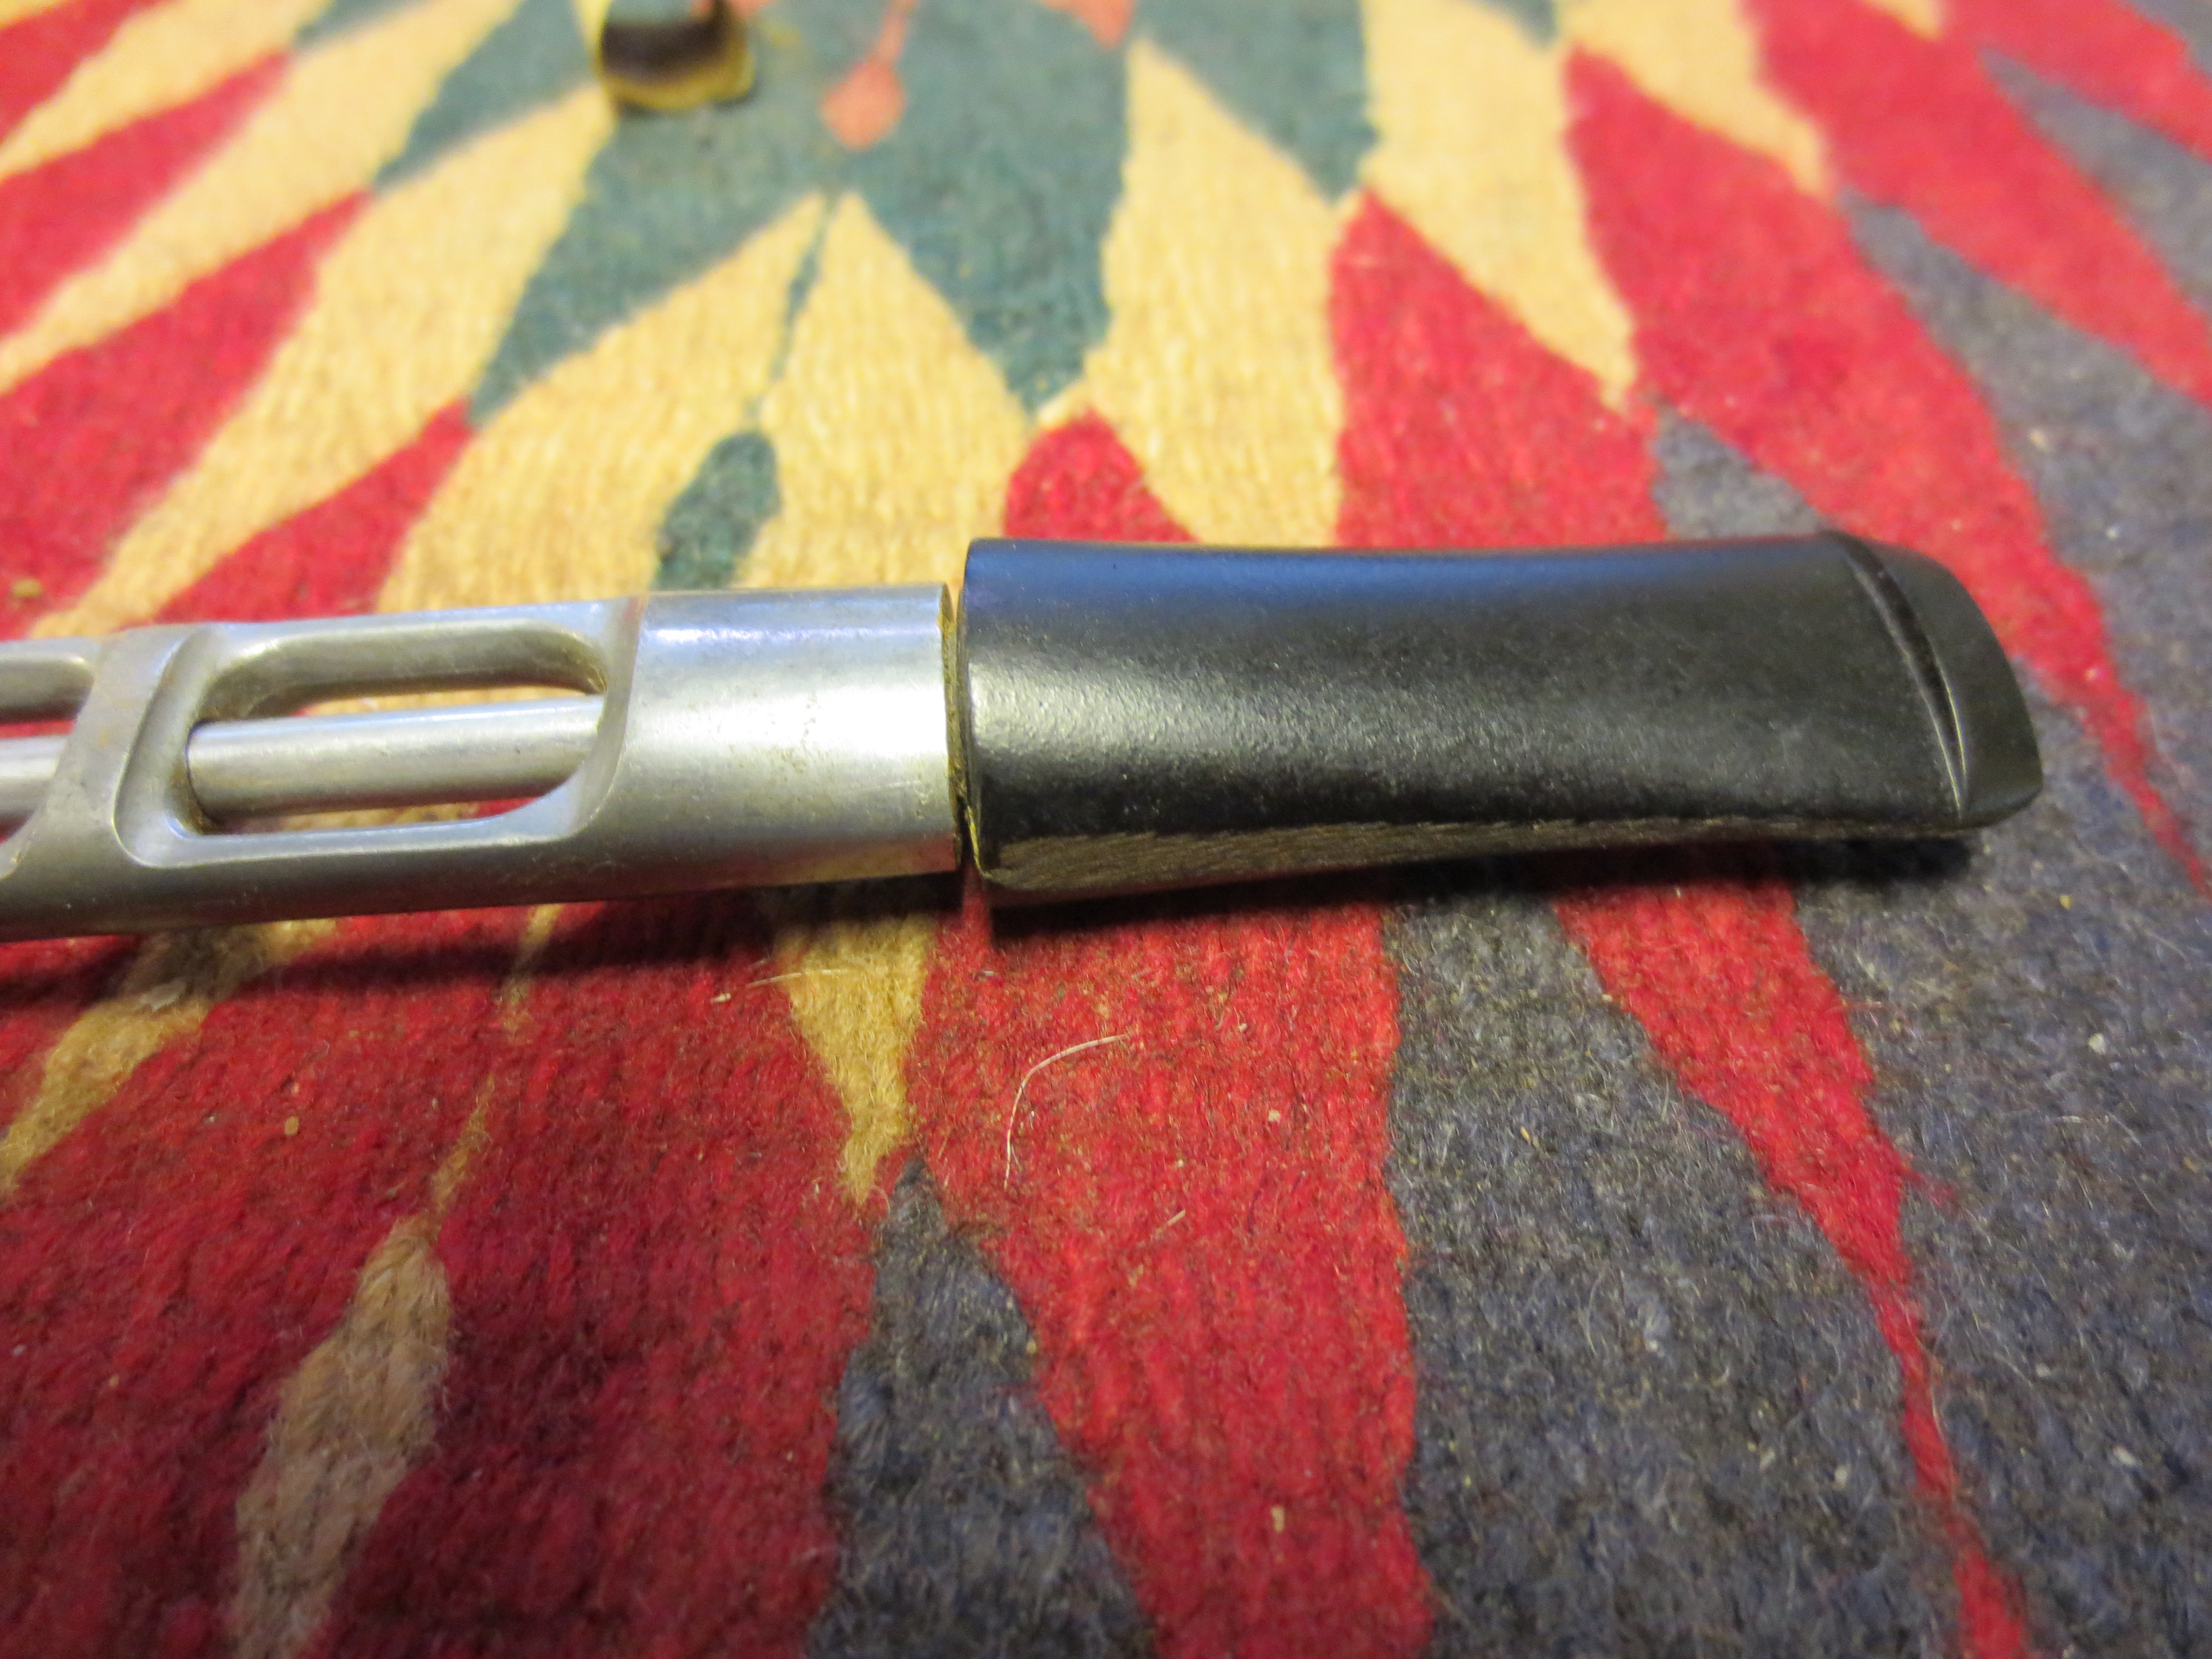
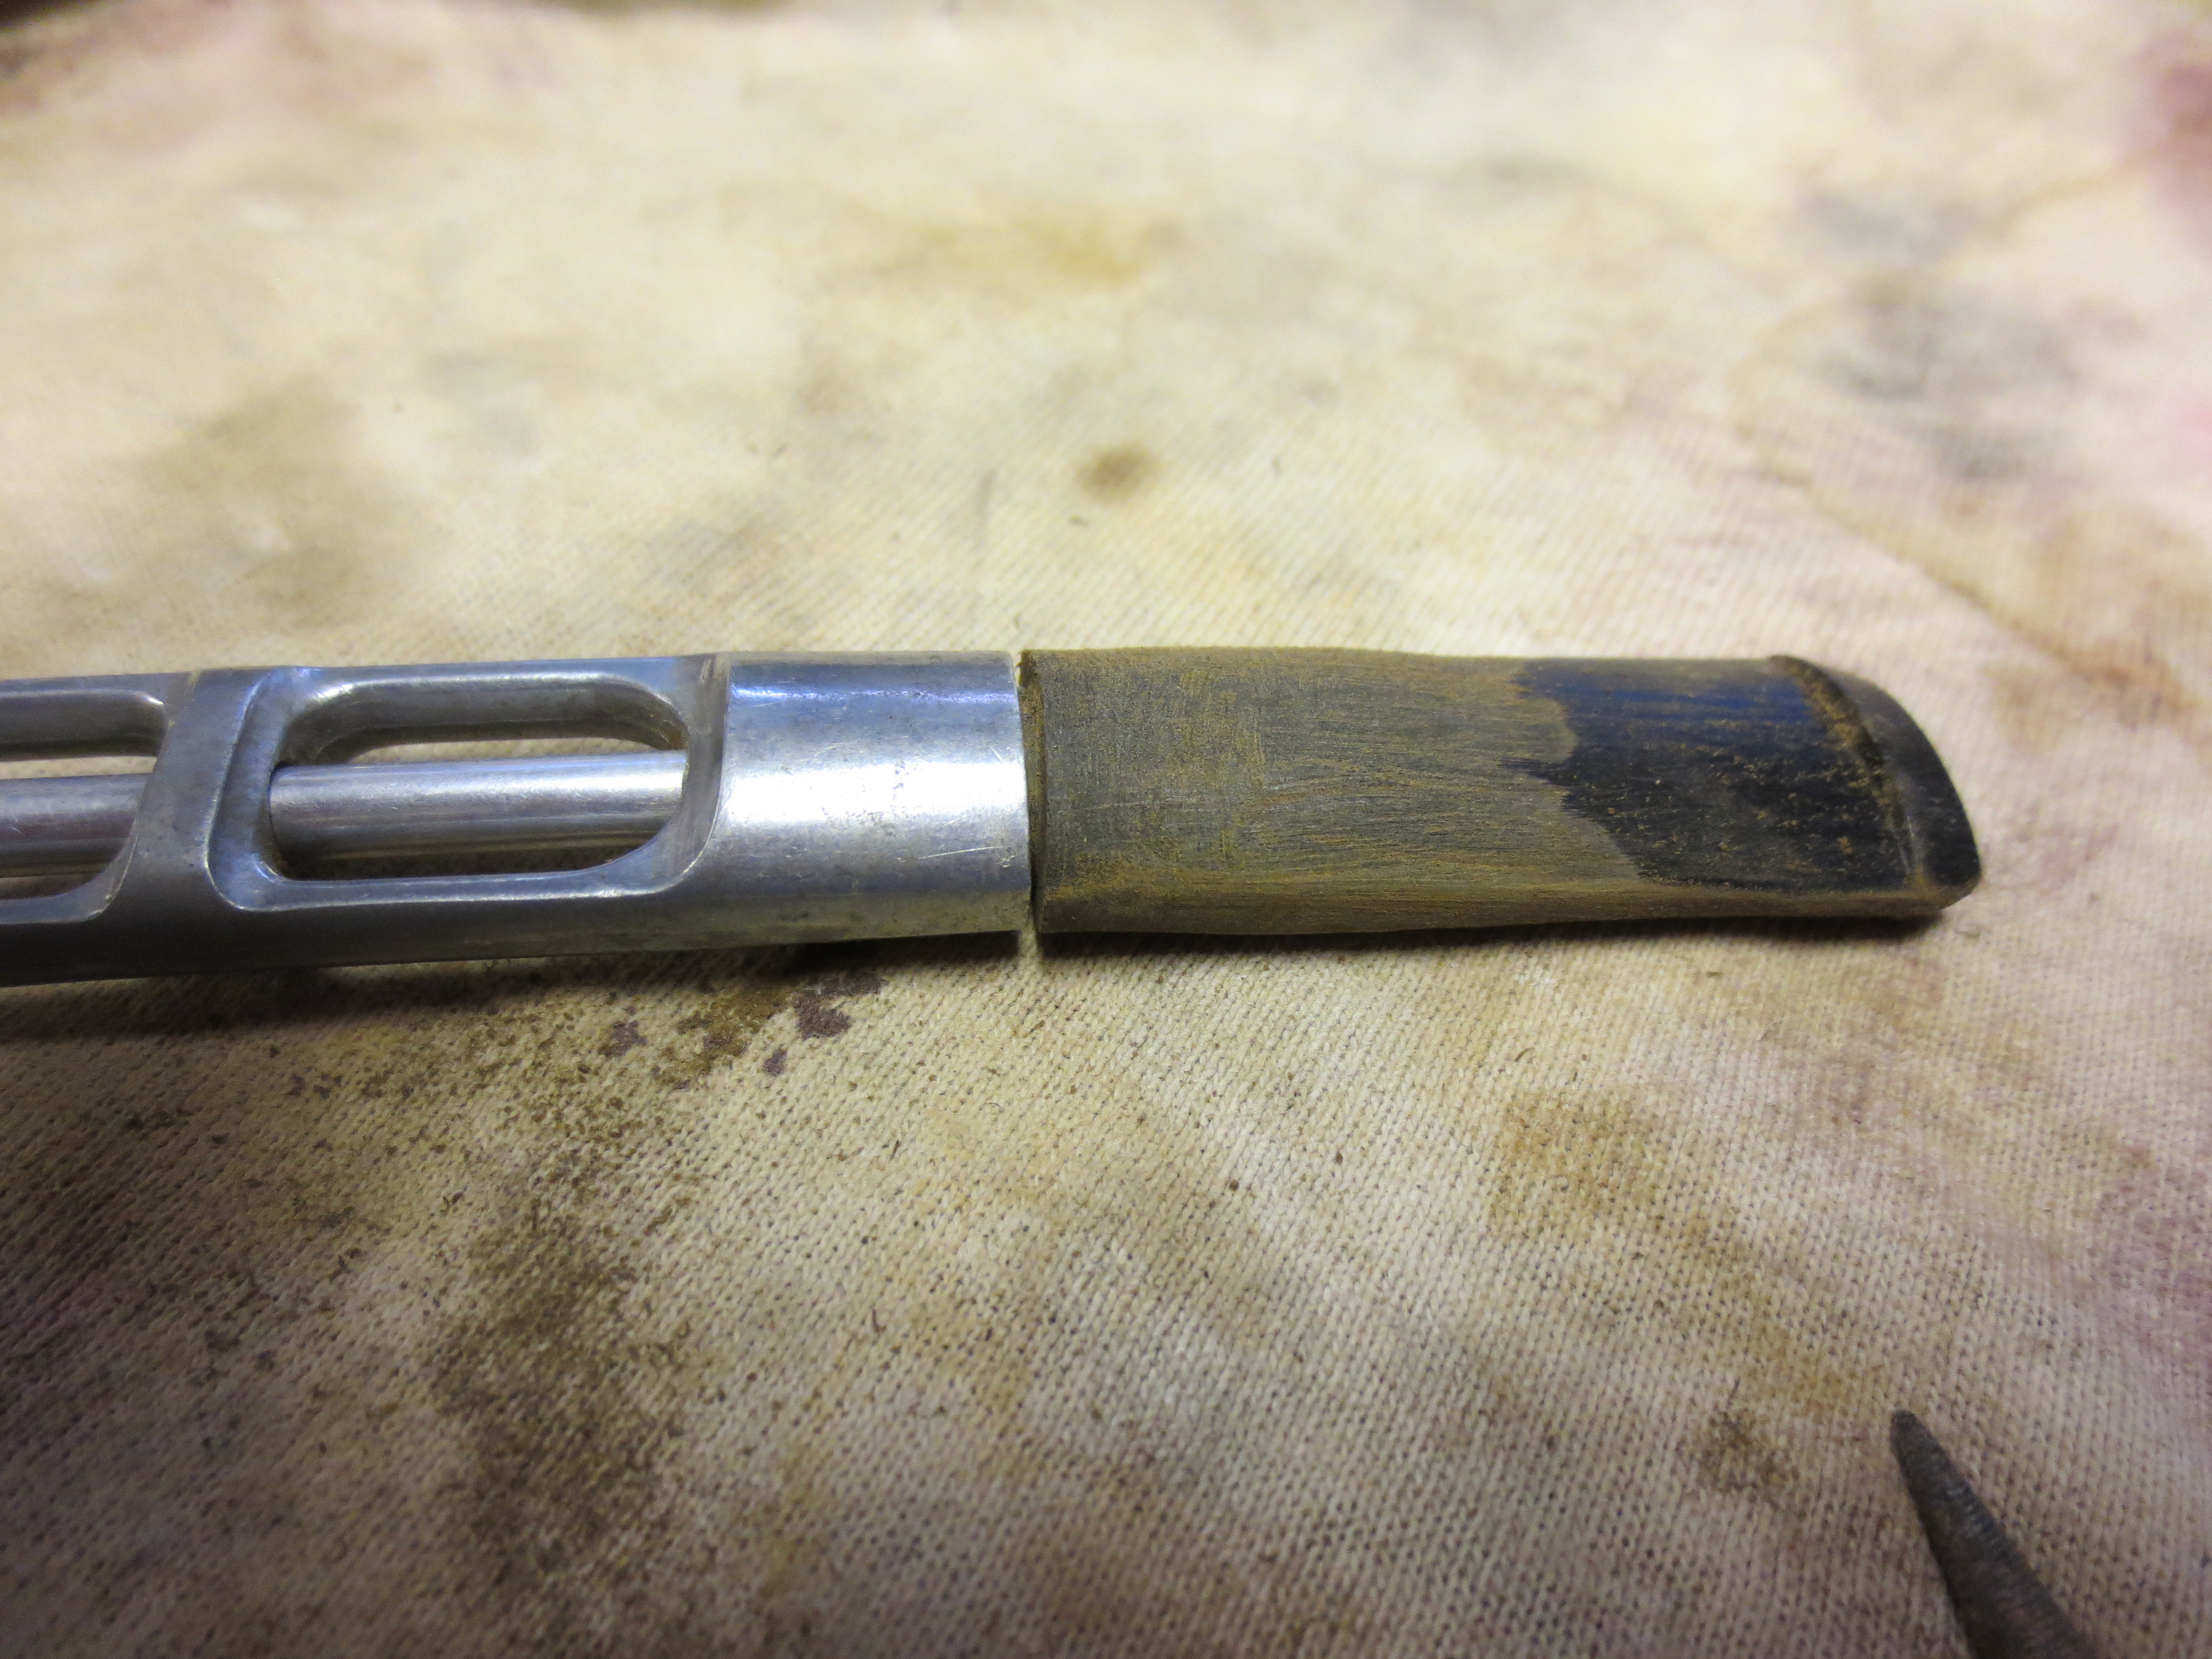
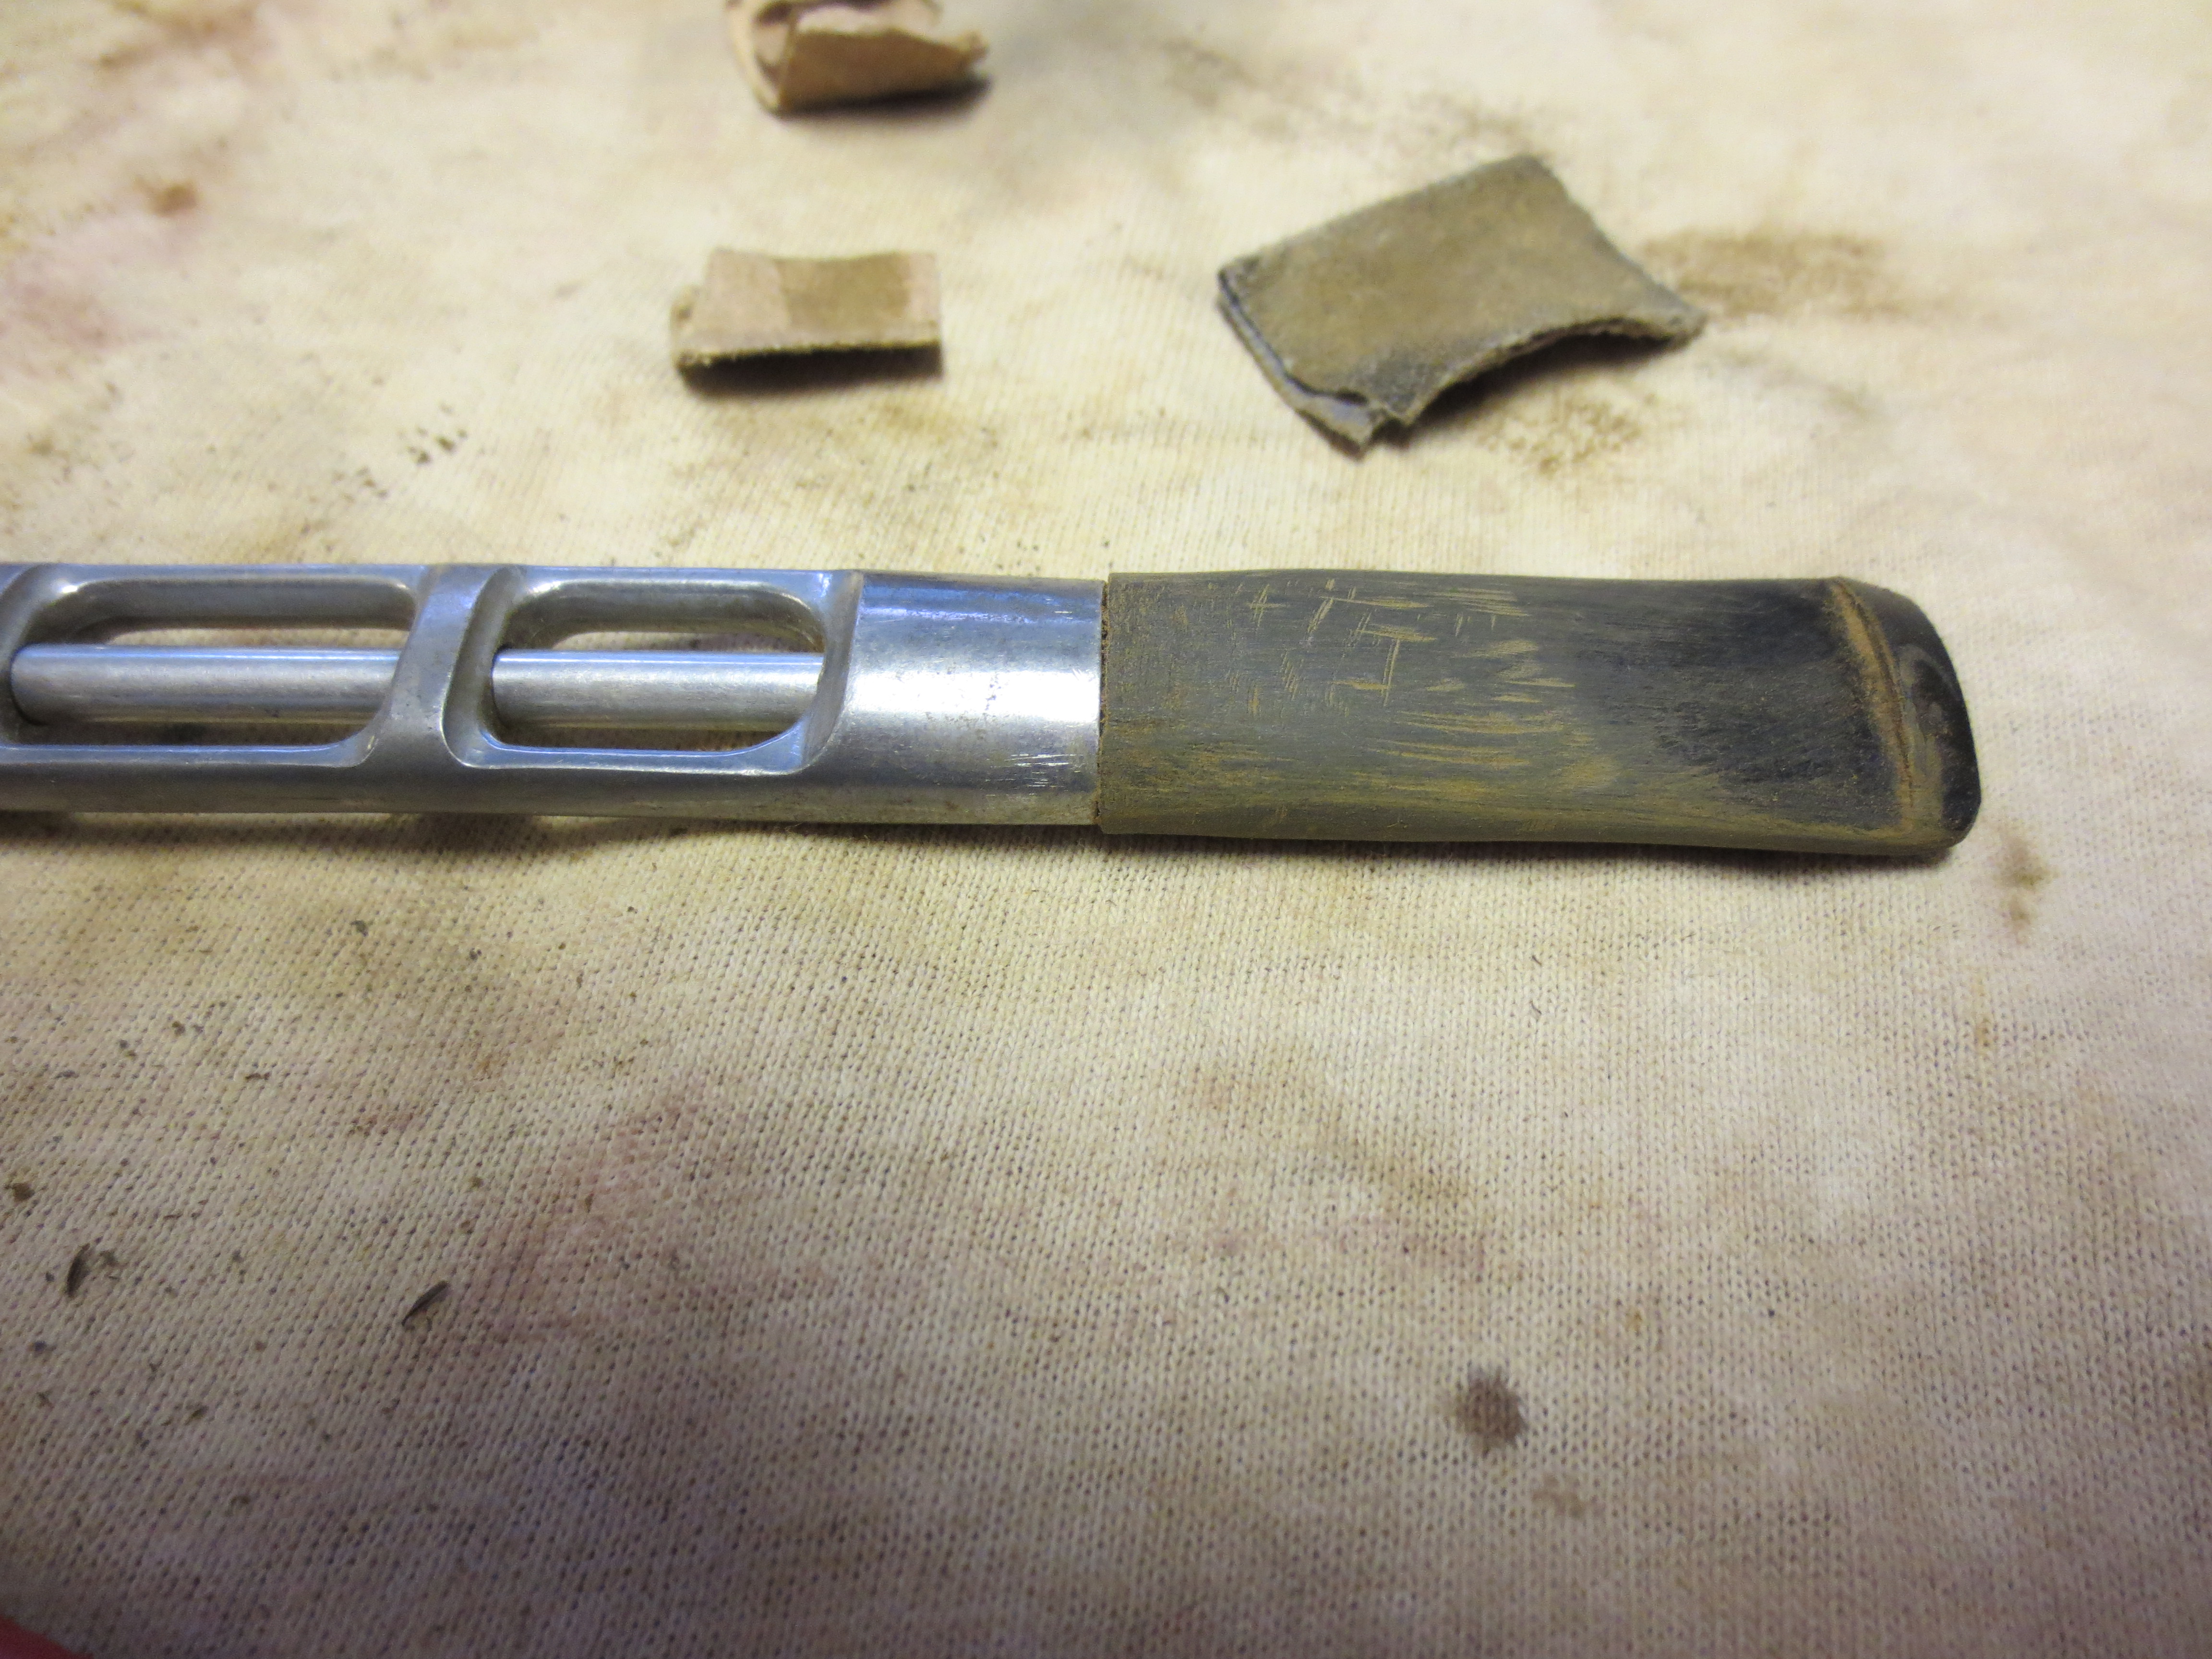
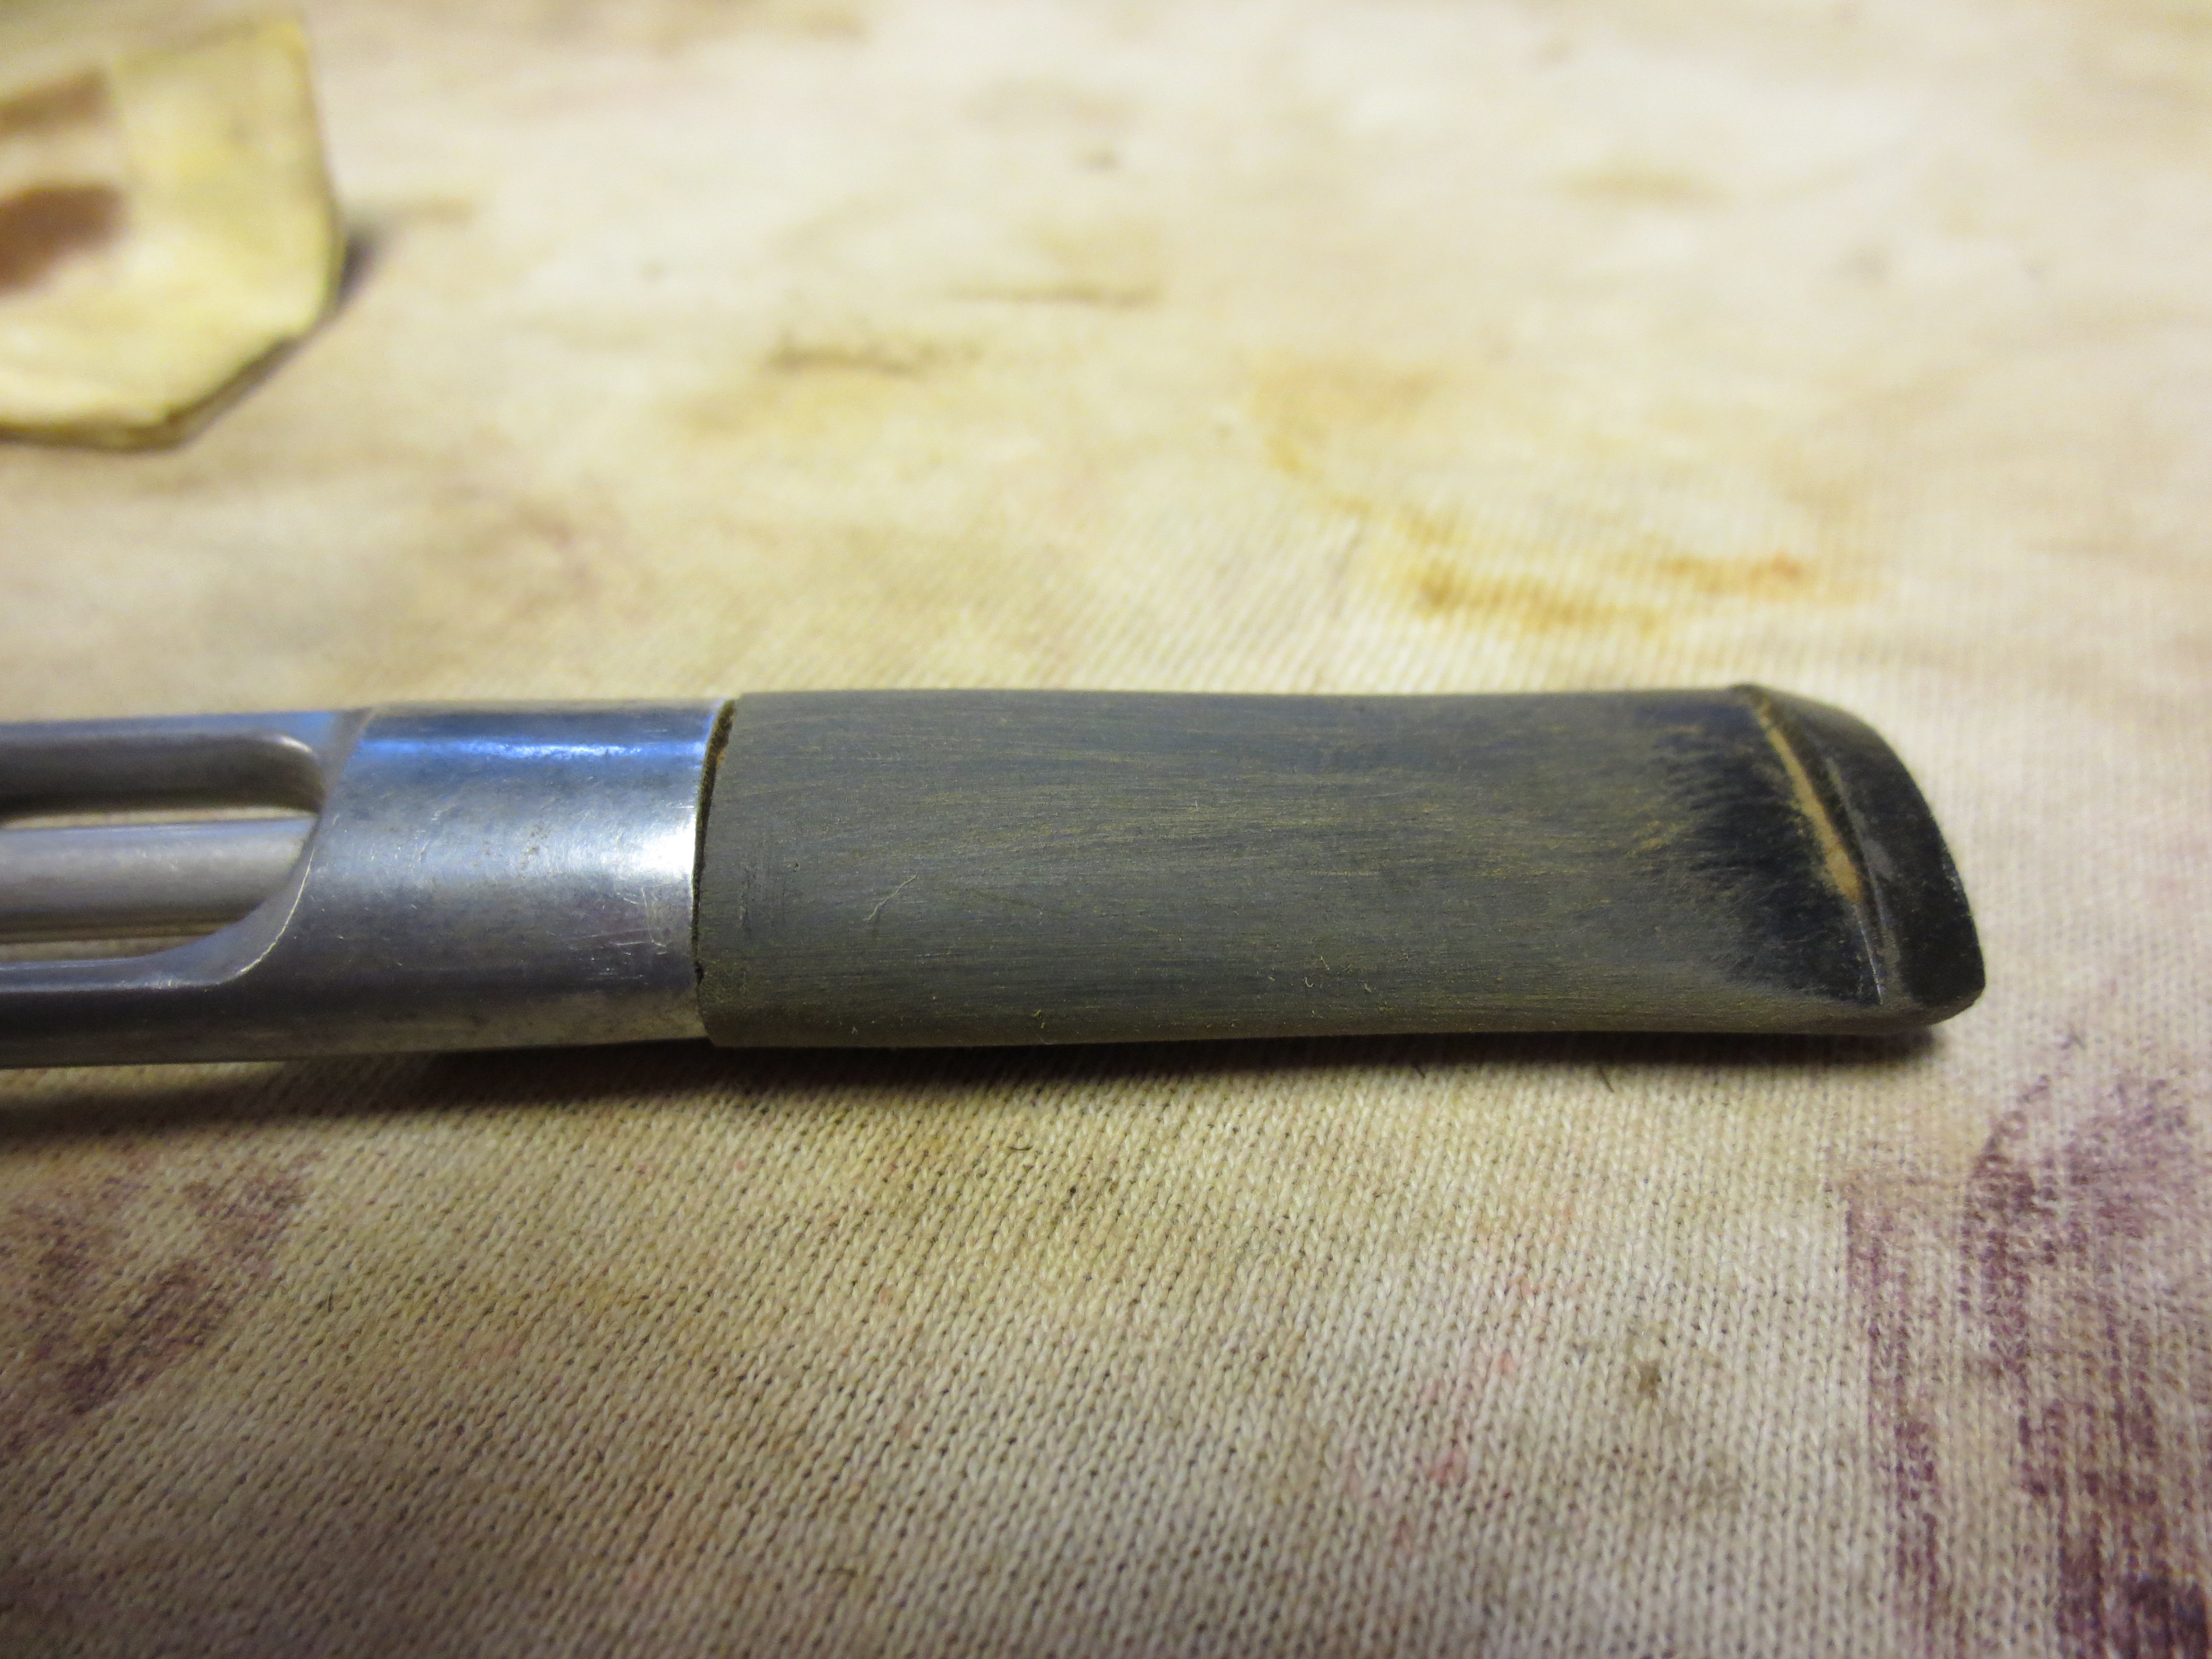
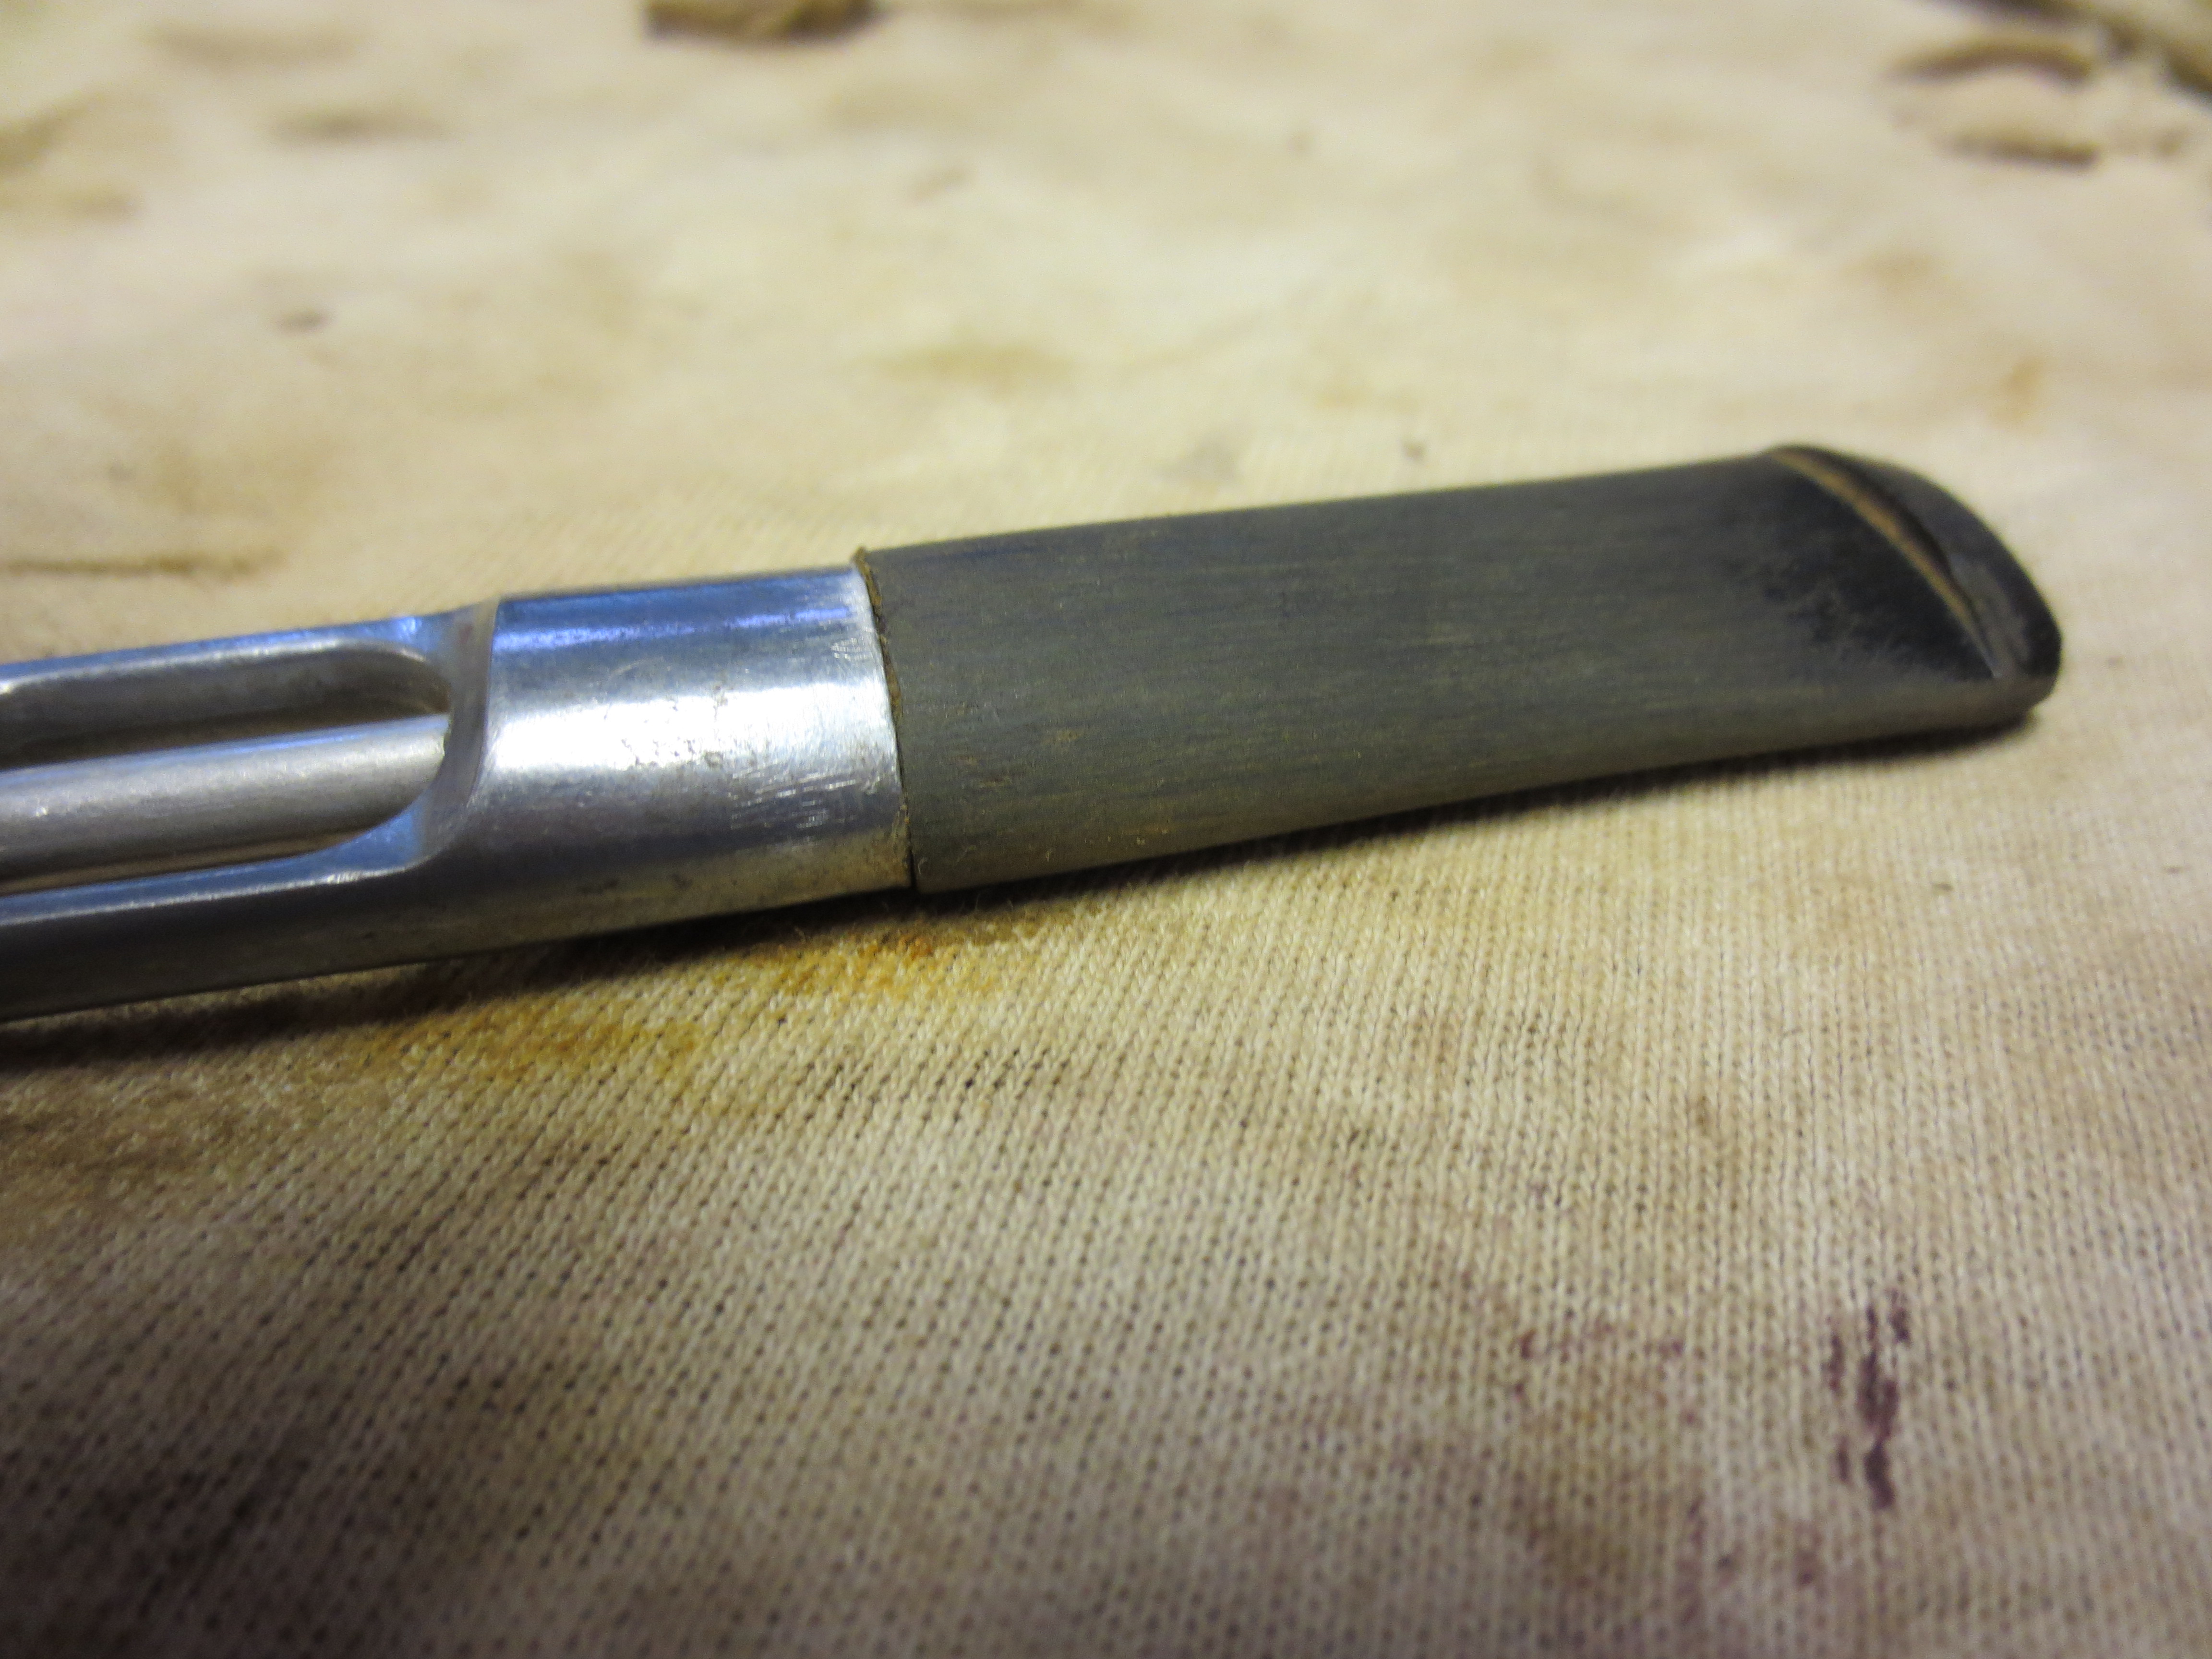
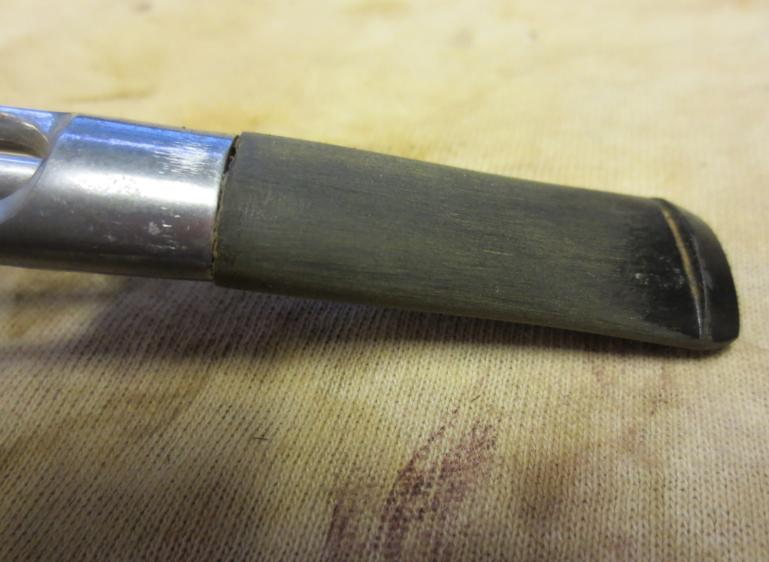
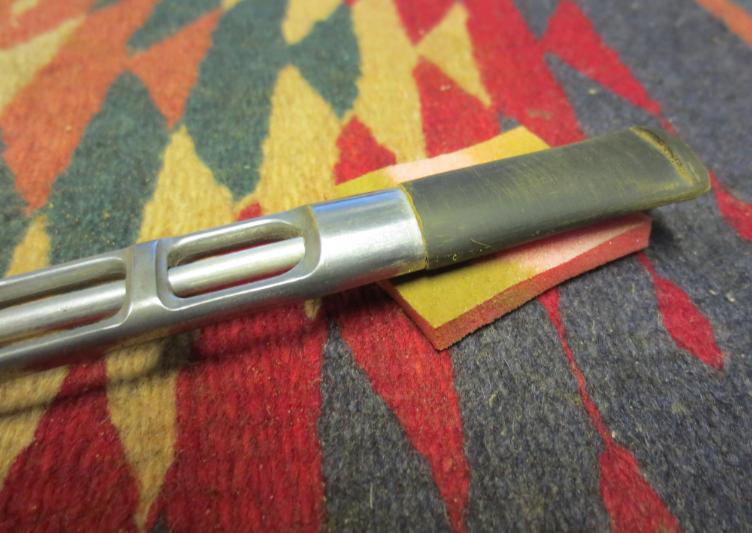
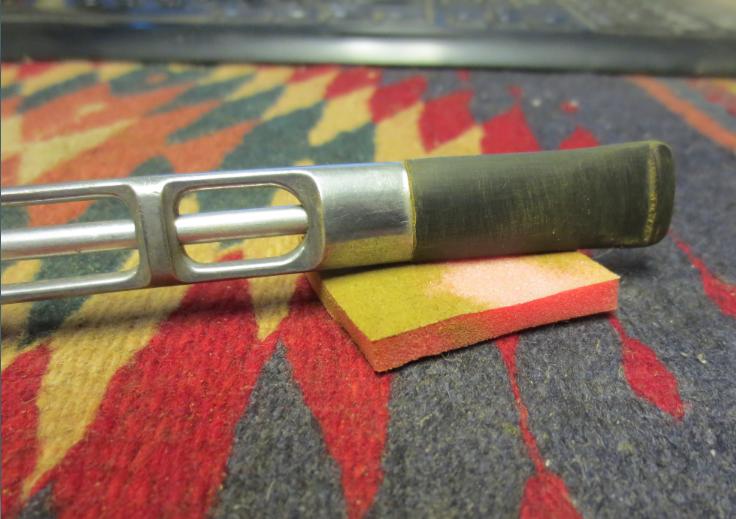
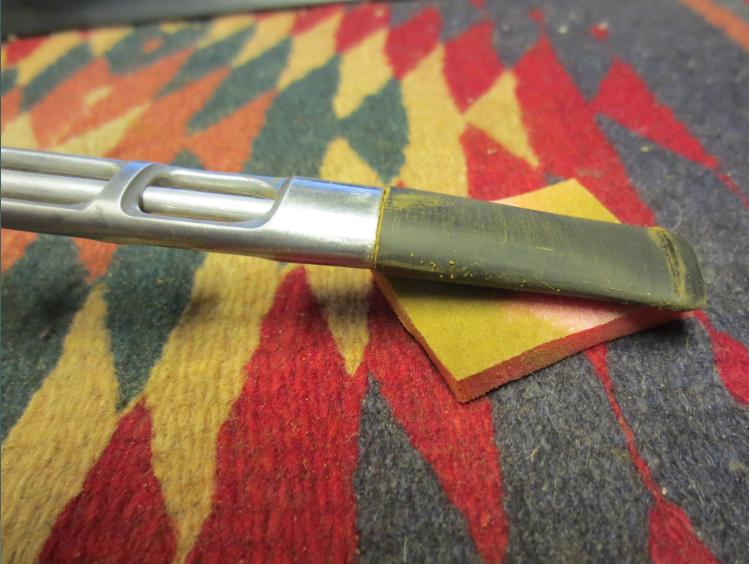
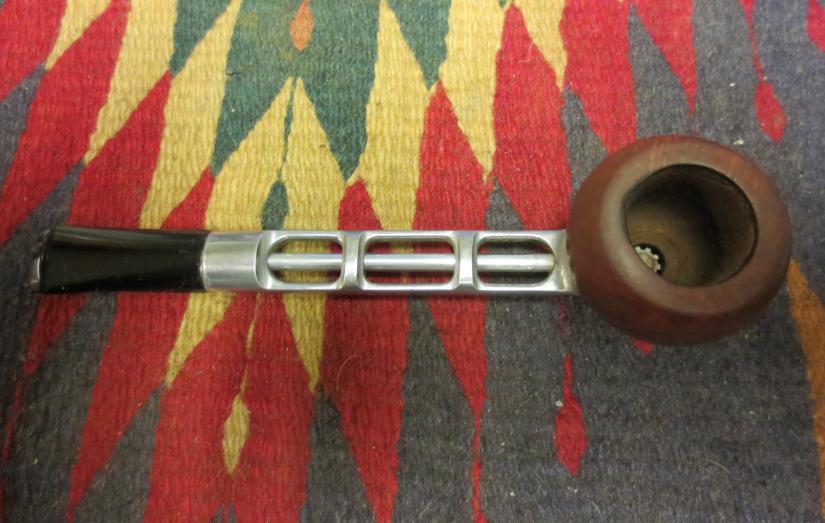
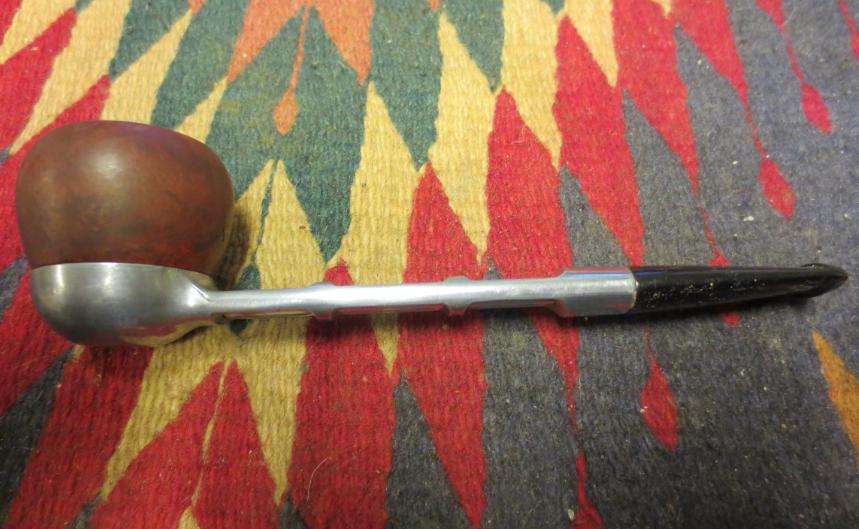
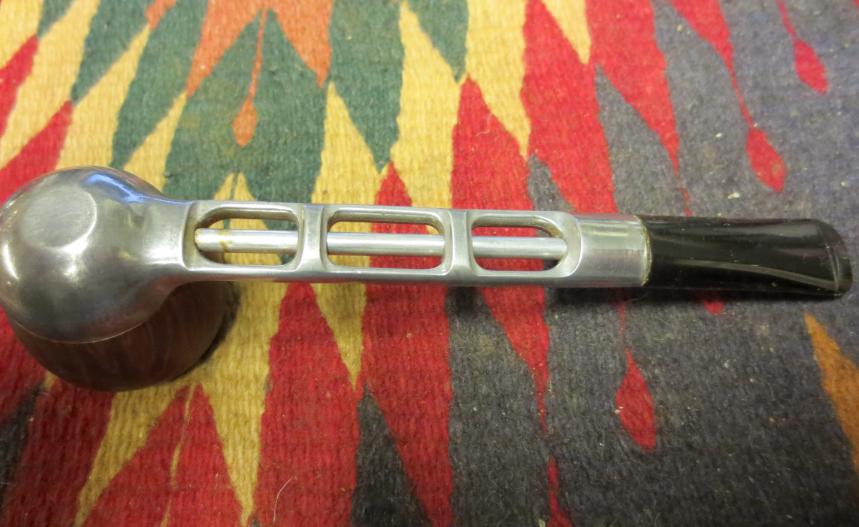
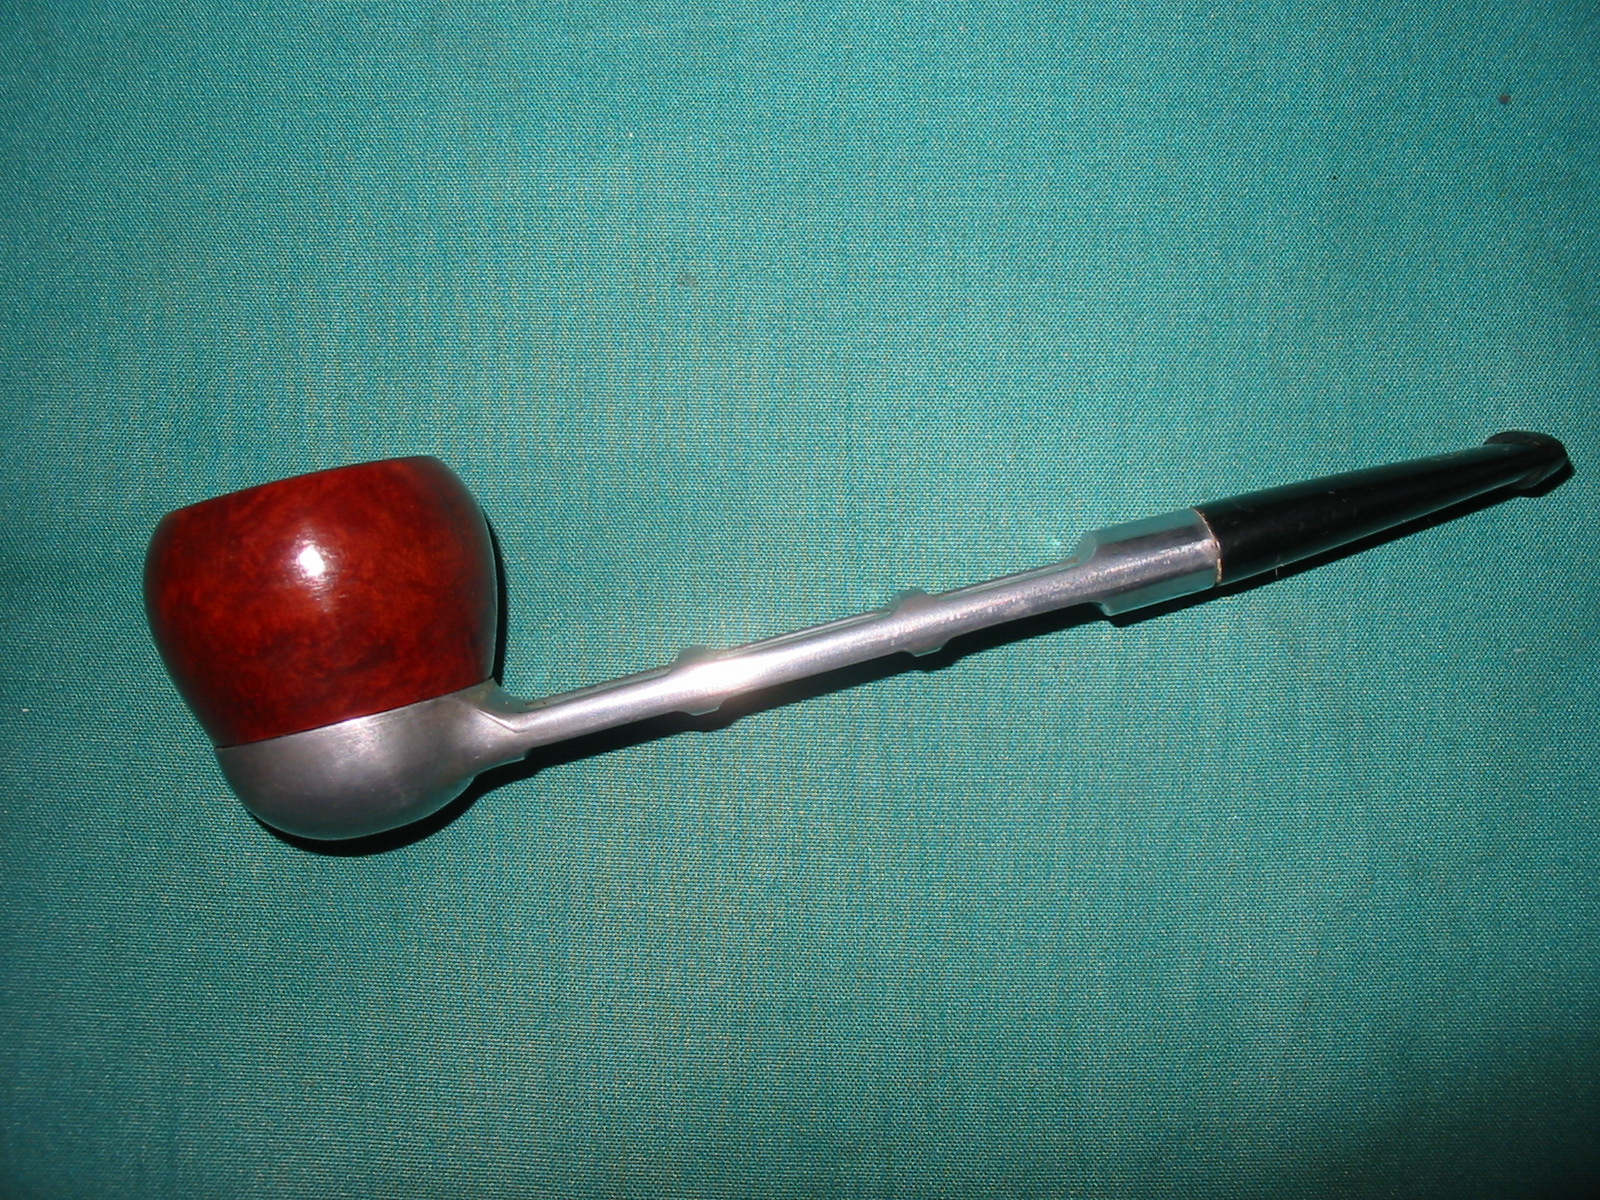
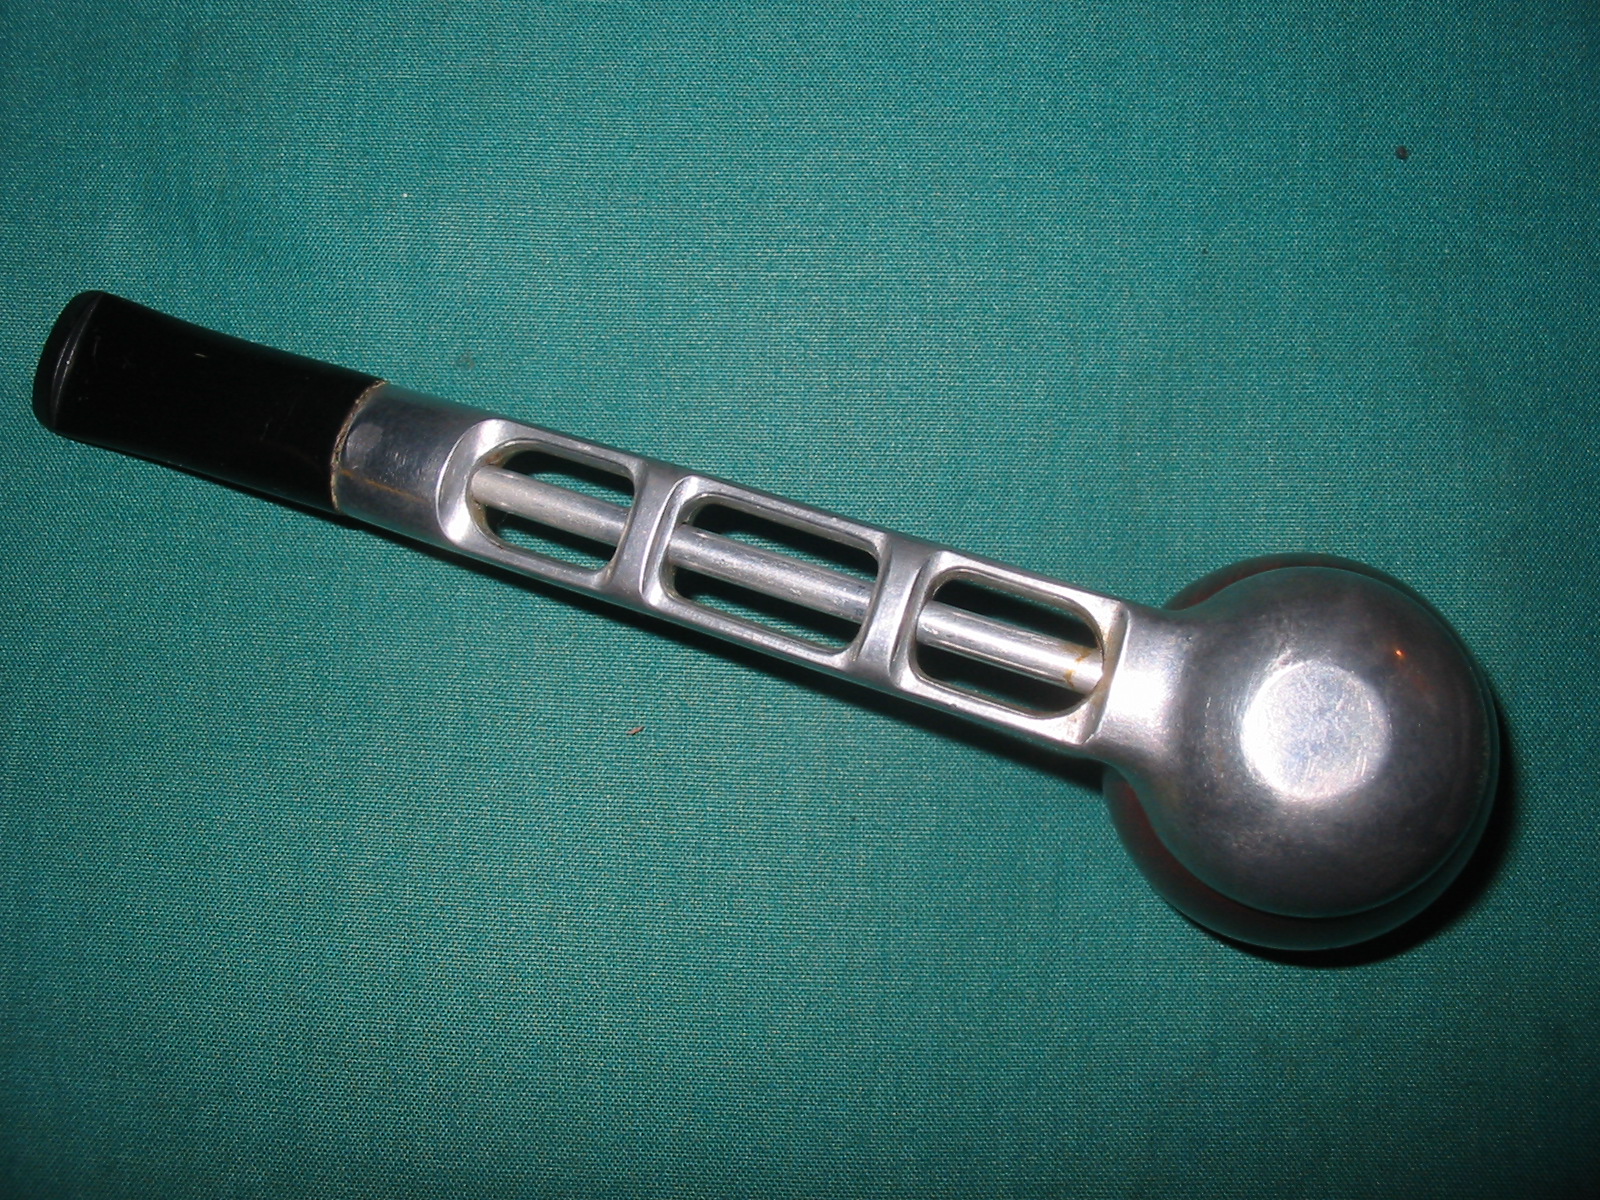
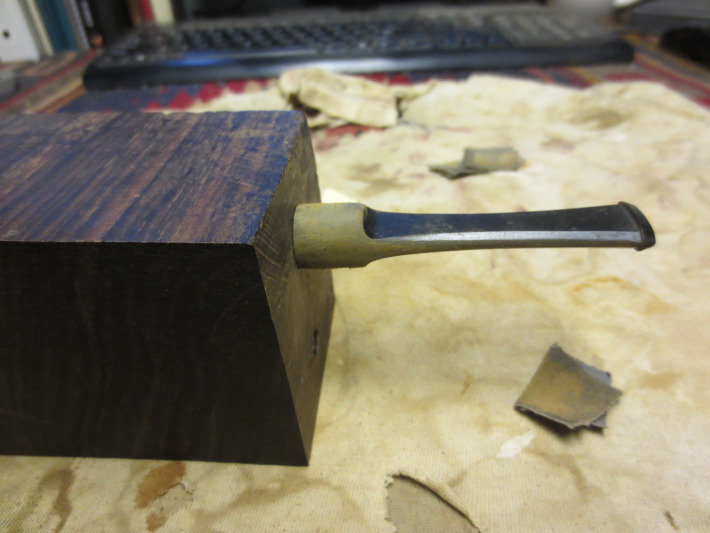
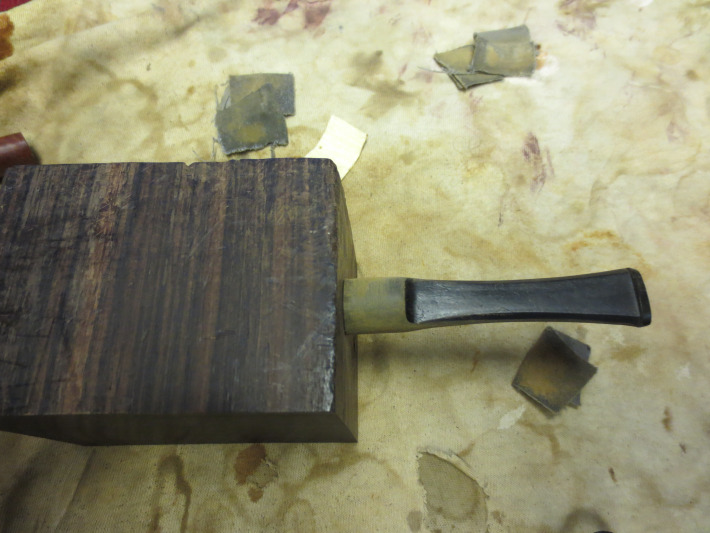
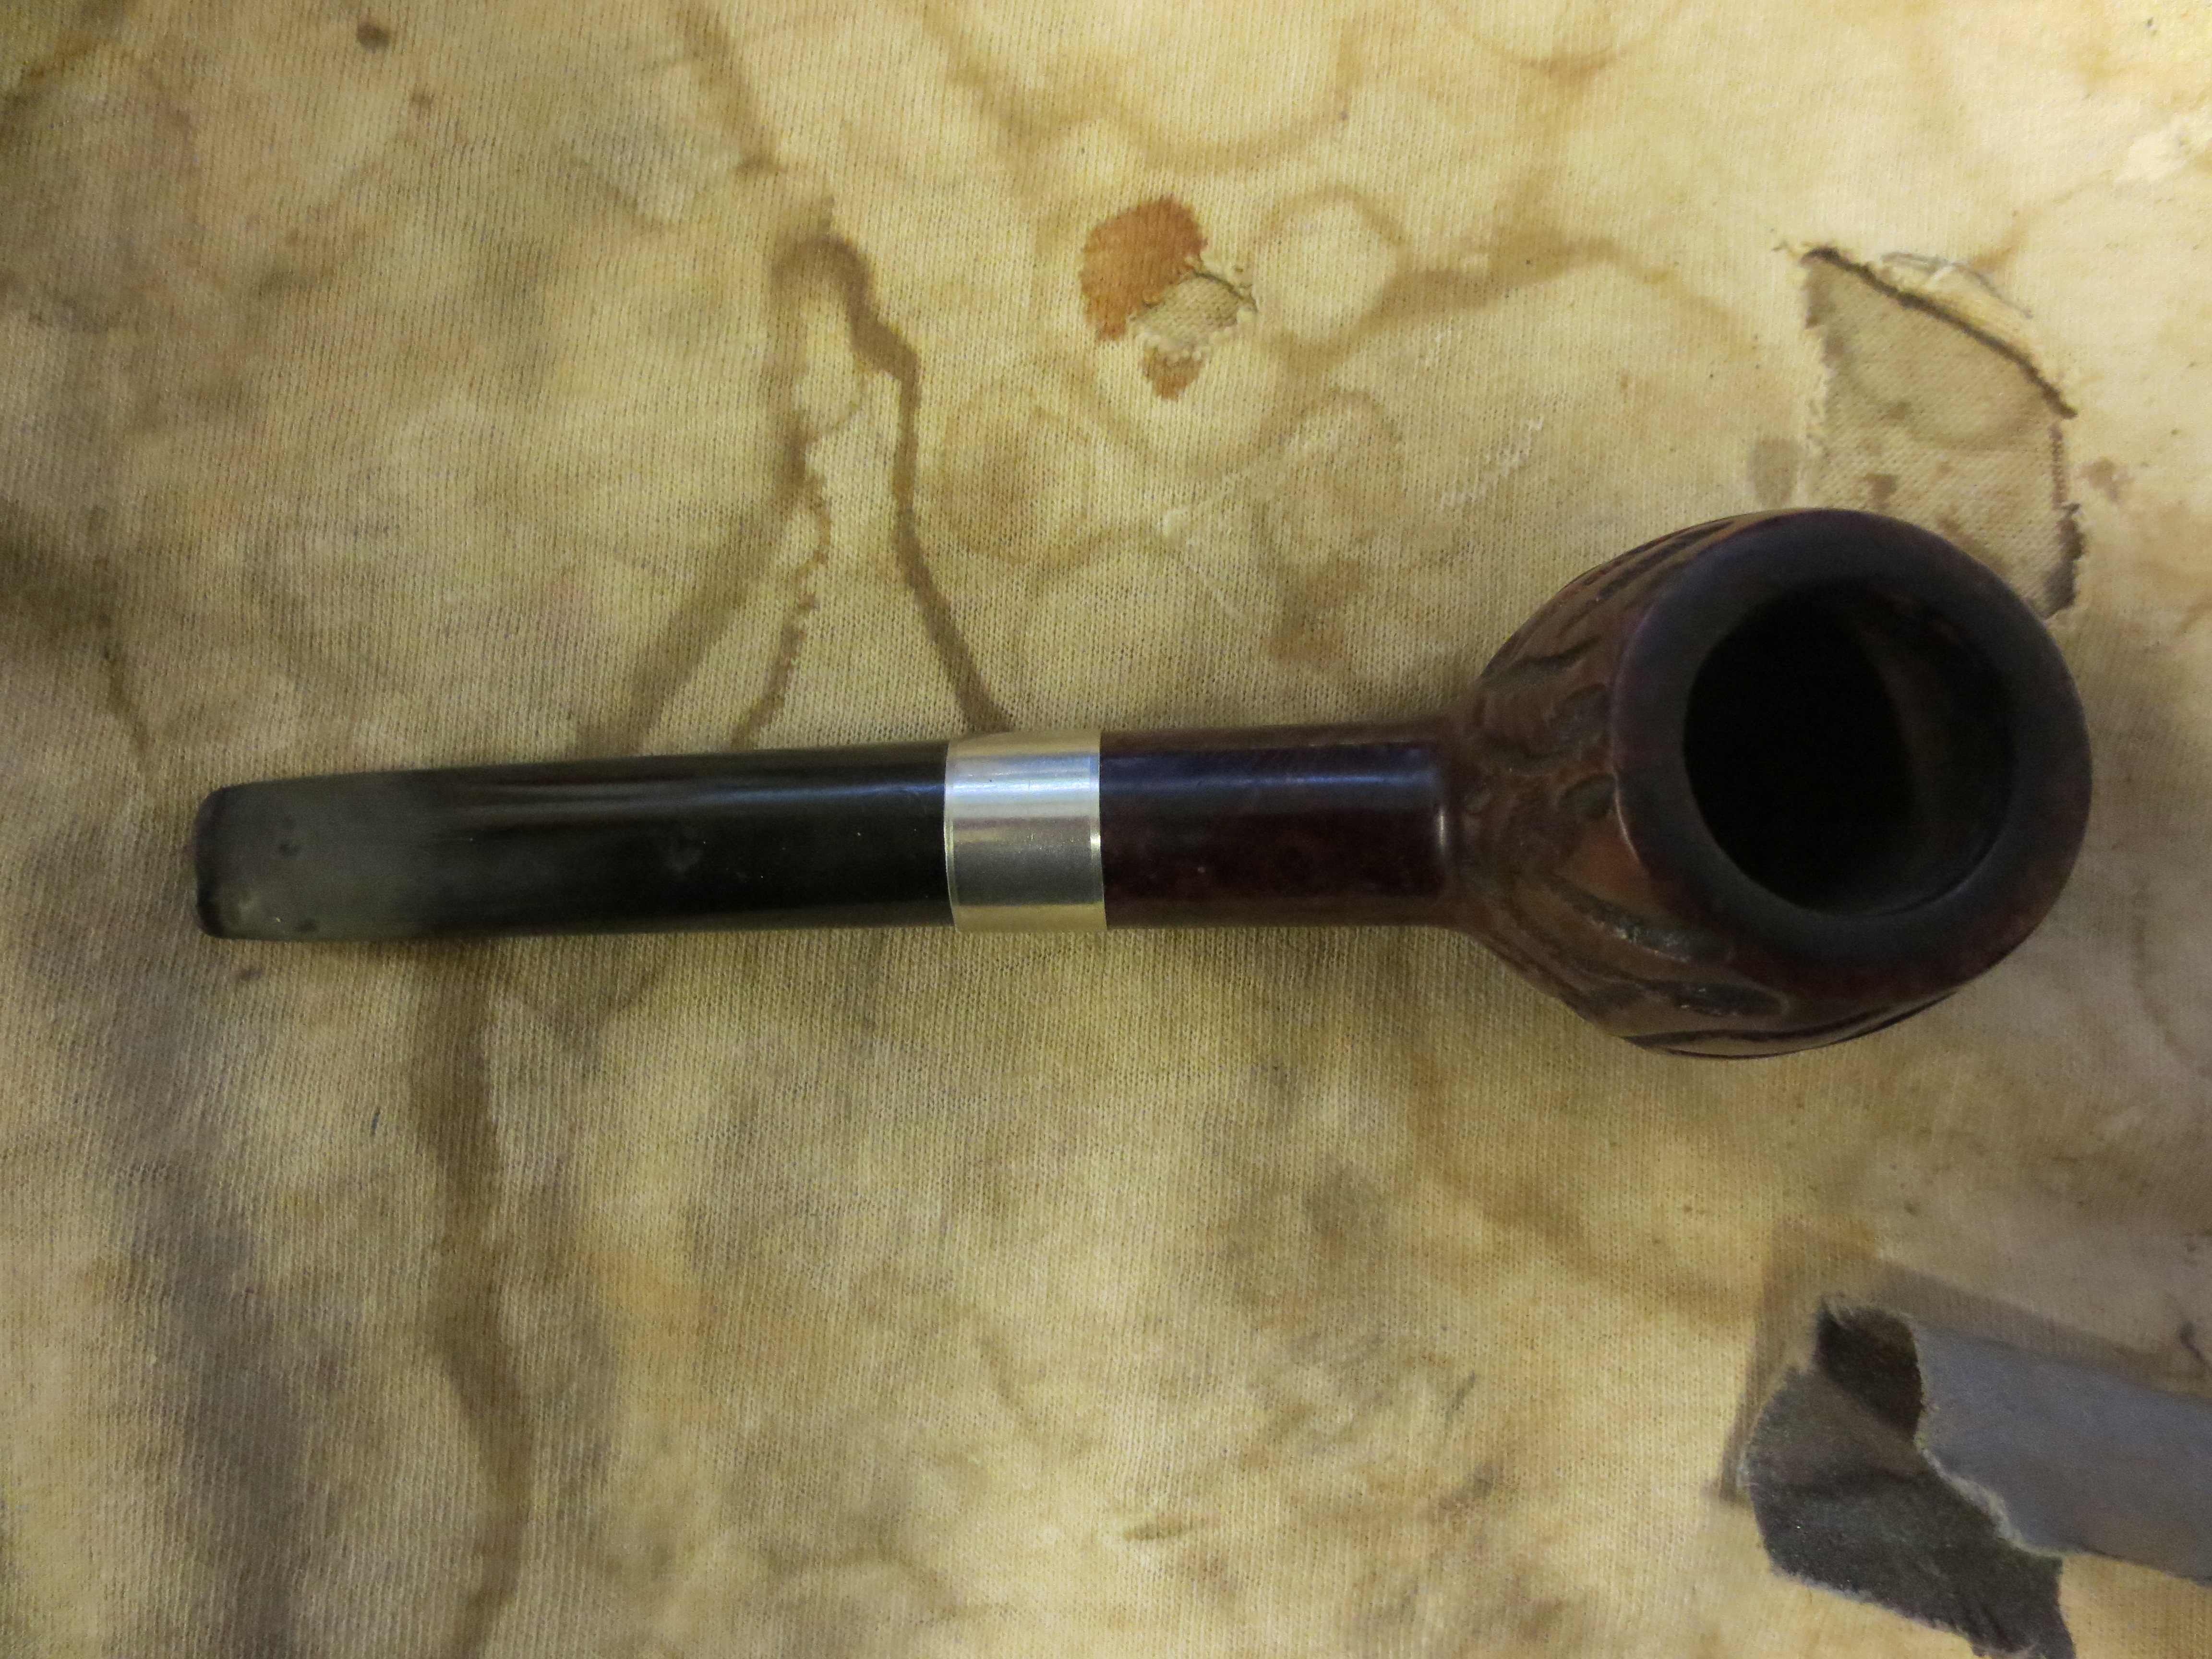
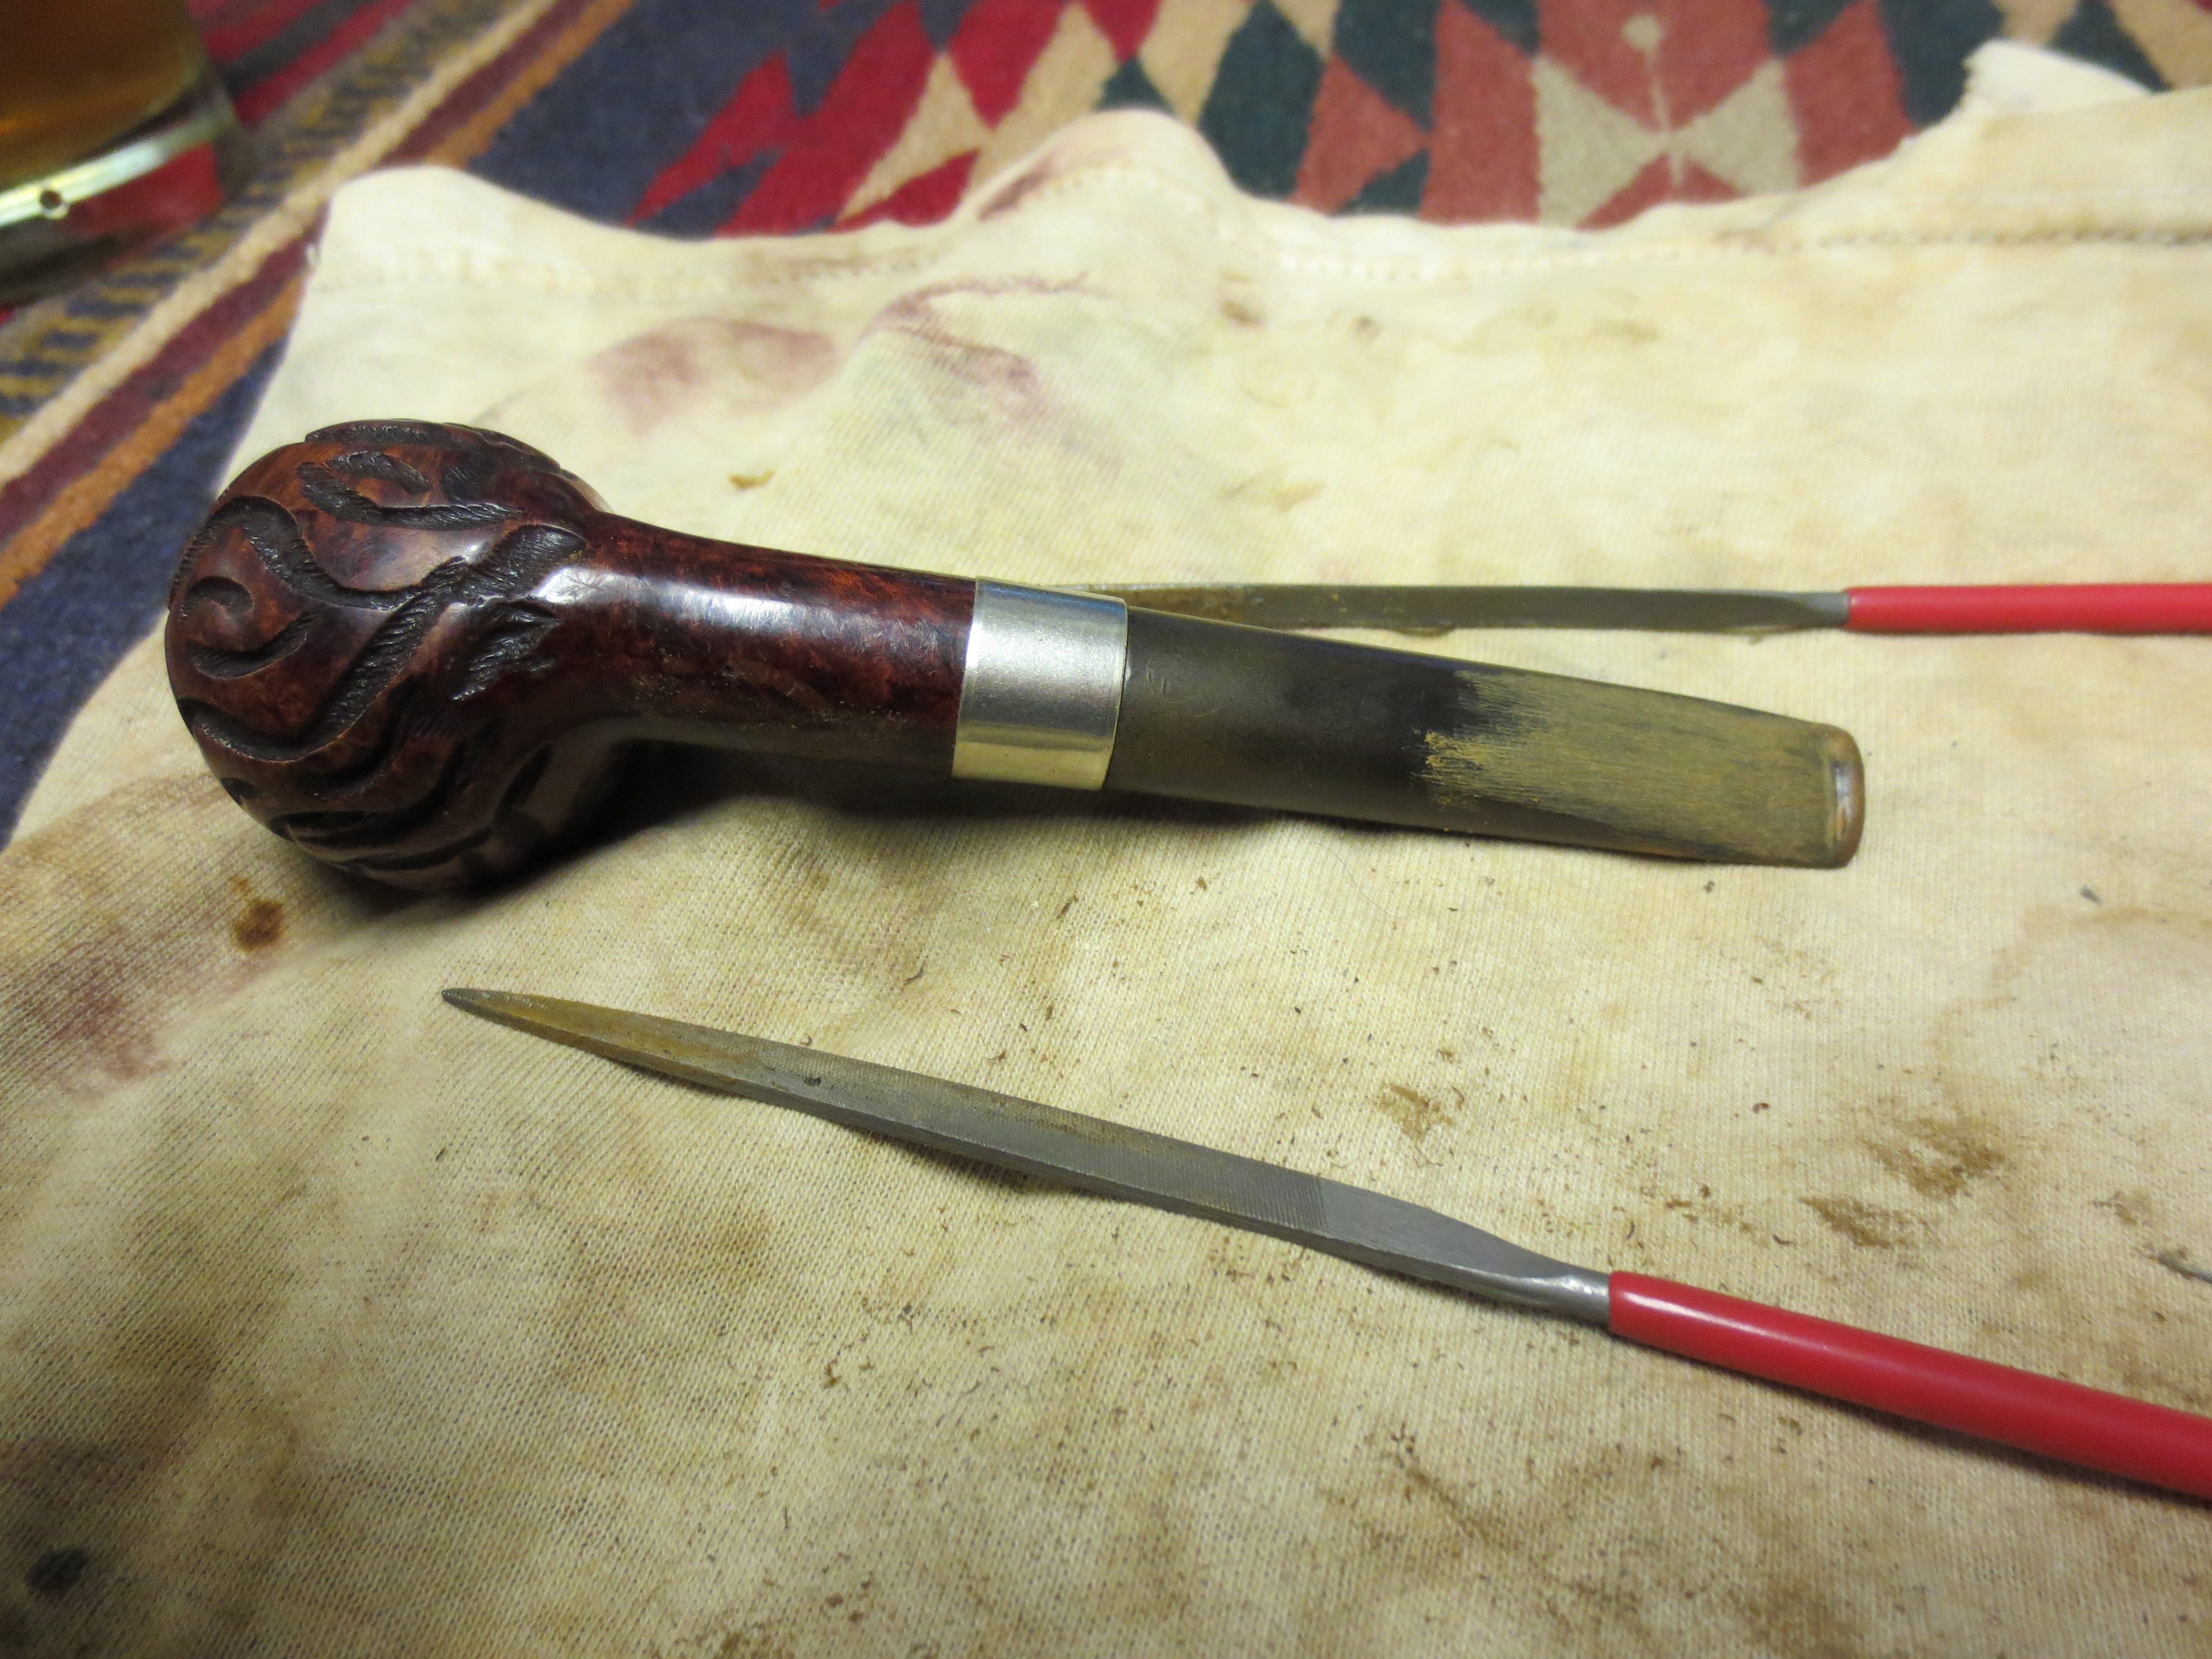
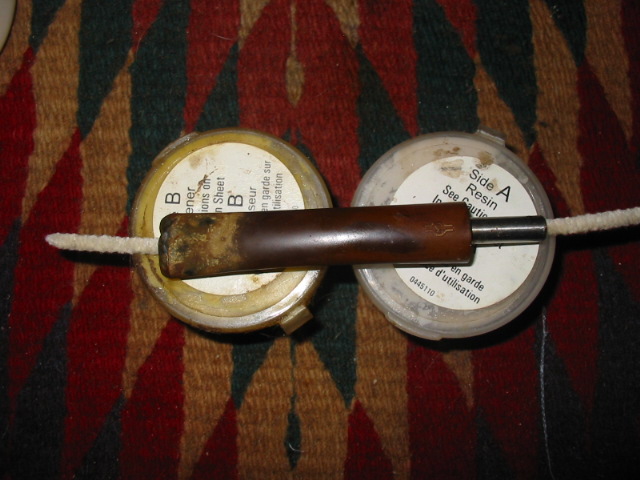
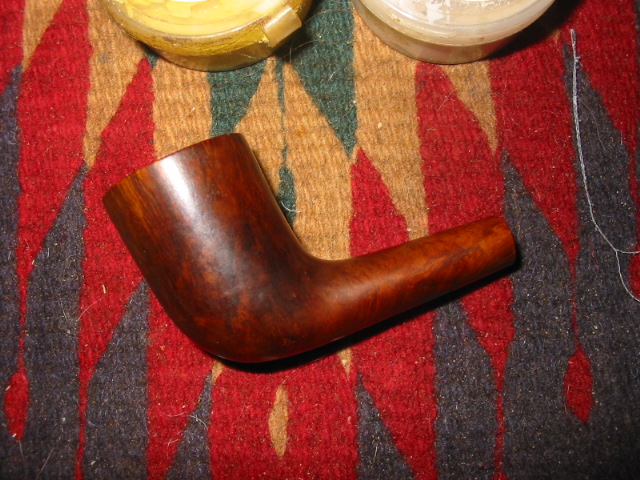
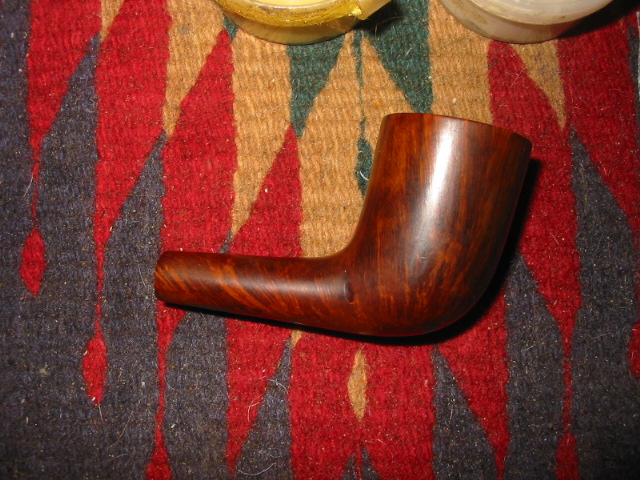
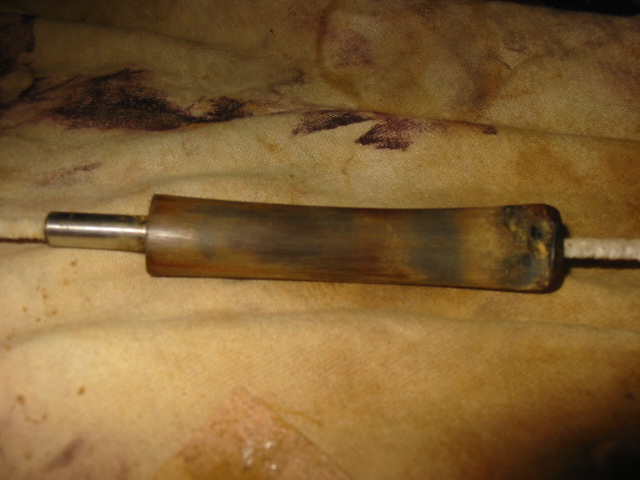
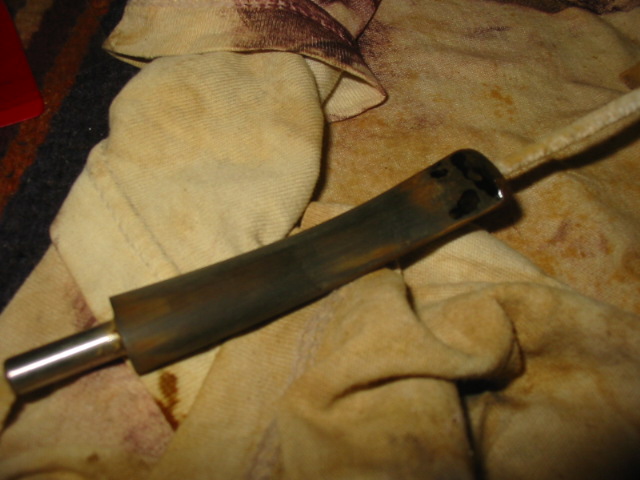
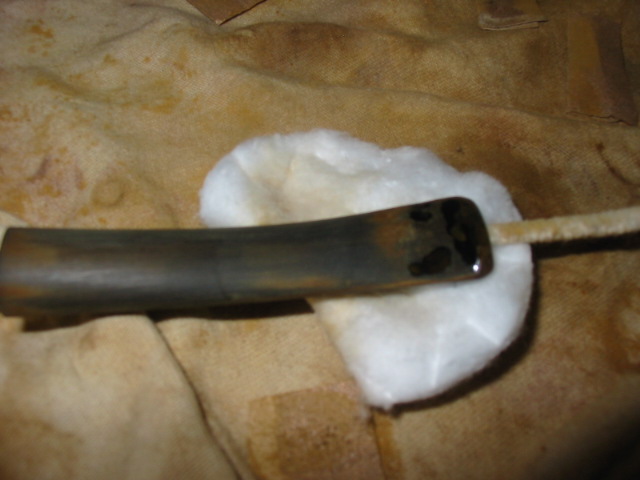
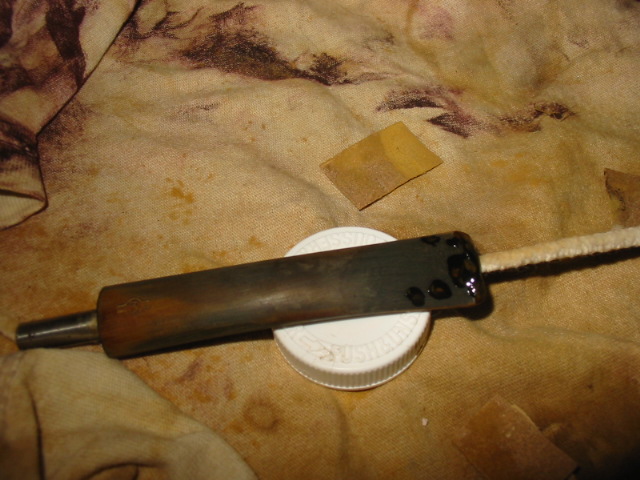
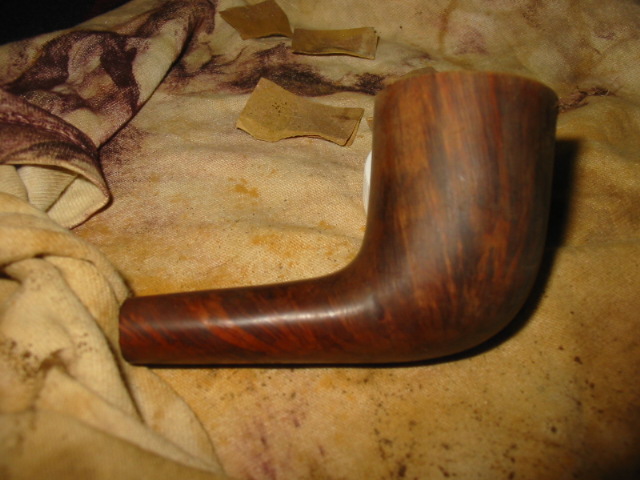
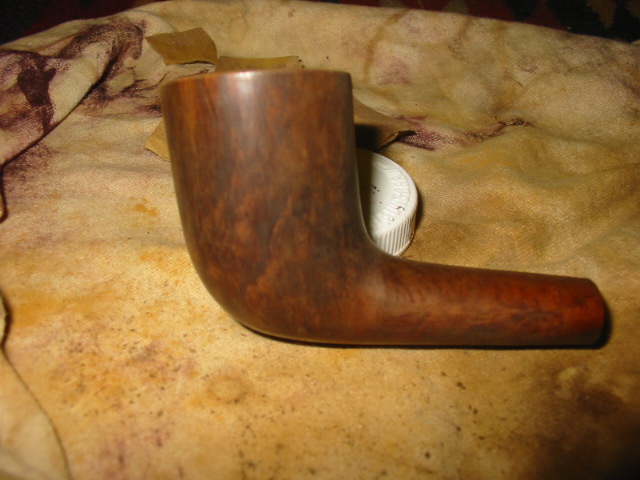
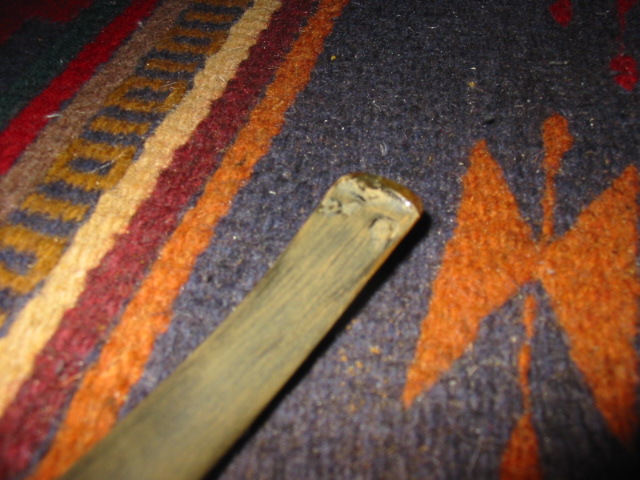
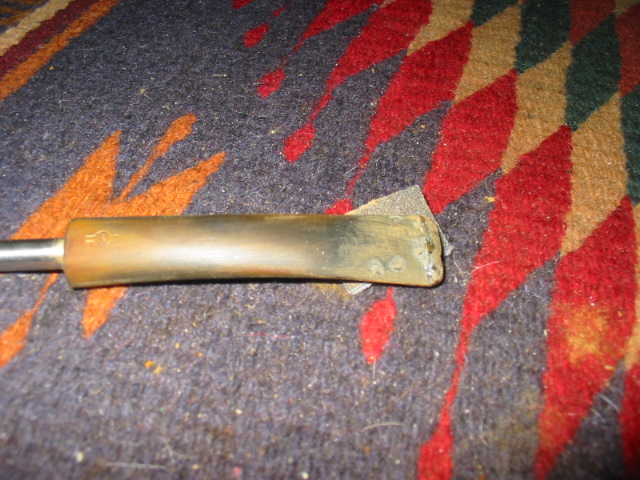
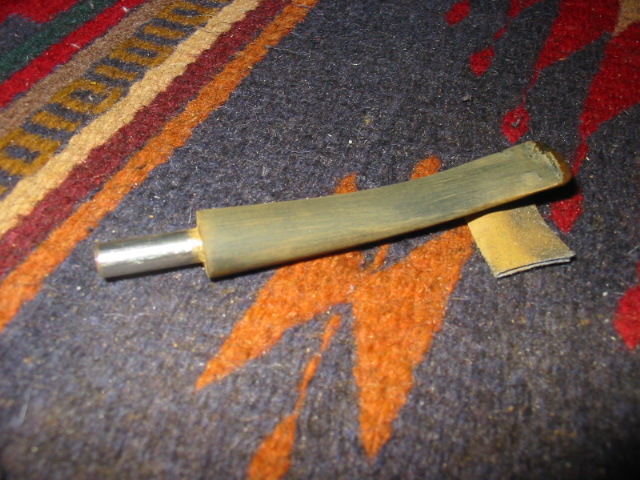
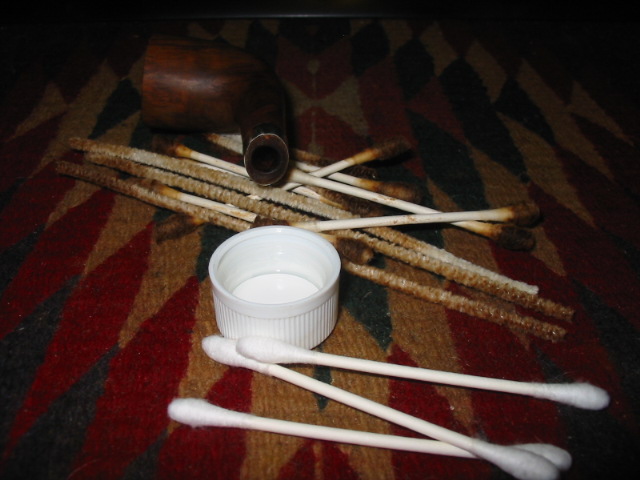
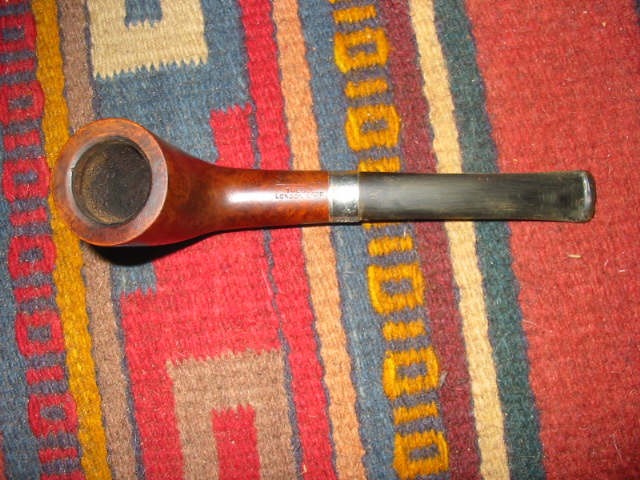
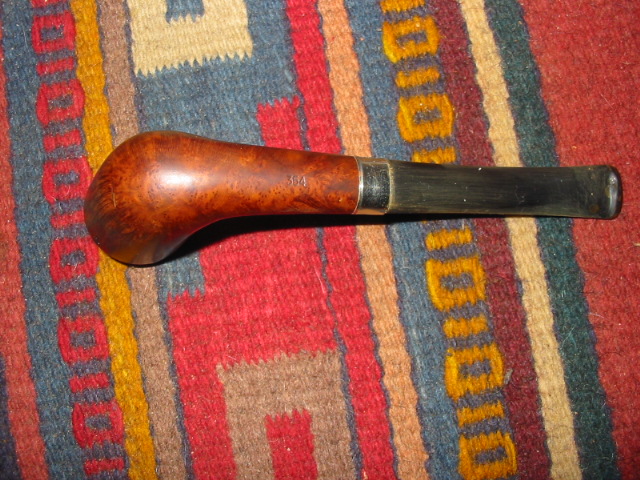
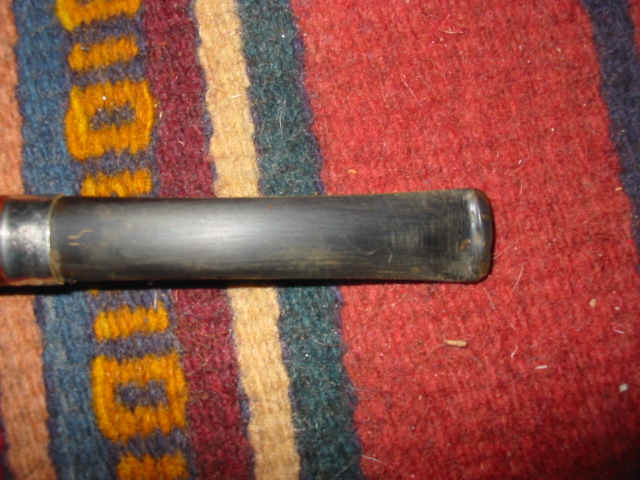
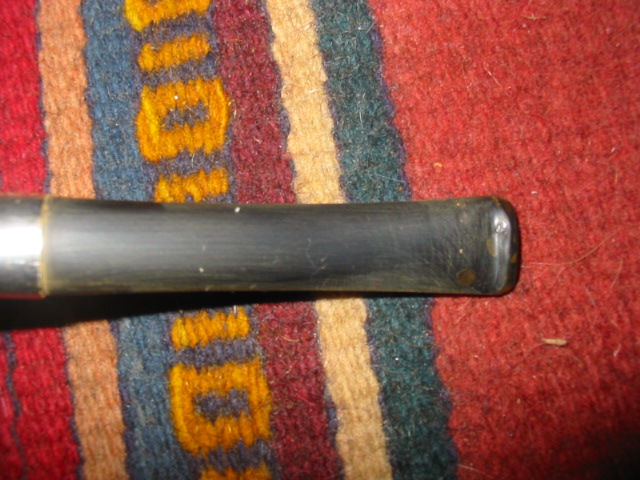
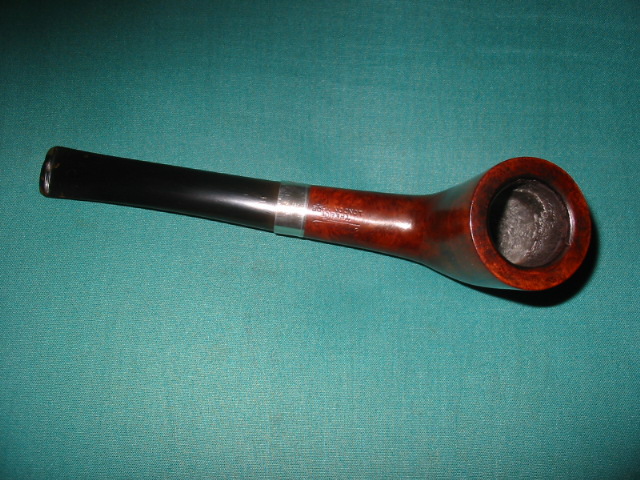
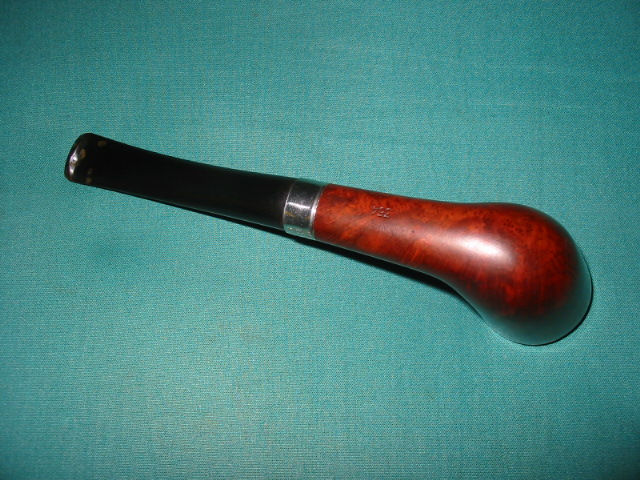
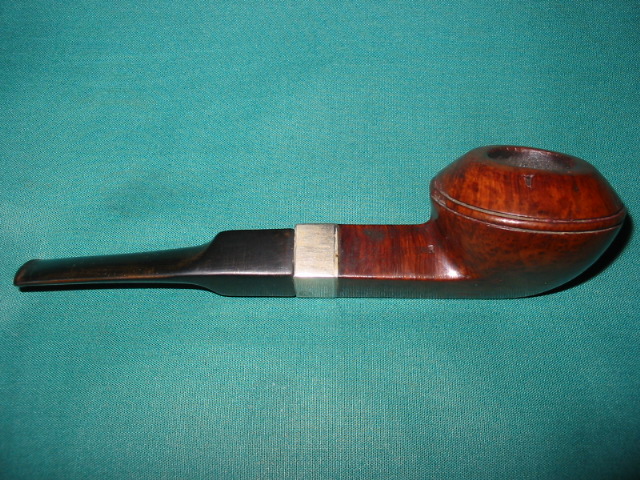
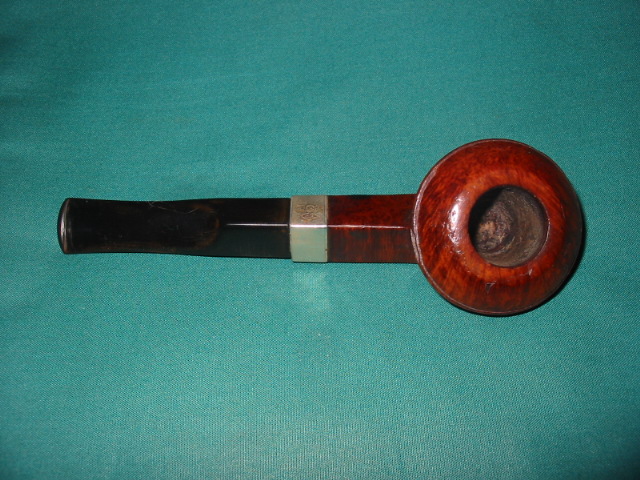
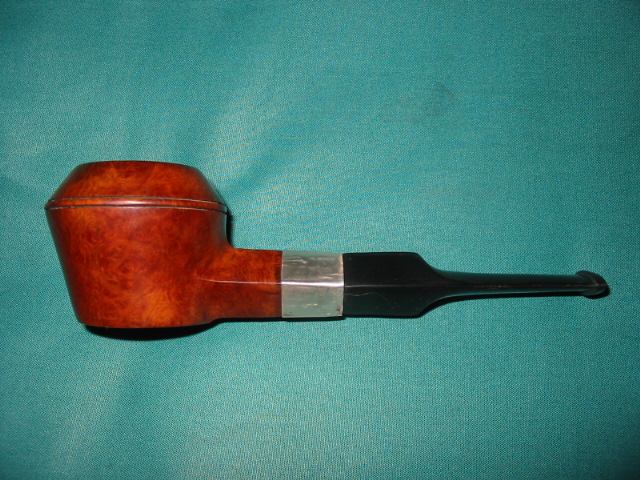
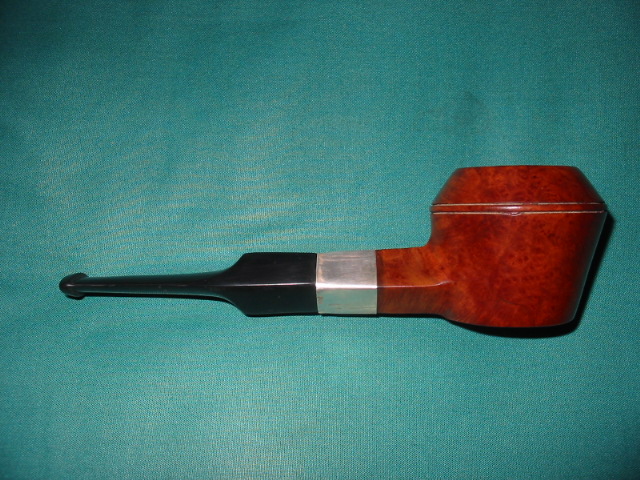
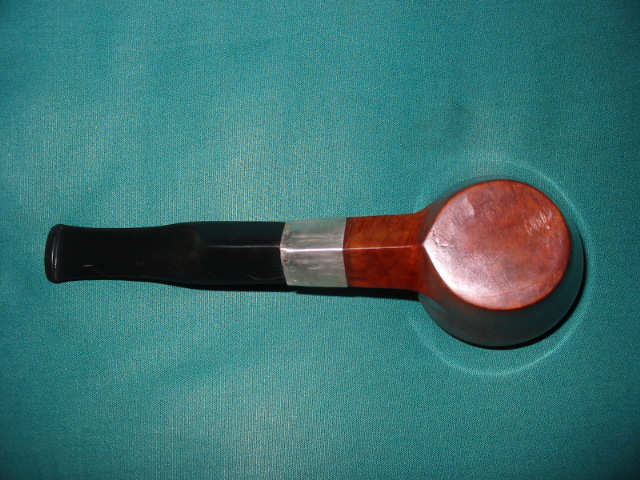
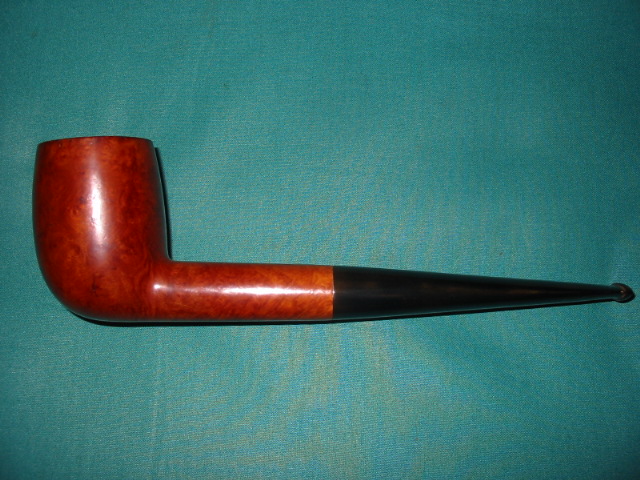
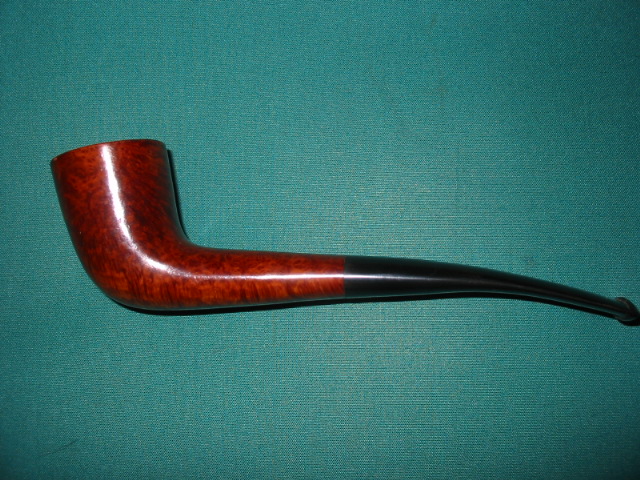
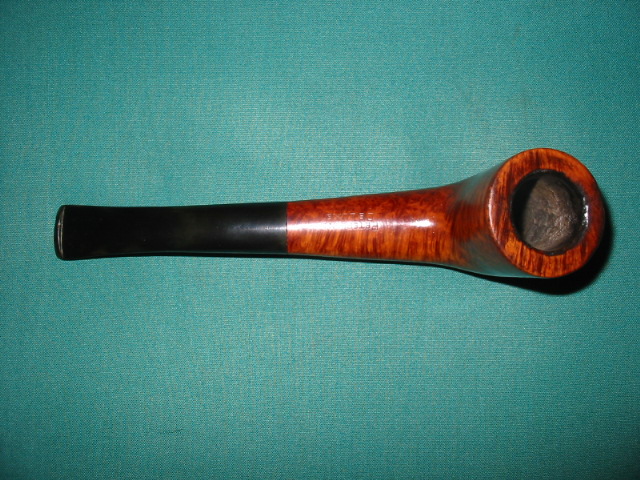
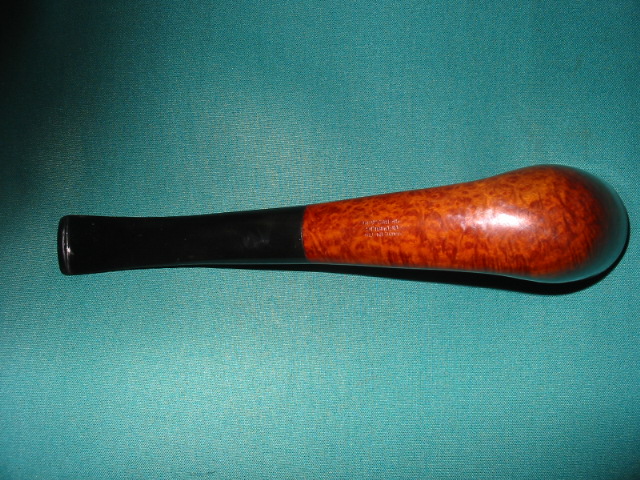
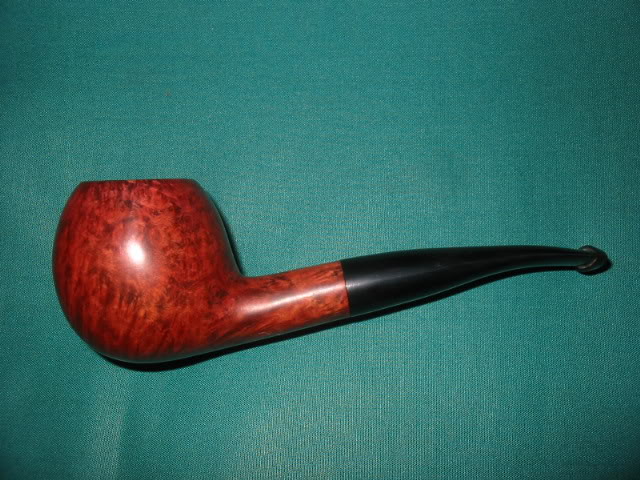
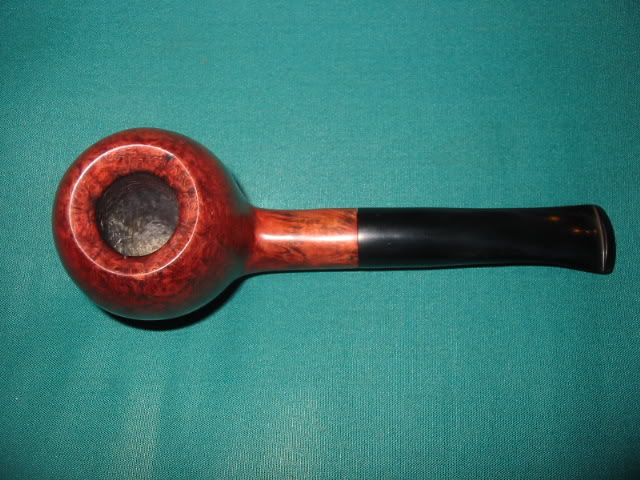
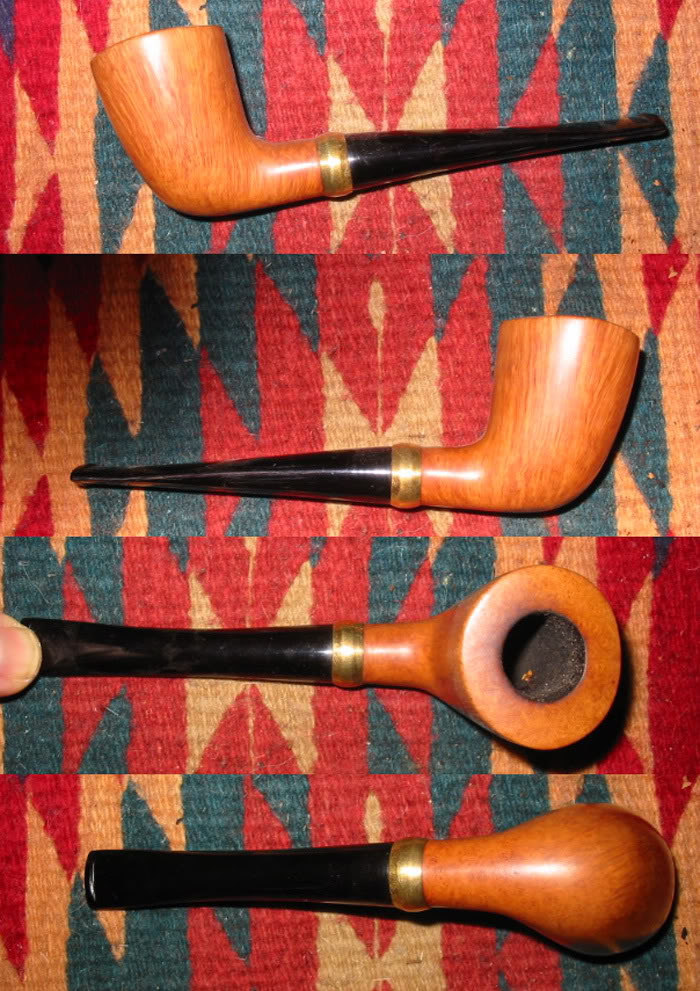
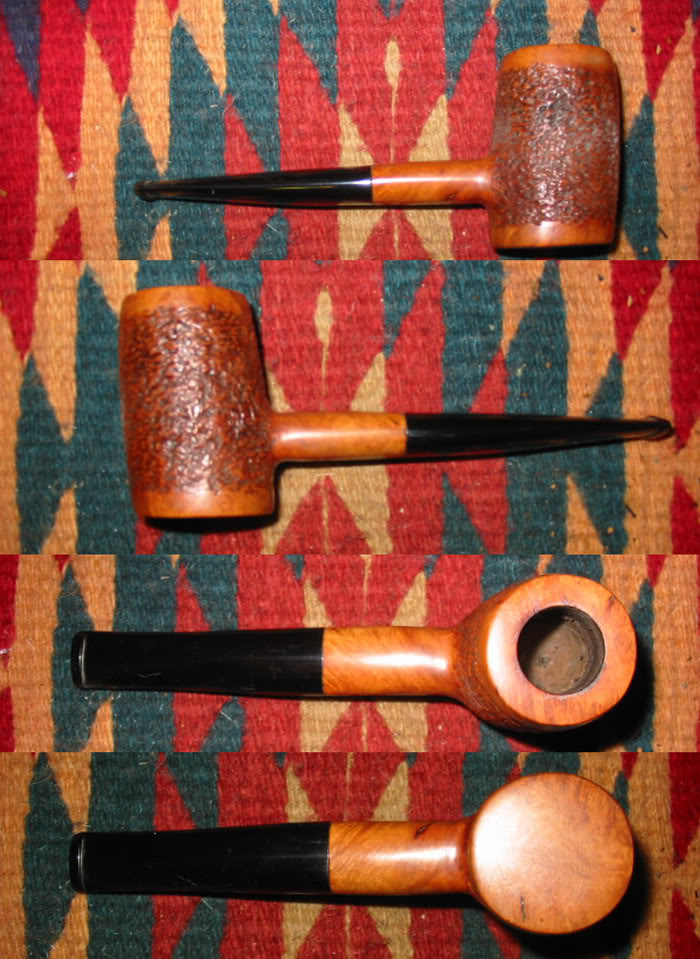
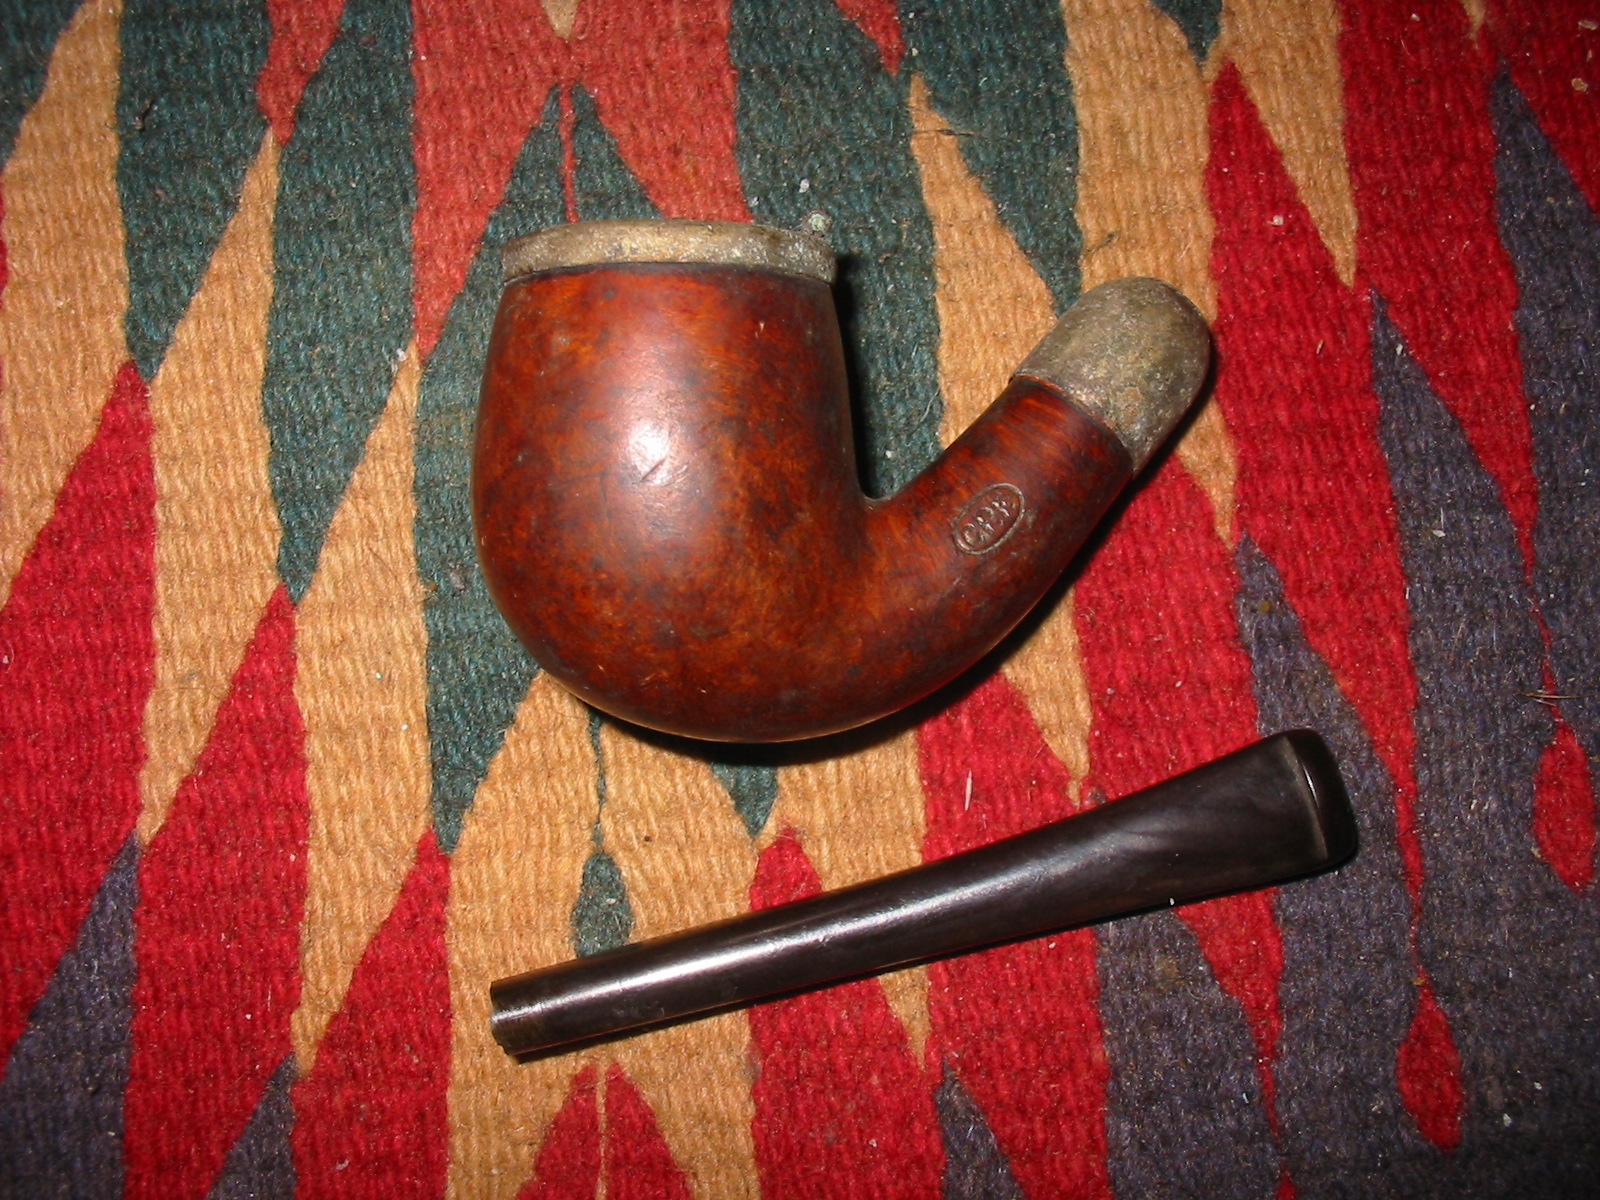
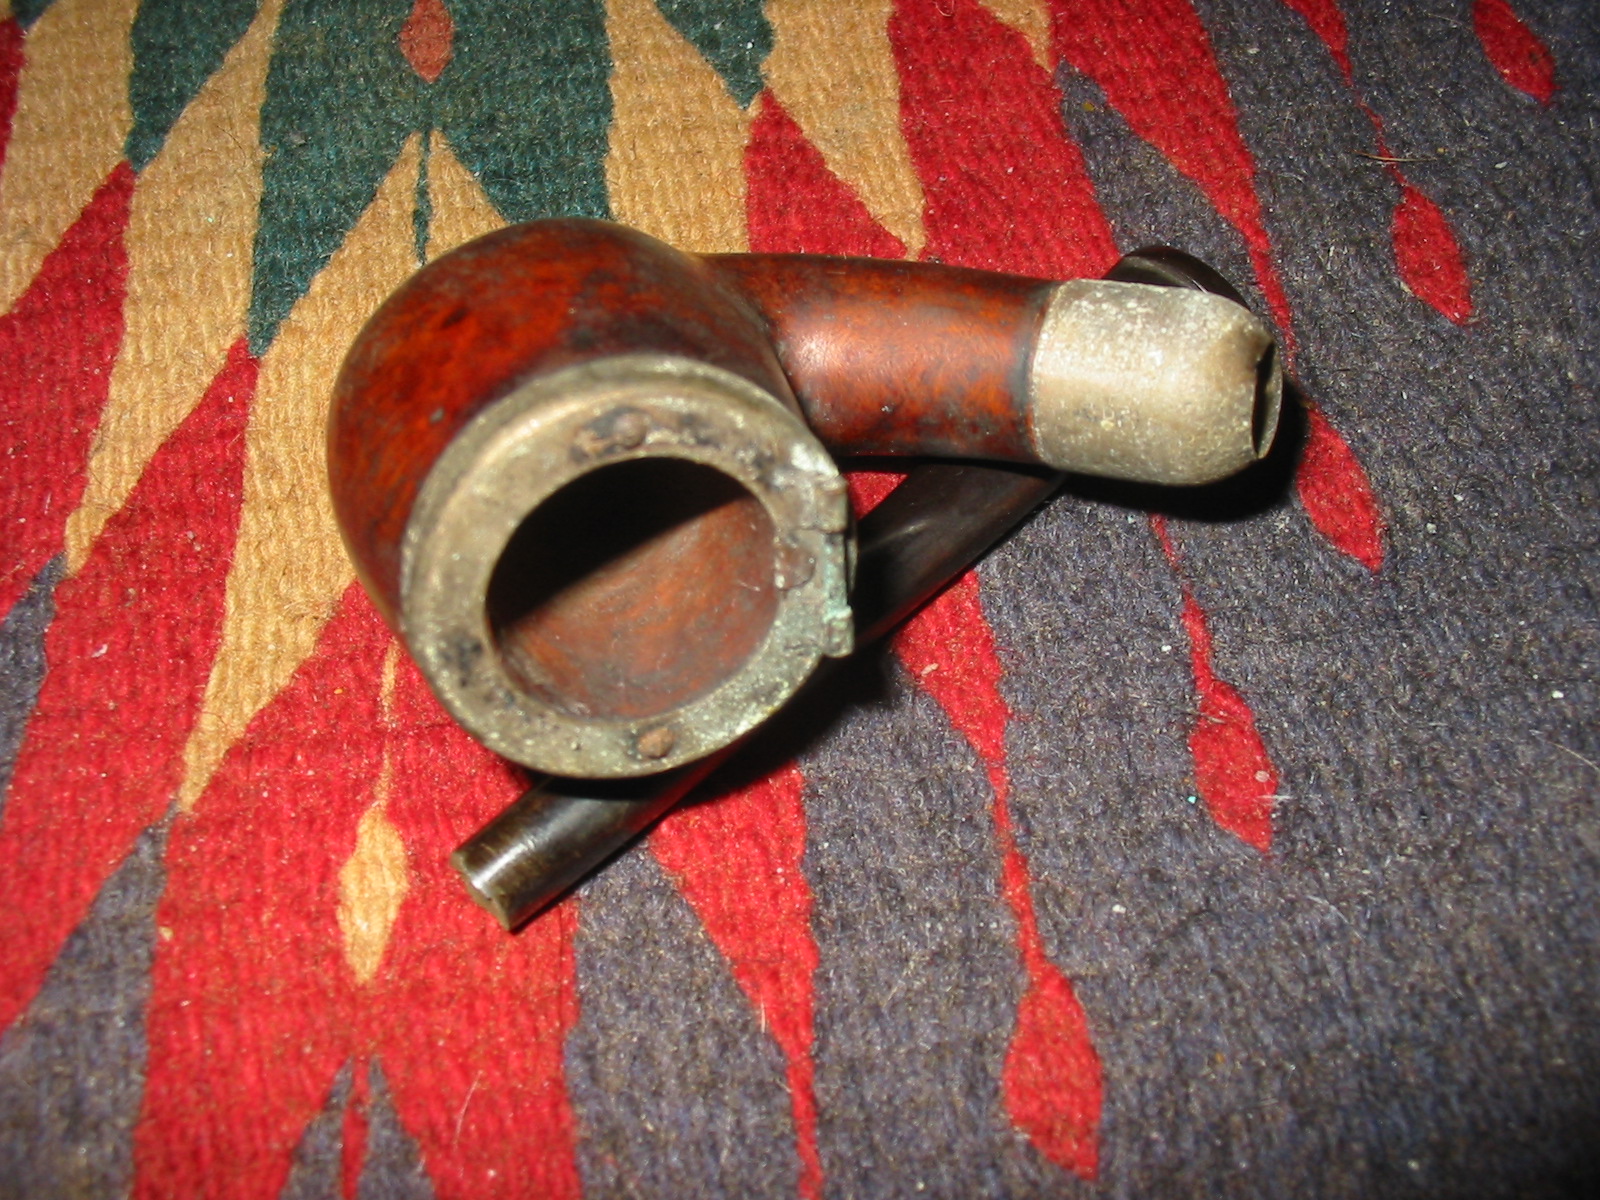
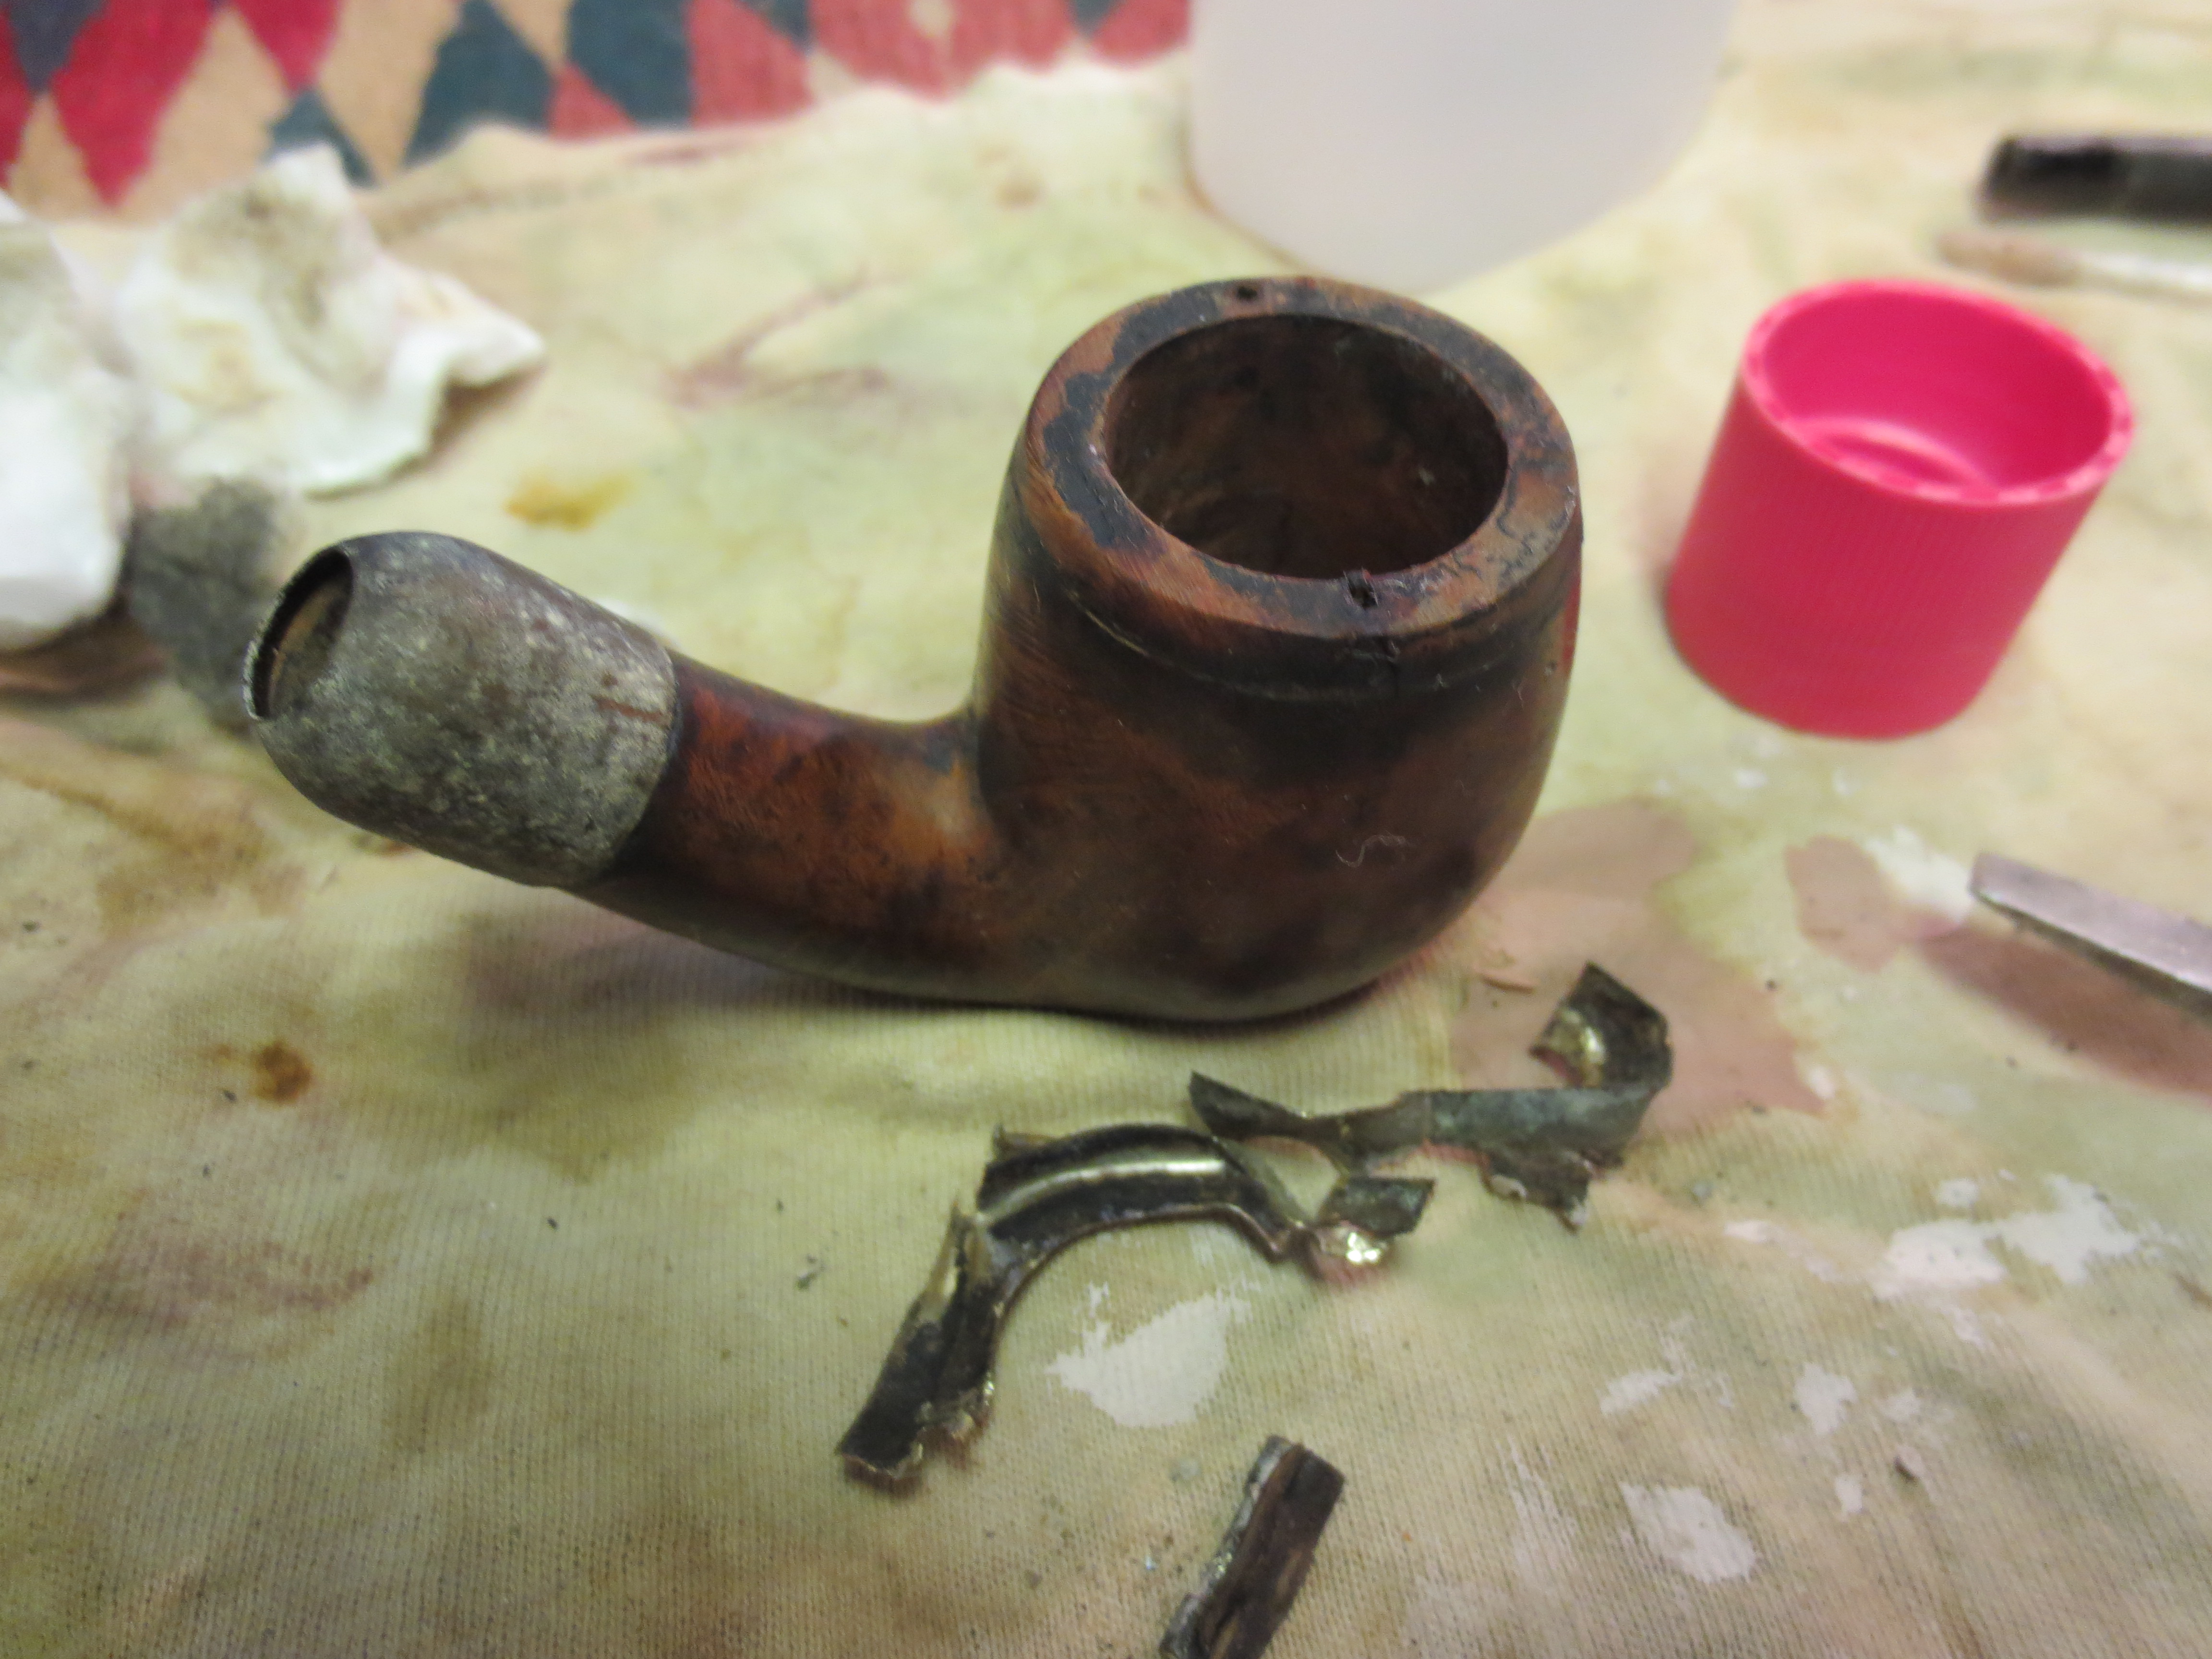
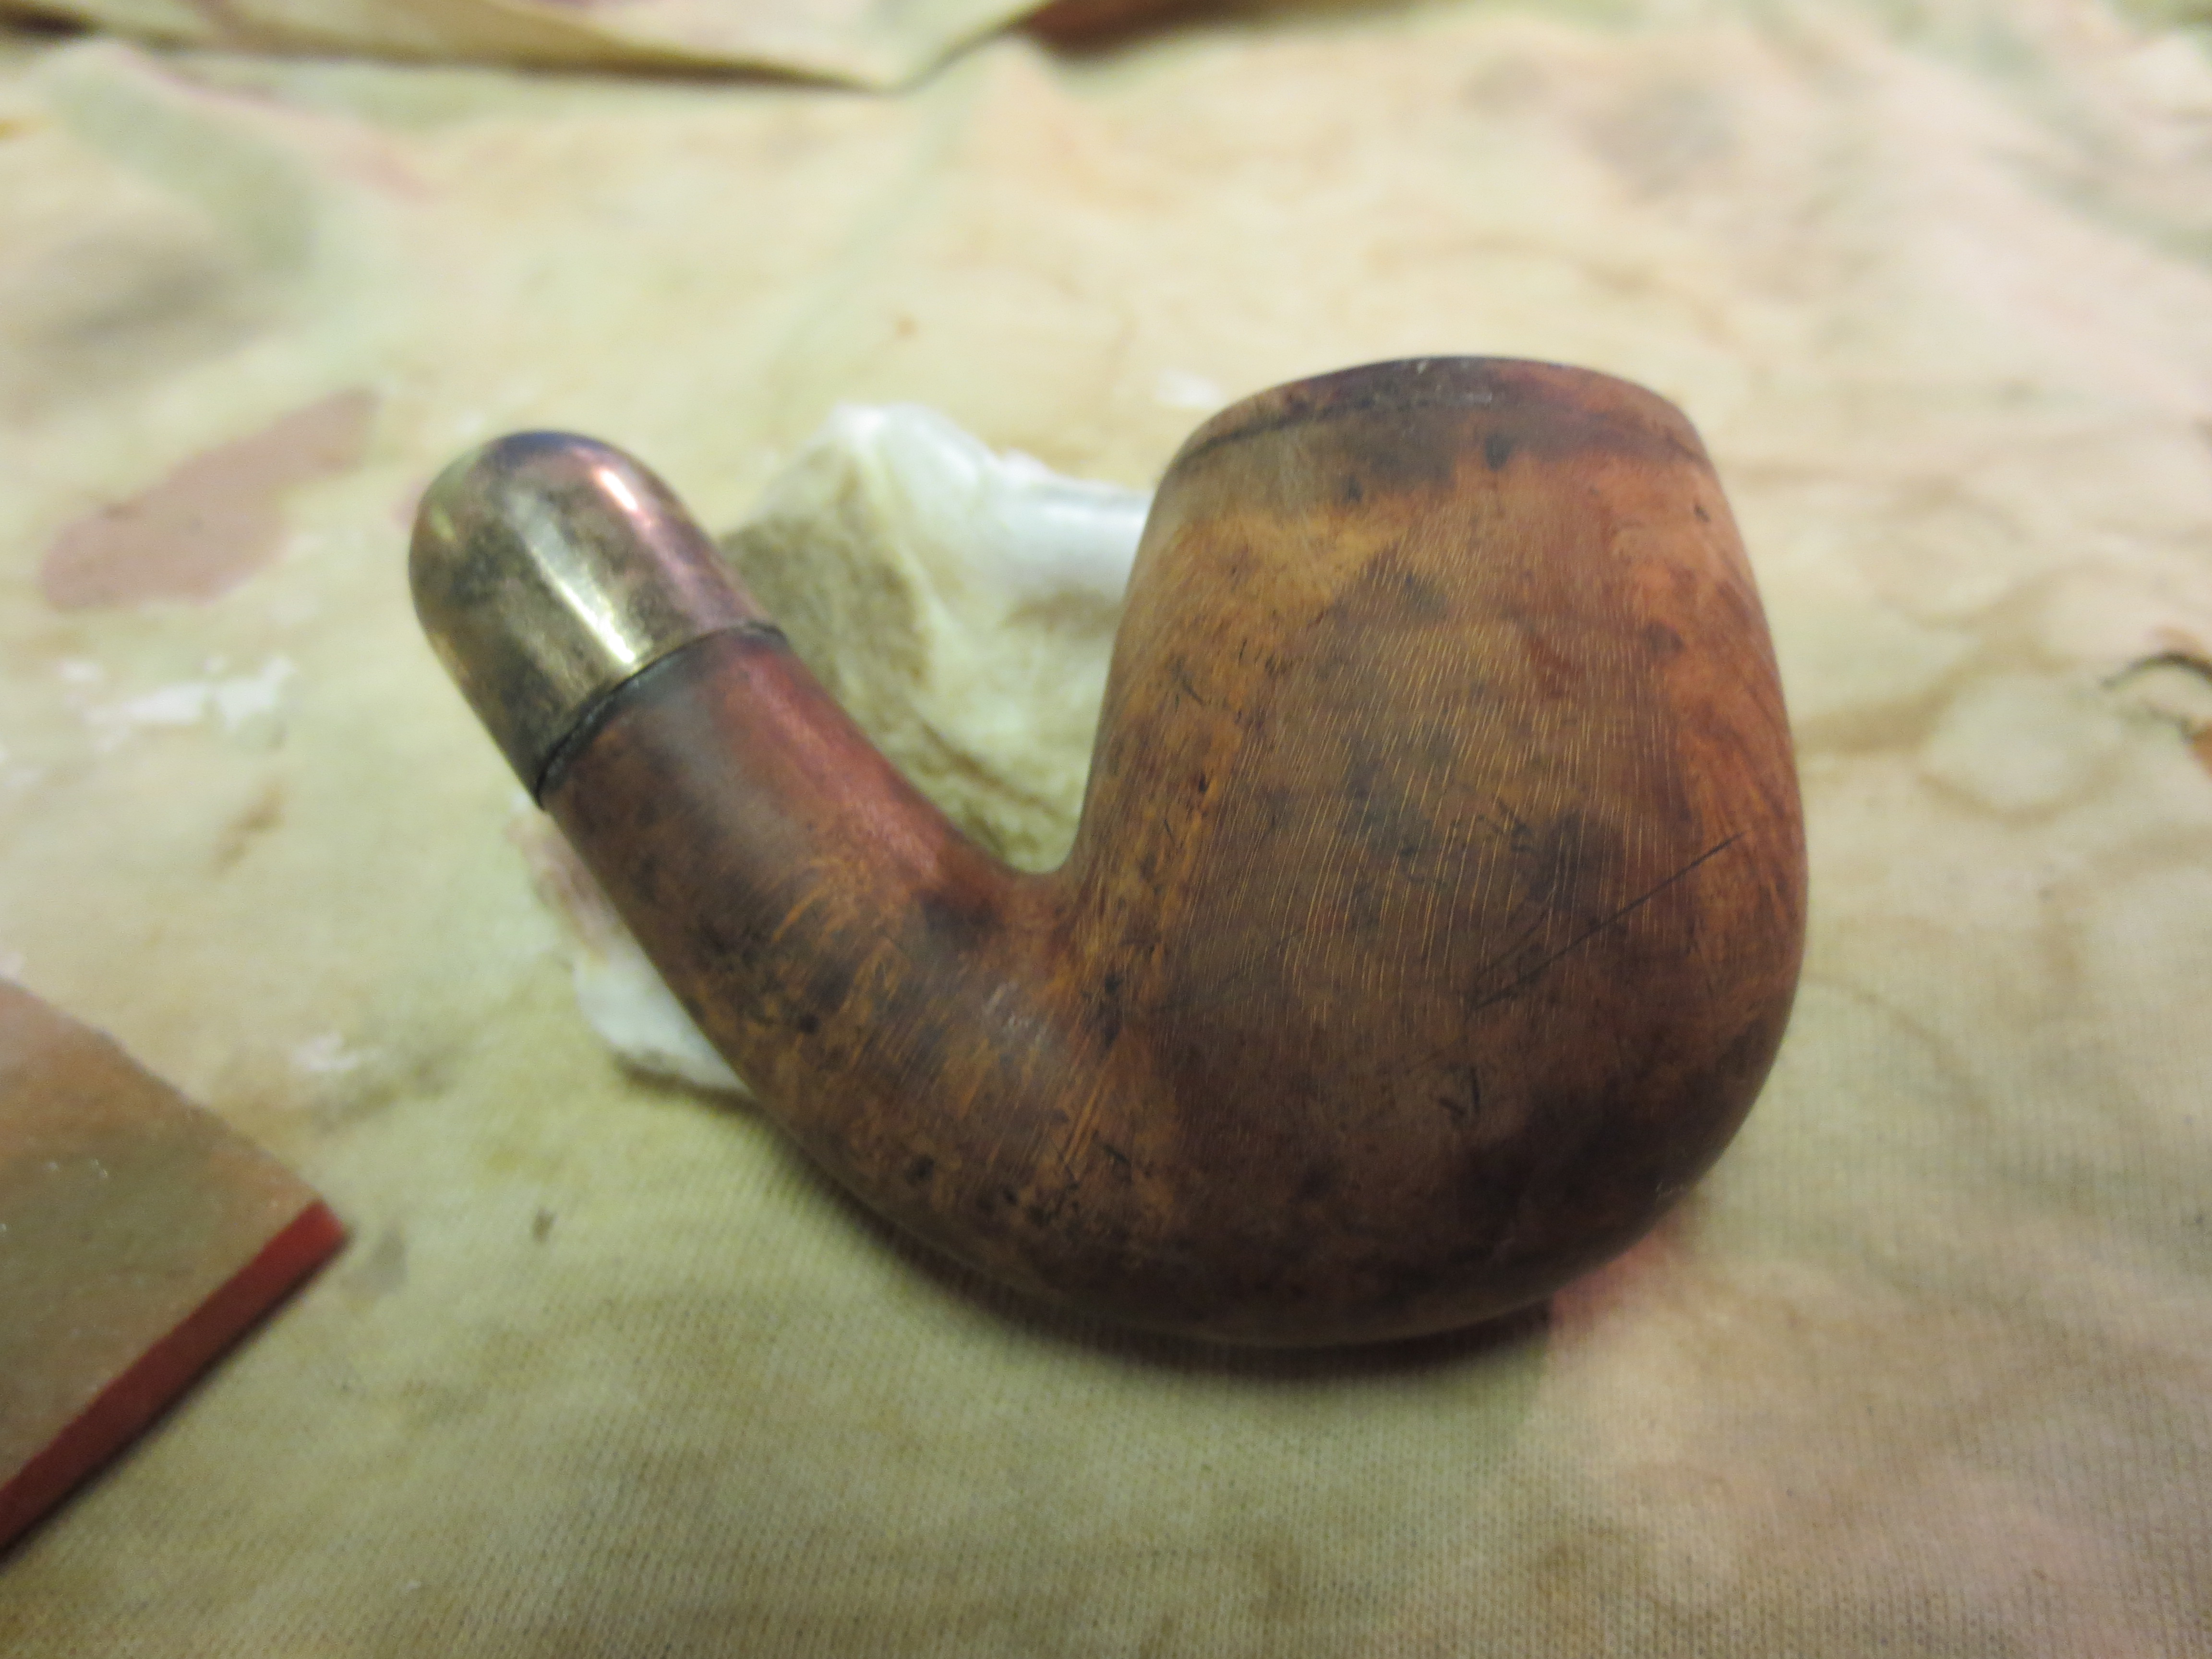
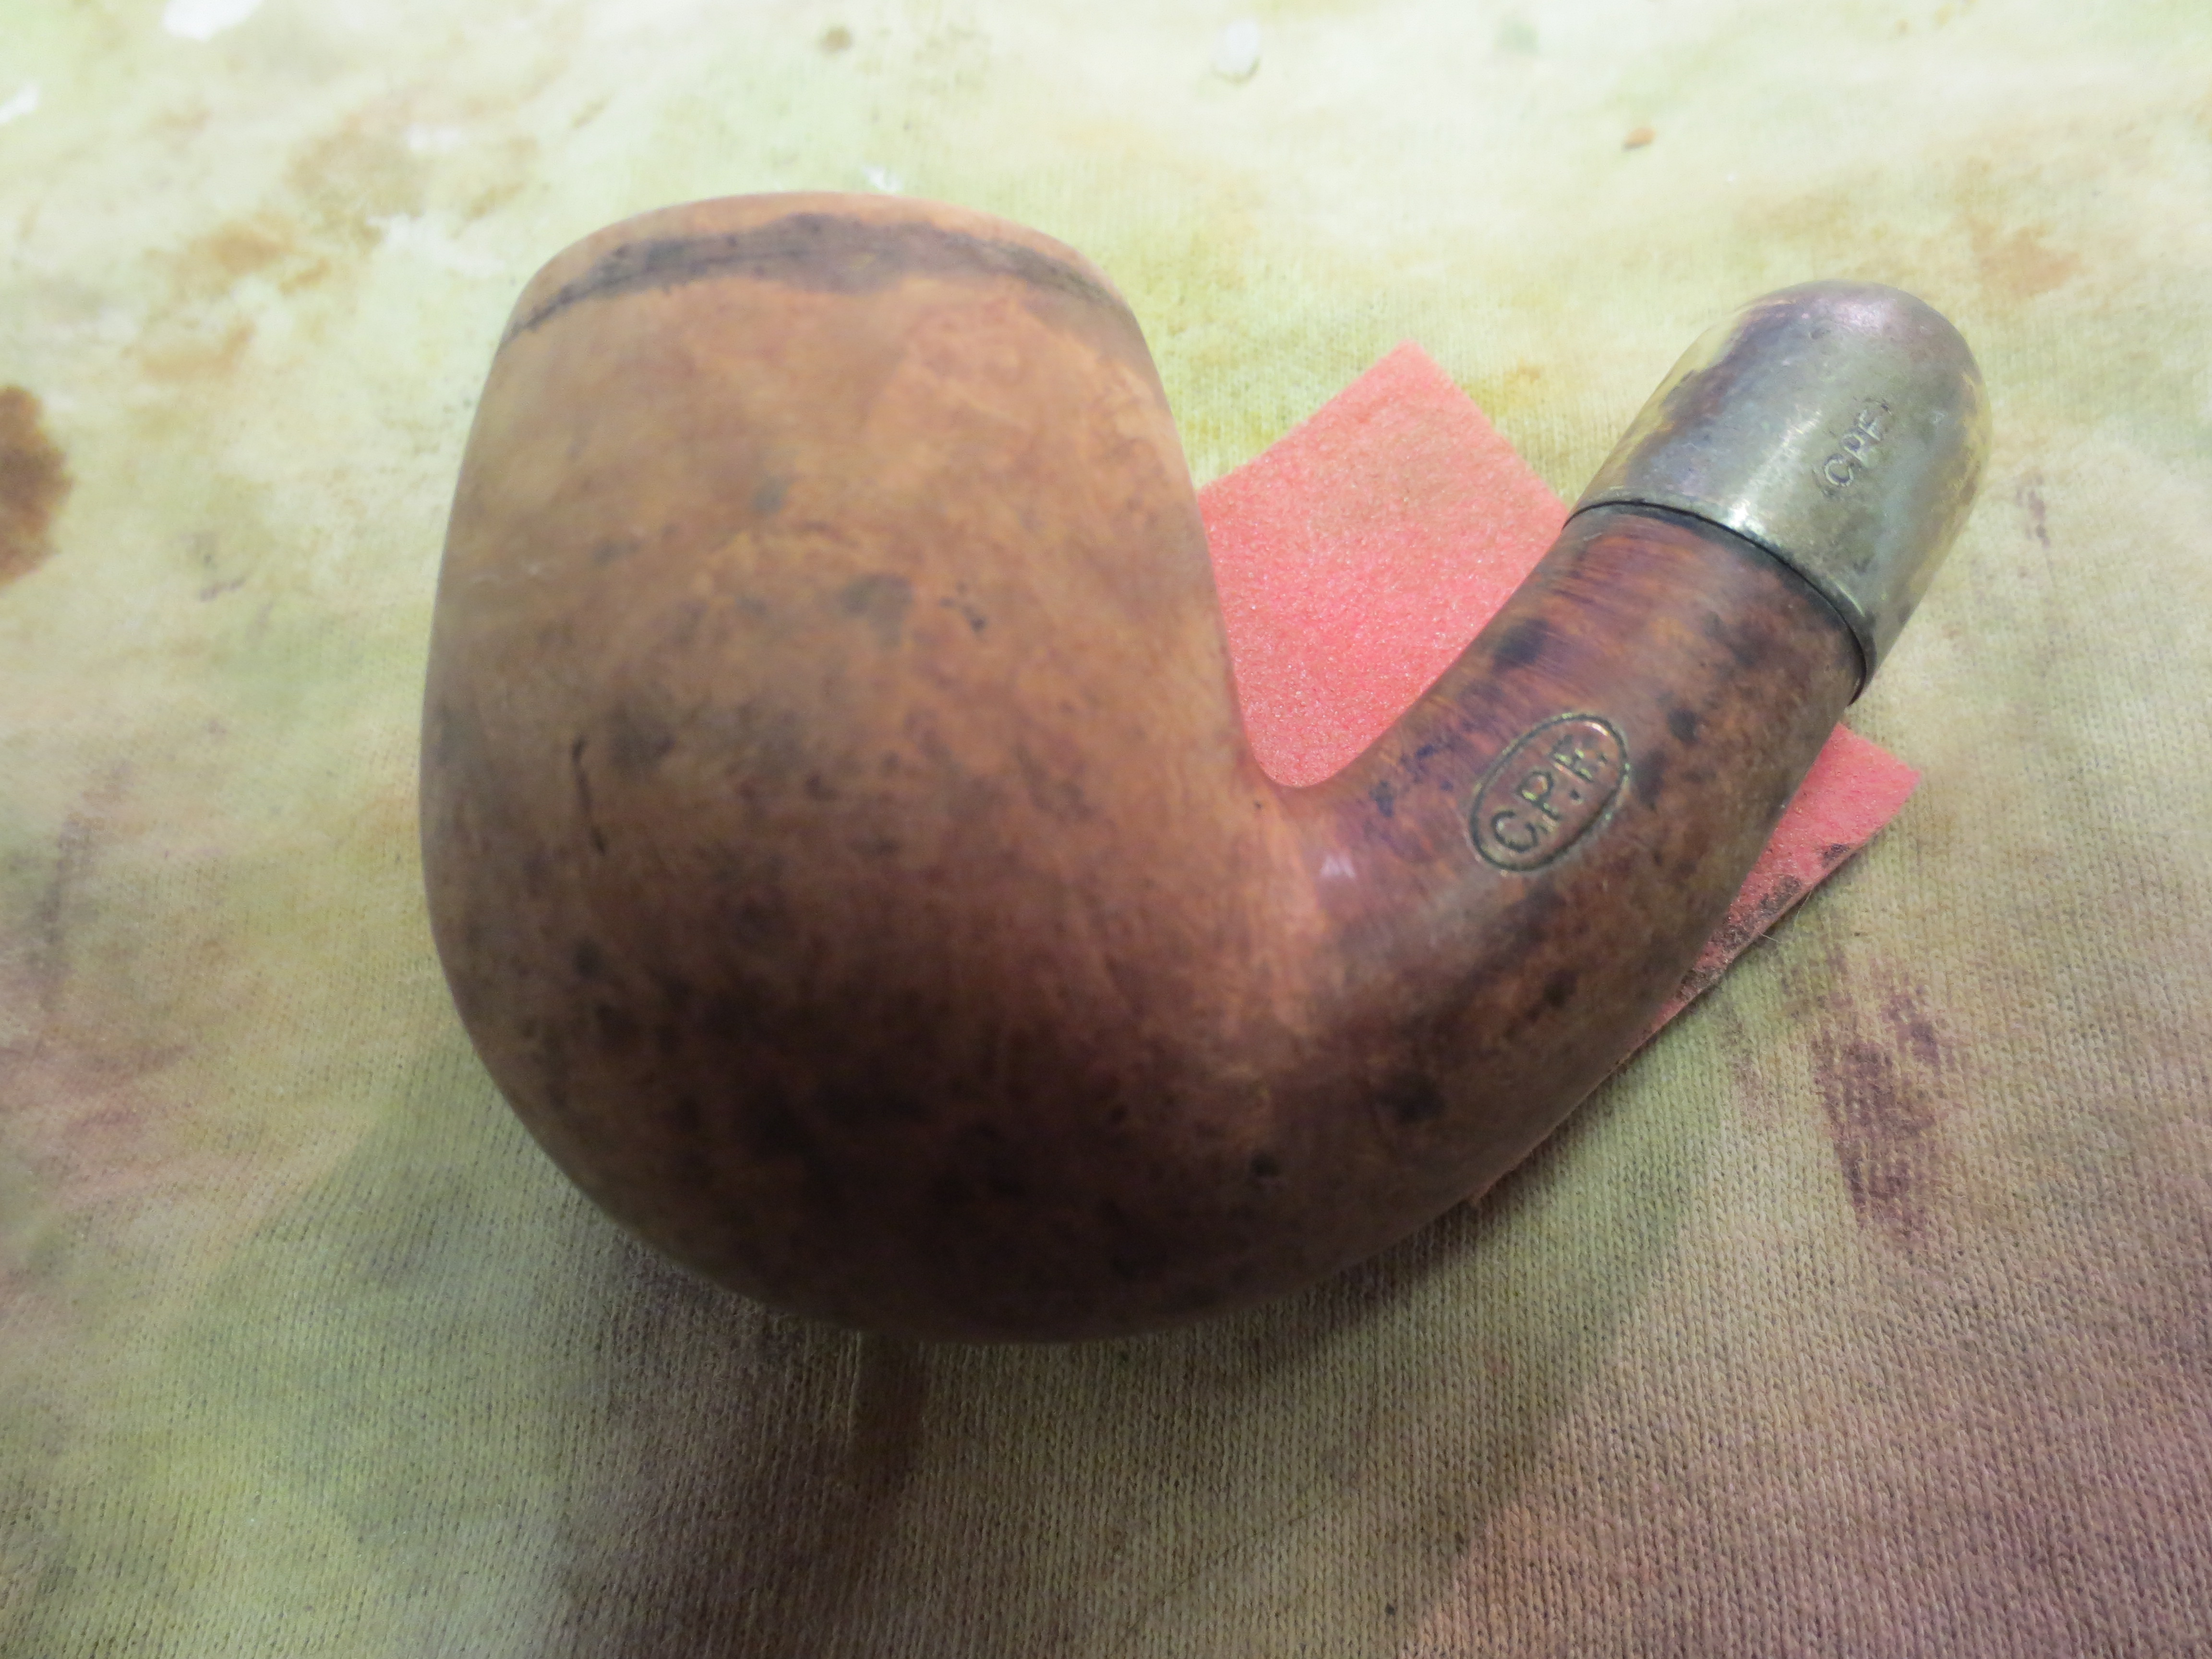
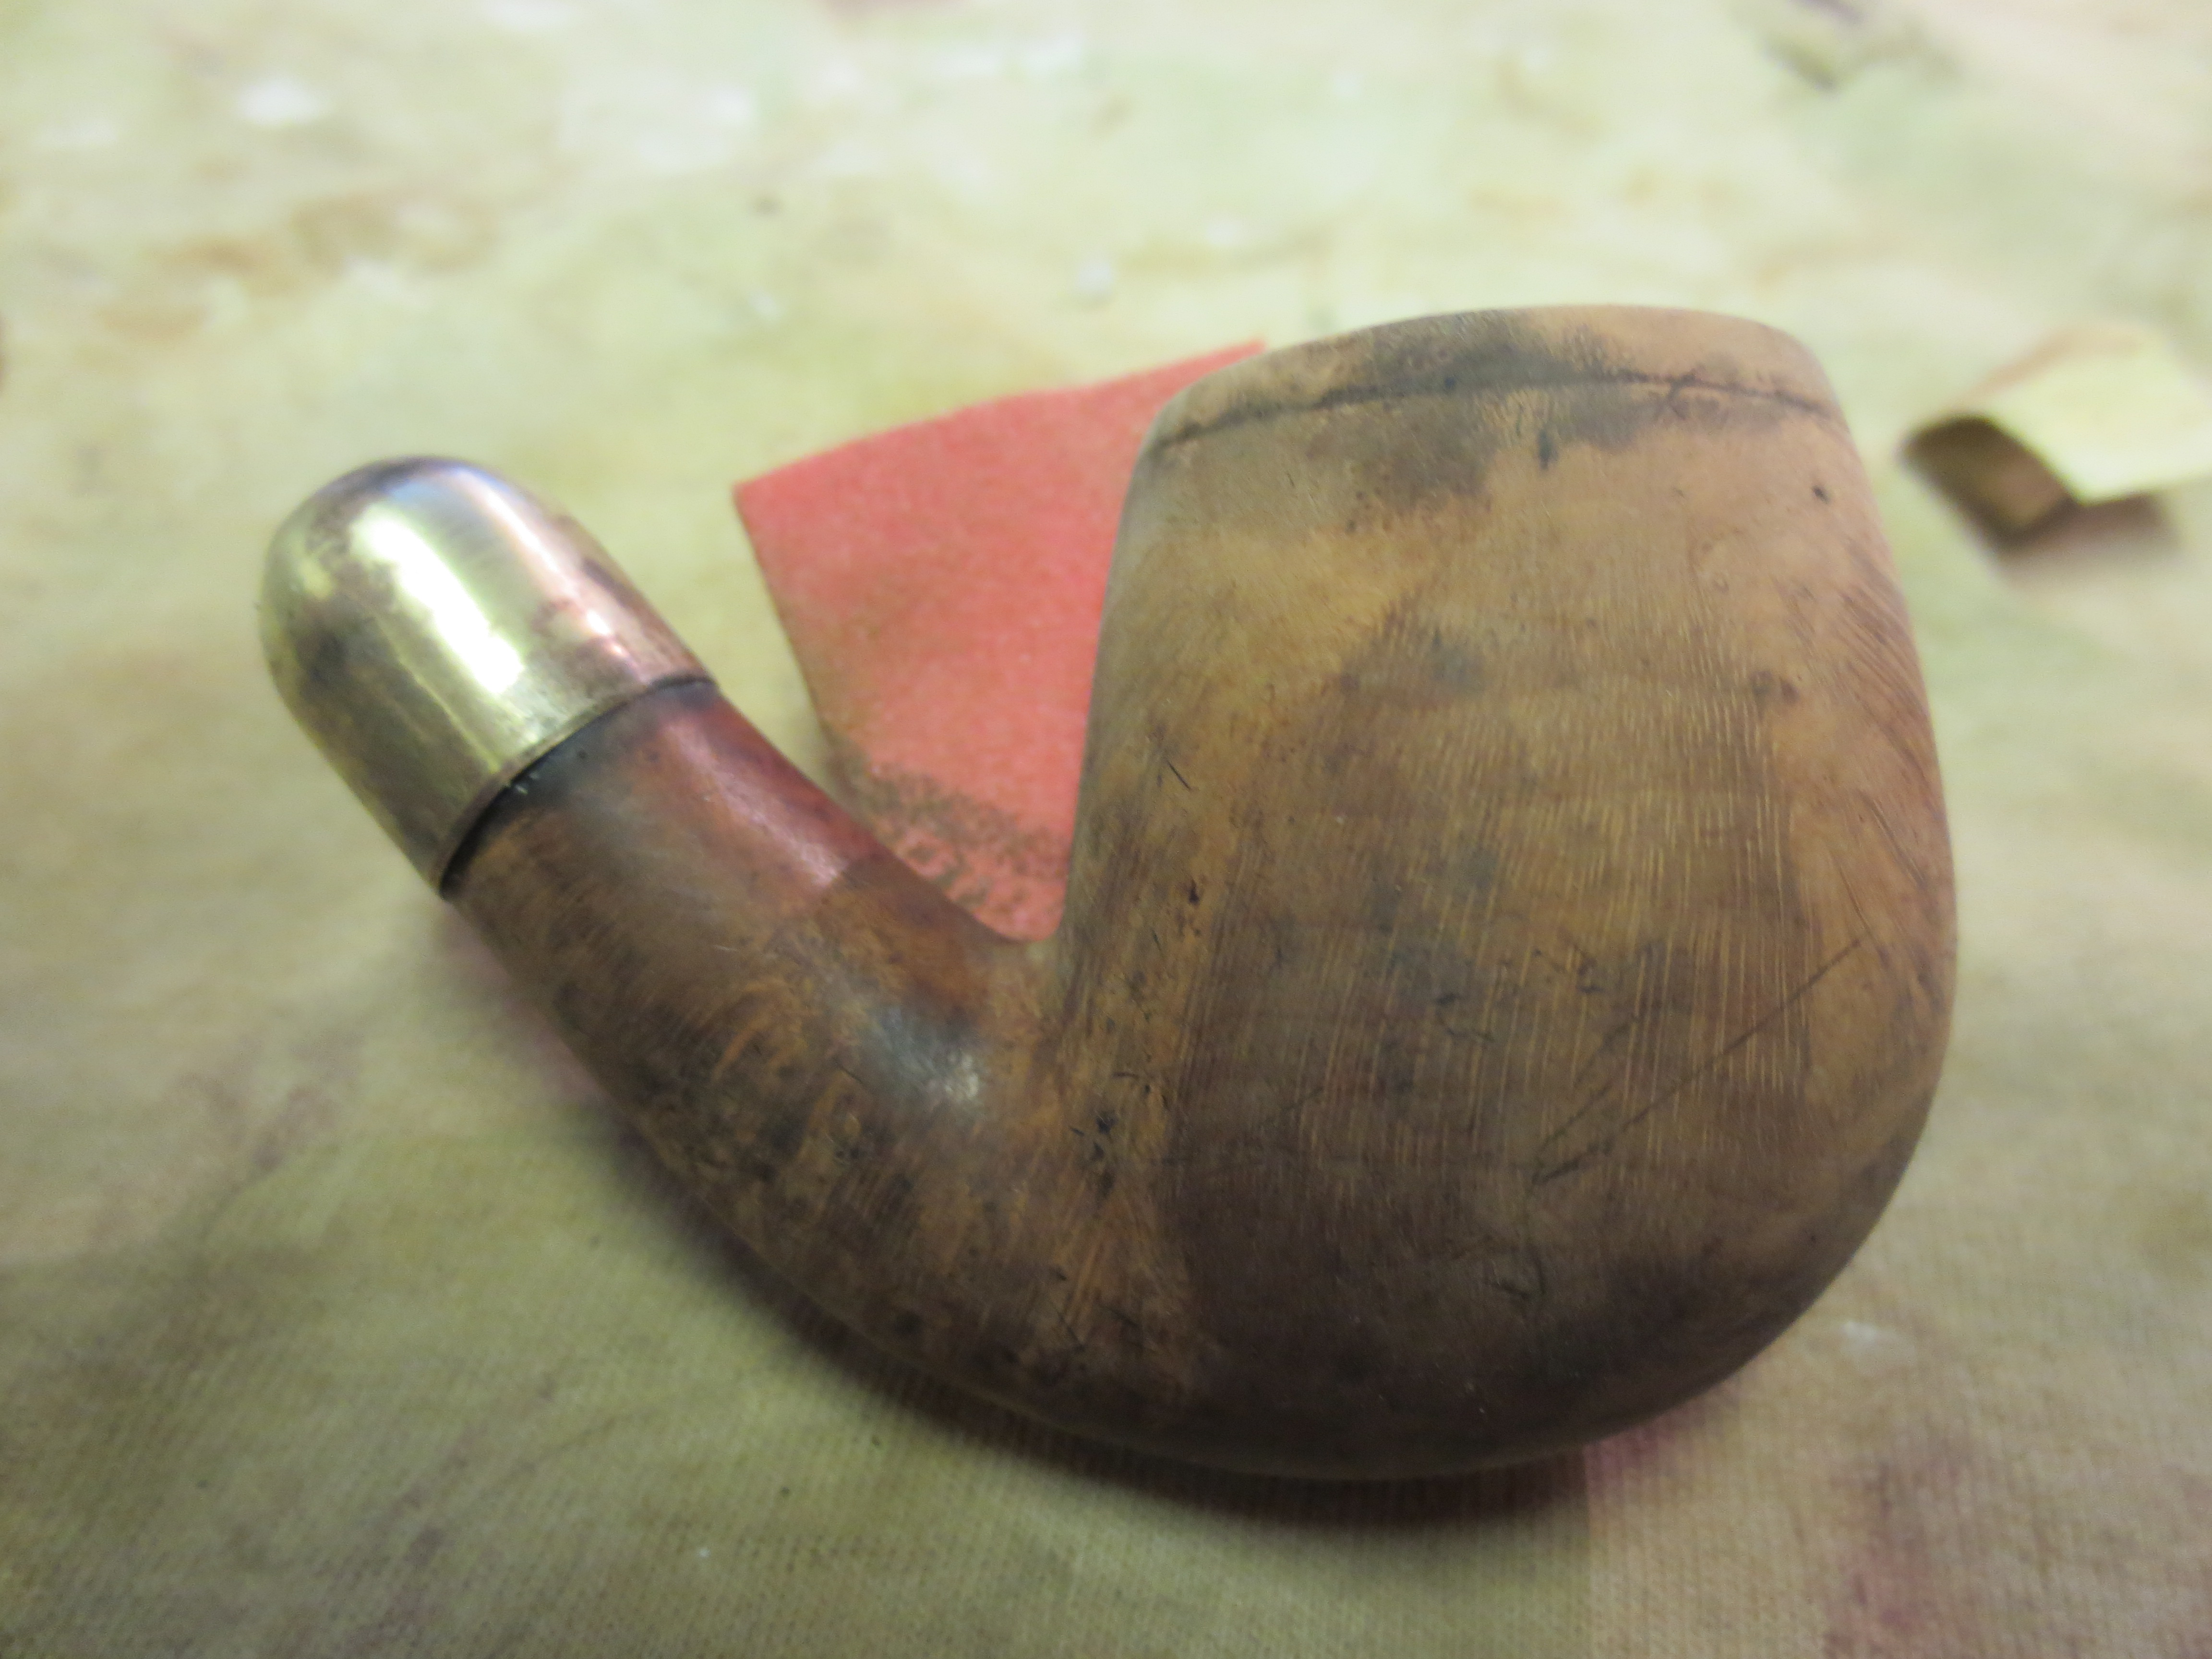
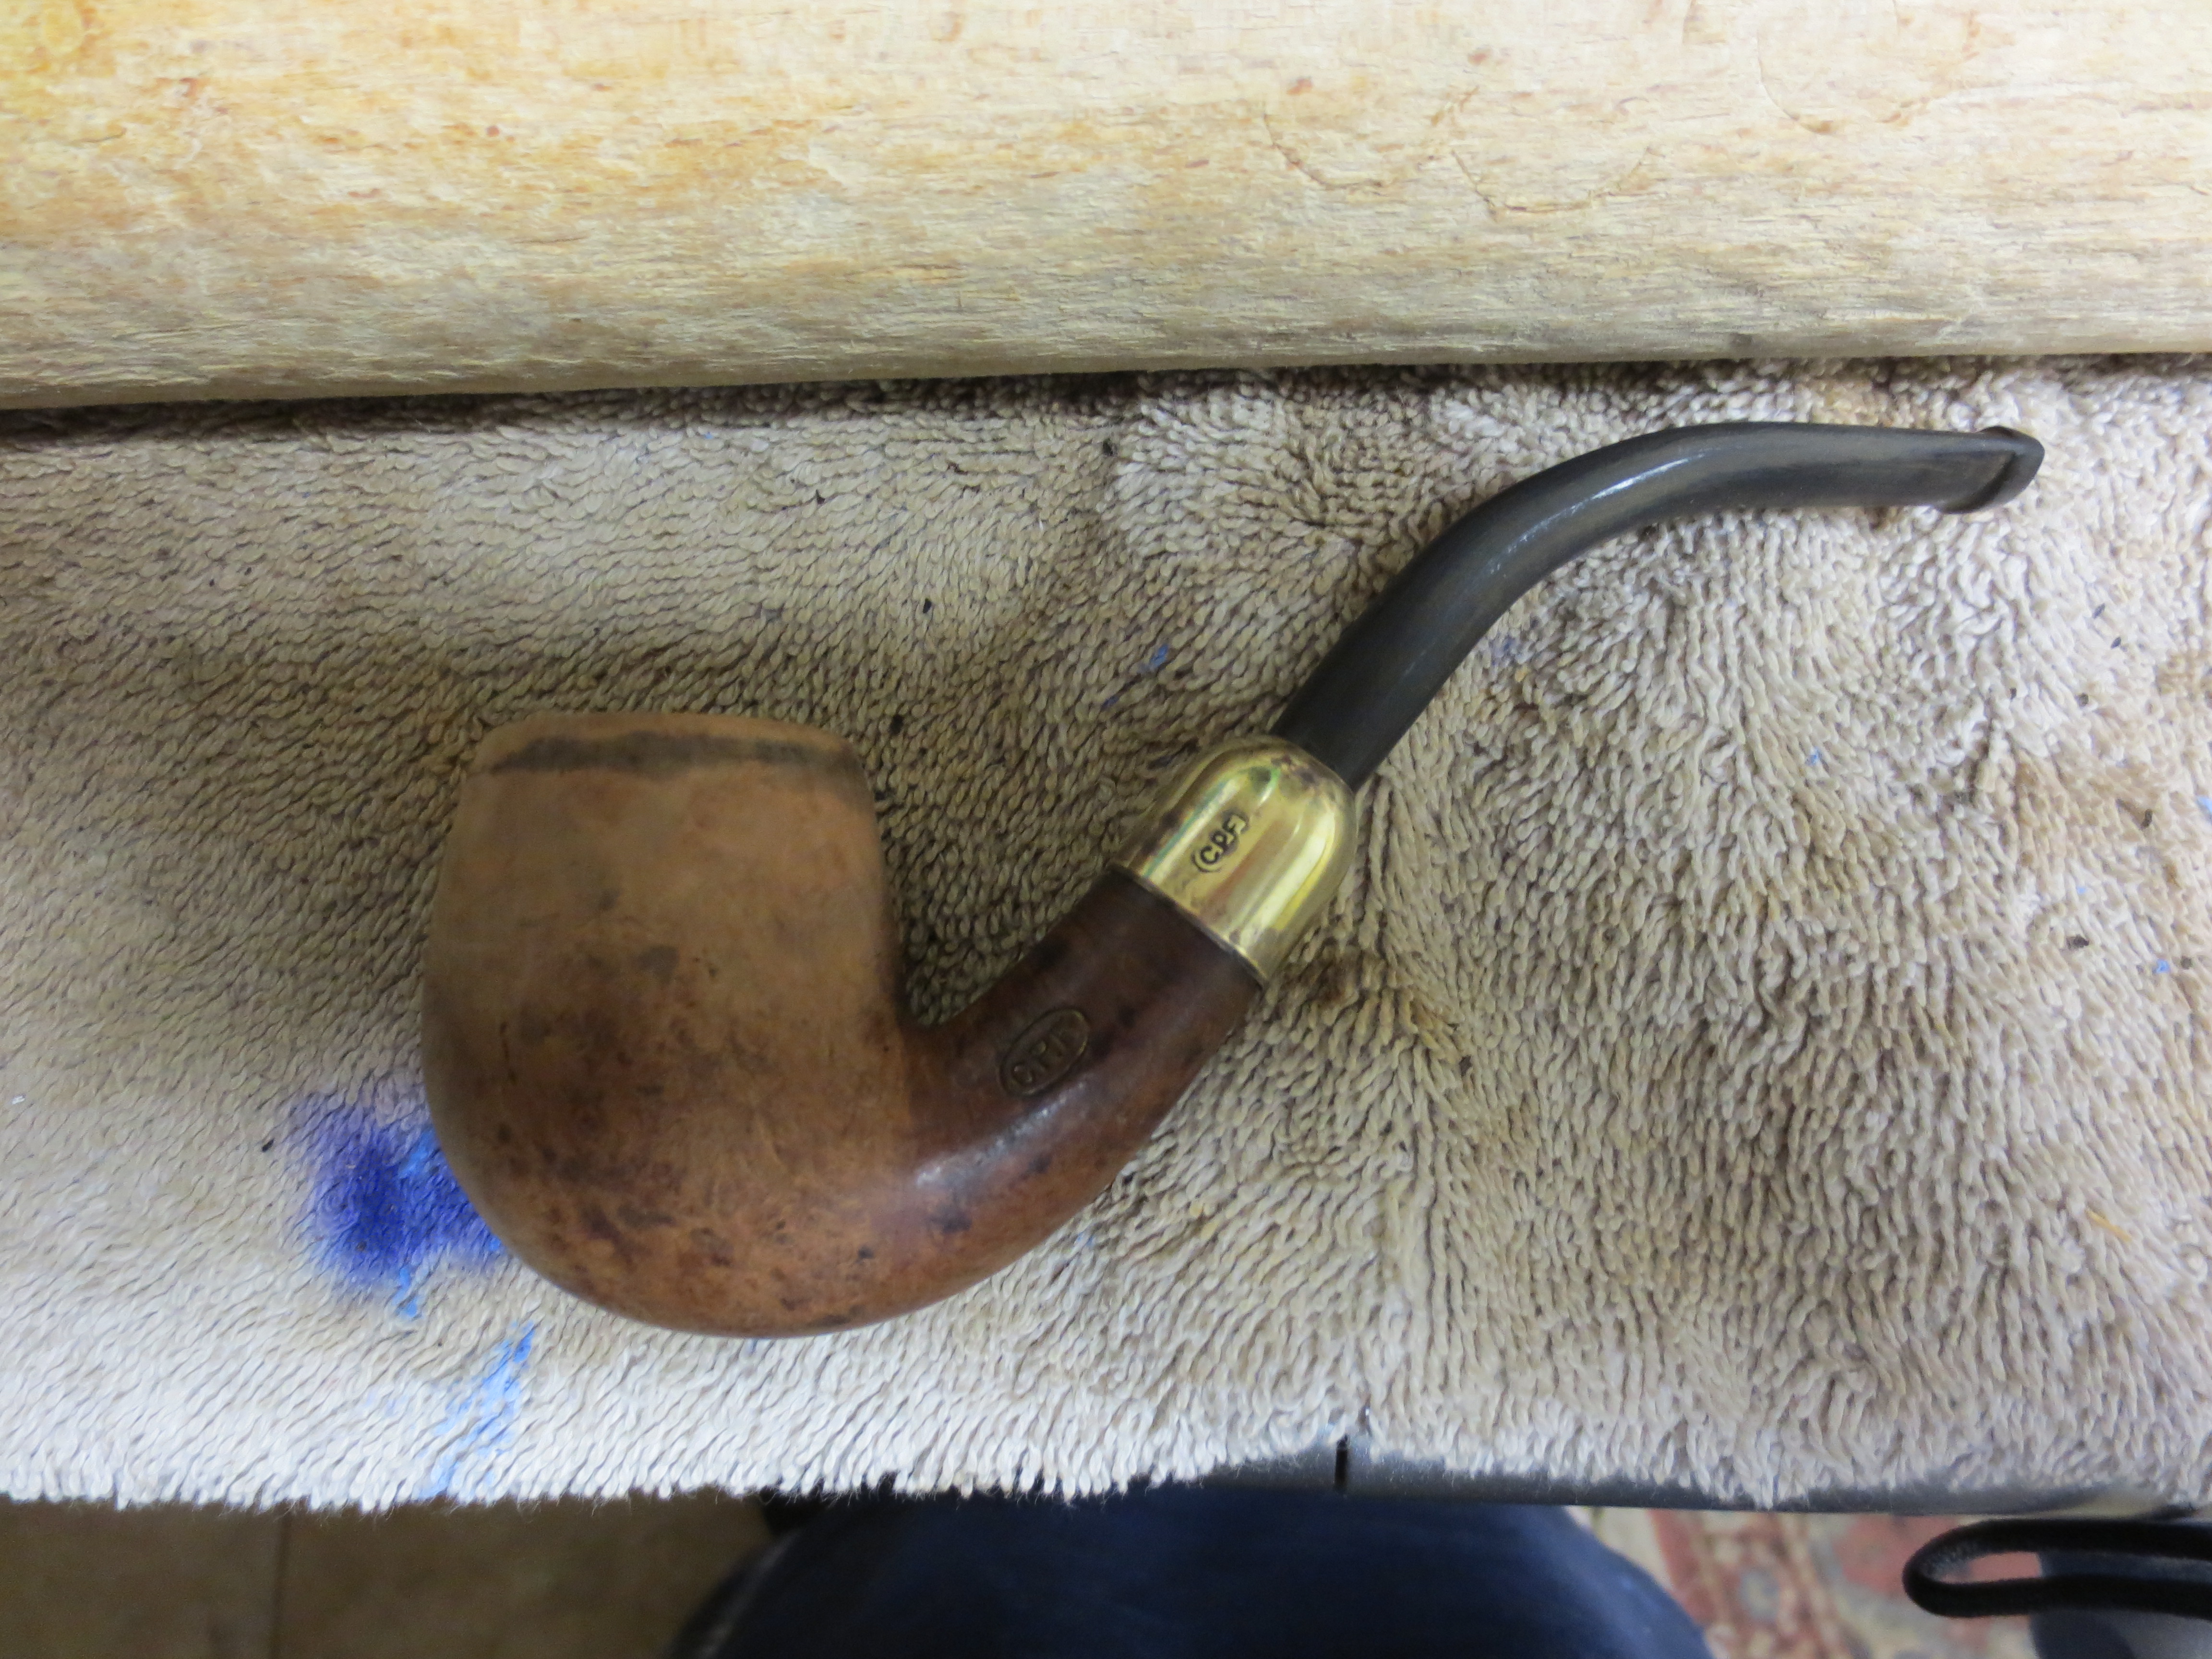
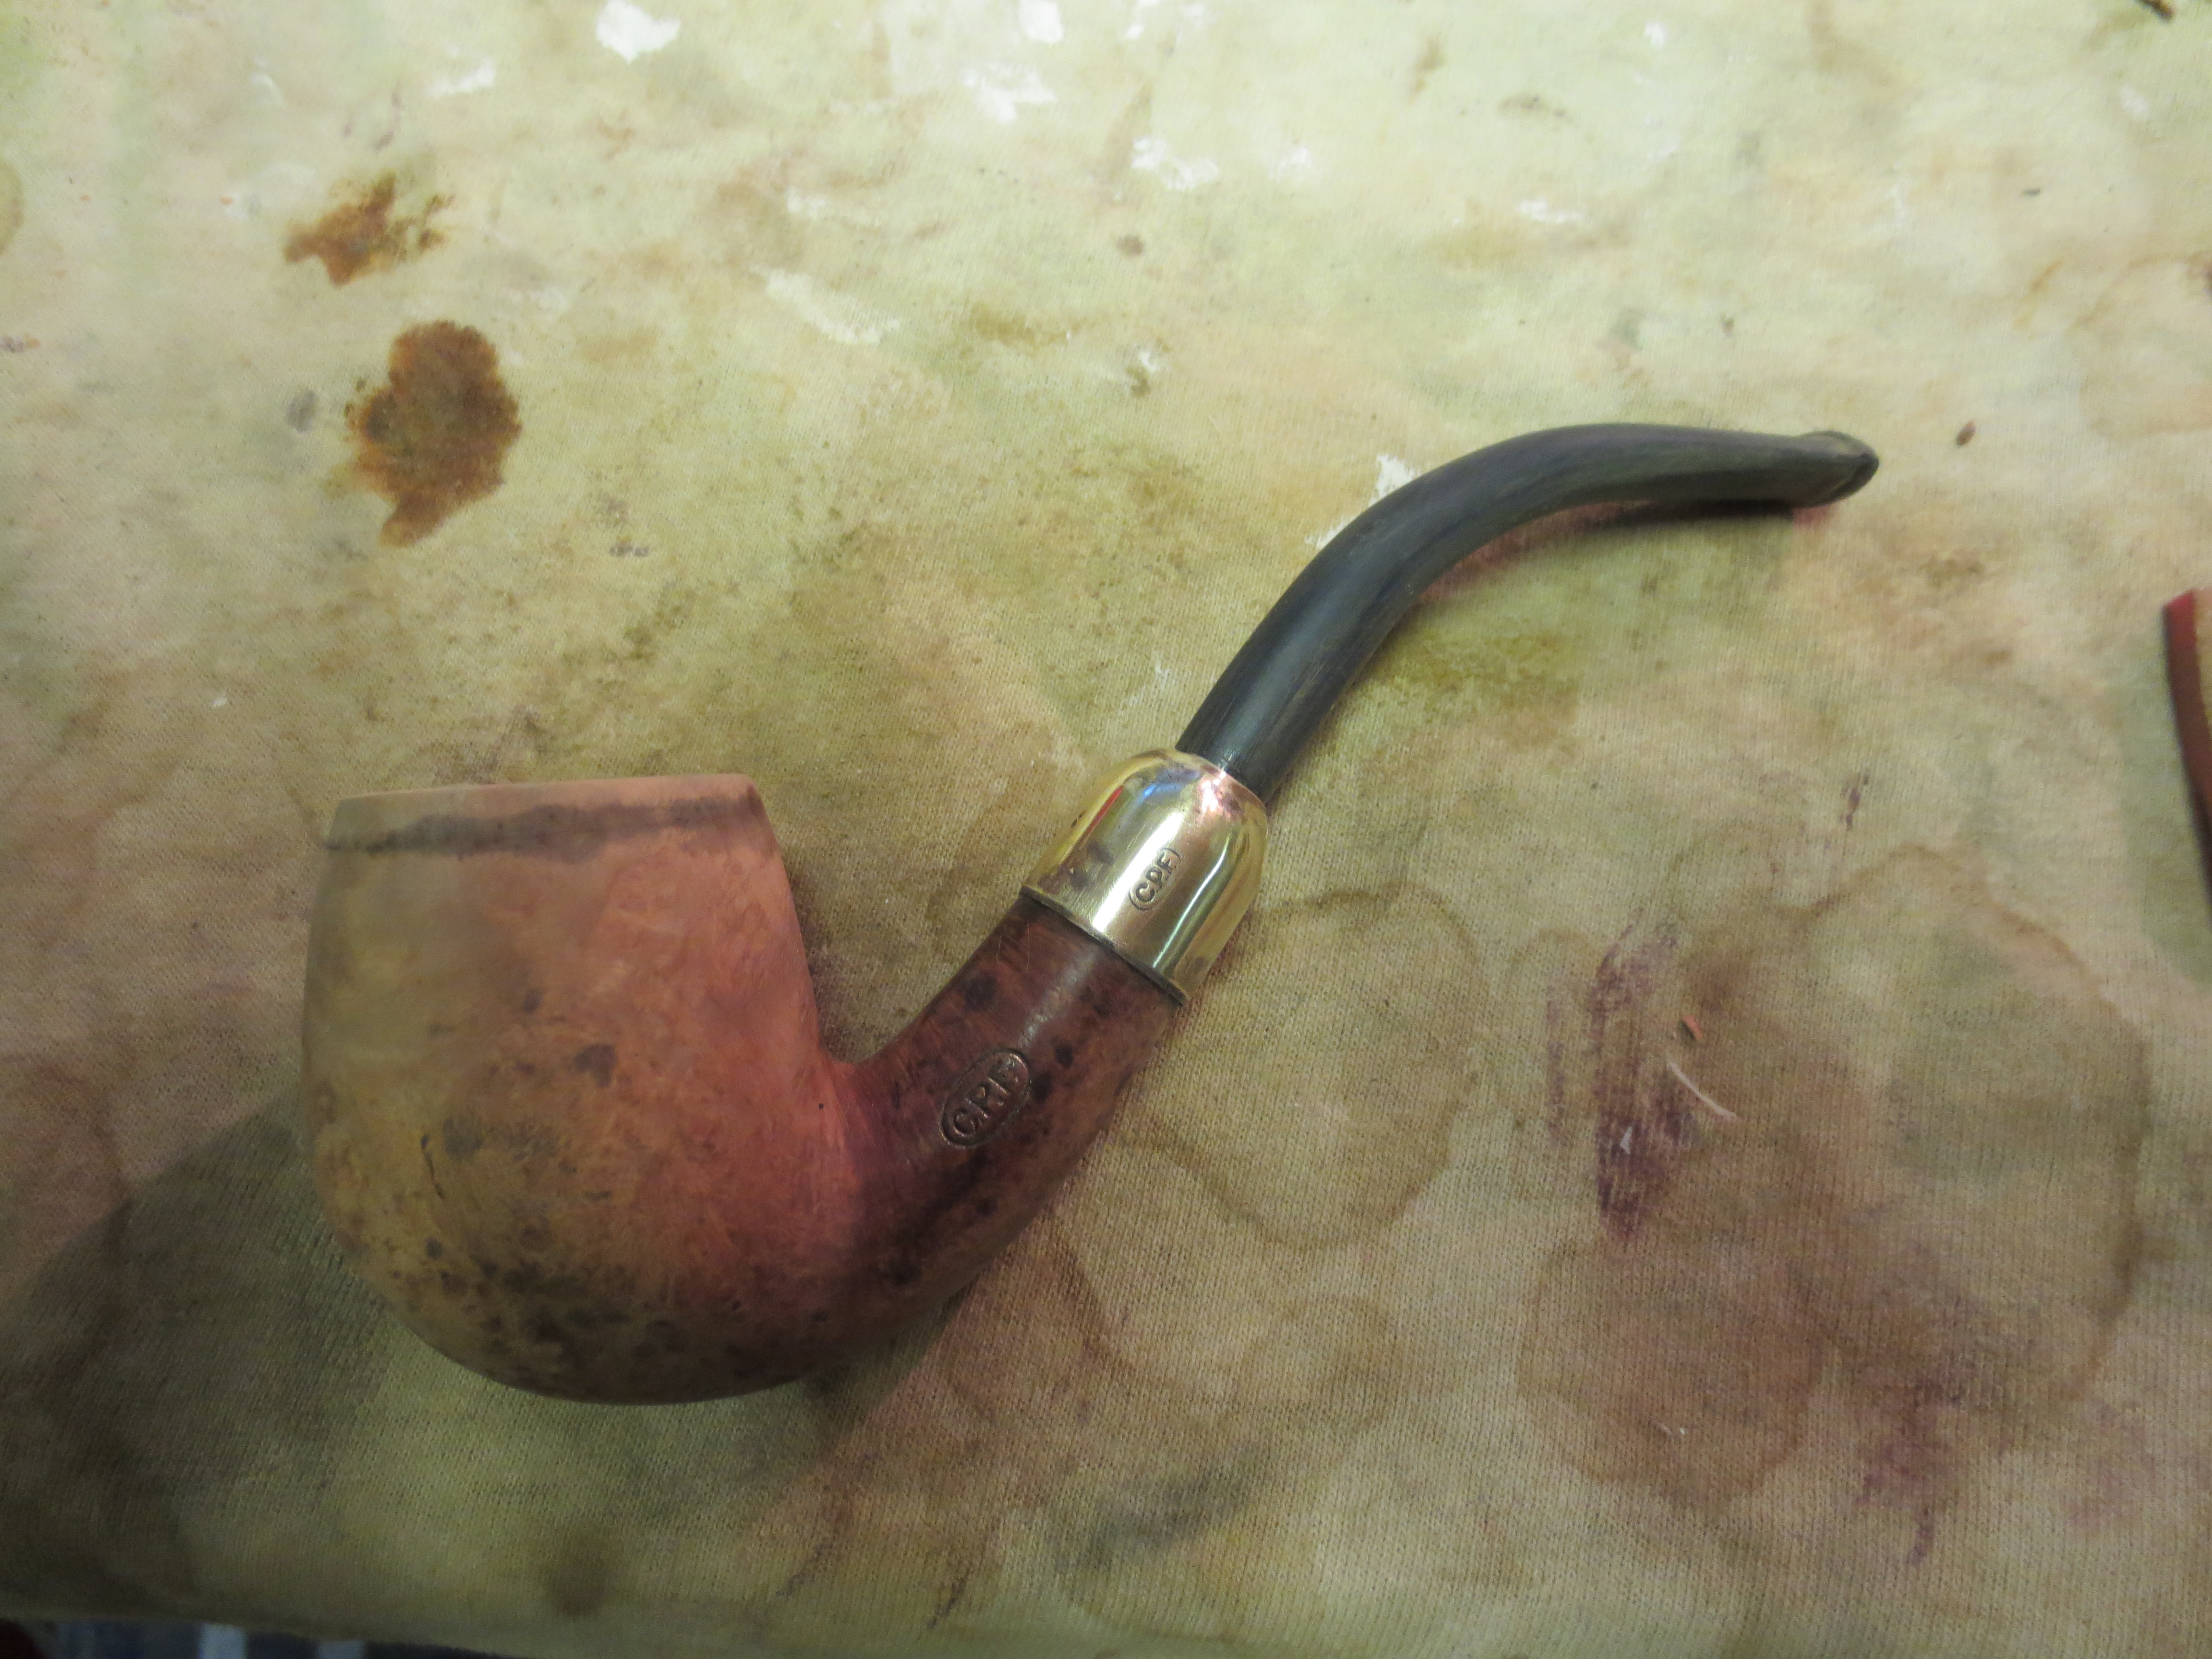
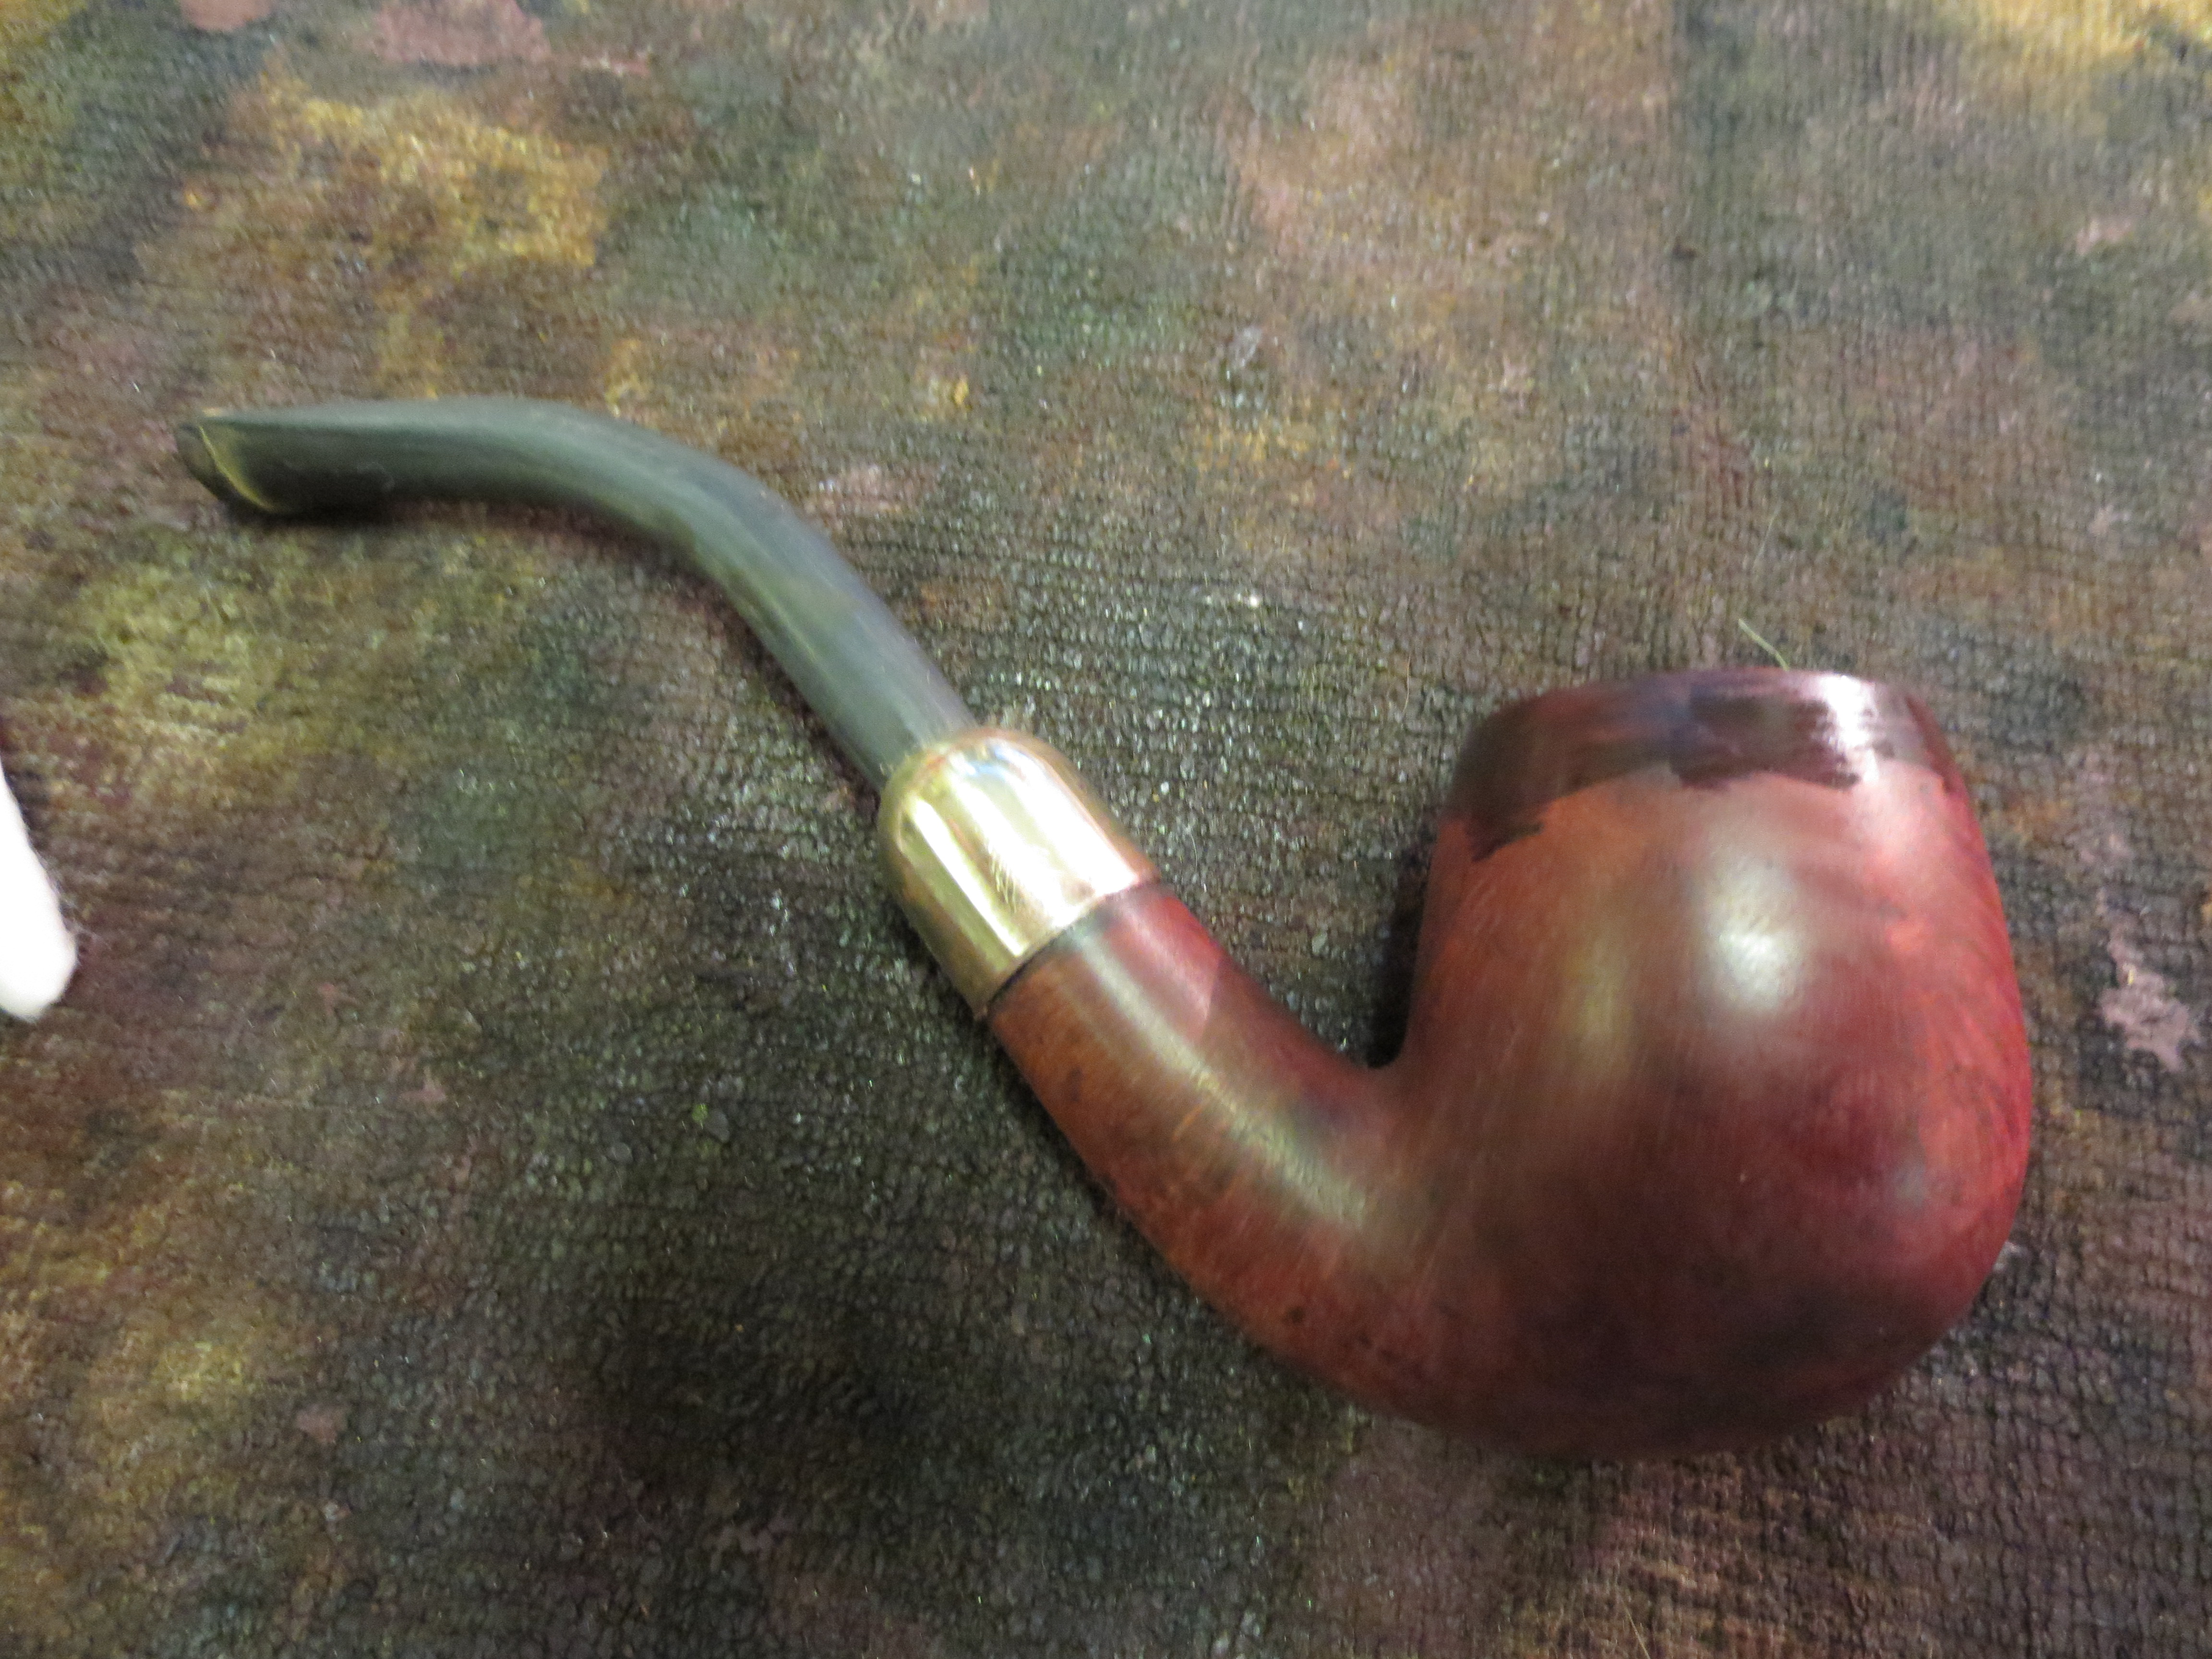
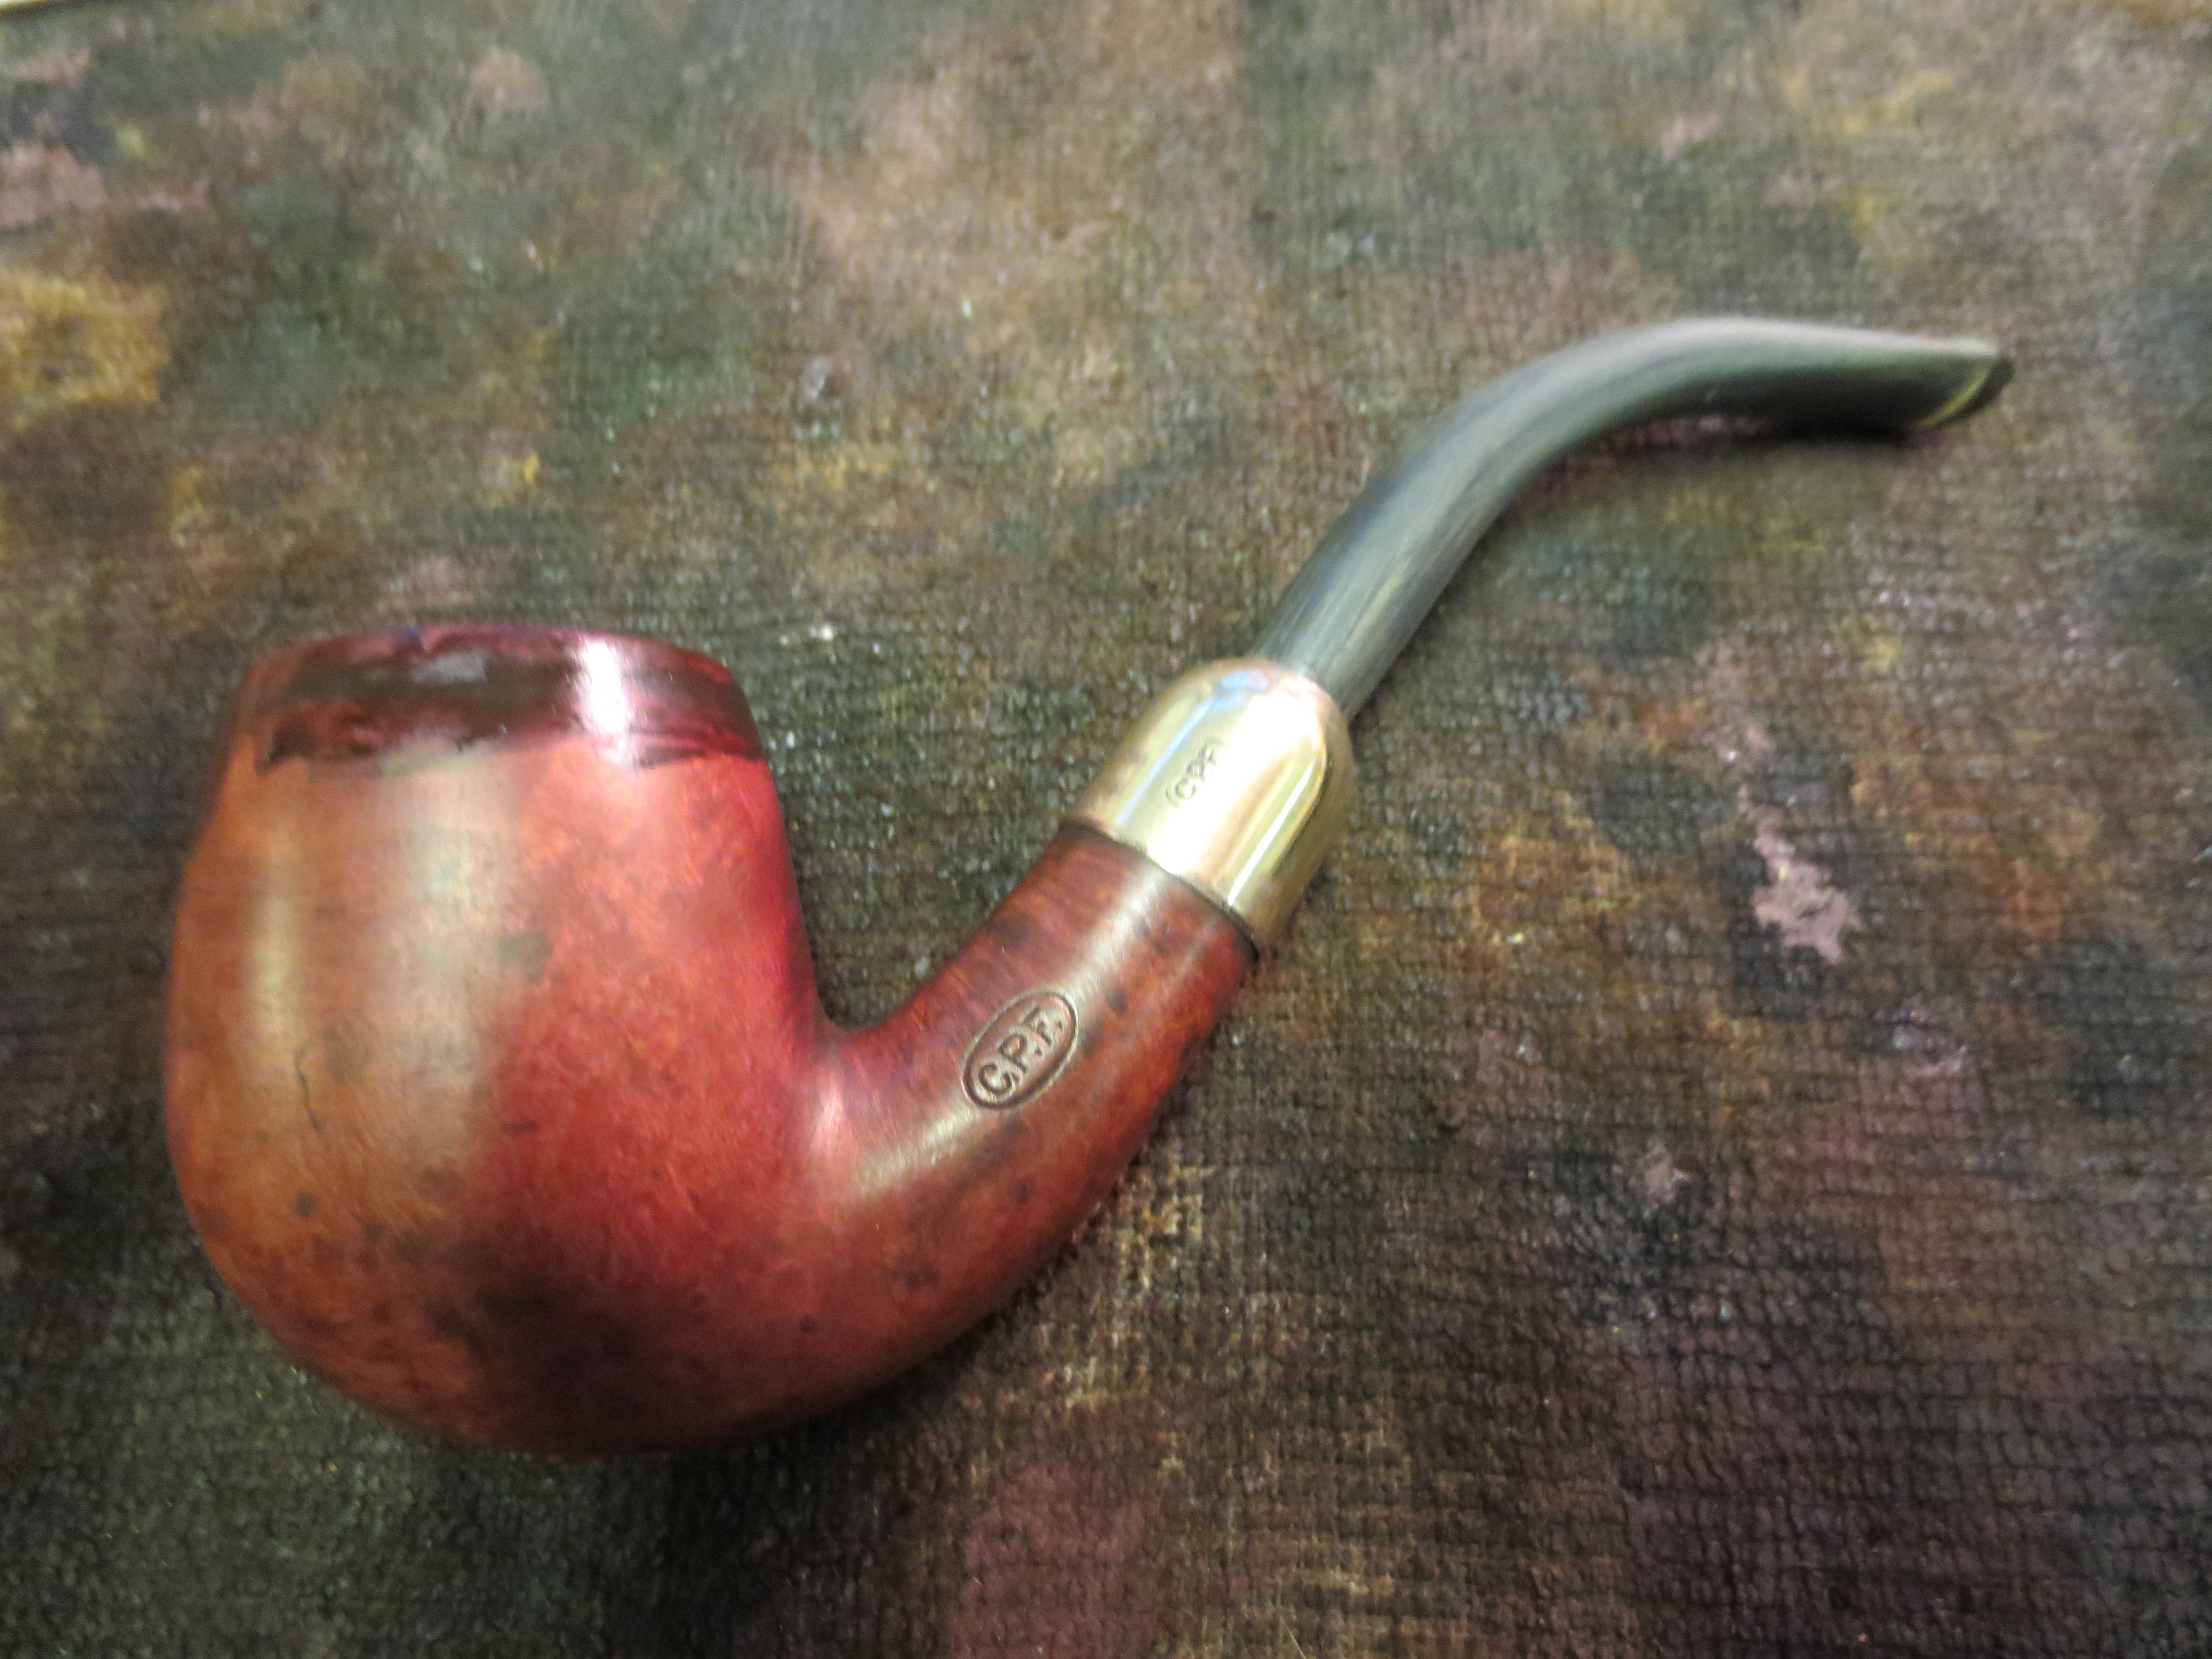
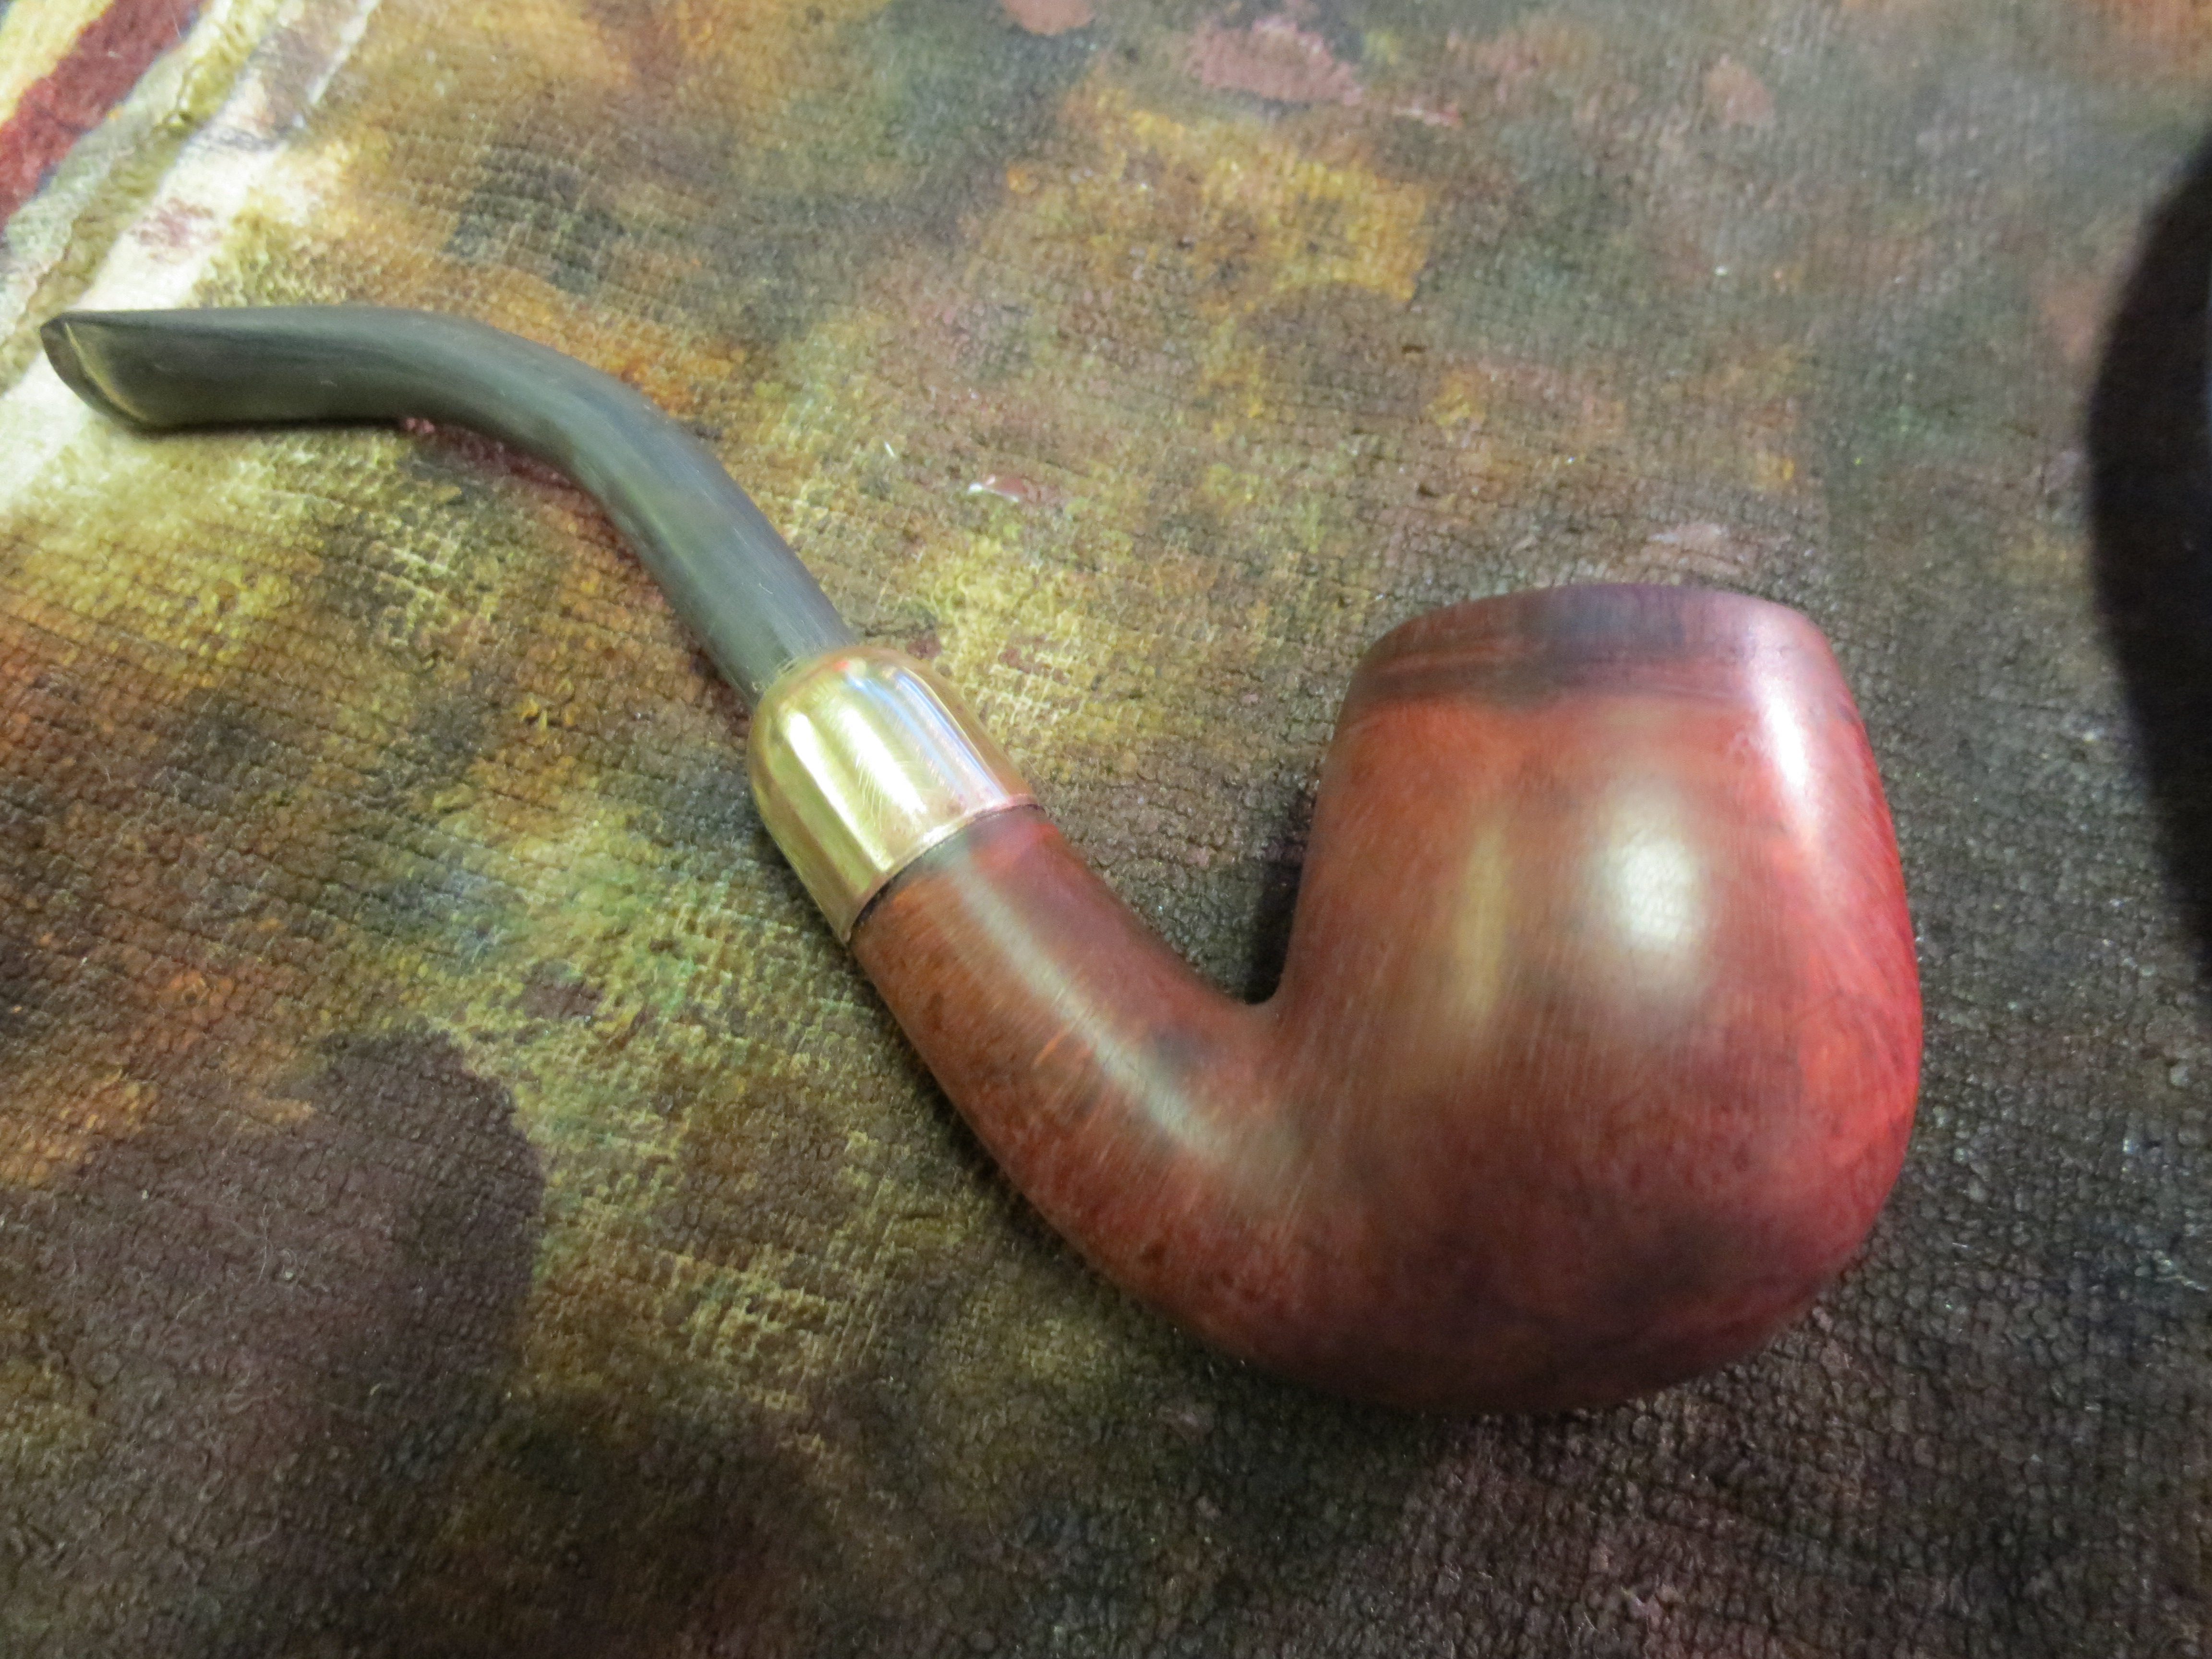
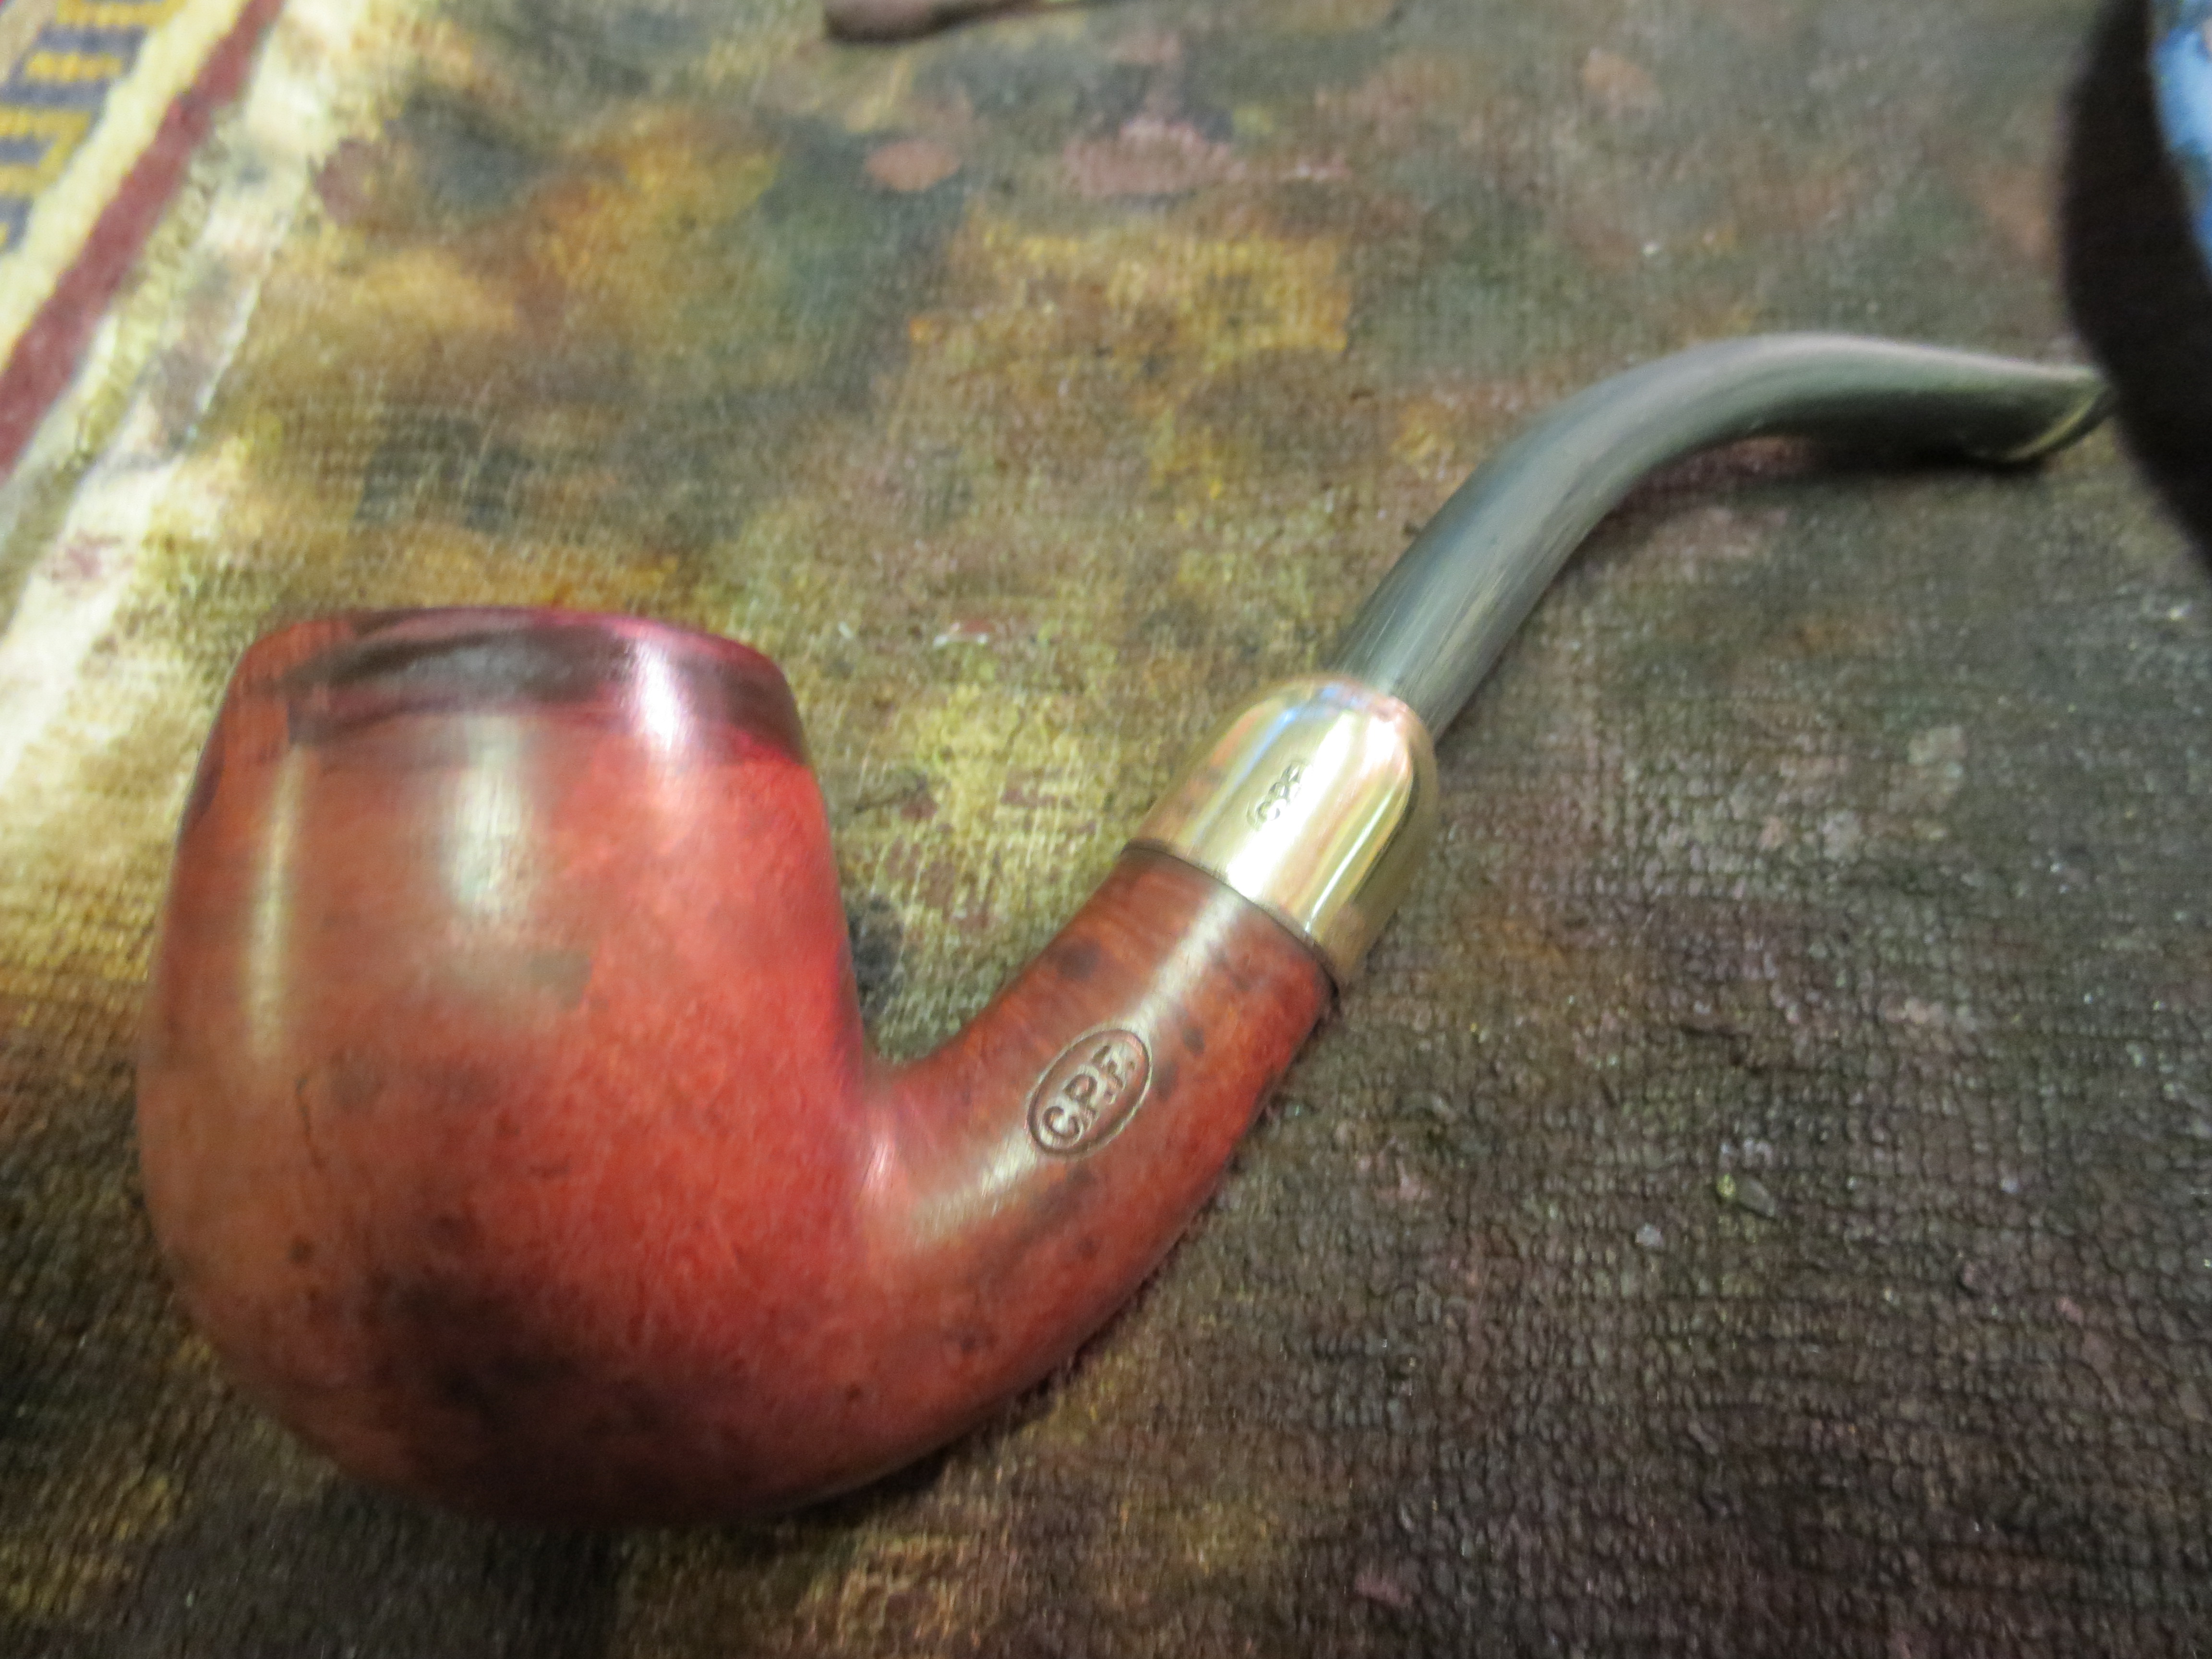
This is the second CPF pipe bowl that was in the lot from EBay. It is a billiard and it was in very rough shape at first glance. It is an old timer. The rim cover and the band were badly oxidized to the point of being crusty with oxidation and a greenish hue. They were also rough to the touch which led me to believe that they were pitted underneath all of the oxidation. It came stemless but I found a stem of the proper age in my can of stems. The finish was rough but there were no deep dings or dents. There was a deep, almost black darkening around the bowl just under the rim cap. The darkening was such that made me think that the oxidation had oozed into the briar and would be interesting to remove from the finish. The same was true of the area around the shank cap. The rim cap originally had a hinged lid on it but that was gone. The shank cap was also loose and when I touched it, it came off. The briar underneath was thick with a reddish coloured glue but was also free of cracks or fissures. It was intact. After the initial examination I came to see that underneath the grime there was a pretty nice piece of briar. The first series of three photos shows the state of the pipe when I took it to my work bench to begin working late yesterday afternoon.

ImageImageImage

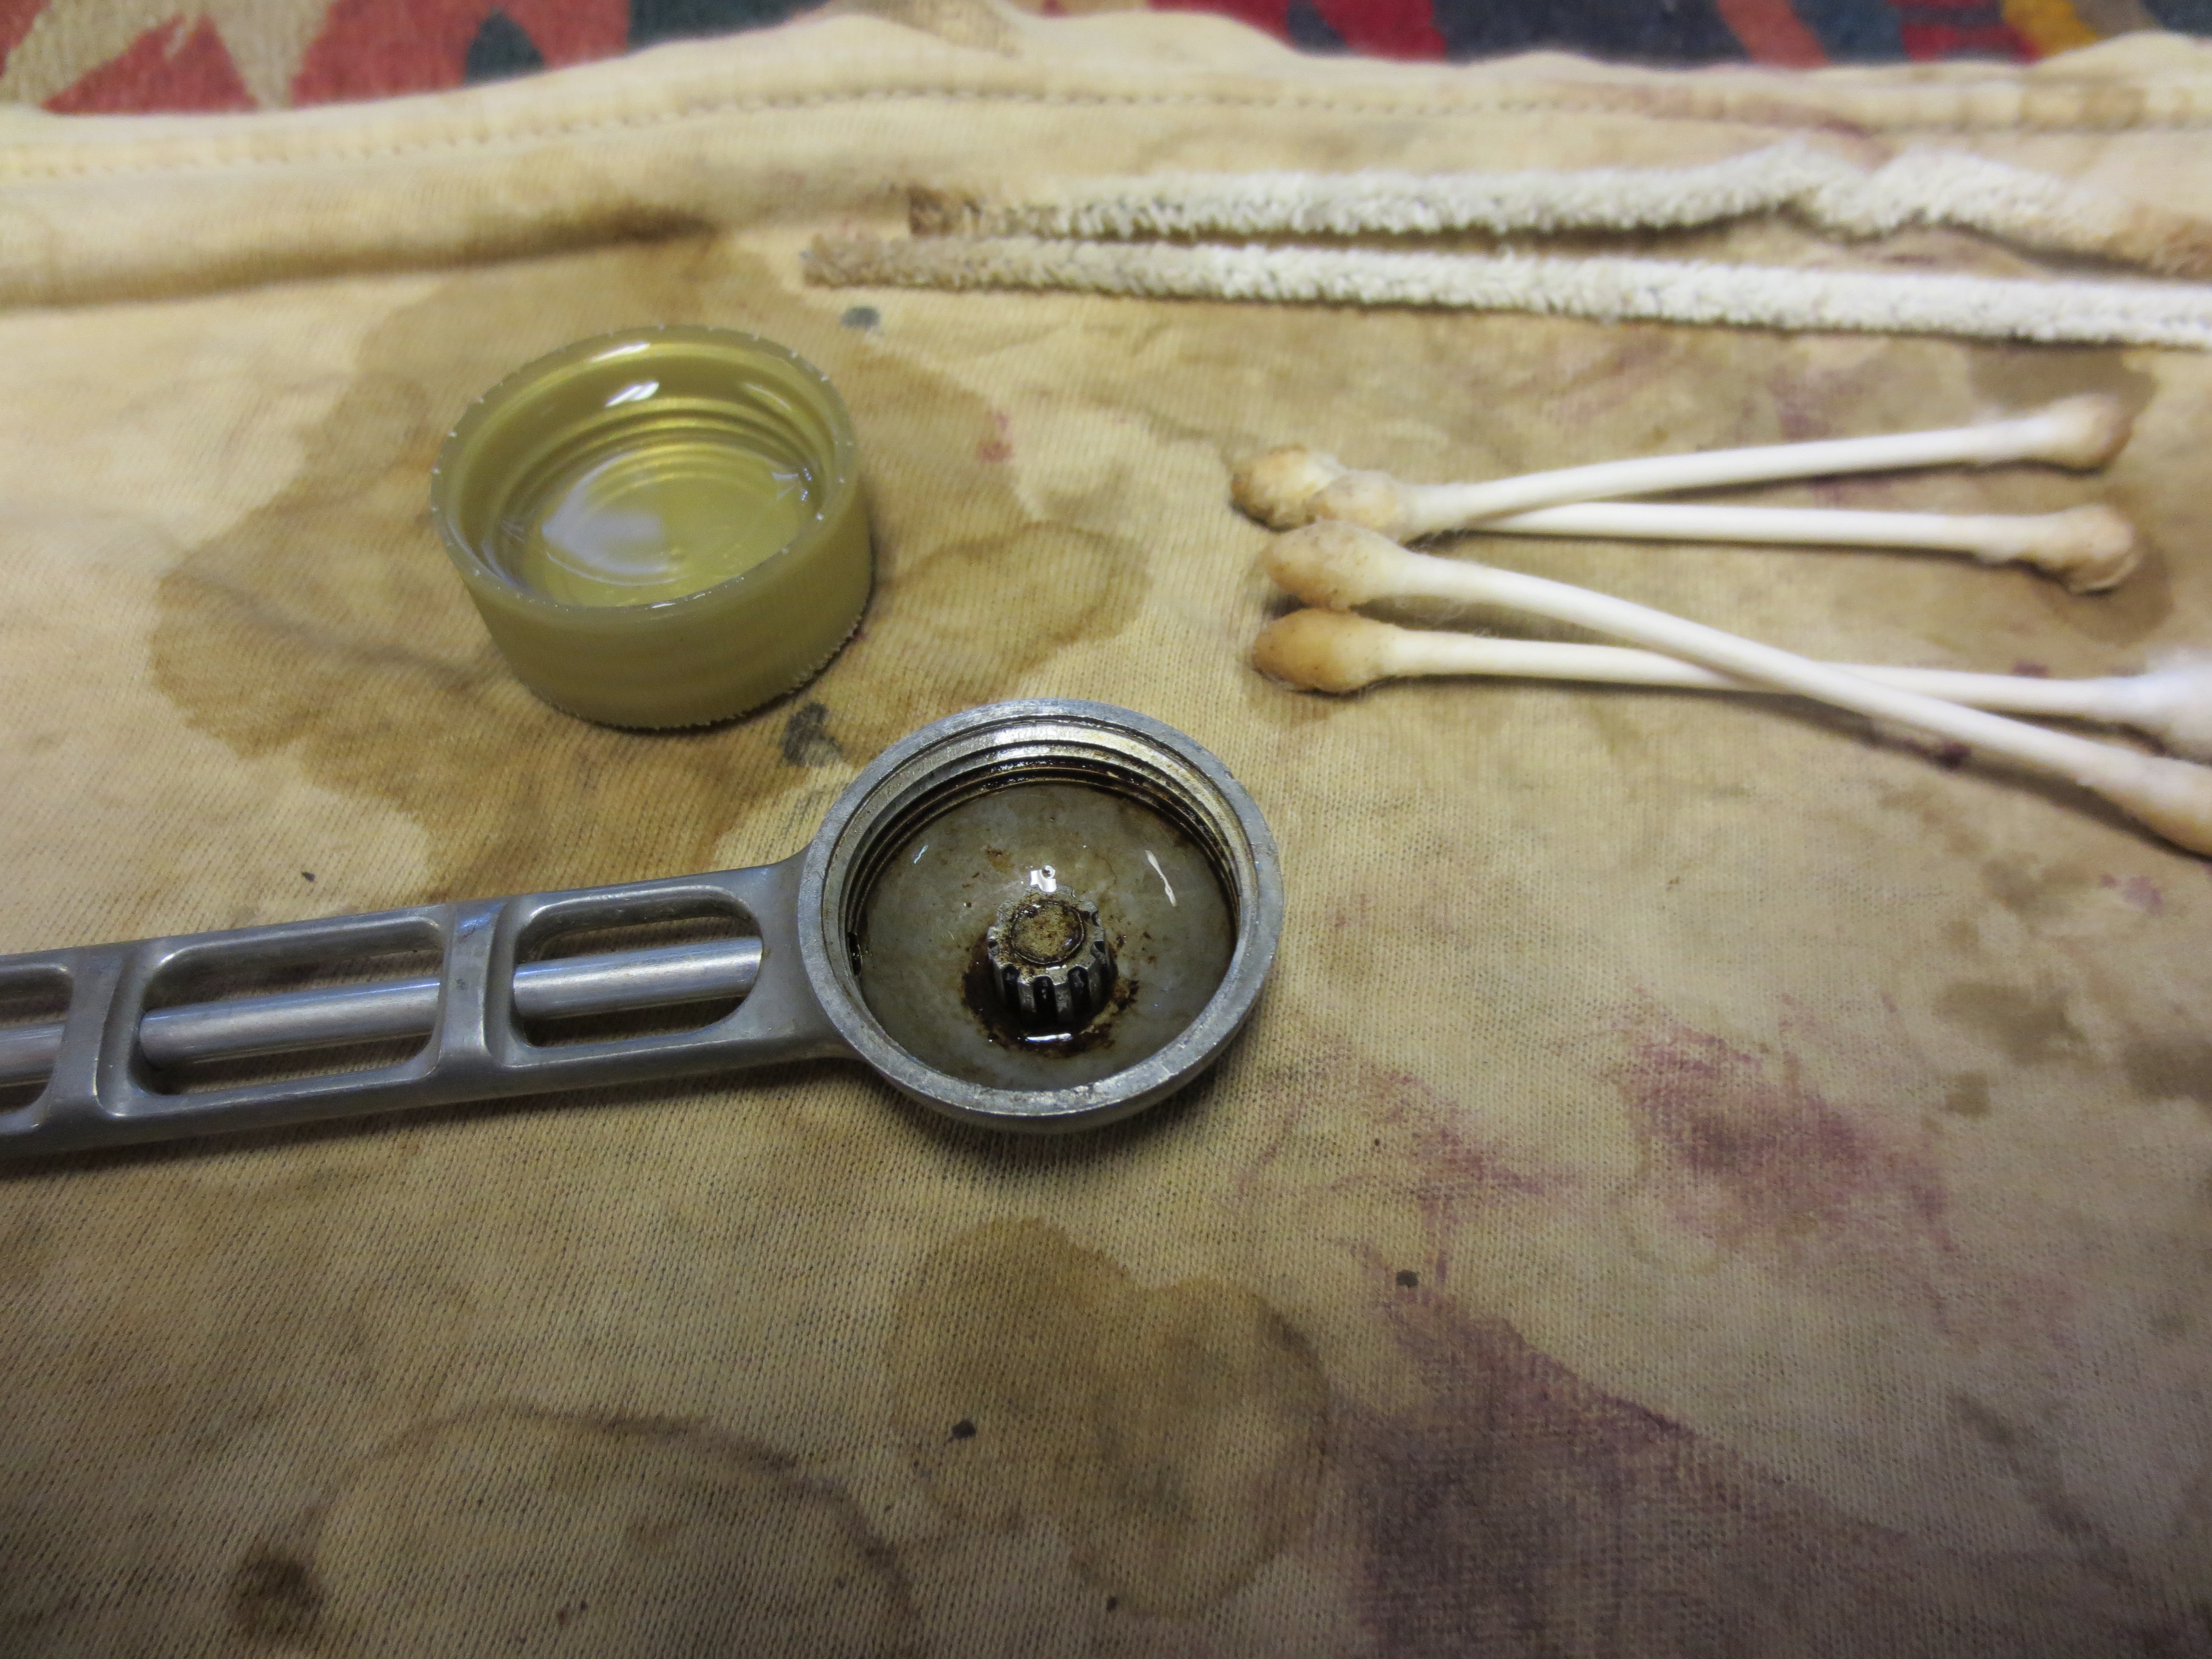
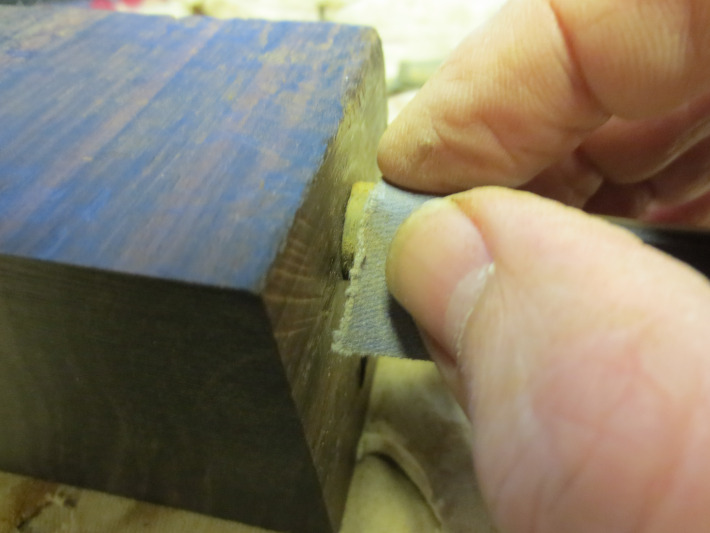
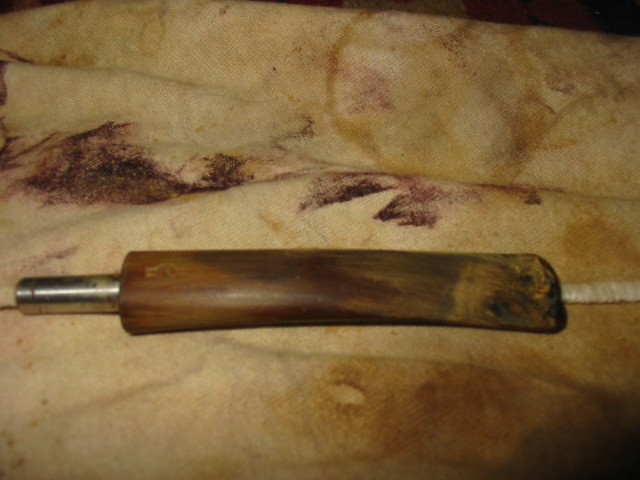
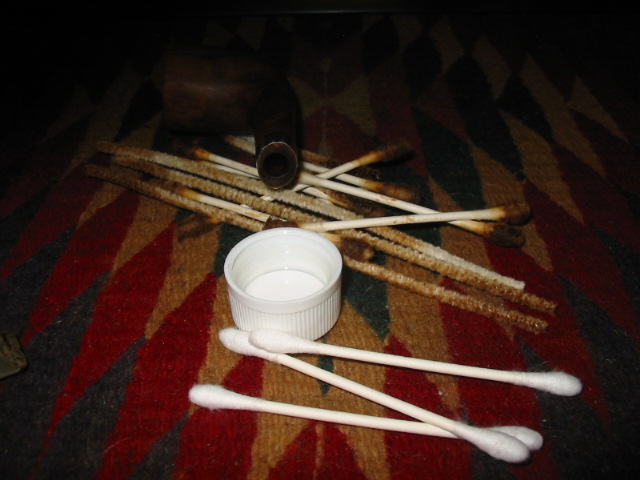
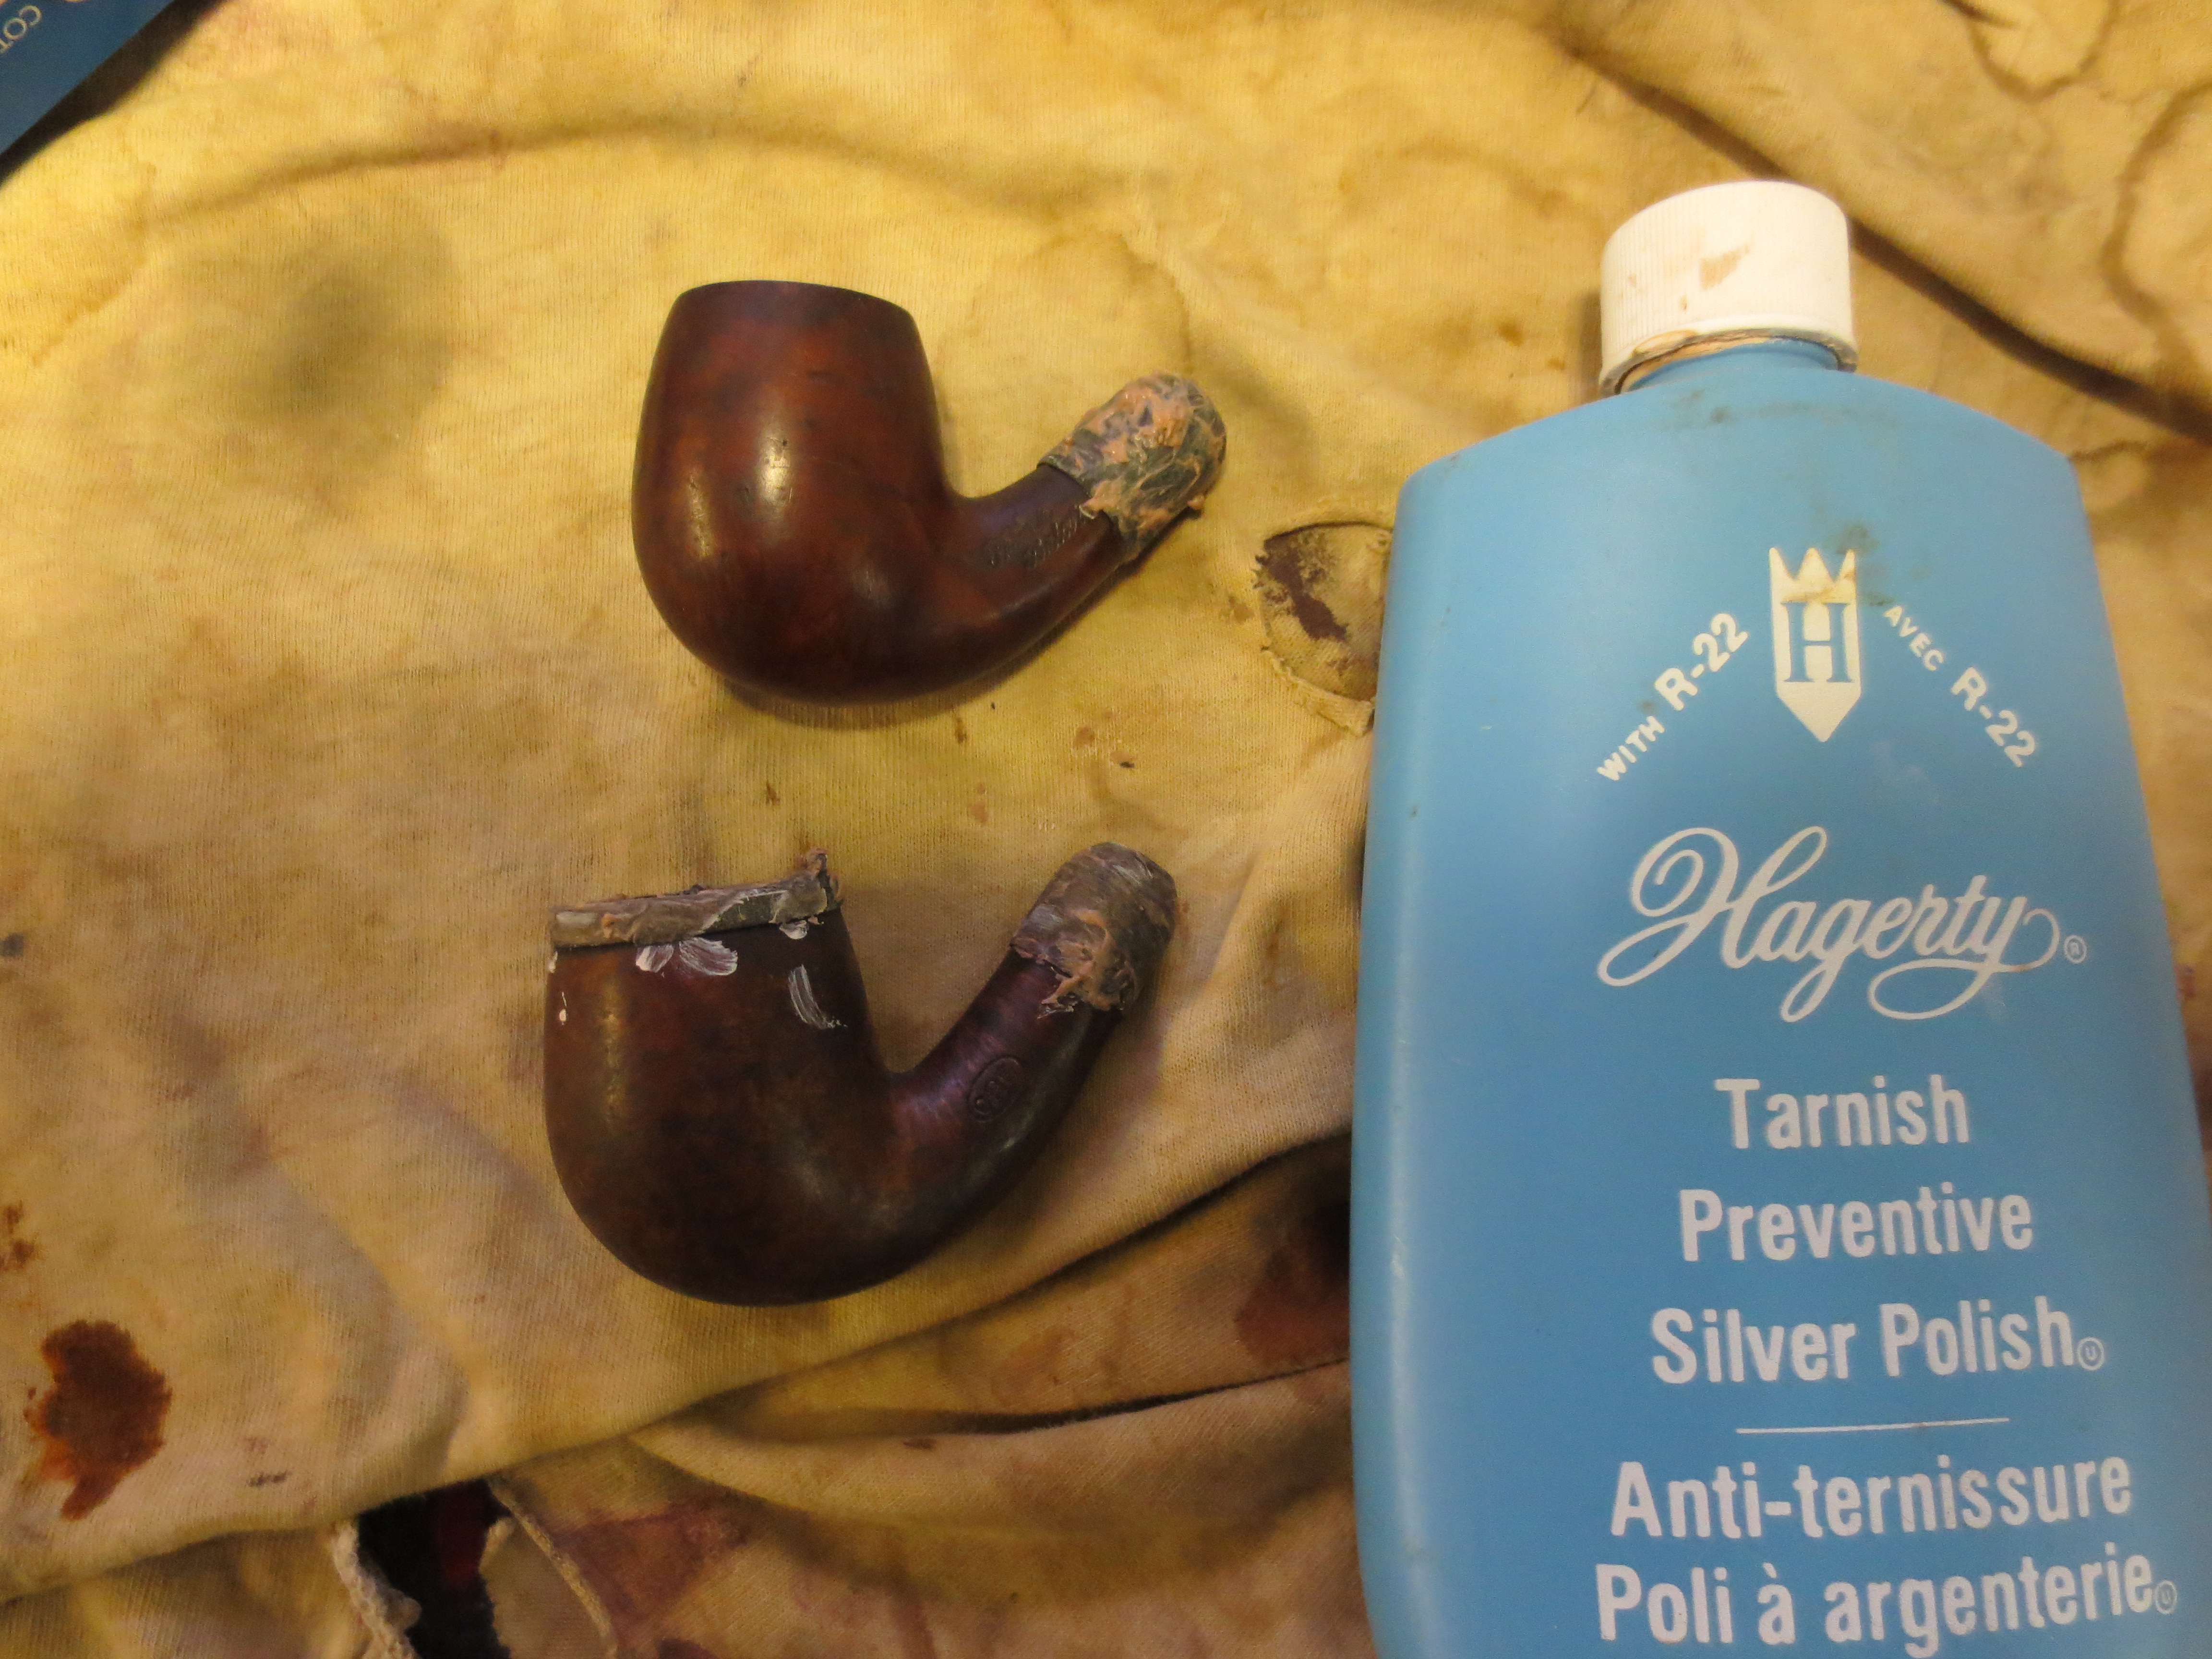
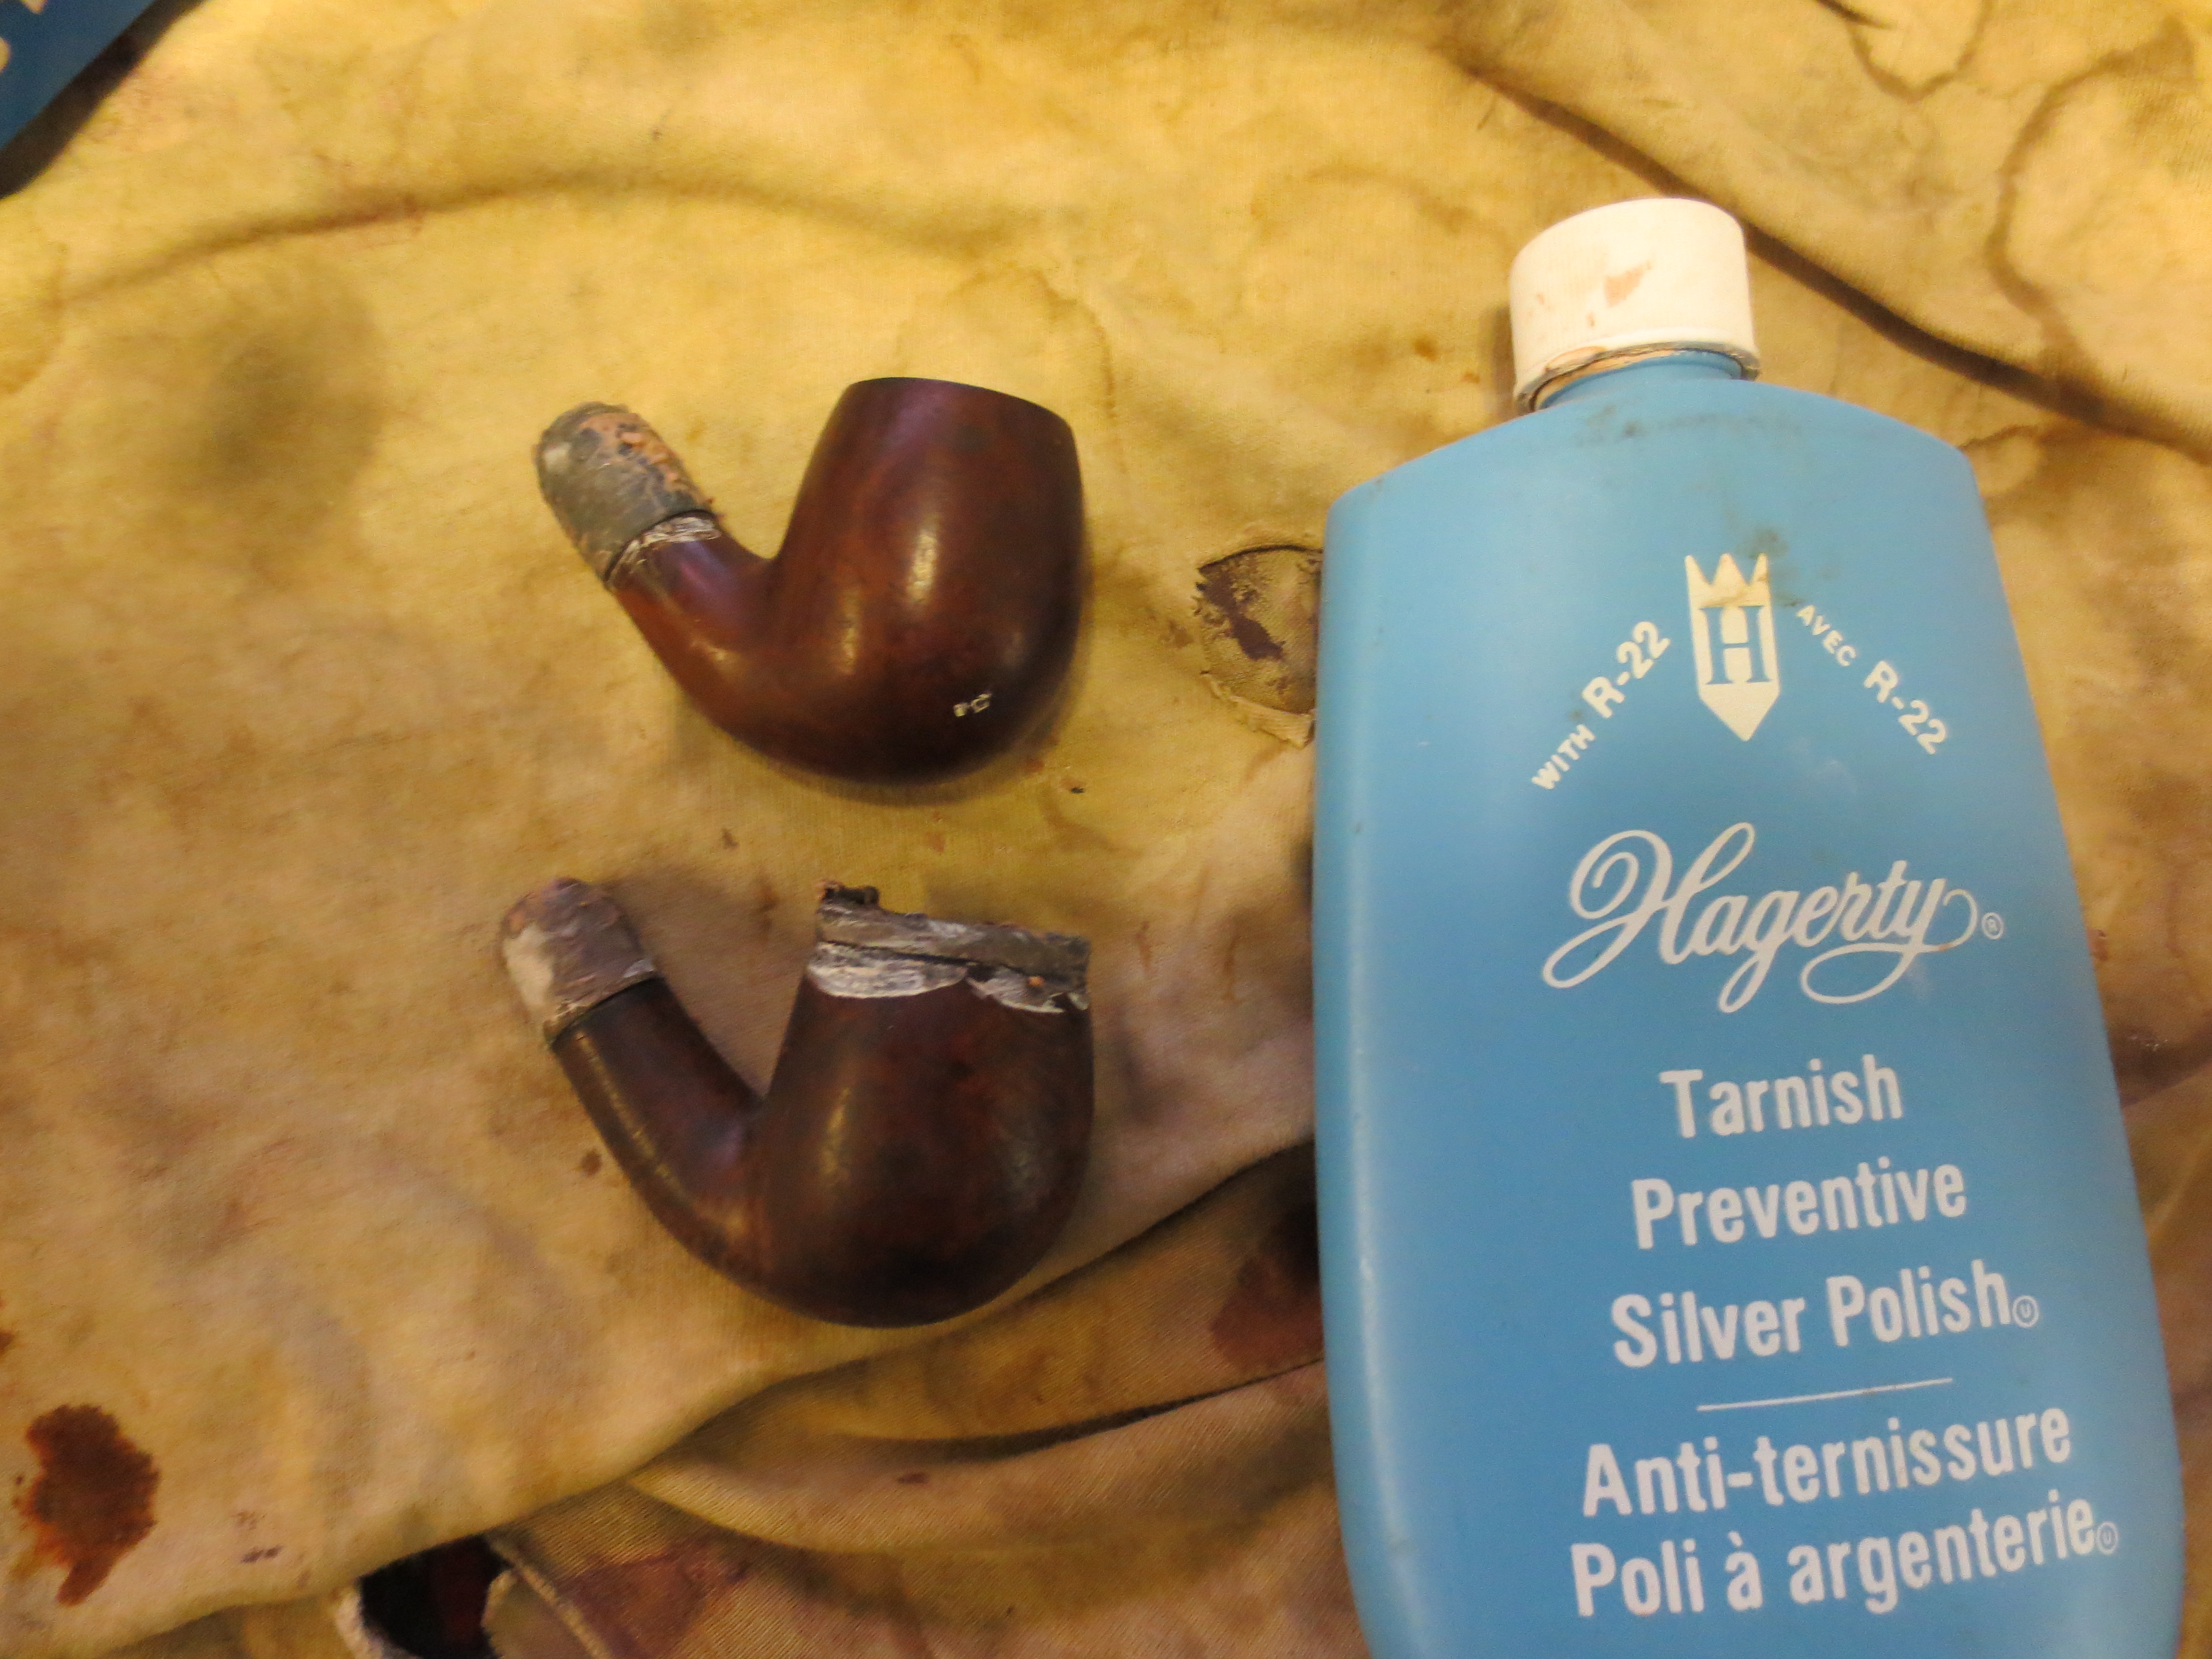
I decided to work on the oxidation on the shank cap and the rim cap. I wanted to see if either one was redeemable. I used a jeweler’s tarnish remover called Hagerty to work on the finish of both. I applied it with a cotton swab and scrubbed it with that until it was dry. Then I wiped it off with a cotton pad. In doing this I saw that the rim cap and the shank cap were both brass. The rim cap had two tears or cracks in it around the hinge that showed up once it was clean. The next two photos show the tarnish remover on the rim and shank caps.

ImageImage

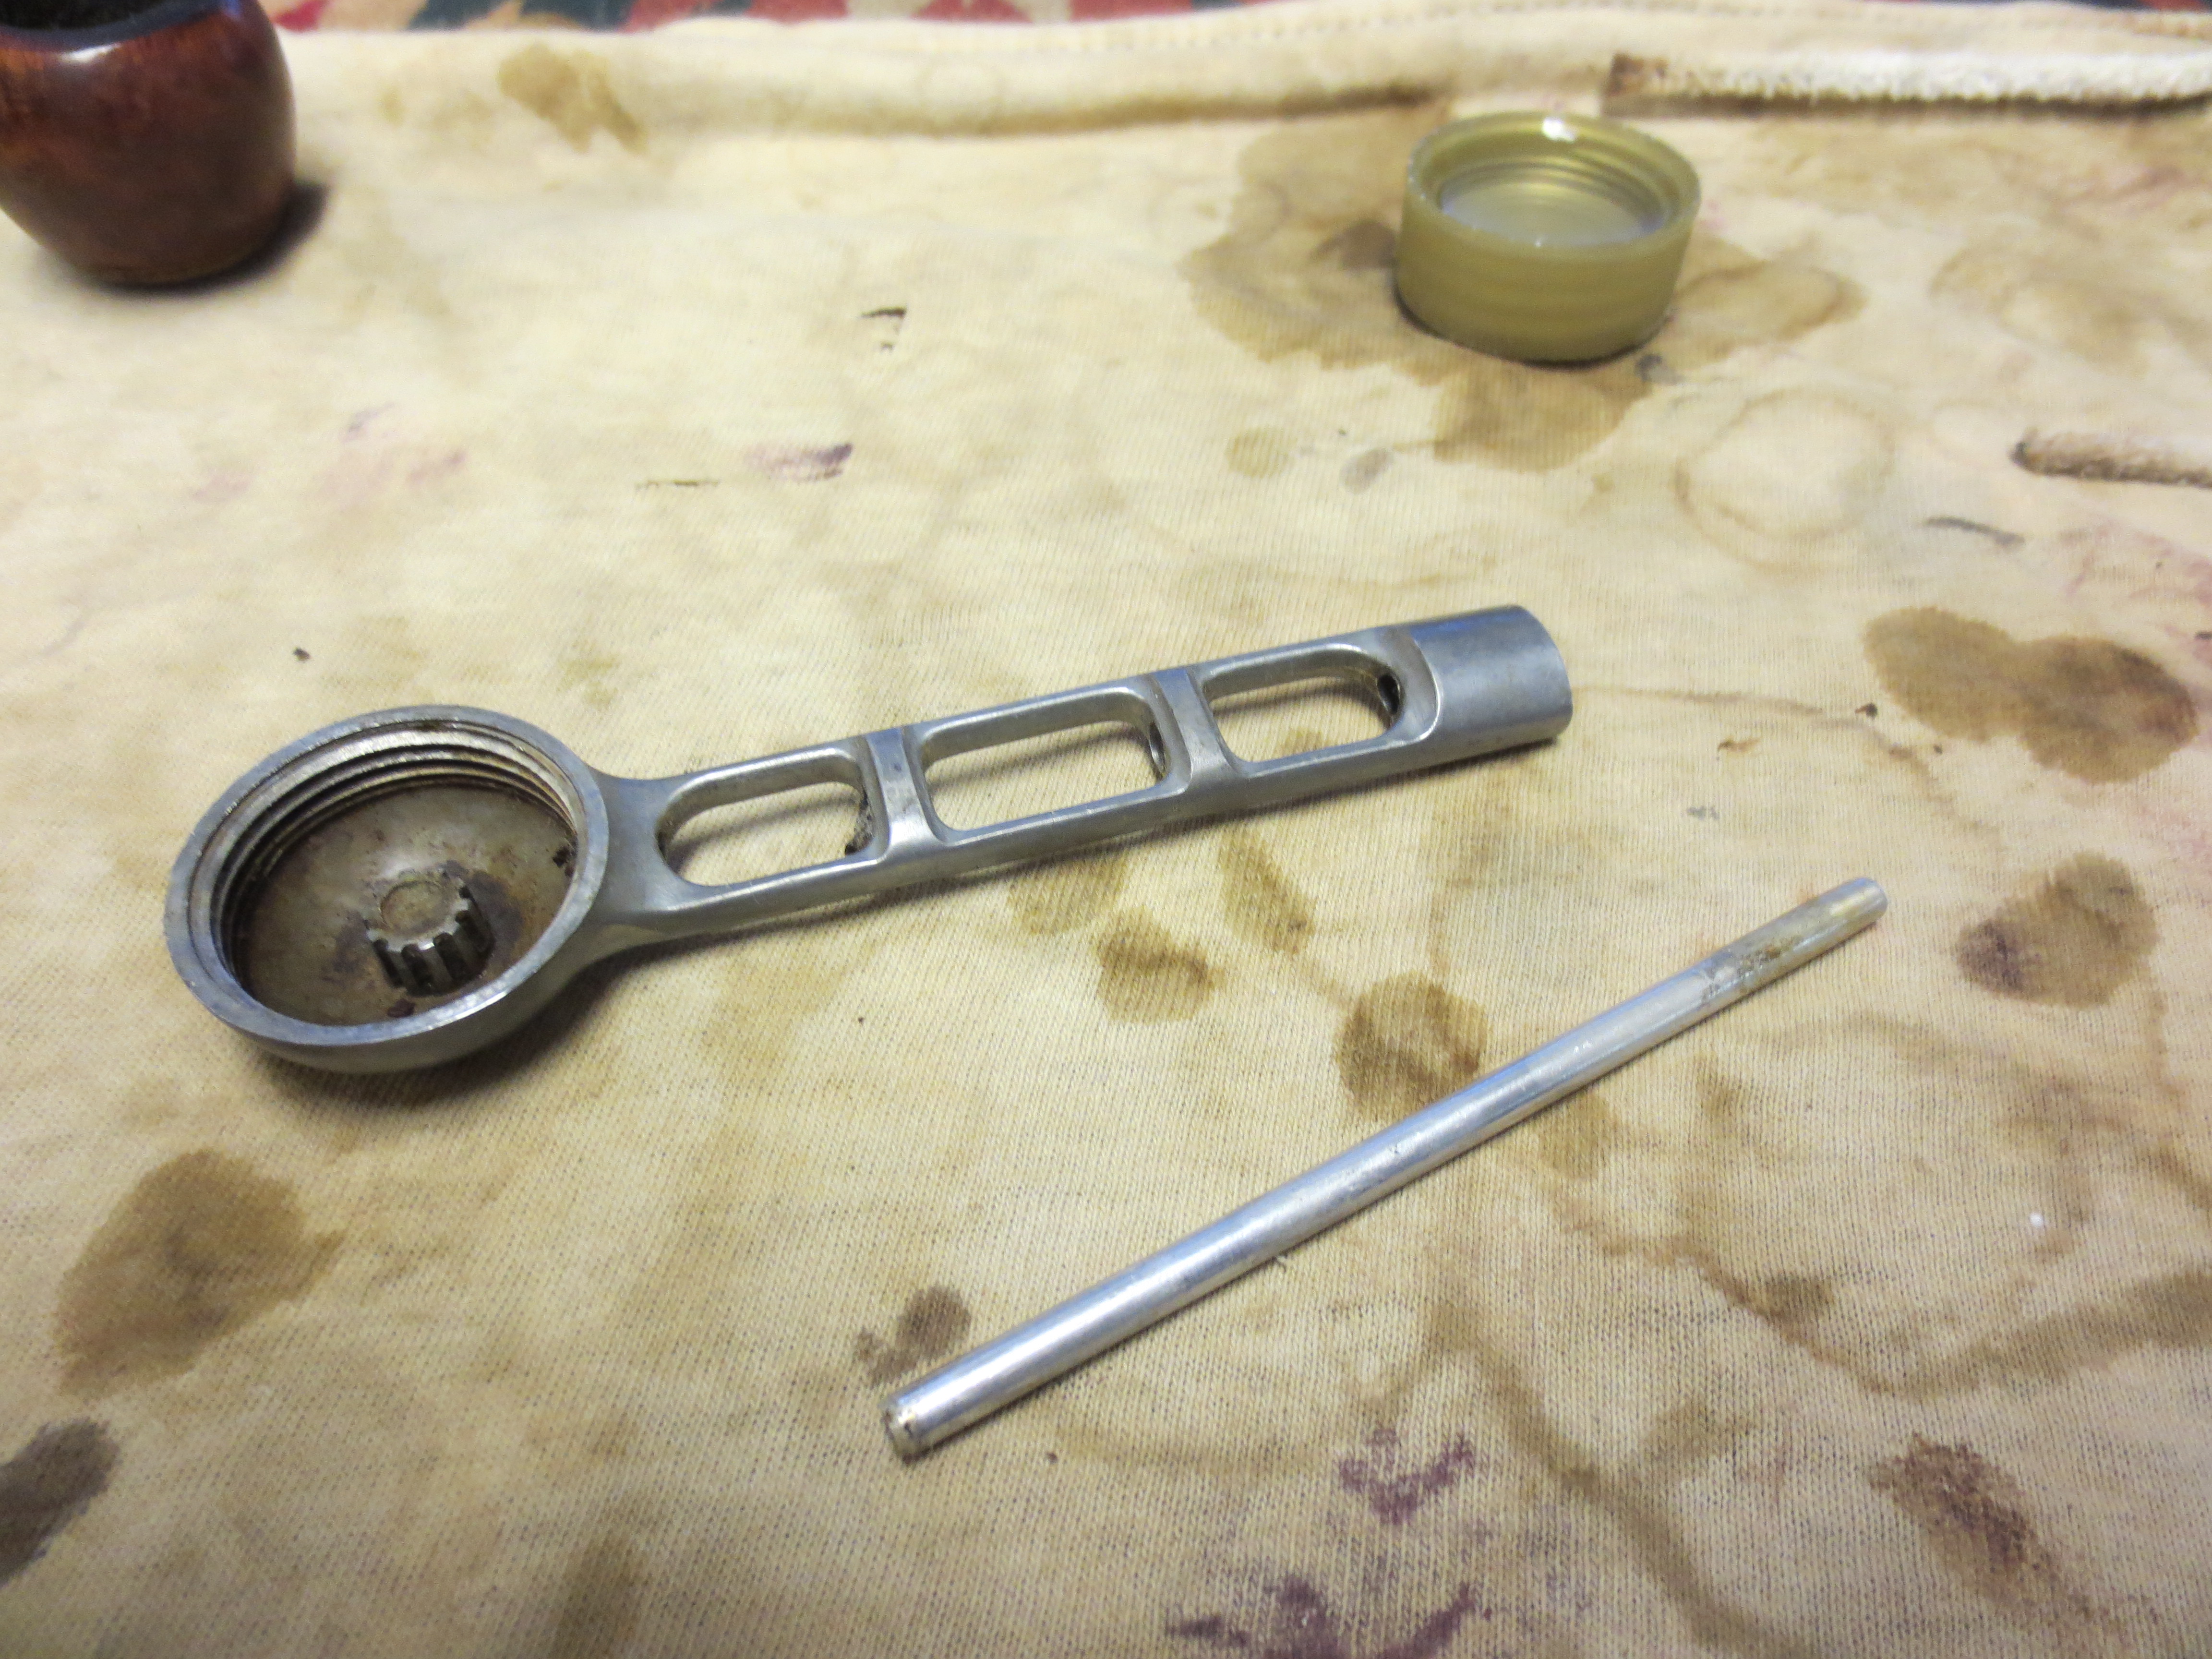
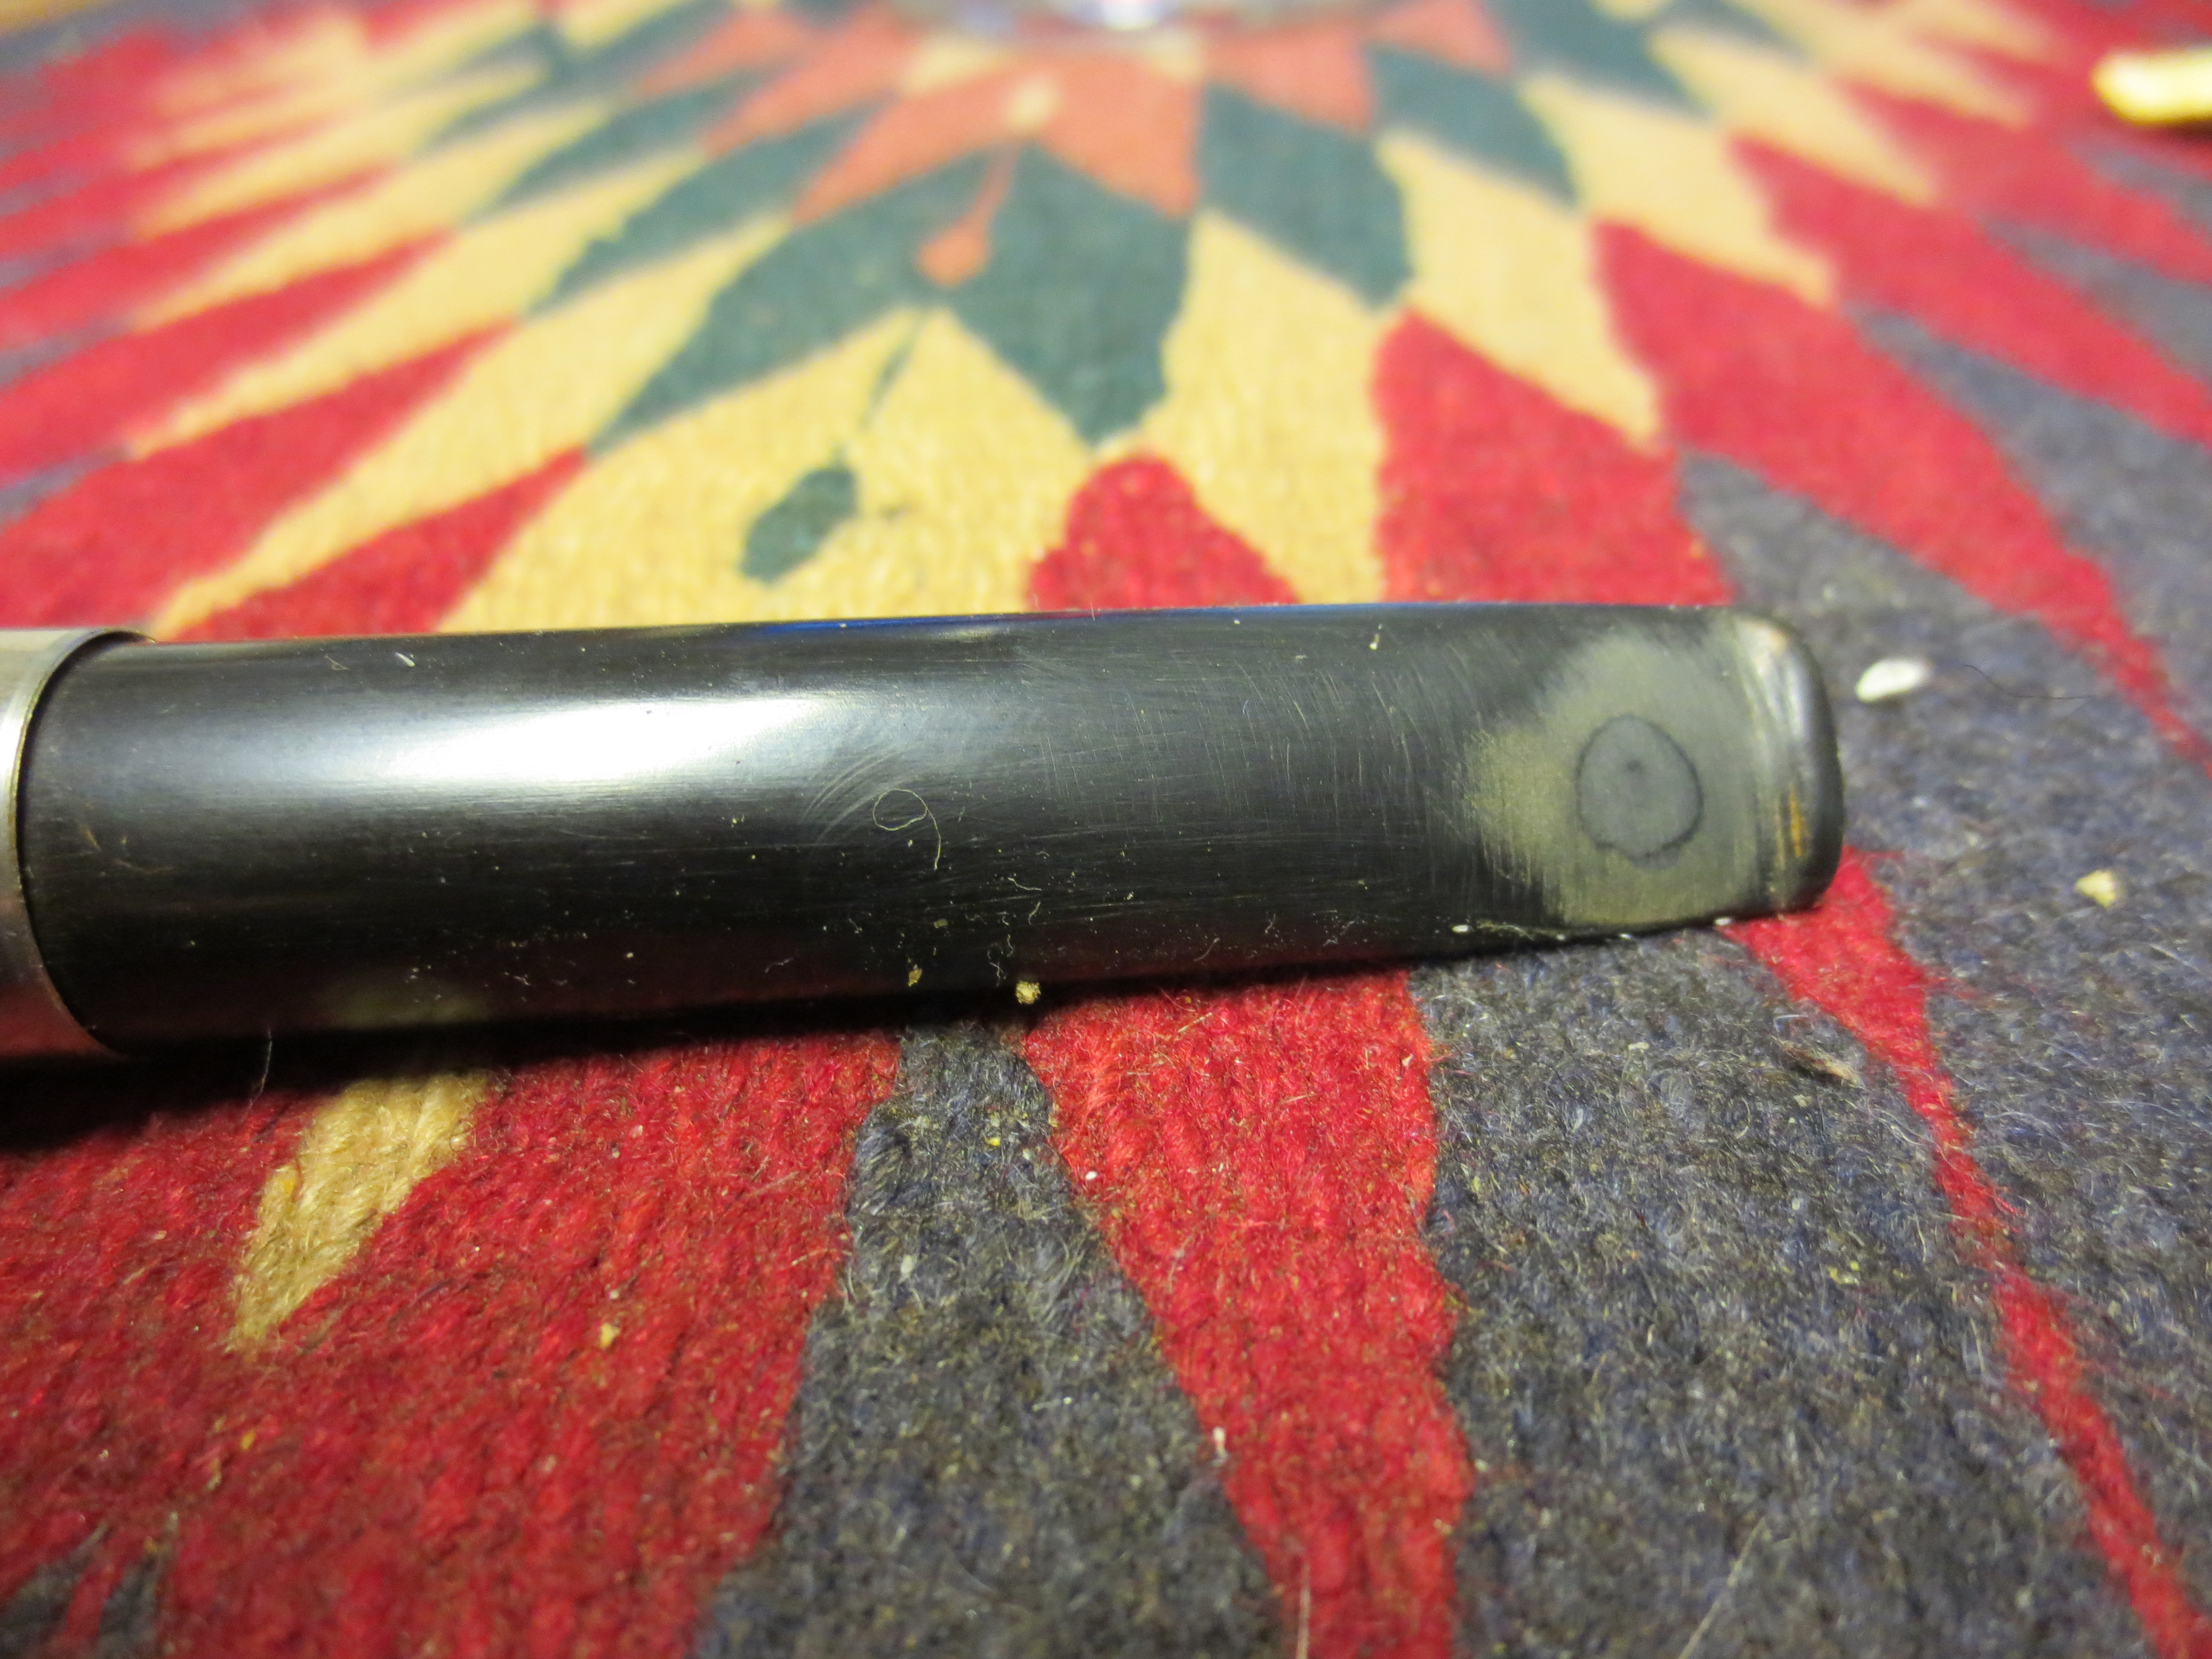
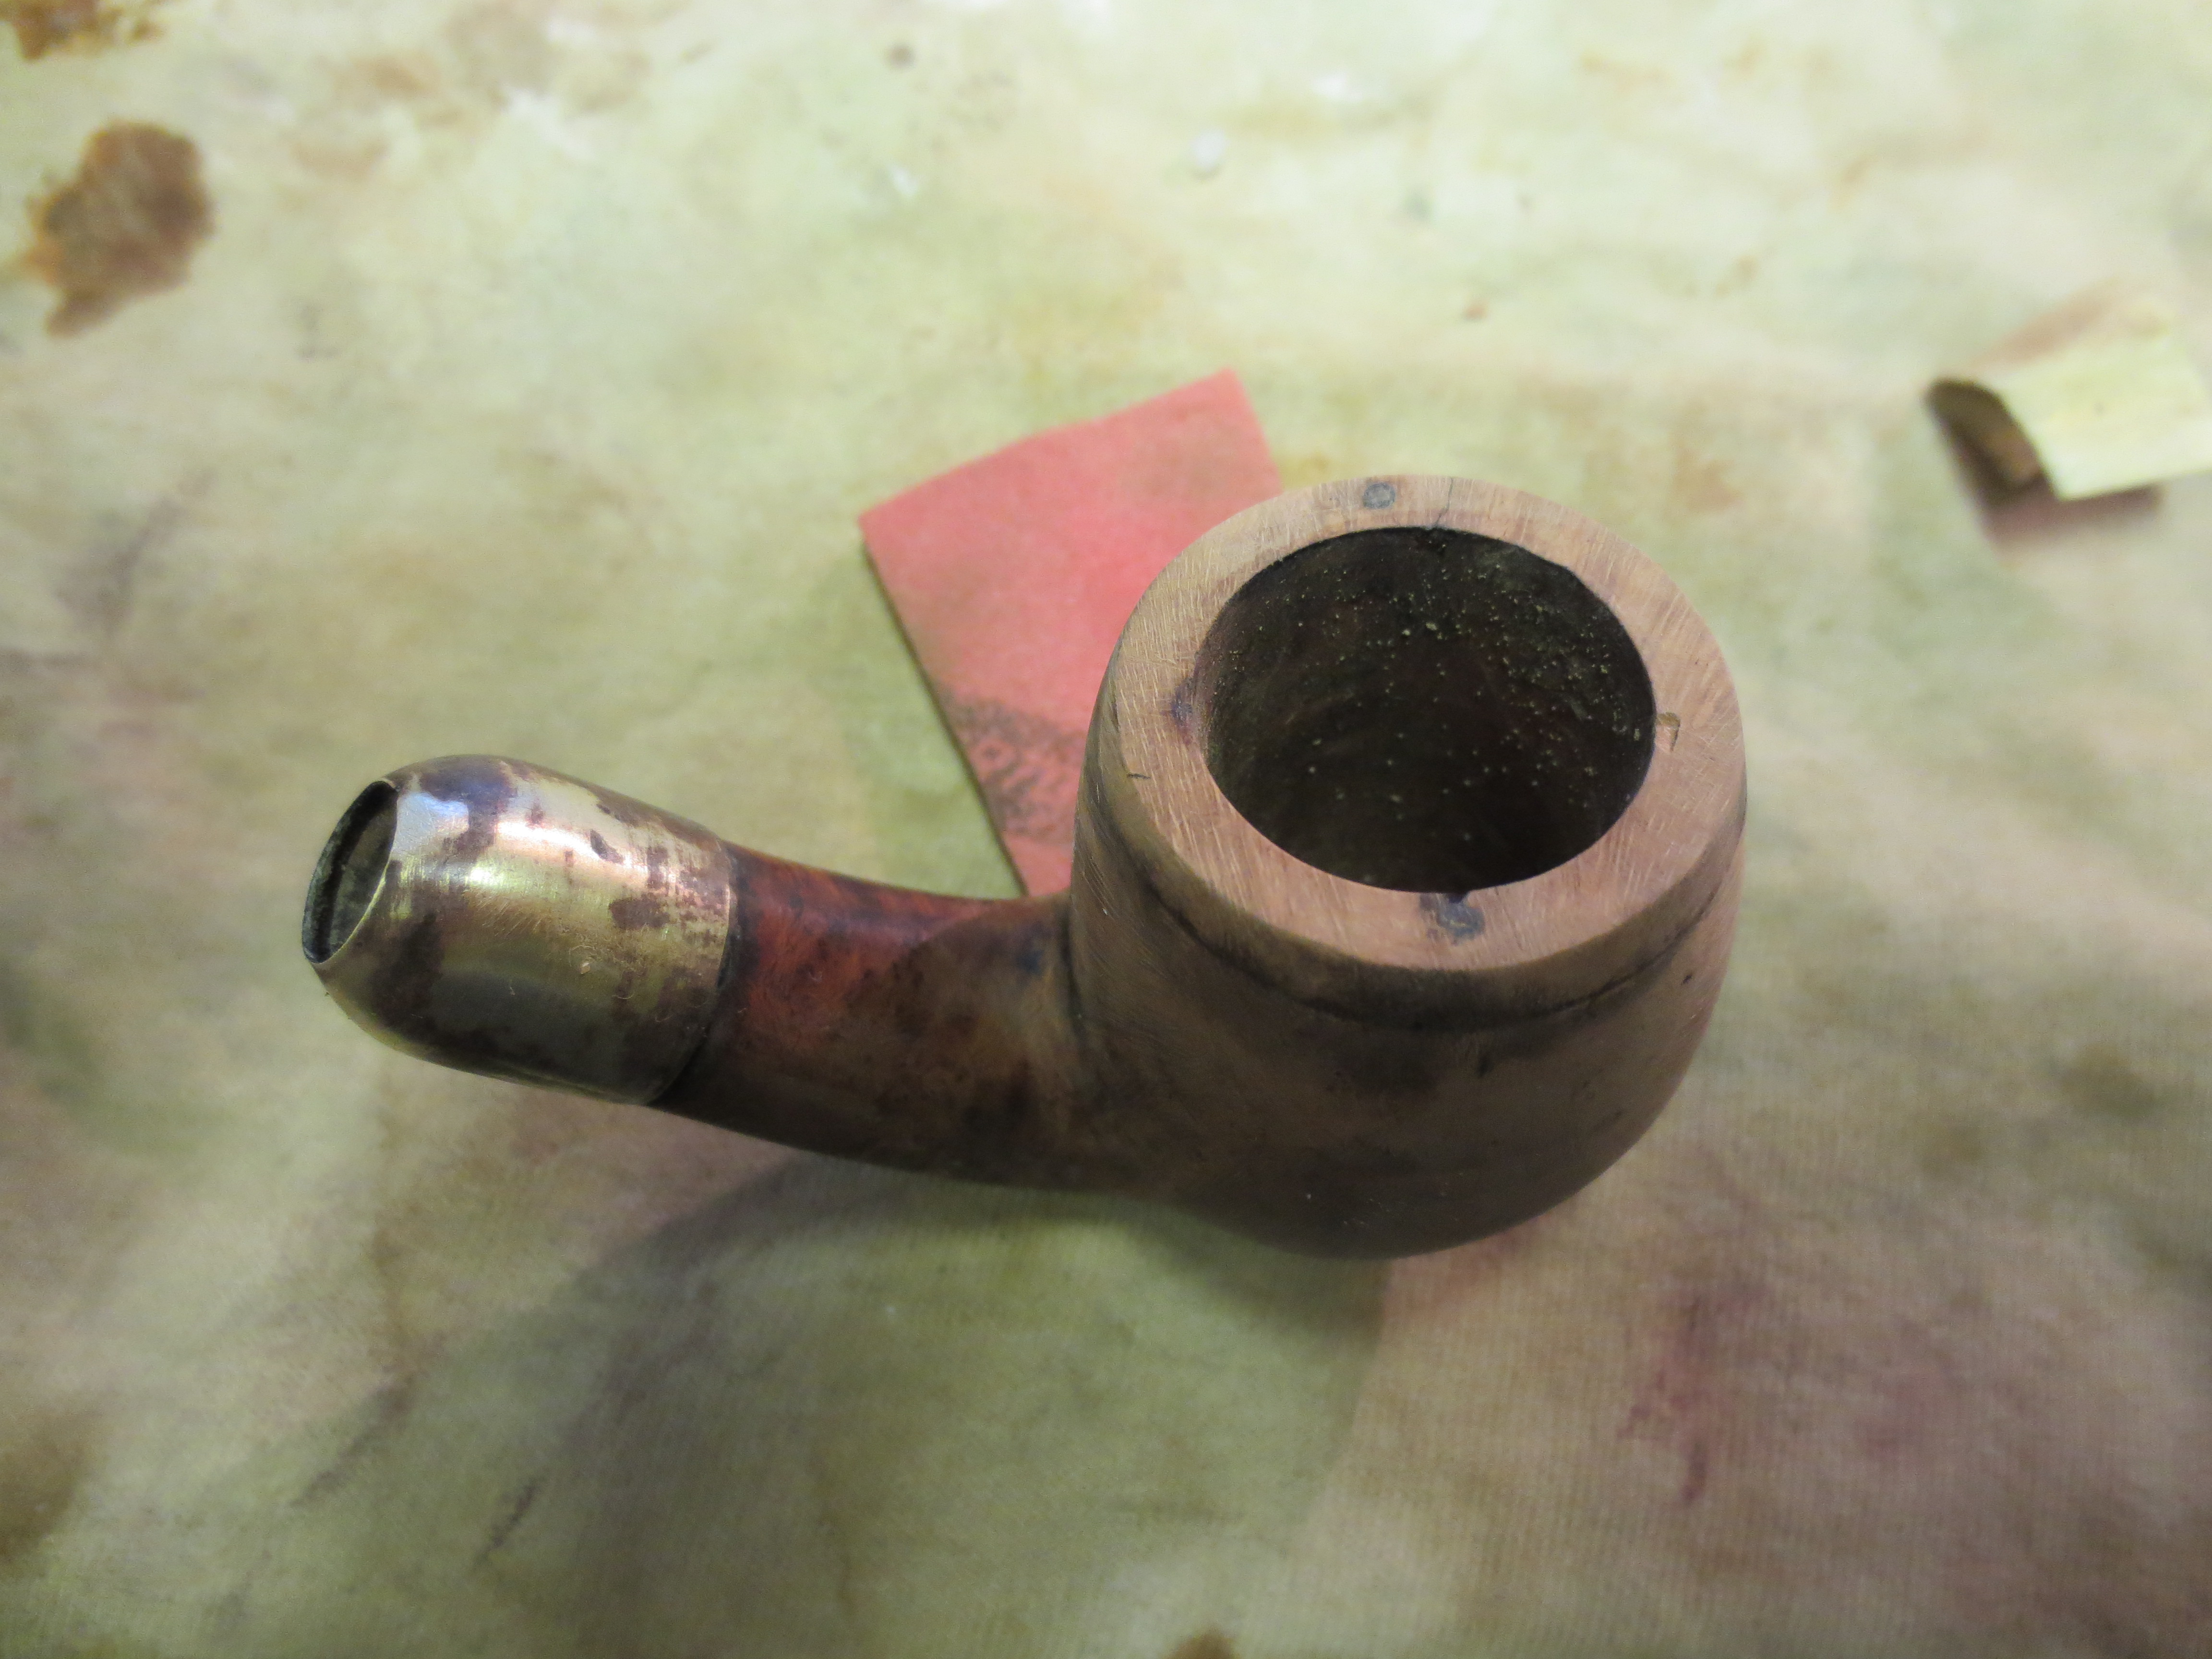
After the initial cleaning of the two I decided to remove the cracked rim cap. This was not as easy as it appears in the photos as it was nailed to the rim and also was pretty tightly bonded with the tars and oils of the tobacco. I used a pair of needle nose pliers and a flat blade screw driver to lift the edge of the cap. I began at the hinge and lifted it from there. It came off with a bit of work and broke at the two nails that held it to the rim mid bowl on each side. The back half of the cap came off in one piece. I was able to lift the front edge carefully using the flat blade of the screw driver to pry the edge and work my way to the front. The nail on the right side came out with the cap while the one on the left side was stuck. I used the flat blade of the screwdriver to lift it from the surface of the rim without scarring the rim and pulled it out with the pliers. Underneath the rim surface was actually smooth and had a slight caking of oils that would come off easily. The two nail holes would need to be filled. The one on the right side of the bowl had been put in at an angle and would take a little more work to repair. The first picture below shows the torn rim cap on the work table next to the pipe bowl. The holes and the state of the rim are also clearly visible. The second picture shows the darkening that seeped down the edges of the bowl from underneath the rim cap.

ImageImage

I used briar dust and superglue to fill the two nail holes. It took several applications to get a smooth and even surface. I packed some briar dust into the nail hole with my dental pick and my finger. I wanted the briar dust to fill the holes so I tamped them down with the dental pick. Then I dripped in the superglue to bind the briar dust to the surrounding area. The first photo below shows the top of the rim after briar dust superglue patch has been done.

Image

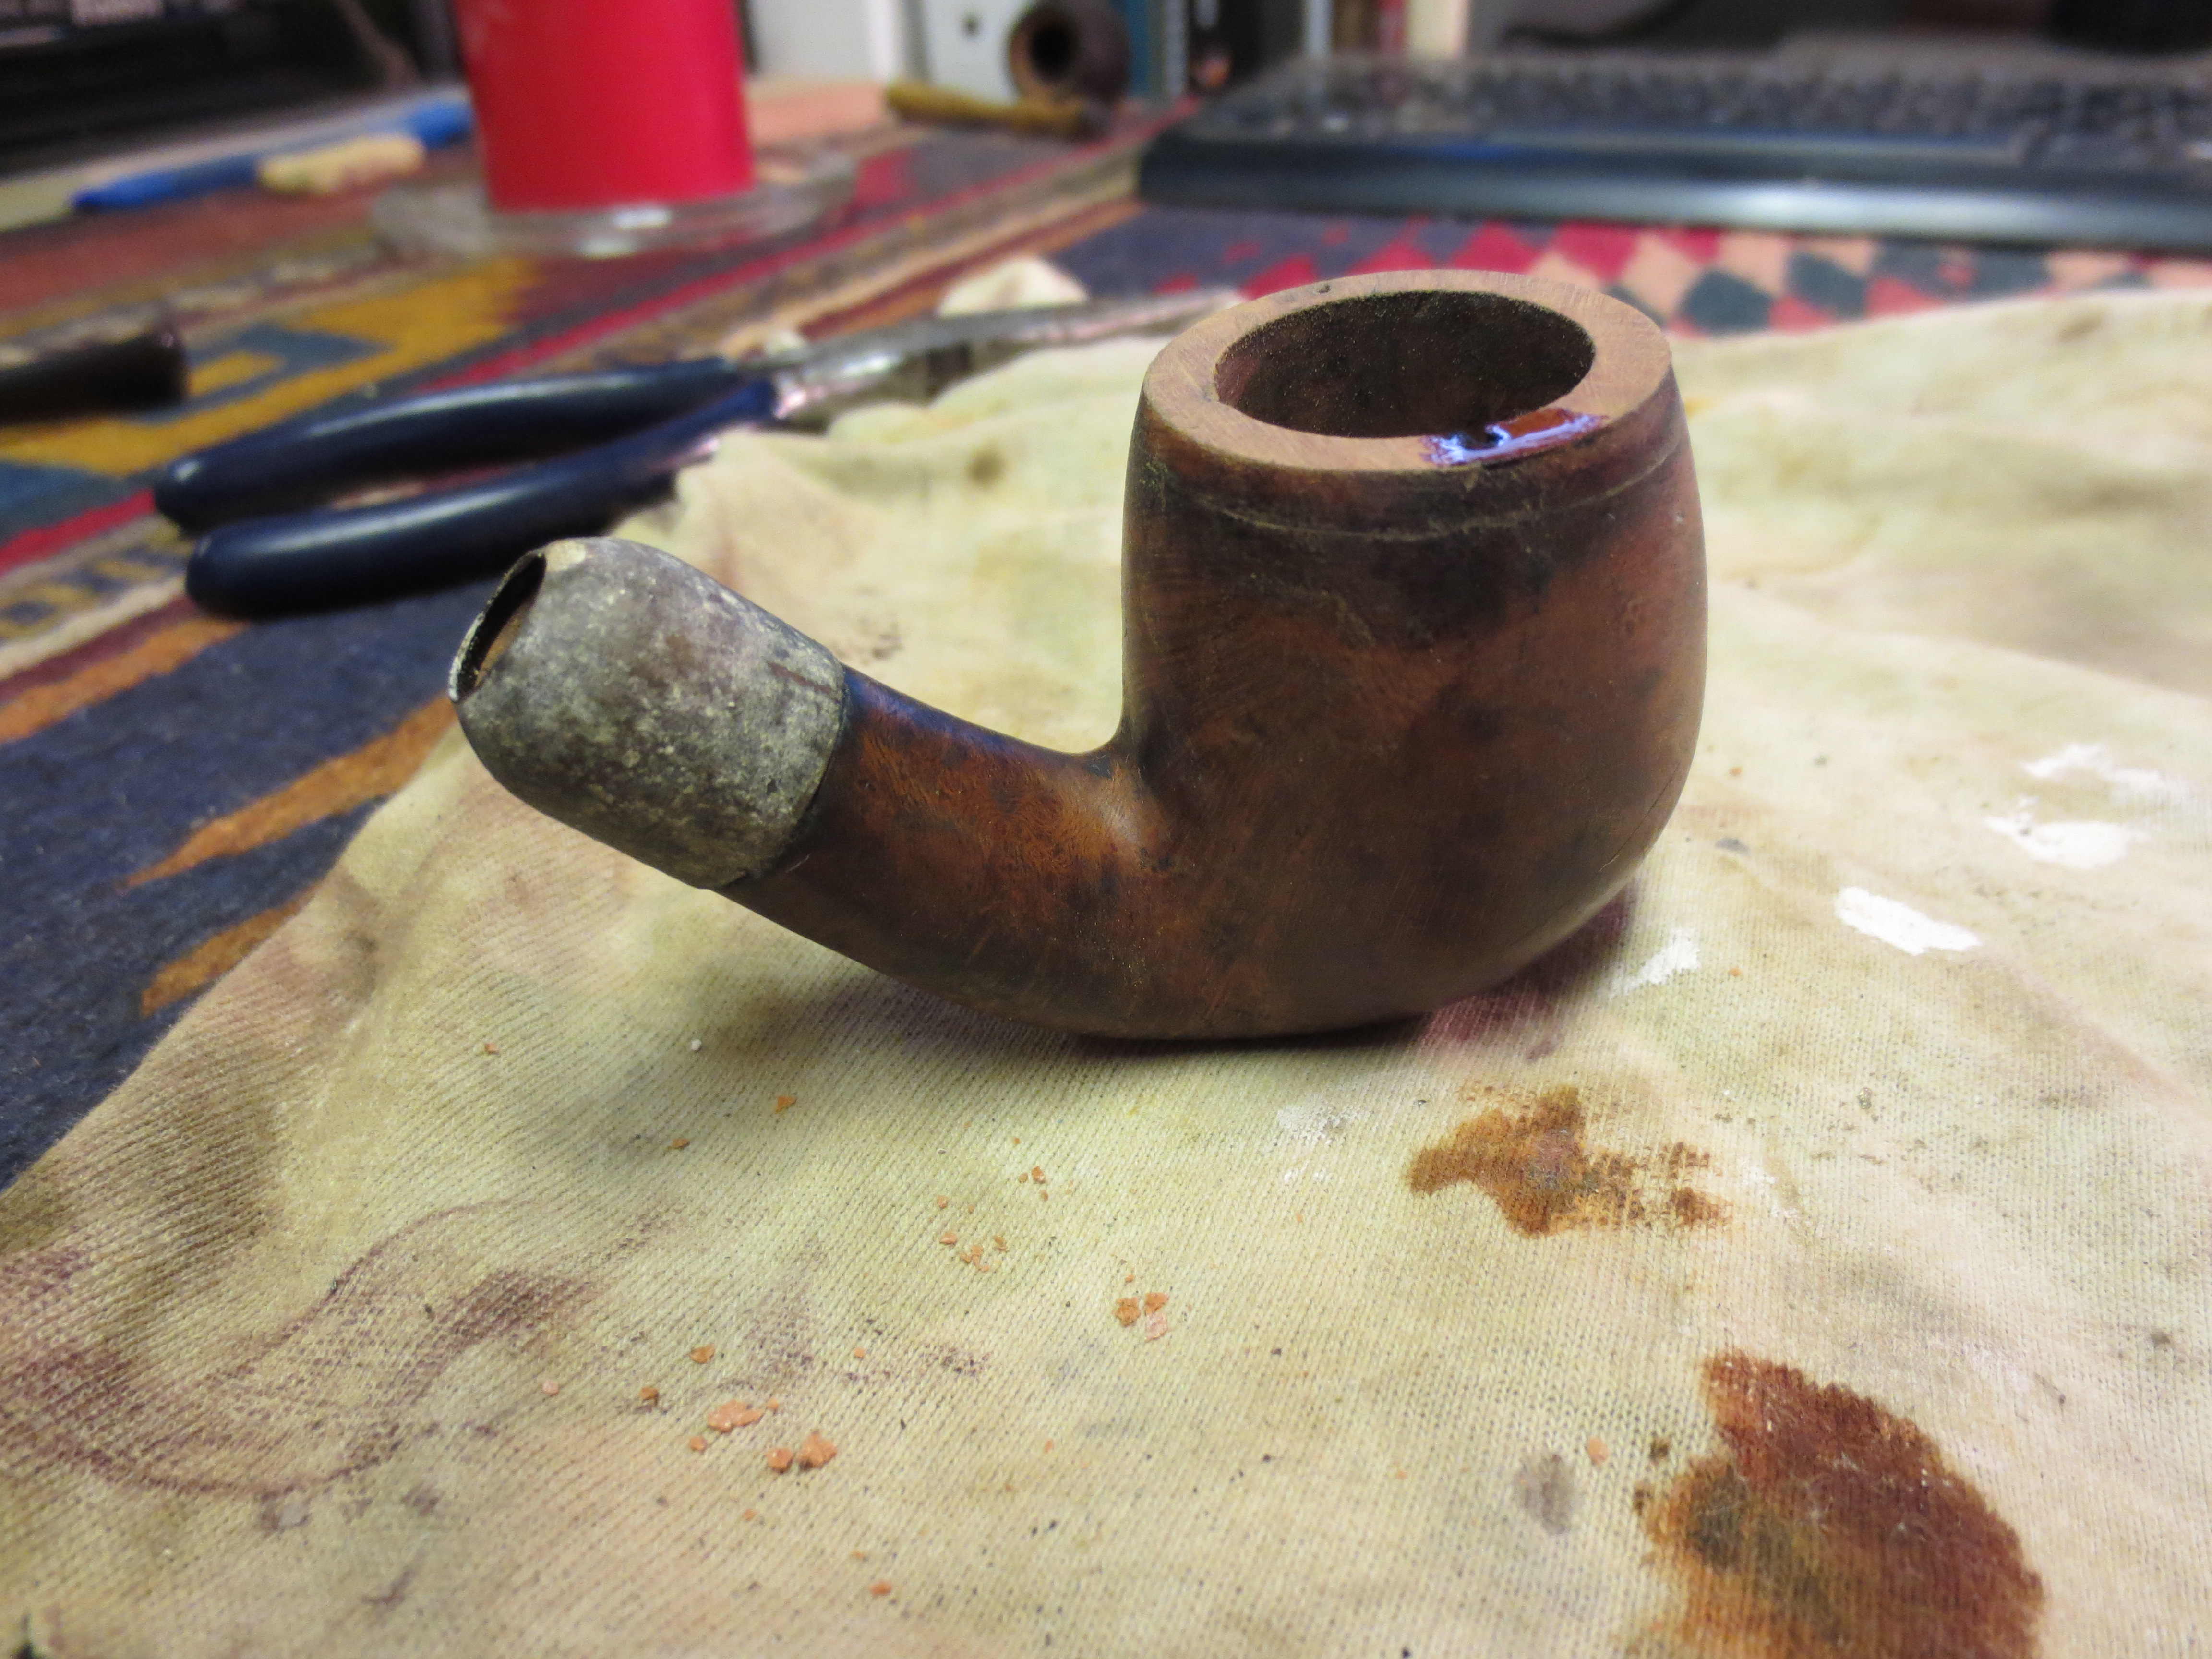
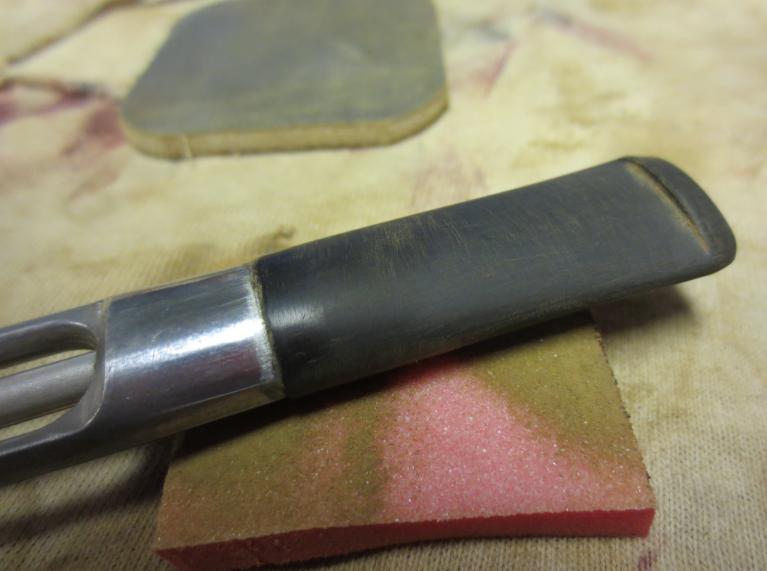
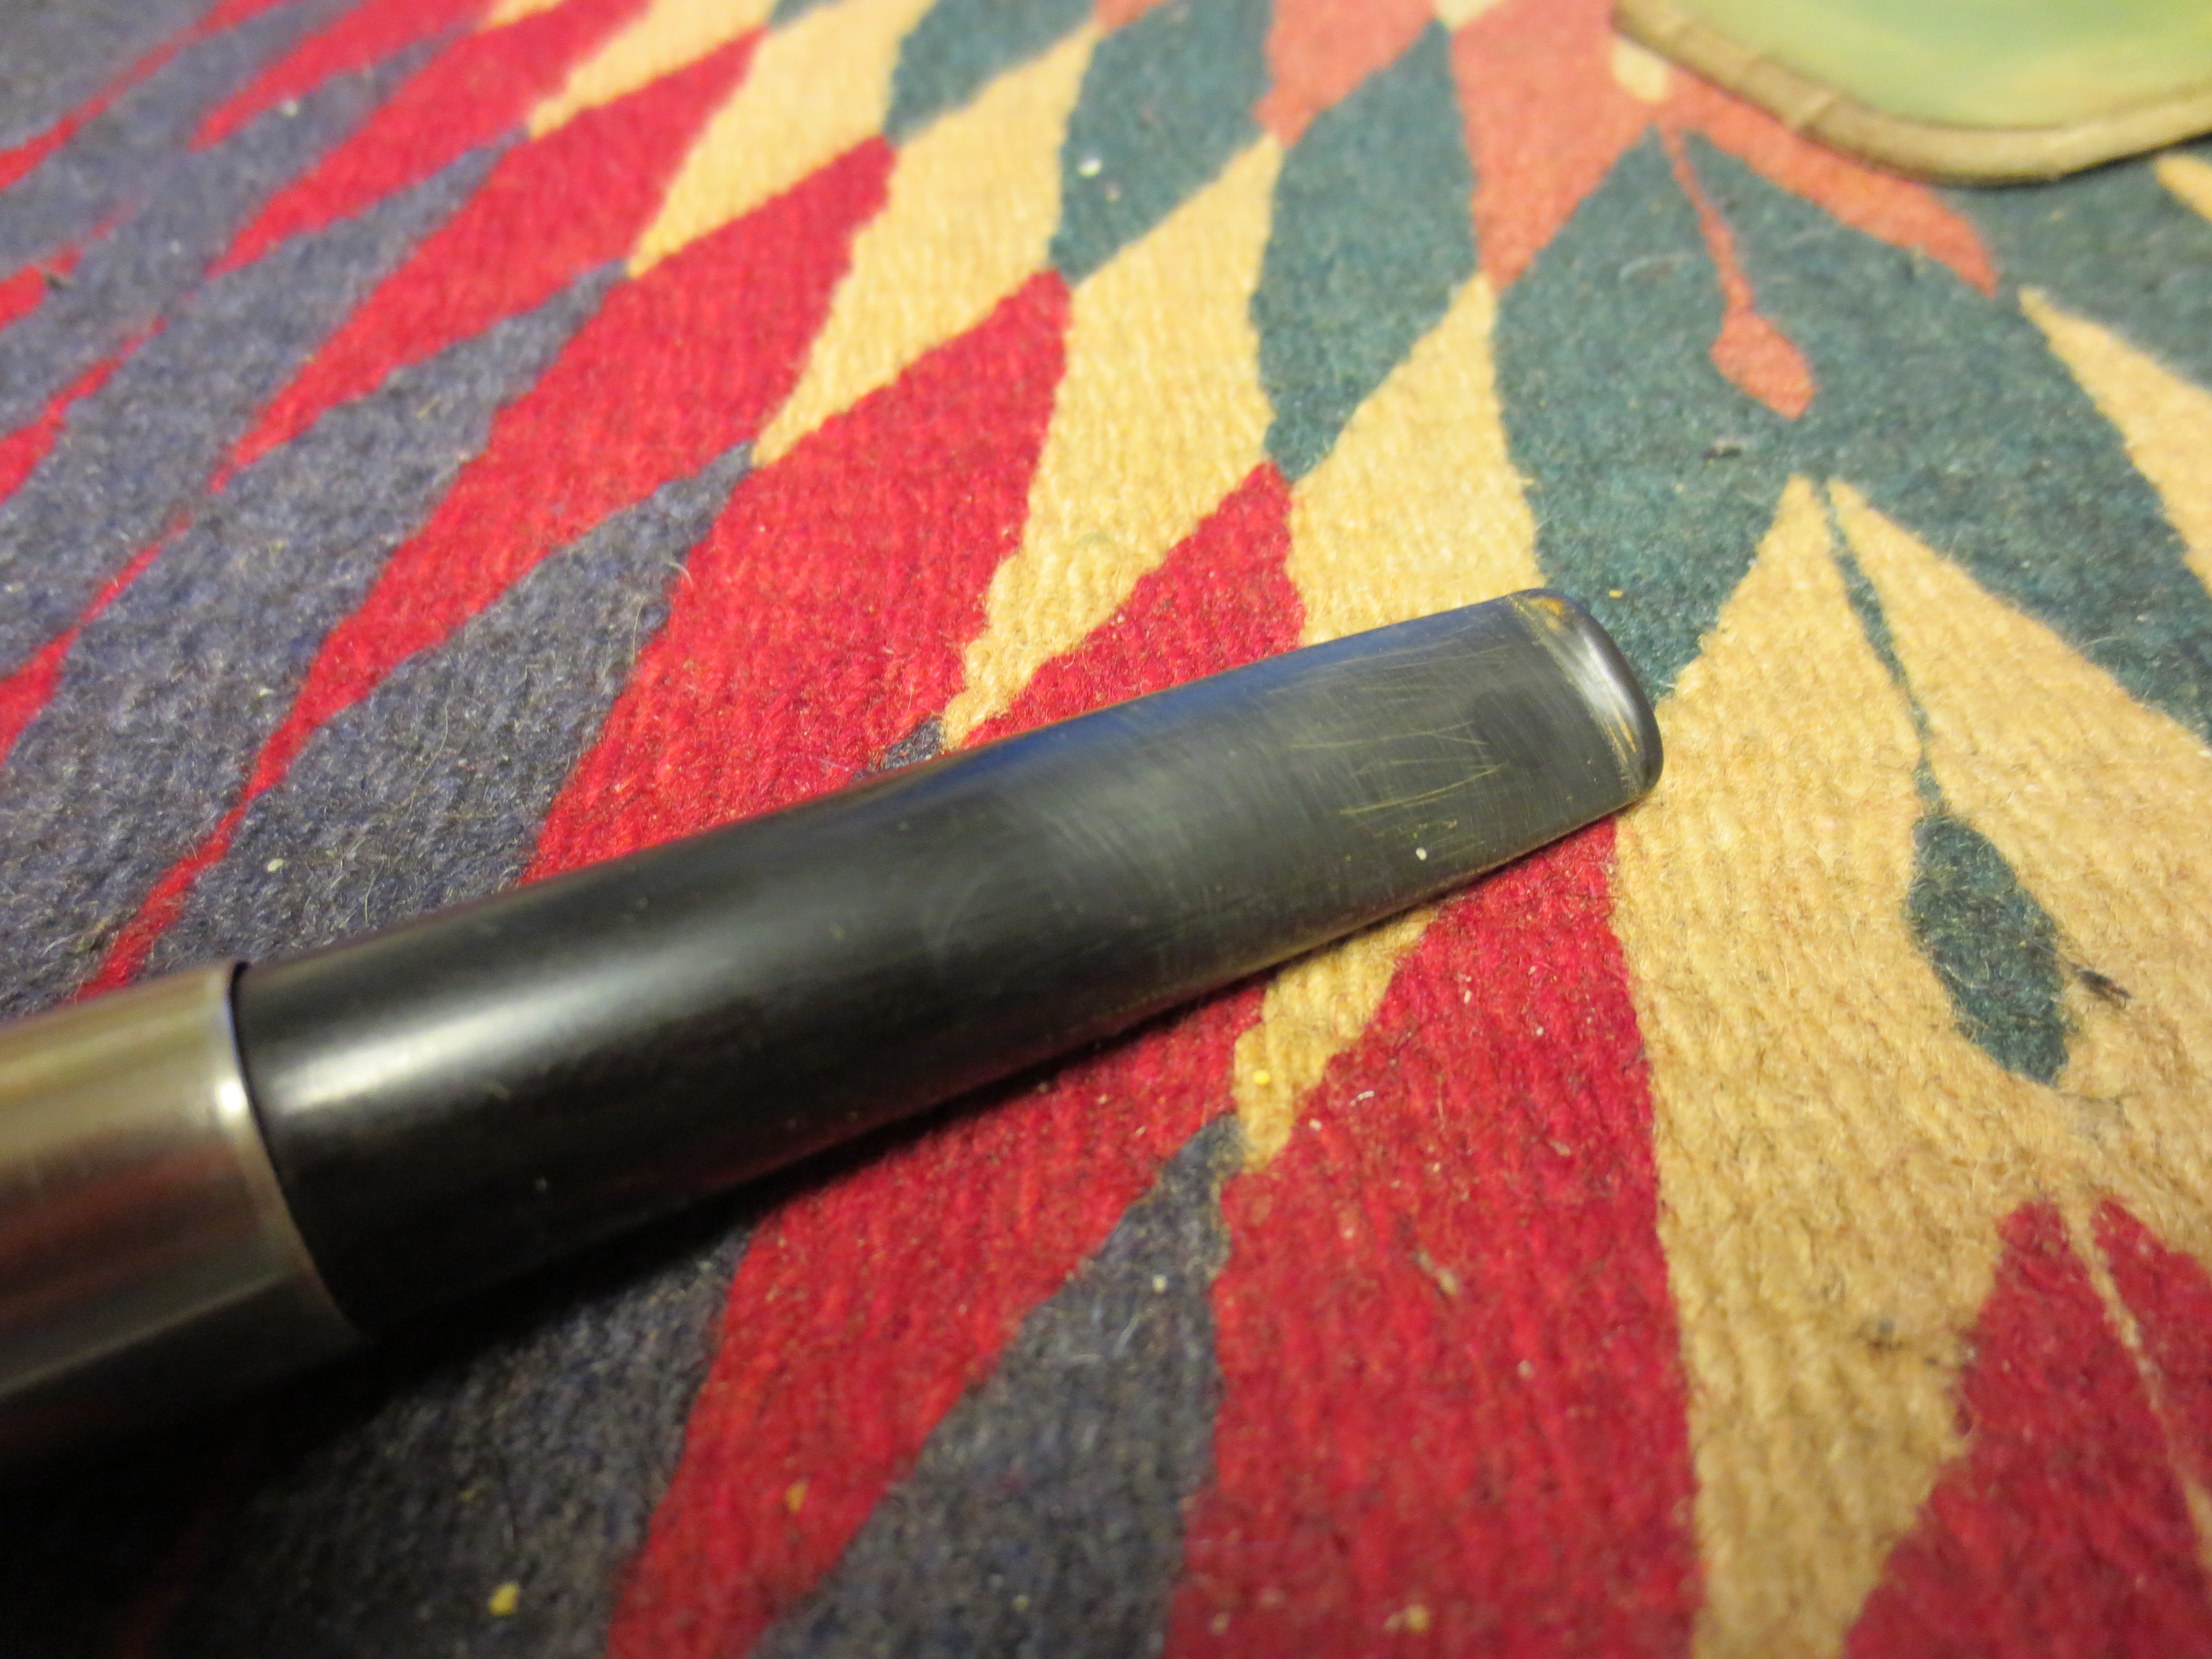
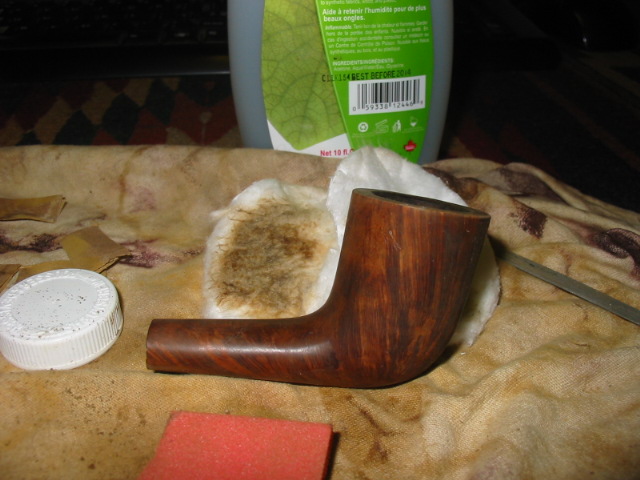
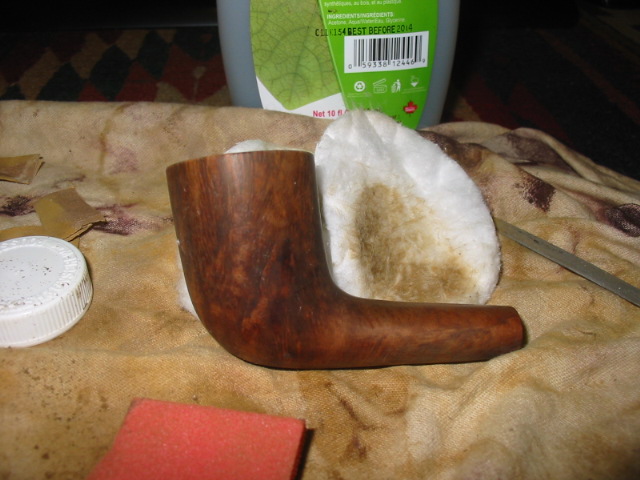
After patching the nail holes I worked on the stain line around the bowl. I removed the finish from the bowl with a cotton pad soaked with acetone. I continued to wipe it down until the finish was gone. After that I sanded it with a medium grit sanding sponge. The next six photos show the sanding process with the sponge. I also sanded the end cap with the sponge being careful around the CPF stamping that I had found under the oxidation.

ImageImageImageImageImageImage

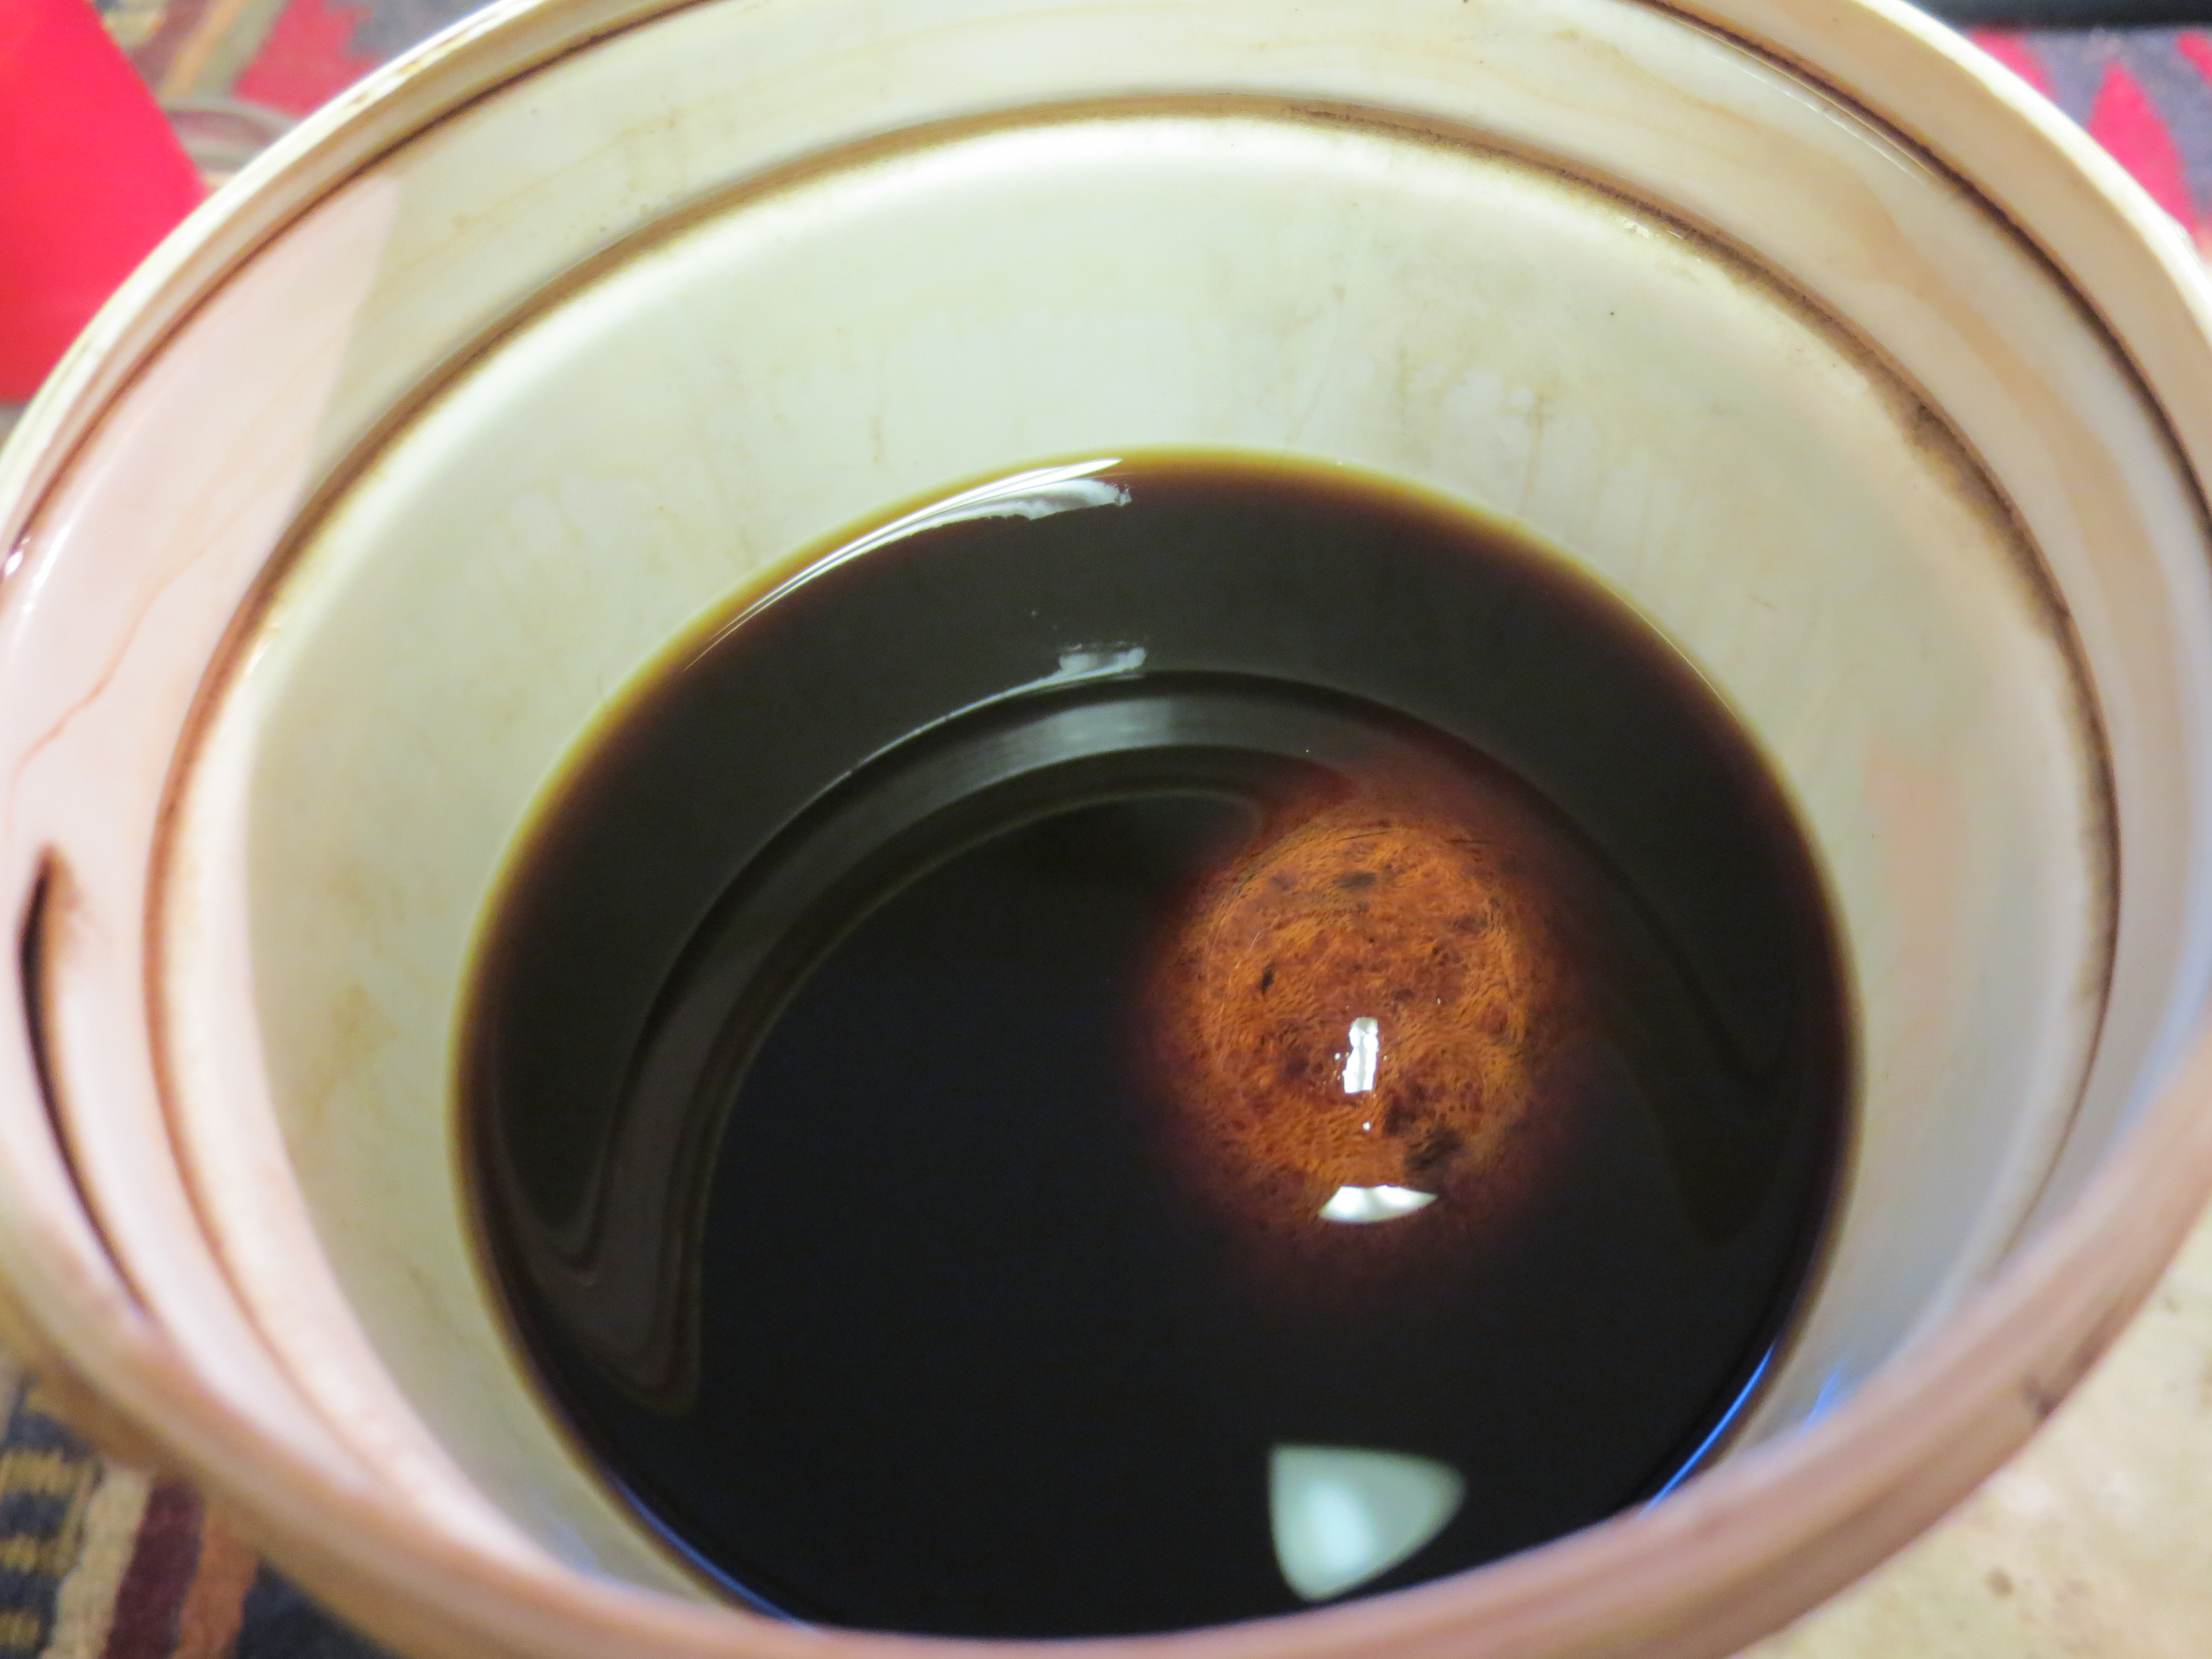
The dark lines were better after the sanding but still very present. I was able to remove the indentation in the briar from the metal cap to a large degree but the black was stubborn. I decided to soak the bowl in an alcohol bath to see what would come out. I took the shank cap off to work on it while I left the bowl in the bath for about an hour. I was able to remove much of the oxidation on the shank cap. I scrubbed it with the tarnish remover and then sanded it with the micromesh sanding pads using 1500-2400 grit pads.

Image

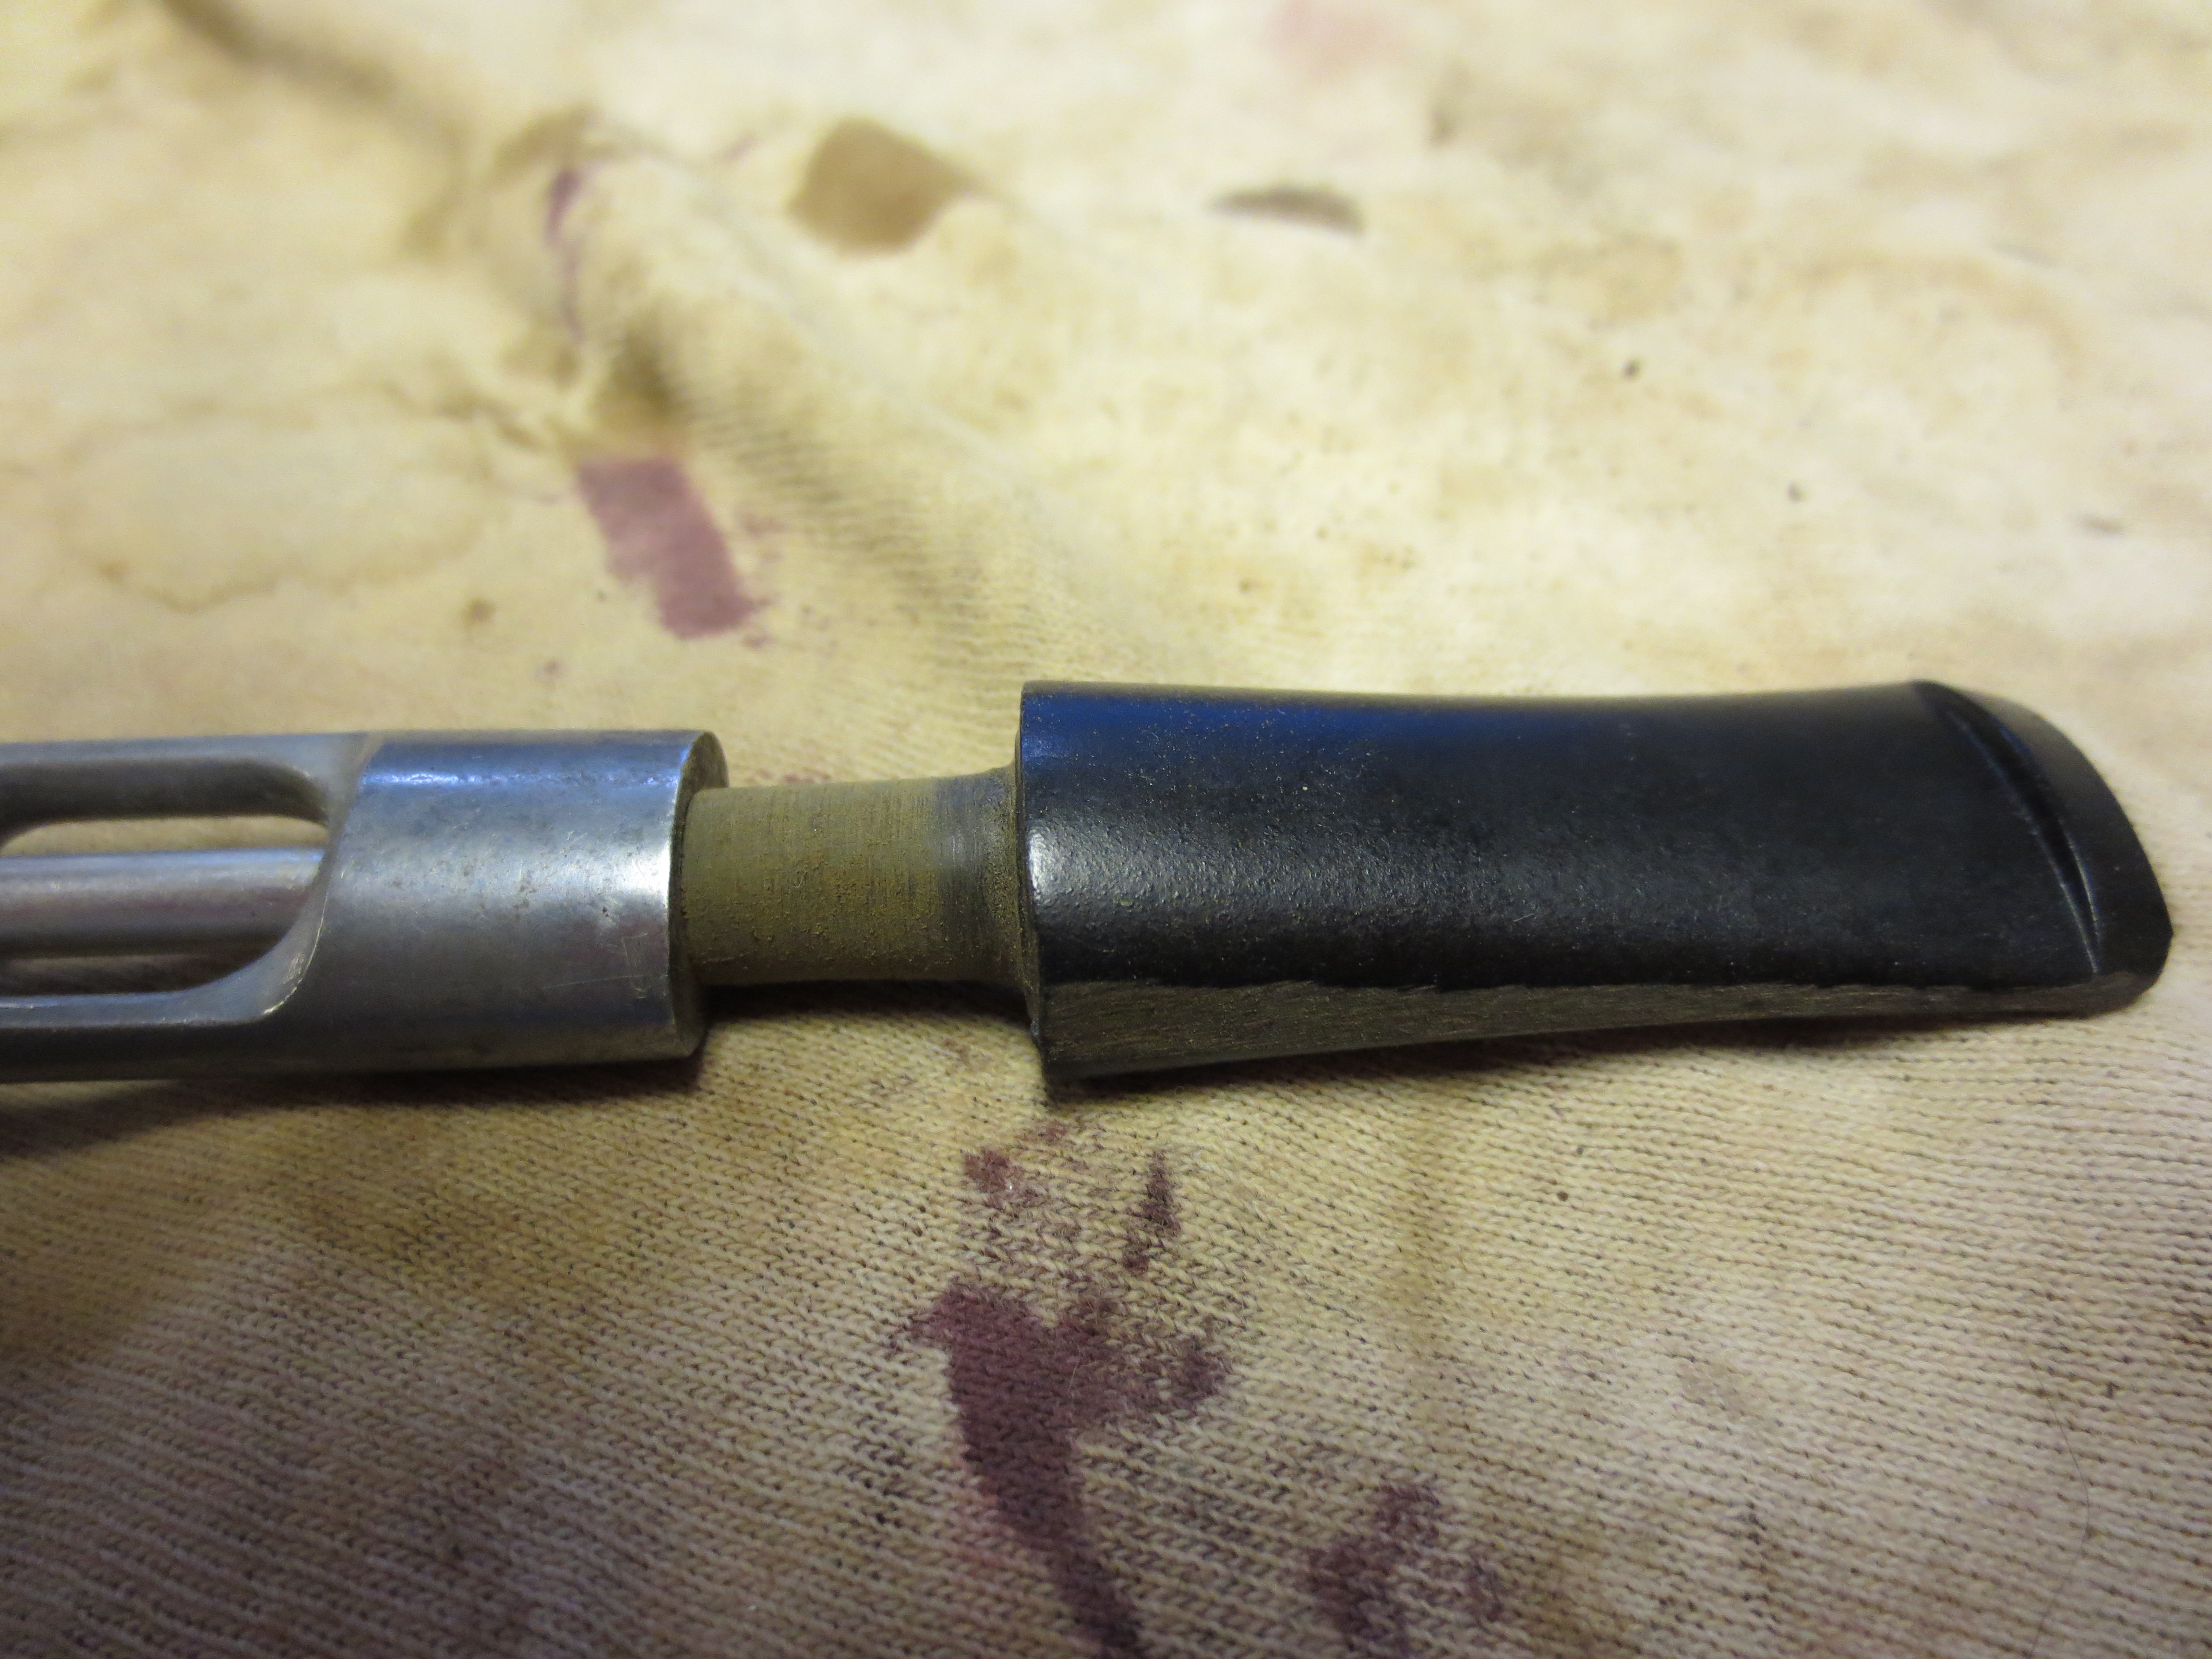
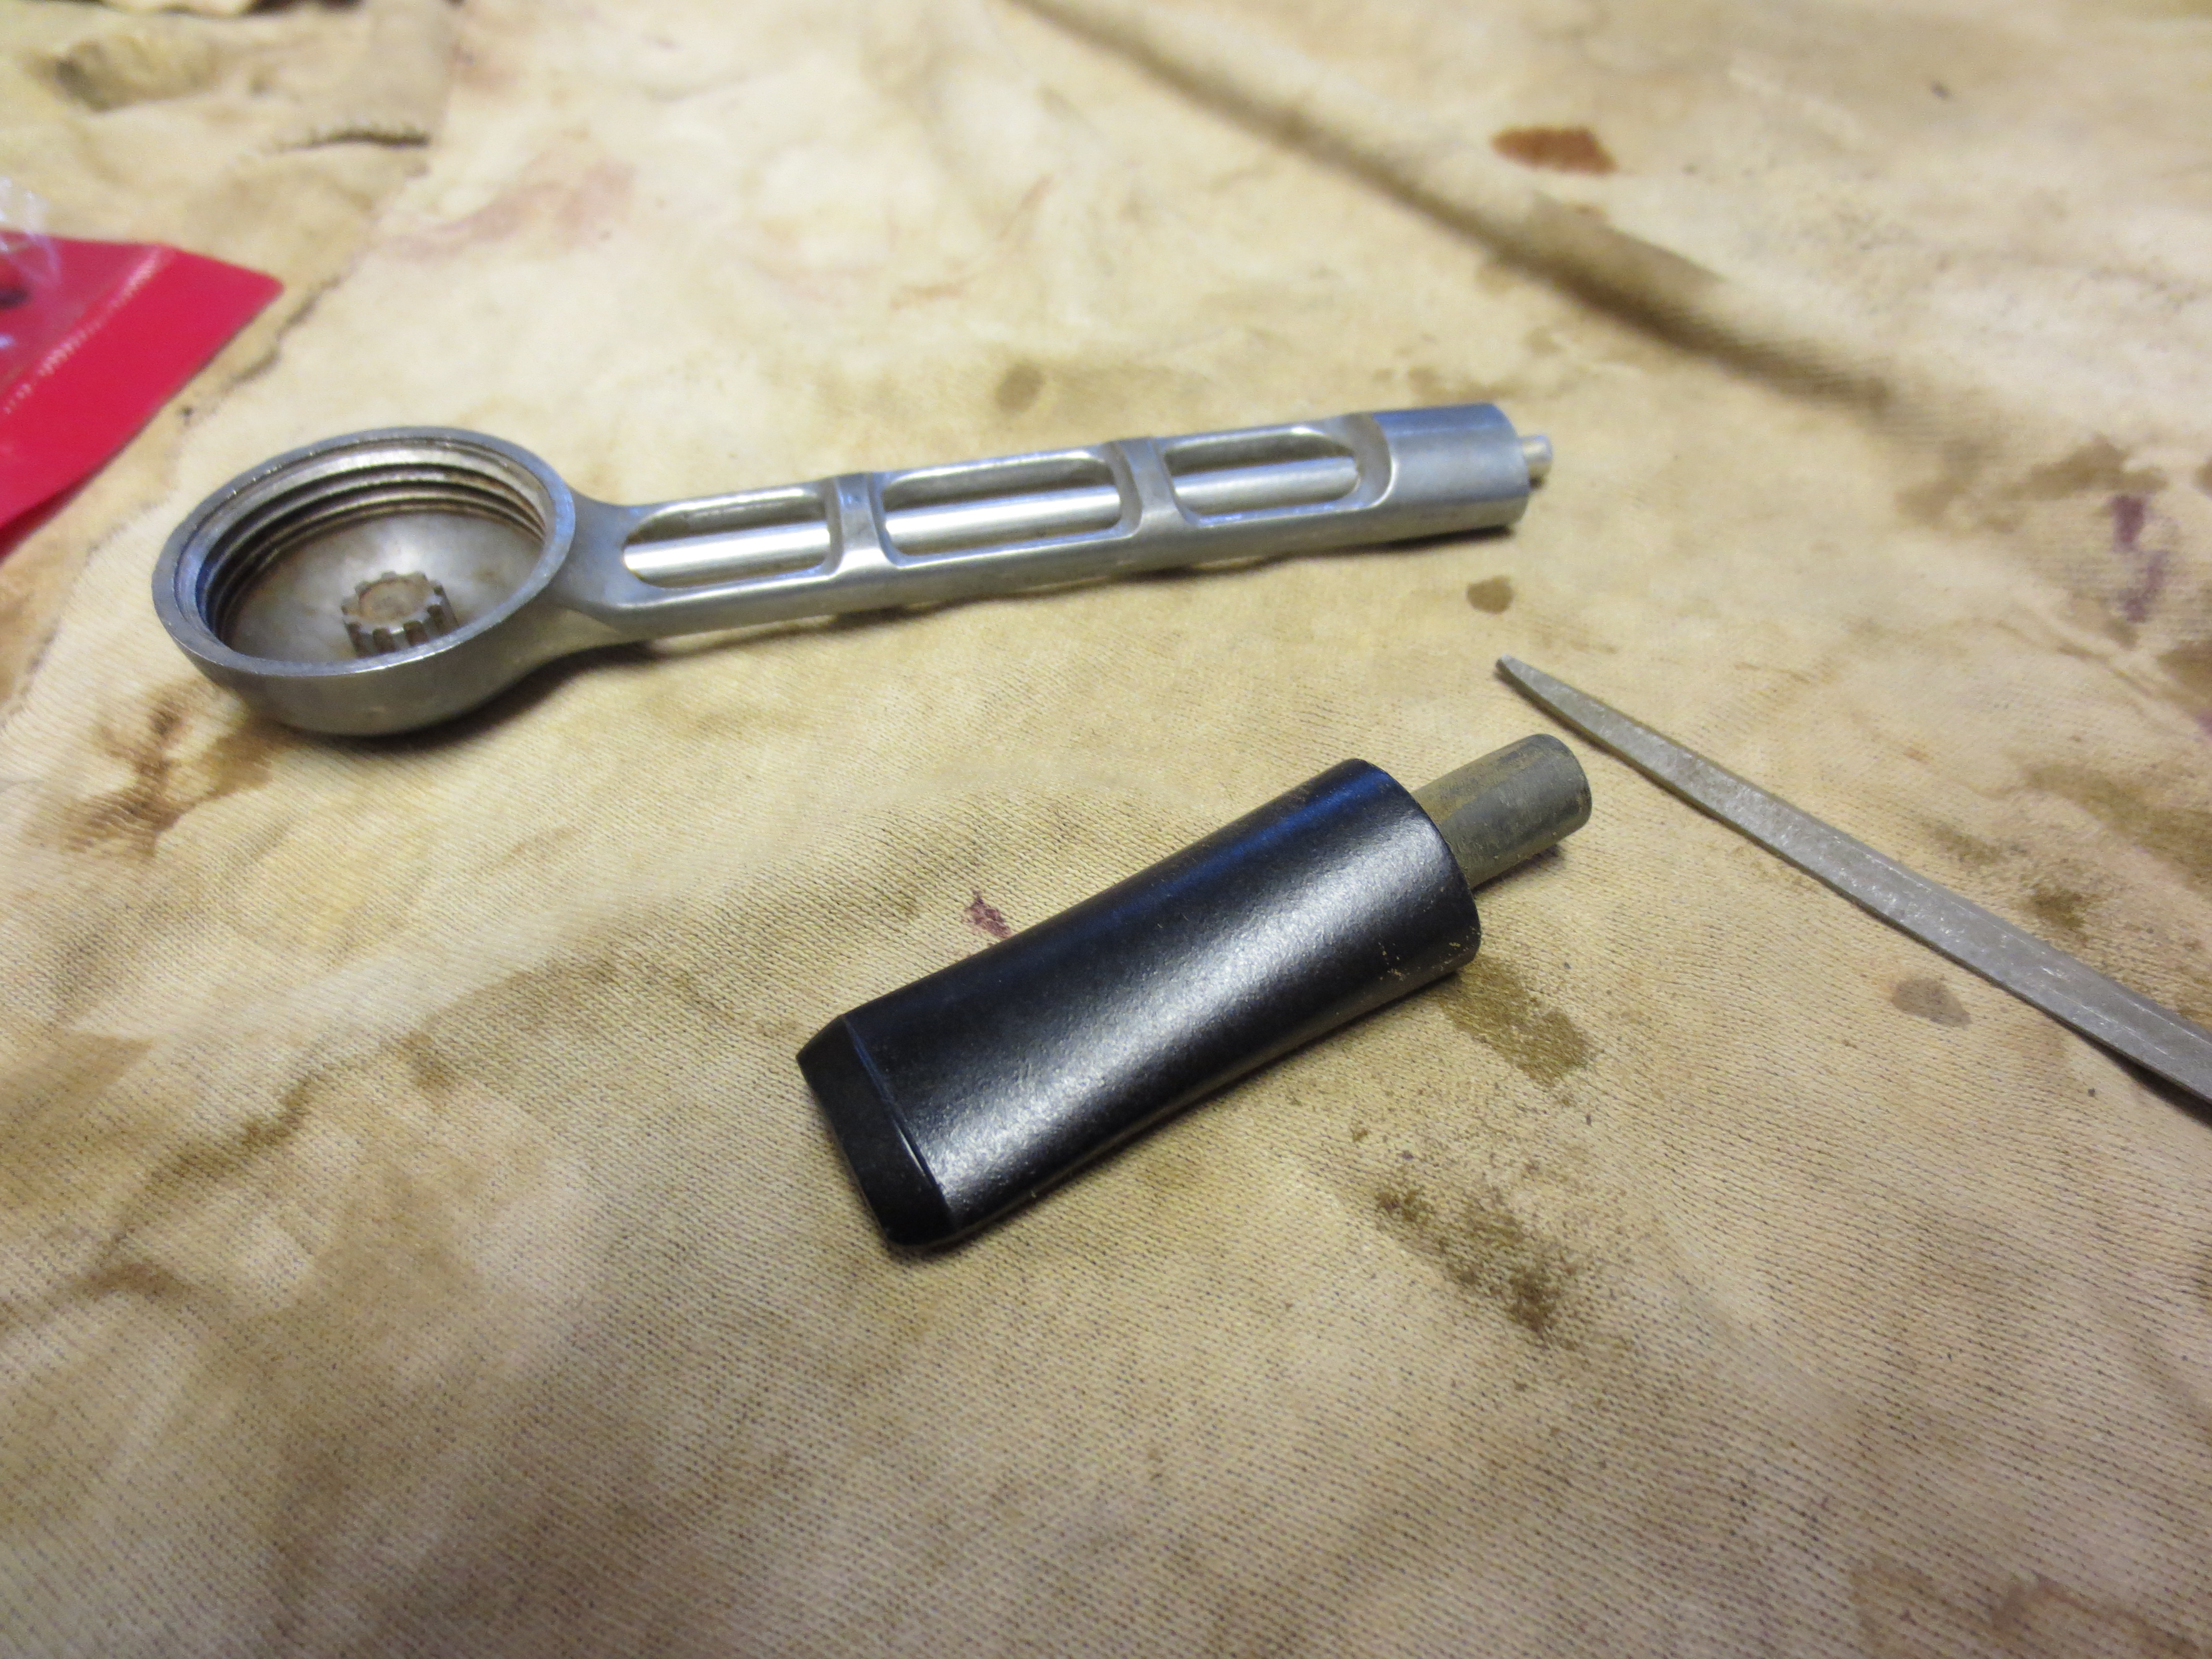
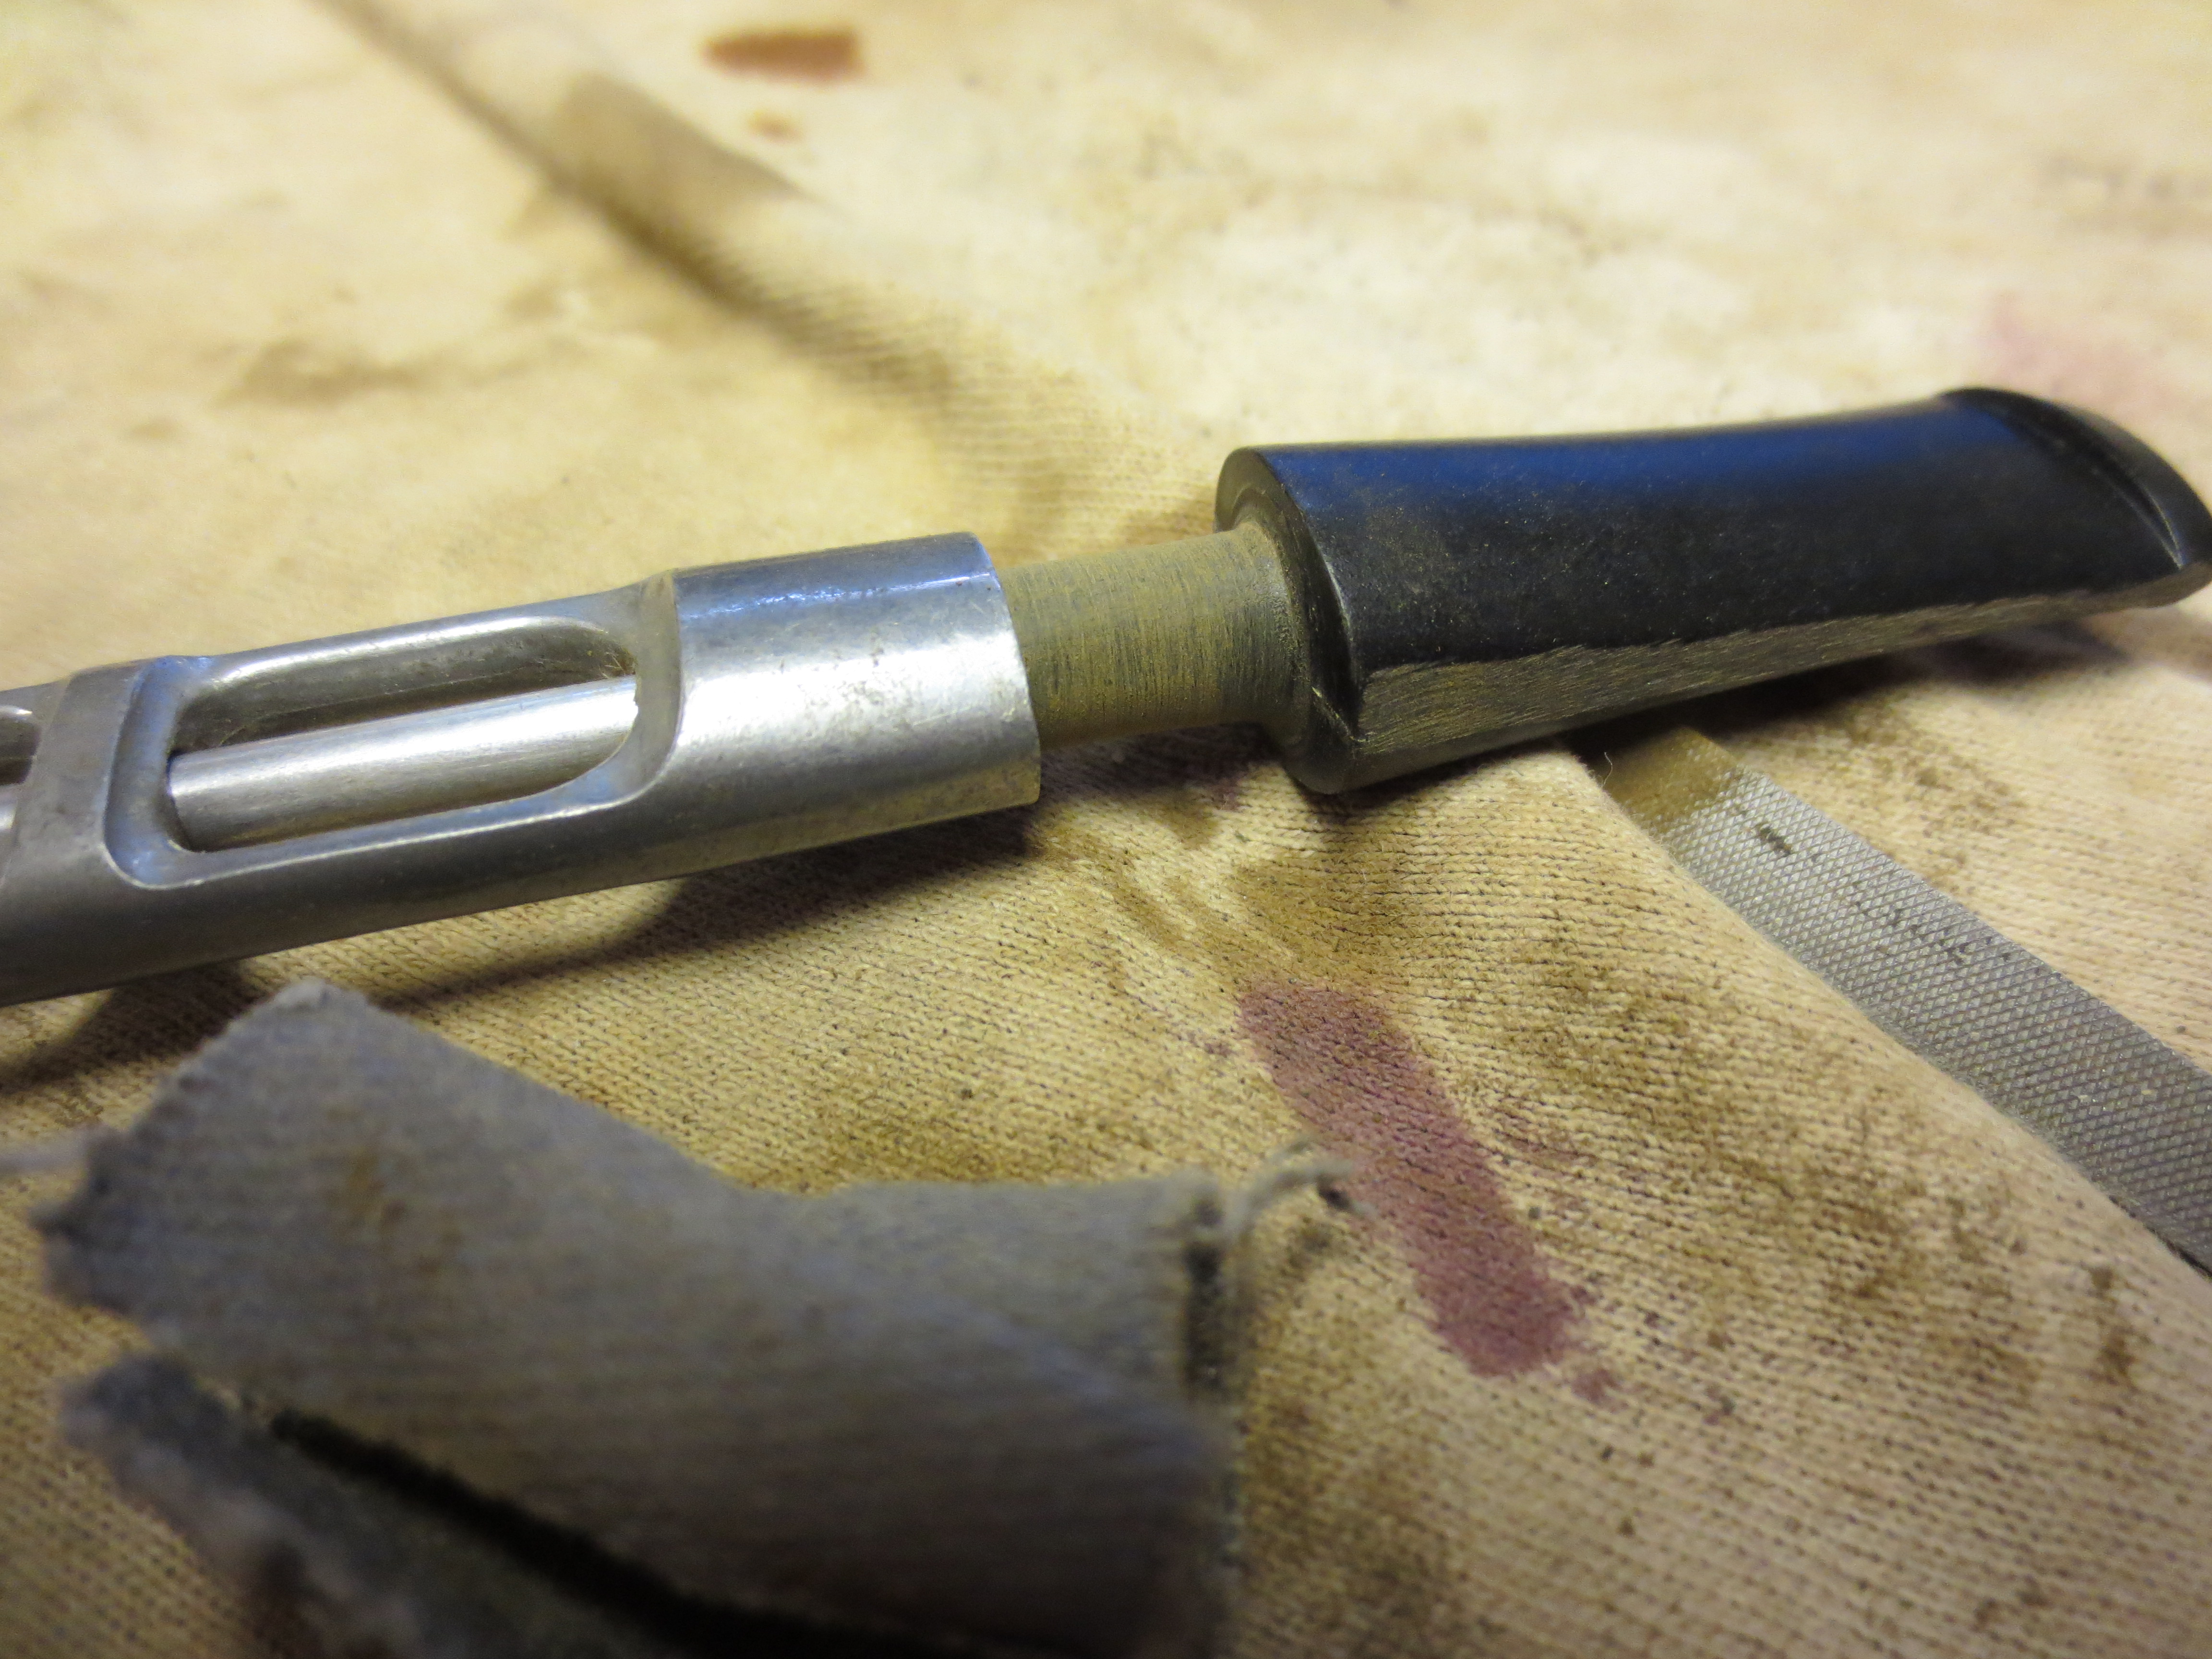
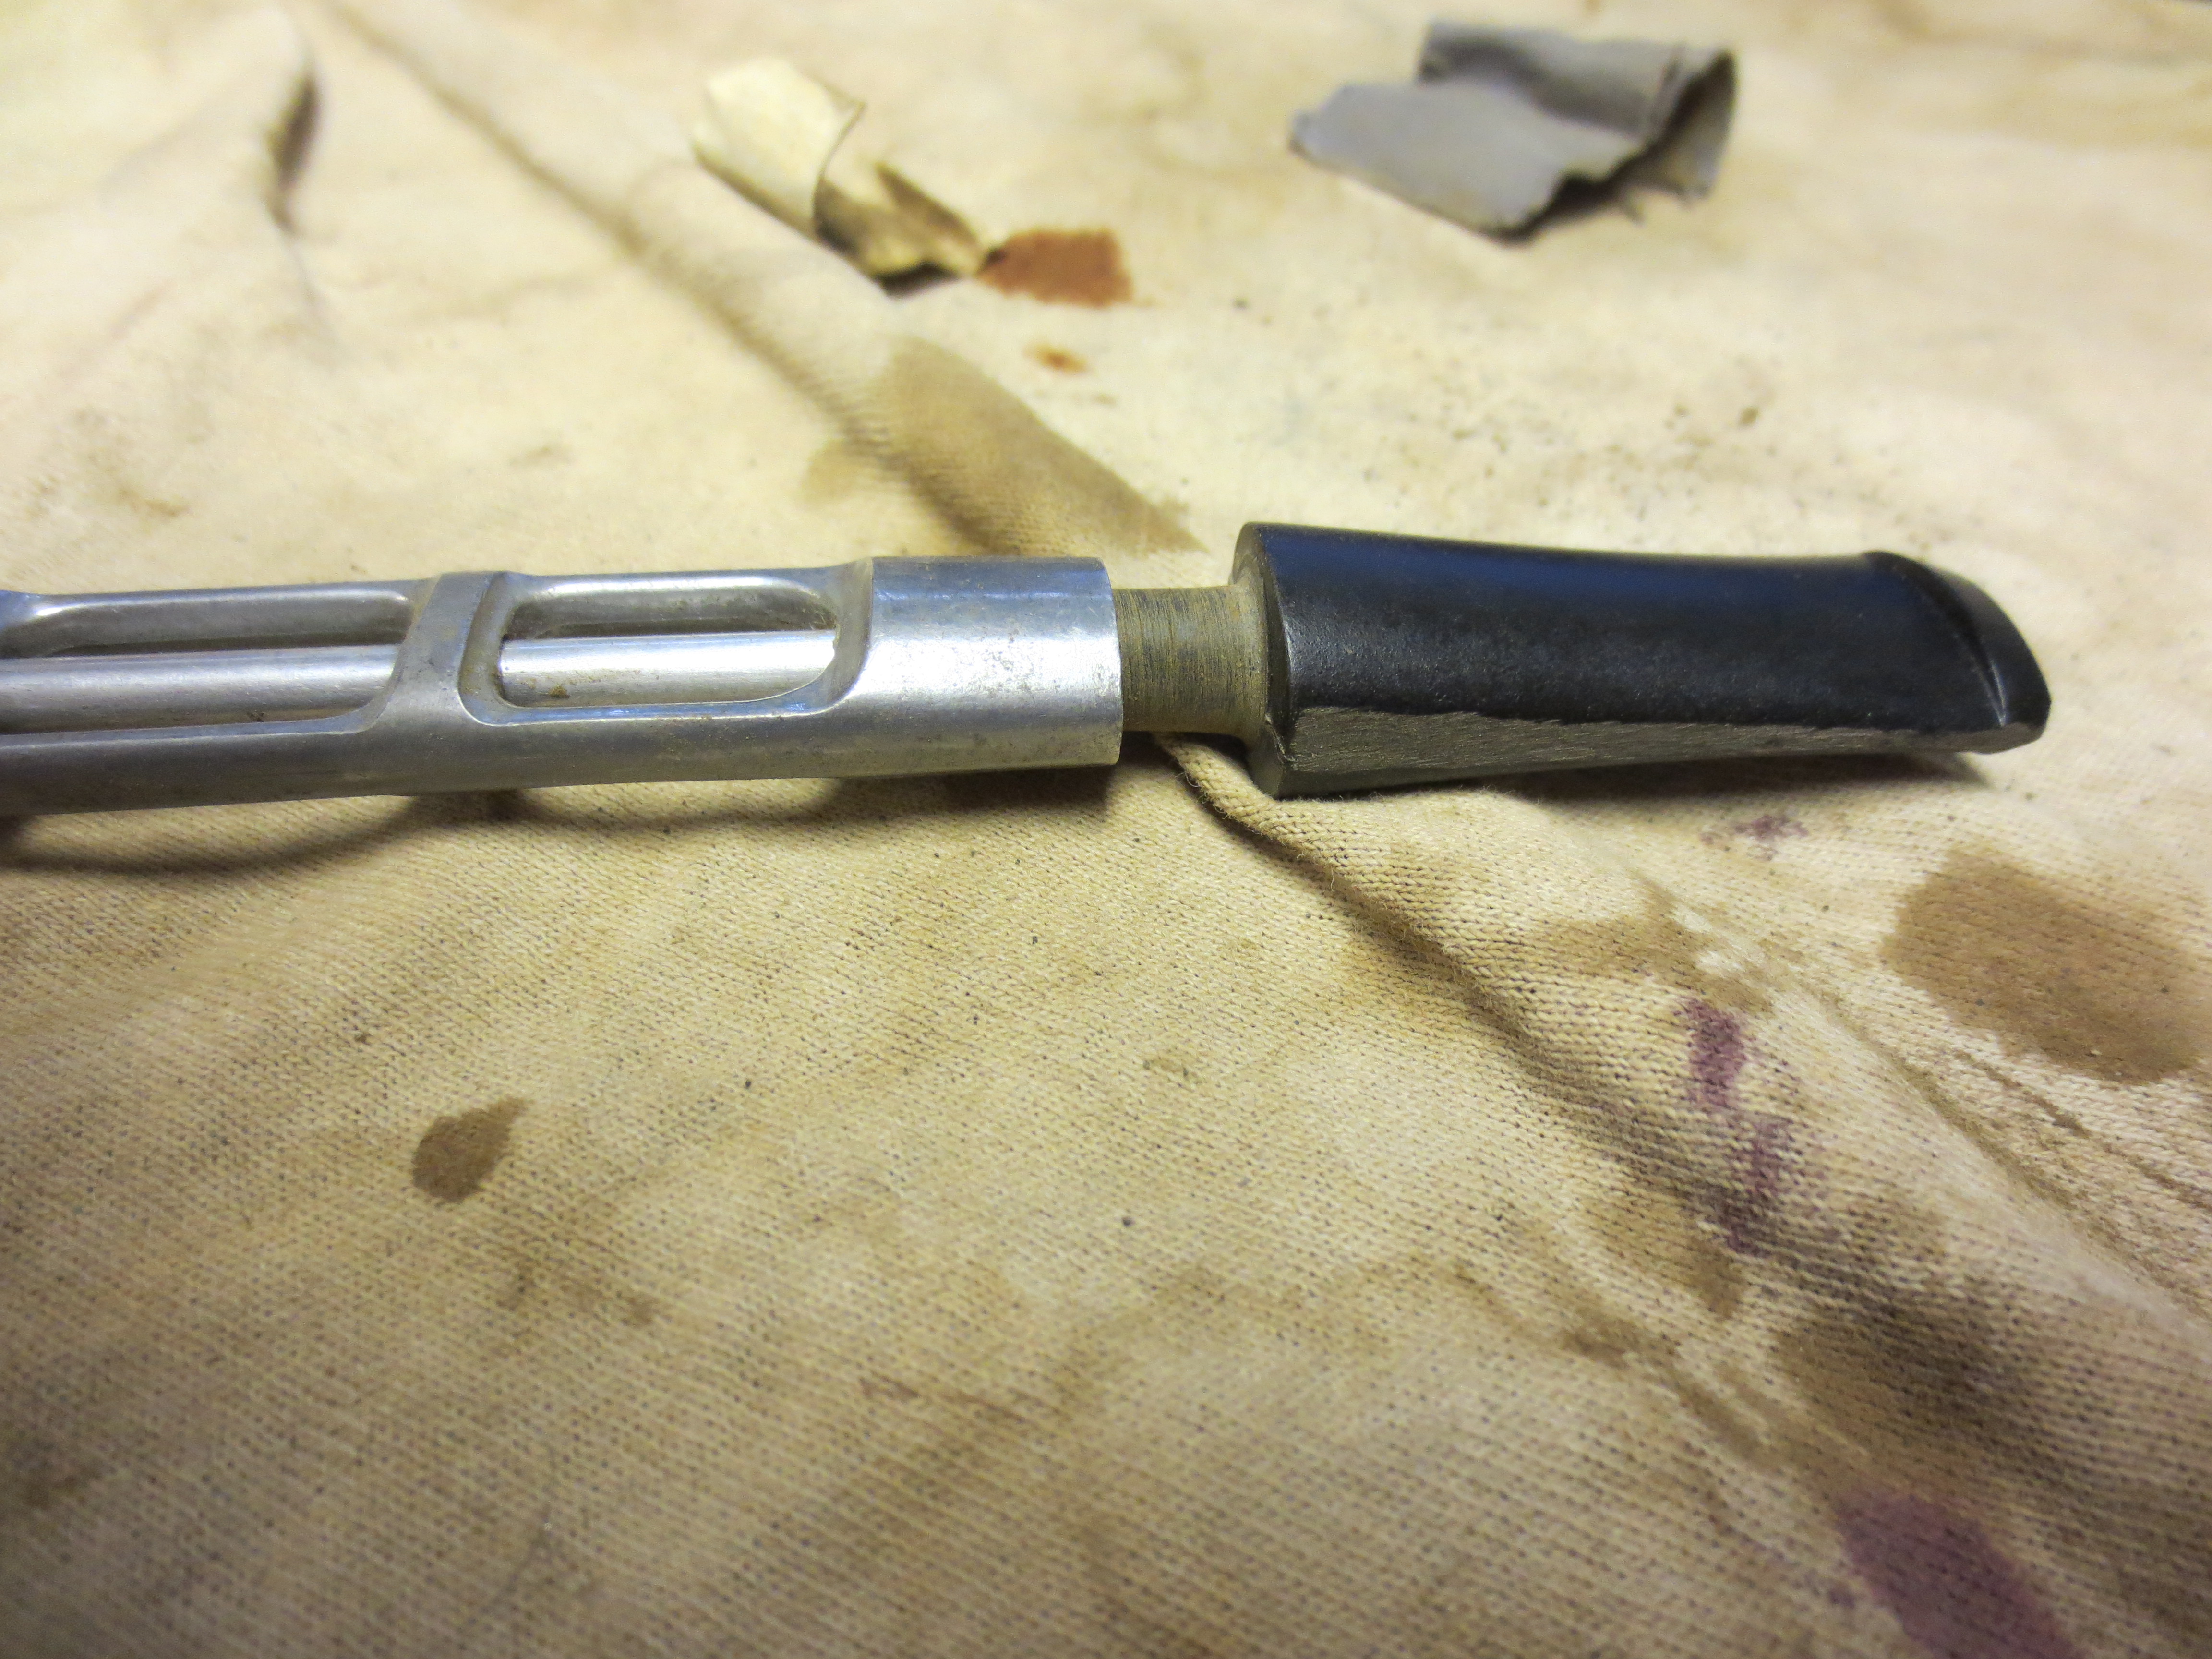
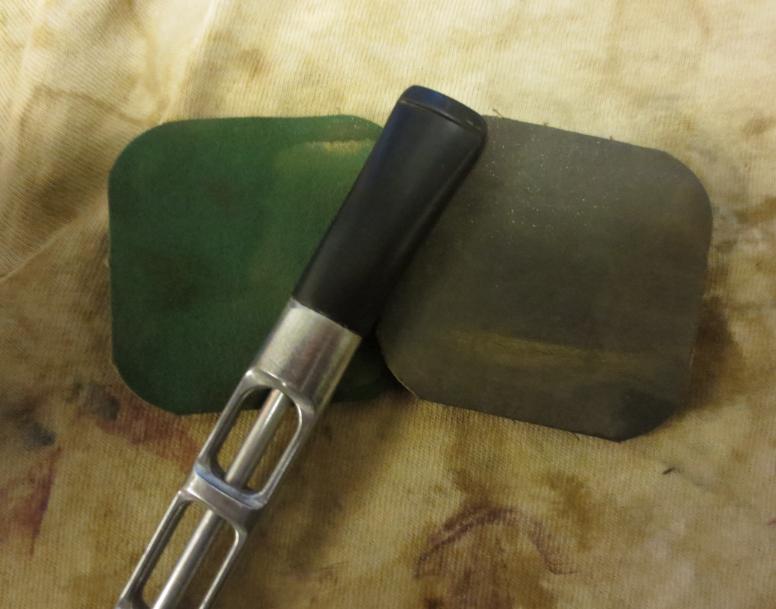
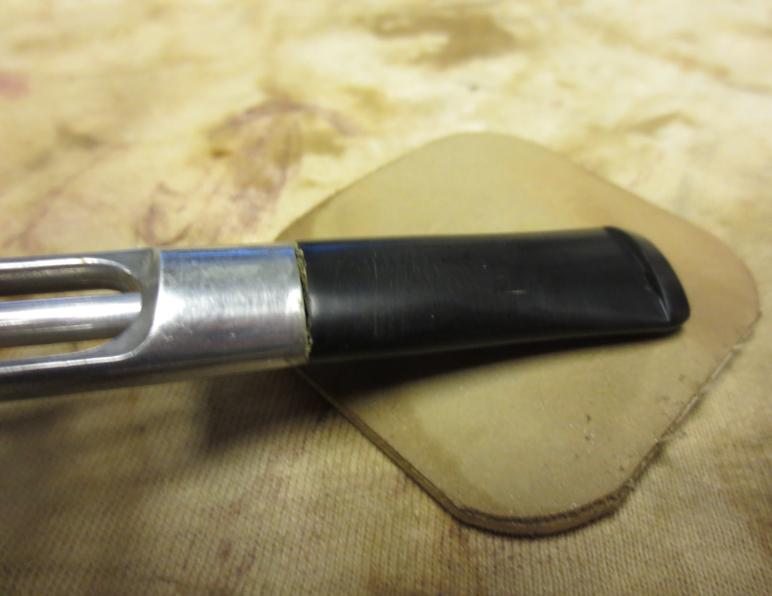
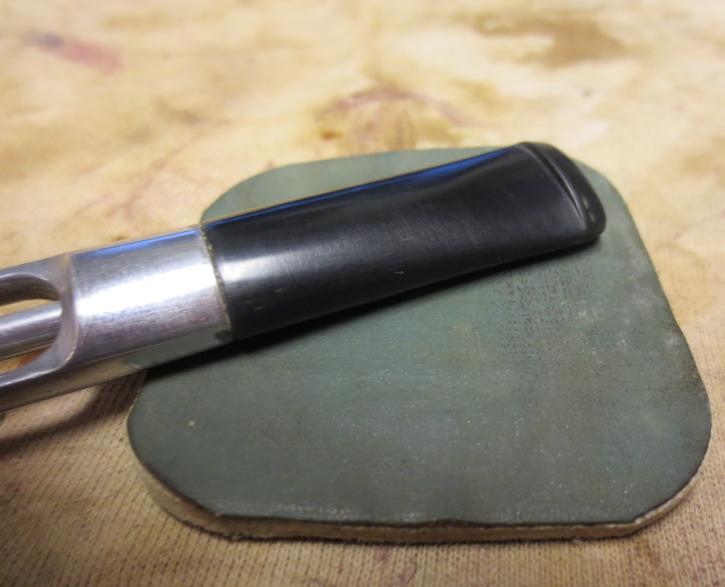
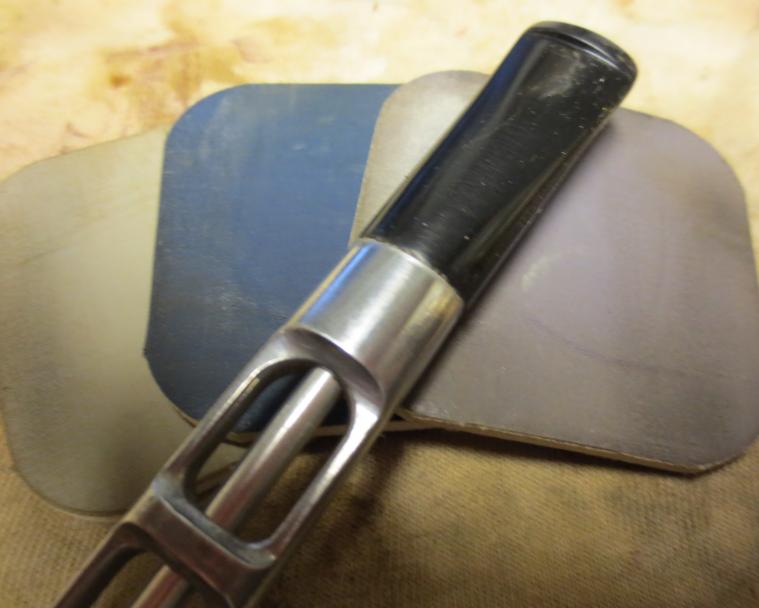
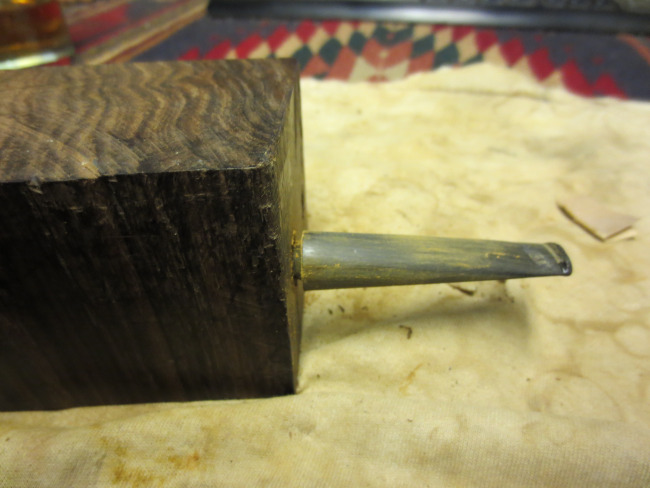
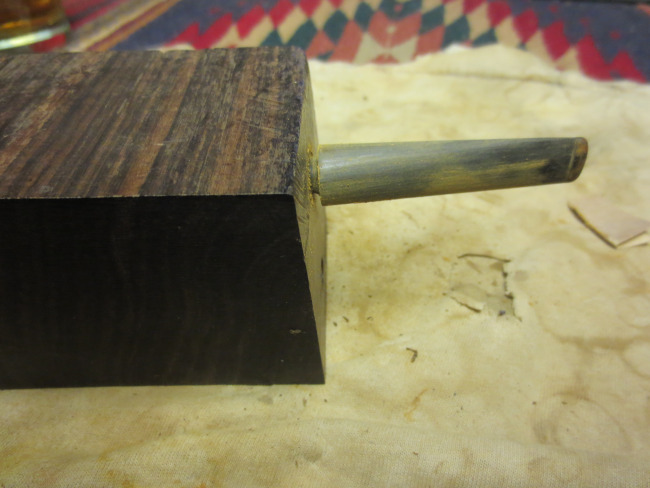
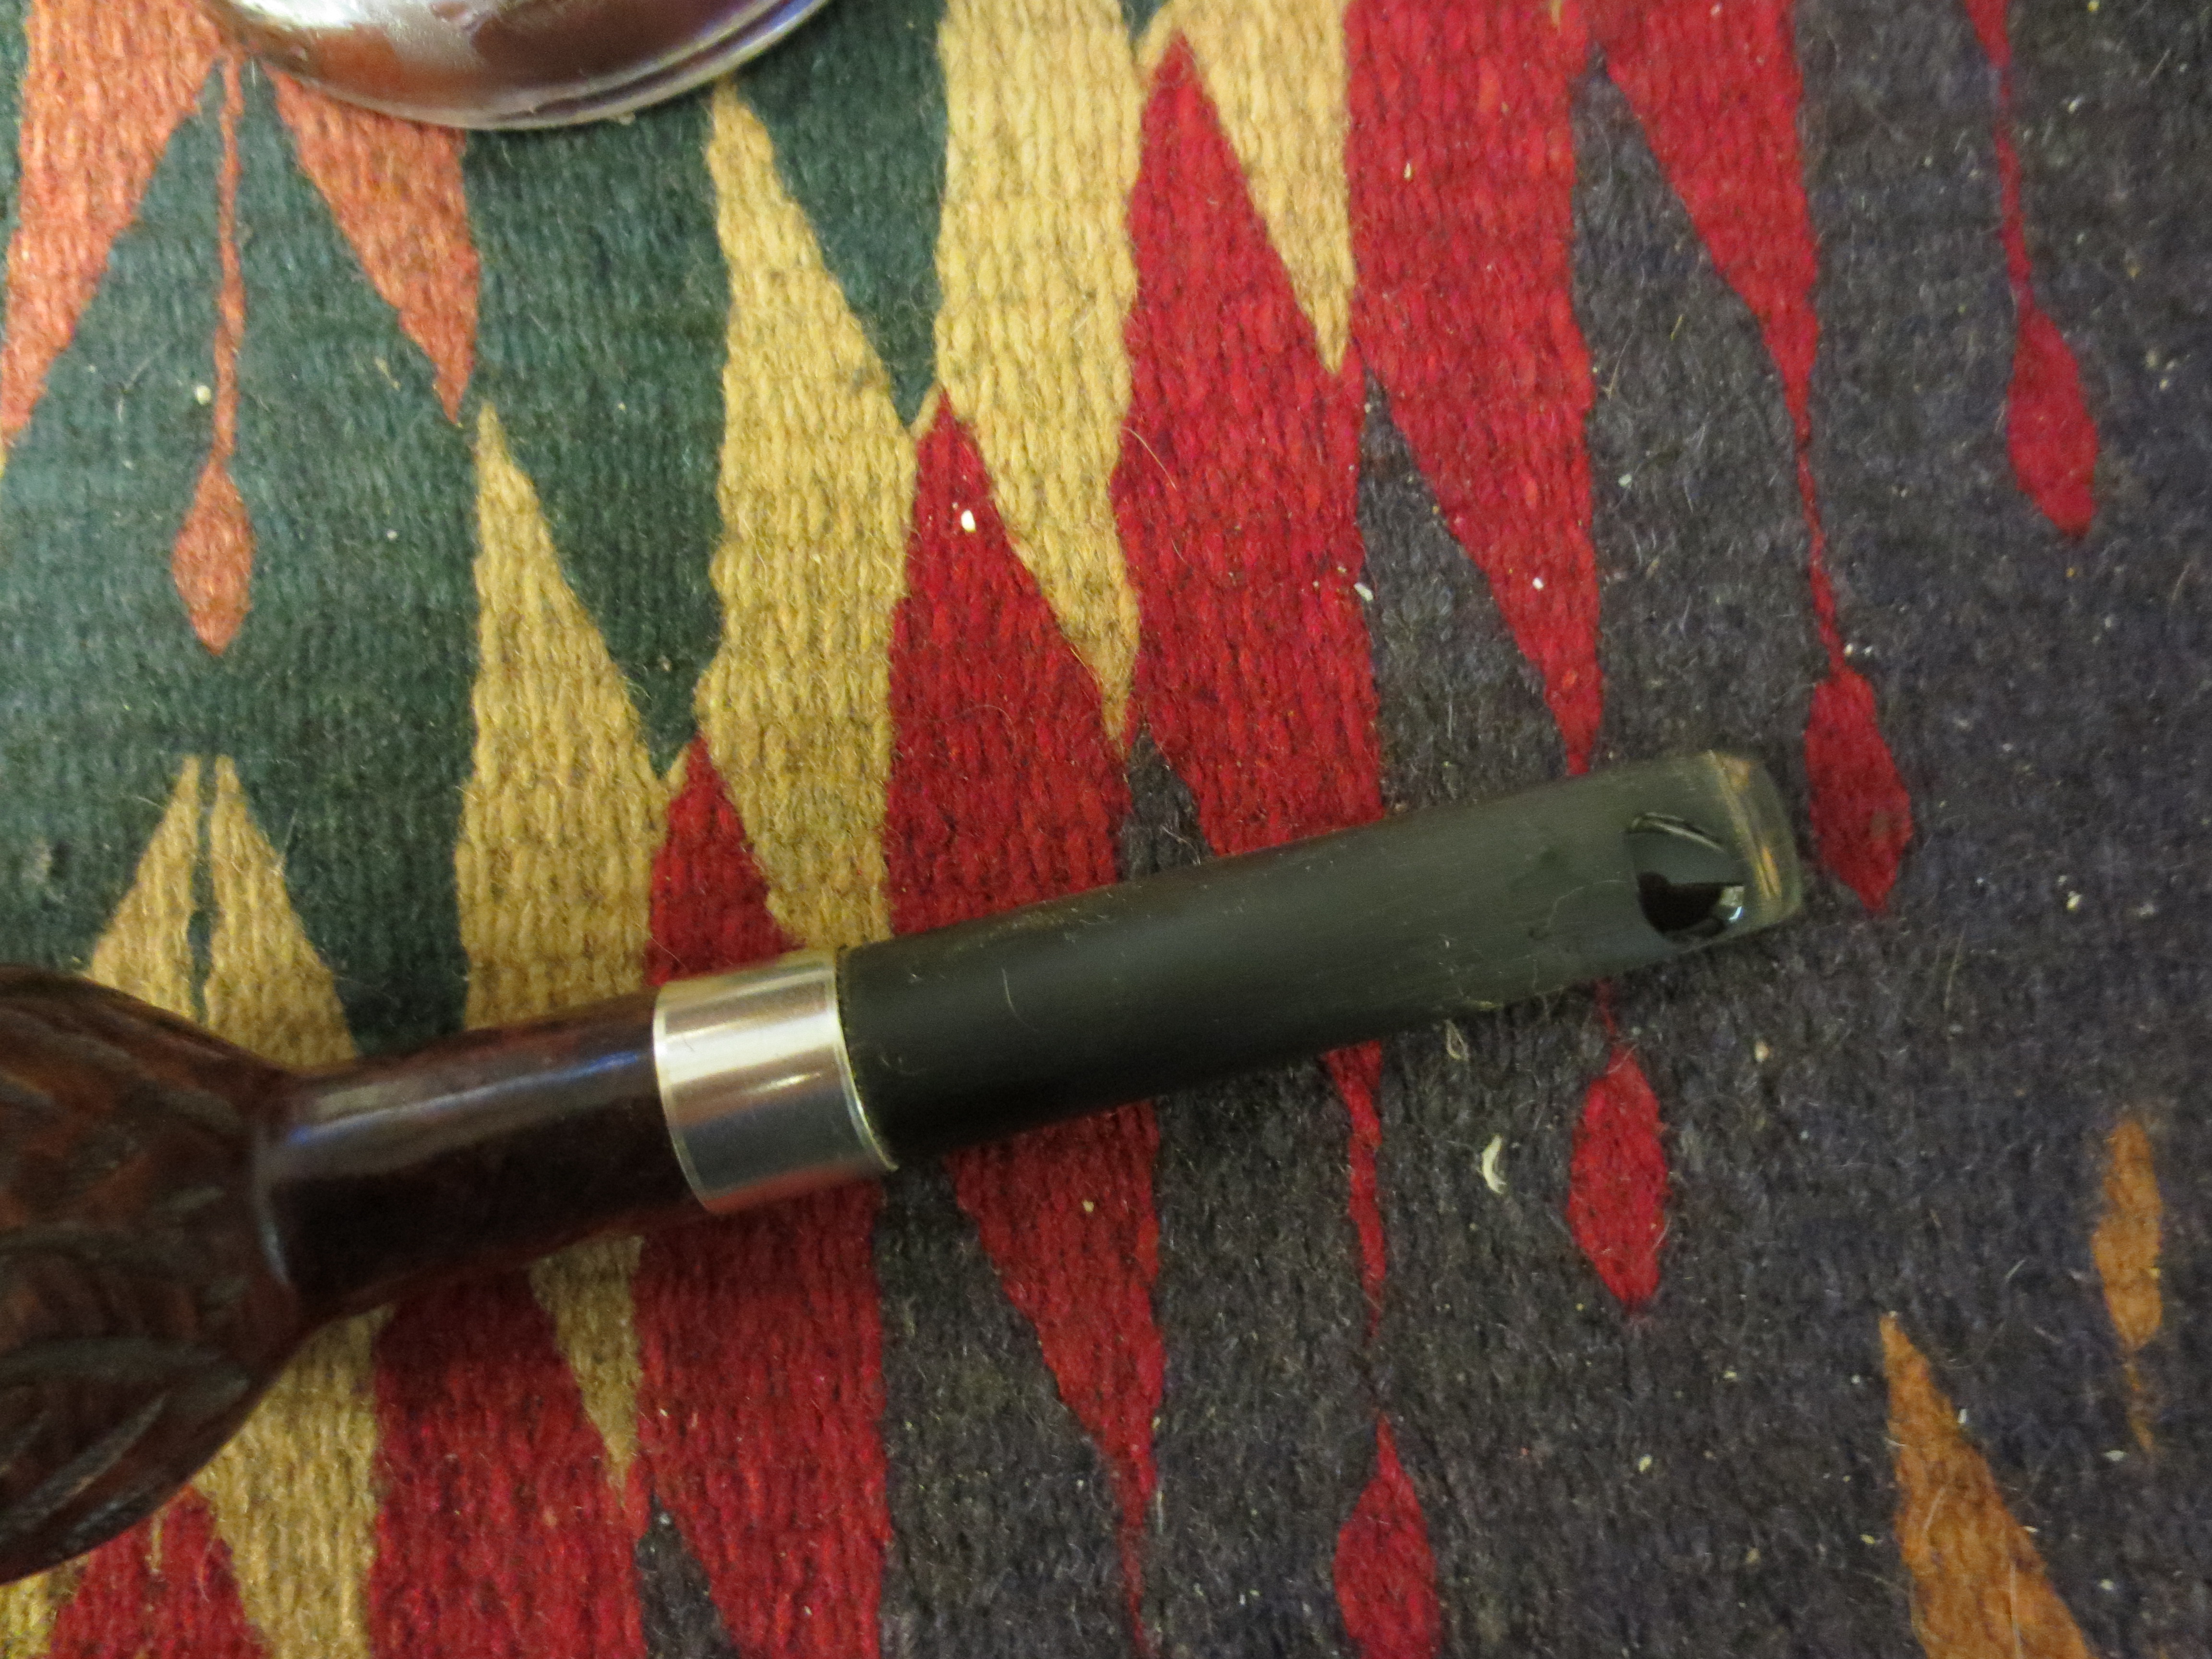
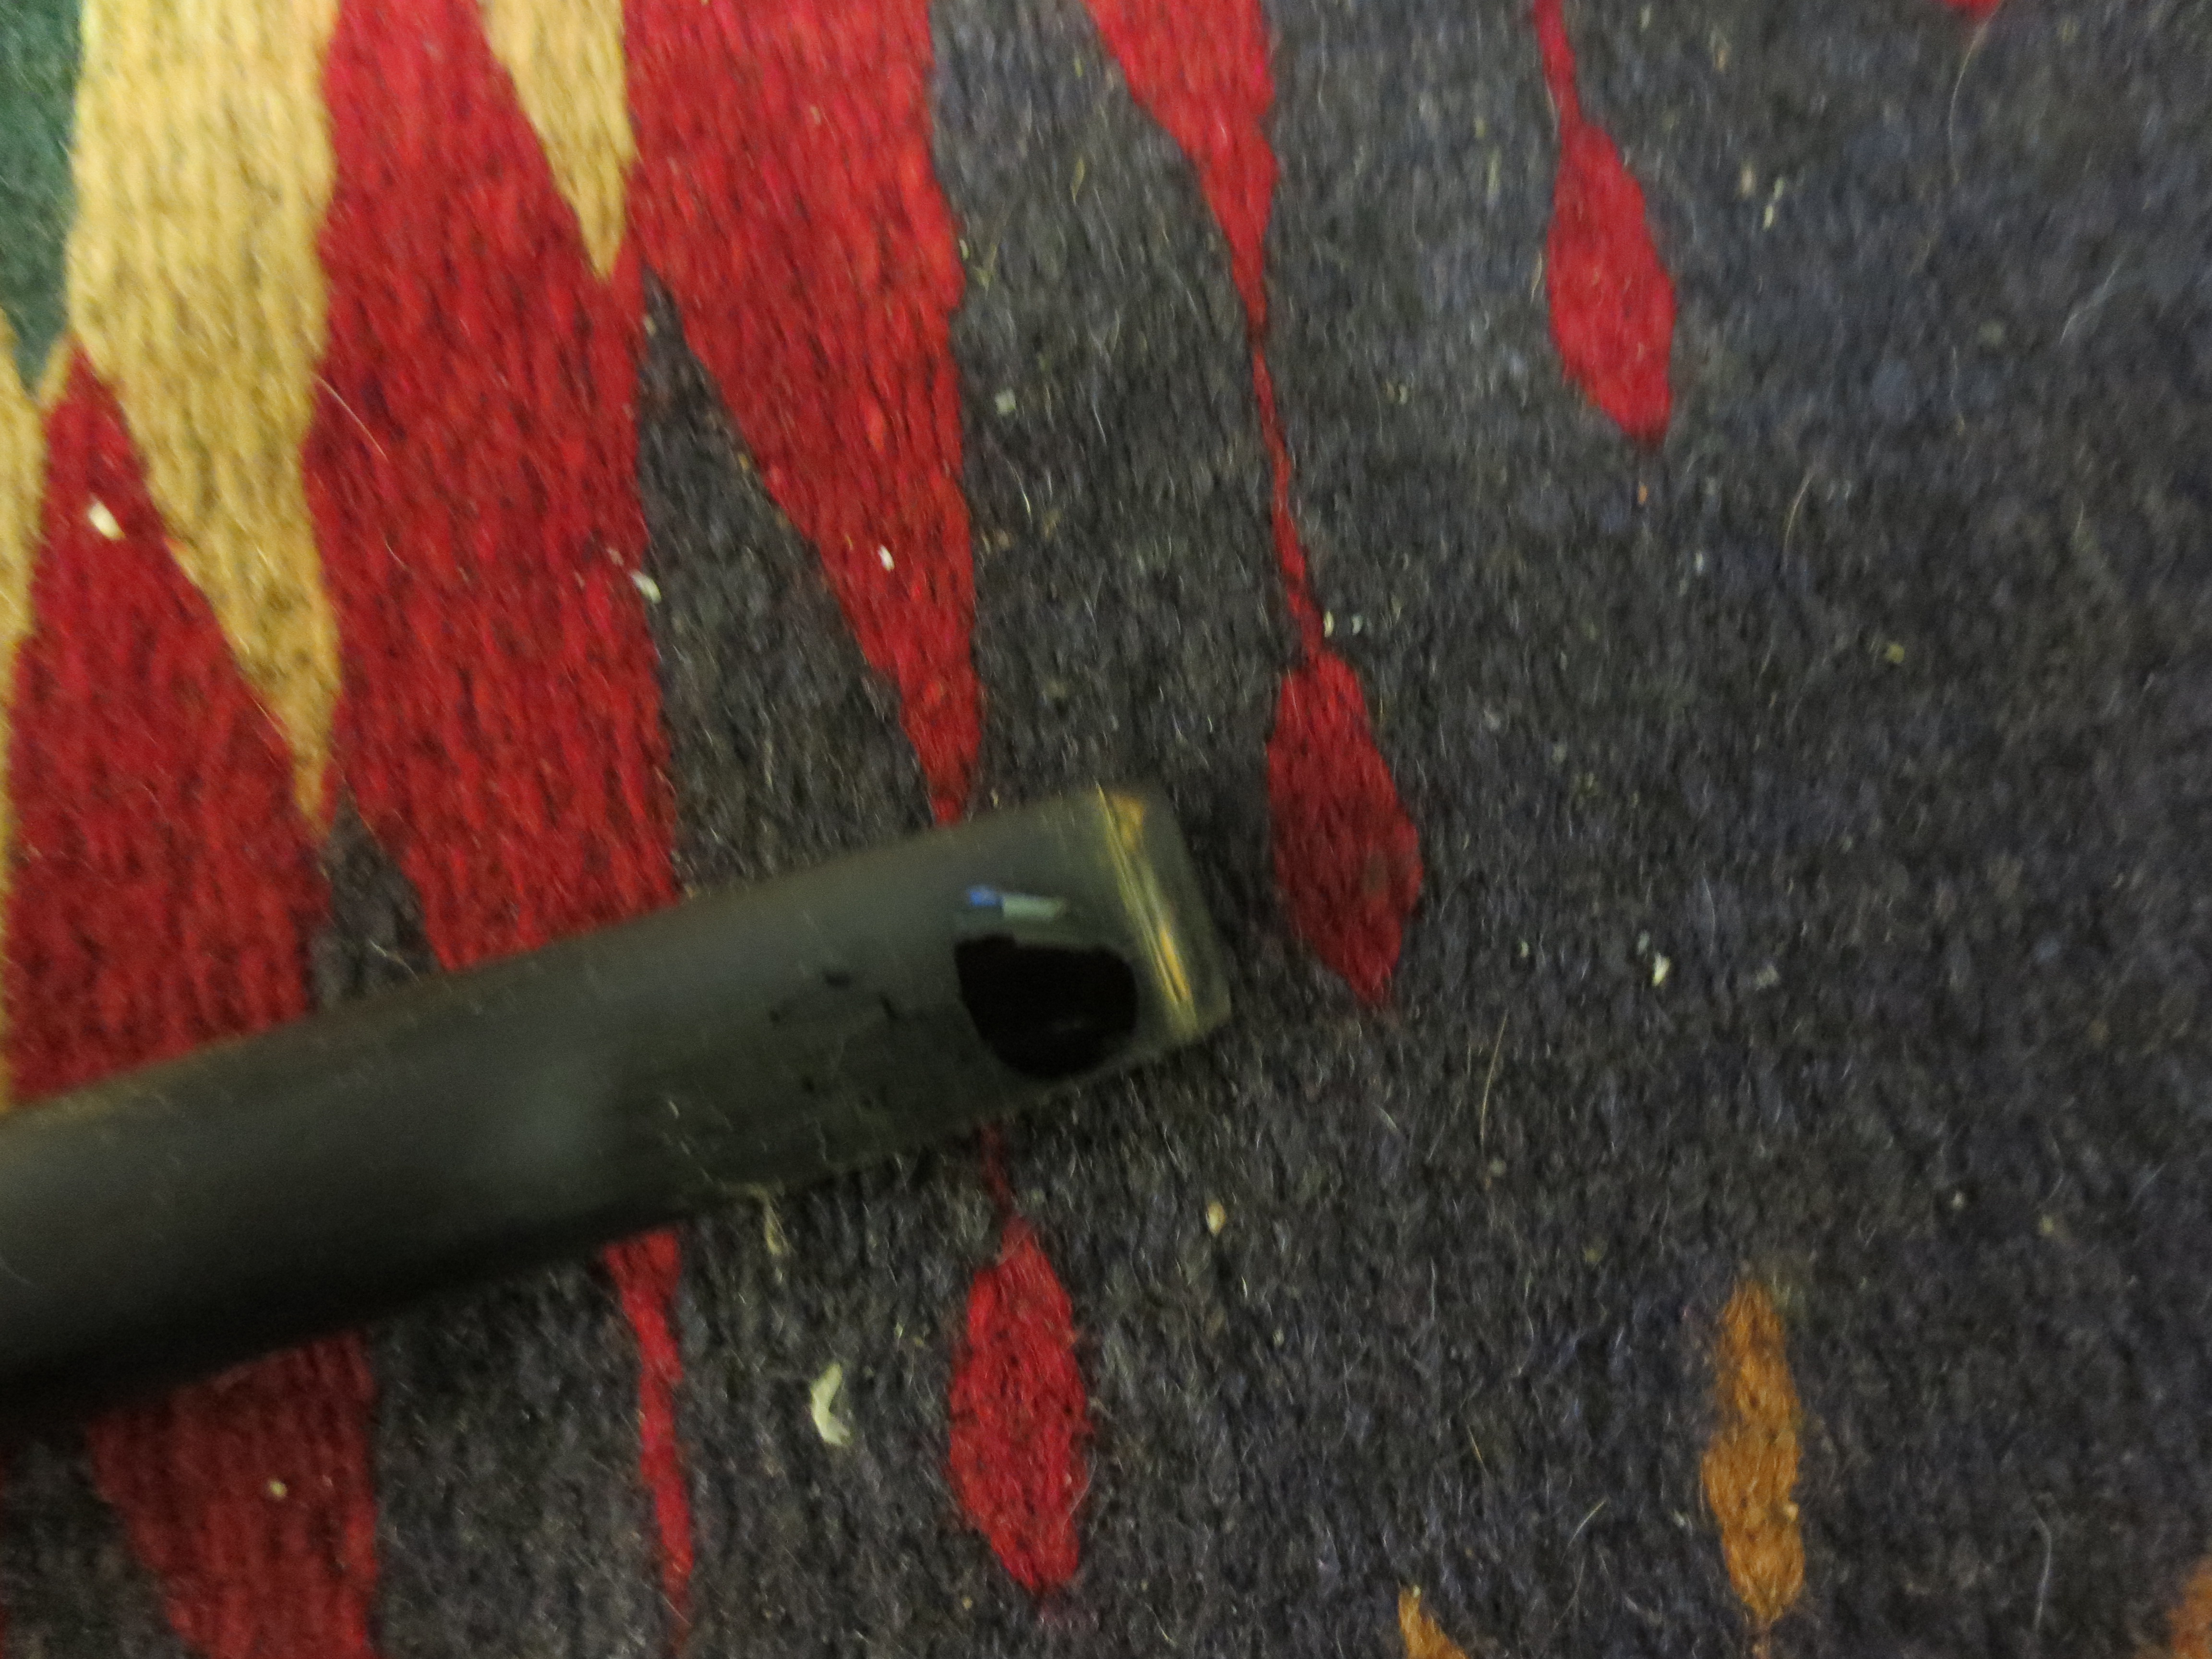
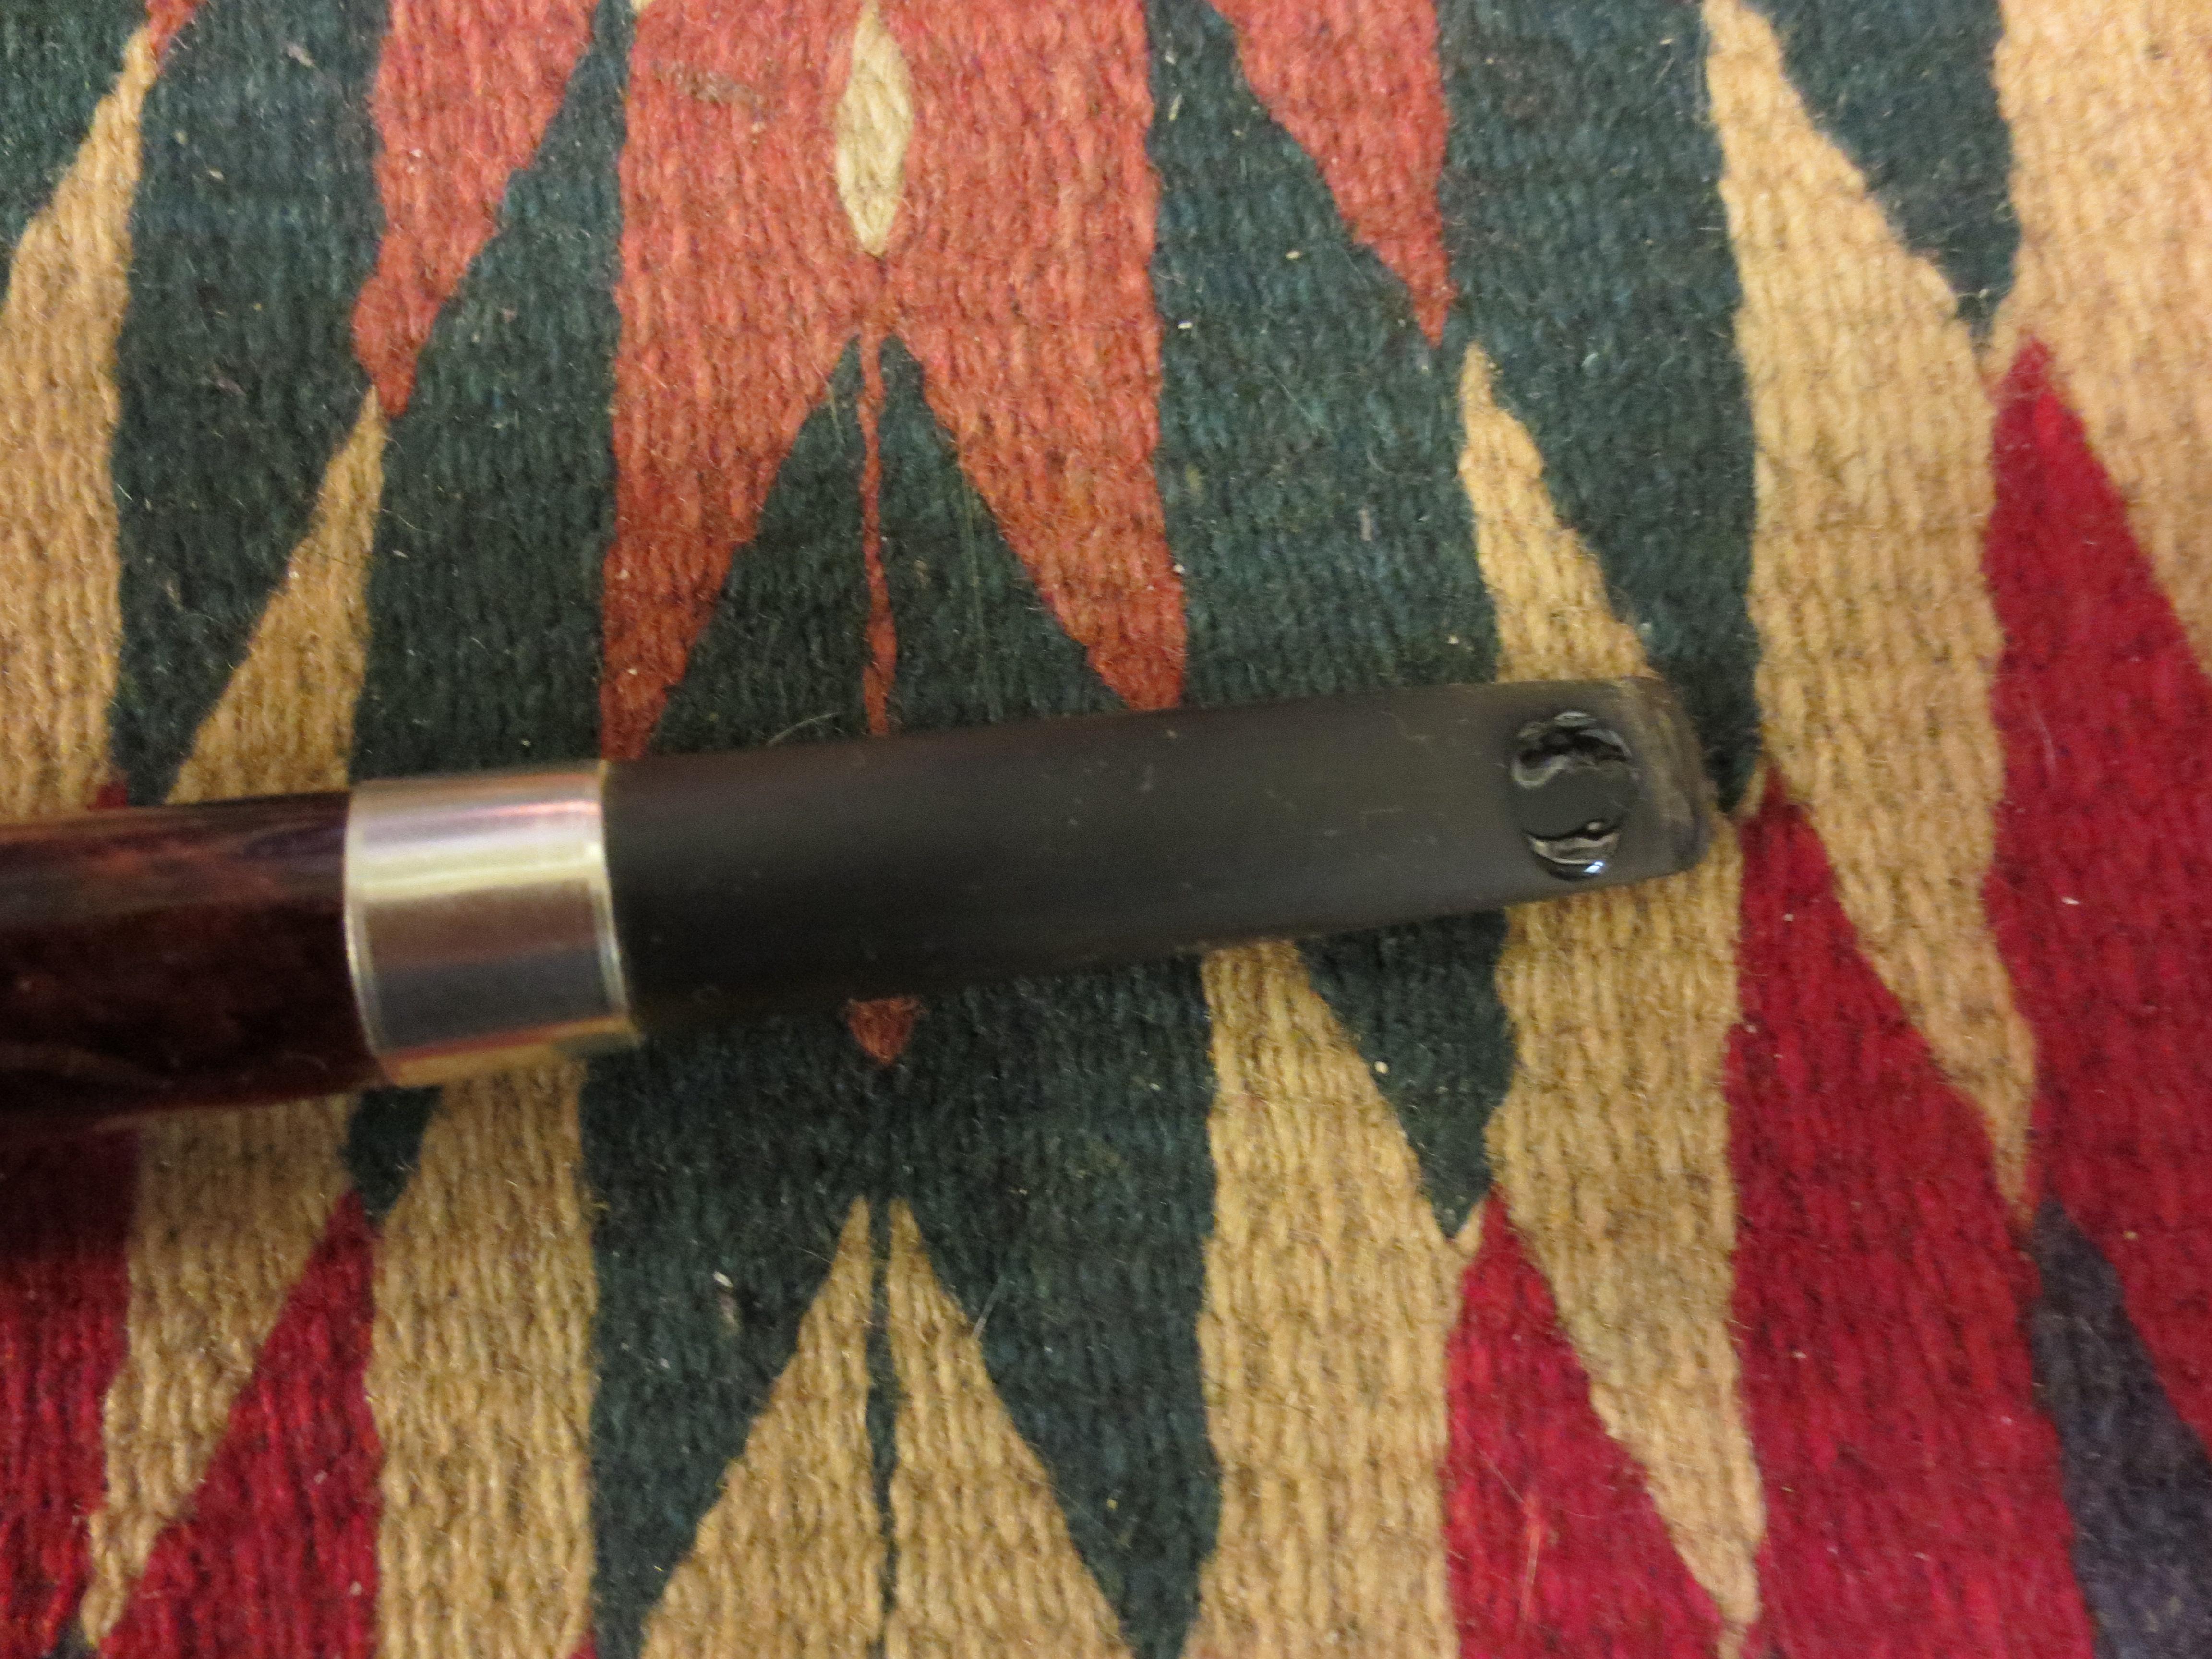
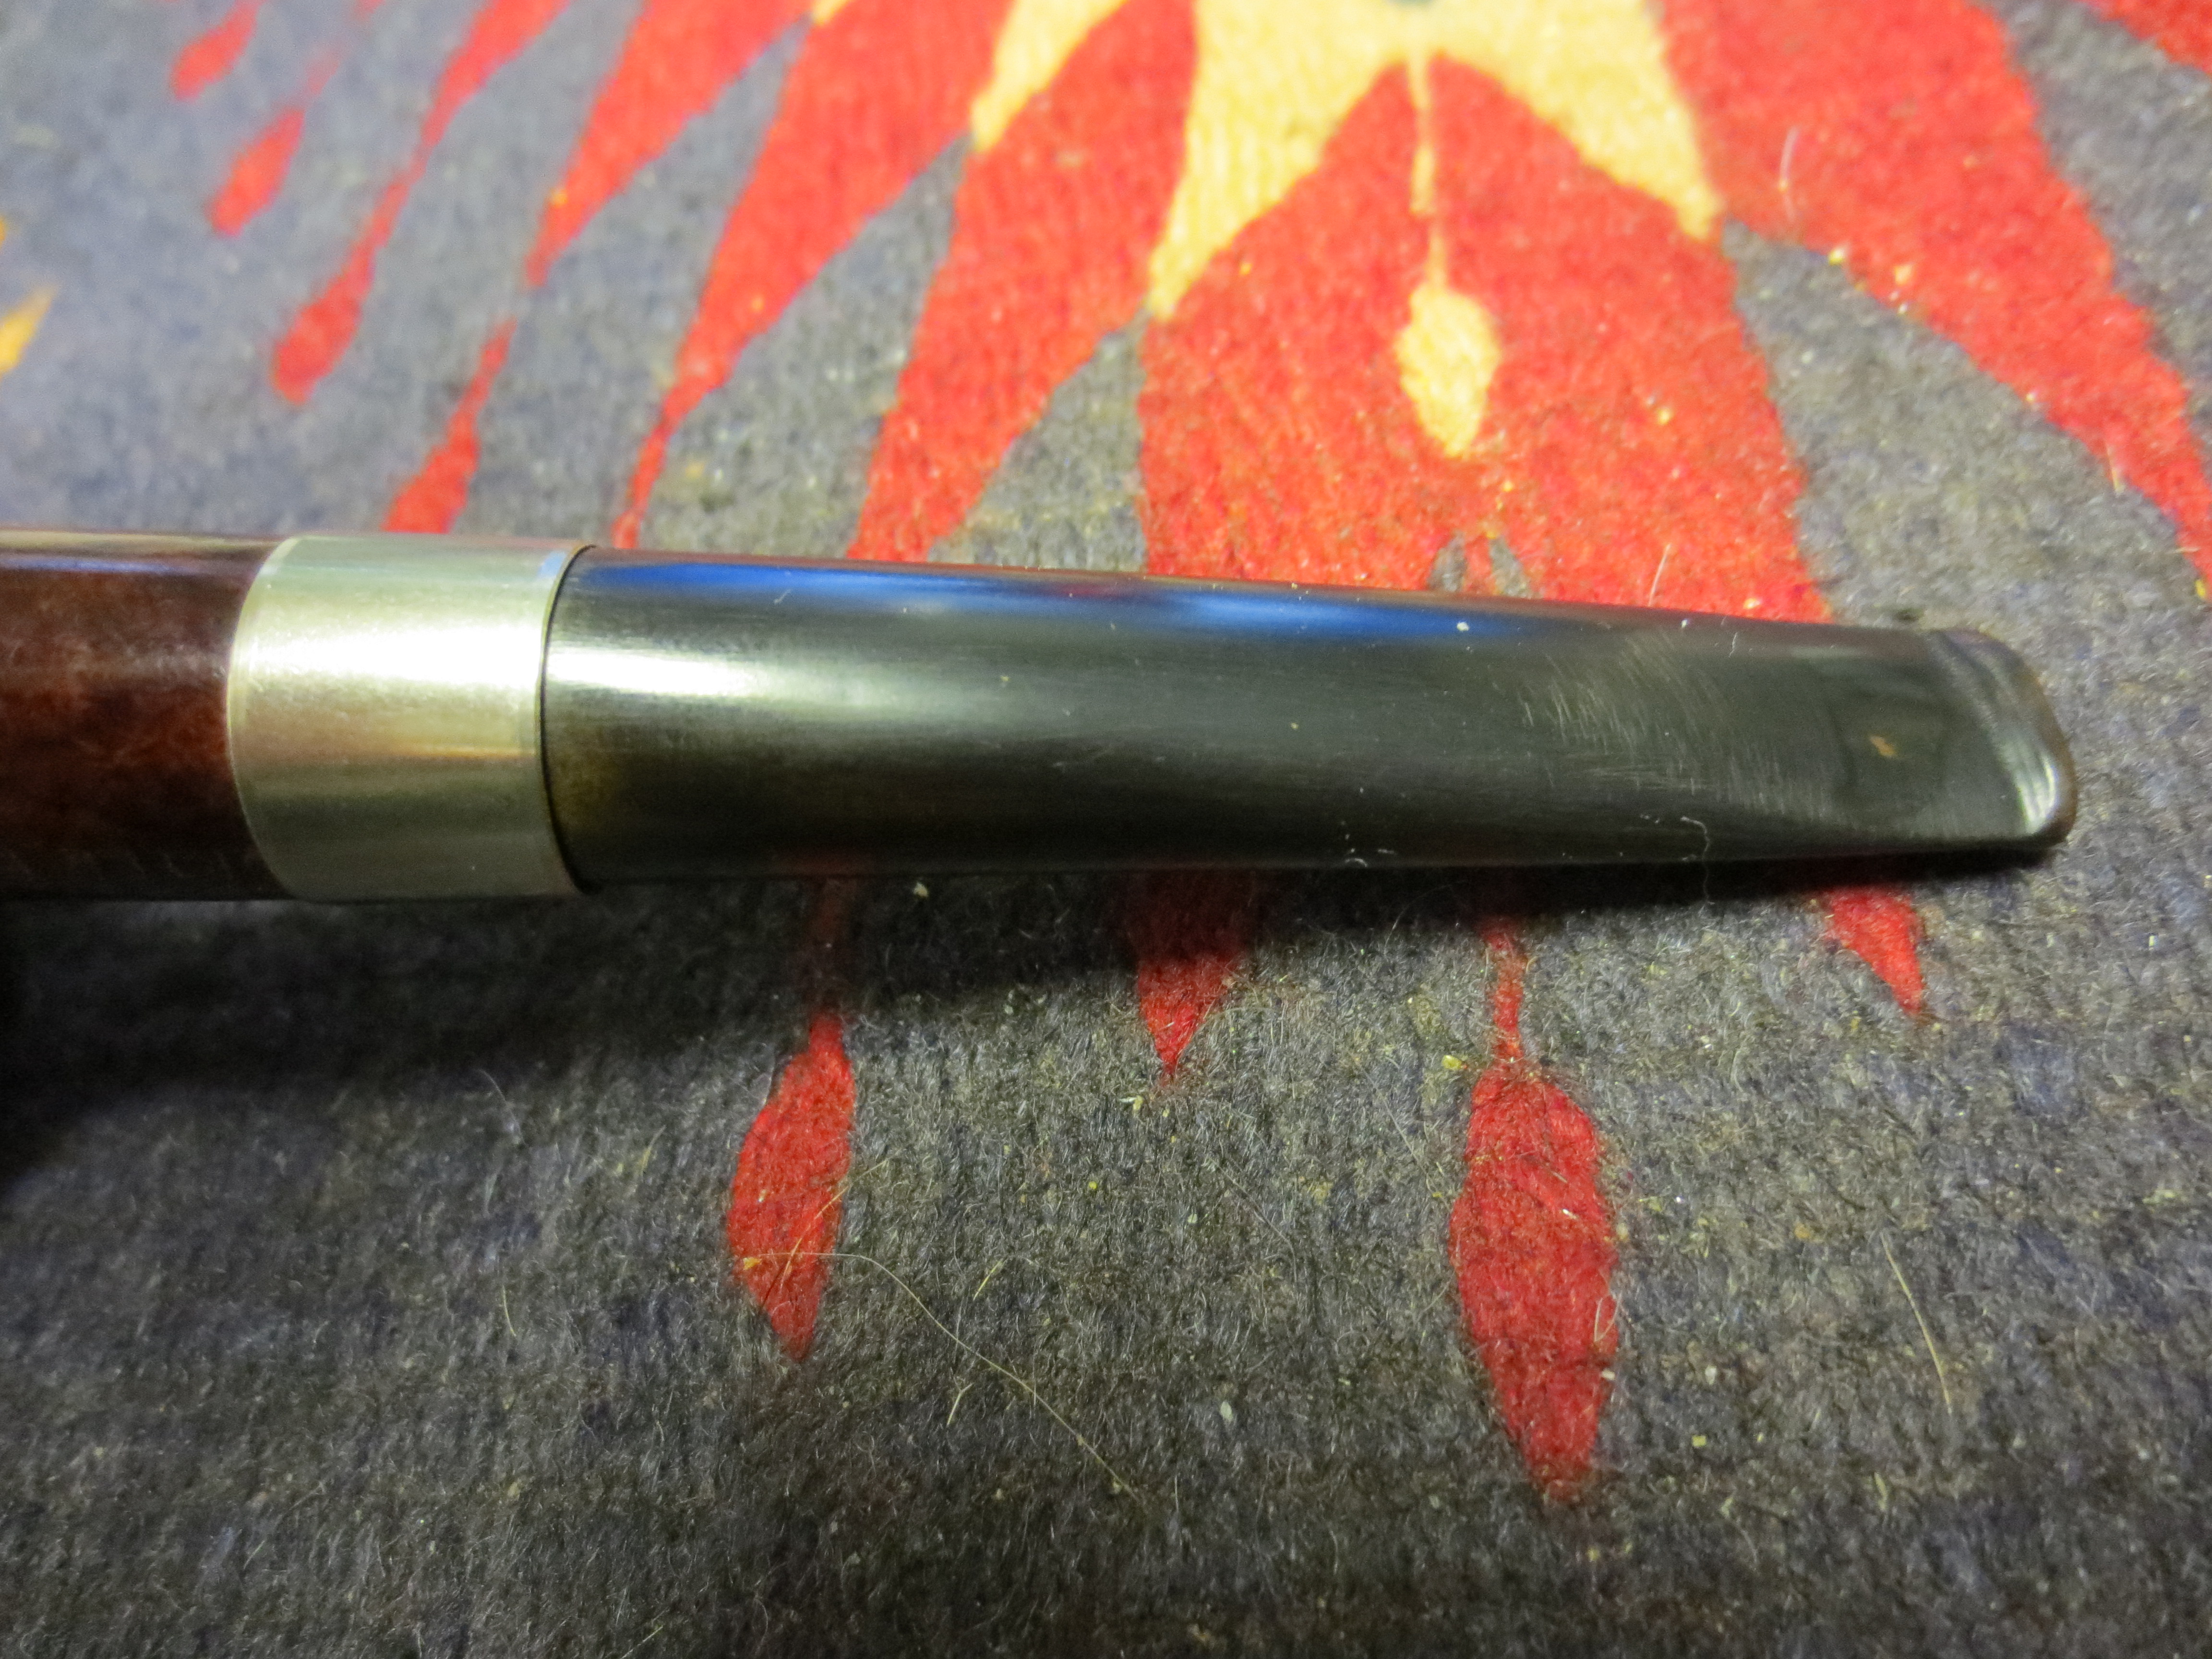
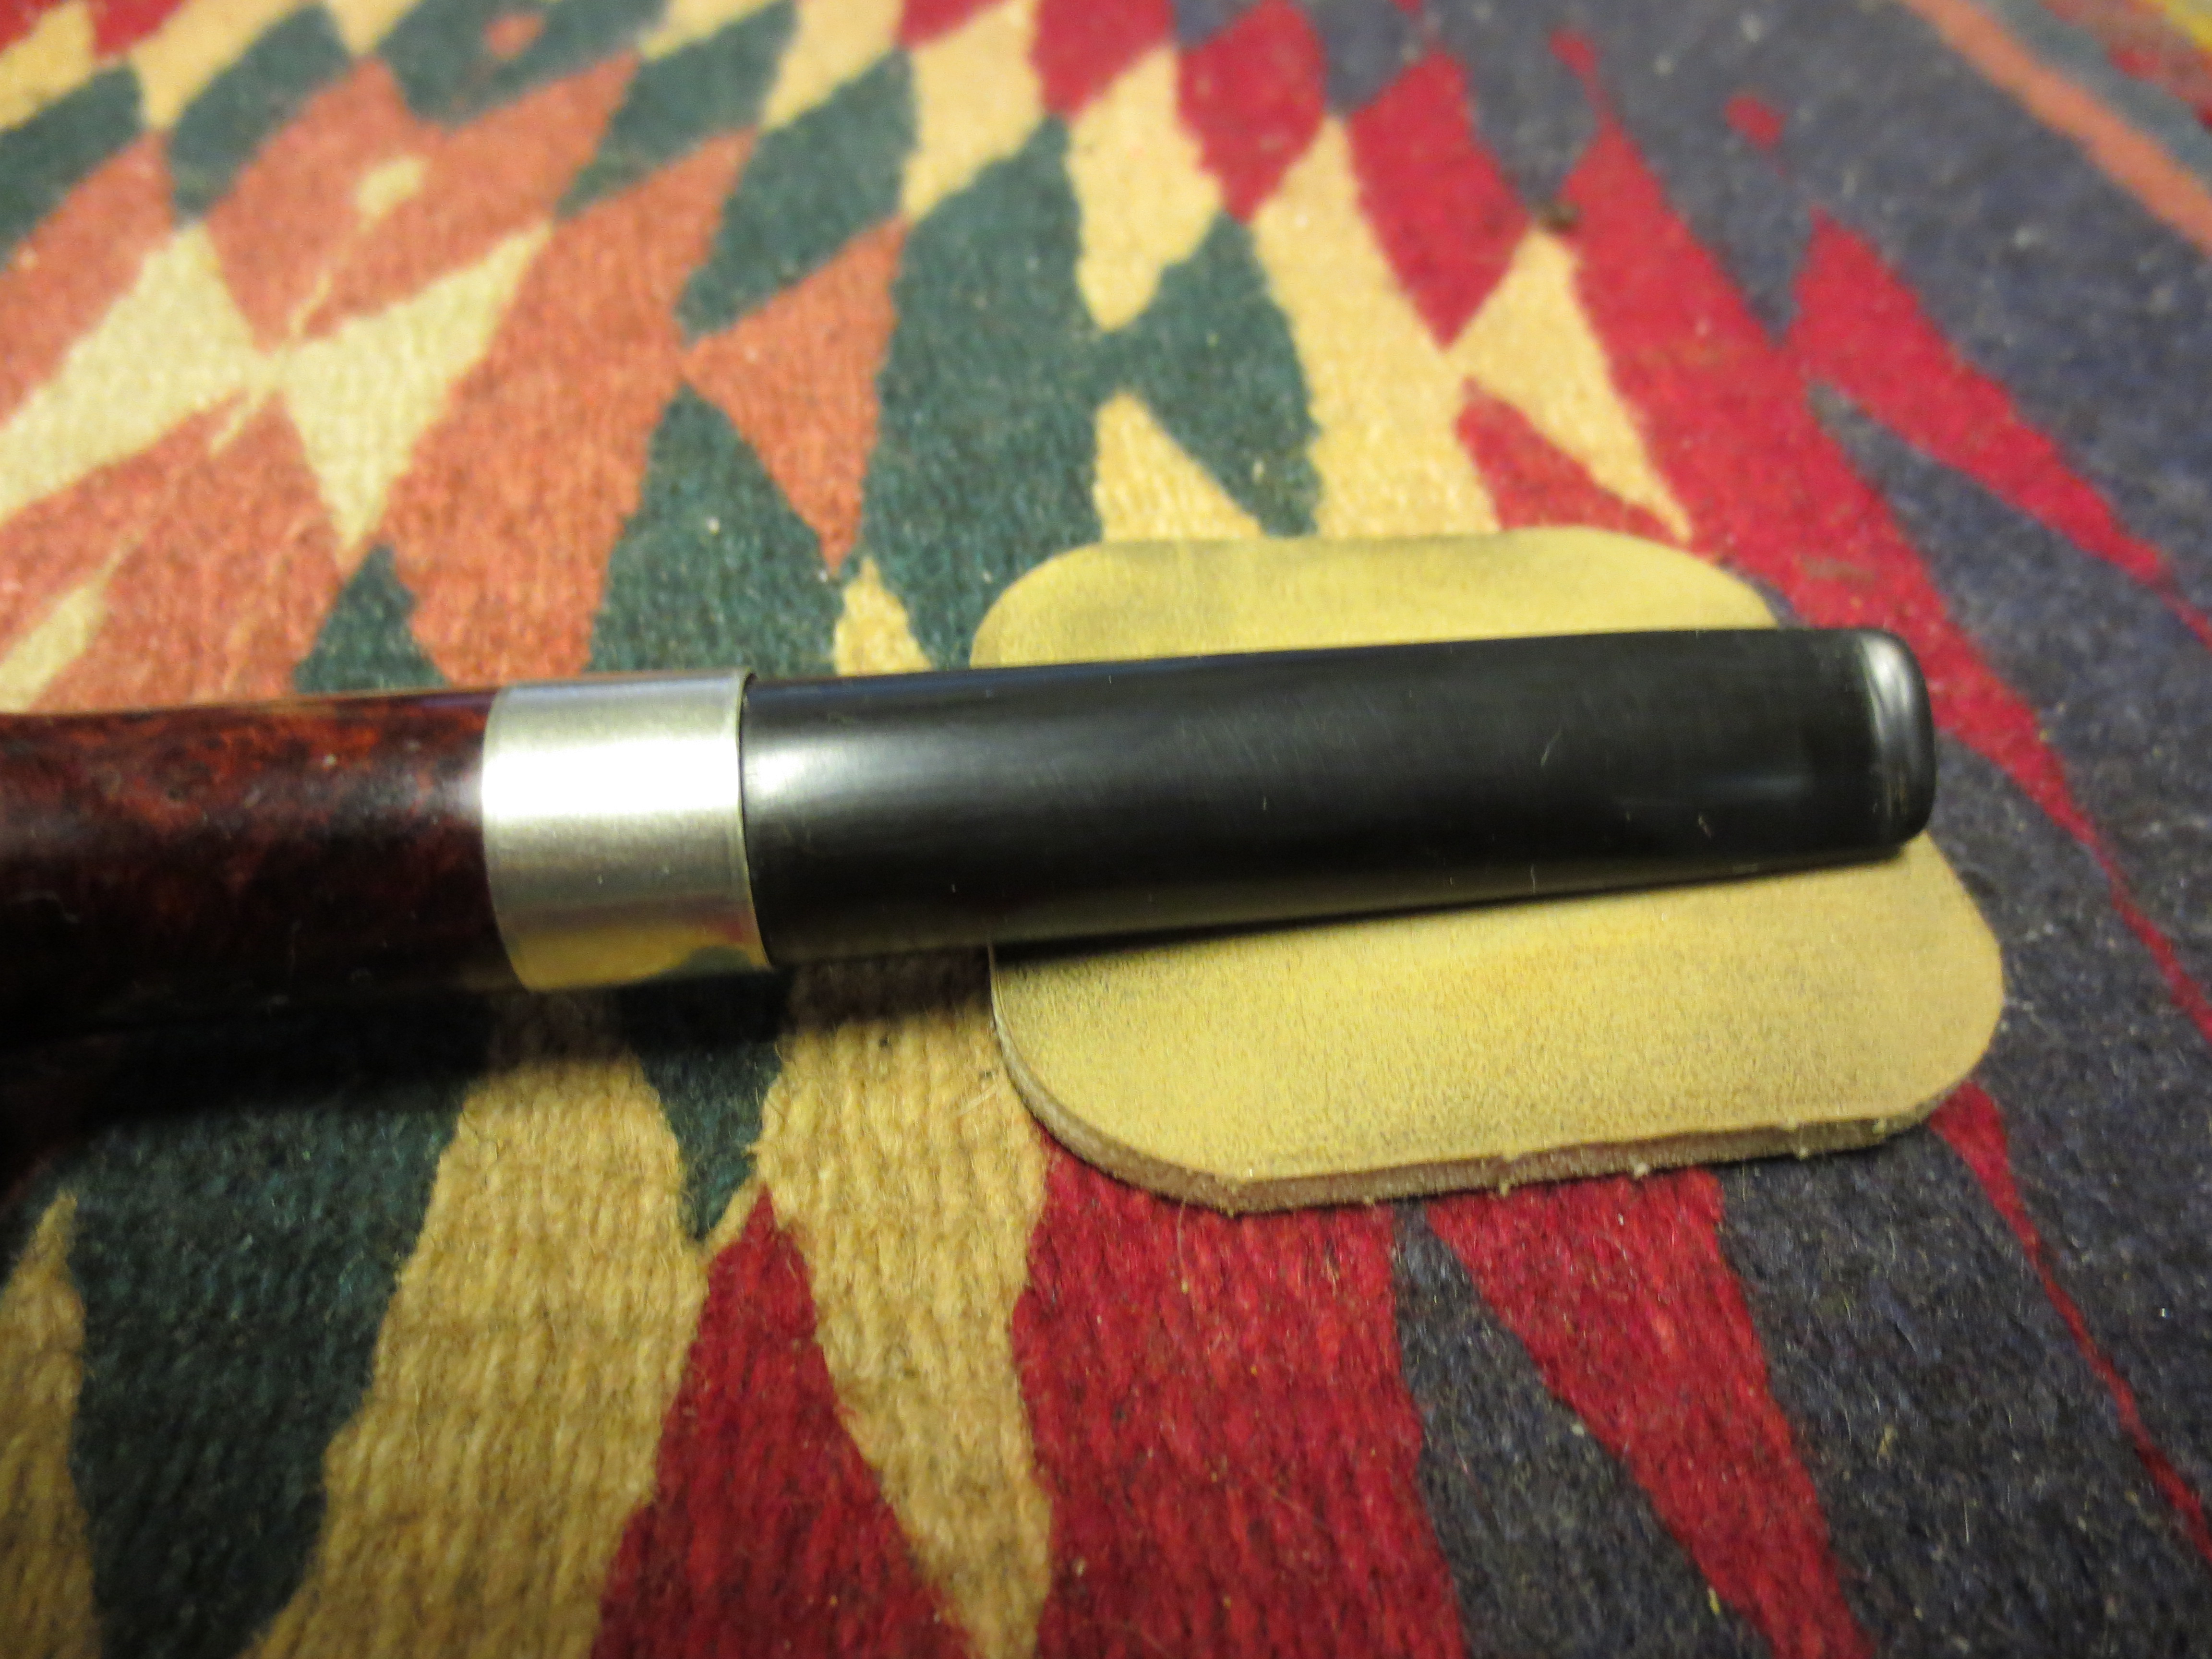
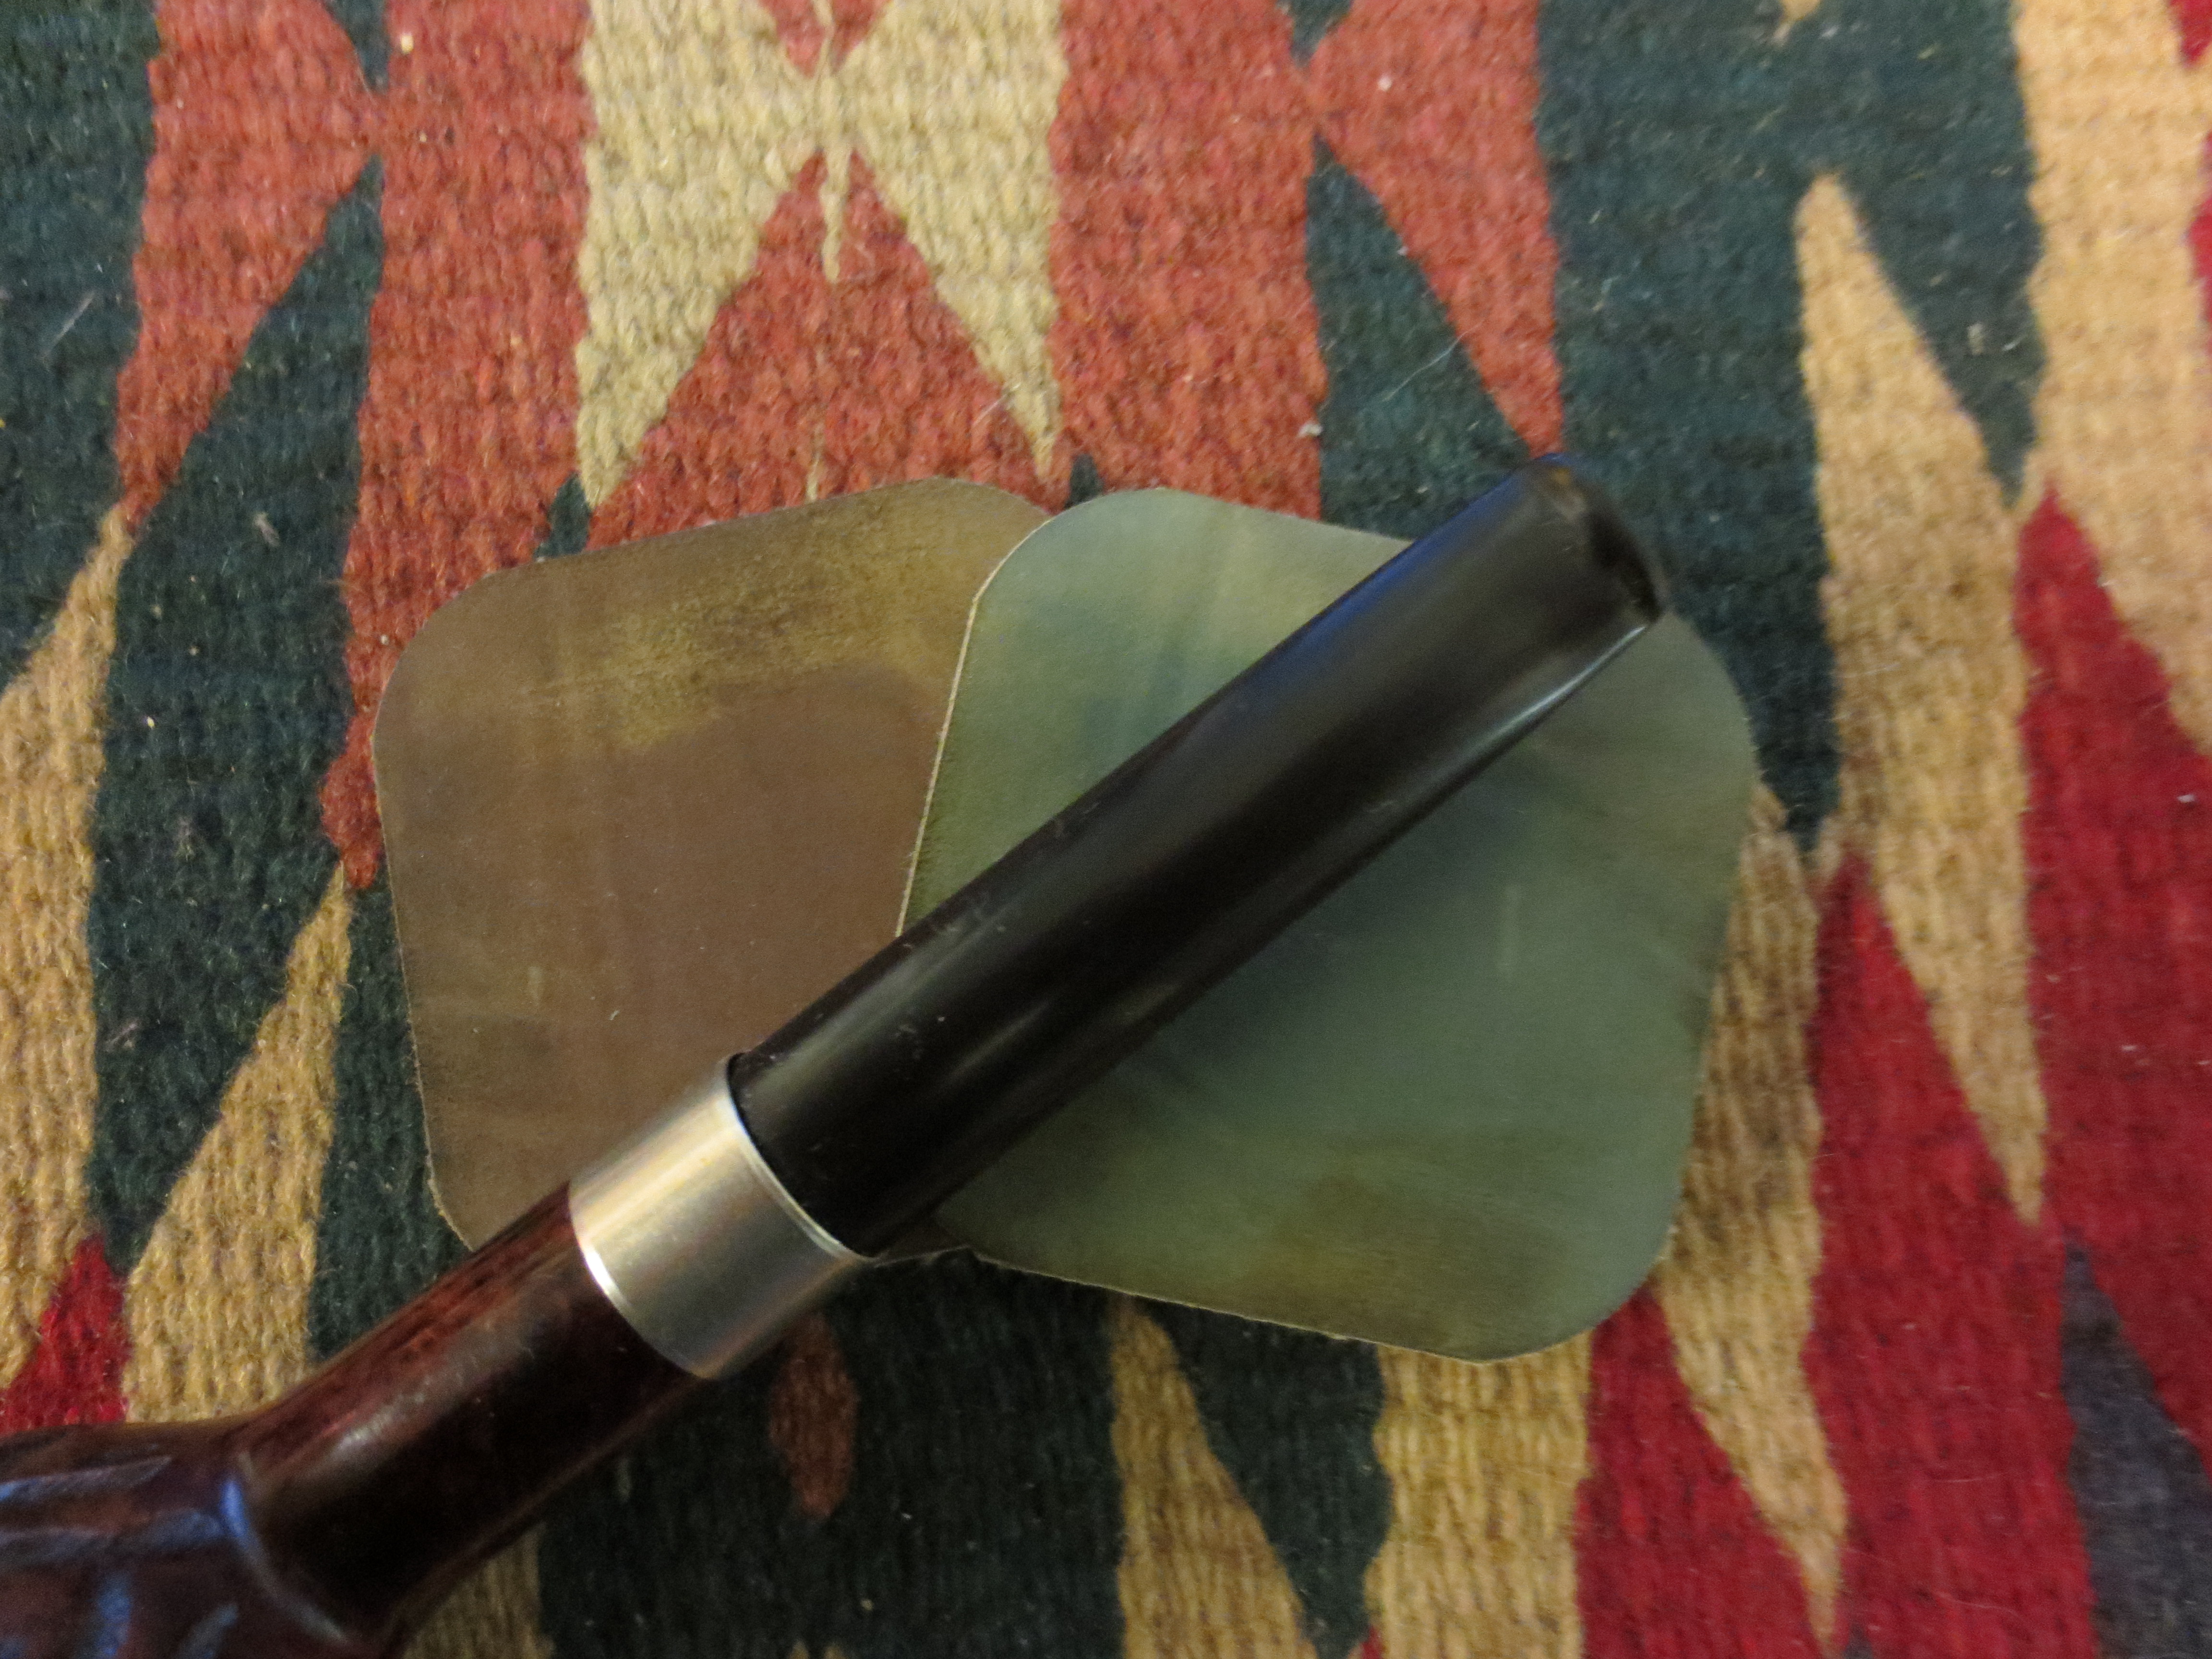
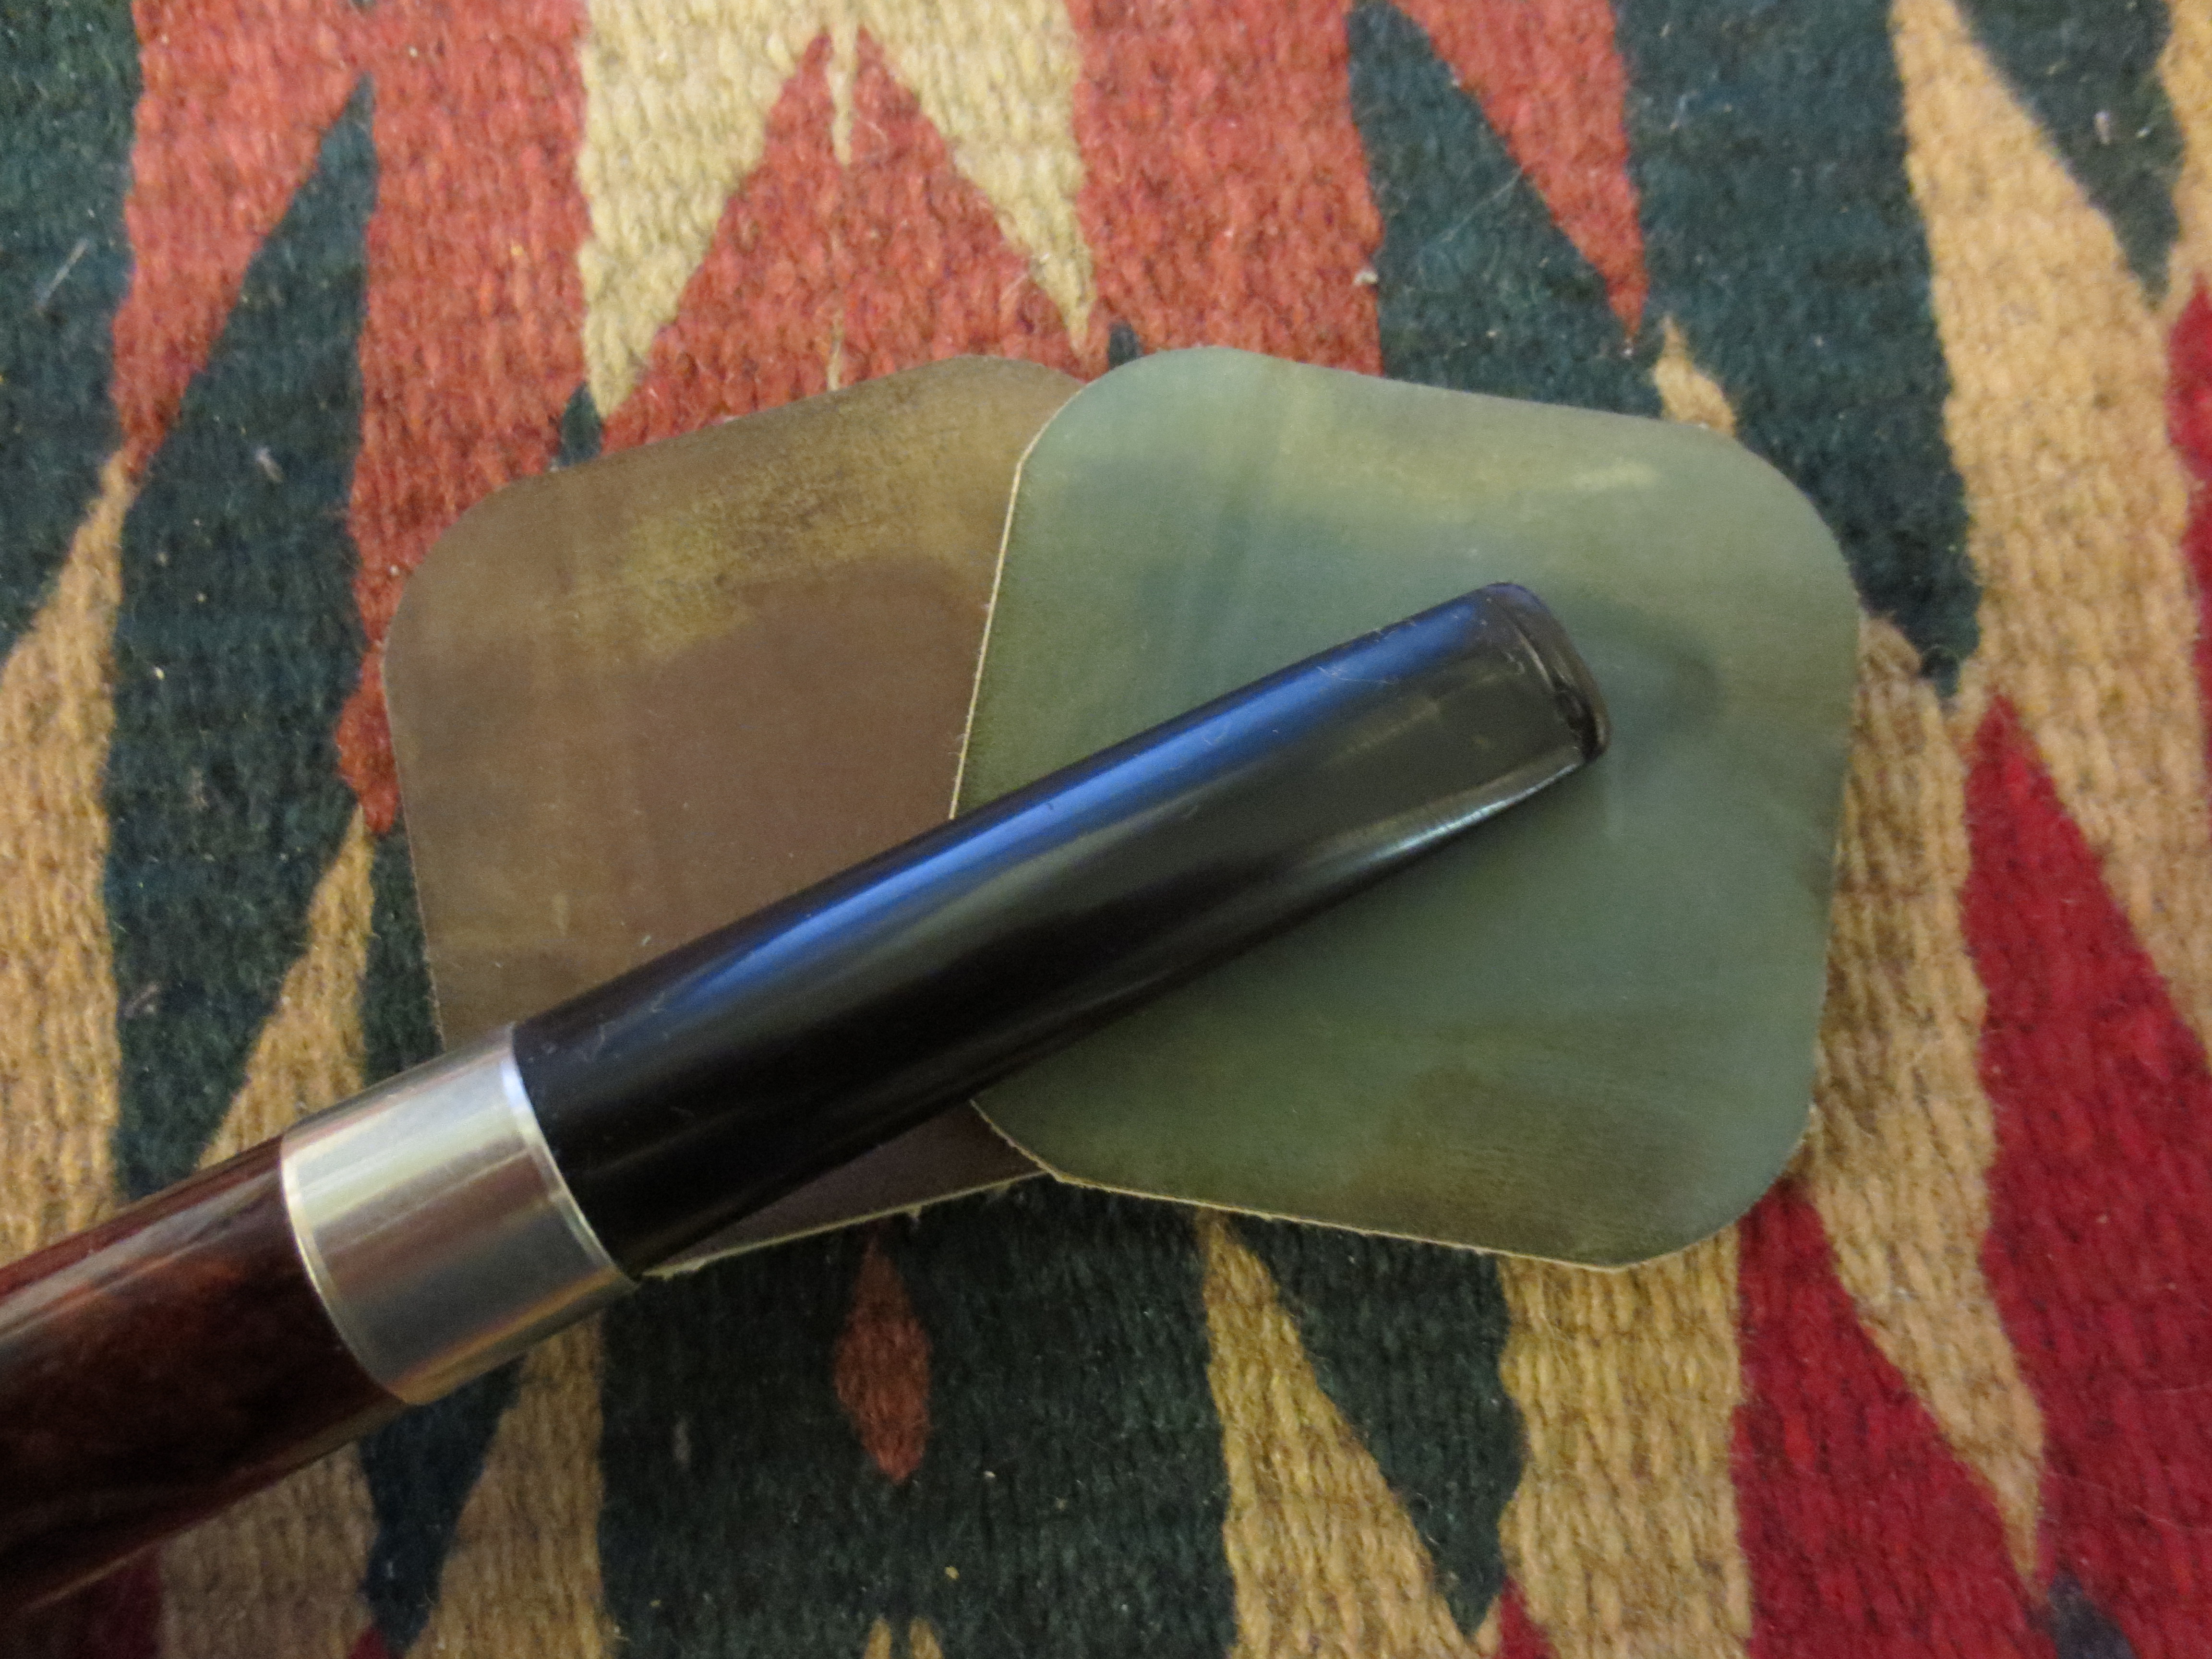
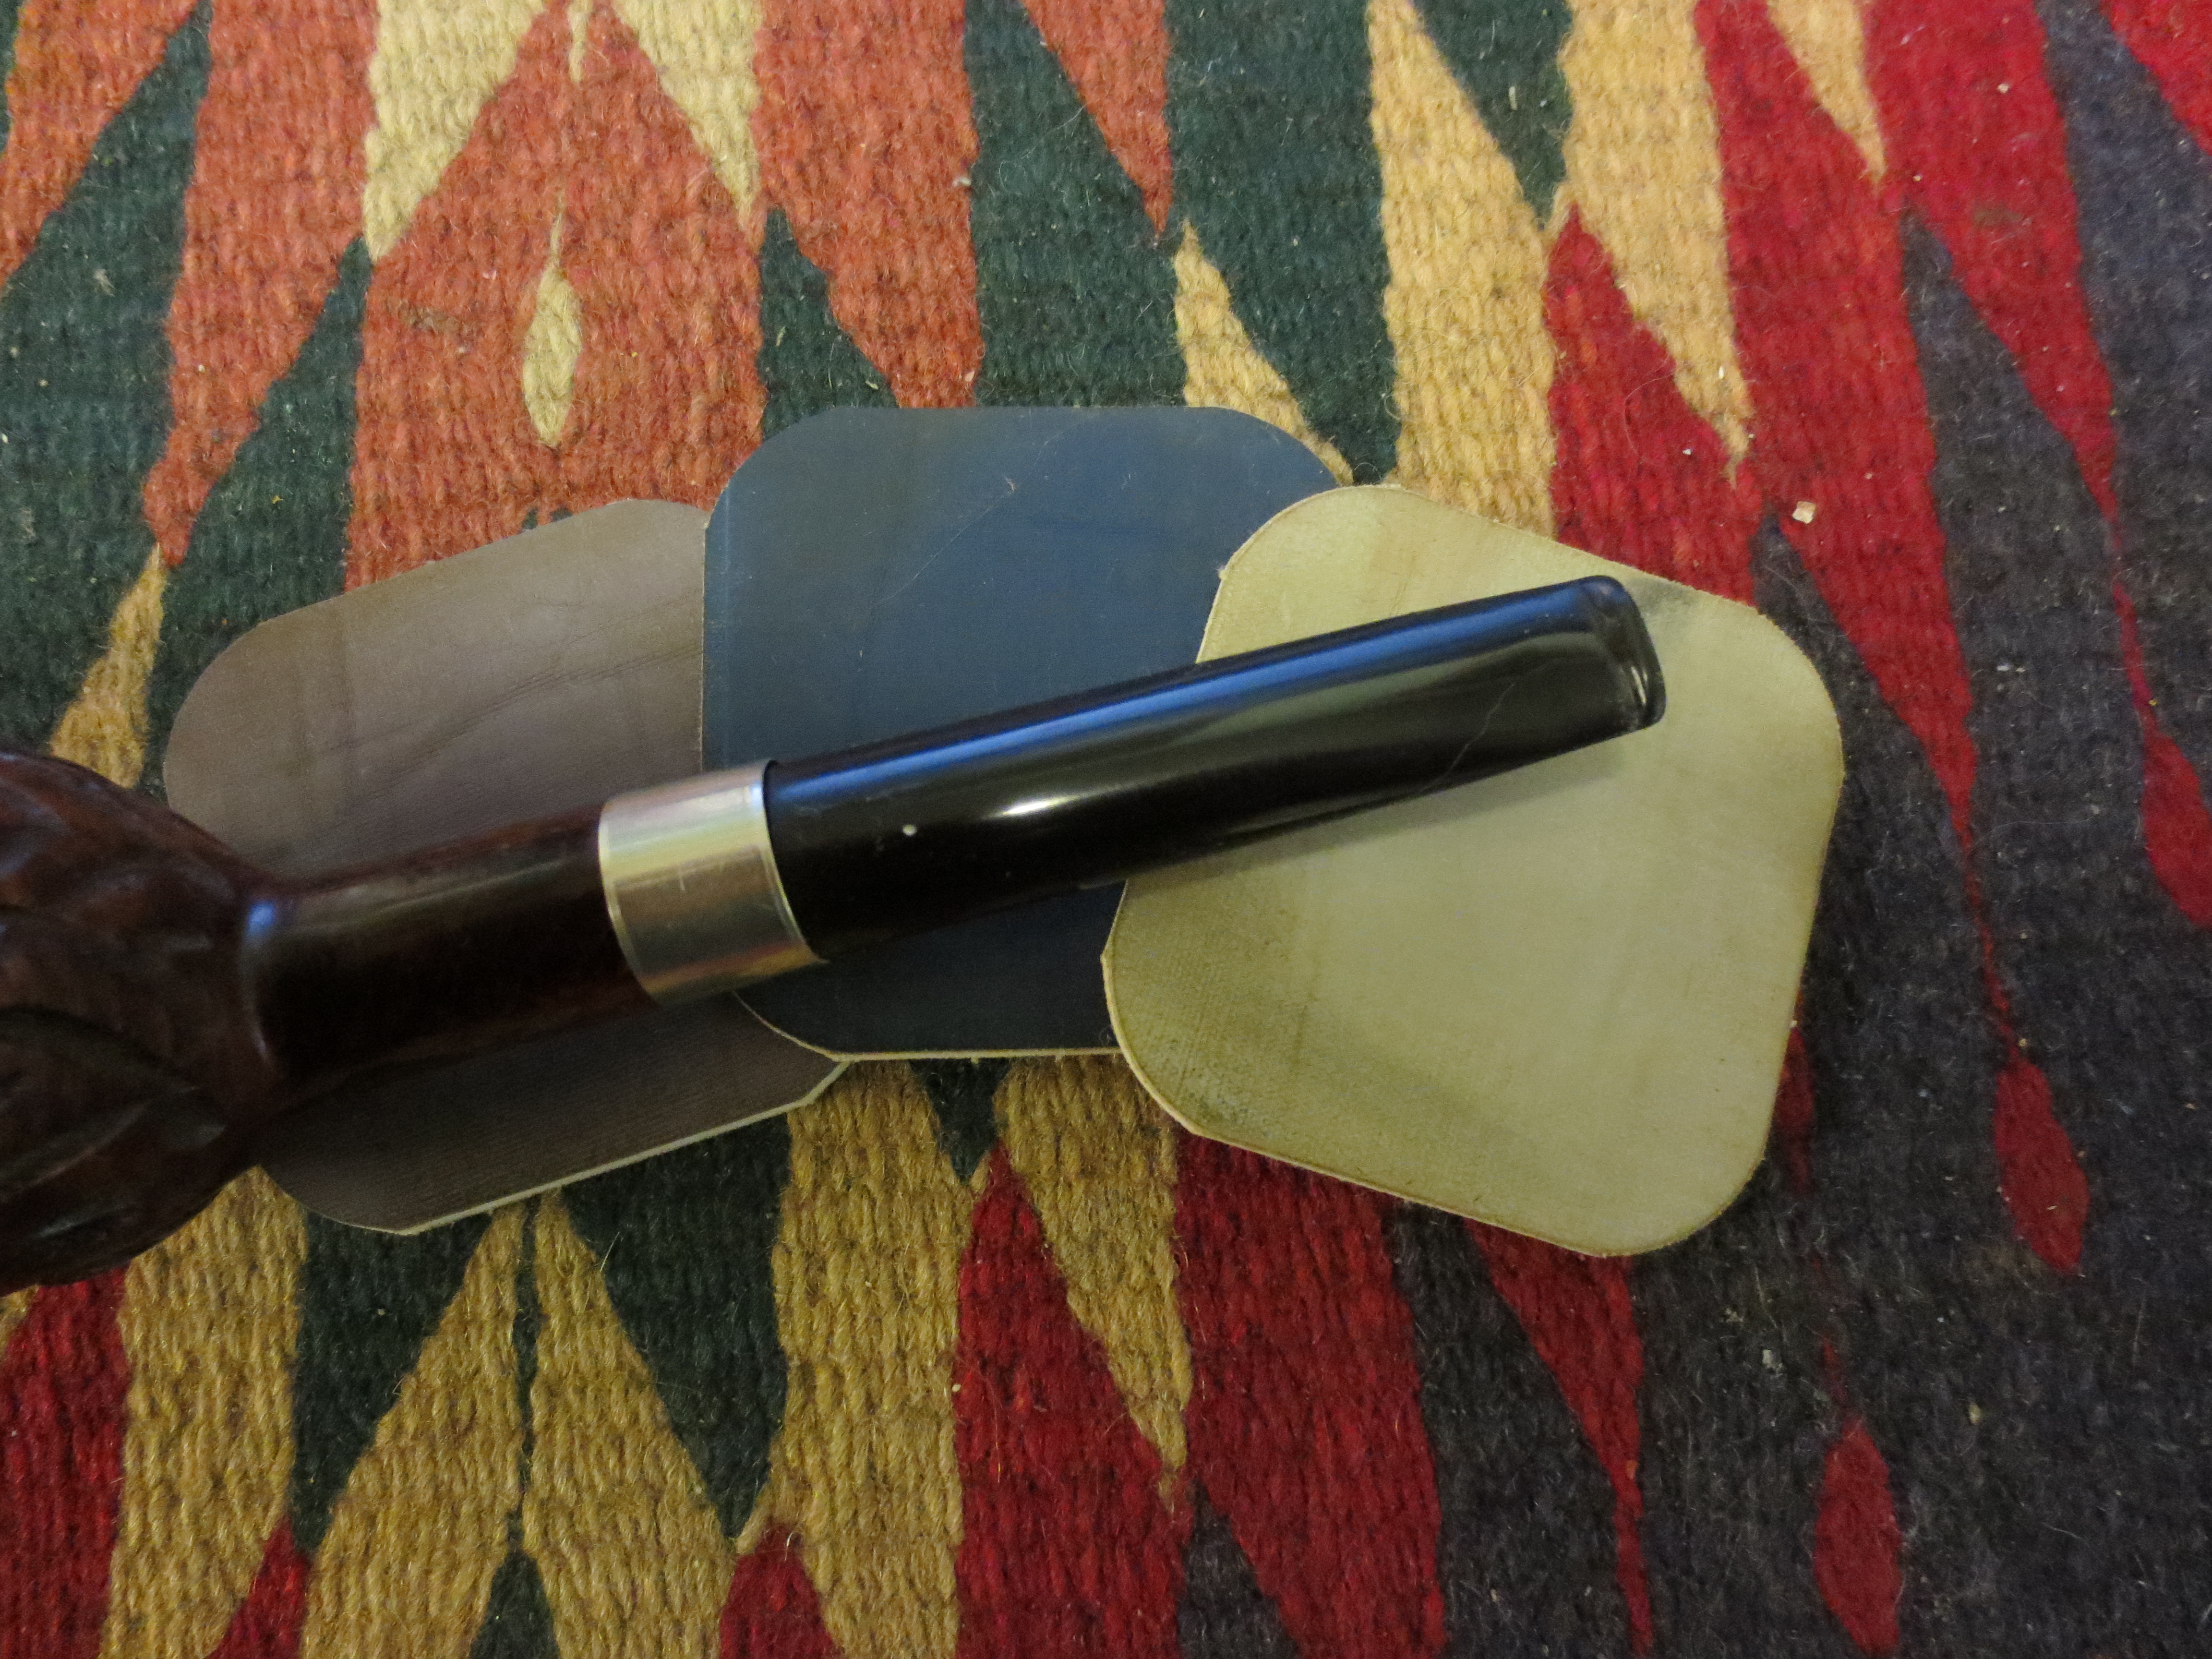
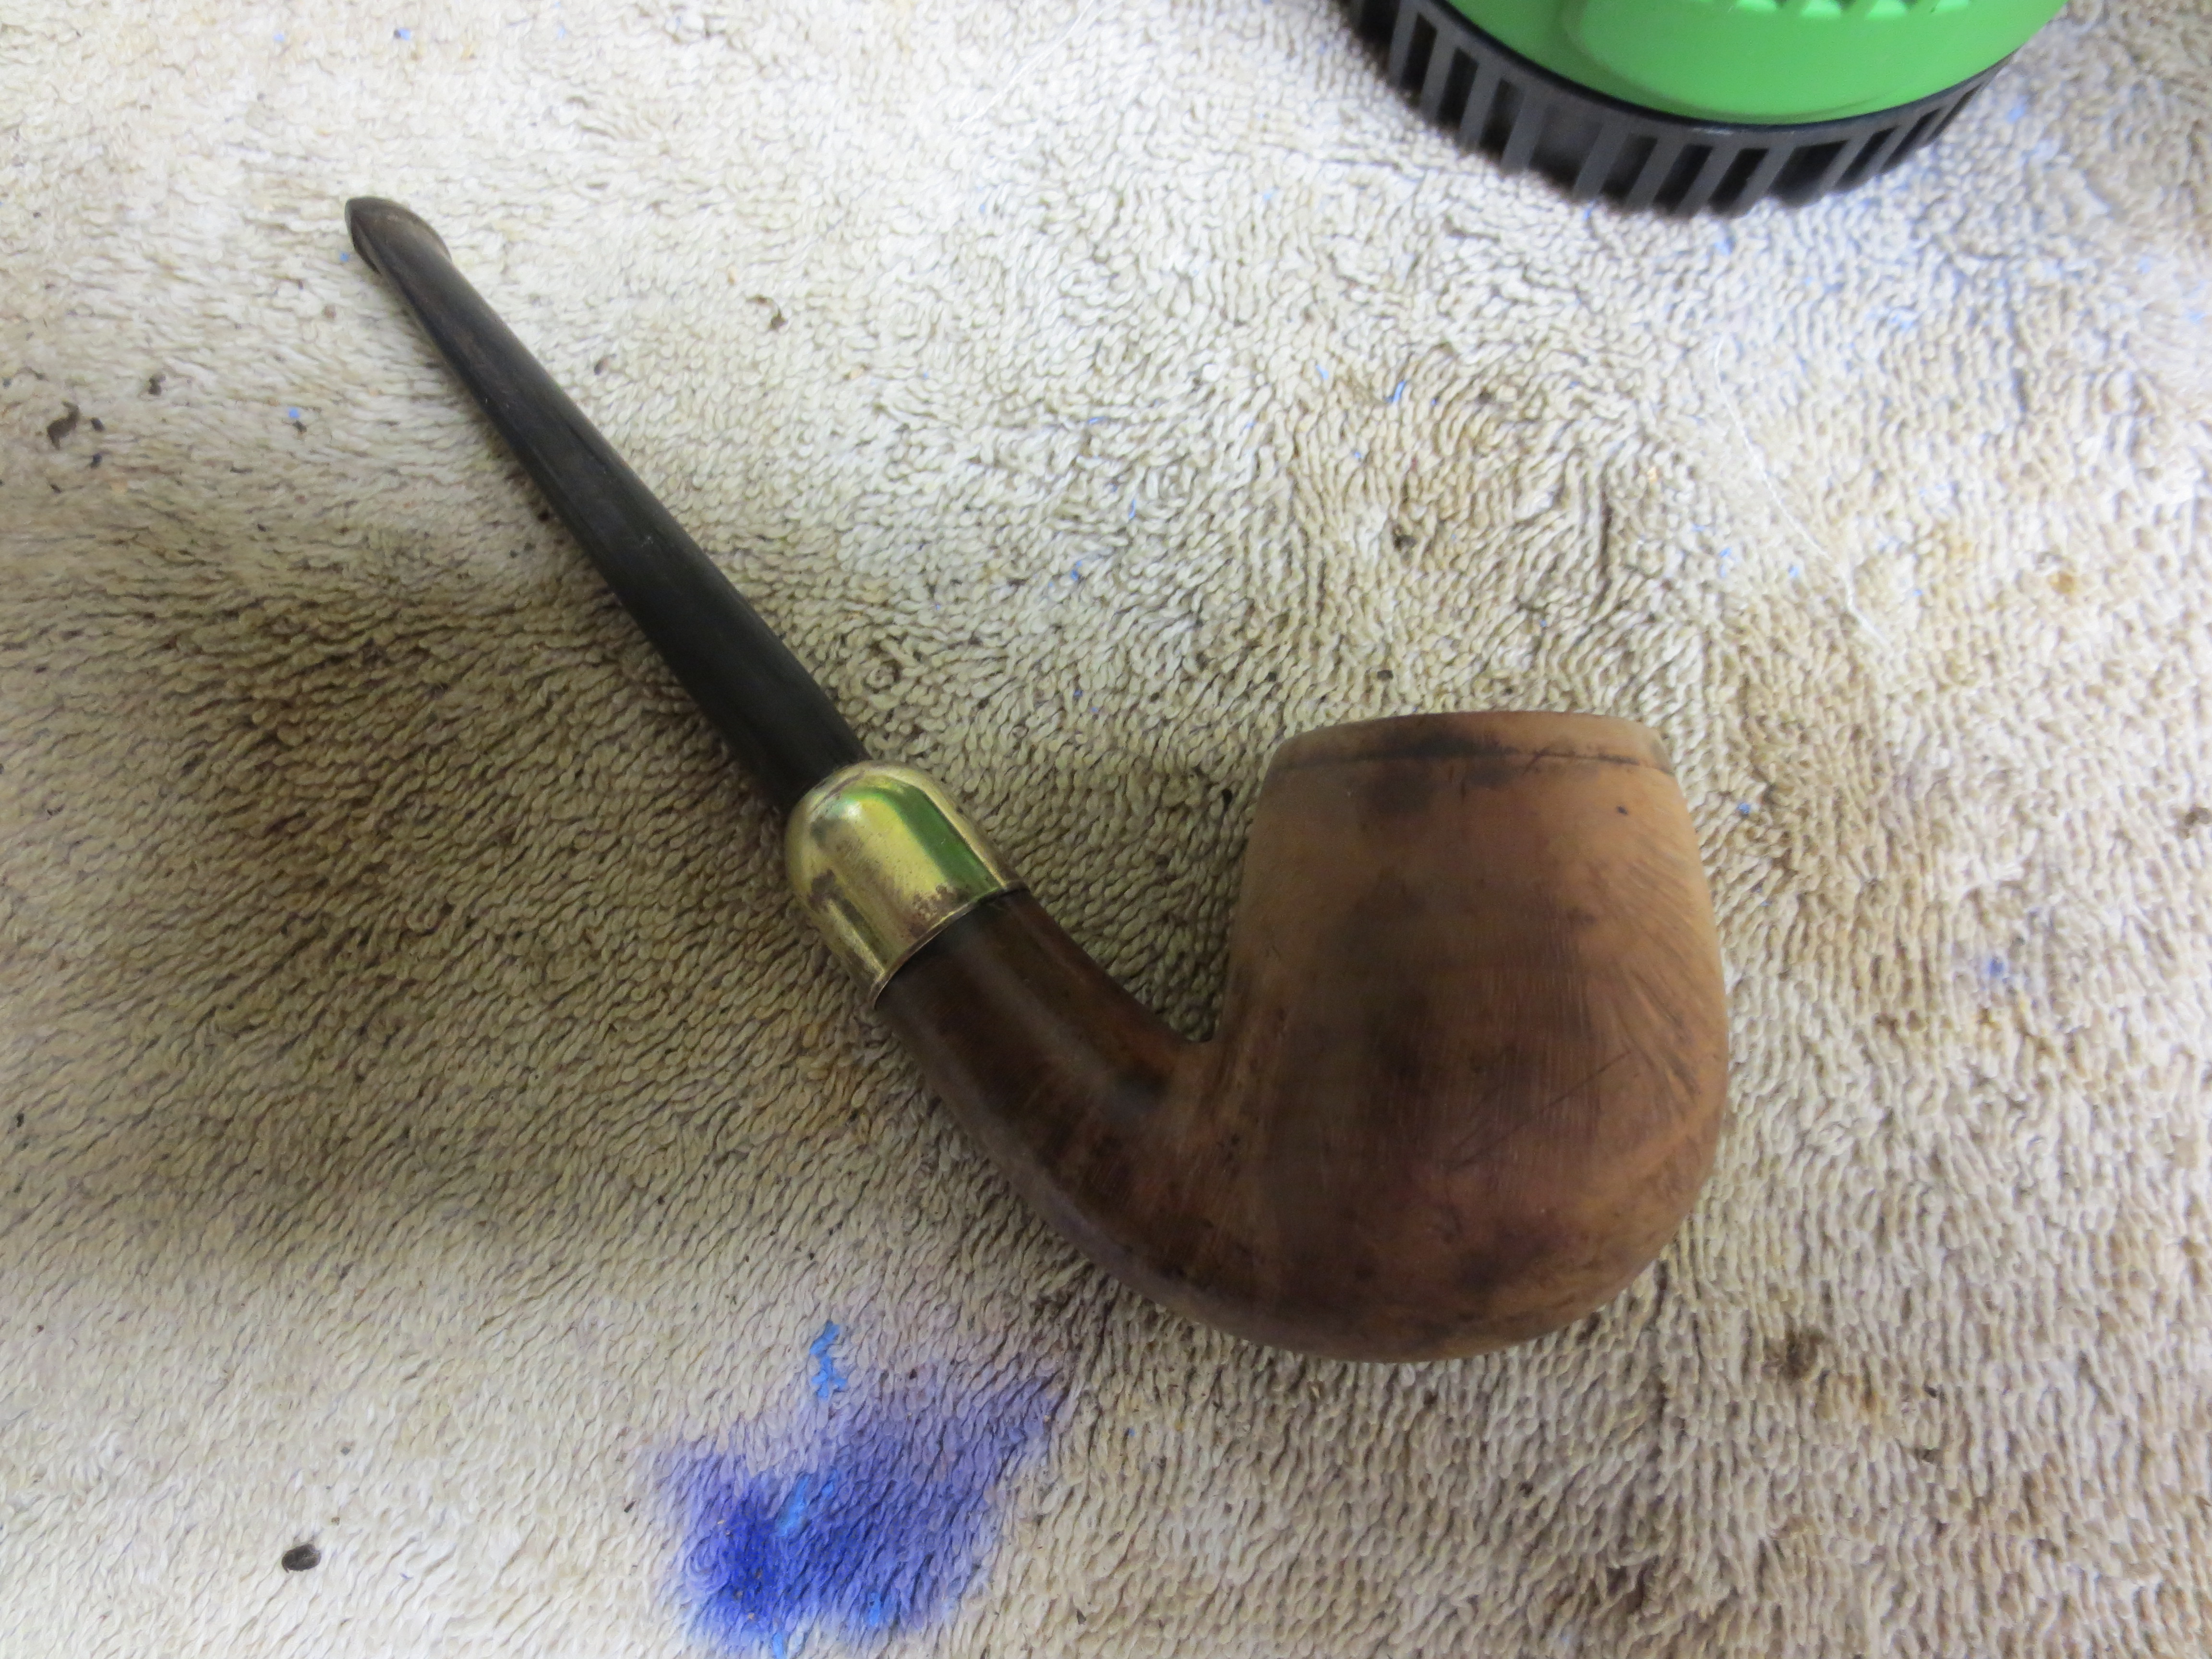
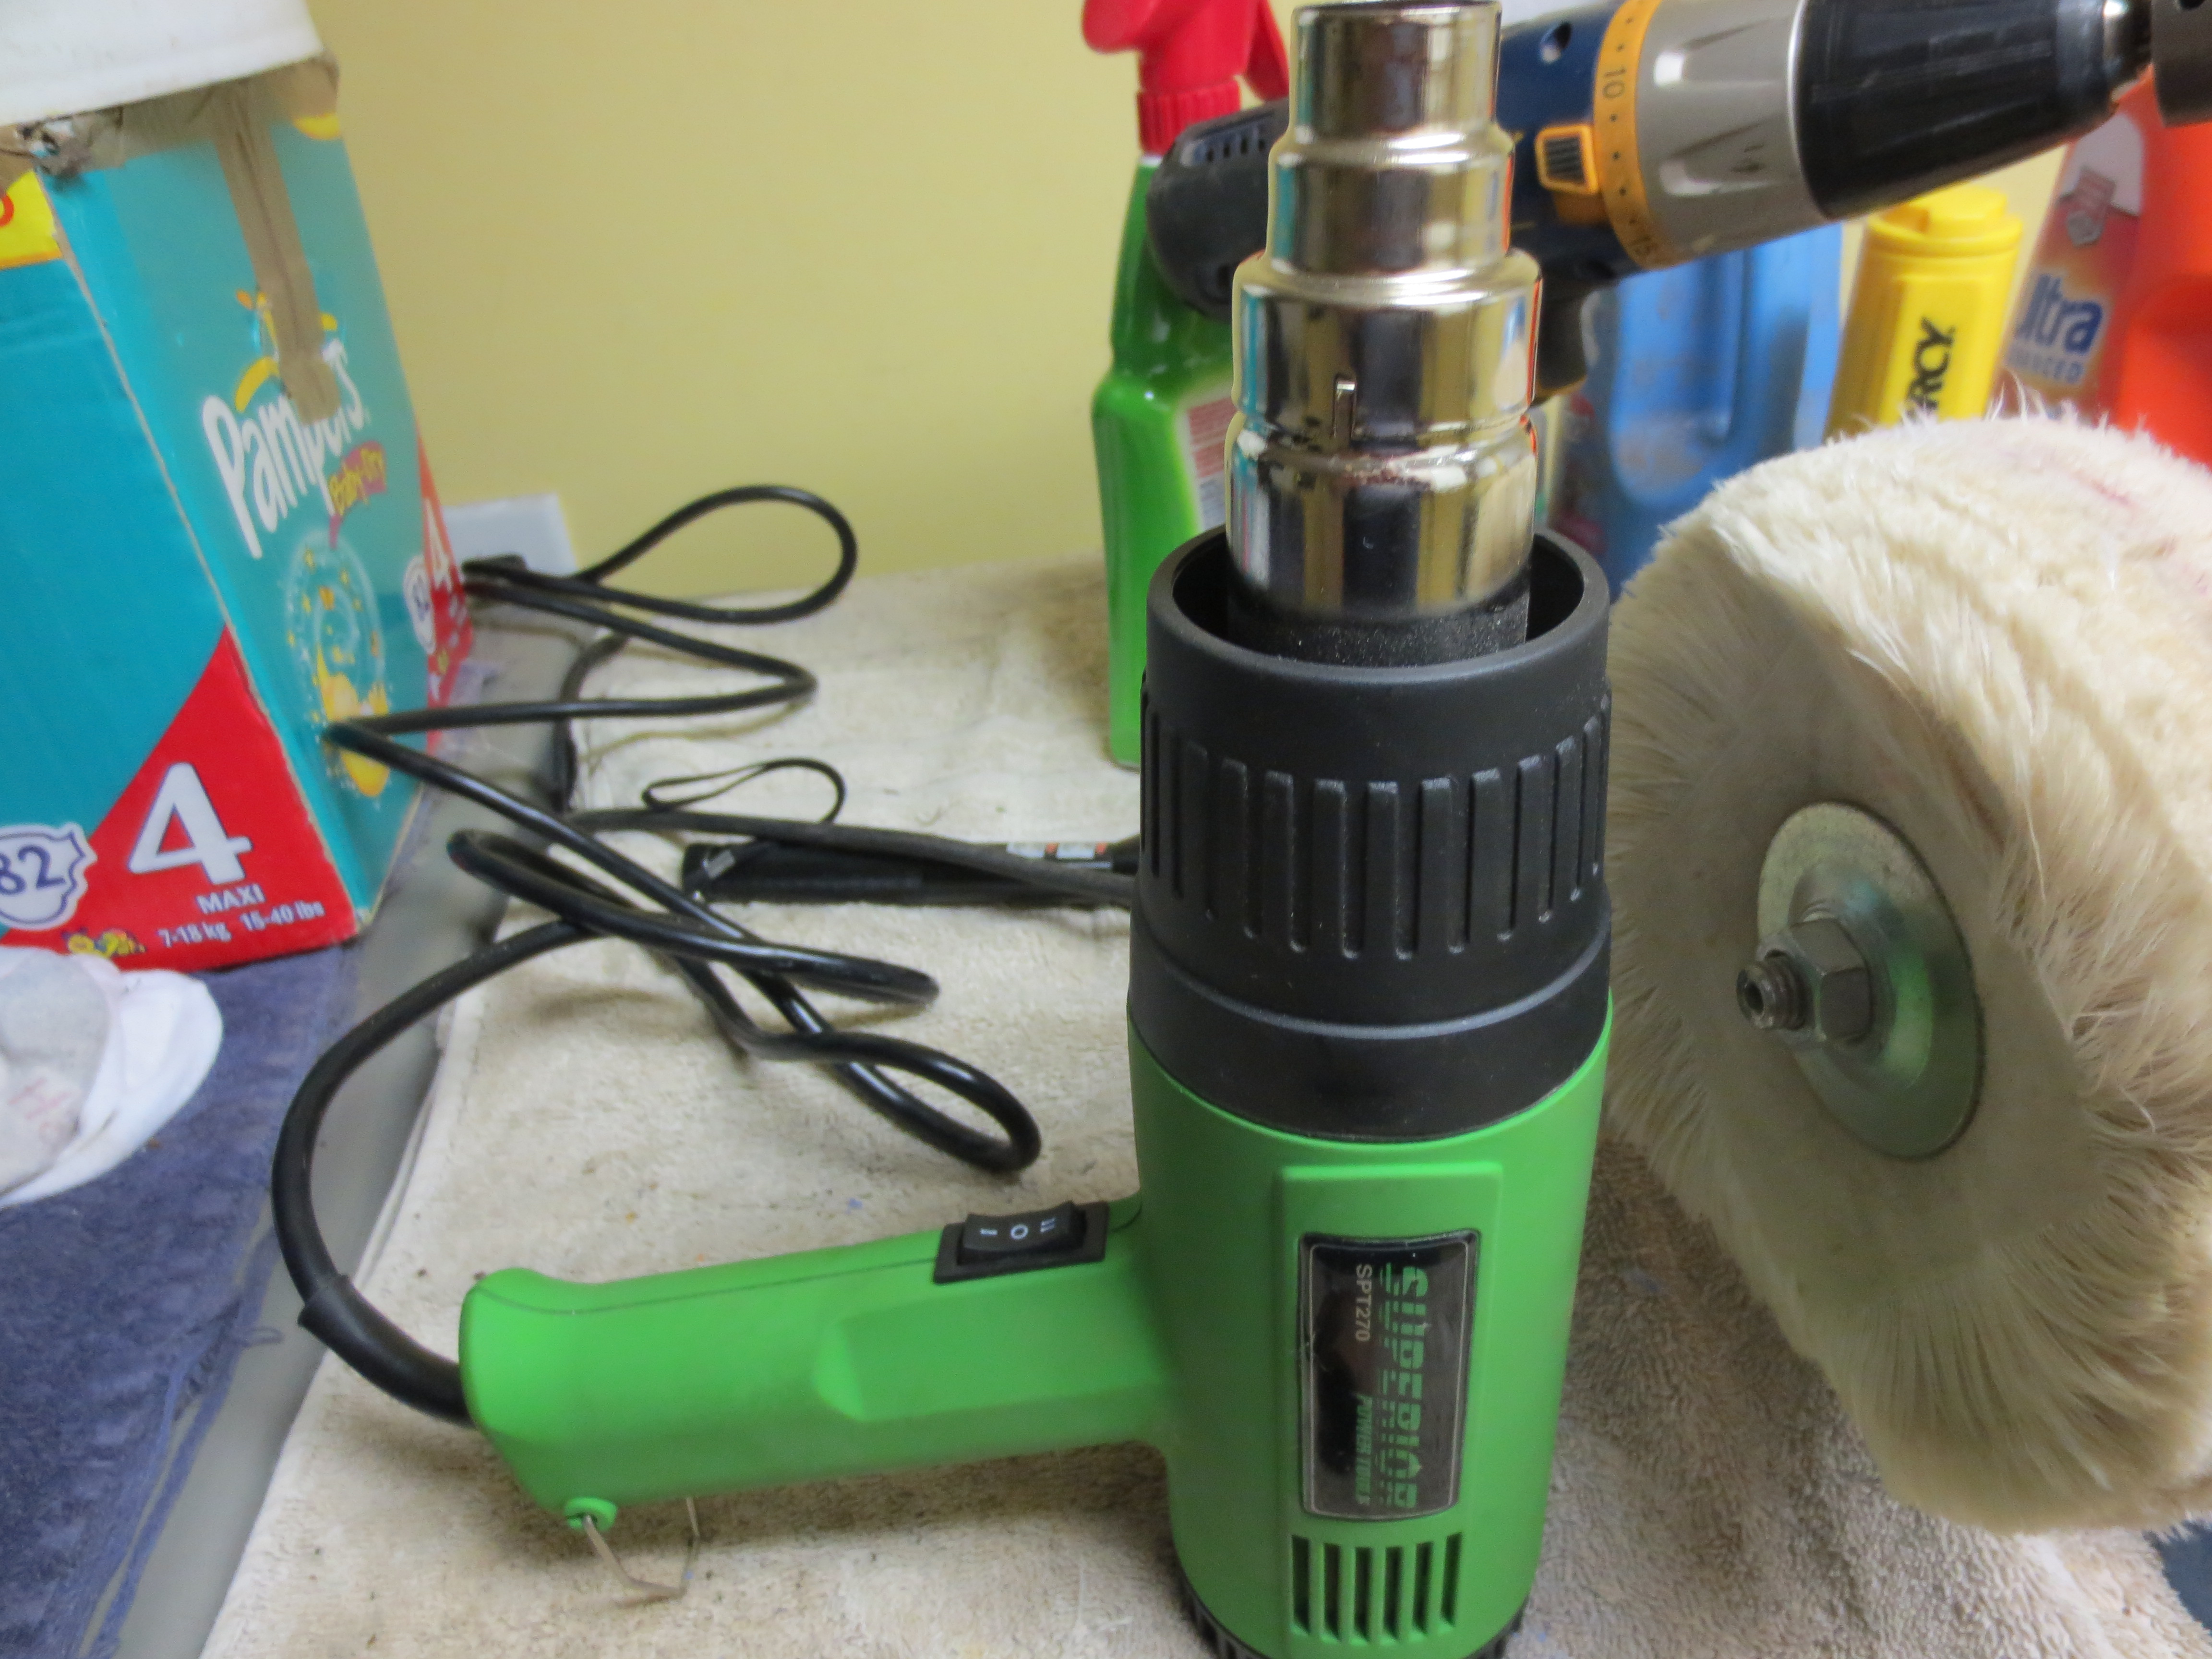
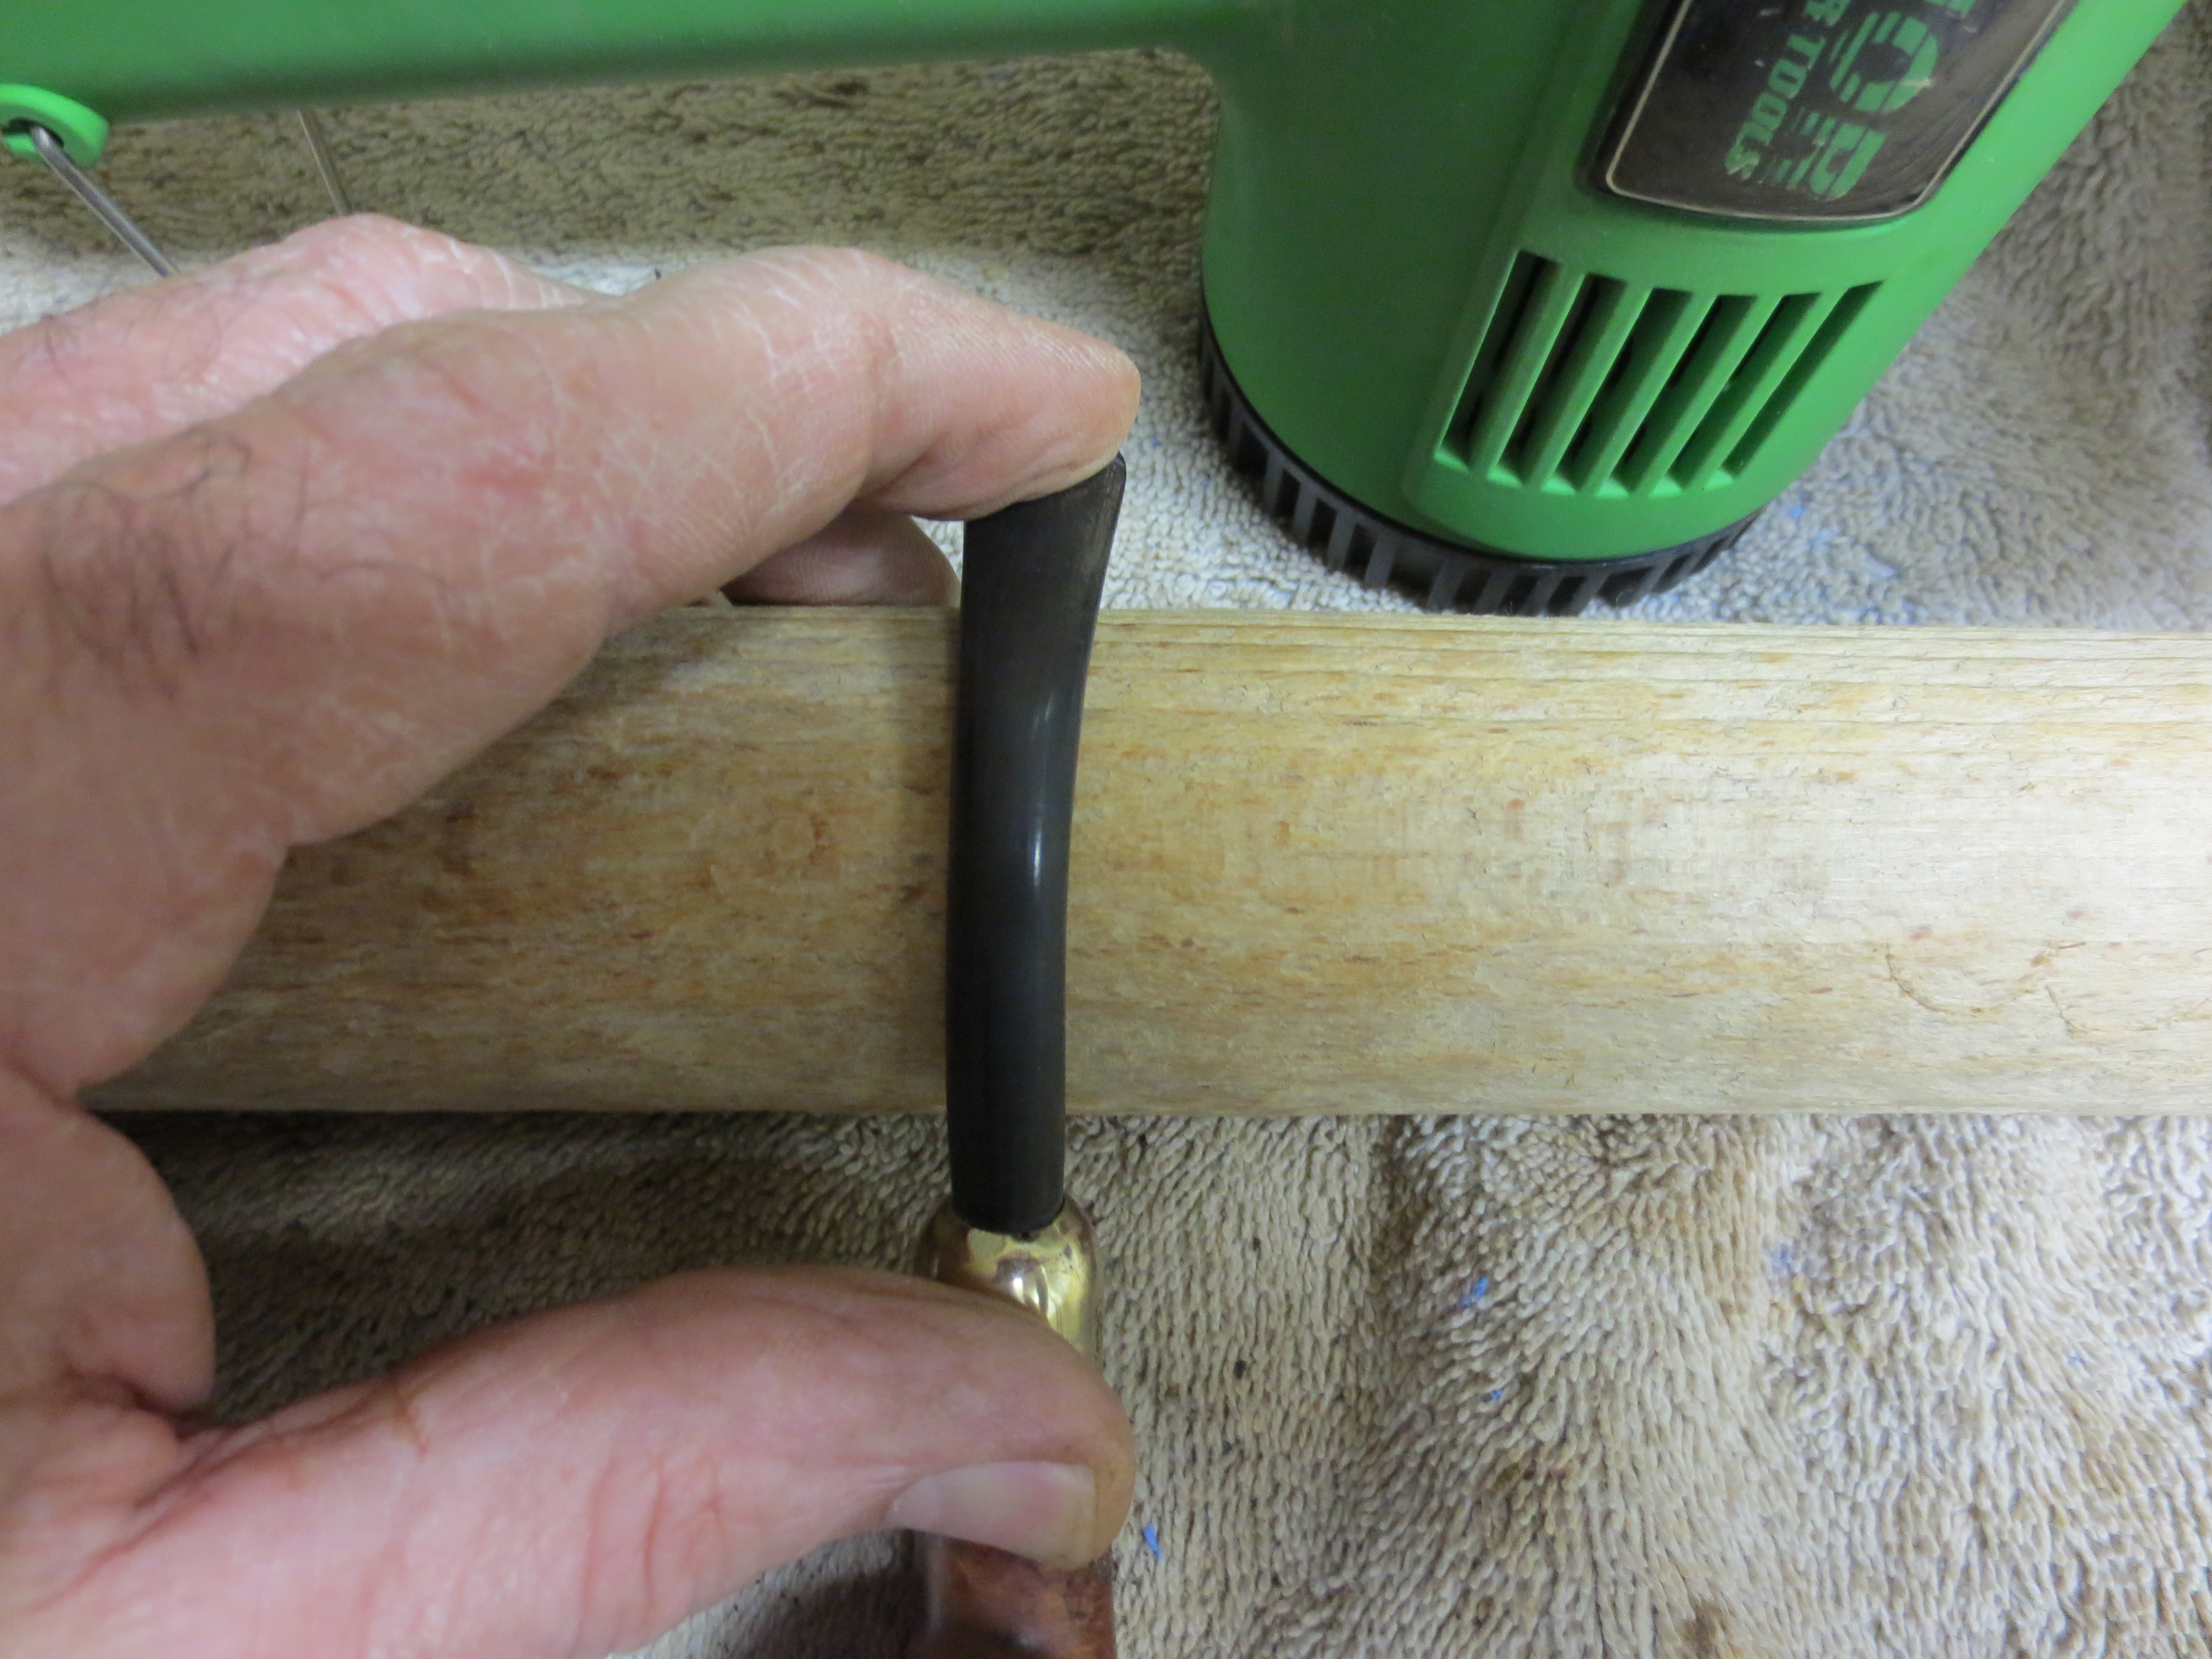
Once I remove it from the bath I dried it off and the lines were lighter than before. I sanded the bowl some more with the sanding sponge and glued the shank cap on with white glue. I wait to glue it on until I am done with the alcohol and acetone as I found out the hard way the glue is dissolved and has to be redone. After that I reinserted the stem and set up my heat gun to bend the stem to the correct angles. The next four photos show the bending of the stem from its beginning to the final look after bending.

ImageImageImageImage

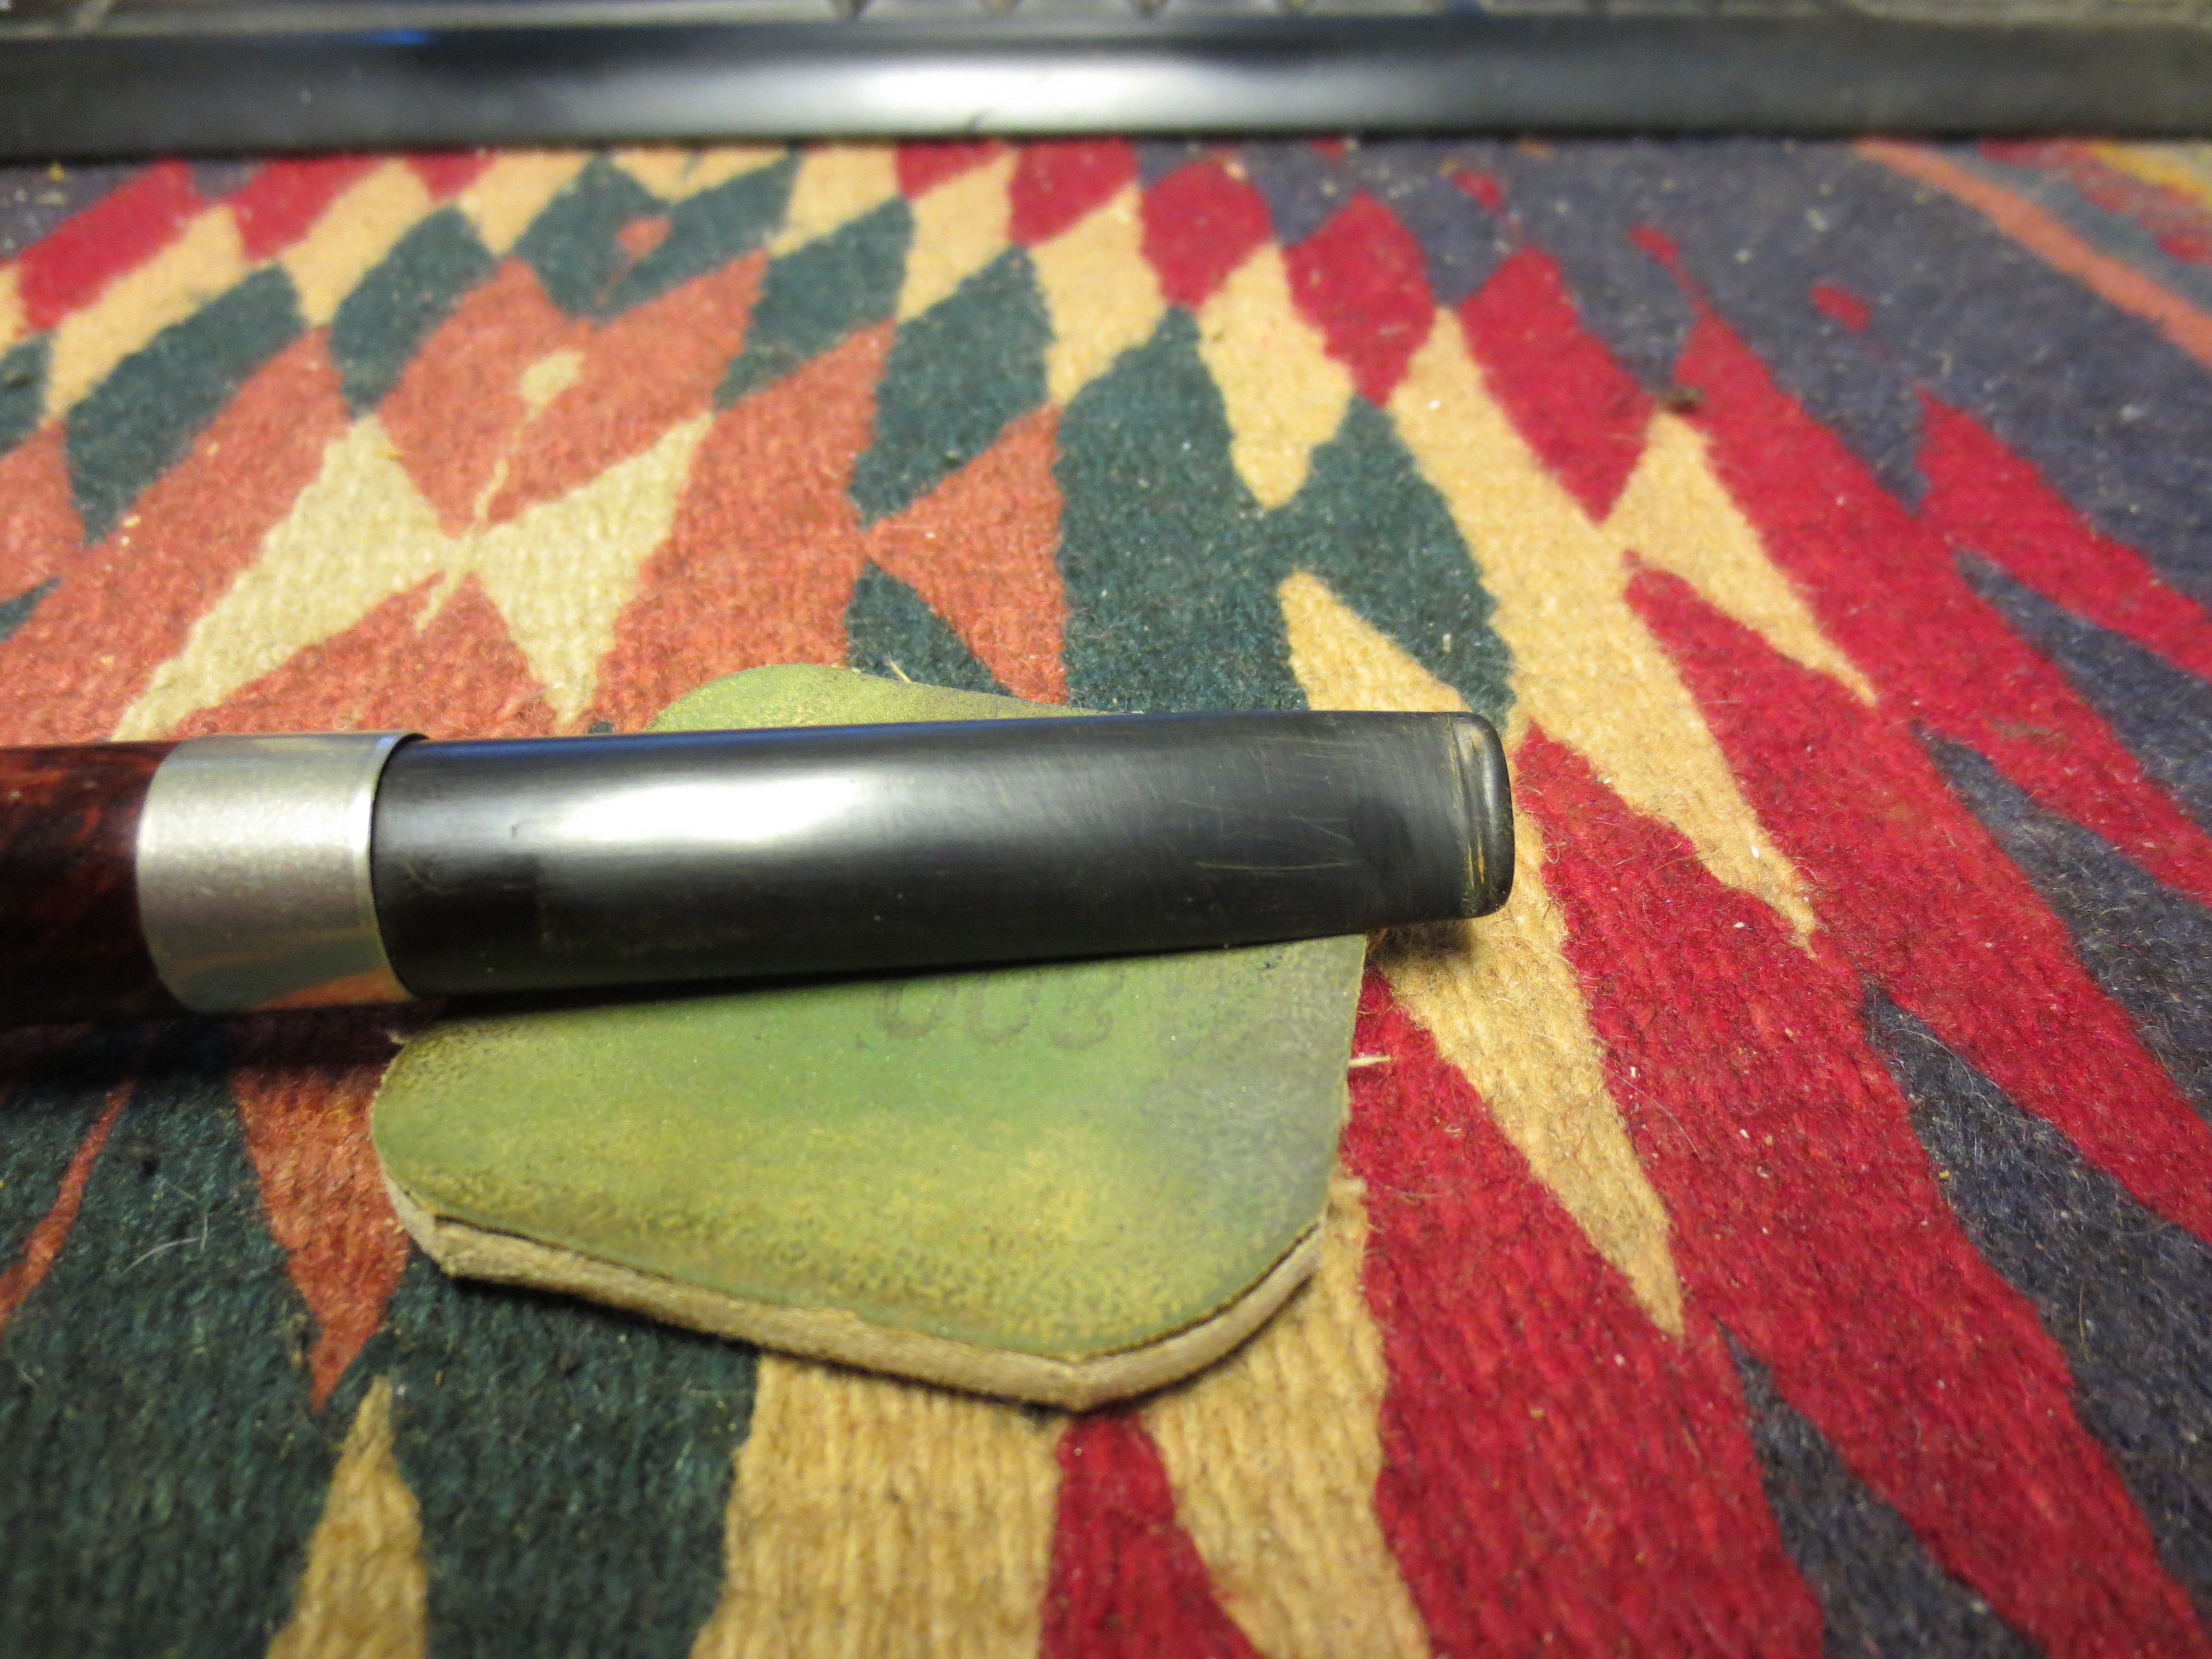
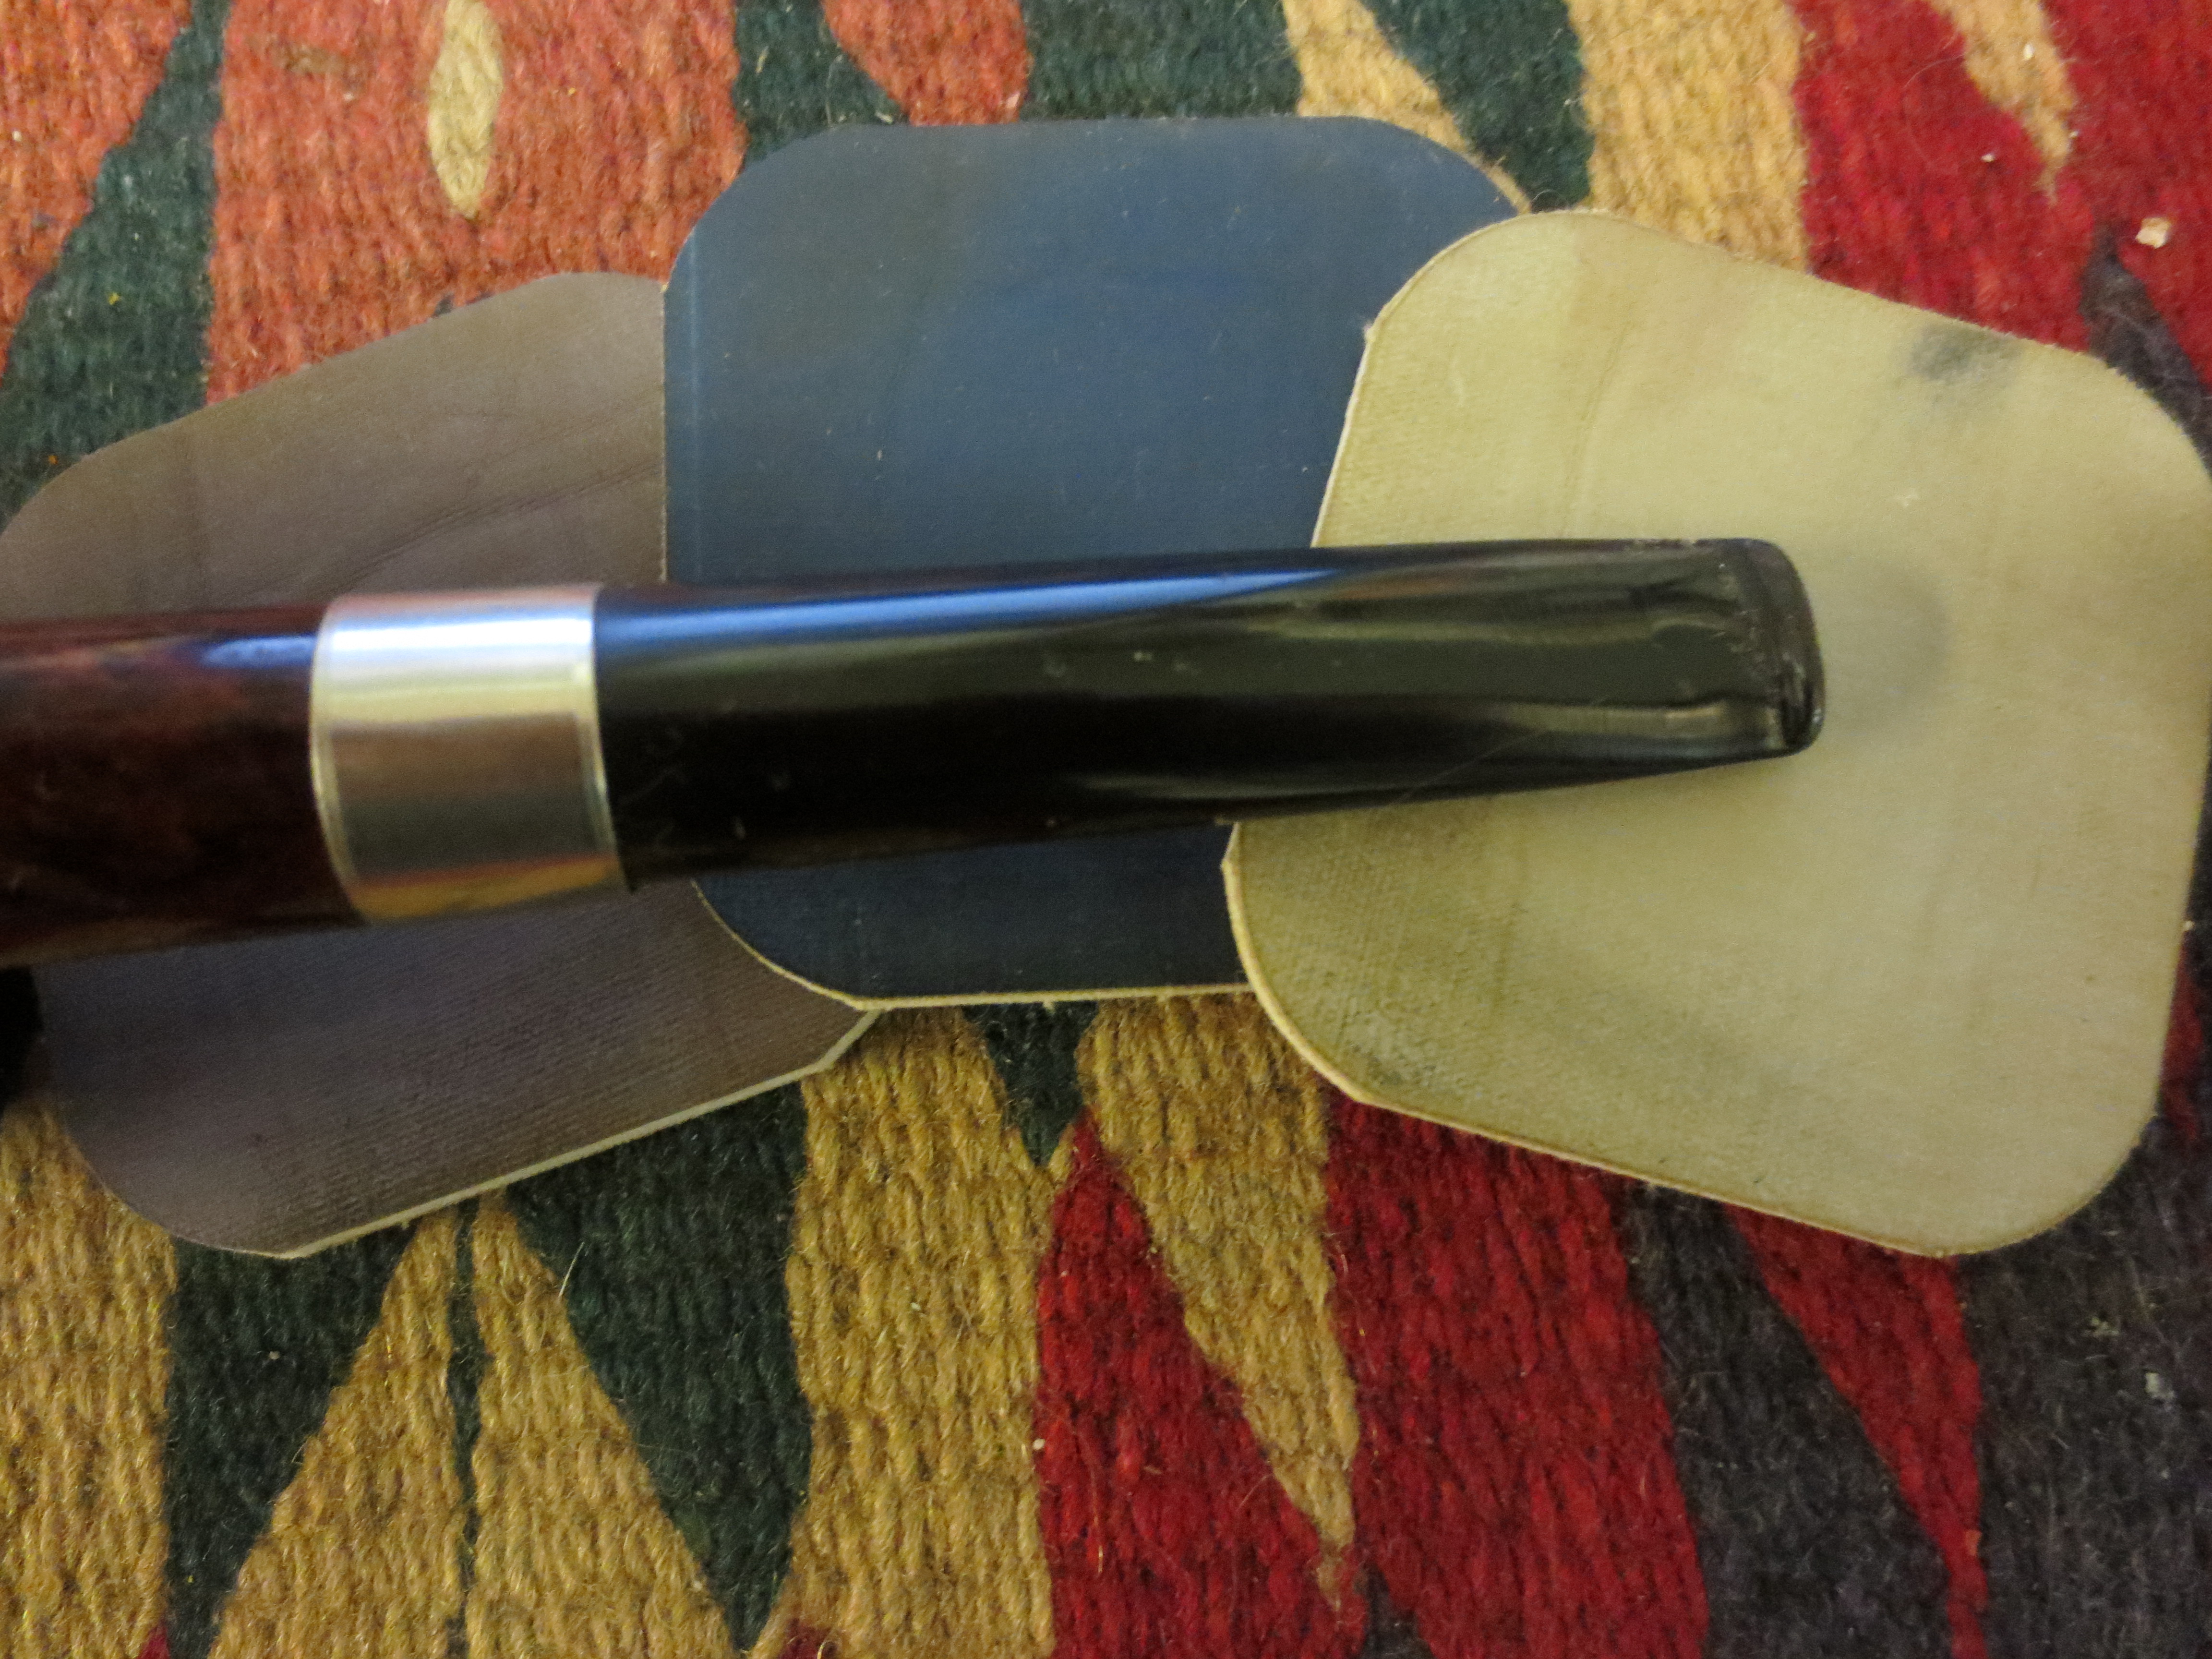
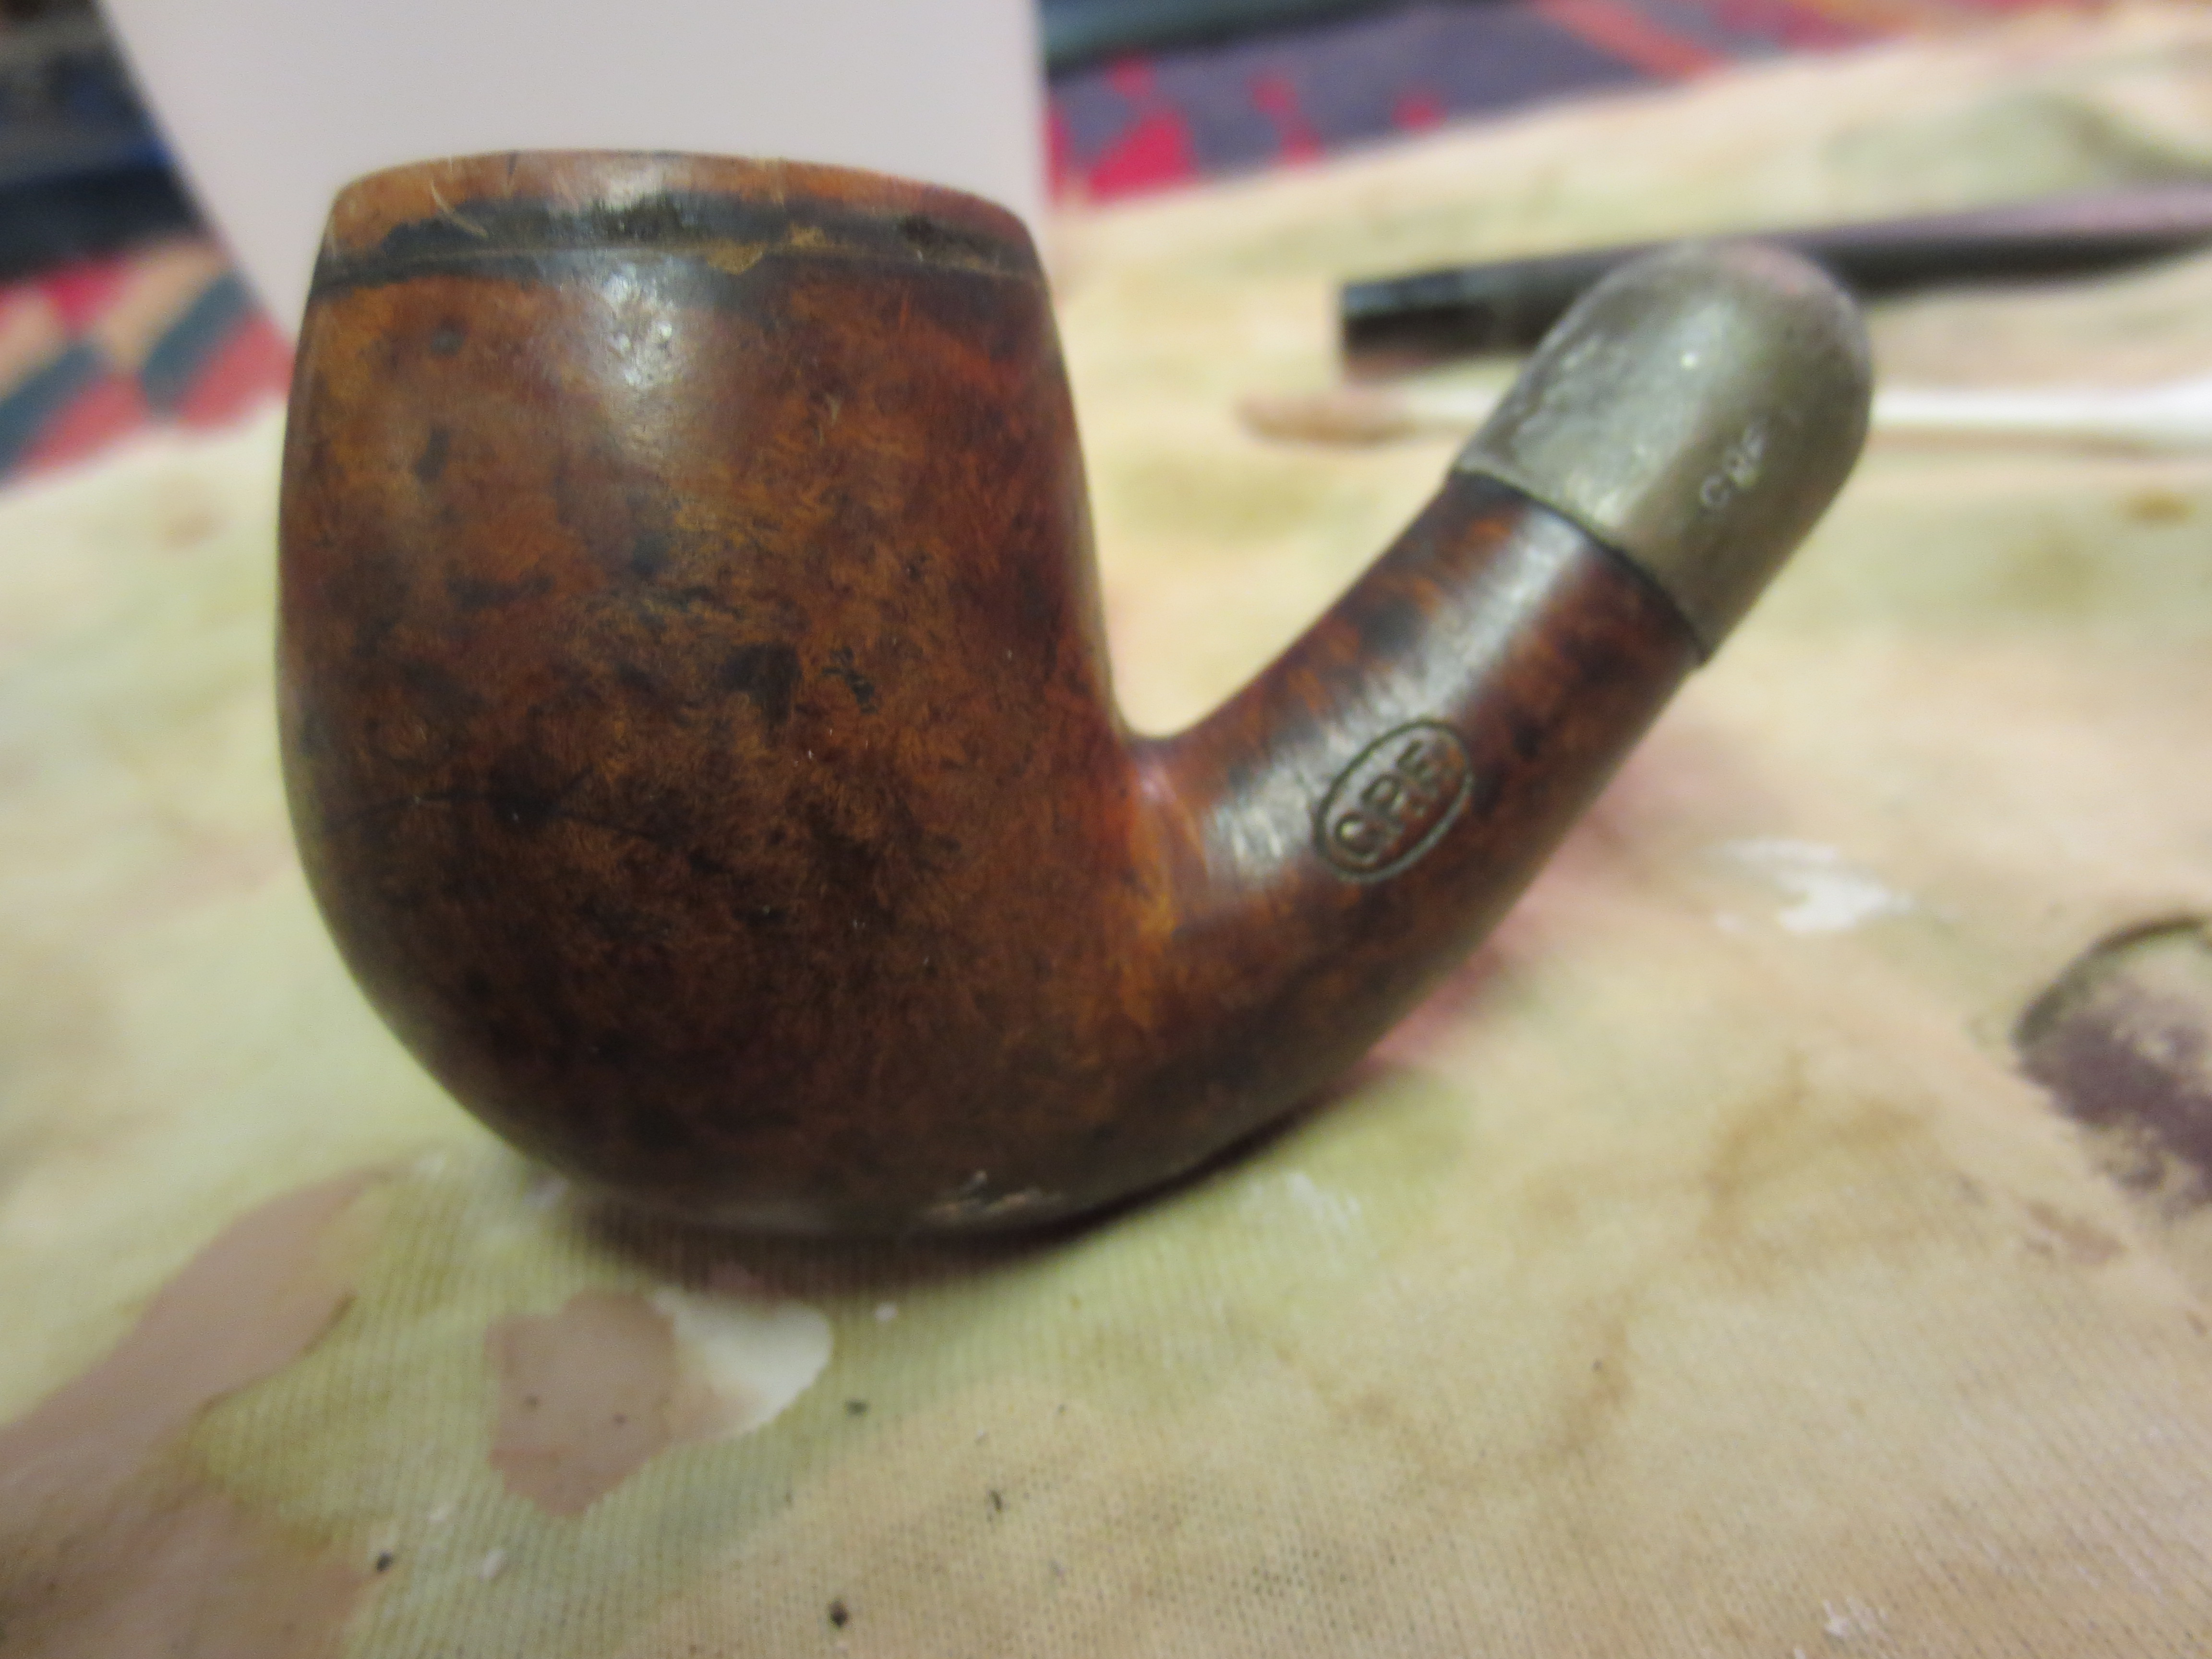
I took it back to the work table and did some more sanding on the bowl especially working on the surface around the top sides near the rim. The black line was stubborn. I wiped it down with white vinegar to see if it would lift any of the stain as I remembered reading about that in an old book on furniture repair on how to remove dark rings from the wood. I also wet a cotton pad with bleach and wiped down the area as well. The result of all that work is evident in the two photos below. It was not going to come out so I sanded it with 1800-3600 grit micromesh sanding pads and then wiped it down with an alcohol dampened cotton pad to remove the surface dust and prepared to stain it. The two photos below show the bowl ready to stain. (Incidentally note the shine on the shank cap. It cleaned up amazingly well.)

ImageImage

I applied an oxblood thick aniline stain for the first coat. I flamed it and reapplied it and flamed it a second time (the first two photos below show the staining of the bowl with the oxblood stain). I then buffed it off to see what I had to work with. The black lines still showed so I restained the bowl around the top edge to see if I could darken that area and mask the black (photos three and four show this process).

ImageImageImageImage

I buffed it a second time to see where I was at with the staining. You can see from the next two photos the effect of that restaining around the top of the bowl. It did indeed darken the edge but the line was still visible and I did not like the look of the dark edge. So I buffed it yet again to see if I could smooth out that look a bit more.

ImageImage

I was not happy with the finished look after buffing. The darkening around the edge still showed both in the top edge of the bowl and around the end cap. I decided to restain the bowl with a dark brown aniline stain. So I applied the stain, flamed it and restained and flamed it a second time. The next two photos show the pipe after the stain had been flamed and had dried.

ImageImage

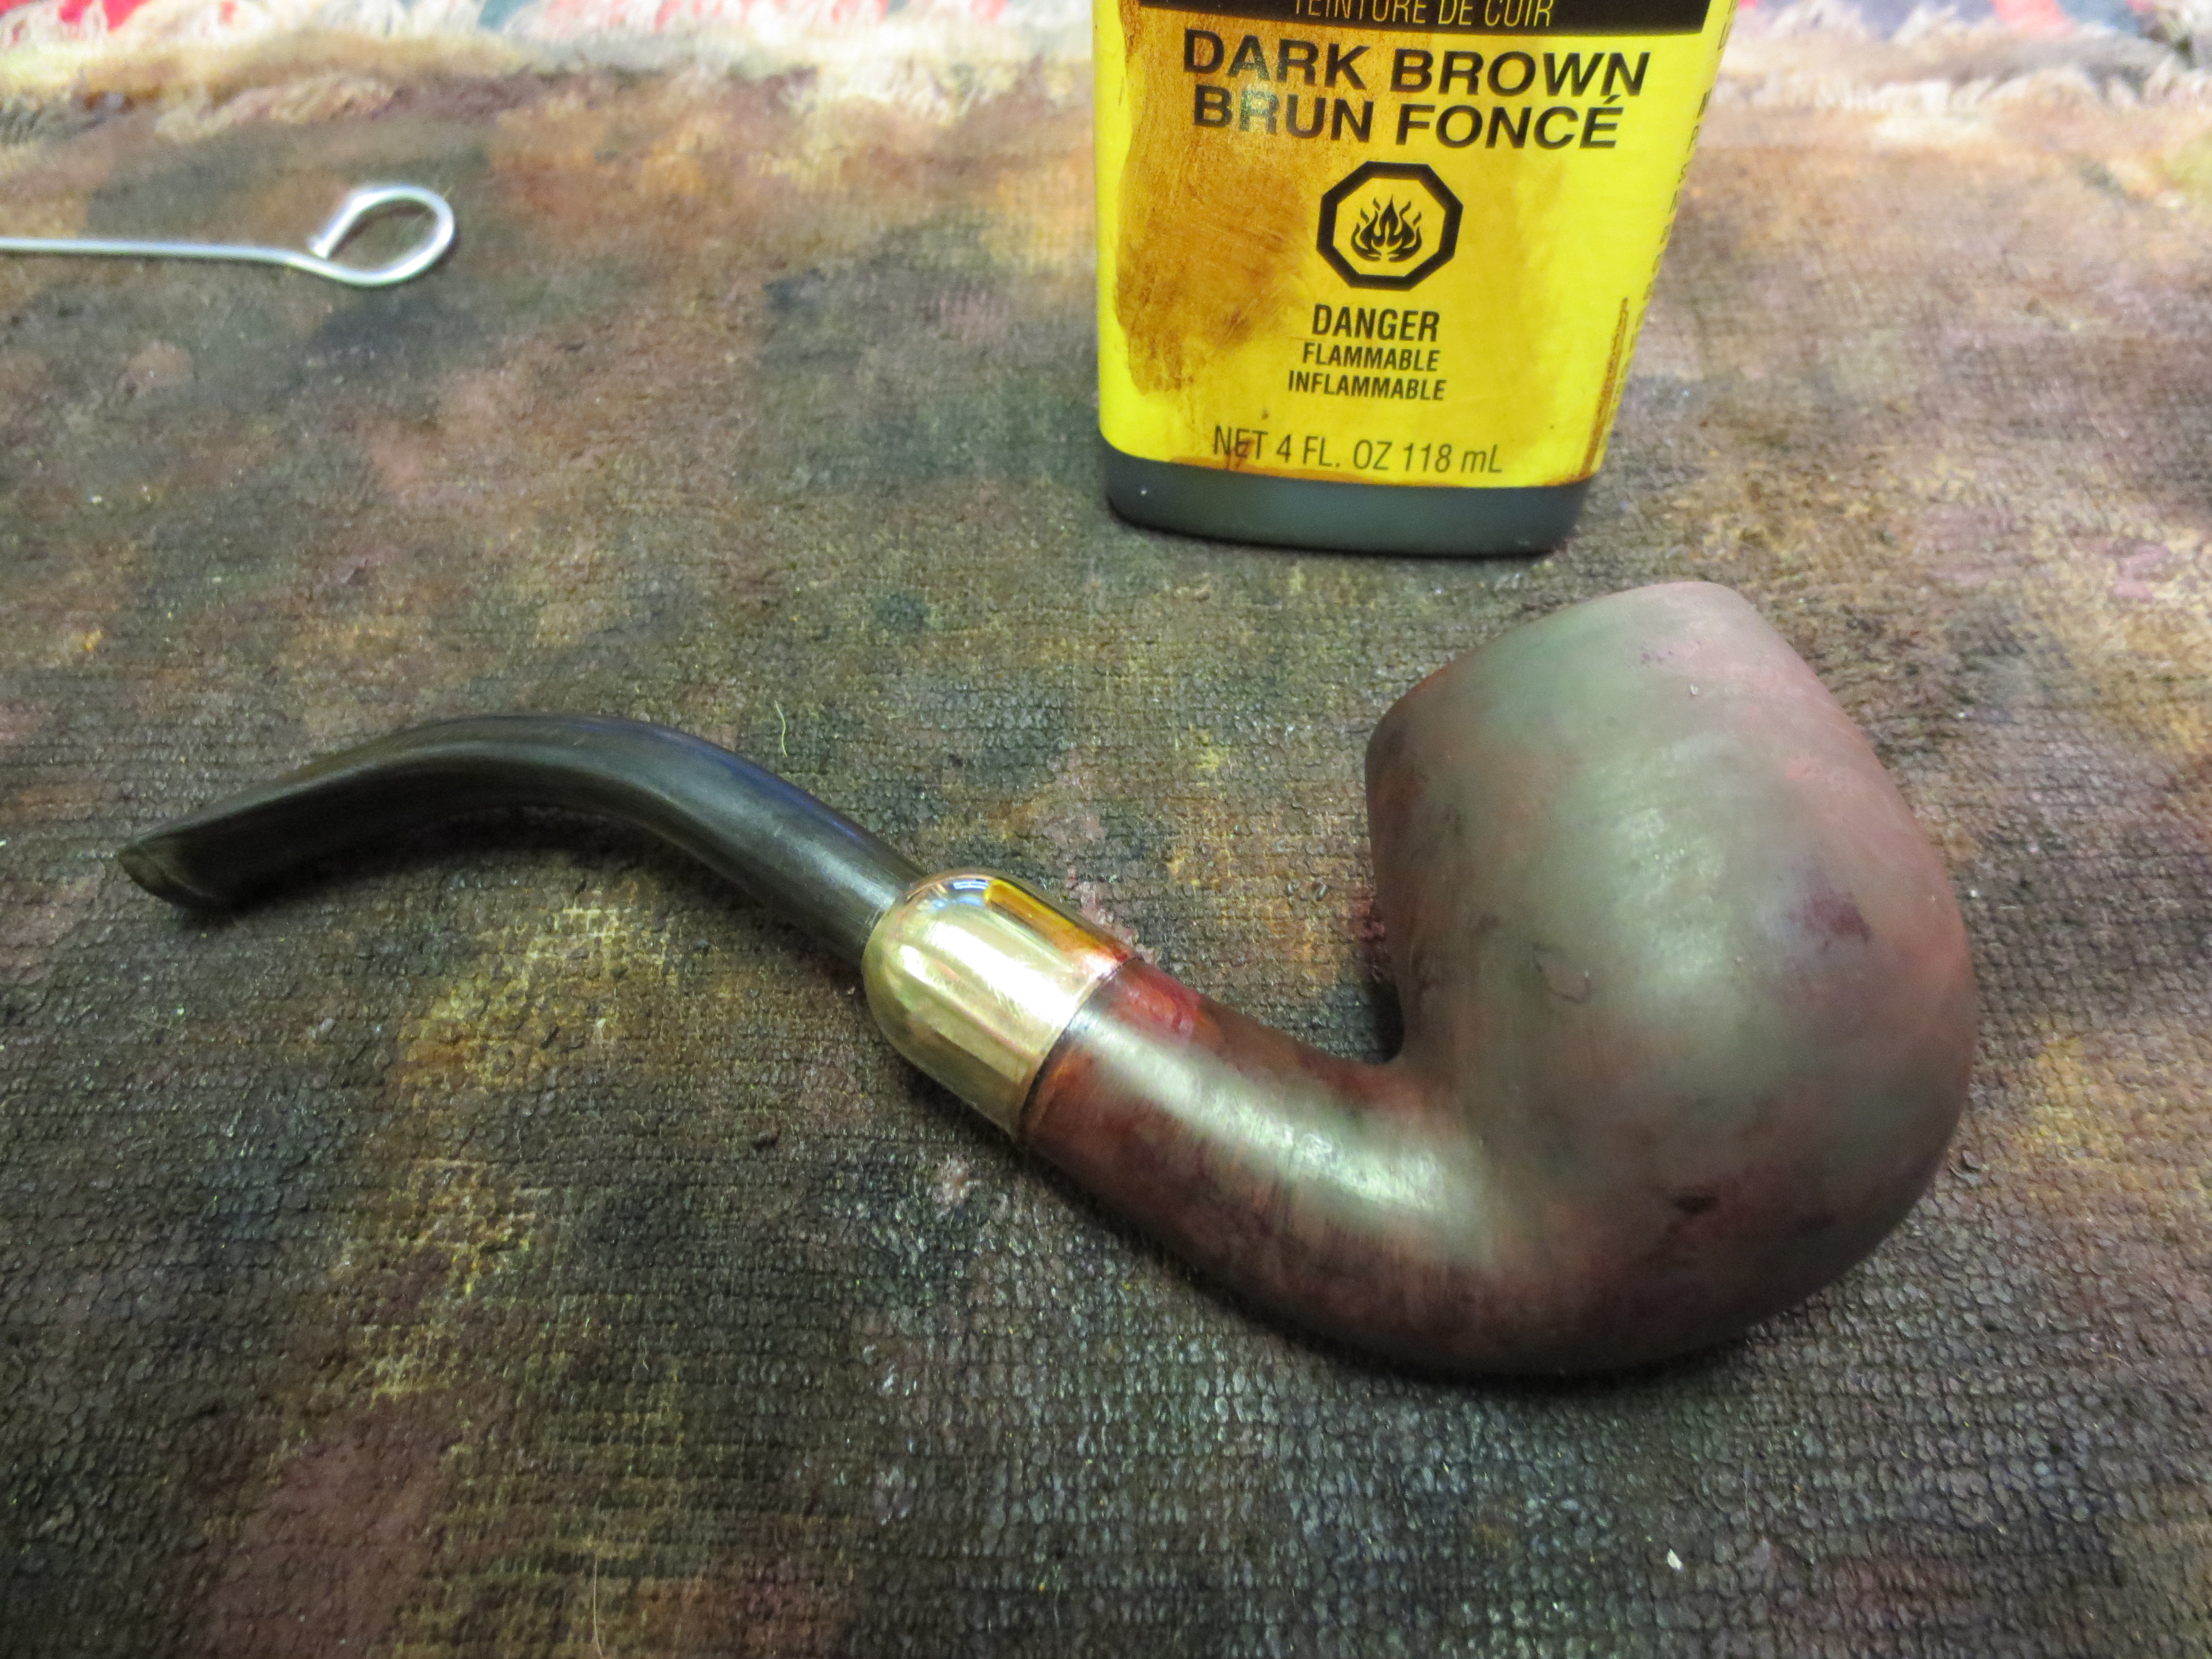
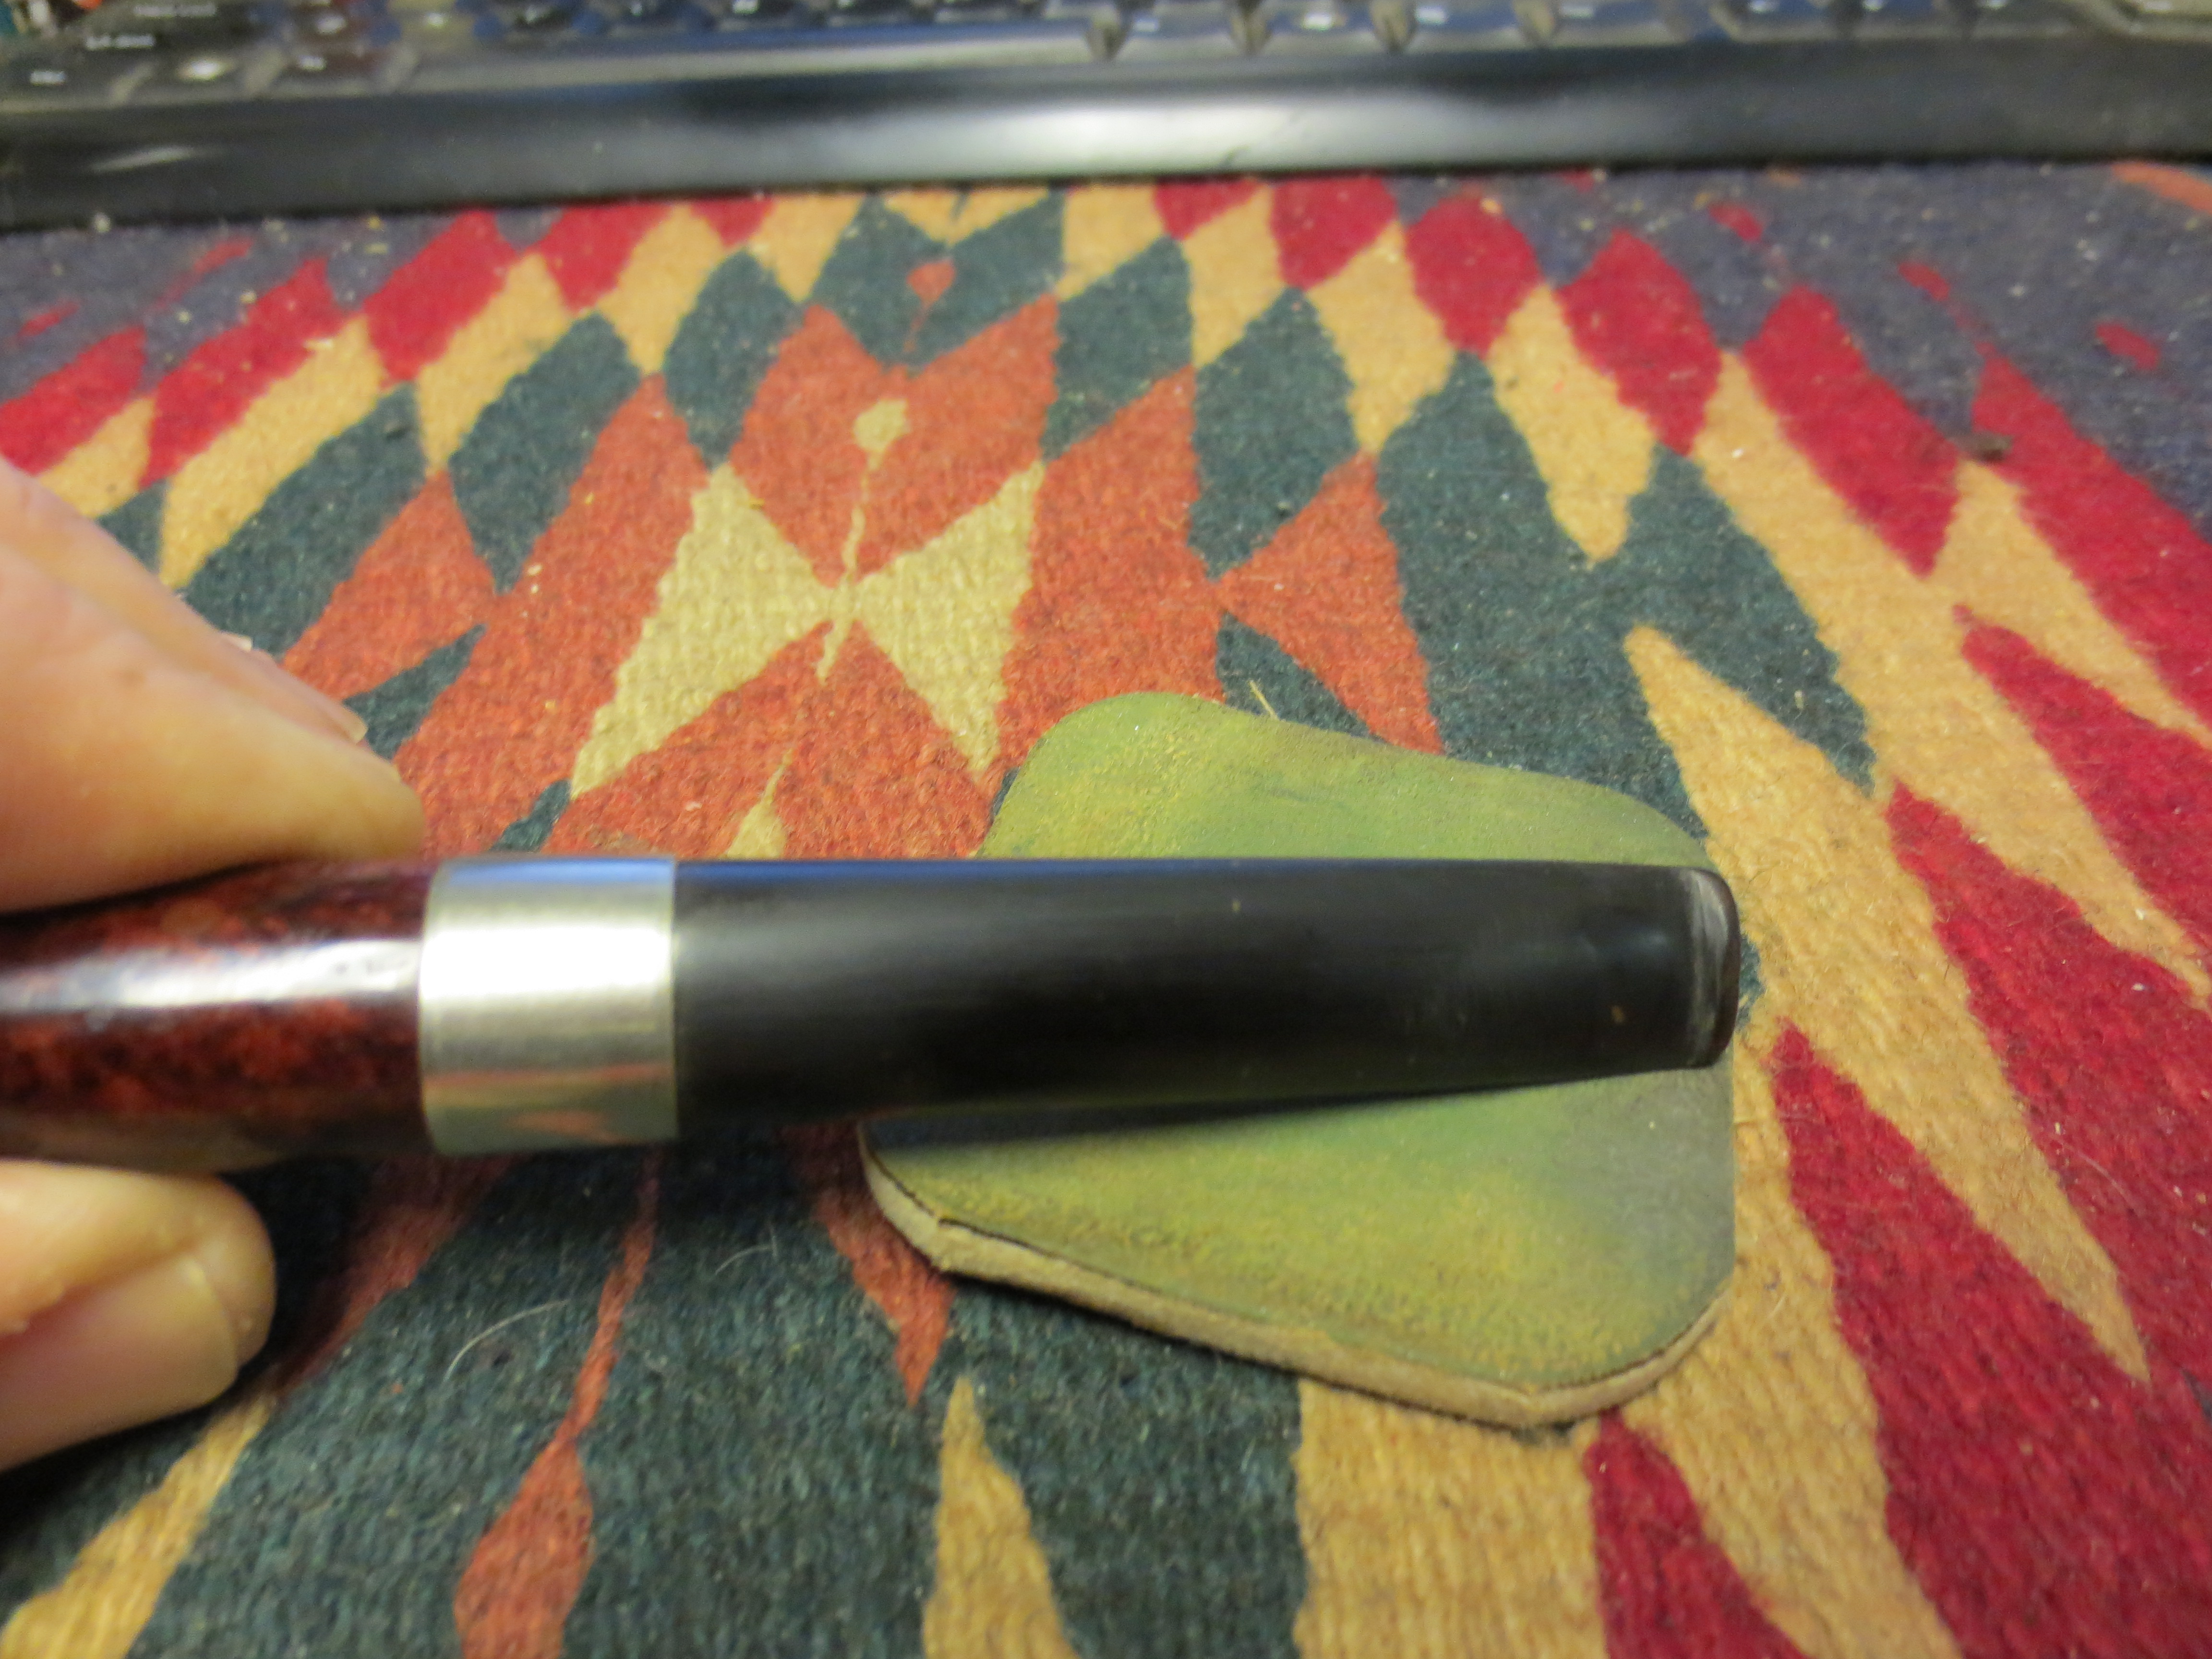
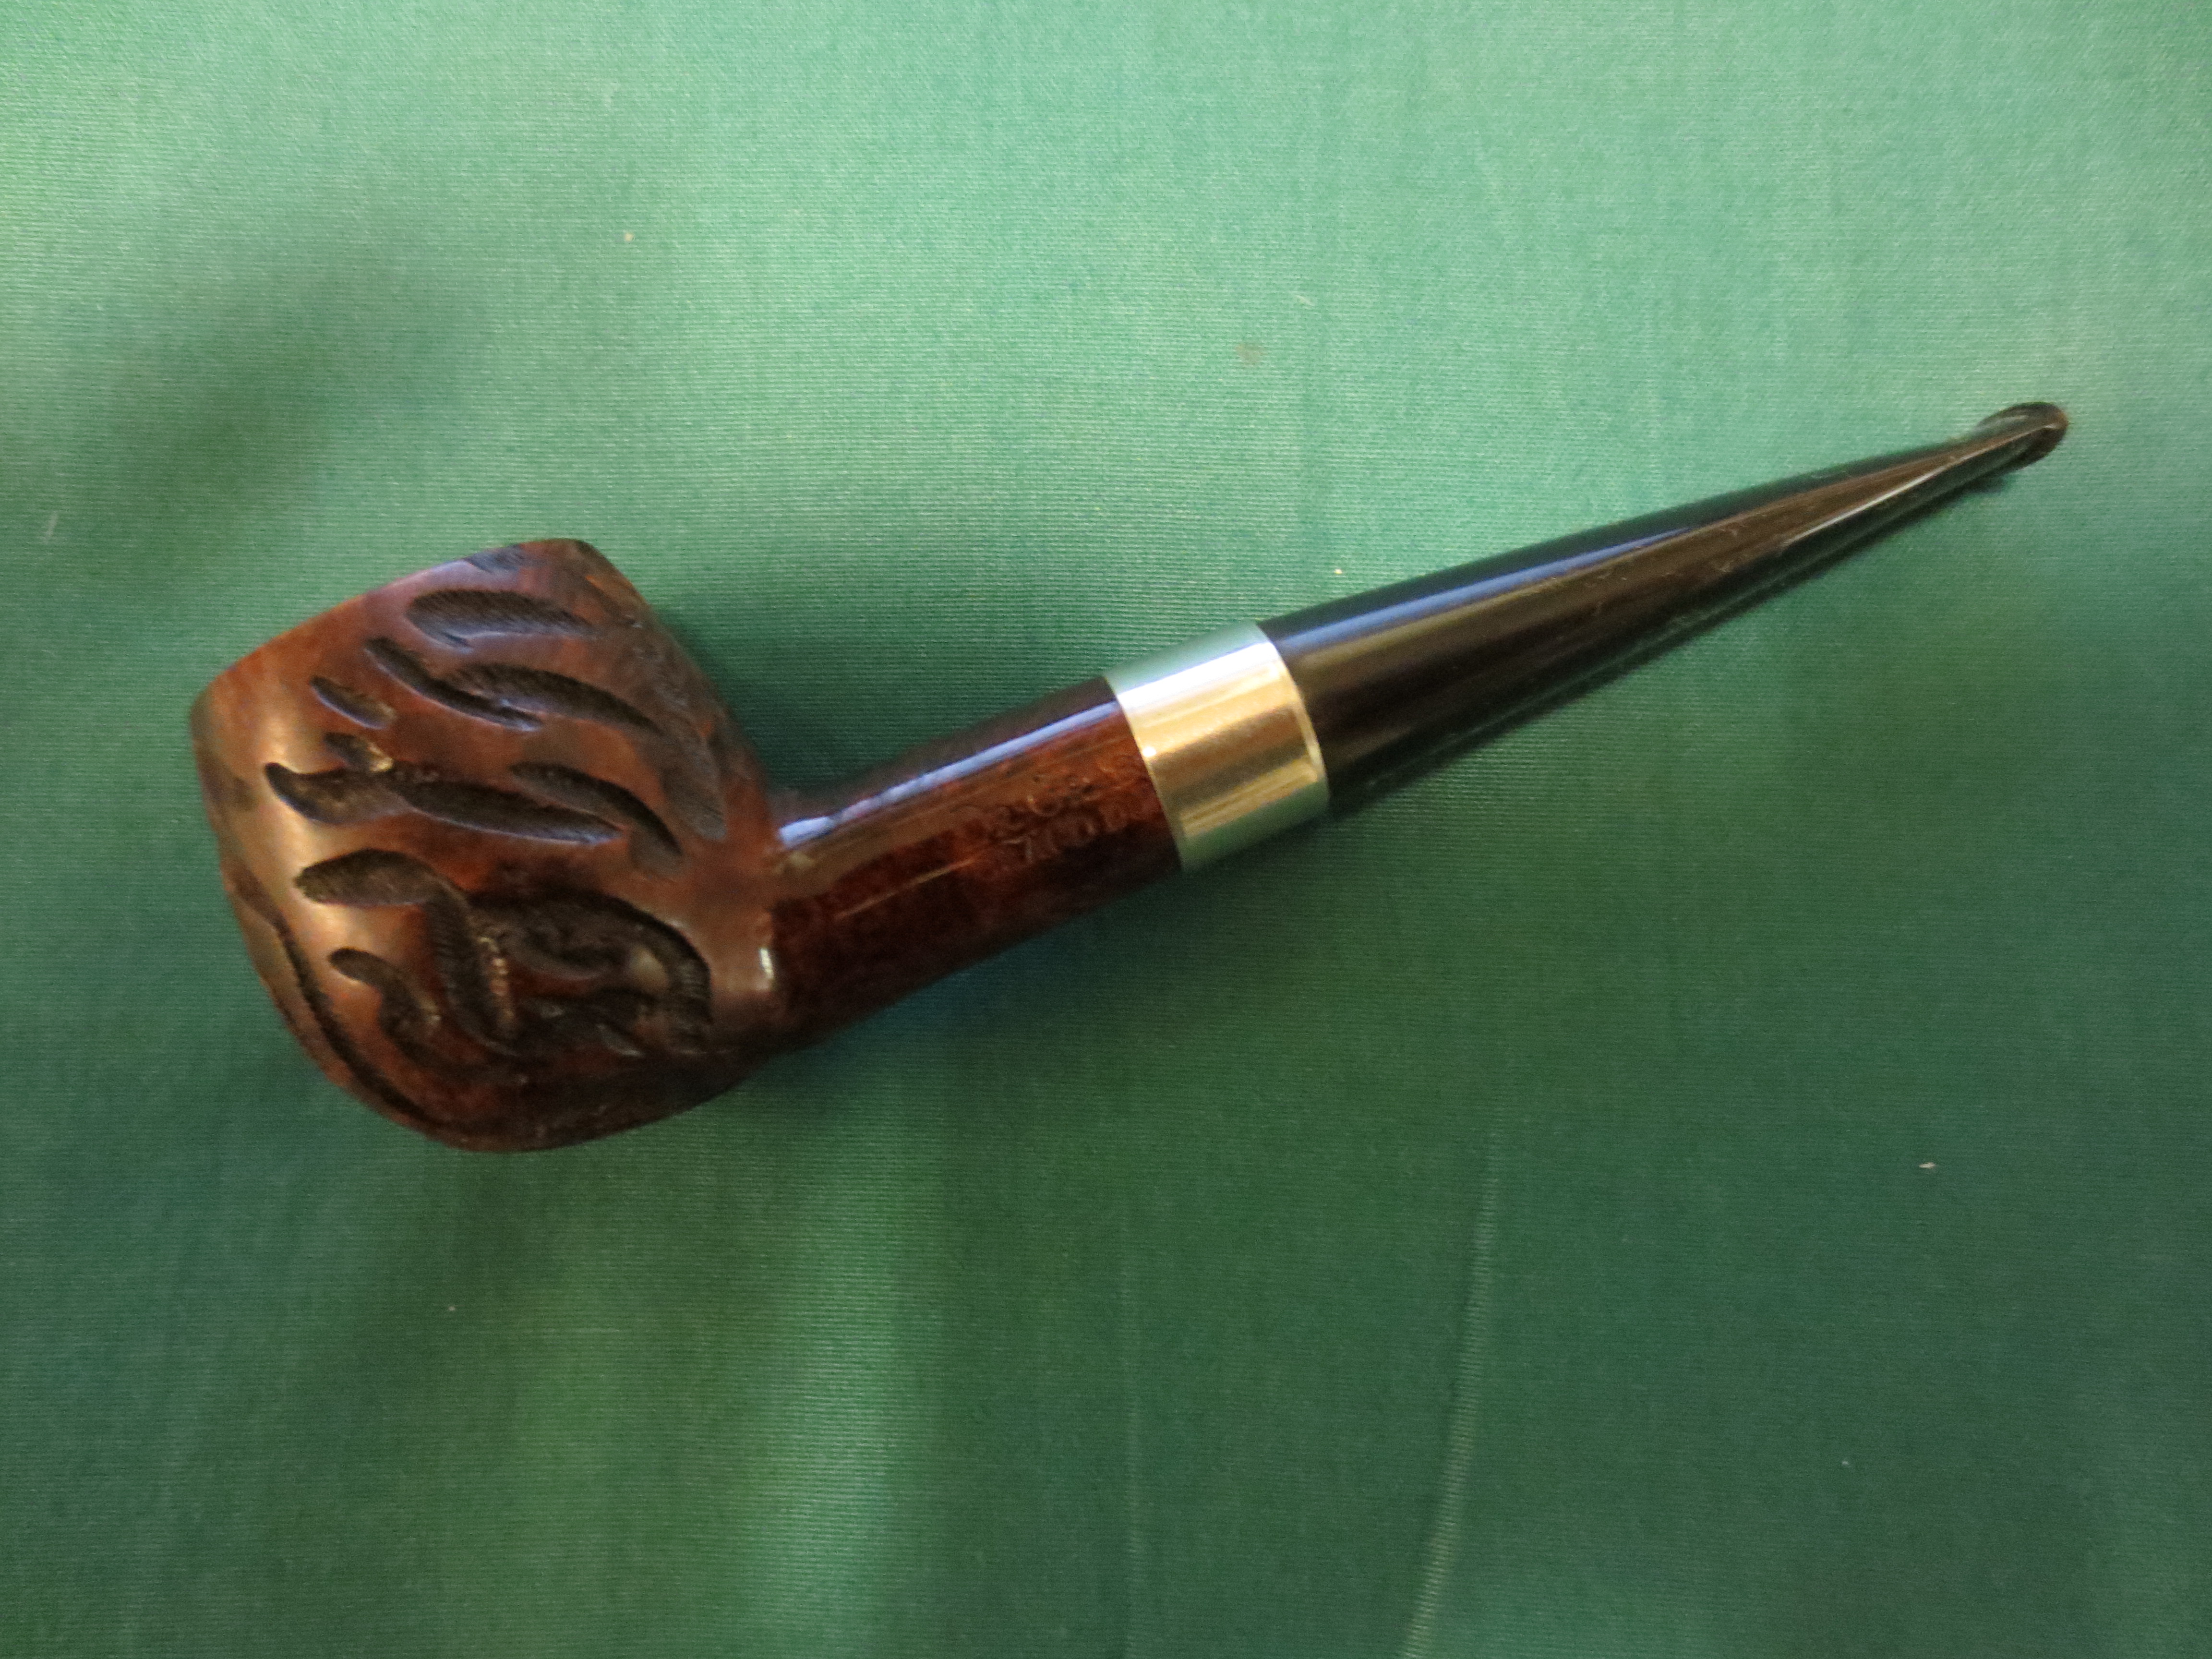
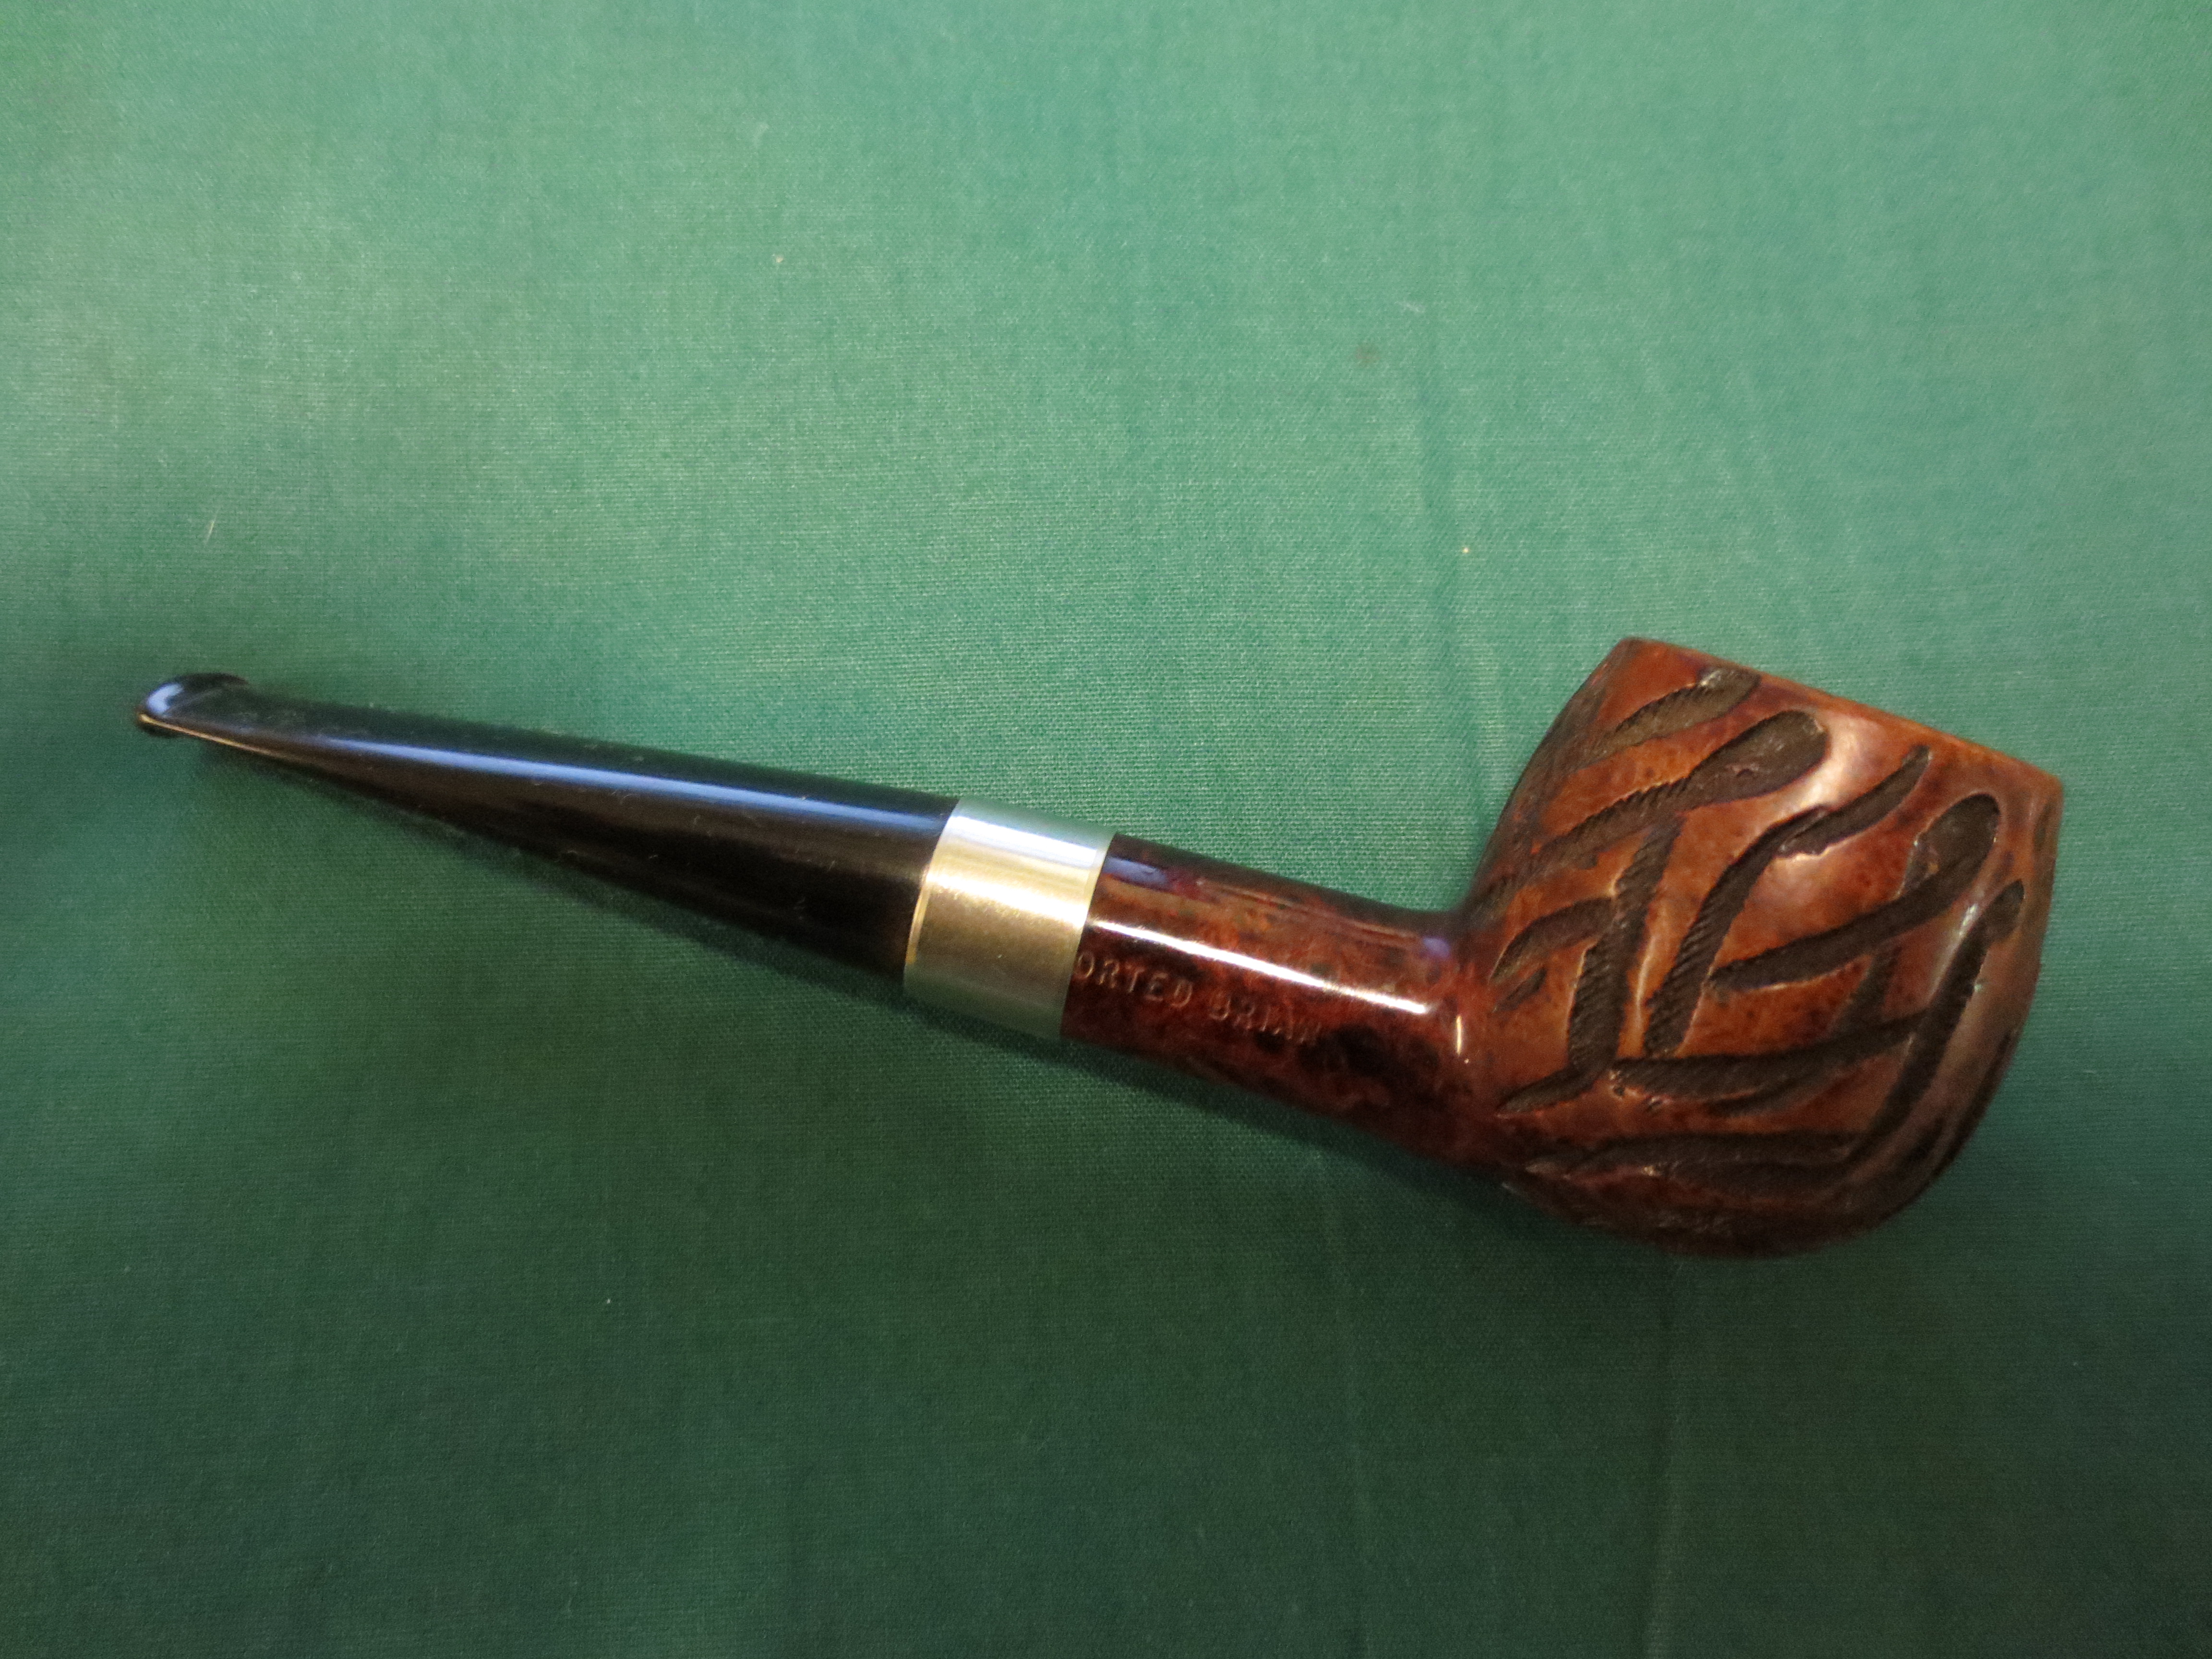
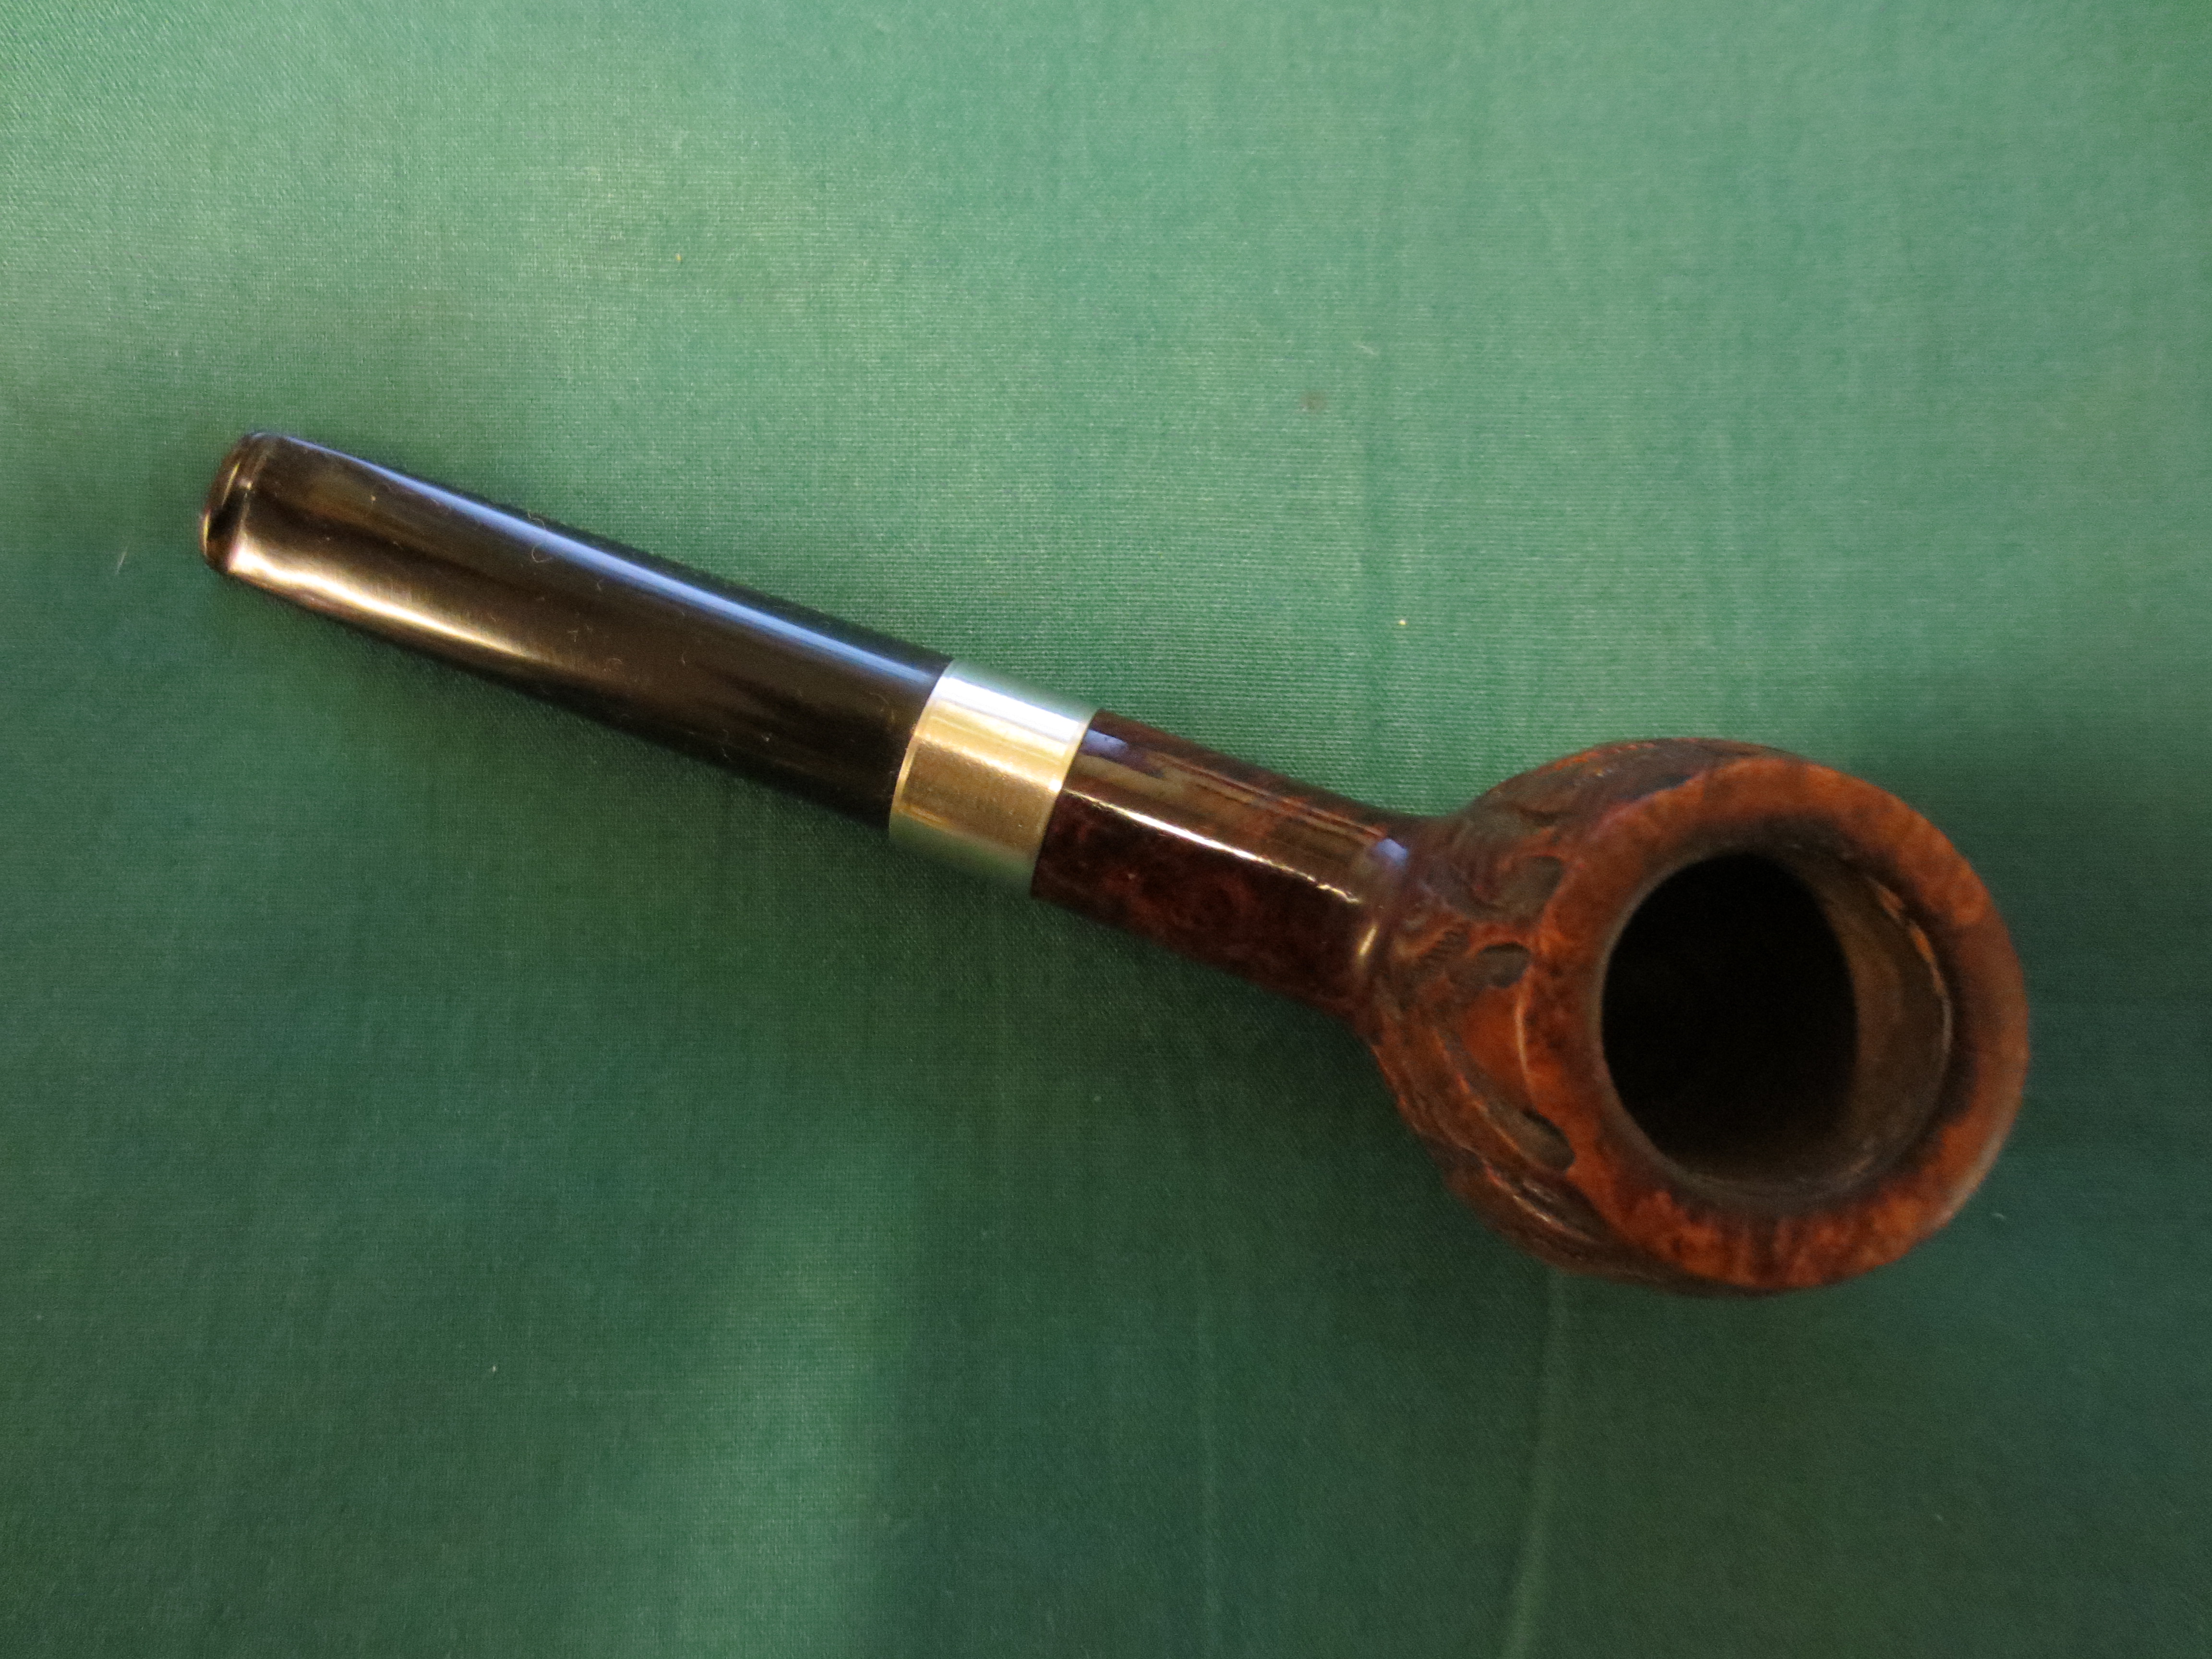
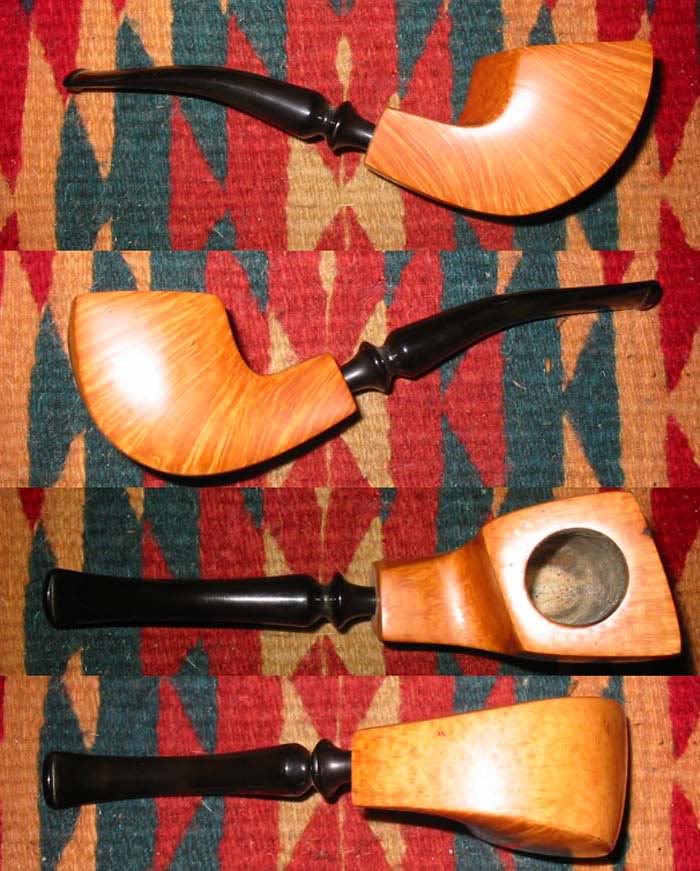
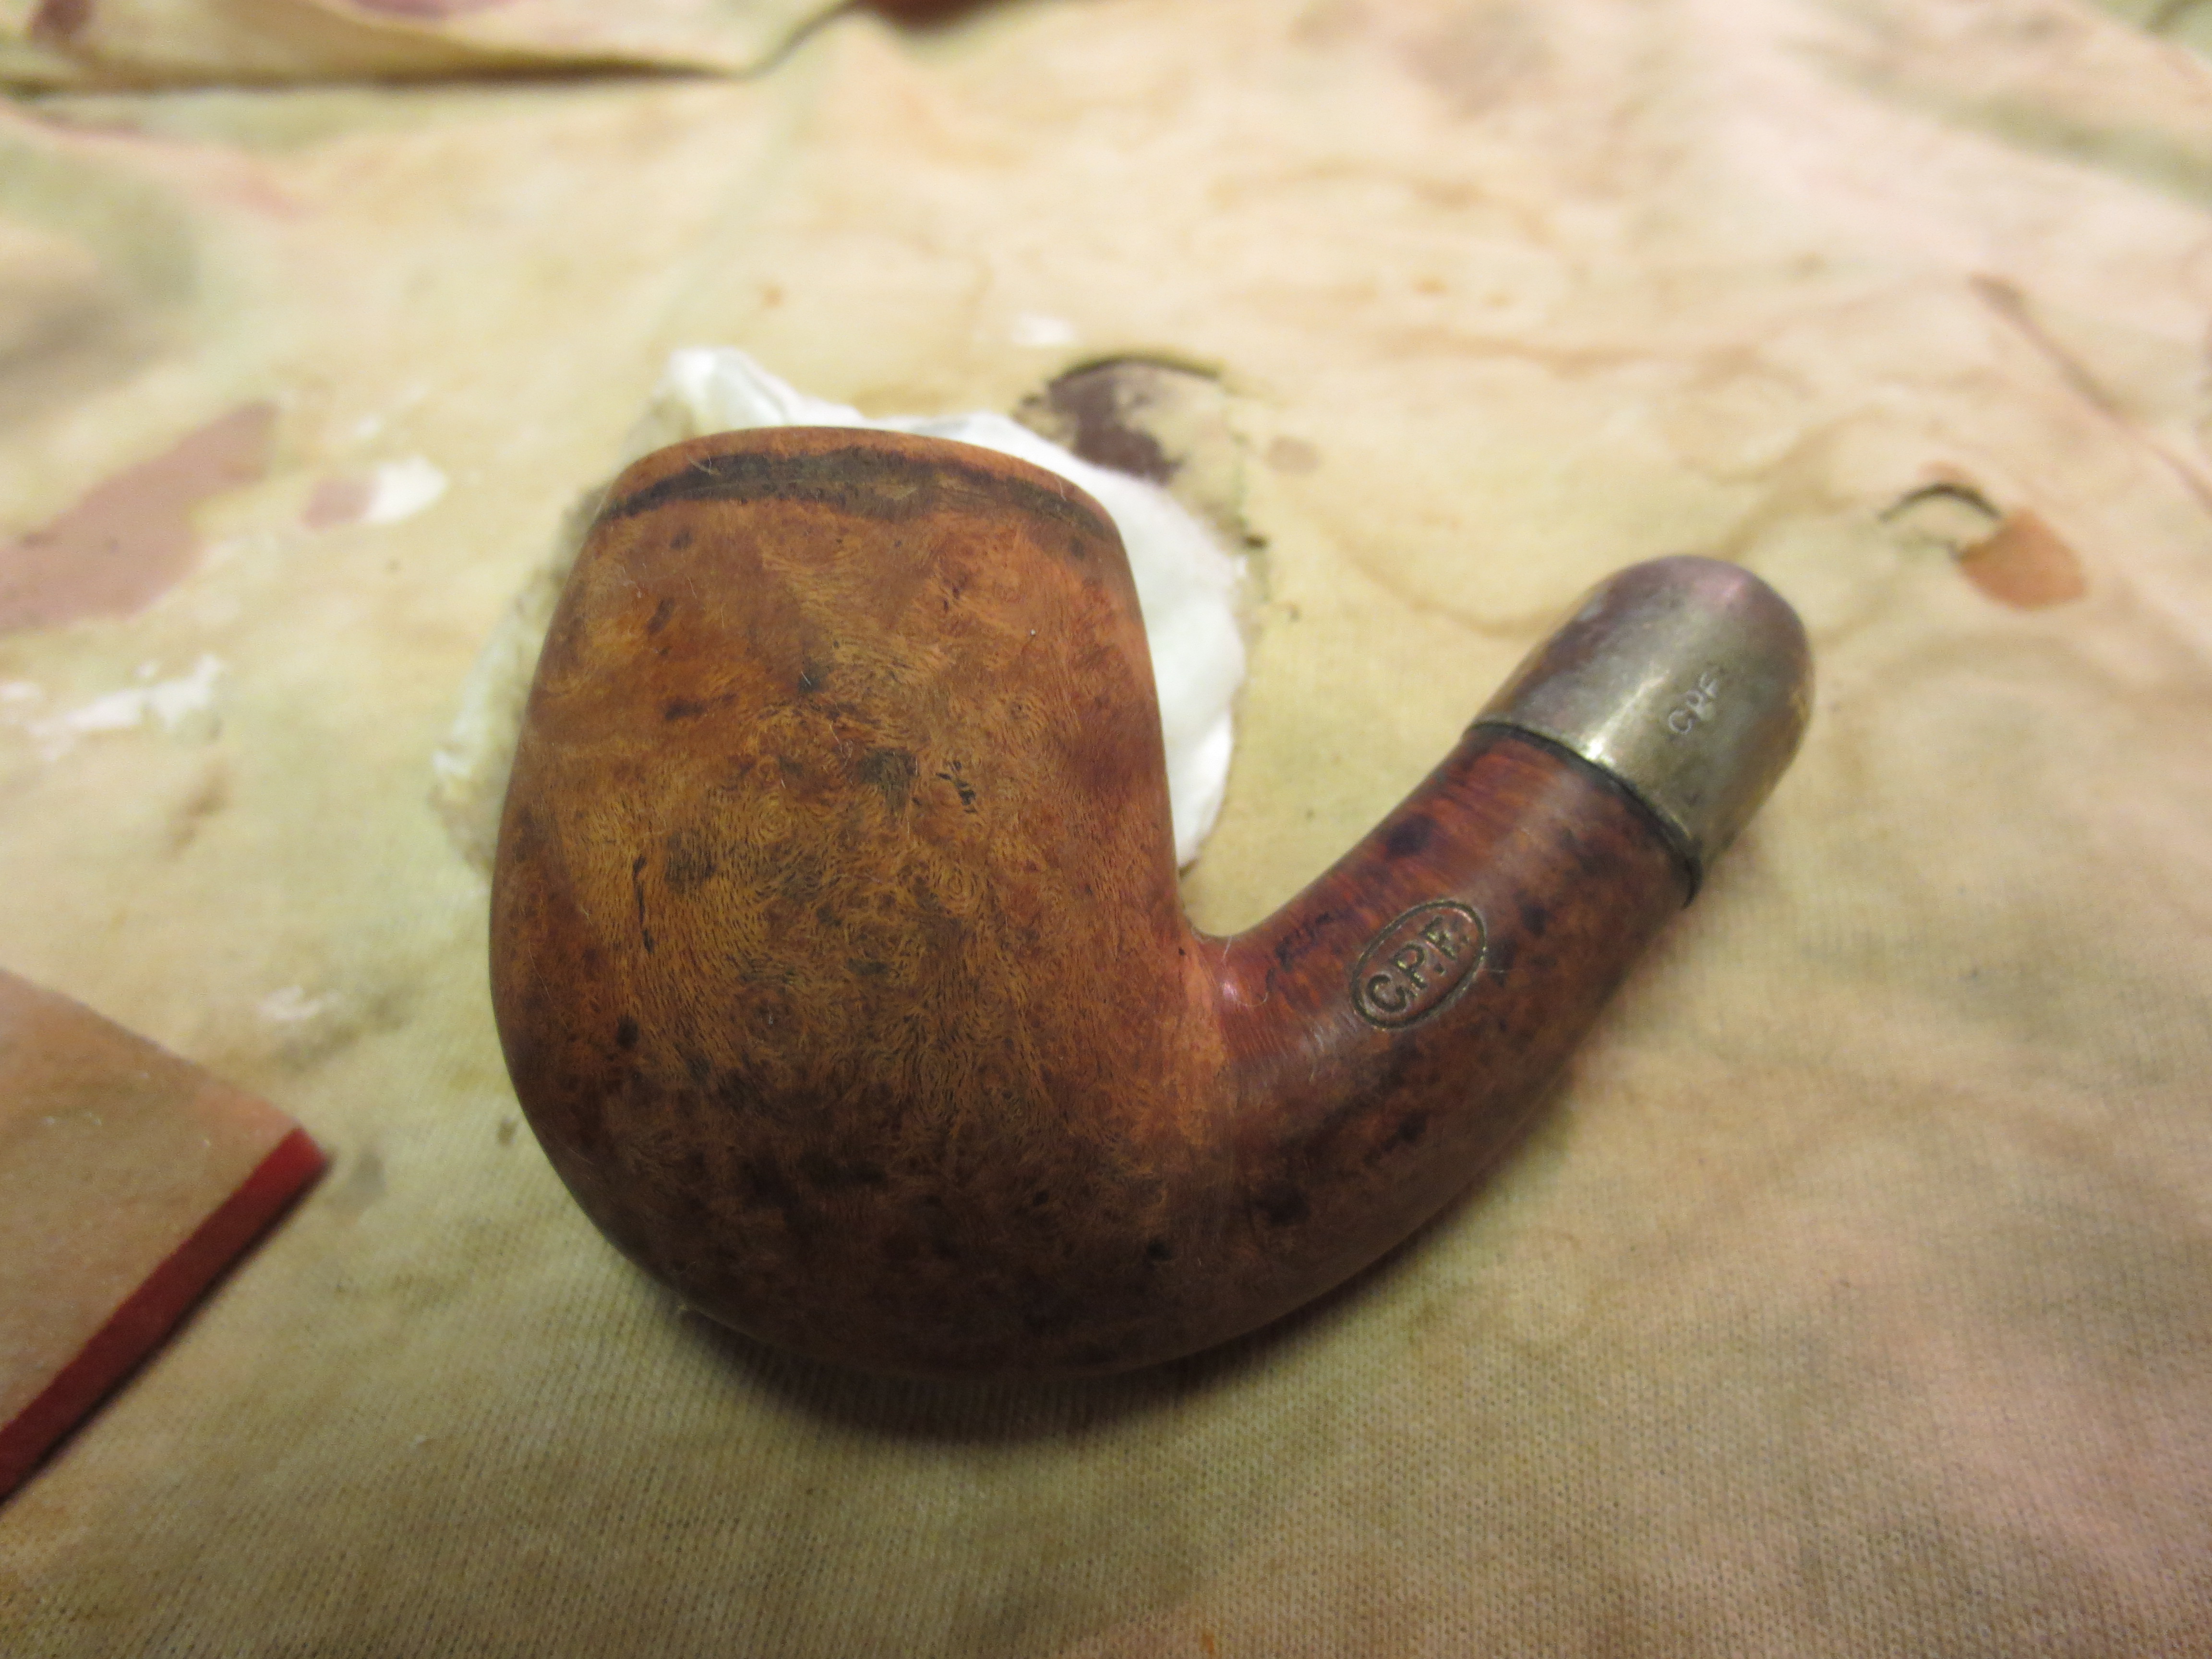
I buffed it to see how the second stain had covered the darkening around the top edge and near the shank cap. I was pleased by the overall look now. It was still there for sure but it certainly was less visible and blended in well with the finish. The next four photos show the pipe after restaining and buffing.

ImageImageImageImage

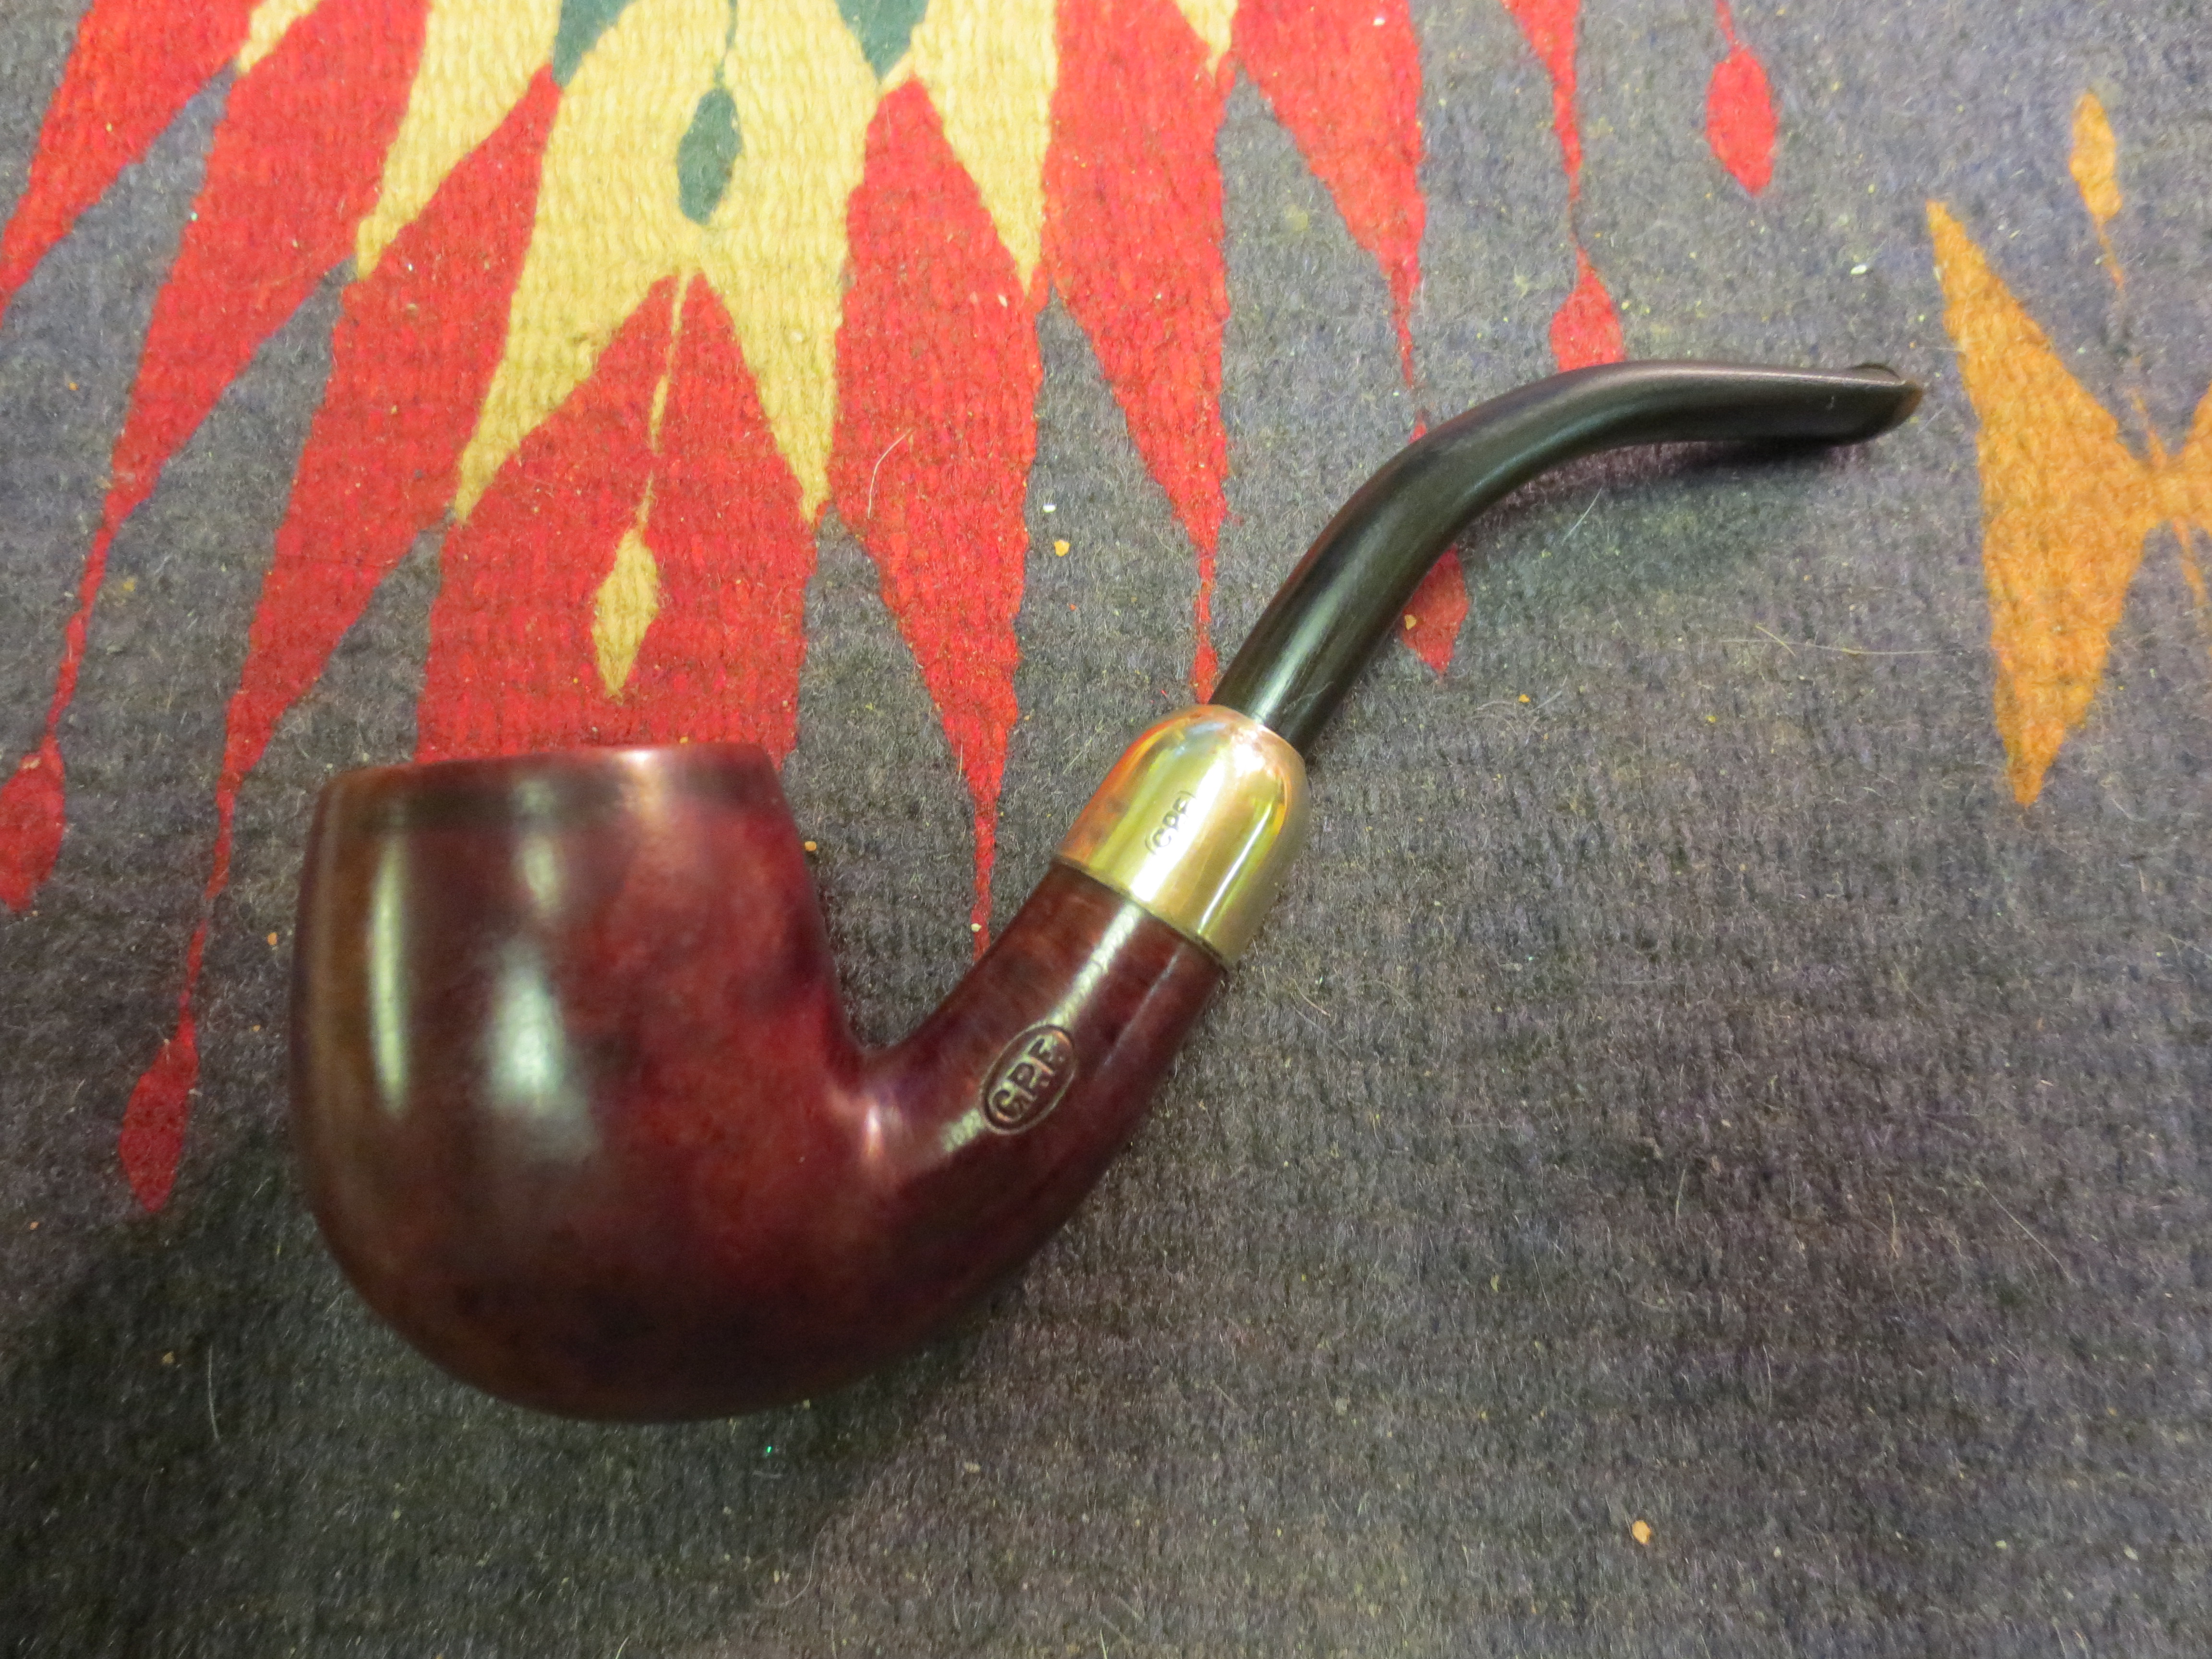
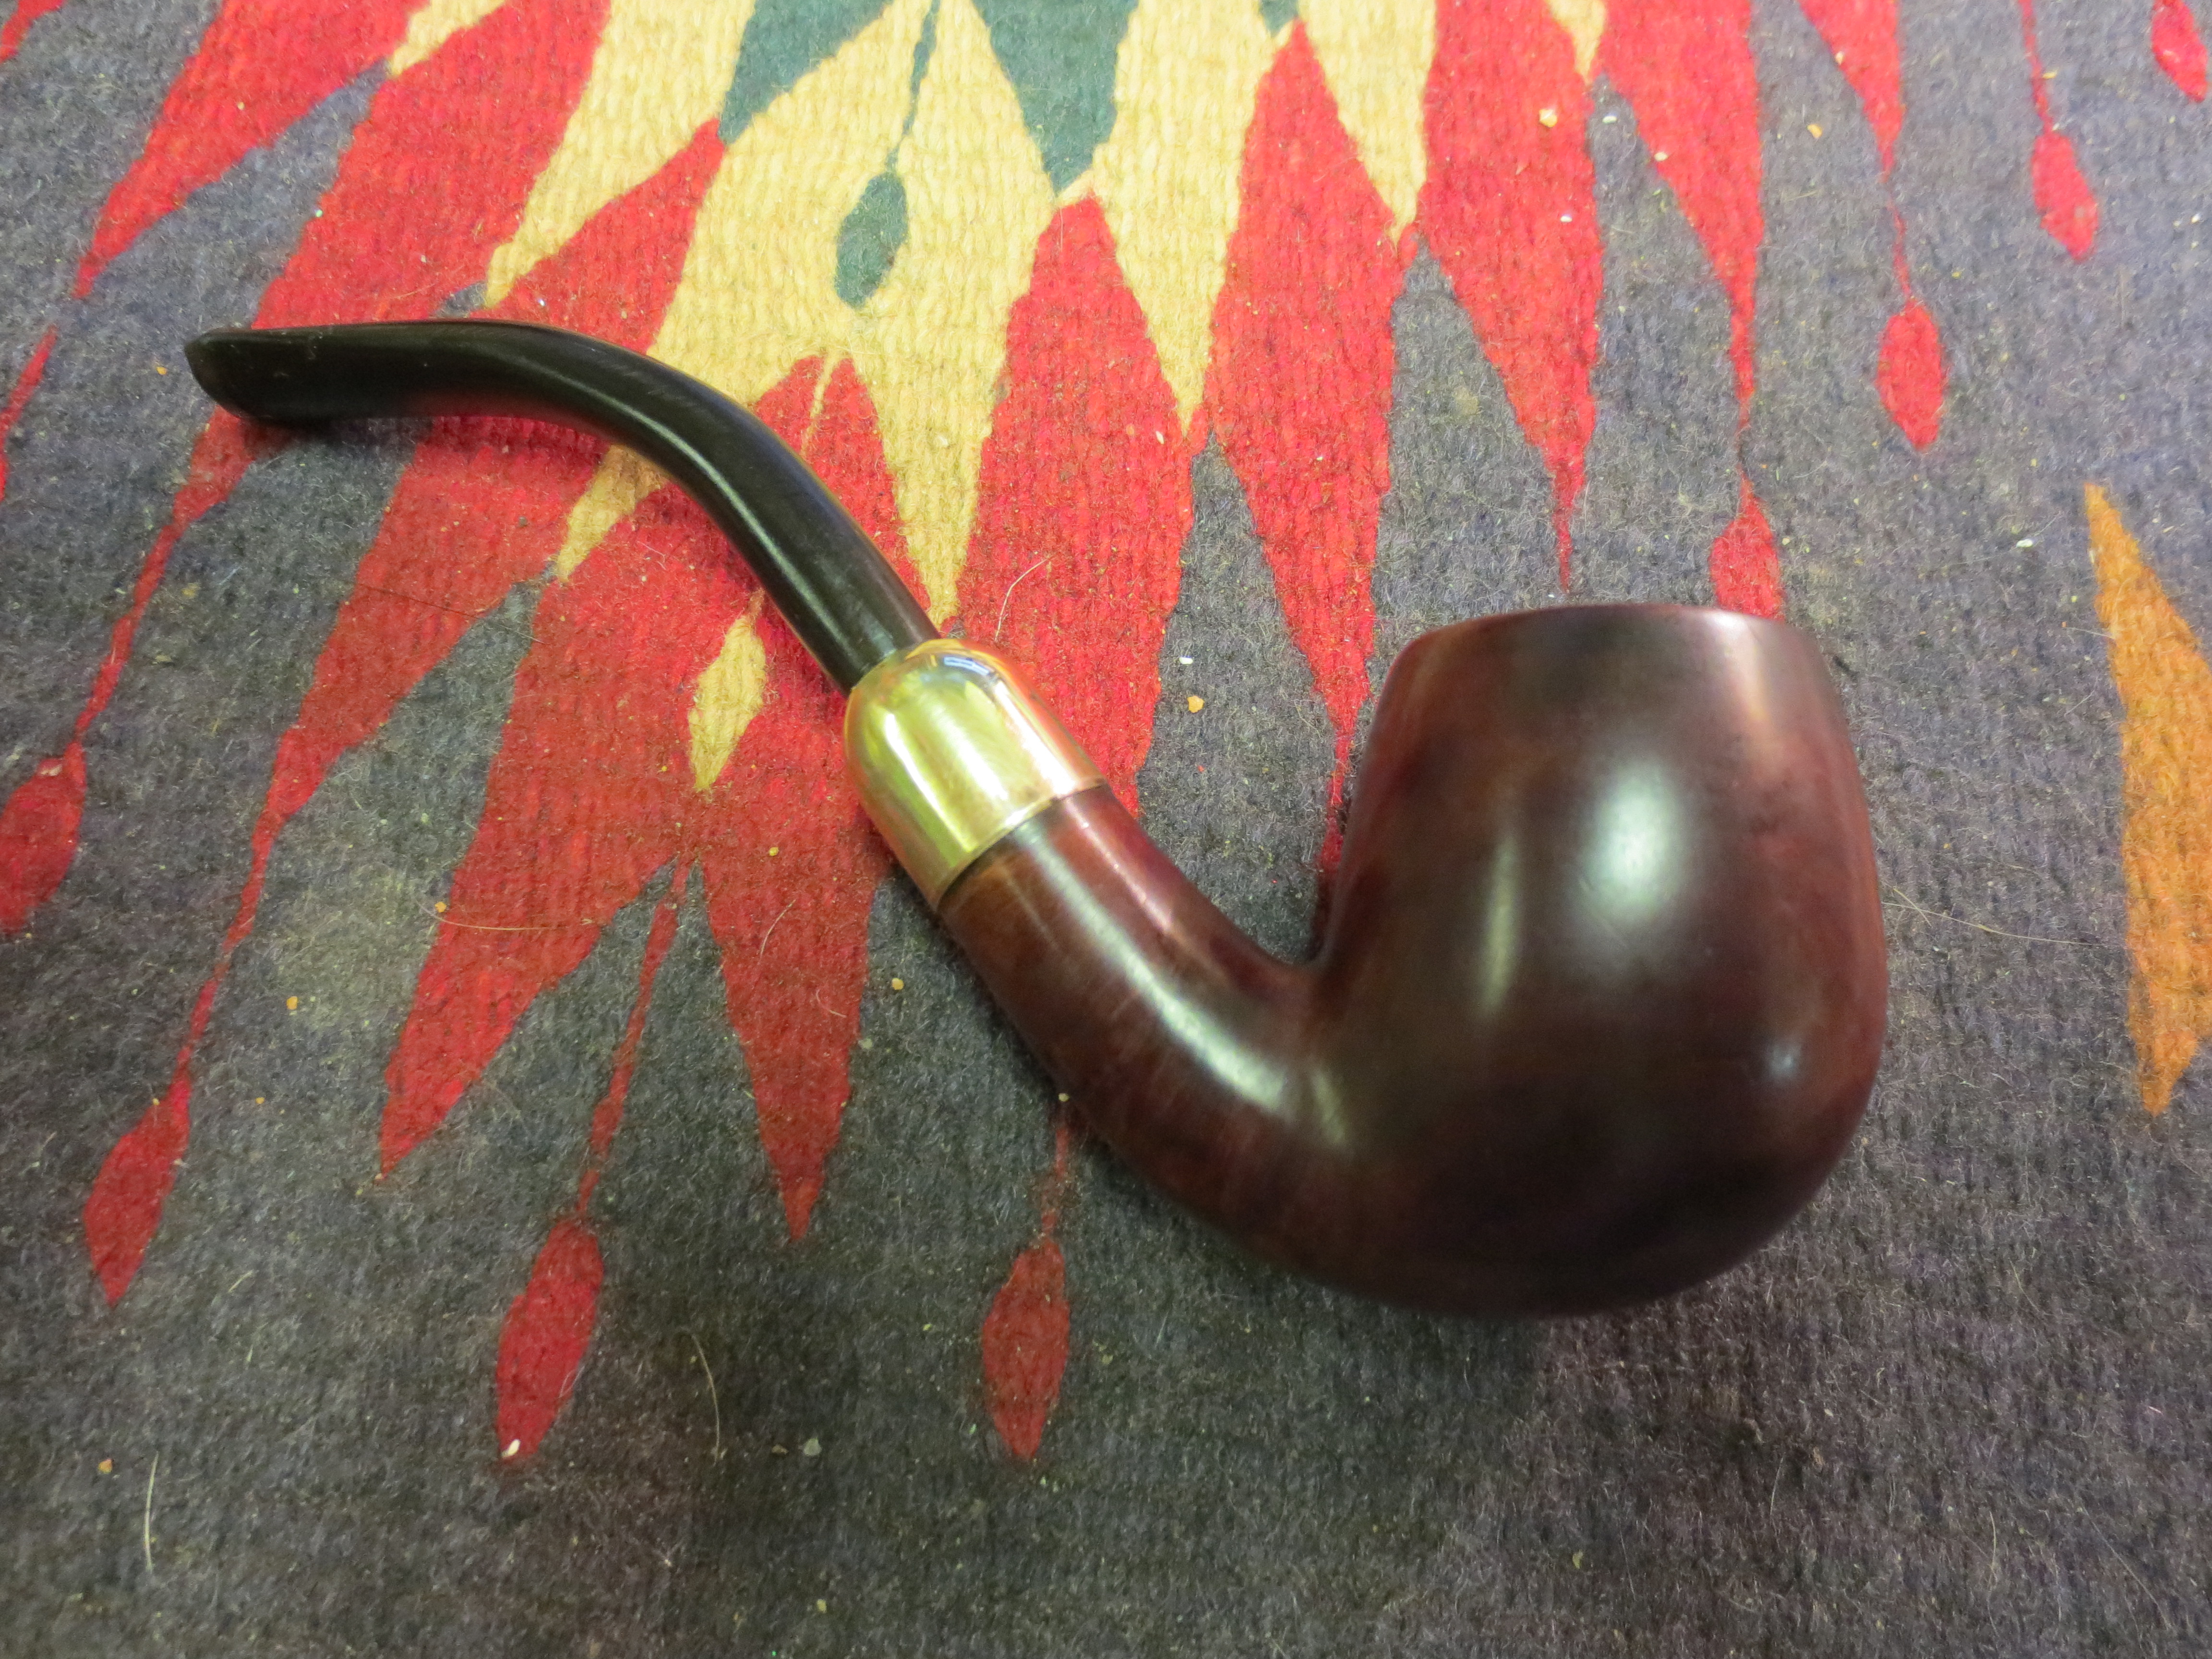
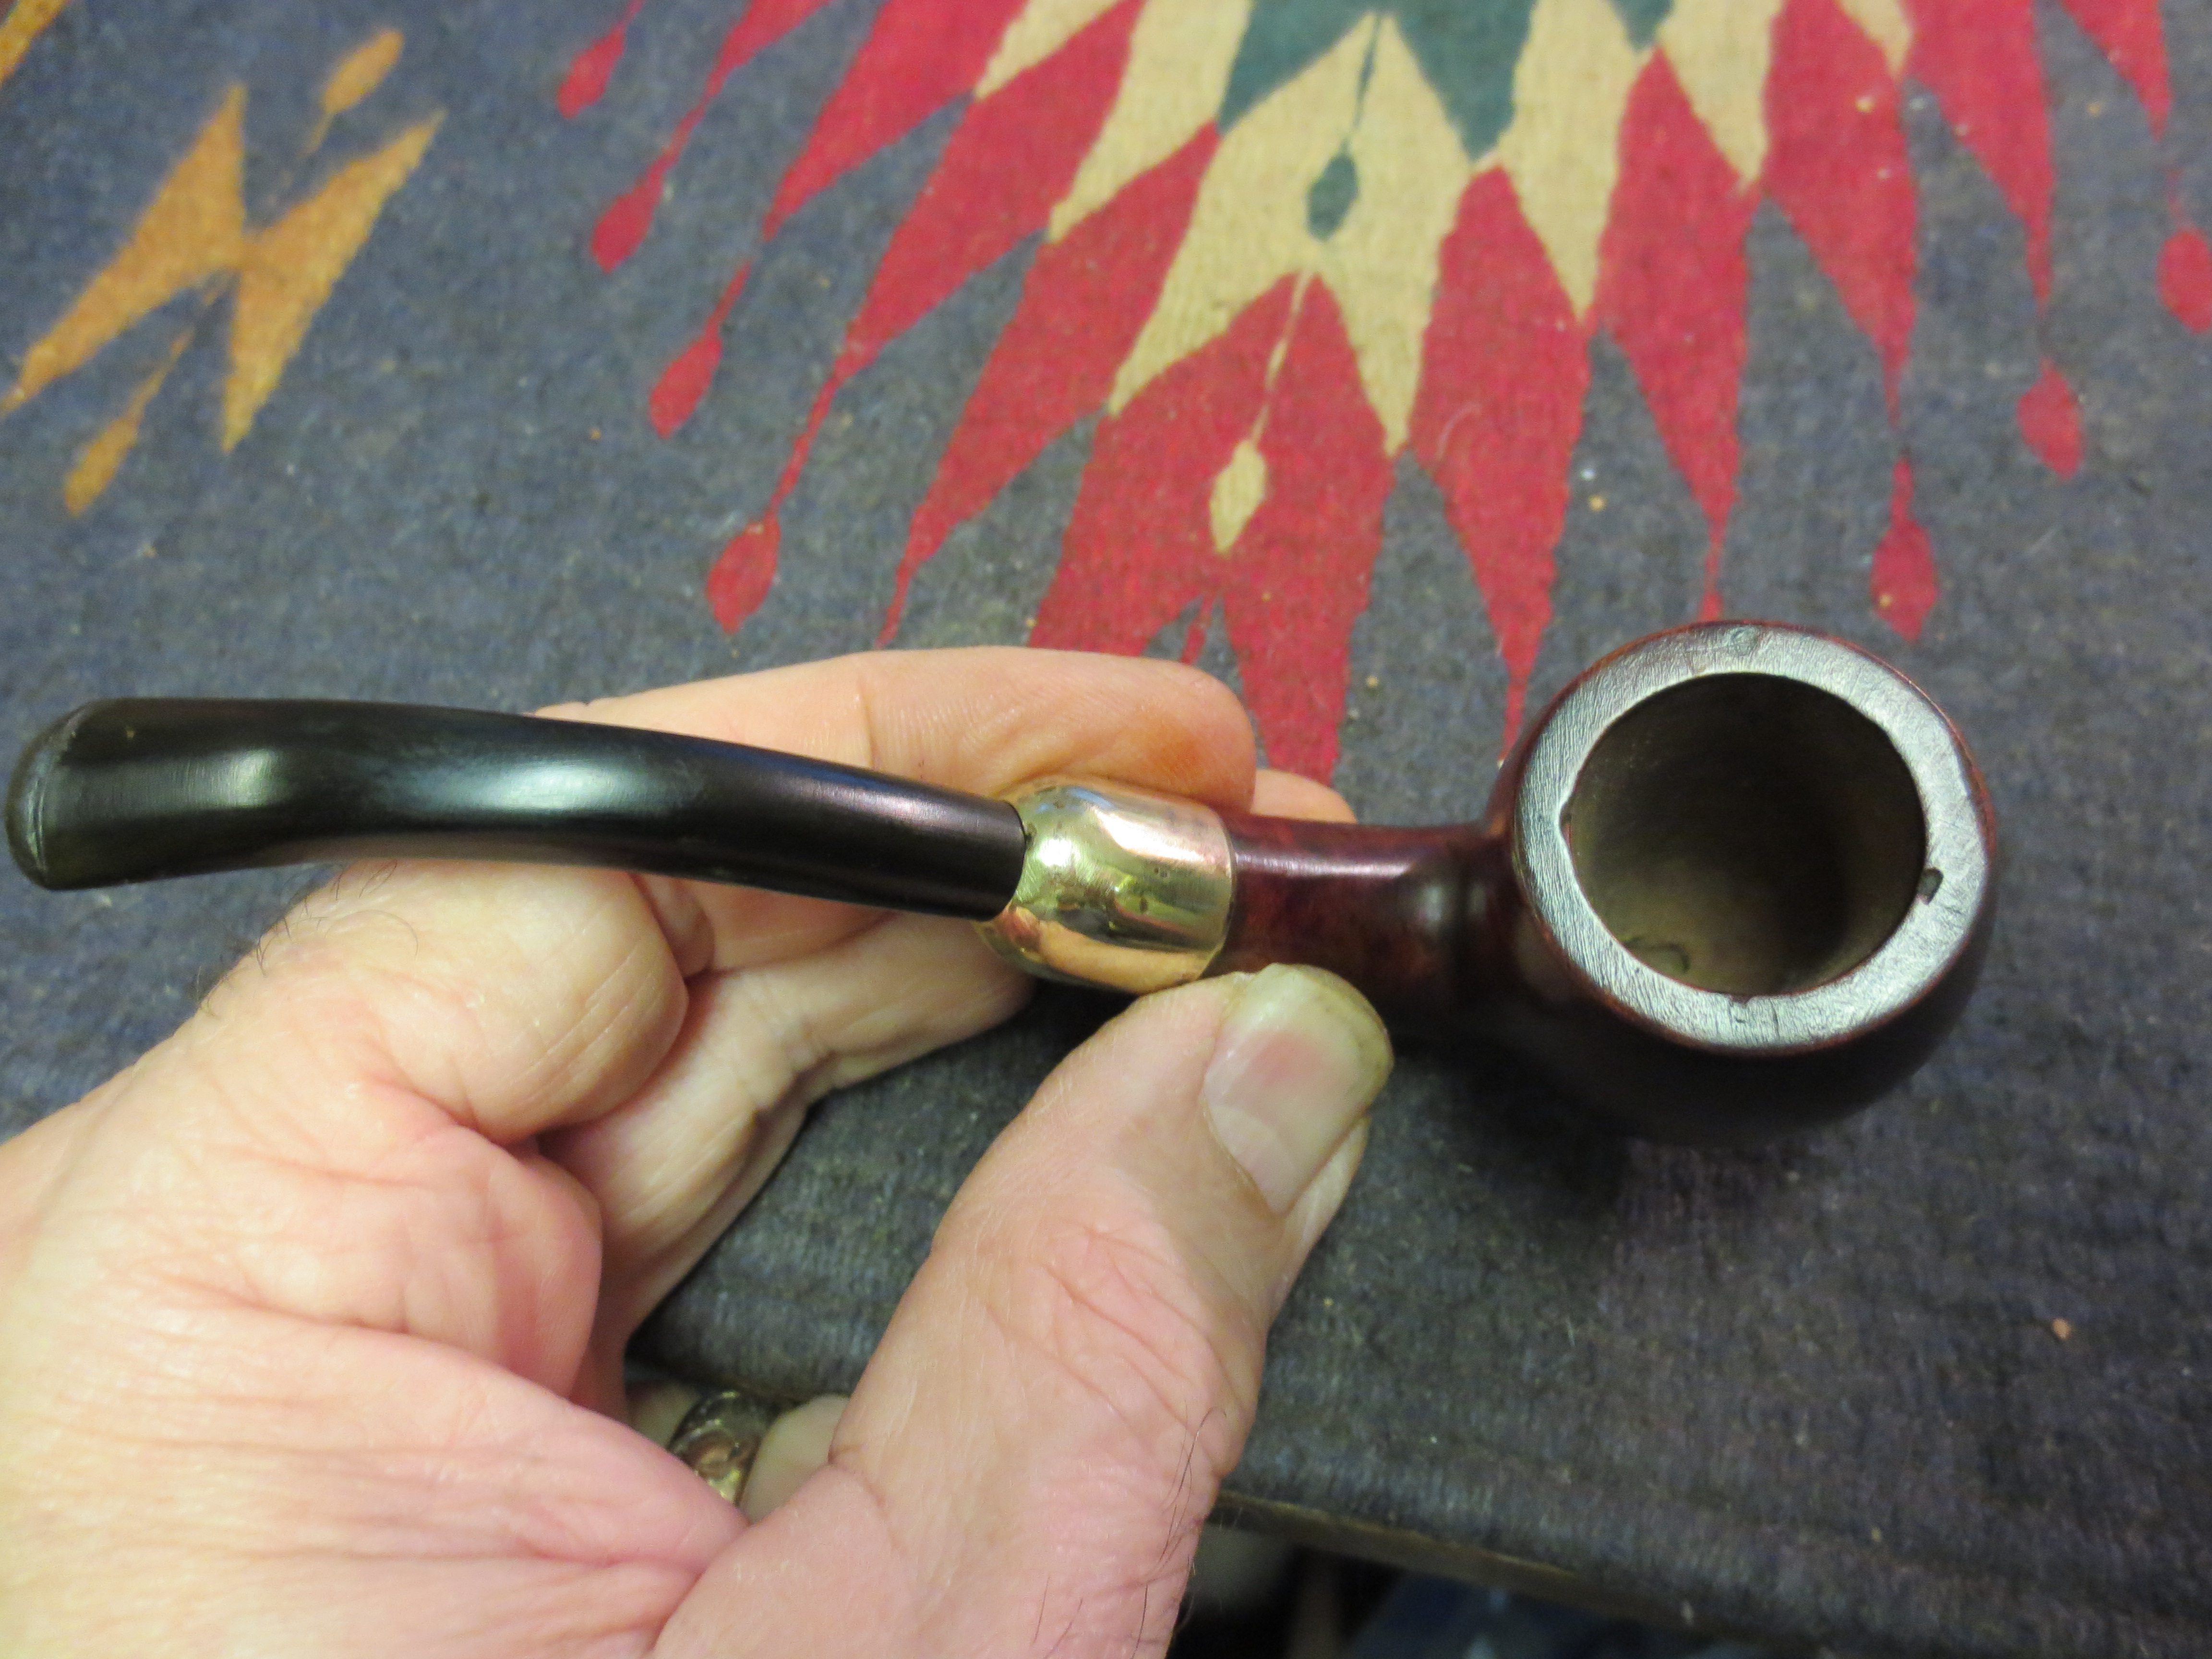
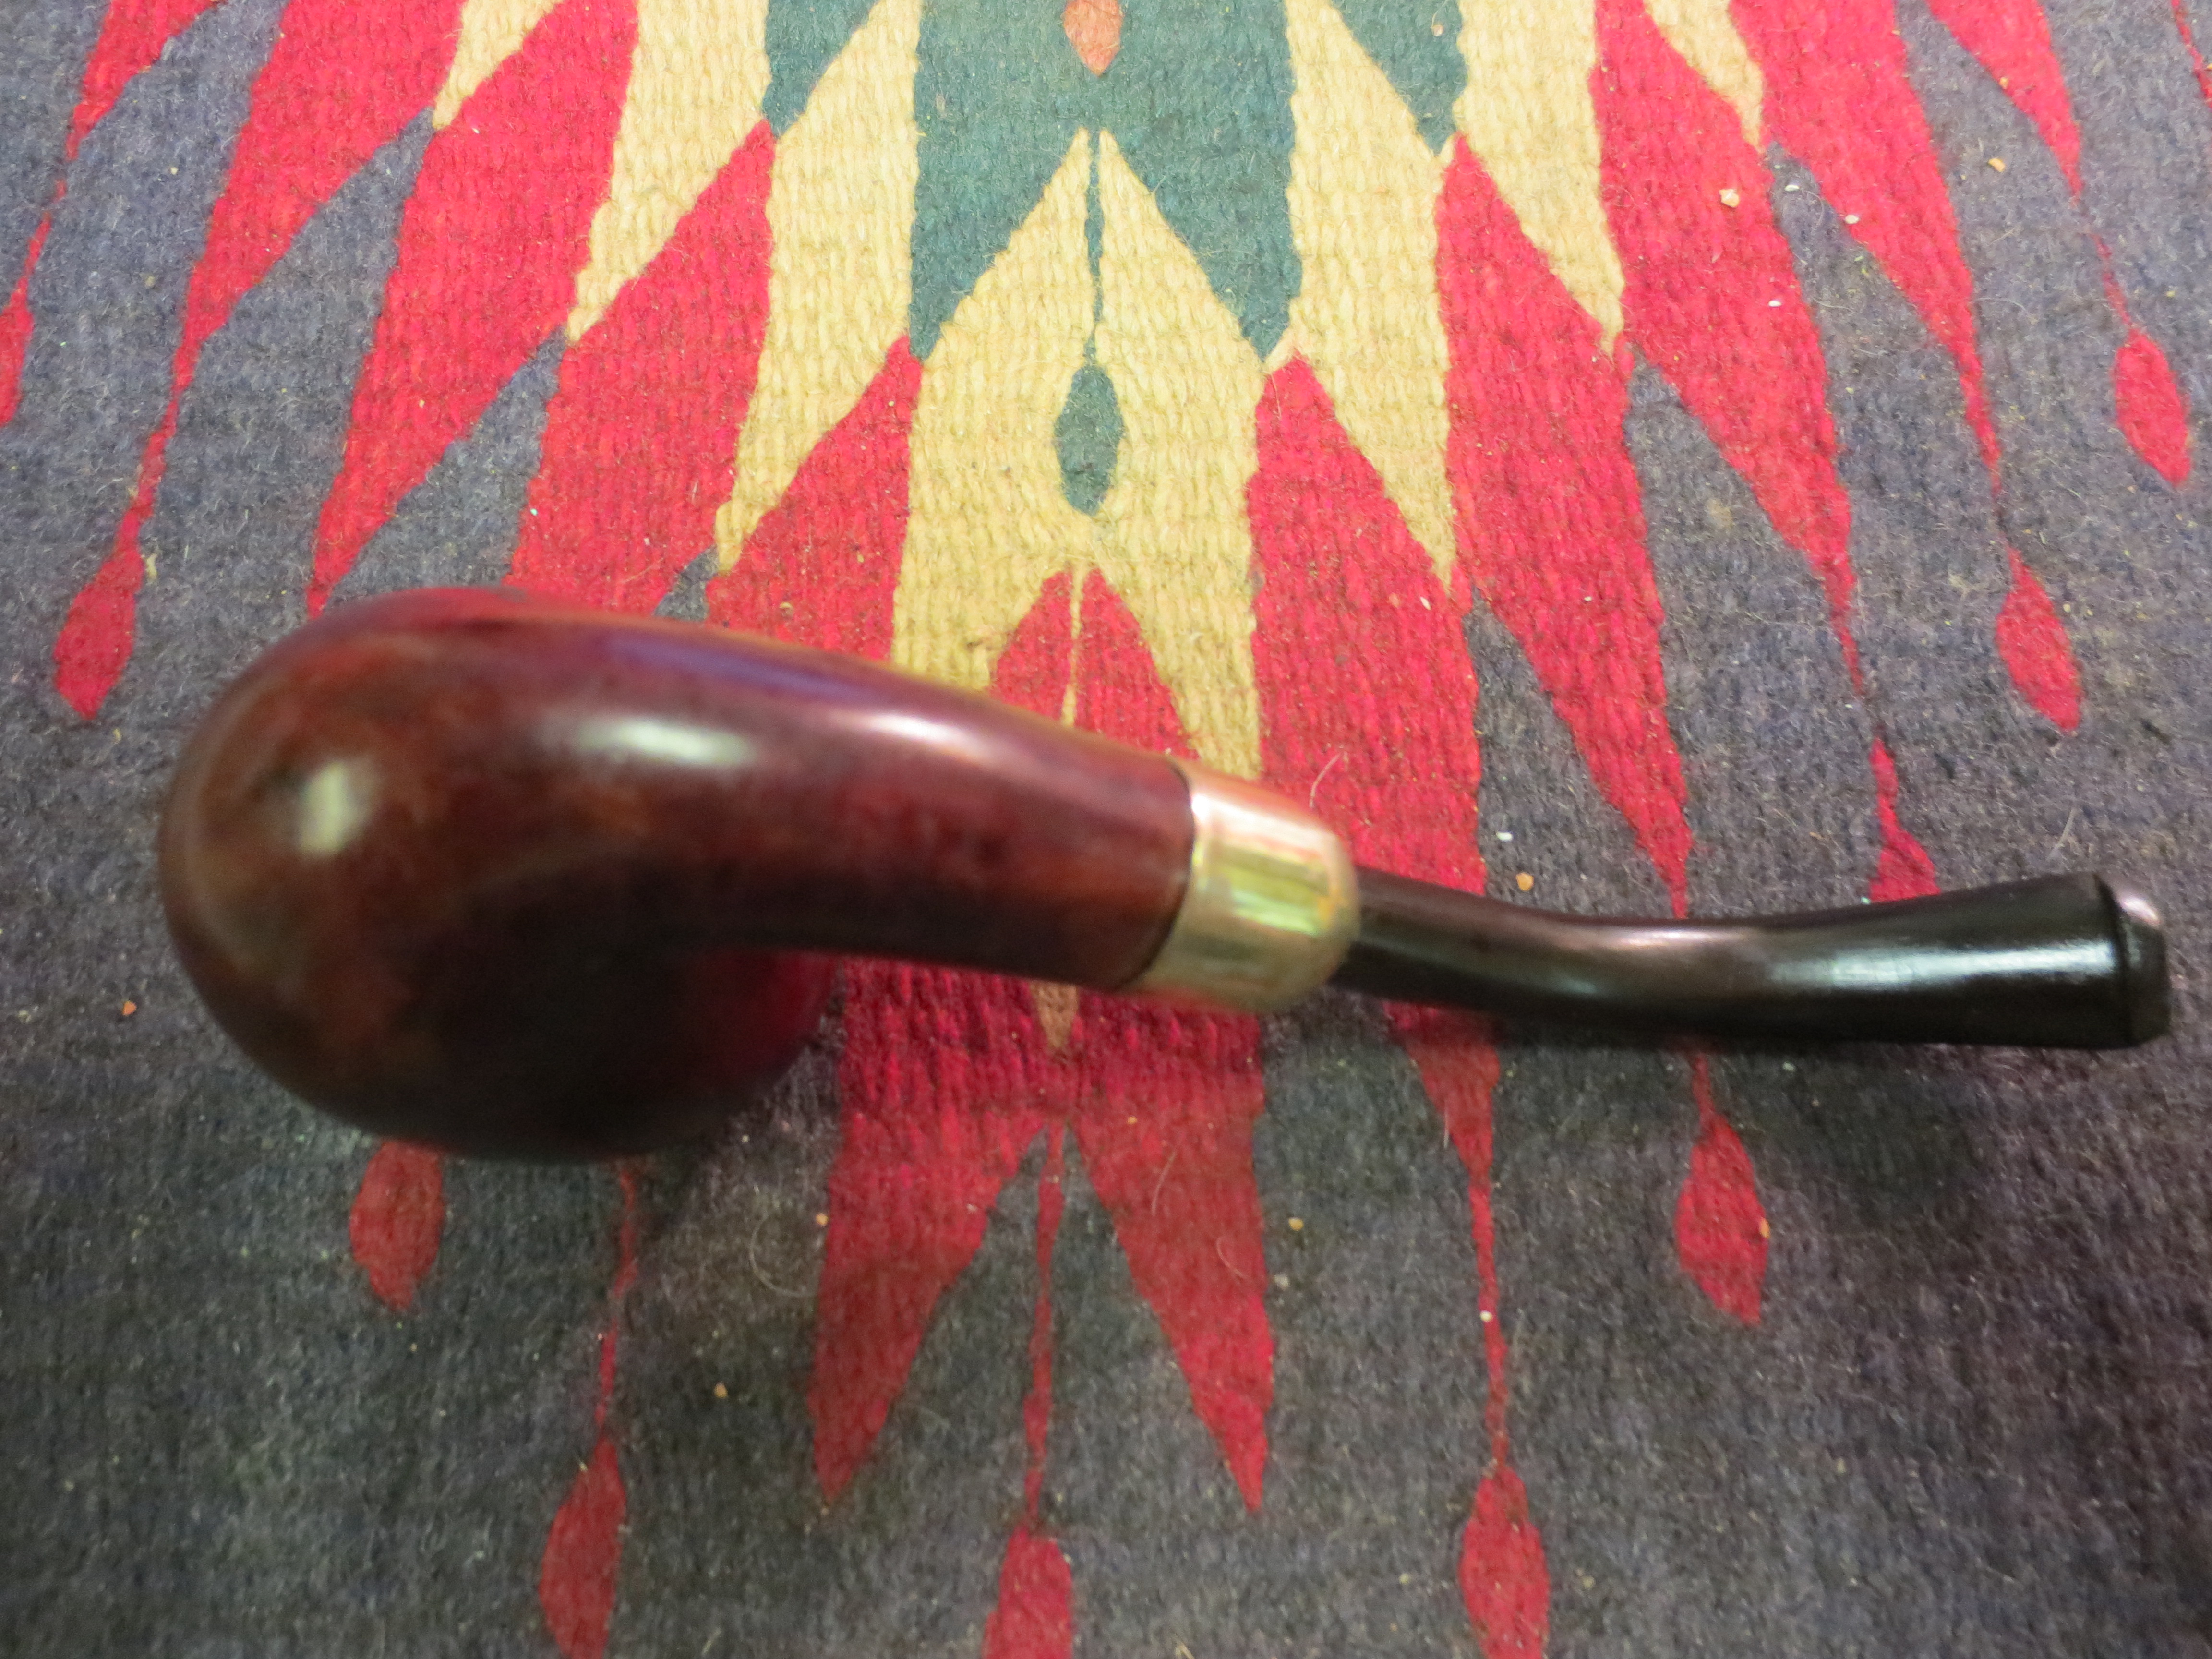
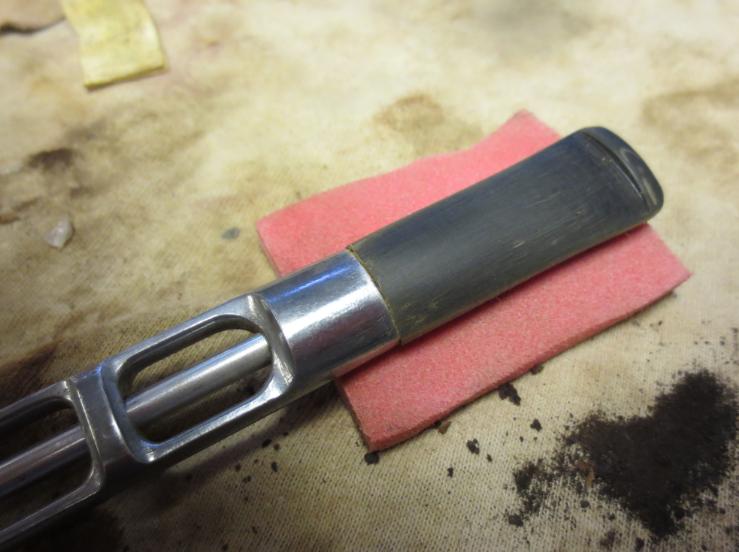
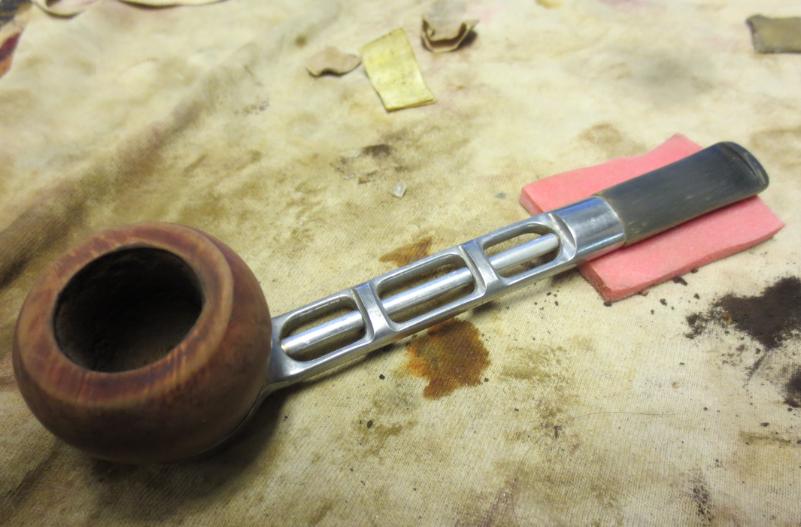
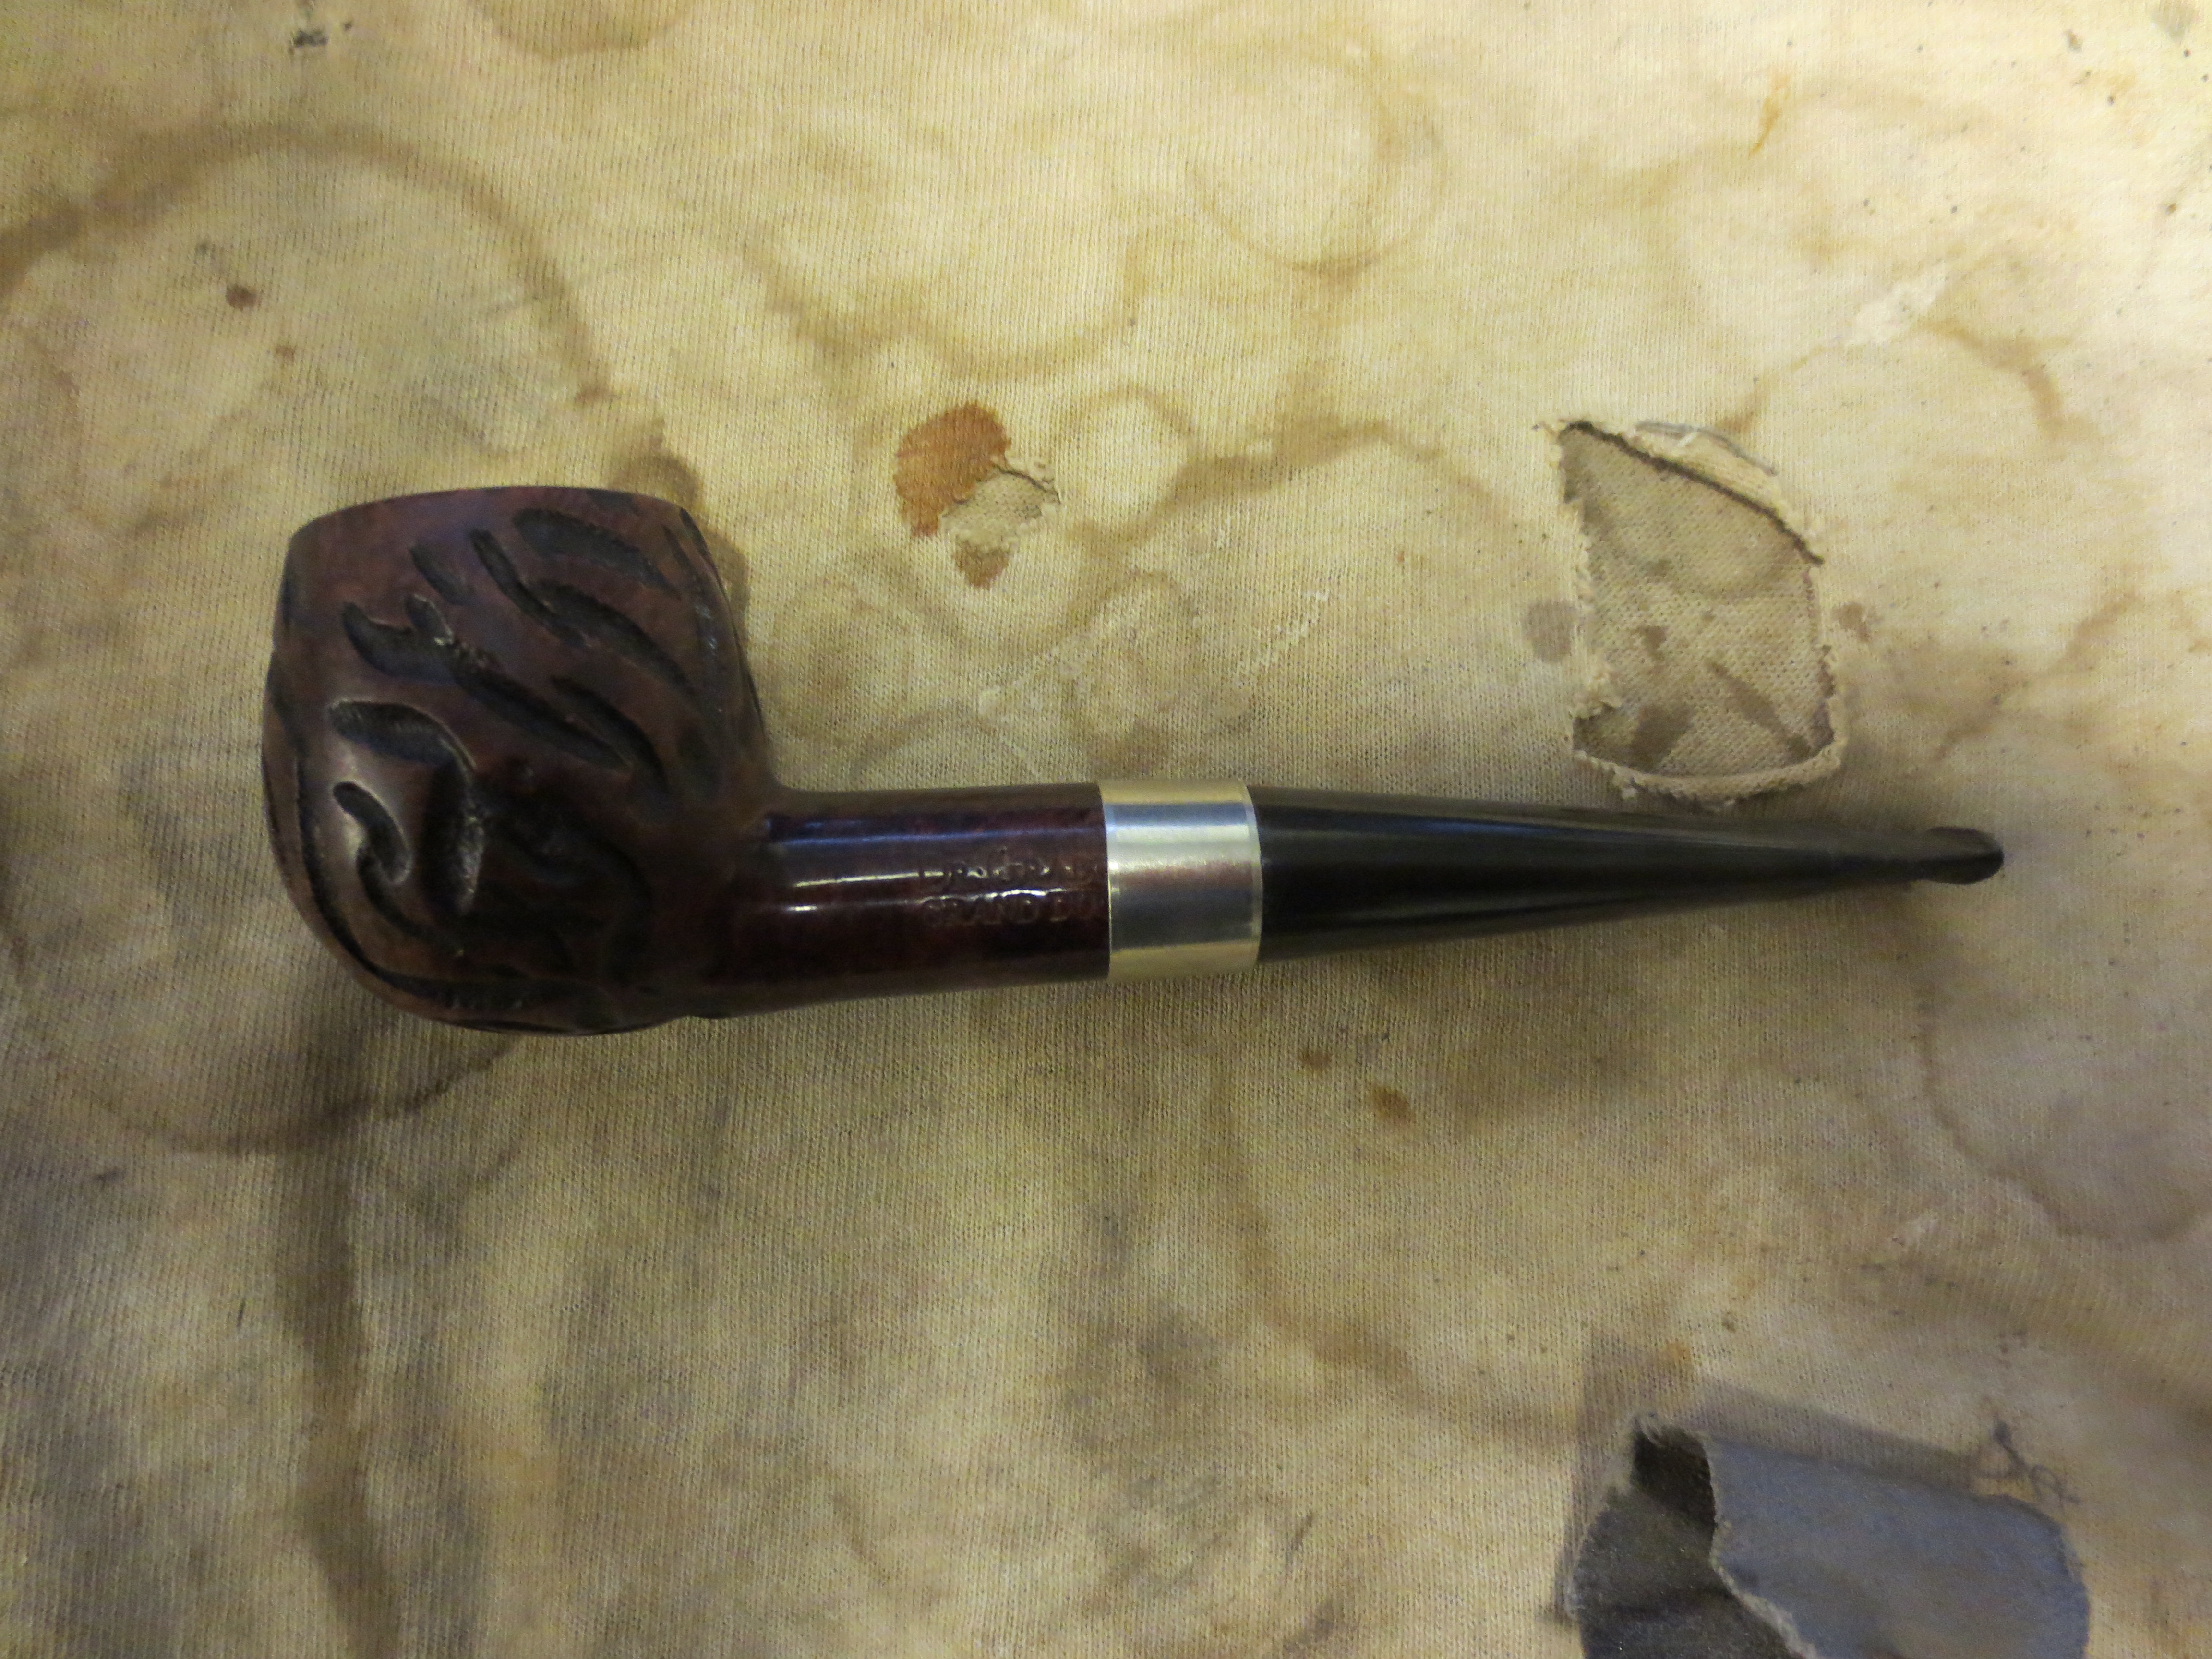
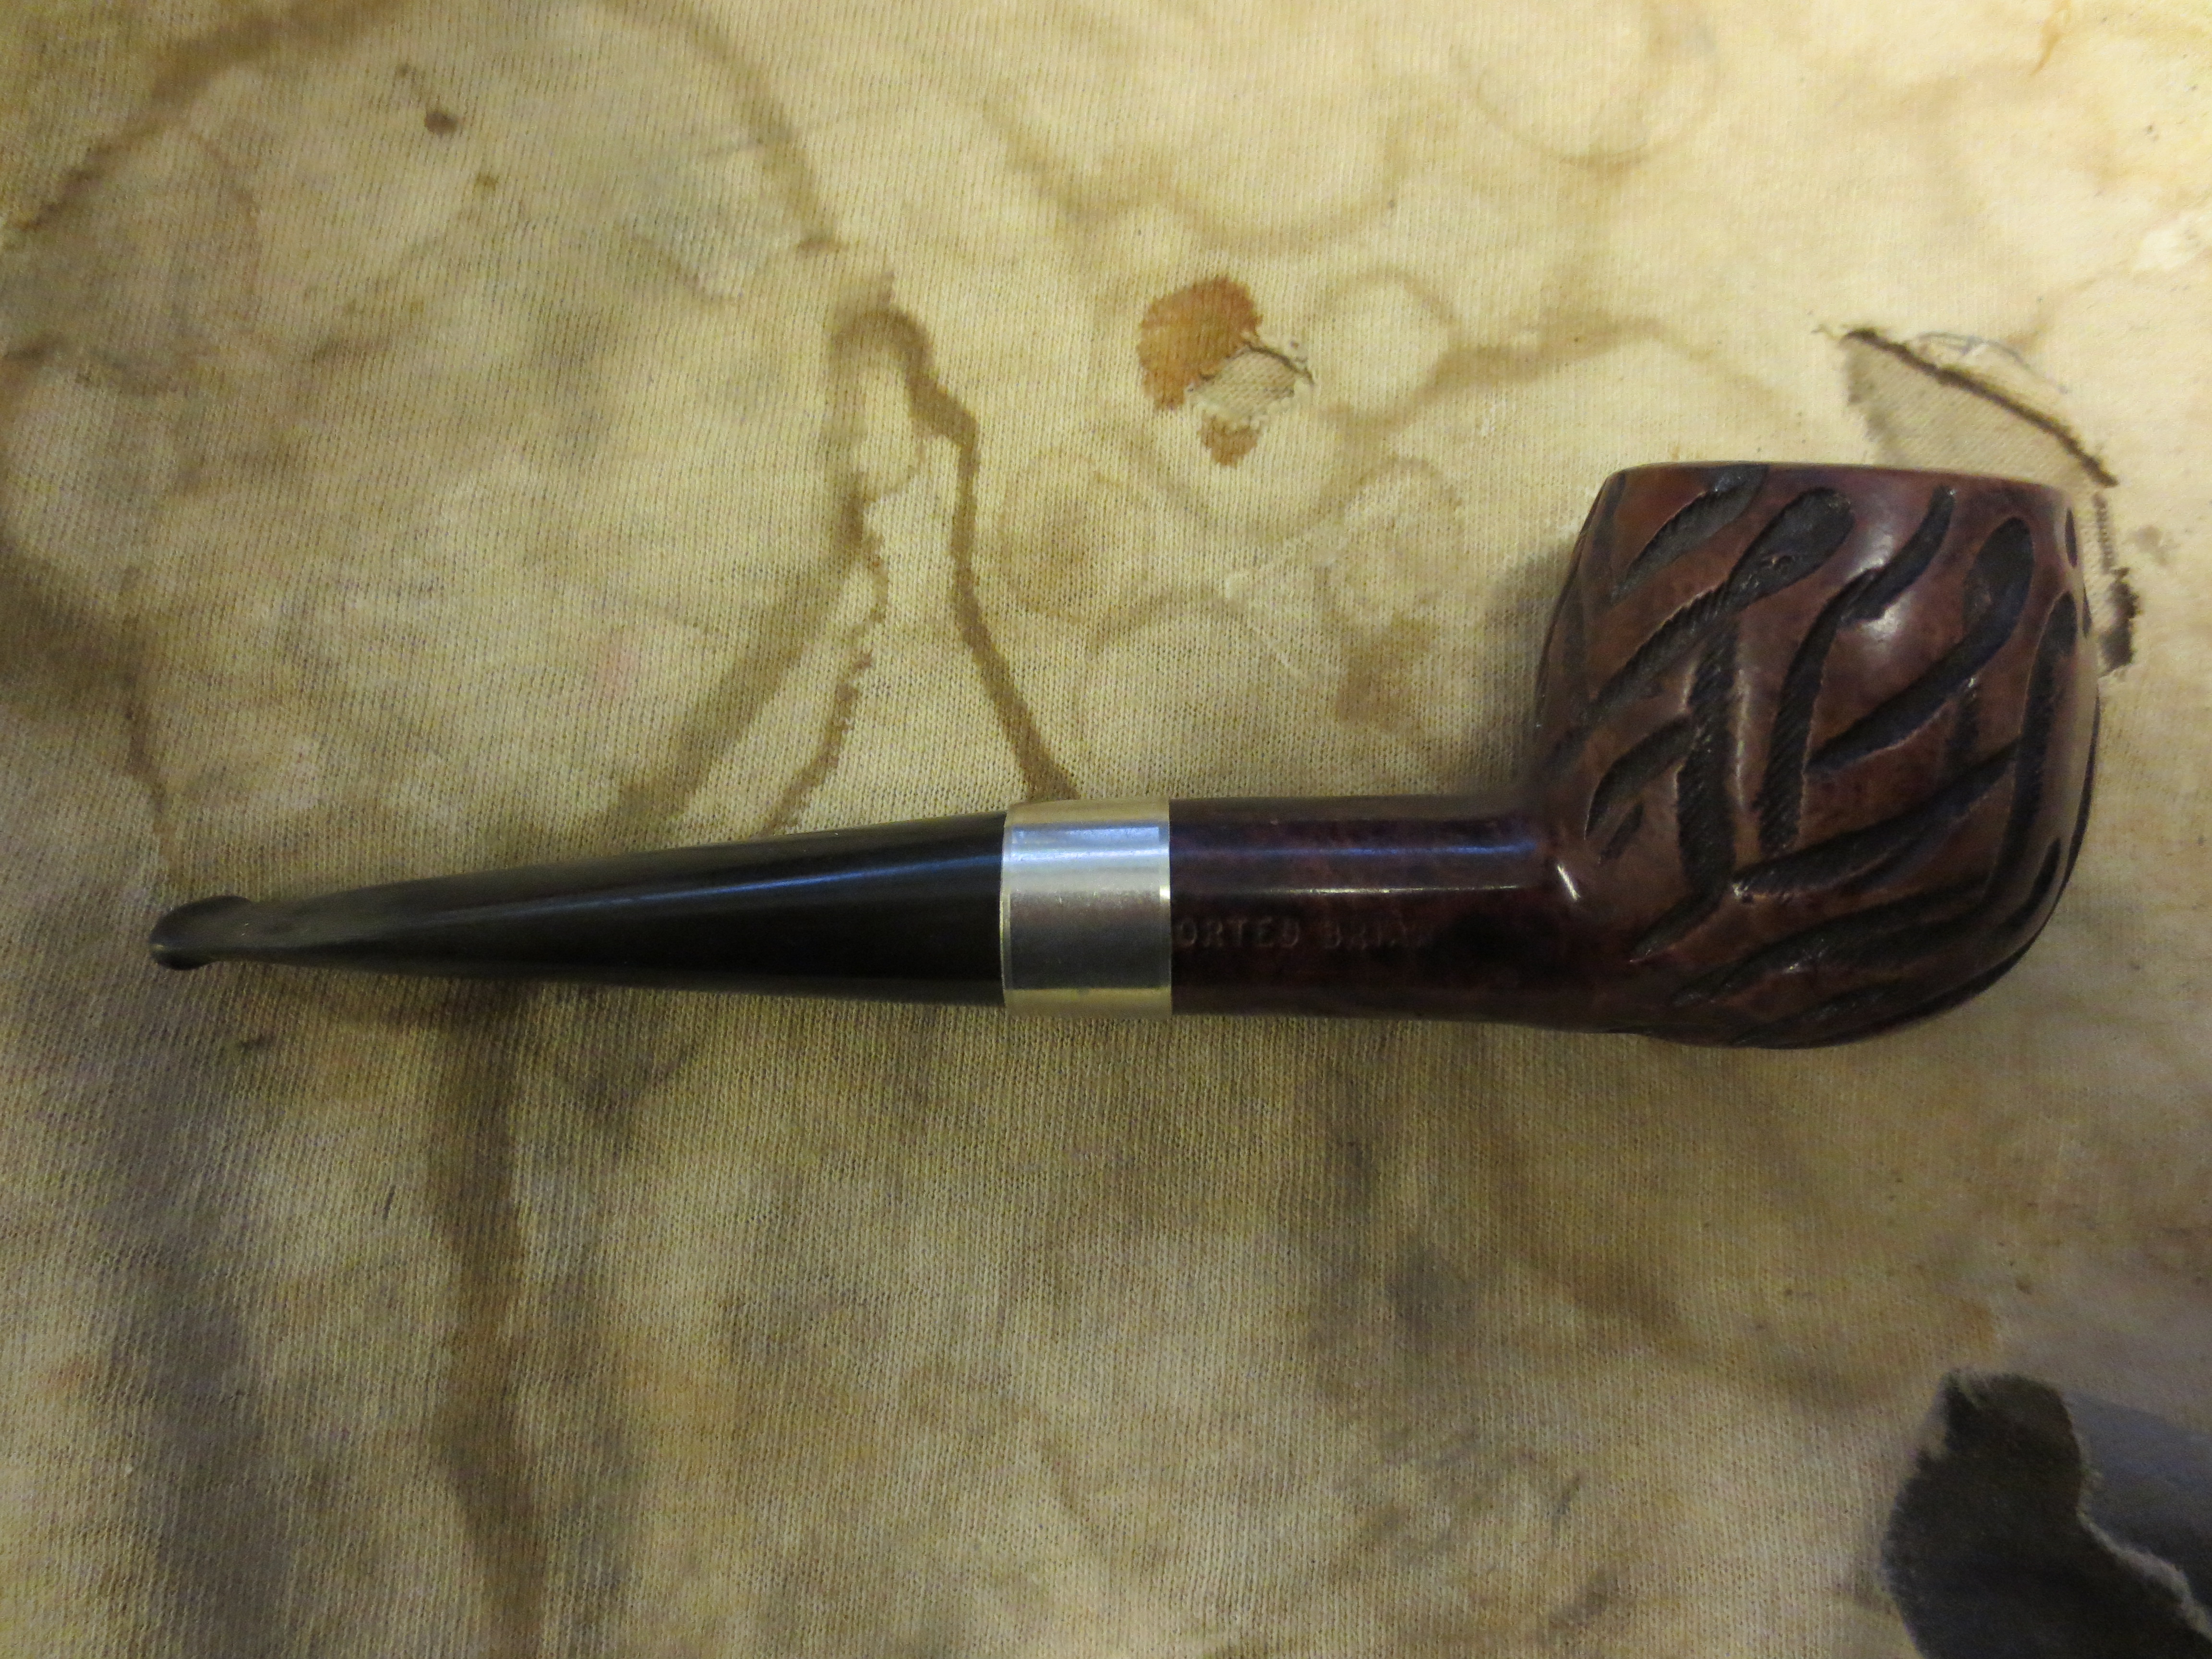
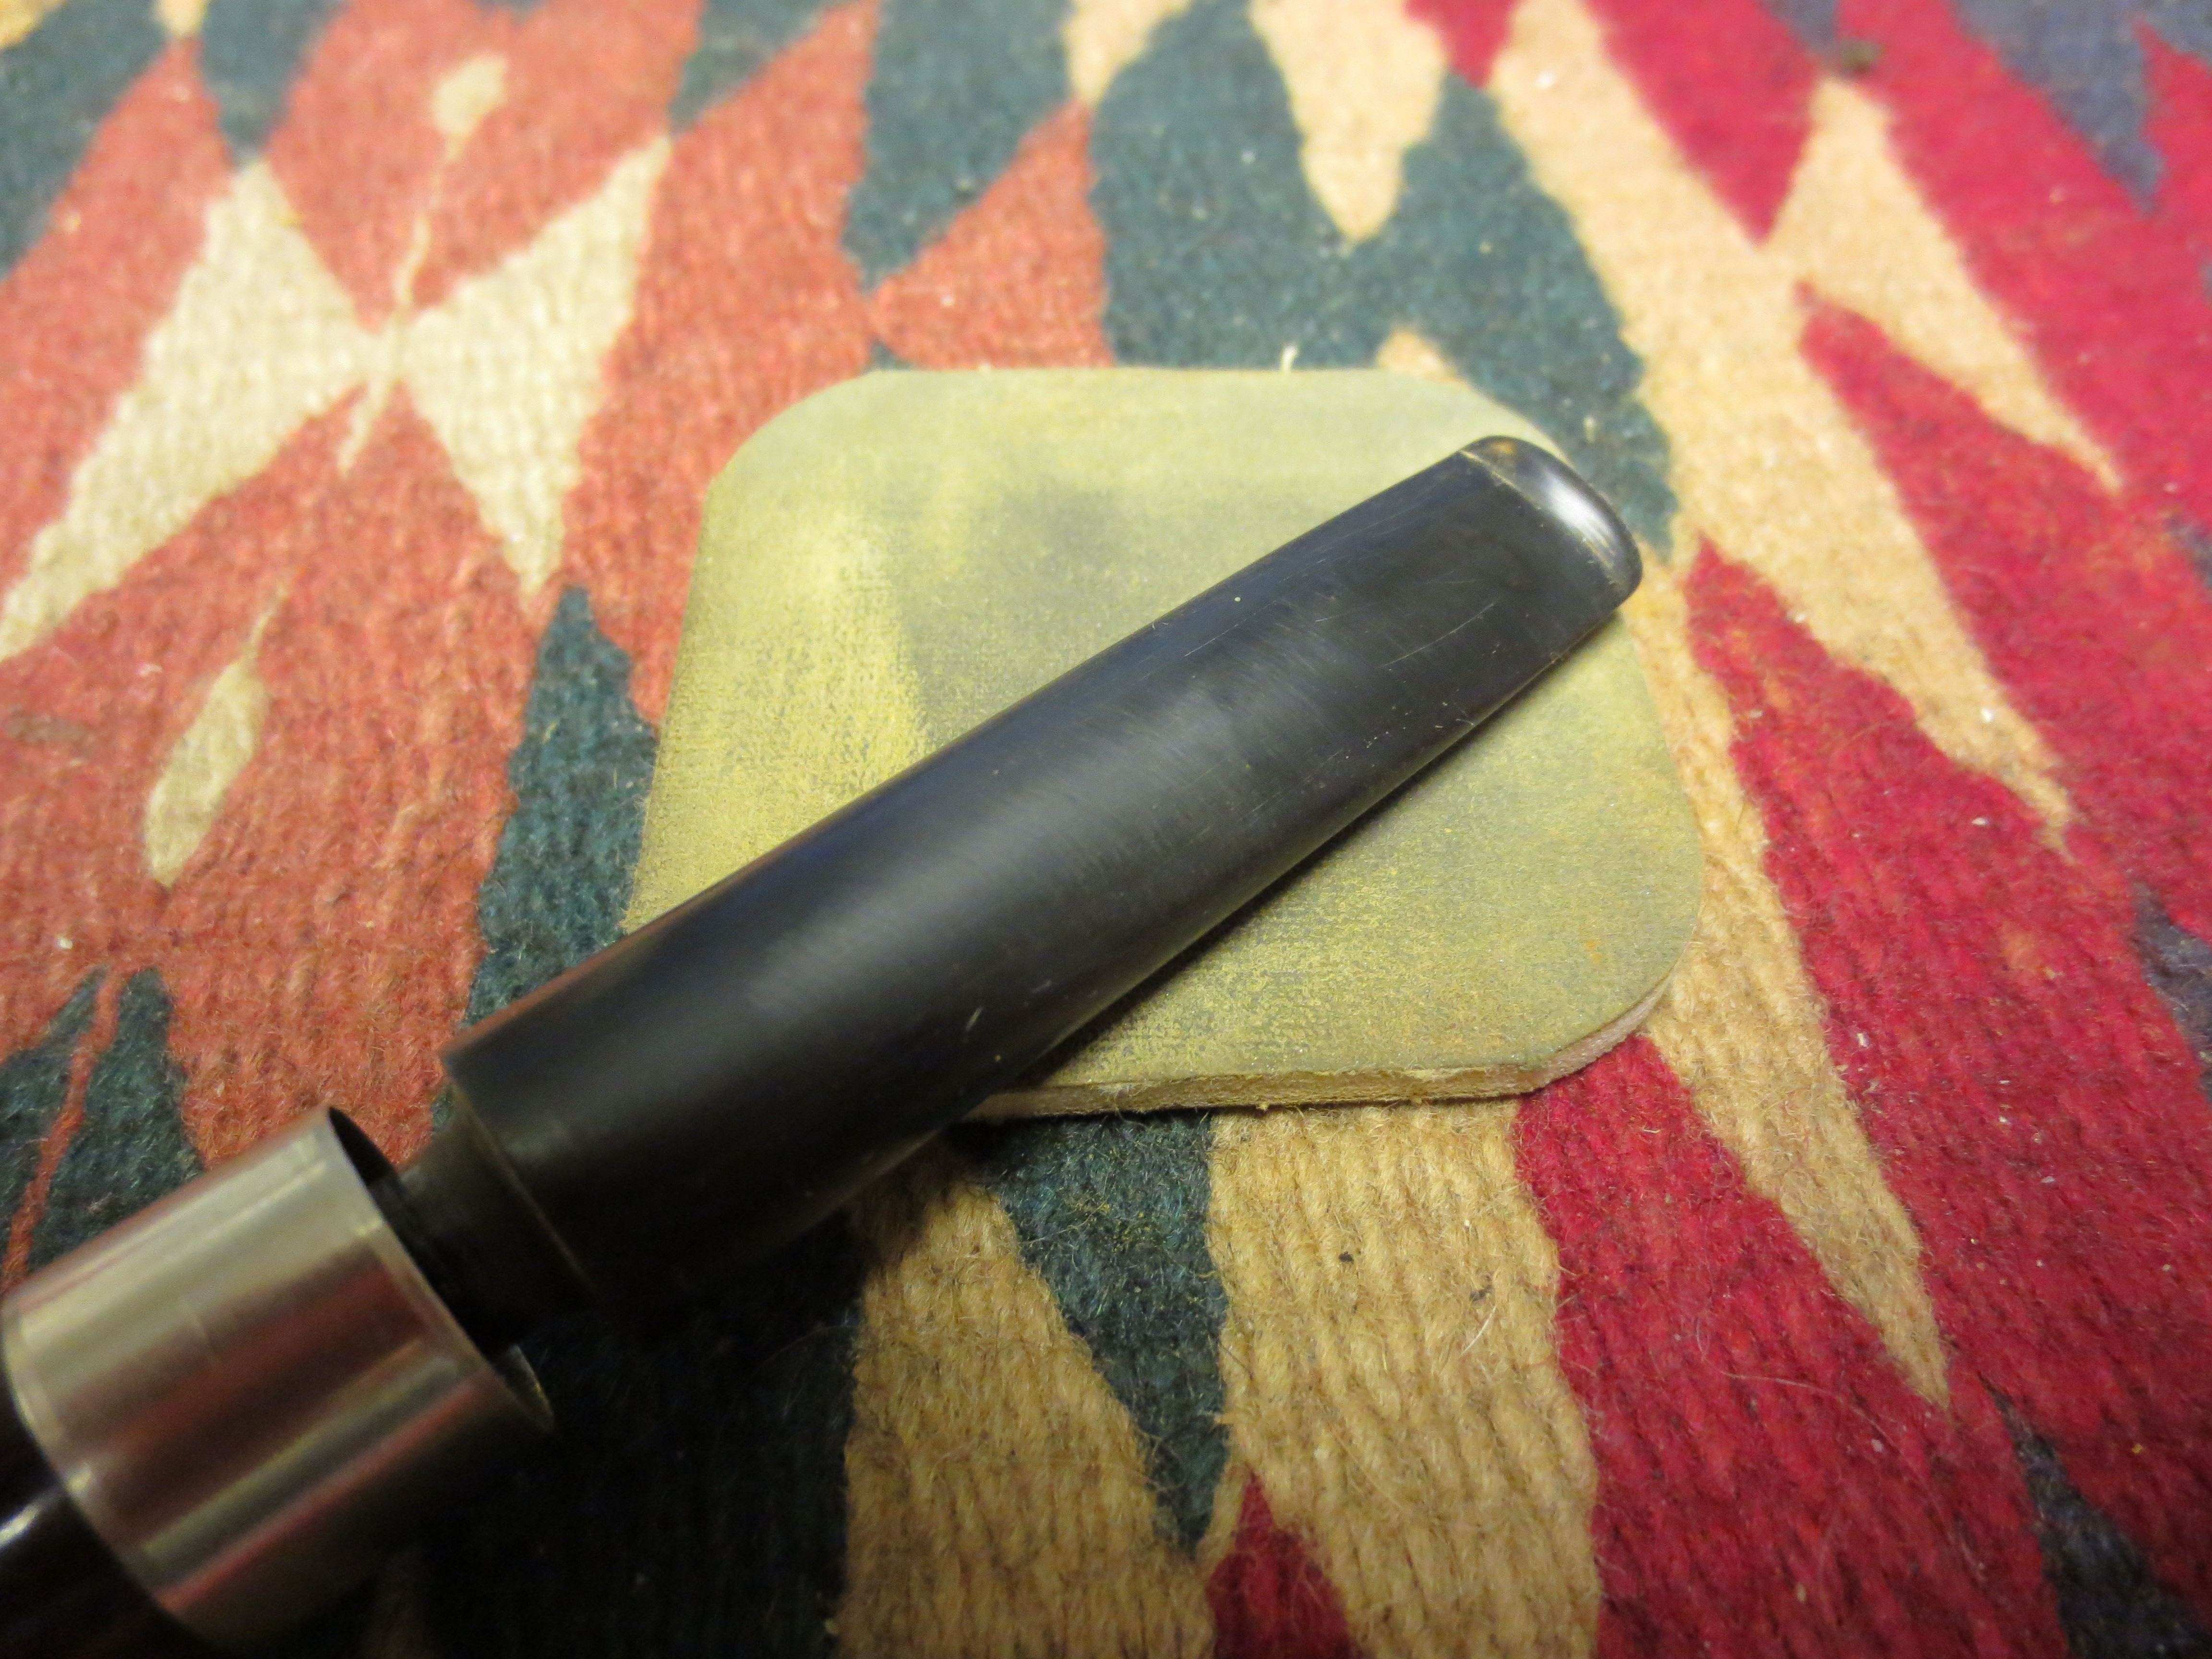
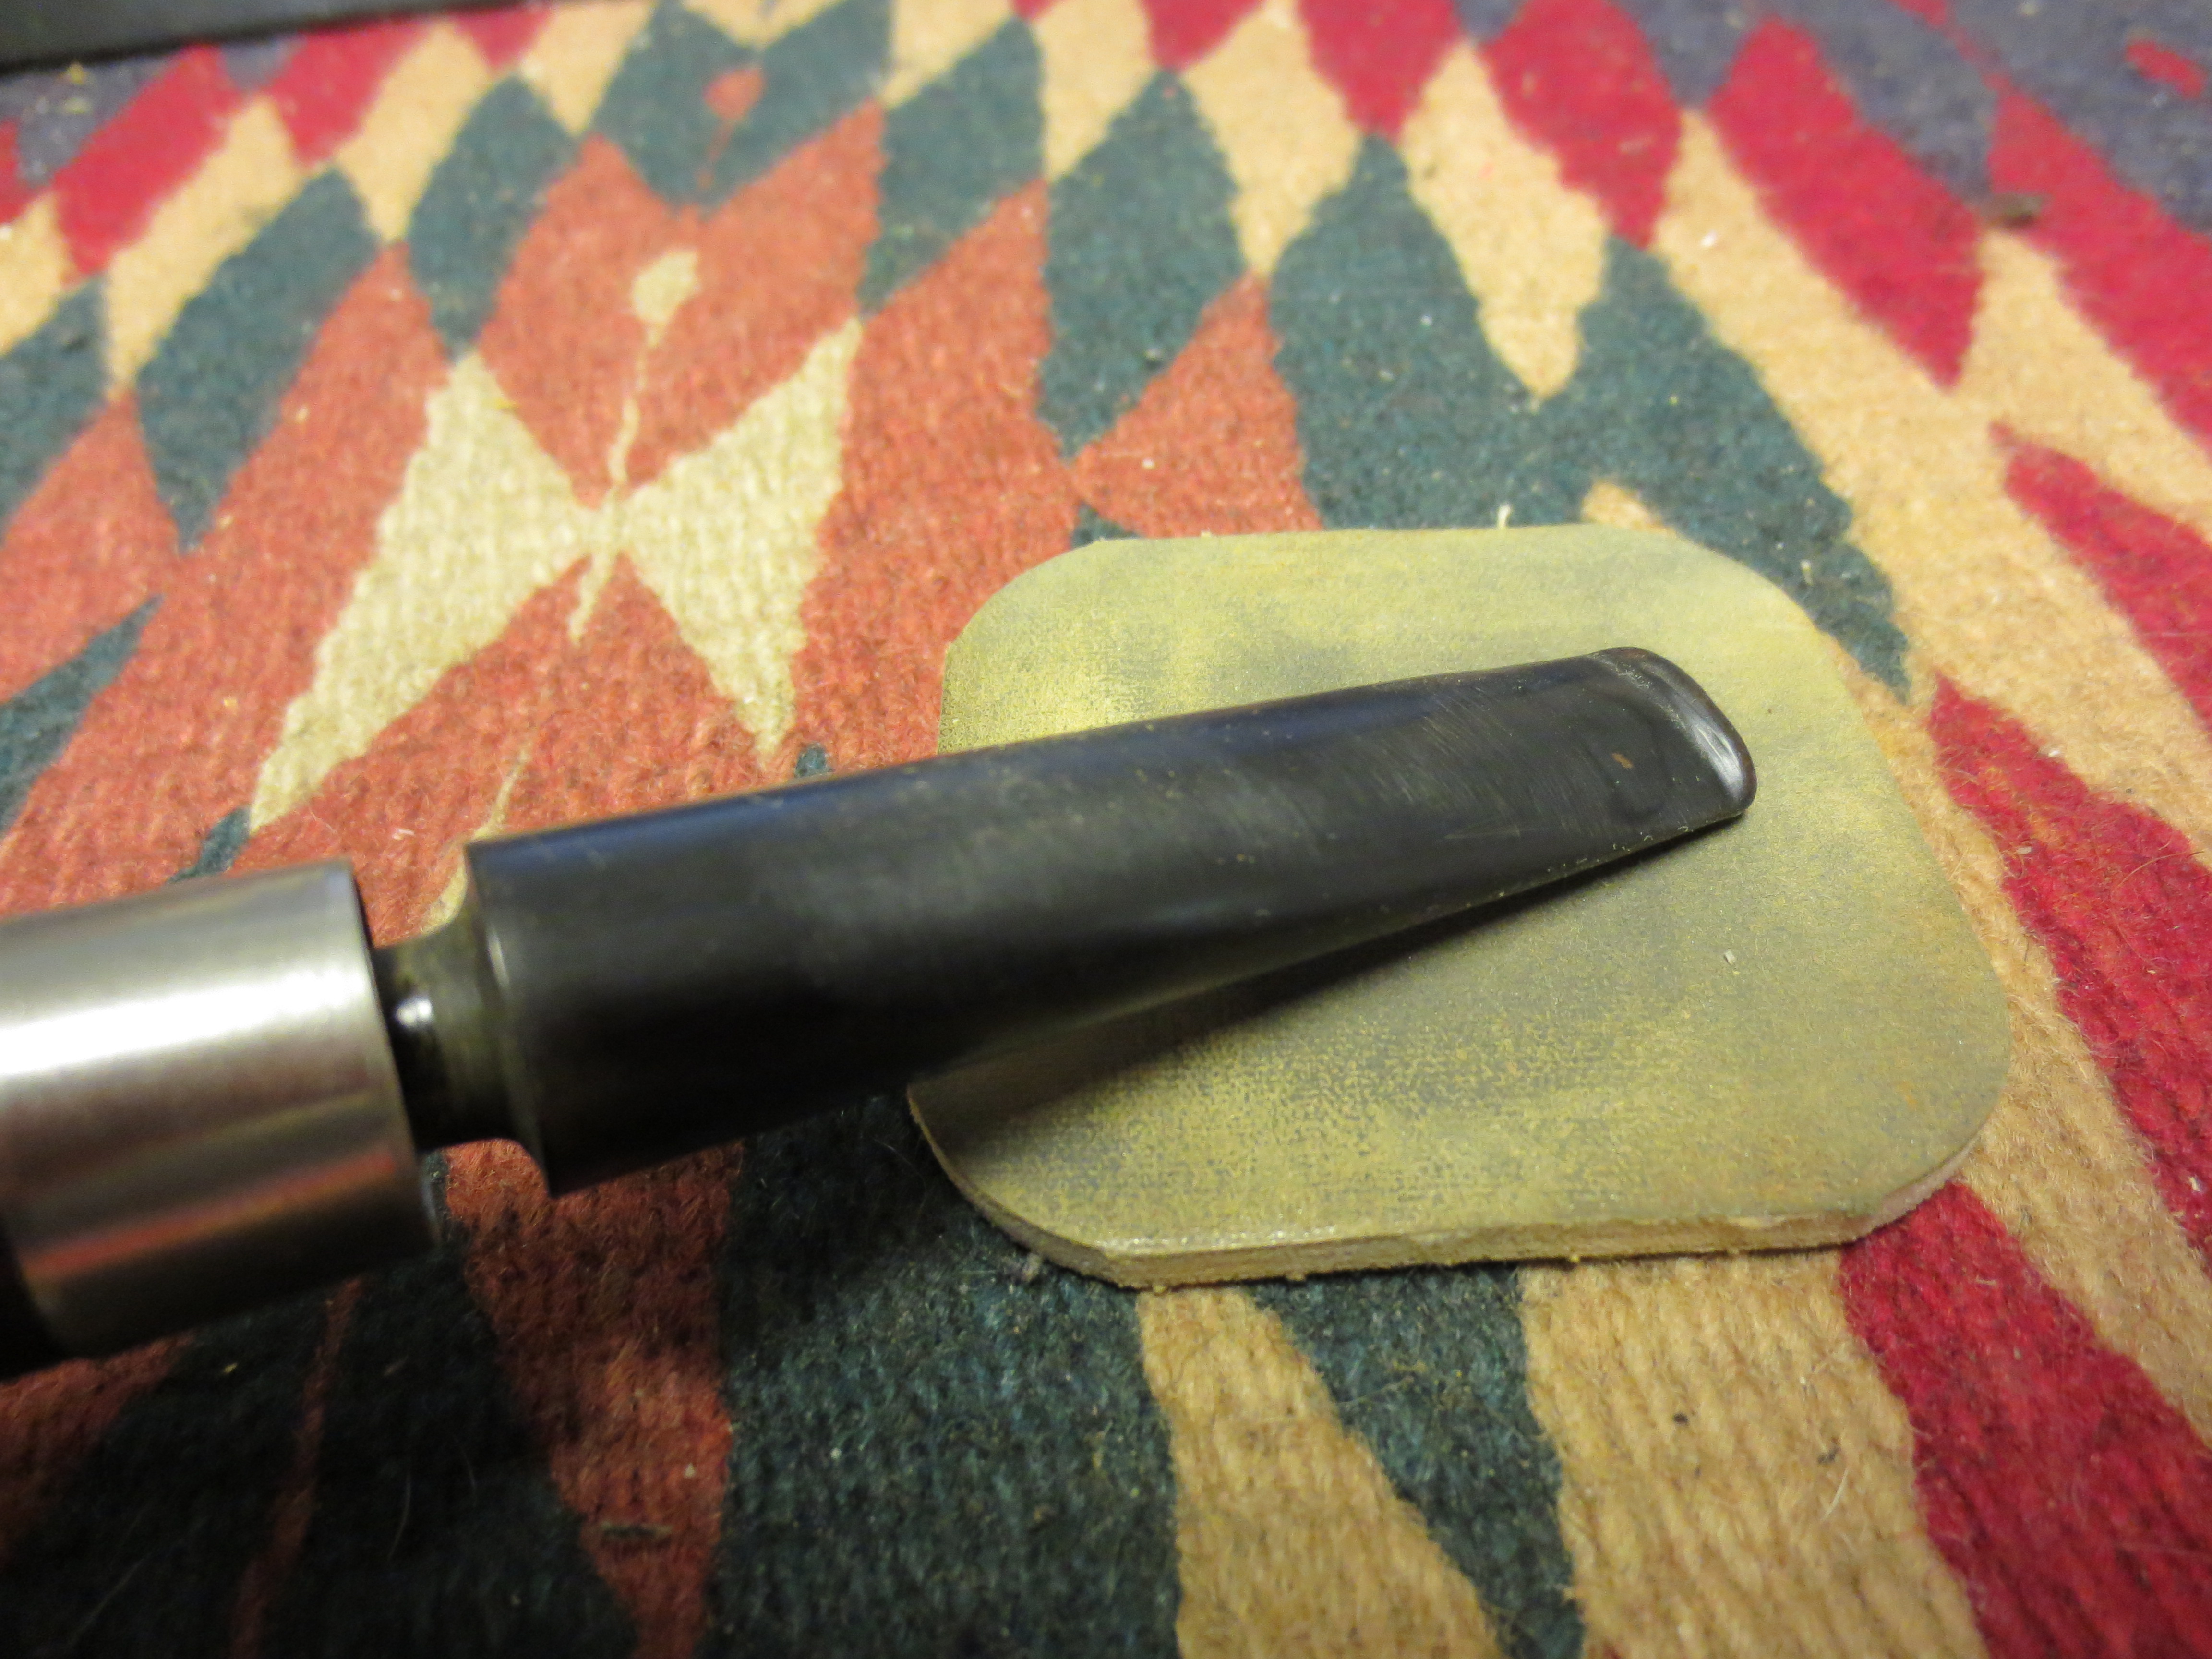
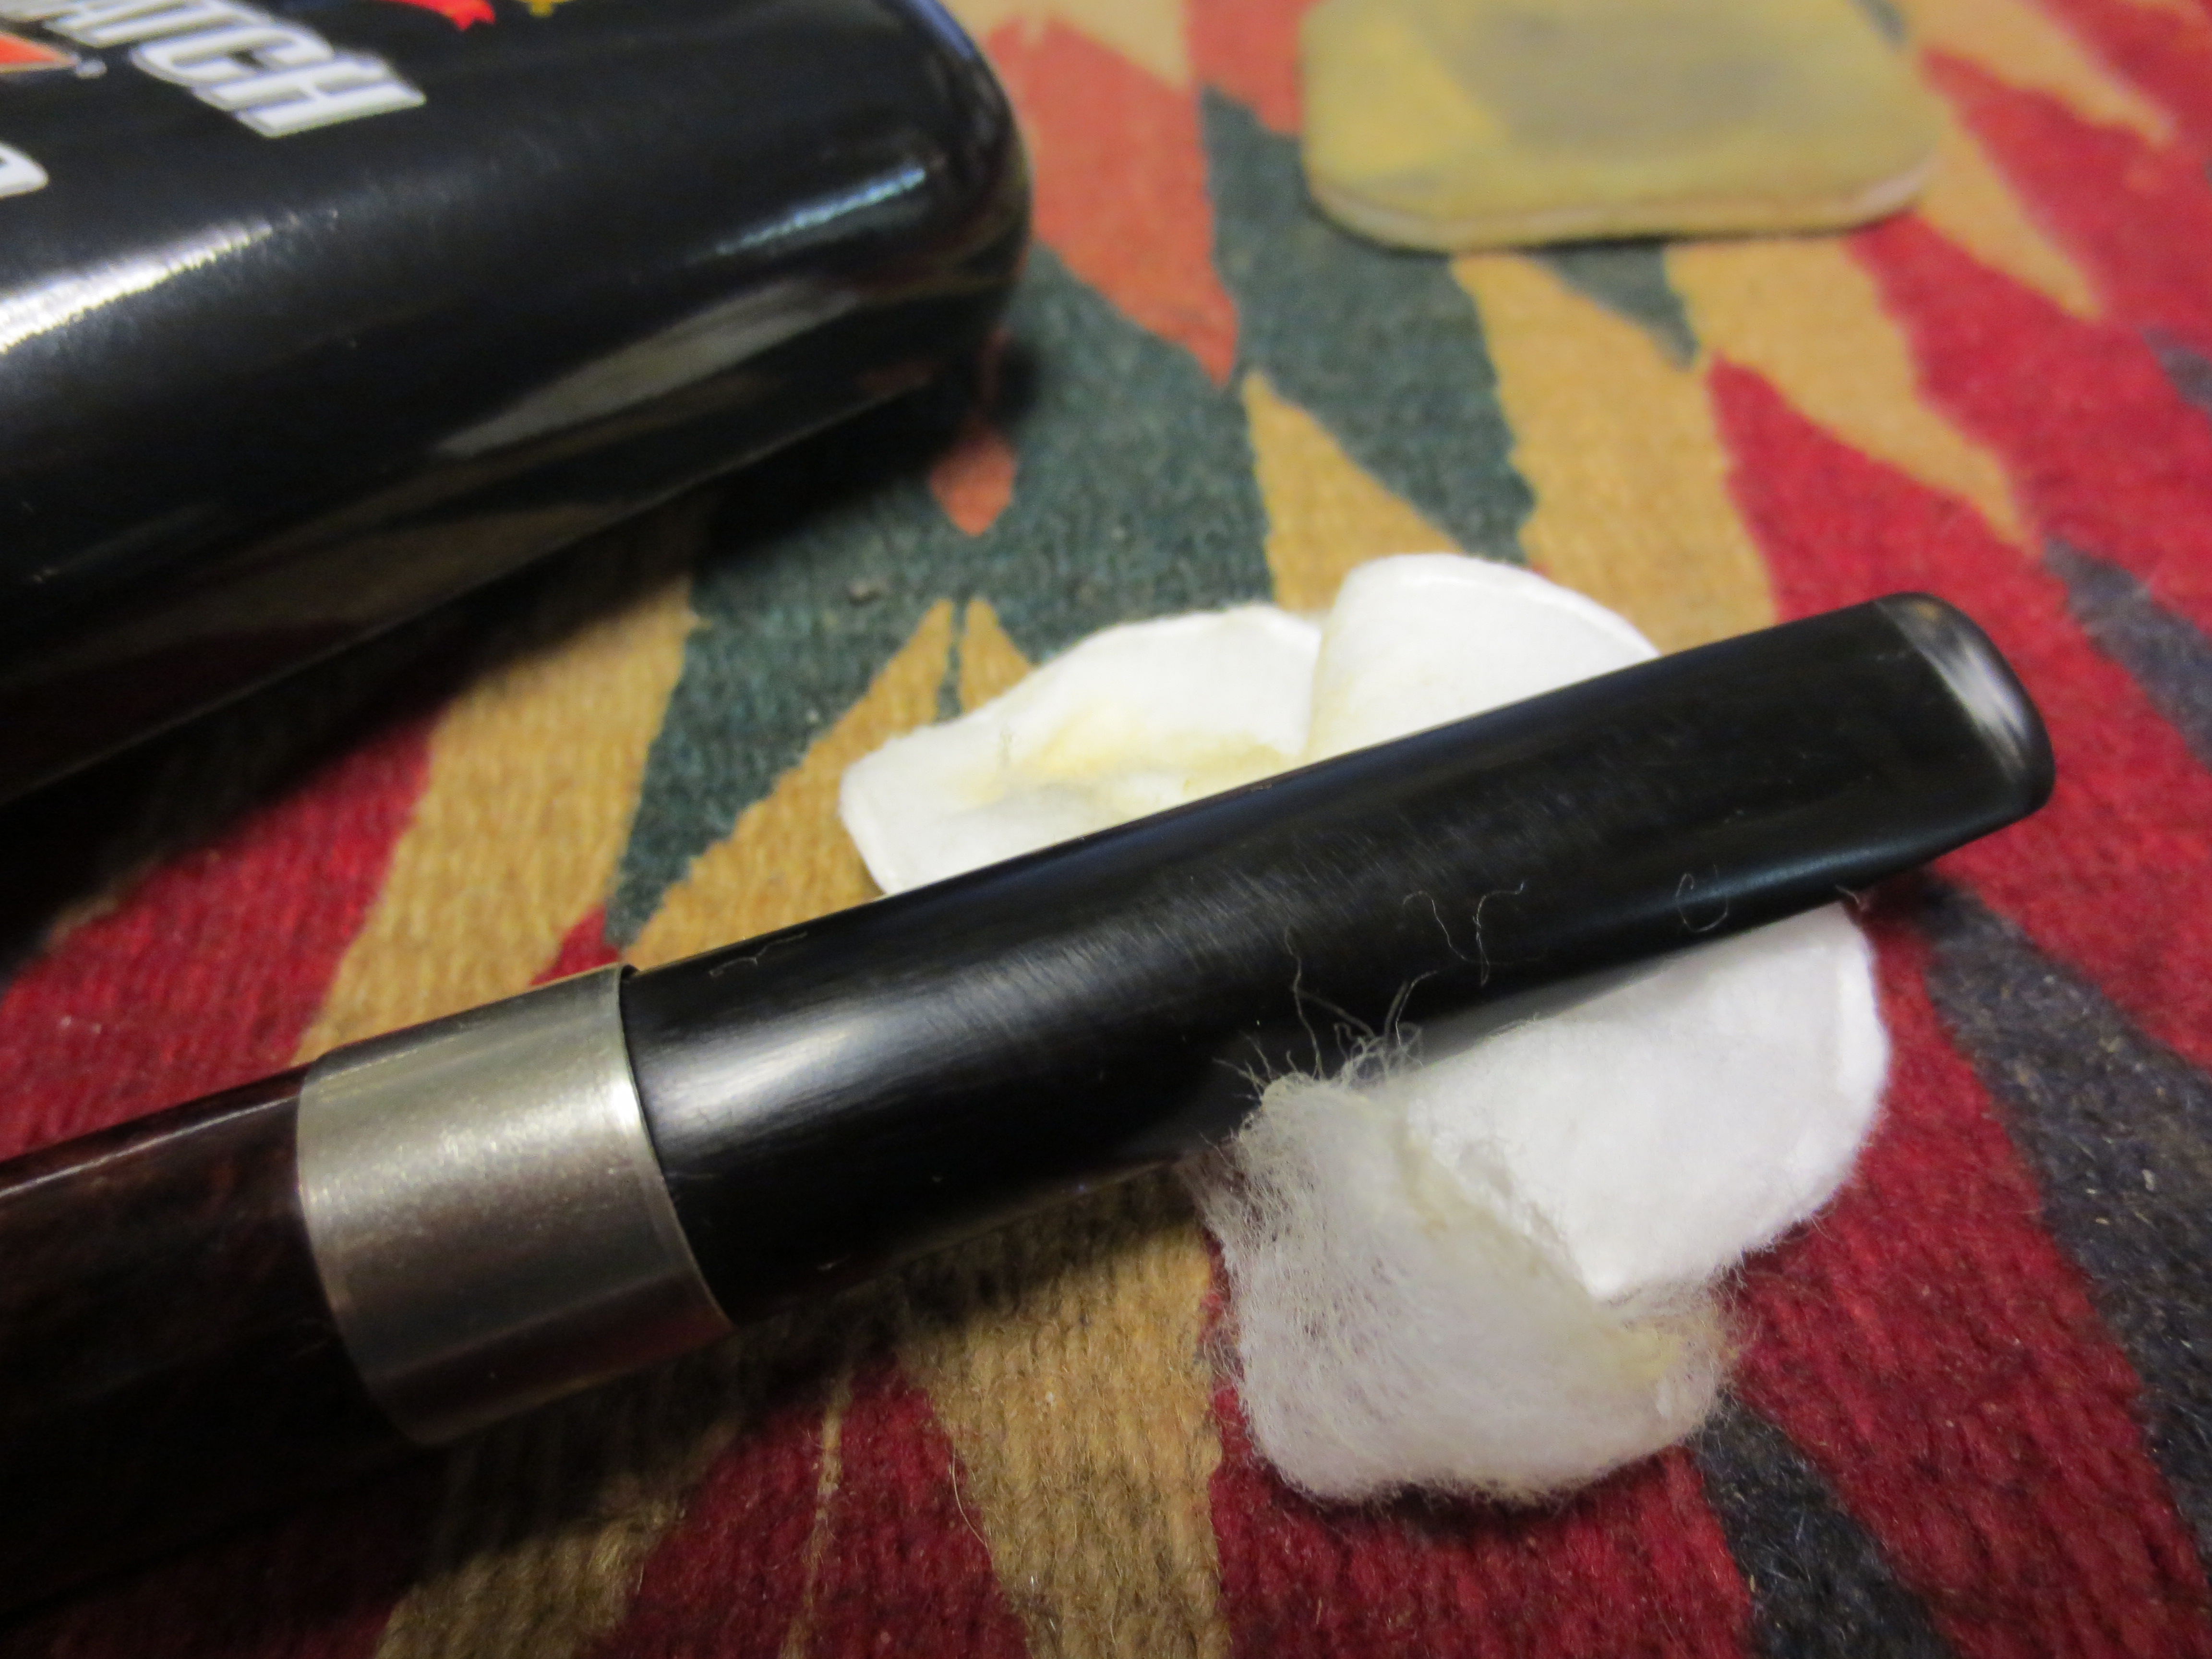
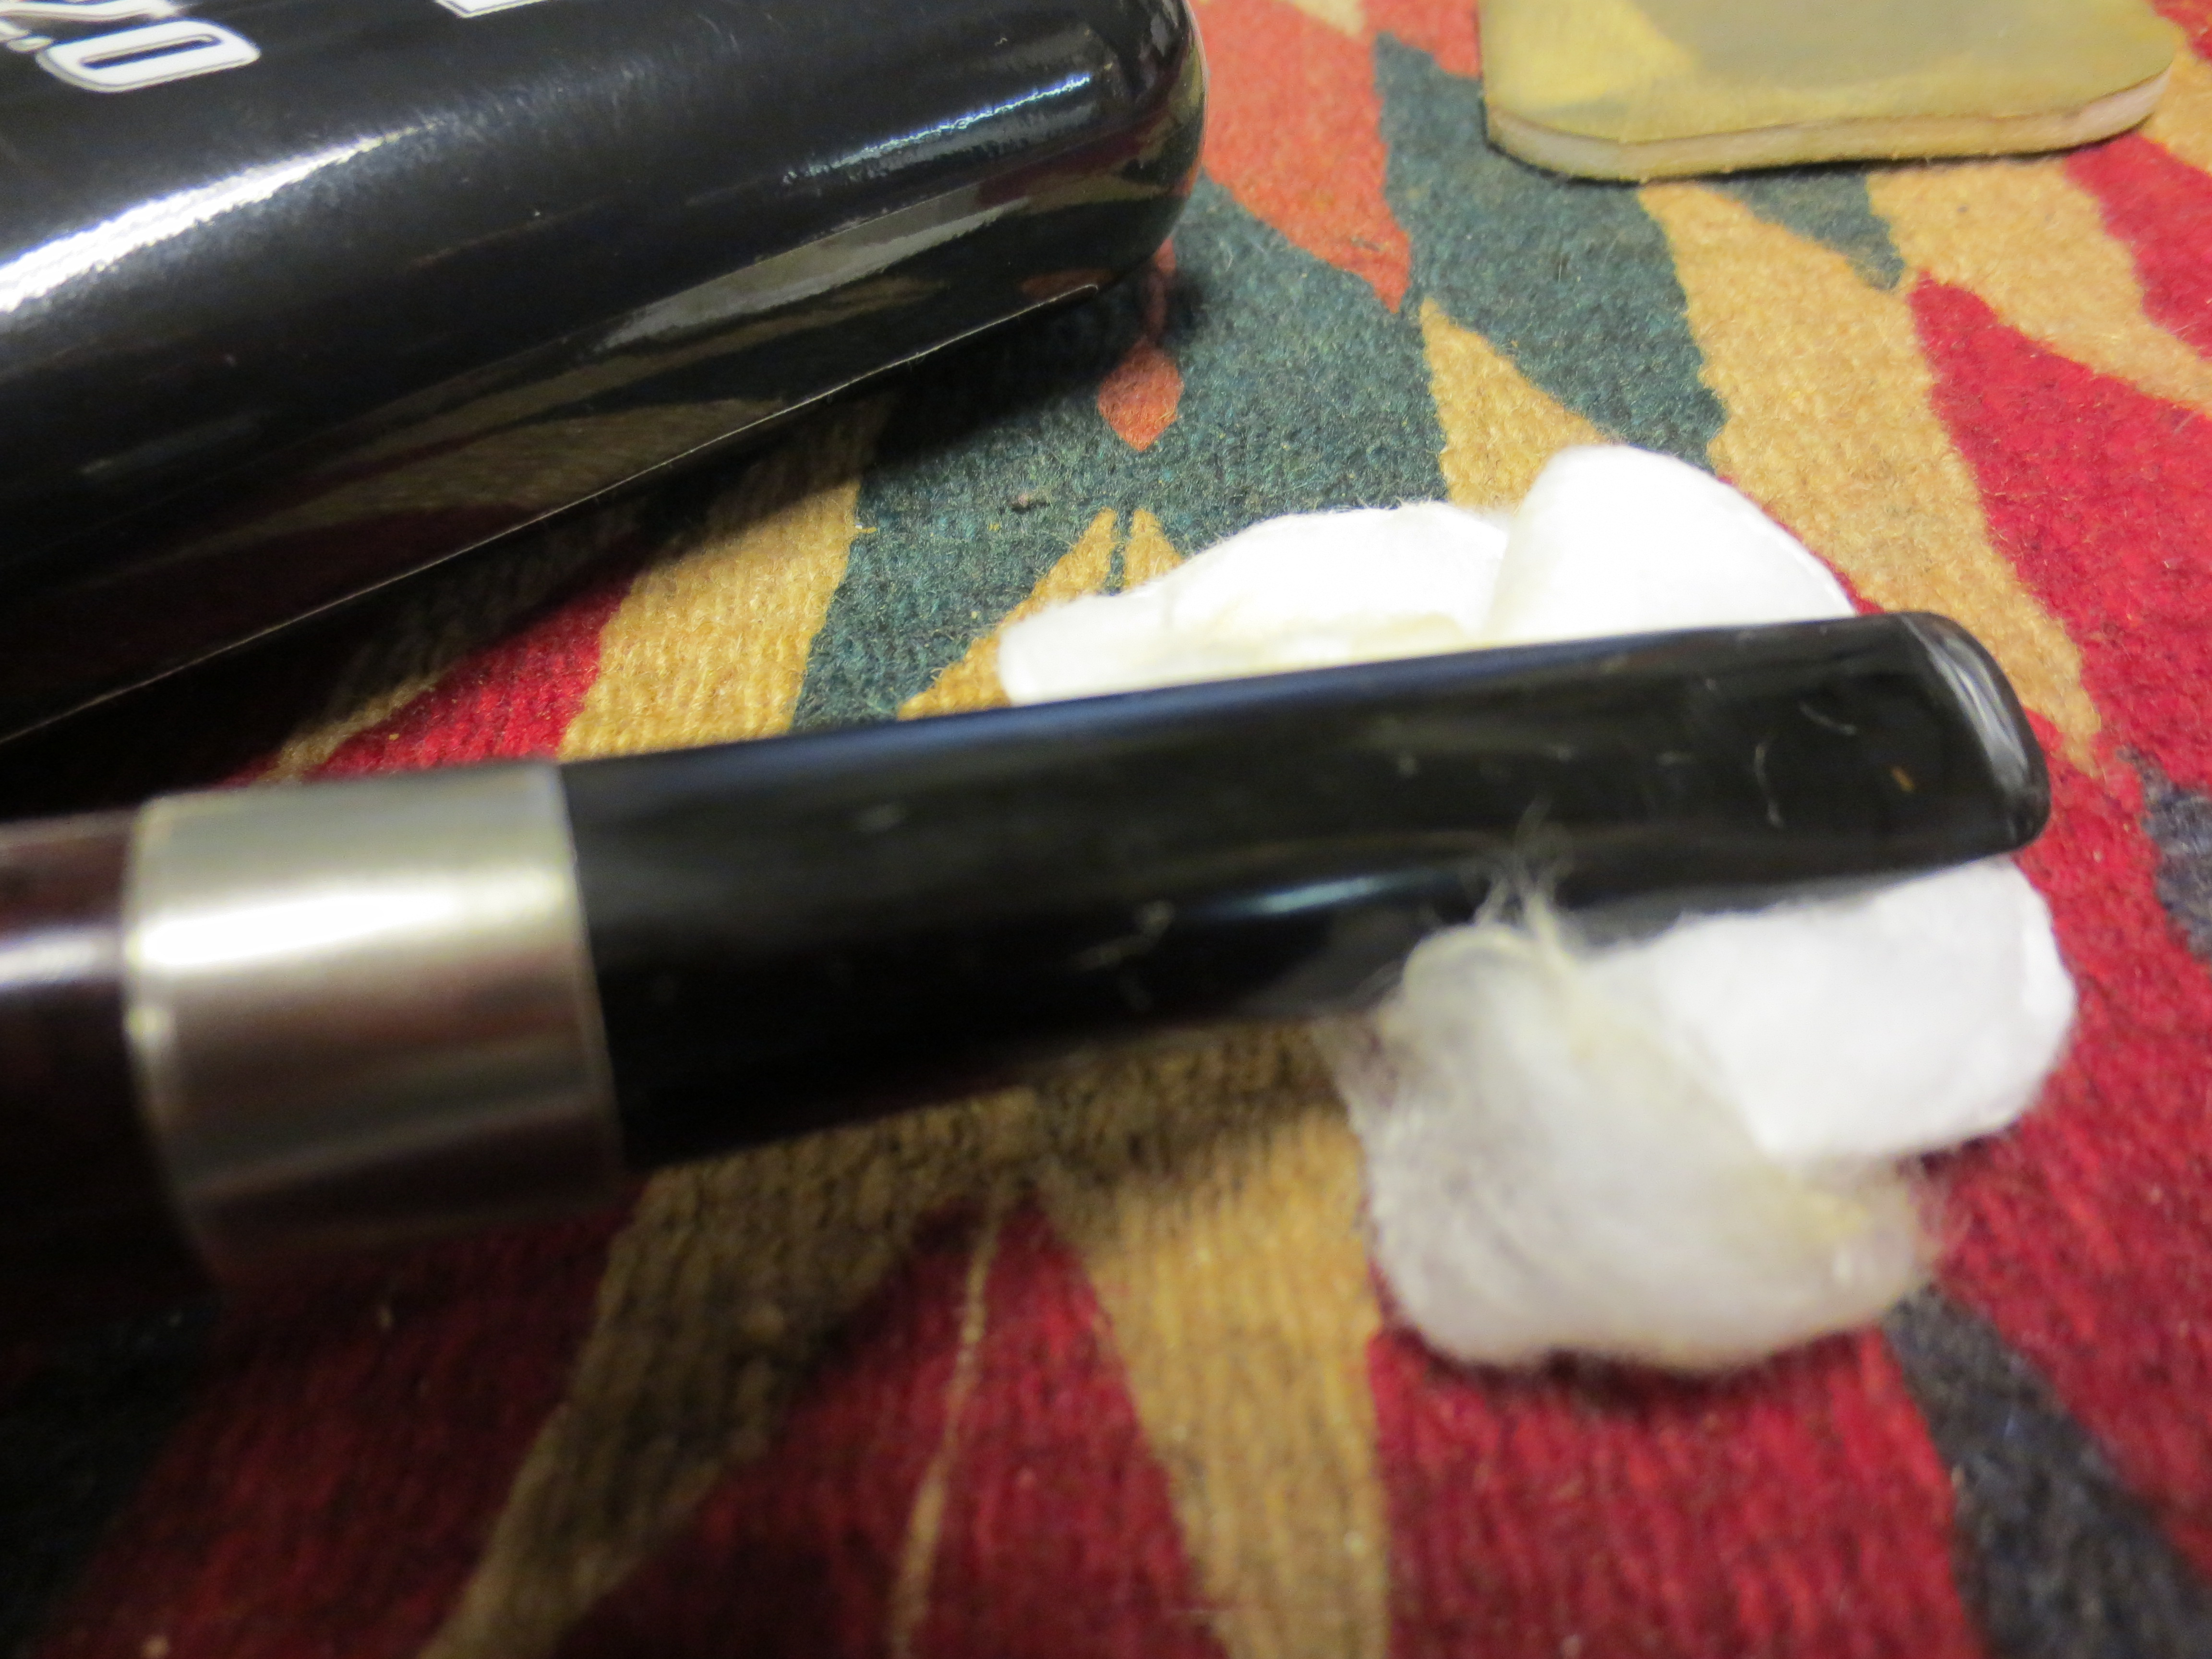
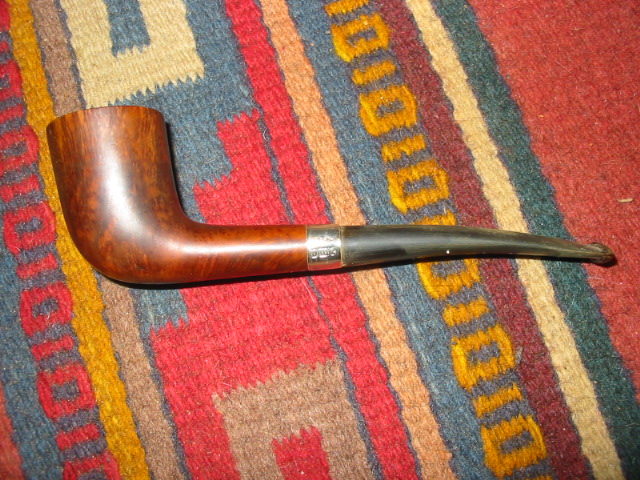
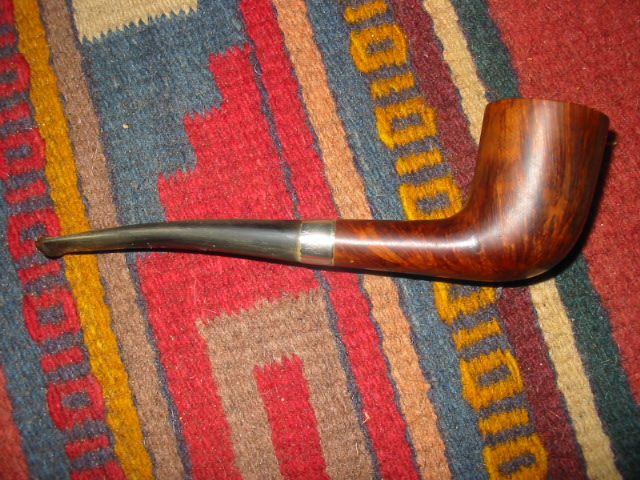
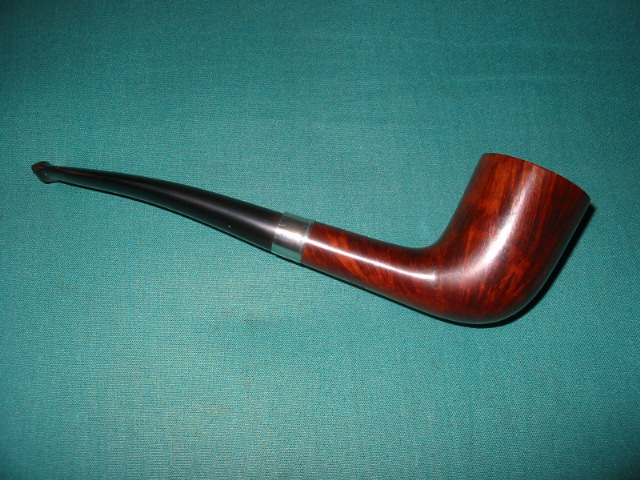
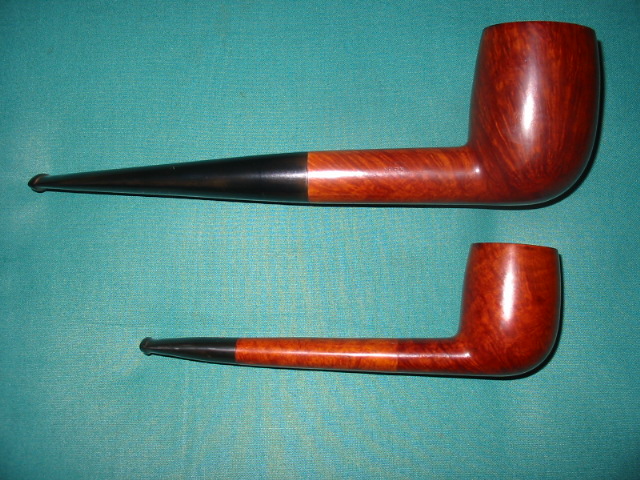
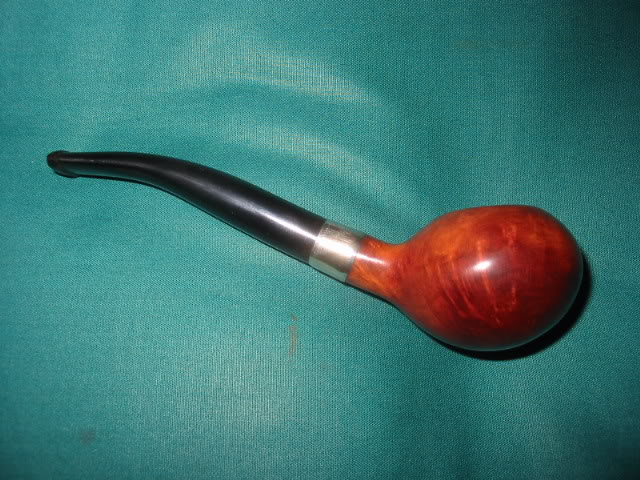
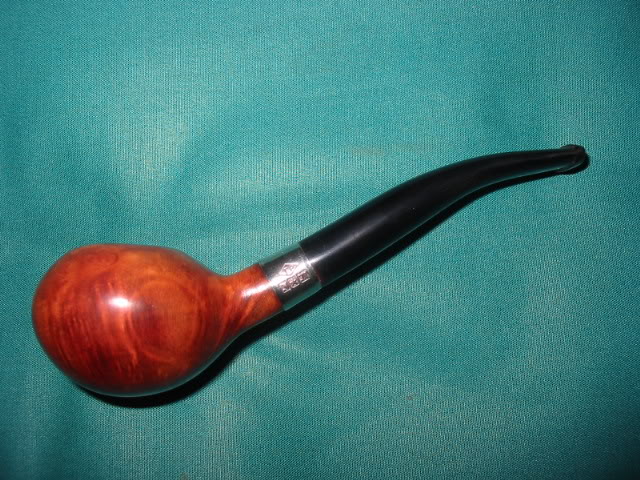
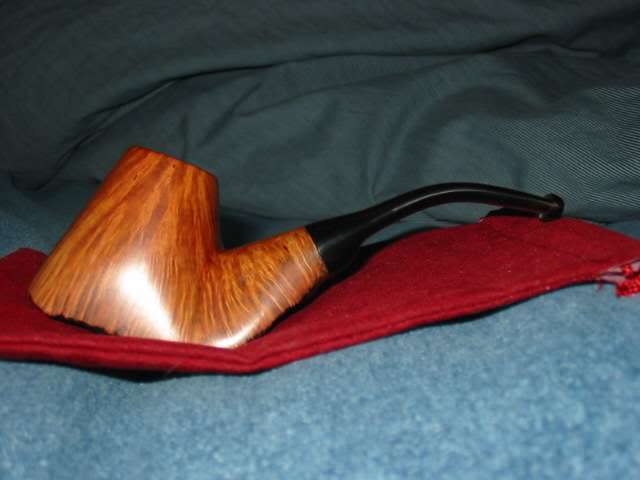
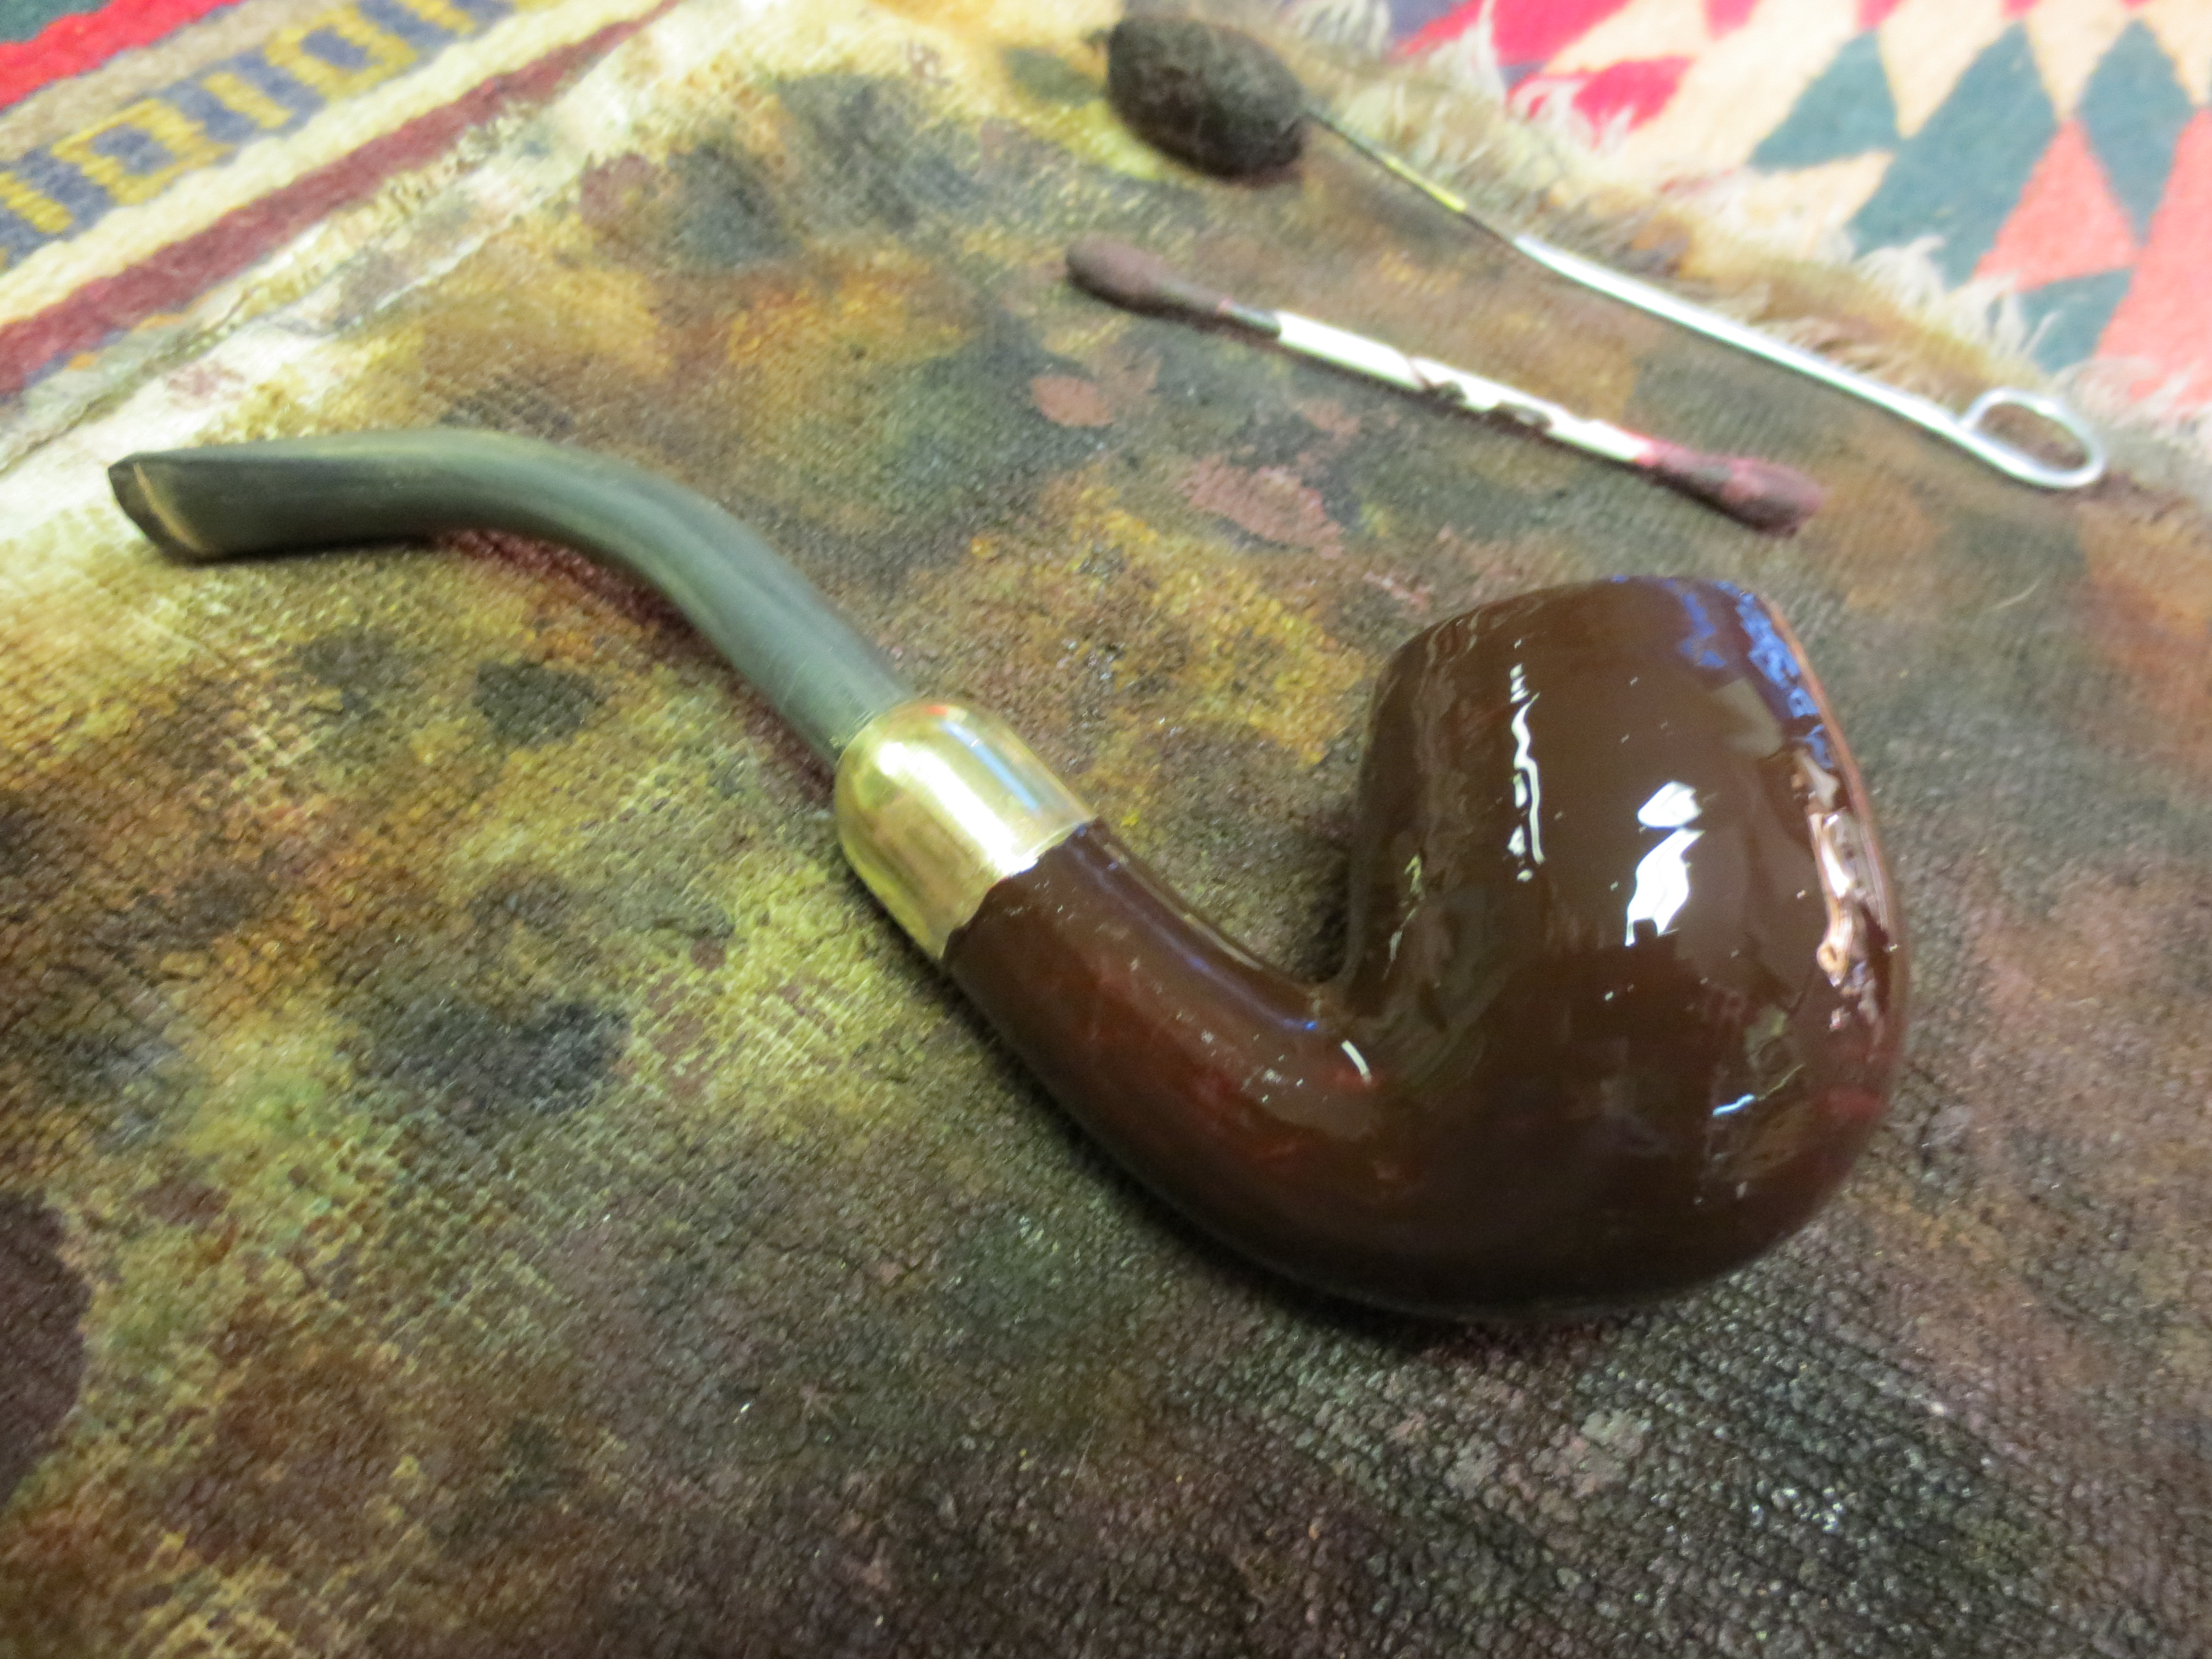
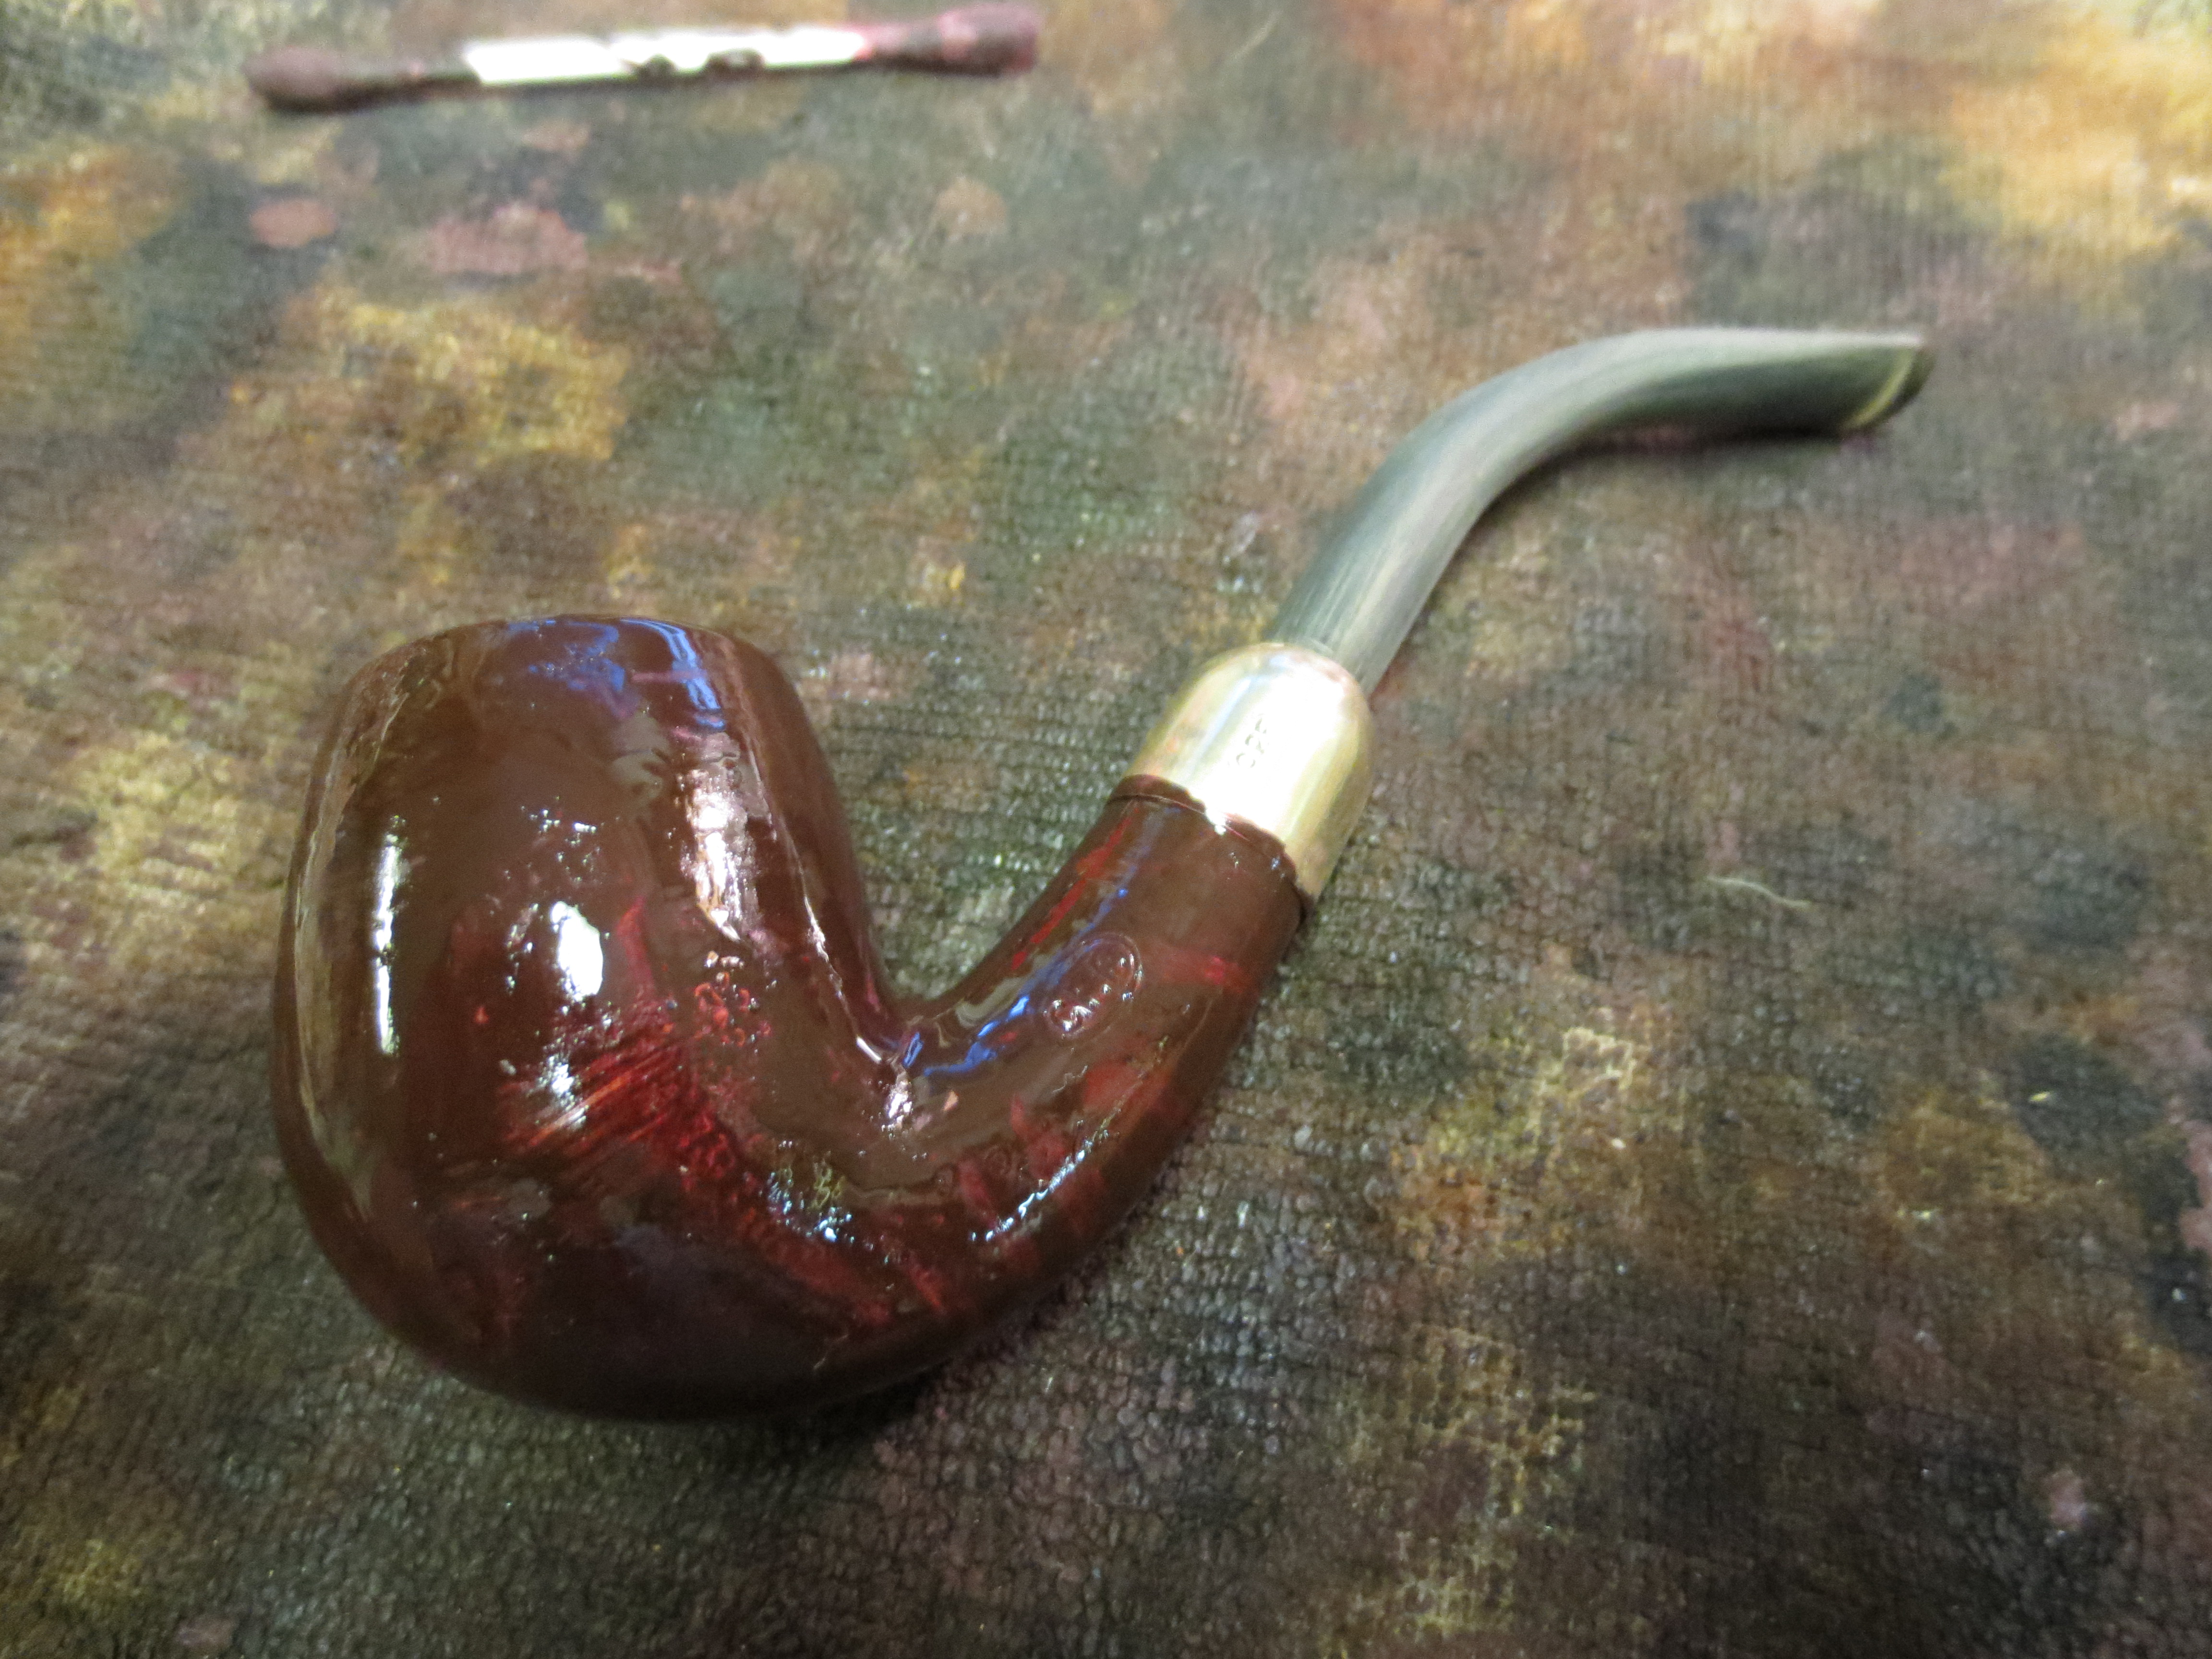
I set the bowl aside and worked on the stem. I sanded it with micromesh sanding pads 1500 – 12,000 grit to polish the stem. I put the stem back in the bowl and then took the pipe to the buffer and gave the entire pipe a buff with White Diamond and then gave both the stem and bowl multiple coats of carnauba. The finished pipe is picture below. It came out very well and the black line around the top edge seems to be less visible. The pipe is restored to a bit of its former glory!

ImageImageImageImage

Dr. Grabow Viking Restemmed and Refurbished


Blog by Steve Laug

In my recent EBay purchase of pipe bowls there was a Dr. Grabow Viking metal base minus the stem. I have had several of the Grabow Vikings over the years and cleaned them up and sold them. I have one that is in my regular rotation and it is a great little pipe. This one came with a Dublin shaped bowl and the shank was not bent or damaged. For a long time now I have wanted to try restemming one of these metal pipes and do a write up on the process. This would be the opportunity to do both. The metal bowl base was coated inside with the tobacco lacquer that is often found in old Vikings or Falcons that have been sitting for a long time unused. The aluminum shank was oxidized and dull but would shine up well with a little elbow grease. The finish on the outside of the bowl was not damaged and would be easy to restore. There was a rough broken cake in the bowl and the rim was tarred and caked. As I inspected the bowl I noted that there was also a burned area on the inner rim at the back of the bowl. The first three photos that follow show the condition of the pipe when it arrived on my work table.

ImageImageImage

My procedure for cleaning an estate pipe is generally the same. I may vary the steps a bit but always cover the same ground in pretty much the same order. On this one I began by working on the bowl. In this case it meant removing the bowl from the pipe. The Viking has screw on bowls that are interchangeable with other Viking bowls (but not with Falcon bowls which have a different thread size and count). I reamed and cleaned the bowl of the old broken cake and picked out the buildup around the hole in the bottom of the bowl using a dental pick. I took apart the base and the inner tube. The tube slipped out easily as it is normally held in place by the stem. I cleaned the tube with pipe cleaners and Everclear and then cleaned out the entrance of the tube into the bowl base. After cleaning that I put the tube back in place. I wanted to plug the hole with it so that I could fill the base with Everclear to soften the lacquer buildup. I soaked it with Everclear and then scrubbed it with cotton swabs once it had softened. The next two photos show the process of cleaning the bowl base and tube.

ImageImage

I sorted through my stem box and found a precast stem for a Canadian. It was a small sized taper that would give me room to work with the diameter and the length that I needed for the right dimensions. I drilled the tenon on the stem blank so that the airway would be large enough to go over the tube at the end of the shank. I turned the tenon with my PIMO tenon turner set to the smallest setting so that I would have little left to remove for a good fit into the hole in the end of the metal shank. The fit involved the tube fitting inside the airway of the tenon and then the tenon itself fitting into the opening on the end of the shank. I used my needle files and emery paper to sand the tenon after I had turned it on the turner. I needed to take it down further for the fit so I used my Dremel with a sanding drum. The next series of seven photos show the process of fitting the stem to the metal shank.

ImageImageImageImageImageImageImage

After I had the basic fit as pictured above I decided to work on the out dimensions of the stem to get a smooth flow between the metal shank and the vulcanite stem. I used my Dremel to take down the majority of the excess material that needed to be removed. The next two photos show the stem after I had used the Dremel. It was ready to hand sand at this point in the process.

ImageImage

I sanded the stem with medium grit emery paper to remove the marks from the Dremel and smooth out the angle of the stem from the shank to the button. I also shortened the tenon to get a tight fit on the stem to the shank. It was just a little too long to fit the depth of the hole in the shank. The next series of five photos show the fit to the shank and the first stage of sanding to remove the scratches.

ImageImageImageImageGrabow under

I took the stem back to the Pimo tenon turner and set it a bit deeper to smooth out the portion that goes against the shank. Then I took it back for more sanding to make it fit more tightly against the shank. I moved on to sand with medium grit sanding sponges to continue to make the stem sit correctly on the shank and to remove the scratches remaining on the stem. The next seven photos show the progress on the stem. It is getting close to a good fit and the scratches are less visible. I also wiped down the bowl with acetone and sanded the top of the bowl and the inside edge of the bowl to deal with the burn mark on the back side of the rim.

Grabow1 Grabow2 Grabow3 Grabow4 Grabow5 Grabow6 Grabow7

At this point you can see some of the minor scratches on the aluminum of the shank. These will come out when I use the micromesh sanding pads after the stem is ready. The next series of two photos show the progress of smoothing out the stem with the micromesh sanding pads. I wet sanded with 1500, 1800 and 2400 grit sanding pads. Each successive grit gave a deeper shine and polish to the stem surface.

Grabow8 Grabow9I also wet sanded with 3200 grit micromesh sanding pads. The next two photos show the change in the stem as the shine deepens.

Grabow10 Grabow11

I went on to dry sand with 3600 – 12,000 grit micromesh sanding pads. The next series of photos show the progress in polishing of the stem. To me the final three grits – 6000, 8000 and 12,000 grit – show the most change. The next two photos are selected to show the progress. The first one below is of the stem after sanding with the 4000 grit micromesh. The second photo shows the stem after sanding with the final three grits of micromesh.

Grabow12 Grabow13Once the stem was polished I used some clear superglue to glue the stem to the shank. I also went on to stain the bowl with an oxblood stain. I applied it and then flamed it and restained and reflamed it. The next four photos show the pipe after staining and before taking it to the buffer. I also used the micromesh to polish the stem and shank.

Grabow14Grabow15 Grabow16 Grabow18

The final four photos show the finished pipe. I buffed it on the buffer with White Diamond and then gave the bowl and stem multiple coats of carnauba wax and buffed with a soft flannel buffing pad to give it a shine.

IMG_0476 IMG_0477 IMG_0478 IMG_0479

No Rounded Shoulders – Keeping Sharp Edges on a Pipe Stem


One of my pet peeves in the realm of refurbished estate pipes is rounded shoulders on the tenon end of the pipe stem where it meets the shank of a pipe. A second one that is nearly as irritating is rounded edges on the button to the point where it has lost all definition. When the pipe was finished and left the factory the transition between the shank and stem was smooth. The edge of the stem was sharp and crisp and the joint was unnoticeable to the touch. I have gotten pickier now in my choice of estates. I would rather pick up a pipe that is in rough shape and needs work than one that has rounded shoulders. Early in my refurbishing days I did not pay attention to this and was guilty of rounding the shoulders. Even in some of the pipes that I have carved in years past I rounded the shoulders through carelessly sanding the stem while it was off of the pipe. Over the years through the helpful critiques of others I have come to see the error and am now very careful in proceeding with stem refurbishing. I decided to write about the error itself and its causes in order to help others avoid this mistake. There are multiple ways to cause the rounding of shoulders and buttons. I want to write about the ones I am guilty of and how I have corrected the errors.

One of the most frequent errors is to over buff the pipe stem to bring it back to black. While the oxidation is removed and the stem shines, the edges are lost. The crisp sharp lines of the pipe are destroyed. I remember working the stems against the buffing wheel with brown and red Tripoli to get rid of the oxidation. I buffed almost indiscriminately on my quest to remove the greenish brown. The sad thing was I also rounded edges, button and sharp angles. I remember buffing stems without the pipe attached and when they were good and black, buffing them with carnauba. They sure shone but the pristine angles were forever gone.

Once the error of buffing the oxidation away and losing the shape of the pipe stem had been pointed out to me I began to search for new ways of removing the oxidation without damaging the edges of the stem and button. My quest took me to the second method that I used – to sand the stem with varying grits of sandpaper. At first glance, this method seemed better than buffing as it was easier to maintain the edges. On another level, however, it was just as bad in that it changed the shape of the stem. Again, I learned the hard way, thinking I could maintain the sharp edges; I sanded the stem while it was removed from the pipe. This stemmed from my fear of damaging the finish and shape of the shank. In doing this my track record was better and over 50% of the stems retained sharp edges. I was better in maintaining the integrity of the button and its edges with this method. But because I knew better than to damage the edges I looked for a different method that would minimize damage to the stem even more.

My third experiment in removing oxidation involved bleaching the stem.  I filled a container with bleach and placed the stem in it for a soak. I tried straight undiluted bleach and bleach diluted 50% with water. I left them in for short periods of time in both solutions. I found that it left the stem surface pitted and rough. It also affected the clean and sharp lines because the pits would also end up on the sharp edges. The only way I knew of removing the pitting and attaining a smooth finish afterward was by sanding with wet dry sand paper from 400-1200 grit. While this was more satisfactory in maintaining sharp and distinct as opposed to rounded shoulders it still was not exactly what I was looking for as it affected the finished look of the stem. Sanding the stem after bleaching still changed the overall profile. So the search went on.

My fourth experiment involved soaking the stems in an Oxyclean solution. I had heard from a variety of people that this worked well and did not leave the stem pitted and rough when it was removed from the soak. I mixed the Oxyclean according to directions – a half scoop for a quart jar of warm water. I shook the jar to dissolve the Oxyclean and then placed the stems in the solution. I experimented with the time left in the solution – anywhere from 1-12 hours. Regardless of the amount of time left in the solution I found that the Oxyclean did not remove the oxidation but did soften it significantly. I learned from my experiments that it took over an hour of soaking to soften the oxidation. The longer soak did not significantly soften the oxidation more. When the stems were removed they were almost white from the work of the solution. I wiped them down with a cotton cloth to remove the surface oxidation that was on the surface and had been softened. I scrubbed it hard with the cloth and was able to remove a lot of the oxidation. However, there was still a remnant that had to be scrubbed or sanded. It is important to note that was less sanding of the stem involved with this method.

A fifth experiment happened accidentally. A friend of mine who does refurbishing as well was using the flame from a Bic lighter to lift tooth marks from a vulcanite stem. He found that the moving flame not only lifted the tooth marks but burned the oxidation. He tried moving the flame quickly over the length of the stem and it worked quite nicely. Many have wondered about heat damage and stems straightening from the heat but miss the point that the flame does not sit anywhere on the stem too long. The concept is to let the flame lick the surface of the stem and quickly paint the stem with the flame. I have experimented with this and found that it works very well in the crease along the button and on heavily oxidized stems. I have also used it after a pipe stem has soaked in Oxyclean and it works. To me the jury is still out on the long term effects of the method but it does work and does not damage the sharp edges or the profile of the stem. The two of us have done a lot of experimenting and talking through the process and continue to learn as we do it. I know others on the blog have experimented with the method as well and have had a variety of experiences with it.

Today, through my experimenting, I arrived at the point where I have combined several of the methods from my learning process described above. I use the Oxyclean soak and the micromesh sanding pads from 1500-12,000 grit to wet sand and dry sand the stems. I like the fact that they do not remove large amounts of material in the process of sanding the stem. Less frequently I have to use 320 grit or 400 grit wet dry sandpaper to work on heavy oxidation. That combination allows me to clean up the stem with minimal invasive action on the surface of the stem. I have added the use a plastic polish between the various grits of micromesh to further clean the stem. I do not finish the stem with the plastic polish but merely use it in the midst of the process. Finally for the tough areas I have used the Bic lighter to quickly move over areas that are hard to sand with the micromesh. With this combination of resources I am happy with the results I am getting on the stems.

But, as always I am on the lookout and thinking of new tools or items that will make my job easier in the cleanup and refurbishing process. Some of my methods or ideas come through odd associations and a passing thought. I was looking at my drill bit keeper the other evening and noticing that the larger bit slots would work well as mortises for the tenons of the stems I was working on. My newest idea is in the design stages. But it is pretty simple. I want to cut a series of 4-5 inch lengths of 1 inch to 1 and ½ inch dowel. I want the doweling to be large enough that I can hold it in my hand while working on the stem or anchor it in a vice.I plan on drilling mortises for the standard tenon sizes into the ends (a different size on each end) of the dowel to accommodate the tenons while I work on the area of the joint of the stem and the shank. At least in theory it will give me a flat edge to push the stem against and allow me to work on the area of the stem that sits against the shank. I have not had time to hunt down some doweling yet but I have been using an ebony block that I have here to the same purpose. I drilled two mortises in the block that can accommodate two different tenon sizes. I also drilled them deep enough to allow the stem to sit flush against the block. I have used it now on two stem cleanups and it works really well. The only drawback that I find is the size of the block. I think the dowel will work better as I can hold it easily in my hand while I am working on the stem.I have included a few pictures of the block that I am currently using with two different styles and sizes of stems. Both stems fit well and the fit gave me a flat edge to work against while sanding the area where the stem meets the shank and keep the shoulders unharmed. I will post a follow-up with photos of the doweling when I have made those.

ImageImageImageImageImageImage

Repairing a Stem on a Dr. Grabow Grand Duke with Black Superglue


I took on this project to demonstrate how I use black superglue to repair deep bit marks/bite throughs on vulcanite stems. I had this old Grabow stummel in my box and I found a stem that looked good on the bowl. The bowl had a small hairline crack in the shank so I pressure fit a band on it for a repair. The bowl needed to be topped so I did that after banding. I restained the top to match the bowl colour. I used a dark brown aniline stain that I mixed with isopropyl alcohol until I got the match I was looking for. I stained and flamed the rim to set the stain. The stem was in pretty rough shape but I decided to use it anyway and take it on as a project. The button was almost gone from the deep bite marks. There were three bite marks on the underside of the stem near the button and on bite mark on the top of the stem. I decided to use the boiling water trick to try to raise the dents as much as possible. These were deep bite marks and the edges were rough so my guess was that they would not come up to the surface with the heat. I then sanded the surface of the stem with medium grit emery paper to remove the surface marks and dents and then smooth out the area of the deep bite marks. I work to have a semi rough surface for the superglue to bond with so I am not sanding it smooth as much as working it over to make it clean. The next three photos show the state of the stem after I had sanded it and readied for patching.

ImageImageImage

Once I had sanded the surface smooth I used my needle files to recut the sharp edge of the button and rework the flow and angles of the button. I also used the needle files to carve the surface of the stem and provide a gentle slope to the new button area. I have found that often when recutting the button and defining its shape it is easy to cut a trough and make a hump in front of the newly shaped button so I always start about half way up the stem and use the file to change the taper to flow to the edge of the button. This served the dual purpose of removing high spots on the bite marks and to help identify the actual holes that would need to be patched. The next two photos show the file work on the stem.

ImageImage

Once I had the slope correct and the button shaped I put the stem in the ebony block I had drilled with a mortise to allow me to sand the rest of the stem without rounding the shoulders of the stem. I wanted the stem shank junction to be smooth and well fit. I also wanted the oxidation removed from the stem before I patched it with the superglue. I did not want the oxidation to remain in the holes that I would patch or on the surface of the stem. I sanded it down and removed the oxidation. I spent extra time around the bite marks. I also picked out any loose debris in the marks with a dental pick and then wiped it down with alcohol to remove the dust and provide a clean surface for my patch work.

ImageImageImage

The next series of three photos show the patch in place. I use black superglue that I pick up from Stewart-Macdonald http://www.stewmac.com/shop/Glues,_adhesives/Stewart-MacDonald_Super_Glues.html I have found that it really works well. I drip it on the cleaned hole and make a bubble of superglue. This particular glue dries slowly so I do one side of the stem at a time. I let it dry for over an hour before turning it over and doing the same thing on the other side of the stem. Once I have made the patch I set the stem aside to dry overnight. I do not want to touch it or sand it until it has had that time to cure and become hard. I have tried sanding sooner but always end up patching the holes a second time because of my impatience.

ImageImageImage

Once the glue has cured and is hard it forms a small bubble of black on the surface of the stem. I sand the bubble flat to the surface and taper of the stem. I use a 320 grit sandpaper to accomplish this sanding. At this point in the process I am not looking for shininess or polish I am only trying to blend the patch into the surface of the stem. The next five photos show the process of sanding down the bubble and the look of the resulting patch on the stem. The tooth marks are gone and in their place is a black patch that with a bit more polishing and sanding with micromesh will blend into the stem well and give a new polished look and comfortable feel to the stem.

Image

The underside of the stem. Notice the patch near the button after sanding with 320 grit sandpaper. The patch on the underside is larger than the one on top but it not as deep.

Image

The bubble of black superglue on the top of the stem. The white dust on the stem is not a problem as the bubble is dry at this point and ready to sand.

Image

The top side of the stem after the initial sanding of the bubble. It is almost smooth and needs to be wet sanded with the micromesh sanding pads.

Image

Top side of the stem after the patch has been wet sanded with 1800 grit micromesh sanding pads.

Image

The top side of the stem after the patch has been wet sanded with 1800 grit micromesh sanding pads. There are still scratches that remain in the stem on both the top and the bottom that more sanding will remove. The patch will also blend in better as the stem itself begins to shine.

The next series of photos show the stem as I sand it with the various grits of micromesh sanding pads. Between the 2400 and the 3200 grit sanding pad I scrubbed the stem with Maguiar’s Scratch X2.0 to polish out some of the remaining scratches.

Image

The top side of the stem after wet sanding with 1800 grit micromesh sanding pads.

Image

The underside of the stem after wet sanding with 1800 grit micromesh pads.

Image

The top side of the stem after wet sanding with 2400 grit micromesh pads. The patch is beginning to be harder to see on the surface of the stem.

Image

The underside of the stem after wet sanding with 2400 grit micromesh pads.

Image

The top side of the stem after I polished it with the Maguiar’s Scratch x2.0. The patch is blending in very well on the top side. If you did not know where it was it would be hard to see.

Image

The underside of the stem after polishing with the Maguiar’s. The patch is also beginning to blend in very well on this side of the stem as well.

Image

The top side of the stem after I had dry sanded it with the 3200 grit micromesh pads.

Image

The underside of the stem after dry sanding with the 3200 grit micromesh pads.

Image

Topside of the stem after sanding with 3600 and 4000 grit micromesh pads. The patch is virtually hidden to the camera at this point as the stem begins to shine.

Image

Underside of the stem after sanding with 3600, 4000 grit micromesh pads.

Image

Top side of the stem after sanding with 6000, 8000 and 12,000 grit micromesh pads.

Image

The underside of the stem after sanding with 6000, 8000 and 12,000 grit micromesh.

The next series of four photos show the finished pipe after buffing with carnauba wax and a soft flannel buff to give it a shine. The pipe is restemmed, repaired and ready for it next smoke.

ImageImageImageImage


Reworking an Imperial Treble Zulu – Stainless Steel Tenon


I picked up this older Imperial Tobacco Co pipe – a Zulu shape number 354. The shape number makes me wonder if the pipe was made by Comoy’s. Maybe someone here knows for sure. The number is missing on the Comoy’s shape number chart on Pipedia. The pipe is interesting to me for several reasons. It is the third in a group of three pipes by Imperial that came to me in an EBay lot. The first two were Two-Points and this one a Treble. I had not heard or seen this line before these came my way. The other reason is that several pipes in this lot had stainless steel tenons! The Treble has one and at first I thought it was original – the stem did not fit well as the tenon was stuck in the bowl and the stem would not seat all the way to the shank. The bowl was in pretty nasty shape. With lots of darkening and the grain virtually obscured under dirt. The rim was caked and tarred. The bowl was full of broken cake and cobwebs. The stem was gnawed with deep bite marks, the button destroyed and the tenon stuck in the shank.

I was able to remove the tenon from shank with a big pair of channel locks and some serious twisting and turning. I filed the end of the tenon and cut grooves in it so that the epoxy would have something to bite into when I pushed it into the stem. I then slid a pipe cleaner into the stem and threaded the tenon on the cleaner. When I got down to the stem I mixed some epoxy (two part mix) and painted it on the tenon. I let it set for a few moments and then pushed it into the stem. I wiped off the excess around the stem and tenon junction. I set it aside and worked on the bowl. ImageImage

I reamed the bowl and cleaned both it and the shank. Then I used a fine grit sanding pad that I have here to work on the lava on the top of the bowl. Once that was done I wiped down the bowl with isopropyl alcohol to remove the grime and the finish. The next photos show the bowl after the initial cleanup. From there I put it in the alcohol bath and went back to work on the stem. ImageImageImage

The next series of two photos show the bite marks on the stem and the state of the button. The bite marks were very deep and some were actually cuts in the stem material rather than just dents. I used my heat gun to raise the dents as much as possible but honestly they did not come up very much at all. This one would be a bit of a challenge. I used sanded the stem around the button and the dents with 240 grit sandpaper to get the oxidation off that area. I was going to use the superglue to repair these bite marks and needed a clean surface to work with. Once I had sanded the area clean I used a dental pick to pick away the brown left in the dents. I wanted to clean out the dents as much as possible and roughen the surface in the dent for a good bond with the glue. The first picture shows the top of the stem, the second shows the bottom. ImageImage

Once they were clean and ready I washed the area down with some isopropyl alcohol to remove any remaining sanding dust. Then I put drops of superglue in the holes on the underside of the stem first. Once they were dry I did the same with the dents on the top side of the stem. The three photos below show the glue in place – they appear as shiny black spots in the photos.ImageImageImage

I set the pipe stem aside to thoroughly dry and took the bowl out of the alcohol bath. I dried it off and then sanded the top of the bowl with the fine grit sanding pads that I have. The top is showing some nice grain and the tars are coming off nicely. ImageImageImage

I wiped down the bowl and rim with acetone (fingernail polish remover) to remove the remaining finish and grime. The white cotton pads in the background of the next three photos show what still remained on the bowl after the alcohol wash. I wanted to get the bowl down to bare briar so that I could refinish it and then give it a new coat of stain. My goal was to highlight the beautiful grain on this one. ImageImageImage

I guess I must get a bit bored doing the same thing or something, because I went back to the stem to sand the patches that I had made. I used emery cloth to get the patches even with the surface of the stem. The next series of three photos show the progress on cleaning up the stem and evening out the stem surface. The patches are beginning to fade and blend into the stem. ImageImageImage

After sanding the stem I cleaned out the stem and the shank. It was a dirty process. The first picture below shows just a few of the many pipe cleaners and cotton swabs. I dip them in the cap filled with isopropyl that is pictured in the photos and swab out the stem and shank with them. ImageImage

I reinserted the stem in the shank and wiped the entirety down with an alcohol soaked cotton pad. I wanted to see where I was at with the stem and the bowl. You will notice the addition of a band in the photos below. Once I refit the stem I could see that the stainless tenon was indeed a replacement and that it was misdrilled – it was set in the stem too high making the match at the tenon impossible. I decided to work on the shank rather than pull the tenon, redrill the hole in the stem and reinsert a bigger tenon. I could still do that should I desire. I sanded the shank a little to reduce the gap between the stem and shank. Then I pressure fit a band on it to guide the stem to the proper fit. It worked well actually and the stem lines up nicely now. ImageImageImageImage

I took the next two photos to show the state of the stem patches at this point in the repair process. You can see that they are virtually invisible on the top of the stem and just slightly visible on the underside. At this point I continued to sand the stem and work at the area around the button to redefine it and to blend in the patches. I used a fine grit sanding pad and an extra fine grit pad to remove the scratches and to make the button area more defined. I then worked over the stem with the usual list of micromesh pads from 1500-6000 grit. ImageImage

I restained the bowl with an oxblood stain and buffed the entirety with White Diamond and then gave the pipe several coats of carnauba wax and buffed with a soft flannel buff to bring out the shine to the pipe. You can see from the profile shots that the button is more clearly defined and the flow of the stem looks correct from the bowl to the button. The patches on the stem have blended quite well and though still visible if you look closely are smooth and black. ImageImageImageImage

Refurbished Mastercraft Bulldog


Another old timer, a Mastercraft Bulldog was in my box of bowls without stems. The squat shape of this little bulldog caught my eye.

The bowl pretty rough looking. The finish was gone and the top had been used as a hammer so it was badly dented and the roughening of the wood left a lot of splintering edges. It was also badly caked and still had a remnant of tobacco left in the bowl. Since it was missing its stem I have no idea when the bowl and tobacco got separated from the stem. I have a coffee can in which I keep a wide range of stems that I have picked up and another can of stem blanks that need to be shaped and fit to the new pipe. For this pipe I found an old stem in the can that was a perfect fit once I removed the old stinger type insert. The stem was badly oxidized virtually brown. There were no tooth marks on the stem and no dents that needed to be repaired.

I reamed and cleaned the bowl and shank until the pipe cleaners came white. I use 99% isopropyl alcohol for doing this as I find that it works well and evaporates quickly leaving no residual tastse. The top had been hammered so much that the bowl had to be topped so that it would be smooth again. The trick with this one was not to remove too much of the top and thus change the angles of the bulldog shape. So I removed enough to give me a smooth surface to work with but not enough to change the shape. Once it was topped and sanded I put it in the alcohol bath and left it while I worked on cleaning up the stem.

I had soaked the stem in a mixture of Oxyclean to soften the oxidation and prepare it for the sanding that would be necessary to clean it. Once I remove it from the soak I buffed it with Tripoli to remove the oxidation that had softened and then sanded it with 240 grit sandpaper. Once I had removed the brown surface I used 400 and 600 grit wet dry sandpaper to continue the smoothing and polishing process. I finished the stem with the micromesh pads from 1500 – 6000 grit. Then I set it aside to wait until I had finished bowl and polish the entirety on the buffer.

I took the bowl out of the alcohol bath and sanded it with the micromesh pads to remove the surface scratches and remaining marks in the bowl surface. I steamed out the dents with a damp cloth and a hot knife and then sanded them smooth again. I restained this bowl with a Medium Brown stain. I flamed it to set the stain, inserted the stem and then took it to the buffer and buffed it with White Diamond to polish it. The entirety was then given several coats of carnauba wax. This one found a new home with someone who loved the shape and it is providing a great smoke for them. ImageImageImage

Refurbished and Restemmed this interestingly shaped no name pipe


I refurbished this interestingly shaped no name pot/rhodesian/bulldog (?) or you name it shape. I was drawn to it and liked the look of it when I found it in my box of pipes and bowls that I have gathered for refurbishing. It is a box I have that at one point held over 300 pipes that needed work but is slowly shrinking even though I add to it each time I go scavenging. I am pretty much incorrigible about picking up estate pipes and hunting for them. I am getting more picky over the years as to what I want to work on but I pick up ones that will be a challenge to me or that I like the brand or the shape.

This one was truly a mess. I forgot to take pictures of what it looked like when I took it out of the box but I will describe it to you. In many ways it was no different than most of the others that I work on. The bowl was caked to the point of barely holding any tobacco any longer. It was a tarry mess on the rim and running down the sides of the bowl. There were dents and deep “wounds” in the briar of the rim. It also was without a stem. The silver band on the shank was badly beat up and to be honest the pipe was downright ugly. But in its ugliness I saw something that drew me to pick it up and see what I could do with it. So I took it to my work table and it became a project that took me two days.

I did what I call field dressing the pipe the first day. That includes reaming the bowl and cleaning out the grit and grime from the shank and bowl. I washed the bowl down with acetone to remove the overflow from the bowl and rim on the outside of the bowl. I also removed the dirt and grease marking on the bowl. Once it was clean I fit a stem for it. It has a diamond shank, and those have always been a challenge for me to make a proper fit. I find that on these old timers what appears to be a diamond with equal sides never truly is equal. Each side on this one had a different measurement. I used a blank that I had here and shaped it to fit. It is difficult to get each side correct and maintain the shape to fit the shank. I cut the tenon with my Pimo tenon turner and worked the shape for a long time to make it flow with the shank. It took a long time because I would get one side perfect only to lose a bit of the angle on the next side. I finally was able to get the angles right and fit the stem to the shank well. In the finished photos you can get a bit of an idea of the work involved in that.

I then removed the silver band and put the bowl in the alcohol bath while I tried to straighten and smooth out the silver band. I got a lot of the wrinkles and dents out of it but a few still remained even after my work.  I set it aside to reinstall on the shank once it was restained and turned my attention to sanding and polishing the stem. I used 400 and 600 grit wet dry sandpaper as usual to remove the scratches and marks left by the shaping. I then use my normal regimen of 1500-6000 grit micromesh to bring a shine to the stem. When I had it finished and ready for the buffer I put it aside and went back to the bowl.

I removed the bowl from the bath and sanded it with the usual variety of sand papers and micromesh pads. Then I restained it with a cherry stain that I use on some of the older pipes as I have found that it brings out the old colours from the briar and really looks good. I then sanded again with micromesh and put the stem on it before taking it to the buffer to polish it with White Diamond. Once that was finished I gave the bowl and stem several coats of carnauba wax.

There are no stamping or marking on it all. But the unusual shape continues to attract me in an odd way. It is 6 inches long, bowl height is 2 inches. The chamber diameter is 1 inch and the chamber depth is1 1/4 inches. The rim is chamfered and clean. Anyone have a name for the shape??
ImageImageImageImage

Refurb on the Weingott Billiard


I finished up refurbishing this large Weingott Billiard that was a part of the threesome I picked up on EBay. All three were huge pipes and were ones that I would definitely recycle to someone else once they were refurbished. The Weingott is a BIG piece of briar – the pipe has a length of 8 inches, height 2 1/2 inches, the bowl inside diameter is 7/8 inches, outside diameter 1 1/2 inches. I took a picture of it next to a Dunhill group 4 to show the size of this big fellow in a picture.

The overall condition of this pipe was poor. Obviously it was a much loved pipe as it had been smoked hard. I had to ream and clean it – the bowl was very caked and the shank and stem almost clogged with a goopy tar substance. The finish was blackened on both sides of the bowl and the rim was caked and dented. The dents and scratches were deep and the surface was rough from knocking the pipe out on something hard. The stem had a very deep oxidation and was greenish brown. There were not tooth marks on the stem – at least the pipe had that going for it.

I reamed the bowl and cleaned out the shank. That took some work to unclog the airway. I ended up using a piece of wire to break through the accumulated tars and residue. I then used a drill bit and turned it into the shank until the airway was clean and open. Then I used a shank brush and many pipe cleaners and isopropyl alcohol to clean out the remaining residue. I packed the bowl with cotton bolls and used an ear syringe to fill the bowl with alcohol so that I could leach out the tars and oils in the bowl. I put a cork in the shank and set the pipe aside overnight.

Image

The oxidation on the stem took a lot of work as it was deep. I quickly buffed the stem with Tripoli to remove the surface oxidation and see how deep it went. The first coat of greenish brown seemed to be untouched by the Tripoli. It was hard and it smelled bad! I then sanded it with emery clot (fine grit) to break the surface of the oxidation. From there I sanded with 240 grit for a long time until I finally got the stem to the point that it was just a brown haze in the stem. I then put the stem in a soak of Oxyclean overnight to let it soften and draw out the remaining oxidation.

In the morning I took the cotton bolls out of the bowl and dumped them in the rubbish bin. They were dark brown and in places almost black. I let the bowl dry out and had a coffee. Then I topped the bowl to remove the damage that was on it. Once it was smooth and clean I put it in the alcohol bath to soak in order to remove the finish and the grime on the surface. It sat for about an hour and ½ before I took it out of the bath and dried it off. I sanded it with micromesh pads 2400-6000 grit and then restained it with a cherry stain.

I removed the stem from the Oxyclean soak and dried it off. I buffed it again with Tripoli and then sanded it with 400 and 600 grit wet dry sandpaper. Then I polished it with micromesh pads 1500-6000 grit to bring the stem back to black. Once finished I put it back on the pipe and buffed the whole pipe with White Diamond and several coats of carnauba. The pipe is now finished and ready for the new owner!

ImageImageImage

Refurbished a Peterson’s Deluxe Zulu


In one of my EBay purchases was this little Peterson’s Deluxe Zulu shape #268. To me this pipe epitomizes the Zulu shape – in other words, when I think Zulu I think of a pipe that is shaped like this. When the pipe arrived the bowl was dirty and caked (two things that I almost forget to say as they are to be expected in estate pipes and I am surprised when I find one that is not). The finish was mottled with light and dark spots where the stain had worn off. It also had some flecks of paint on the surface that are not clearly visible in the photos below. The rim was very caked and covered with tars. Fortunately there was no charring that was visible as I looked it over. The stem also had paint flecks on it and was slightly oxidized. There were tooth marks on the top and bottom of the stem that would need to be repaired.ImageImage

I reamed and cleaned the bowl and the rim of the pipe. The shank took some work with isopropyl alcohol and many pipe cleaners and a shank brush before it was clean. I wiped down the surface of the bowl with acetone to clean off the remaining finish and the paint spots. I use cotton makeup removal pads that I picked up at the store. They work great and are easier to use than just cotton bolls. Once the finish was cleaned I dropped the bowl in the alcohol bath to soak while I turned my attention to the stem.

I buffed the stem to remove the oxidation and the paint spots. I was careful to avoid the area where the stem and shank meet so as not to round the sharp edges and ruin the great fit of the two. I heated the tooth marks that needed to be lifted with my heat gun and when they had come back as far as possible I sanded the stem with 240 grit sandpaper to remove what remained. I sharpened up the edge of the button with my needle files to give it a good crisp edge. I then sanded the whole stem with 400 and 600 grit wet dry sandpaper and water. I finished the sanding and polishing process with micromesh pads from 1500 to 6000 grit. Once that was finished I laid the stem aside with a coat of Obsidian Oil and turned back to the bowl.

I took the bowl out of the alcohol bath and restained it with a medium brown aniline stain. I flamed it, let it dry and then took it to the buffer and buffed it with White Diamond. This was done and the entirety buffed and polished with carnauba wax to give it several layers of wax. The cross grain, birdseye and straight grain on this beauty are well laid out. ImageImageImageImage

Some of the pipes I have carved over the years


I thought I would post some pictures of the pipes I have carved over the years. Some are better than others and many are no longer in my collection as I have given them to friends. I post them here on the blog to show some of the possibilities with finishes – smooth, rusticated and semi rusticated – and with various stains and also as naturals.

Pipe #1 (only in terms of pictures not in terms of creation). A quarter bent ball or apple with a chamfered rim. The stains include a black under stain and a medium brown over stain.ImageImage

Pipe #2 – A ¼ bent tadpole. This is a great smoker and very light weight. The stains are a contrast of reds and browns.

ImageImage

Pipe #3 – A saddle stem Dublin with a Medium Brown stain

Image

Pipe #4 – a ¼ bent Tomato. This one is rusticated to look like old leather. The undercoat is black stain then it is buffed and given a top coat of Medium Brown stain.Image

Pipe #5 – A semi rusticated apple. The bottom of this pipe is plateau briar and the rustication carries that theme upward to mid bowl. The rustication has a black understain and a medium Brown top coat. The smooth portion is medium brown. Image

Pipe #6 – A Canadian with a leaf pattern carved over a flaw in the briar. The stain is a Medium Brown.Image

Pipe #7 –a bent Dublin. On this one I used a medium brown stain. I had Stephen Downie help me with the shank extension and work on this one. Image

Pipe #8 – Volcano shape with plateau on the bottom. This one has a black understain to highlight the beautiful grain and then a medium Brown overstain. The stem is a modified saddle.ImageImage

Pipe #9 – ¼ bent egg. This one is stained with a black understain and then a tan overstain. The grain is very interesting on it.Image

Pipe #10 is a natural Dublin with no stain. Many coats of carnauba wax were applied. The band is a brass pressure fitting that I shaped to give it character. Image

Pipe #11 is a poker with a mix of rustication and smooth. It was stained with a medium brown stain. And waxed with carnauba. Image

Pipe #12 is a fanciful freehand that I did to highlight the amazing grain that flows along the pattern. This one is also natural in terms of finish – no stains were used. Just wax.Image