Tag Archives: sanding a stem

Rough Texture of a Jobey Shellmoor combined with Yellow Lucite


Blog by Steve Laug

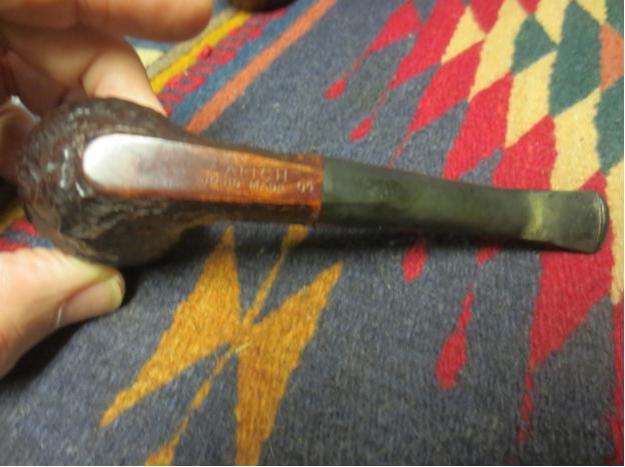
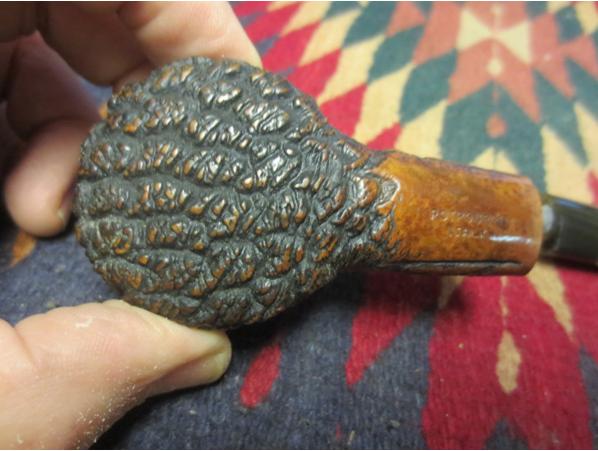
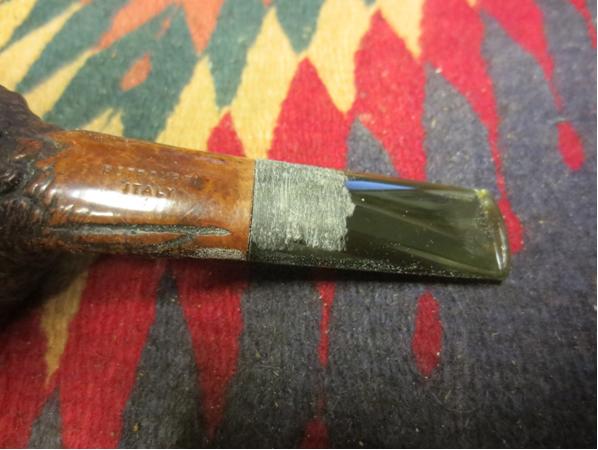
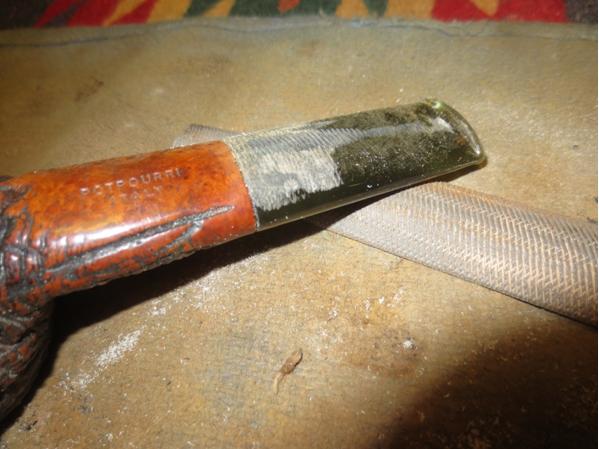
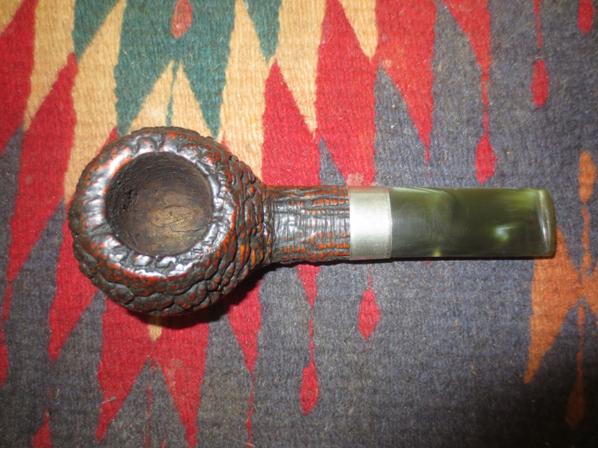
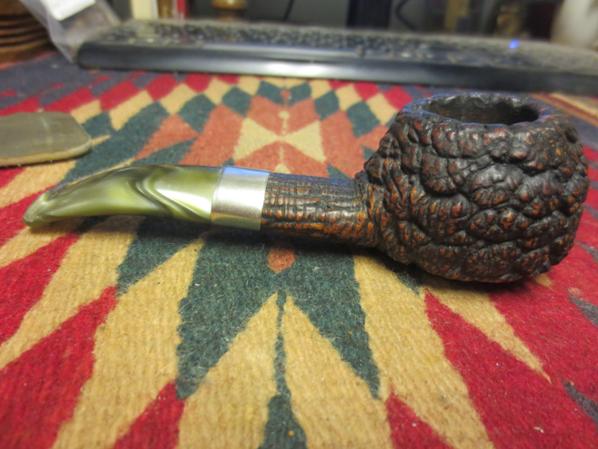
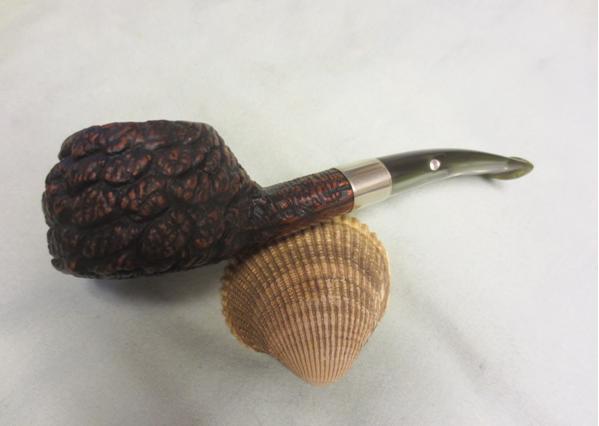
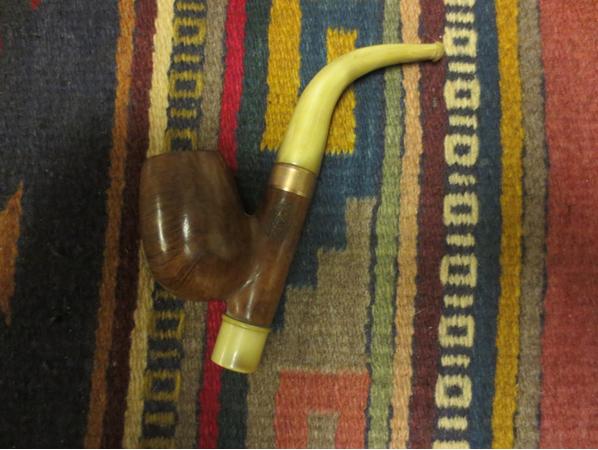
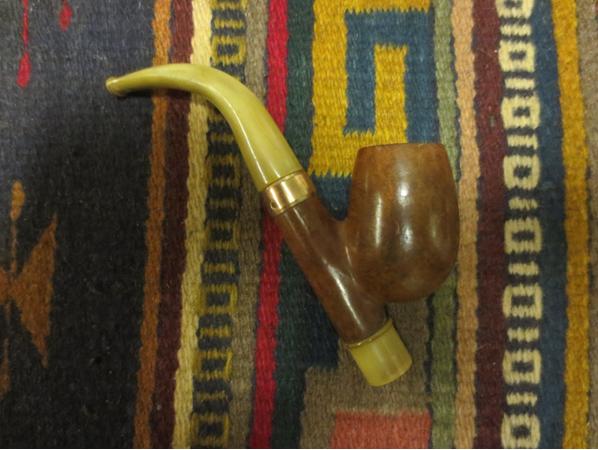
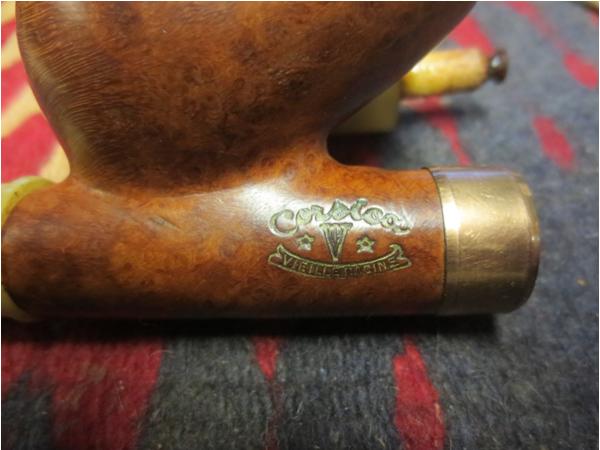
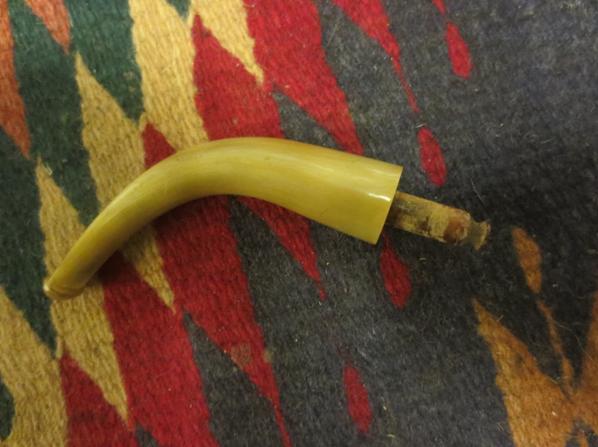
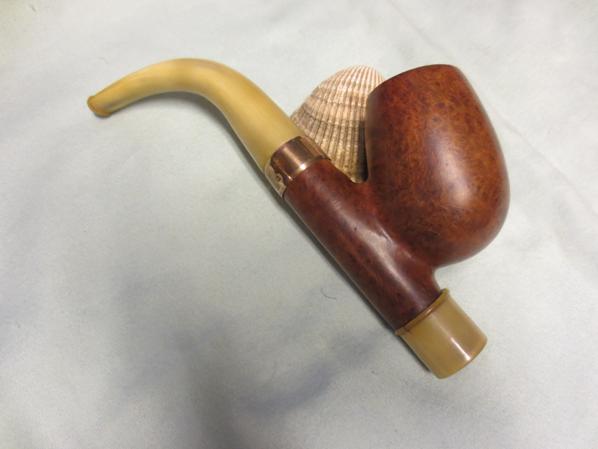
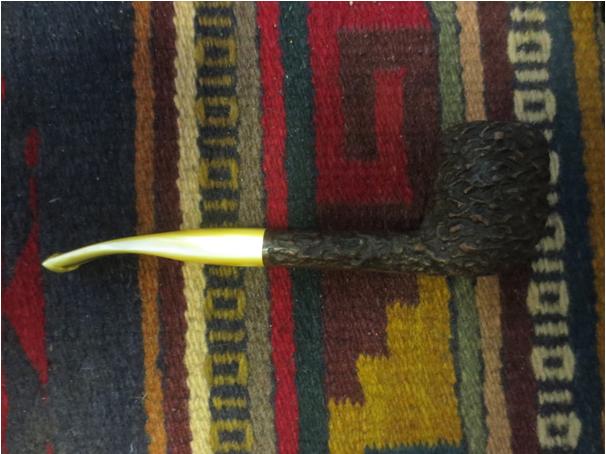
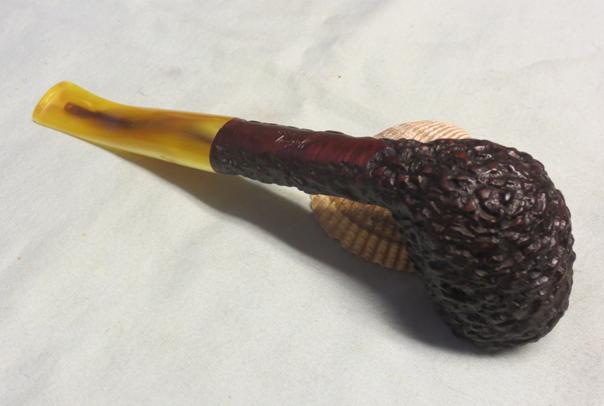
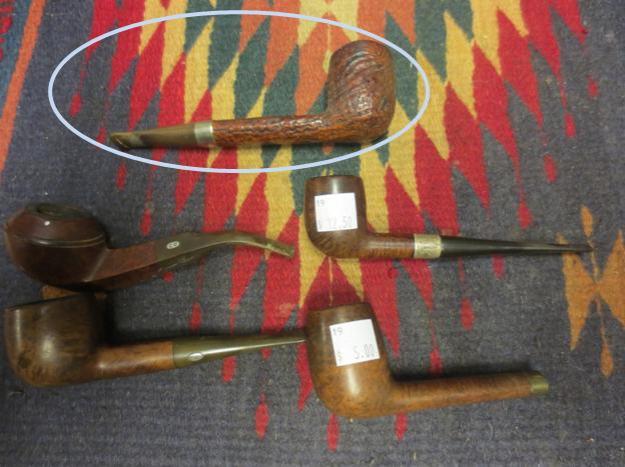
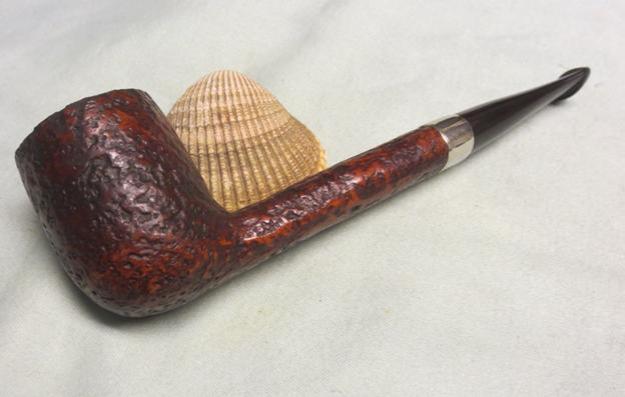
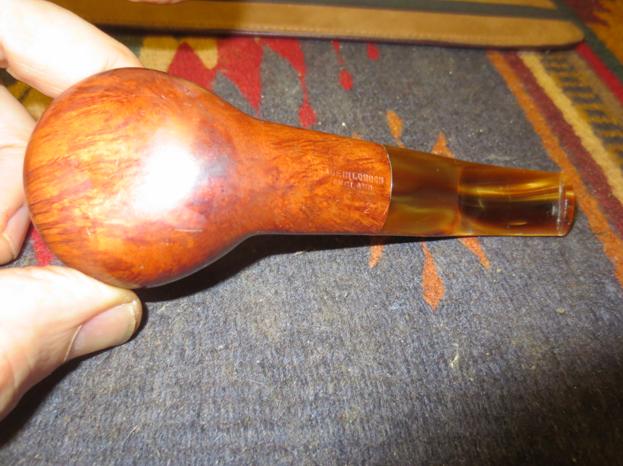
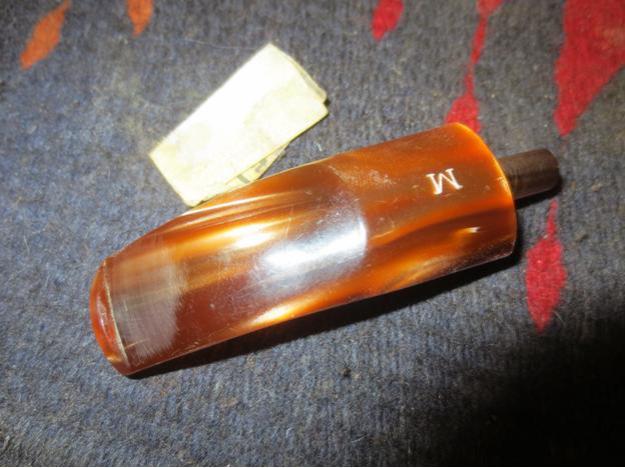
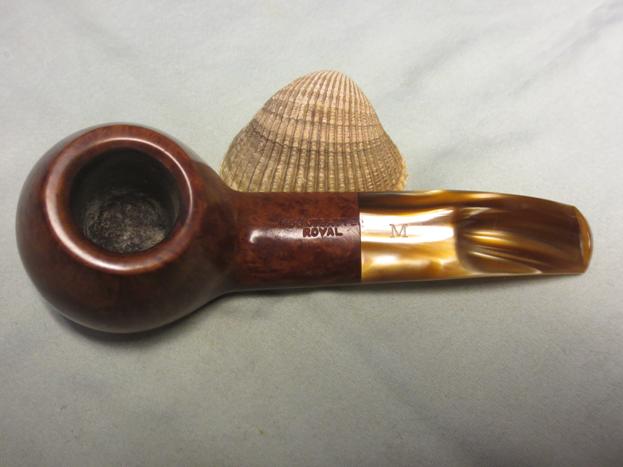
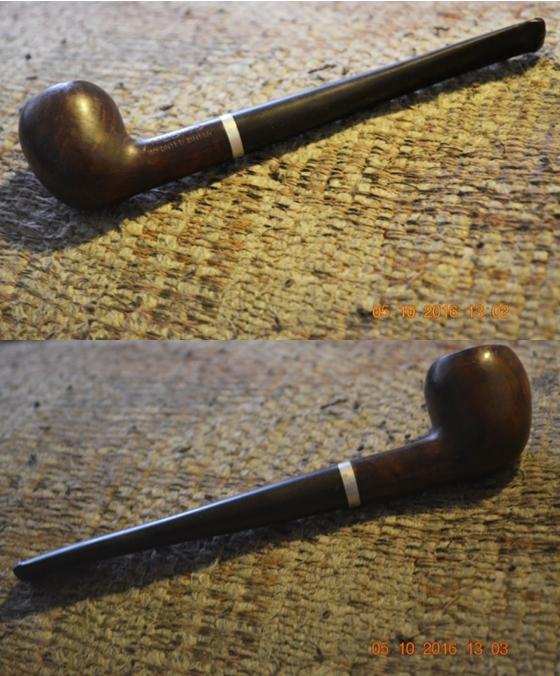
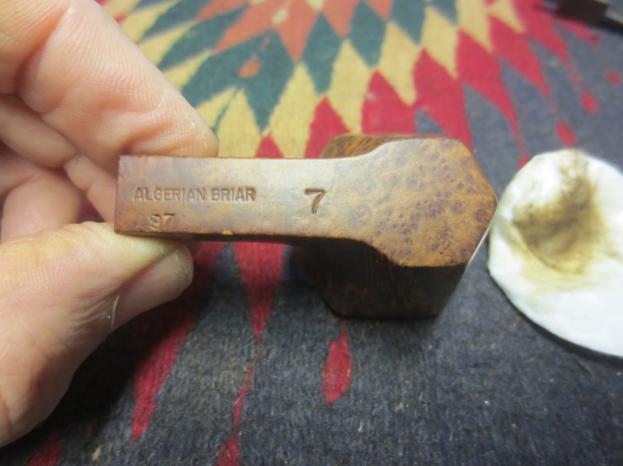
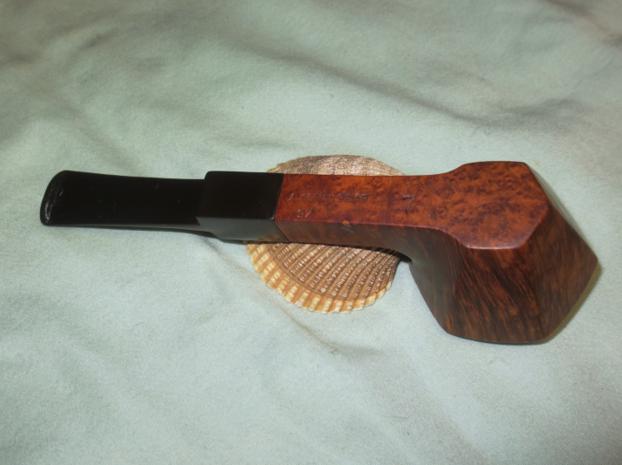
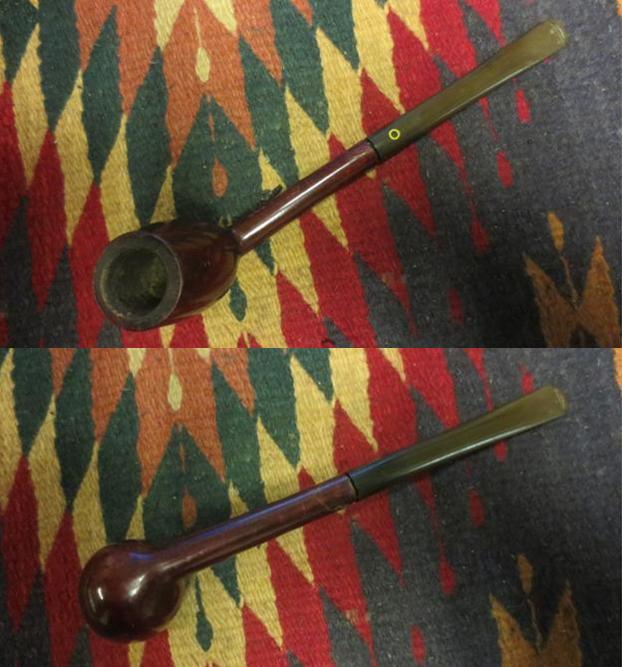
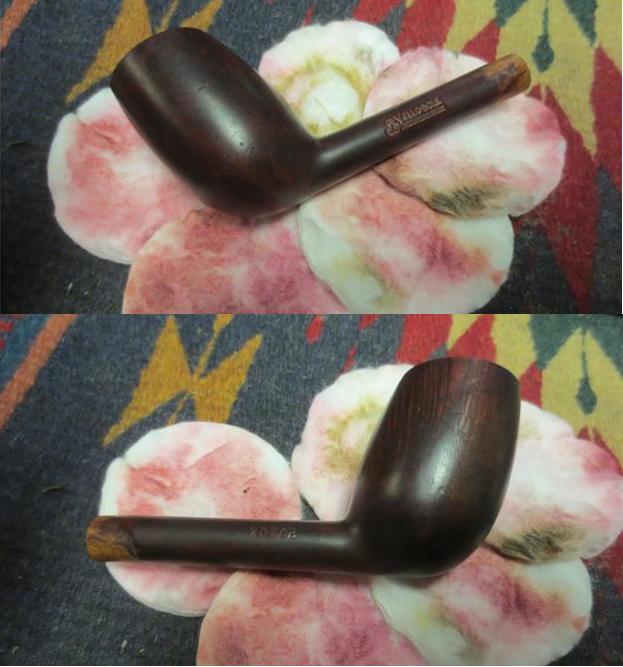
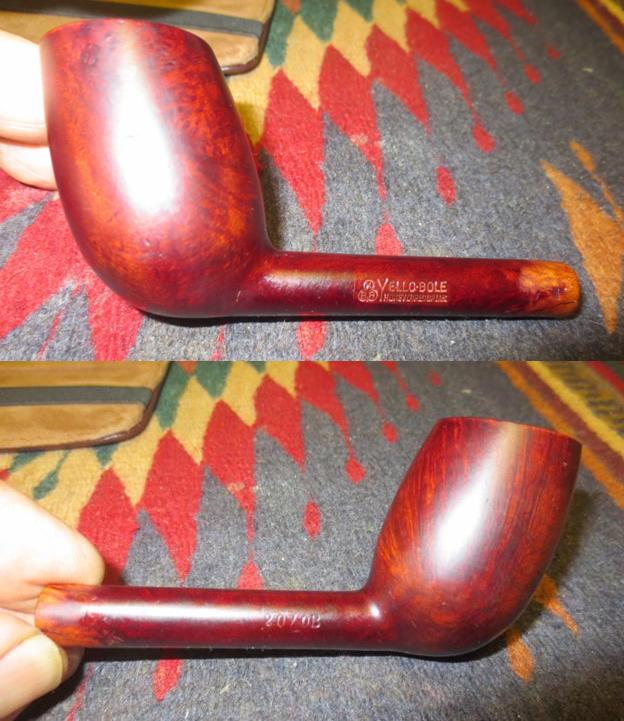
As I said before I never paid much attention to Jobey pipes. My brother has given me a new appreciation for them. The pipe he sent me that I chose to work on next is stamped Jobey Shellmoor on the underside of the shank. There is no shape number or other stamping on the pipe. There is a Jobey logo stamped on the yellow acrylic/Lucite stem. When I first saw the pipe I was pretty certain that the stem was a replacement. Now that I have it in hand I have to admit I was wrong it is the original. When I first picked it up I thought it would be a pretty straightforward repair. I could not have been more wrong but that would come out in the process of the restoration.Jobey1 Jobey2
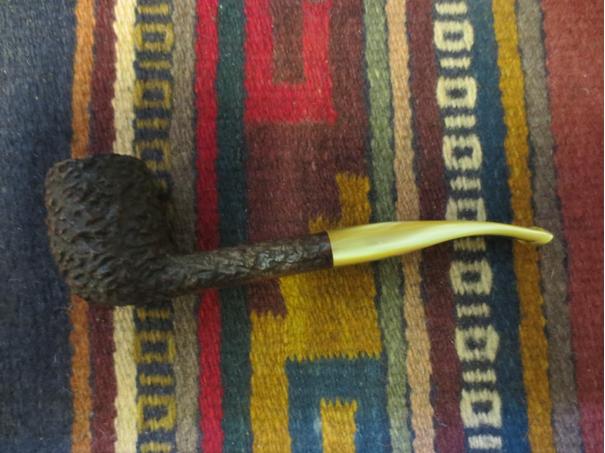
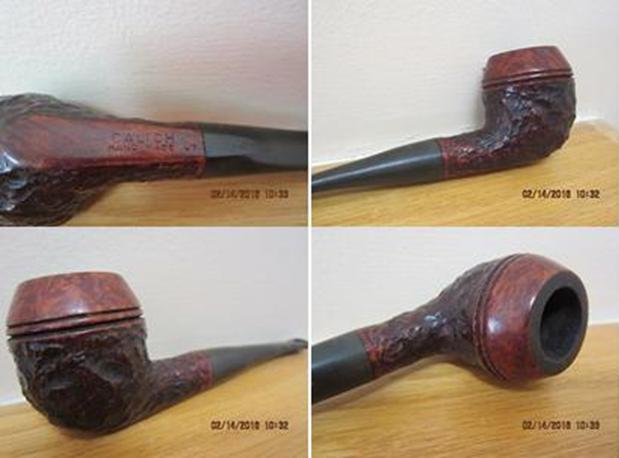
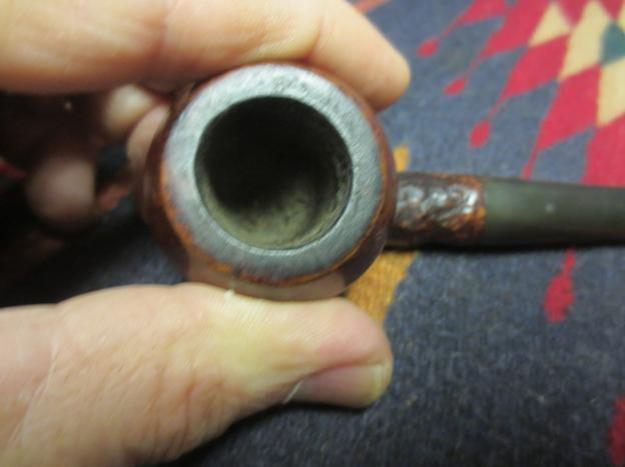
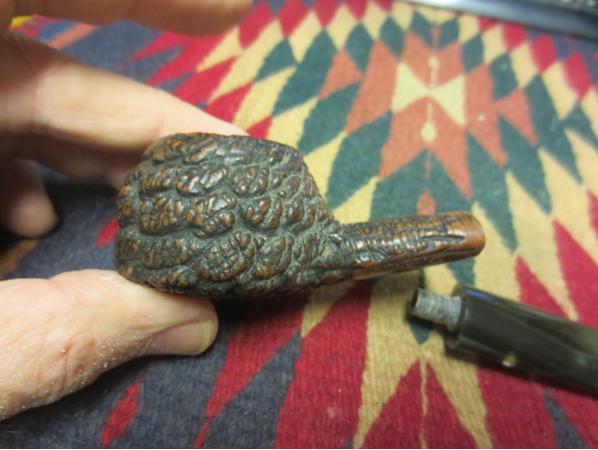
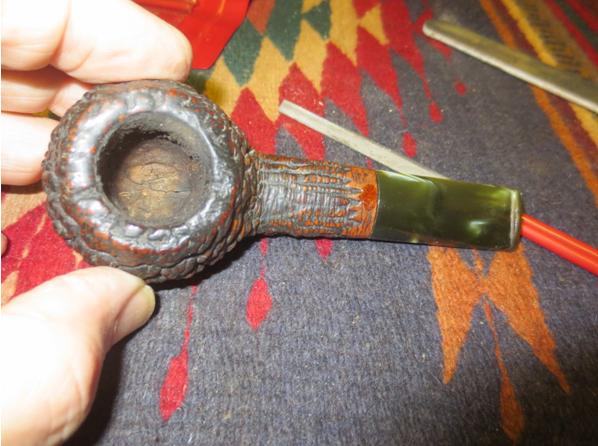
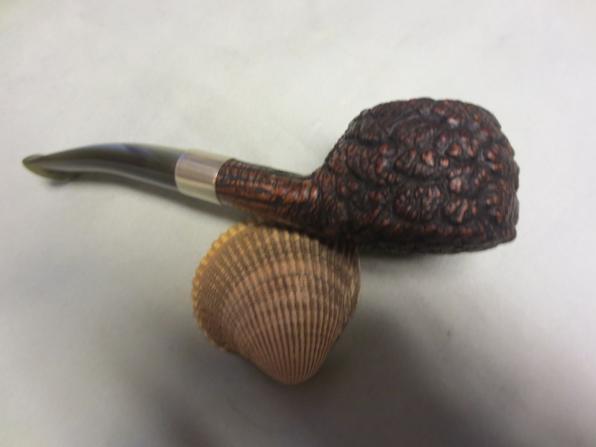
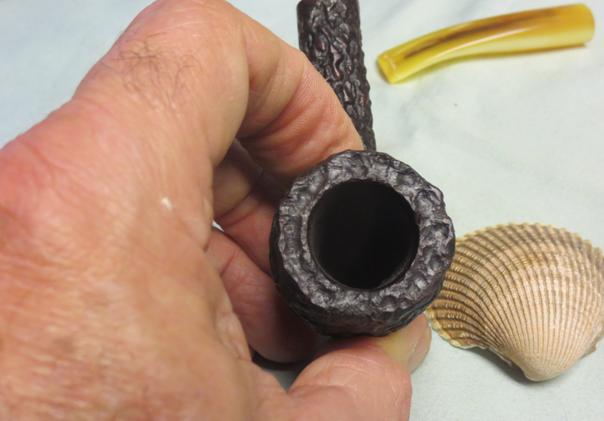
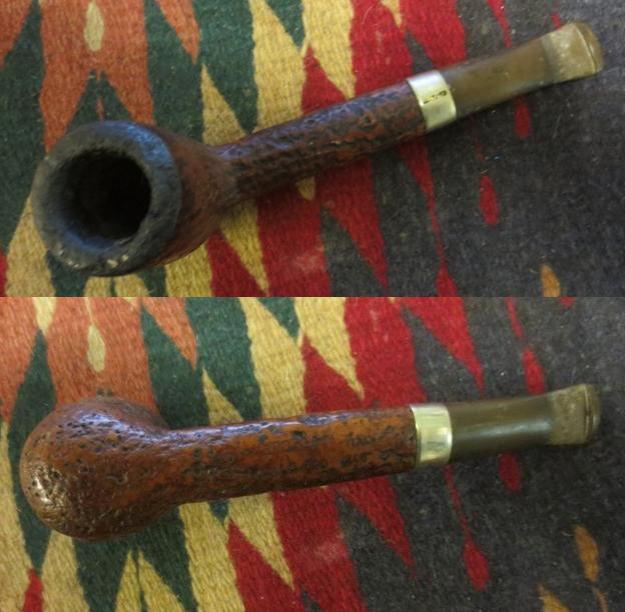
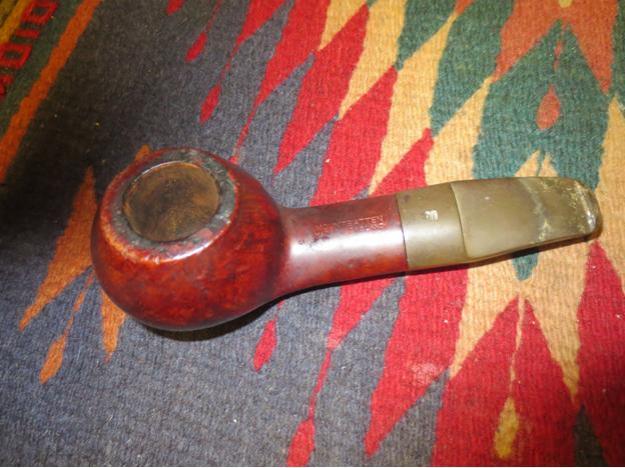
The rustication was very dirty on the sides of the bowl but it had that rough rustication that I have come to expect on Shellmoor pipes. The rim was in rough shape with lava in all of the grooves. That would have been easily remedied but there was also a burned area on the top of the rim at the front that had left a deep groove. The bowl was thickly caked (I removed much of it in Idaho when I was there). When I brought it to the work table and tried to finish reaming the bowl I was reminded of the rock hard cake. It took two different reamers to take out the cake. The stem had some tooth marks and the airway was black with tars. When I removed the stem the Jobey Link was stuck in the stem. Not a big deal but it would make getting the black out of the airway.Jobey3 Jobey4
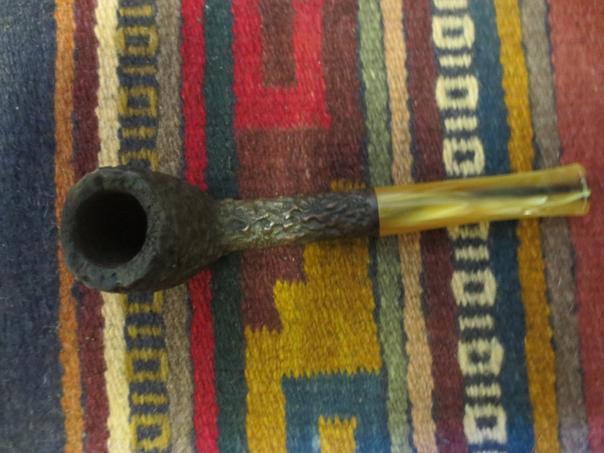
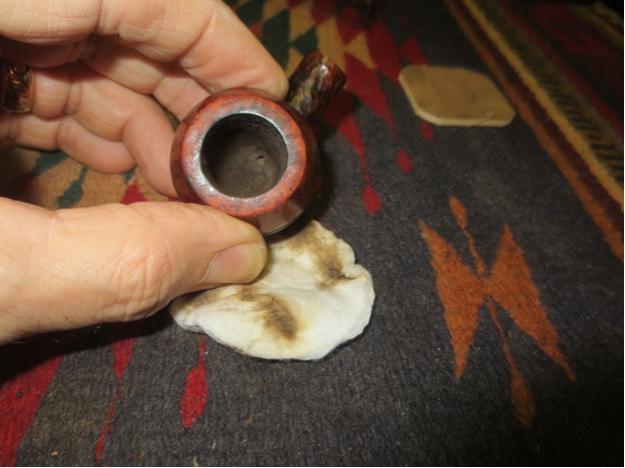
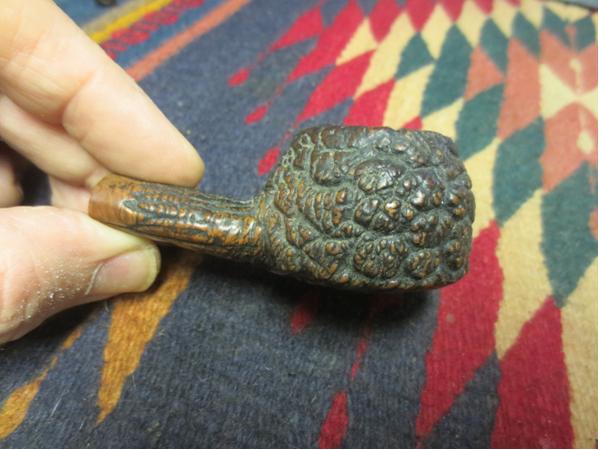
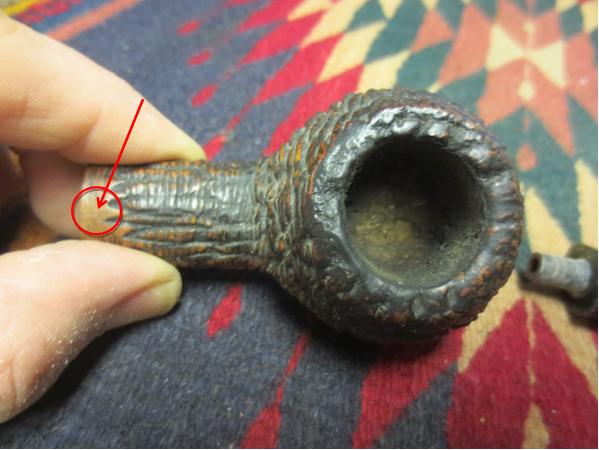
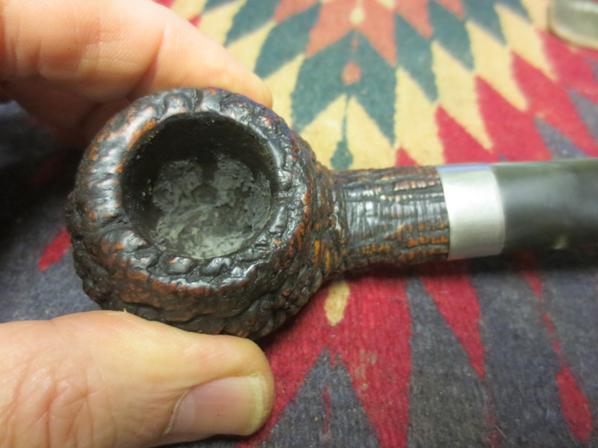
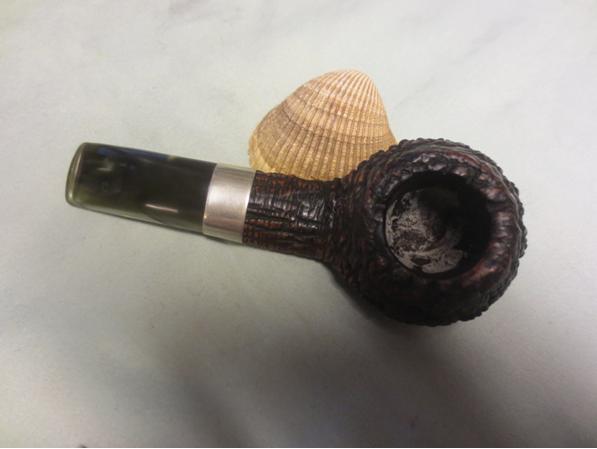
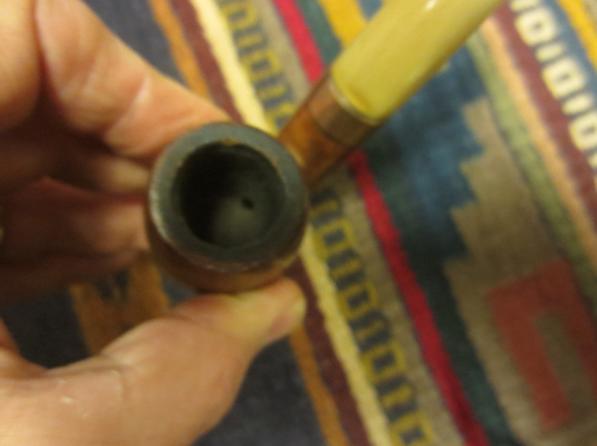
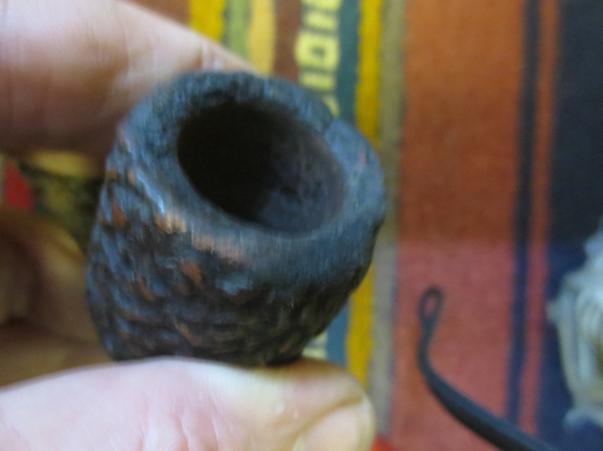
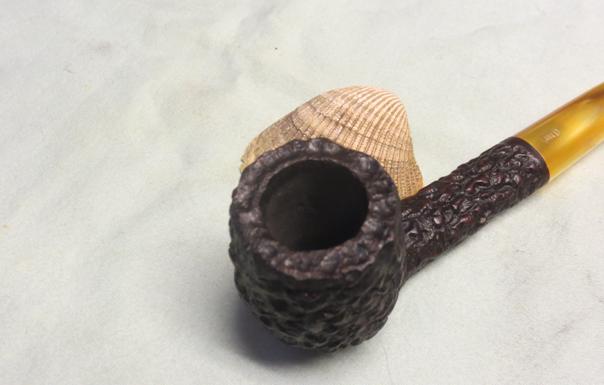
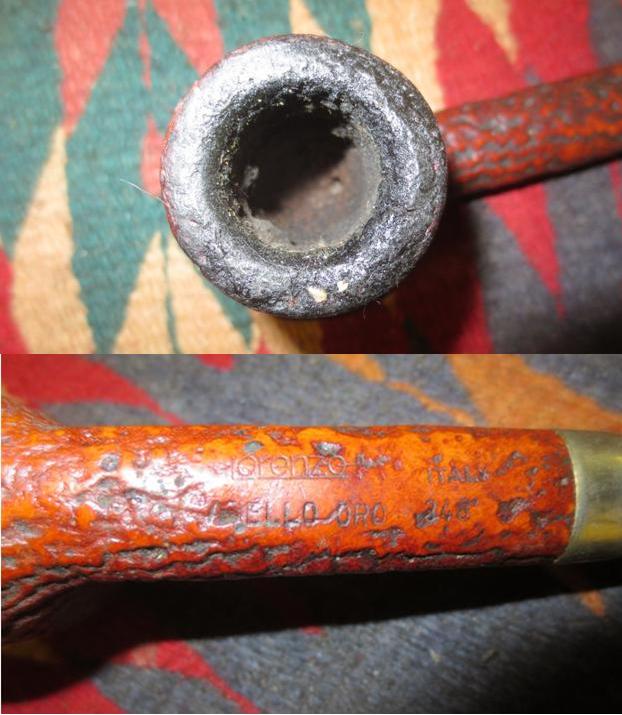
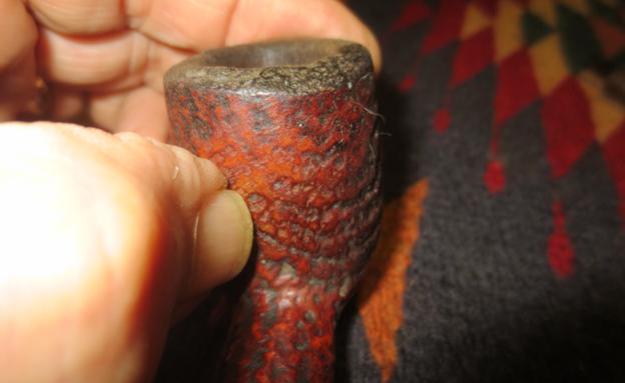
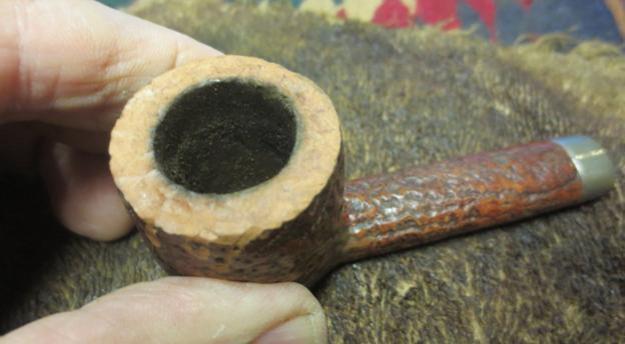
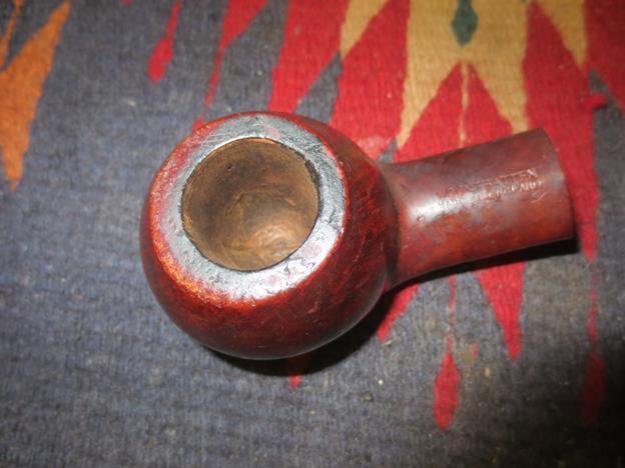
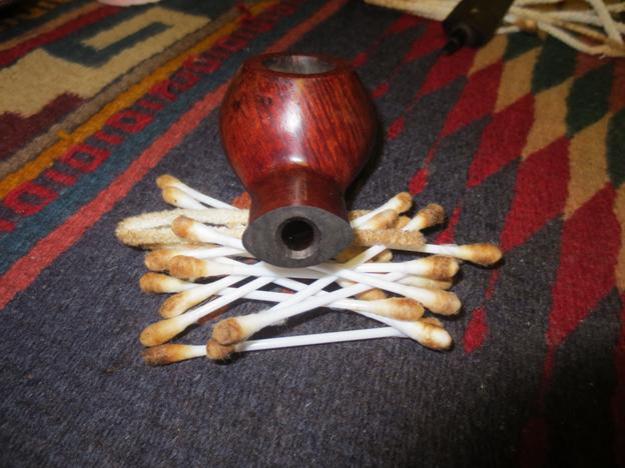
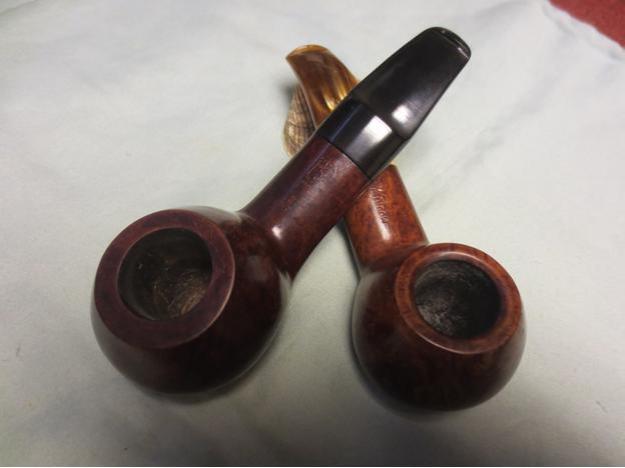
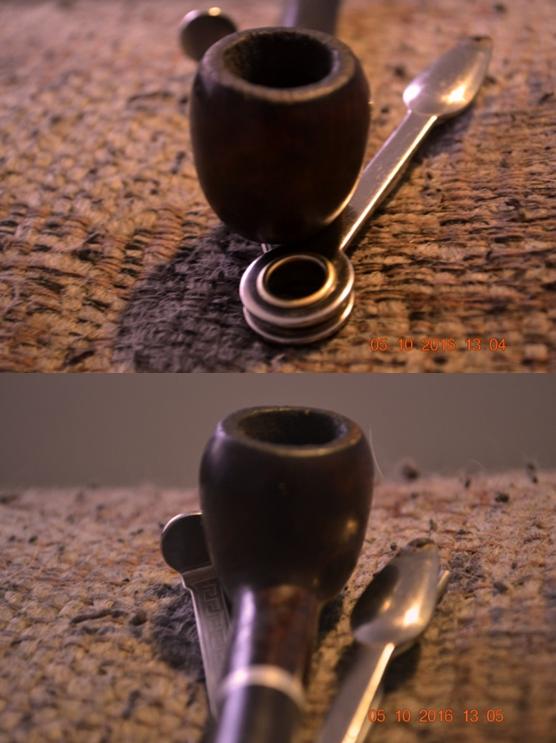
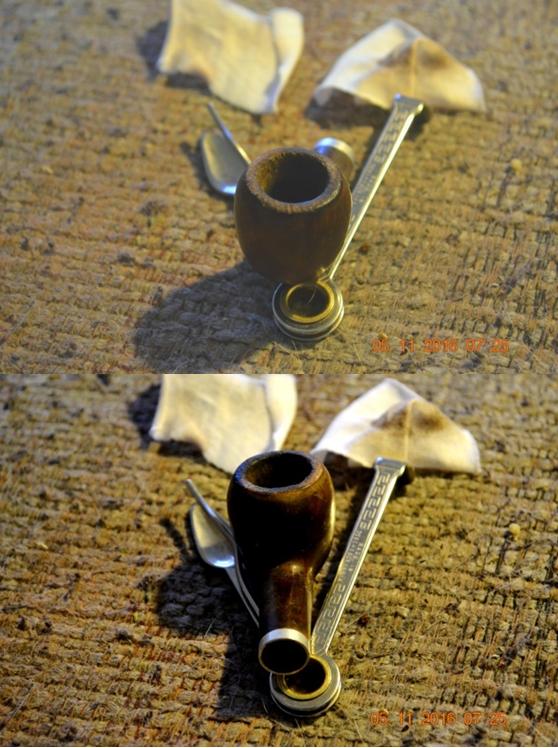
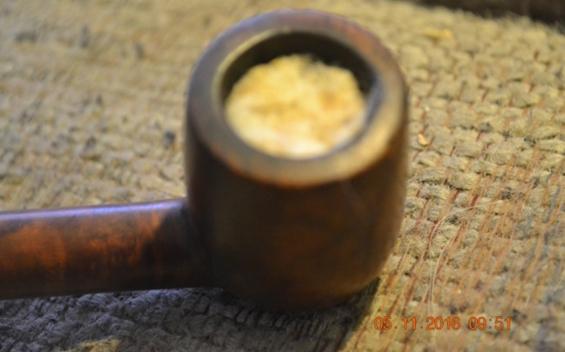
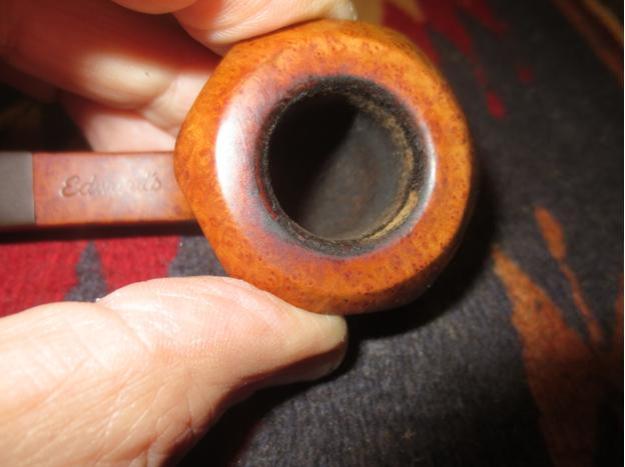
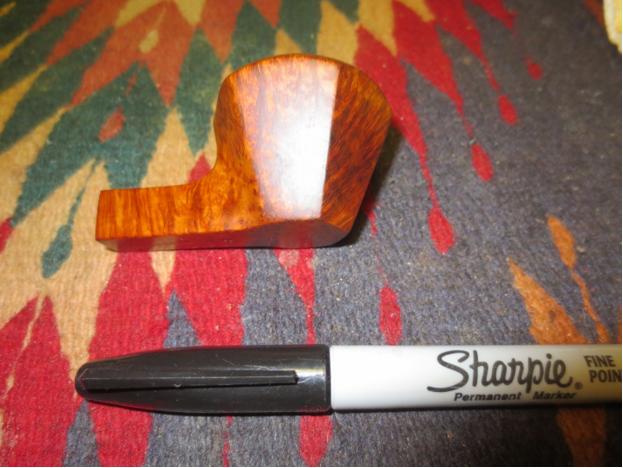
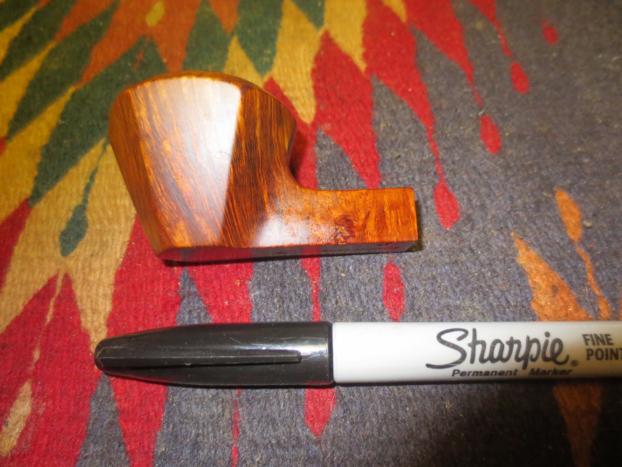
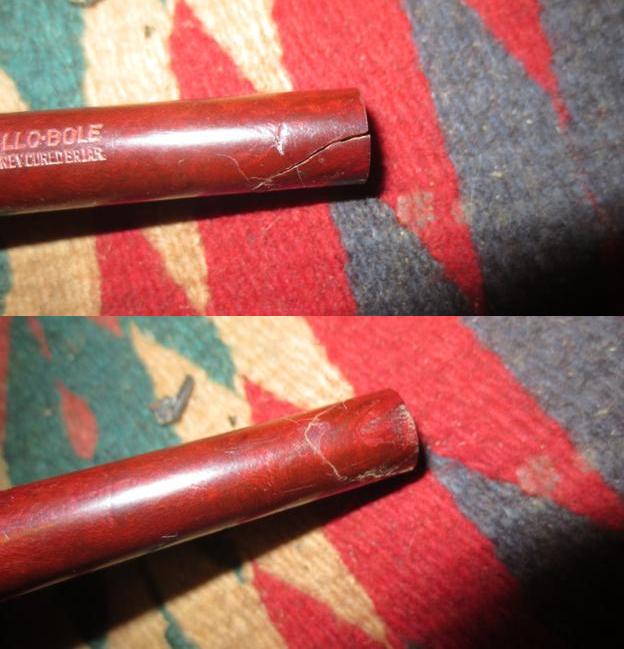
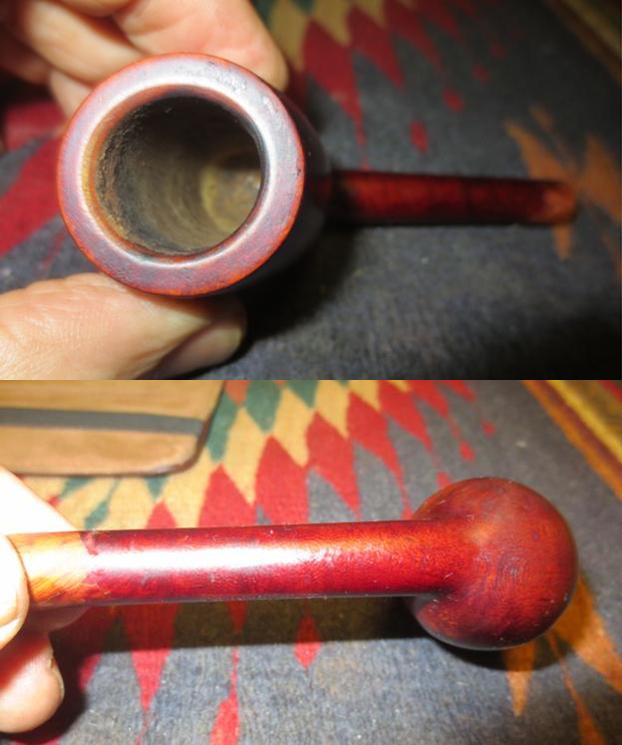
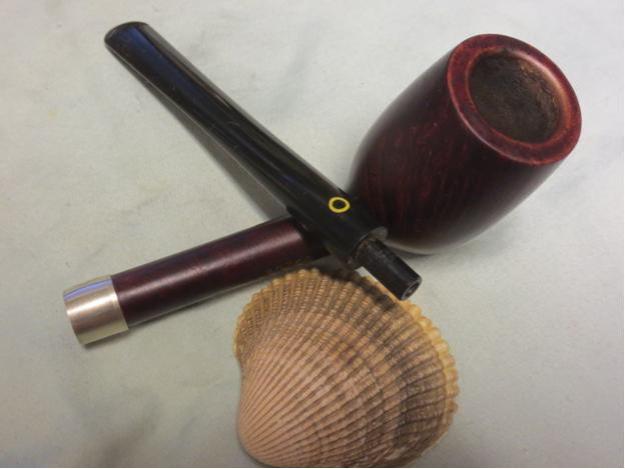
When I examined the rim more closely I saw that it was actually quite damaged. I took two close-up photos of it to show the thick lava and the burned area on the front of the bowl. It is a little hard to see in the second photo (forgive the slightly out of focus photo) but it extends down the front of the bowl about ¼ inch.Jobey5 Jobey6
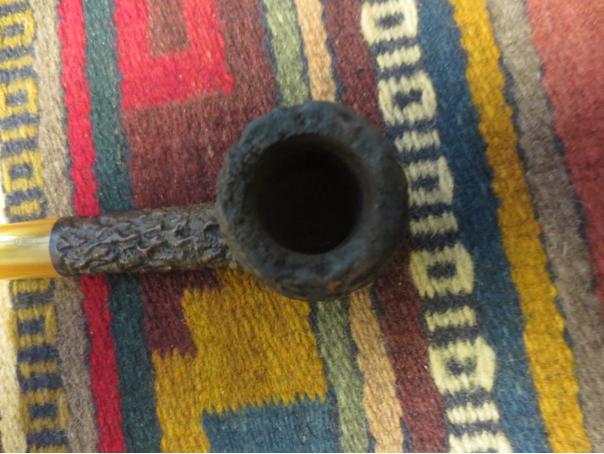
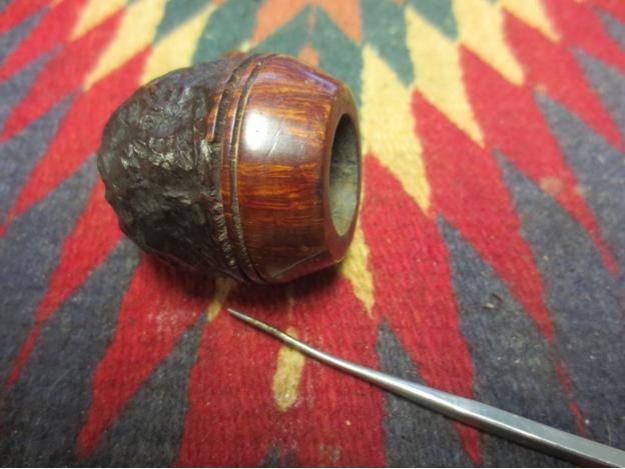
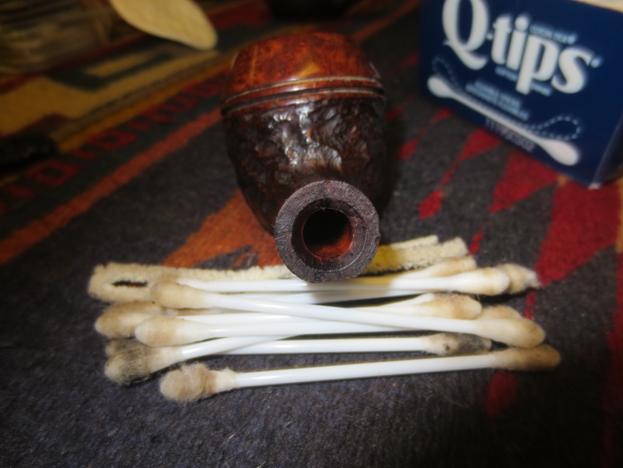
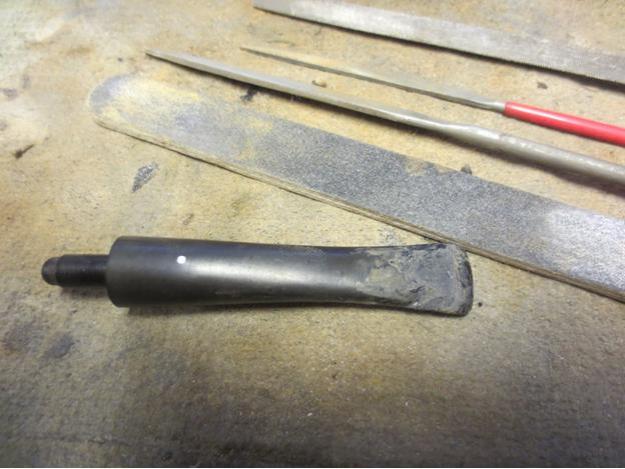
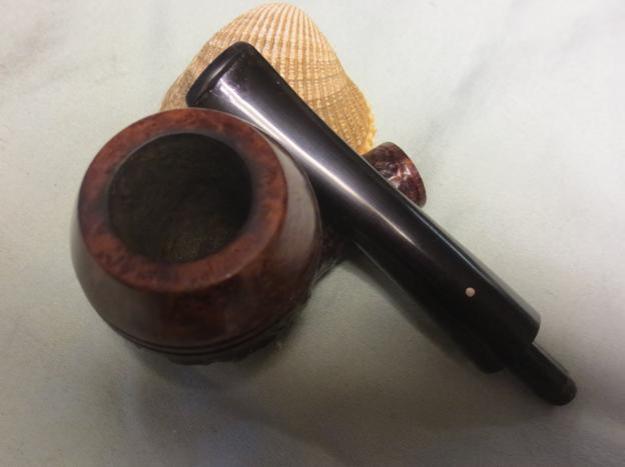
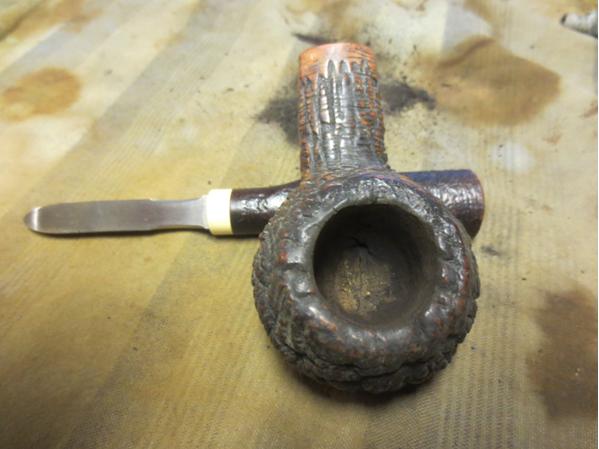
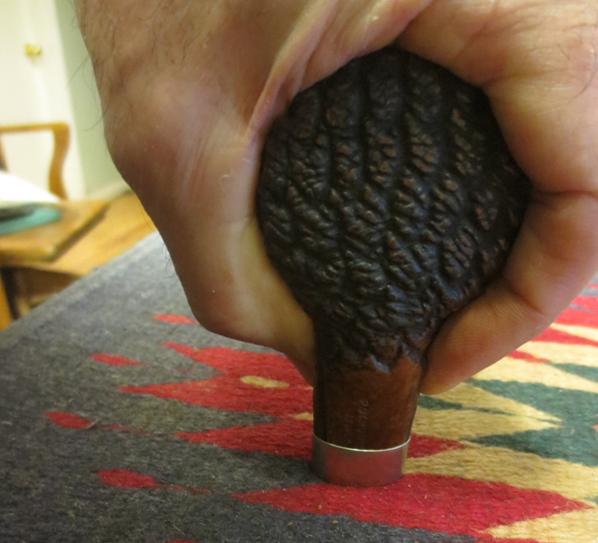
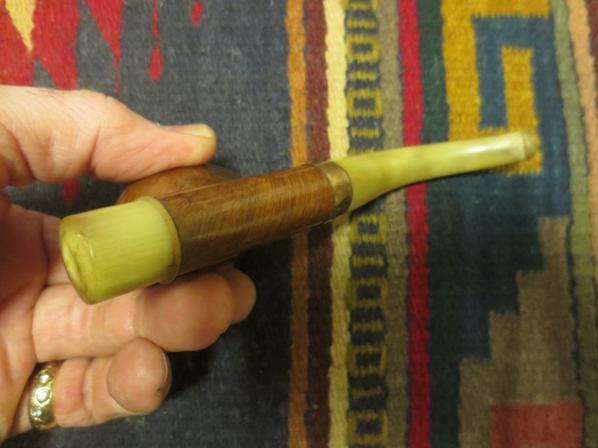
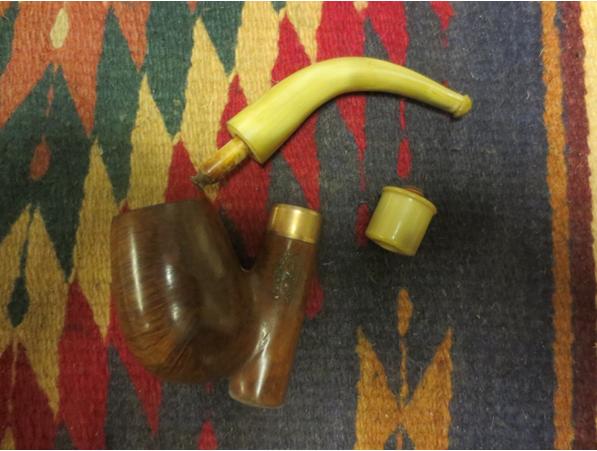
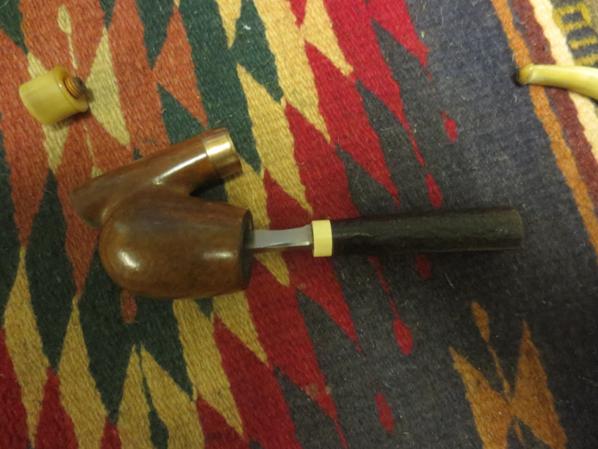
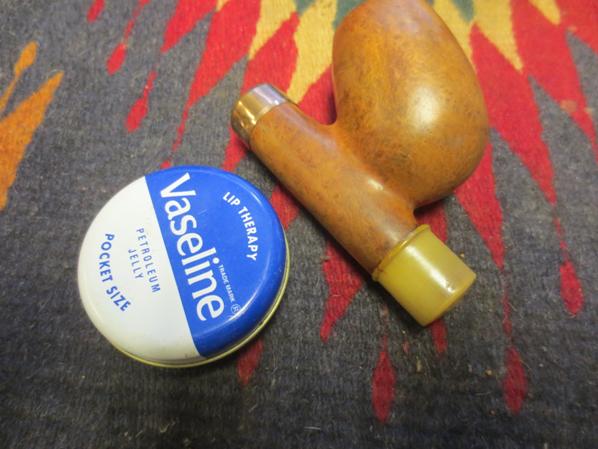
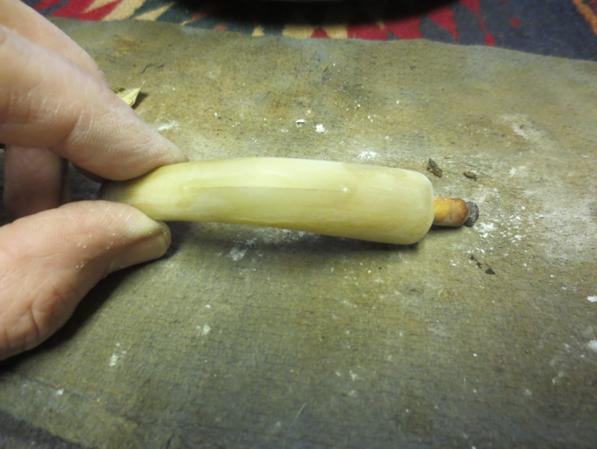
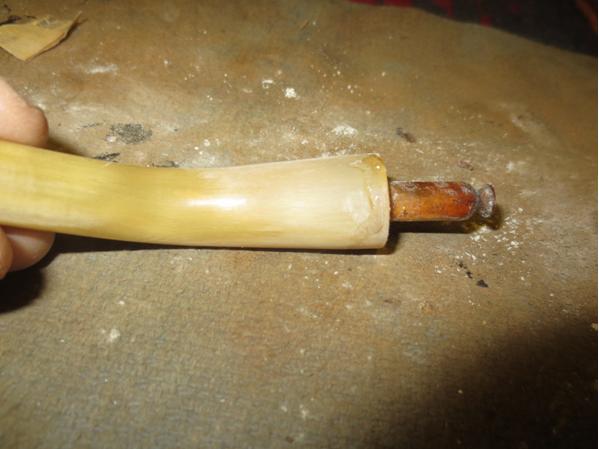
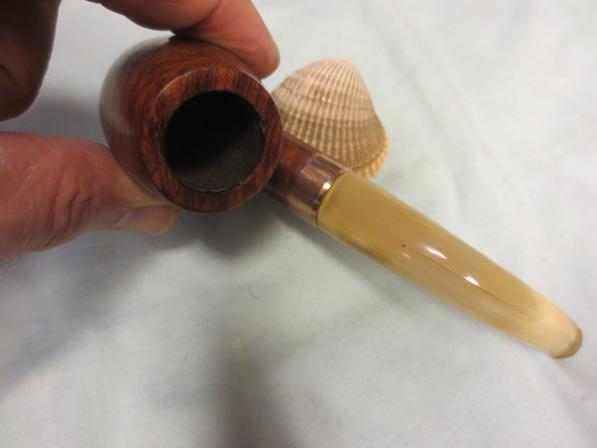
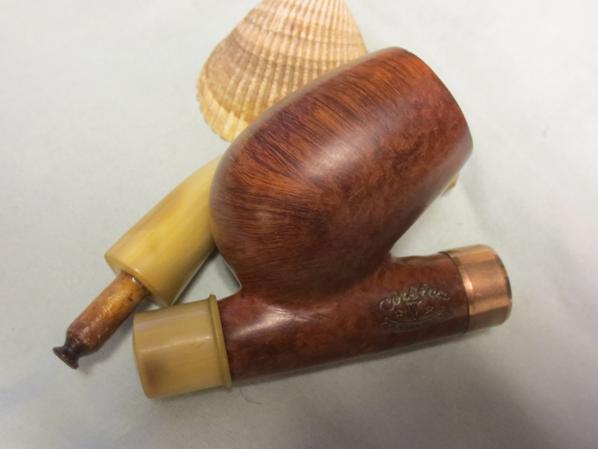
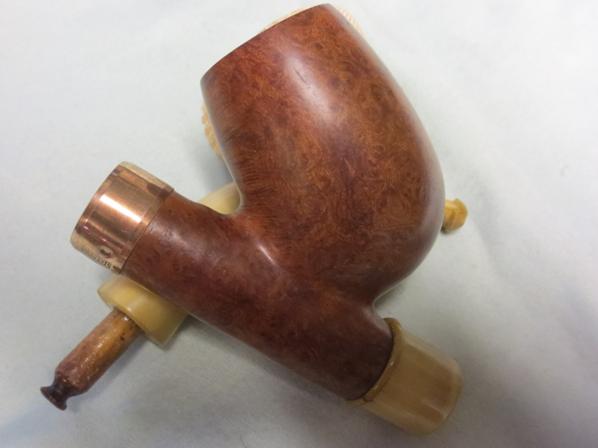
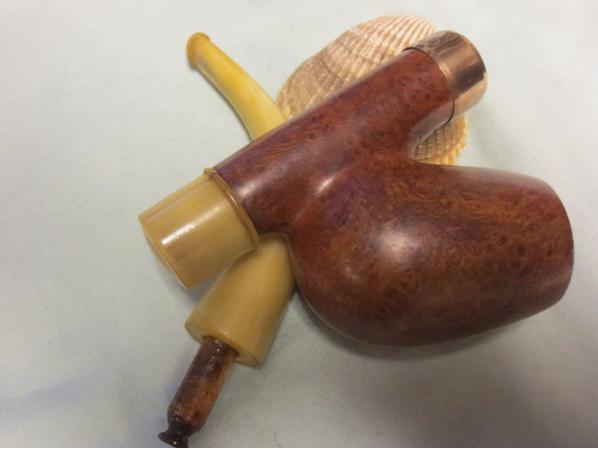
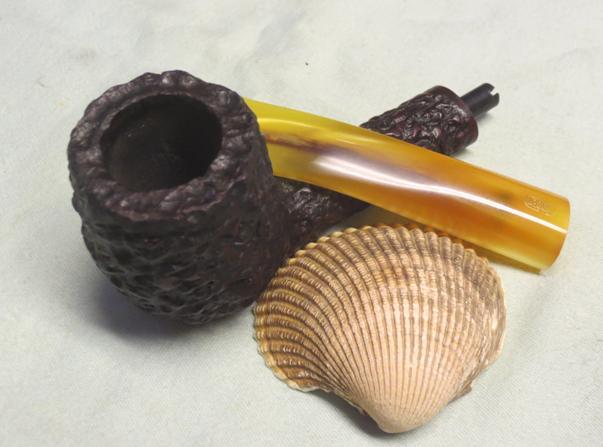
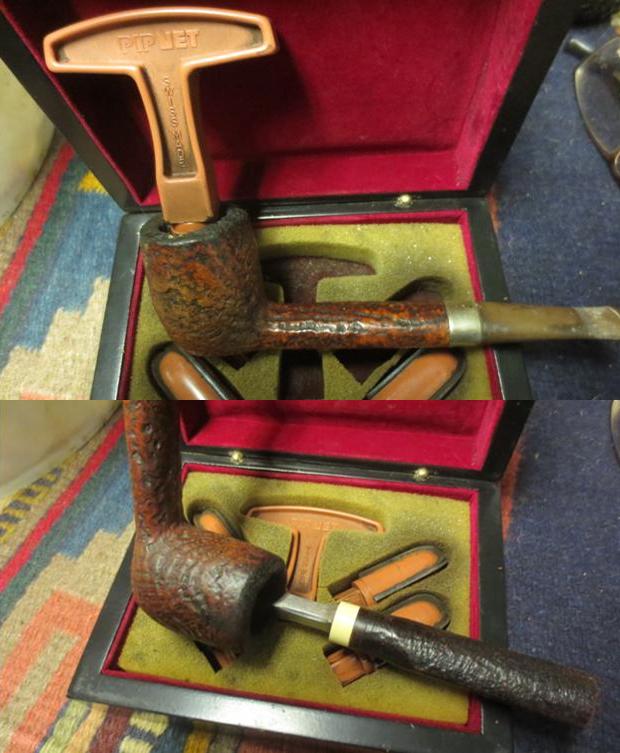
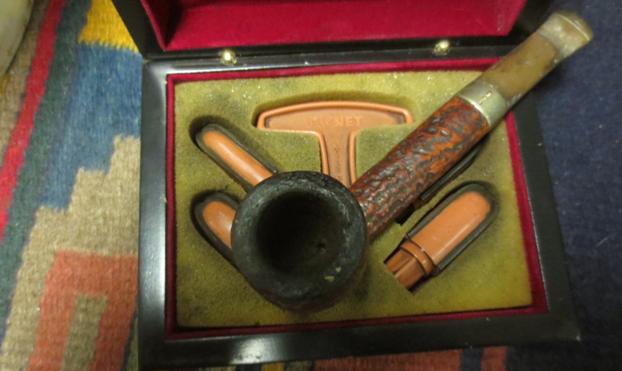
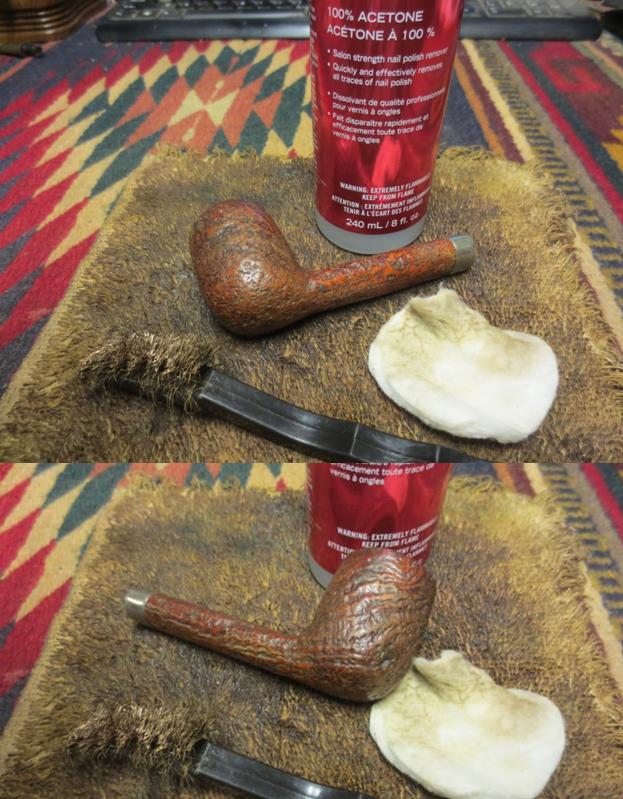
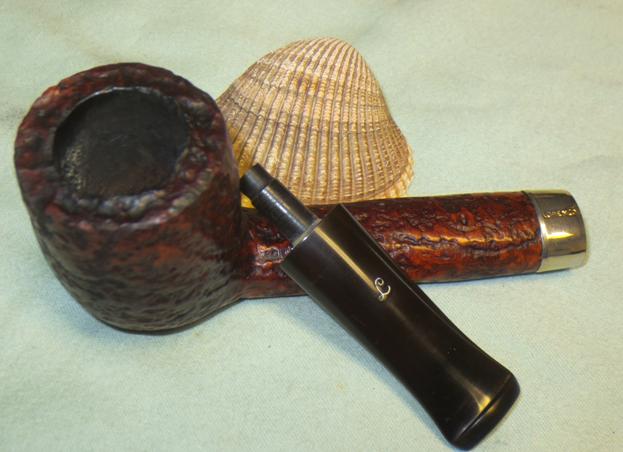
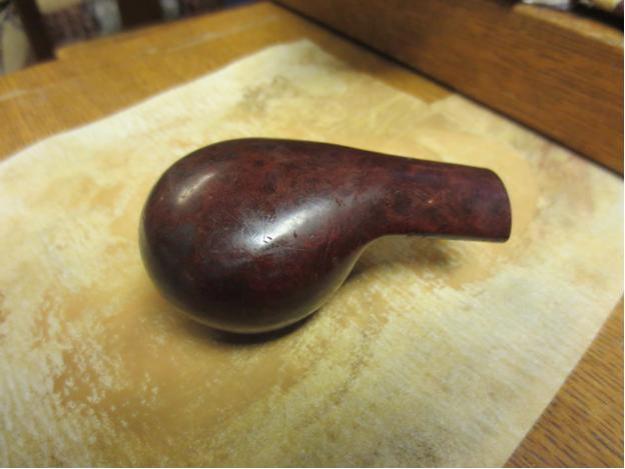
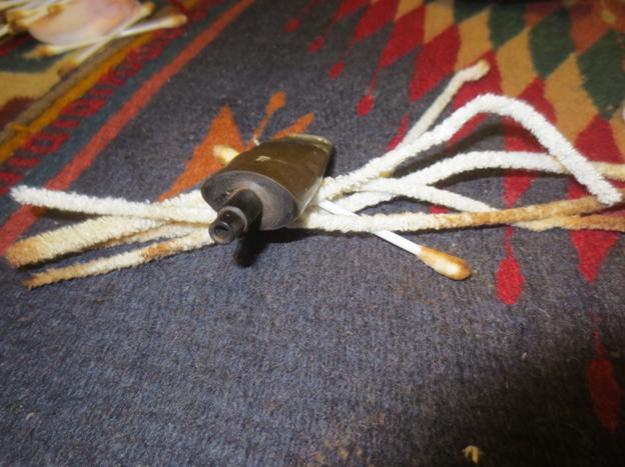
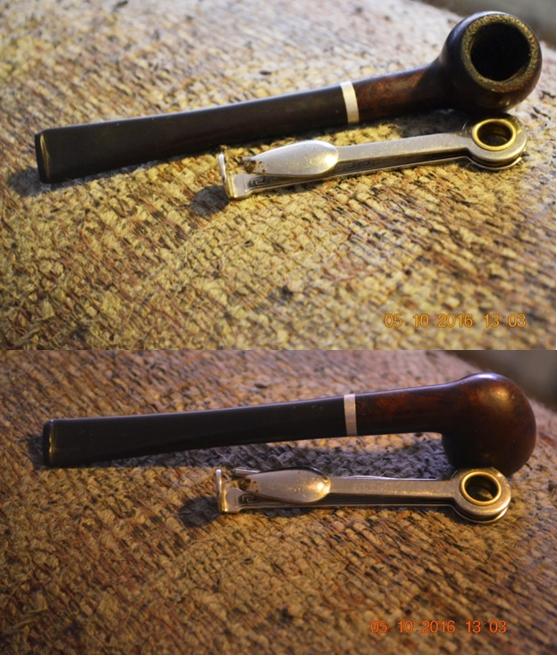
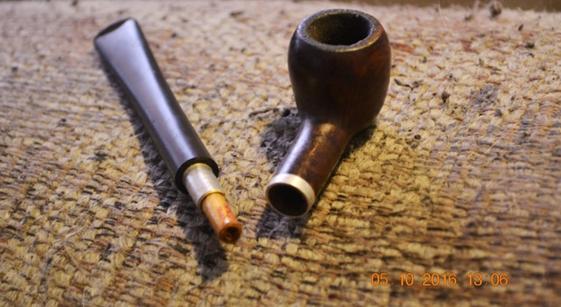
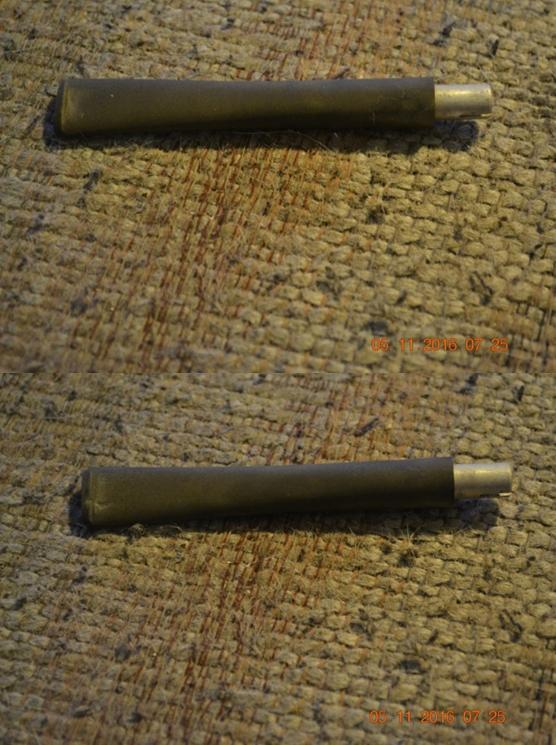
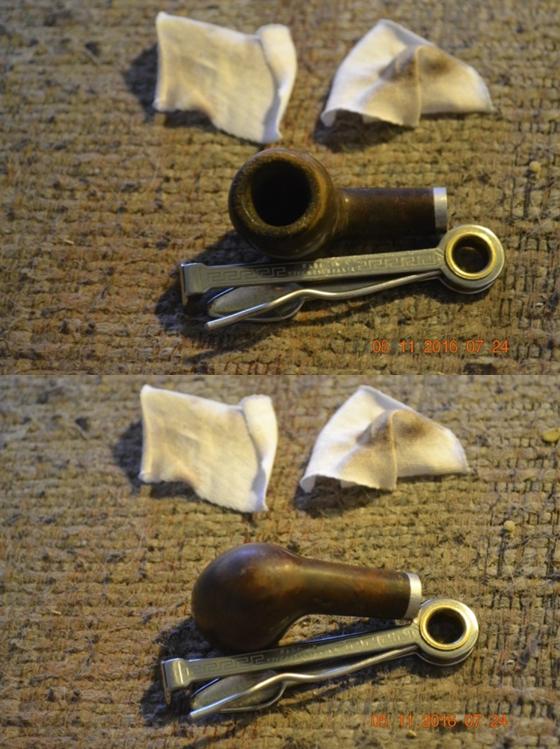
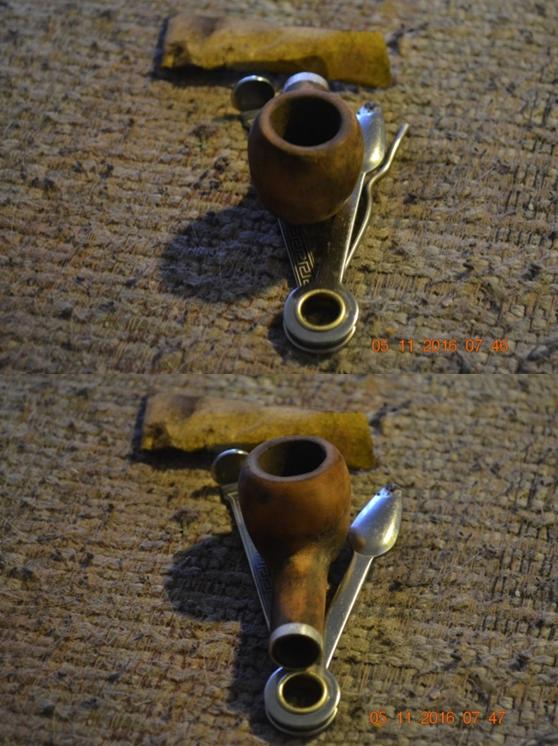
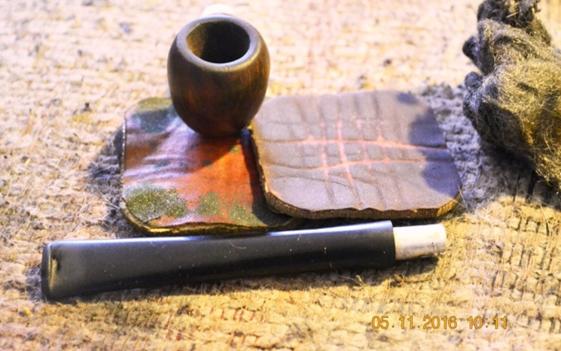
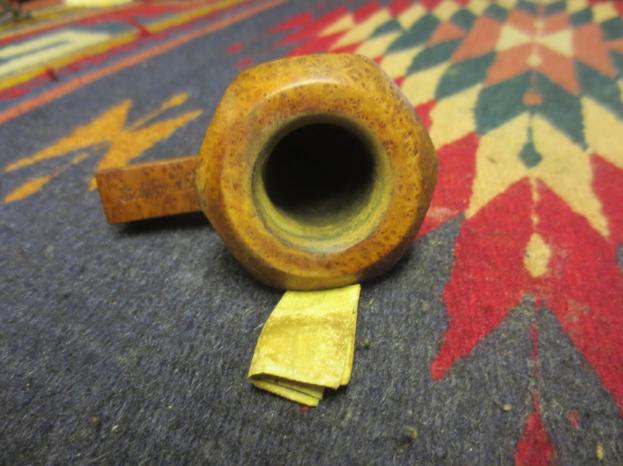
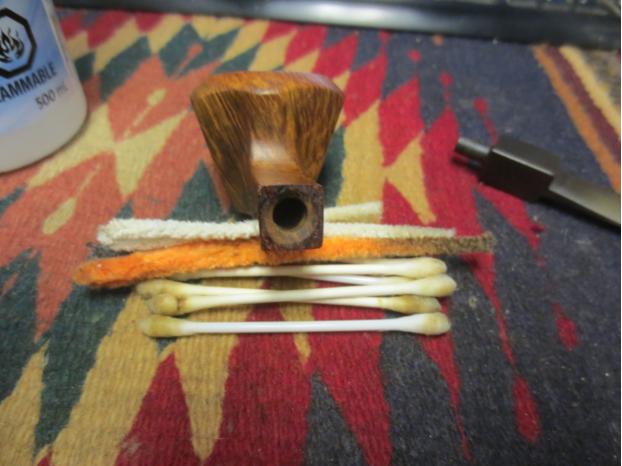
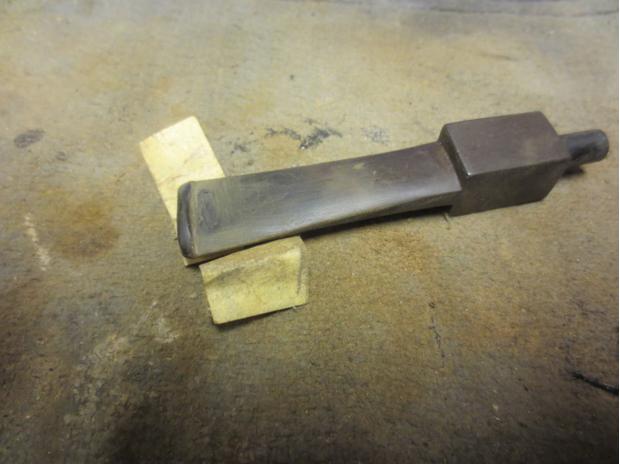
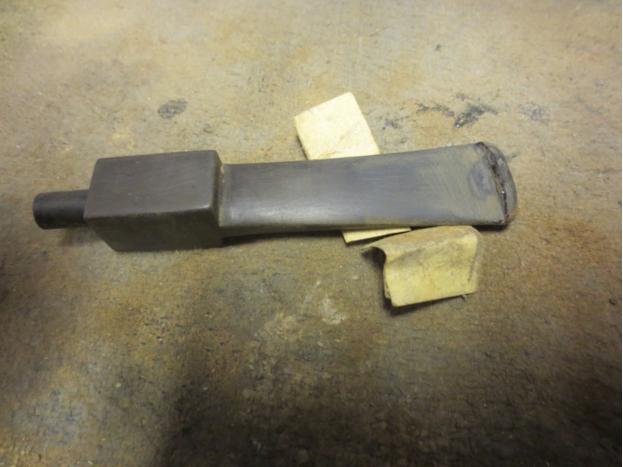
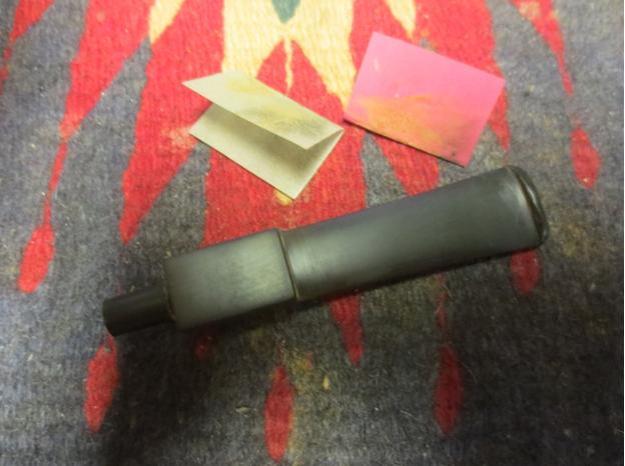
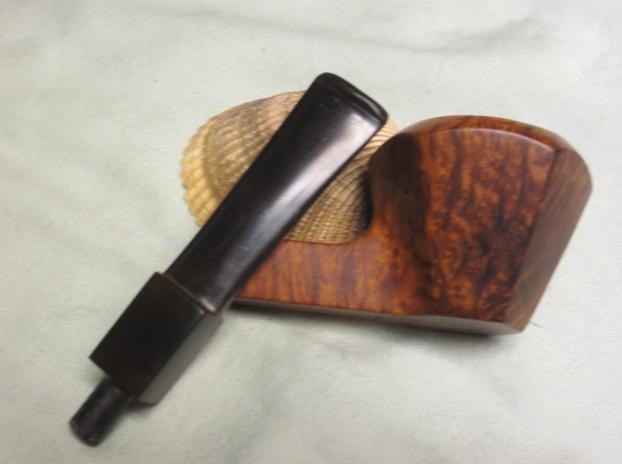
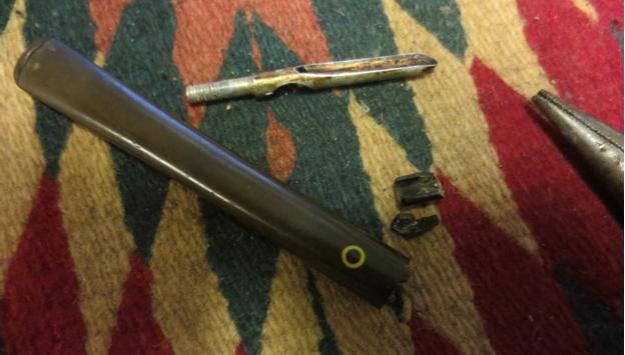
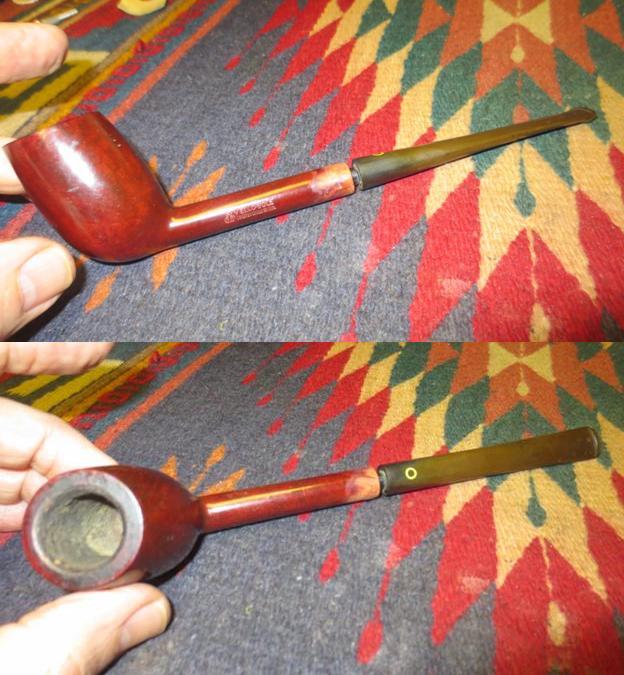
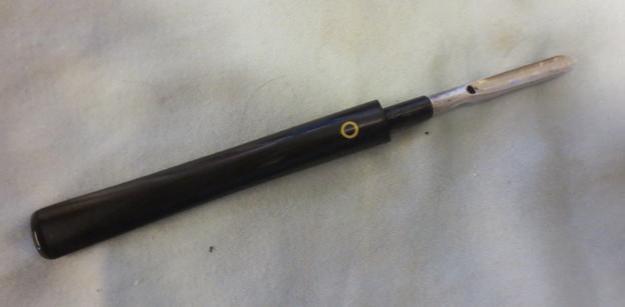
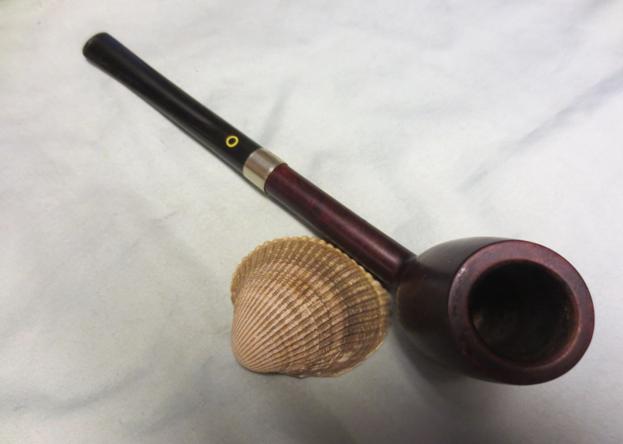
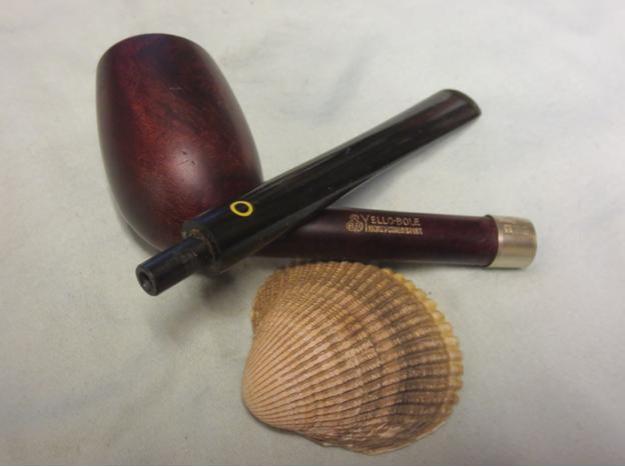
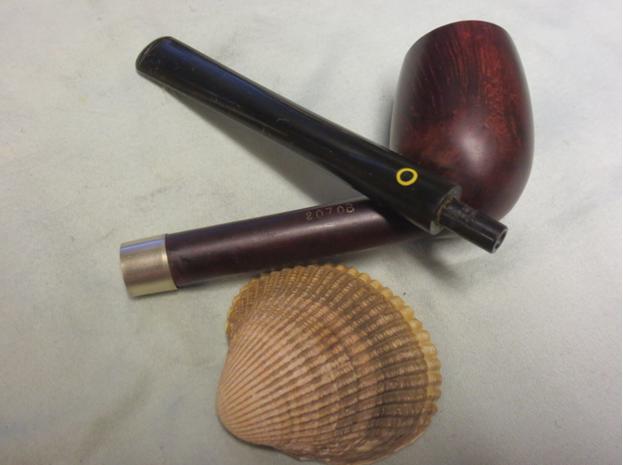
I worked on the Jobey Link and was able to dribble alcohol down the stem to soften the tars that held it in the stem. I wiggled it free. The photo below shows the pipe taken apart.Jobey7
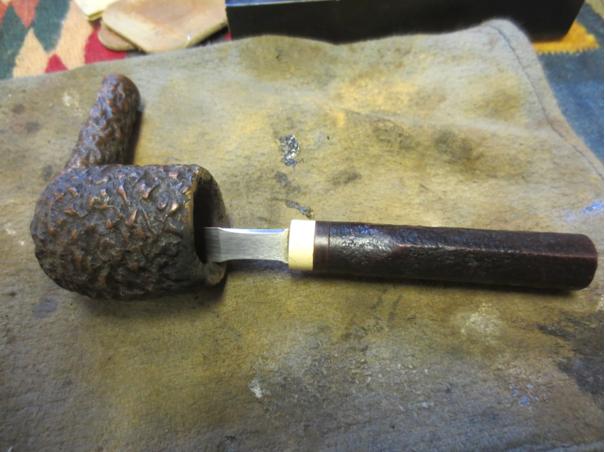
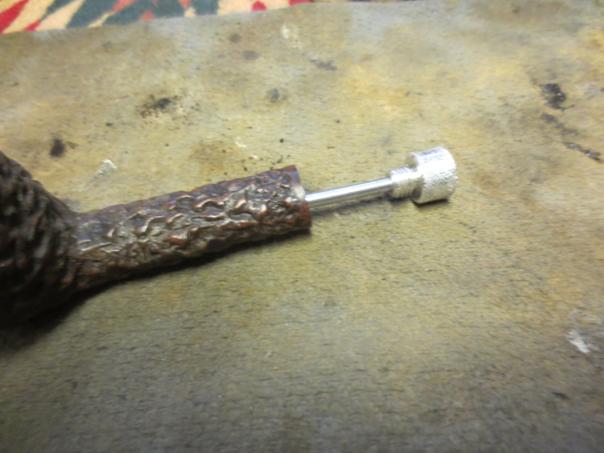
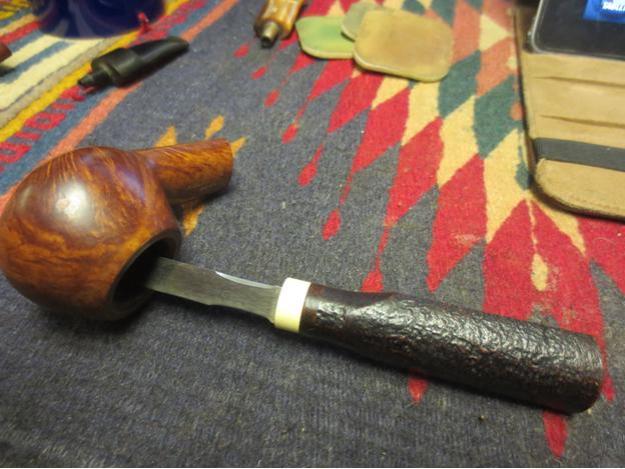
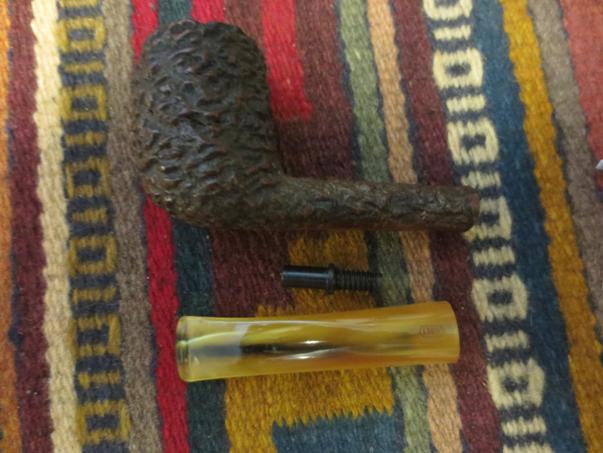
I started working on the bowl by reaming it completely. The cake was exceptionally. I hard I used the PipNet reamer with the first three cutting heads to take the cake back to bare briar. I used a Savinelli Pipe Knife to complete the job at the bottom of the bowl. When I had finished reaming the bowl I noticed that the airway into the bowl was absolutely invisible. I could not see it on the back wall of the bowl. I used the drill bit from the KleenReem pipe reamer to hand drill out the airway from the shank into the bowl. The tars in the shank were almost as hard as the cake in the bowl. It took a lot of elbow grease and pressing the bit into the airway. I was finally rewarded with it popping through into the bowl.Jobey8 Jobey9 Jobey10
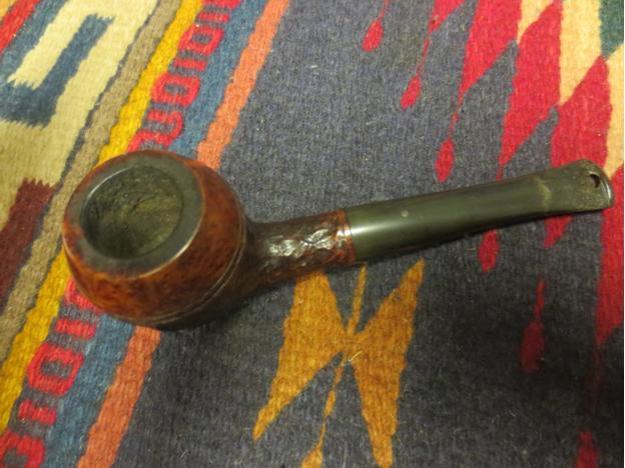
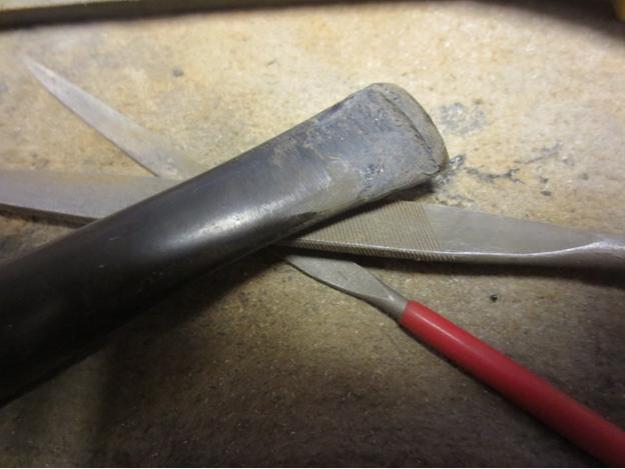
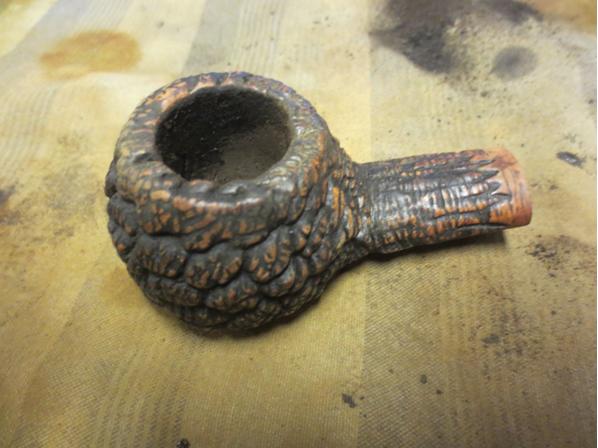
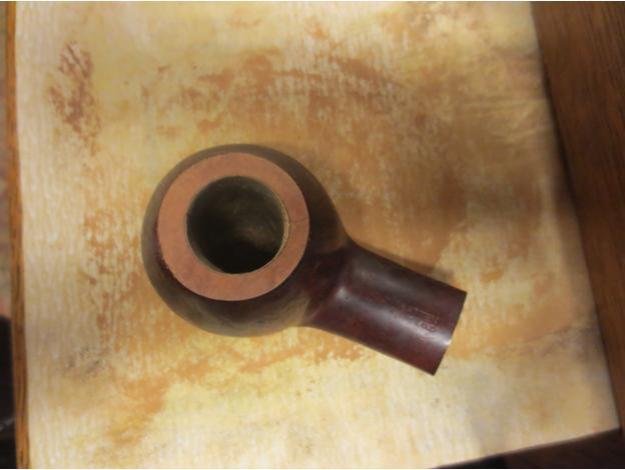
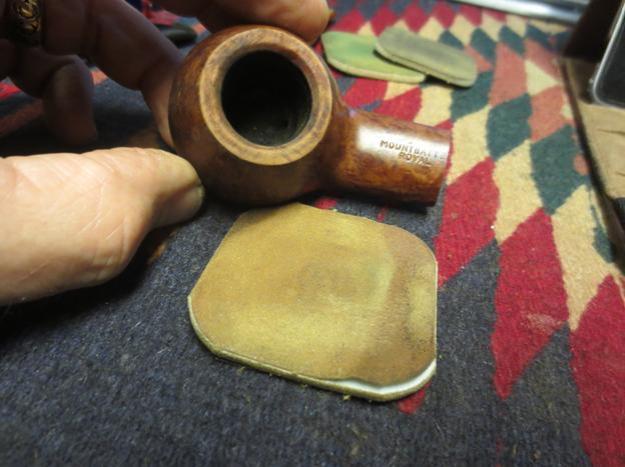
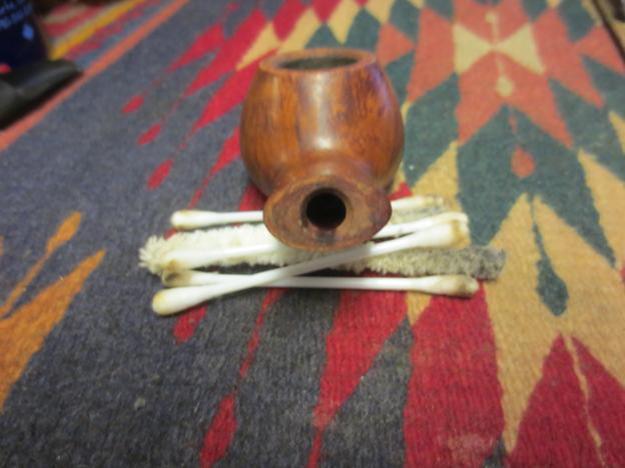
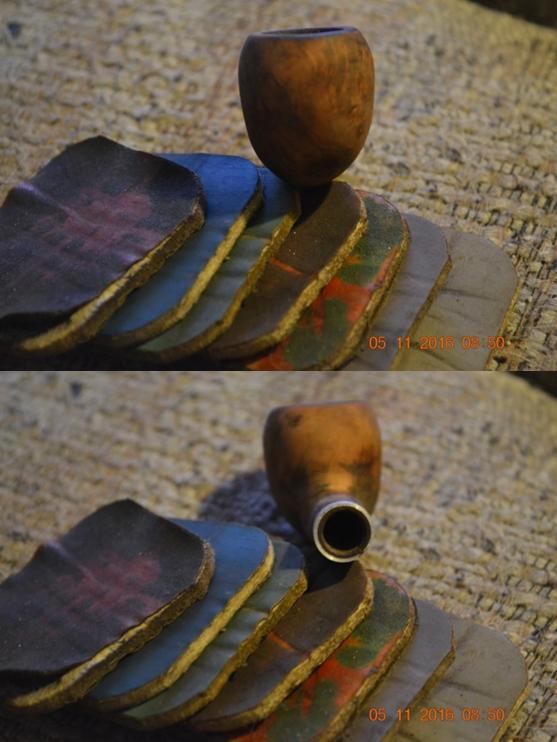
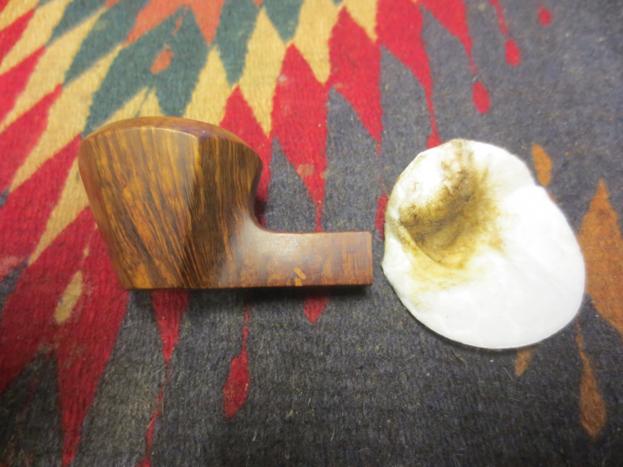
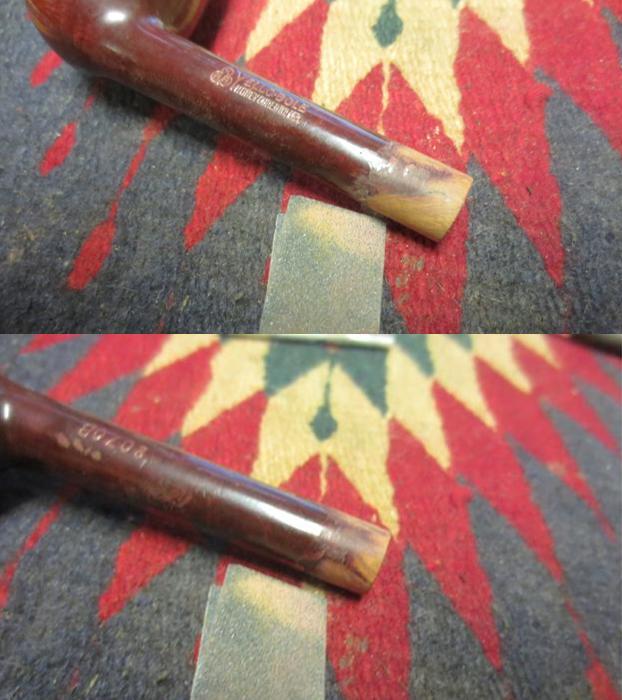
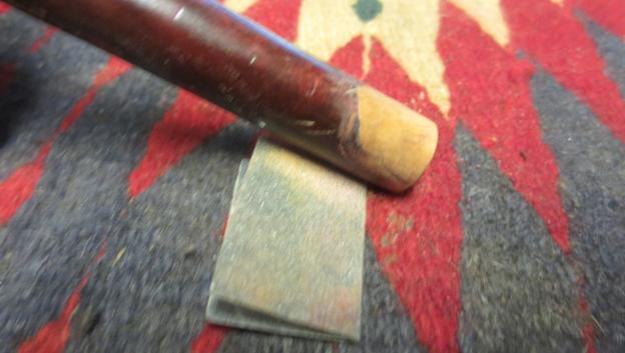
With the rough cleaning done on the bowl and shank I decided to work on the rim surface. I topped it with 220 grit sandpaper on the topping board. (If you look closely at the shank end in the photo it appears that there is a crack in the shank. It is merely a scratch in the top surface of the briar at that point.)Jobey11
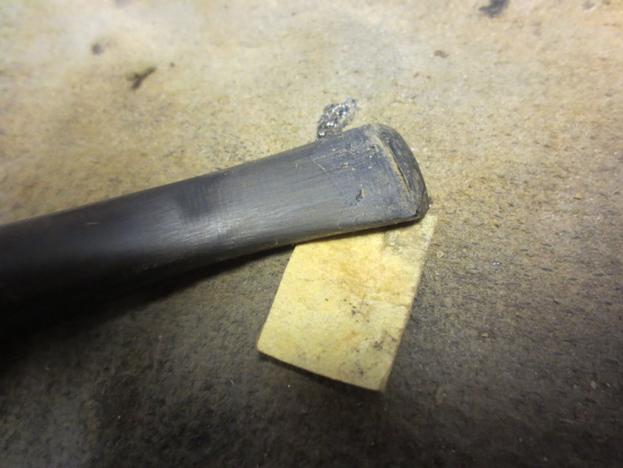
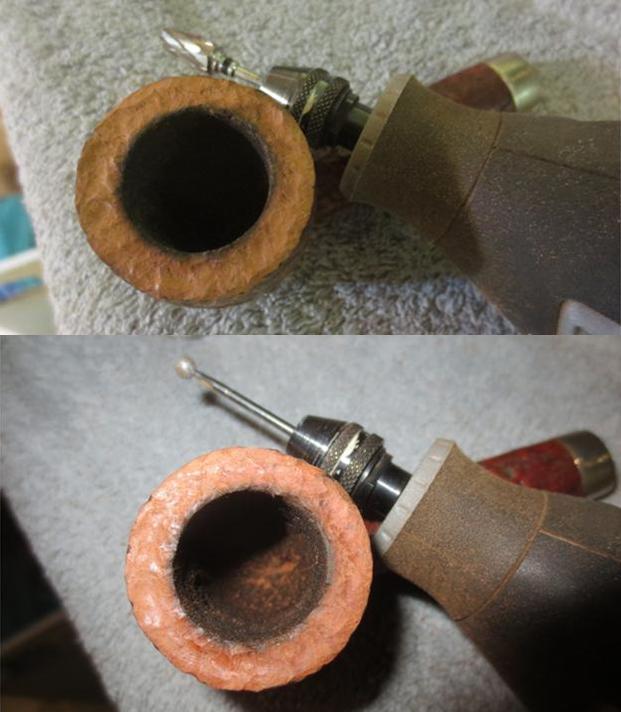
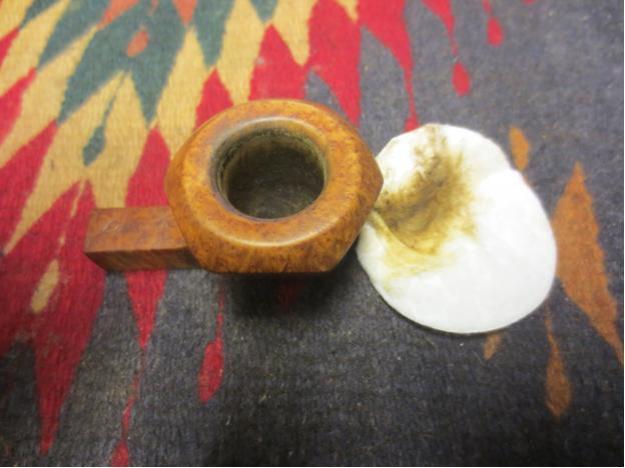
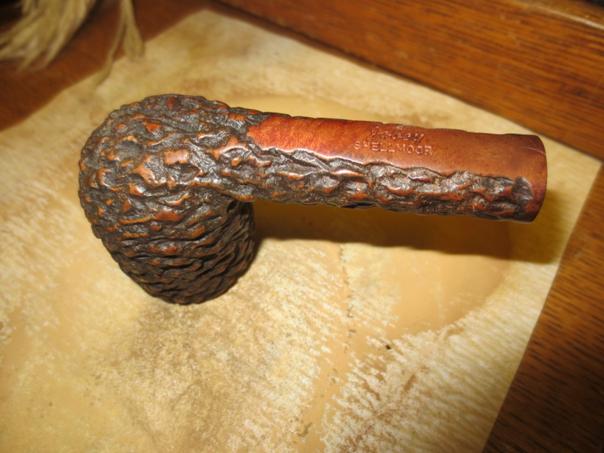
After topping it for a while I took a photo to show the extent of the damage to the rim. This photo clarifies what I saw in the original scan of the bowl.Jobey12
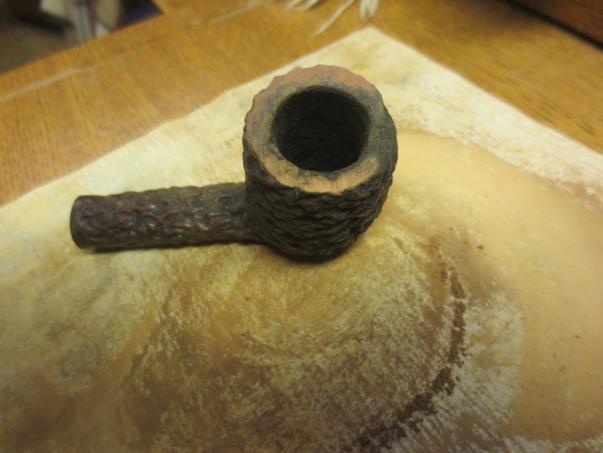
I continued topping the bowl until I got to solid wood under the burned area. The rim surface was darkened but the briar was hard. I picked the burned area on the front of the bowl clean of soft burned wood with a dental pick.Jobey13
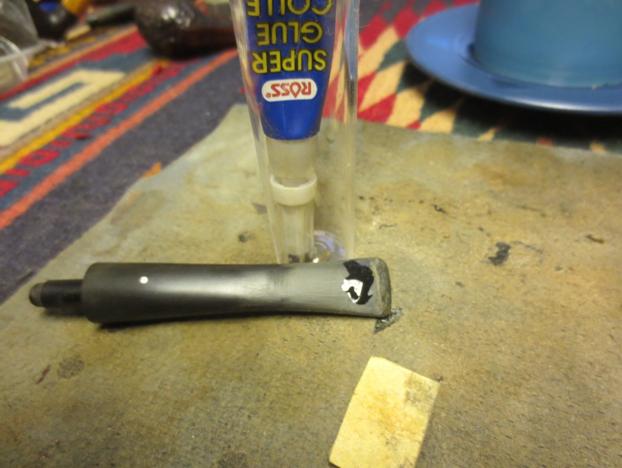
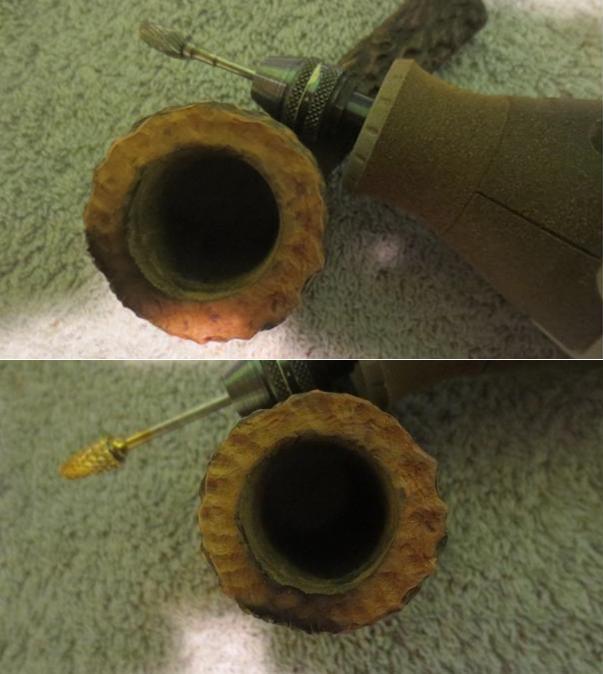
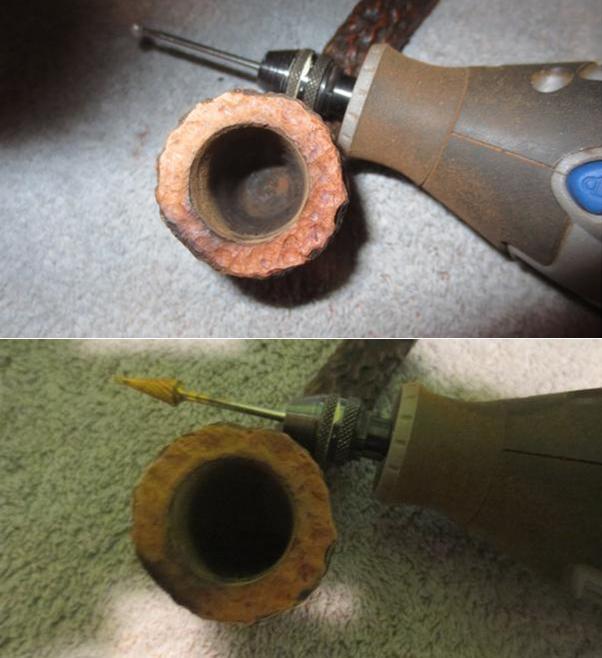
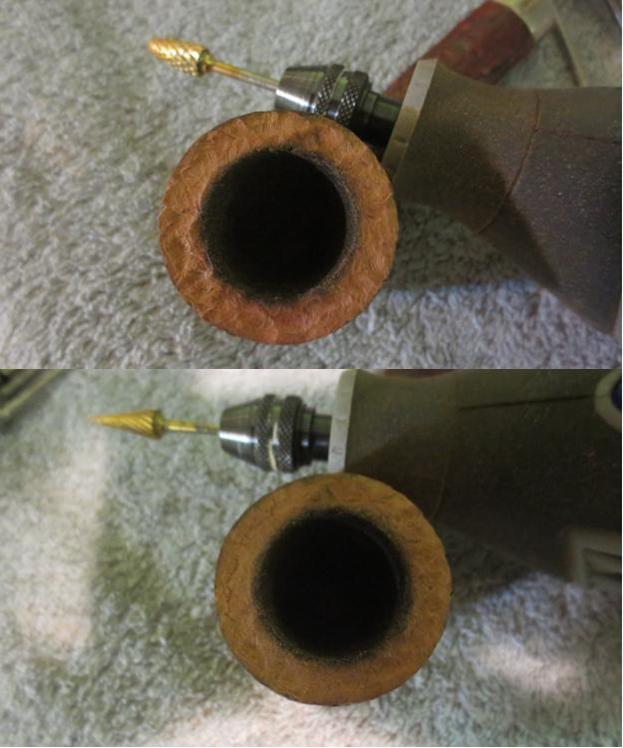
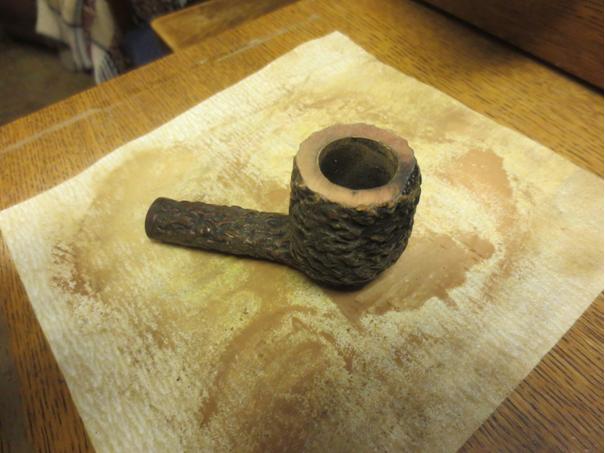
I was not too worried about the rim darkening as I intended to rusticate it again to match the rough finish of the bowl. I filled in the burned area with clear super glue to build it up. I also intended to rusticate the burned area on the front of the bowl at the same time. The next series of photos show the process of rustication and the different burrs I used on the Dremel to get the pattern on the rim I wanted. I also worked on the front of the bowl to remove the damage of the burned area with the same burrs. I tried to match the pattern on the rest of the bowl. The success of that will be seen in later photos. Jobey14 Jobey15 Jobey16 Jobey17
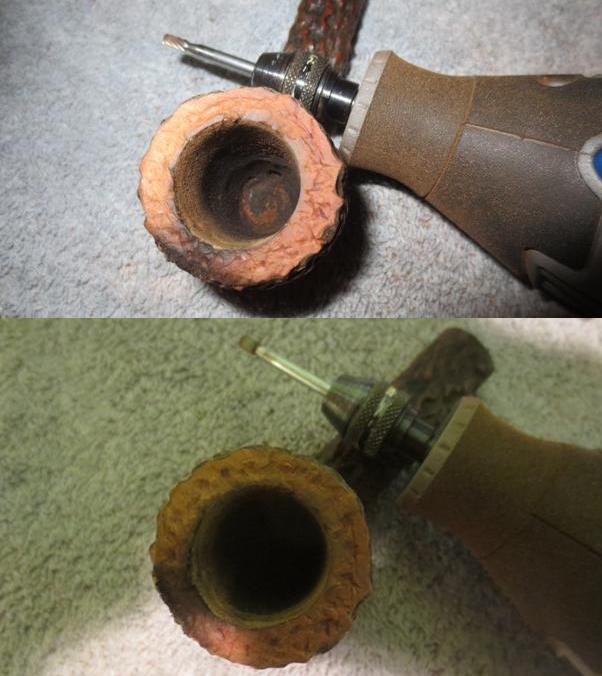
Once I had the work down with the Dremel and burrs I took it back to the worktable and used a brass bristle brush to knock of the sharp edges and the loose pieces of briar from the rim and the bowl front. The second and third photos show the bowl front and the work that I did to match the pattern in that area. Jobey18 Jobey19
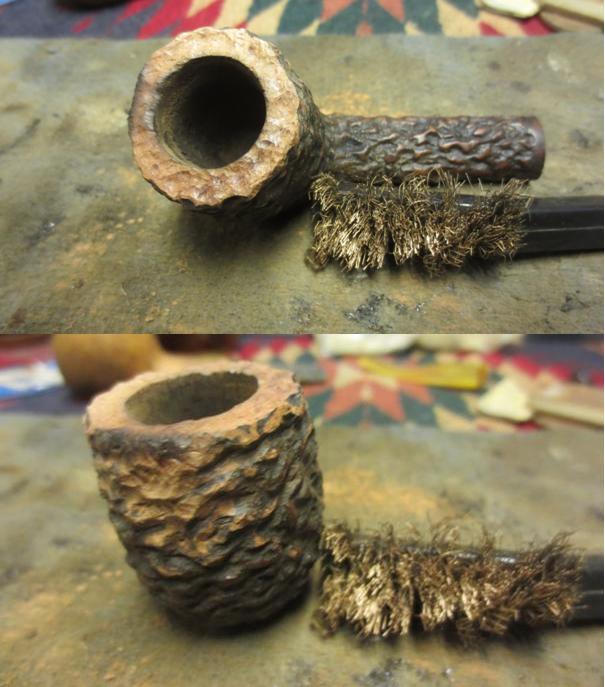
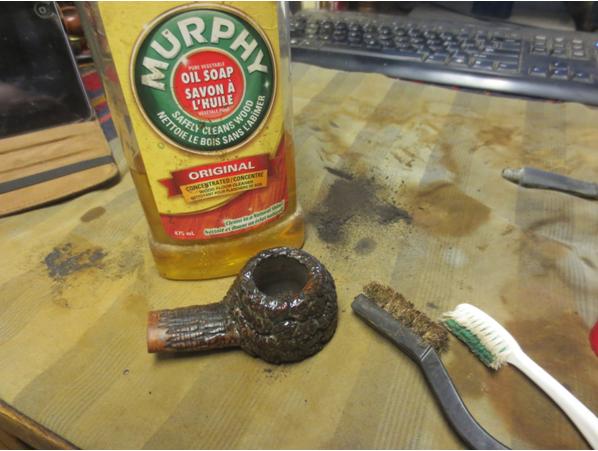
I scrubbed the briar with Murphy’s Oil Soap and a tooth brush to remove the grime so that I could restain the bowl. I rinsed it with warm running water to remove the soap from the grooves and crevices along with the loosened grime.Jobey20
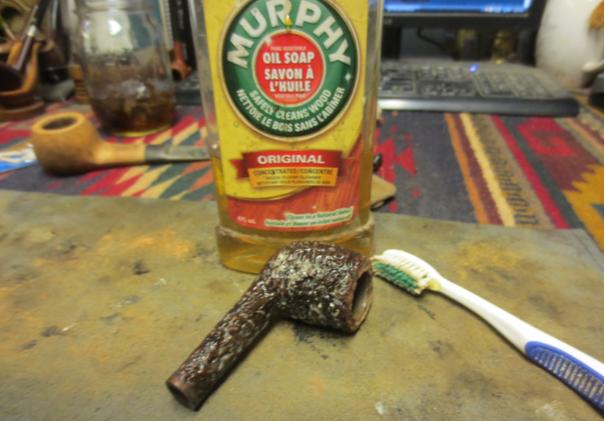
I used a black Sharpie to colour in the depths of the rustication on the rim and the repaired area at the front of the bowl. I wanted to approximate the contrast in the rest of the finish.Jobey21
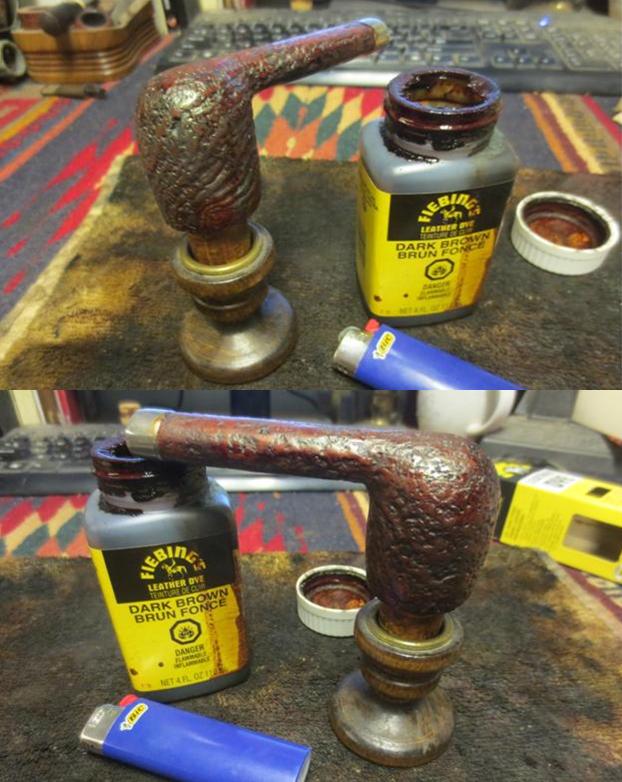
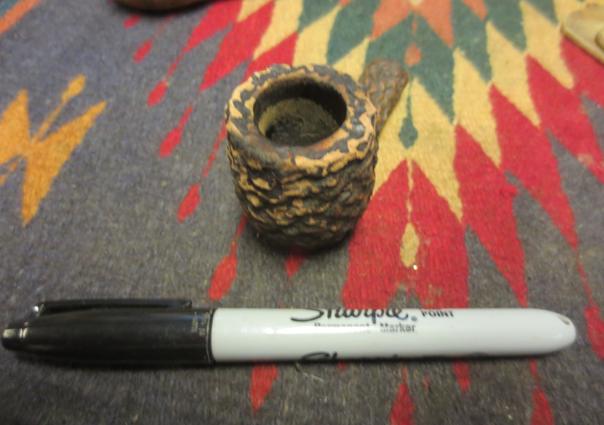
I restained the bowl with a dark brown aniline stain and flamed it to set it in the grain. I repeated the process until the coverage was what I wanted.Jobey22
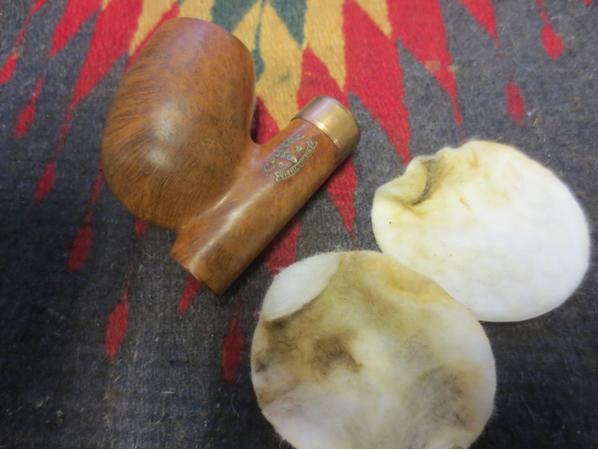
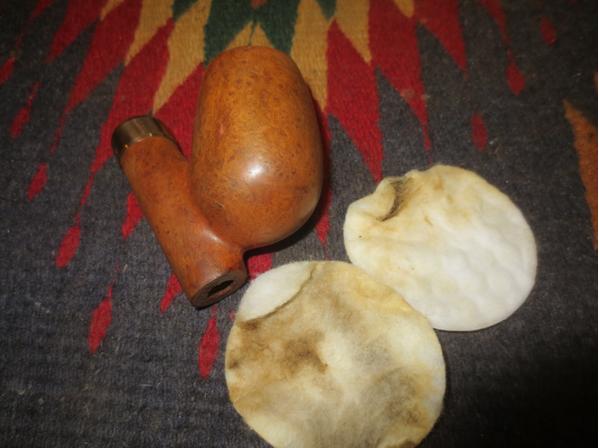
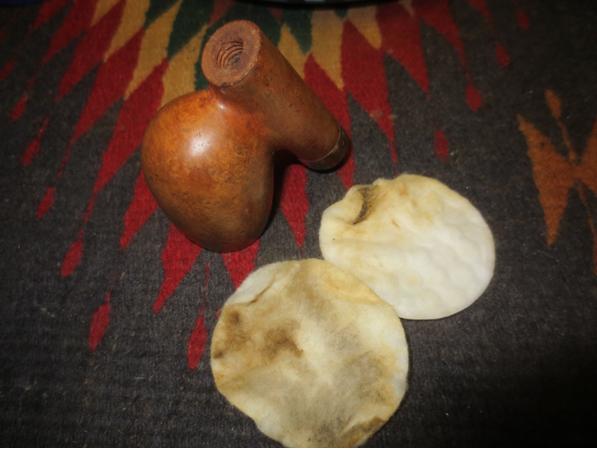
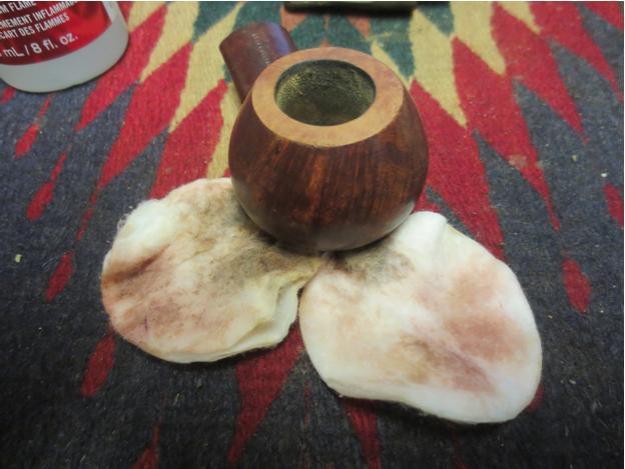
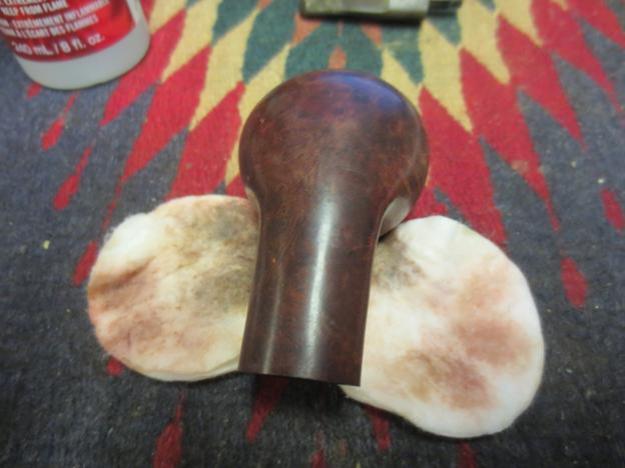
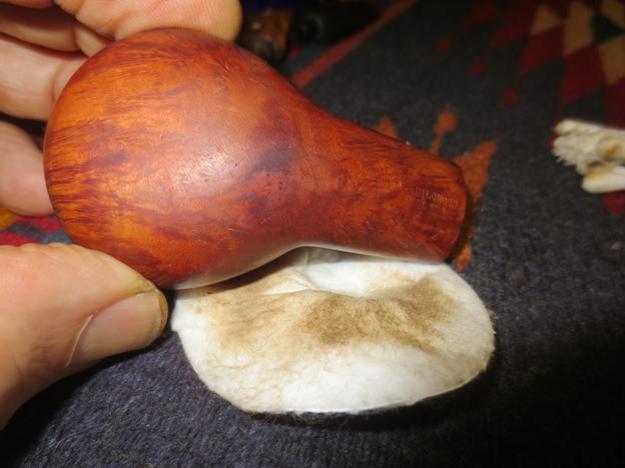
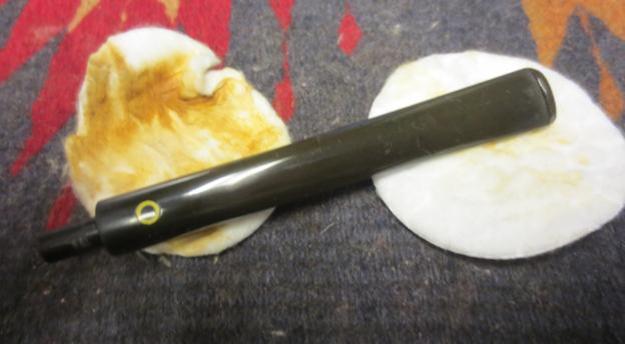
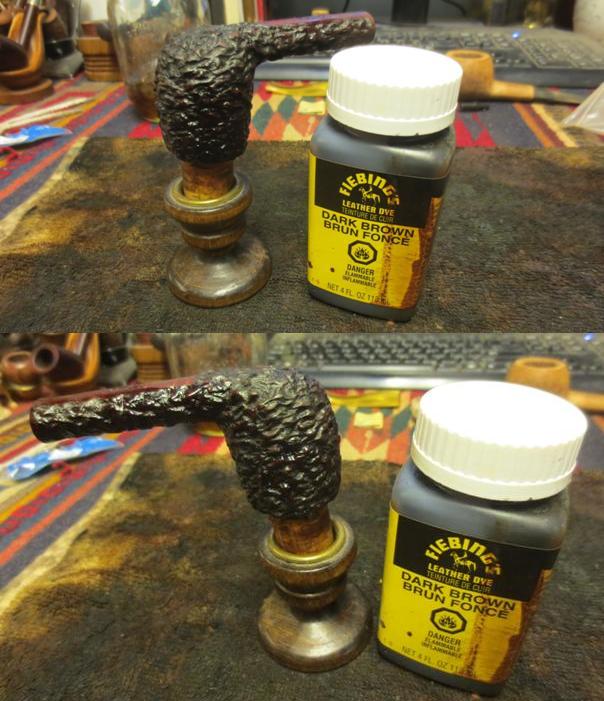
I wiped down the bowl with alcohol on cotton pads to remove some of the dark brown stain from the high spots on the bowl and add some contrast and depth to the finish.Jobey23 Jobey24
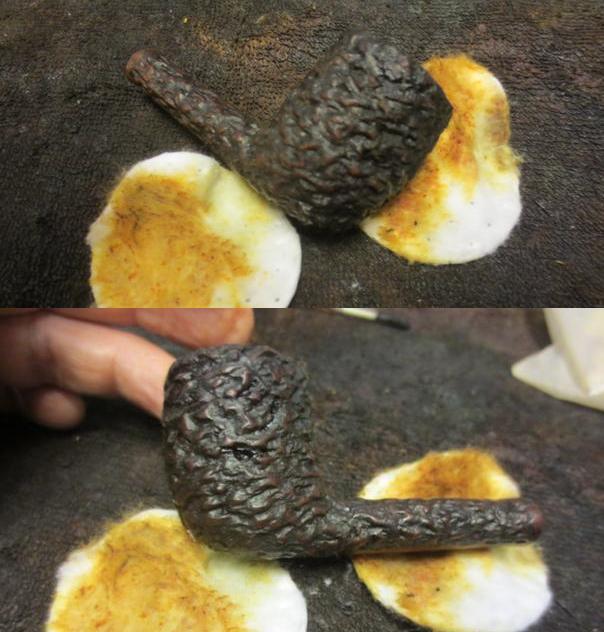
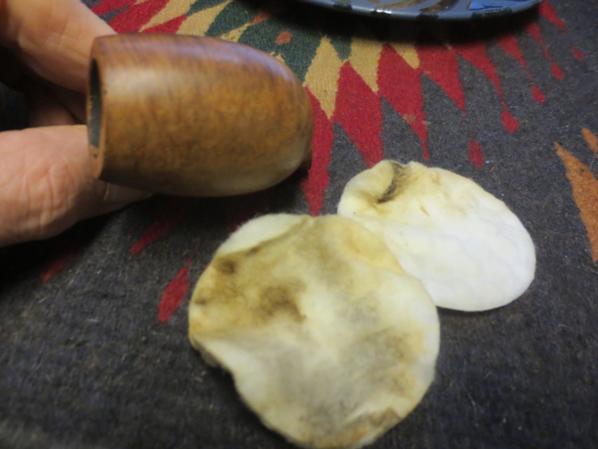
I took another close-up photo of the rustication on the rim to show what it looked like with the stain coat.Jobey25
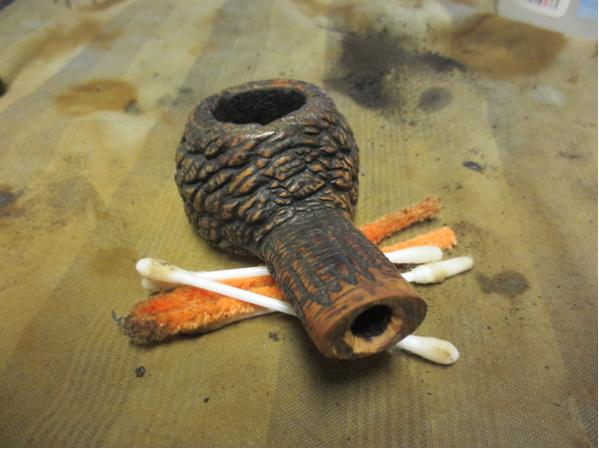
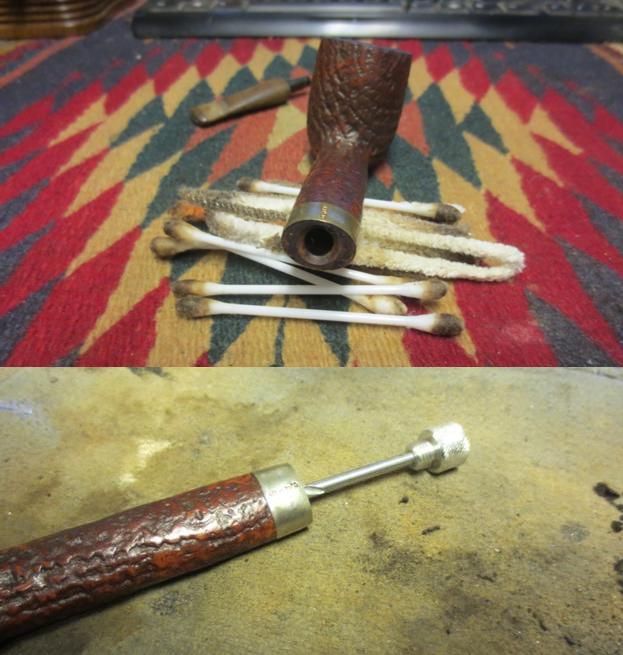
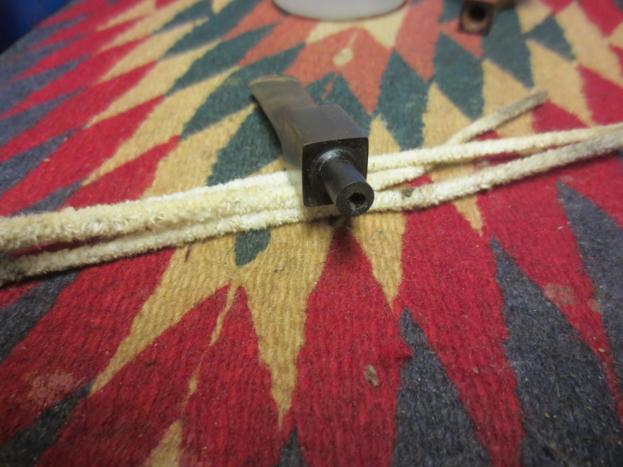
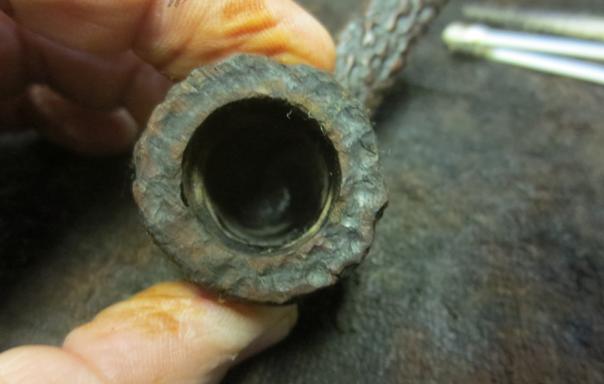
I cleaned out the mortise threads and the airway with pipe cleaners, cotton swabs and alcohol.Jobey26
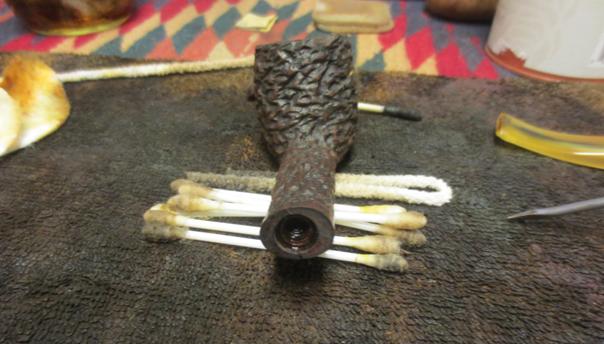
Once it was clean I greased the threads on the Jobey Link with Vaseline and turned it in place in the shank with a small screwdriver.Jobey27
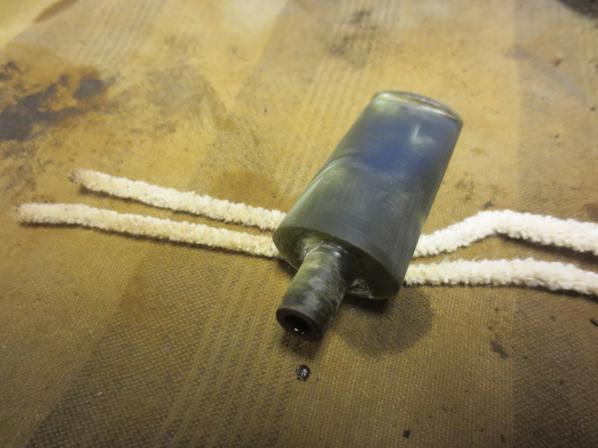
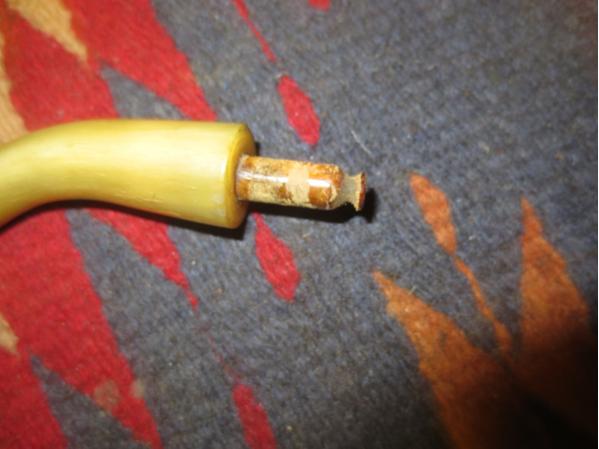
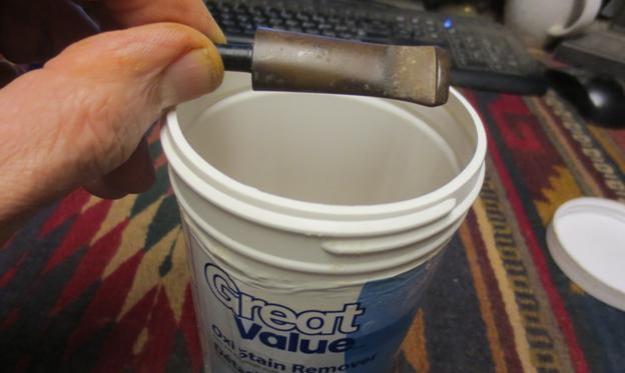
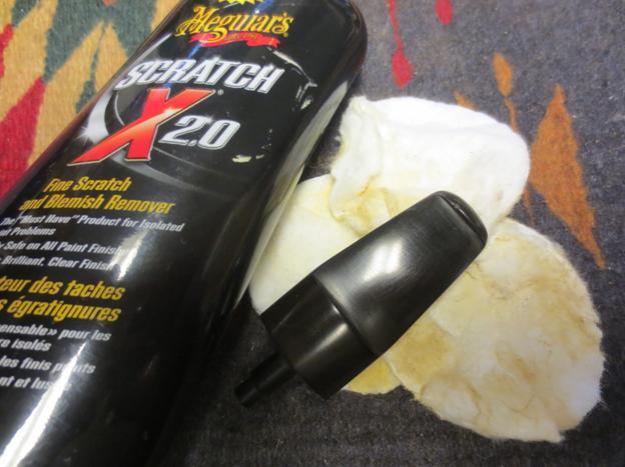
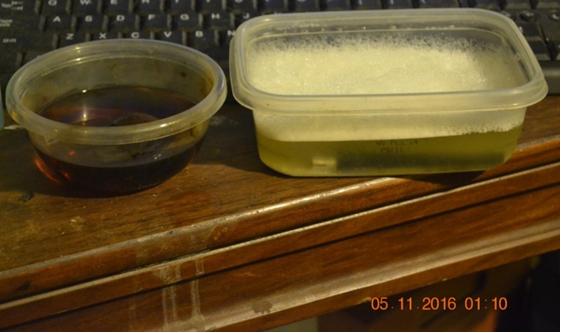
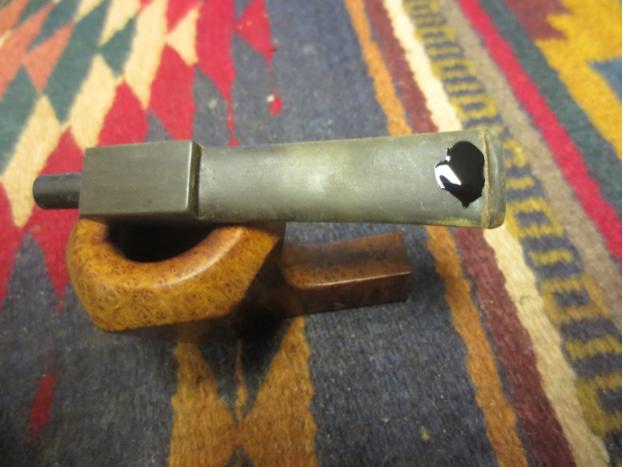
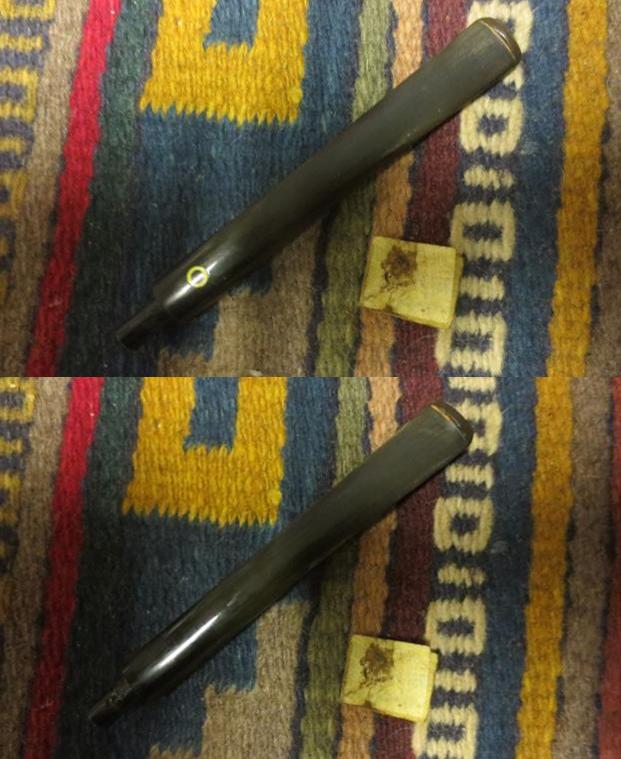
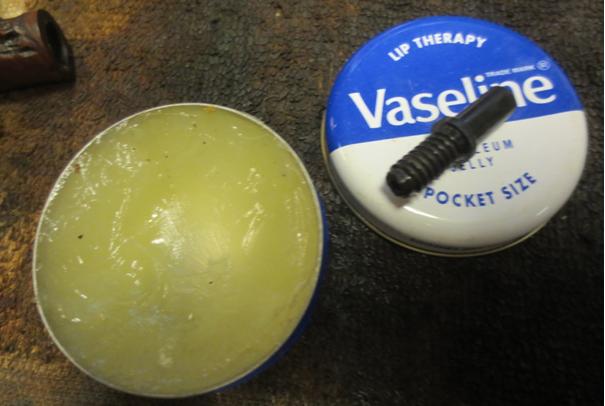
The stem turned out to be another issue that I had not taken into real consideration. The dark stain of tars and oils in the airway turned out to be a real pain. I used cotton swabs and alcohol to clean out the portion of the stem that slid over the Link. That was the easy part. I then scrubbed out the airway with alcohol and pipe cleaners. I used a dental pick to clean out the slot in the button. The tars in the airway were stubborn. I mixed a batch of Oxyclean, inserted pipe cleaners in the airway to wick the mixture up the stem and then dropped the pipe in the mixture to soak overnight. I took it out in the morning and scrubbed it with several different brushes and pipe cleaners. I removed about 50% of the black in the stem but not all of it. I put it back in the Oxy soak for another night.Jobey28
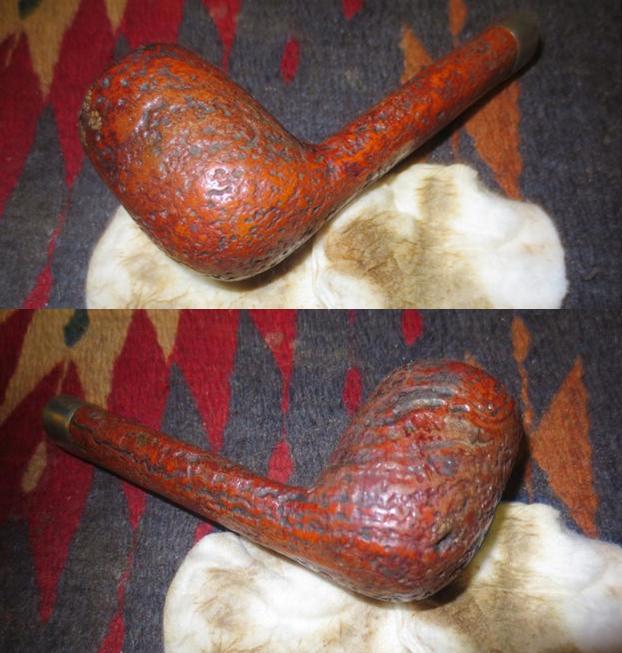
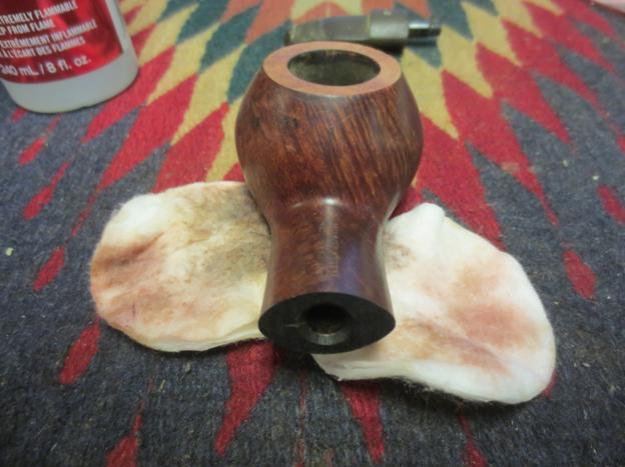
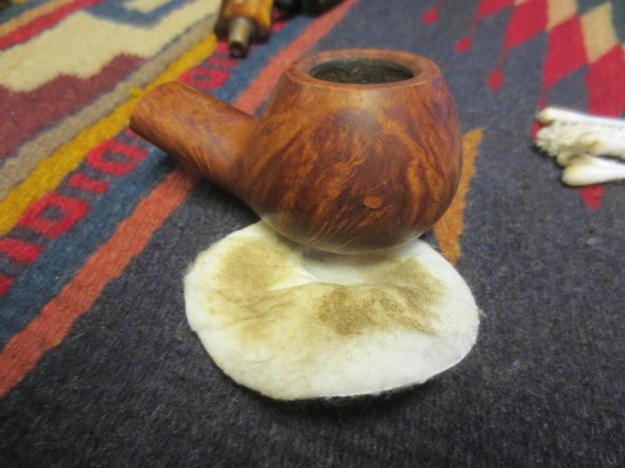
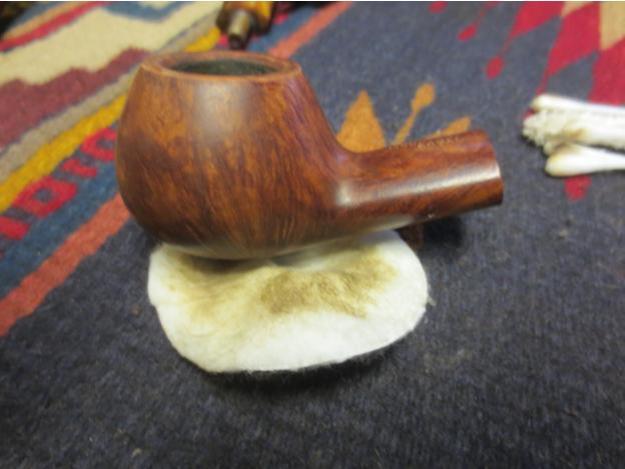
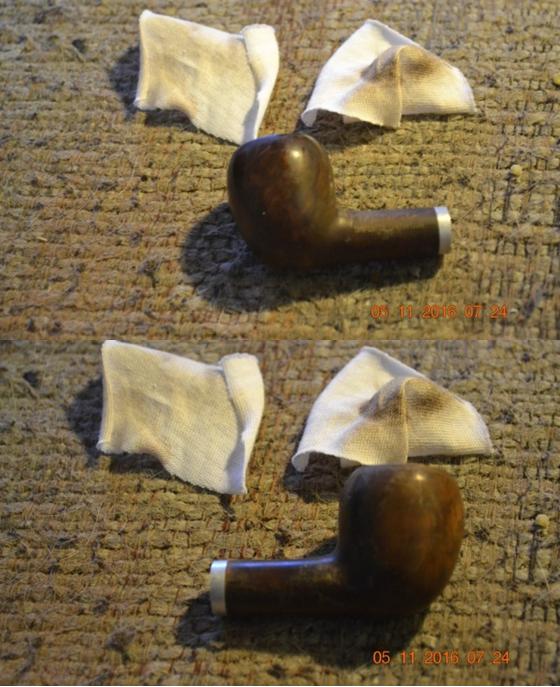
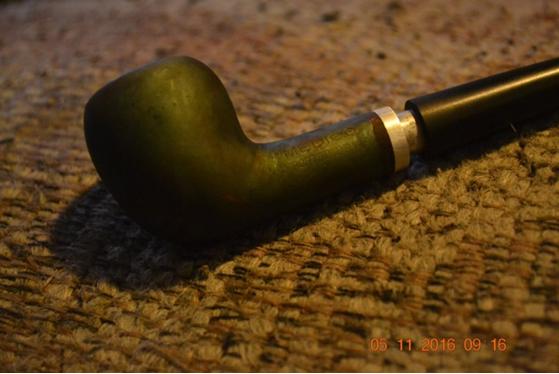
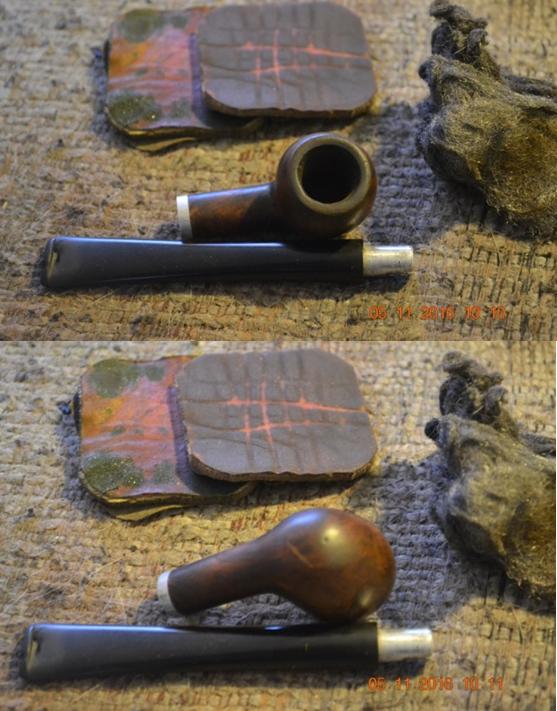
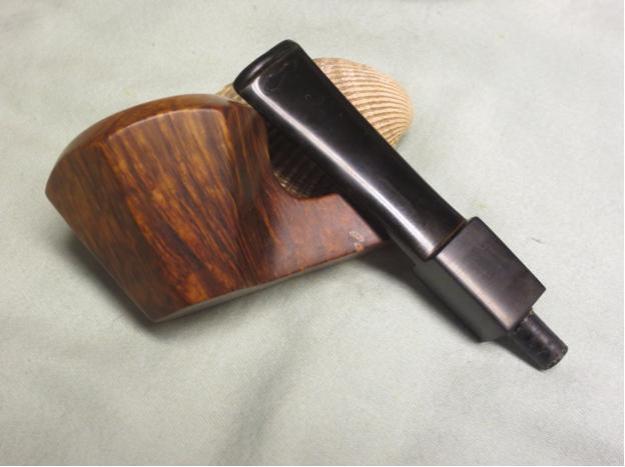
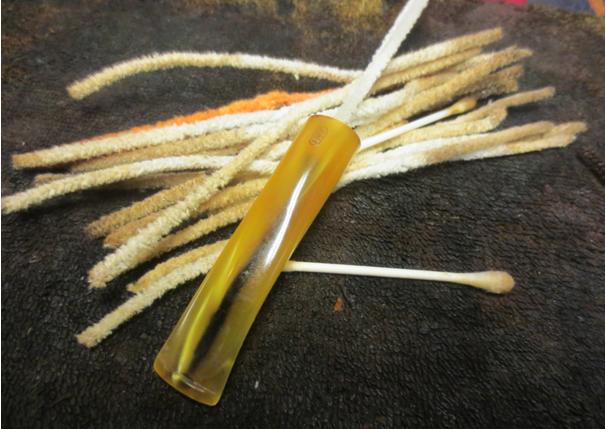
I buffed the bowl by hand with a shoe brush to see what the finish would look like. The following photos give a good picture of where things stand with the bowl at this point.Jobey29 Jobey30
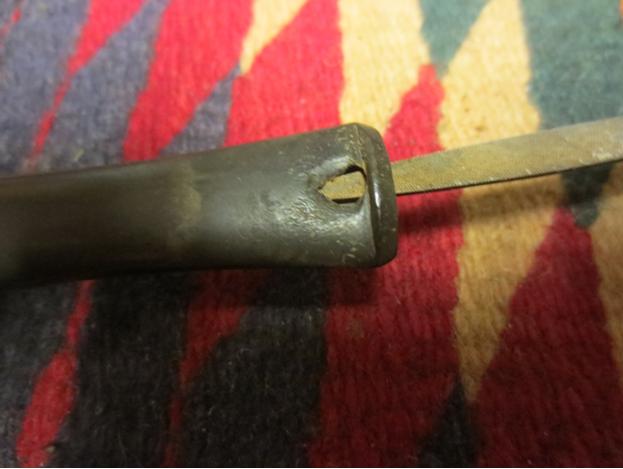
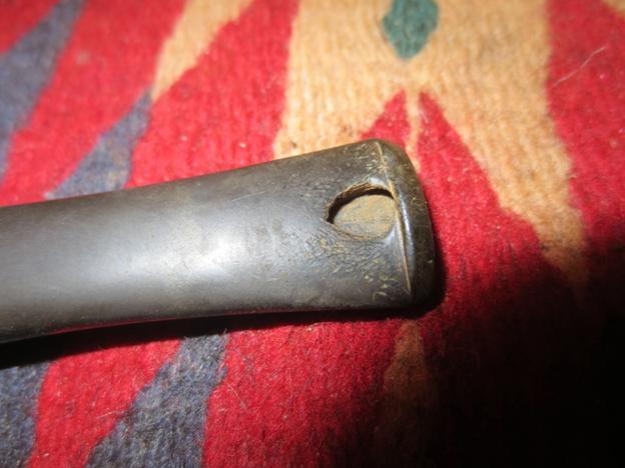
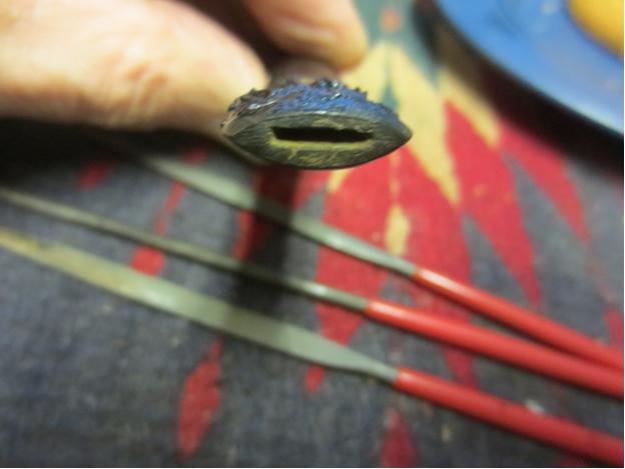
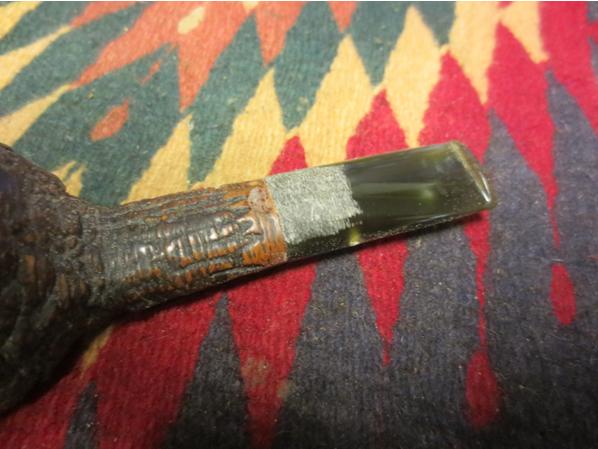
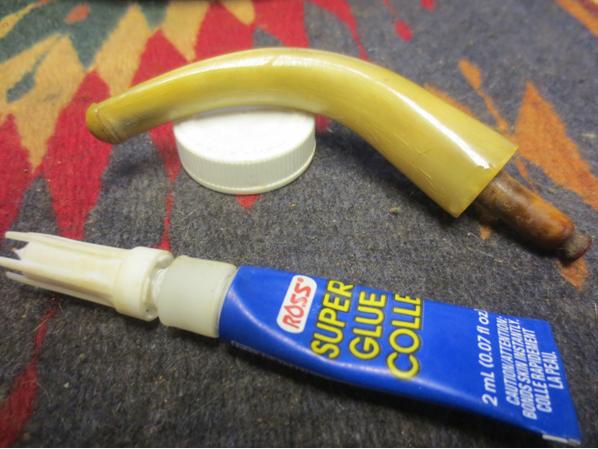
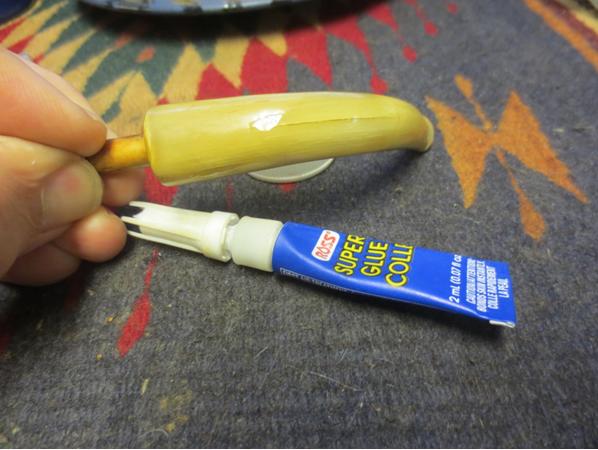
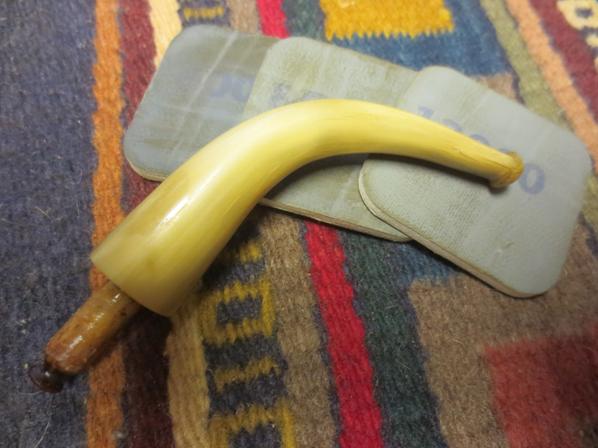
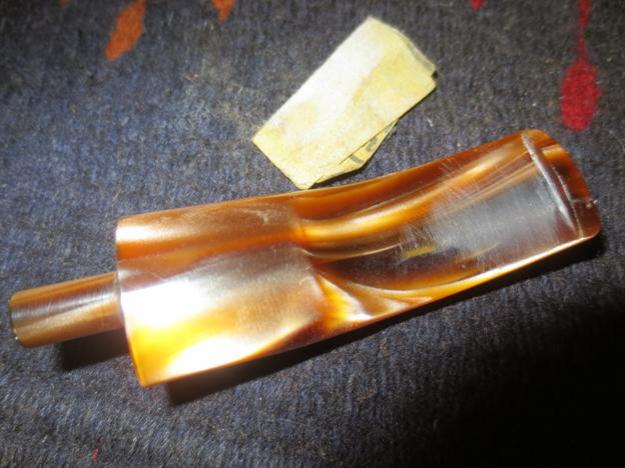
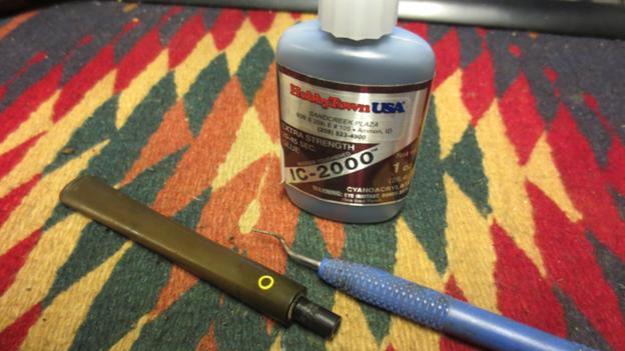
I took the stem out of the Oxy bath and cleaned out a bit more of the darkened area. I used pipe cleaners dipped in Bar Keepers Friend scouring powder and was able to get out more of the tars and darkening. I stopped for a little while and worked on the externals. There were several deep tooth marks in the stem near the button on the top and bottom sides. I sanded and cleaned the stem then filled the tooth marks with clear super glue. When the glue set I sanded the repairs smooth to match the surface of the stem.Jobey31 Jobey32
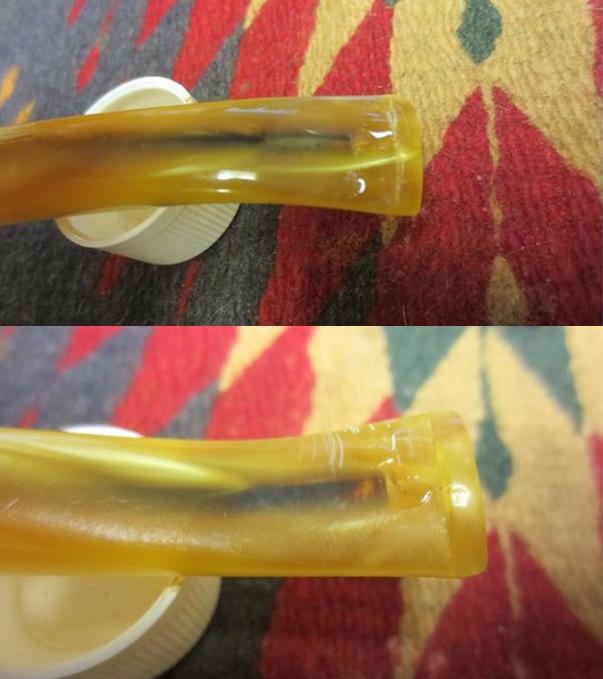
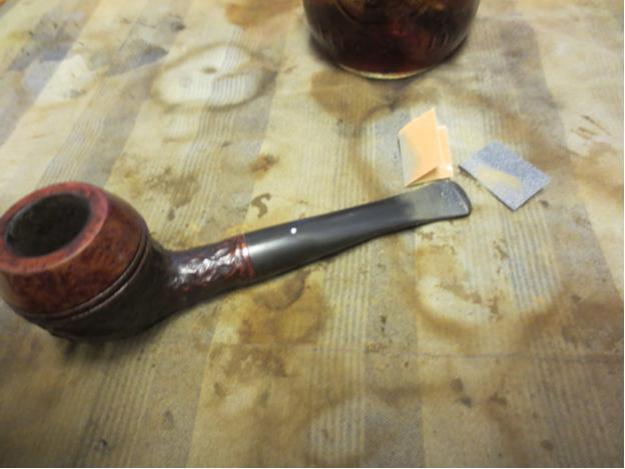
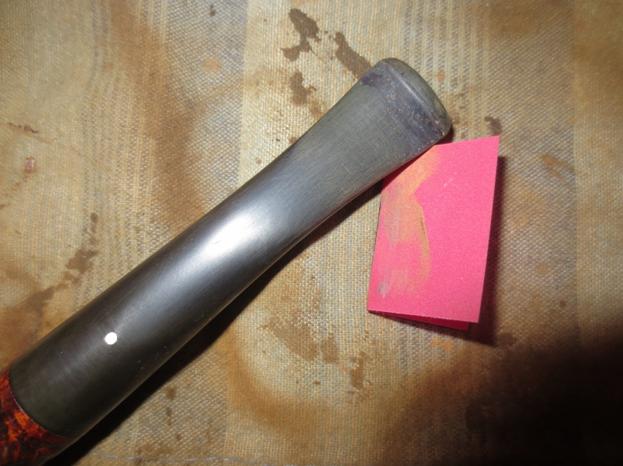
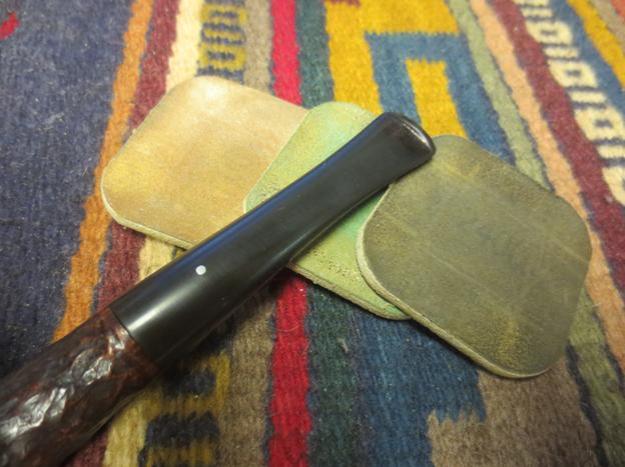
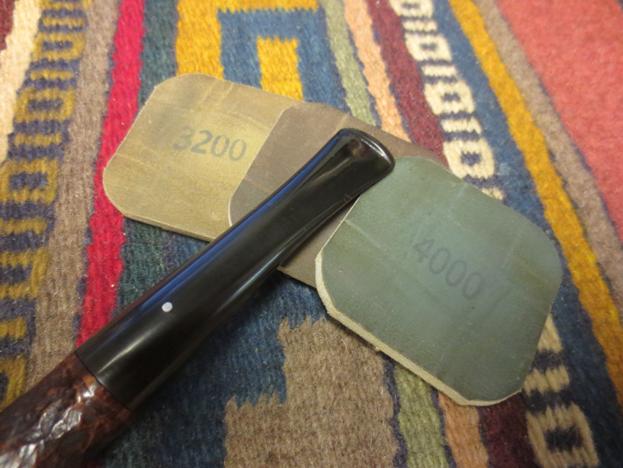
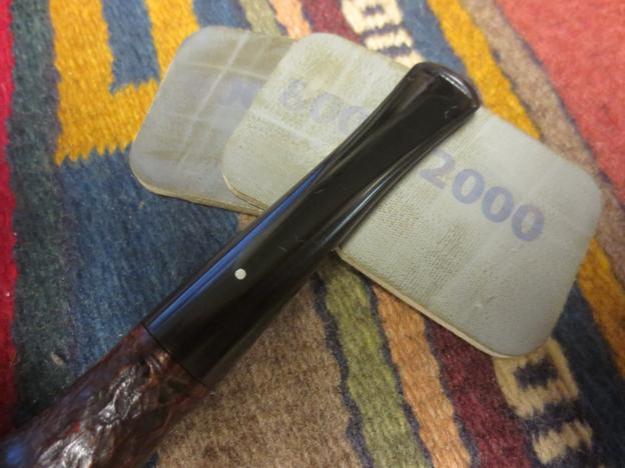
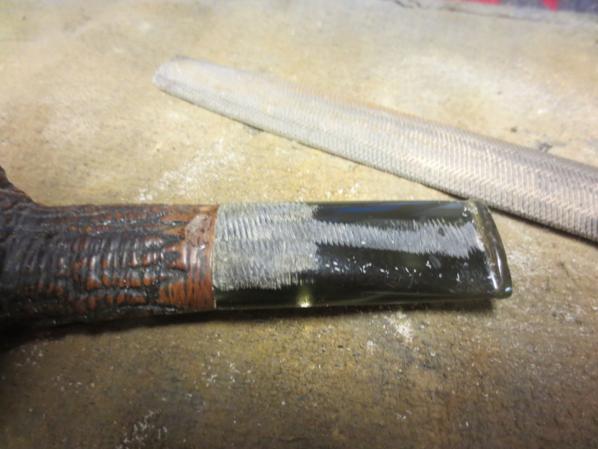
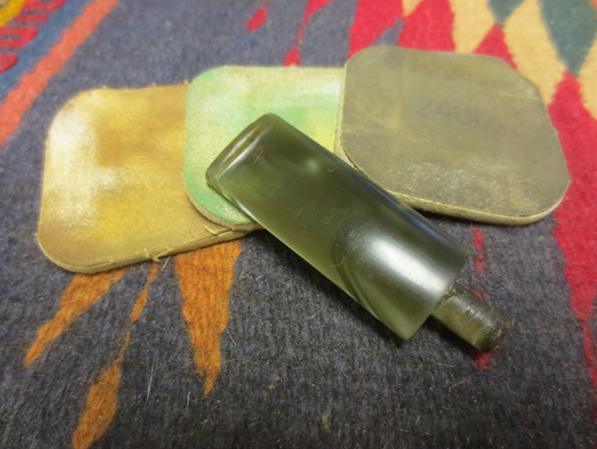
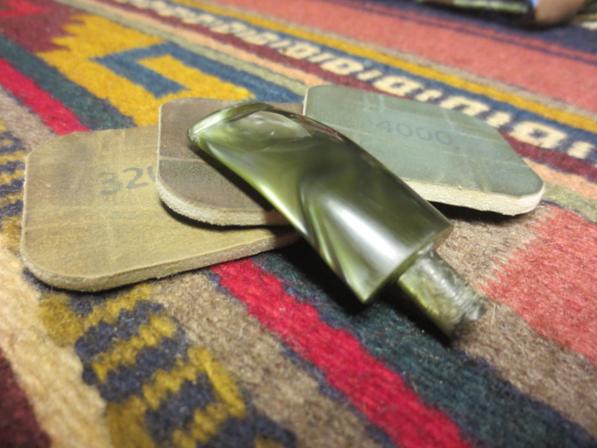
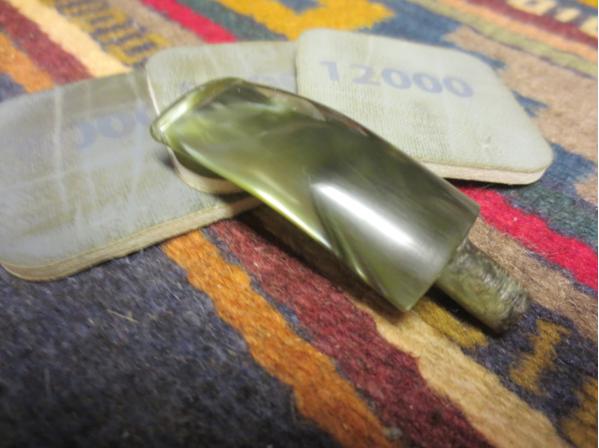
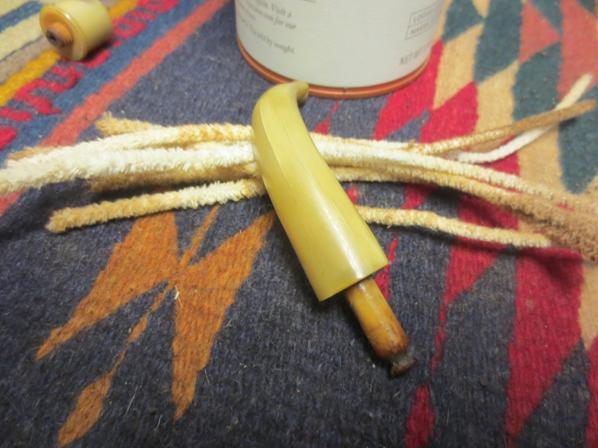
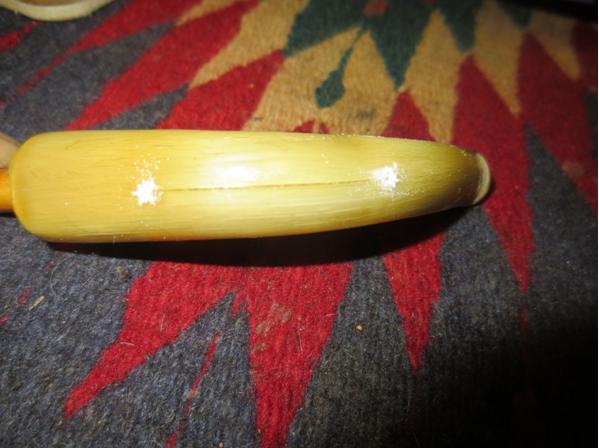
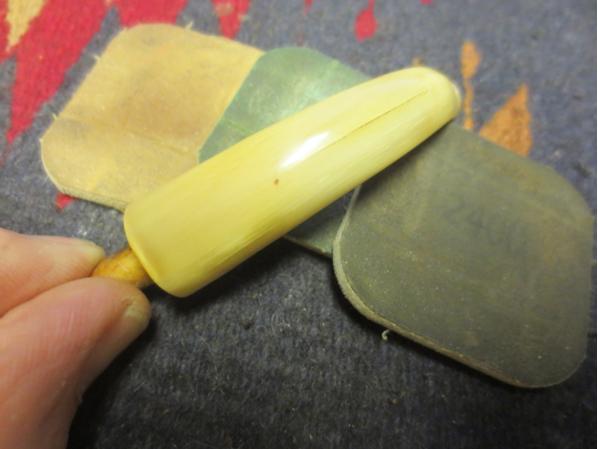
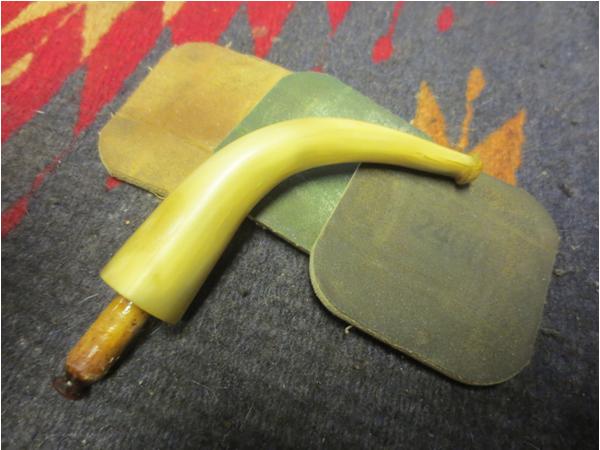
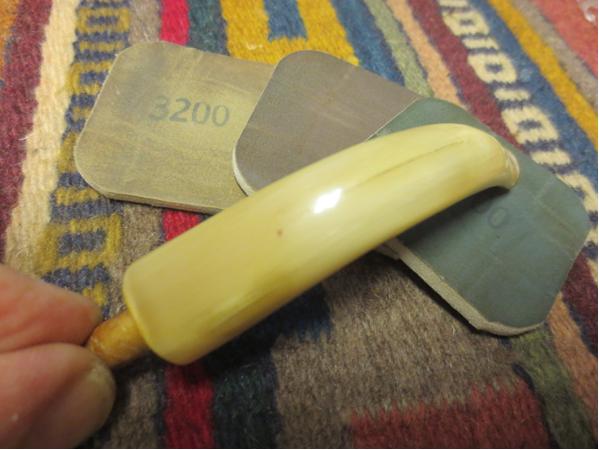
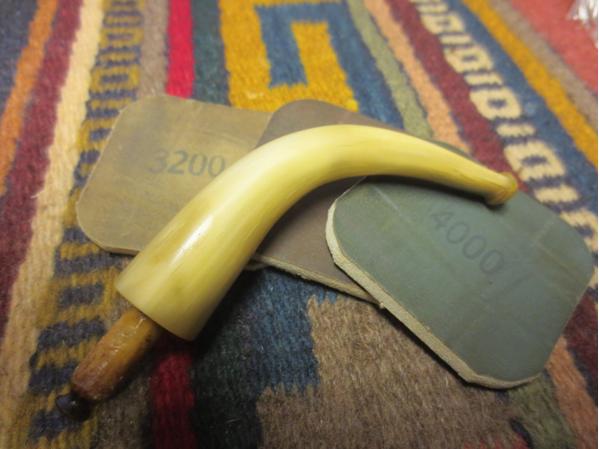
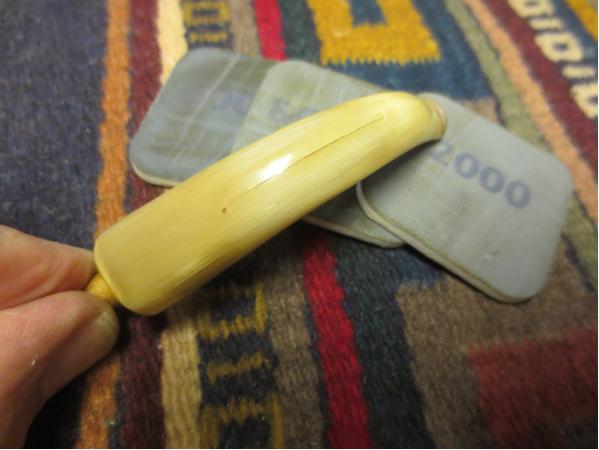
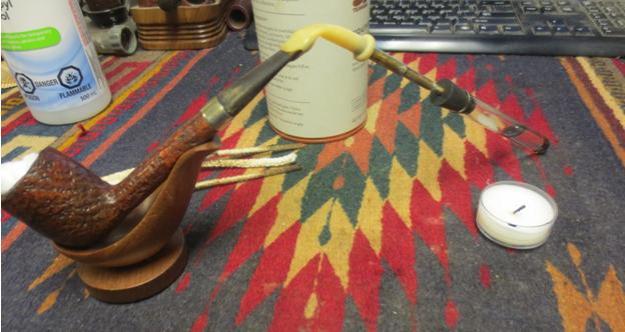
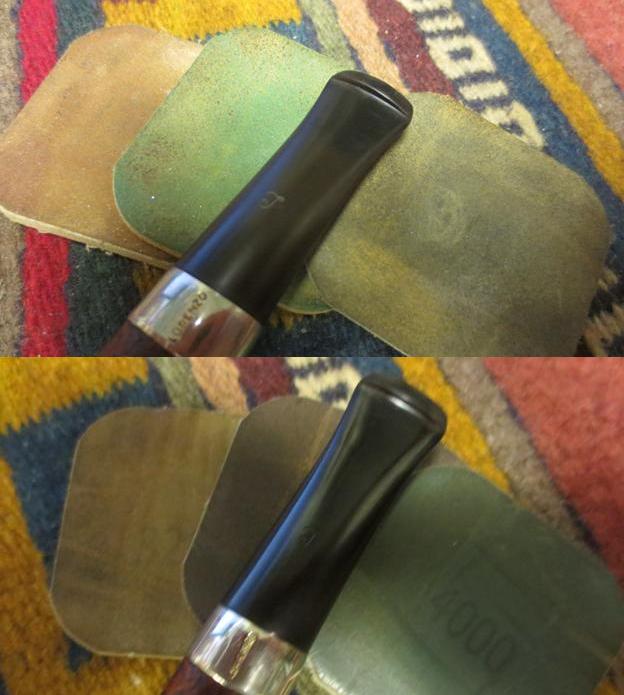
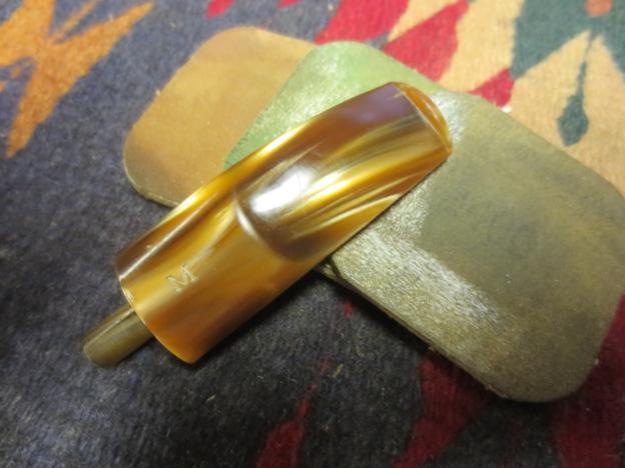
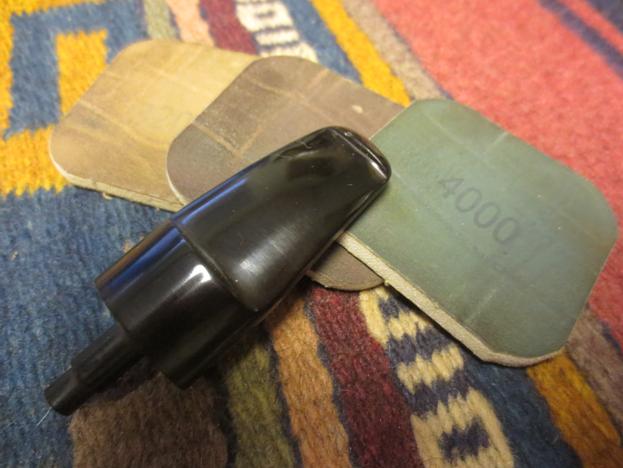
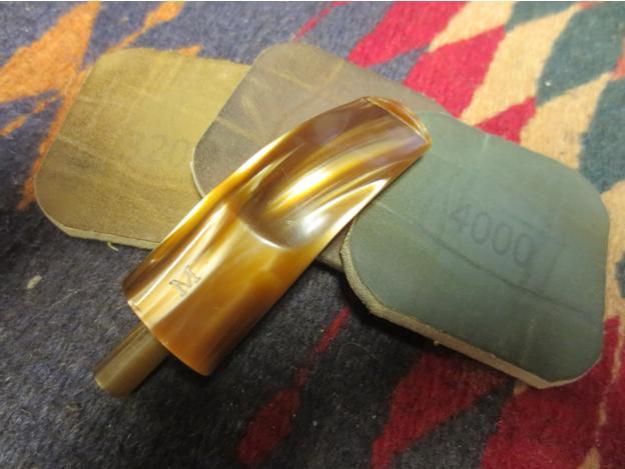
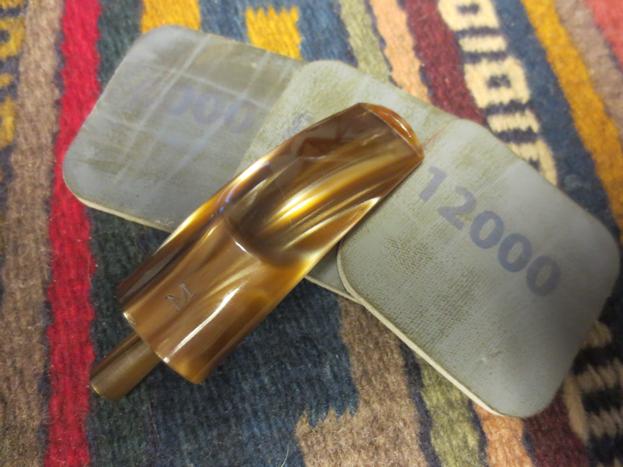
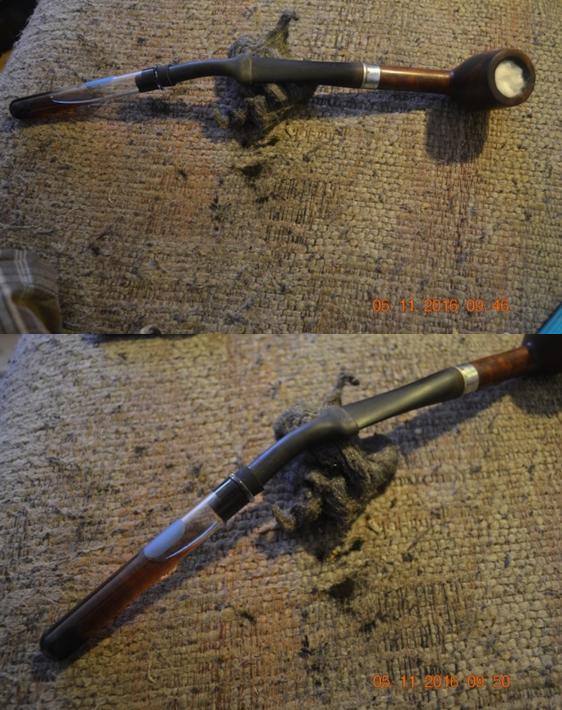
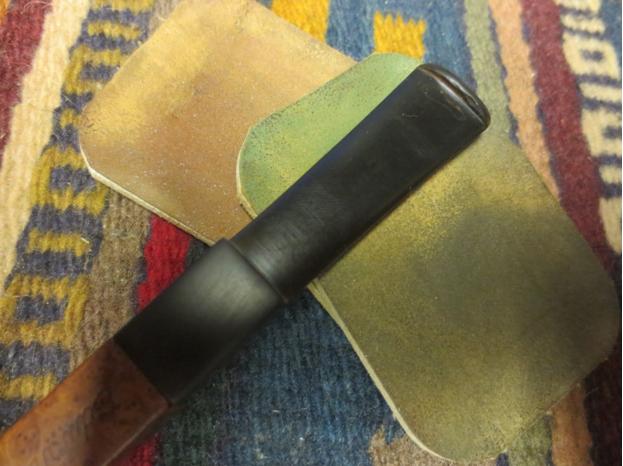
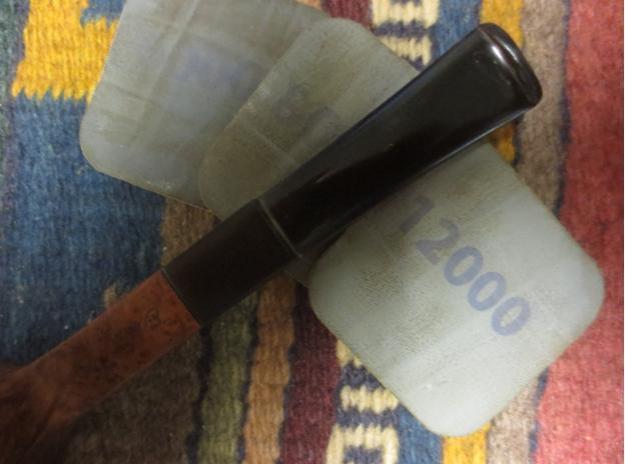
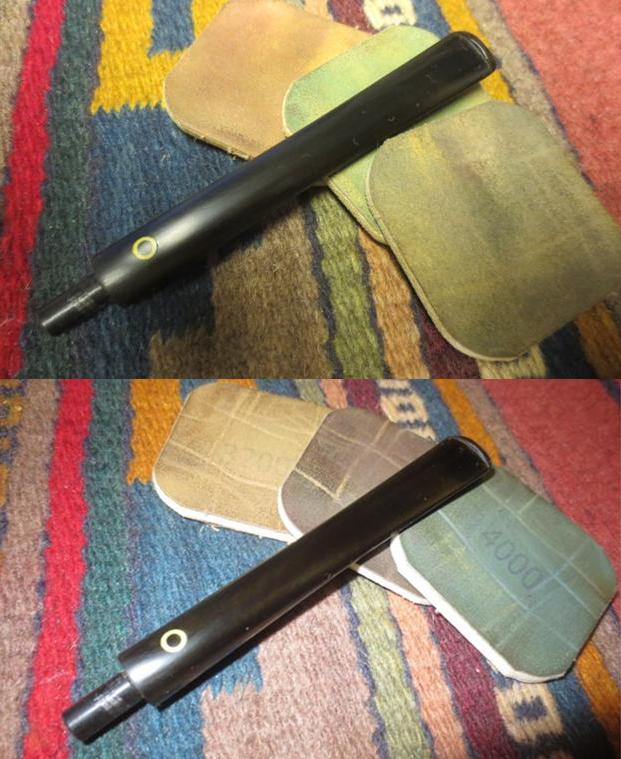
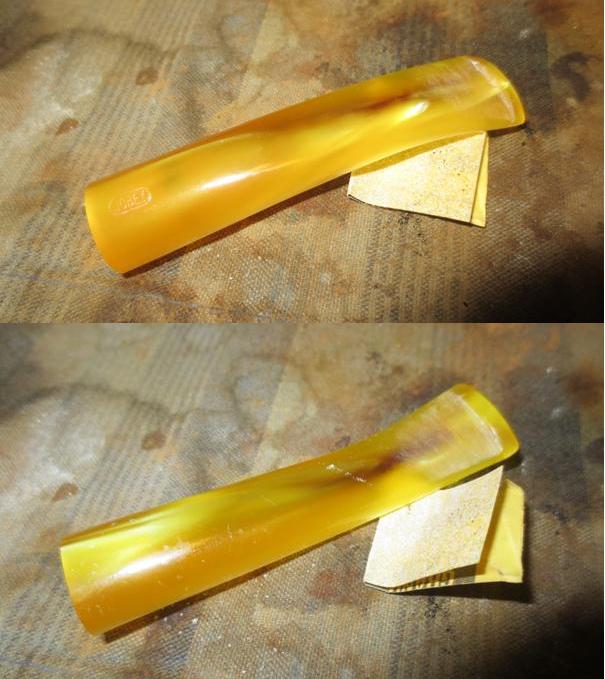
I went back to scrubbing the airway. I remembered reading about someone using soft scrub successfully so I ran upstairs and asked my wife if she had any I could use. I push it through the airway in the stem with thick, fluffy pipe cleaners and rotated them to scrub. It took out some more of the darkening but still not enough to my liking. Finally I set up a retort on the stem alone. I boiled alcohol through the stem to remove more. Finally I used an ear syringe to shoot boiling water through the stem. I gave up after using all of those methods. I think I had removed as much of the darkening as I was going to get out of the stem. The stem definitely looks better than it did when I started. I wet sanded the stem with 1500-2400 grit micromesh sanding pads and wiped it down. I dry sanded with 3200-12000 grit pads and wiped it down. Jobey33 Jobey34 Jobey35
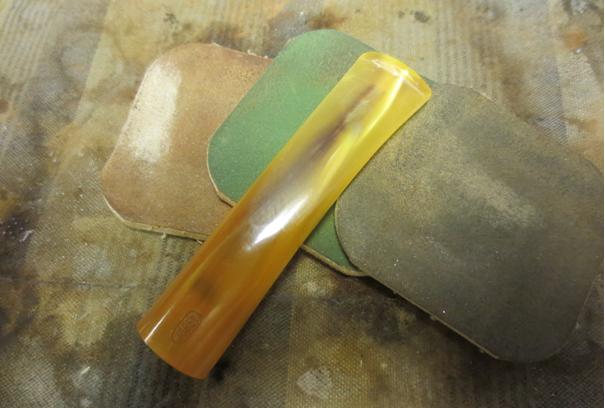
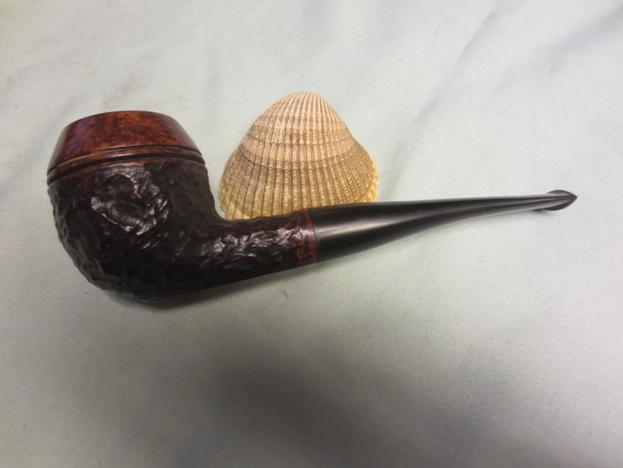
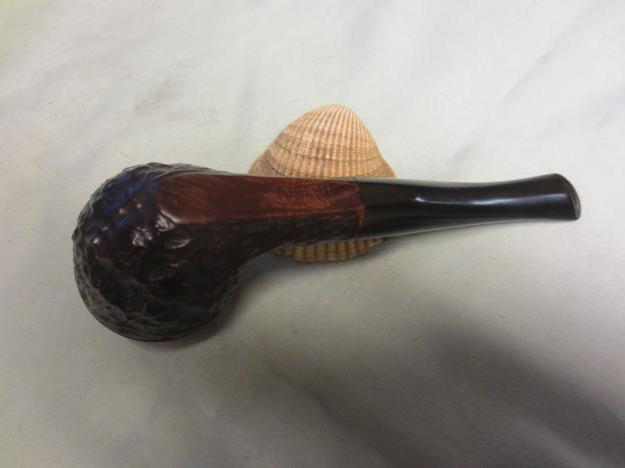
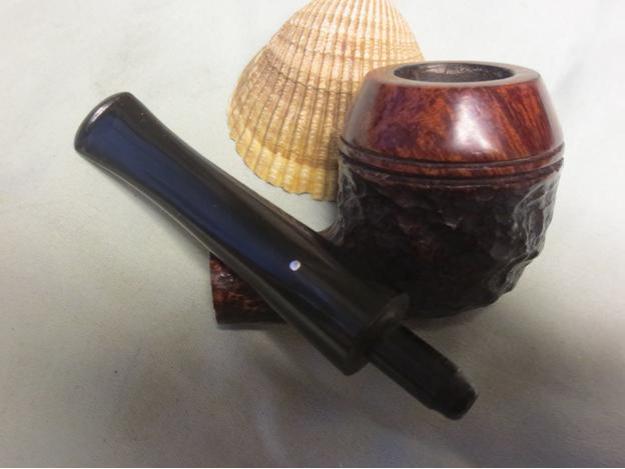
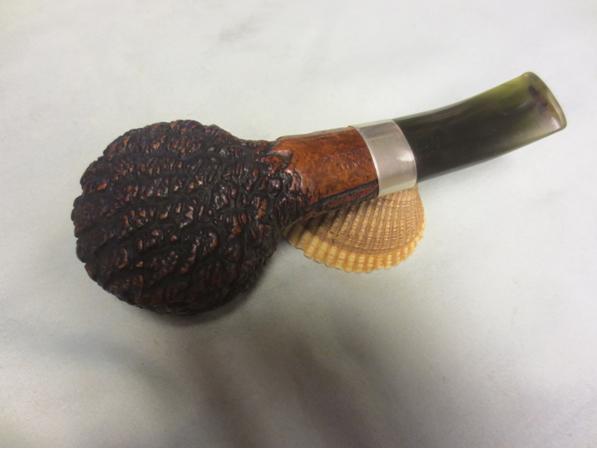
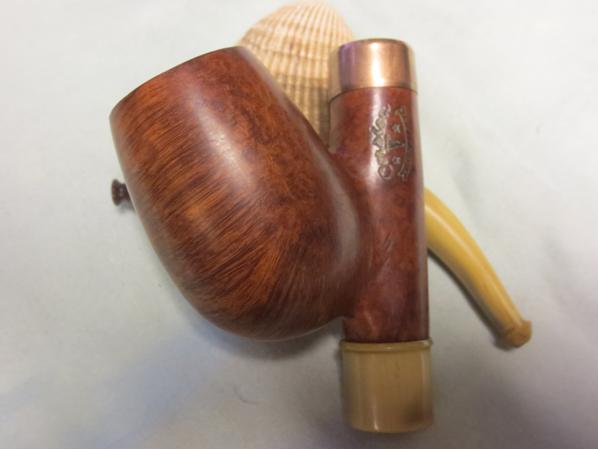
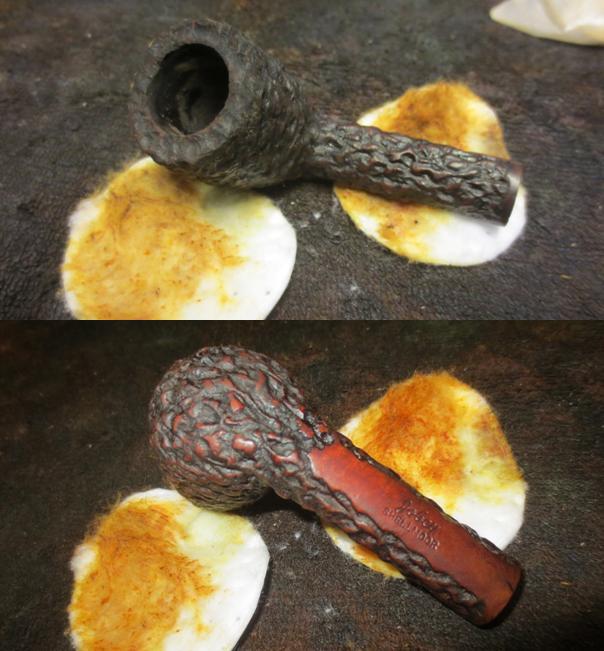
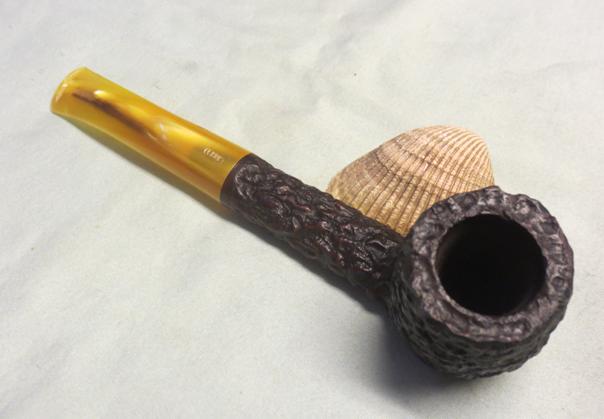
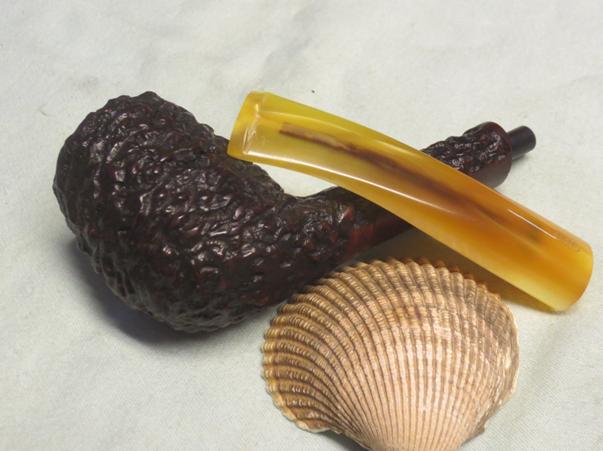
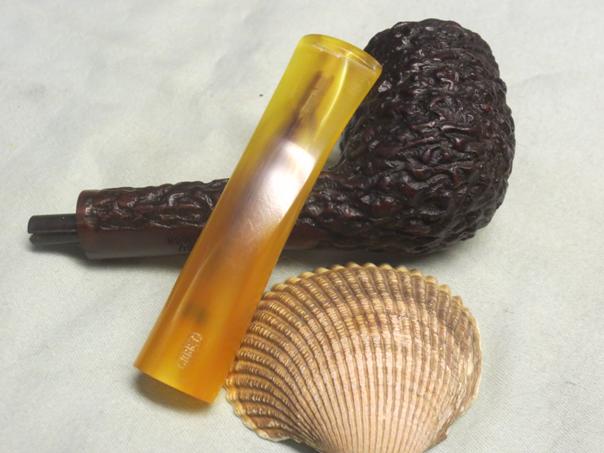
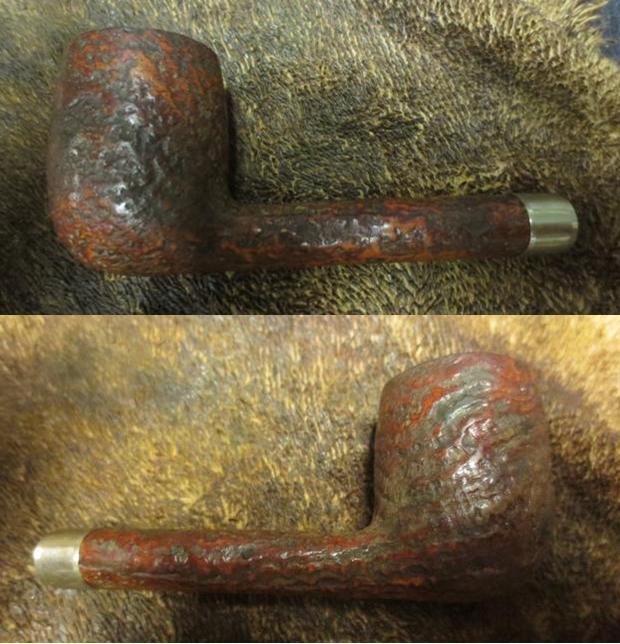
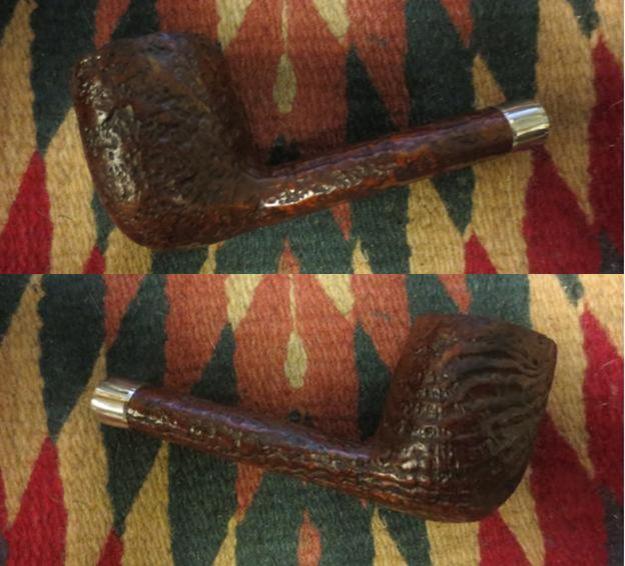
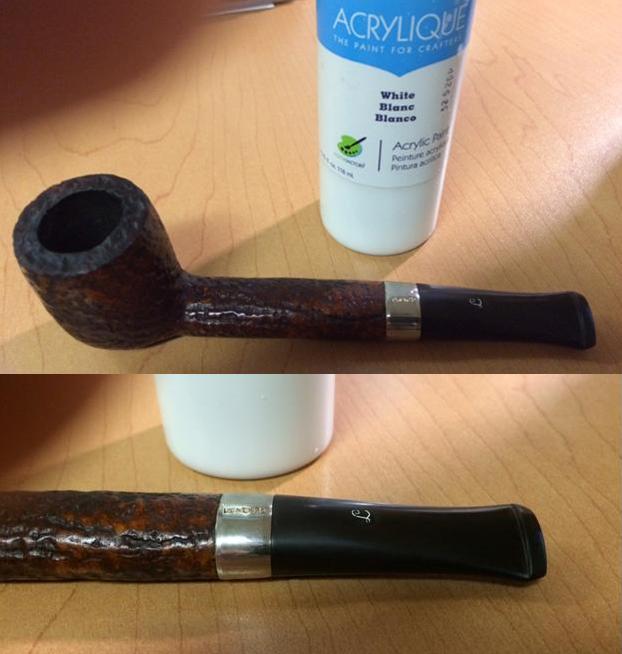
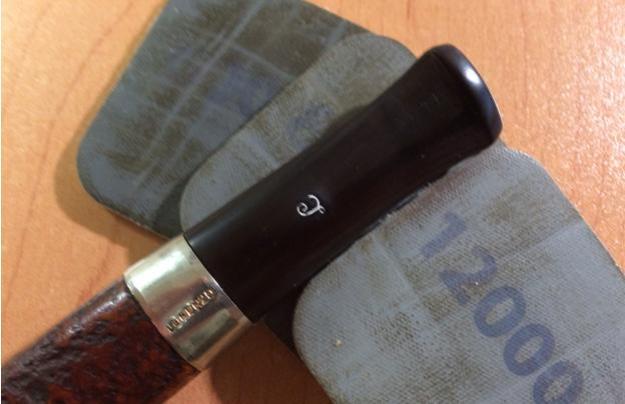
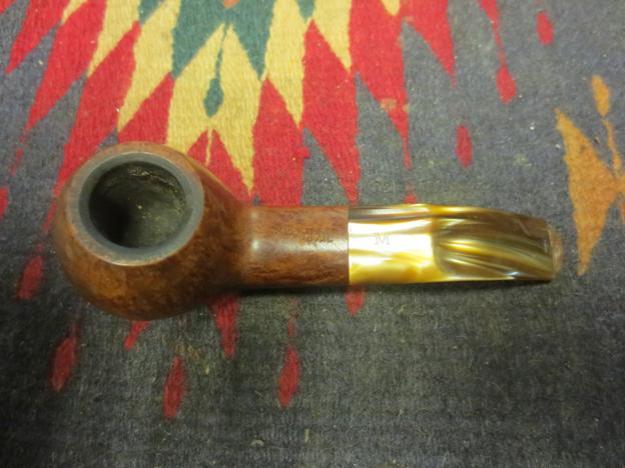
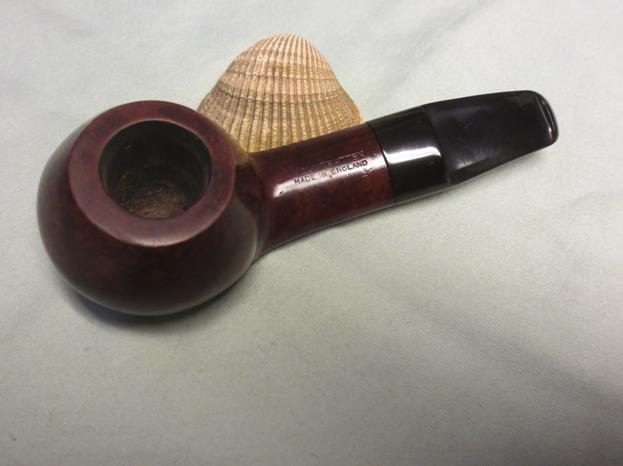
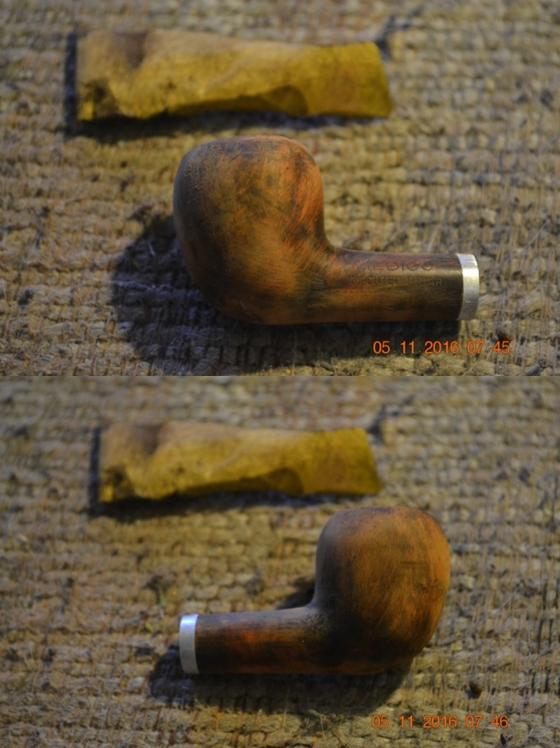
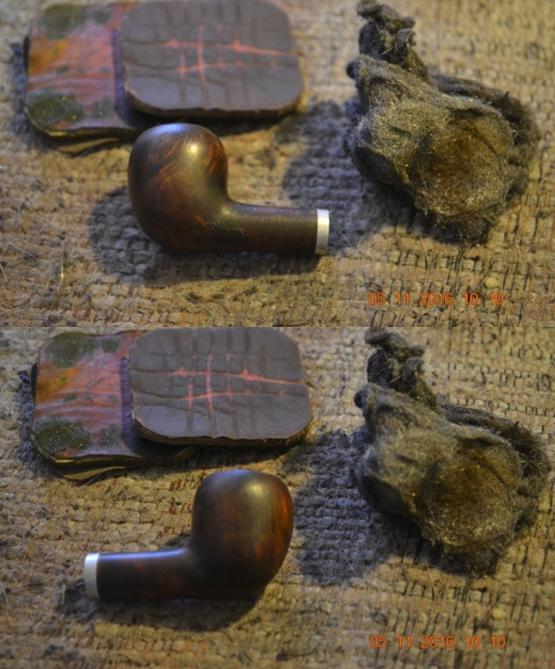
I lightly buffed the bowl and stem with Blue Diamond on the wheel and then gave the stem several coats of carnauba. I polished the stem and bowl with a clean buffing pad and then by hand with a microfibre cloth. The finished pipe is shown below. The first photos show the areas of the rim and the front of the bowl that I cleaned up and re-rusticated with the burrs and Dremel. Jobey36 JObey37 Jobey38
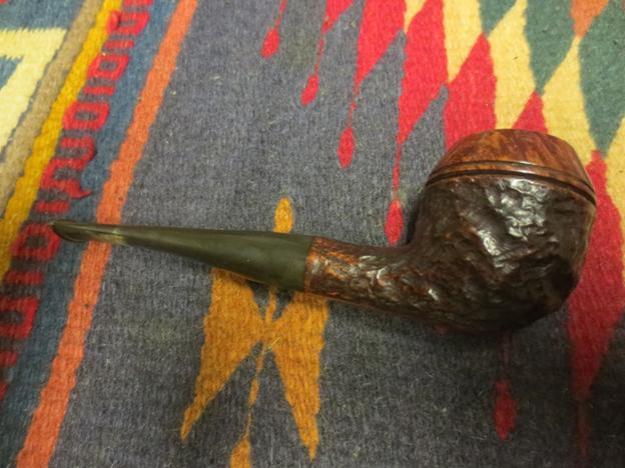
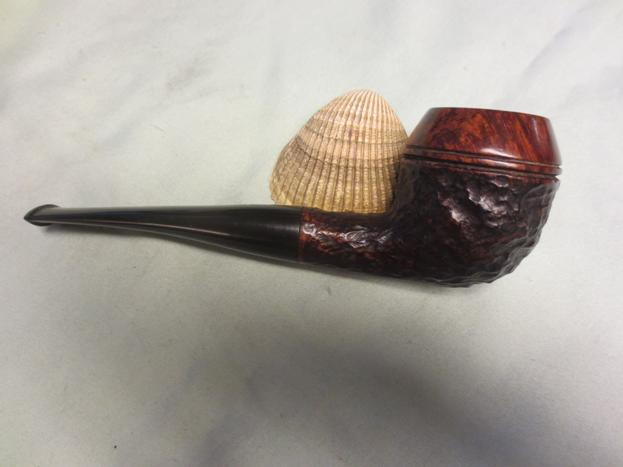
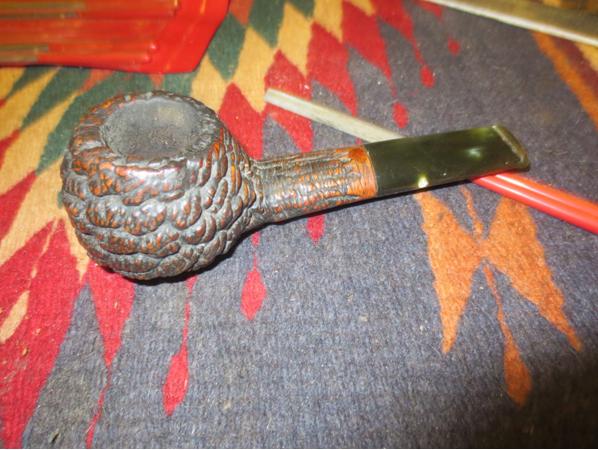
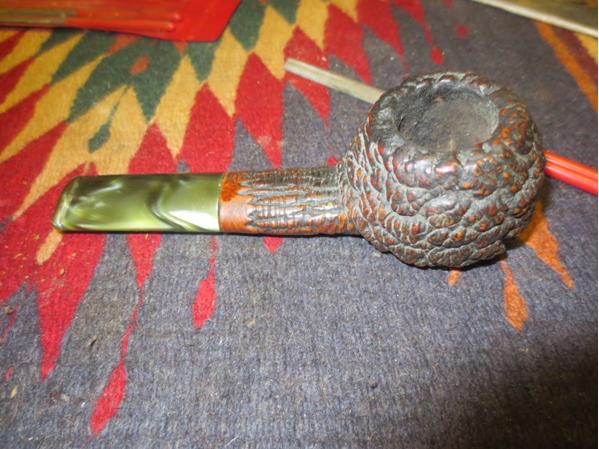
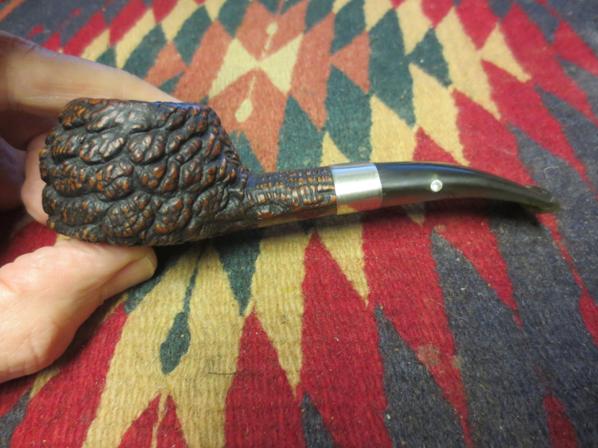
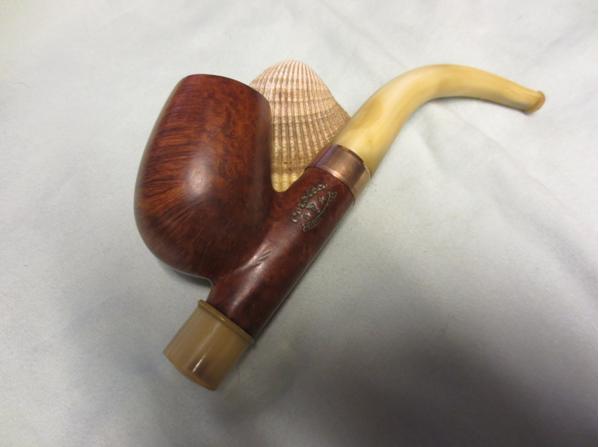
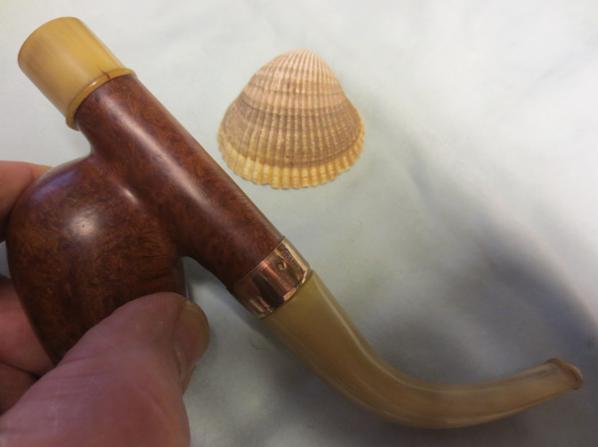
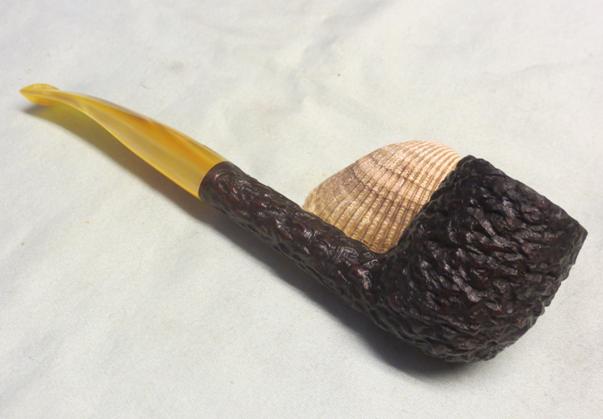
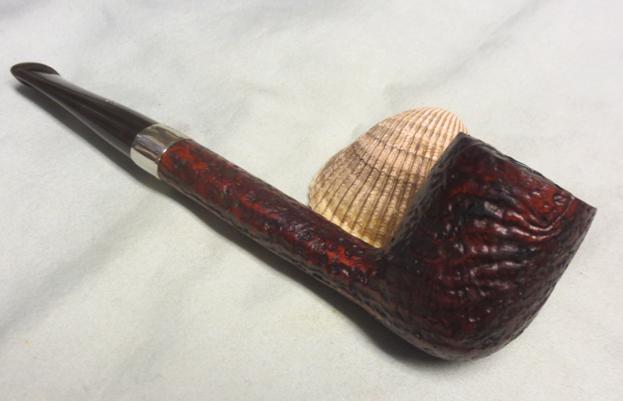
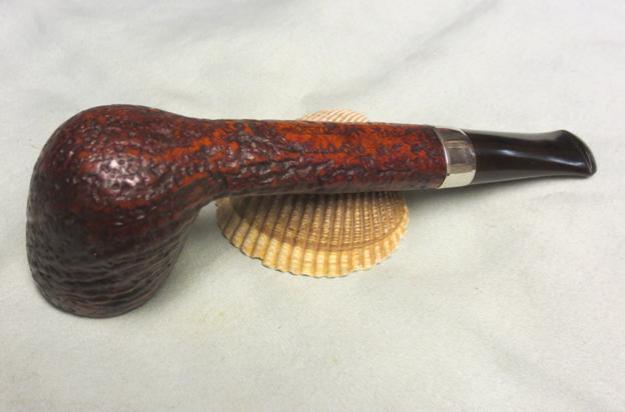
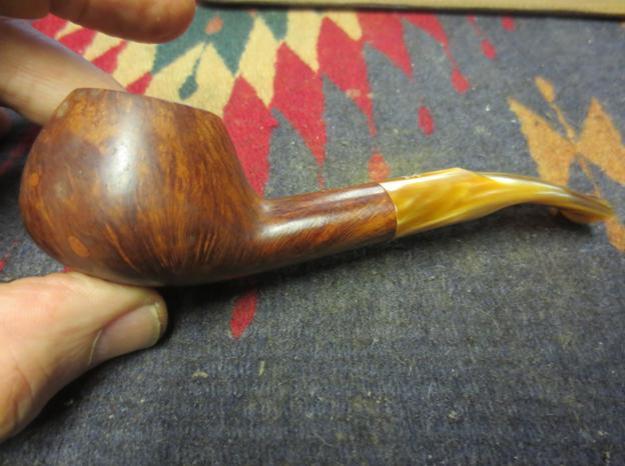
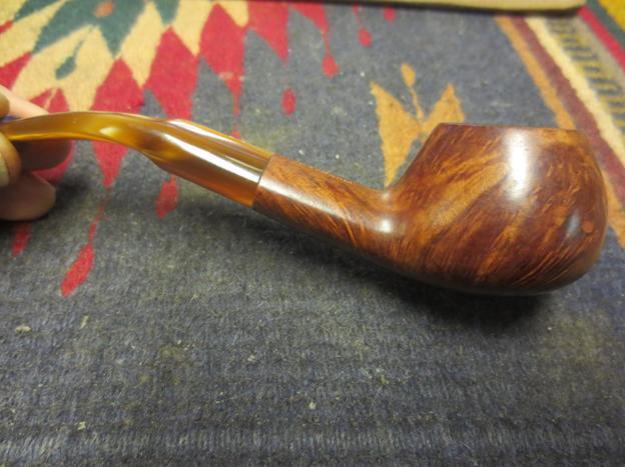
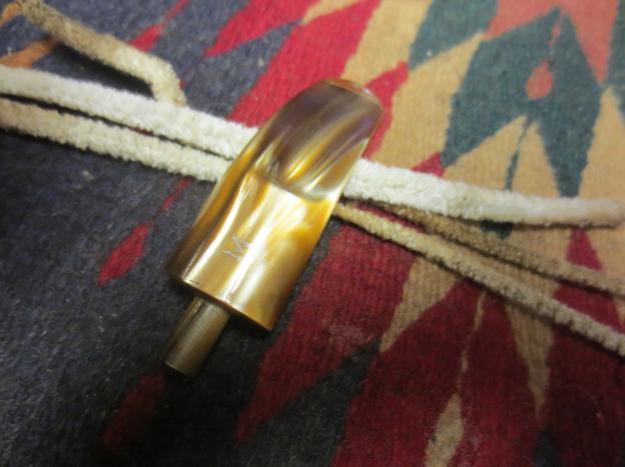
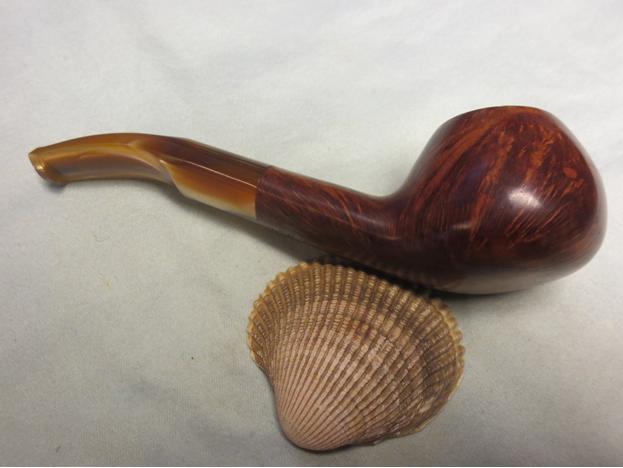
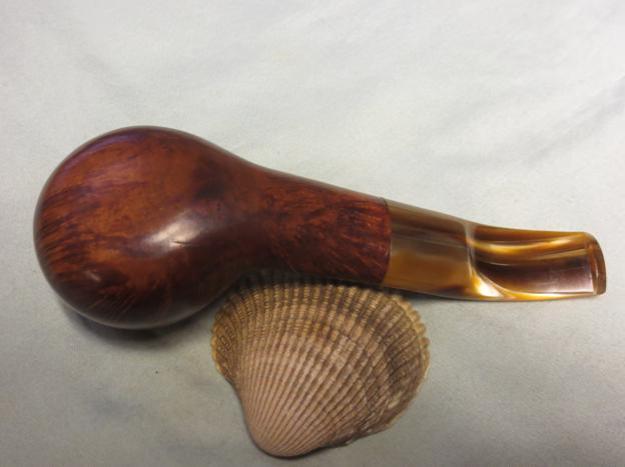
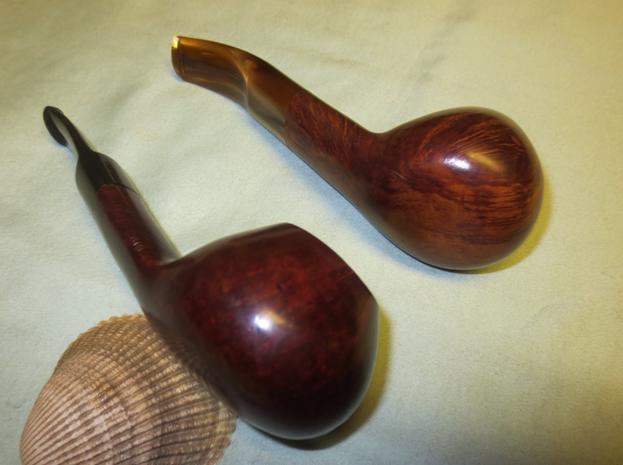
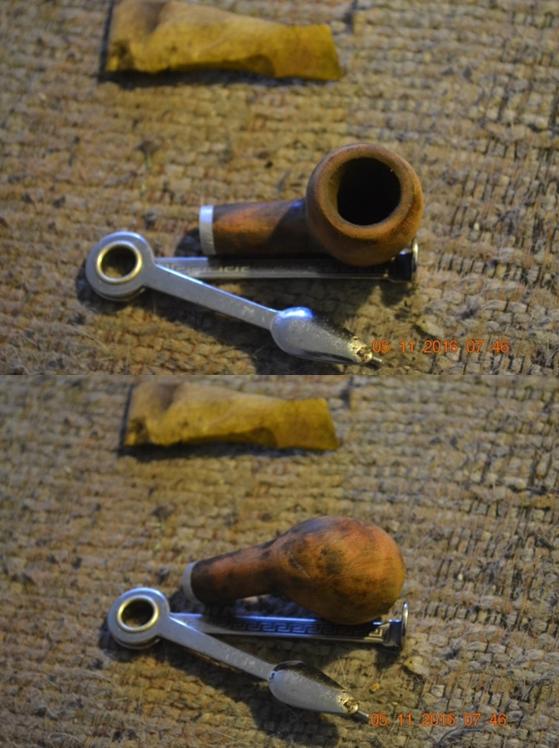
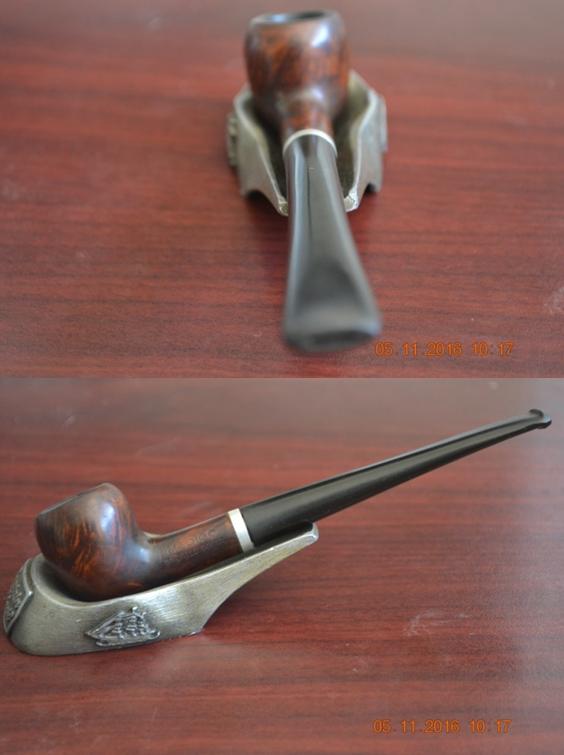
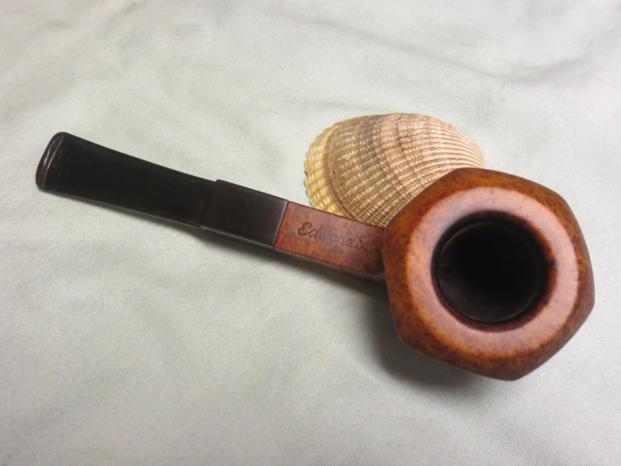
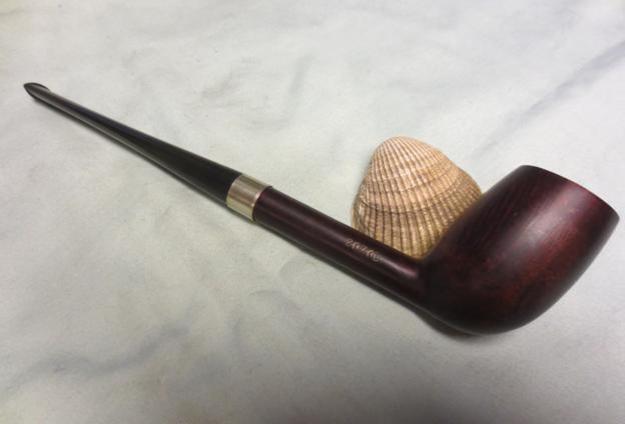
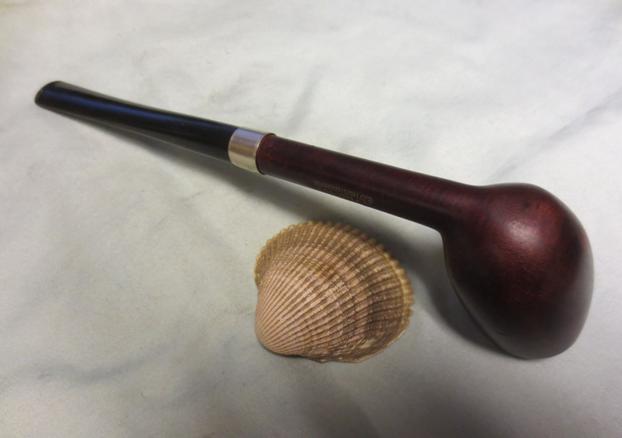
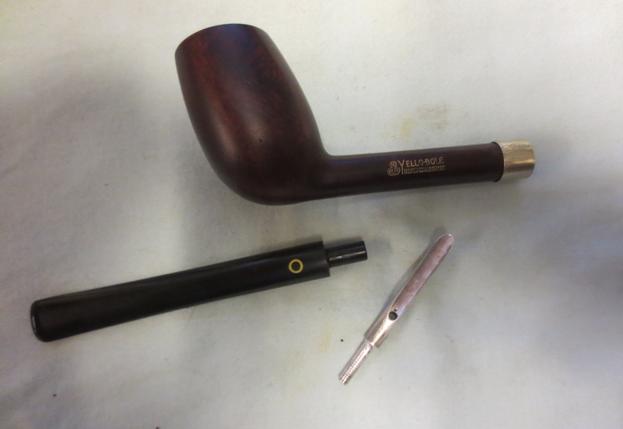
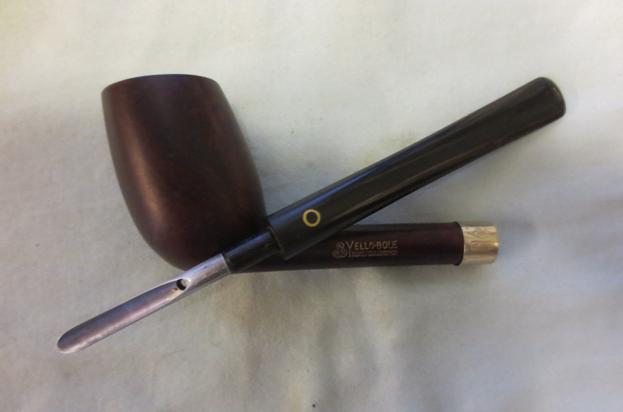
The remaining photos are of the pipe in its entirety. I have never seen a Jobey Shellmoor pipe with a Lucite stem but this golden stem goes really well with the dark brown stain. The finished pipe is 6 ½ inches long and looks rather dapper and stylish. It has come a long way from when I started on it. I picked this pipe to work on while I was restoring the La Strata because I thought it would be easy. I could not have been more wrong. But I am glad it is finished. Thanks for looking.
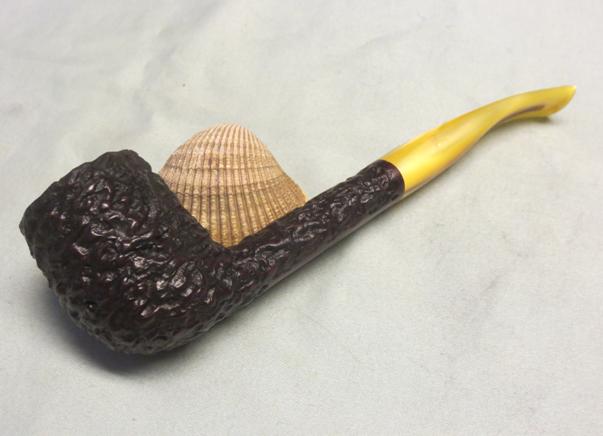
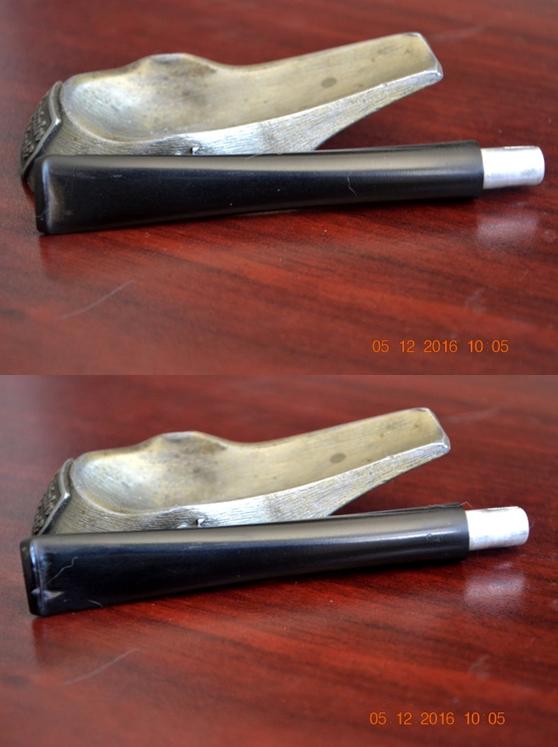
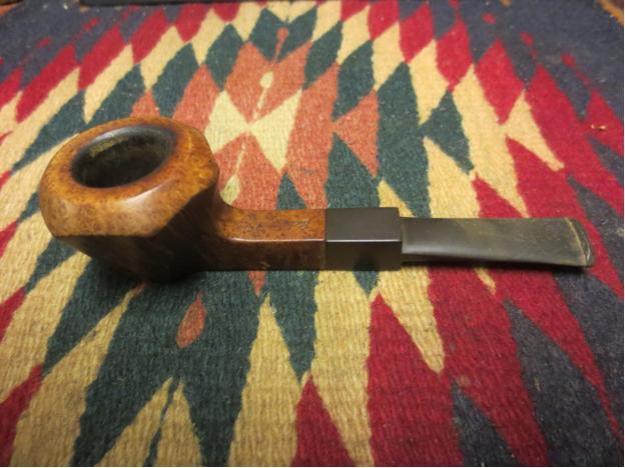
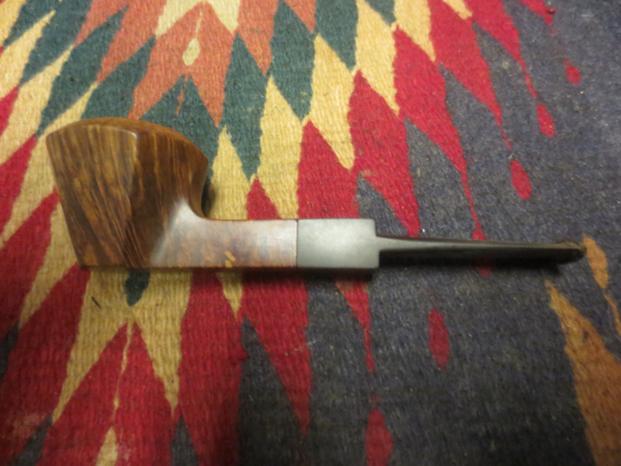
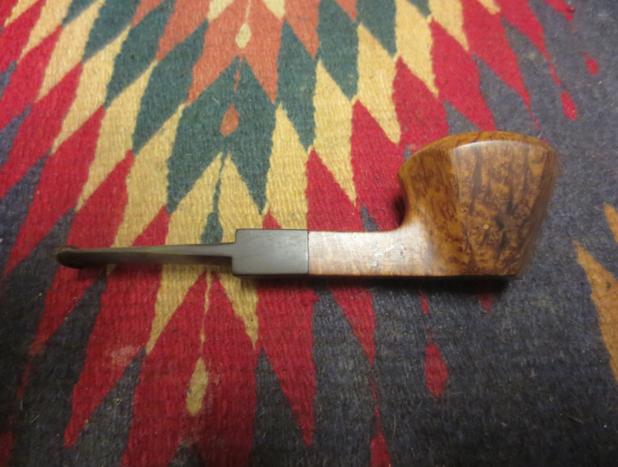
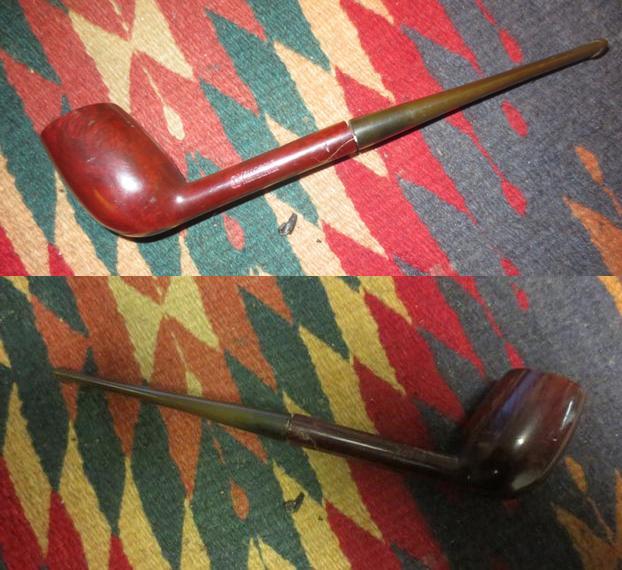
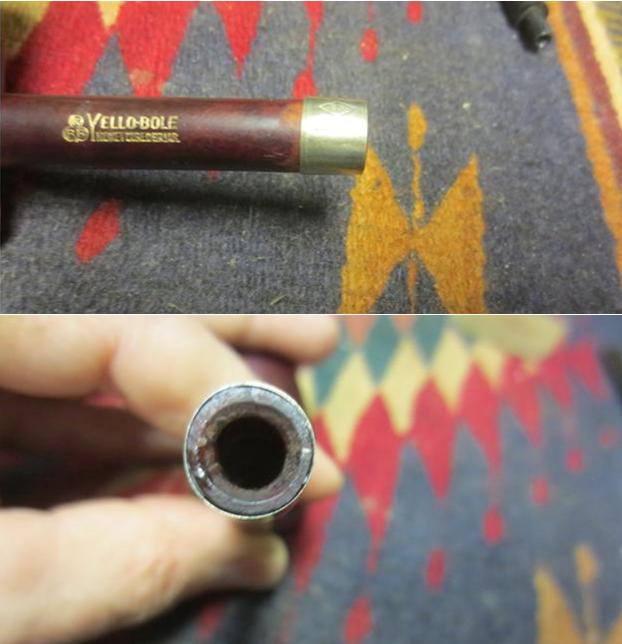
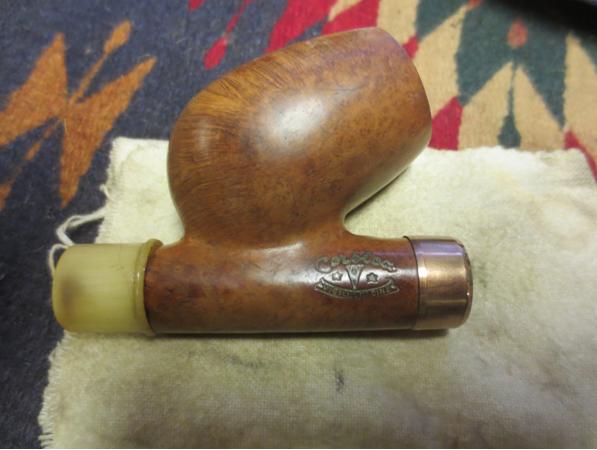
Jobey39 Jobey40 Jobey41 Jobey42 Jobey43 Jobey44 Jobey45

Something About This Lorenzo Canadian Caught My Eye


Blog by Steve Laug

A few weeks ago my family took my wife down to the US from Vancouver for her birthday. After a huge breakfast celebration the ladies went shopping and I hit a few favourite antique shops. I found a nice handful of old pipes. One of the lot was sandblast Lorenzo Canadian. It had a nice looking blast and I could see underneath the high gloss, grit and ruined rim what looked like a great pipe. It was in pretty rough shape. The bowl had a thick cake of sweet smelling aromatic tobacco. It was soft and crumbly but it was thick. There was a significant lava flow of tars over the rim to the point it was hard to see what the rim looked like. The back right outside edge of the rim was worn away, rough and rounded. The finish looked as if it had been coated in urethane as a sealer. It almost looked as if that had been done after the grime and build up on the bowl. It was a mess. There was a nickel band on the shank that was stamped Lorenzo across the top face. The underside of the shank was smooth and stamped Lorenzo in script over AMELLO-ORO (at least that is what it looks like as the blast goes across the stamping. There is also the shape number 348 below the stamp ITALY. The stem was oxidized and dirty but seemed to have a cursive L mid stem on the top side. I picked it up for $12 US. The photo below shows the five pipes I picked up that day. The Lorenzo is in the oval at the top of the photo.Lorenzo1I took the next series of photos to show the condition of the pipe when I brought it to the work table. It has clean lines but is in sad shape. Can you see the beauty under the grime on this one?Lorenzo2 Lorenzo3I took a close-up photo of the rim to give you a clear picture of the state of the bow and the rim when I started working on it. It needed a lot of work on the bowl and rim before it would be usable again. The second photo below shows the stamping on the pipe. You can see where the sandblast covered portions of the stamping.Lorenzo4I started by reaming the bowl with a PipNet reamer. I used the smallest cutting head and worked my way up to one that had the same diameter as the bowl. I finished cleaning up the inside of the bowl with a Savinelli Pipe Knife.Lorenzo5 Lorenzo6The rim was not only heavily covered with lava but also was worn down on the back right side of the outer edge.Lorenzo7I topped the bowl with 220 grit sandpaper on the topping board and took off the damage to the rim as much as possible without changing the profile of the pipe.Lorenzo8I wiped the bowl down acetone to try to break down the urethane top coat that had been applied. It the bowl had not been sandblasted it would have been easy to sand off the top coat. In this case it was going to be a combination of things that I would have to use to break through the coating and remove it.Lorenzo9While the acetone removed a lot of the coating I decided to let the bowl soak overnight in an alcohol bath. My experience was that what the acetone softened the alcohol bath loosened.Lorenzo10In the morning I took the bowl out of the bath and dried it off. The coating was definitely much less shiny and in many places was gone altogether.Lorenzo11 Lorenzo12I used a brass bristle wire brush to scrub the surface and get into the crevices and grooves in the blast. I wiped it down afterwards with acetone on cotton pads. I repeated the process until the finish coat was gone and I was left with the stain on the briar.Lorenzo13With the finish removed it was time to rusticate the topped rim to match the finish on the bowl more closely. I used an assortment of burrs with the Dremel to make a random pattern on the rim top. I wanted the grooves and cuts to be at different depths and in different styles to approximate the look of the sandblast on the bowl and shank. The photos below show the progression of the rustication and each burr that was used. Lorenzo14 Lorenzo15 Lorenzo16I used the brass bristle wire brush to knock off any loose pieces of briar and to further rusticate the rim surface. The finished rustication is shown in the photo below.Lorenzo17I used a black Sharpie pen to colour in the grooves and crevices in the rim and to add some depth to the finish. I stained over the top of it with a medium brown stain pen for contrast.Lorenzo18With the rim finished I restained the entire bowl with a dark brown aniline stain thinned by 50% with isopropyl alcohol. I applied it with a cotton swab and then flamed it to set it in the grain of the pipe.Lorenzo19I wiped down the bowl with alcohol on cotton pads to further thin it down and make it more translucent. I wanted the dark stain in the grooves and crevices of the blast to show through the top coat of stain and approximate the colouring I had done on the rim surface.Lorenzo20I scrubbed the interior of the airway and mortise with pipe cleaners, cotton swabs and alcohol to begin the cleanup. The condition of this pipe and the heavy aromatic tobacco that had been smoked in it demanded a more drastic measure. I used the drill bit that is part of the KleenReem reamer to clean out the airway from the mortise to the shank. A huge amount of thick tars and grit came out on the bit. It took quite a bit of push to get the bit through the buildup in the airway. It was virtually clogged. I twisted the bit in until the airway was clean and then used the retort on the pipe. I set up the retort and boiled three tubes of alcohol through the shank before I was able to get one tube that was clean.Lorenzo21 Lorenzo22I wanted to see how the stain on the bowl and rim looked at this point so I buffed the bowl with Blue Diamond on the wheel. I polished the metal band on the shank with a jeweler’s cloth to remove the oxidation on the surface and give it a shine. I liked the look of the finish and knew that with a little more effort I would be able to finish the pipe and have it look far better.Lorenzo23 Lorenzo24I dropped the stem in Oxyclean before I went to work and in the evening when I came home took it out of the bath. The oxidation had softened and risen to the surface. I used a coarse towel to scrub it off. The majority of it came off leaving the stem almost clean. Lorenzo25 Lorenzo26I sanded the stem with 220 grit sandpaper to remove the remaining oxidation on the stem and ran some pipe cleaners through the airway to clean it out. I was careful as I sanded around the cursive L on the stem face so as not to damage it. I went on to wet sand the stem with 1500-2400 grit micromesh sanding pads. I gave the stem a coat of Obsidian Oil and then dry sanded it with 3200-4000 grit pads. I gave it another coat of oil and finished sanding it with 6000-12000 grit pads. I gave it a final coat of oil and let it dry.Lorenzo27At this point in the polishing of the stem I paused to address the faded logo on the top of the stem. I used a small #4 artist’s brush and some white acrylic paint to fill in the cursive L logo. The white paint made the logo stand out and added a finishing touch to the stem.Lorenzo28I finished sanding the stem with 6000-12000 grit micromesh pads and gave it a final coat of Obsidian Oil. I set the stem aside to let the oil soak in and dry.Lorenzo29I buffed the pipe – lightly on the bowl and shank, normally on the stem with Blue Diamond polish on the buffing wheel and then gave the stem several coats of carnauba wax. I buffed the stem with a clean buffing pad. I gave the bowl several coats of Conservator’s Wax and buffed it with a shoe brush between each coat. I lightly buffed the bowl with a clean buffing pad and then hand buffed the whole pipe with a microfibre cloth. The finished pipe is shown in the photos below. It has definitely come a long way from the mess I started with but the “good bones” I saw when I picked it up at the antique shop proved to be truly present. The pipe is restored and ready for a long life. Thanks for looking.Lorenzo30 Lorenzo31 Lorenzo32 Lorenzo33 Lorenzo34 Lorenzo35 Lorenzo36

Restoring a Pair of Mountbatten Authors


Blog by Steve Laug

My brother sent me pictures of the first pipe in this pair of Mountbattens and wondered what I thought of it. We decided that it was worth a bid as the shape interested me. I had no idea who produced Mountbatten pipes, but this one had the look of an older one. The narrow taper on the stem back to the button, the darker stain, the narrow slot in the rounded button and the stepped down tenon all pointed to a pipe from an older time period. This one was stamped on top of the shank Mountbatten over Made in England. On the right side of the oval shank it bore the shape number 819. The finish was in decent shape other than a badly beat up rim top. The cake in the bowl was pretty thick. The stamping was distinct and clear. There were some dents and dings in the bowl sides. The stem had what appeared to be a surface logo on top of the saddle. It was not stamped and was peeling on one edge. It was oxidized and had some tooth marks on the top and underside near the button edge. The slot was so narrow that a pipe cleaner would not easily pass through to the bowl.Mt1Mt2 Mt3 Mt4He sent a picture of the second one as well – same shape as the first but having a different shape number and a Lucite stem. It was a newer version of the pipe. The shape was similar but slightly smaller. The taper on the stem was not as drastic and flowed to the button ending at the button almost the same width as the beginning at the saddle. The button shape, the shape and style of the slot in the button end, the stamping of the M on the top of the saddle all were signs of a newer version. This one was stamped on top of the shank Mountbatten over Royal. On the underside of the shank it was stamped Made in London over England. Under that near the stem shank union was the shape number. It was different from the older one – 207. The finish on this one was lighter and more of a matte. There were also quite a few fills in the sides of the bowl that were pink putty. They were pretty well blended into the grain so they would be fine. The bowl had a light cake in it and the beveled inner edge of the rim was darkened and had some lava that ran over the top edge. The Lucite stem was in good shape with some small tooth marks on the top and underside near the button.Mt5 Mt6 Mt7 Mt8This would be a fun pair of pipes to clean up and restore. Before I started to work on them I decided to do a bit of research on the brand. I started with my usual first stop – PipePhil’s Logo and Stampings site. I found out there that the pipe was made by Charatan. There were pictures of a variety of stampings on the stem and some beautiful looking pipes but no other information. Here is the link to that page: http://www.pipephil.eu/logos/en/logo-m7.html.

I did some further digging and found a link on Pipes Magazine’s forum where the brand was discussed: http://pipesmagazine.com/forums/topic/mountbatten-pipe. There was a discussion on that thread regarding the brand. Quite a few of the respondents originally said that the brand was a Charatan second. There was one dissenting voice that led to more responses similar in tone. The fellow said that the pipe was not a second. There was a quote from another site.

I googled the information and found that the quote came from a thread on pipes.org. Here is the link: http://pipes.org/forums/messages/23/45025.html?1169997817 I quote the original dissenter on the Pipes Magazine site in full because of the information that it gives. The original poster was Bill Ramsey. Here is Bill’s reply:

“Friends, after 40 years of nosing around pipes, what I have gleened is this: Charatan sold its seconds under private labels and later acquired the English rights for Ben Wade for just this purpose. Mountbatten, on the other hand was not a “second”(in that there was some physical deformity in the pipe) but rather a first line production from Charatan’s apprentice program. Each Charatan carver might have four or six apprentices at any one time of various skill levels. As they improved and started cutting pipes themselves, these pipes had to move… thus the Mountbatten. These were made on Charatan tooling with Charatan materials and teaching. Bear in mind that there was a high attrition rate and , perhaps, one apprentice in nine or ten made it to cutting their own bowls much less a Charatan carver. This is why you see more Charatans than Mountbattens on the market. You’re never going to put your kid through college by selling one but you’ve got a day to day workhorse of the first order. Good luck and happy puffing.”

That was just the kind of information I had been looking for. I close this section on the history of the brand with a quote that pretty well sums up the details that I had learned. It is taken from the same conversation that is traced in the last link above. “Yup now I know Mountbatten pipes were the fruit of an apprentice’s labor made under the supervision of a Master Pipe Maker at Charatan, most likely in the pre-Lane era; not a second, but a “sub-brand” (even though many experts still classify them as seconds anyway).”

A bit better educated about the pipes I was working on I was ready to start the refurbishing process on them both. I took some close up photos of the rims of both pipes. The first one is the older 819 pipe and the second is the newer 207 bowl. The damage to the first bowl would require topping while that on the second was less extensive and would only need a cleanup.Mt9 Mt10I set up my topping board and topped the 819 carefully so as not to remove more of the top than necessary to flatten and remove the damage to the outer edge of the bowl and rim.Mt11 Mt12

I reamed the bowl of the newer bowl with the Savinelli Pipe Knife and took out the thin cake that was on the walls. I used a flat penknife blade scrape the lava from the rim face and the inner bevel on the rim and then wet sanded the top with 1500-2400 grit micromesh sanding pads. The photo below shows the cleaned up rim surfaces.Mt13 Mt14 Mt15I carefully scrubbed the bowl walls and shanks with alcohol on a cotton pad to remove the grime. It did not take much scrubbing to clean up both bowls.Mt16 Mt17 Mt18 Mt19 Mt20 Mt21 Mt22 Mt23 Mt24

I sanded the topped bowl on the older, darker pipe with 1500-2400 grit micromesh sanding pads until the scratches left behind by the topping were gone. I then stained the top of the bowl with a dark brown stain pen. I stained the top of the lighter, newer bowl with a light brown stain pen to match the bowl sides.Mt25 Mt26

I cleaned the internals of both pipes: mortise, airway in the shank and stem and the slot in the button with alcohol, cotton swabs and pipe cleaners.Mt27 Mt28 Mt29 Mt30

The stem clean up on each of the pipes was slightly different. The vulcanite stem needed the most attention. I sanded the tooth marks on the top and bottom side of the stem next to the button with 220 grit sandpaper and followed that with 280-600 grit sandpaper. I soaked it in Oxyclean overnight to soften the oxidation. I removed it in the morning and after drying it off scrubbed it with Meguiar’s Scratch X2.0 to remove the softened oxidation.Mt31 Mt32 Mt33The Lucite stem was much easier to work on. I sanded the tooth marks on both the top and underside of the stem at the button with 220 grit sandpaper to remove them. It took some focused sanding to remove the two marks but once I was done sanding them they were no longer visible.Mt34 Mt35With the oxidation taken care of on the vulcanite stem and the tooth marks removed from both stems it was time to work on them with micromesh sanding pads. I wet sanded both stems with 1500-2400 grit micromesh sanding pads.Mt36 Mt37I wiped the vulcanite stem down with Obsidian Oil and then dry sanded both stems with 3200-4000 grit micromesh sanding pads.Mt38 Mt39I wiped down the vulcanite stem with another coat of oil. I sanded both stems with 6000-12000 grit micromesh sanding pads. I gave the vulcanite stem a final coat of oil and set it aside. Once the oil dried I would put the stems on the bowls and buff them.Mt40 Mt41I put the stems back on the pipes and gave them a final buff with Blue Diamond polish on the wheel. I gave both multiple coats of carnauba wax and buffed them with a clean buffing pad to raise the shine. I hand buffed them with a microfibre cloth to add depth to the shine. The finished pair are shown in the photos below. The young apprentice carvers at Charatan did a great job in shaping and finishing these two pipes. They look great together. The mystery to me is the different number stamps on the pipes. They are similar in shape even though the newer is a little smaller. They look like they came from the same shape chart in terms of appearance. I suppose I will never know why the numbers are different but I do know that both should be great smoking pipes. Thanks for looking.Mt42 Mt43 Mt44 Mt45 Mt46 Mt47 Mt48 Mt49 Mt50 Mt51 Mt52

Spotlight: Ladies Pipes, Part 3/7, a Tiny Medico Acorn


Guest Blog by Robert M. Boughton
Member, International Society of Codgers
Member, North American Society of Pipe Collectors
http://www.naspc.org
http://www.roadrunnerpipesnm.biz
http://about.me/boughtonrobert
Photos © the Author

Two old buddies are heading off on their Annual Fishing Trip. For argument’s sake we’ll call them Kevin and Bob.
Bob notices that Kevin is being more grumpy than usual and tries to lighten things up by way of conversation.
Bob: “So Kev, last week was your birthday, happy belated.”
Kevin: (grudgingly) “Thanks.”
Bob: “Say, did, Laura, buy you that Estate Dunhill that you were constantly hinting at?”
Kevin: “Na”
Bob: “Well what did she get you instead?”
Kevin: “SUV.”
Bob: “New or used?”
Kevin: “New of course.”
Bob is extremely puzzled as Kevin is still driving the same beat-up pickup that was already old when Saddam was considered an ally.
Bob: “You know, Kev, you and I have been friends for a long time, and I’m entitled to say that you are an ungrateful sour puss. Laura buys you a New SUV instead of a second hand pipe, and that has you in a bad mood.”
Kevin: “Humph!”
Bob: “Well what kind of an SUV was it anyway?”
Kevin: “Socks, Underwear, Viagra”
— Thanks to mate on smokingpipes.com/forums. (I don’t know, but for some reason this struck me as a good gift idea for the next man who gives a lady grief for enjoying a pipe.)

INTRODUCTION
Steve comments now and then on the pleasure he gets from researching a pipe’s history. I know his motivation is not to tuck away, in his mind and for his own use, the information he gathers. I can’t say for sure what drives Steve, but I suspect he, also, is a natural born reporter – which is to say collector and sharer of information – with an insatiable longing to spread his news to readers as well as to supplement or in some cases create new pipe lore available online. Steve laughed at this when I suggested the notion, but I would say his crowning achievement so far is the definitive and exhaustive research that got to the bottom (which was deep) of the complex origins and Byzantine life of Brewster pipes – a close second to his exposé on the history of the Colossus Pipe Factory (CPF).

As a former freelance news reporter/photographer and still a spot news enthusiast, not to mention aspiring literary writer and pursuer of other investigative endeavors, I have a knack of my own for probing. When I can’t find any mention whatsoever of a pipe brand, I therefore become somewhat vexed. This was the case in particular with the first two pipes I restored for this series. One was a Frasa (or maybe FRASA as an acronym) French natural bent billiard;. The other was a Clinton natural straight oval that was neither the Israeli Alpha brand type nor the U.S. variety. Forever a dogged reporter at heart and also having a serious case of Obsessive-Compulsive Disorder, however, I intend to stay on these stories and others until I uncover the facts. The truth is out there.

As for Medico, there is much to be found online and in actual bound and printed books on pipes and the long, glorious history of their peaceful enjoyment. Indeed, the latter tools still exist, however tenuous their future. I hope and pray they survive for as long as Mankind occupies this planet, if not beyond. The history of Medico began with S.M Frank & Co.in New York in 1851, giving S.M. Frank the claim to the oldest pipe manufacturer in the U.S. By the time Frank formed Medico Pipes in 1957, it had already consumed eight other pipe makers, some still celebrated and others less remembered: the Manhattan Briar Pipe Co. in 1922; William DeMuth & Co. (WDC) in 1937; The Kaywoodie Co. (later Kaywoodie Pipes Inc.), Yello-Bole, Kaufman Brothers & Bondy (KB&B), the Reisss-Premier Corp. and the New England Briar Pipe Co. in 1955, and the New Jersey Briar Pipes Co. in 1956.

Discussions today about Medico pipes, in person or online forums, can become downright nasty, pitting vehement supporters against rabid critics. Nevertheless, older Medicos certainly possess a certain heightened quality and charm, and the brand’s lines are still made to be inexpensive and durable. As cigarsinternational.com put it, Medicos are “no-nonsense pipes made for the everyman.” That, they no doubt definitely are, at prices ranging from $15.99-$39.99. Medico has made pipes with materials including traditional briar, Brylon (an S.M. Frank synthetic invention of high temperature resin and wood flour) and even a unique bent tall billiard covered with a mysterious material described by Pipephil as either felt, synthetic fur “or a piece of wall-to-wall carpet.” Well, that settles that. To tell the truth, I would love to own one of those, if only for show-and-tell and to be able to call myself a carpet piper, despite the risk of static-electric charges and burns.Lady1SOME FEMALE SMOKERS AND PIPE MAKERS
I have put out various general calls for help in my local and online pipe communities searching for women who smoke pipes and would be willing to share some of their experiences and preferences, and my friend Liz invited me to become a Friend of her Facebook Ladies of the Briar Group. I still need to pursue that line, but at least have four blogs left to do so.

Since my second ladies pipe blog, I have re-focused my research on areas of interest I had not even considered until some other friends mentioned them. The one was revealed to me by Jennifer, the owner of Stag Tobacconist in Albuquerque where I am a very frequent fixture. The other, suggested to me by another Smoking Forums UK friend, Ed, was a fact that struck me as so obvious I was embarrassed to have overlooked the idea. Both, I believe, will prove of great interest.

Unknown to me until Jennifer’s revelation, was that Samuel Gawith Fire Dance Flake – a Virginia mix with blackberry, vanilla and brandy flavorings that was a favorite of mine back in my aromatic-heavy days but remains a blend I still enjoy on occasion – was formulated by one of the few female tobacco blenders in the U.S. The light flavorings and Best Brown Virginia used give Fire Dance a nice little bite.Lady2Of more significance is the presence of females – ye gads, what’s the world coming to? – in the business of making pipes. Ed mentioned the following names and provided a few links, worried these were not enough, and I looked up the rest to get samples of their work: Vilma Armellini, one of three daughters of the great Italian pipe maker Mauro Armellini and who regularly assisted her father in making many of his pipes and took over the business upon his death; Anne Julie; Nanna Ivarssen, and two newcomers who have been crafting fine pipes for the past several years, Sabina Santos and Scottie Piersal. Alas, I have been unable to locate a pipe made entirely by Vilma Armellini, but the first photo below shows her father’s work that likely included her help. I will, you can bet, continue looking.Lady3 Lady4 Lady5 Lady6 Lady7In light of my severe case of P.A.D., I expect to add samples of these brilliant women’s pipe crafting art to my collection as soon as possible.

RESTORATION
Now, for the drab little Medico Real Briar acorn as I first saw it.Lady8 Lady9 Lady10 Lady11The bit looked like this close up.Lady12I put it in an OxiClean bath and the stummel in used Everclear (not to drink, but to strip prior pipes).Lady13I took the bit out after a half-hour or so and wet micro meshed it. Then I went ahead and buffed it with red and white Tripoli, White Diamond and carnauba.Lady14I apologize for the gunk in the last photo. I just noticed it, but I assure you it came off with a wipe, or I wouldn’t have sold it the next day. About an hour after putting the stummel into the Everclear, I removed it and swabbed the chamber with one small soft cotton square and the outside with another.Lady15 Lady16 Lady17As usual, there was still old stain to remove, but other than uncommon situations such as removing that awful red varnish used on almost all pipes made in China , for example, I prefer not to let the wood soak too long. A little sanding with 220-grit paper in easy, even strokes, for the most part in the same direction, worked off the rest of the drab and dreary cloaking stain on the briar that had left darkness there and nothing more, as Edgar Allen Poe wrote.Lady18 Lady19 Lady20Call me anything other than Ismael, but I always get a distinct rush when the stummel is ready for micro meshing. In an average restoration of this type, with no serious, time-consuming obstacles, micro meshing most of the time is the halfway + 1 point, or the hump of the project. However, with five steps to go before completion of the pleasant task – it was better than the movie, which I had seen 10 times already – I was exactly halfway finished. The point, however obtuse, is that in my mind I was almost to the finish line. Oh, never mind! Alright, then, I proceeded to micro mesh from 1500-12000.Lady21 Lady22 Lady23Next up was re-staining the stummel, using Lincoln brown alcohol-based shoe and boot leather dressing.Lady24I also enjoy the brief puff of blue fire after holding my Bic or a good kitchen match close to the stain-wet wood, like flaming baked apples served with ice cream. Sort of. But that doesn’t make me a pyro. I prefer to think that life is like a bowl of ice cream, even if it’s served up on fire at times. Consequently, a few minutes after torching the stummel, I started with 2400 and 3200 micro mesh to remove the charred neon green coating. That broke through to dark brown, at which time I switched to super fine four-ought steel wool to take the darkness down a few notches.Lady25 Lady26 Lady27Ready for the second to last step in this somewhat off-the-norm order of events, I retorted the pipe at last.Lady28 Lady29After running a fluffy cleaner through the shank and clearing more last-minute soot from the chamber with a cotton cloth square, I buffed the stummel with white Tripoli, White Diamond and carnauba, using the wheel I keep clean after each to work the compounds further into the briar and keep them from smudging.Lady30 Lady31 Lady32CONCLUSION
So far, by an eerie coincidence if there is such a thing, all three of the pipes I have restored for this ladies pipes series have sold. The Frasa (or FRASA) went to my good friend and fellow pipe club member, Ashley. The Medico Acorn of this installment was snatched up by another woman, Rita, whom I met last night when she saw me smoking a pipe and mentioned that her husband “used to enjoy his pipes all the time” (I took this rather ominous wording as either a sign that the good man is no longer with us or just not with Rita), as well as the fact that she gave up cigarettes by puffing on a pipe of her own with tobacco until she weaned herself off both, and she added that she missed the feeling of the pipe in her mouth. No comment. The third pipe, a Citation Real Briar oval, sold to an 18-year-young man who also approached me because of the fine pipe in my mouth at the time. Ashley reserved hers before it was even restored while the others fell victims to my persuasive sales technique and the fortuitous circumstance that I had my available pipes with me. Still, I didn’t push any of the ladies pipes on anyone. They were all picked out of the box by the happy buyers.
SOURCES
http://pipesmagazine.com/forums/topic/smoke-jokes
https://rebornpipes.com/tag/brewster-pipes/
https://rebornpipes.com/2013/04/14/some-reflection-on-the-historical-background-on-cpf-pipes/
http://www.smfrankcoinc.com/home/?page_id=2
https://pipedia.org/wiki/S.M._Frank
http://www.pipephil.eu/logos/en/logo-medico.html
http://www.smfrankcoinc.com/home/?page_id=143 Medico pipes
http://www.cigarsinternational.com/brands/1552/medico/
http://www.tobaccoreviews.com/blend/1965/samuel-gawith-firedance-flake
http://www.theitalianpipe.com/artisans/armellini.htm
http://www.annejulie.com/pipes.html
https://pipedia.org/wiki/Ivarsson,_Nanna
http://www.sabinapipes.com/
http://mypipeclub.com/forum/index.php?PHPSESSID=18ed18b6fd1b7cfa581ca18da56449f7&topic=805.0 Scottie Piersal

Cleaning up an Edwards Unique – Hexagonal Straight Dublin


Blog by Steve Laug

Over the years I have cleaned up, traded or kept many Edwards smoking pipes. The natural finish briar has always made these pipes attractive to me. The briar is always light weight and beautiful. Many have had a few fills in them but that in no way detracted from the beauty of the pipe. This one from my brother Jeff is different than any of the others that I have had pass through my hands. It is a square shank hexagonal Straight Dublin that has a shape that I have never seen before. The grain on it is quite stunning even though there are some small fills on the shank and on the right side of the bowl. The finish was in decent shape under the light grime on the surface. The beveled inner edge of the rim had some lava build-up and it spilled over to the flat portion of the rim toward the back side. I had field reamed the cake while I was staying with my brother in Idaho. The bowl was pretty clean and the inner edge of the rim was round. There were no dings or dents in the rim or the curved cap on the bowl. The stem was oxidized and had some fairly deep tooth marks at the button.Ed1Ed2Ed3

The shank was stamped on top with the word Edward’s and on the underside Algerian Briar with the shape number 87 underneath. There was a large #7 near the flat bowl bottom.Ed4Ed5

I took a close-up photo of the bowl and the rim to highlight the cleanness of the bowl and the lava on the bevel.Ed6

I sanded the rim with a worn piece of 220 grit sandpaper to remove the lava on the rim surface and also to rework the inner bevel.Ed7

I scrubbed the bowl with Murphy’s Oil Soap and cotton pads to remove the grime. I scrubbed around the rim surface as well. I sanded the rim with 1500-2400 grit micromesh sanding pads and then scrubbed it again. I was amazed at how well the rim came out.Ed10Ed9Ed10Ed11

With the externals clean I scrubbed the airway and the mortise and the stem with cotton swabs, pipe cleaners and alcohol. I used a dental pick to clear out the slot in the button.Ed12Ed13

I sanded the stem with 220 grit sandpaper to remove the oxidation. I worked on the area around the tooth marks next to the button on both sides. I scrubbed out the tooth marks with alcohol and once they were clean prepared them for the patch. I patched the tooth marks with black super glue and set the stem aside so the glue would cure.Ed14Ed15

While the glue dried I decided to work on masking the fills on the shank and the bowl of the pipe. I used a Black Sharpie and lightly drew lines across the fills on the right side of the bowl and the middle of the left side of the shank, working to blend them into the surrounding grain.Ed16Ed17

Once the patches on the stem had cured I sanded the stem with 220 grit sandpaper to blend the patch into the stem material. I sanded it with 280-600 grit sandpaper to smooth out the scratches and used a medium grit sanding stick to sand in the angles of the saddle. The oxidation on this stem was stubborn. I scrubbed it with Meguiar’s Scratch X2.0 and then spent a significant amount of time wet sanding it with 1500-1800 micromesh pads. Finally I got through the oxidation. It was not deep in the stem it was just stubbornly hard so breaking the surface took a lot of sanding. Ed18Ed19Ed20Ed21Ed22

With the oxidation finally conquered and the patches blended in I sanded the stem with 1500-2400 grit micromesh some more – this time working to polish the stem. I gave the stem a coat of Obsidian Oil and sanded it with 3200-4000 grit pads. I gave it another coat of oil and sanded it with 6000-12000 grit pads. I gave it a final coat of oil and let it dry.Ed23Ed24Ed25

I buffed the pipe with Blue Diamond on the wheel and gave the bowl and stem multiple coats of carnauba wax. I buffed it with a clean buffing pad and hand buffed it with a microfibre cloth. The finished pipe is shown in the photos below. I was able to clean up the rim so it looks almost new – little darkening on the inside bevel toward the back. The fill on the side of the bowl disappeared and the one on the shank is less glaring. The stem repairs look good and I was finally able to remove the oxidation. All in all it is a beautiful pipe with lovely grain and it should provide many more years of service. Ed26Ed27Ed28Ed29Ed30Ed31Ed32

Repairing and Restoring a KBB Yello-Bole 2070B Cutty


Blog by Steve Laug

I was contacted by Robb, a reader of the blog about working on an old Yello-Bole Cutty that he had picked up. He said it was in decent shape but had a cracked shank that someone had already done a repair on. They had glued the shank with wood glue but when the stem was inserted it cracked again. He wanted the shank reglued and banded. We talked about different options for repairing the pipe and the costs of doing it. Finally, in an email he offered to trade me the pipe in exchange for one that I had for sale on the blog – a Kaywoodie Signature Bulldog. The deal was done and the pipe was now mine.

As with many of the pipes I repair and restore I want to learn as much about them as I can. I did some work on the internet trying to find the shape number of the pipe and information on the stamping. After a pretty fruitless search I wrote to Troy Wilburn of the Baccypipes Blog to get some information on dating the pipe. Troy has become my go to guy when I want to learn information on this particular brand of American pipes. He wrote back quickly with a reply which I summarize below. In it he walked me through the meaning of the stamping and how that helped with the dating of the pipe. His quick first answer stated that the pipe was made between 1933-1936. Here is the main portion of what he wrote to me:

“I’ll break down the stamping and numbers for you. Starting with the left side of the shank the pipe is stamped with KBB in a clover leaf and next to that it says Yello-Bole. Underneath it is stamped Honey Cured Briar. Yello-Bole pipes that come from 1933-1936 bore the stamp Honey Cured Briar. On the right side of the shank it is stamped 2070B. The meaning of the numbers breaks down as follows. The number 20 tells us that the stem is black vulcanite with a push tenon made between 1932-1940s. The next two numbers, 70 gives the shape – a long Belgian and that it was made between 1928/9 and 1935. They made a regular 70 (it’s just called Belgian), a large Belgian 70B, and a long Dublin Belgian 70B.”

I took some photos of the pipe with the stem in the shank to highlight the issues that I saw with the pipe. Not only was the shank cracked but the tenon was also cracked and set at an angle to the stem making alignment in the shank impossible. The dimensions of the pipe to give some perspective to the photos are: Length – 8 inches, bowl height – 2inches, outer bowl diameter – 1 ¼ inches, inner bowl diameter – ¾ inches. You can see that it is a large pipe. The finish was crackled and dirty – almost opaque to the point that the grain was hidden. The rim had a lava buildup and the bowl had a thin, uneven cake that covered it top to bottom. The stem was oxidized and yellow. The stinger was glued in place in the tenon with the broken tenon anchored firmly to the metal insert on the stinger. It was also glued in sideways instead of upright.YB1 YB2 YB3I took a close up photo of the tenon and stinger repair that had been done to show the cracked and glue pieces of the tenon on the stinger. You can see in the photo where pieces of the tenon had broken free when I removed the stem from the pipe.YB4The crack in the shank arced from one side of the pipe to the other forming a closed crack. The chunk of briar had been glued in place by what appeared to be wood glue. The repair was not strong enough to protect the shank when the angled tenon was inserted in the mortise. Each time the stem was inserted the crack opened wide. Because it had a start and an end point there was no threat in the crack spreading upward along the shank. I had two options for repairing this. I could either insert a tube inside the shank thus internally banding the pieces in place or I could use a band on the exterior to the same effect. As I worked on the i decided to band the shank rather than do an internal repair. The thinness of the tenon with the stinger in place would make it impractical to reduce the size of the tenon further to fit in the inner tube repair.YB5I removed the stinger from the stem and broke away the pieces of the rubber tenon from the metal insert. The stinger was exceptionally long and once I replaced the tenon I would make a decision what to do with it.YB6I have an assortment of threaded replacement tenons that I use to repair broken tenons. I went through my container and found one that was a good fit in the shank.YB7I used the Dremel and sanding drum to flatten out the broken pieces of the old tenon on the end of the stem. I used the topping board to square up the end. I set up a cordless drill and a drill bit approximately the size of the threaded portion of the new tenon. I turned the stem onto the drill bit and slowly opened the airway to fit the new tenon. Once I had the airway open and deep enough to accommodate the threaded end I used a tap to cut threads into the inside of the stem. YB8I turned the new tenon into the threaded airway in the stem to check the fit. When it was correct I gave the threads a coat of slow drying black super glue and turned the tenon into the stem until it was tight against the face of the stem.YB9 YB10I set the stem aside to let the glue cure and began to work on the crack in the shank. It did not matter which way I chose to repair the shank I needed to clean up the previous repair and remove the dried wood glue. I needed a clean surface to reglue with super glue. Once I had the surface clean I pried open the crack and used a dental pick to push clear super glue into the crack. Once the glue was in place I clamped the shank until the glue set.YB11I sanded the glued shank with 180 grit sandpaper to remove the finish and the over flow of glue from the repair. I wanted to make the surface smooth so that I could either band it externally or do it internally and then refinish the shank.YB12 YB13The next two photos show the gold/yellow colour of the paint in the stamping of the shank on both sides. Once I stripped the bowl of the varnish coat this would disappear and I would need to recreate it.YB14I cleaned out the inside of the shank and the mortise with alcohol, pipe cleaners and cotton swabs. It was dirty but cleaned up easily. I repeated the same process on the airway in the stem. It too was easy to clean. I reamed out the bowl with the Savinelli Pipe Knife to take the cake back. Underneath the light cake I found that they original Yello-Bole coating was still in place.YB15Once the glue on the shank had cured overnight I carefully put the stem in the shank to check the alignment of the stem and shank. I took the following photos of the pipe at this point in the process.YB16 YB17I wiped the bowl down with acetone on cotton pads to remove the varnish coat that was crackling. It took some scrubbing but the finish came off quite easily and left the colour in the briar.YB18I was careful to not wipe around the repaired shank as the acetone will dissolve super glue and I would be back to square one. I sanded the bowl with 1500-2400 grit micromesh sanding pads to further remove the finish.YB19I wiped the bowl down with a light coat of olive oil to see what the grain looked like.YB20 YB21I cleaned the shank and used European Gold Rub N’ Buff to restore the gold in the stamping. I really like how Yello-Bole and some of the older American pipes utilized the gold leaf in the stamping to make it highly readable.YB22I scrubbed the stem with Meguiar’s Scratch X2.0 to remove the majority of the oxidation and polish the stem. The residue of the oxidation is shown on the cotton pad under the stem.YB23I sanded the remaining oxidation with 220 grit sandpaper to remove it from the surface of the stem. There were some small tooth marks on the top and bottom sides of the stem as well that I sanded out with the sandpaper.YB24I wetsanded the stem with 1500-2400 grit micromesh sanding pads and gave the stem a coat of Obsidian Oil. I dry sanded with 3200-4000 grit pads and gave it another coat of oil. I finished sanding with 6000-12000 grit pads and gave it a final rubdown with Obsidian Oil.YB25 YB26I drilled out the tenon to the diameter of the stinger apparatus that had originally come with the old tenon. I made it large enough that the stinger was removable in order that the pipe could be smoked with or without the stinger.YB27The band that Charles shipped me came on Friday and it was a good fit on the shank. I coated the shank with some white glue and pressed the band onto the shank. I wiped away the excess glue with a damp cotton pad.YB28 YB29I used a dark brown stain pen to touch up the area around the shank repair that extended beyond the band. The colour worked well with the brown/red colour of the stain on the rest of the shank.YB30I buffed the area around the band with White Diamond on the wheel to blend in the stain colour with the rest of the pipe. I buffed the entire pipe with Blue Diamond, being careful to avoid the nickel band. I have found that when I buff the band at the same time as the rest of the pipe the black from the nickel on the buffing pad is transferred to the shank and stem. I rubbed the stem down with Obsidian Oil and gave the stem and bowl multiple coats of carnauba wax. I buffed the pipe with a clean buffing pad and then with a microfibre cloth to deepen and raise the shine. The finished pipe is shown in the photos below. I really like the way it turned out and I am sure glad that I was able to work a trade with Robb for the pipe.YB31 YB32 YB33 YB34 YB35 YB36 YB37 YB38I took some final photos of the pipe. The first photo shows the stinger next to the bowl and stem go give an idea of the size of the stinger and the second photo shows the stinger in place in the stem. Thanks for looking. YB39 YB40

Restoring a Lovely Rhodesian by John Calich


Blog by Steve Laug

I have had a thing for Calich pipes since John made a new stem for a bowl I bought on Ebay for one of his pipes. It was a labour of love and one which led to several phone conversations and correspondence with John. He was a great guy and a definite loss to the Canadian pipe smoking community. Whenever I come across one of his pipes in need of work I try to purchase it and restore it. The pipe I am writing about at this time is a Calich Hand Made Rhodesian that is stamped that way on the underside of the shank. It also has a 04 stamping. The photos below were shown by the eBay seller. The bowl appears to be in great shape. The stem is slightly oxidized and the seller noted that there was a hole in the top side of the stem at the button. I knew what I was getting into when I purchased this pipe – or so I thought.Calich1I have written several blogs about Calich pipes that help give an idea of the age of the pipe. While I waited for the pipe to arrive I reread those pieces to refresh my memory on the stamping. I have included the links to the blogs below.

https://rebornpipes.com/2015/03/03/one-of-my-john-calich-pipes-a-calich-ee-billiard/

I summarize the dating information from those blogs now: From my research and conversations I learned that John’s pipes were graded 3E – 8E. The retail prices for them ranged from $145.00 to $500.00. Each pipe was stamped “CALICH” and given an E grade. His earlier pipes were graded from 3-14 and had a single, tiny silver dot applied to the top of the stem. More information can be found at the Pipedia website by clicking on this link. http://pipedia.org/wiki/Calich This information told me as expected that the pipe I had was an earlier one.

I vaguely remembered that I had found further information but could not remember it so I read the next blog I wrote. https://rebornpipes.com/2014/03/21/reflecting-on-my-collection-of-john-calich-pipes/ There the information honed in on the date more closely. I quote from that blog now: I did find out some further information on the dating of Calich pipes as the information on Pipedia was not complete. What I found was very helpful. His early pipes were graded with numbers from 3 – 14. By the late 1980’s Calich introduced 15, 16, and even one 17. In the mid-90’s the grade system changed employing a number of E’s. The more EE’s the higher the grade. From that information I knew that the pipe I had was not only an earlier one but came from early in the 1980s.

When the pipe arrived I took some photos of it to give a clear picture of what I was going to have to deal with in the restoration of this pipe. The stem was more oxidized than the seller’s photos showed and the finish also showed more debris in the rustication and the double rings around the bowl cap than had appeared in the photos. The rim top looked about the same – there was a thin build up of lava on the flat surface but the inner and outer edges were undamaged.Calich2 Calich3The bowl had a light cake in it and would be easy to deal with. There was no damage to the inner bowl. As I looked over the surface of the bowl it was clear that under the grime the pipe was in pretty decent shape. The big issue was the hole in the top side of the stem at the button.Calich4 Calich5 Calich6I took a photo of the bite through to show the extent of the damage. The edges of the bite through were also pushed down into the airway on the stem constricting the airway so that a pipe cleaner would not pass through. The topside of the button was also thinned down considerably and would need to be built up. Calich7 Calich8I used needle files and a dental pick to open up the airway and clean up the crushed edges of the bite through. It enlarged the hole but the airway was wide open when I finished. I also roughed up the edges of the cleaned up hole with the needle files to give a rough surface for the repair to bond to.Calich9 Calich10 Calich11With the stem hole cleaned up I was ready to begin the repair. I cut a wedge of cardboard and covered it with clear tape to make a surface that the glue would not stick to. I inserted it into the airway under the hole and wedged it in place. I mixed a batch of activated charcoal powder and black super glue to make a patching mortar and using a dental spatula applied the material to the hole and the top of the button to build it up. I sprayed it with some accelerator to harden the surface so I could continue to work on the pipe and removed the cardboard wedge.Calich12 Calich13I reamed the bowl with the Savinelli Pipe Knife to clean out the thin cake. You can see from the photo that there was not much of a build up so it was quick job.Calich14I set the stem aside and used a dental pick to clean out the rings around the bowl cap. I scrubbed the rustication with some Murphy’s Oil Soap to clean up the dust in the grooves and crevices of the finish.Calich15I scrubbed the top of the rim with saliva and cotton pads and was able to remove the lava on the surface without harming the finish on the bowl top.Calich16 Calich17I cleaned out the inside of the mortise and shank with cotton swabs, pipe cleaners and alcohol.Calich18By that time I was also able to clean out the inside of the stem with pipe cleaners and alcohol. The pipe cleaners went through with little issue and the stem was clean.Calich19The next morning after the glue had cured overnight I worked on the stem. I needed to reshape the slot to facilitate easy cleaning so I used needle files to clean up the entrance of the airway.Calich20I sanded the stem repair and the surface of the button top with a sanding board to begin the process of reshaping the surfaces of both.Calich21I cleaned up the edge of the button and shaped the surface of the button with needle files until the edge was sharp the surface matched that of the underside of the button.Calich22With all of the hard shaping done it was time to begin the tedious process of sanding the repairs. I started with 220 grit sandpaper to smooth out the surface and the transition to the rest of the stem.Calich23There were still some small holes around some spots on the fill. I used a clear super glue to fill these in and smoothed out the patch with a spatula.Calich24 Calich25When the repair had dried I sanded it with some finer grit sand papers until the surface was smooth.Calich26 Calich27 Calich28I moved on to sand the stem with micromesh sanding pads – wet sanding it with 1500-2400 grit pads and then giving it a coat of Obsidian Oil. I dry sanded with 3200-4000 grit pads and gave it another coat of oil. I finished by sanding it with 6000-12000 grit pads and giving it a final coat of oil. I let the oil dry before buffing the pipe.Calich29 Calich30 Calich31I buffed the pipe and stem with Blue Diamond on the wheel and then gave the stem several coats of Carnauba wax. I buffed the stem with a clean buffing pad. I gave the bowl several coats of Conservator’s Wax and hand buffed it with a shoe brush. The finished pipe is shown in the photos below. The stem repair is solid and though visible to me as I have looked at it so long, it is not obvious. The pipe is useable and looks as close to what it must have looked like when John shipped it out from his shop in the 80s. Thanks for looking.Calich32 Calich33 Calich34 Calich35 Calich36 Calich37 Calilch36

Restemming and Restoring a Potpouri Author


Blog by Steve Laug

I have a growing box of bowls that came to me without stems. It seems each time I clean it out and restem the pipes I inherit more of them. This is not a complaint as I actually enjoy restemming pipe bowls. It is always a challenge to get a new stem to align properly with the shank and to deal with cracks or damages to the bowl or the shank. This bowl came to me and I immediately fell for the rustic rocklike features of the rustication. It was gnarled and rough looking and felt great in the hand. The bowl was dirty and the deep grooves of the rustication had a lot of dirt and grime build up in them. The rim was caked and the rustication pretty much filled in the grooves making the rim surface smooth. The bowl had a rough cake in it and looked as if someone had started reaming the bowl but did not finish. There were some small fissures like cracks in the sides of the bowl near the entrance of the airway and on the bottom and the top of the airway. Someone had cleaned out the shank so it was not too dirty. There was a small crack on the top of the shank that was about 1/8 long. I could open it slightly with a wedge so it would need to be glued and banded. The pipe showed a lot of promise though and I could see it come alive if I had the correct stem for it.Pot1 Pot2In the photo below there is a small crack barely visible in the middle of the shank end between my fingers. I have circled it with red to focus your eye on it. The tip of the red arrow is on top of the crack in the shank. It extends about 1/8 to ¼ inch.Pot3 Pot4I took a close-up photo of the bowl and rim to give you an idea of the state of things when I started. It is hard to see but at this point I could see some small cracks around the entrance of the airway to the bowl.Pot5I went through my can of stems and found a green acrylic stem that would do the trick on this pipe. It would go well with the rustication and the length and width of the stem would carry through the thickness of the bowl. I sanded the tenon with the Dremel and sanding drum until it was a close fit to the shank. I finished sanding by hand with 220 grit sandpaper. It fit well in terms of the width of the shank but it was slightly thicker on the top and the bottom where it met the shank. I was careful inserting it as I did not want to crack the shank further.Pot6 Pot7 Pot8I used the Dremel and sanding drum to remove much of the excess thickness on the top and the bottom of the stem at the shank junction. I do this carefully with the stem in place in the shank so that I can get it as close as possible without damaging the finish on the shank. You can see in the next two photos that the junction is pretty smooth now and the thickness is almost a match.Pot9 Pot10I finished the fit with a file and took off the remaining thickness that had to go. I also used the file to remove the tooth indentations on both sides of the stem near the button.Pot11 Pot12With the fit nearly perfect it was time to sand out the filing marks and smooth out the stem. I have a medium grit sanding stick that works perfect for this application and I sanded with it until all of the file marks were gone and the transition between the shank and the stem was smooth.Pot13 Pot14With the stem fit roughed in I turned my attention to the bowl and shank. I wanted to have the shank and bowl clean so I could deal with the repairs to the airway in the bowl and the crack on the top of the shank. I reamed the bowl with a PipNet reamer using the largest cutting head. I cleaned up the remaining cake with the Savinelli Pipe Knife.Pot15 Pot16I scrubbed the exterior of the bowl with Murphy’s Oil Soap and a tooth brush on the sides, shank and the bowl of the bowl. I scrubbed the rim with a brass bristle brush until all of the lava that filled the rustication was gone.Pot17I rinsed off the soap with warm water and dried the bowl with a soft towel. The cleaned and reamed pipe is shown in the photo below.Pot18With the bowl reamed and the finish clean I turned to the internals. I cleaned out the mortise and airway into the bowl with pipe cleaners, cotton swabs and alcohol. It did not take too much to clean out the pipe. I cleaned the stem the same way and used a dental pick to clean up the slot in the end of the button.Pot19 Pot20I lightly sanded the crack on the top of the shank and spread it open with a dental pick. I used a tooth pick to push super glue into the crack and then held the crack together until the glue set. Once it was dry I found a round band that had the right circumference to fit the shank and heated it with a lighter and pressed it onto the shank of the pipe.Pot21 Pot22With shank repair complete and the bowl cleaned and ready I put the stem in place in the shank and took some photos of the pipe. I really liked the look of the band breaking up the rustic bowl and the smooth green stem. The band fit perfectly and did not cover the stamping on the underside of the shank. I still needed to sand the stem some more to get a shine but you can see what the pipe will look like at this point. Pot23 Pot24I mixed a batch of pipe mud (cigar ash and water) and used a dental spatula to apply it to the bottom of the bowl. I inserted a pipe cleaner in the airway and used the spatula to apply the mud to the small cracks and fissures around the airway. Once the mud cured the pipe bowl would be in good shape until a new cake was built.Pot25I heated the stem in a cup of water in the microwave until it was pliable and then put a gentle bend in it to give it a more elegant look and comfortable feel.Pot26 Pot27I wet sanded the stem with 1500-2400 grit micromesh sanding pads to remove the scratches. I dry sanded with 3200-4000 grit pads and then finished with 6000-12000 grit pads. I rubbed away the sanding dust with a damp cloth.Pot28 Pot29 Pot30I gave the pipe a light buff with Blue Diamond on the wheel to bring some deep shine to the stem. I then gave the stem several coats of carnauba wax and buffed it with a clean buffing pad. I finished by hand buffing it with a microfibre cloth. The finished pipe is shown in the photos below. The green acrylic stem works well with the rough finish on the bowl. I like the finished look. What do think? Thanks for looking.Pot31 Pot32 Pot33 Pot34

An Amazing Find – A Corsica Cavalier with a Horn Stem and End Cap


Blog Steve Laug

This is yet one more of my brother’s amazing finds. It is a beautiful Cavalier with a horn stem and end cap. It is stamped in classic late 19th Century fashion with gold leaf on the left side of the shank. It reads CORSICA in and arch over two stars around a capital V with what looks like an elongated 0 in the middle of the V. Underneath the *V* is VIEILLE RACINE stamped in a reverse arch. The words form and oval. It is my understanding that the Vielle Racine stamp translates literally as Old Root. The band is stamped 14K and is almost a rose gold. It is fitted to the shank and also is beveled inward covering the shank end. The horn end cap has a threaded short bone tenon that screws into the briar. It has a large bowl.

When the pipe came to me it was dirty but the bowl had been reamed. The rim had a slight build up and the inner edge had been slightly damaged when it had been reamed. The gold band was tarnished. The finish was dirty and spotted with sticky dark spots on the end cap and in the bend at the top of the shank bowl junction. The bowl had been coated with shellac that was spotty and cloudy in places. The stem looked really good at first glance but I would have to examine it more closely once I started cleaning it up. The grain on the briar was beautiful and I could not wait to clean it up and see what lay beneath the grime and the shellac.Cor1 Cor2 Cor3 Cor4I took several close-up photos to highlight different aspects of the pipe. The first of these is the state of the rim and bowl. The rim photo is a bit blurry but gives a pretty good idea nonetheless of the state of the bowl and the tars on the rim. The second photo is of the stamping on the left side of the shank. It still had the gold leaf in the stamping to highlight it.Cor5 Cor6I took the pipe apart and photographed the parts. I also took a photo of the end cap so that the bone tenon in visible.Cor7 Cor8The horn stem looked really good but looking at it up close I could see a crack along the top of the stem following the curve and a small group of them on the right side of the stem. There were also a few chips missing on the underside of the stem near the shank junction. The tenon had a unique look to it – almost a nipple on the end of it. It was coated with a little varnish as well so it much have someone’s attempt to tighten it as it was currently quite loose in the shank.Cor9 Cor10Before I started to work on it I decided to do a bit of research to fill in the gaps on another pipe brand that had not heard of before seeing this one. I was familiar with briar coming from Corsica but had not run across the pipe brand of that name. I resorted to the pipephil site to see if he had any information on the pipe and who may have made it. The site did have the brand listed. It turns out that Corsica is a brand of Henri Vuillard of Saint Claude, France. This Vuillard was not to be confused with E. Vuillard & Cie also of Saint Claude. Reading that information helped me to make sense of the large *V* in the centre of the stamping on the pipe that I am working on. Here is the link to the information: http://www.pipephil.eu/logos/en/infos/hvuillard-en.html. The site included the following photos of several pipes in this line. The cursive form of the Corsica stamp is very similar to the stamping on my pipe.Cor11The link also included a sub link to a secondary page on the history of the brand. The following is an abstract of the information that I found regarding the maker of this pipe. At the end of the 19th century the Vuillard house managed by Paul Vuillard and established at Chemin de la Coupe (Saint Claude) produced match boxes and cases for spectacles. At the beginning of the 20th century on Henri’s (son of Paul Vuillard) initiative the factory is converted to the production of briar pipes which were marketed under the “Corsica” brand.

From that information along with the materials and the design of the pipe I am pretty confident in saying that it was made in the early 20th century when the company was managed by Paul Vuillard who took the initiative to start making pipes. An interesting note is that from 1914-1918 The Henri Vuillard Factory produced pipes for the French Army. The article says that at that time they had between 170-180 employees.

Armed with this new knowledge and an estimate of the age of the pipe I began to clean it up. The cake had been reamed already so I just cleaned up the walls of the bowl with the Savinelli Pipe Knife. I had removed the stem and the end cap so it was easy to hold the bowl and ream it.Cor12I cleaned the shank from the mortise to the end cap with pipe cleaners, cotton swabs and alcohol. The oils and tars that came out were not very dark and they did not smell like tobacco. It was almost as if they were the stain from the outside of the bowl. It did not matter though it took quite a few before the shank was clean all the way through.Cor13I cleaned the airway in the stem as well. It also was dirty. But as I cleaned off the exterior the cracks became more noticeable, particularly the one on the topside.Cor14I scrubbed the exterior of the bowl with acetone on cotton pads to remove the shellac coat. I was careful around the gold leaf in the stamping as I did not want to damage that area of the bowl.Cor15 Cor16 Cor17 Cor18I put Vaseline on the threads of the bone tenon on the end cap and carefully turned it into the end of the shank. I polished the bone of the end cap with 1500-4000 grit micromesh sanding pads to smooth it out. I rubbed it down with some Obsidian Oil and let it dry. Cor19In the photo below you can see the fine cracks in the stem near the tenon end. This is also where the chips were. I drilled a tiny hole at each end of the crack on the top of the stem with a micro drill bit. I filled the holes and the crack with clear super glue. I used the clear super glue to also stabilize the other cracks on the sides of the stem and to build up the chipped areas on the underside of the stem.Cor20 Cor21 Cor22When the glue dried I sanded the stem with 220 grit sandpaper to smooth out the repairs and to begin to polish the stem.Cor23 Cor24 Cor25 Cor26 Cor27Once the repairs were smooth I wet sanded the stem with 1500-2400 grit micromesh sanding pads and gave the stem a coat of Obsidian Oil. I dry sanded it with 3200-4000 grit pads and gave it another coat of oil. I know the oil is made for vulcanite but I wanted to bring a little life to the horn. I finished sanding the stem with 6000-12000 grit pads and gave it a final coat of oil.Cor28 Cor29 Cor30 Cor31 Cor32 Cor33I polished the gold band on the shank end with a jeweler’s cloth until it shone. I gave the briar several coats of Conservators Wax and hand buffed the bowl with a shoe brush when it dried. Cor34 Cor35I decided not to buff this pipe on the wheel because I did not want to damage the gold leaf or the horn. I hand buffed it with a microfibre cloth and polished it until it shone. The finished pipe is shown in the photos that follow. It truly is a beautiful old pipe. I only wish that the horn was more perfect. The stem glows but I see the repaired cracks. Ah well it is better than having the stem splinter apart while using it. It should be good for another hundred plus years now. Thanks for looking.Cor36 Cor37 Cor38 Cor39 Cor40 Cor41 Cor42 Cor43 Cor44 Cor45