Tag Archives: sanding a stem

Just a few simple touches brought this Giorgio Orsini Bulldog to the top


Blog by Steve Laug

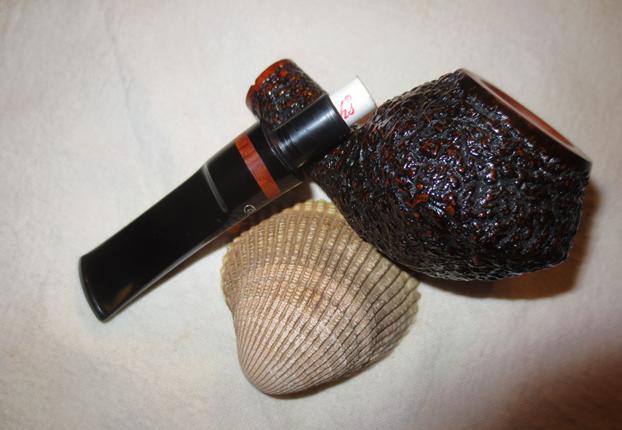
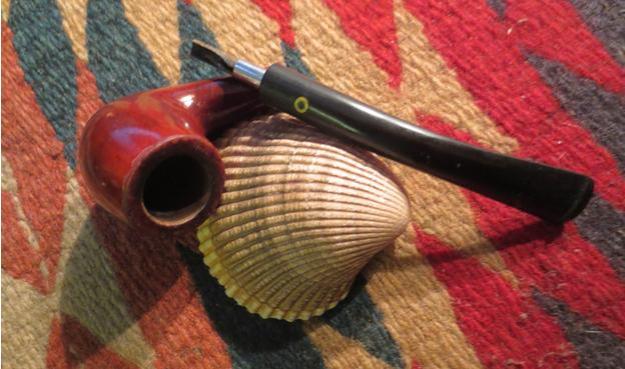
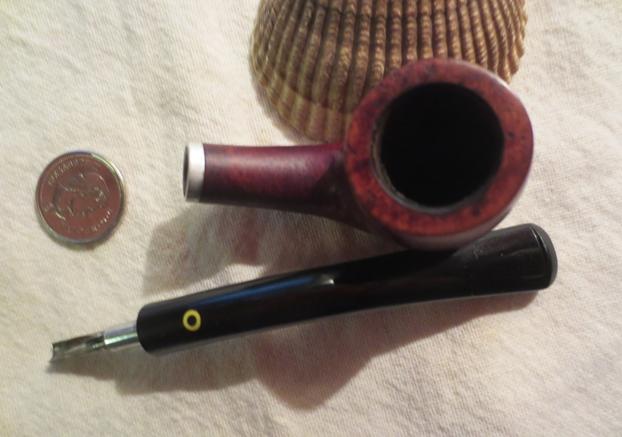
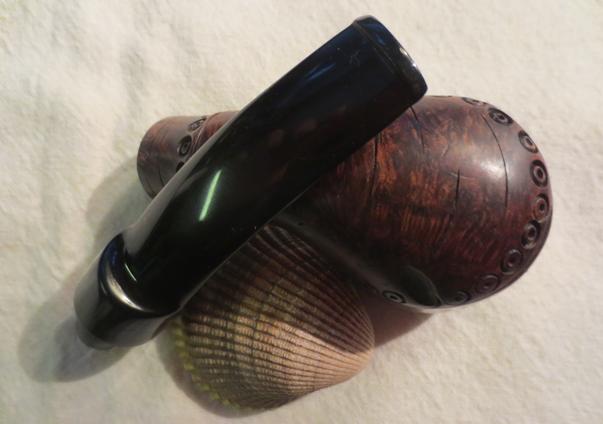
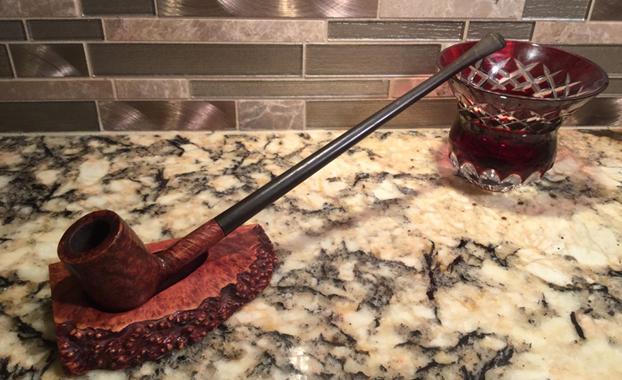
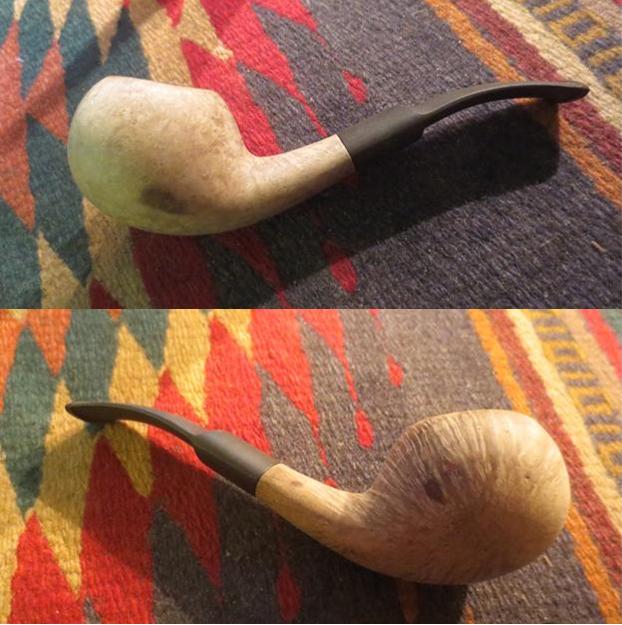
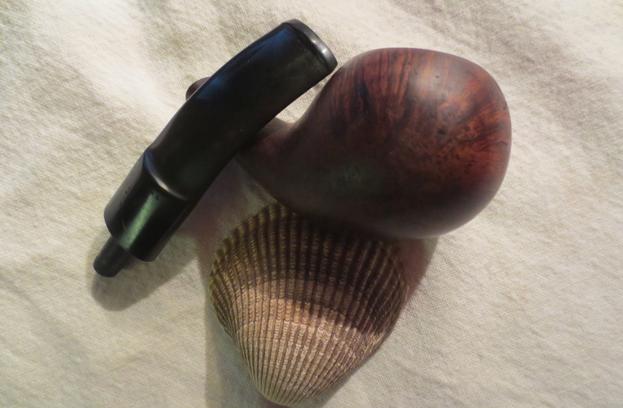
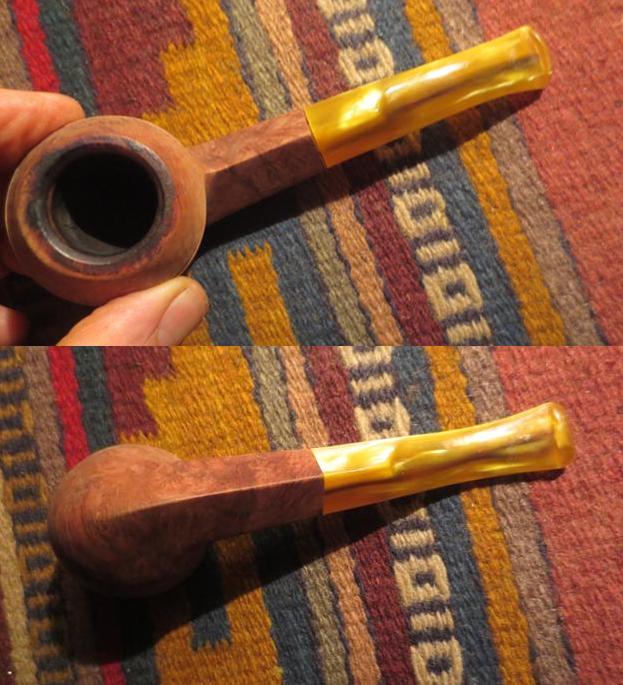
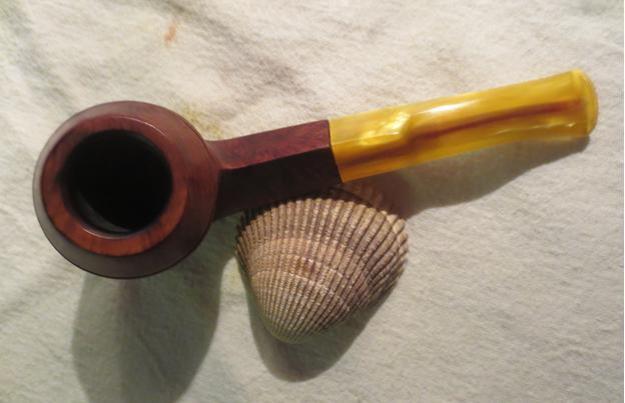
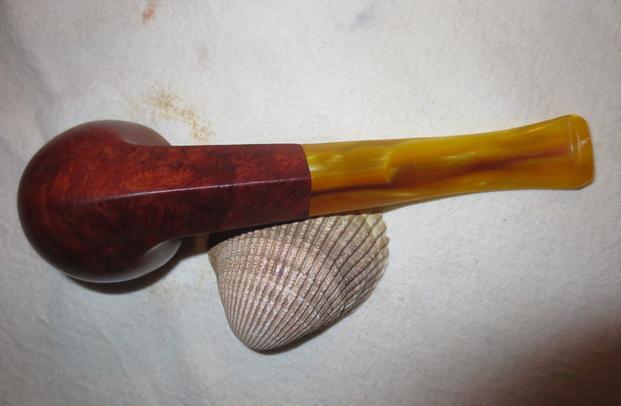
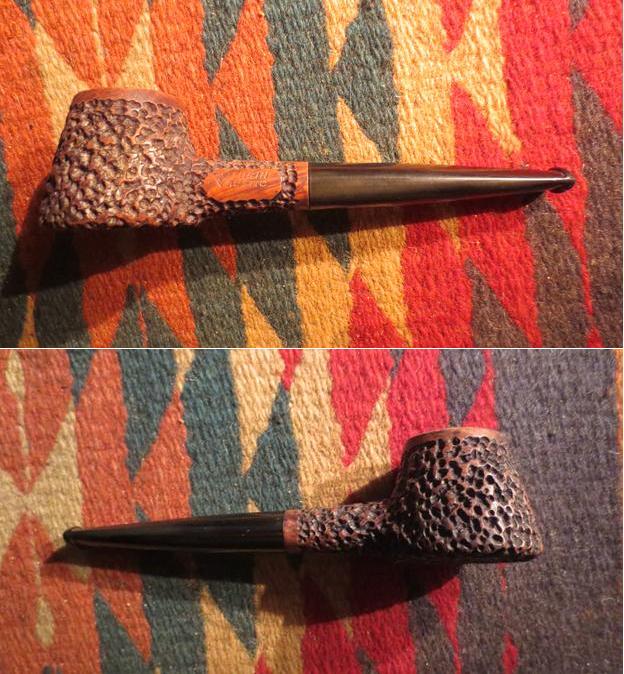
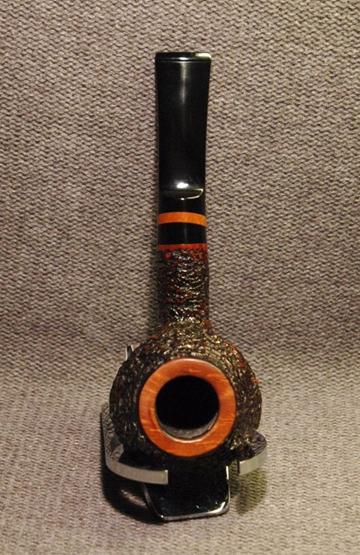
When I opened the last box that my brother Jeff sent and saw this Orsini Bulldog I was drawn to the shape, rusticated finish, smooth rim and shank end and the band of briar across the stem. There was something pleasing looking about this pipe that made me think it was going to be a keeper. He sent me the following photos by the eBay seller before the pipe arrived so I had some idea of what was coming but I have learned not to trust the photos of sellers. They tend to show things in their best light. orsini1
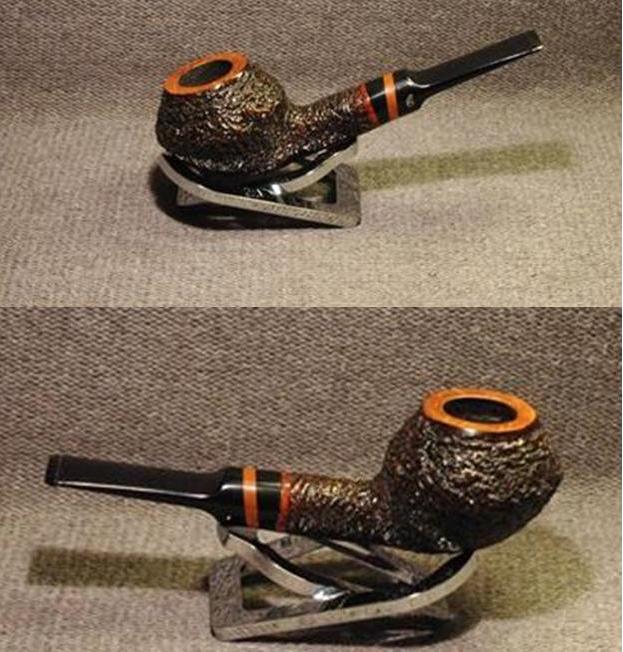
The seller described the pipe as follows: The Pipe has a nice sand grain. Mouthpiece has very small bite marks and usable with 9mm Filter. Pipe is smoked and not cleaned, but in a good estate condition. The dimensions are: length: 5.5 in/14.1cm, height: 1.7in/4.4cm, width: 2in/5cm and chamber width: .75in/2cm. The only real negative to my mind was the 9mm filter in the shank but even that could be dealt with. Overall the pipe looked to be in pretty decent shape and even the filter was new.orsini2 orsini3
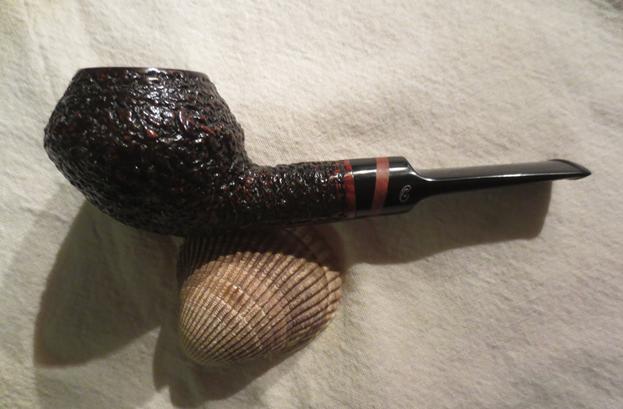
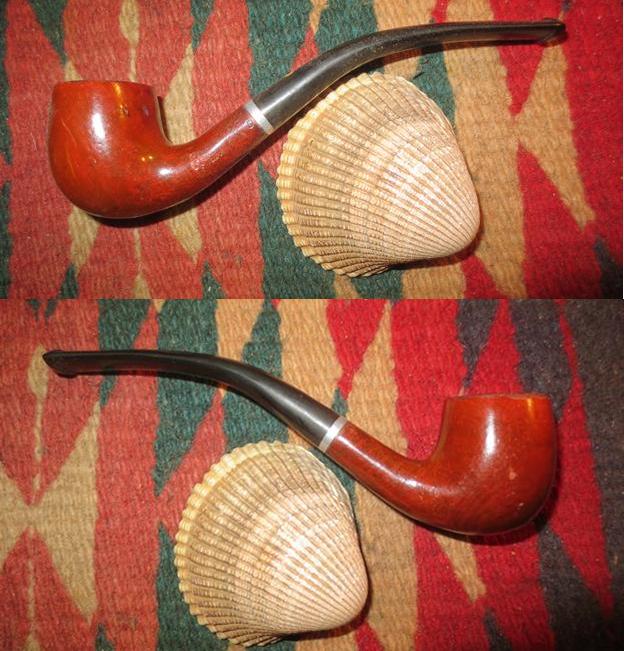
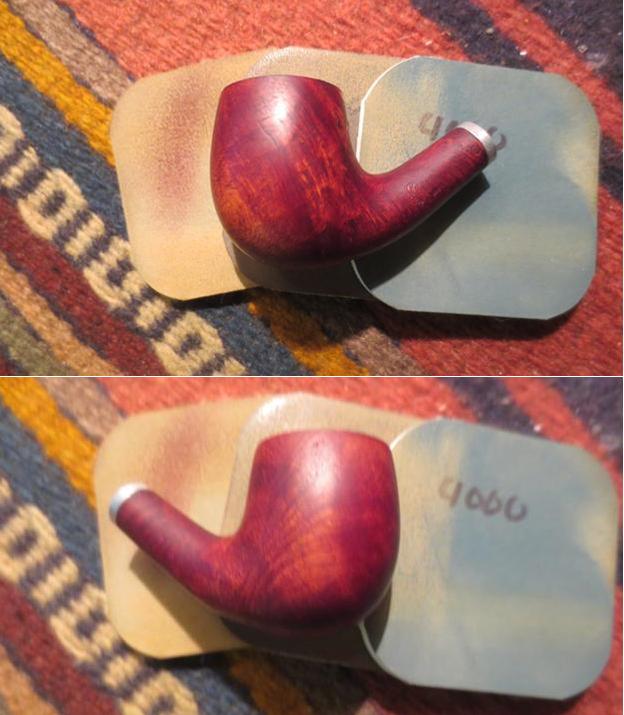
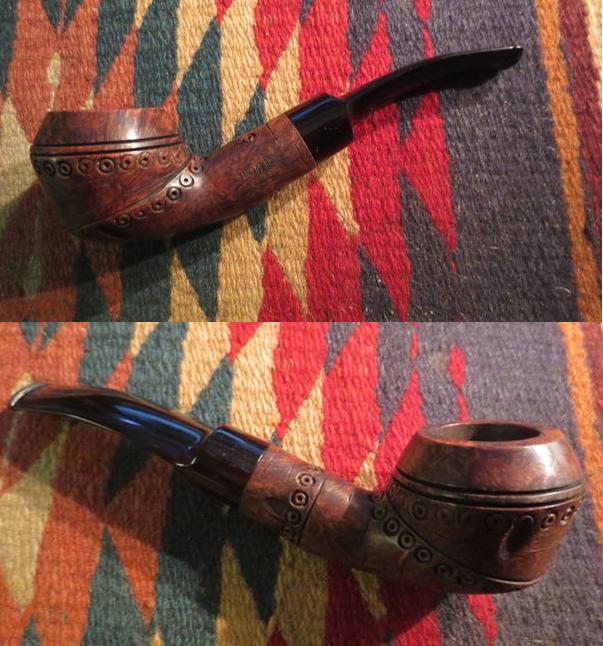
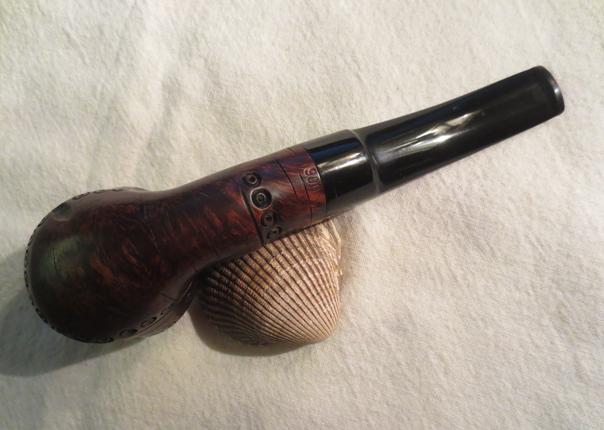
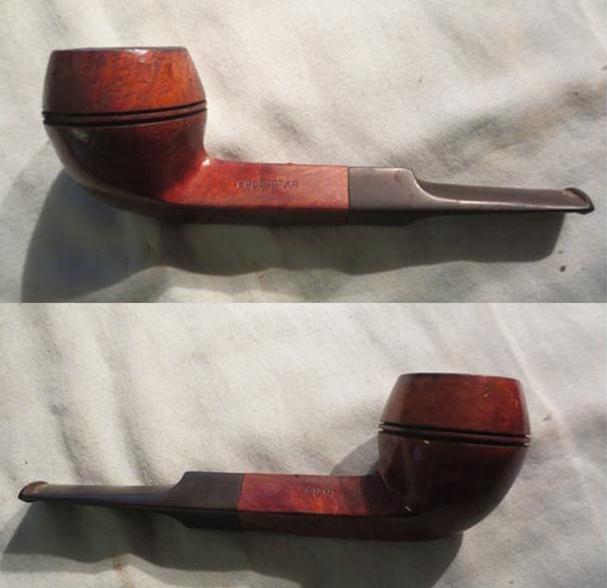
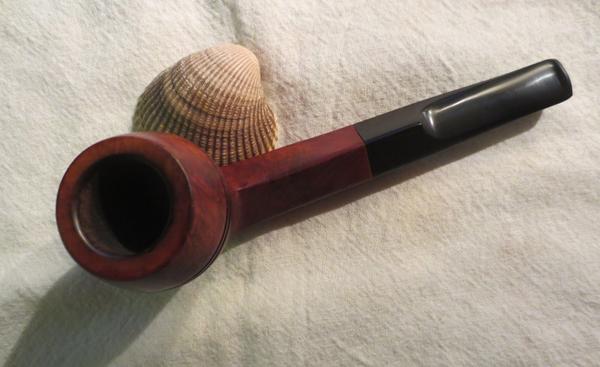
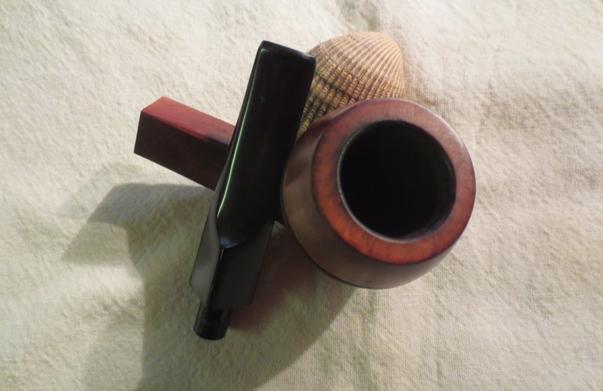
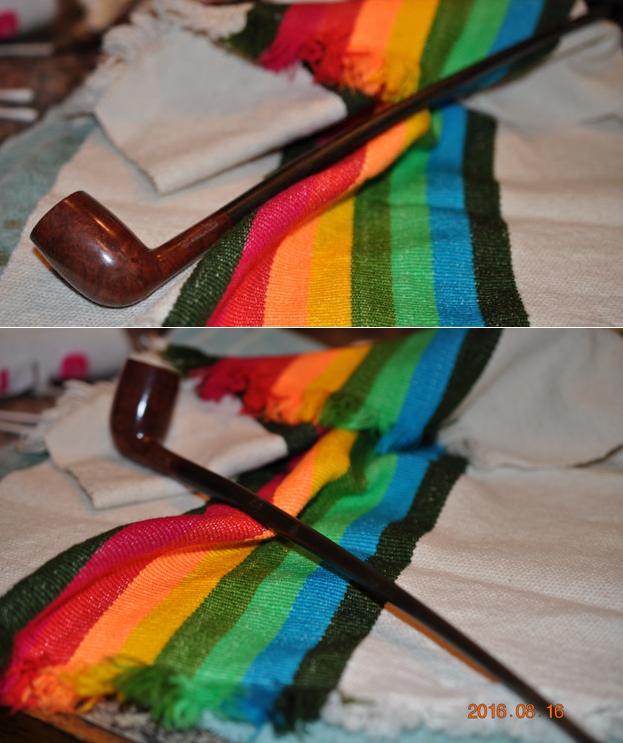
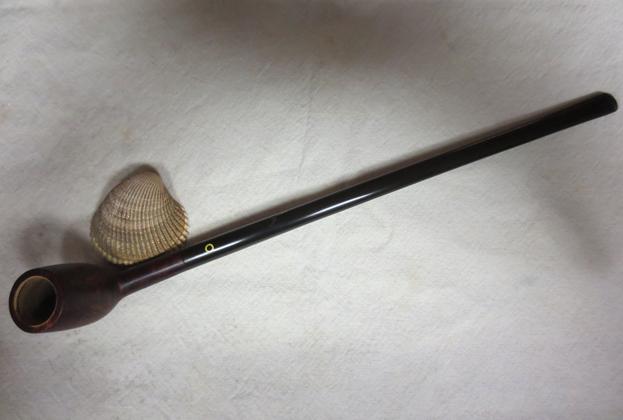
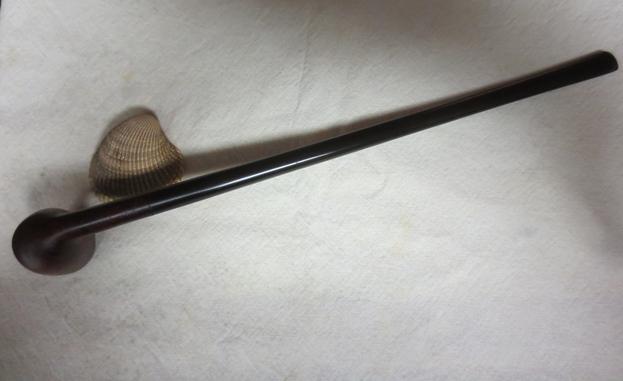
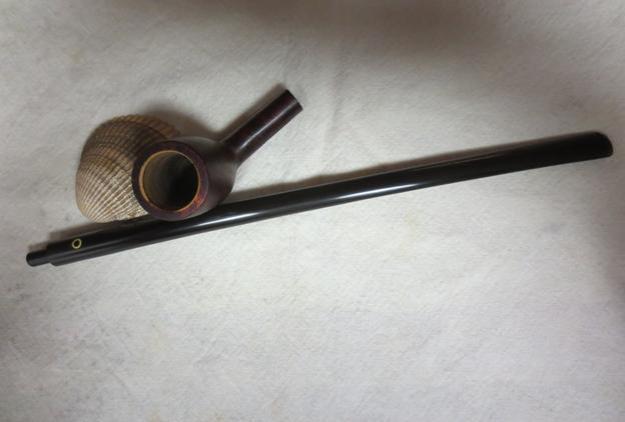
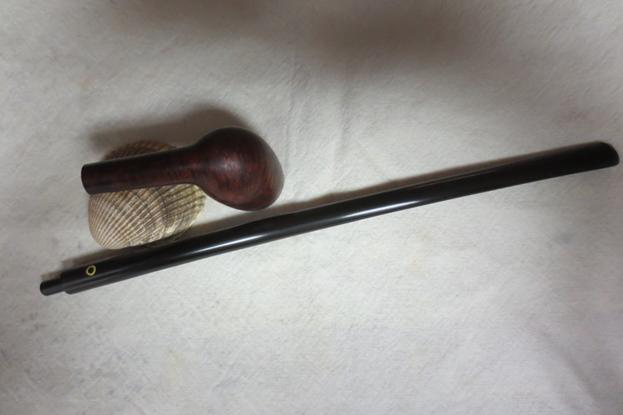
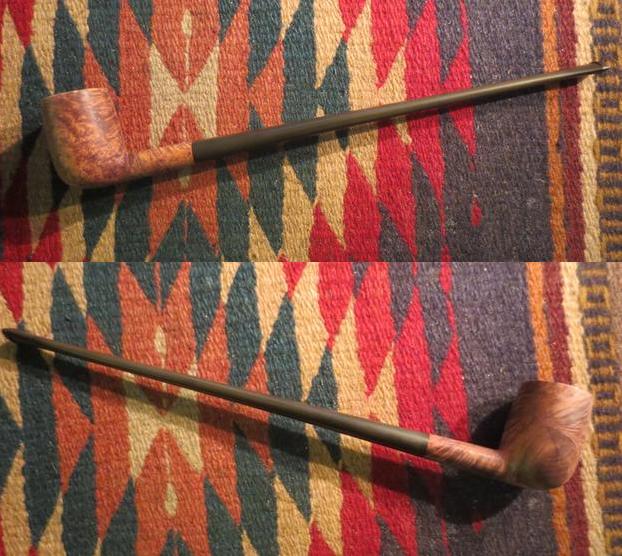
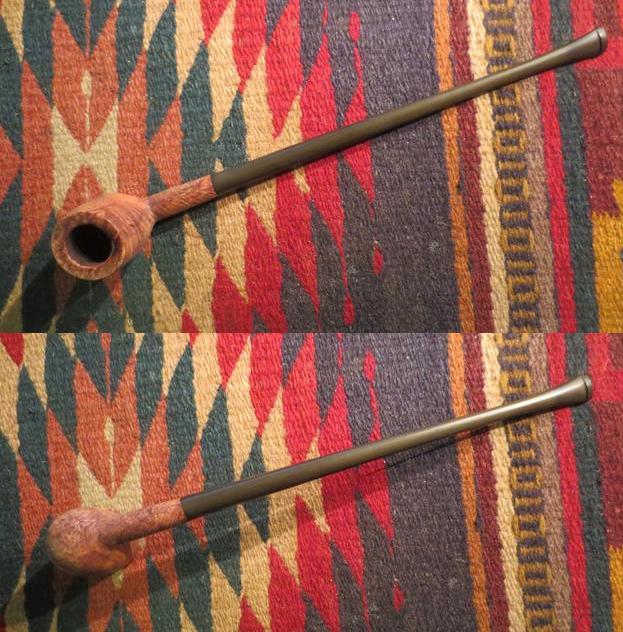
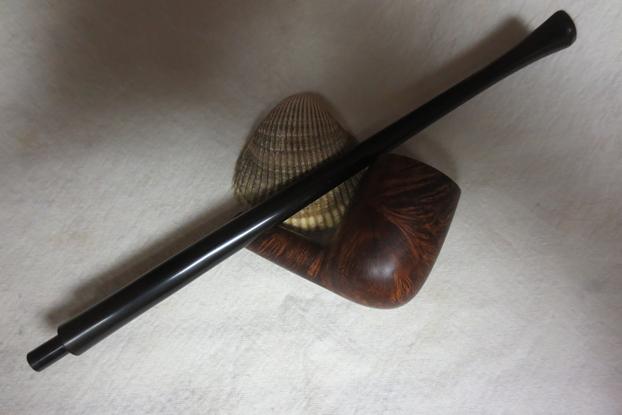
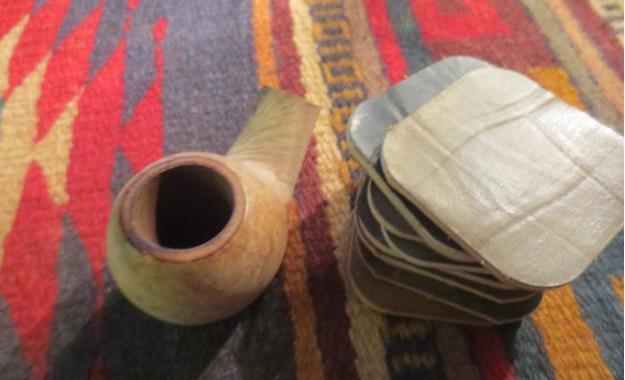
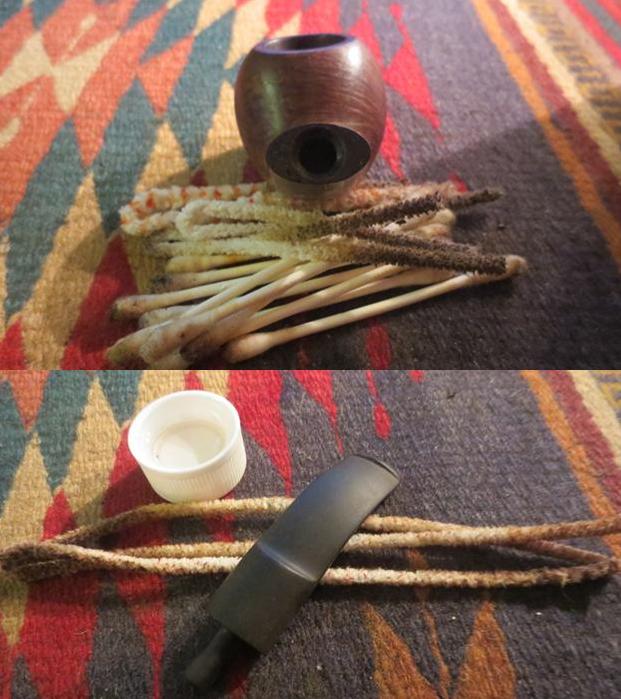
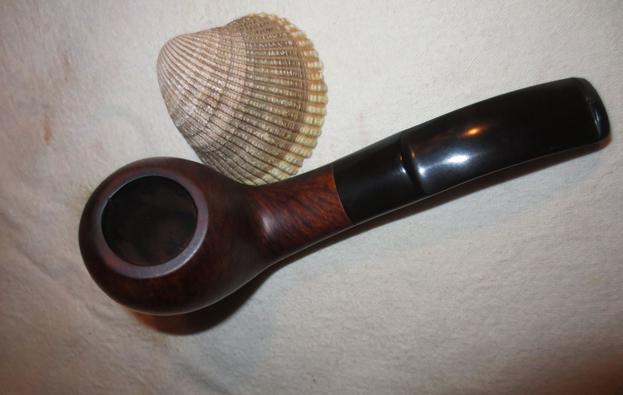
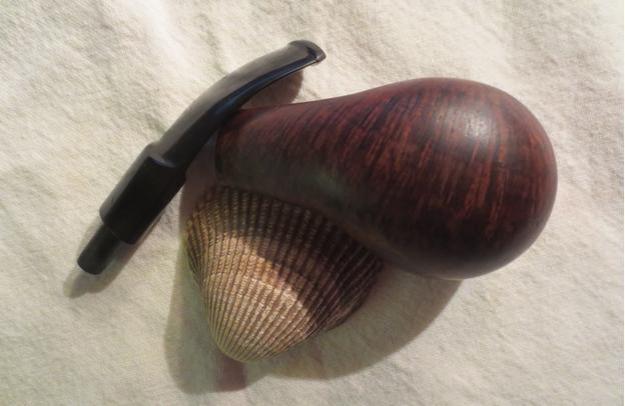
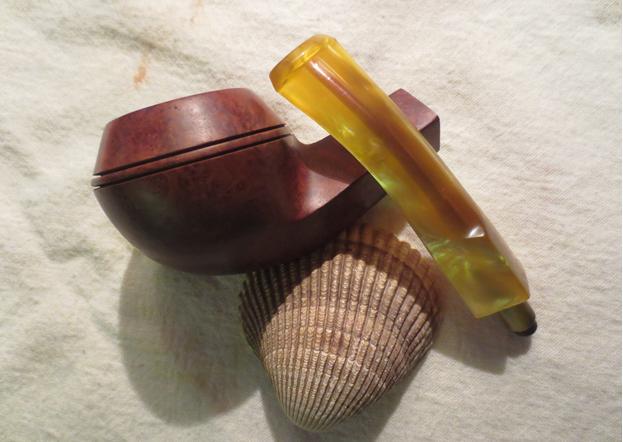
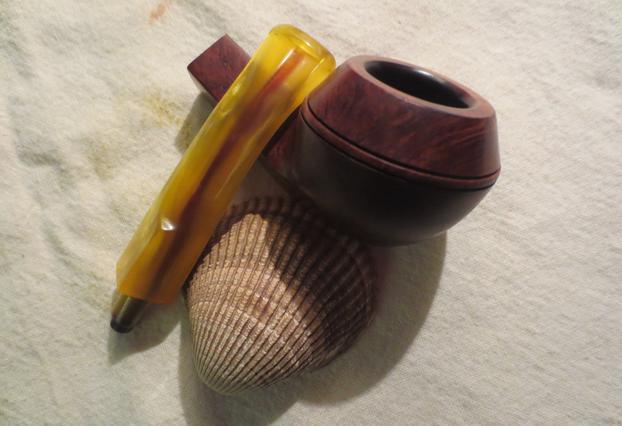
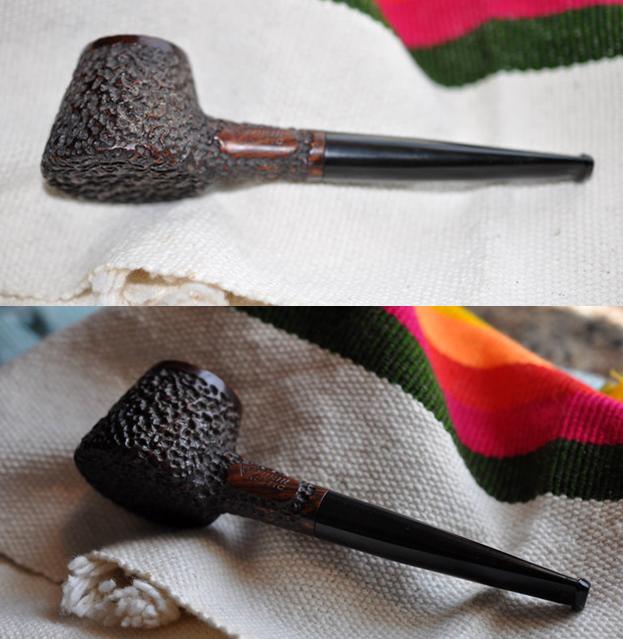
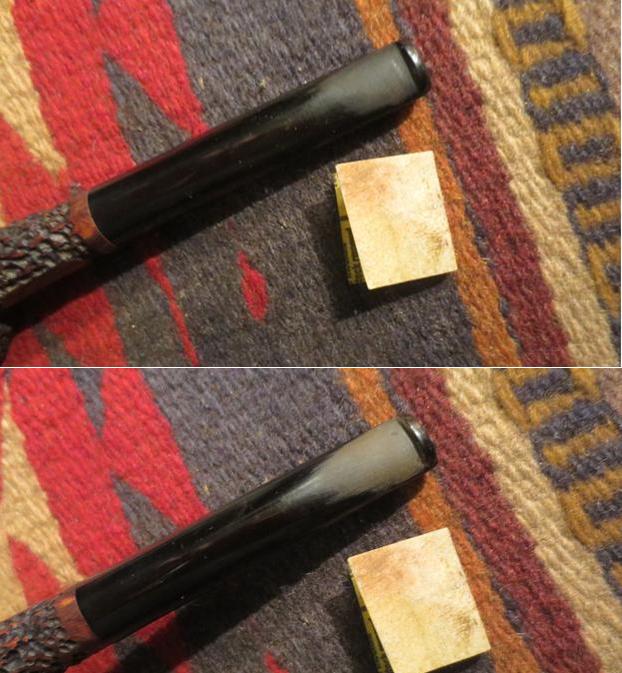
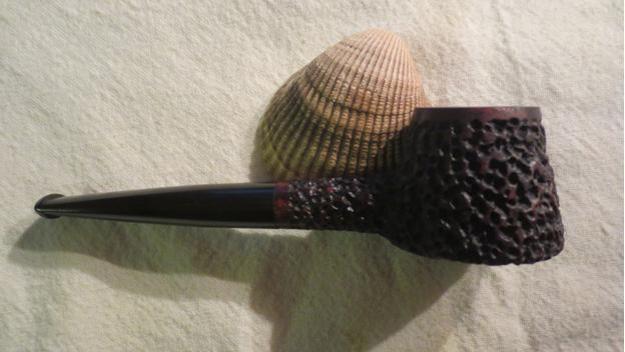
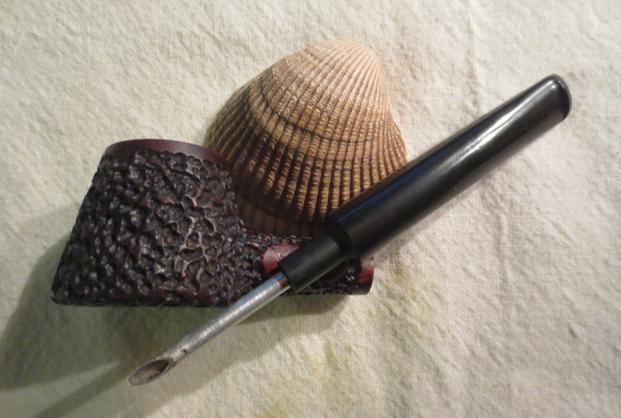
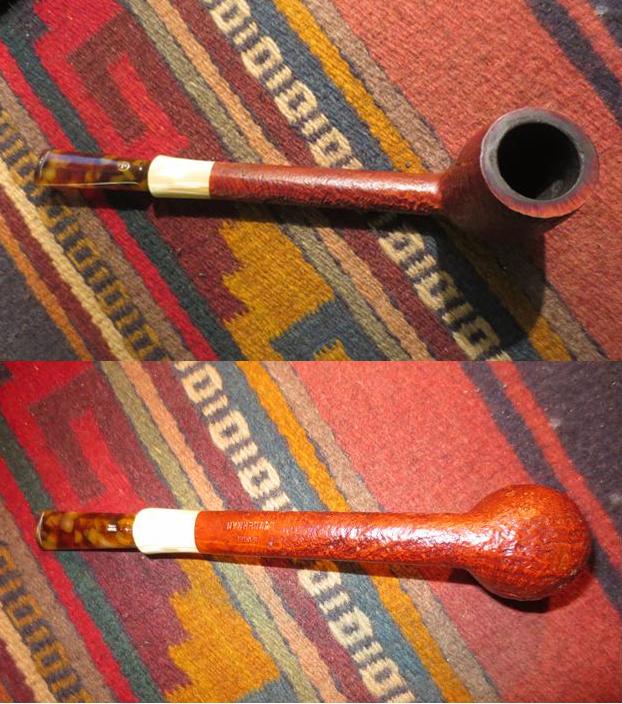
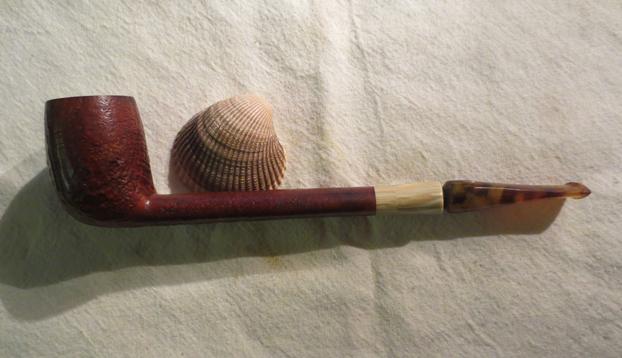
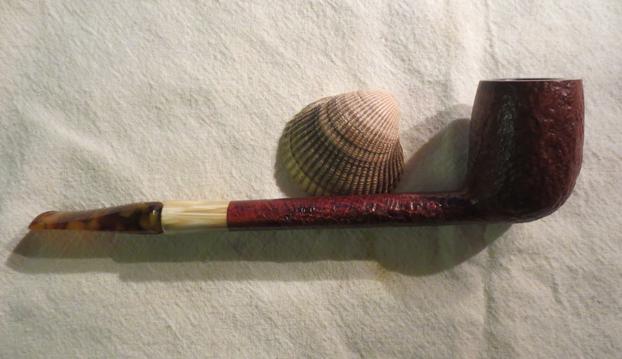
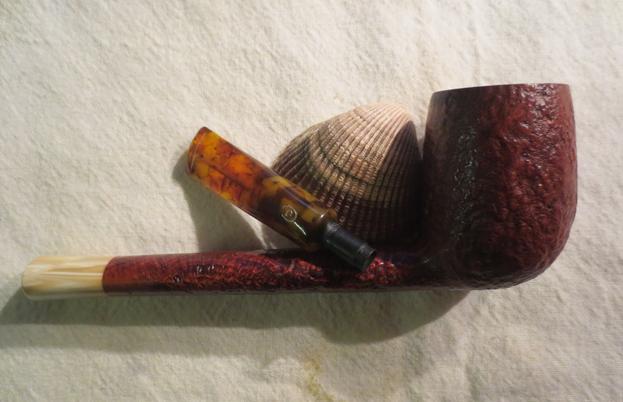
My brother did a cursory cleaning on this one as it came in refurbished condition. The stem looked good as did the interior of the pipe. The next set of photos set on the colourful cloth are ones my brother took after cleaning the pipe.orsini4 orsini5
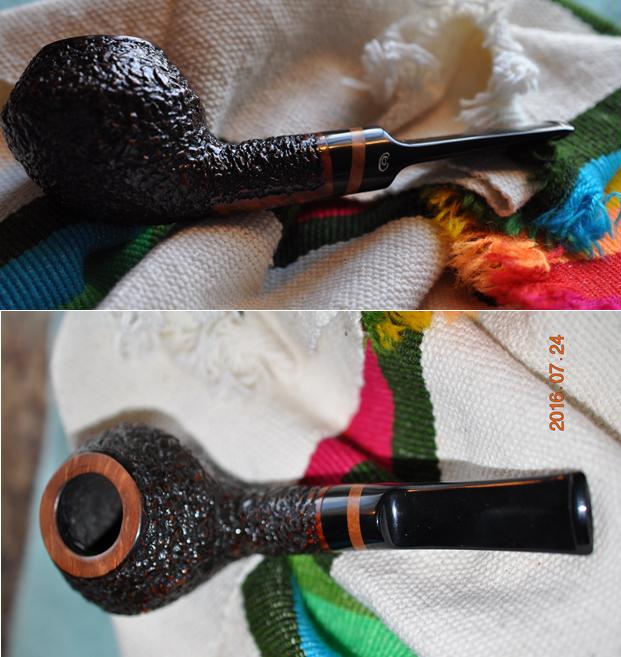
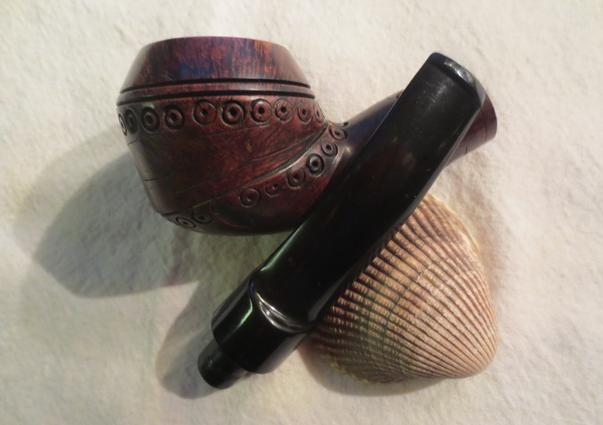
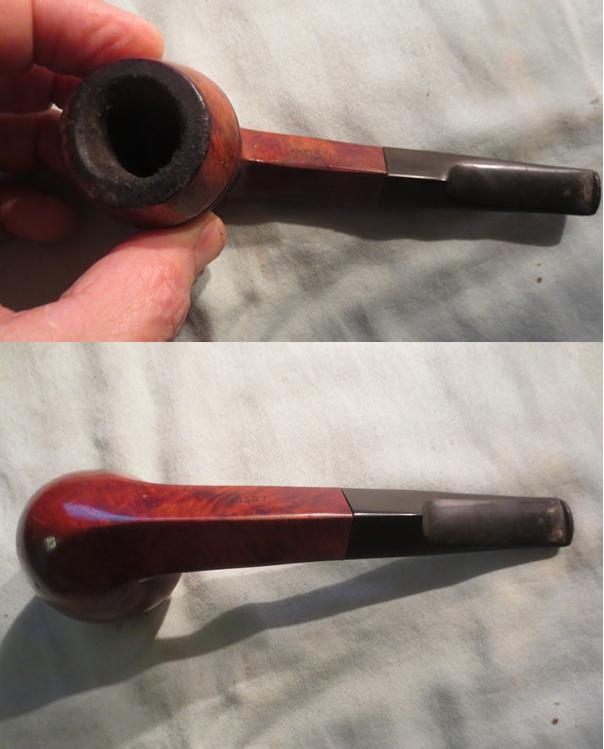
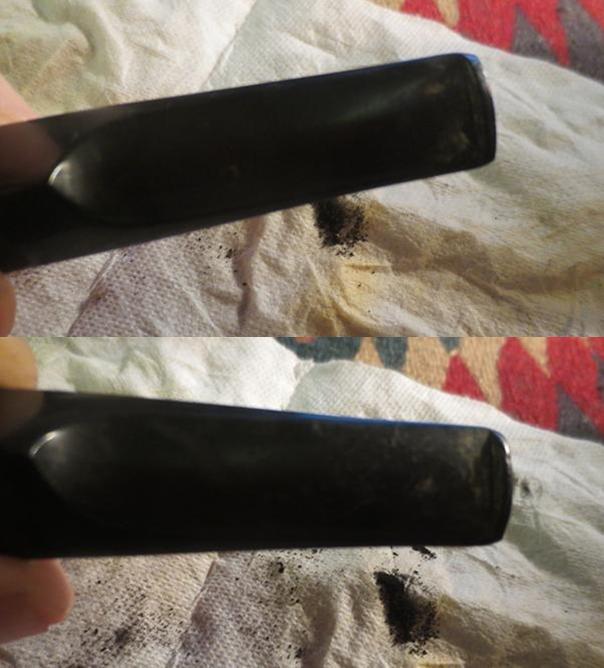
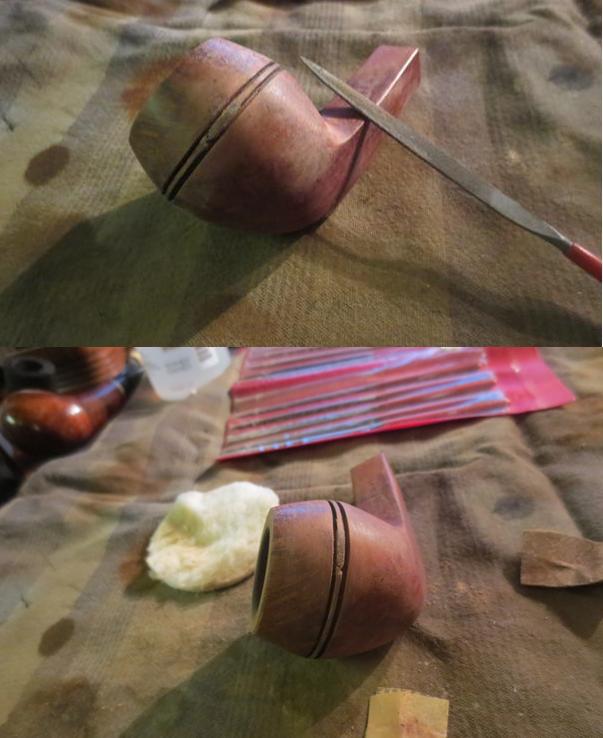
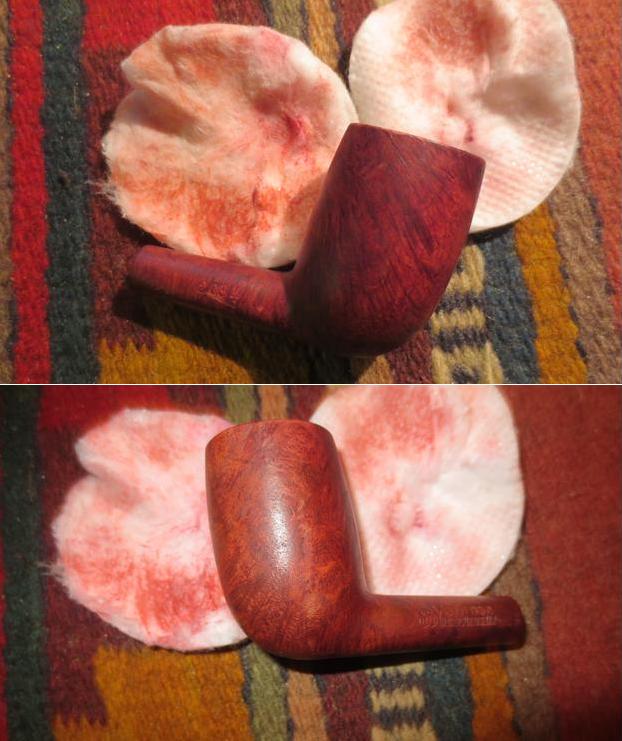
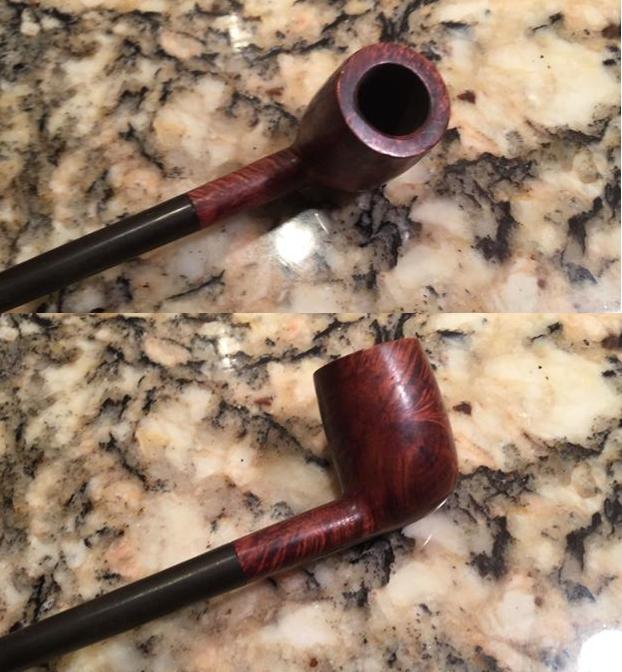
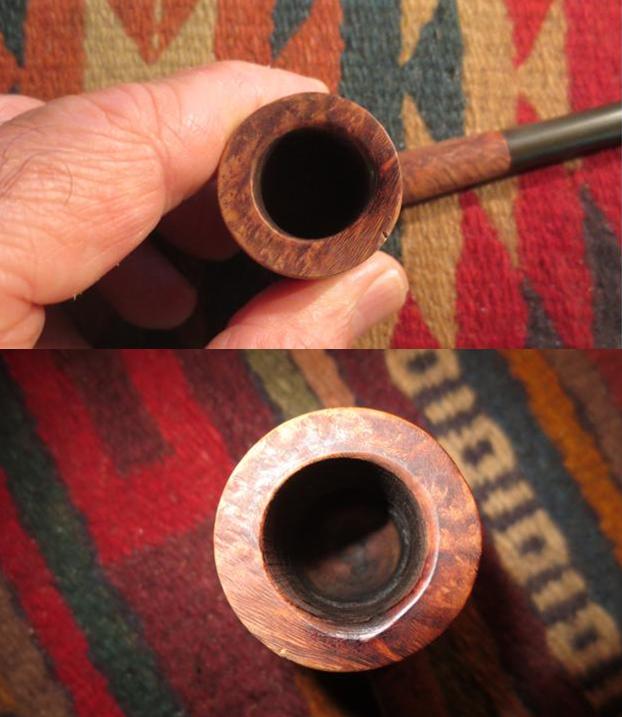
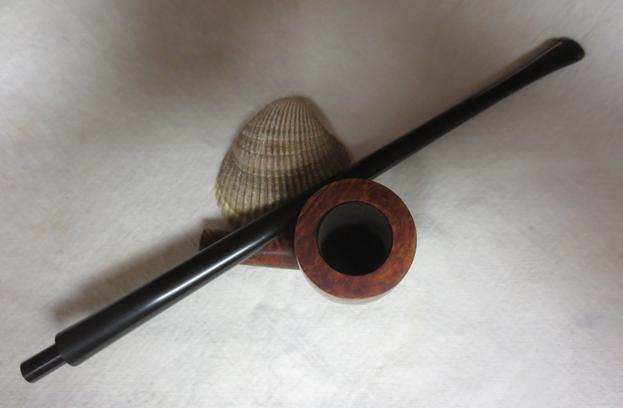
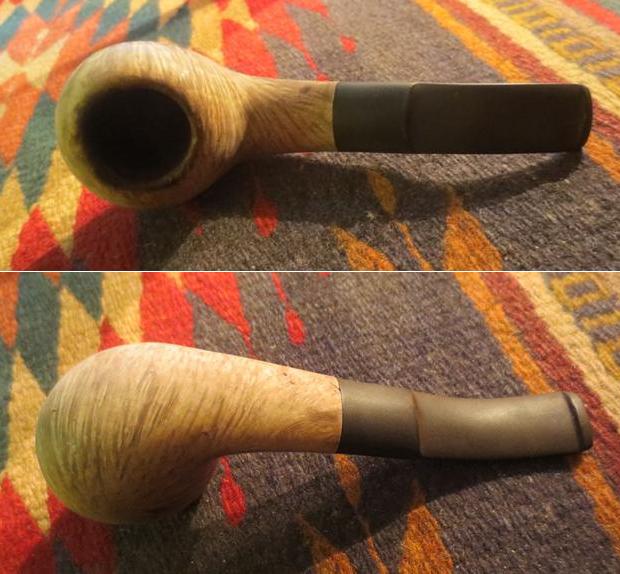
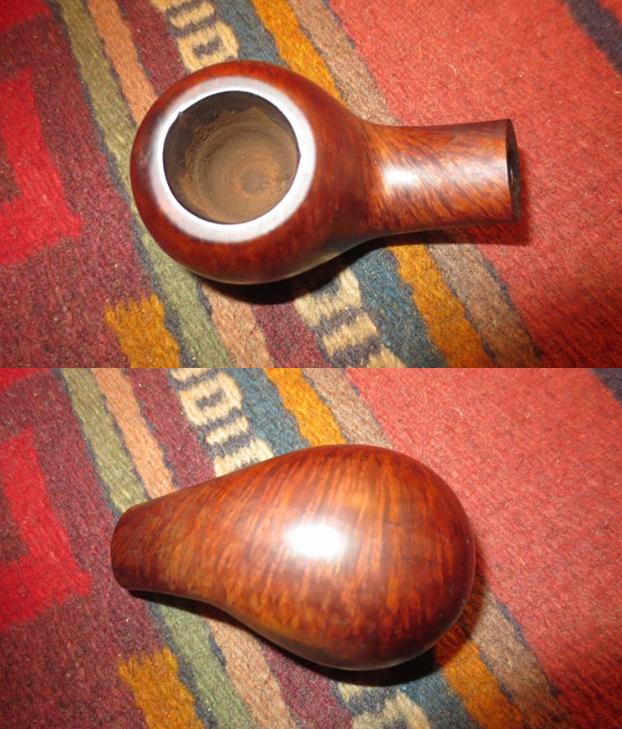
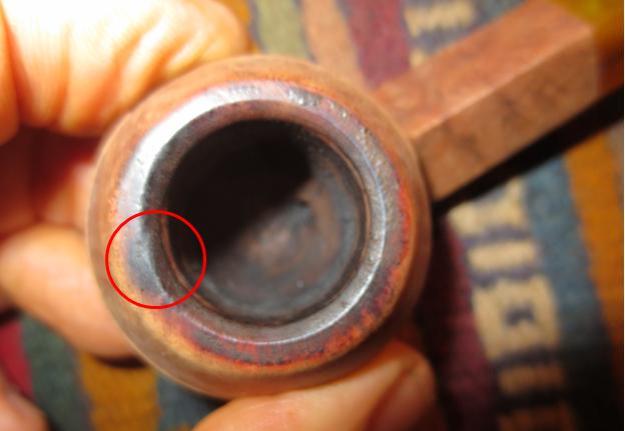
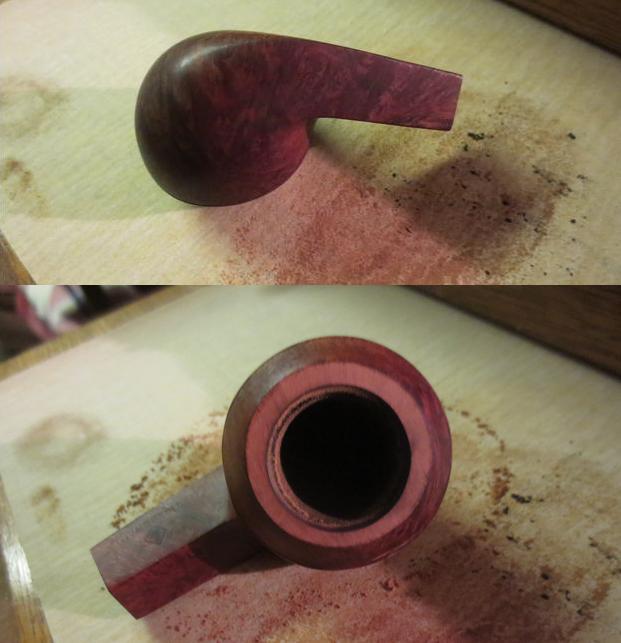
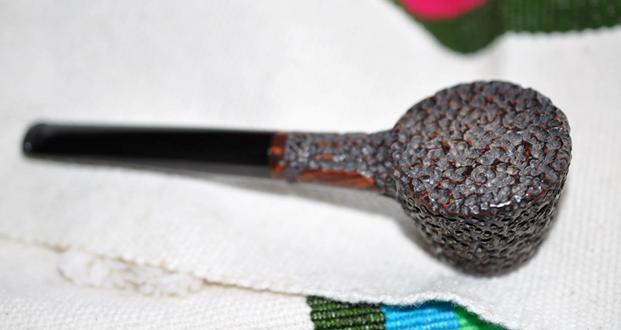
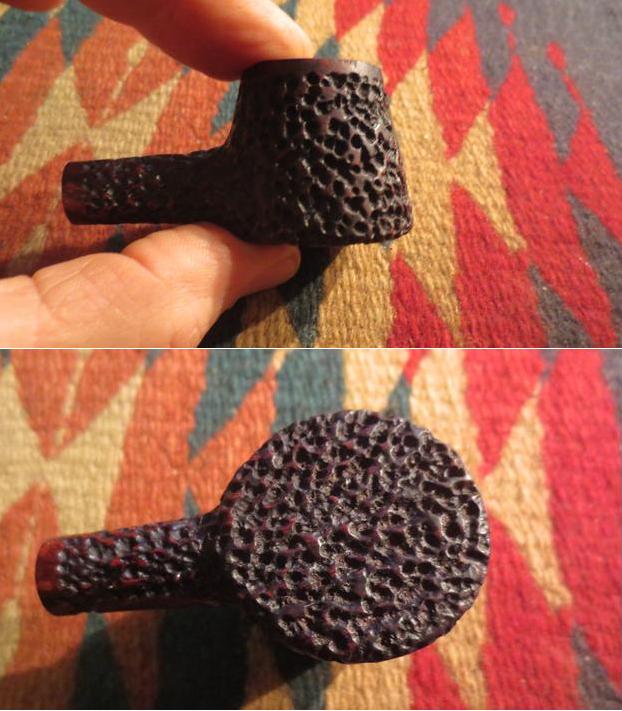
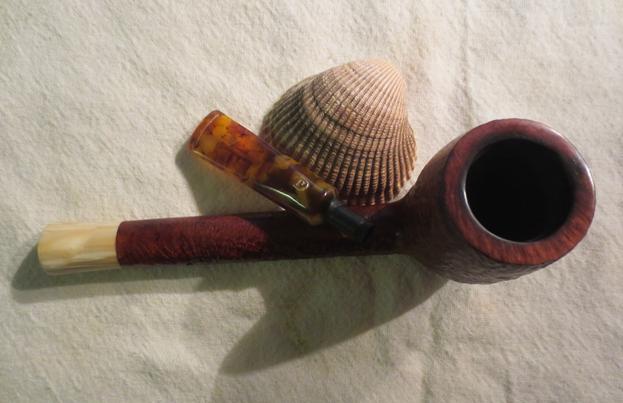
He took some close up photos so that I could see what the rim and the stamping looked like on this pipe. The rim had some scratches and it looked to me like someone had stripped the varnish coat and some stain off of it. There were some shiny spots that remained.orsini6
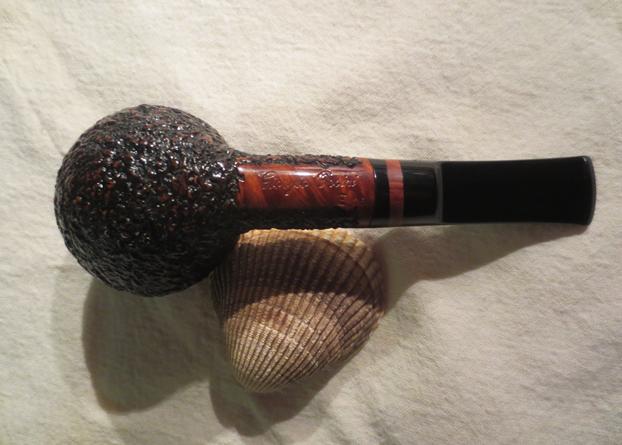
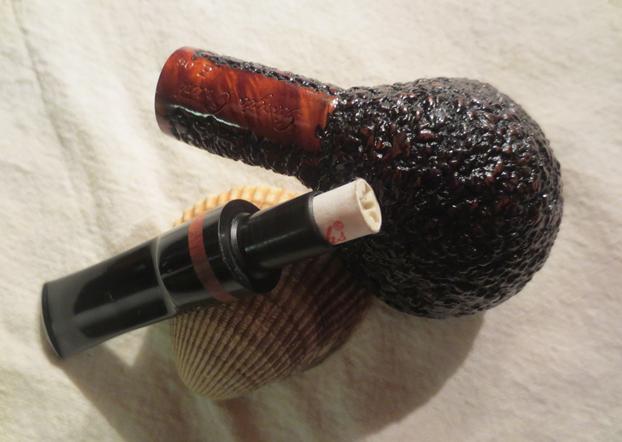
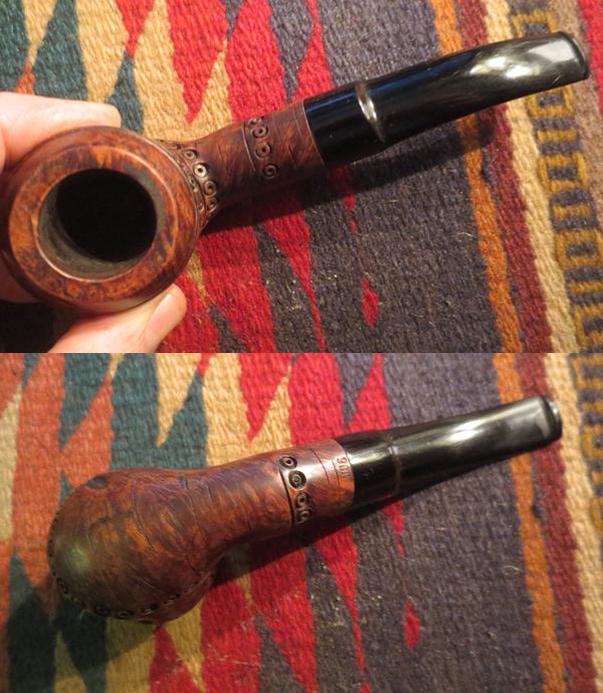
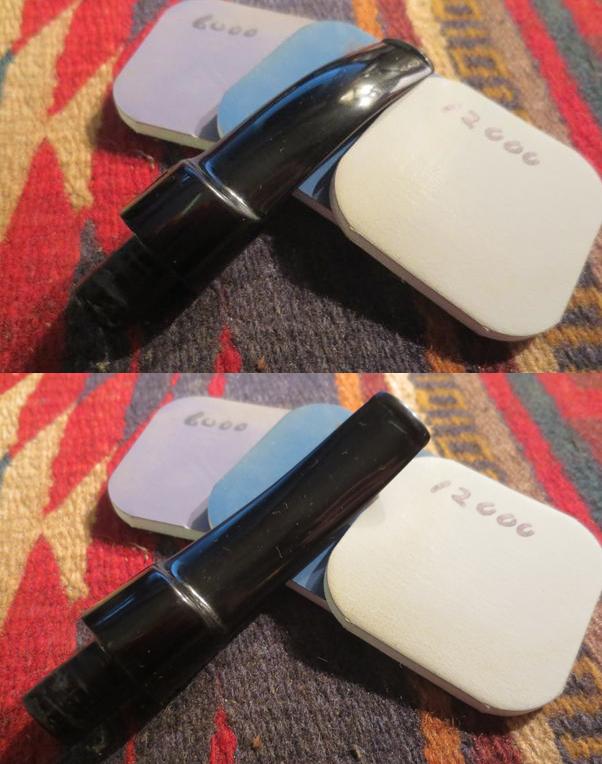
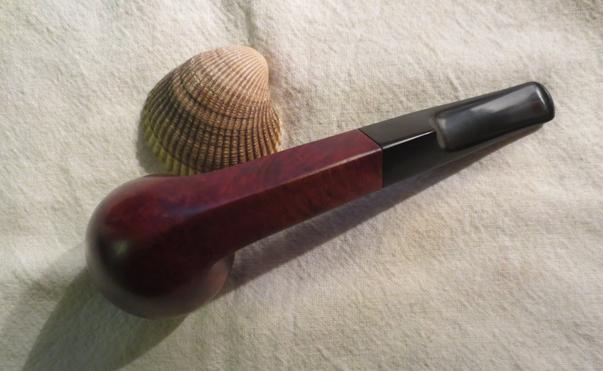
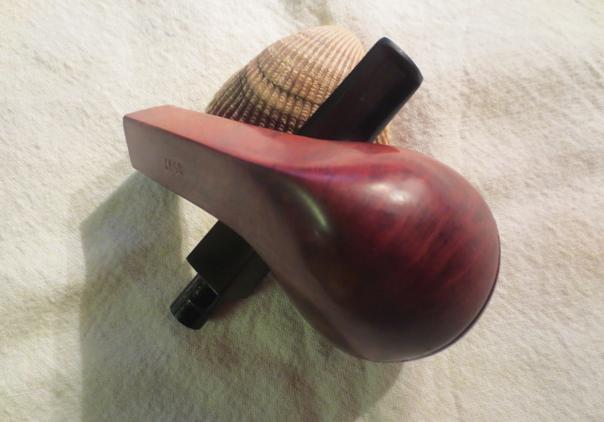
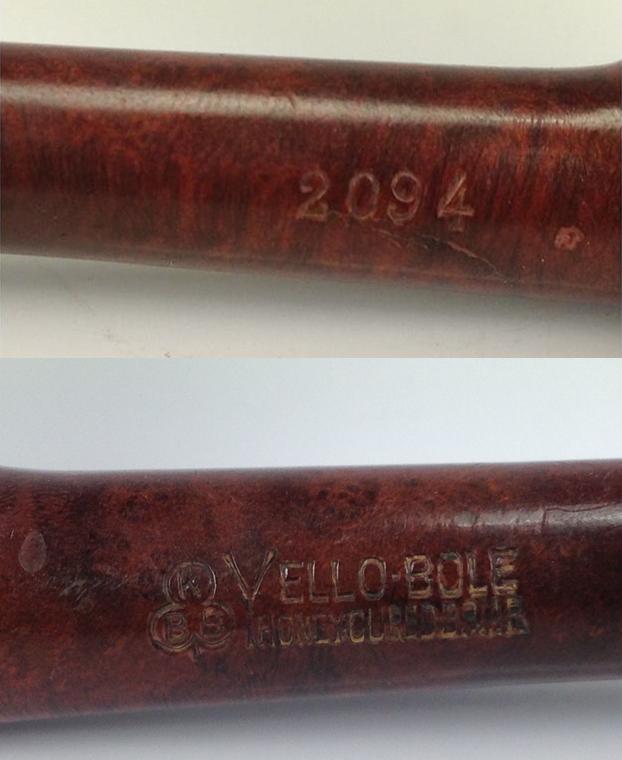
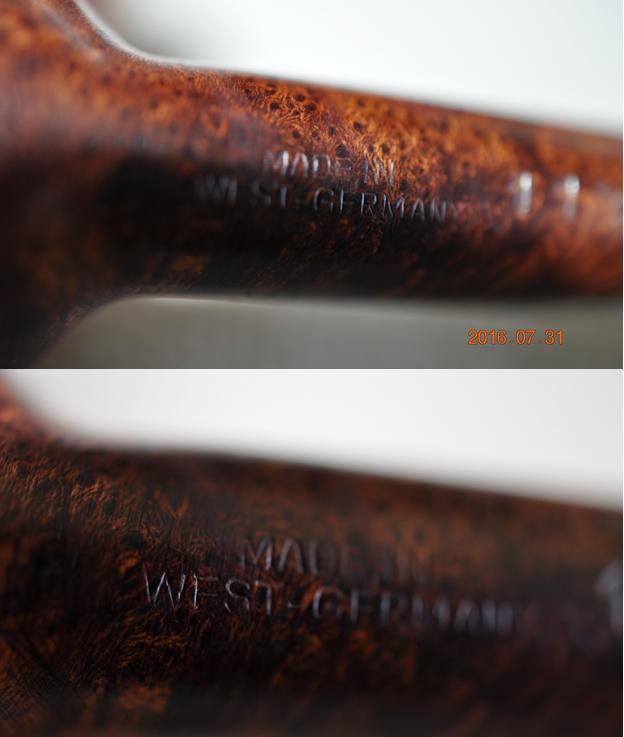
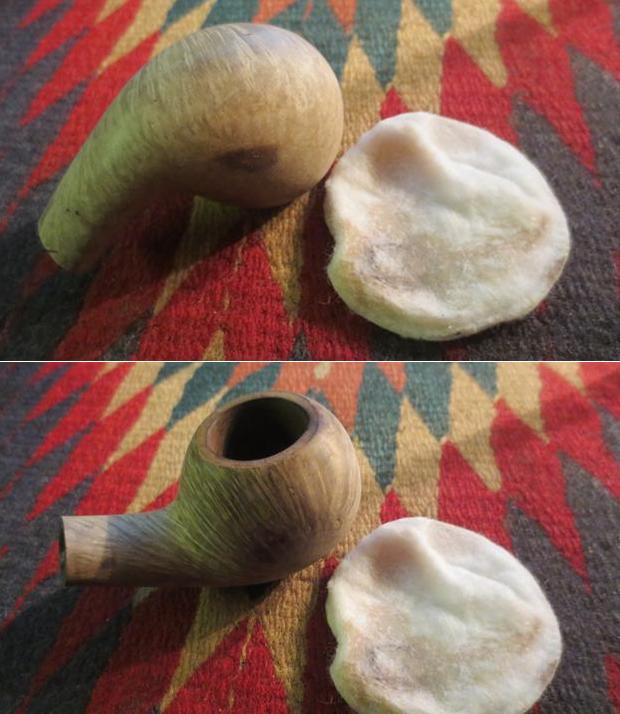
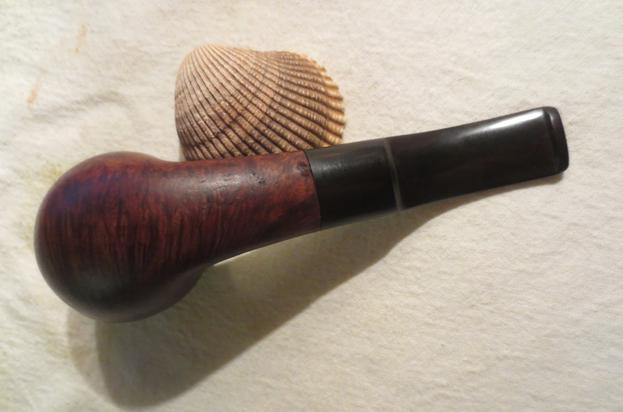
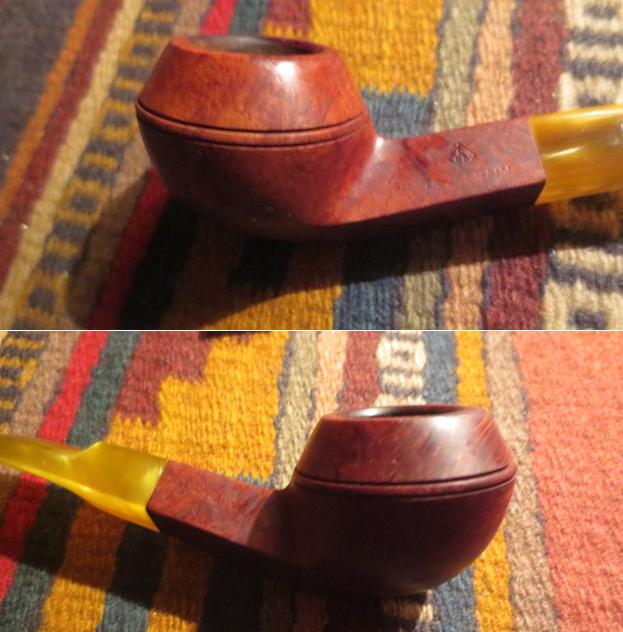
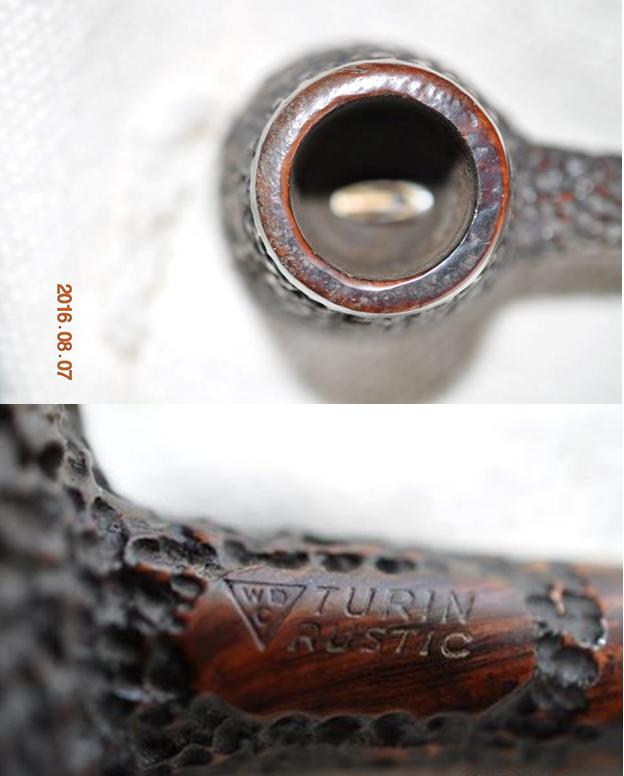
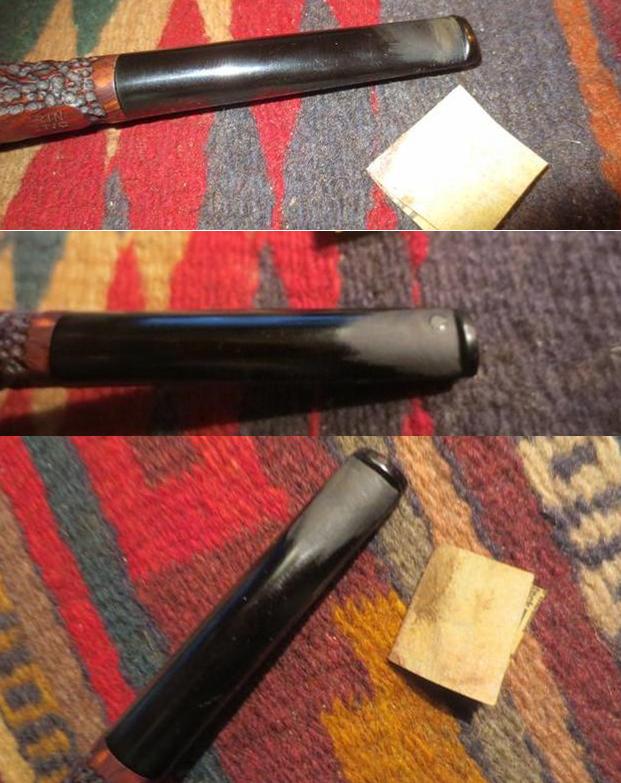
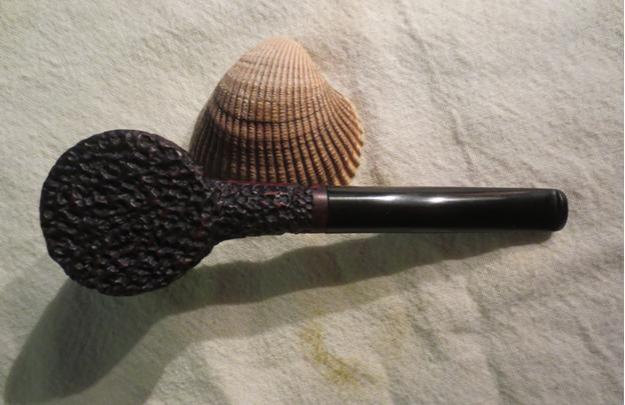
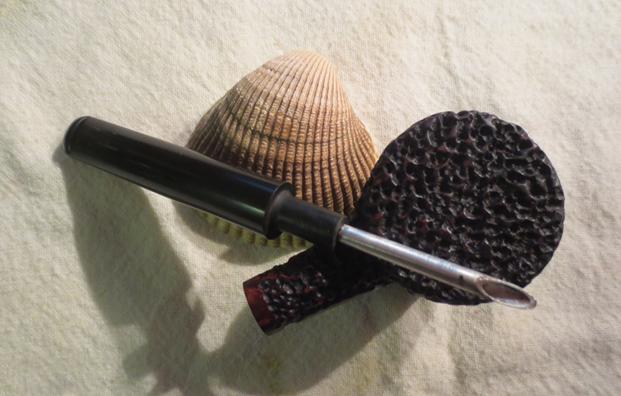
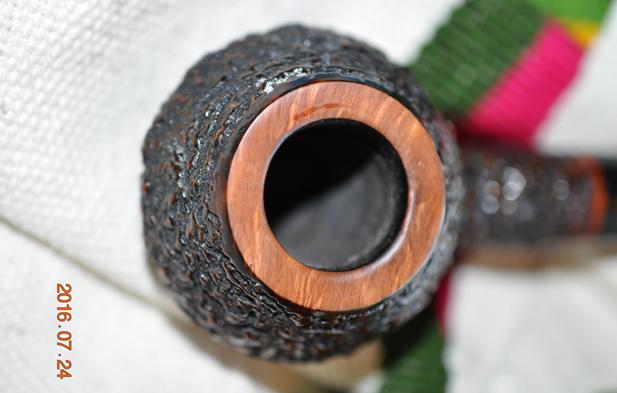
He took a photo of the smooth underside of the shank that clearly showed the sharp stamp on the underside of the shank. It has the signature of the maker, Giorgio Orsini as well as the stamping E 06.orsini7
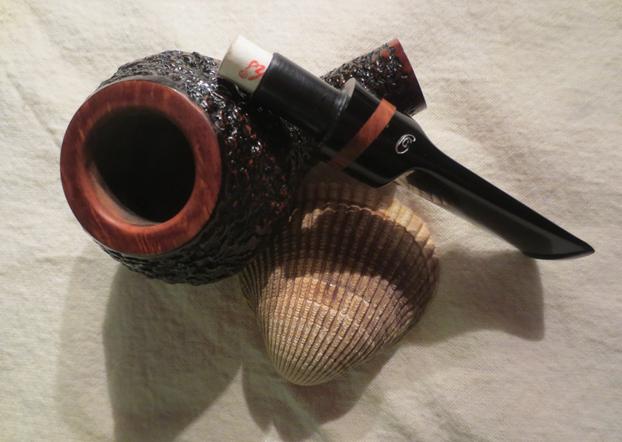
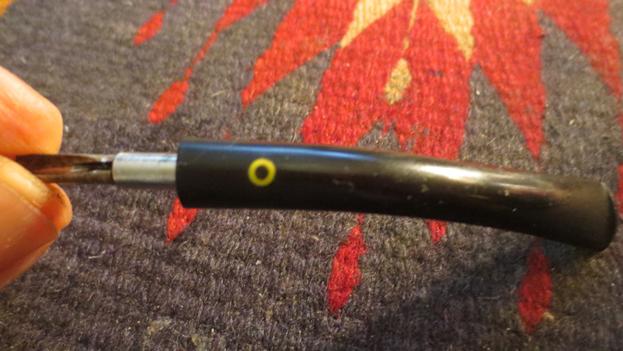
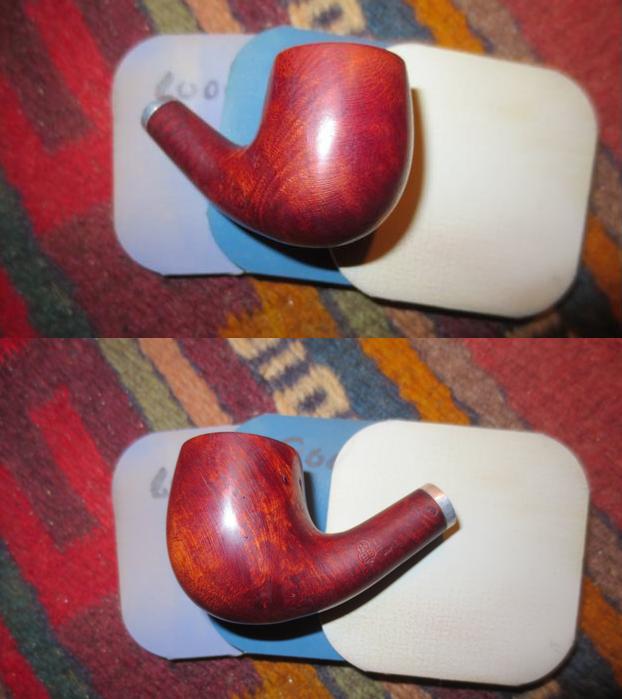
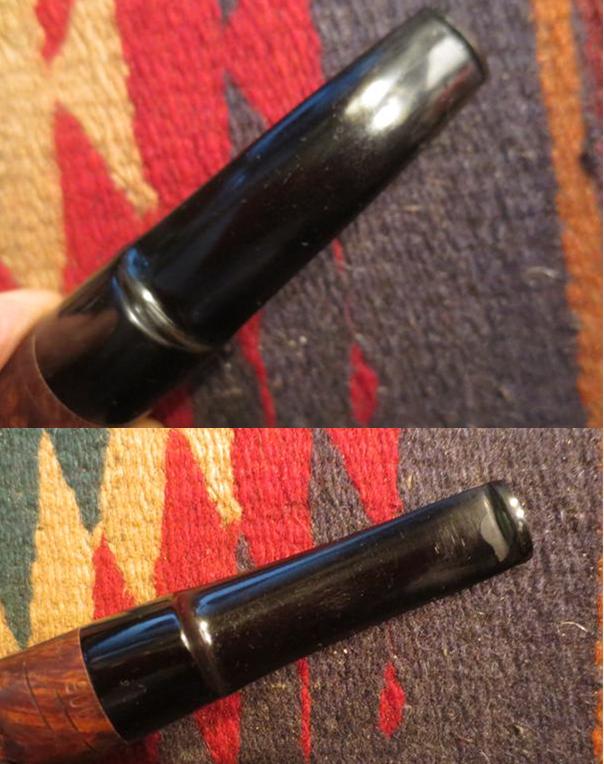
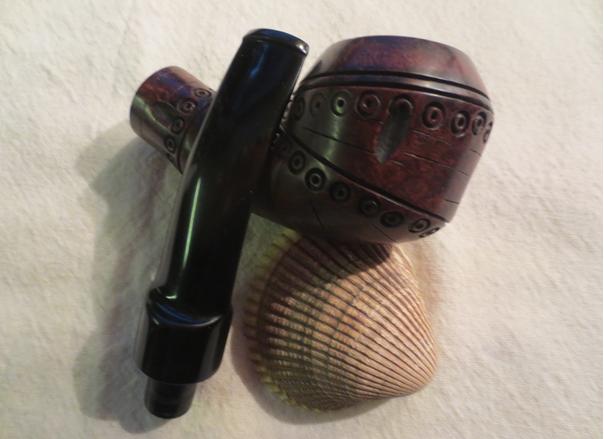
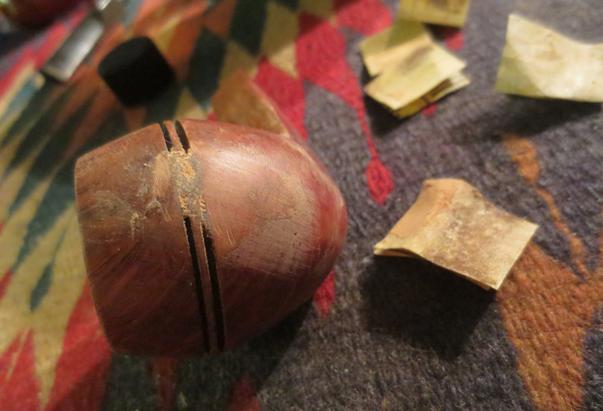
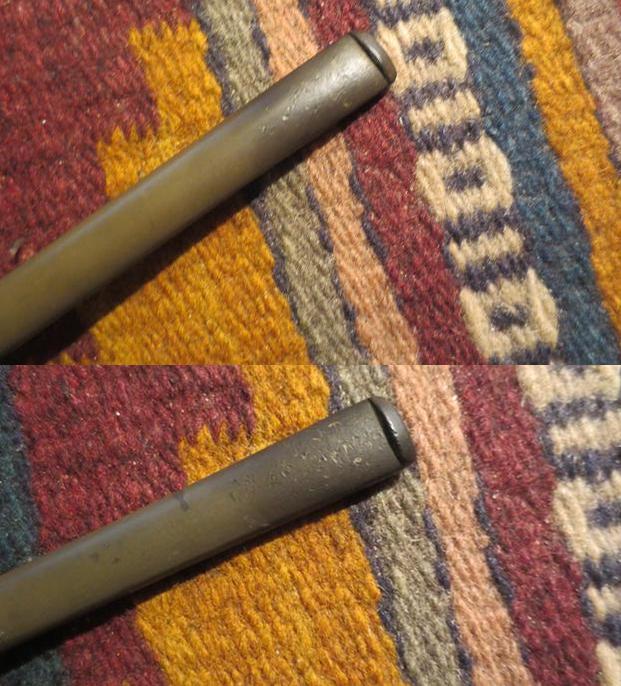
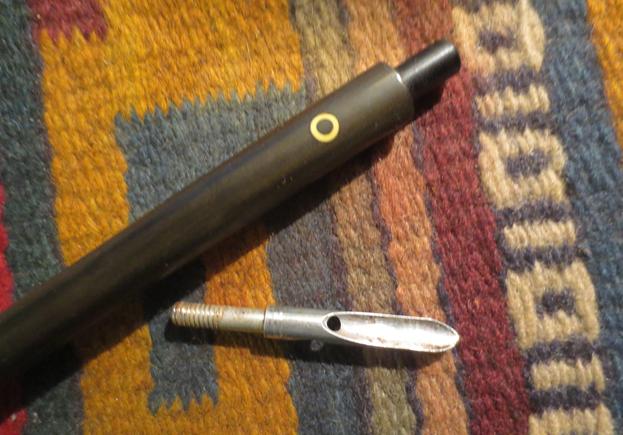
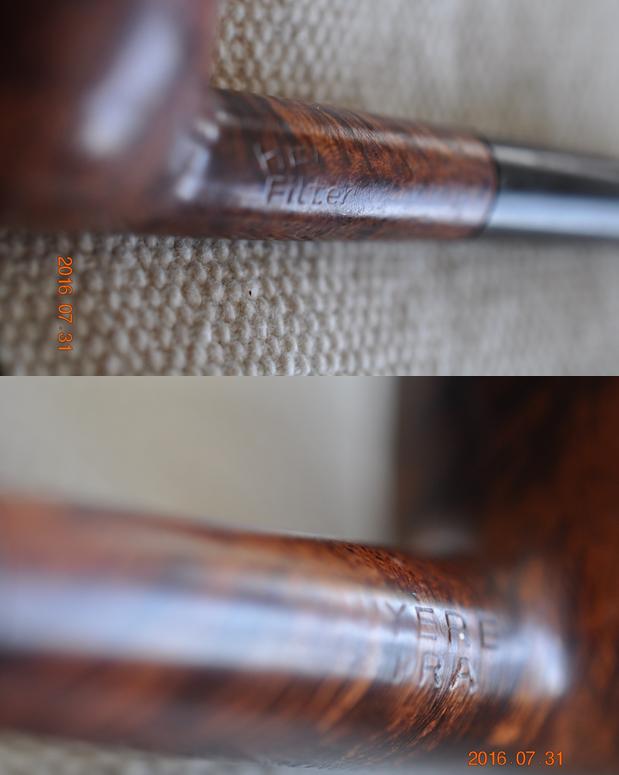
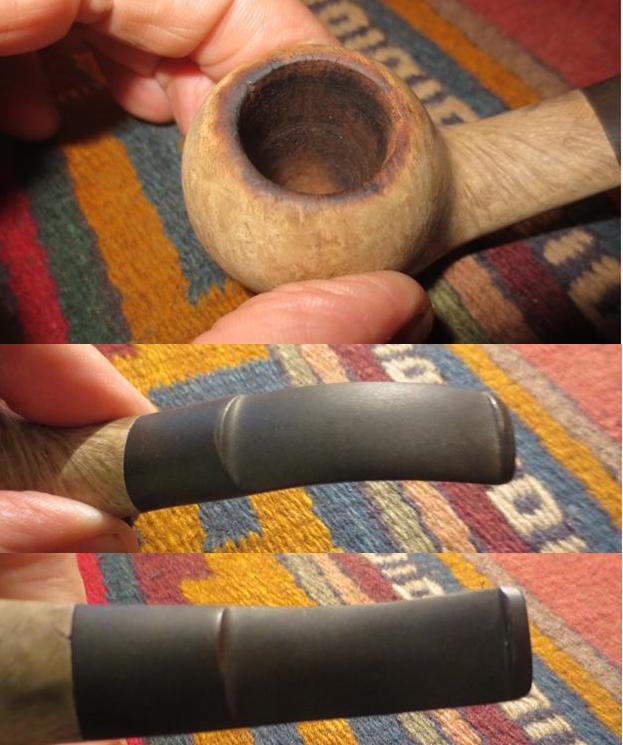
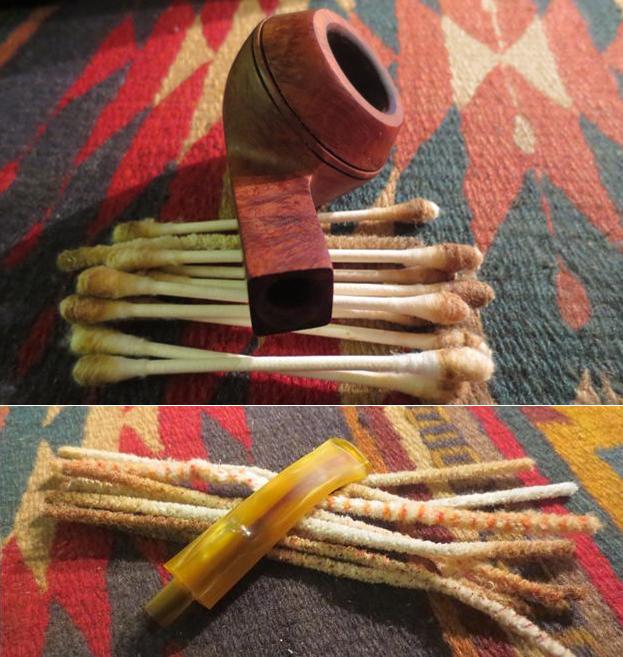
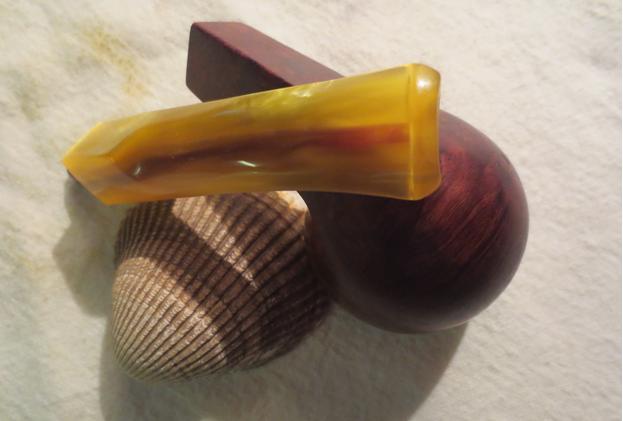
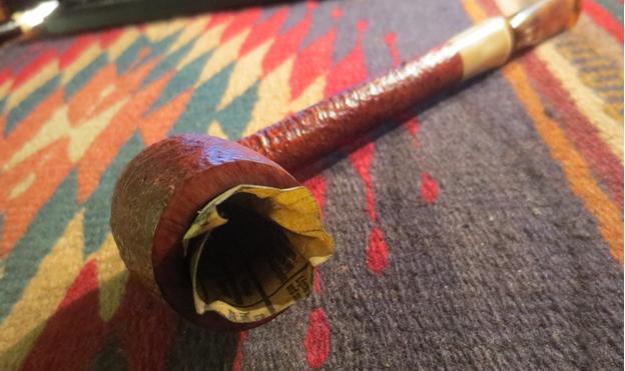
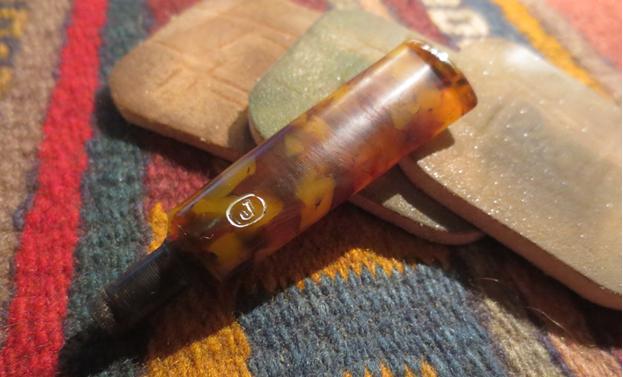
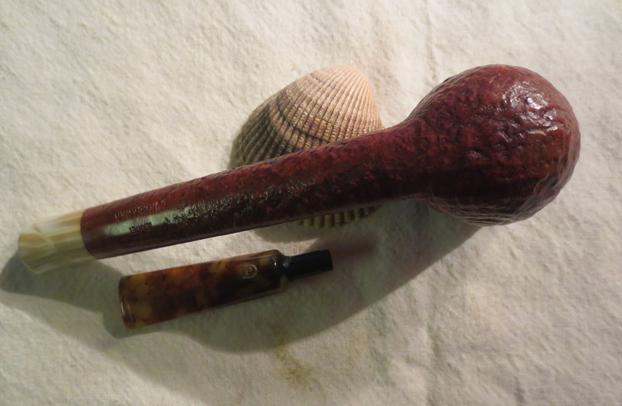
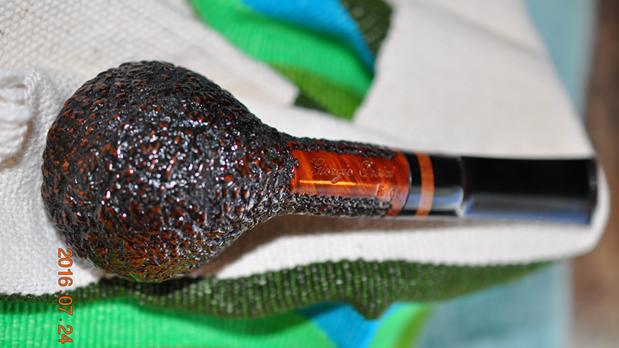
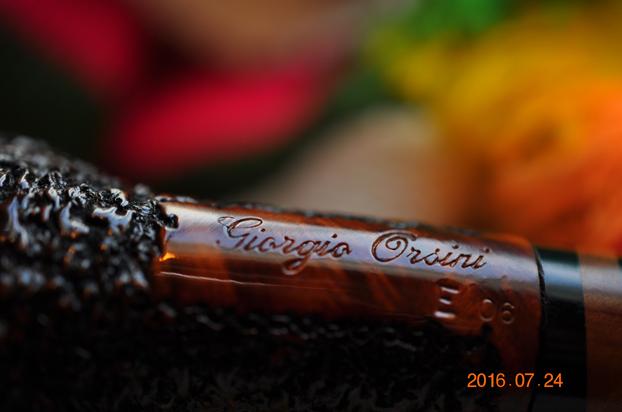
He took a close up photo of the look of the rustication and the logo on the stem. The stem logo was a G and O superimposed and highly stylized. The second photo below shows what looked like a flaw in the shank.orsini8
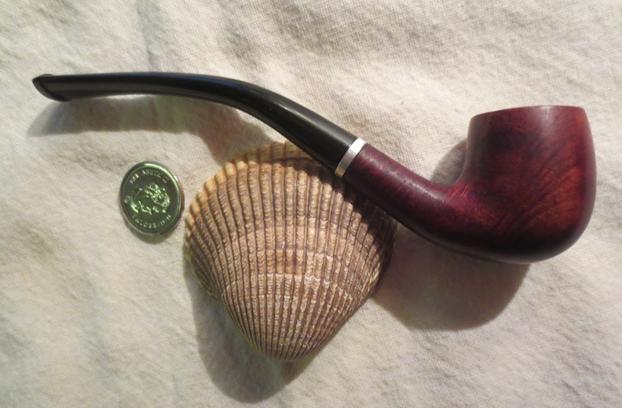
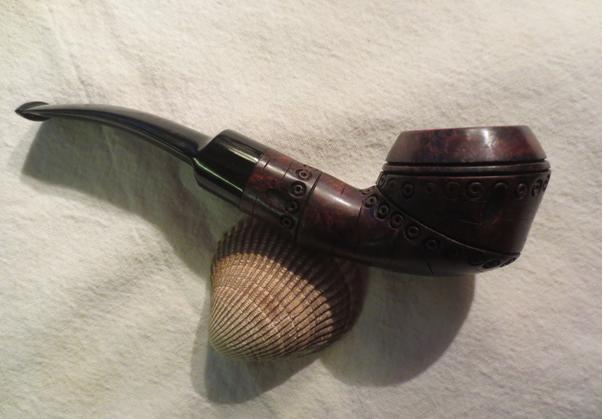
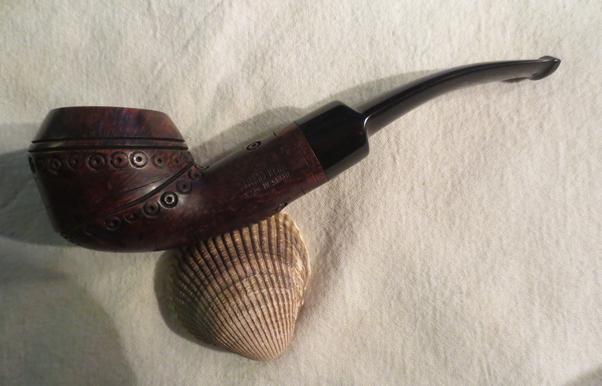
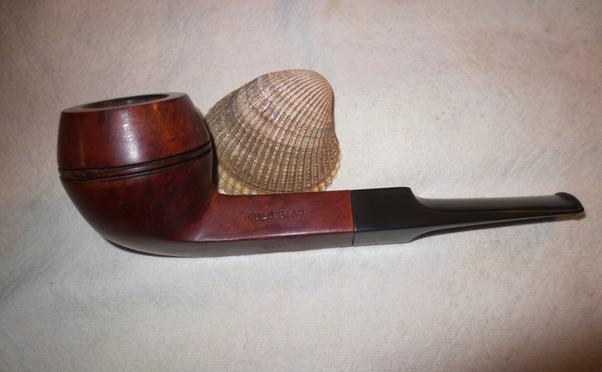
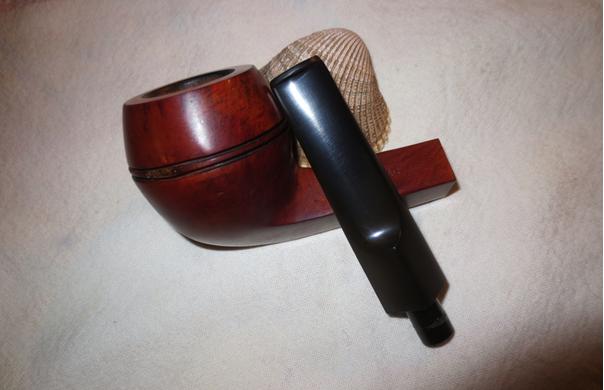
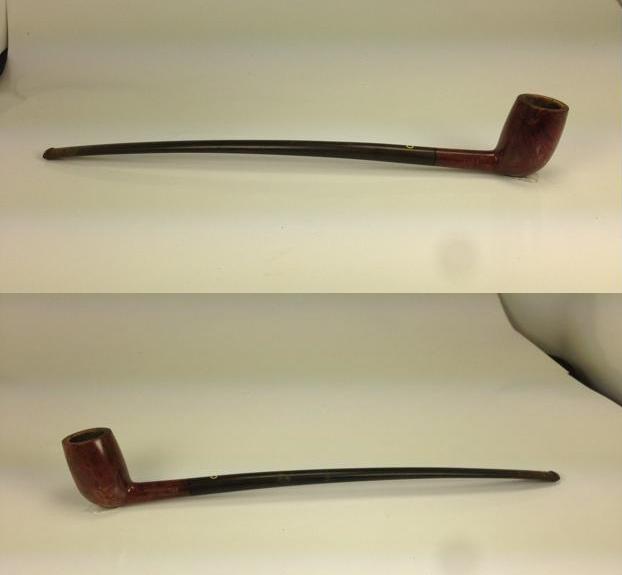
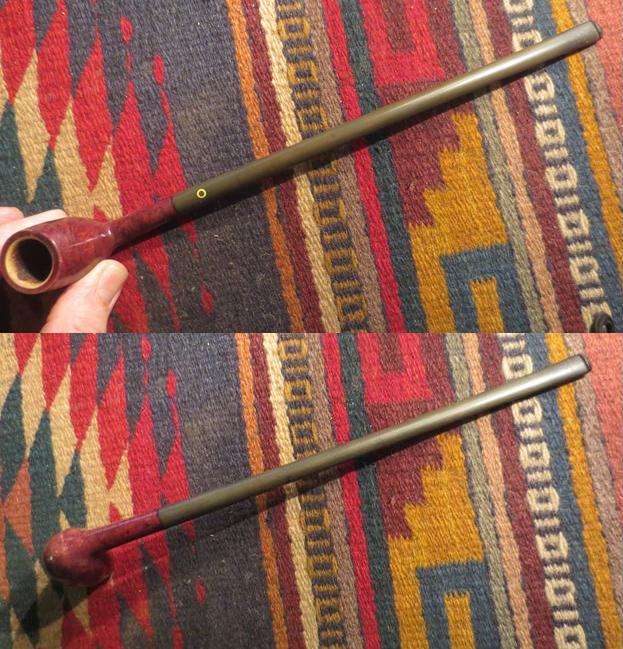
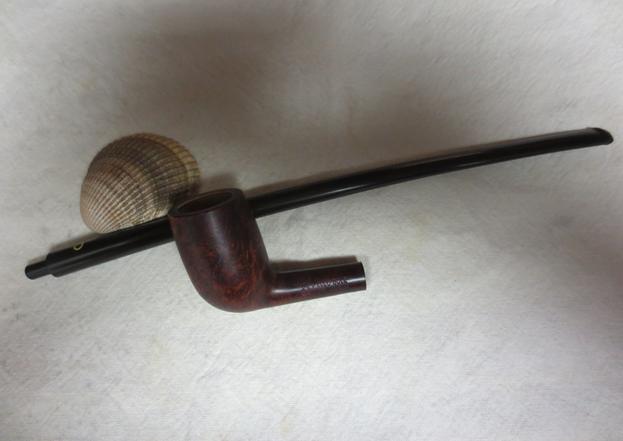
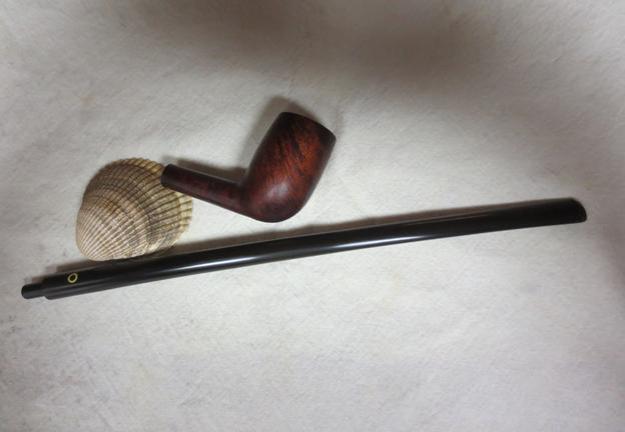
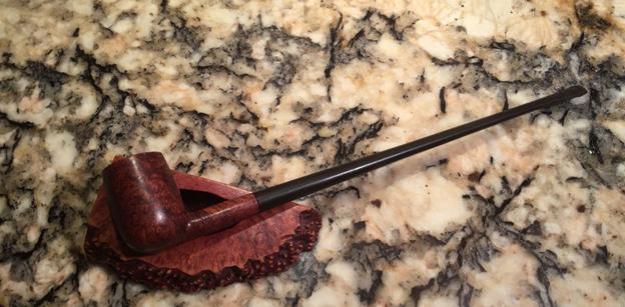
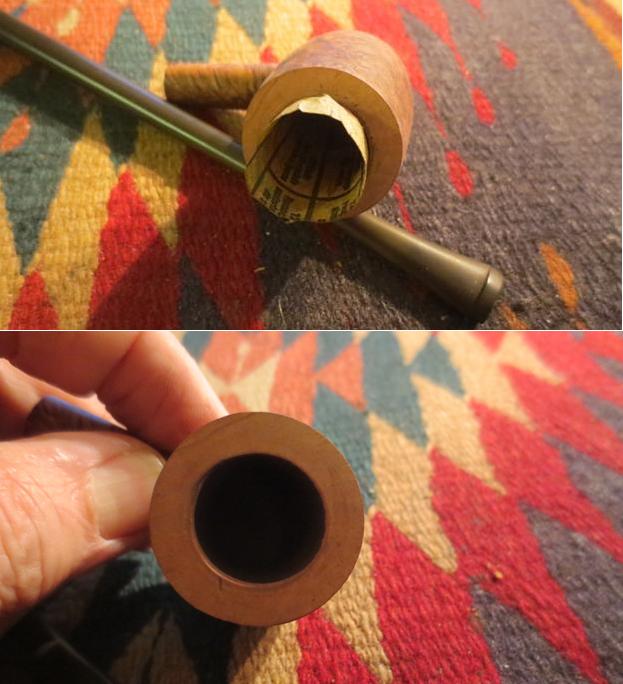
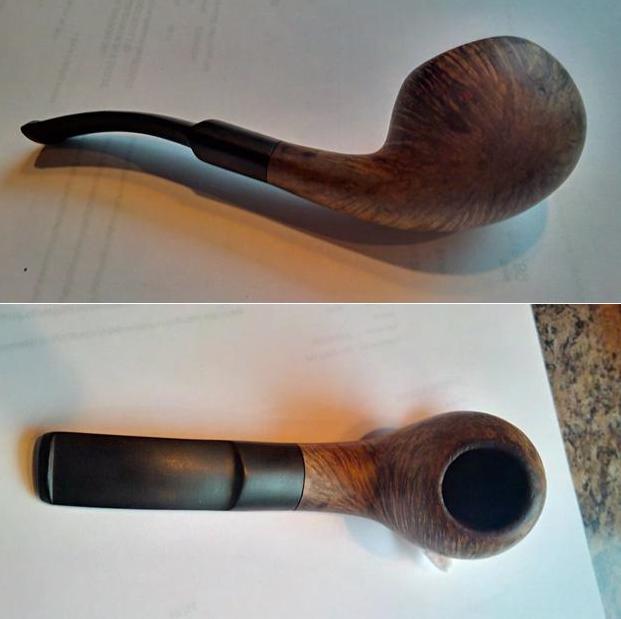
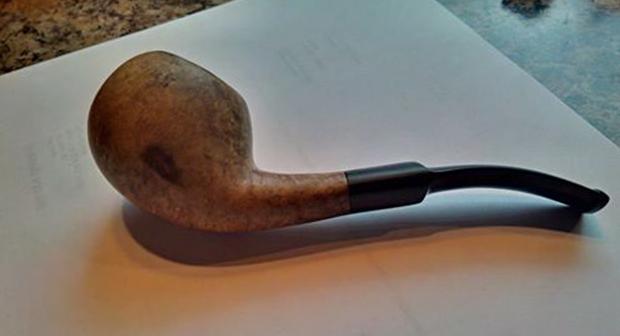
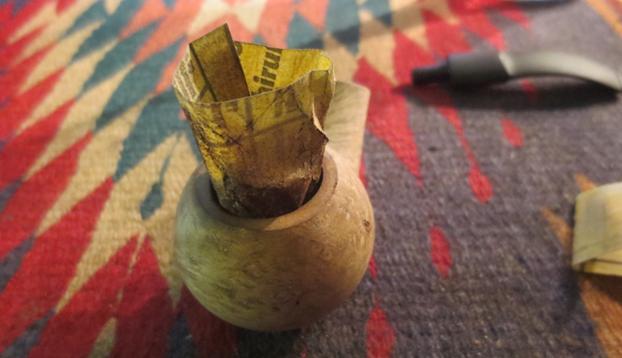
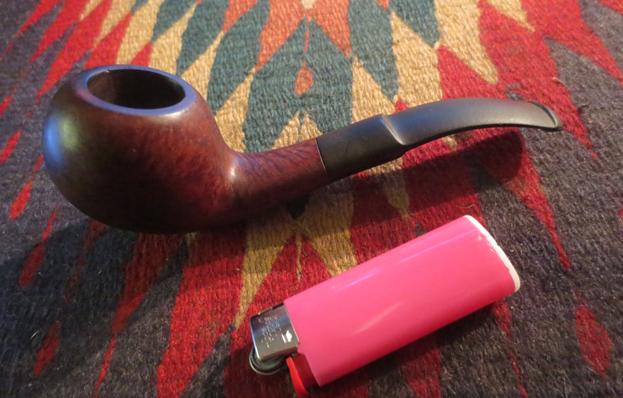
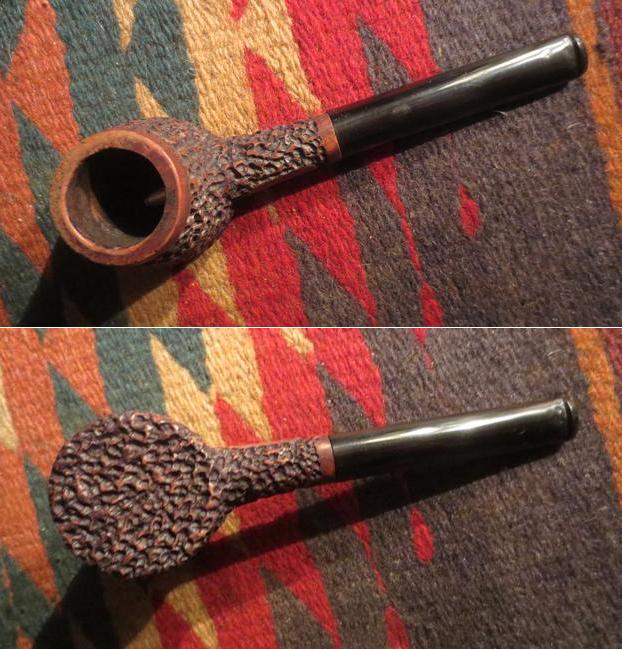
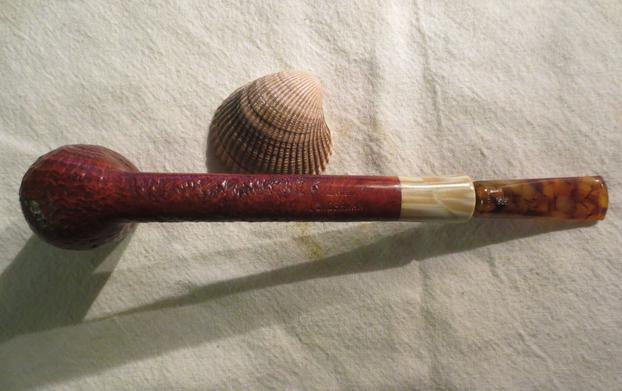
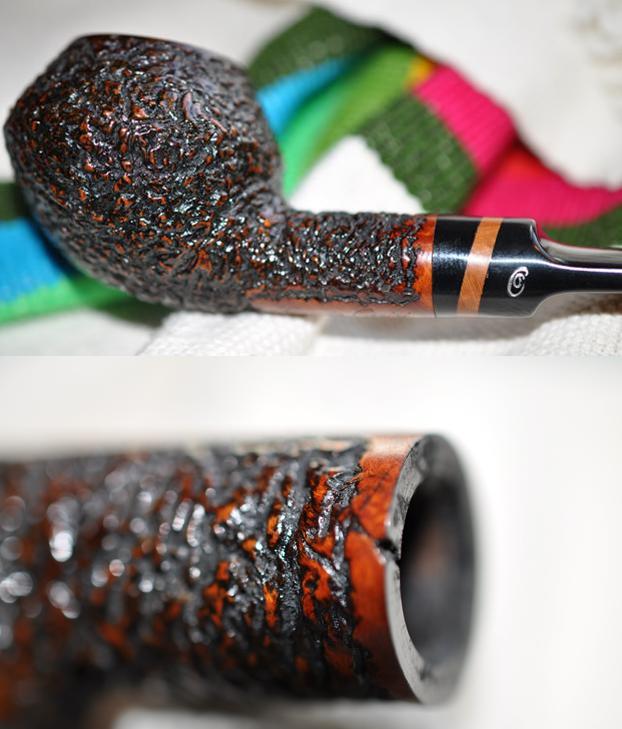
I looked up the brand on my usual sources, Pipephil and Pipedia and found that Giorgio Orsini is from the Livorno region of Italy. His pipes were principally sold by Dan Pipe. All of them had acrylic stems. I took the following photos before I started working on the pipe.orsini9 orsini10
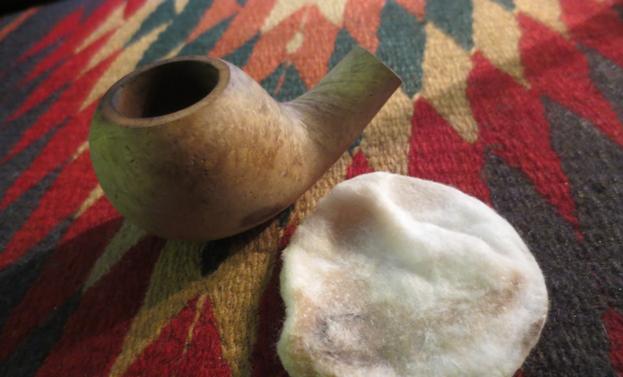
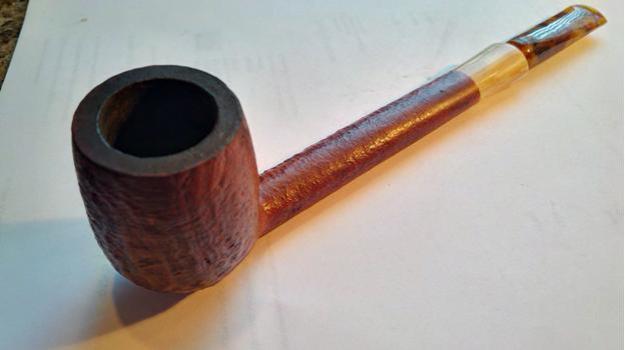
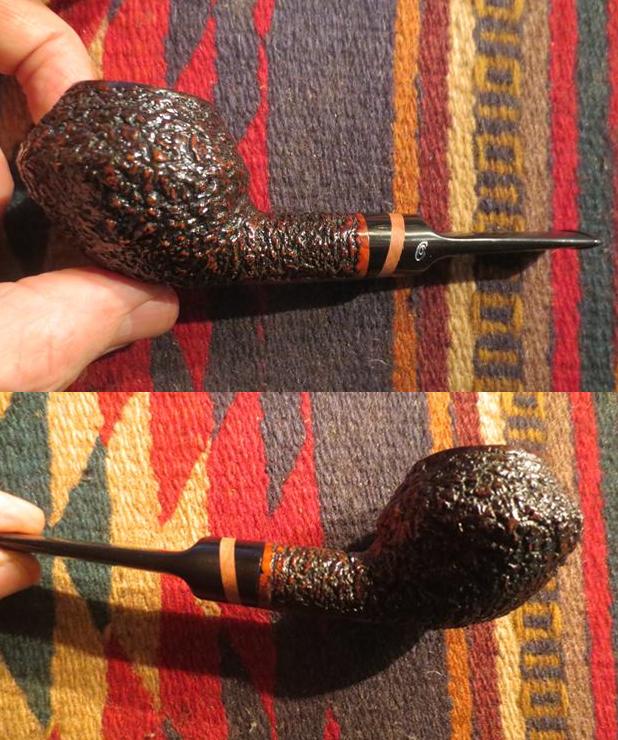
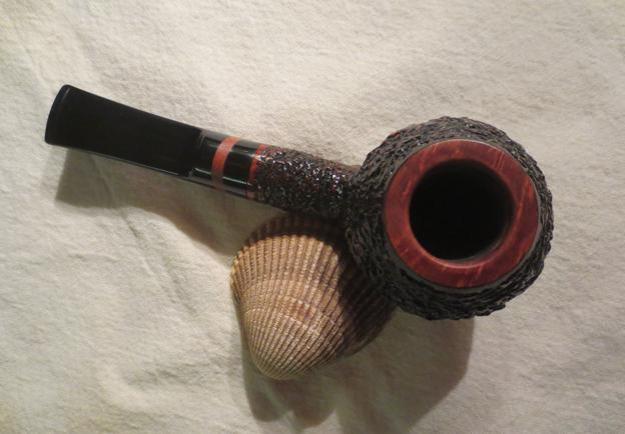
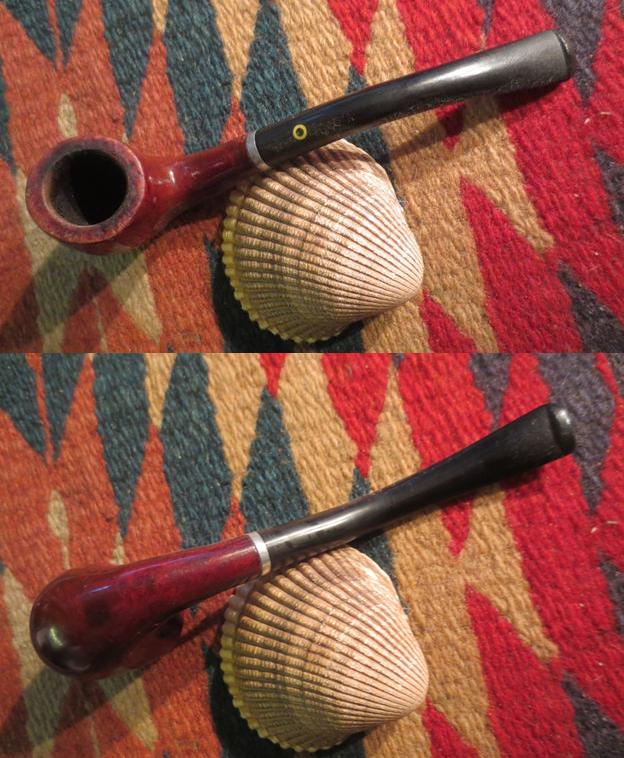
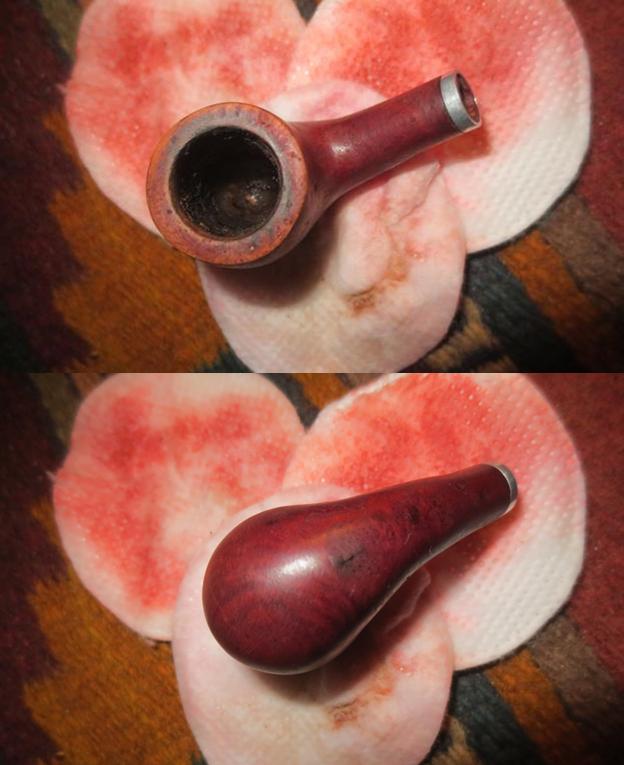
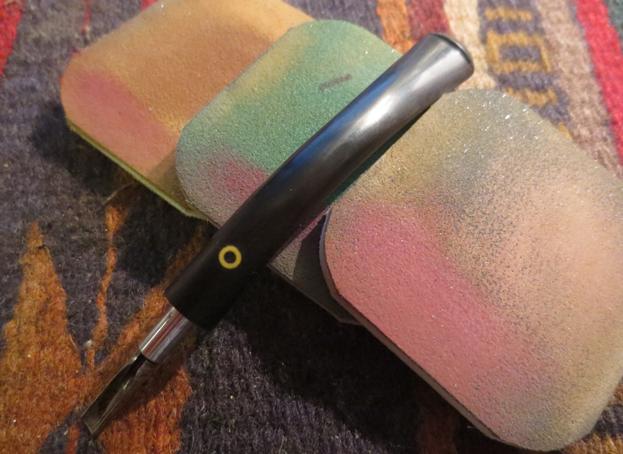
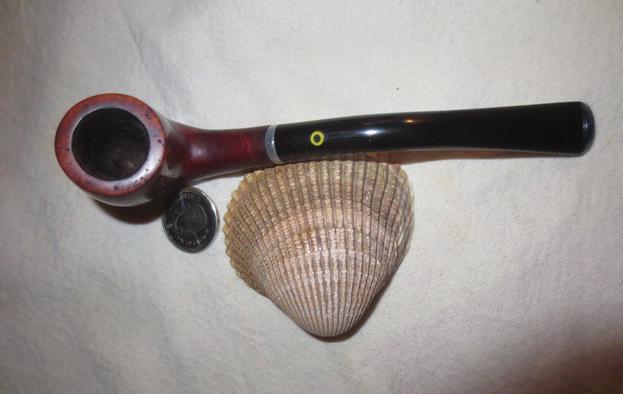
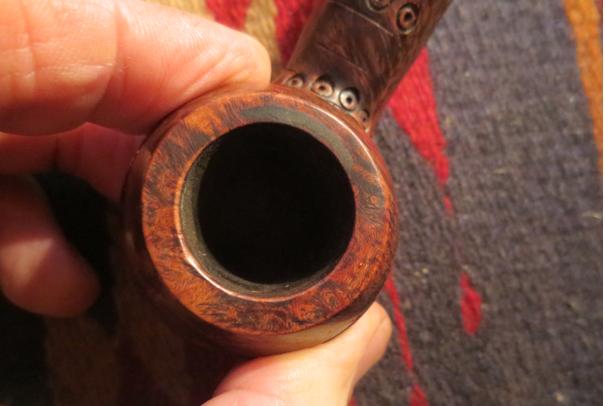
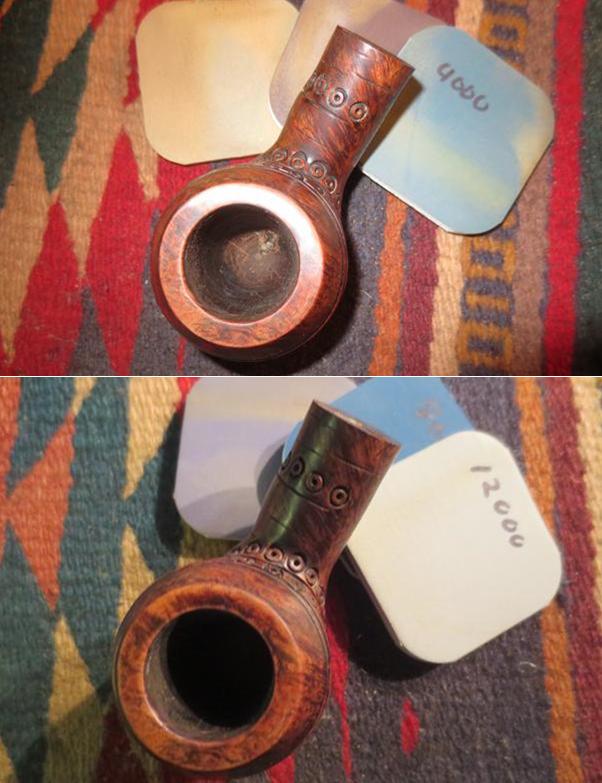
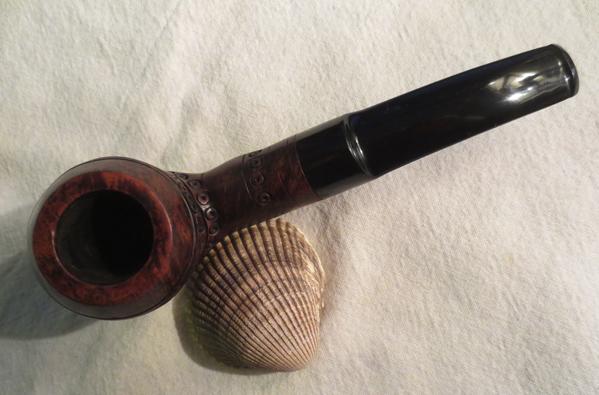
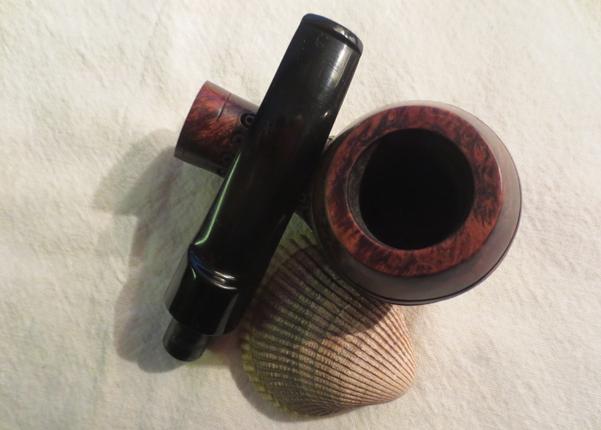
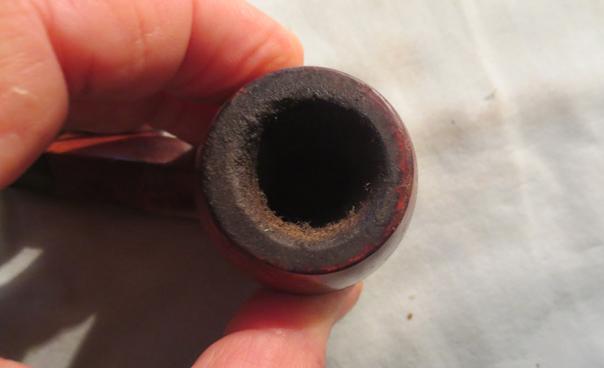
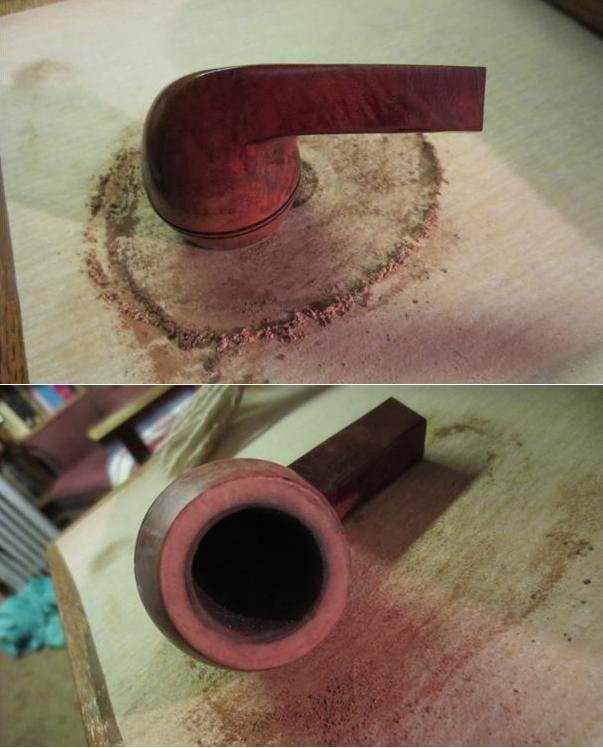
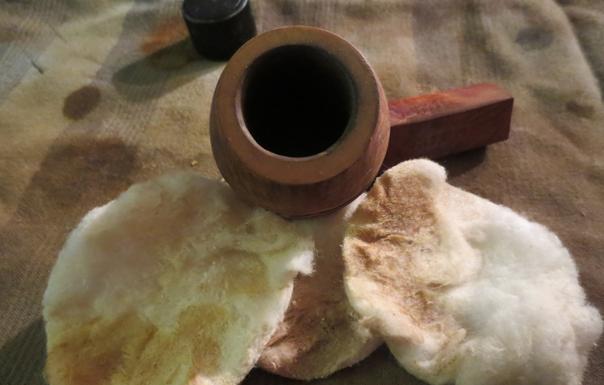
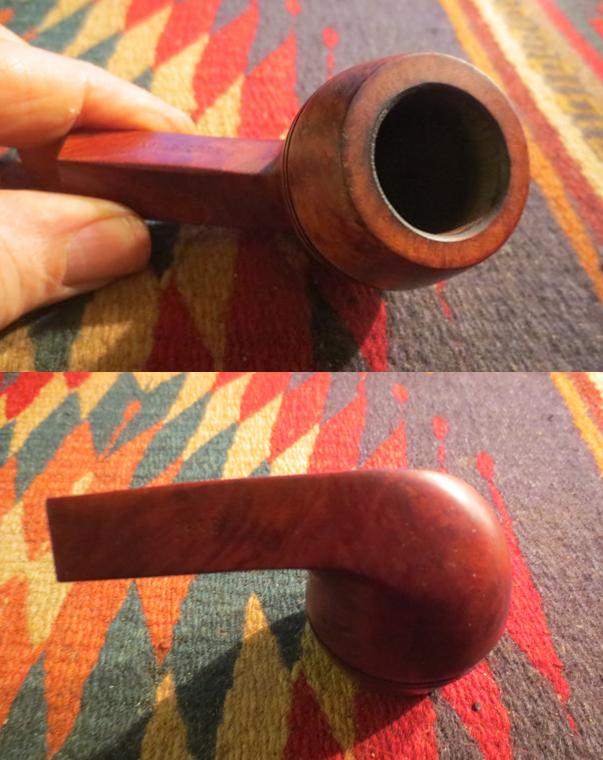
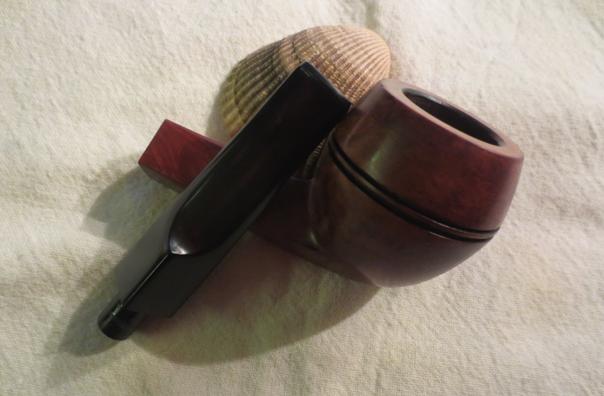
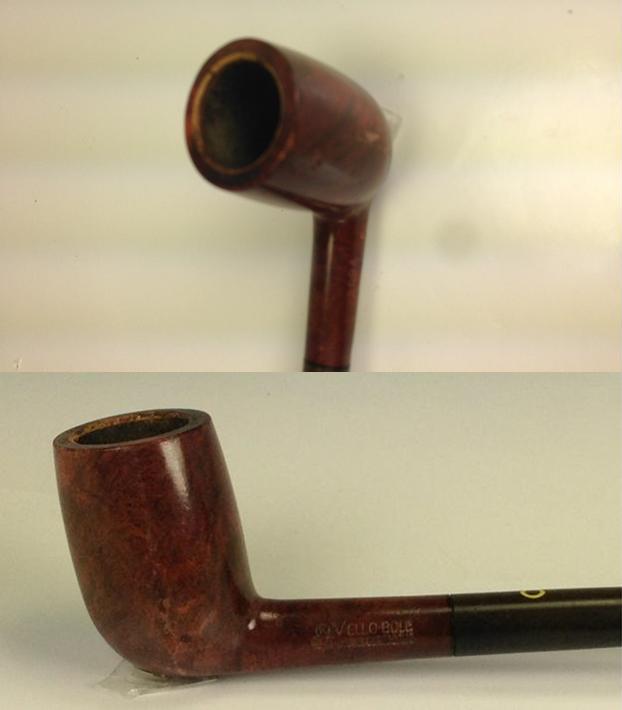
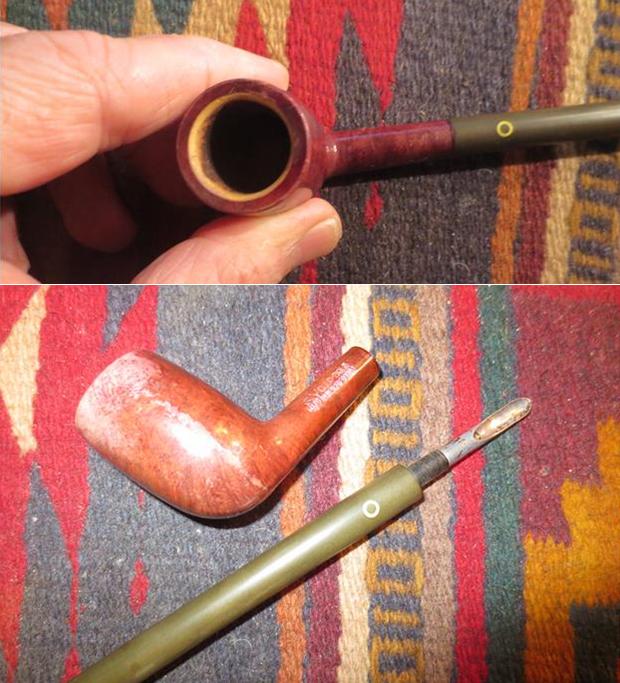
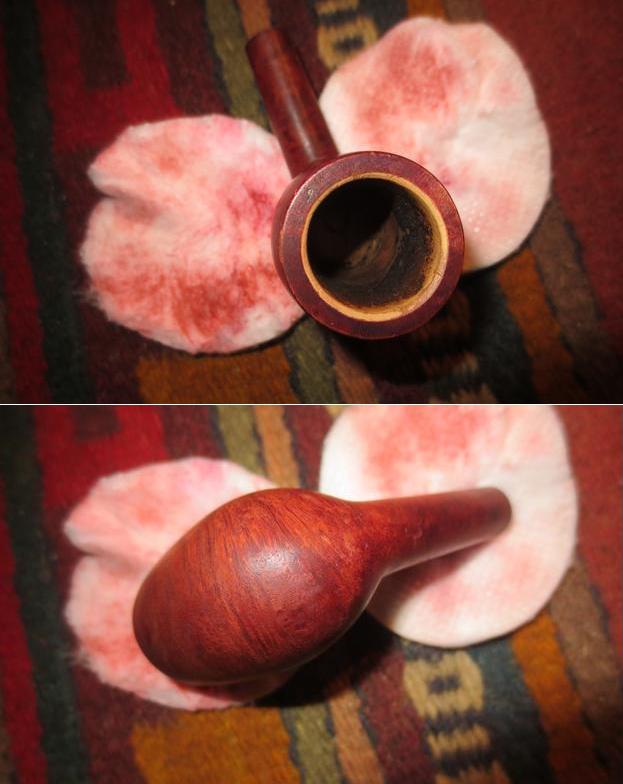
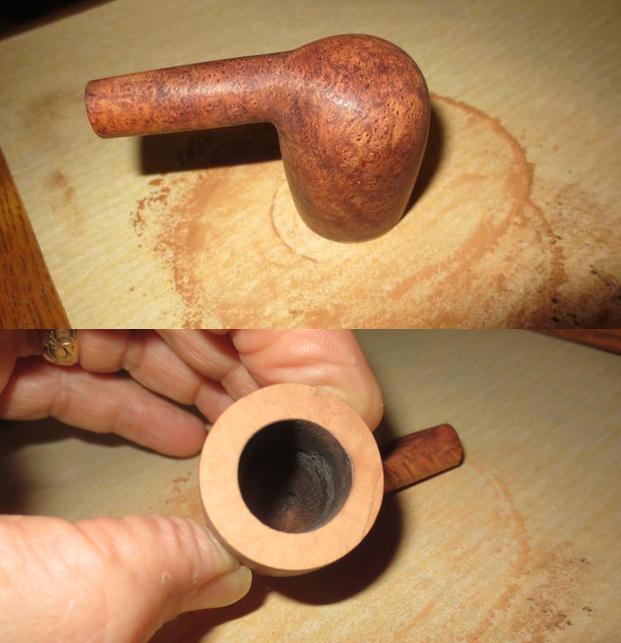
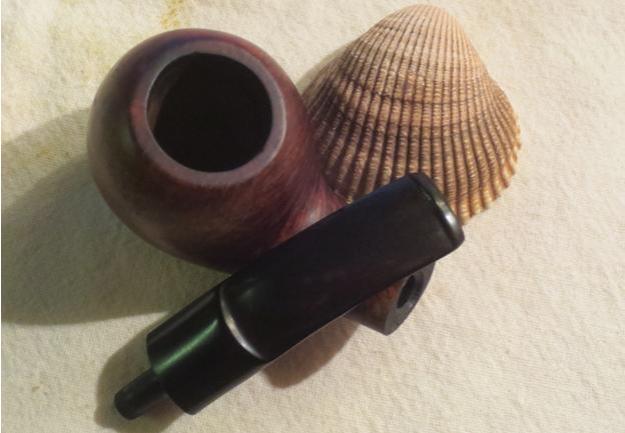
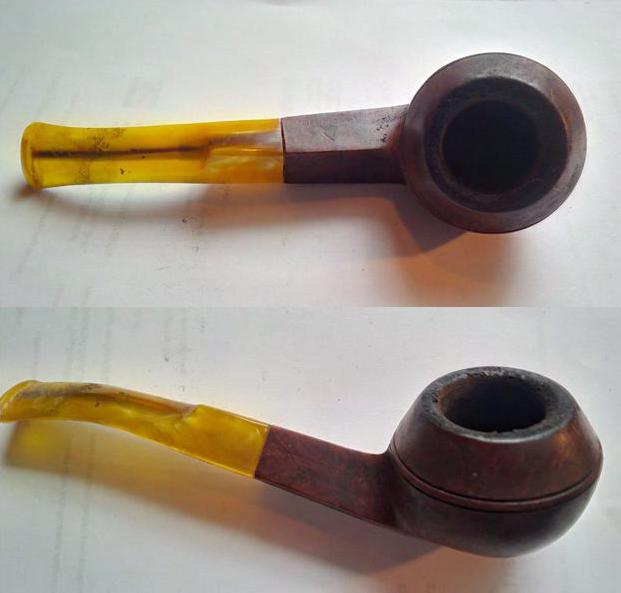
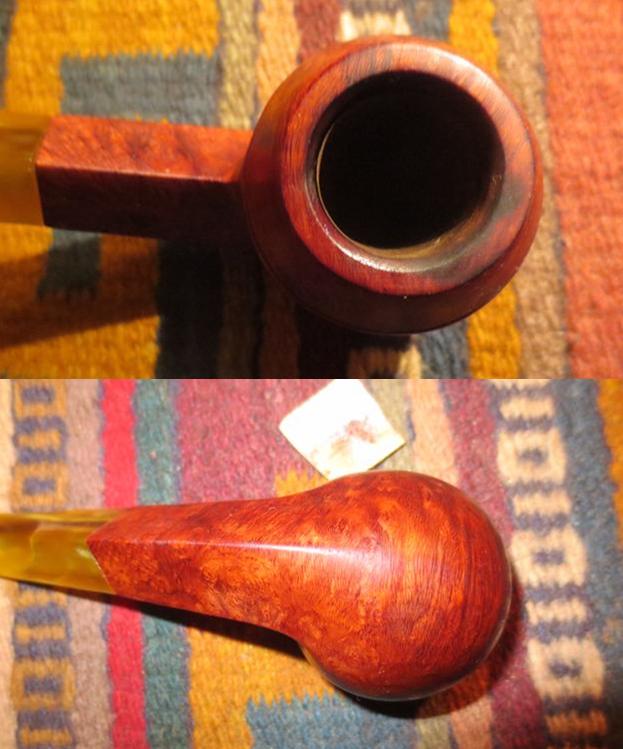
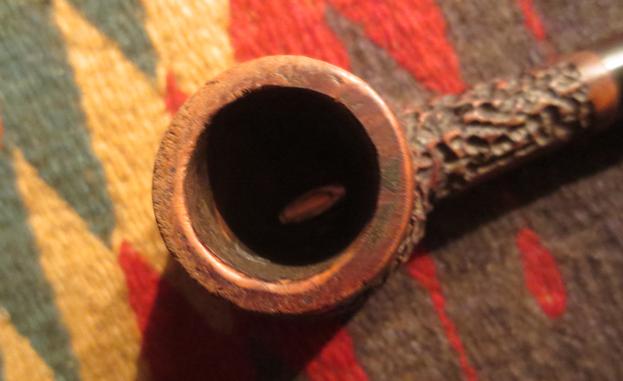
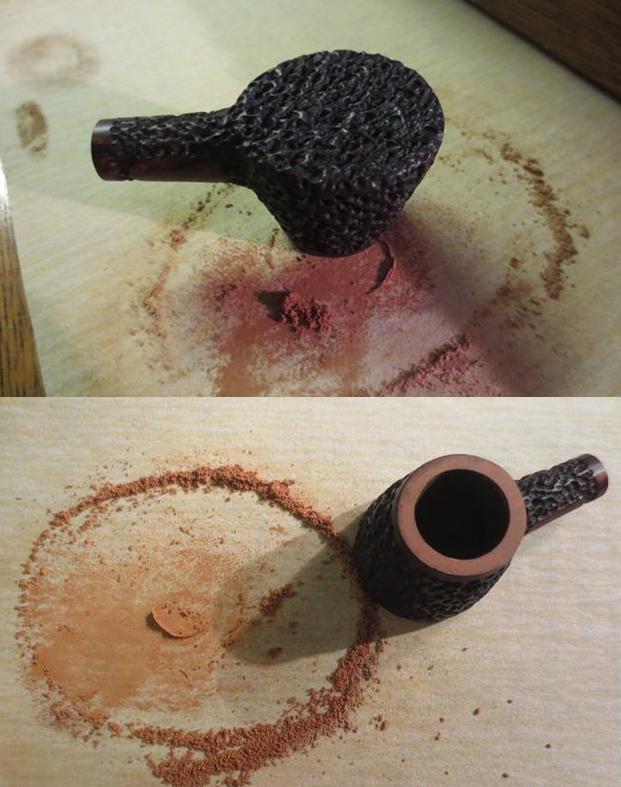
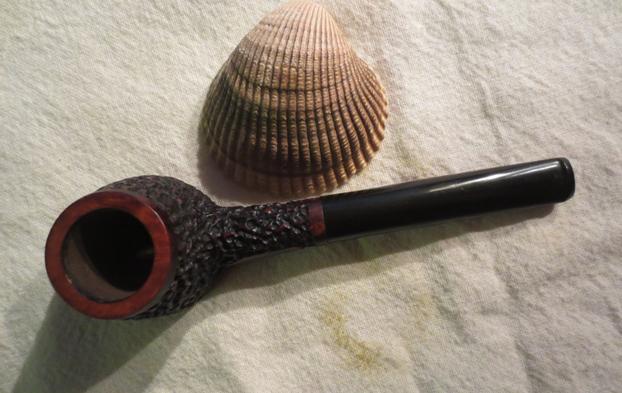
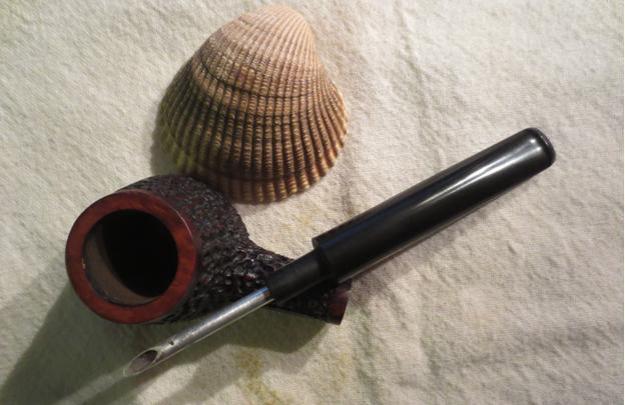
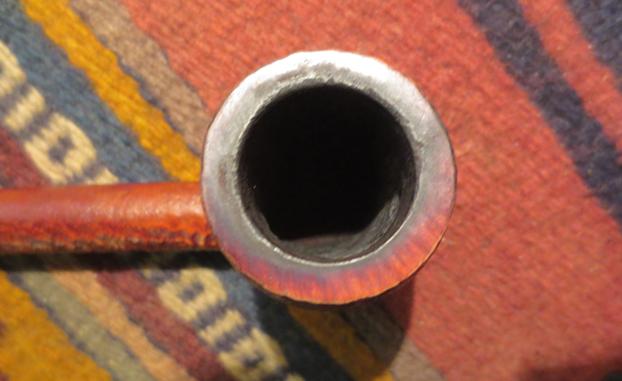
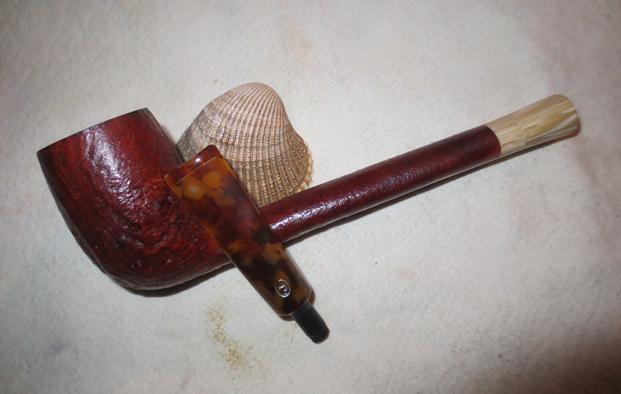
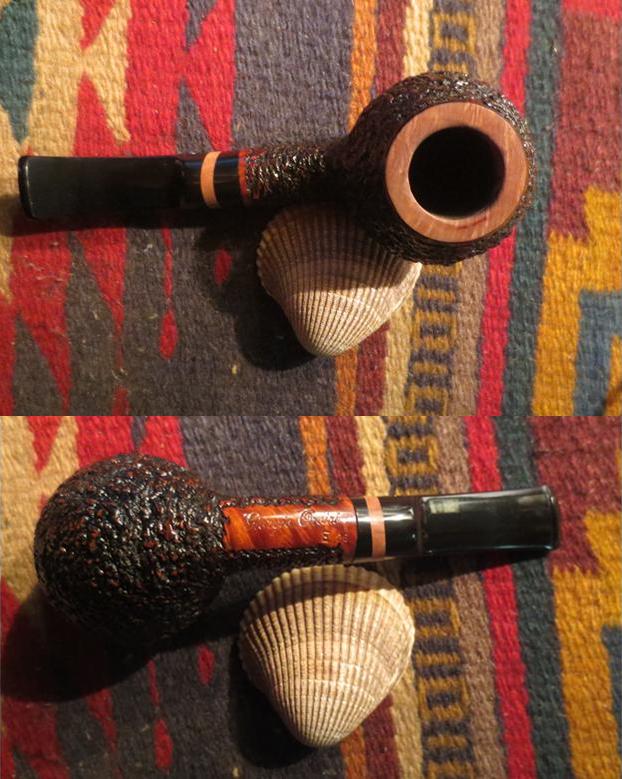
The next close up photo of the rim shows the damage to the inner edge of the rim. I was a bit surprised as it did not show up clearly in earlier photos. You can see the uneven bevel to the rim particularly between the 6 and 8 o’clock position in the photo below.orsini11
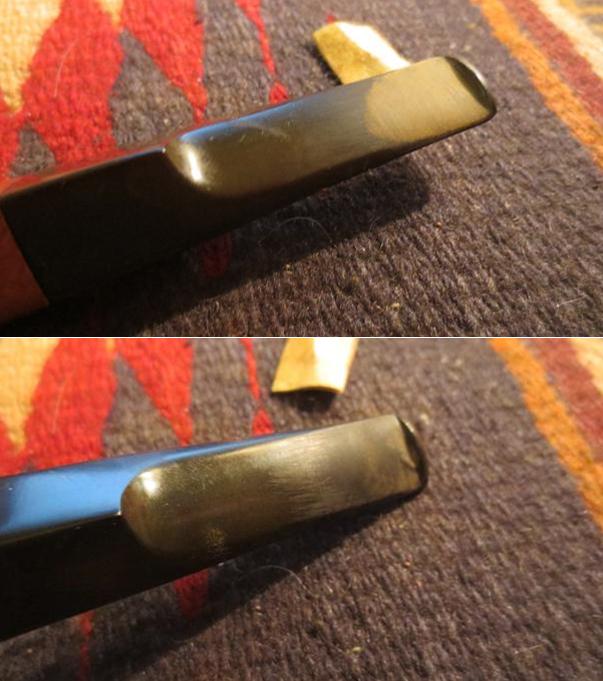
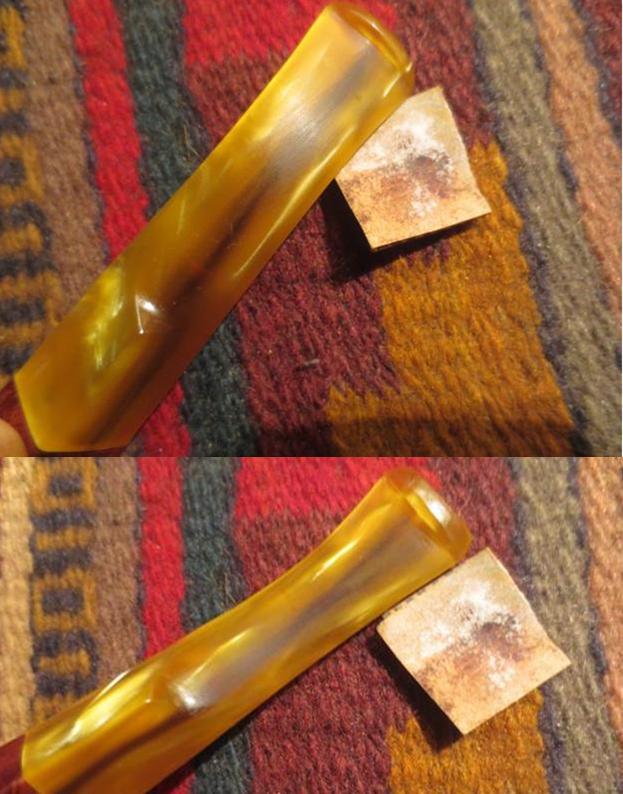
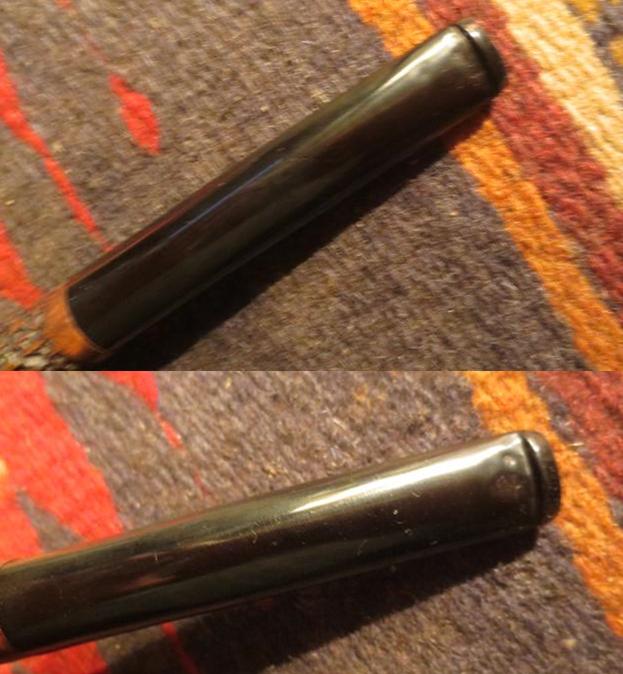
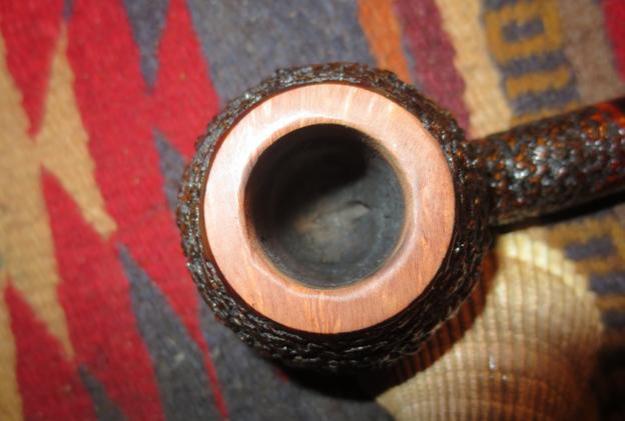
The stem showed scratches and light tooth marks as the seller had noted in his advertisement. These would be easy to deal with.orsini12
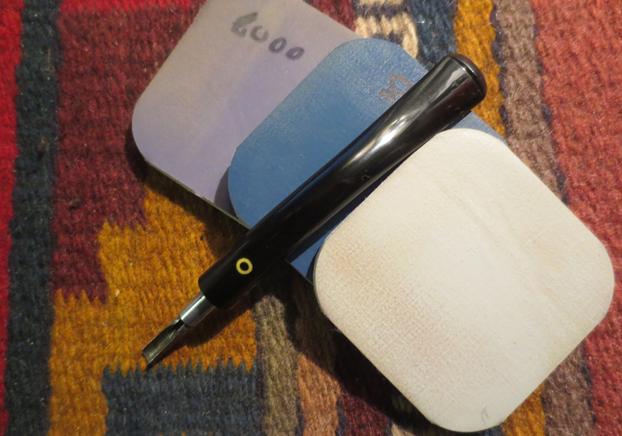
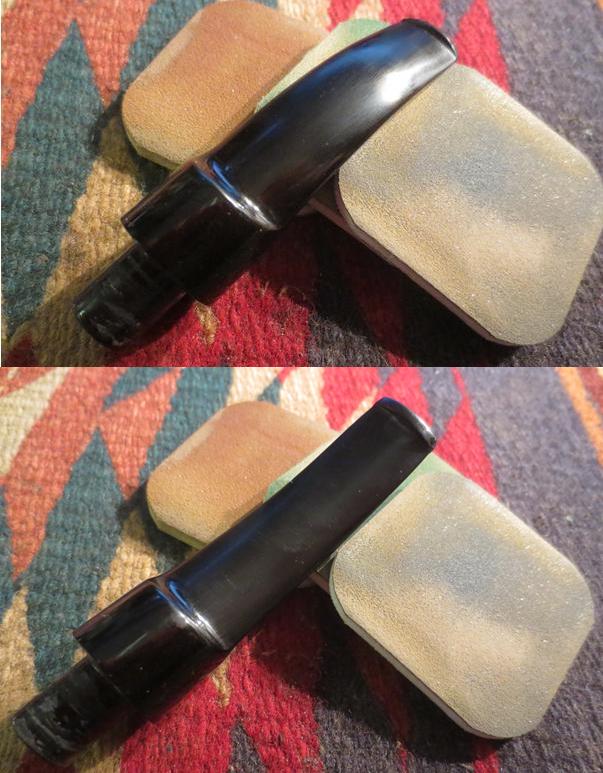
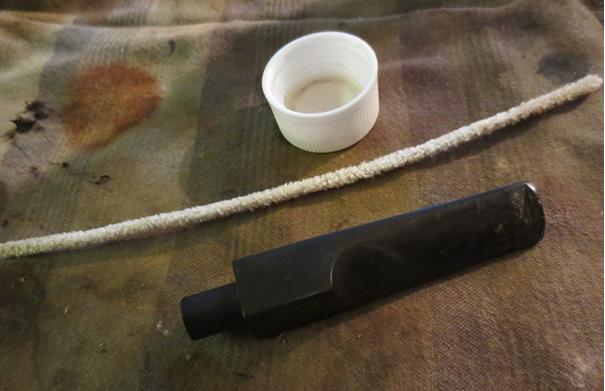
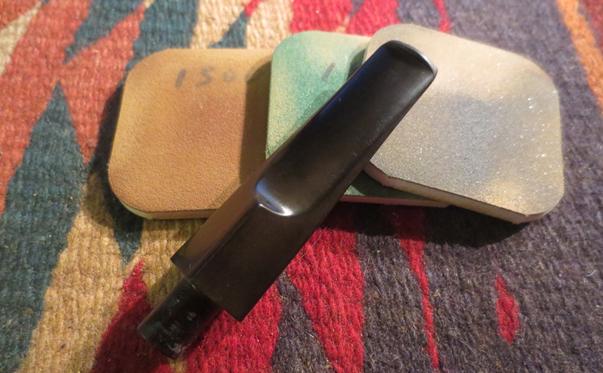
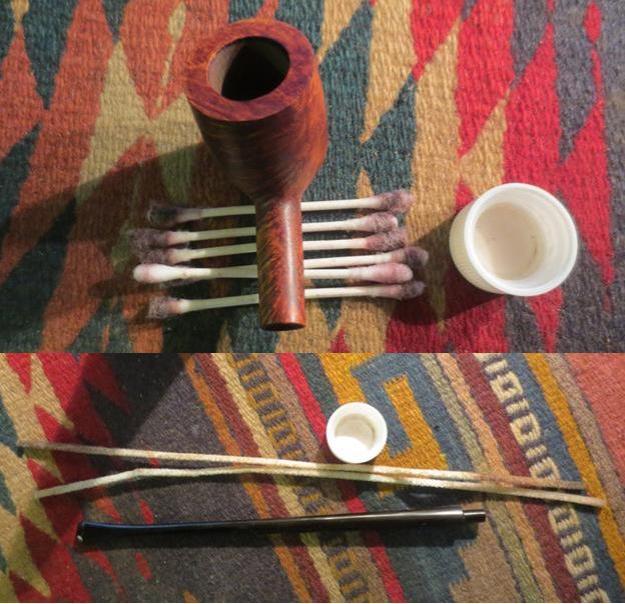
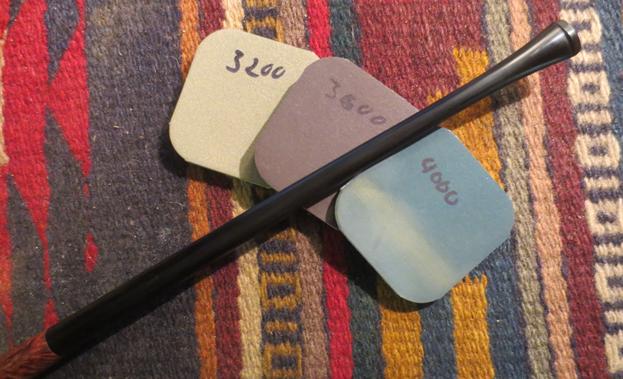
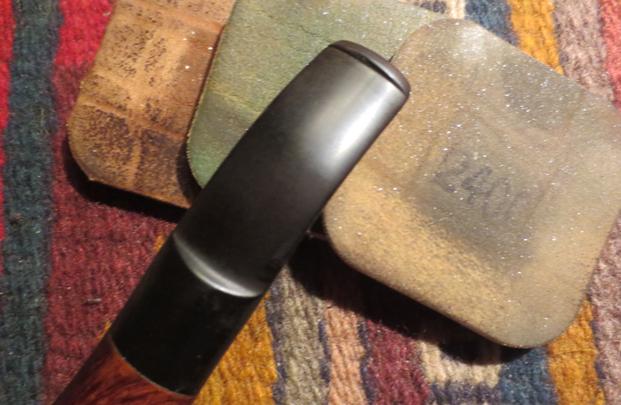
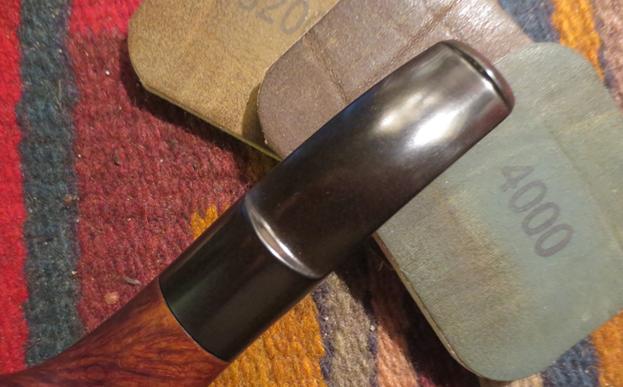
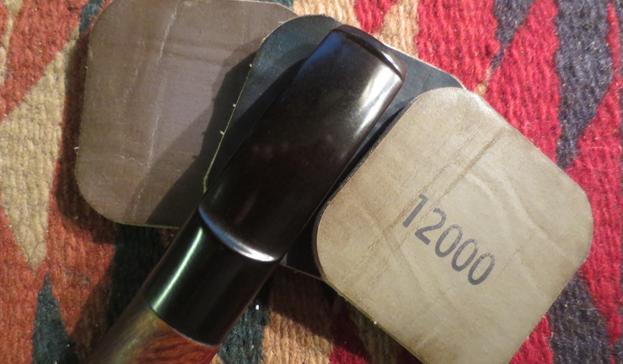
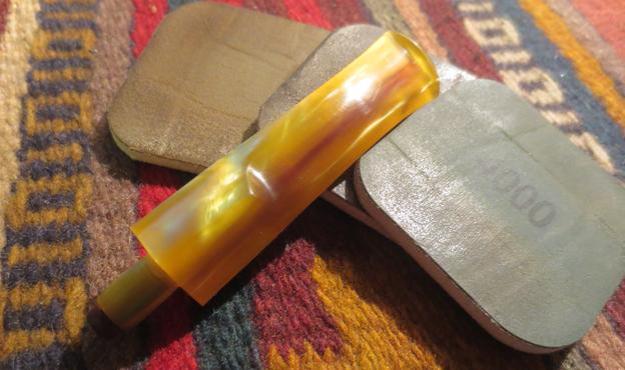
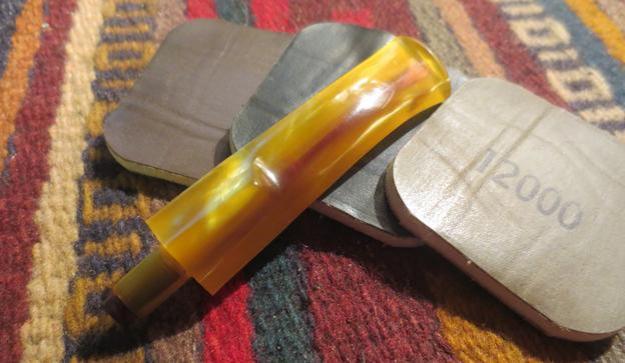
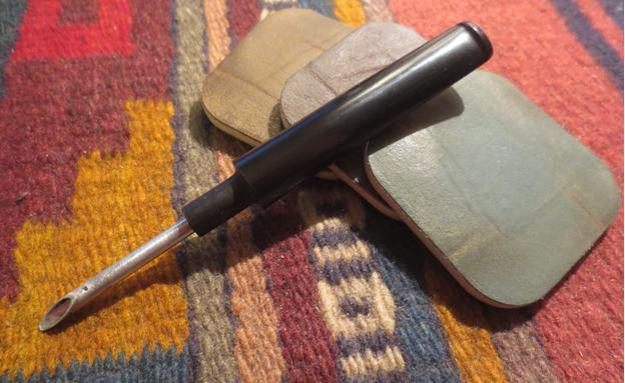
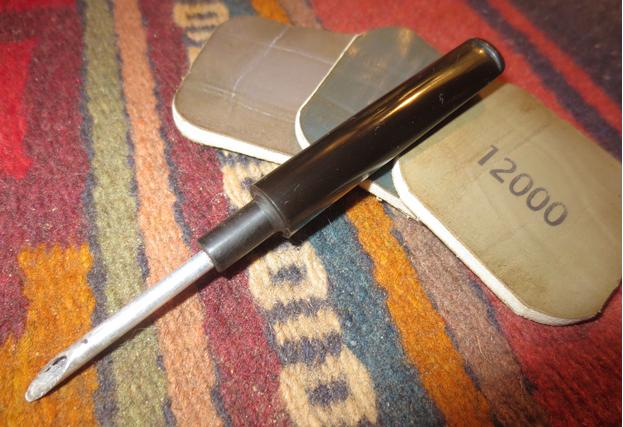
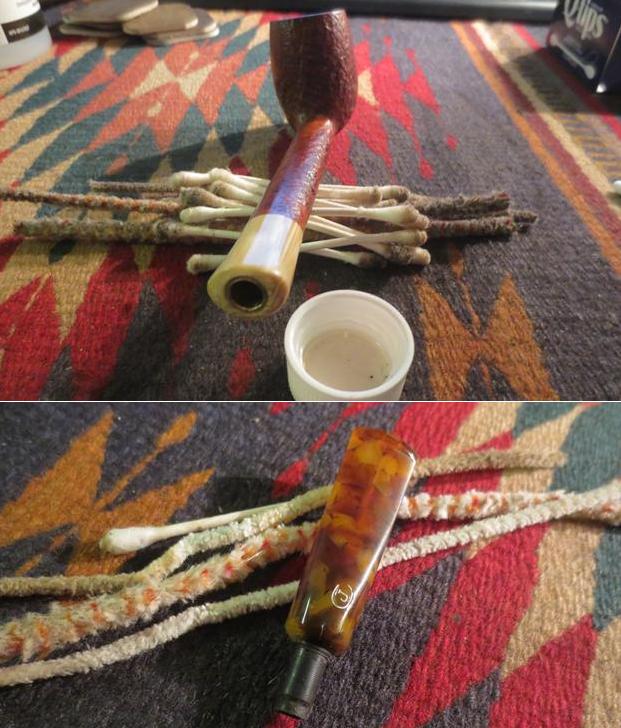
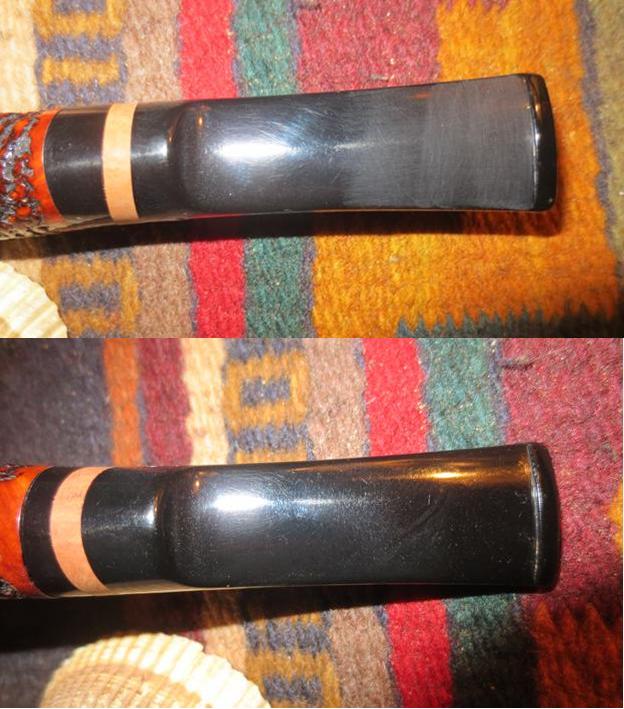
I lightly sanded the stem with 220 grit sandpaper and then with micromesh sanding pads – wet sanding with 1500-2400 grit and dry sanding with 3200-12000 grit pads.orsini13
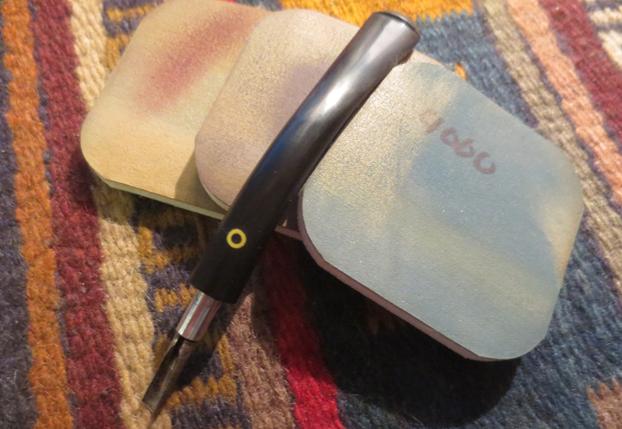
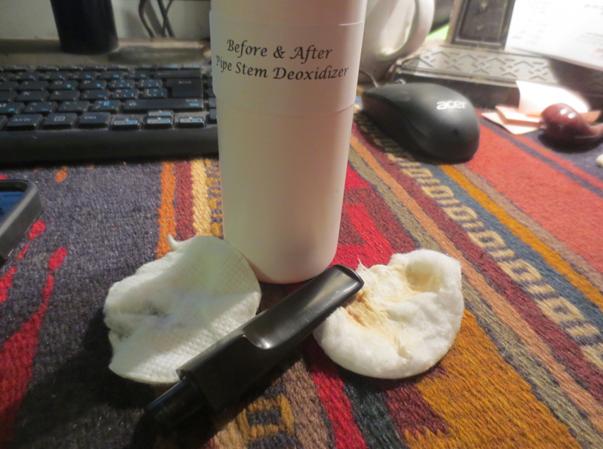
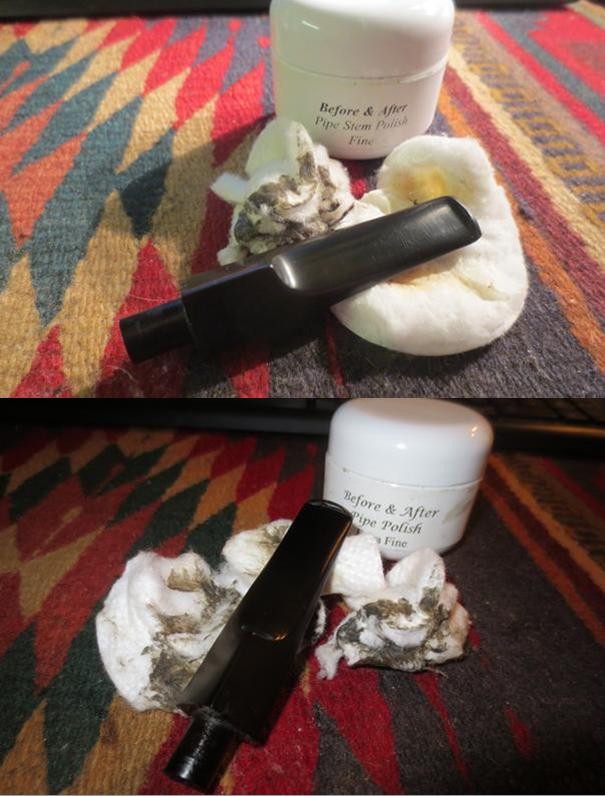
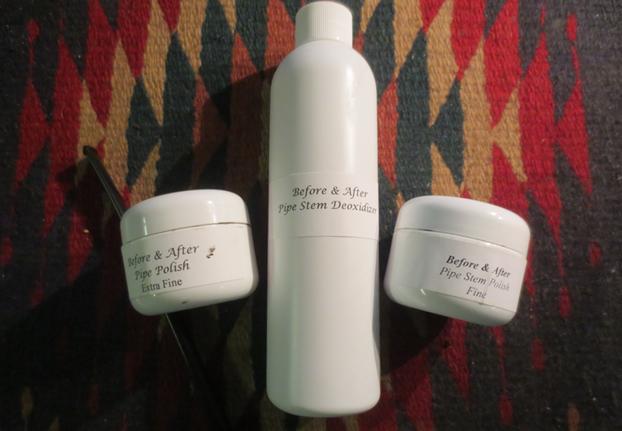
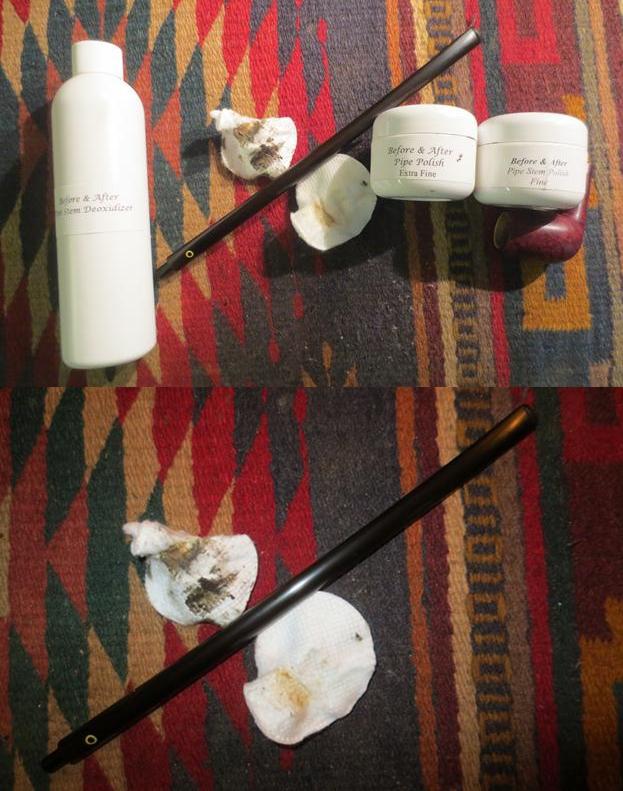
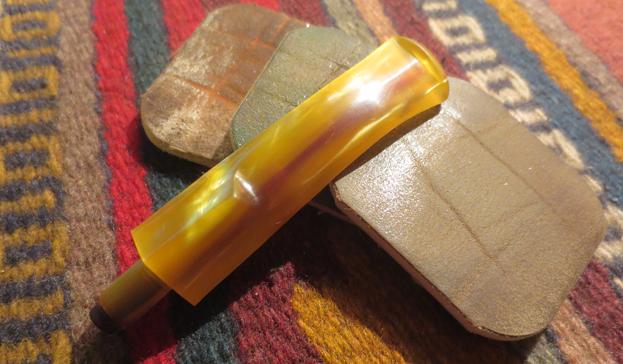
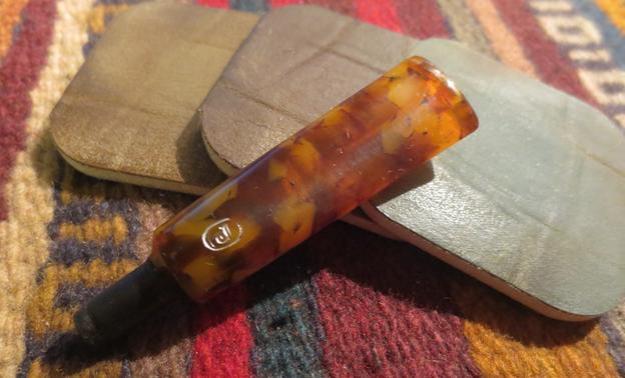
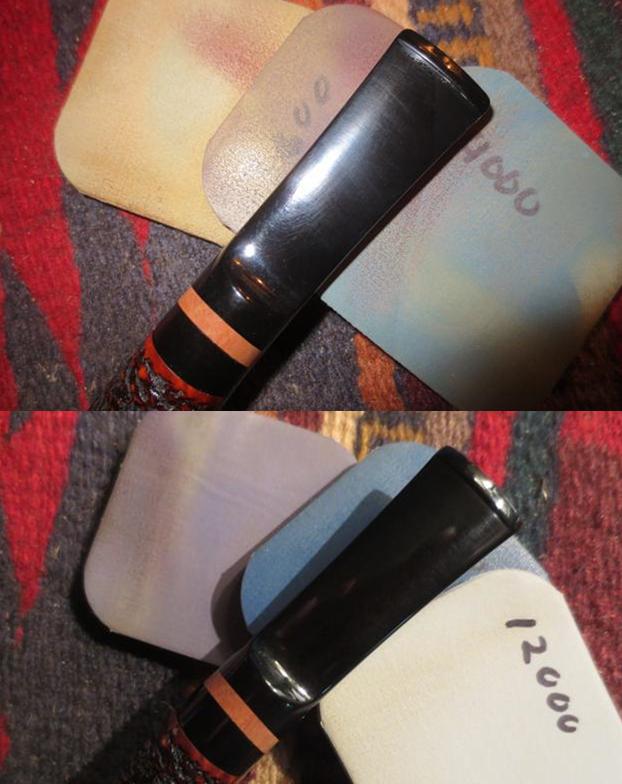
I polished the stem with Before & After Pipe Polish using both the fine and extra fine paste. I am still experimenting with this product but so far I really like how it brings a shine and removes even scratches left behind by micromesh sanding pads.orsini14
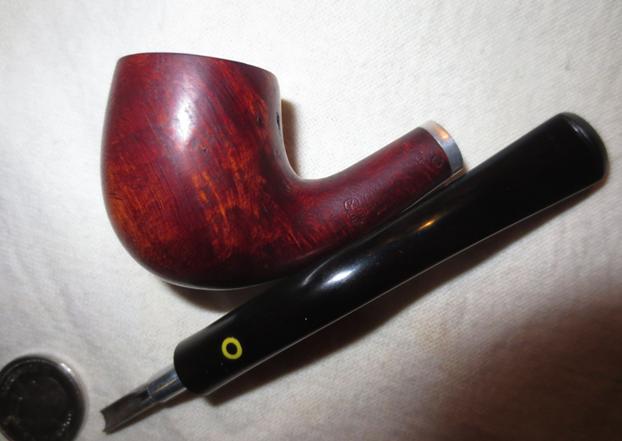
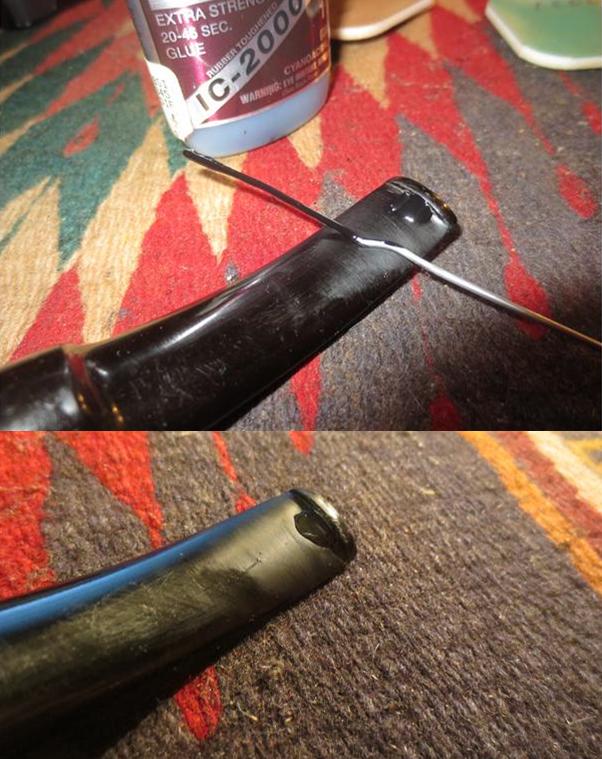
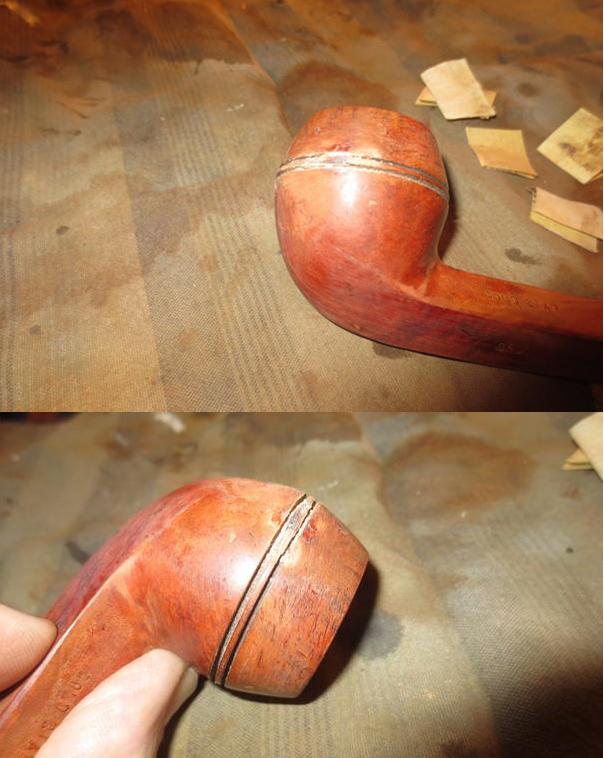
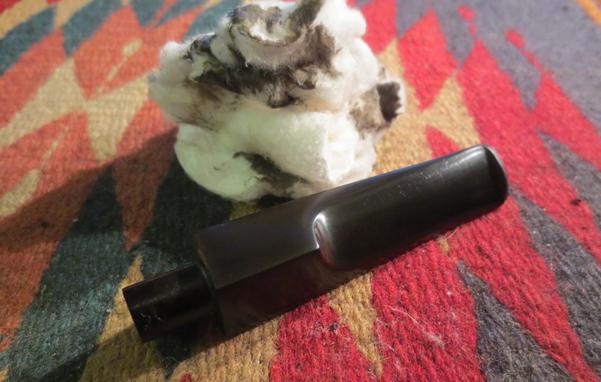
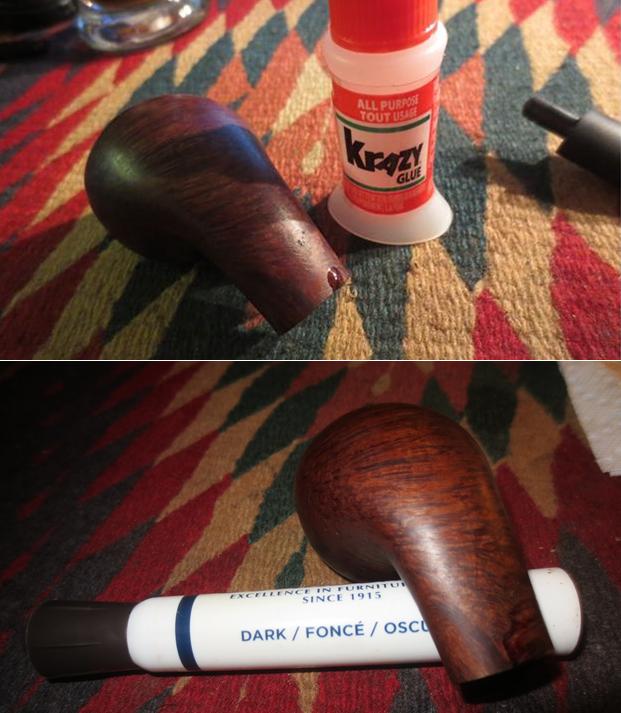
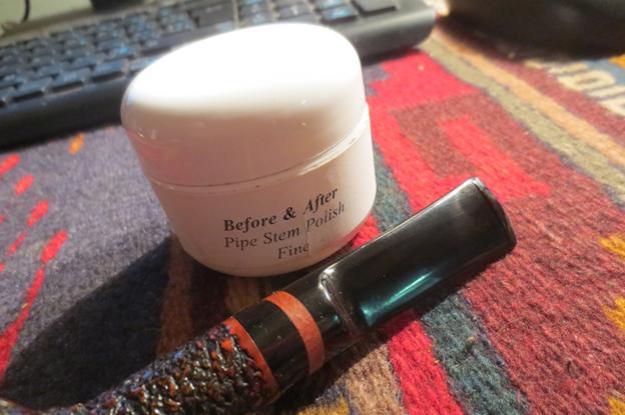
I repaired the flaw in the shank end and right side with a drop of clear super glue. I sanded it smooth once it dried and the flaw all but disappeared.orsini15
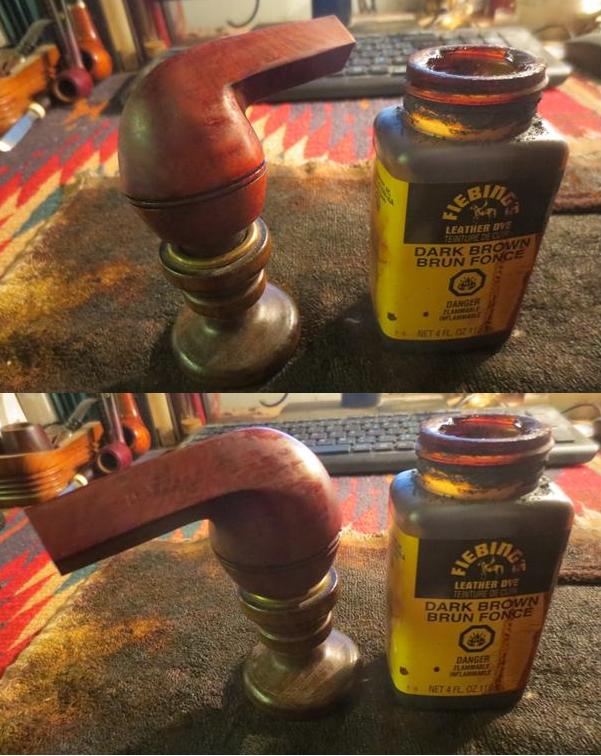
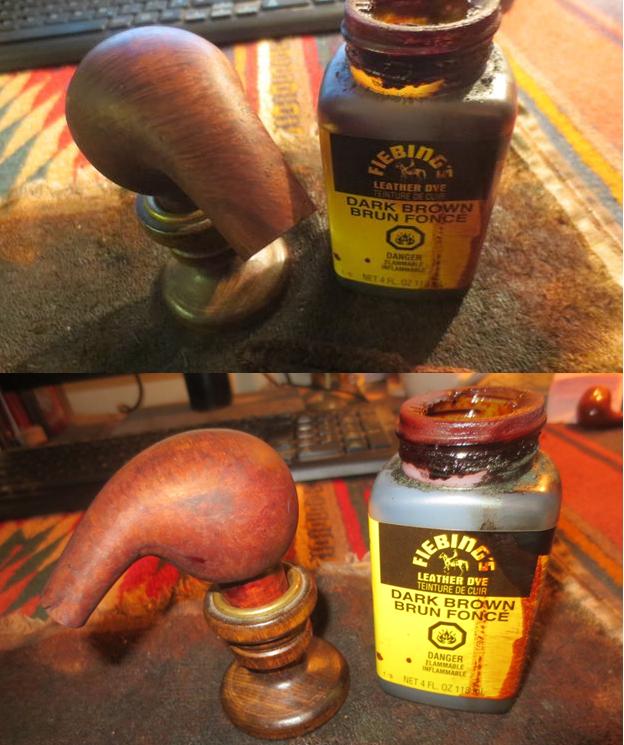
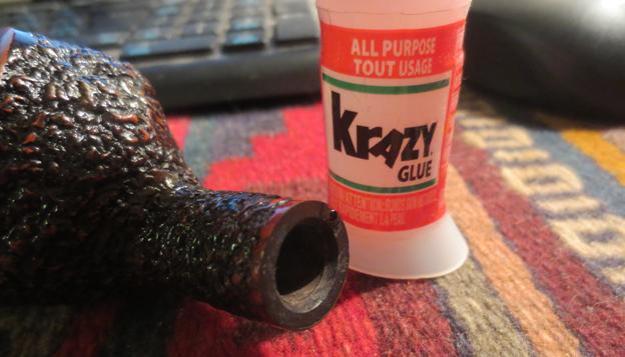
I sanded repaired area lightly and the rim lightly with 220 grit sandpaper and also with 400-12000 grit micromesh sanding pads to smooth out the surface. I stained it with a dark brown stain pen. In retrospect I should have done that after addressing the poorly done bevel on the rim. But live and learn.orsini16
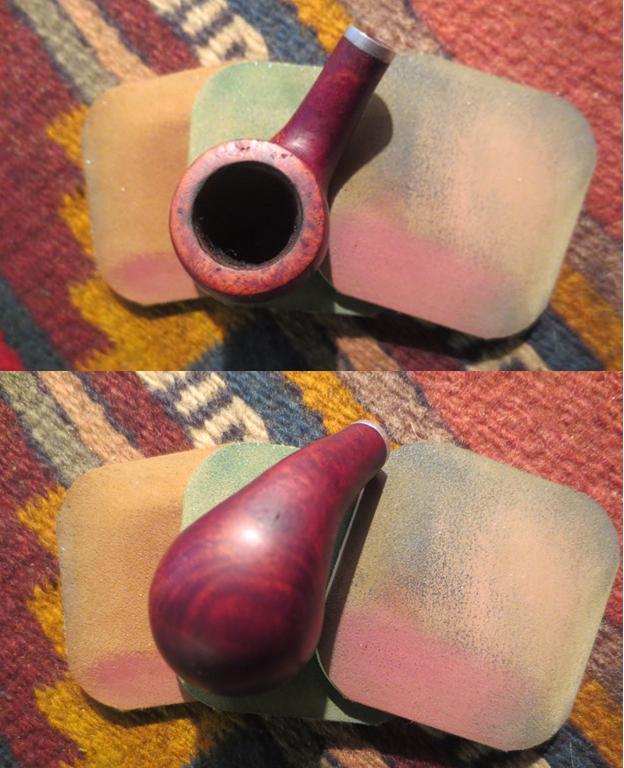
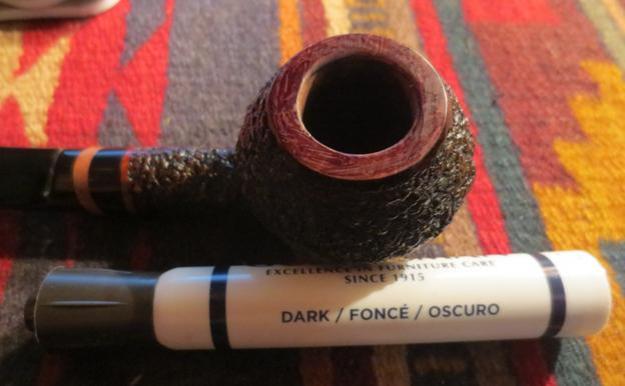
I polished the rim with a bit of Conservator’s wax to smooth out the stain. I reworked the bevel on the inside edge of the bowl with a folded piece of 220 grit sandpaper. I slowly reshaped the beveled edge to remove the unevenness of the previous bevel. I was able to remove it and give it a cleaner more original look. I polished the rim top with 4000-12000 grit micromesh sanding pads.orsini17
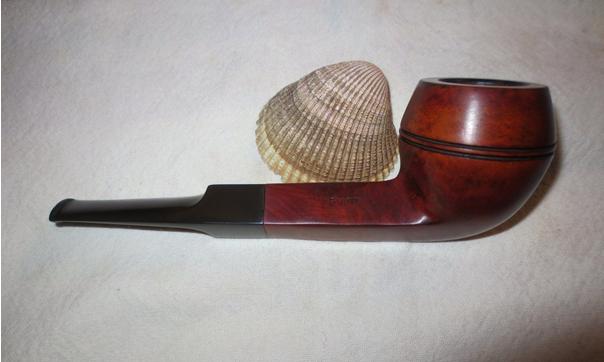
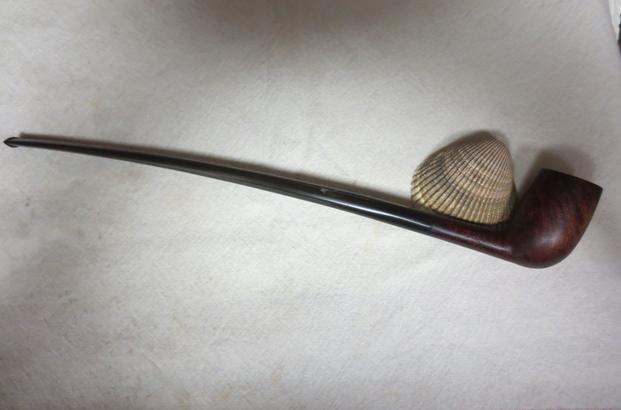
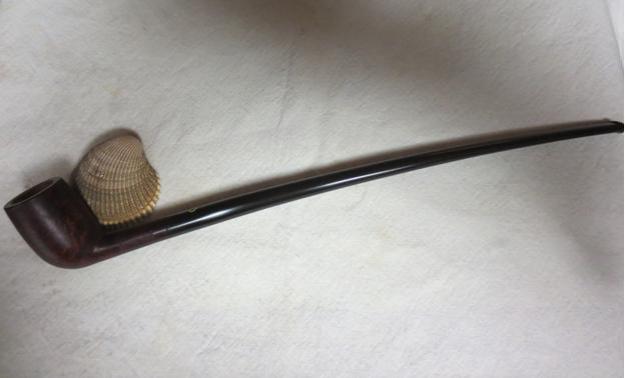
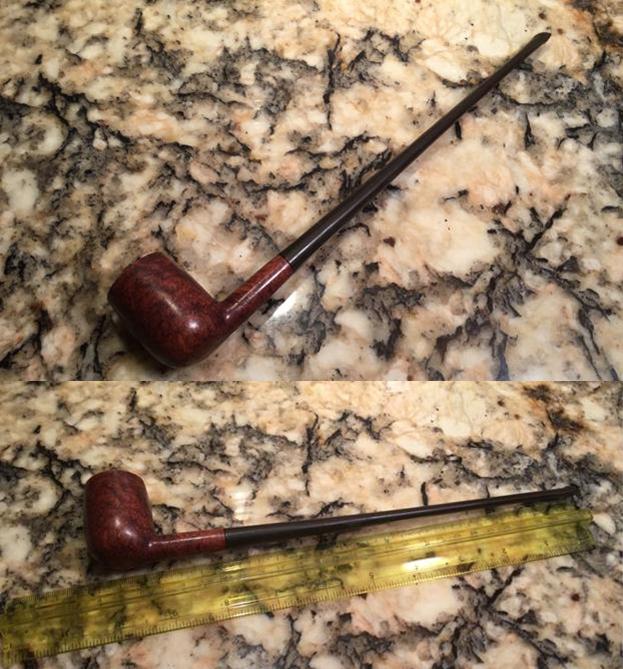
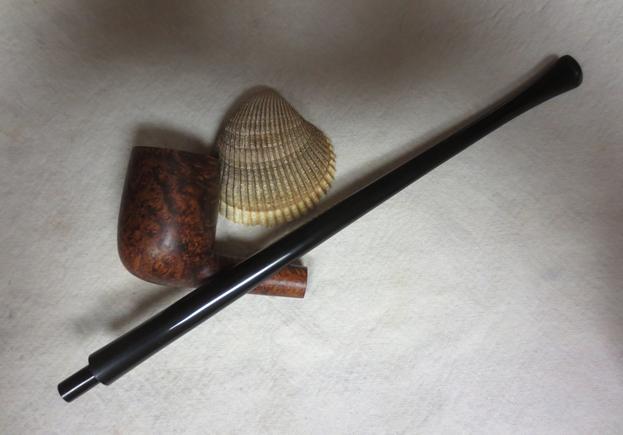
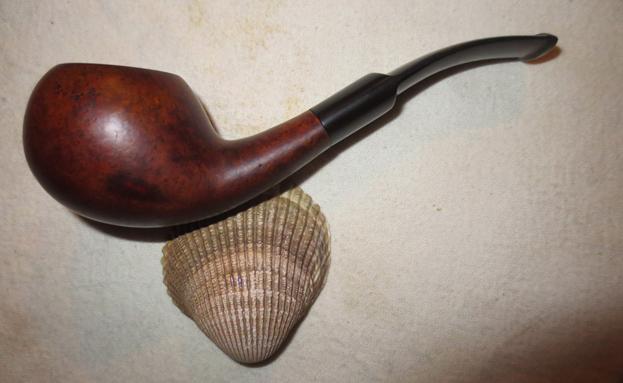
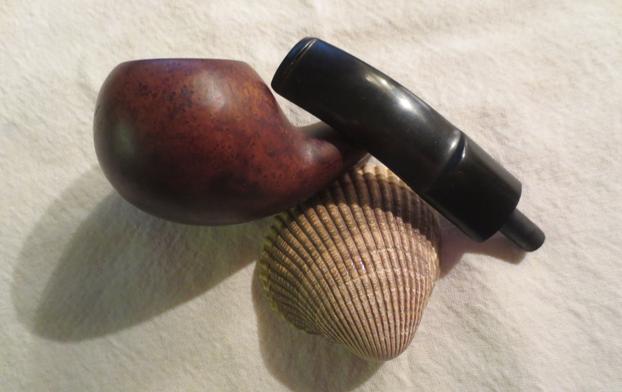
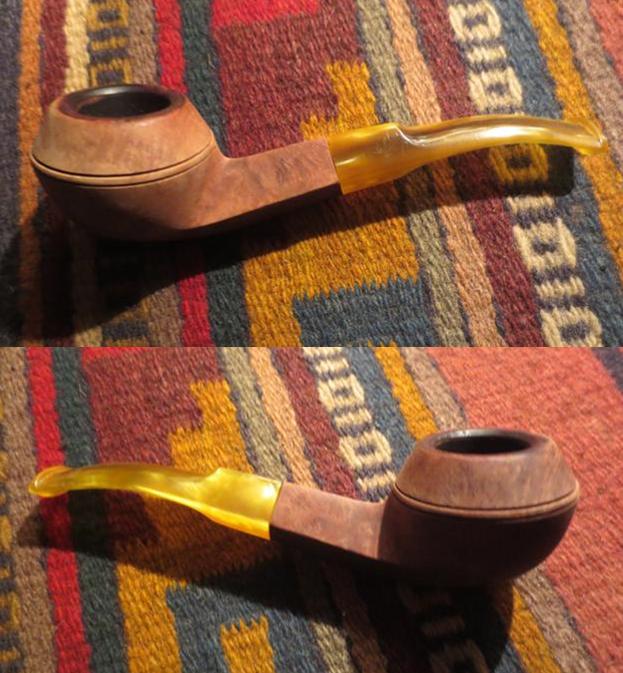
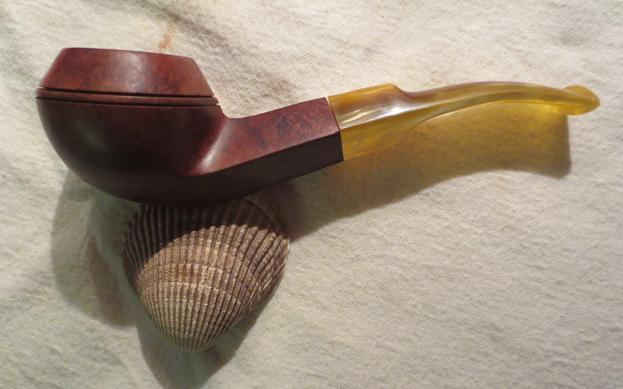
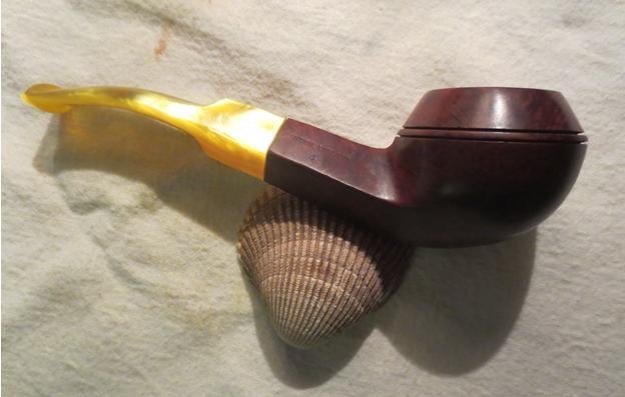
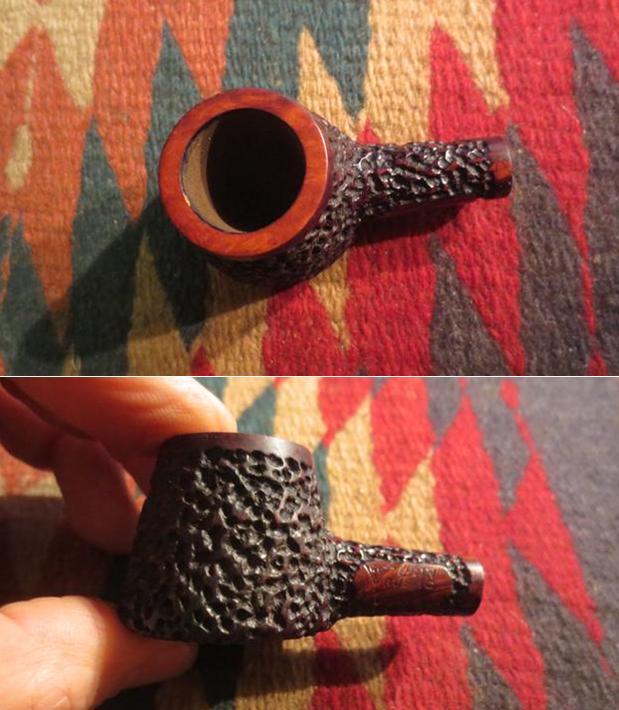
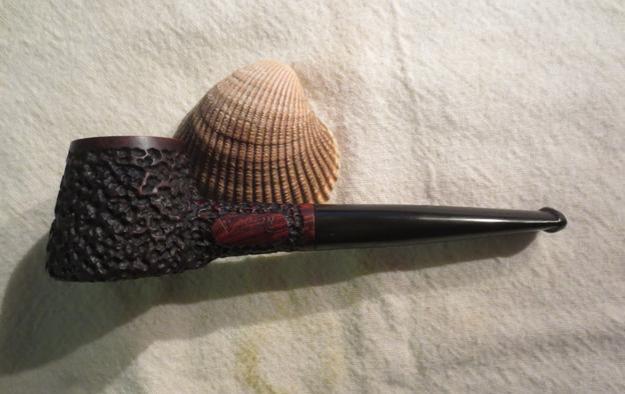
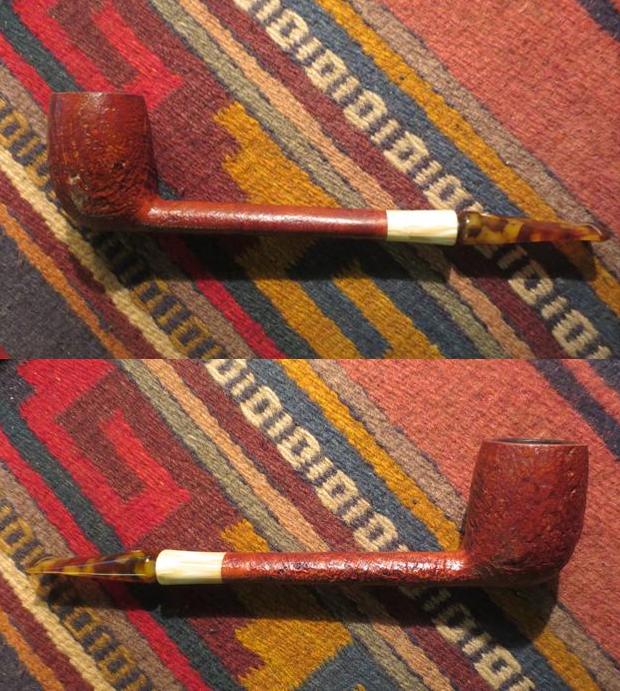
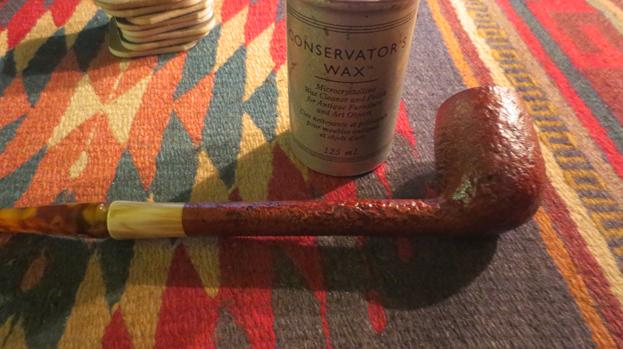
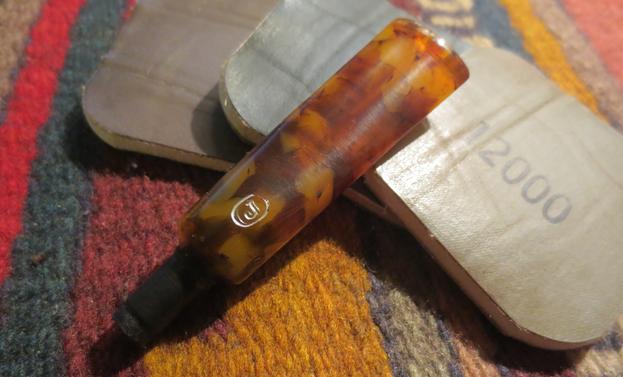
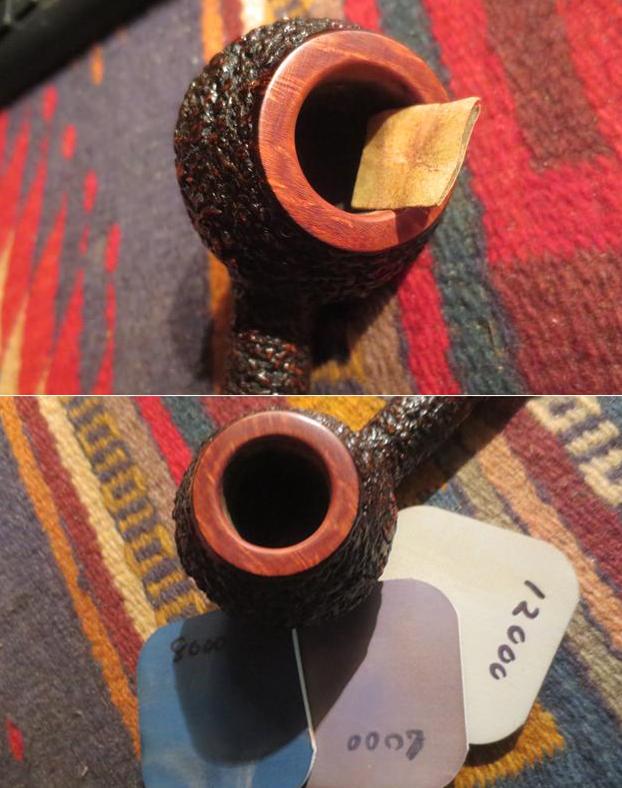
I buffed the rim with Blue Diamond polish and gave it and the stem several coats of carnauba wax. I hand waxed the bowl with Conservator’s Wax and lightly buffed the pipe with a clean buffing pad. I hand buffed it with a microfibre cloth for a finished look. The completed pipe is shown in the photos below. It is a stunning looking pipe and one that feels great in the hand. I am pretty sure that this one will stay with me. Thanks for looking.orsini18 orsini19 orsini20 orsini21 orsini22 orsini23 orsini24 orsini25

A Living Tiny KBB Yello-Bole Salesman’s Pipe


Blog by Steve Laug

I have always been fascinated with miniature copies of larger items. When my daughters were younger we used to buy them brass miniature stoves and household items that were surprisingly real. All of them had working parts and were small copies of the larger counterparts. I found out that Salesmen’s samples were similar to these items I bought my daughters. They were a common item in the early 20th century. Salesmen needed a smaller version of their product to show off to retailers, and retailers in turn needed a way to demonstrate the features of larger items, which might need to be ordered from the manufacturer, to their customers. Many salesmen’s samples were highly detailed, with additional marketing copy pointing out important features of the product. http://www.collectorsweekly.com/advertising/salesmans-samples I have cleaned up a few tiny salesmen’s pipes over the years that were working models of larger pipes. They have all been smokeable.

Today I worked on one that came in my brother’s box of pipes. It is stamped KBB in a cloverleaf and next to that Yello-Bole over Imported Briar. The stem is vulcanite and the pipe bowl is briar. It had been smoked and there was a light cake in the bowl.yb1None of the reamers that my brother had would fit the tiny bowl of the pipe. My little finger is still too big to fit into the bowl. The bowl had a light cake in it and the rim was damaged both with tars and with dents from tapping the pipe out. The stem was lightly oxidized and there were tooth marks and chatter on the top and the bottom sides near the button. The finish on the bowl sides was peeling and flaky. The pipe was tiny but well used. I took the next four photos to show what the pipe looked like when I started to work on it. I put the pipe next to the seashell that I have been using for all my photos to give an idea of its diminutive size. I reamed the bowl with the Savinelli Pipe Knife but forgot to take photos of it before and after.yb2 yb3When I took the stem off the pipe it had the standard Yello-Bole shovel like stinger. It was pressure fit in the tenon. The tenon on this tiny pipe was metal which was different from previous Yello-Bole Salesmen’s pipes I have refurbished.yb4I carefully removed the stinger from the tenon with a pair of pliers. While the pipe was apart I cleaned out the shank and the airway in the shank and the stem with pipe cleaners, cotton swabs and alcohol.yb5I cleaned the spoon shaped stinger with a brass bristle wire brush, cotton swabs, pipe cleaners and alcohol to remove the tars and oils. Once it was clean and the stem was clean I pushed it back in place in the shank.yb6I took off the peeling varnish coat on the bowl with acetone and cotton pads. It did not take a lot of scrubbing to take off all of the finish. The acetone took off the varnish coat and some of the opaque stain on the bowl. Once it was gone I could see some nice grain showing through. The cotton pads give an idea of how small this pipe is.yb7 yb8I sanded the bowl with 1500-12000 grit micromesh sanding pads to even out the finish and smooth out some of the dings and dents on the briar. There was a dark spot on the bottom of the shank where it joined the bowl that appeared to be a burned area. I sanded it and was able to remove most of it. Each successive grit of micromesh sanding pad brought more shine to the surface of the briar. By the end of the progression, the 12000 grit pad the bowl had a shine to it that looked really good and showed off the nice grain on the bowl.yb9 yb10 yb11 yb12I sanded out the tooth chatter with 220 grit sandpaper and then wet sanded the stem with 1500-2400 grit micromesh sanding pads. I dry sanded the stem with 3200-12000 grit pads. I rubbed the stem down with Obsidian Oil after each set of three pads. I set the stem aside to dry after sanding it with the 12000 grit pad.yb13 yb14 yb15I put the stem on the bowl and buffed the pipe with Blue Diamond on the buffing wheel. The polish made the bowl and the stem shine. I was careful around the stamping so as not to damage it. I gave the pipe multiple coats of carnauba wax and buffed it with a clean buffing pad to raise the shine. The finished pipe is shown in the photos below. To give an idea of the size of the pipe I took the photos with a Canadian dime or 10 cent piece next to it. The Canadian dime is the same size as the American dime. Thanks for looking.yb16 yb17 yb18 yb19 yb20 yb21 yb22 yb23

Another Spanish Carved Bamboo Like Pipe – this time a Rhodesian


Blog by Steve Laug

Earlier this year I restored an old briar oval shank billiard that was carved to look like bamboo. It came out beautifully and showed the skill of the Spanish carver who had shaped and crafted it. He carved in the nodules, the cracks and patina of a piece of bamboo.Here is the link to the blog on that old pipe. https://rebornpipes.com/2016/04/10/introduced-to-a-bamboo-briar-of-spain-oval-shank-billiard/. Today I pulled another pipe out of the box my brother sent – another Spanish carved Bamboo looking pipe. This one is a Rhodesian shaped pipe with a saddle stem. The carving was really well done. The pipe is stamped on the left side of the bowl with the words BAMBOO BRIAR over Made in Spain. On the underside of the shank next to the shank stem union it is stamped with the shape number 900.

Once again the carver did a marvelous job of replicating the look of bamboo in the briar. The nodules, lines and grooves that he/she put in the briar really look like bamboo. Instead of being left unfinished like the previous one this one was stained with a contrast of medium and dark brown stain. The grain of the briar came through the smooth areas of the bamboo and the carved nicks in the surface. It is really beautiful.

Fortunately my brother cleaned up this pipe for me. He reamed back the cake and scrubbed the exterior of the bowl with Murphy’s Oil Soap. He cleaned the internals with cotton swabs, pipe cleaners and alcohol. There was a small part of the rim top that had a remnant of the lava that must have overflowed the bowl. The stem was in great shape with no oxidation. Someone had repaired a tooth mark on the underside of the stem near the button with what looked like a grey epoxy. It was significantly lighter than the rest of the black stem. It was sanded smooth but it stuck out.

bam1I reread the blog I had written on the previous pipe I restored. I reread the information that I had found on the brand on the pipephil website, Logos and Stampings: http://www.pipephil.eu/logos/en/logo-b1.html#bamboobriar.

The description said that the bamboo like decorative carving on these pipes was typical of Valencia’s manufacturers since the early 20th century. The carvers did a great job of replicating a chunk of bamboo on both the shank and the bowl sides. The site also said that even though the Valencia connection it is easy to make it’s difficult to say who exactly the maker was.

When I took it out of the last box my brother sent me it was in far better shape than the previous Bamboo Briar that I had cleaned up.  My brother sent along this photo of the pipe. Look at the nodules and grooves that have been carved in the bowl and shank. It is really well done carving.

bam2I took the following photos of the pipe before I started cleaning and restoring it. It was in great shape with just a few small touch ups that needed to be done.bam3 bam4I took a close up photo of the rim top showing the remnant of lava that was stuck on the back topside of the rim. The bowl was in great shape though and my brother had taken the cake back.bam5The next two photos show the stem in close up. The top side of stem looked good at the button. The underside of the stem shows the repaired area next to the button. It is lighter in colour than the black of the stem.bam6I worked on the lava build up on the back side rim top. I sanded it with micromesh sanding pads. I started with 2400-4000 grit pads and was able to remove all of the tars. I continued to sand it with 6000-12000 grit pads to polish the rim top.bam7I sanded the repaired area of the stem until I had a small dip sanded out the surface of the stem. I filled it in with black super glue.bam8I sanded the repaired area back with 220 grit sandpaper until it was smooth. I wet sanded it with 1500-2400 grit micromesh sanding pads and rubbed it down with Obsidian Oil. I dry sanded it with 3200-12000 grit sanding pads. I rubbed it down with oil after each set of three pads. After the last rubdown fowling the 12000 grit pad I set the stem aside to dry.bam9 bam10 bam11I buffed the pipe with Blue Diamond on the buffing wheel. The polishing compound brought a shine to the bowl and stem and also made the grain stand out. I gave the bowl and stem multiple coats of carnauba wax and buffed it with a clean buffing pad. The bowl and stem took on a shine. I hand buffed the pipe with a microfibre cloth. I have found that the extra step gives some depth to the shine. The finished pipe is shown in the photos below. It is a beautiful example of the Spanish Valencia carved Bamboo Briar Pipes. Thanks for looking.bam12 bam13 bam14 bam15 bam16 bam17 bam18 bam19

Breathing New Life into a Gold Star Giant 8597


Blog by Steve Laug

I have a lot of pipes to work on so making a decision which one to work on it a bit interesting. Several months ago now Steve in Dawson Creek sent me a box of pipes for restoration as allowed. He sent me a list of priorities regarding which pipes he wanted restored in the order of importance to him. So I decided to work on one of the pipes that he sent me for restoration. The next one on his list of priorities was a bulldog that was in pretty rough shape. It is stamped Gold Star on the left side of the shank and Giant on the right side. On the underside of the left side of the diamond shank it is the shape number 8597. I can’t much information about the brand. It is a bit of a mystery pipe but under the grime and the peeling finish there was nice looking grain. gold1The pipe was dirty and the finish was very rough. The varnish coat was peeling away. There was a large chip out of the ring on the right side of the bowl. The rim was darkened and caked under tars. The cake was thick and overflowing the bowl. The stem was oxidized and there were tooth marks on the top and underside of the stem next to the button.gold2I took a close up photo of the rim and the bowl to show you what I was working on in dealing with this pipe. The bowl was a mess. I also took close up photos of the stem to show the bite marks on the top and underside of the stem.gold3 gold4I reamed the bowl with a PipNet reamer and a Savinelli Pipe Knife to take the cake back to bare briar on the bowl walls. There was a lot of cake so it took some time. I used the largest cutting head and the cutting head just below that one.gold5I topped the bowl on a topping board with 220 grit sandpaper. I worked the rim against the sandpaper until the damaged bowl top was removed and the bowl was once again smooth and round.gold6I repaired the damaged portion of the ring around the bowl with briar dust and super glue. I mixed the two together and made putty and pressed it into the damaged area of the ring. In the photo below you can see the repaired area on the ring.gold6aI used the Dremel and sanding drum to remove the excess patch and sanded it back until it was smooth against the rest of the bowl.gold7I sanded it with 220 grit sandpaper until the ring blended in with the rest of the pipe. I used a hack saw blade to recut the grooves on each side of the ring repair. The photo below shows the recut grooves and the repaired ring. It still needs to be cleaned up but it is looking better.gold8I used a knife blade needle file to clean up the grooves. I was able to match the grooves on the rest of the bowl. I sanded the ring with 220 grit sandpaper.gold9I wiped the bowl down with acetone (fingernail polish remover) on cotton pads. I broke up the peeling varnish with sandpaper and wiped it down again.gold10I scraped the inside of the mortise with a dental spatula to remove the hardened tars. It scraped away all of the buildup and then I scrubbed it down with pipe cleaners, cotton swabs and alcohol until it was clean. I cleaned the airway in the stem until it was clean.gold11 gold12I sanded the tooth marks out the top and underside of the stem with 220 grit sandpaper until they were minimized.gold13I wet sanded the stem with 1500-2400 grit micromesh sanding pads to smooth out the scratches in the vulcanite.gold15I scrubbed the stem with Before & After Pipe Stem Deoxidizer to remove the oxidation. It took some elbow grease but I was able to remove all of the oxidation with the new product. I am starting to really like this stuff.gold14I polished the stem with the Before & After Pipe Polish using the fine and the extra fine polishing compound. I rubbed it on by hand using a finger and then scrubbed it off with a cotton pad until the polish was gone and the stem shone.gold16 gold17I stained the bowl with a medium brown aniline stain and flamed it to set it in the grain. I repeated the process until the stain was evenly spread on the bowl.gold18I buffed the bowl on the buffing wheel to see what the new stain coat looked like. I liked the new look of the old Gold Star Giant. What do you think?gold19 gold20I buffed the pipe and stem with Blue Diamond on the wheel to bring a shine to the bowl and gave it multiple coats of carnauba wax. I buffed it with a clean buffing pad and then with a microfibre cloth. The finished pipe is shown in the photos below. Steve, this one turned out to be another beauty. I am looking forward to hearing what you think about it once you get it back to Dawson Creek.gold21 gold22 gold23 gold24 gold25 gold26 gold27 gold28


Restoring an Older KBB Yellow-Bole 2094 Churchwarden with absolutely stunning grain.


Blog by Steve Laug

My most recent box of pipes that came from my brother had this Yello-Bole Churchwarden in it for restoration. It is a long pipe – 12 inches from bowl to button. The next seven photos were the ones provided by the eBay seller. They don’t really show the grain in the pipe or the peeling shellac coat on the bowl but they give a clear picture of the shape and carriage of the pipe. It really is a beauty in terms of overall appearance. It is graceful with a gentle bend to the stem ending in a button that is not flared from the end of the stem but is straight-edged with a small slot in the end. The stem also had the inset yellow circle on the top of the stem.yb1The third and fourth photos provided in the seller’s photos show the damage to the finish and the build up and damage to the rim. You can also see some of the peeling of the finish and the way that it obscures the grain of the briar. The rim is dirty in the photo below and at first glance it looks like the bowl may have been meerschaum lined. I was pretty sure that this was not the case but would know better once it arrived in Vancouver. It appears that the bowl had a light cake but was not in bad shape. It would not take too much to ream the bowl. The stem was lightly oxidized and had tooth chatter on the top and underside near the button.yb2The stamping on the shank is very clear. The shape number on the right side of the shank is 2094 and the brand stamp on the left KBB in a cloverleaf next to Yello-Bole over Honey Cured Briar.yb3My brother scrubbed the externals of the pipe with Murphy’s Oil Soap and was able to loosen some of the flaking varnish or shellac. He reamed the light cake back to the yellow bowl coating. He cleaned out the shank and the airway in the stem with pipe cleaners and alcohol.yb4 yb5The next two close-up photos of the bowl sides shows what the finish looked like once he had done his work. You can see the interesting grain showing through the damaged finish.yb6 yb7I took photos of the pipe when I received it in Vancouver. You can see the condition of the finish in the photos. In the cleaning process oxidation came to the surface of the stem.yb8 yb9The internals of the pipe are interesting. The first photo below shows the yellow bowl coating that still remained in the bowl. This one was certainly lightly smoked to be in this condition. The second photo shows the standard Yello-Bole stinger apparatus that is screwed into the tenon.yb10There was light tooth chatter and tooth marks on the top and underside of the stem but the button was in excellent shape with minimal tooth marks or bites.yb11I removed the remaining varnish/shellac coat with acetone (fingernail polish remover) on cotton pads. It also removed some of the stain and brought the grain to the surface of the bowl. I liked the look of the pipe once the varnish was removed.yb12 yb13The stamping looked even clearer once the top coat had been removed. In the first photo below there is a line under the number that looks like a crack or a fill. It is not but rather it is debris left behind by the cotton pad and acetone wash.yb14I ran pipe cleaners, cottons swabs and alcohol through the mortise and the airway in the shank and the stem remove any remaining oils. The red colour on the cotton swabs is actually some of the red stain that was inside of the shank. I was able to remove all of stain from the shank and mortise.yb15I unscrewed the stinger from the tenon and cleaned it with 0000 steel wool. I am not sure whether I will put it in or not. I may do so and let the new owner decided whether to keep it in place or remove it.yb16I lightly sanded the stem with 220 grit sandpaper to remove the tooth chatter and bite marks. I sanded it with 1500-2400 micromesh sanding pads then tried a new product that I picked up from Mark Hoover of La Belle Epoque Vintage & Modern Fountain Pens. I follow Mark on Facebook and have been reading about his restorations and cleanup or estate pipes. He developed a product for pens that deoxidizes and polishes vulcanite. He also uses it on vulcanite stem with great results. I have seen his before and after pictures of pipes that he has restored so I thought I would order some and try it out. The photo below shows what came with the kit.

Mark wrote on his site that the product was specifically designed for hard rubber and celluloid but that it does work well on other types of plastics. He also sells the same product relabeled for pipe stems. The line is called Before and After. He states on the website that “All of our polishes are made using the highest quality products.  These products are designed to not only recondition your pen (or in this case stem) but also to provide a layer of protection. All of the products used in these polishes are none-toxic and environmentally friendly.”

“There are two different polishes.  Fine and Extra Fine.  We recommend both as some pens will show more wear then others.  Often one will work on a pen using the Fine polish and finish with the Extra Fine. The polishes are sold in 2 oz jars.  The cost is 12.00 per jar. The number of pens one can restore will of course vary depending on the wear that each pen shows.  I have restored from 75-150 pens per jar.”

Here is the link to his site with the prices for the product: http://www.lbepen.com/apps/webstore/products/category/1185536?page=1. The product can be ordered onsite. It is shipped in a well wrapped package and I had no issues with it coming across the border through the post office.yb18The Deoxidizer is a thick gel that I rubbed onto the stem with a cotton pad. I let it sit for a short time before rubbing it off with another pad. It removed the oxidation quite nicely. I repeated the process until the stem was once again black. After using the Deoxidizer I polished the stem with the Fine and the Extra Fine Pipe Polish. It quickly shined up the vulcanite. Both of the stem polishes are quite thick and sticky. The fine is grittier than the extra fine. It took some time to rub each of them onto the stem surface and then polish it with a soft cotton pad. The second photo below shows the stem after using the Extra Fine Polish.yb17I buffed the pipe with Blue Diamond on the buffer and then gave the bowl and stem several coats of carnauba wax. I buffed it with a clean buffing pad and hand buffed it with a microfibre cloth to deepen the shine. The finished pipe is shown in the photos below. I left the stinger out of the tenon for these photos but it is easily screwed into place. The grain shines through beautifully with the oxblood coloured stain. The polished stem is smooth and shiny with a lot less effort than other products I have used. Thanks for looking.yb19 yb20 yb21 yb22 yb23 yb24 yb25 yb26


A Heibe Filter Bruyere Extra 1132 Churchwarden Made in West Germany


Blog by Steve Laug

Looking at the stamping on this older churchwarden pipe I can distinguish HEI__ on the left side of the shank over FILTER. From what I can see looking at it under a bright light with a lens it looks to me like the stamping is HEIBE. On the right side of the shank it is stamped Bruyere over Extra. On the underside of the shank it is stamped Made in West Germany followed by the number 1132. The pipe is 10 ½ inches long and the bowl is 2 inches tall. The diameter of the chamber is 5/8 inches. The finish was in decent shape with some scratching and the pipe is dirty. The rim was damaged and the bowl had a burn mark on the inside edge of the inner rim. The bowl was out of round and the top of the bowl was also damaged. The stem was oxidized and the pipe smelled foul. The next series of photos with the granite/marble counter top were taken by the eBay seller and show the overall state of the pipe.h1According to Pipedia, Heibe pipes were made by the company of the same name, owned in turn by Erich Heikaus, KG, in Bergneustadt, Germany. The trademark for the Heibe name was first filed on March 9, 1966 and registered on January 14, 1967. The sole trademarked line name of Heibe is the Heibe Goldpoint, which was applied for in 1970 and granted on May 31, 1972. Pipes have been seen stamped both “Germany” and “West Germany”, showing that the Heibe Company continued to make pipes after 1990, but these pipes appear to no longer be in production. https://pipedia.org/wiki/Heibe h2 h3The next photos are close ups of the pipe. They show the condition of the rim and the grain around the sides of the bowl.h4 h5My brother reamed the bowl cleaned up and scrubbed the exterior of the bowl and stem. He took some photos of the pipe after he cleaned it. h6The next photos show the stamping on the pipe. The first one shows the underside of the shank with the shape number and West Germany. The left side shows the brand over the word Filter. The right side shows the name Bruyere Extra.h7 h8 h9The next two photos show the beautiful grain on this pipe. The spots and streak on the second photo were just grime on the pipe. When I received it those were gone.h10 h11The next photo shows the damage to the rim top. There outer edge shows damage and the inner edge bevel is rough and looks like it did not belong originally. There is clearly a burn mark at the back side of the inner rim. There are a lot of dings and dents on the rim edge.h12When the pipe arrived in Vancouver I took the next four photos to show what it looked like before I started on it. My brother did a great job cleaning up the surface of the bowl. He was able to scrub off the finish and the grain just pops.h13 h14The next photo shows the rim after my brother cleaned it up. The dents and dings on the out edge are visible. The burn mark at the back of the inner rim is very clear. It is not deep but it is present. The bowl will need to be topped.h15I topped the bowl on the topping board with 220 grit sandpaper. It took some time to remove the inner rim damage. I sanded and checked constantly to make sure I did not sand too far. The second photo shows the topped bowl and the cleaned rim edge.h17I sanded the inside of the bowl with the rolled sandpaper to smooth out the inner edge of the bowl. The second photo below shows the fresh edge of the bowl.h18I sanded the rim top with 1500-4000 grit micromesh sanding disks until the scratches were gone. I restained the rim with a dark brown stain pen to blend it into the colour of the bowl. h19I cleaned out the mortise and airway in the shank with cotton swabs, pipe cleaners and alcohol. It appears that the bowl was dip stained as the cotton swabs came out with a red stain and no tars or oils. I cleaned the stem with pipe cleaners with and alcohol.h20I used my new micromesh sanding pads on the stem and it made short work of removing the oxidation. I forget how quickly new micromesh pads remove oxidation and polish the vulcanite. I sanded it with 1500-12000 grit sanding pads – wet sanding with 1500-2400 and dry sanding with 3200-12000 grit pads. I rubbed the stem down with Obsidian Oil after each set of three pads. I set the stem aside to dry after the last rub down.h21 h22 h23I buffed the bowl and stem with Blue Diamond on the buffing wheel to polish the scratches. It always amazes me how much different the pipe looks after buffing. I buffed it with several coats of carnauba wax to protect the vulcanite and bowl. I buffed it with a clean buffing pad to raise the shine and then by hand with a microfibre cloth to add depth. The photos below show the new restored German Churchwarden. It is a beauty. Thanks for looking.h24 h25 h26 h27 h28 h29 h30

A Bleak Looking Royal Danish with an indistinguishable shape number


Blog by Steve Laug

My brother Jeff found this old pipe either on eBay or in his travels and picked it up. He sent me photos of the pipe when he received it. It looked pretty bleak to me but there was some promise in the interesting shape of the pipe and the grain that was visible in the photos. There were also some dark spots on the sides of the bowl that I wondered about as I looked at the photos. The finish was very dirty and underneath the grime it was gone. There were some burn marks around the top of the bowl. The bowl was lightly caked but very dirty. The stem was lightly pitted and oxidized but there were no tooth marks or chatter on the stem.dan1 dan2My brother cleaned the pipe really well and the grime and remnants of the finish were all gone by the time I received the pipe. I took some photos of the pipe before I started to work on it. The dark spots on the sides of the bowl are visible in the photos below. The damage to the rim is also visible. There are some nicks in the top of the bowl and some burned areas that will need to be addressed. He cleaned out the airway in the shank and the stem as well as the mortise area. I noticed however that there was a slight ledge in the mortise that was hard and made me wonder what was happening there.dan3 dan4I took a close up photo of the bowl to show the extent of the damage to the inner edge of the rim and the rim top. The bowl was quite out of round and the burn marks though not deep were prevalent in the briar. I took some close up photos of the stem as well to show the condition they were in when I started the clean up.dan5I topped the bowl on the topping board with 220 grit sandpaper until all of the damage was removed.dan6I sanded the inside of the bowl and the inner edge of the rim with a tube of sandpaper until the edge was smooth and round.dan7I sanded the top of the rim with micromesh sanding pads – wet sanding with 1500-2400 grit pads and dry sanding with 3200-12000 grit pads. The rim took on a shine.dan10I wiped the bowl down with acetone on a cotton pad to remove the remaining debris and worked on the dark areas. The dark areas turned out to be fills and the darkening occurred around the edges of the fills.dan8 dan9I warmed the briar and then stained it with a dark brown aniline stain mixed 50/50 with isopropyl alcohol. I flamed the stain to set it in the briar and then repeated the process until the coverage on the bowl was good.dan11I hand buffed the bowl with a microfiber cloth to see what the coverage looked like particularly over the filled areas. The photos below show the pipe at this point in the process. The putty spots are visible in the first two photos. I have circled them in red to make them clear. Both fills were solid and tight but had a red overtone that stood out.dan12The top of the rim came out looking really good. The burned spots and damage to the rim top and inner edge have been minimized.dan13I recleaned the interior of the shank using the dental spatula to scrape away the hardened tars and oils. I scrubbed it with pipe cleaners, cotton swabs and alcohol until it was clean. I cleaned up the airway in the stem with bristle cleaners and was able to remove the last of the tars.dan14The stem fit against the shank with a slight gap on the right side. I heated the tenon with a Bic lighter and while it was still soft held it straight in the shank until it cooled.dan15On the underside of the shank next to the stem there was a chipped area where the briar was missing from the shank. I cleaned out that area and filled it in with clear super glue and briar dust. Once it dried I sanded it smooth with 220 grit sandpaper and then polished it with 1500-4000 grit micromesh sanding pads. I used a dark brown stain pen to touch up the sanded area.dan16I sanded the stem with 220 grit sandpaper to smooth out the pits and roughness. I polished it with micromesh sanding pads. I wet sanded it with 1500-2400 grit pads and dry sanded it with 3200-12000 grit pads. I rubbed the stem down with Obsidian Oil between each set of three pads. After the final rubdown I let the stem dry.dan17 dan17a dan18I used a black Sharpie Pen to draw “grain” lines through the fills and used the dark brown stain pen to blend the pen lines into the body of the pipe. I buffed the pipe and stem with Blue Diamond polish on the buffing wheel to finish cleaning up the small remnants of oxidation. I gave it several coats of carnauba wax and buffed it with a clean buffing pad. I hand buffed it with a microfibre cloth. The finished pipe is shown in the photos below. Thanks for looking.dan19 dan20 dan21 dan22 dan23 dan24 dan25 dan26


This BBB Tiger Grain Bulldog was in rough shape


Blog by Steve Laug

I have always liked older BBB pipes. I used to buy them on eBay when no one was hunting for them for almost nothing. The prices they are today they are generally untouchable for me. Once in a while though one slips under the radar. This Tiger Grain with a Lucite stem was one my brother caught in his ongoing prowl of eBay. He got it for a decent price. It is either a newer BBB or it has a replacement stem on it. My thinking tends toward the previous – a newer pipe from when Cadogan took over the line. The pipe is stamped on the left side of the shank with BBB in a Diamond and underneath it reads Tiger Grain. The right side of the shank reads London England and the number 4. The next two photos show the condition of the pipe when it arrived in Idaho. The bowl finish on the bowl was dirty and there were rough spots. The rim had burn marks on the outer and inner edges on the front side. The beveled rim was thickly caked with the overflow from the cake in the bowl. The Lucite stem had tooth marks and was covered with sticky debris. The airway in the stem was darkened with tars and oils. The mix of bright yellows, white and greys looked good underneath the grime. The dark black/brown airway stood out like a sore. With the exterior that dirty I could only guess that the inside was also very dirty.bbb1My brother once again did the major clean up on this pipe. He reamed the bowl with a PipNet reamer and took the cake back to bare briar. He scrubbed the exterior with Murphy’s Oil Soap to remove all of the grime and grit. He was able to scrub away much of the rim build up and the surface of the stem. He scrubbed the internals with pipe cleaners and cotton swabs. When the pipe arrived in Vancouver it was pretty clean. I took the following photos of the pipe before I began to work on it.bbb2 bbb3I took a close up photo of the rim to show the small amount of cake on the rim and the burn marks on the front of the pipe on both the inner and outer edge of the rim. I circled the burned spot with a red circle in the photo below.bbb4There was a red tone to the briar. I rubbed it down with a light coat of olive oil and brought out the red. I wanted to see what the bowl and rim looked like when it had been oiled.bbb5I sanded the rim and bevel with a folded piece of 220 grit sandpaper to remove the remaining cake and clean up the bevel on the rim. When I finished the rim was clean but it still showed the burn marks and the inner bevel on the rim was also darkened.bbb6I decided to top the bowl on the topping board to remove the damaged rim top and the burn marks. I sanded it until the rim top was smooth and the outer edge was clean.bbb7I polished the topped bowl with micromesh sanding pads – wet sanding with 1500-2400 grit pads and dry sanding with 3200-12000 grit pads. When I finished the rim was smooth and polished.bbb8I worked on the mortise and shank with pipe cleaners, cotton swabs and alcohol. I used a dental spatula to scrape out the mortise. Once I was finished cleaning it the shank and airway was clean. I also scrubbed out the airway in the stem with pipe cleaners and alcohol. I used bristle pipe cleaners- both thin and thicker to scrub out the tars and dark stains.bbb9 bbb10I sanded out the tooth marks on the top and underside of the stem to remove them and blend them into the surface of the Lucite.bbb11aI polished the stem with micromesh sanding pads – wet sanding it with 1500-2400 grit pads and dry sanding it with 3200-12000 grit pads. I wiped it down with a damp cloth between each grit of micromesh pads.bbb12 bbb13 bbb14I buffed the pipe and stem with Blue Diamond on the buffing wheel to polish the pipe. I carefully avoided the stamping. I gave the bowl and stem several coats of carnauba wax and buffed it with a clean buffing pad. I hand buffed it with a microfibre cloth to deepen the shine. The finished pipe is shown in the photo below. It is a nice looking pipe. The bowl and rings are in perfect shape. The new rim top looks like it has always been there. Thanks for looking.bbb15 bbb16 bbb17 bbb18 bbb19 bbb20 bbb21 bbb22

A unique old WDC Turin Rustic Volcano


Blog by Steve Laug

When I saw this one on eBay I sent a message to my brother and asked him to bid on it. He did and we got it. I love the rustication on the Turin Rustic series. It is rough and yet dignified at the same time. The seller billed it as restored/refurbished and clean. By and large that was true. The shank and the inside of the stem were very clean. The rim had been knocked about a bit and the inner edge of the rim was rough and uneven. The bowl had been reamed. The stem was polished though there were deep tooth marks on the top and underside of the stem next to the button.demuth1 demuth2My brother took the above photos and the following ones before he cleaned the pipe. You can see the damage to the rim top and the inner edge in the next photo. The second photo shows the stamping on the left side of the shank.demuth3Though I knew a bit about the WDC pipe maker and the William Demuth Company I thought it might be good to review the history before I started restoring the pipe. I googled the Turin Rustic to see what I could find. It immediately referred me to a post on the Kaywoodie Forum that in turn was an excerpt from pipedia.org. Here is the link.

http://kaywoodie.myfreeforum.org/archive/w.d.c.-master-list__o_t__t_191.html

William Demuth, a native of Germany, entered the United States at the age of 16 as a penniless immigrant. After a series of odd jobs he found work as a clerk in the import business of a tobacco tradesman in New York City. In 1862 William established his own company. The William Demuth Company specialized in pipes, smoker’s requisites, cigar-store figures, canes and other carved objects.

The Demuth Company is probably well known for the famous trademark, WDC in an inverted equilateral triangle. William commissioned the figurative meerschaum Presidential series, 29 precision-carved likenesses of John Adams, the second president of the United States (1797-1801) to Herbert Hoover, the 30th president (1929-1933), and “Columbus Landing in America,” a 32-inch-long centennial meerschaum masterpiece that took two years to complete and was exhibited at the World’s Columbian Exposition in Chicago in 1893.

The Presidential series was the result of Demuth’s friendship with President James A. Garfield, a connoisseur of meerschaum pipes. Demuth presented two pipes to Garfield at his inauguration in 1881, one in his likeness, the other in the likeness of the President’s wife. Later, Demuth arranged for another figurative matching the others to be added to the collection as each new president acceded to the White House, terminating with President Hoover.

In 1897 Ferdinand Feuerbach joined the Demuth Company and by 1903 had become the production manager. Feuerbach is credited with developing Demuth’s popular Royal Demuth and Hesson Guard Milano pipelines. He left in 1919, when Sam Frank Sr. needed an experienced pipe man to run his pipe factory, located at 168 Southern Blvd., in the Bronx. Feuerbach and Frank had been close friends since Frank started his own business in 1900 and was closely associated with the sales staff of WDC, selling their line of pipes.

In early 1937, the City of New York notified S.M. Frank & Co. of their intent to take by eminent domain, part of the land on which the companies pipe factory was located. This was being done to widen two of the adjacent streets. As a result of this, Frank entered into negotiations to purchase the Wm. Demuth Co.’s pipe factory in the Richmond Hill section of Queens. It was agreed upon that Demuth would become a subsidiary of S.M. Frank and all pipe production of the two companies would be moved to Demuth factory. New Corporate offices were located at 133 Fifth Avenue, NYC.

Demuth pipes continued to be made at the Richmond Hill plant till December 31. 1972. Then the Wm. Demuth Company met its official end as a subsidiary company by liquidation. Demuth’s mainstay pipe, the Wellington continued to be offered in the S.M. Frank catalog until 1976. In the mid-80’s, the Wellington even made a brief return as a direct to the consumer offer.

When the pipe arrived from Idaho it was quite clean and ready to work on. I took some photos of it before I started.demuth5 demuth6The next photo shows the rim and the damage to the surface. There were a lot of dents and dings as well as some roughness on the right side toward the front of the bowl. The inner edges was also worn and rough.demuth7The next photos show the condition of the stem – it had some deep tooth marks on the top and underside that are visible in the photo below.demuth8I “painted” the surface of the vulcanite with the flame of a Bic lighter to lift the dents and I was able to raise all but one of them completely. Even the worst one on the underside came up so that is only needed a little patch. The rest of them I was able to sand smooth with 220 grit sandpaper.demuth9I cleaned the sanded area on the underside of the stem with alcohol and then filled in the remaining tooth mark with a spot of clear super glue. Once it dried I sanded it smooth with 220 grit sandpaper and blended it into the surface of the stem.demuth10I rolled a piece of sandpaper and sanded out the inside of the bowl and the inner edge of the rim to smooth out the damage.demuth12

I touched up the rough spots on the inner edge with a piece of 220 grit sandpaper and smoothed out the edge until it was back in round. In the photo below you can see the damage to the top and outside edge of the bowl toward the front. It looked like it had been knocked out on concrete.demuth13I decided to lightly top the bowl on the topping board with 220 grit sandpaper until the rim top was smooth and clean of damage.demuth13aI sanded the rim top with micromesh sanding pads from 1500-12000 grit until the surface of the rim was clean and smoothly polished.demuth13bI used a light brown stain pen and touched up the rim top. The next four pictures show the bowl after I had rubbed it down with a light coat of olive oil. I love the rustication on the bowl sides and bottom. It really is a unique pattern.demuth13c demuth13dI polished the stem with micromesh sanding pads – wet sanding with 1500-2400 grit pads and dry sanding with 3200-12000 grit pads. I rubbed the stem down with Obsidian Oil after each set of three pads. After the final rub down I set the stem aside to dry.demuth14 demuth15 demuth16

I buffed the bowl and stem with Blue Diamond on the buffing wheel. I gave the stem multiple coats of carnauba wax and buffed it with a clean buffing pad to raise the shine. I hand wax the bowl with Conservator’s Wax and buffed it with a clean buffing pad. The finished pipe is shown in the photos below. The finish shines and the pipe belies its age. It is a beauty. Thanks for looking.demuth17 demuth18 demuth19 demuth20 demuth21 demuth22 demuth23 demuth24 demuth25


Cleaning up a Long Shanked Jeantet Lumberman


Blog by Steve Laug

This lightly sandblasted long shank Canadian is stamped Jeantet over Lumberman on the underside of the shank. The tortoise-shell Lucite stem is stamped with a J in a circle on top of the freehand style stem and on the underside it is stamped Hand Cut and France. The shank extension is made of acrylic made to look like faux bone. The mortise is lined with a brass insert to stabilise the shank extension. The tenon is Delrin. The fit in the shank is snug and clean. The slot in the stem was dirty with a black buildup in the edges and the Y-shaped opening. The shank smelled dirty and strongly of aromatic tobacco. The finish was dirty but looked to be in good condition under the grime. There was a large nick in the right side of the bowl half way down the side. It was rough to the touch. The rim was tarry and dirty but underneath it was smooth. The inner and outer edge of the rim looked in good condition. There was a light cake in the bowl. It is a big pipe – 8 inches long, 2 inches tall, bowl is 1 ¾ inch deep, the bowl diameter is ¾ inch.jean1I have had a few older Jeantet pipes over the years but never one that was quite like this one. It is truly a beautiful piece of workmanship. I looked up information on two of my go to websites for information. The first was pipehphil’s Logos and stamping site. There I found that the Jeantet Company joined the Cuty-Fort Enterprises group (Chacom, Ropp, Vuillard, Jean Lacroix…) in 1992. In 2010 it dropped out and the brand isn’t part of the group any more. The label once again is owned by the Jeantet family (Dominique Jeantet). The production of pipes is currently discontinued. Dominique Jeantet retired in 2000. http://www.pipephil.eu/logos/en/logo-jeantet.html

The second site I looked on was Pipedia (https://pipedia.org/wiki/Paul_Jeantet_SA). There I found information from a book by José Manuel Lopes’ entitled Pipes, Artisans and Trademarks. Since I have the book here I went and read it first hand in the book. Here is what I found there.

Paul Jeantet SA (formerly Ebonite Co. is a French factory in Saint-Claude, and the name and business of the business man who in 1912 began making vulcanite stems for the pipe industry. Coming from a family of pipe makers (see Jeantet), Paul started using ebonite for the stems.

Paul Jeantet SA factory (1905 Saint-Claude), from the Jeantet Website: At one point the company was producing 35 million stems a year, and is still one of the few to produce ebonite stems in Europe.

From the Jeantet website: Founded in 1905 by Paul JEANTET, our company is being progressing in the field of rubber compound. Since the 70´s, JEANTET élastomères has been controlling the both processes of over molding and adhesion rubber / metal. Our manufacture is set in a 7000 m2 block, based in Saint-Claude, France. We are at one hour far from Geneva and one hour and a half far from Lyon. From prototype to mass production, JEANTET élastomères, certified ISO 9001, guarantee you availability and speed answers to all your asks of quotation.

Today, our group includes three companies specializing in vulcanized and thermoplastic elastomers : JEANTET élastomères, IXEMER ans PERROT. We are at your disposal for the creation and the development of innovating solutions. In 2014, the Group JEANTET took back the clientele of the Swiss company DUFOUR industries, what consolidates an important presence on the Swiss market of parts in Elastomers. (The Lopes’ book included the following contact information for the brand.

Contact Information:
JEANTET élastomères
Website: http://www.jeantet.com
6 Faubourg des Moulins
39200 SAINT-CLAUDE
Phone: +33 (0)3 84 45 79 00
E-mail: jeantet@jeantet.com

When the pipe arrived in Vancouver in a lot of pipes that Jeff sent me it caught my eye. It is a beautiful pipe. I took the next four photos to show the condition of the pipe when I started working on it.jean2 jean3I took a close up photo of the bowl and the rim. You can see the light cake in the bowl and the overflow on the back and the right side of the rim top. Underneath it looks like there is some good-looking grain.jean4I sanded the rim clean and took off the burned areas on the rim top with 220 grit sandpaper. I followed that by sanding the rim with 1500-4000 grit micromesh sanding pads. I wiped it down with alcohol and then used a light and a medium brown stain pen to touch up the rim to match the rest of the bowl.jean5I rolled a piece of sandpaper and sanded the inside of the bowl and the inner edge of the rim to clean up the damage left behind by the burns.jean6I waxed the bowl and shank with Conservator’s Wax and buffed it with a shoe brush to give it a shine.jean7I cleaned out the inside of the mortise, the airway in the shank and the stem with pipe cleaners, cotton swabs and alcohol until it was clean.jean8I polished the tortoise coloured Lucite stem with micromesh sanding pads – wet sanding with 1500-2400 grit and dry sanding with 3200-12000 grit pads. I wiped the stem down with a damp cloth to remove the grit and grime.jean10 jean11 jean12I buffed the pipe with Blue Diamond on the buffing wheel to polish the stem and the rim. I buffed the bowl and stem with carnauba wax and buffed it with a clean buffing pad to raise the shine. I hand buffed it with a microfibre cloth to deepen the shine. The finished pipe is shown in the photos below. It is a beautiful pipe and one I have not seen before. There is something about it that draws the eye. For a pipe this large it is well-balanced and proportionally works well. Thanks for looking.jean13 jean14 jean15 jean16 jean17 jean18 jean19 jean20