Blog by Steve Laug
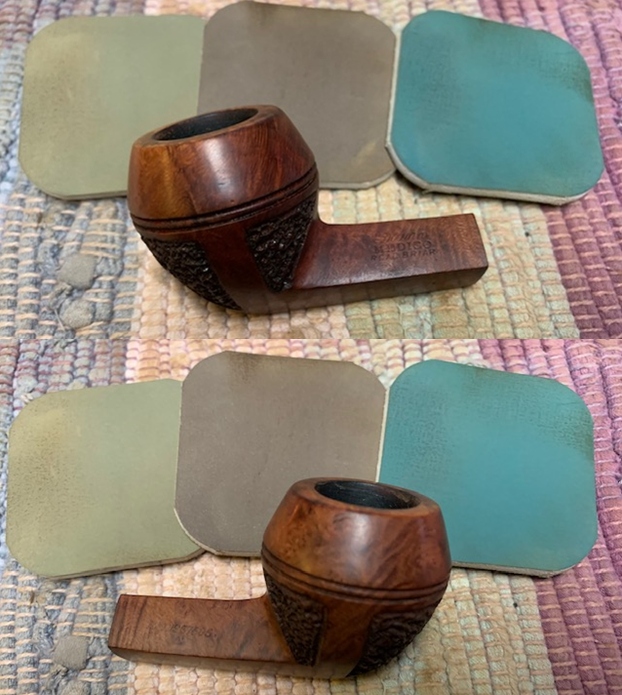
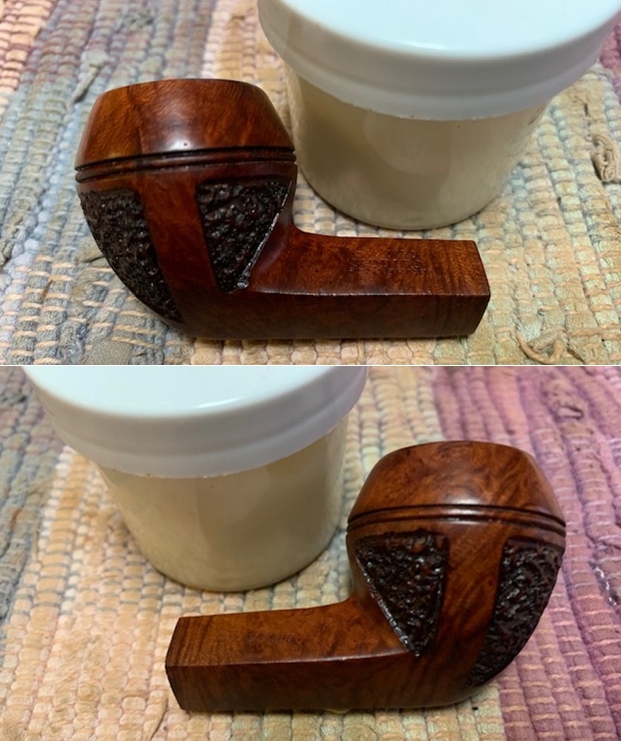
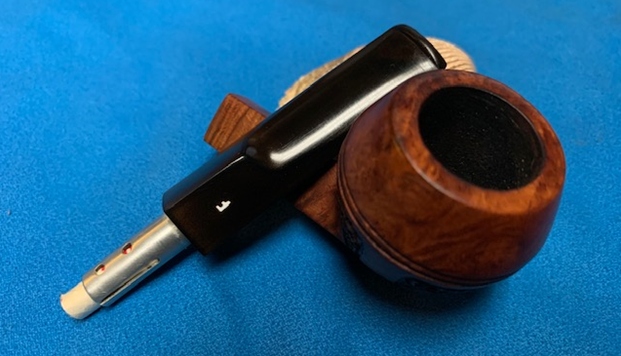
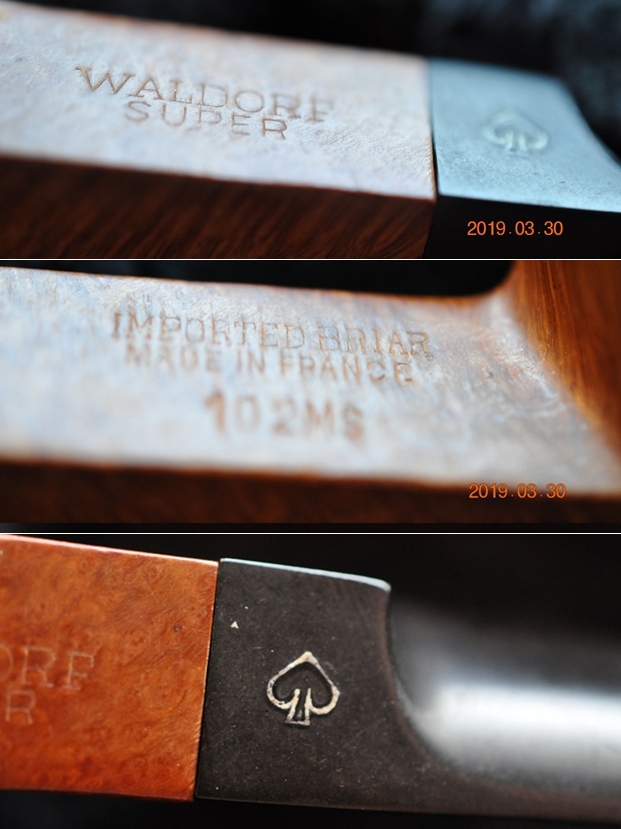
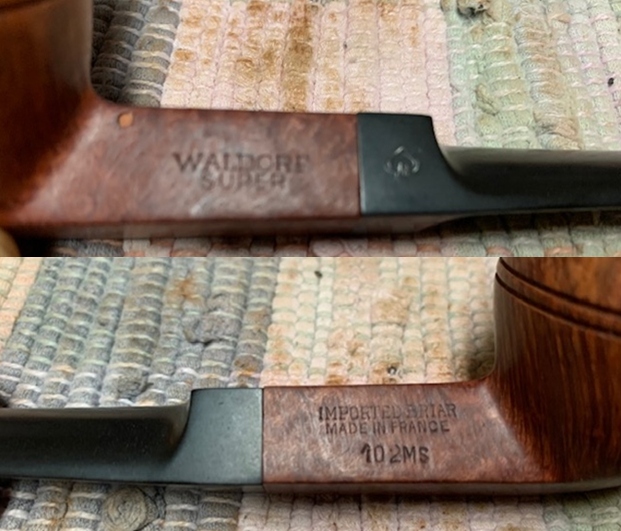
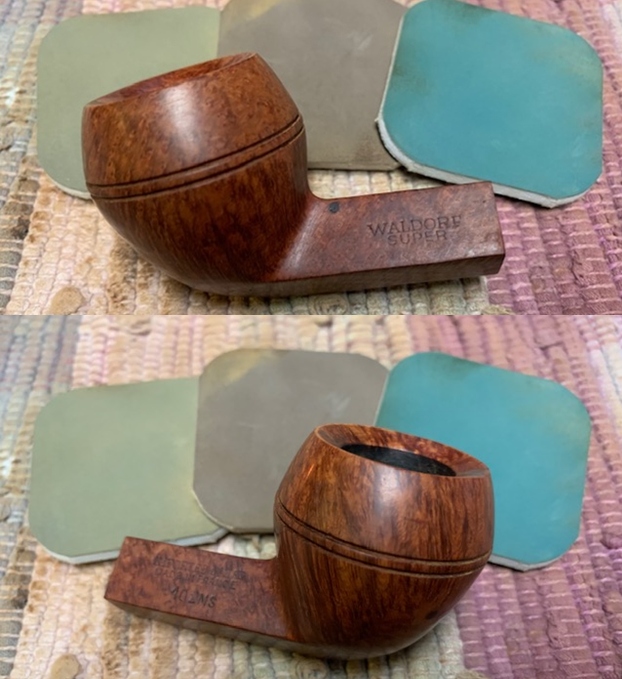
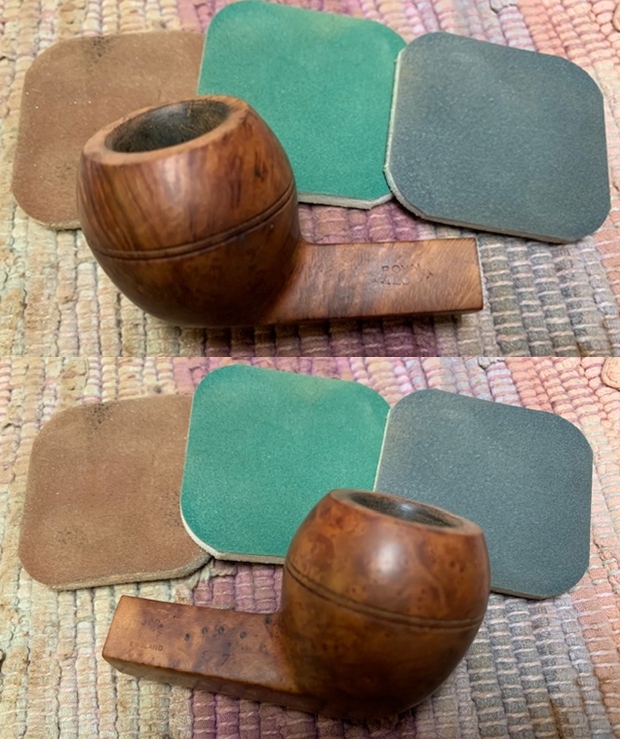
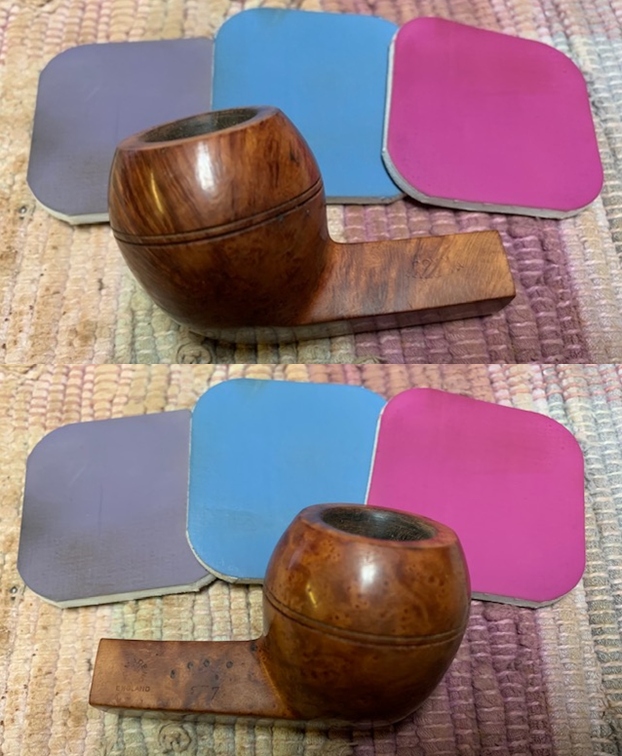
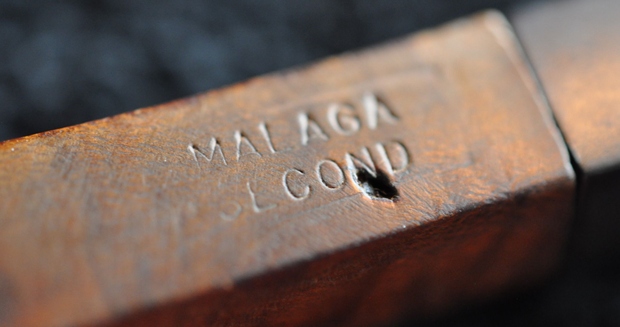
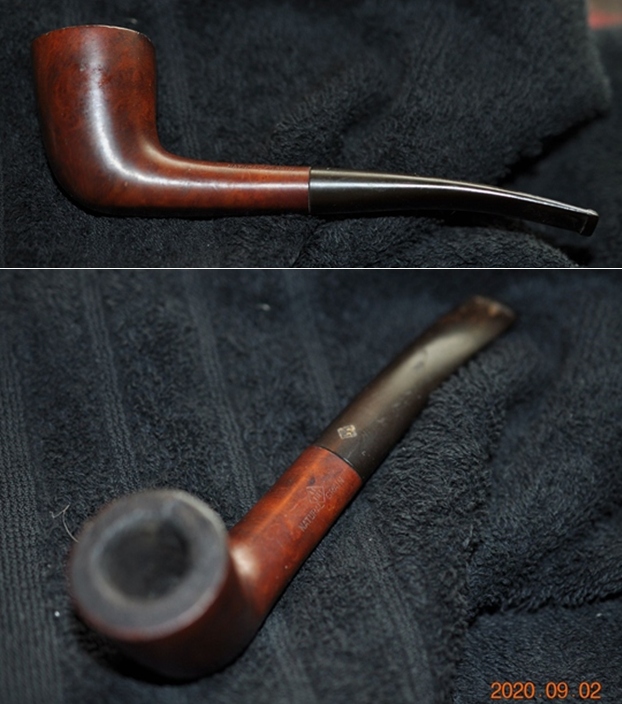
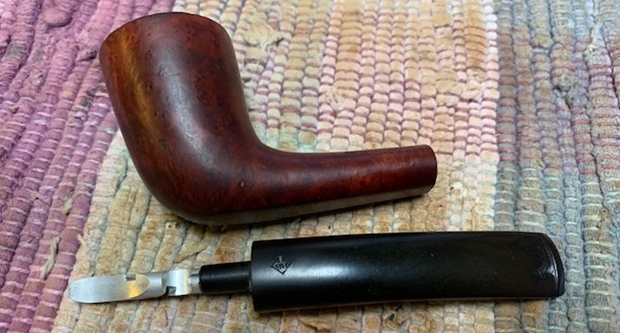
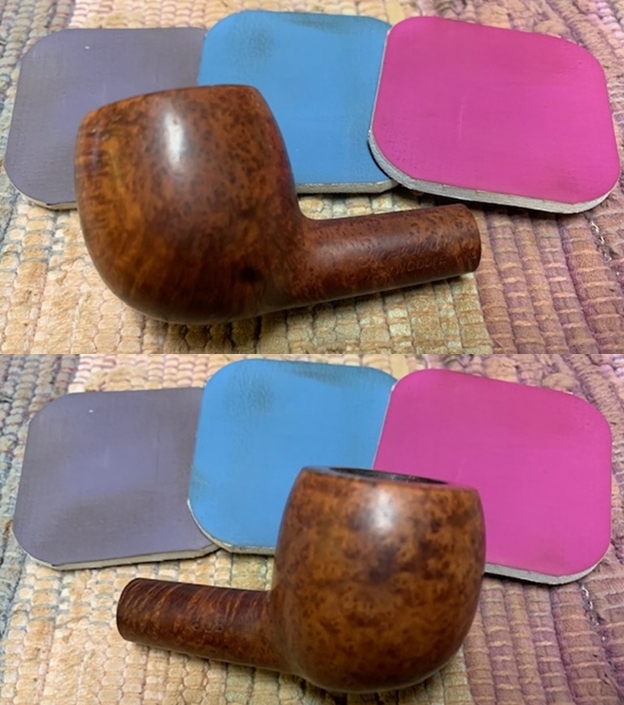
The next pipe on the table has been here a long time. It was found in a pipe hunt that Jeff and I did in 2017 at long since closed Antique Mall in Pocatello, Idaho, USA. It was a tired and worn Kaywoodie Super Grain straight apple with a threaded tenon. The smooth finish on the bowl was very dirty and worn. The pipe was filthy and there was significant rim top damage. The bowl had a thick cake that made me wonder how it could still be smoked. There was tobacco debris in the bottom of the bowl and a thick overflow of lava on the rim top. It is hard to know what the inner edge of the rim looked like under the lava coat. The outer edge of the rim had some darkening and chips around the edges. The pipe is stamped on the left side of the shank and reads Super Grain [over] Kaywoodie on the left side of the shank. On the right side it is stamped with the shape number 80B. The stamping is faint but readable on the pipe. The stem was dirty and lightly oxidized. There were light tooth marks and chatter on the stem near the button on both sides and some on the surface of the button as well. There was the Kaywoodie White Club/Clover logo on the left side of the taper stem. The stinger apparatus is a four-hole one that is threaded into the threaded tenon. It is a different kind of set up than previous Super Grain pipes that I have worked on it. The stamping and the stinger date it as an older one. Jeff took photos of the pipe before he worked on it.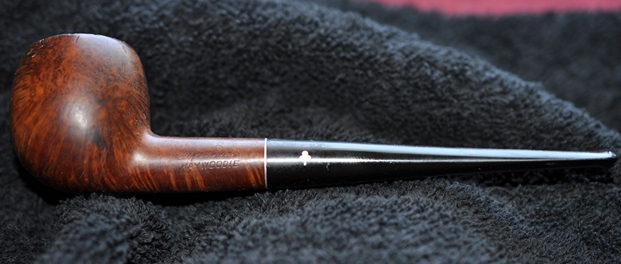
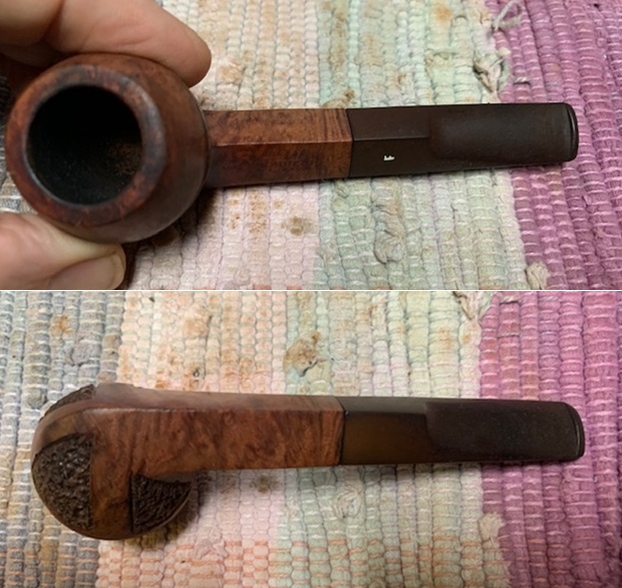
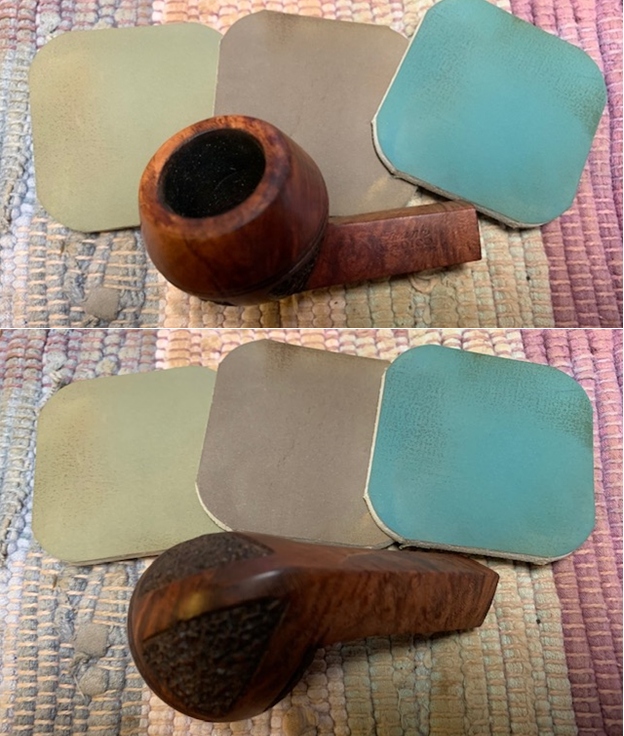
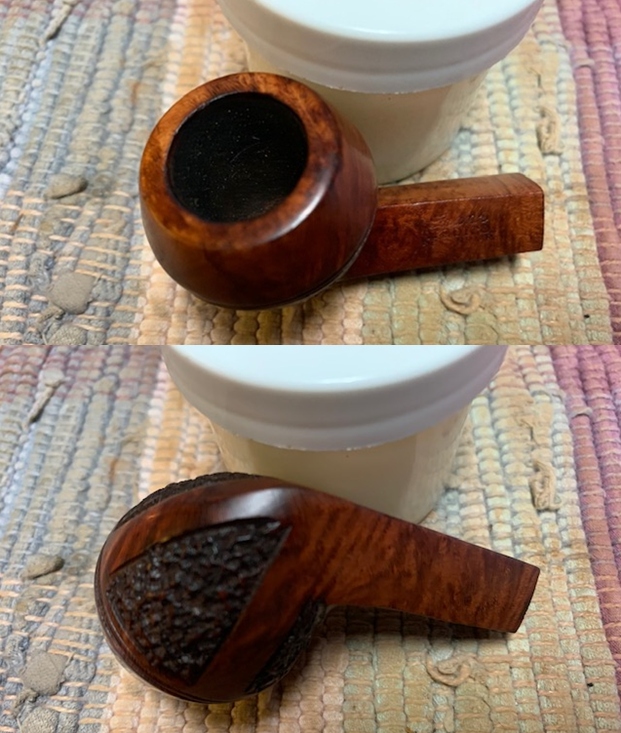
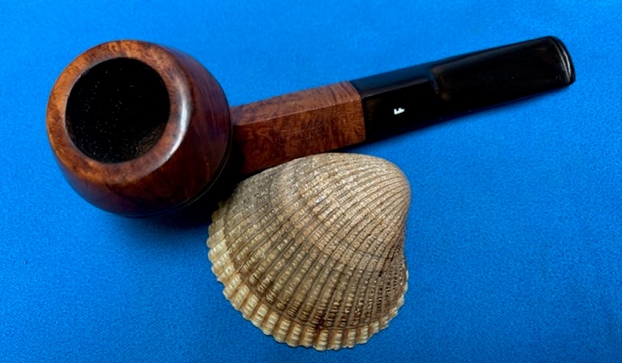
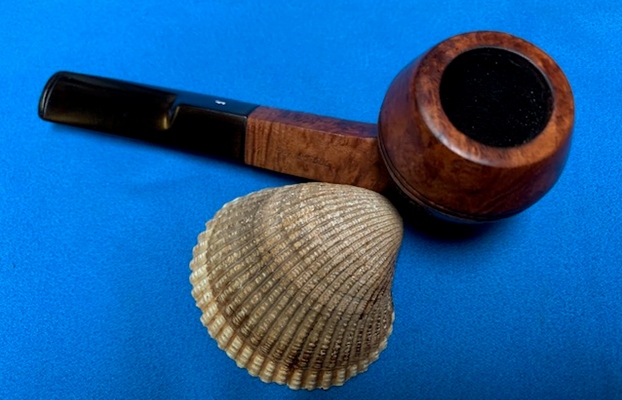
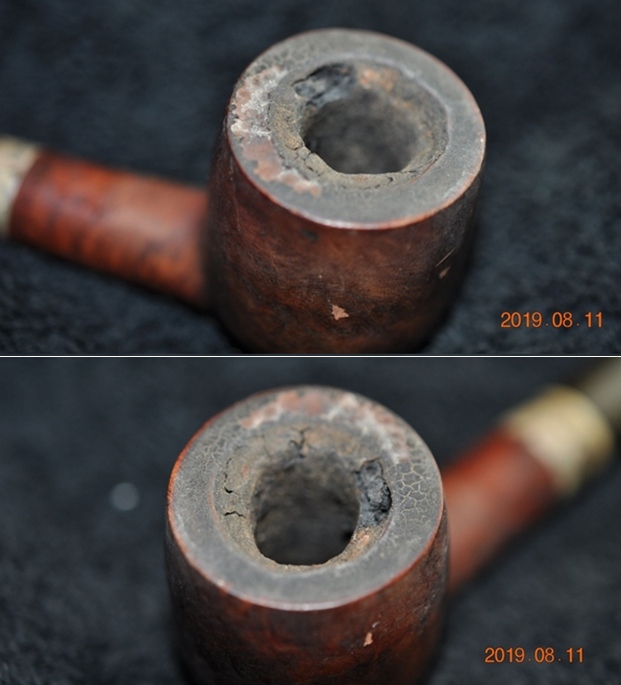
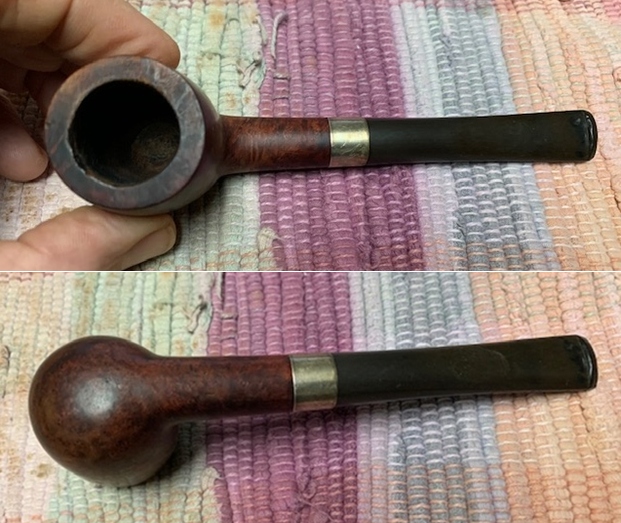
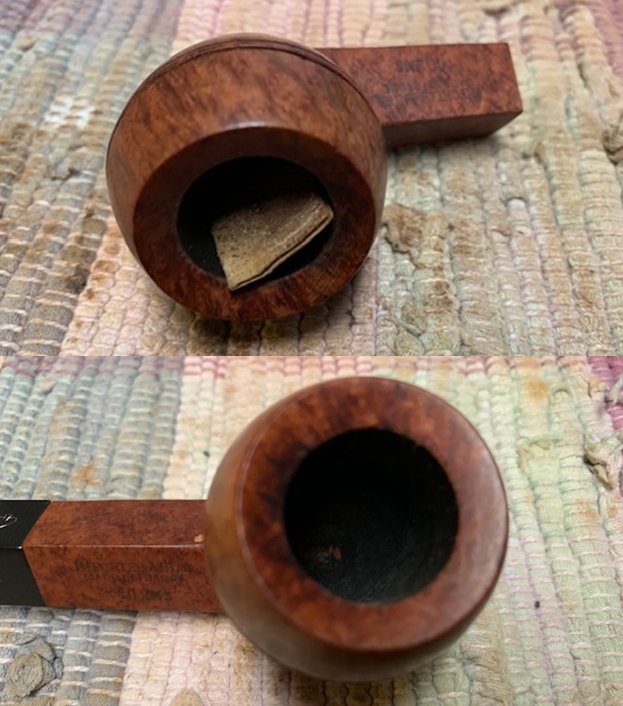
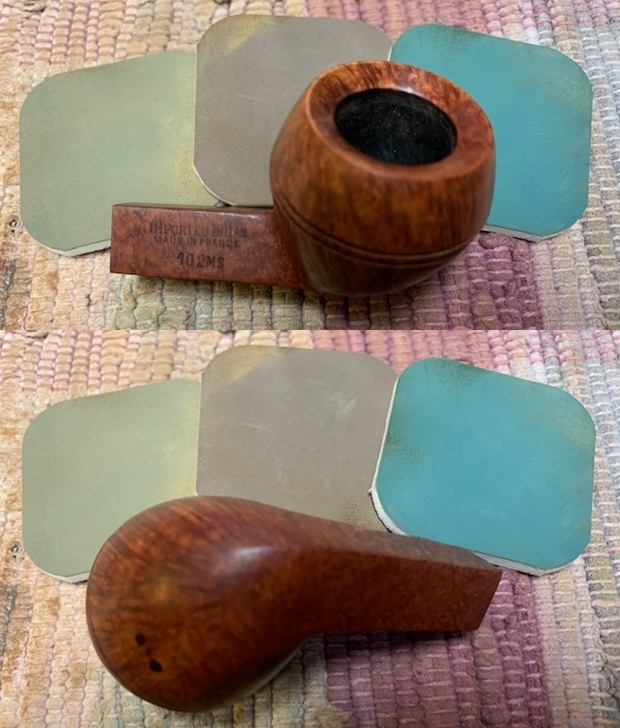
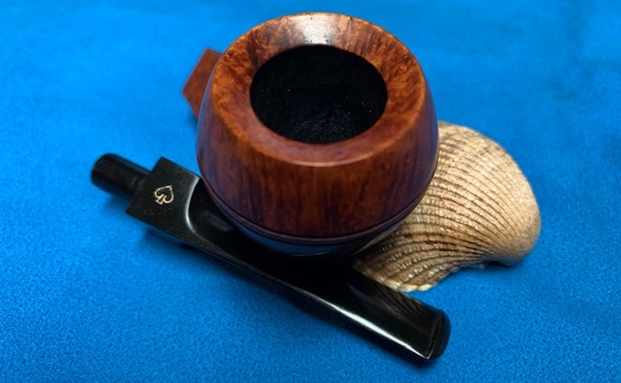
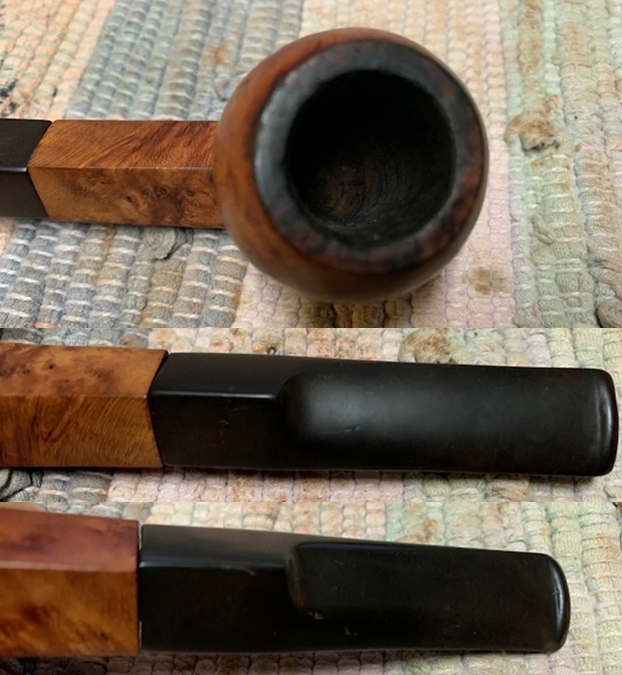
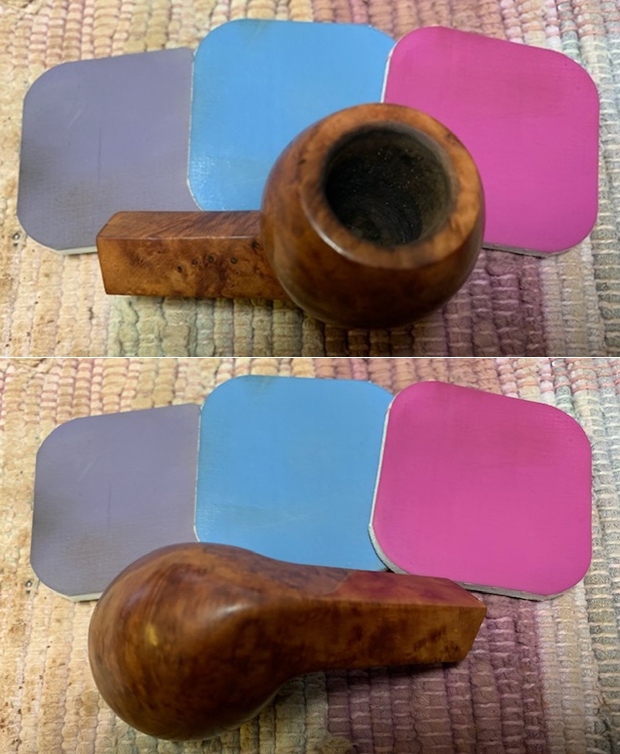
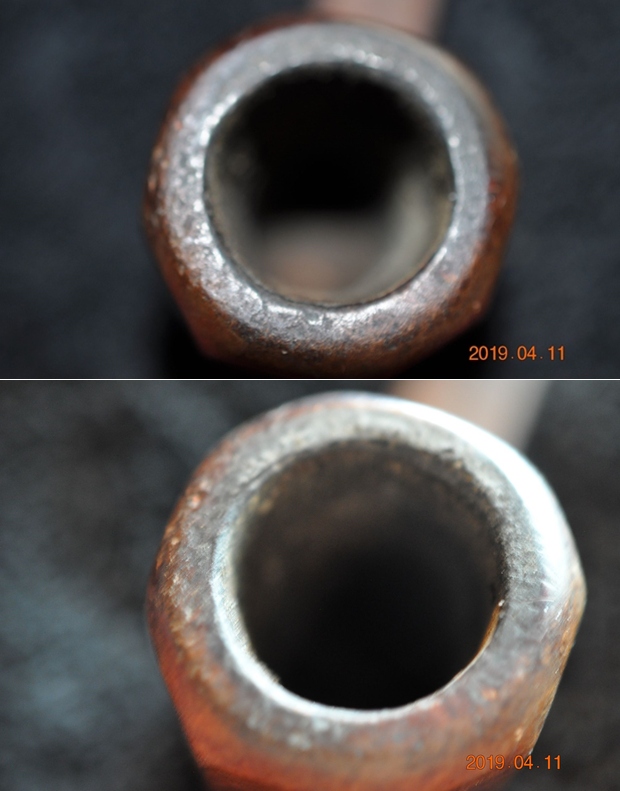
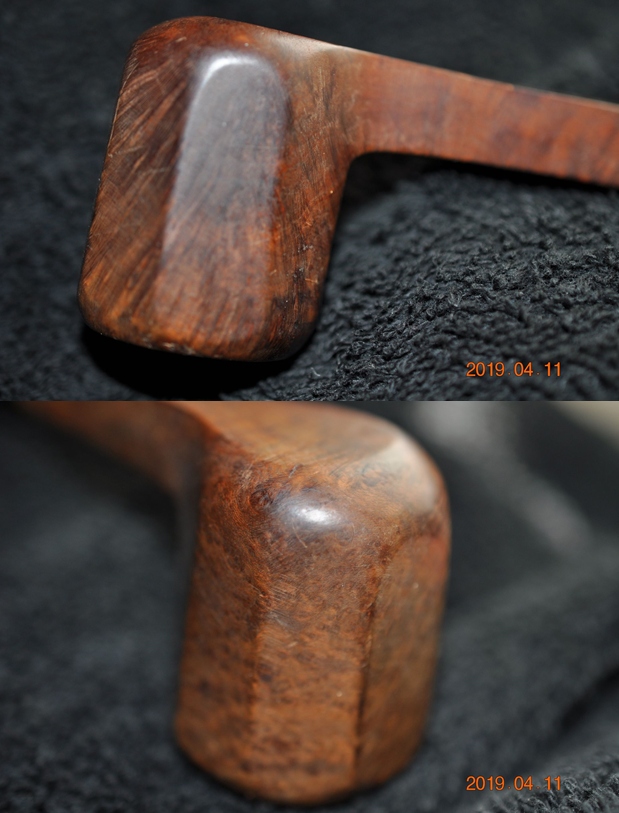
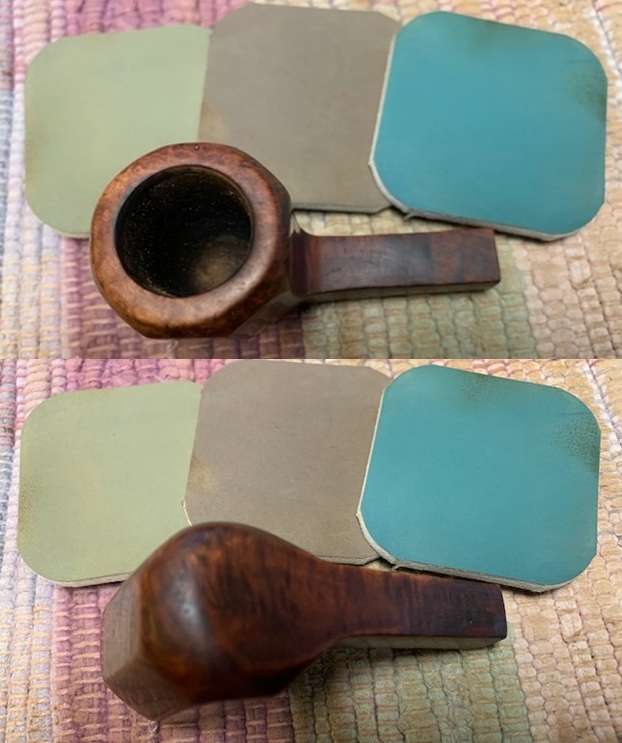
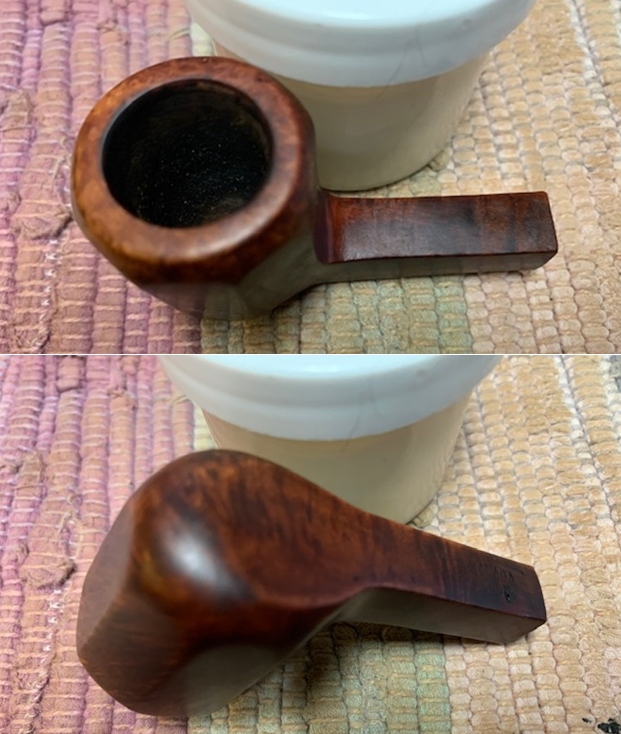
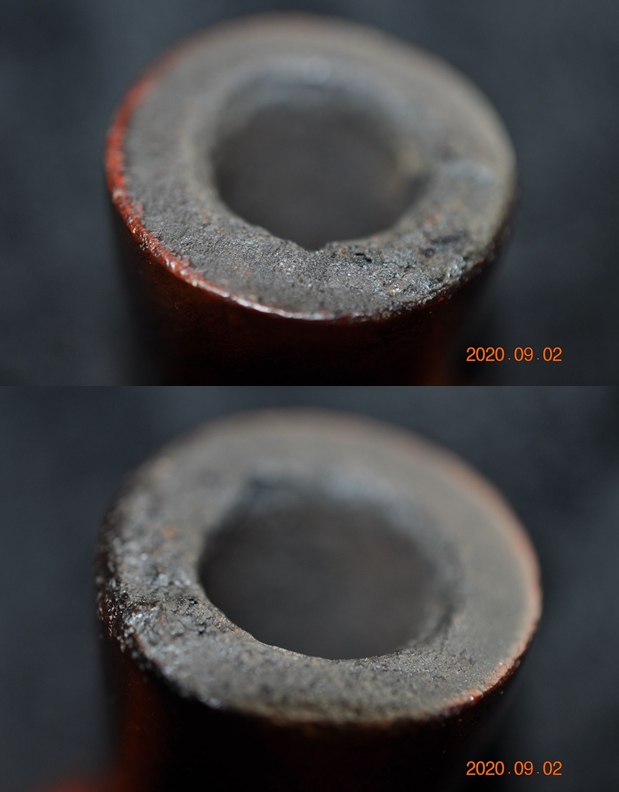
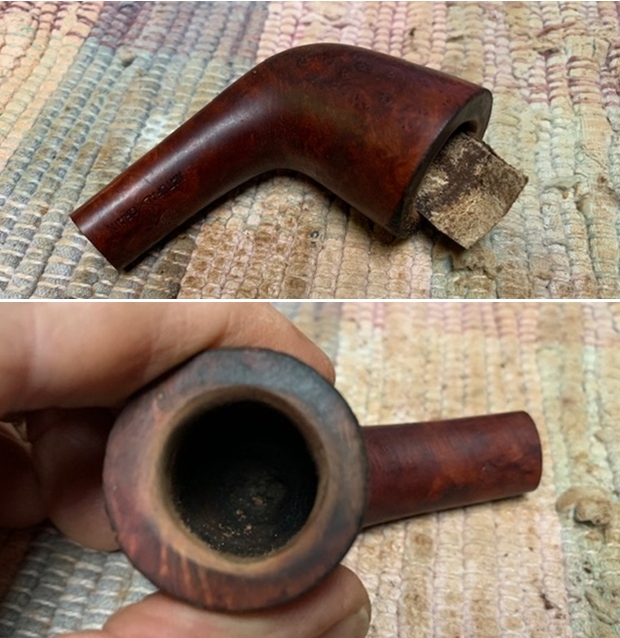
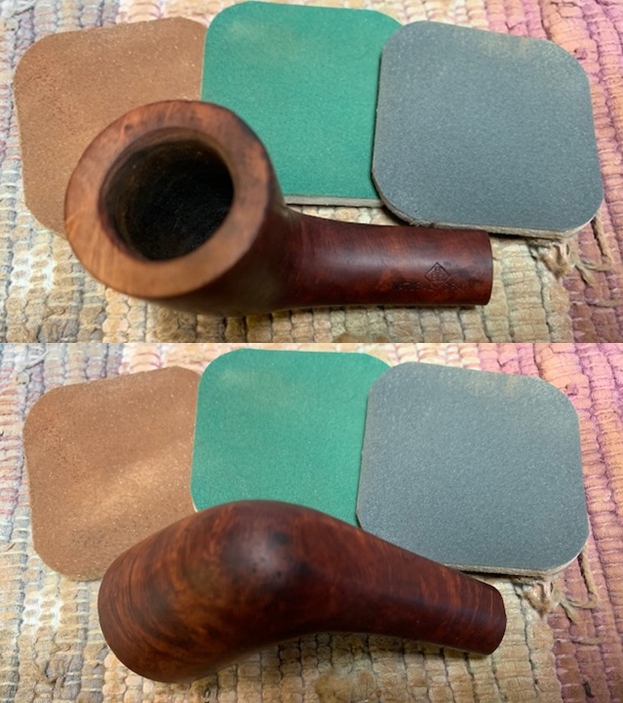
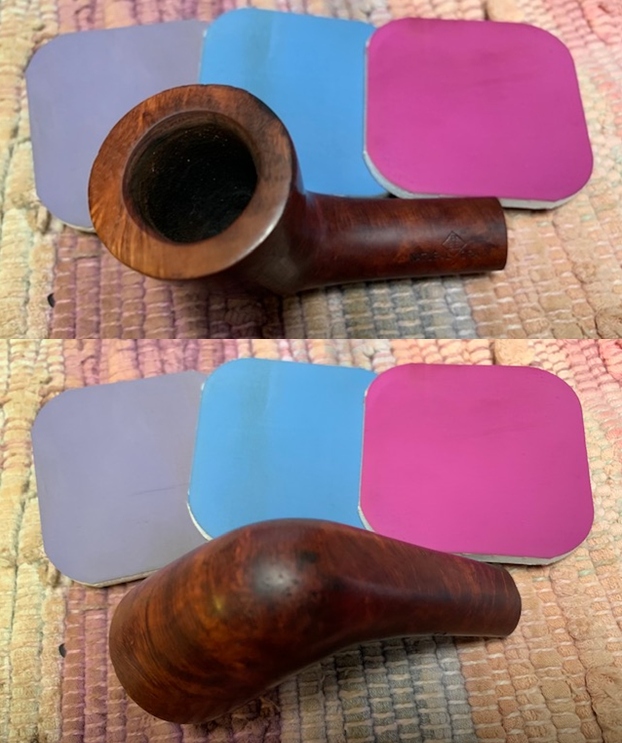
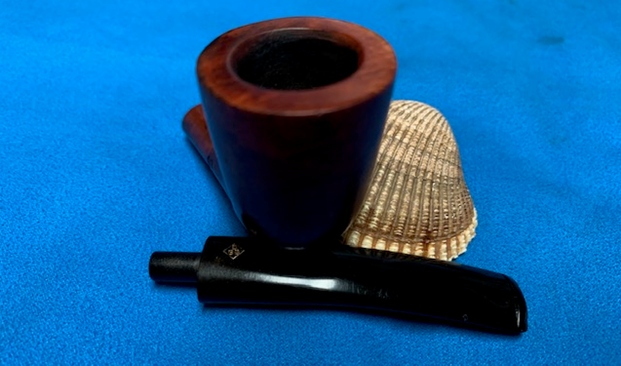
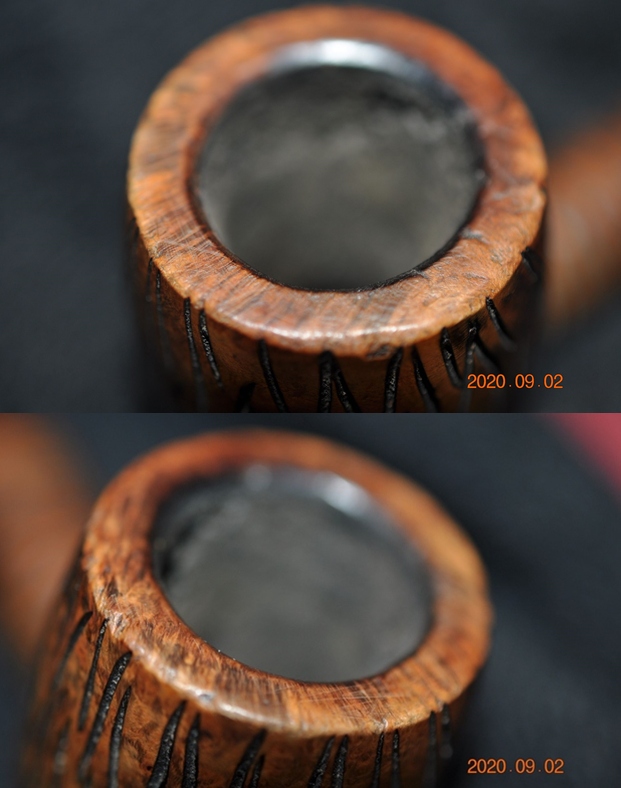
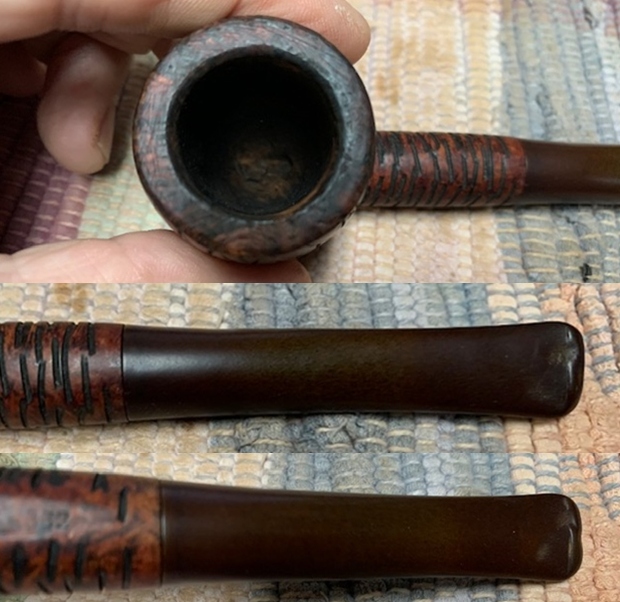
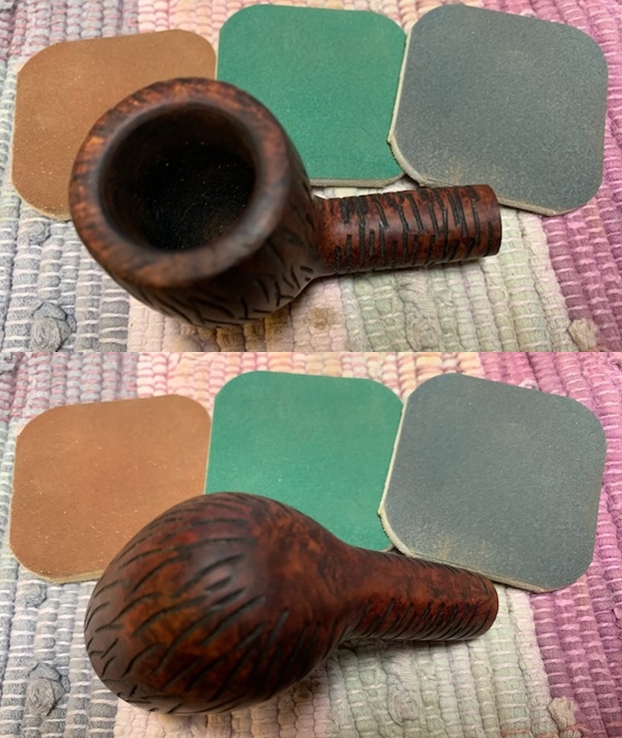
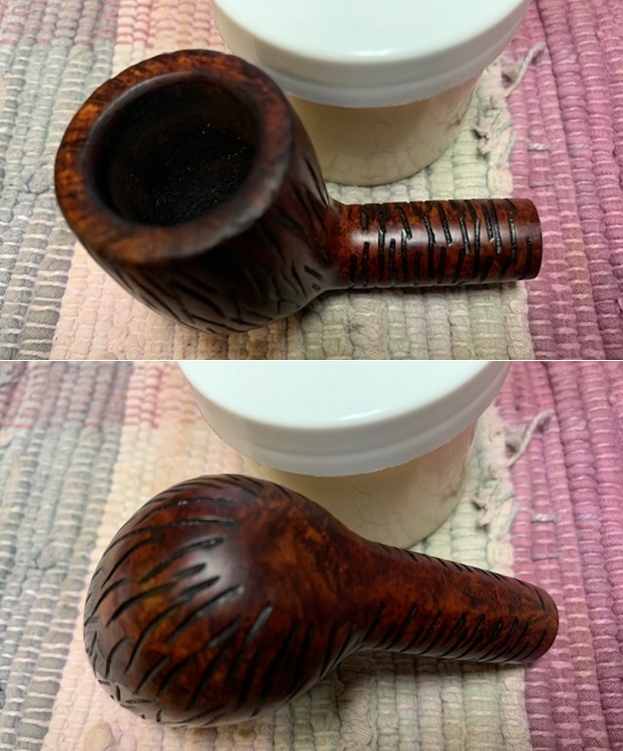
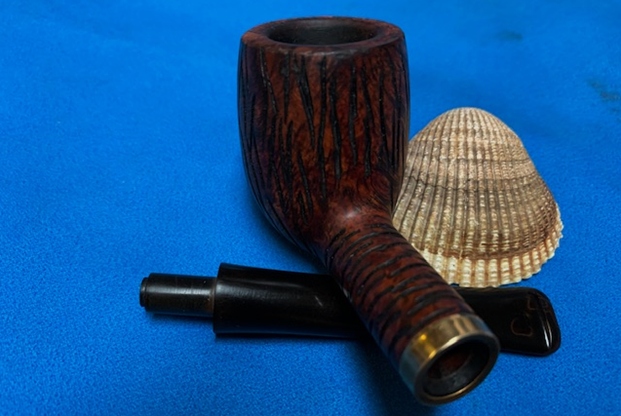
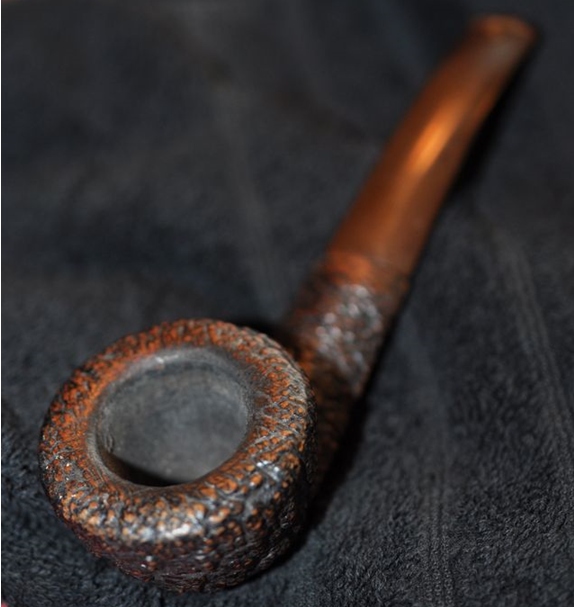
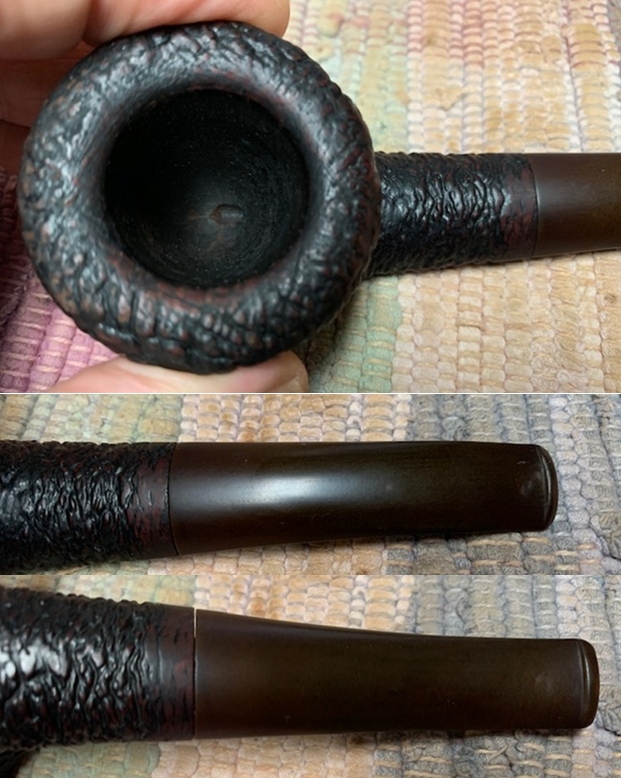
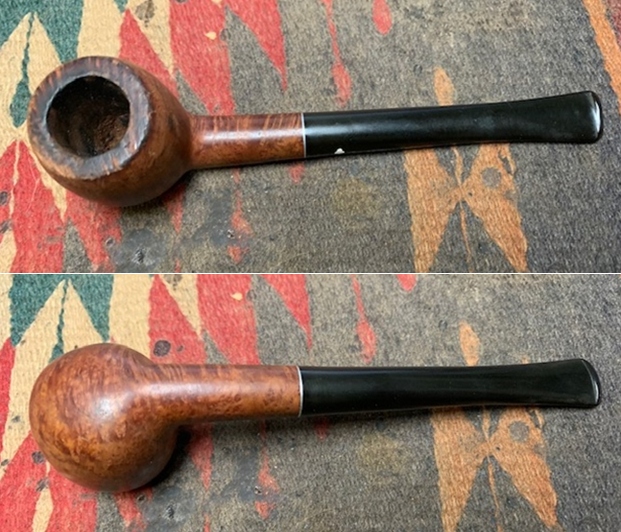
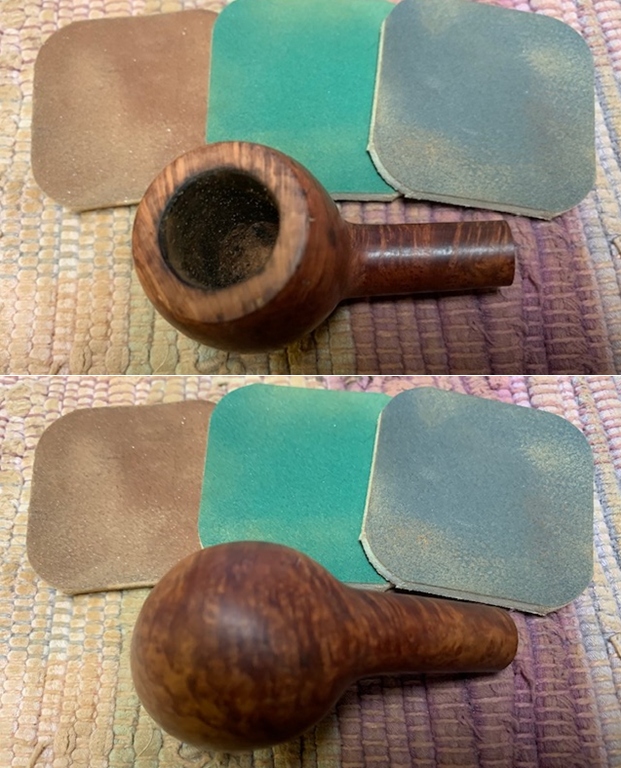
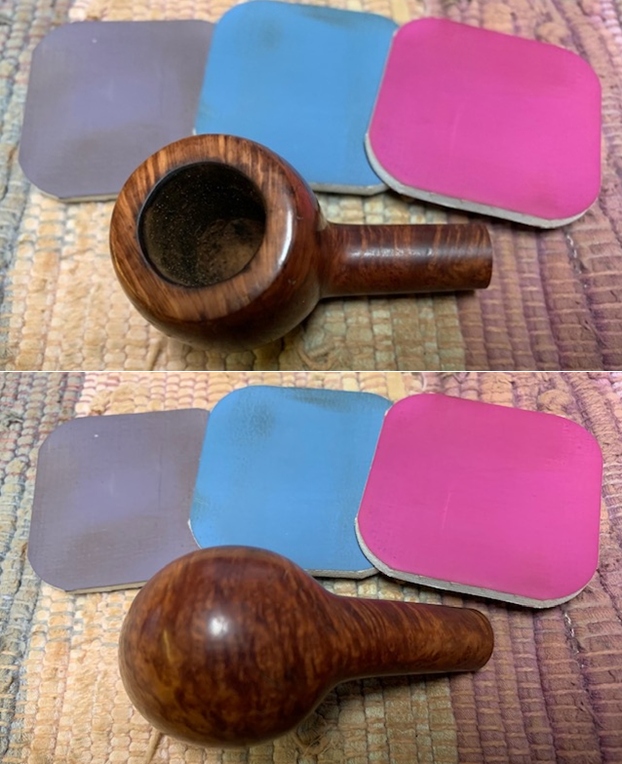
 Jeff took a close up photo of the bowl and rim to capture the condition of the pipe before he started the cleanup work. The bowl had an incredibly thick cake and a thick overflow of lava on the rim top. It was hard to know what the inner edge looked like but the outer edge was a mess. The stem is lightly oxidized, calcified and dirty and there is tooth chatter and marks on both sides of the stem ahead of the button.
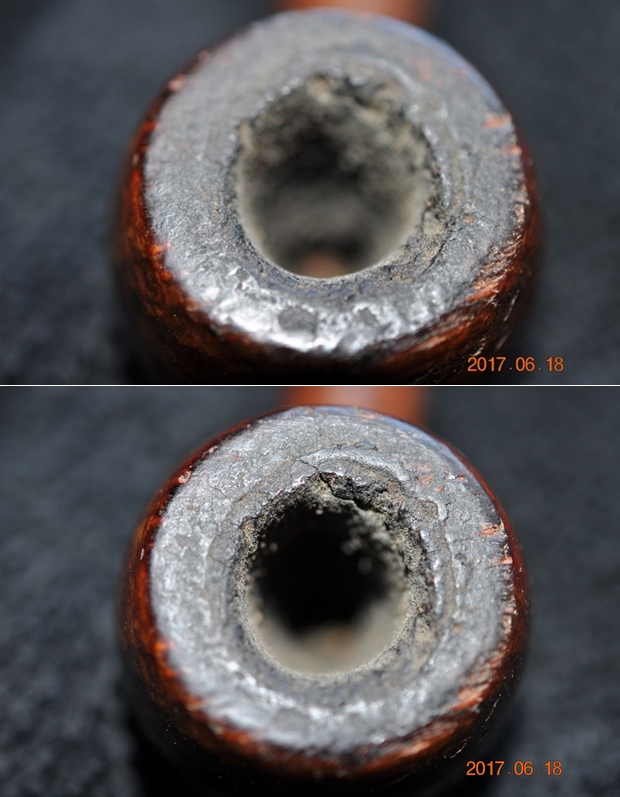
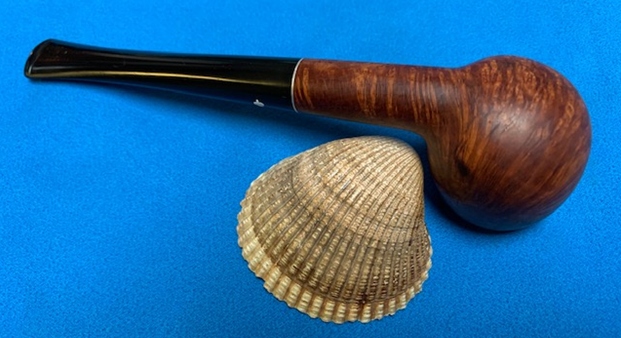
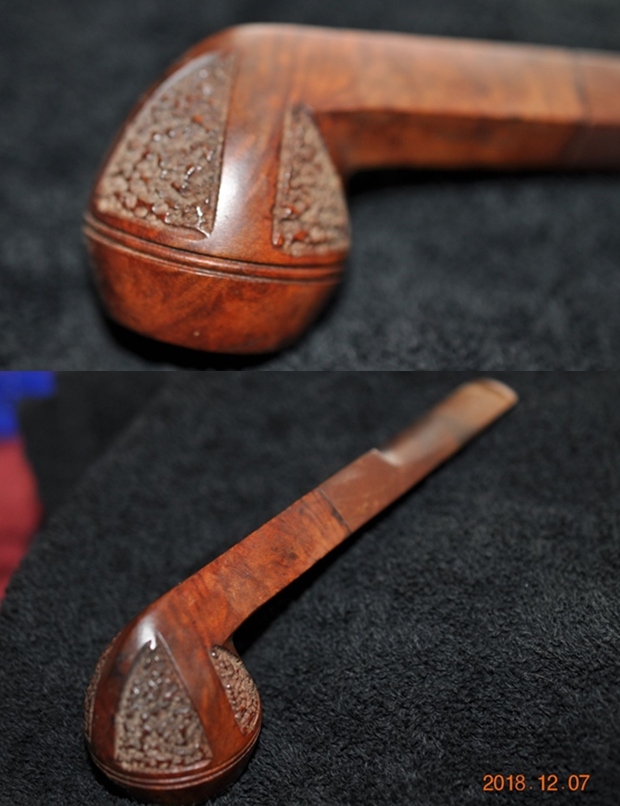
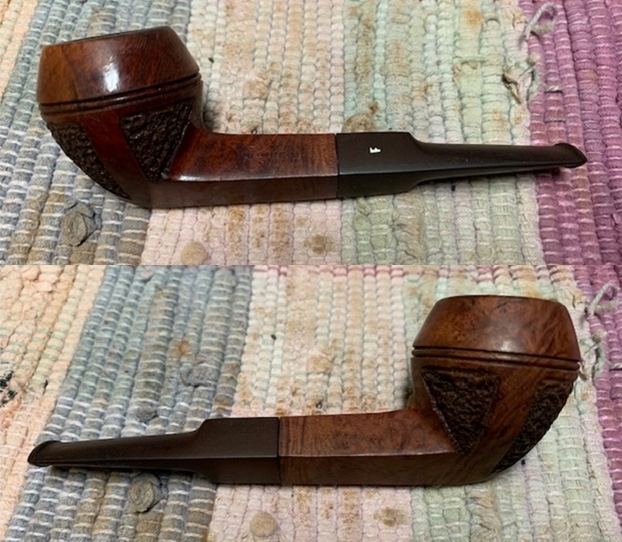
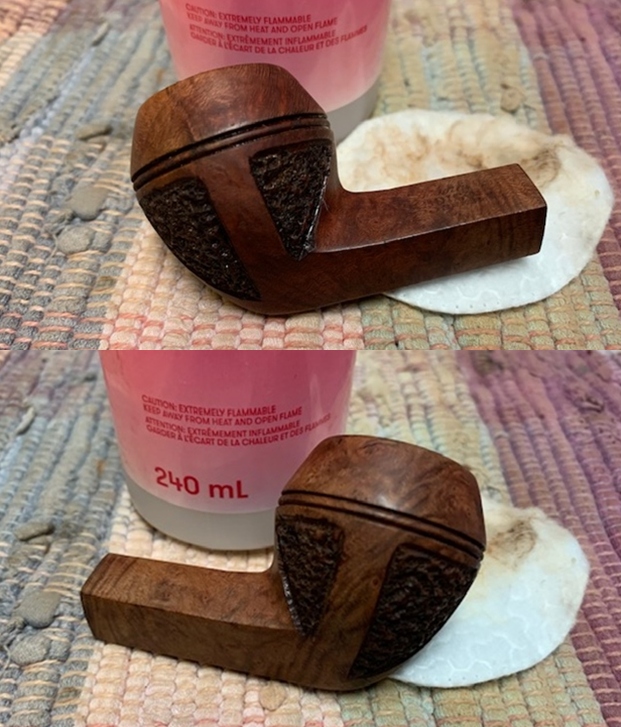
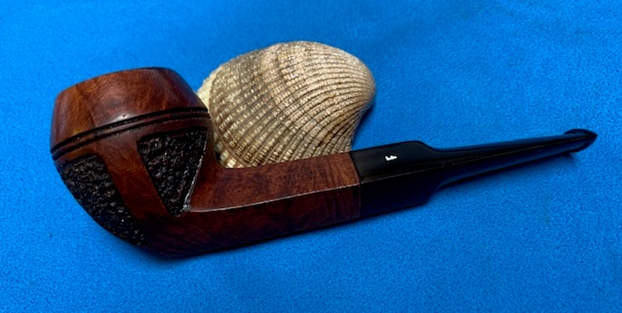
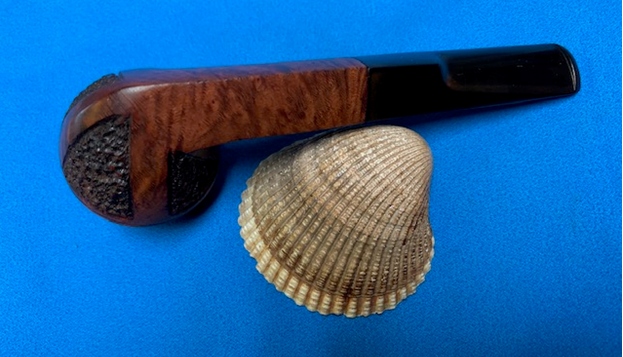
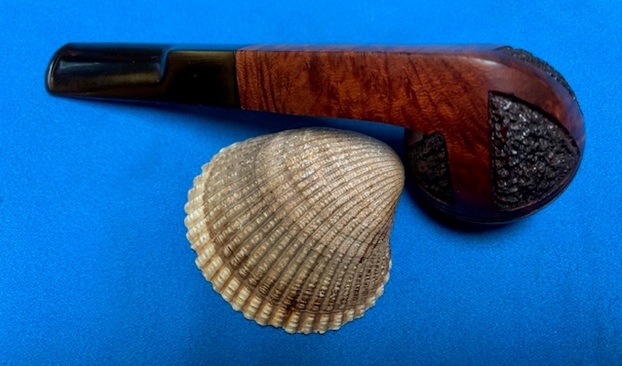
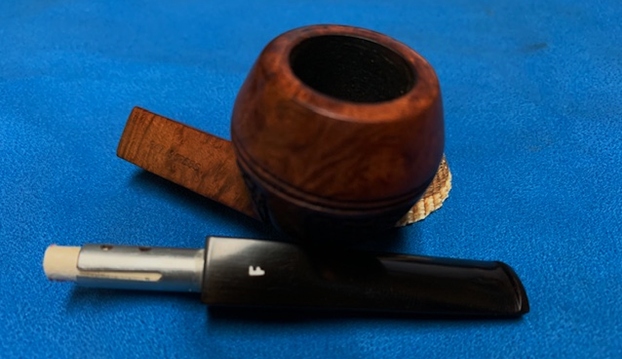
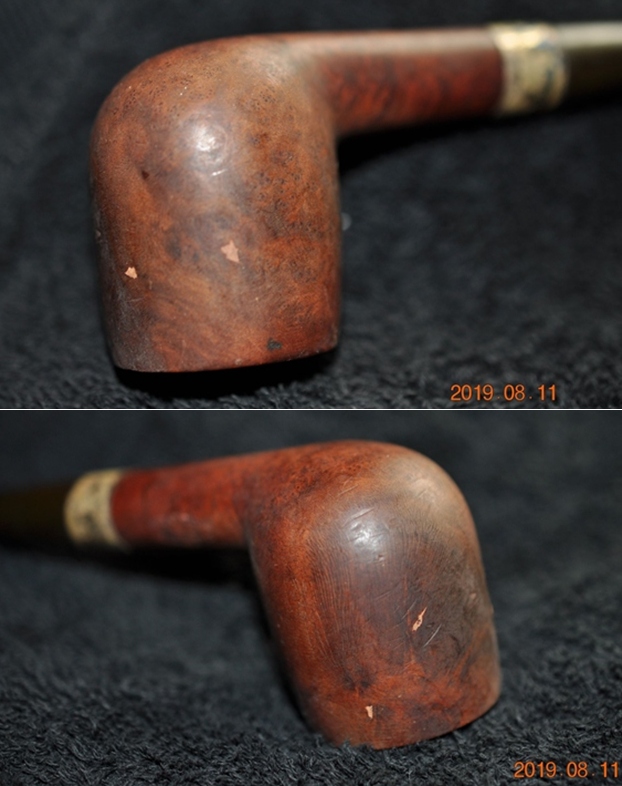
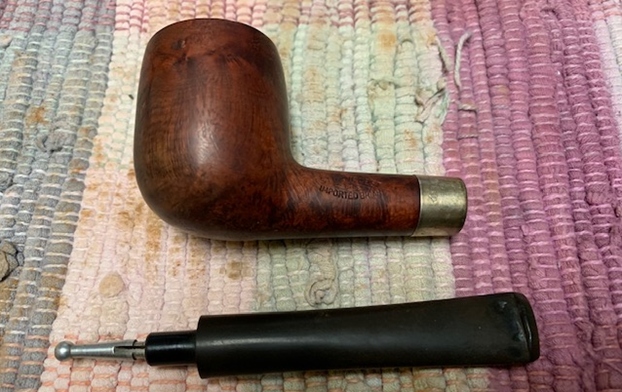
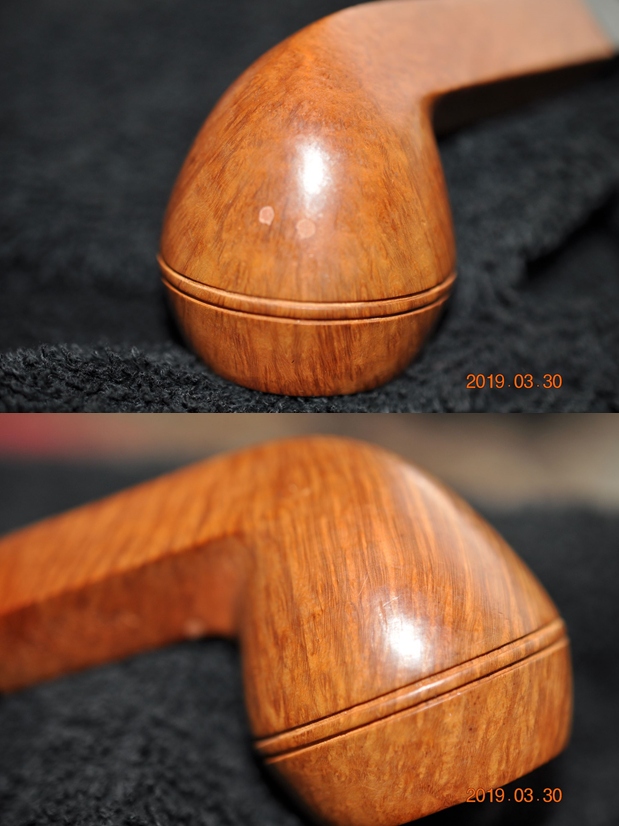
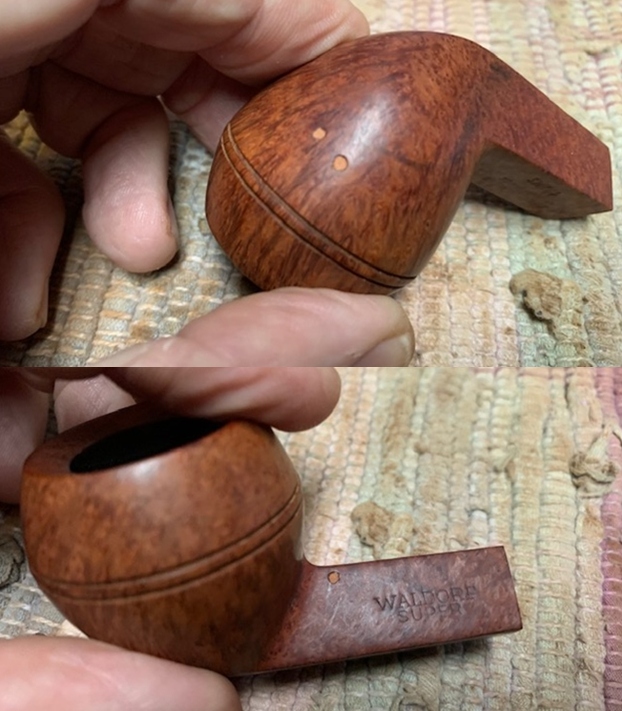
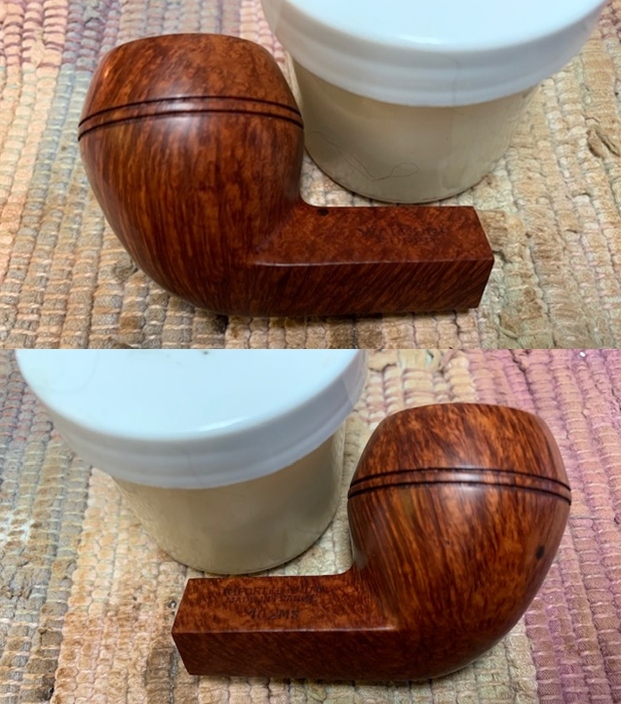
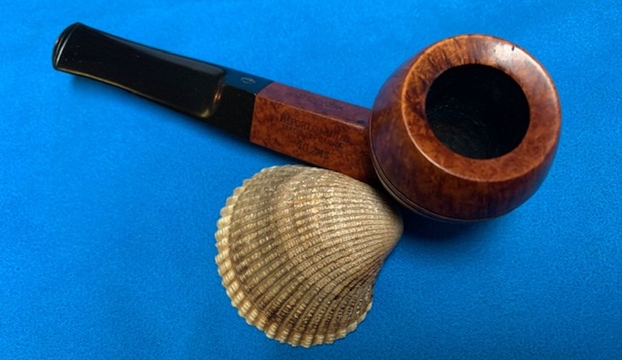
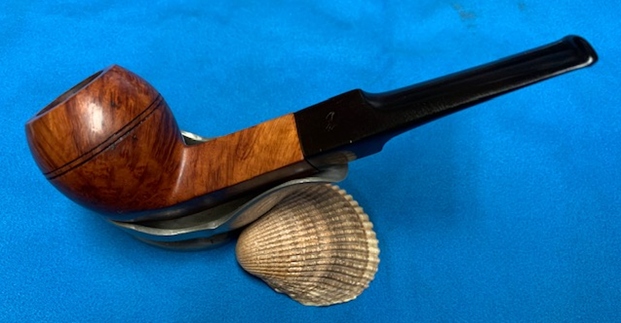
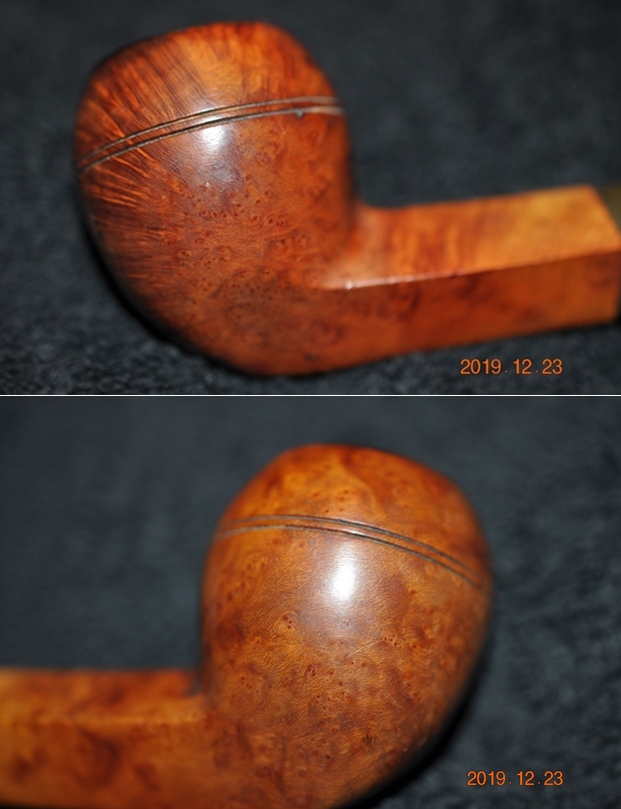
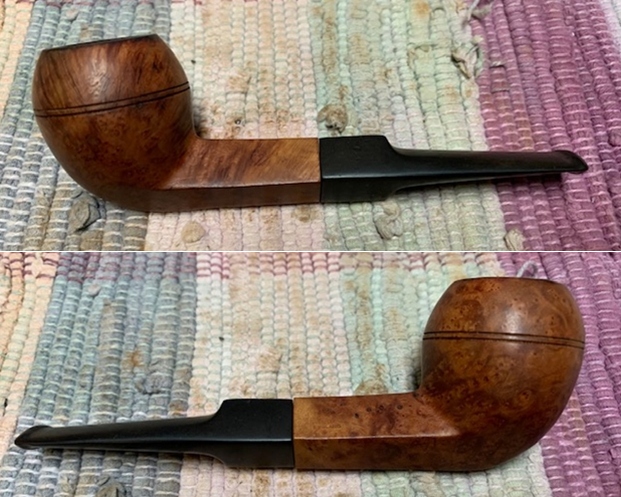
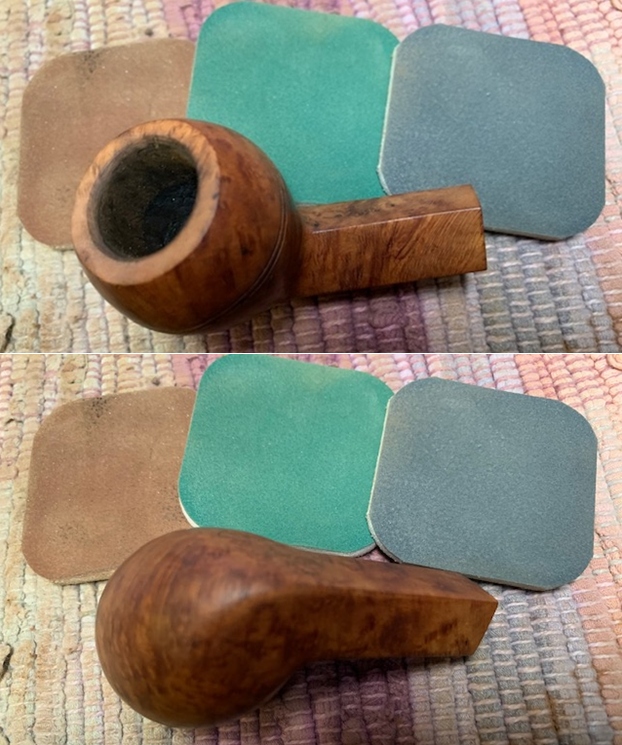
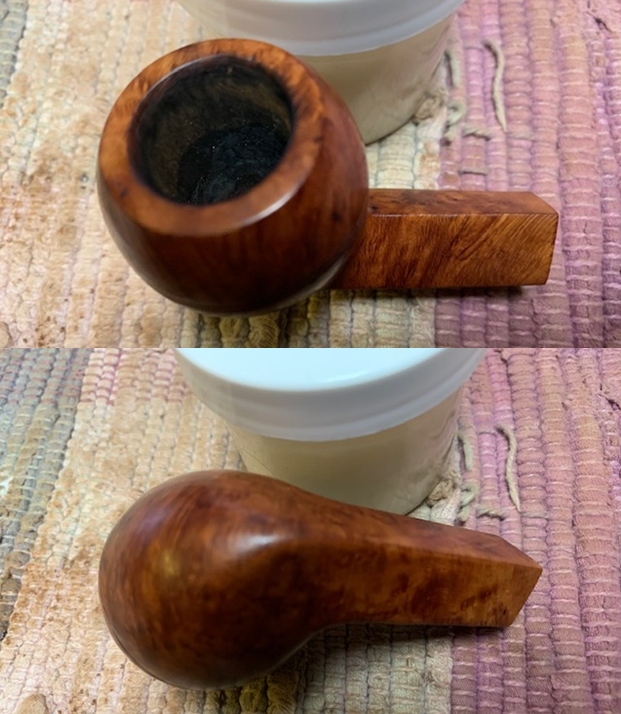
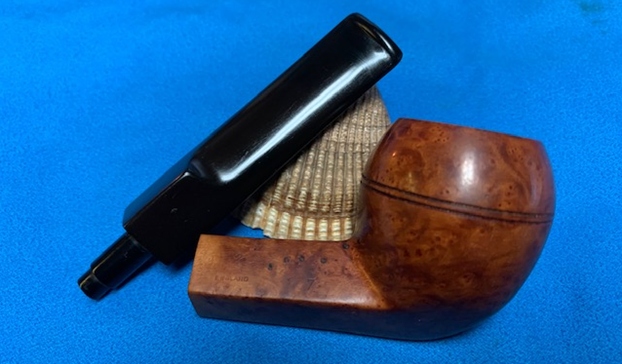
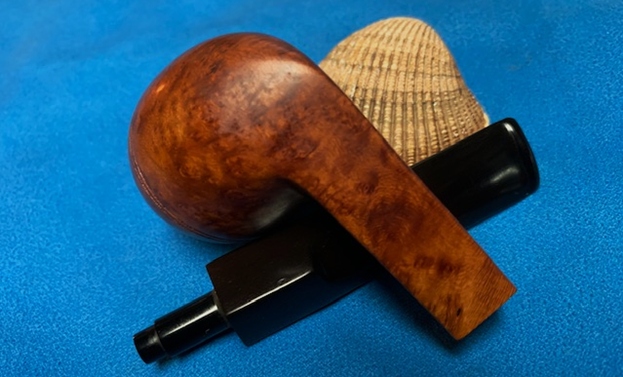
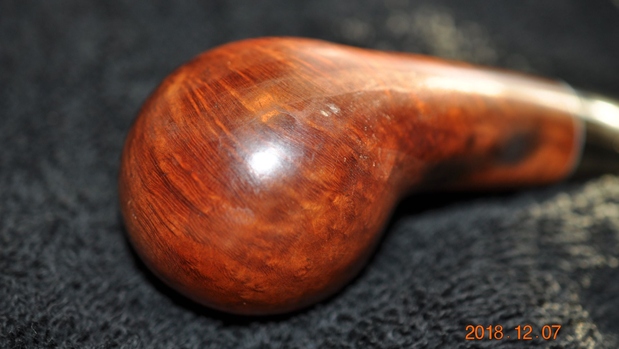
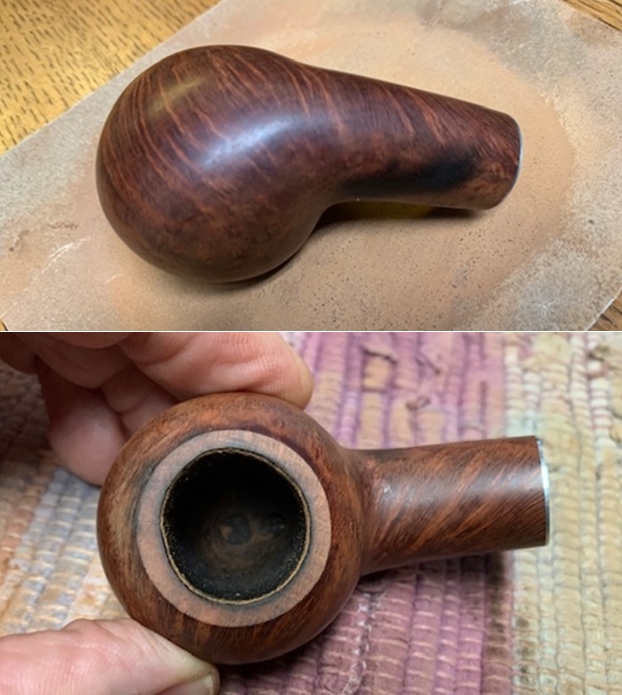
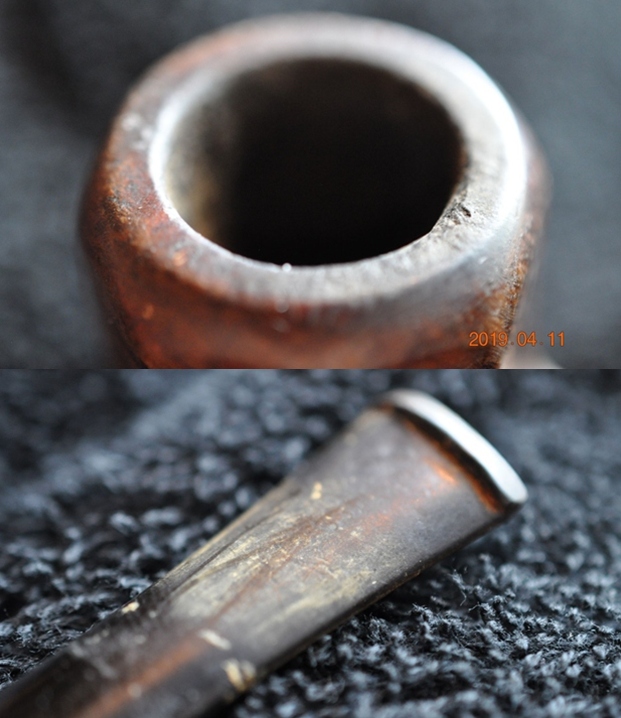
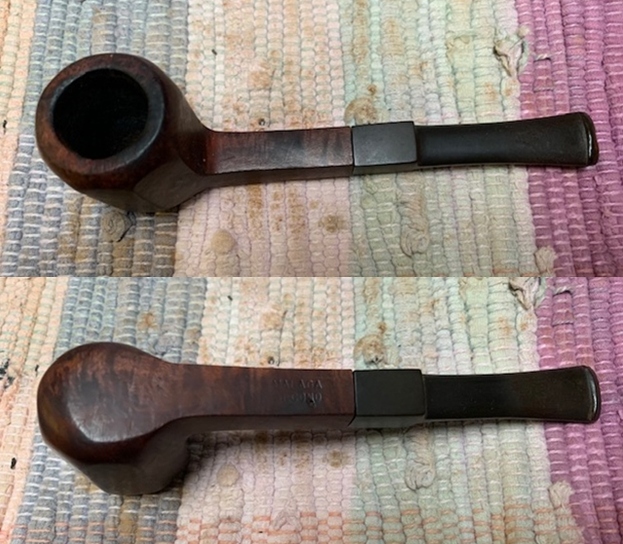
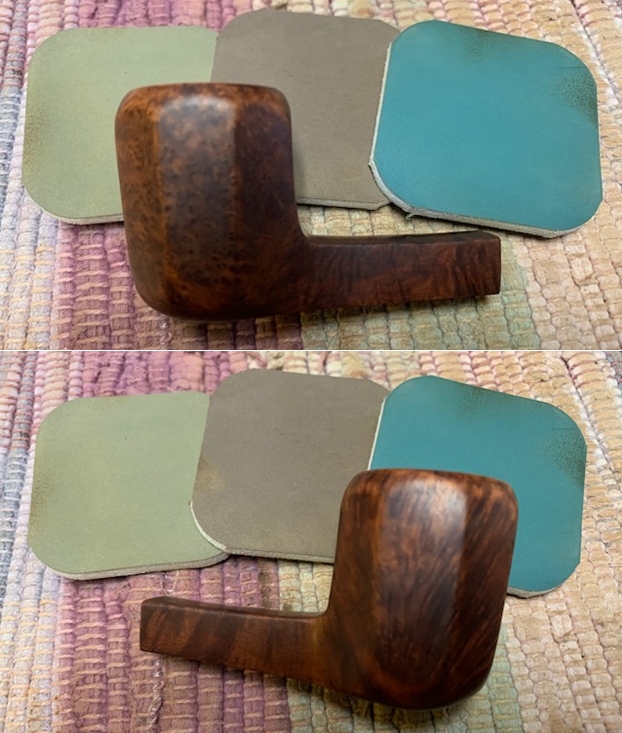
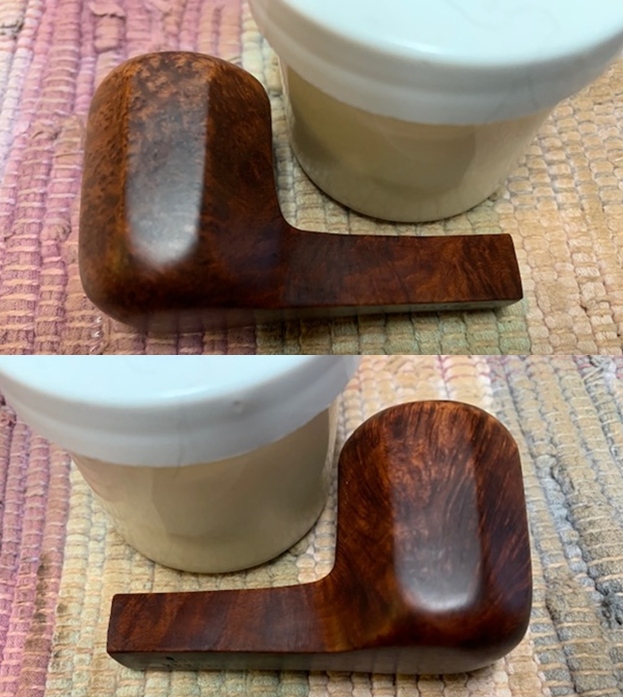
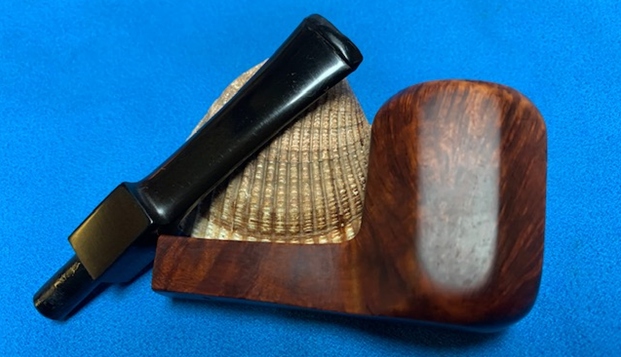
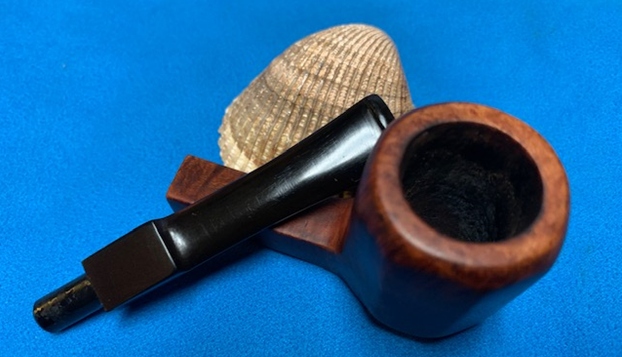
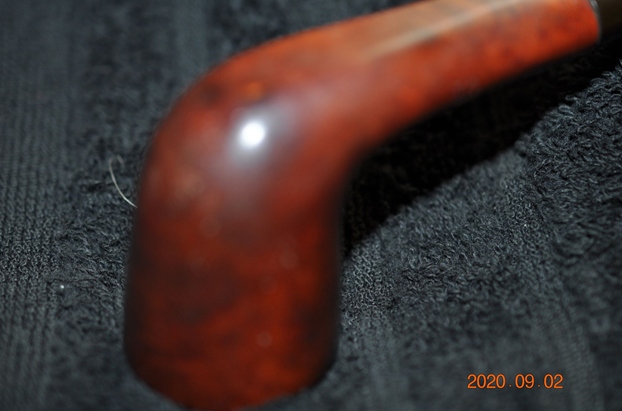
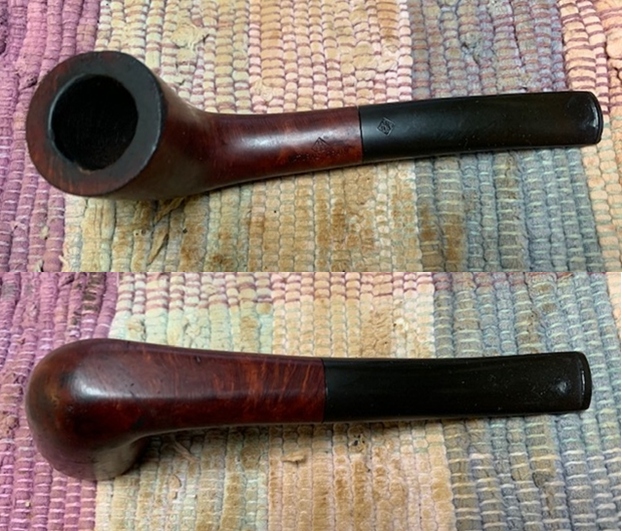
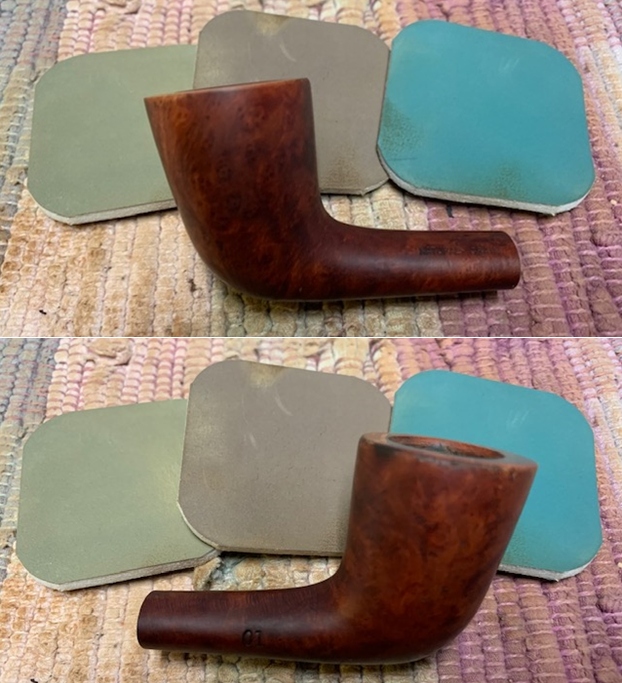
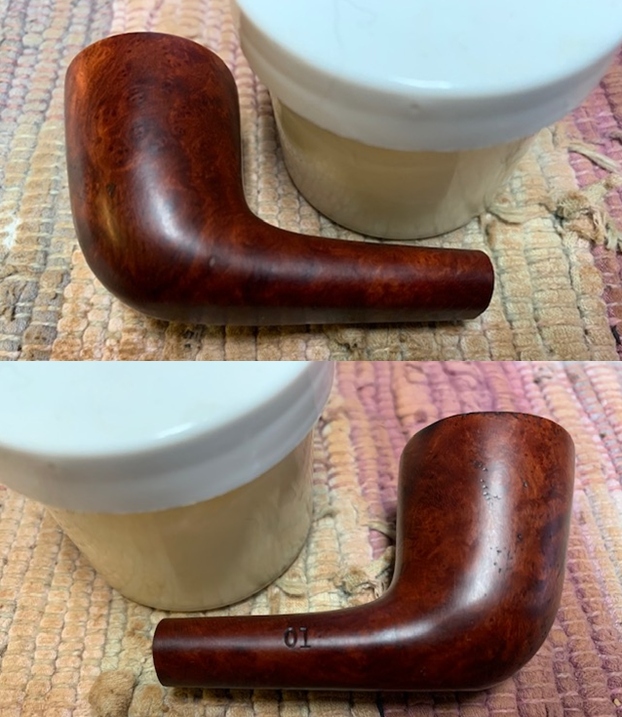
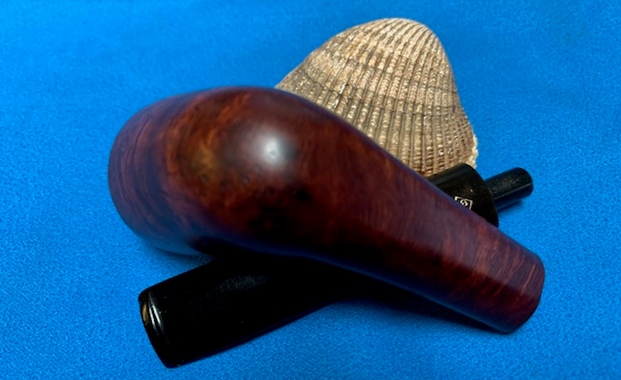
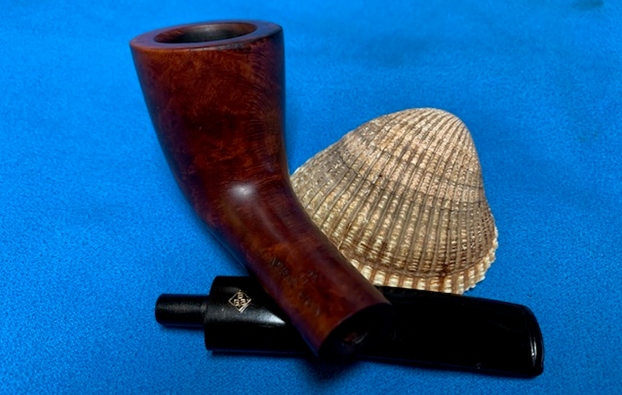
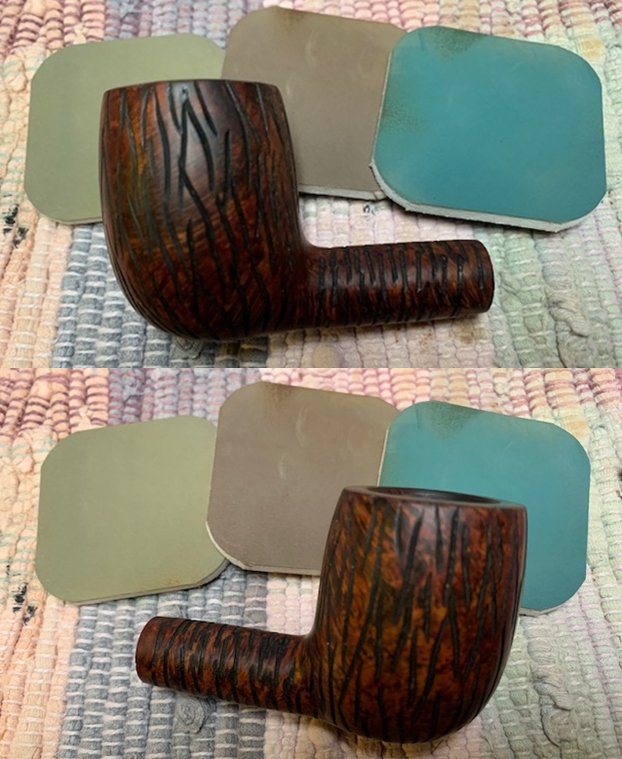
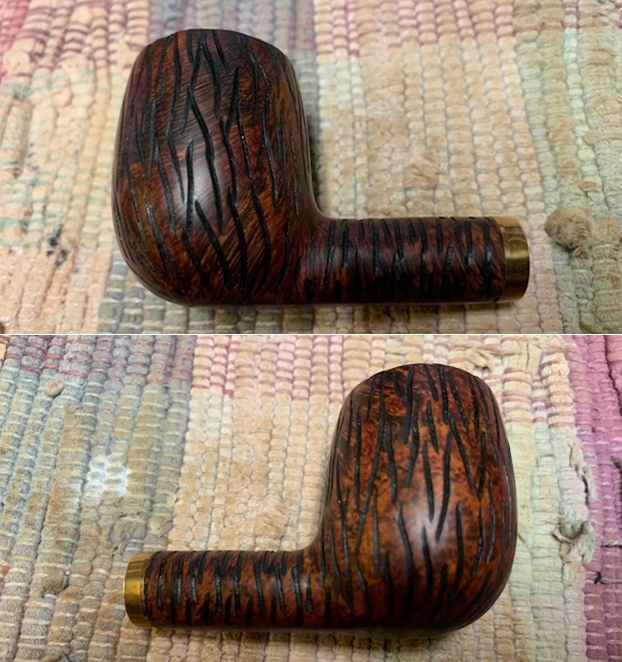
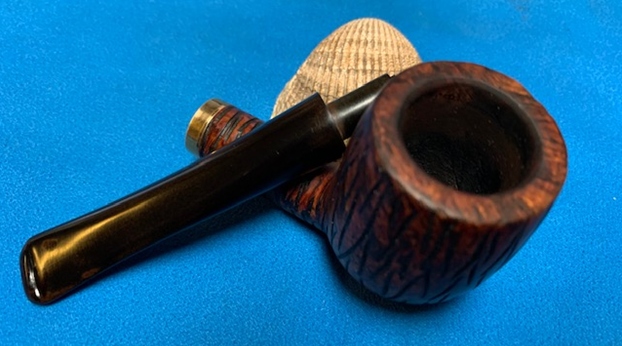
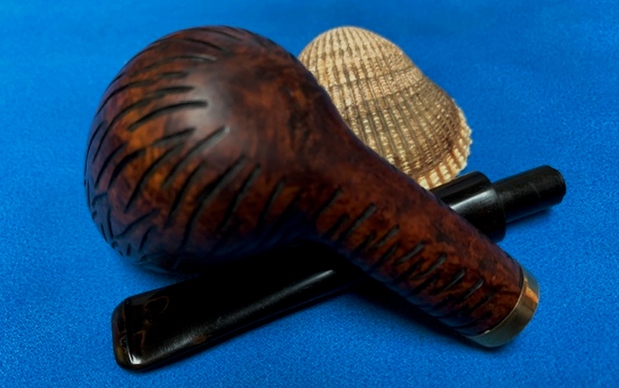
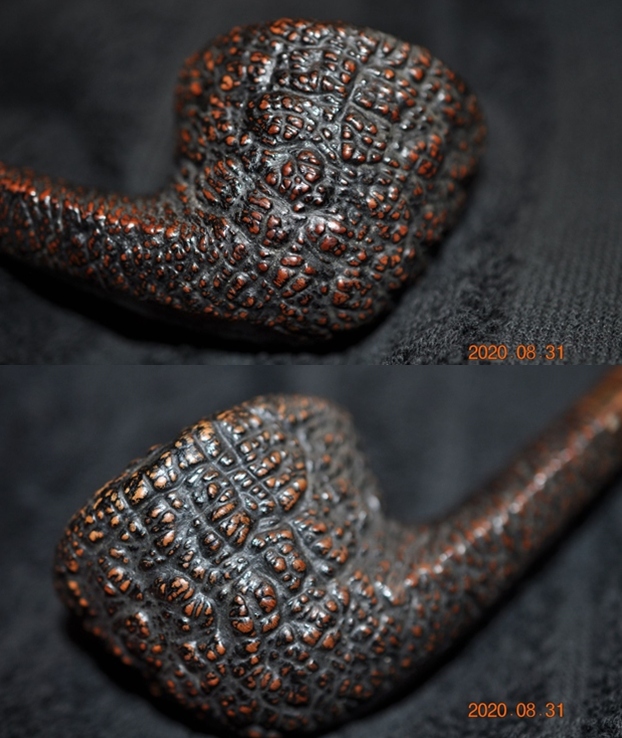
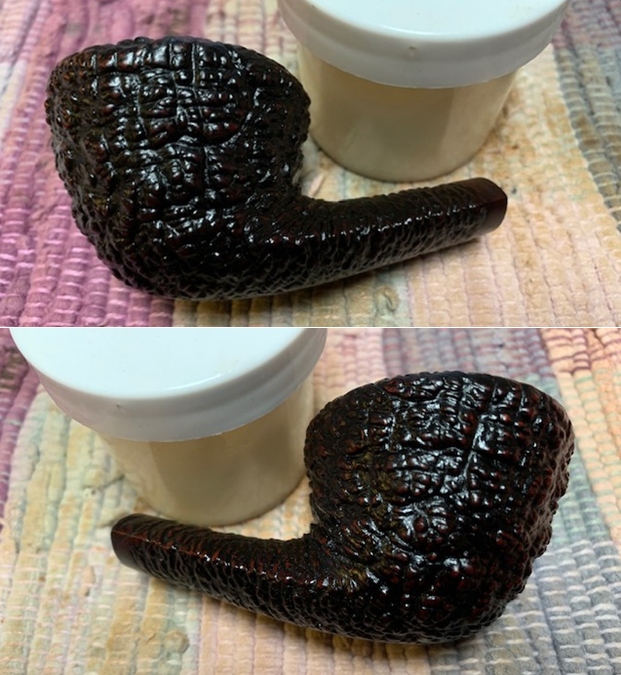
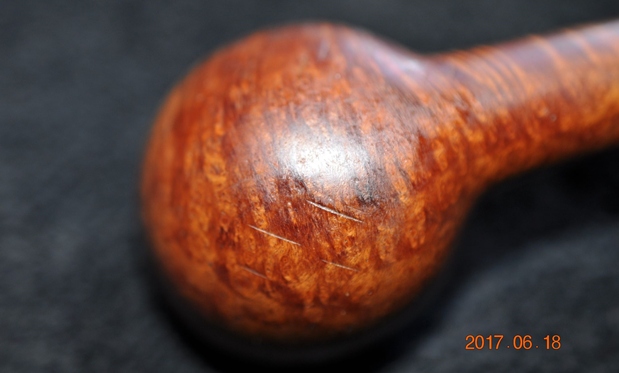
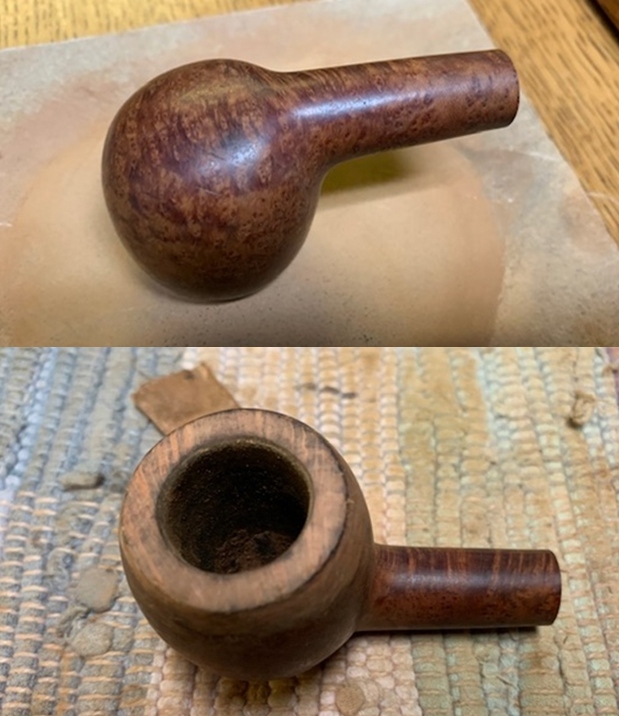
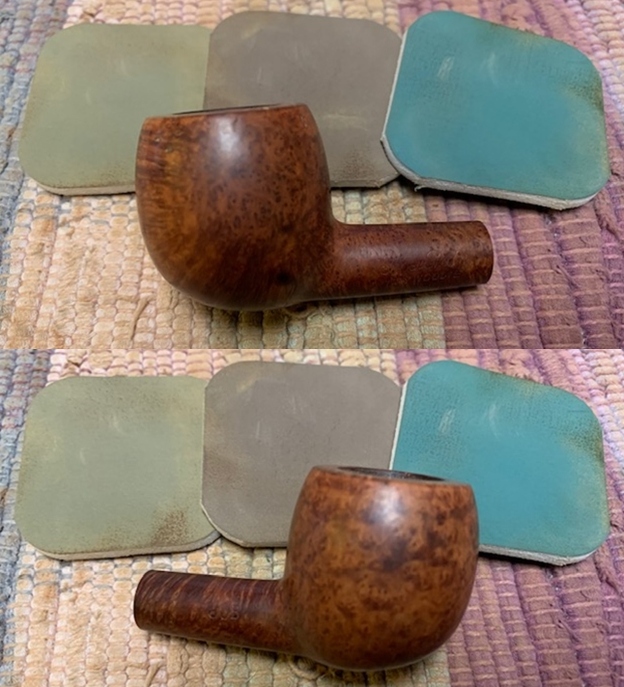
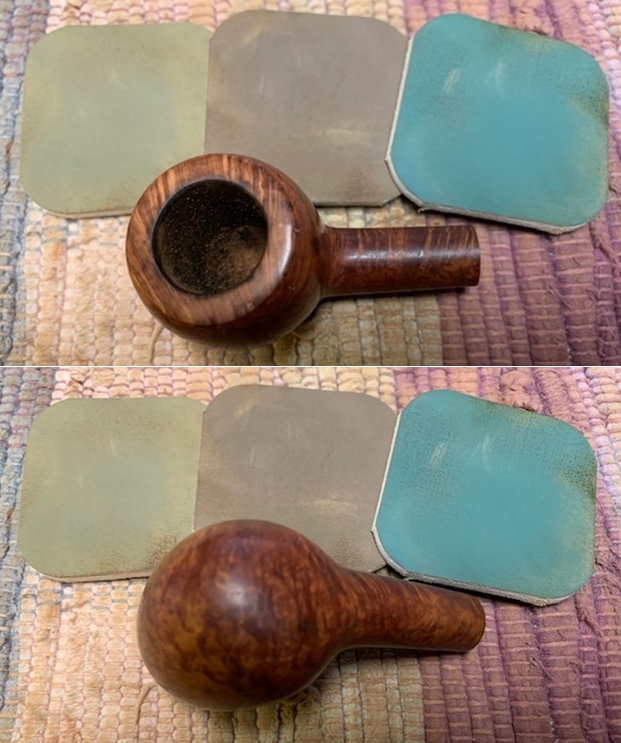
 Jeff took a photo of the side and heel of the bowl to give a picture of what the briar looked like. There is some nice grain on the piece of briar.
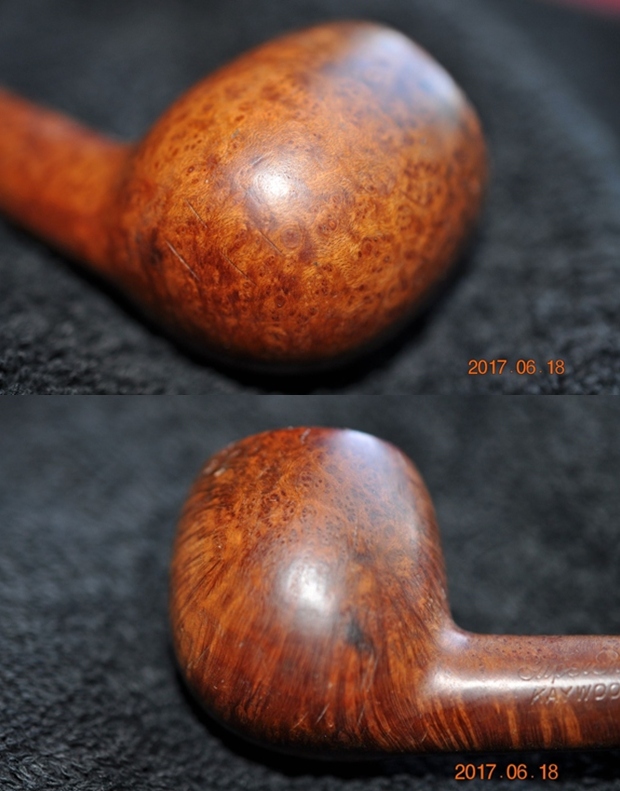
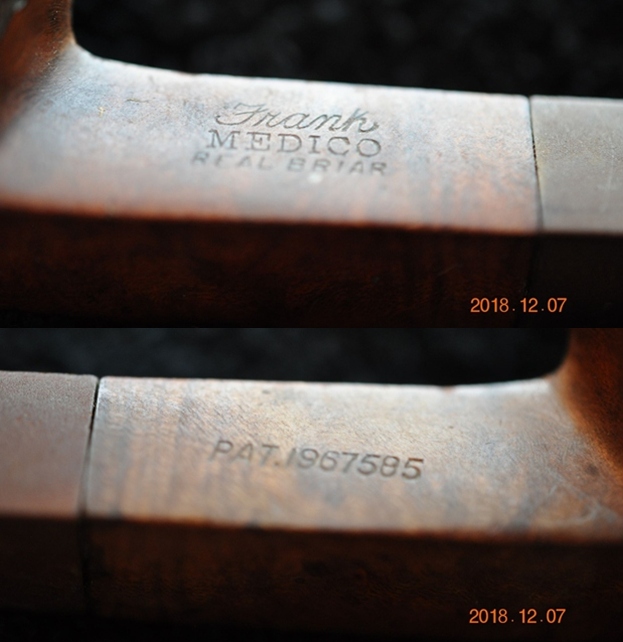
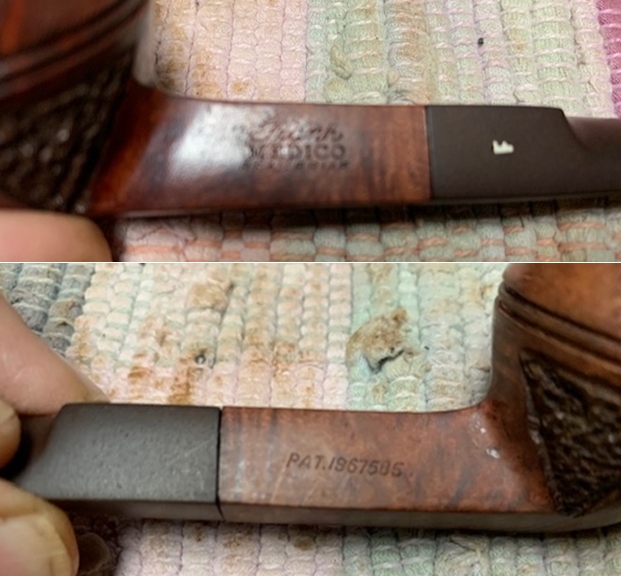
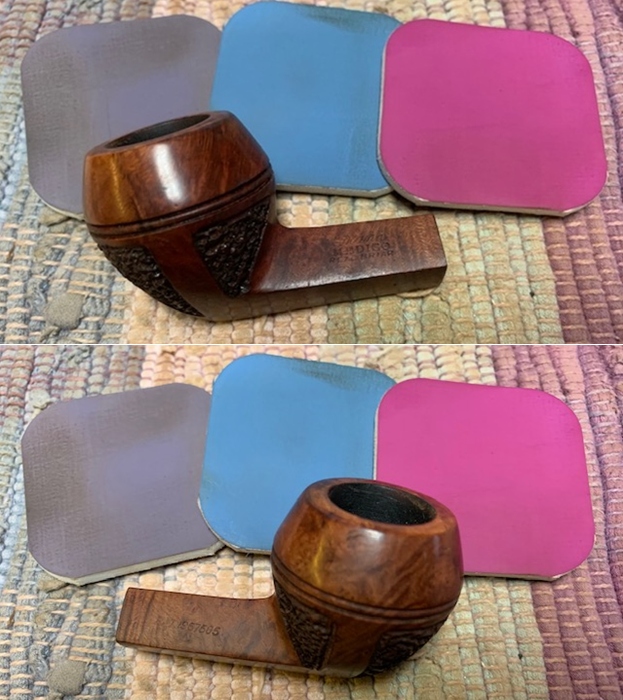
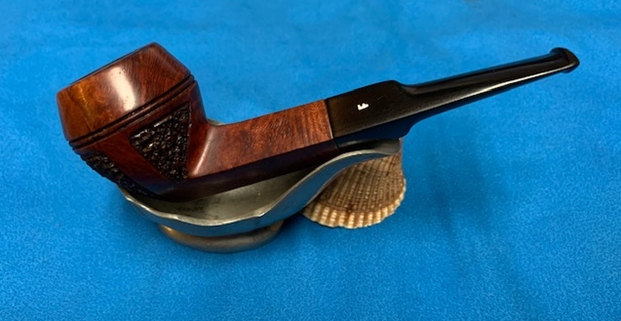
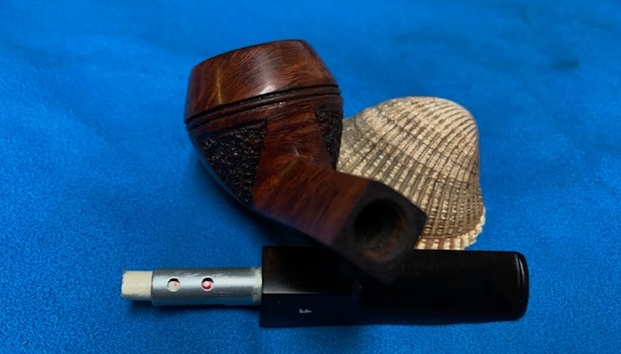
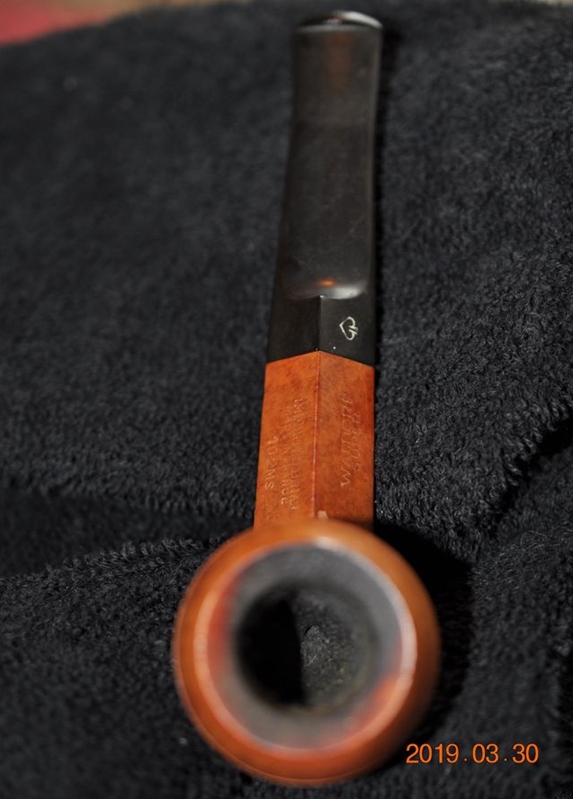
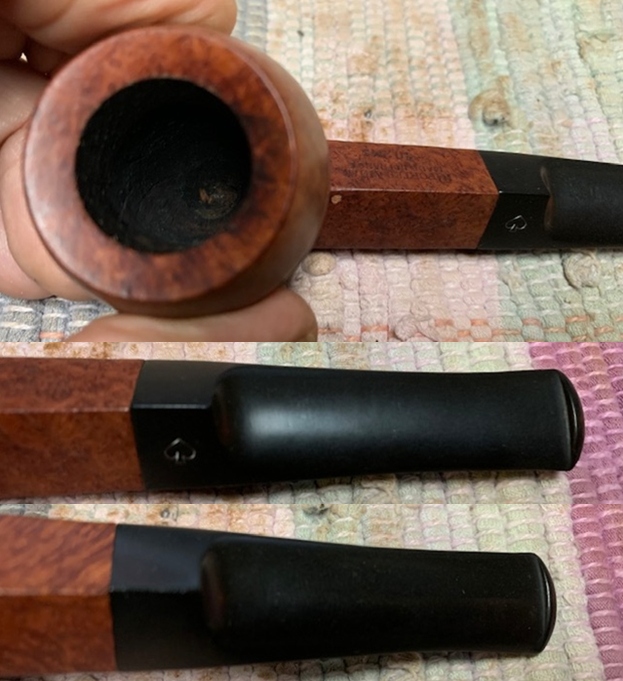
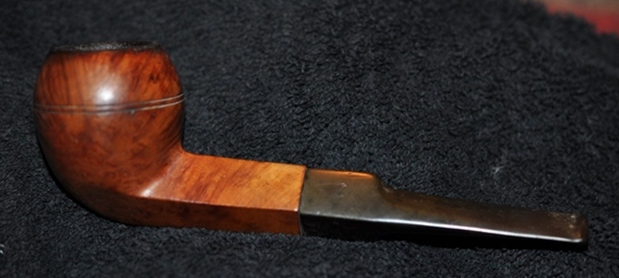
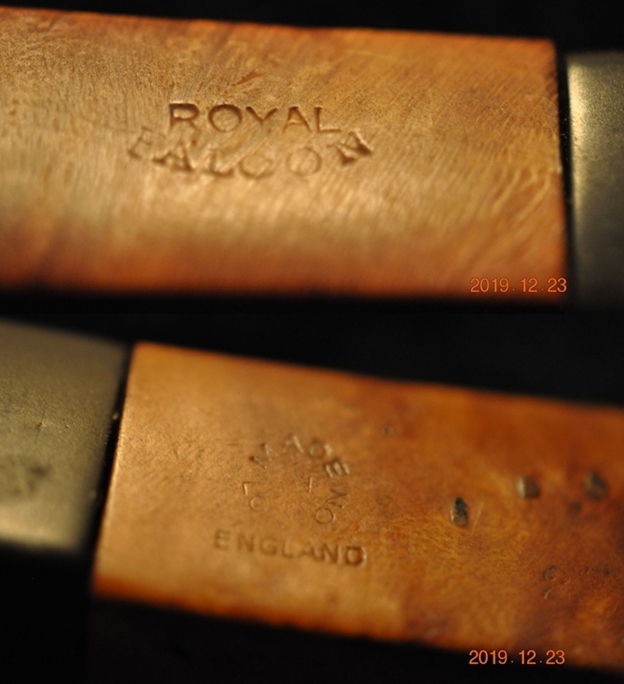
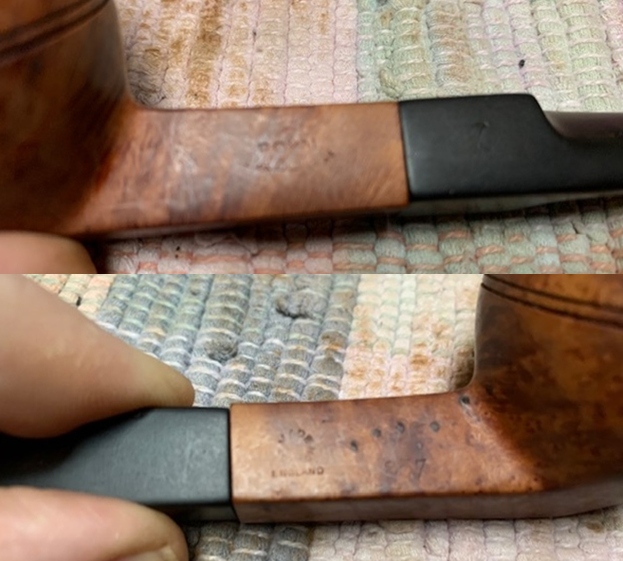
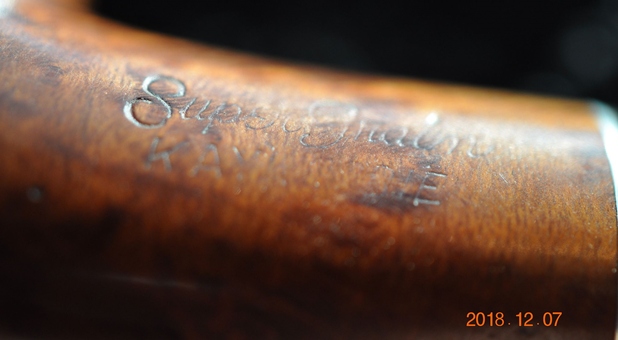
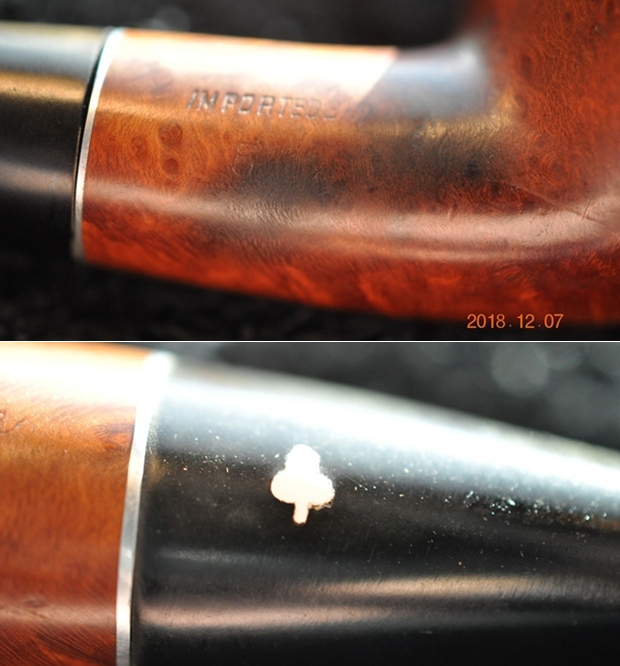
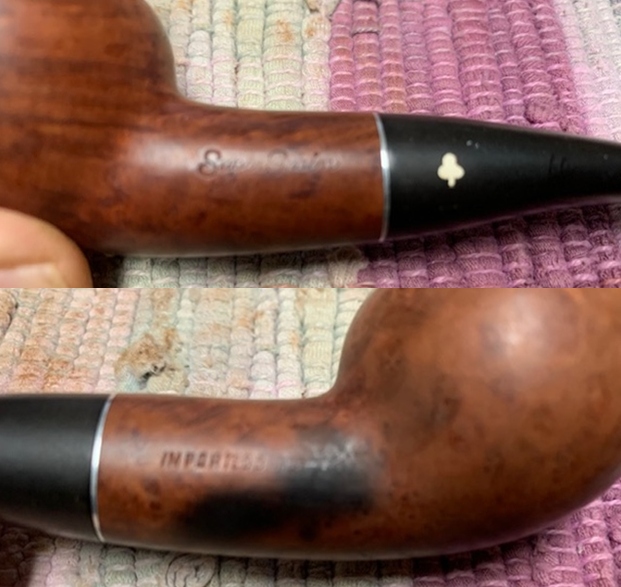
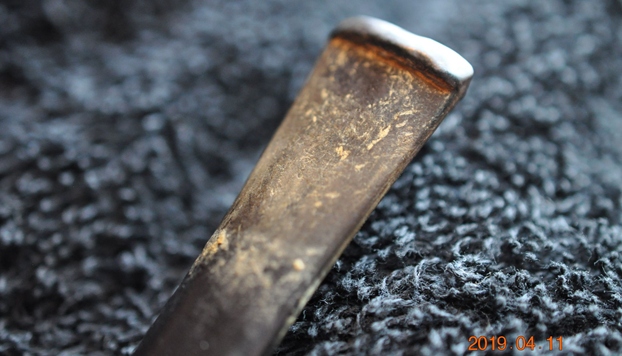
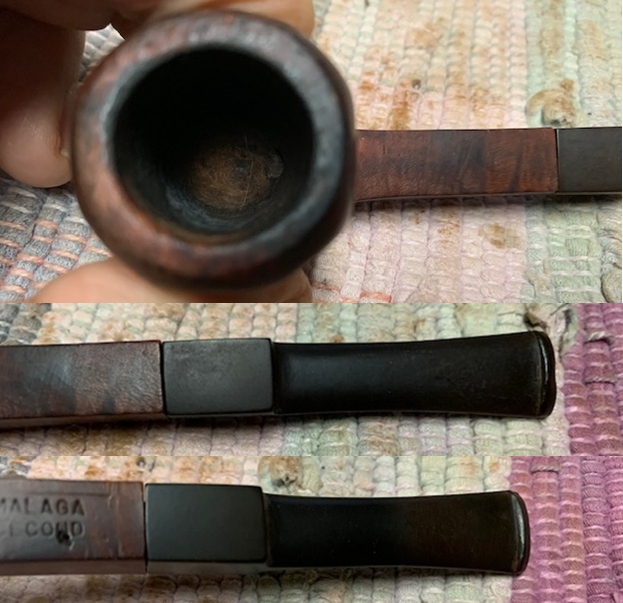
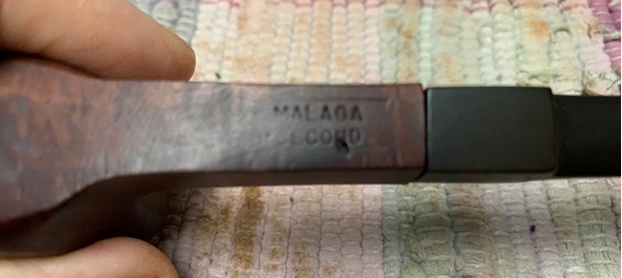
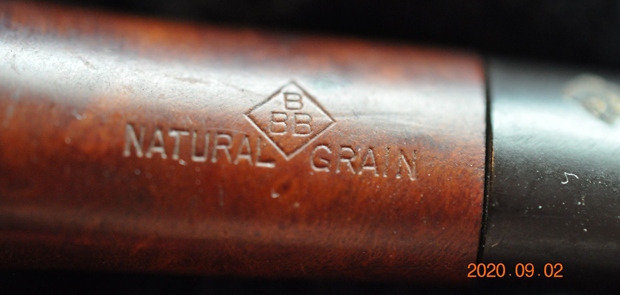
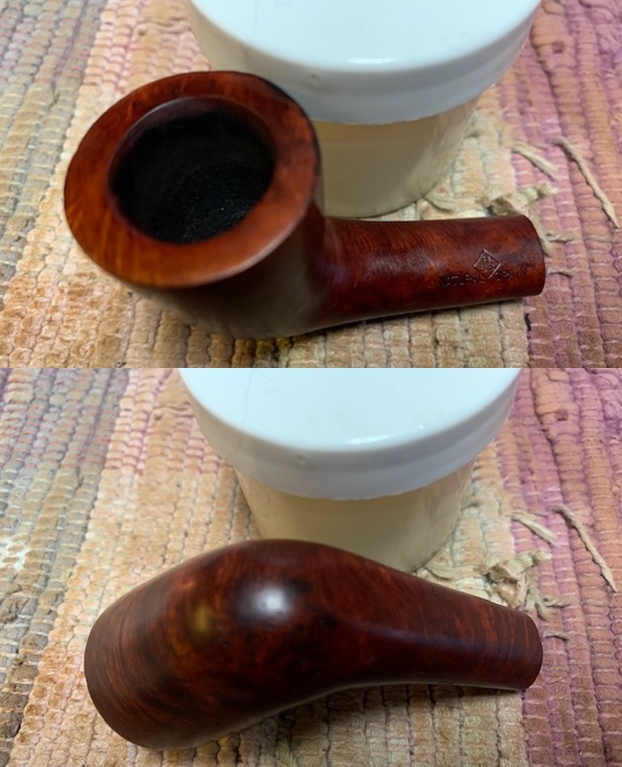
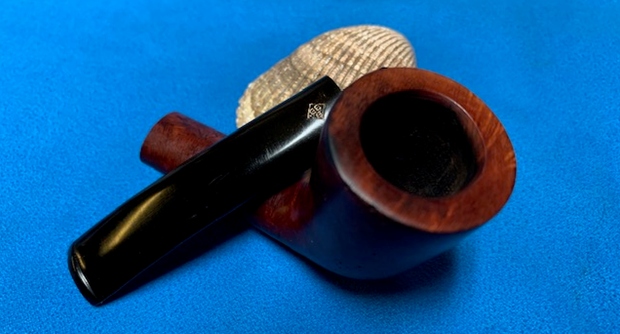
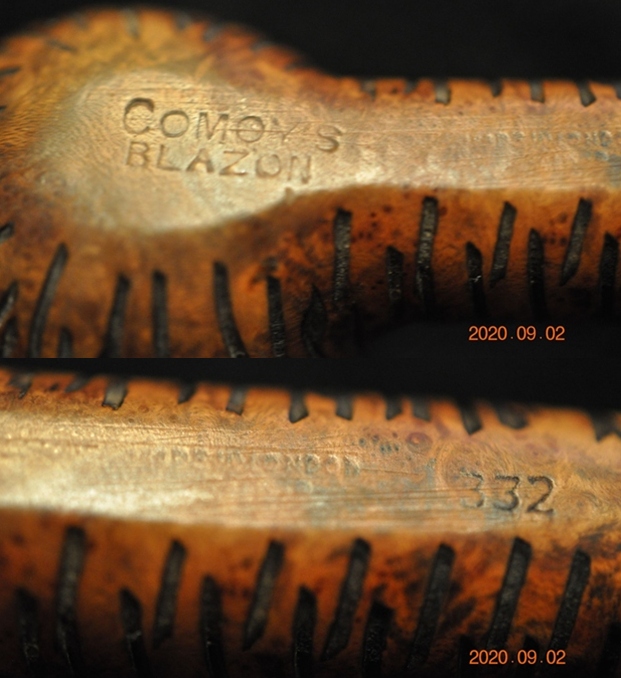
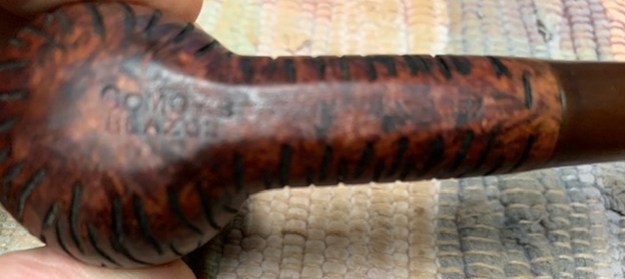
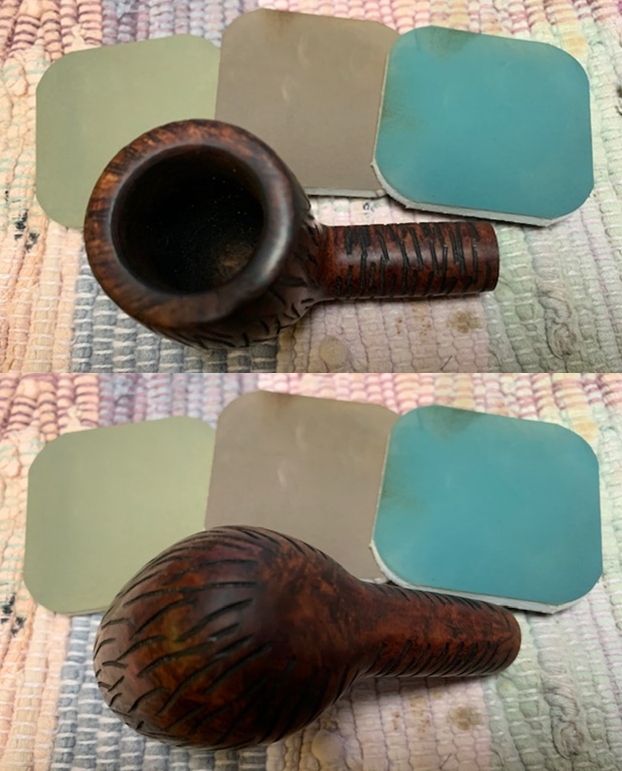
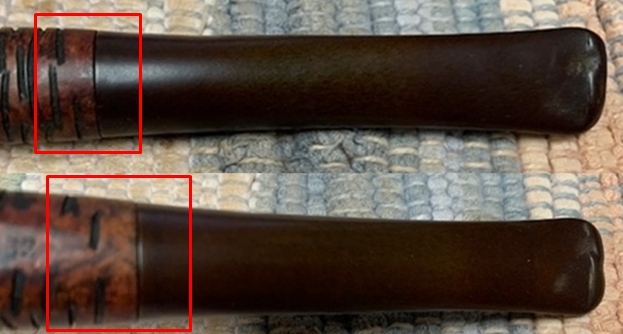
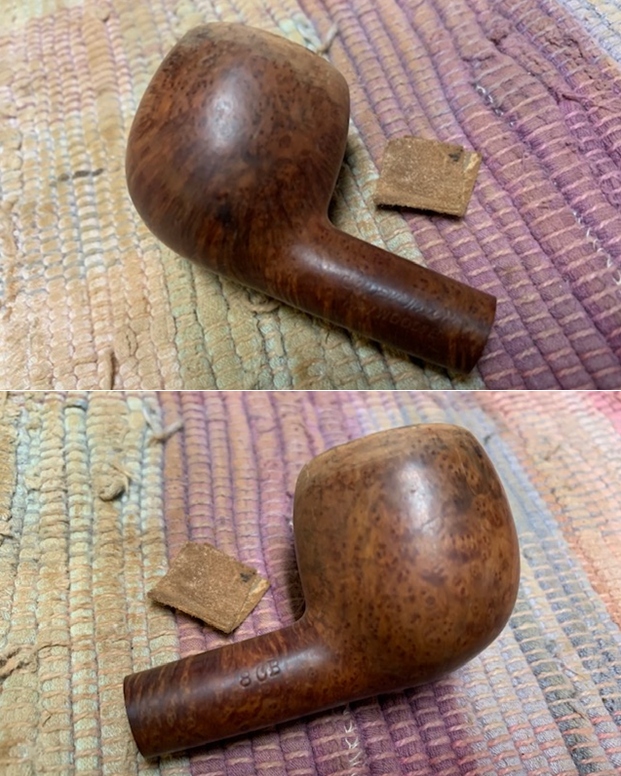
 The stamping on the sides of the shank read as noted above. The photos show that they are very faint but readable. The Clover/Club on the left side of the stem is in good condition.
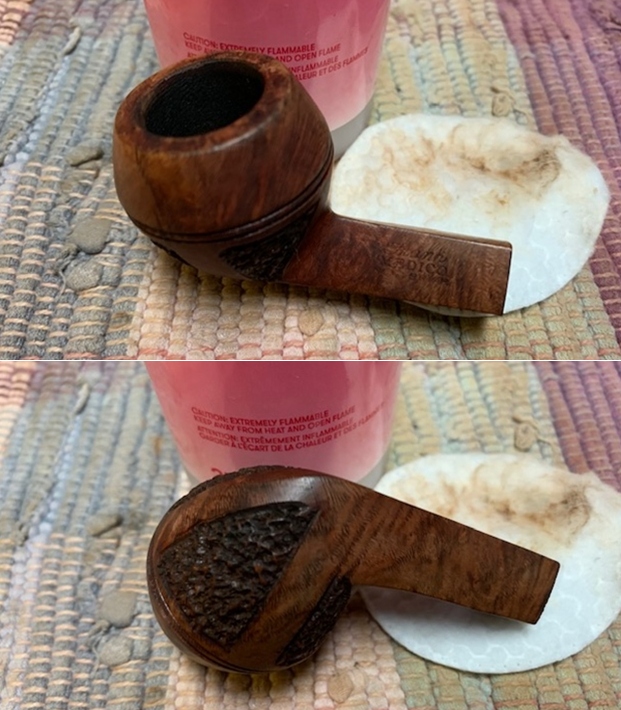
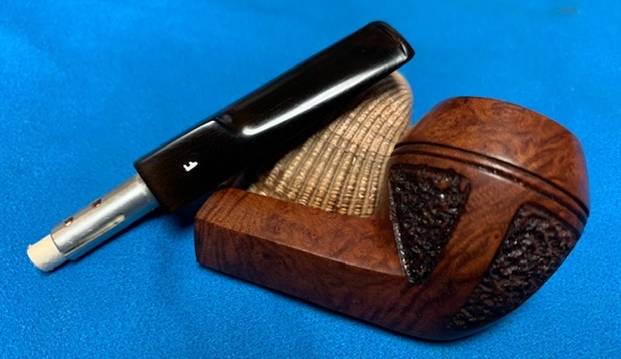
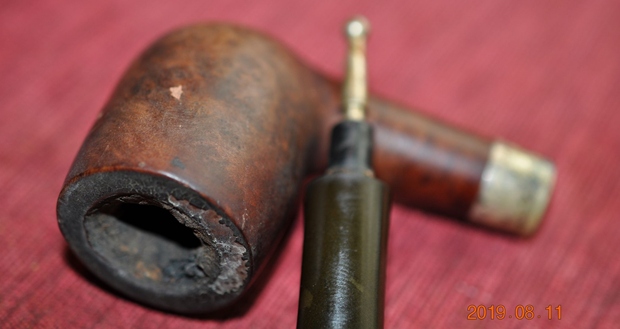
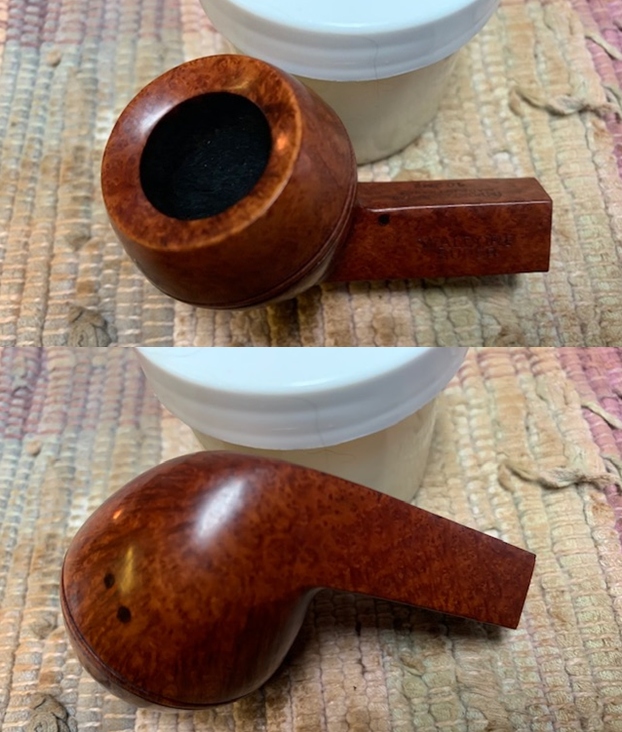
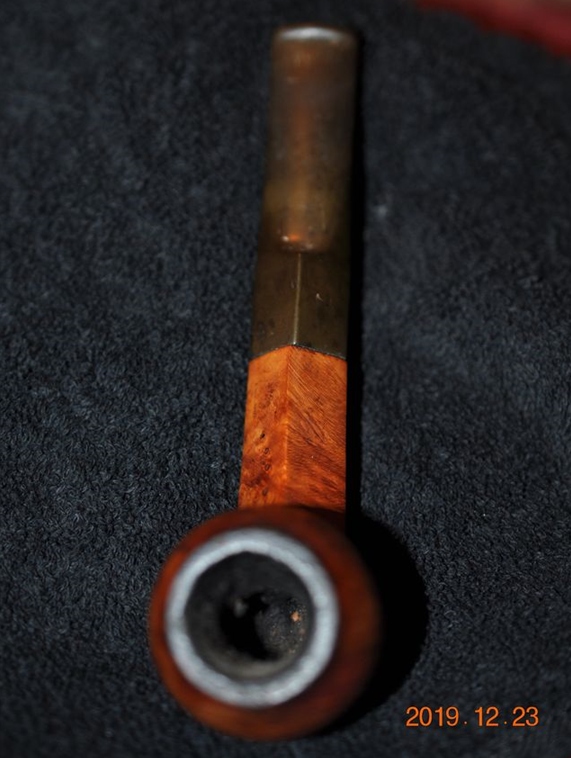
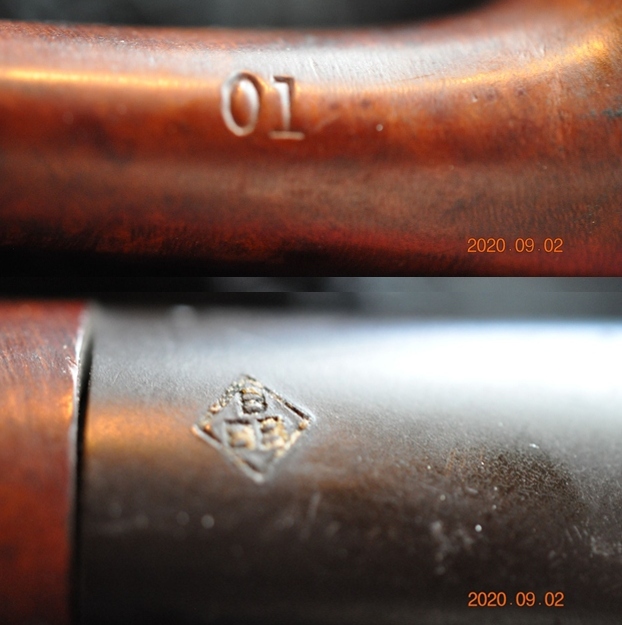
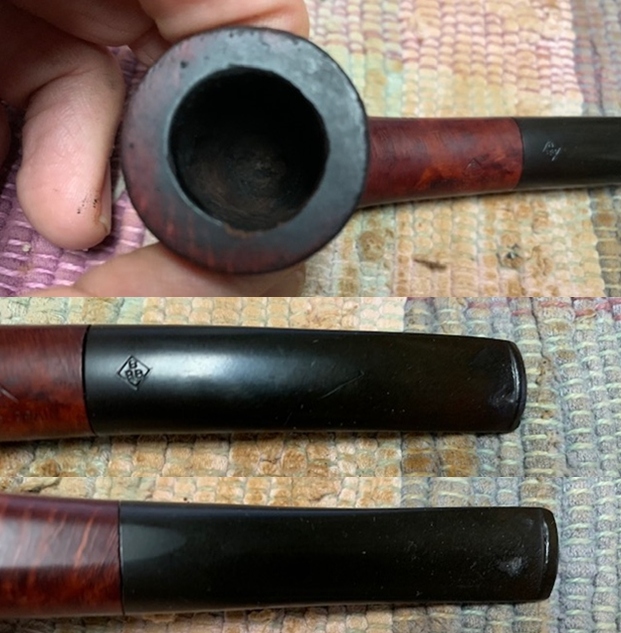
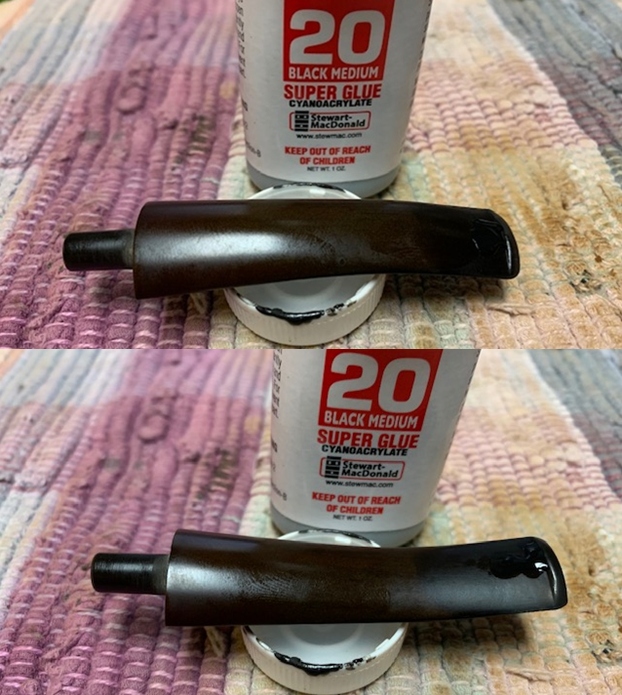
 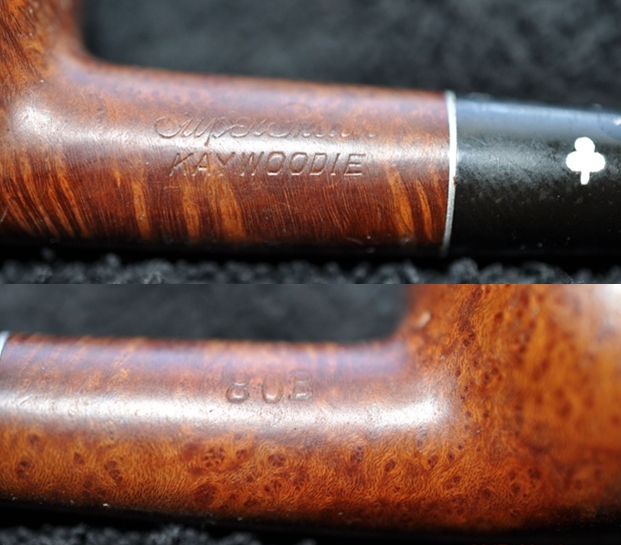 Jeff took a photo of the interesting stinger and threaded tenon set up. The stinger was absolutely covered with grime and tars.
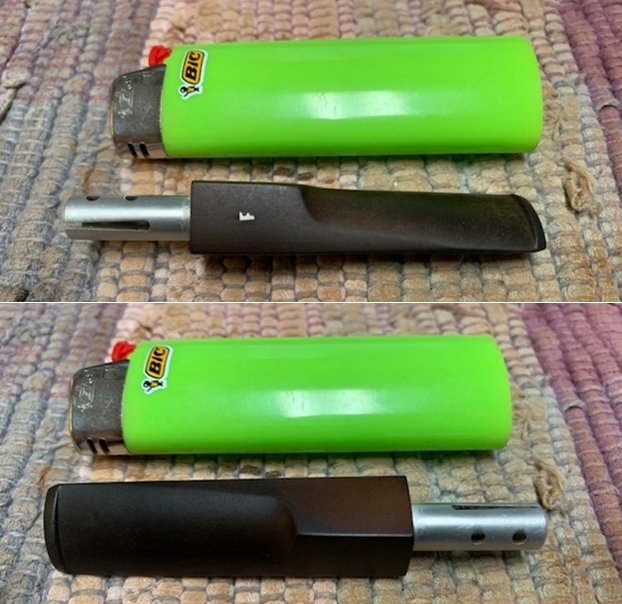
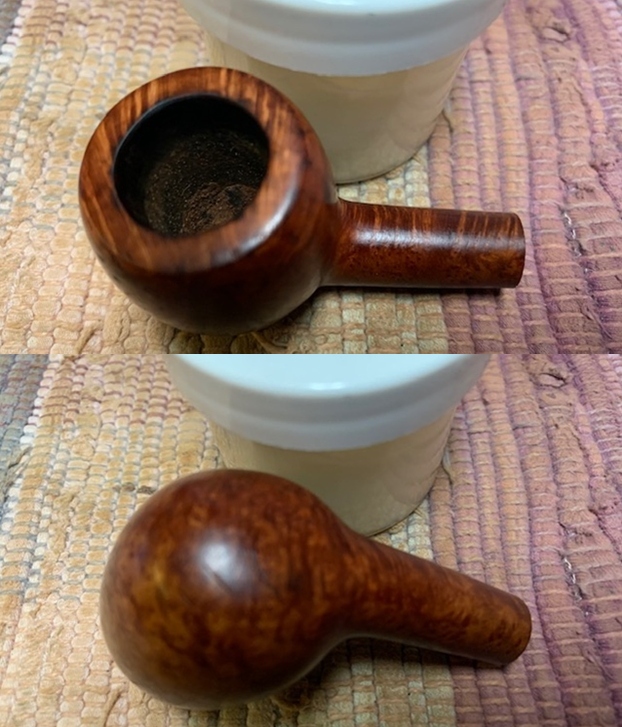
 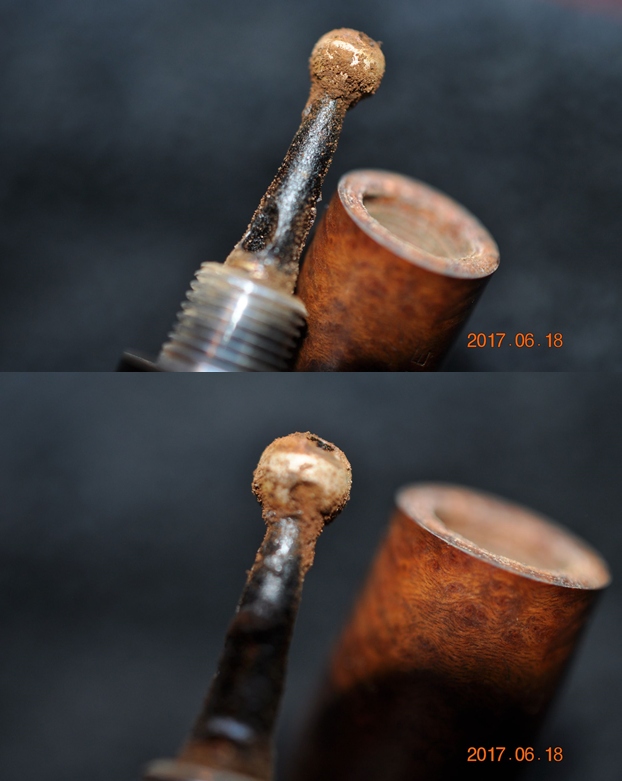 The two digit shape number and the threaded 4 hole stinger told me a lot about the age of the pipe but I wanted to know a bit more. I turned first to Pipephil’s site as it is always a quick sources of information (http://pipephil.eu/logos/en/logo-kaywoodie-2.html). I have included a screen capture of the section on the Super Grain Below.
 Up until the late 1940’s/early 50’s, the logo was on top of the stem. After that the logo was moved to the side of the stem (exceptions exist). The one I am working on has the white cloverleaf logo on the left side making the pipe an early 1950’s. The 4-hole stinger also fits this time period.
From that section I learned that indeed the pipe was older because of the stamping, Super Grain over Kaywoodie. I could narrow it down because it did not inlcude the Imported Briar stamp which was added in 1935 though that is not always the case. The cloverleaf logo on the left side of the stem also moved the date forward to the early 1950’s. I also knew that 4 hole stingers occurred on pipes in the 60’s. So it appears that the pipe came out between the early 50s to the 1960s.
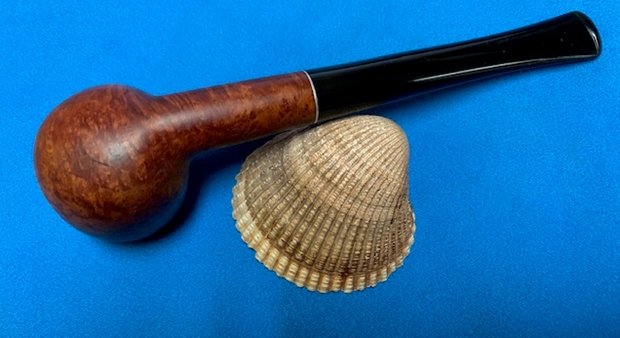
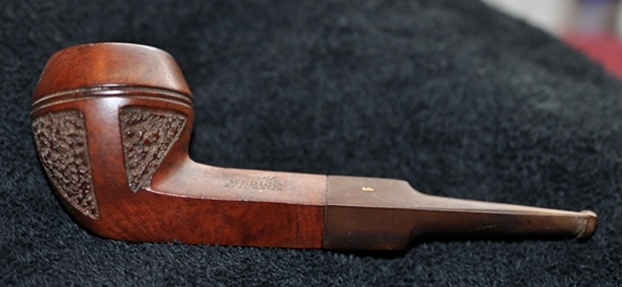
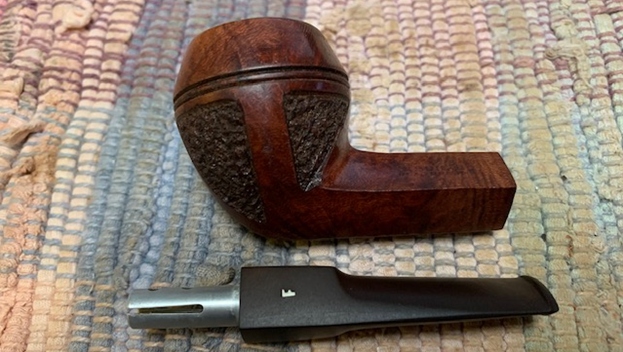
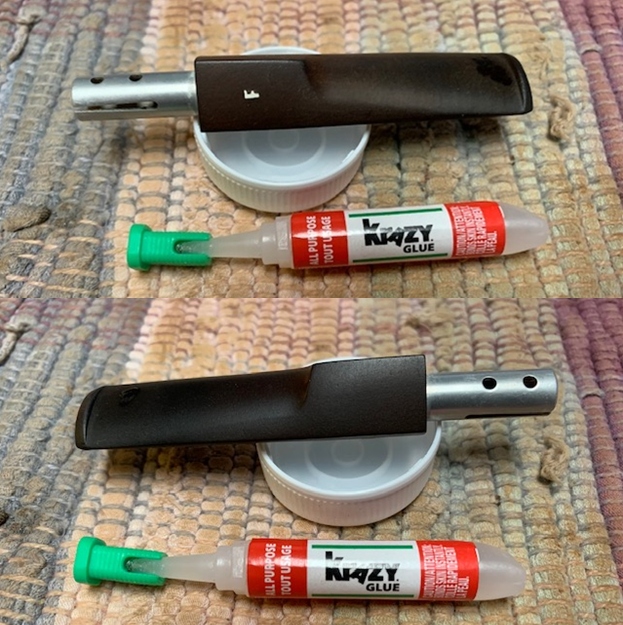
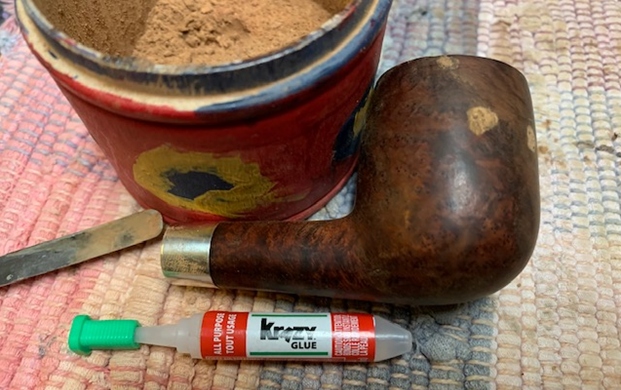
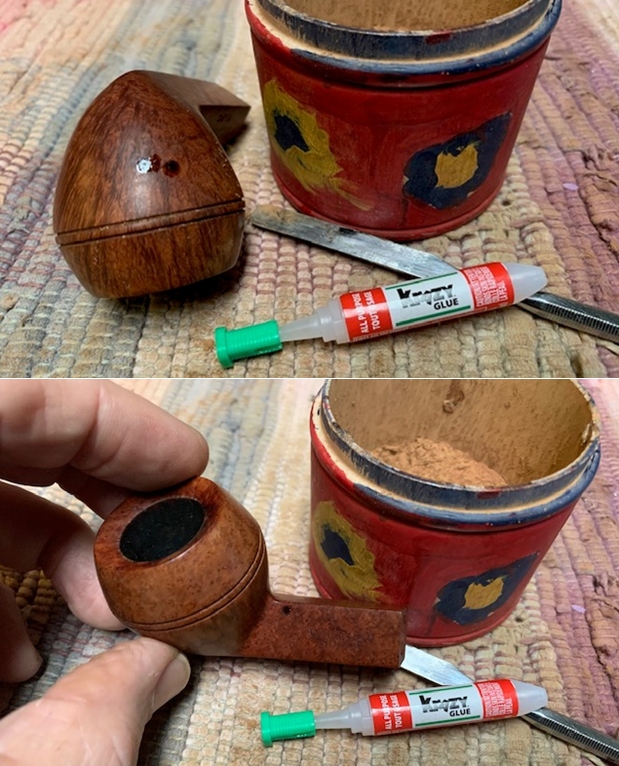
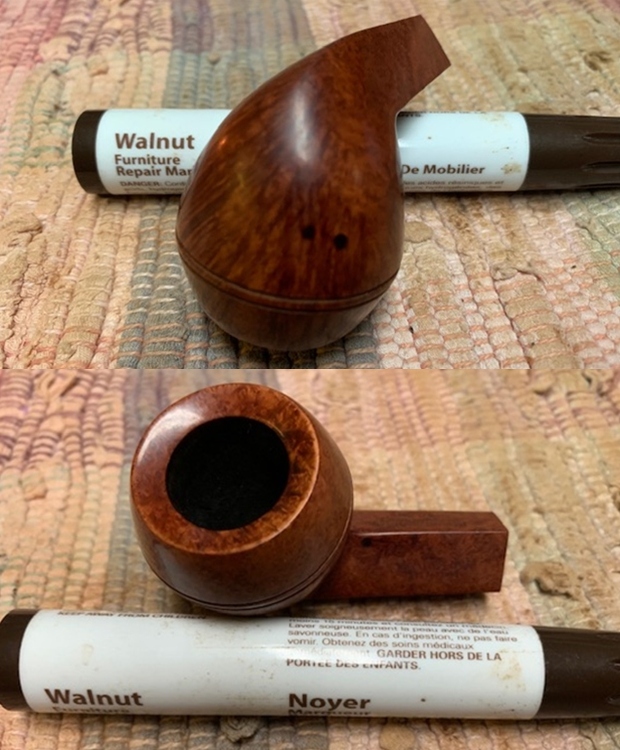
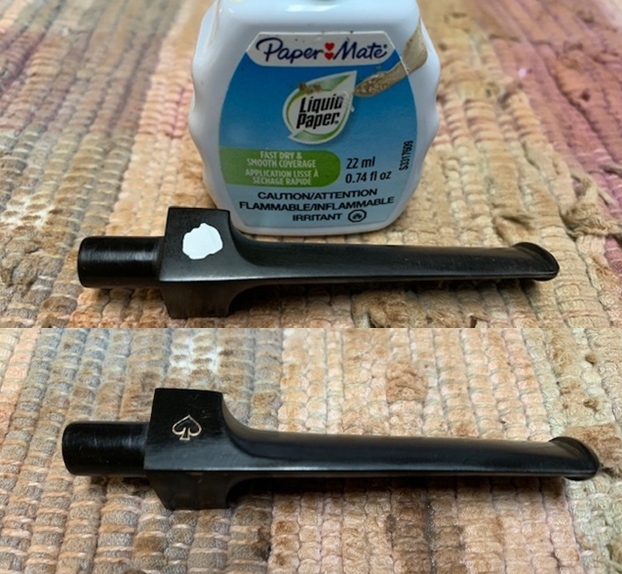
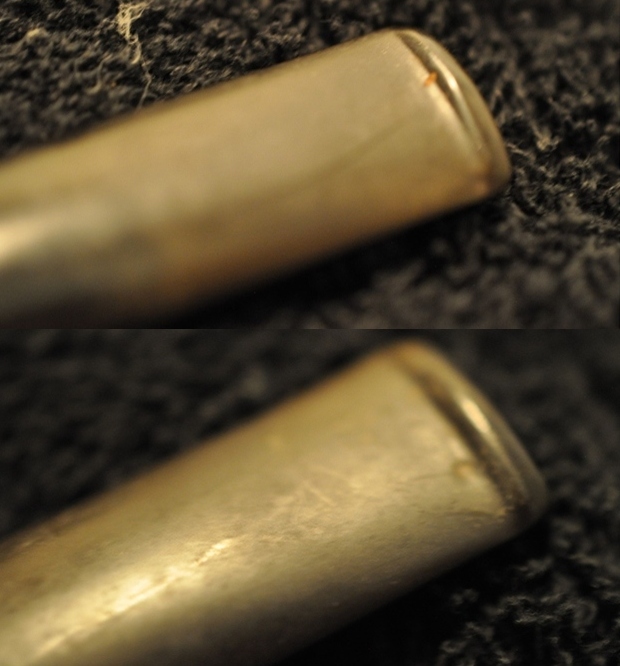
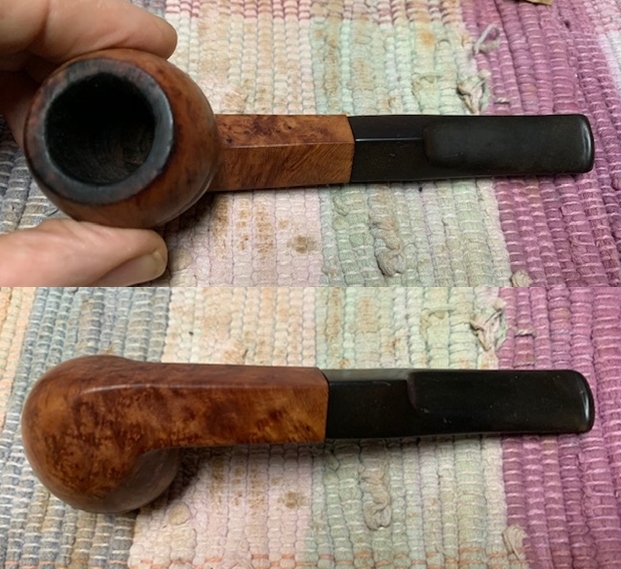
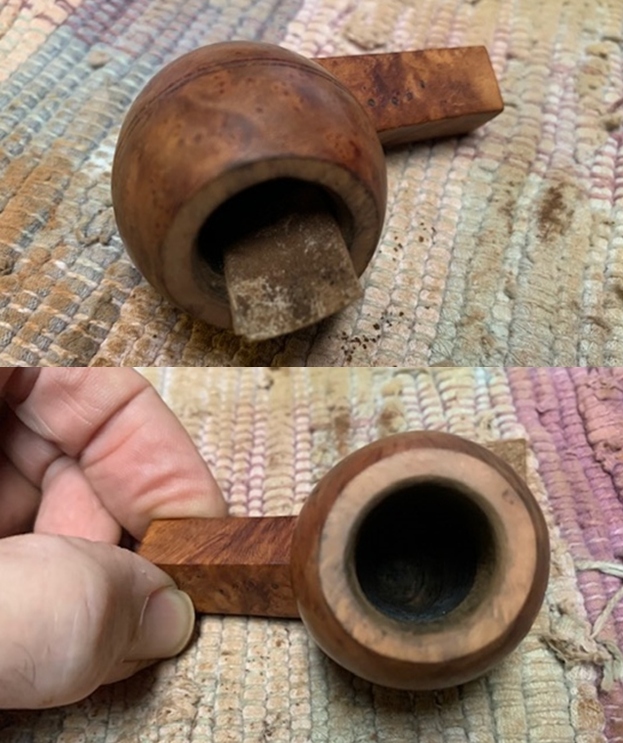
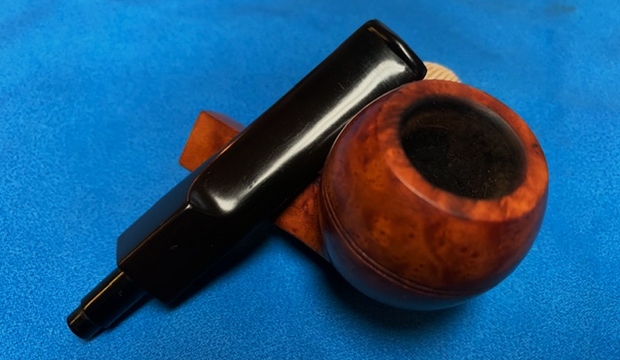
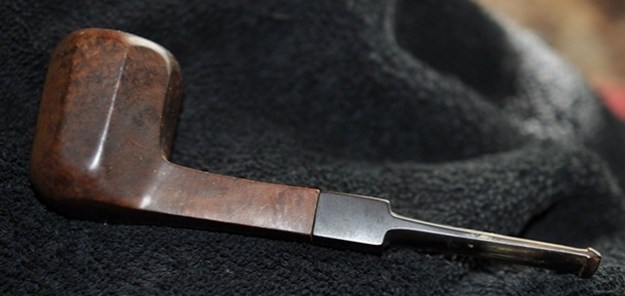
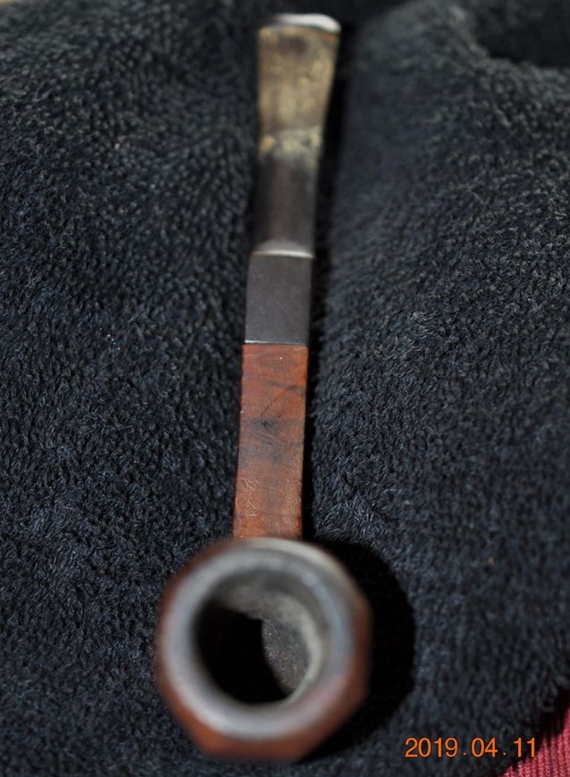
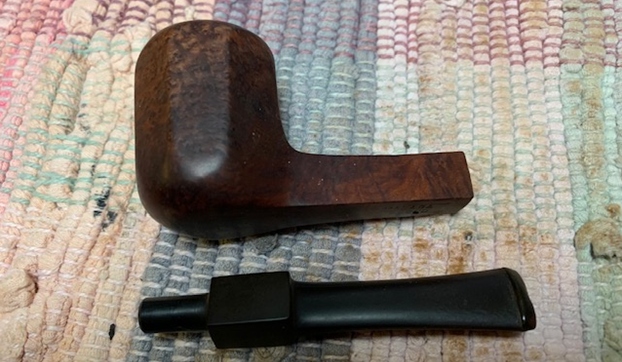
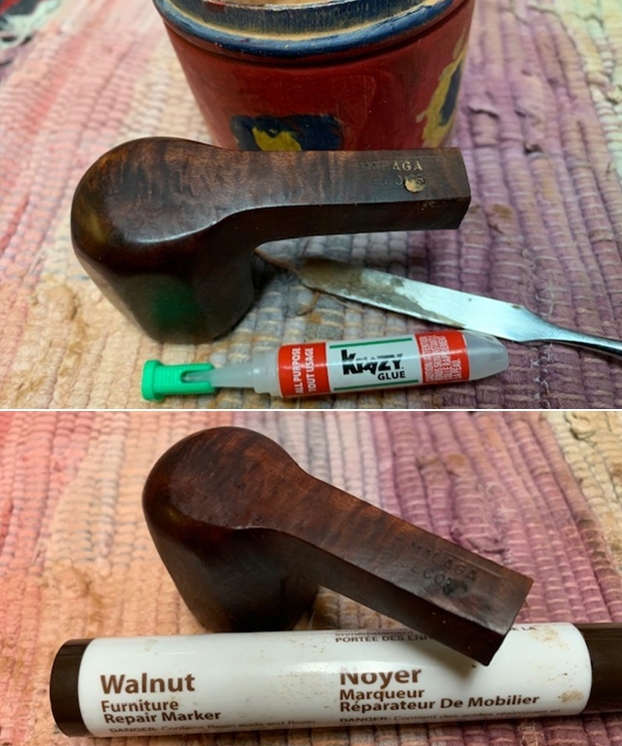
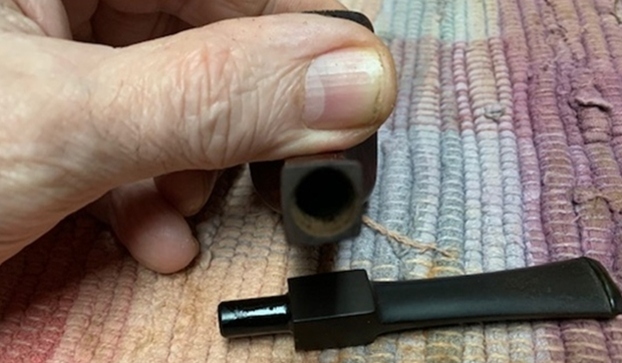
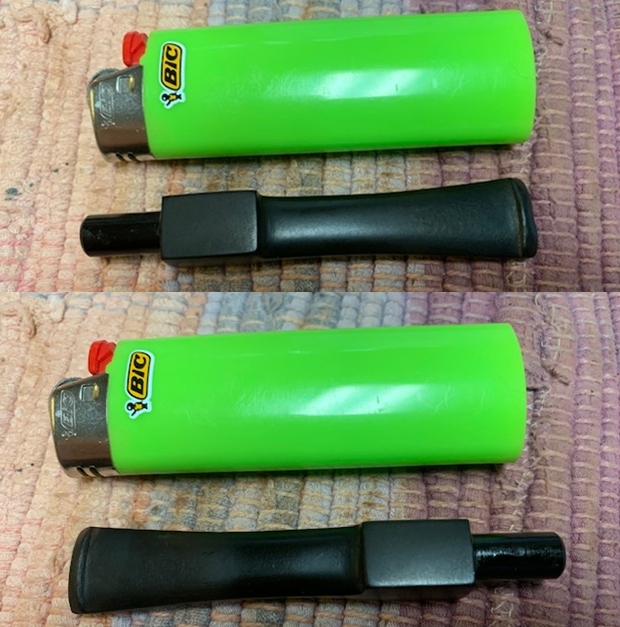
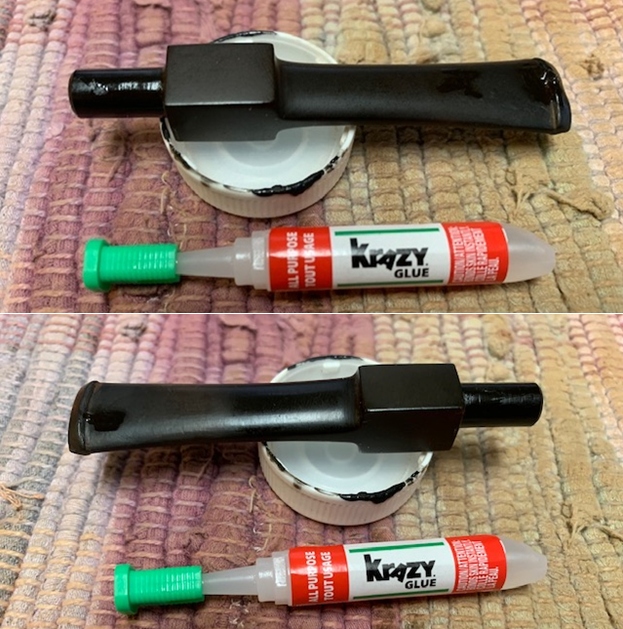
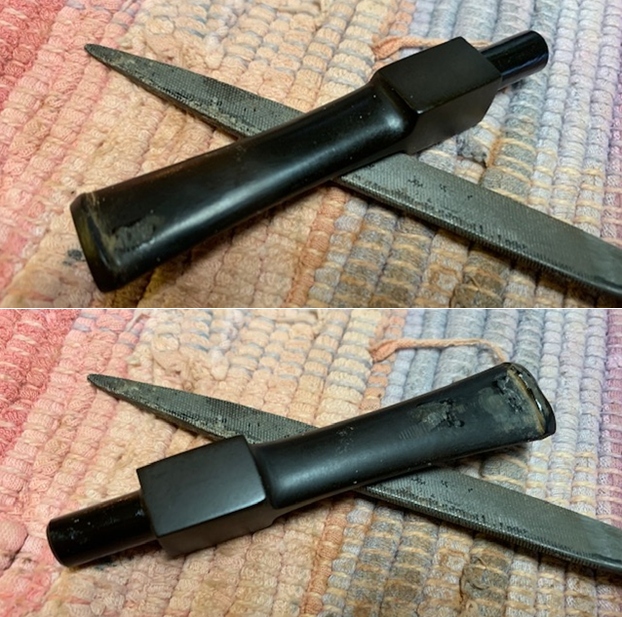
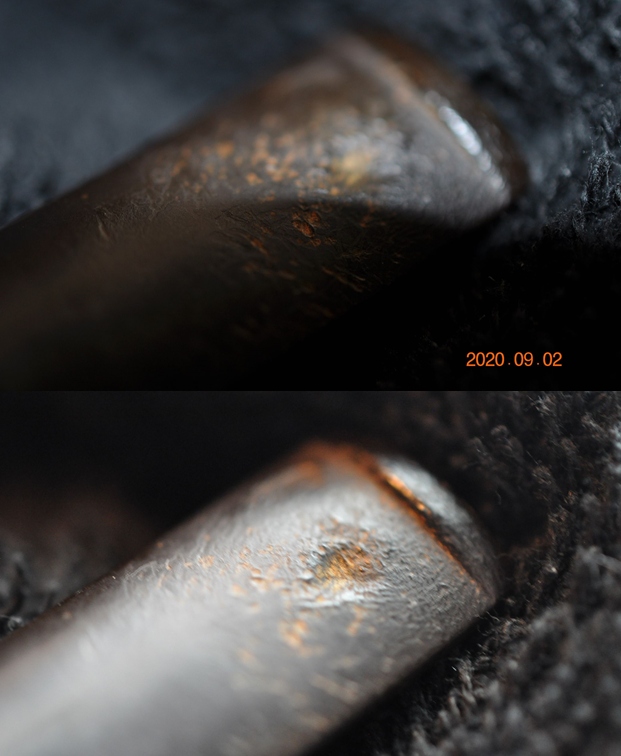
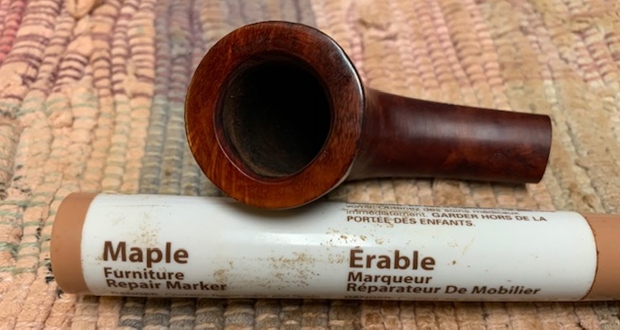
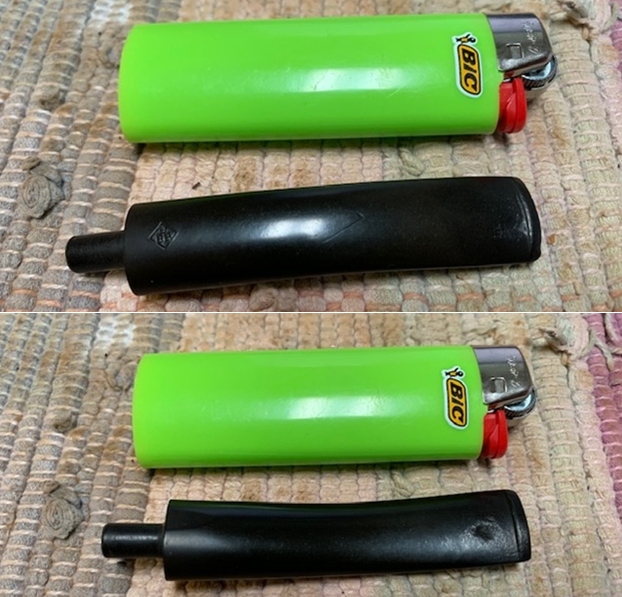
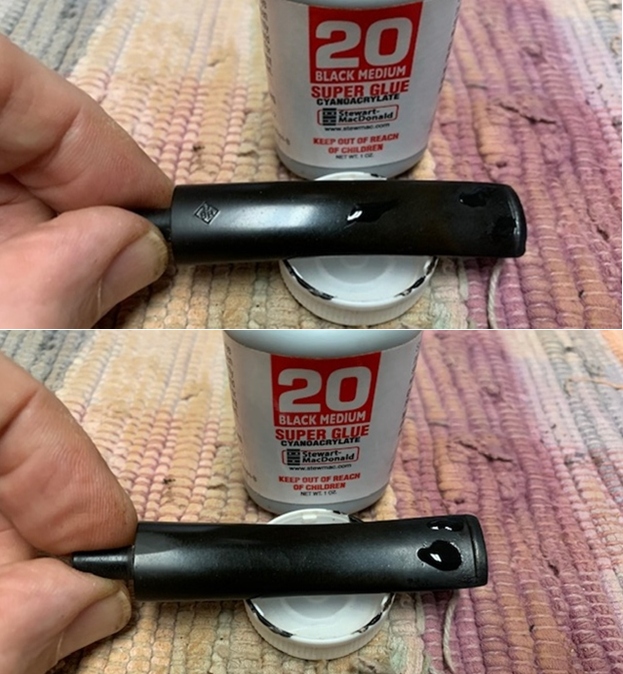
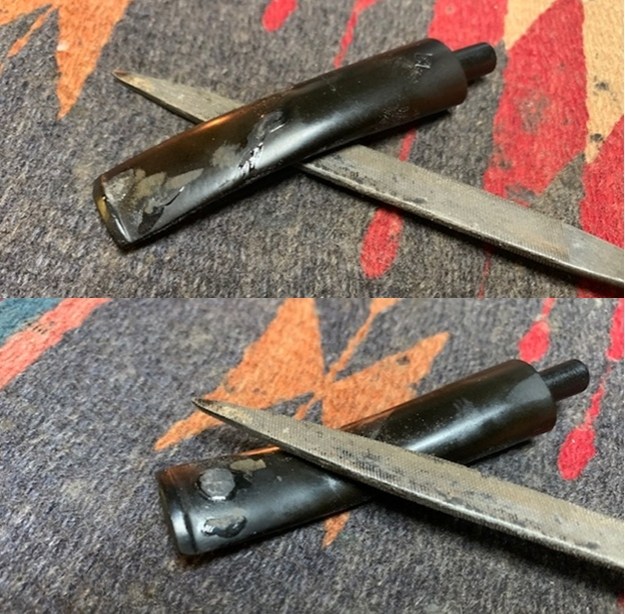
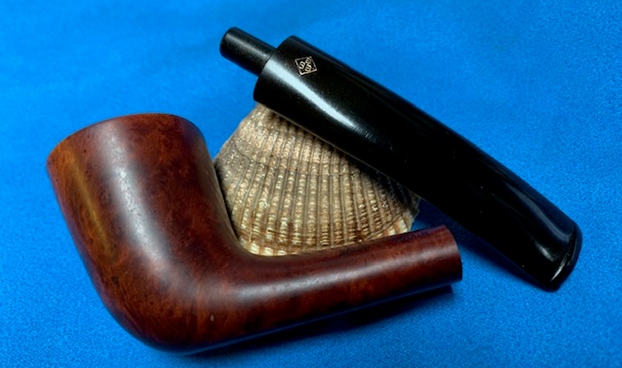
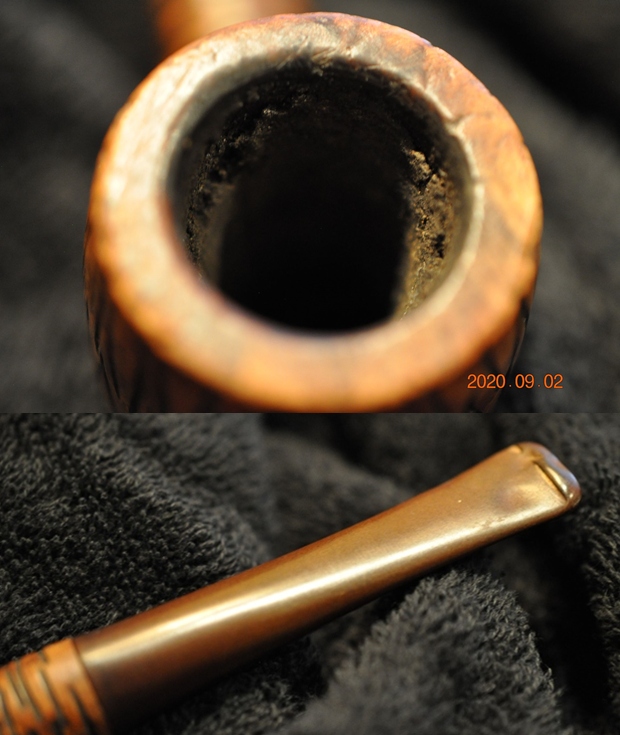
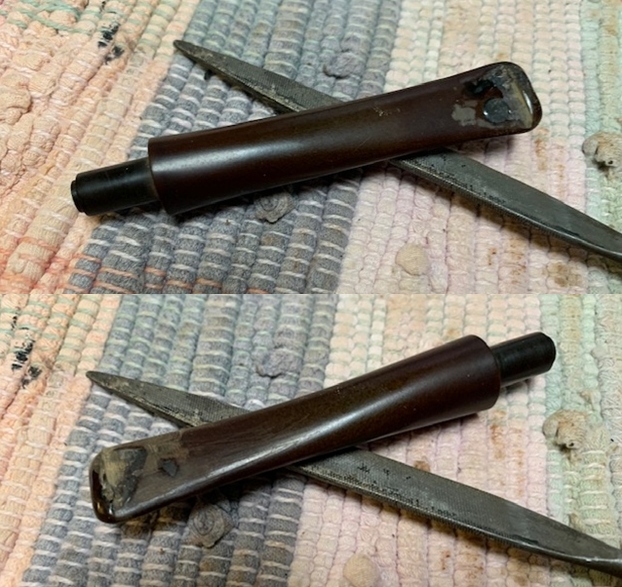
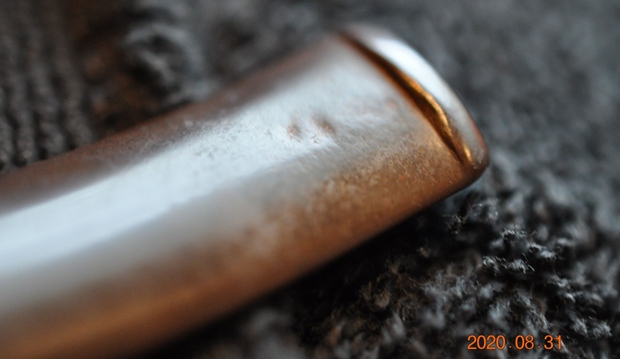
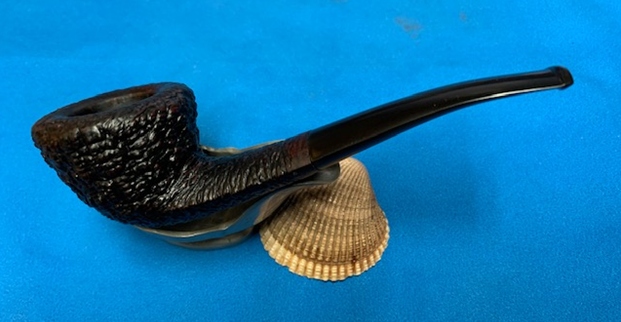
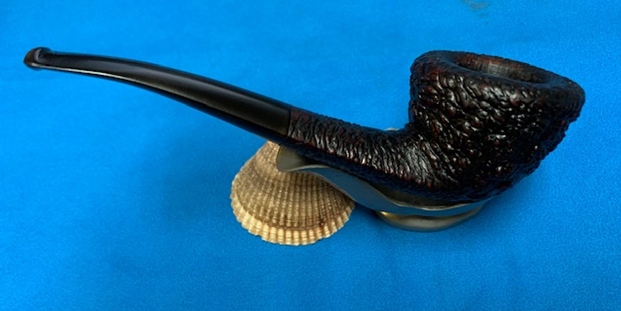
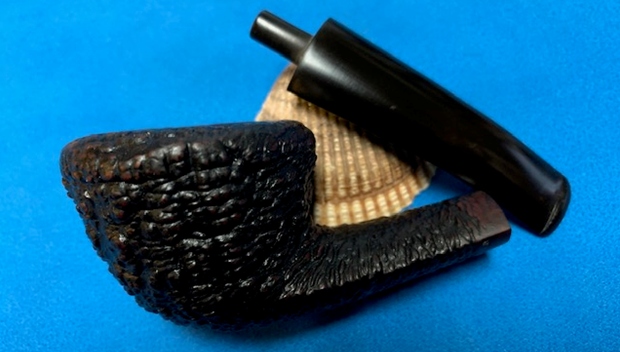
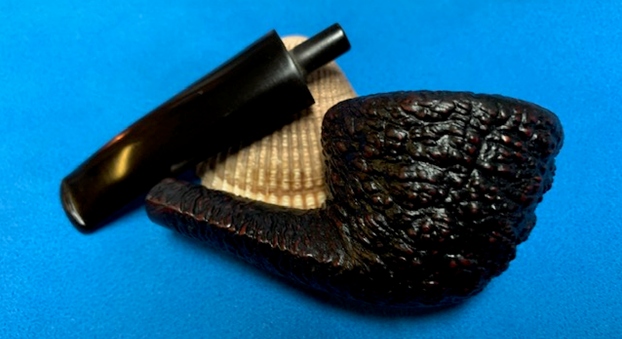
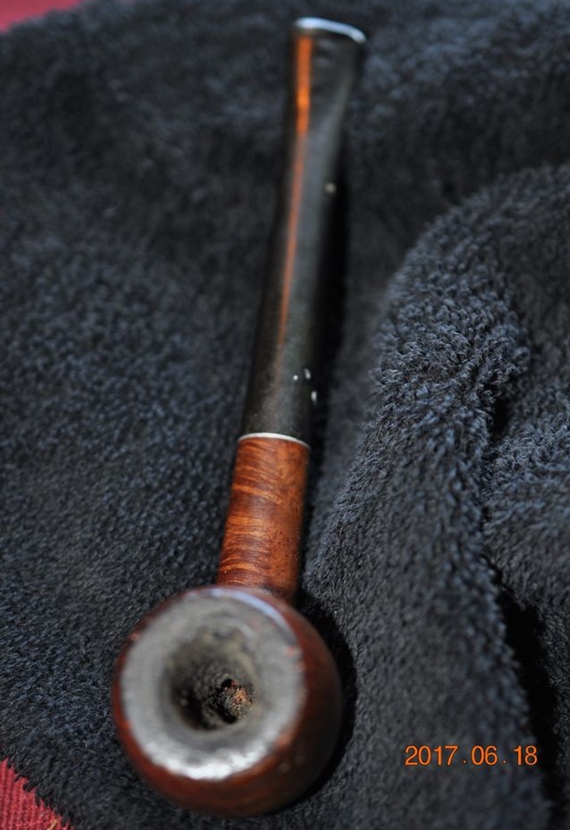
Jeff had cleaned up the pipe with his usual penchant for thoroughness. He reamed the pipe with a PipNet pipe reamer and removed the rest of it with a Savinelli Fitsall Pipe Knife. He scrubbed the bowl with undiluted Murphy’s Oil Soap with a tooth brush. He rinsed it under running warm water to remove the soap and grime. He cleaned out the inside of the shank and the airway in the stem with alcohol, cotton swabs and pipe cleaners. He soaked the stem in Before & After Deoxidizer and rinsed it off with warm water. When the pipe arrived and I unpacked it the stem was broken off at the end. There was about a ¼ inch of the stem and the entire button was in the bottom of the bag that the pipe was packed in. I took photos of the pipe once I received it. 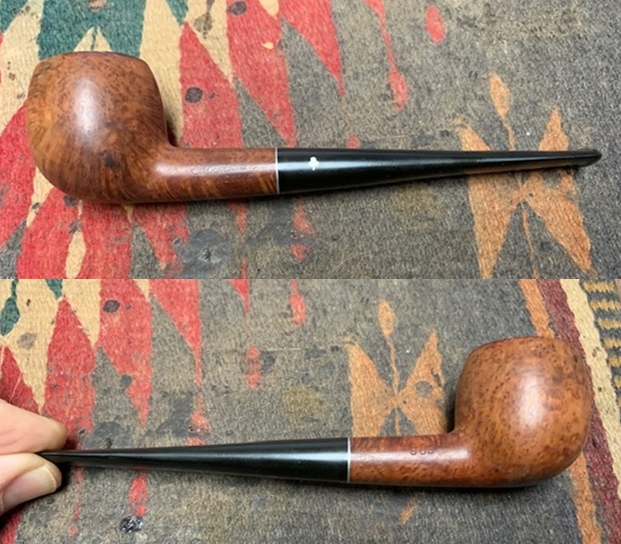
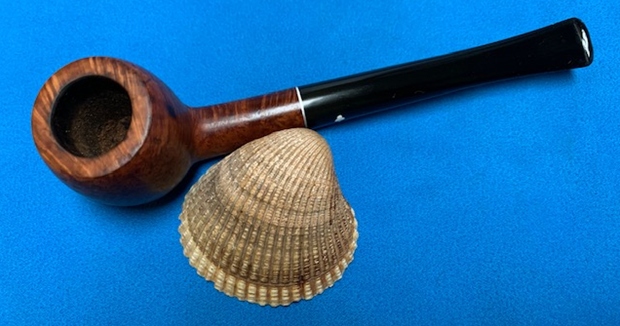
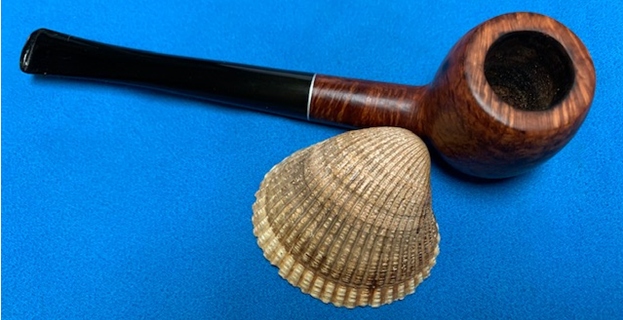
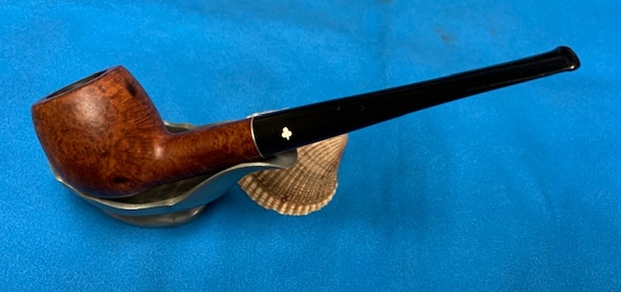
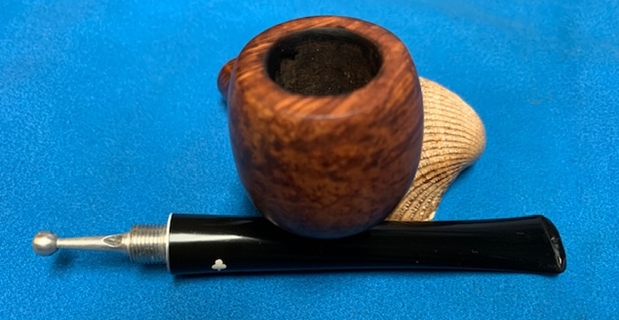
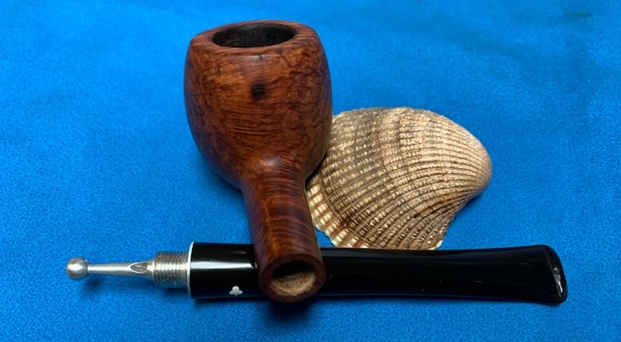
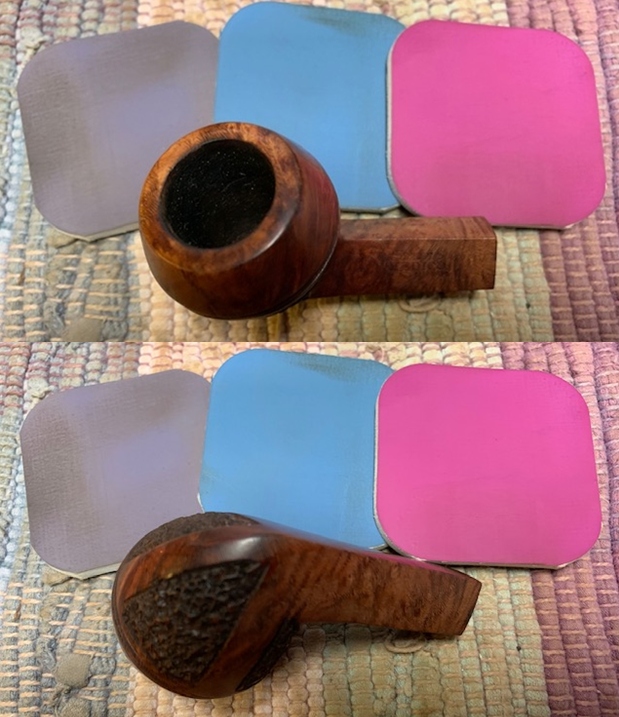
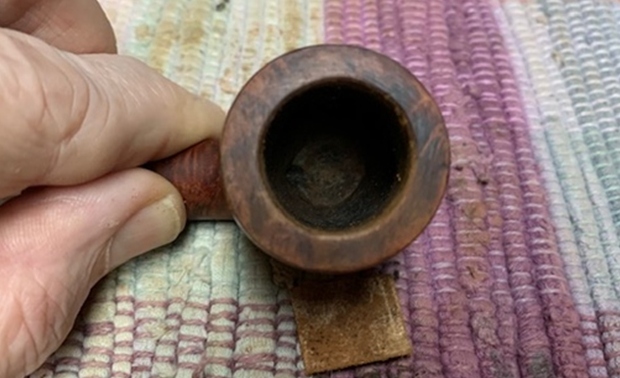
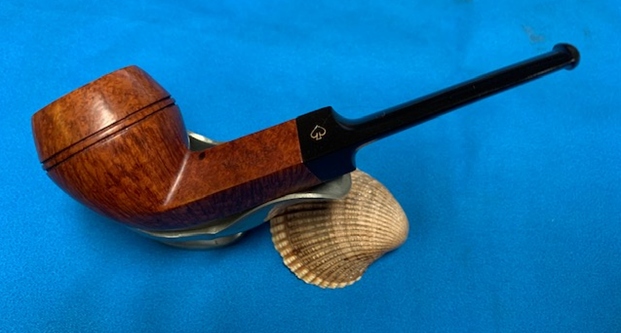
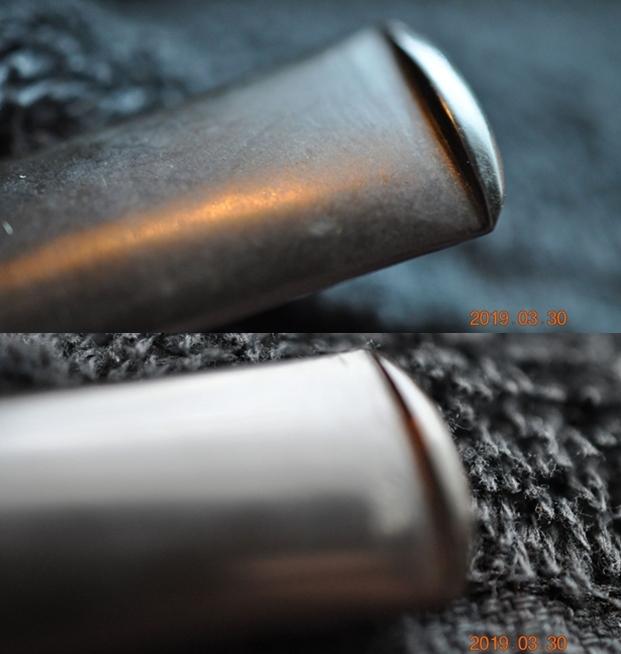
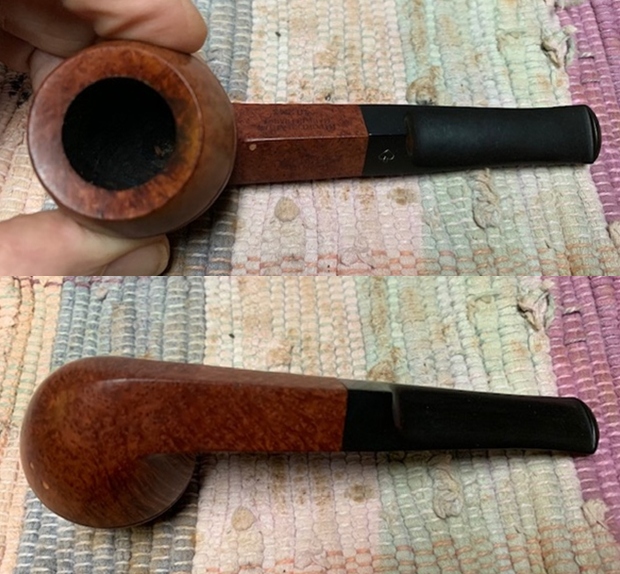
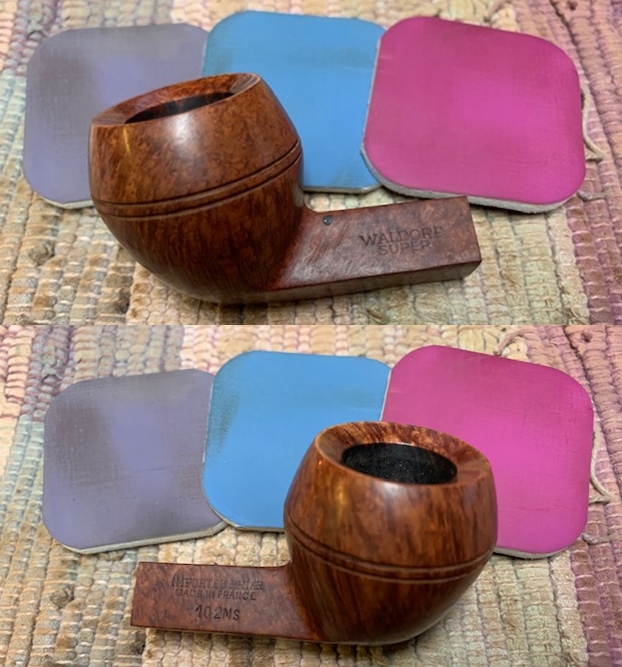
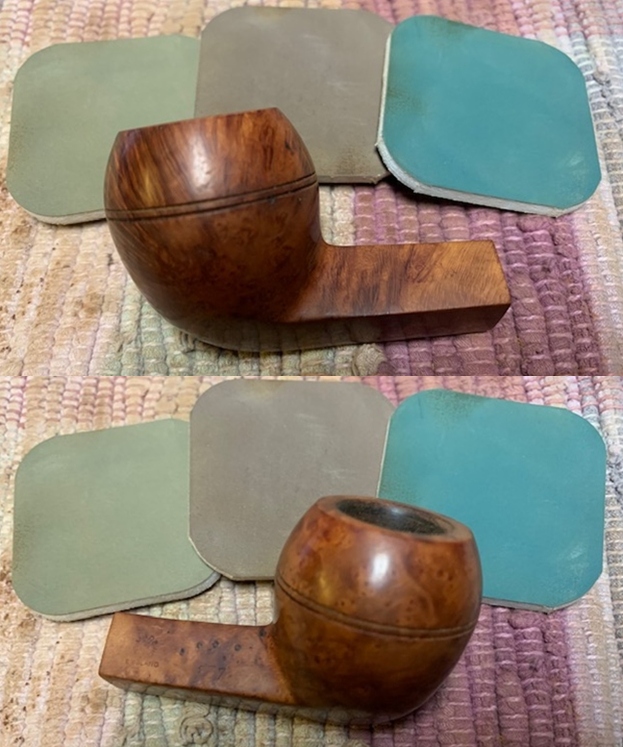
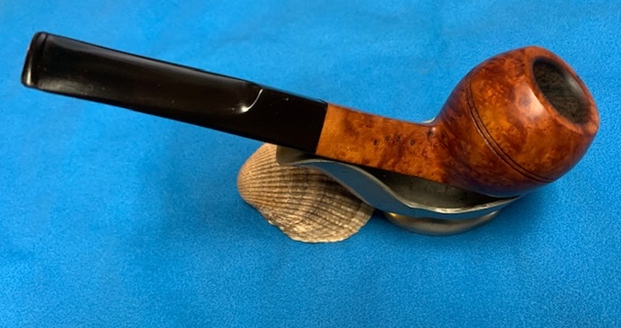
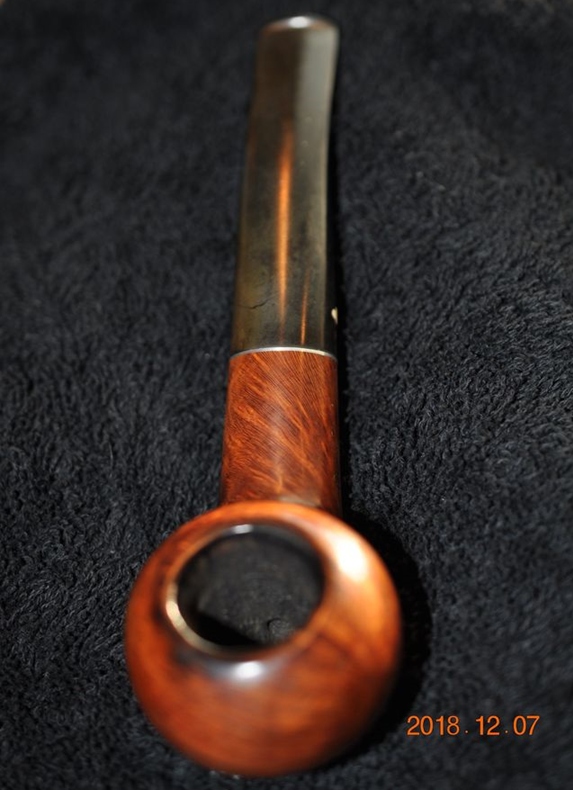
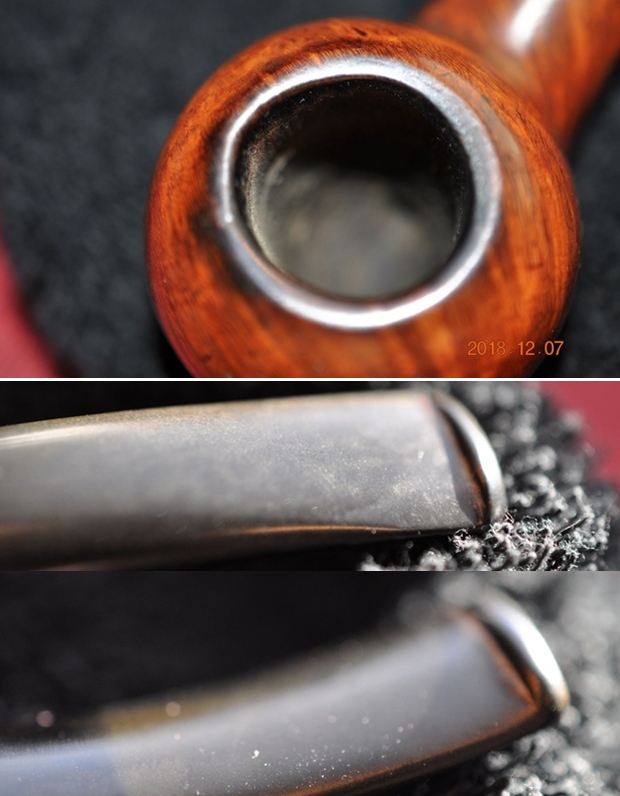
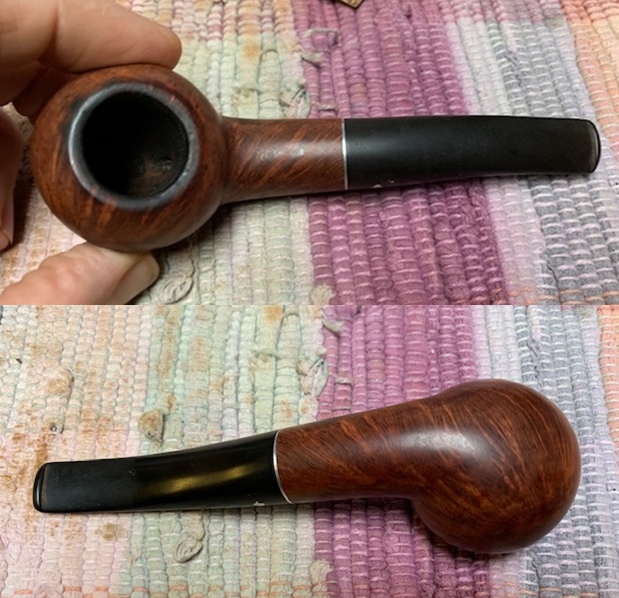
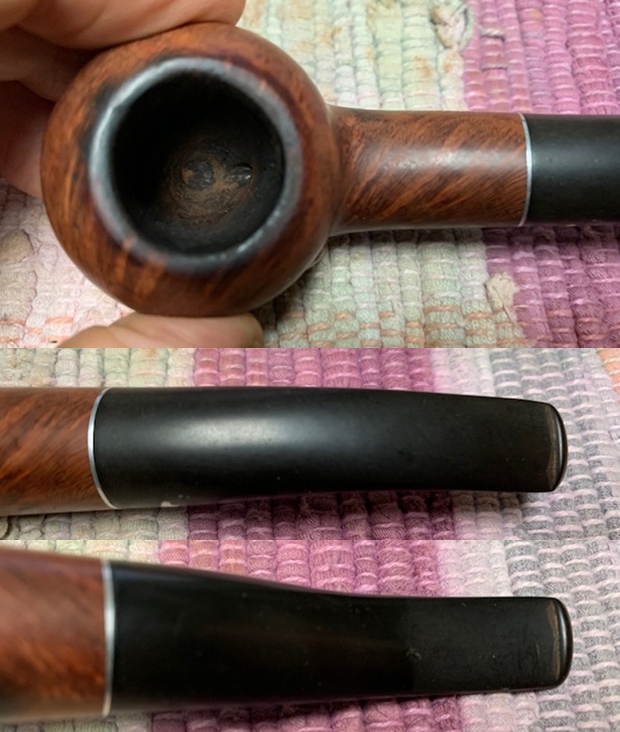
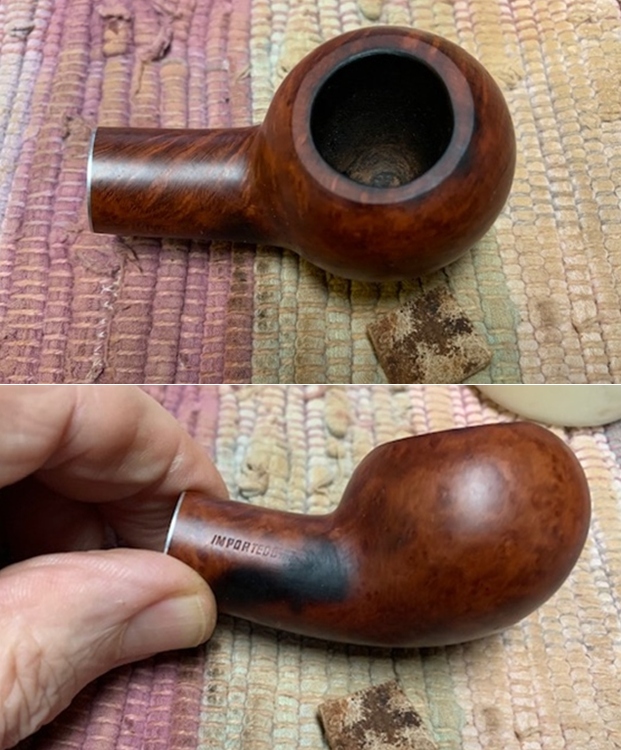
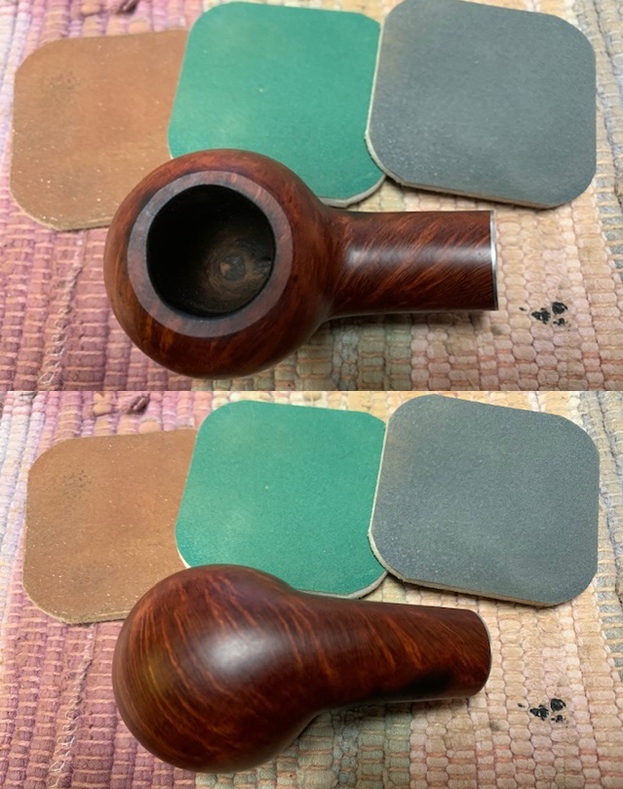
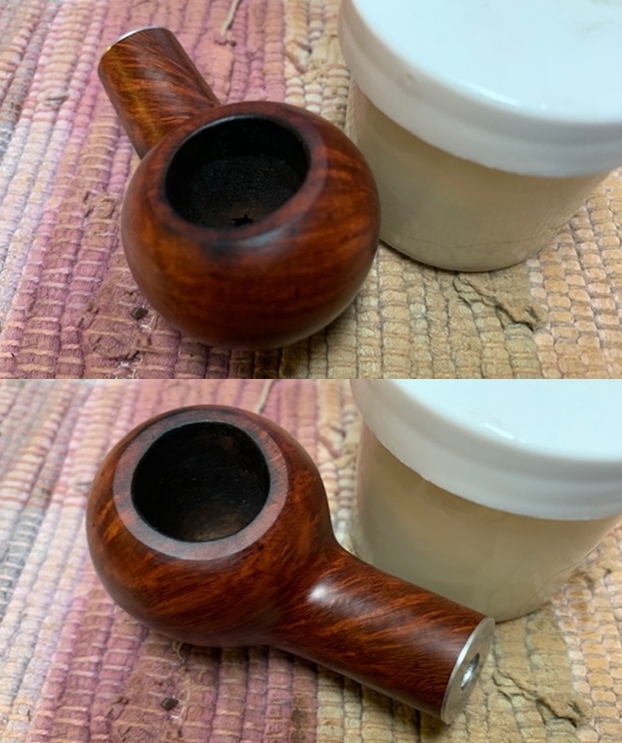
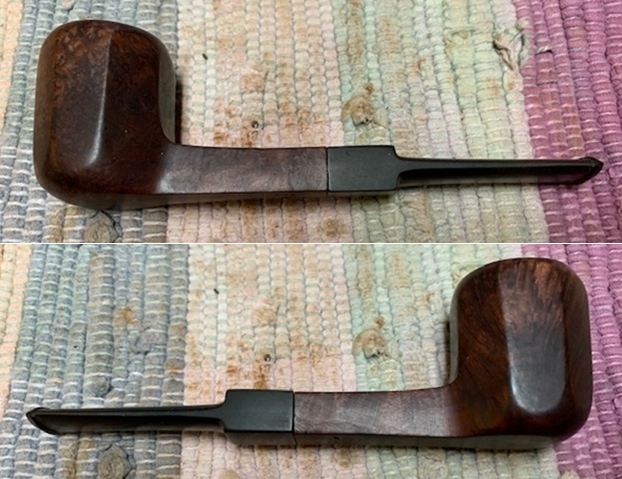
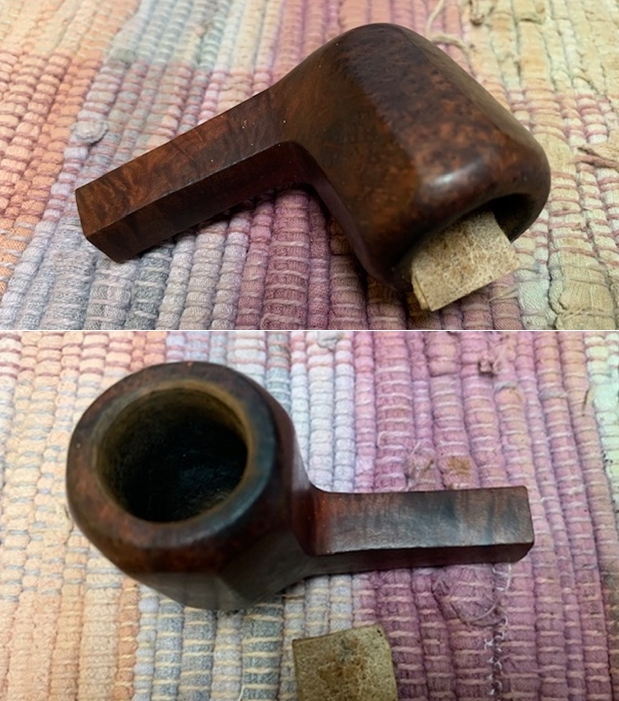
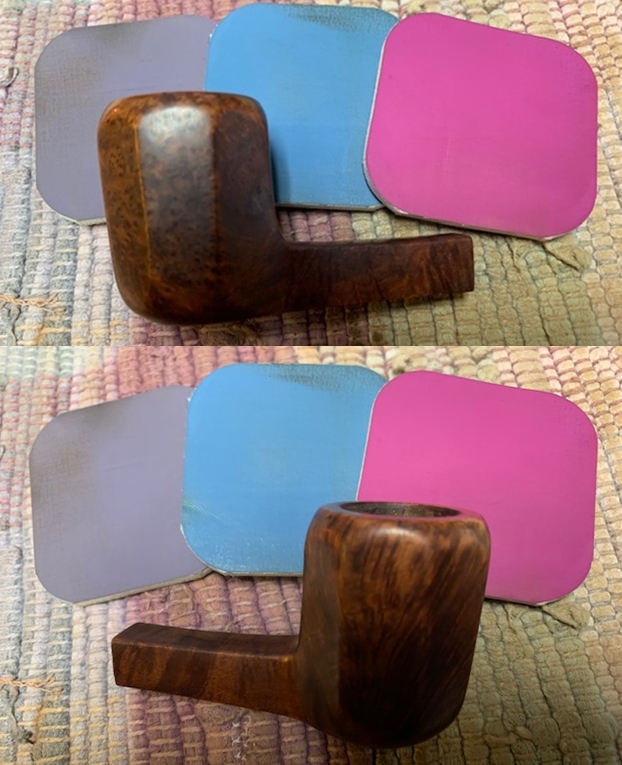
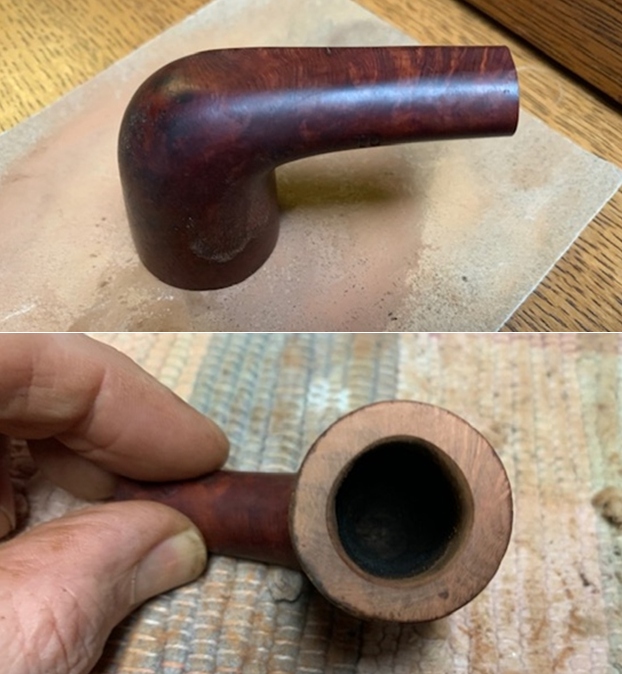
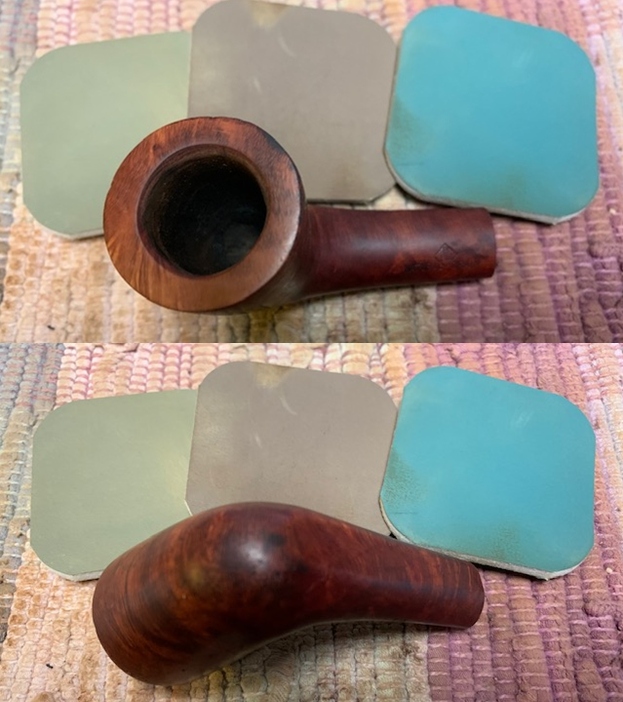
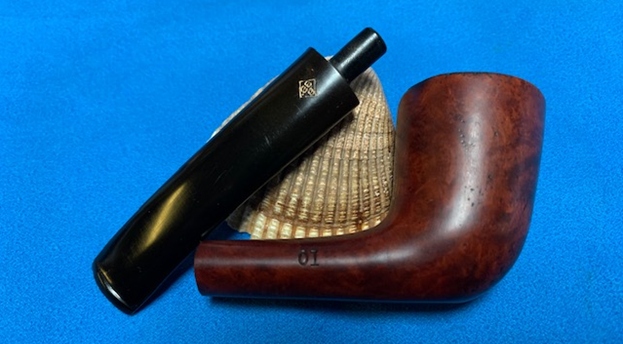
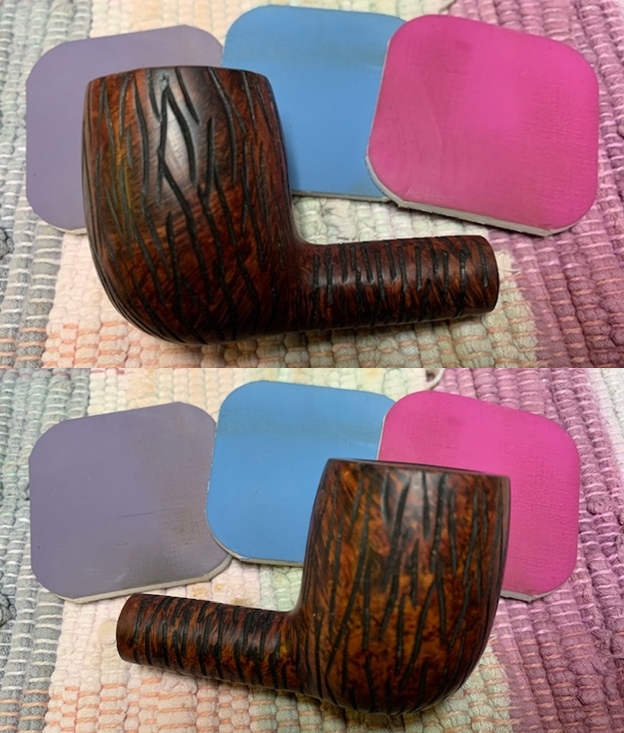
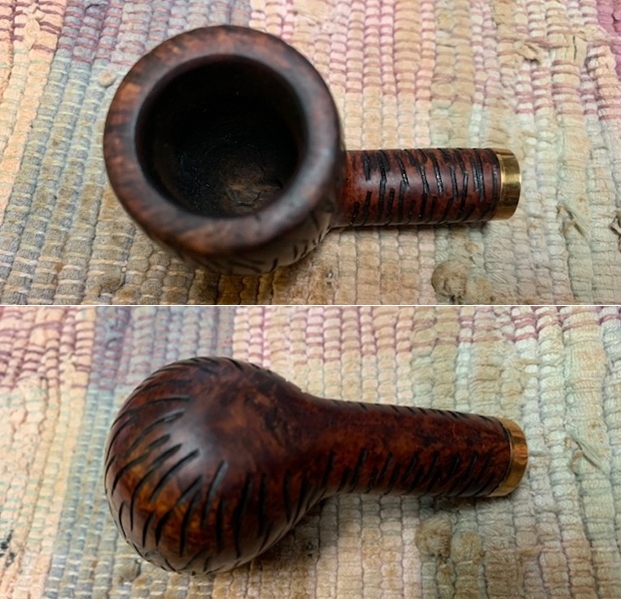
 The rim top cleaned up really well. The rim top and outer edge of the bowl show damage from being knocked against a hard surface. There is damage to the inner edge of the bowl and bowl is slightly out of round. The stem surface looked very good with tooth marks and chatter on the top side and the underside near the button.
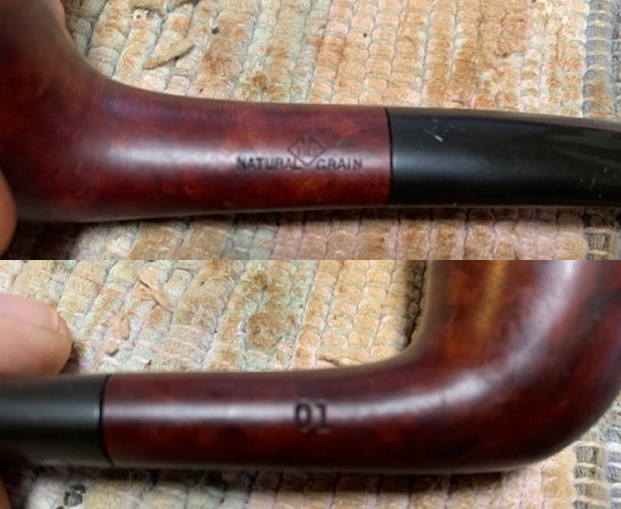
  The stamping on the sides of the shank is faint but readable. It reads as noted above.
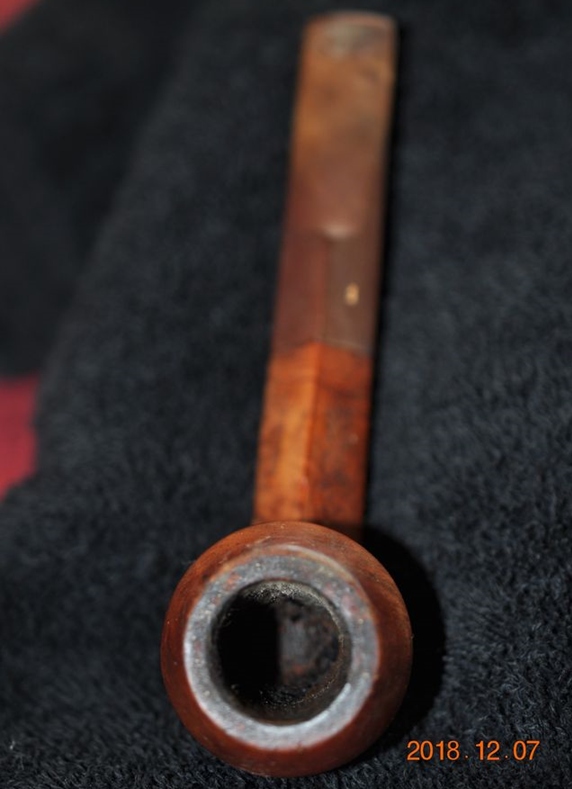
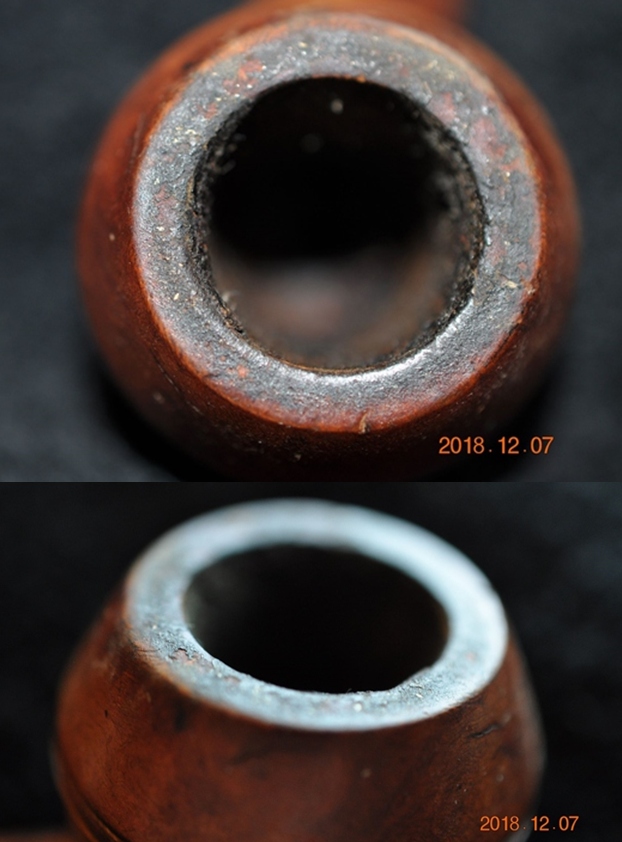
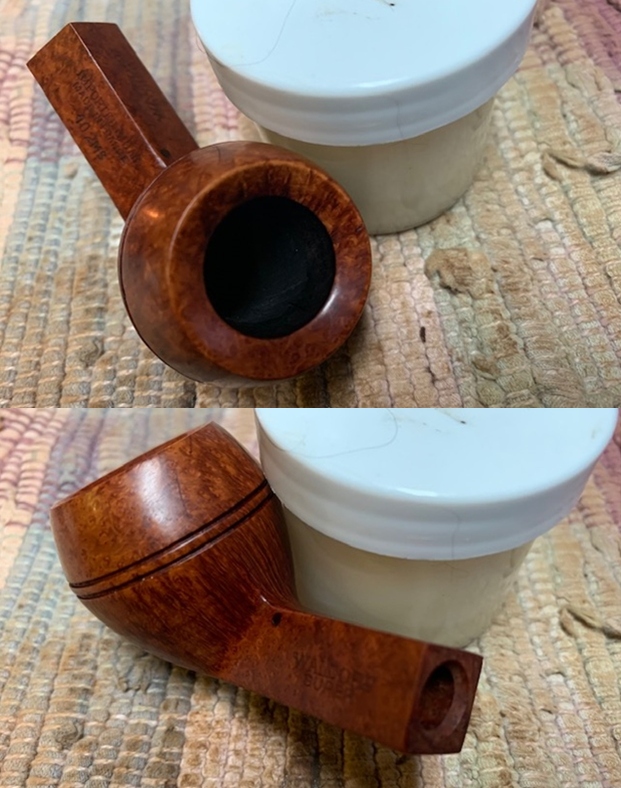
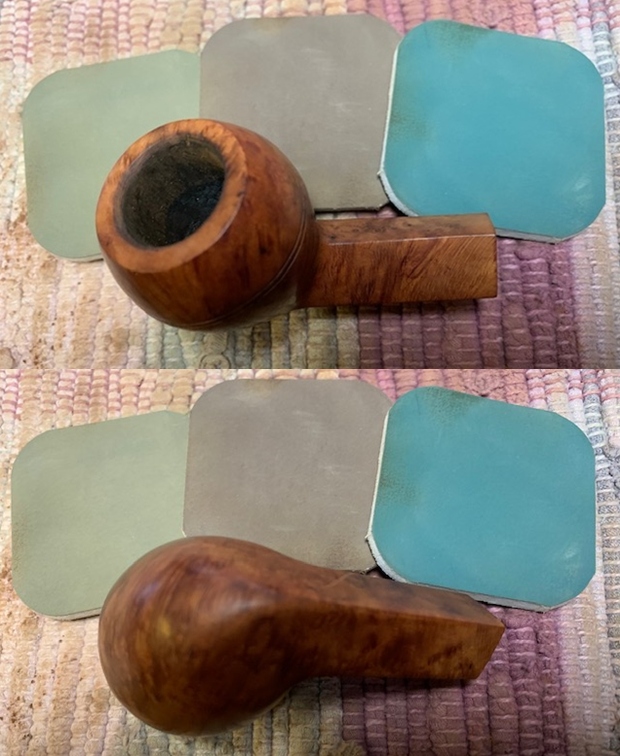
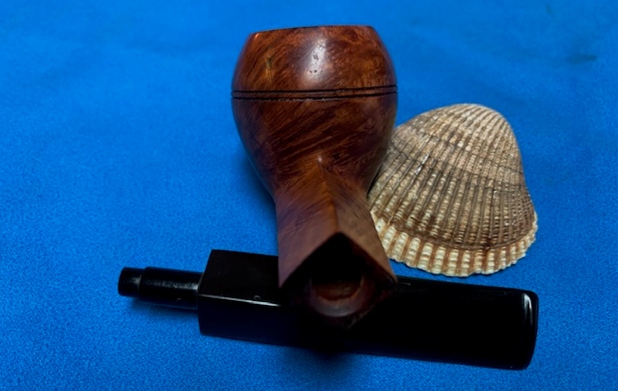
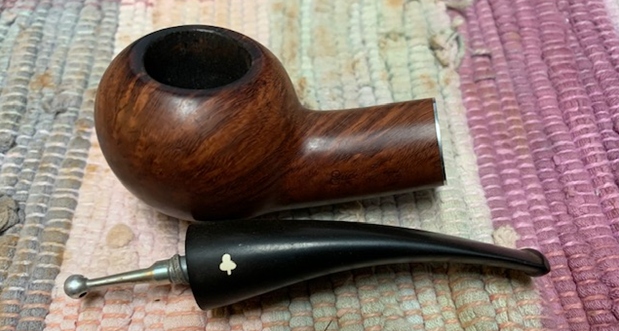
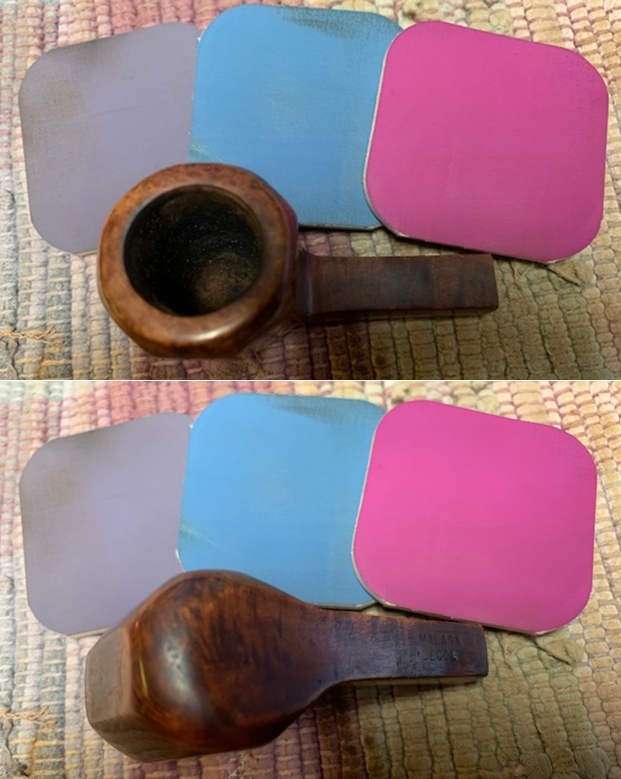
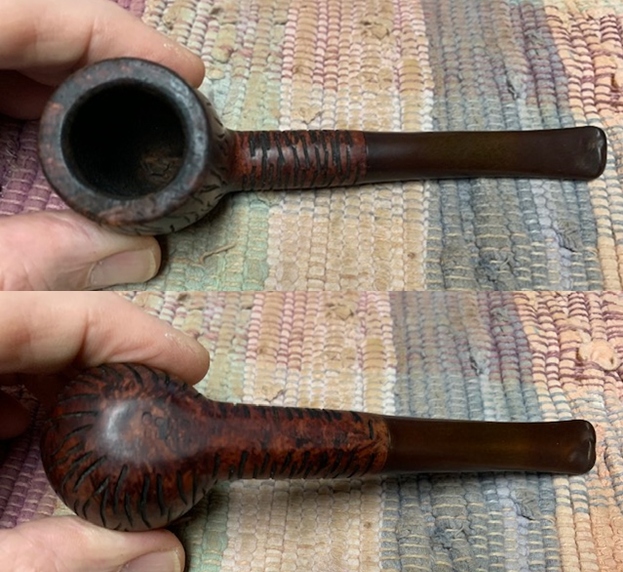
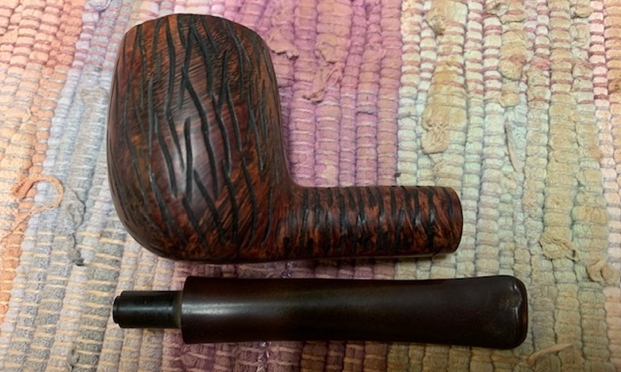
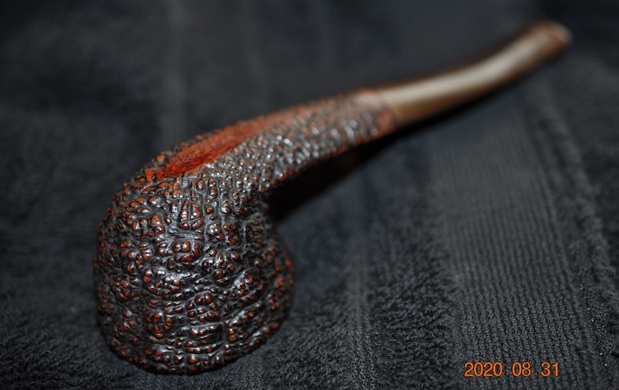
 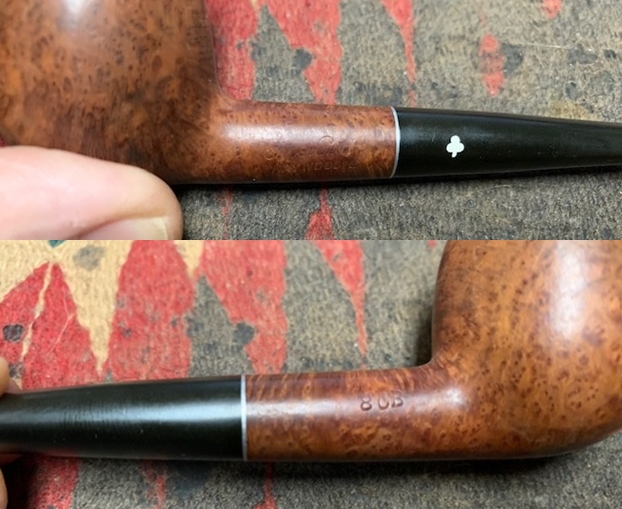 I removed the stem and took a photo of the pipe to give a sense of the whole. The four hole stinger is in excellent condition.
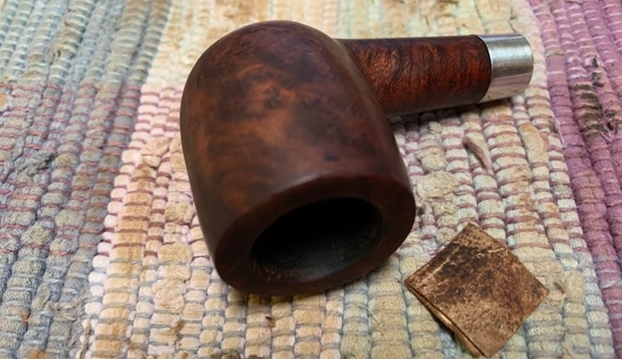
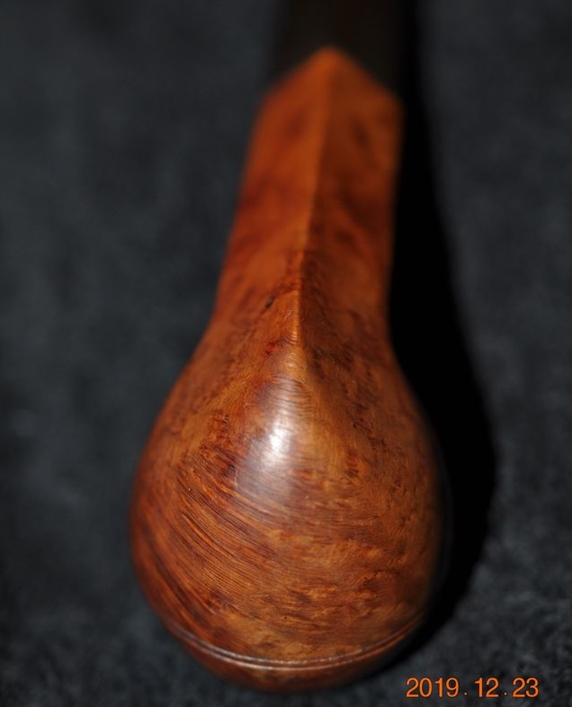
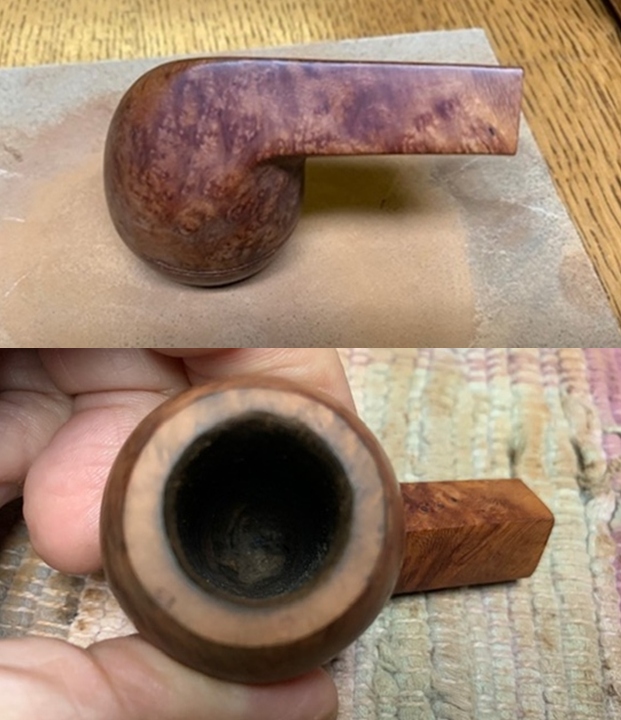
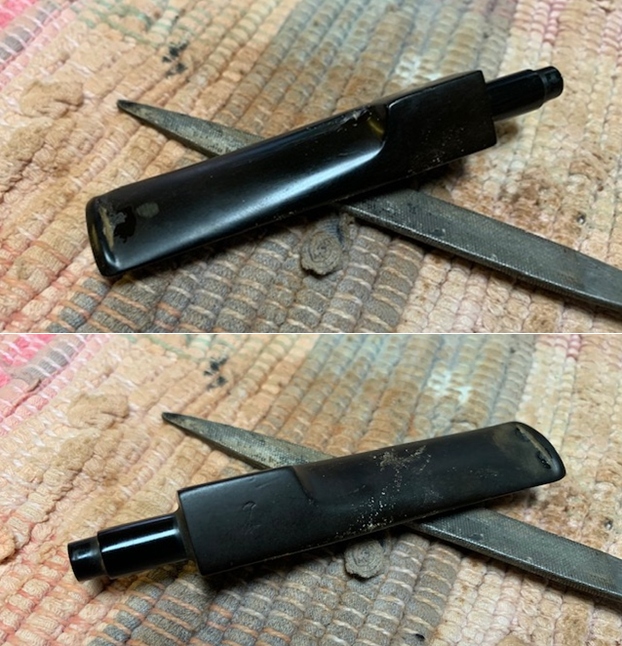
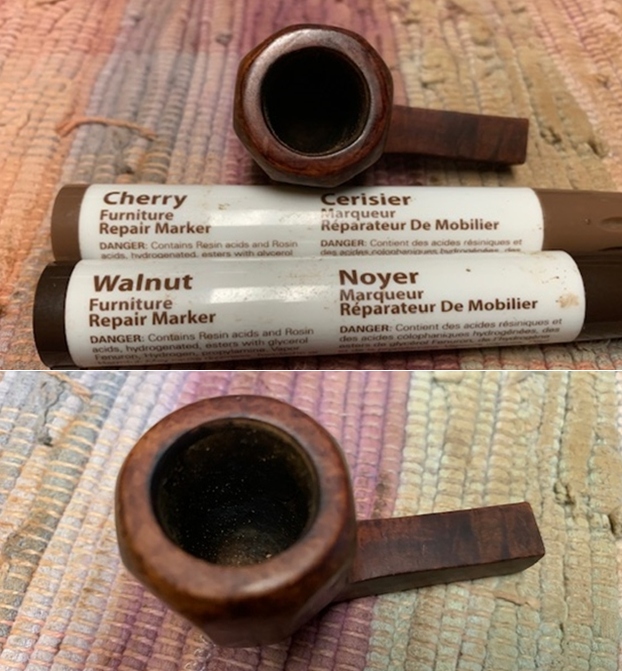
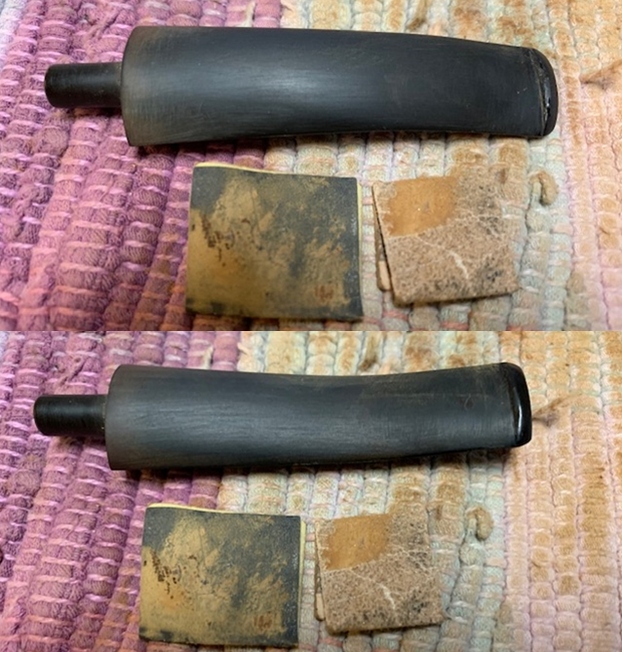
 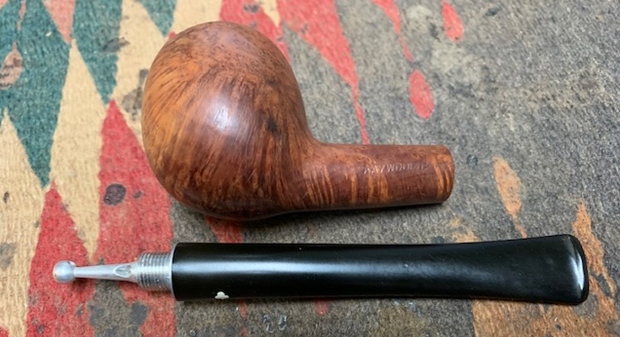 I started my work on the pipe by cleaning up the inner edge of the bowl with a folded piece of 220 grit sandpaper. I topped the bowl on a topping board to remove the damage to the rim top. It also helped to minimize some of the damage to the inner edge. Once I had it cleaned up the rim top damage was minimized. I sanded the outer edge of the bowl with the sandpaper to smooth out the damage there.
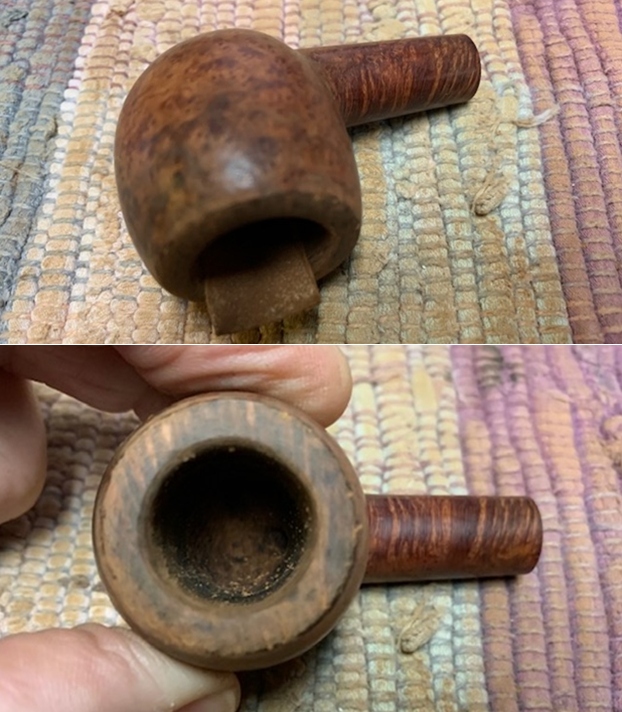
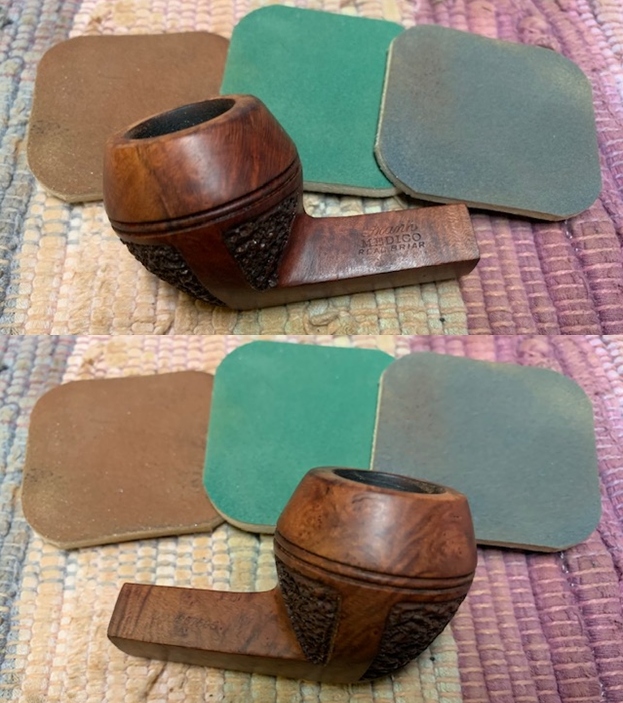
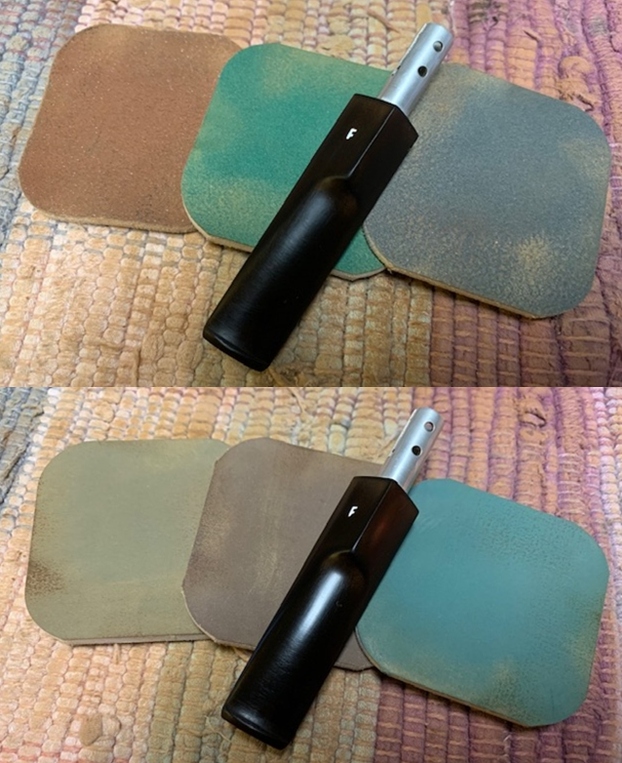
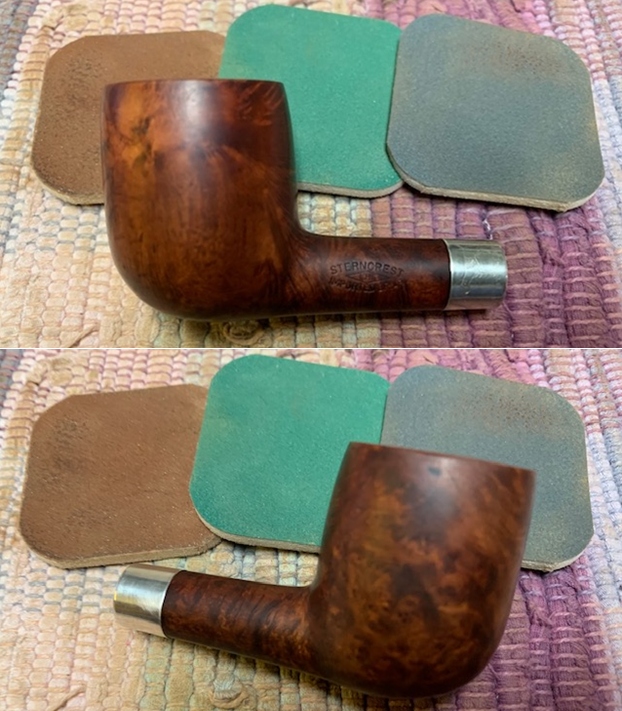
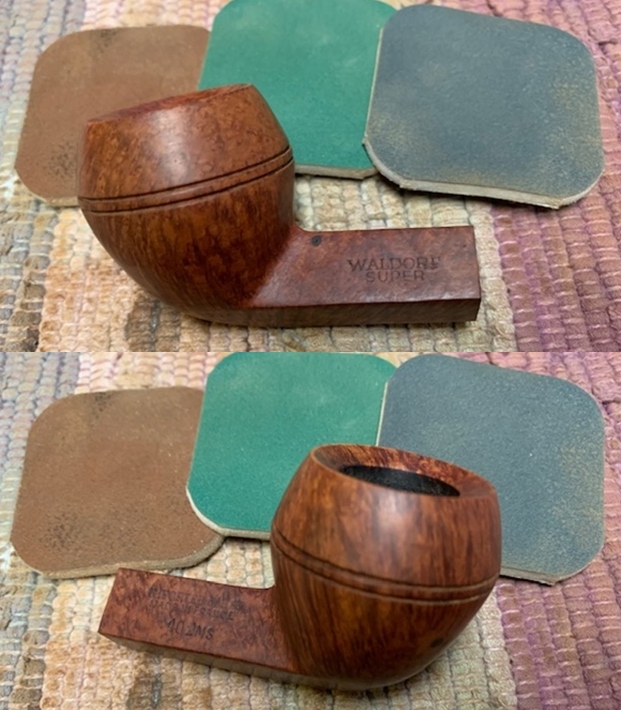
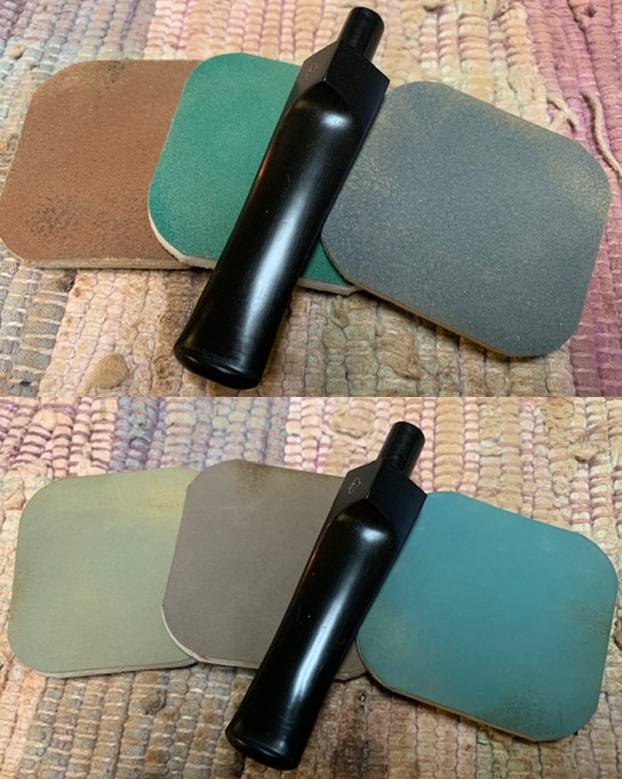
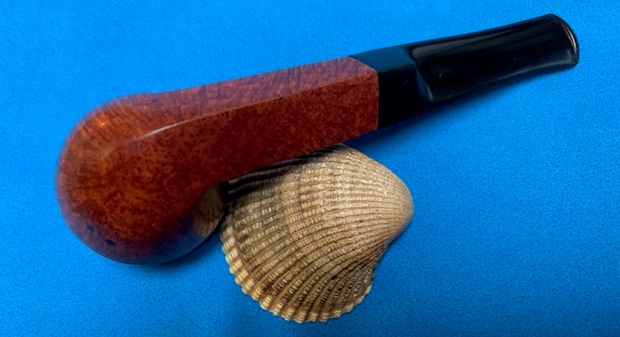
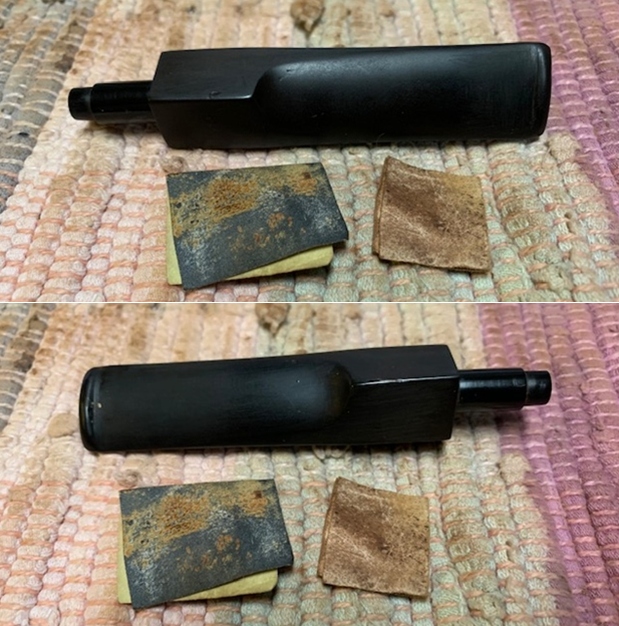
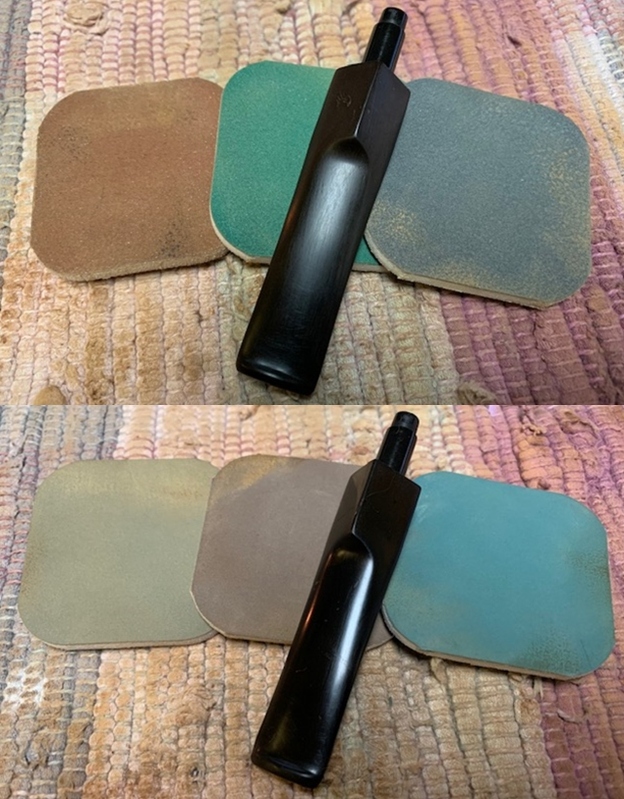
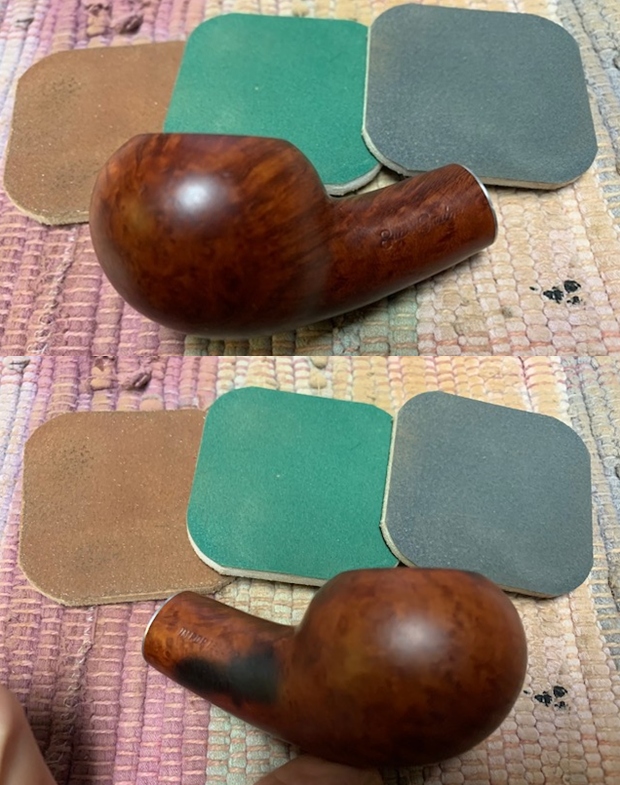
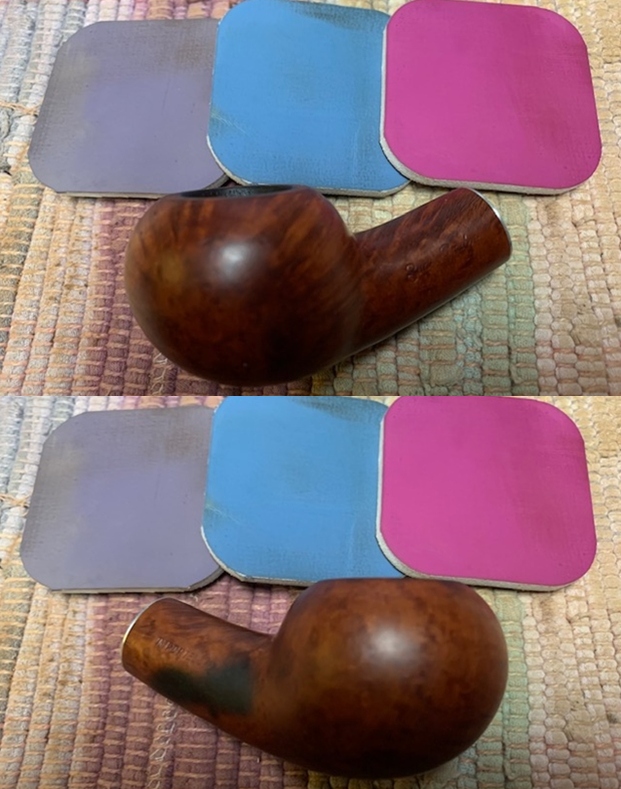
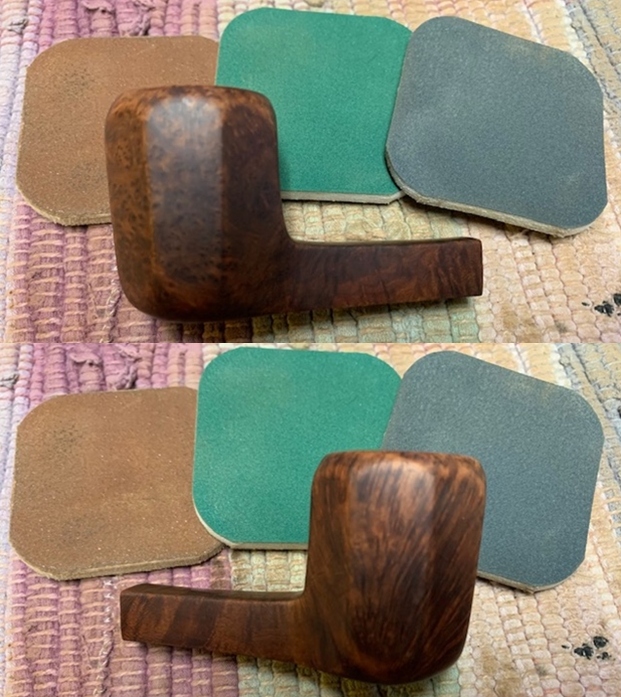
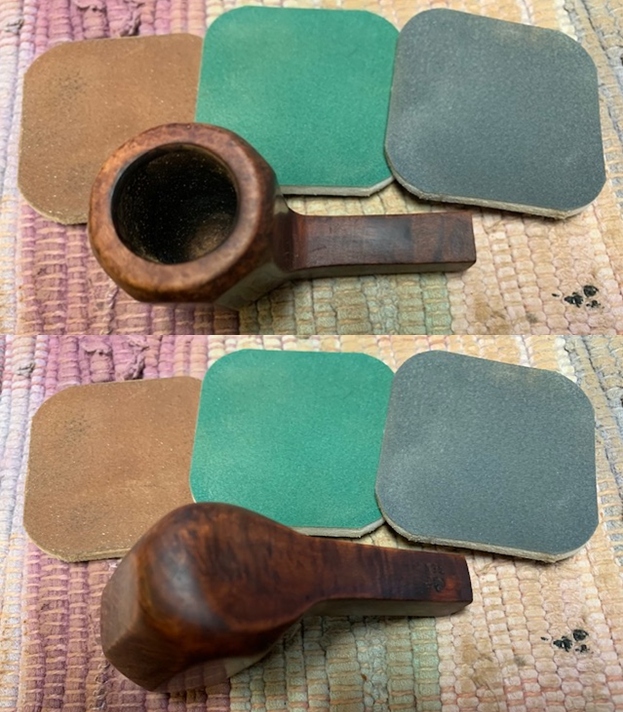
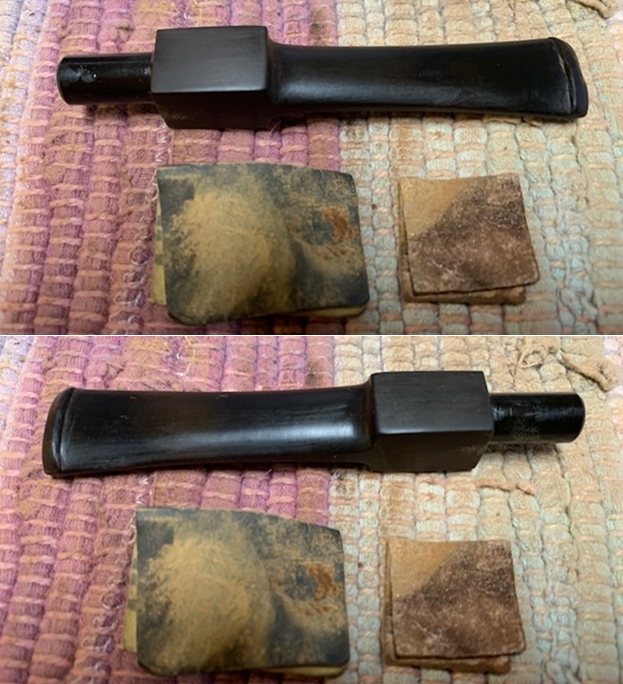
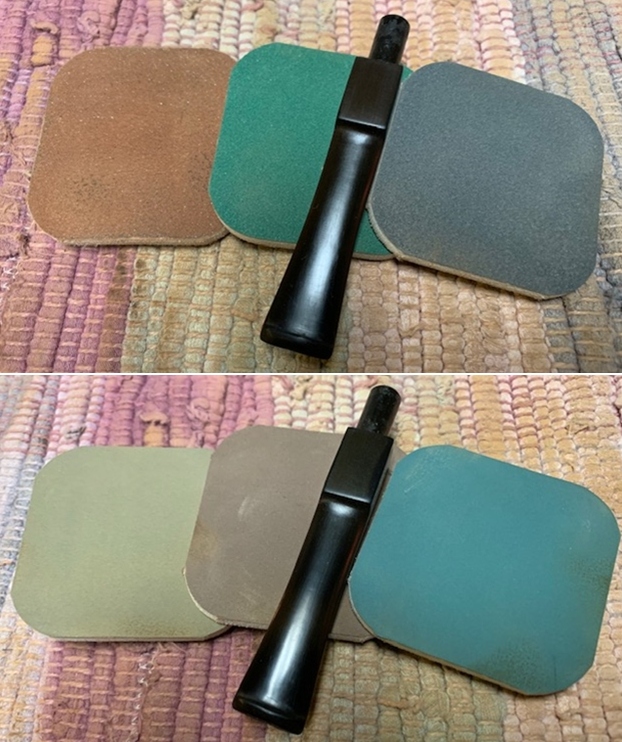
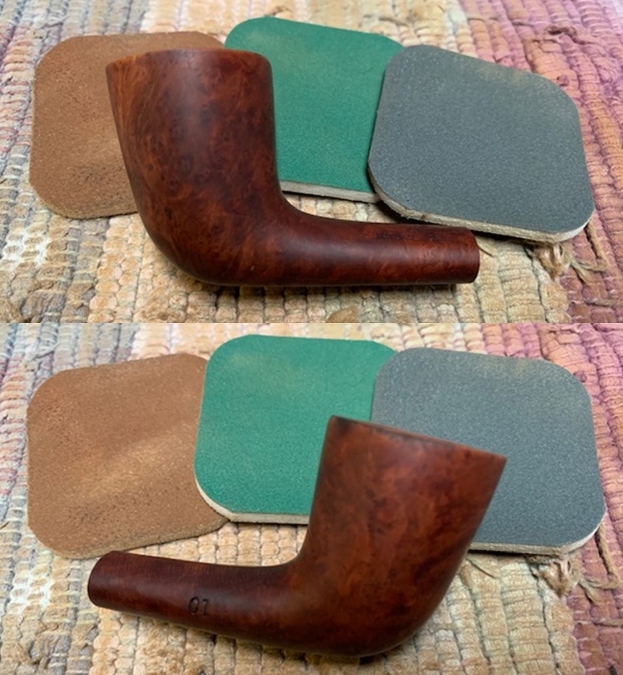
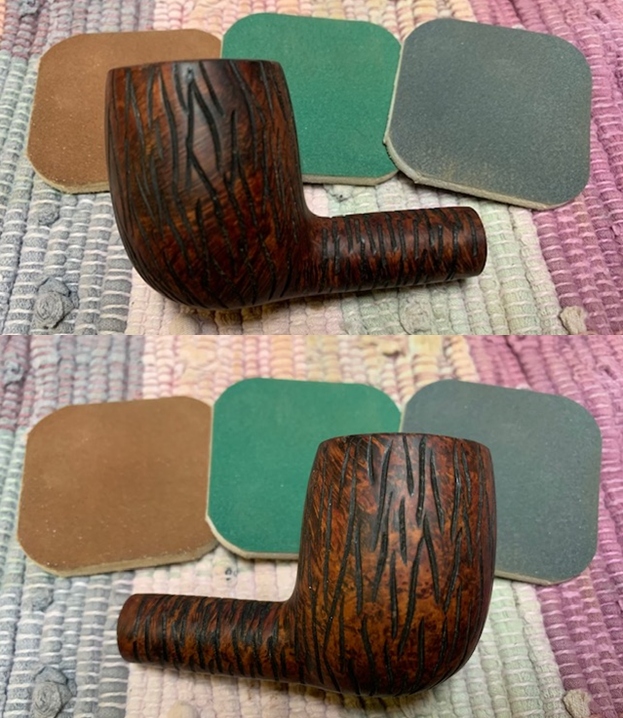
 I polished the briar with micromesh sanding pads – wet sanding with 1500-12000 grit pads and wiping the briar down with a damp cloth after each pad. The briar began to take on a rich glow.
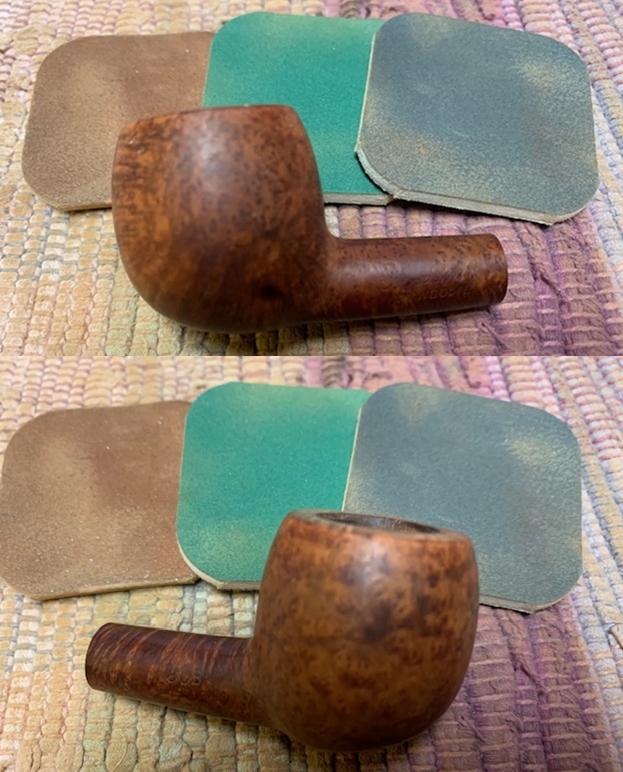
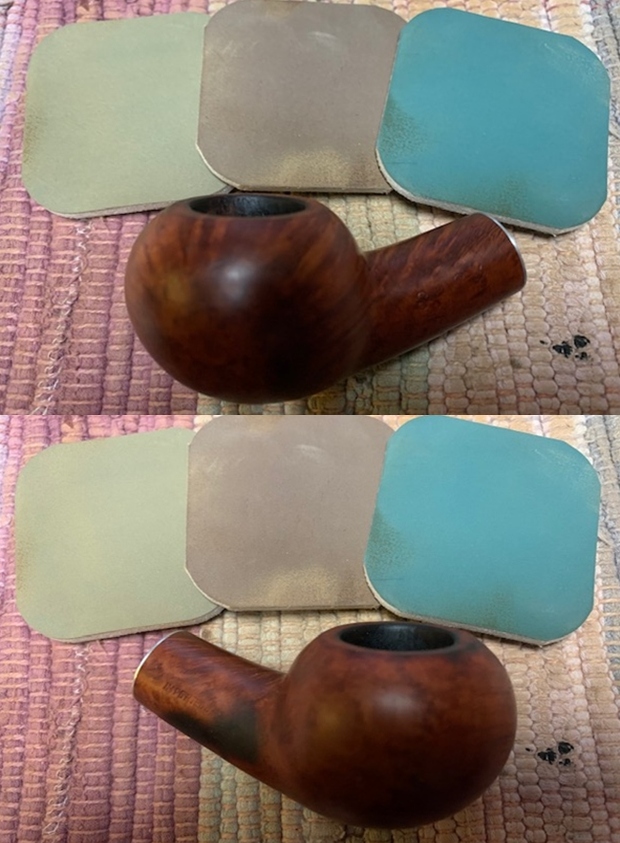
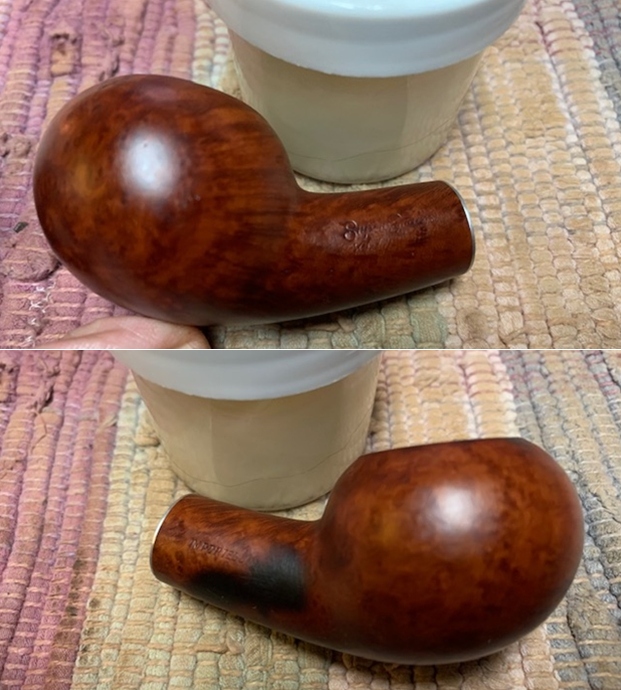
 I rubbed the briar down with Before & After Restoration Balm. I worked it into the briar with my fingertips into the briar. The product works to clean, enliven and preserve the briar. I let it sit for 10-15 minutes while I worked on the stem. After the time passed I buffed it with a cotton cloth to deepen the shine.
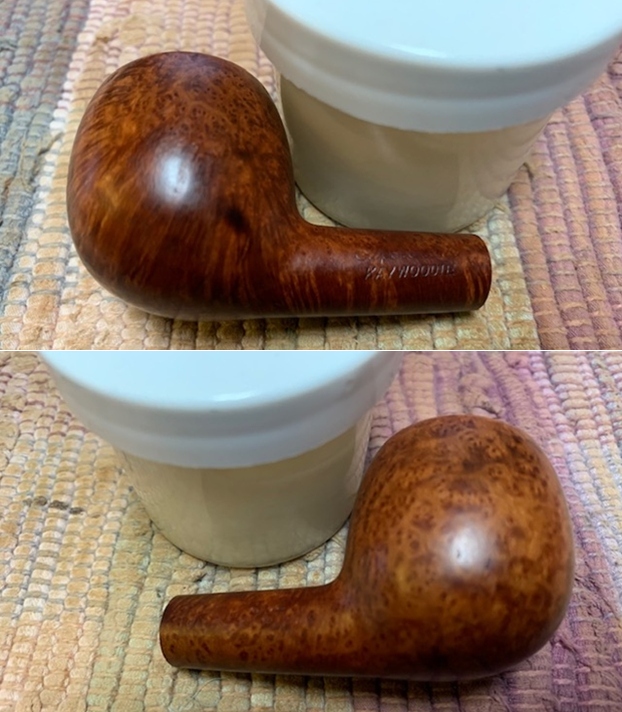
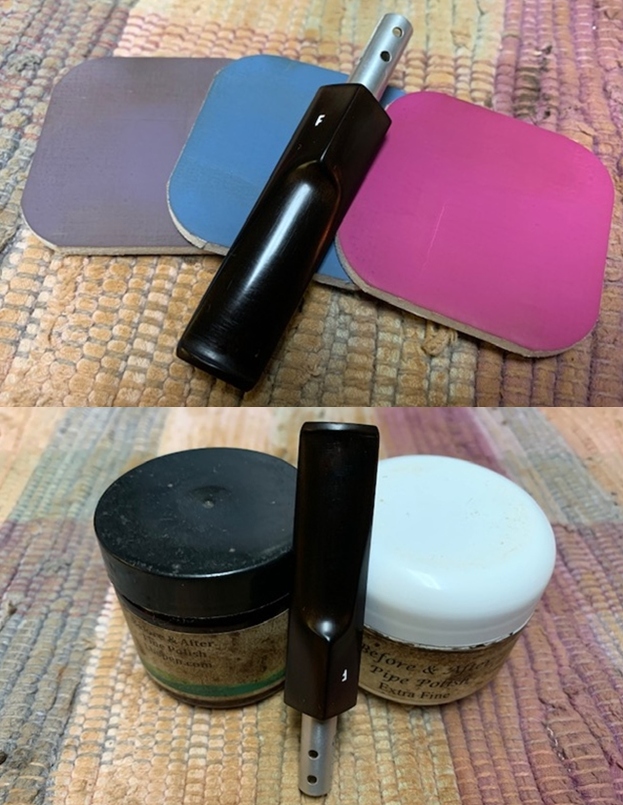
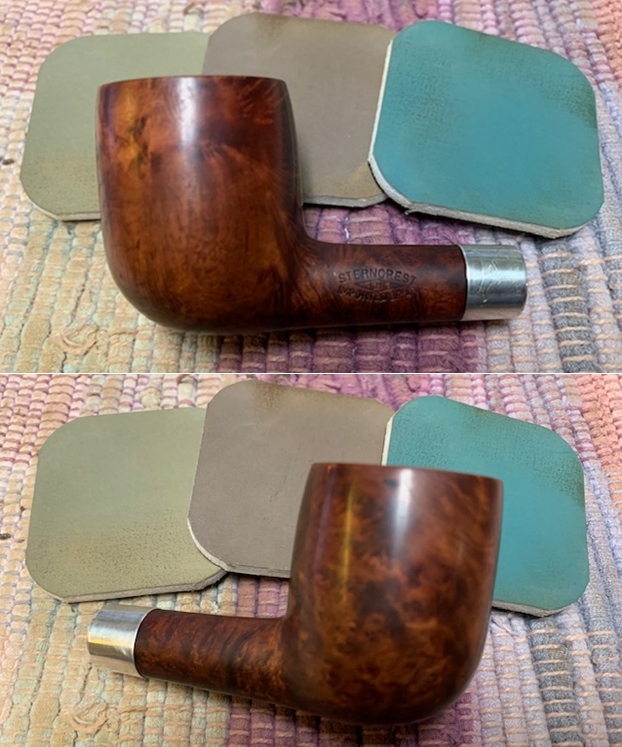
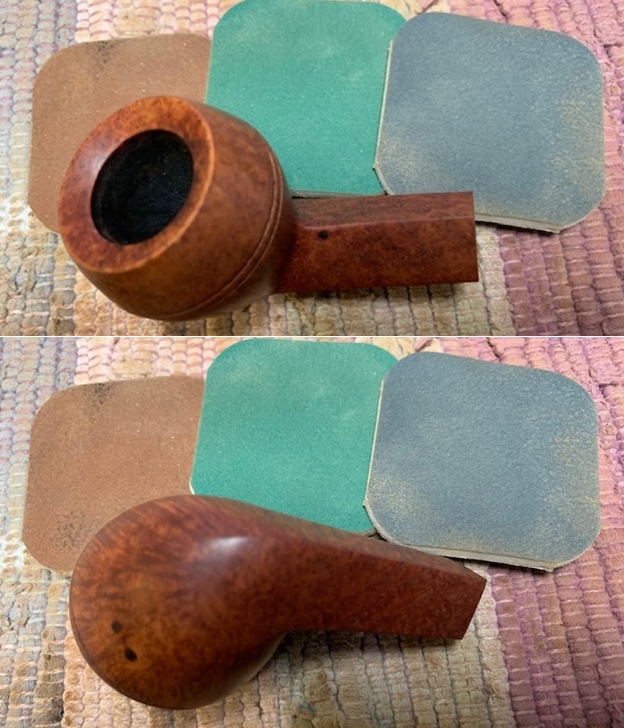
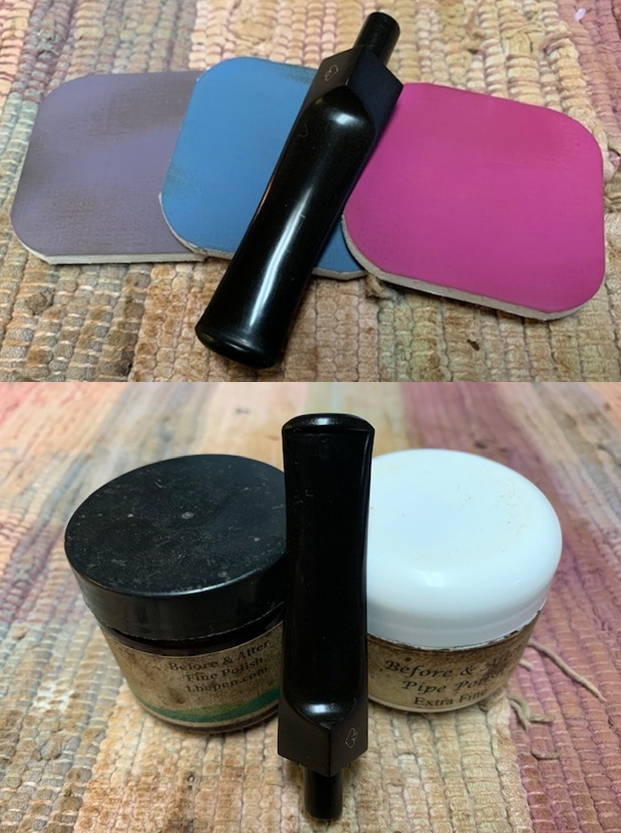
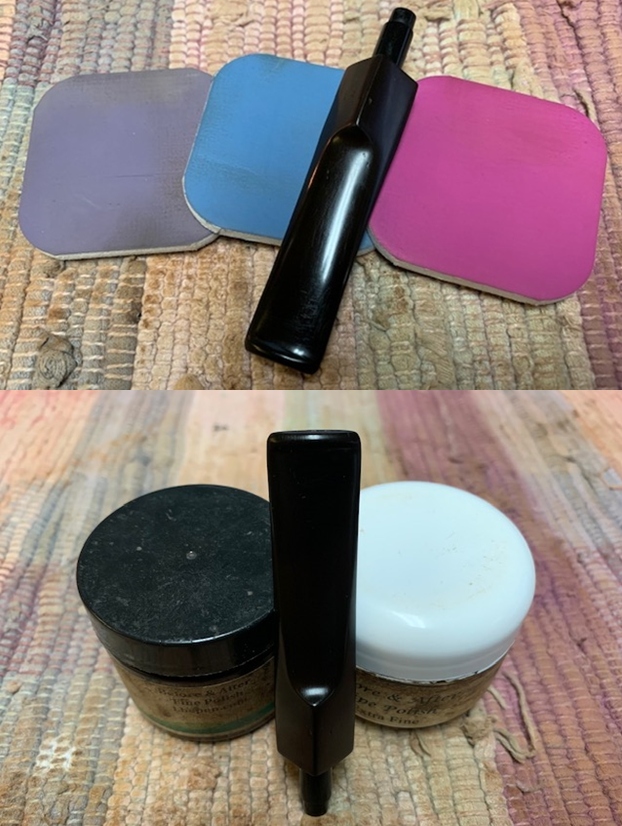
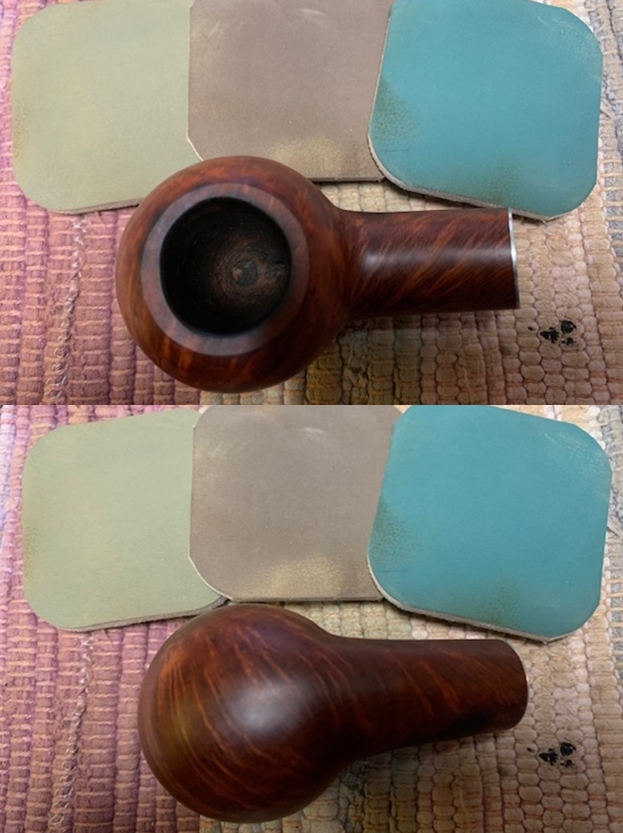
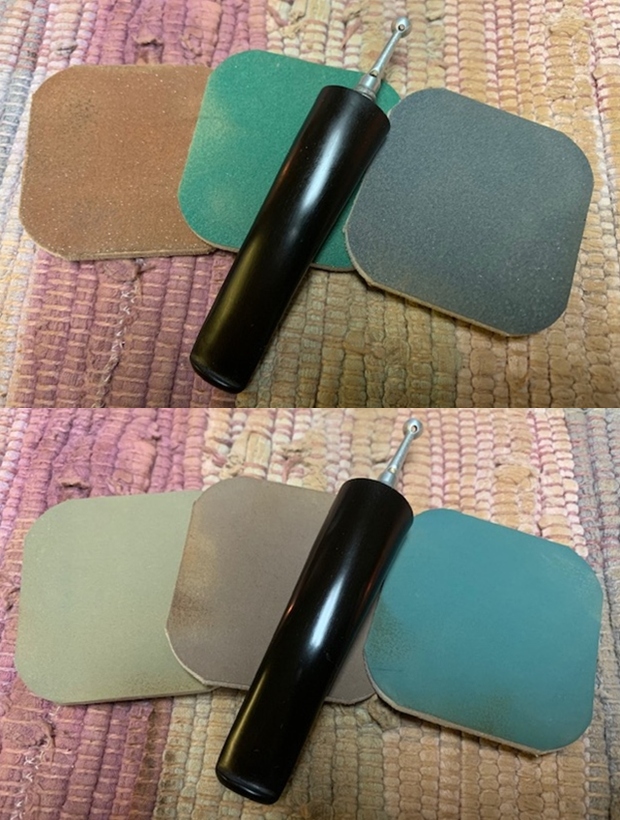
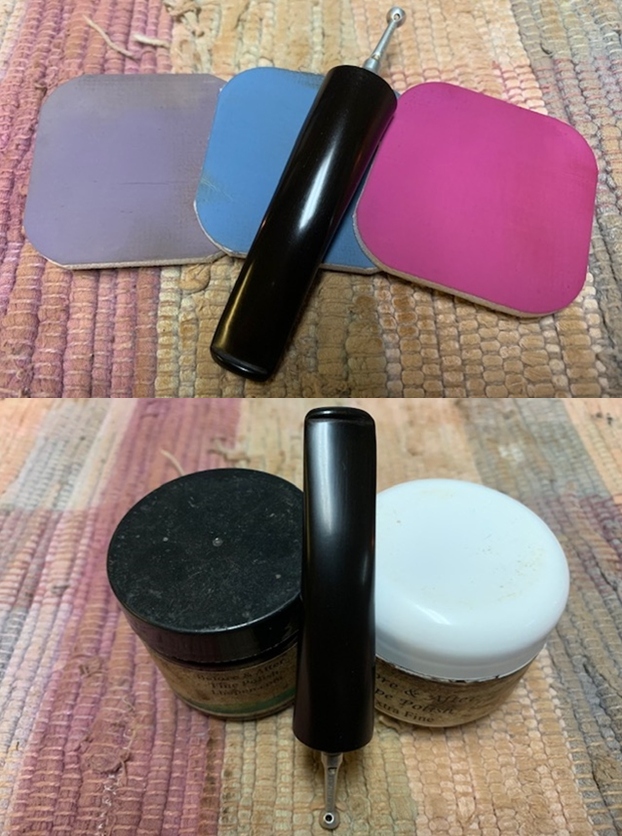
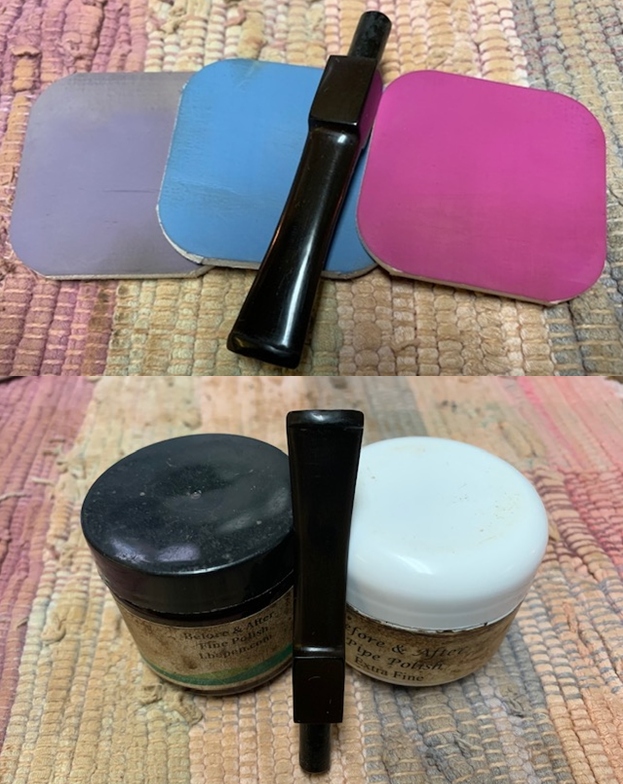
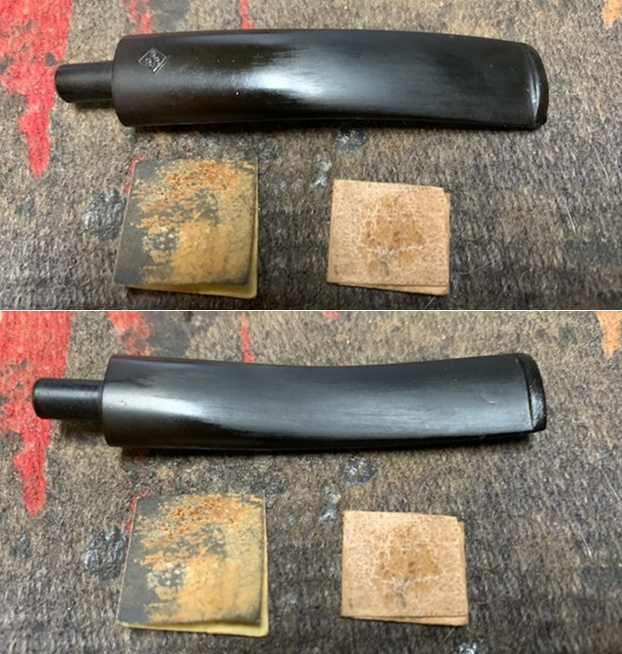
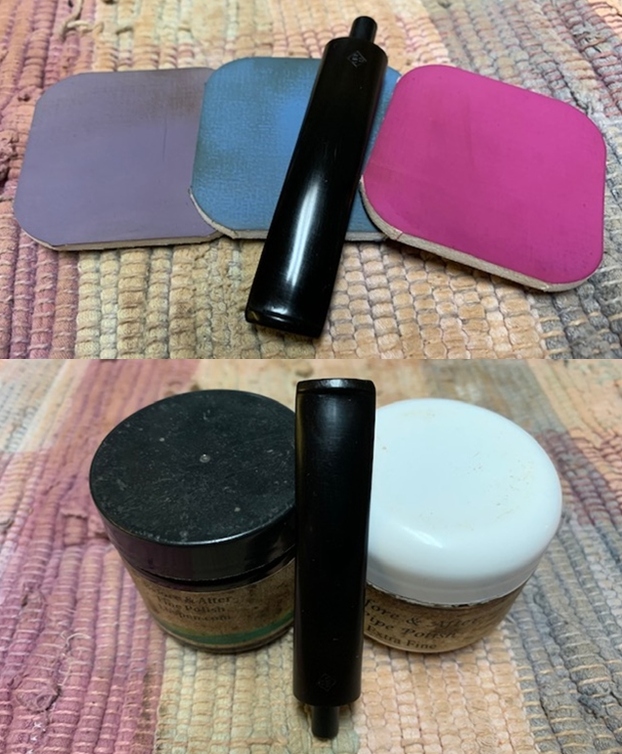
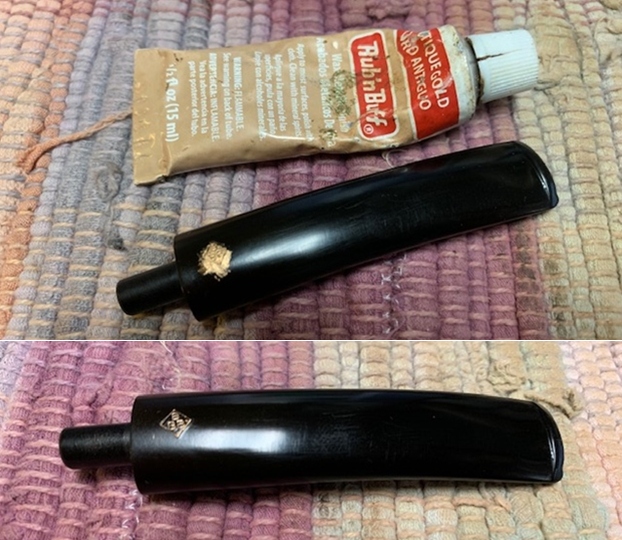
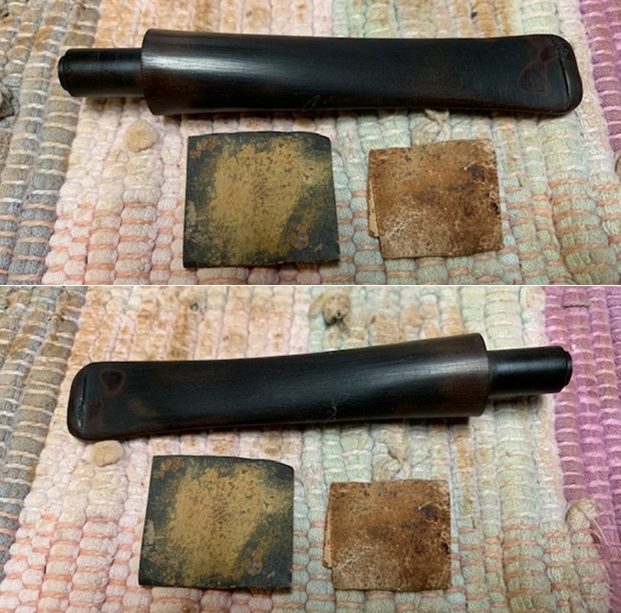
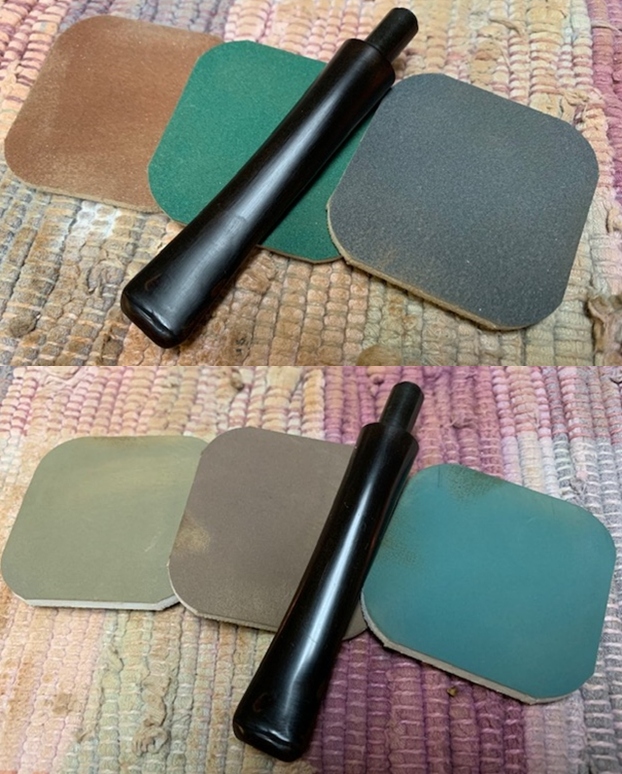
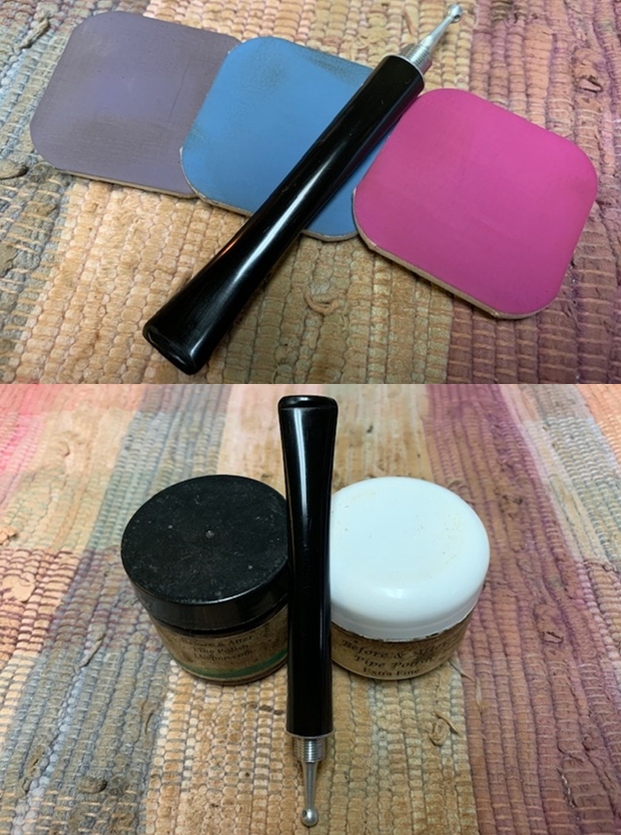
 I set the bowl aside and turned my attention to the stem. The stem was in good condition and I would be able to polish out the tooth chatter. I polished the stem with micromesh sanding pads – 1500-12000 grit pads. I wiped it down with Obsidian Oil after each sanding pad. I used Before & After Pipe Polish – both Fine and Extra Fine to further polish the stem.
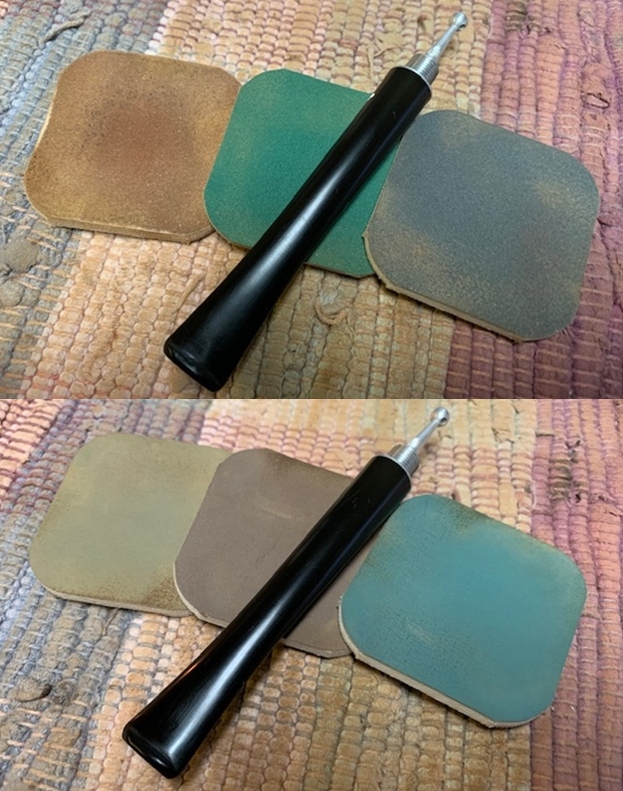
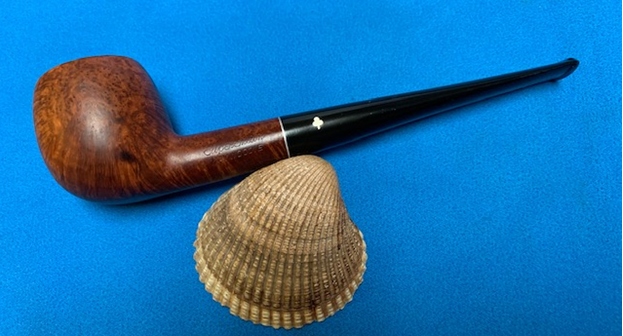
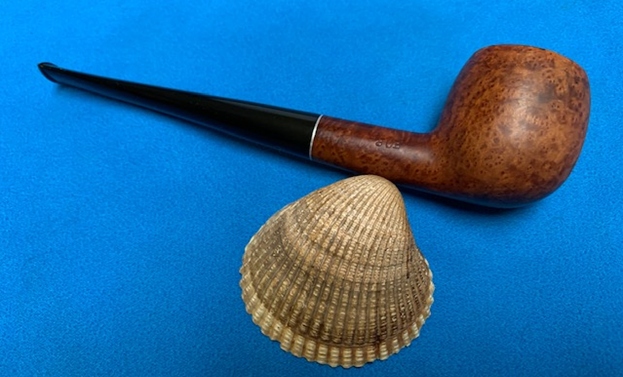
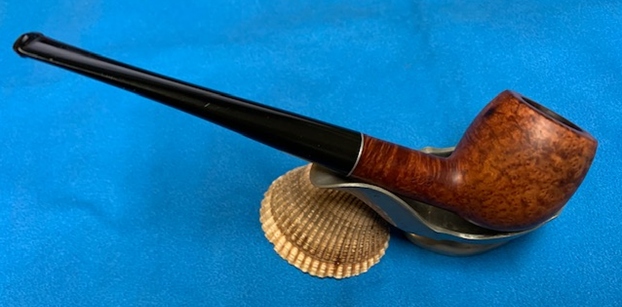
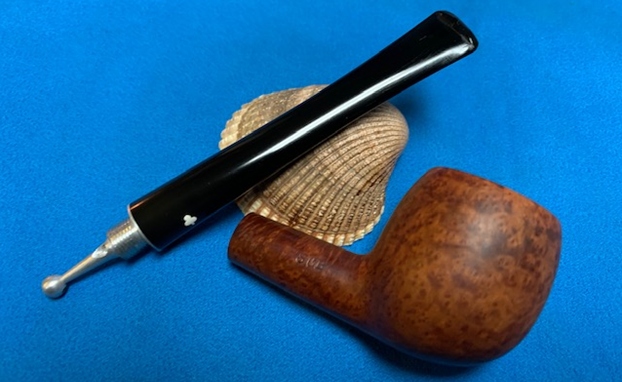
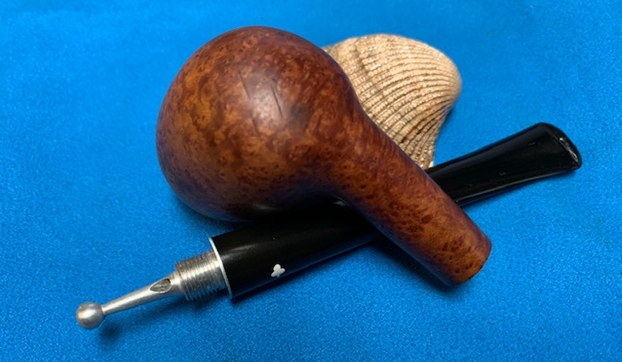
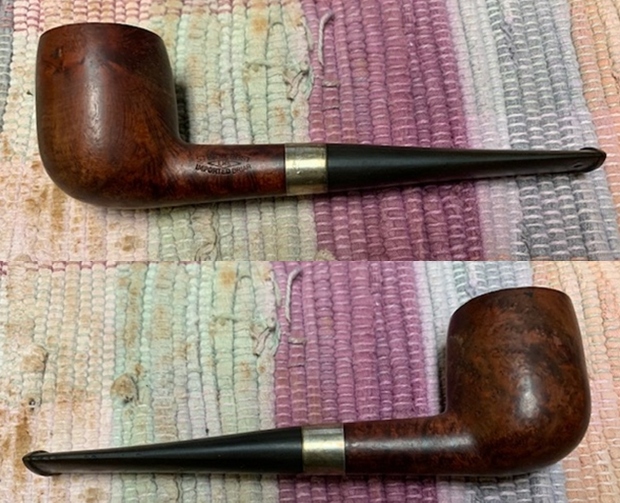
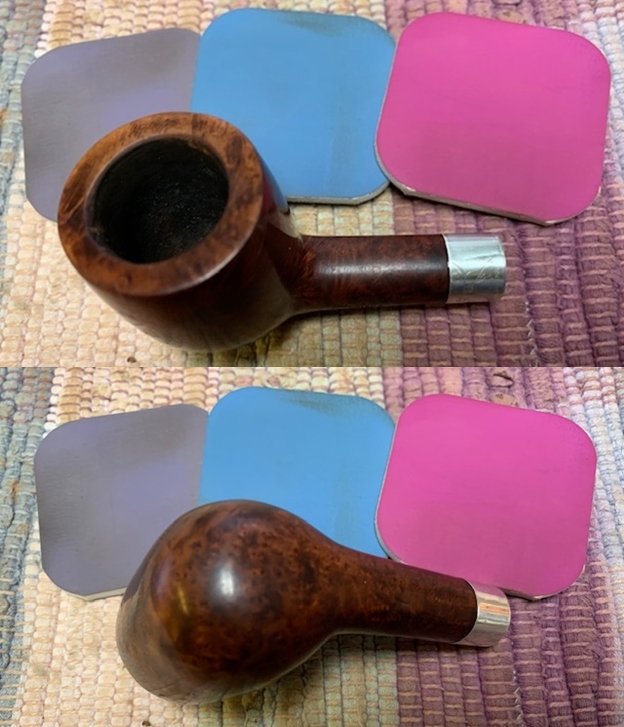
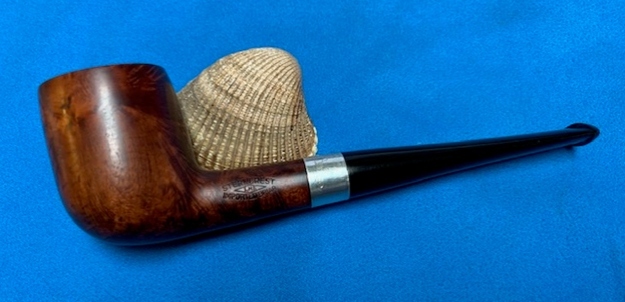
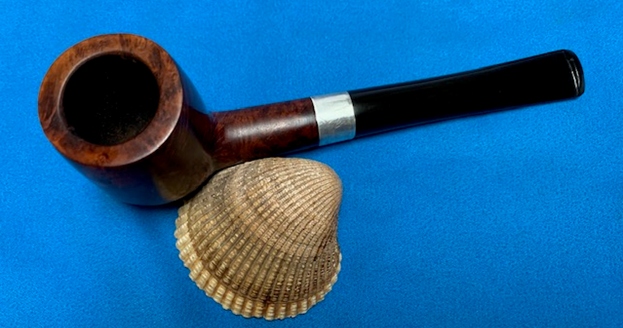
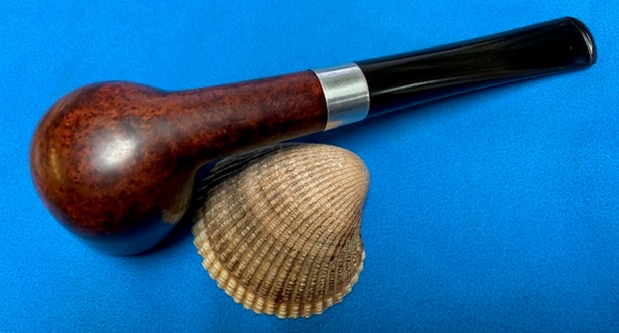
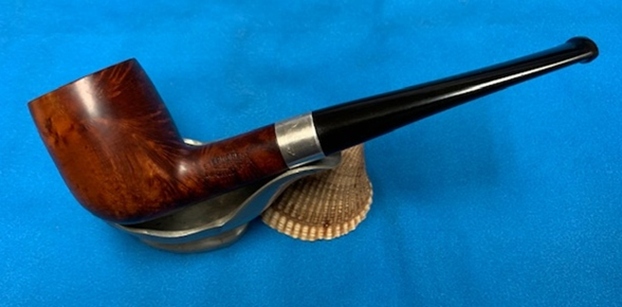
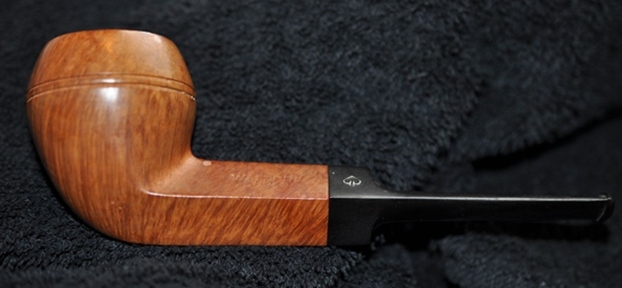
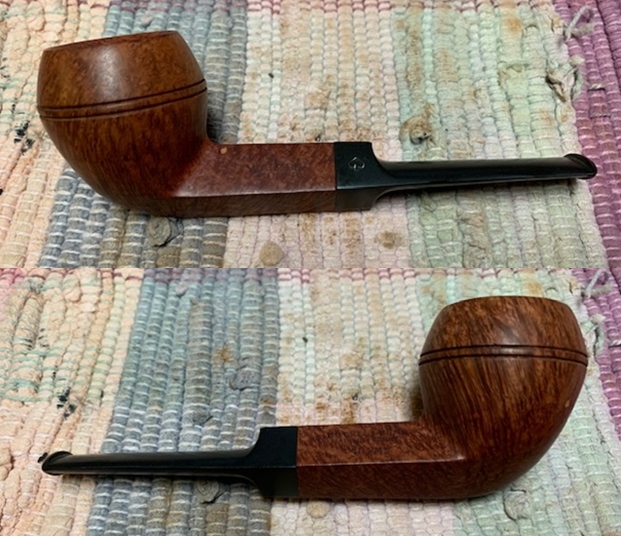
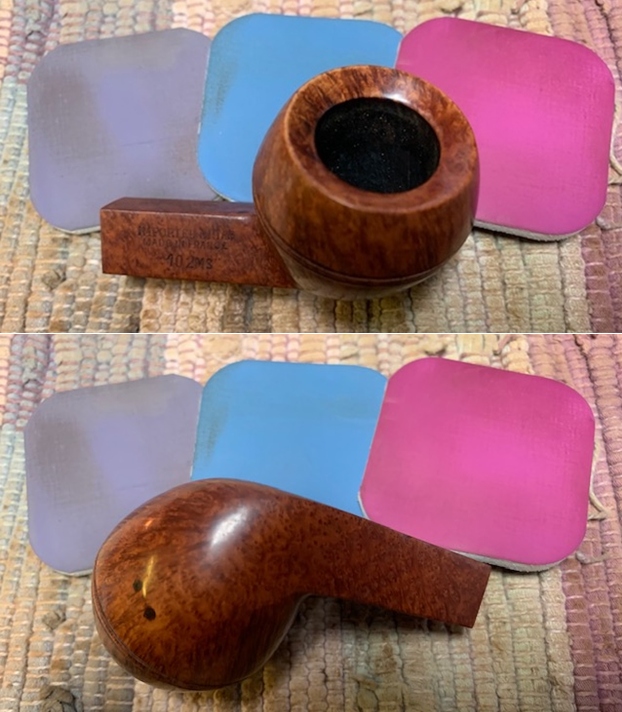
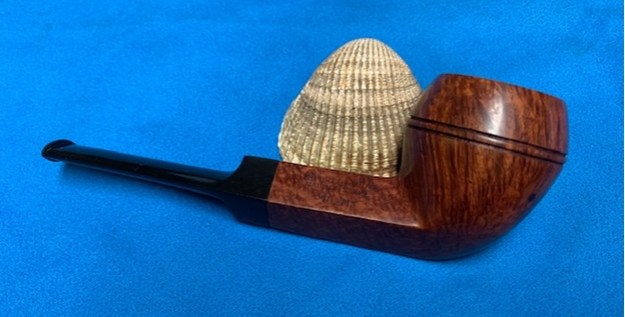
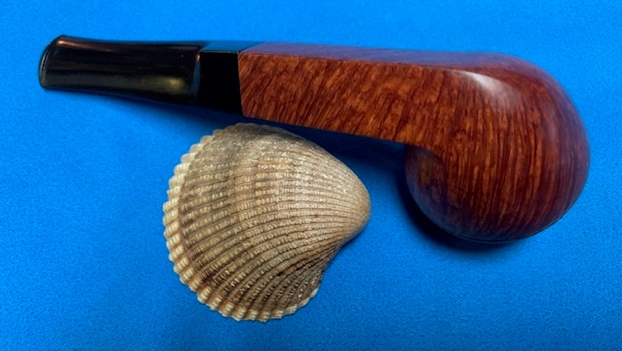
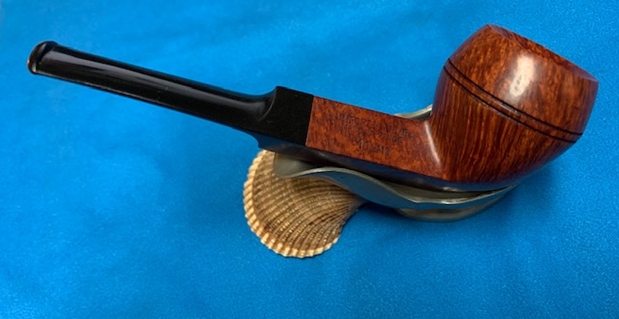
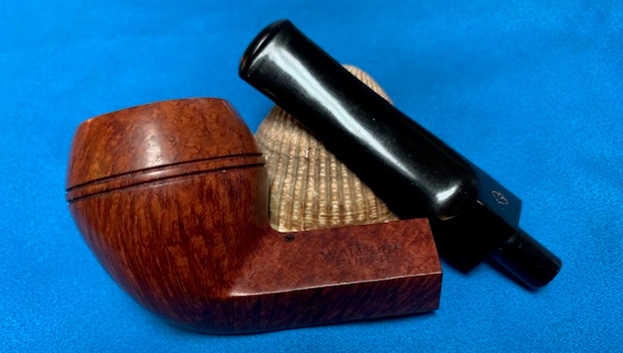
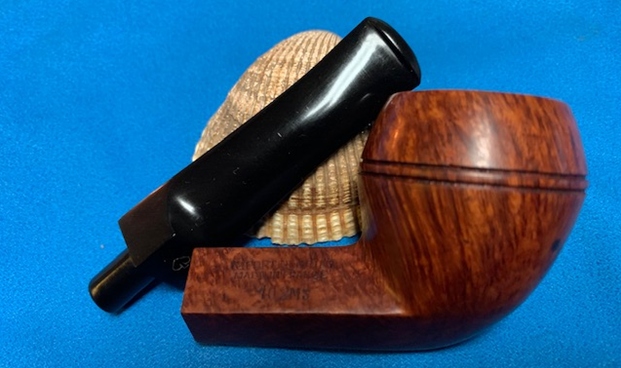
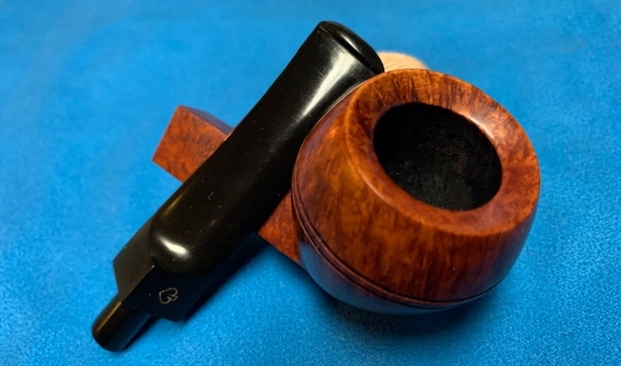
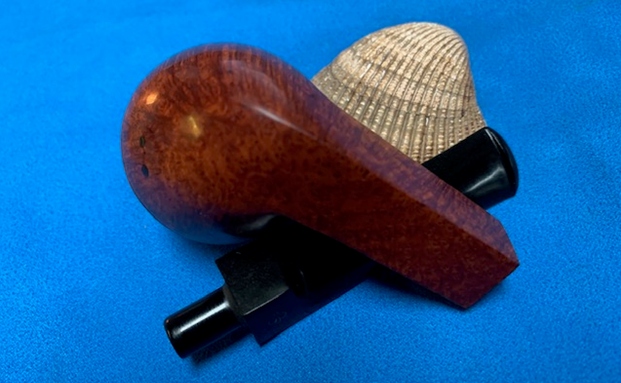
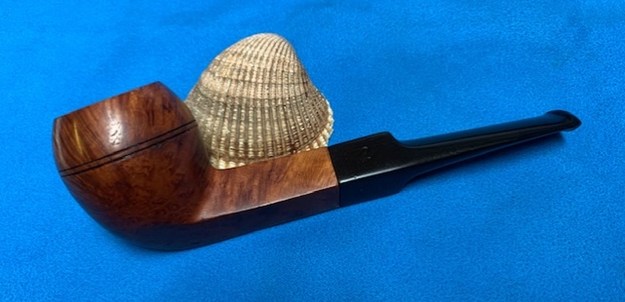
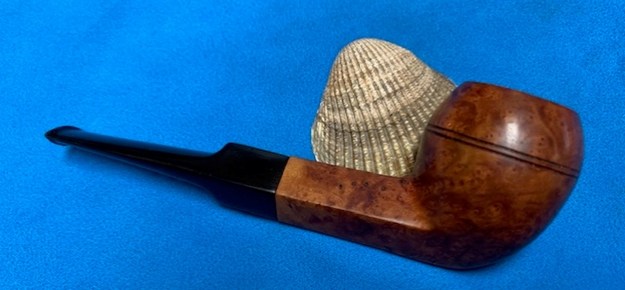
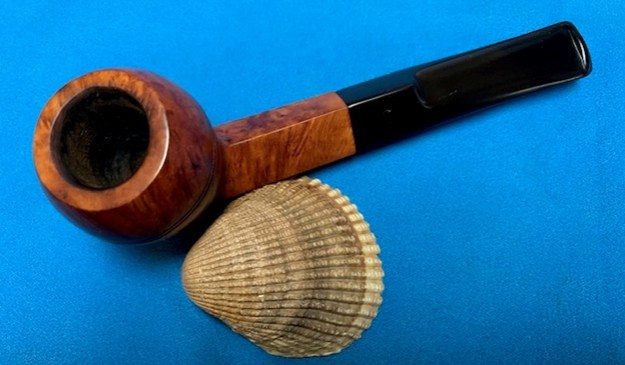
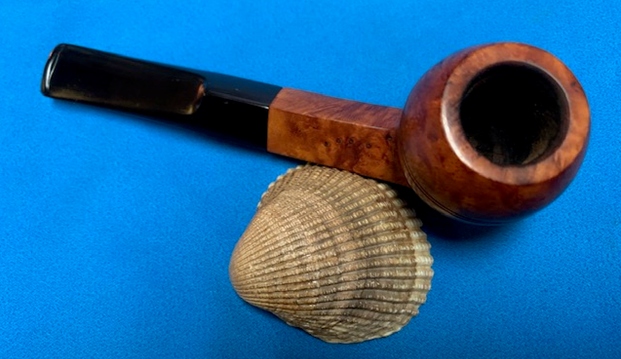
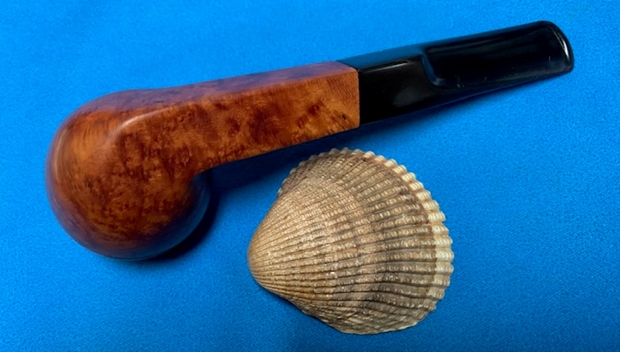
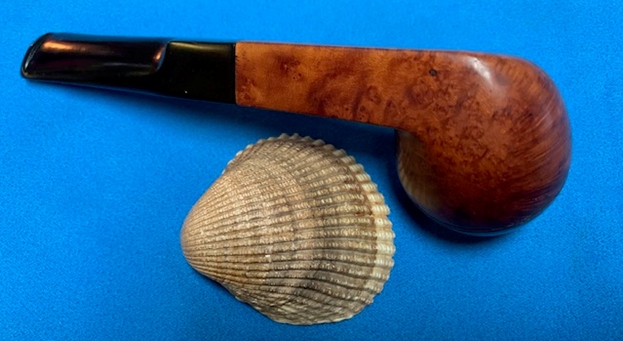
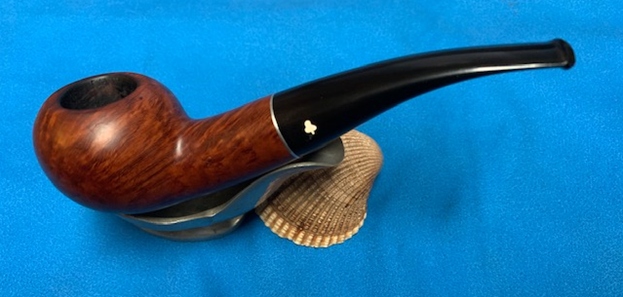
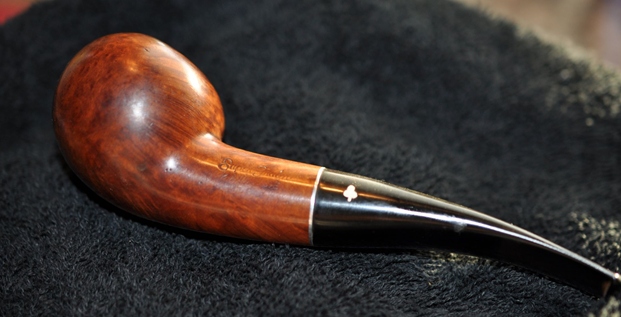
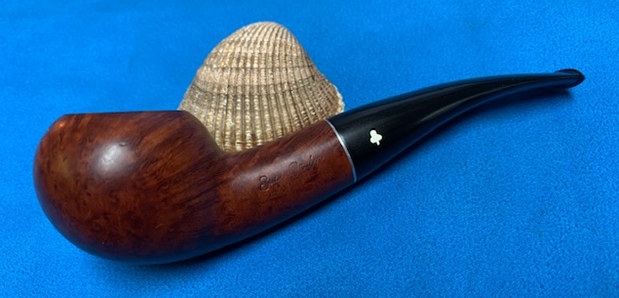
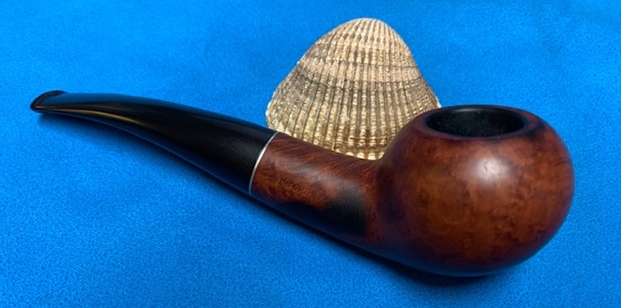
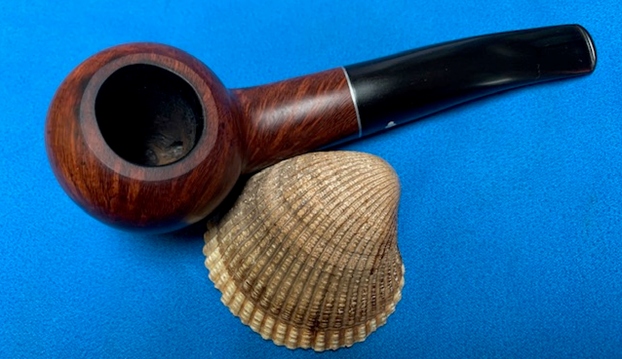
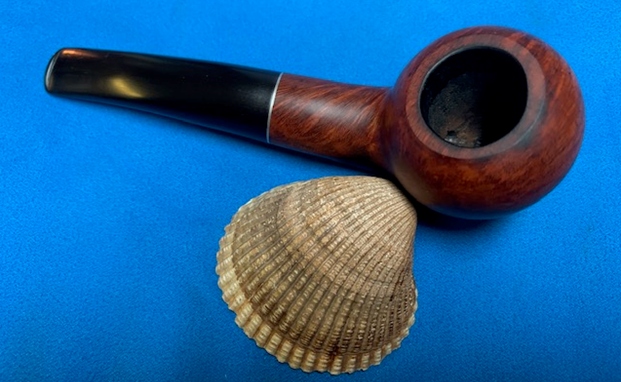
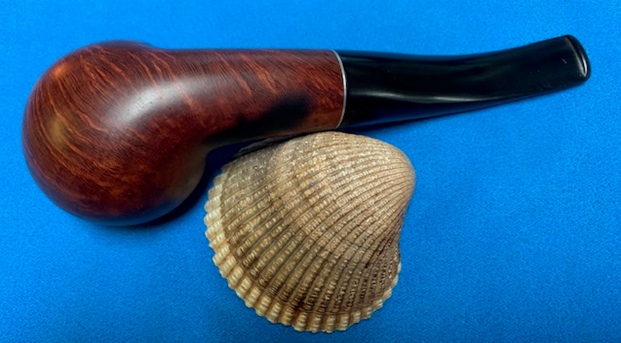
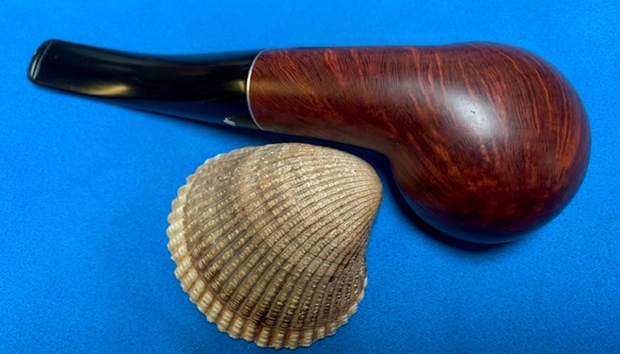
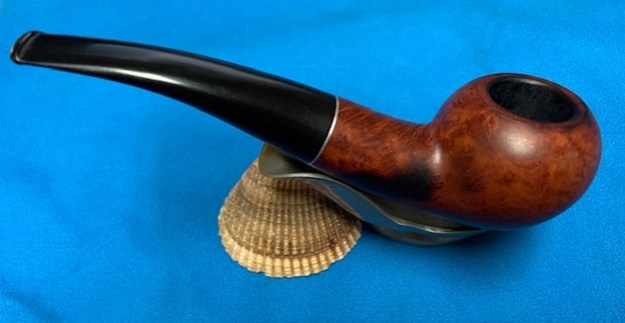
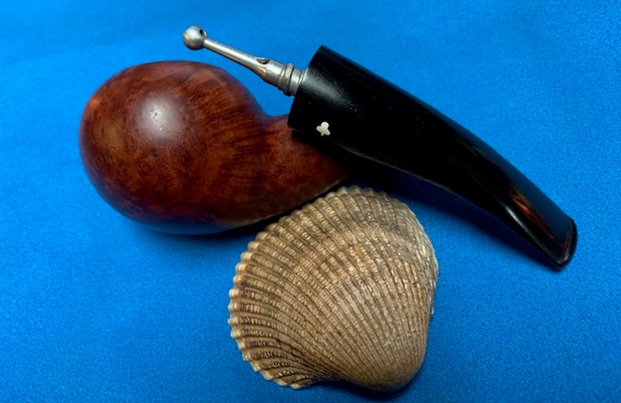
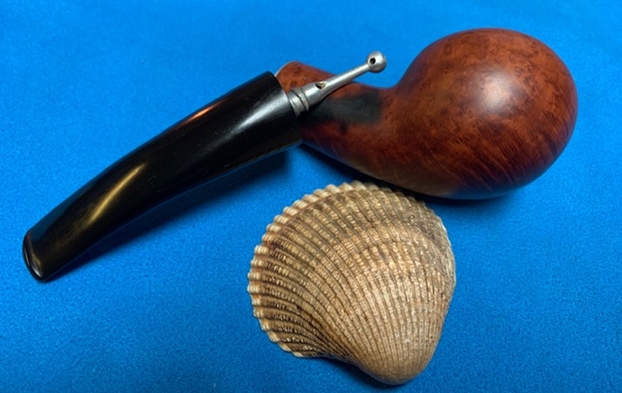
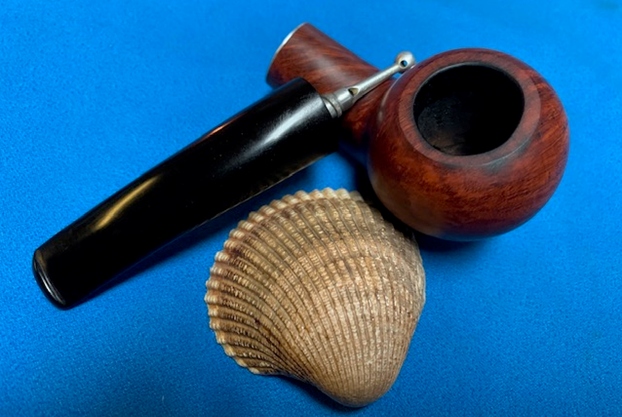
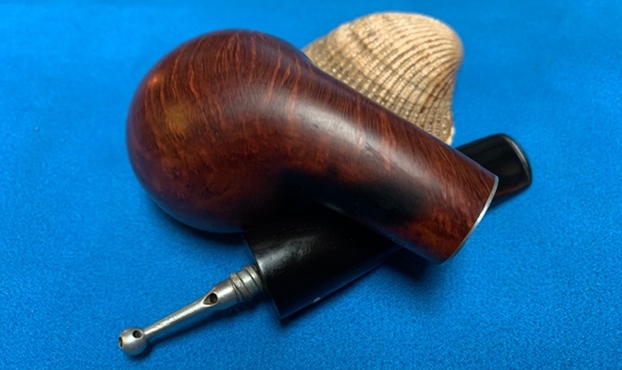
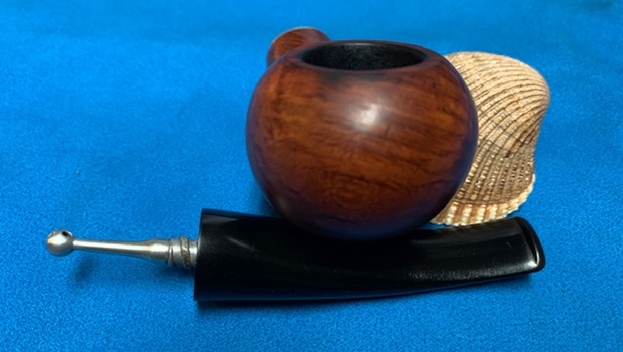
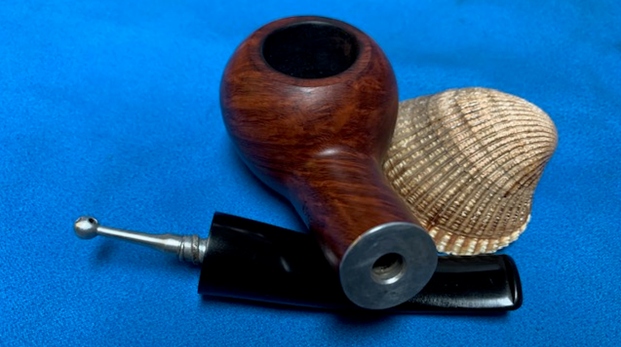
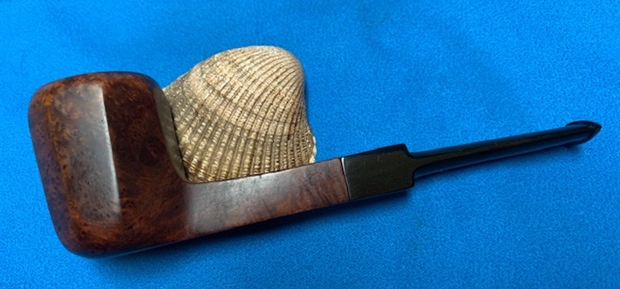
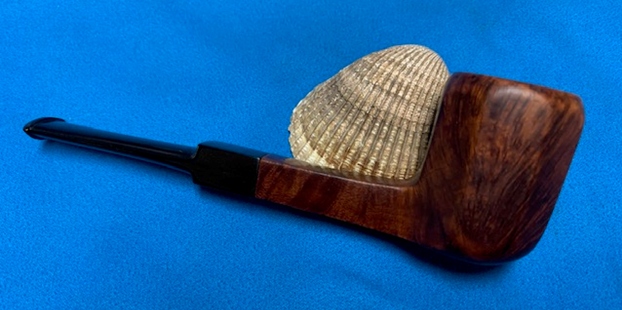
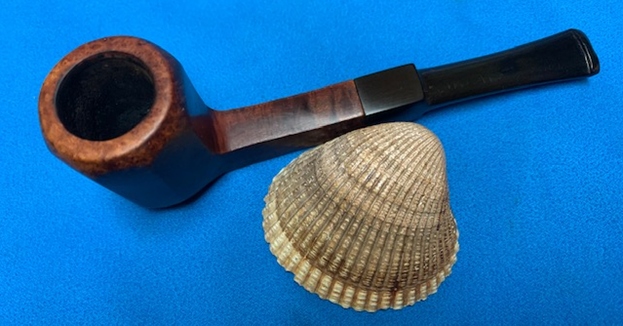
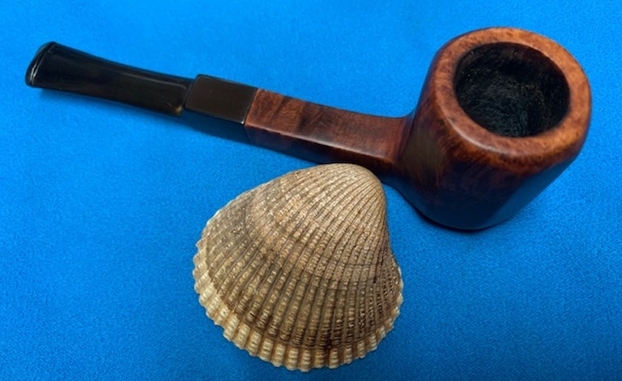
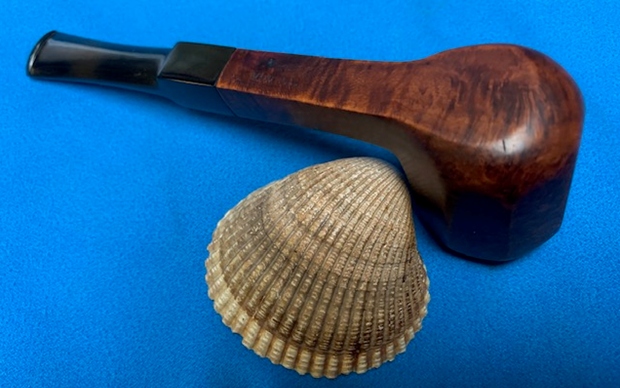
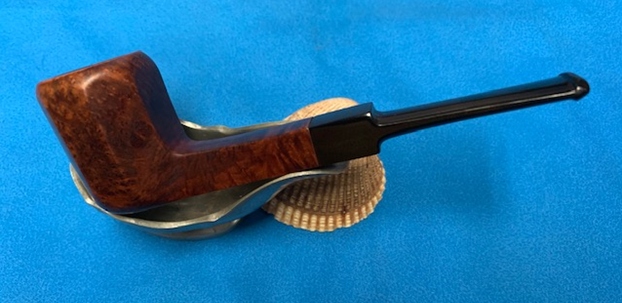
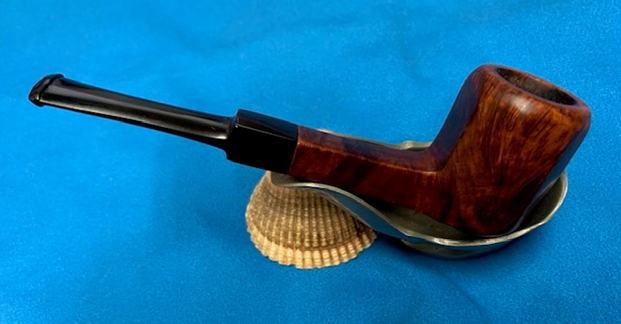
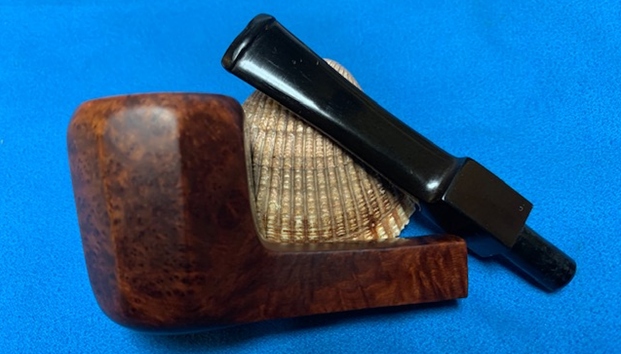
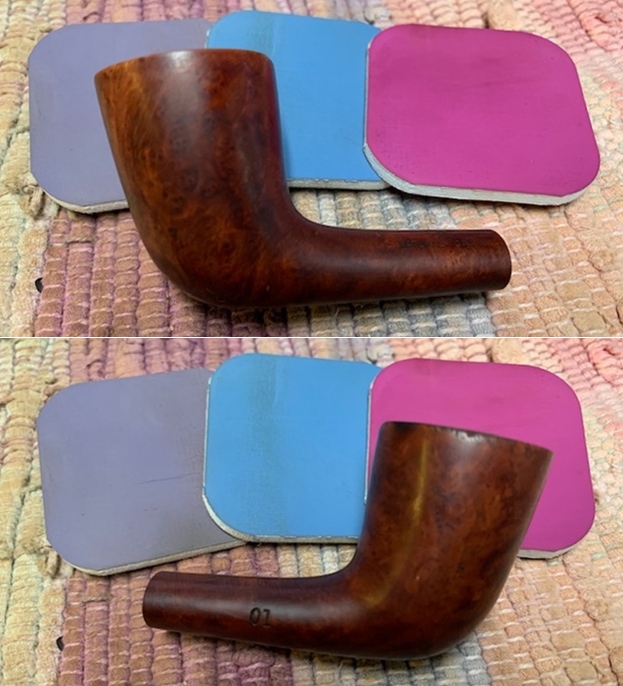
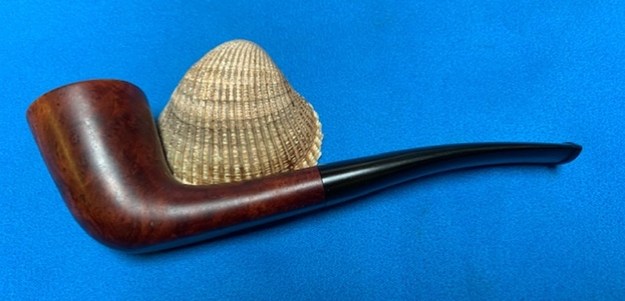
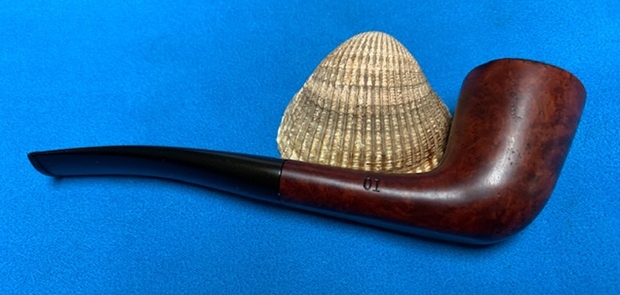
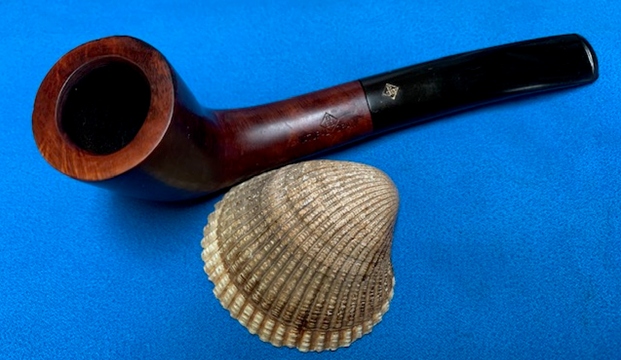
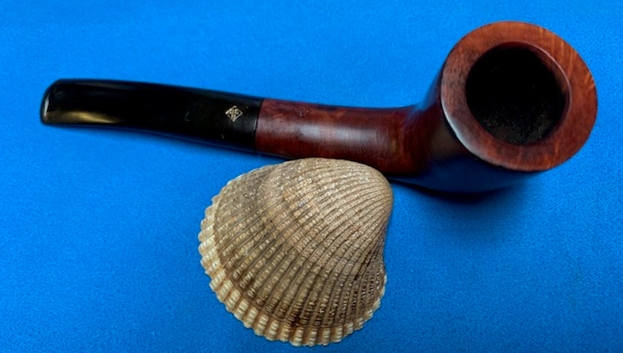
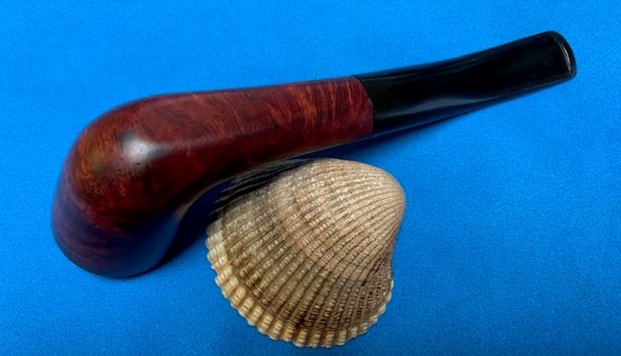
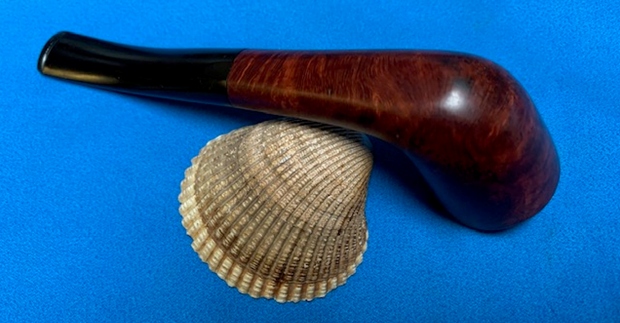
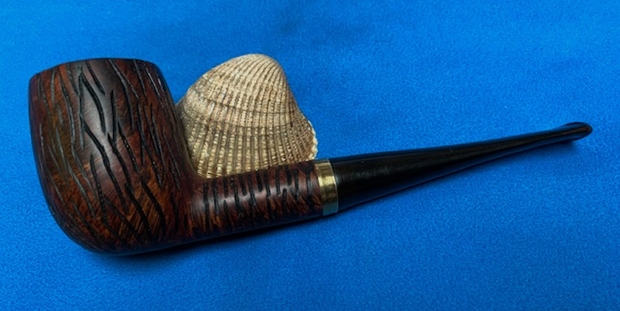
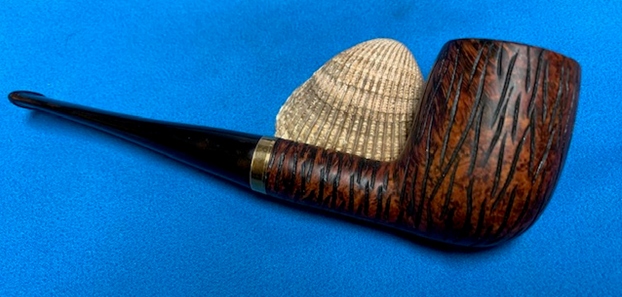
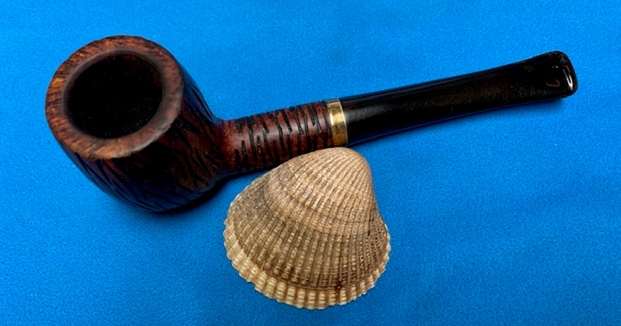
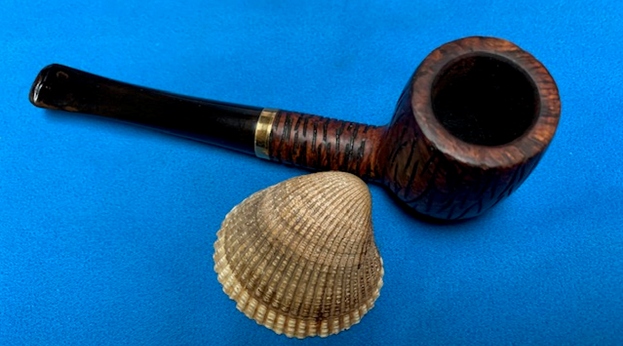
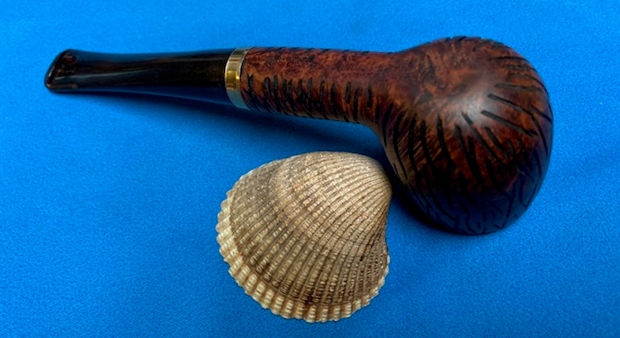
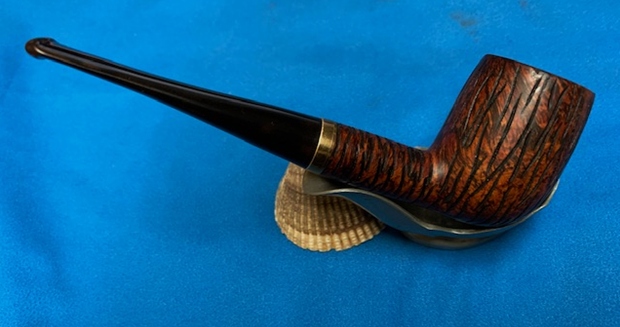
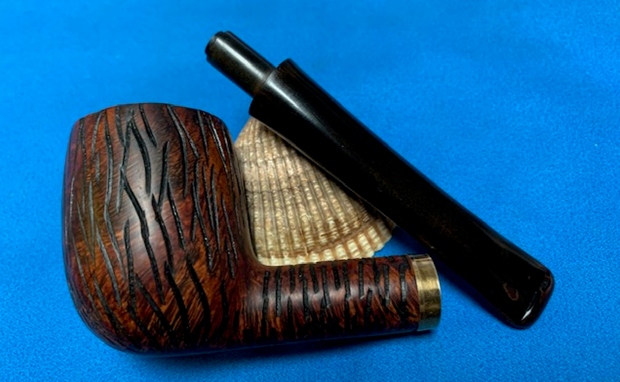
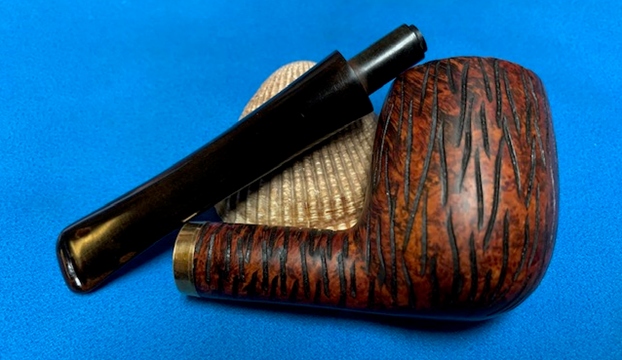
 This Super Grain Kaywoodie 80B Straight Apple is a great looking pipe. The smooth finish and brown stain around the bowl sides and shank make the grain just pop. Even the burn mark on the right side of the shank while present does not detract from the beauty of the pipe. The finish on the pipe looks great and the brown stains work well to give some contrast to the polished black vulcanite taper stem. The pipe is really quite eye-catching. I put the stem back on the bowl and buffed the pipe with Blue Diamond on the buffing wheel, carefully avoiding the stamping on the shank. I gave the bowl and the stem multiple coats of carnauba wax on the buffing wheel and followed that by buffing it with a clean buffing pad. I hand buffed the pipe with a microfiber cloth to deepen the shine. There were two burn marks – one on the lower left side of the bowl and the other on the back toward the topside. The finished Straight Apple Super Grain is quite nice and feels great in the hand. Give the finished pipe a look in the photos below. I can only tell you that like the other pipes I am working that it is much prettier in person than the photos capture. The dimensions of the pipe are Length: 6 inches, Height: 1 ½ inches, Outside diameter of the bowl: 1 ¼ inches, Chamber diameter: ¾ of an inch. The weight of the pipe was 32g/1.13oz. Thanks for walking through the restoration with me as I worked over another interesting pipe. This Super Grain Kaywoodie will be added to the American Pipe Makers section of the rebornpipes store soon. If you want to add it to your collection send me an email or a message! Thanks for your time.