Blog by Kenneth Lieblich
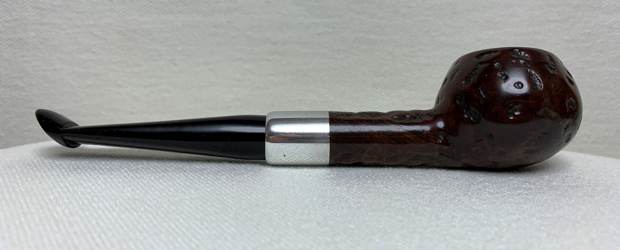
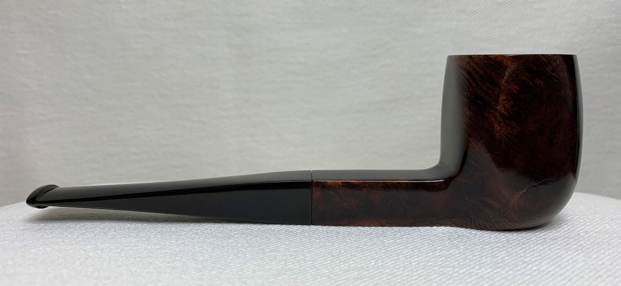
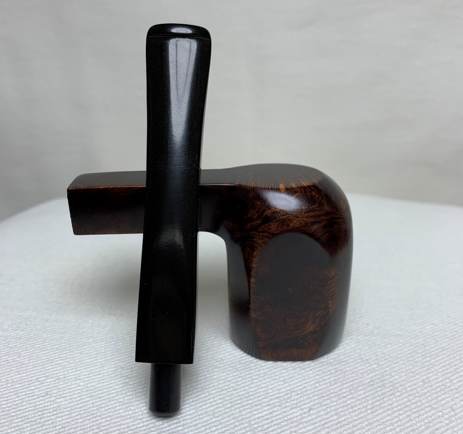
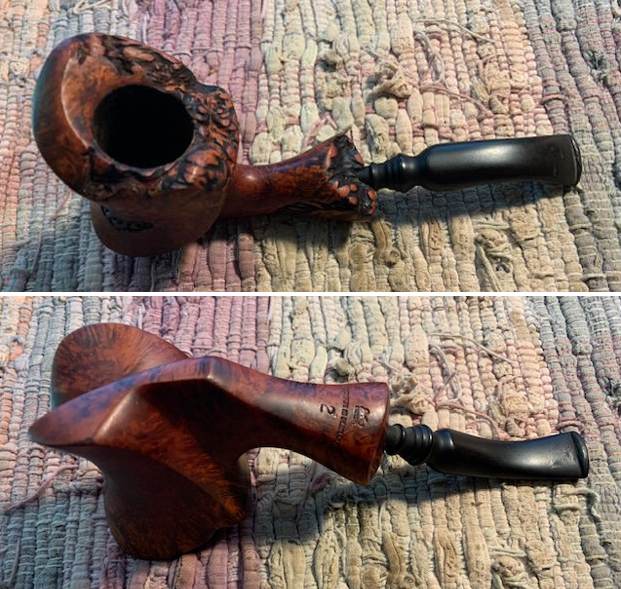
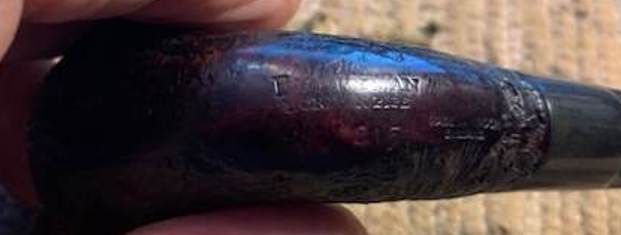
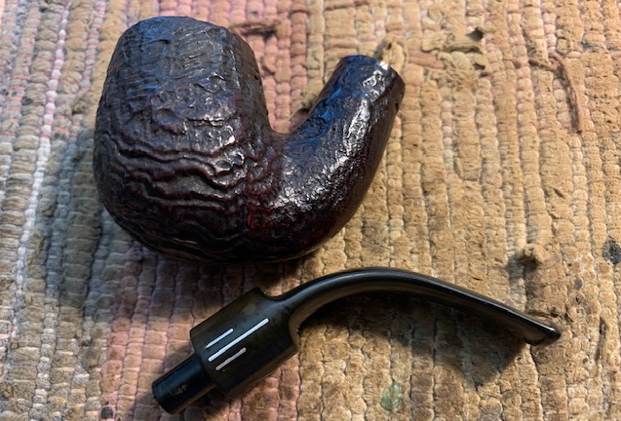
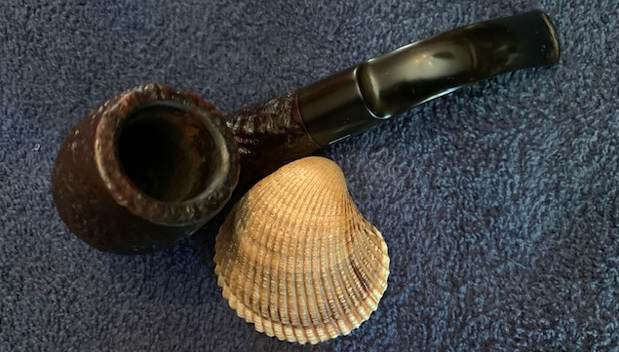
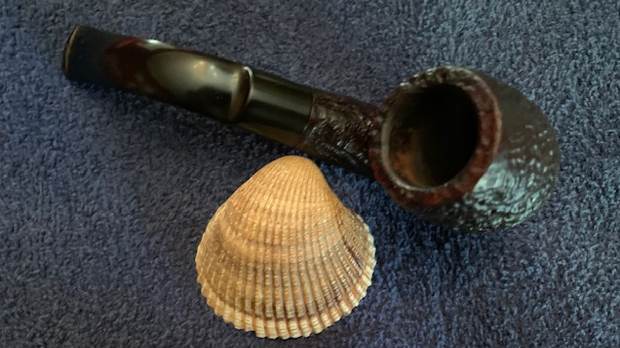
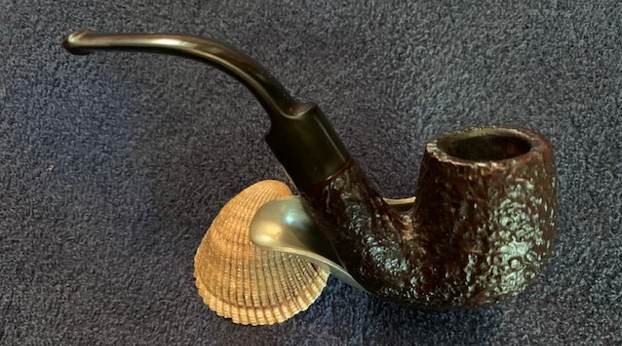
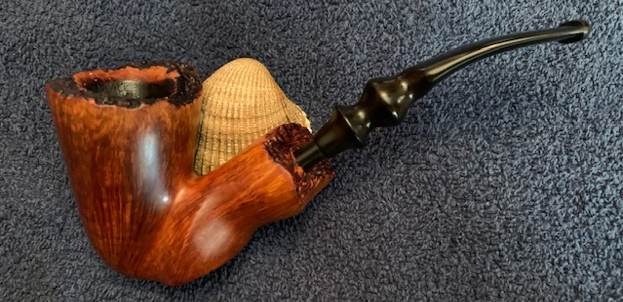
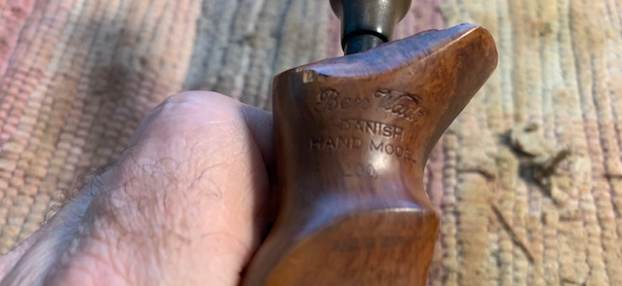
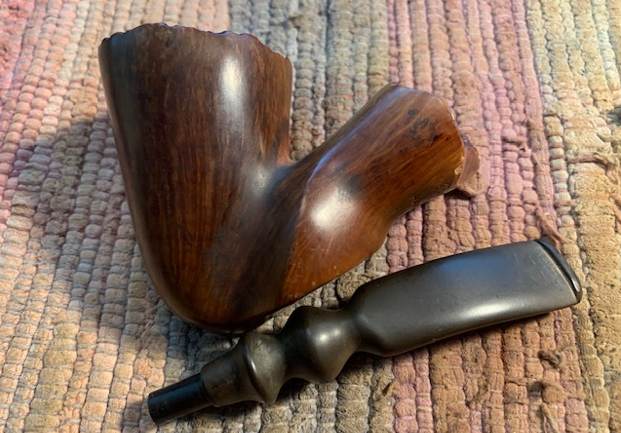
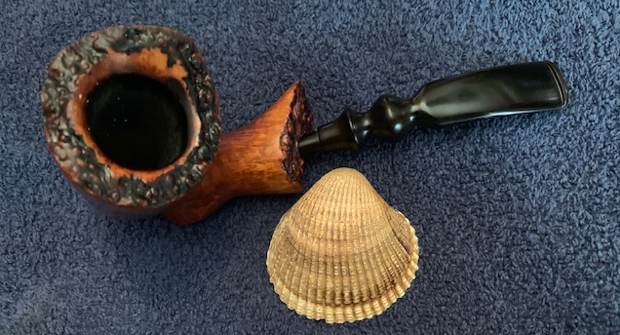
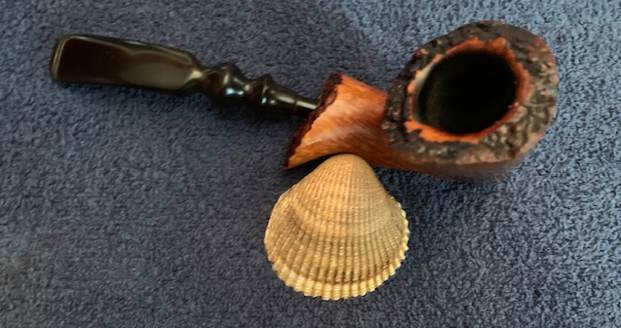
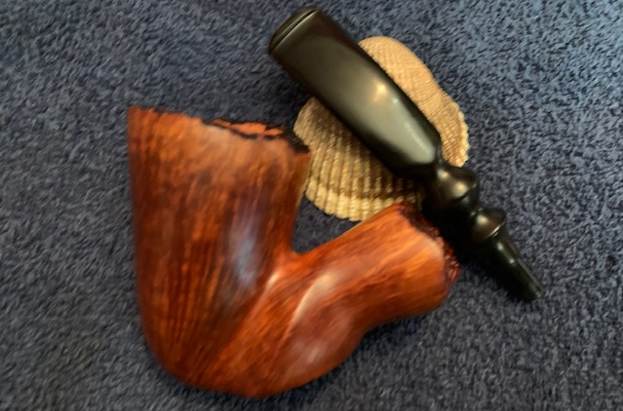
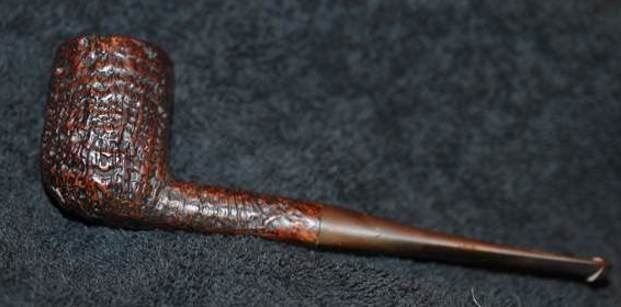
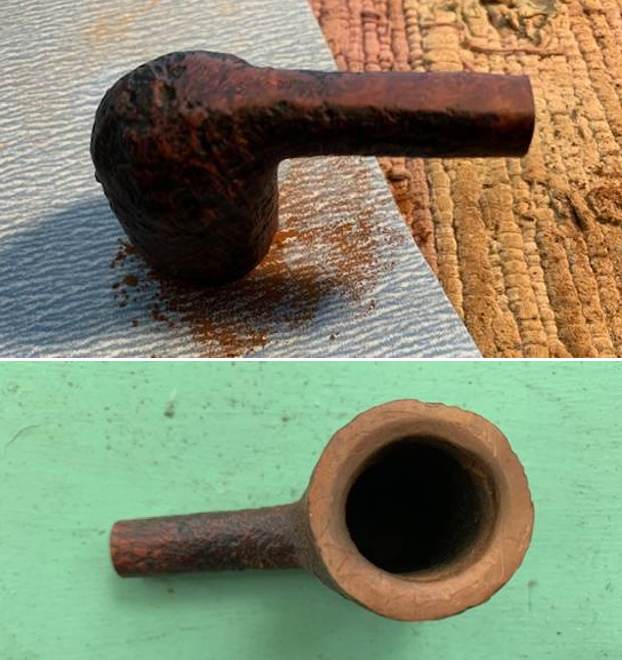
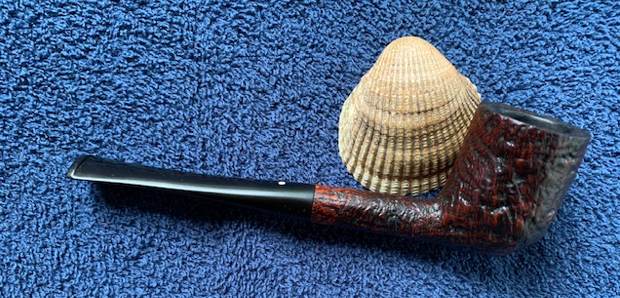
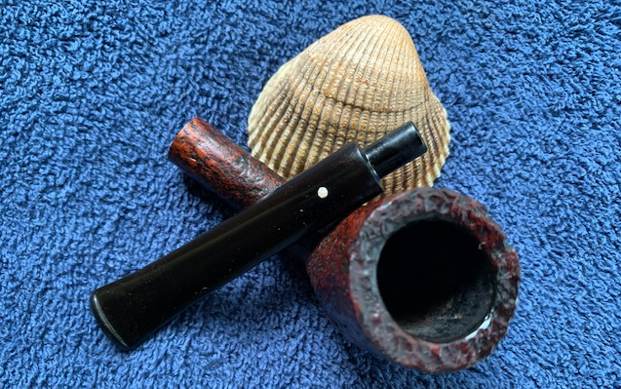
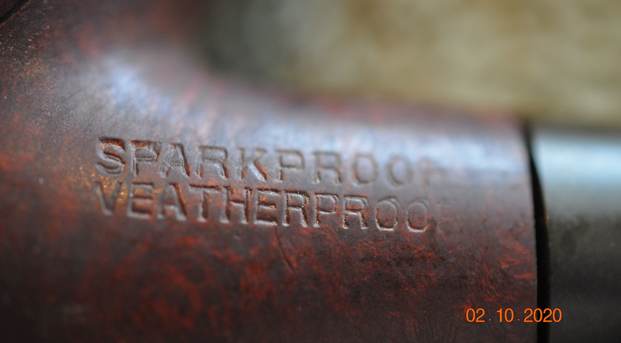
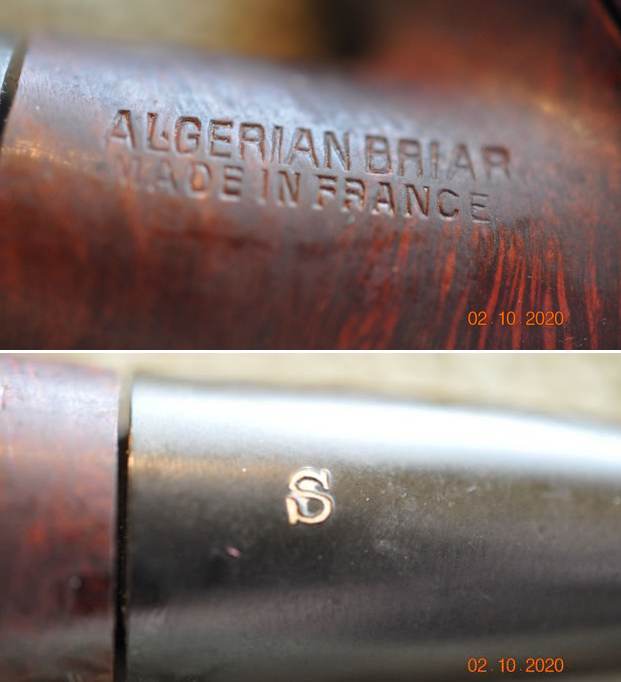
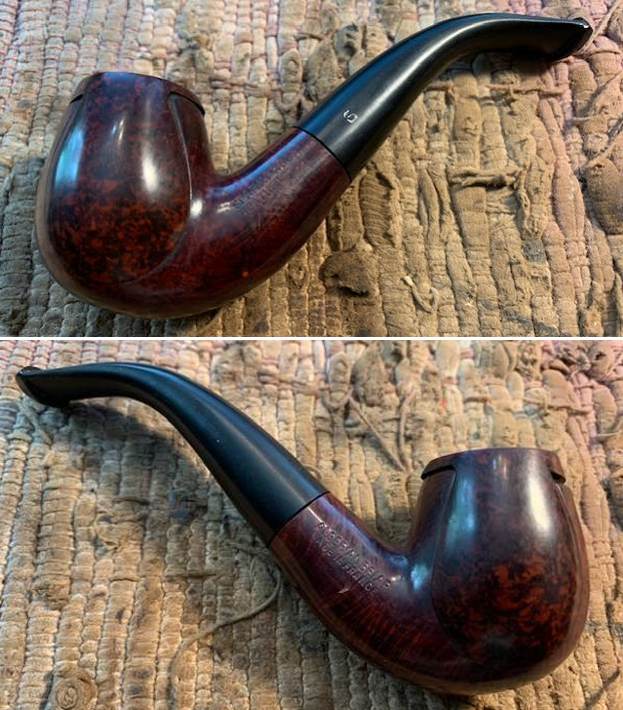
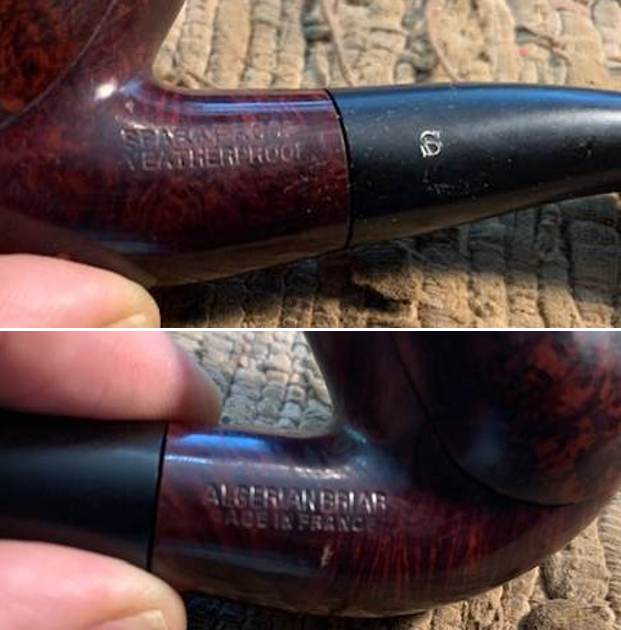
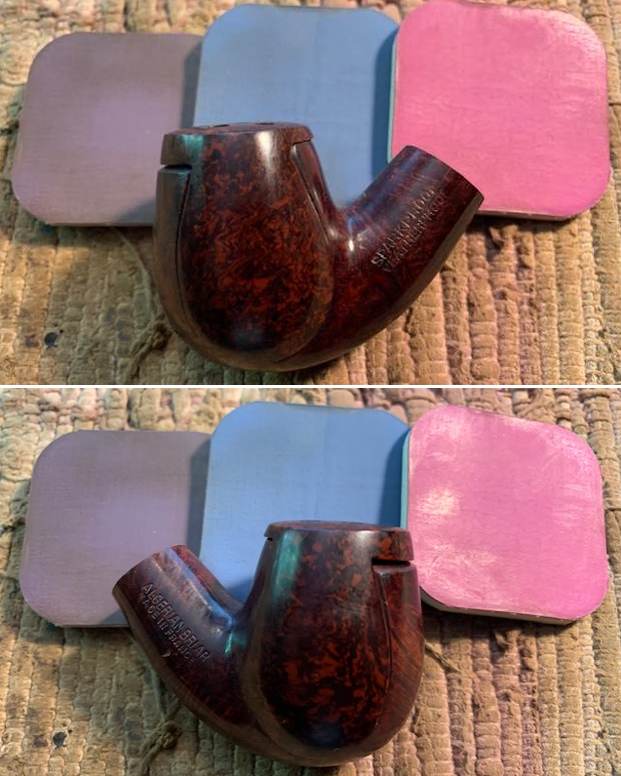
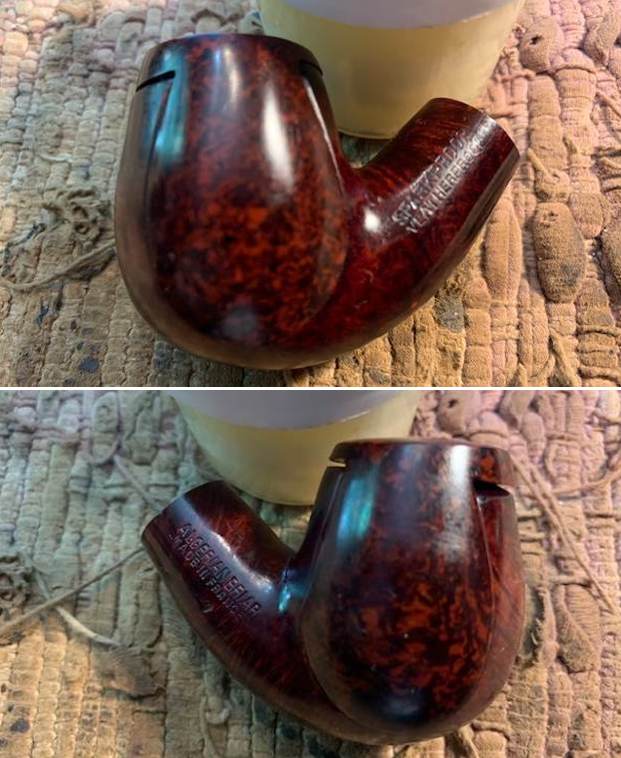
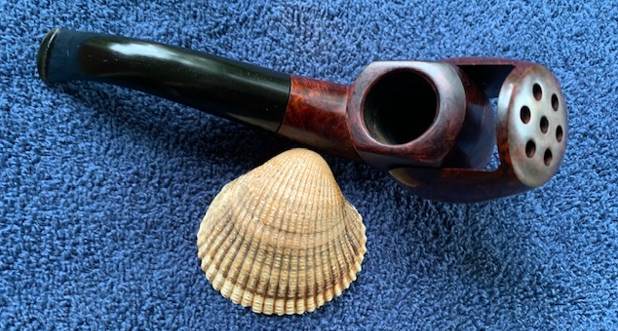
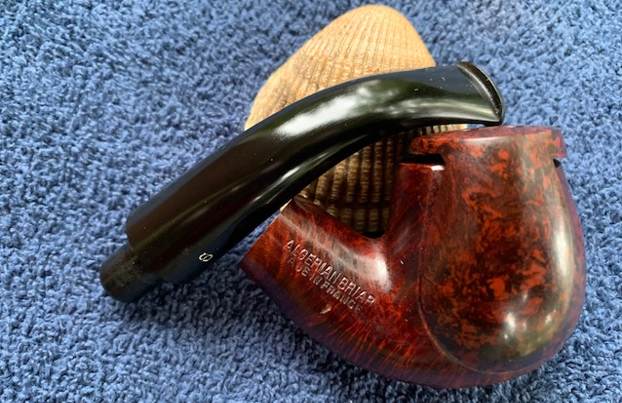
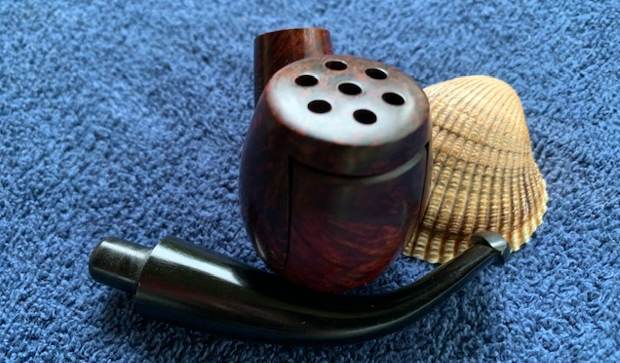
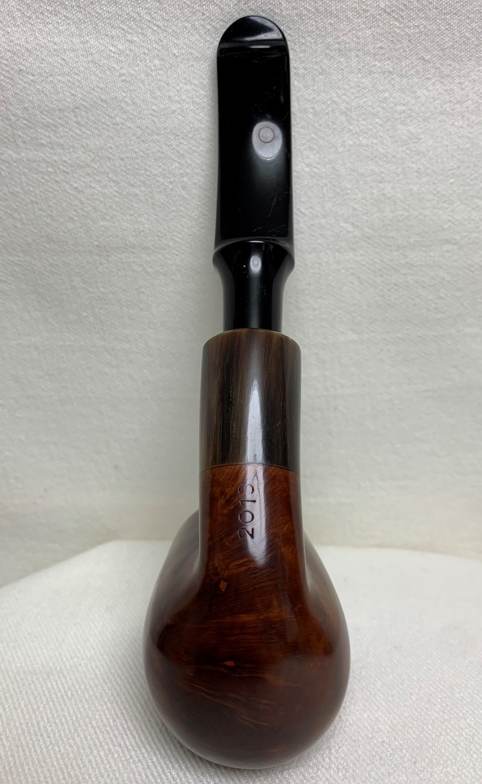
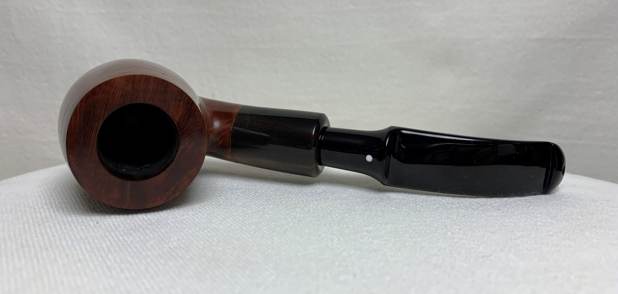
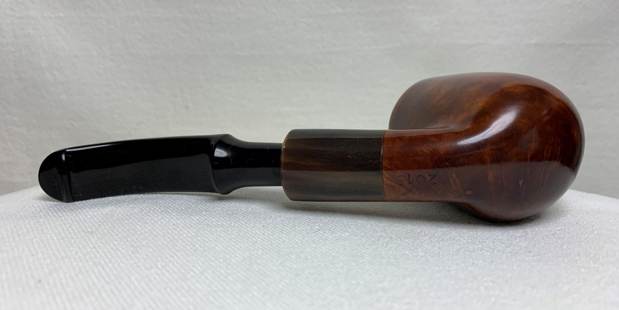
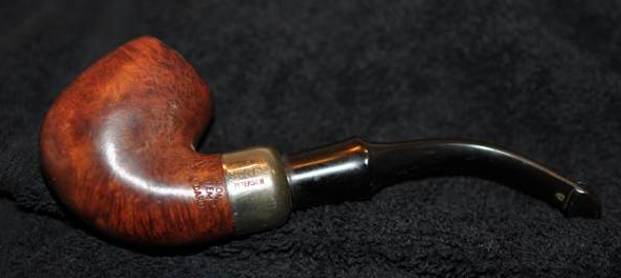
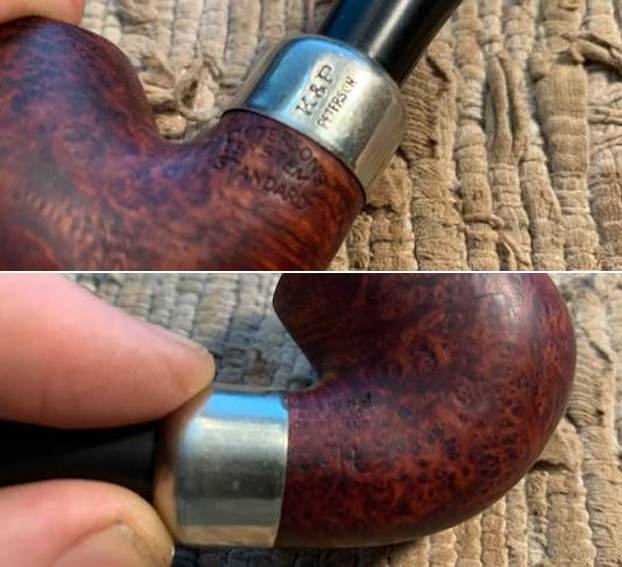
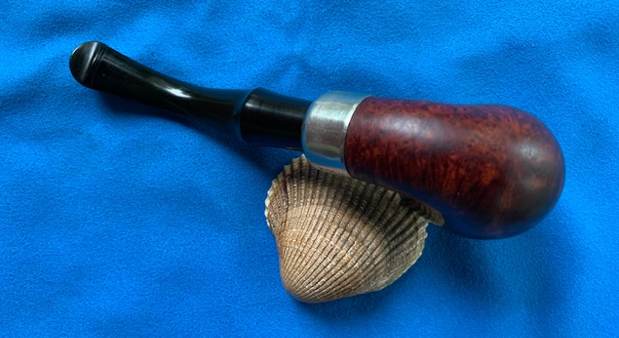
Pull up a chair and light your pipe – I am about to regale you with the tale of one of the most challenging restorations I have ever undertaken. I hesitate to write “restoration”, simply because the work required on this pipe imposed a burden on that word that it may not have been intended to bear. Perhaps “re-creation” is a better word. This post is a little longer than usual, but worth it. This frog needed much more than a kiss to turn into a prince.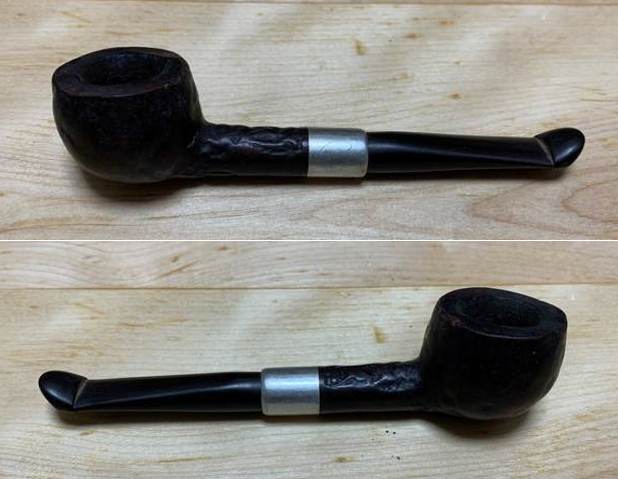 This is a rusticated Leonard Payne Classic pipe in a billiard shape, with a matching military-style stem and dental bit. The left side of the shank reads Len Payne [over] Classic. Similarly, the ferrule also reads Payne [over] Classic. However, there are no markings (or no visible markings) on the right side of the shank. I acquired this pipe from the granddaughter of the gentleman who once owned it. This fellow is now deceased, but I am pleased to honour his memory with my work. This was obviously a favourite pipe of his, both because it was so dirty and because the rustication was so worn! It is clearly a great smoker.
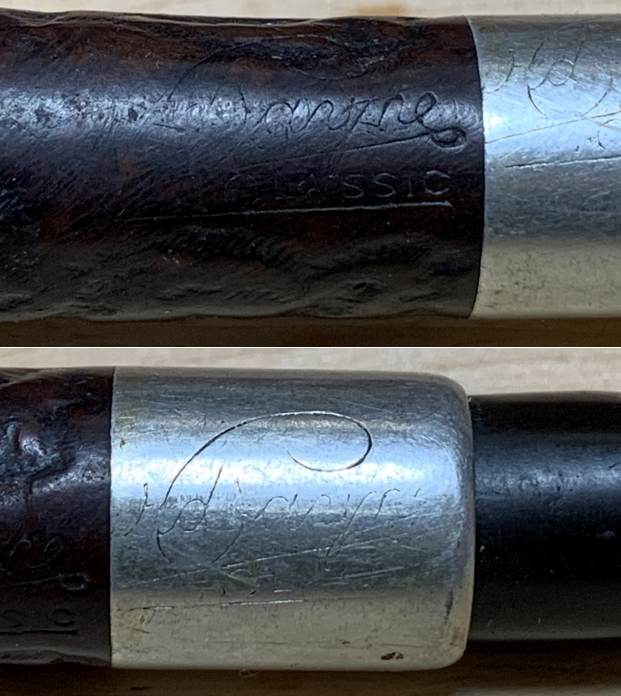 The pipe in question was made by the late, great Canadian artisan, Leonard Payne. He was born in England, moved to Canada in the 1950s, and died in the Vancouver area within the last few years. Payne was, to put mildly, an idiosyncratic pipe maker. I can do no better than quote Mike Glukler of Briar Blues (found on Pipepedia):
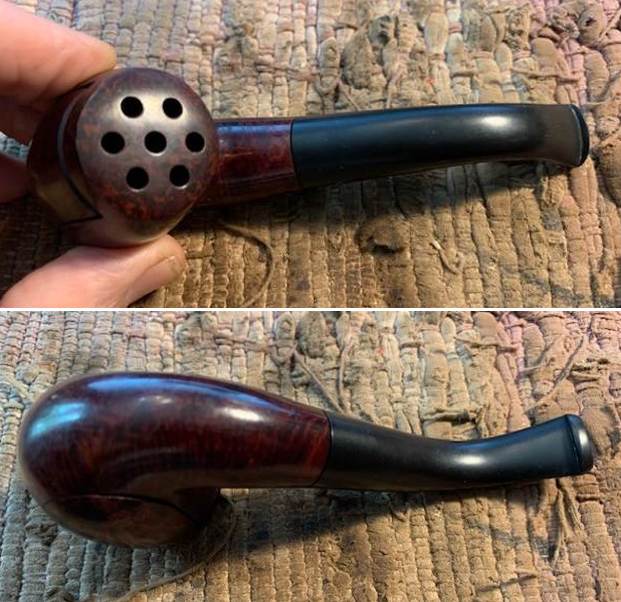
“Leonard Payne was based in B.C. for many years. He came to Canada from England. He had shops in Surrey, B.C. and Kelowna, B.C. Interesting fellow. Gruff as the day is long. When you bought a pipe, it was handed to you in a paper bag. No sock, no box. Most of his pipes carried a ‘carburetor’ system at the shank/stem junction. Another Payne idea was his shanks. Almost all his pipes were two pieces. He’d turn the bowl and shank, then cut off the shank and reattach with glue (not always with the same piece of briar, so many did not match grains). His thinking was that the shank being the weakest link, if cut and glued would never break and thus ‘correcting’ the weakest link. In addition, there was a photograph that Steve found of Payne on Reddit that appears to date from the 1960s. The original poster on Reddit told me that the photo comes from the City of Surrey Archives. I have no idea why it is in French, but here is my translation of the text on the right:
“Pipe makers are not on every street corner in Canada! Leonard Payne, originally from England, didn’t know the challenges he would face and that’s probably what influenced his decision to come and try his luck in Canada. After his arrival in 1957, he and his family settled in Vancouver, where he first found work as a tool maker – and made pipes in his free time. In 1959, he decided to become a full-time pipe maker, and since then he has had department stores in all parts of Canada among his clients. He imports briar blocks from Italy and pipe stems from England.” This pipe was a perfect example of Payne’s work. It had a ‘carburetor’ system at the shank/stem junction and the stummel had been separated in two and reattached with glue (although, in this case, he did reattach the matching piece of briar).
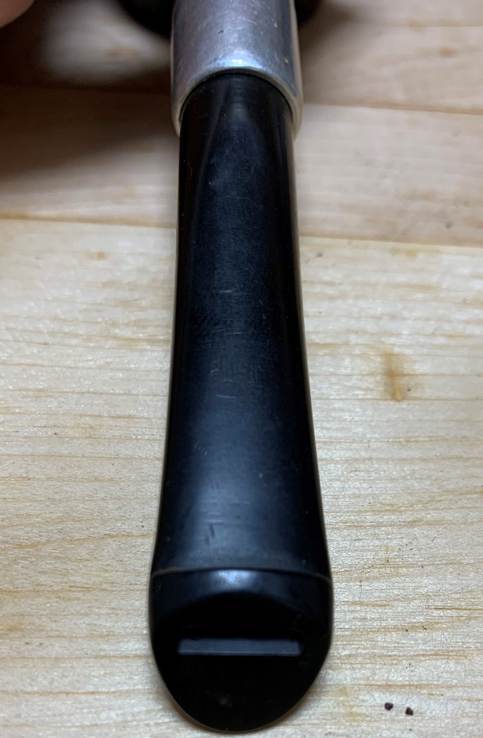
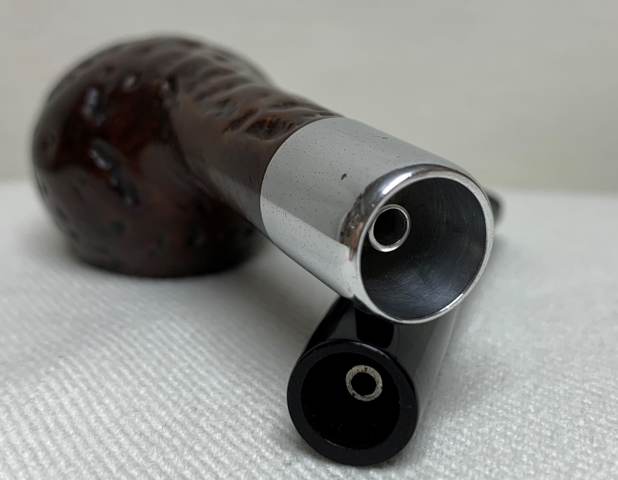
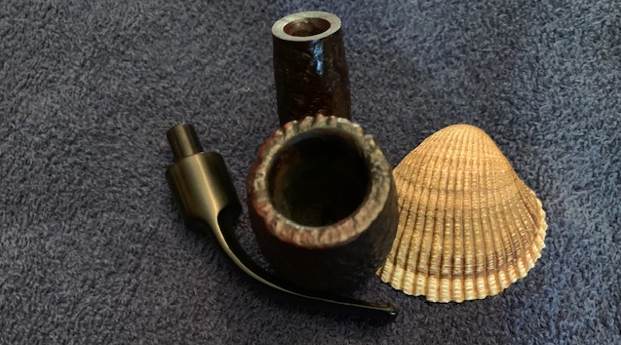
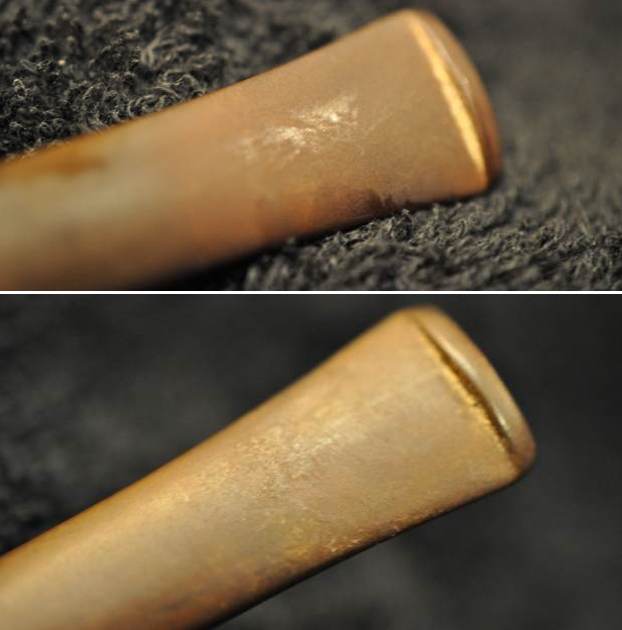
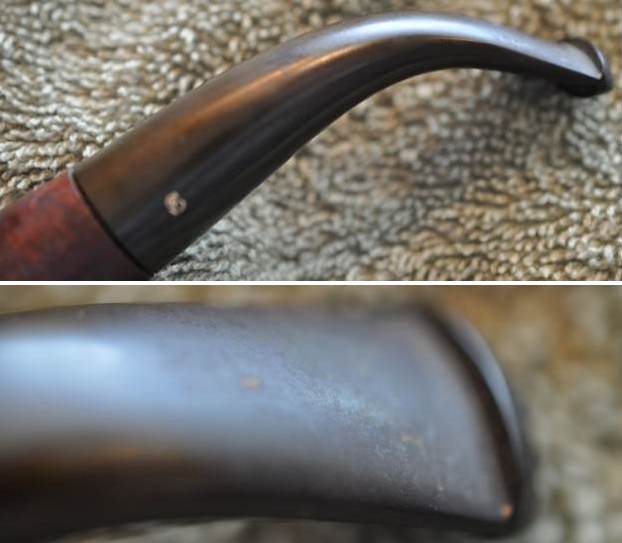
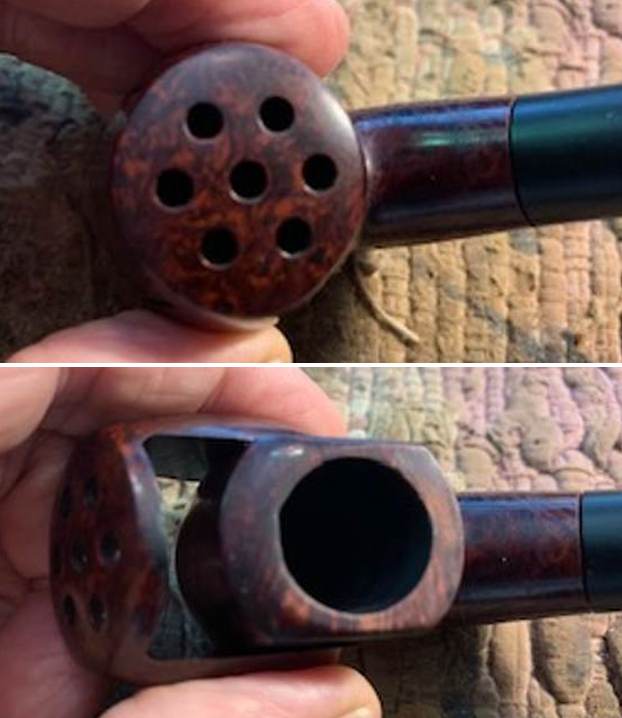
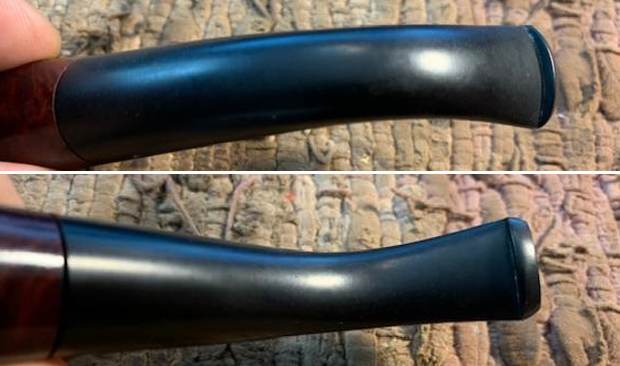
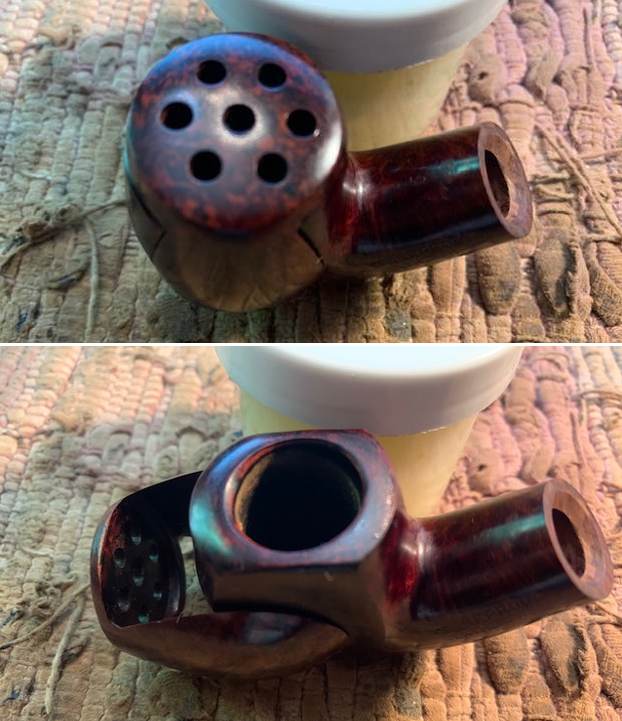
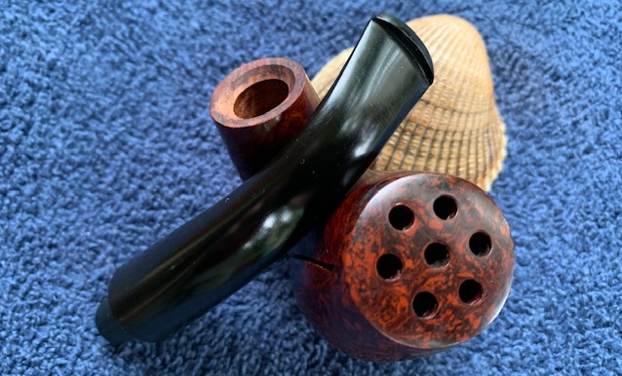
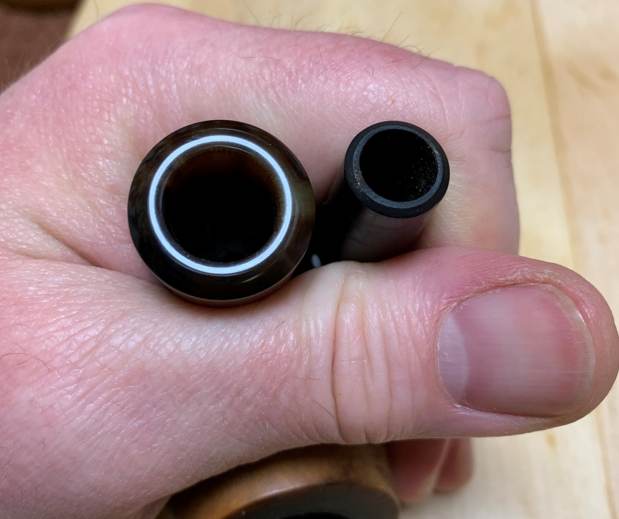
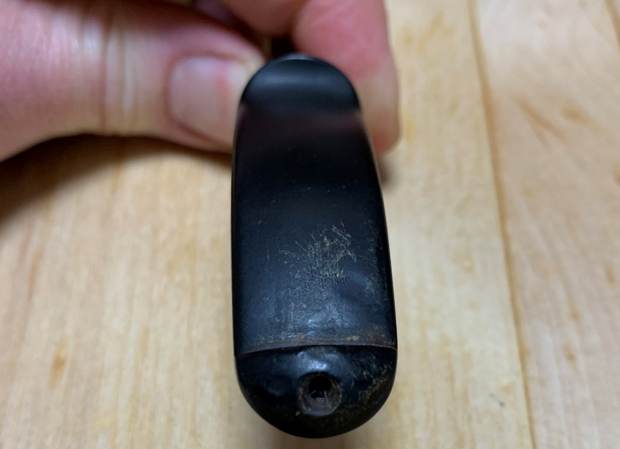
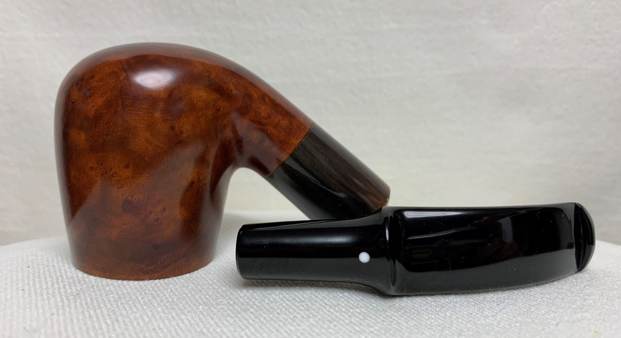
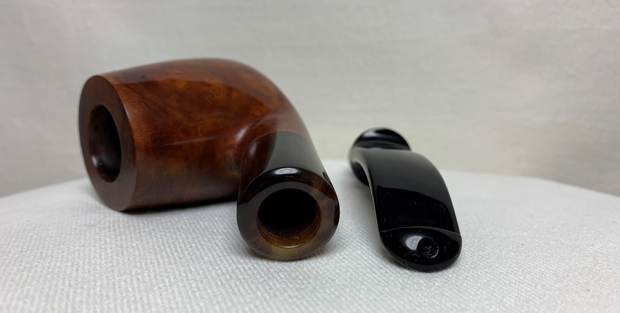
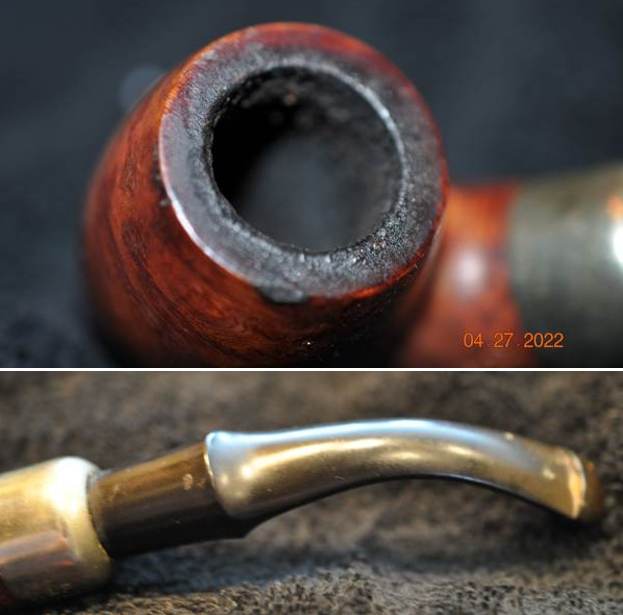
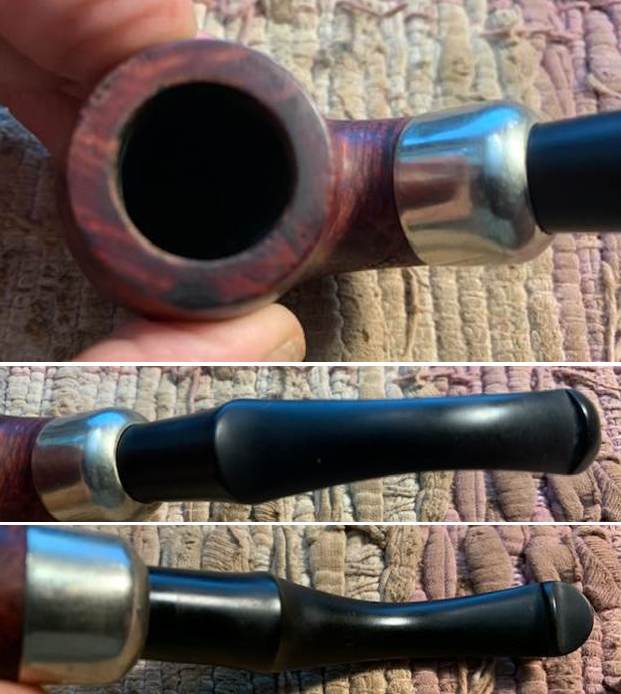
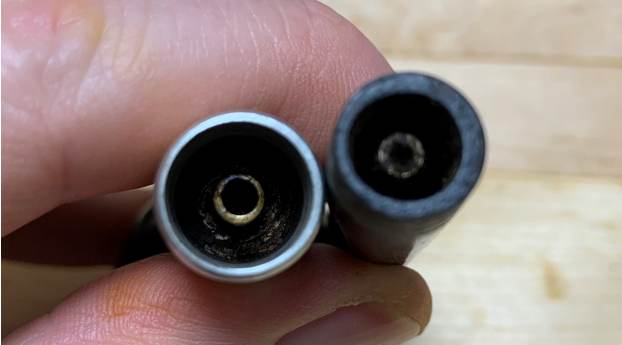 This pipe was charming, but it had a number of issues. The stem was dirty, though not too beat up. There were a few small scratches, etc., as well as some minor oxidation to the vulcanite. The ‘carburetor’ system was going to make cleaning all the more challenging, as there was little room around the end of the aluminum tube to remove all the filth.
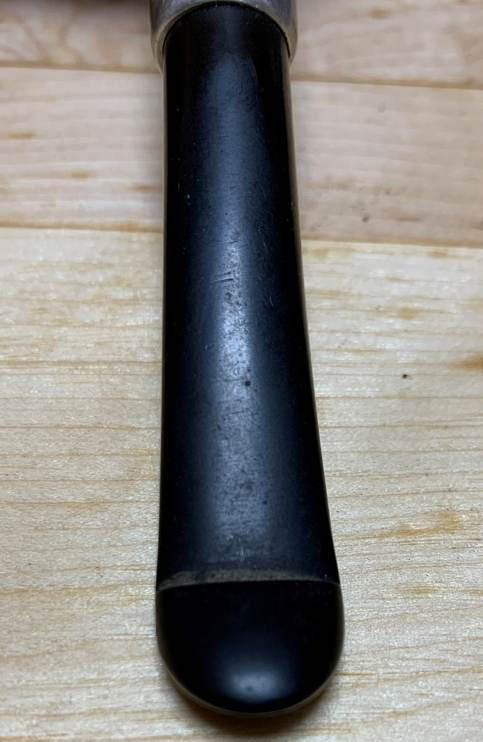
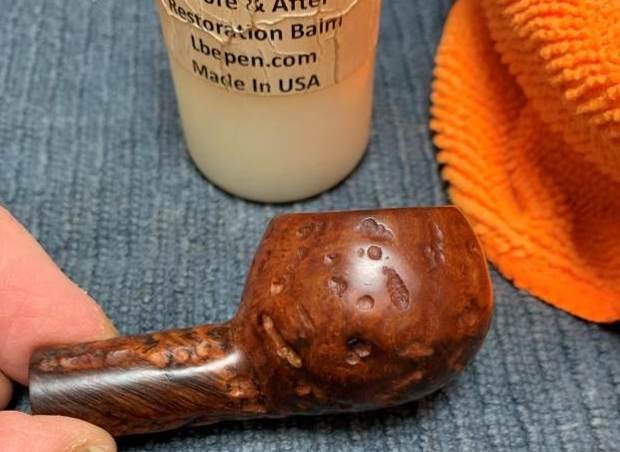
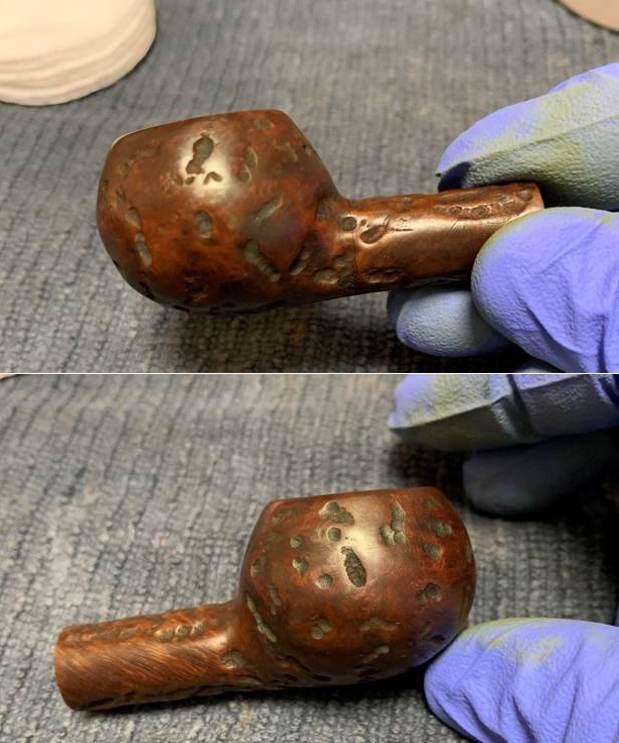
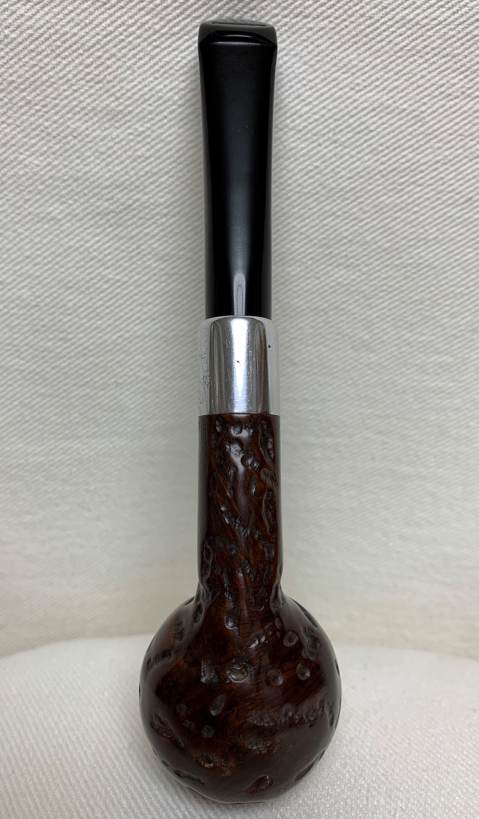
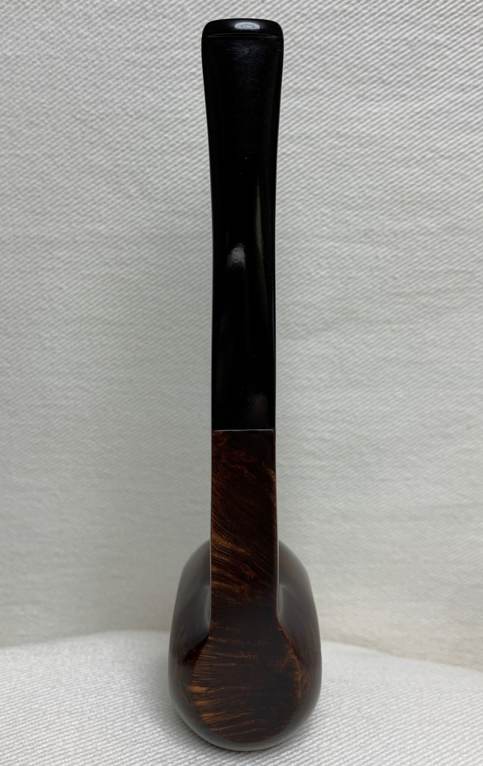
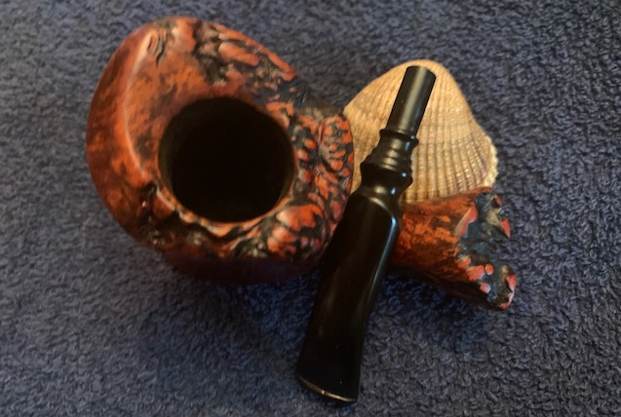
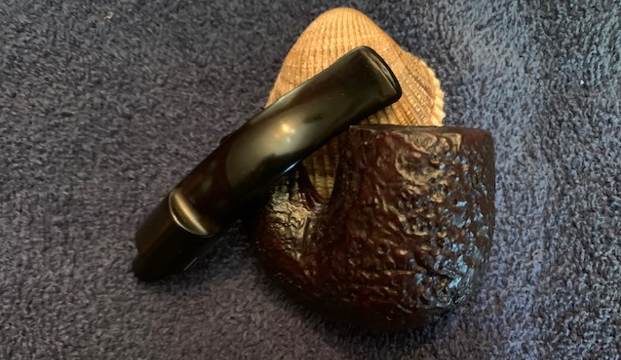
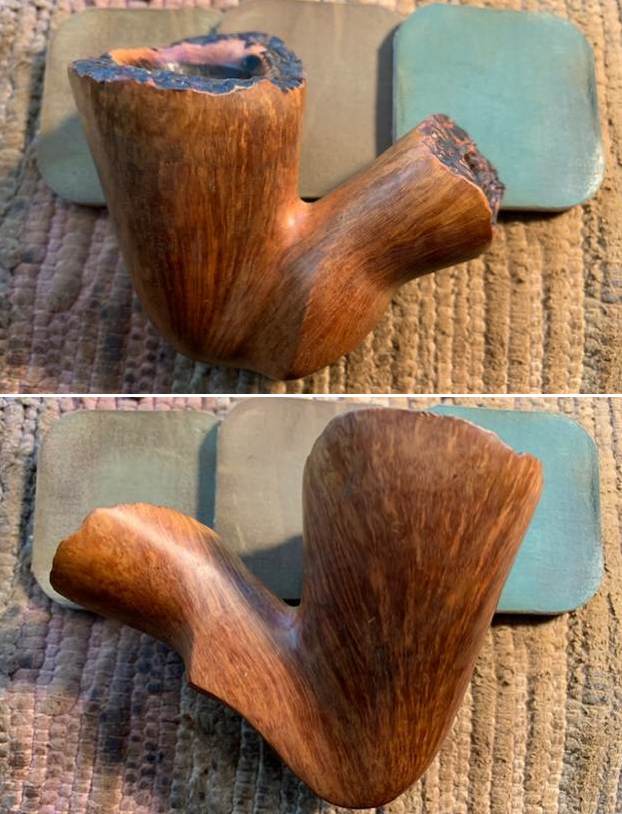
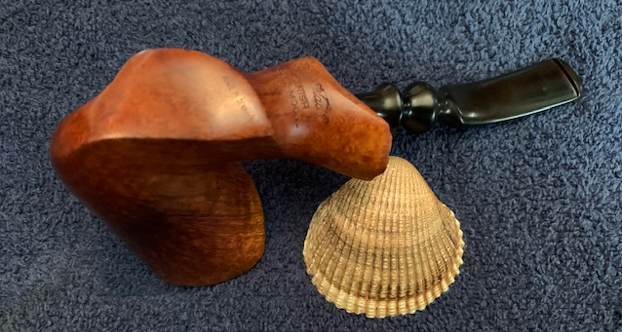
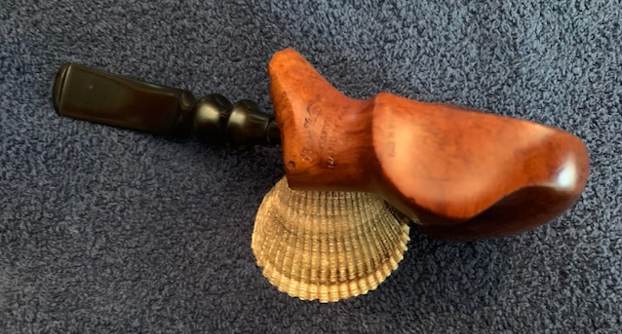
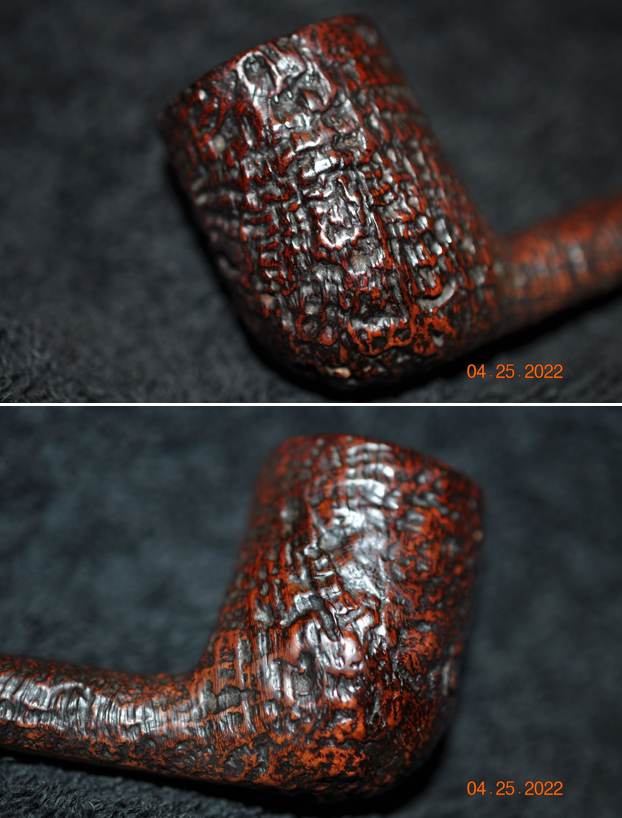
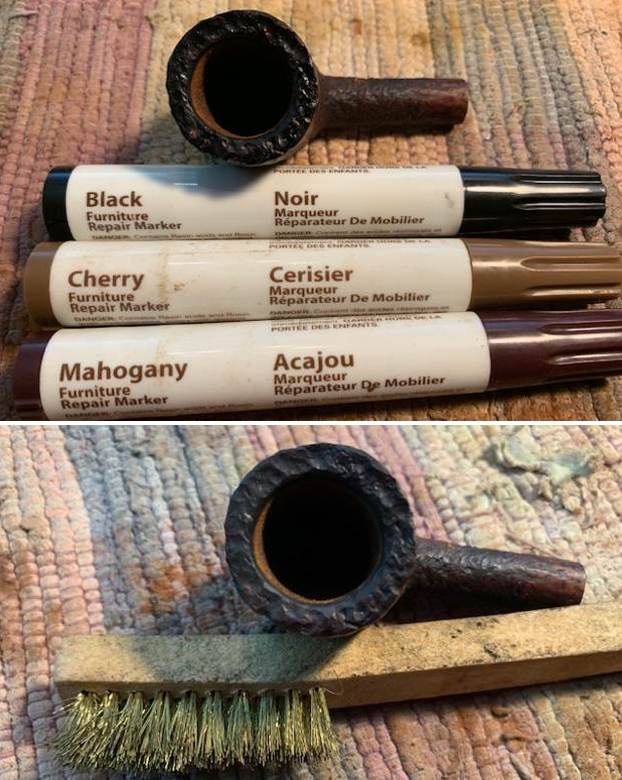
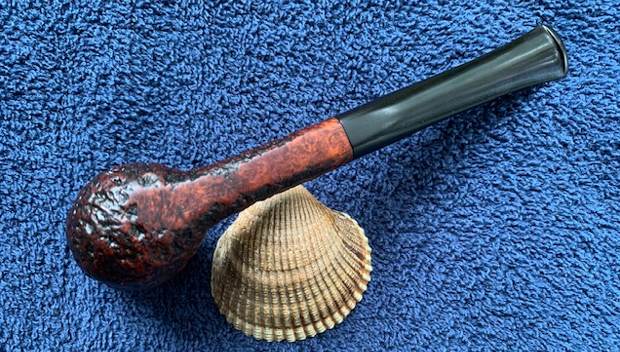
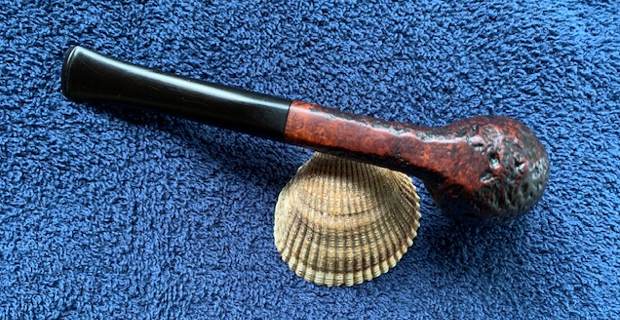
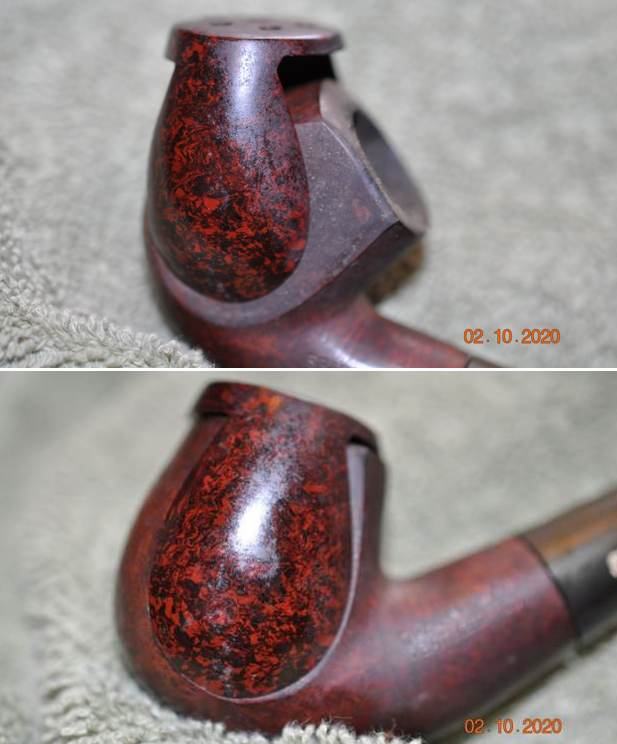
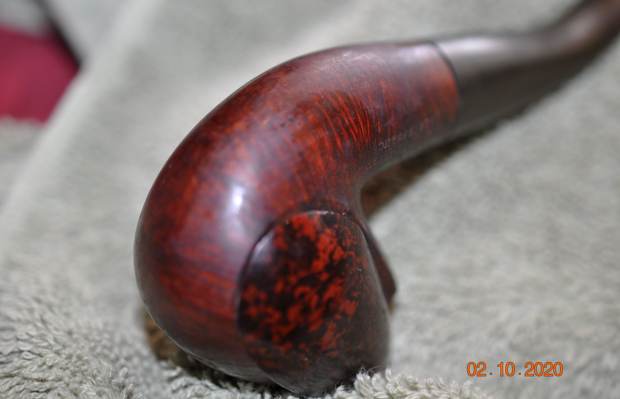
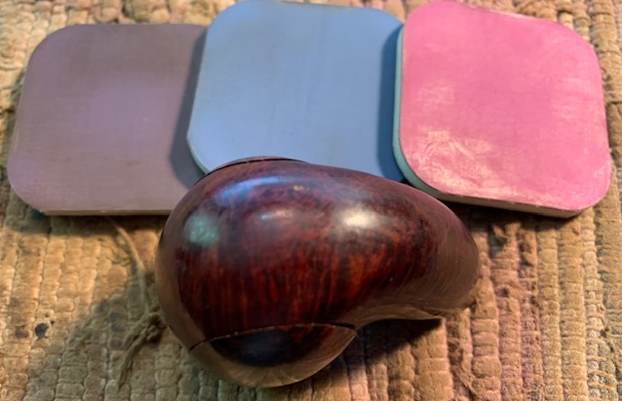
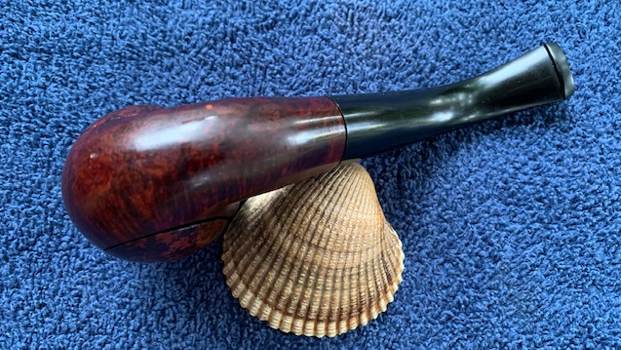
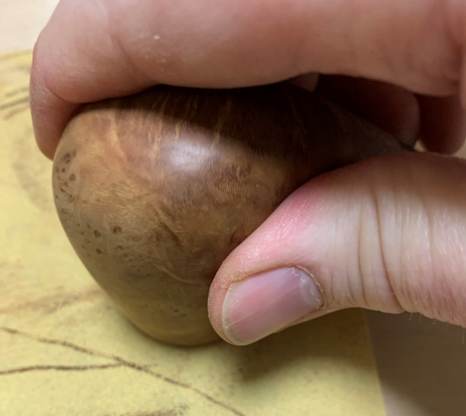
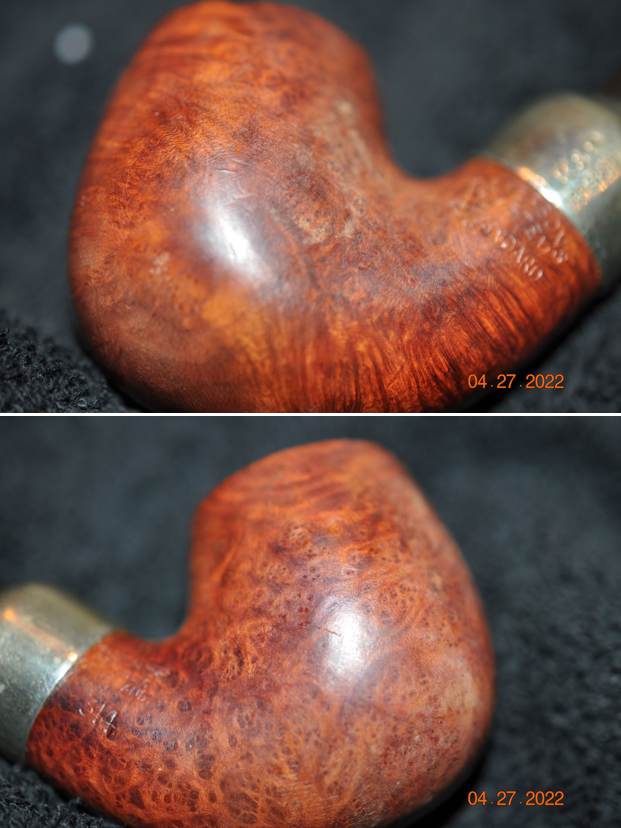
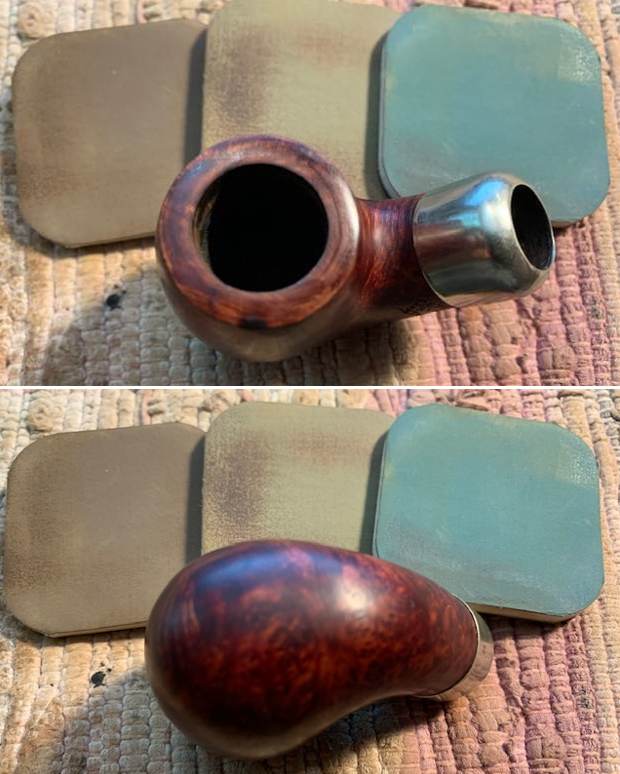
 The stummel was a different story. It was dirty, dull, and worn. The pipe had been rusticated once-upon-a-time, but so much hand-rubbing of the wood over the years had eroded it (and a lot of the Len Payne markings).
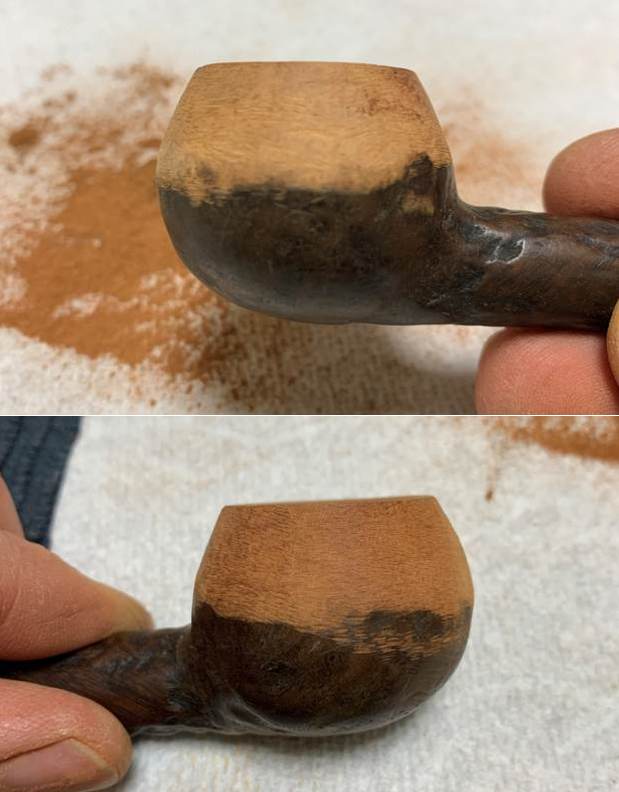
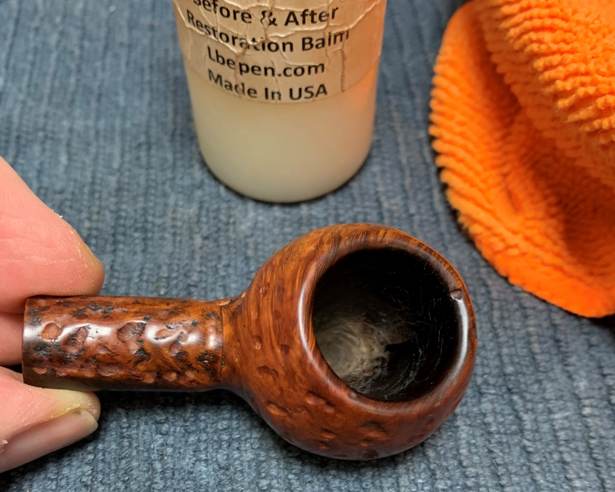
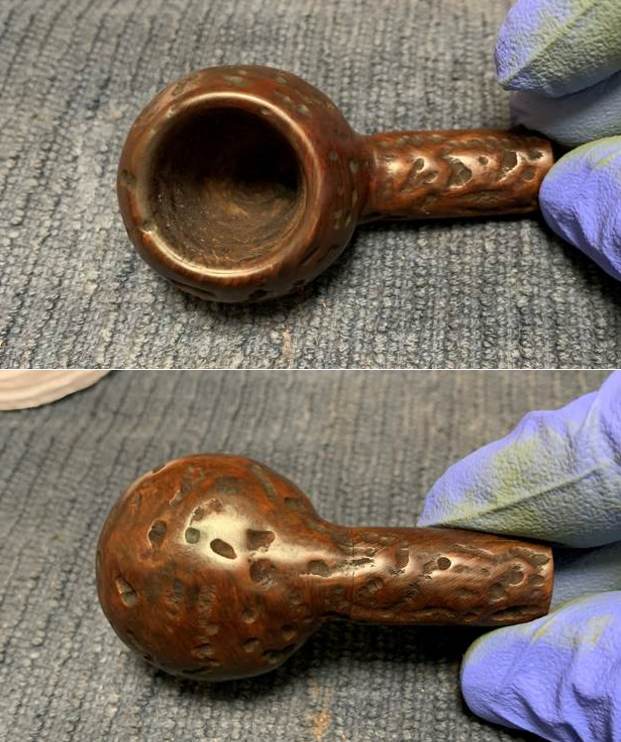
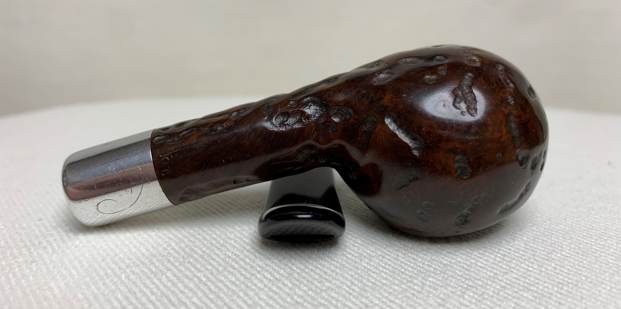
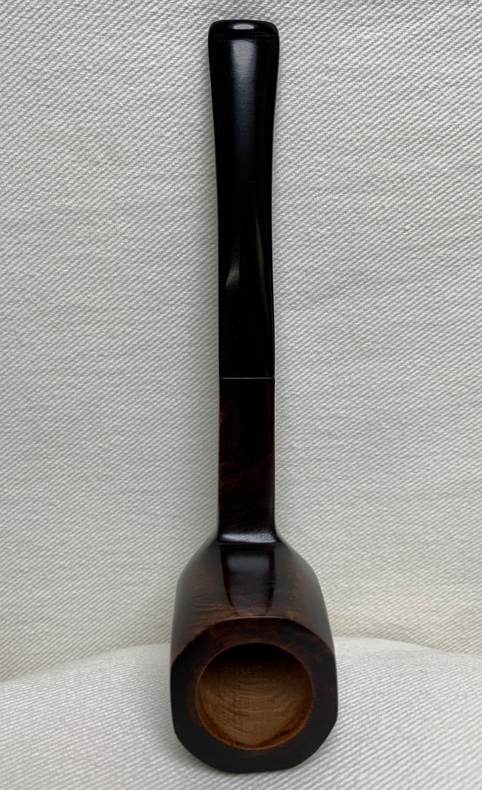
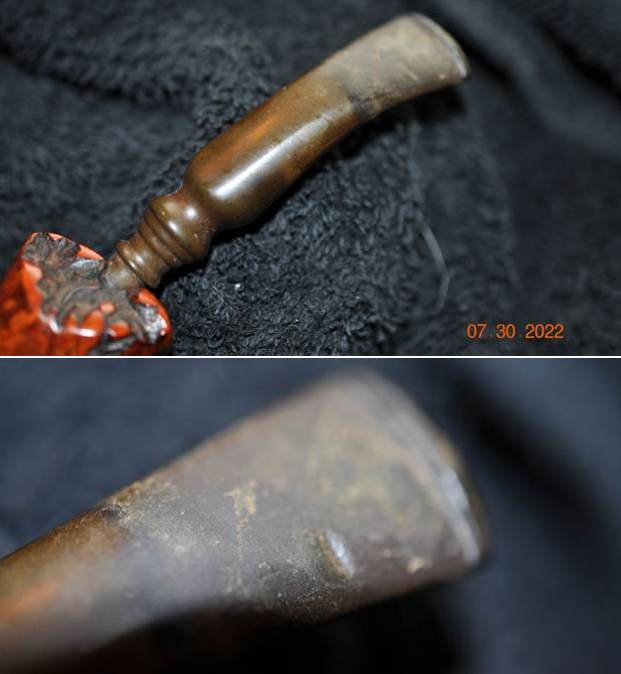
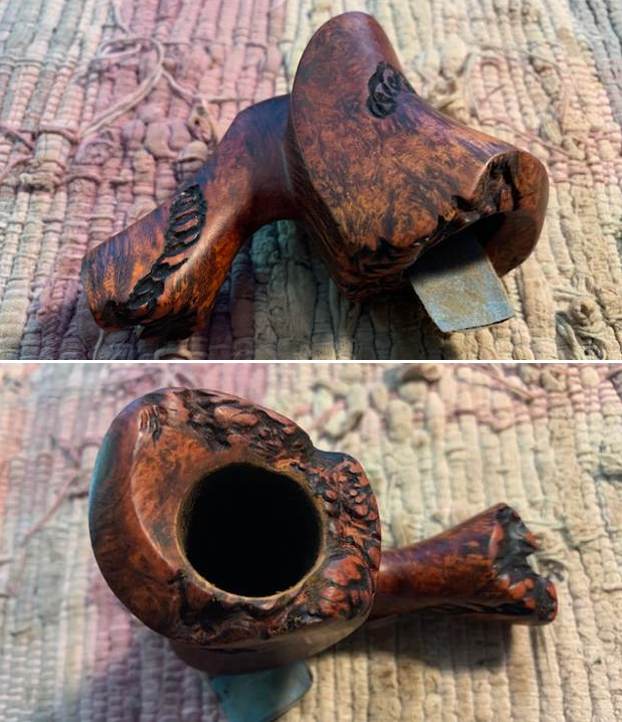
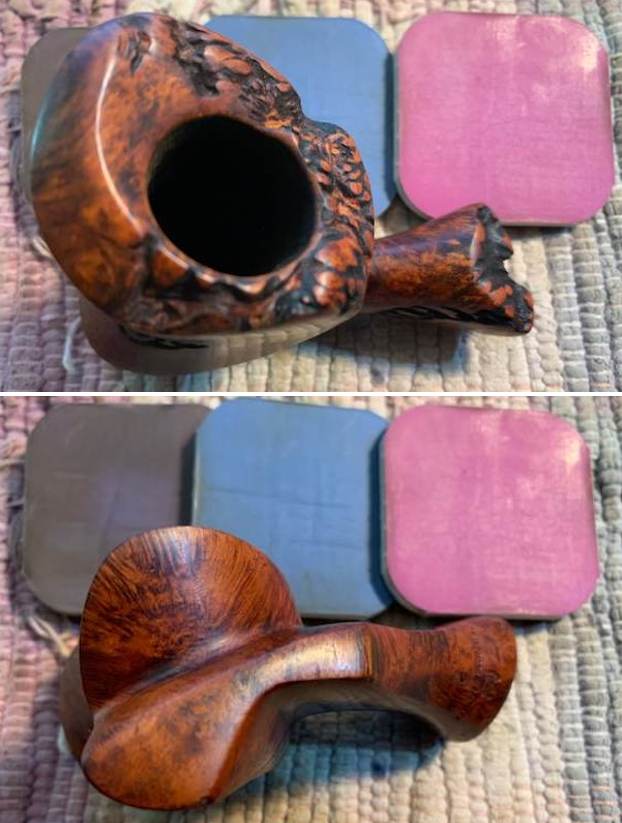
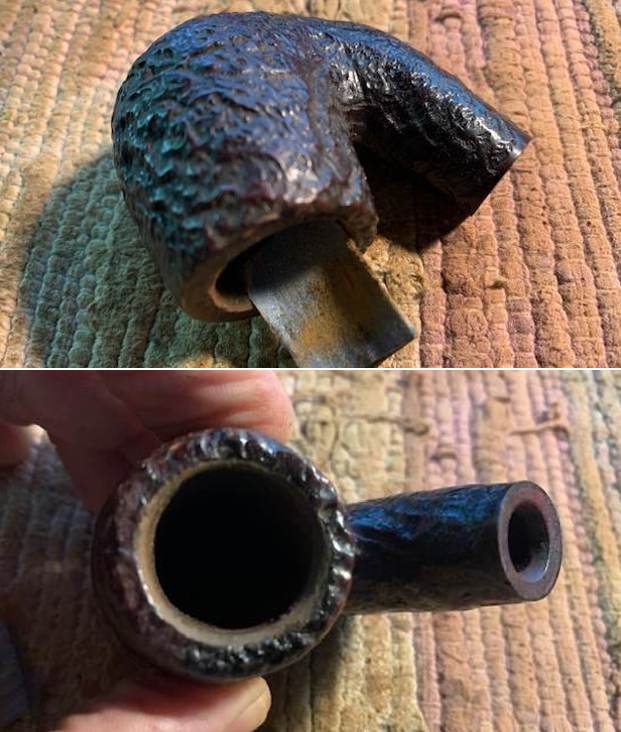
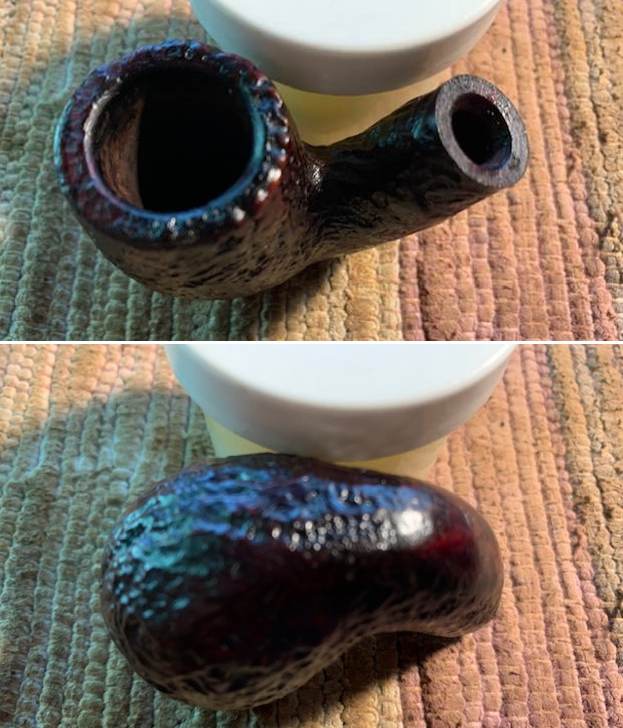
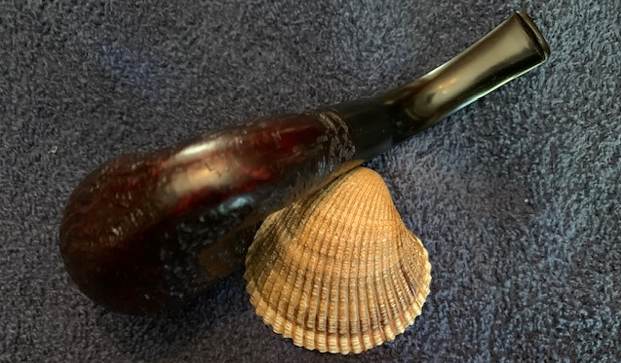
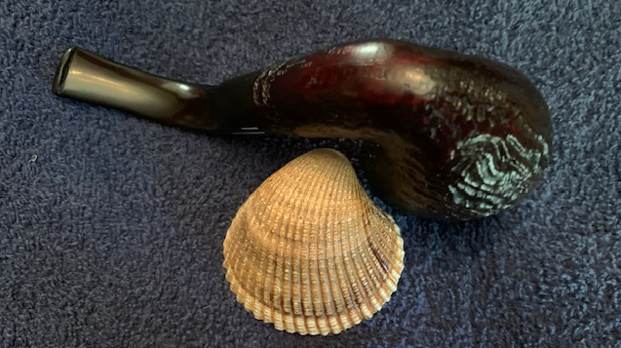
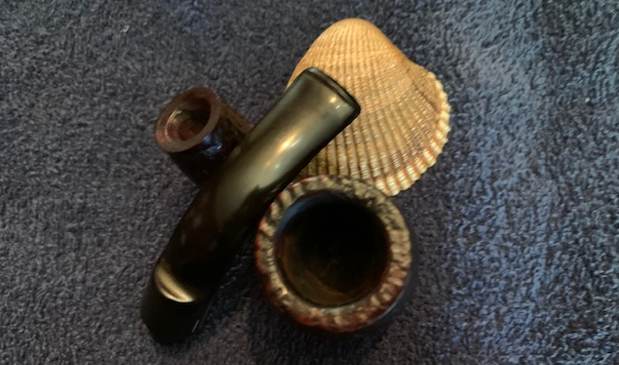
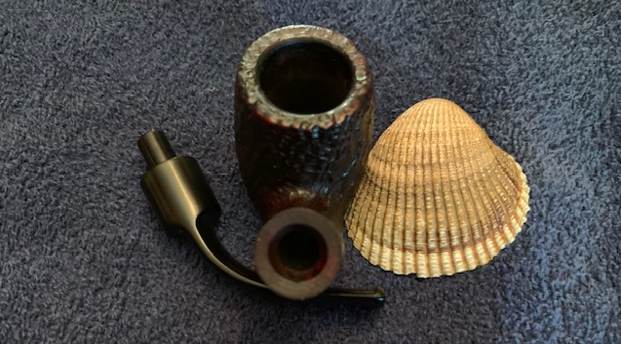
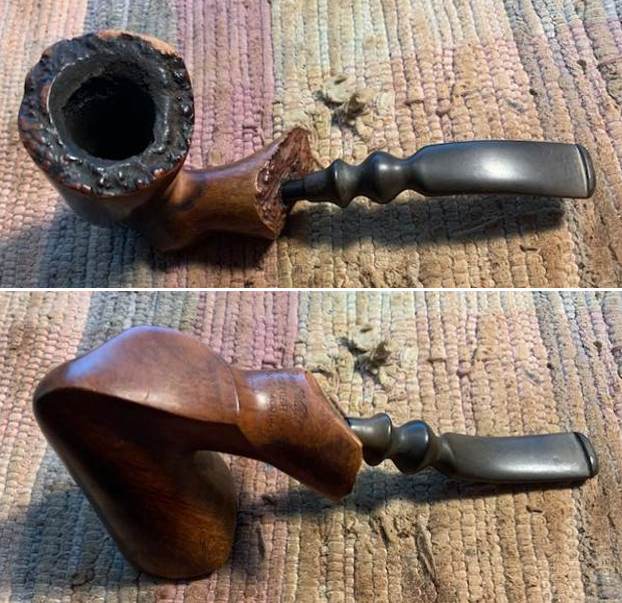
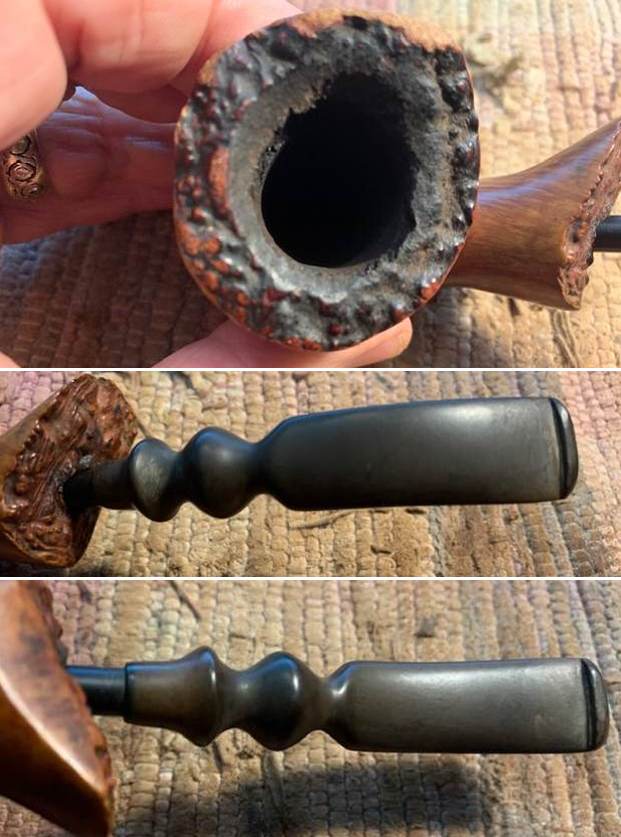
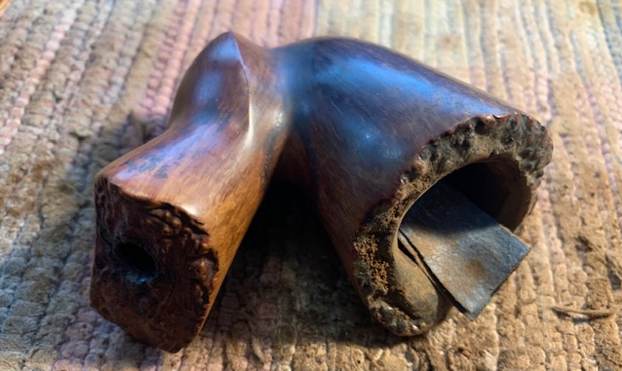
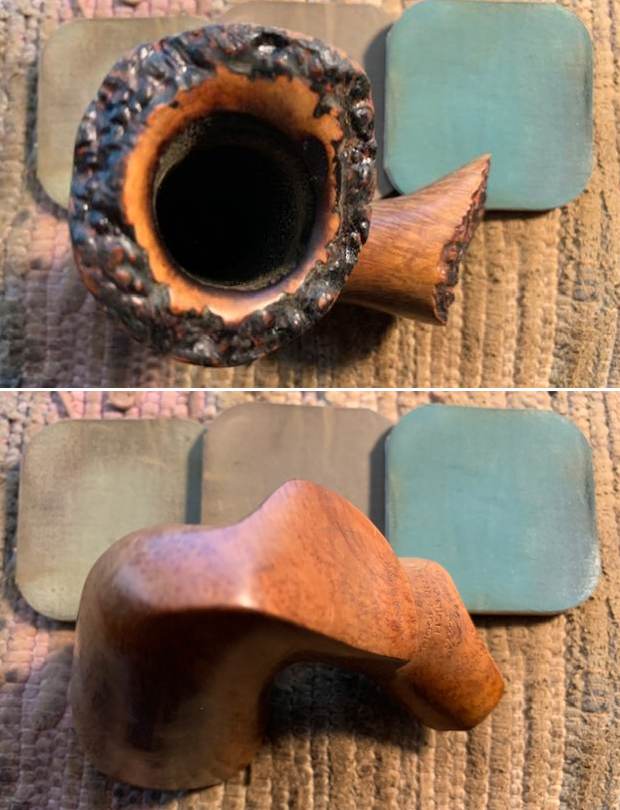
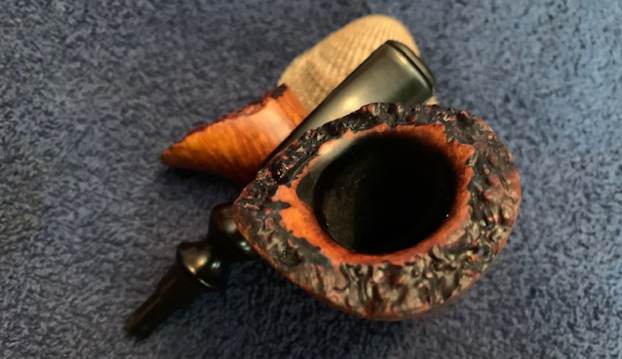
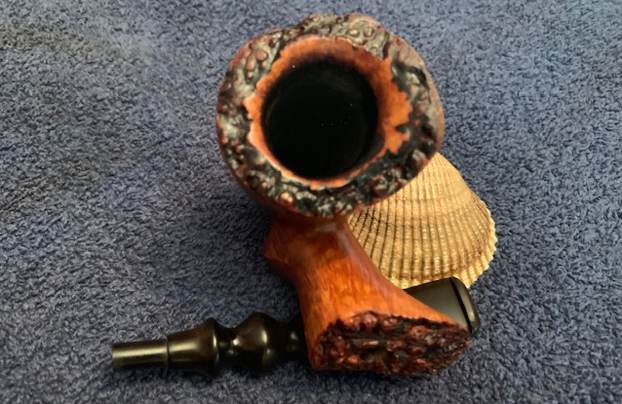
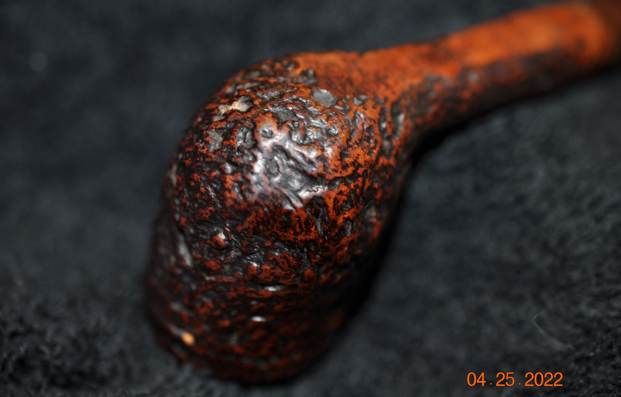
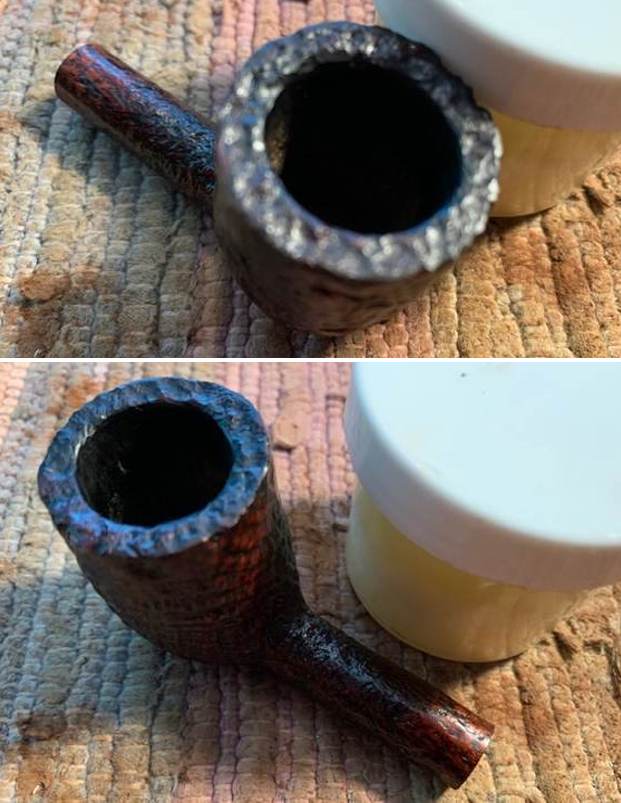
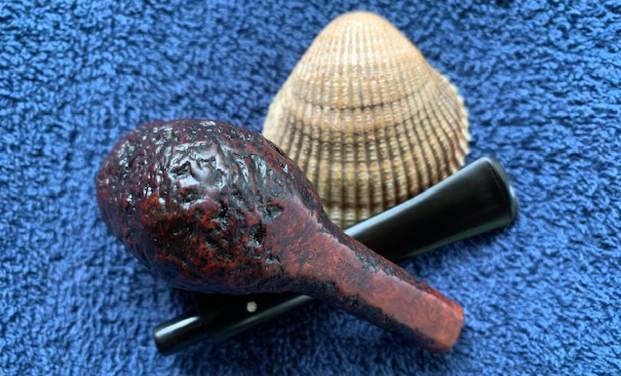
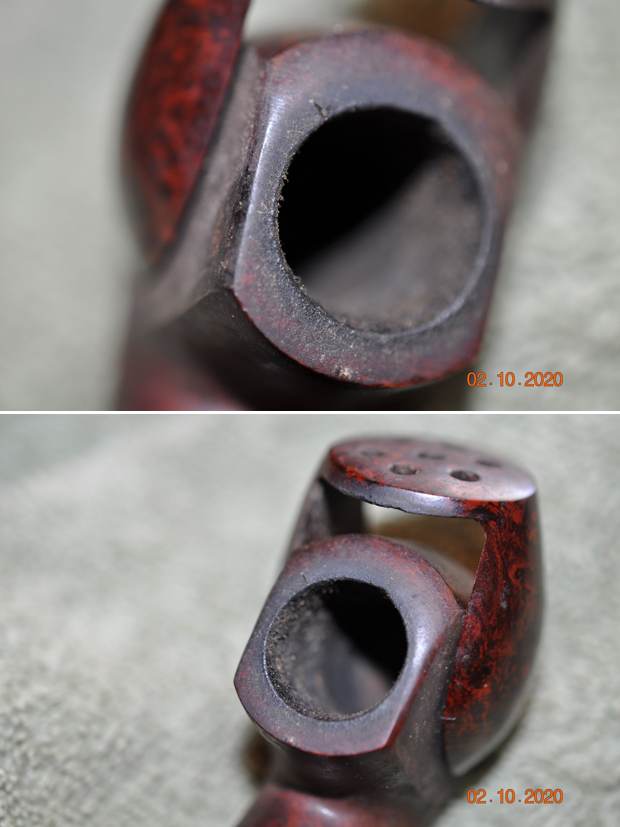
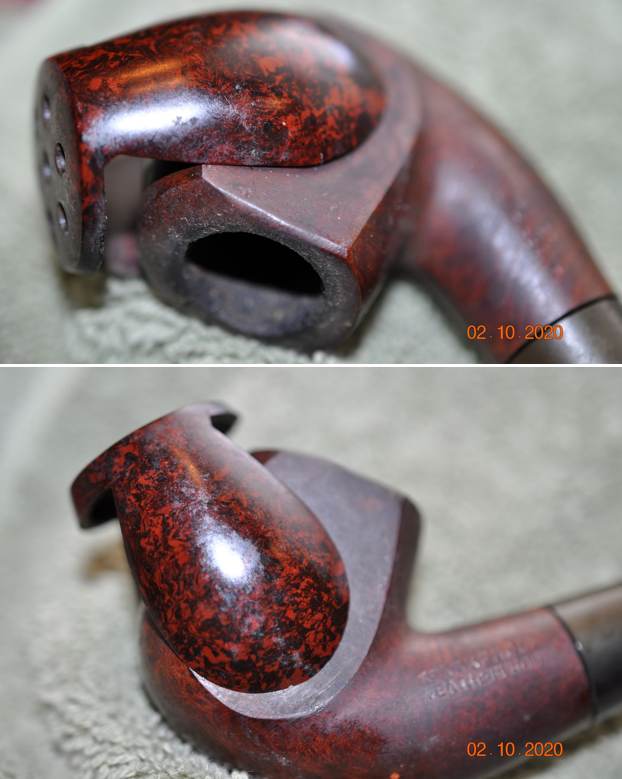
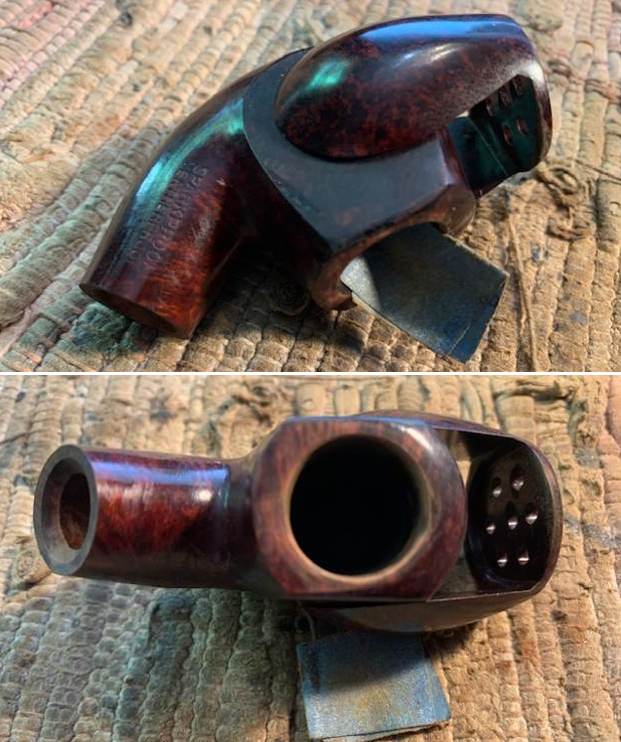
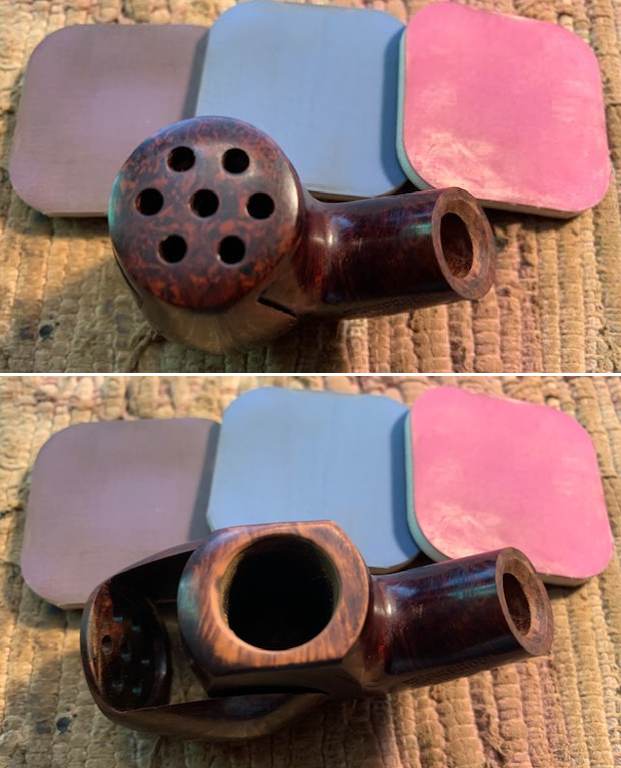
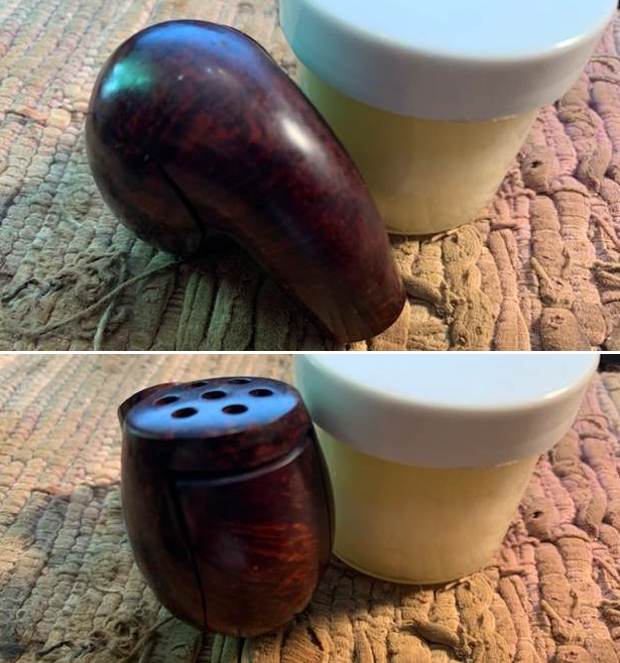
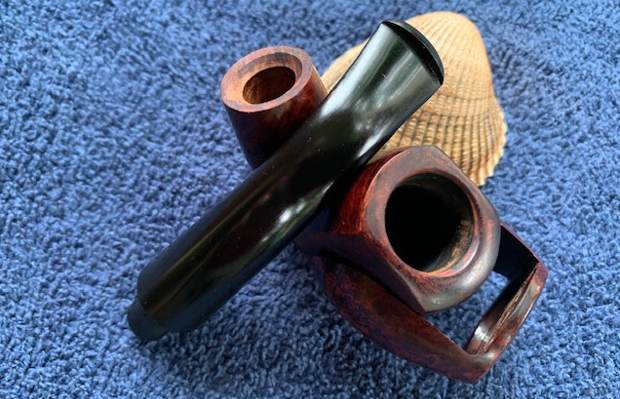
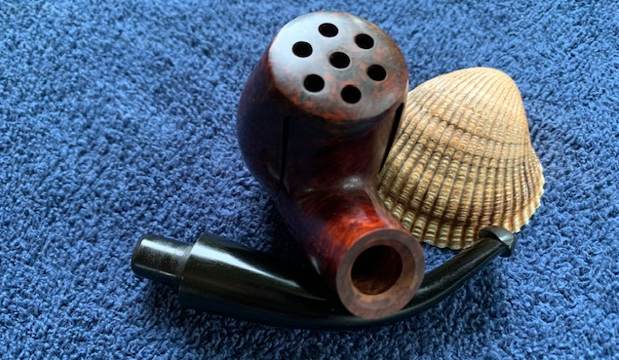
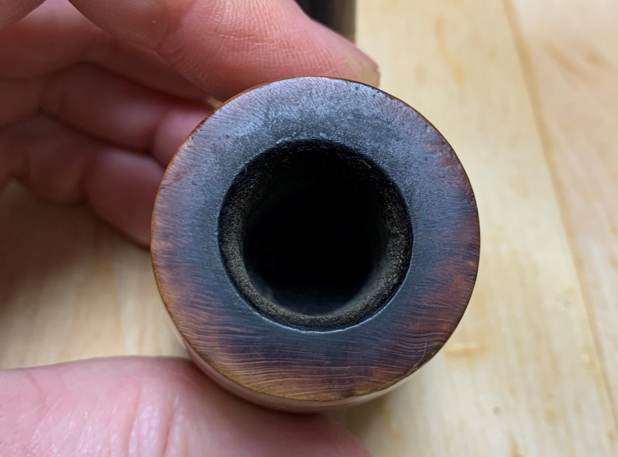
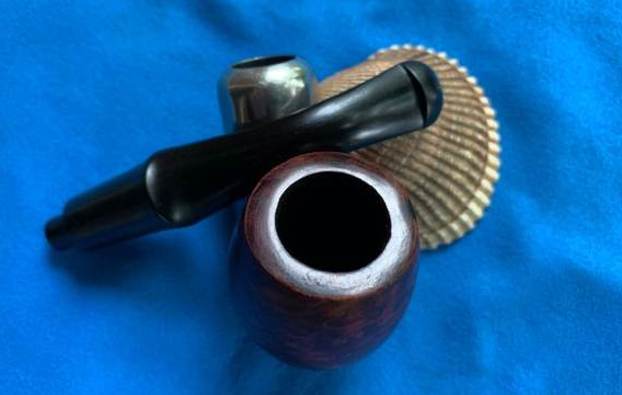
However, by far the biggest problem was the bowl. It was badly out-of-round, burned on the rim, and – take a close look at the photos – it had clearly been decapitated at some point in the past. Steve and I spoke about it, and we figure that the original pipe probably developed a crack after heavy use. The owner, loving his pipe so much, decided that he would rather modify it than toss it. Presumably, he then took a saw and cut off the damaged wood. Following this, he would have stained the wood with something very dark. All of this is conjecture, of course, but it seems likely, given the current state of the pipe.  What on earth do you do with a hacked-up pipe? Read on…
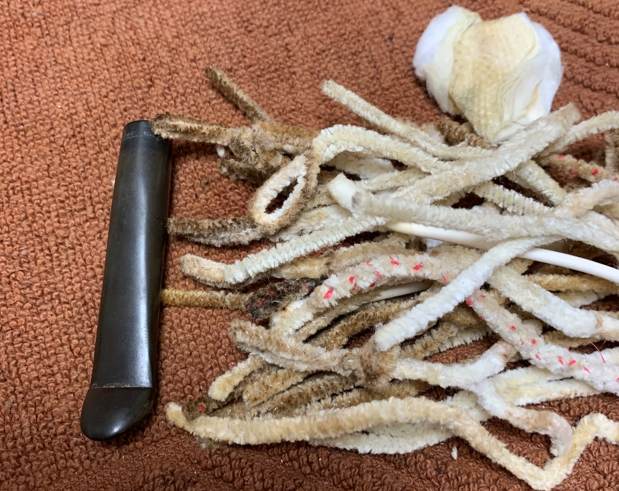
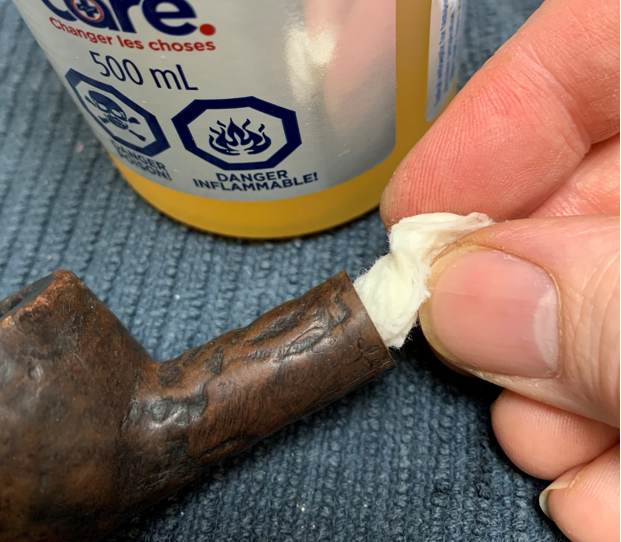
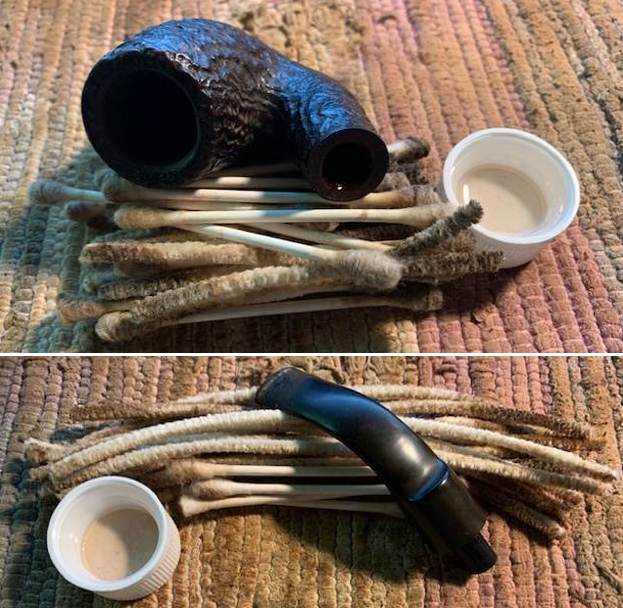
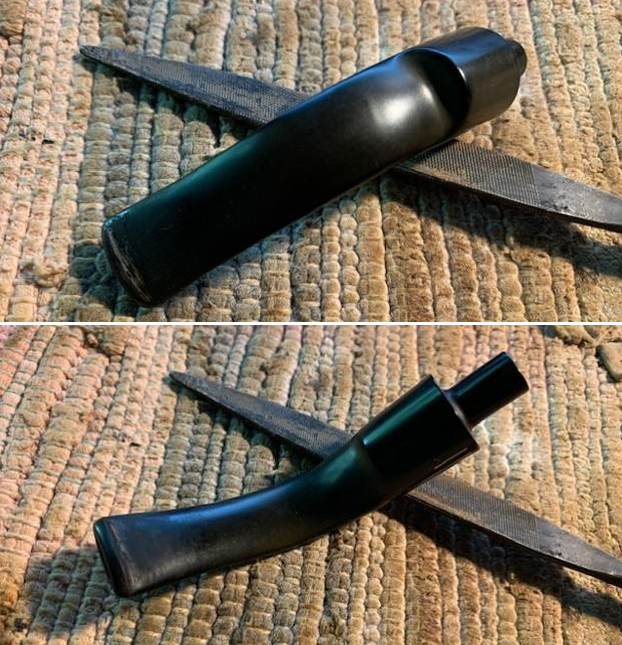
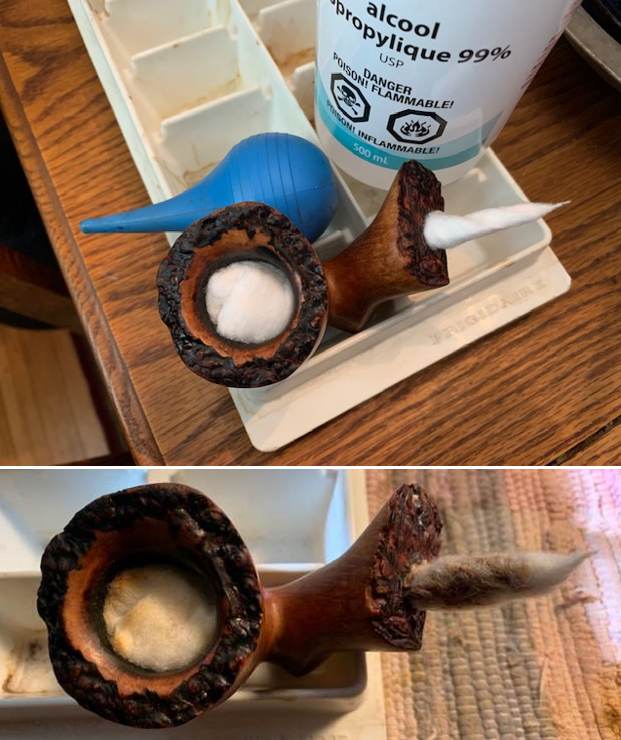
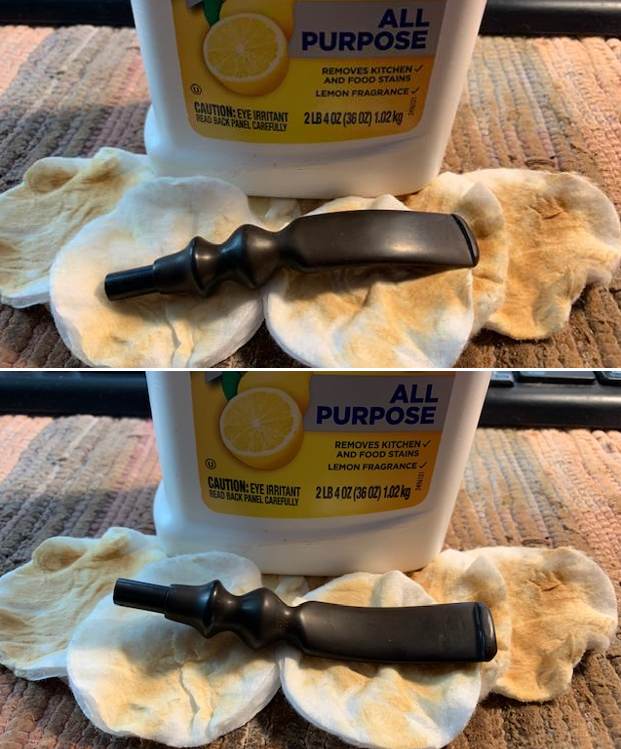
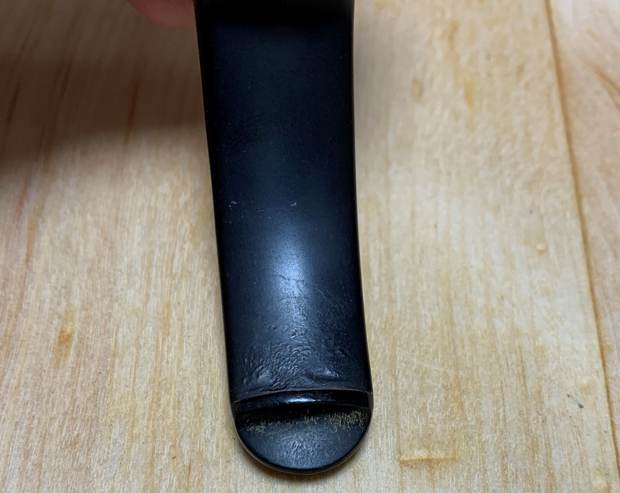
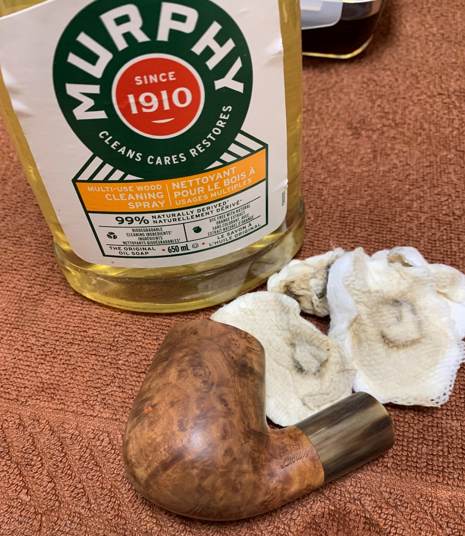
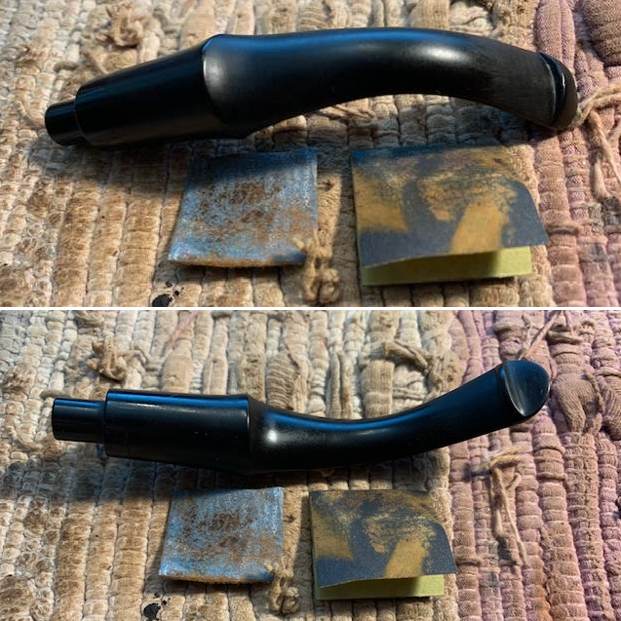
While I decided to have a “thunk” about it, I tackled the stem. I began by cleaning some of the filth on the outside with some Murphy’s Oil Soap on cotton rounds. This removed some of the surface staining. Then, I started cleaning the inside with isopropyl alcohol and pipe cleaners. This took a while. The inside wasn’t terribly dirty, but the empty space inside the end of the stem was tricky to clean well.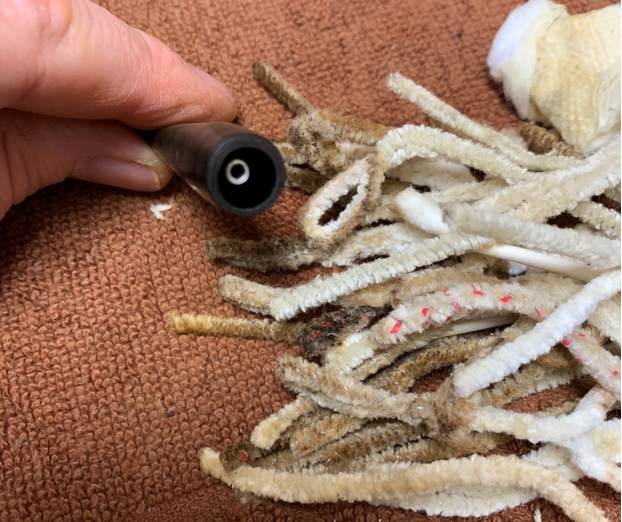
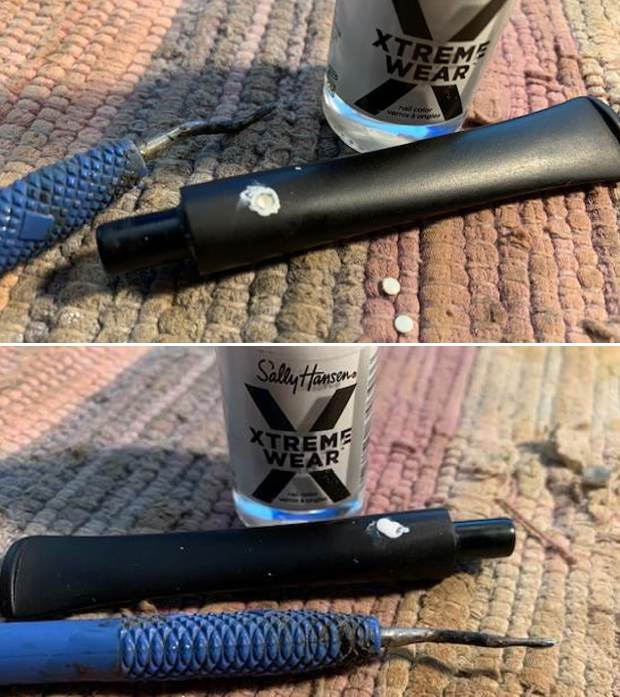
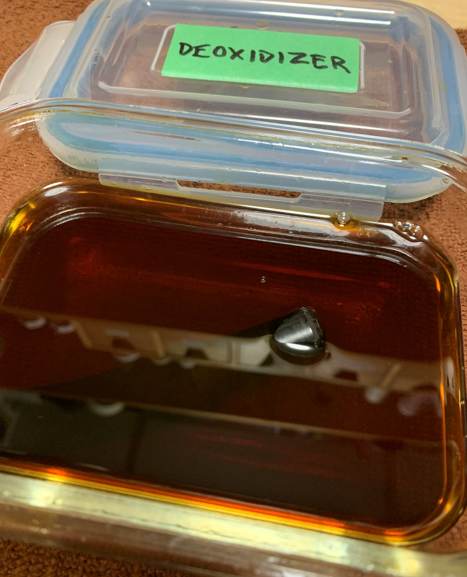
 Once the stem was good and clean, I placed it in a container of Pipe Stem Oxidation Remover overnight. This liquid does (as the name suggests) remove oxidation, but, more than anything, it helps draw oxidation to the surface of the vulcanite. This allows me to clean the oxidation off in a couple of ways: both by applying a mild abrasive cleaner to the surface, then by sanding the stem.
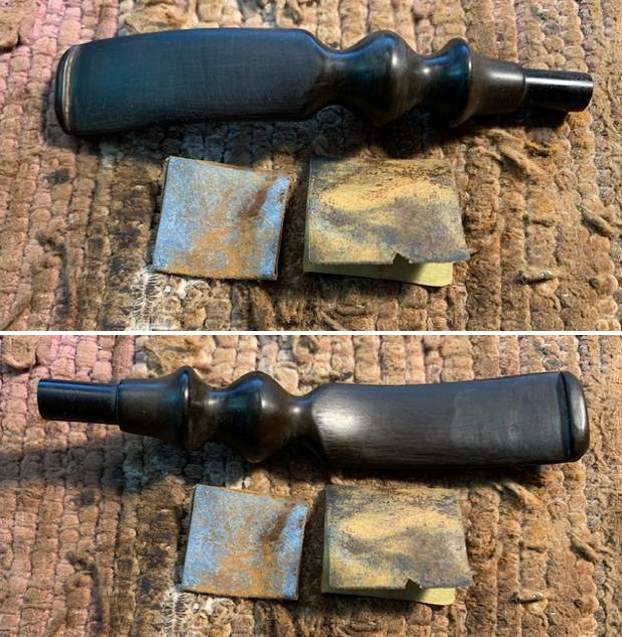
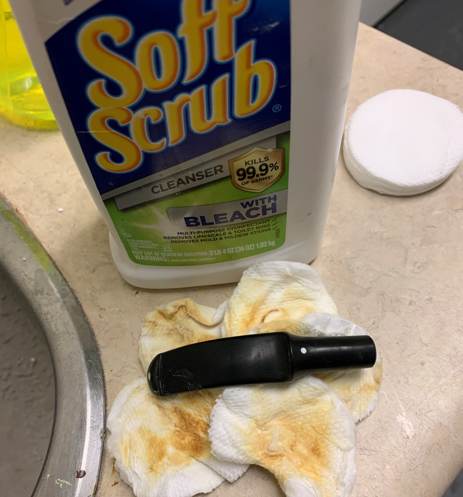
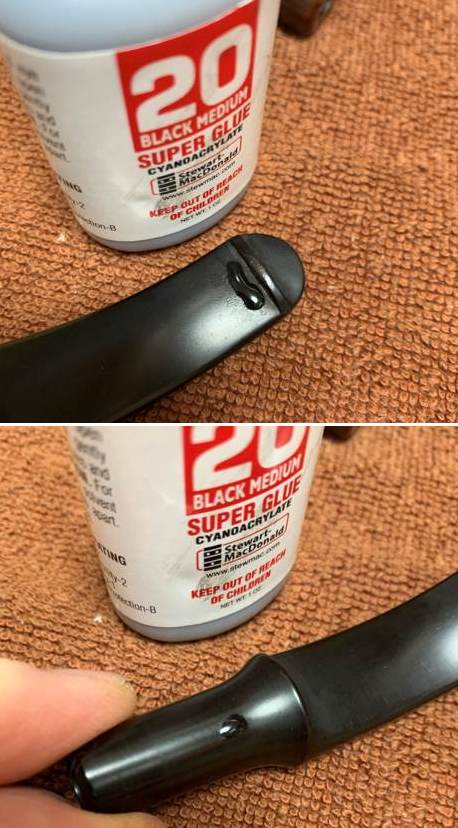
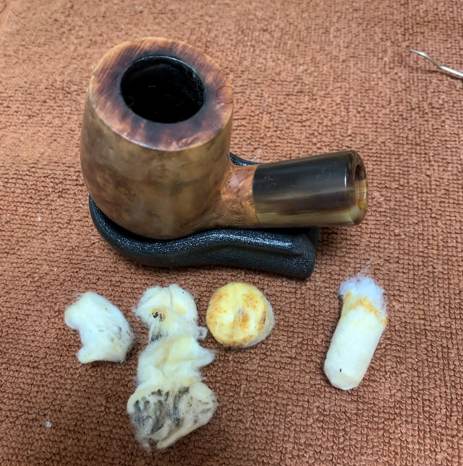
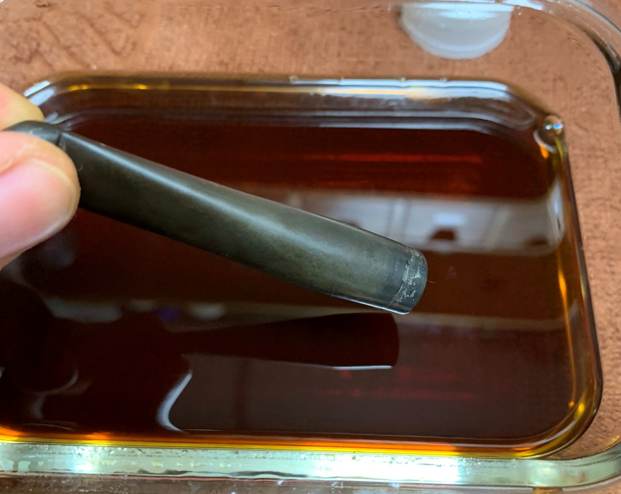 I used SoftScrub with some cotton rounds and, as you can see, lots of revolting colour came off the stem. Thankfully, there were no significant dents, scratches, or bite marks that required a cyanoacrylate glue repair, so I moved on to the next step.
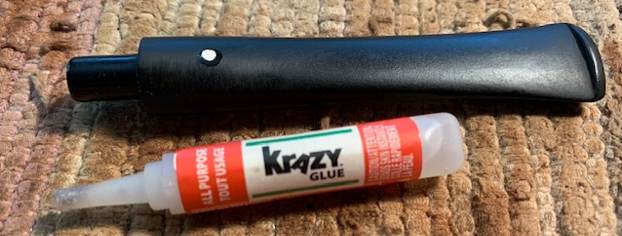
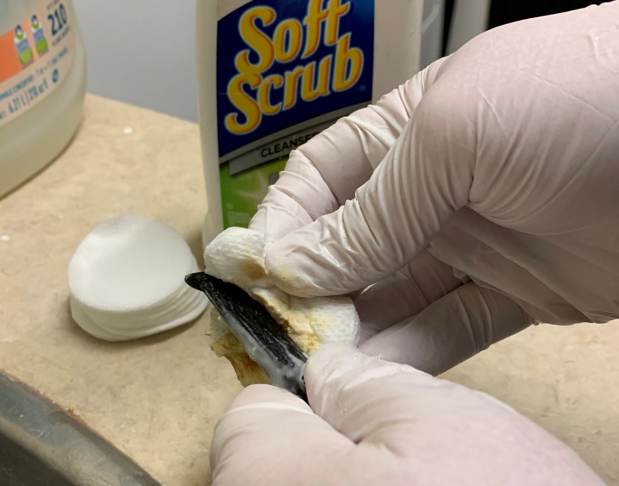
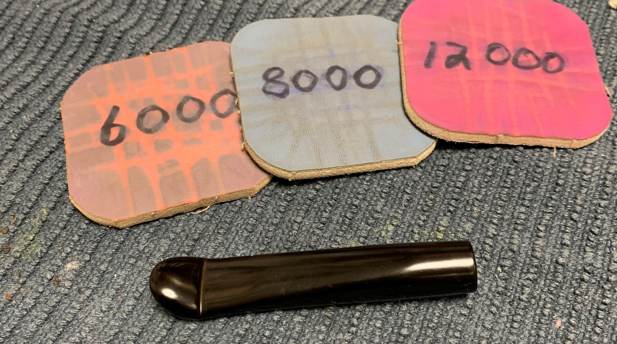
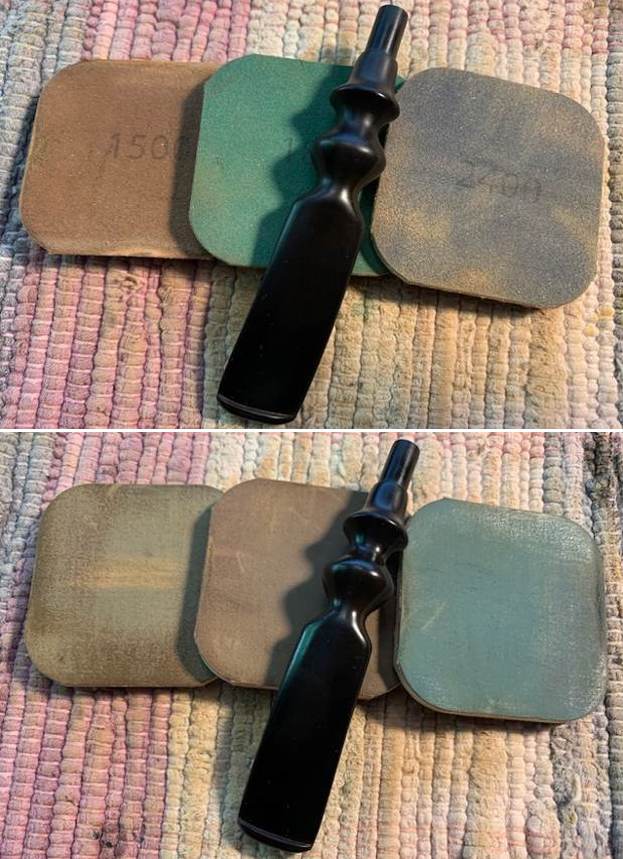
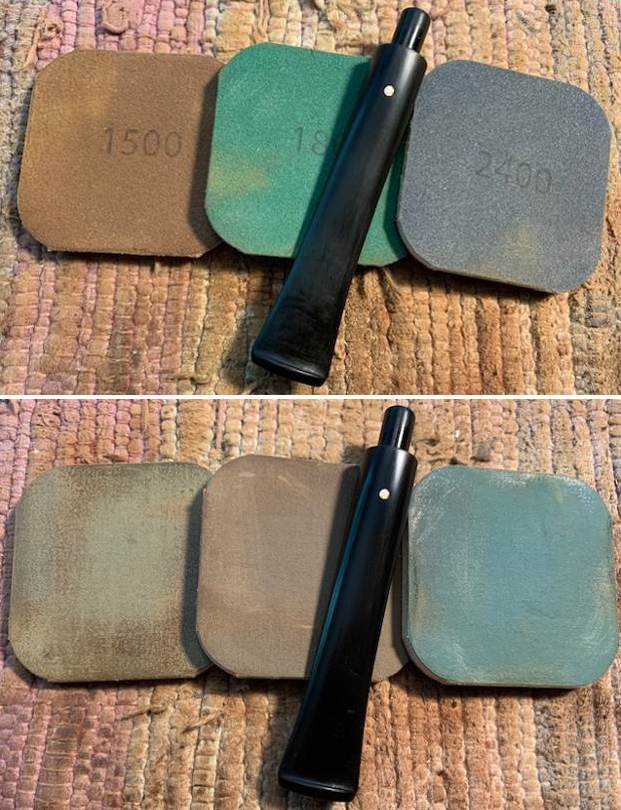
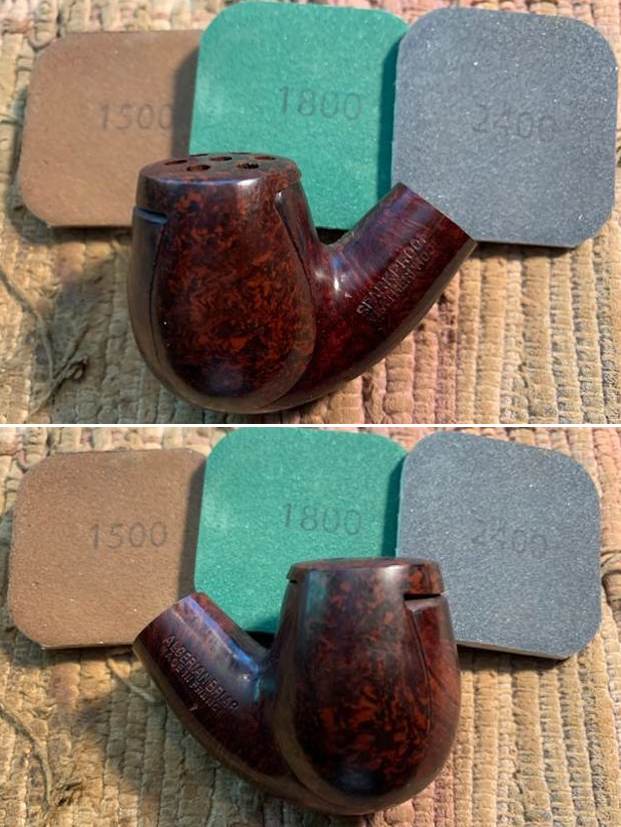
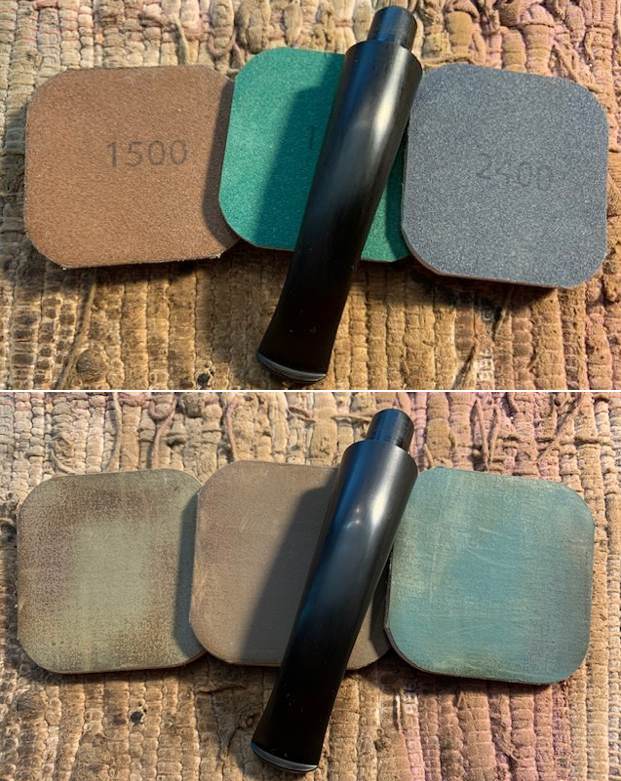
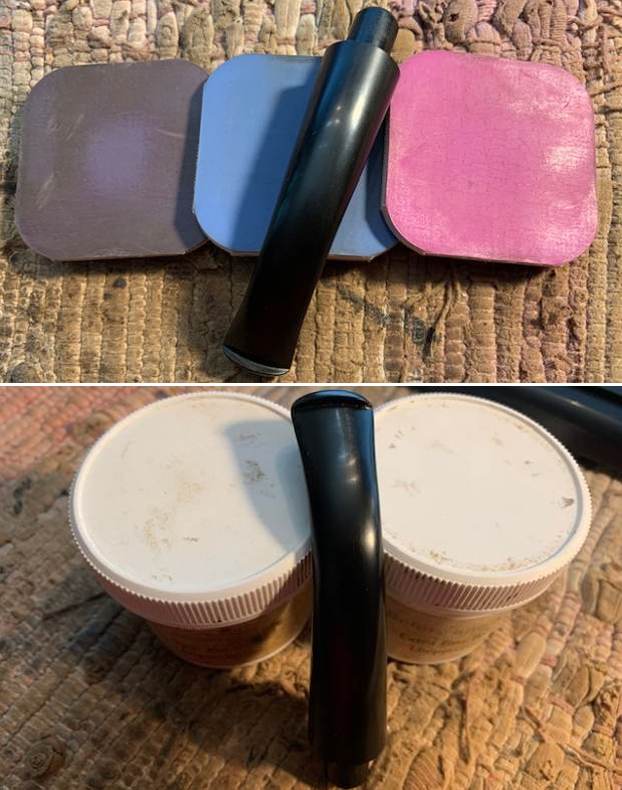
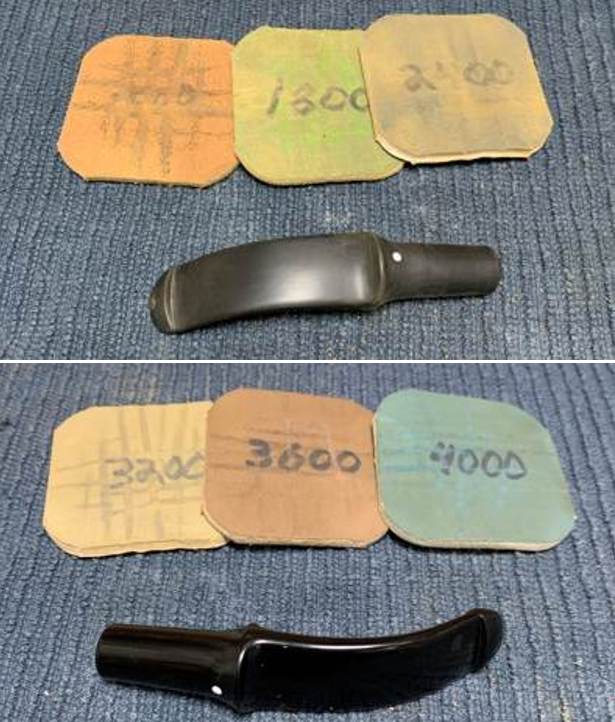
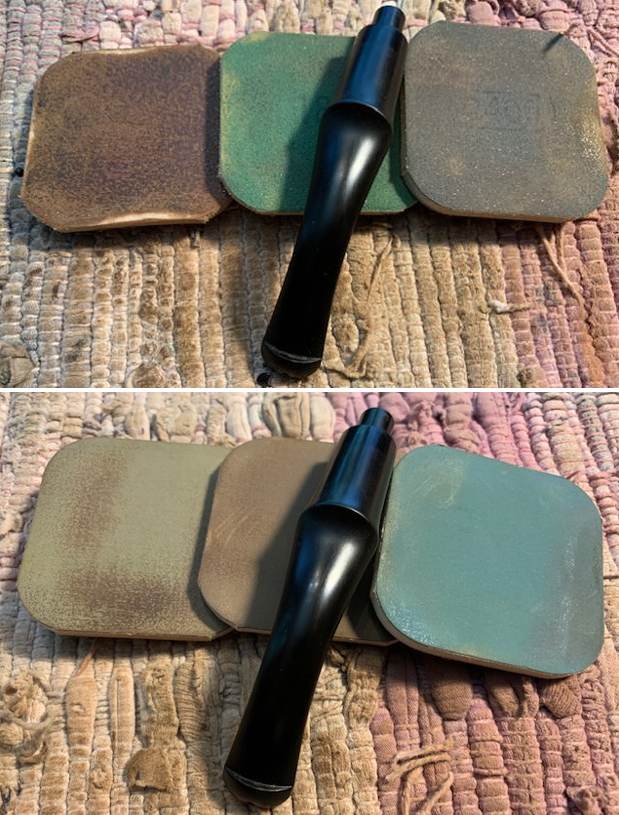
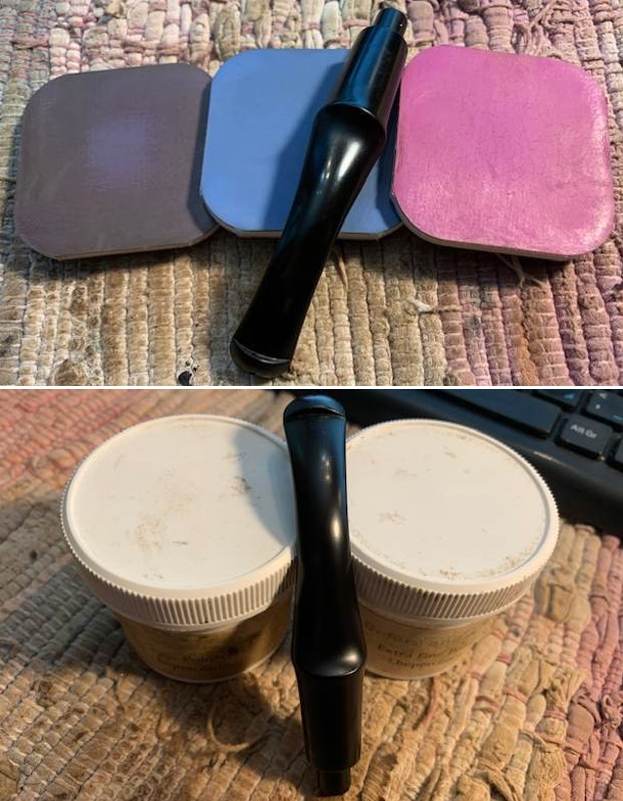
 For sanding the stem, I use a set of nine Micromesh pads (1,500 through 12,000 grit) which gradually erase the ravages of time and bring out the stem’s lovely black lustre. For the last five pads, I also lightly coat the stem with Obsidian Pipe Stem Oil in between each scrubbing. At last, I set the finished stem aside.
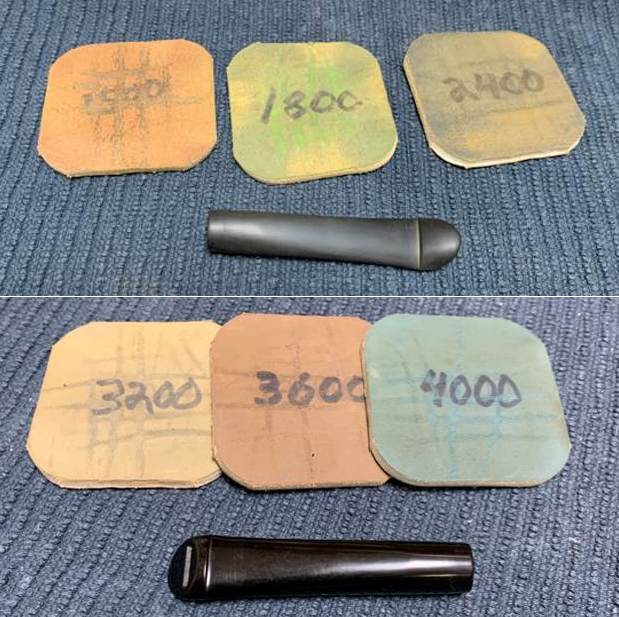
 On to the stummel and, as I indicated earlier, there were MANY problems to be solved.
- The insides were quite filthy and would need considerable work to clean.
- The metal ferrule would not come off the wood. It was absolutely solid.
- The metal ferrule also needed to be polished.
- The rustication had rubbed away so much that it would need to be redone in some way.
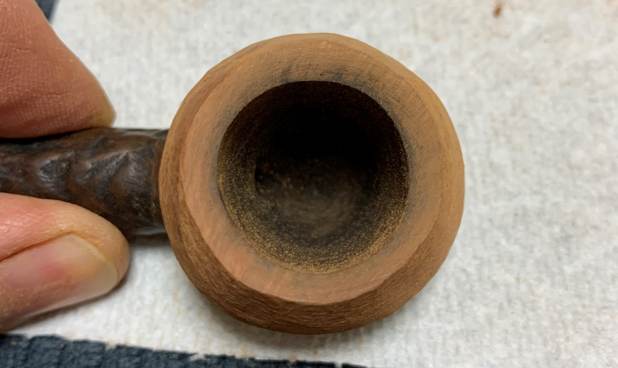
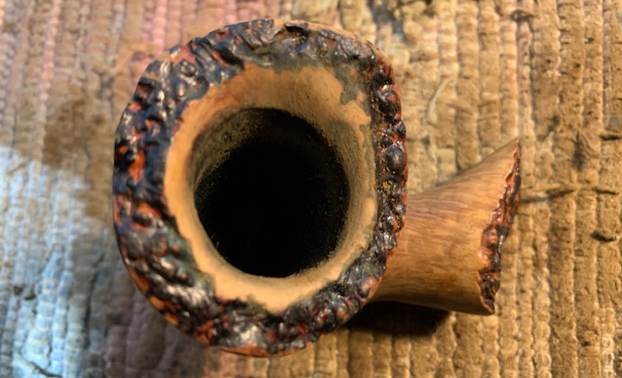
- The bowl opening was badly out-of-round.
- Burn marks and an uneven surface blighted the rim of the pipe.
- The fact that the top of the pipe had been lopped off meant that it just didn’t look In a sense, this was the biggest problem of them all.
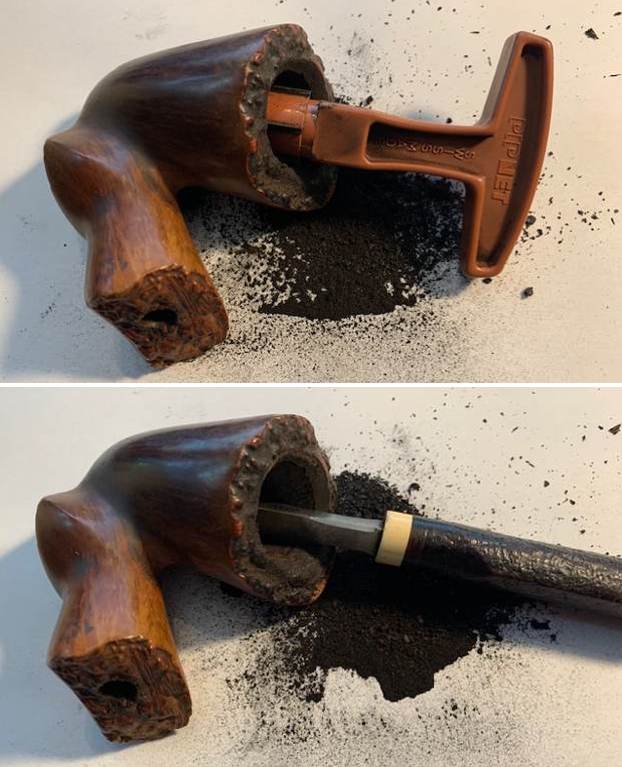
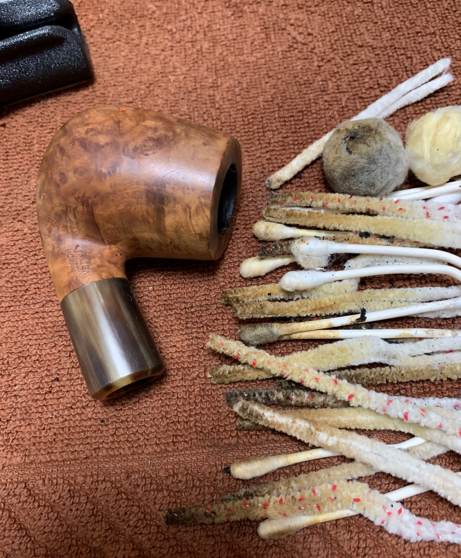
On to problem #1. The bowl really needed to be reamed, so I used the KleenReem too to scrape off as much built-up cake and followed that with 220-grit sandpaper taped to a dowel to eliminate as much as possible. Generally, I prefer to sand the chamber down to bare briar. When restoring, it is important to ensure that there is no damage to the briar under the cake. There are a few situations when I might leave some cake in the bowl, but not today. And, fortunately, there were no hidden flaws to the briar on this pipe.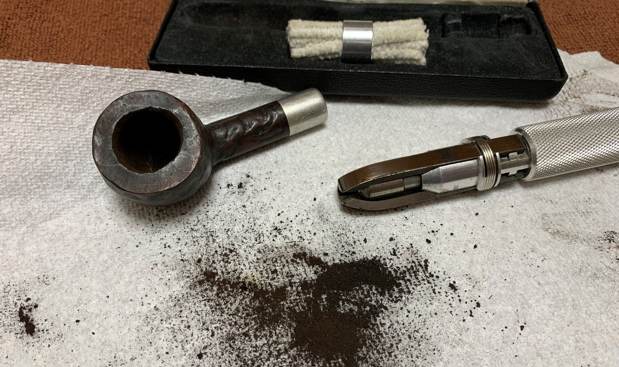 I gave the wood a quick cleaning with Murphy’s Oil Soap. It turned out that I would need to clean it again later.
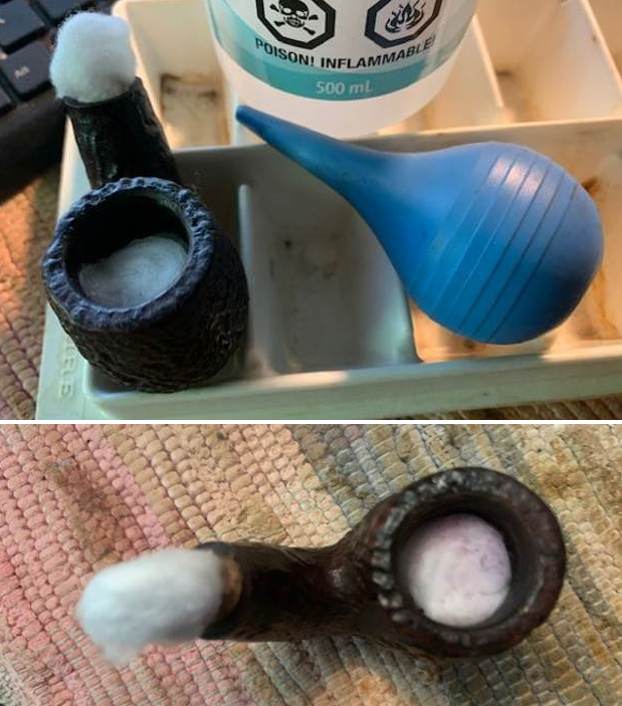
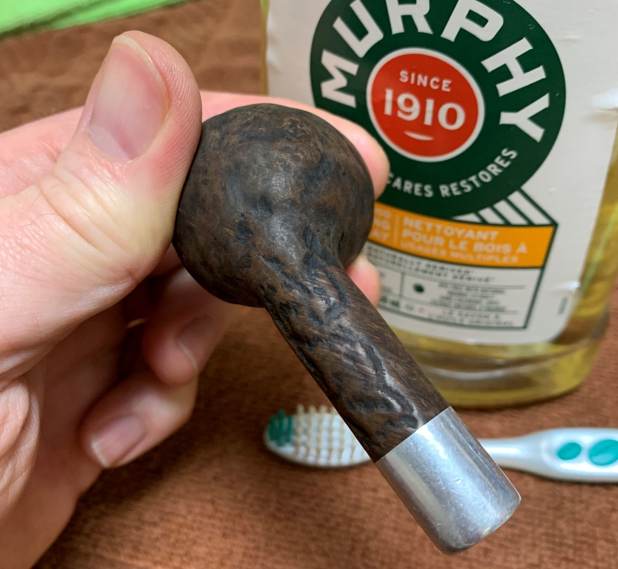 I then proceeded to clean out the insides of the shank with pipe cleaners and lemon-infused isopropyl alcohol. There was quite a bit of built-up grime inside this stummel, and it took a good number of pipe cleaners to get it clean. Or – I thought it was clean. I’ll come back to that.
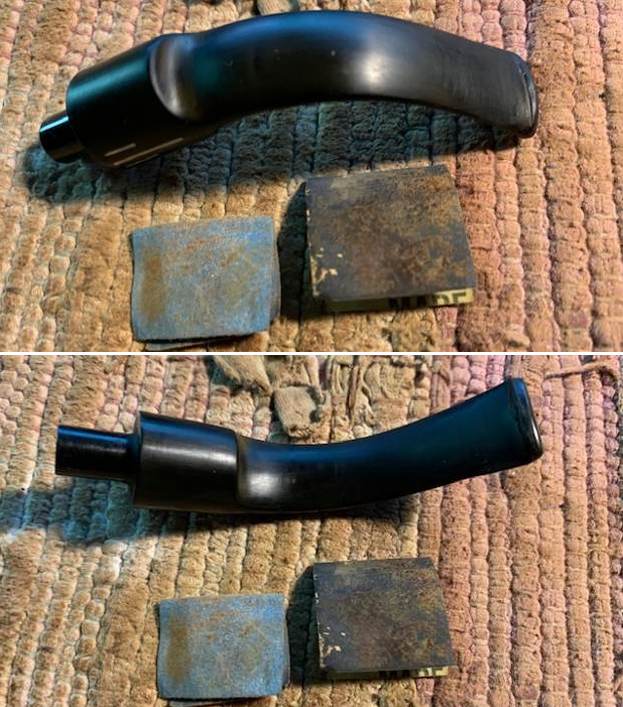
 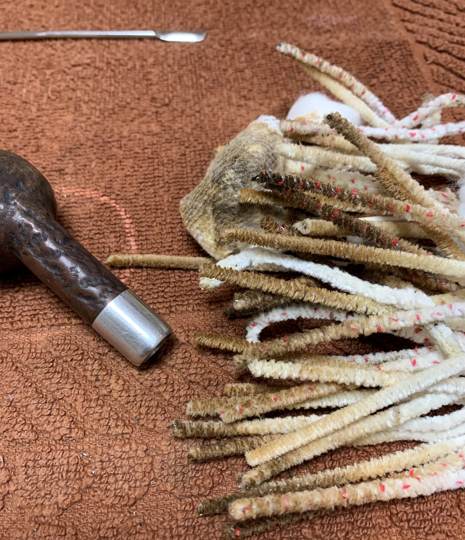 Problem #2 was an interesting one. To be honest, I wasn’t sure if the ferrule was permanently attached to the shank or not. Steve told me that it is supposed to come off and that I’d better get it off because there would be plenty more pipe goo to clean. So, I dug out my trusty heat gun, applied some heat to the join and – voilà! – the grime softened sufficiently for me to unscrew the ferrule.
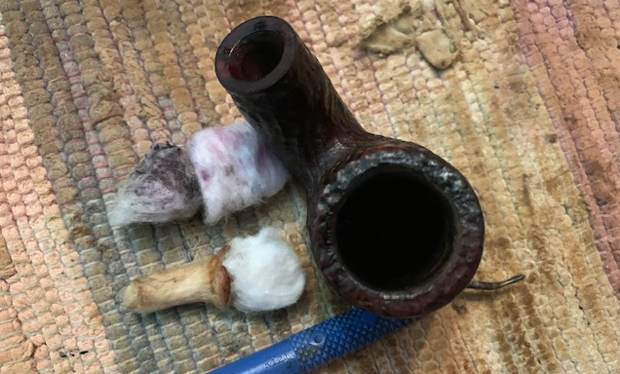
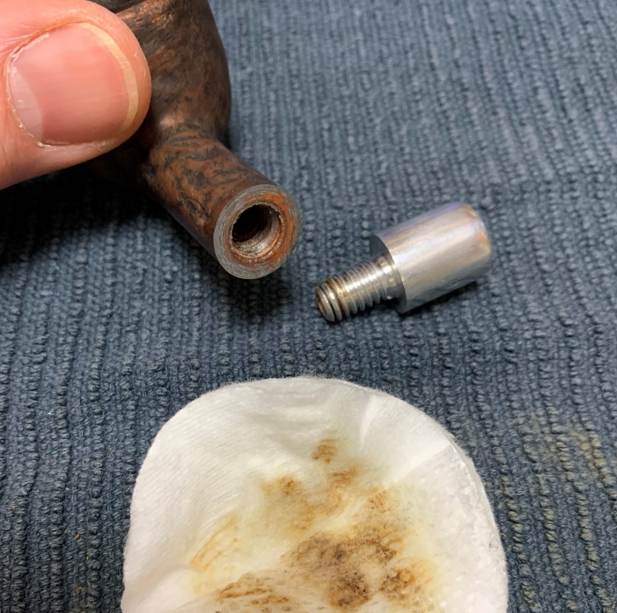 As Steve had hinted, it was a real mess inside the shank, behind the ferrule. Just dreadful – and it took more pipe cleaners and Q-tips than I used for the rest of the stummel just to clean out this area. It had obviously never been cleaned before. I even threw the thing in an alcohol bath! The dirt just kept coming and coming, but, at long last, I finally got it clean.
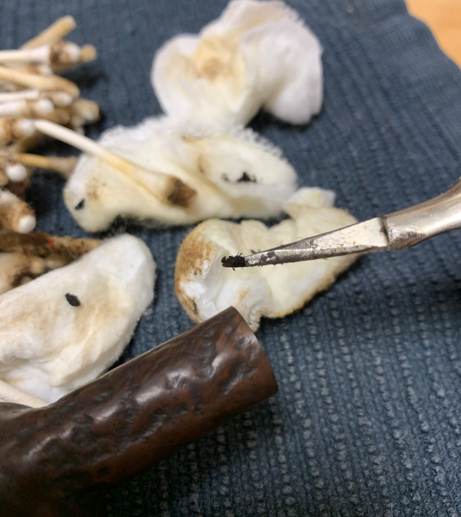

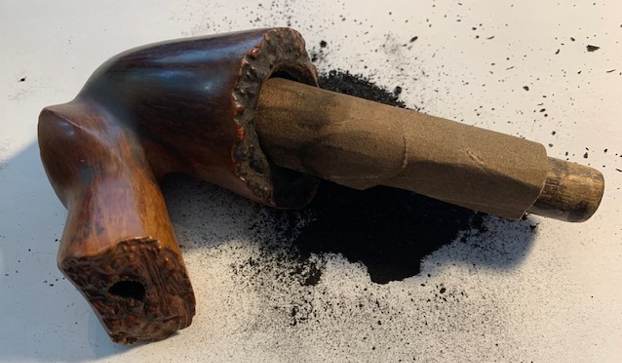
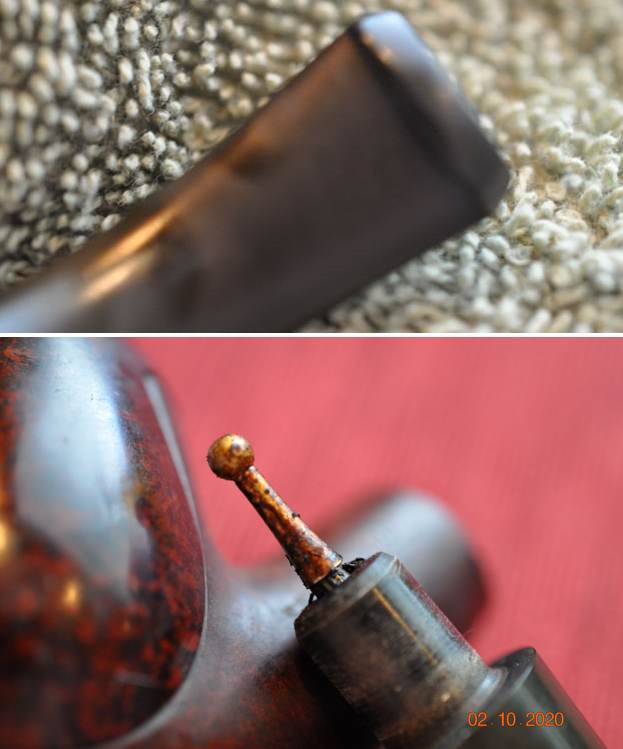
 I followed that up by cleaning the insides of the whole stummel with some Castile soap and tube brushes. Finally, I polished the tiny piece of the ‘carburetor’ system by inserting a piece of 0000 steel wool down the shank and grinding it shiny.
 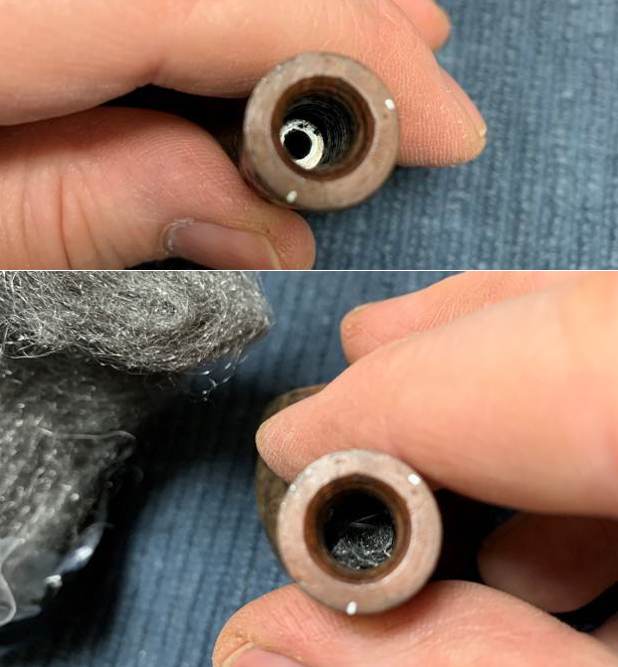 Problem #3 was quite straightforward to resolve – Deo gratias. I started by soaking the filthy threads of the screw in my lemon-infused isopropyl alcohol. They were dirty and the dirt was very stubborn. Eventually, it did come off and I could proceed. Next, I rubbed the aluminum ferrule with 0000 steel wool. This is the least abrasive grade of steel wool and I wouldn’t use anything harsher than that. I then used the last few MicroMesh pads to make the metal shine.
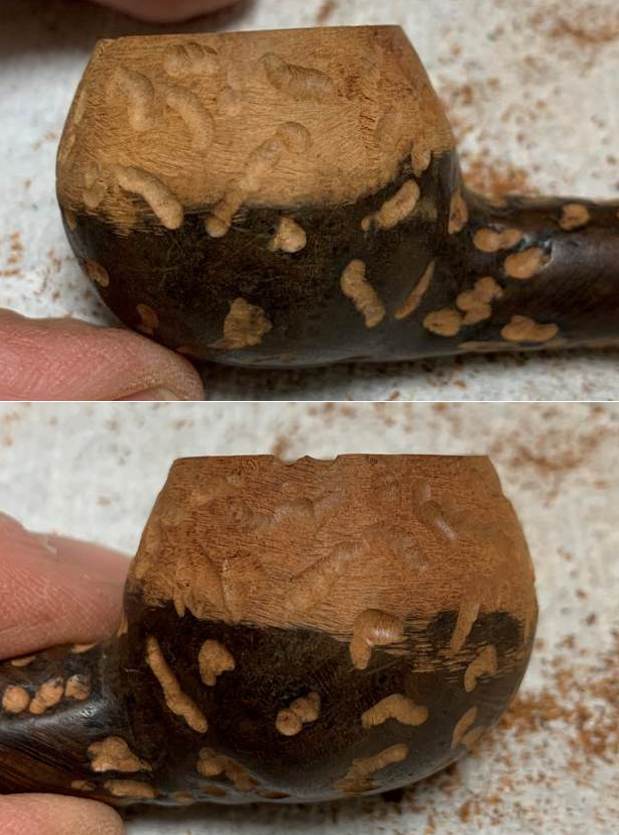
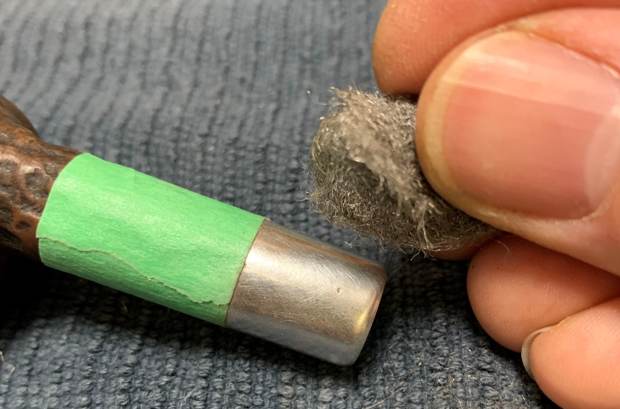 Problem #4 concerned how worn away the rustication had become. I wanted to recreate the pattern that Payne had originally devised on his pipe. I took my Dremel Rotary Tool and used the smaller engraving cutter to achieve the small worm-track. The work was intricate and a bit nerve-wracking, but I was quite pleased with the results. My only problem was that I ended up having to repeat this process later, but I digress…
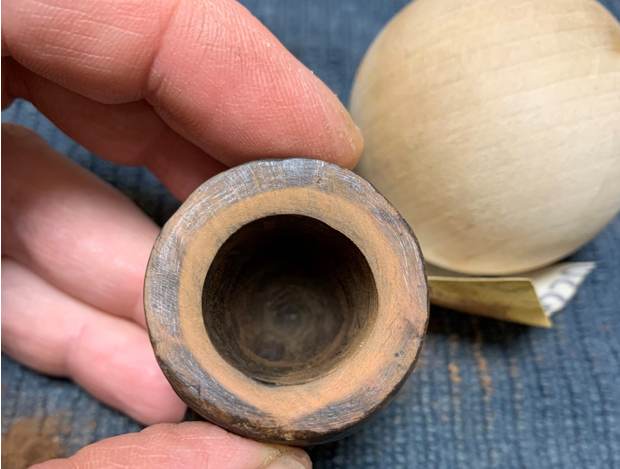
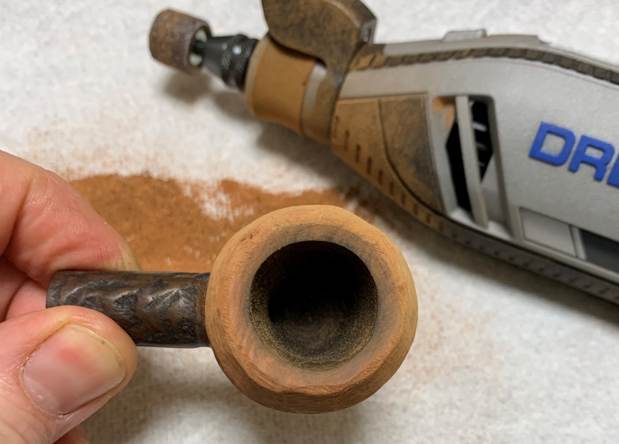
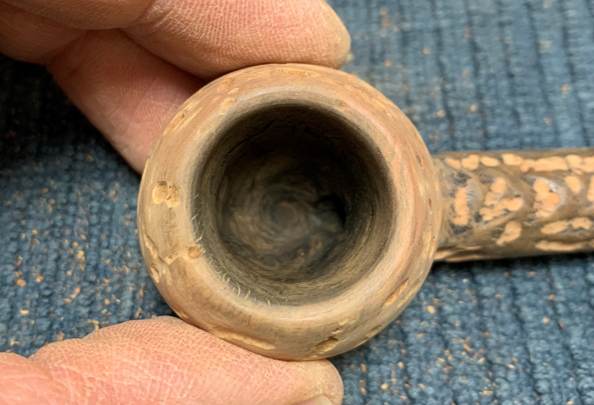
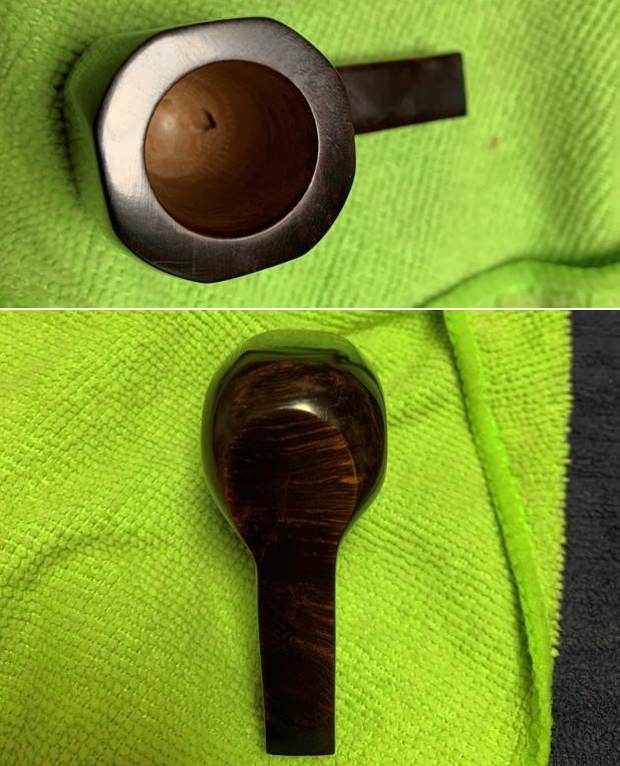
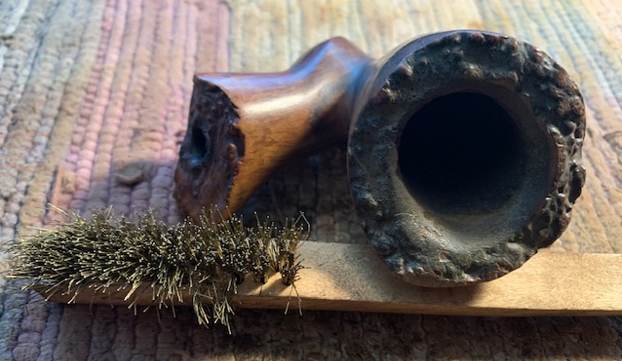
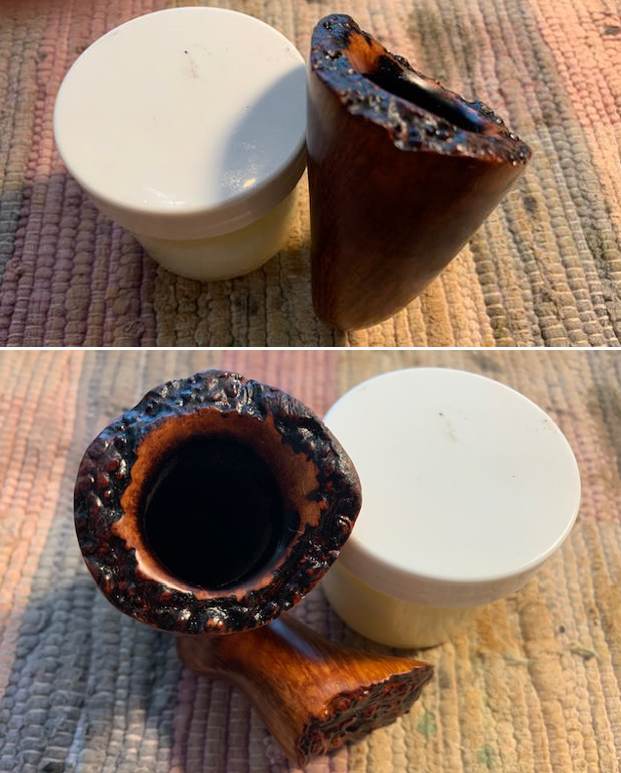
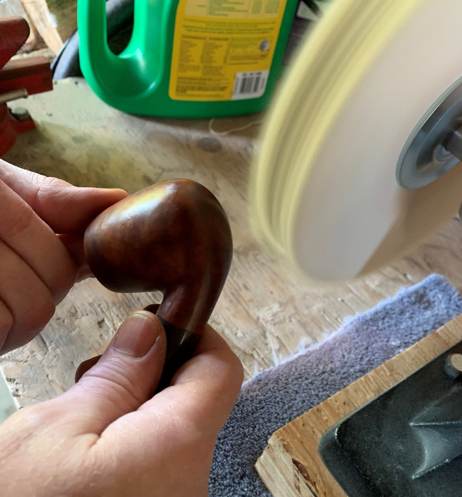
The solution to problem #5 – the out-of-round chamber opening – came from a familiar source. I took a solid wooden sphere, wrapped a piece of 220-grit sandpaper around it, and sanded the inner side of the chamber. This achieved two things: first, it removed some of the burn marks on the inner edge of the rim; and second (and more importantly), the circular shape and motion of the sphere gradually returned the edge to a perfect circle. This takes time and patience, but it is quite effective. But there was more to come.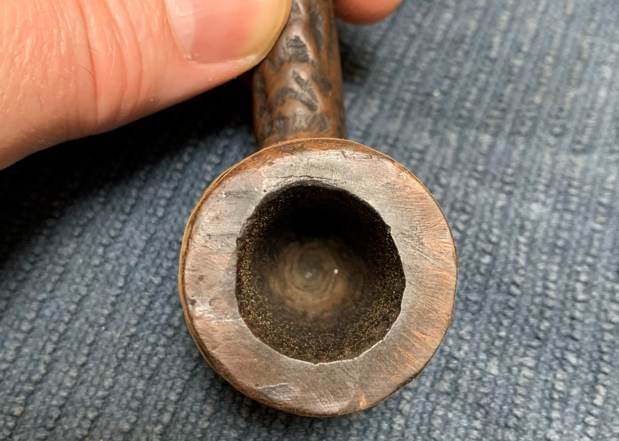

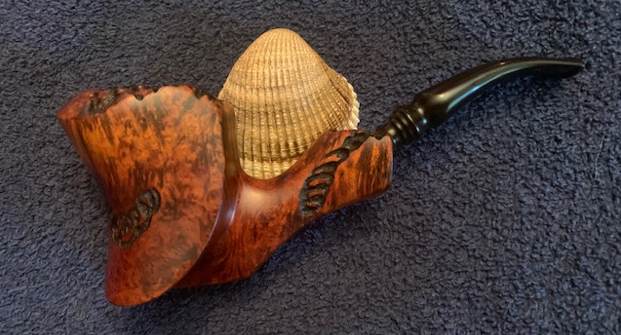
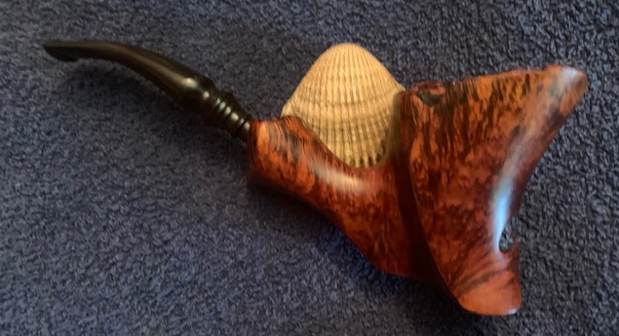
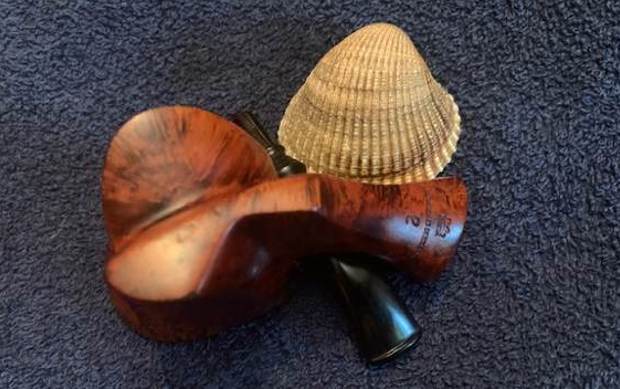
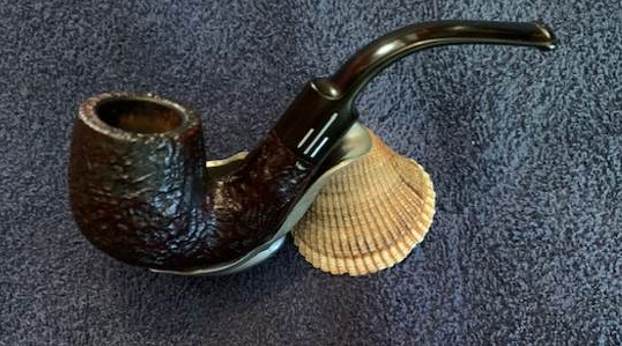
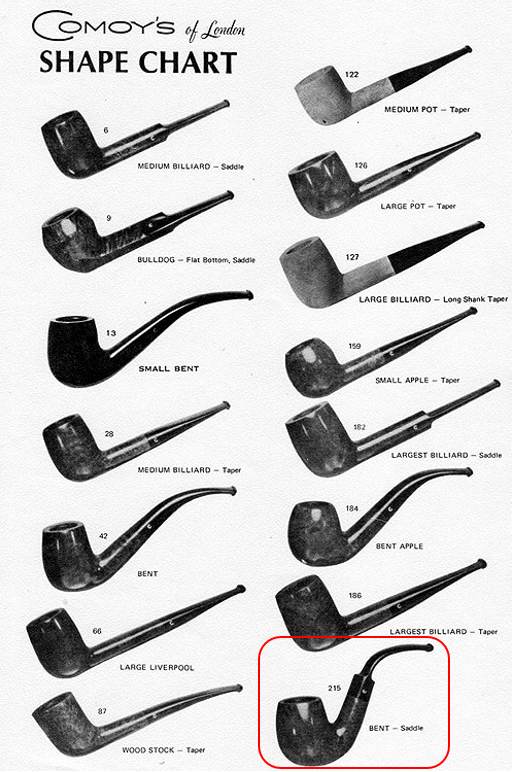
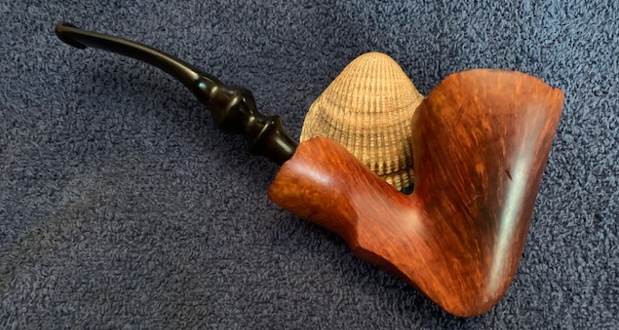
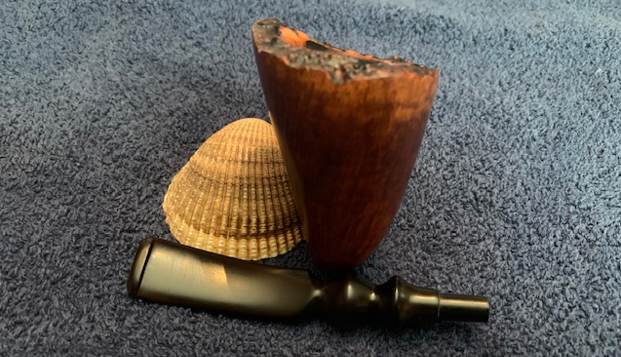
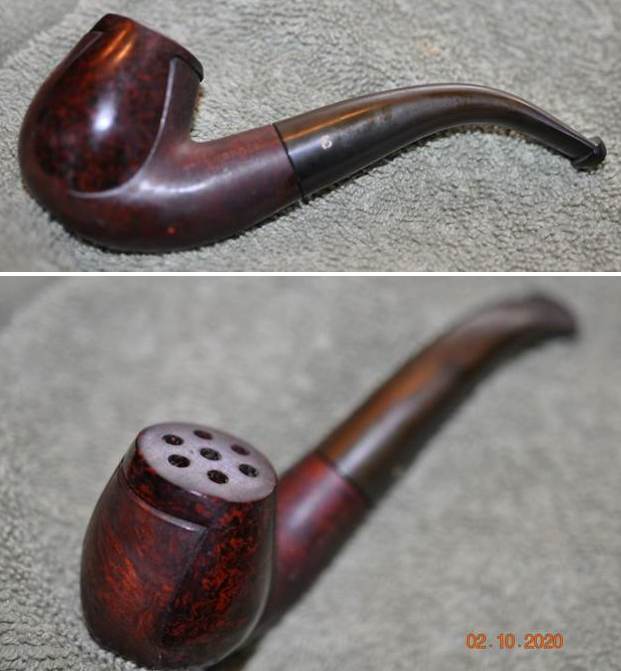
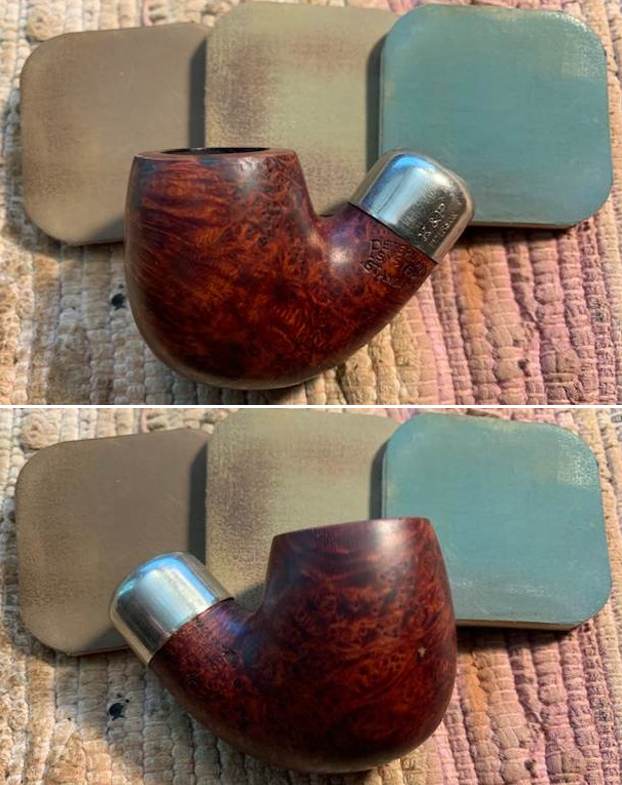
 As it turned out, problem #6 bled right into problem #7. As I mentioned earlier, the surgery that the pipe received earlier in its life just didn’t look right. Something significant needed to be done. As always, Steve made an excellent suggestion to save and beautify this Payne pipe. He proposed modifying the pipe to a prince shape. This made a lot of sense. Changing this into a prince would (1) smooth out the ridiculously uneven rim top; (2) eliminate the burn marks on the top; and (3) allow what remains of the briar to be showcased properly and to greatest effect. I’ve included a sample photo of some prince pipes from Greg Pease’s collection, just to give you an idea of what I was aiming for. I’ll let you be the judge of whether I succeeded or not.
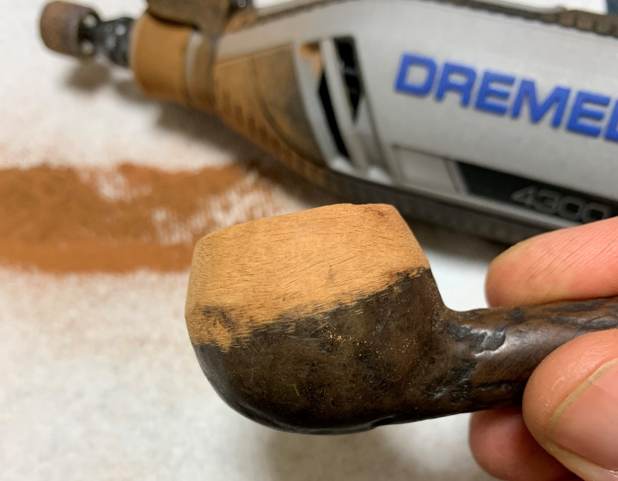
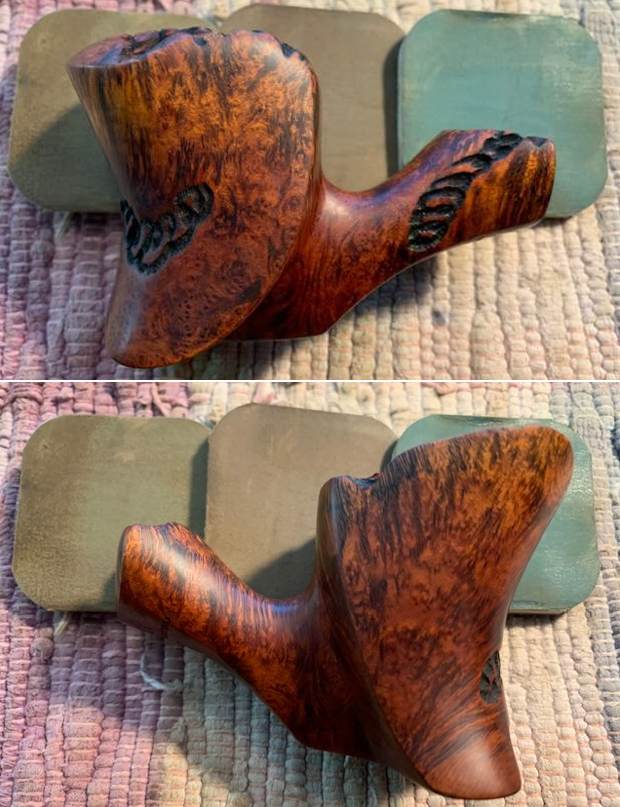
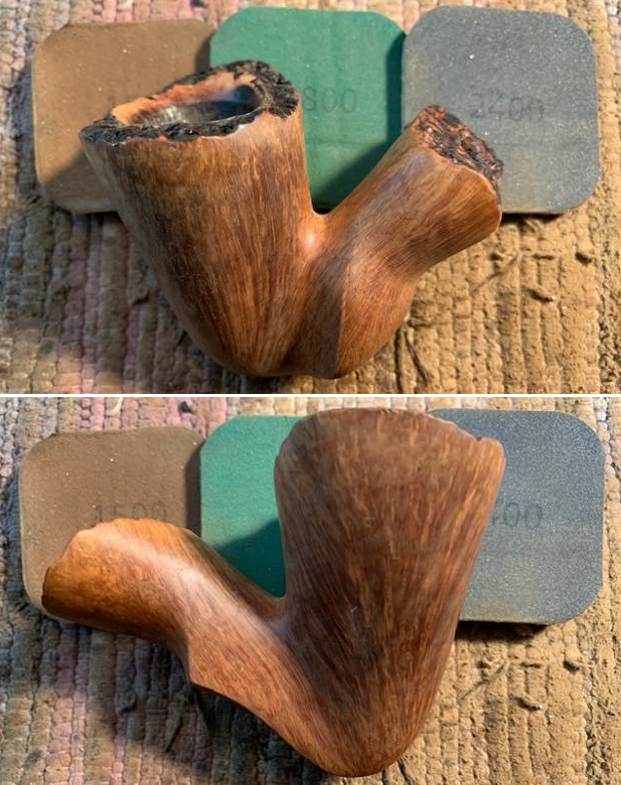
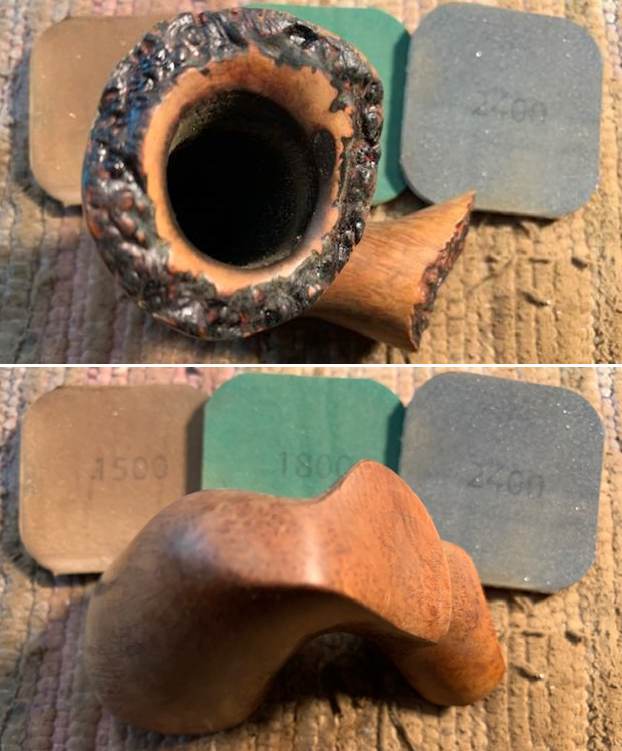
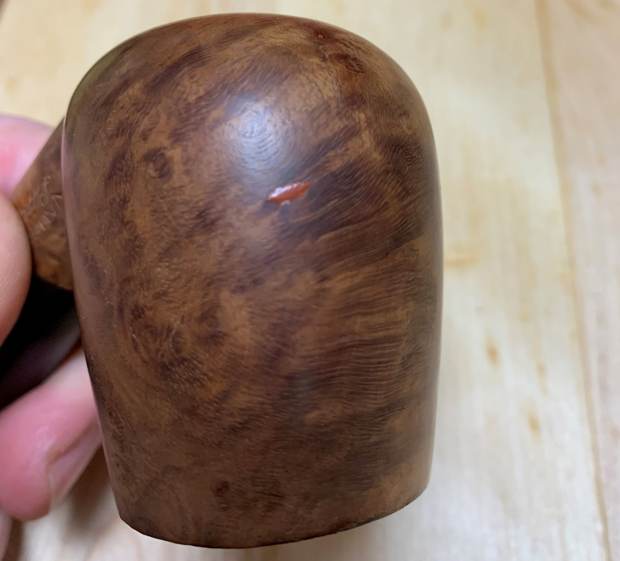
 So, heart-in-throat, I set about grinding the Payne with my Dremel and a sanding disc. Gently, gradually, cautiously, I removed more wood and began to set the new shape. This was no mean feat for me – the Dremel is a powerful tool, and this process can go pear-shaped very easily. The following series of photos demonstrates the progress as I shaped the bowl.
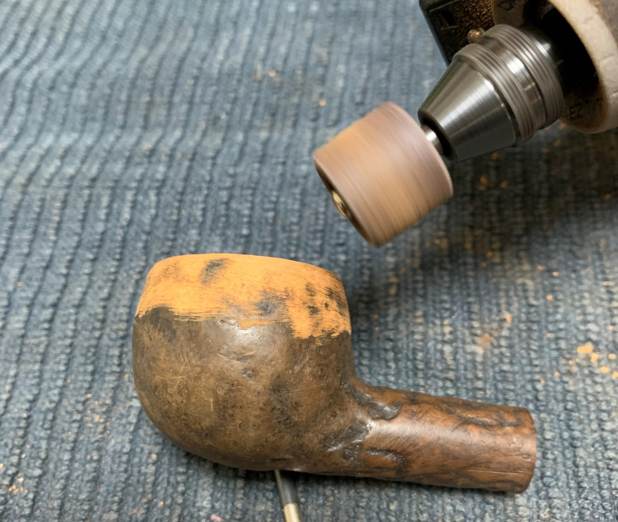
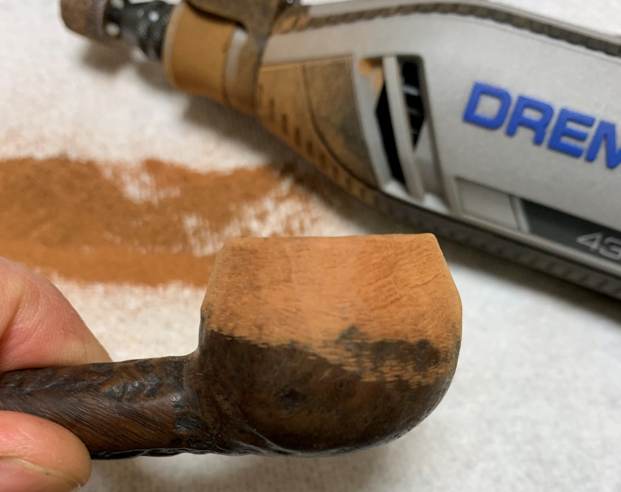
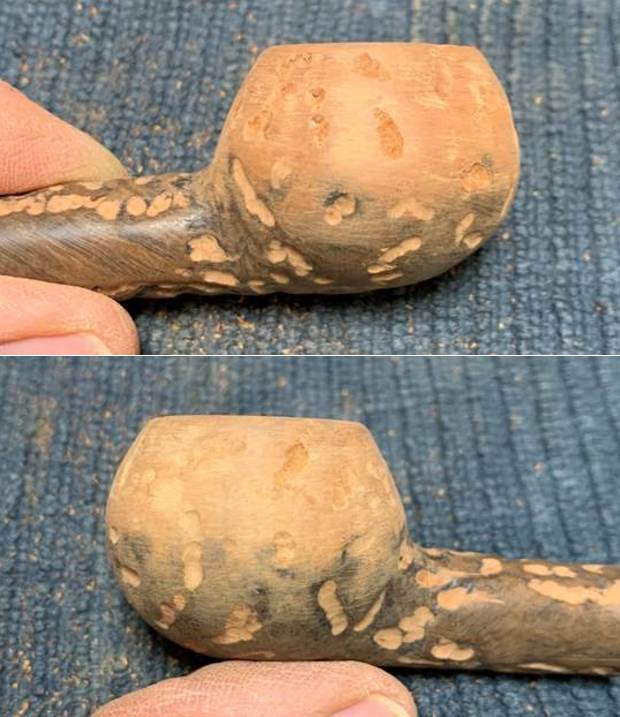
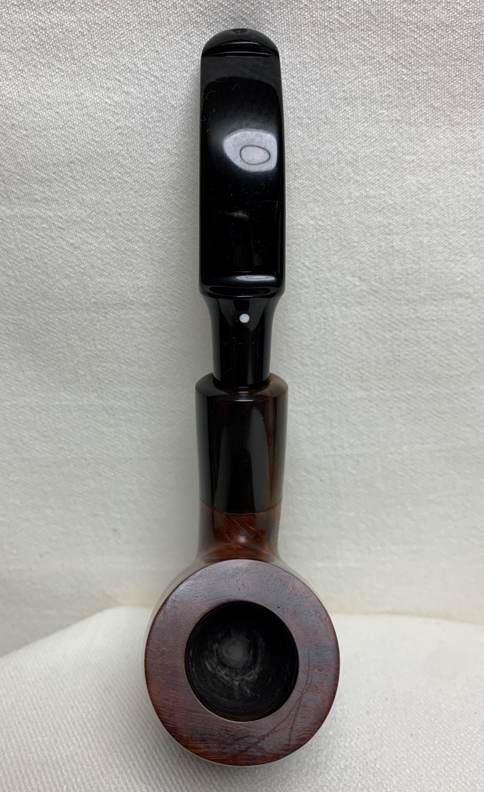
 Once the shape was nicely developed, I used some 220-grit sandpaper to smooth and round the crown of the rim. Of course, I had to redo much of the rustication work I did earlier, since my Dremel removed most of it. This went very well.
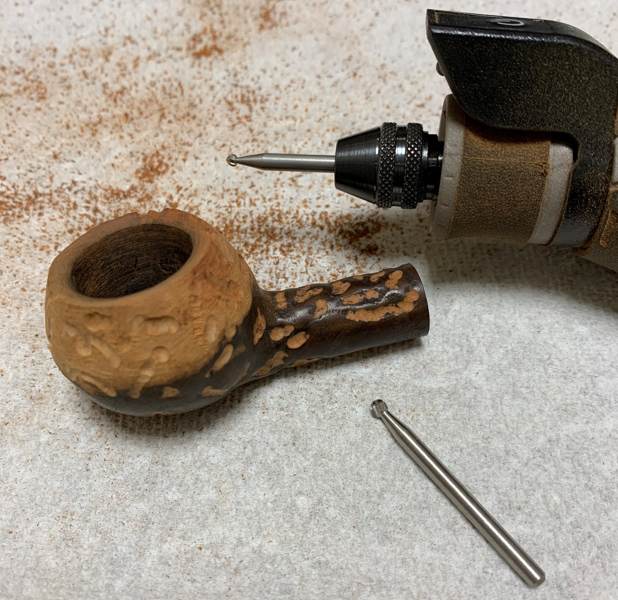

 It was only at this point, when I felt comfortable with the work I had done, that I cleaned the outside of the pipe thoroughly with Murphy’s Oil Soap and a toothbrush.
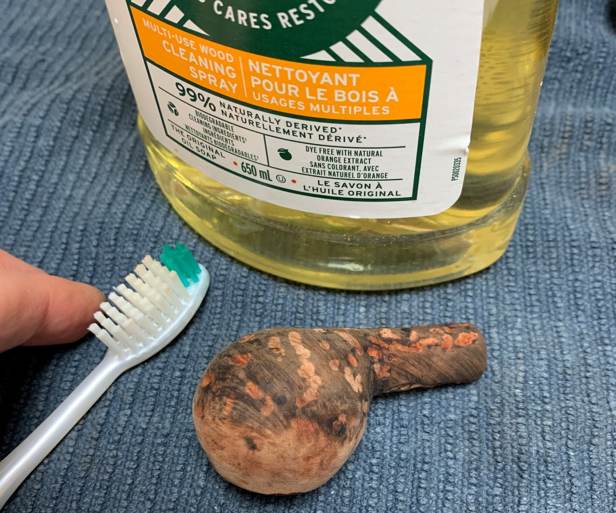

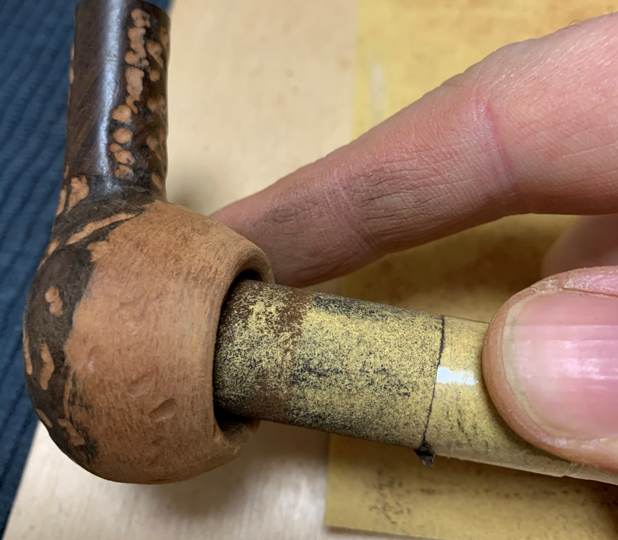
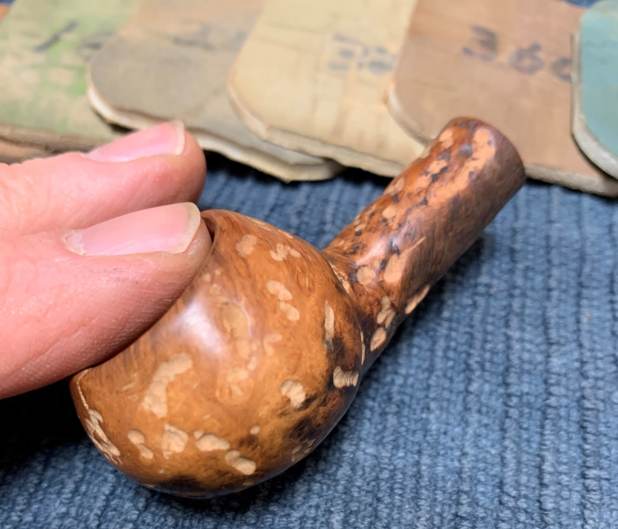
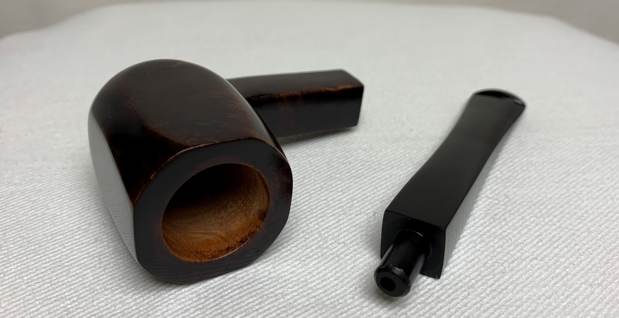
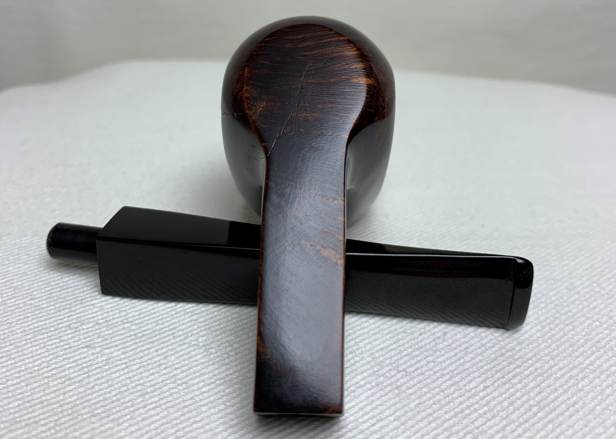
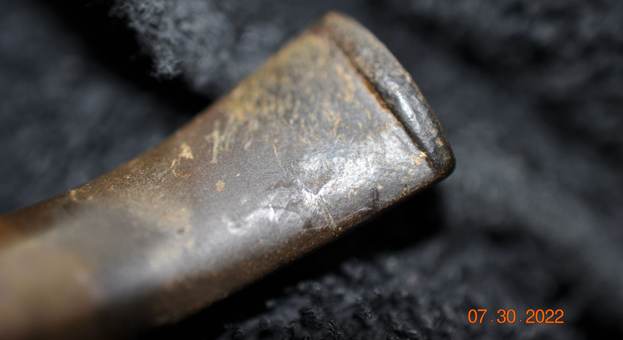
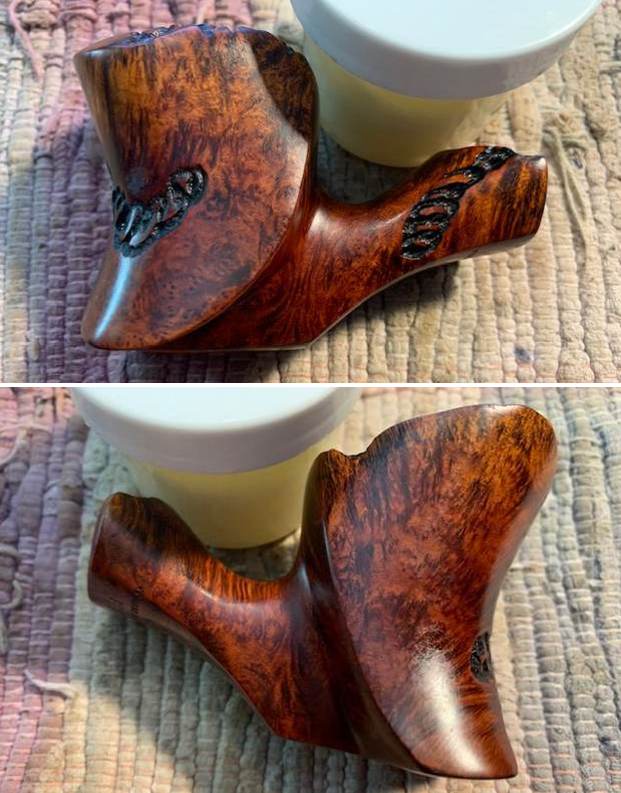
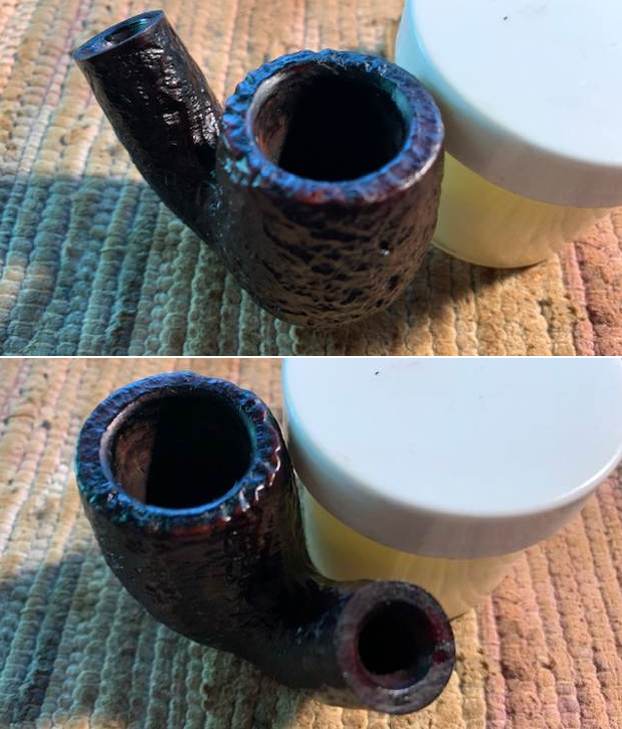
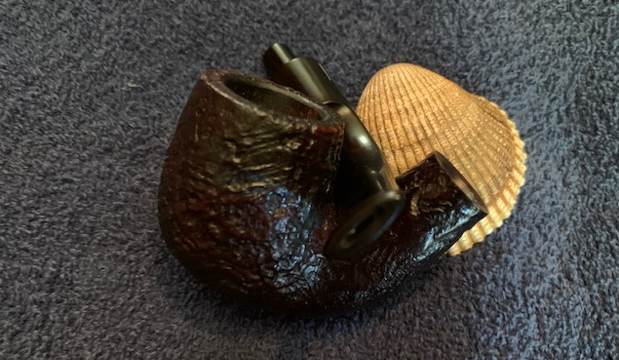
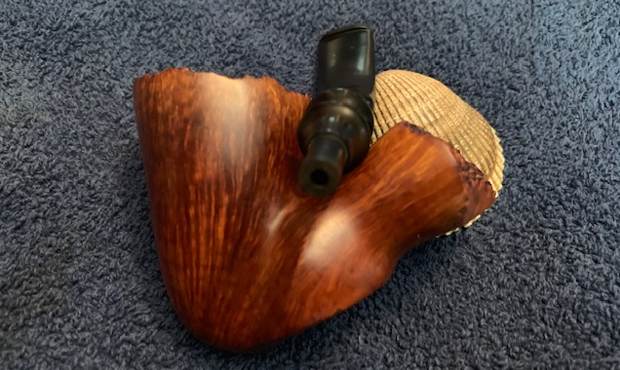
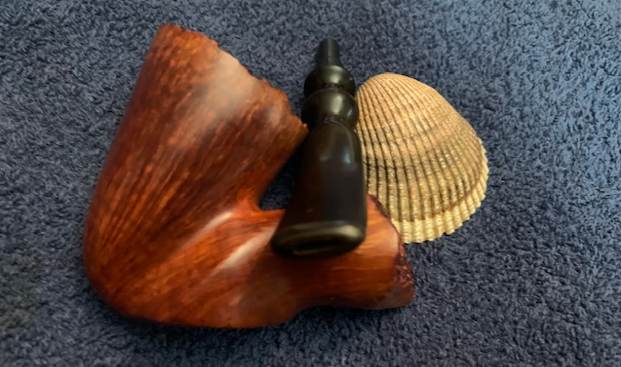
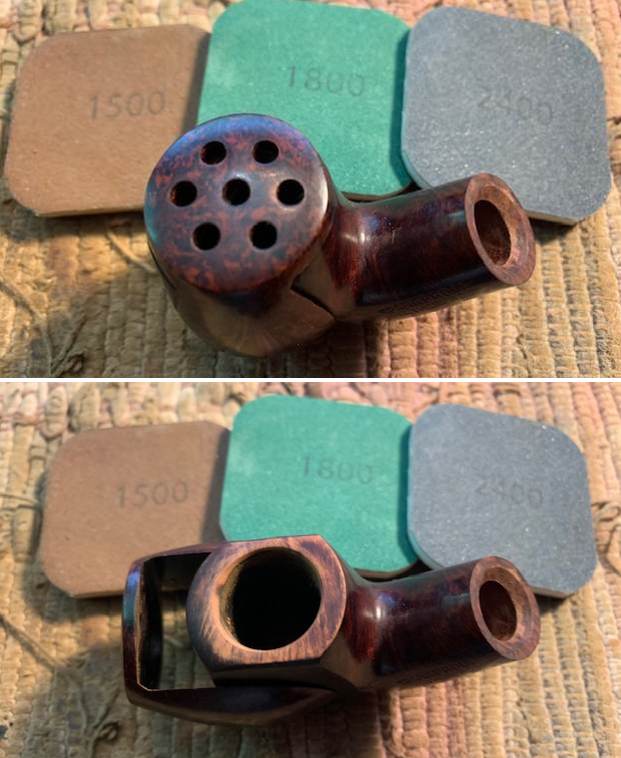
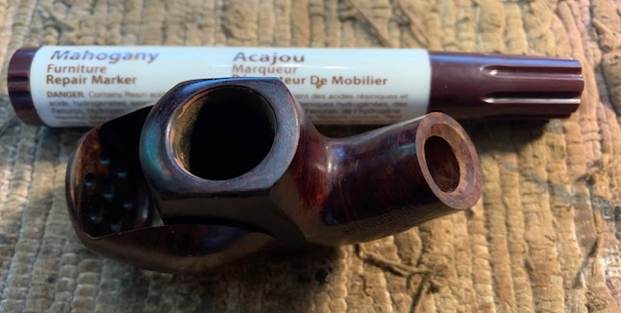
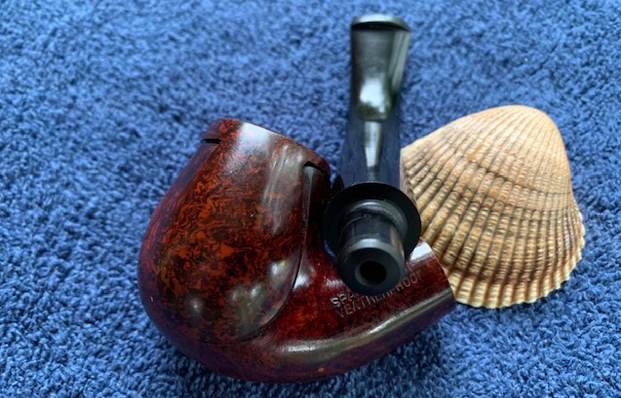
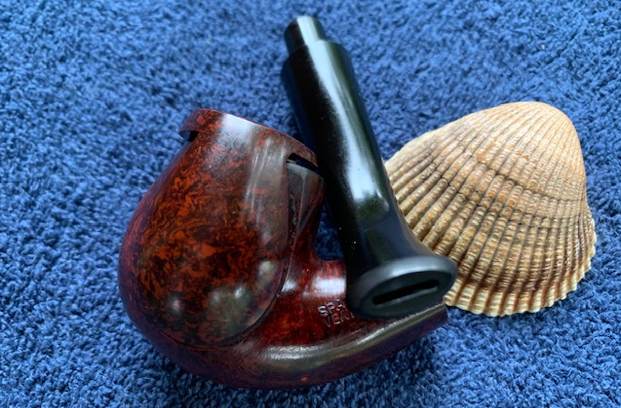
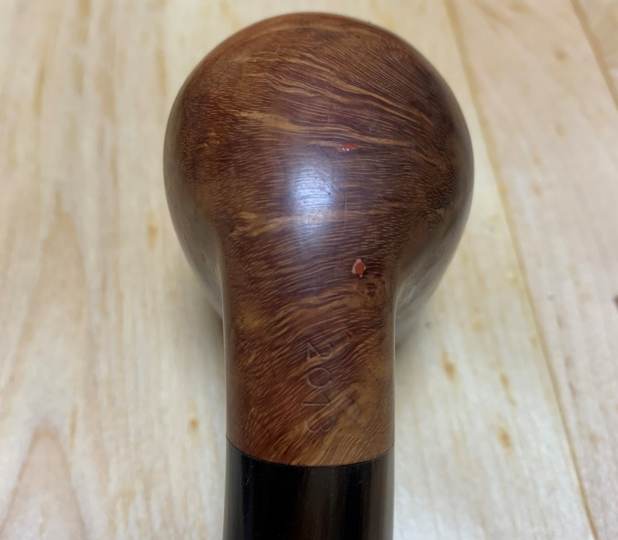
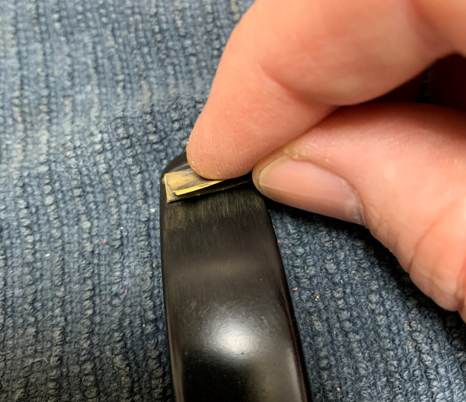
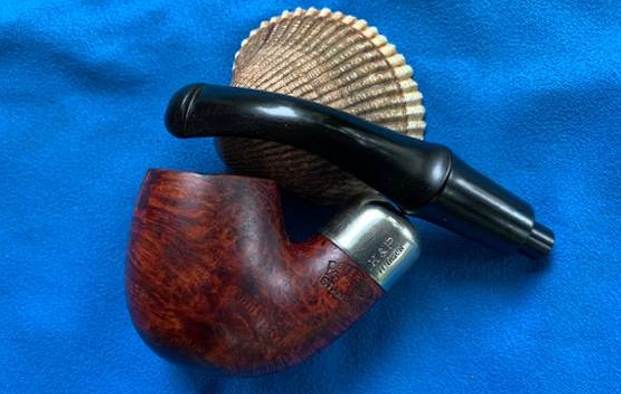
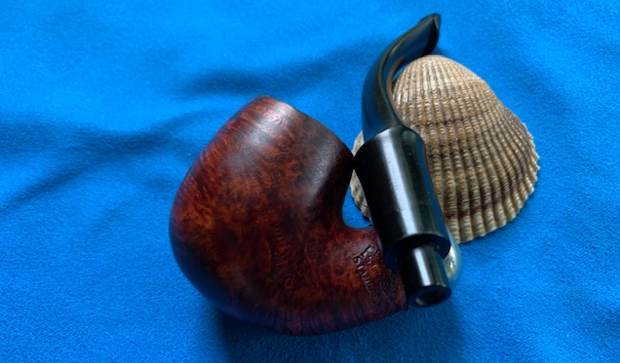
 By the way, here is a close-up photo of how Payne cut off then rejoined the bowl and shank. It’s unusual – I’ll give him that!
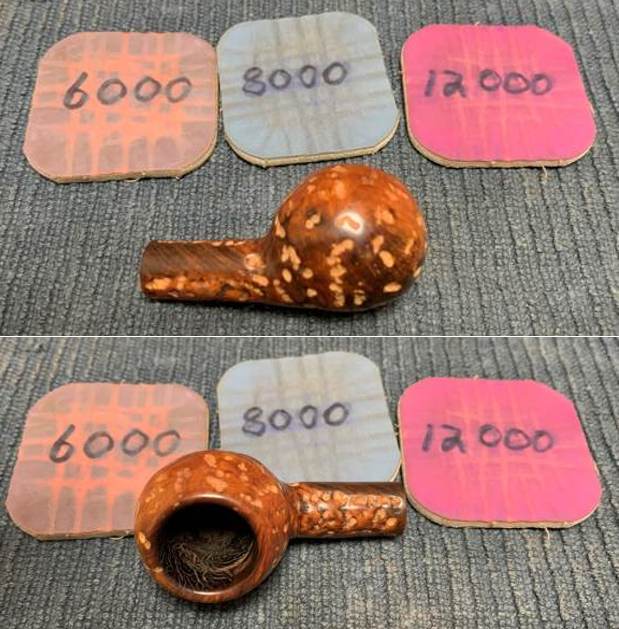
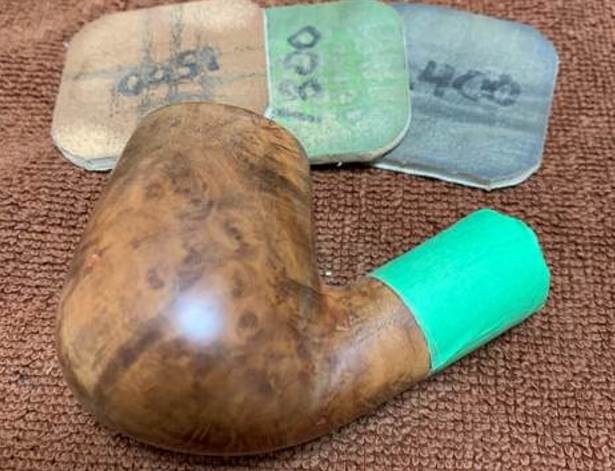
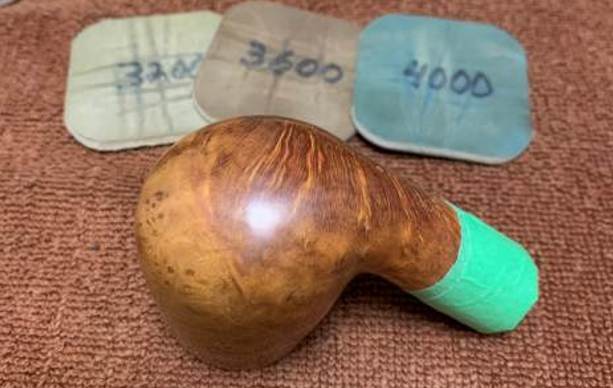
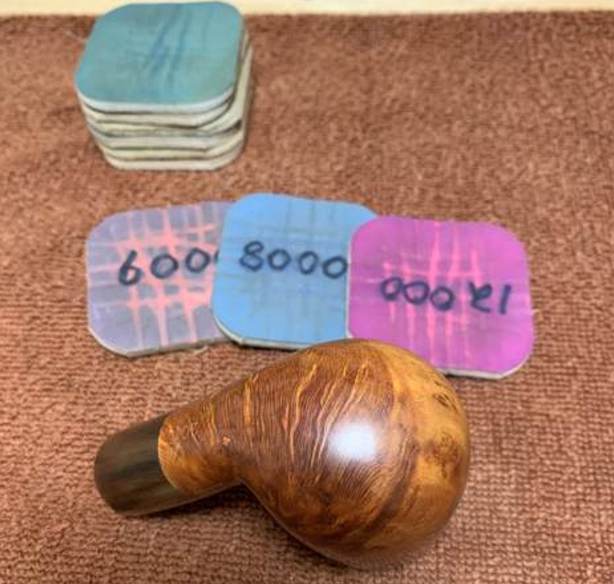
 The stummel cleaned up quite nicely and I was able to move on to the MicroMesh pads. Again, using all nine (1,500 through 12,000 grit), I sanded, rounded, and further embodied the prince shape.
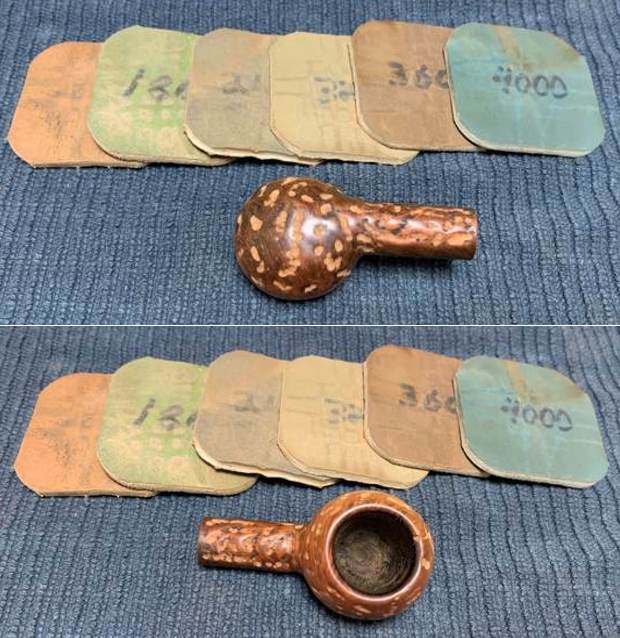

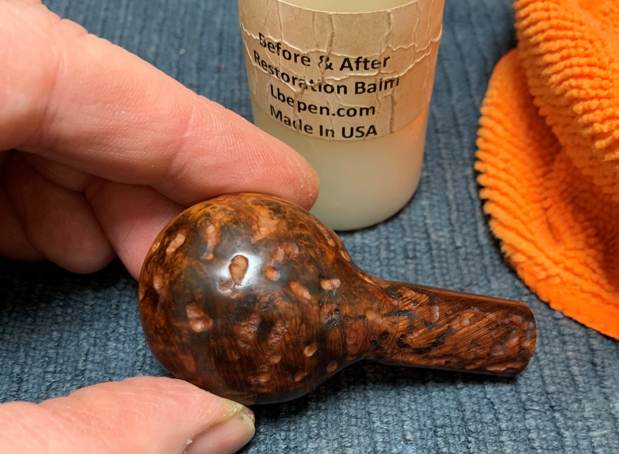
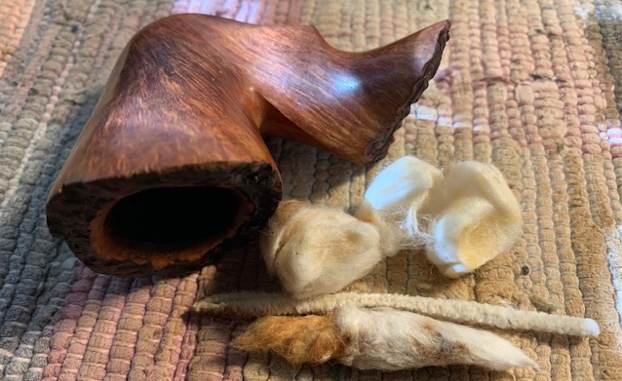
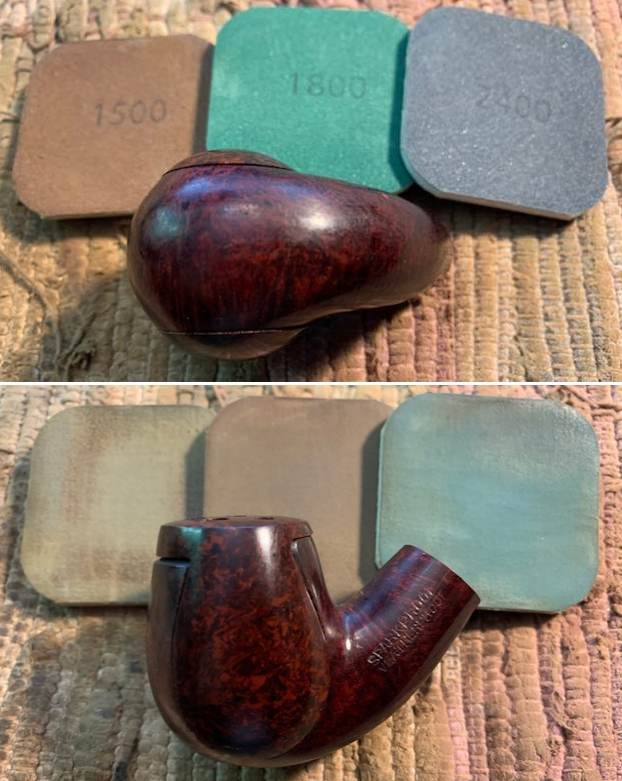
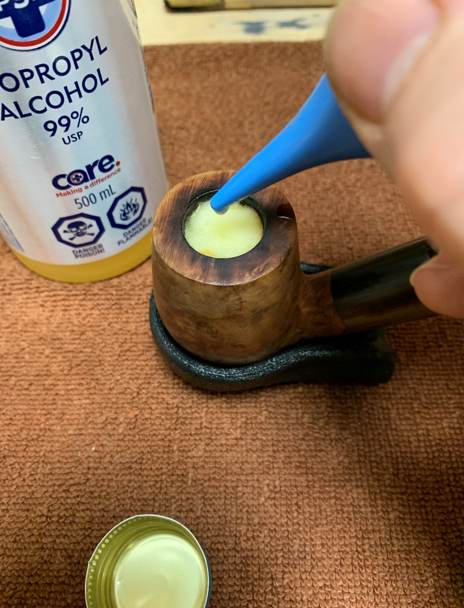
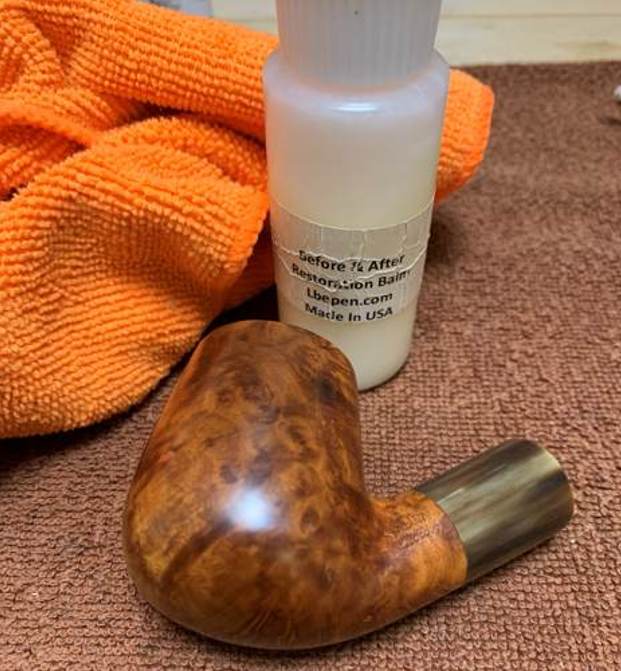
 I then paused and rubbed some Before & After Restoration Balm into the soft and smooth wood. I gently brushed it into the rustication grooves and let the balm sit for fifteen minutes or so. The BARB works so well at bringing out the best in the wood. I brushed it with a horsehair brush and buffed it with a microfibre cloth. Beauty!
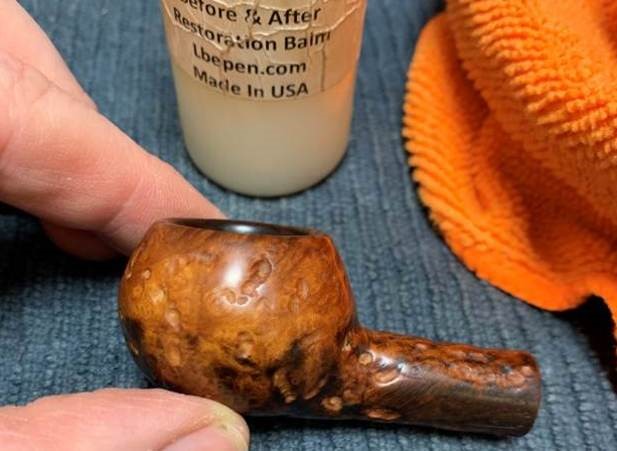
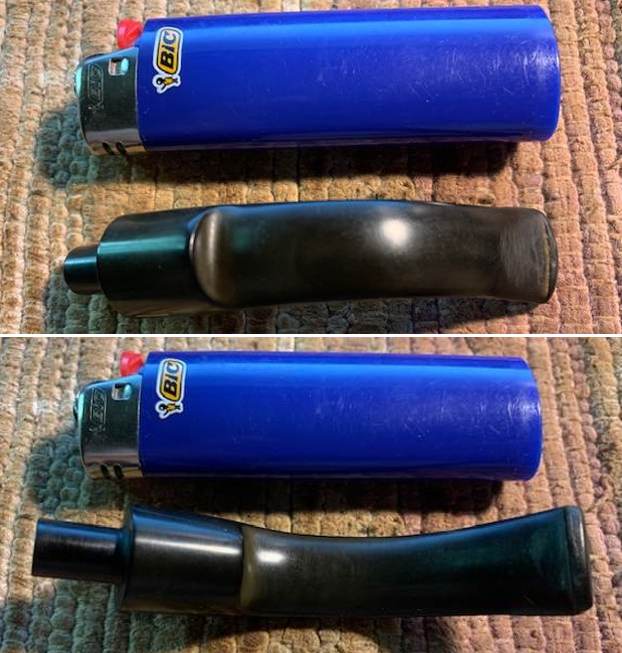
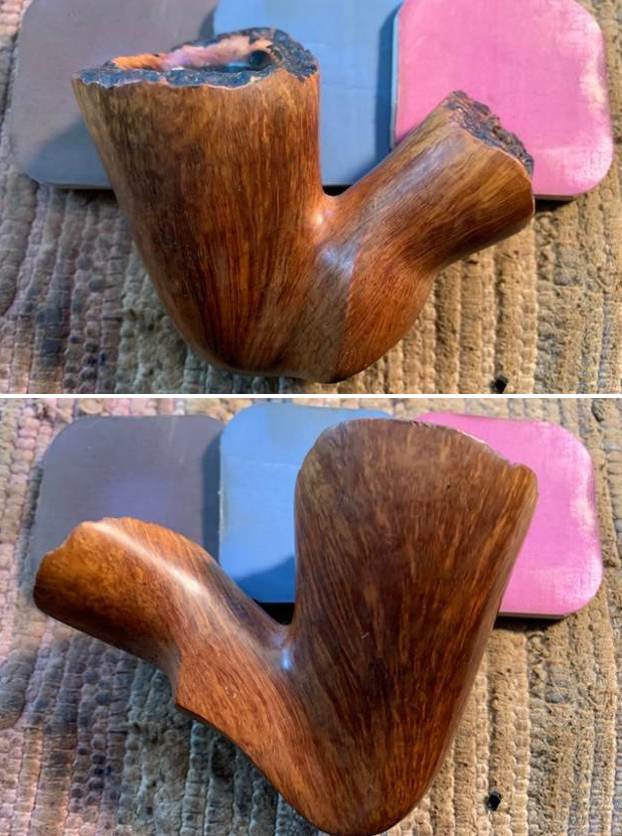
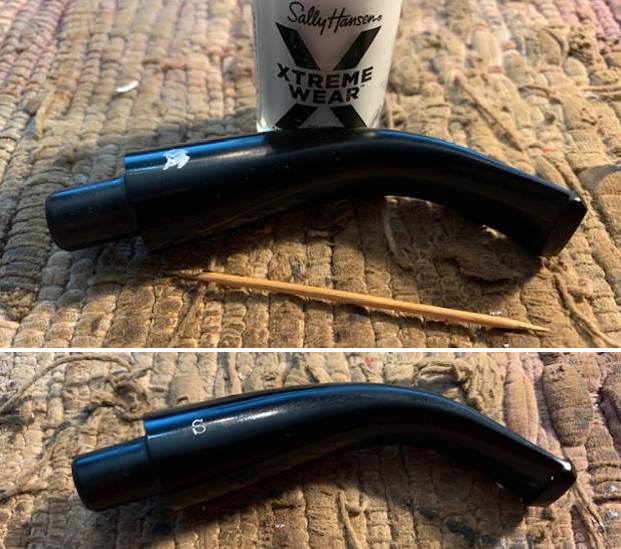
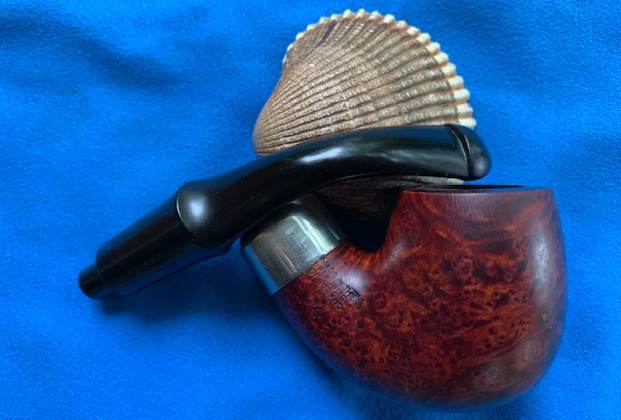
 It is obvious that at this point the pipe needed to be stained. One issue that needed to be addressed right away was how to match the sanded area to the colour of the pre-existing stain. I opted to apply some Fiebing’s Dark Brown Leather Dye only to the sanded area. I flamed it with a BIC lighter and let it set. I then removed some excess with isopropyl alcohol on a cotton round. This provided a sufficiently accurate undercoat to the wood and would allow me to apply a separate layer of dye to the whole stummel.
 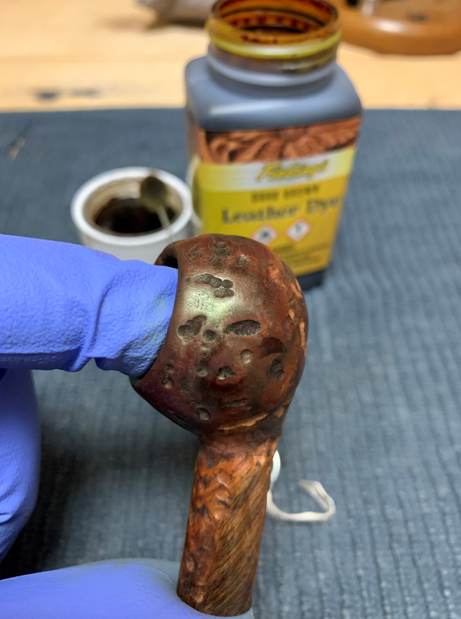 I repeated my steps in order to add the second and final layer of Dark Brown to all of the wood. This turned out beautifully – dark and rich, with lovely subtle variations in colour.
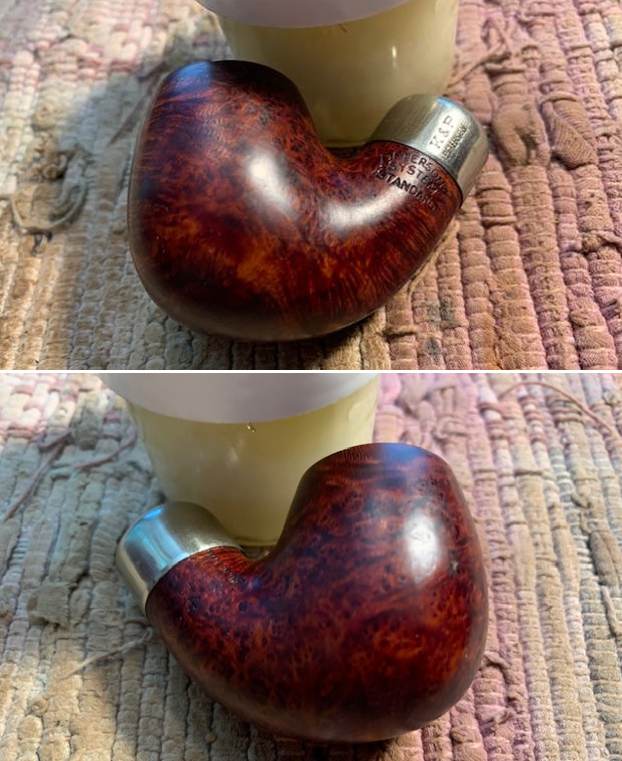
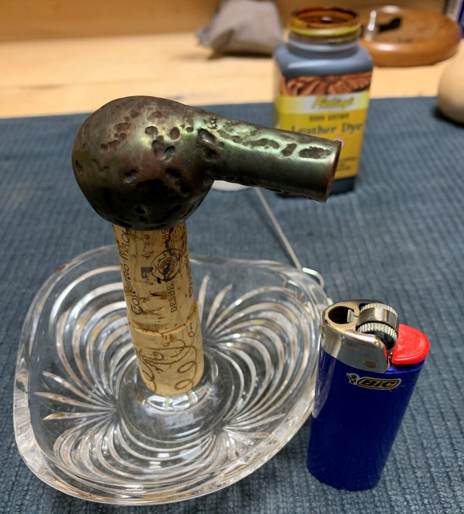
 I reassembled the pipe to prepare it for polishing on the bench buffer. However, I added a little bit of petroleum jelly to the wooden threads inside the shank. This would provide some much-needed lubrication for the connection with the aluminum ferrule.
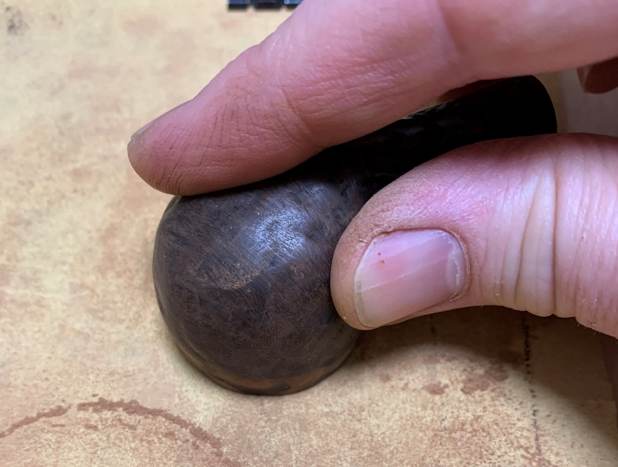
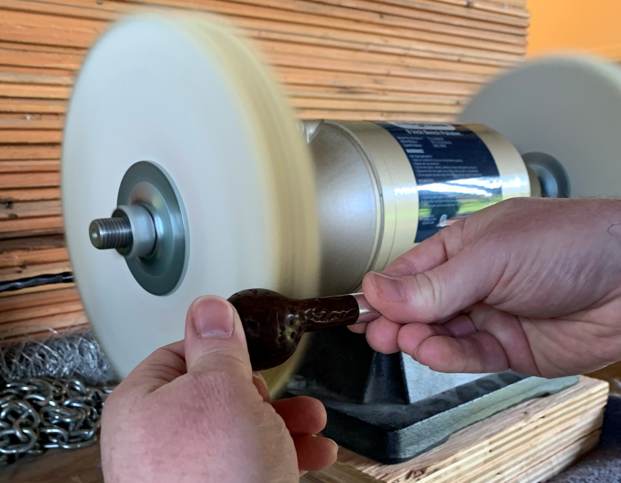
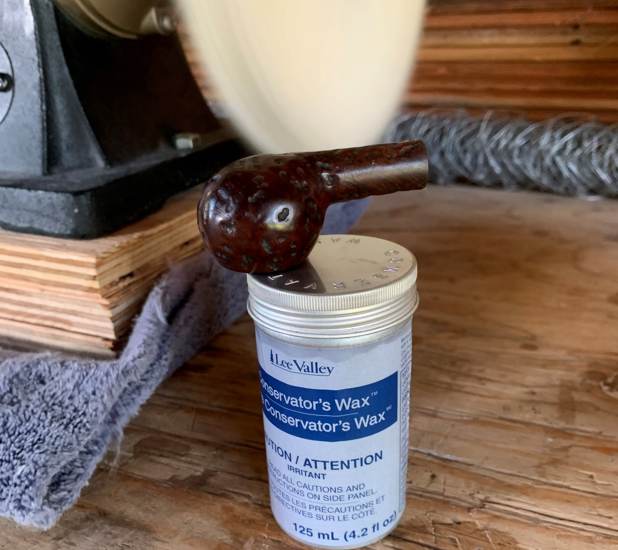
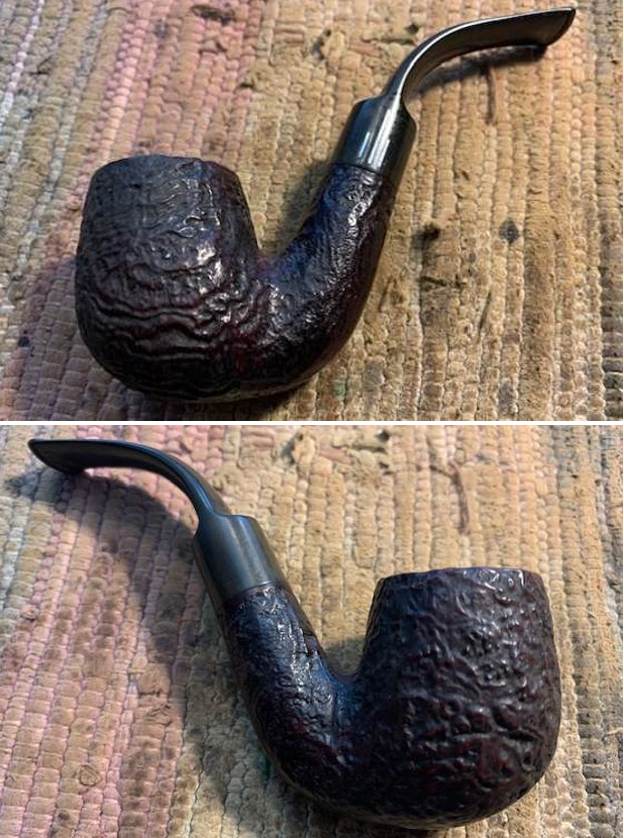
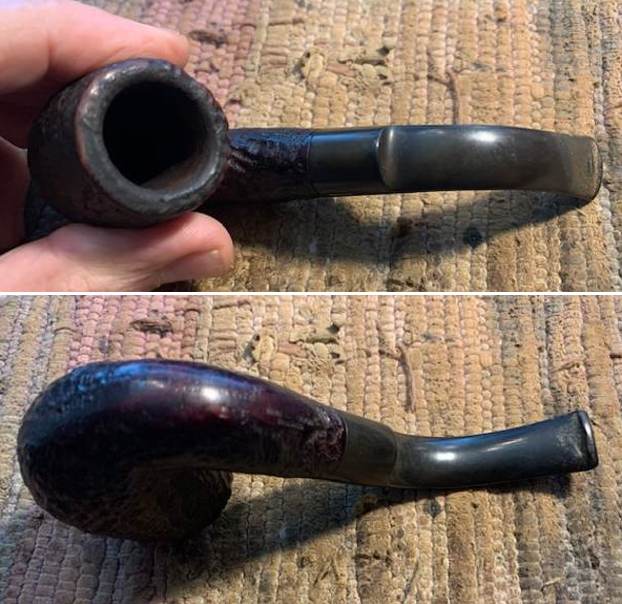
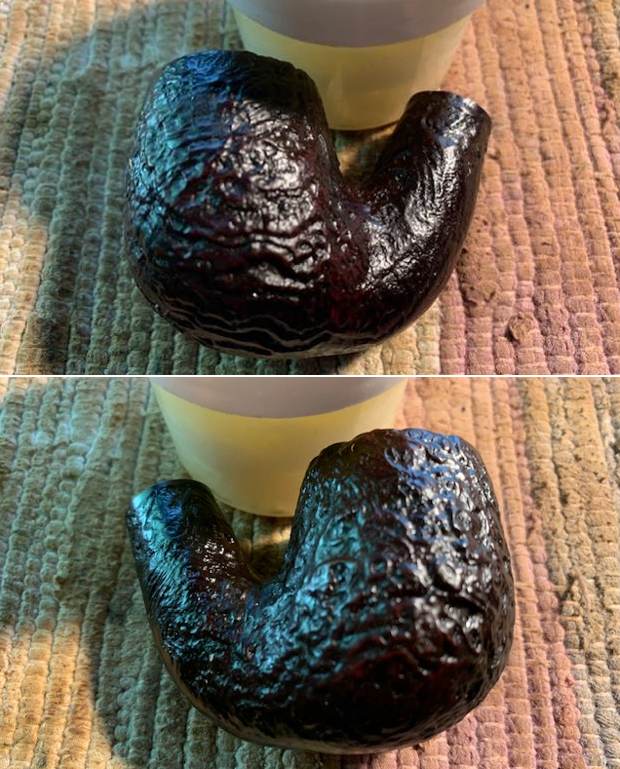
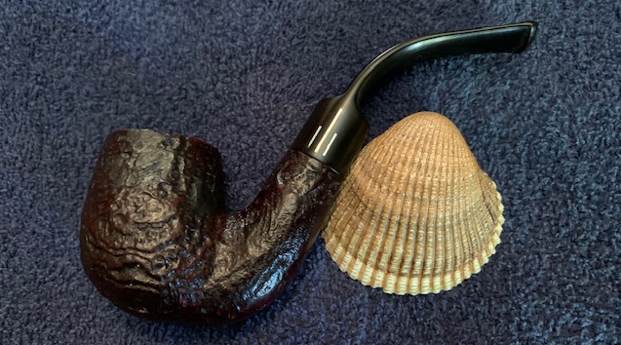
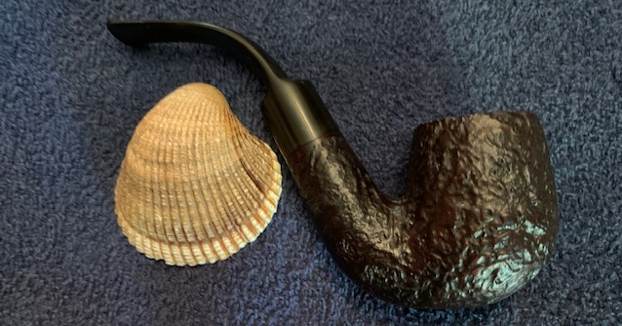
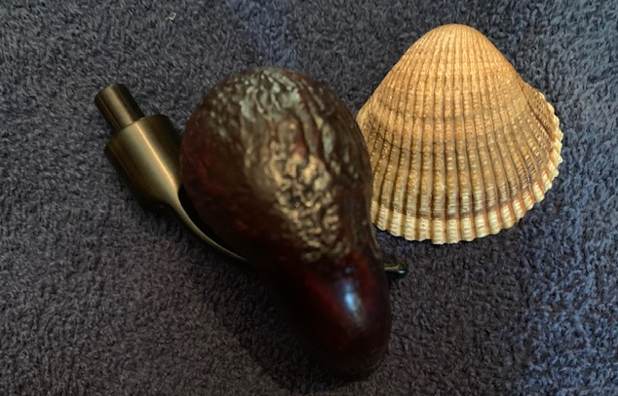
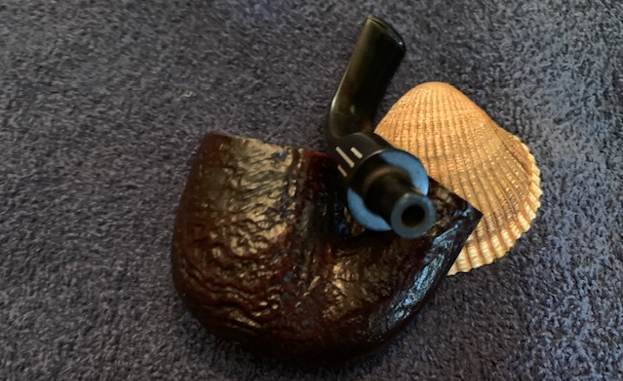
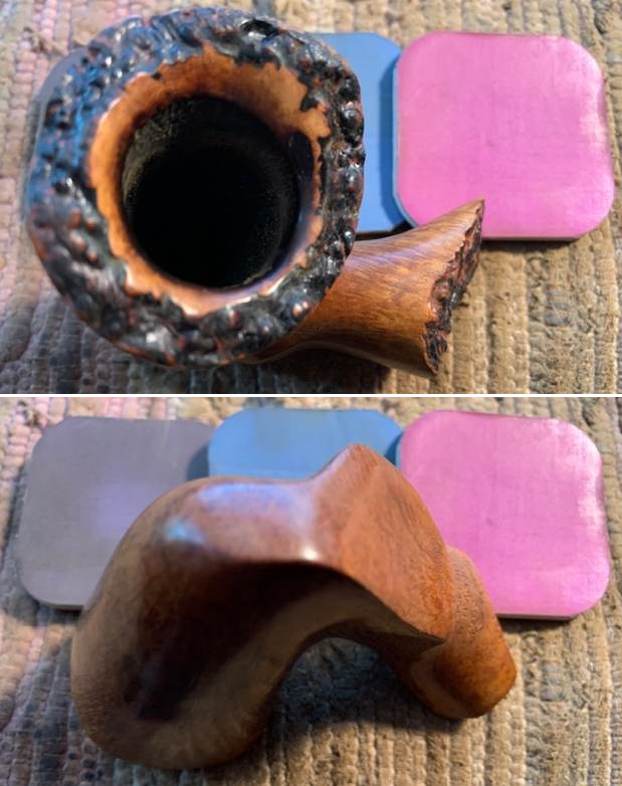
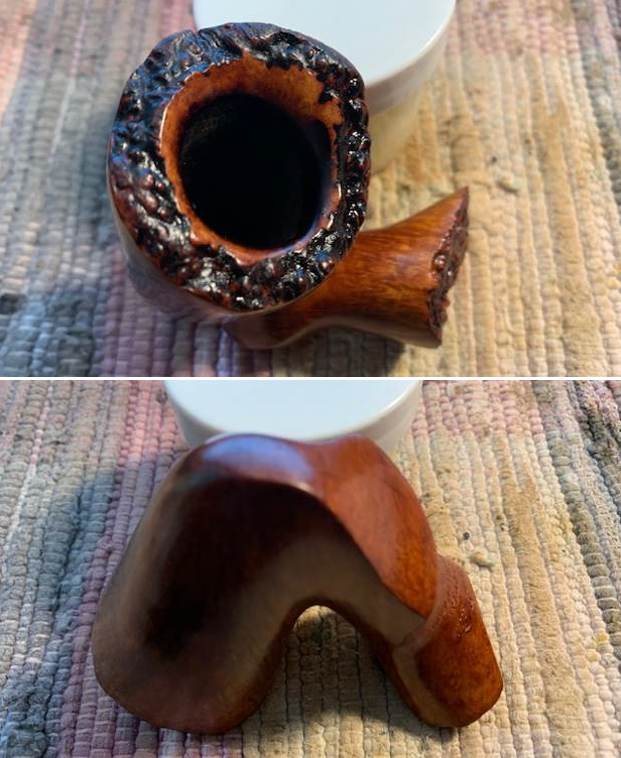
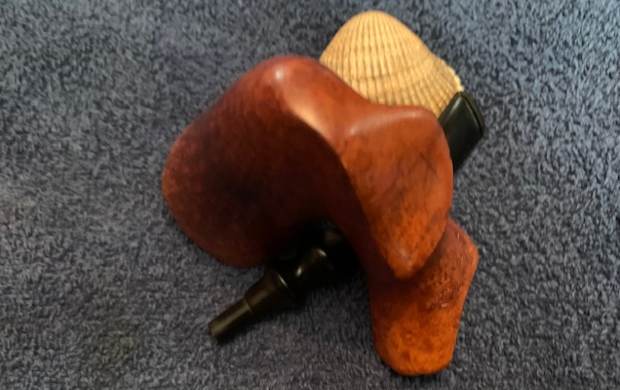
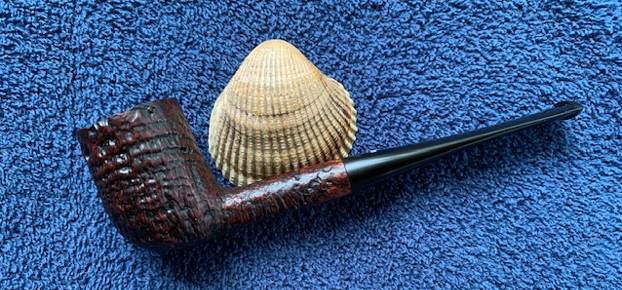
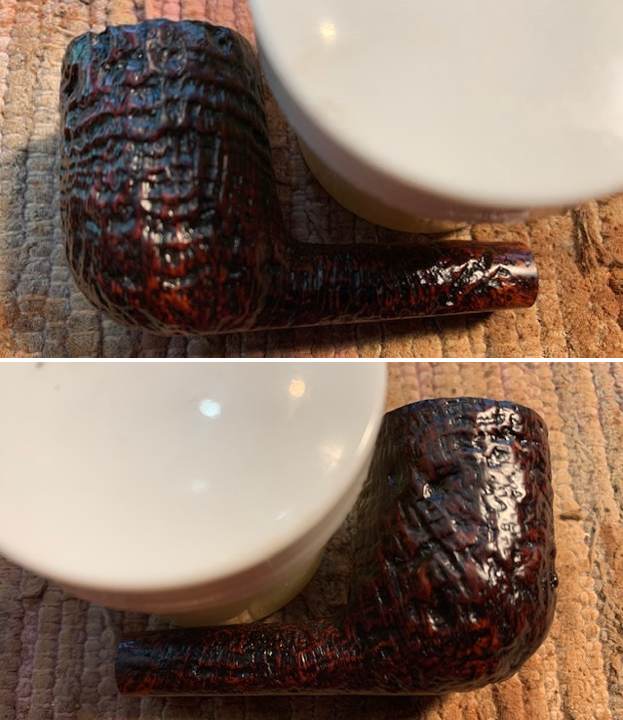
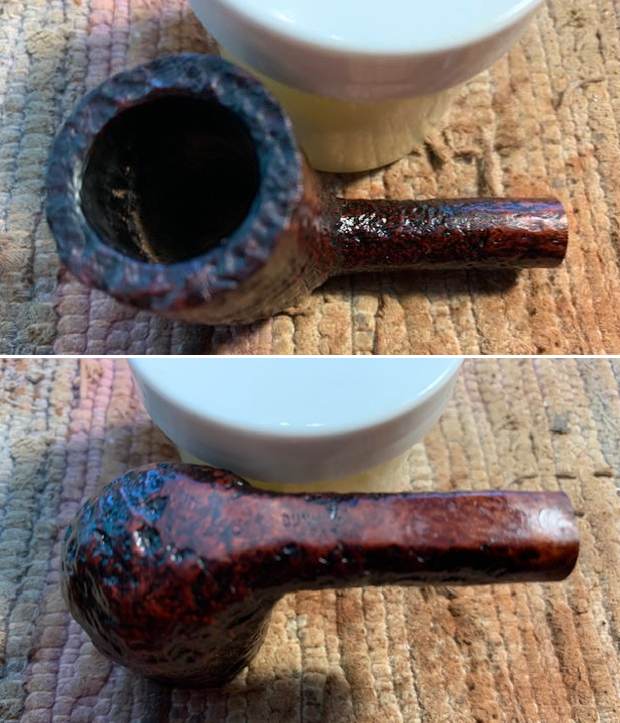
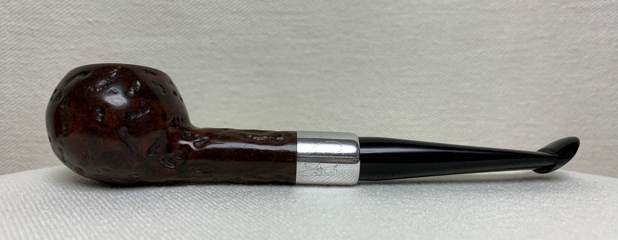
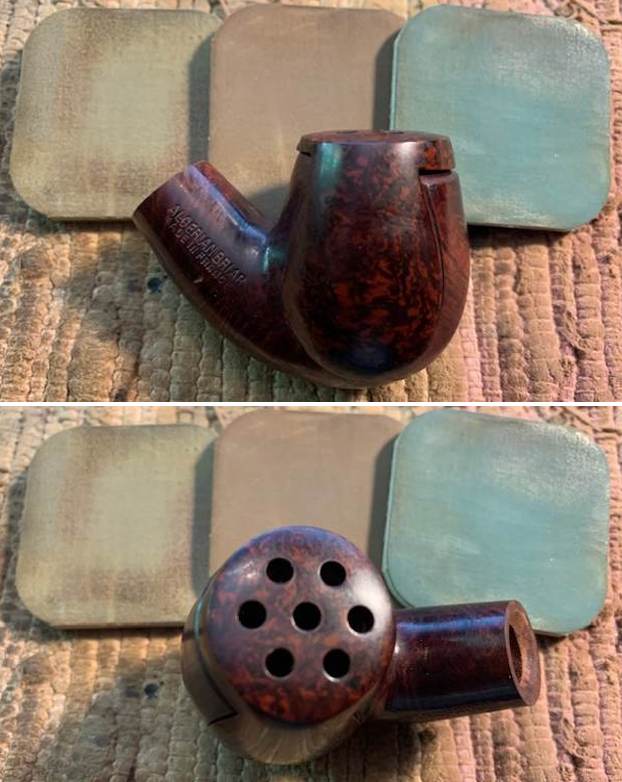
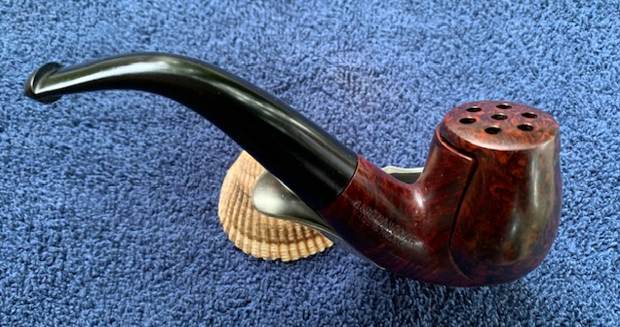
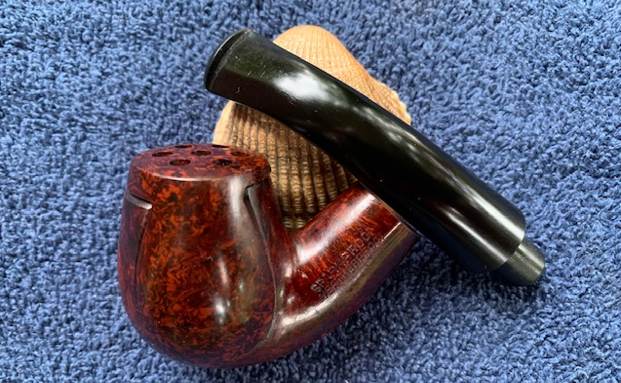
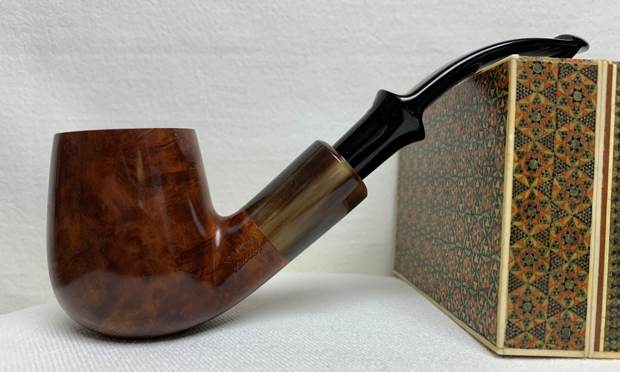
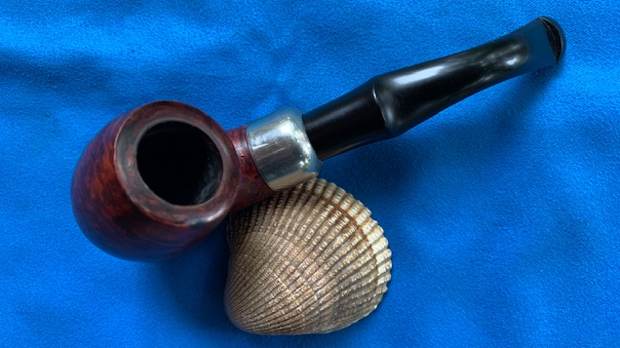
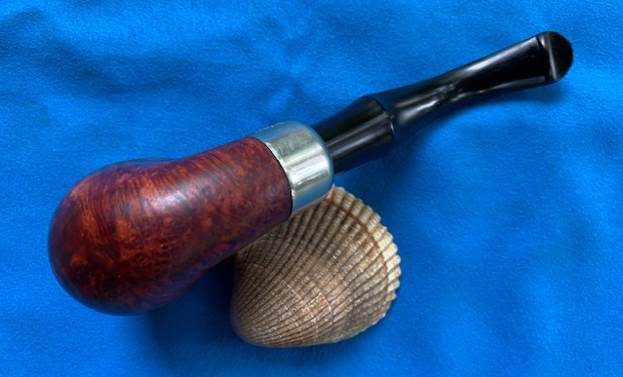
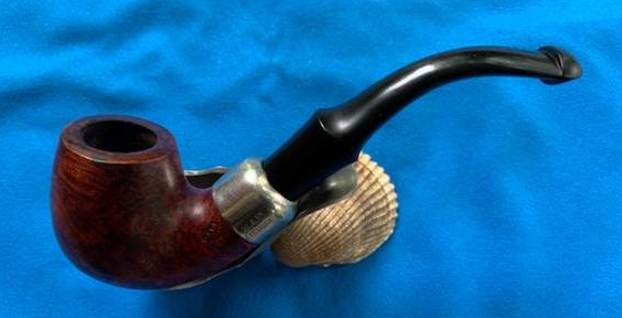
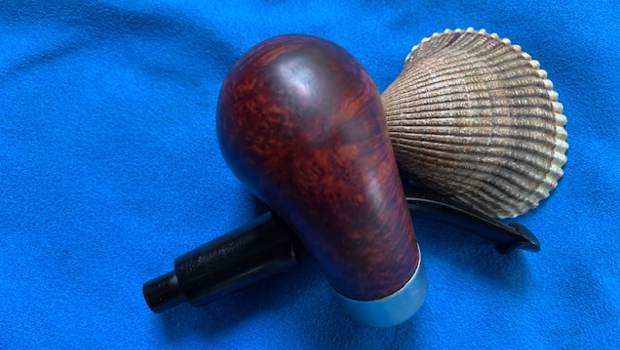
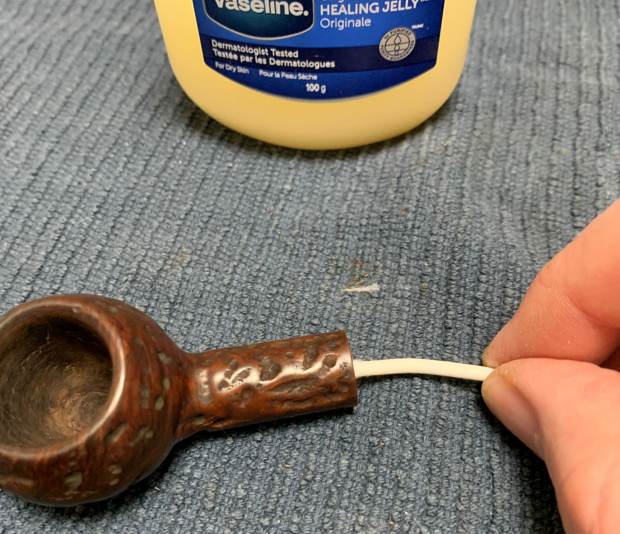 I went to the bench buffer and applied some White Diamond to the stummel and stem. Then the final polish! The rusticated surface meant that I didn’t use carnauba wax – it gets gummed up in the grooves. Instead, I used Lee Valley Conservator’s Wax which worked like a charm. What a pipe! Goodbye frog, hello prince!
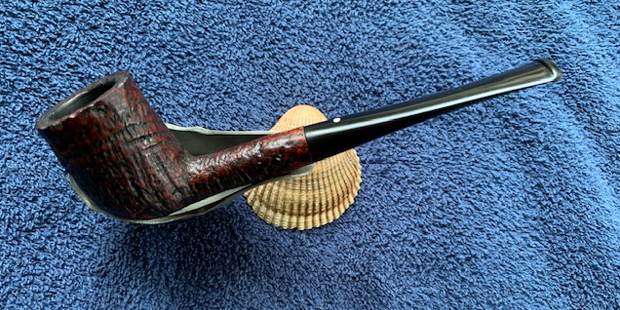
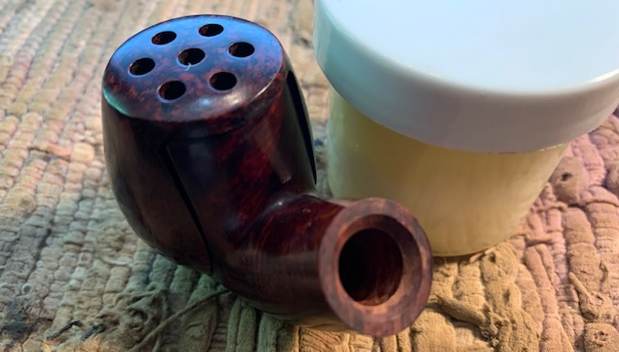
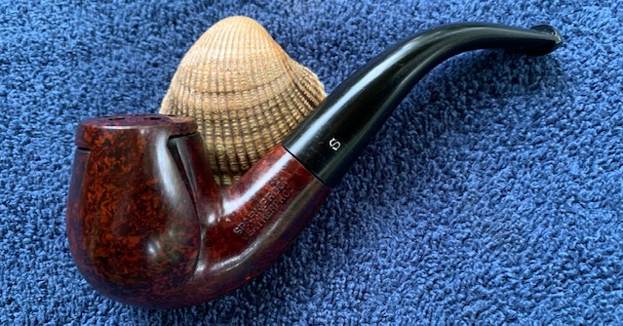
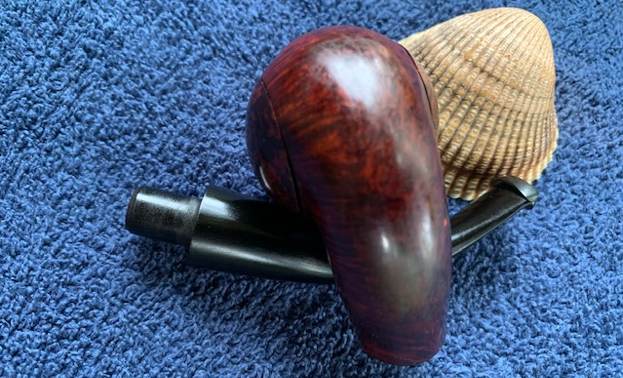
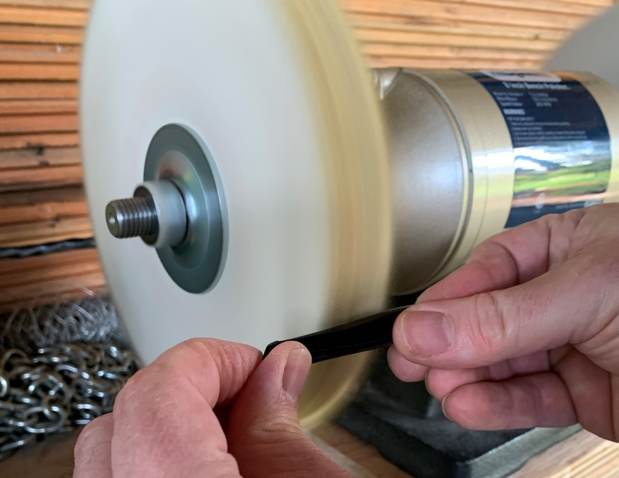
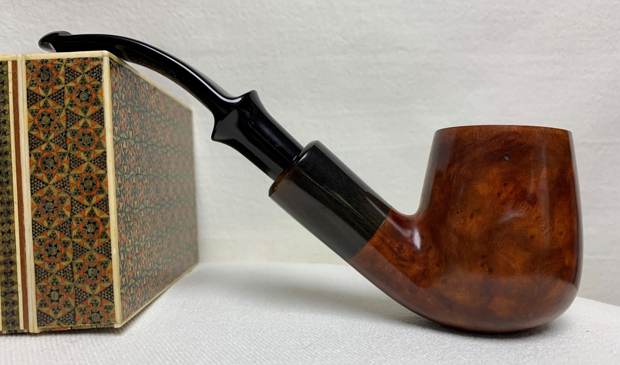
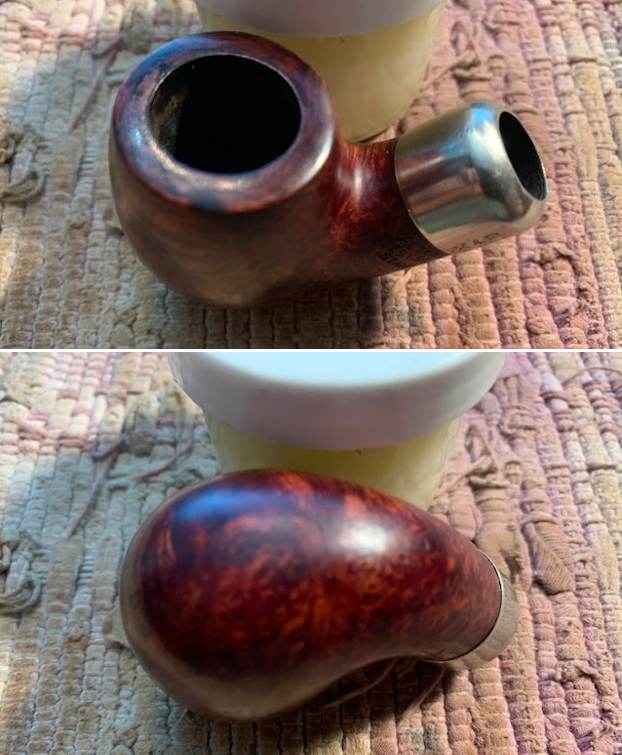
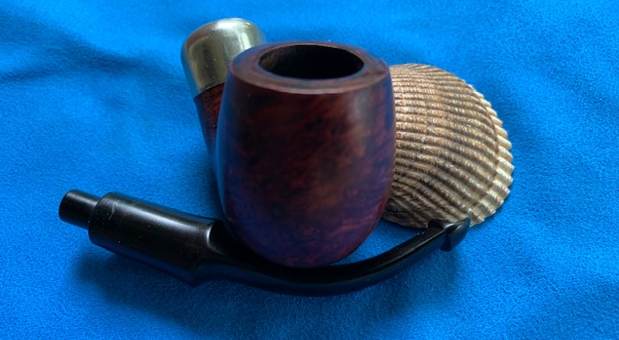
 This was an amazing restoration/re-creation and I really had fun with it. I think the result is fantastic – it turned a lump that was destined for the firewood pile into a pipe that pays homage to the man who created it originally and the man who smoked it so joyfully.
I am pleased to announce that this pipe is for sale! If you are interested in acquiring it for your collection, please have a look in the “Canada” pipe section of the store here on Steve’s website. You can also email me directly at kenneth@knightsofthepipe.com. The approximate dimensions of the Payne Classic are as follows: length 5½ in. (140 mm); height 1⅛ in. (29 mm); bowl diameter 1⅝ in. (41 mm); chamber diameter ¾ in. (19 mm). The weight of the pipe is ⅞ oz. (27 g). I hope you enjoyed reading the story of this restoration as much as I enjoyed restoring it. If you are interested in more of my work, please follow me here on Steve’s website or send me an email. Thank you very much for reading and, as always, I welcome and encourage your comments.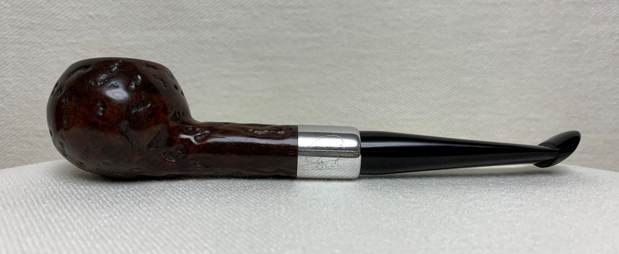


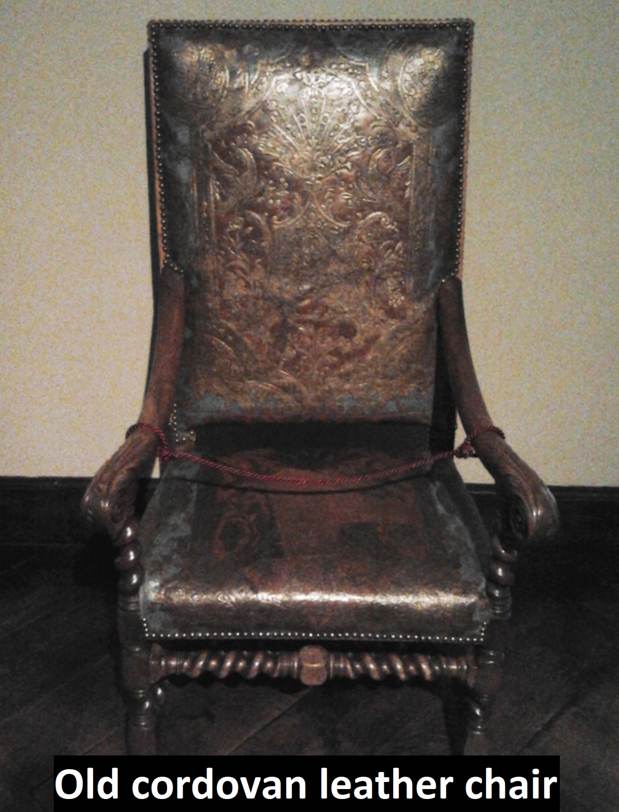 Of course, the name of the colour comes from the Spanish city of Córdoba. Córdoba (or Cordova) has had a thriving leather industry since the seventh century AD, and it is this that is most closely associated with the word, cordovan. I referred to my Oxford Dictionary of English Etymology. It confirmed this information and added that the first known use of the word in English was in 1591 – in this context, it was simply used as the adjectival form of the city name. According to the Dictionary of Color, the first recorded use of cordovan as a colour in English was in 1925.
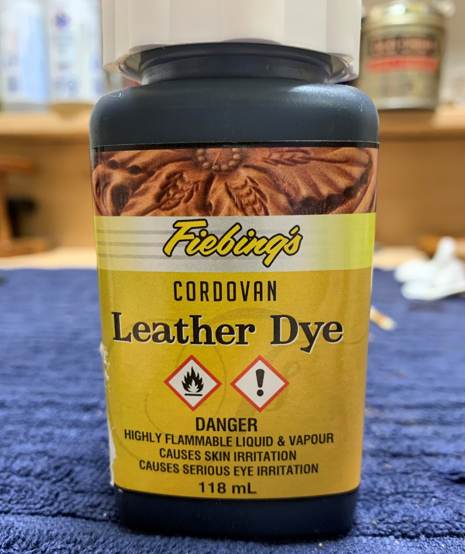
 I expected this colour to be quite red and that accounted for my previous hesitation in using it. Certainly, the bottle of Fiebing’s Cordovan Leather Dye appeared a bit redder that I would have liked, but an opportunity presented itself to try it out on a pipe. I own Fiebing’s oxblood and I’ve used it before, but it was time to try something different…
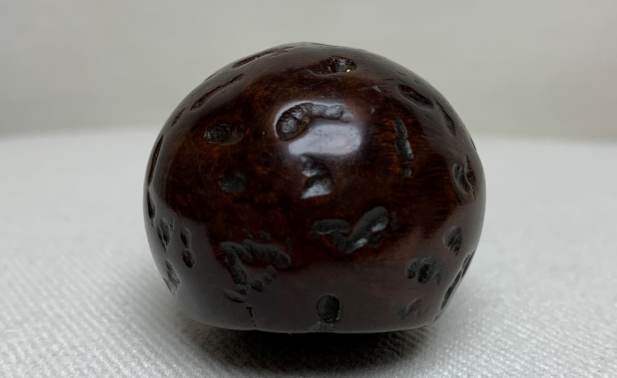
 As you can see, the briar had some water stains on it and the pipe was generally dusty and dirty, despite never having been used.
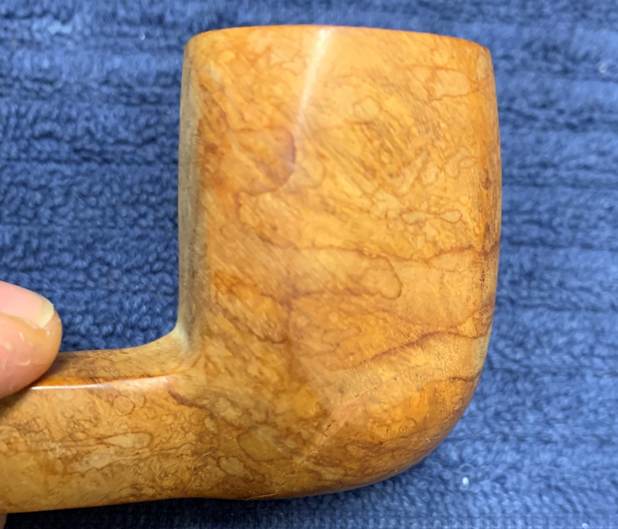 To give the dye the best chance of succeeding, I cleaned the stummel with Murphy’s Oil Soap. This removed all the stains and made the stummel nice and clean. I also used a can of compressed air to blow out any dust from the draught hole and chamber.
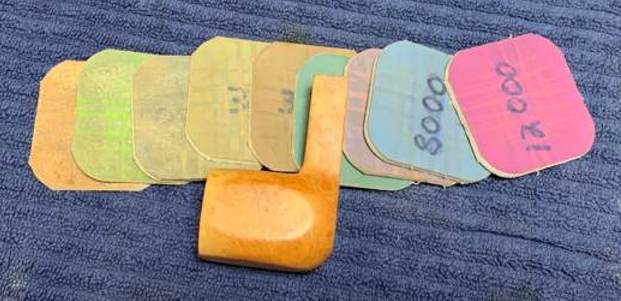
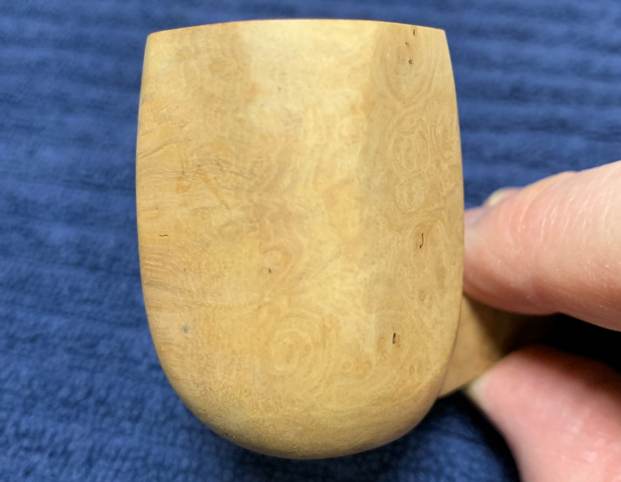 The stem was also new but was clearly dirty from sitting around untouched for years. I cleaned it with a couple of pipe cleaners and then polished up the stem with all nine of my MicroMesh pads.
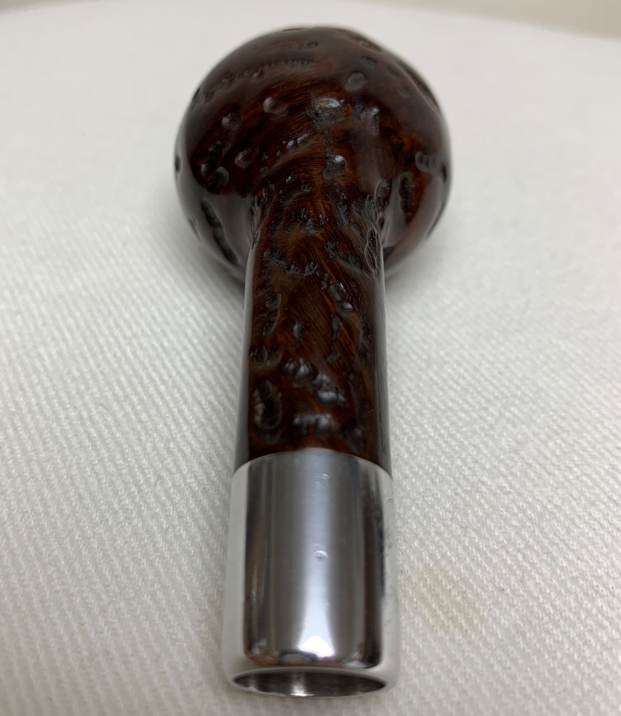
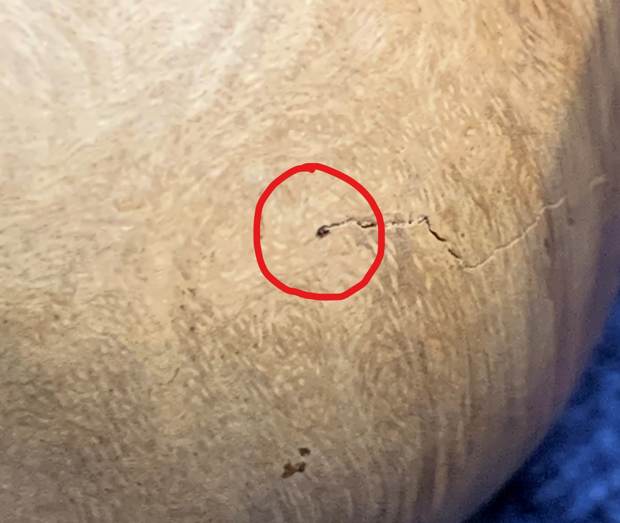
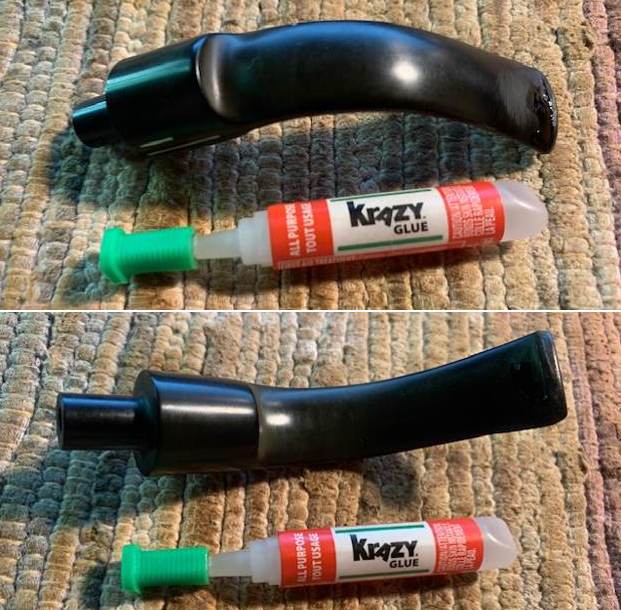
  Next, I had to address a couple of issues in the briar. As the photos show, there are some cracks in the wood that I need to tackle. Upon close inspection, fortunately, the cracks are quite shallow and do not meaningfully affect the integrity of the pipe.
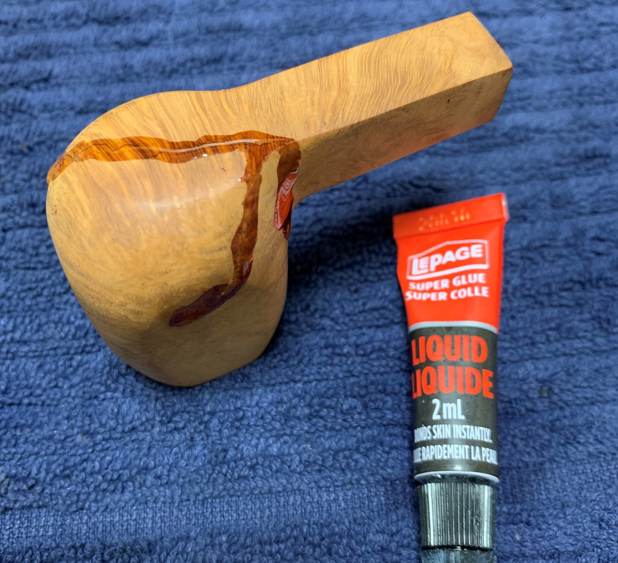
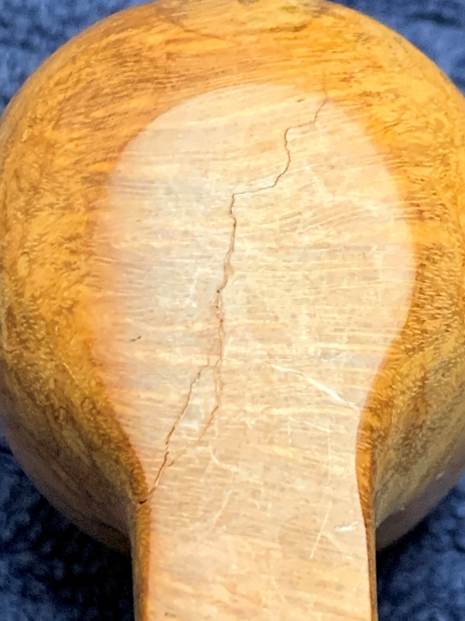 One of many techniques that I learned from Steve is to use a micro drill bit to stop any briar cracks from lengthening. So, I took one of my micro drill bits – and it is really tiny – put it in my Dremel, and drilled minuscule holes at the end of each crack. Of course, I followed this up by filling the drill holes and cracks with cyanoacrylate glue and let it fully cure. Once cured, I sanded it all down with my MicroMesh pads.
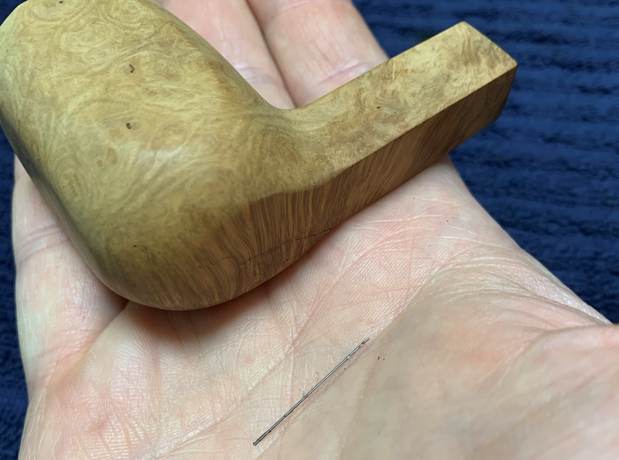
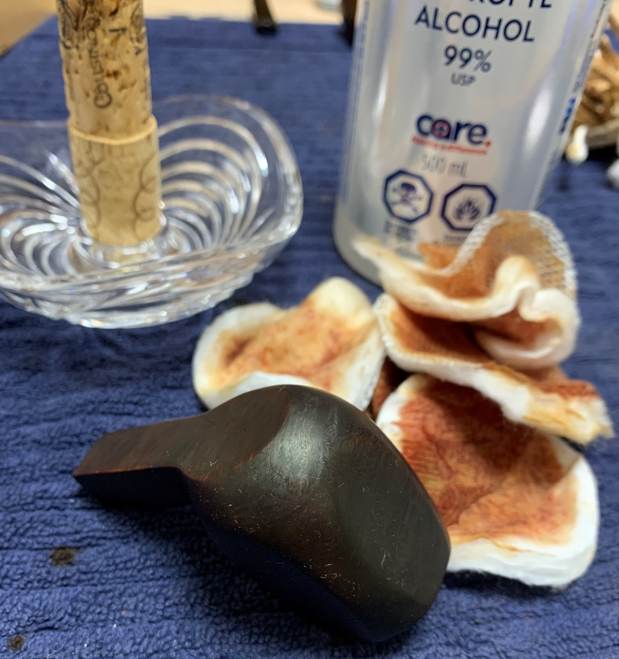
 Time to try the cordovan! As I mentioned, I expected cordovan to be quite red. In fact, it was a beautiful, rich, brown colour – I suppose at the brown end of burgundy. I flamed it and let it set and then coated it again with dye and flamed that too. I was pleasantly surprised at how attractive the colour was. However, I was equally concerned that I had made it too dark by staining it twice, so I decided to lighten it. Fortunately, this dye is alcohol-based, so I used isopropyl alcohol to wipe down the pipe and remove excess stain. I am very pleased with the results.
 I polished the pipe on my bench buffer with White Diamond and carnauba wax which made the pipe look all the more lovely.
 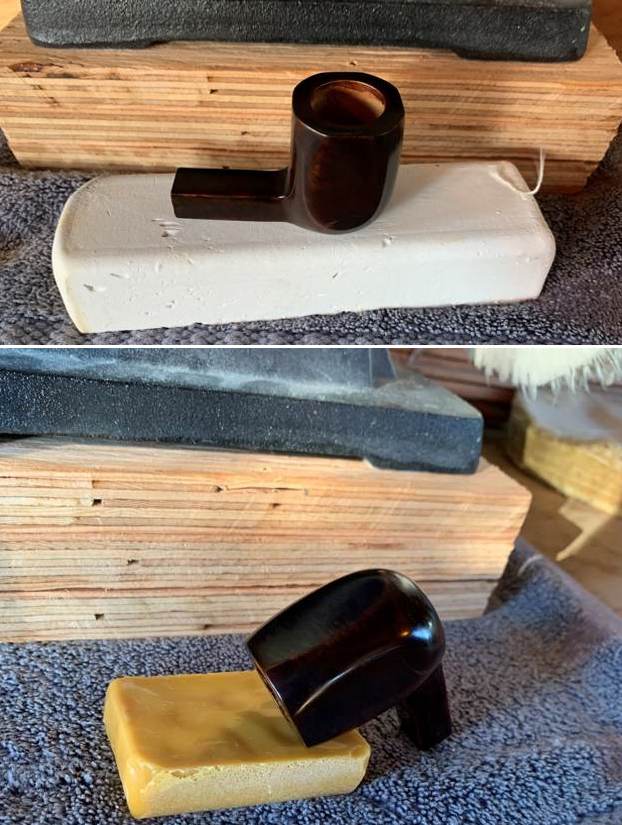 Cordovan turned out to be an excellent addition to my palette of colours for pipe work. As I mentioned, I expected it to be much redder than it turned out to be, and that originally precipitated my hesitation in using it.
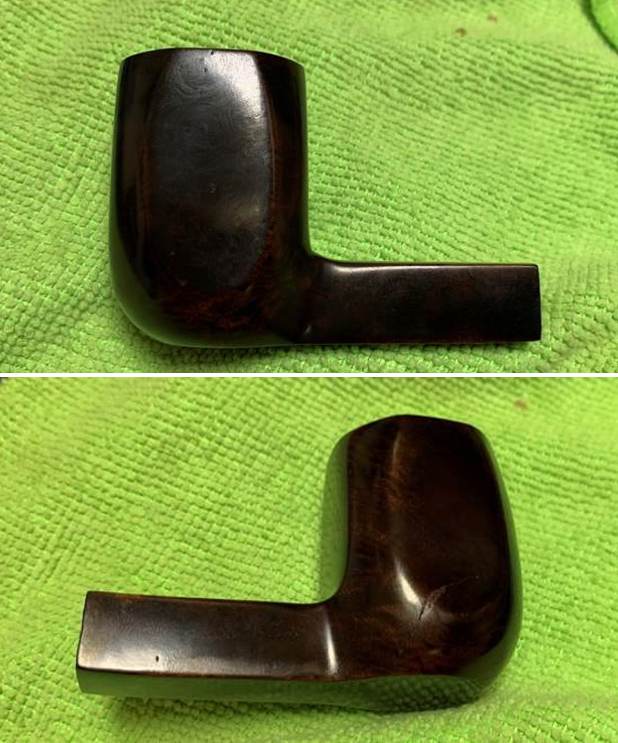
 I am pleased to announce that this pipe is for sale! If you are interested in acquiring it for your collection, please have a look in the ‘Pipes from Various Countries’ section of the store here on Steve’s website. You can also email me directly at kenneth@knightsofthepipe.com. The approximate dimensions of the pipe are as follows: length 5⅝ in. (143 mm); height 1¾ in. (45 mm); bowl diameter 1⅛ in. (29 mm); chamber diameter ⅞ in. (22 mm). The weight of the pipe is 1⅛ oz. (34 g). I hope you enjoyed reading this installment of the Pipe Incident Report – I look forward to writing more. If you are interested in my work, please follow me here on Steve’s website or email me directly at kenneth@knightsofthepipe.com. Thank you very much for reading and, as always, I welcome and encourage your comments.
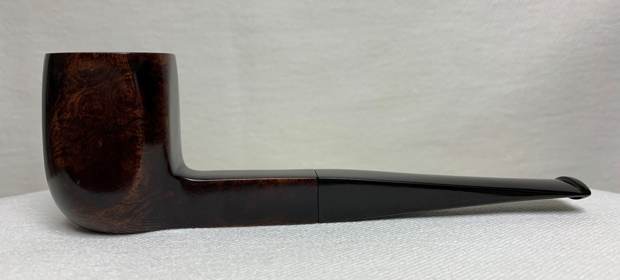


