Blog by Paresh Deshpande
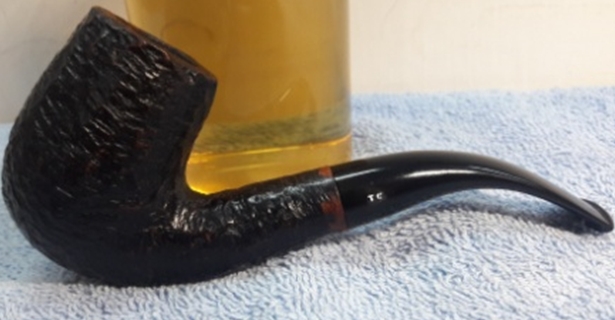
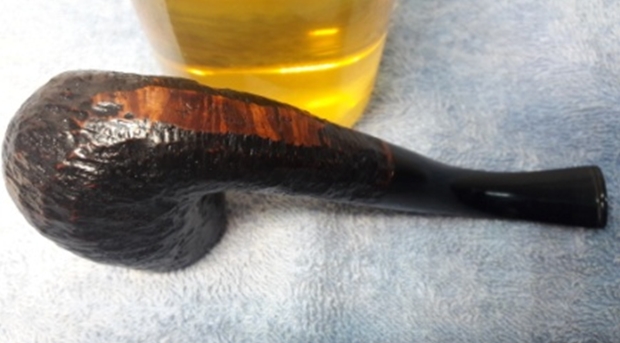
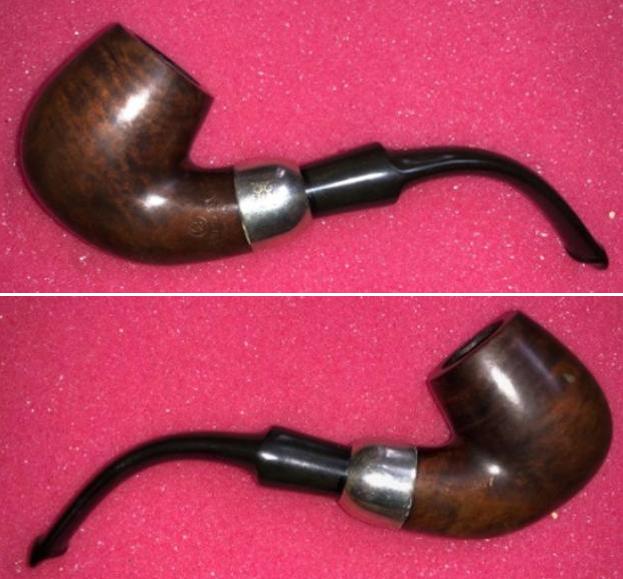
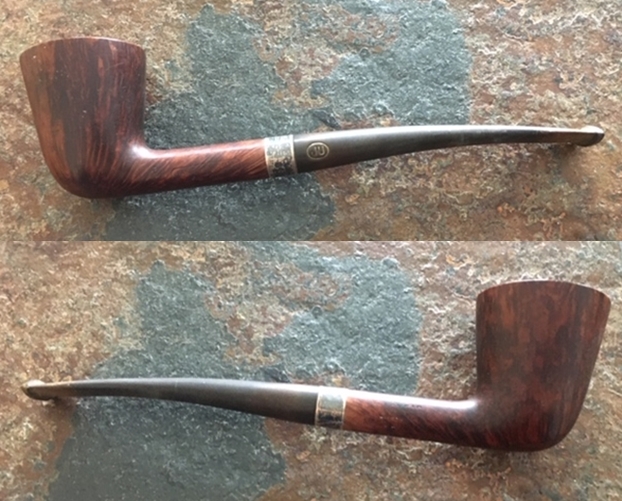
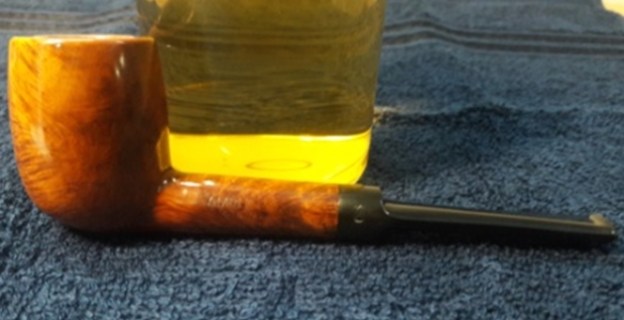
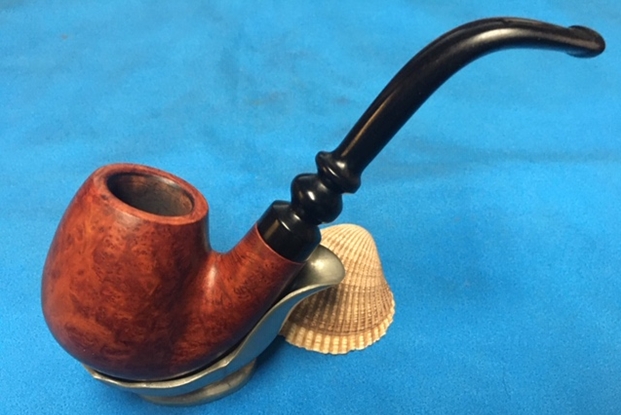
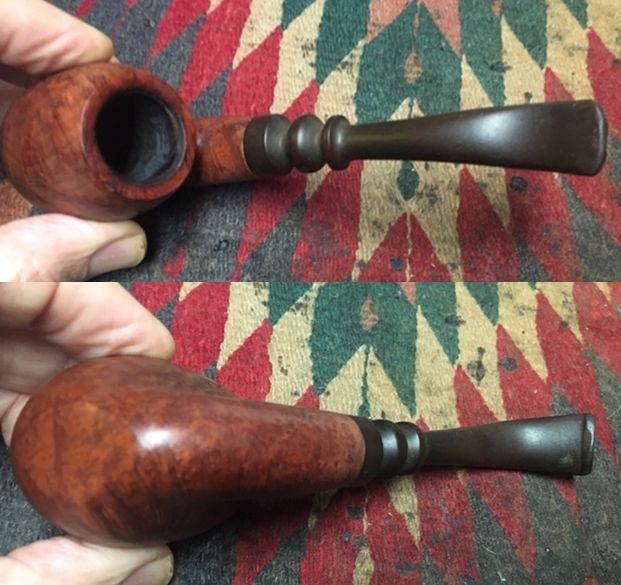
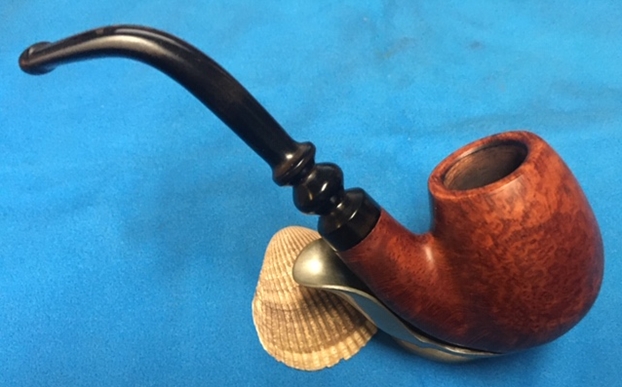
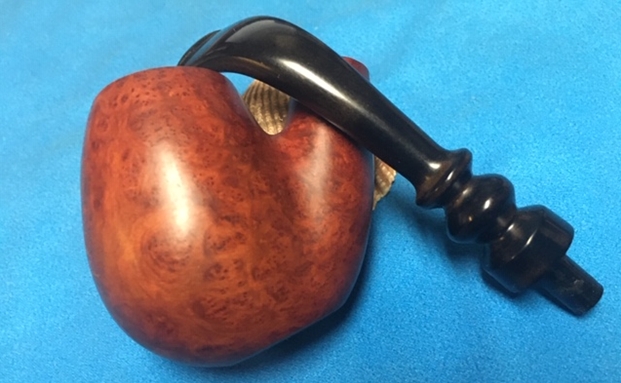
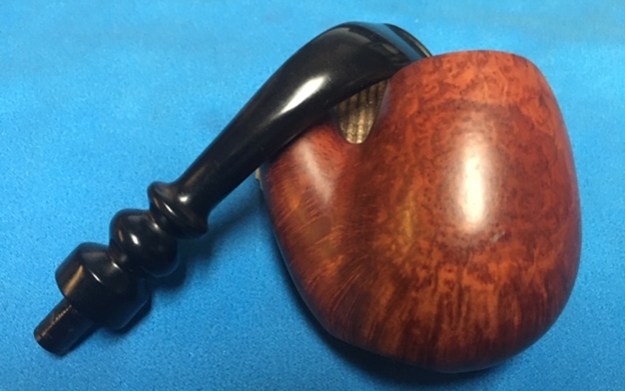
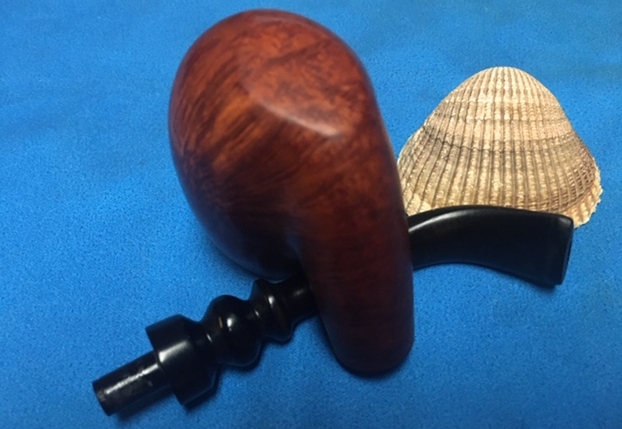
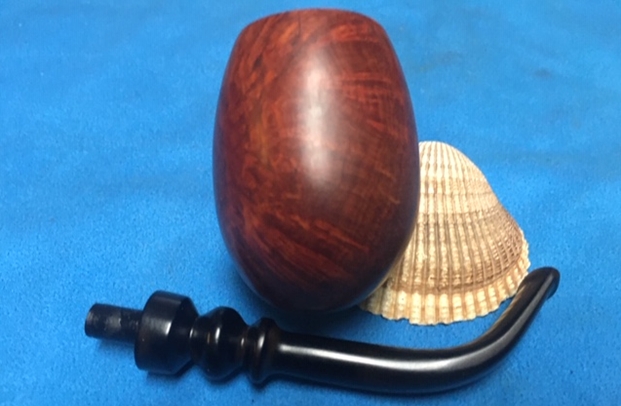
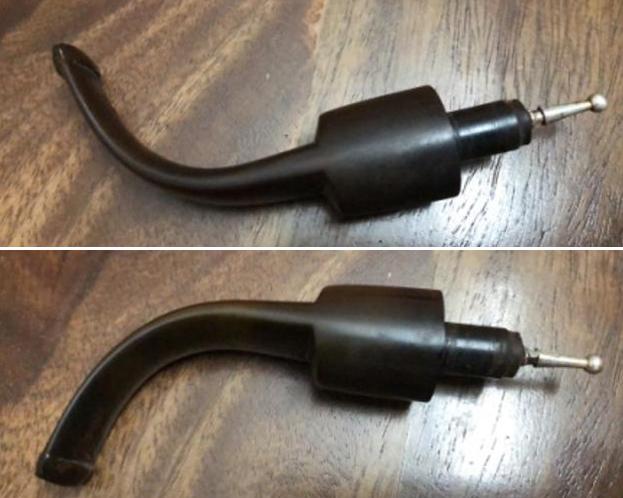
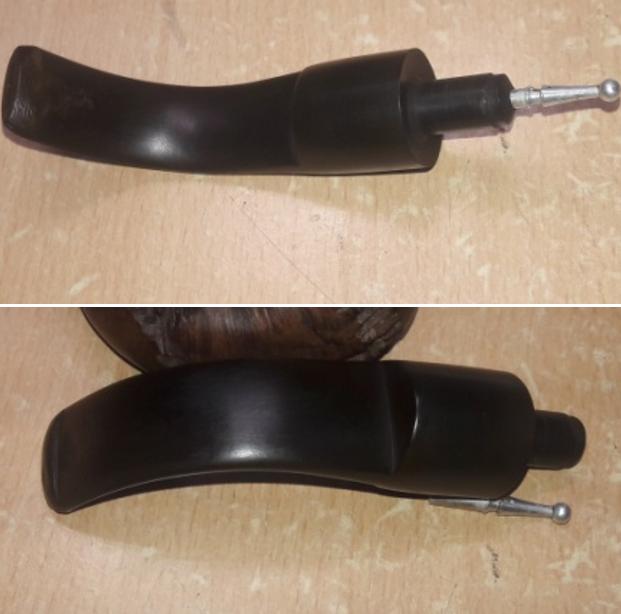
The next pipe that I picked up for restoration is a massive sized classic full bent Billiards shaped pipe that feels robust in the hands with a nice and comfortable feel in the mouth when clenched. It has the classic British shape which oozes excellent craftsmanship, very high quality of briar and vulcanite and screamed “VINTAGE”. No wonder then that this beauty had found its way in my grandfather’s rotation (seeing the condition that it was in) in the past and now will surely be part of my rotation too!!
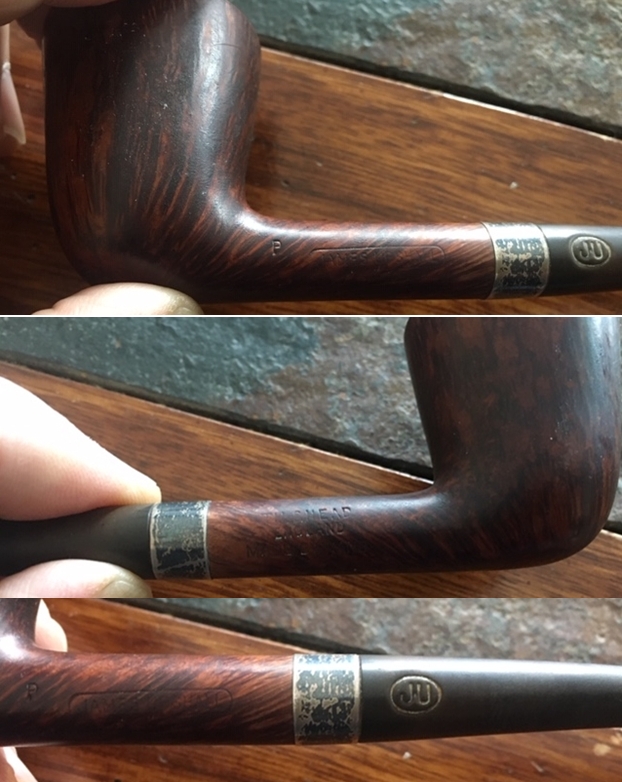
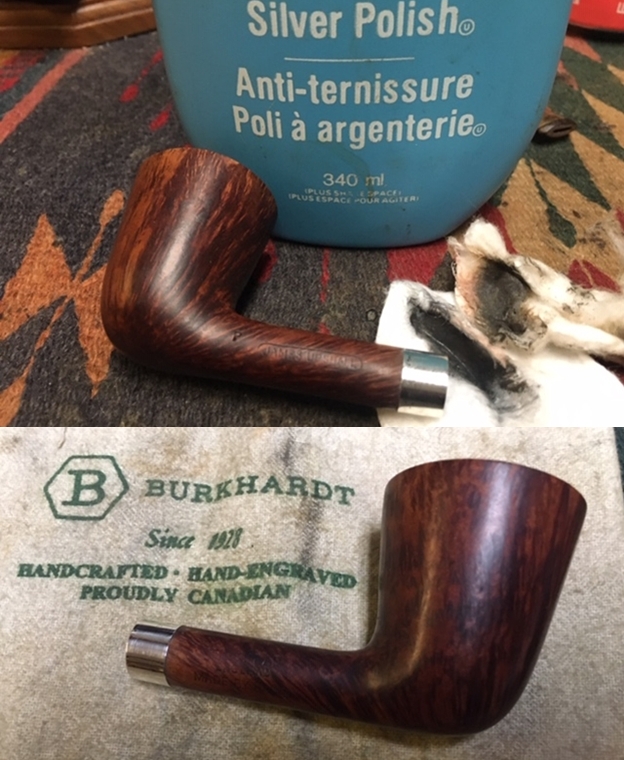
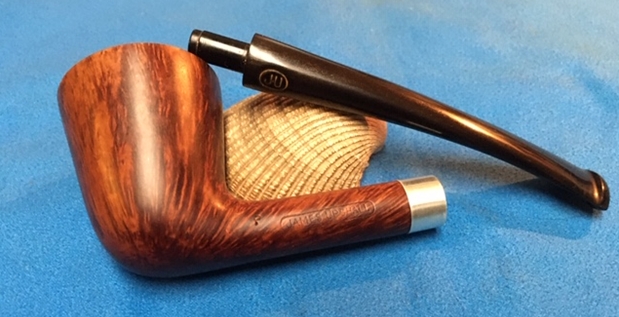
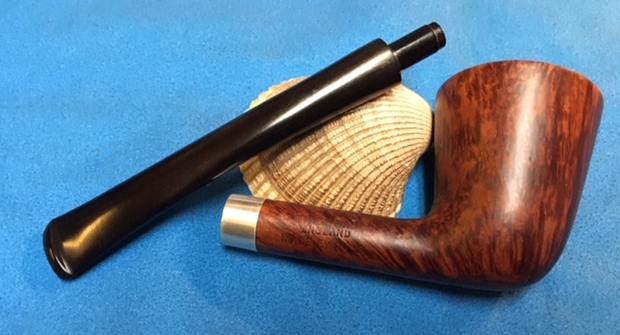
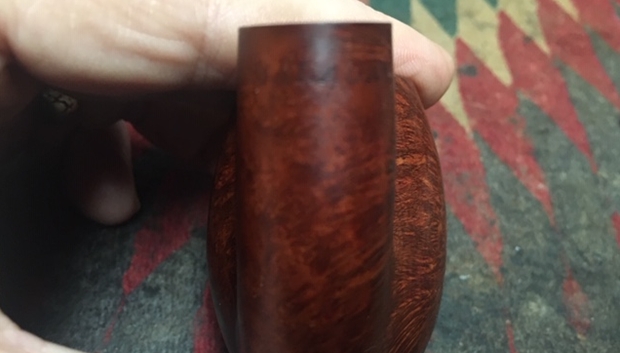
The stummel of this pipe appears to be a combination of rustication and sandblast!! It is unique and it sure does feel good to run your fingers over the surface of the stummel. There is a thin strip of smooth briar surface at the bottom of the shank which bears the stampings on this pipe. It is stamped as “THORBURN CLARK” over “MANCHESTER”. To the left of this stamp towards the foot of the stummel, it is stamped as “XL” at an angel and to the right towards the shank end it is stamped with the letter “R”. The set of stampings on this pipe are all crisp and in block capital letters. The vulcanite stem bears the logo “TC”, in separate capital letters. While researching any pipe, the first site that I visit is rebornpipes.com since this is one site where I usually find well researched information on any brand that has anything, even remotely related, to pipes!! Now, till the time I got this pipe on my work table, I had not heard or read anything on this pipe maker and now that I have decided to work on it, rebornpipes does have a write up by Steve on a similar shaped pipe, though considerably smaller and with same rustication pattern as the one on my work table, from this carver. He had thoroughly researched this pipe and makes for an interesting read. Here is the link to the write up: https://rebornpipes.com/2017/12/03/restoring-a-thorburn-clark-rusticated-bent-billiard/
From the information that I read and the fact that this pipe came from my grandfather’s collection, this one could be dated from the period 1930s to 1940s.
INITIAL VISUAL INSPECTION
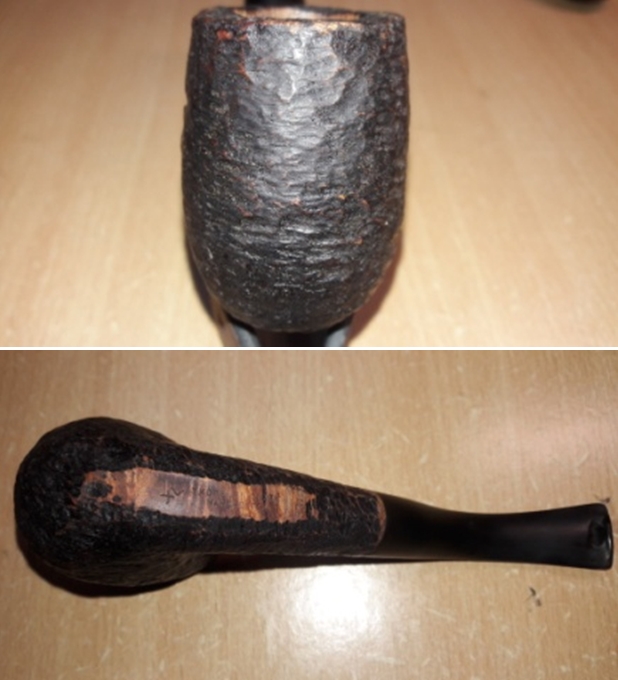
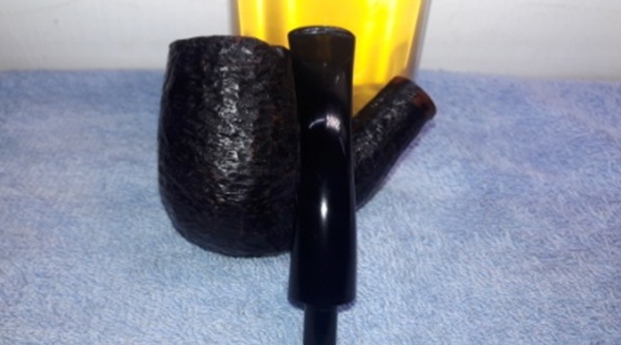
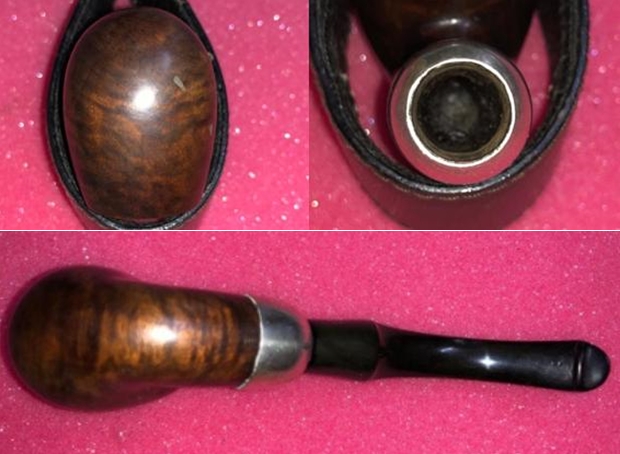
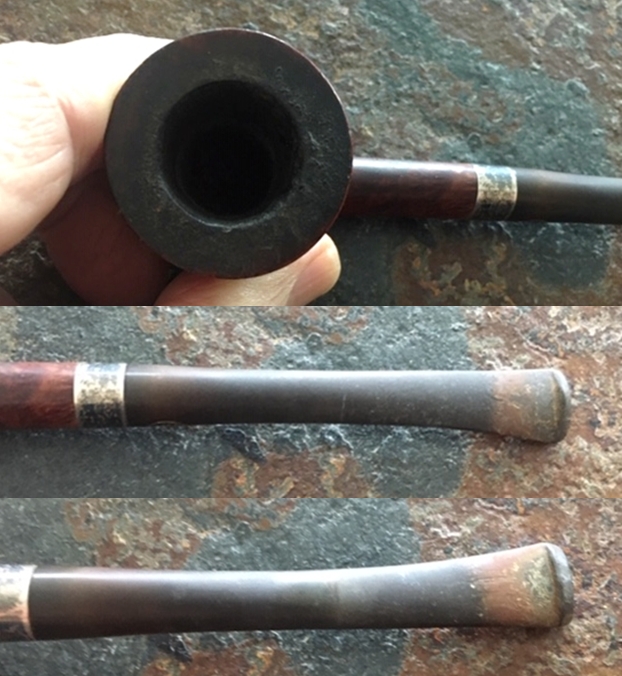
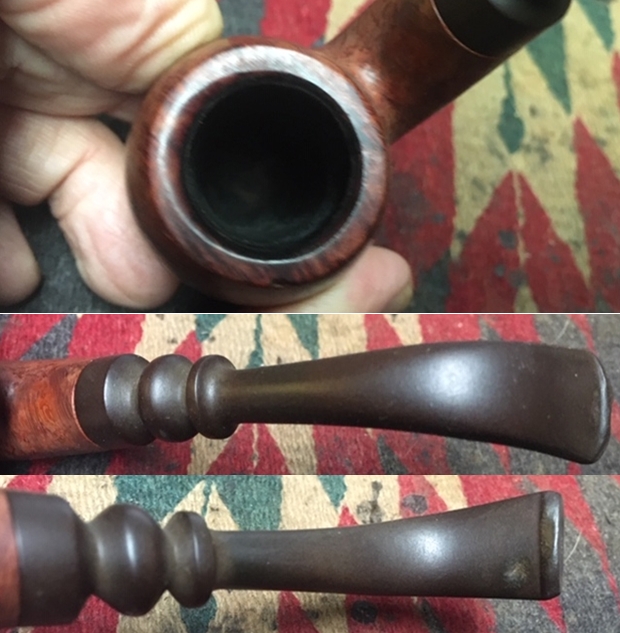
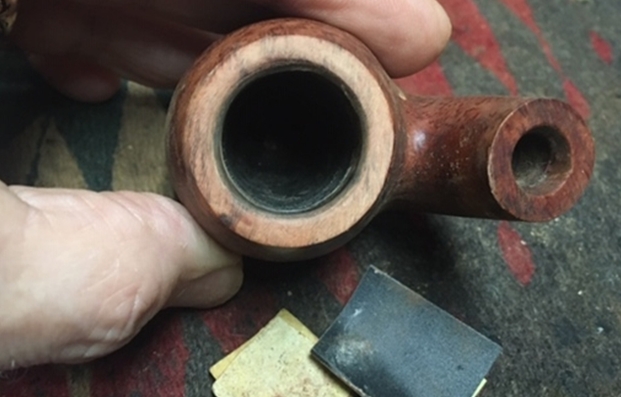
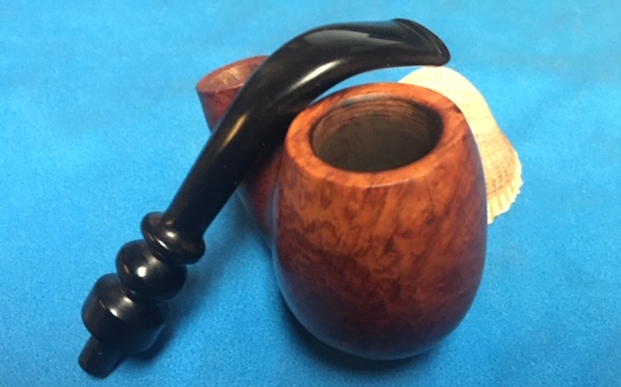
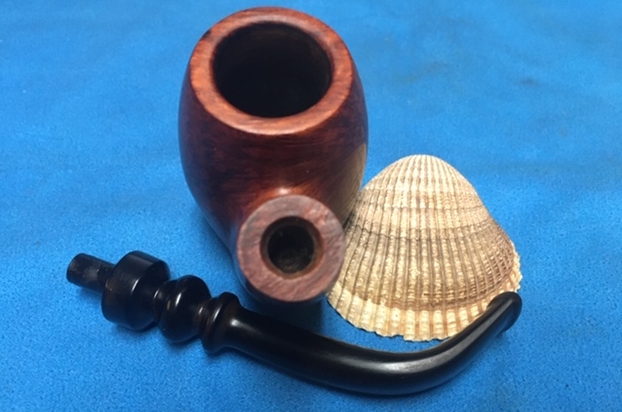
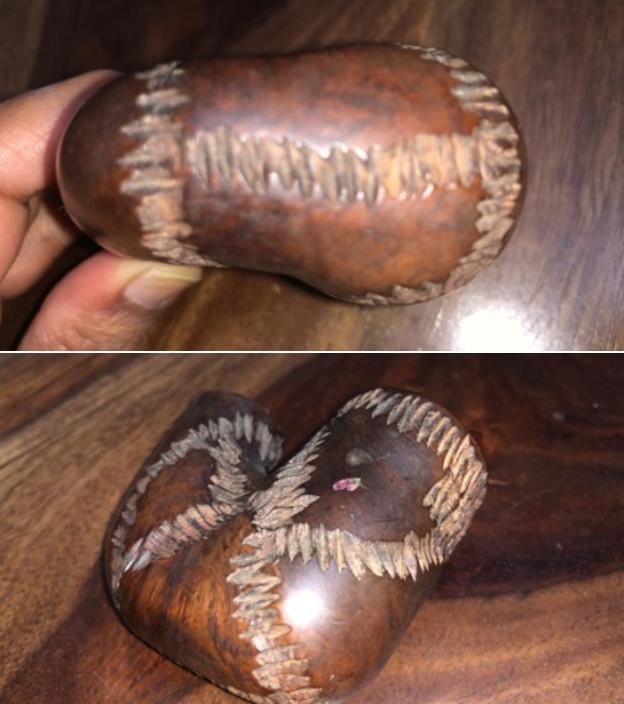
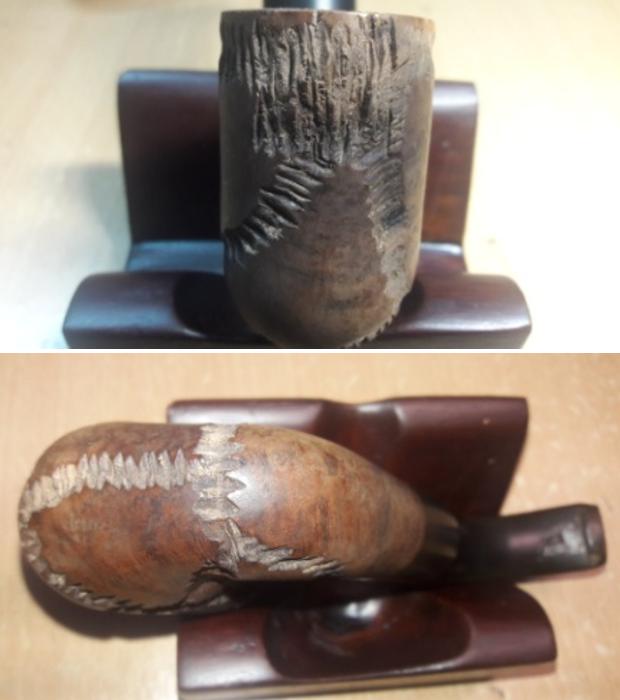
As observed with maximum of my inherited pipes, this too has a thick layer of cake in the chamber with overflow of lava on the rim top. The inner rim edge appears sans any damage and would be confirmed once the chamber has been reamed. The condition of the walls of the chamber can be commented upon once the cake has been taken down to the bare briar. However, the external surface of the stummel feels and looks solid and hence I do not foresee any major issues surprising me later. The ghost smells are very strong in the chamber. The rim top surface on this pipe as also rusticated like the rest of the stummel. As is commonly seen on rusticated or sandblasted pipes with some serious age on them, the crevices in these are always filled with dust, dirt, oils, tars and grime from all the years of smoking and storage. This one is no exception to this observation. The grooves of the sandblast are filled with dust while the small smooth bottom of the shank which bears the stamping is covered in dust and grime. The fact that the textured patterns of the rustications are dusty and filled with dirt is accentuated more due to the contrast of dark and medium brown stains on the stummel and the shank. The briar is looking lifeless and bone dry and has taken on black dull hues. The mortise is full of oils, tars and gunk and air flow is restricted.
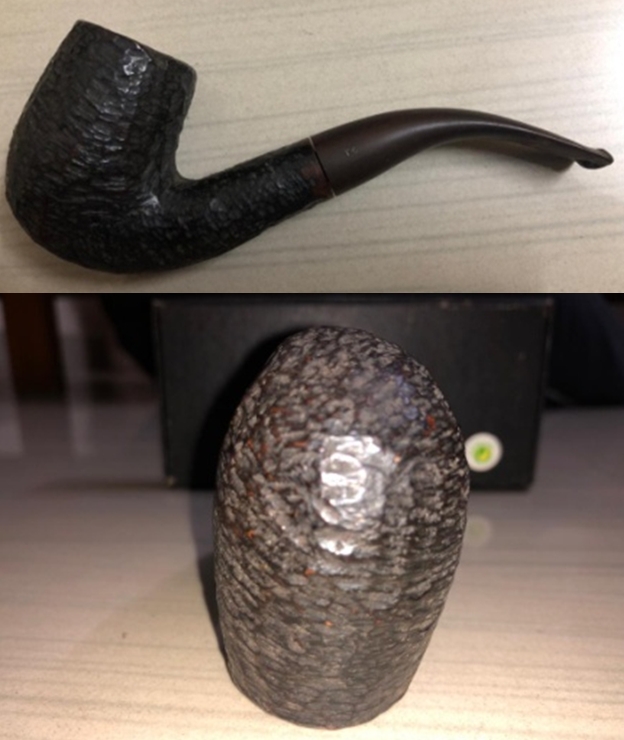
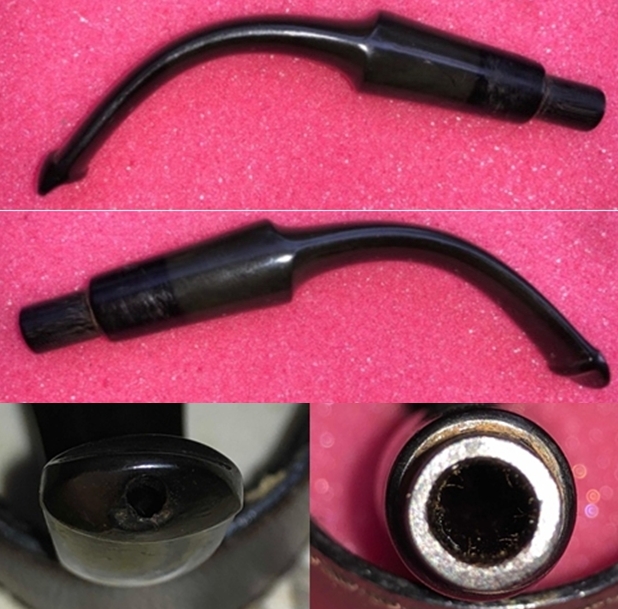
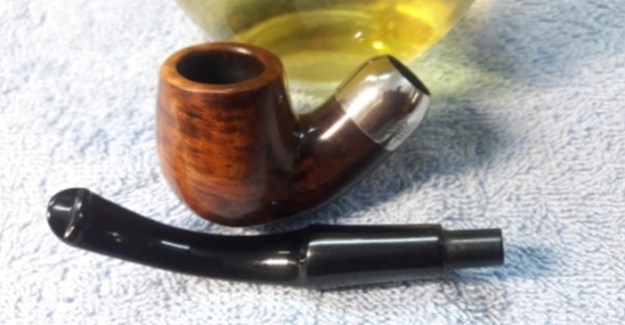
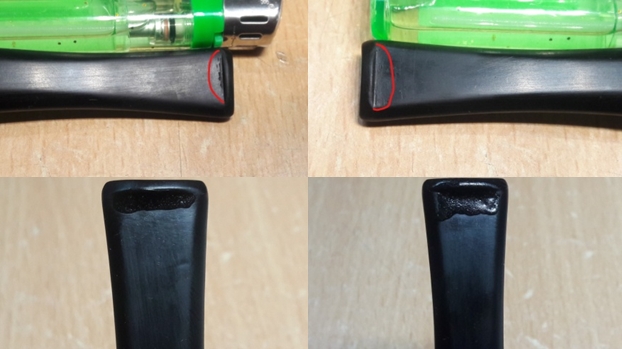
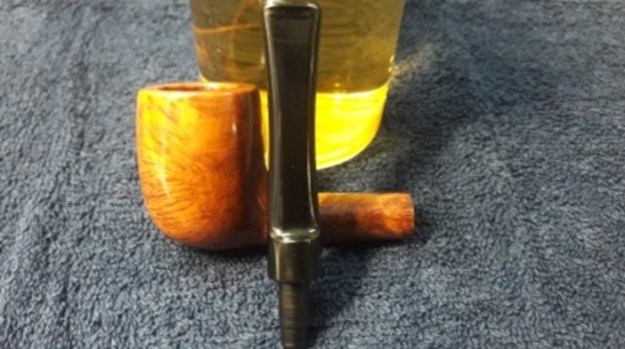
 As usual, it is the stem that has suffered the maximum damage. Heavy oxidation, calcification in the bite zone, chewed and deformed button edges, heavy tooth chatter and a large through hole near the button edge on the lower surface are some of the common issues I have observed on maximum pipes in my inheritance. This is no exception. The tenon and slot on this stem is clogged with dried gunk making for a very laborious draw. The following pictures speak for themselves.
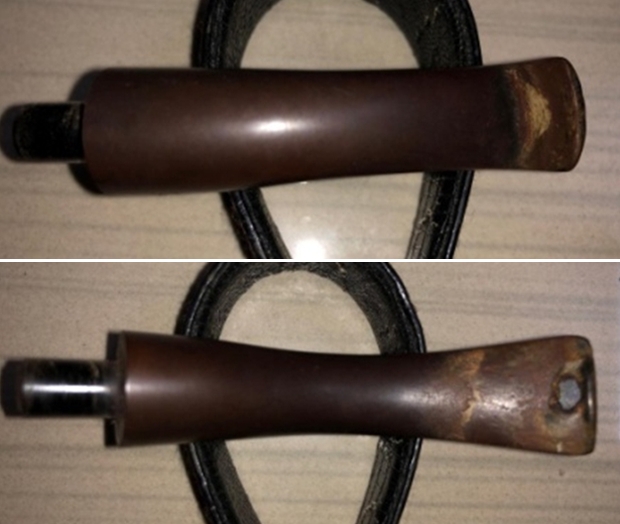 INITIAL CLEANING BY ABHA…
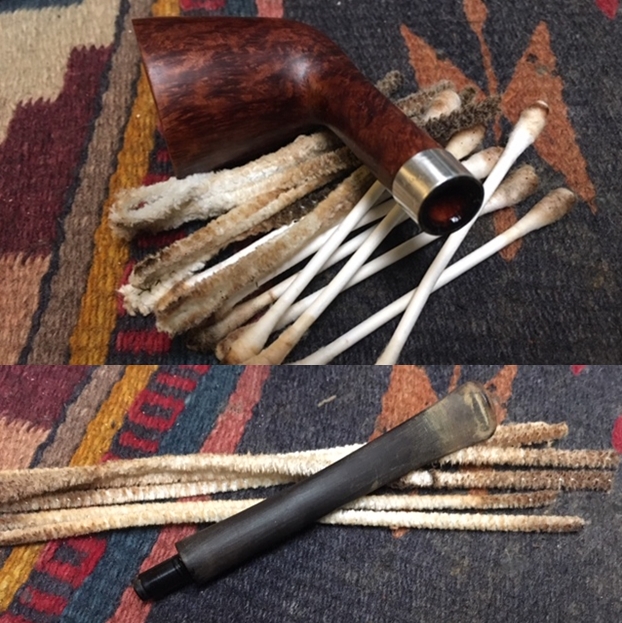
The initial cleaning on this pipe was done by Abha, my wife (she has cleaned up around 40-50 pipes and these have now reached me for further restoration). She reamed out the complete cake and further smoothed out the chamber walls with a folded piece of 220 grit sand paper. She further cleaned out the internals of the shank with pipe cleaners and alcohol and cotton buds. She followed the internal cleaning of the shank with external cleaning of the stummel using Murphy’s Oil soap and hard bristled tooth brush and dried it with paper napkins and cotton cloth.
Next she cleaned out the internals of the stem air way and immersed it in “Before and After Deoxidizer” solution along with the stem of other pipes in line for restoration. Once the stem had soaked overnight, she cleaned the stem under running warm water and scrubbed the raised oxidation from the stem surface using scotch brite pad. She further removed the oxidation by scrubbing the stem with 0000 grade steel wool and applied a little olive oil to rehydrate the stem.
ONCE THE PIPE IS ON MY WORK TABLE…
The cleaned up pipes presents a very clear picture of what needs to be done to restore this pipe to a decent and smokable condition. I really cannot thank Abha, my wife, enough for all the help and support that she extends me in my pursuance of this hobby. I proceed to carry out my appreciation of the work that needs to be done on this pipe to restore it.
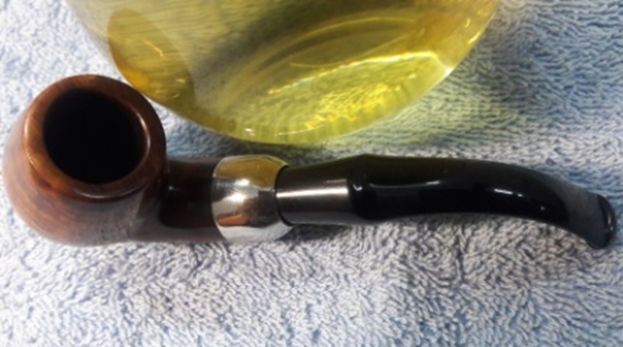
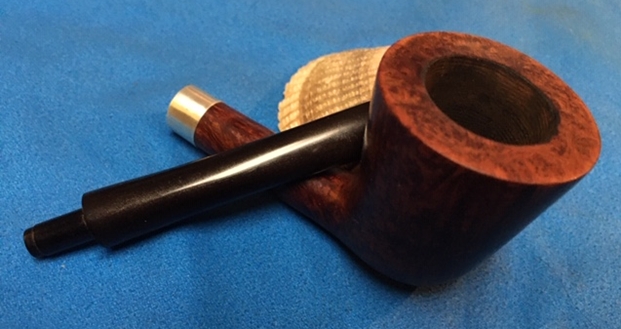
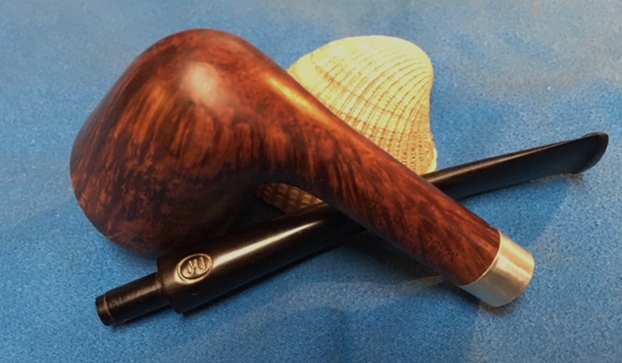
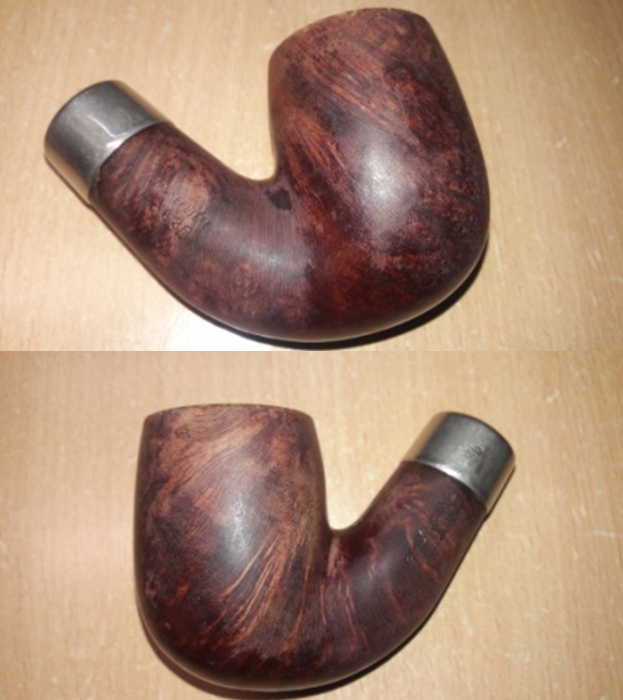
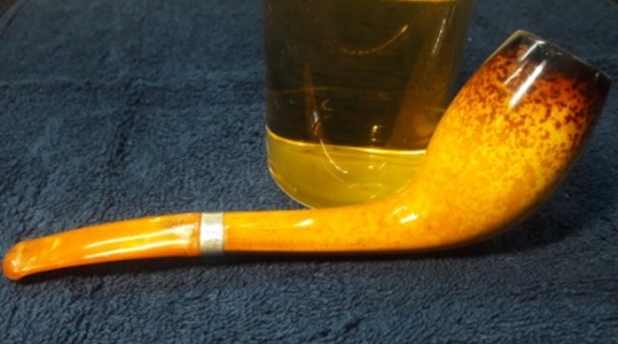
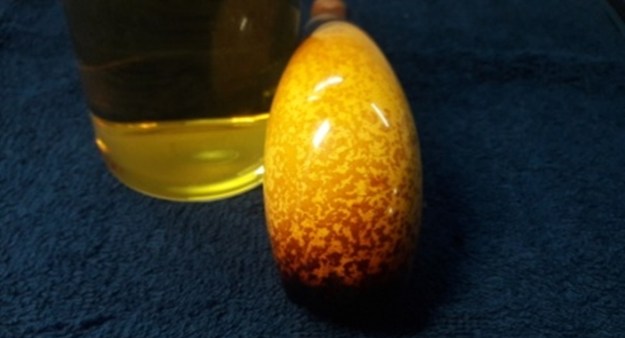
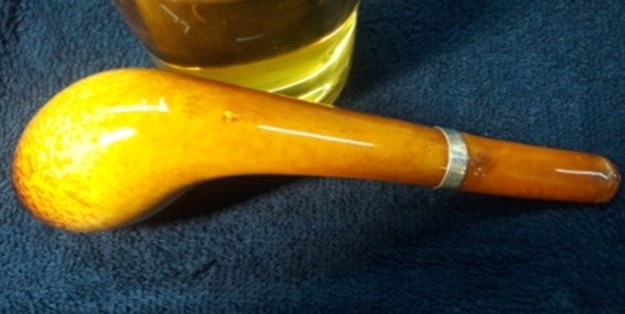
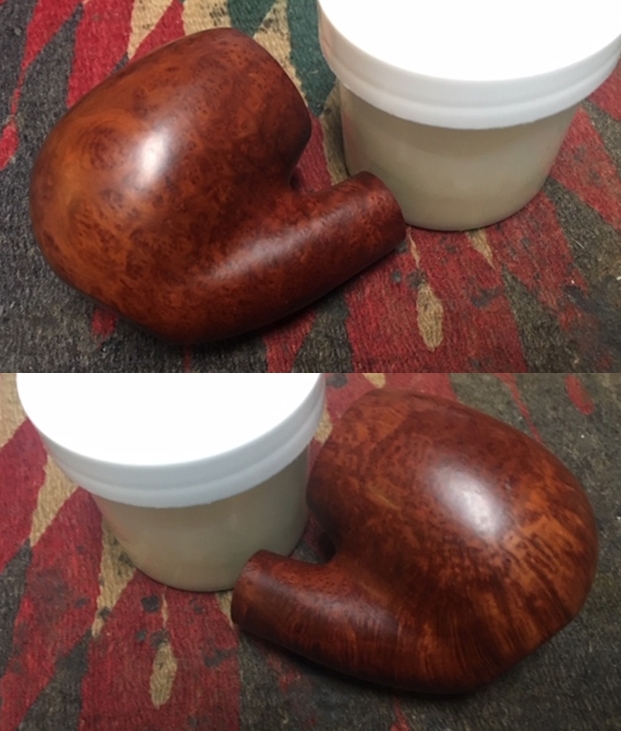
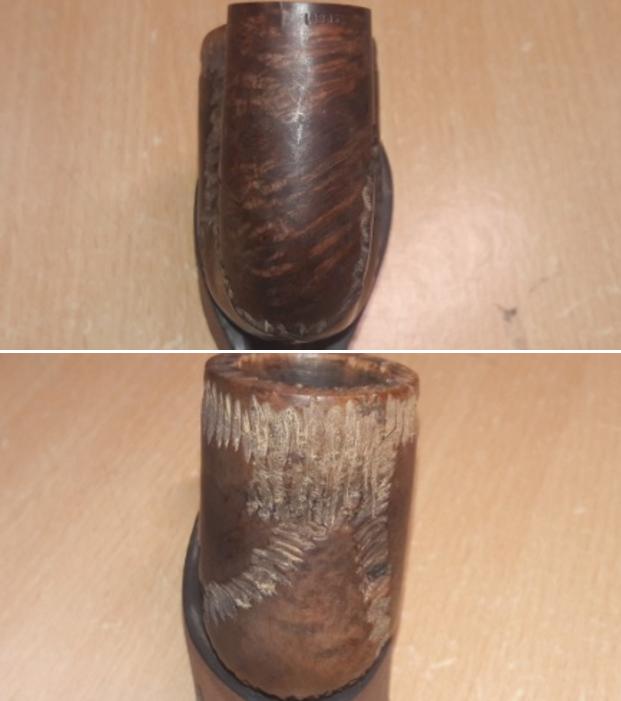
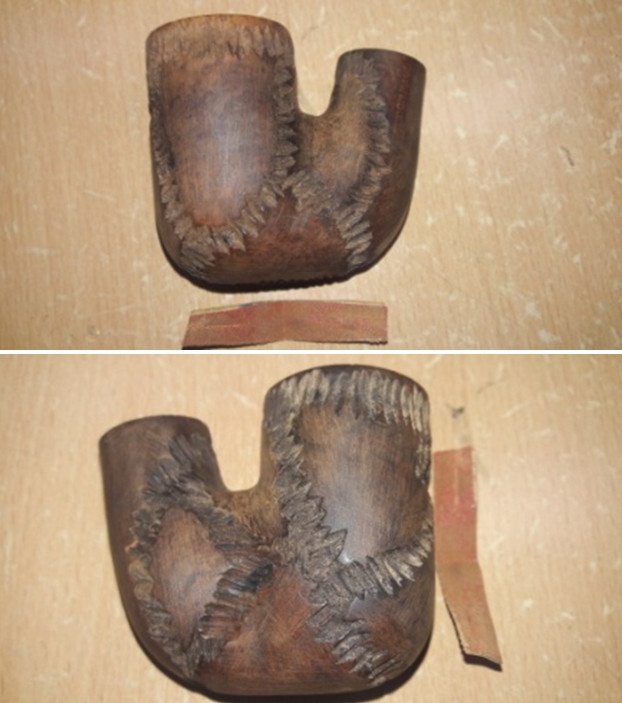
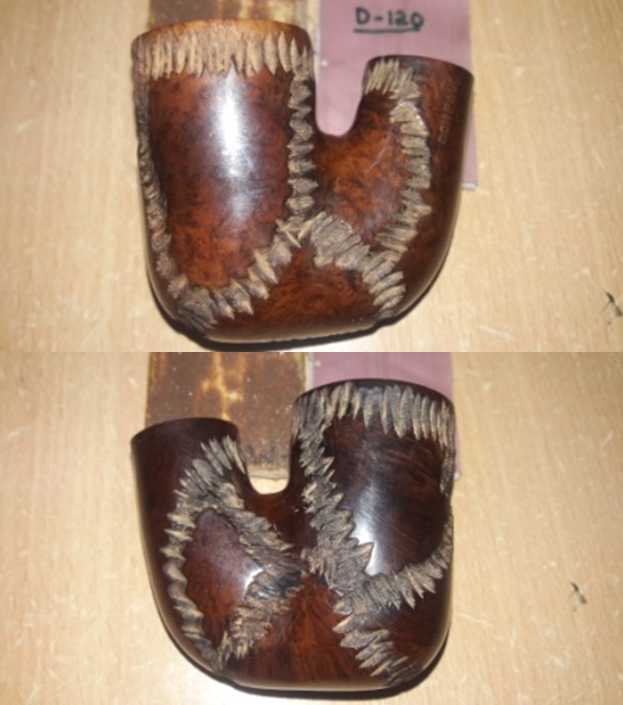
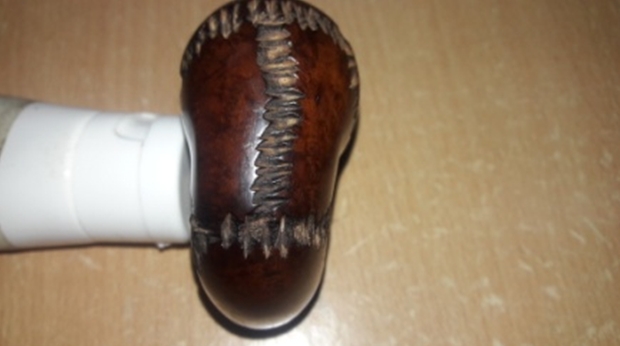
As with all the cleaned pipes that Abha packs, there was a note in the zip lock pouch with issues that she had observed in the pipe. The first point was that she was not happy with the way the stummel had cleaned up. Here are the pictures of the pipe as I had received.
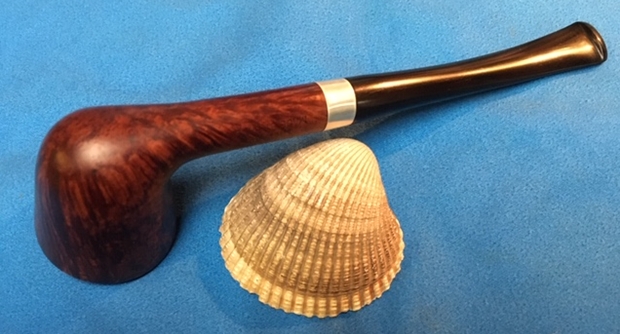
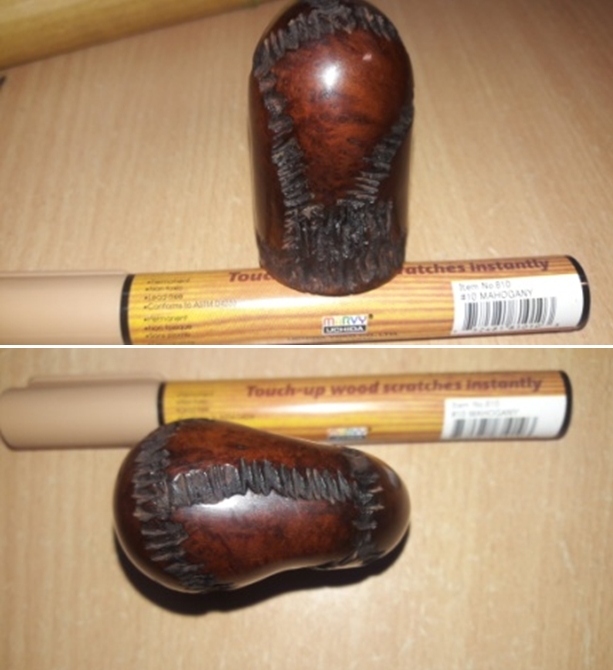
 To be honest, the pipe had cleaned up nicely. What she thought is grime in the rustications is in fact the old stain which had loosened up. A simple wipe with Murphy’s Oil soap will clear out the loosened stain leaving behind a well set coat of darkened stain.
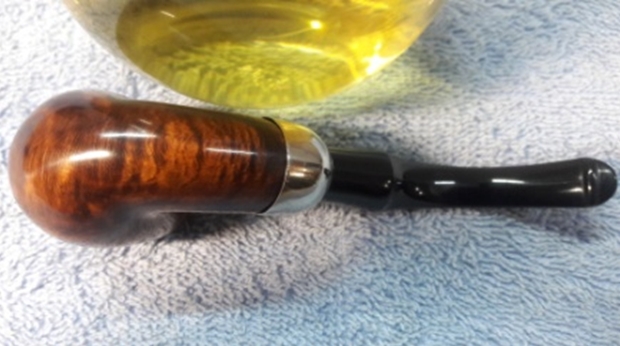
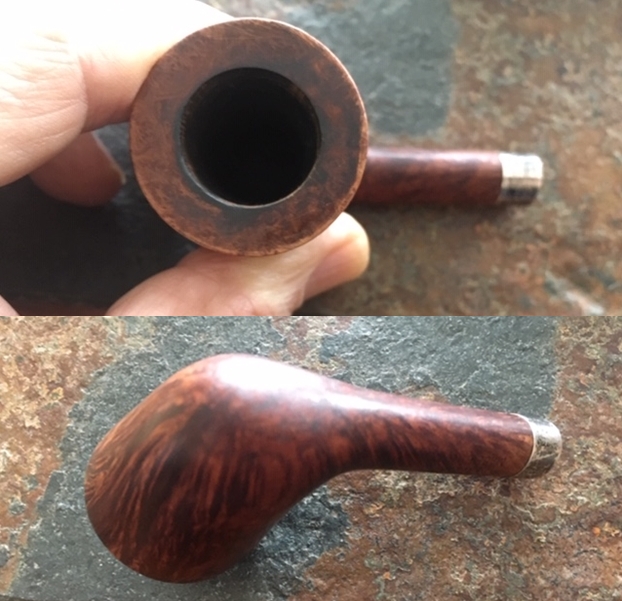
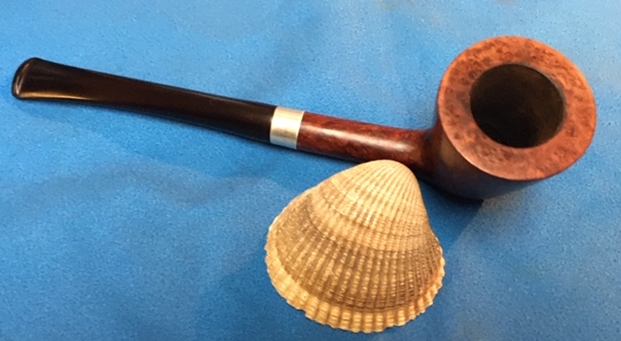
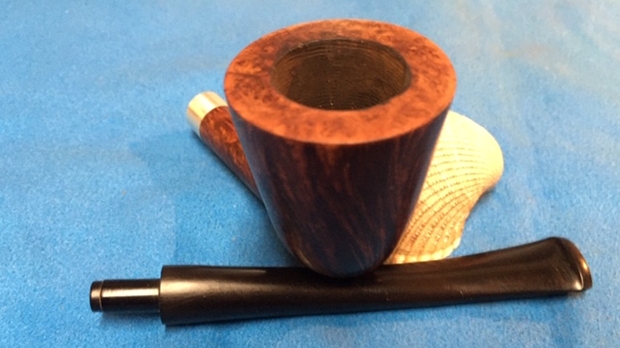
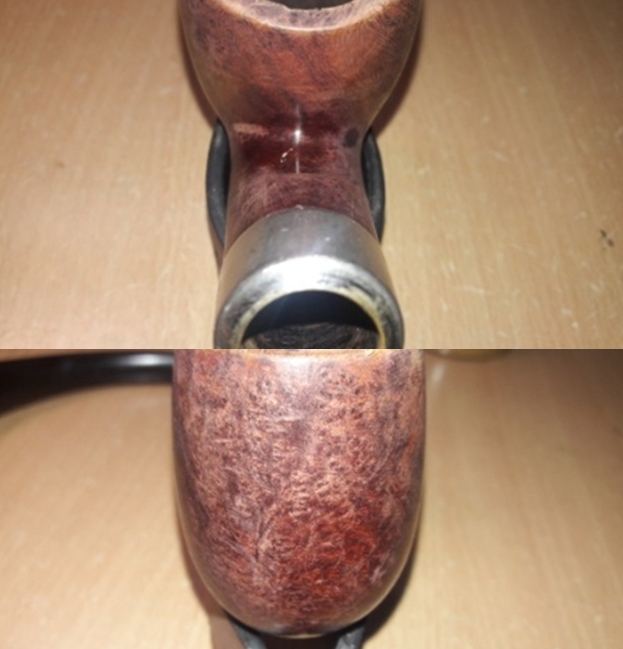
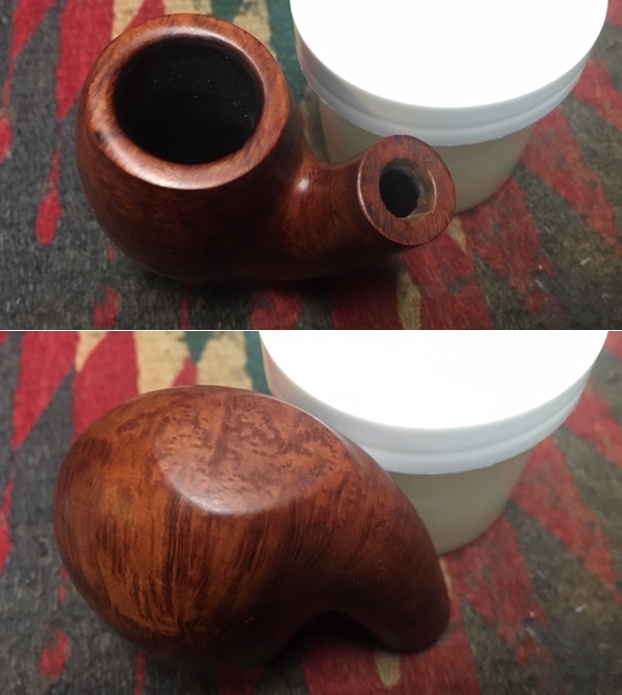
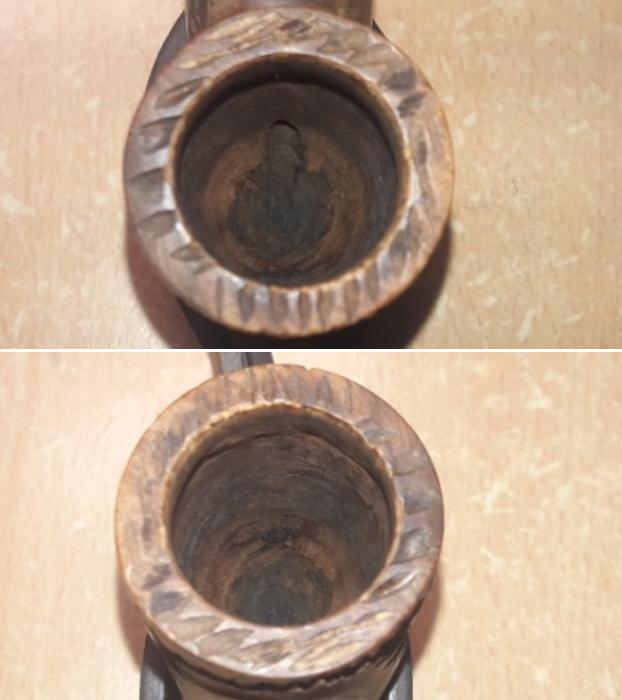
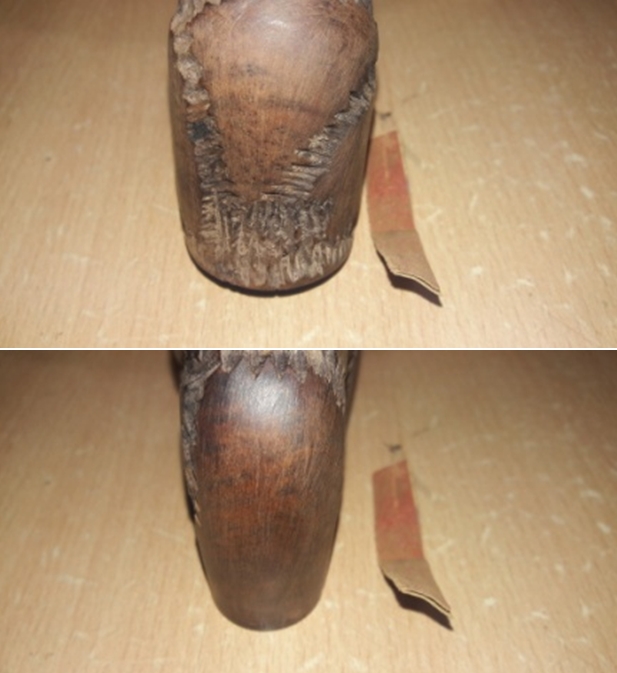
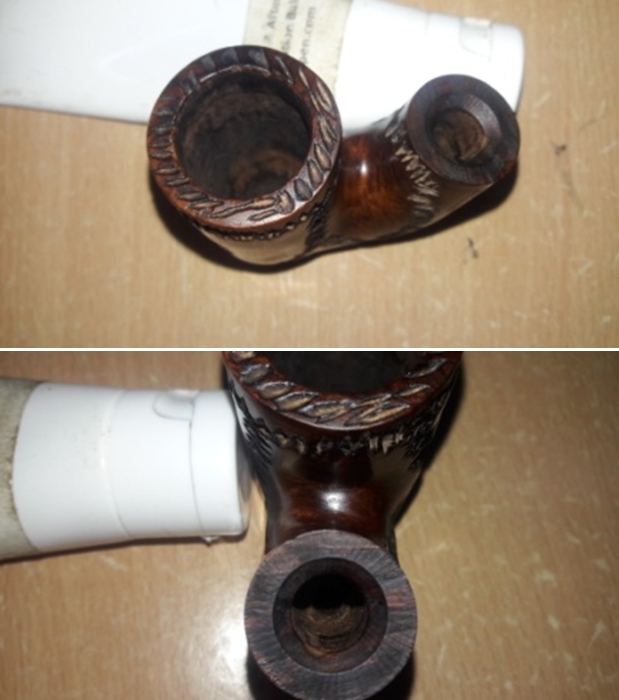
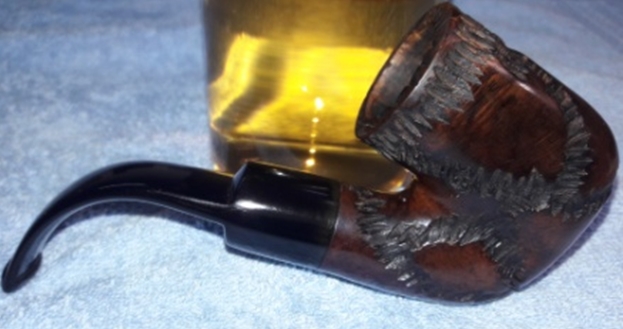
The second point was that the chamber has developed heat fissures. Close scrutiny of the chamber walls made me realize that there is still a very thin layer of cake in the chamber and it is my experience that this gives an appearance of heat fissures! Only after the cake has been completely removed will I be able to confirm presence of heat fissures or otherwise. There are traces of lava overflow deeply embedded in the rustications of the rim top surface. I now know what I should be gifting Abha for our forthcoming Anniversary (of course, a soft brass bristled wire brush as she does not have one…LoL!!). The outer and inner rim edges are in good condition. However, the ghost smells are still all pervasive. This would necessitate a more invasive internal cleaning of the shank and the chamber. The draught hole is dead center and at the bottom of the heel and should be a fantastic smoker.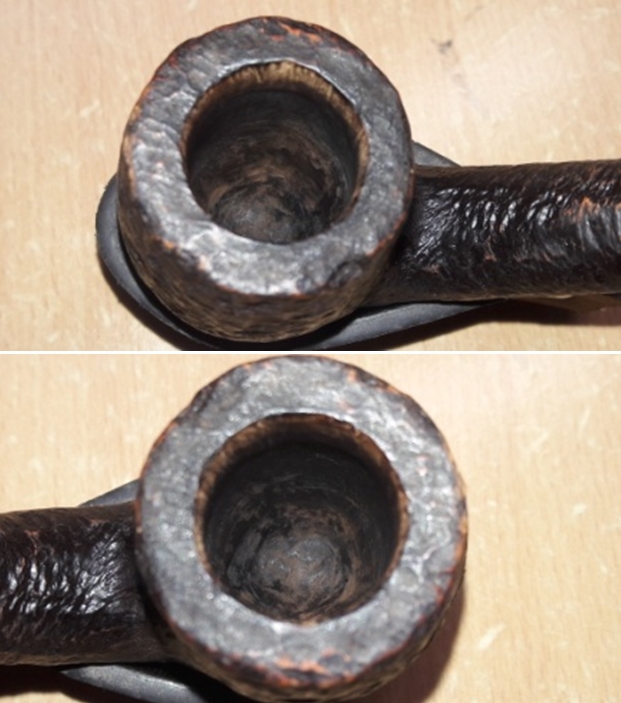
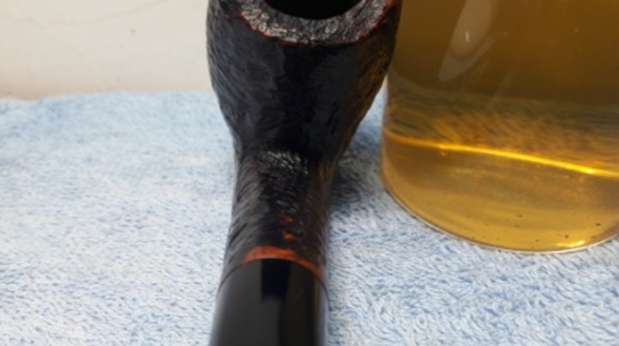
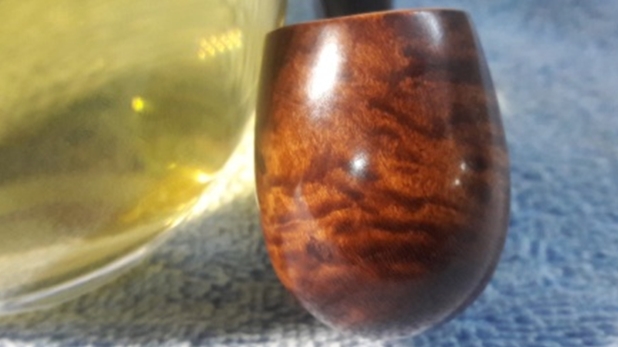
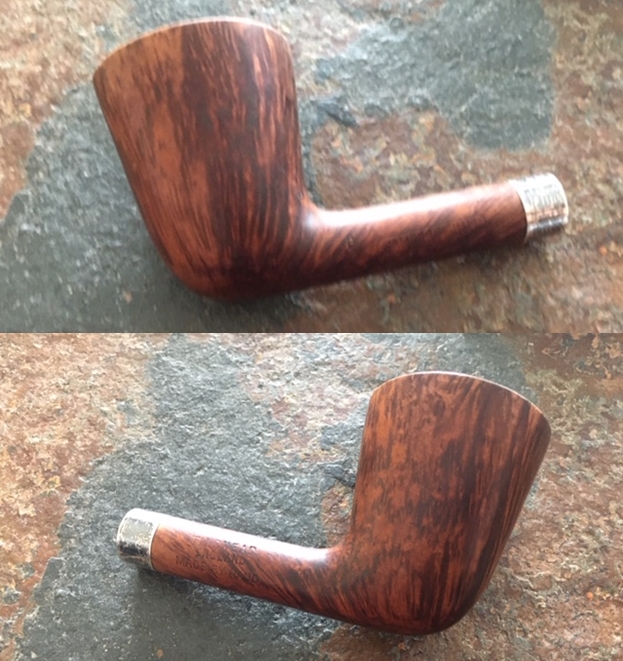
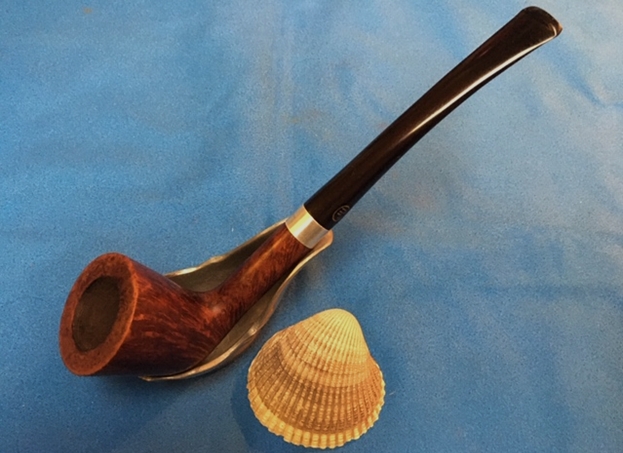
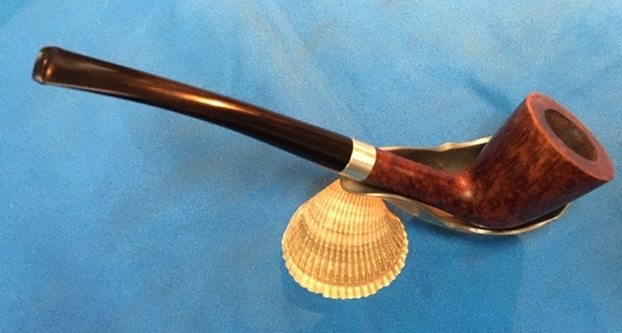
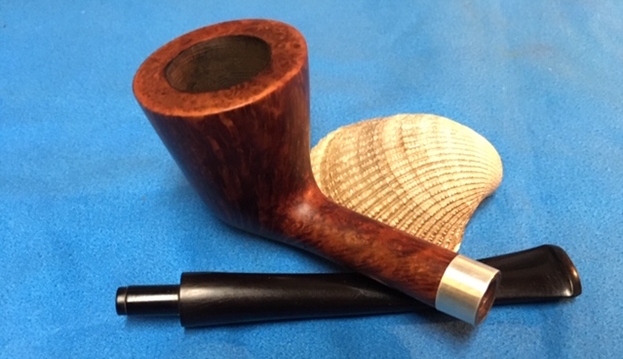
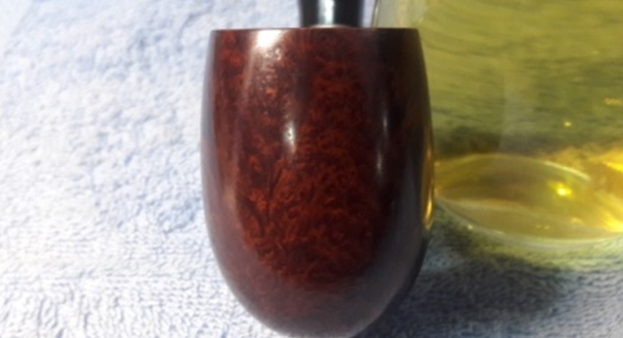
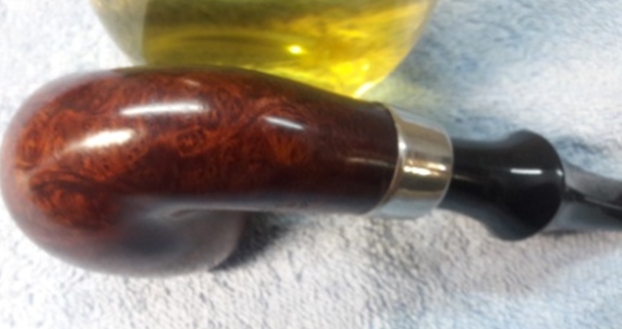
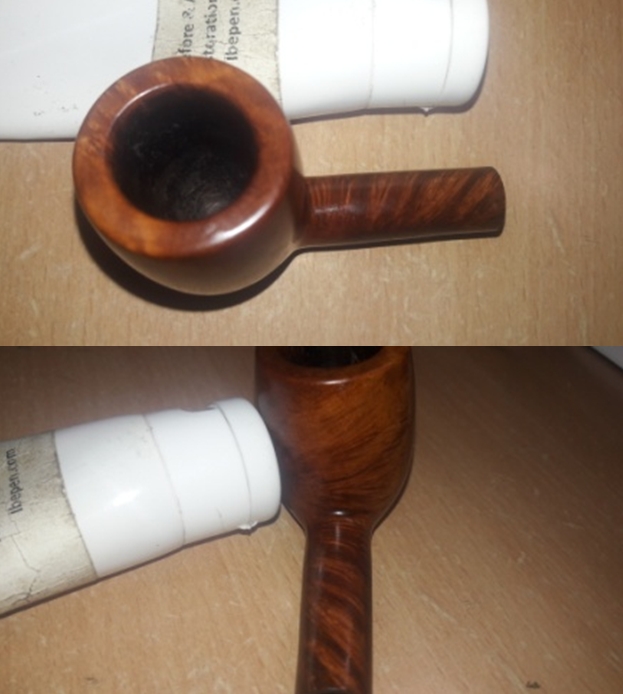
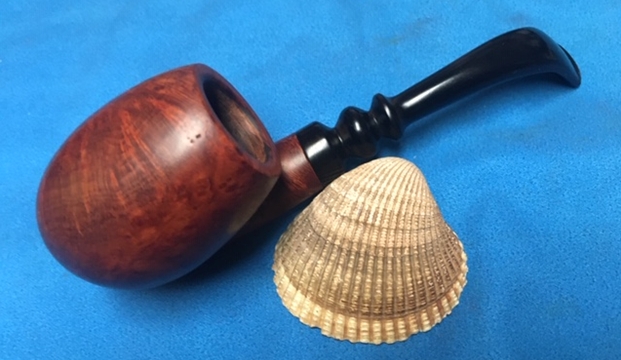
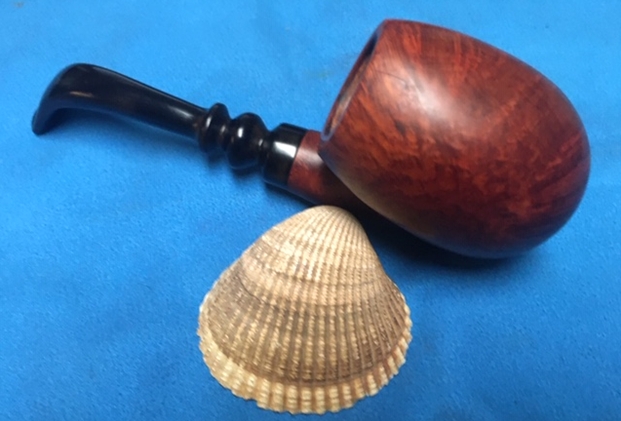
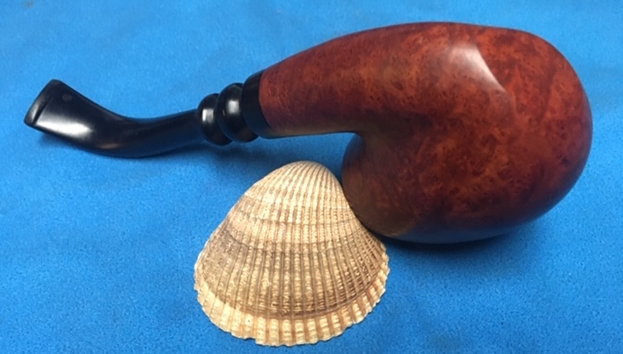
 The stummel is clean with no traces of dust or dirt embedded in the nooks and crannies of the rustications other than what I have explained earlier. The stummel surface is solid and robust without any issues. The contrast of dark and medium brown stains looks gorgeous and should polish up nicely. This is really a well made pipe and the craftsmanship is right up in the ally of some really expensive and renowned brands. The mortise is clean.

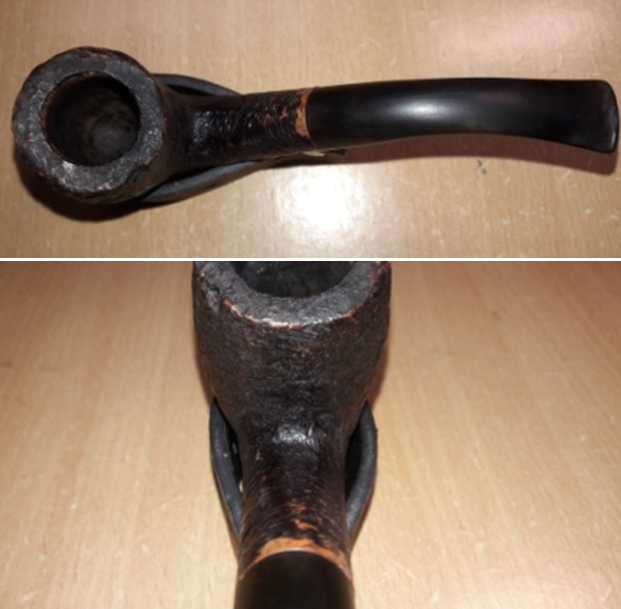
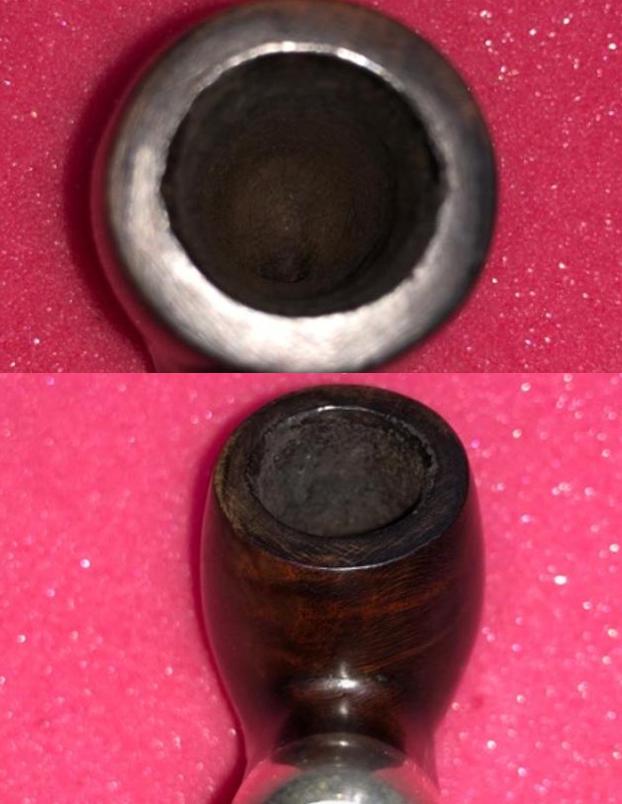
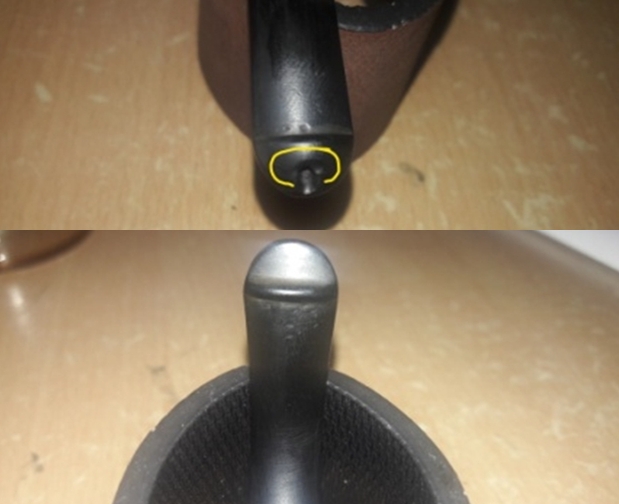
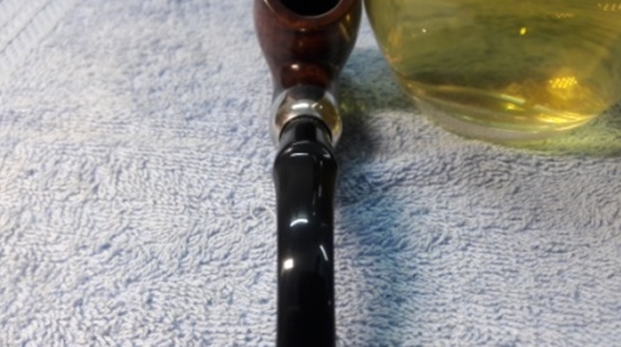
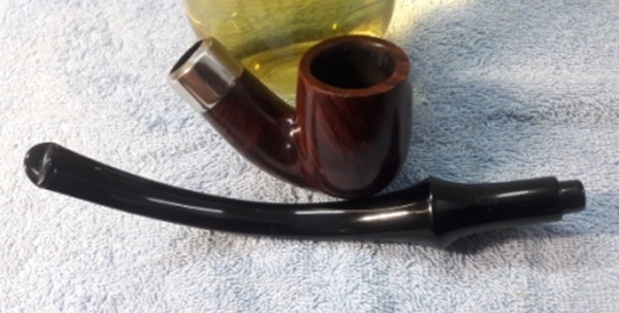
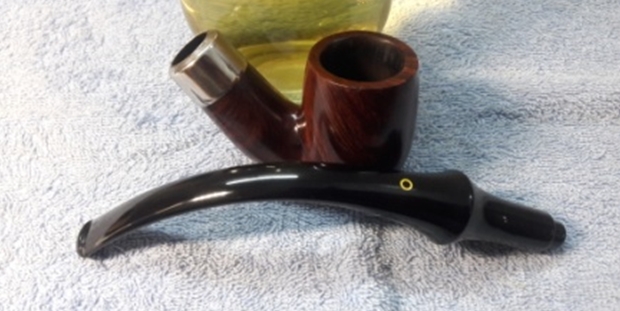
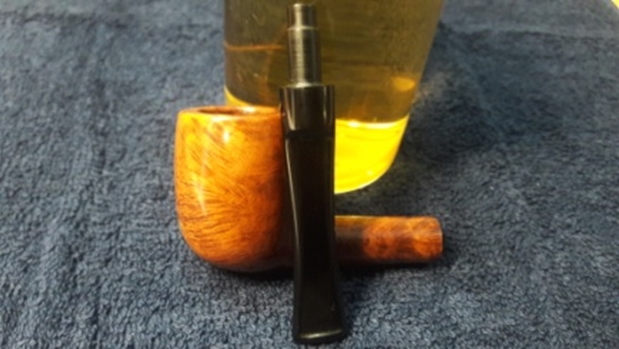
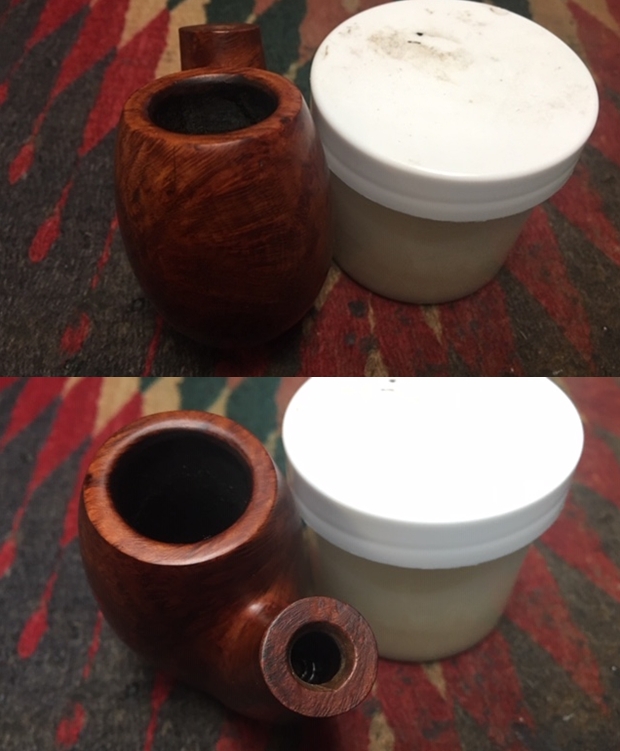
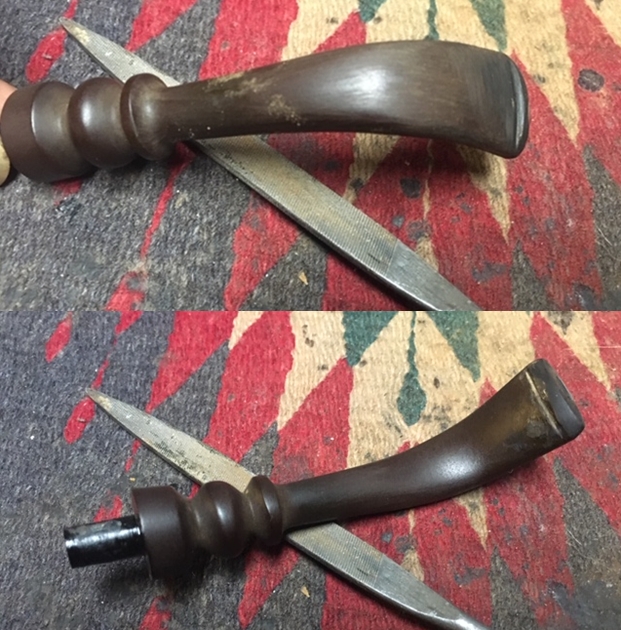
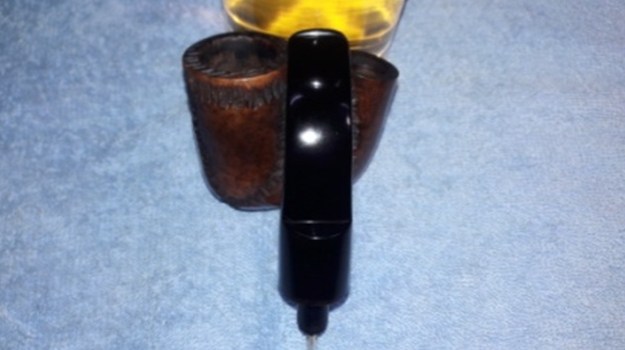
 As expected, the stem is where major repairs are required. The button on the upper surface has completely worn down with deep bite marks as seen. The lower surface has a large gaping through hole very close to the edge of the button, exposing the stem’s air way. The button is completely worn out on the right side. Though an easy repair, it is time consuming.
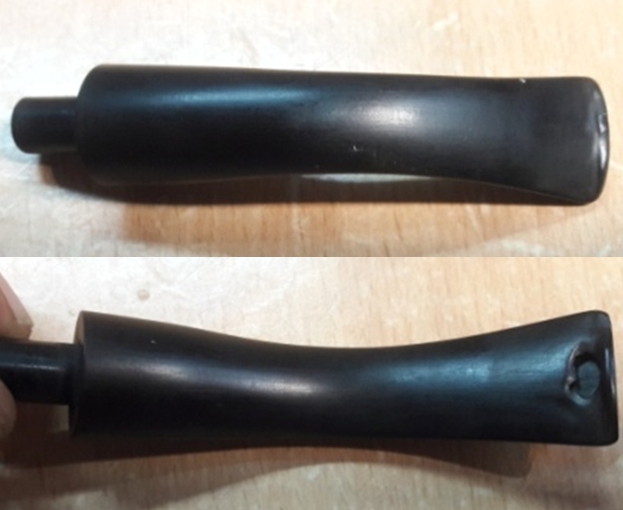
 THE PROCESS
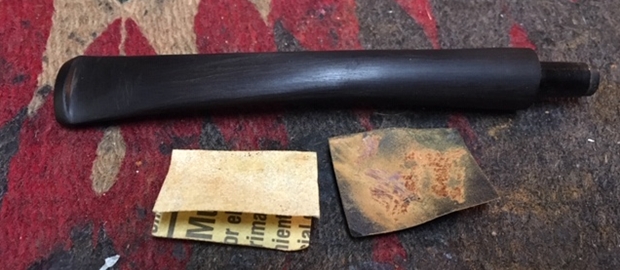
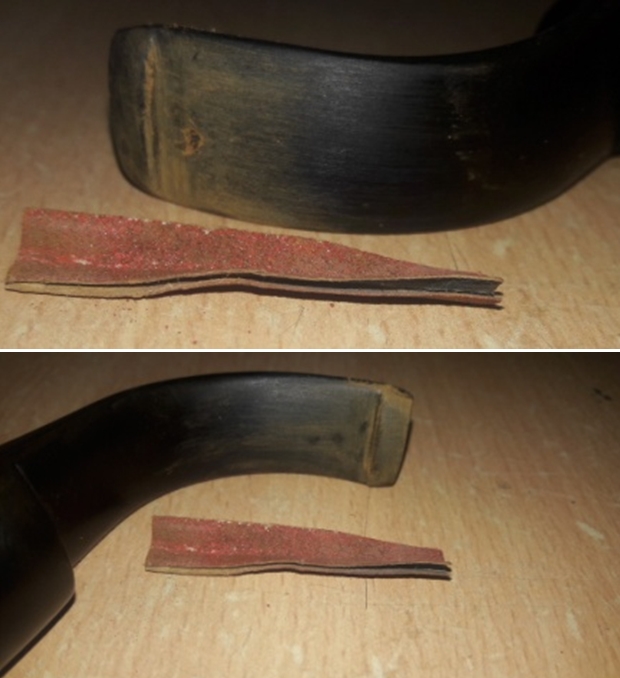
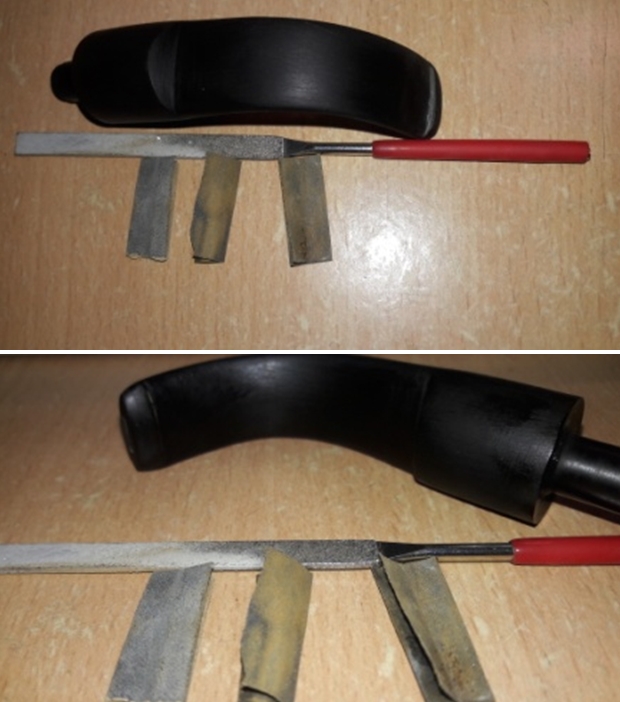
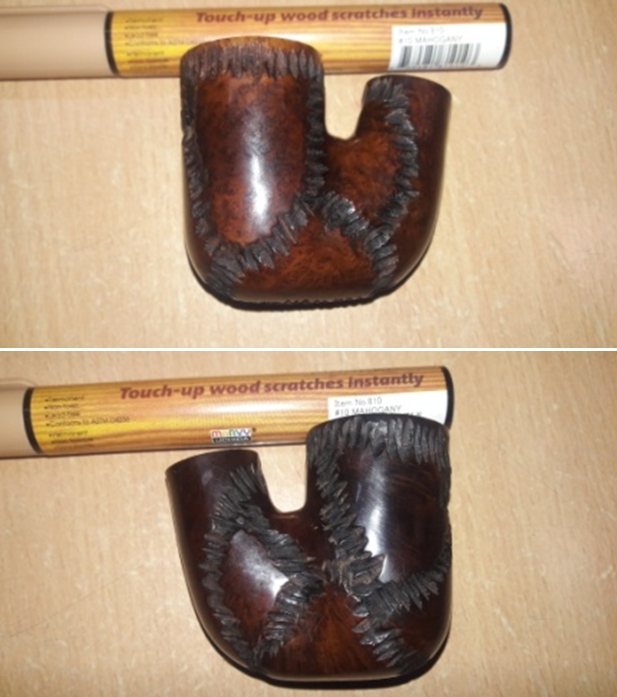
I embarked on the journey of restoring this pipe by addressing the stem first since it was damaged the most and would take considerable time to repair. Abha had done a fantastic job of cleaning the stem both internally and externally and this facilitated me to straight away heat the stem surface with the flame of a lighter which helps to raise the tooth indentation to the surface. I sand the stem surface with a 220 grit sand paper to even out the raised tooth indentation and remove what little oxidation that had remained on the surface. I follow it up by cleaning the surface with a cotton swab and alcohol. I wipe the stem with a cotton swab and Murphy’s oil soap to deep clean the surface. The stem surface is now ready for a fill.
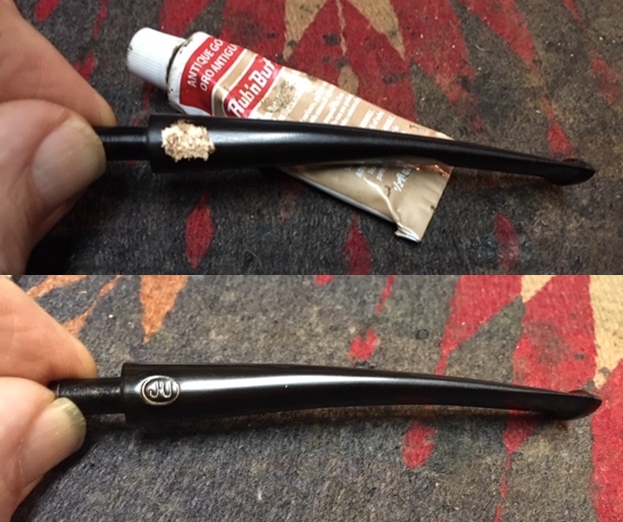
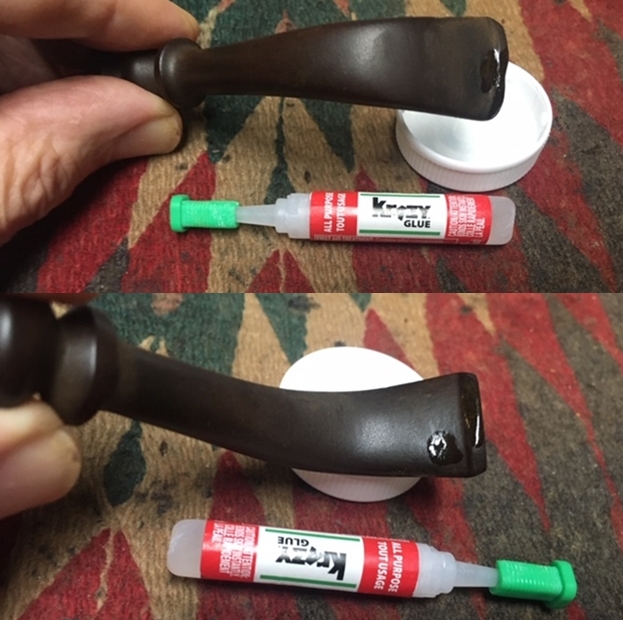
 I appropriately folded an index card and covered it with a transparent tape which prevents the superglue and charcoal mix from sticking to the card. This is how it appears and fits in to the broken stem.
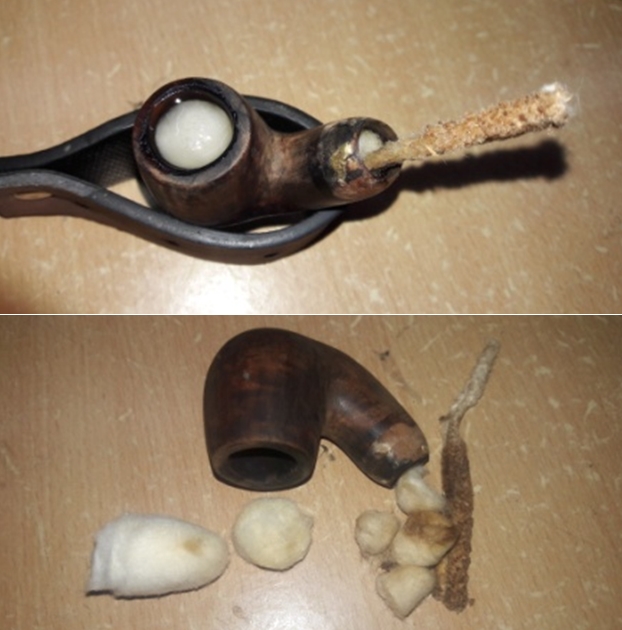
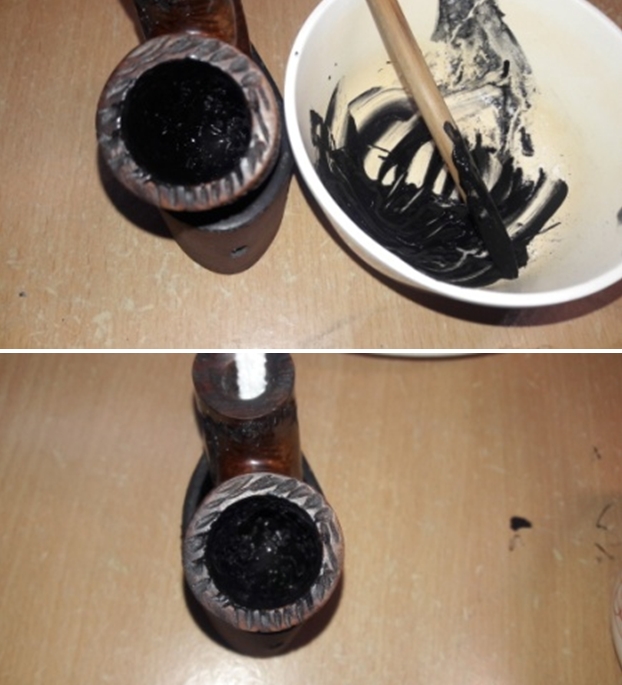
 I mix activated charcoal and superglue and fill the hole and the tooth indentations on the buttons and in the bite zone. I prefer to paint the entire bite zone with the mix and always apply a thick layer. This helps me in subsequent better blending of the fill with the rest of the stem surface by sanding it down. I set the stem aside for the fill to cure overnight.
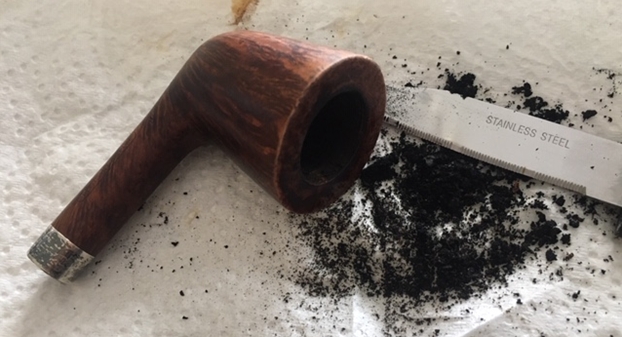
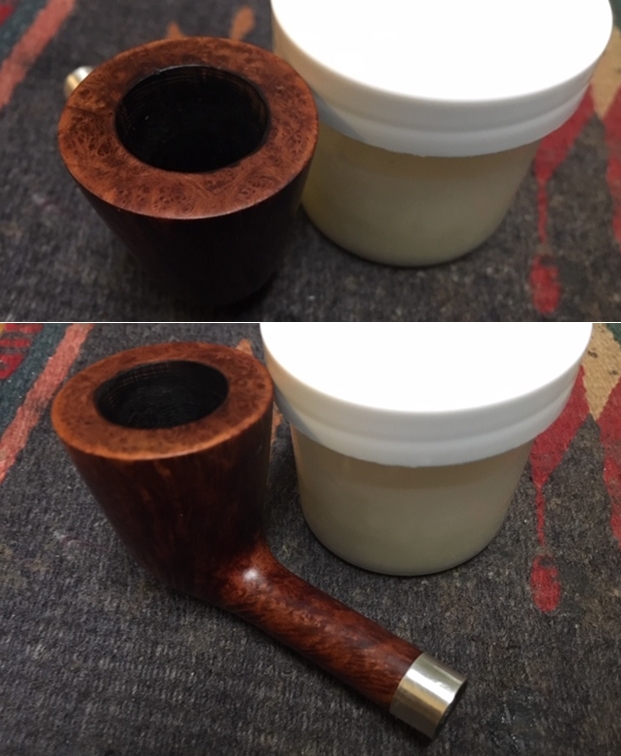
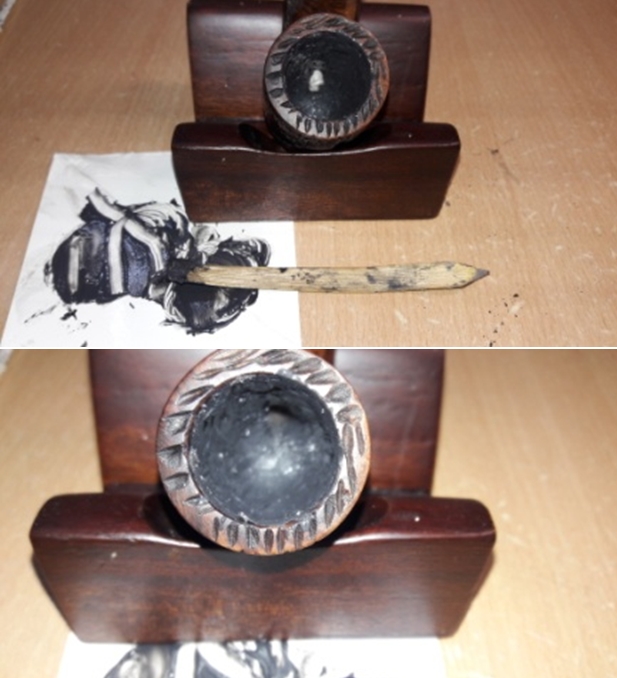
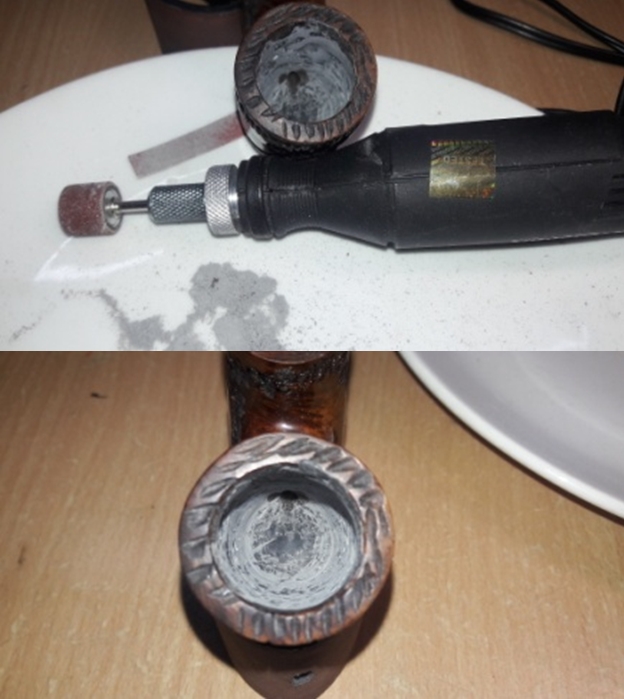
 While the stem fill was curing, I worked the stummel surface. With my fabricated knife, I scraped out all the remaining cake from the chamber walls and followed it up by sanding with a 180 grit sand paper. This ensured that the cake was taken down to bare briar. I wiped the chamber with a cotton swab and alcohol to remove all the fine cake dust that was left behind. The amount of cake that was reamed out and that was after Abha had reamed and sanded it was surprising. But I was happy to note that there are no heat fissures in the walls of the chamber.
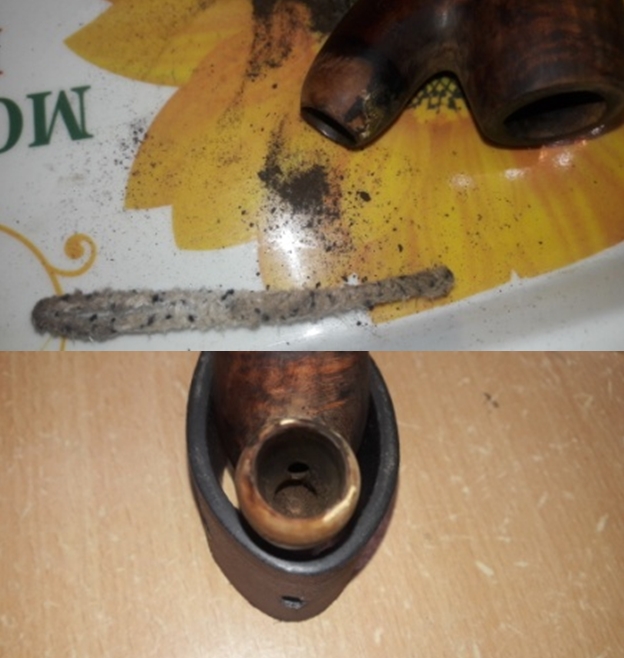
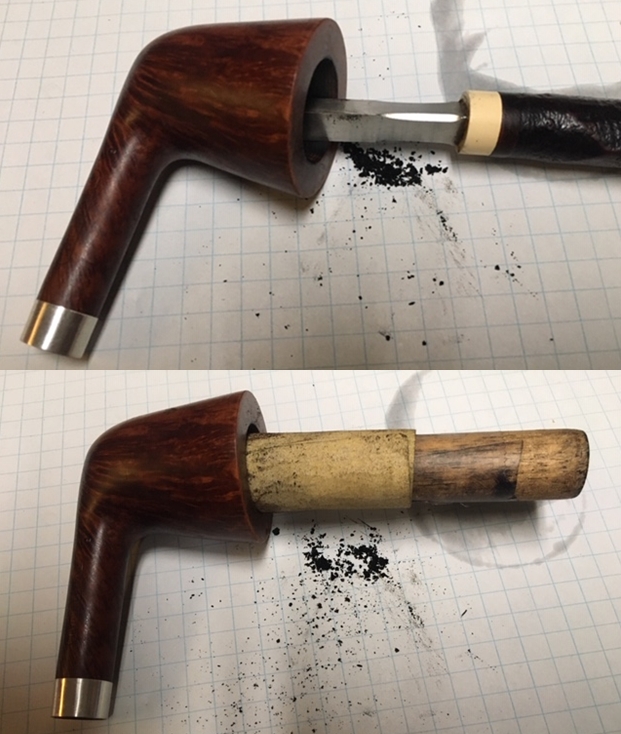
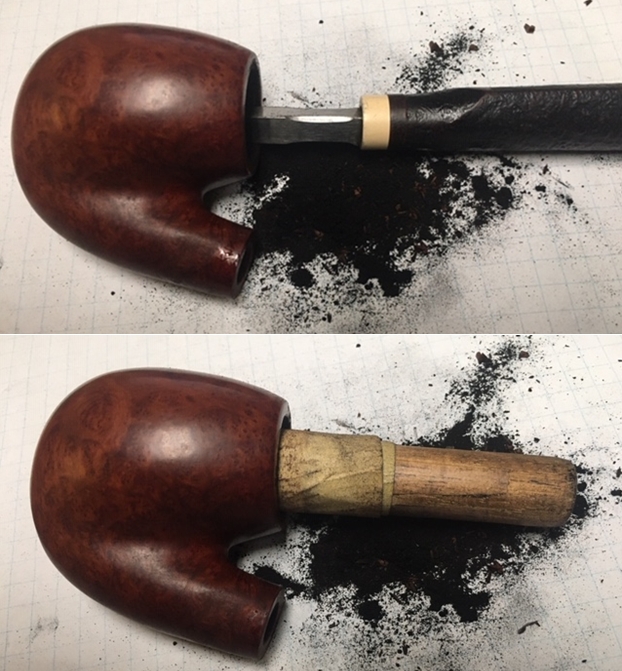
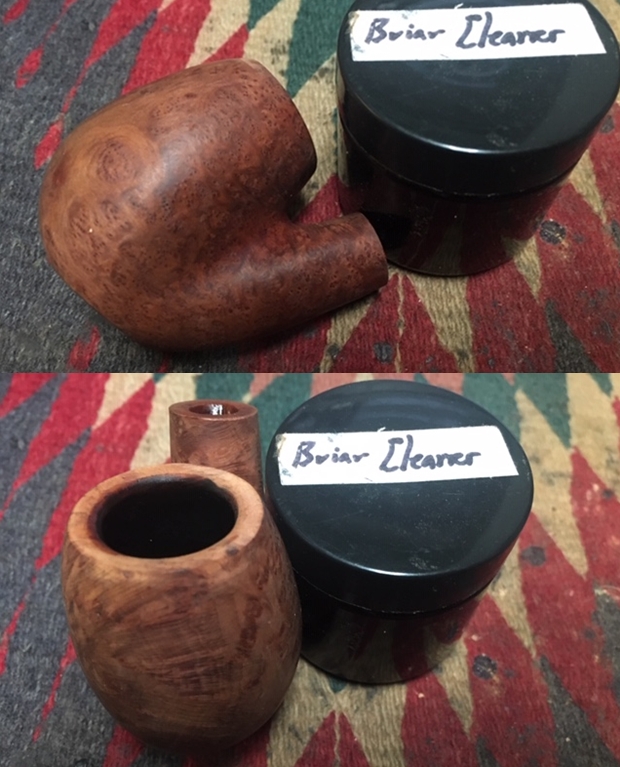
 With this reaming of the chamber, I had expected the ghost smells to be eliminated or at the least, considerably reduced. But that was not to be. I decided to address the issue of old odors in the chamber and shank by subjecting it to a cotton and alcohol bath. I wrapped some cotton around a folded pipe cleaner, keeping the tip of the pipe cleaner free of wrapped cotton as this would be inserted through the draught hole in to the chamber. This would form the wick for the shank. I tightly packed the chamber with cotton balls and filled it with 99% pure isopropyl alcohol using a syringe and set it aside. By next day, the cotton and alcohol had drawn out the tars and oils from the chamber and max from the shank. With tools at my disposal, I scraped out the entire loosened gunk (second picture) from the mortise and the airway leading to the draught hole. Am I glad that Abha’s fears of heat fissures in the walls were unfounded!!
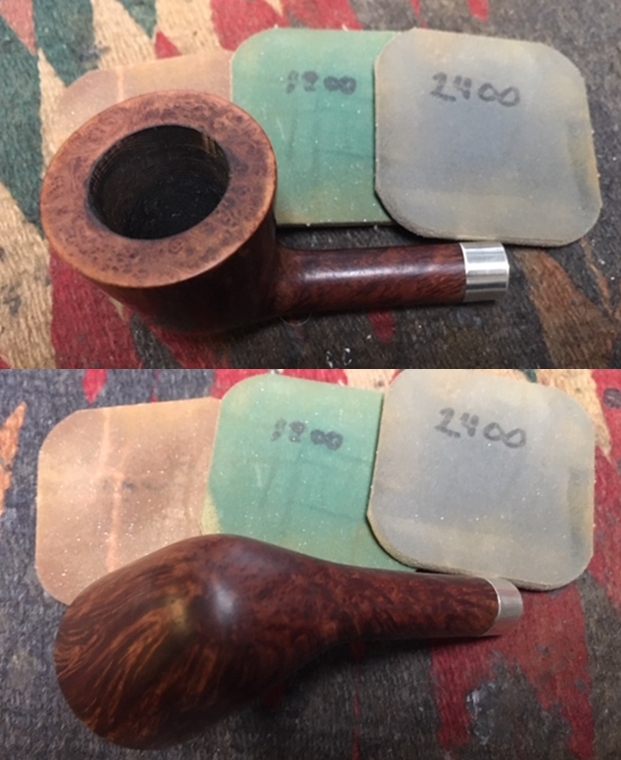
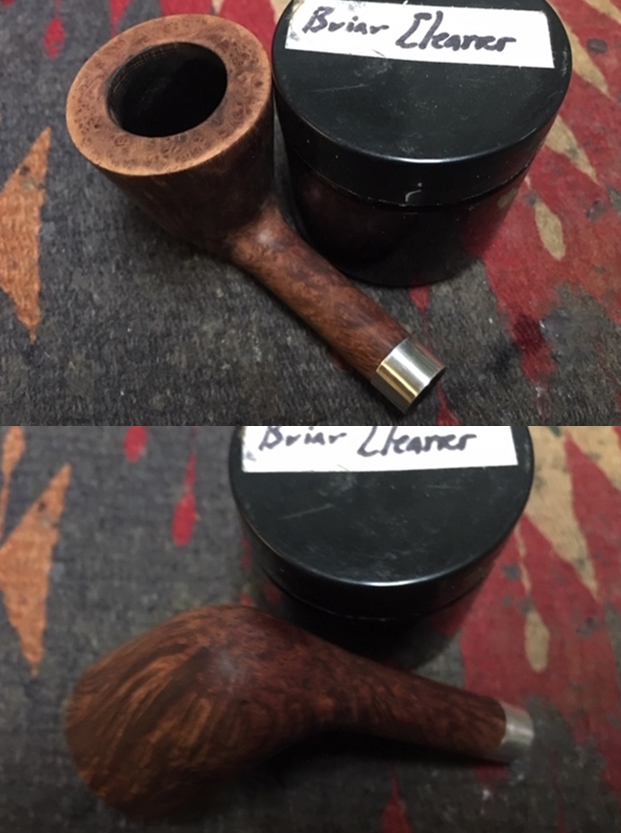
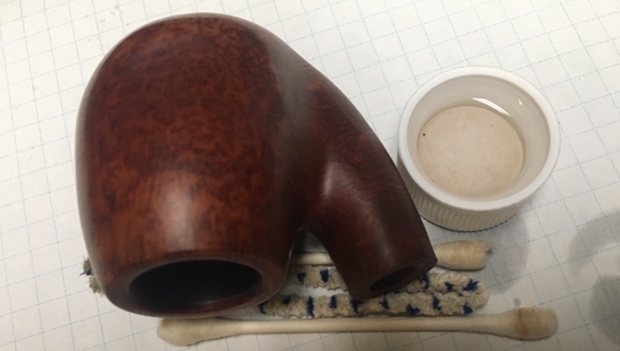
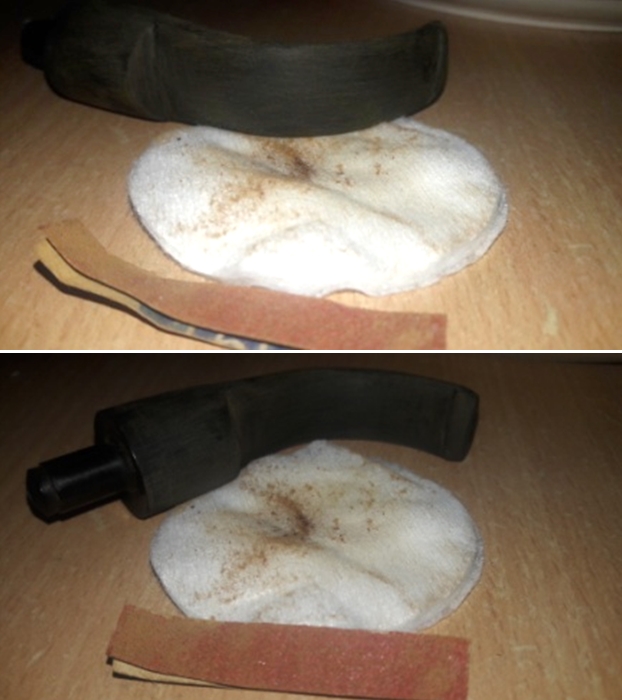
 Next, I scrub the rusticated rim top surface and the stummel, cleaning it with a brass wired brush. This helped to dislodge the little overflow lava from rim top and the dried and loosened stain particles which previously were visible. I wiped the stummel surface with a cotton swab and Murphy’s oil soap.

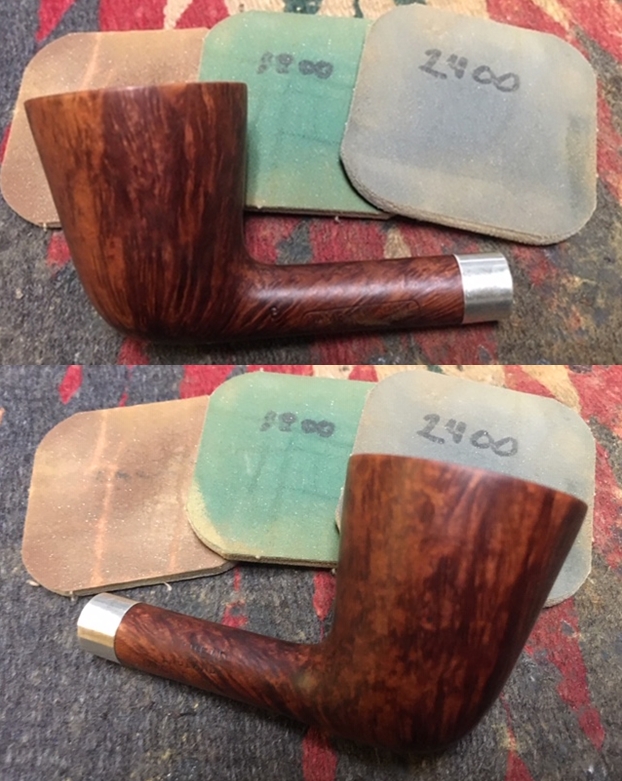
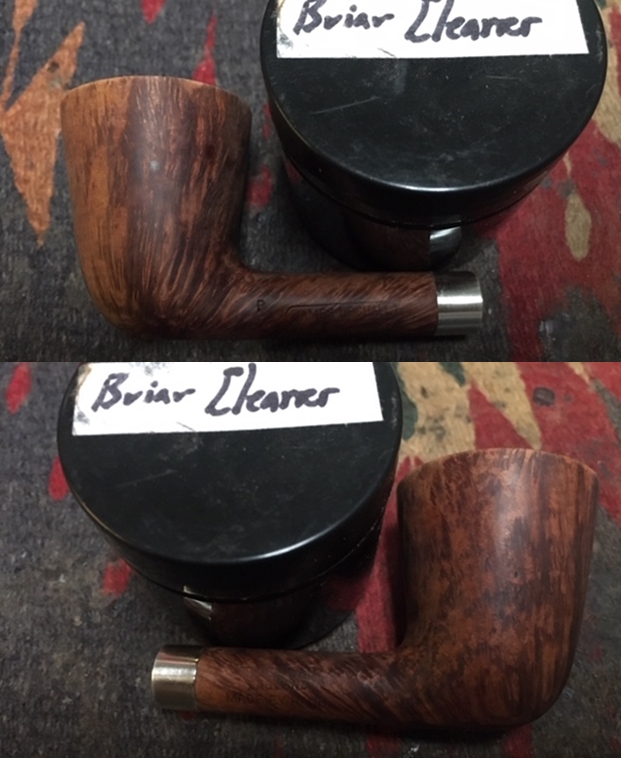
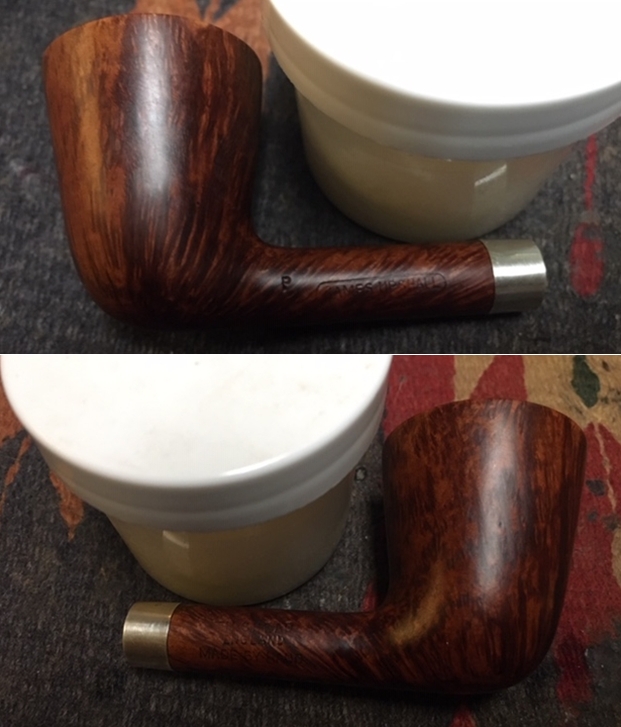
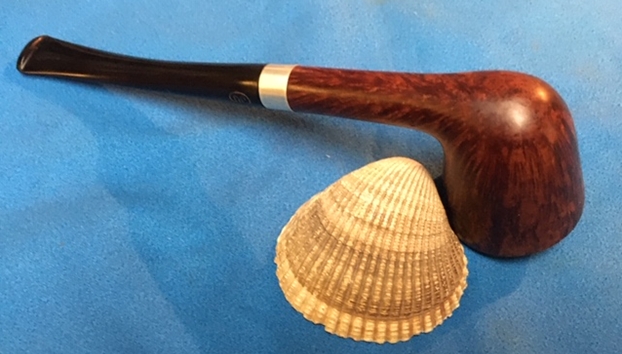
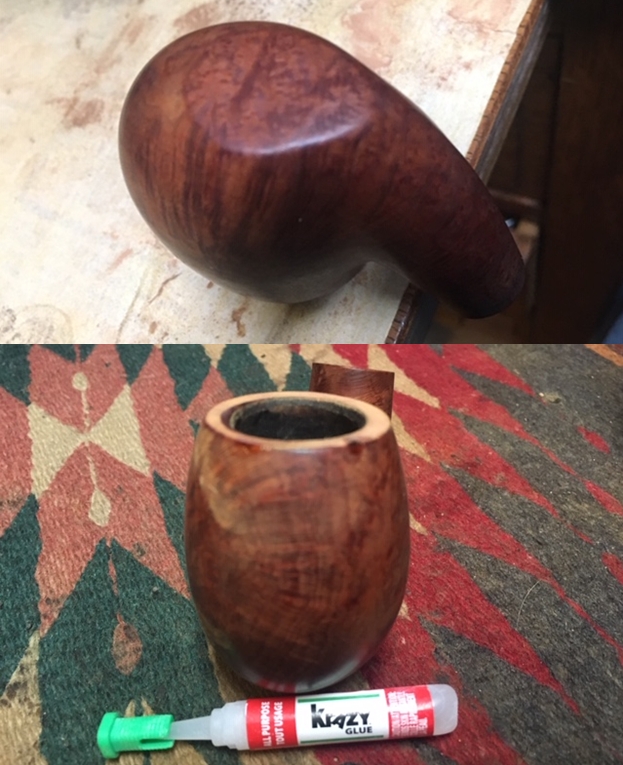
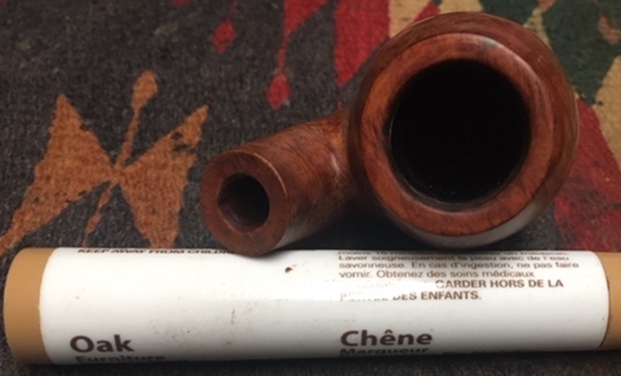
 Next, I rub a small quantity of “Before and After Restoration Balm” in to the stummel surface with my finger tips and let it rest for a few minutes. I worked the restoration balm deep in to the textured rustications. The balm almost immediately works its magic and the briar now has a nice vibrant appearance. The stummel looks very handsome with the contrasting dark and light brown hues.

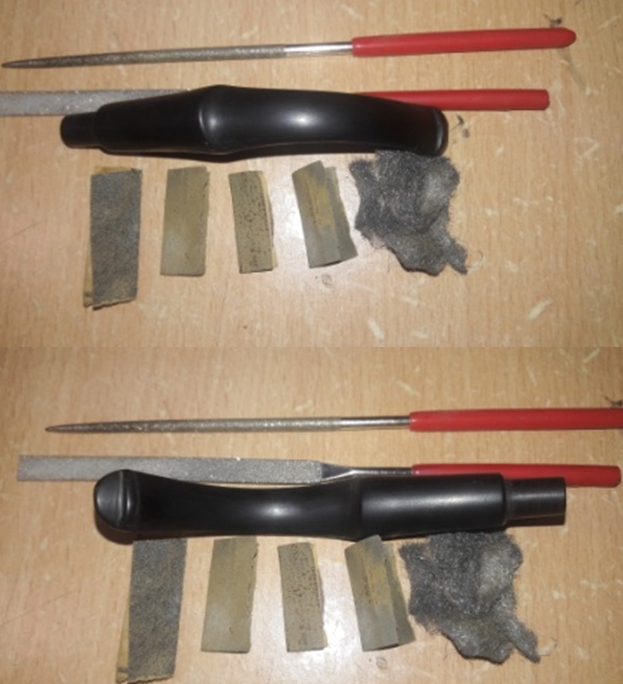
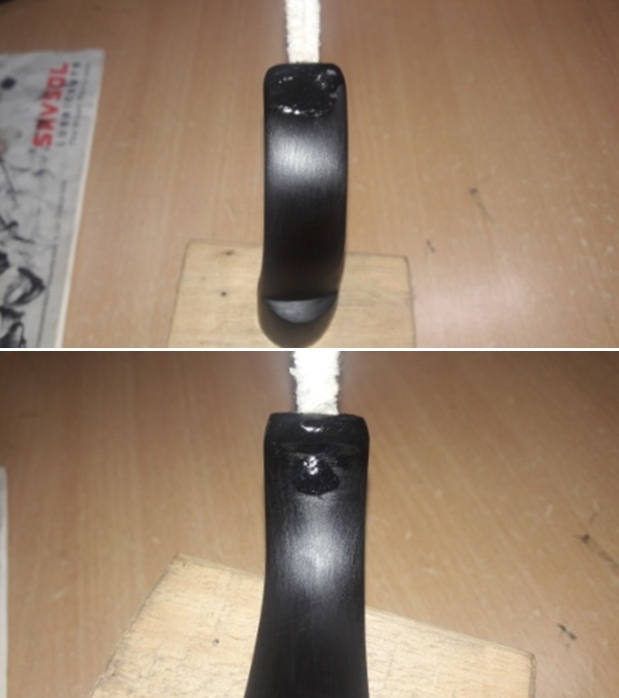
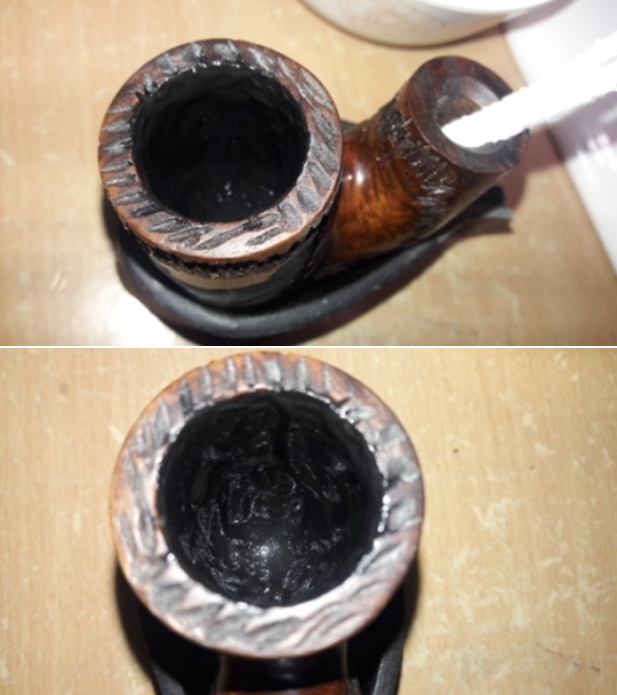
 Now that the stummel was nearly complete, I turned my attention to the stem refurbishing. The stem fill had cured well. Using a flat head needle file, I reshaped the button and roughly matched the fills with the rest of the stem surface. However, things rarely happen as you want them to happen and in this case, a few air pockets were revealed on both surfaces as I was sanding the fill with 220 grit sand paper. This is one phenomenon that I never want to see as it is involves a refill (time penalty) and still it is not always possible to address them completely!!
 I cleaned the surface with cotton swab and alcohol again and applied a fresh mix of activated charcoal and superglue. I set the stem fill aside to cure.
 Second round of sanding the stem and the end results… The air pockets are still visible in all their ugliness!! This was revealed when I had reached the end of my routine of sanding with ascending grit of sandpapers.
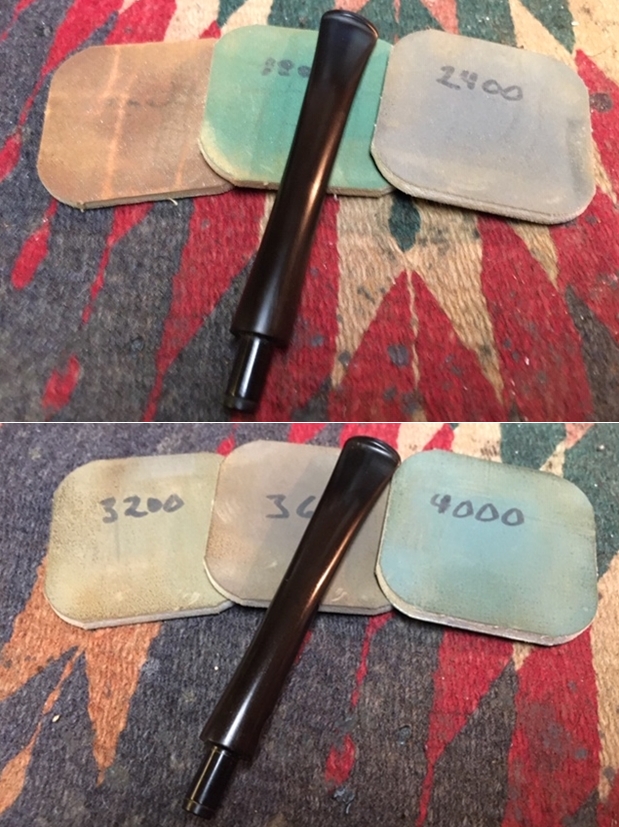
  Third round of fill and later sanding with 220, 400, 600, 800 and finishing with 0000 grade steel wool, I am happy with the results.
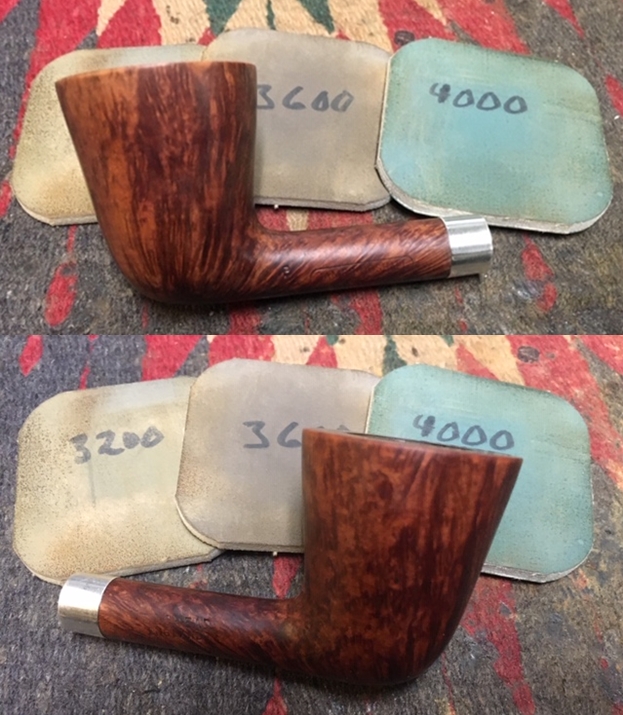
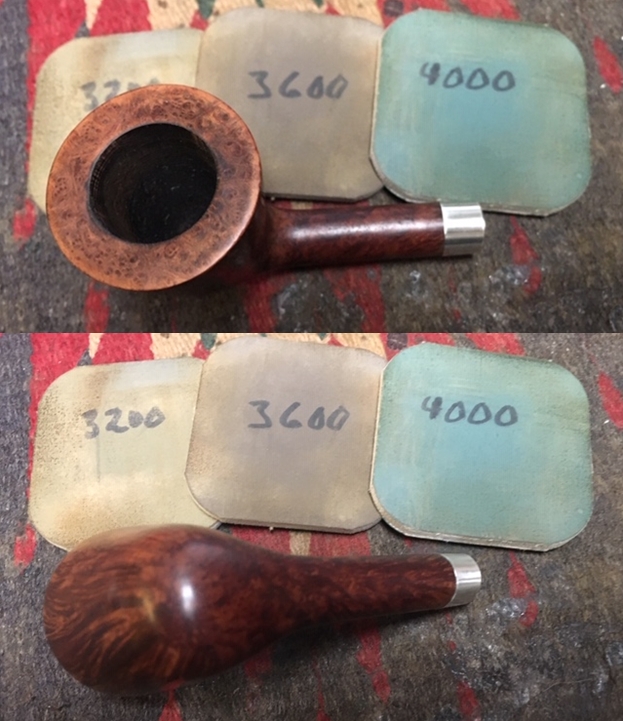
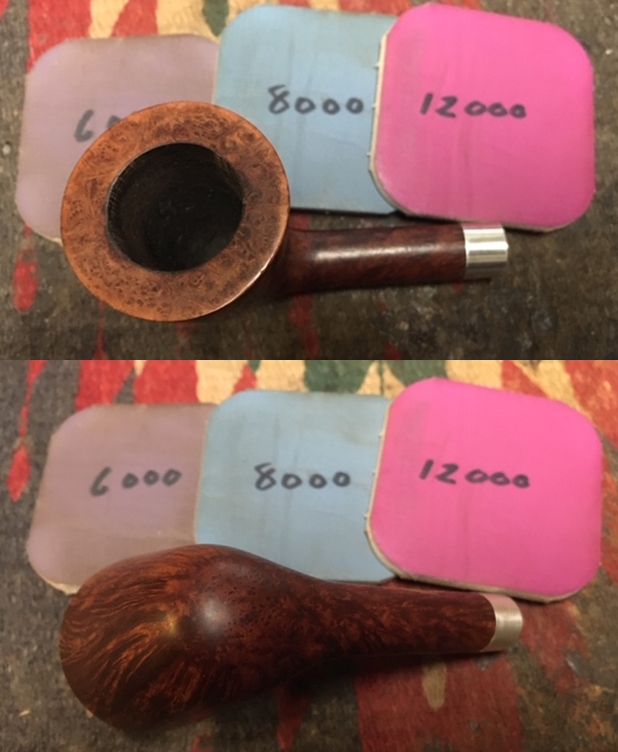
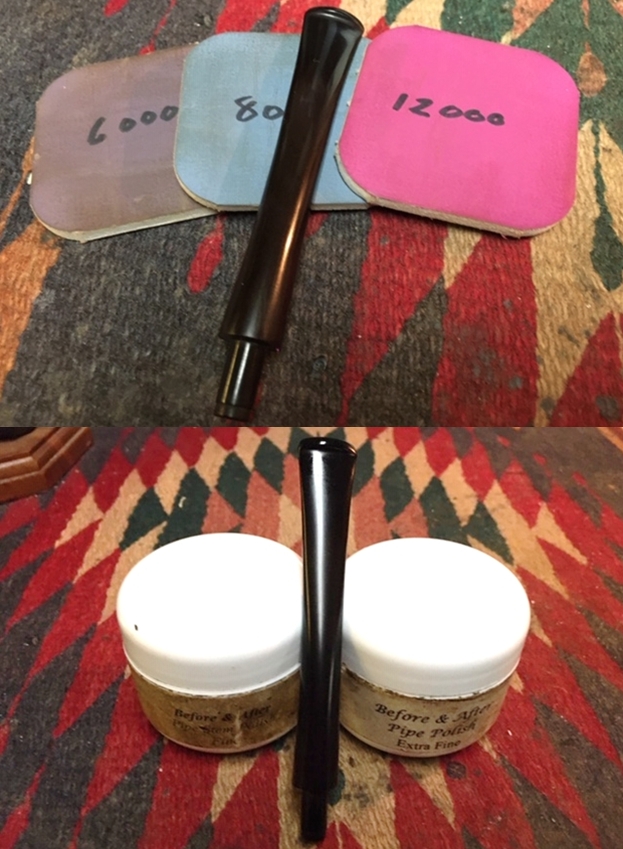
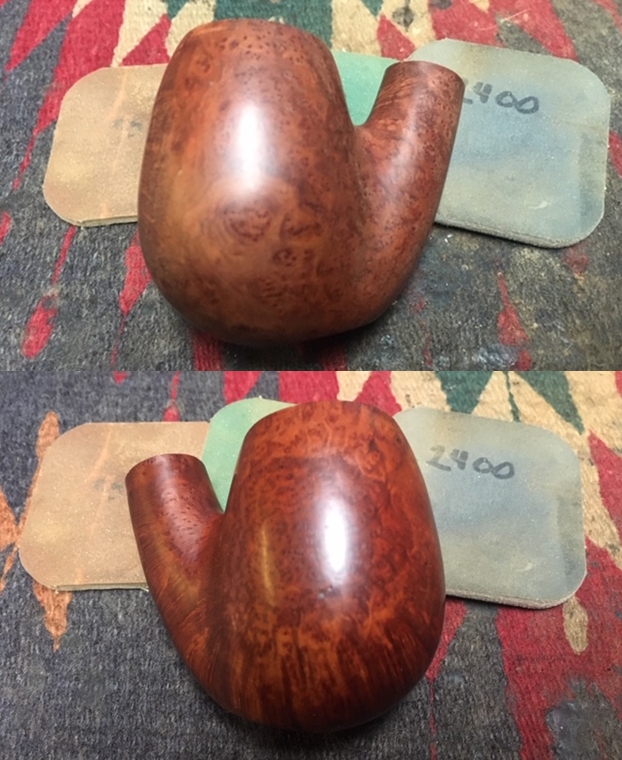
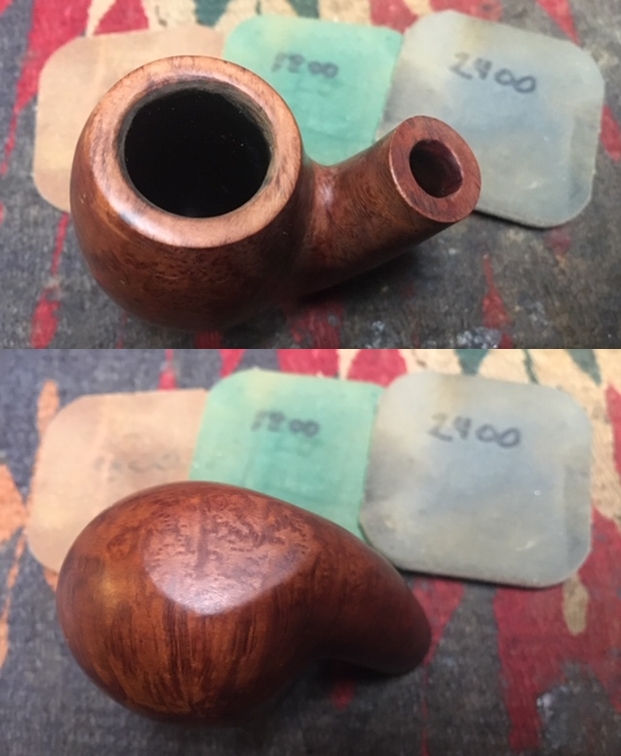
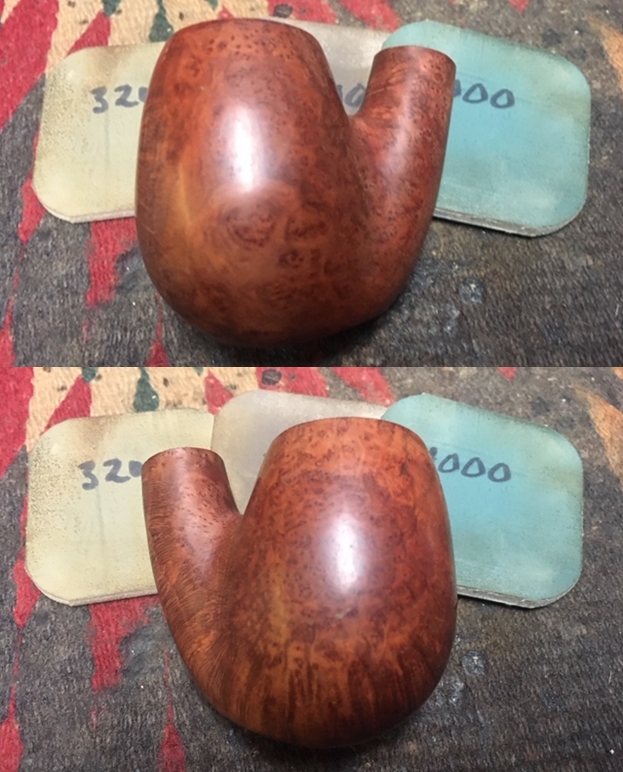
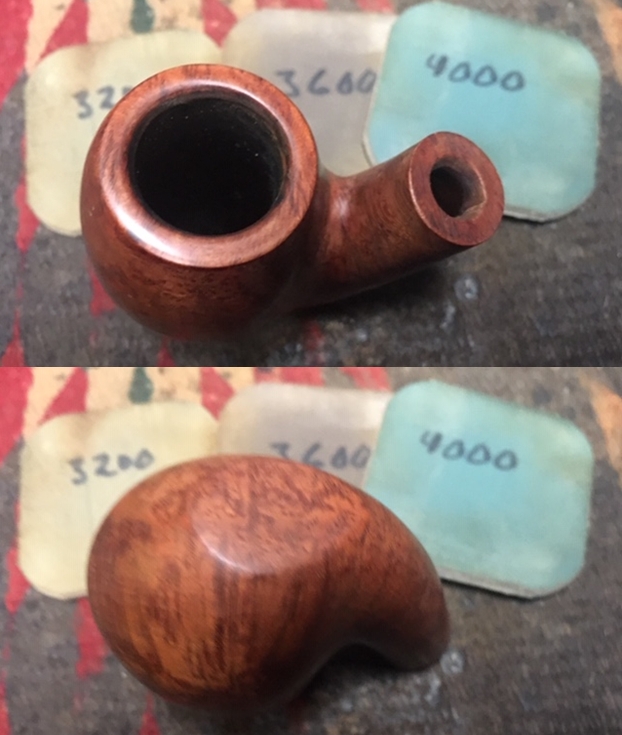
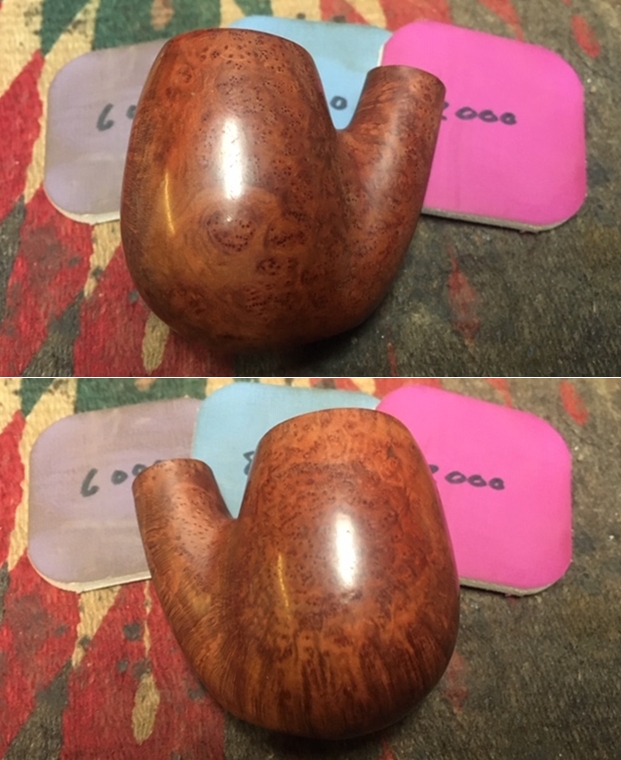
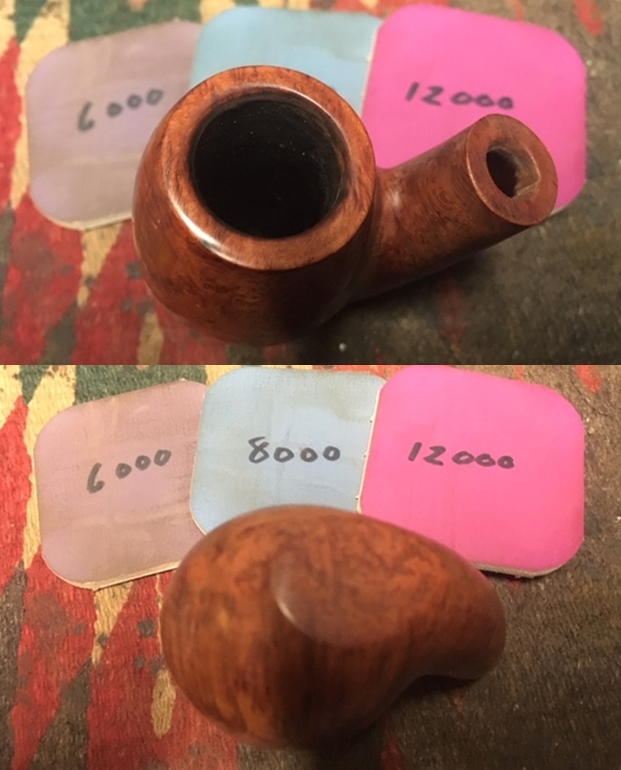
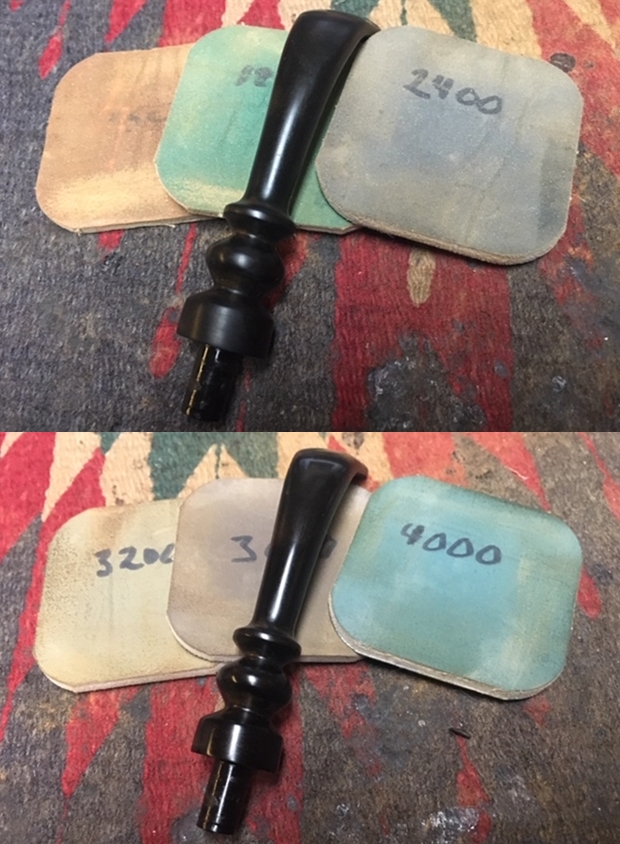
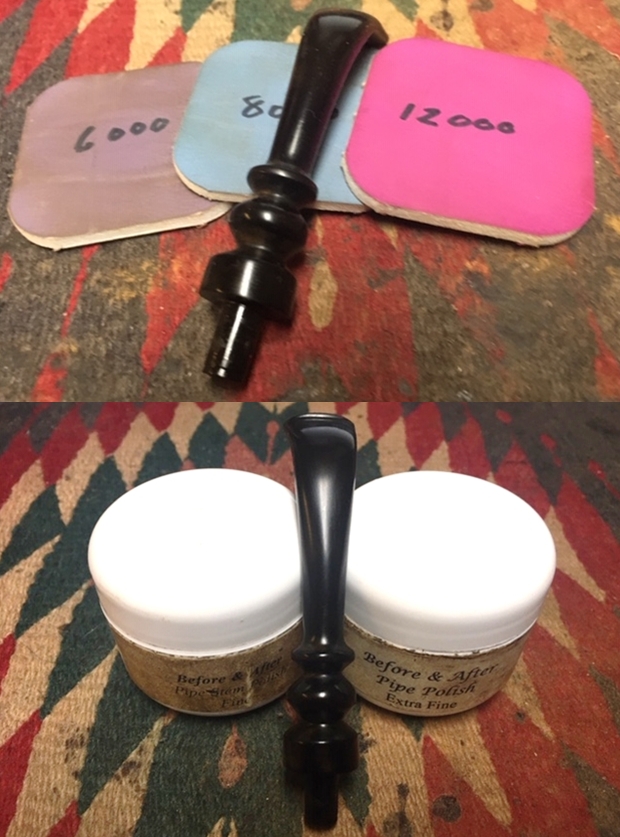
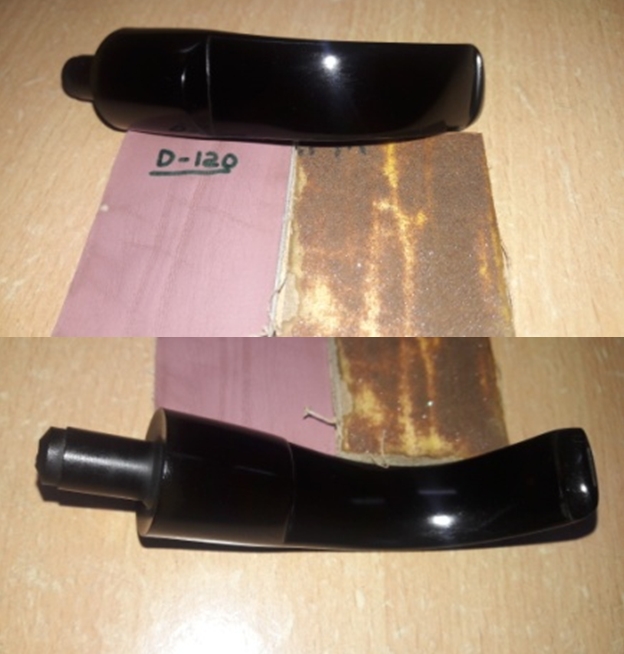
 I completed the polishing cycle of the stem by wet sanding the surface with 1500 to 12000 girt pads. The stem looks great with the fills nicely matched with the rest of the surface. I gave a final rub with “Before and After Extra Fine” stem polish compound to remove fine scratches from the stem surface. I rub a little quantity of Extra Virgin Olive oil in to the stem surface and set it aside to be absorbed by the vulcanite. The stem polished up nicely and the repairs appear good.
 To complete the restoration, I mount a cotton cloth buffing wheel on to my hand held rotary tool and applied a coat of Blue Diamond to the stummel and the stem to polish out the minor scratches.
 I refreshed the stem logo with a white correction pen and a tooth pick. The letter C appears slightly worn at the ends.
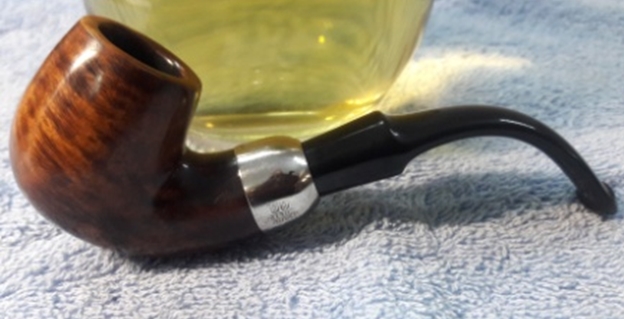
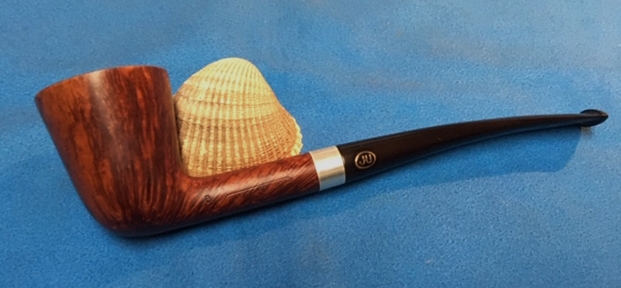
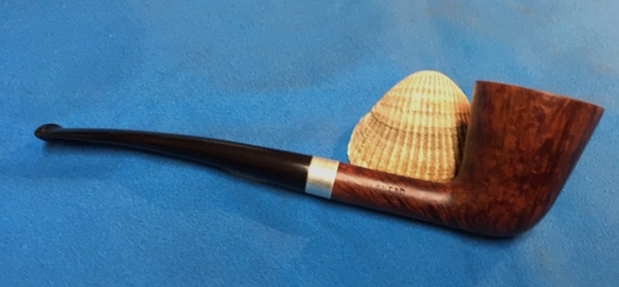
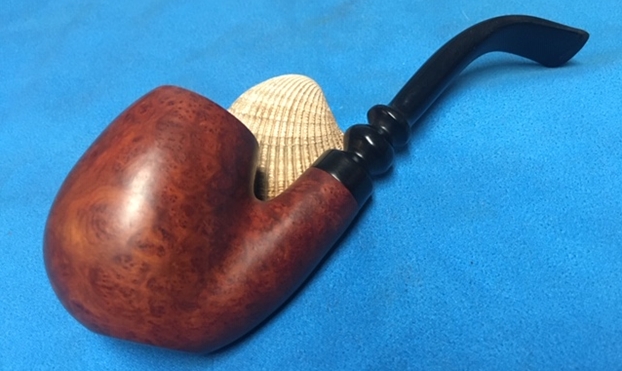
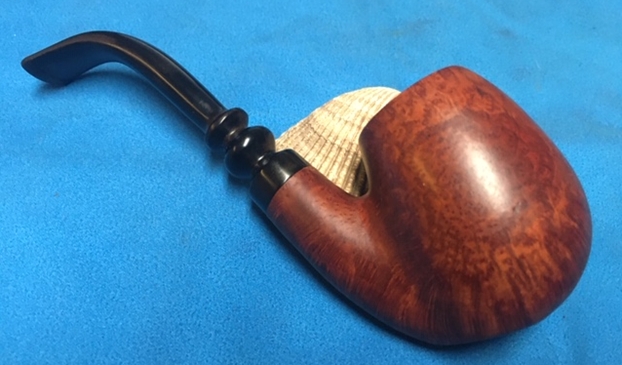
 With a cotton buffing wheel that I use for carnauba wax, I apply a coat of carnauba wax and continue to work on it till the complete coat of wax had been polished out. I finished the restoration by giving the entire pipe a rigorous hand buffing using a microfiber cloth to raise the shine further. The completed pipe looks fresh, vibrant and ready for its next innings with me. This piece of briar feels fantastic in hands with its textured rustications, classic size and will find a place of pride in my collection as a part of the memories left behind by my grand old man. If only it could tell me stories it had witnessed and what tobacco did my grandfather smoke in this pipe!!


 Thank you to all esteemed readers for joining me and walking with me through this restoration. Cheers!!


