Blog by Dal Stanton
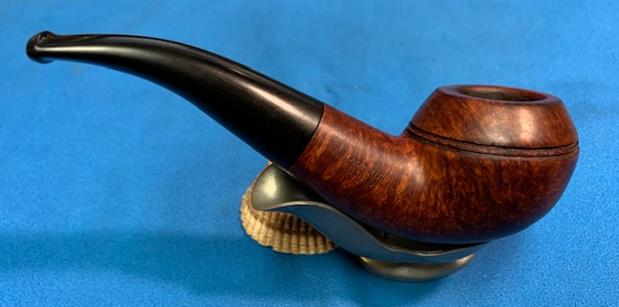
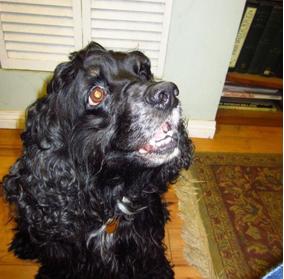
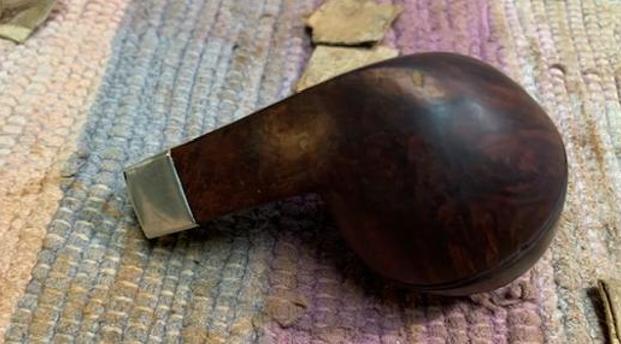
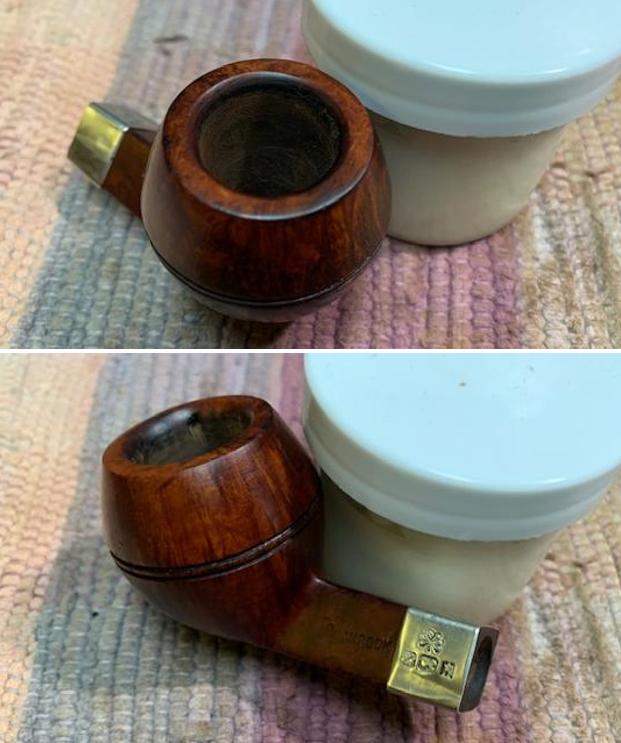
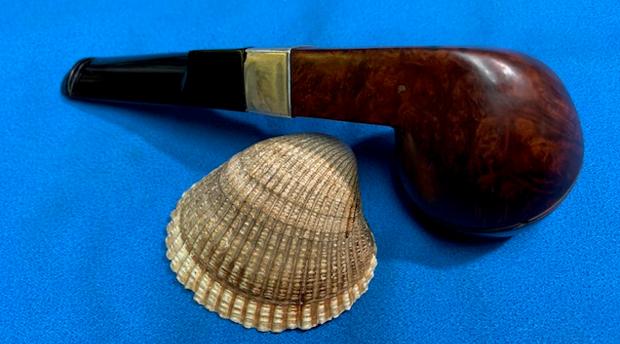
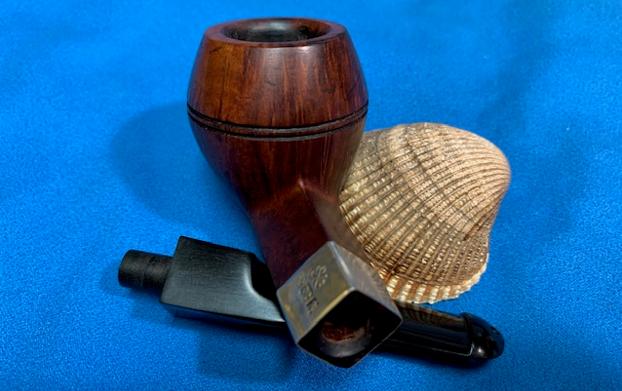
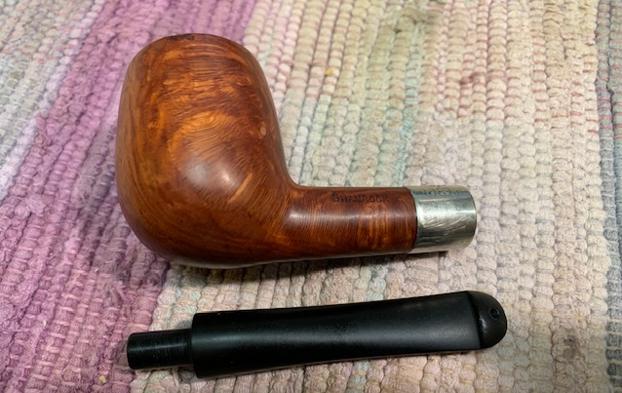
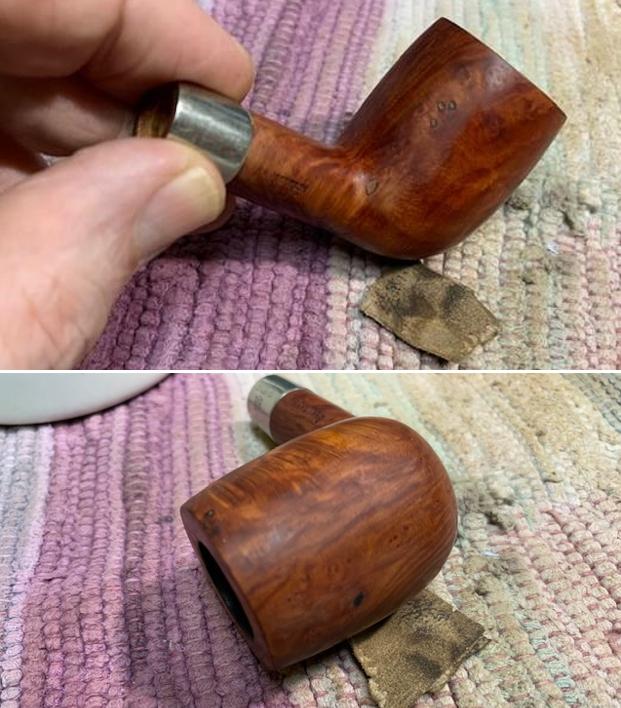
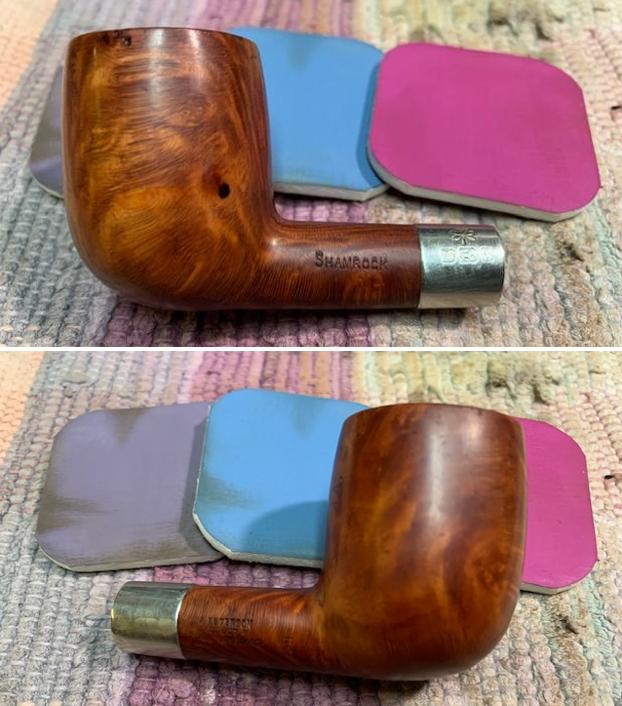
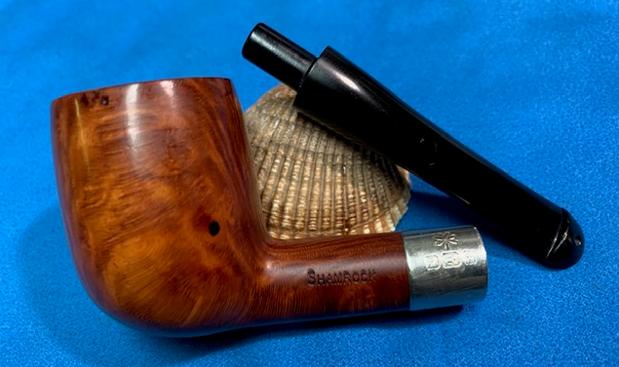
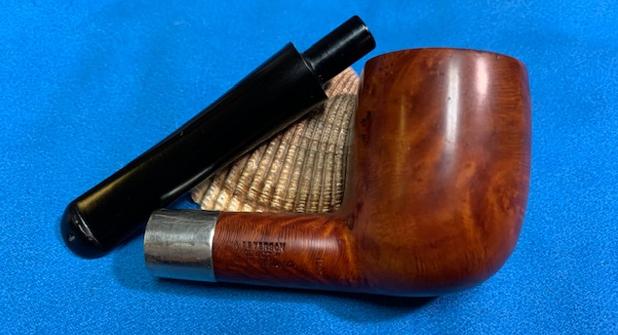
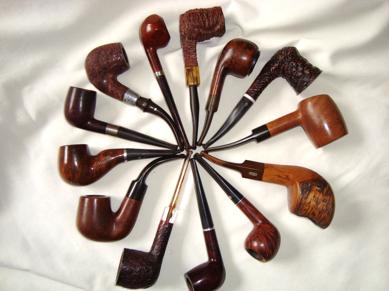
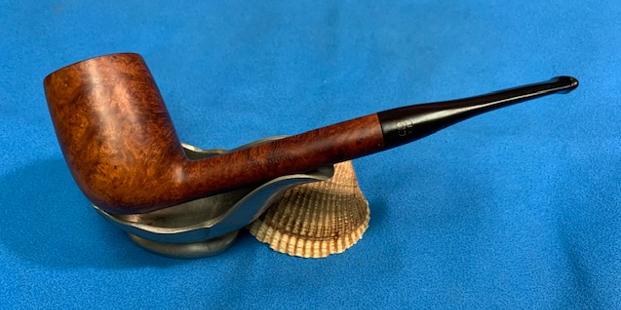
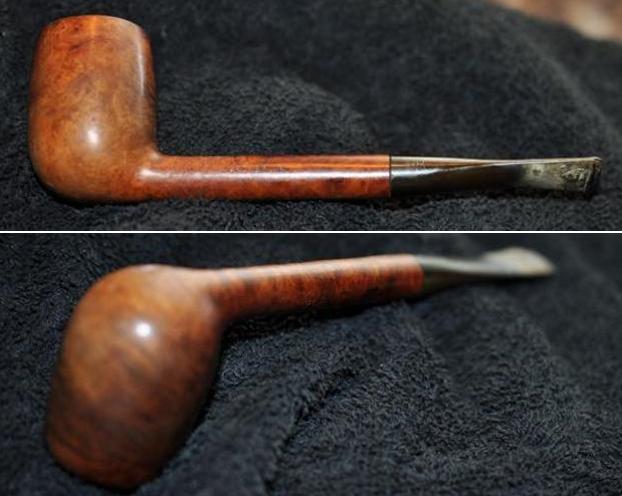
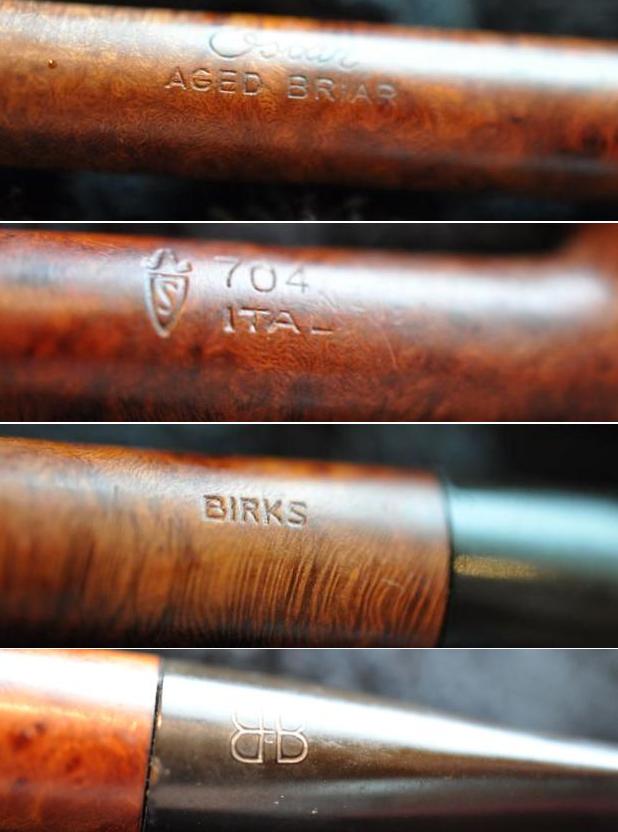
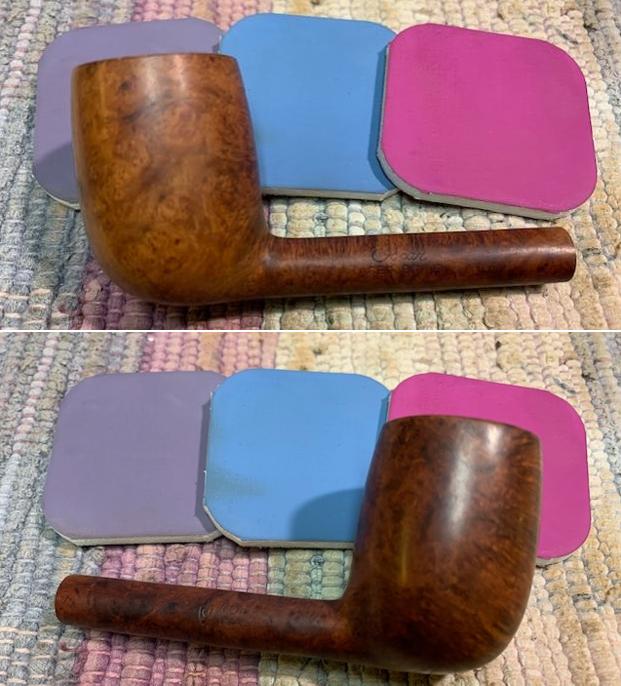
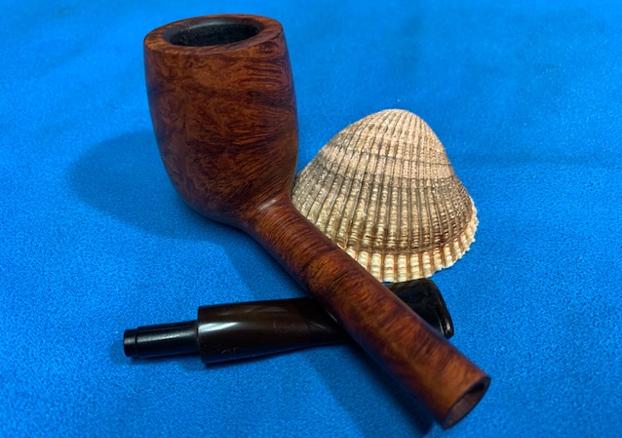
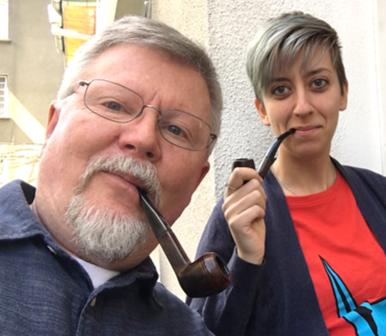 I remember well when I received this beautifully sculpted ‘Edelweiss’ in 2017. Kari, a gifted young Bulgarian lady who is a fellow colleague working with the Daughters of Bulgaria in Sofia, Bulgaria, saw the pipe in a second-hand shop on a visit to London while visiting her parents who lived and worked there. Among colleagues of Daughters of Bulgaria, my pipe restoration exploits benefiting the daughters, is well-known. Kari purchased the pipe and gifted it to The Pipe Steward for the Daughters on her return to Sofia. Kari’s support did not end there! She ALSO commissioned a pipe for herself which also benefited the Daughters. That pipe was a graceful beauty which joined our fellowship during a break at work (pictured below) in Sofia a few years ago (See: A Lady’s Choice – WDC Milano Swan Neck Billiard). Kari, along with several other staff and volunteers, are the courageous ones who go where few go to help women and girls who have been trafficked and sexually exploited. Thank you, Kari, not only for the pipe but for all you do!
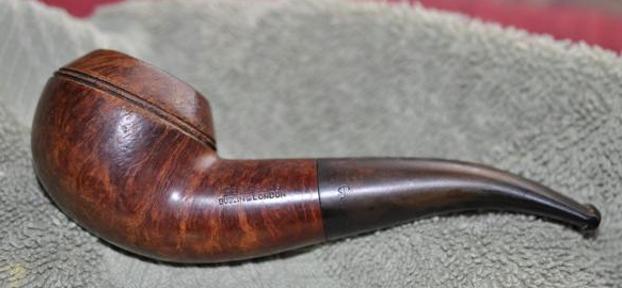
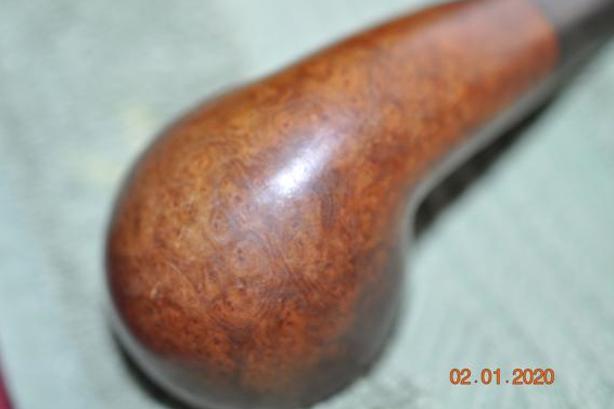
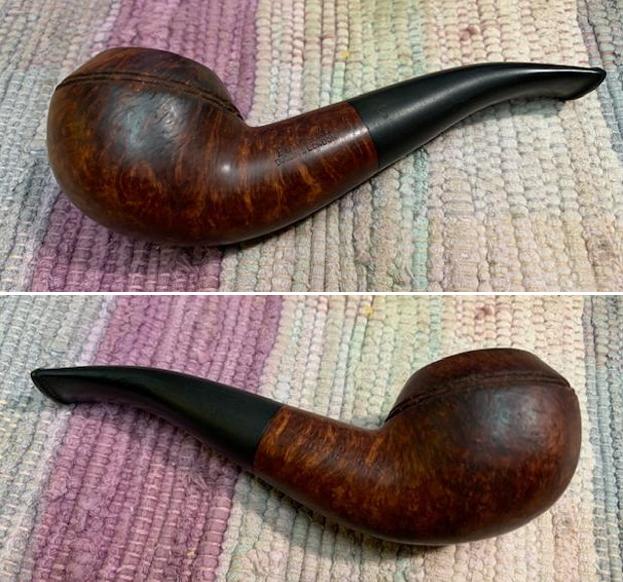
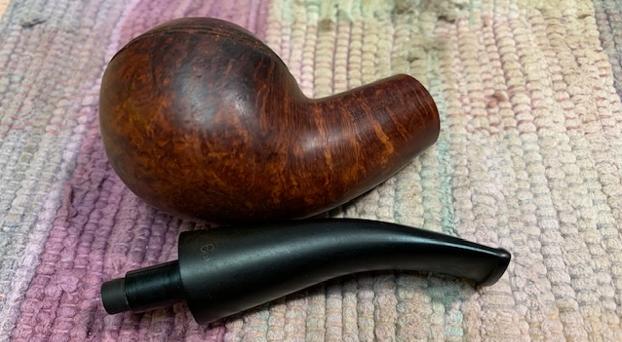
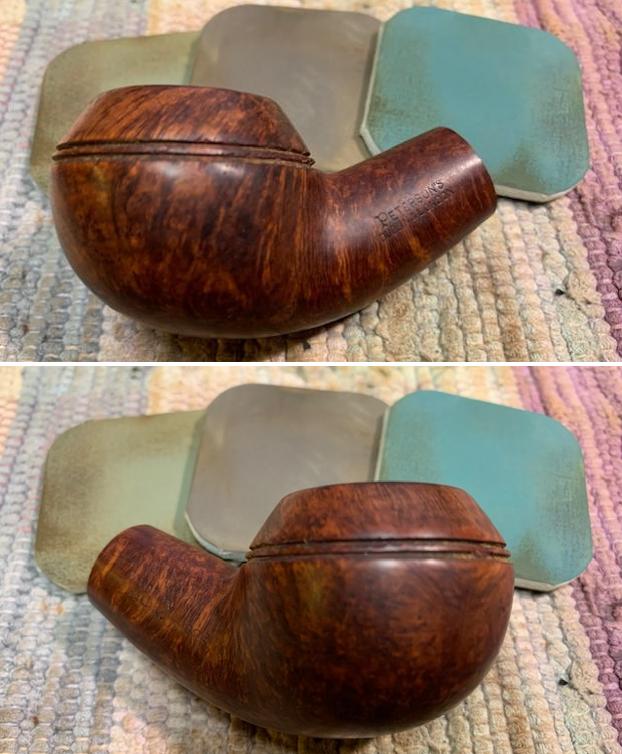
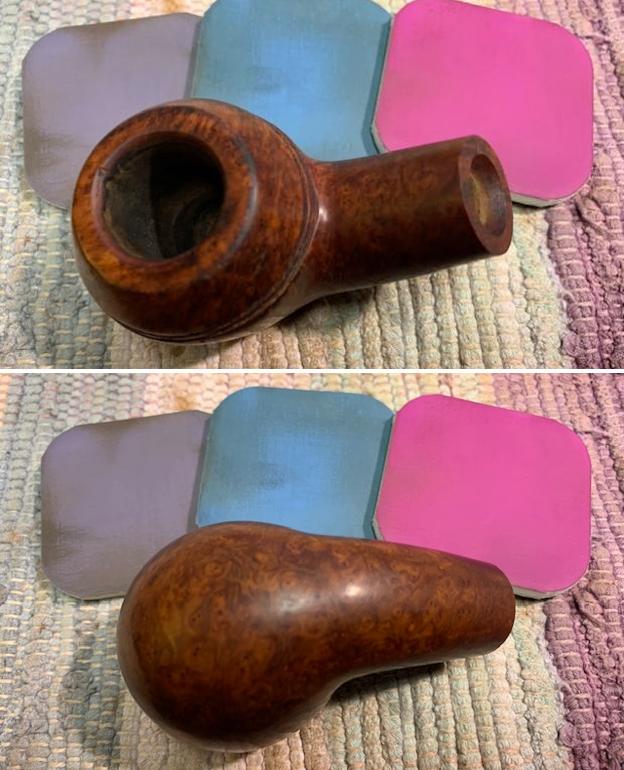
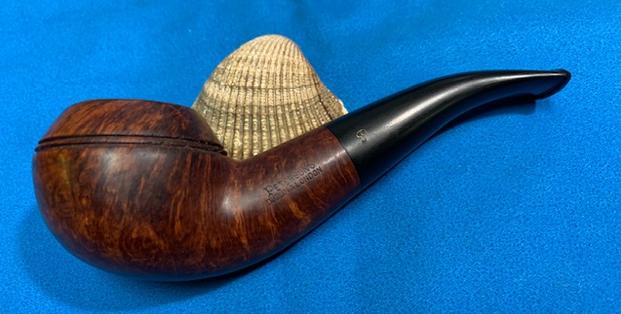
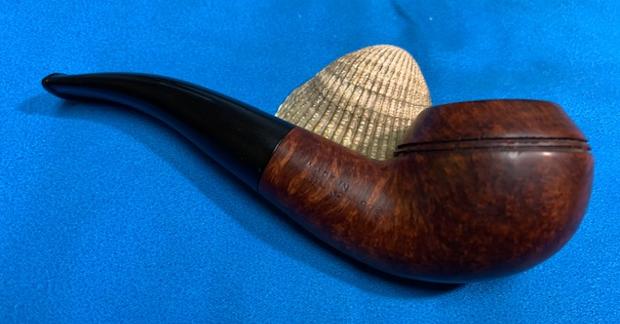
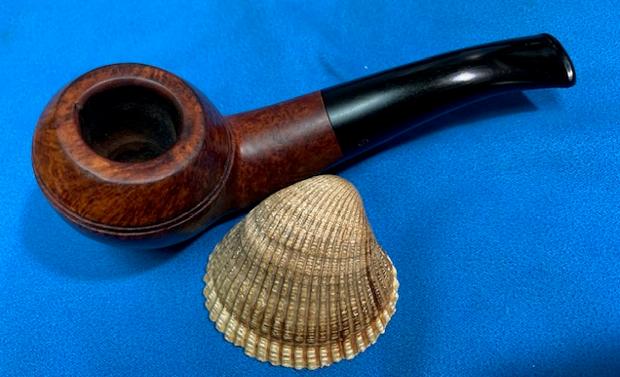
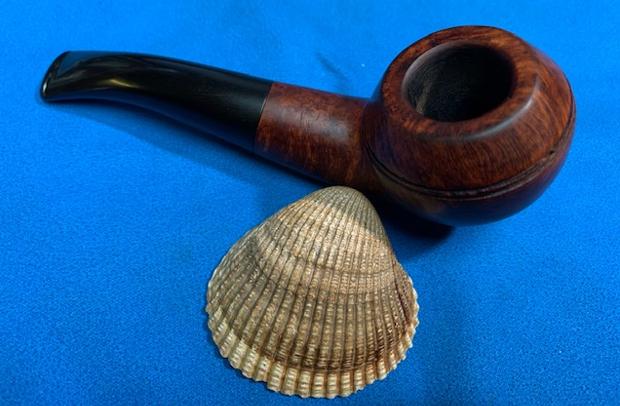
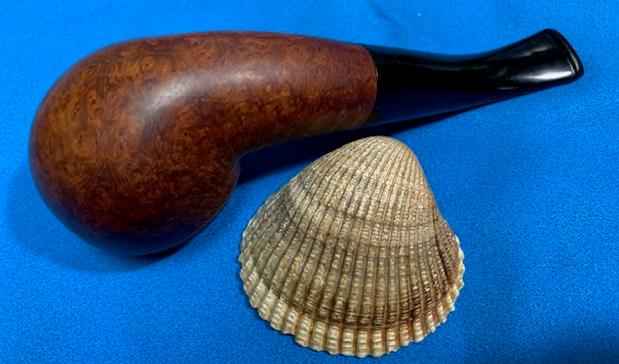
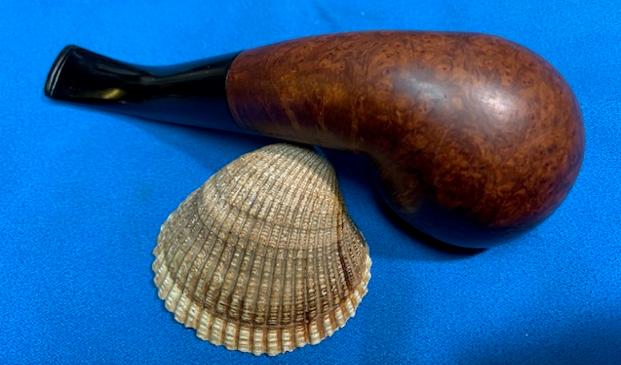
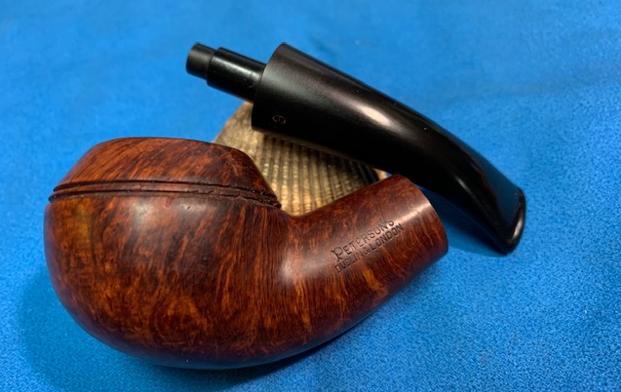
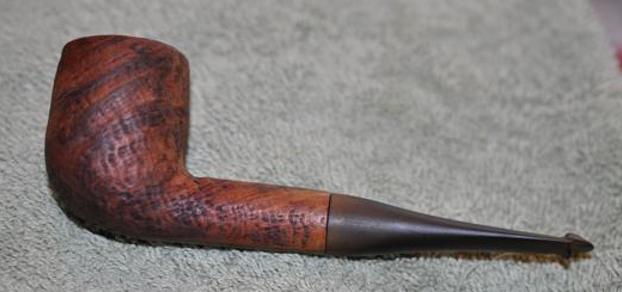
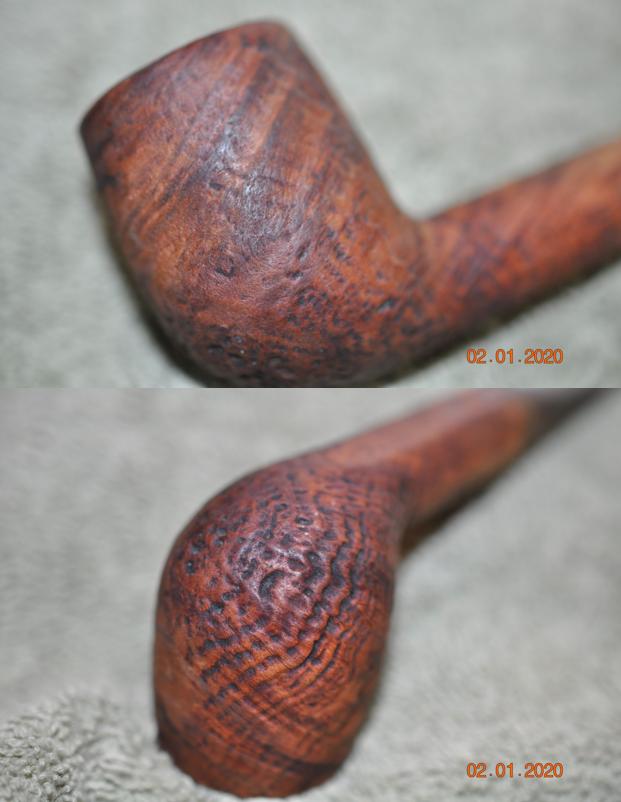
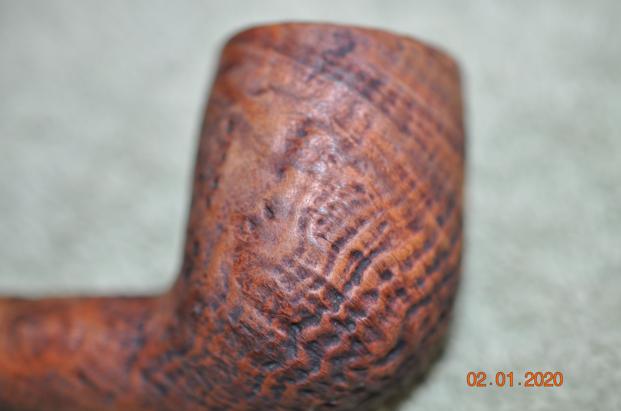
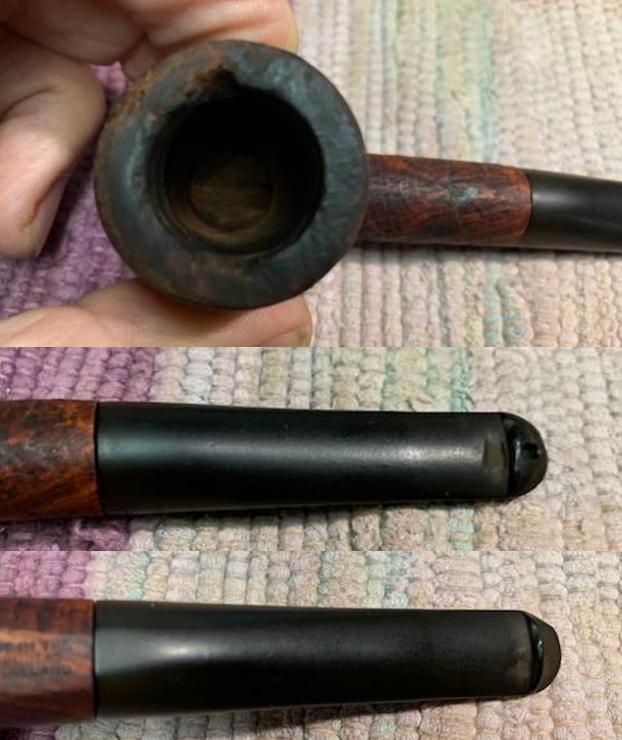
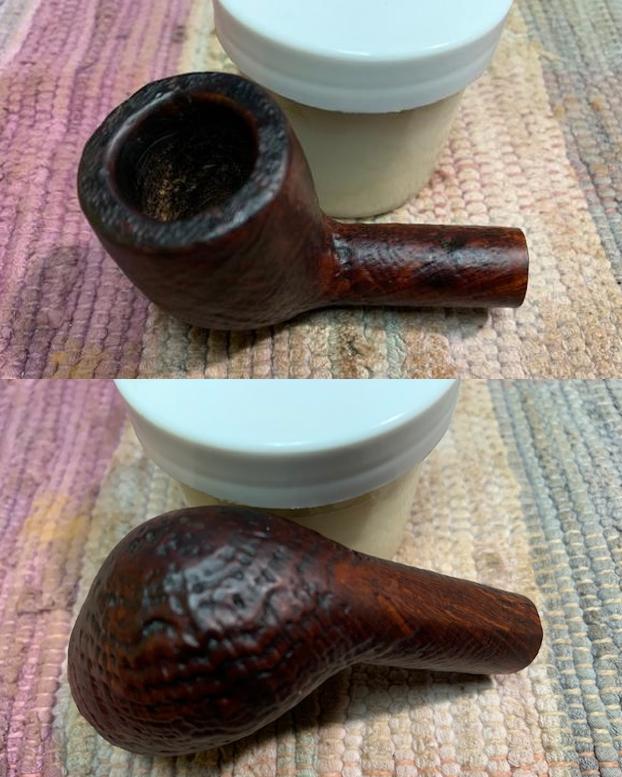
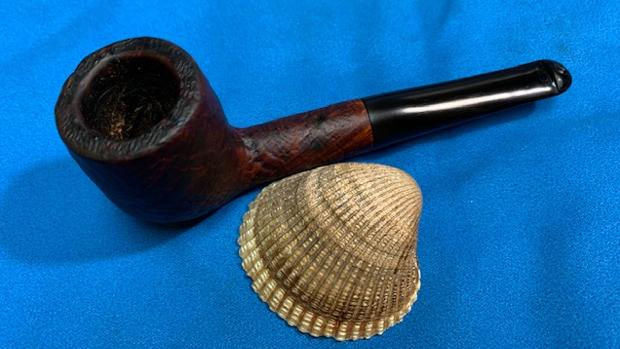
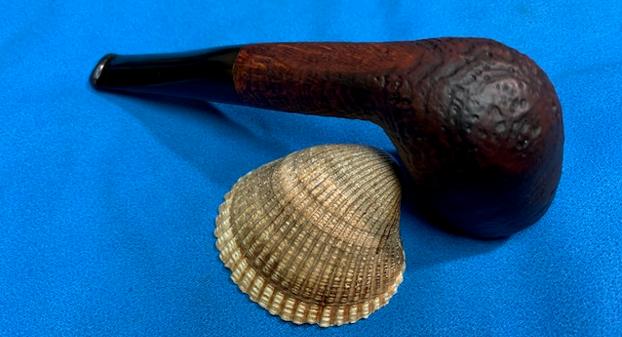
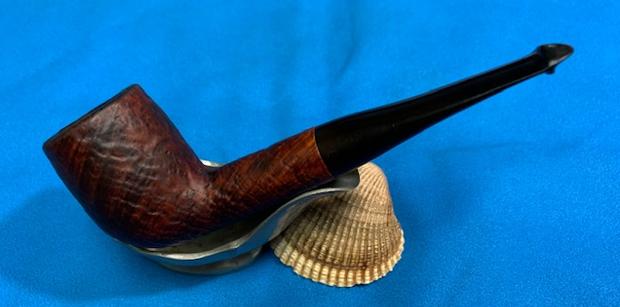
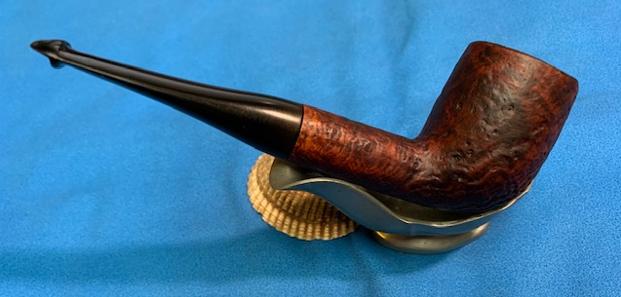
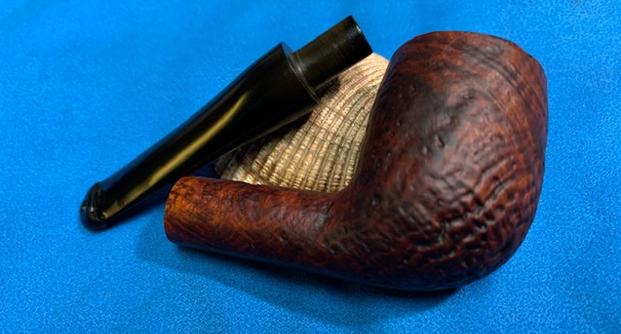
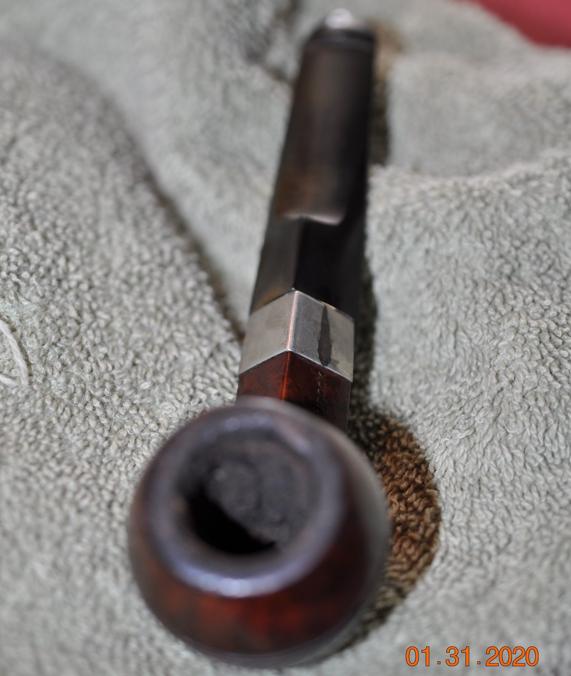
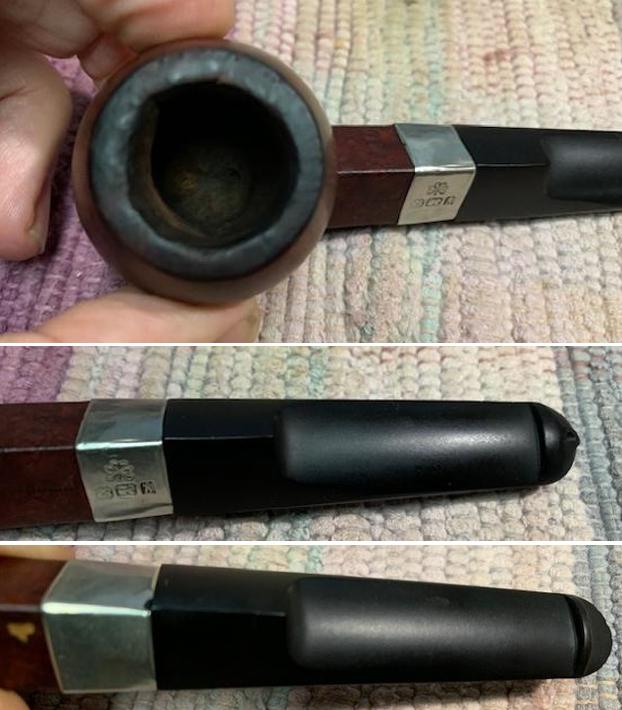
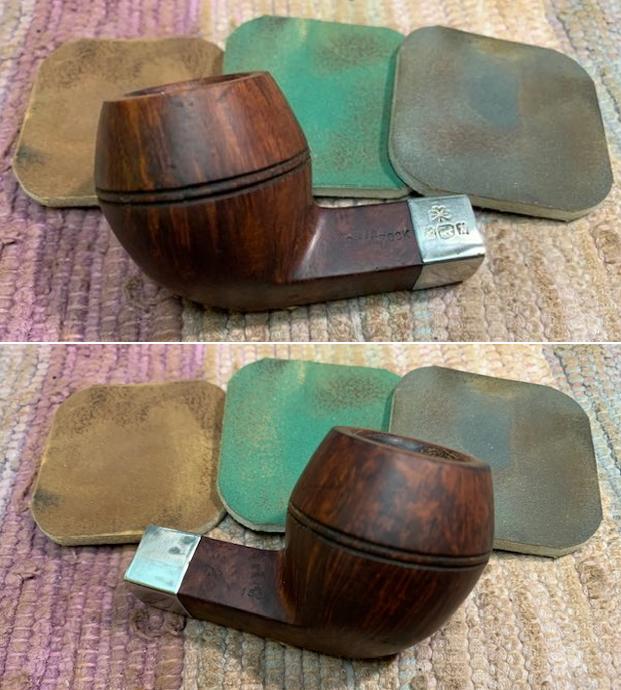
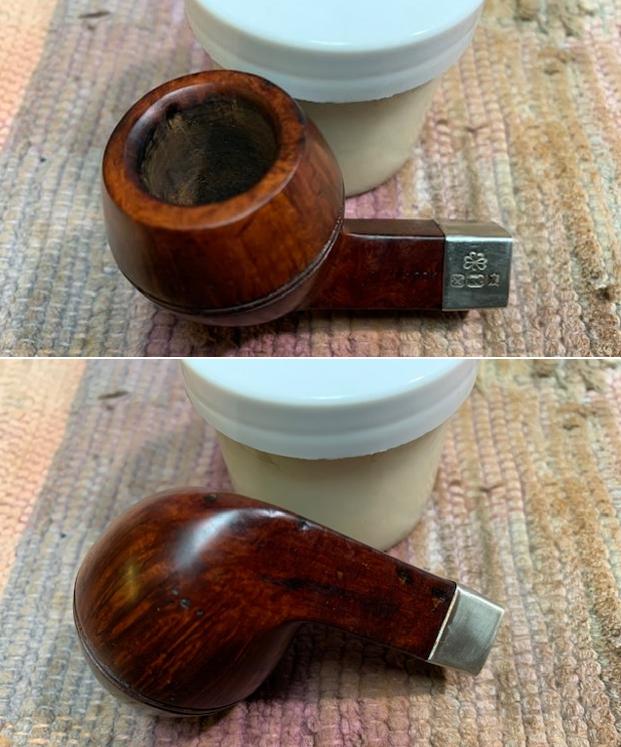
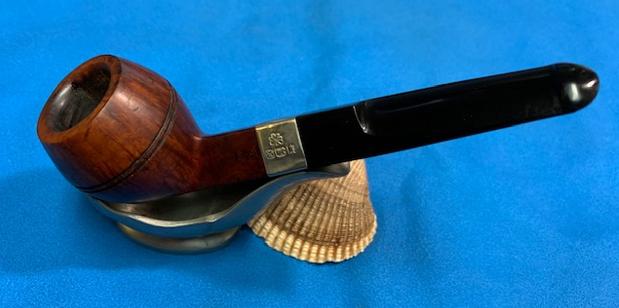
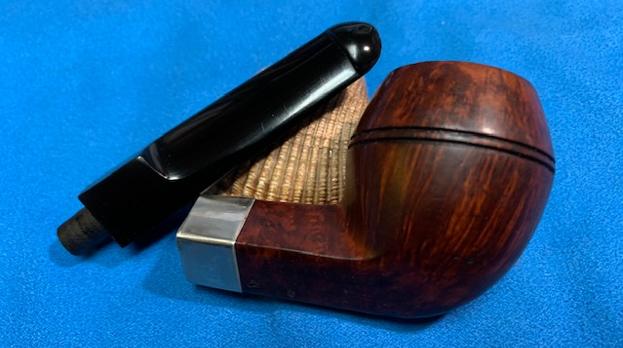
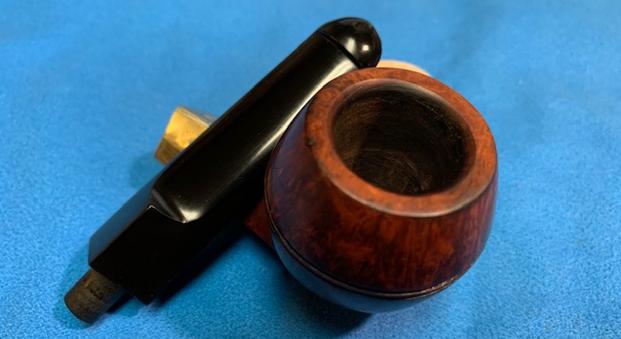
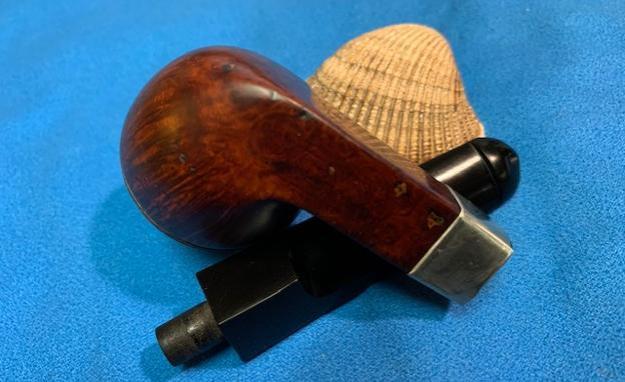
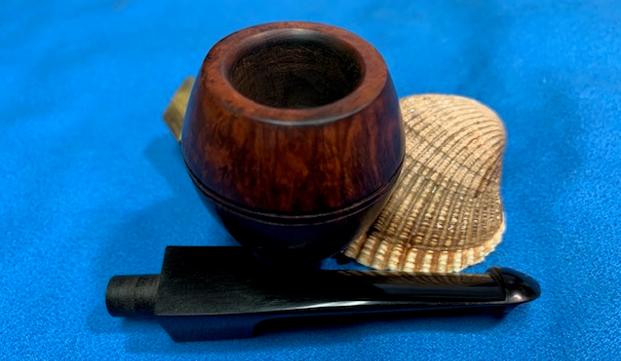
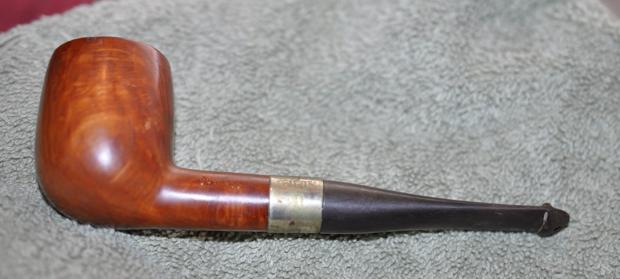
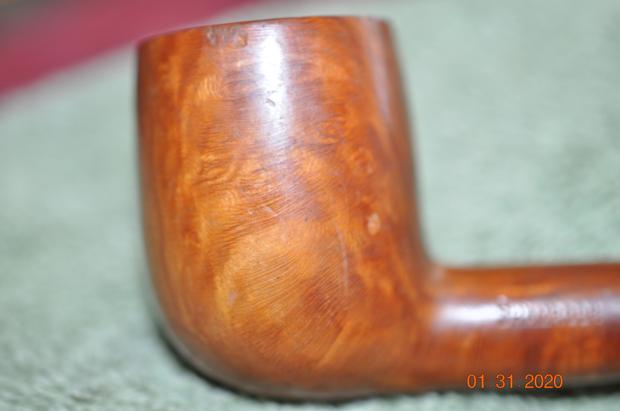
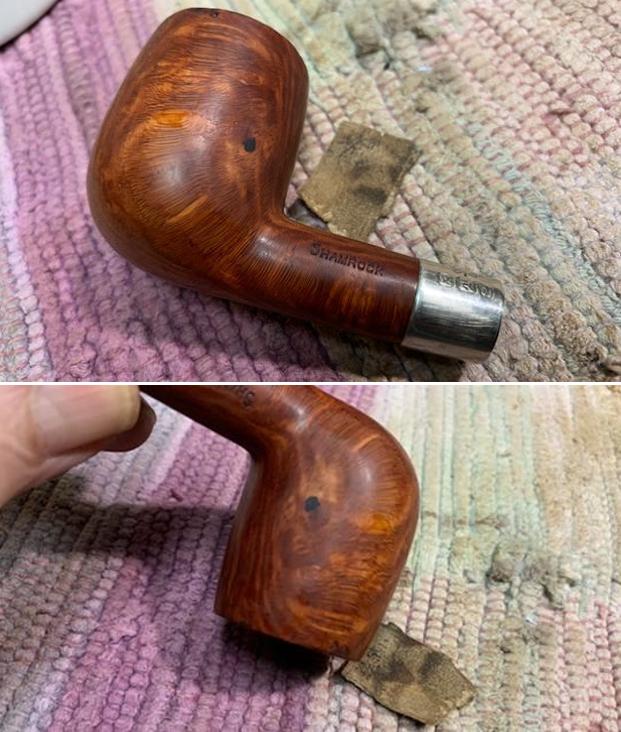
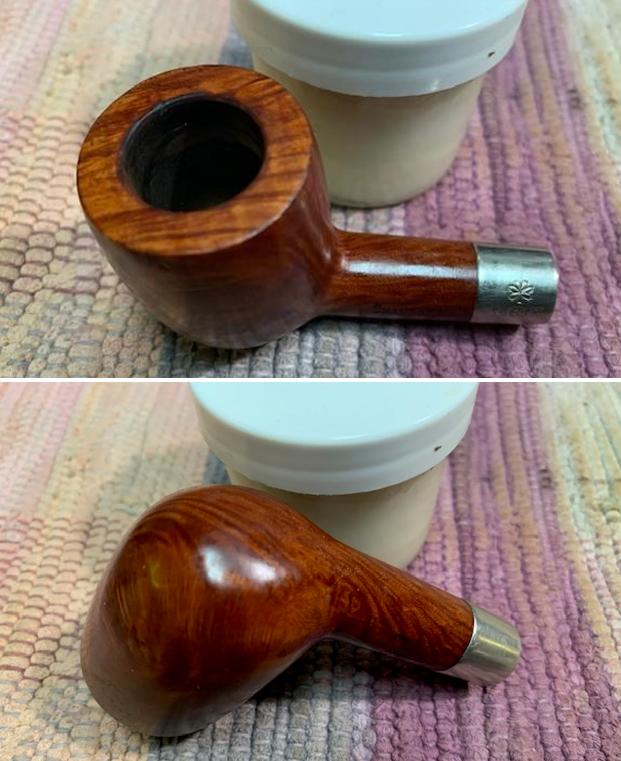
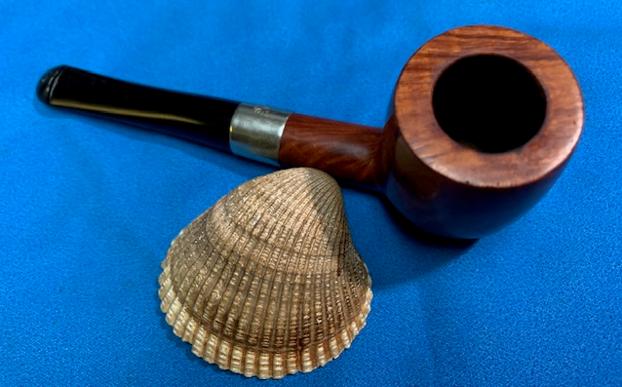
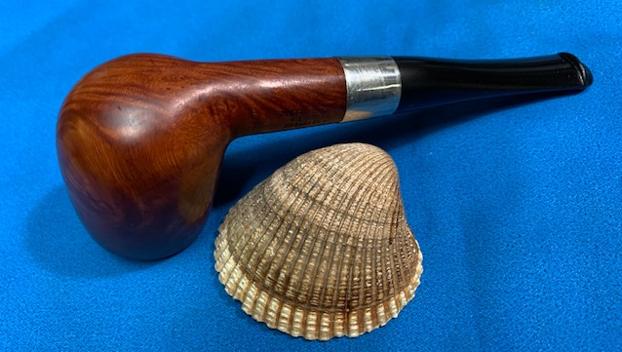
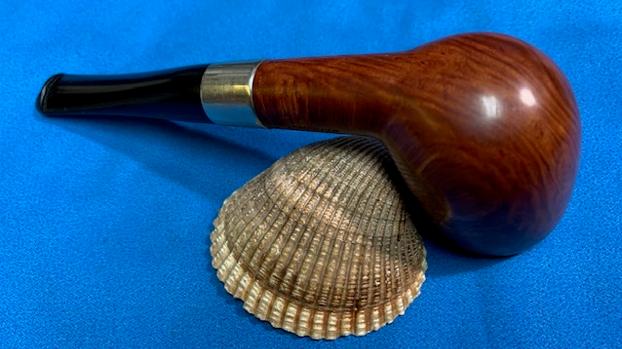
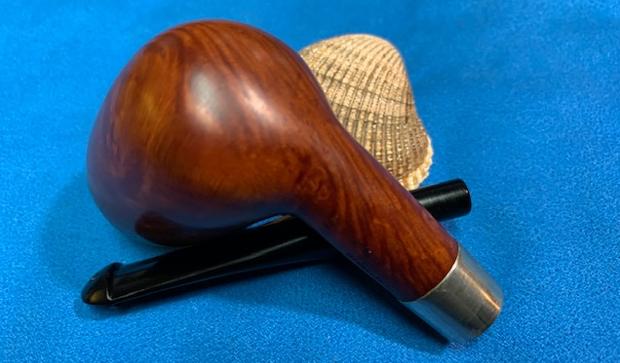
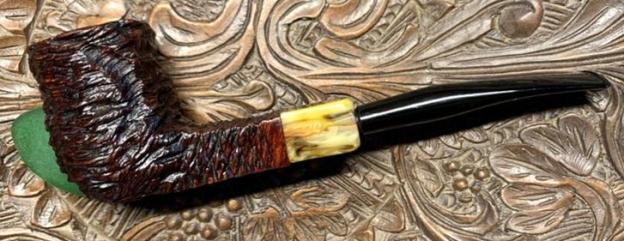
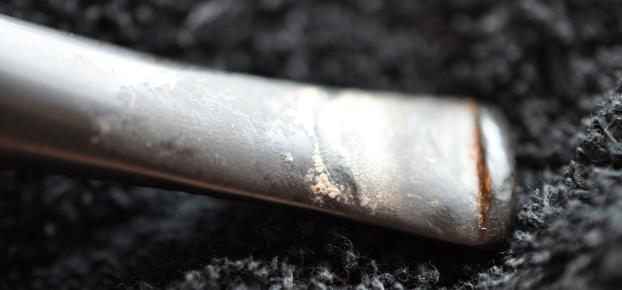
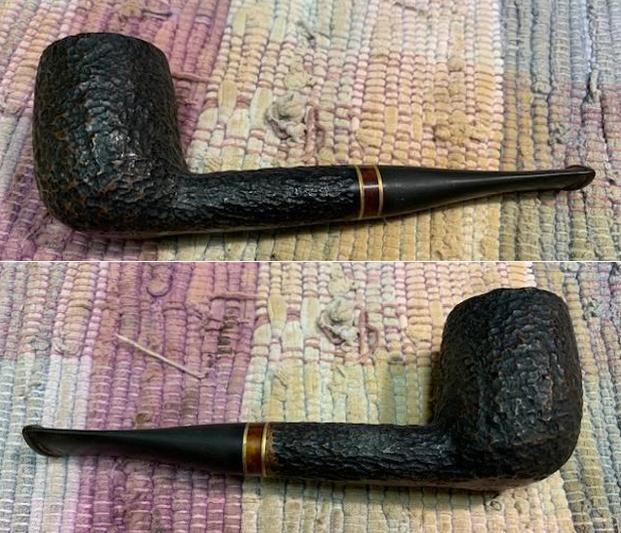
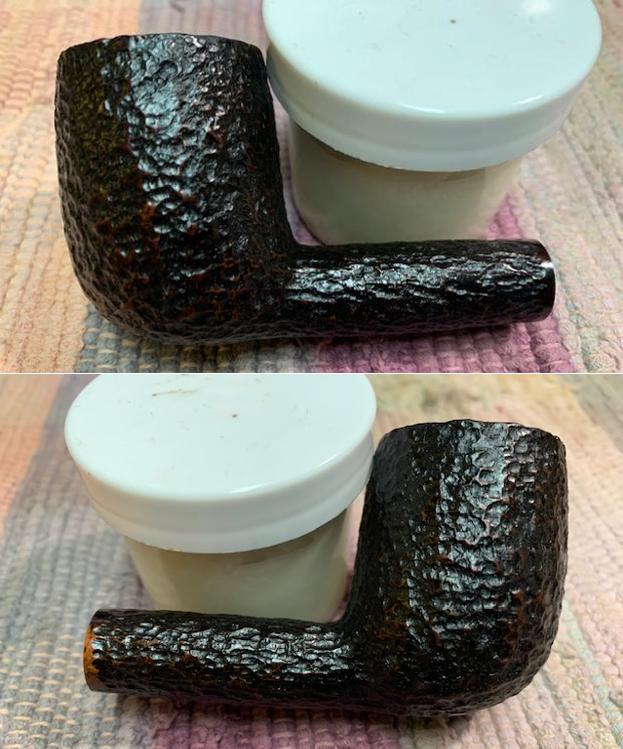
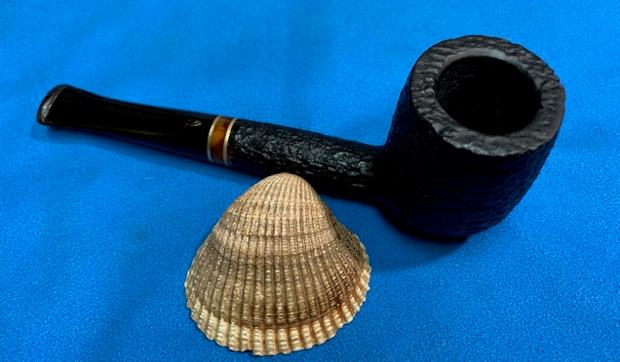
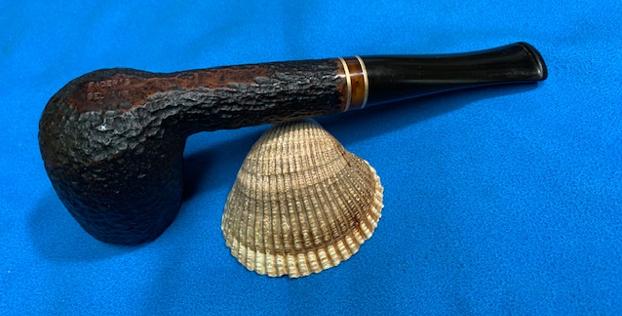
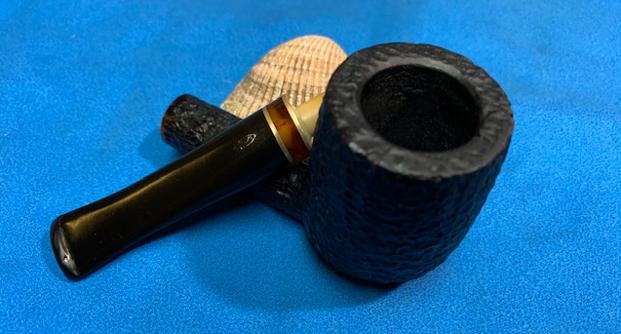
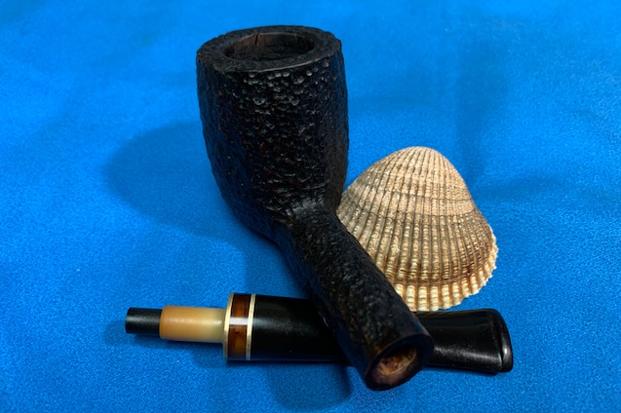
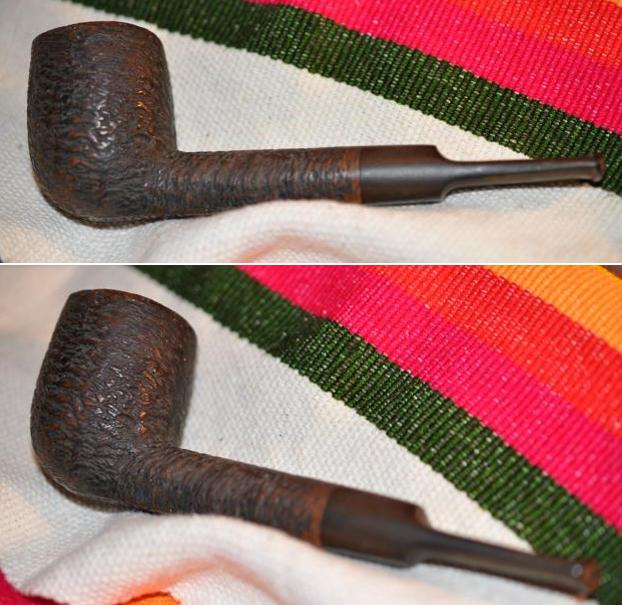
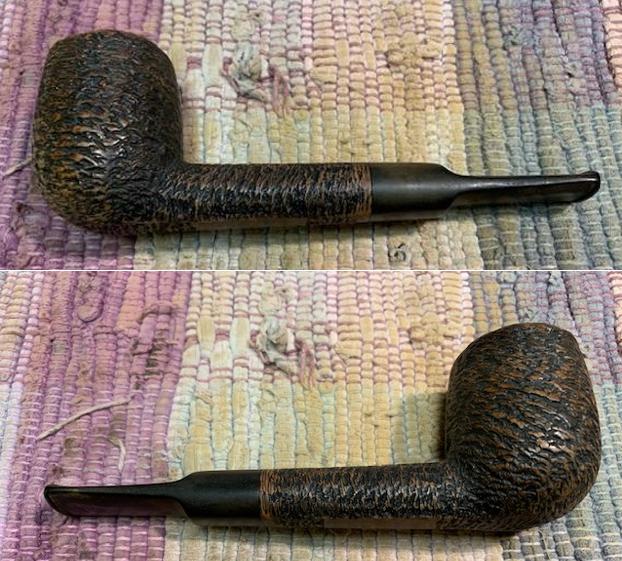
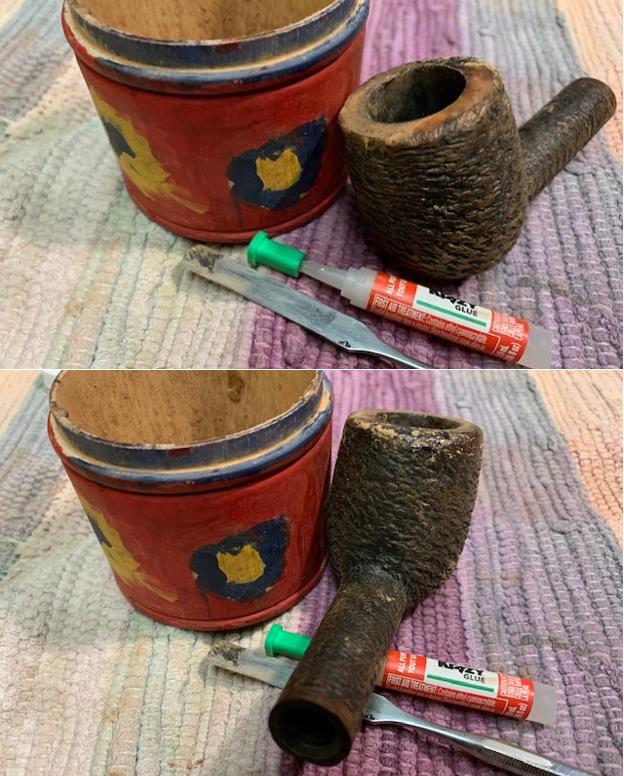
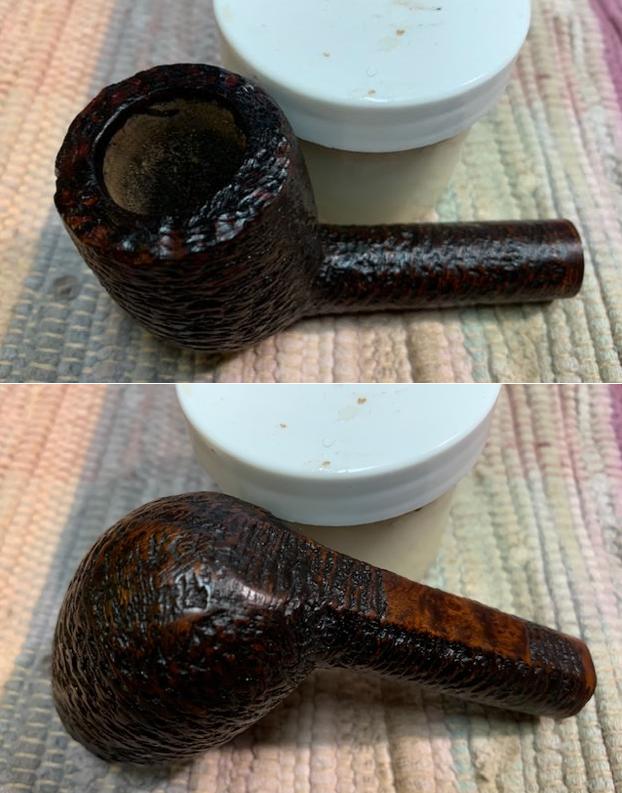
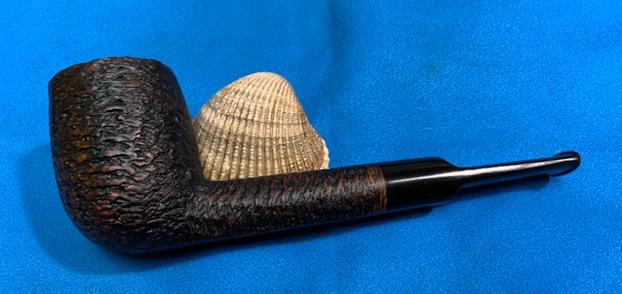
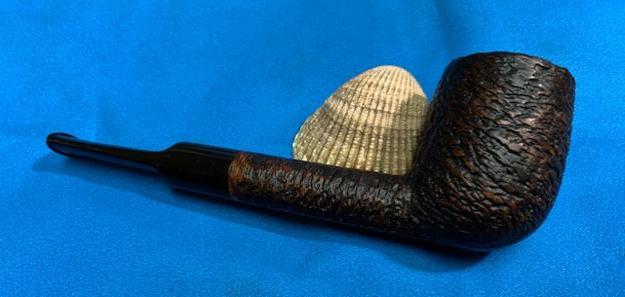
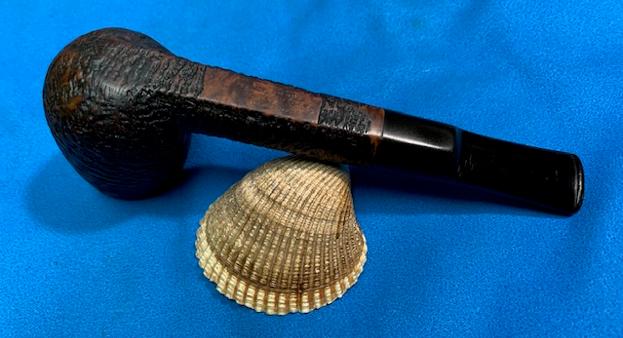
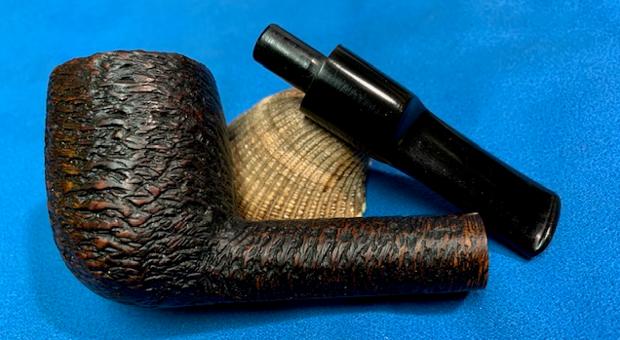
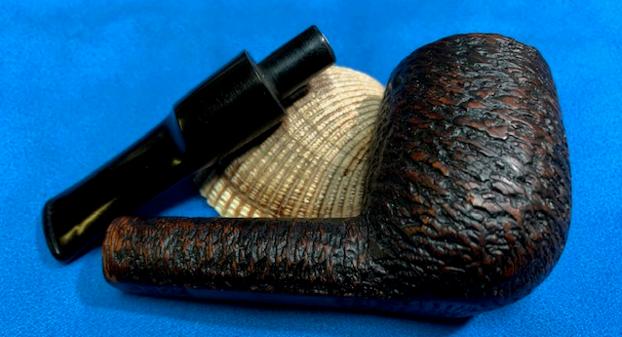
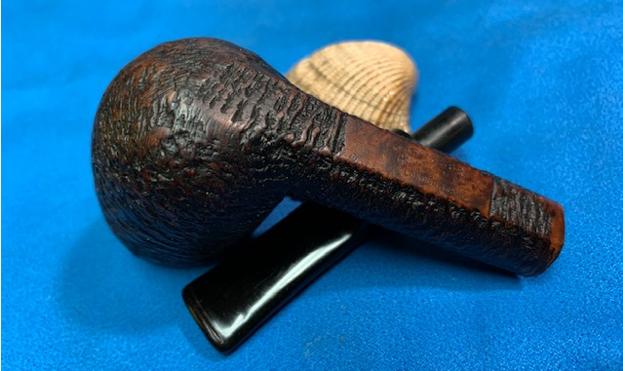
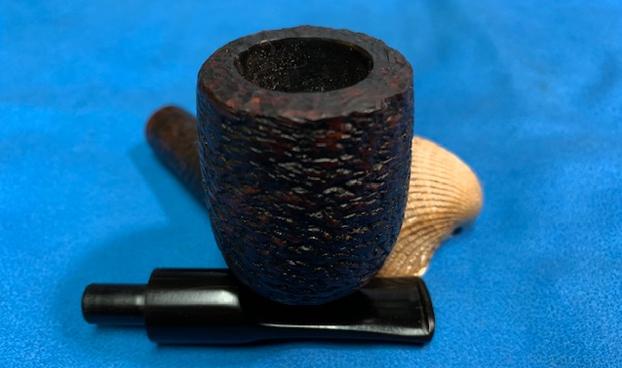
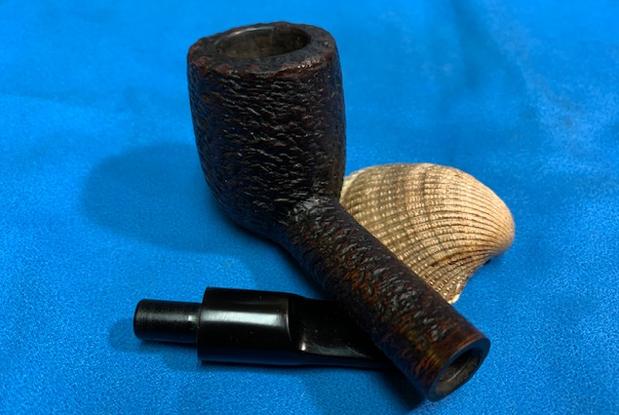
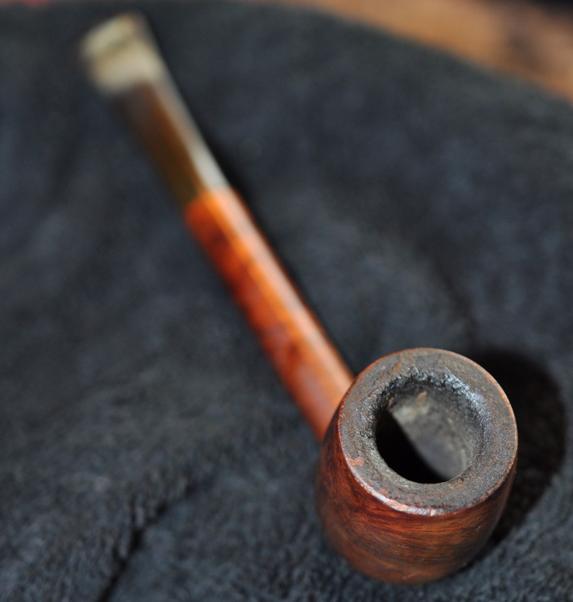
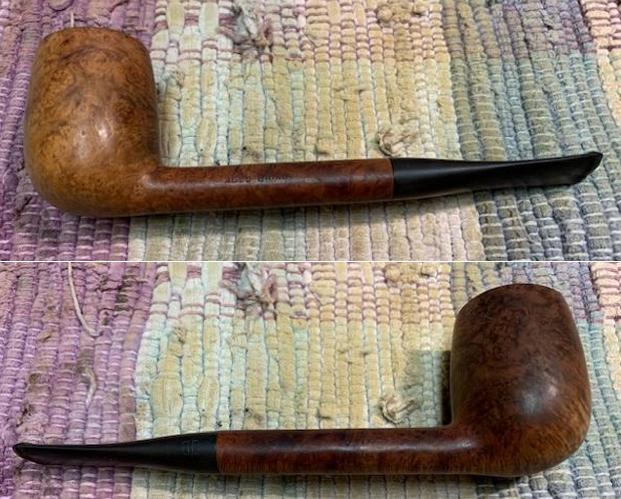
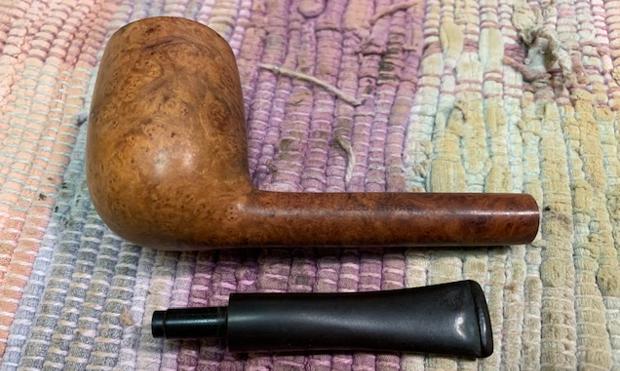
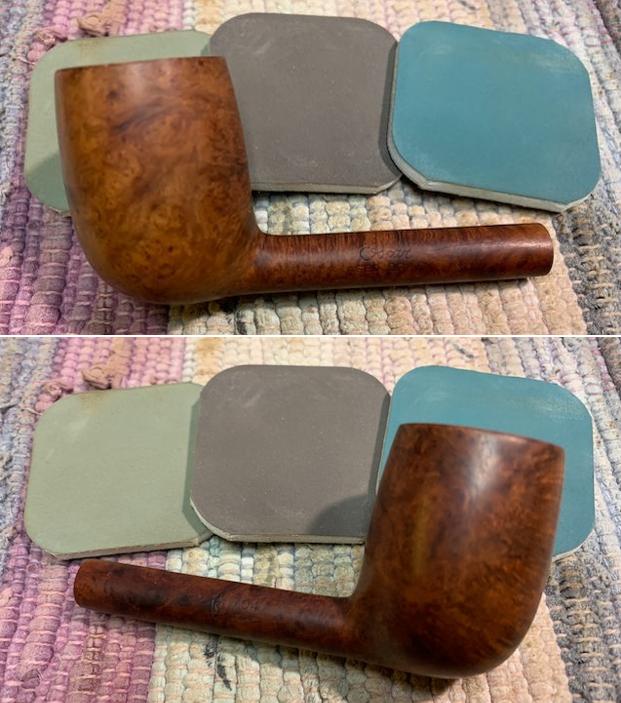
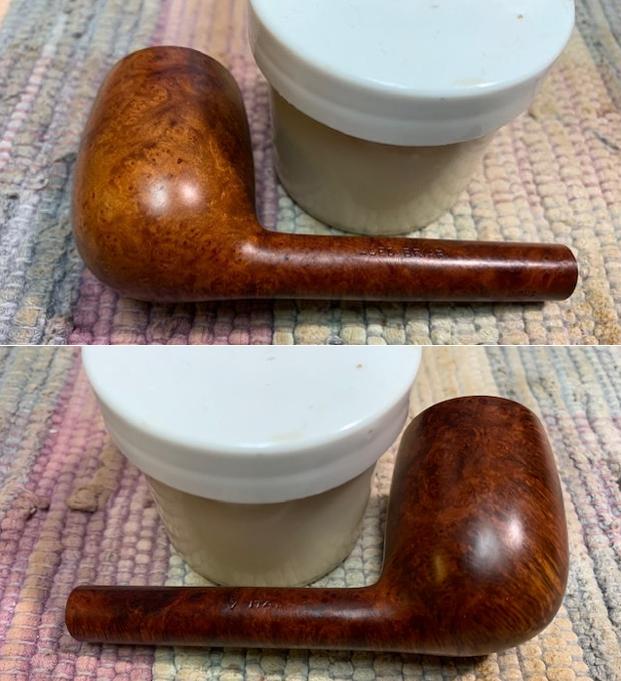
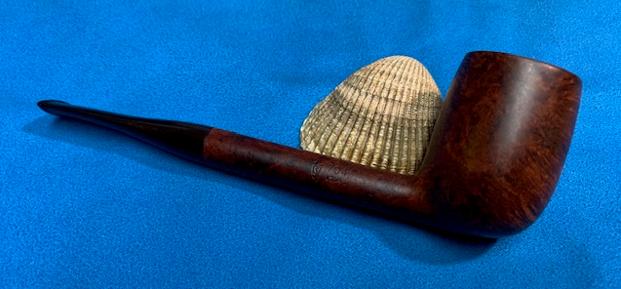
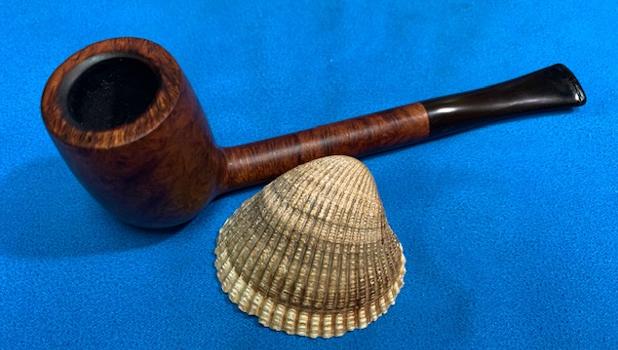
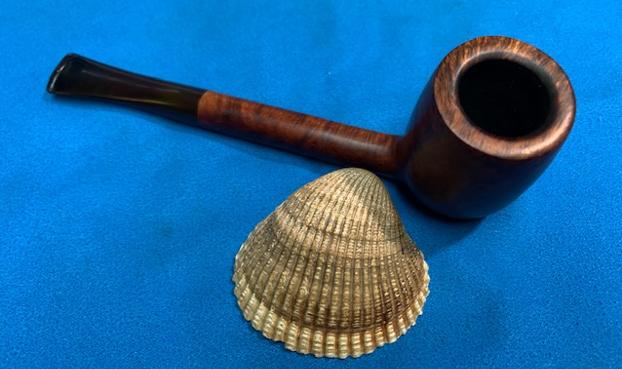
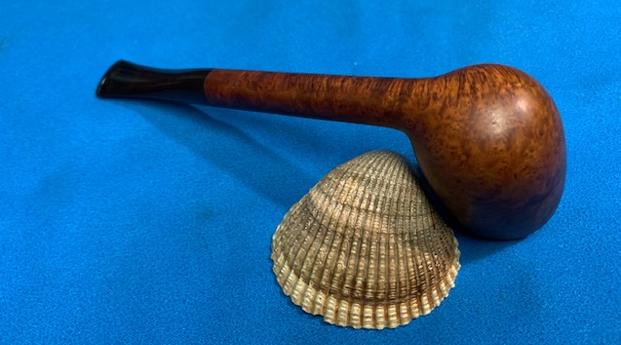
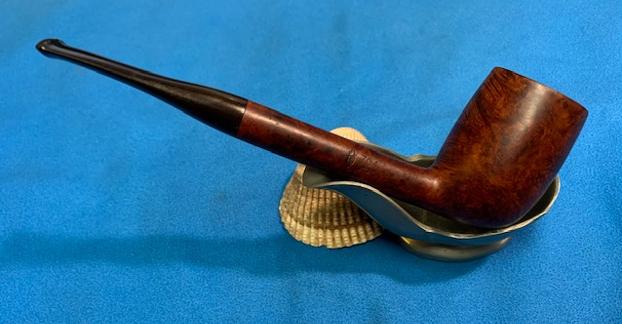
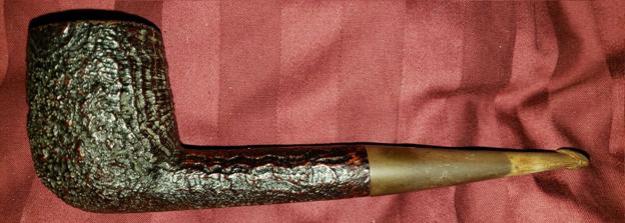
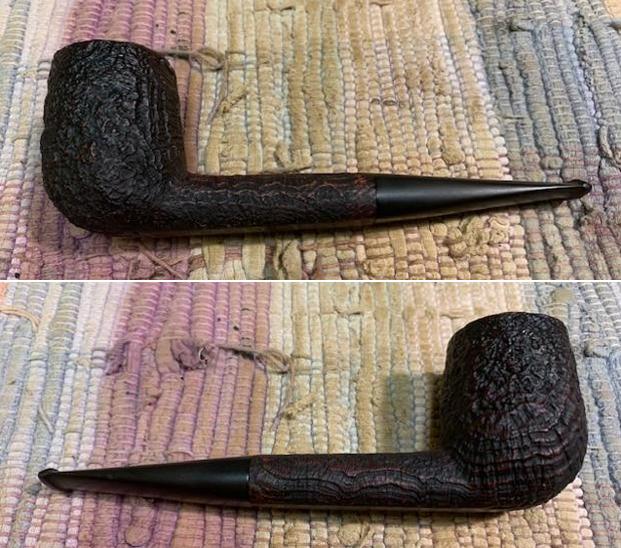
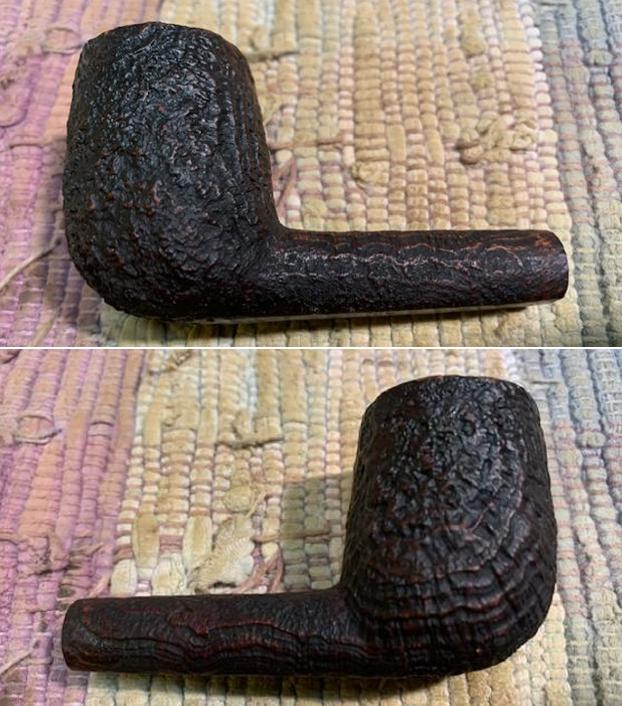
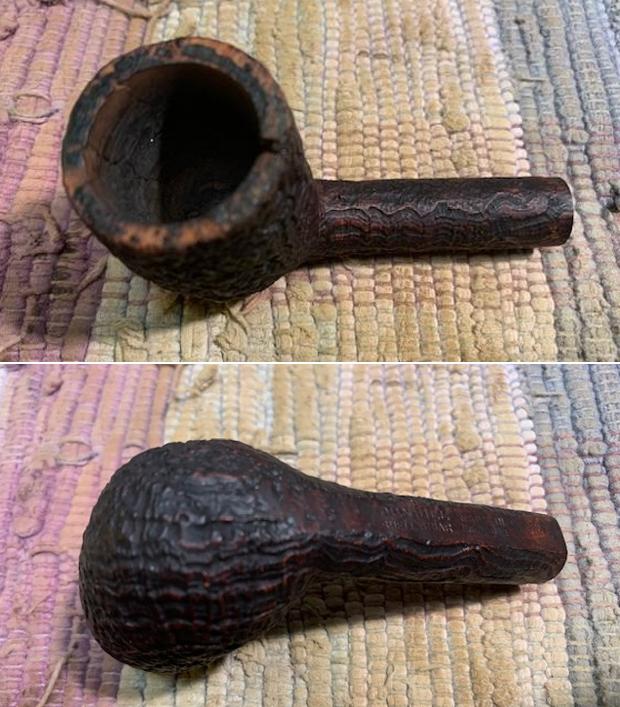
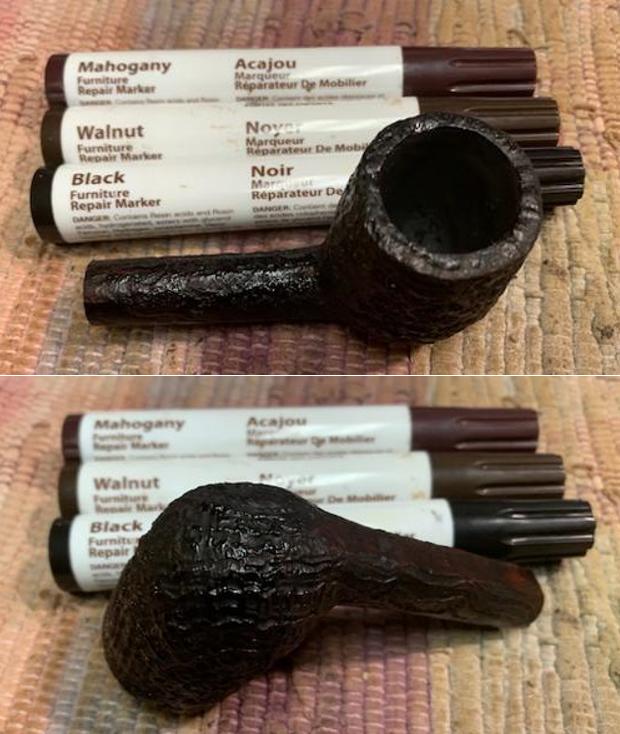
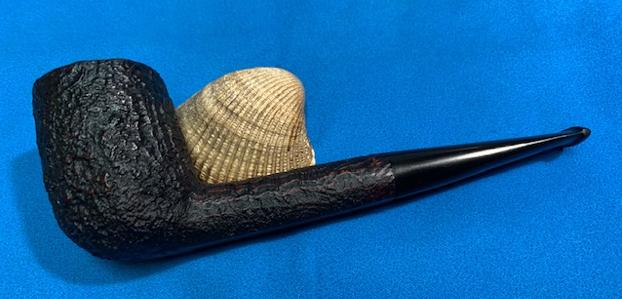
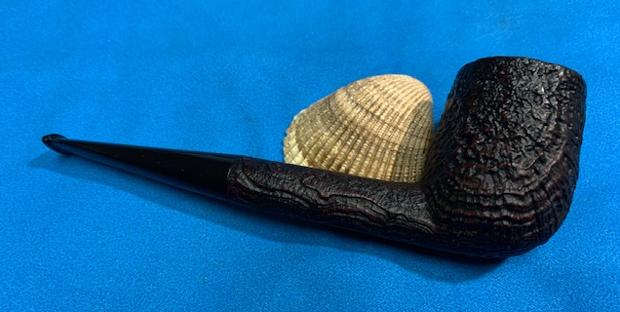
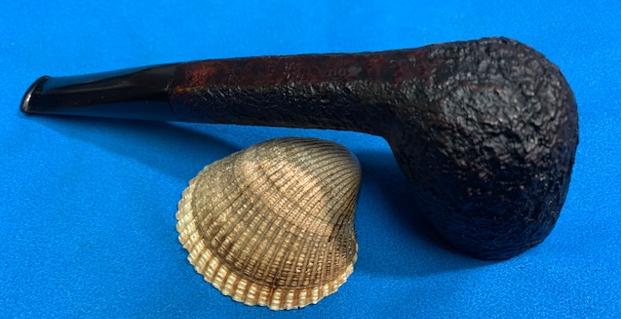
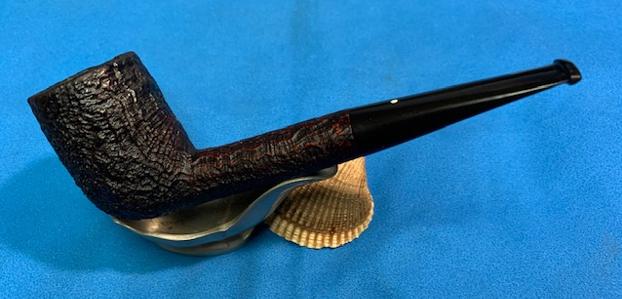
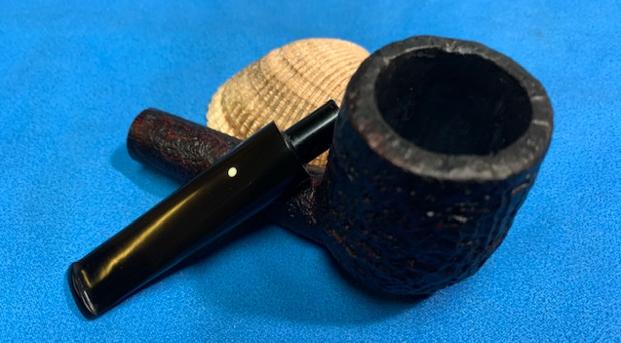
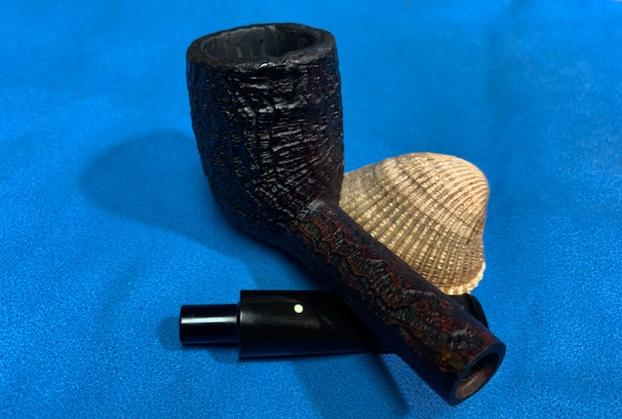
When I received the pipe from Kari, I found that it had no branding, but the sculpting whispered ‘Edelweiss’ very clearly. A Wikipedia article gives the Latin name, Leontopodium nivale, and describes the small, delicate flower with noteworthy characteristics – several reminiscent of those working to combat human trafficking and exploitation world-wide: The Edelweiss was put in the For “Pipe Dreamers” Only! collection and eventually, it caught one pipe man’s eyes. Bob is retired in a small town near Keene, New Hampshire, where my wife and I have some family connections. Even though Bob described himself as ‘retired’ in our communications, he also has a hand at restoring pipes specializing in what I would describe as ‘truly vintage pipes’ – Viennese coffeehouse pipes, Turkish and Kenyan pipes. What I found fascinating as well was that Bob collects clays and has found a niche providing reed pipes to Civil War reenactors. After looking at the pipes he has posted on Estsy (See: GlenwrightPipes), I was doubly impressed that the Edelweiss caught his discerning eye. Here are a few pictures of the Sculpted Edelweiss with a diamond shank and horn stem:


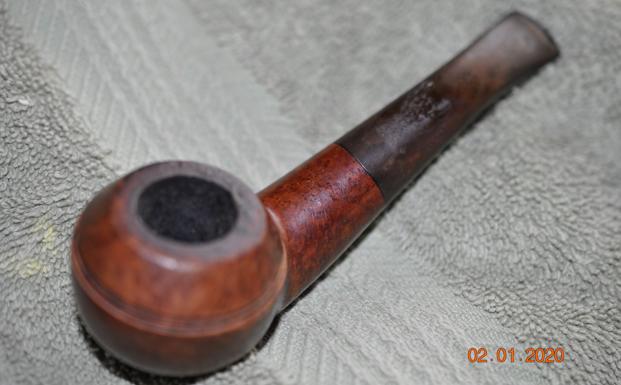
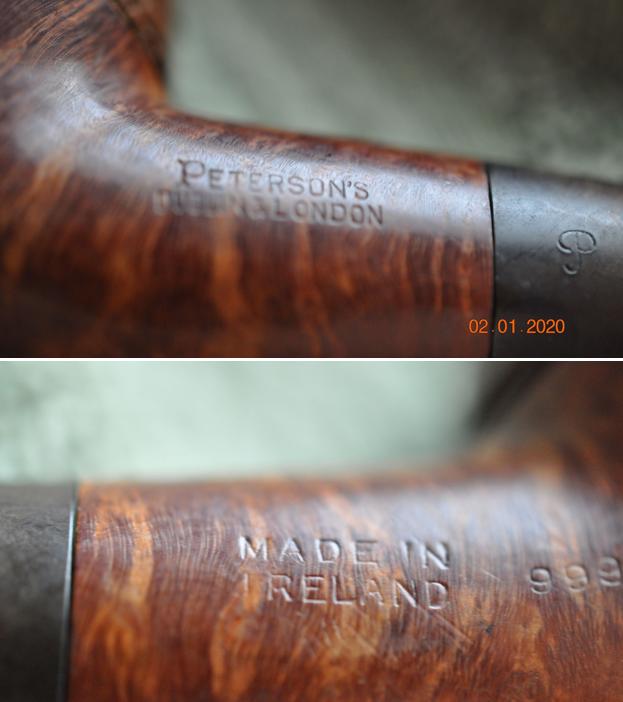
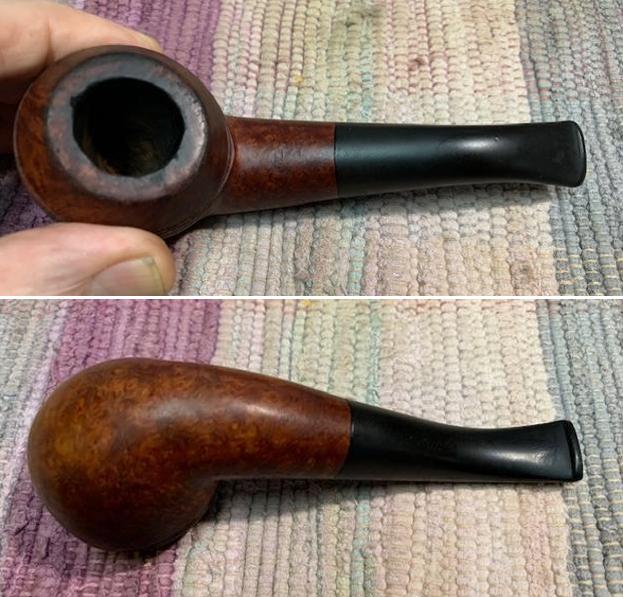
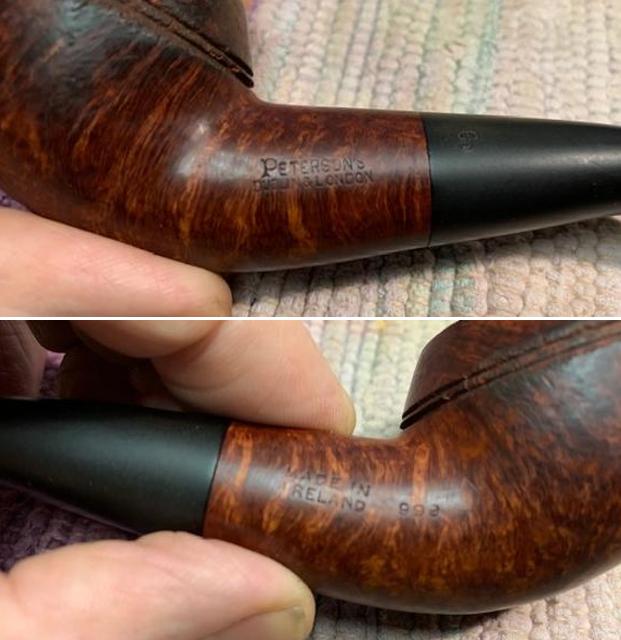
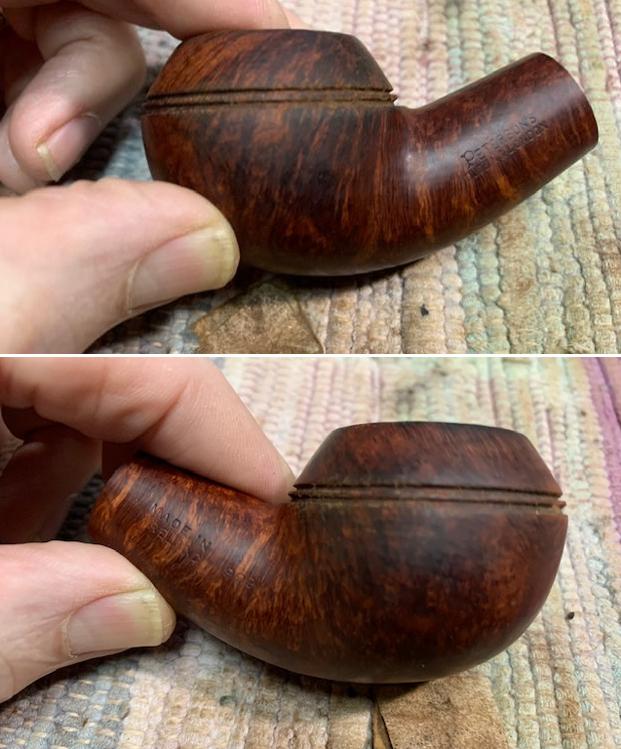
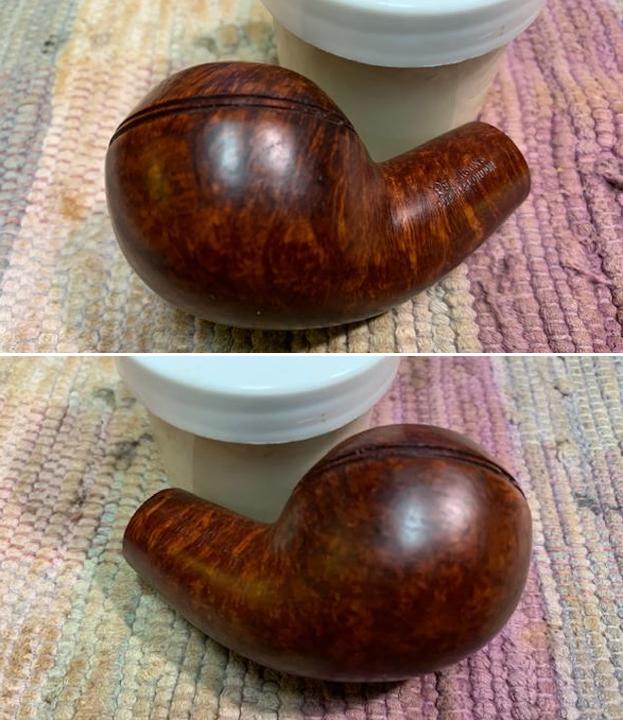
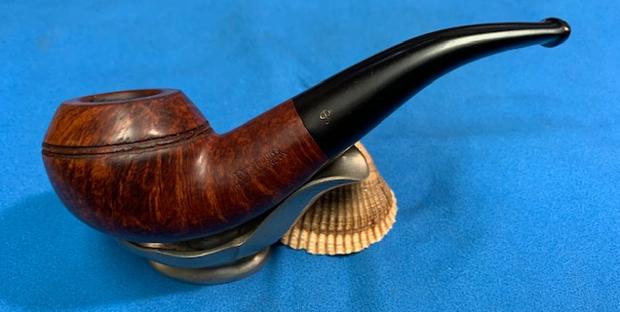
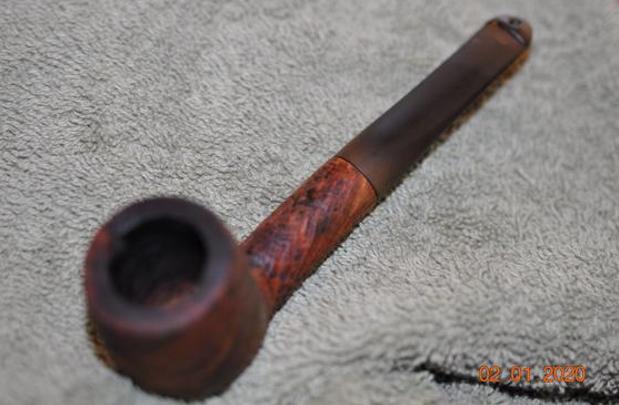
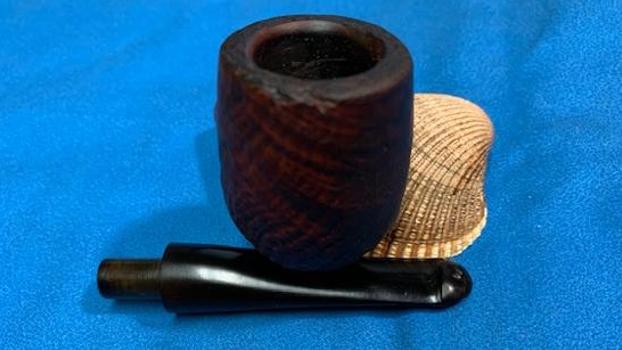
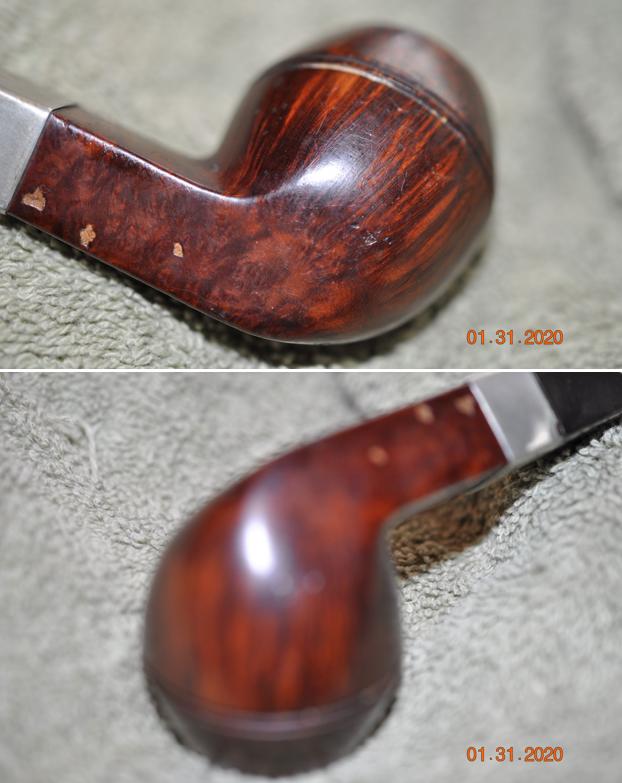
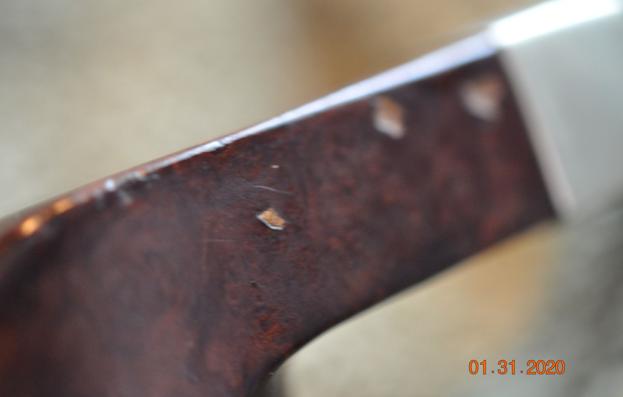
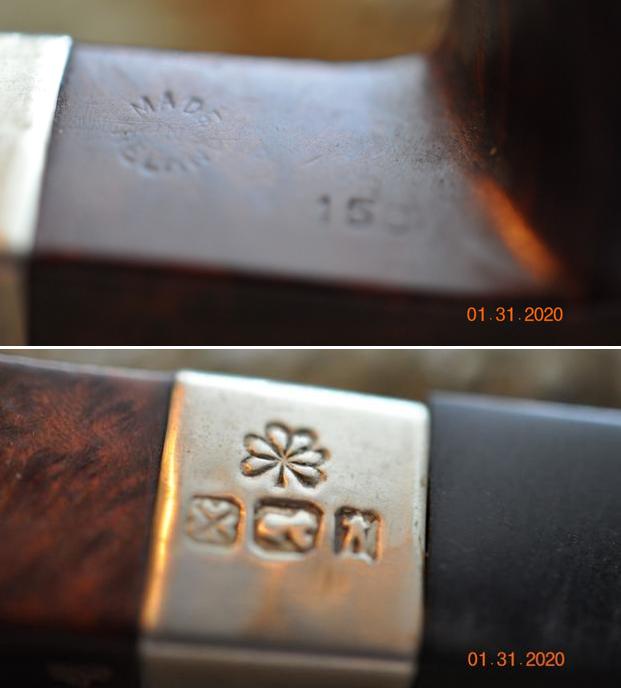
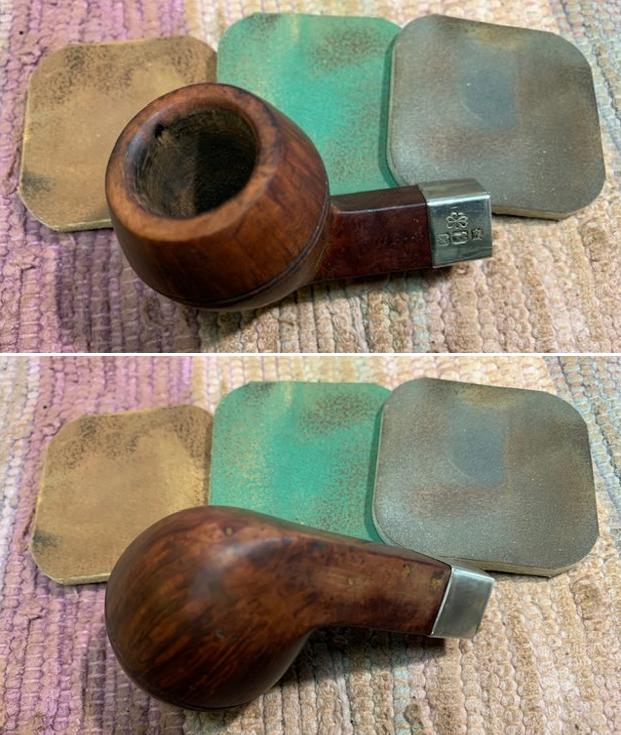
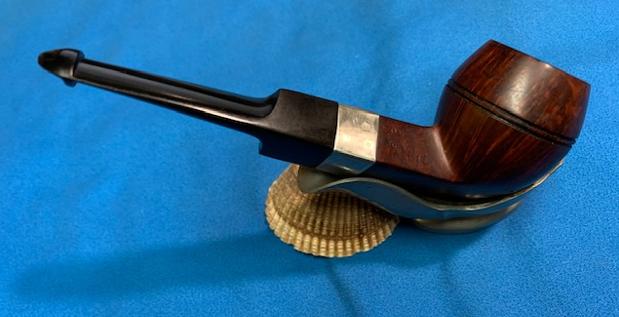
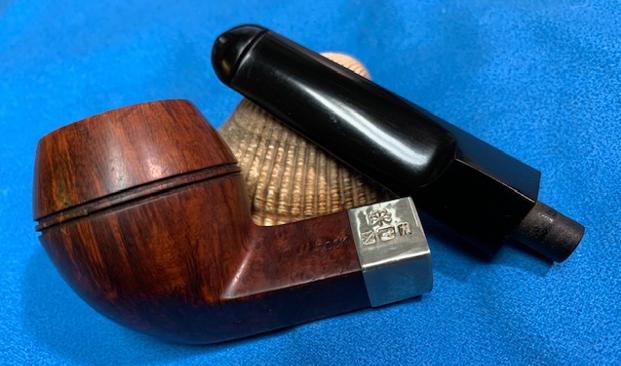
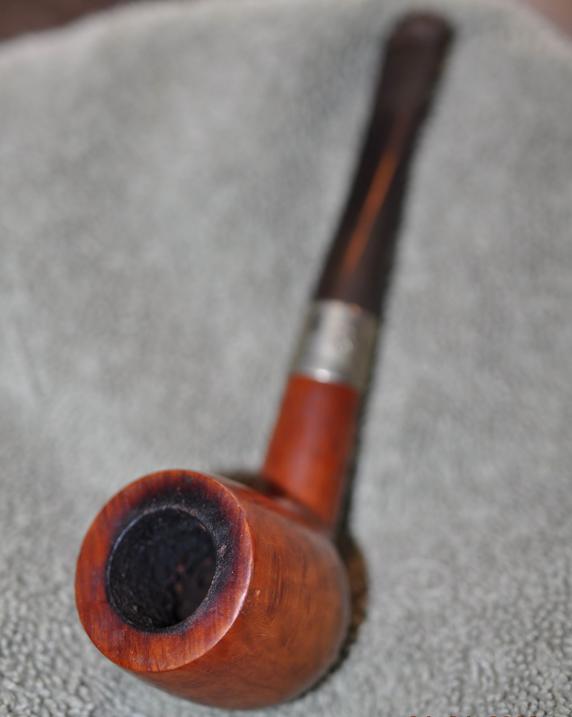
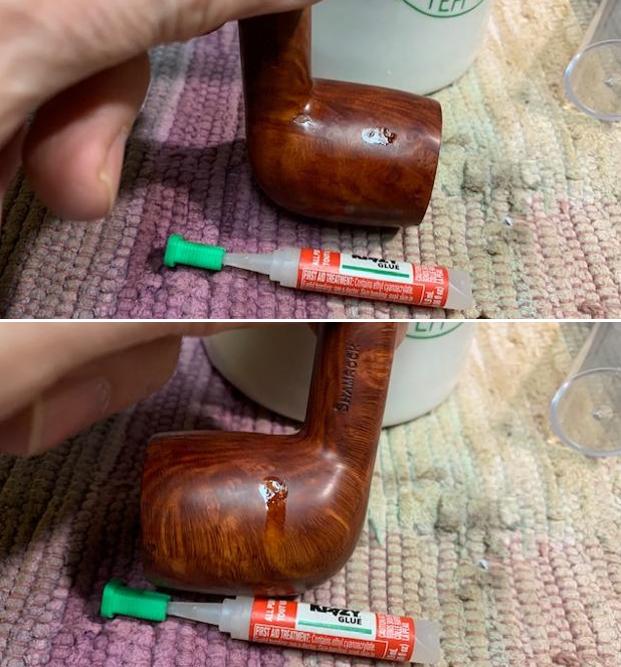
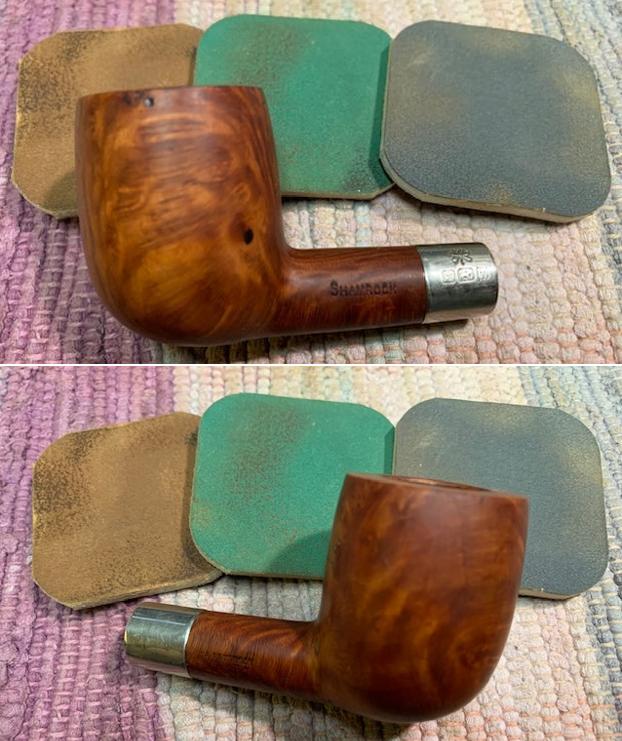
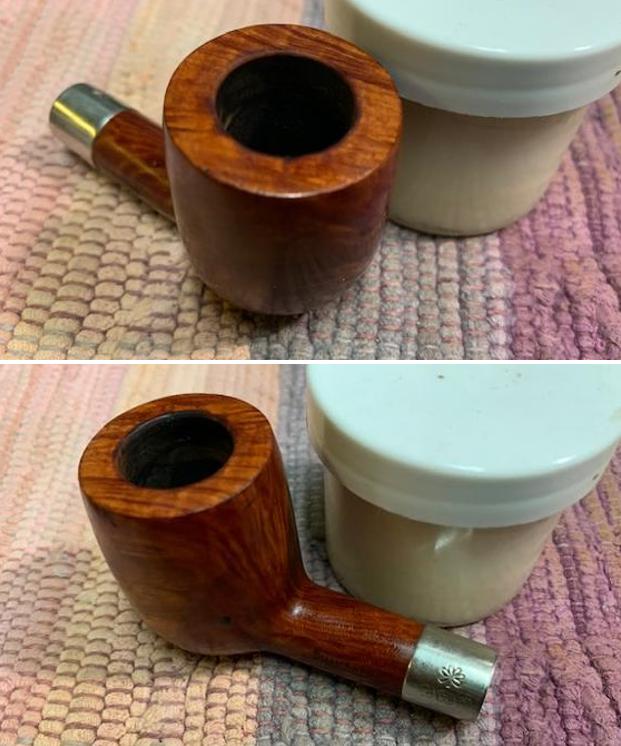
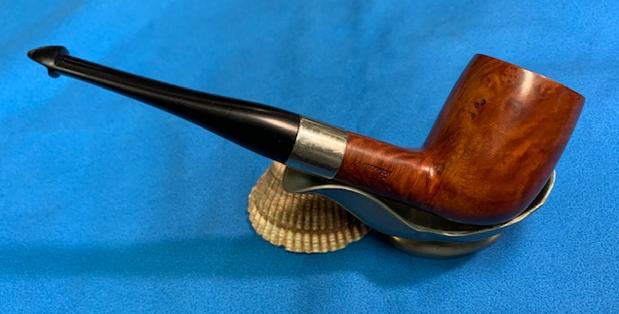
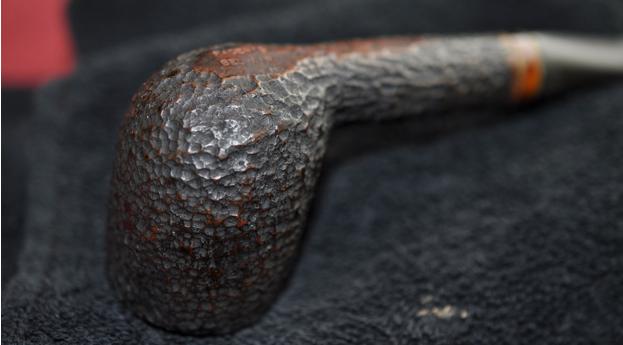
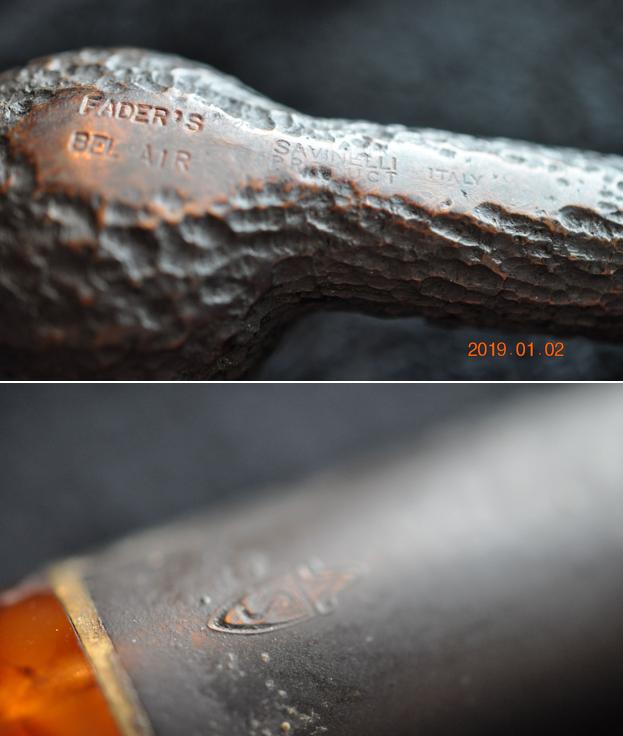
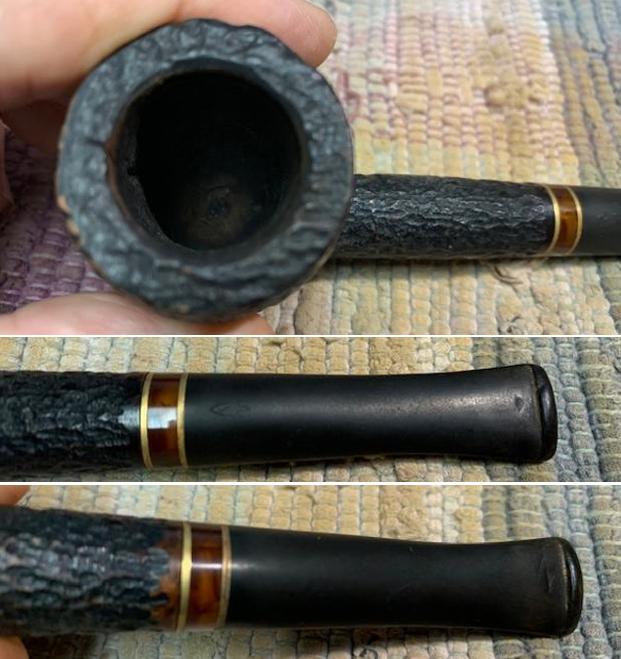
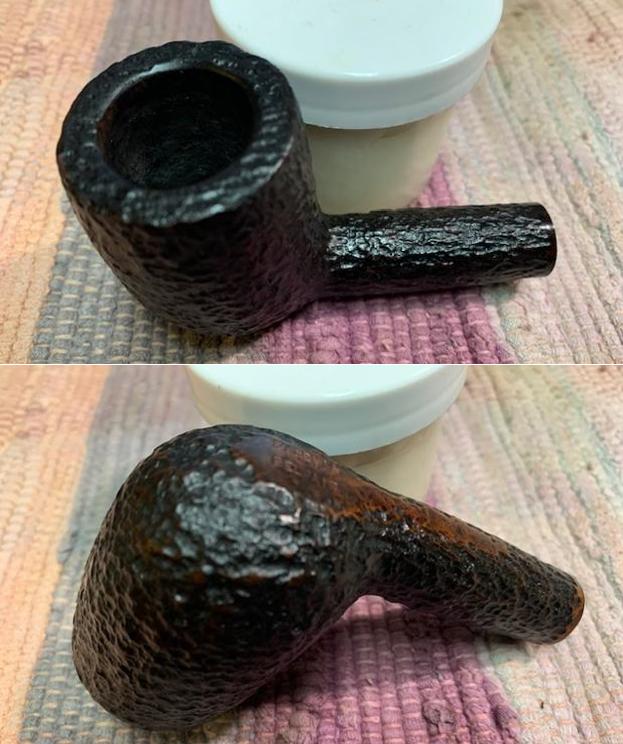
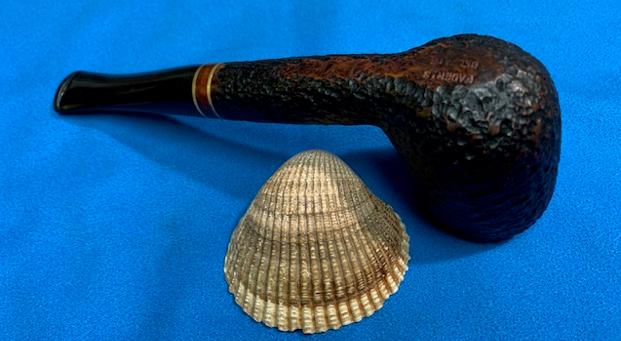
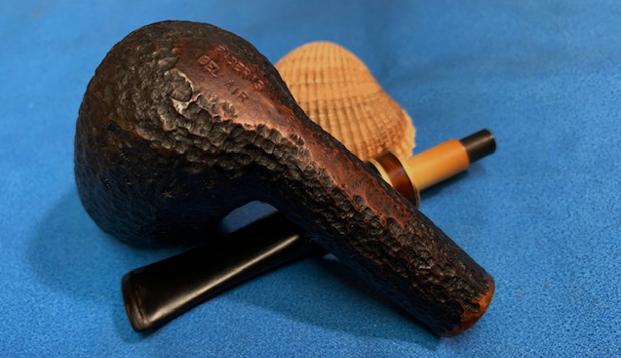
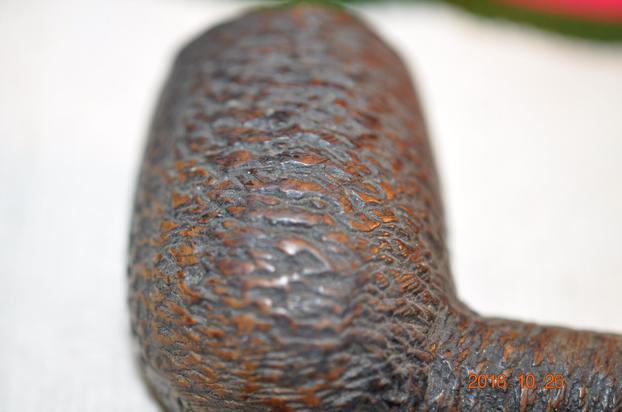
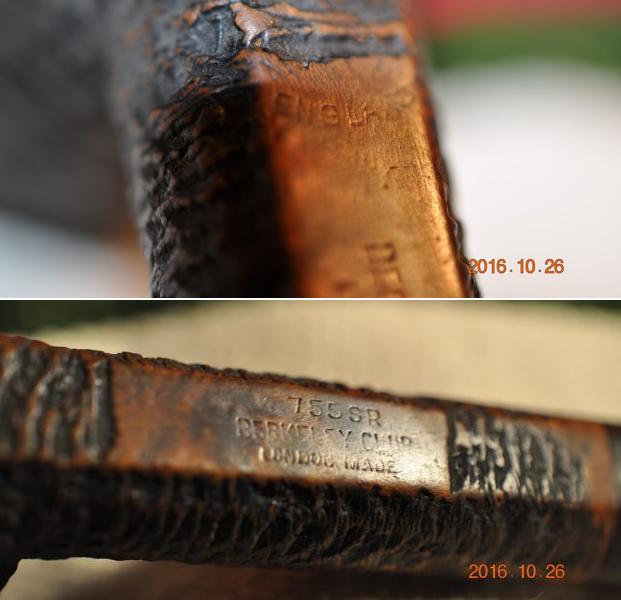
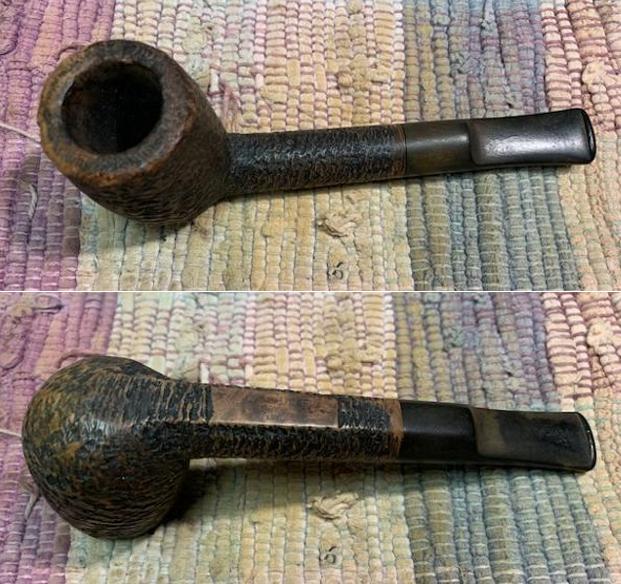
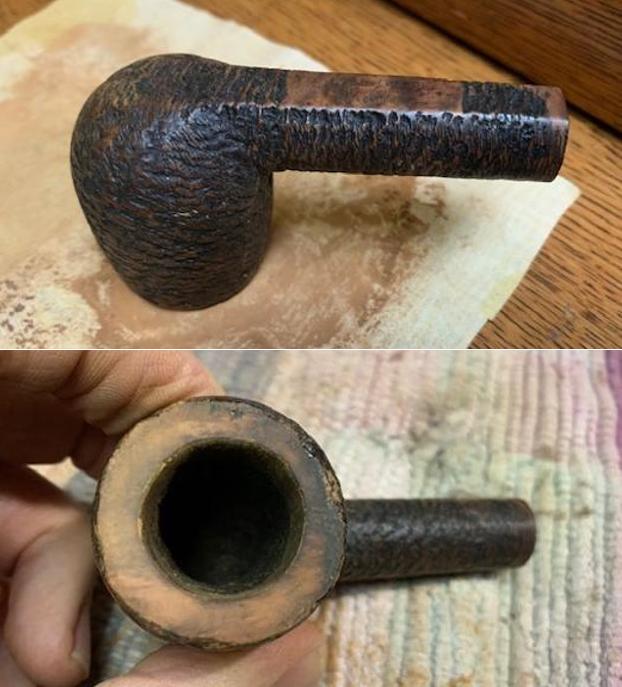
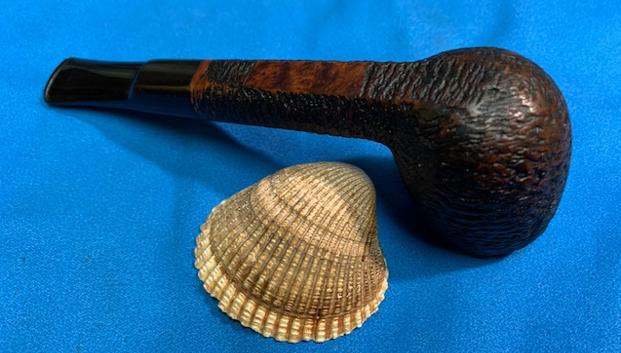
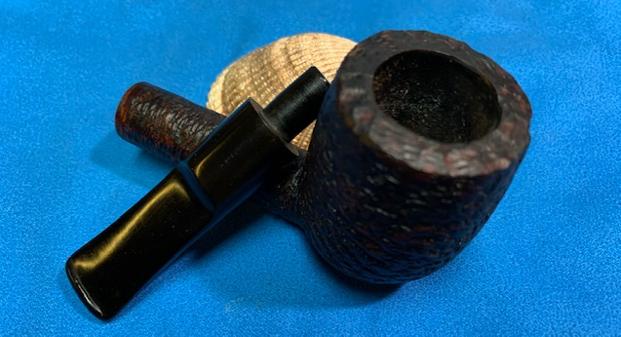
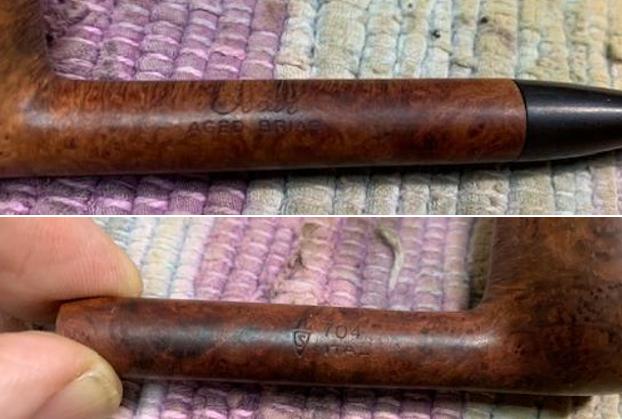
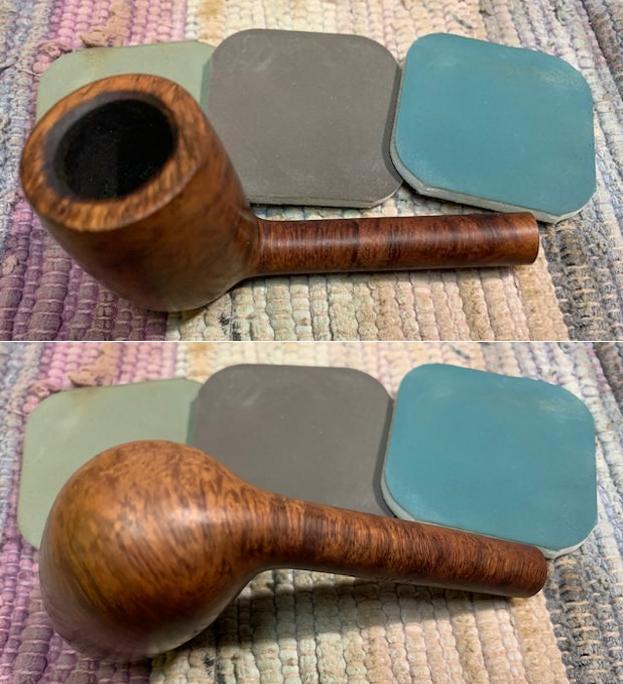
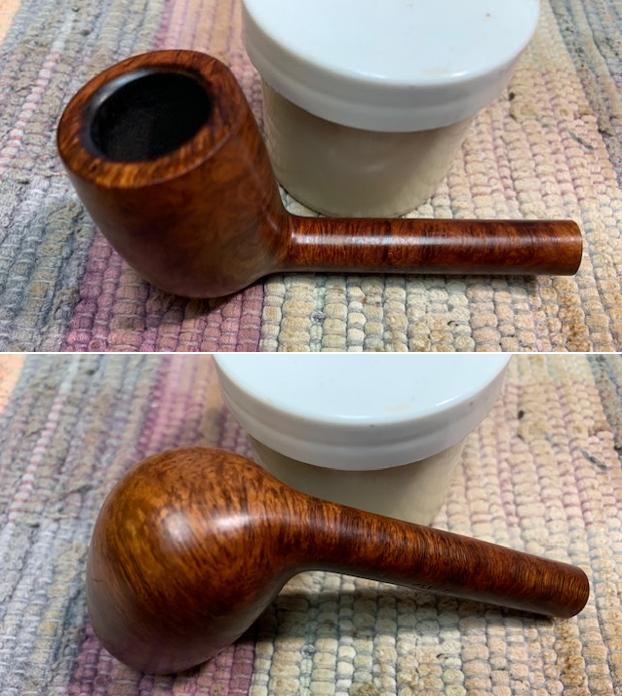
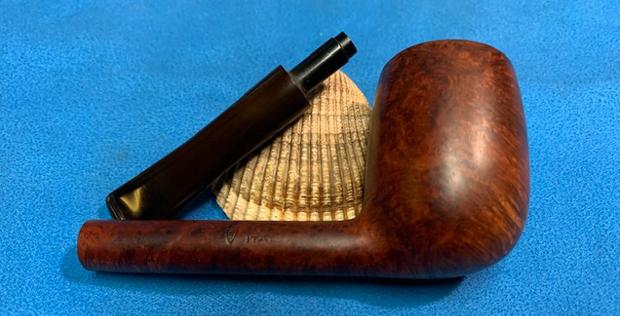
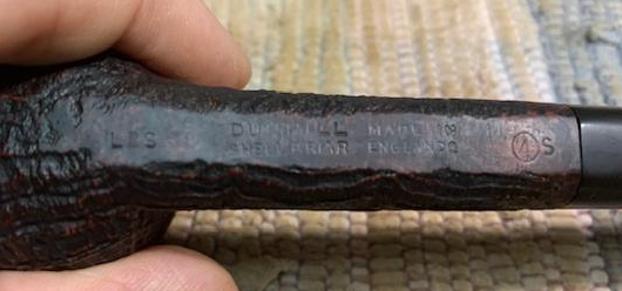
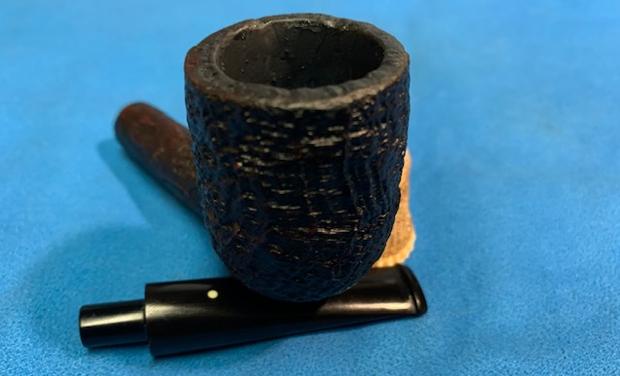
 The only marking on the Edelweiss is on the upper left panel of the diamond shank. ‘Bruyere’ is stamped inside a rhombus trapezoid for those of you who are geometric fans! Underneath the trapezoid is stamped, EXTRA. I am guessing that the pipe has French origins – it has that feel and appearance. It could possibly date from the 1940s, probably a post-WW2 pipe when Europe was going through the shortages with rubber and horn came to the forefront, especially in France. The ‘Bruyere’ spelling lends toward France as well but not exclusively. These are guesses at this point and probably will remain guesses because the nomenclature is not detailed.
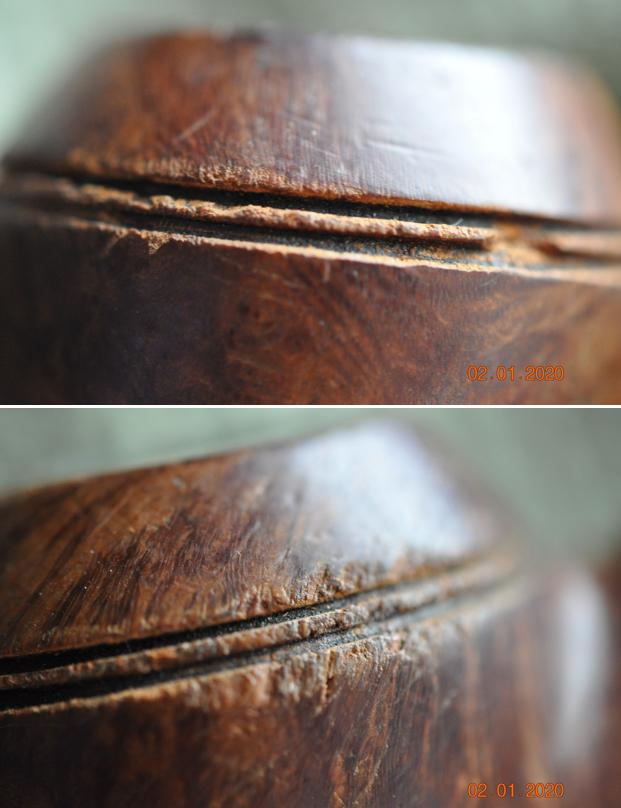
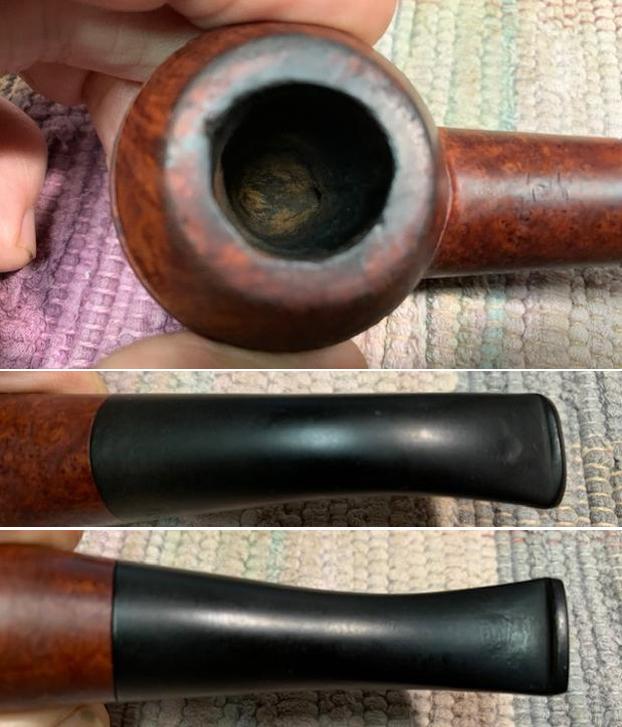
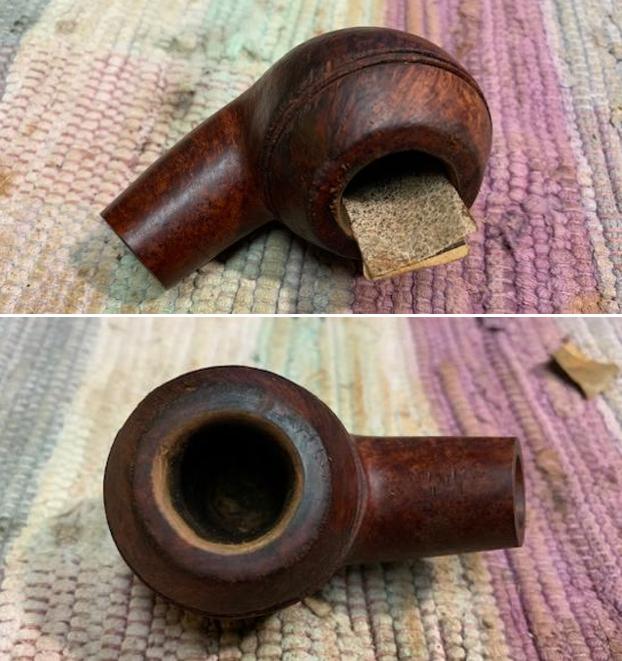
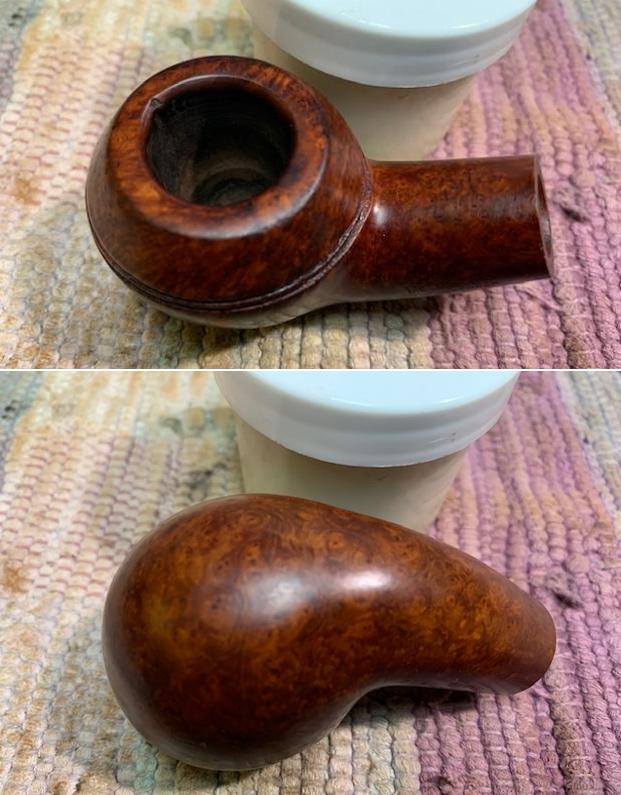
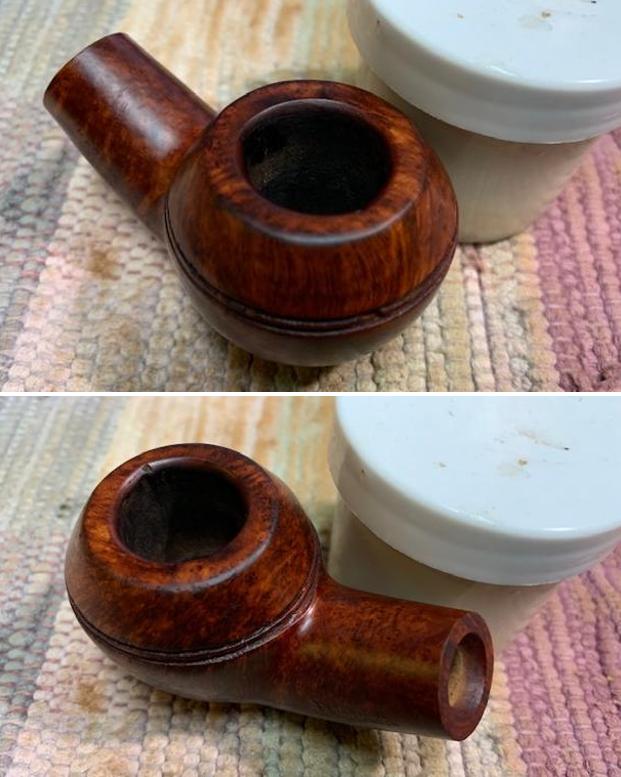
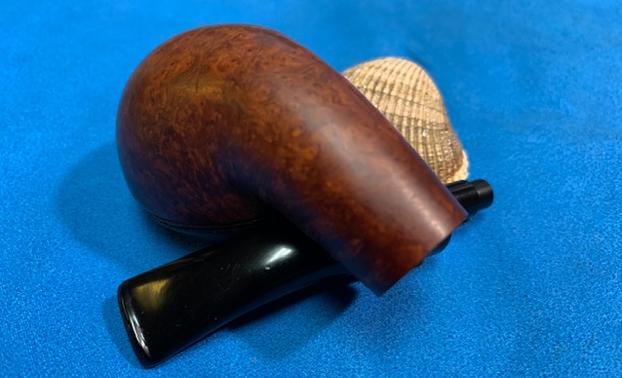
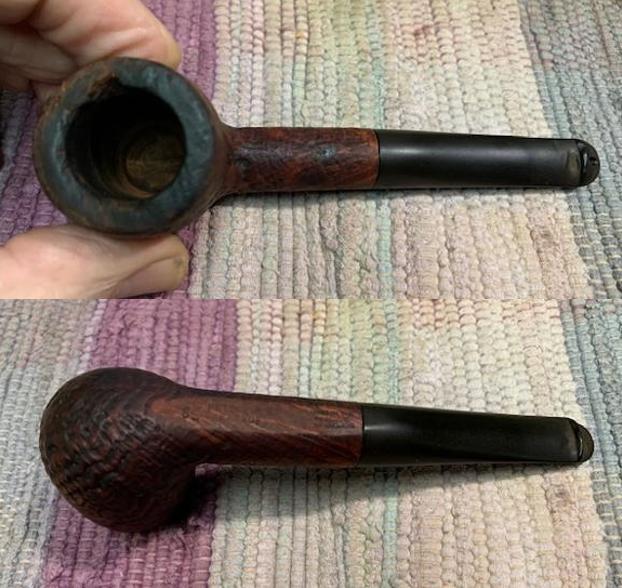
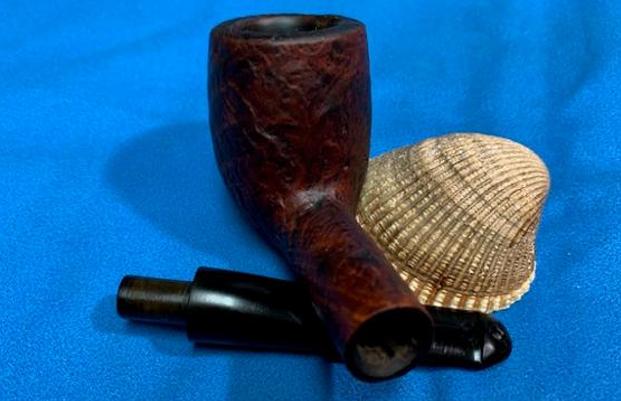
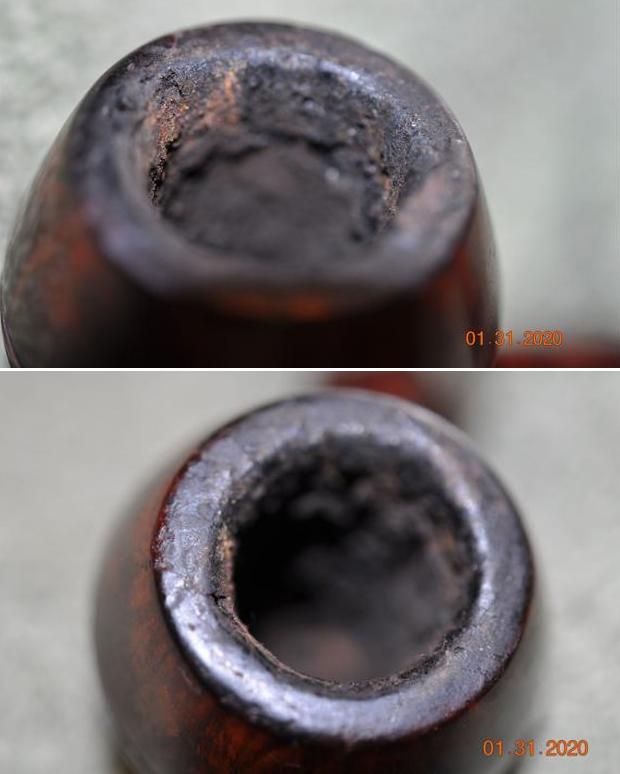
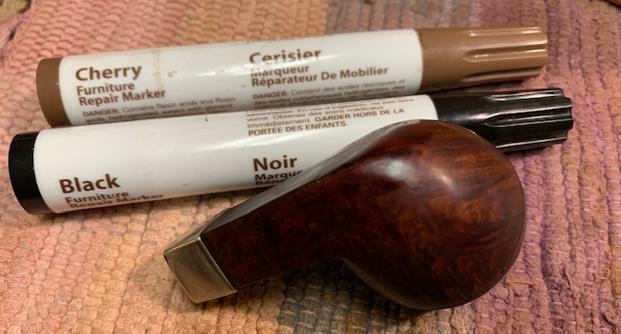
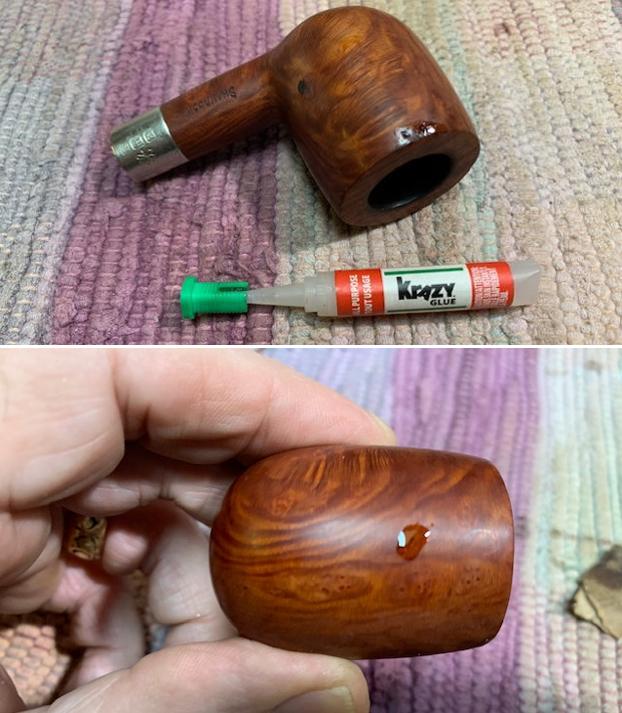
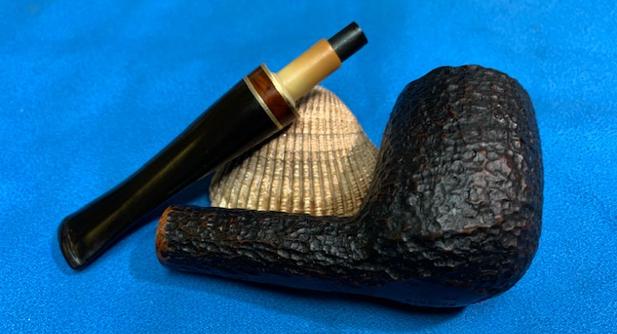
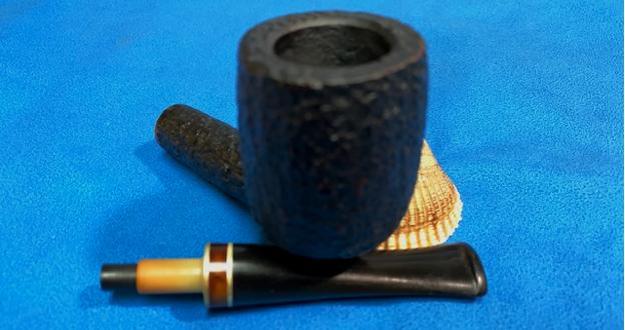
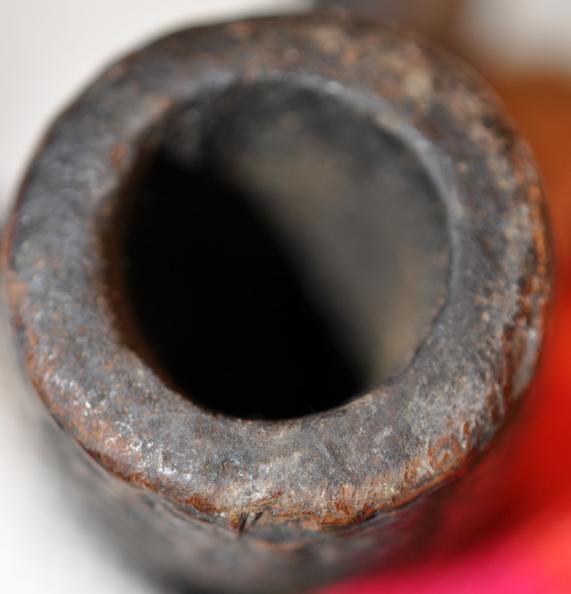
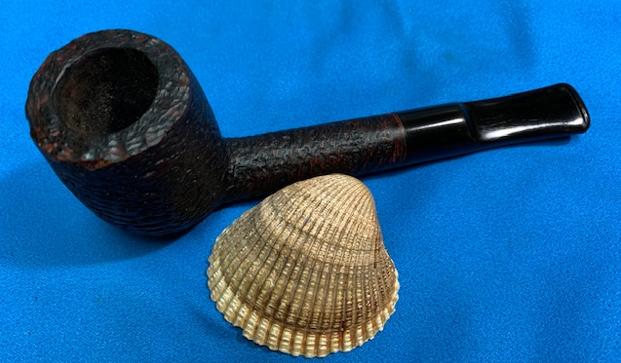
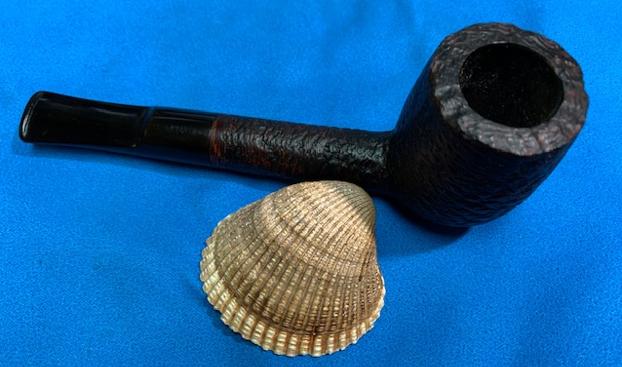
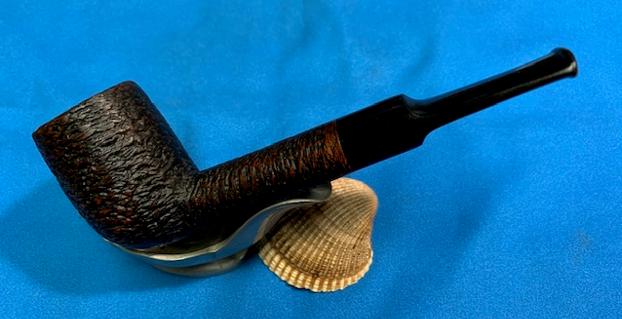
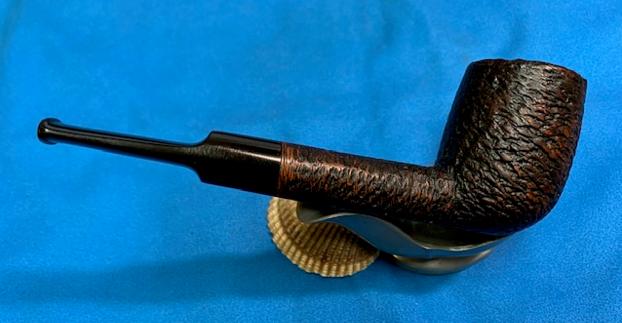
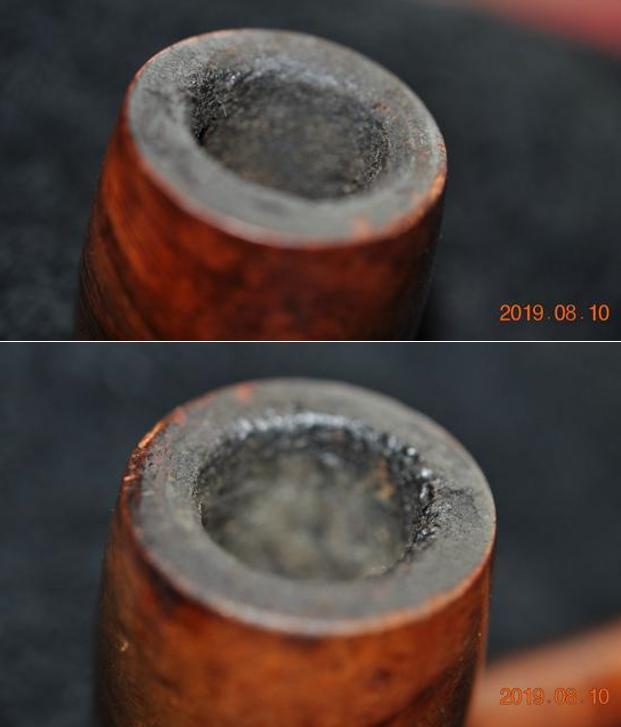
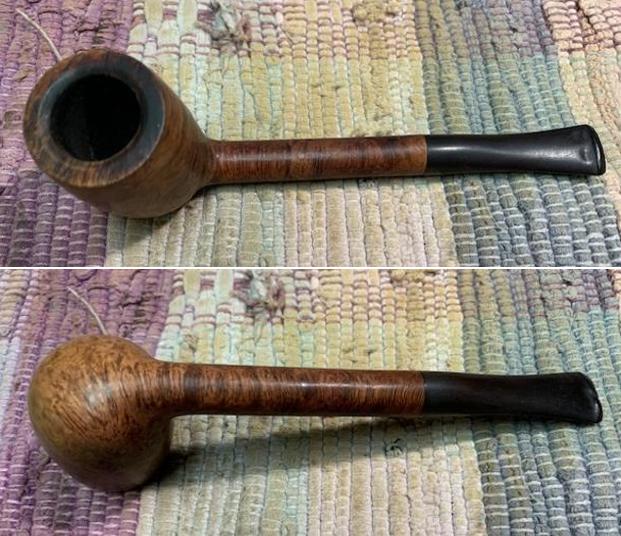
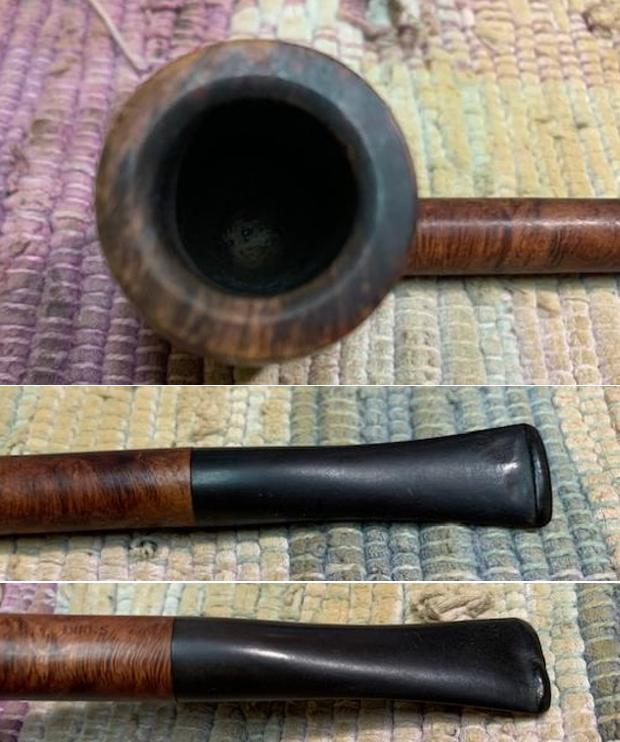
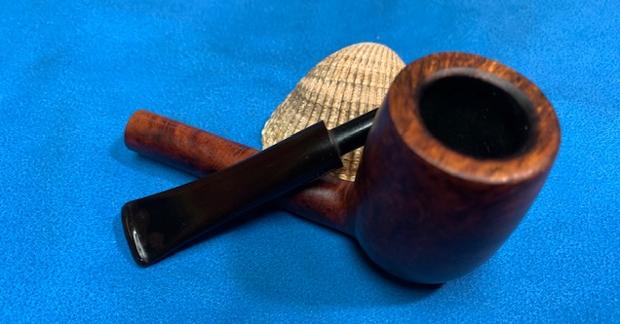
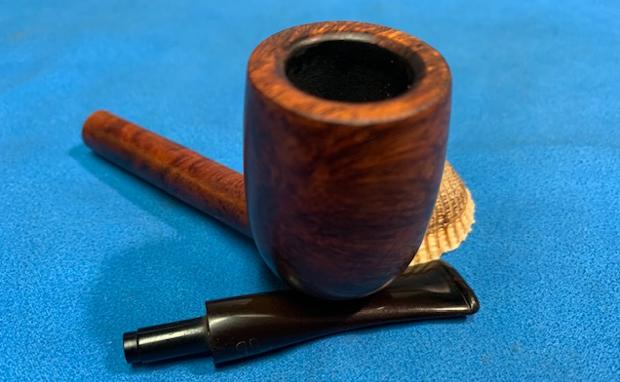
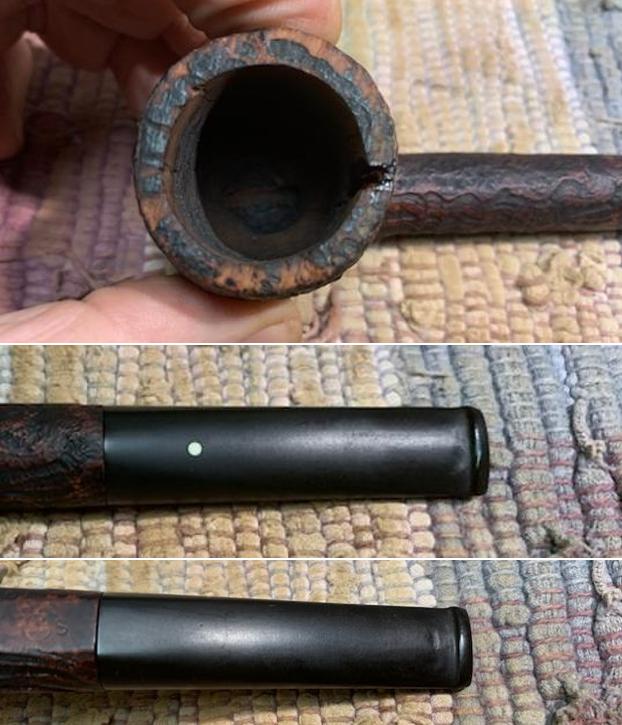
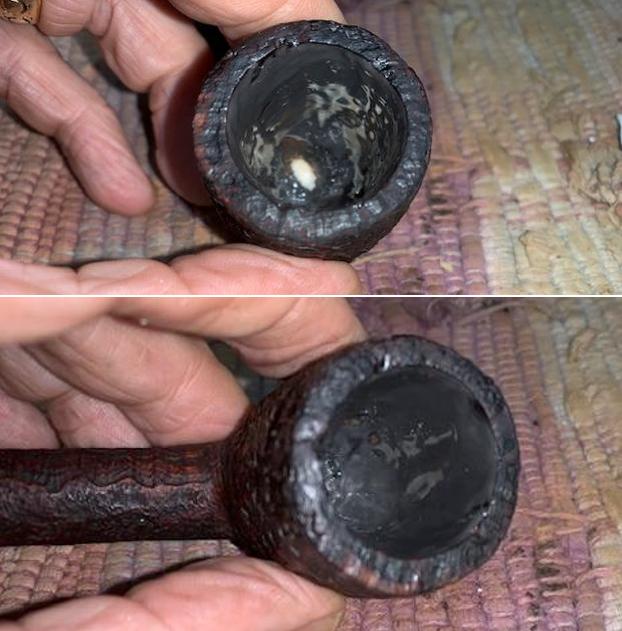
  Looking at the condition of the pipe itself, the chamber needs reaming with a thick cake buildup. Reaming will give the briar a fresh start and allow me to inspect the chamber walls. The rim has lava flow and needs cleaning. It is a given that the sculpted briar surface needs scrubbing. The smooth panels of the sculpted briar surface will come out looking good. The challenging issue with this pipe is the horn stem. The short, bent horn stem is nice – I like horn stems and the rustic look they offer. The challenge for this horn stem is that the button is totally obliterated. It looks as though it was chewed off. If there is a silver lining, it is that there is a remnant of the slot facing remaining. This will help guide rebuilding the button.
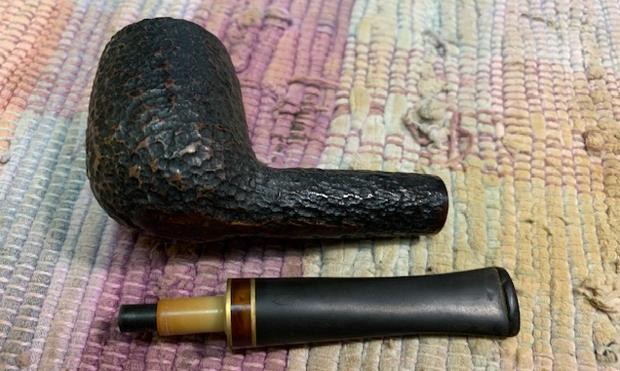
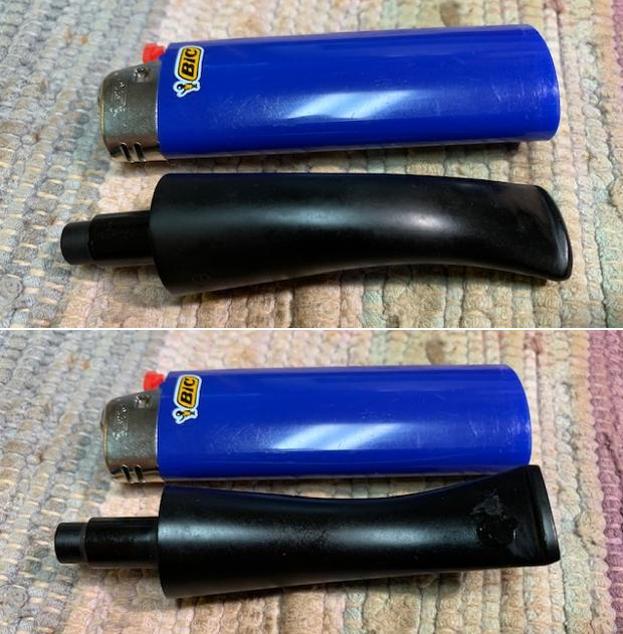
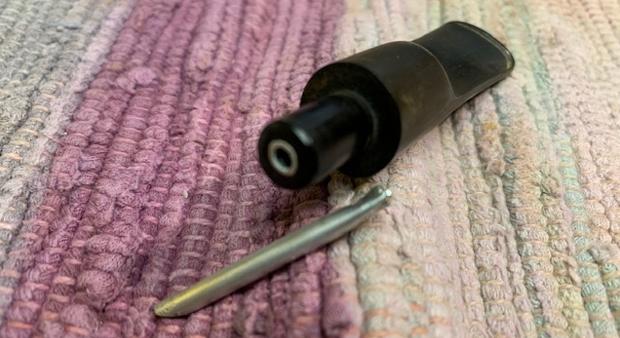
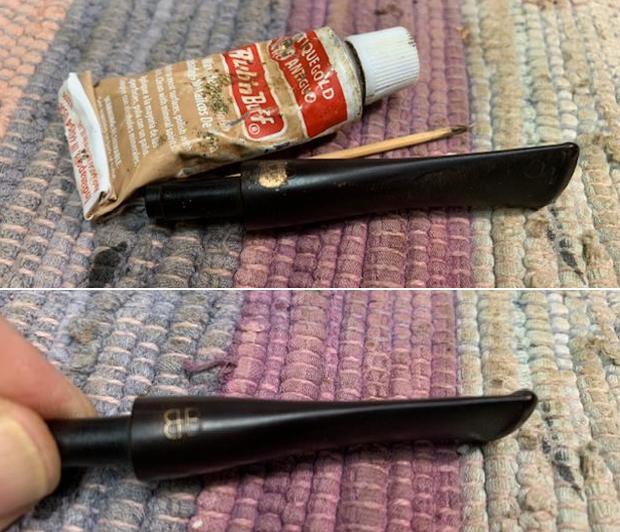
To begin, I focus first on the stem. Before beginning the repair on the button, I clean the airway. I’m hopeful that the nickel stinger can be removed to help. I’m not concerned whether the stinger is threaded or not. Either way, I’m not able to easily remove it gently using pliers. To try to loosen it, the nickel tenon is heated with a Bic lighter and that does the job. I discover that the stinger is threaded. The stinger goes into a little dish with alcohol to soak to clean. Next, after one pipe cleaner wetted with isopropyl 99%, the airway is cleaned. Steel wool also removes the staining on the end of the nickel tenon.
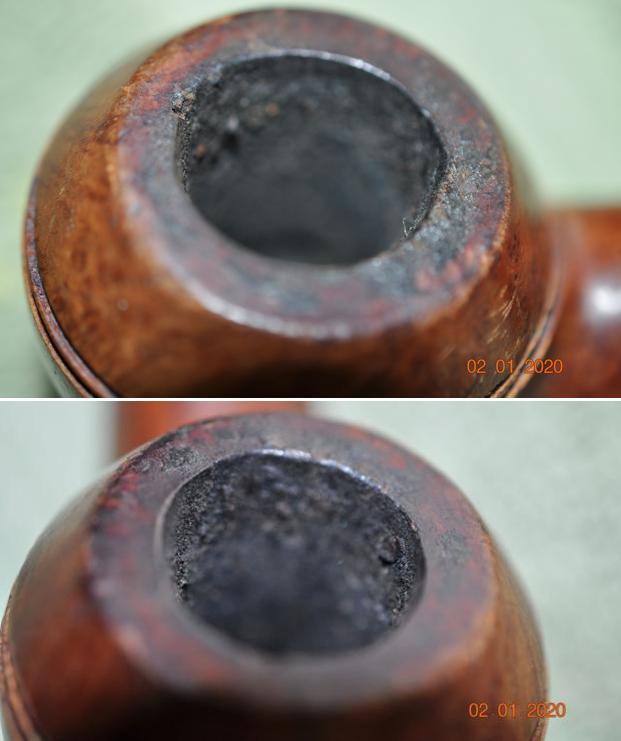
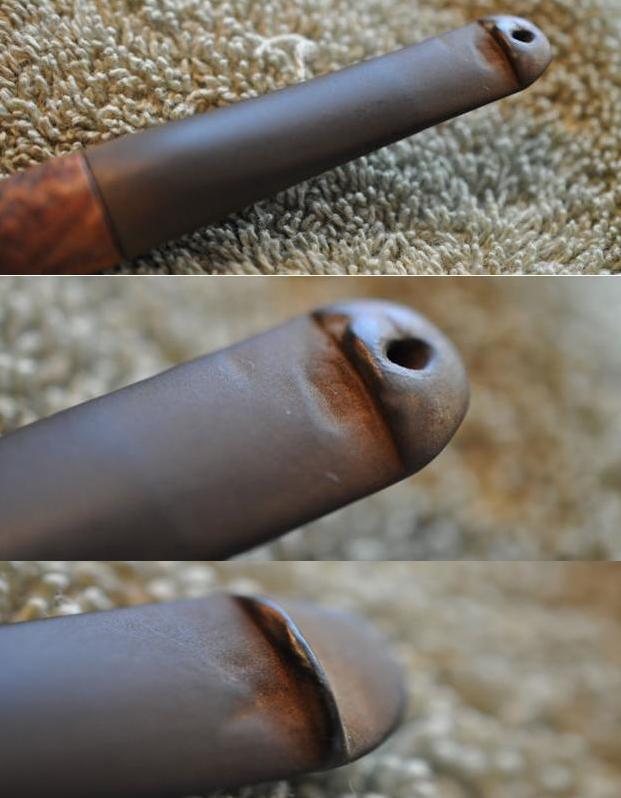
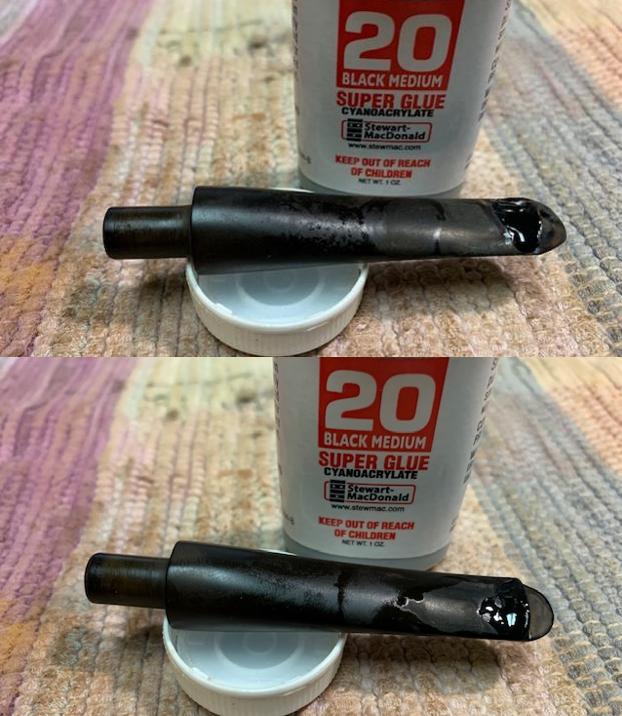
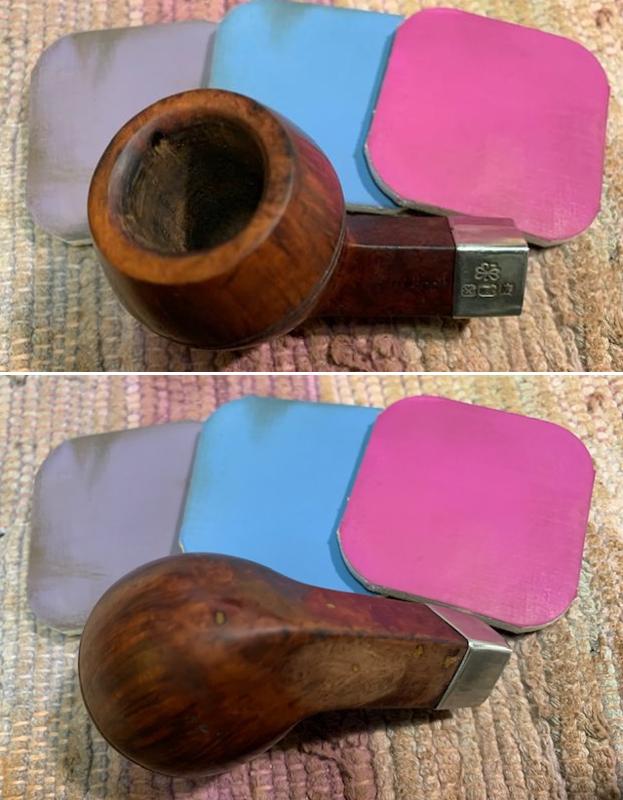
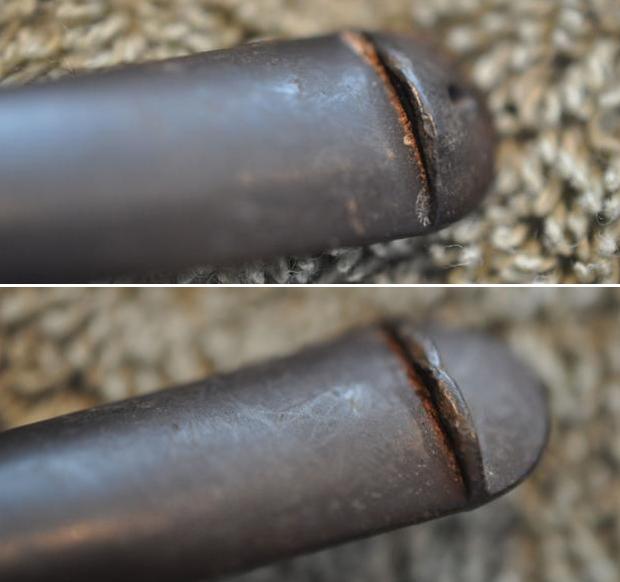
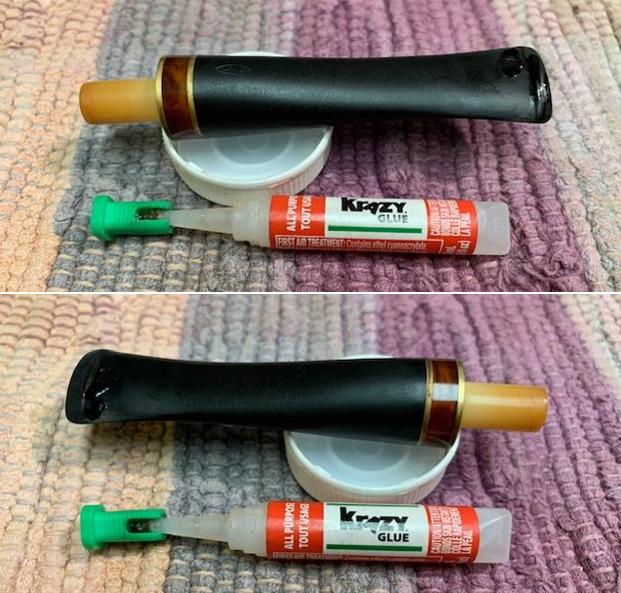
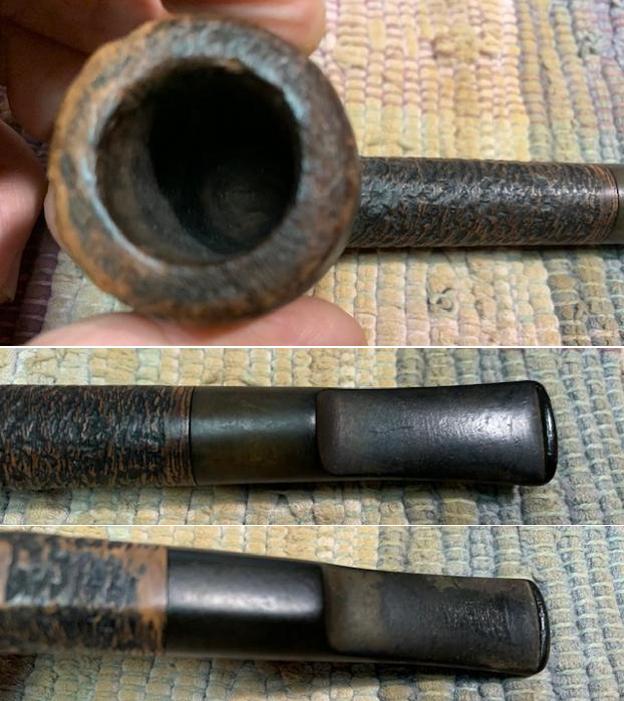
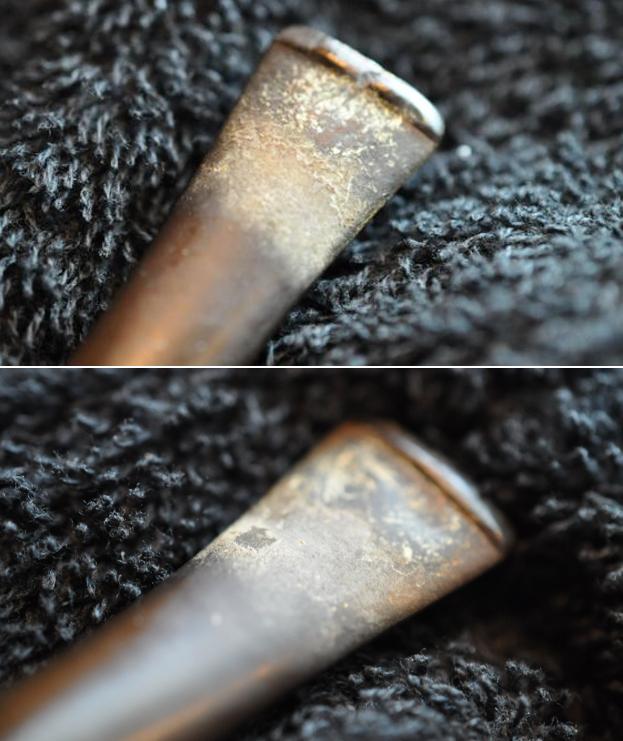
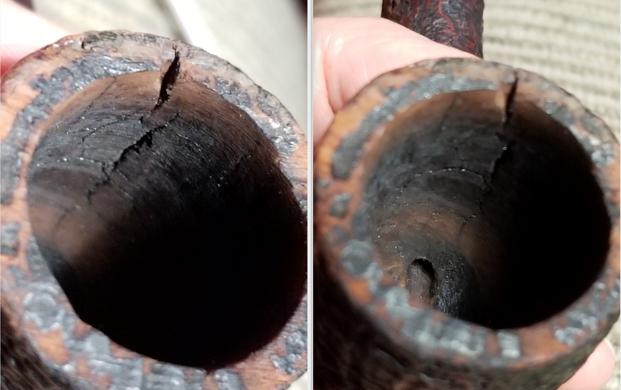
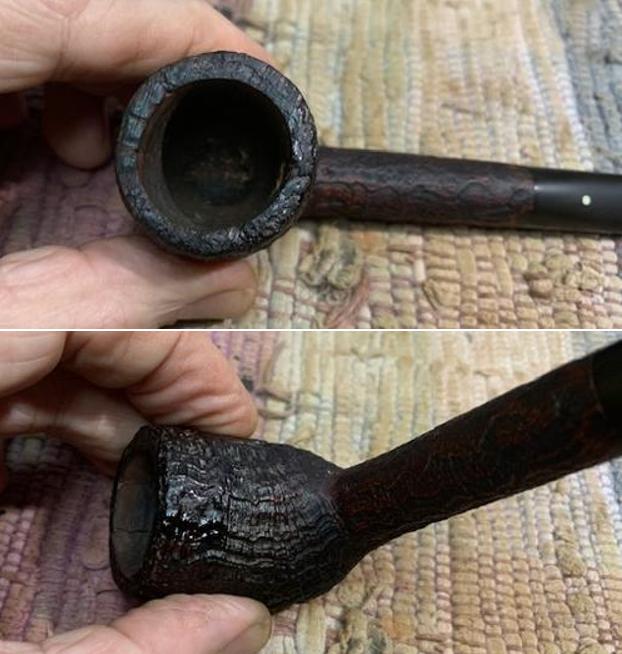
 Next, the button rebuild. Knowing that the Edelweiss with the button rebuild was coming up in the queue, I have given thought to how to approach this repair. I am confident that CA glue will provide a good, sturdy rebuild of the button. The challenge leans more on the cosmetic side of the rebuild – matching as close as possible the translucent, wavy, horn hues. I know it will be difficult to reproduce the shade patterns in the horn, but I can try to get in the ballpark. I take some fresh pictures to get a closer look. In the next two pictures looking down onto the top of the stem and then the lower side, the shades of the horn are clear. The upper button is totally bisected exposing the airway. The second picture shows the gnawed condition in progress. The airway is not yet compromised.
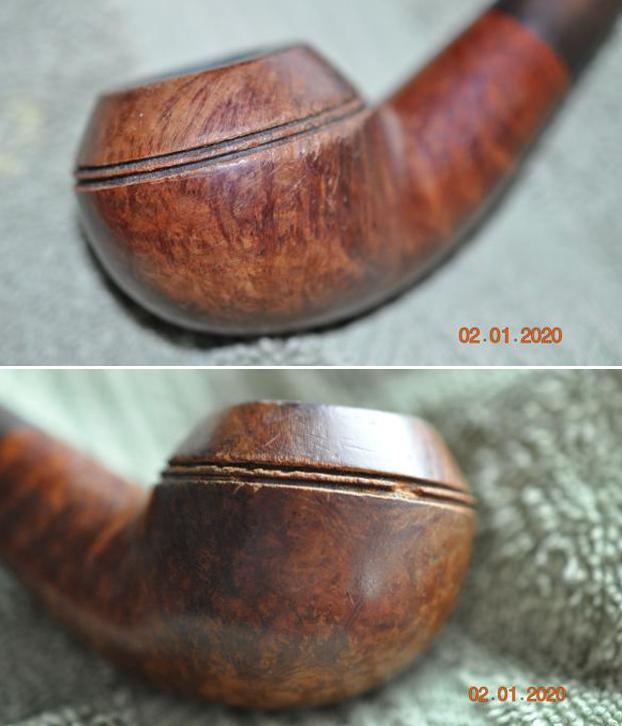
 The lateral view in the next picture shows the sideline of the diamond shank as it runs down the side of the stem and disappears into the carnage. The sideline will dictate the width of the button contouring.
 As I said before, the silver lining is that there remains some of the original slot facing. The single hole slot will make it easier fashioning the button without having to craft a slot inset which is true for most vulcanite stems.
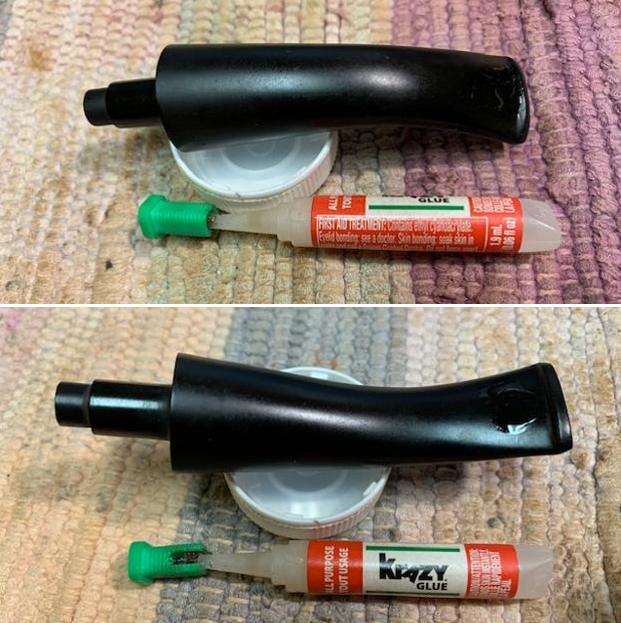
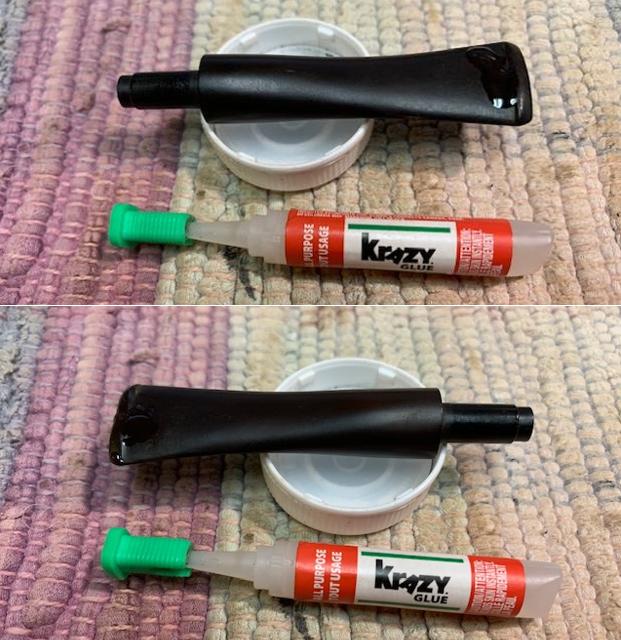
  I use an amber medium thickness CA glue to nuance the coloring I want to match the horn. After covering a piece of paper with clear packing tape to serve as the mixing palette, I put a small dab of the amber glue on the palette to test the color and how it acts when I add to it.
  To the amber CA is added just a small amount of activated charcoal and mixed to see how it reacts. Only a small amount of the charcoal is used because too much and it will turn black. I want there to be a lighter hue in the mixture with darker hints mingling with the amber.
 I like the look of the color of the glue – it has potential. Before mixing more CA, to fashion the button and to protect the airway, a pipe cleaner wrapped with scotch tape and with petroleum jelly dabbed on the tape is inserted in the airway. This forms the airway channel and protects it from being filled with glue. The petroleum jelly helps to keep the pipe cleaner from adhering permanently to the CA glue – that would be problematic.
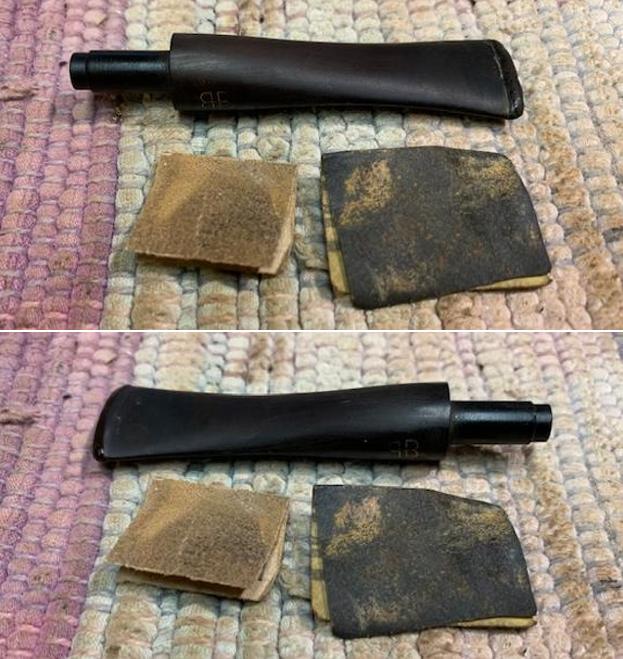
 Now, to thicken the CA/slight charcoal mixture, I add extra thick CA glue and mix with a toothpick. Thickening the mixture helps when it is applied to the stem to not be as runny.
 With the pipe cleaner inserted, I put an initial layer of the CA mixture over the pipe cleaner to form the initial airway channel. The glue is immediately sprayed with an accelerator which quickly cures the glue and holds the pipe cleaner in place.
 Rebuilding the button was a repetitive dance of adding a bit more charcoal, amber CA and extra thick CA and mixing and applying to the button area with the toothpick – wrapping the glue around the toothpick as one wraps pasta around a fork. After each application of the CA mixture, the button is sprayed with the accelerator. The following pictures show the progress in gradually adding layers to rebuild the button.
 After sufficient layers have been laid, as hoped, with a bit of wiggling, the pipe cleaner comes out without problem. The excess rebuild patch material that has been applied was intended. From the excess the filing process whittles down the excess to shape the button as needed.
  The airway formed around the taped pipe cleaner as hoped. My only concern at this point is that the patch material above the airway is not sufficiently thick as I begin filing. I’ll be cognizant of this later. I set the stem aside to allow the button rebuild patch to thoroughly cure.
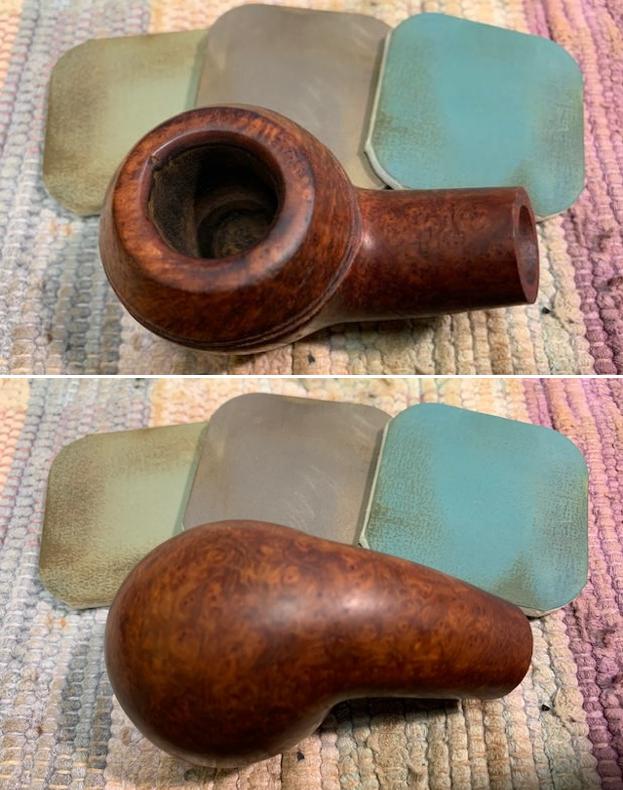
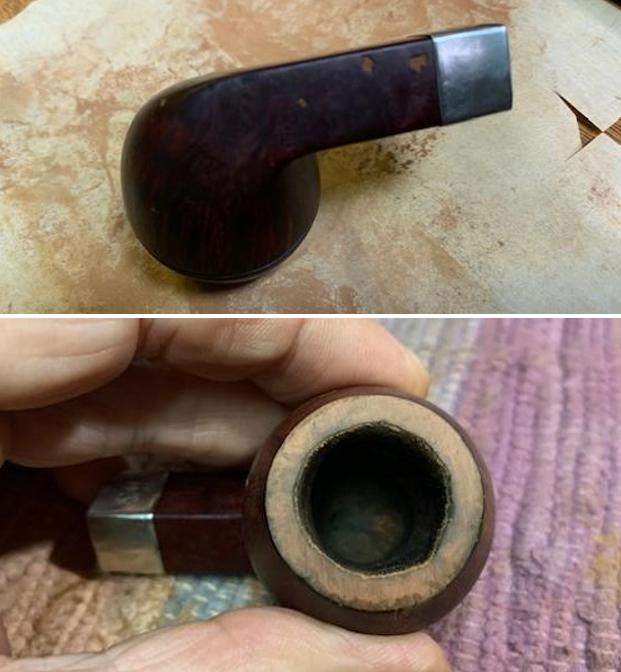
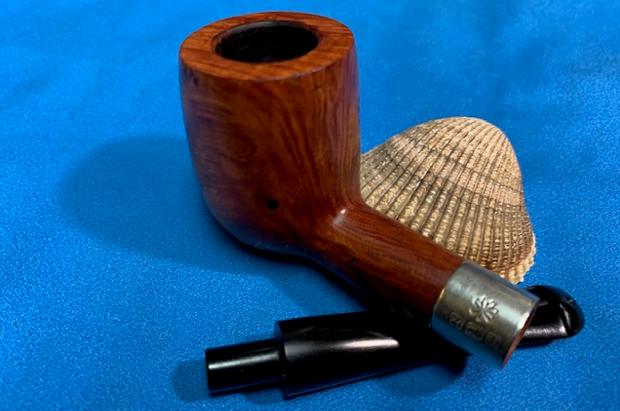
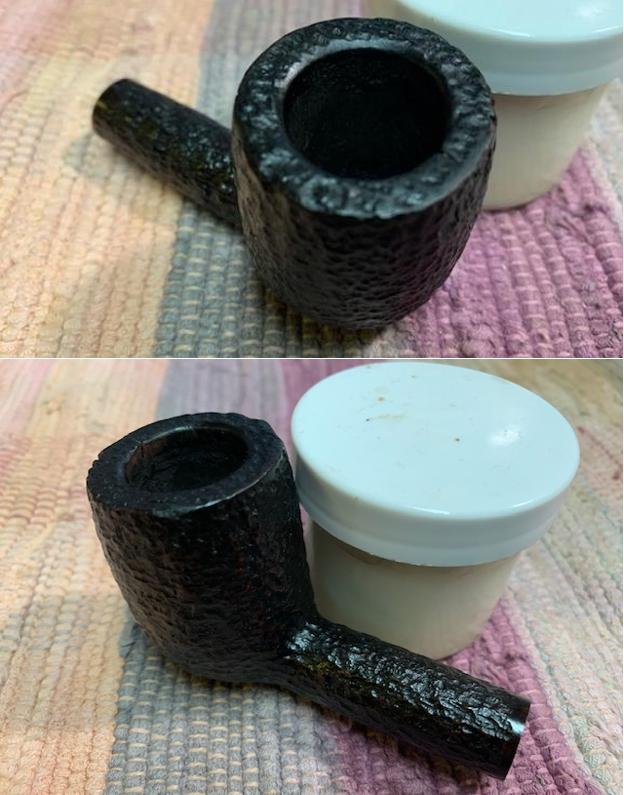
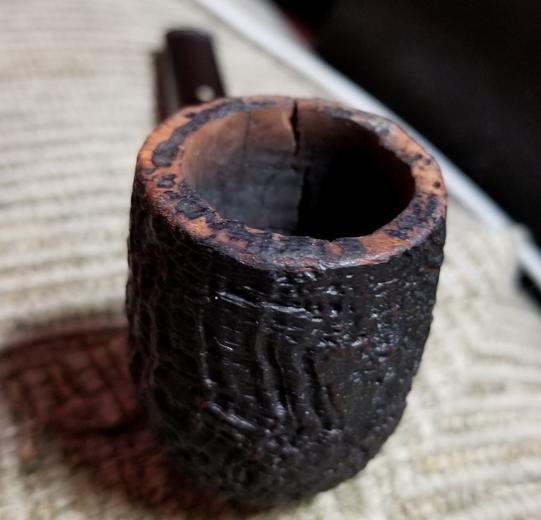
 With the stem on the side, I take a closer look at the stummel before starting the cleaning process. The rim has thick lava flow. The grime on the bowl also is evident.
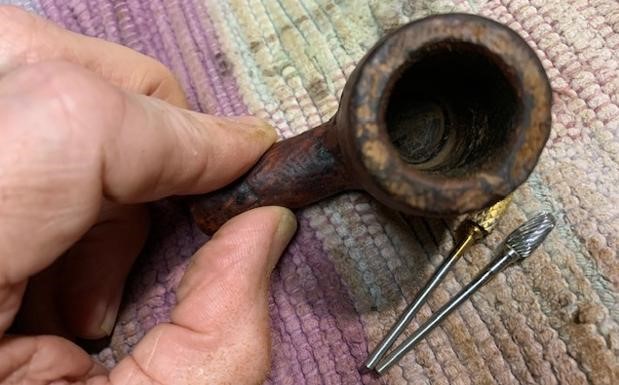
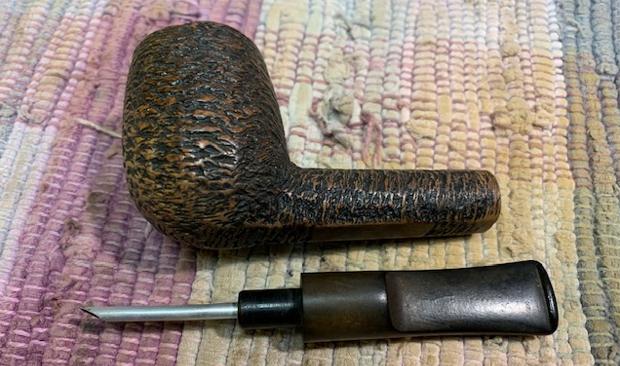
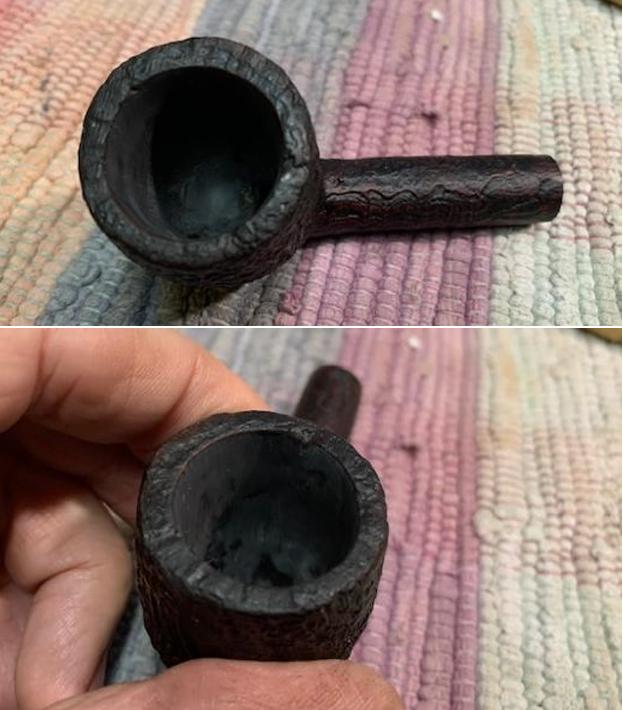
 The clean up of the stummel starts with reaming the chamber using the Pipnet Reaming Kit.
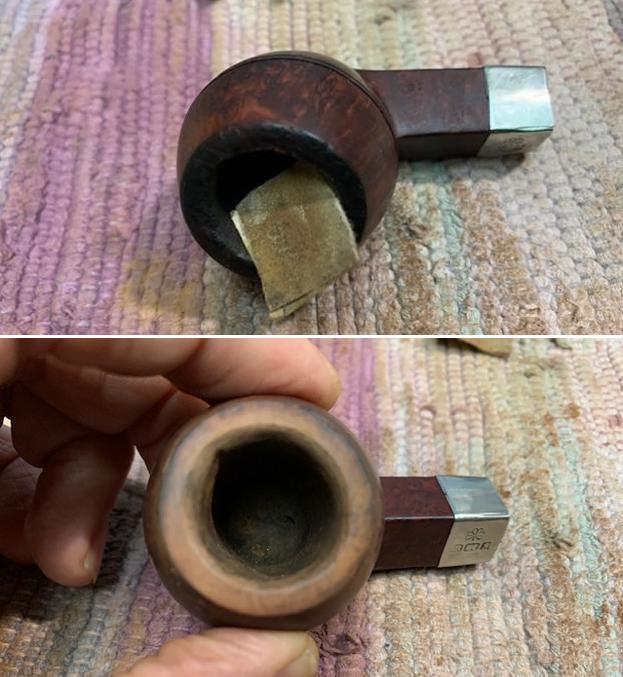
  The reaming required 3 of the 4 blade heads available. This is followed with the Savinelli Fitsall Tool to further scrape the chamber removing the carbon buildup. Finally, the chamber is sanded using 240 sanding paper wrapped around a Sharpie Pen.
  An inspection of the chamber after the reaming process shows healthy briar.
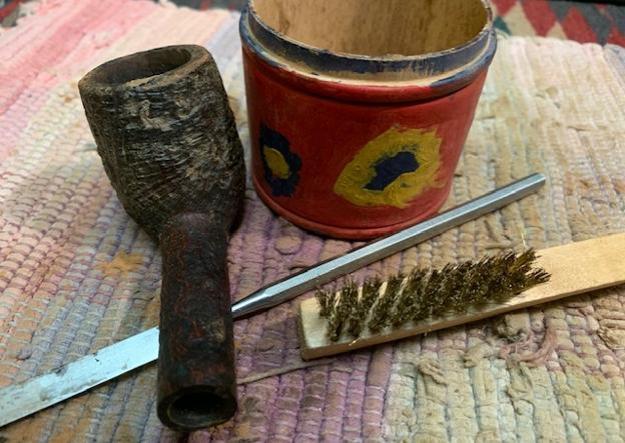
 Moving now to the sculpted briar surface, undiluted Murphy’s Oil Soap is used on a cotton pad to scrub. A bristled toothbrush is also used to get into the grooves of the sculpting and a brass bristled brush helps with the lava buildup on the rim surface. The lava on the rim proved to be stubborn. The sharp edge of the pocketknife was also used to carefully scrape the surface.
  The stummel is next taken to the sink where the cleaning continues with shank brushes. Using the brushes and anti-oil liquid dishwashing soap, the mortise is cleaned using warm to hot water. The bristled toothbrush is used again to clean the external surface. After a thorough rinsing, the bowl is taken back to the worktable.
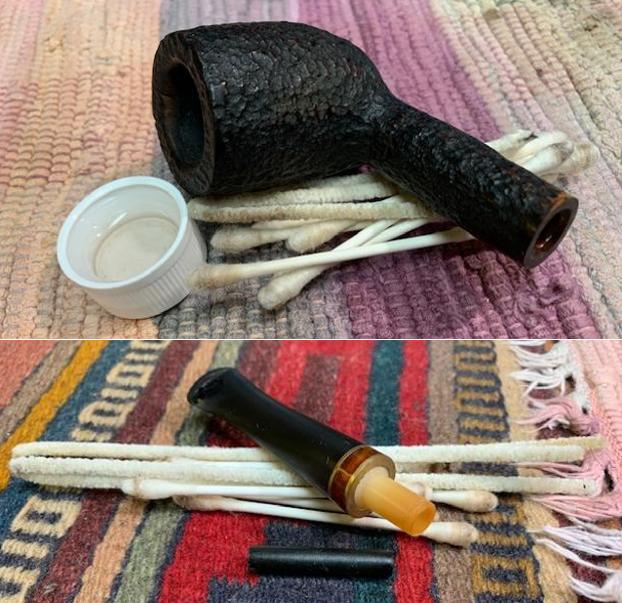
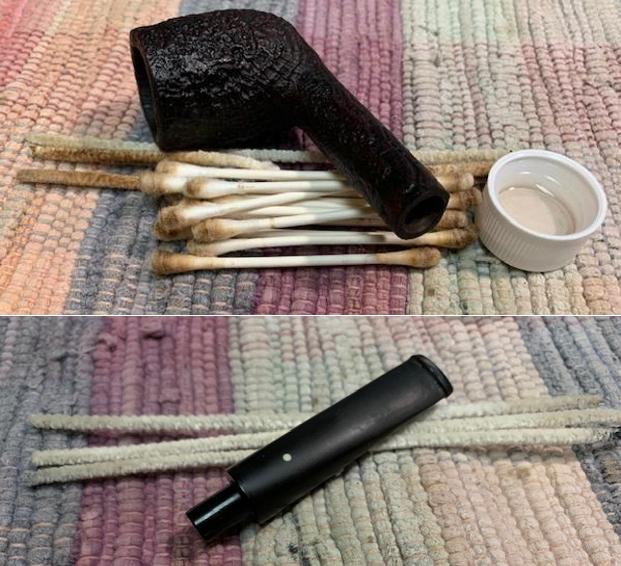
 Next, to fine tune the internal cleaning, pipe cleaners and cotton buds wetted with isopropyl 99% scrub the mortise and airway. From the picture below, the number of buds and pipe cleaners used was quite a bit. A dental spoon also was useful in scraping the sides of the mortise.
  I discovered at the beginning of the cleaning that the mortise has what appears to be cork lining affixed to the sides to keep the metal tenon snug. During the cleaning process, I cleaned over the cork not wanting to damage it more than it was. I call a truce on the cleaning for now and will plan to do a kosher salt and alcohol soak through the night to further clean and freshen the internals.
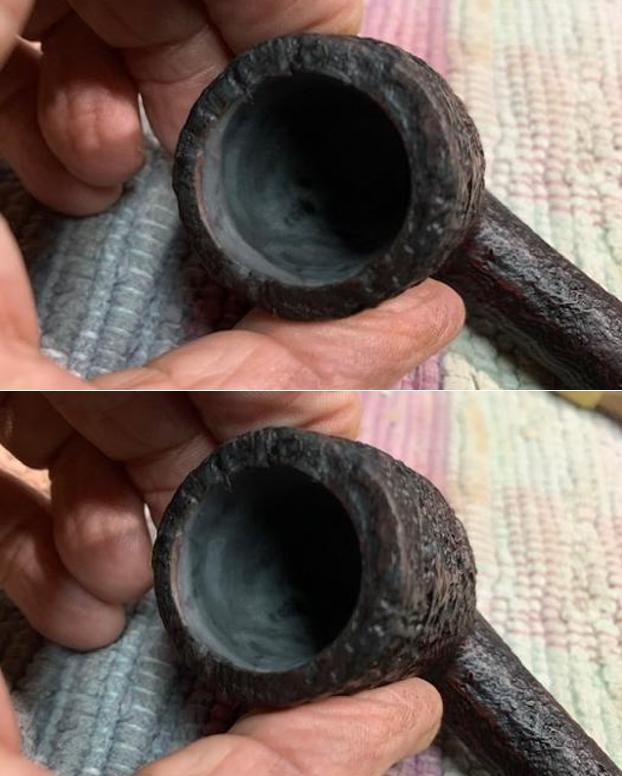
 After the cleaning of the stummel I look back at the results. There persist some darkened, scorched areas on the rim and just inside the chamber on the left-hand side – the lighting side. I will need to do some remedial sanding to clean this.
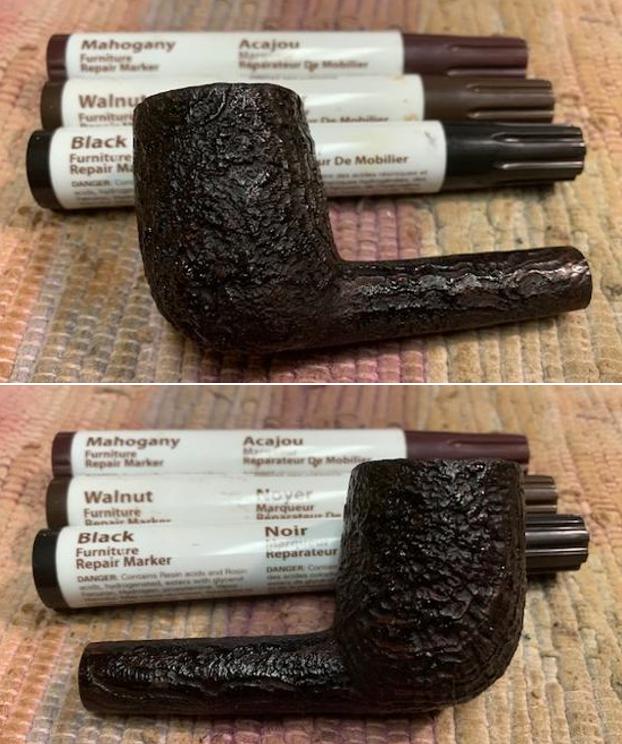
 The stummel has cleaned up well. I’m looking forward to the sanding phase when the grain in the smooth briar sections of the sculpting will emerge. This will look good. The finish, what there was of one, seems to be non-existent after the cleaning.
 I begin to address the issues with the rim by topping the stummel to reestablish fresh lines and to remove the darkened areas. Using 240 paper on the chopping board, the stummel in inverted and rotated on the flat surface. I expect the progress often not wanting to remove more briar than is necessary.
 At this point, I am satisfied with the progress even though the burn spot on the left side of the stummel (the bottom in the picture) is still evident. I will try to address this by cutting a smart bevel on the inner lip of the rim. I am hopeful this will remove more charring.
 To complete the topping, the paper is changed to 600 grade paper and the stummel is rotated several more times to smooth the rim surface further.
 Next, a bevel is cut using 240 paper then 600 paper by pinching the rolled paper with a hard surface backing the paper. This removes the dark ring nicely and I’m satisfied with the results even though a small dark spot remains.
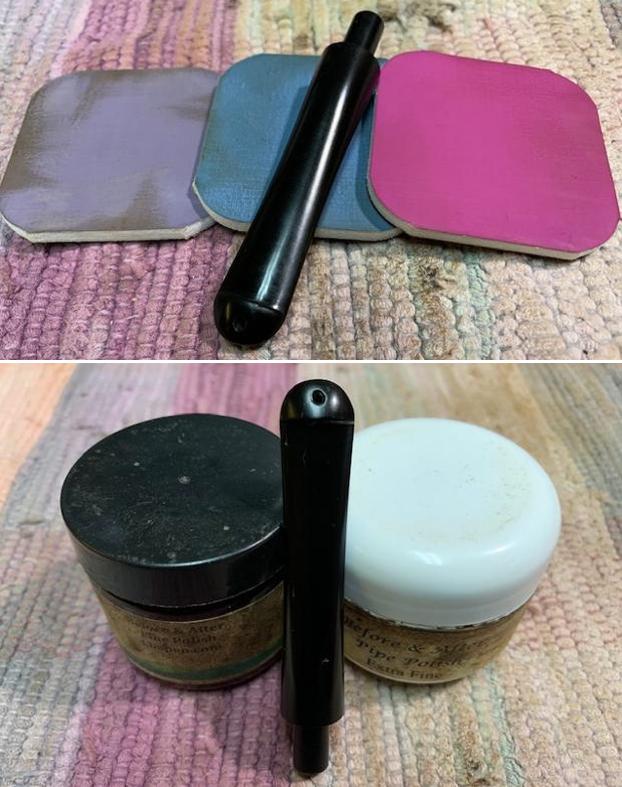
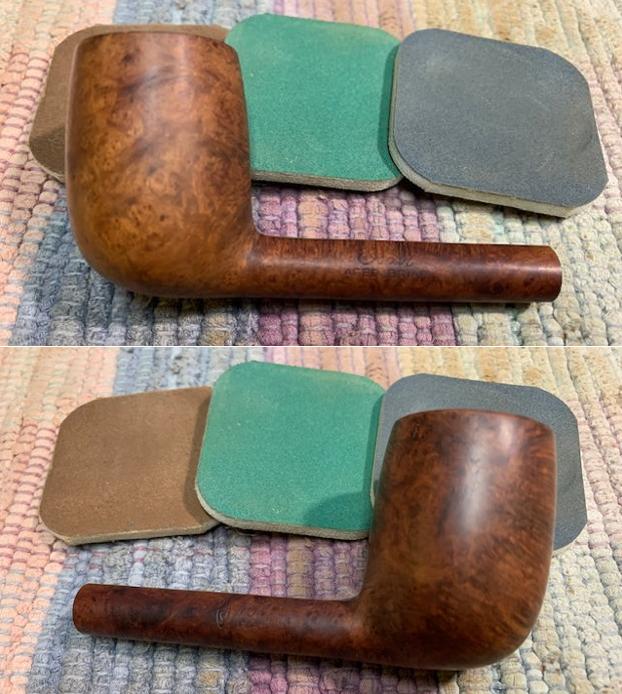
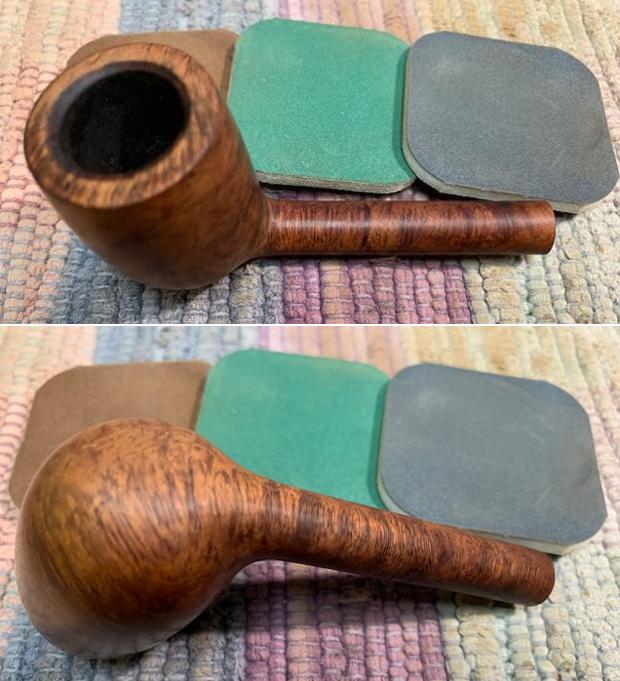
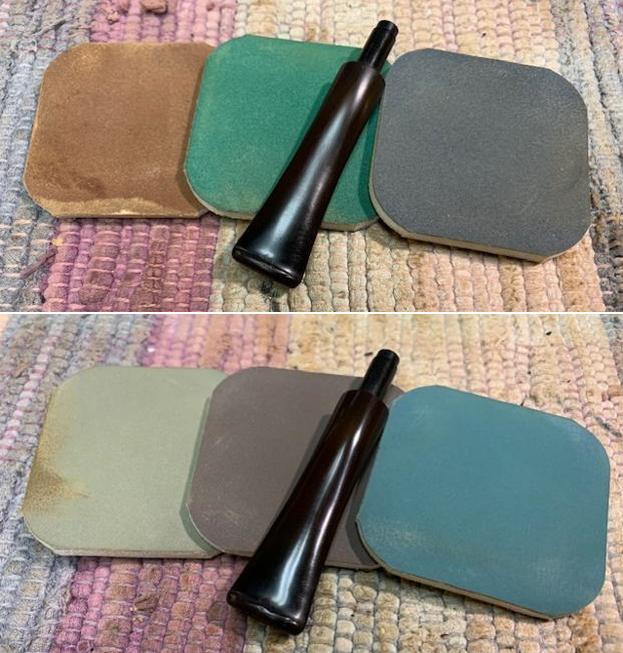
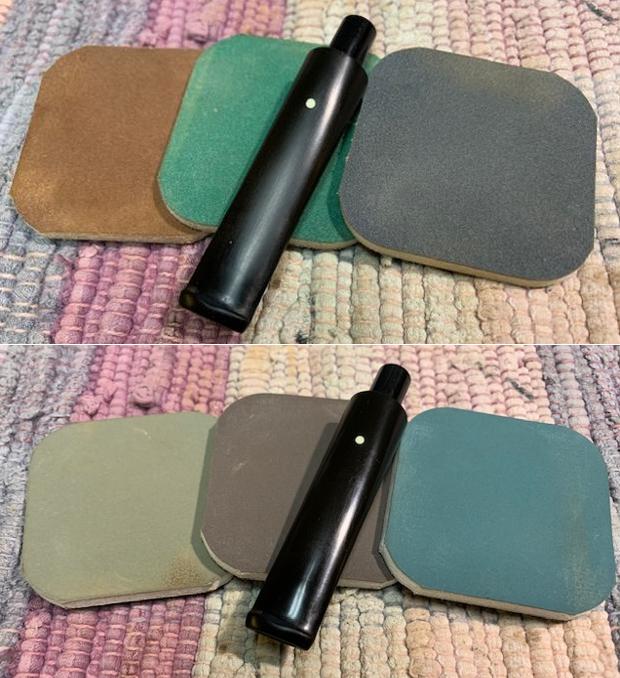
 Next, sanding sponges are applied to the sculpted briar surface. Three sponges are used, first a coarser grade, then medium and finishing with a light grade. The sponges do a great job cleaning the briar surface.
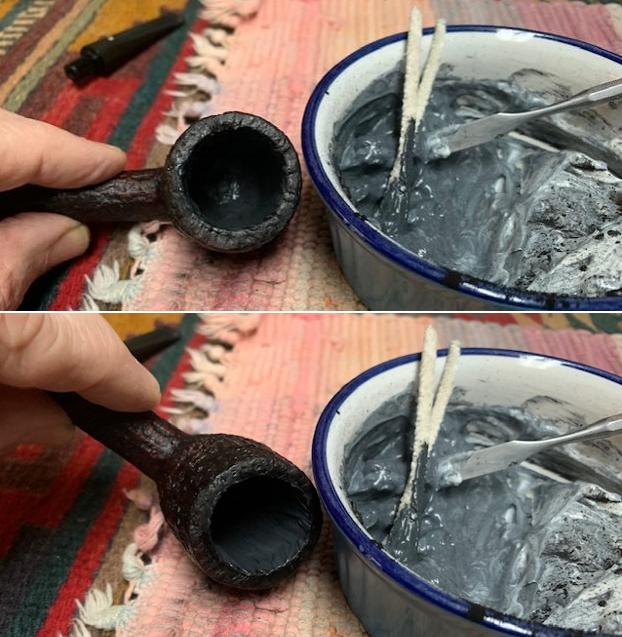
 With my workday closing, the internal cleaning is continued using a kosher salt and alcohol soak through the night. This helps to draw the oils out of the internal briar and freshen the stummel. First, a cotton ball is stretched and twisted to form a ‘wick’ which is then pushed/guided down the mortise with the help of a stiff wire. The wick helps to draw the oils out.
  The bowl is then filled with kosher salt which does not leave an aftertaste. After putting the stummel in the egg crate for stability, the chamber is filled with isopropyl 99% until it surfaces over the salt. After a few minutes, the alcohol is absorbed into the salt and a little more alcohol is added to top it off. The lights are then switched off.
 The next morning, the soak had continued the cleaning through the night as evidenced by the salt and cotton wick being soiled. After clearing the salt crystals from the bowl and wiping with a paper towel, I also blow through the mortise just to make sure that the salt was removed.
  To make sure the cleaning was successful, a few pipe cleaners and cotton buds wetted with isopropyl 99% reveal that more cleaning is necessary. After a good bit of work, the buds emerged lighter and I declare the job done!
  Next, I’m anxious to work on shaping the new button. The patch rebuild material has cured through the night and I begin by filing the end of the stem to shape the button facing. I flat needle file begins the process of removing the excess patch material to flatten it.
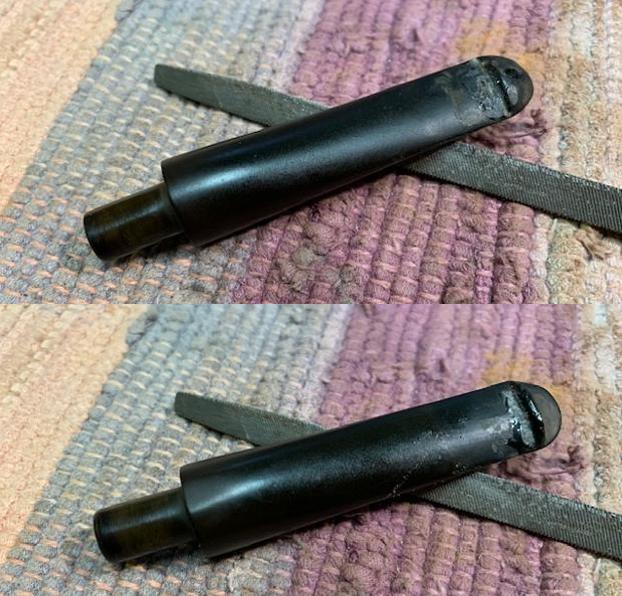
 It does not take long filing to discover I have some problems. I mentioned earlier I was concerned about the thickness of the top bit area. The reason for my concern was that I did not realize until after the initial CA glue application to establish a solid airway, that the tape-wrapped pipe cleaner, the airway template, had popped up just a little when the attention was on troweling the glue mixture to the rebuild with a toothpick. The form was set when I quickly sprayed the CA with the accelerator. The picture below shows the form of the airway pushing too far upward. The problem with this therefore, results in a cavity where there should be hardened CA glue. Looking through the slot you can see daylight – the translucent light coming through the hardened CA. The second picture shows this area looking down on the upper bit.
  Undeterred, I believe the best approach is to file down the upper bit as I would normally do – shaping it as it should be. As I file, I expect the cavity will be breached providing the means to add more CA mixture to fill the cavity. The pipe cleaner with the scotch tape wrap will also again be in place when more CA is added. On we go! Using the flat needle file, I work on the upper bit forming the button lip. A few pictures show the gradual progress.
 As I file close to being flush with the horn surface, filing is transitioned to sanding with 240 grade sanding paper to shape the button further. I am surprised when there are no breaches exposing a cavity in the button.
 I transition to filing the lower button. Instead of a flat needle file, a squared filed is used. It doesn’t take long, and 240 grade sandpaper continues the sanding process.
 Next, the flat needle file is used to shape the button itself. The general approach is to follow the curvature of the horn stem on the upper and lower button lip. In addition, the button is filed to taper toward the sides of the stem so that the upper and lower button meet flush with the side of stem. This results in a uniform edge running down from the diamond shank sides through the stem/button.
  Sanding and shaping the button continues with 240 grade paper and is expanded to sand the entire stem to clean small nicks and smooth. A plastic disk is used to prevent shouldering the edges while sanding.
 The button is looking good but still in a rough state. As is often the case when working with CA glue patches, pits appear from air pockets caught in the glue when it solidifies. I take a few pictures to show the progress.
 Even though filing and sanding did not open a cavity as I was expecting, there is a gap where there shouldn’t be a gap and there is a small cavity behind the gap where there shouldn’t be and this concerns me.
  The approach that came to mind was again to wrap a pipe cleaner in scotch tape. After applying petroleum jelly to the tape to reduce the CA glue sticking to it, the pipe cleaner was again placed in the airhole and into the airway. If I had three hands, I could have taken pictures of the following process, but with the picture below serving as the starting point, it shows the gap created earlier is exposed while filling the accurate airway with the pipe cleaner.
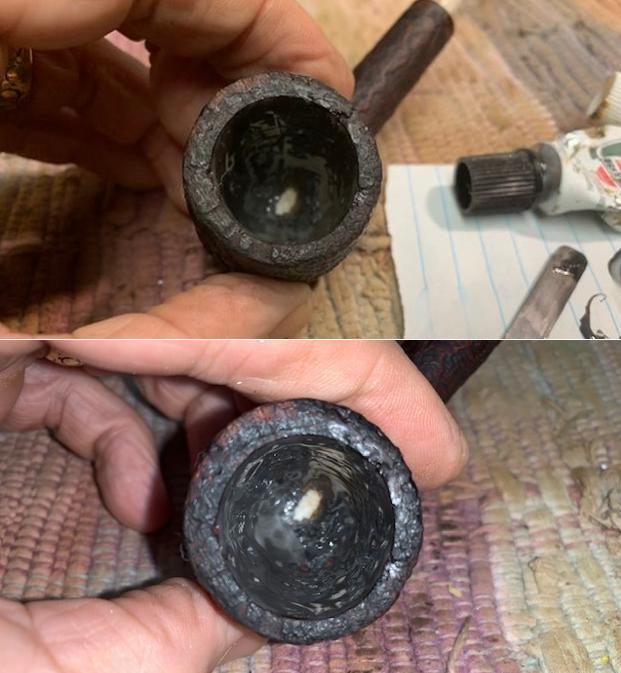
  A precision spout is then attached to the Black CA glue bottle and reinforced with tape. With the tip of the precision spout being small, I am able to insert it into the gap hole and ‘inject’ the Black CA glue into the cavity. This was done very slowly because it was difficult pushing the CA through the small exit and I did not want to blow the spout off with the pressure – therefore the spout is reinforced with tape! When the glue emerges out of the gap, I spray accelerator on it to solidify in place the excess black CA emerging from the cavity assuring that the slot hole remains firm. After about 5 minutes, I gave the pipe cleaner a slight twist to see if the petroleum jelly prevented the sticking. It snapped and moved, but I left it in place as the black CA glue injected in the cavity fully cures. I put the stem aside again to let the CA glue fully cure.
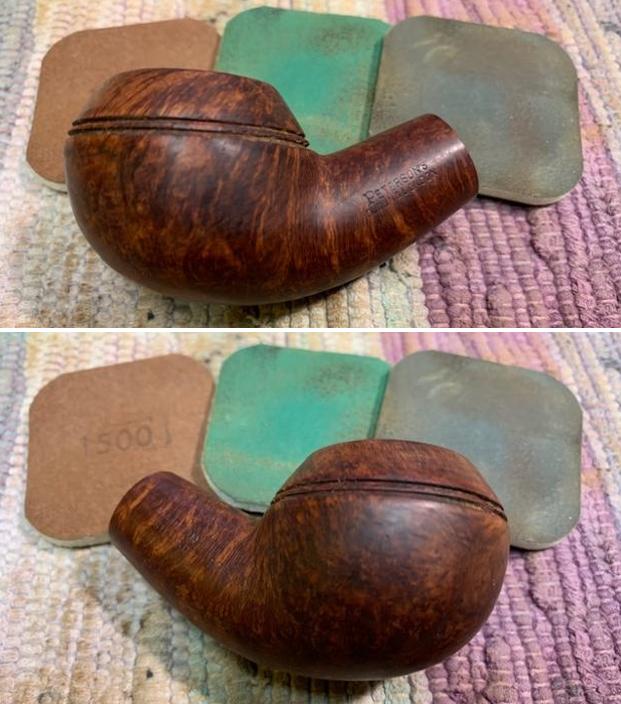
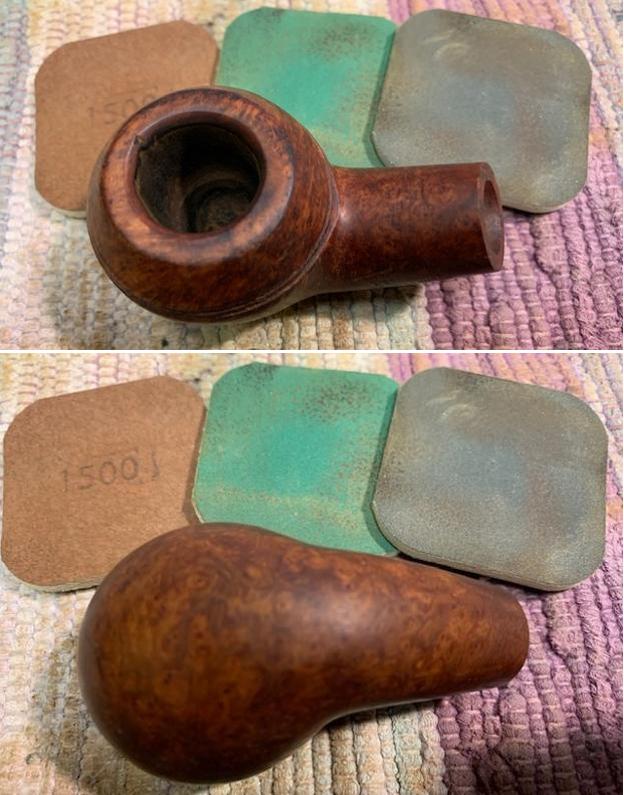
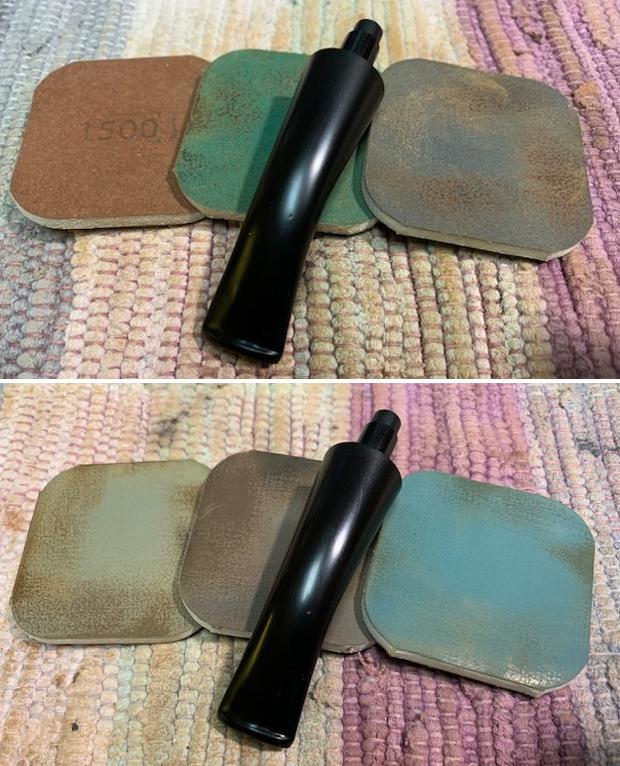
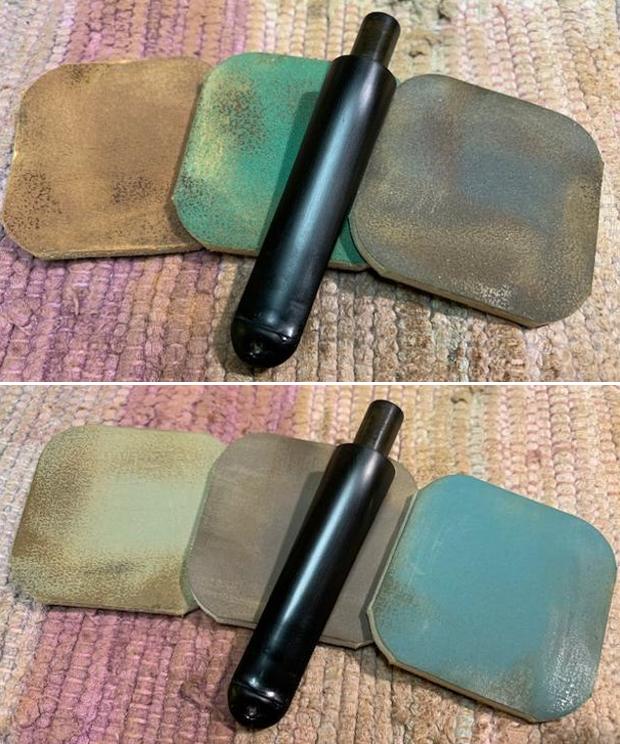
  With the stem on the sideline, the sanding process with the stummel is continued following the sponges. The full regimen of micromesh pads is applied by first wet sanding with pads 1500 to 2400. Dry sanding follows with pads 3200 to 4000 and 6000 to 12000. I enjoyed watching the emergence of the smooth briar grain during the micromesh process. It’s looking great!

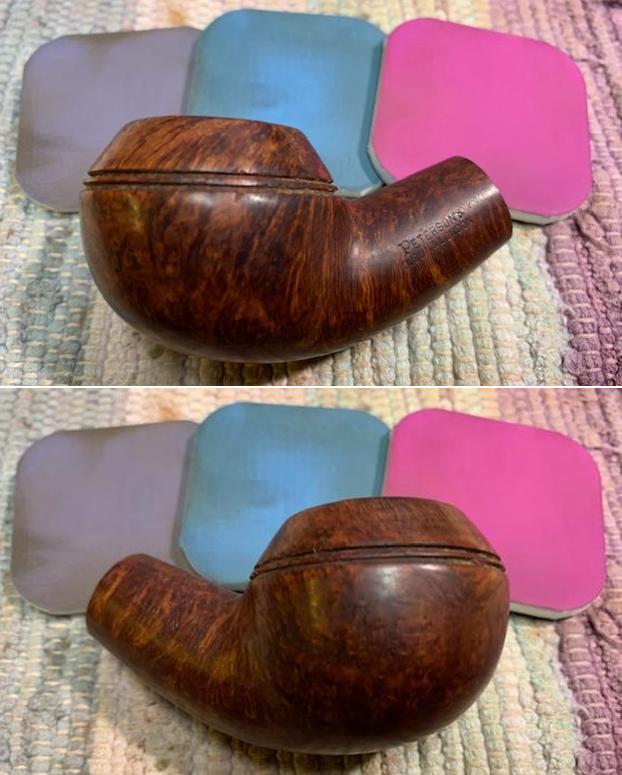
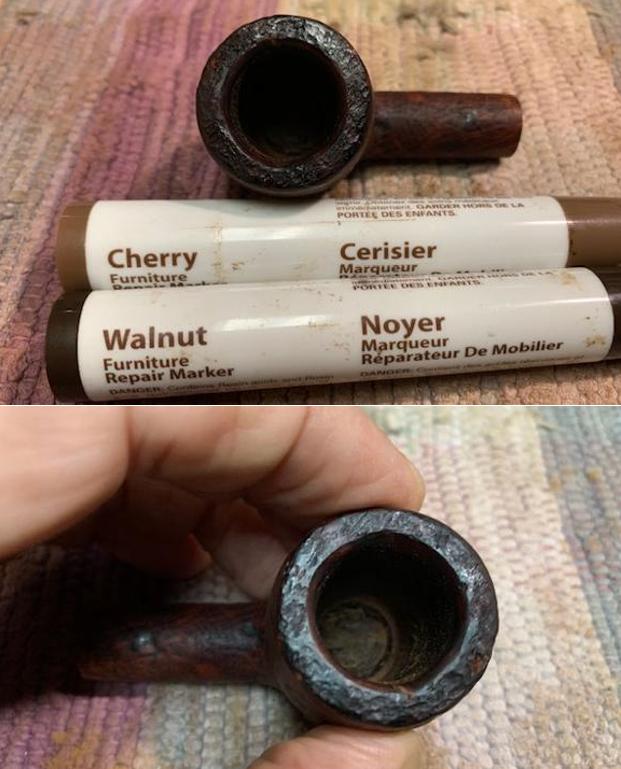
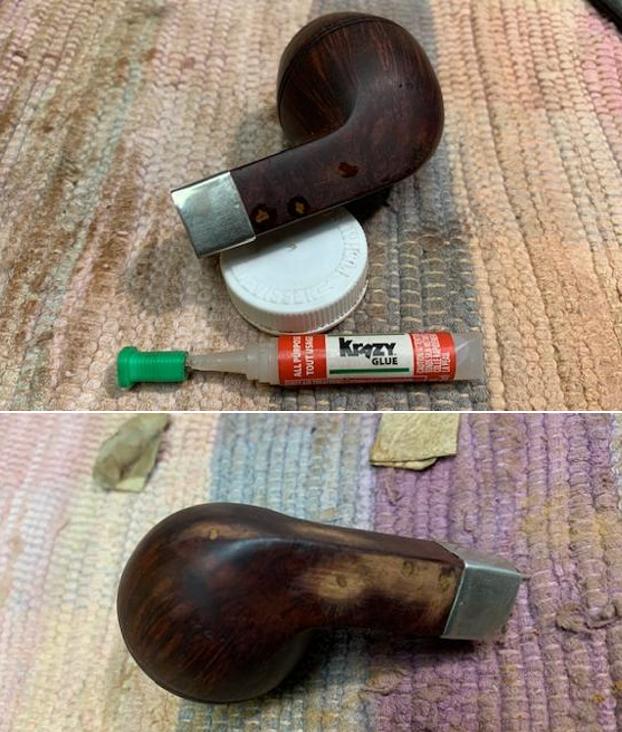
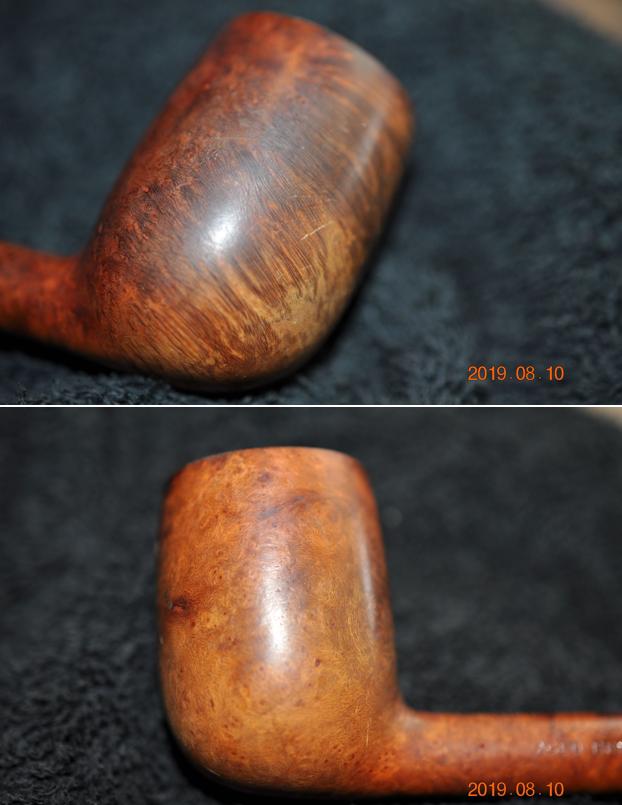
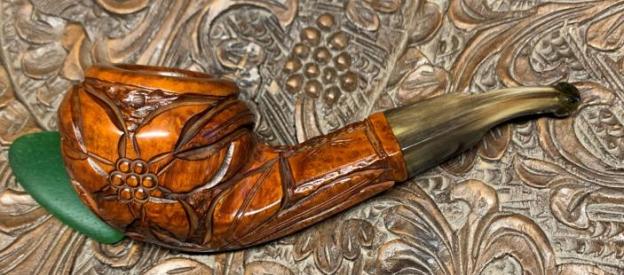
 While sanding with micromesh pads, I had more of a focus on the beautiful carving design of the Edelweiss. Both sides of the bowl display an Edelweiss flower in full bloom, but more subtle is the leafy branch design holding up the flowers from below. The leafy branch extends from the shank into the bowl’s heel and then flowering upward encompassing the bowl – amazing! To bring more relief to the sculpted leaf and flower panels I decide to apply Fiebing’s Tan Leather Dye to the stummel. My thinking is this – the tan will freshen the overall color, but it will not be distinctively different from the lighter briar surface. The main effect I am looking for will be on the ‘unnoticed’ rough, sculpted cuts, which surround and define the leaves and flowers. The fresh dye will absorb and should darken the rough briar, I believe, and provide more of a contrast pop for the overall briar canvas. At least, this is what I think will happen! As can be seen in the above pictures, there is compacted briar dust lodged in the cut lines and edges. Using a sharp dental probe, I carefully scrape and blow the debris out of the cracks and cuts.
  After assembling the materials and tools on the worktable, in preparation for the dye, I first wipe the bowl with alcohol to further clean the surface. Next, the bowl is warmed with the hot air gun to heat and expand the briar. I believe this helps the wood to receive the dye.
  After the stummel was warmed, a pipe cleaner is used to apply Fiebing’s Tan Leather Dye to a portion of the bowl and then it is ‘flamed’. The aniline dye is combusted with a lit candle and when the alcohol quickly burns off, the pigment is set into the briar. I debated whether I should fire the dye given that it will be more difficult to remove the resulting crusted surface.
  I decide that the cuts and crevasses are accessible enough that it should clean up with the rotary tool and buffing wheels. After thoroughly applying the dye and firing it, the bowl is put aside to rest allowing the dye to settle in.
 With the stummel resting, the injection of black CA glue into the cavity of the button slot has cured. With a bit of nervousness, I pull and twist the tape wrapped pipe cleaner which had been covered with petroleum jelly to prevent sticking. Thankfully, it was dislodged with no problems.
 To clean the excess black CA glue the flat needle file is used followed by 240 grade sanding paper. A round pointed needle file is used to fine tune the rounding of the air hole. It looks great! I breathe a bit easier. The draft hole is correctly formed and the rebuild is now solid other than the airway running through it.
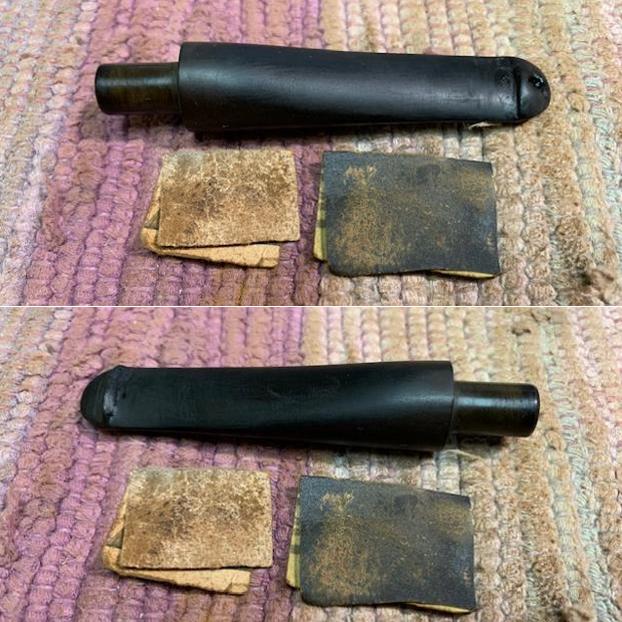
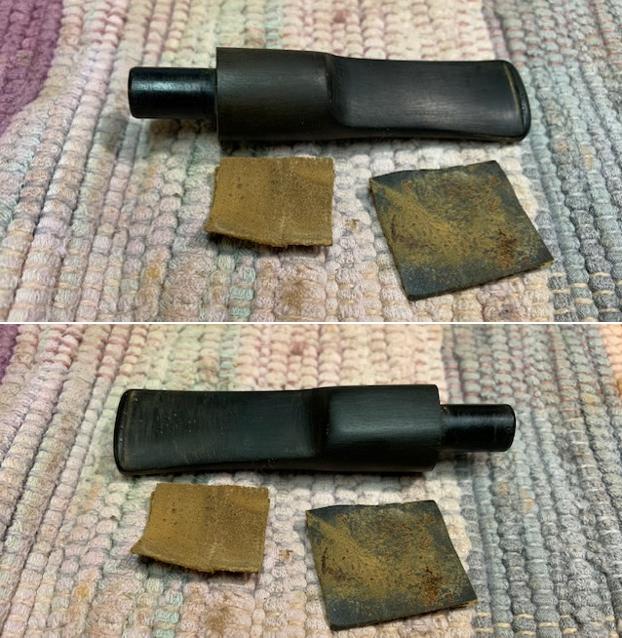
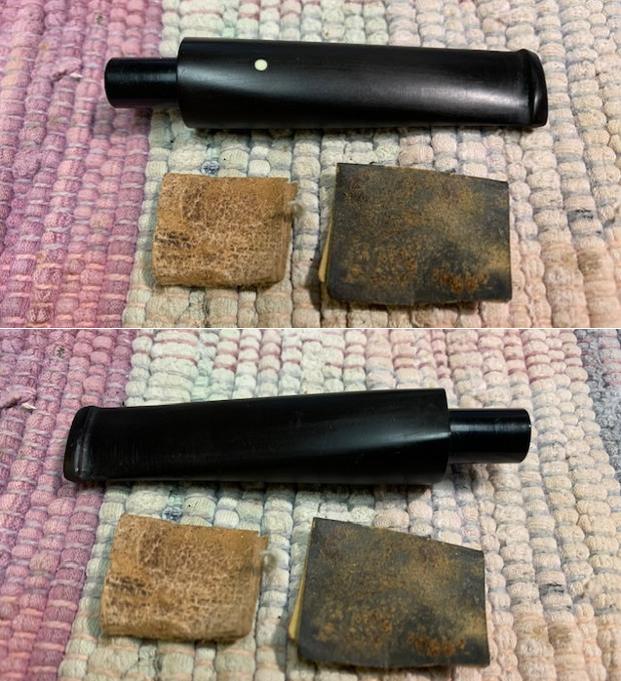
 To smooth the horn stem and button rebuild, 600 grade paper is used to wet sand followed by applying 0000 grade steel wool.
  The horn is looking great and the coloring of the button could not be much better. Looking more closely at the button, there remain some pits that need to be filled and smoothed.
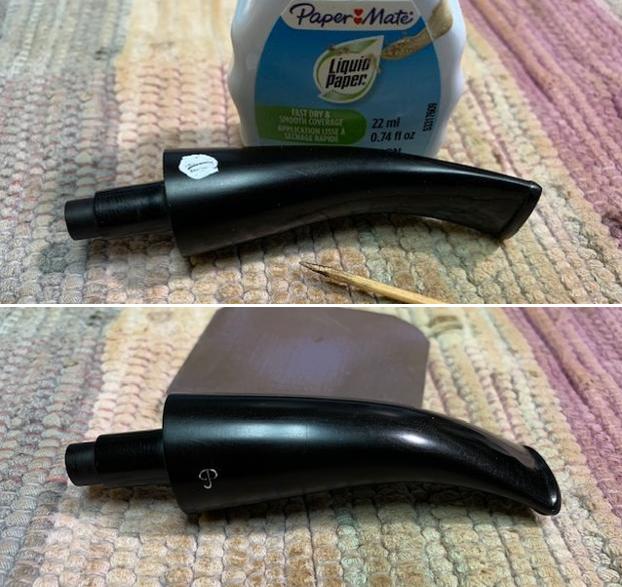
 To address this, thin CA glue is carefully spread over the button to fill the small pits on the button lip and above the airhole.
  After the CA is cured in a few hours, again I wet sand with 600 paper and 0000 steel wool, focusing on smoothing the button. I am pleased with the results of the button rebuild.
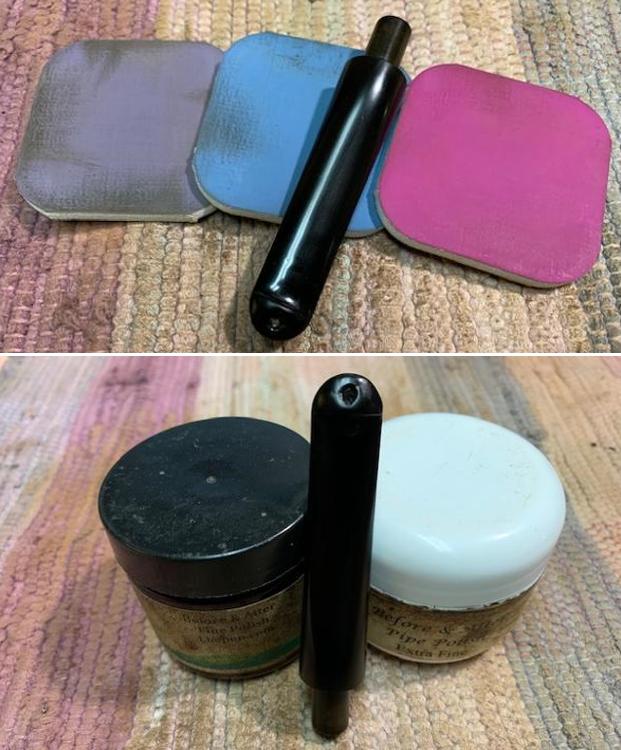
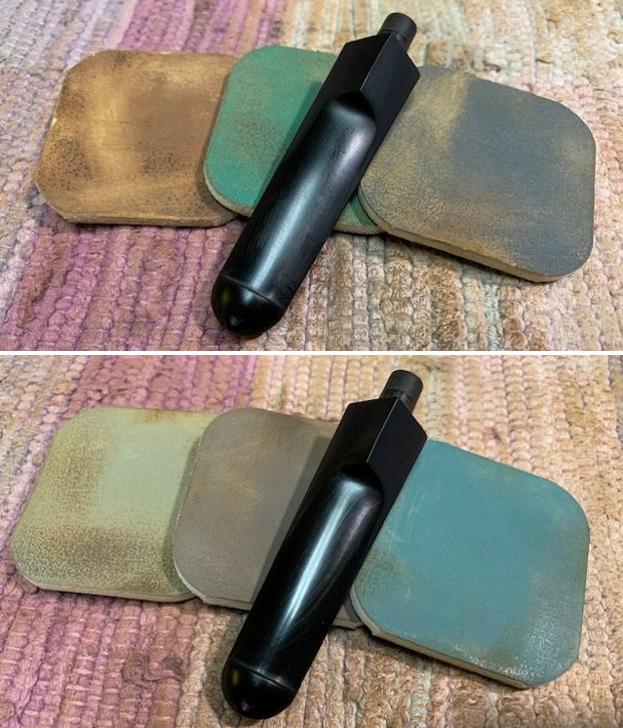
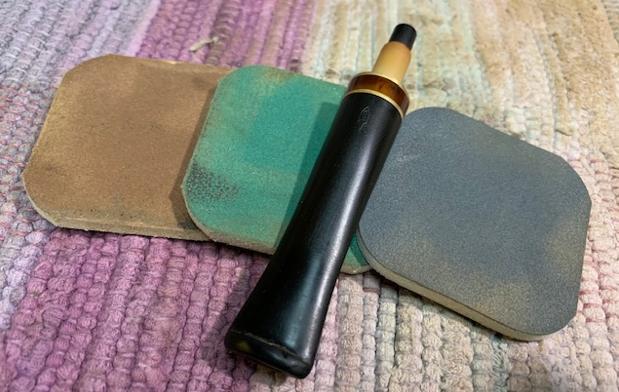
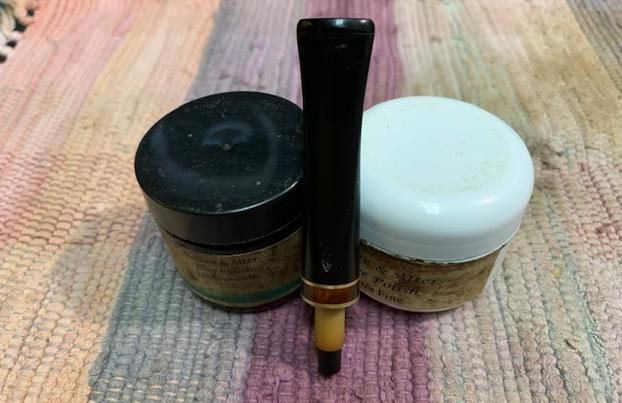
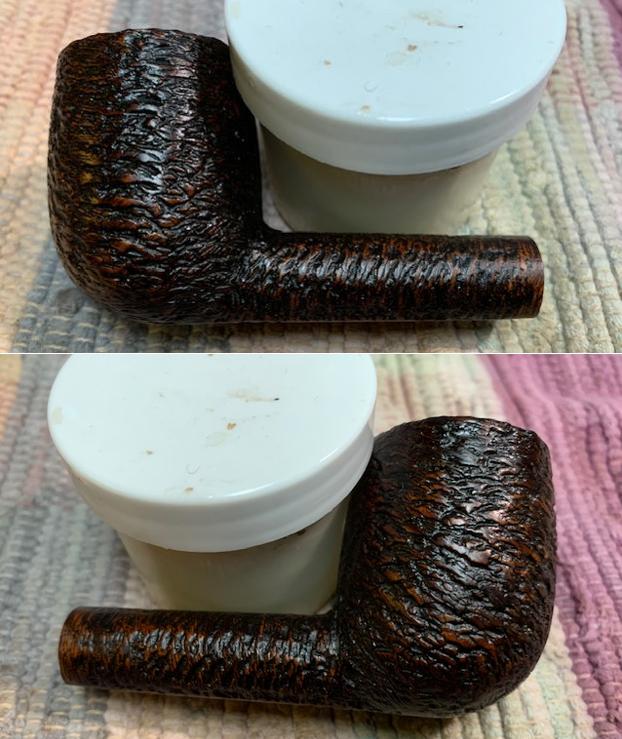
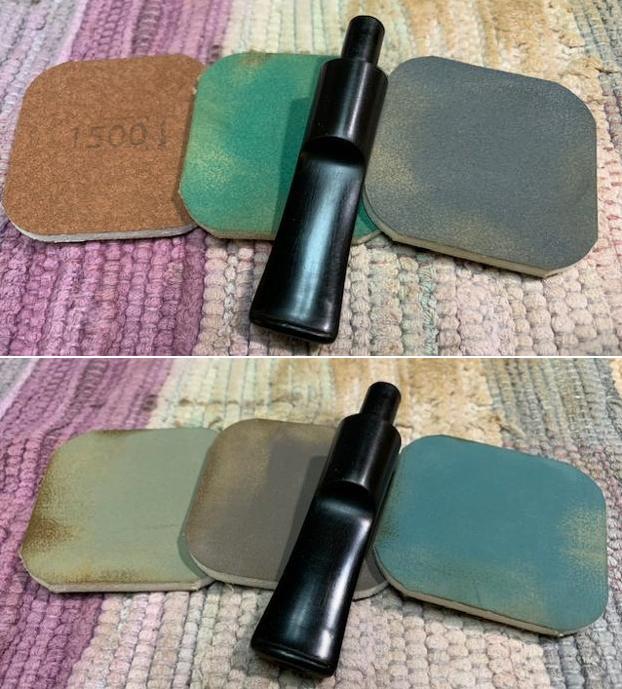
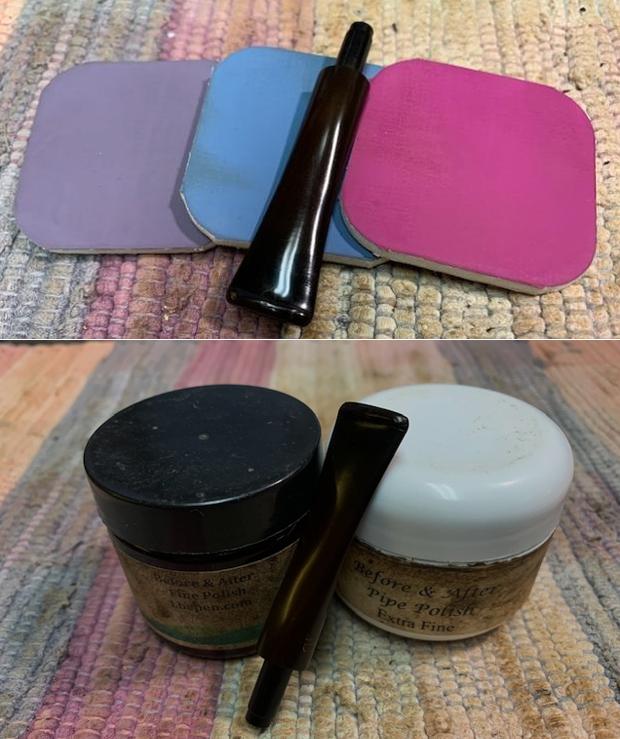
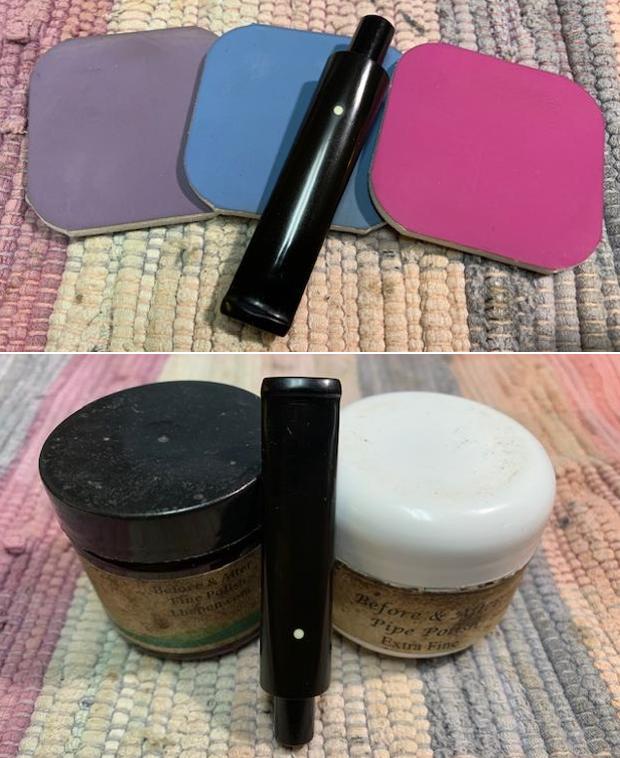
 Next, the horn stem is sanded with micromesh pads. Starting with pads 1500 to 2400, the stem is wet sanded. Following this, pads 3200 to 4000 and 6000 to 12000 are used to dry sand. To condition the horn material, Obsidian Oil is applied between each set of three pads. The horn almost drank the oil, and the pop of this horn stem is great!
 The newly dyed Edelweiss stummel is next. It has rested for several hours and the next step is to remove the flamed shell.
 To do this a felt buffing wheel is mounted to the rotary tool and set to a slower speed – about 25% full power. This reduces the heat generated by the felt and the Tripoli compound, a coarser abrasive compound. Tripoli is applied to the stummel with the felt wheel and I navigate the wheel to put an edge down into the crevasses as much as possible. The rotary tool makes it easy to address the different angles of the sculpting contour.
  After using the compound, a cotton pad wetted with alcohol is used to wipe down the stummel. I do this to lighten the dye and to blend the new dye more evenly over the sculpted surface.
 Next, a cotton cloth buffing wheel is mounted to the rotary tool and the speed is increased to about 40% full power. I do not apply more compound with this wheel but simply buff through all the crooks and crannies to remove any excess Tripoli compound that may have gotten lodged. This also continues to buff up the new dyed surface.
 After reattaching the nickel stinger to the tenon, the stummel and horn stem were reunited. After changing to another cotton cloth buffing wheel with the speed remaining at 40%, Blue Diamond compound is applied to the entire pipe. I use a light touch with the compound so not to clog the nooks and crannies with compound dust. As before, the wheel is navigated over the smooth surfaces as well as in the carved valleys and cuts.
 Not shown is that I again wipe the stummel one more time with a cotton pad wetted with alcohol to continue to reduce the dye residue. The final step to reduce dye leaching onto the hand after the pipe is put into service is to emulate the heating of the bowl. To do this the bowl is warmed with the hot air gun and when hot, the stummel is rubbed with microfiber cloth which removes residue created by the heating.
 The final step is to apply carnauba wax to the pipe. After changing the buffing wheel again at the same speed, the wax is applied to the entire pipe. Again, little is more when applying the wax, especially not wanting to muck up the sculpting with excess wax. After the wax is applied to the horn stem and Edelweiss stummel, the pipe is given a hearty hand buffing with a microfiber cloth to raise the shine and to distribute and remove excess wax.
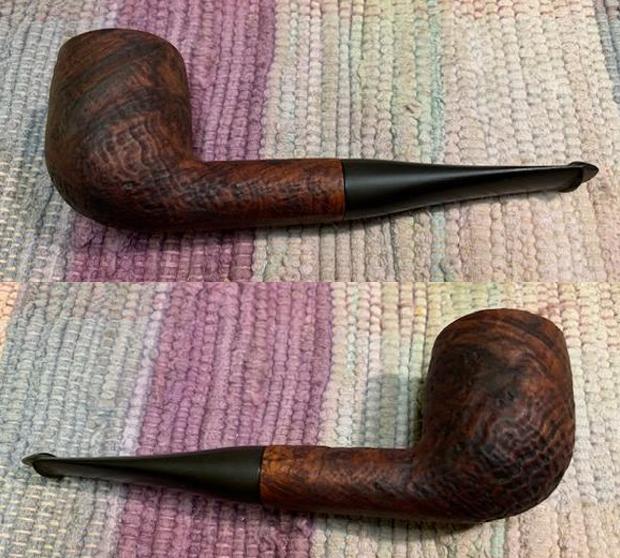
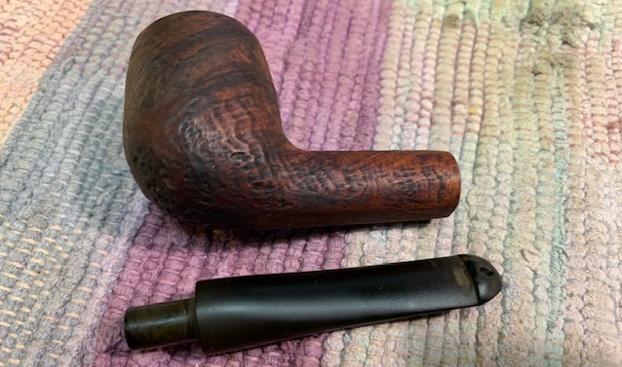
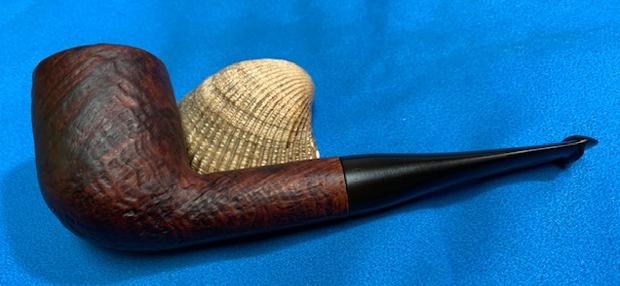
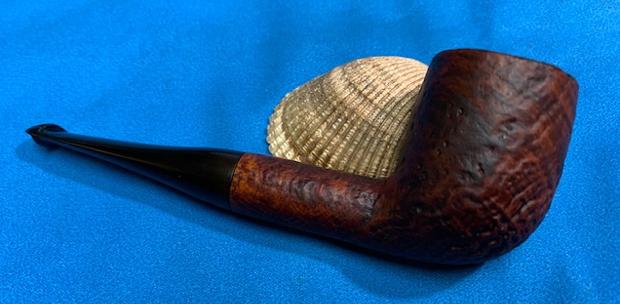
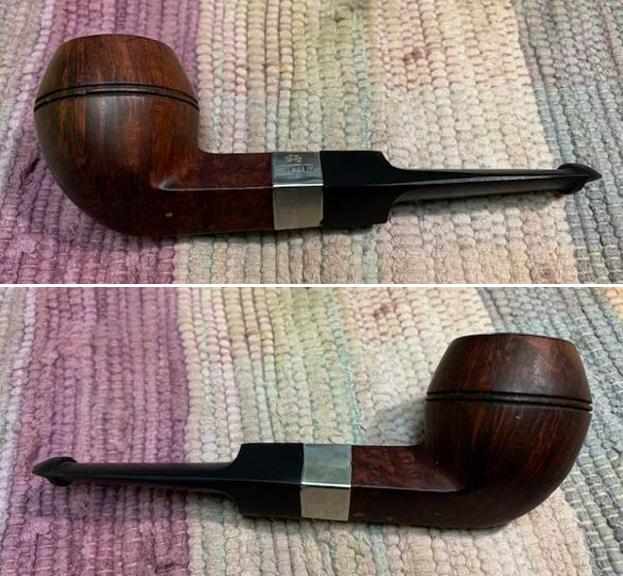
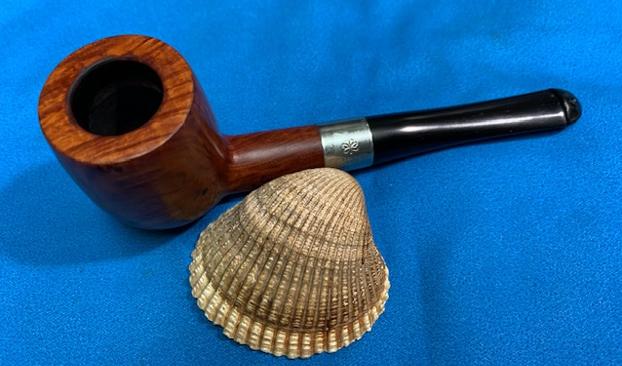
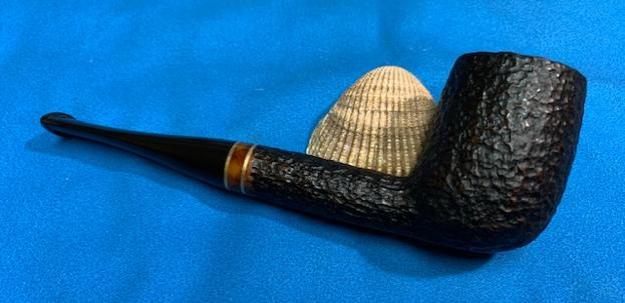
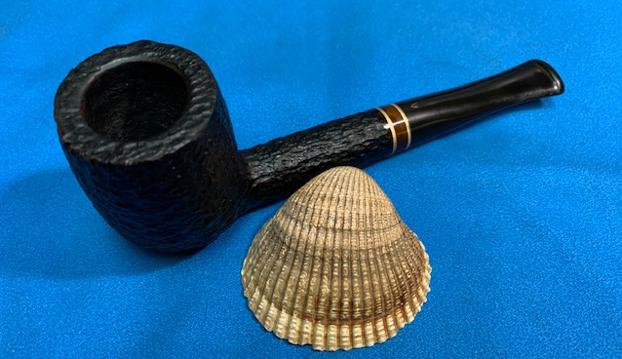
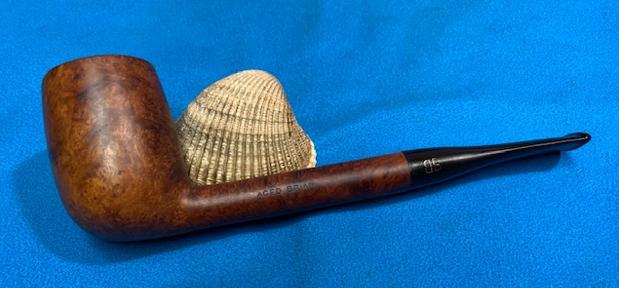
 My goodness – I am pleased with the results of the restoration of this Sculpted Edelweiss horn stem that Kari donated to benefit the Daughters of Bulgaria. What a beauty! Rebuilding the button to blend well with the horn stem was a challenge, but the mixing of the different CA glue hues had the effect of a wavy translucence that emulated very well the horn coloring. The sculpting of the edelweiss flowers and leaves is exquisite and coupled with the rustic, earthy horn stem, an eye-catching ensemble is created. Bob had the vision to see the potential and commissioned the Sculpted Edelweiss Horn Stem and will have the first opportunity to claim it in The Pipe Steward Store benefiting the Daughters of Bulgaria – helping women and girls who have been trafficked and sexually exploited. Thanks for joining me!