By Steve Laug
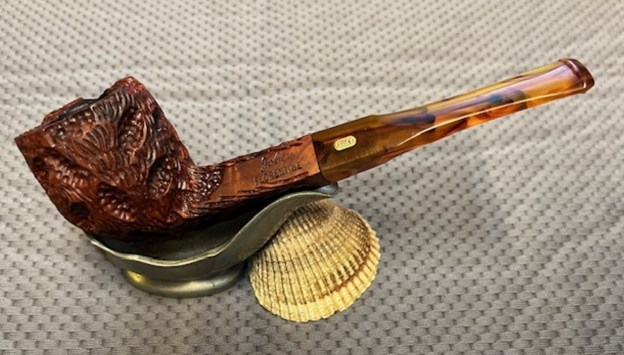
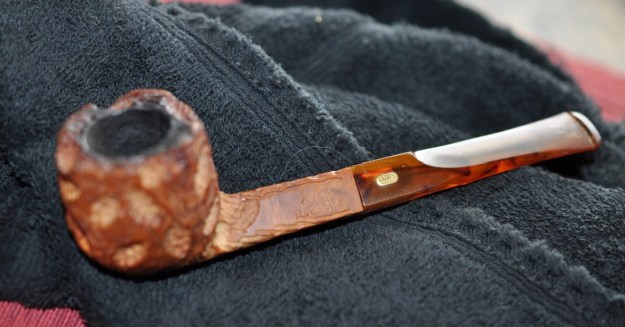
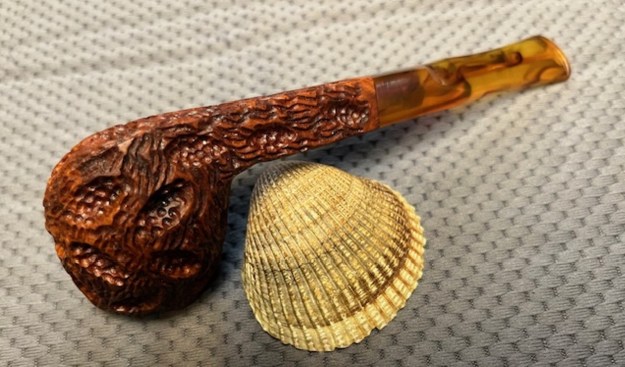
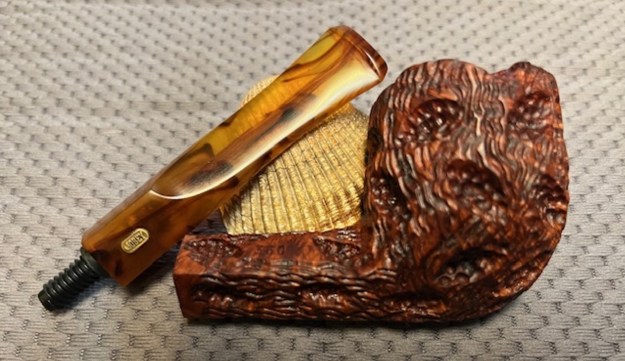
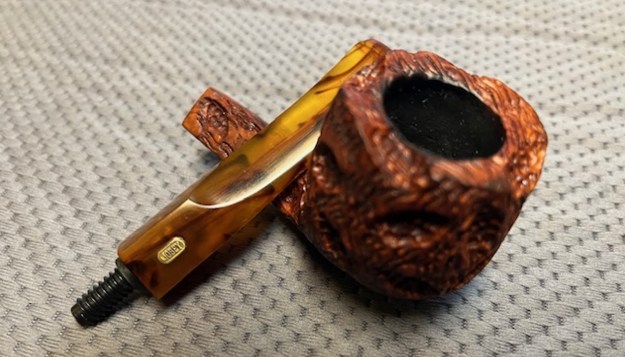
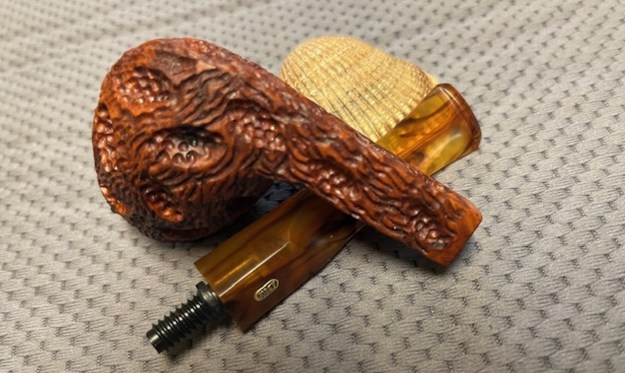
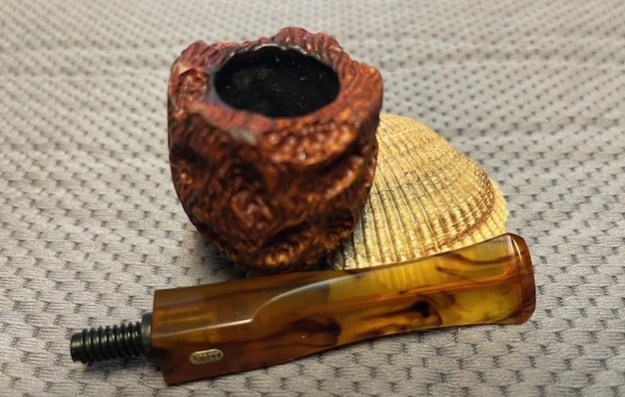
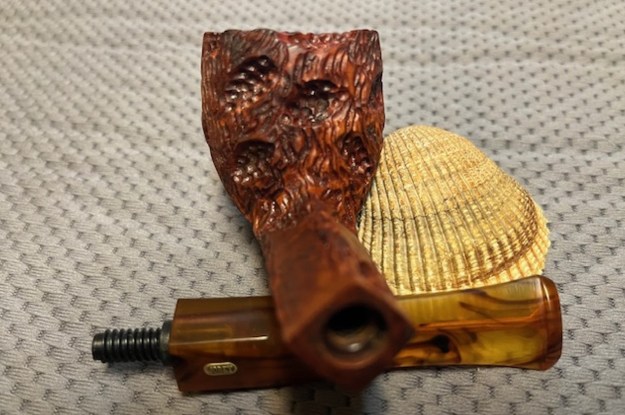
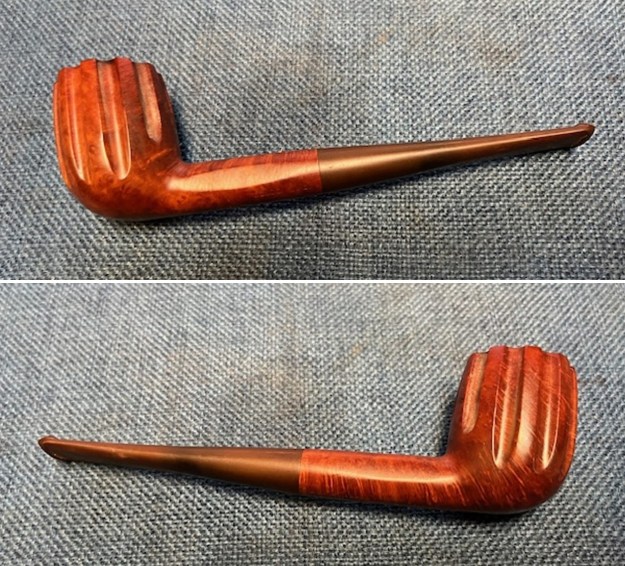
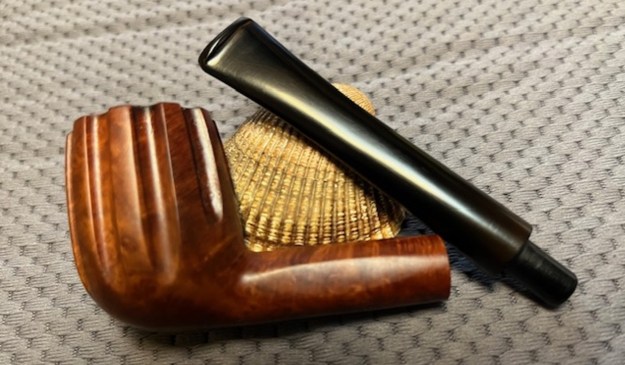
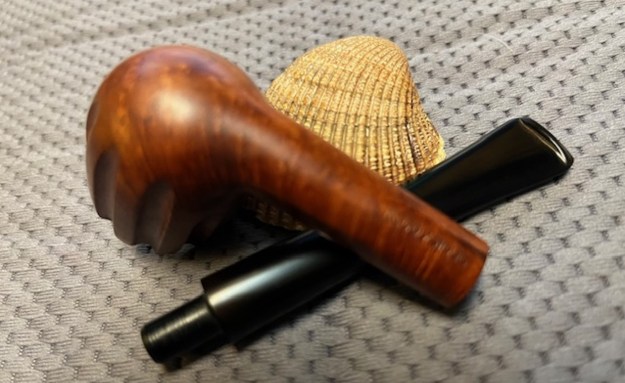
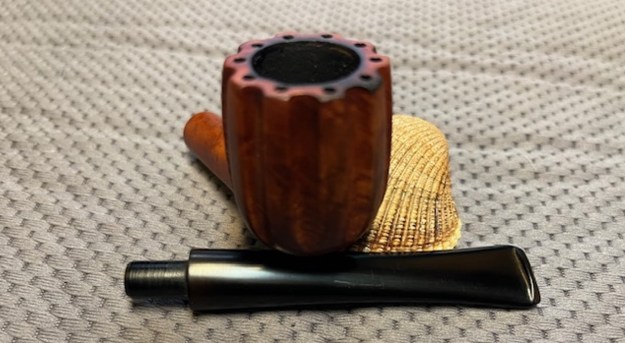
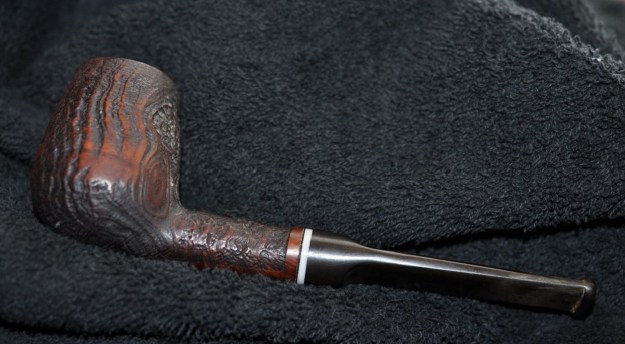
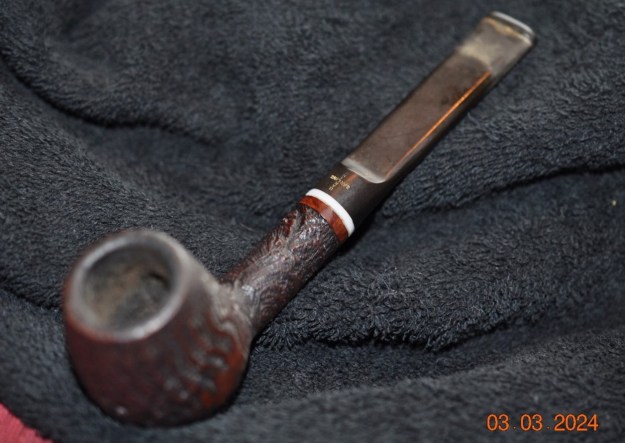
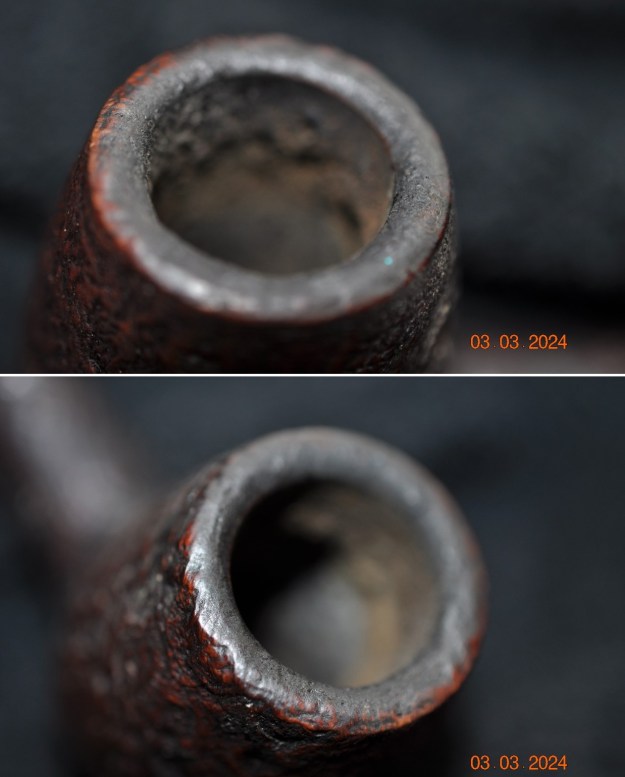
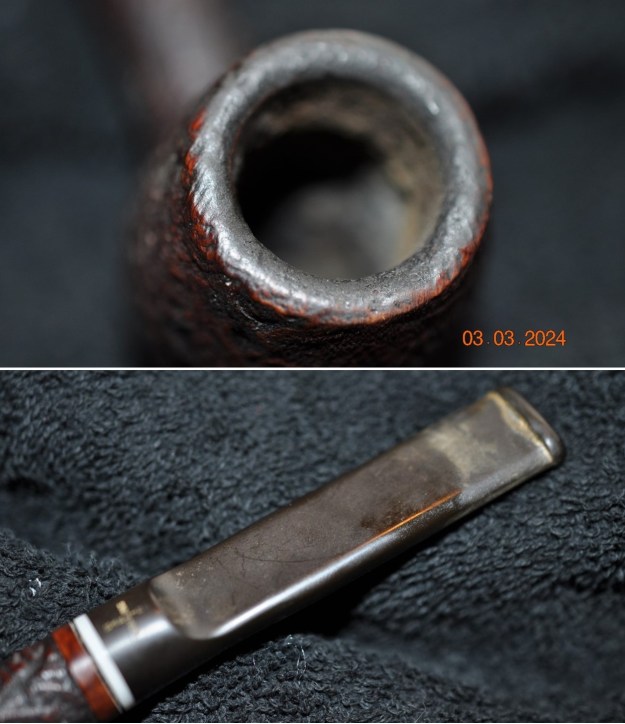
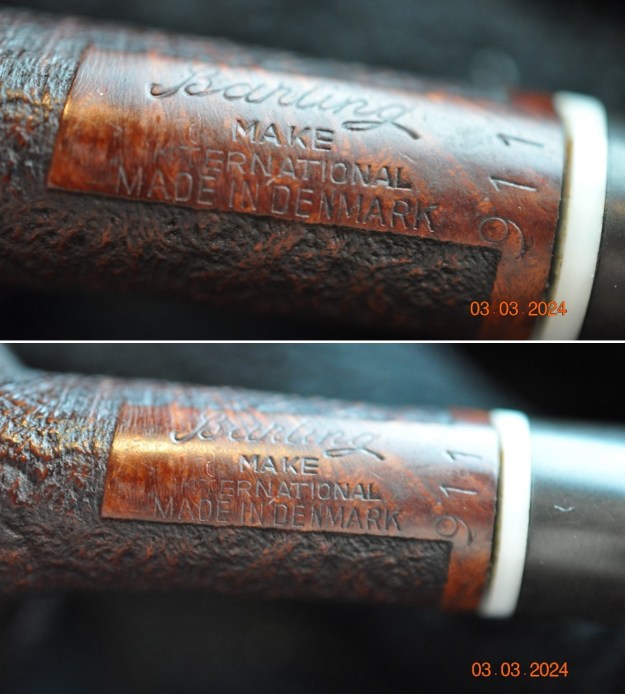
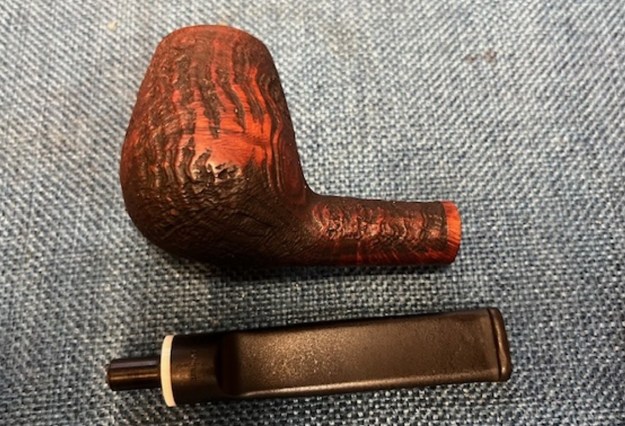
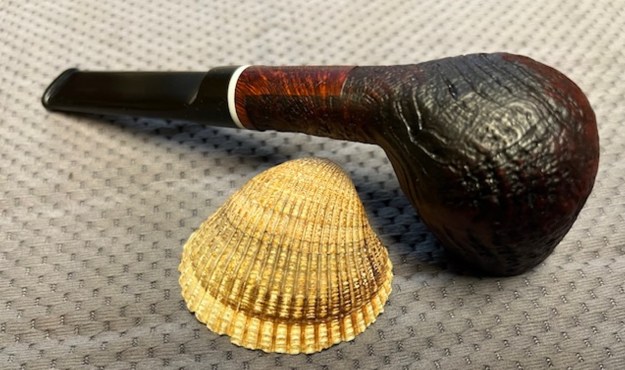
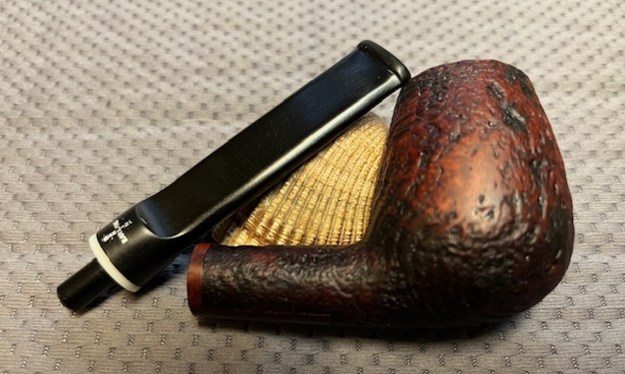
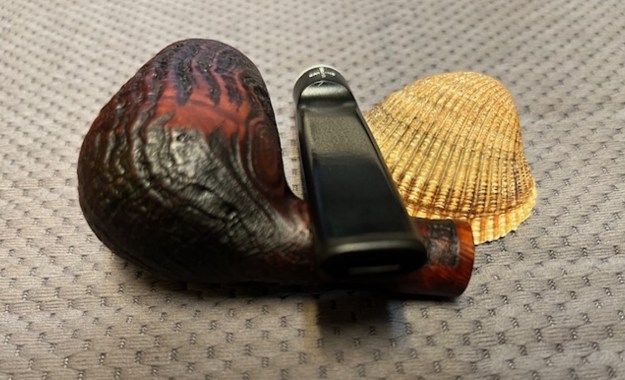
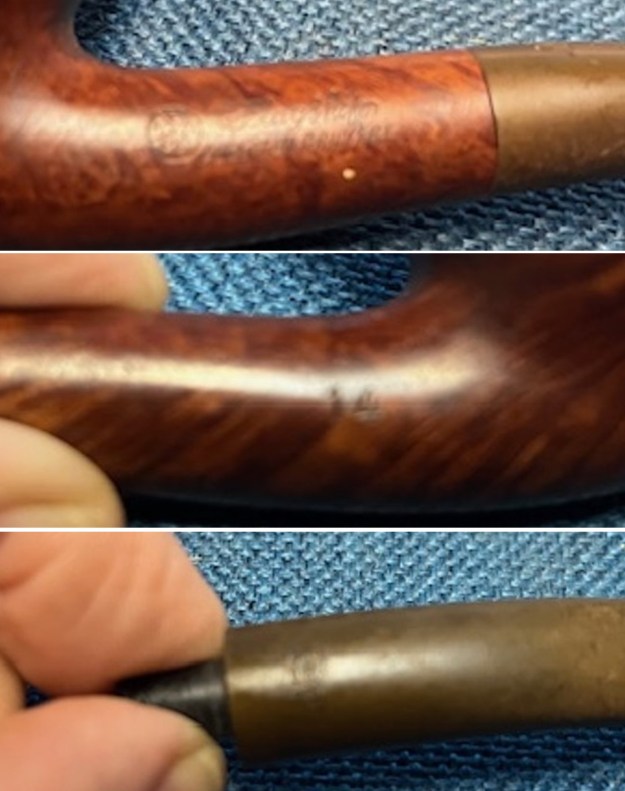
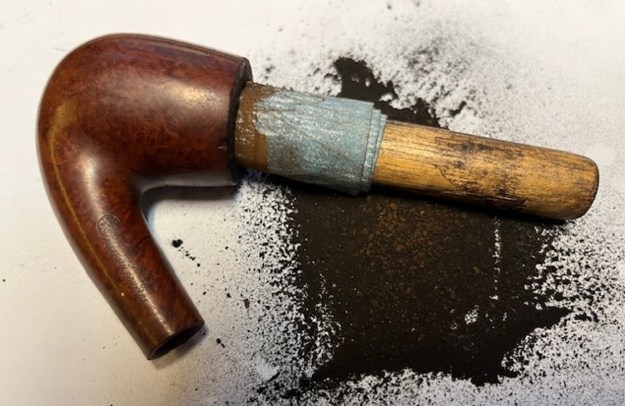
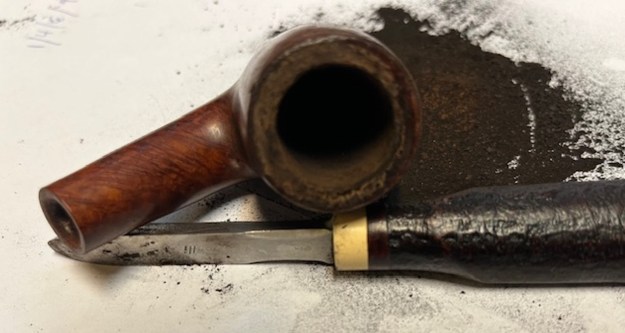
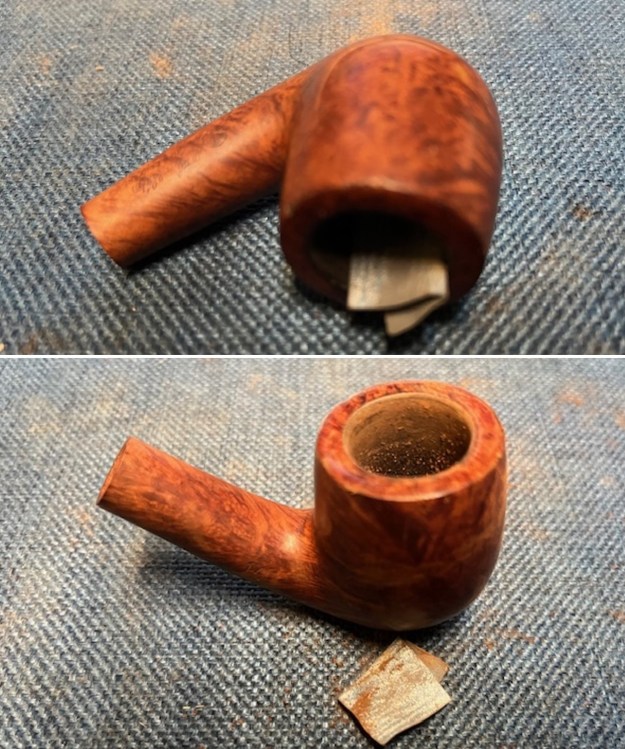
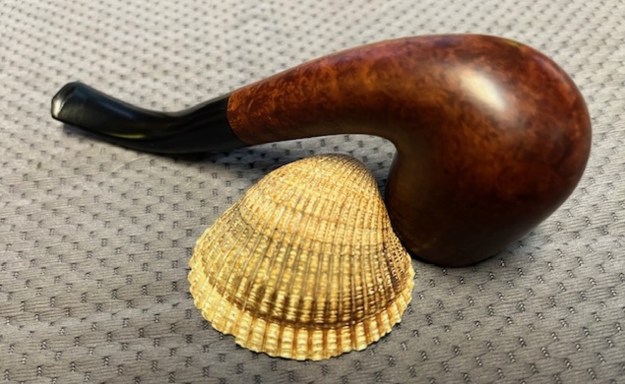
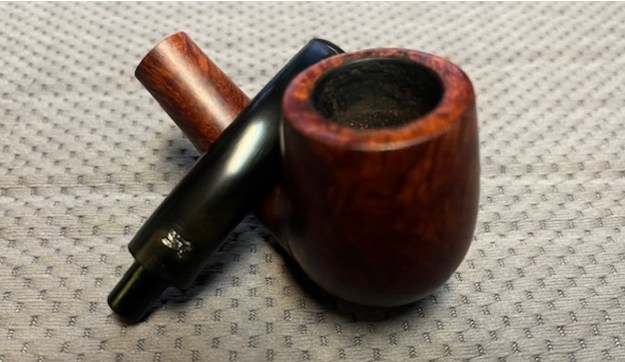
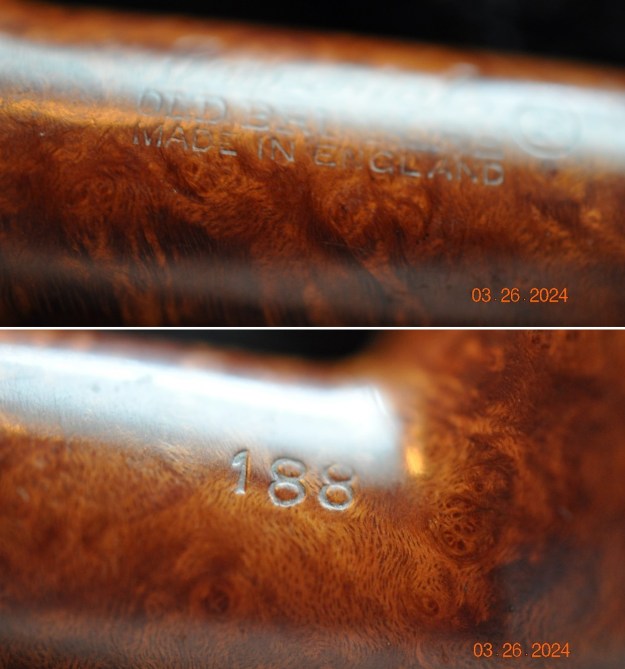
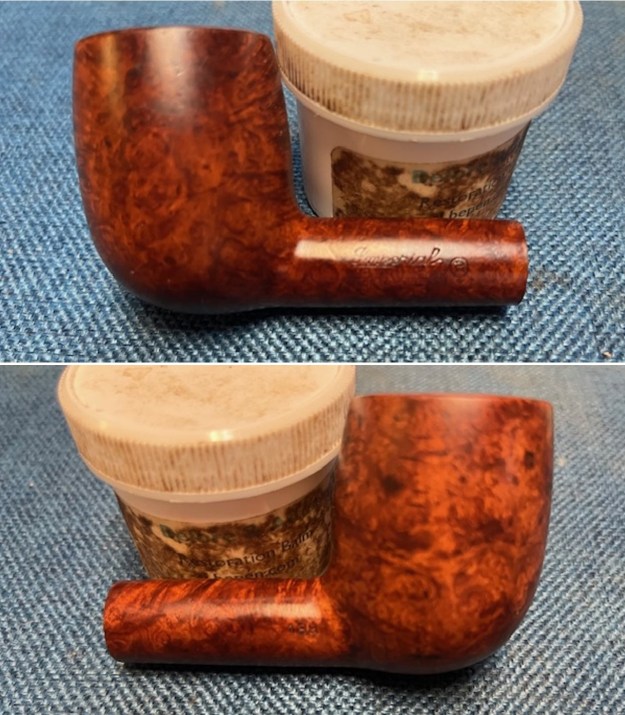
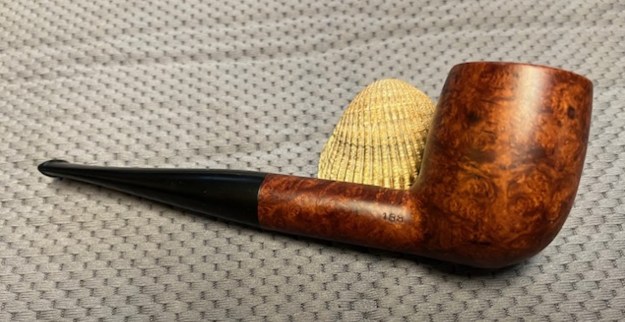
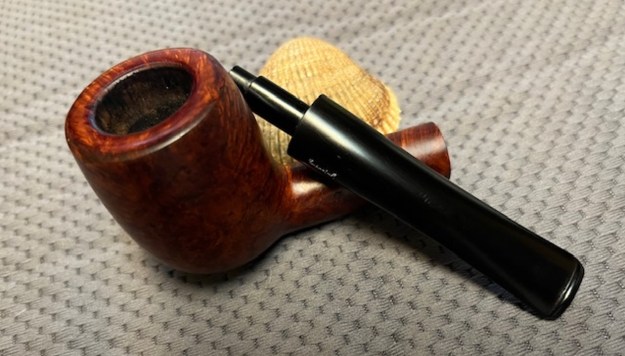
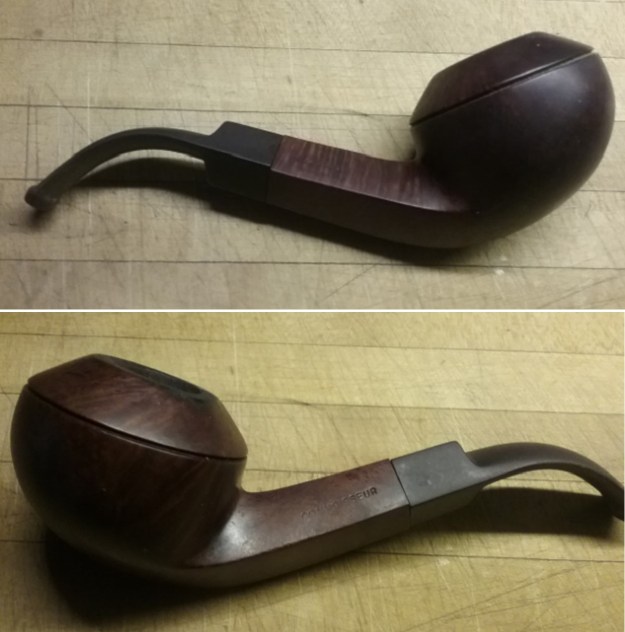
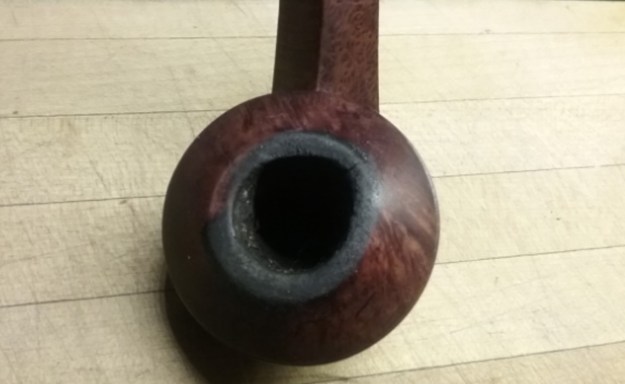
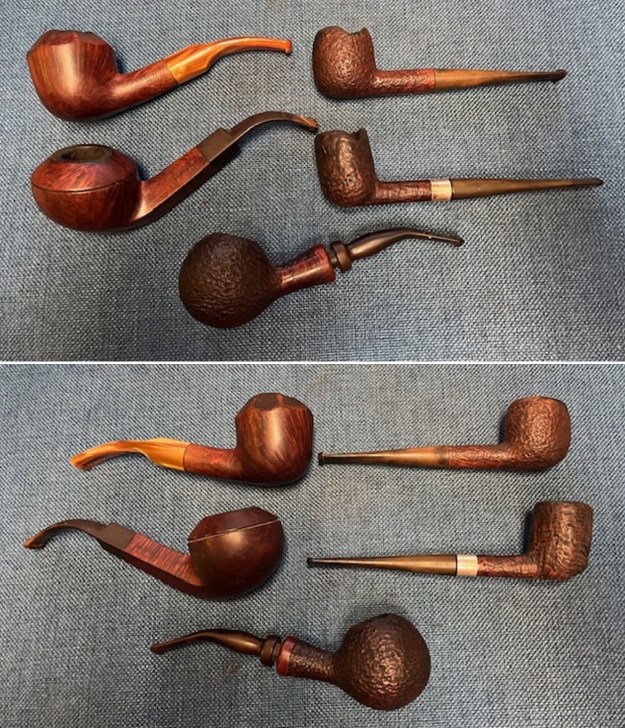
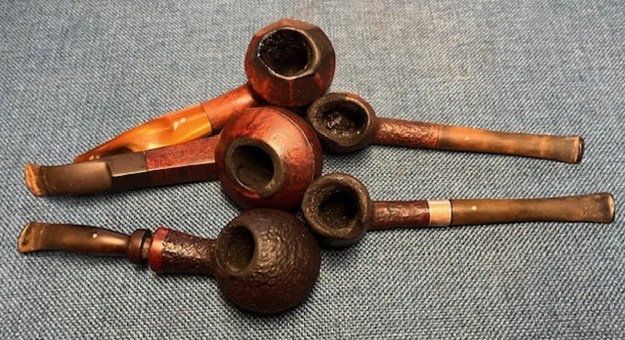
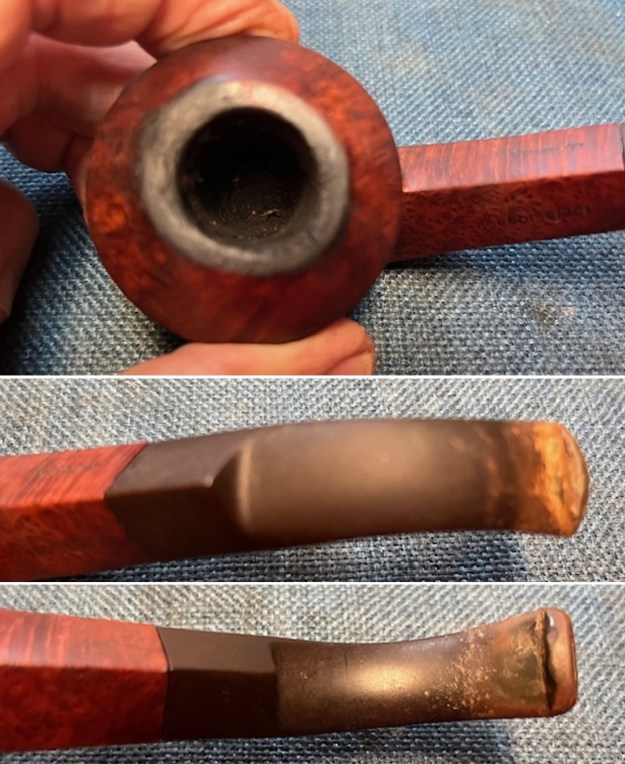
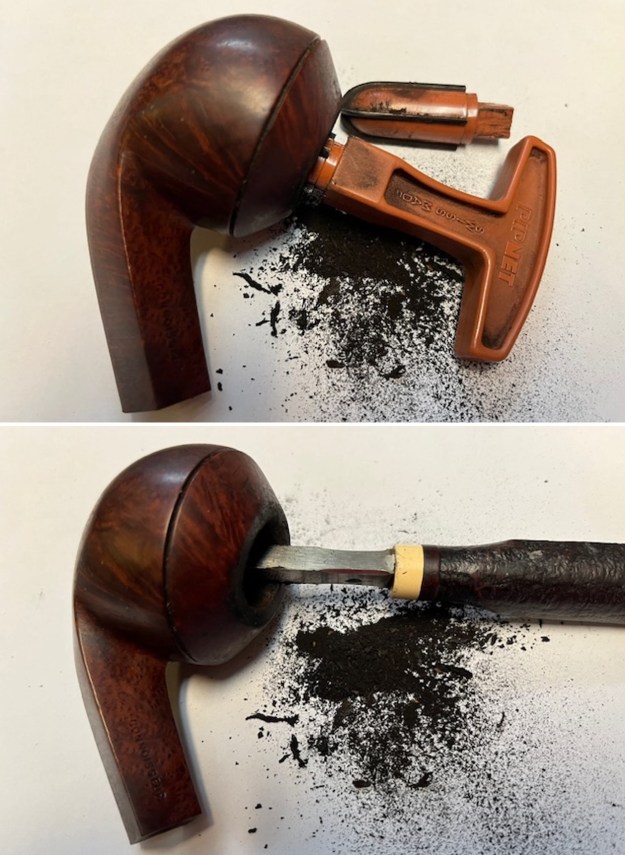
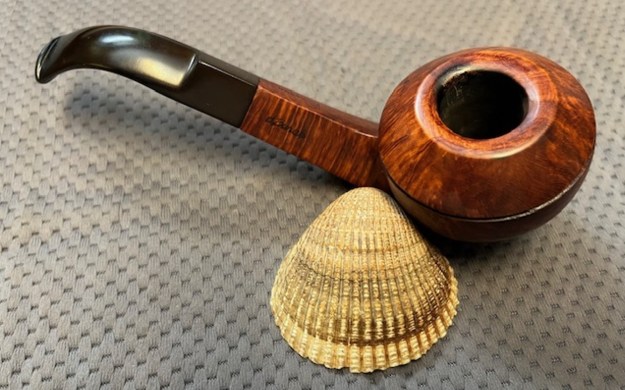
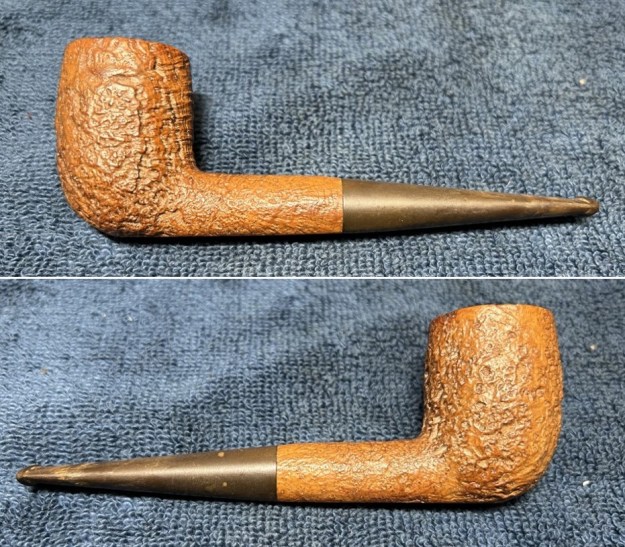
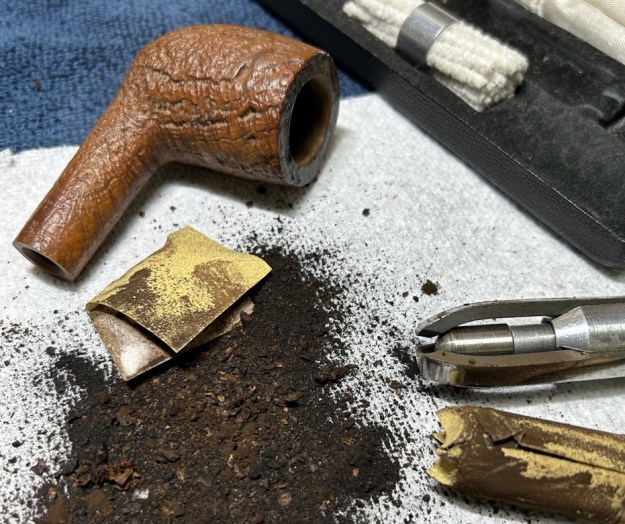
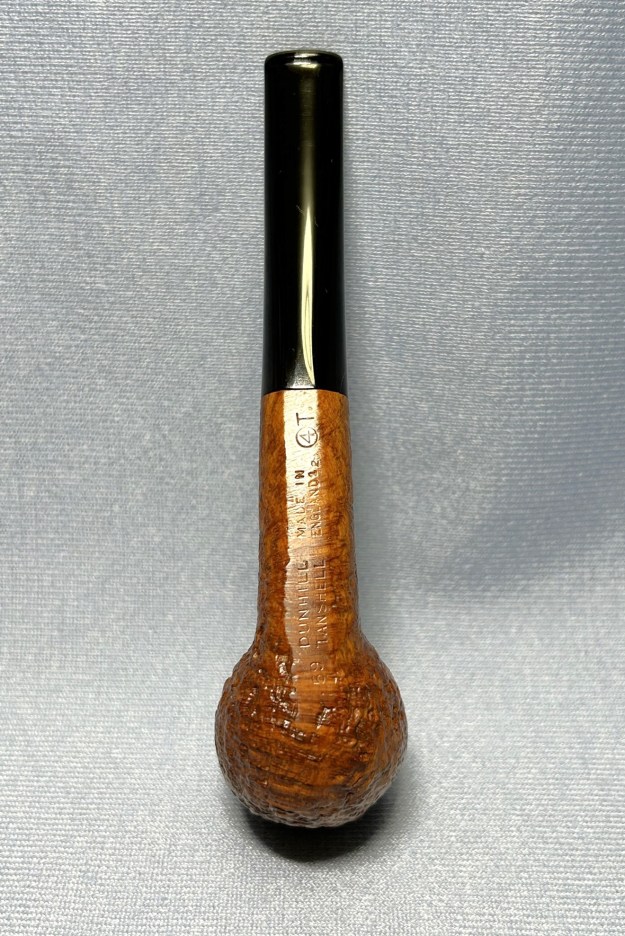
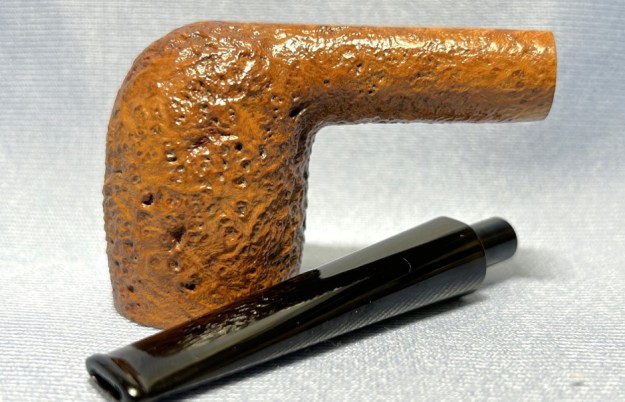
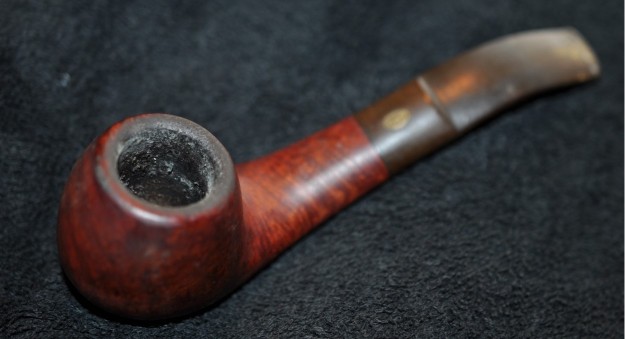
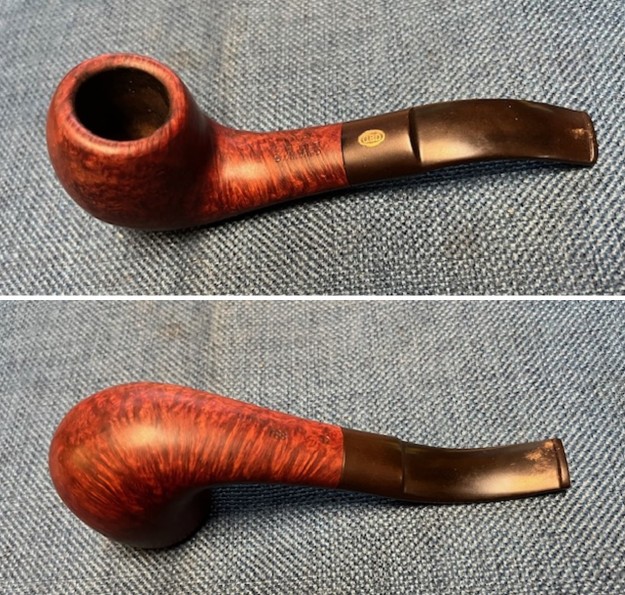
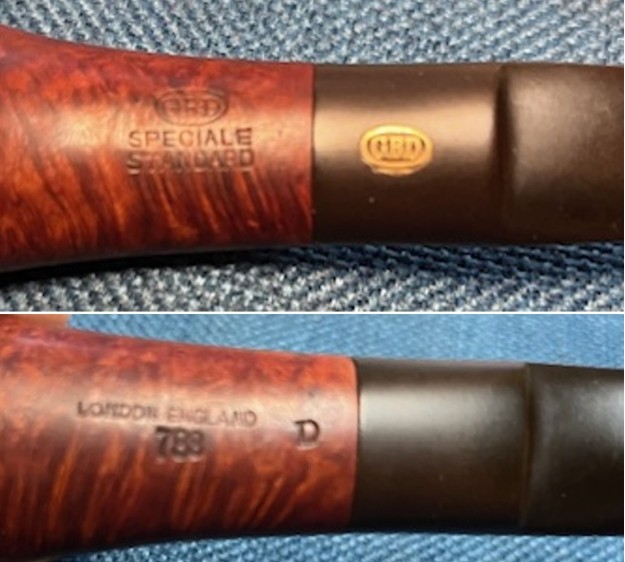
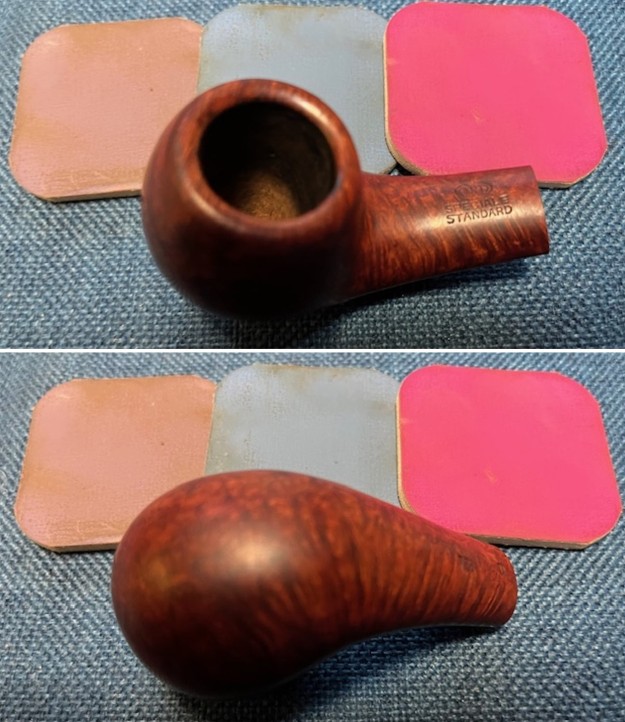
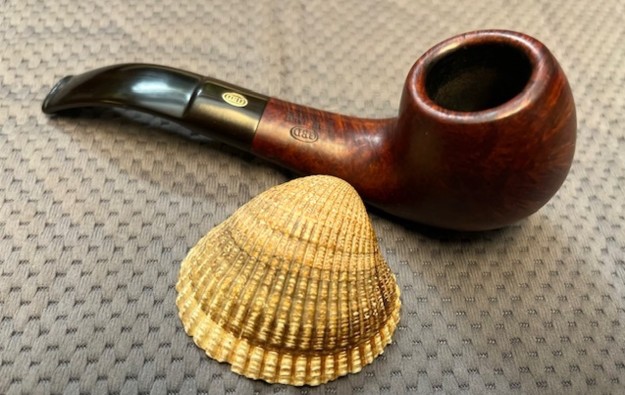
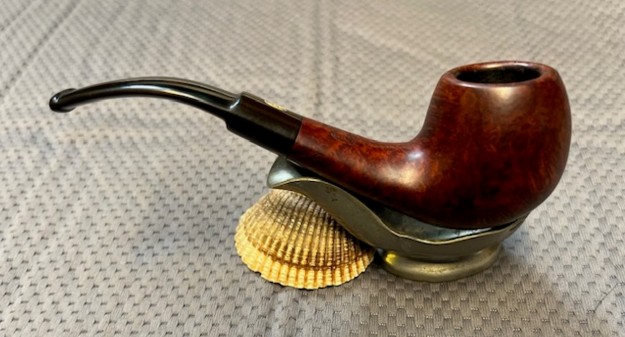
The next pipe on the table was one we purchased on 01/22/24 off eBay from a seller in Jordan, Minnesota, USA. It is a uniquely rusticated Jobey that I have never seen before. I have worked on a lot of Jobey rusticated pipes but this is a unique one. It has almost a tree bark rustication on the higher parts and the deep areas are carved like leaves. The stem is a saddle stem that is tortoise shell amber acrylic with a Jobey brass oval inlaid on the left side of the stem. The pipe is stamped on smooth panels on the left and right top sides of the diamond shank. The left side reads Jobey in script [over] Florentine. The right side has the shape number 360 stamped. Both are clear and readable. The finish is quite dirty with darkening in the deep rustication in spots where the hand held the bowl on both sides. It looks like burn marks but I don’t believe that they are. The rim top is also dirty with darkening and also lava in the rustication on the edges as well. There is a thick cake in the bowl with some tobacco debris stuck on the walls and in the heel. The stem has tooth marks and chatter on both sides ahead of the button that are a bit deep and will need to be addressed. The tenon is the Jobey Link System as you will see in the photos. Jeff took some photos of the pipe before he started his clean up work. It is unique and certainly one that we are looking forward to seeing once it is cleaned up.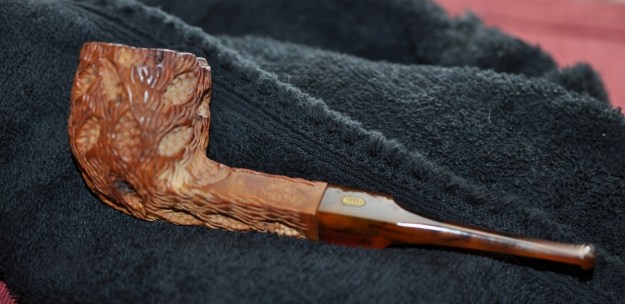
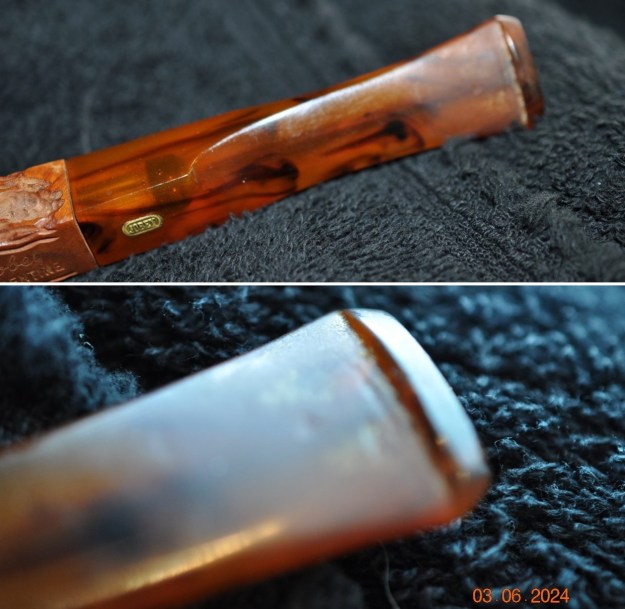
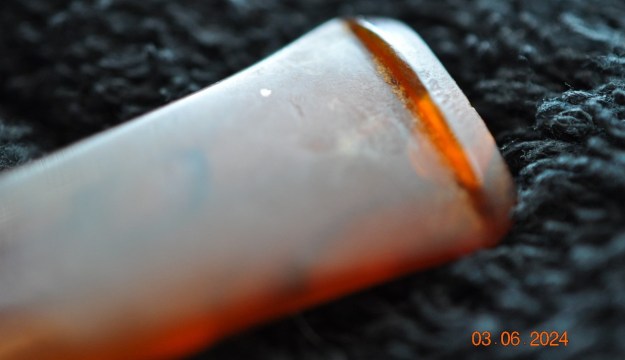
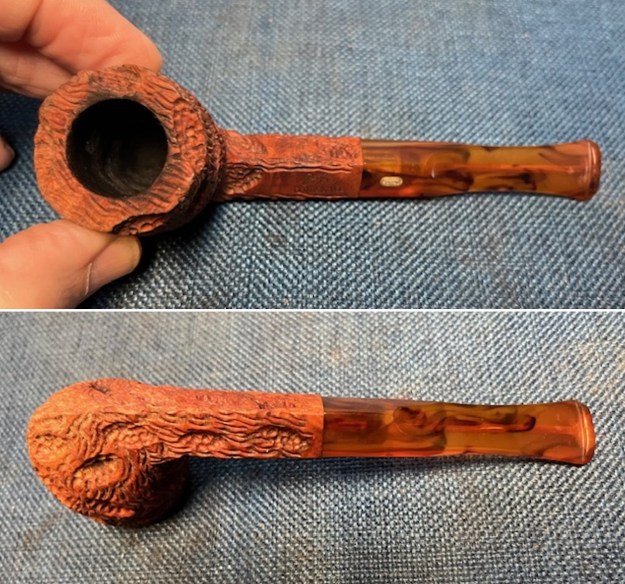
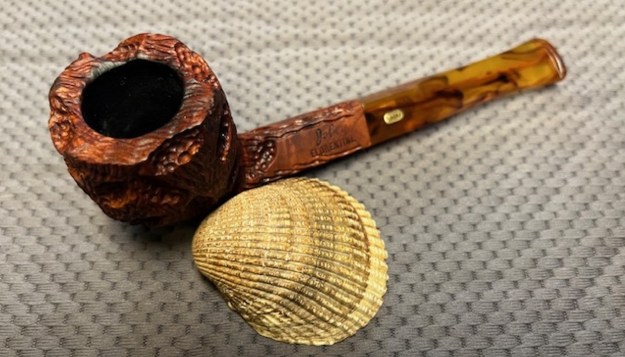
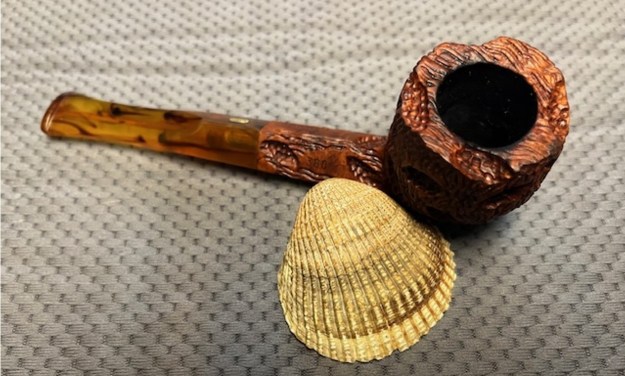
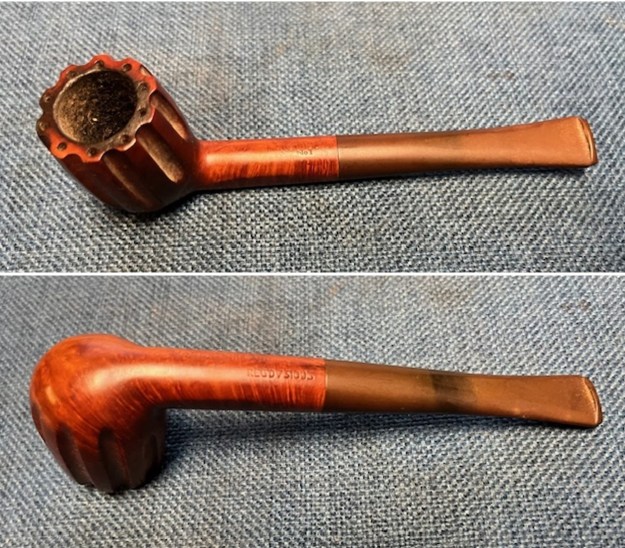
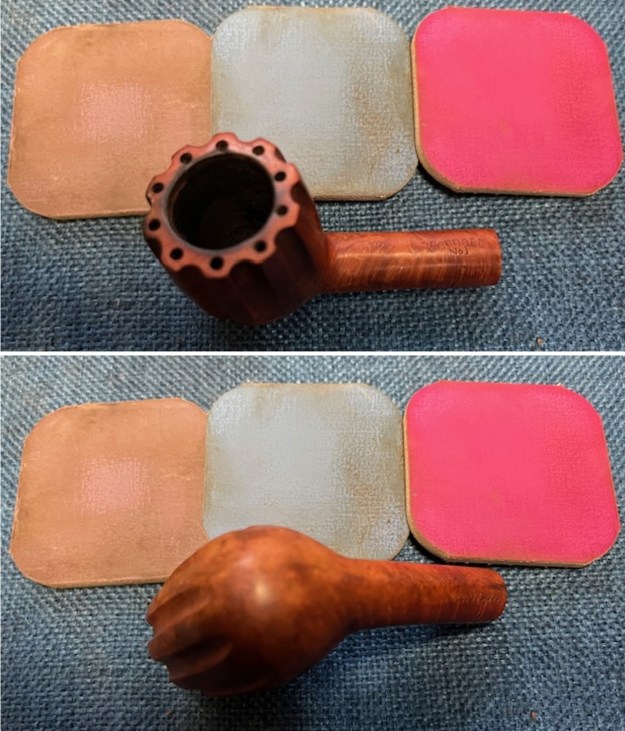
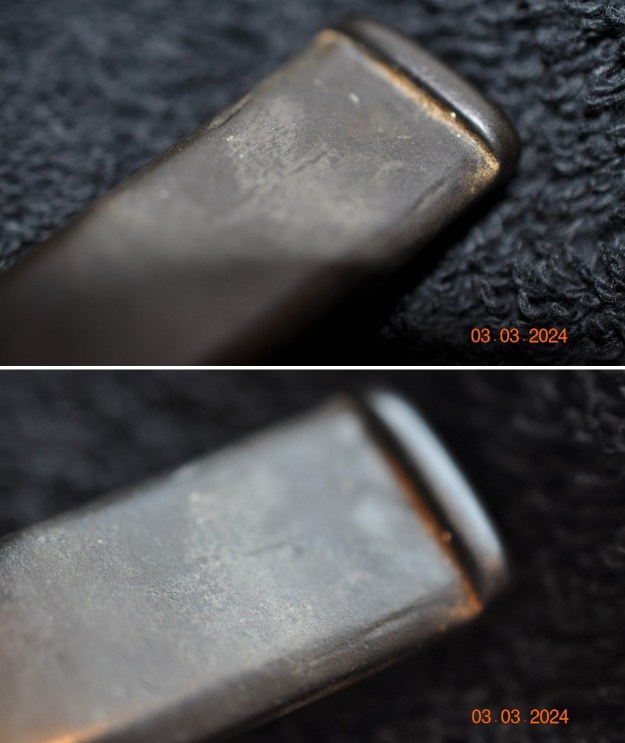
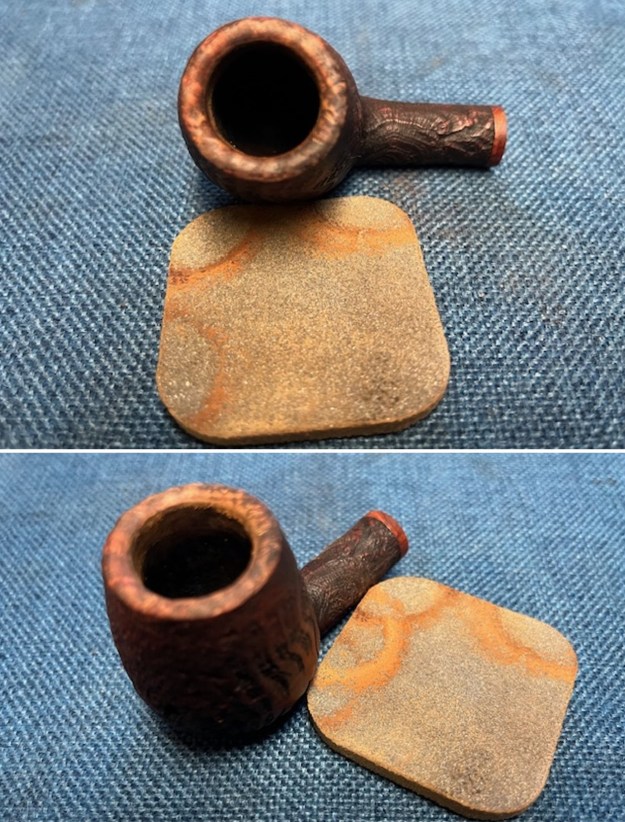
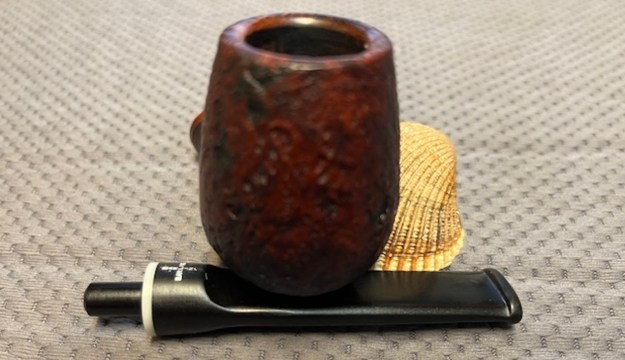
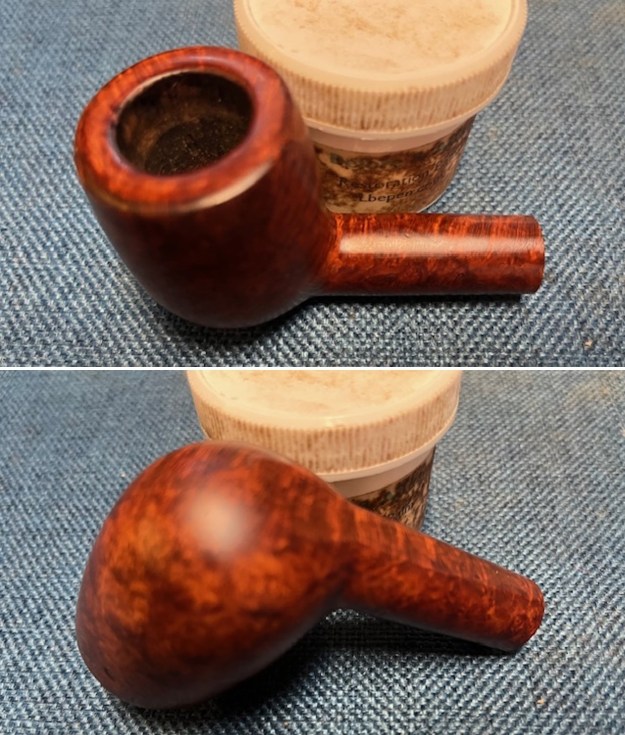
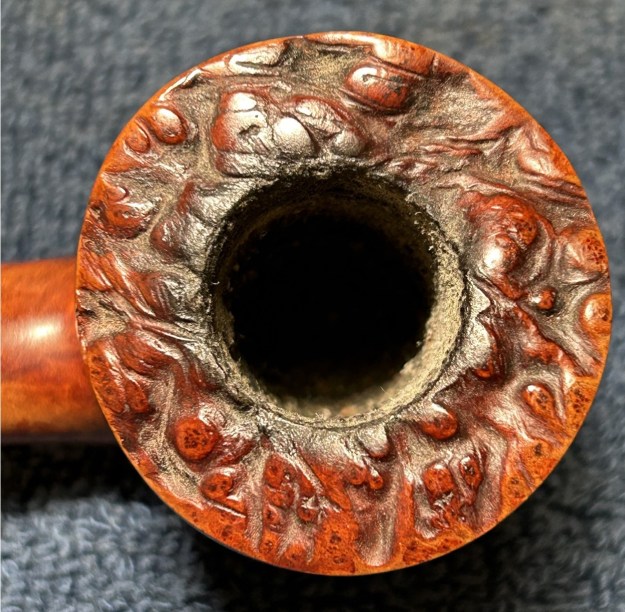
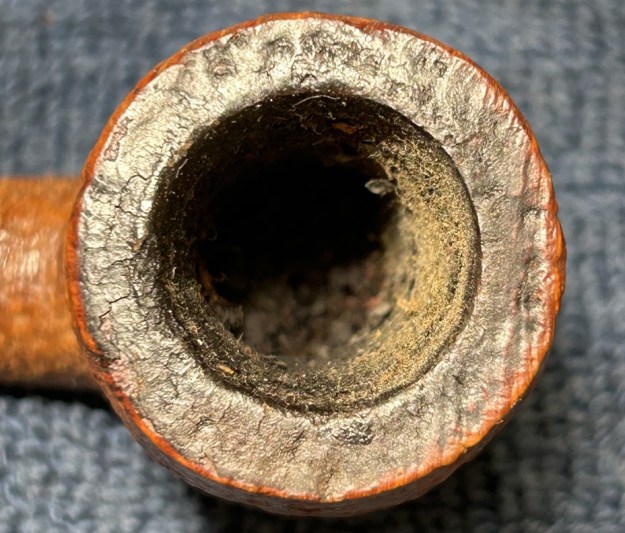
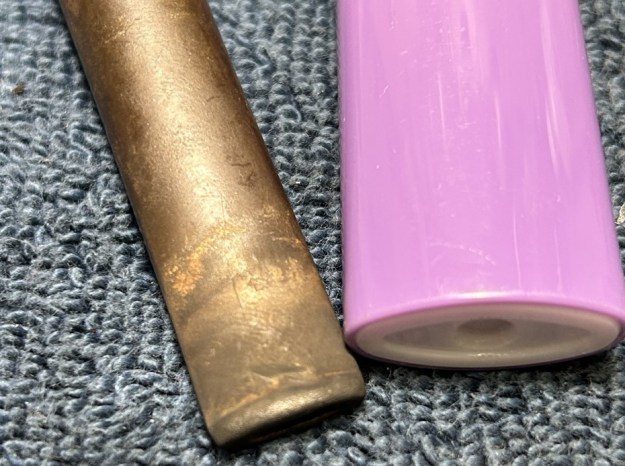
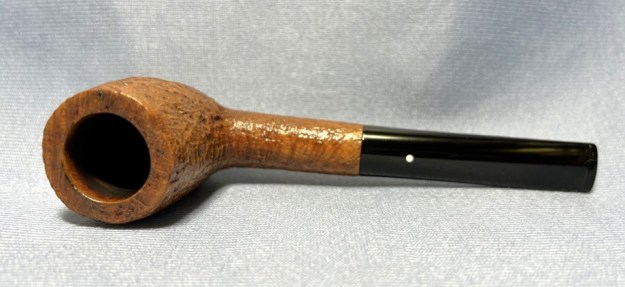
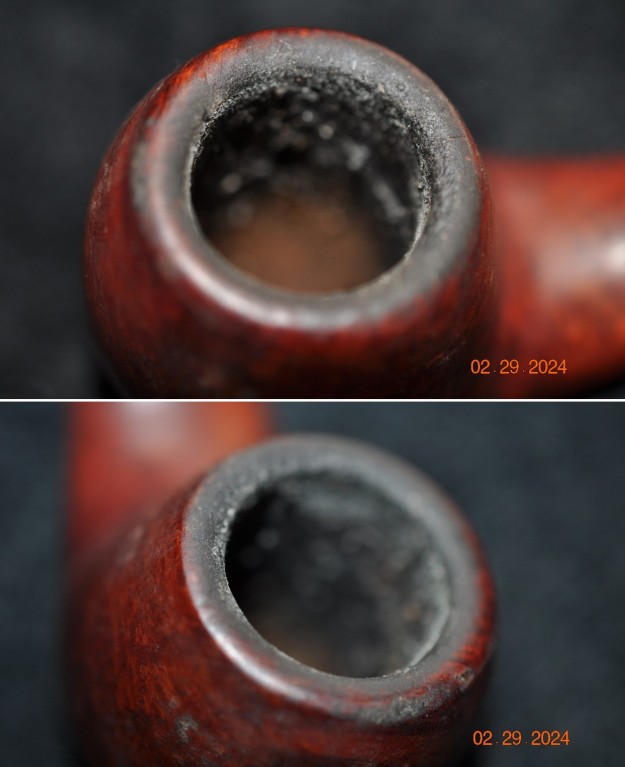
 Jeff took closeup photos of the bowl and rim top to clearly show the condition of both. The match what I described above. He also took photos of the stem to show the tooth marks and chatter on both sides ahead of the button.
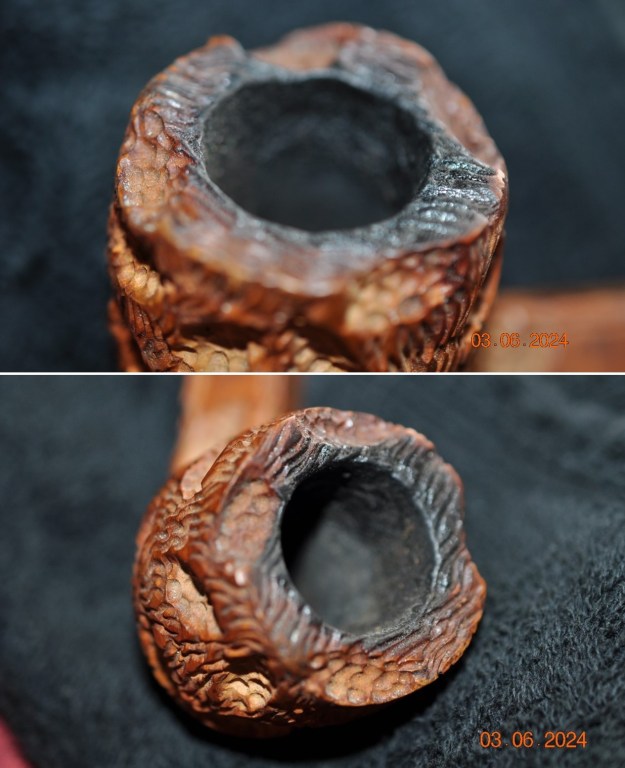
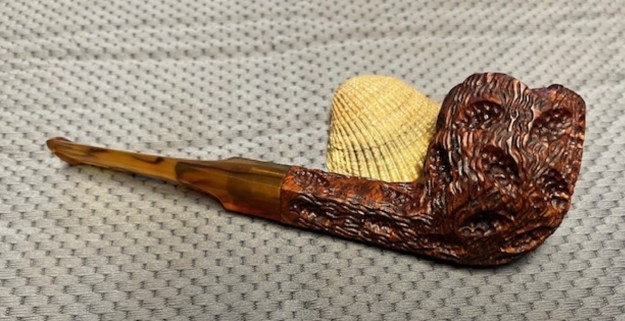
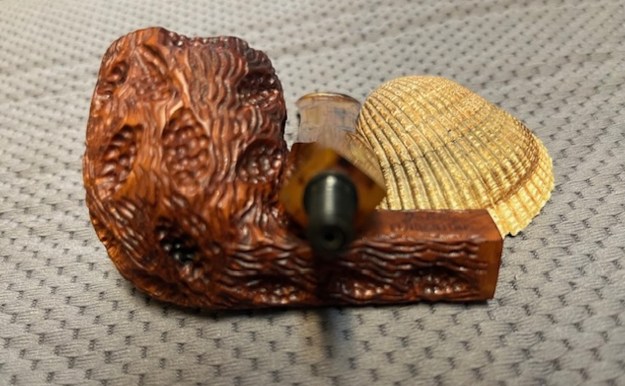
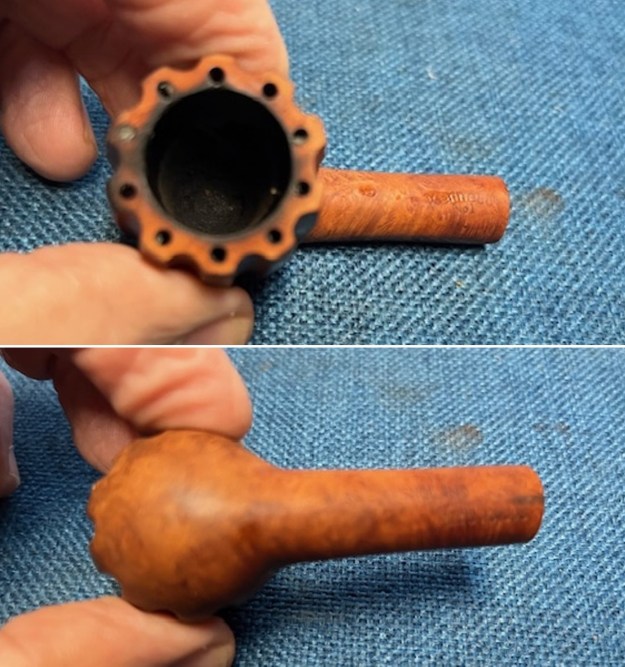
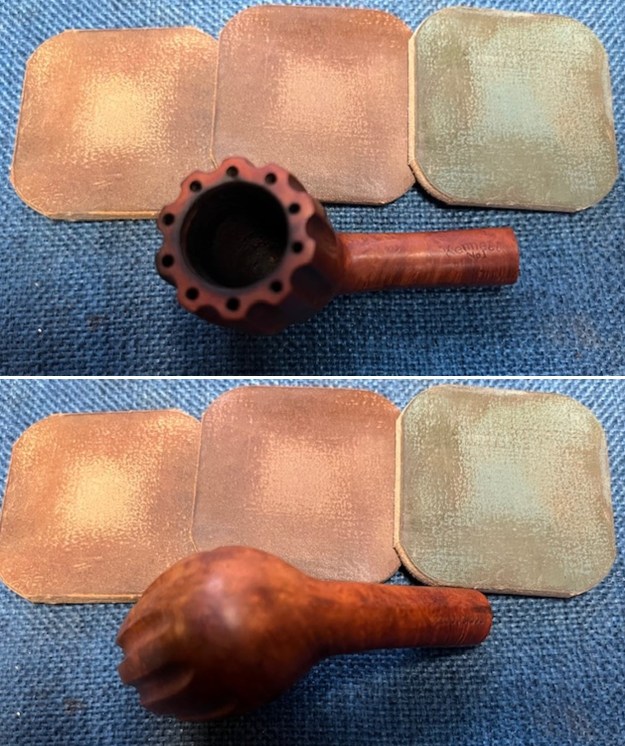
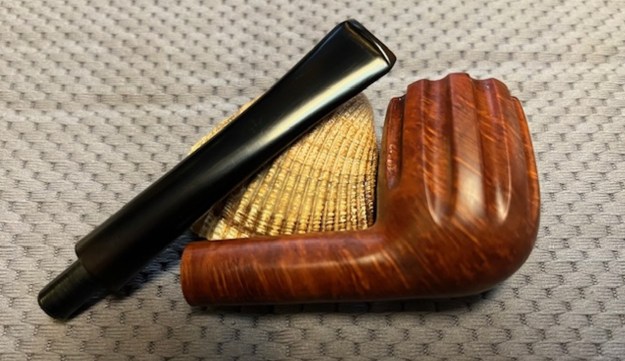
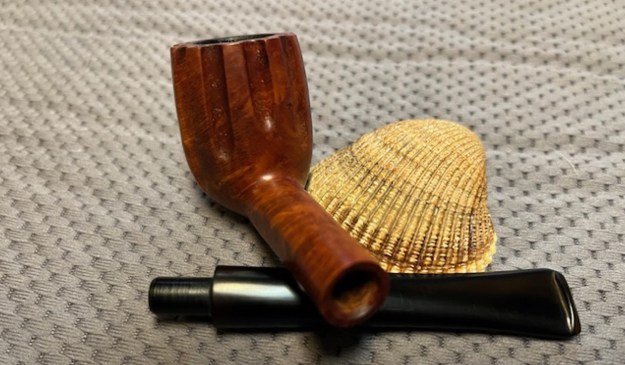
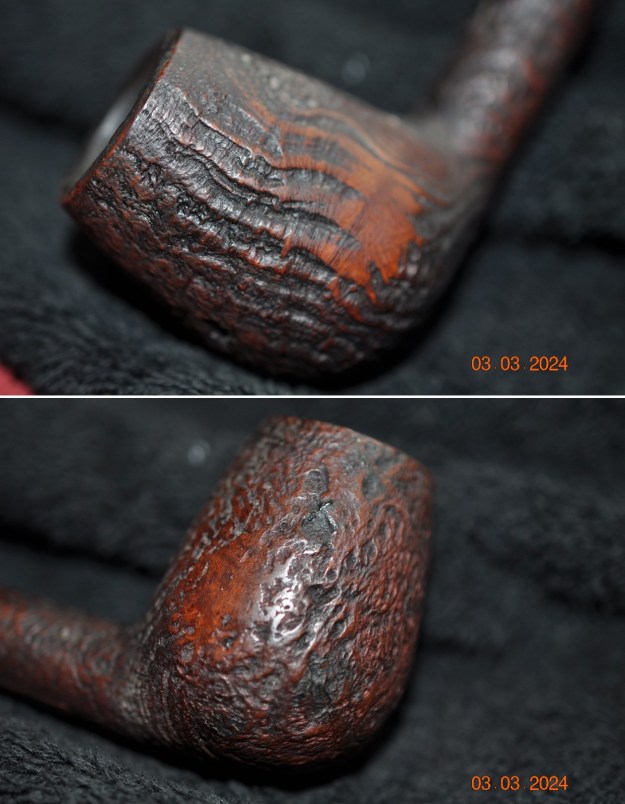
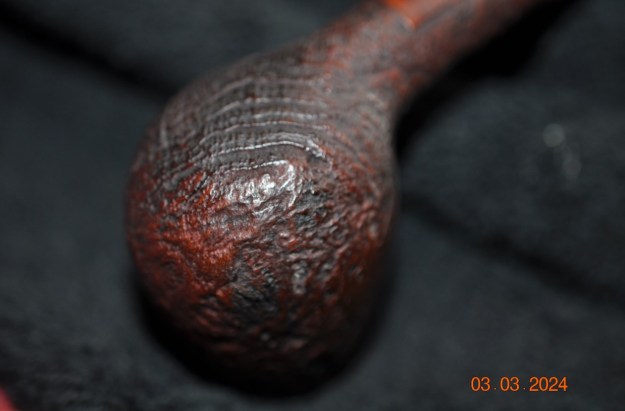
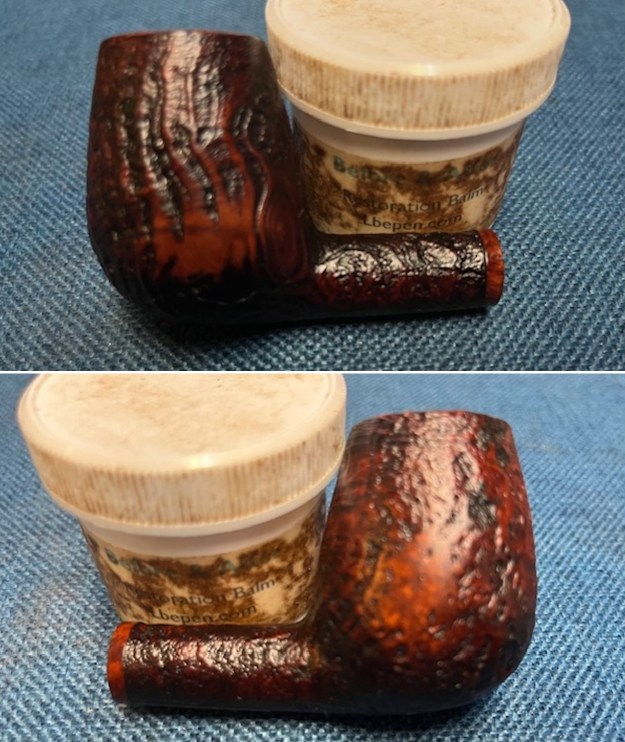
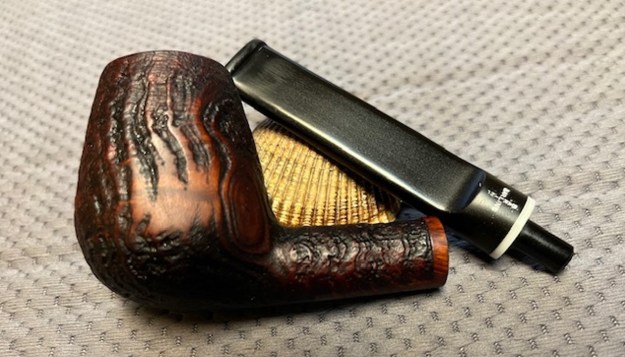
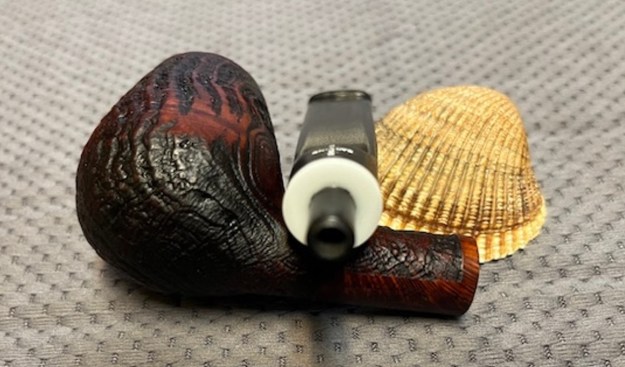
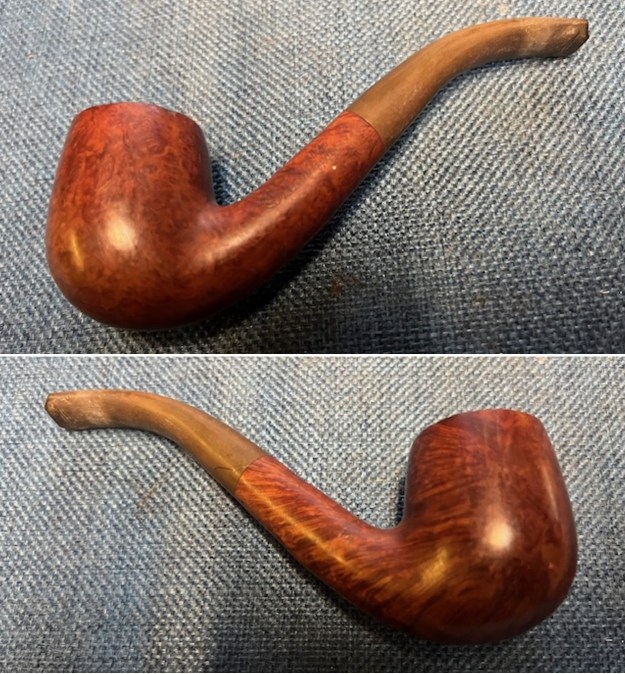
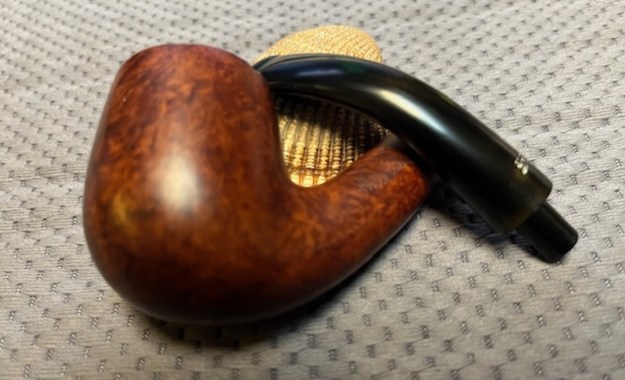
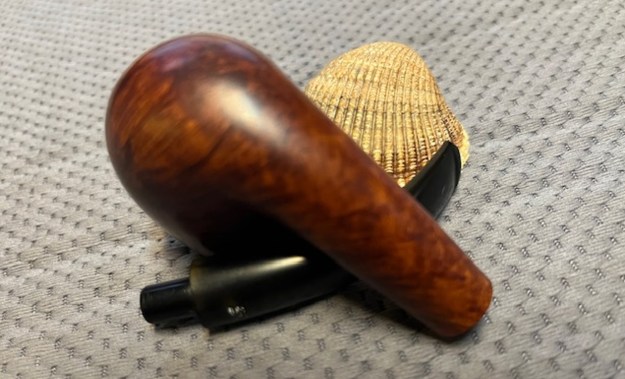
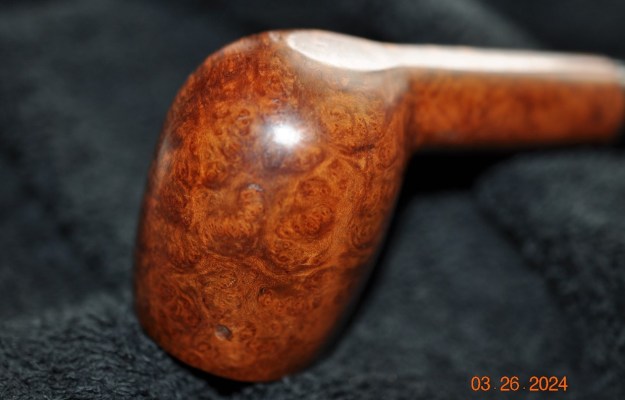
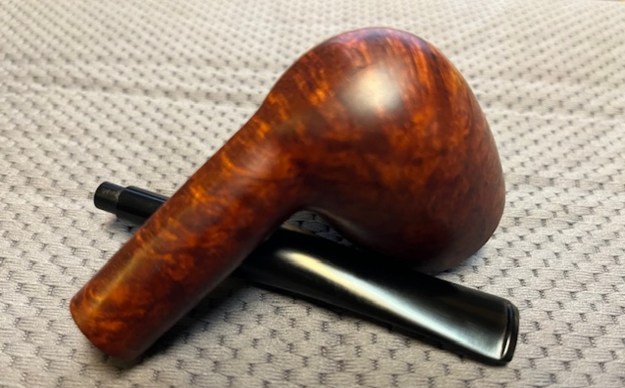
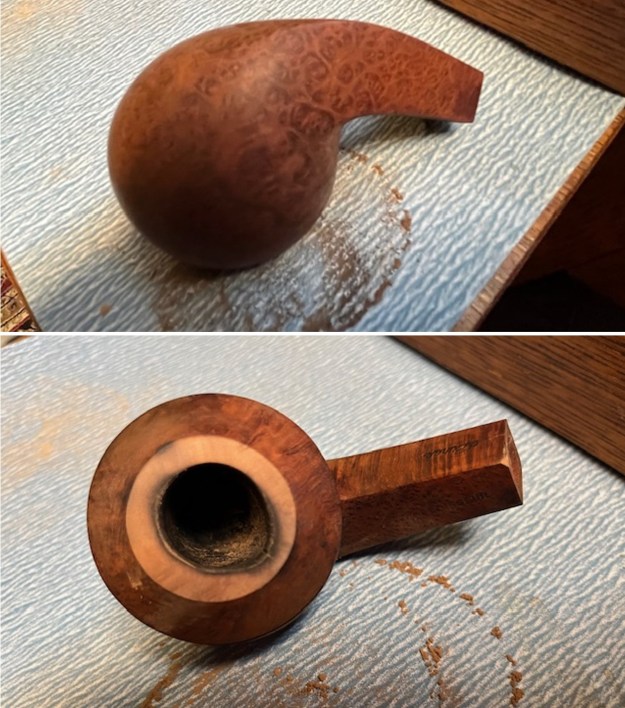
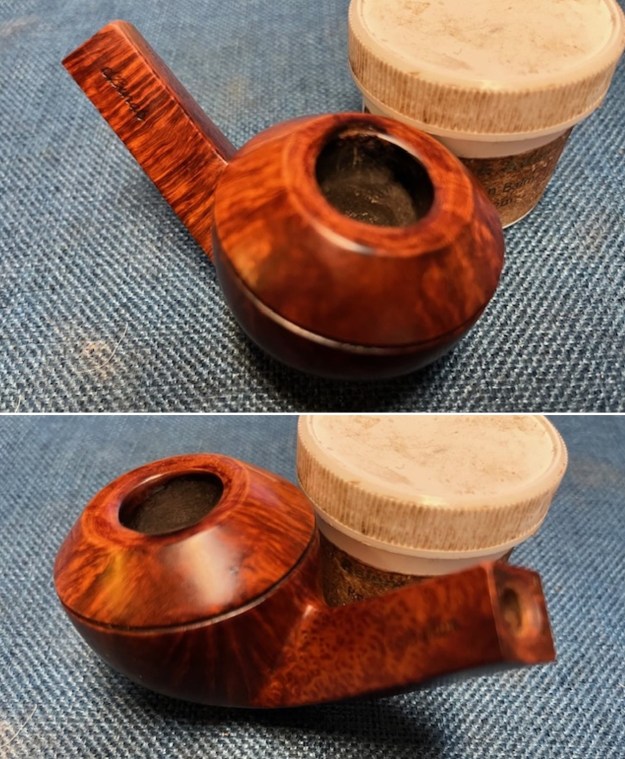
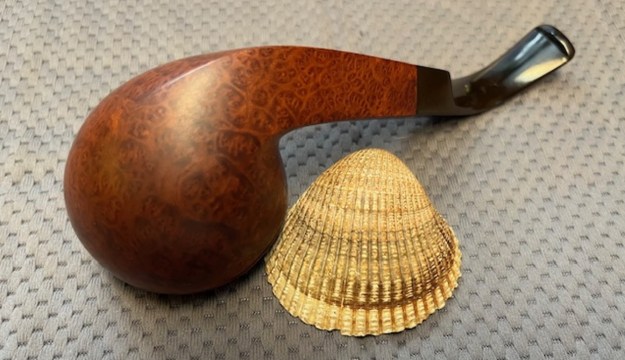
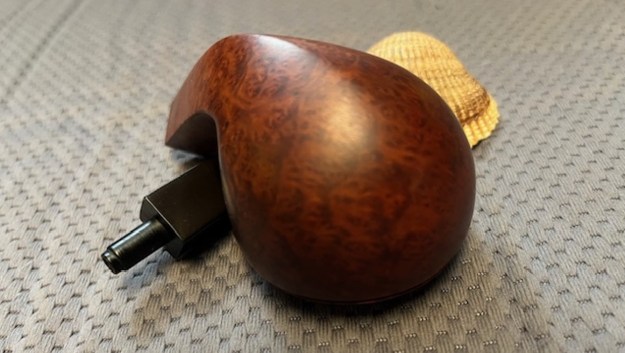
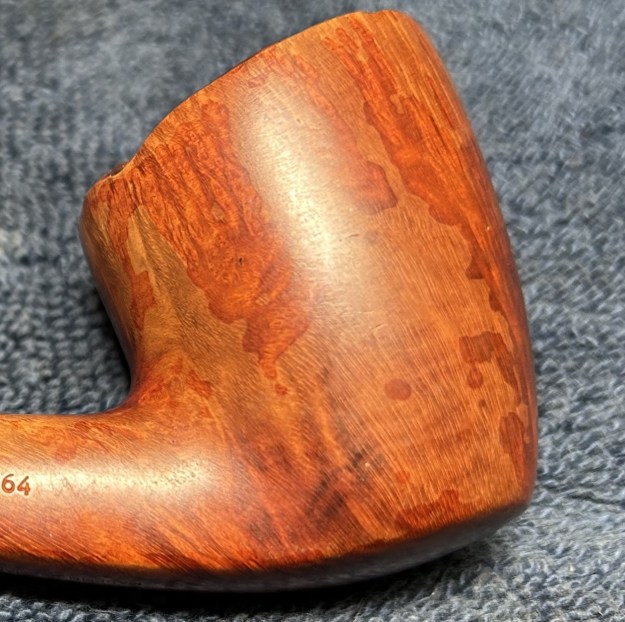
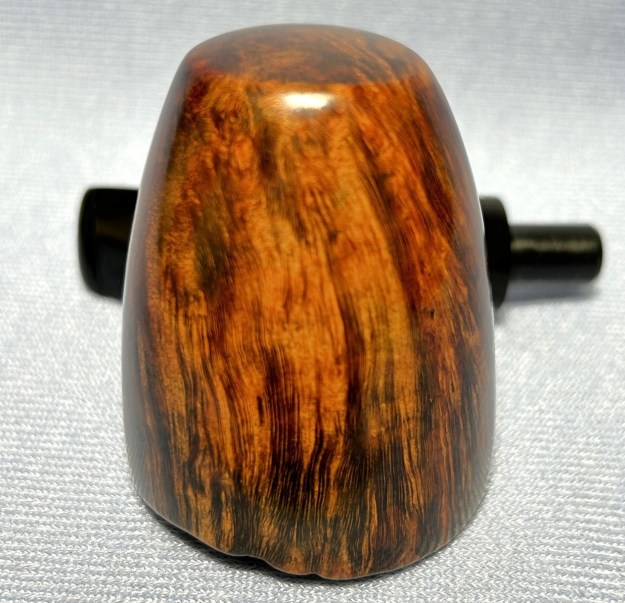
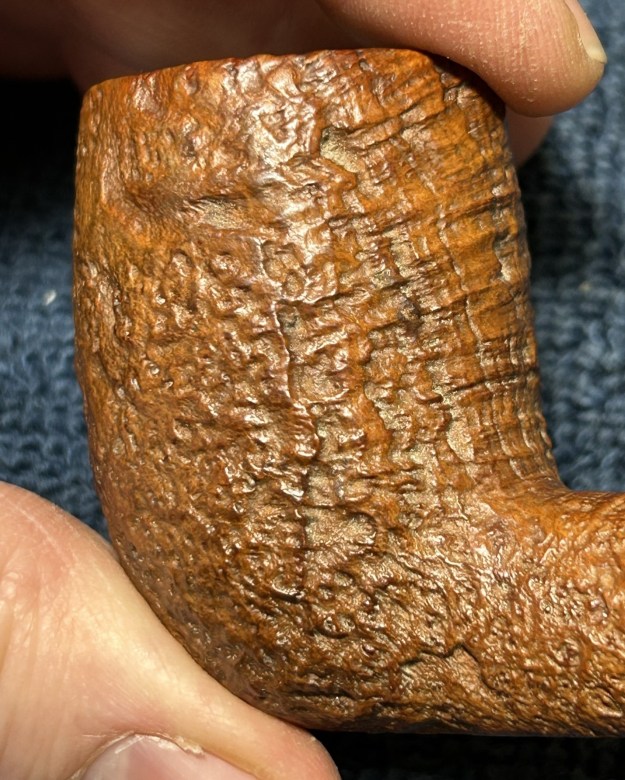
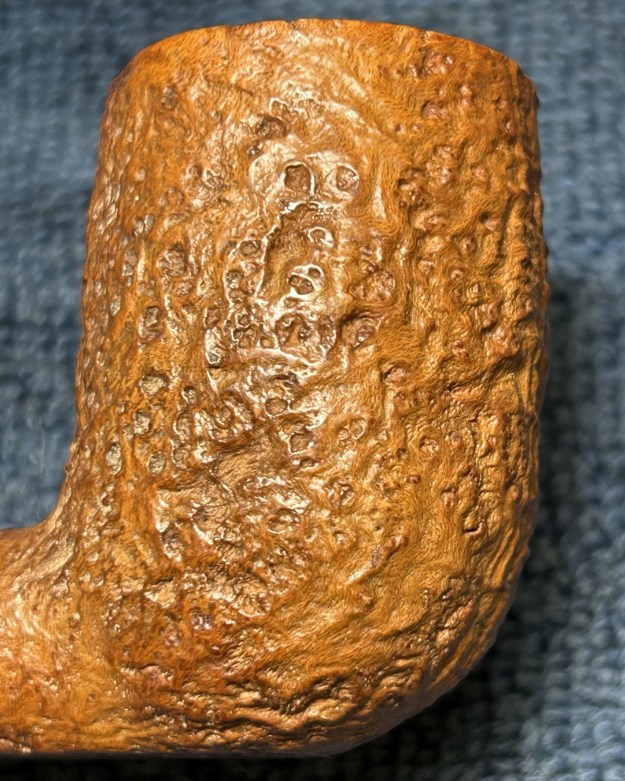
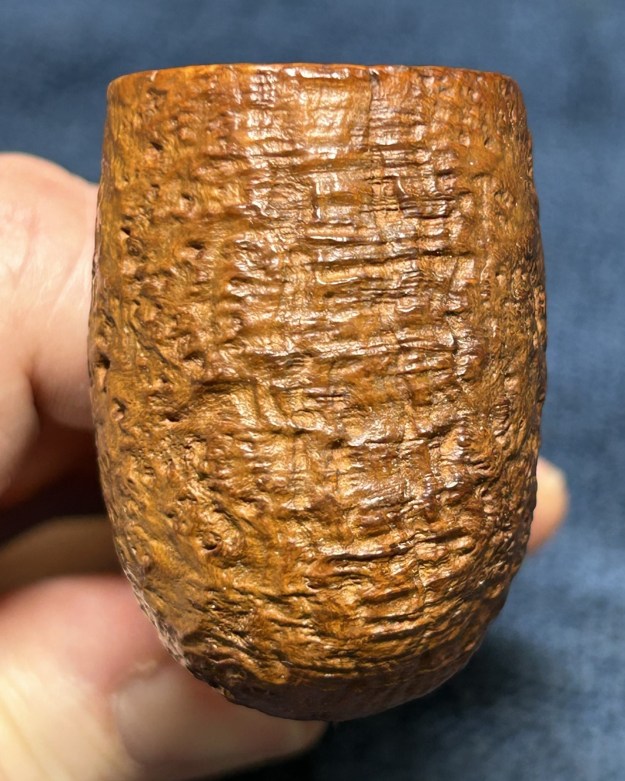
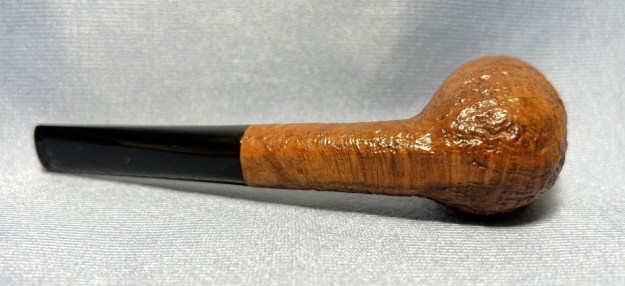
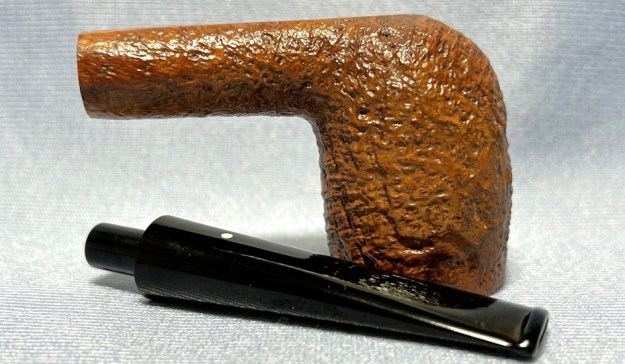
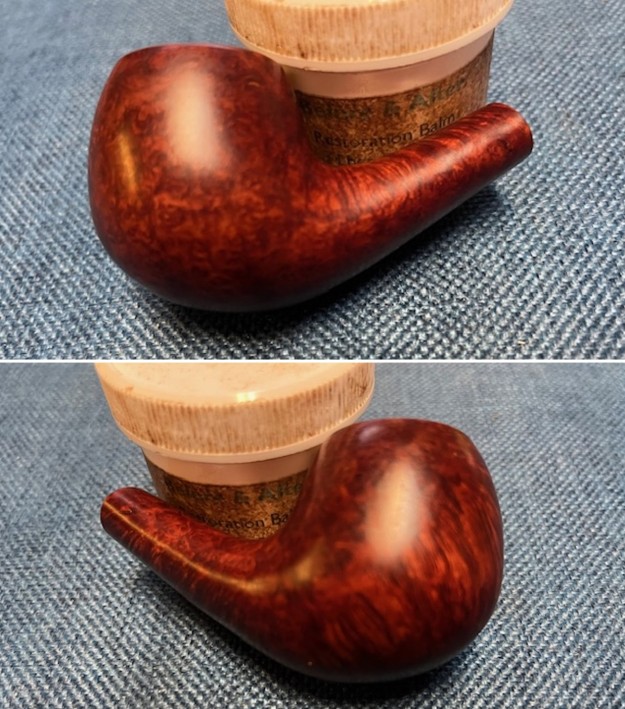
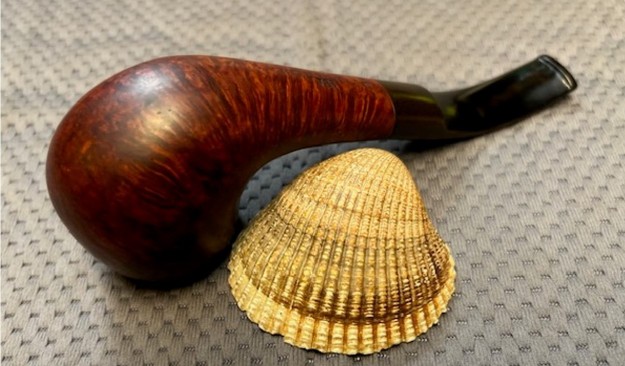
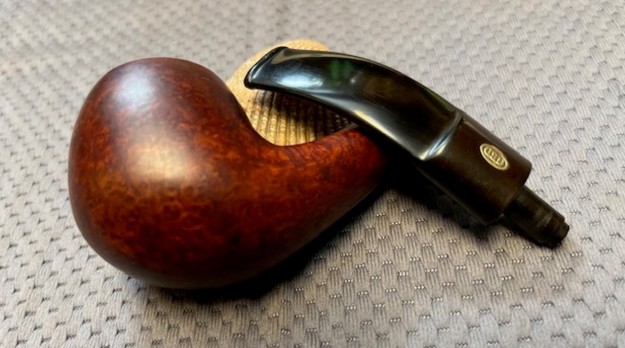
 He took photos of the finish around the sides of the bowl and the heel. You can see the tree bark rustication on the high parts and an almost leaf like pattern in the lower spots. It is a unique finish that is hard to clean but well worth the effort.
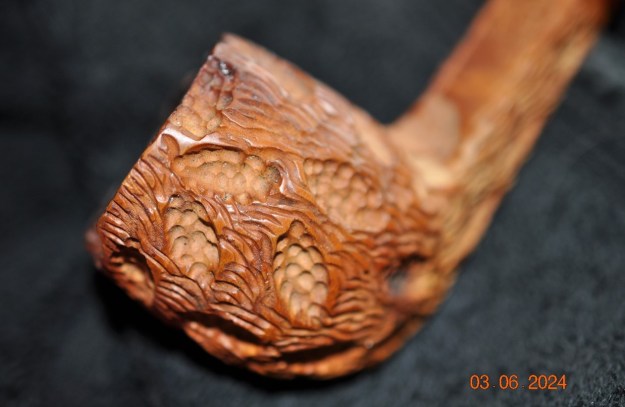
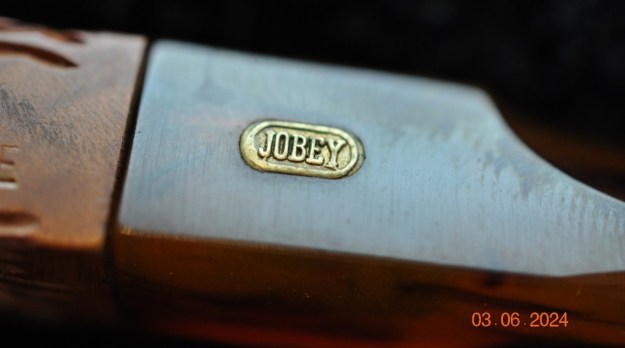
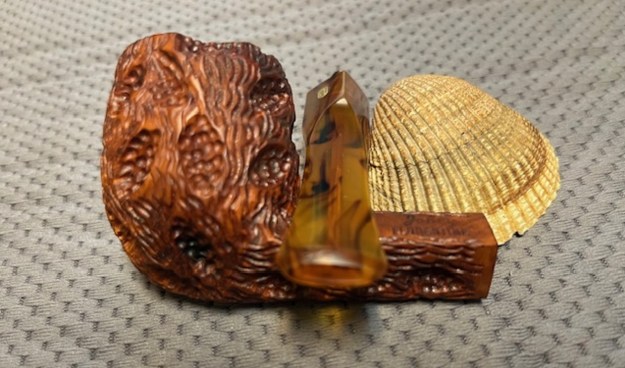
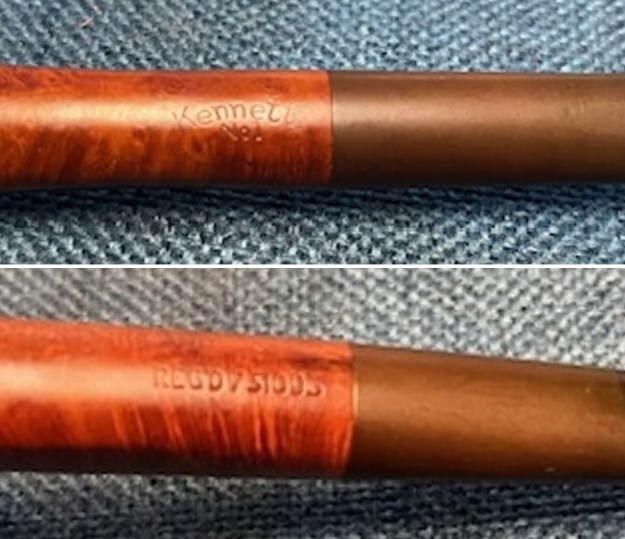
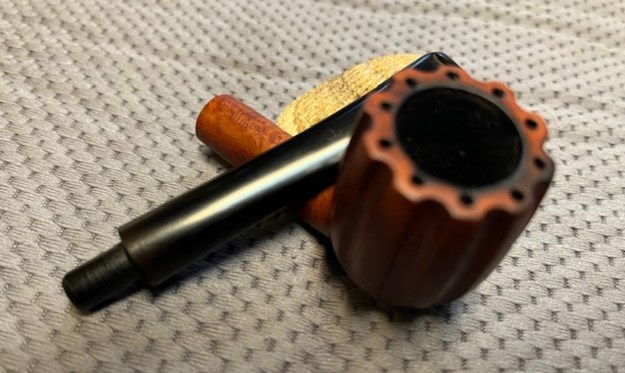
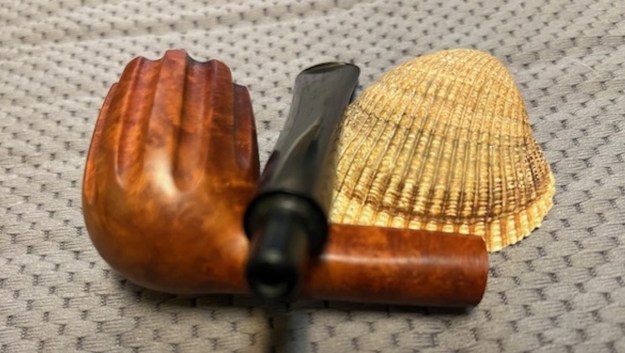
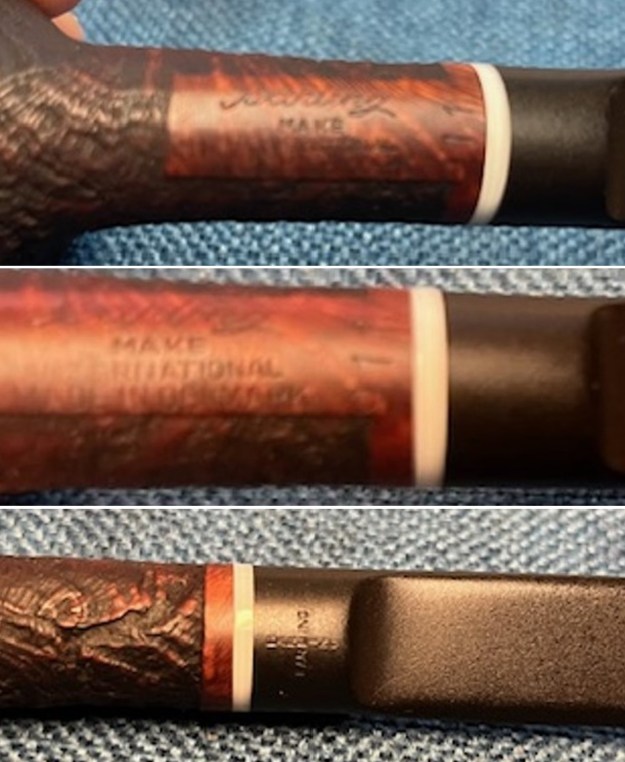
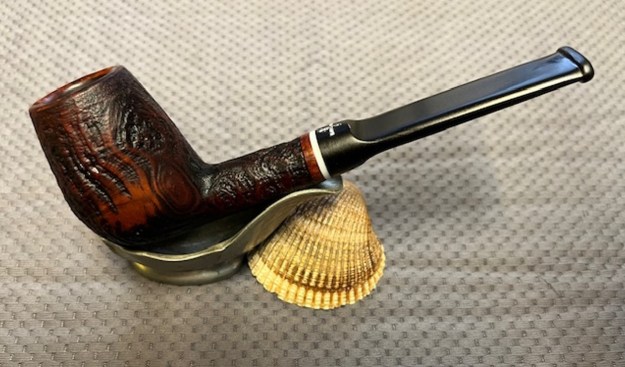
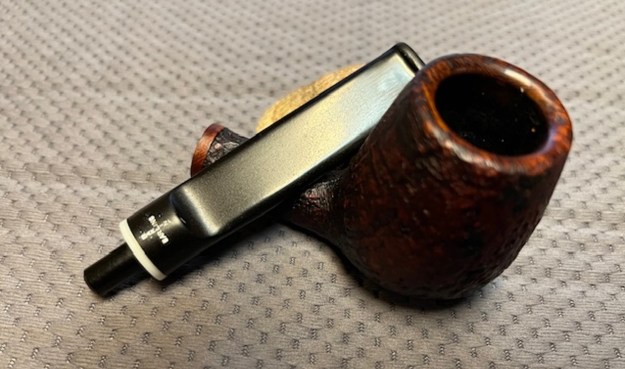
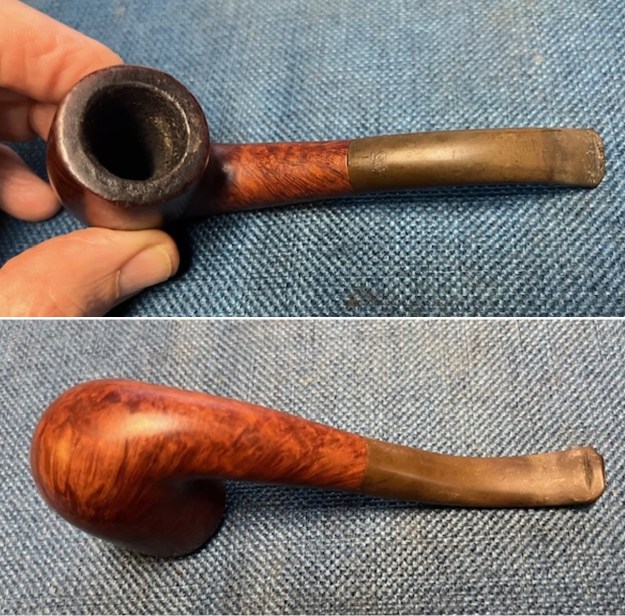
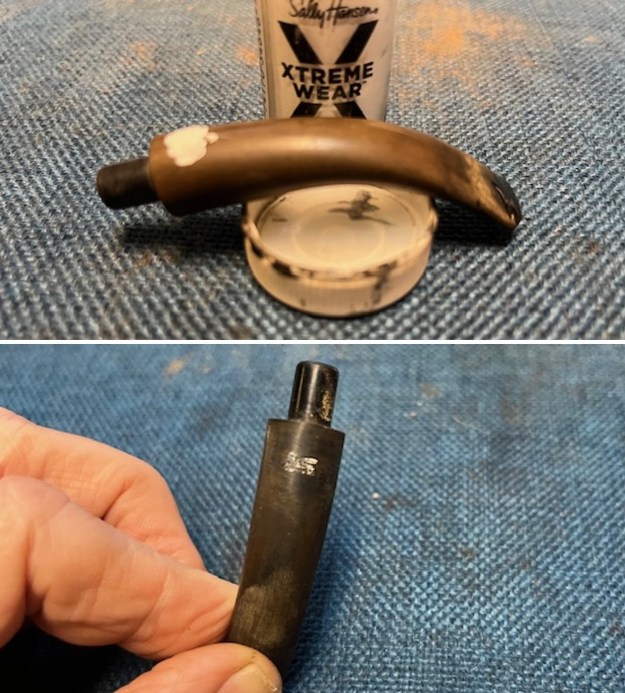
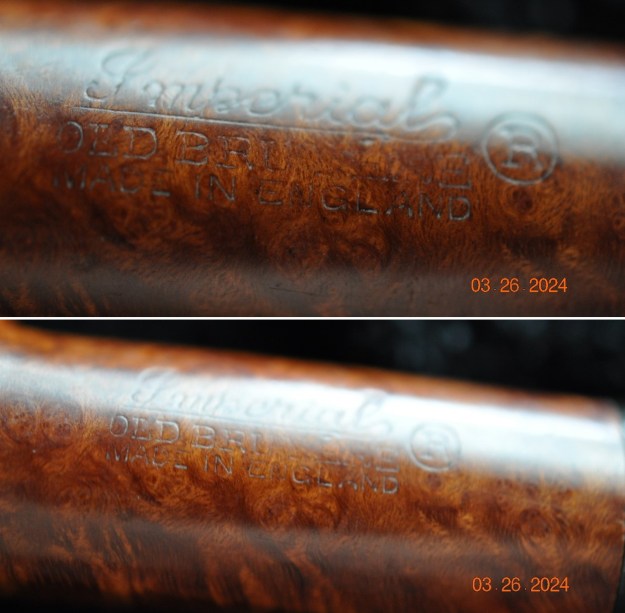
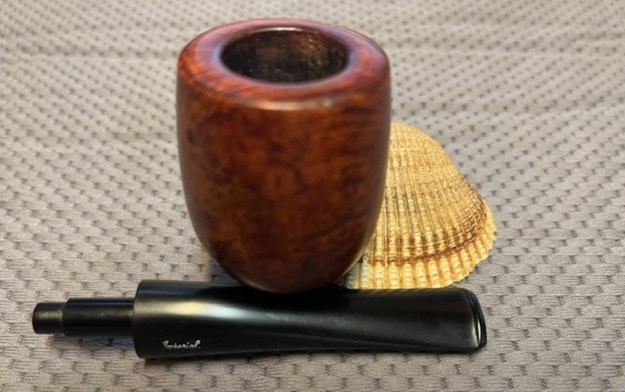
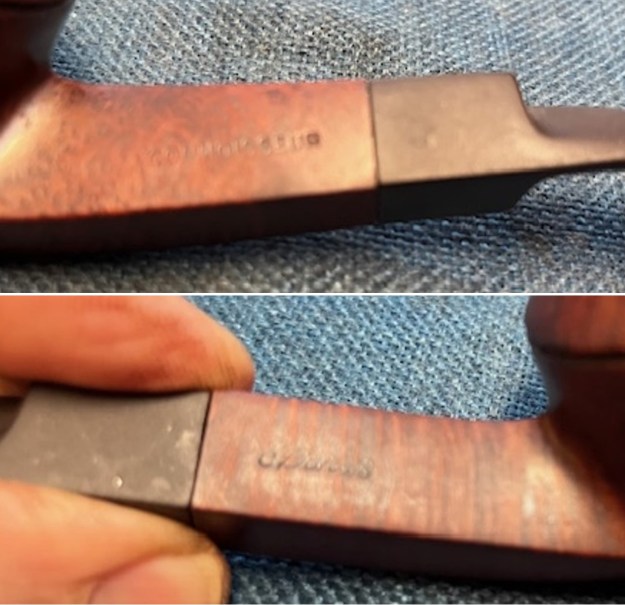
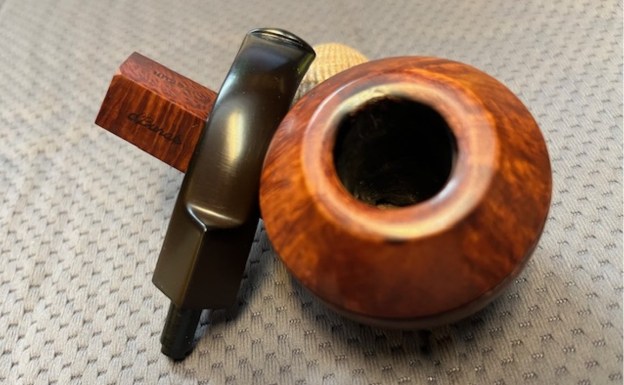
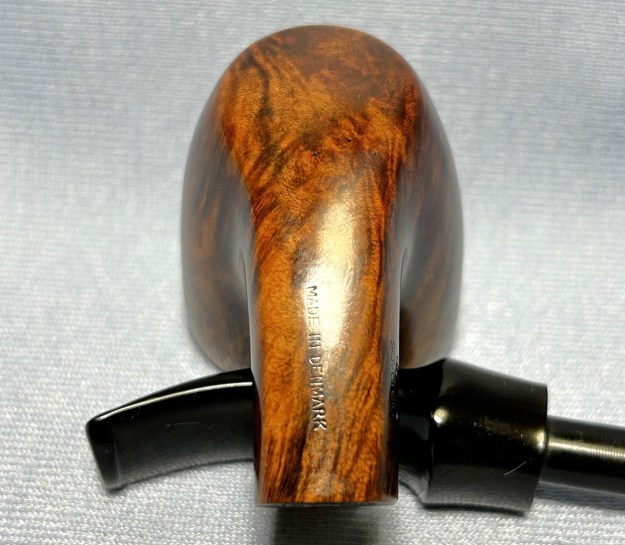
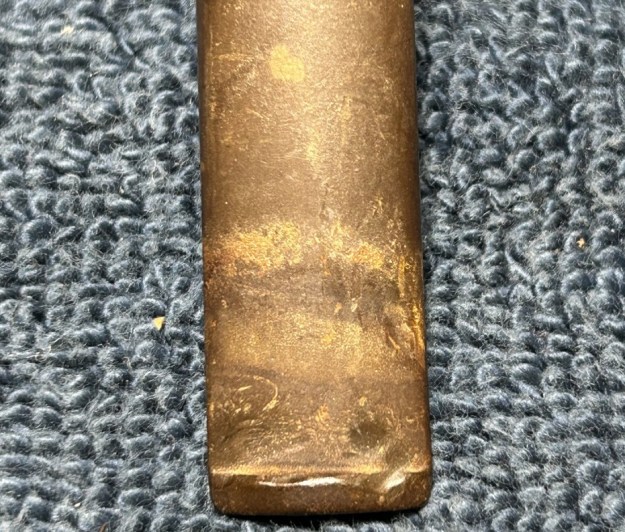
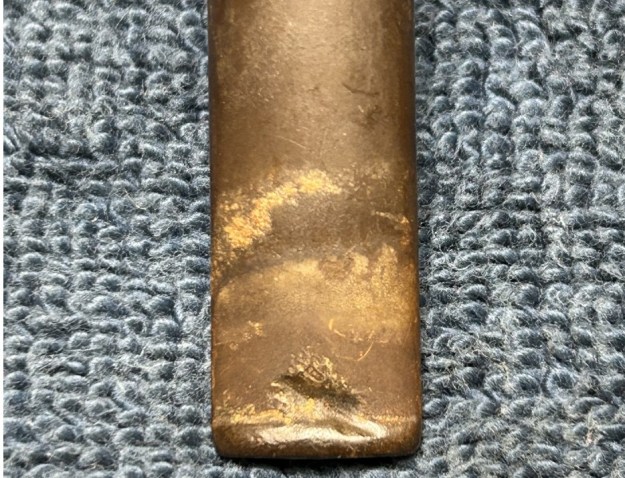
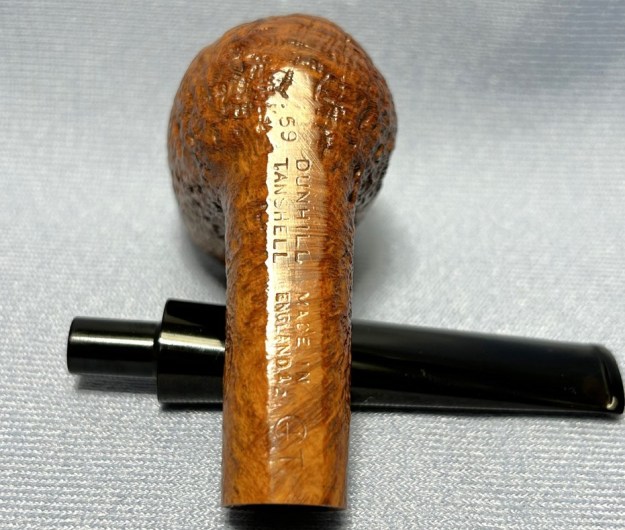
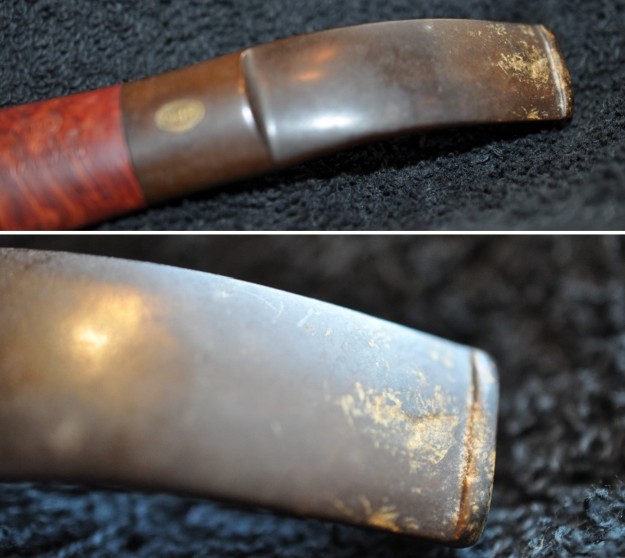
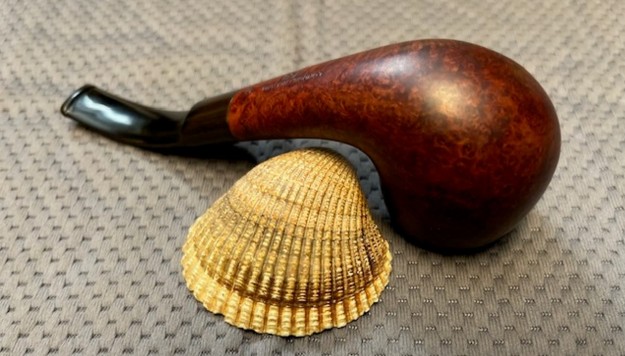
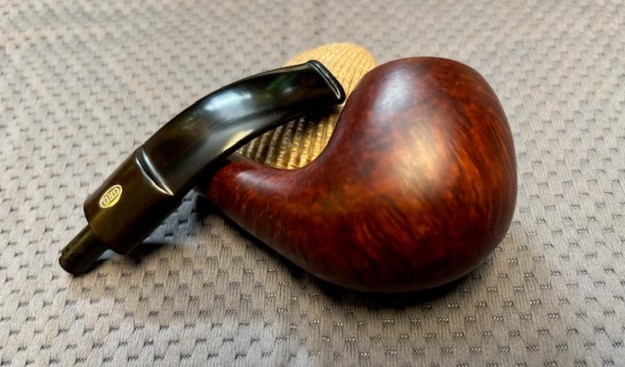
 The next photos of the stamping on the smooth panels on the sides of the shank show that it is clear and readable as noted above. The third photo shows the Jobey brass logo on the left topside of the saddle stem.
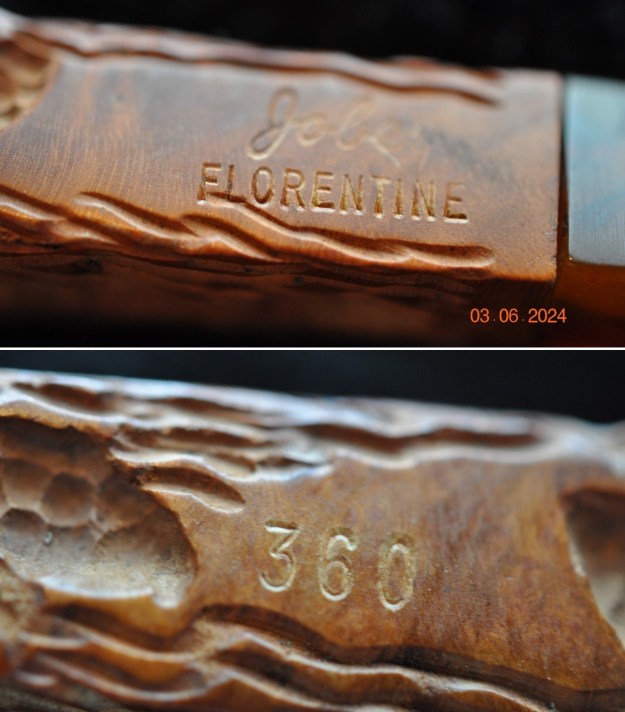
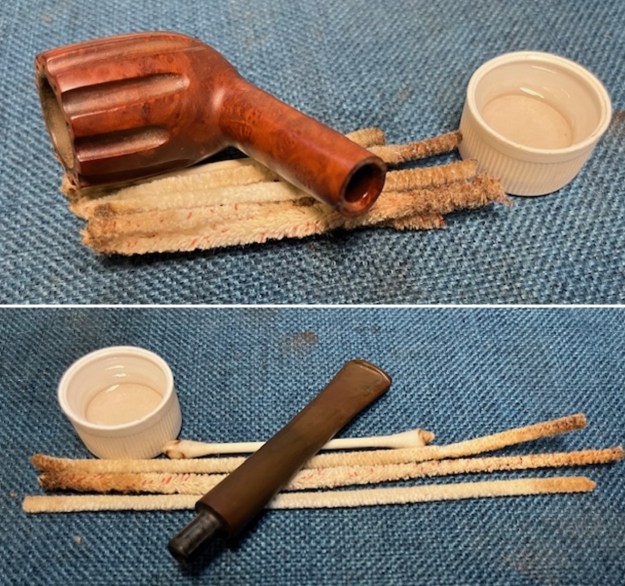
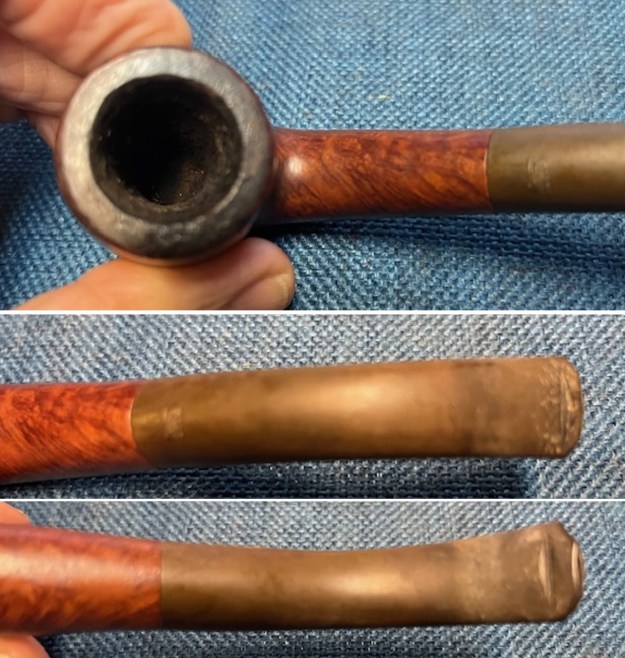
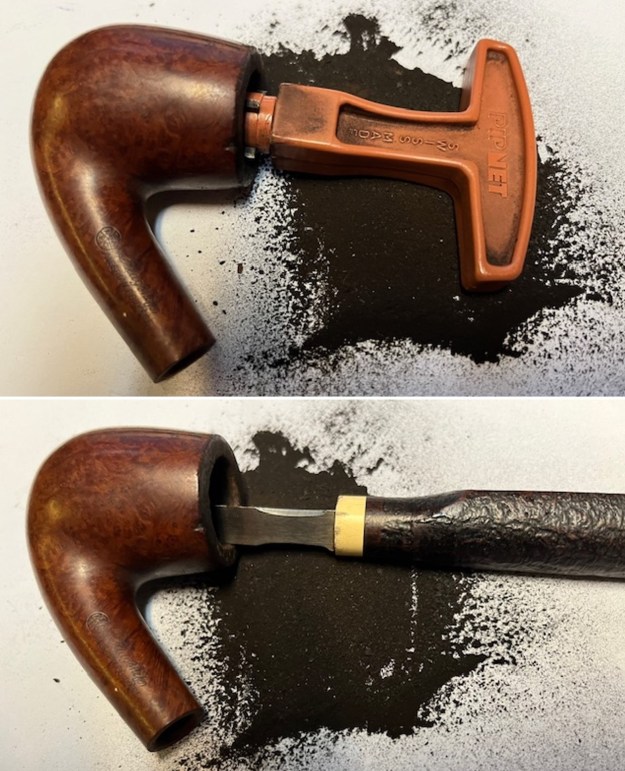
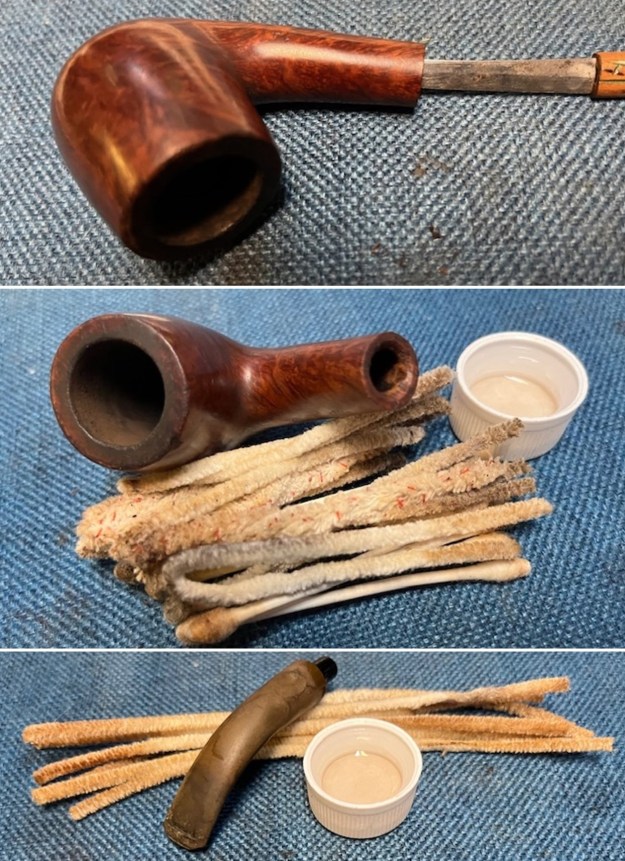
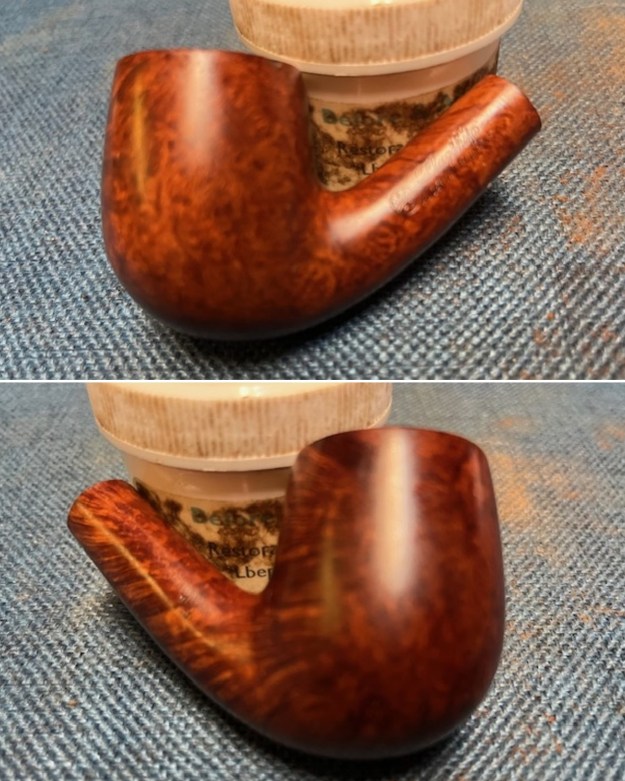
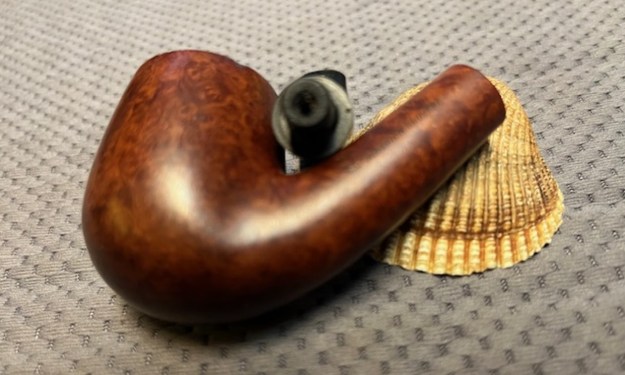
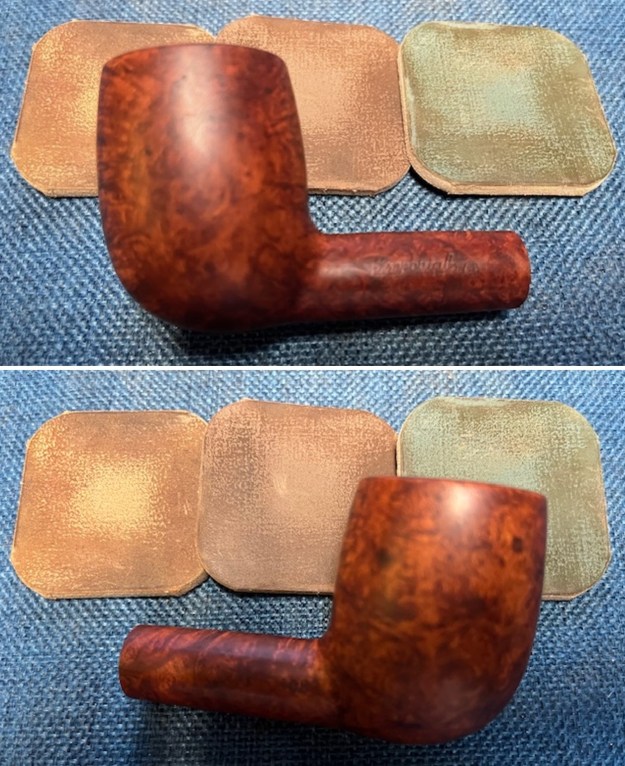
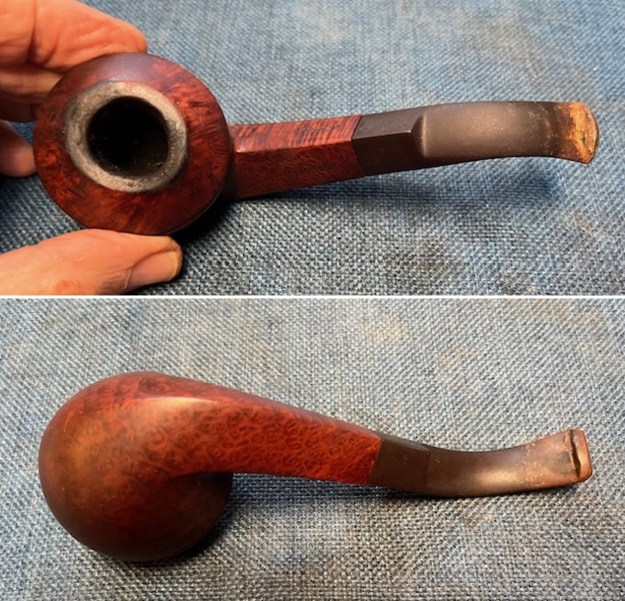
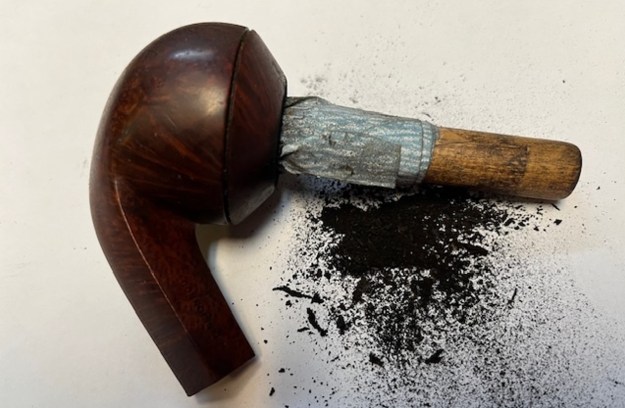
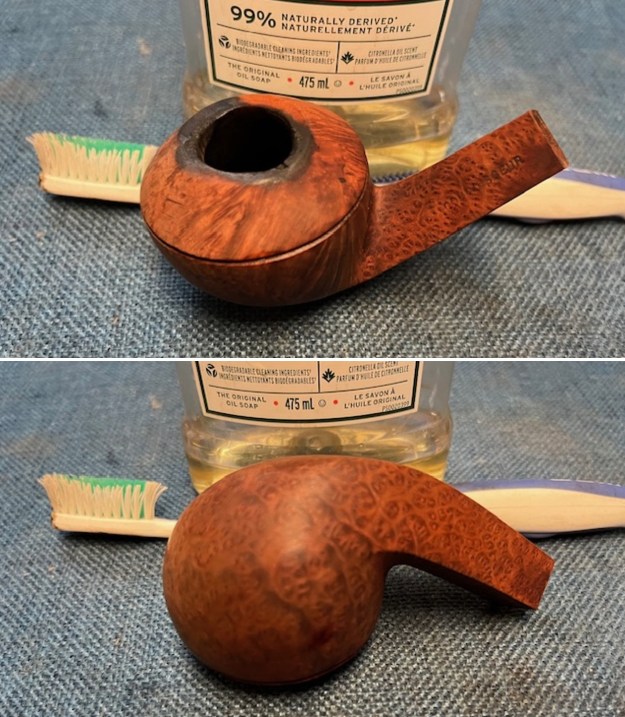
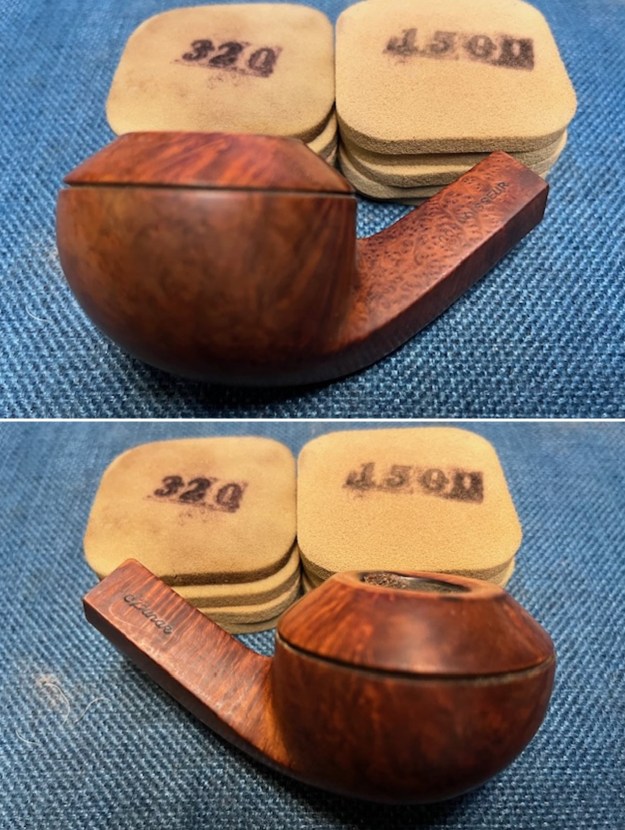
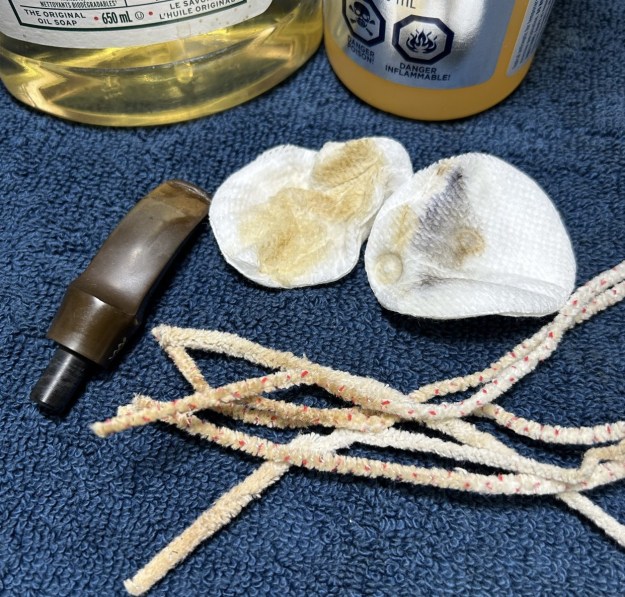
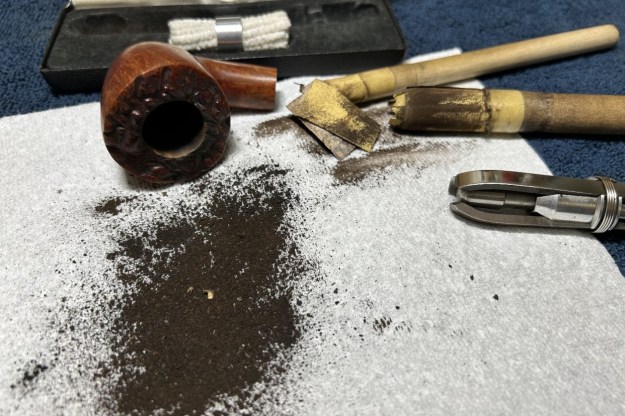
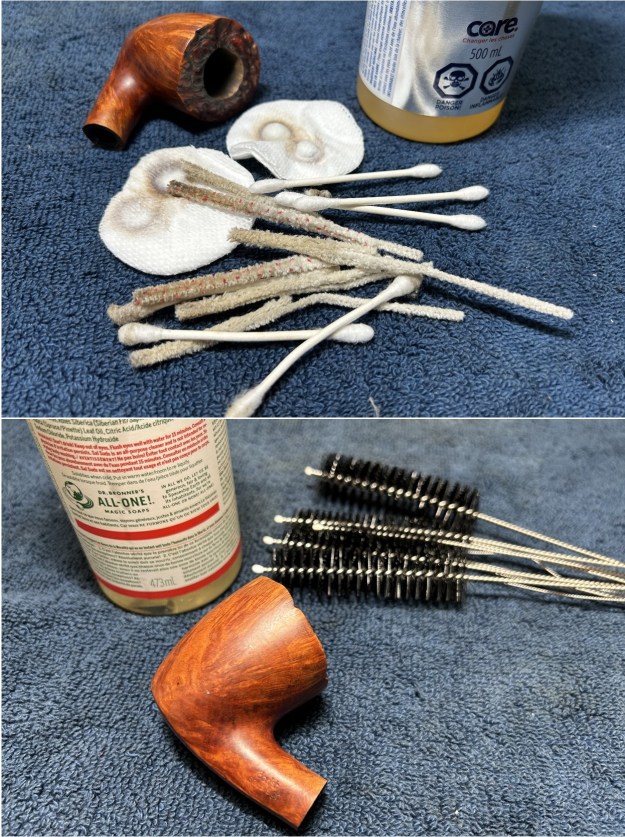
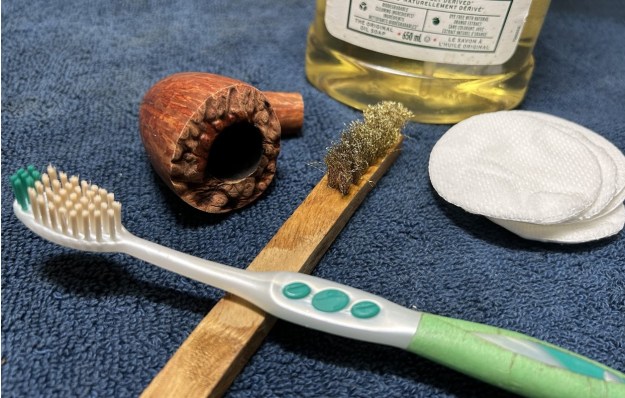
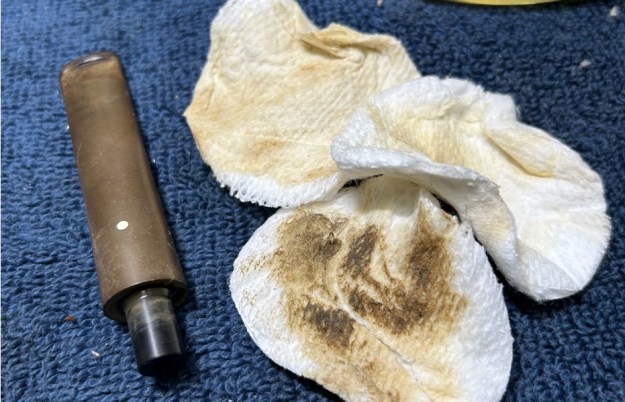
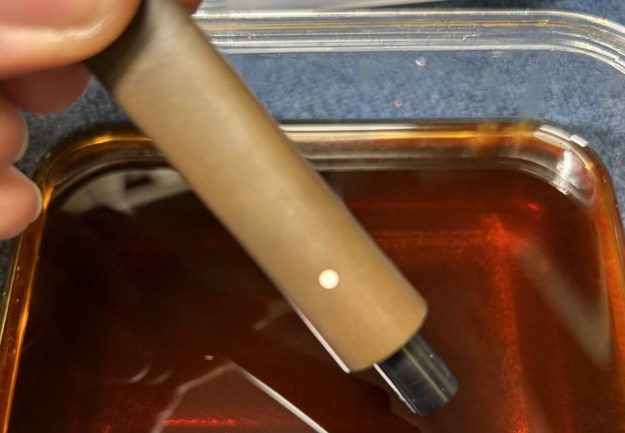
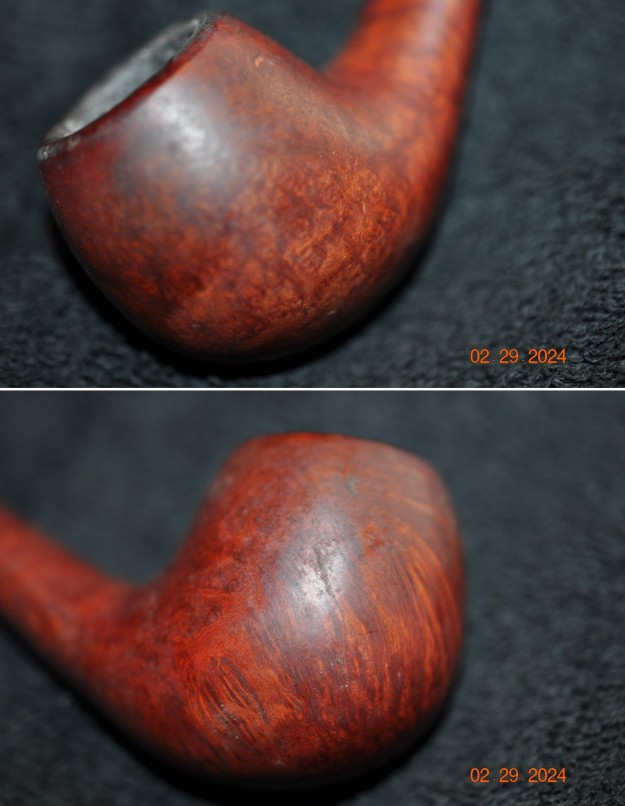
 Now it was time to look at it up close and personal. Jeff had removed the cake and the lava on the rim top. He had reamed the bowl with a PipNet Pipe Reamer and cleaned up the remnants with a Savinelli Fitsall Pipe Knife. He took the cake back to bare briar so we could check the walls for damage. He scrubbed the exterior of the bowl with Murphy’s Oil Soap and a tooth brush to remove the grime on the bowl and rim and was able to remove the lava and dirt. He cleaned out the interior of the bowl and shank with shank brushes, pipe cleaners, cotton swabs and alcohol until they came out clean. He cleaned the stem with Soft Scrub to remove the grime on the exterior. He cleaned out the airway with alcohol, cotton swabs and pipe cleaners. I took some photos of the pipe before I started my work on it today.
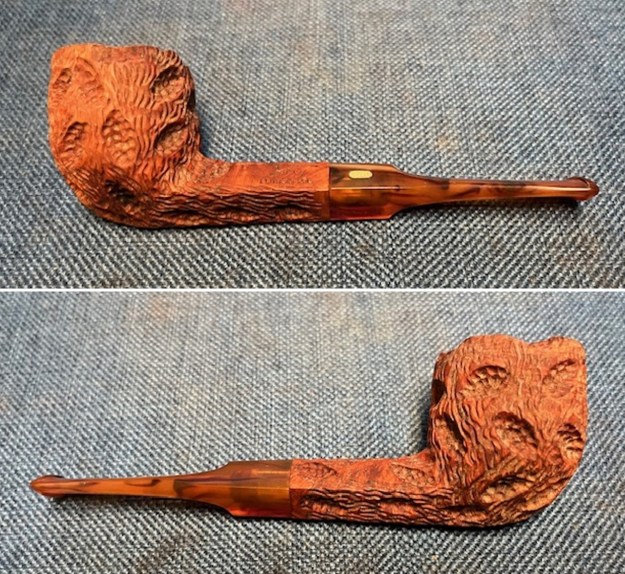
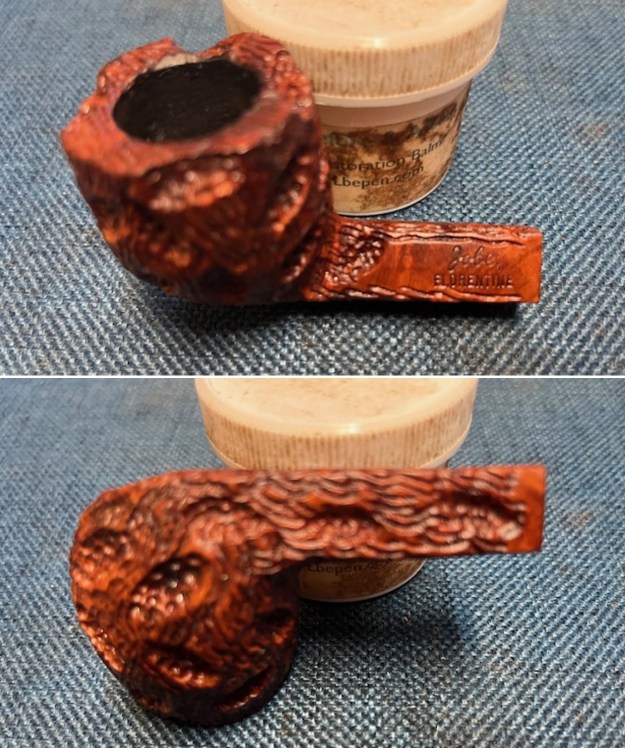
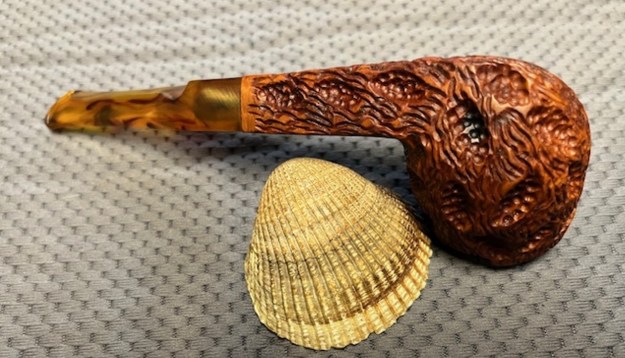
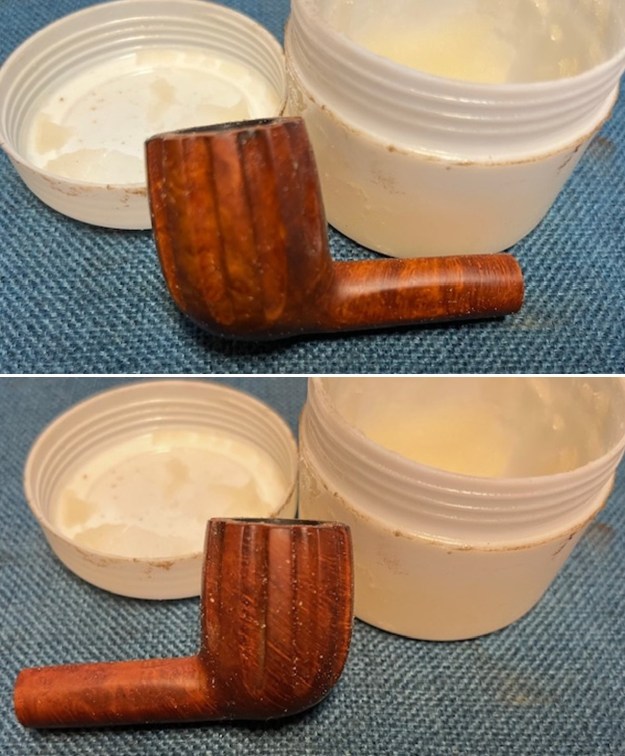
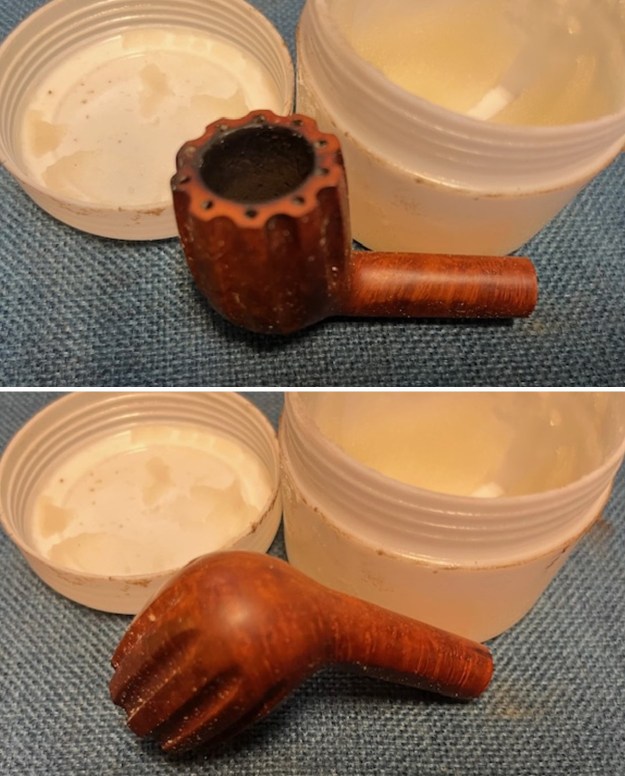
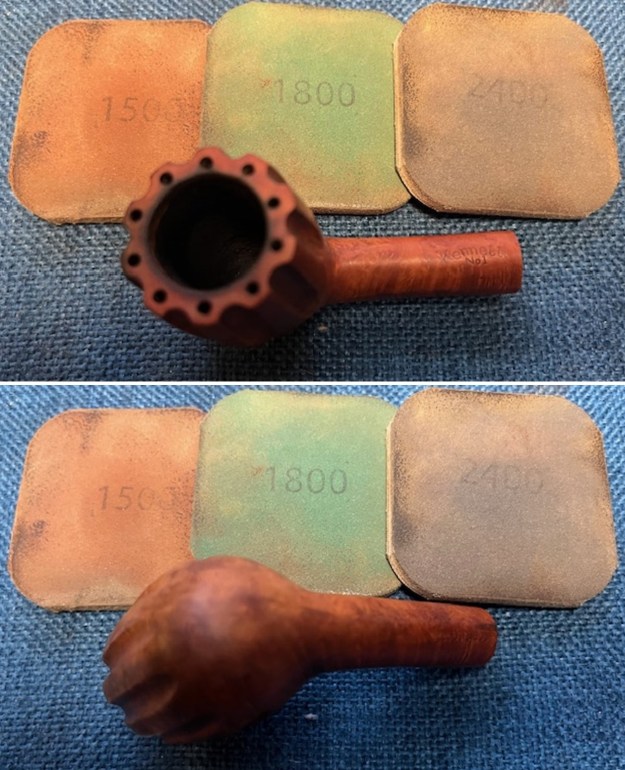
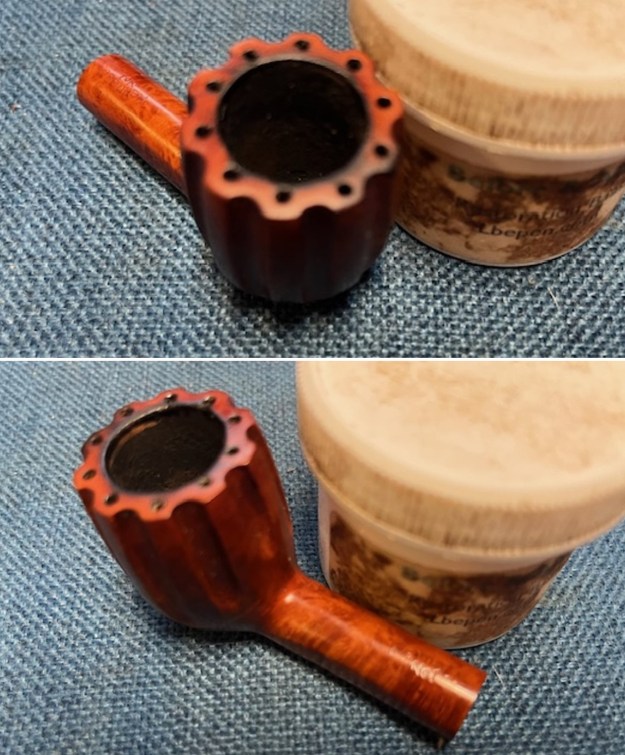
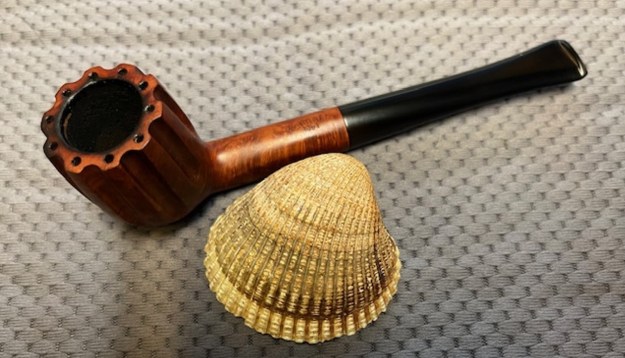
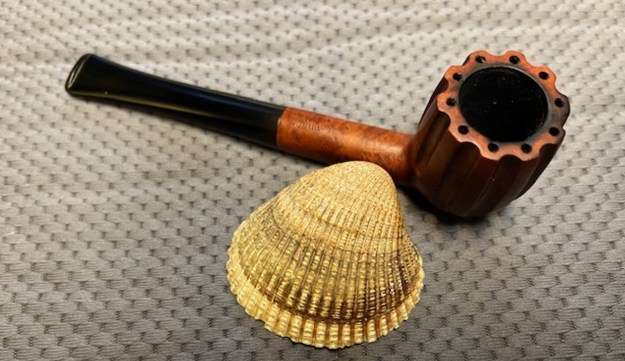
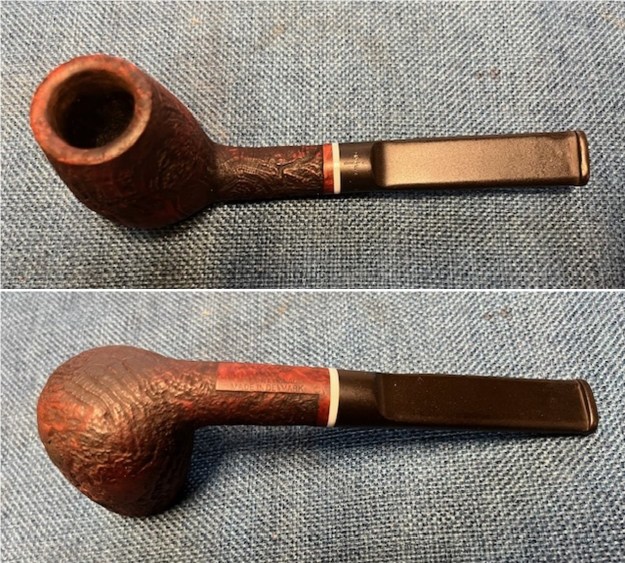
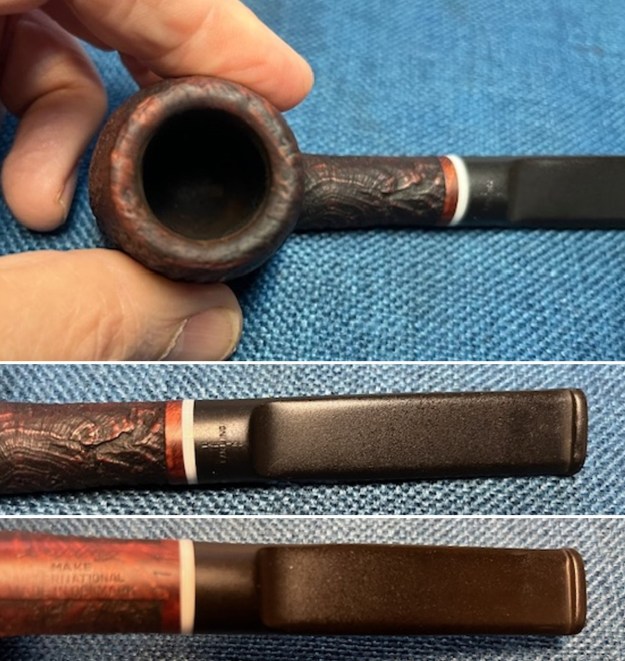
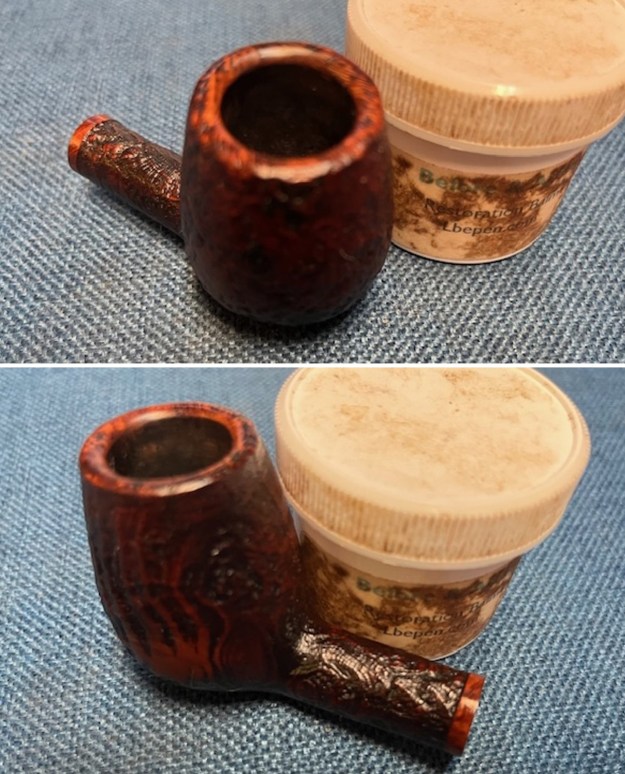
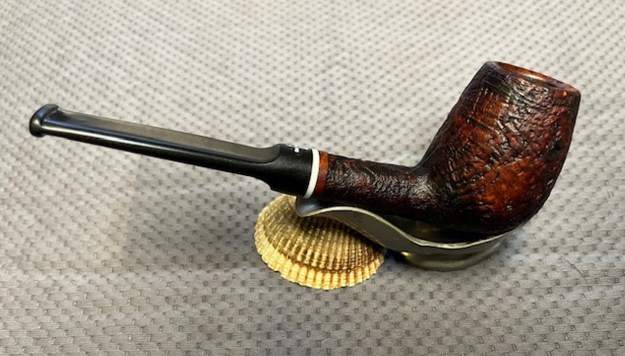
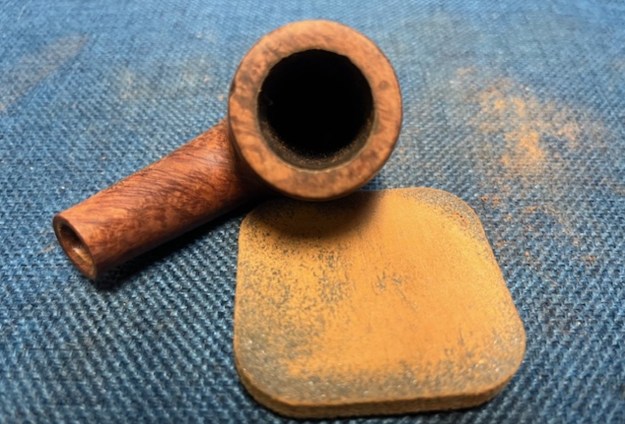
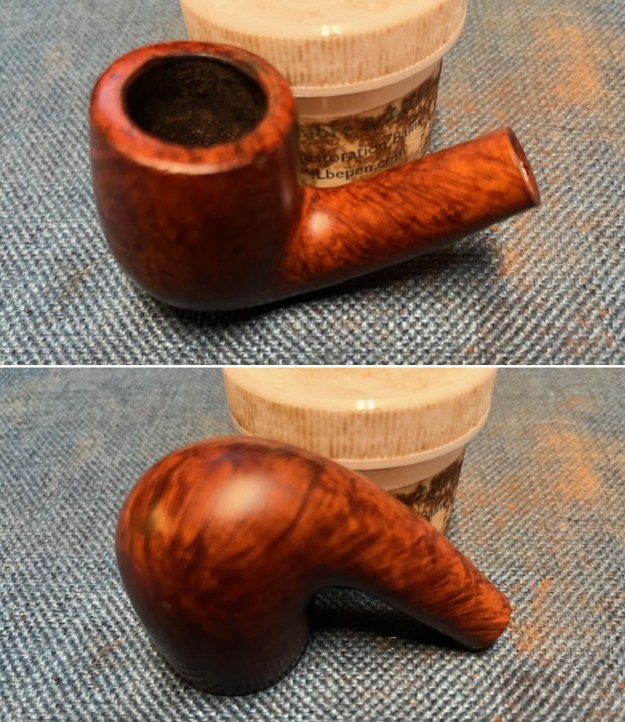
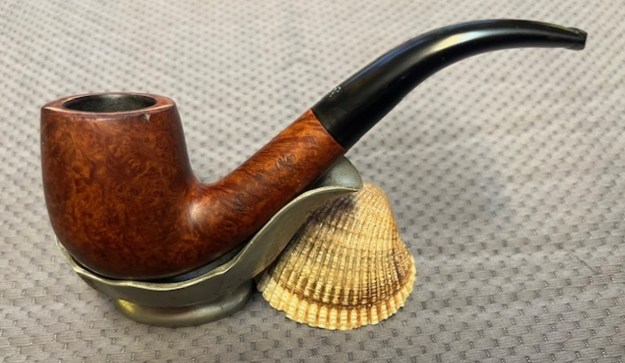
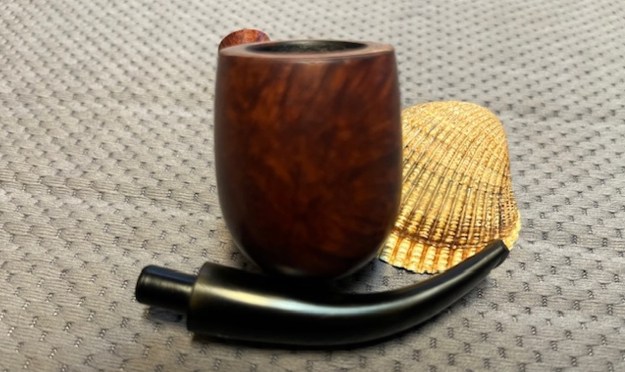
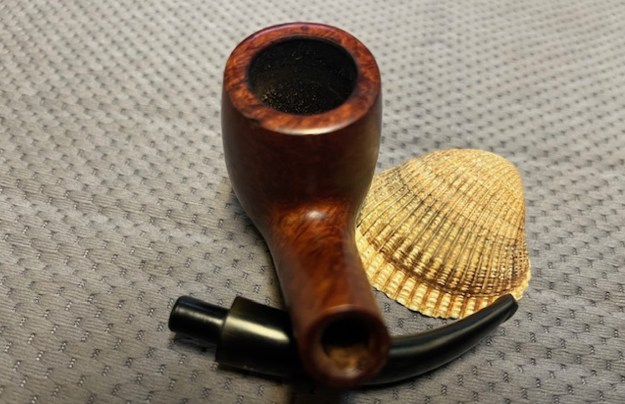
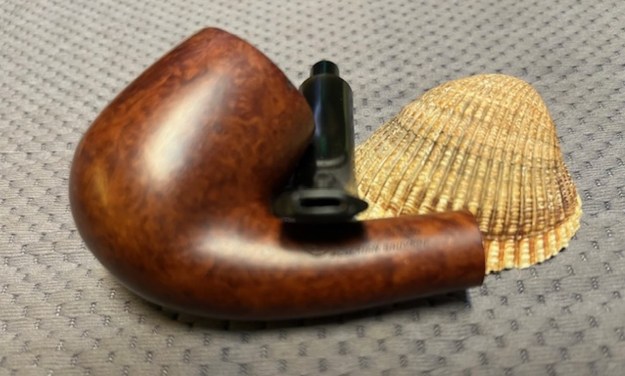
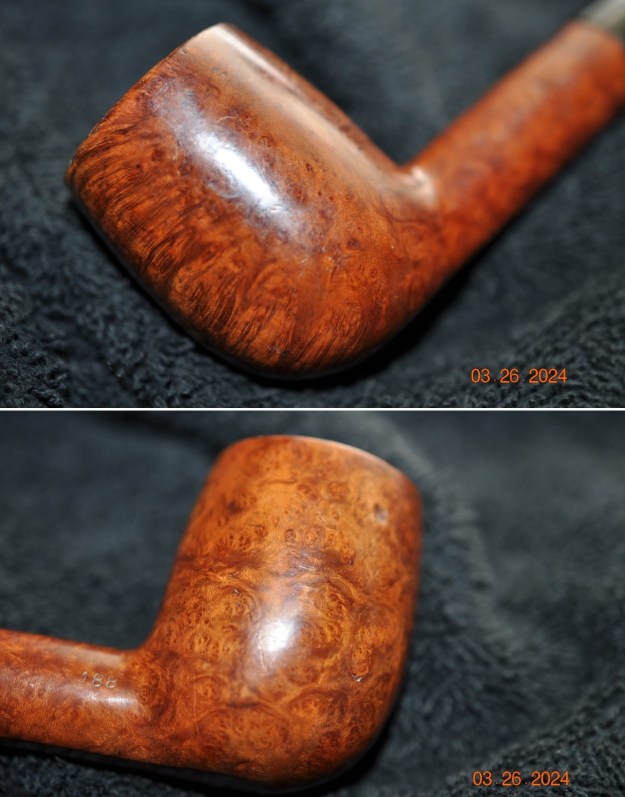
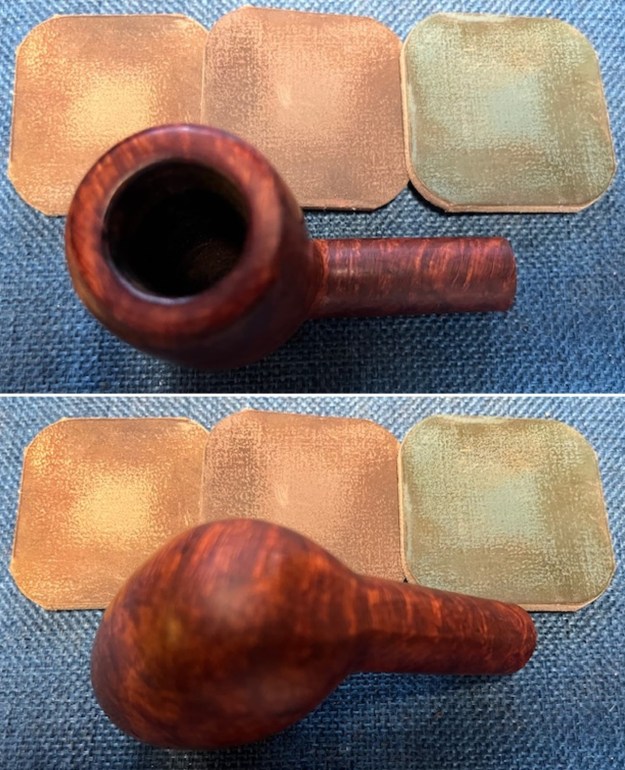
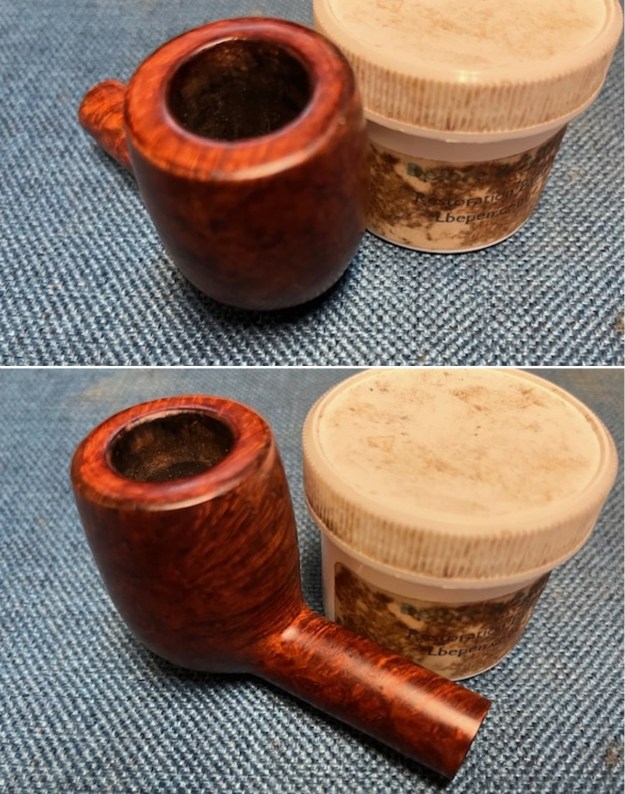
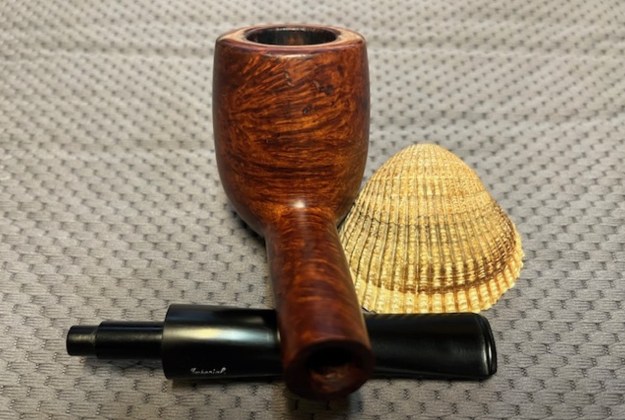
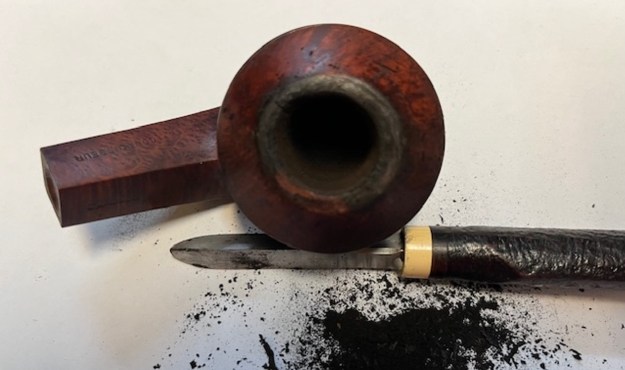
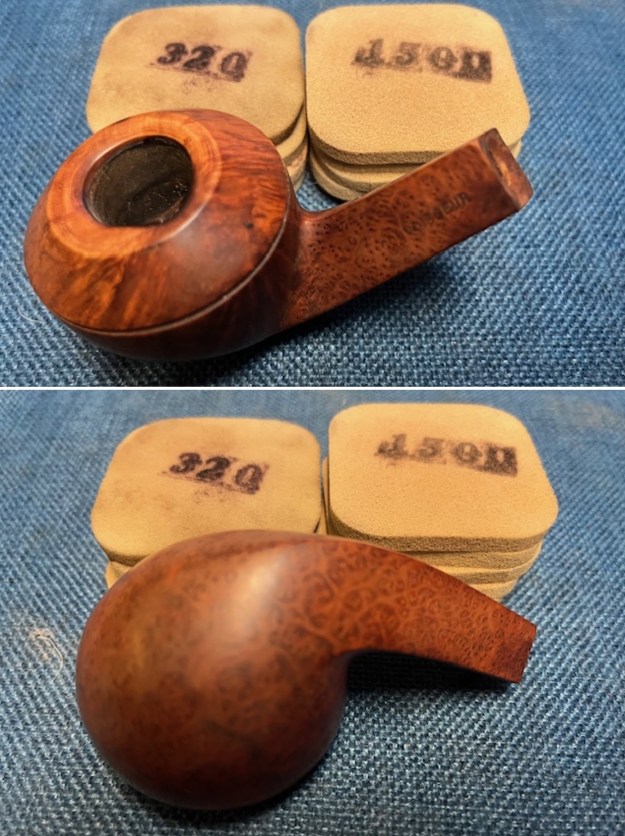
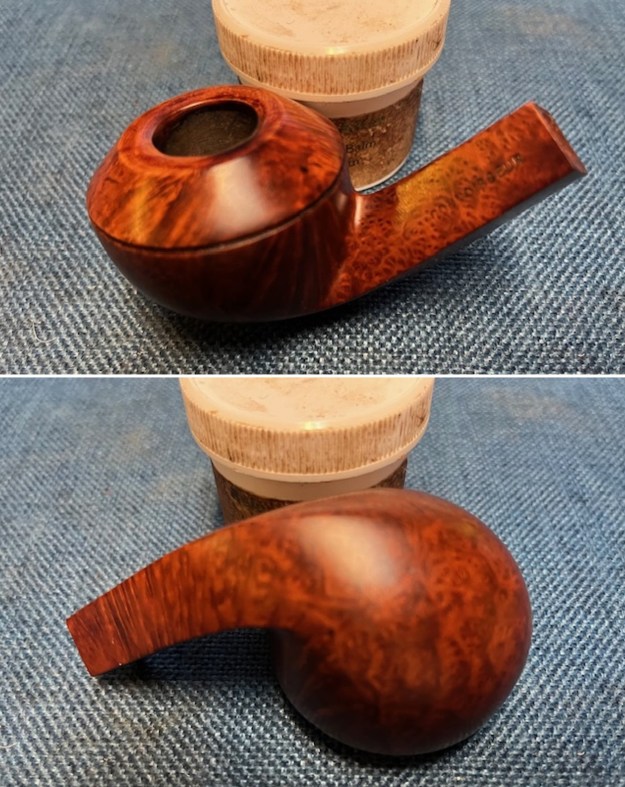
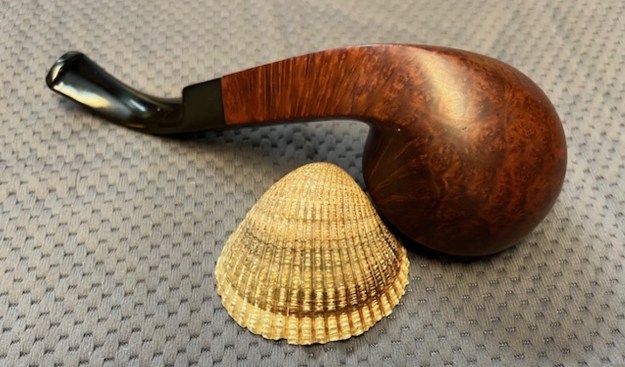
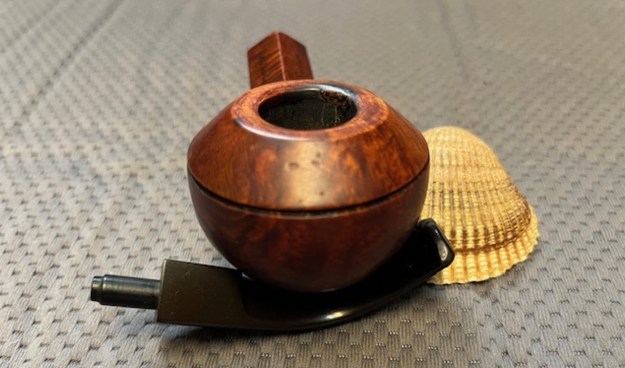
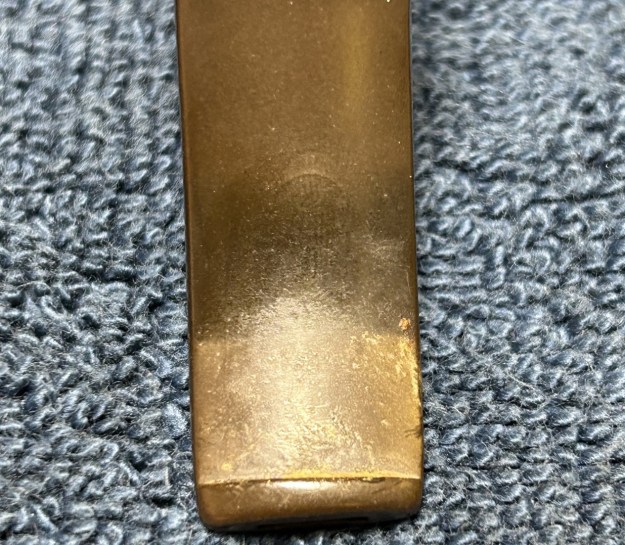
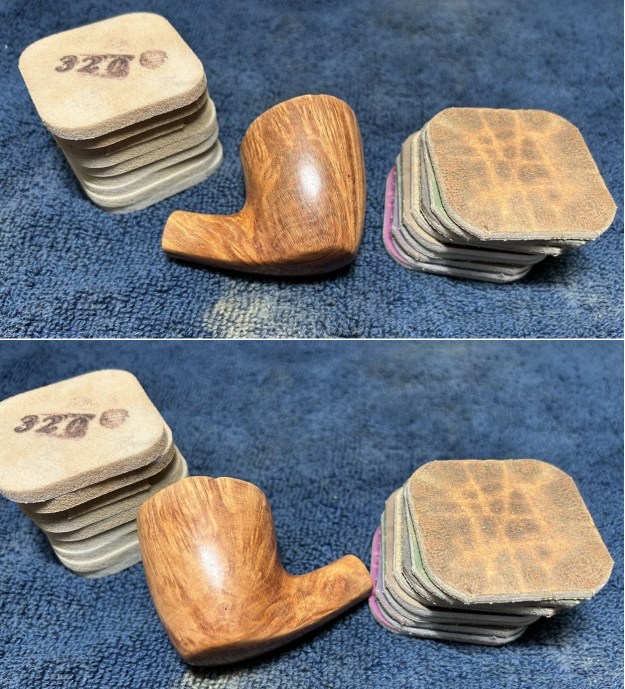
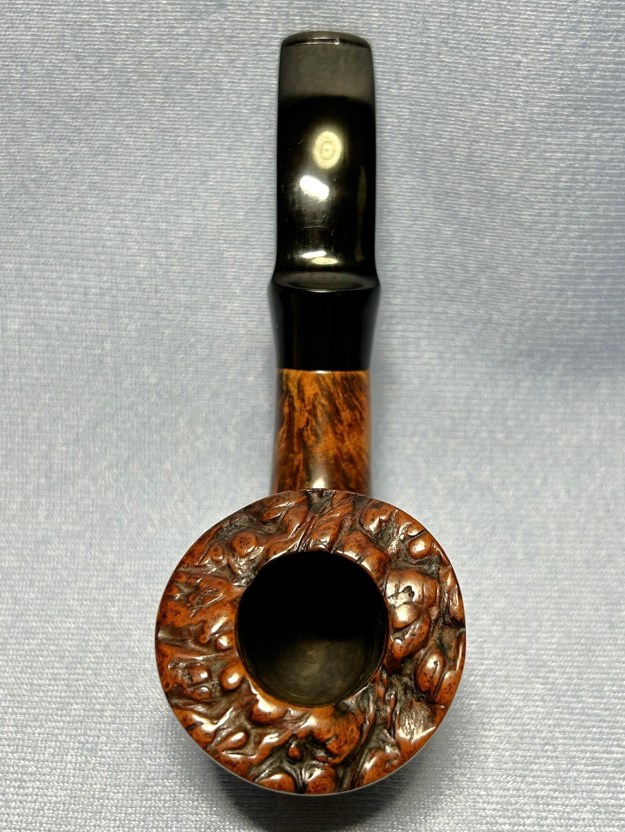
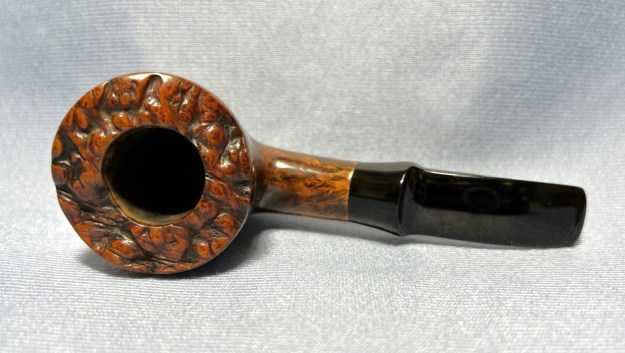
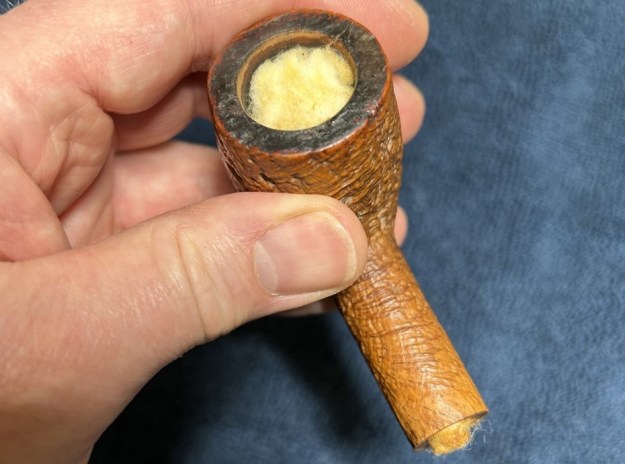
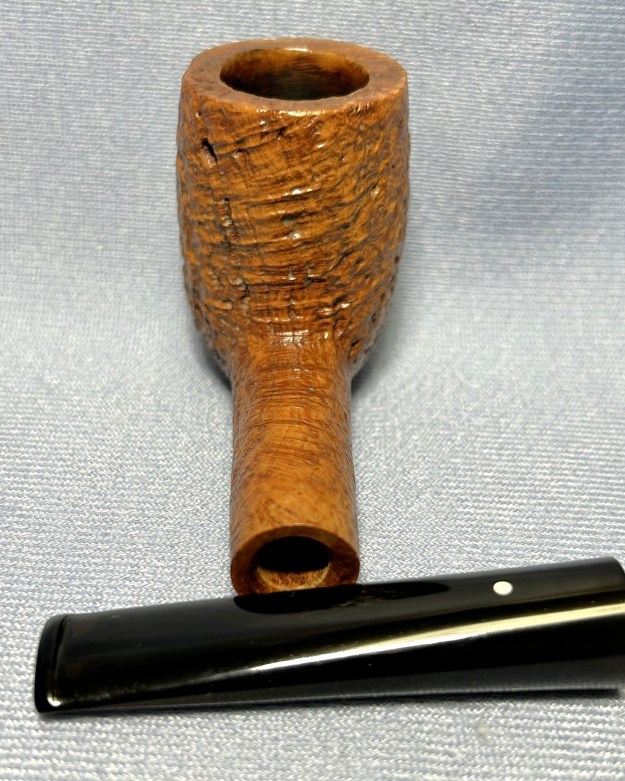
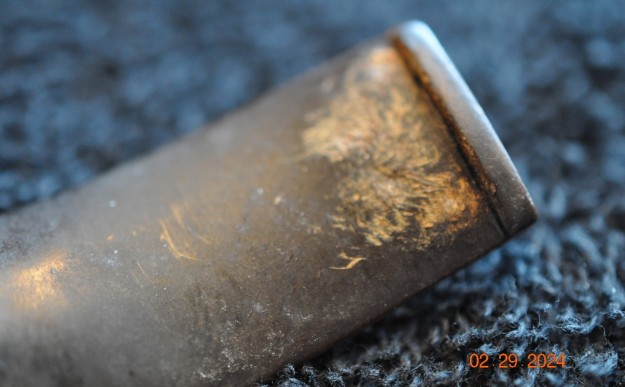
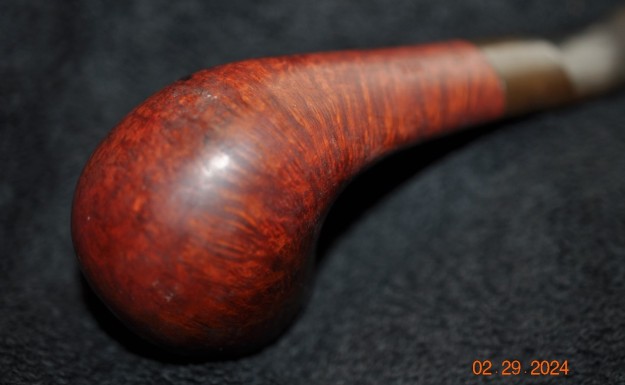
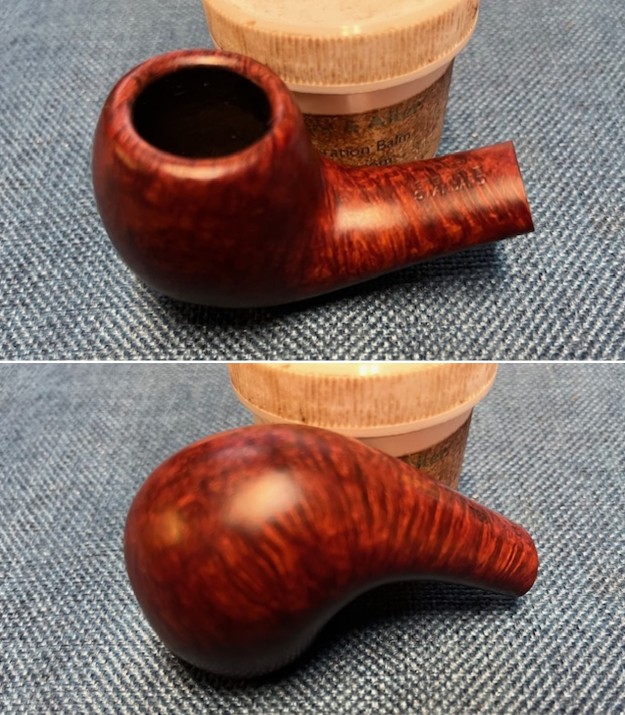
 I took a close up photo of the cleaned up rim top. The rim top and the inner edge look good. The bowl is clean and the walls are undamaged. There was still some darkening in the rustication but it was much better. The stem looks good with some tooth chatter and marks along the top and underside ahead of the button.
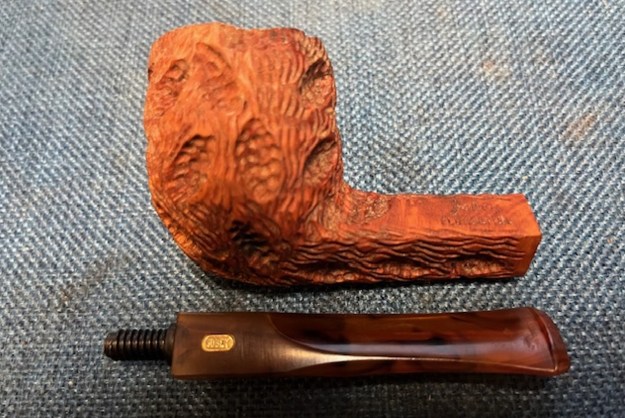
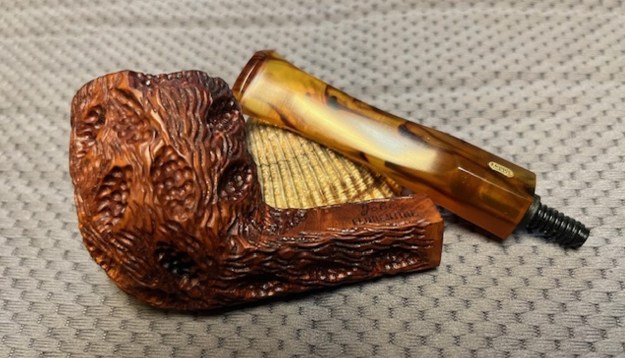
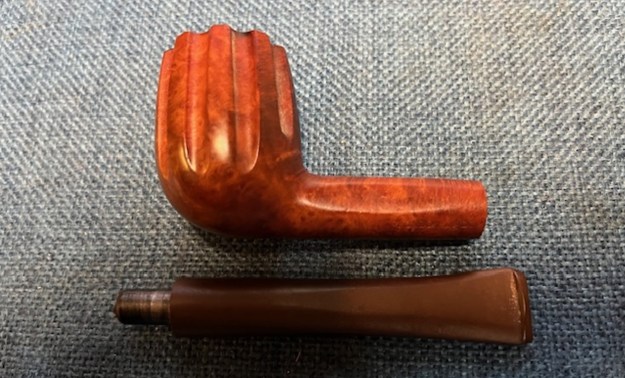
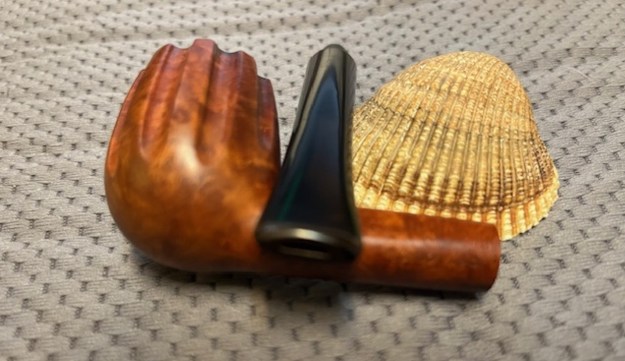
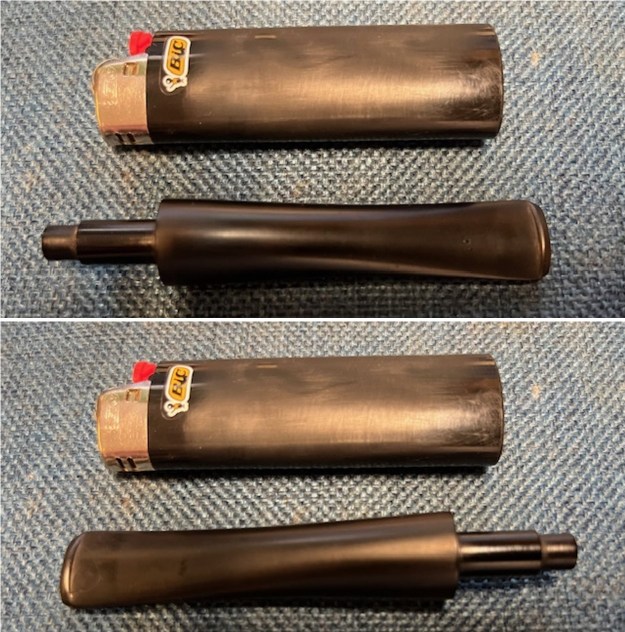
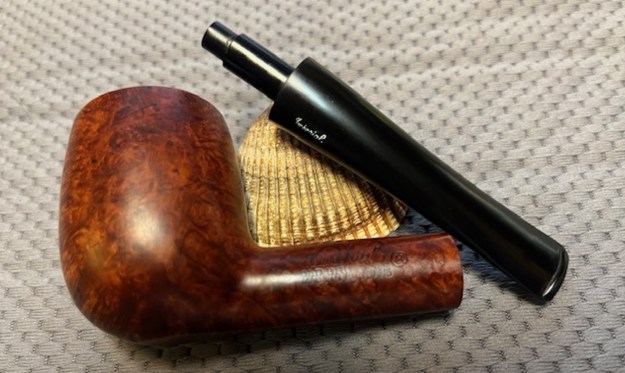
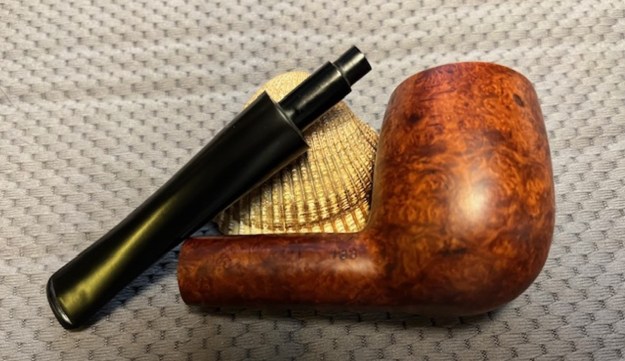
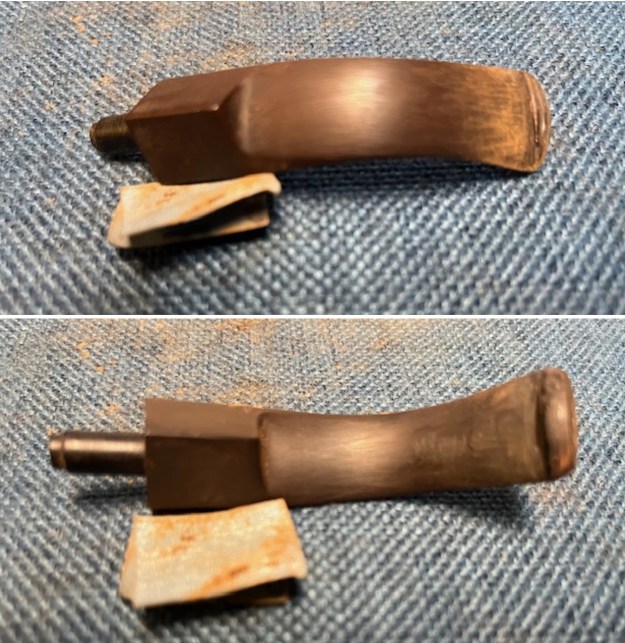
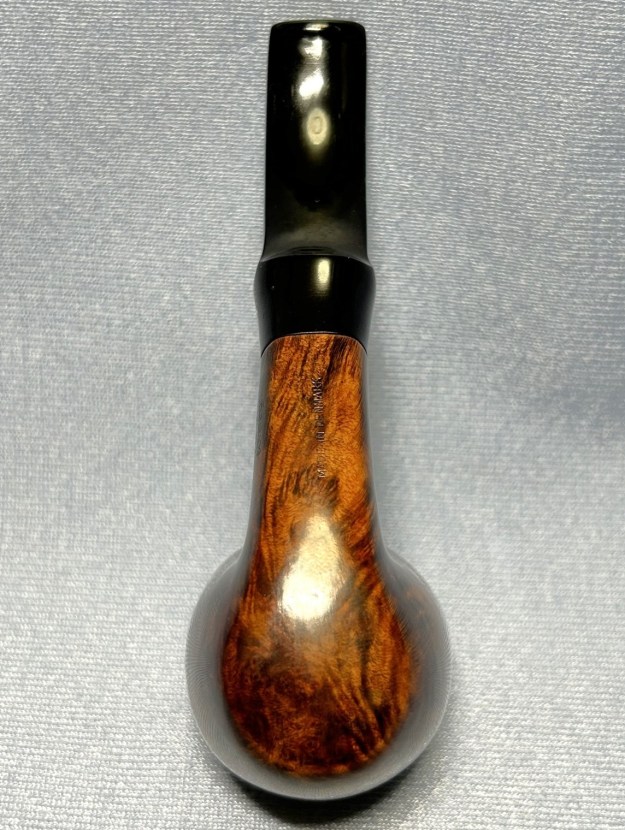
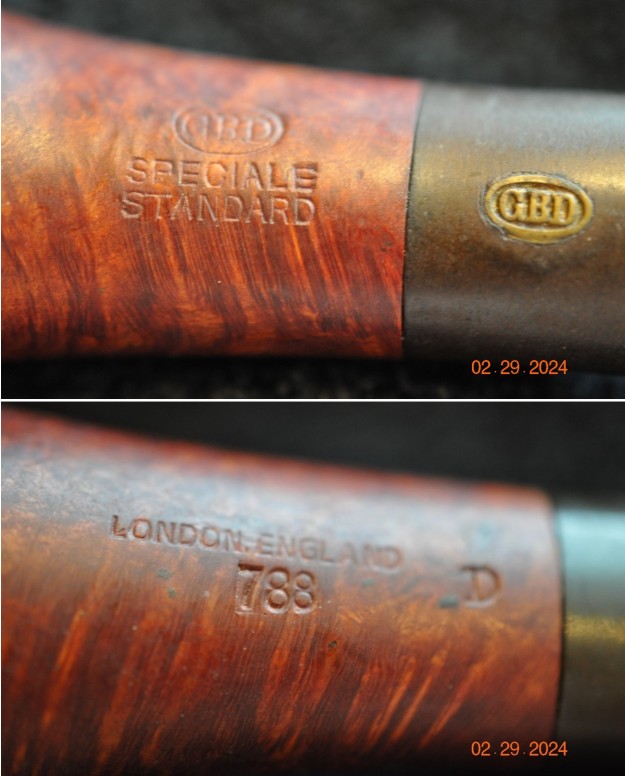
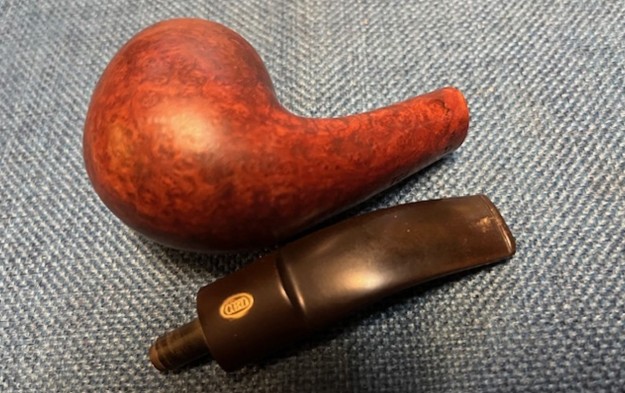
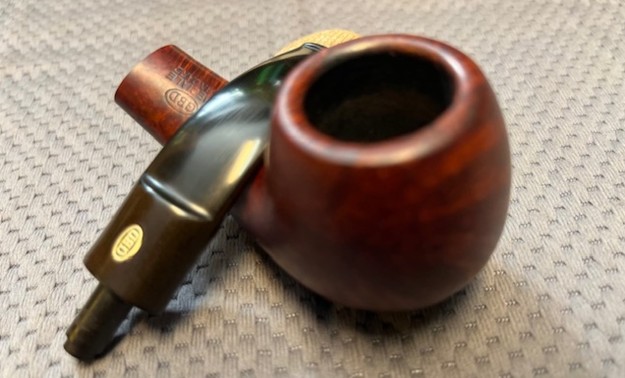
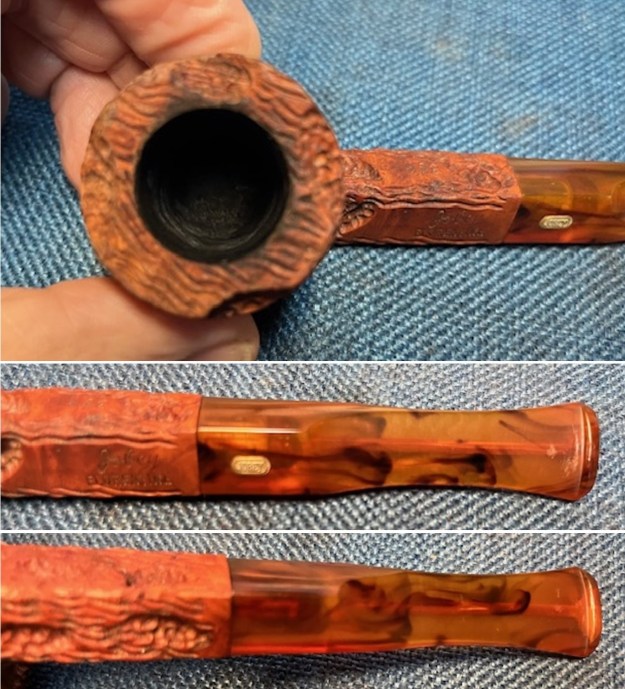 I took photos of the stamping on the shank sides. It is clear and readable as noted above. I took the stem off the pipe and took a photo. The diamond shank billiard is an attractive looking pipe with nice lines. The saddle stem shows tooth damage on the top and undersides of the stem.
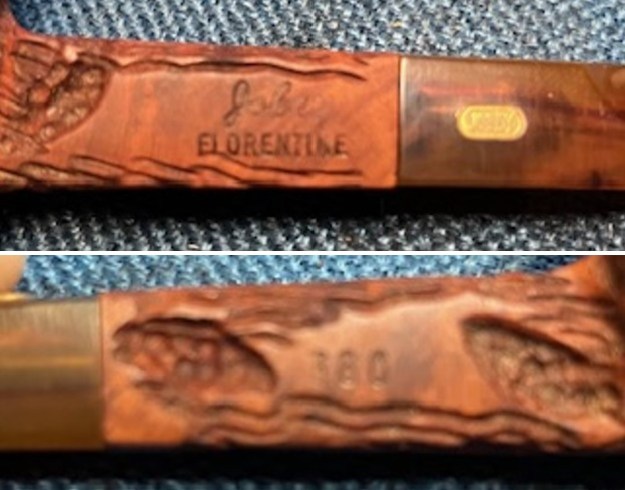
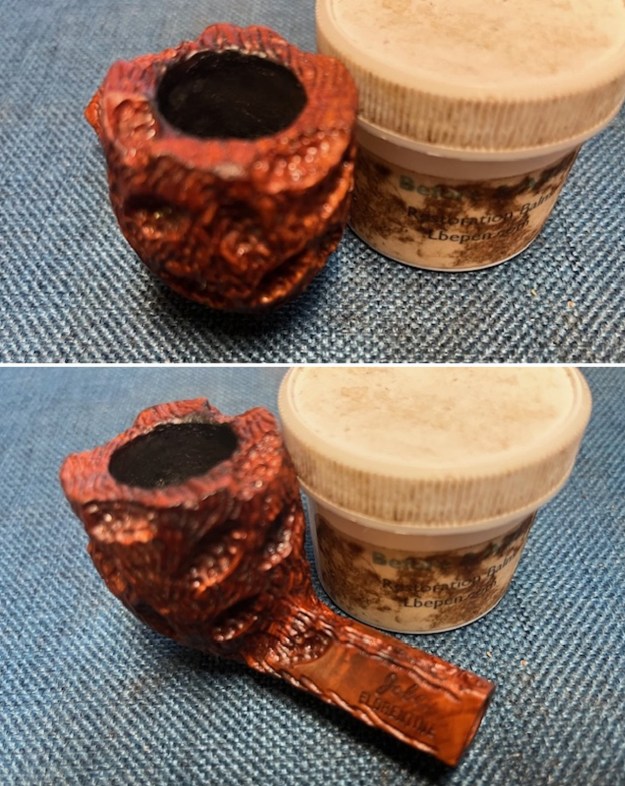
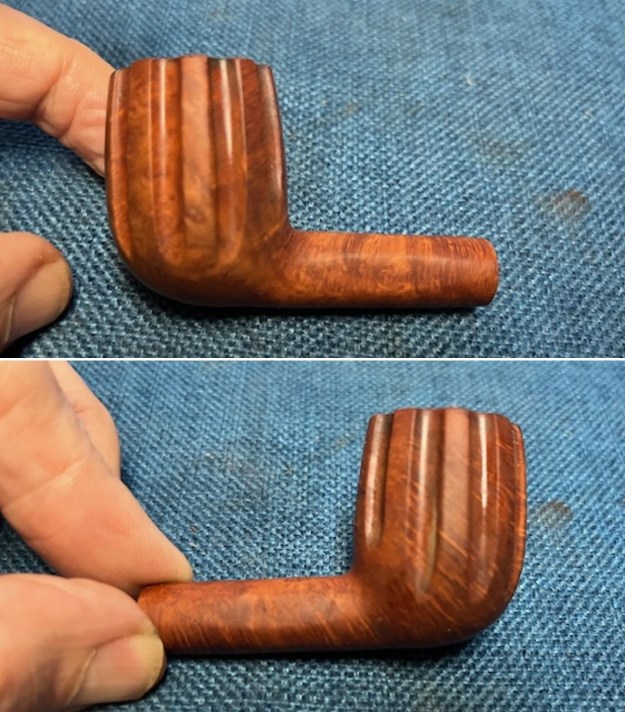
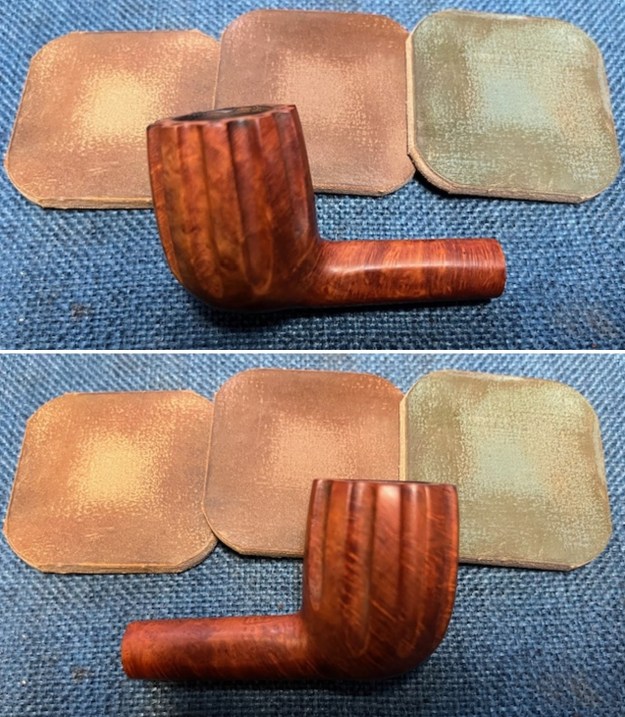
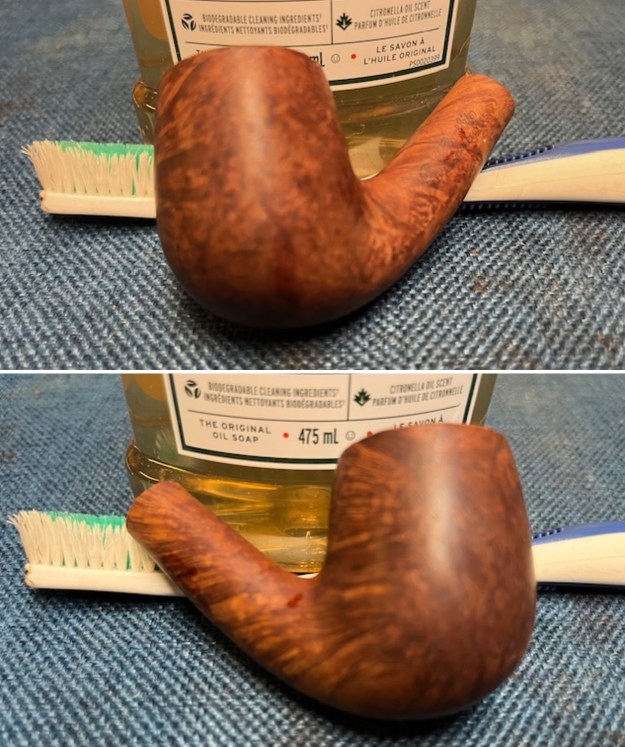
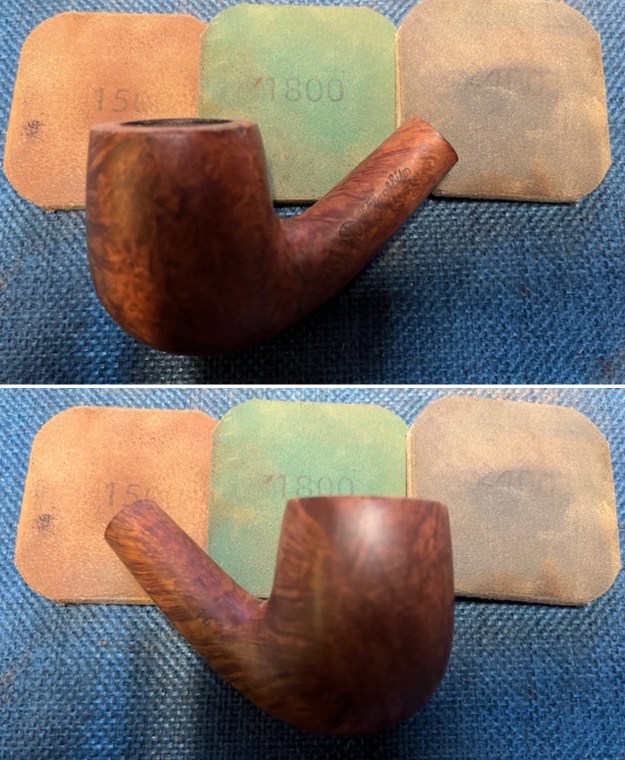
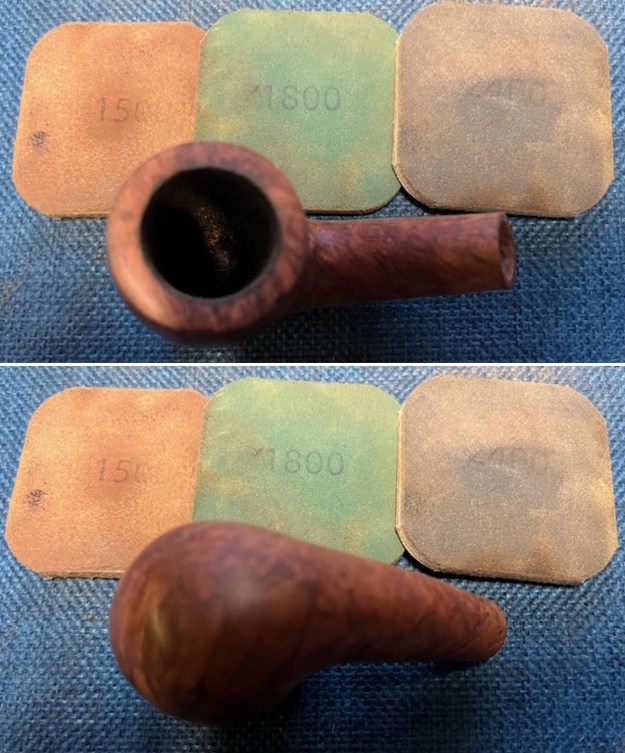
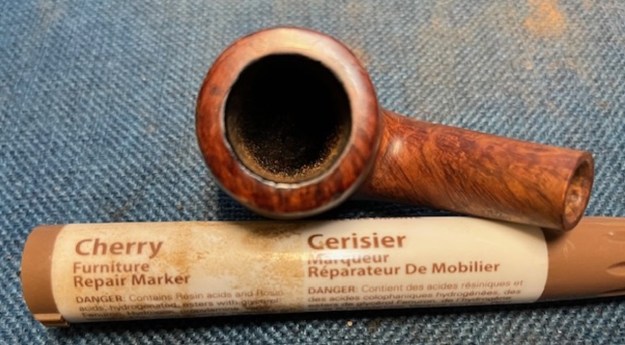
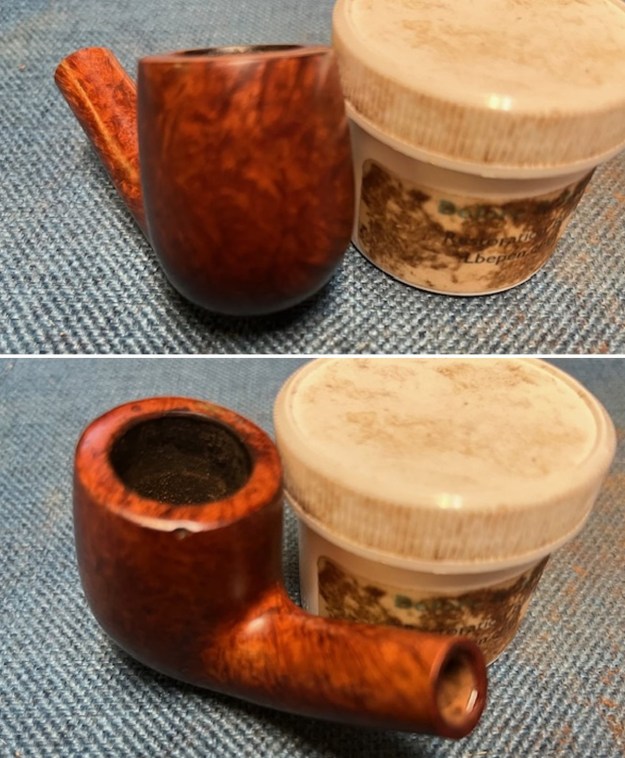
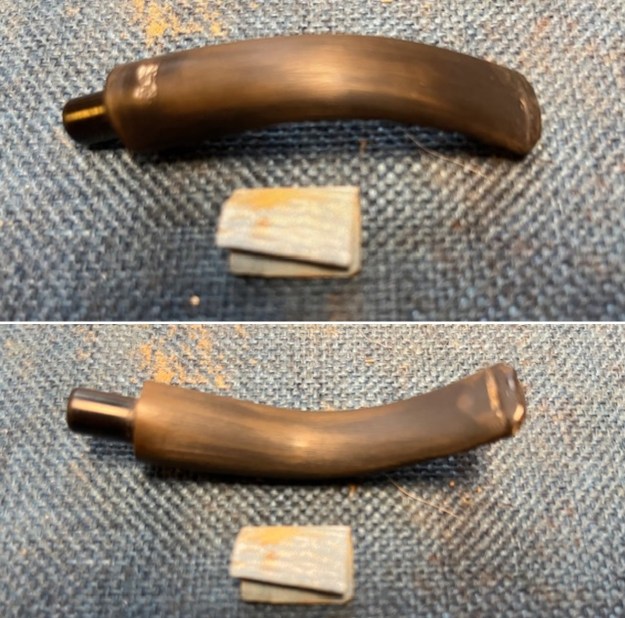
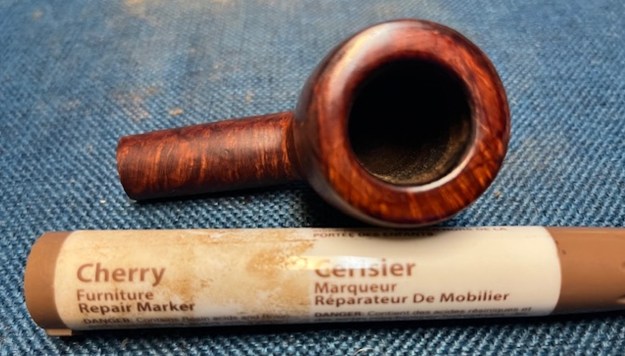
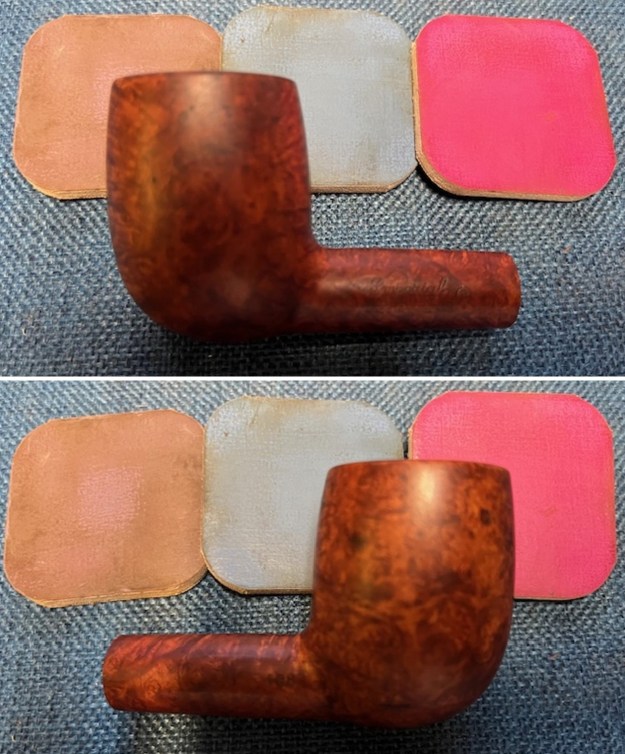
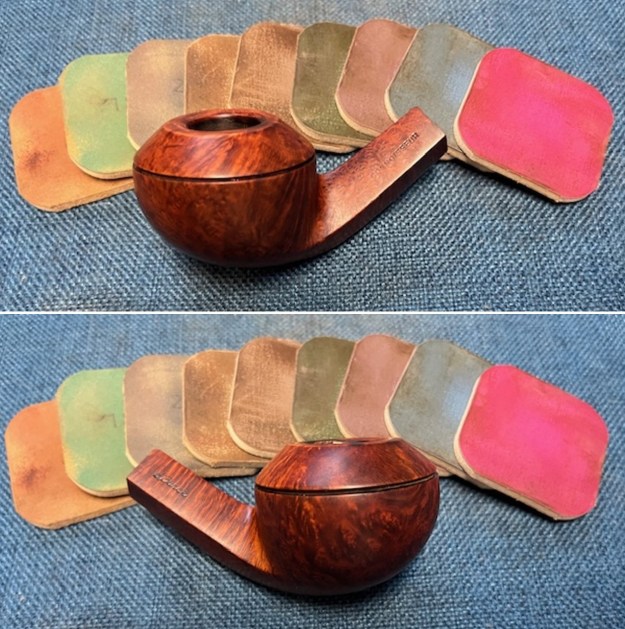
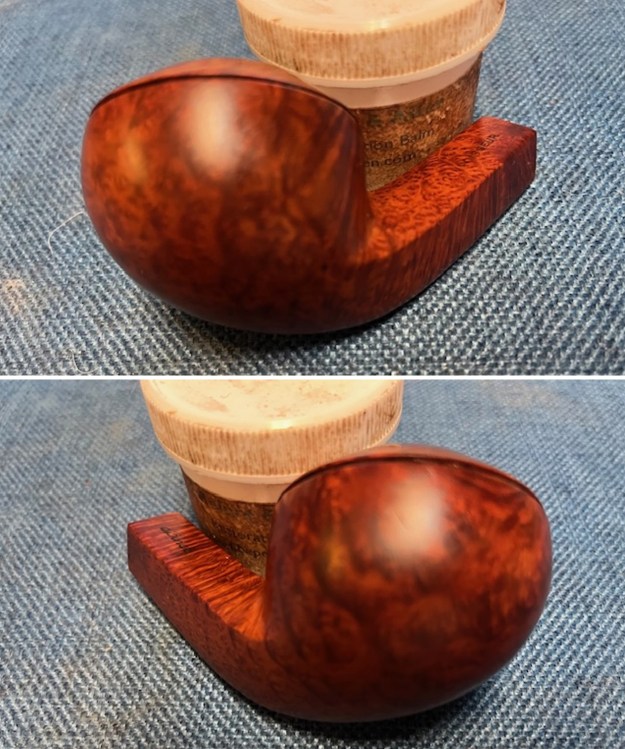
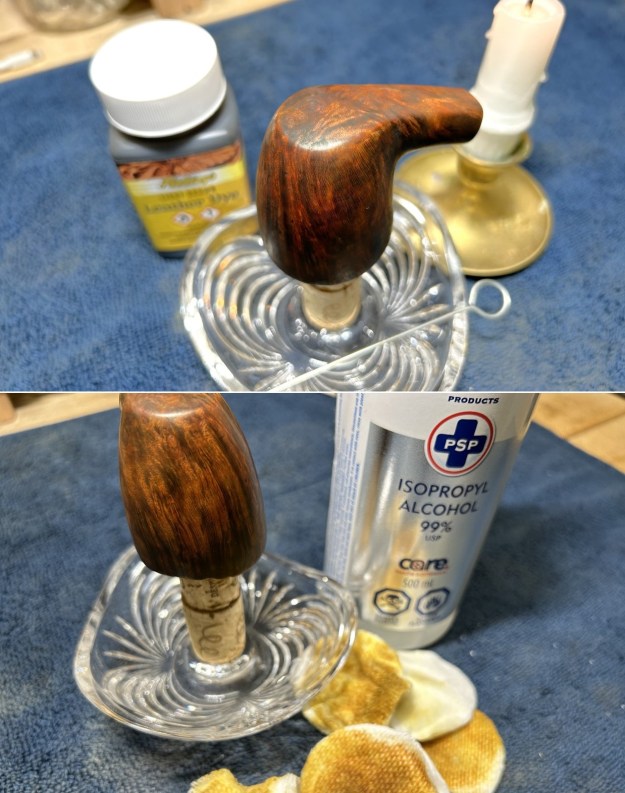
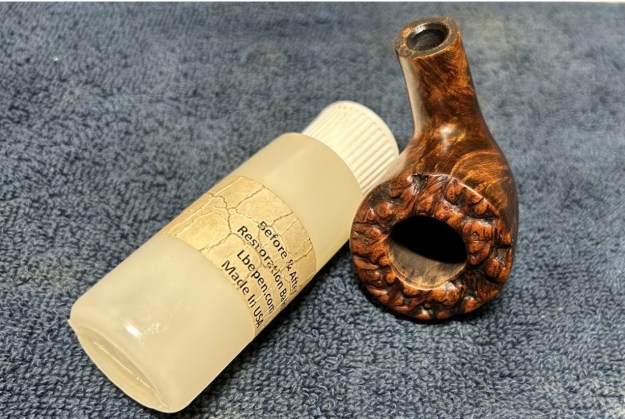
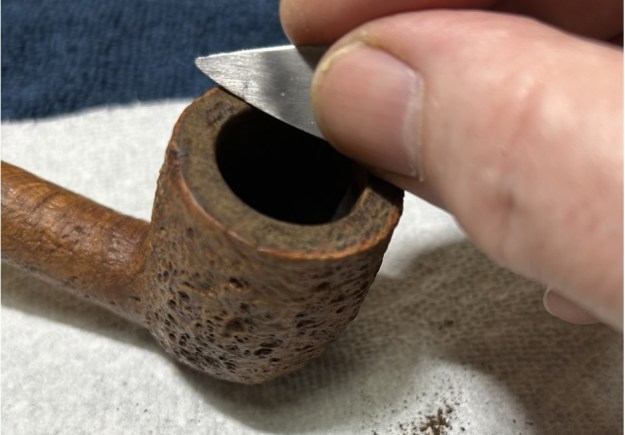
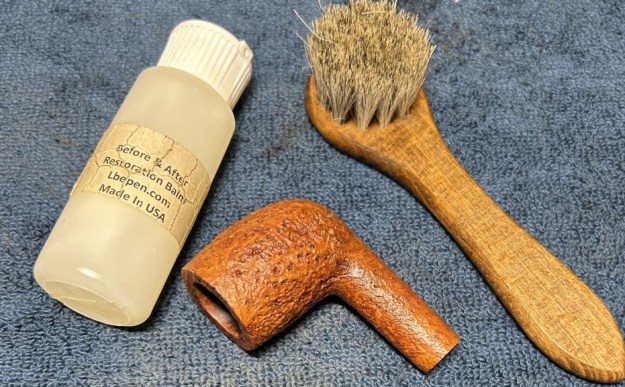
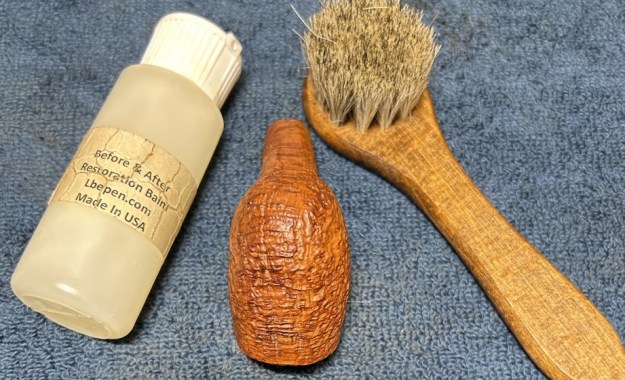
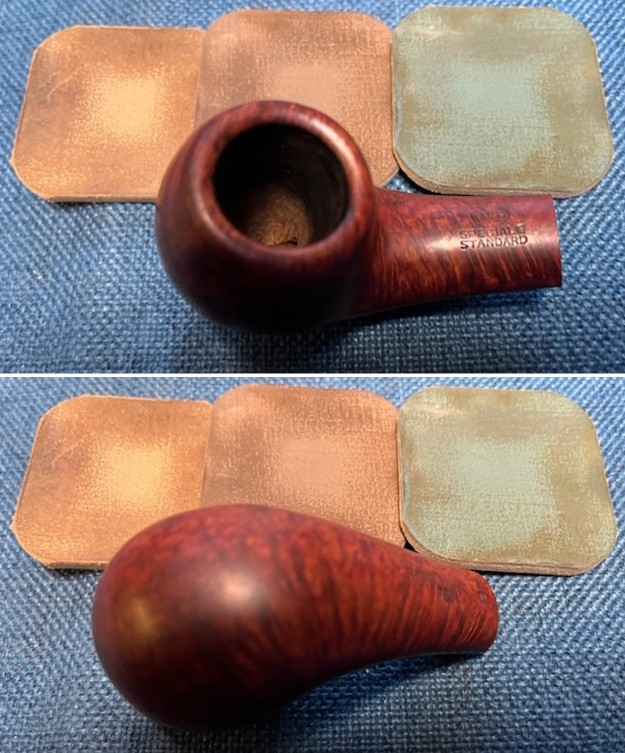
 I went over the rustication with a brass bristle wire brush to knock off any of the darkening on the grooves of the rim top and on the spots on both sides. It looked better. I rubbed the bowl down with Before & After Restoration Balm. I worked it into the surface of the briar with my fingertips and with a shoe brush to get deep in the rustication where it works to clean, restore and preserve the briar. I let it do its magic for 15 minutes then buffed it off with a cotton cloth. The pipe looks incredibly good at this point in the process.
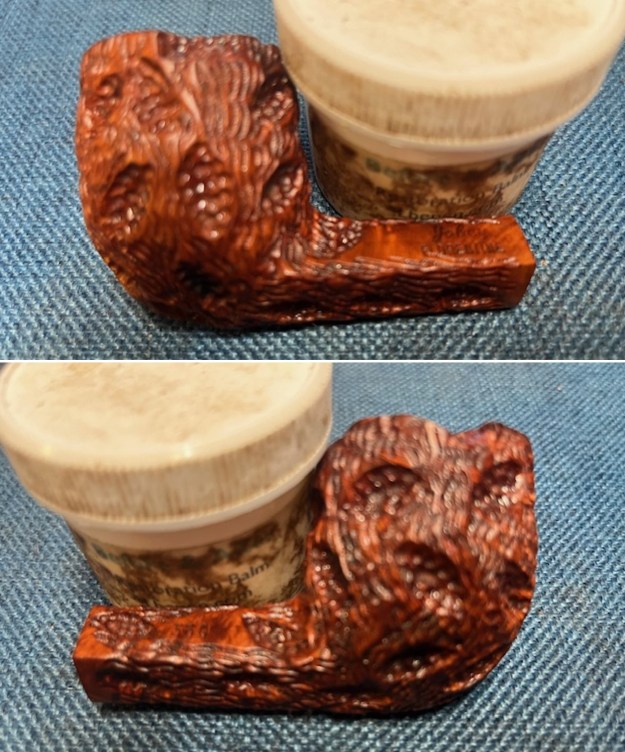
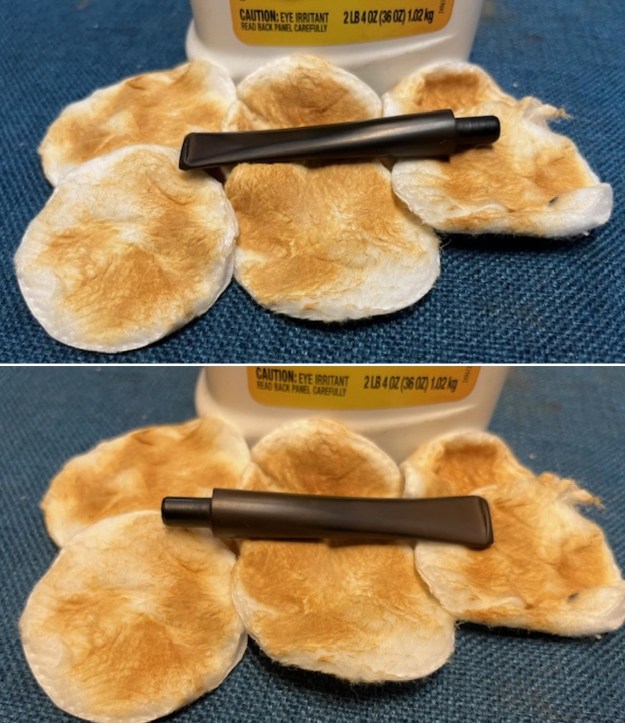
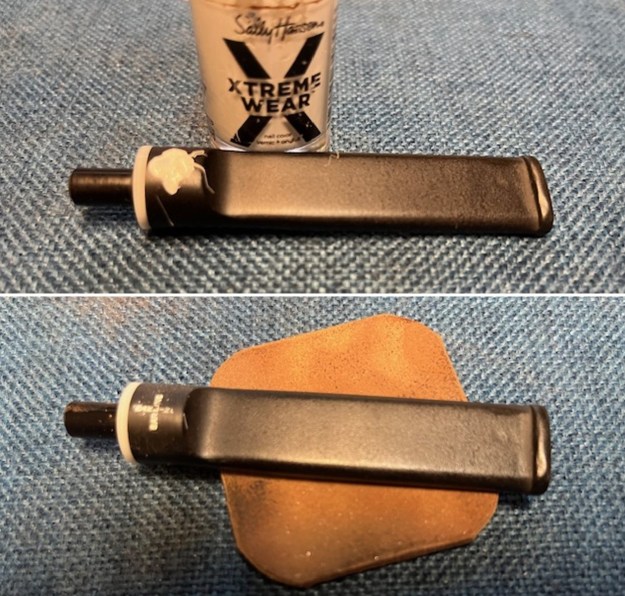
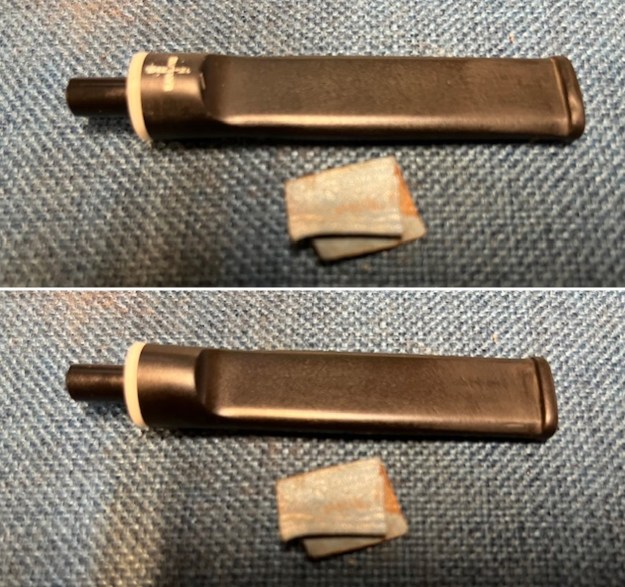
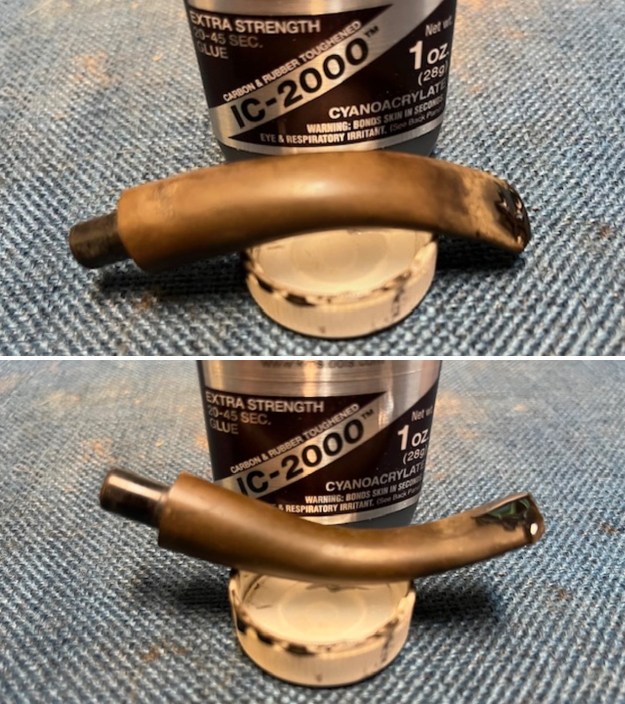
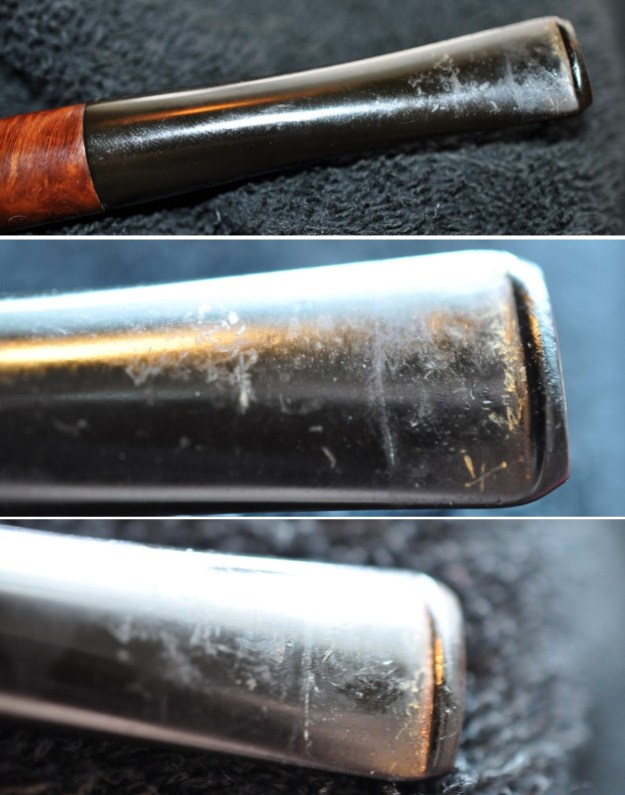
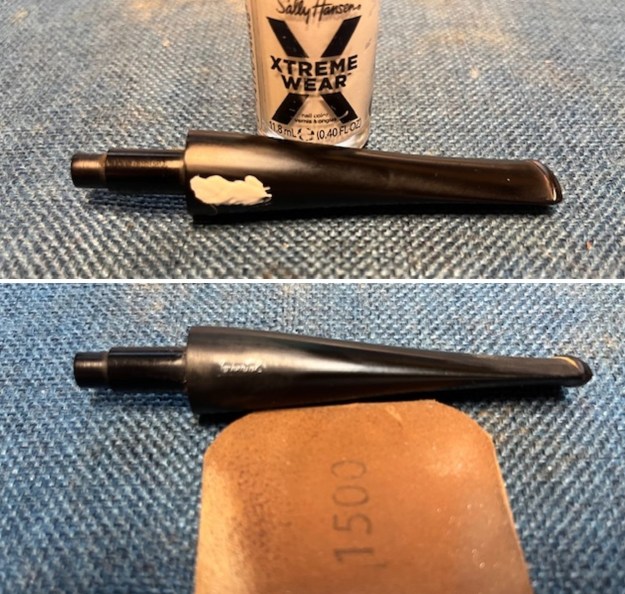
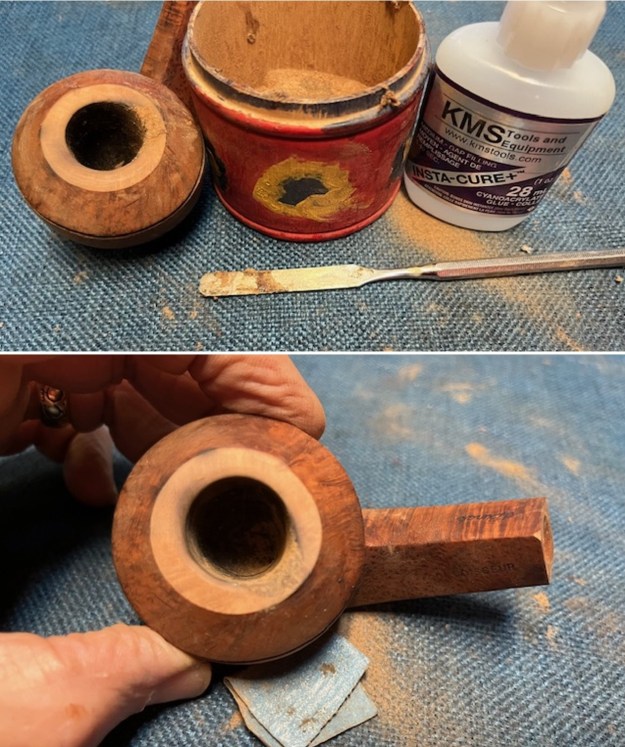
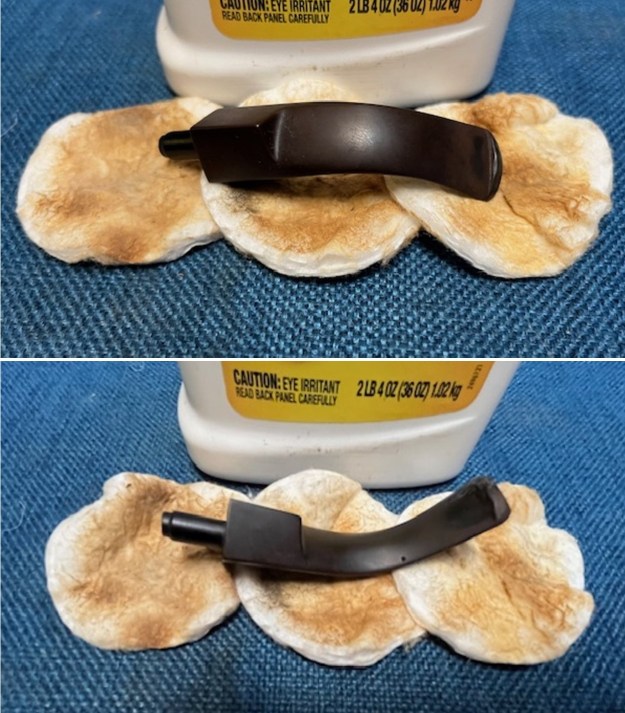
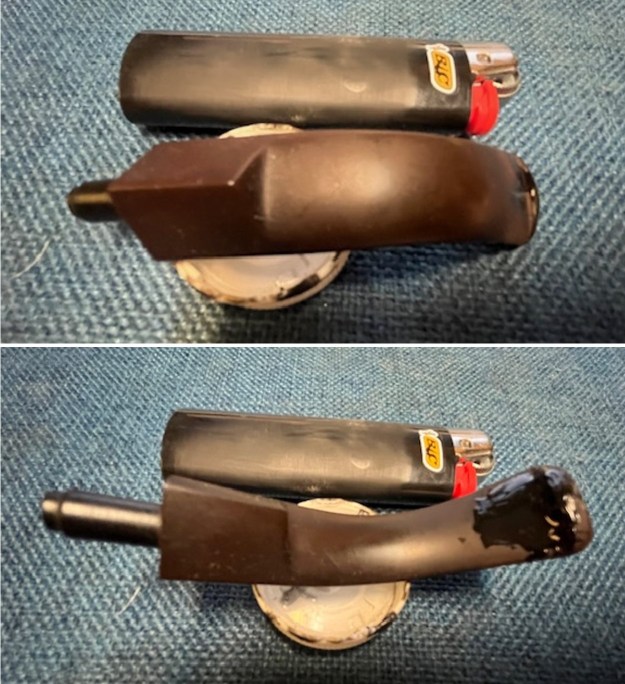
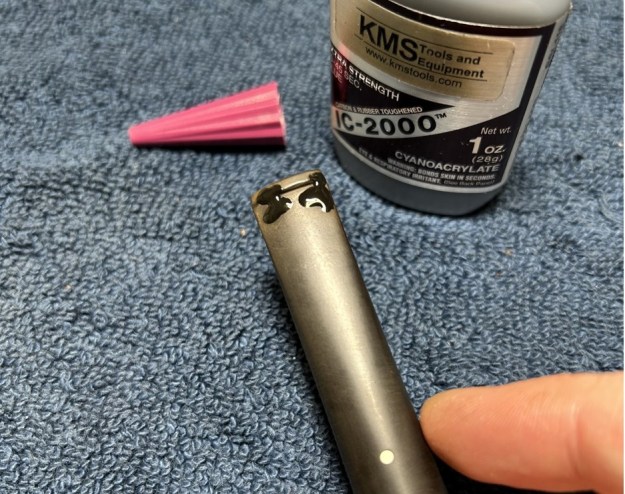
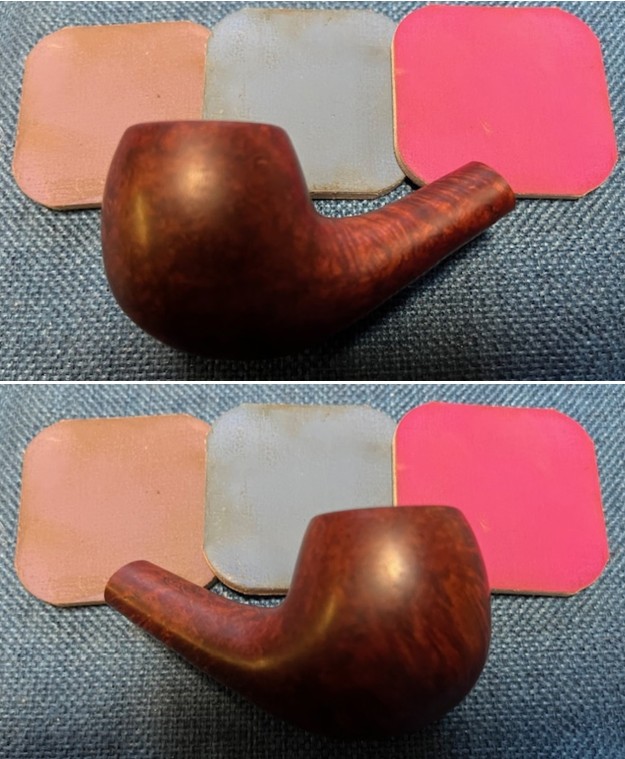
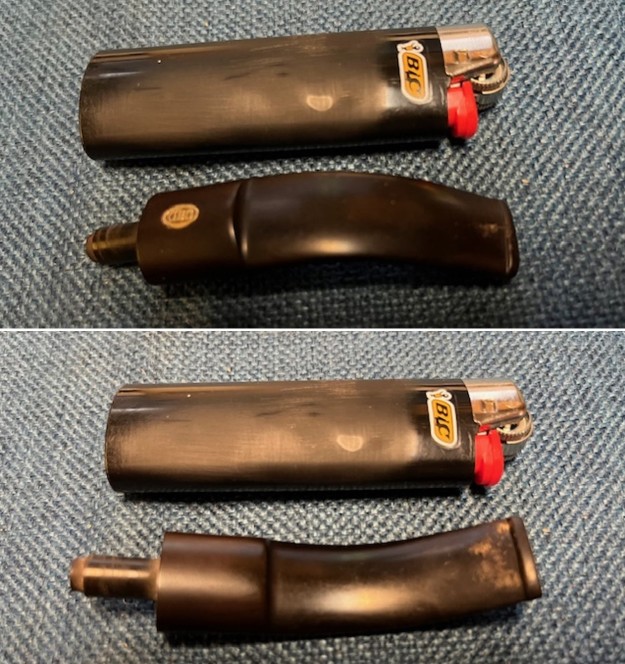
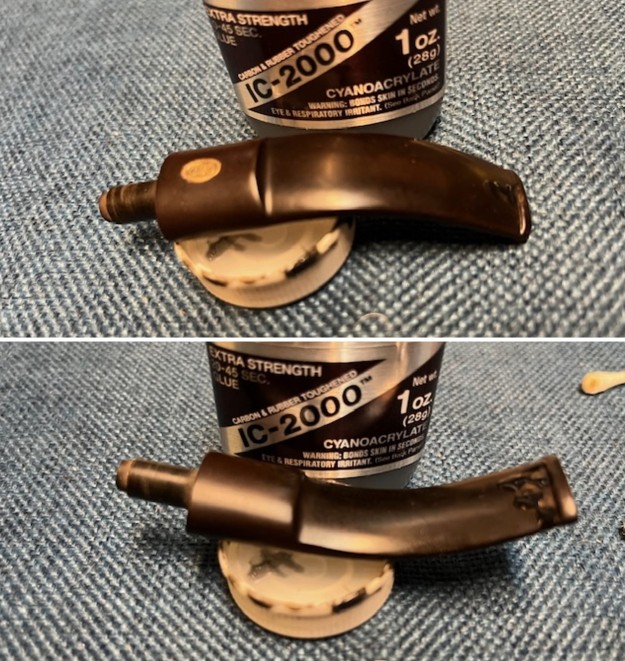
 I filled in the deep tooth marks ahead of the button on the top and underside of the stem with clear CA glue. I like this particular glue (KM Tools) as it is transparent and the colour underneath the repair comes through. It is also not brittle like other glues can be once it cures. I sanded the cured repairs flat with a folded piece of 220 grit sandpaper and the tooth marks and dents are taken care of.
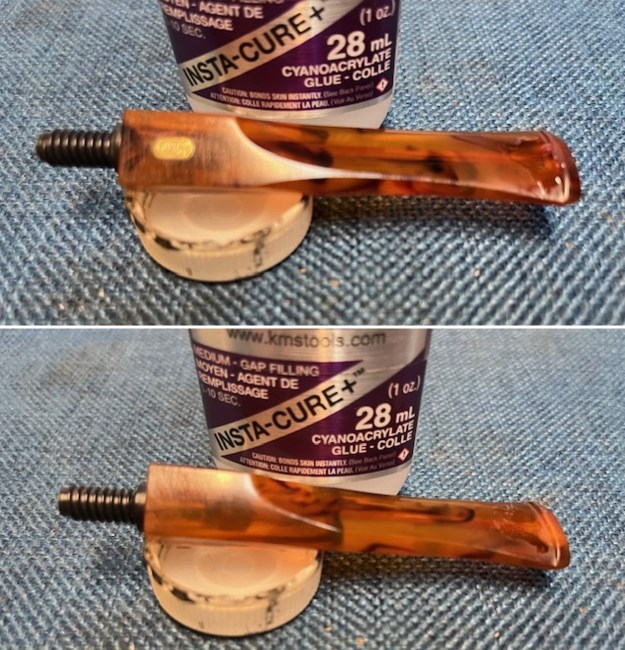
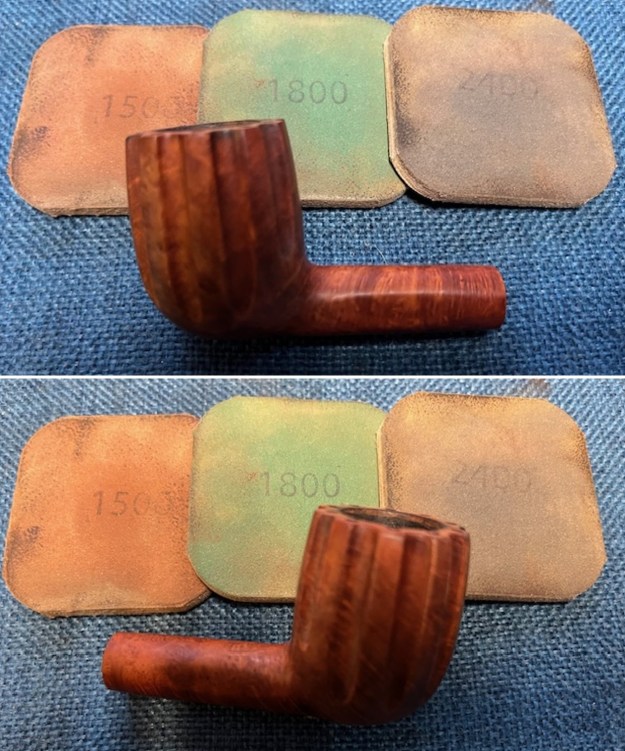
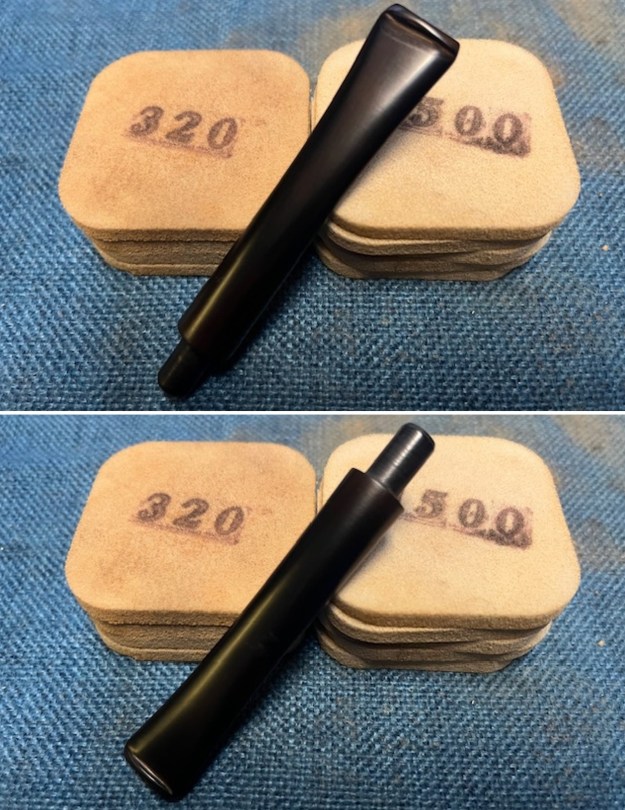
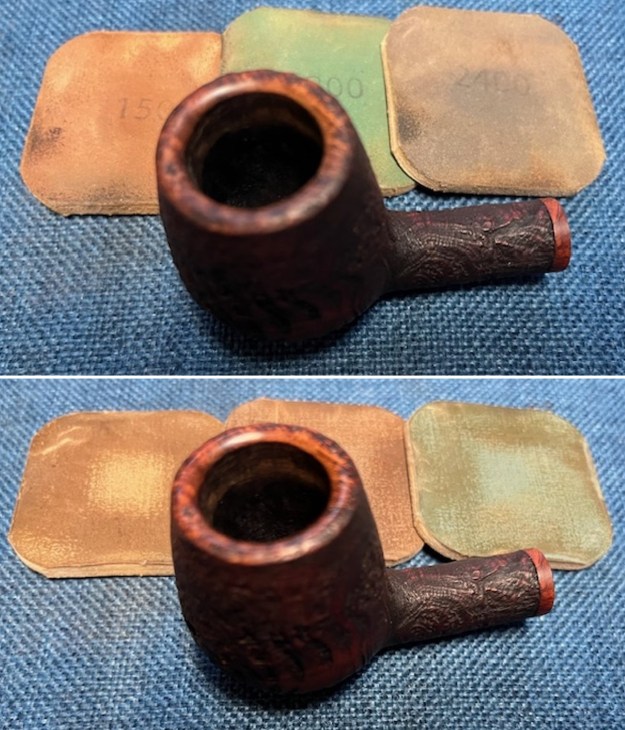
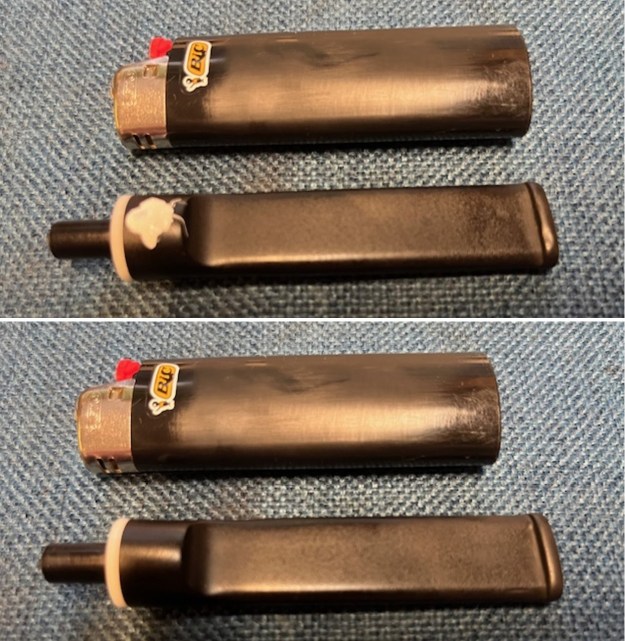
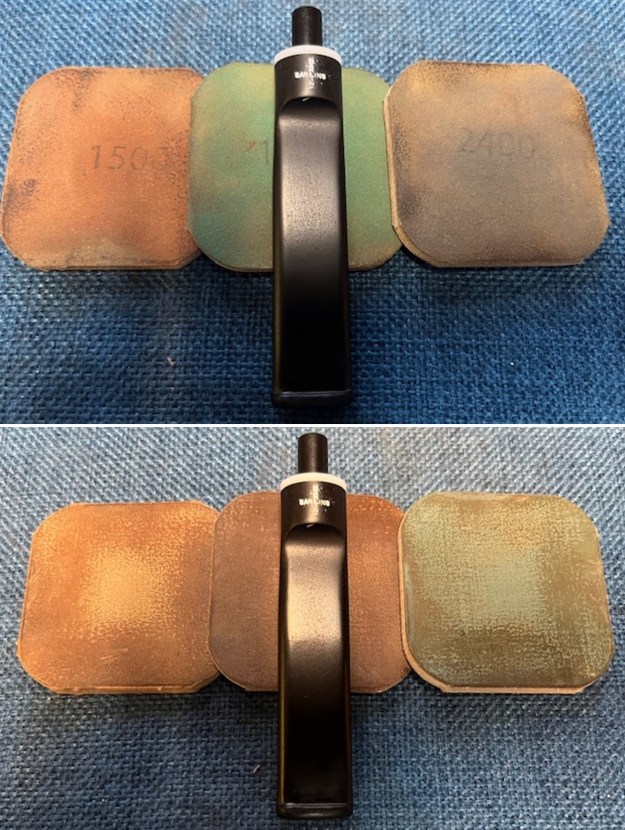
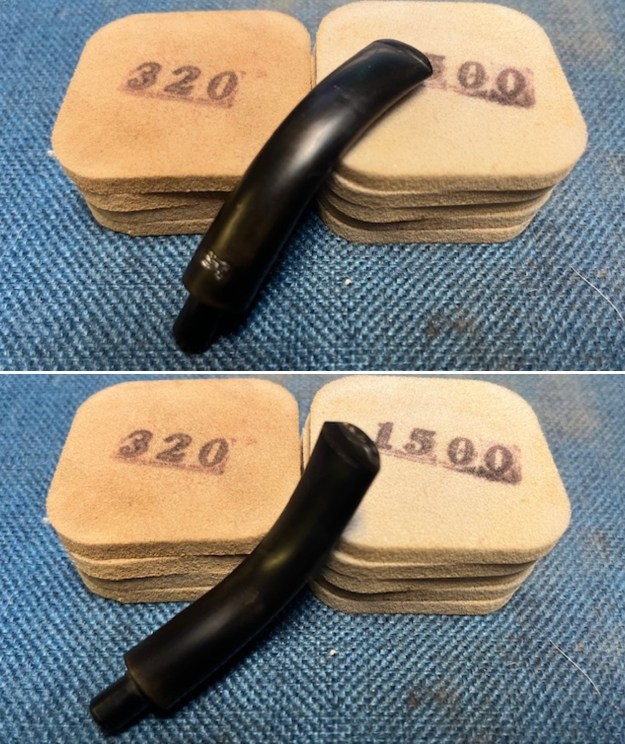
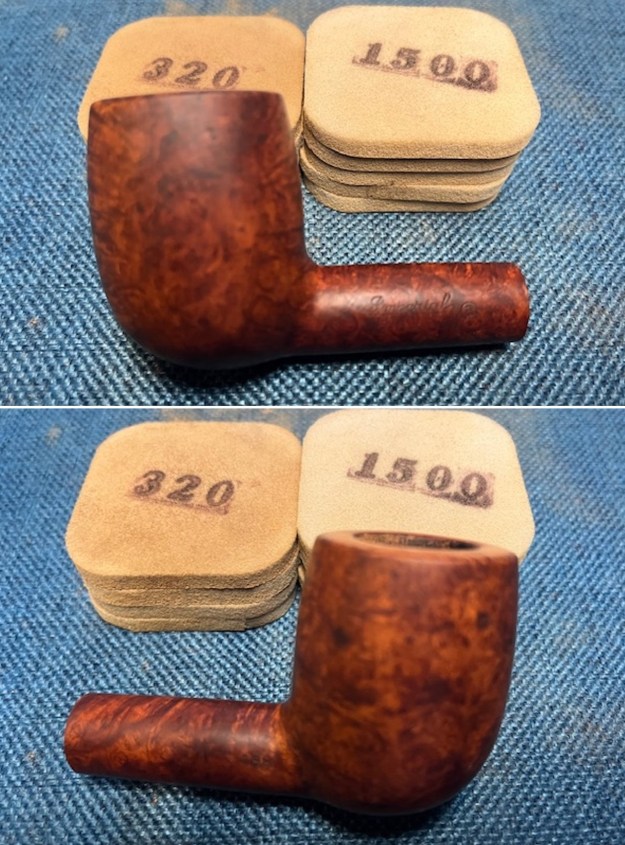
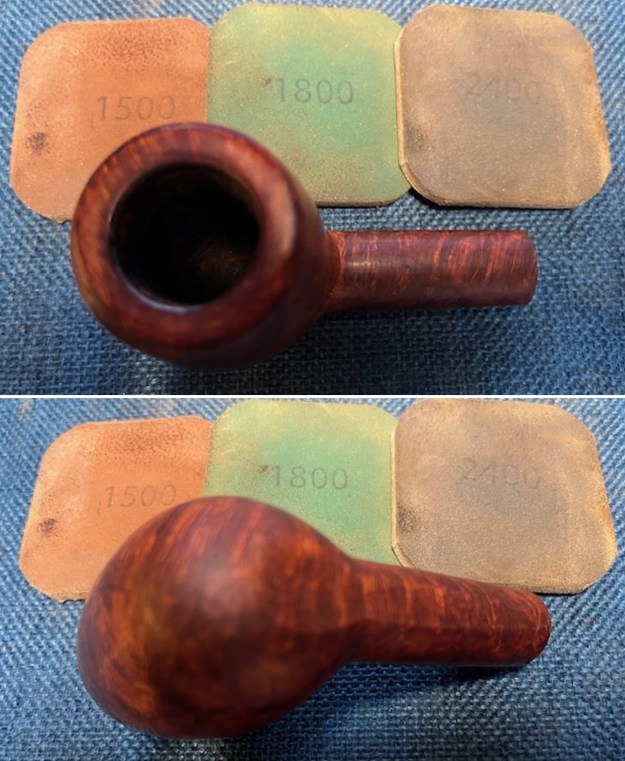
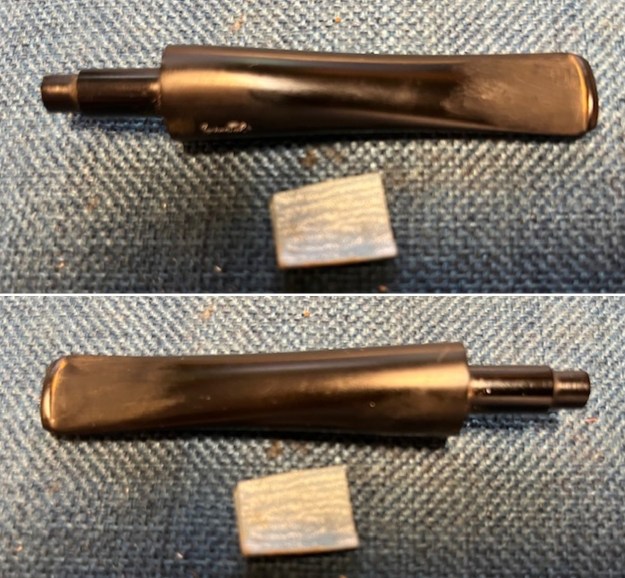
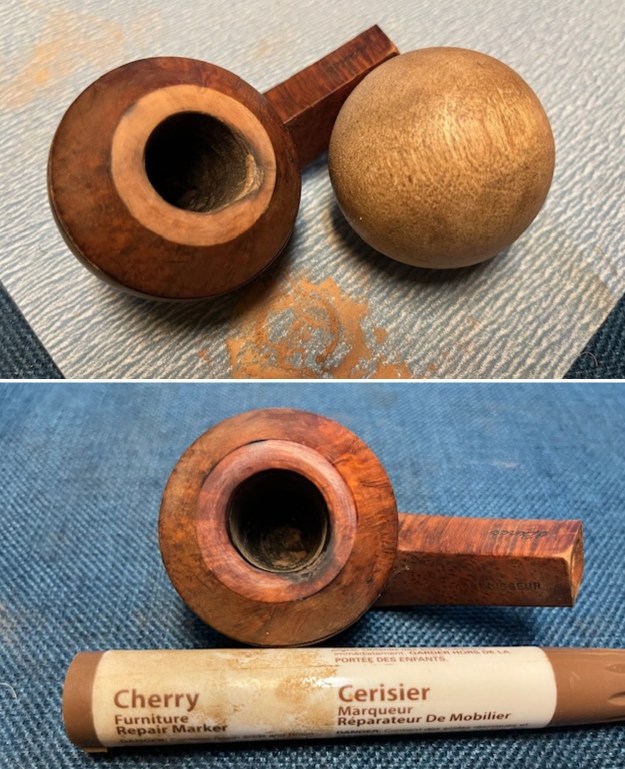
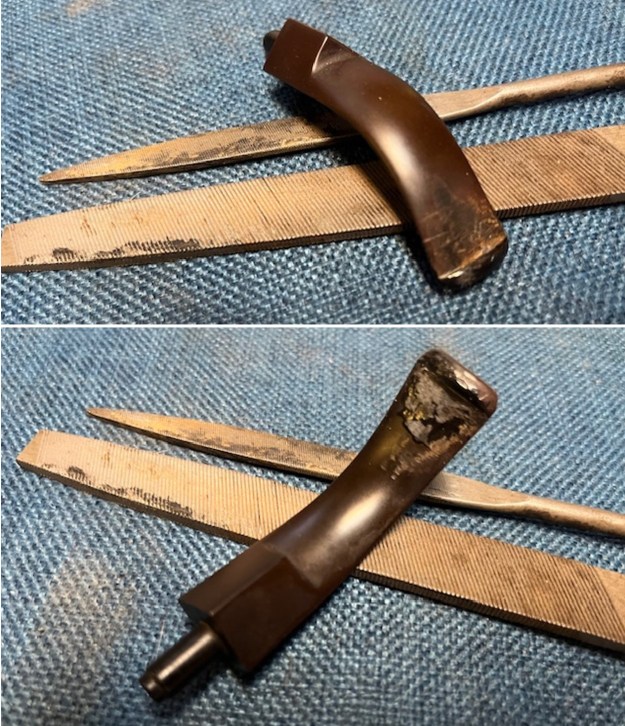
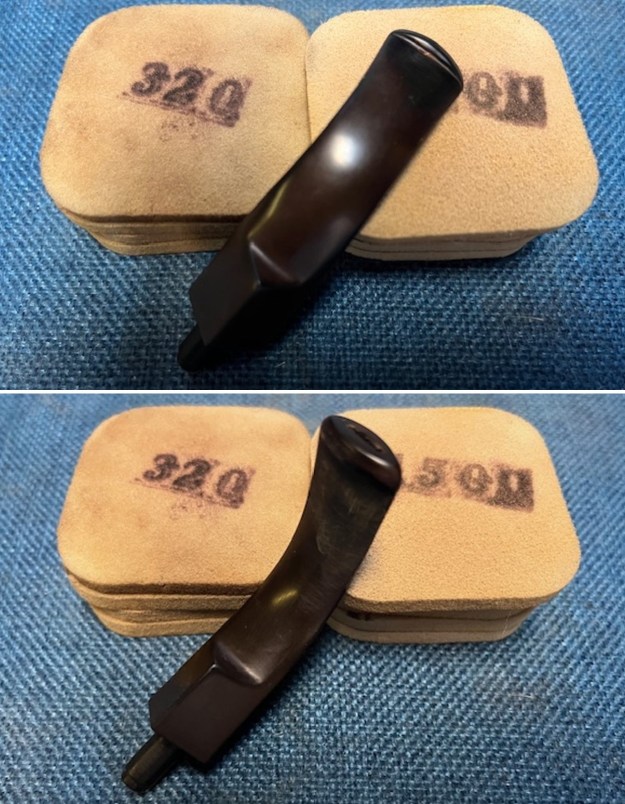
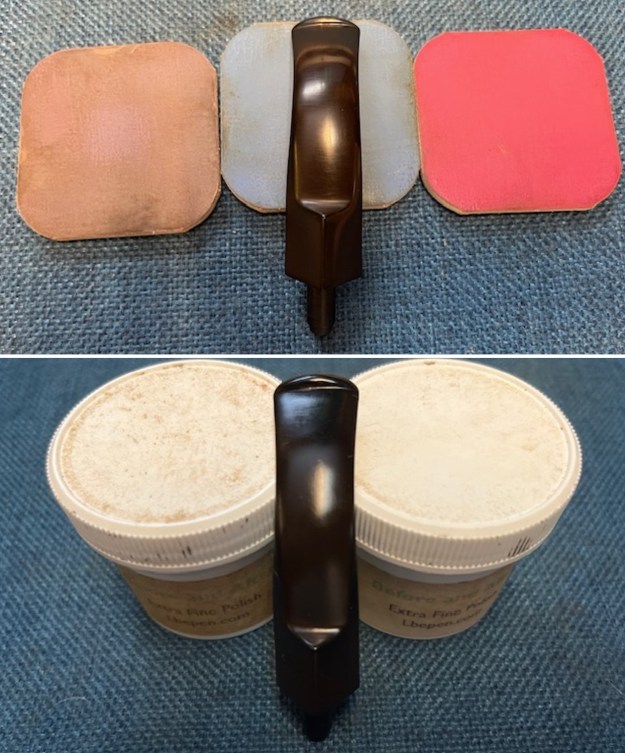
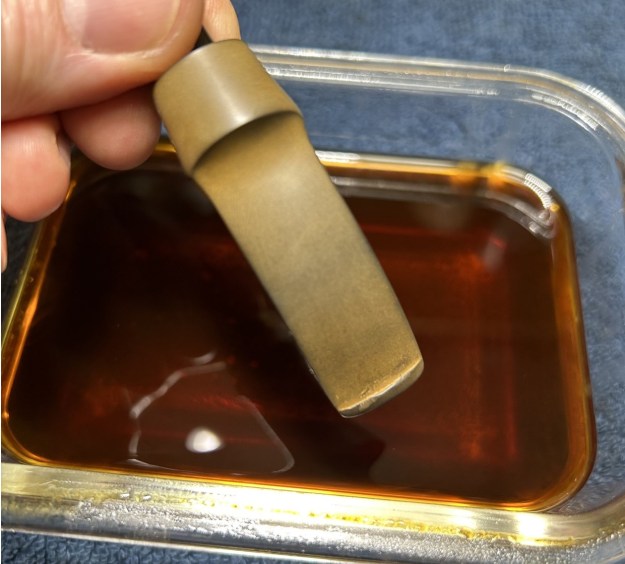
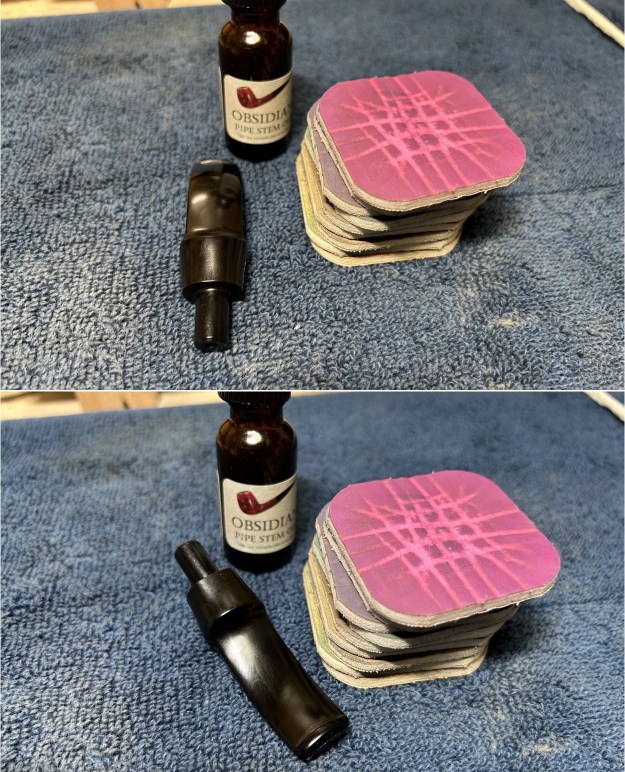
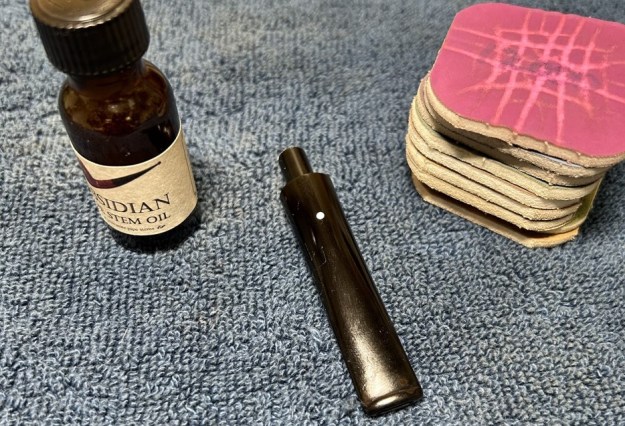
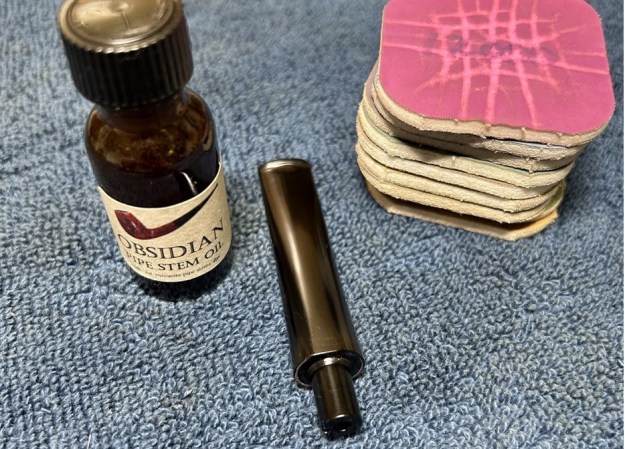
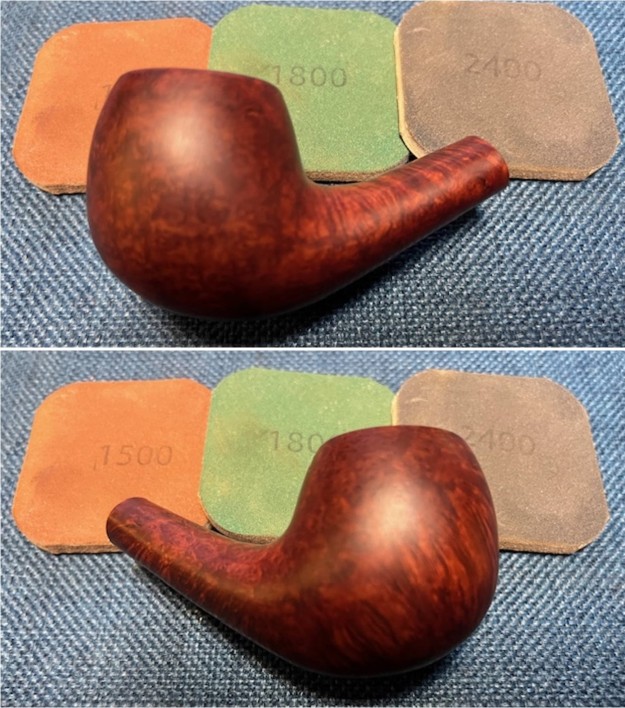
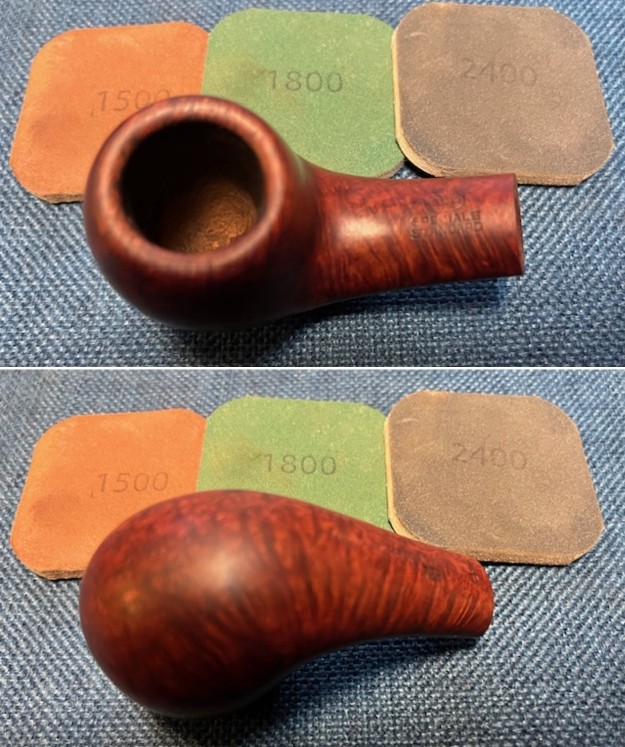
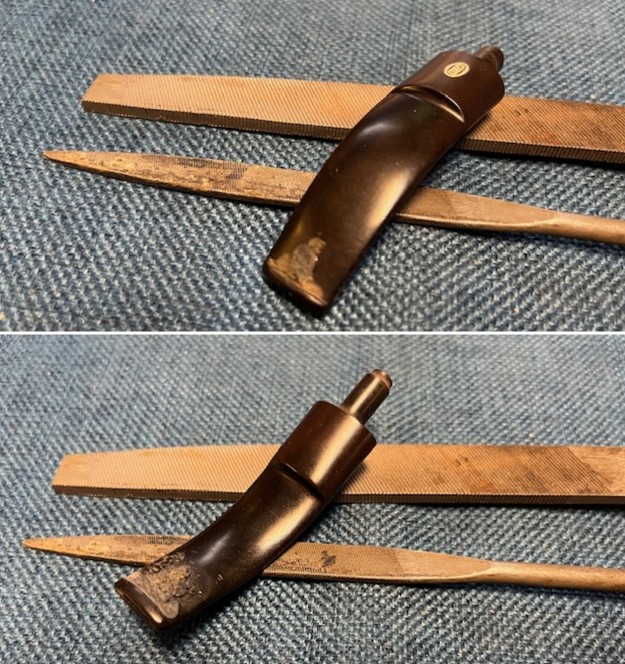
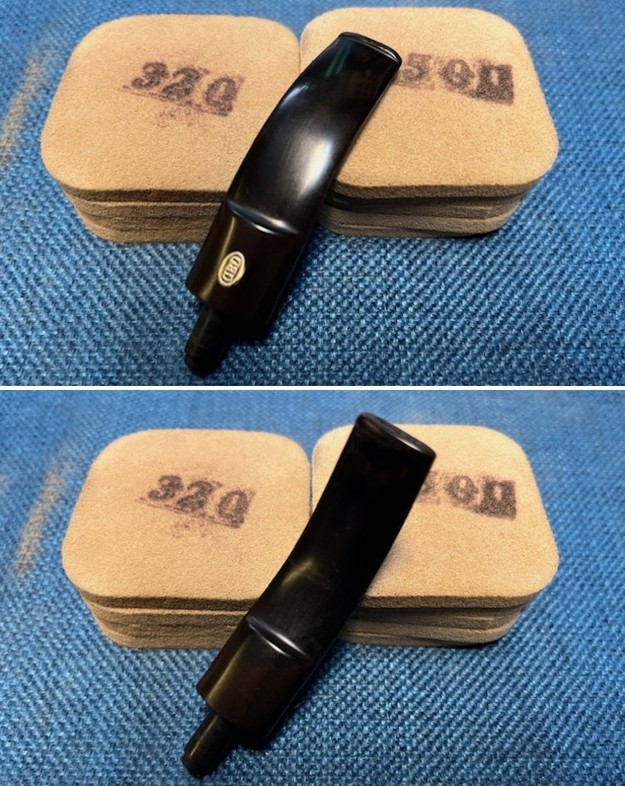
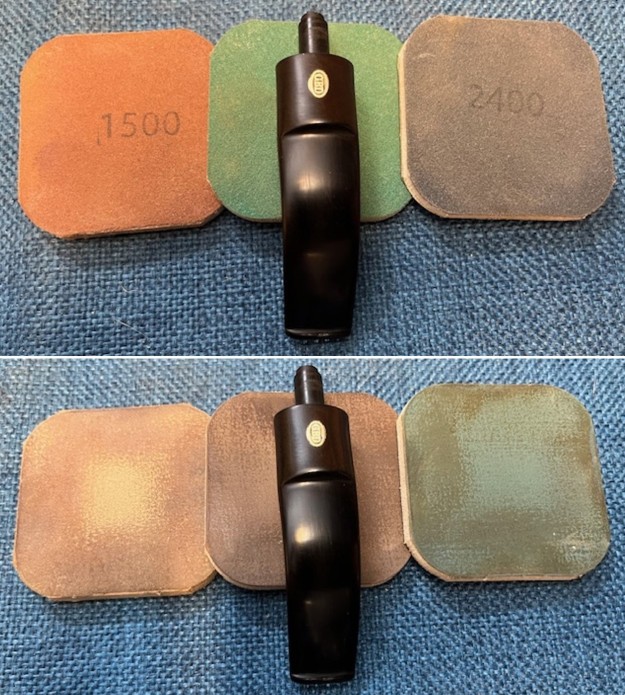
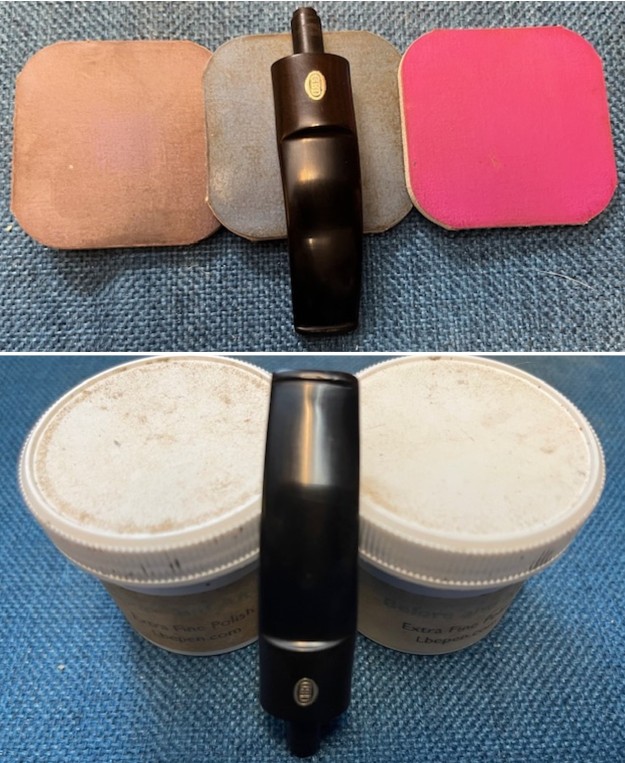
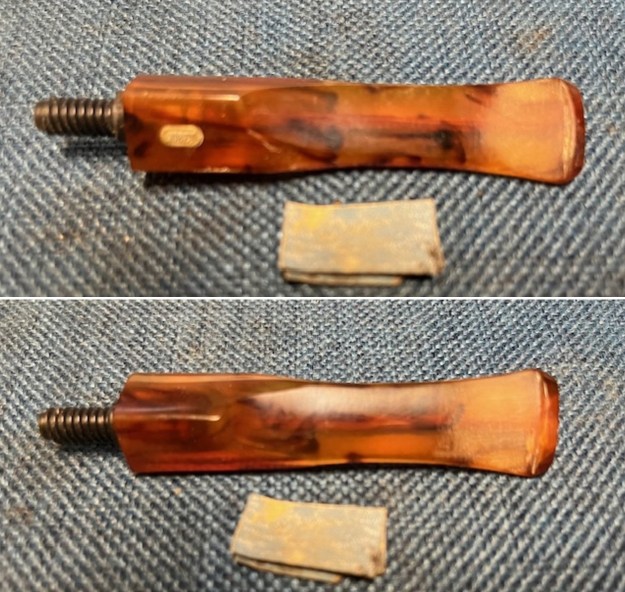 I started polishing out the scratch marks and smoothing the repairs with 320-3500 grit sanding pads. I wiped the stem down after each sanding pad with an Obsidian Oil impregnated cloth. It removes the dust and also gives the sanding pads some bite. By the final pad it was looking quite good. The tooth marks and dents were invisible.
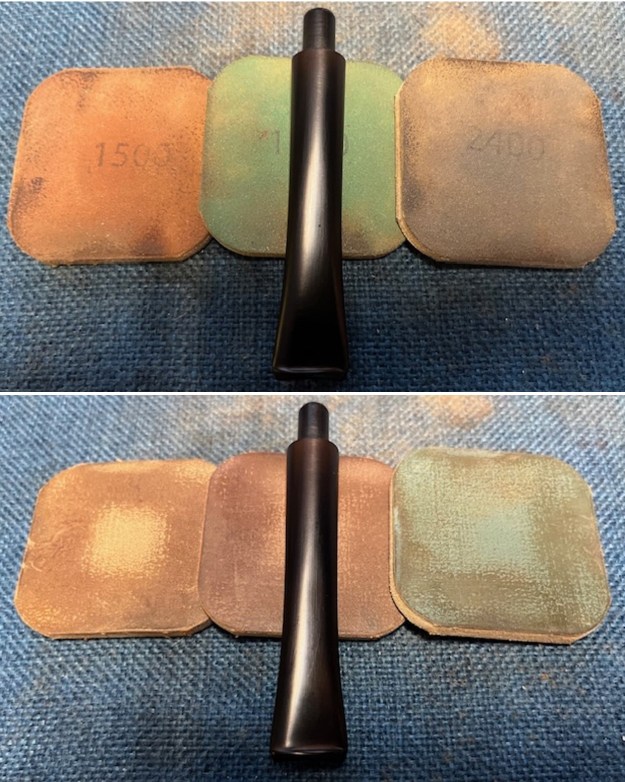
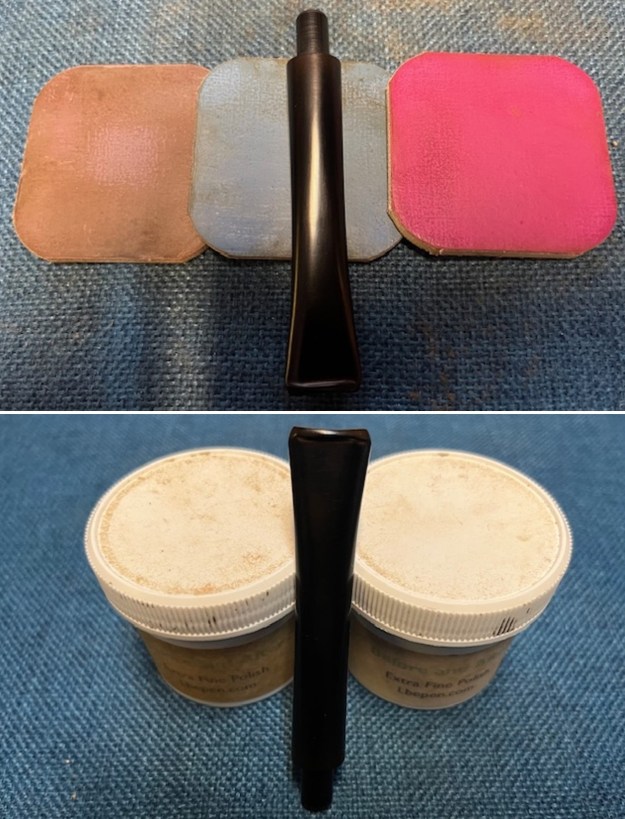
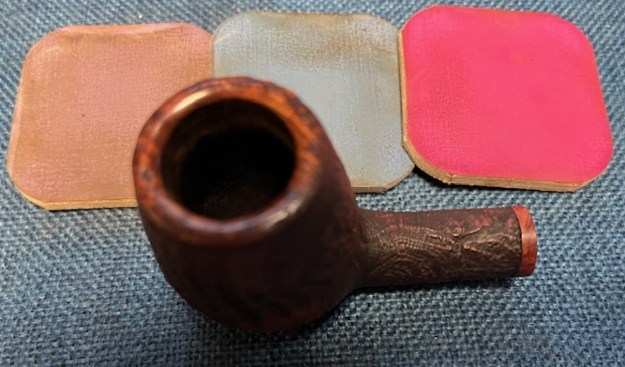
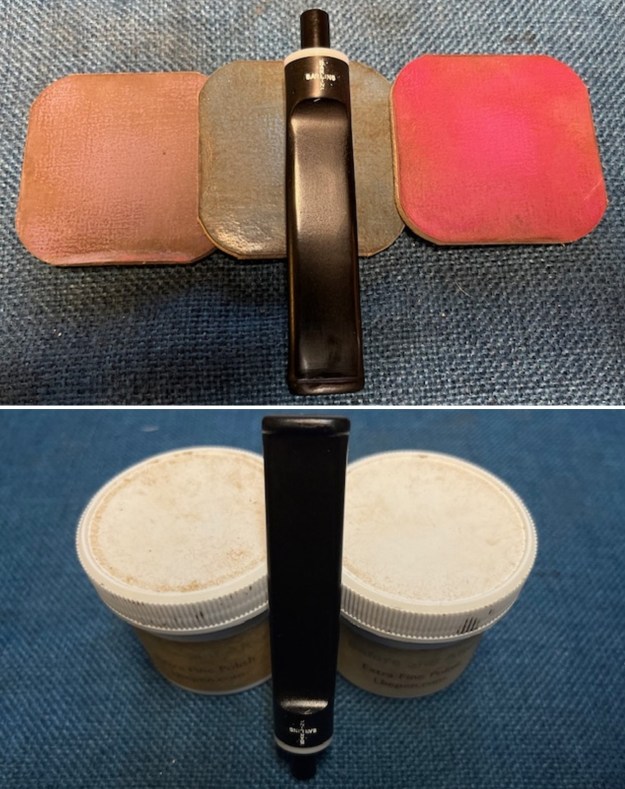
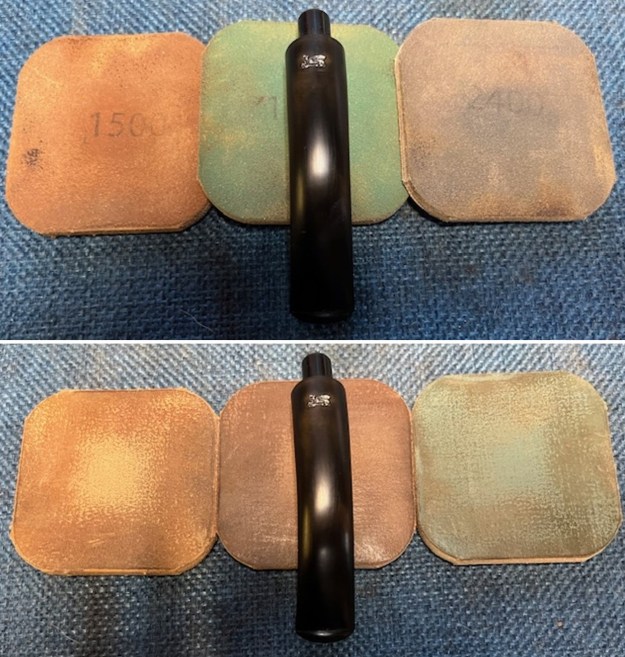
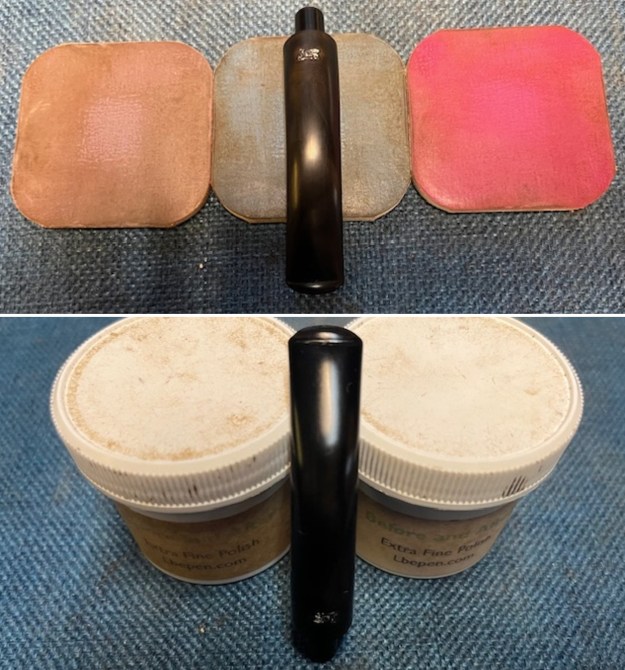
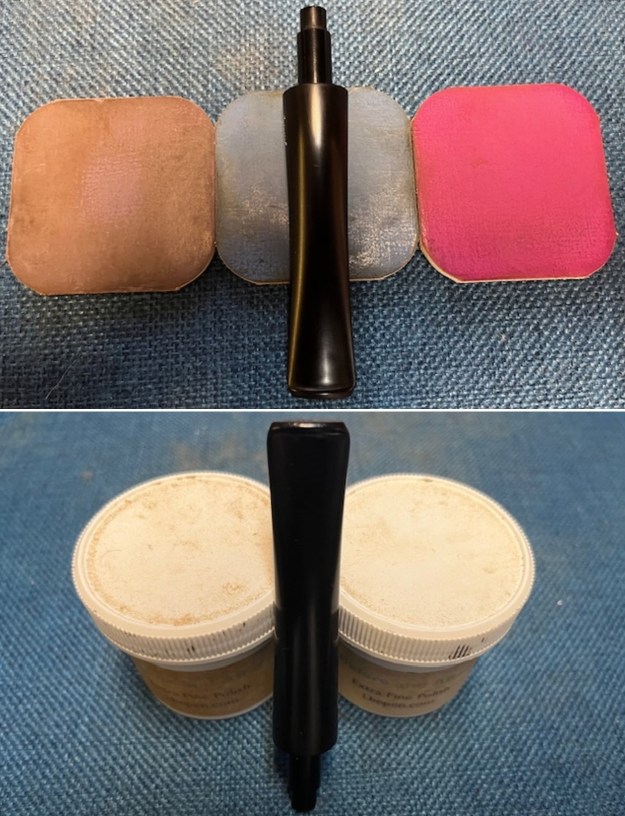
 Following my usual process in restoration I polished the stem with micromesh sanding pads – dry sanding with 1500-12000 grit sanding pads. I wiped it down after each sanding pad with Obsidian Oil. I polished it further with Before & After Stem Polish – both Fine and Extra Fine. I gave it a final coat of Obsidian Oil and set it aside to absorb the oil.
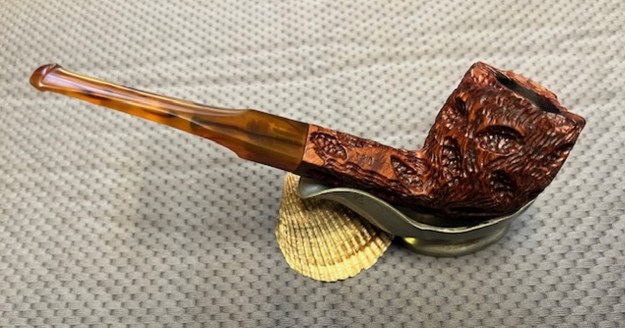
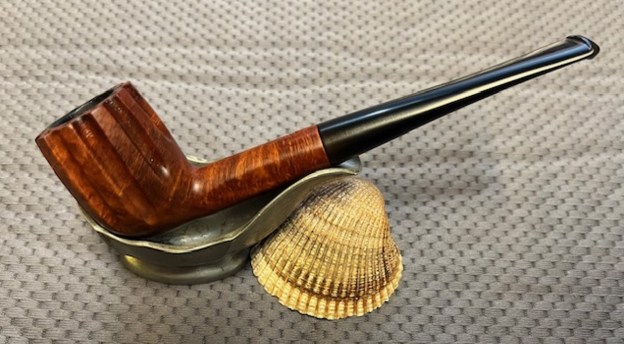
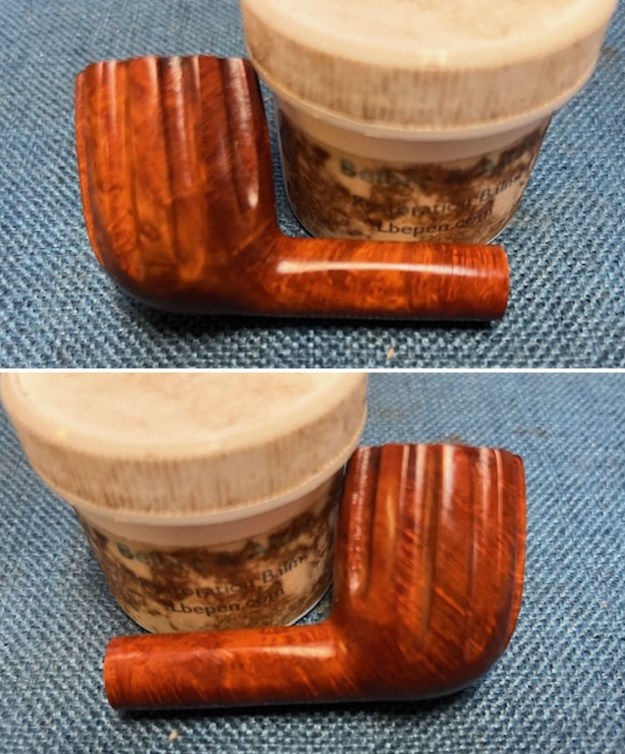
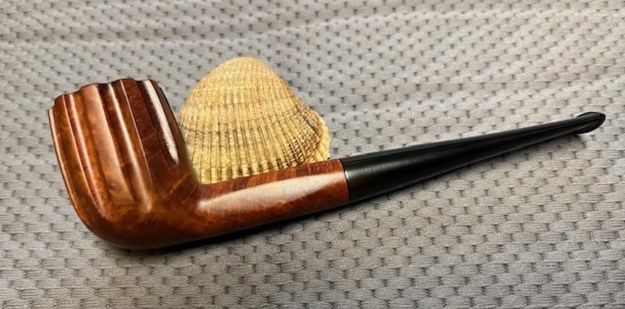
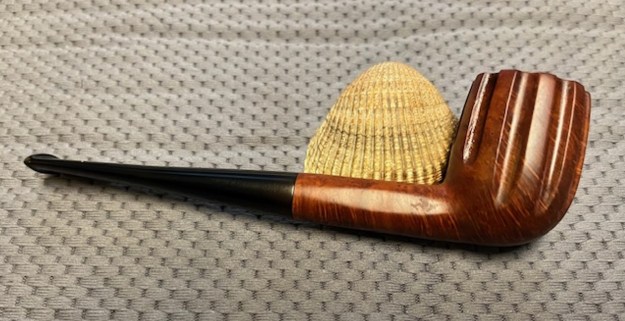
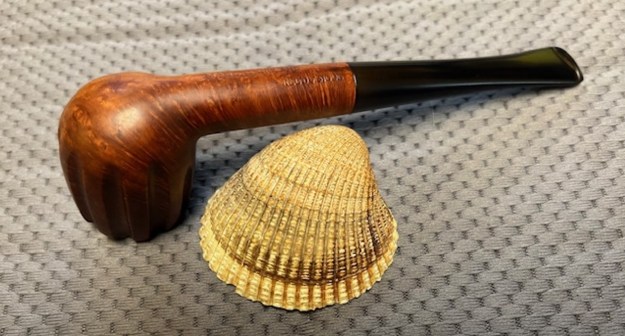
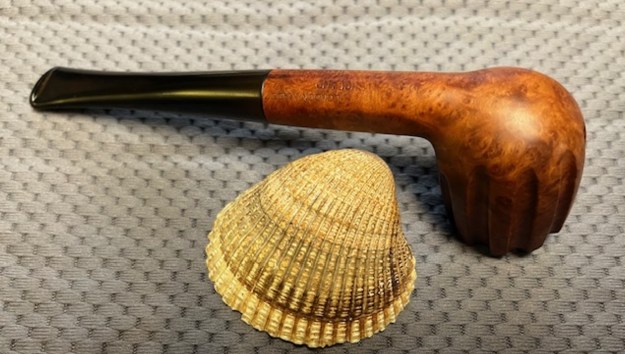
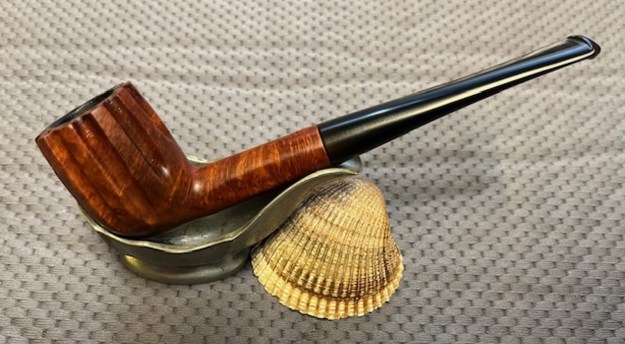
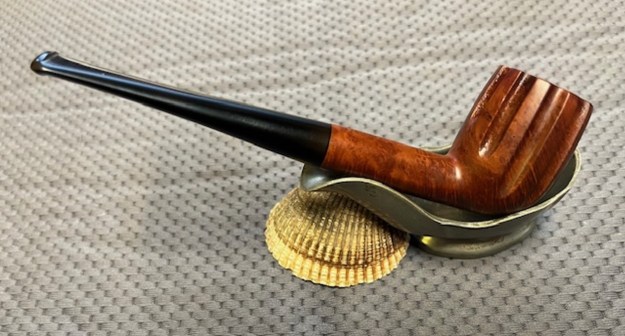
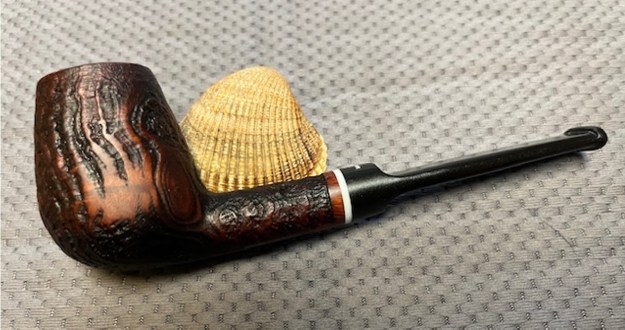
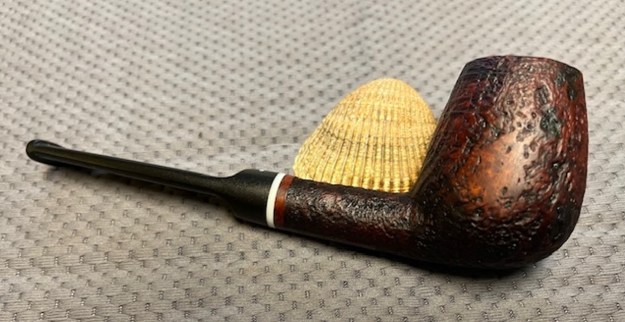
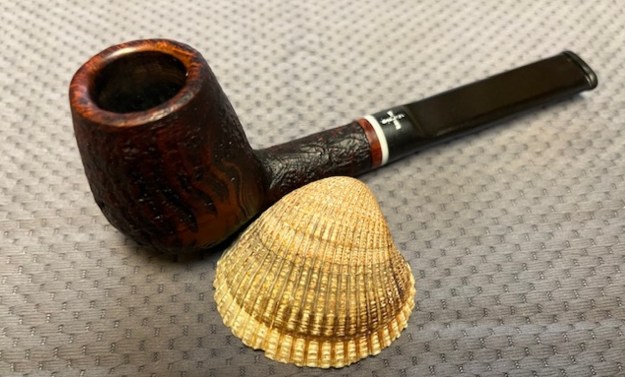
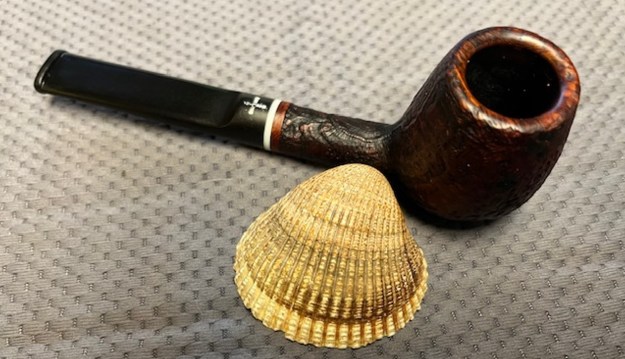
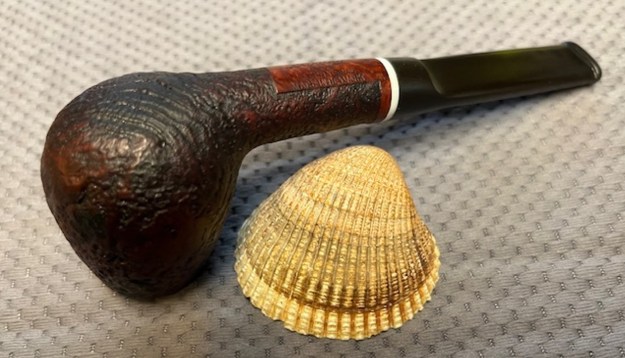
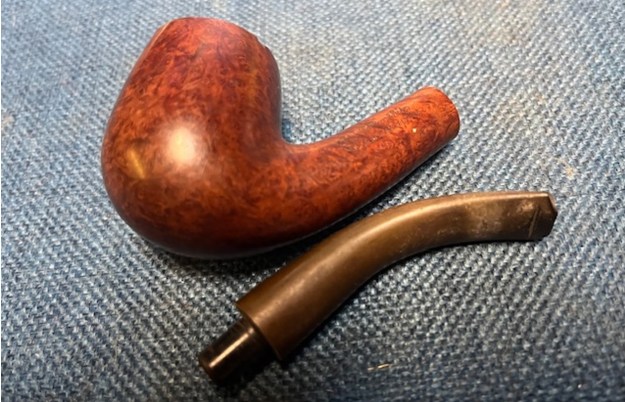
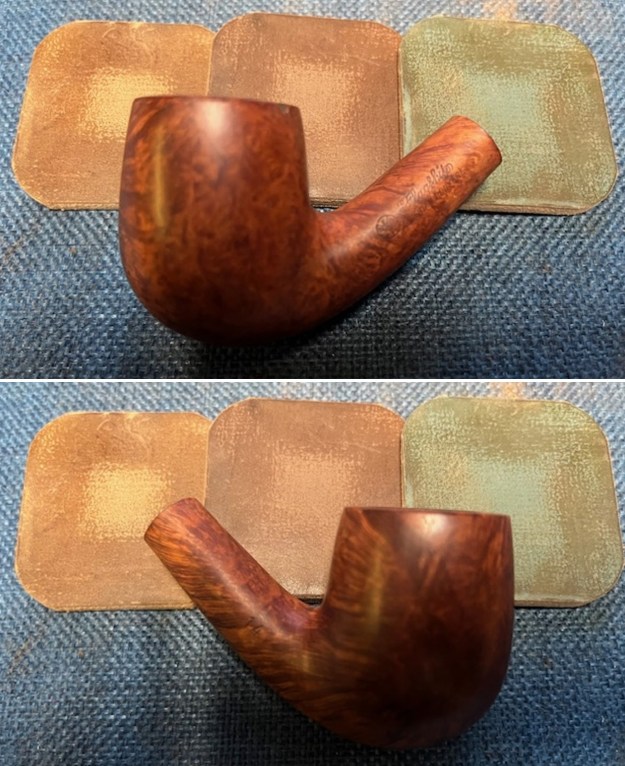
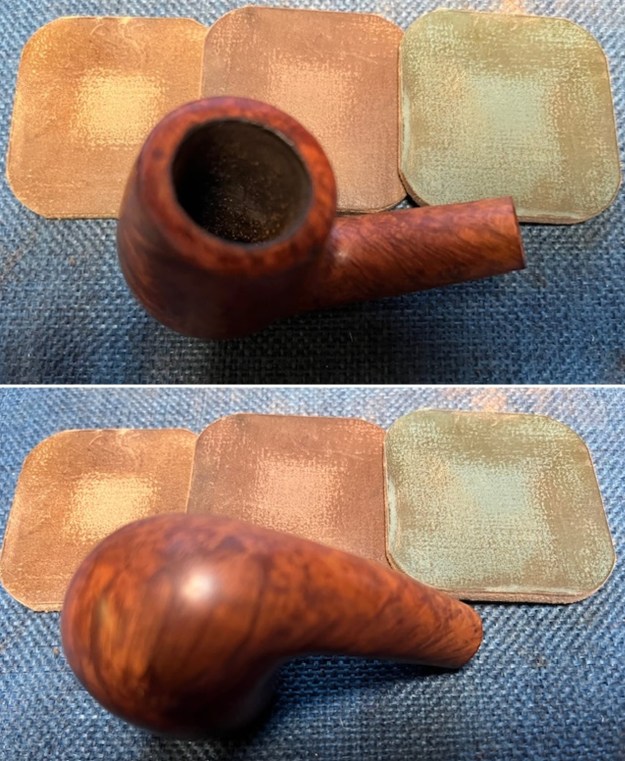
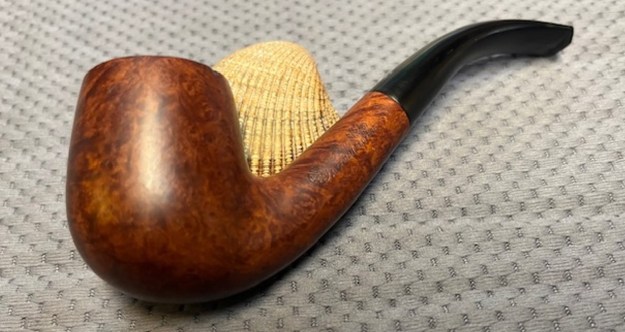
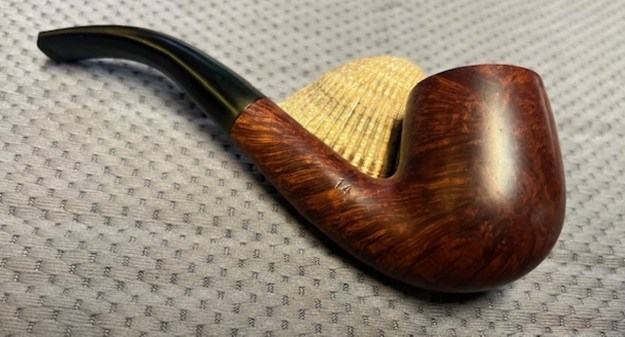
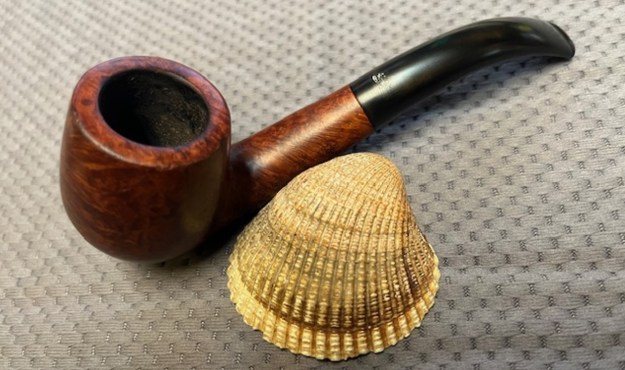
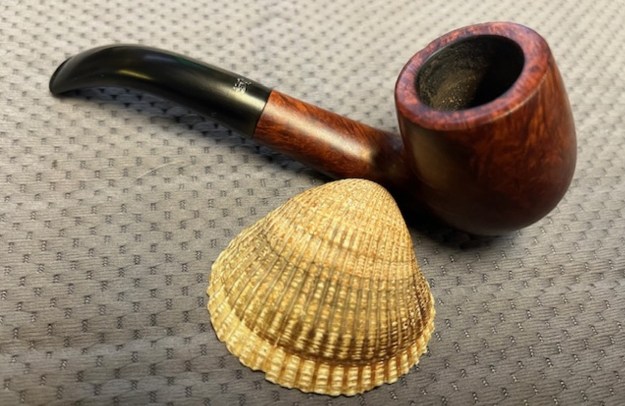
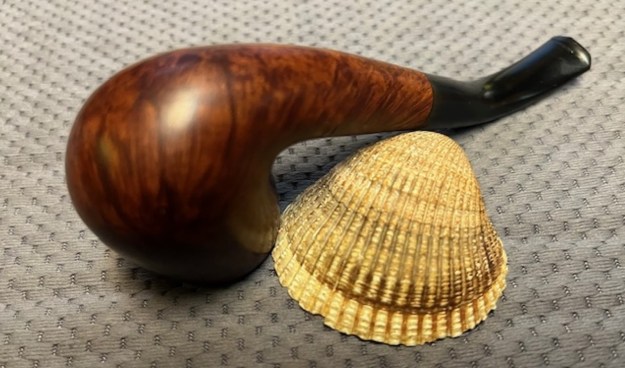
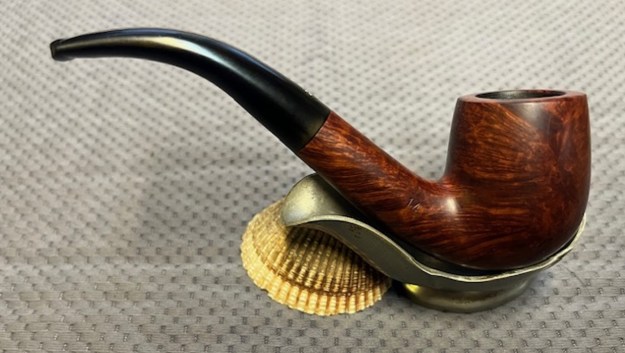
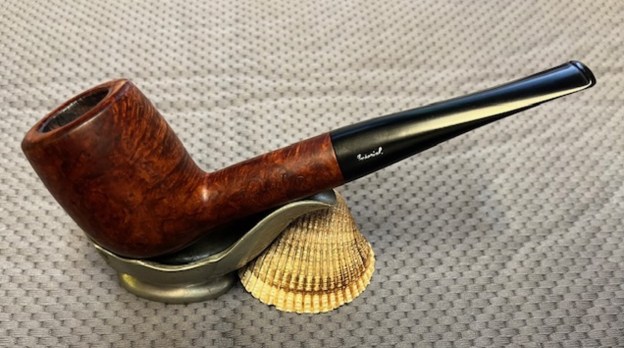
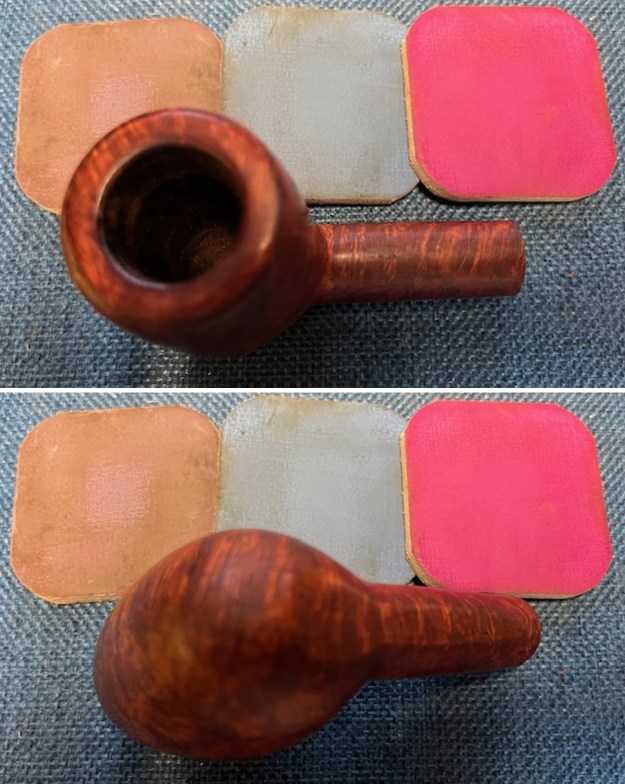
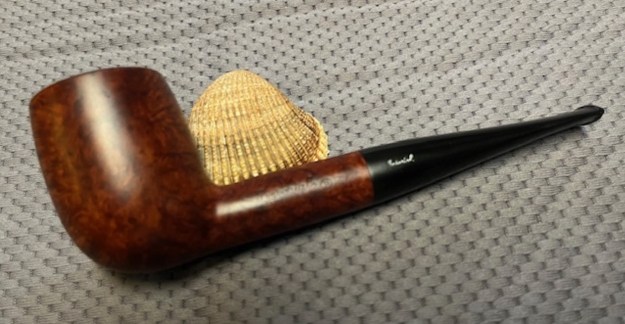
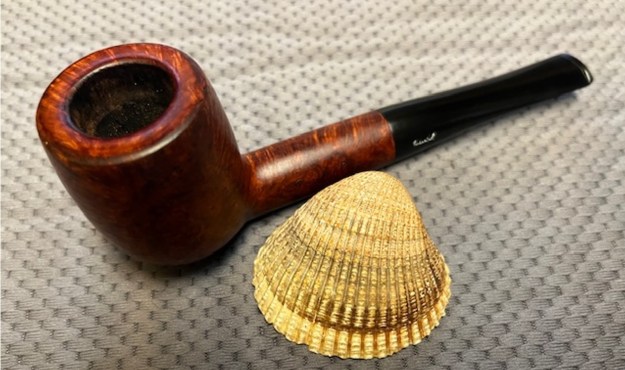
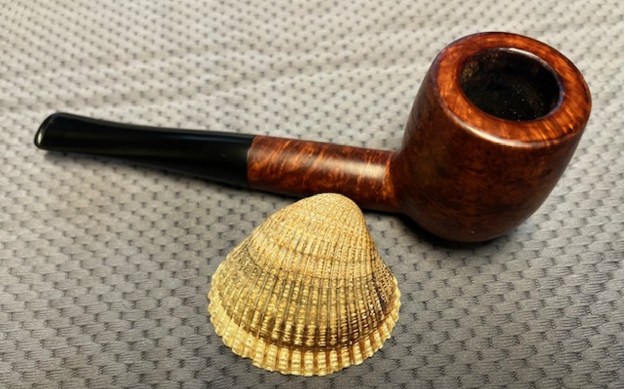
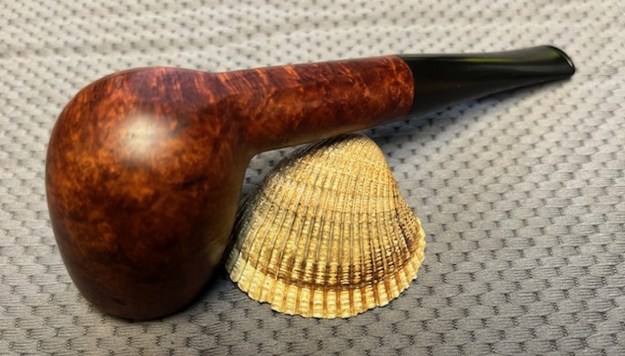
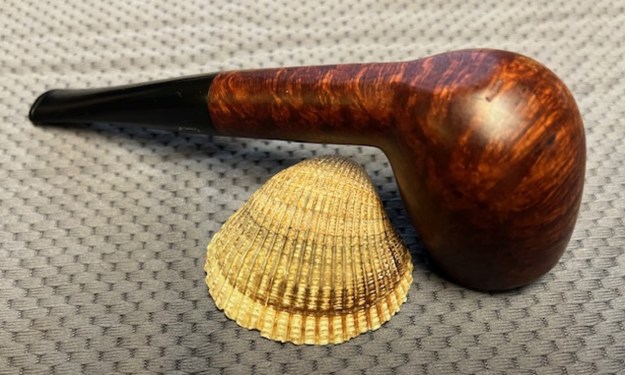
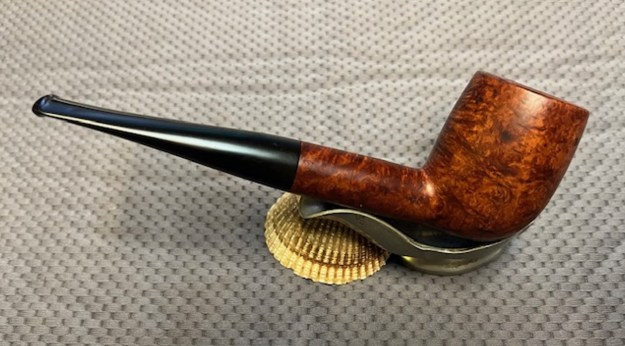
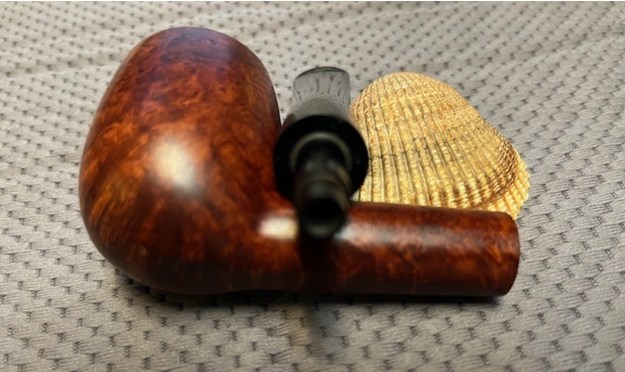
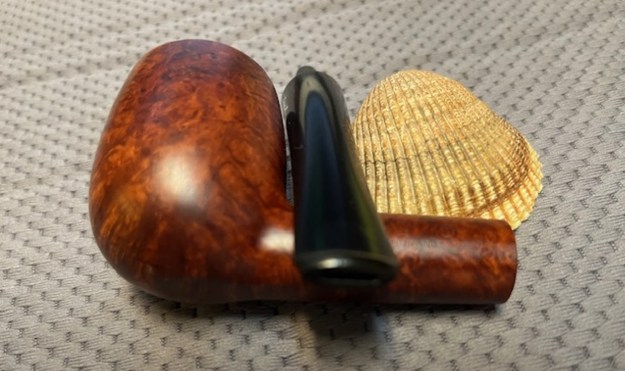
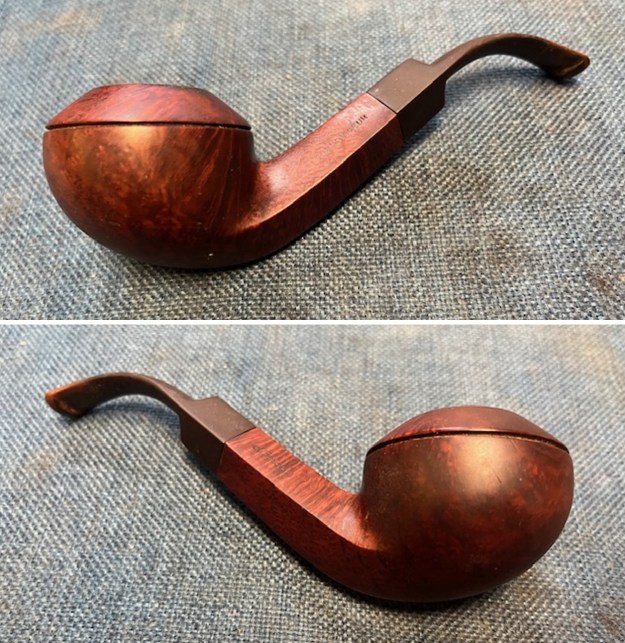
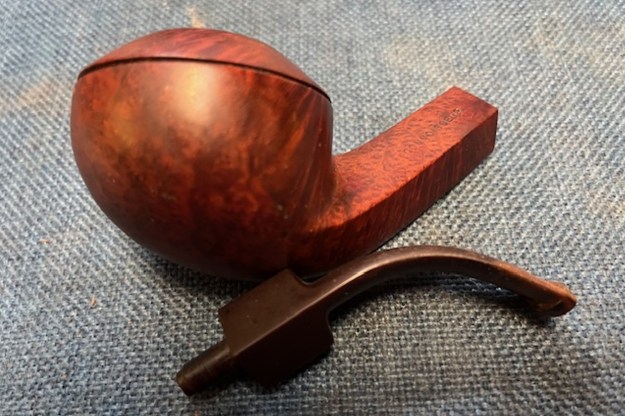
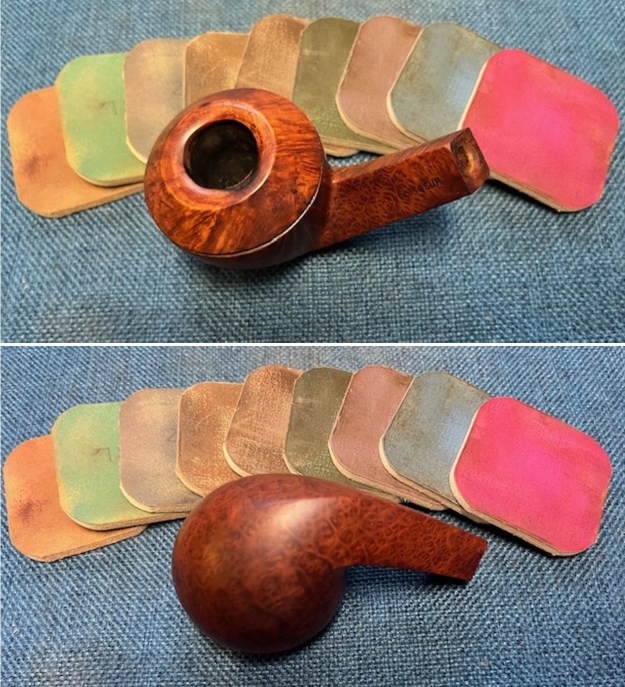
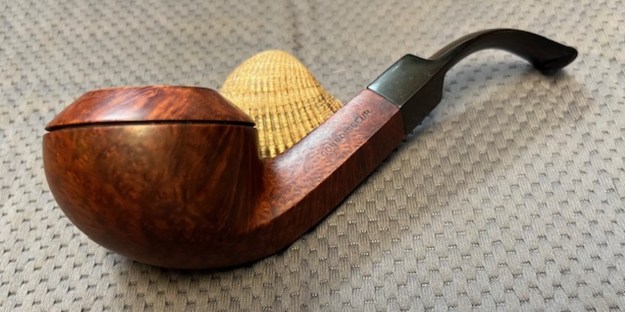
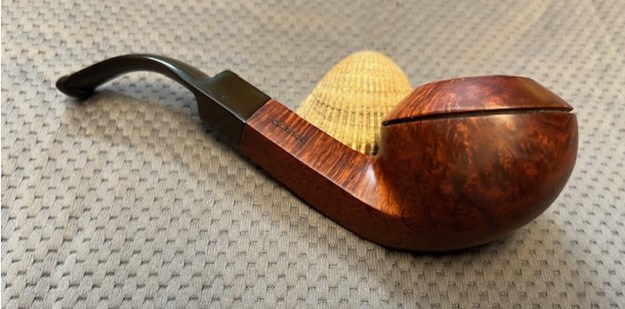
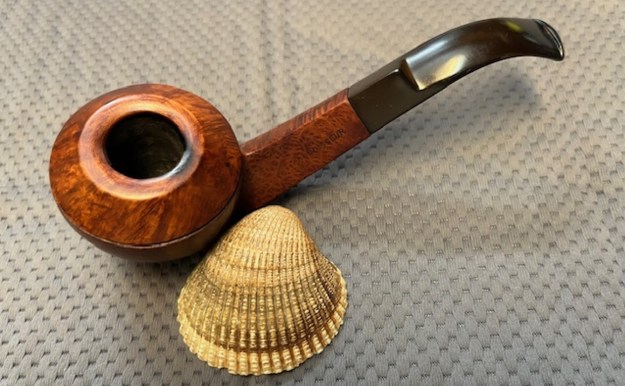
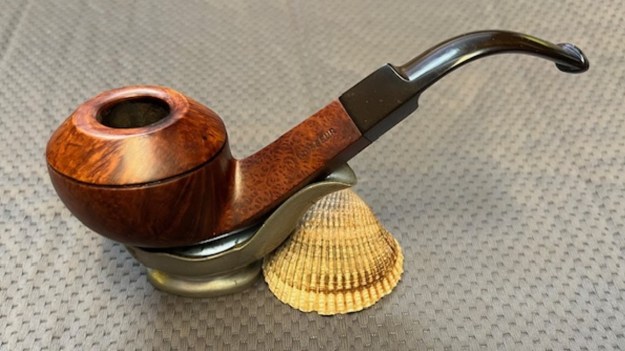
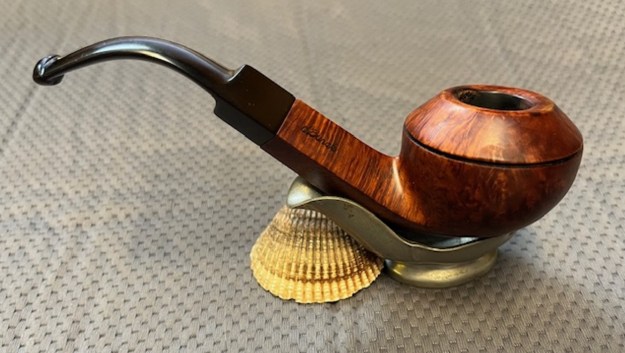
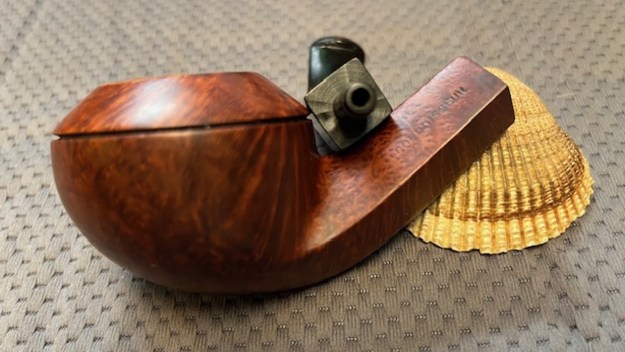
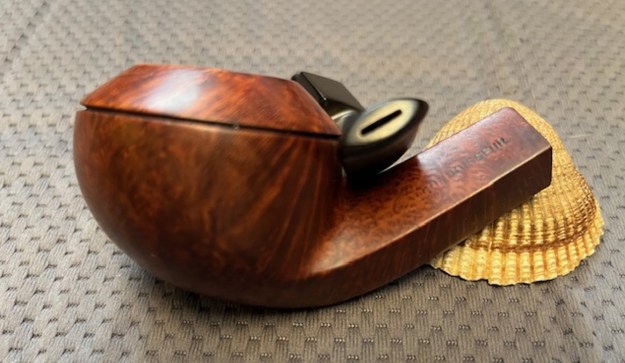
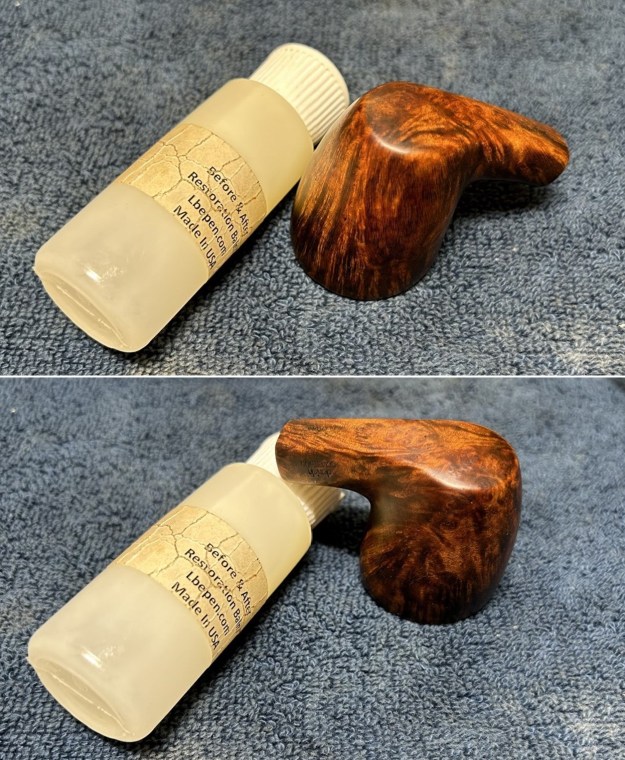
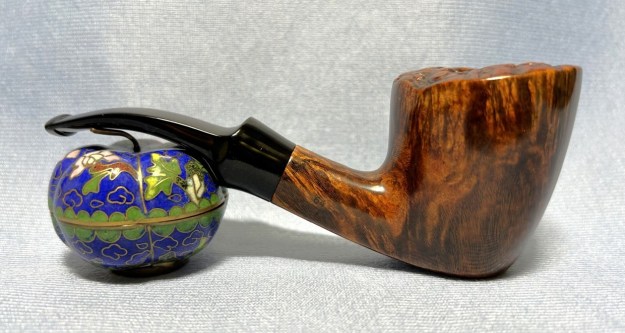
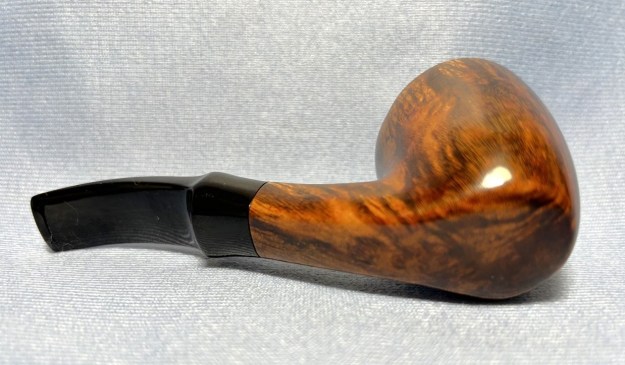
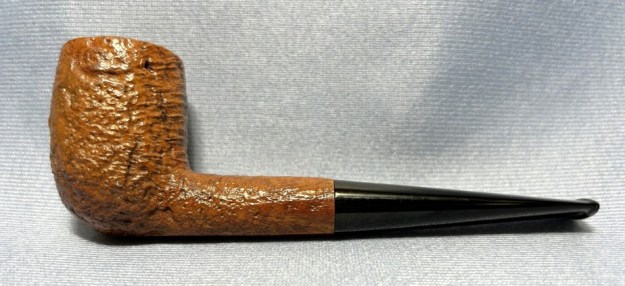
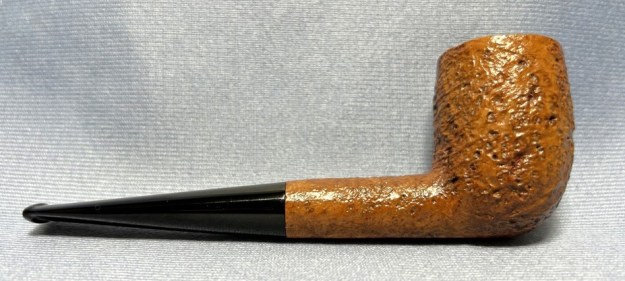
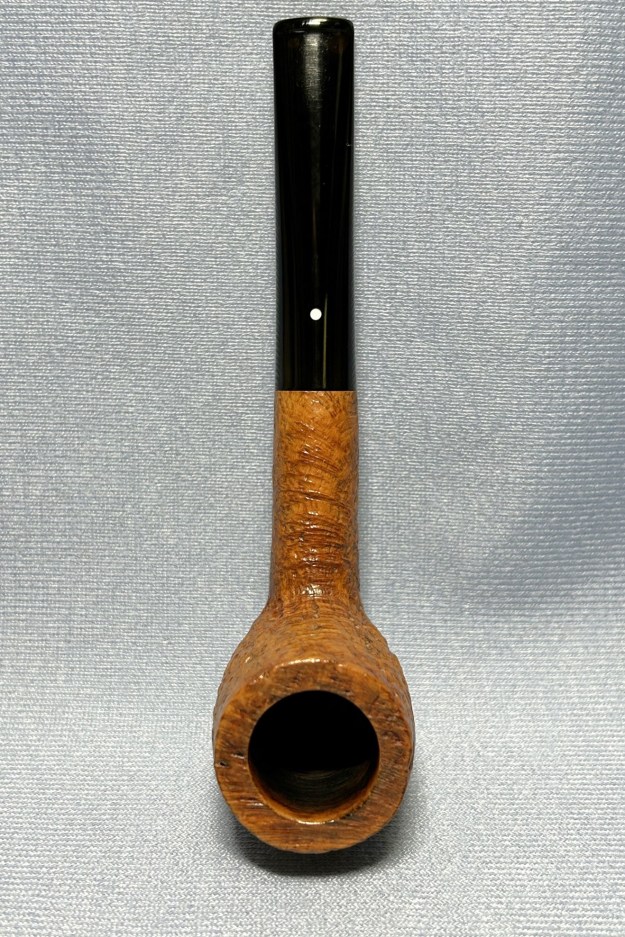
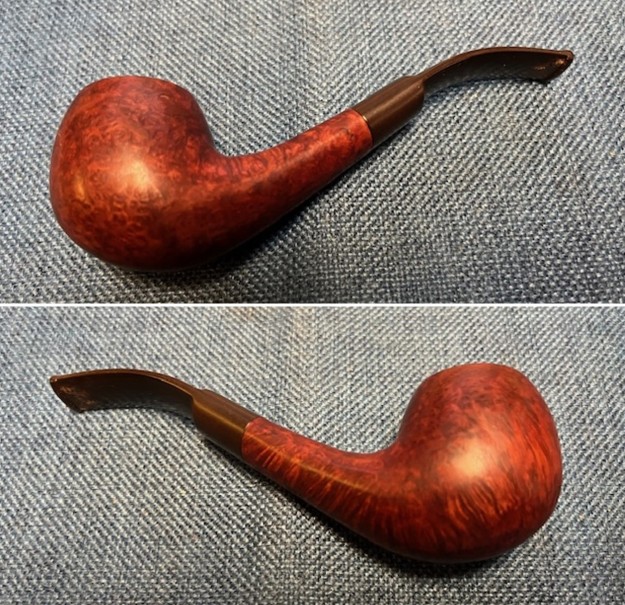
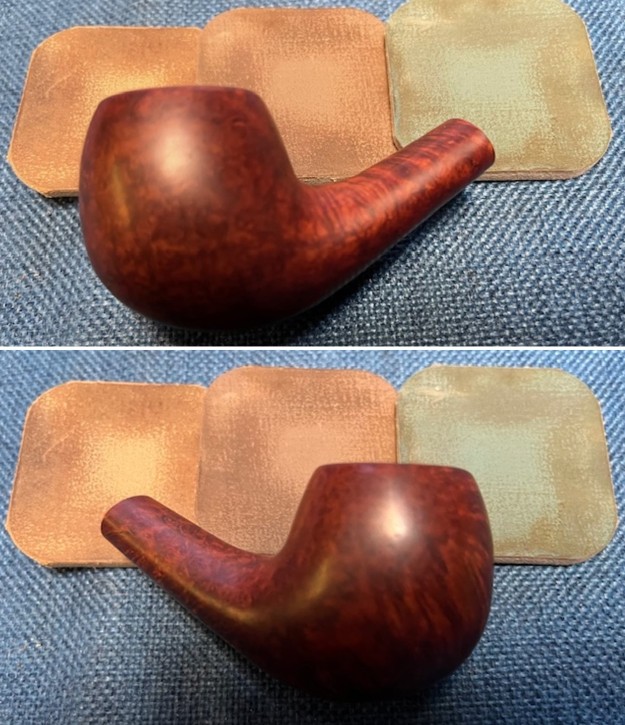
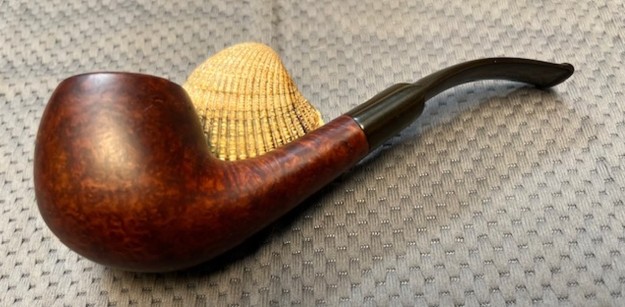
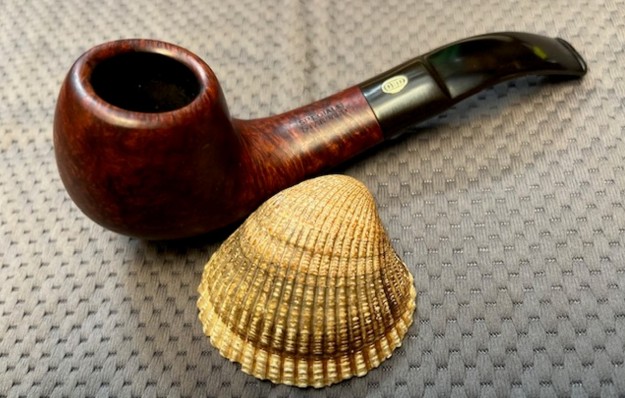
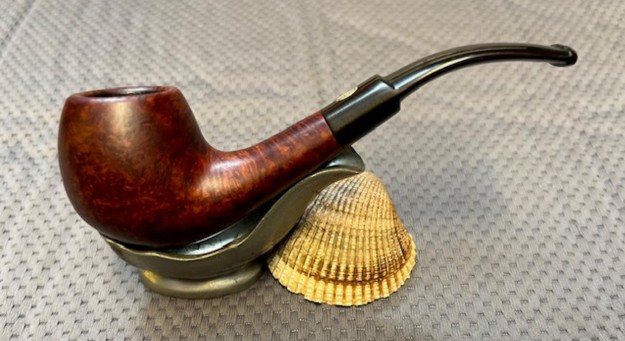
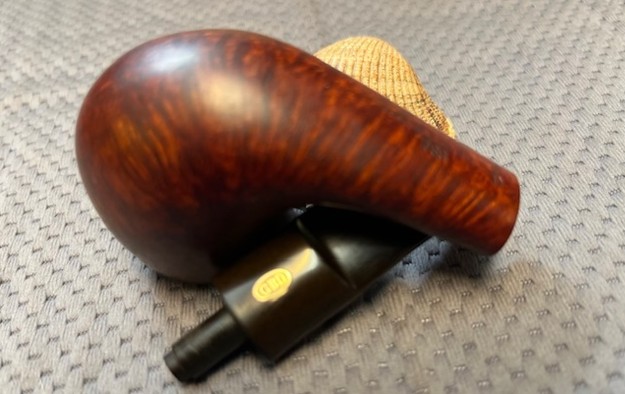
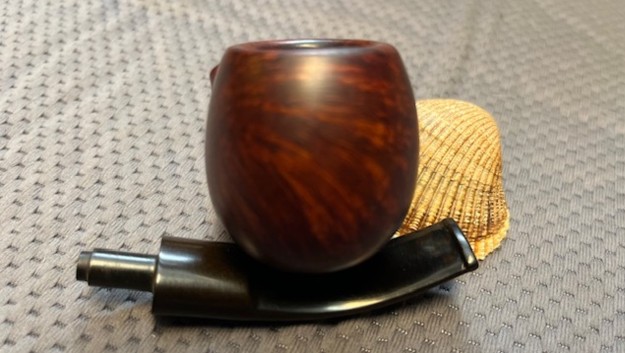
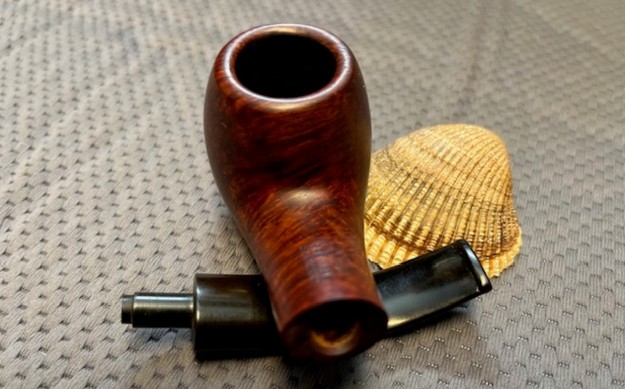
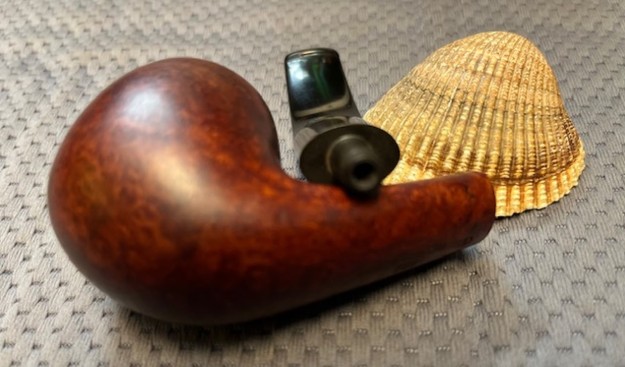
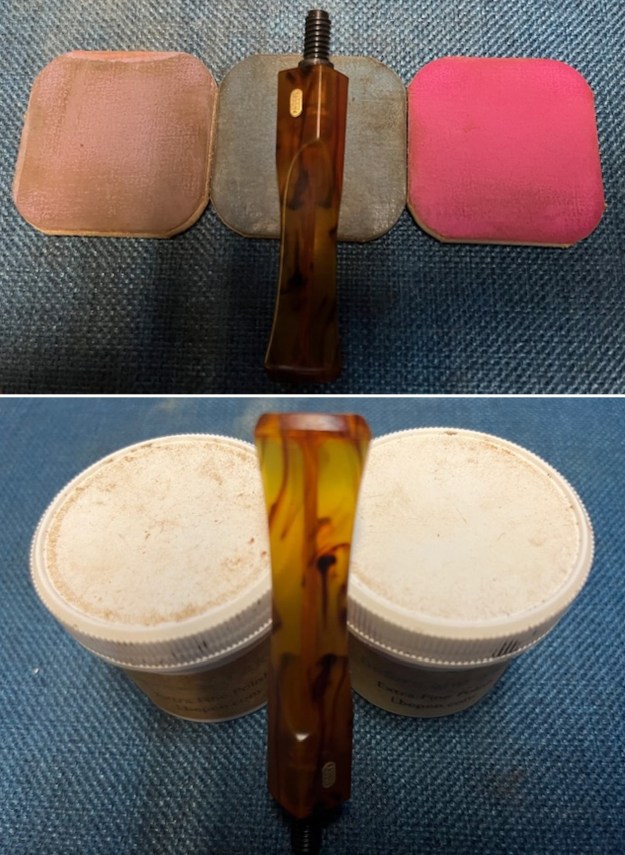 The Jobey Florentine 360 Diamond Shank Billiard is finished other than the final waxing and buffing. I polished the stem with Blue Diamond to polish out the remaining small scratches and gave it several coats of carnauba. I polished the bowl and shank with Conservator’s Wax and buffed it with a shoe brush. I buffed the pipe with a clean buffing pad to raise the shine. I hand buffed it with a microfiber cloth to deepen the shine. The pipe polished up pretty nicely. The finished pipe is shown in the photos below. The dimensions are Length: 6 inches, Height: 2 inches, Outside diameter of the bowl: 1 ½ inches, Chamber diameter: ¾ of an inch. The weight of the pipe is 43 grams/1.48 ounces. I will be adding it to the rebornpipes store shortly in the American Pipemakers section. If you are interested in adding it to your collection email me at slaug@uniserve.com or send me a message on Facebook. Thanks for walking through the restoration with me as I worked over this uniquely rusticated Jobey Florentine Billiard.
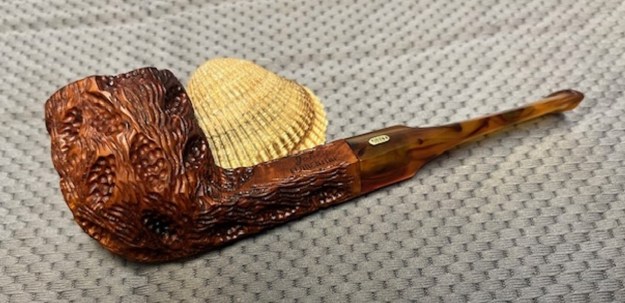


