Tag Archives: repairing tooth marks

My brother has an eye for unusual pipes – A Mastercraft Sea Slug


Blog by Steve Laug

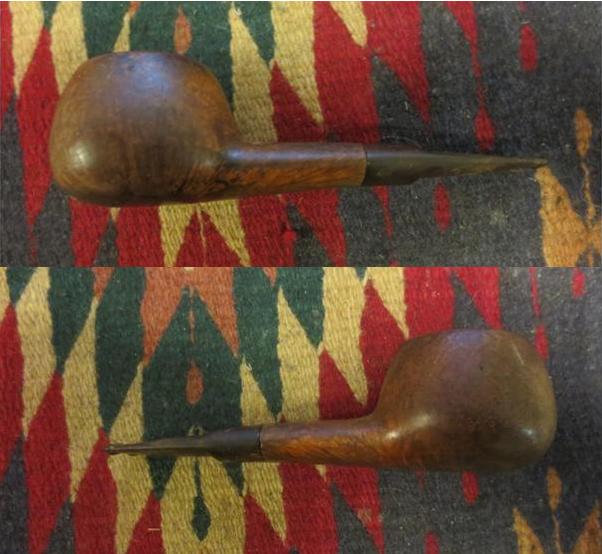
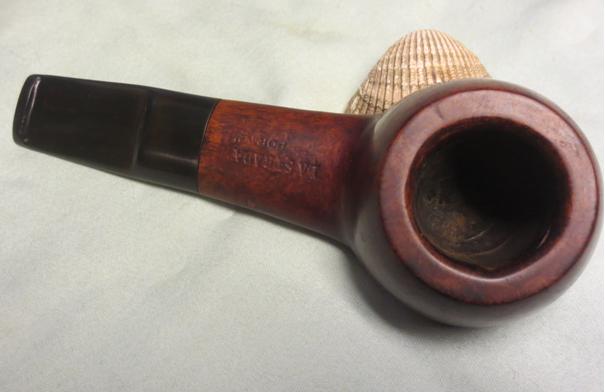
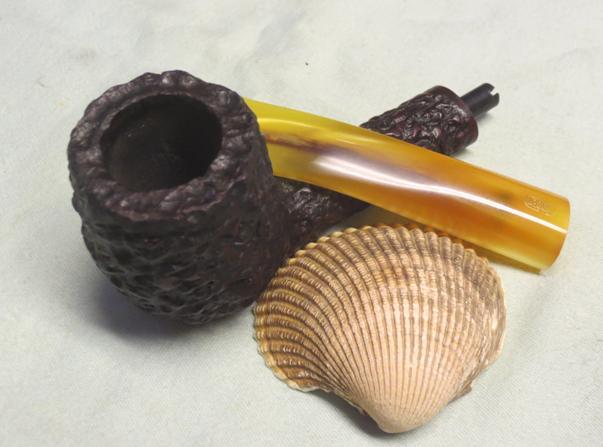
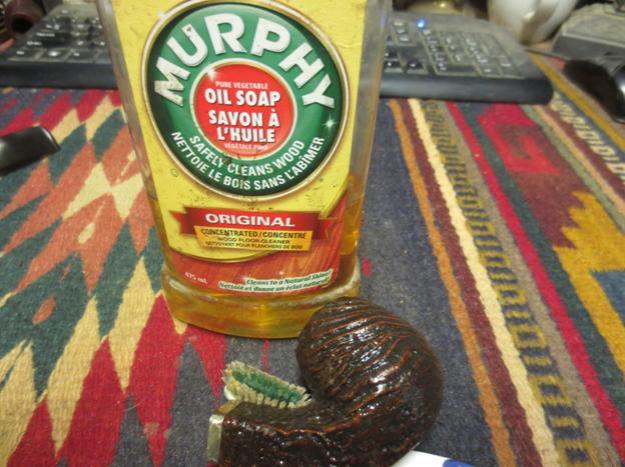
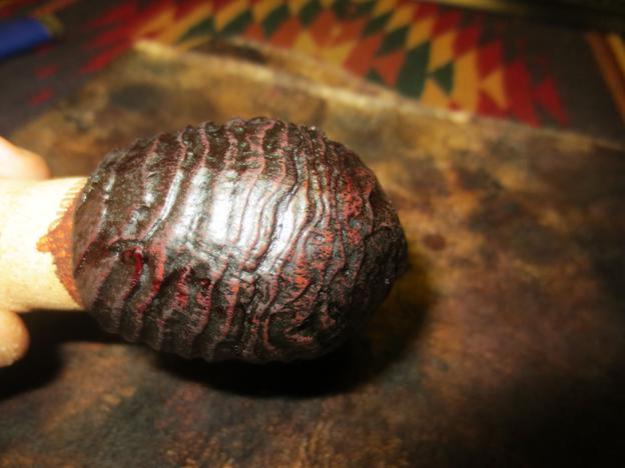
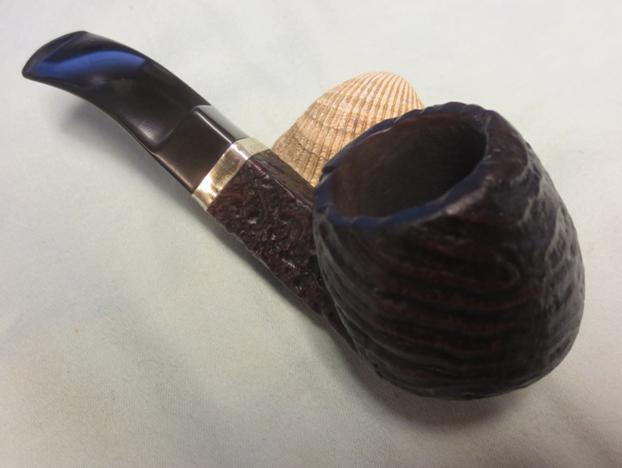
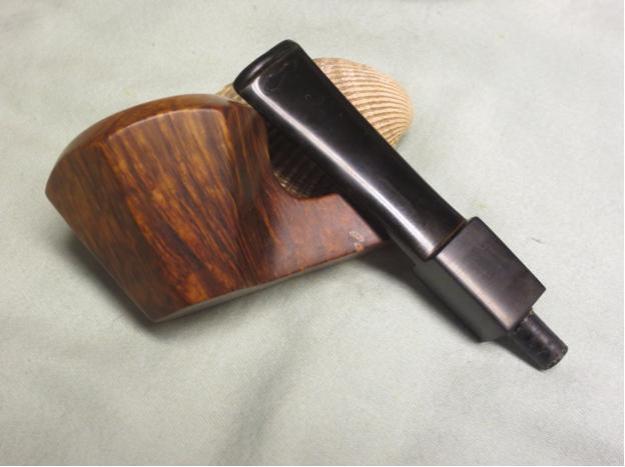
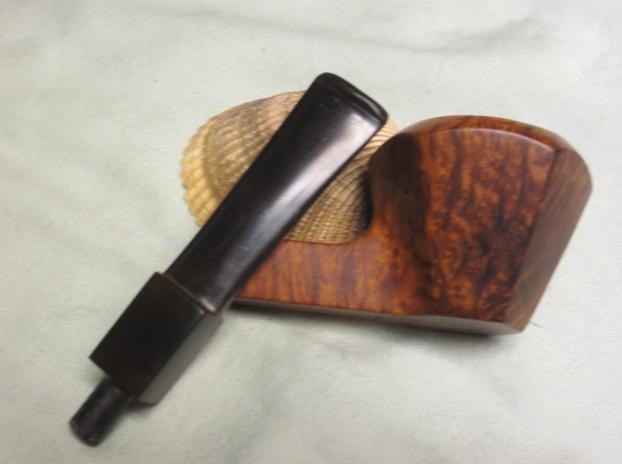
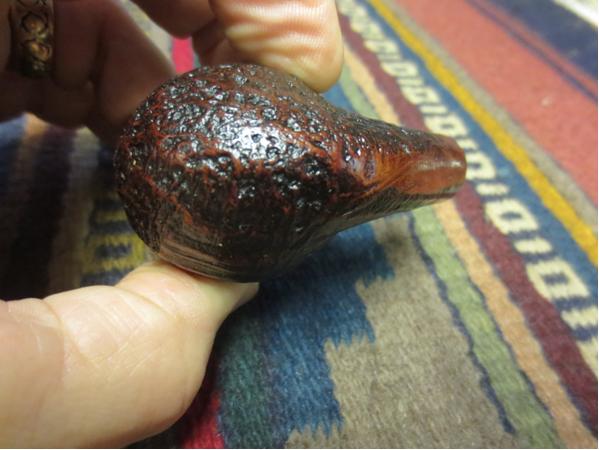
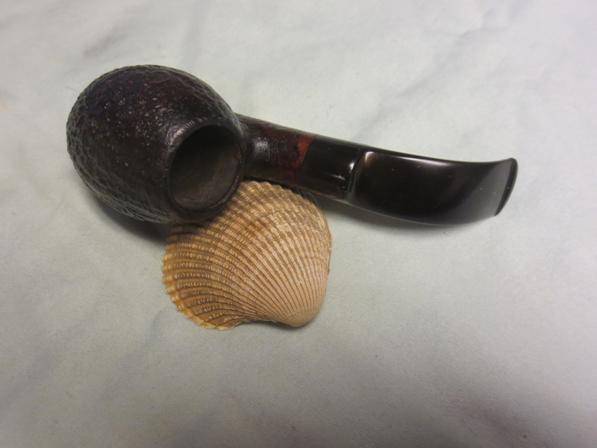
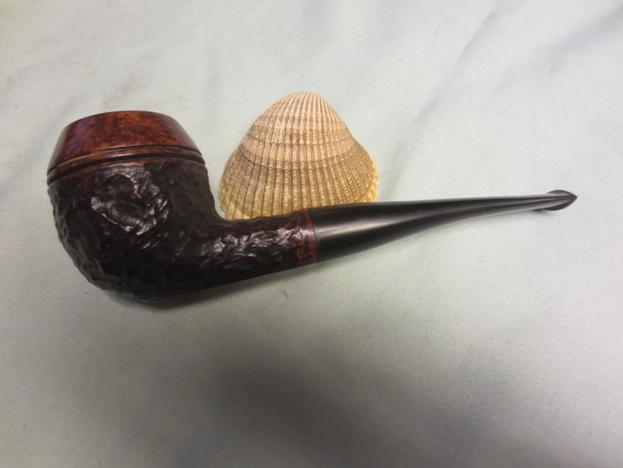
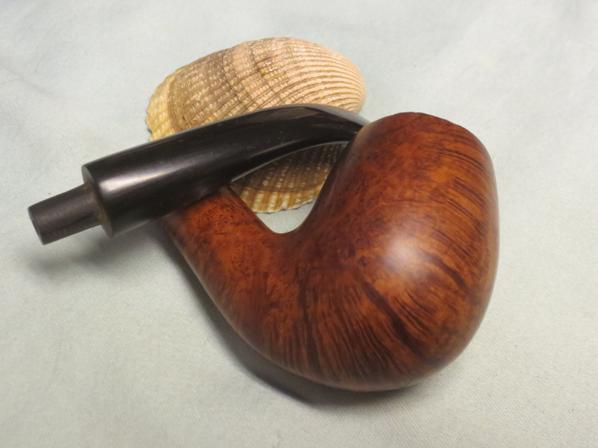
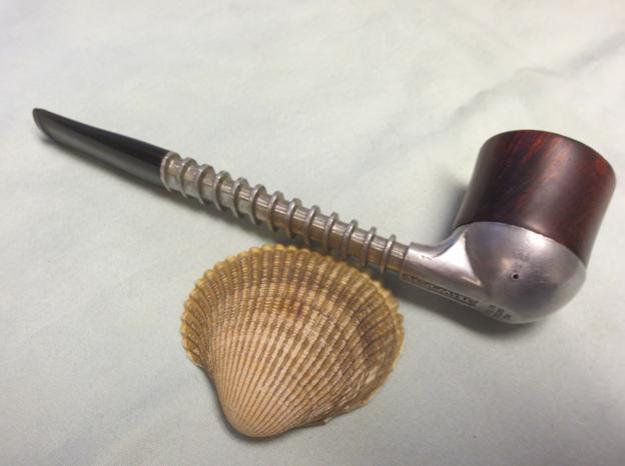
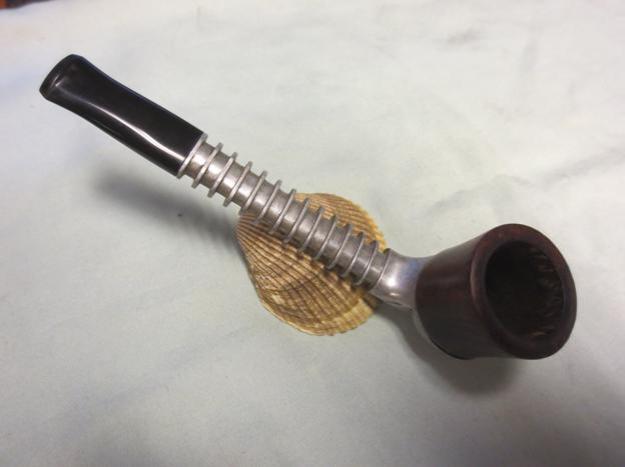
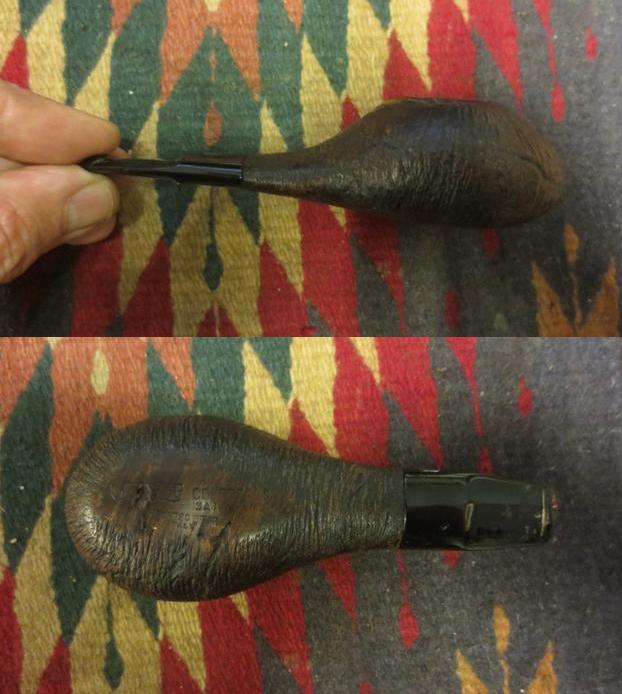
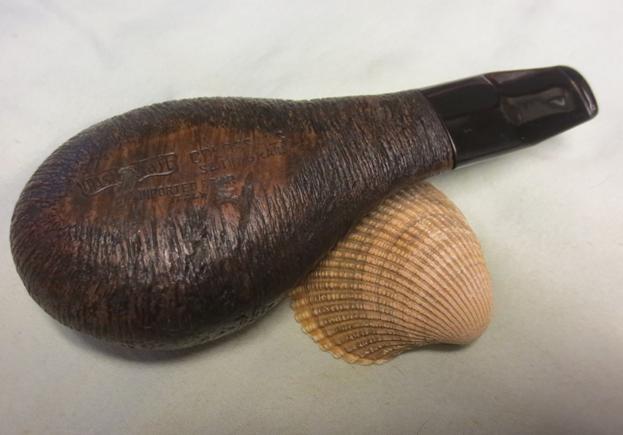
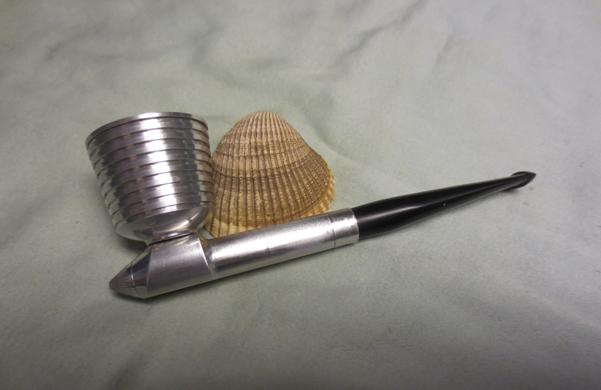
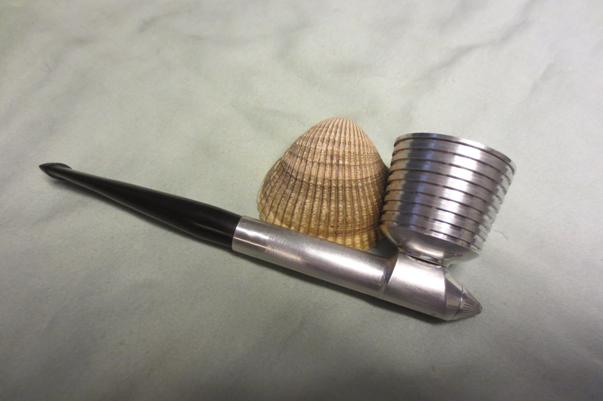
When I visited my brother a few months ago one of the pipes that he had picked up for me to restore is one that I probably would never have picked up myself. In fact to me it was ugly and there was nothing redeeming about it. It looked like a giant sea slug to me and even the striations looked like the wrinkles in the slug’s body as it crawled. But I have to say that my opinion changed as I worked on this old pipe. I know that Mastercraft actually made few pipes but had the pipes jobbed by other pipe companies globally. This one was made in Italy and has all the marks of a Lorenzo pipe to me. I doubt I will ever know for sure but that is my take on it. As you look at the photos you may have your own take on it and that is totally fine – just take the time to post what you think in the comments at the end of the post.

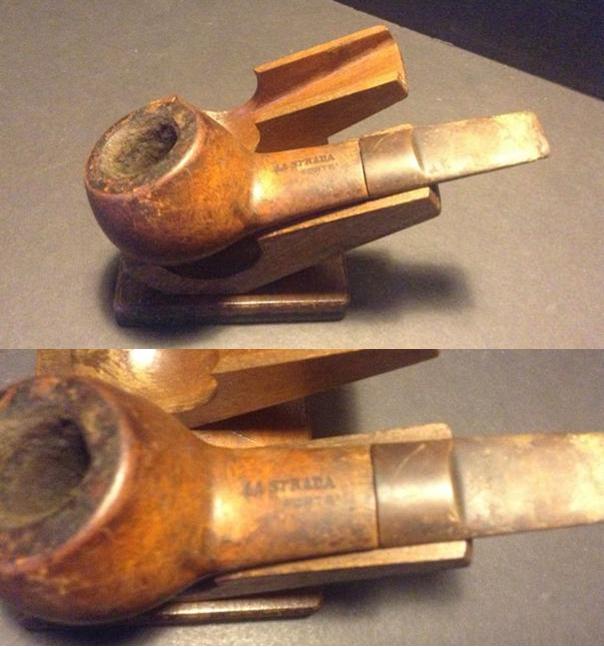
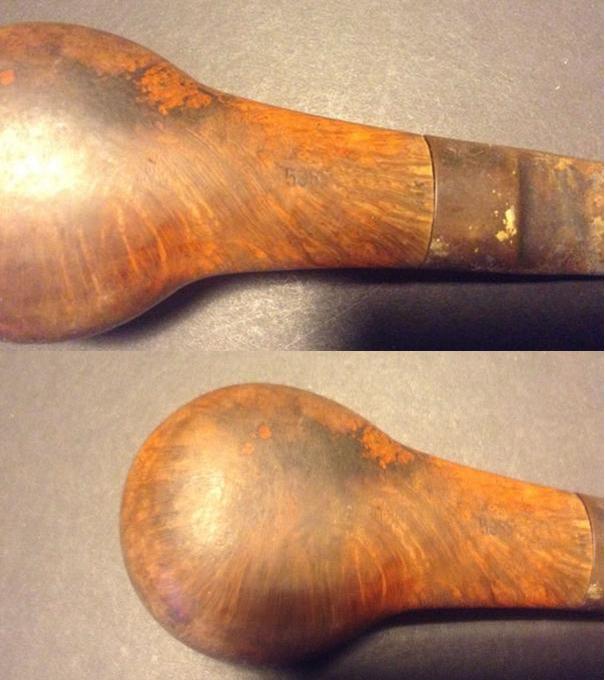
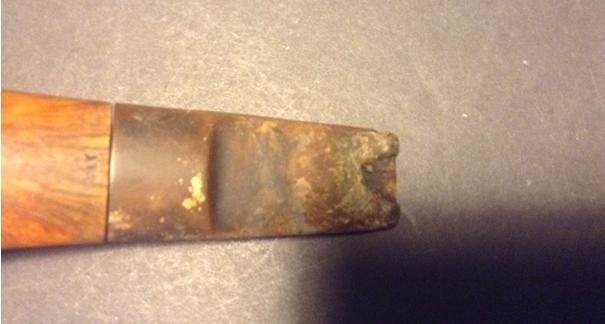
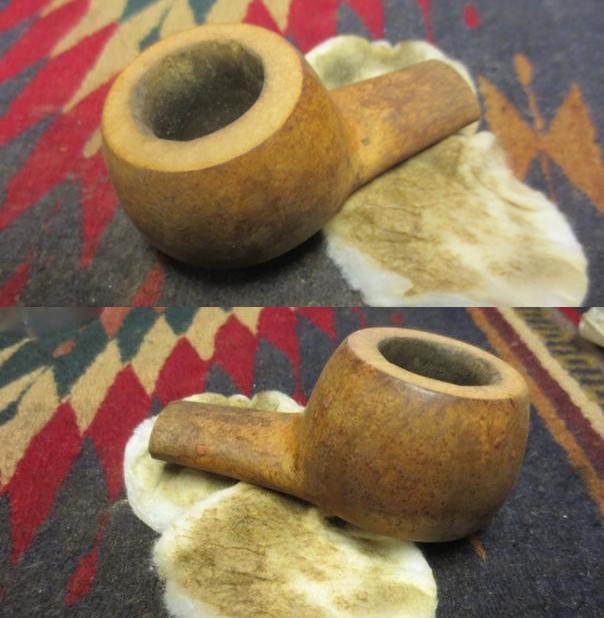
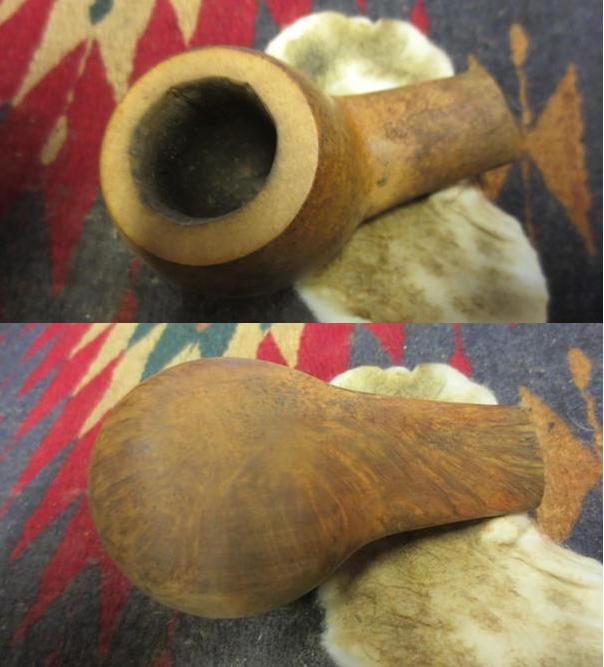
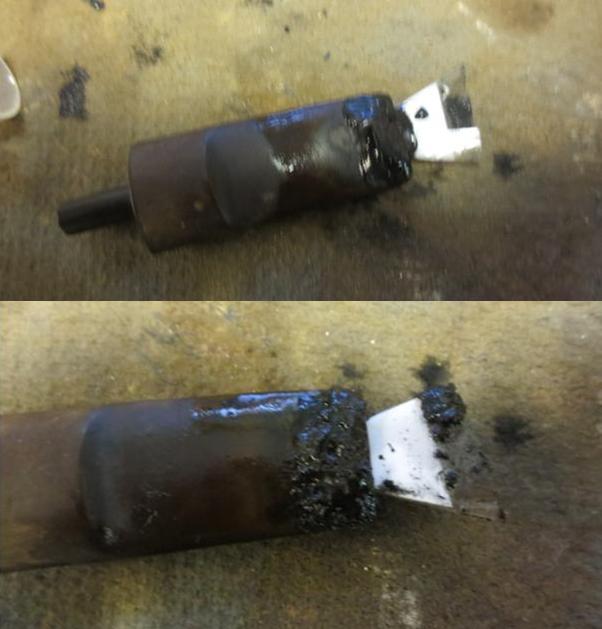
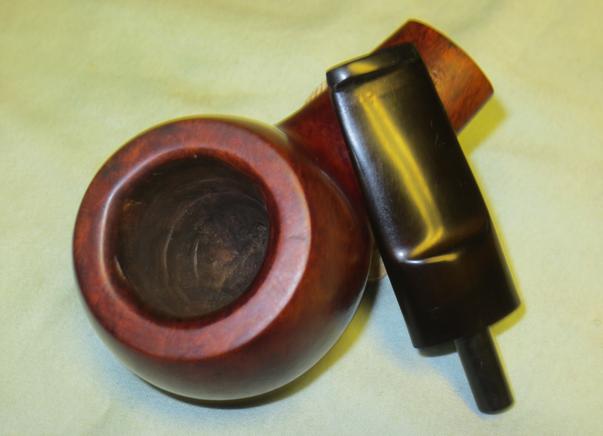
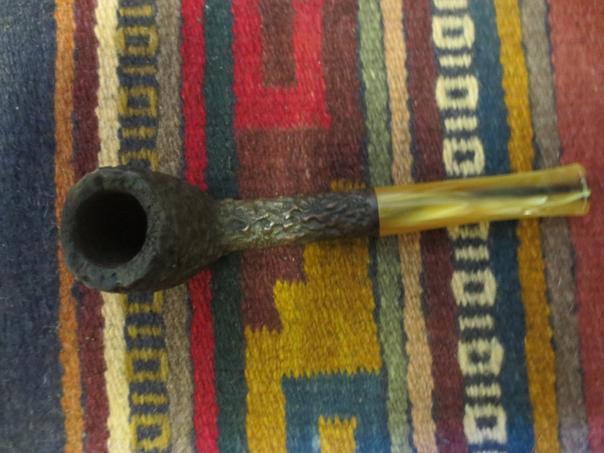
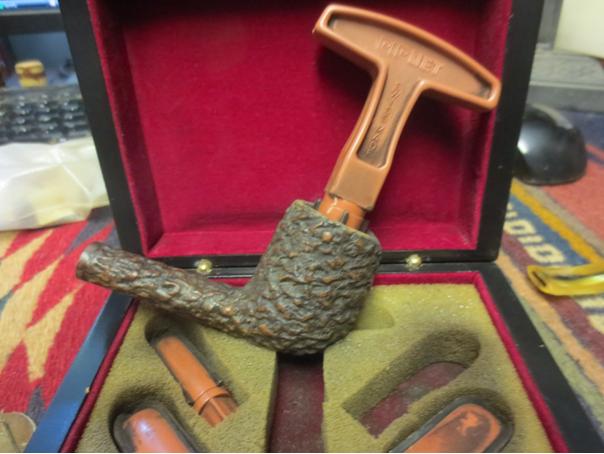
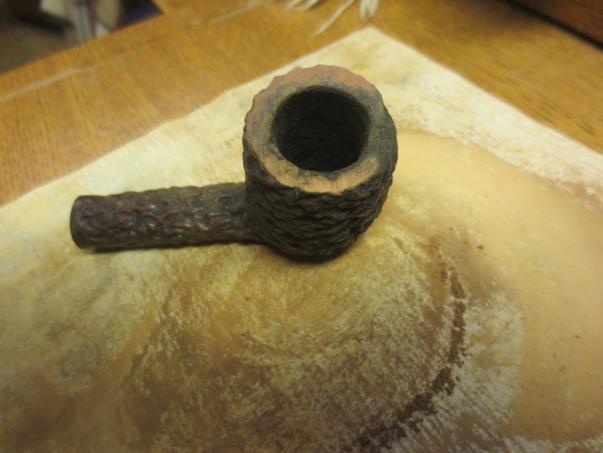
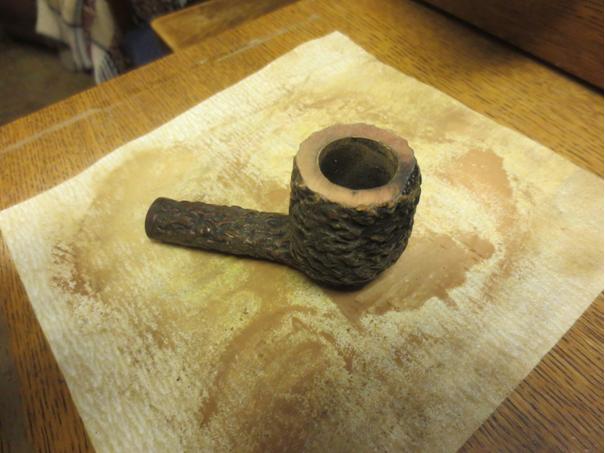
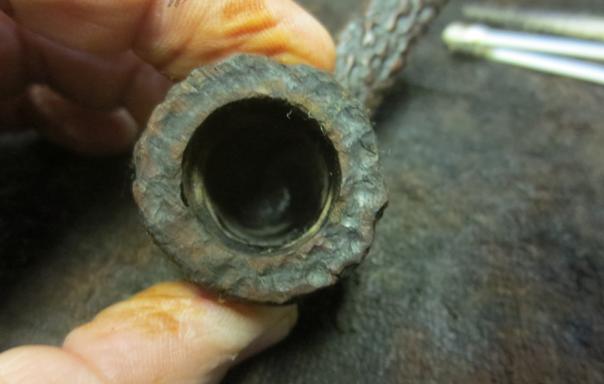
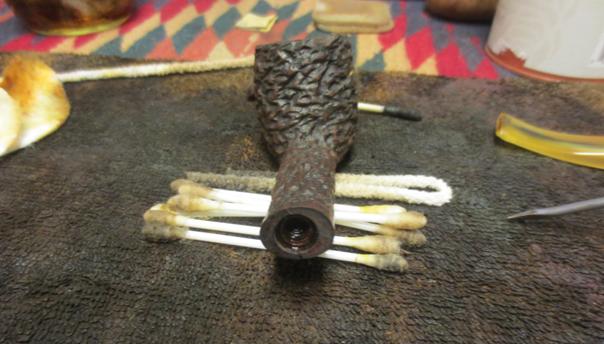
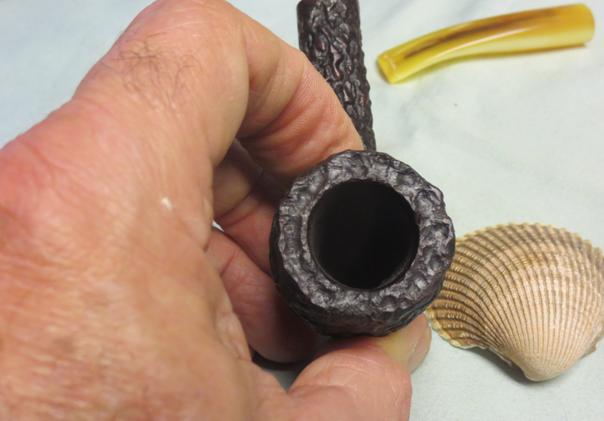
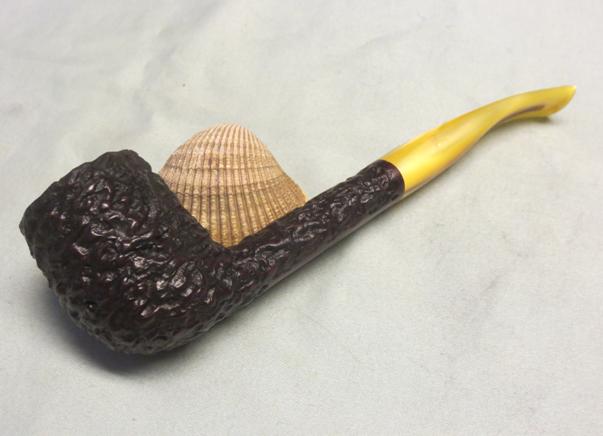
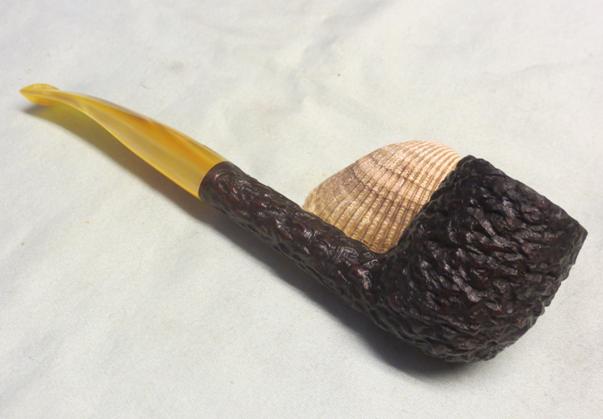
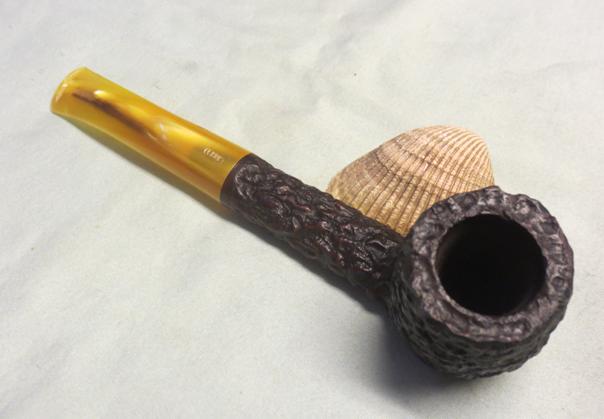
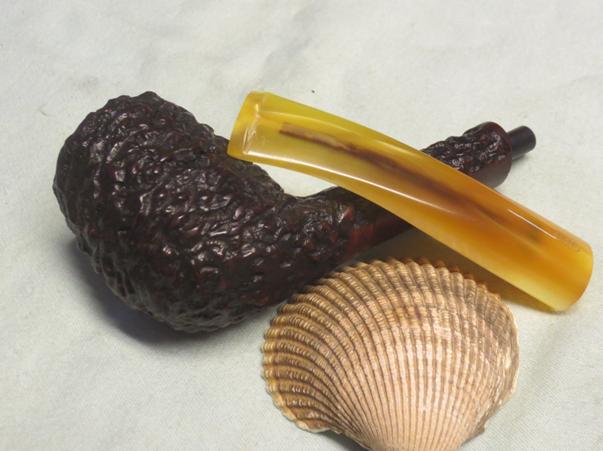
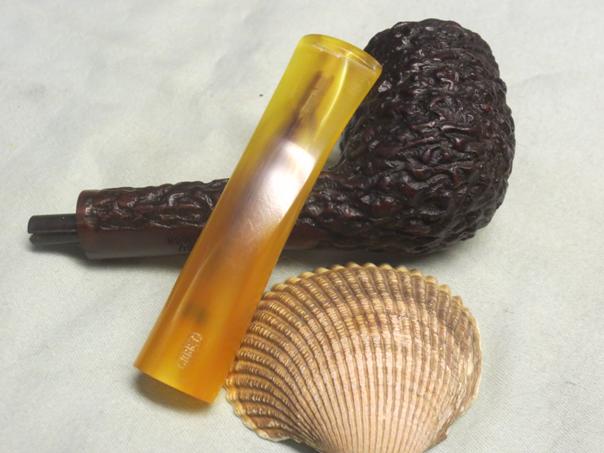
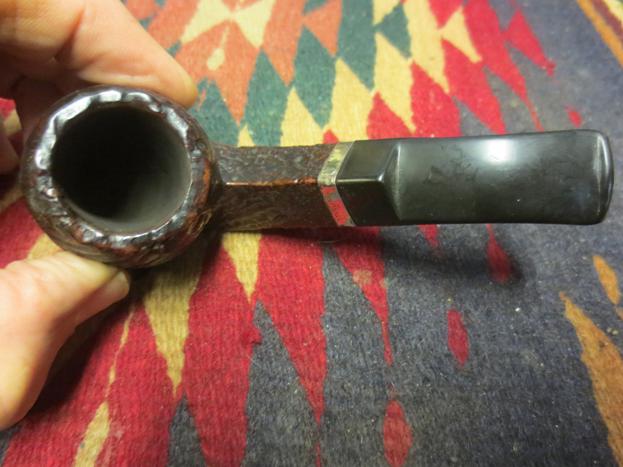
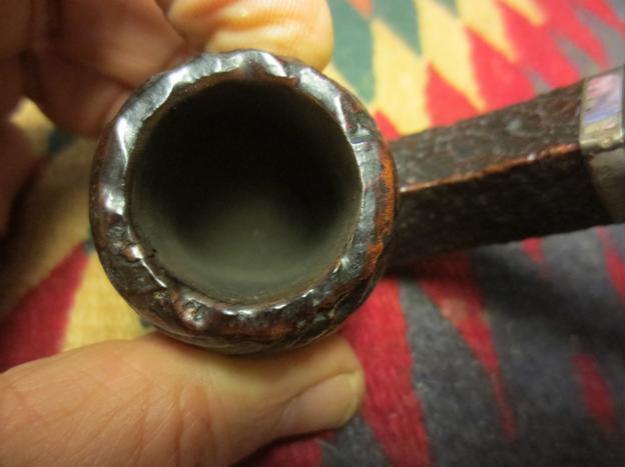
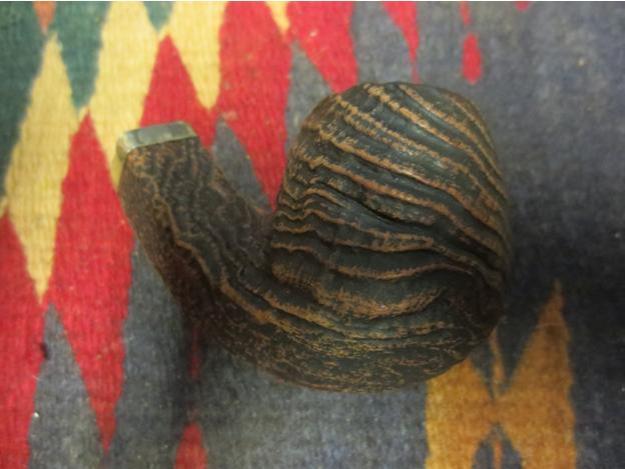
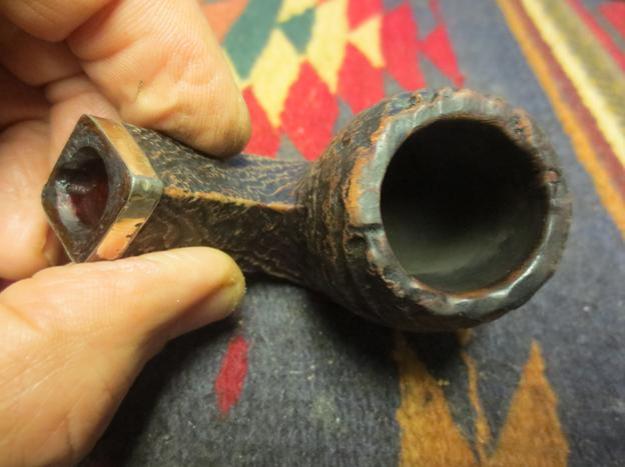
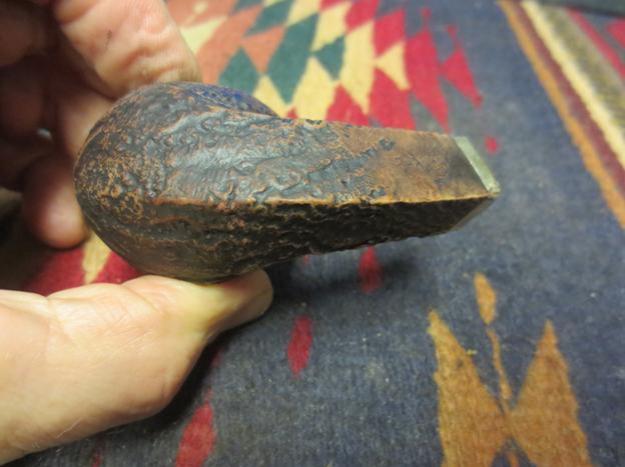
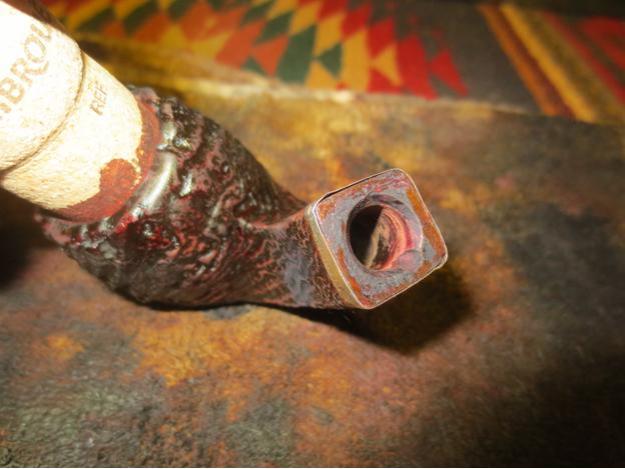
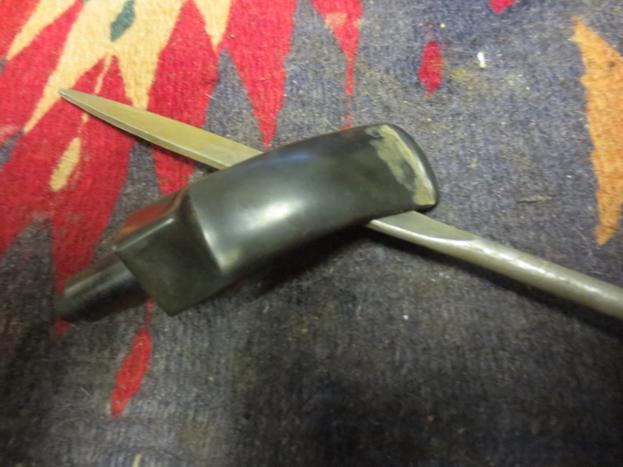
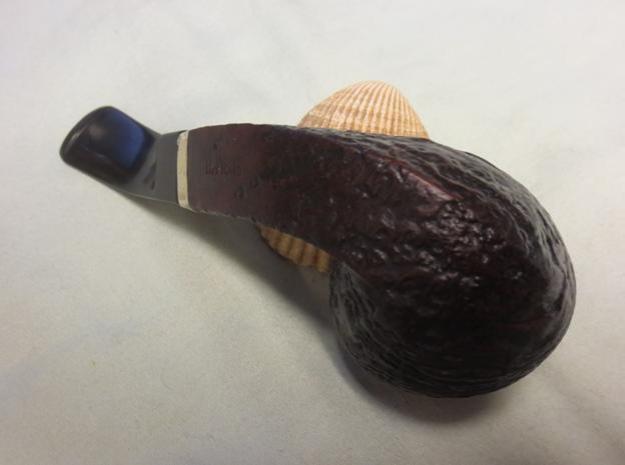
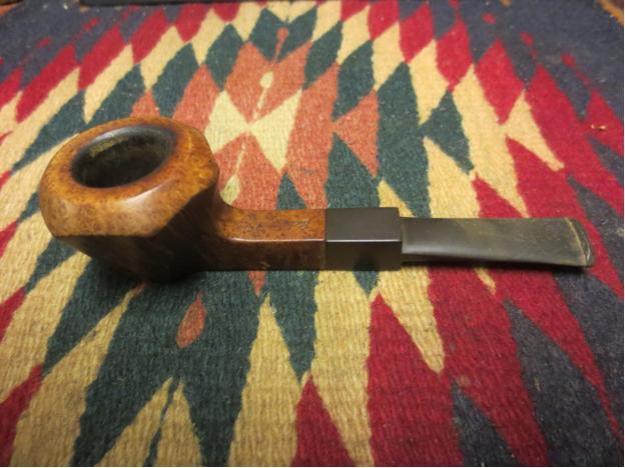
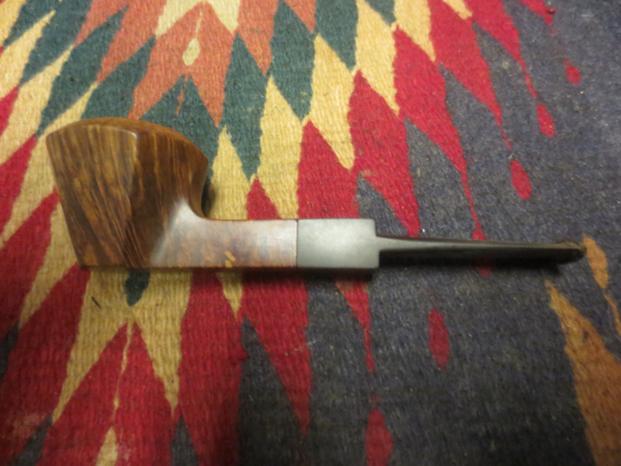
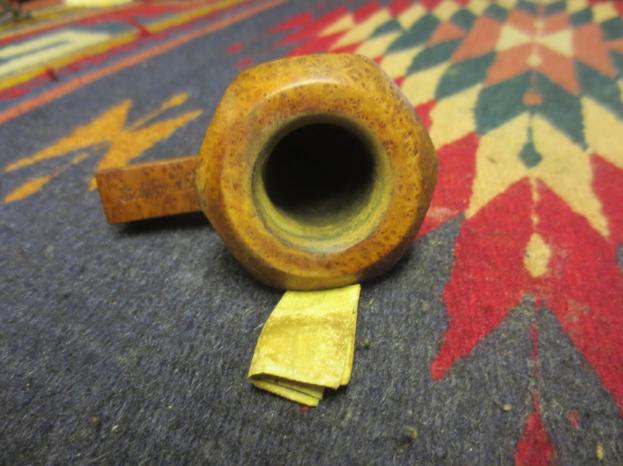
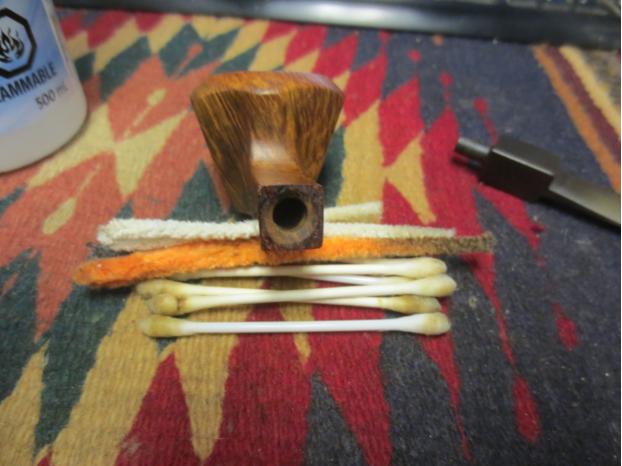
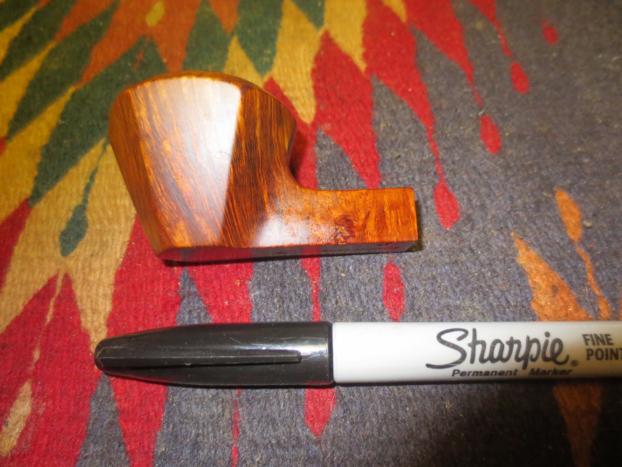
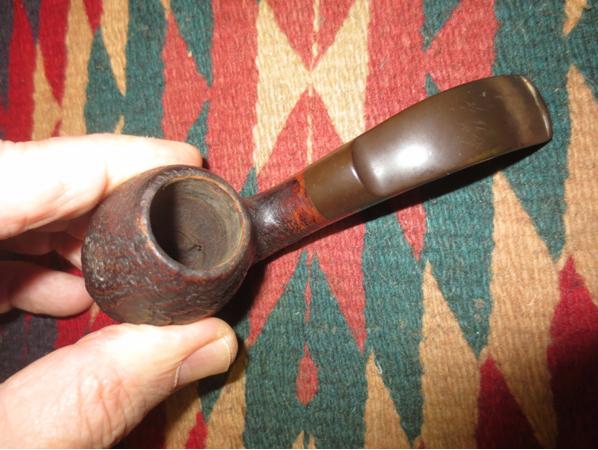
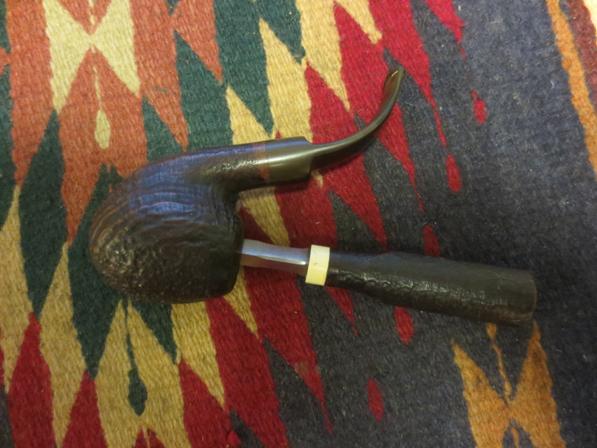
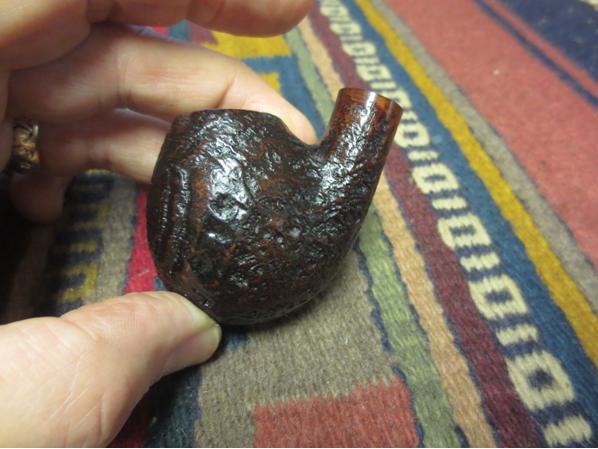
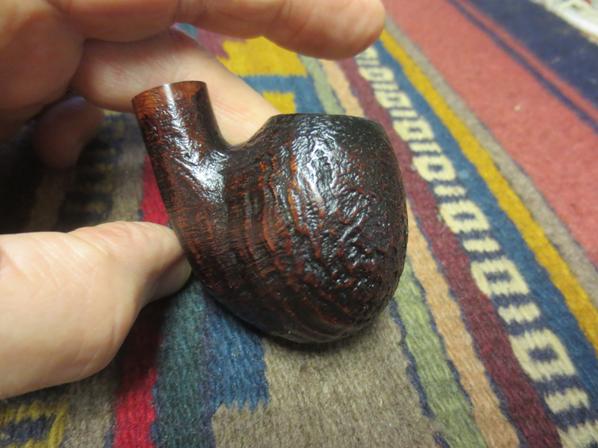
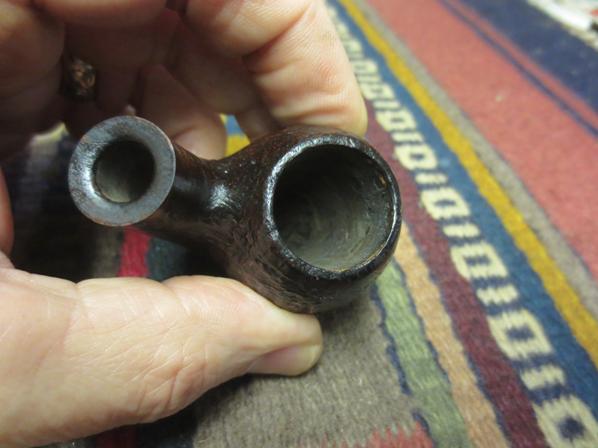
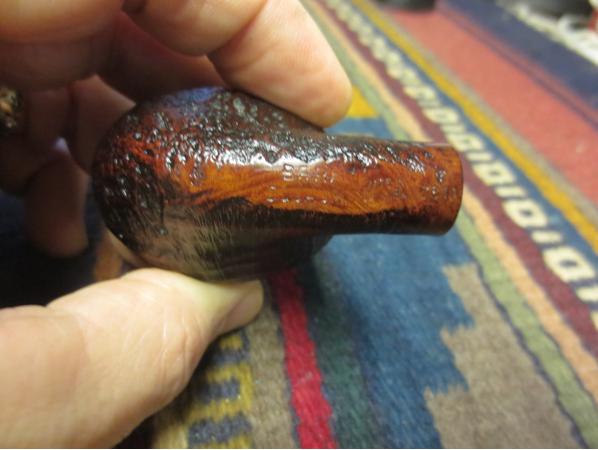
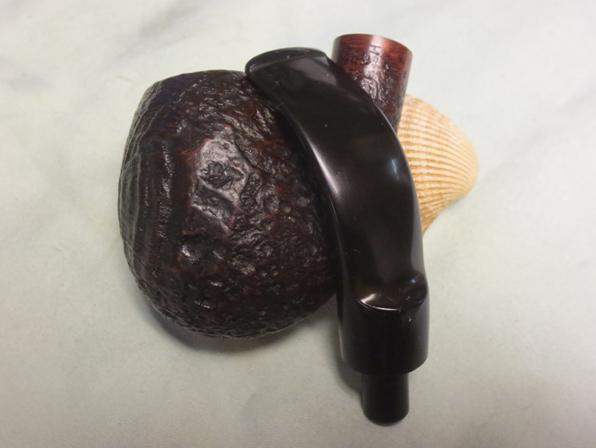
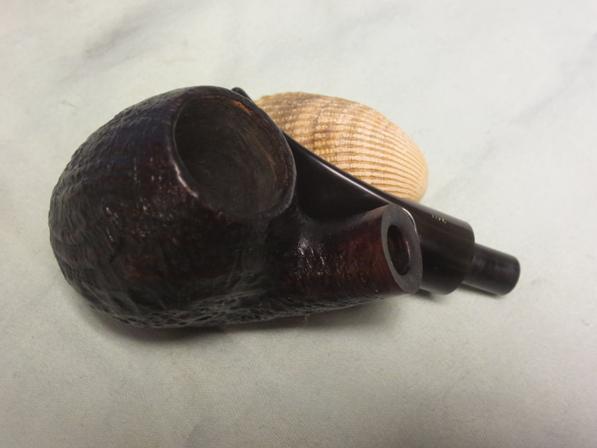
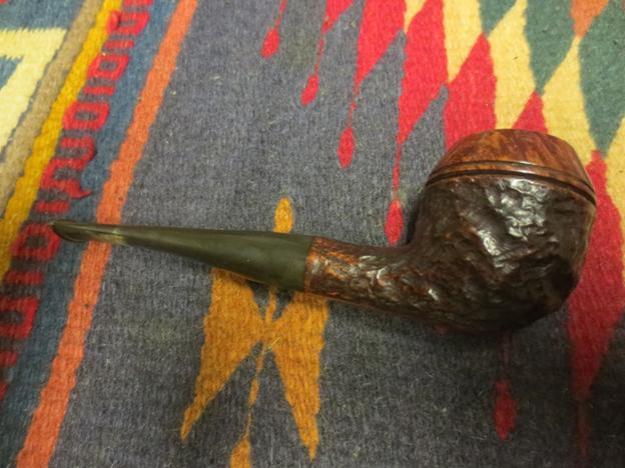
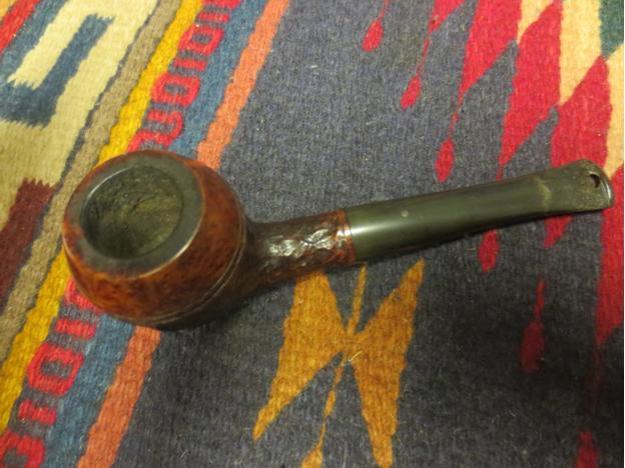
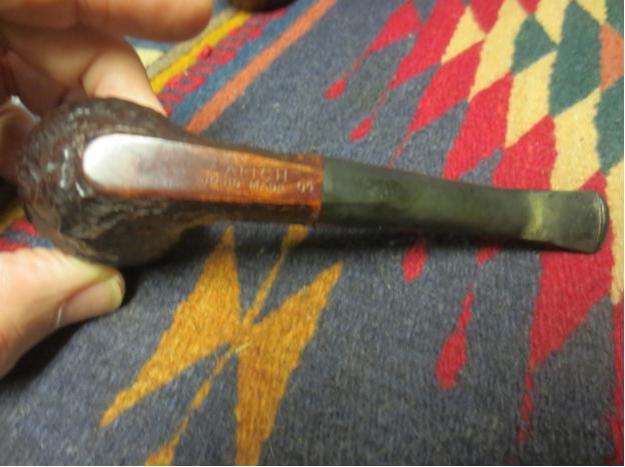
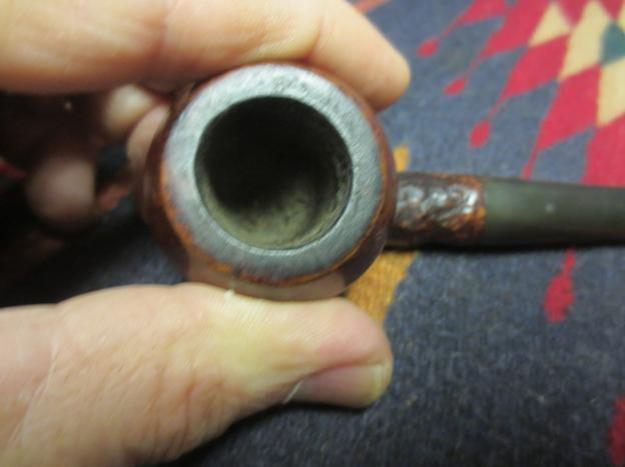
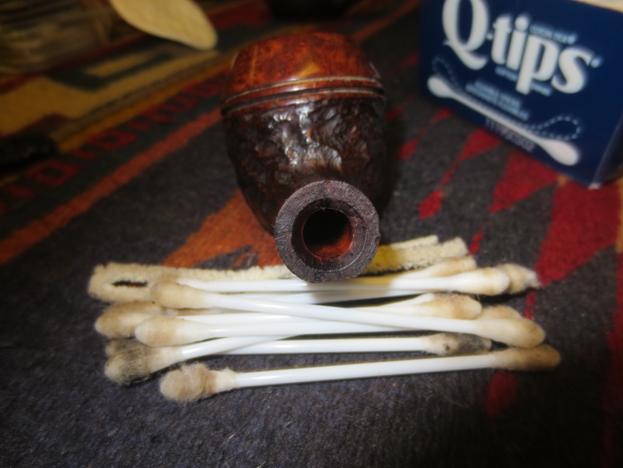
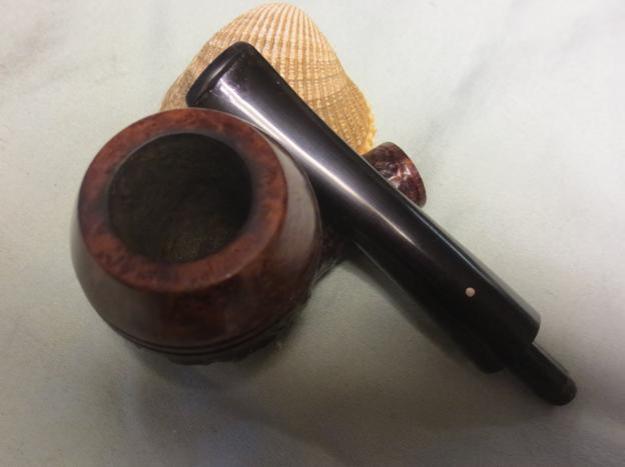
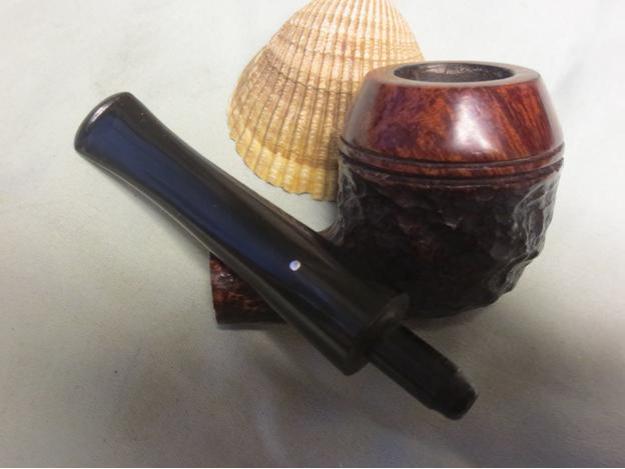
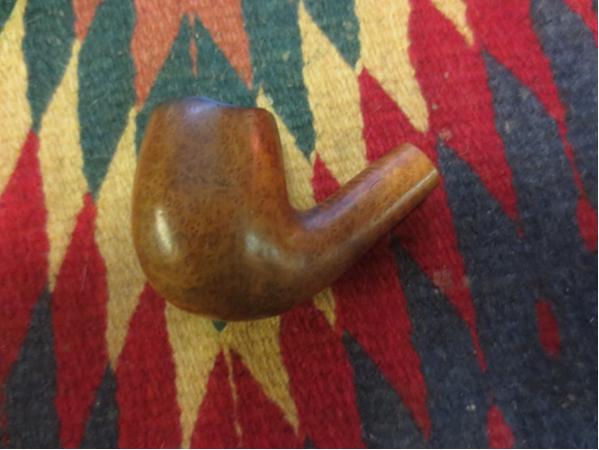
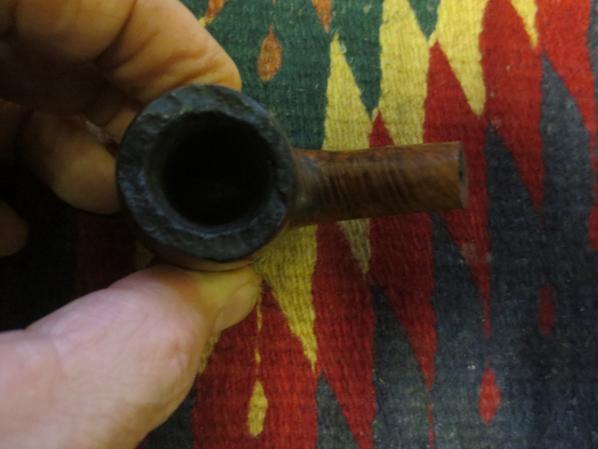
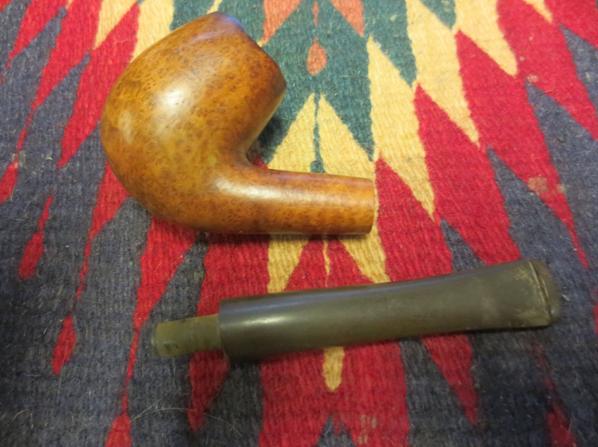
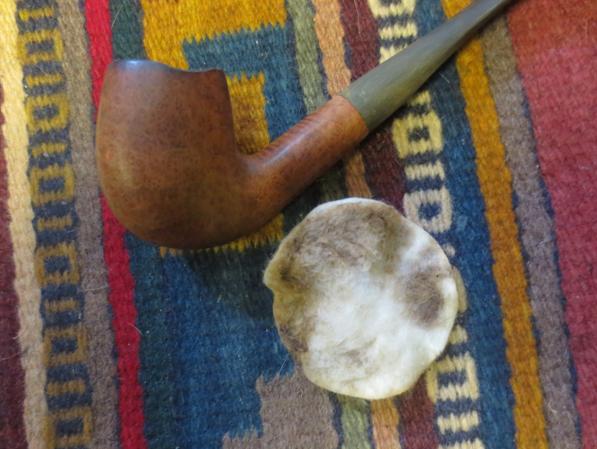
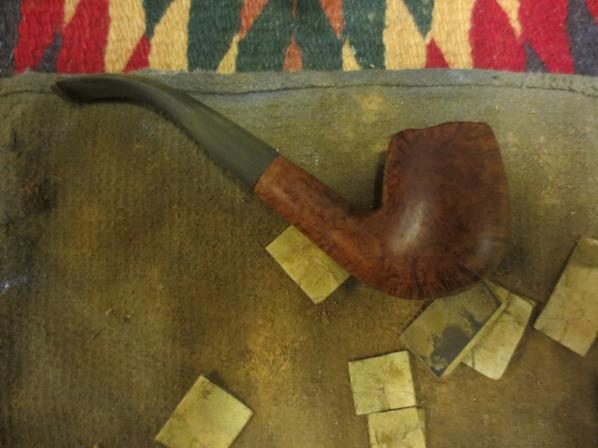
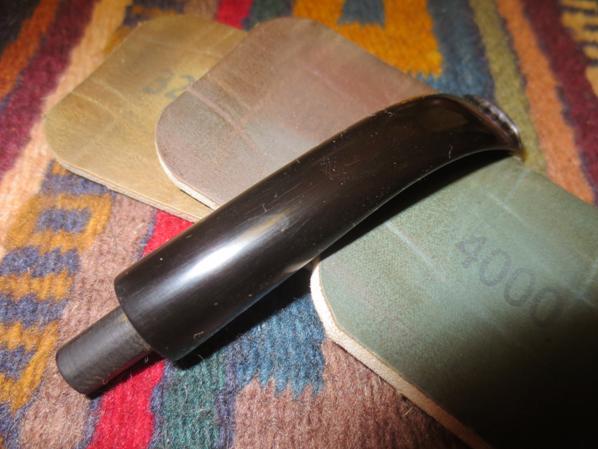
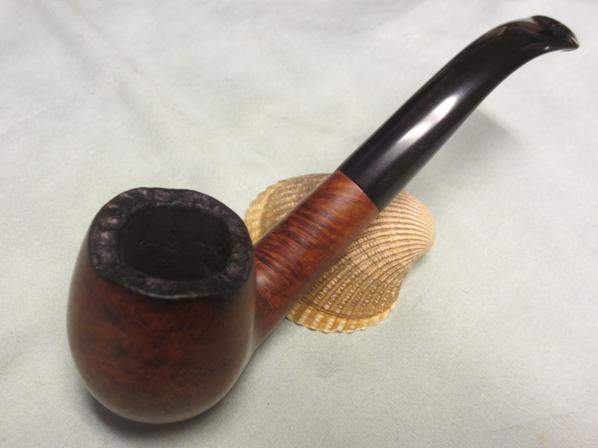
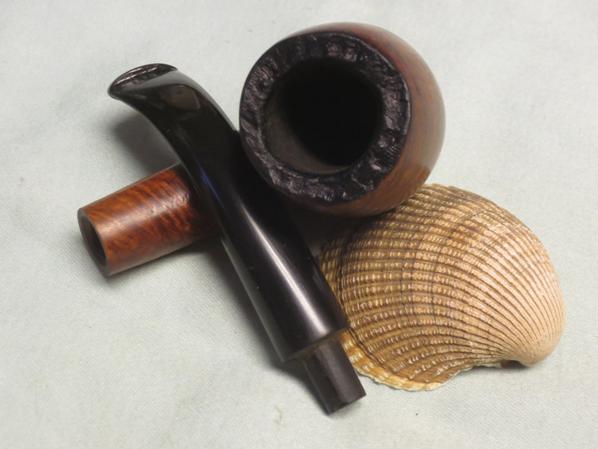
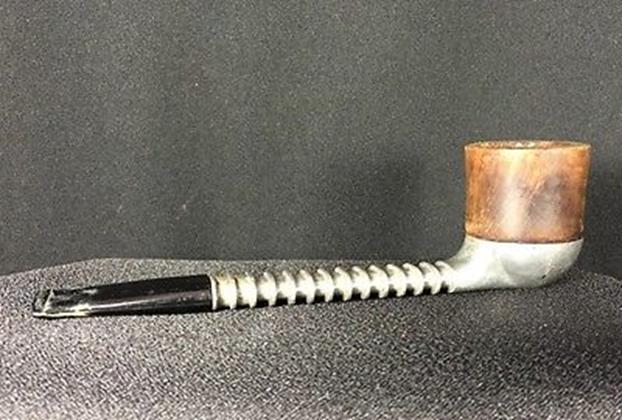
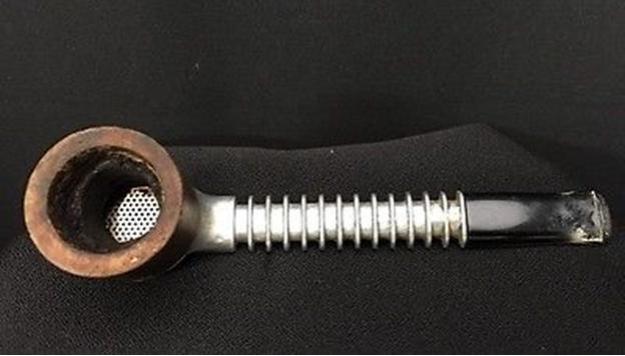
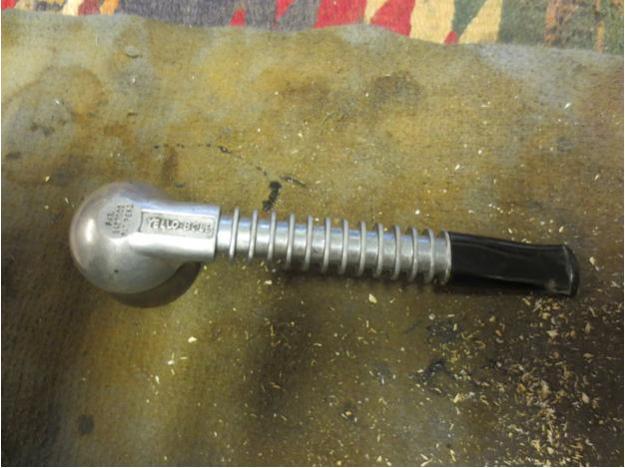
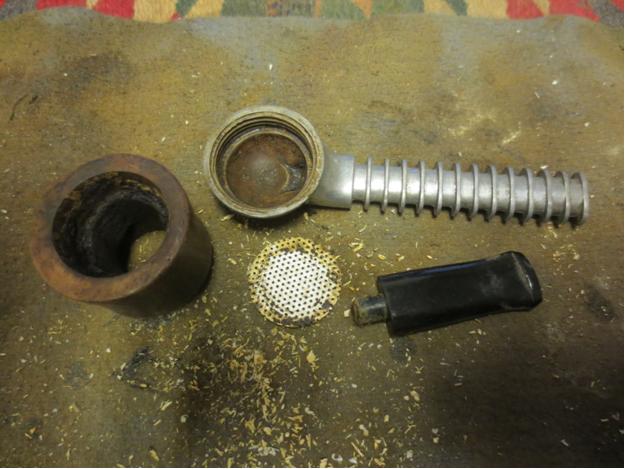
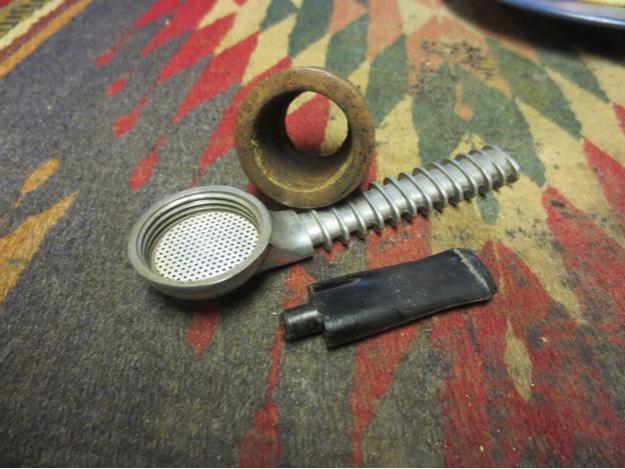
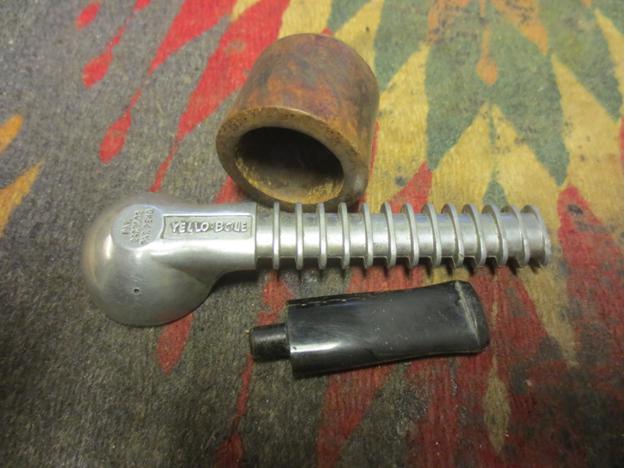
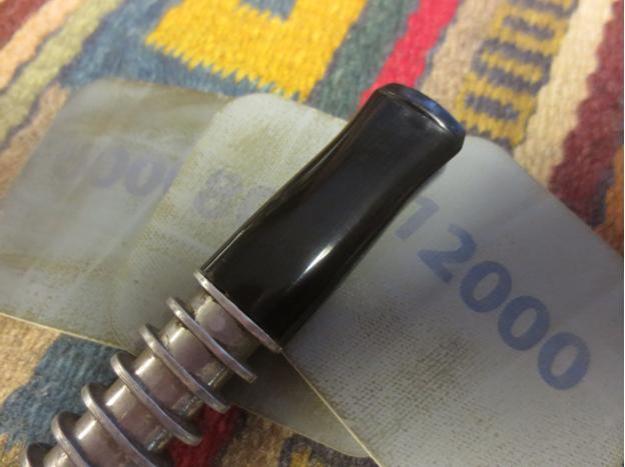
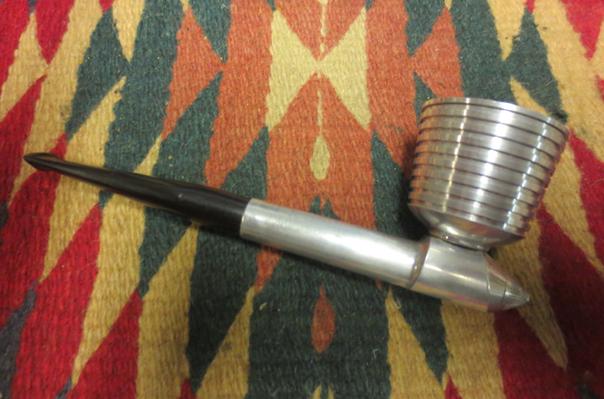
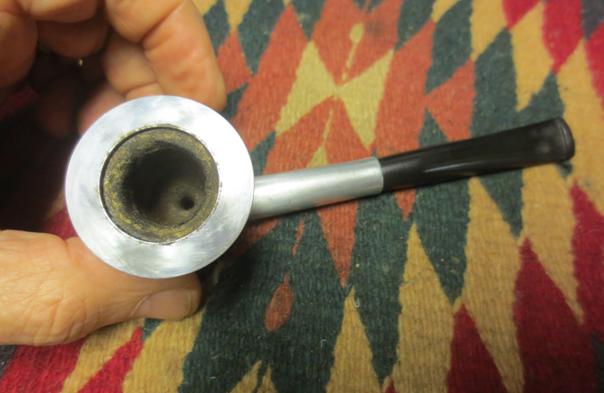
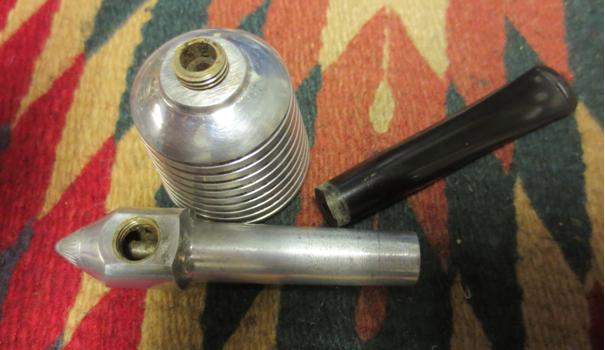
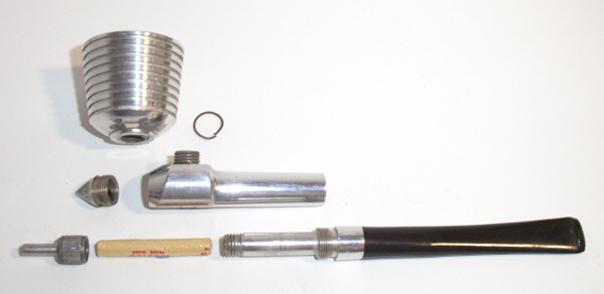
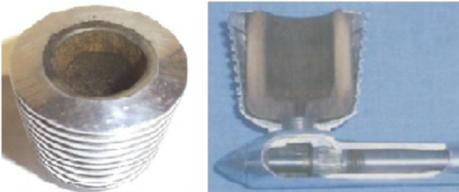
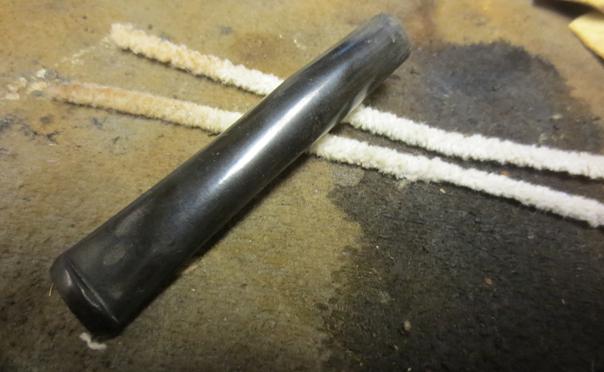
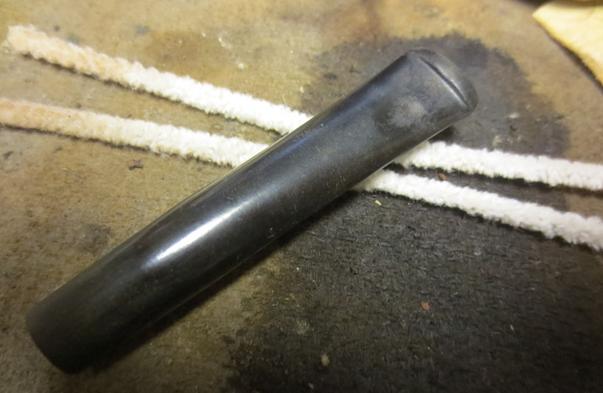
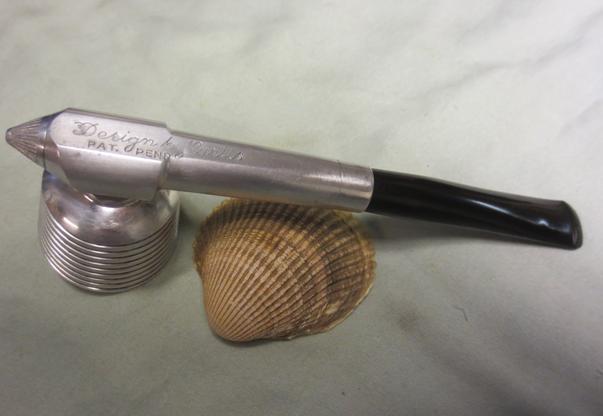
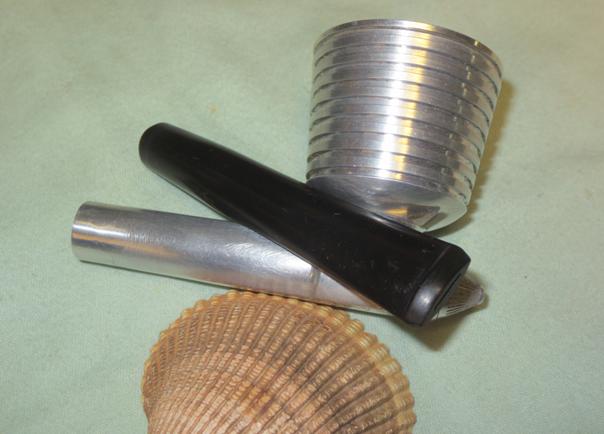
This old pipe was pretty rough when it came to my work table. The rim was battered and the reaming that had been done did not account for the angled bowl. There gouges of briar missing on the rim edge that extended into the bowl. The cake was soft but generous. The finish was tired and worn but underneath the grime the wire striations on the briar had something about them that drew me to them. The pipe is stamped on a semi-smooth portion of the bottom of the bowl/shank (on this pipe I am not sure where each of those terms ends). It reads Mastercraft in the classic shield of the logo. Next to that is stamped COLOSSALS or COLOSSAL S with the S slightly bigger perhaps referring to the Satin Grain. Under that is it stamped Imported Briar and Italy. There are some deep gouges in the briar on that smooth portion that obviously were there when the pipe was stamped as the stamping goes through them but does not show up in the deeper areas. The stem is Lucite and it was covered with tooth chatter on the top and the bottom sides near the button as well as some deep tooth marks on both sides and on the button surface. The slot in the airway was clogged and dirty. (The first picture below is a little out of focus but it gives and idea of the shape of the pipe.)Master1 Master2
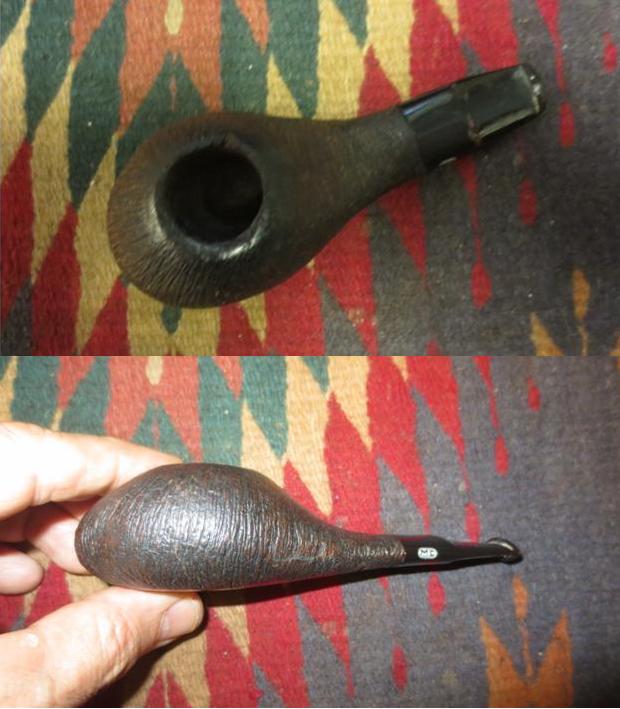
I cleaned up the reaming angles with the Savinelli Pipe Knife and was able to get the bowl clean and smooth back to briar.Master3
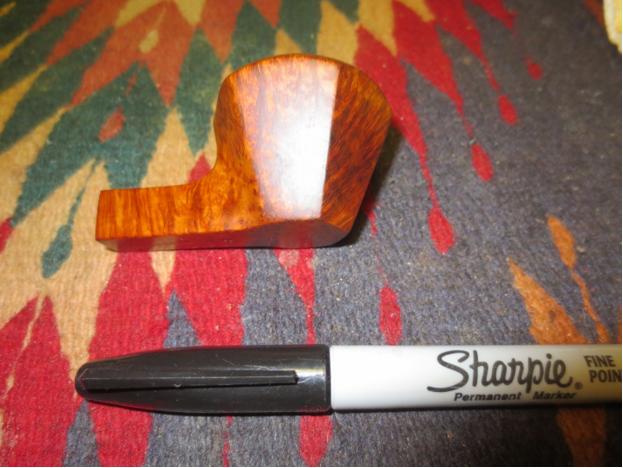
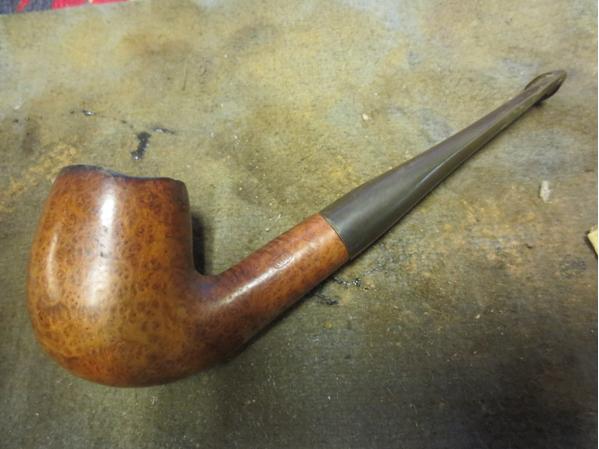
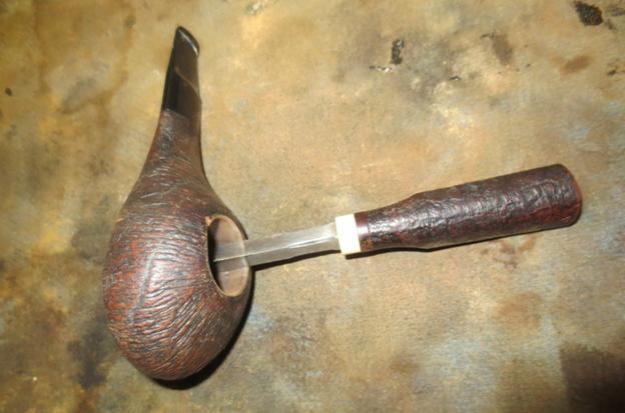
I decided to try to bevel the rim to remove the gouges on the right top side. I worked on it for quite a while before I gave up on that and topped the bowl. In the photo below the largest gouge is the light brown portion of the rim on the top of the photo toward the back of the bowl.Master4
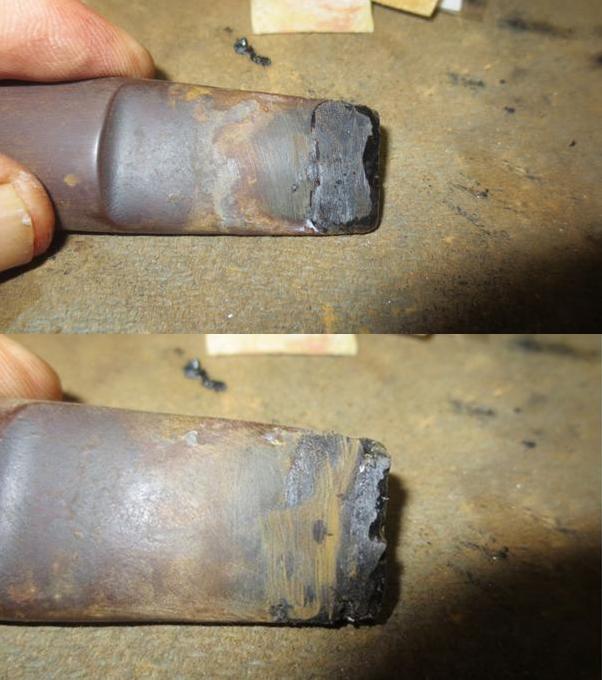
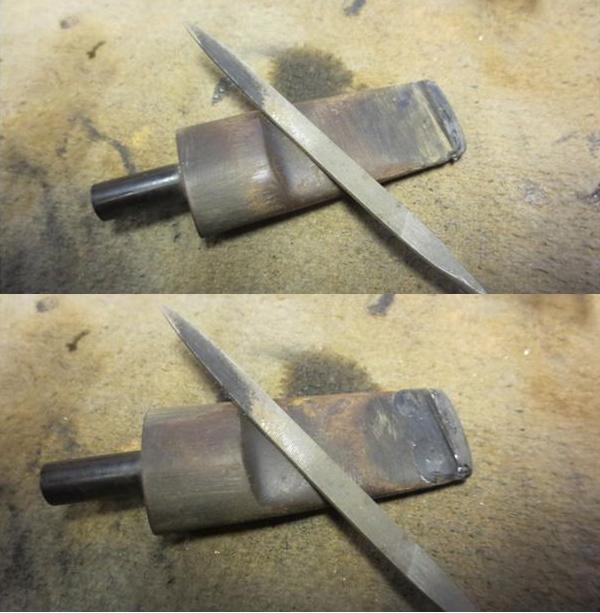
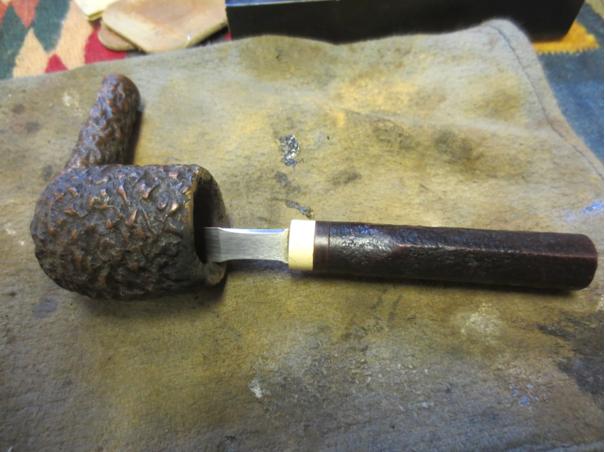
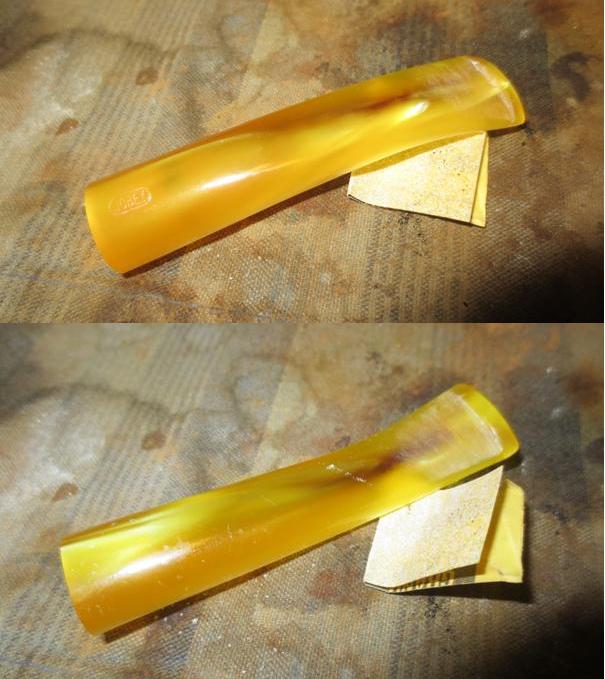
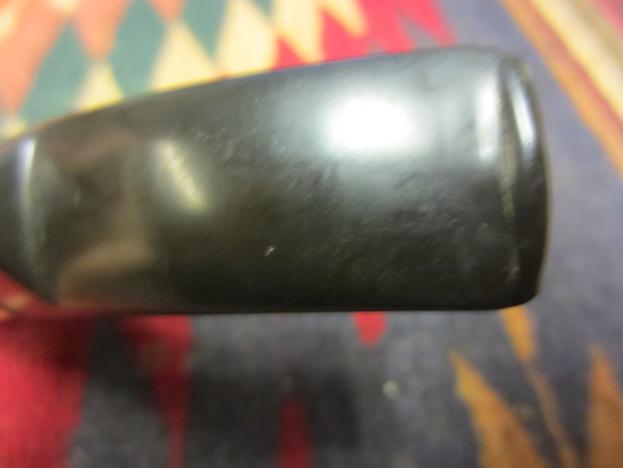
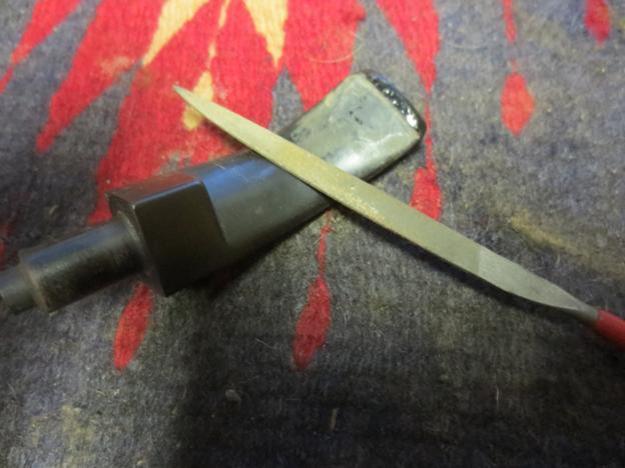
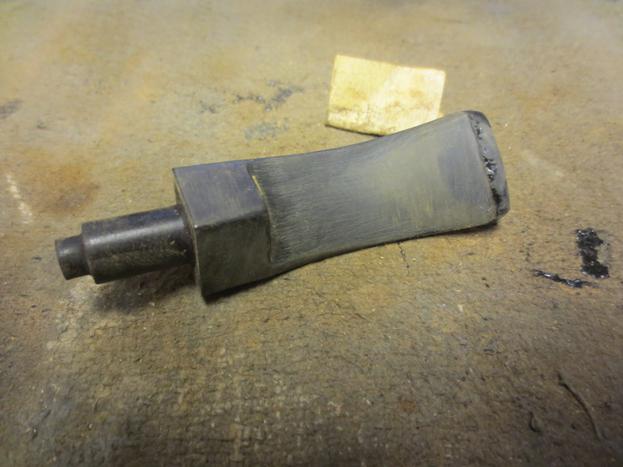
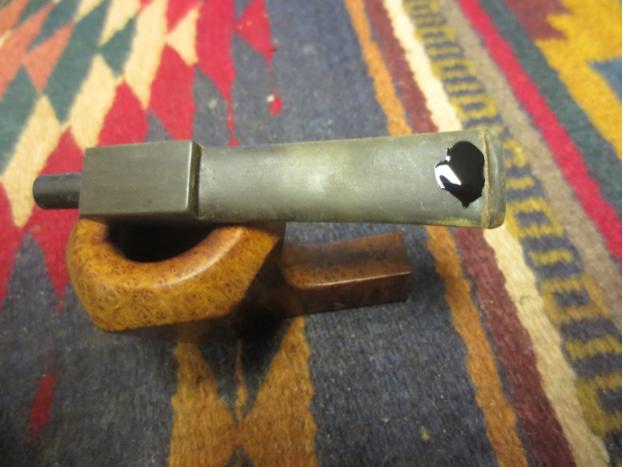
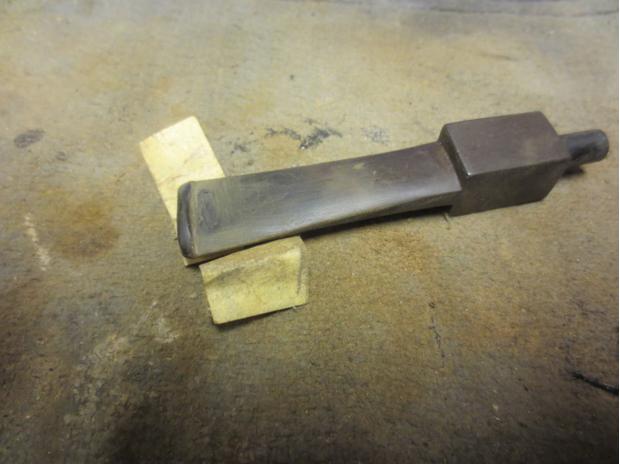
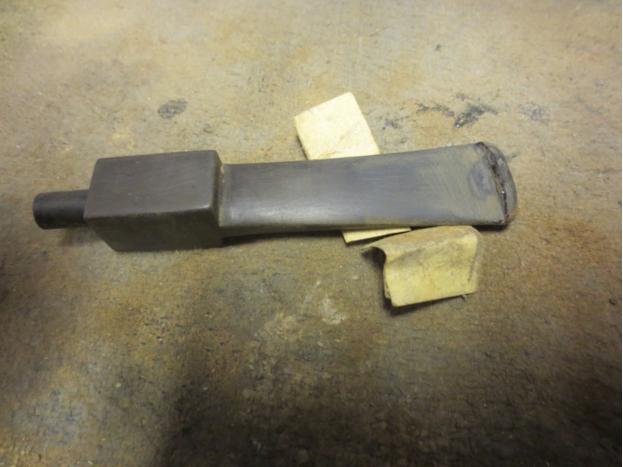
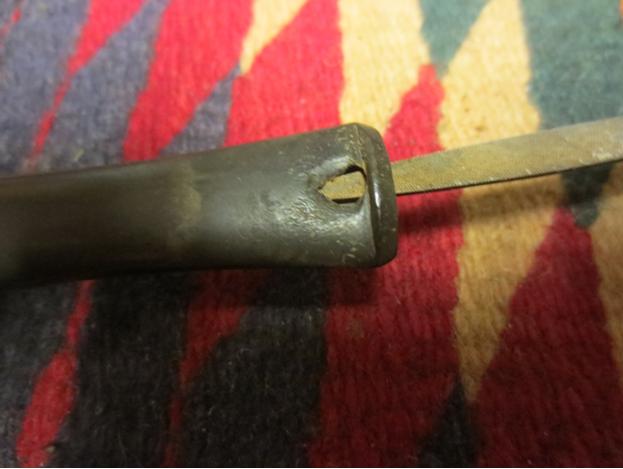
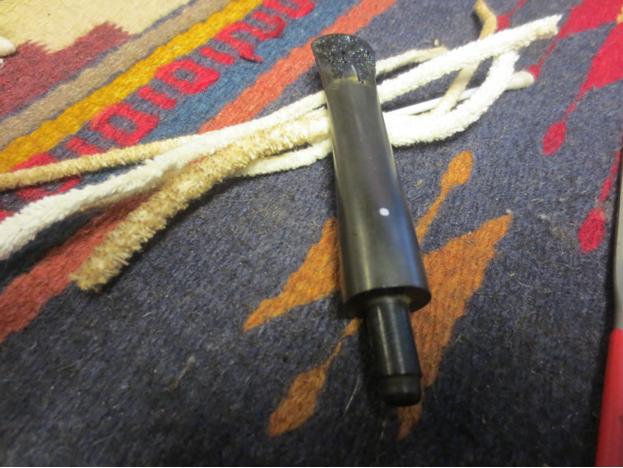
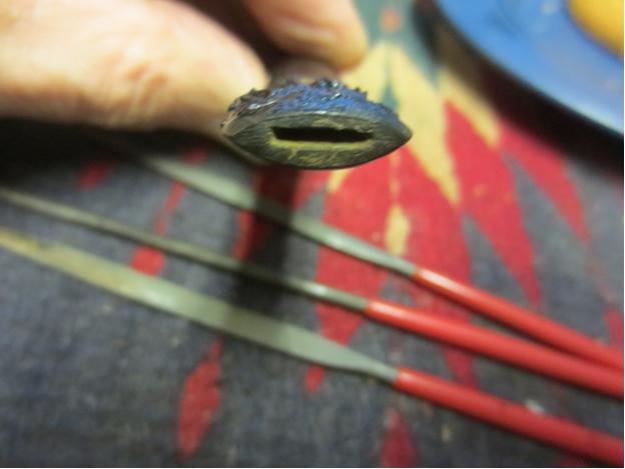
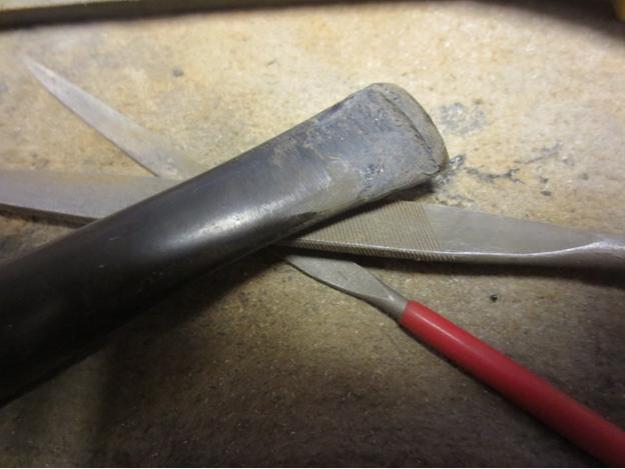
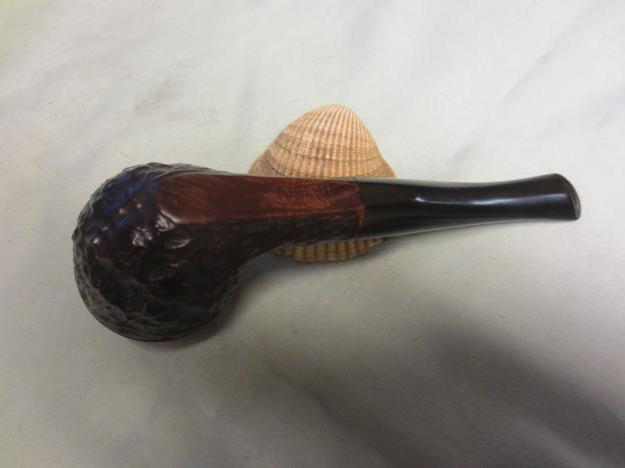
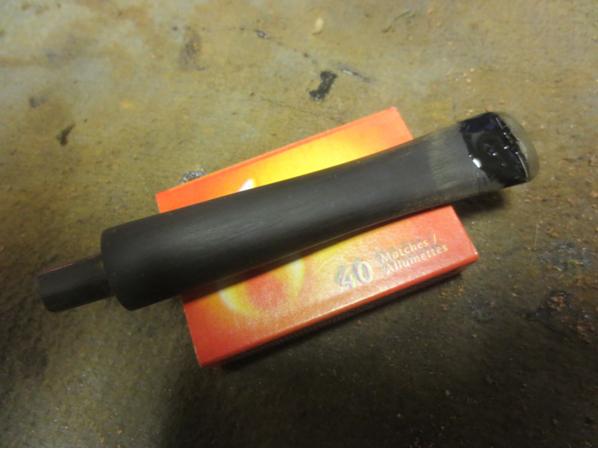
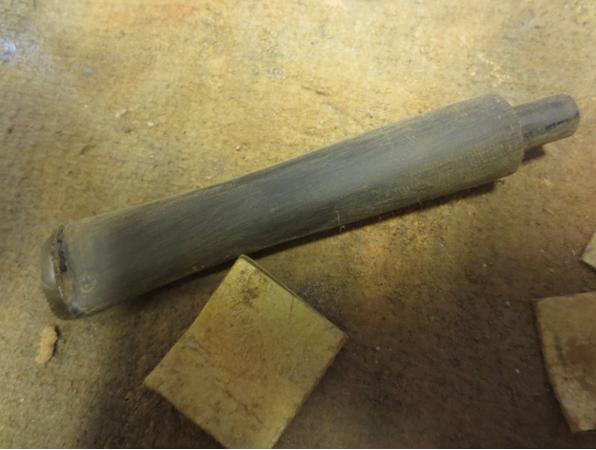
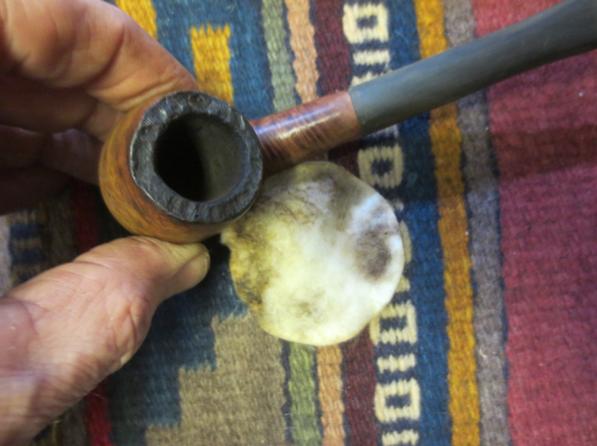
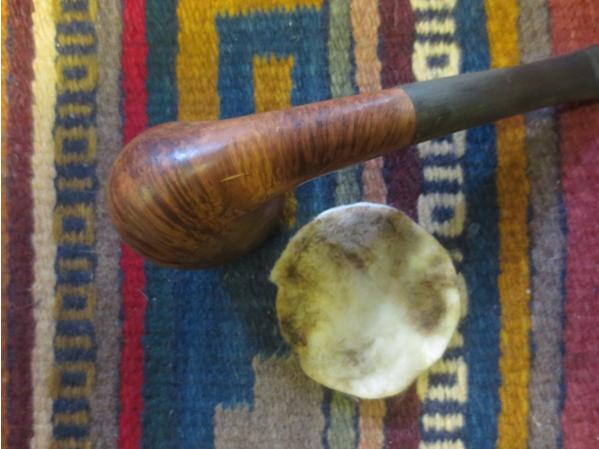
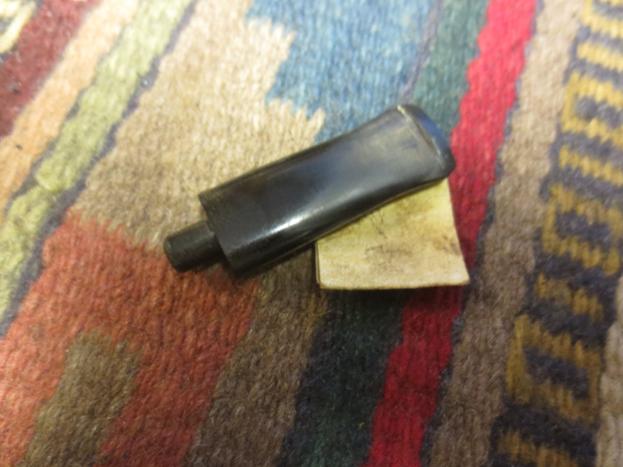
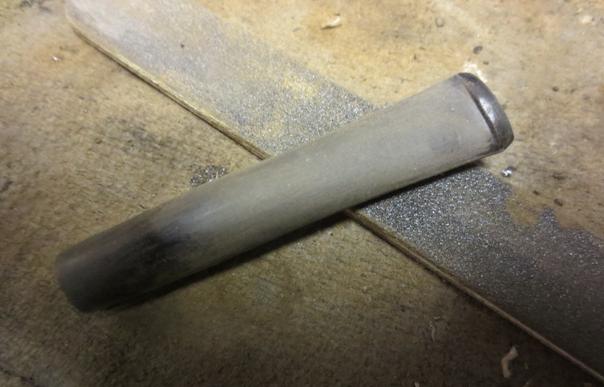
I took some photos of the stem to show the damage that needed to be worked on to recondition and rework it to bring it back to new. The first photo is the top of the stem and the second the underside.Master5
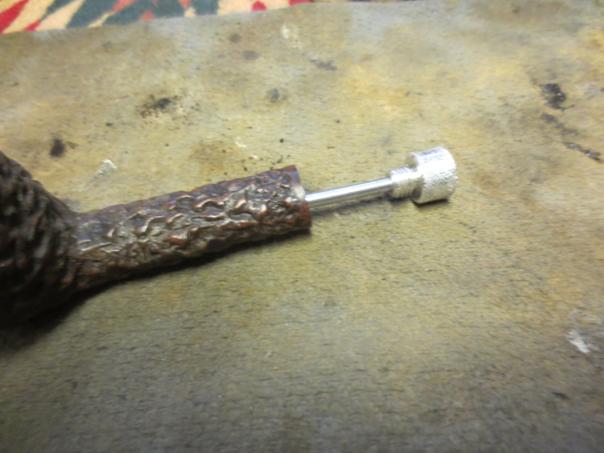
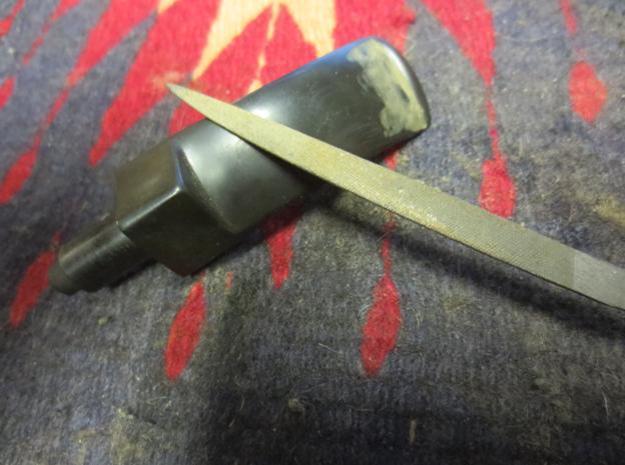
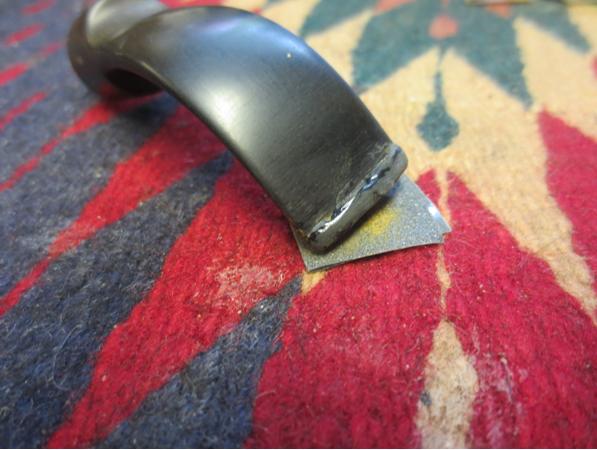
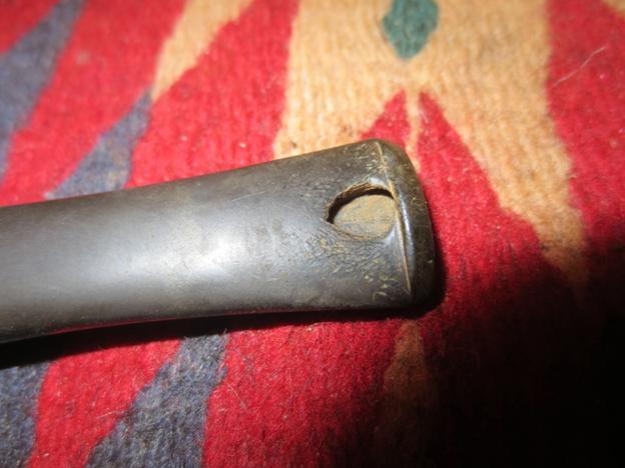
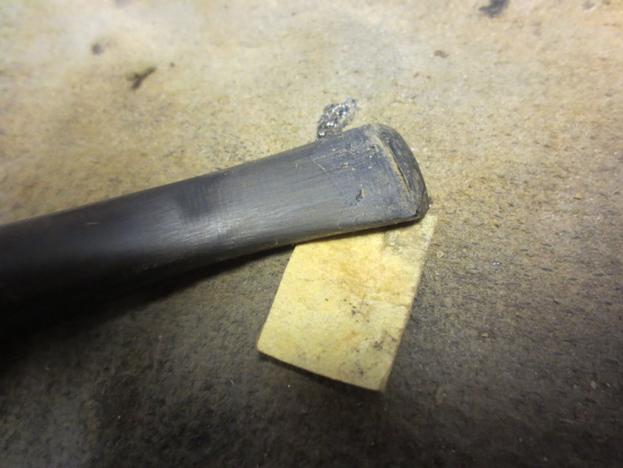
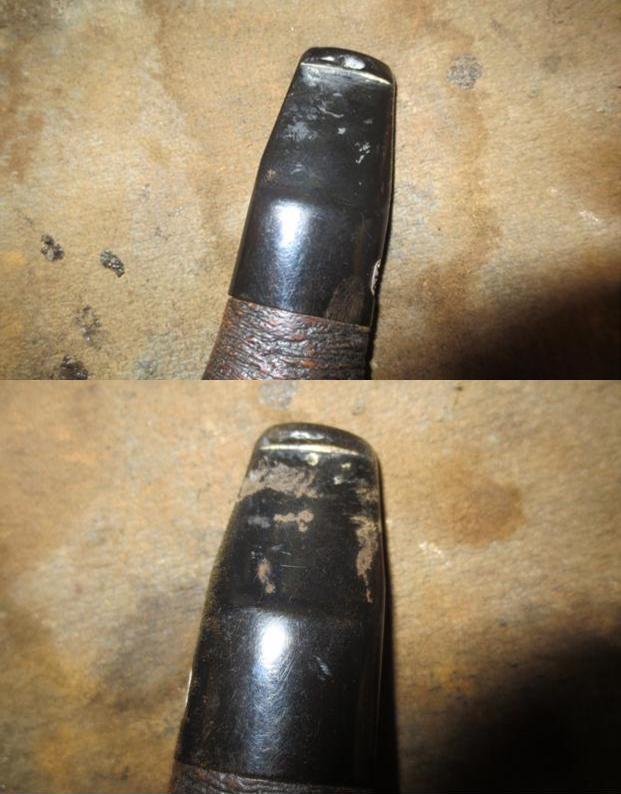
I was able to sand out the tooth marks on the top side of the stem with 220 grit sandpaper and also reshape the button a bit. I did the same on the underside but there was one deep tooth mark that I would need to fill.Master6
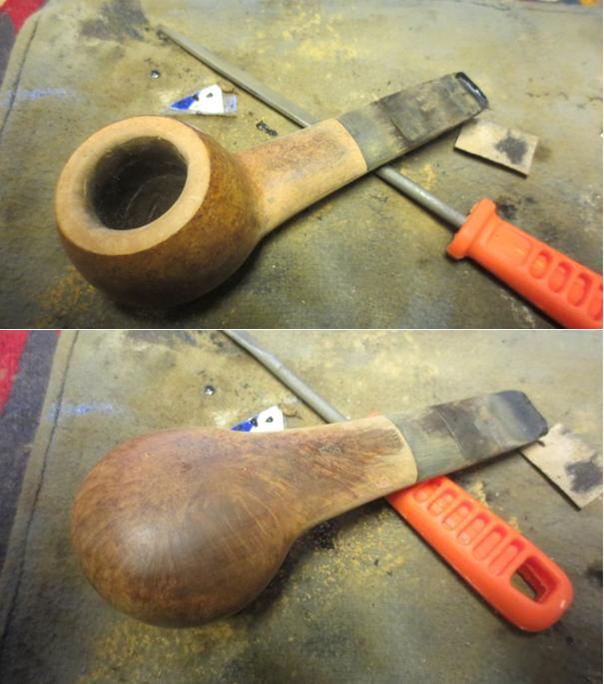
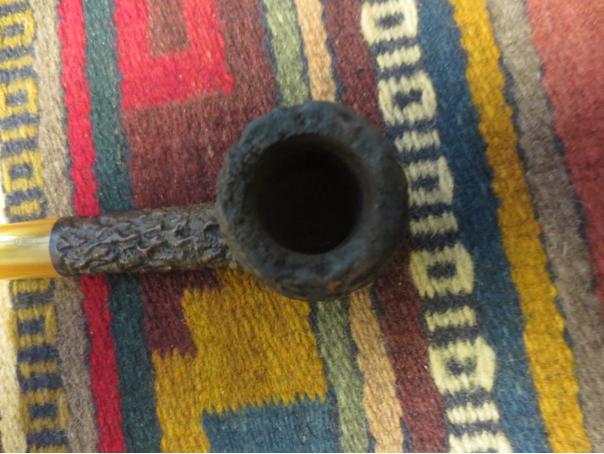
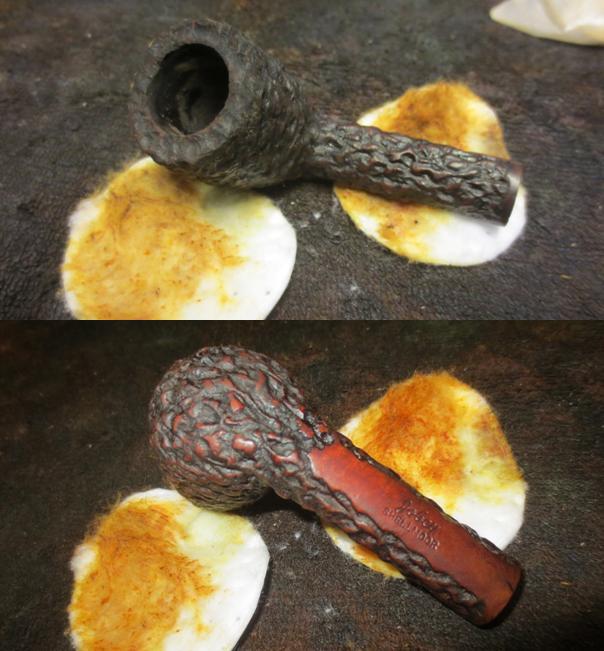
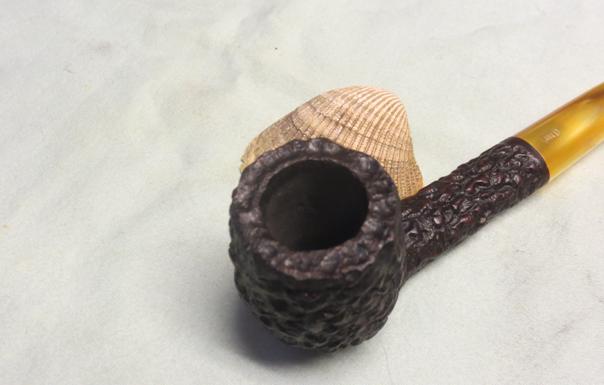
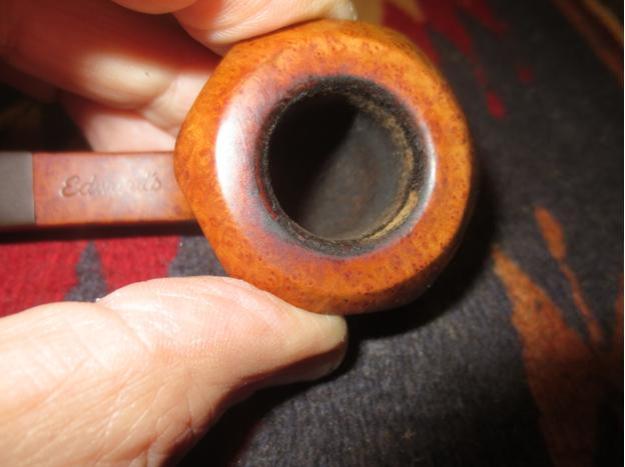
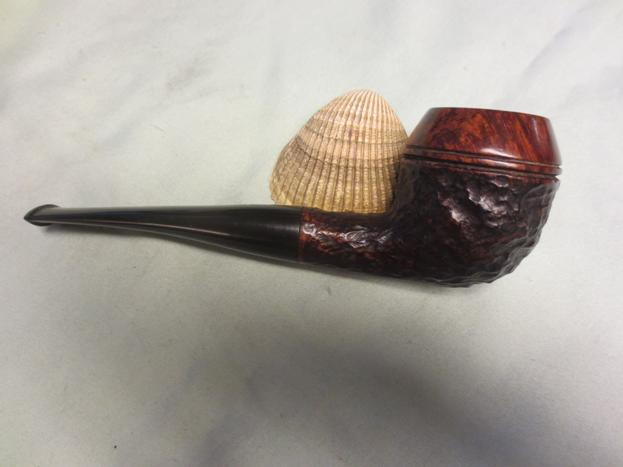
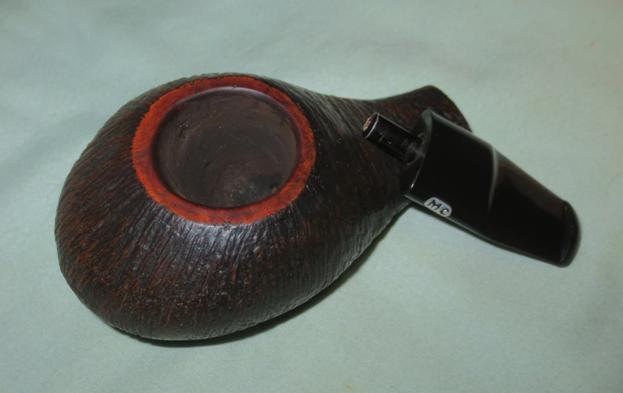
Giving up on trying to reshape the rim or repair it I topped the bowl on my topping board and took of the damaged area on the right side of the rim and the back of the left side as well. The gouges were just not something I wanted to try to fill in. I also decided that I would flatten the rim and give the inner edge a slight bevel. I would stain the rim to match the smooth portion on the underside of the pipe.Master7
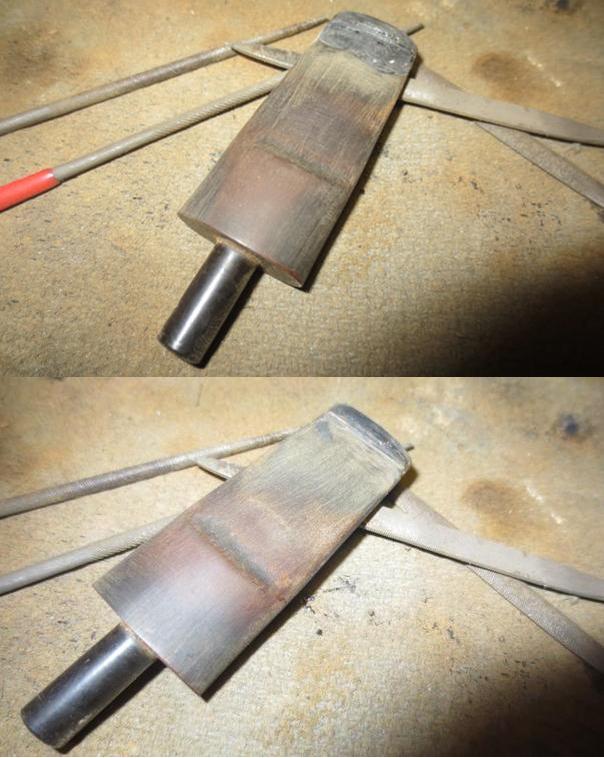
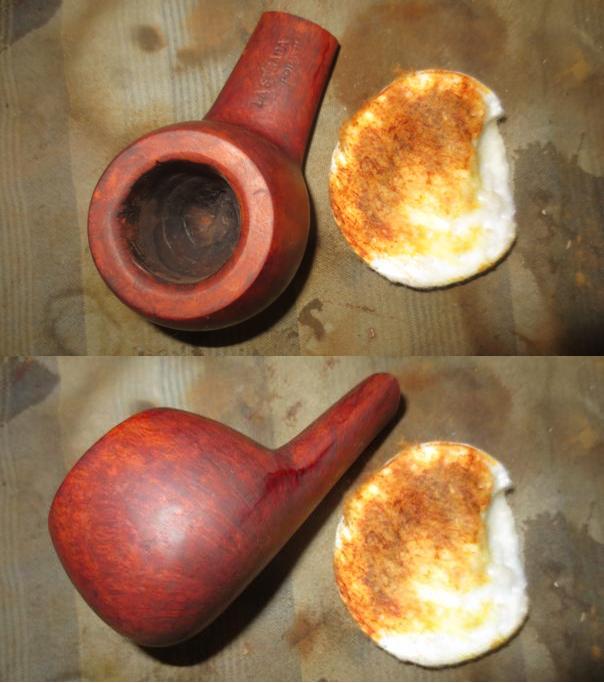
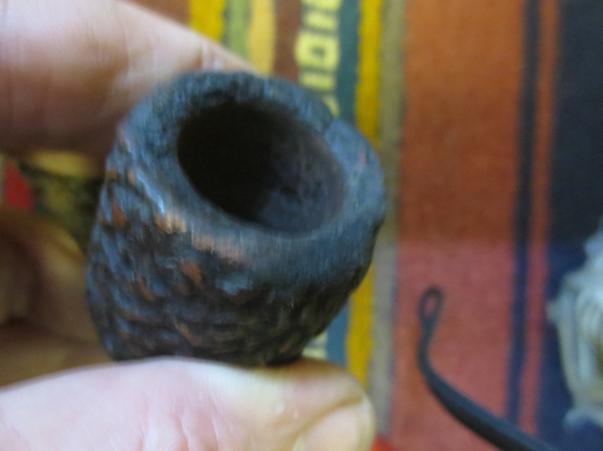
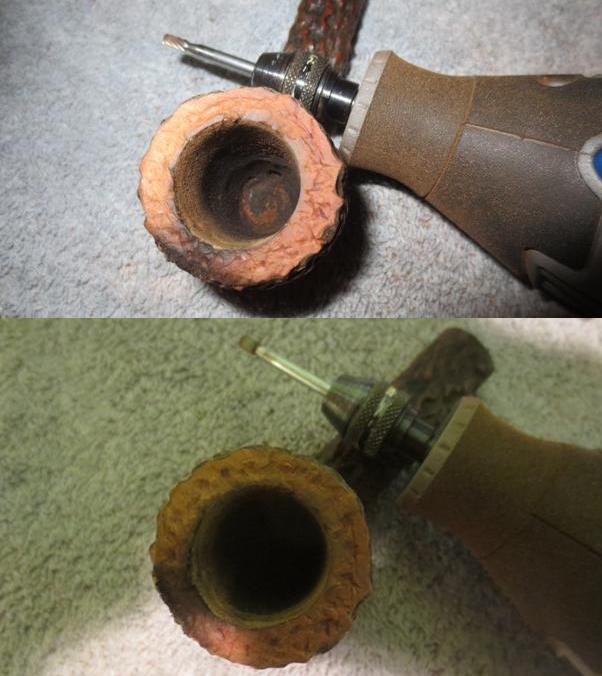
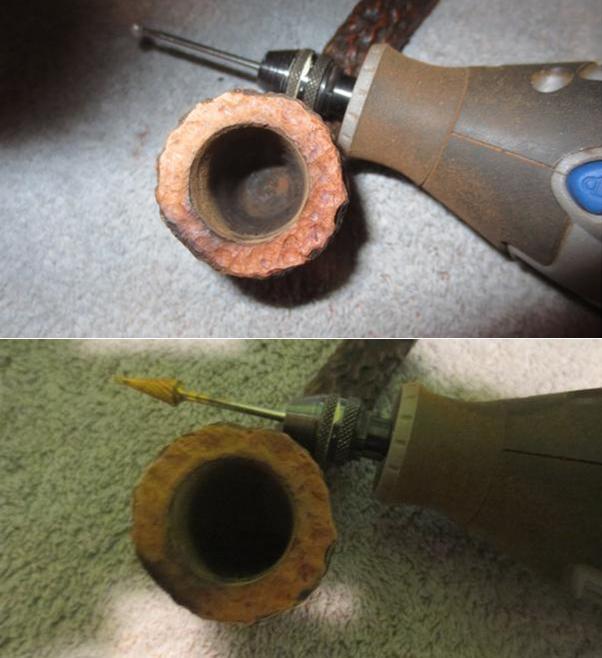
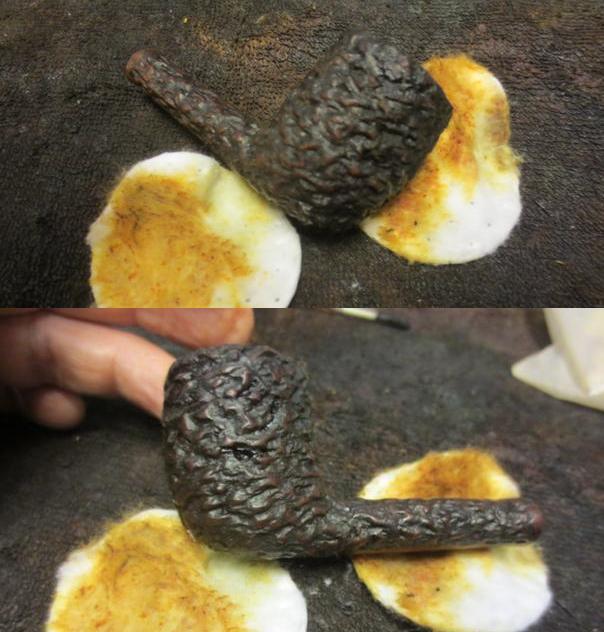
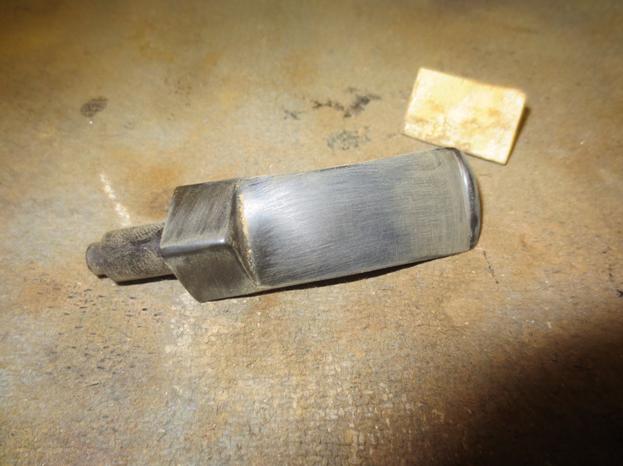
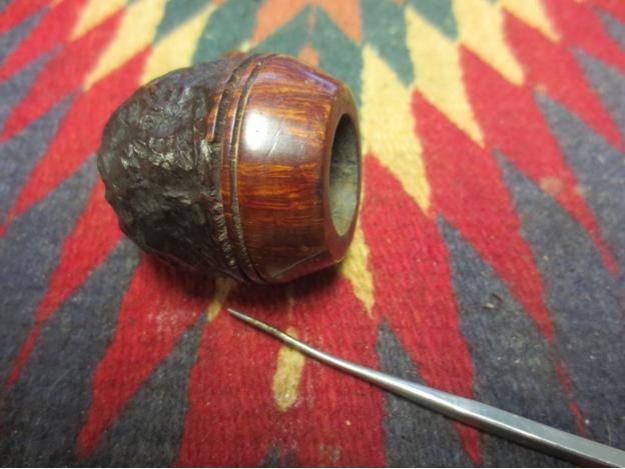
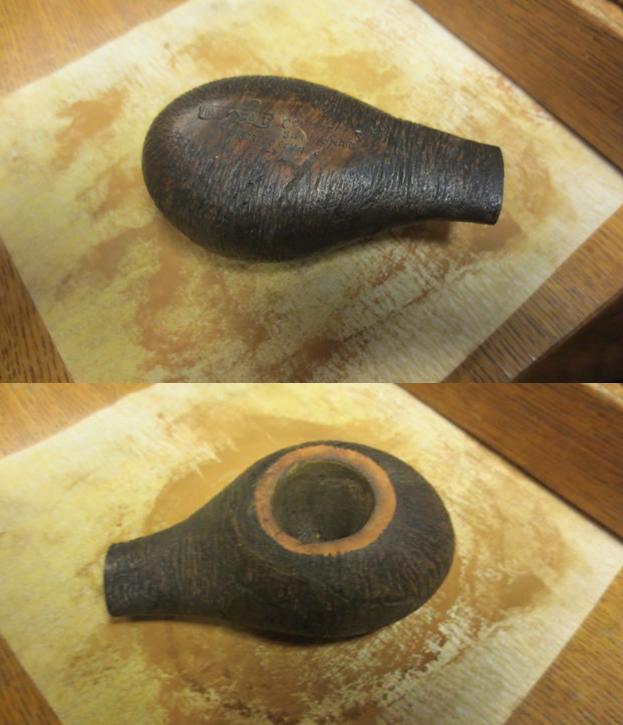
I used the Dremel and sanding drum to bring the bowl back into round and then lightly beveled the inner rim edge with the sanding drum (first picture below). I cleaned up the Dremel work with a folded piece of 180 grit sandpaper followed by 220 grit (second picture).Master8
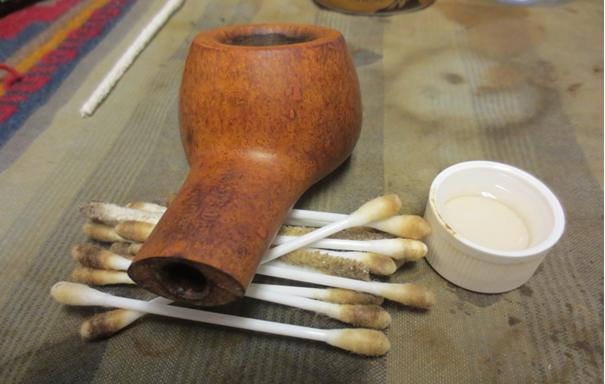
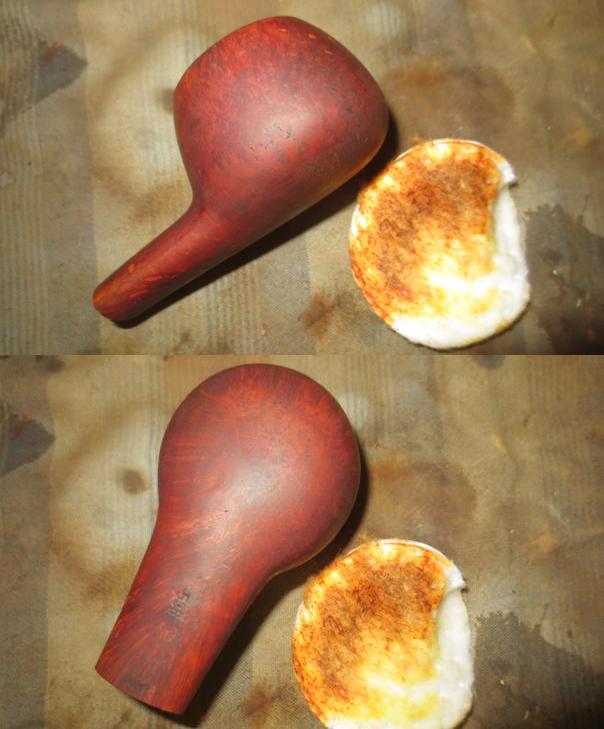
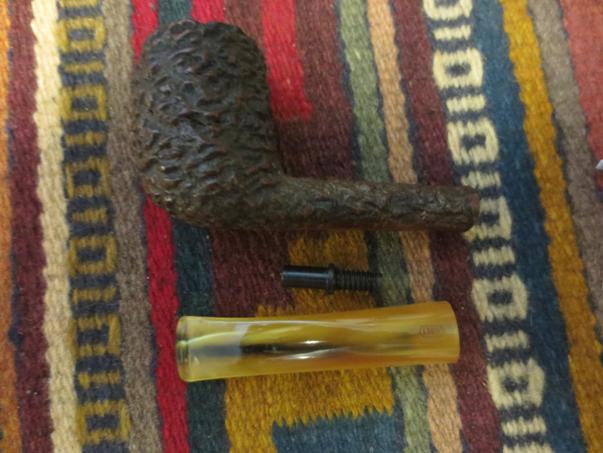
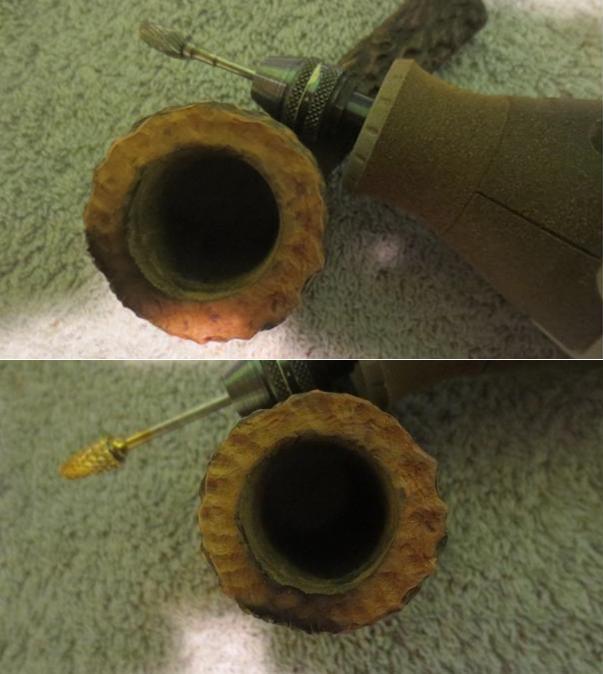
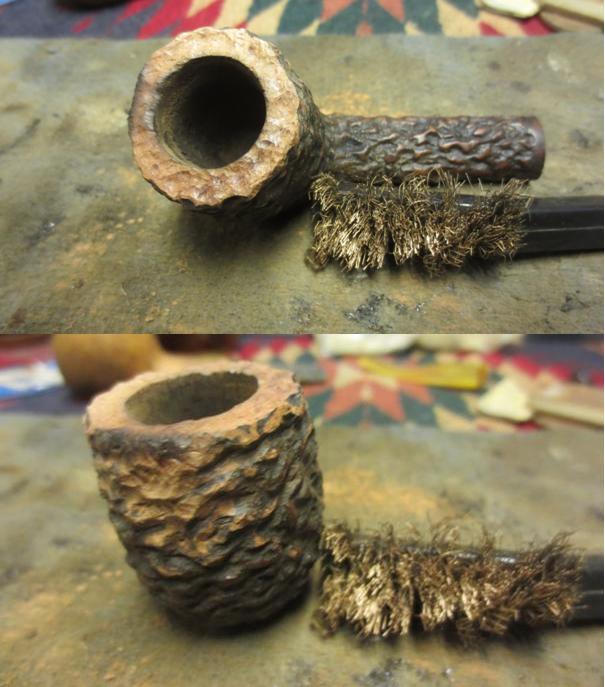
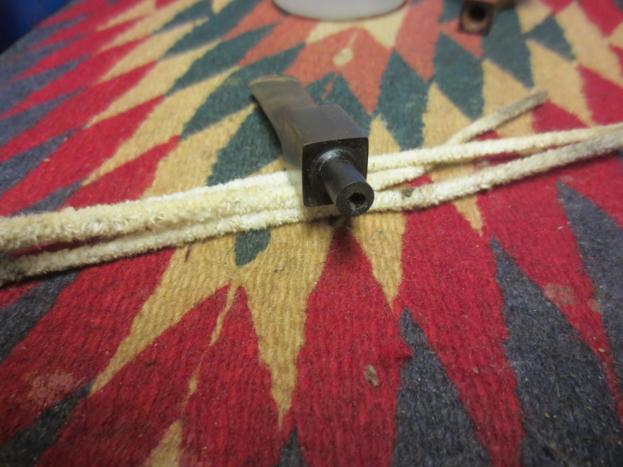
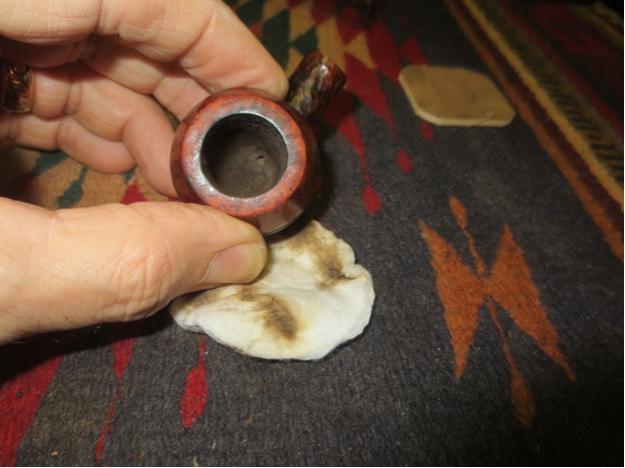
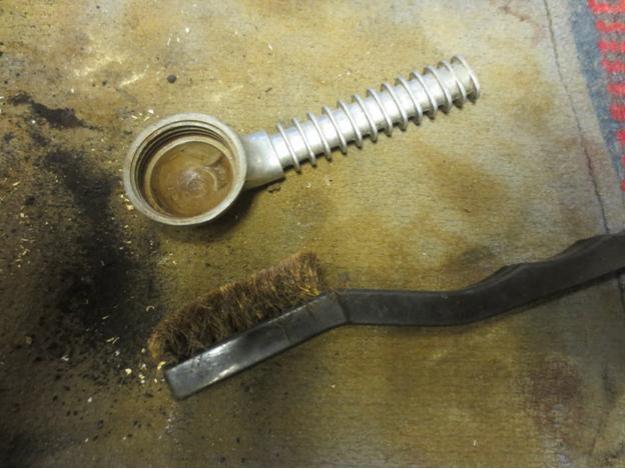
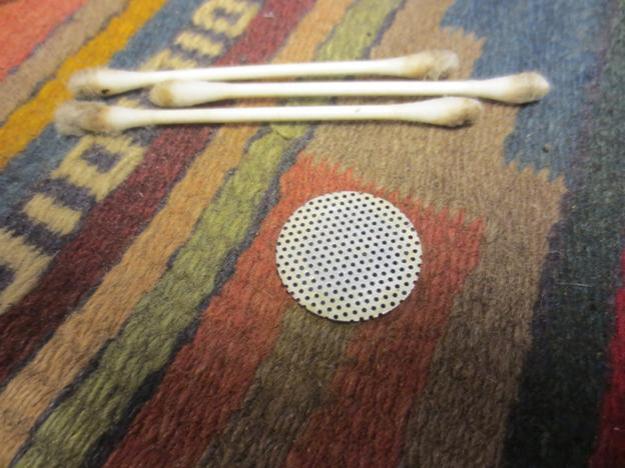
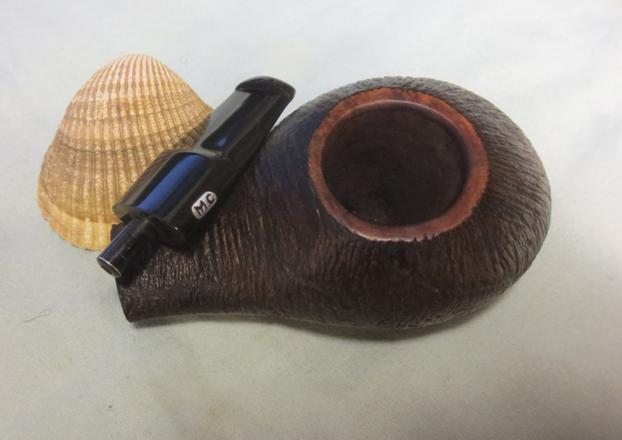
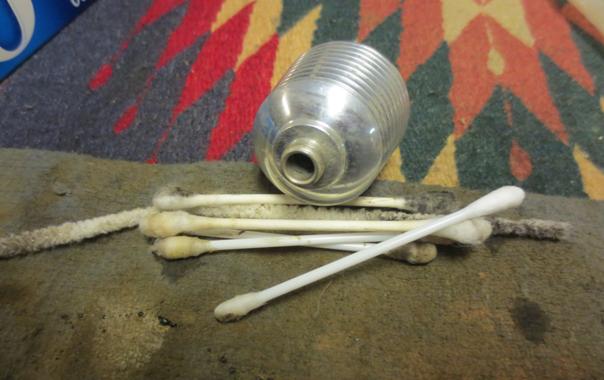
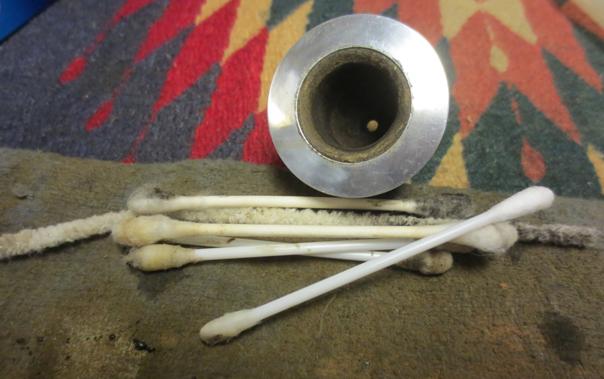
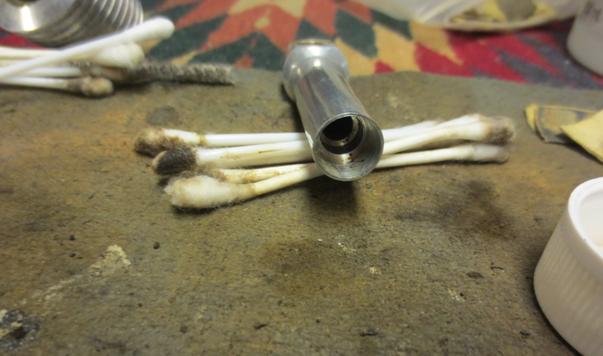
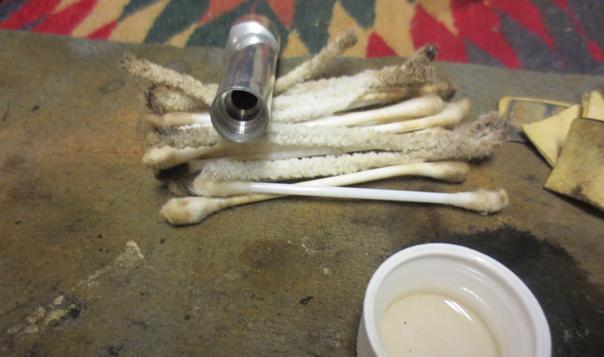
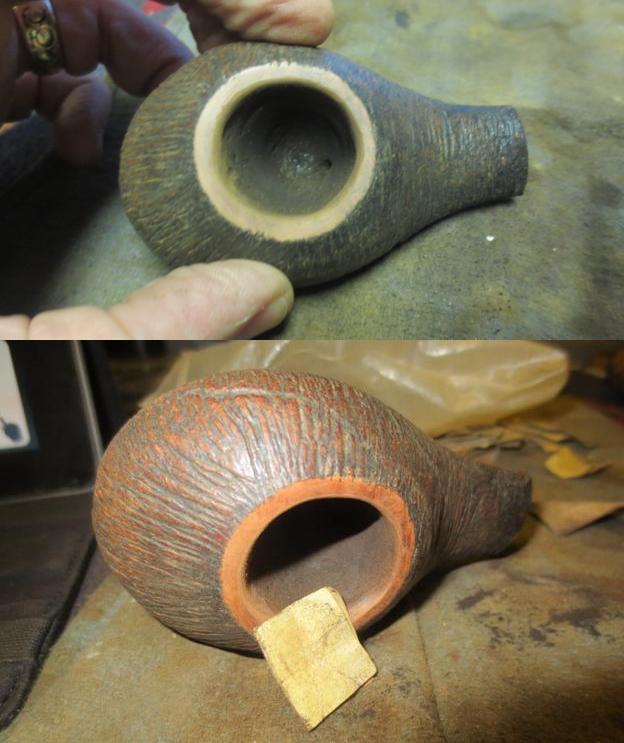
I cleaned the mortise and airways in the bowl and the stem with pipe cleaners, cotton swabs and alcohol (I have always used 99% isopropyl).Master9
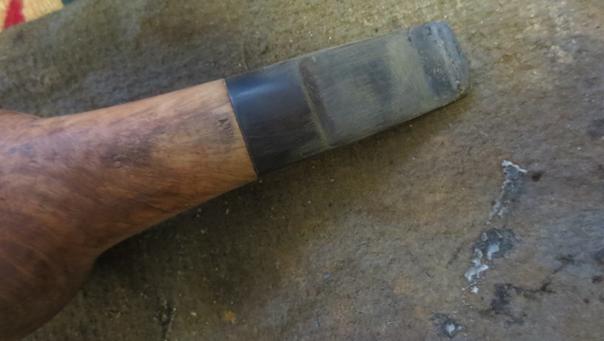
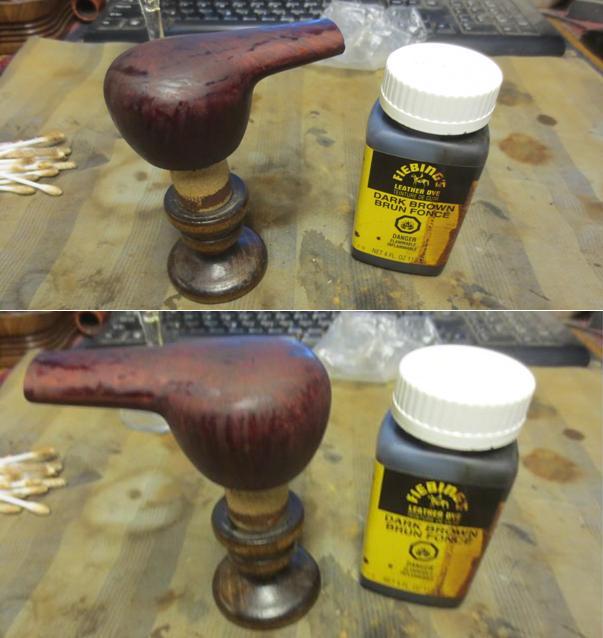
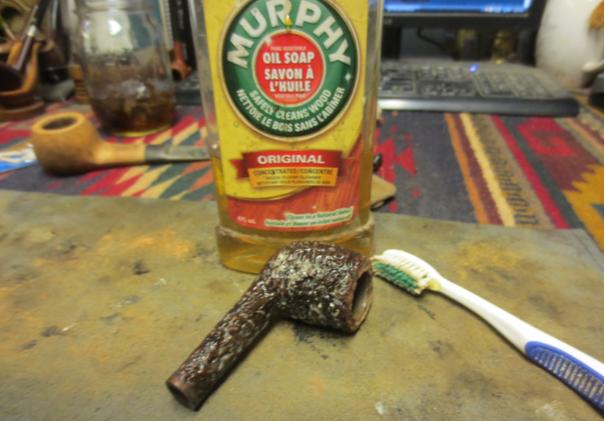
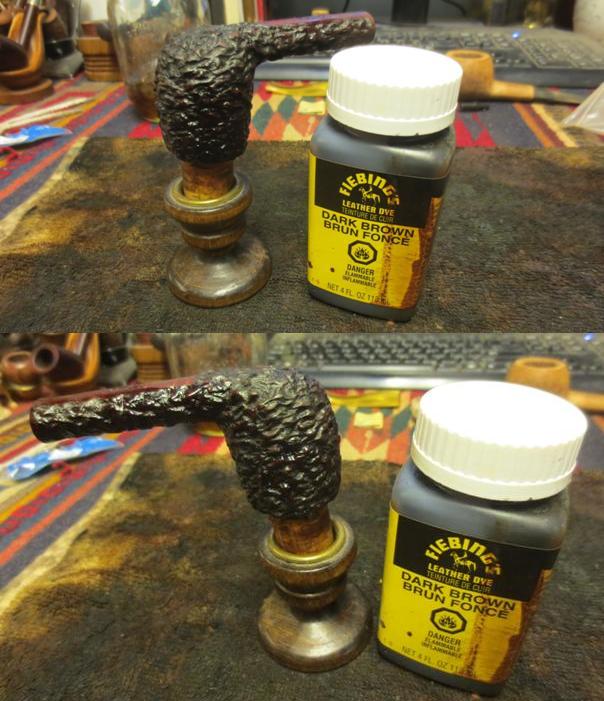
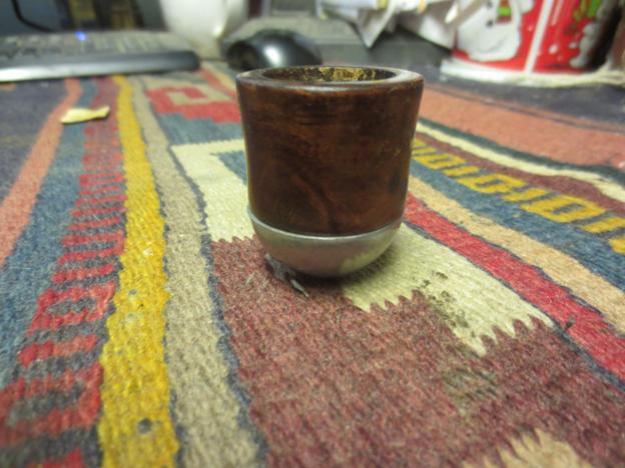
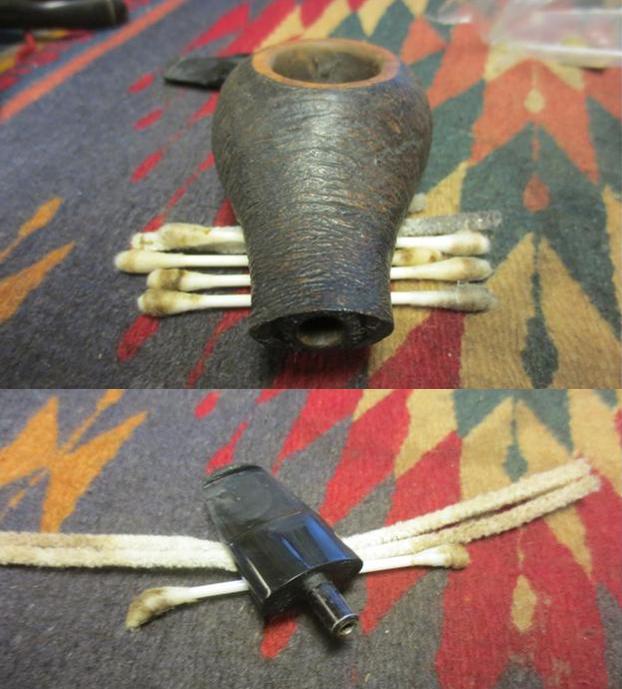
I restained the rim with a dark brown stain pen and blended in some black from a Sharpie pen. I wiped down the exterior of the bowl with alcohol on a cotton pad to remove the grime and to blend the rim colour with the bowl.Master10
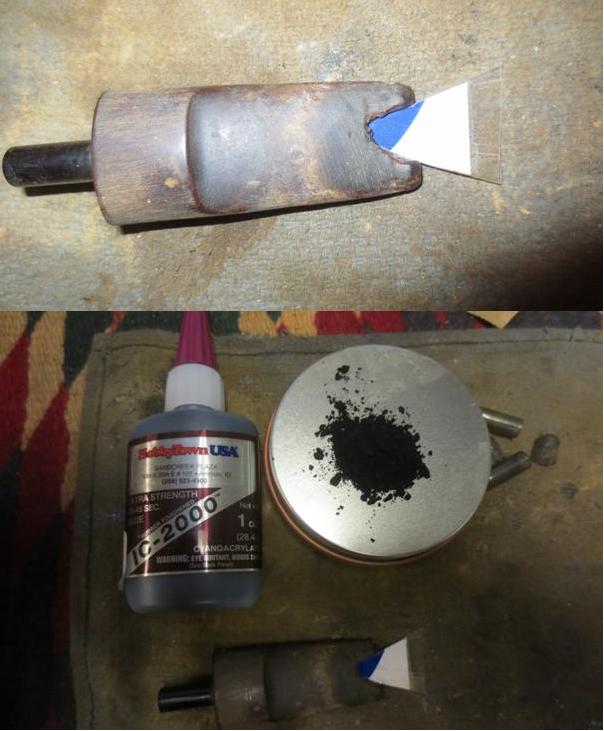
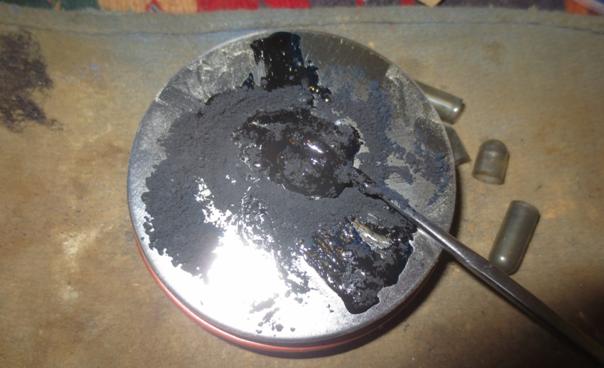
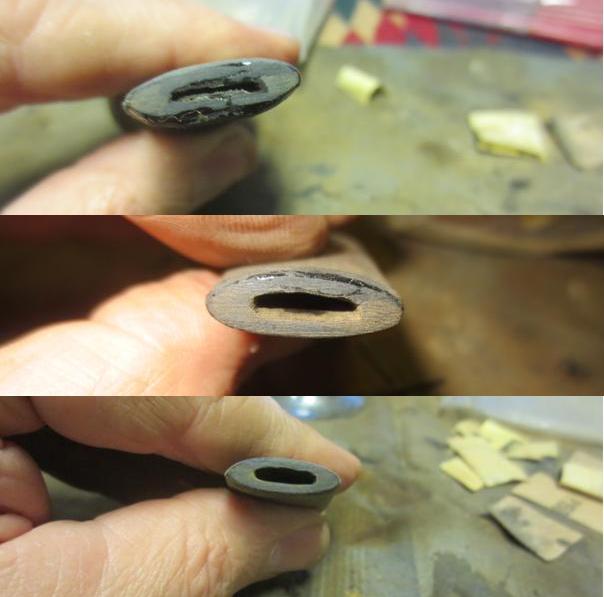
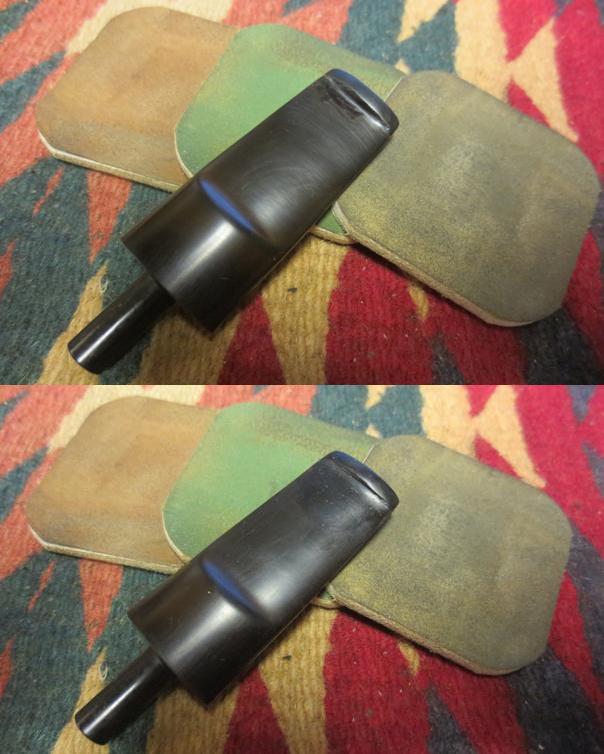
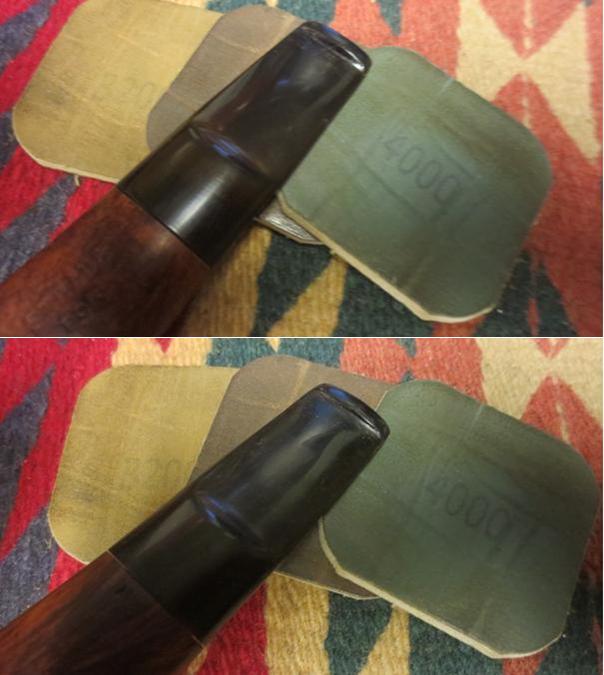
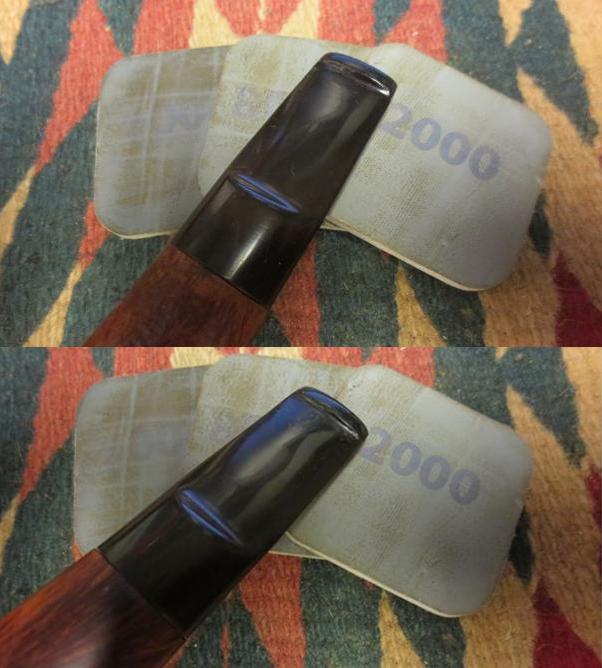
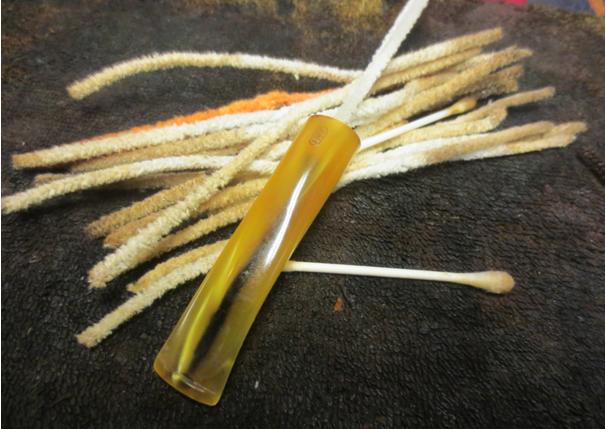
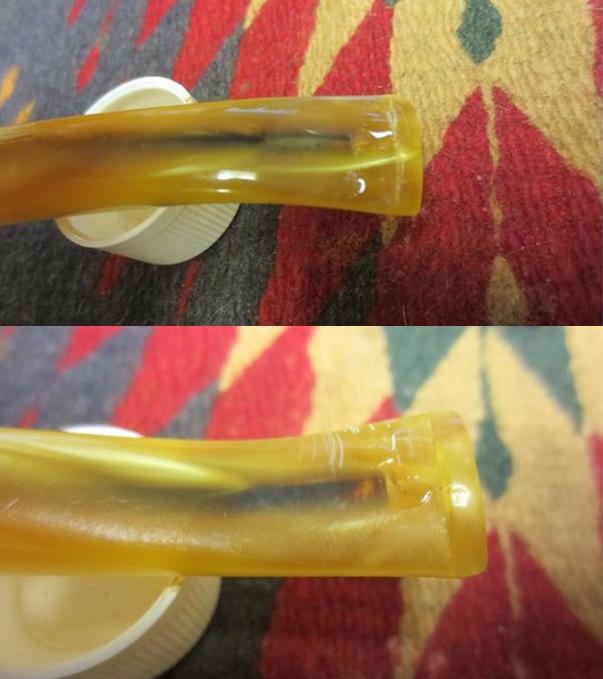
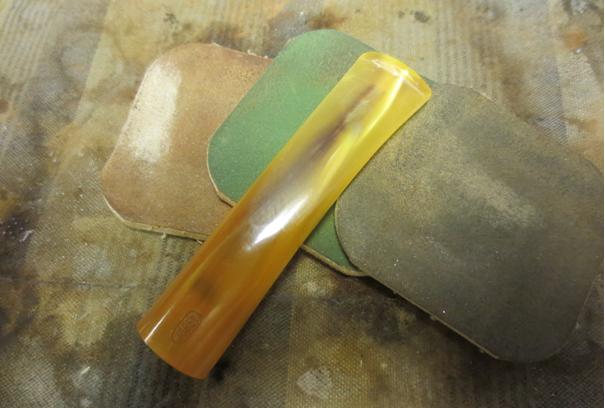
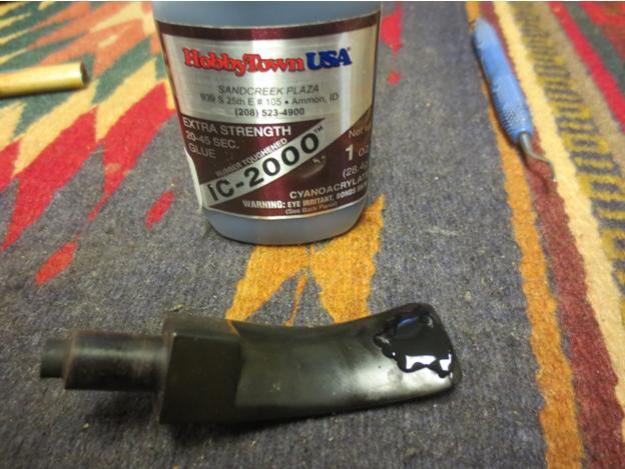
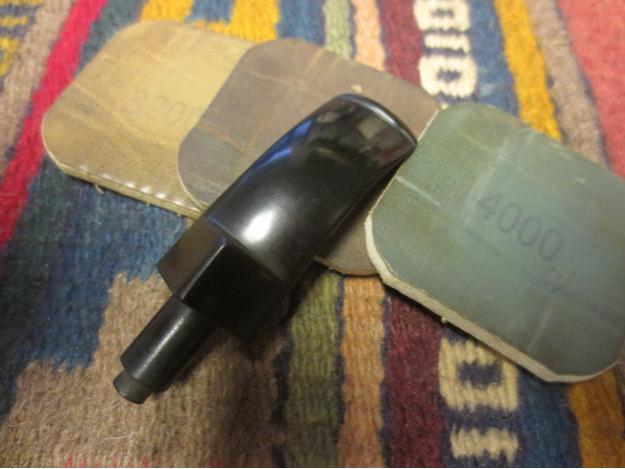
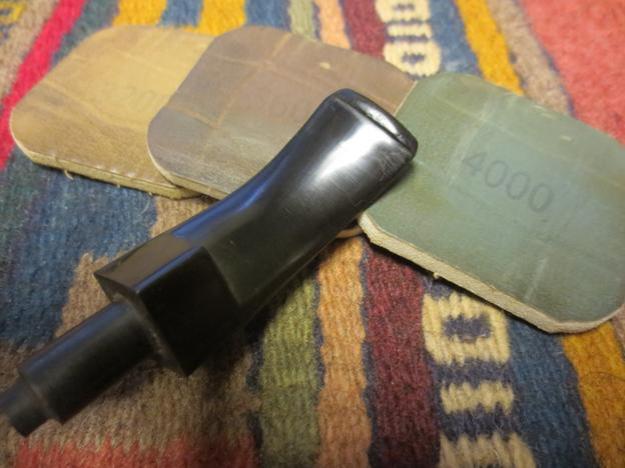
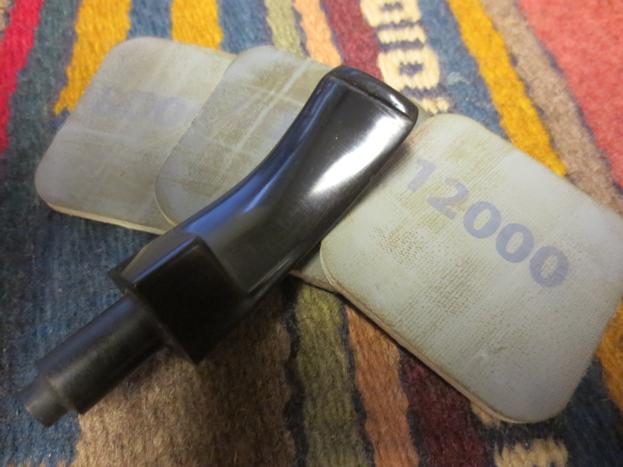
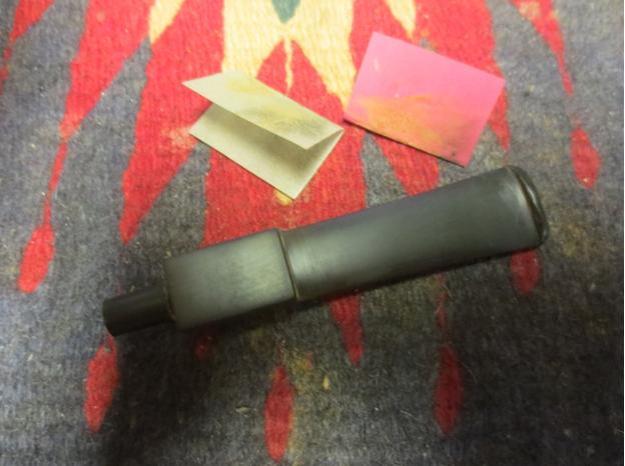
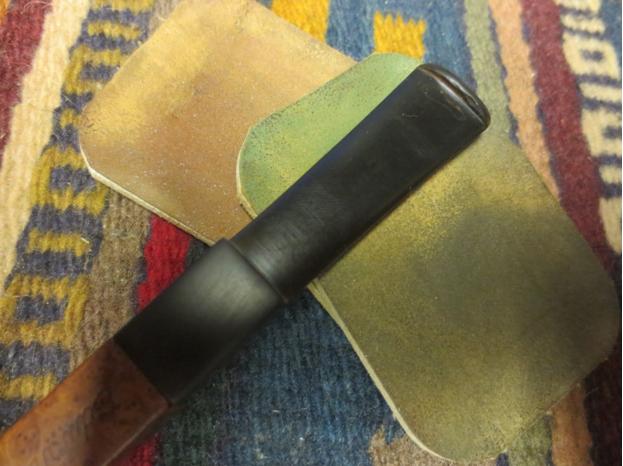
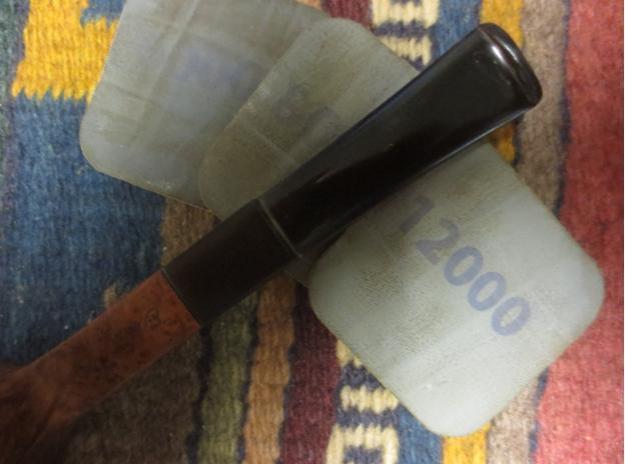
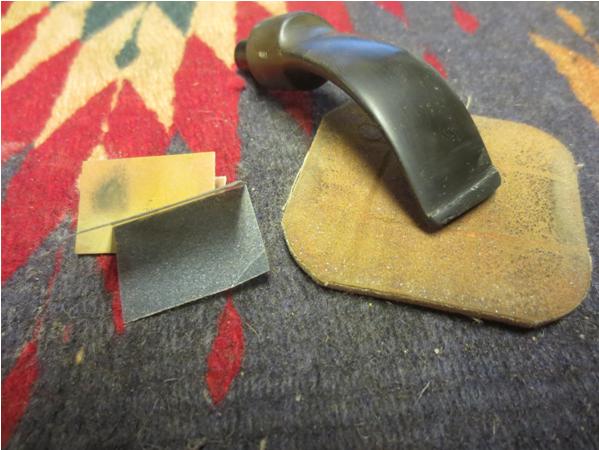
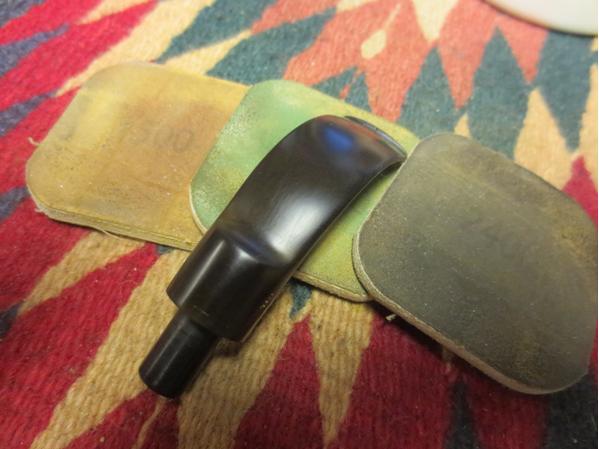
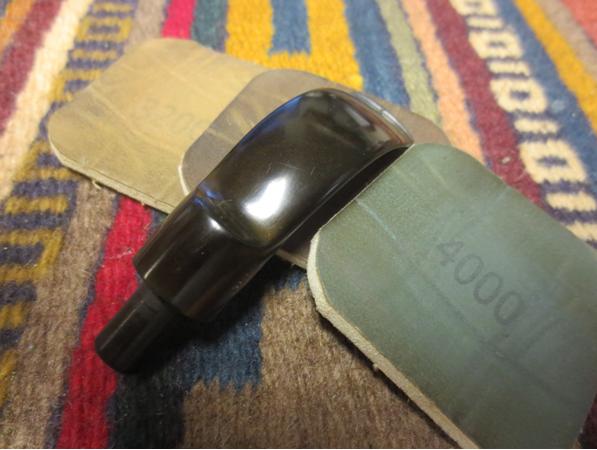
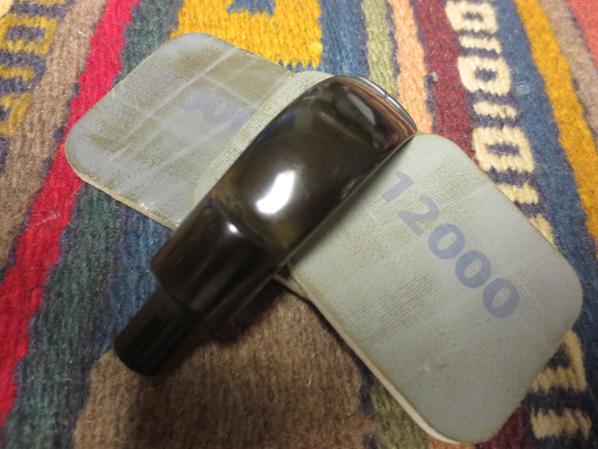
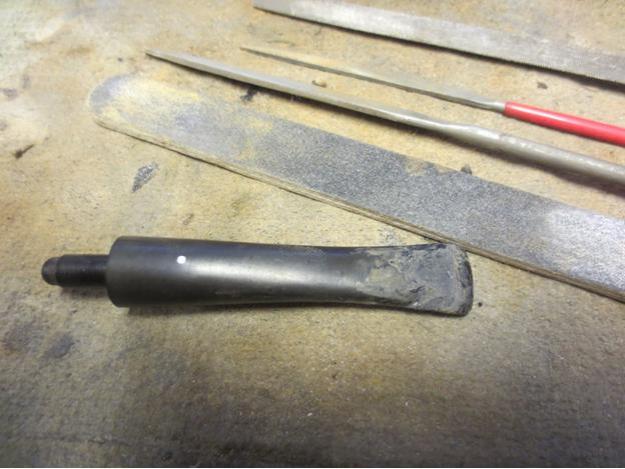
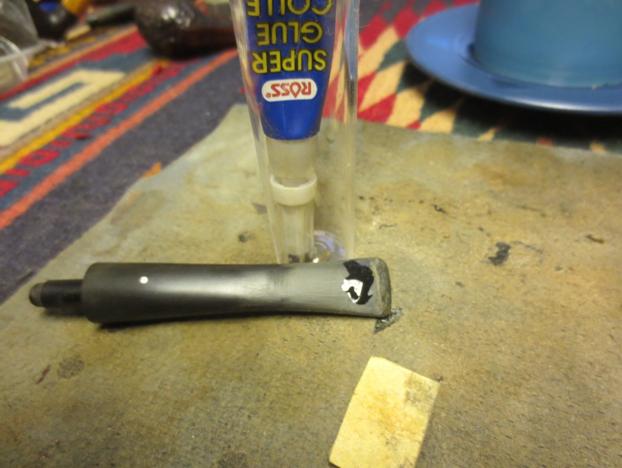
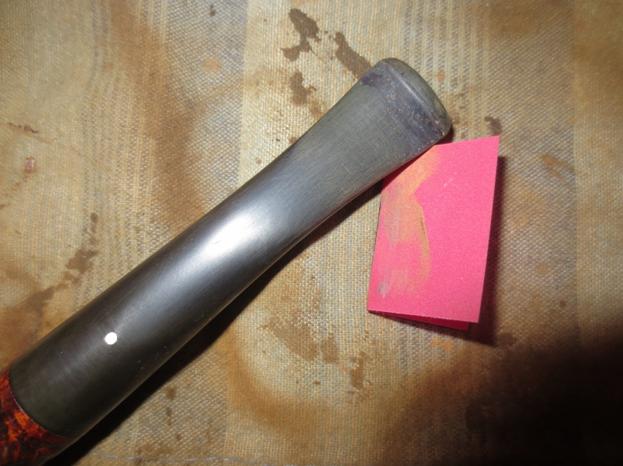
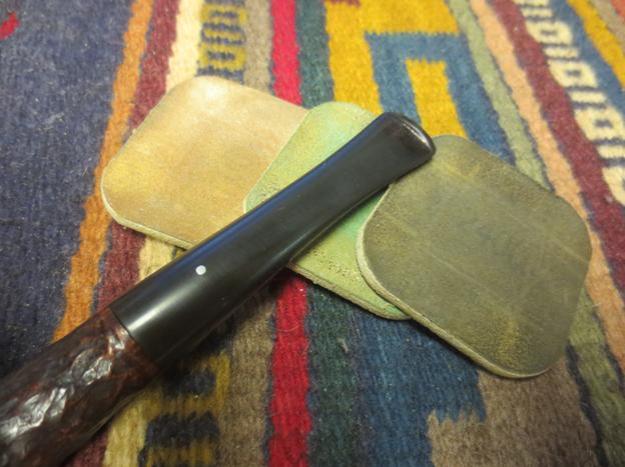
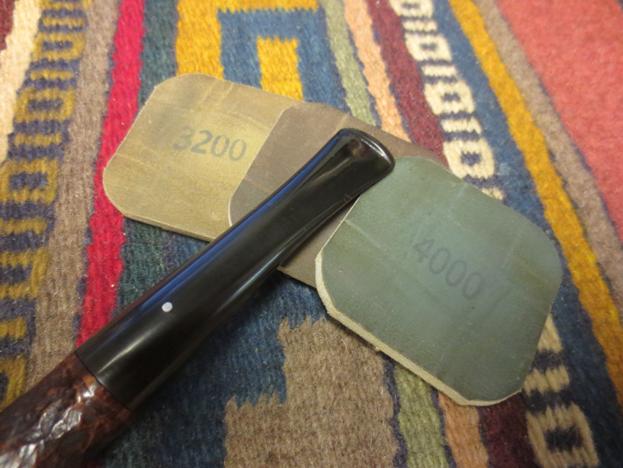
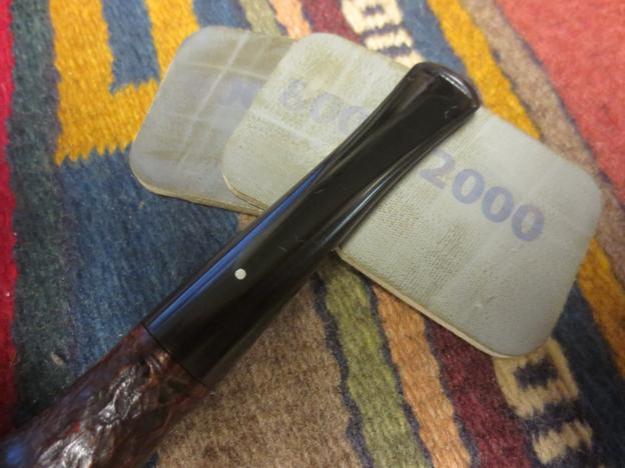
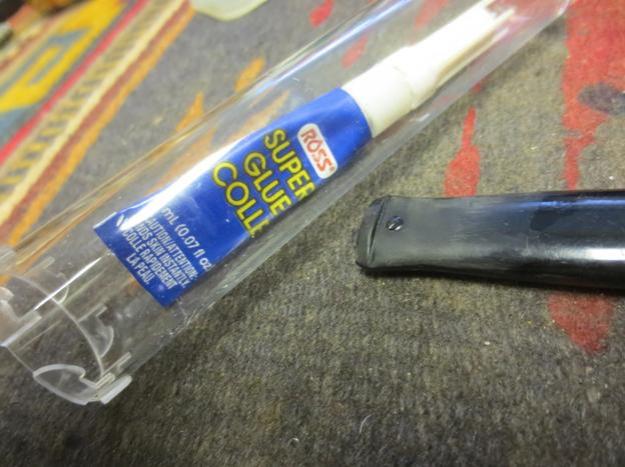
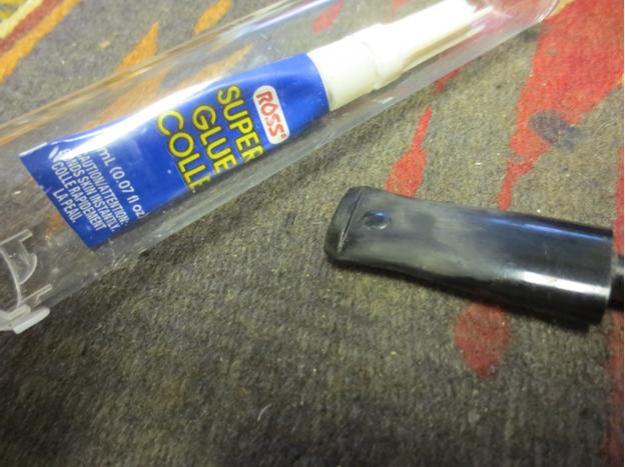
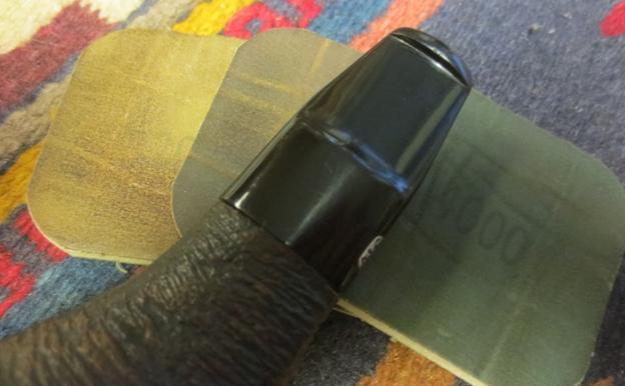
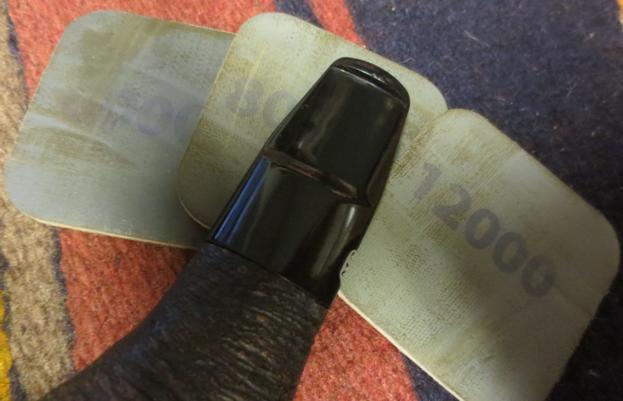
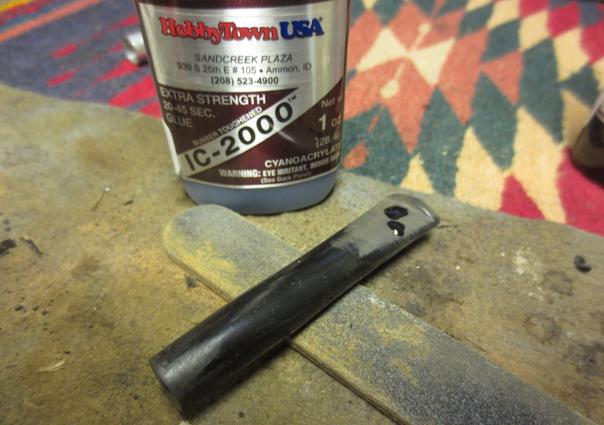
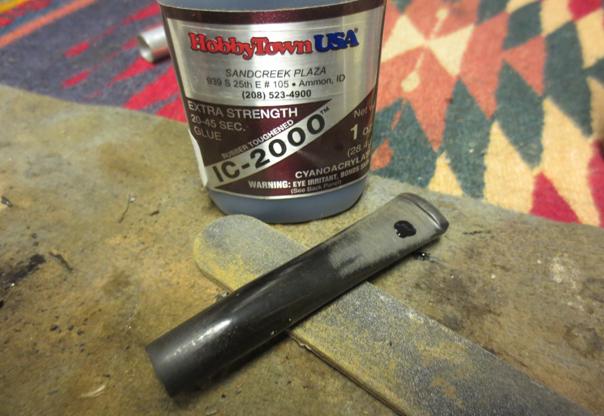
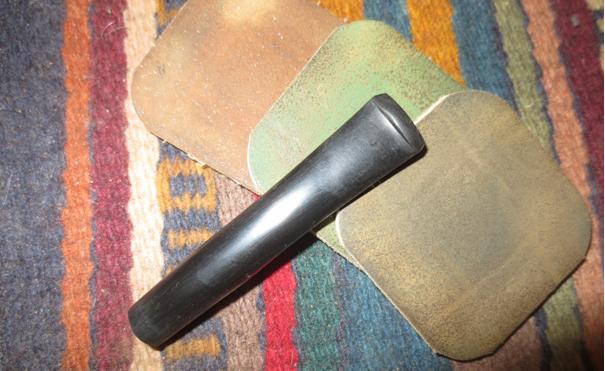
I built up the tooth mark on the underside of the stem and the deep marks on the button surface with black super glue. Once it dried I sanded the repairs with 220 grit sandpaper to blend them into the surface and sharpened the button edge with a needle file. I sanded the stem with 400-600 grit wet dry sandpaper to remove the scratches. I wet sanded it with 1500-3600 grit micromesh sanding pads and dry sanded it with 4000-12000 grit pads. I buffed it quickly with Blue Diamond and gave the stem a light coat of carnauba wax.Master11 Master12 Master13
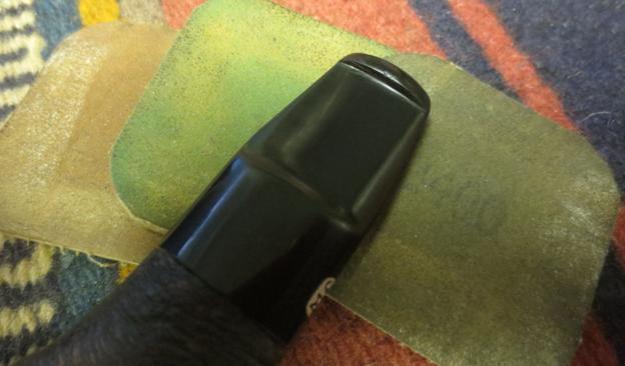
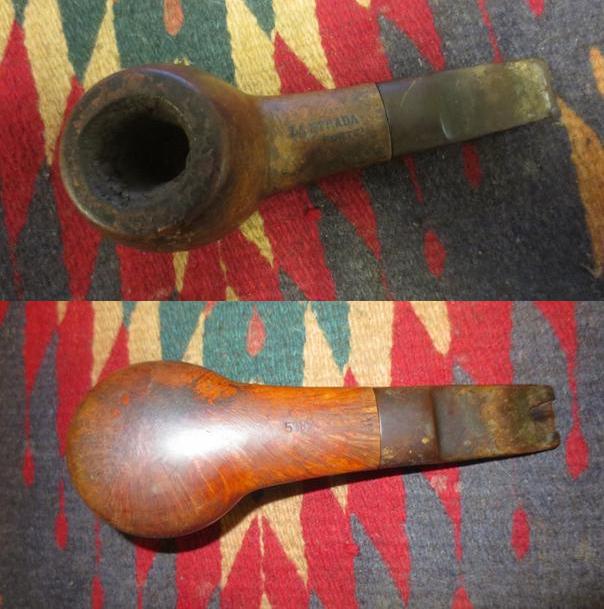
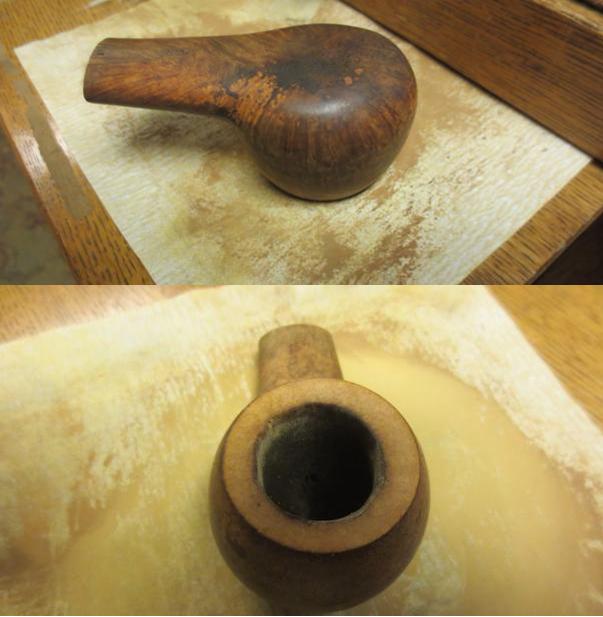
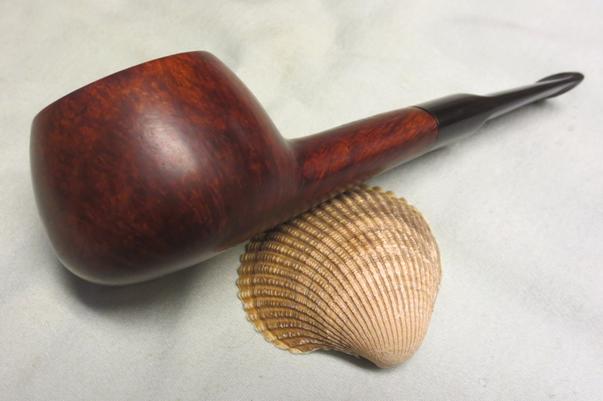
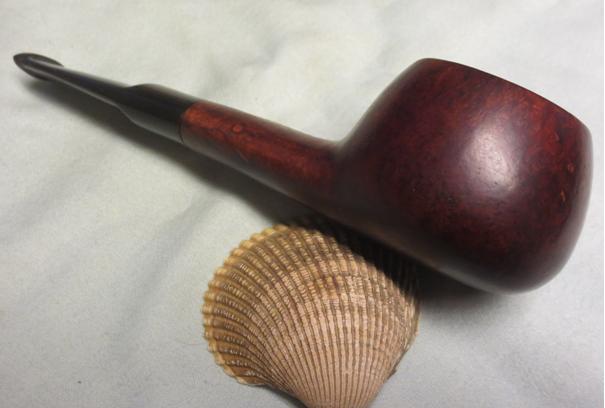
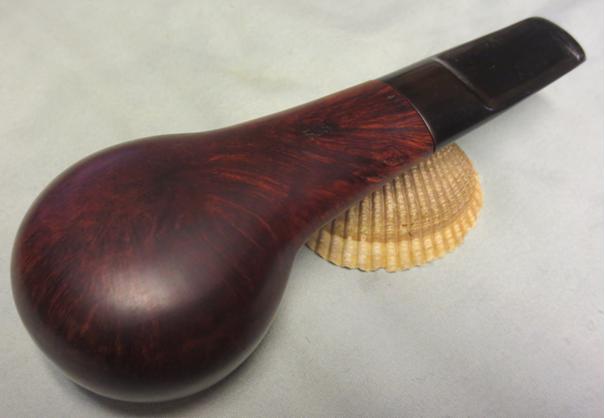
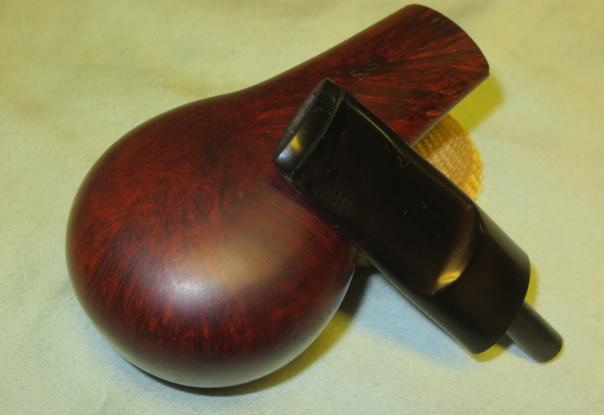
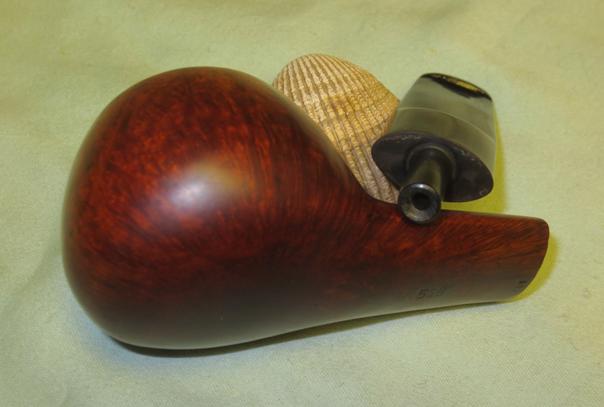
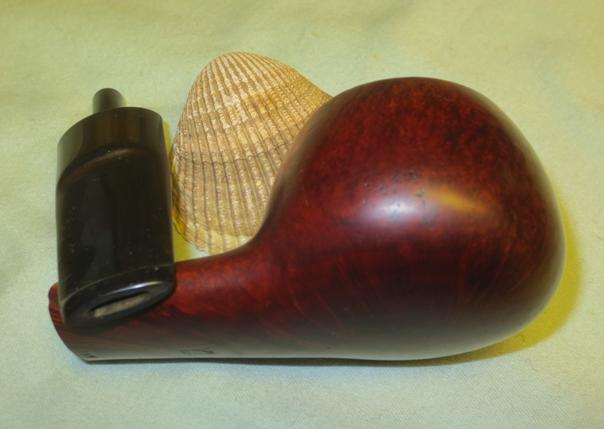
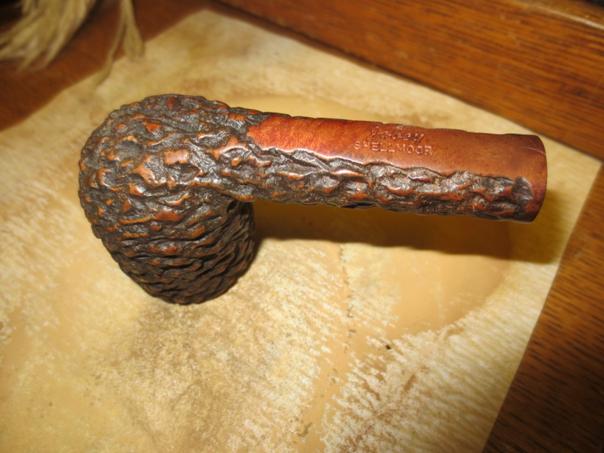
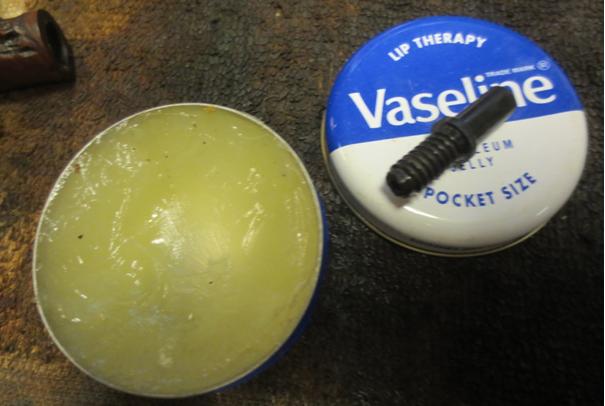
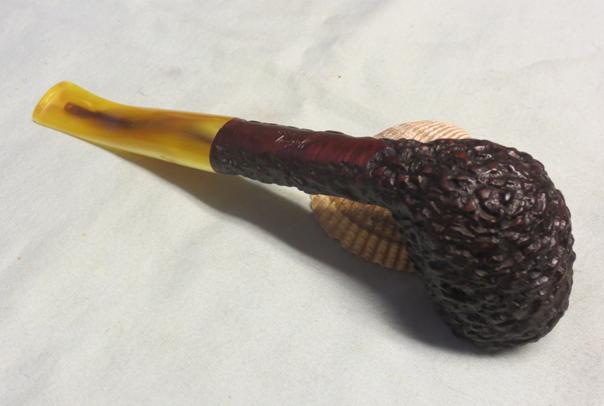
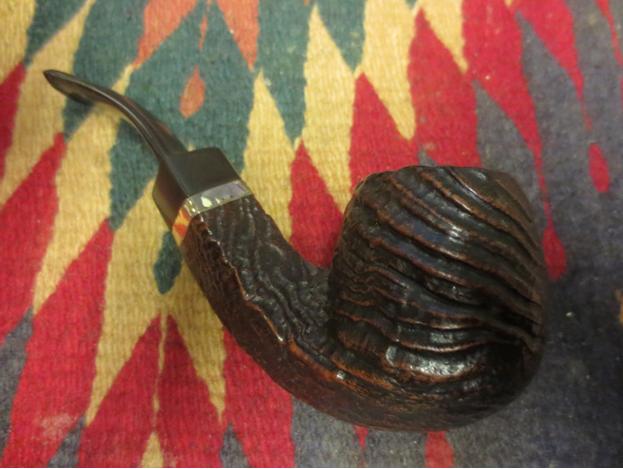
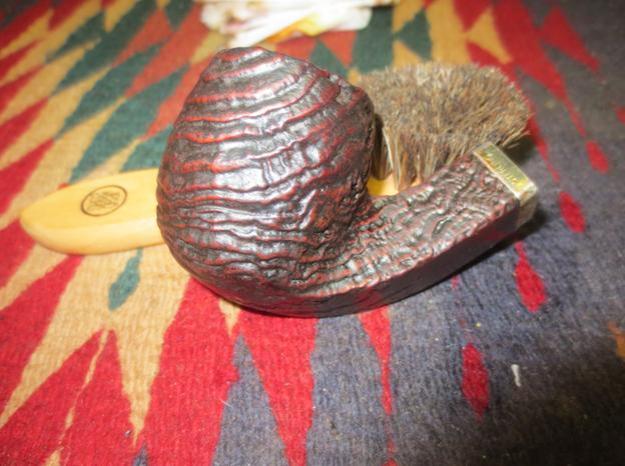
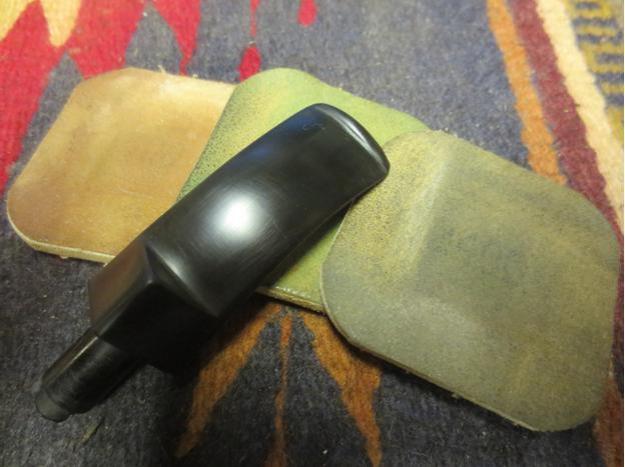
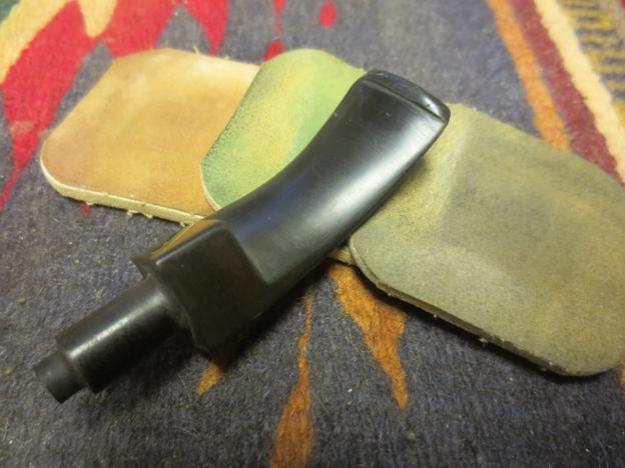
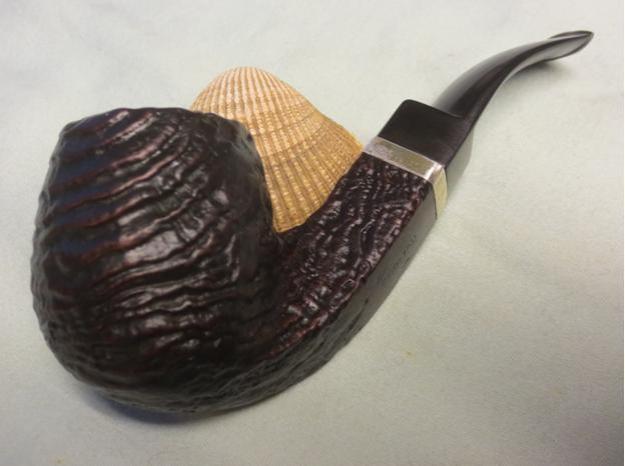
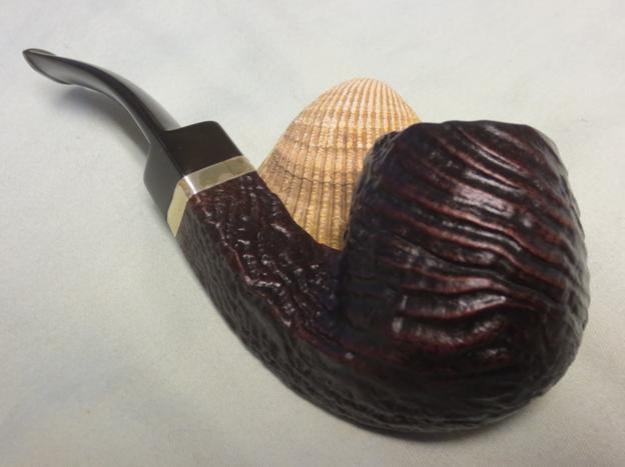
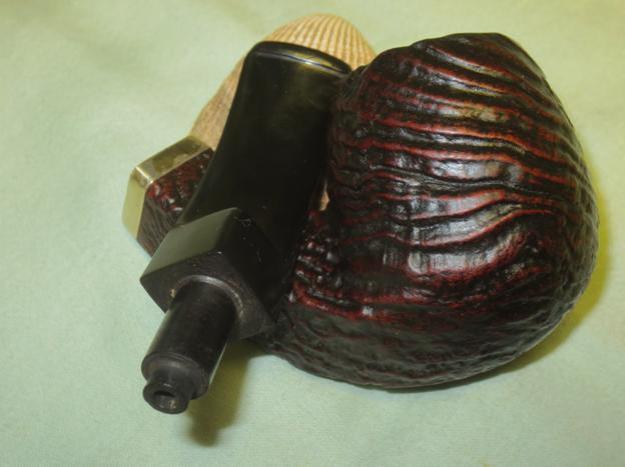
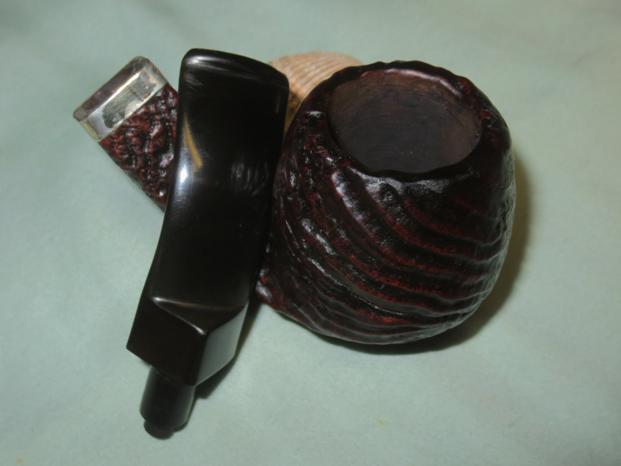
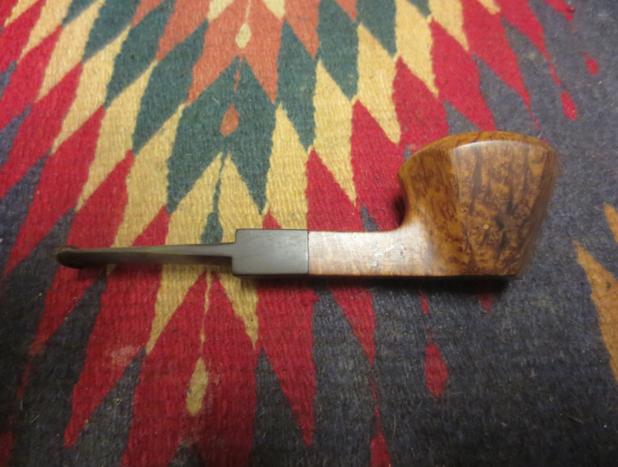
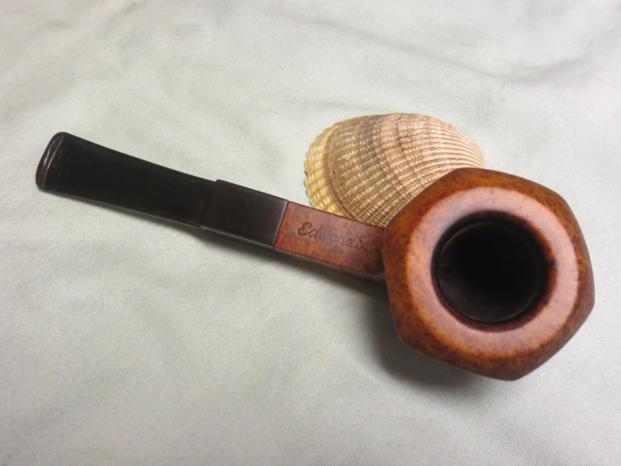
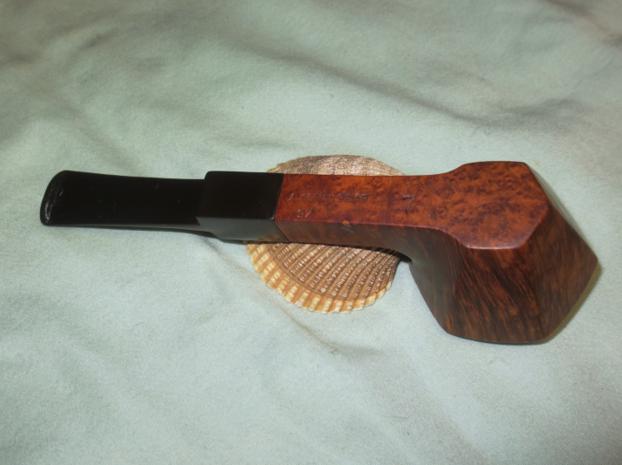
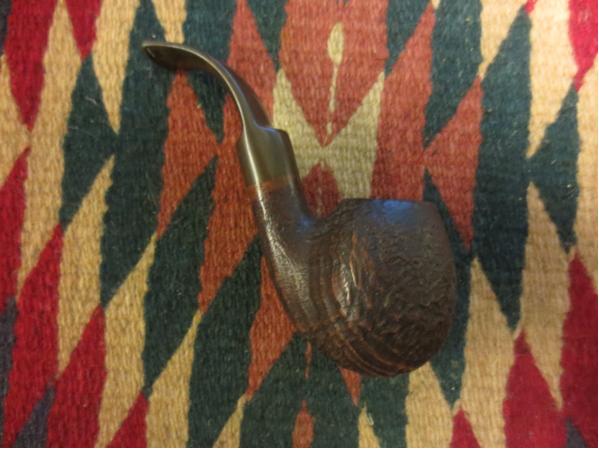
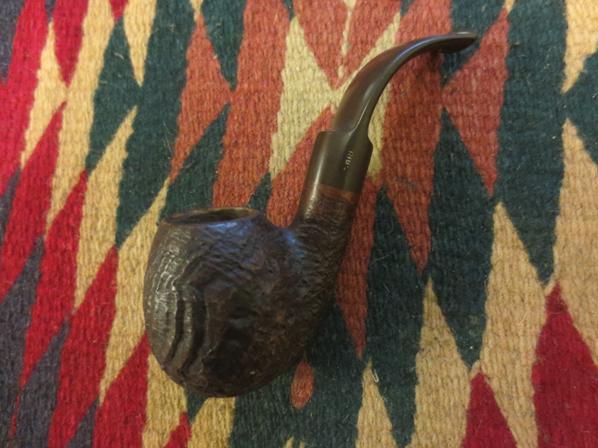
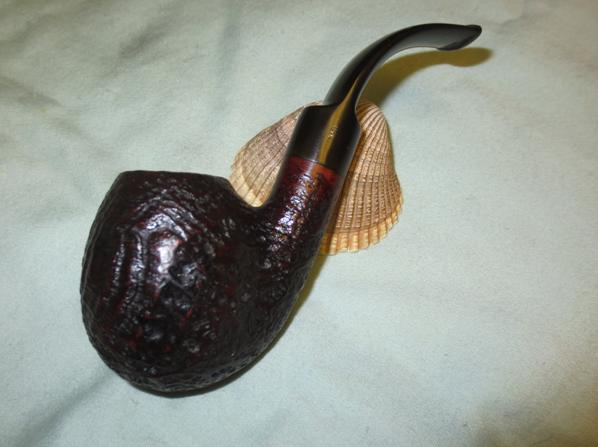
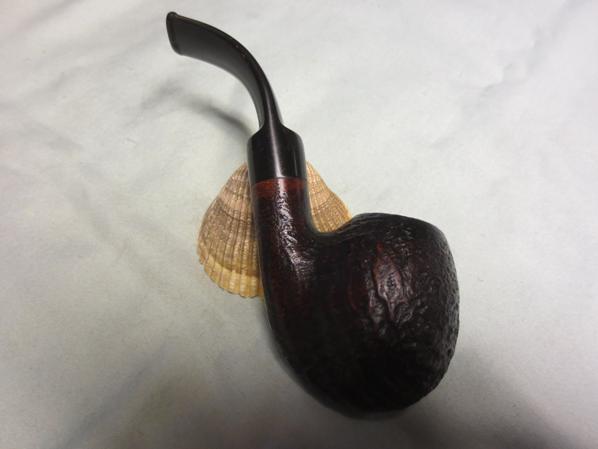
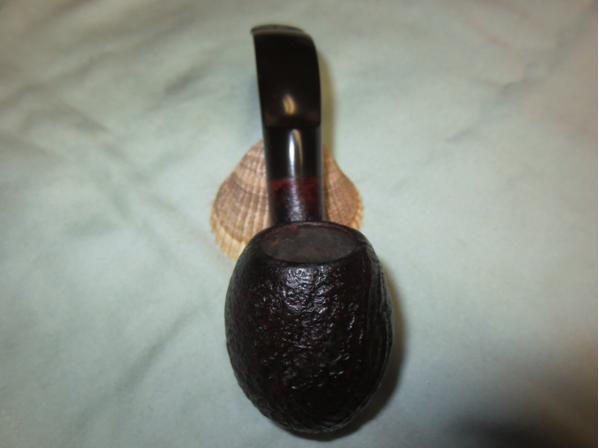
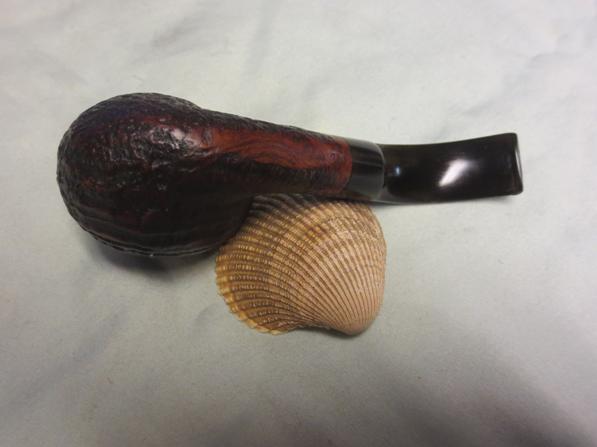
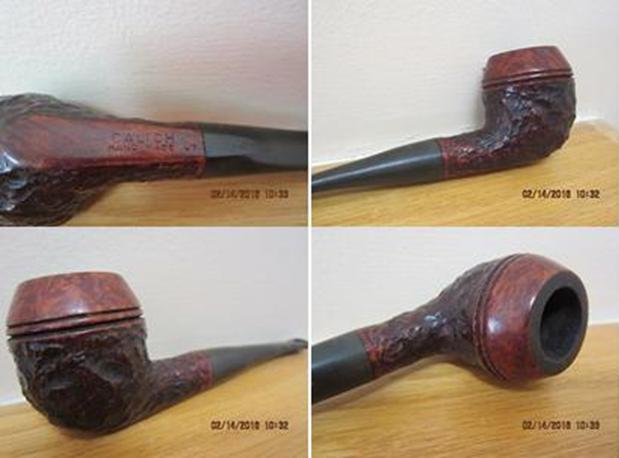
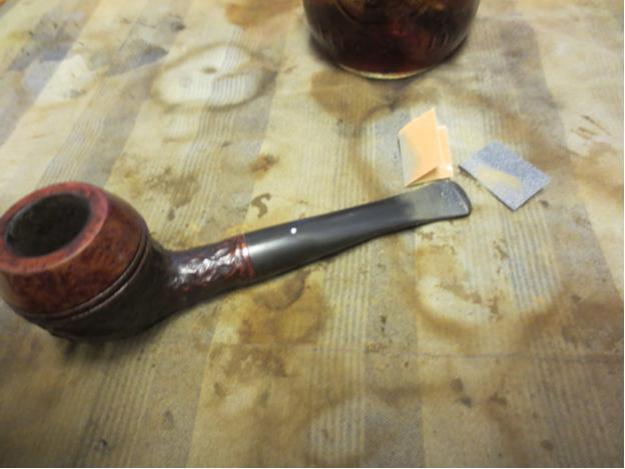
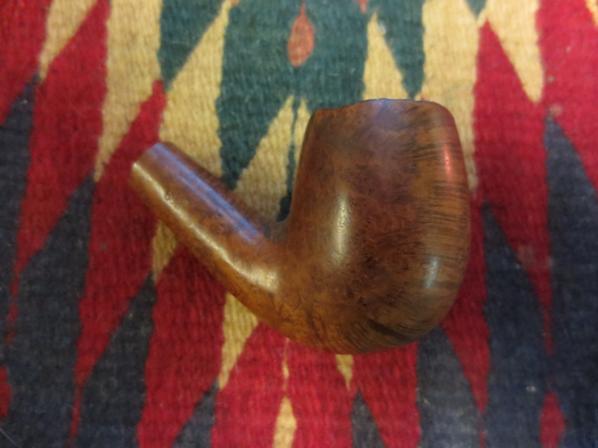
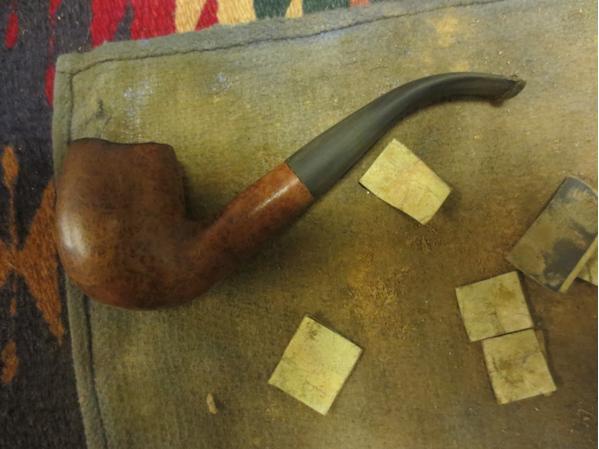
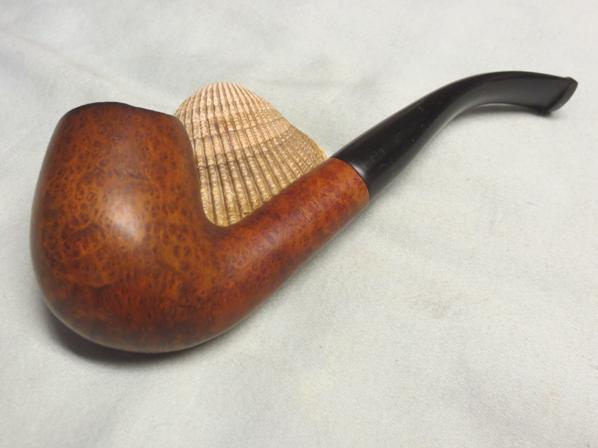
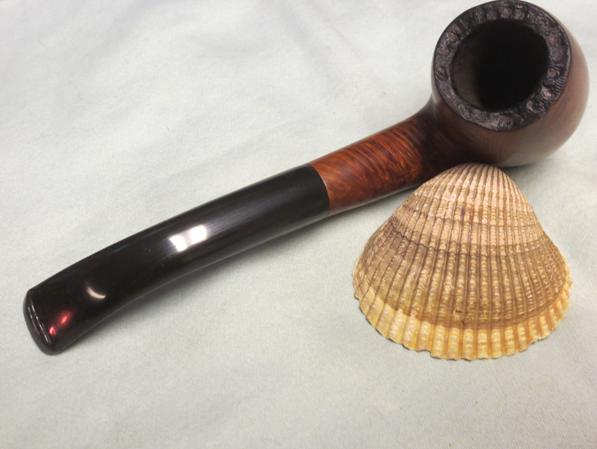
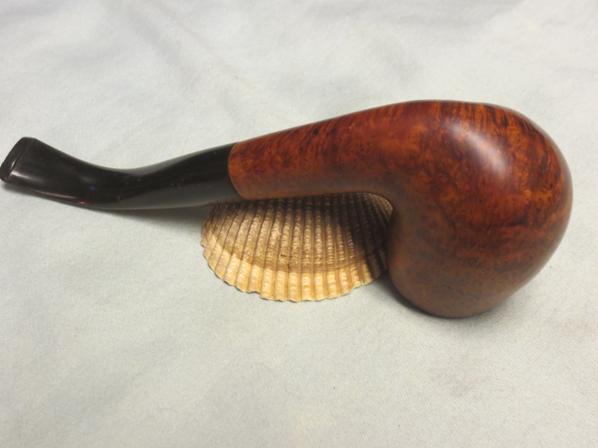
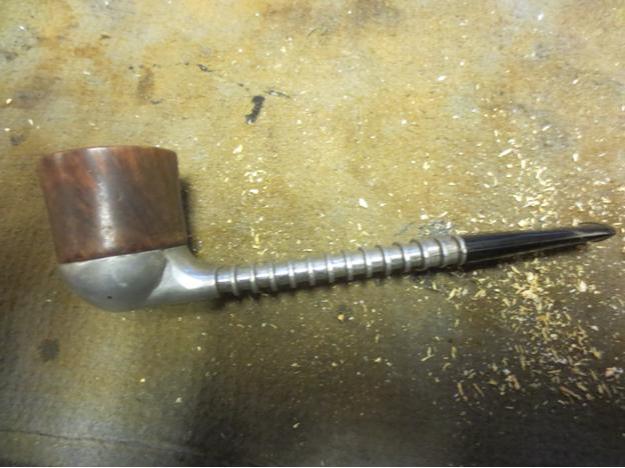
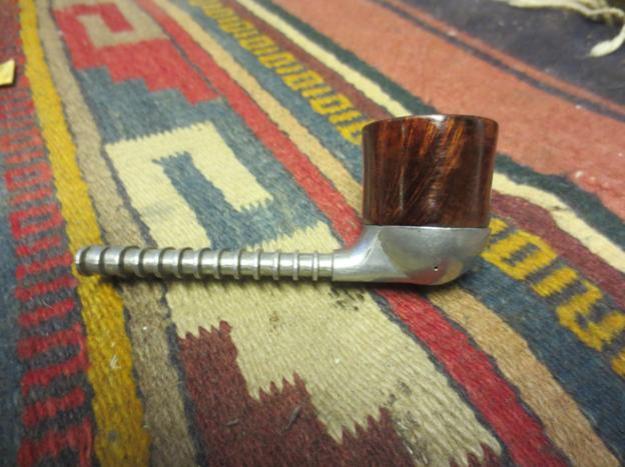
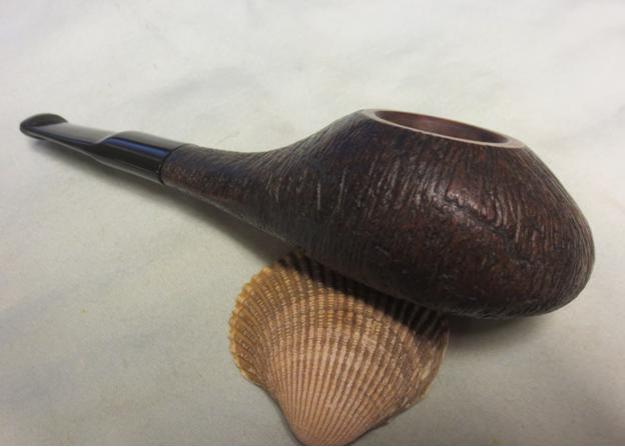
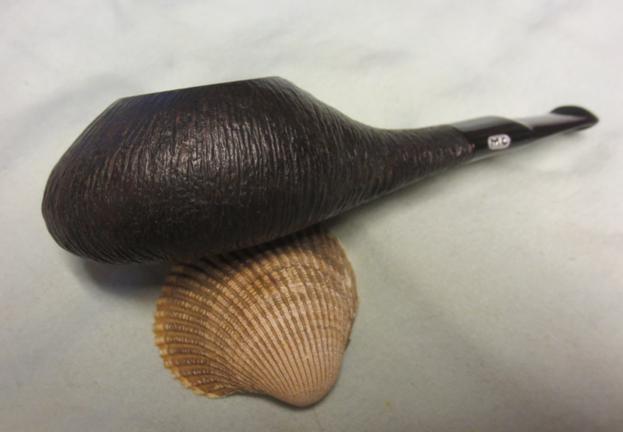
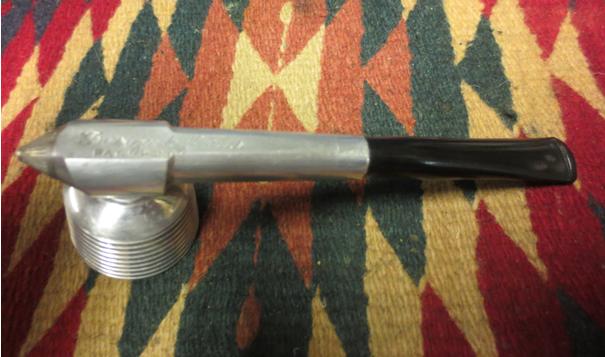
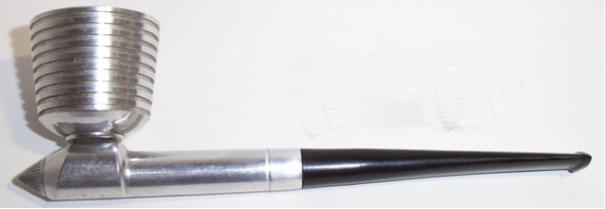
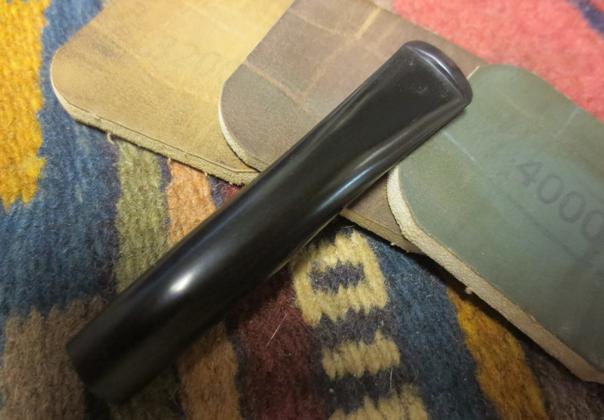
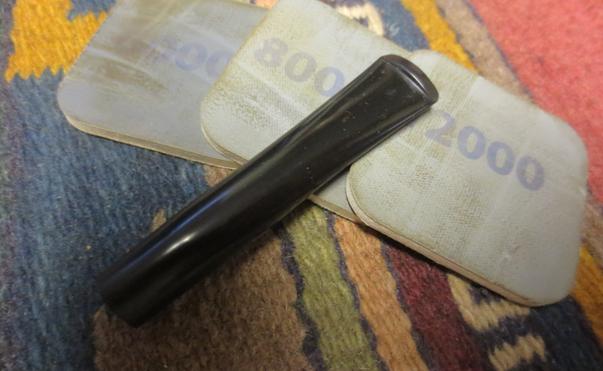
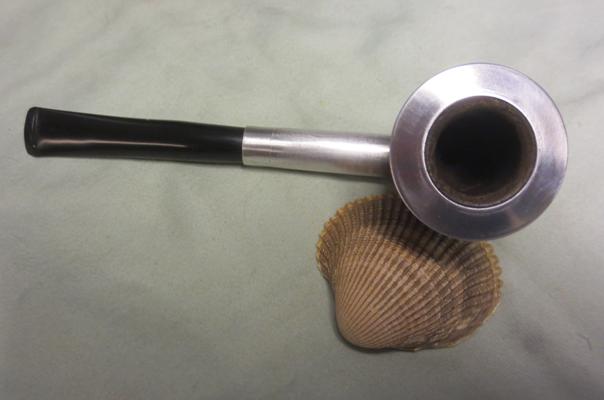
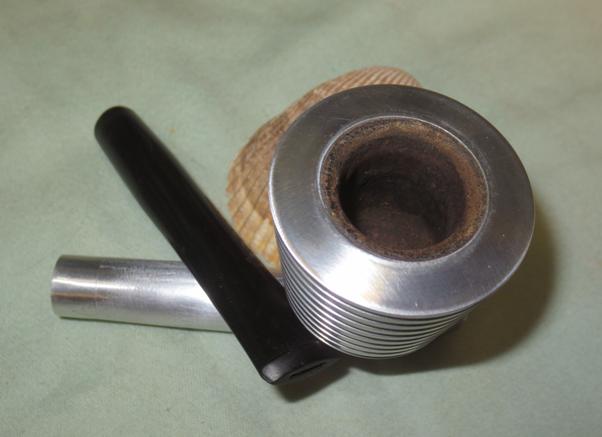
I gave the bowl several coats of Conservator’s Wax and buffed it with a shoe brush and a microfibre cloth to give it a shine. I gave the stem several more coats of carnauba wax. I lightly buffed the pipe with a clean buffing pad and then again with the microfibre cloth. The finished pipe is shown in the photos below. What started out as an oddball pipe to me somehow in the process of restoration took on a beauty of its own. I like the smooth rim and the contrast it gives with the wire finish on the bowl and shank. Together they work for me. I know in the box of pipes I have sitting to refurbish that Jeff has sent me some others that cause a raised eyebrow but I have to say he has an eye for seeing beauty where I would walk by it and leave the pipe to molder away.
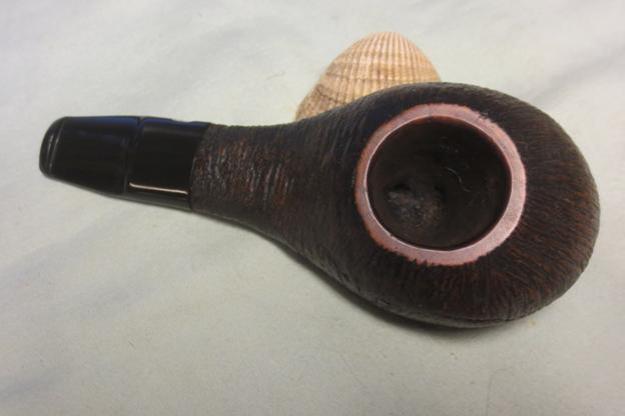
Master14 Master15 Master16 Master17 Master18 Master19 Master20 Master21

Breathing New Life into a Design by Curtis Metal Pipe


Blog by Steve Laug

This smoking metal pipe is really Art Deco looking. It has a metal finned bowl with a pressure fit top cap holding in a briar bowl. There is a threaded connector between the bowl and the metal shank base. The connector threads into both the bowl and the shank. The shank has a pointed end cap that is frozen in place. The bowl was caked and worn. The stem had bite marks on both the top and the bottom sides near the button. The stem is a military mount that sits in a stepped down interior of the metal shank. There is a tube at the end of the airway in the shank that seems to have holes in it as the air flows through when blown into the end. The exterior of the pipe is oxidized and dull. The bottom of the shank is stamped Design by Curtis over Pat. Pend. It is a brand about which I know nothing.Curtis1 Curtis2 Curtis3 Curtis4I took some close-up photos of the bowl and the stamping on the shank to give a better idea of what the pipe looked like when I started.Curtis5 Curtis6I took the pipe apart to have a look at the pieces individually and see what I could learn from the way it fit together. I was unable to take the end cap off the shank and I was not willing to damage the cone shaped piece to work it free.Curtis7 Curtis8 Curtis9I wanted to learn more about the pipe so I did a bit of digging on the Smoking Metal Pipes Site and found this information and pictures (http://www.smokingmetal.co.uk/pipe.php?page=52 ). The site showed a picture of another version of the pipe. It may be newer than the one that I had in hand. It was marked as a Curtis Custom-Built Pipe Model 100. It was manufactured by Curtis Industries of 1120 East 222nd Street, Cleveland, Ohio. They were first seen around 1946. The pipe that was pictured was different in several ways. The stem was different in that it had a filter insert and a threaded tenon. My version did not have a filter system and also did not have the stinger end cap that held the filter in place. The pictures that follow come from that site. I have cropped and rearranged them to better suit the order of my blog. The brochure also comes from that site.Curtis9a Curtis9bFrom the Smoking Metal Site it appears that the patent was applied for 25 December 1945. It had the patent number #D143257 and the inventor is named as Howard Abrams from University Heights, Ohio. The site also showed a cut away photo of the bowl and cup.Curtis10It also includes a copy of the brochure that was included with the pipe. The cover of the brochure reads The Curtis Custom-Built Pipe and three descriptors – Streamlined, Precision Built, Guaranteed. The back reads The Curtis Pipe carries a six month guarantee. The rest reads No. 52927 over Curtis Industries 1120 East 222nd St. Cleveland, Ohio over Model 100 Patent Pending.Curtis11Inside it reads A few simple ways to care for your Curtis Pipe. I typed out the contents below the picture.Curtis121. Break your pipe in slowly. For the first few smokes fill the pipe loosely and only half way then smoke the new Curtis Pipe slowly and all the way down. Don’t puff hard or fast or you may burn your tongue and may burn out the bowl as well.

2. Don’t collect too much cake, a cracked, burnt and useless bowl will result.

3. Never knock your pipe on hard surfaces since you may split the shank or break the bit. Don’t bite on the bit too hard.

4. Keep your pipe clean. Use your cleaner every few smokes and occasionally use a good fluid to cleanse it.

5. By removing the knurled cap on the pipe stem, a standard pipe filter can be used.

The Curtis Pipe, new in design is produced with a high degree of precision, designed for a cool, clean smoke. Enjoy the full smoking benefits of the pipe by following above suggestions.

Armed with this information I took the pipe apart and began to clean and restore it. I reamed the bowl with the Savinelli Pipe Knife to remove the cake and clean up the briar rim of the bowl insert.Curtis13 Curtis14I unscrewed the bowl and the threaded connector from the bottom of the bowl. I cleaned out the connector and the airway in the bowl with alcohol, pipe cleaners and cotton swabs.Curtis15 Curtis16I scrubbed the rim and the interior of the bowl with cotton swabs and alcohol to clean out the remaining debris in the bowl and on the rim.Curtis17I scrubbed out the mortise and airway with alcohol, pipe cleaners and cotton swabs to remove the tars and residue.Curtis18 Curtis19I heated the end cap and still could not remove it so I cleaned out the inside of the airway from the top of the shank with pipe cleaners, cotton swabs and alcohol. It was a bit of a pain to work around the tube in the shank below but I was able to remove the grime and build up in that place.Curtis20I set the shank aside and worked on the stem. I cleaned it out with alcohol. There were two deep tooth marks on top and the underside of the stem. Curtis21 Curtis22I wiped the stem surface down and filled in the dents with black super glue. I sprayed the glue with the accelerator and then sanded the repairs down with 220 grit sandpaper and a medium grit sanding stick until they matched the surface of the stem.Curtis23 Curtis24 Curtis25I wet sanded the stem with 1500-2400 grit micromesh sanding pads and rubbed it down with Obsidian Oil. I dry sanded with 3200-4000 grit pads and gave it another coat of oil. I finished sanding it with 6000-12000 grit pads and gave it a final coat of oil. I let the oil dry.Curtis26 Curtis27 Curtis28I dry sanded the aluminum barrel shank and the rim of the bowl with 4000-12000 grit micromesh pads. I buffed the stem with Blue Diamond and then buffed it with a clean flannel buffing pad. The finished pipe is shown in the photos below. It is a beautiful example of the Curtis pipe and the finished pipe is a great addition to my metal collection. Thanks for looking.Curtis29 Curtis30 Curtis31 Curtis32 Curtis33 Curtis34 Curtis35 Curtis36

ADDENDUM

I received and email from one of the blog’s readers, Doug with some photos of the break down of the bowl system. It looks like the rim top is indeed pressure fit. Thanks for providing these photos Doug. They certainly add to our understanding of the way the bowl was designed. thumbnail_20160709_144214-1_resized[1] thumbnail_20160709_144222-1_resized[1] thumbnail_20160709_144234-1_resized[1] thumbnail_20160709_144253-1_resized[1] thumbnail_20160709_144305-1_resized[1]


This one was just plain ugly it was such a mess


Blog by Steve Laug

When my brother sent me the link for this one and I scrolled through the pictures the seller included, I almost said to pass on it. It was such a mess that the ugliness made me not want to even deal with this one. But there was something challenging about the pipe and through the gunk it looked like it might have some interesting grain. I know in the early days of my estate buying on EBay I did not pay attention to the measurements on the pipe. I figured it would be a moderately sized Banker or Author with an oval shank. I also ignored the brand stamping on the pipe. It read La Strada Forte on the top of the shank which also should have been a bit of a giveaway. Even the photos below that the seller included of the pipe in a rest should have been a clue. But I missed the clue because I was blown away by the sheer disaster of the pipe. As you look at it below try to catalogue the issues that you see.La1 La2 La3 La4Let me tell you what, no matter how much I prepared myself by cataloging the issues I saw in the pictures they in no way captured the reality of the mess this pipe was in. It was actually quite unbelievable. First off, I should have read the measurements. This pipe was huge. The length was average really, at 5 ½ inches long. The width of the shank was a bit bigger at 1 1/8 inches wide. The diameter of the bowl exterior was 2 1/8 inches. The chamber appeared to be an inch in diameter but the cake in it reduced it to about ¾ inch. The cake was thick and it was hard. It overflowed onto the top of the bowl and part way down the sides. The inner edge of the rim looked like someone had hacked at it with a knife so underneath the thick cake I could see the chop marks of the knife in the edges of the bowl. The finish was more than shot – it was gone and in its place was thick oily grime ground into the briar. The stamping was black with the oils. It was thick enough that the grime was flaking off on the bottom of the bowl. The stamping was readable and said LA STRADA over FORTE on the top side. On the underside was the shape number 538 and next to the shank stem junction was stamped Italy. The stem was not only oxidized but really worn. The top edge of the button was almost flattened and there were tooth marks in the top of the stem. The underside was another story – there was a chunk of vulcanite missing and the button was gone. The airway was collapsed and the inside surface was gouged with file marks. This poor pipe was looking pretty desperate and I thought about cannibalizing it for briar and parts.La5Then I looked at the briar through the grime. The bottom of the bowl had some really nice grain – a few fills popping through – but still really nice. The sides of the bowl also had some promise under the grime. And, I liked the shape of the pipe even though it was a war club. Maybe…just maybe…La6I took a close-up photo of the top of the bowl and the cake inside. I still shake my head when I see the state of the bowl and the damage to the inner rim. It was really in bad shape. Just look at the hack job that had been done to that inner edge.La7I also took a couple of close-up photos of the stem to show the extent of damage that had been done to it as well. It was in very rough shape.La8I reamed the bowl with a PipNet reamer starting with the smallest cutting head to clean up the walls of the bowl slowly. I worked through all four reaming heads ending with the largest one. I used the Savinelli Pipe Knife to do some clean up to the edges and try to smooth out some of the rim damage. La9Between the largest PipNet cutting head and the pipe knife I was able to do a lot of redeeming work on the inner edge of the rim.La10I topped the bowl on the topping board to remove the damaged finish and to reduce the damage to the inner edge of the rim.La11I scrubbed the surface of the briar with acetone on cotton pads to remove the dirt and grime in the grain as well as the oils. It was amazing how much grit came off the bowl. La12 La13Once the surface was clean I worked on the inner rim. I used a folded piece of 220 grit sandpaper to bevel the edge inward and clean up the cuts and nicks in the edge. I did not take a picture at this point but you will see the cleaned up rim in the pictures that follow the work on the stem.

I set the bowl aside to work on the stem. To take care of the damaged stem I made a wedge out of cardboard and covered it with clear strapping tape so that the super glue mixture I was going to use would not stick to it. I wanted it thick enough to leave an airway/slot in the stem. I mixed up a paste of charcoal powder and black super glue. The glue has a slow drying time so I was able to mix a thick paste with the combination.La14 La15I used a dental pick and spatula to put the mixture in place on the top and the bottom of the stem and build up the area that would become the button on the top side and the repair and button on the underside. I also built up a slope on the stem underside to give me a bit more thickness over the airway. At this point I sprayed the repair with an accelerator to harden the surface of the glue. I set it aside to let the glue repair cure/harden.La16Once the repair had hardened I used the sanding drum on the Dremel to smooth out the repair. I would still need to sand it by hand but the Dremel took a lot of the heavy spots out of the mix and also allowed me to rough shape the button.La17The next photos show the repairs after a lot of filing and sanding. The shape is very clear and distinct. The repair is rock solid. You can also see the inner rim bevel on the rim of the bowl in the first photo.La18The slot was really tight in the button. It was partially closed off and need to be reopened. I used different shaped needle files to open the slot and to reshape it. I also reshaped the button with the needle files. The three photos below show the development of the slot and the button.La19I reshaped the button edges with needle files and reshaped the taper of the stem from the saddle to the button. I sanded it with 220 grit sandpaper to blend it into the surface of the vulcanite stem. The photos show the progression in the shaping. There is still a lot of sanding to do to finish the shaping and polishing of the stem but I set it aside and worked on the bowl for a while.La20 La21 La22I cleaned out the inside of the mortise and the airway in the shank with pipe cleaners, cotton swabs and alcohol. It took a lot of scrubbing to clean out the airway and mortise.La23I heated the briar with a blow dryer and then stained it with a dark brown aniline stain mixed 50% with isopropyl. I used a black Sharpie to darken the fills on the bowl and shank then applied the stain with a cotton swab and flamed it with a lighter to set it in the grain.La24I wiped the bowl down with alcohol cotton pads to blend the stain and to make it more transparent. The photos below show the bowl after the wipe down. The scrubbed bowl looks quite a bit lighter but once it is waxed it will darken again.La25 La26I wet sanded the stem with 1500-2400 micromesh sanding pads and rubbed the stem down with Obsidian Oil. I dry sanded it with 3200-4000 grit pads and gave it another coat of oil. I finished sanding it with 6000-12000 grit pads and gave it a final coat of oil and let it dry. (The photos below show both sides of the stem with each set of micromesh pads.)La27 La28 La29I buffed the pipe with Blue Diamond on the wheel and then gave it multiple coats of carnauba wax. I buffed it with a clean buffing pad to polish the wax. I buffed it by hand with a microfibre cloth to add depth to the shine. I am pleased with the overall look of the pipe and considering what it was like when I first looked at it the improvement is vast. The stem repair is quite extensive. It has cured and is hard now and I am curious as to how it will hold up over time. The pipe looks good and should have a long life ahead of it. Thanks for looking.La30 La31 La32 La33 La34 La35 La36 La37

Rough Texture of a Jobey Shellmoor combined with Yellow Lucite


Blog by Steve Laug

As I said before I never paid much attention to Jobey pipes. My brother has given me a new appreciation for them. The pipe he sent me that I chose to work on next is stamped Jobey Shellmoor on the underside of the shank. There is no shape number or other stamping on the pipe. There is a Jobey logo stamped on the yellow acrylic/Lucite stem. When I first saw the pipe I was pretty certain that the stem was a replacement. Now that I have it in hand I have to admit I was wrong it is the original. When I first picked it up I thought it would be a pretty straightforward repair. I could not have been more wrong but that would come out in the process of the restoration.Jobey1 Jobey2The rustication was very dirty on the sides of the bowl but it had that rough rustication that I have come to expect on Shellmoor pipes. The rim was in rough shape with lava in all of the grooves. That would have been easily remedied but there was also a burned area on the top of the rim at the front that had left a deep groove. The bowl was thickly caked (I removed much of it in Idaho when I was there). When I brought it to the work table and tried to finish reaming the bowl I was reminded of the rock hard cake. It took two different reamers to take out the cake. The stem had some tooth marks and the airway was black with tars. When I removed the stem the Jobey Link was stuck in the stem. Not a big deal but it would make getting the black out of the airway.Jobey3 Jobey4When I examined the rim more closely I saw that it was actually quite damaged. I took two close-up photos of it to show the thick lava and the burned area on the front of the bowl. It is a little hard to see in the second photo (forgive the slightly out of focus photo) but it extends down the front of the bowl about ¼ inch.Jobey5 Jobey6I worked on the Jobey Link and was able to dribble alcohol down the stem to soften the tars that held it in the stem. I wiggled it free. The photo below shows the pipe taken apart.Jobey7I started working on the bowl by reaming it completely. The cake was exceptionally. I hard I used the PipNet reamer with the first three cutting heads to take the cake back to bare briar. I used a Savinelli Pipe Knife to complete the job at the bottom of the bowl. When I had finished reaming the bowl I noticed that the airway into the bowl was absolutely invisible. I could not see it on the back wall of the bowl. I used the drill bit from the KleenReem pipe reamer to hand drill out the airway from the shank into the bowl. The tars in the shank were almost as hard as the cake in the bowl. It took a lot of elbow grease and pressing the bit into the airway. I was finally rewarded with it popping through into the bowl.Jobey8 Jobey9 Jobey10With the rough cleaning done on the bowl and shank I decided to work on the rim surface. I topped it with 220 grit sandpaper on the topping board. (If you look closely at the shank end in the photo it appears that there is a crack in the shank. It is merely a scratch in the top surface of the briar at that point.)Jobey11After topping it for a while I took a photo to show the extent of the damage to the rim. This photo clarifies what I saw in the original scan of the bowl.Jobey12I continued topping the bowl until I got to solid wood under the burned area. The rim surface was darkened but the briar was hard. I picked the burned area on the front of the bowl clean of soft burned wood with a dental pick.Jobey13I was not too worried about the rim darkening as I intended to rusticate it again to match the rough finish of the bowl. I filled in the burned area with clear super glue to build it up. I also intended to rusticate the burned area on the front of the bowl at the same time. The next series of photos show the process of rustication and the different burrs I used on the Dremel to get the pattern on the rim I wanted. I also worked on the front of the bowl to remove the damage of the burned area with the same burrs. I tried to match the pattern on the rest of the bowl. The success of that will be seen in later photos. Jobey14 Jobey15 Jobey16 Jobey17Once I had the work down with the Dremel and burrs I took it back to the worktable and used a brass bristle brush to knock of the sharp edges and the loose pieces of briar from the rim and the bowl front. The second and third photos show the bowl front and the work that I did to match the pattern in that area. Jobey18 Jobey19I scrubbed the briar with Murphy’s Oil Soap and a tooth brush to remove the grime so that I could restain the bowl. I rinsed it with warm running water to remove the soap from the grooves and crevices along with the loosened grime.Jobey20I used a black Sharpie to colour in the depths of the rustication on the rim and the repaired area at the front of the bowl. I wanted to approximate the contrast in the rest of the finish.Jobey21I restained the bowl with a dark brown aniline stain and flamed it to set it in the grain. I repeated the process until the coverage was what I wanted.Jobey22I wiped down the bowl with alcohol on cotton pads to remove some of the dark brown stain from the high spots on the bowl and add some contrast and depth to the finish.Jobey23 Jobey24I took another close-up photo of the rustication on the rim to show what it looked like with the stain coat.Jobey25I cleaned out the mortise threads and the airway with pipe cleaners, cotton swabs and alcohol.Jobey26Once it was clean I greased the threads on the Jobey Link with Vaseline and turned it in place in the shank with a small screwdriver.Jobey27The stem turned out to be another issue that I had not taken into real consideration. The dark stain of tars and oils in the airway turned out to be a real pain. I used cotton swabs and alcohol to clean out the portion of the stem that slid over the Link. That was the easy part. I then scrubbed out the airway with alcohol and pipe cleaners. I used a dental pick to clean out the slot in the button. The tars in the airway were stubborn. I mixed a batch of Oxyclean, inserted pipe cleaners in the airway to wick the mixture up the stem and then dropped the pipe in the mixture to soak overnight. I took it out in the morning and scrubbed it with several different brushes and pipe cleaners. I removed about 50% of the black in the stem but not all of it. I put it back in the Oxy soak for another night.Jobey28I buffed the bowl by hand with a shoe brush to see what the finish would look like. The following photos give a good picture of where things stand with the bowl at this point.Jobey29 Jobey30I took the stem out of the Oxy bath and cleaned out a bit more of the darkened area. I used pipe cleaners dipped in Bar Keepers Friend scouring powder and was able to get out more of the tars and darkening. I stopped for a little while and worked on the externals. There were several deep tooth marks in the stem near the button on the top and bottom sides. I sanded and cleaned the stem then filled the tooth marks with clear super glue. When the glue set I sanded the repairs smooth to match the surface of the stem.Jobey31 Jobey32I went back to scrubbing the airway. I remembered reading about someone using soft scrub successfully so I ran upstairs and asked my wife if she had any I could use. I push it through the airway in the stem with thick, fluffy pipe cleaners and rotated them to scrub. It took out some more of the darkening but still not enough to my liking. Finally I set up a retort on the stem alone. I boiled alcohol through the stem to remove more. Finally I used an ear syringe to shoot boiling water through the stem. I gave up after using all of those methods. I think I had removed as much of the darkening as I was going to get out of the stem. The stem definitely looks better than it did when I started. I wet sanded the stem with 1500-2400 grit micromesh sanding pads and wiped it down. I dry sanded with 3200-12000 grit pads and wiped it down. Jobey33 Jobey34 Jobey35I lightly buffed the bowl and stem with Blue Diamond on the wheel and then gave the stem several coats of carnauba. I polished the stem and bowl with a clean buffing pad and then by hand with a microfibre cloth. The finished pipe is shown below. The first photos show the areas of the rim and the front of the bowl that I cleaned up and re-rusticated with the burrs and Dremel. Jobey36 JObey37 Jobey38The remaining photos are of the pipe in its entirety. I have never seen a Jobey Shellmoor pipe with a Lucite stem but this golden stem goes really well with the dark brown stain. The finished pipe is 6 ½ inches long and looks rather dapper and stylish. It has come a long way from when I started on it. I picked this pipe to work on while I was restoring the La Strata because I thought it would be easy. I could not have been more wrong. But I am glad it is finished. Thanks for looking.Jobey39 Jobey40 Jobey41 Jobey42 Jobey43 Jobey44 Jobey45

Gotta Love this Sandblast on the Ehrlich Diamond Shank Bent Billiard


Blog by Steve Laug

When I saw this Ehrlich Sandblast Diamond Shank bent Billiard I was immediately drawn to the cragginess of the blast on the bowl. The deep lines and grooves of the blast that go all around the bowl are really nicely done. The ridges and grooves flow with the cut of the pipe and give it a distinctive flare that I was taken by. The finish was worn but in decent shape in the EBay photos but it still looked good. When I picked up the pipe from my brother on an April visit I could not wait to work on it. I took these photos to show the state of the pipe when I received it. The finish was worn and dirty – lots of grime in the deep grooves. The rim was pretty clean. I field reamed it when I was at my brothers and took back the cake that was there to bare briar. The shank had a smooth portion on the left underside where the EHRLICH stamp resides. I have no idea how to tell the age of their pipes as all the ones I have had over the years have had the same stamping. Some added a second line – Supreme, etc. – but this one only had Ehrlich. The band on the shank end is stamped Sterling. It was obviously put on the shank after the blast and was a shop cosmetic addition. It does not hide any cracks in the shank. The stem was oxidized and had some serious bite marks on the underside that would need to be addressed. I liked the shortness of the stem as it gave the pipe a compact look that worked with this pipe.Erl1 Erl2 Erl3 Erl4I took some close-up photos of the rim and the stem to show their condition. The rim had no buildup or tars on it. The thin edges were lightly grooved – almost looked like the pipe maker had rusticated the rim to match the look of the bowl rather than risk sandblasting it. The stem was another story. The top side had lots of small dents that looked like they had been buffed out and the result was a wavy top surface. The underside had deep bite marks and tooth indentations that amazingly did not break through the surface and leave holes. I think that the thickness of the stem prevented the bite marks from going through to the airway. The sharp edge of the button and the top and bottom surfaces were pretty much obliterated by the “chomper” who had previously owned this pipe. Erl5 Erl6 Erl7I cleaned out the deep tooth marks on the stem with alcohol and cotton swabs. I removed the debris in the pits and grooves with a dental pick. I dried off the stem and then filled the bite marks with black super glue. I built up the button and filled in the sharp groove. I would need to recut that once the glue had cured. I laid the stem aside to let the glue harden.Erl8I scrubbed the grooves and ridges of the bowl and shank with a tooth brush and Murphy’s Oil Soap. I rinsed the bowl under running water and dried it off. The scrubbing had done a great job removing all of the grit and grime in the ridges and grooves of the sandblast.Erl9 Erl10 Erl11 Erl12 Erl13While the stem repair cured I worked on the bowl. I wiped it down to remove any remaining dust and then put a large cork in the bowl so that I could hold on to it while staining the bowl. I used a dark brown aniline stain that had been thinned to 50% with isopropyl alcohol to restain the bowl. I flamed it to set the stain in the blast.Erl14 Erl15 Erl16 Erl17I wiped down the bowl with alcohol on cotton pads to make it a bit more transparent and allow the dark black in the grooves to show through.Erl18 Erl19I hand buffed the bowl with a shoe brush to get a bit of a shine on the briar.Erl20With the externals pretty well cleaned up and restored I addressed the internals of the bowl and shank. I cleaned out the mortise and shank with pipe cleaners, cotton swabs and alcohol. To my surprise there was not much tobacco debris or oil in the shank. What came out with the cleaning was the original brown stain. Evidently the bowl had been dipped in stain. The amount of stain that came out on the pipe cleaners and cotton swabs was amazing. You can see it in the photo below. I scrubbed it until it was clean and I could see bare briar on the sides of the mortise.Erl21I sprayed the stem repair with some accelerator to harden the super glue more quickly. I decided to use it this time. I usually let the repair cure over night, but this time I was a bit impatient. When the glue was hard to the touch I used a series of flat needle files to begin flattening the repair and shaping the sharp edge of the button on both sides of the stem.Erl22 Erl23 Erl24 Erl25With the button edges cleaned up and the slot opened slightly with the files I sanded the stem surface with 180 and 220 grit sandpaper to smooth out the repairs and minimize the file marks in the vulcanite.Erl26 Erl27I wet sanded both sides of the stem with 1500-2400 grit micromesh sanding pads to blend in the repair on the underside. I rubbed it down with a coat of Obsidian Oil. Erl28 Erl29I dry sanded both sides with 3200-4000 grit sanding pads to further blend in the patch on the underside. By this point it was beginning to disappear into the shine of the stem. I gave it another coat of oil. Erl30 Erl31I finished sanding it with 6000-12000 grit pads and gave it a final coat of oil and let it sit until the oil was dry.Erl32 Erl33I buffed the stem with Blue Diamond and lightly touched the blast with the polish. Too heavy a touch and the grooves fill in with the polishing compound so it is critical to have a very light touch. I gave the stem multiple coats of carnauba wax and buffed it with a clean buffing pad. I sparingly applied some Conservator’s Wax to the bowl and hand buffed it with a shoe brush and with a clean buffing pad. I finished by hand buffing the pipe with a microfibre cloth to give depth to the shine. The finished pipe is shown in the photos below. I really like the way the stain turned out and I am pleased with the repair to the stem. Thanks for looking.Erl34 Erl35 Erl36 Erl37 Erl38 Erl39 Erl40

Cleaning up an Edwards Unique – Hexagonal Straight Dublin


Blog by Steve Laug

Over the years I have cleaned up, traded or kept many Edwards smoking pipes. The natural finish briar has always made these pipes attractive to me. The briar is always light weight and beautiful. Many have had a few fills in them but that in no way detracted from the beauty of the pipe. This one from my brother Jeff is different than any of the others that I have had pass through my hands. It is a square shank hexagonal Straight Dublin that has a shape that I have never seen before. The grain on it is quite stunning even though there are some small fills on the shank and on the right side of the bowl. The finish was in decent shape under the light grime on the surface. The beveled inner edge of the rim had some lava build-up and it spilled over to the flat portion of the rim toward the back side. I had field reamed the cake while I was staying with my brother in Idaho. The bowl was pretty clean and the inner edge of the rim was round. There were no dings or dents in the rim or the curved cap on the bowl. The stem was oxidized and had some fairly deep tooth marks at the button.Ed1Ed2Ed3

The shank was stamped on top with the word Edward’s and on the underside Algerian Briar with the shape number 87 underneath. There was a large #7 near the flat bowl bottom.Ed4Ed5

I took a close-up photo of the bowl and the rim to highlight the cleanness of the bowl and the lava on the bevel.Ed6

I sanded the rim with a worn piece of 220 grit sandpaper to remove the lava on the rim surface and also to rework the inner bevel.Ed7

I scrubbed the bowl with Murphy’s Oil Soap and cotton pads to remove the grime. I scrubbed around the rim surface as well. I sanded the rim with 1500-2400 grit micromesh sanding pads and then scrubbed it again. I was amazed at how well the rim came out.Ed10Ed9Ed10Ed11

With the externals clean I scrubbed the airway and the mortise and the stem with cotton swabs, pipe cleaners and alcohol. I used a dental pick to clear out the slot in the button.Ed12Ed13

I sanded the stem with 220 grit sandpaper to remove the oxidation. I worked on the area around the tooth marks next to the button on both sides. I scrubbed out the tooth marks with alcohol and once they were clean prepared them for the patch. I patched the tooth marks with black super glue and set the stem aside so the glue would cure.Ed14Ed15

While the glue dried I decided to work on masking the fills on the shank and the bowl of the pipe. I used a Black Sharpie and lightly drew lines across the fills on the right side of the bowl and the middle of the left side of the shank, working to blend them into the surrounding grain.Ed16Ed17

Once the patches on the stem had cured I sanded the stem with 220 grit sandpaper to blend the patch into the stem material. I sanded it with 280-600 grit sandpaper to smooth out the scratches and used a medium grit sanding stick to sand in the angles of the saddle. The oxidation on this stem was stubborn. I scrubbed it with Meguiar’s Scratch X2.0 and then spent a significant amount of time wet sanding it with 1500-1800 micromesh pads. Finally I got through the oxidation. It was not deep in the stem it was just stubbornly hard so breaking the surface took a lot of sanding. Ed18Ed19Ed20Ed21Ed22

With the oxidation finally conquered and the patches blended in I sanded the stem with 1500-2400 grit micromesh some more – this time working to polish the stem. I gave the stem a coat of Obsidian Oil and sanded it with 3200-4000 grit pads. I gave it another coat of oil and sanded it with 6000-12000 grit pads. I gave it a final coat of oil and let it dry.Ed23Ed24Ed25

I buffed the pipe with Blue Diamond on the wheel and gave the bowl and stem multiple coats of carnauba wax. I buffed it with a clean buffing pad and hand buffed it with a microfibre cloth. The finished pipe is shown in the photos below. I was able to clean up the rim so it looks almost new – little darkening on the inside bevel toward the back. The fill on the side of the bowl disappeared and the one on the shank is less glaring. The stem repairs look good and I was finally able to remove the oxidation. All in all it is a beautiful pipe with lovely grain and it should provide many more years of service. Ed26Ed27Ed28Ed29Ed30Ed31Ed32

Breathing Some Life into a Bari Squash Full Bent 7811


Blog by Steve Laug

Bari1When my brother sent me a picture of this Bari Squash there was something about it that reminded me of the teardrop shape that Julius Vesz, a Canadian pipemaker, carved. It was more egg-shaped however but the similarity caught my attention. He was able to pick it up on Ebay for a decent price and it only remained for me to get it in hand and work on it. Once I got the pipe to the work table I could see that it really was in decent shape. The pipe fit nicely in the hand and is 4 3/4 inches long, the bowl is 1.875 inches tall, inside diameter of bowl is 3/4 inches. The stamping on the smooth portion on the bottom is unevenly stamped and reads: Bari over Squash. Next to that is reads Made in Denmark with the shape number 7811 at the end. Bari2 Bari3I know next to nothing about the Bari brand so I looked it up on Pipedia. Here is the link: https://pipedia.org/wiki/Bari. I summarized the material that I found there as it gives a clear picture of the brand. I found several pipes in my latest hunt by Viggo Nielsen so this was very interesting information.

Pipedia states that Bari Piber was founded by Viggo Nielsen in Kolding, Denmark around the turn of 1950/51. His sons Kai and Jørgen both grew into their father’s business from a very young age and worked there till 1975. Both have become successful pipe makers. Bari successfully adapted the new Danish design that had been started mainly by Stanwell for its own models. Bari was sold in 1978 to Van Eicken Tobaccos in Hamburg, Germany though the pipes were still made in Denmark. From 1978 to 1993 Åge Bogelund and Helmer Thomsen headed Bari’s pipe production. Helmer Thomson bought the company in 1993 re-naming it to “Bari Piber Helmer Thomsen”. The workshop moved to more convenient buildings in Vejen. Bogelund, who created very respectable freehands of his own during the time at Bari got lost somehow after 1993. Bari’s basic conception fundamentally stayed the same for decades: series pipes pre-worked by machines and carefully finished by hand – thus no spectacular highgrades but solid, reliable every day’s companions were what they turned out. The most famous series are the smooth “Classic Diamond” and the blasted “Wiking”.

The finish on the Bari Squash that I was working on was dirty and tired looking but the blast was really nice. The rim was clean and both the inner and outer edges were in great shape. I had reamed the pipe back to bare briar while I was traveling. It looked to be in excellent shape. There was some wear on the front outer edge of the rim that would need a touch up of stain. The stem was oxidized and scratched. The top of the button had a tooth mark that indented it mid button along the sharp edge but not on the outer curve. The stamping on the left side of the stem read BARI and was light and uneven. After reading about the factory I wonder what era of the Bari life span this pipe came from. Bari4 Bari5Once I got home to the workshop I cleaned up the “field” reaming with a Savinelli Pipe Knife to smooth out the walls of the bowl.Bari6I cleaned out the shank and airway in the bowl and the stem with alcohol, pipe cleaners and cotton swabs. The darkening on the cotton was a combination of tobacco juices and brown stain. It looked as if the inside of the shank had some stain.Bari7 Bari8I scrubbed the exterior of the bowl with Murphy’s Oil Soap and then rinsed it off and dried it. I gave it several coats of Conservator’s Wax and hand buffed it with a shoe brush.Bari9I gave the bowl a light buff on the wheel with a clean buffing pad to raise the shine.Bari10 Bari11 Bari12 Bari13 Bari14With the bowl finished it was time to work on the stem. There was a bite mark on the top of the button that needed to be addressed. I used some black super glue to fill in the divot on the top and smooth out the damage.Bari15Once the glue dried I sanded and shaped the button with needle files and sandpaper. The photos below show the shape developing from the repair to the finished look. Much polishing still needed to happen but it was shaped and ready.Bari16 Bari17 Bari18I wet sanded the stem with 1500-2400 grit micromesh sanding pads. I gave it coat of Obsidian Oil and then dry sanded the stem with 3200-4000 grit pads. I gave it another coat of oil and then buffed it with Blue Diamond on the wheel. I took it back to the table and sanded it with 6000-12000 grit pads and gave it a final coat of Obsidian Oil. I set it aside to dry.Bari19 Bari20 Bari21I buffed the pipe stem with Blue Diamond and then with multiple coats of carnauba wax. I buffed the pipe with a clean buffing pad to raise the shine. I hand buffed it with a microfibre cloth and took the final photos below. I love the shape of this little pipe and the feel of it in hand. It came out beautifully in my opinion. Thanks for looking.Bari22 Bari23 Bari24 Bari25 Bari26 Bari27 Bari28 Bari29 Bari30

Restoring a Lovely Rhodesian by John Calich


Blog by Steve Laug

I have had a thing for Calich pipes since John made a new stem for a bowl I bought on Ebay for one of his pipes. It was a labour of love and one which led to several phone conversations and correspondence with John. He was a great guy and a definite loss to the Canadian pipe smoking community. Whenever I come across one of his pipes in need of work I try to purchase it and restore it. The pipe I am writing about at this time is a Calich Hand Made Rhodesian that is stamped that way on the underside of the shank. It also has a 04 stamping. The photos below were shown by the eBay seller. The bowl appears to be in great shape. The stem is slightly oxidized and the seller noted that there was a hole in the top side of the stem at the button. I knew what I was getting into when I purchased this pipe – or so I thought.Calich1I have written several blogs about Calich pipes that help give an idea of the age of the pipe. While I waited for the pipe to arrive I reread those pieces to refresh my memory on the stamping. I have included the links to the blogs below.

https://rebornpipes.com/2015/03/03/one-of-my-john-calich-pipes-a-calich-ee-billiard/

I summarize the dating information from those blogs now: From my research and conversations I learned that John’s pipes were graded 3E – 8E. The retail prices for them ranged from $145.00 to $500.00. Each pipe was stamped “CALICH” and given an E grade. His earlier pipes were graded from 3-14 and had a single, tiny silver dot applied to the top of the stem. More information can be found at the Pipedia website by clicking on this link. http://pipedia.org/wiki/Calich This information told me as expected that the pipe I had was an earlier one.

I vaguely remembered that I had found further information but could not remember it so I read the next blog I wrote. https://rebornpipes.com/2014/03/21/reflecting-on-my-collection-of-john-calich-pipes/ There the information honed in on the date more closely. I quote from that blog now: I did find out some further information on the dating of Calich pipes as the information on Pipedia was not complete. What I found was very helpful. His early pipes were graded with numbers from 3 – 14. By the late 1980’s Calich introduced 15, 16, and even one 17. In the mid-90’s the grade system changed employing a number of E’s. The more EE’s the higher the grade. From that information I knew that the pipe I had was not only an earlier one but came from early in the 1980s.

When the pipe arrived I took some photos of it to give a clear picture of what I was going to have to deal with in the restoration of this pipe. The stem was more oxidized than the seller’s photos showed and the finish also showed more debris in the rustication and the double rings around the bowl cap than had appeared in the photos. The rim top looked about the same – there was a thin build up of lava on the flat surface but the inner and outer edges were undamaged.Calich2 Calich3The bowl had a light cake in it and would be easy to deal with. There was no damage to the inner bowl. As I looked over the surface of the bowl it was clear that under the grime the pipe was in pretty decent shape. The big issue was the hole in the top side of the stem at the button.Calich4 Calich5 Calich6I took a photo of the bite through to show the extent of the damage. The edges of the bite through were also pushed down into the airway on the stem constricting the airway so that a pipe cleaner would not pass through. The topside of the button was also thinned down considerably and would need to be built up. Calich7 Calich8I used needle files and a dental pick to open up the airway and clean up the crushed edges of the bite through. It enlarged the hole but the airway was wide open when I finished. I also roughed up the edges of the cleaned up hole with the needle files to give a rough surface for the repair to bond to.Calich9 Calich10 Calich11With the stem hole cleaned up I was ready to begin the repair. I cut a wedge of cardboard and covered it with clear tape to make a surface that the glue would not stick to. I inserted it into the airway under the hole and wedged it in place. I mixed a batch of activated charcoal powder and black super glue to make a patching mortar and using a dental spatula applied the material to the hole and the top of the button to build it up. I sprayed it with some accelerator to harden the surface so I could continue to work on the pipe and removed the cardboard wedge.Calich12 Calich13I reamed the bowl with the Savinelli Pipe Knife to clean out the thin cake. You can see from the photo that there was not much of a build up so it was quick job.Calich14I set the stem aside and used a dental pick to clean out the rings around the bowl cap. I scrubbed the rustication with some Murphy’s Oil Soap to clean up the dust in the grooves and crevices of the finish.Calich15I scrubbed the top of the rim with saliva and cotton pads and was able to remove the lava on the surface without harming the finish on the bowl top.Calich16 Calich17I cleaned out the inside of the mortise and shank with cotton swabs, pipe cleaners and alcohol.Calich18By that time I was also able to clean out the inside of the stem with pipe cleaners and alcohol. The pipe cleaners went through with little issue and the stem was clean.Calich19The next morning after the glue had cured overnight I worked on the stem. I needed to reshape the slot to facilitate easy cleaning so I used needle files to clean up the entrance of the airway.Calich20I sanded the stem repair and the surface of the button top with a sanding board to begin the process of reshaping the surfaces of both.Calich21I cleaned up the edge of the button and shaped the surface of the button with needle files until the edge was sharp the surface matched that of the underside of the button.Calich22With all of the hard shaping done it was time to begin the tedious process of sanding the repairs. I started with 220 grit sandpaper to smooth out the surface and the transition to the rest of the stem.Calich23There were still some small holes around some spots on the fill. I used a clear super glue to fill these in and smoothed out the patch with a spatula.Calich24 Calich25When the repair had dried I sanded it with some finer grit sand papers until the surface was smooth.Calich26 Calich27 Calich28I moved on to sand the stem with micromesh sanding pads – wet sanding it with 1500-2400 grit pads and then giving it a coat of Obsidian Oil. I dry sanded with 3200-4000 grit pads and gave it another coat of oil. I finished by sanding it with 6000-12000 grit pads and giving it a final coat of oil. I let the oil dry before buffing the pipe.Calich29 Calich30 Calich31I buffed the pipe and stem with Blue Diamond on the wheel and then gave the stem several coats of Carnauba wax. I buffed the stem with a clean buffing pad. I gave the bowl several coats of Conservator’s Wax and hand buffed it with a shoe brush. The finished pipe is shown in the photos below. The stem repair is solid and though visible to me as I have looked at it so long, it is not obvious. The pipe is useable and looks as close to what it must have looked like when John shipped it out from his shop in the 80s. Thanks for looking.Calich32 Calich33 Calich34 Calich35 Calich36 Calich37 Calilch36

Restemming a GBD International London Made – 508 Bent Billiard


Blog by Steve Laug

Quite a while ago now my brother Jeff picked up a handful of pipes from an antique shop in Montana. There were quite a few GBD pipes in the lot. One of them was this GBD International bent billiard. It came with a gnawed off stem that was irreparable. The bowl was caked and dirty and the rusticated/plateau top was filled with grime to the point that it was almost smooth. The bowl looked good under the grime and the finish looked salvageable. The pipe was stamped GBD in an oval over International over London Made on the left side of the shank. On the right side it was stamped with London England over the shape number 508. I failed to take photos of the bowl before I cleaned it up as I was on a roll with about four bowls going at the same time. Here is what it looked like after I had wiped it down with alcohol. I scrubbed the plateau top with a brass bristle brush and some Murphy’s Oil Soap. I rinsed it down with cool water and dried it off. It is in very good shape. I had reamed the bowl with a PipNet reamer and cleaned out the shank and the bowl. GBD1 GBD2 GBD3 GBD4I went through my stem can and had several potential stems there. I chose one that was slightly larger in diameter than the shank. I had to shorten the tenon as it was too long to sit correctly in the shank.GBD5 GBD6With the tenon shortened the stem fit nicely in the mortise. The diameter was close and I would adjust it to fit.GBD7The stem was a used one that I recycled and it had one deep bit mark on the top side near the button. I sanded it smooth and cleaned it before I filled it in with black super glue. Once the glue cured I sanded the repair with 220 grit sandpaper to smooth it out.GBD8 GBD9I used the Dremel and sanding drum to reduce the diameter of the stem. I sanded it with 220 grit sandpaper until the transition was smooth. I wiped down the bowl with acetone on cotton pads to clean off the remaining grime before restaining the rim with a Black Sharpie.GBD10 GBD11 GBD12 GBD13I heated the stem over a heat gun until it was pliable and bent it to the proper angle. I set the bend with cold water. I sanded the stem with 220 grit sandpaper to remove the scratches left behind by the Dremel and smooth out the flow of the stem.GBD14 GBD15I sanded the stem with micromesh sanding pads – wet sanding with 1500-2400 grit pads. I rubbed the stem down with Obsidian Oil and then dry sanded it with 3200-4000 grit pads. I gave it another coat of oil and then finished sanding it with 6000-12000 grit pads. I gave it a final coat of oil and let it dry.GBD16 GBD17 GBD18I buffed the bowl and stem with Blue Diamond on the buffing wheel and then gave the pipe multiple coats of carnauba wax. I buffed it with a clean buffing pad and then hand buffed it with a microfibre cloth. The finished pipe is shown in the photos below. The grain on this pipe is spectacular – great birdseye on the sides and cross grain on the front, back and bottom. The plateau or rustication on the rim that I stained black gives it a unique look. I think it is a beauty! Thanks for looking.GBD19 GBD20 GBD21 GBD22 GBD23 GBD24 GBD25 GBD26 GBD27

Bringing New Life to a Yello-Bole Metal


Blog by Steve Laug

My brother found this older Yello-Bole metal pipe. It is a lot like the older Grabow Vikings but the bottom of the bowl is different from the Grabow. Between the bowl and the metal base there is a flat perforated screen or disk that the tobacco sits on. It acts as the bottom of the bowl. The wooden bowl itself is a threaded tube that screws into the base. There are two pin holes on the sides of the base (one on each side about mid base below the bowl). These serve as openings to draw air into the bowl. This one was in decent shape and would take a little work to clean up. The photos below were provided by the eBay seller and show the state of the pipe. From the first two photos below you can see the wear on the stem and the white calcification that generally builds up under a rubber softee bit. The finish on the bowl is shot. There is nothing but bare briar showing. The outer edge of the rim looks good. YB1 YB2The next two photos give a top and underside view of the pipe. You can see the ring of cake in the bowl around the middle and lighter on the top and bottom edges. You can see the metal disk in the bottom of the bowl. I have purchased a few of these over the years and almost all of them were missing the metal disk that sat in the base between the bowl and base. The stem shows some tooth marks on the top and underside.YB3 YB4The final photo included by the seller showed the stamping on the underside of the base. It read Yello-Bole horizontally along the bottom of the shank. It also gave the patent number on the bottom of the base. It read PAT. over 2467002 over PAT. PEND. That was enough data to do a patent search on the US Patent Information site. http://www.uspto.gov/patents-application-process/search-patents. From there I copied the patent drawing and included it below.YB5The diagram and the accompanying documents show the conceptual and descriptive narrative of what the pipe was about and what its maker hoped to achieve with his design. The inventor was a Samuel Laurence Atkins of New York. He filed his patent application on July 14, 1945. The patent was granted April 12, 1949. The pipe that I have is stamped Patent Pending thus it is easy to extrapolate that it was made between the dates July 14, 1945 and April 11, 1949 which are the dates before the patent was granted. That makes this pipe between 67-71 years old. It is in pretty decent shape for a pipe of that age.YB6 YB7I took the following photos when the pipe arrived. The seller’s photos were pretty good at showing the issues with the pipe. All the things noted above were correct.YB8 YB9 YB10 YB11The pipe was quite easy to take apart. I unscrewed the bowl and tapped out the disk in the base. The stem came out of the shank with little effort. I took the photo below to show the parts. The second photo shows the cake in the bowl.YB12 YB13I started the clean up with reaming the bowl. I used the PipNet reamer and the largest cutting head to ream from the top of the bowl. I used the second head to ream the bowl from the bottom. I reamed it back to bare briar. There was still some of the signature Yello-Bole bowl coating showing near the top just below the rim.YB14 YB15I scrubbed the bowl base with a brass bristle brush to loosen up the dried tars and oils in the base. I used a dental pick to clean out the threads. I also scrubbed the disk with the brush. YB16 YB17I used pipe cleaners, cotton swabs and alcohol to clean the surface of the disk and the inside of the base and airway.YB18 YB19

I scrubbed the interior and exterior of the stem with alcohol and pipe cleaners to remove the build up on the outside and the oils on the inside.YB20With the cleanup finished I set the parts on the table and took a few photos of the cleaned up pipe. Now it was time to restore it.YB21 YB22I wiped down the bowl with cotton pads and acetone to remove the grime and the remaining finish on the bowl.YB23

I stained the bowl with a dark brown stain pen.YB24 YB25I buffed the bowl with red Tripoli to spread and polish the stain. I buffed it with Blue Diamond and rubbed the bowl down with a light coat of olive oil. At this point in the process the bowl and the metal base was complete. I took the following photos to show the state of the progress thus far.YB26 YB27 YB28 YB29 YB30I cleaned the stem and used a clear super glue to repair the deep tooth marks in the top and underside of the stem near the button.YB31 YB32I sanded the repairs with 220 grit sandpaper to blend it into the surface of the stem. YB33 YB34I worked on the stem with micromesh sanding pads. I wet sanded with 1500-2400 grit sanding pads and then rubbed the stem down with Obsidian Oil. I wet sanded with 3200-4000 grit pads and gave it another coat of oil. I finished by dry sanding with 6000-12000 grit pads. I gave it a final coat of oil and let it dry.YB35 YB36 YB37I buffed the bowl and stem with Blue Diamond on the wheel and then gave both multiple coats of carnauba wax. I buffed it with a clean buffing pad and then by hand with a microfiber cloth. The finished pipe is shown in the photos below. Thanks for looking.YB38 YB39 YB40 YB41 YB42 YB43