Blog by Steve Laug
I am back working on one of the pipes that came from the estate of an elderly gentleman here in Vancouver. I met with his daughter Farida a year ago and we looked at his pipes and talked about them then. Over the Christmas 2017 holiday she brought them by for me to work on, restore and then sell for her. There are 10 pipes in all – 7 Dunhills (one of them, a Shell Bulldog, has a burned out bowl), 2 Charatan Makes, and a Savinelli Autograph. I have restored all but three of them – a Dunhill Shell and the two Charatan’s Makes. His pipes are worn and dirty and for some folks they have a lot of damage and wear that reduce their value. To me each one tells a story. I only wish they could speak and talk about the travels they have had with Farida’s Dad.
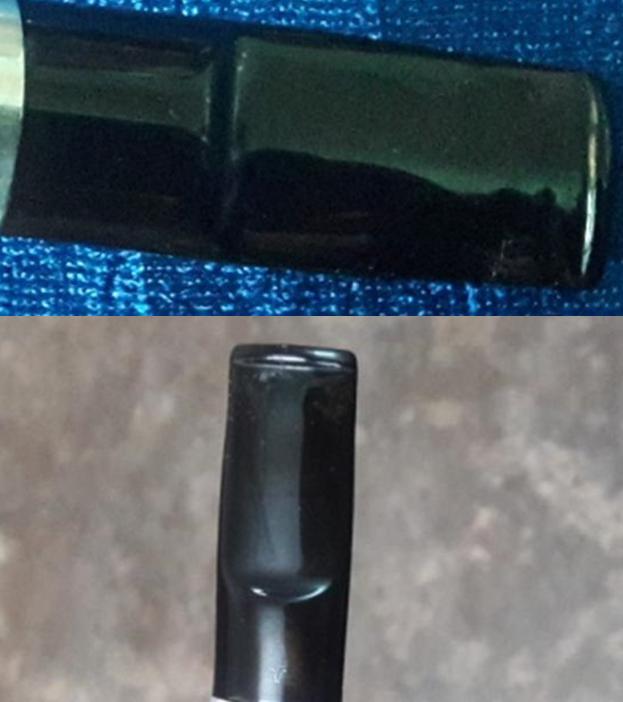
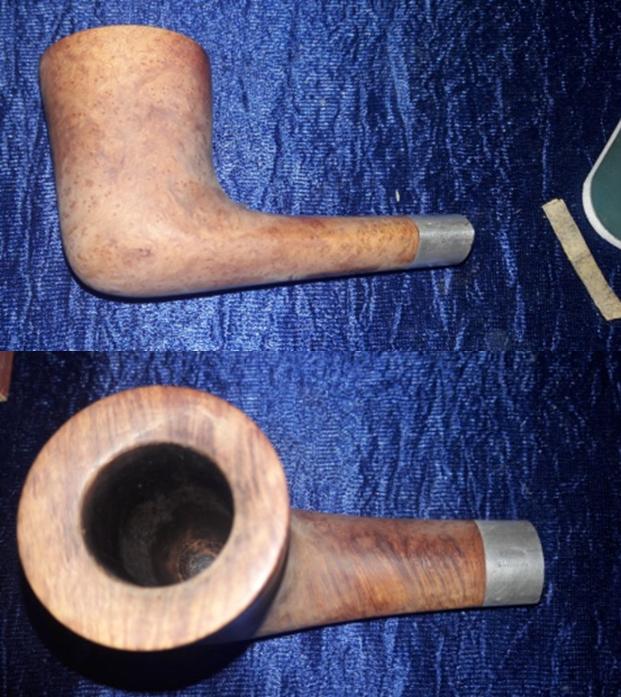
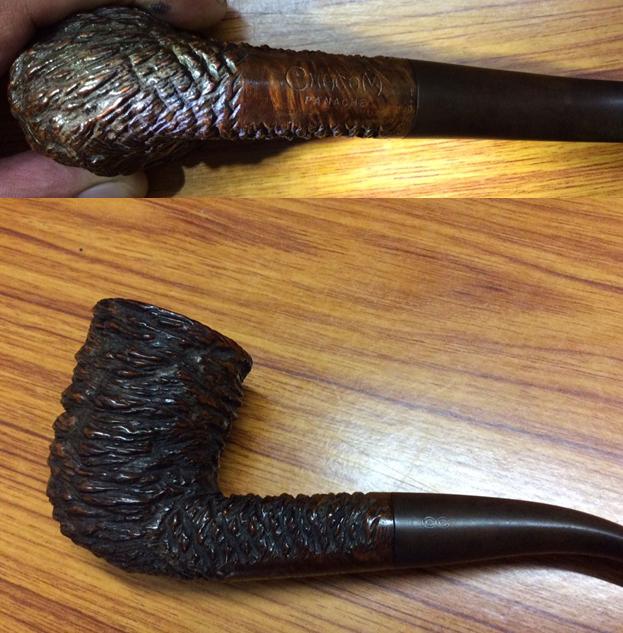
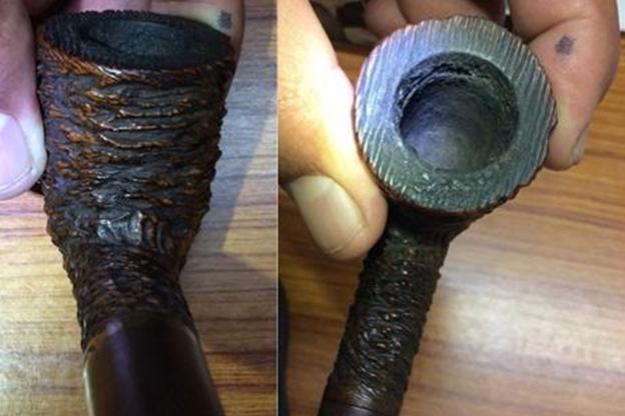
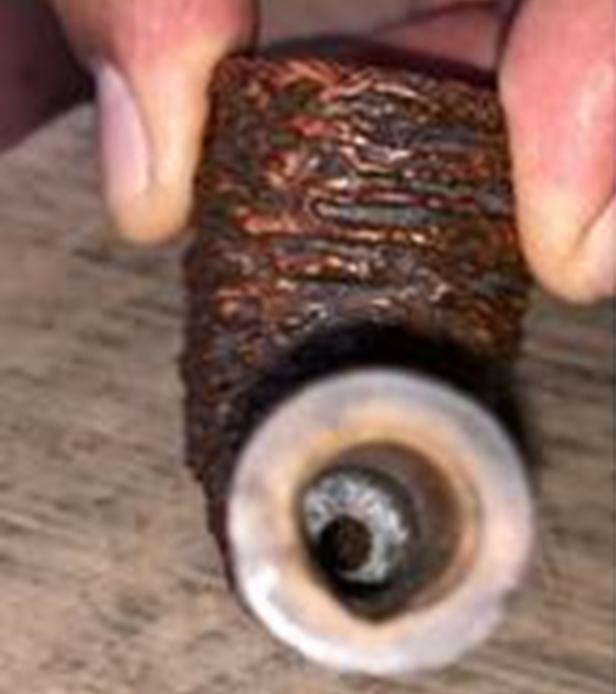
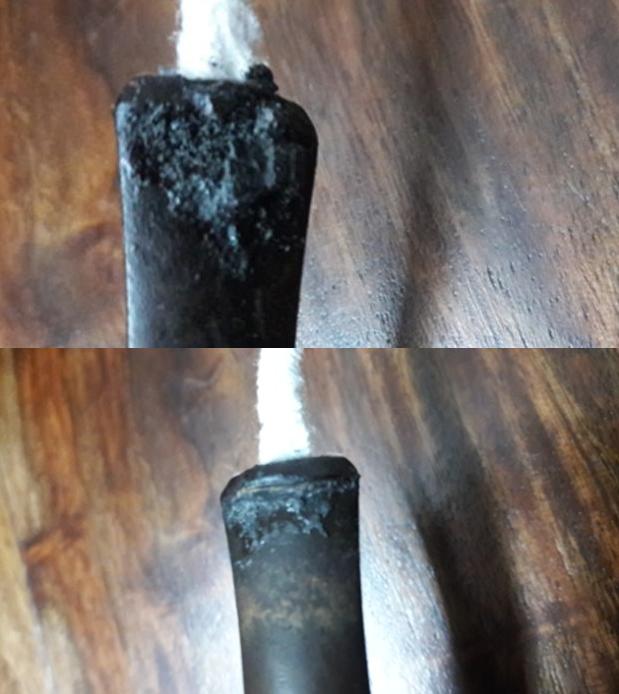
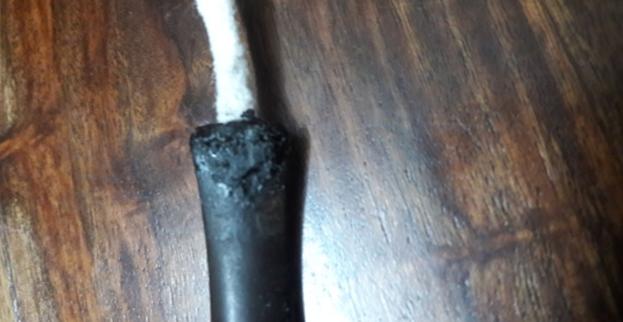
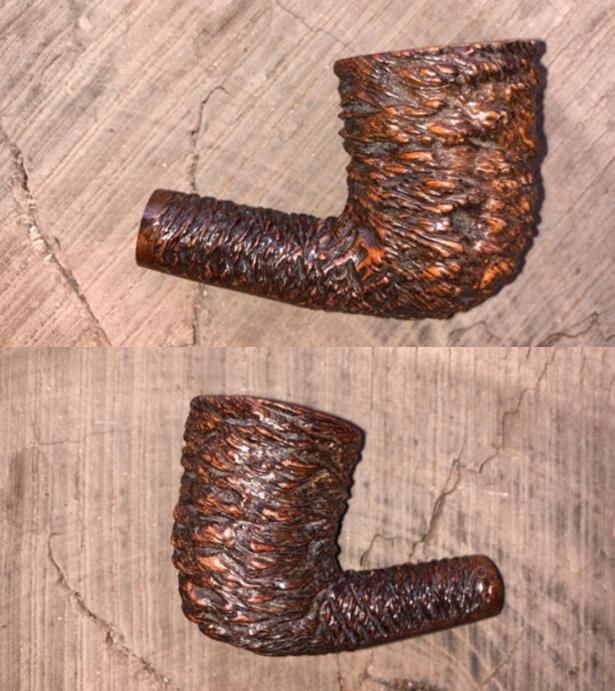
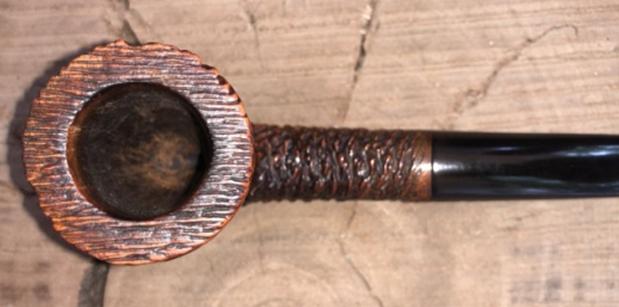
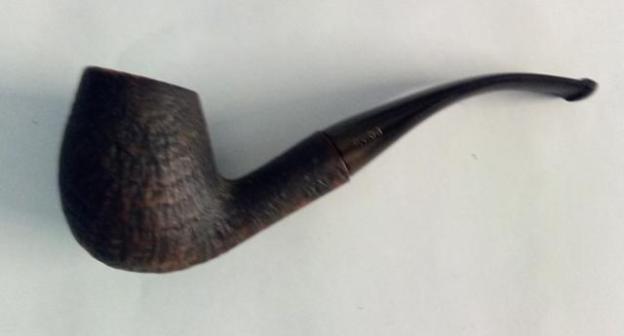
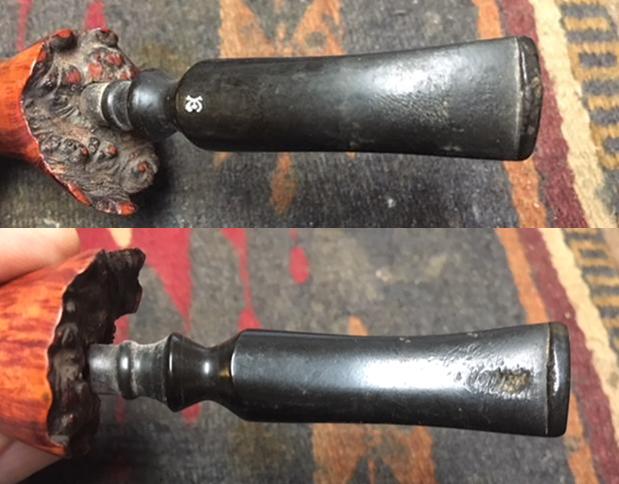
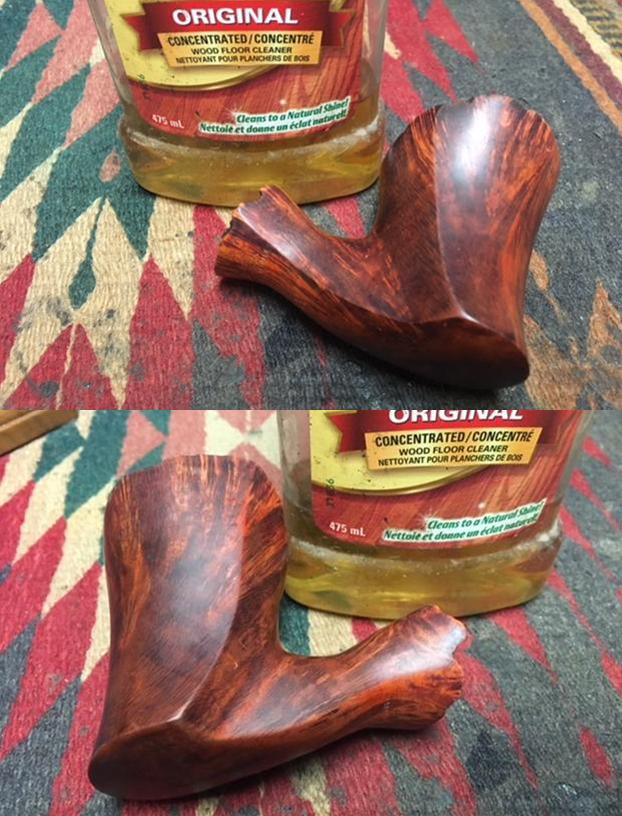
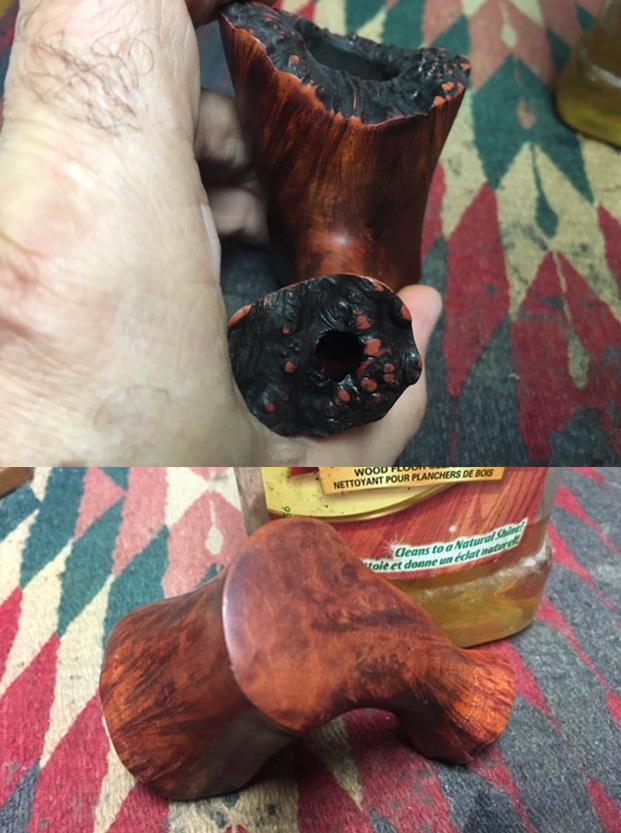
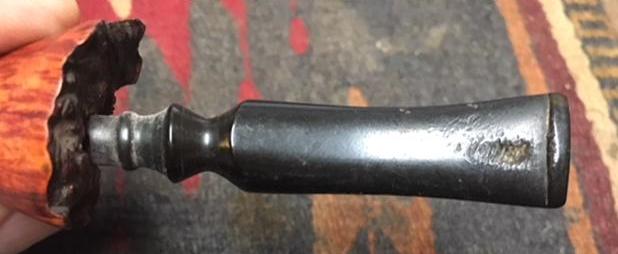
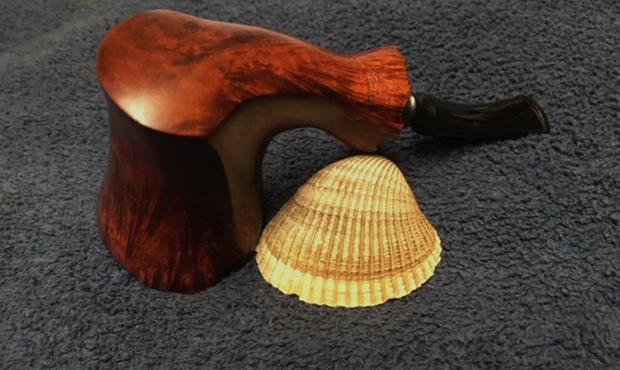
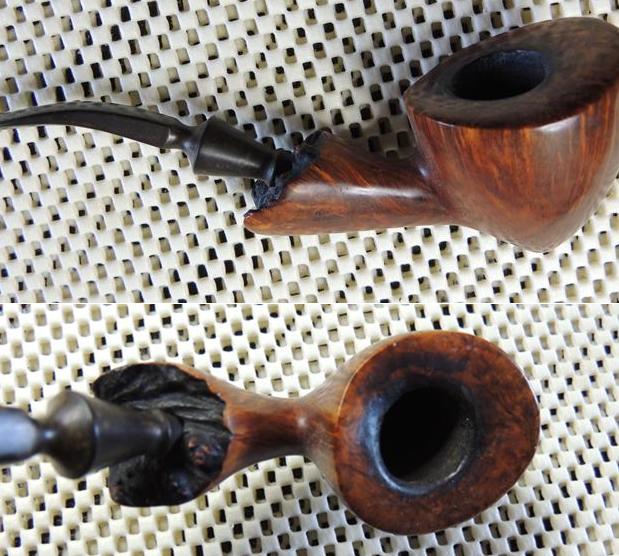
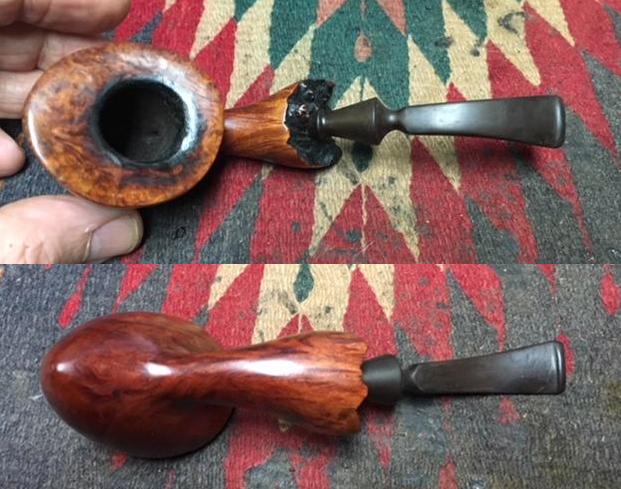
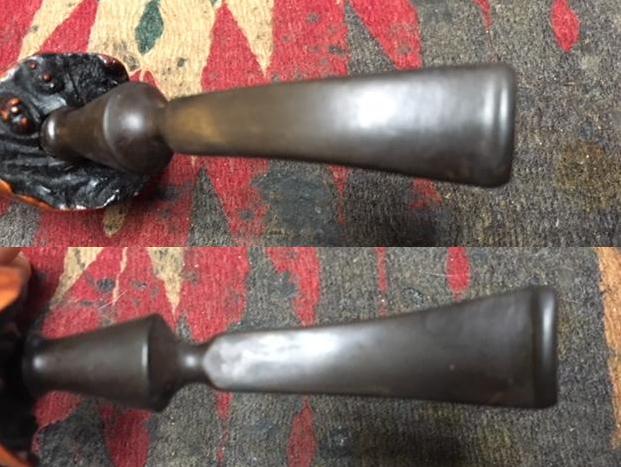
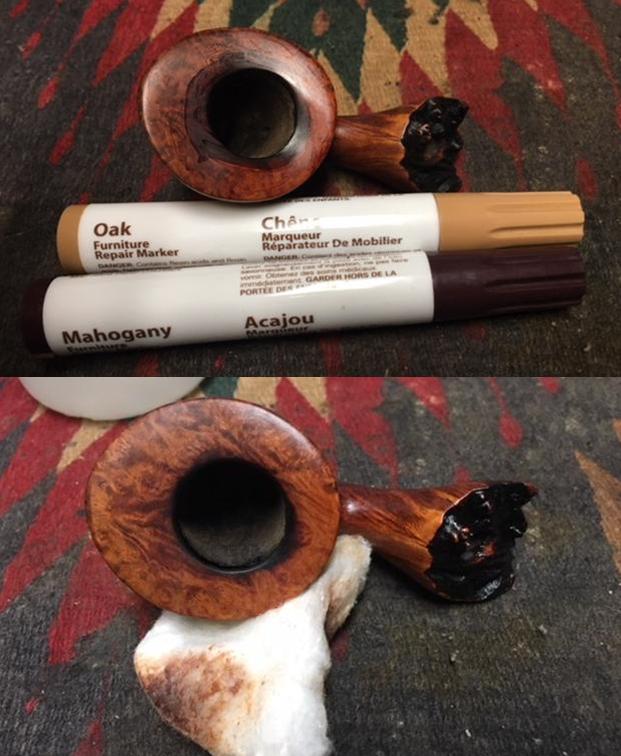
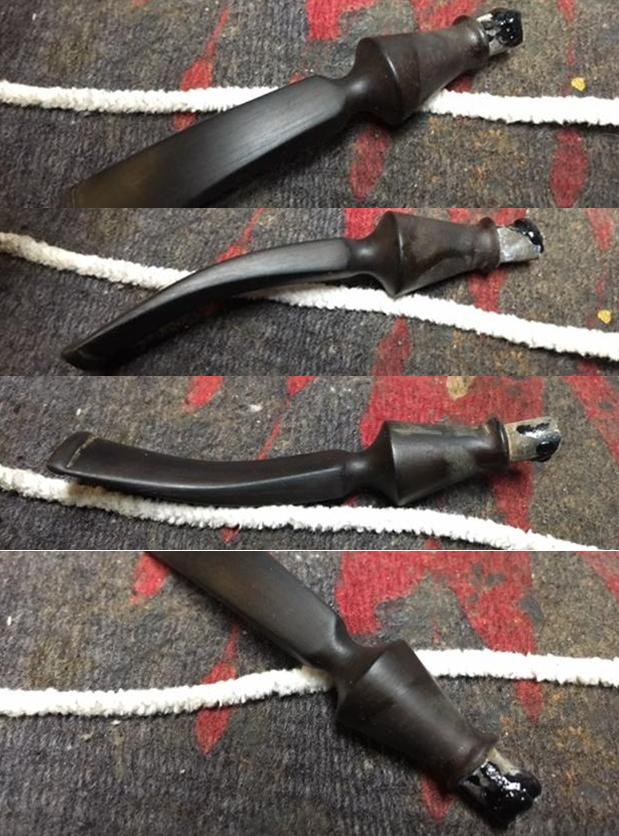
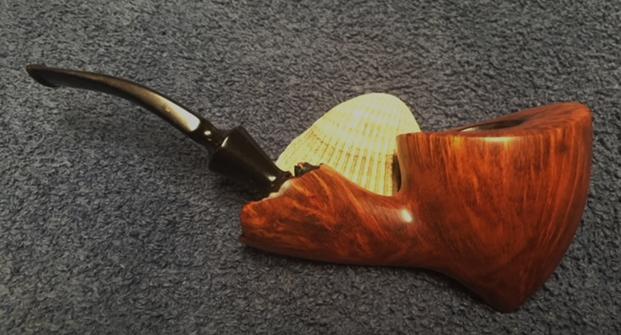
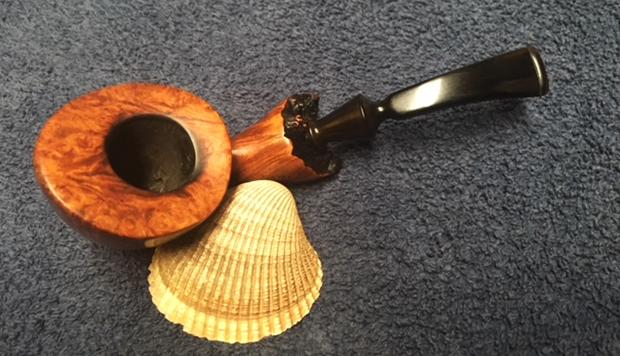
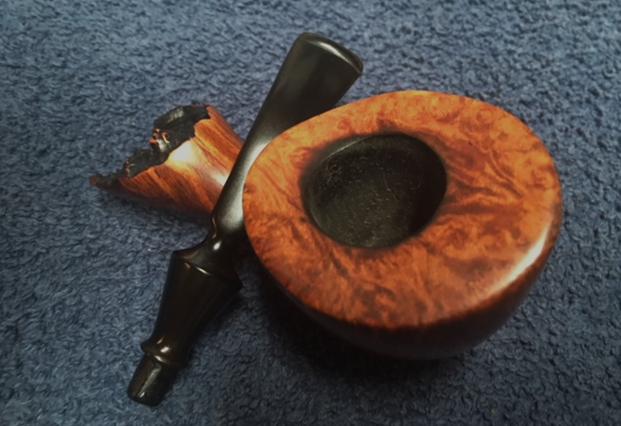
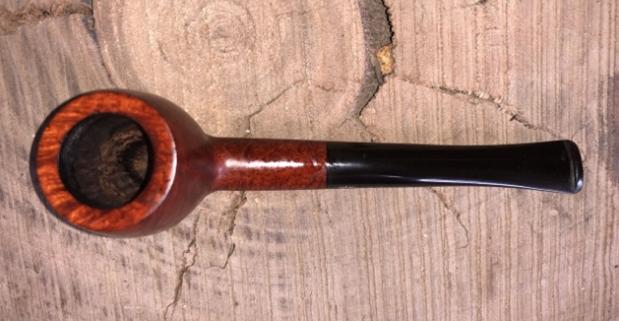
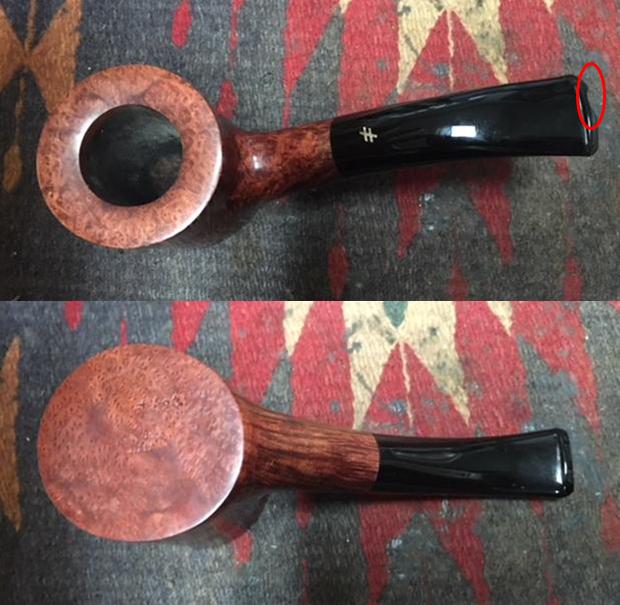
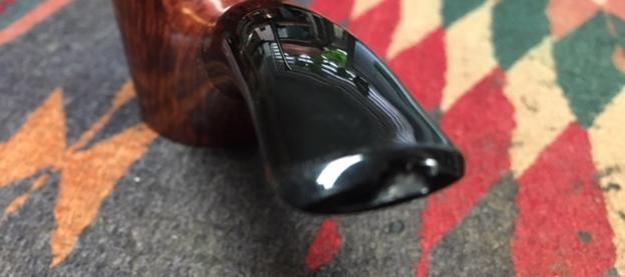
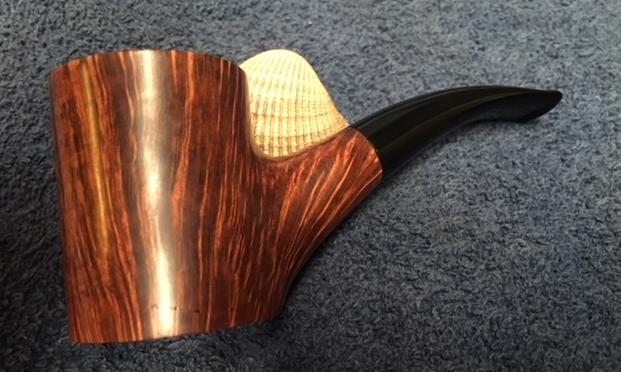
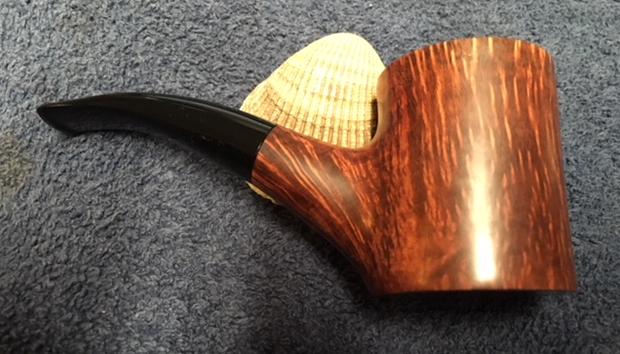
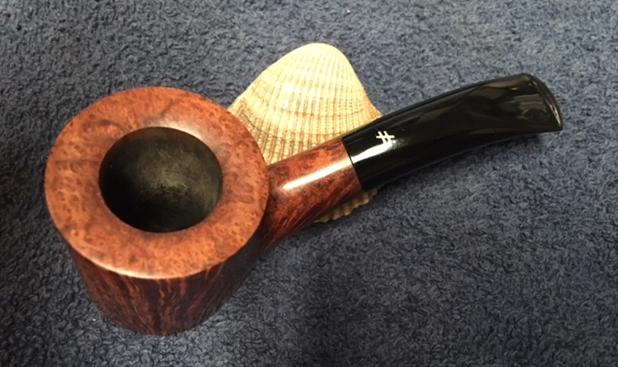
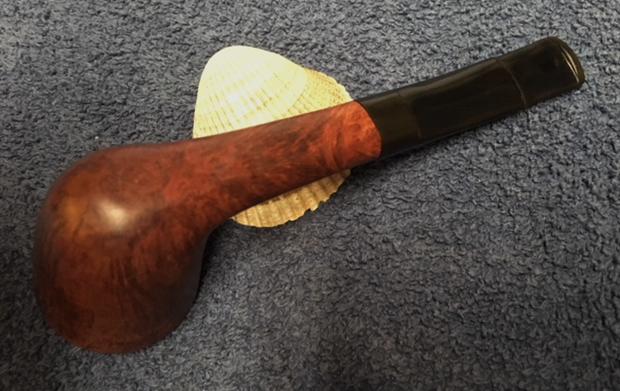
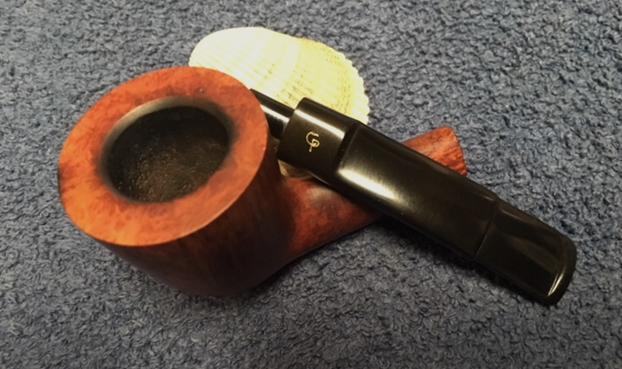
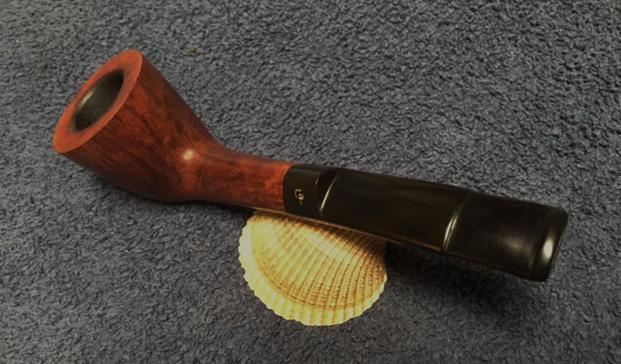
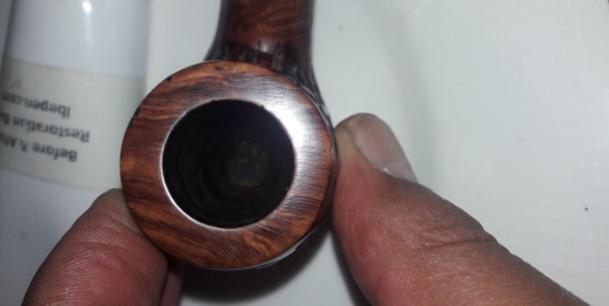
The bowl was thickly caked and the cake had flowed over onto the smooth finish on the rim top forming hard lava that made the top uneven. The inner and outer edges of the rim were both damaged. On the right front of the bowl the rim had a burned area – it was not a deep burn but it had darkened. On the back of the bowl there was damage on the inner edge of the bowl and it looked like it might be slightly out of round. The stem was oxidized but otherwise in good condition. There was a thick sticky, oily substance on the surface of the stem that I could scrape with my fingernail. There were tooth marks and chatter on both sides in front of the button. I took photos of the pipe to show what it looked like before I started the cleanup work.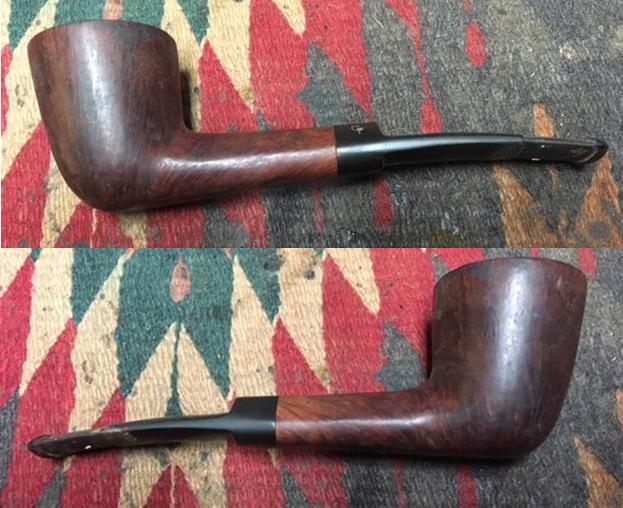
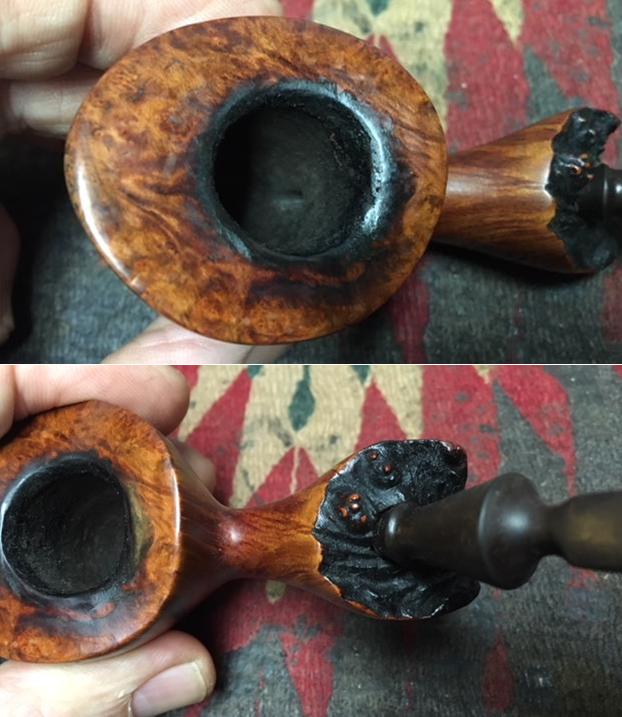
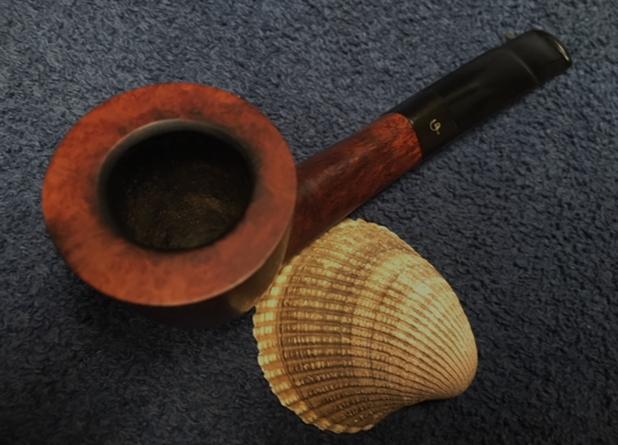
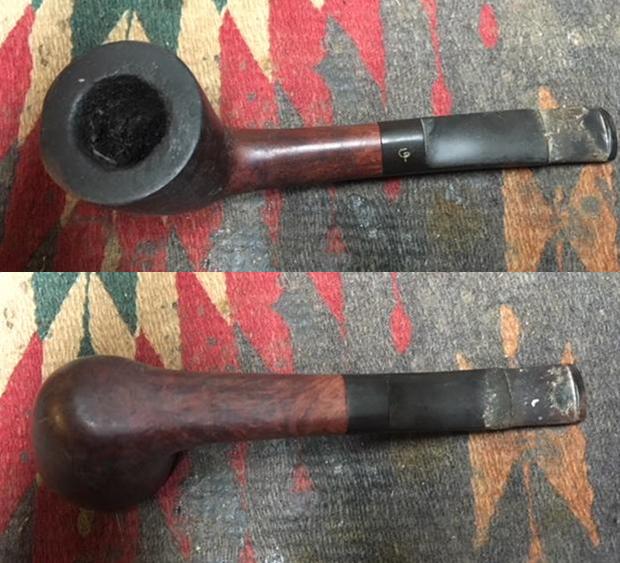 I took close up photos of the bowl and rim top as well as the stem. You can see the condition of the rim top and bowl in the first photo. The outer edge has damage on the front right – burn damage and wear that comes from lighting a pipe repeatedly in the same spot. The inner edge at the back middle also shows damage but I won’t know until I remove the thick lava overflow on the surface. The stem had tooth chatter and some bite marks on the top and the underside of the stem just ahead of the button.
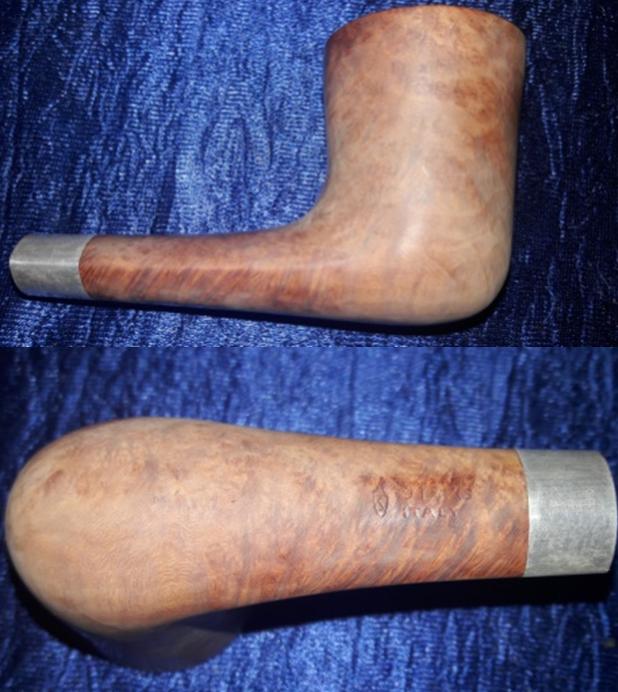
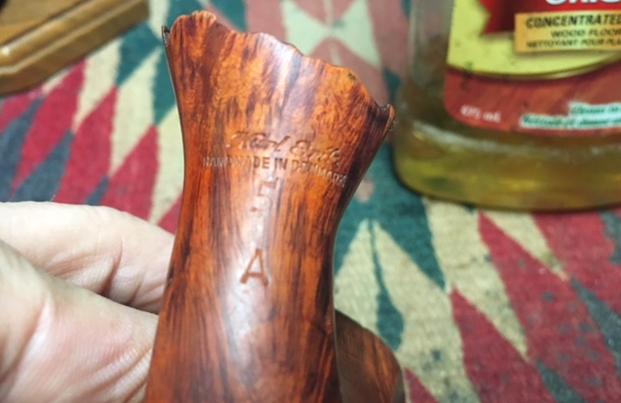
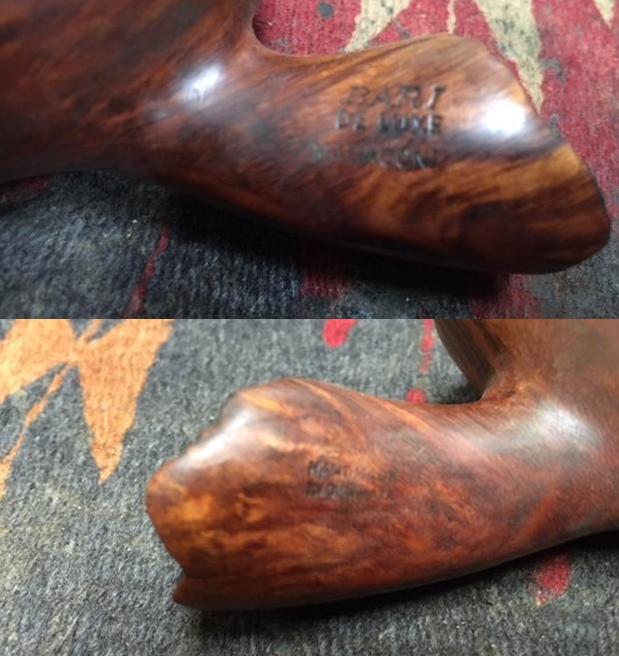
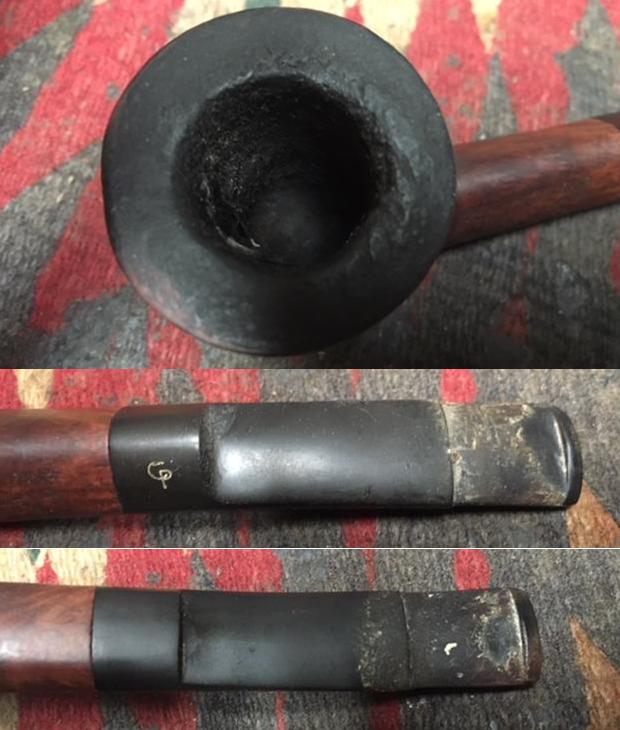 I took a photo of the left side shank stamping – it is readable but faint on the left side.
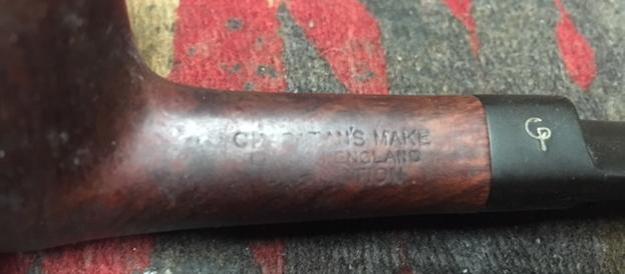 It has been a while since I have worked on the remaining pipes that belonged to Farida’s Dad. I thought it might be helpful to remind us all of the background story of these pipes. Here is the material that I quoted in previous blogs. I have included both the written material and the photo that Farida included of her Dad.
When I wrote the blog on the Classic Series Dunhill and thinking about its travels, Farida sent me an email with a short write up on her Dad. She remembered that I had asked her for it so that I could have a sense of the stories of her Dad’s pipes. Here is what she wrote: My dad, John Barber, loved his pipes. He was a huge fan of Dunhill and his favourite smoke was St. Bruno. No one ever complained of the smell of St. Bruno, we all loved it. I see the bowls and they’re large because he had big hands. When he was finished with his couple of puffs, he would grasp the bowl in the palm of his hand, holding the warmth as the embers faded. The rough bowled pipes were for daytime and especially if he was fixing something. The smooth bowled pipes were for an evening with a glass of brandy and a good movie. In his 20s, he was an adventurer travelling the world on ships as their radio operator. He spent a year in the Antarctic, a year in the Arctic and stopped in most ports in all the other continents. He immigrated to Canada in the mid-fifties, working on the BC Ferries earning money to pay for his education. He graduated from UBC as an engineer and spent the rest of his working life as a consultant, mostly to the mining companies. Whatever he was doing though, his pipe was always close by.
She sent along this photo of him with his sled dogs in the Antarctic sometime in 1953-1954. It is a fascinating photo showing him with a pipe in his mouth. He is happily rough housing with his dogs. As a true pipeman the cold does not seem to bother him at all. Thank you Farida for sending the photo and the background story on your Dad for me to use on the blog. I find that it really explains a lot about their condition and gives me a sense of who Dad was. If your Dad was rarely without a pipe I can certainly tell which pipes were his favourites.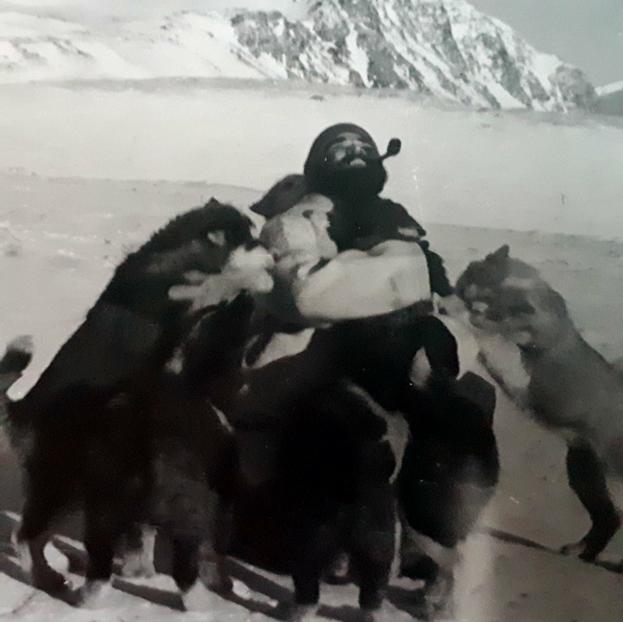 As I looked over the pipes I noted that each of them had extensive rim damage and some had deeply burned gouges in the rim tops. The bowls seemed to have been reamed not too long ago because they did not show the amount of cake I would have expected. The stems were all covered with deep tooth marks and chatter and were oxidized and dirty. The internals of the mortise, the airway in the shank and stem were filled with tars and oils. These were nice looking pipes when her Dad bought them and they would be nice looking one more when I finished.
Here are the links to the previous five blogs that I wrote on the five pipes that I have finished. The first was a Dunhill Shell oval shank pot (https://rebornpipes.com/2018/02/04/restoring-a-1983-dunhill-shell-41009-oval-shank-pot/). The second was a Dunhill Classic Series Shell Billiard (https://rebornpipes.com/2018/02/08/faridas-dads-pipes-2-restoring-a-1990-lbs-classic-series-dunhill-shell-billiard/). The third pipe was a Savinelli Autograph (https://rebornpipes.com/2018/02/15/faridas-dads-pipes-3-restoring-a-savinelli-autograph-4/). The fourth pipe was a Dunhill Red Bark Pot that was in rough shape (https://rebornpipes.com/2018/03/10/faridas-dads-pipes-4-restoring-a-dunhill-red-bark-pot-43061/). The fifth pipe was a Dunhill Root Briar Bent Billiard https://rebornpipes.com/2018/07/07/faridas-dads-pipes-5-restoring-a-dunhill-root-briar-56-bent-billiard/
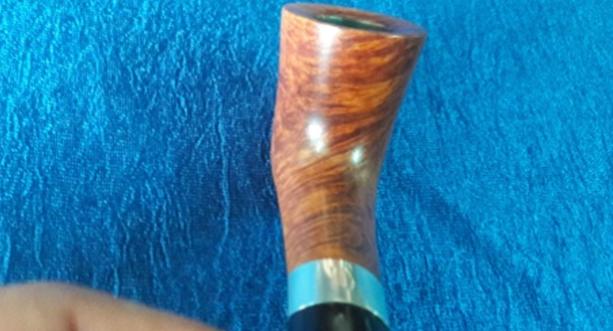
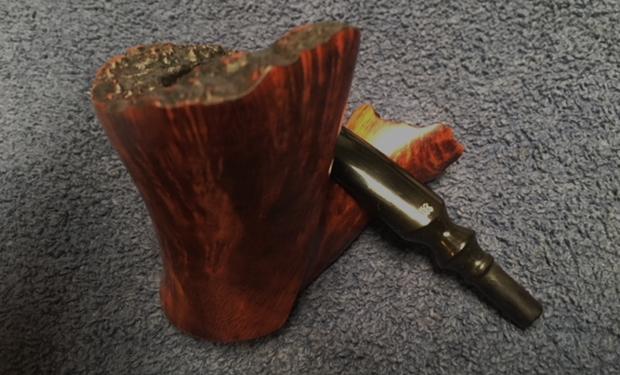
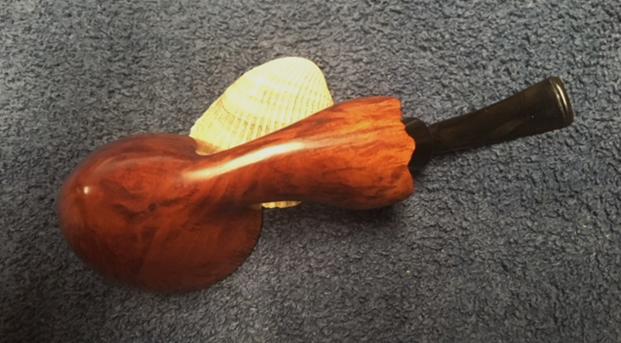
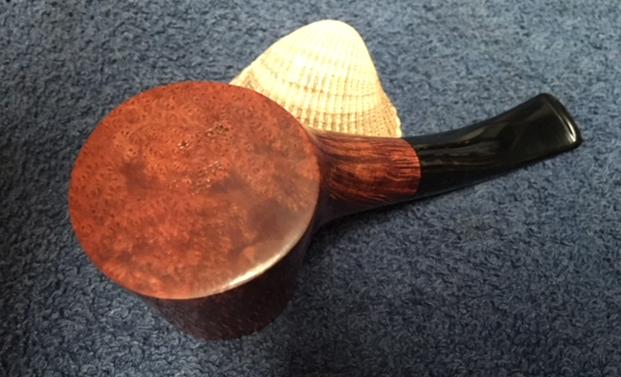
Today, I went back to the remaining three pipes in the collection today and chose to work on one of the Charatans – a triangular shank Dublin. It was dirty but I was able to read the stamping. On the top left side of the triangular shank it is stamped Charatan’s Make, over London, England over Distinction. On the right side it was stamped Made By Hand in the City of London. I cannot see any shape number on the shank as it is pretty worn. The smooth finish was sticky with oils and thick grime. The bowl felt oily to touch.
To try and figure out the era of the Charatan’s pipe I was working on I turned to the pipephil website on Logos and Stampings. There is some really helpful information on each of the lines of Charatan’s Make pipes that entered the market. Here is the link to the section of the site that I turned to, http://www.pipephil.eu/logos/en/logo-charatan.html. There is an alphabetical listing of the lines but unfortunately they did not list the Distinction. The site did give a short history of the brand. I quote the portion that is most pertinent.
The brand was founded in 1863 by Frederik Charatan. When his father retired in 1910, Reuben Charatan took over the family business. All the pipes were handmade until 1973. The brand name has been overtaken by Dunhill in 1978 and sold in 1988 to James B. Russell Inc.(NJ, USA). During the period 1988-2002 Charatans were crafted by Butz Choquin in St Claude (France). Dunhill re-purchased Charatan brand name in 2002 and Colin Fromm (Invicta Briars, Castleford) followed up on freehand production.
I turned to Pipedia to see if I could find more information on the brand and possibly a link to the Distinction line (https://pipedia.org/wiki/Charatan) but once again in the general article it was not listed. It did give a little more historical information. I quote the pertinent parts and have highlighted in bold the sections that give information on this particular pipe.
In 1863 Frederick Charatan, a Russian/Jewish immigrant, opened a shop in Mansell Street, located in the borough of Tower Hamlets, London E1, where he began to carve Meerschaum pipes. These pipes got very popular soon, and thus Charatan moved to a bigger workshop in Prescot Street, just around the corner. Here he began to make briar pipes which should make the name famous the world over. Charatan was the first brand to make entirely hand-made briars from the rough block to the finished pipe including the stems. The nomenclature “Charatan’s Make” refers to this method of production and was meant to differ Charatan from other brands who “assembled” pipes from pre-drilled bowls and delivered mouthpieces.
Being the undisputed No. 1 in English pipemaking, Charatan was approached by Alfred Dunhill who was unsatisfied with the quality of the pipes he imported from France. During 1908 – 1910 Dunhill bought pipes from Charatan paying exorbitant prices to ensure he had some of the very best pipes for sale in England. In 1910 he lured away Joel Sasieni, one of Charatan’s best carvers, and opened his own small pipe workshop on 28 Duke Street. On the retirement of his father in 1910 Reuben Charatan took over the family business…
…The pre-Lane period (prior to 1955) and the Lane era pipes (1955 to until sometime between 1979 – 1984) are of primary interest the collector. The Lane era is often quoted as beginning about 1950… Charatan records are almost non-existent before Lane due to a factory fire, making it difficult to date pre-Lane pipes. Charatan used 4 basic grades prior to 1950: Supreme, Selected, Executive, and Belvedere. After 1950 Herman Lane’s influence began, and the grades started to expand. In 1955 Lane took over sole distributorship of Charatan in the US. In 1957 he introduced the Supreme S. Most of his other introductions were from the 60’s and early 70’s…
The section called Miscellaneous Notes had some interesting information.
Charatan records indicate the DC (Double Comfort) bit was introduced in the 50’s, but some report seeing them in earlier production. Still others indicate they were introduced by Lane in 1960. Regardless, the DC bit is not an accurate way to date a pipe because many Charatan’s were made with regular and saddle type bits throughout the “Lane Era”…
…The Lane Trademark serif and circled L indicates the pipe is from the “Lane Era” (approx. 1955 to 1979 -1984?), however it appears that both the English factory or Lane themselves sometimes, or perhaps even often forget to stamp the L on a pipe. The Charatan factory was known for inconsistencies, especially in stampings. Therefore, although an L on the pipe definitely defines it as a Lane Era pipe, the lack of it could simply mean the pipe missed receiving the stamp from the factory. The lack of the trademark could also mean the pipe was destined for the European market.
…Generally, when the pipe is stamped with the BLOCK letters “MADE BY HAND” it means the pipe was probably made between 1958 and 1965”
…Generally, block letters “MADE BY HAND” and some of the other nomenclature in script (i.e. City of London or Extra Large next to the MADE BY HAND) means the pipe was made sometime between 1965 and the mid 1970’s. The total script nomenclature “Made by Hand in City of London” evolved over this period of time, so many pipes had variants, such as Made By Hand in block letters and City of London in script, or some other variation of the terms or stampings. The Charatan Logo (CP) on the pipe bit was changed over the years.
I found an interesting Russian site on the various lines of Charatan. Here is the link to that site – http://brbpipe.ru/wp-content/uploads/2012/06/T-shop_1-2011-12_56-69_3.pdf. I did a google translation of the section on the DISTINCTION line.
The first of two medium sized factories. Neutral flame grain under contrast stain. Sometimes, however, there is a completely fantastic, almost perfectly smooth cross cut, sometimes – inclined to the side of the smoker flame. The most important thing: in this and the next grade begins a serious predominance of freehand over cataloged shapes.
The reason for this predominance lies in the strategy of educating carvers. Both medium grades are the launch pad for those who sought the right to work with top grades. Where the freaks have become the rule. The master had to work out a sufficient number of freehands and show a personal fantasy, so that he was allowed to work with the best, selective locks. And if at this “school of life” you could make extra profits … well, you remember that in this regard, there was a little iron Hermann.
I also found a description of the Distinction on VKpipes. Here is the link to that site, https://www.vkpipes.com/pipeline/charatans-make-distinction. I quote from that site.
Distinction was one of the most successful and valued lines of Charatan’s pipes from the “first Lane era” (1961-95). These years the old good Charatan’s family manufactory turned into the brightest star of the pipe making by means of new investments, a successful management and a creative approach of the Charatan’s artisans. There’s no shape number on the pipe: it was made by one of the leading carvers at this factory regardless any catalogues…
I also found a list of the various lines of Charatan’s Make Pipes that helps to place the Distinction in the hierarchy of pipes. Here is the link to the list https://www.reddit.com/r/PipeTobacco/comments/z9knr/charatan_models_shape_information_for_the/. I will be posting it as a separate blog shortly. The Distinction line is just below the Executive line and just ahead of the After Hours line – both Charatan’s Make Freehand Straight Grains.
From all of the historical data I could work through this Charatan’s Make Distinction was one of the higher grade pipe from the mid 1970’s Lane era. I continue digging further into the dating of the pipe, but what I had found was a good start for me. If some of you would like to try your hand at dating it more accurately as to the time period it came out you might want to check out the article on Pipedia on Dating Charatans (https://pipedia.org/wiki/Dating_of_Charatans). I had enough for me to start working on the pipe itself and see what lay beneath the heavy tars and oils.
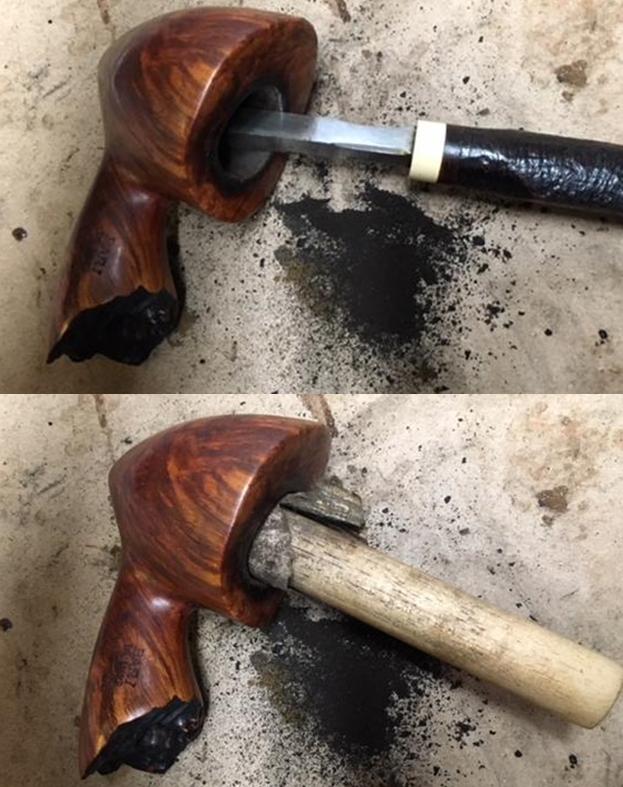
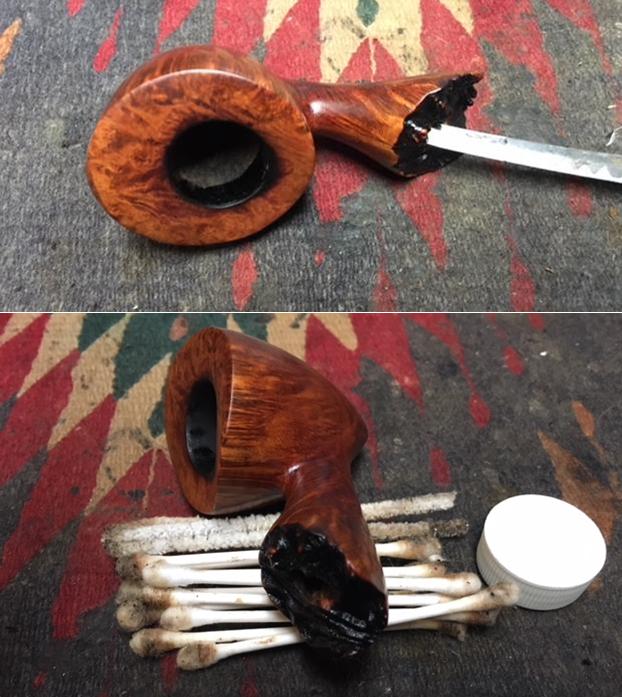
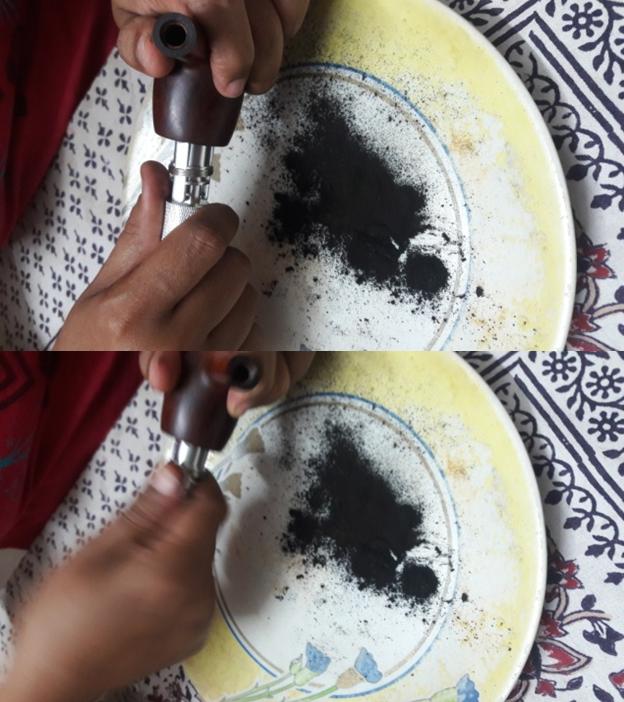
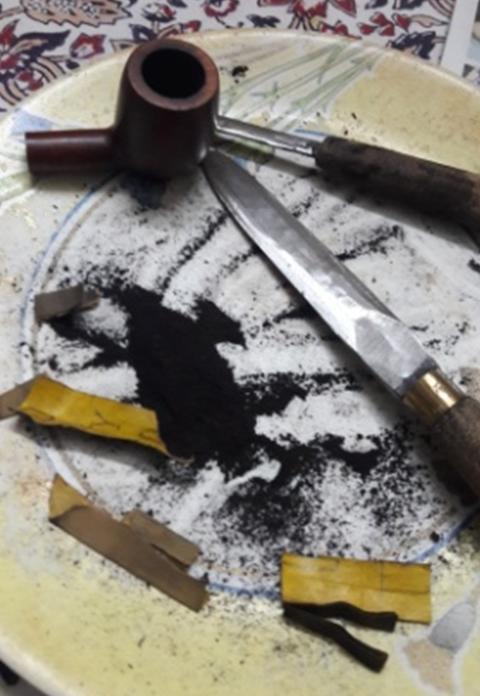
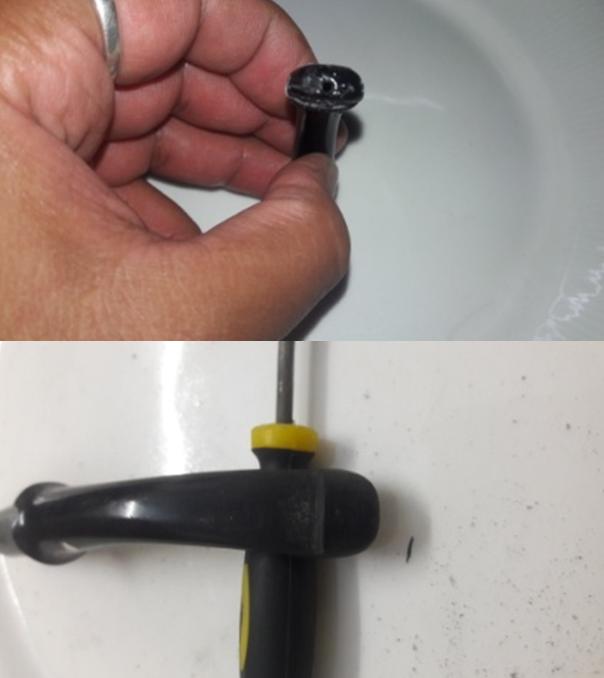
I began working on the pipe by reaming the bowl with a PipNet reamer. I used two of the four cutting heads to clean out the cake. The bowl was thickly caked so I started with the smaller of the two and worked my way up to the second one which was about the same size as the bowl diameter. I cleaned up what remained in the bowl with a Savinelli Fitsall Pipe Knife and scraped it back to bare briar. I finished by sanding the inside of the bowl with a dowel wrapped in sandpaper. I worked on the top of the rim with the edge of the Savinelli Fitsall Pipe Knife. I scraped the heavy buildup that was there.
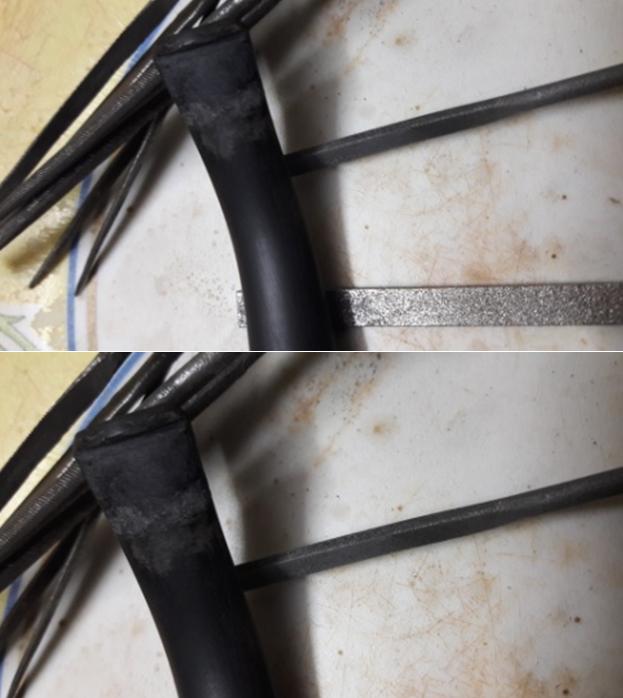
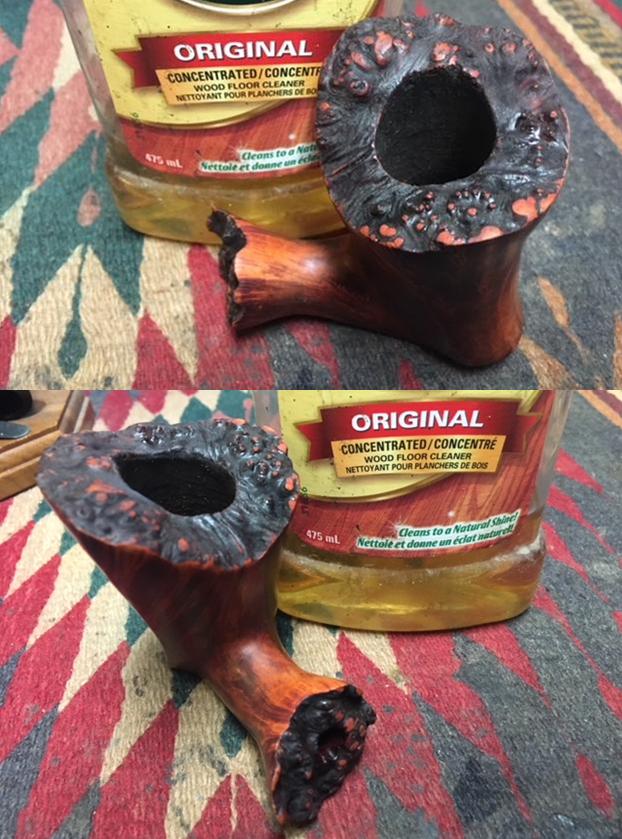
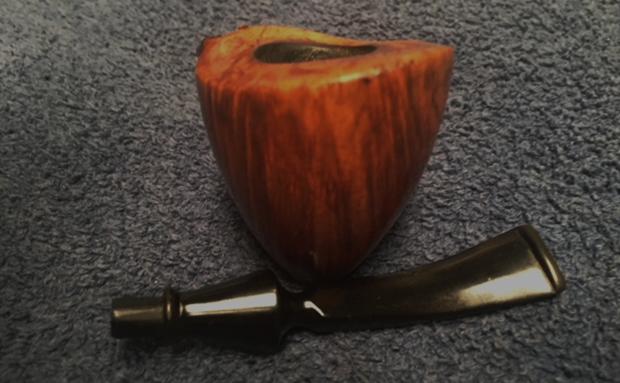
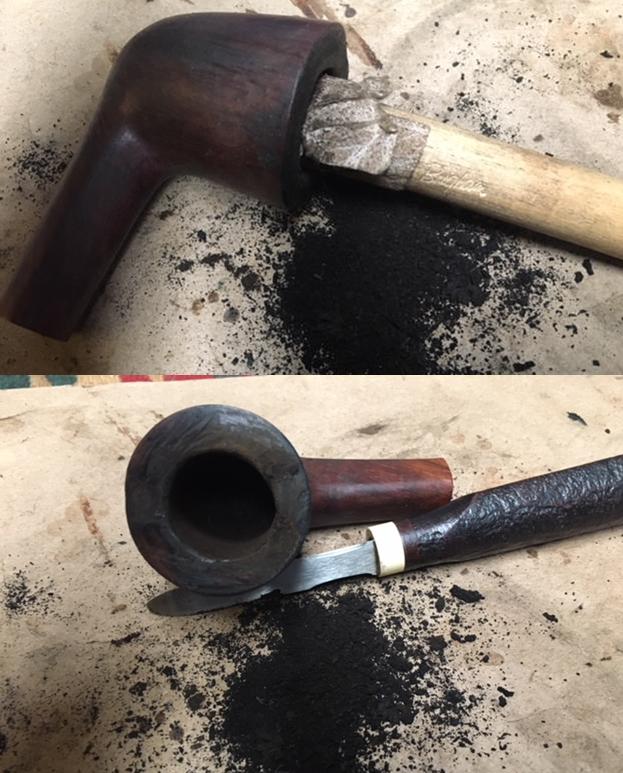 I topped the bowl on a topping board with 220 grit sandpaper to remove the damage to the top surface of the rim and clean up the damage to the edges. I did not have to remove a lot and repeatedly checked it to make sure that I had removed enough but not too much. I wanted to take the rim top down until the burn damaged area was smooth and minimized. The second photo shows the burned and damaged areas clearly. I continued to top the bowl until I had removed the damage. I wiped down the rim top with alcohol and cotton pads to remove the sanding dust.
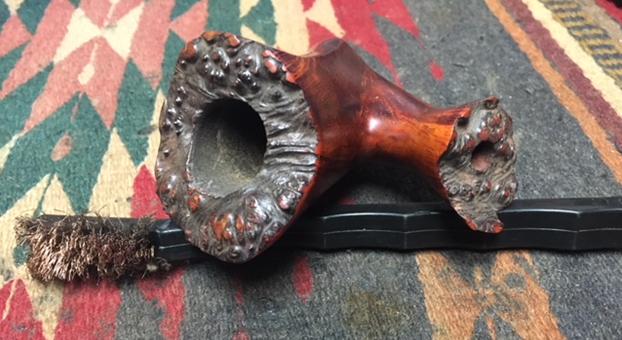
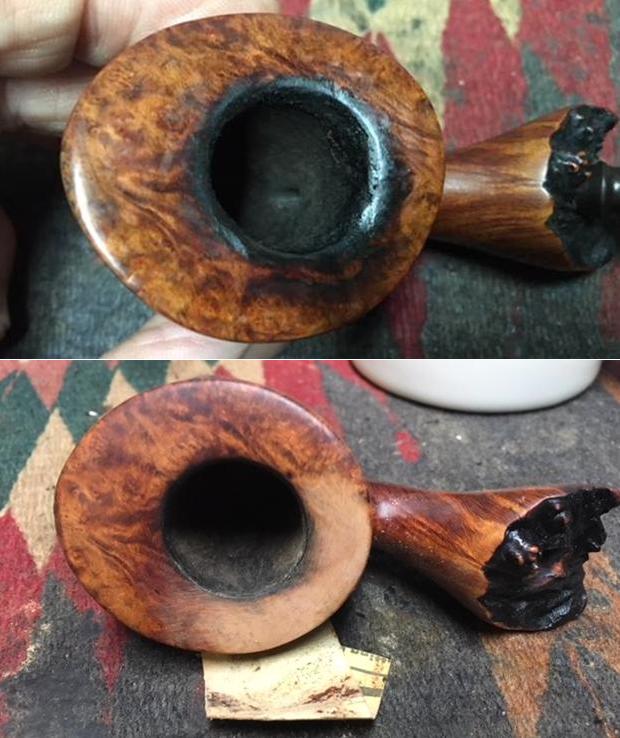
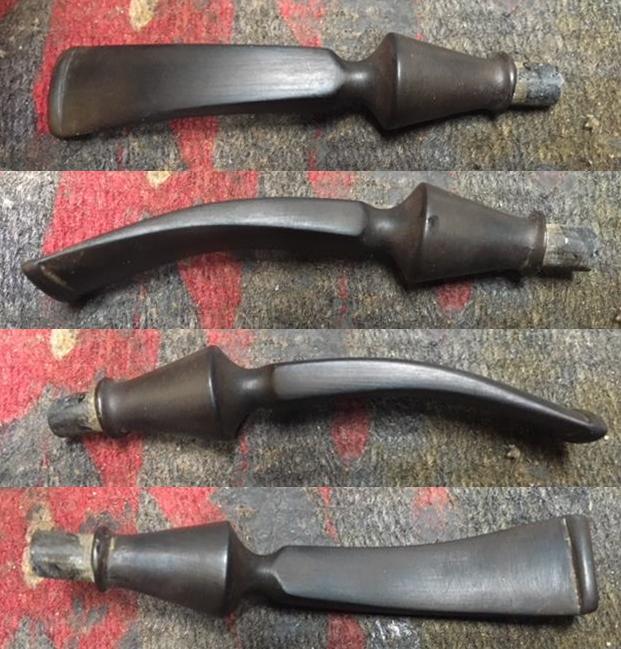
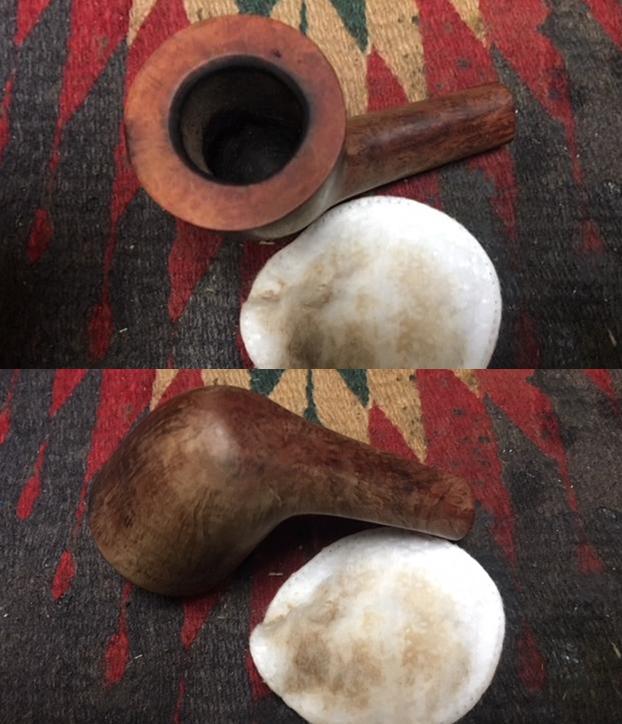
 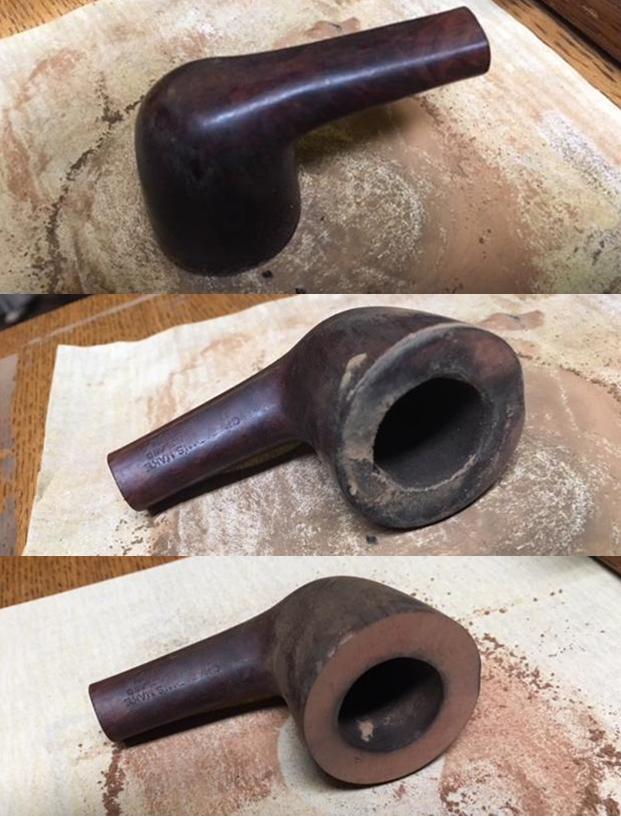 I scrubbed the exterior of the bowl and shank with a tooth brush and Murphy’s Oil Soap to break through all the grime. I rinsed the bowl under running water to remove the grime and grit. I repeated the process until I had the bowl clean. I took photos of the cleaned exterior of the bowl to show where things stood at this point in the process.
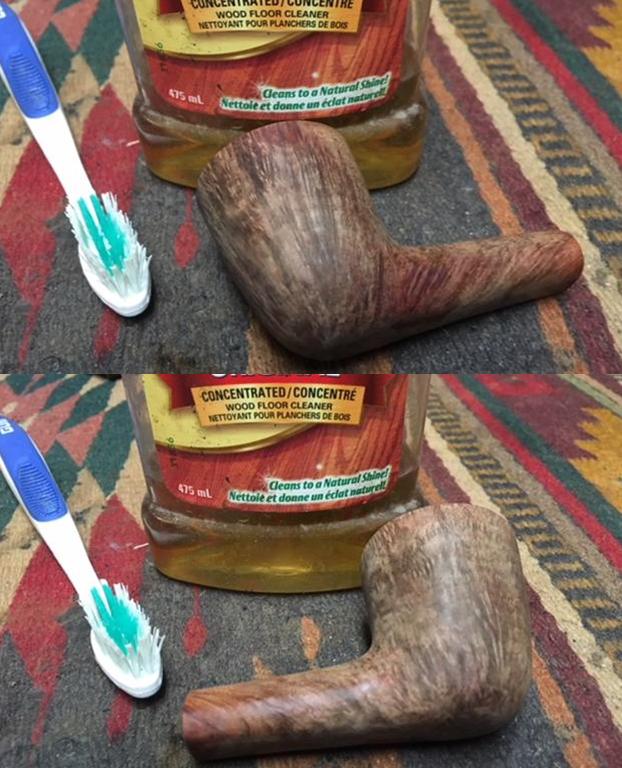
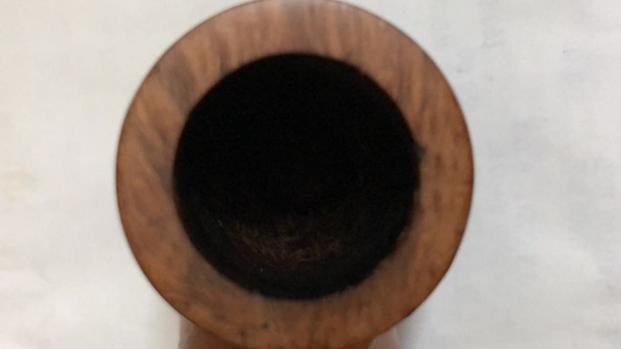
 I used a folded piece of 180 and 220 grit sandpaper to bevel the inner edge of the rim until I had removed most of the damage on the back inner edge.
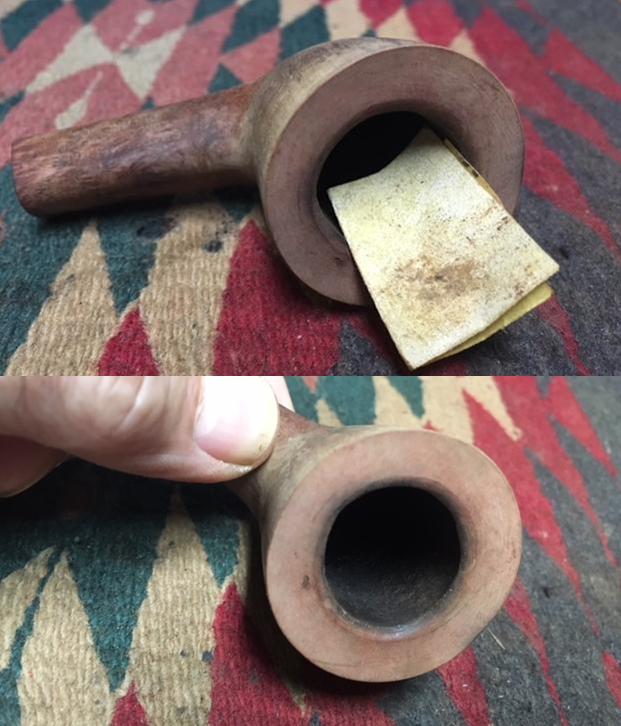 With the externals clean it was time to clean out the mortise and shank and airway into the bowl and the airway in the stem with alcohol, cotton swabs and pipe cleaners. I scraped the mortise with a dental spatula and a pen knife to loosen the tars before cleaning. I worked on the bowl and stem until the insides were clean.
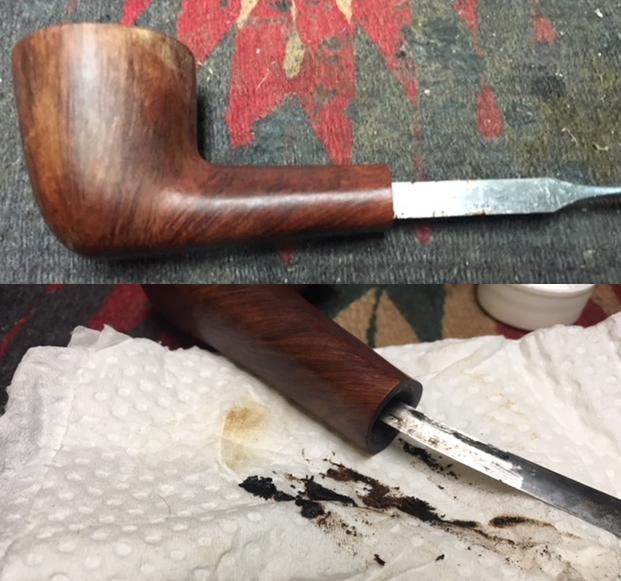
 I wiped down the exterior of the bowl with alcohol on a cotton pad to remove any remaining oils and grimes from my cleaning of the bowl and rim. Once the alcohol evaporated the briar was very dry but also very clean.
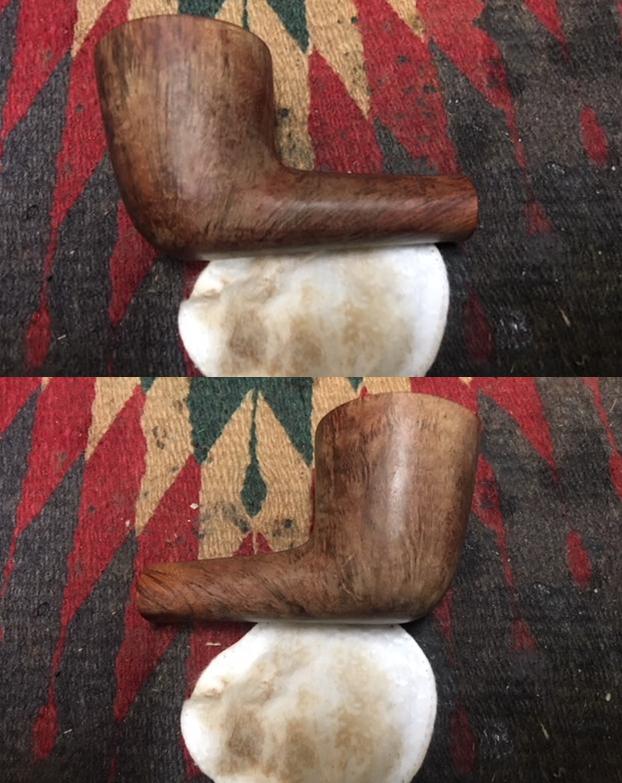
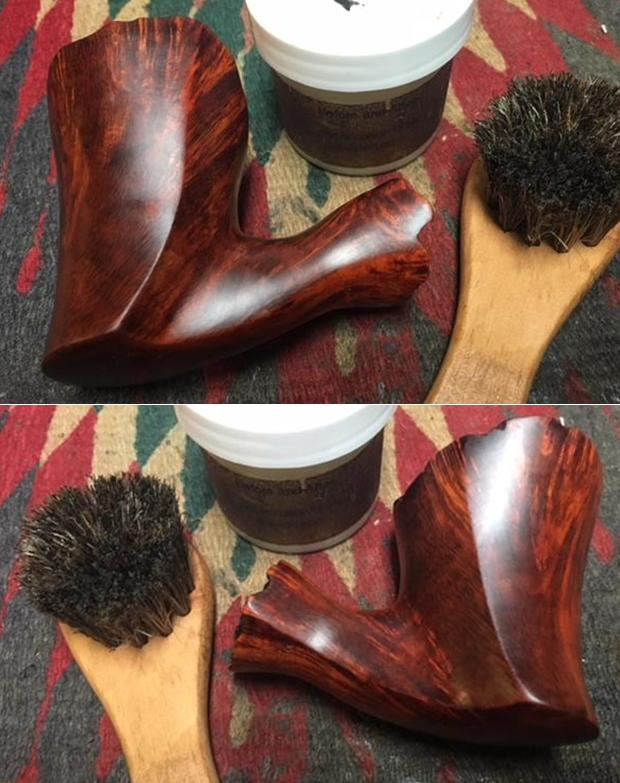
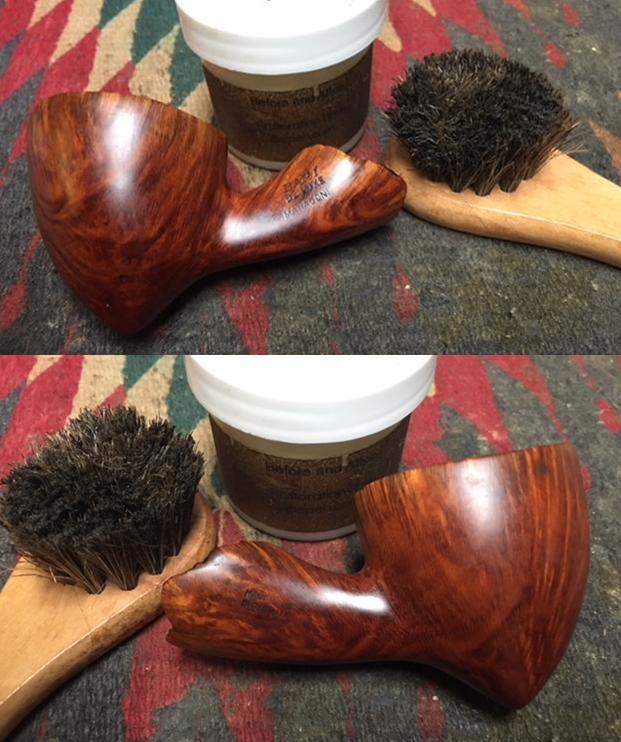
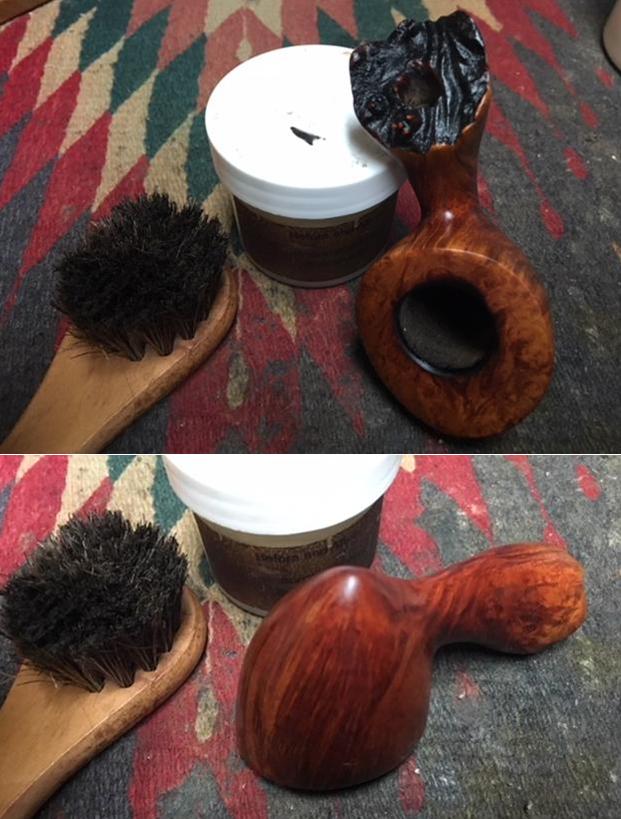
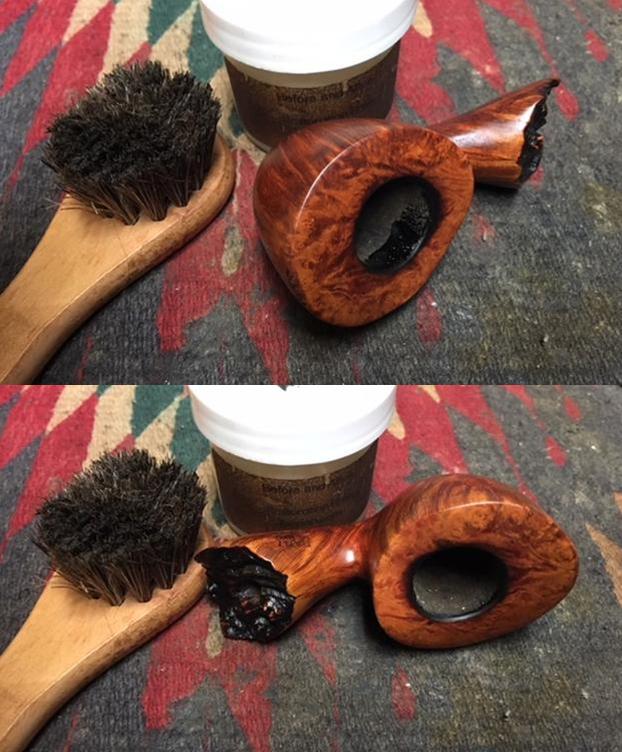
 I rubbed down the briar with Before & After Restoration Balm. I worked it into the smooth finish to clean, enliven and protect the new finish. It also evened out the stain coat and gave the stain a dimensional feel. I let the balm sit for a little wall and then buffed it with a horsehair shoe brush. I buffed the bowl with a cotton cloth to raise the shine.
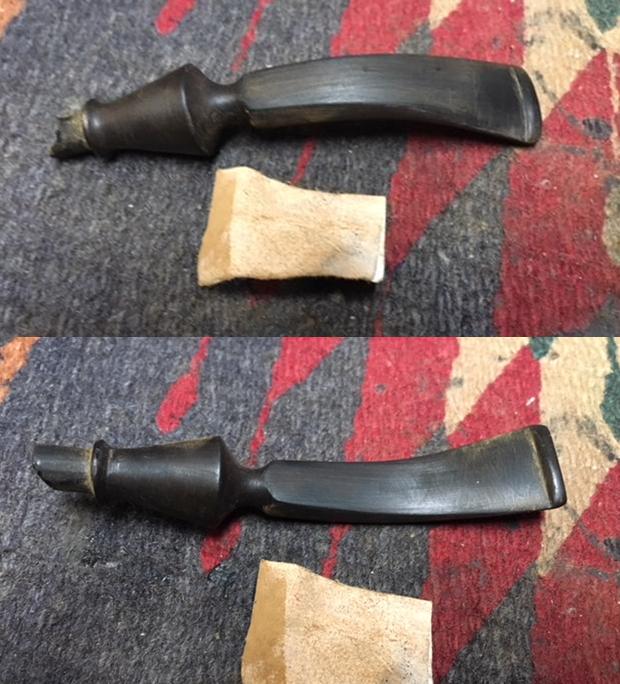
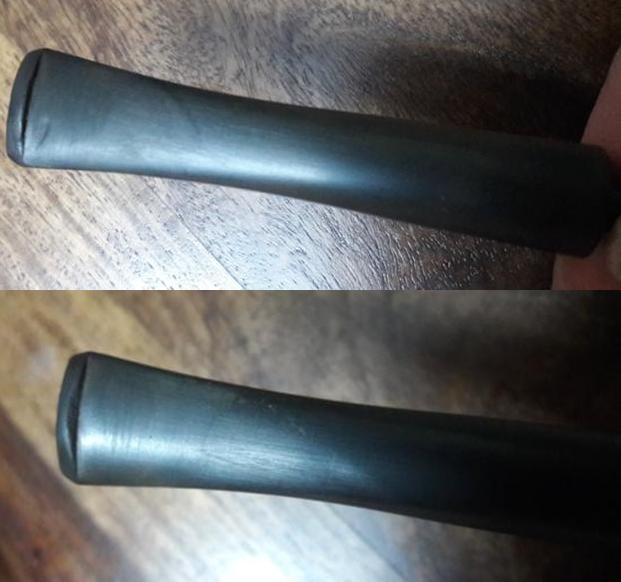
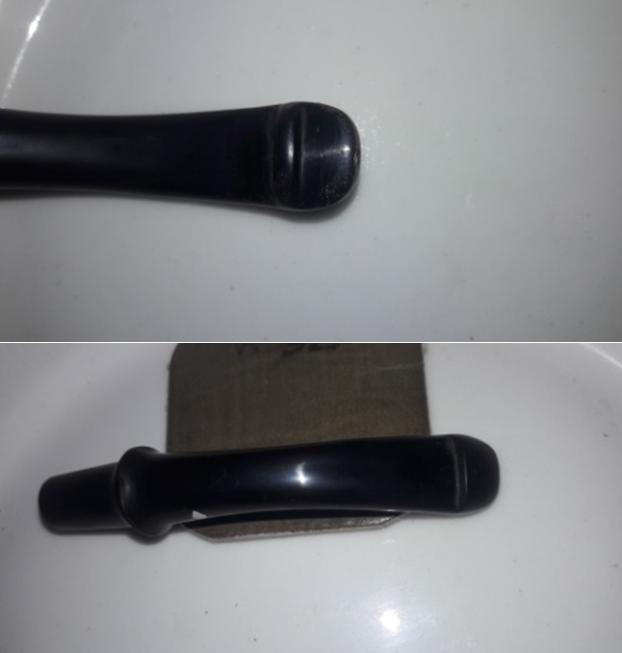
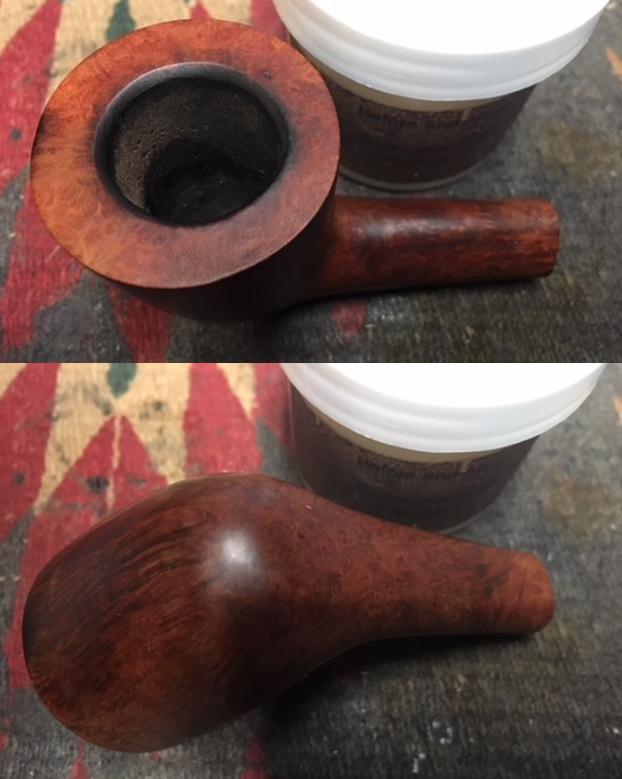 There was some darkening on the rim top on the right front and around the inner edge of the bowl but the briar was solid all around the bowl. The bowl looked really good at this point in the process. I set it aside and turned my attention to the stem. I sanded out the tooth chatter on both sides with a folded piece of 220 grit sandpaper.
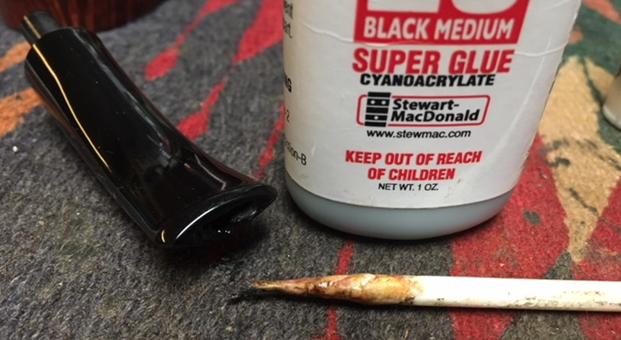
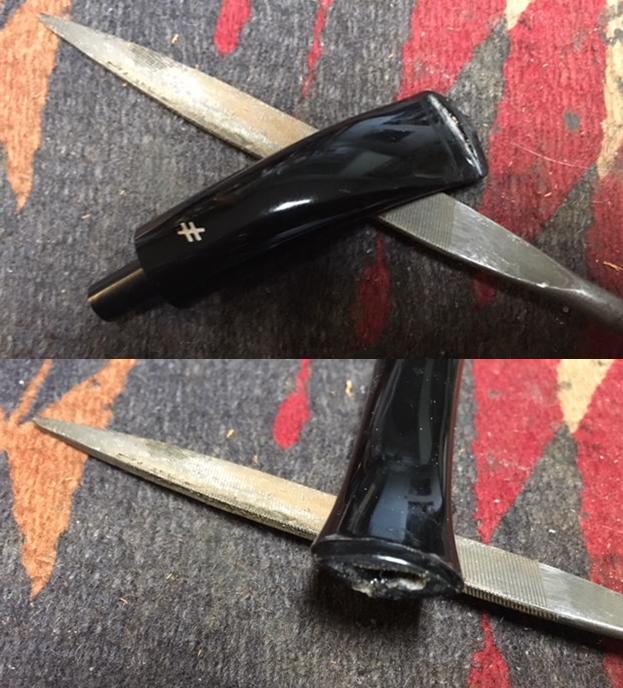
  I cleaned the surface of the stem with alcohol on a cotton pad and filled in the tooth marks with black super glue and set the stem aside to let the repair cure.
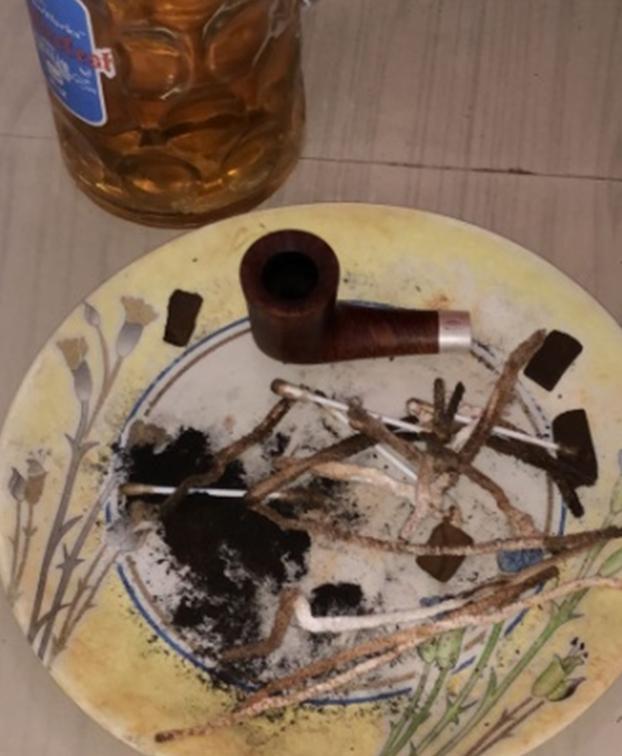
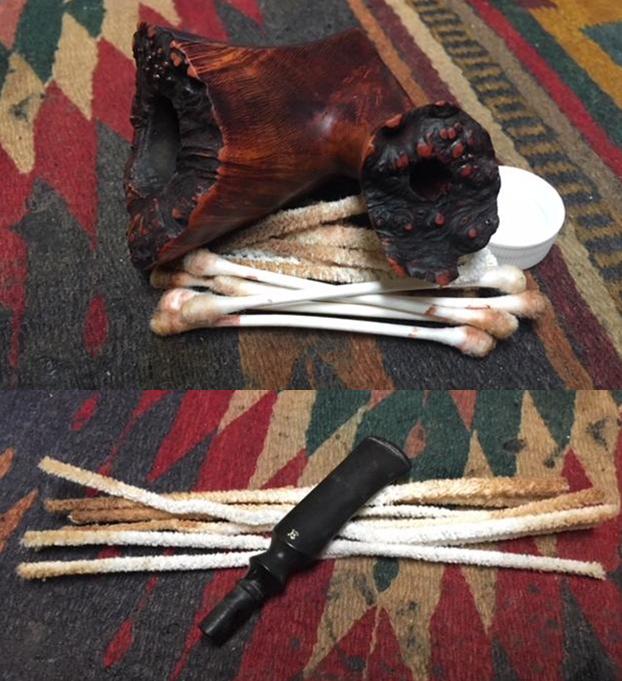
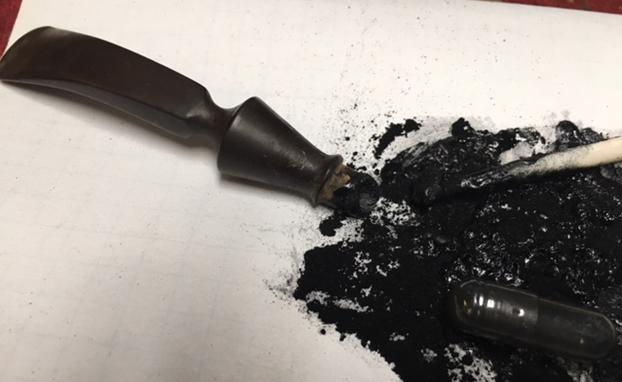
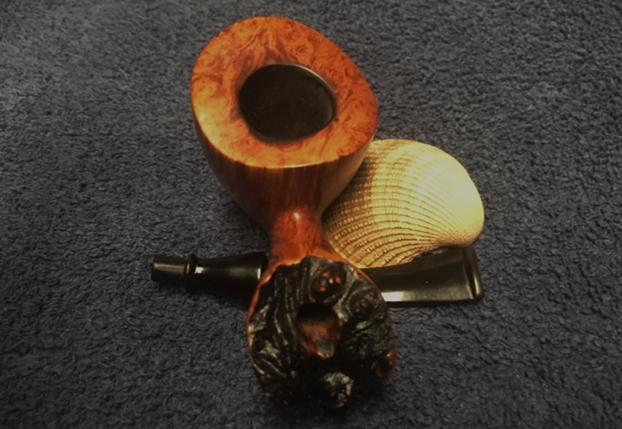
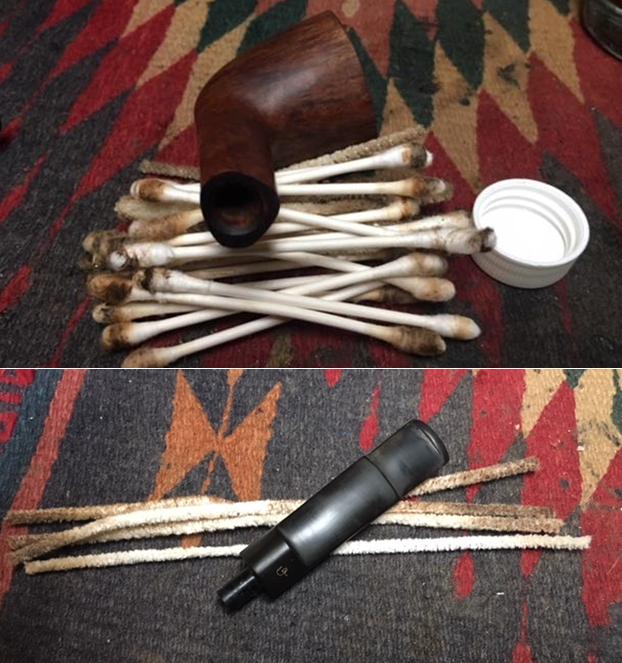
 While the stem repair was curing I stuffed the bowl with cotton balls and put a folded pipe cleaner in the shank. I filled the bowl with alcohol to leech out the oils and tars in the bowl. I set the bowl in an old ice cube tray and let it sit throughout the day while I was at work. I find that cotton balls work as well as kosher salt and the folded pipe cleaner leeches tars out of the shank as well. The first photo shows the pipe when I set it up early in the morning. The second shows it after it sat all day. The cotton balls were dark brown with the oils that had wicked out of the briar. The pipe smells fresh and new now!
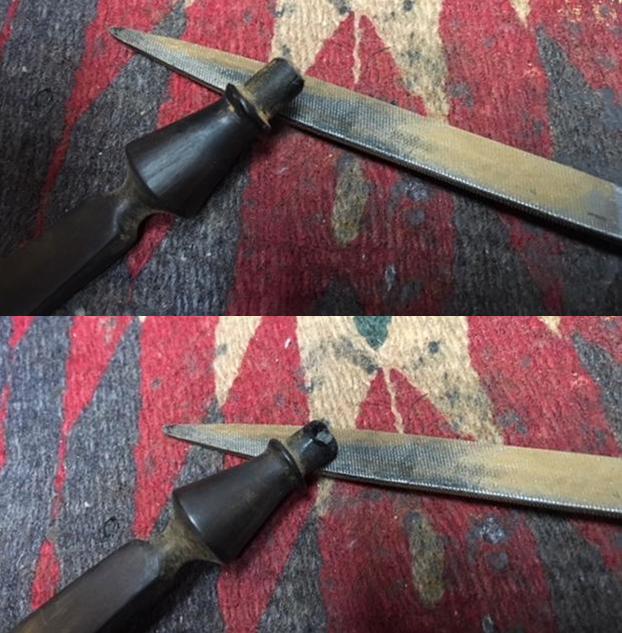
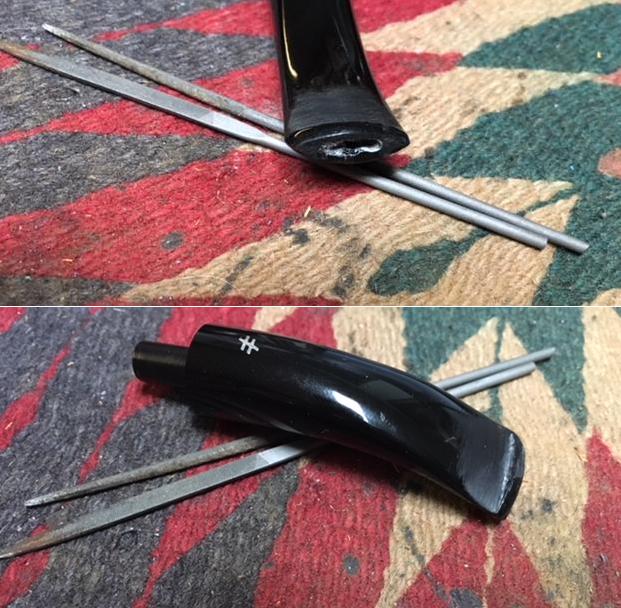
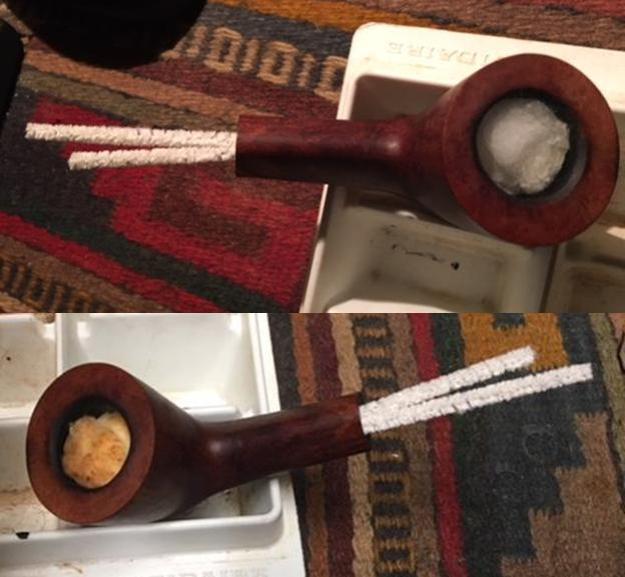 When the repair had cured I used a needle fill to clean up the sharp edge of the button. I sanded the repairs on the stem with 220 grit sandpaper to blend them into the rest of the surface of the vulcanite.
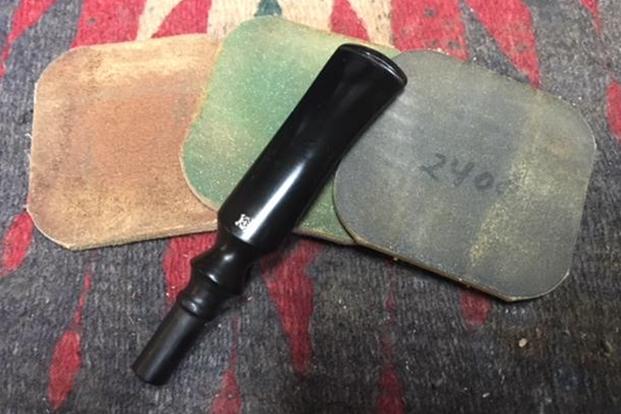
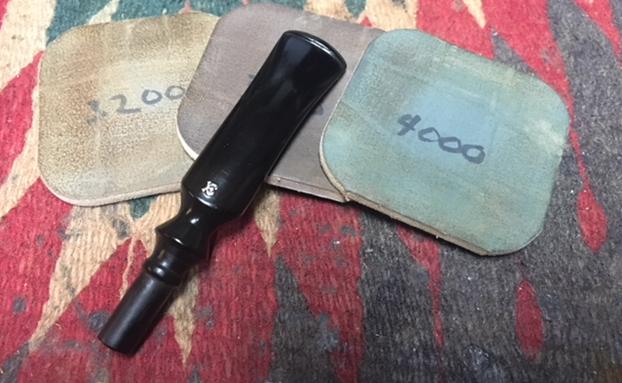
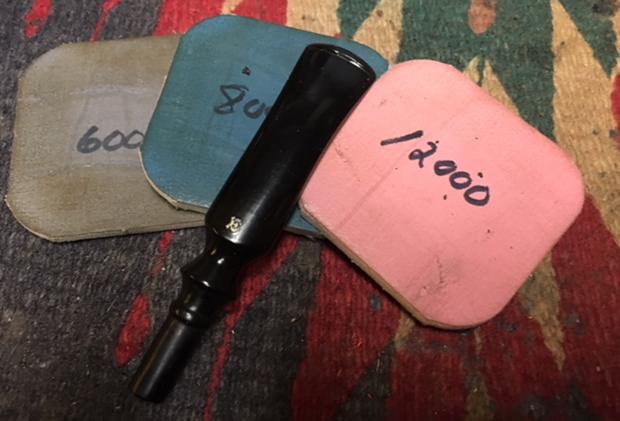
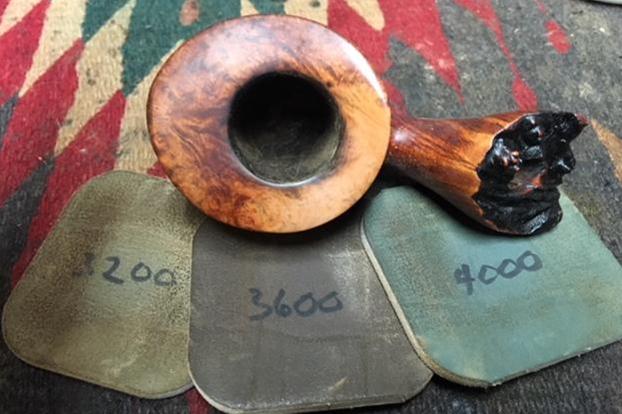
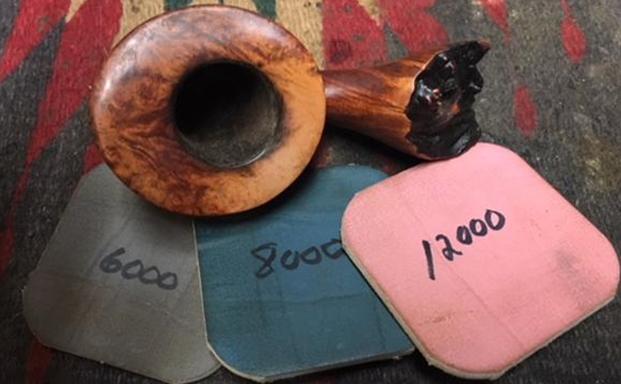
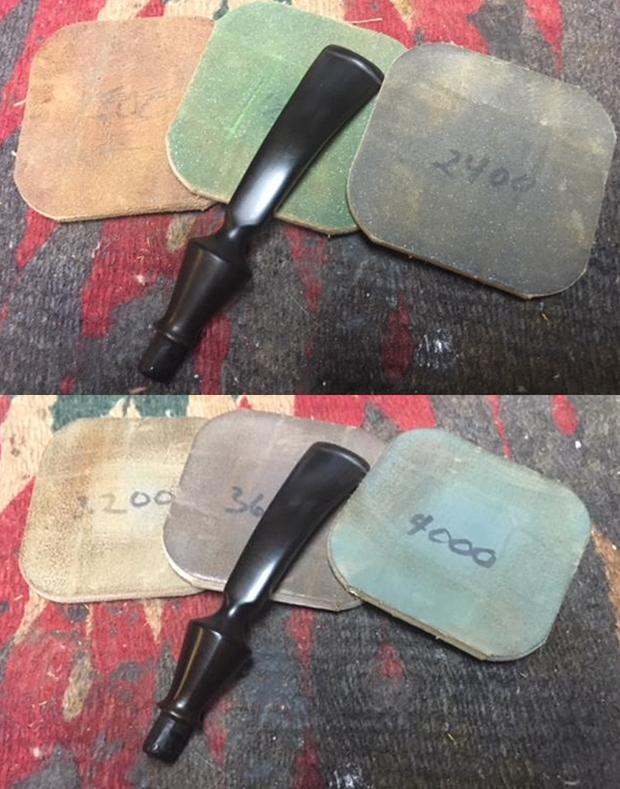
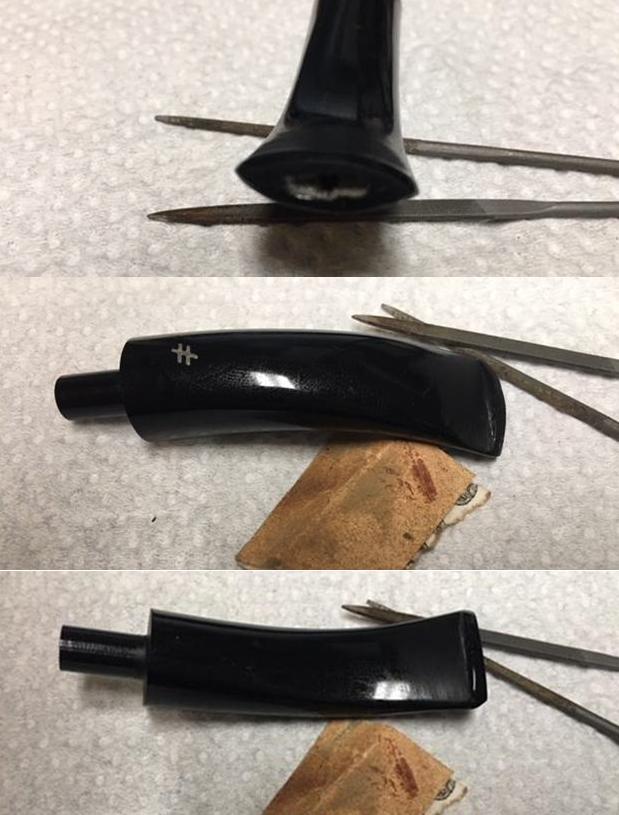
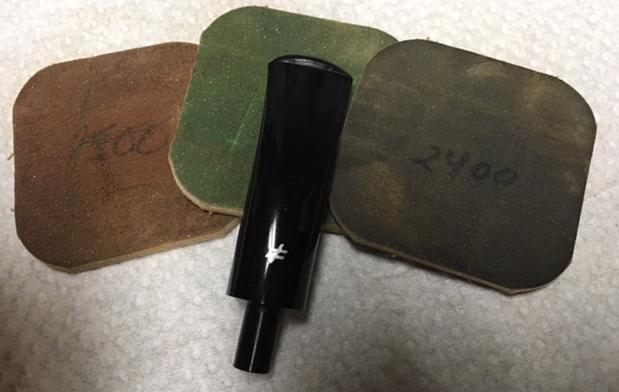
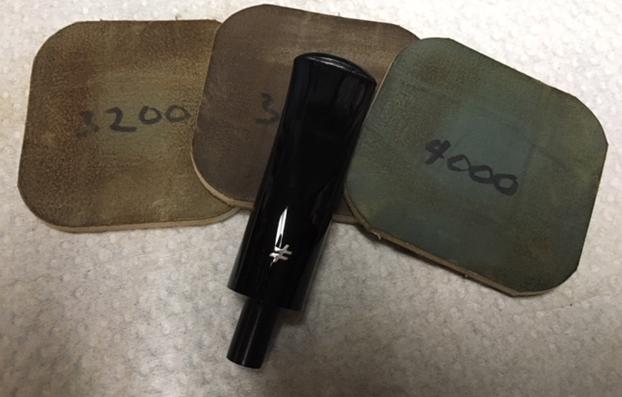
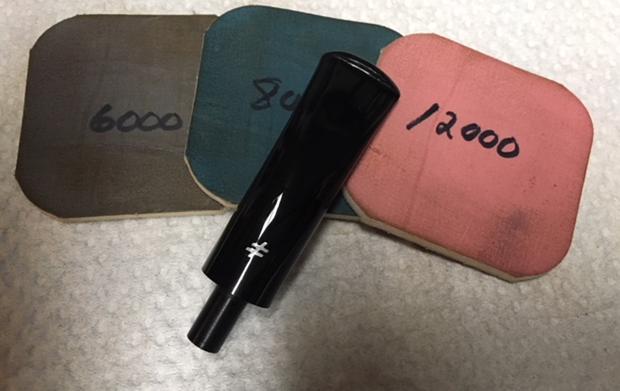
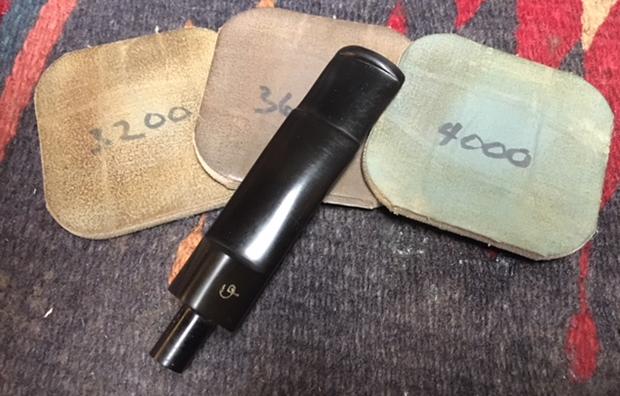
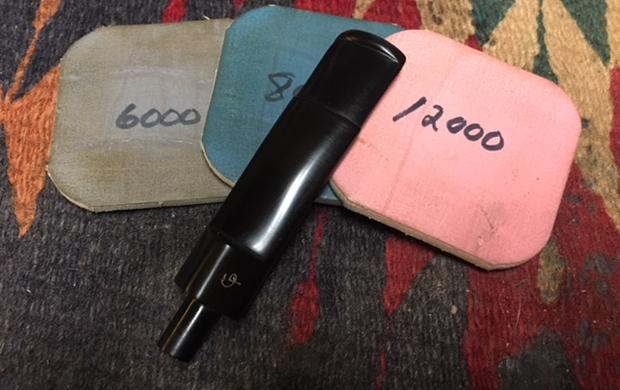
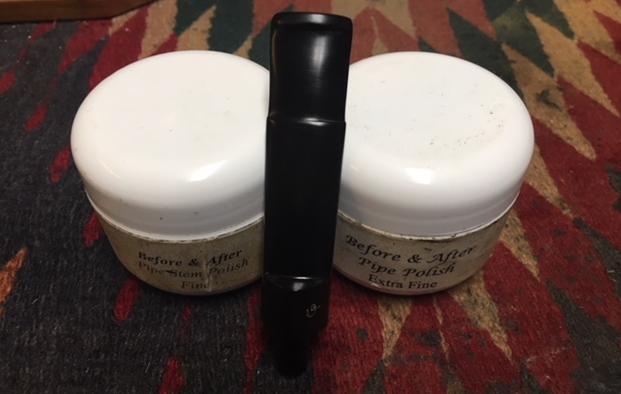
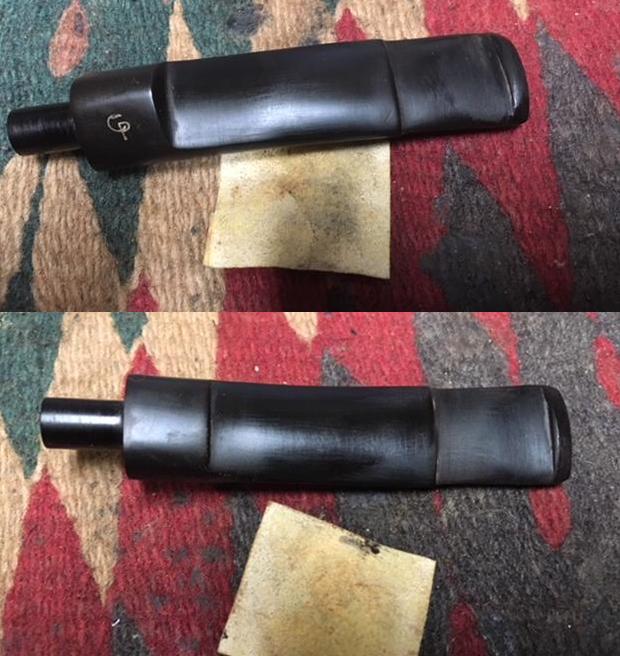 I polished the stem with micromesh sanding pads – wet sanding with 1500-2400 grit micromesh sanding pads and dry sanding it with 3200-12000 grit pads. I rubbed the stem down with Obsidian Oil after each pad. I polished it further with Before & After Pipe Polish, using both the Fine and Extra Fine polishes to further protect and polish out the scratches. When I finished with those I gave it a final rub down with the oil and set it aside to dry.
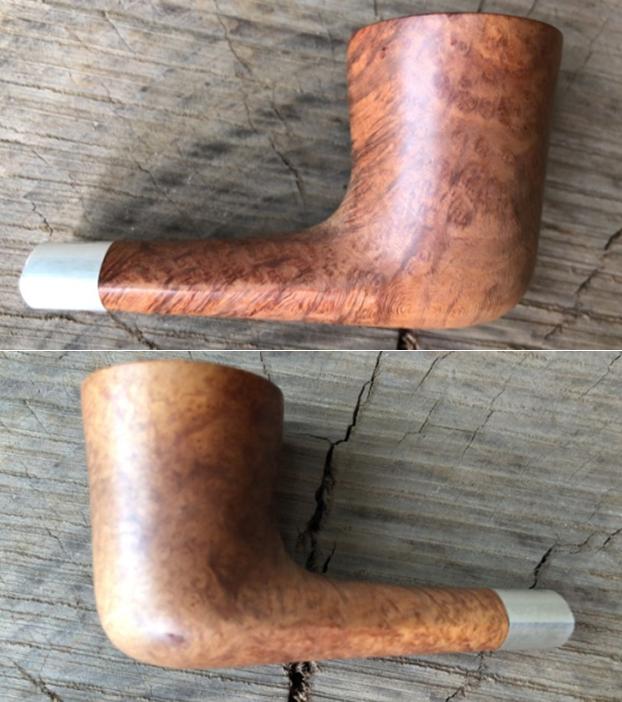
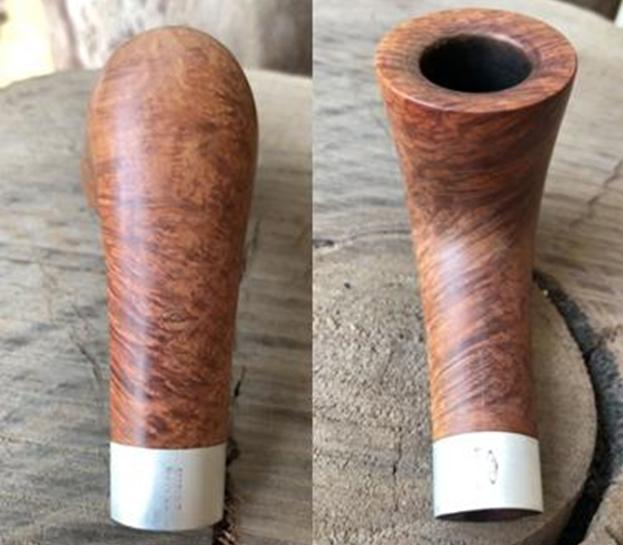
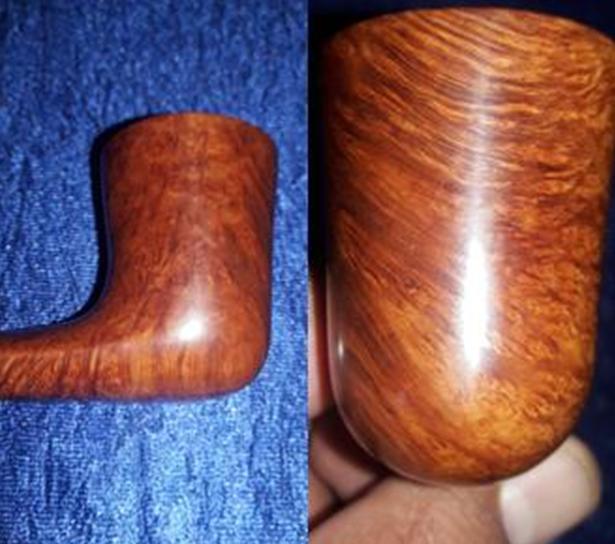
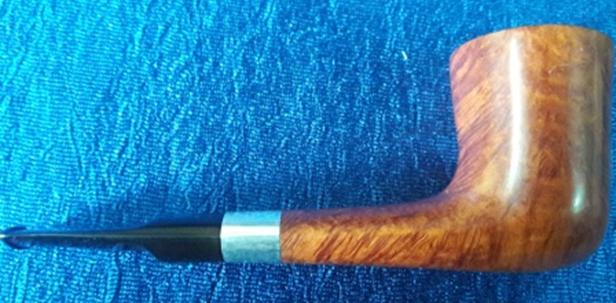
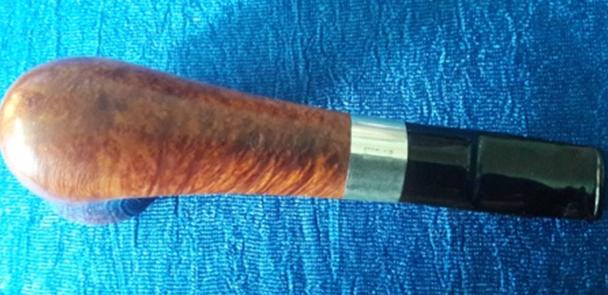
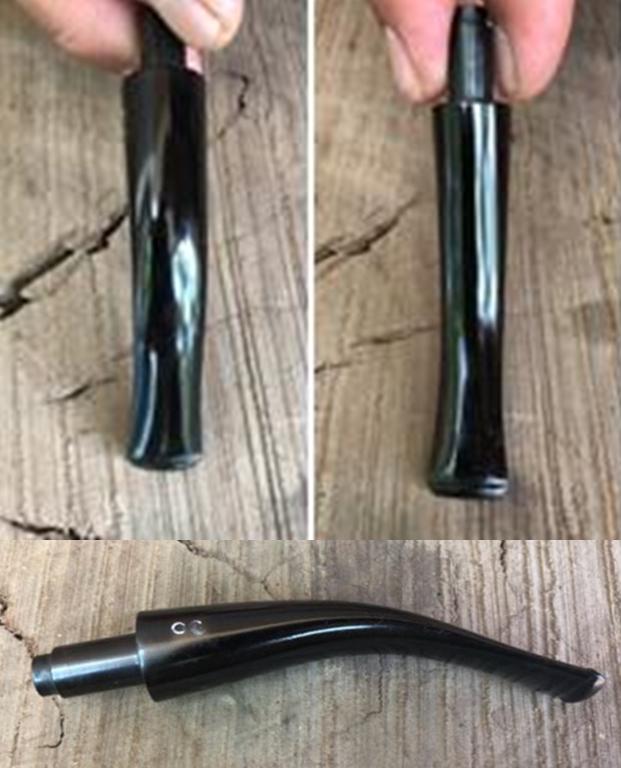
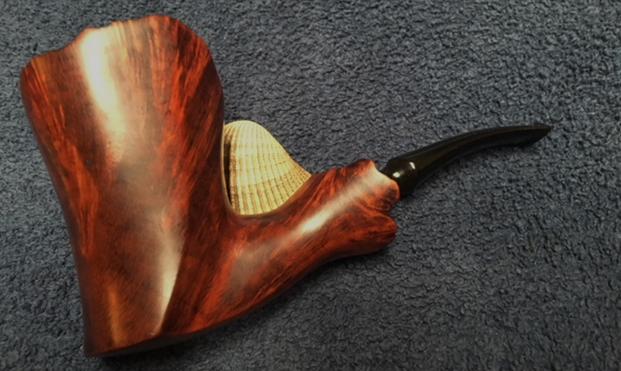
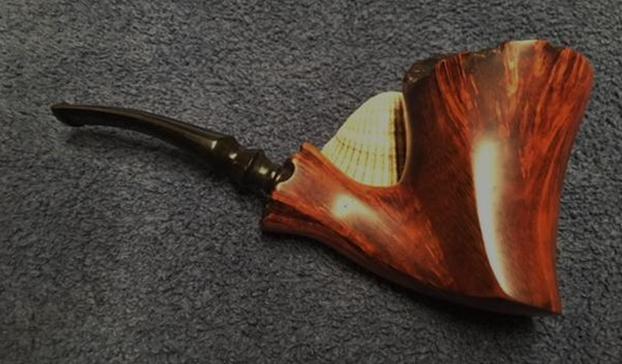
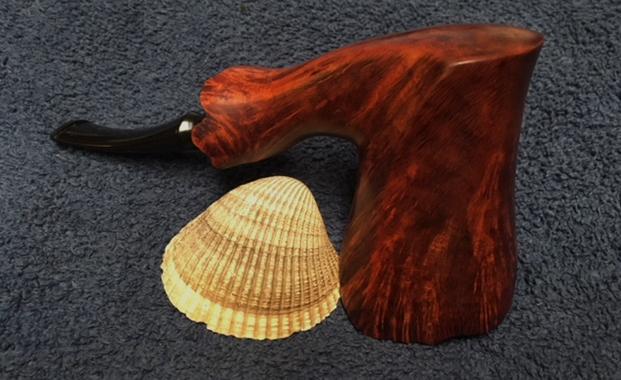
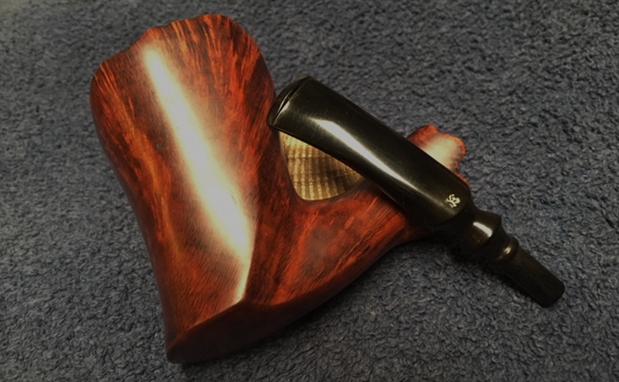
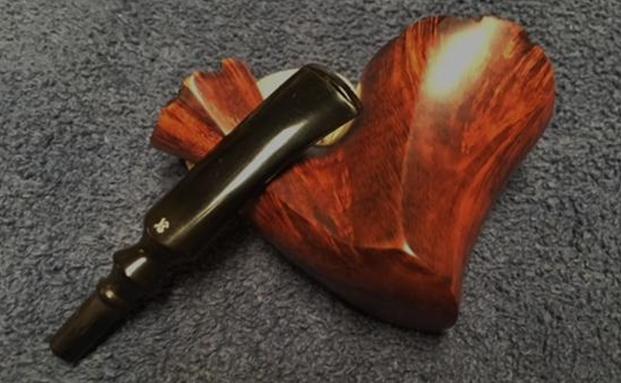
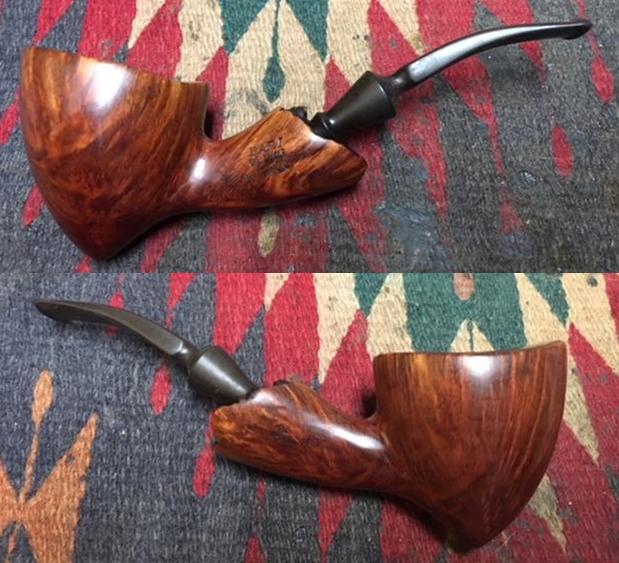
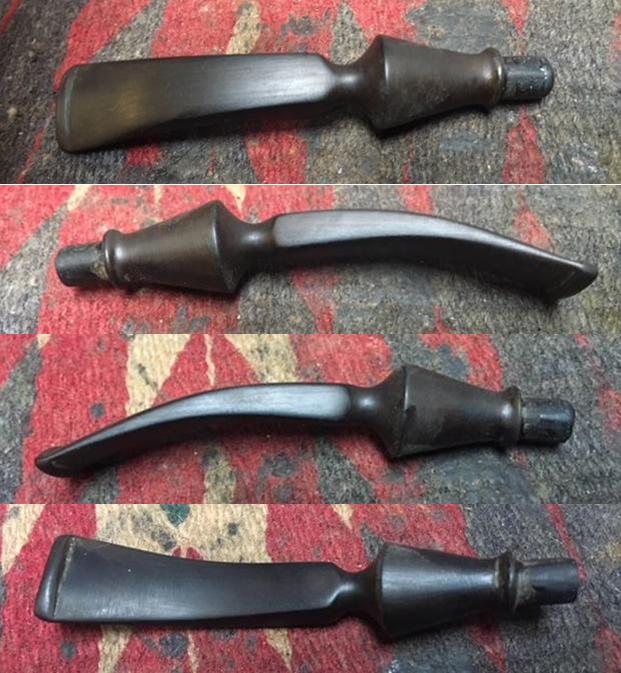
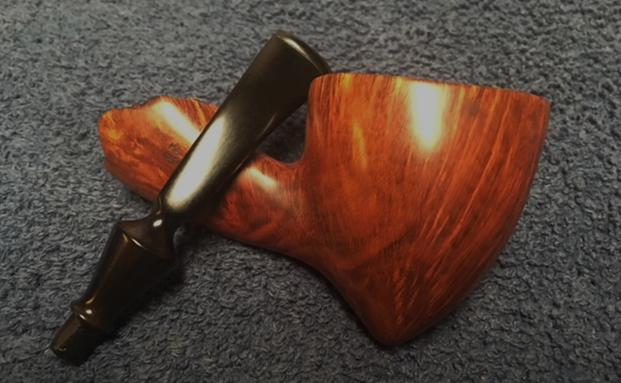
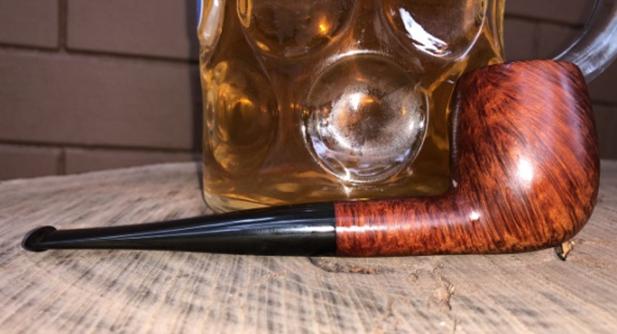
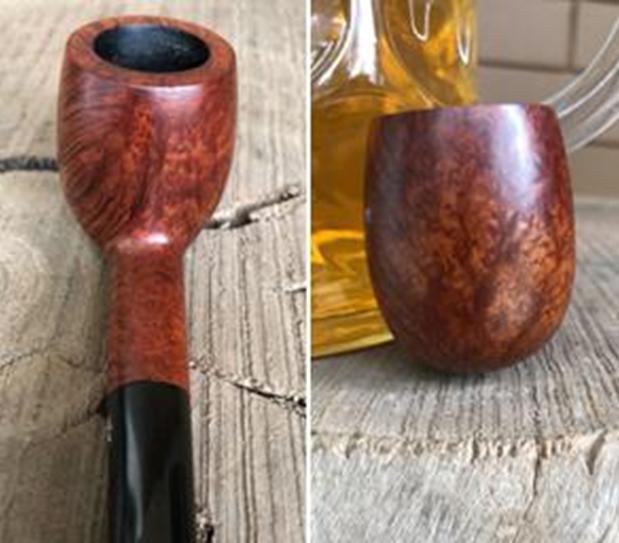
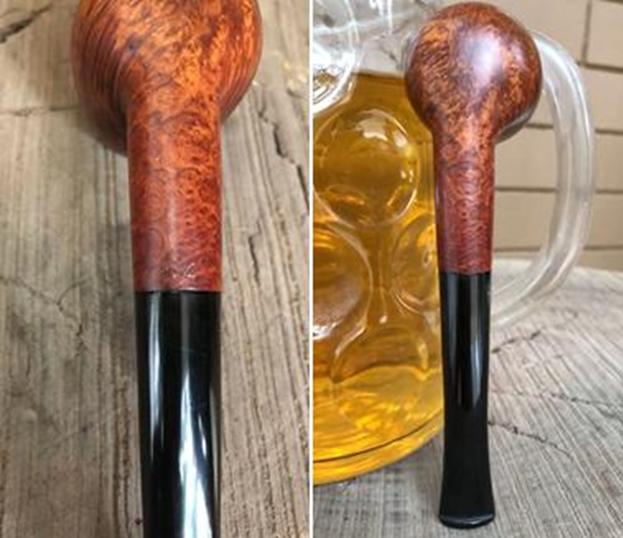
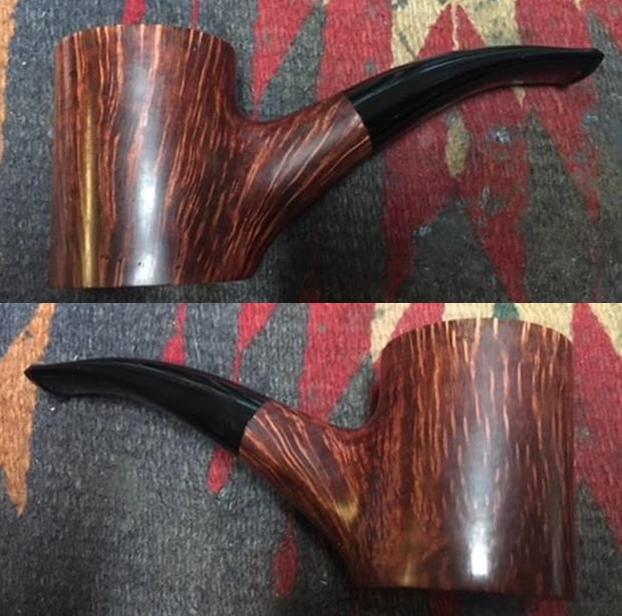
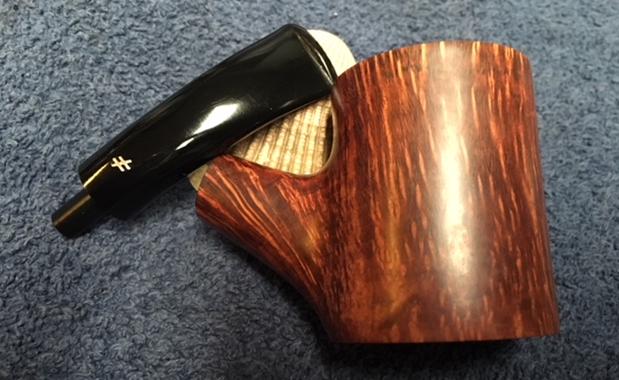
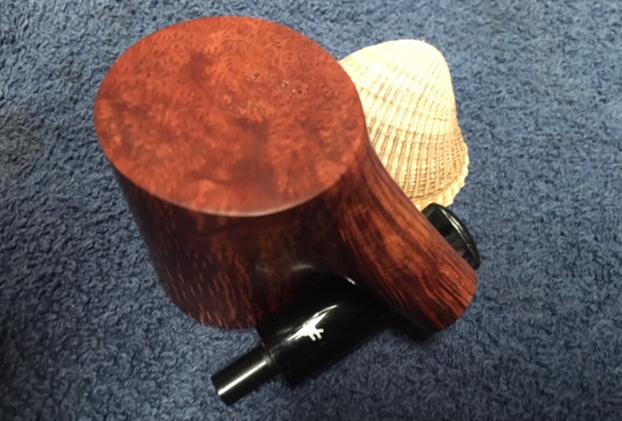
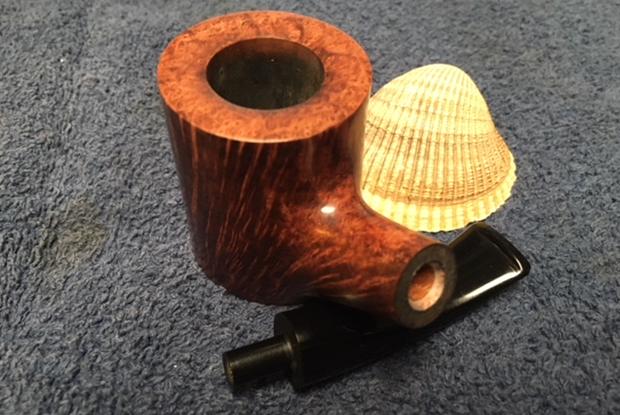
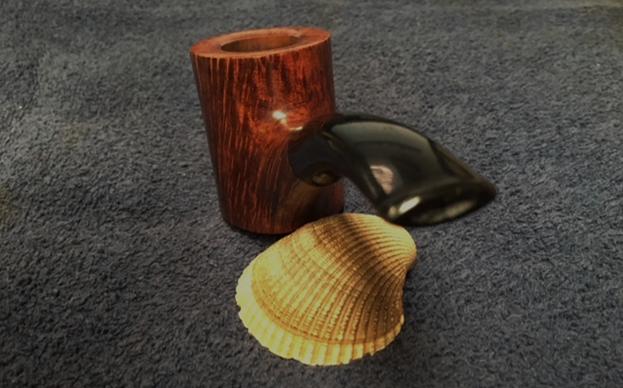
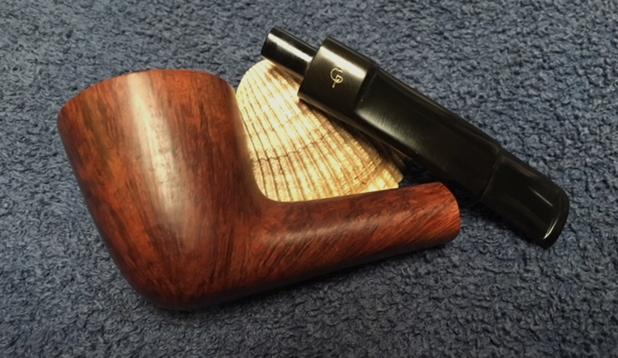
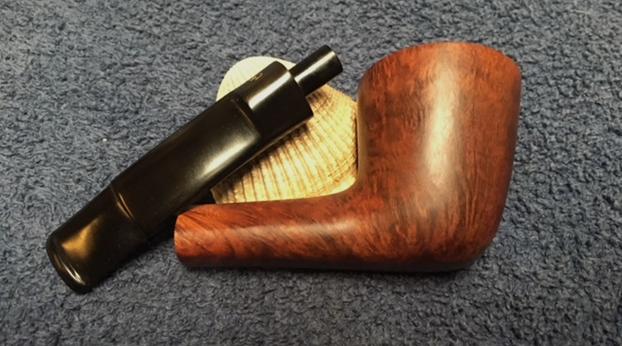
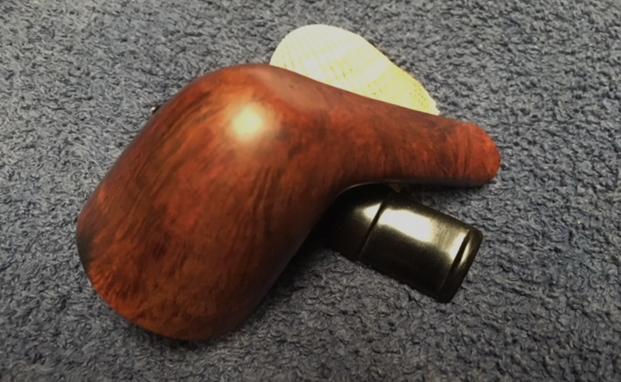
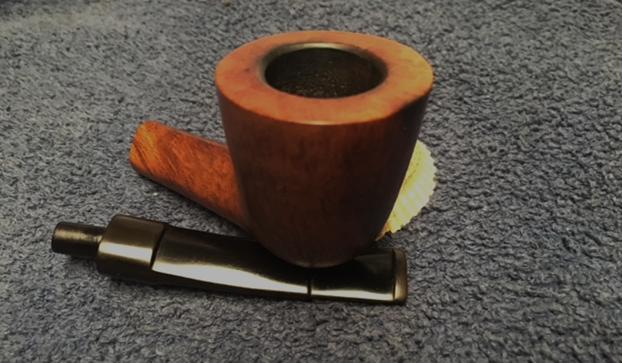
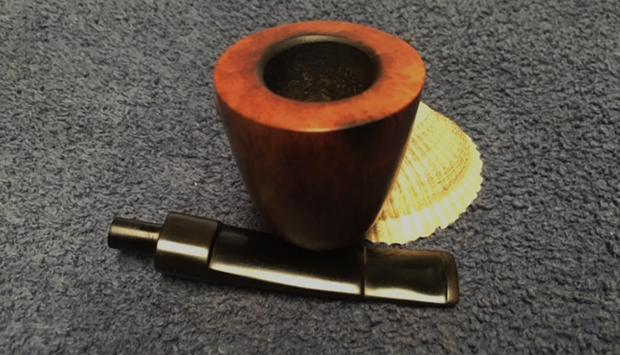
 With the stem polished I put it back on the pipe and lightly buffed the bowl with Blue Diamond. I buffed the stem with a more aggressive buff of Blue Diamond. I gave the bowl several coats of Conservator’s Wax and the stem several coats of carnauba wax and buffed the pipe with a clean buffing pad to raise the shine. I hand buffed it with a microfiber cloth to deepen the shine. The pipe polished up pretty nicely. The finished pipe is shown in the photos below. This is the sixth of Farida’s Dad’s pipes that I am restoring from his collection. I am looking forward to hearing what Farida thinks once she sees the finished pipe on the blog. This Charatan Distinction will soon be on the rebornpipes store if you want to add it to your rack. The dimensions are Length: 6 inches, Height: 1 3/4 inches, Outside diameter of the bowl: 1 1/2 inches, Chamber diameter: 7/8 inches. Thanks for walking through the restoration with me as I worked over another of the her Dad’s pipes. I have two more of his pipes to work on – one more Dunhill and one Charatan’s Make.
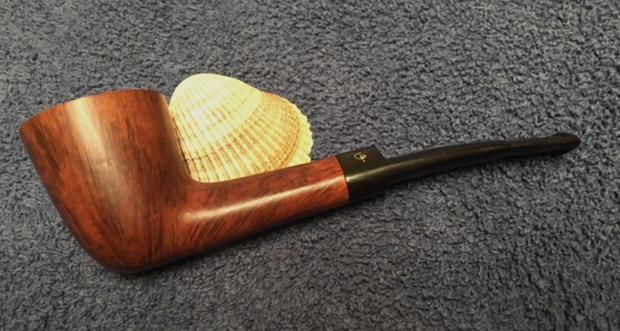


 I searched pipedia.com for information about the brand and try to place the period when this model was introduced by Dr. Grabow. The site has very detailed information about the brand and various models and is a highly recommended read. I have extracted only the relevant portions here:-
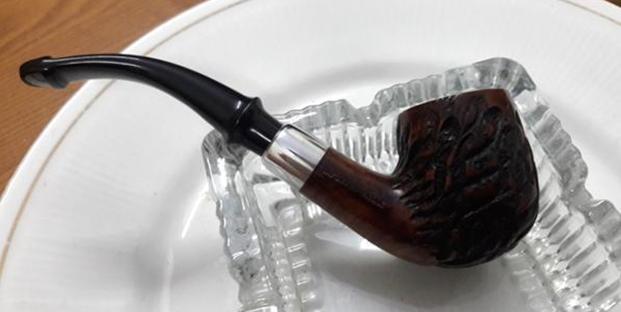
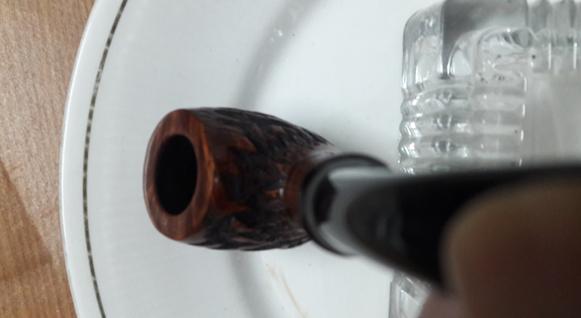
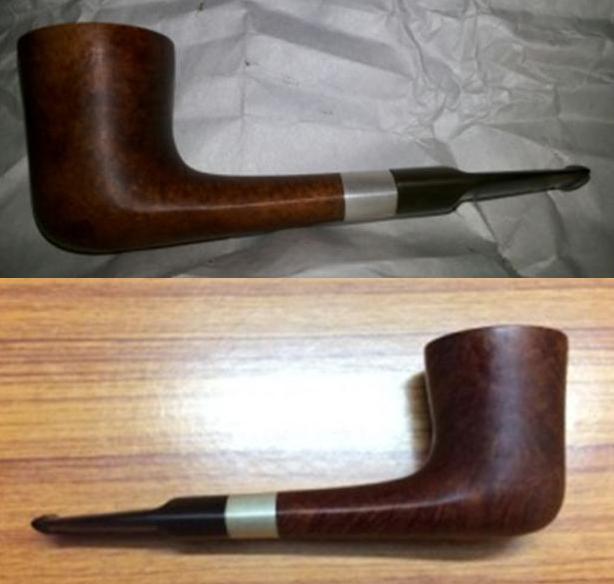
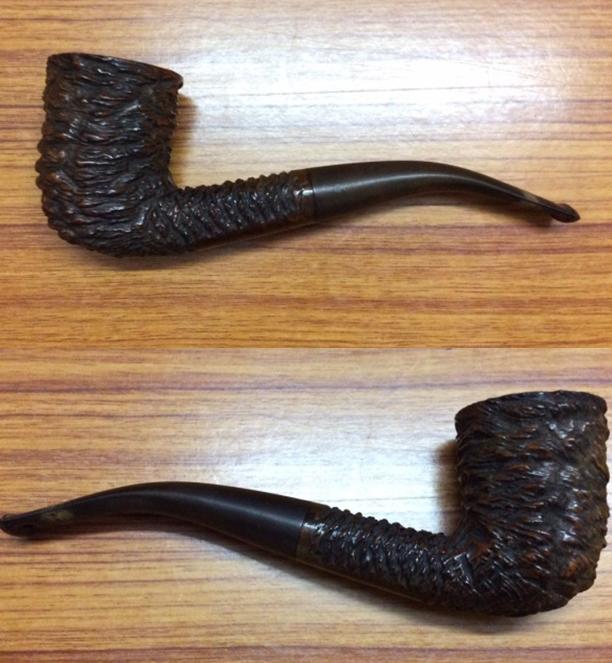
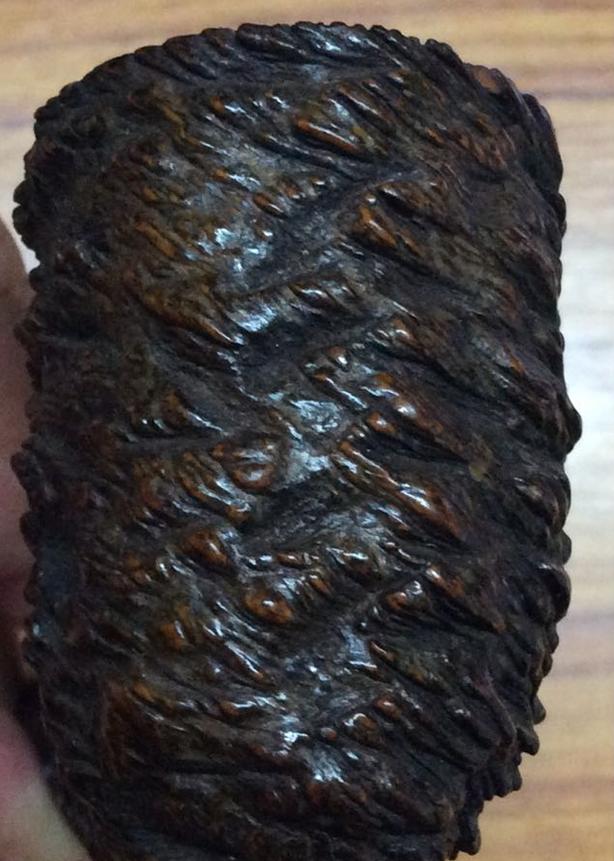
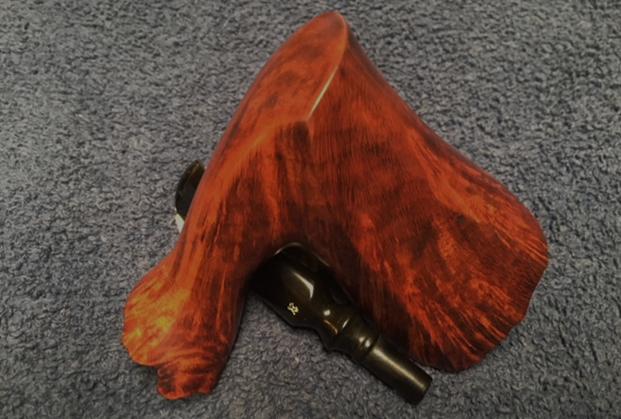
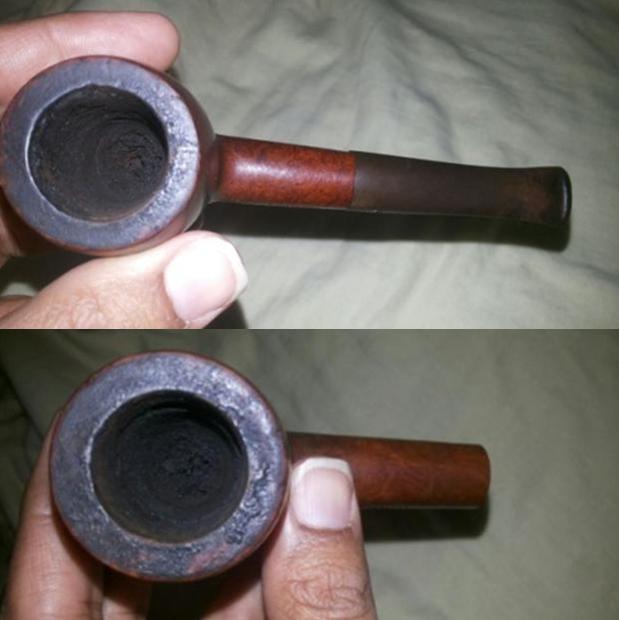
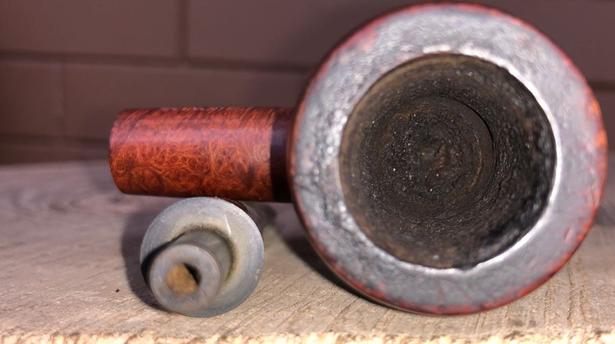
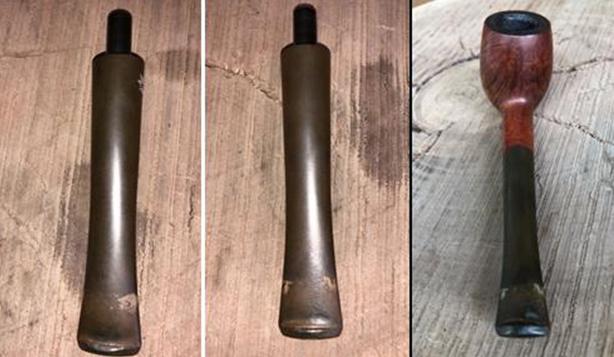
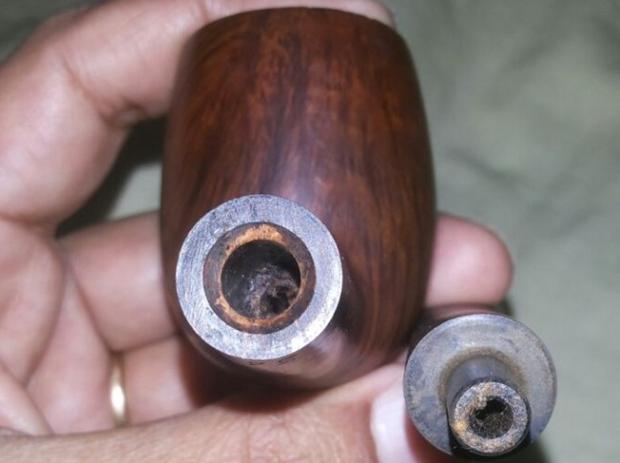
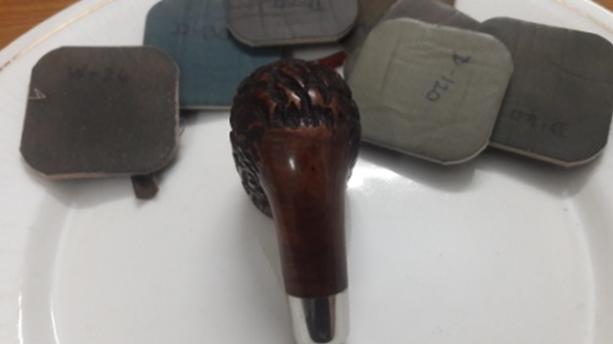
 The chamber is lightly caked and has overflow of lava on the rim top. This will have to be cleaned and sanded down if the rim top surface is damaged underneath the overflowing lava. The inner and outer edge has minor dents and dings.
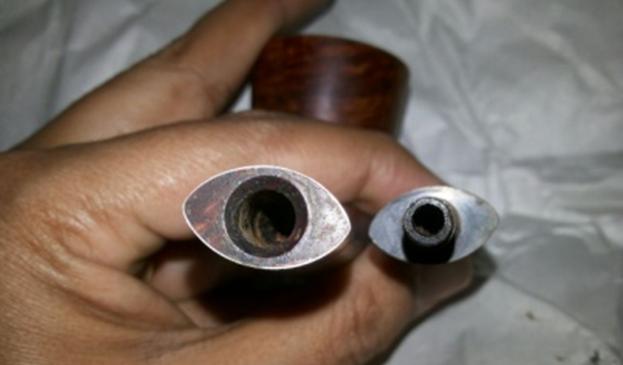
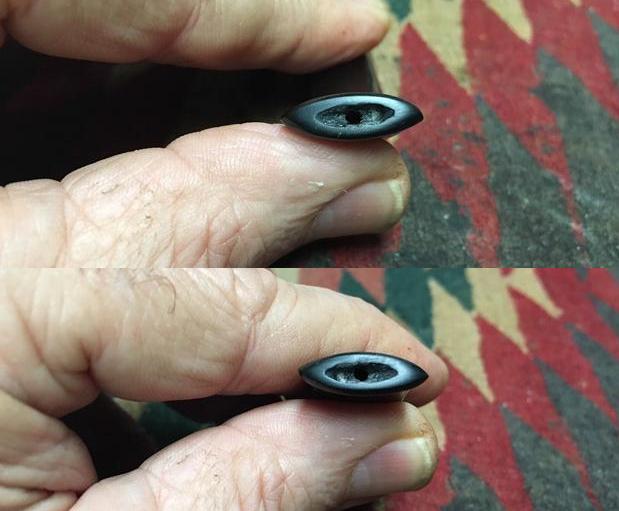
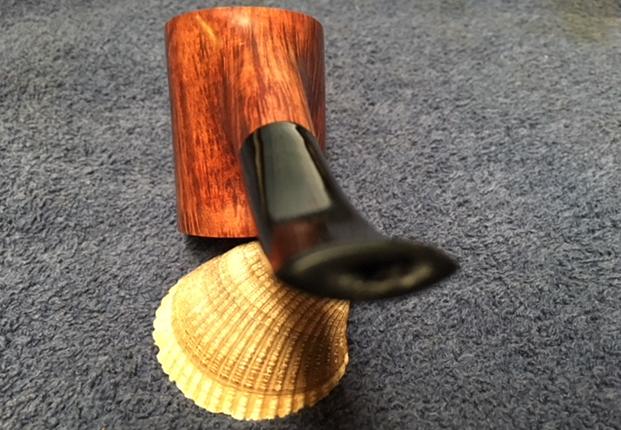
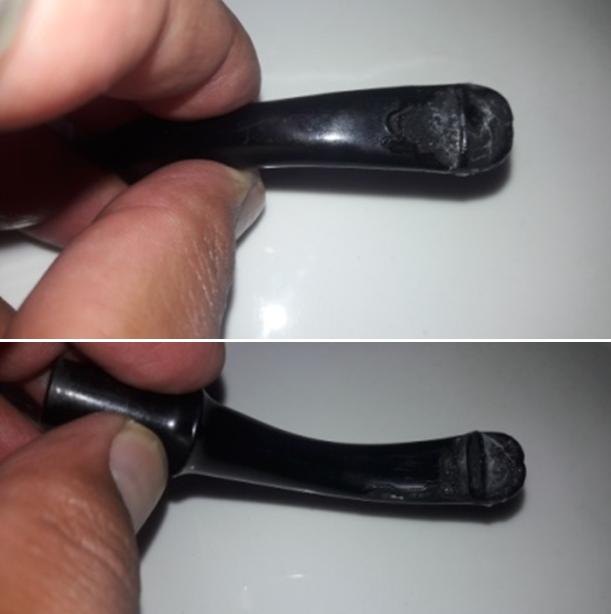
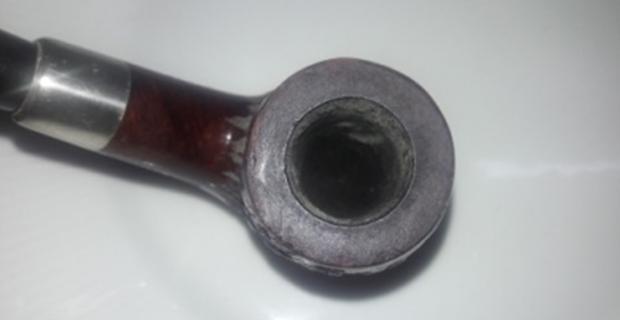 The stem appears to be ebonite and has a plastic feel to it. The stem is a copy of the famed Peterson’s P-Lip button with the difference in the bore being dead center on the end of the button as opposed to being on the top surface. It has extensive damage to the upper and lower surface of the lip. It is peppered with tooth chatter and has one deep bite mark each on both the surfaces. This will have to be addressed.
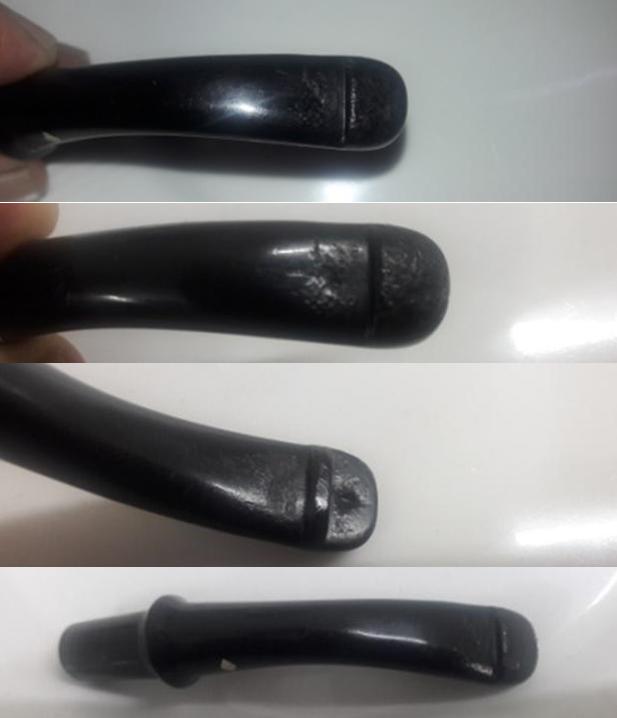 The mortise is relatively clean and air flows freely through the airway in the pipe and shank.
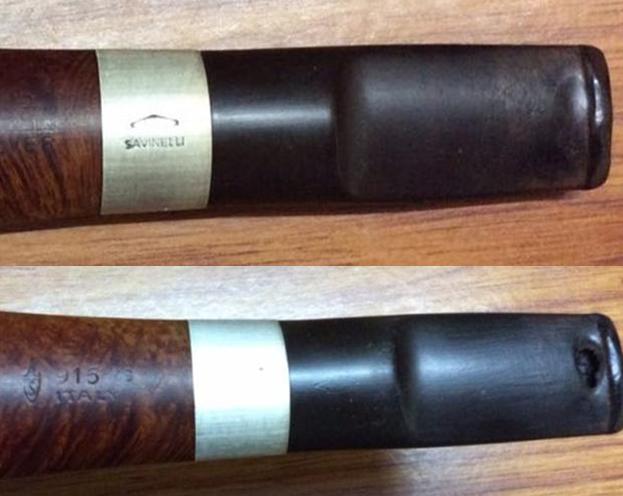
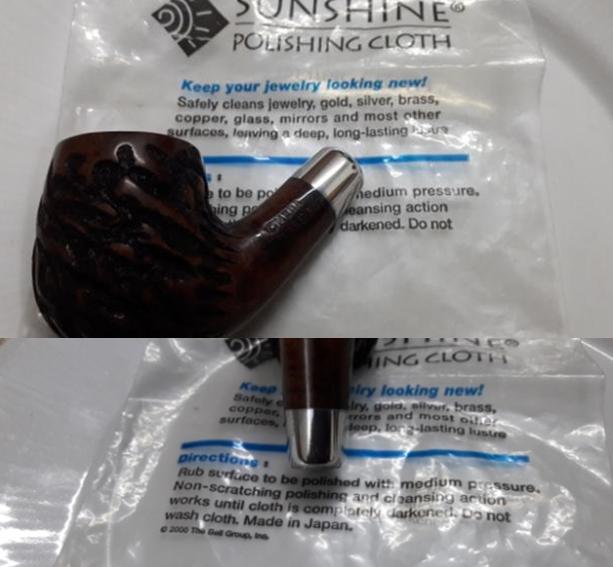
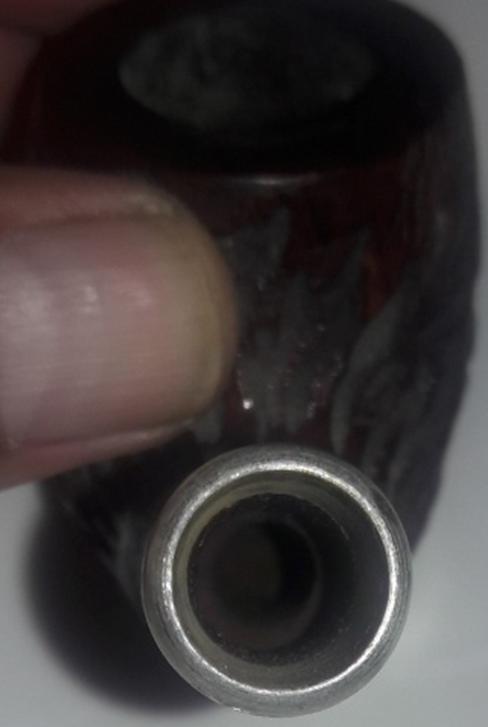 The nickel ferrule has lost its shine and shows minor spots of corrosion. I think it will polish up nicely.
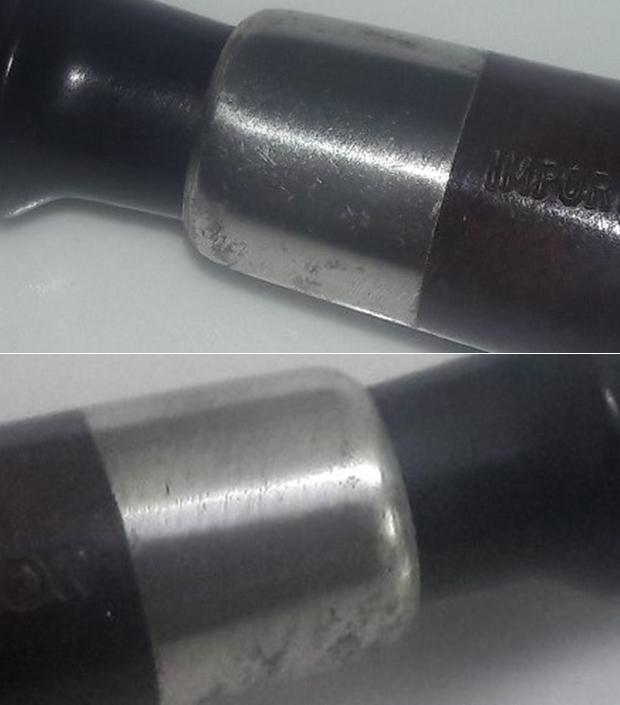 THE PROCESS
 Once the chamber was cleaned, I turned my attention to the stummel and tried to get rid of the lacquer coating. I started by wet sanding with a 1500 grit micromesh pad and soon realized that it would not work. I tried sanding with 800 grit sand paper without any success. Soon I found myself sanding the stummel with 150 grit sand paper. The lacquer was very difficult to get rid off and after a considerable time, I was finally able to completely remove the lacquer coating. Believe you me, my fingers had started to hurt and sitting at the table for 3-4 hours at a stretch caused cramps in my back. But the end result was pleasing.
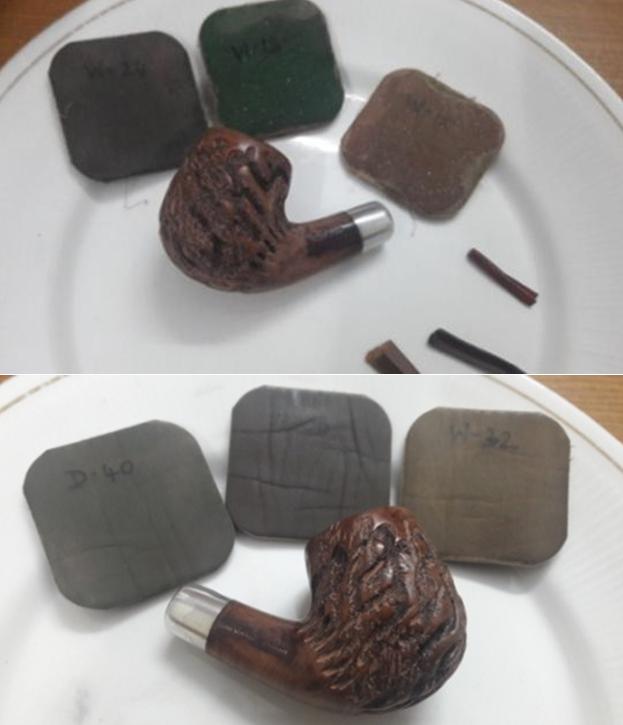
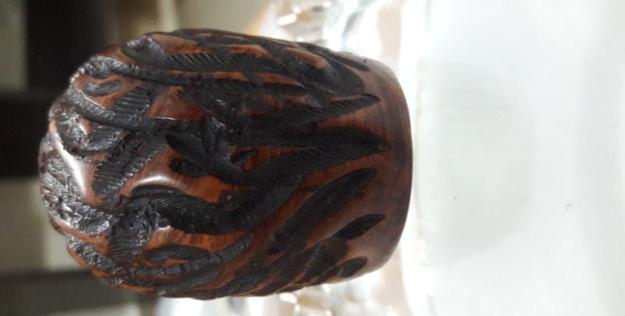
 Once I was through with micromesh pads, I cleaned the stummel with undiluted Murphy’s oil soap and tooth brush. I paid special attention to the deep areas of the rustication, thoroughly cleaning it with the brush. I dried the bowl with cotton cloth and paper towels.
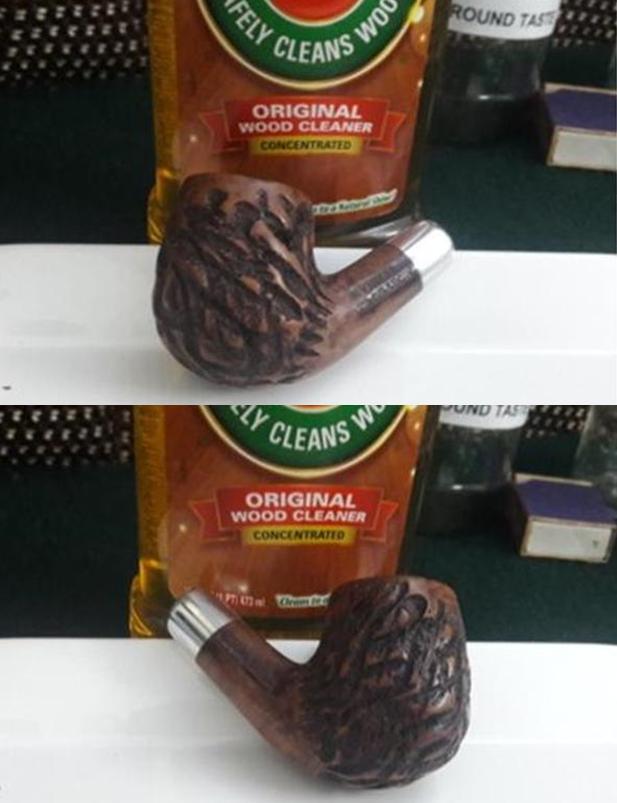 I rubbed “Before and After Restoration balm” in to the stummel with fingers deep into the rustications and let it rest for a few minutes before I buffed it with a horse hair brush. Finally, I polished the stummel with a soft cotton cloth and muscle power!!!! I also polished the nickel ferrule with a jeweler’s cloth. Luckily, the corrosion was superficial and polished up nicely.
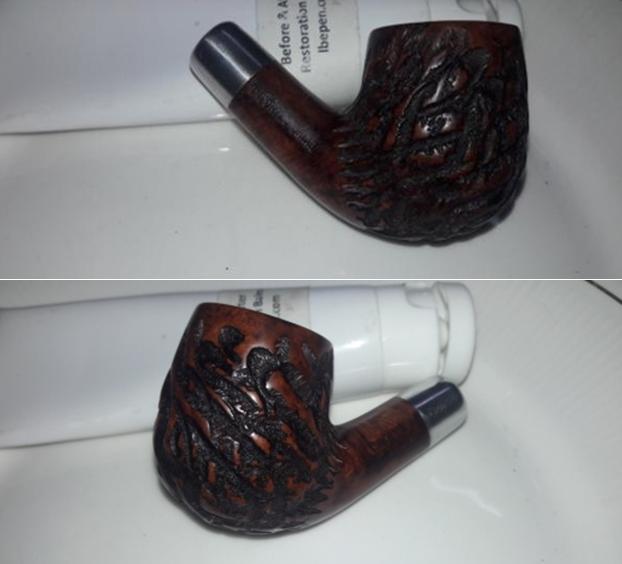
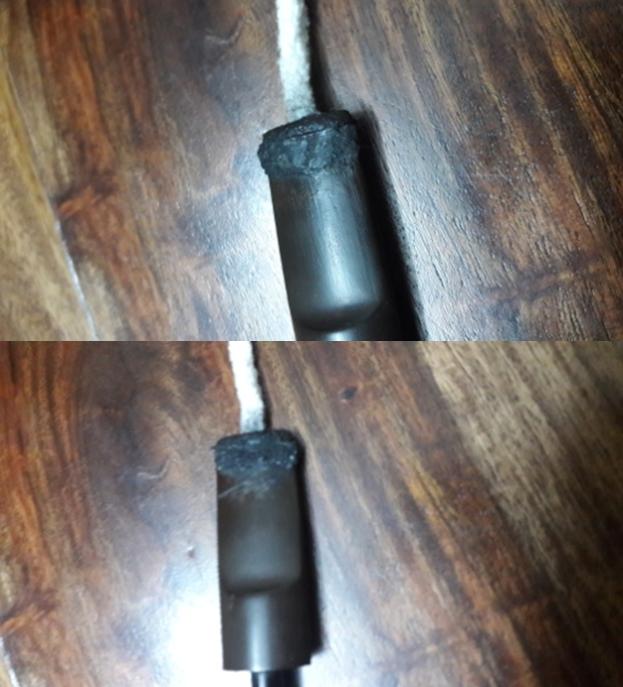
 Turning my attention to the badly damaged stem, I start by cleaning it with cotton pads dipped in isopropyl alcohol. I flamed the stem surface with a Bic lighter to raise the tooth chatter. The deeper tooth chatter and bite marks were filled with clear CA superglue. Thereafter began the time consuming process of curing, sanding with flat head needle file, 220 grit sand paper and finally by micromesh pads. In all, I had to repeat the fill and sand procedure thrice before resorting to final polish using micromesh pads. I also cleaned out the internals of the stem with pipe cleaners dipped in alcohol.
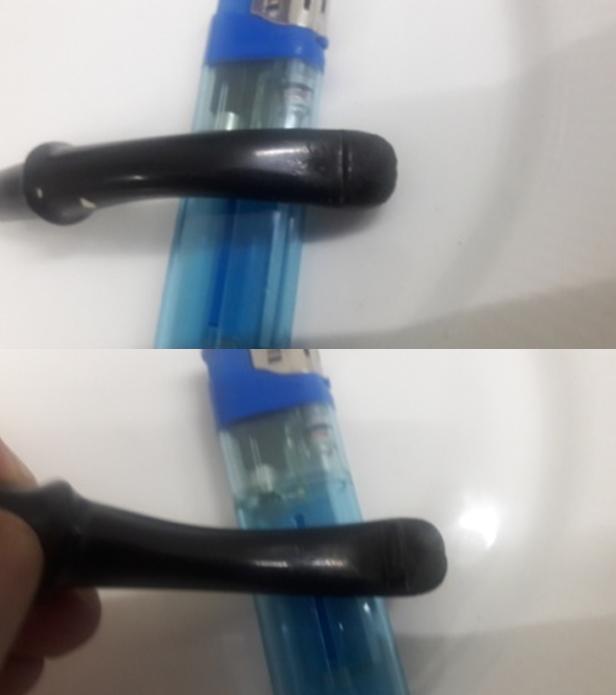


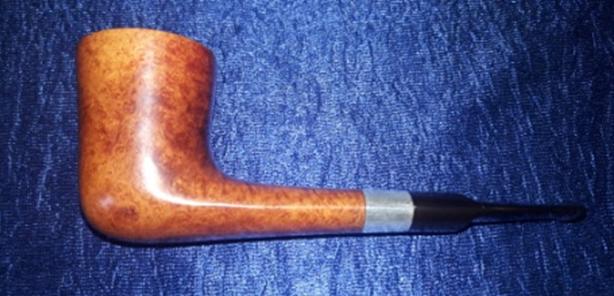
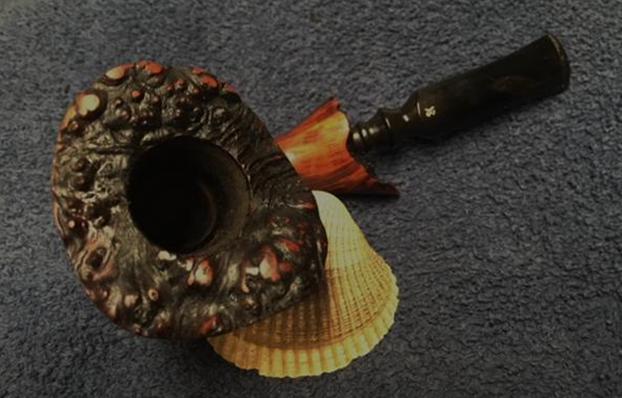
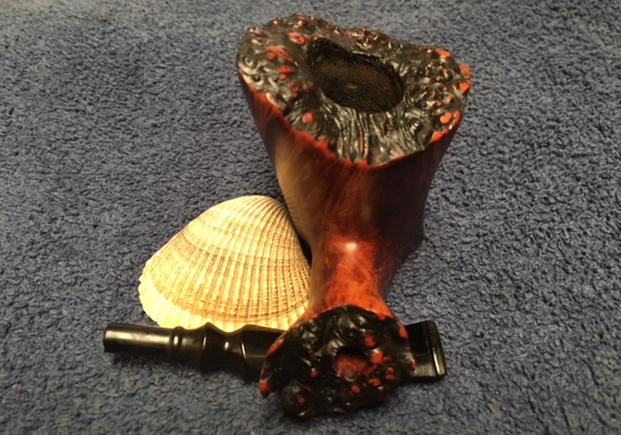
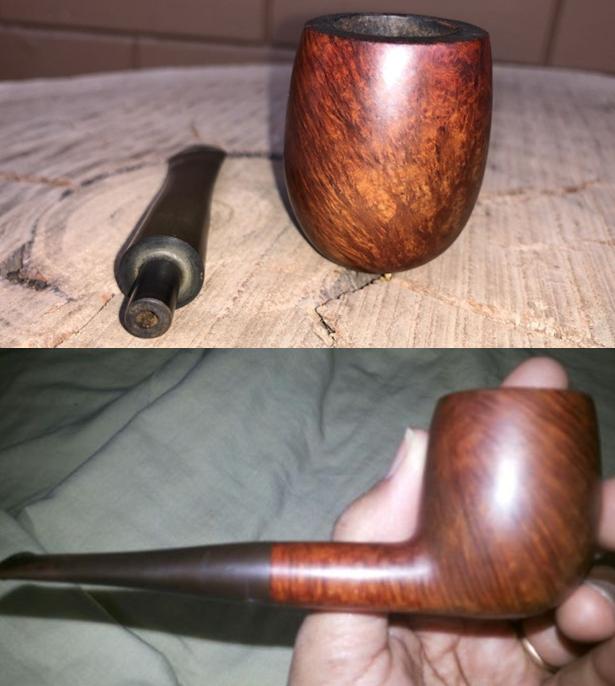
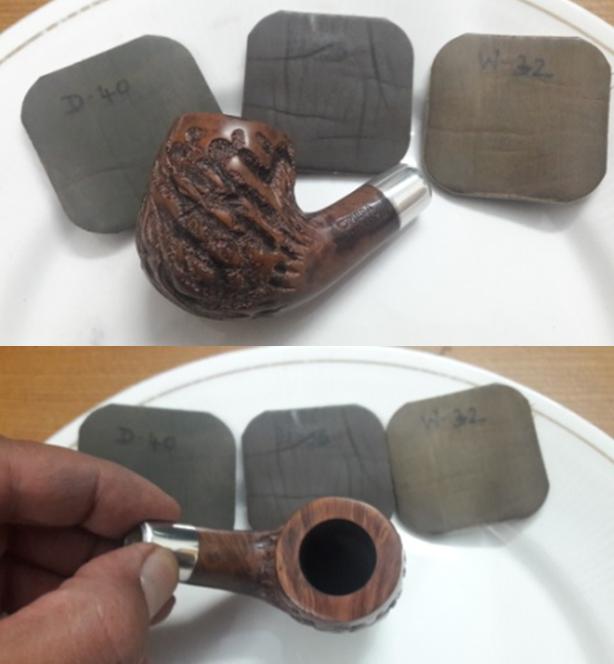
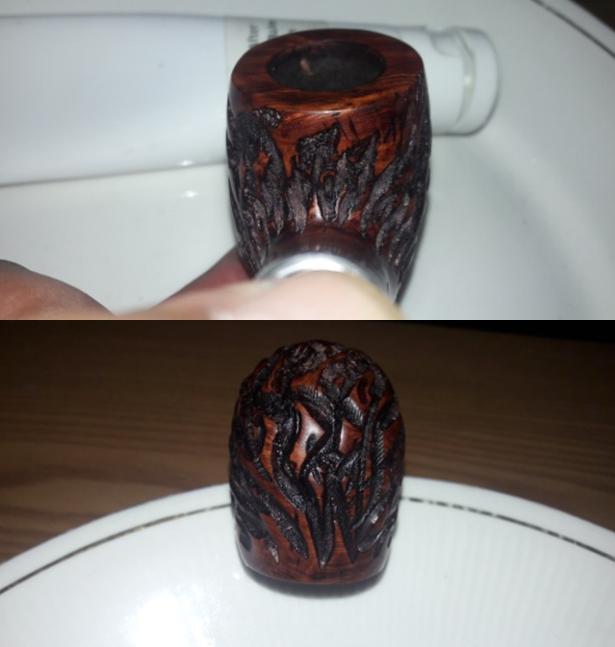
 To finish the pipe, I rubbed a small quantity of Halcyon wax II on to the stummel and gave it a nice polish. The pipe now does look stunning. I love the way the pipe has turned out and I can proudly reply back to this Omega “IT’S YOU!!!!!!” The finished pipe is shown below.