Blog by Dal Stanton
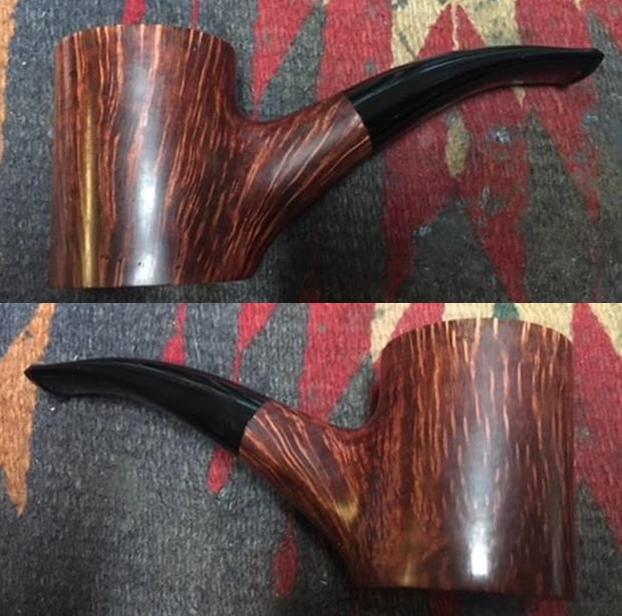
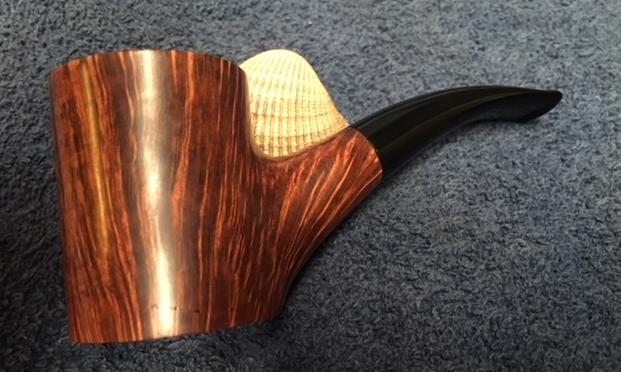
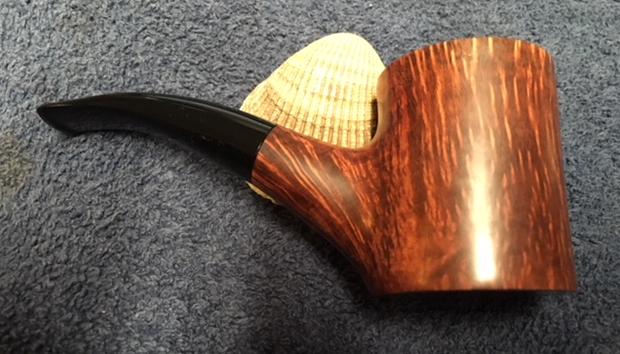
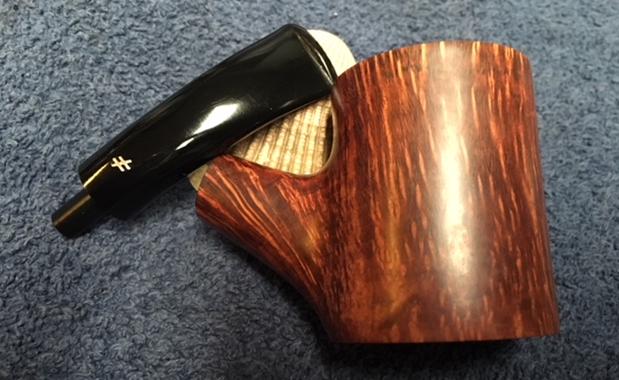
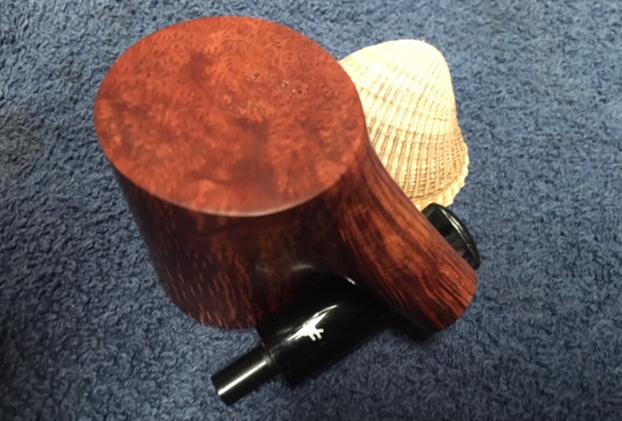
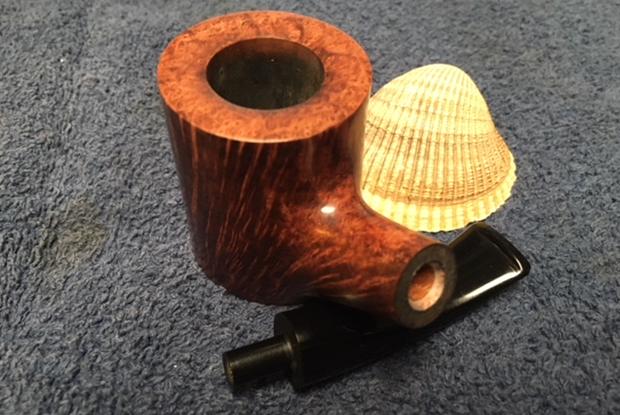
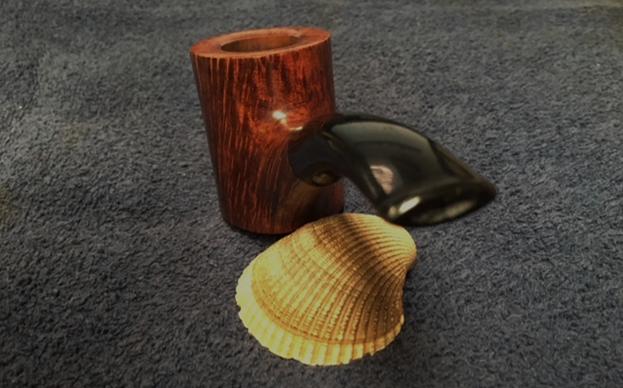
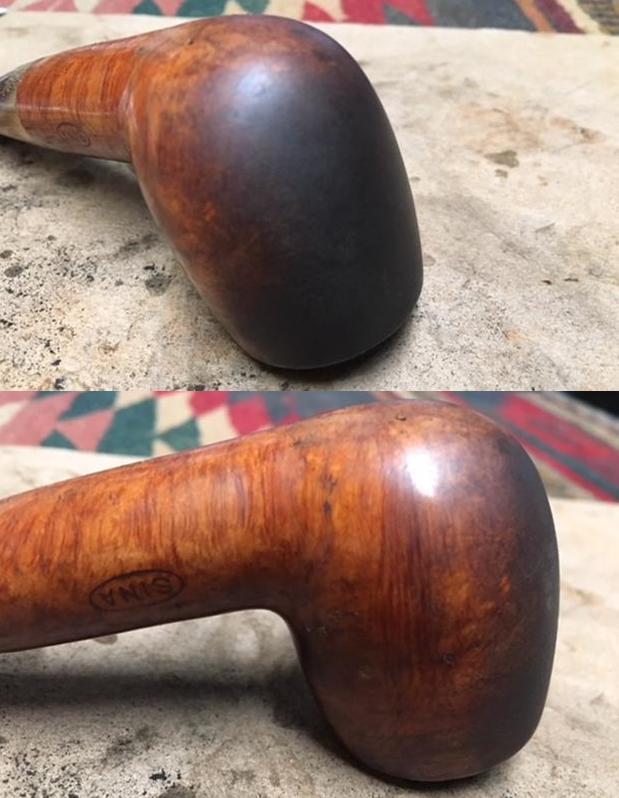
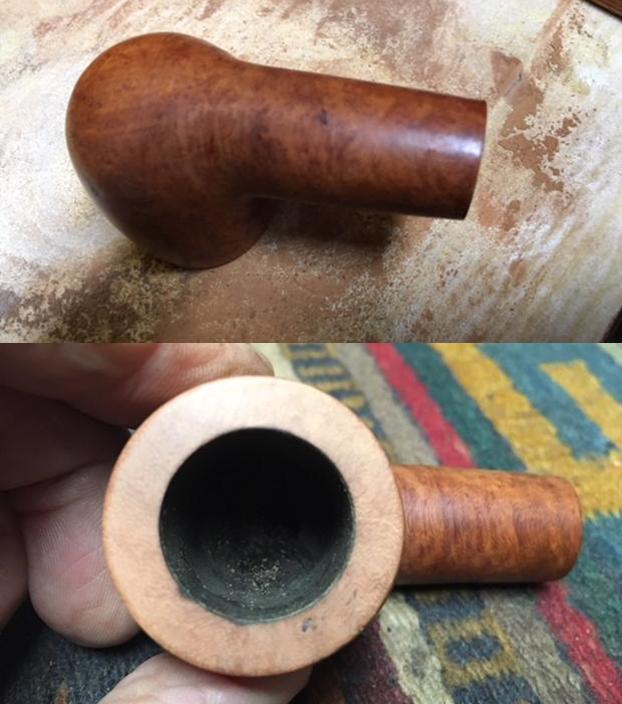
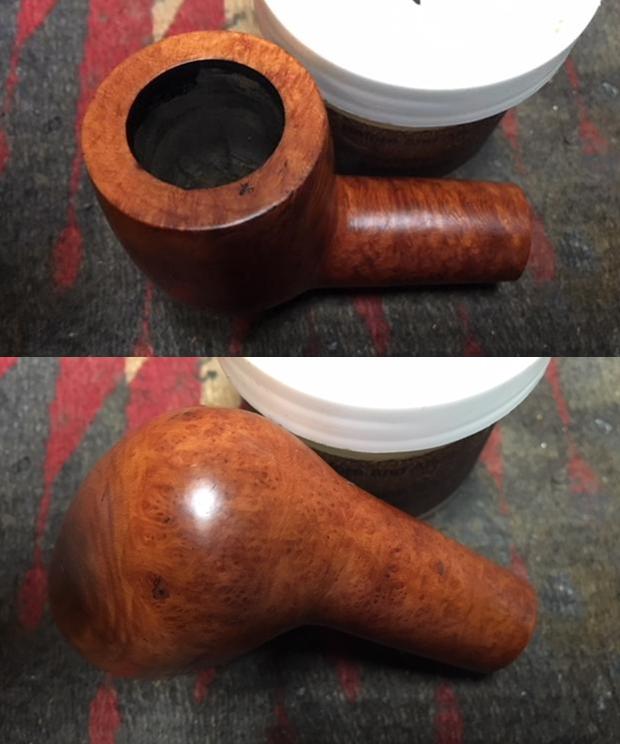
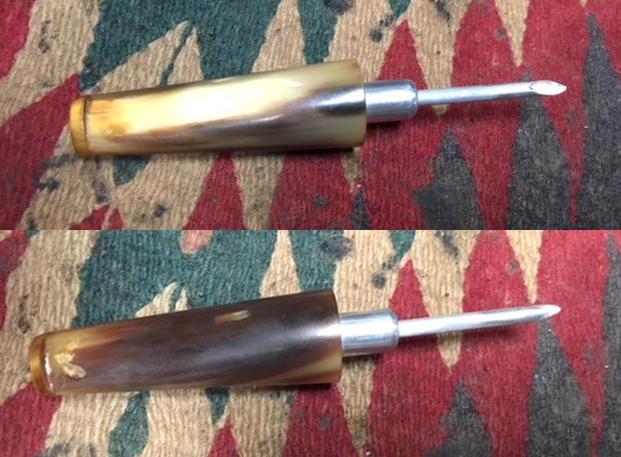
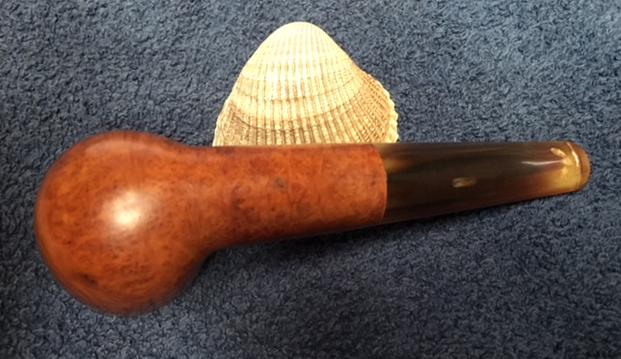
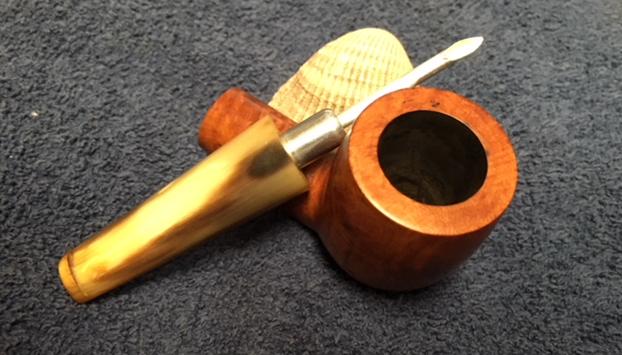
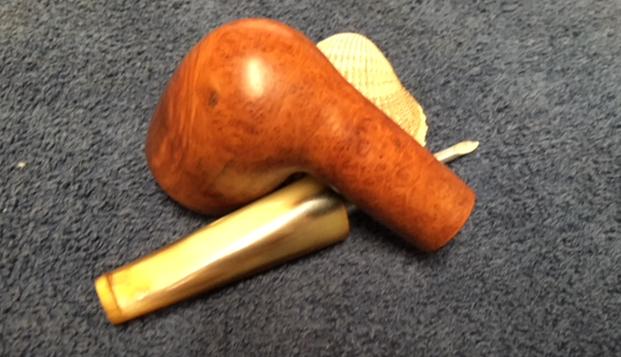
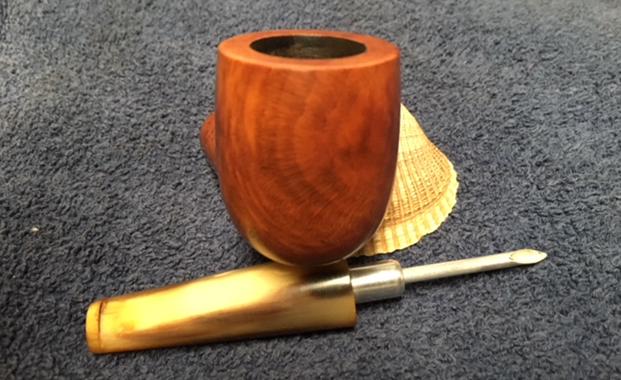
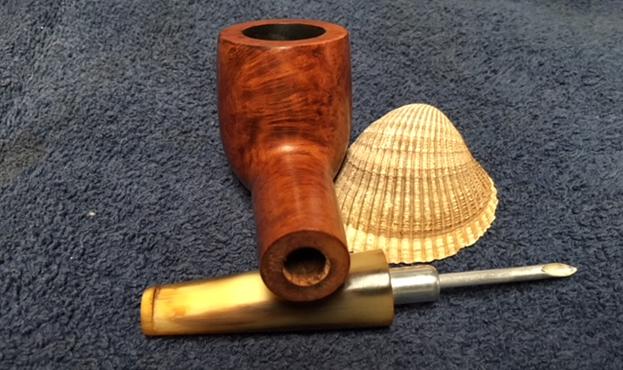
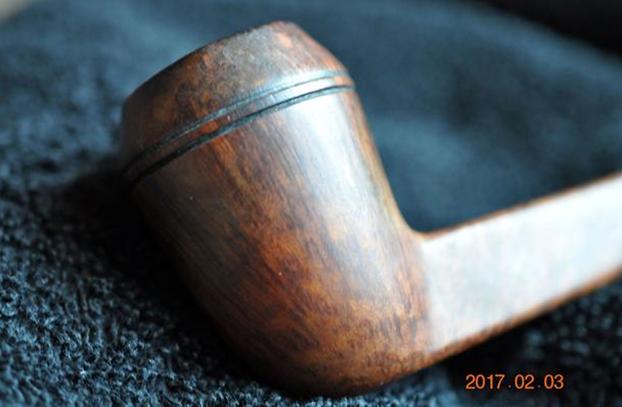
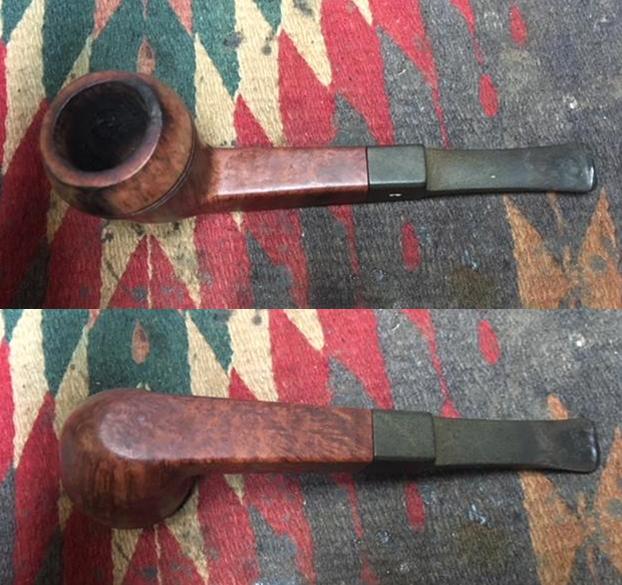
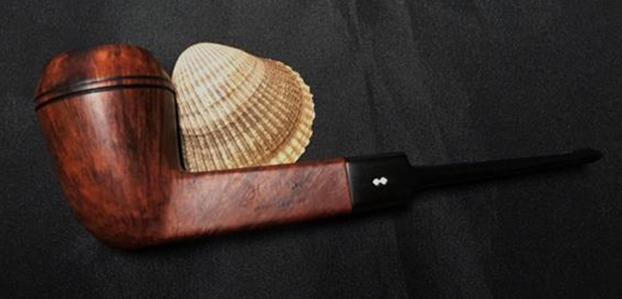
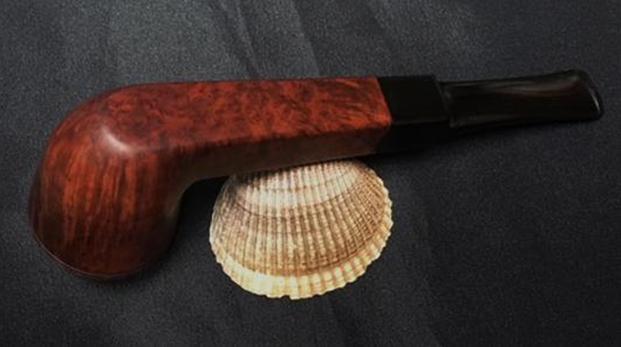
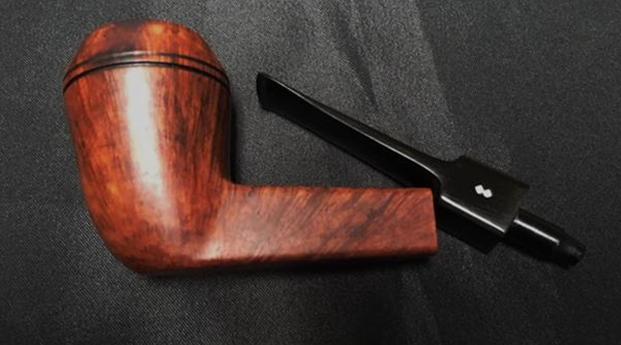
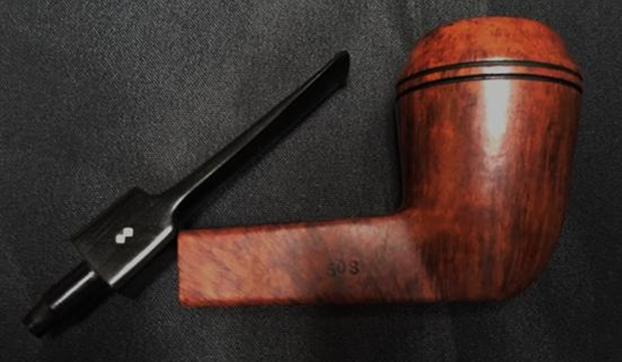
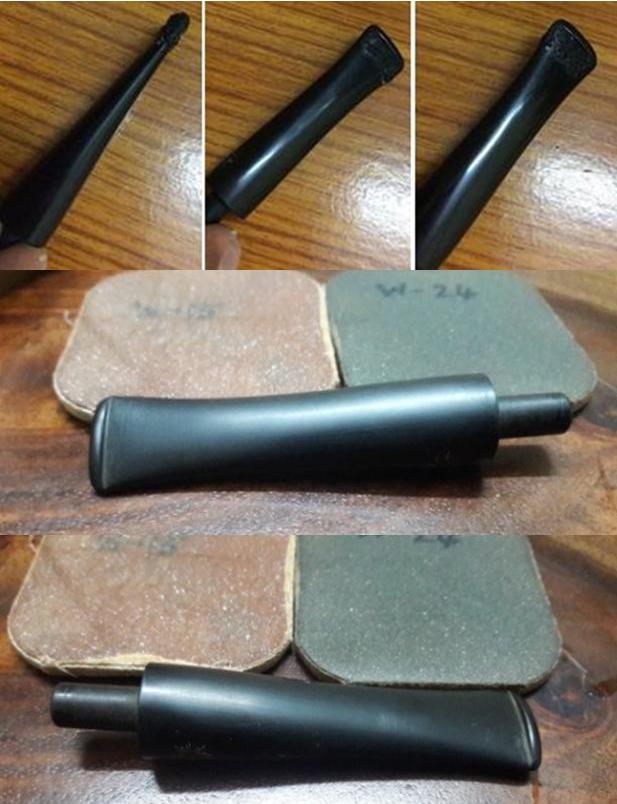
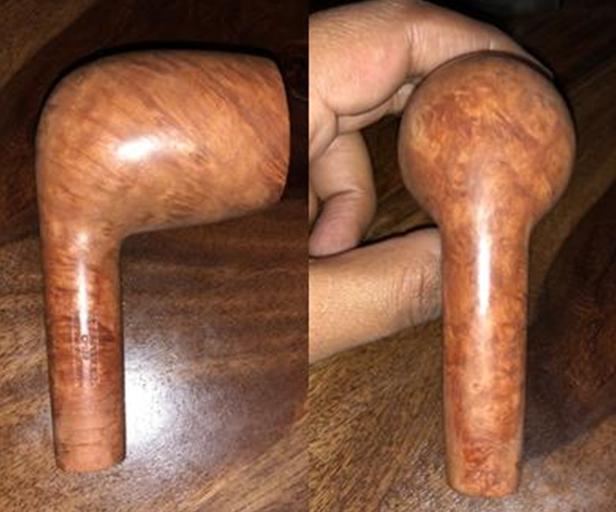
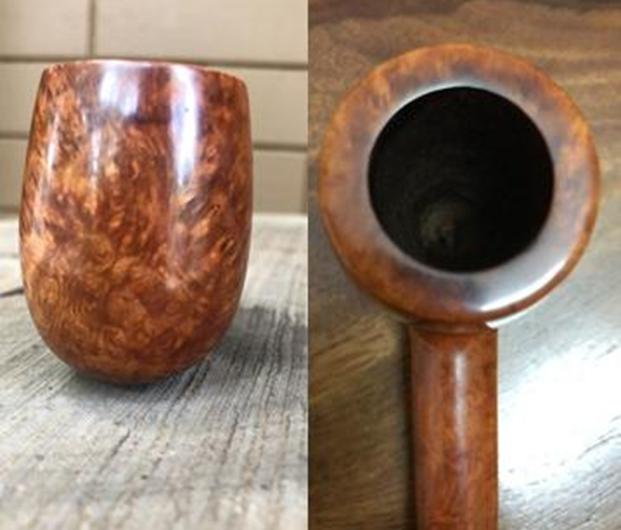
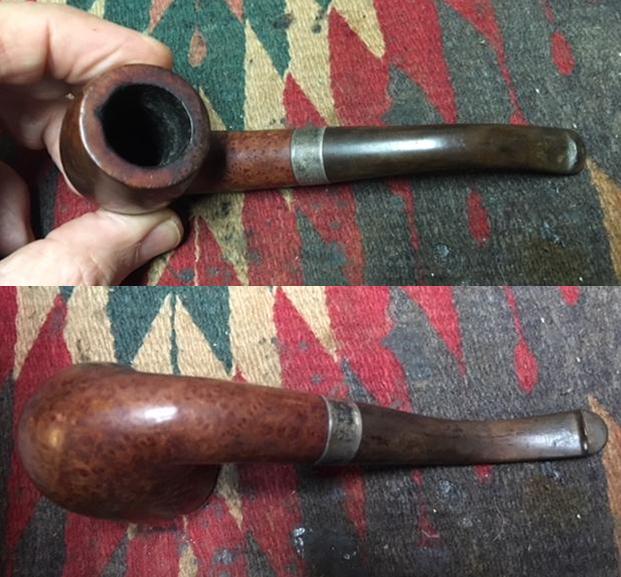
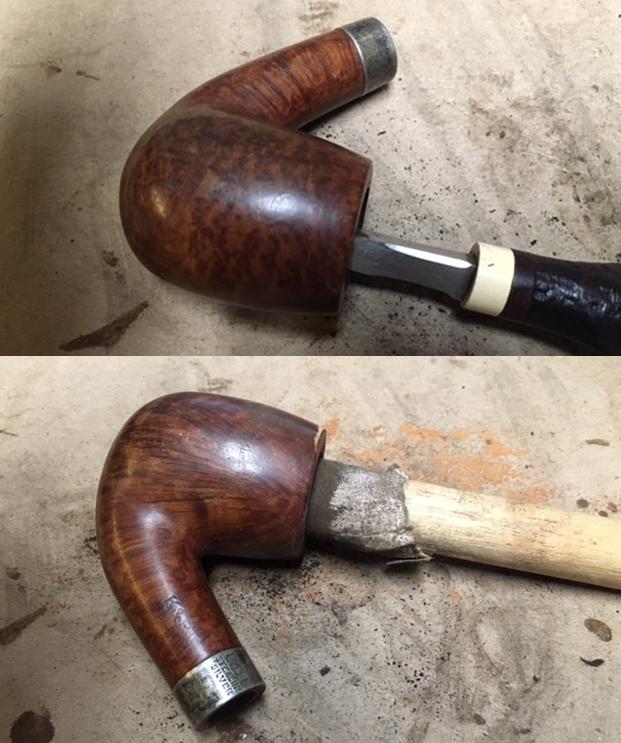
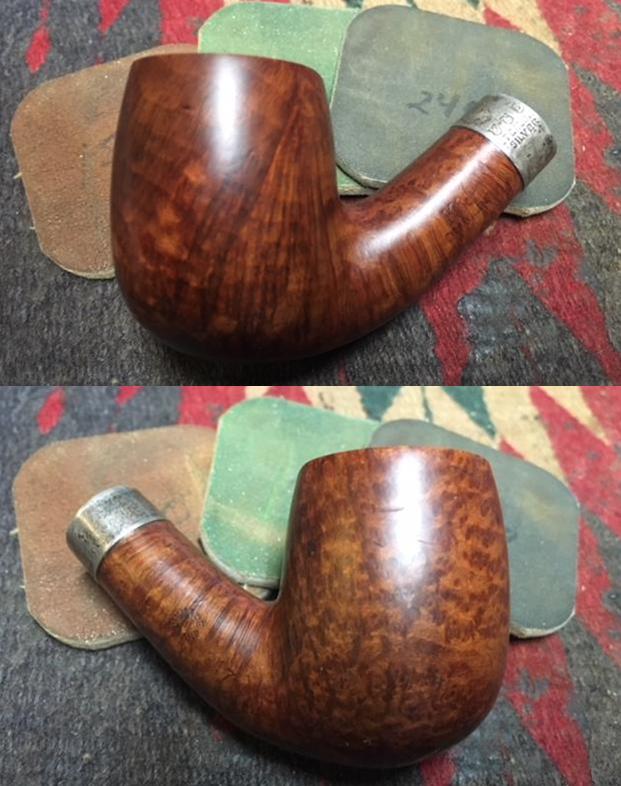
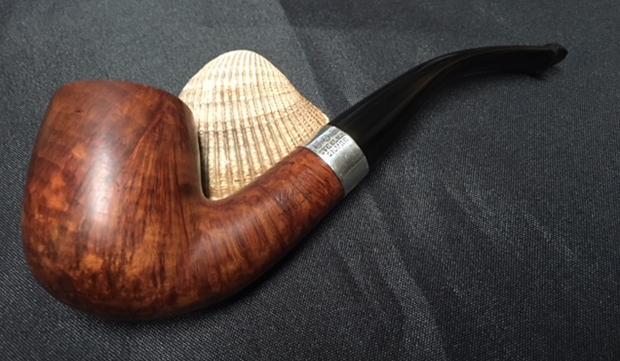
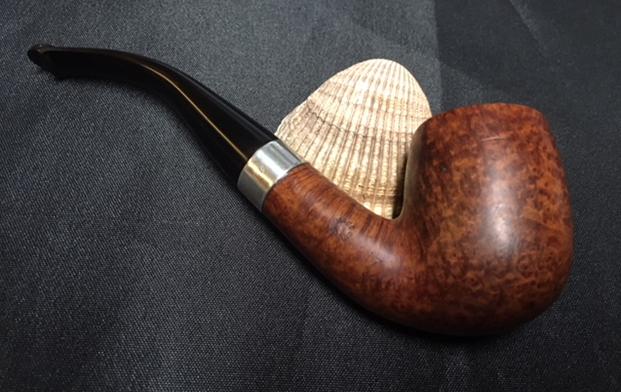
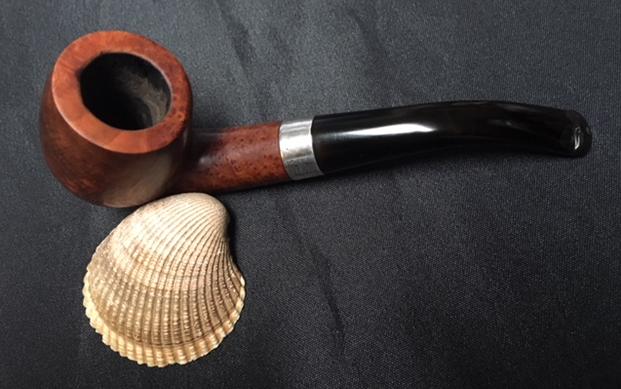
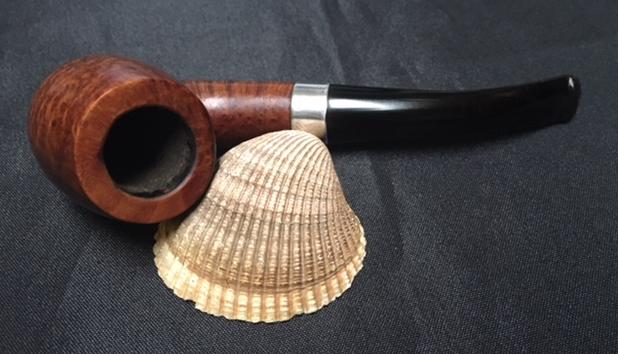
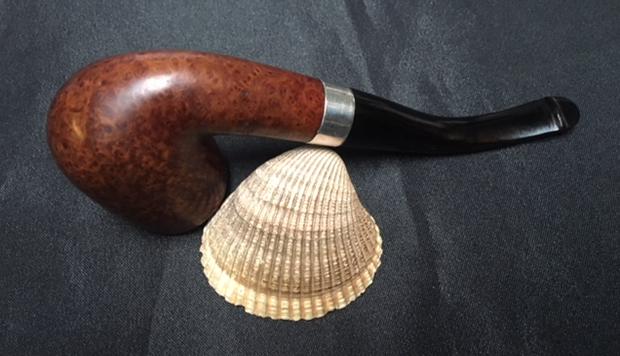
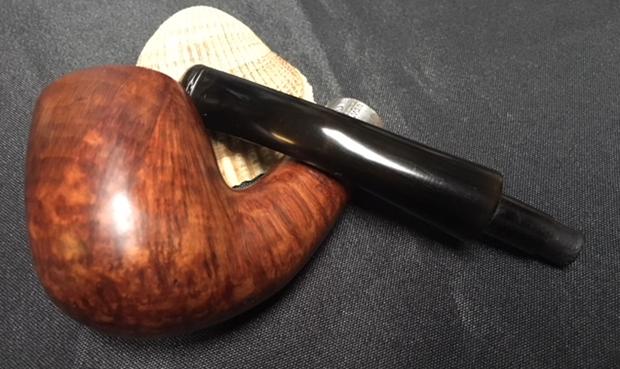
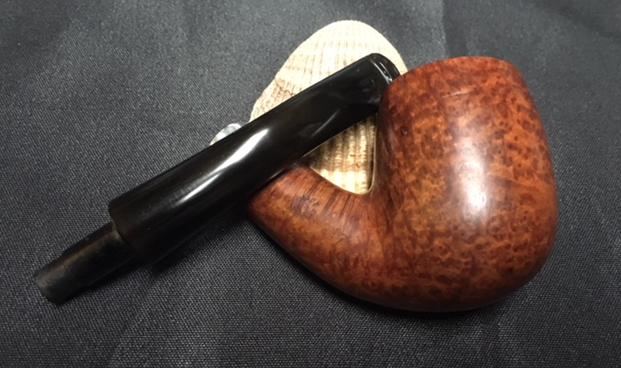
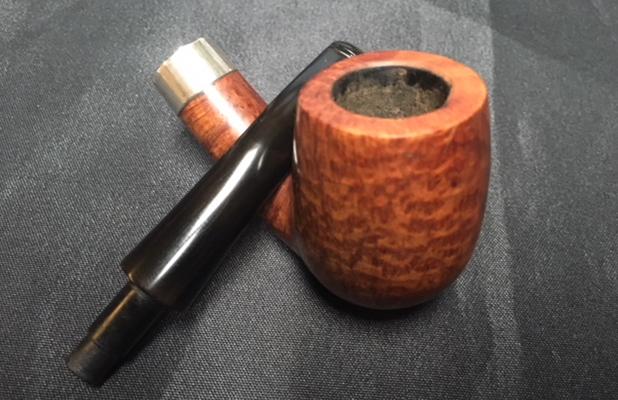
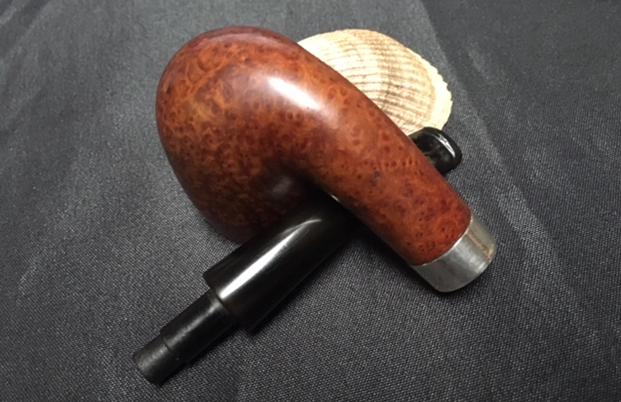
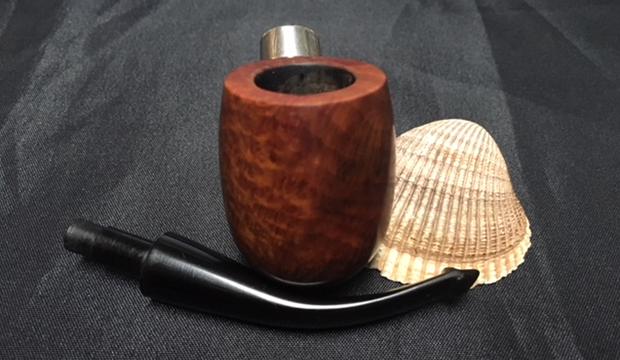
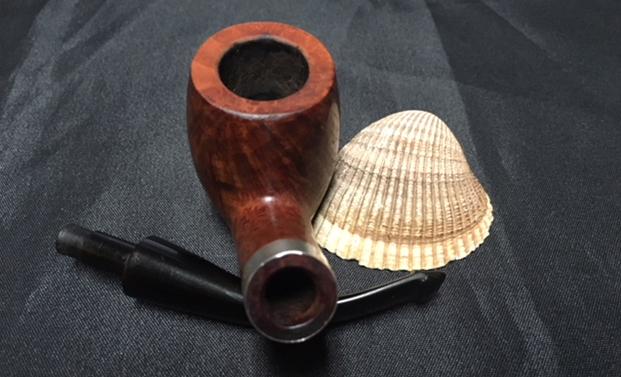
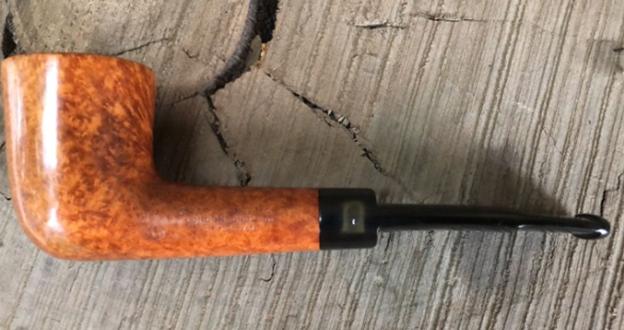
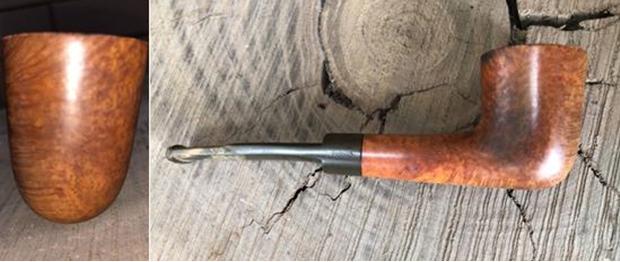
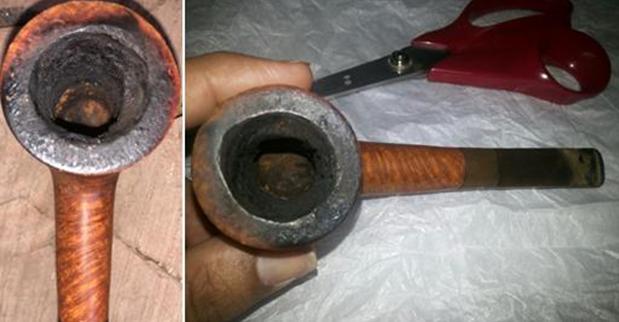
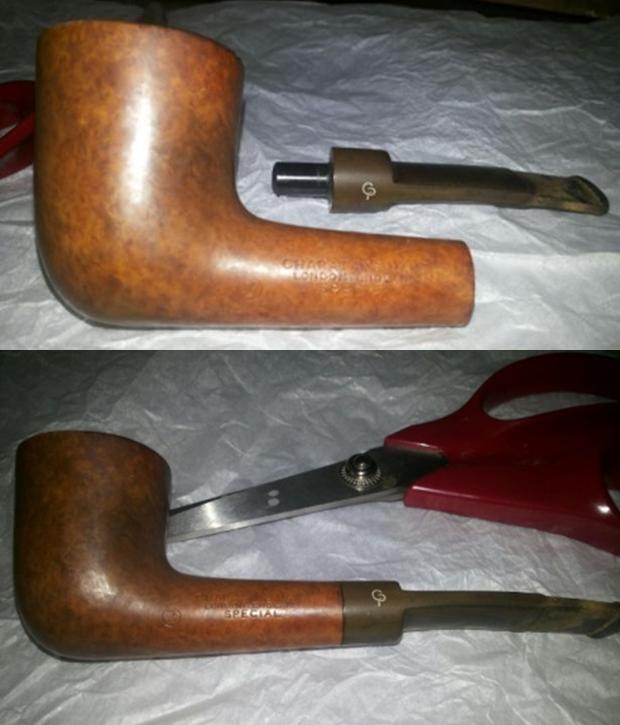
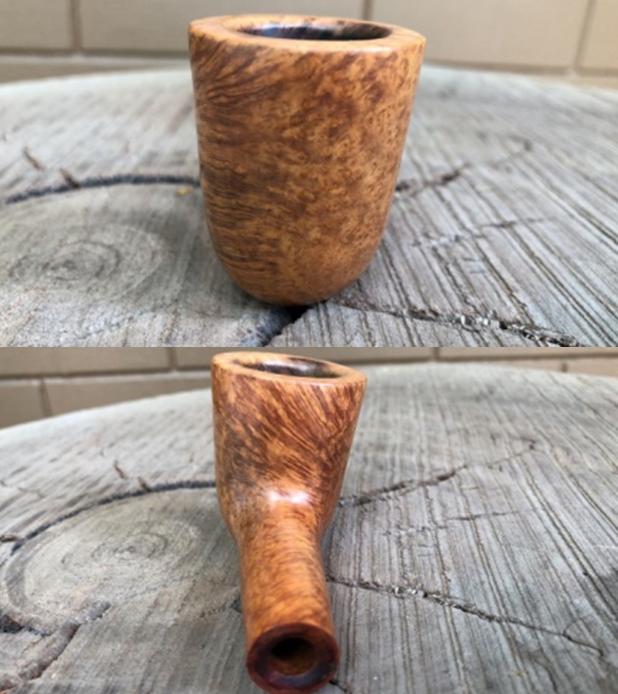
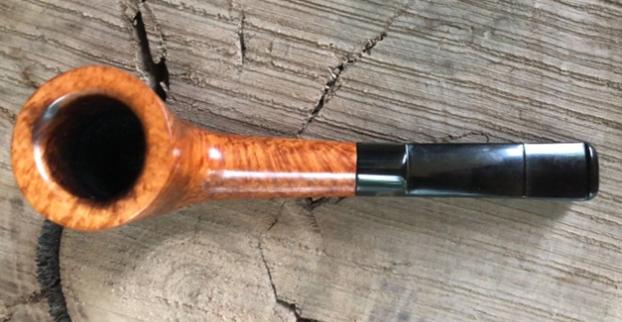
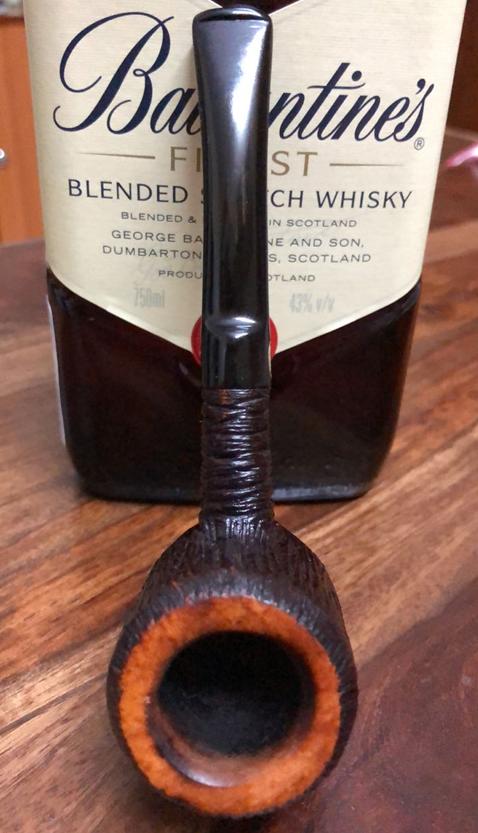
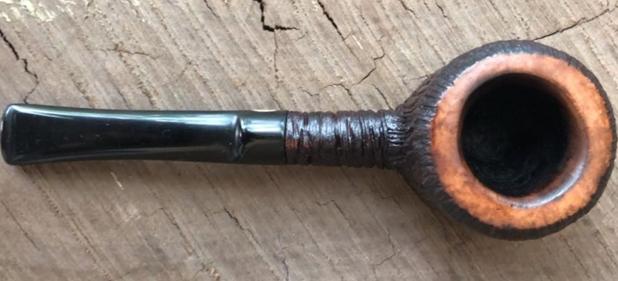
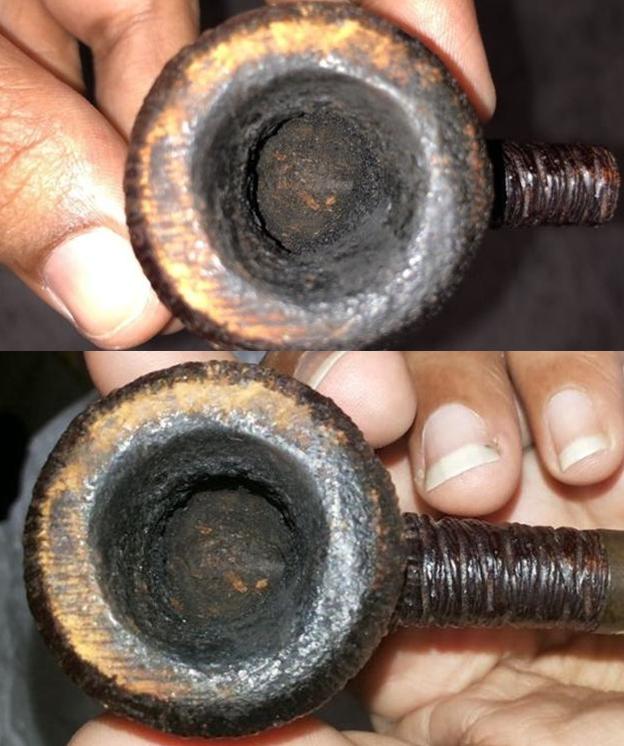
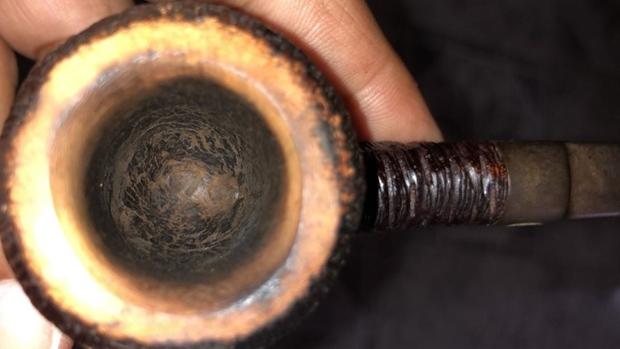
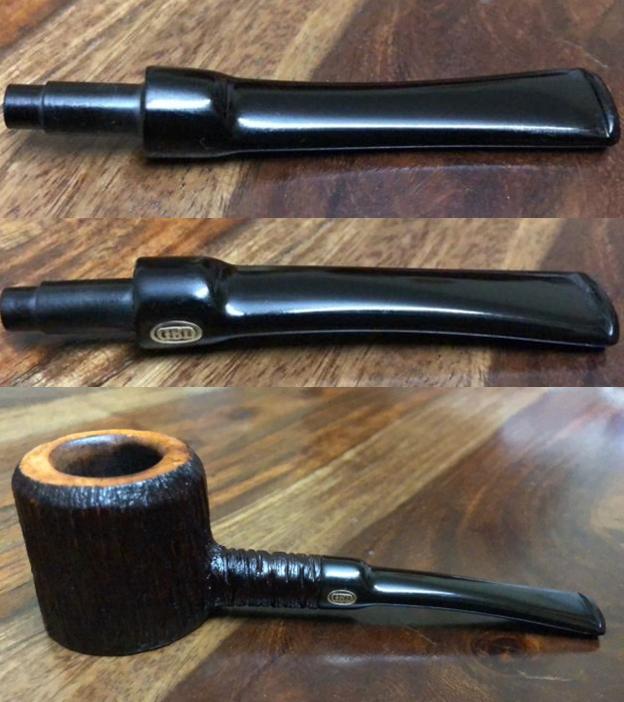
This Canadian Lumberman came to me in the Lot of 66 that I’ve mentioned several times having restored several pipes coming from that one eBay acquisition. He has a hefty presence. He has a length of 6 3/8 inches, bowl height of 2 inches, bowl width of 1 5/16 inches, and a depth of 1 ¾ inches – plenty of room for one’s favorite blend. I do not have an active Canadian shape in my rotation and I had considered adding this Pipe Pub Brigade to my collection, but I decided to put him on The Pipe Steward site in the “For ‘Pipe Dreamers’ Only!” section to benefit the Daughters of Bulgaria – women and girls we seek to help who have been trafficked and sexually exploited. Towner, a long-time friend living in Pennsylvania, saw the Pipe Pub Brigade online and sent me a note desiring to commission this Canadian. I recalled talking to Towner last year when my wife and I were visiting Towner’s church and talking about our work in Bulgaria – he said that he wanted to add a Canadian to his collection and that he would wait for me to get back to Bulgaria. He waited and now his commissioned Canadian Lumberman is on my worktable. Here are the pictures that got Towner’s attention as he was ‘Pipe Dreaming’! 

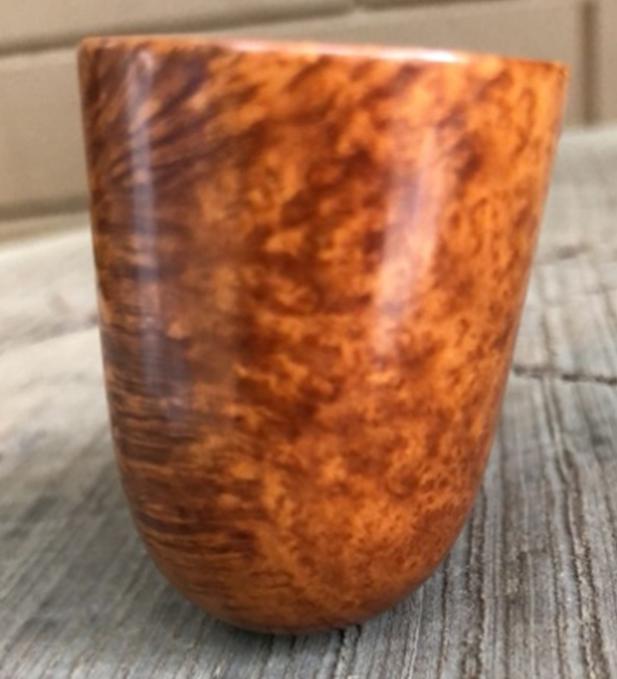
 According to Bill Burney’s Pipedia Pipe Shapes Chart, this Canadian is a Lumberman. Here is his helpful information for those of us seeking to understand the nuances of the Canadian pipe family.
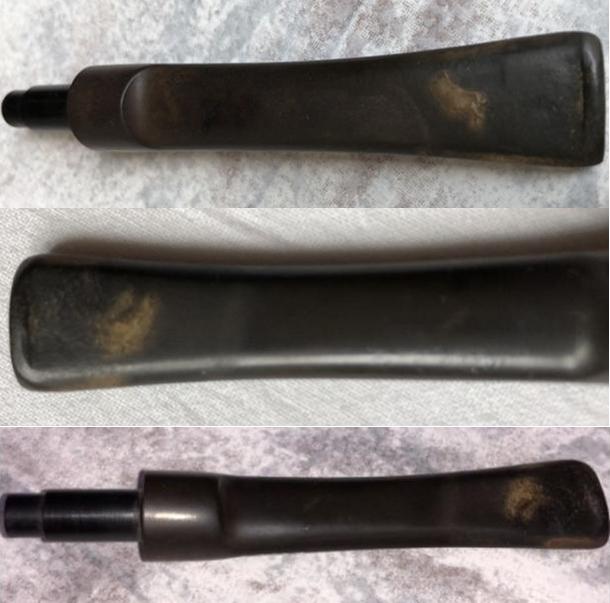
 The Lumberman stands out among the Canadians with the oval shank coupled with the saddle stem. The combination of both unique characteristics translates into a classy looking pipe.
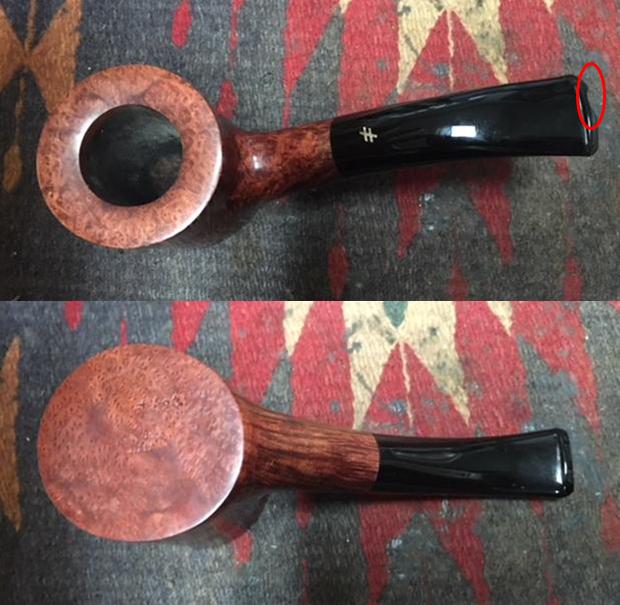
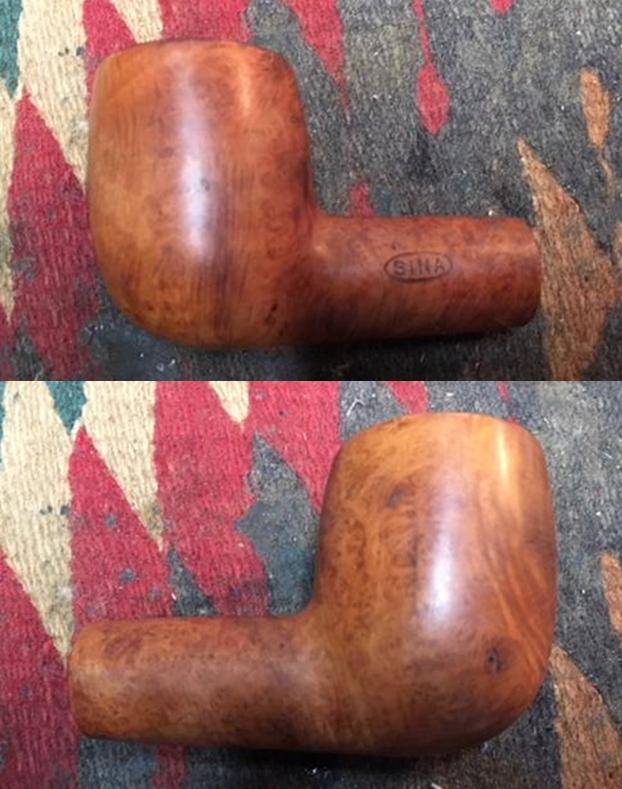
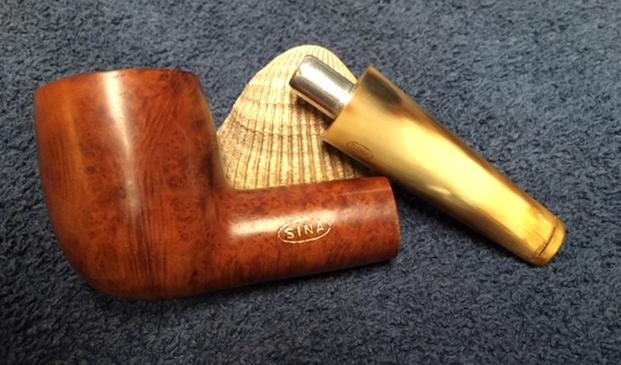
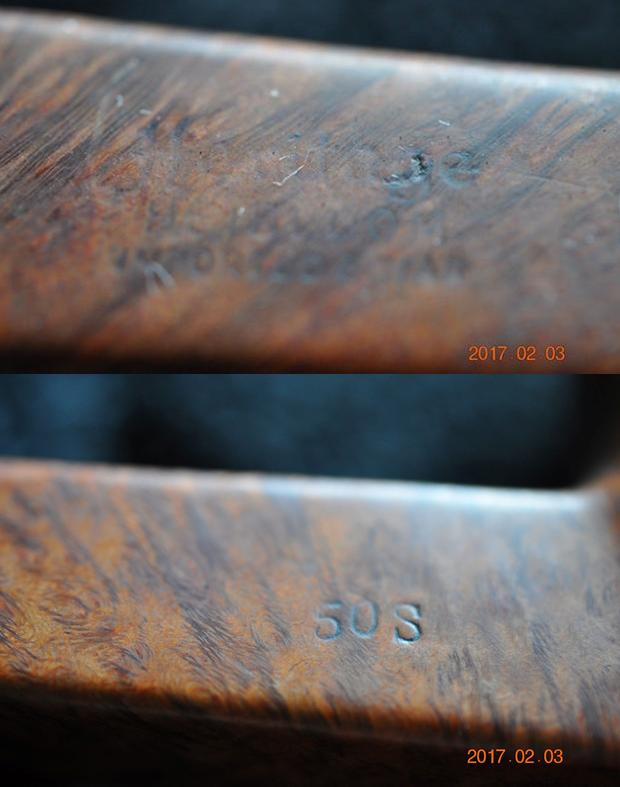
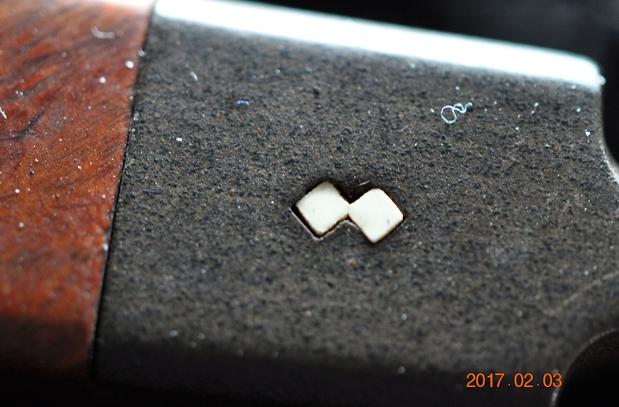
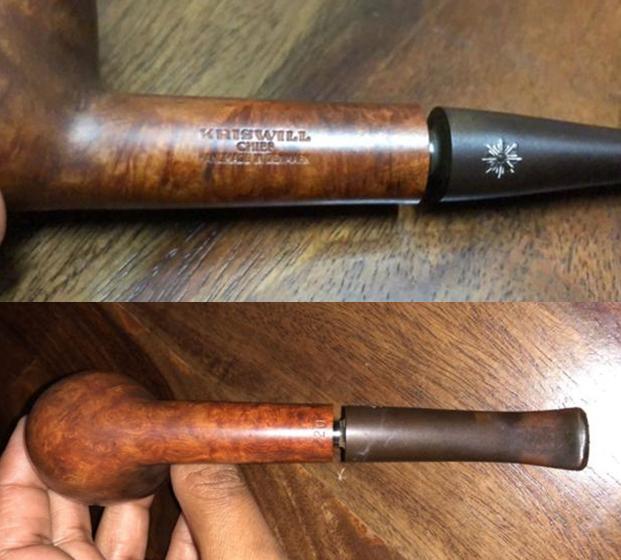
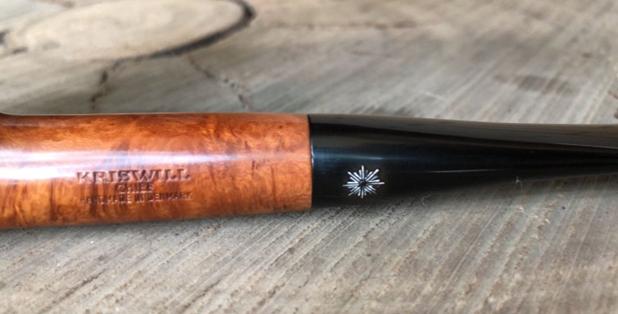
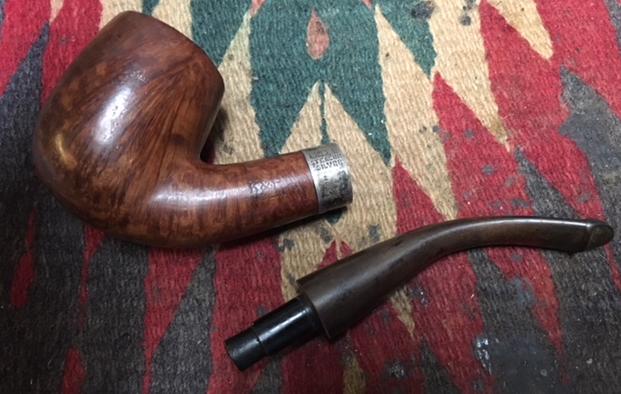
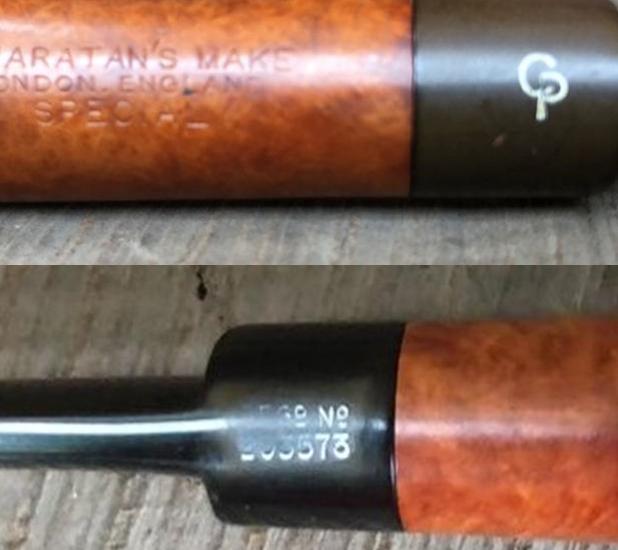
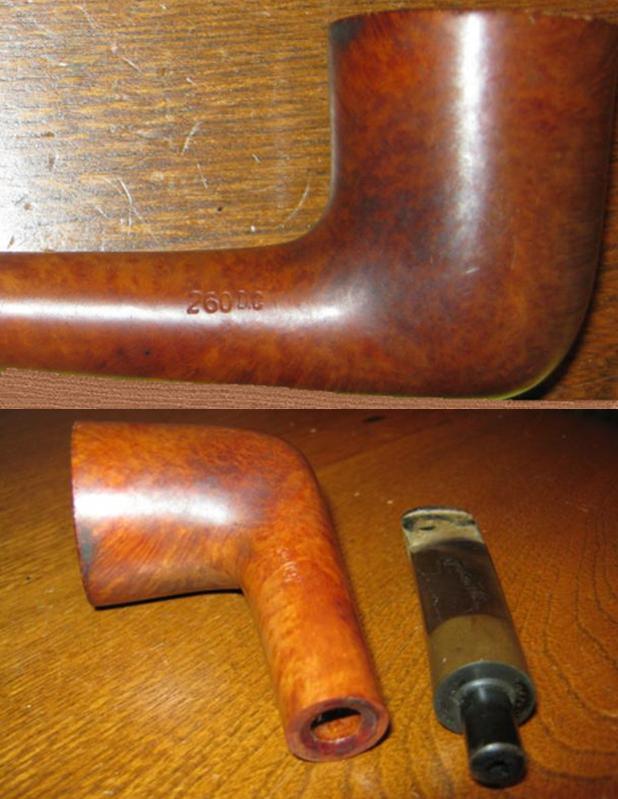
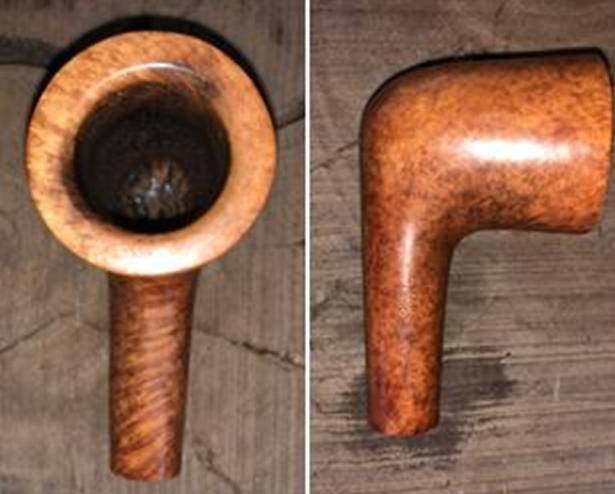
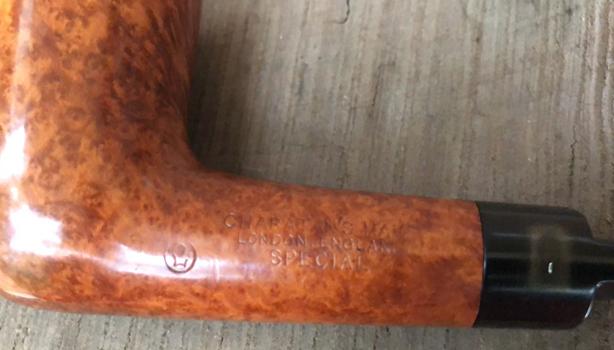
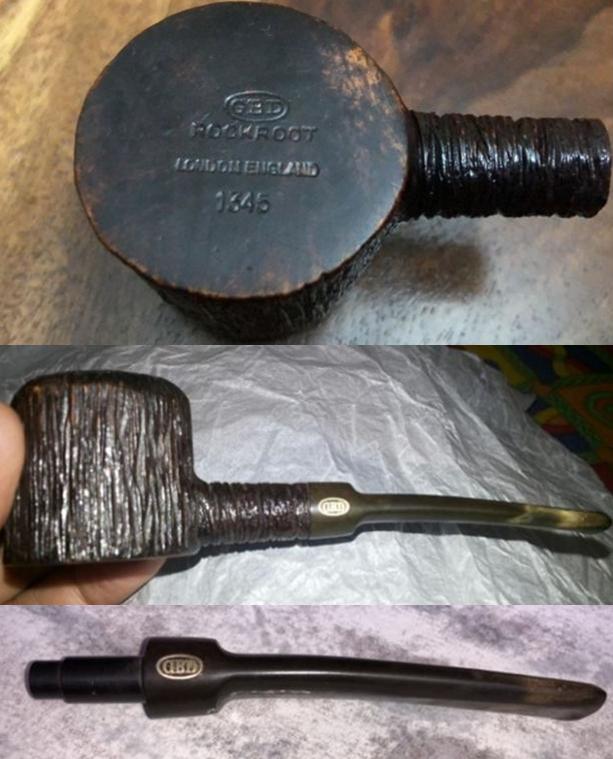
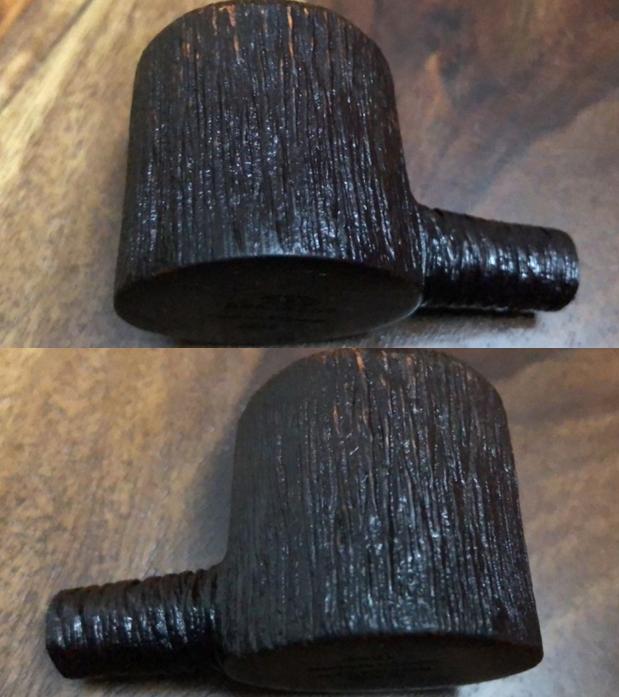
The nomenclature of this Canadian Lumberman proved to be a bit more difficult. Mid-way on the top of the long shank is stamped, PIPE PUB over Brigade, in a ‘old world’ looking script. On the opposite side of the shank is stamped, MADE IN over LONDON, ENGLAND. Stamped on the top of the oval saddle stem is ‘PP’ in a cursive script, which I’m assuming stands for Pipe Pub.
 To learn more about the provenance of the Pipe Pub name I started my search in my regular go to sites – Pipedia.com and Pipephil.eu and came up with absolutely nothing. I broadened my search on the internet by simply searching ‘Pipe Pub’ and ‘Pipe Pub Brigade’. My initial findings had more to do with bagpipers, bagpipe brigades, Irish pubs and pipes…, all of these go well together! Yet, I wasn’t finding anything that helped me with the Canadian looking back at me on my worktable. I looked in my copy of Wilczak and Colwell’s ‘Who Made that Pipe?’ and found nothing giving me a direction. Usually, when I face the brick wall my response is to send Steve an email. With all his vast Rebornpipes experience, surely, he’ll know something. Steve’s response was quick and helpful:
Hi Dal
I have heard of it. Here is a link to one on Smoking pipes.com
https://www.smokingpipes.com/pipes/estate/england/moreinfo.cfm?product_id=200834
I would try to ferret out the shape number. For instance on the one from Smoking pipes it is a 124… which interestingly is a GBD shape number for a Billiard. I wonder if the brand was not made by special order for pipe shops and stores.
Steve I looked at the link and saw my first example another Pipe Pub pipe – a very nice classic Billiard. I immediately looked again to see if I missed a shape number on the Canadian – I still saw no number. But the other piece of information that Steve gave was helpful – the brand was perhaps a special order for pipe shops and stores. I went back to Google not looking for pipes but for places named ‘Pipe Pub.’ I hit pay dirt and the dirt was surprising! With the COM of the Canadian stamped indicating London, England, I had been expecting to find something that was UK based but instead, I found a reference for Pipe Pub that was based in the great US state of Texas – who would have thought? Through several iterations of search parameters, I came across a Google Group chat stream that started in 1998 entitled, “Pipe Pub?” . The question posed was about a Pipe Pub “almost Canadian” pipe that had the same nomenclature and stem ‘PP’ as mine, but the COM was stamped, ‘Italy’. The questioner in the stream proposed a correlation with the Italian Savinelli name wondering if Pipe Pub might be a second of that well-known Italian pipe house?
The next response to Bro. R from Larry introduced the Texas connection:
Bro. R,
Back in the 70’s the mall tobacconists here in Austin, TX, were named Pipe Pub; they became Pipe World a little later. I don’t know if, then or now, these businesses were strictly local or part of a larger chain. I’m pretty sure they sold a store brand with their name on the pipes. Today, Pipe World’s store brand pipes *are* made by Savinelli.
Larry
With these two entries, I knew that we were talking about the same pipe name – the ‘PP’ on the stem was the clincher. Pipe Pub is a local Texas tobacconist which had pipes manufactured with the Pipe Pub name. But there was more information that perhaps should be submitted to Pipedia! The next entry I’m including in its entirely because it brings in much of the historical context with much color and the source of the information is a Jon Carter, who is described by Don Schram as a manager of Pipe Pub in the 80s.
Here’s the skinny on Pipe Pub, as related to me by Jon Carter, former manager of Pipe Pub from 1983 to 1987, who isn’t online as of yet. (Messages will be relayed to him through me at: dsc…@bigfoot.com ,however.)
Pipe Pub was started in the Houston area of Texas in the early 70’s with a single downtown store. It was joined a short time later by a store located in the Austin, TX, area, which was owned and operated by a brother-in-law of the original founders (whose name escapes Jon for the moment). While Pipe Pub wasn’t nationwide, they owned approx. 14 stores throughout Texas, primarily in the Houston area, and were much in competition with Tinderbox. (Comparable to Churchill’s in the S.E. Michigan area.)
The Pipe Pub pipe in question was confirmed by Jon to be a pipe from this chain. The letters ‘PP’ in script on the stem indicate that the bit is original, and you are correct in that it stands for Pipe Pub. As far as the age, there is no definite method of dating this pipe, however; Pipe Pub only carried their own line of ‘Private Label’ pipes between the early 70’s and 1983 when they were phased out in favor of higher grade (and higher priced) pipes, to coincide with the Texas oil boom of the 80’s. Jon was not able to confirm positively that the pipe is indeed of Savinelli make (second or otherwise), however, he did point out that Pipe Pub did have an excellent relationship with the Savinelli company, as they were allowed to carry and sell the rare Savinelli 0000 (Quadruple-ought) Autograph, of which only 3 have been produced in the last century. Jon also pointed out that he and another manager sold it to a gentleman who worked for the telephone company to complete a collection of Savinelli Autographs. (He went to the bank and took out a $5000 loan for it. The bank, initially thought he was purchasing ‘oil drilling pipe’, but gave him a personal loan for the tobacco pipe anyways. He kept it in a lock box for a while, then finally broke it out and smoked it for the first time during the 1986 or 1987 Superbowl.)
To round out the history of Pipe Pub, the chain was bought out, save one store, in 1985 by a family, by name of Kowalski, who turned the tobacco chain into a chain of mall knick-knack stores. (Sound all-too familiar Churchill’s customers?) The one store, Pipe Pub in Austin, run by the brother-in-law, was not included in the deal, but it was agreed that he would change the name of the store. Jon commented that the lone store may have changed its name to Pipe World, but wasn’t really privy to such information, as it was, more or less, operated as a renegade store. The Kowalski’s opened one additional store in Louisiana, their home state, and promptly ran the chain right into the ground after one Christmas season, due to poor ownership and product focus. Jon pointed out, “They carried vibrating pillows, for God’s sake!” Forcing the company into bankruptcy, the Kowalski’s sold the chain back to the original owners, whom to his
knowledge, still own it today.
For more information, Jon recommends calling down to Houston and asking information for their main office, which was on Mitchelldale. [A search of Yahoo Yellow Pages came up empty, however there is a Carol’s Pipe Pub in Bacliff, TX, a suburb of Houston. Phone (281) 488-7300. It’s unknown if they’re related.]
DS (Don Schram.)
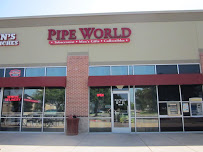 This information-filled post is dated, 1998. On a hunch, I google the name of the offshoot store characterized as the ‘renegade’ store that wasn’t part of the reported 1985 Pipe Pub acquisition described in stream above. As part of the legal agreement this store was required to change the name without further association with the Pipe Pub name. Pipe World, based in Austin, and run by a “brother-in-law” family member came into existence – or, more accurately, carried on the original legacy of Pipe Pub under a different name because it seems that the new owners of Pipe World ran the company off the rails. I found http://pipeworld.com/ with different locations in Texas and wondered if this was the same ‘Pipe World’ referenced above.
As I’ve done in the past with surprising success, I go directly to the front door and knock. I went to the ‘Contact Us’ section on the Pipe World site and sent an email asking if anyone had been around long enough to know something about the history of the former, Pipe Pub Tobacconist out of which Pipe World came. You never know what will happen!  I received a reply to my email the same day from Pipe World – from Kyle who asked me to call directly if I had any questions. Thankfully, I have an internet phone from Bulgaria and I called Kyle in Texas. Kyle answered the phone and was extremely helpful. His grasp of the history was amazing – he had been there during the whole transition. I was totally taken off guard when I discovered through our conversation, that he was the owner of Pipe World. His name is Kyle Haas. He was the ‘brother-in-law’ referenced above who opened the new Pipe World and held firm to the values that had been true historically of Pipe Pub.
I enjoyed talking with Kyle, his recall of the events and his grasp of all the many moving parts of the tobacco industry fascinated me. He was able to answer the primary question I had about the origin of the Pipe Pub pipes. Definitively according to Kyle, during the 70s and early 80s, GBD/Comoy’s was producing the English line of pipes with the Pipe Pub name out of the London factory. Pipe Pub pipes marked ITALY were all produced by the well-known Italian house of Savinelli. He said that he doubted that Savinelli continued to do sub-contract work because they sell enough of their own pipes today to make it worthwhile. He said that they had to order a lot of each shape as part of the requirements – I believe he said that they introduced a new shape each year. He mentioned that the pipes that were produced in England and Italy with the Pipe Pub label were done with higher quality in mind. I said that I could attest to this as I looked at the GBD/Comoy’s factory made Pipe Pub Canadian on my worktable.
After talking about the current climate in the tobacco industry, some of the current issues with Dunhill and the like, I shared with him our work with the Daughters of Bulgaria (he was surprised to hear I was calling from Bulgaria!) and my love for restoring classic pipes which benefit our Daughters of Bulgaria Foundation. We ended our conversation with words of friendship and for me, a desire to stop off at Pipe World and visit Kyle at their shops in Round Rock and Austin, Texas. I appreciated the time Kyle gave me on the telephone to discover a bit more pipe history.
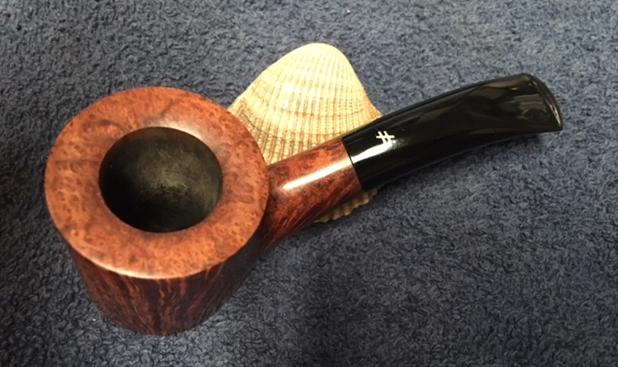
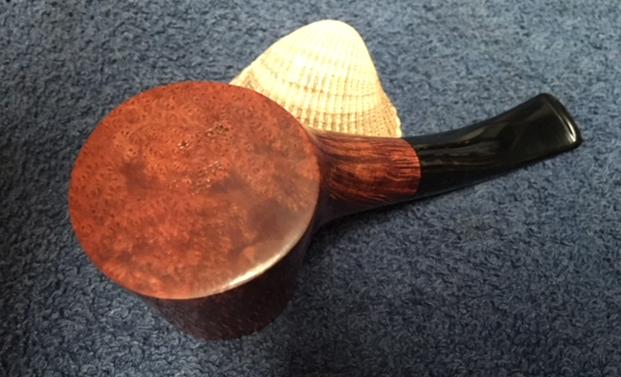
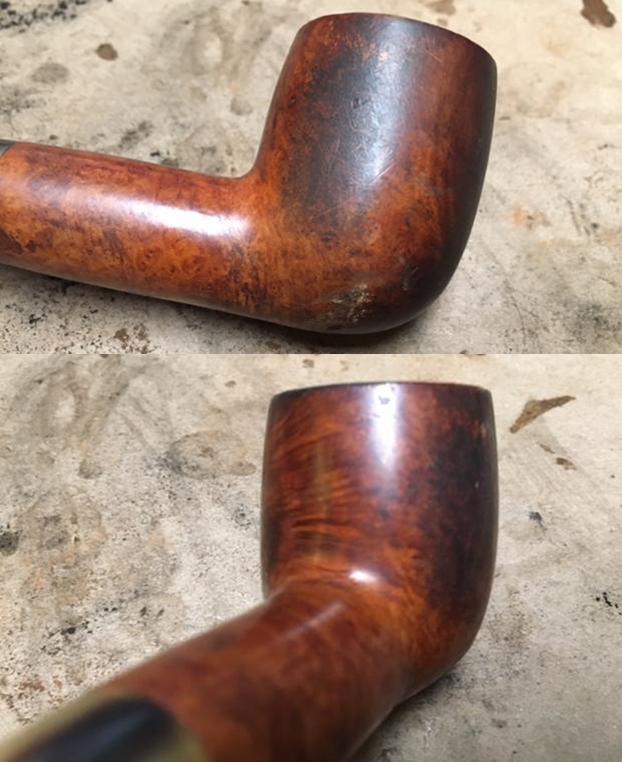
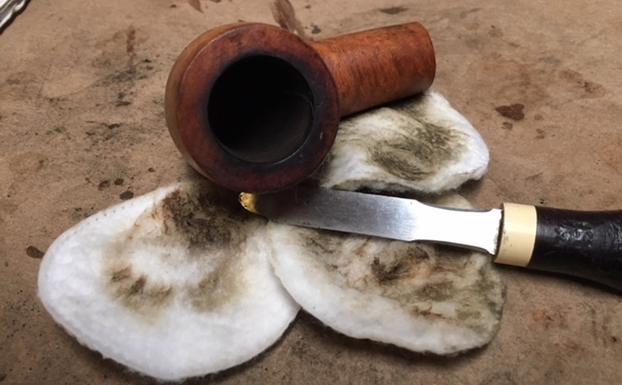
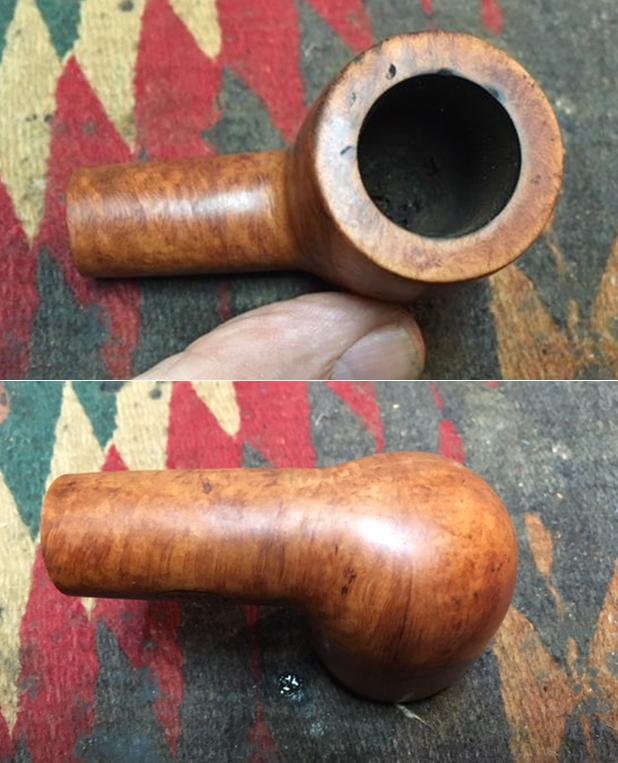
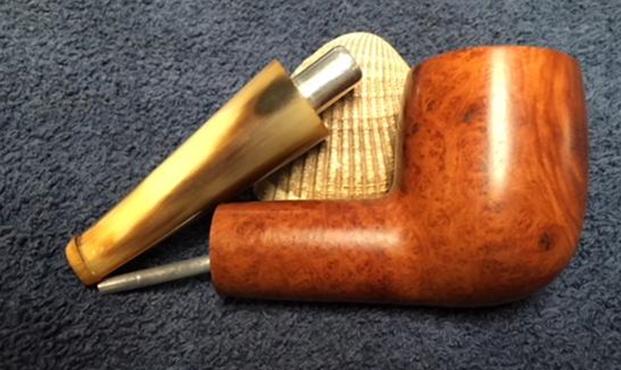
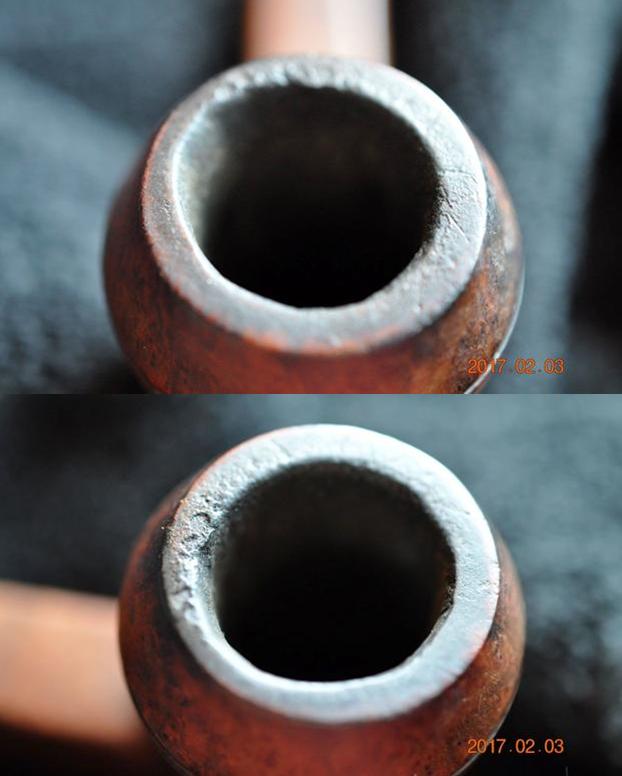
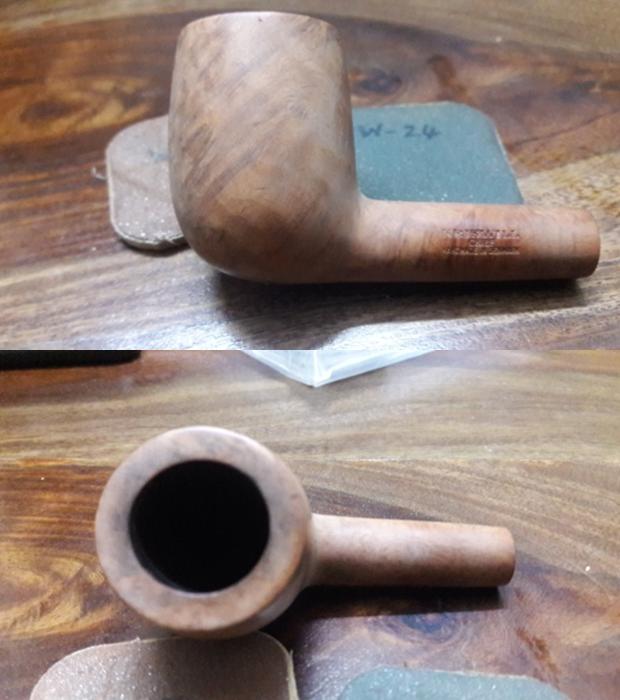
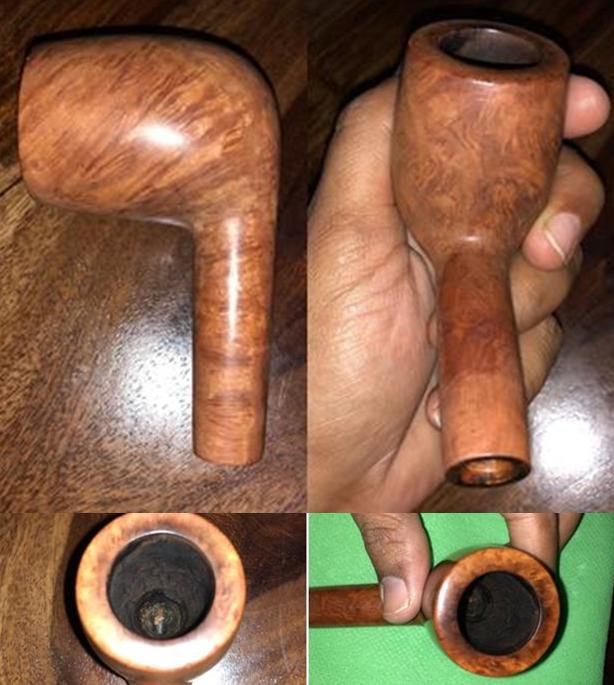
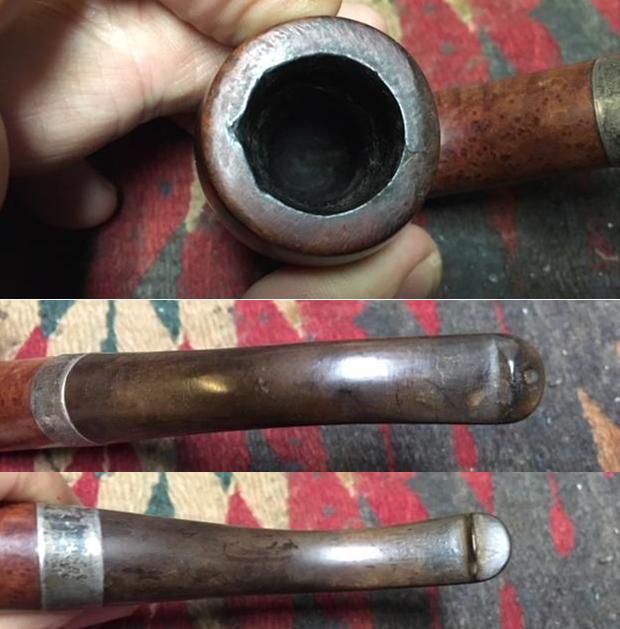
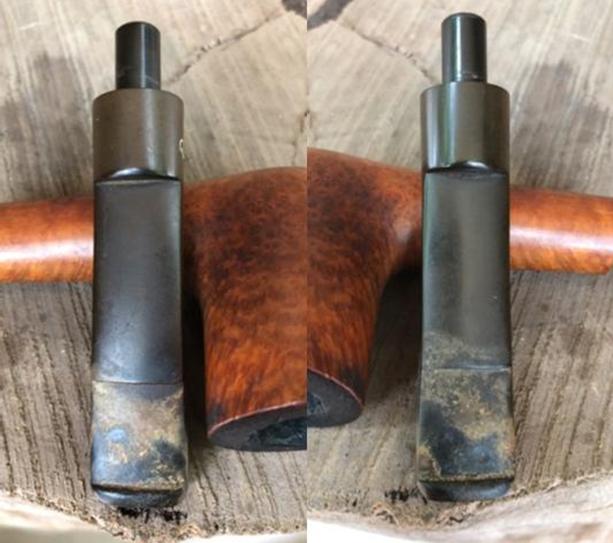
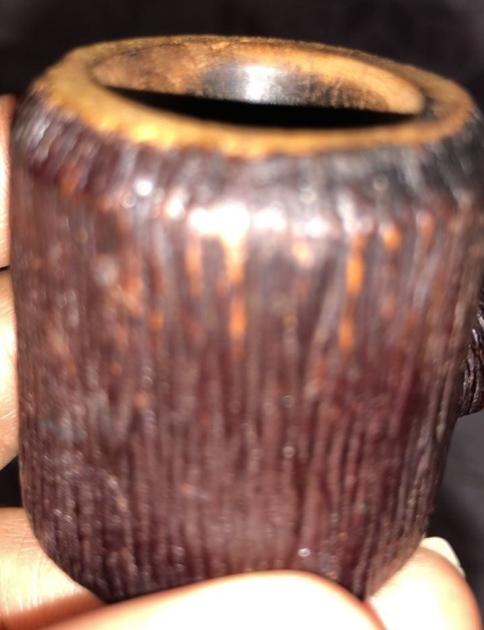
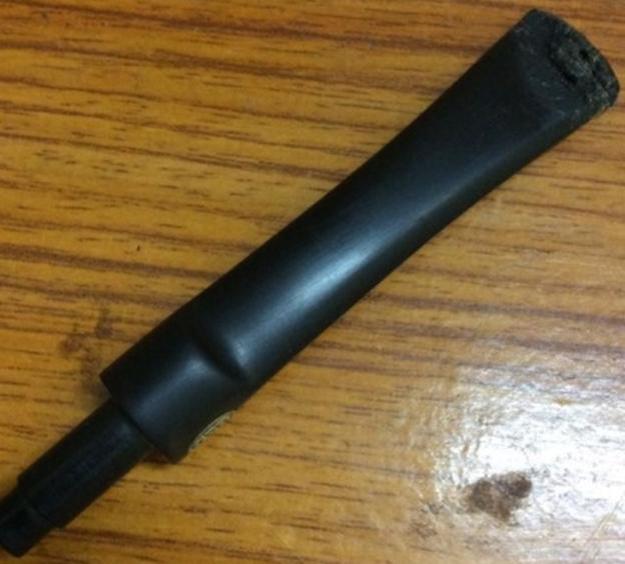
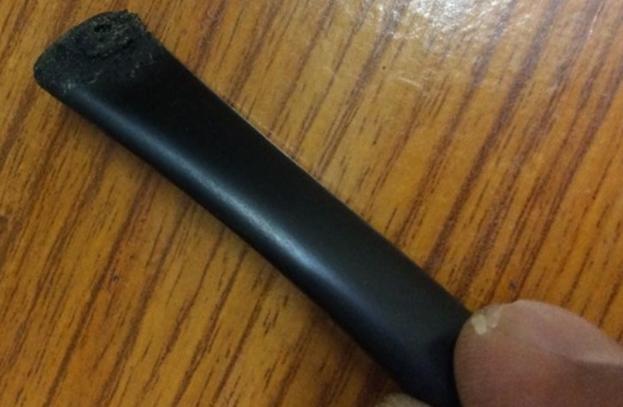
With a better understanding now of the origins of this Pipe Pub Made in London, England, Canadian Lumberman thanks to Kyle, I look to recommissioning it for yet another lifetime. I take a few close-ups to take a better look. The chamber has light carbon cake which will not be difficult to remove getting down to fresh briar for a fresh start. There is some darkening on the rim and nicks, cuts and bruises over the entire briar surface. I identify an odd-looking fill at the shank/stummel transition. It looks like dark CA glue, but it doesn’t blend at all. I also identify about mid-way on the side of the shank a divot of sorts in the briar. The finish is old, worn, and tired, though the briar grain hiding beneath shows very good potential. The stem also has some dents and button damage. 
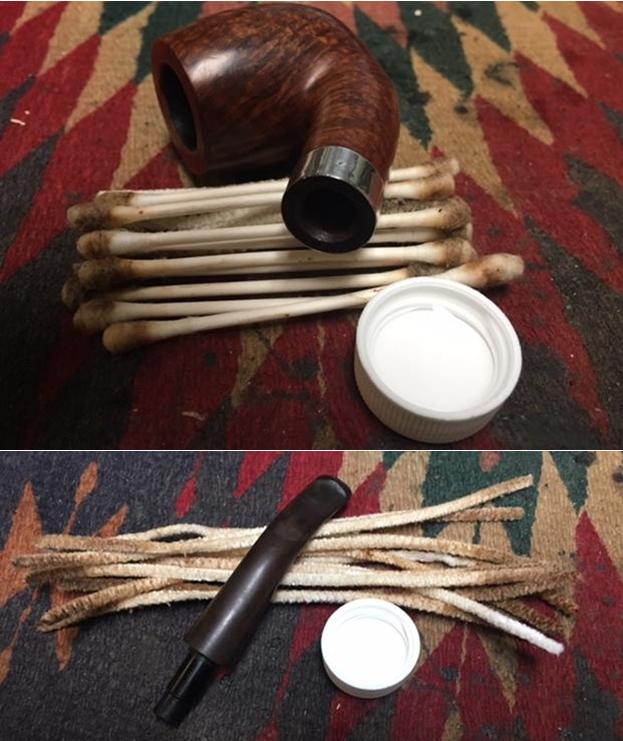
 To start, after cleaning the internal of the stem with pipe cleaners dipped in isopropyl 95%, I add the short saddle stem to a soak with Before & After Deoxidizer along with 5 other pipe stems in queue for restoration. After soaking for a few hours, I fish out the saddle stem and wipe off the Deoxidizer and raised oxidation with cotton pads and light paraffin oil. I also run some pipe cleaners through the airway dipped with alcohol to clear the Deoxidizer. The Before & After Deoxidizer did a good job on the oxidation.
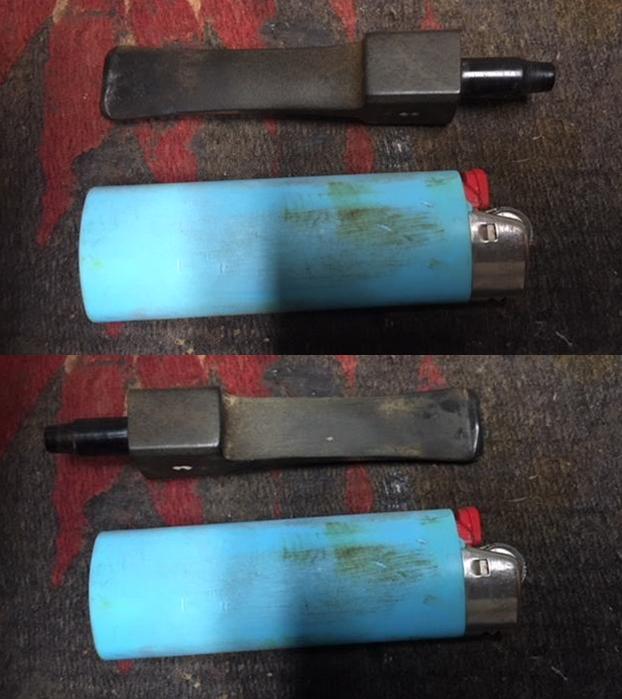
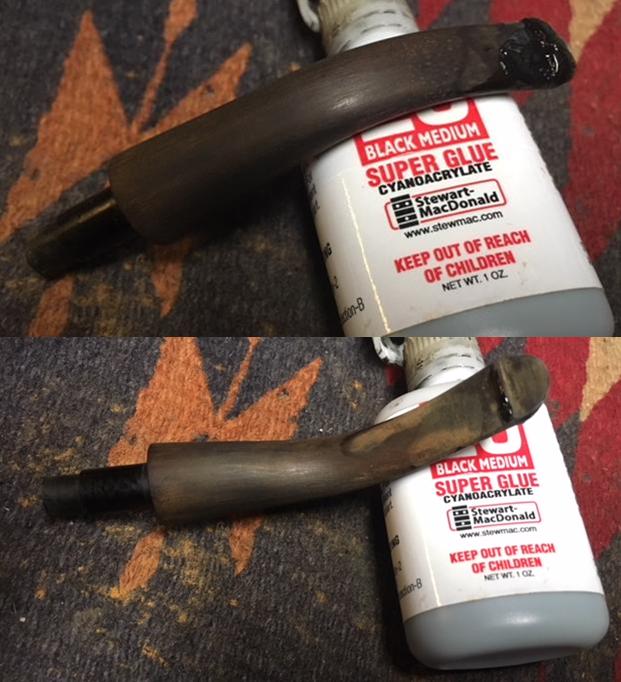
 I decide to first work on the stem by using the heating method to minimize the tooth chatter and dents. Heating the vulcanite causes it to expand and return to some degree to the original condition of the vulcanite. I paint the problem areas with a flame from a Bic lighter – both upper and lower bit. I take starting point pictures to compare both uppers and then lowers. The heating technique made a difference by minimizing the damage and raising the compressions.
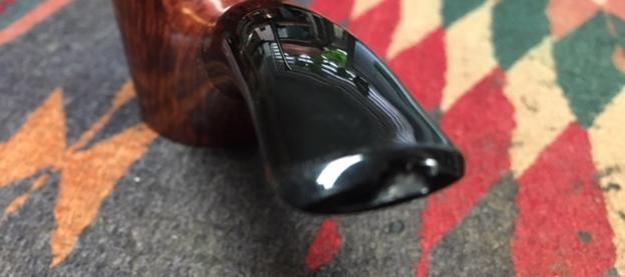
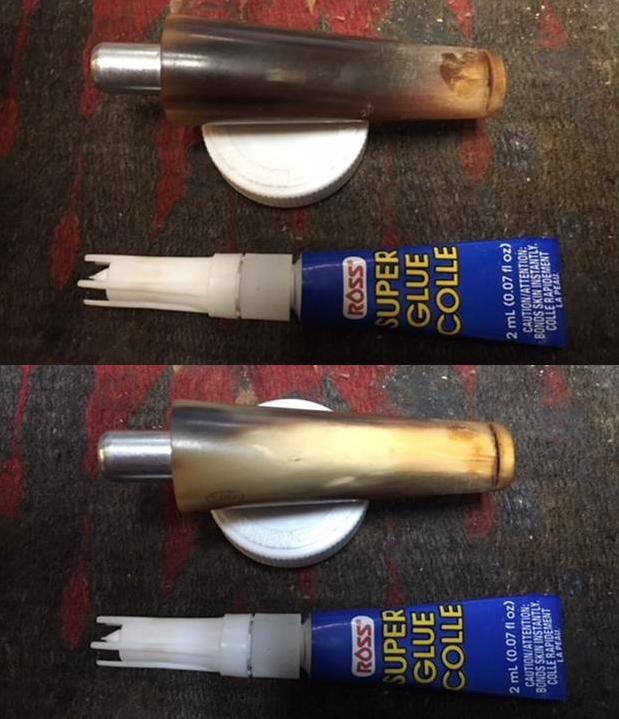
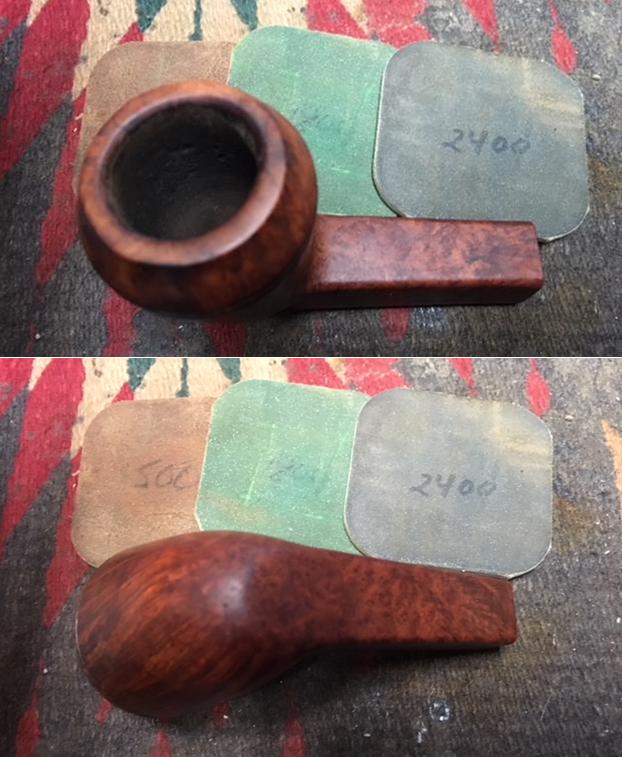
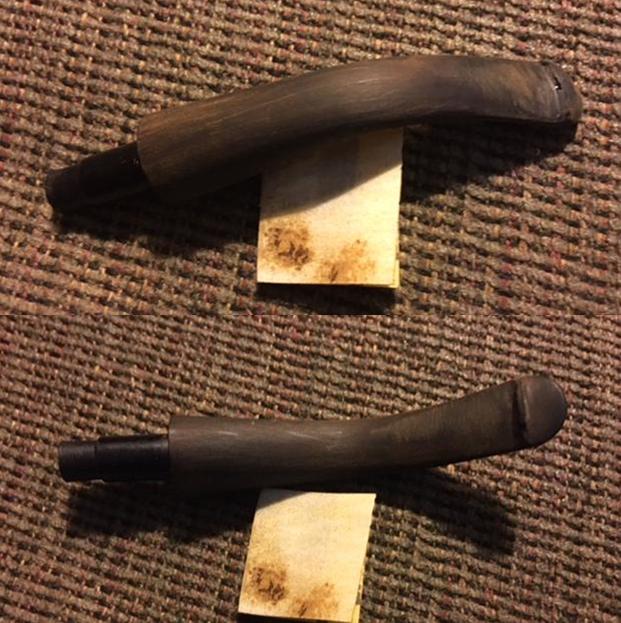
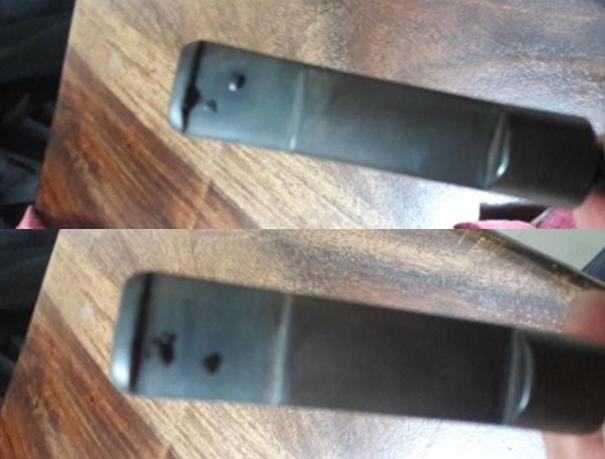
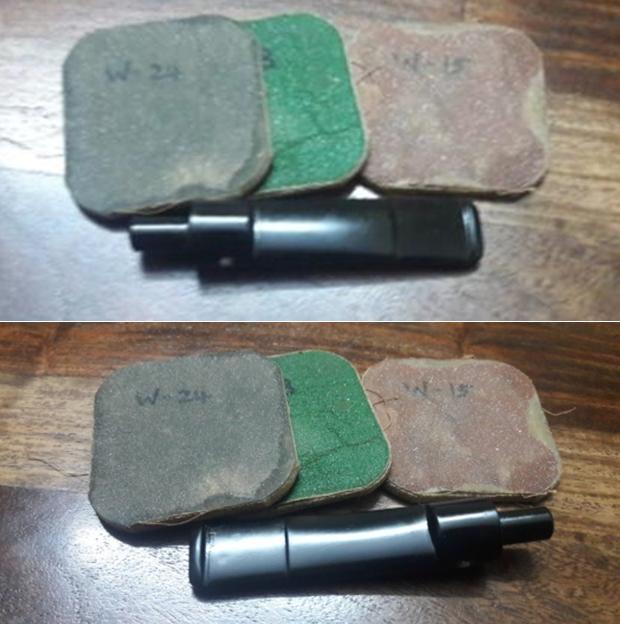
 With the dents and chatter less extreme, I’m able to sand out the remaining problems. Using 240 grade paper I sand both upper and lower bit and I also redefine the button lips using a flat needle file. I’m very careful to avoid the Pipe Pub “PP” stamping – the second “P” is thin and I don’t want to add to its challenges!
 To erase the 240 scratches, I follow by sanding with grade 600 paper then with 0000 steel wool to smooth further and buff up the vulcanite. I like the results.
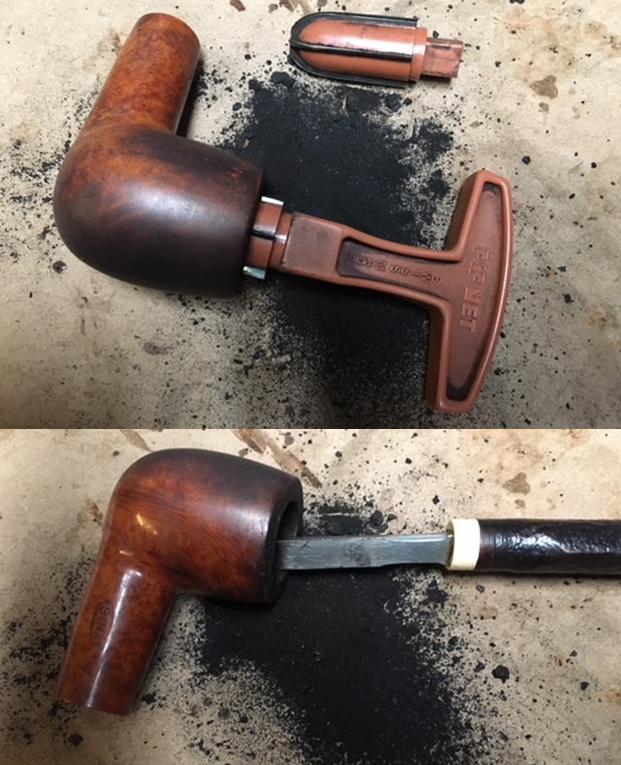
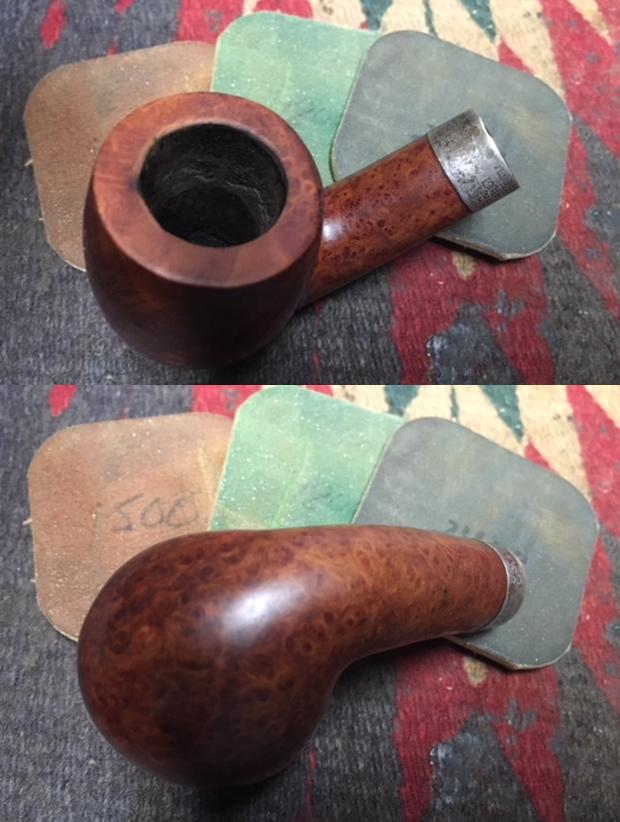
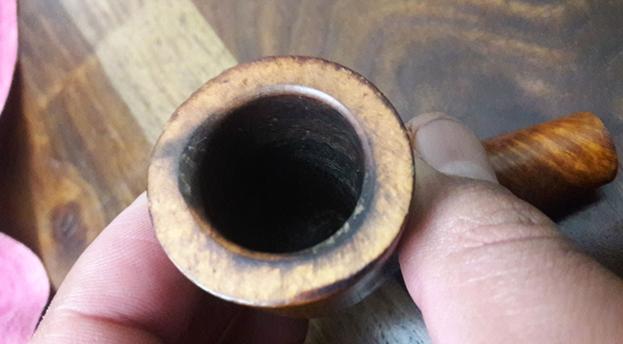
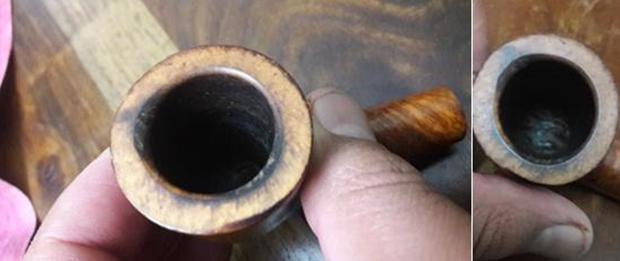
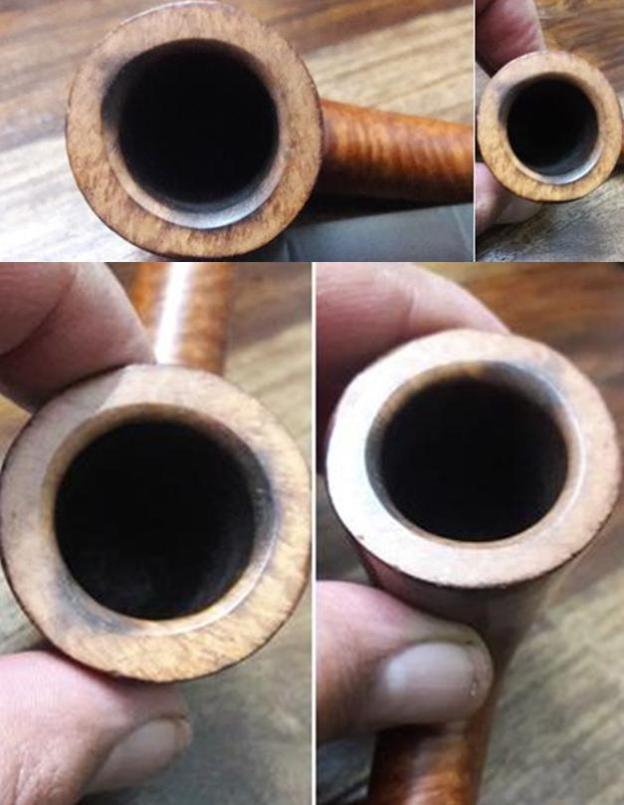
 With the stem progress at this point, I turn to the Pipe Pub Canadian Lumberman stummel. To deal with the very light carbon cake buildup in the chamber, I utilize the Pipnet Reaming Kit and jump to the 3rd largest blade head – the bowl is large! I remove a good bit of the cake and then I transition to the Savinelli Fitsall Tool to fine tune – getting to the lower part of the chamber and removing more carbon. To get down to the fresh briar, I then wrap a piece of 240 grit paper around a Sharpie Pen and sand the chamber wall – the pen gives me leverage. Finally, to remove the carbon dust I wet a cotton pad with isopropyl 95% and wipe out the chamber. I inspect the chamber walls and I see no cracks or heat fissures – all looks great! The pictures chronicle the steps.

 Turning to the external briar surface, using undiluted Murphy’s Oil Soap, I scrub using cotton pads and utilize a brass brush on the rim. I also use a pen knife carefully to scrape the rim. The stummel and rim cleaned up nicely.
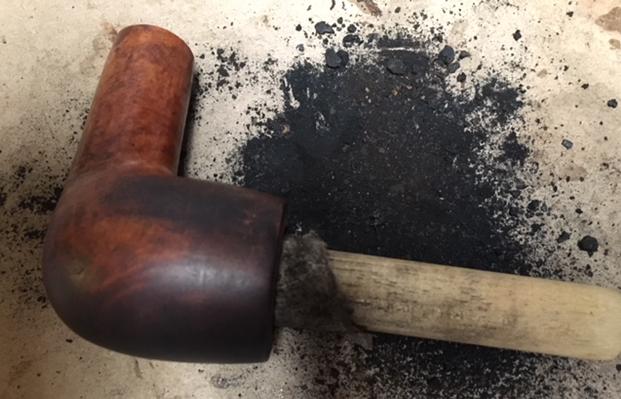
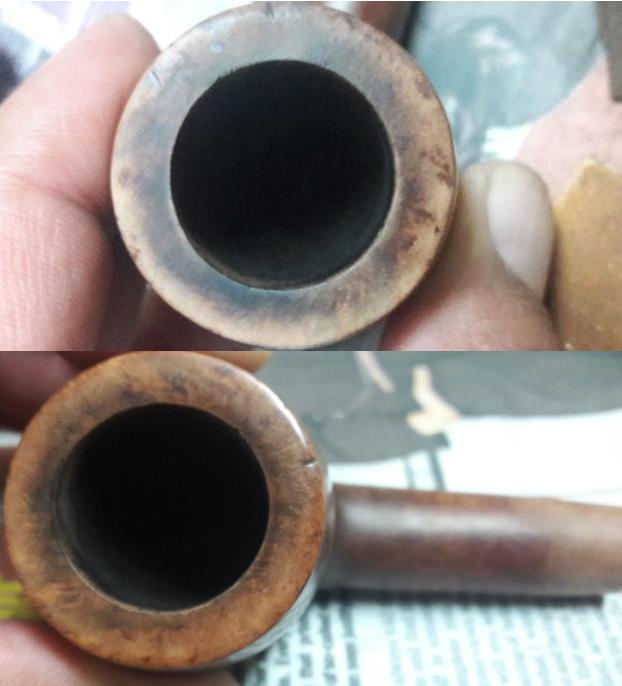
 Before proceeding with the external surface, I clean the internals of the stummel – the long Canadian mortise and airway. Using isopropyl 95%, I employ many cotton buds, utilize a dental shovel to scrape the mortise walls, and pipe cleaners and shank brushes to reach into the long Canadian airway. There was a lot of lodged tars and oils but it finally started giving way. I plan to clean further utilizing a kosher salt and alcohol soak at the end of my work day. I take a picture of the weapons and carnage!
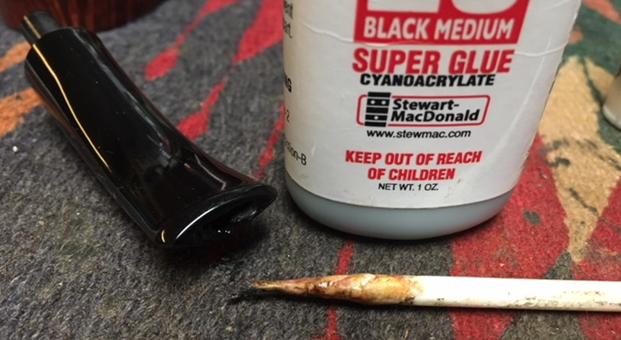
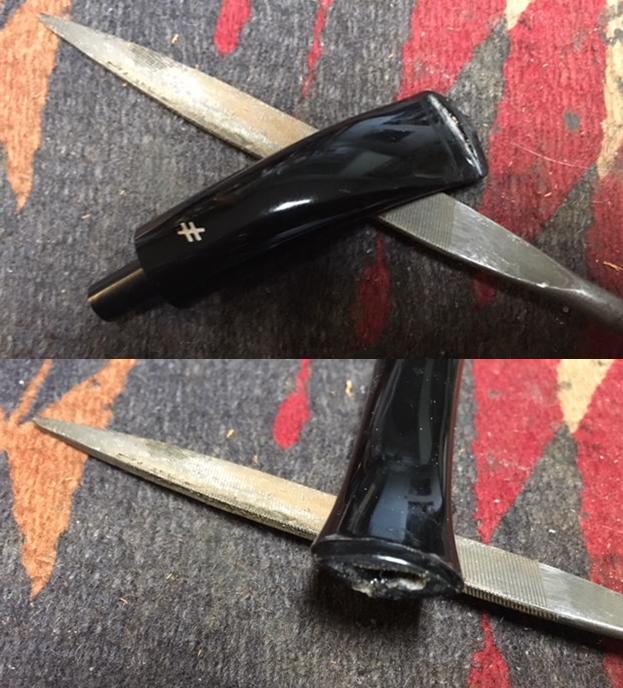
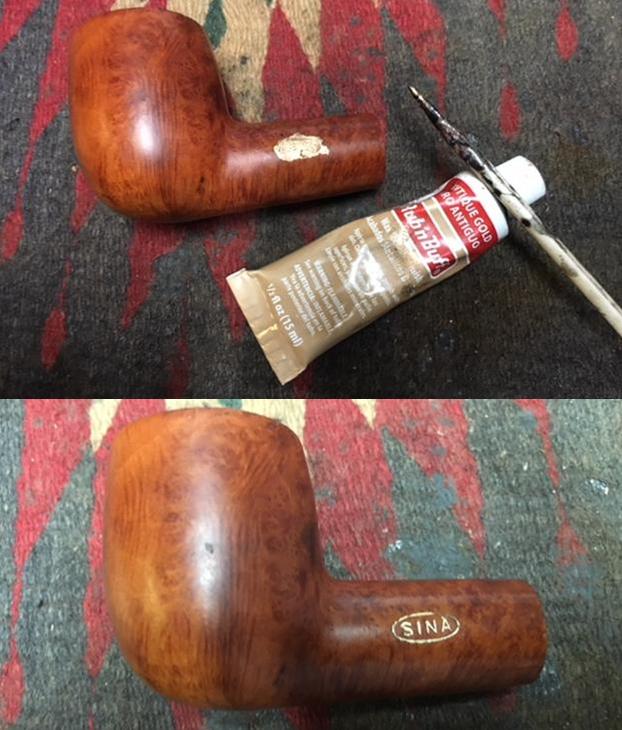
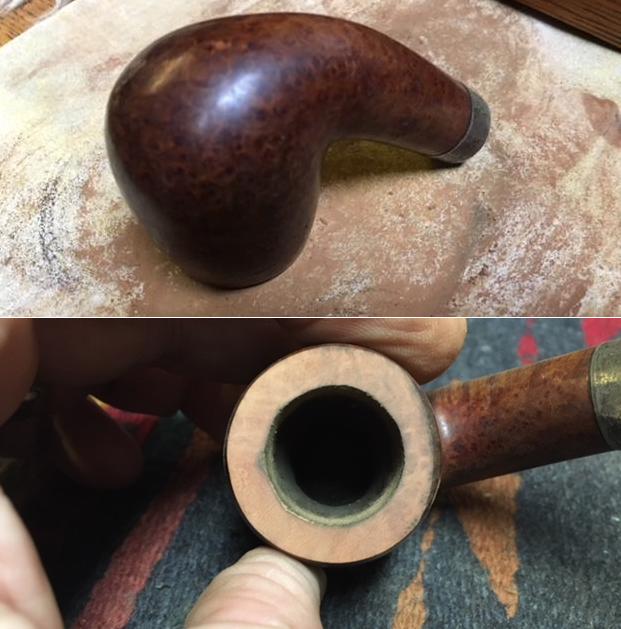
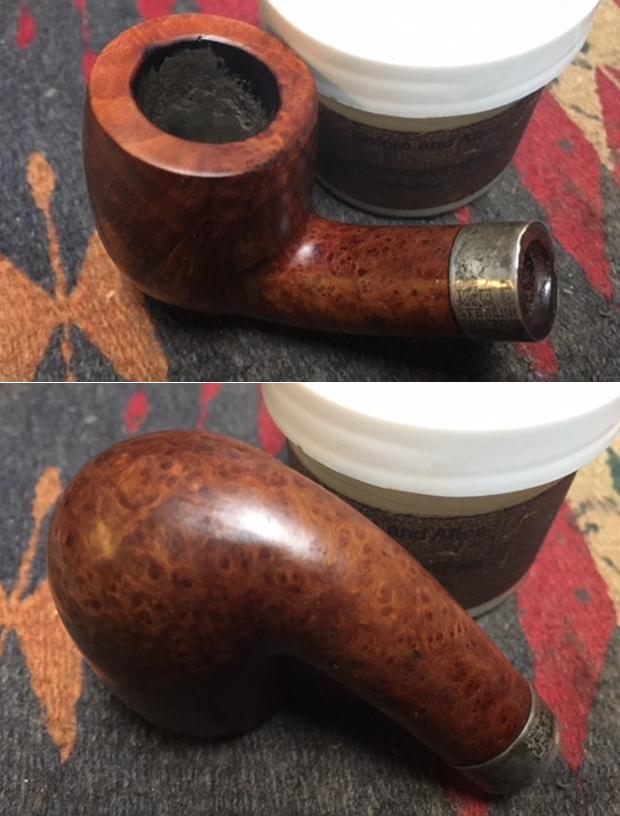
 As I look over the stummel and shank, I see two problem areas, both on the shank. As the shank merges with the bowl, there is an old fill that is shiny black and stands out like a sore thumb. It appears to be solid CA glue but an eyesore. The other problem is mid-way on the right side of the shank. It appears to be a gouge or puncture in the grain. I take pictures of both as I consider what to do.
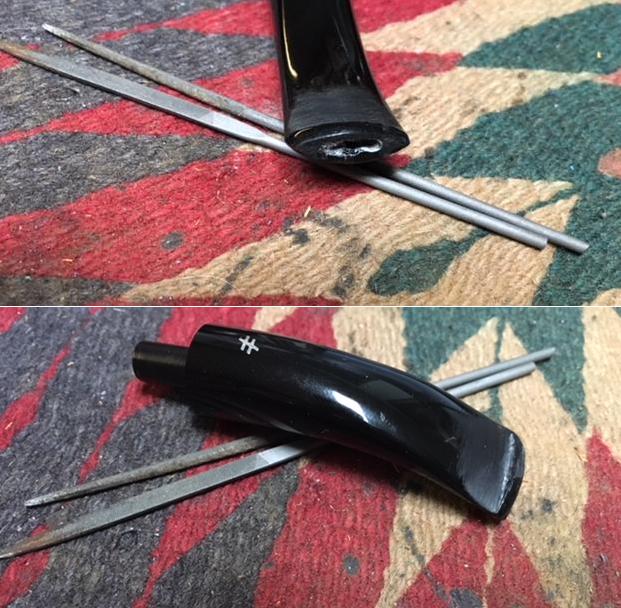
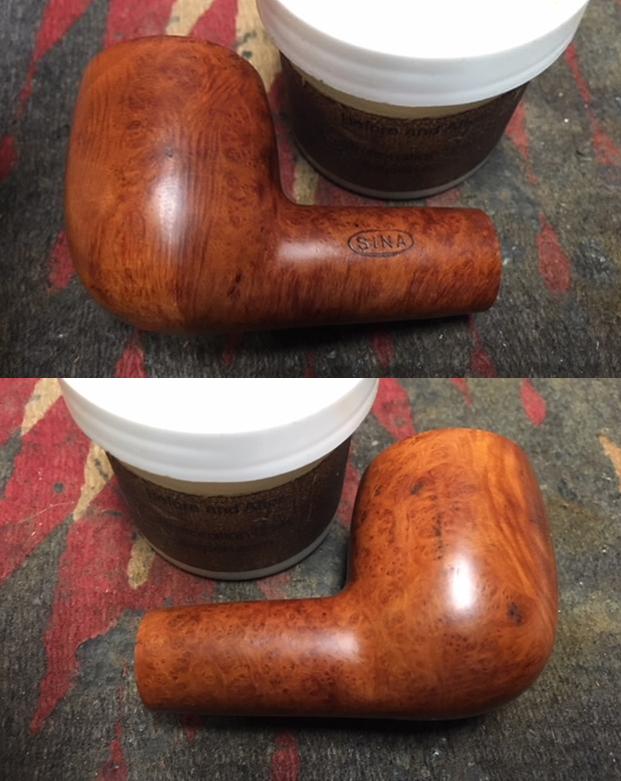
 I address first the shiny black fill. I want to remove the fill but not impact the surrounding briar with sanding. To do this I will try to dissolve the CA fill by applying a small amount of acetone directly to the fill and hopefully it will soften and allow me to dig it out with a dental probe. It works like a champ. Since acetone evaporates quickly, I repeatedly dob a bit of acetone on the fill using a cotton bud. While the acetone rested on the fill as a droplet, I would carefully scrape and probe the fill with a sharp dental probe. Gradually the CA began to soften, allowing the dental probe to undermine the integrity of the fill. After repeating the dob, scrape, probe several times, the fill disintegrated, and the briar blemish can be refilled and hopefully blended better. The pictures show the process.
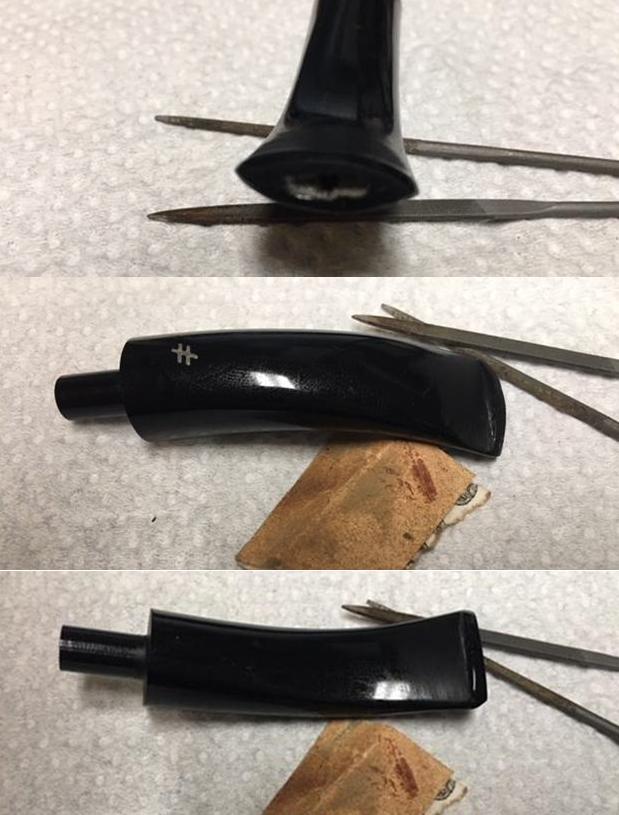
 For the gouge on the other side, I gently clean out the wound with the sharp dental probe to remove any old fill and debris that had collected. I then wipe both repair areas with alcohol to clean the areas in preparation for a new fill.
 I mix together thick CA glue and briar dust to form a putty. I place some briar dust on an index card and put a few drops of the CA glue next to the briar dust. Using a toothpick, I add briar dust to the CA glue until I reach a viscosity of about molasses. I then apply the Briar putty to the two areas on the shank – a mound of putty over the areas in anticipation of sanding them down after the putty cures. I put the stummel aside for several hours.
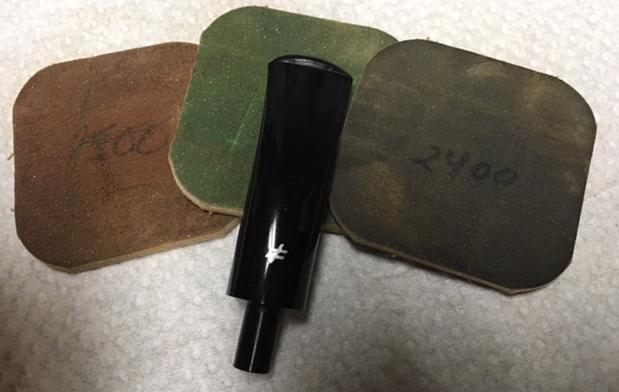
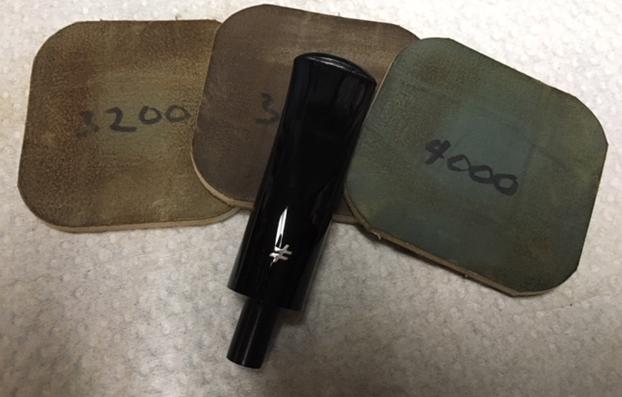
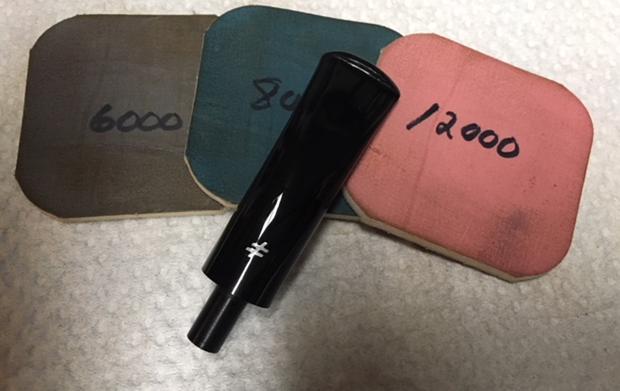
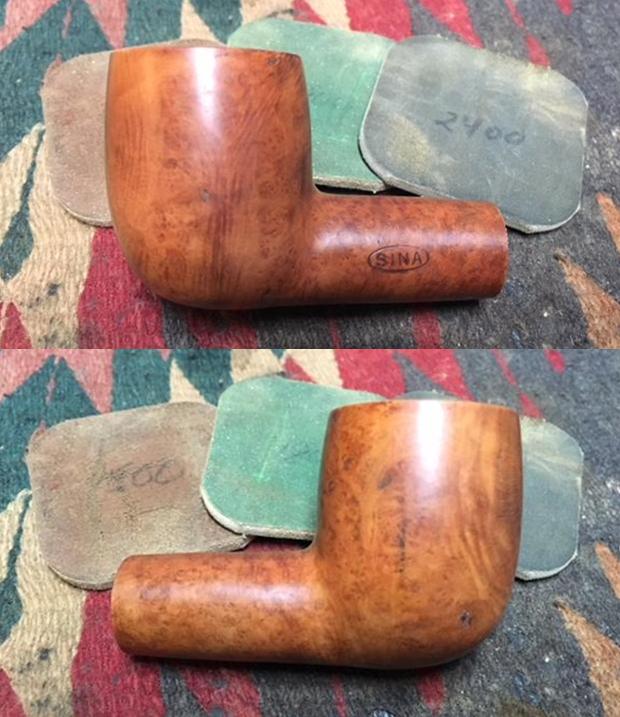
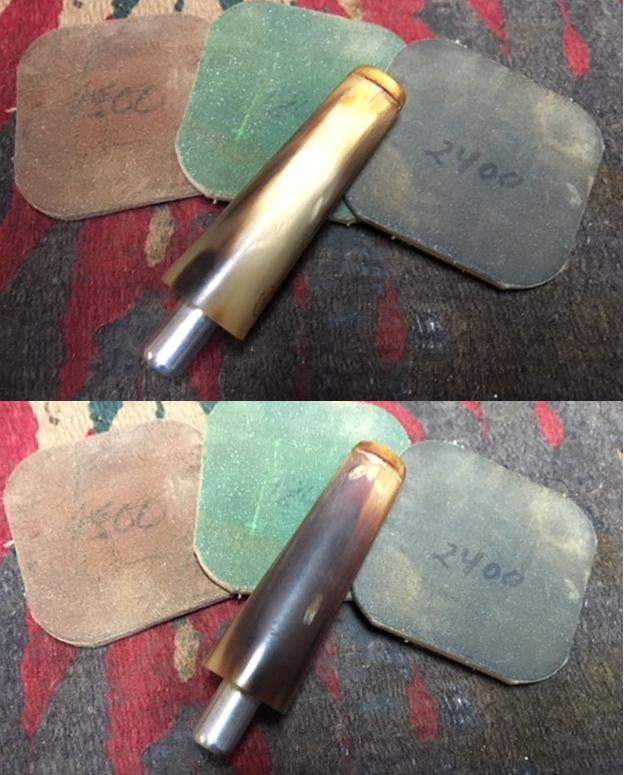
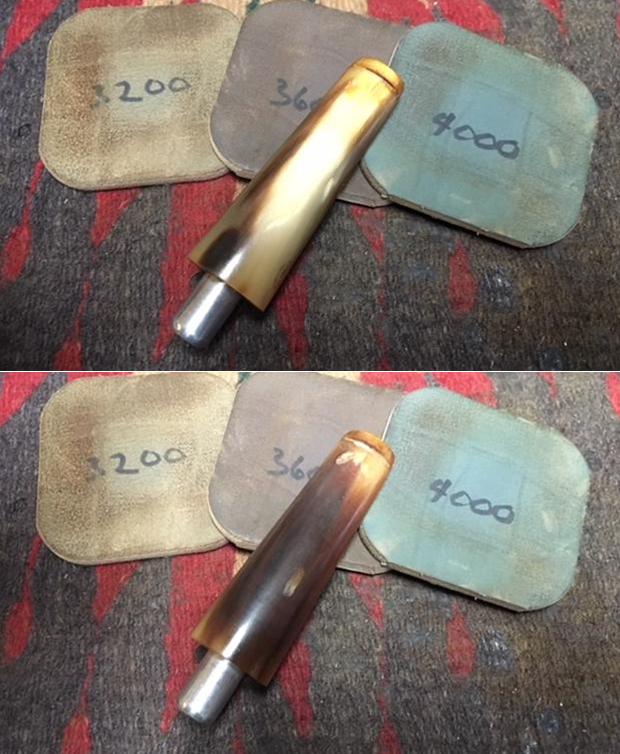
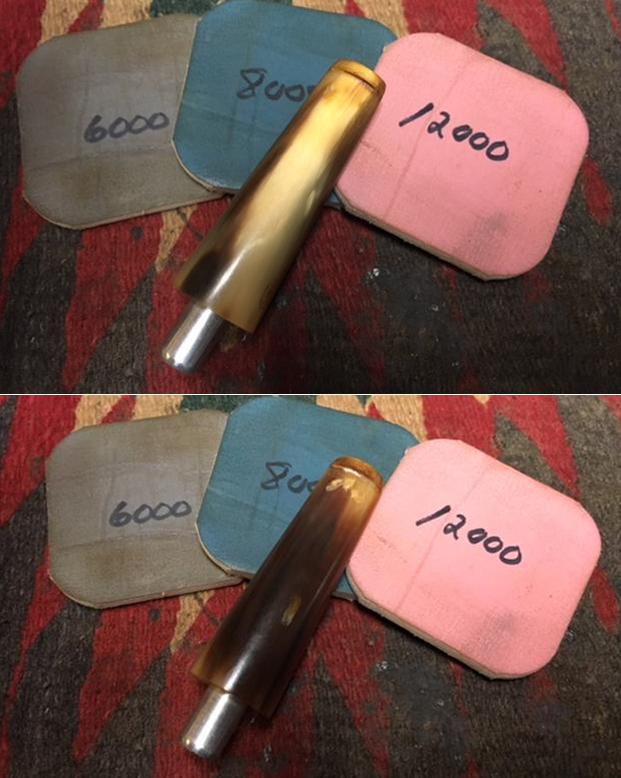
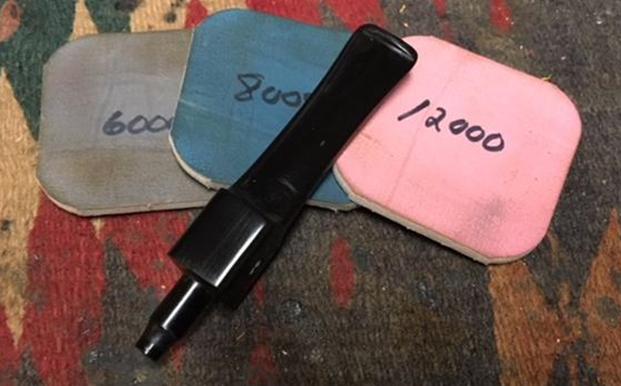
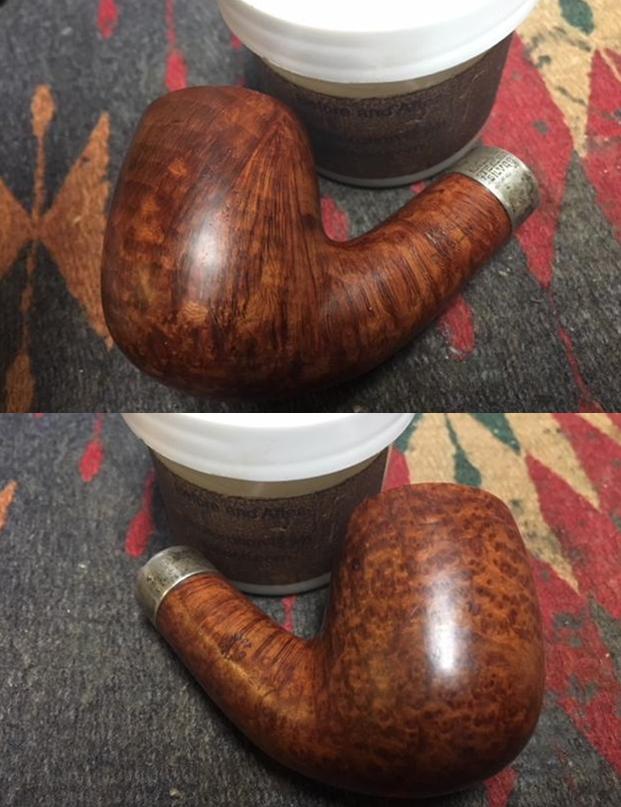
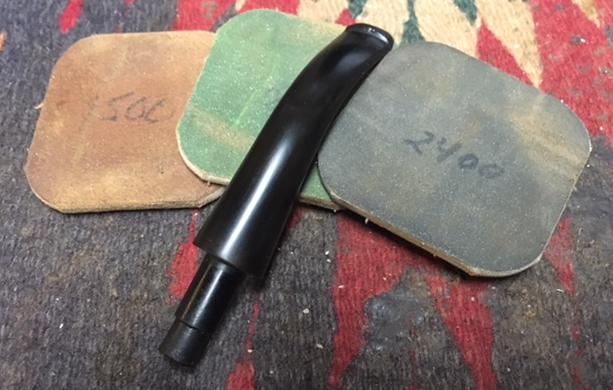
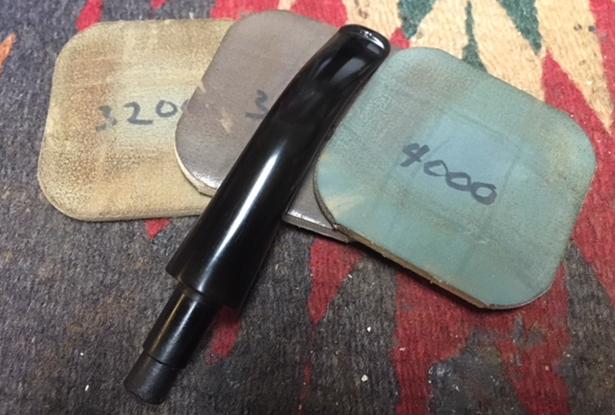
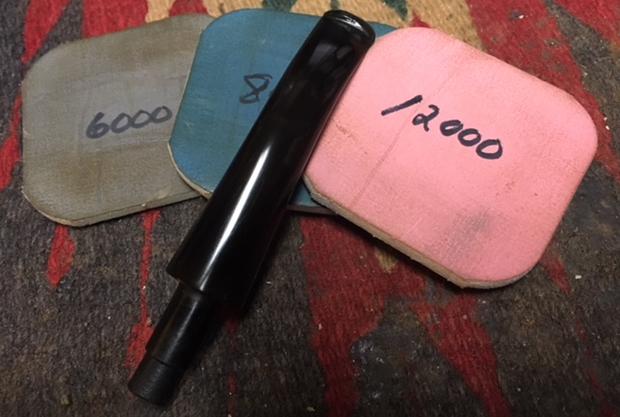
  With the patches curing, I turn to the stem and using micromesh pads 1500 to 2400, I wet sand the stem. I follow by dry sanding with pads 3200 to 4000 and then 6000 to 12000. After each set of three I apply a coat of Obsidian Oil to rejuvenate the vulcanite stem. Throughout all the sanding I take care to avoid the Pipe Pub ‘PP’ stamping on the top of the stem. The first ‘P’ is strong but the second ‘P’ is faded. Later I will add paint to the stamping with hope that there’s enough tread left in the second ‘P’ to hold the paint. I like the progress – the vulcanite stem has a glossy pop!
 The patches on the shank are ready for filing, sanding and blending. I use a flat needle file to bring the patch mounds down near to the briar surface. Then I follow with 240 grit paper rolled up tightly, then 600 grit – each removing the scratches of the former. Finally, I run 0000 steel wool over each patch. I take pictures to show the progress.


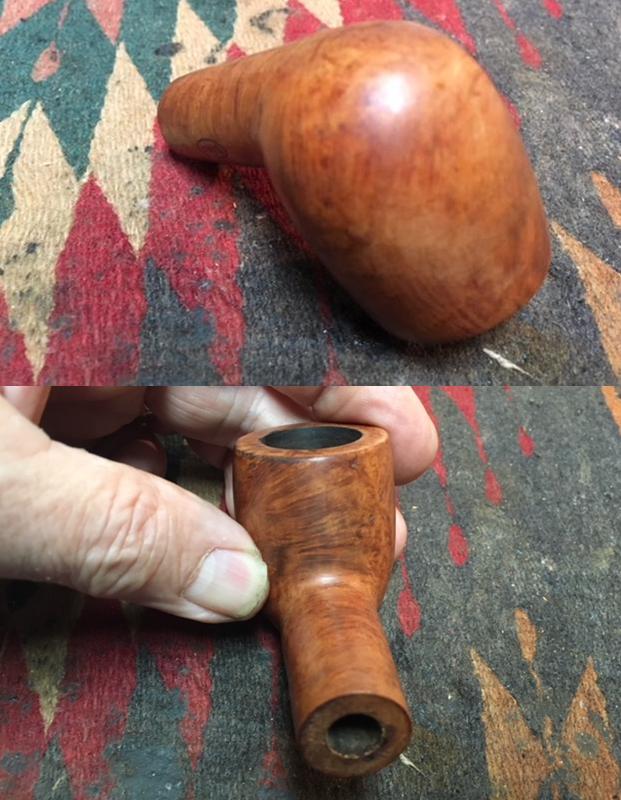
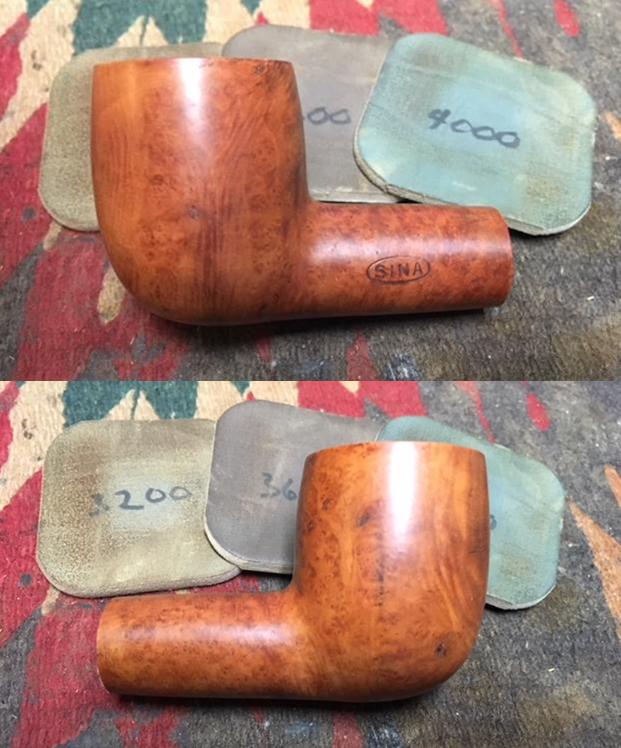
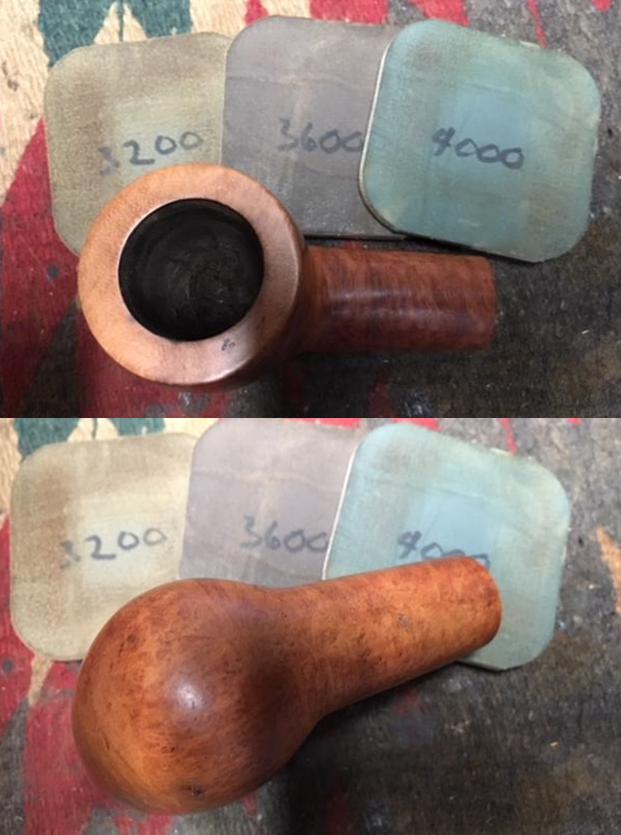
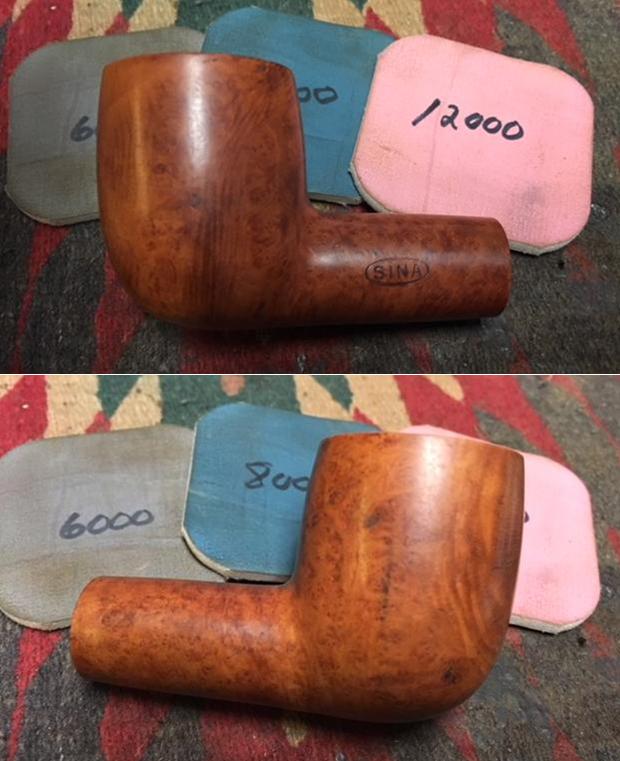
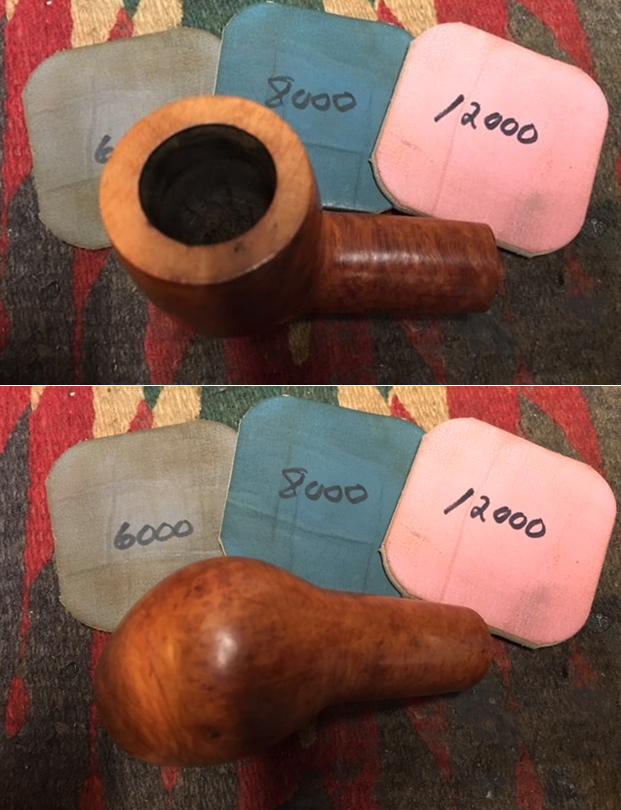
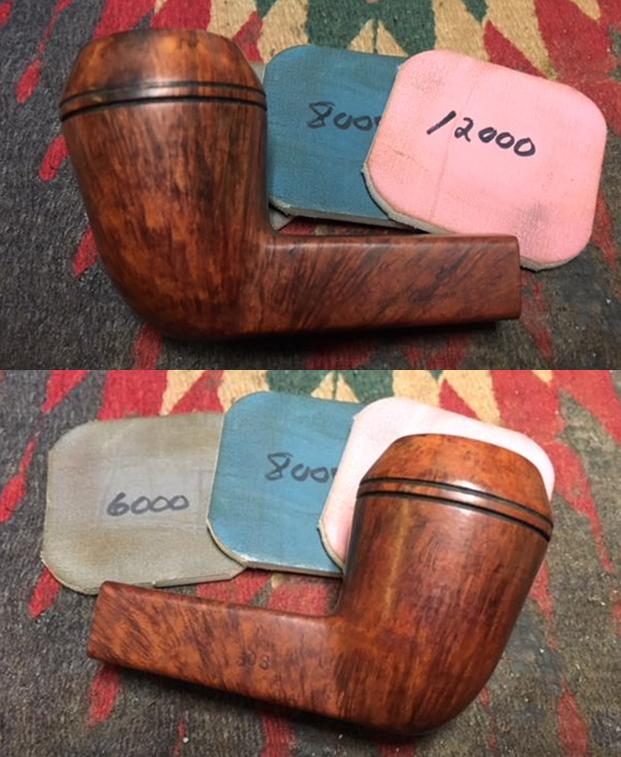
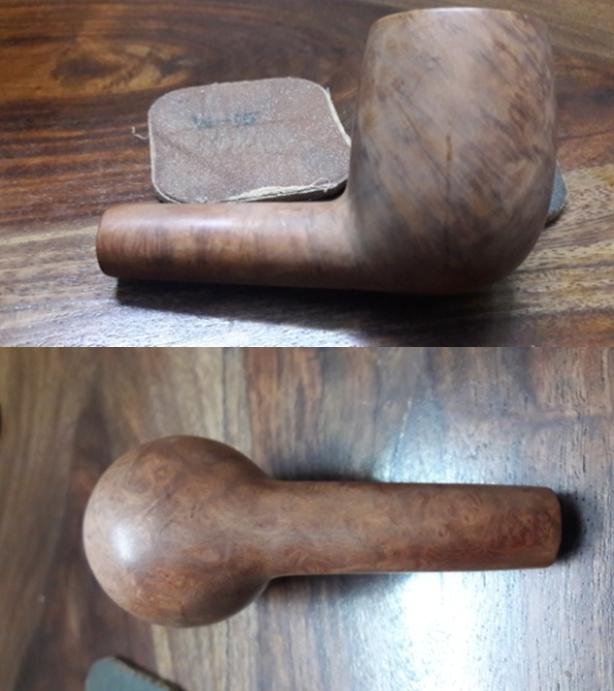
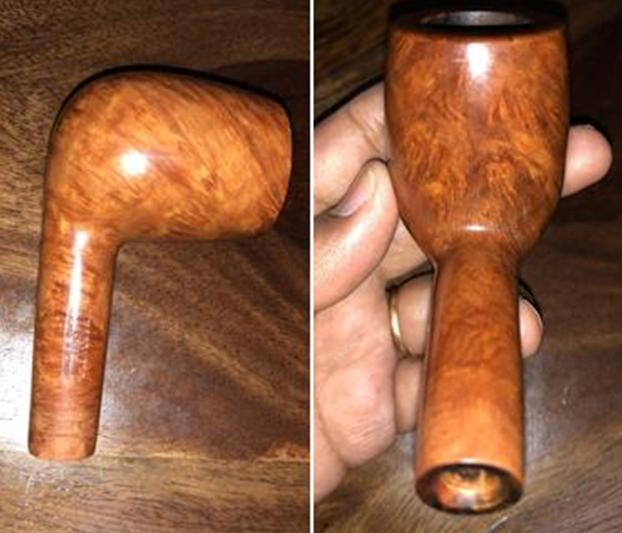
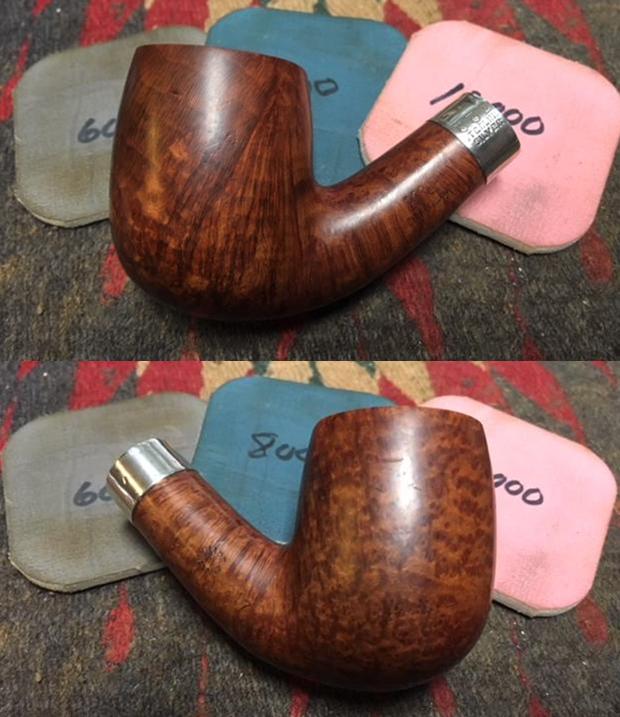
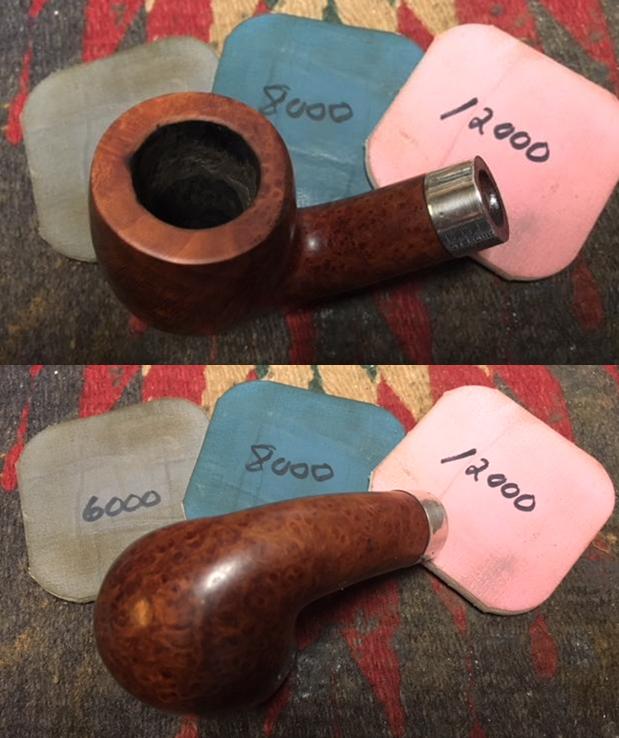
 Moving on to the micromesh phase. To address the tired finish and the myriad of small scratches over the stummel from normal wear, I wet sand using micromesh pads 1500 to 2400, then dry sanding with pads 3200 to 4000 and pads 6000 to 12000. I love watching the gradual unveiling of the briar grain during the micromesh cycle. I never grow tired of the beautiful matrix of grains – no pipe is the same, each a new showcase of God’s creation. The pictures show the progress.
 I’m at a decision point. The question before me is whether to apply a darker stain to the stummel or leave it at the natural grain hue? The current state is very attractive except for the fact that the briar patch I applied closest to the bowl, as seen in the pictures above, stands out more than I like because it is surrounded by lighter wood. I wonder if I would have applied simply a drop of clear, regular CA glue the patch would have been lighter? Hmm. Something to consider in the future. While I’m considering the question of staining, I decide to give the stummel a kosher salt and alcohol soak to further freshen the internals of the Canadian for the new steward.
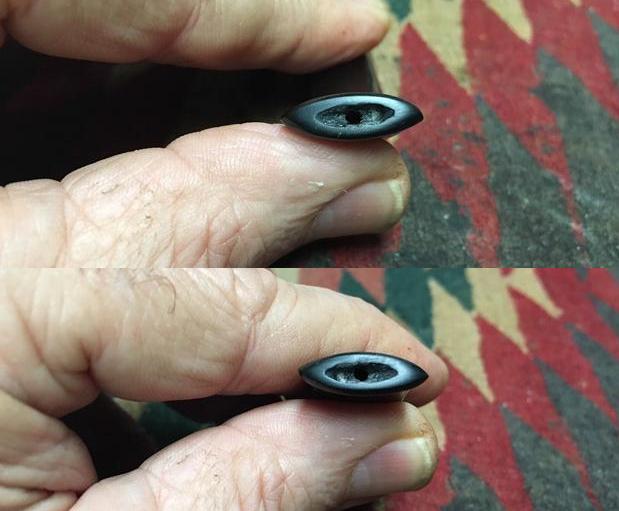
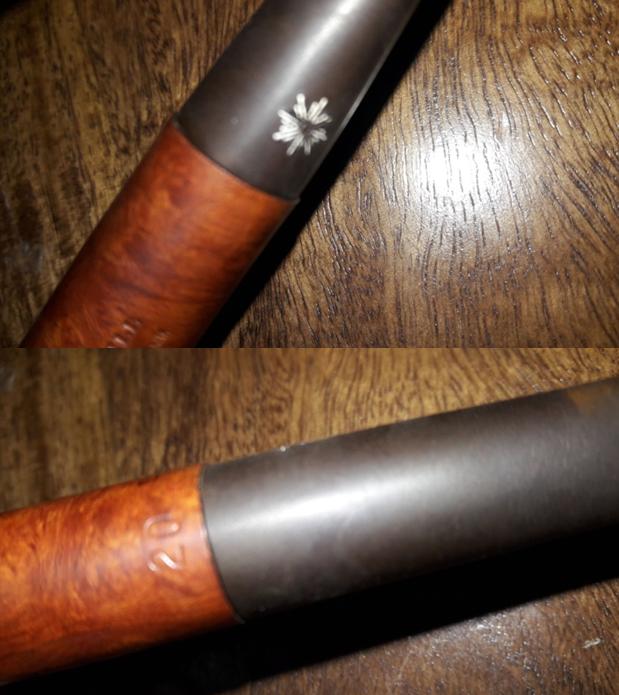
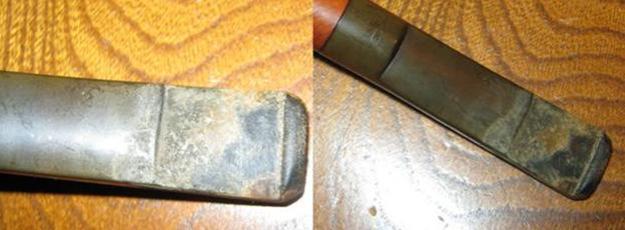
First, I form a wick to insert as far down the long shank’s airway as possible to draw out tars and oils. I use a cotton ball and by stretching it out and twisting it I form the wick. I use a straight wire to help force it down to airway. I then fill the bowl with kosher salt, which leaves no aftertaste. After setting the stummel in an egg carton for stability, using a large eyedropper, I fill the bowl with isopropyl 95% until it surfaces over the salt. I wait a few minutes and top off the alcohol again. I set the stummel aside to soak for several hours. While the stummel is soaking, I take another closeup of the ‘PP’ stamping on the stem. To add a nice touch to the recommissioning of this Pipe Pub Canadian, I want to add white acrylic paint to the lettering. I have no pictures of Pipe Pub pipes that give this detail to compare, but I’m assuming that when this Pipe Pub Canadian rolled off factory line in London, the ‘PP’ stamping was colored. I’m hoping too, that the second ‘P’ can hold the paint. Using white acrylic paint, I apply a very small amount over the ‘PP’ stamping spreading it with a toothpick and then using a cotton pad I dob off some of the paint – to thin it so that it will dry more evenly. I take a picture at this point. I let it set for a few hours. Using the mid-part of a toothpick to rub lightly the dried paint, I’m able to achieve a good look with the first ‘P’. I apply more paint over the second ‘P’ and let it cure. Well, after some time I’m somewhat satisfied with the results – it’s the best I can do with the worn, thin second ‘P’.
 The stummel has been in a kosher salt and alcohol soak for several hours. The salt has discolored and the wick as well. Its done its job. I shake the salt in the waste and clean the bowl of salt with paper towel. I also blow through the mortise to dislodge in salt crystals. The bowl is fresher now and the new steward will appreciate this!
 After some thought, I decide to darken the hue on the stummel to mask more effectively the fills on the shank and to capture a more classic darker English style considering the London, England origins of this Canadian. I use Fiebing’s Dark Brown Leather Dye and I cut it with isopropyl 95% by about 50%. I want a darker stain but not too dark. As an aniline dye, if I elect, I can lighten it further by wiping the stained stummel with alcohol. I first mix the stain with alcohol in a shot glass, and then I clean the stummel by wiping it down with a cotton pad wetted with alcohol. I fit the stummel with a cork in the shank to act as a handle. I then heat the stummel using a hot air gun to expand the briar making the grain more receptive to the dye. After heated, I apply the dye liberally to the stummel and long Canadian shank with a folded over pipe cleaner. After thoroughly covering the stummel with dye, I flame the stummel by igniting the aniline stain and the alcohol in the dye combusts leaving behind the dye set into the grain. After a few minutes, I repeat the application of applying dye and flaming. I set the stained stummel aside to rest through the night. I turn off the lights and do the same!
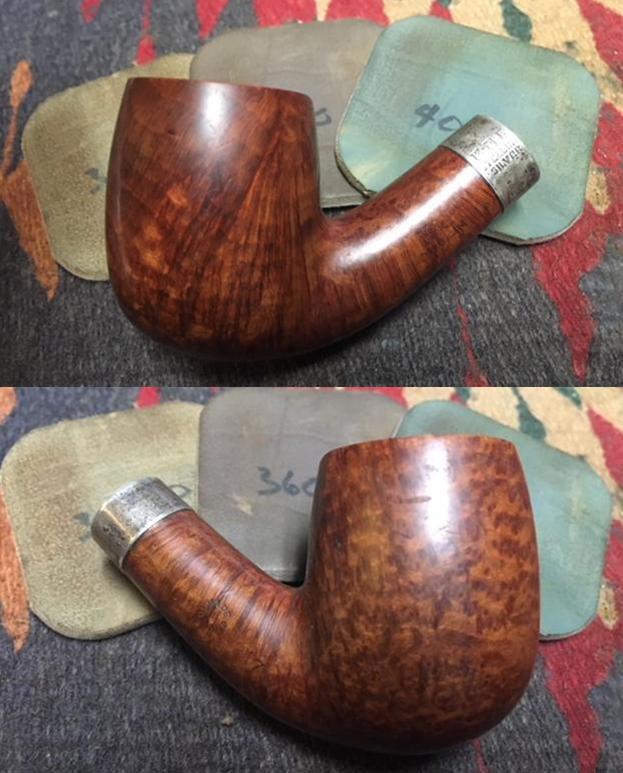
 The next morning arrives, the stummel has rested through the night allowing the stain to set well. I enjoy ‘unwrapping’ the stummel of the flamed dye crust to reveal the grain below. To do this, I mount a dedicated felt buffing wheel on the Dremel – the felt wheel creates more torque and friction on the surface. With the felt wheel I apply the coarser Tripoli compound with the Dremel set at the slowest speed. I purge the wheel with the metal edge of the Dremel’s adjustment wrench which removes old compound and softens the wheel. I then methodically work the wheel over the surface with the compound to reveal the newly stained briar and buffing with the compound. I purge the wheel often as old compound collects quickly. I pause and take a picture to show the border of progress. It takes close to an hour to complete the use of the felt wheel. With the felt wheel I was unable to reach into the crook where shank and bowl meet, so I change a cotton cloth wheel and increase the speed of the Dremel to about 40% and apply Tripoli to the crook to remove the flamed stain. When complete, I give the stummel a very light wipe with alcohol using a cotton wipe not really to lighten but to blend the new stain. Pictures show the progress.
 After the Tripoli, I apply the finer Blue Diamond compound to both reunited stem and stummel. I mount a cotton cloth wheel dedicated to Blue Diamond onto the Dremel, keep the speed at 40% and apply the compound methodically over the entire pipe.
  After completing the Blue Diamond compound, I wipe the pipe with a felt cloth to remove the compound dust in preparation for the wax. I mount another cotton cloth wheel on the Dremel with the speed at about 40% and apply a few coats of carnauba wax to stem and stummel. I finish the restoration by giving the pipe a rigorous hand buffing with a microfiber cloth.
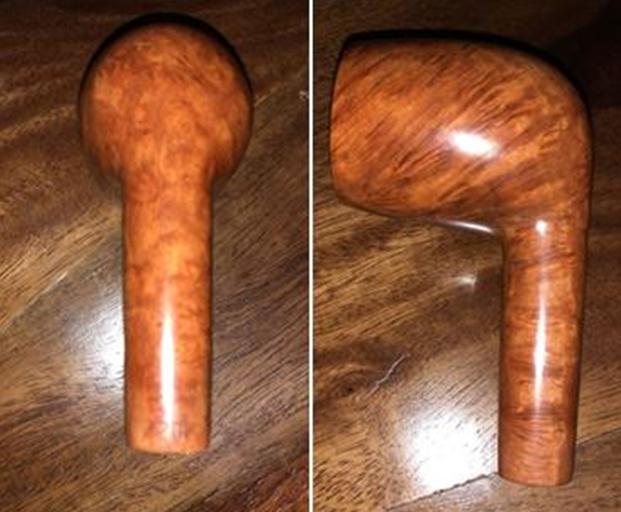
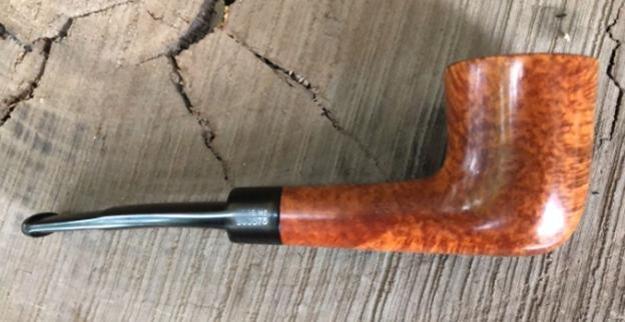
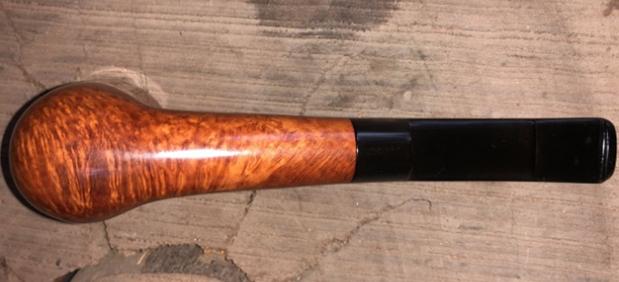
Wow! I’m pleased with the results of this Pipe Pub Canadian Lumberman. I appreciate more the history of the Pipe Pub name and the provenance of this pipe manufactured in London, England. What stands out in this Classic Canadian shape is the briar grain. Oh, my…the pop of the grain is beautiful, and I know that a new steward will enjoy this pipe. Towner commissioned the Pipe Pub Canadian Lumberman from the “For ‘Pipe Dreamers’ Only” area of The Pipe Steward site and he will have first dibs at it in The Pipe Steward Store. As usual with other restorations, this pipe will benefit the Daughters of Bulgaria – women and girls who have been trafficked and sexually exploited. Thanks for joining me!


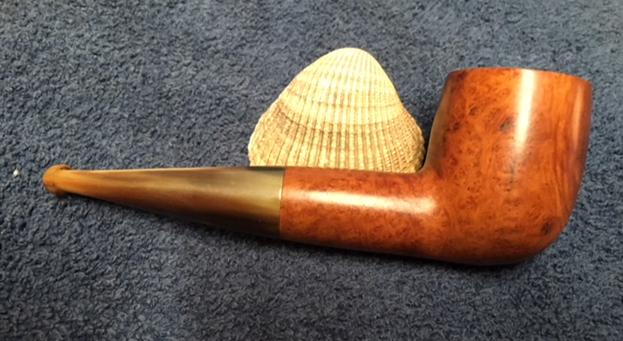
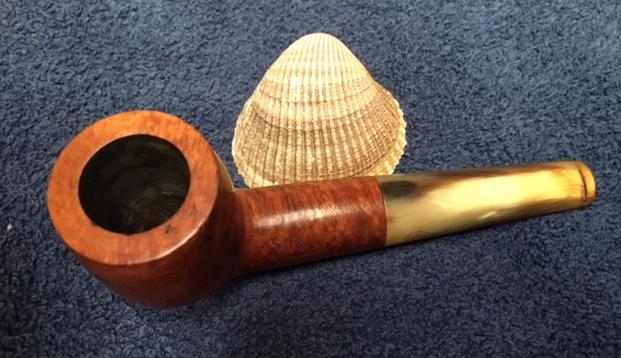
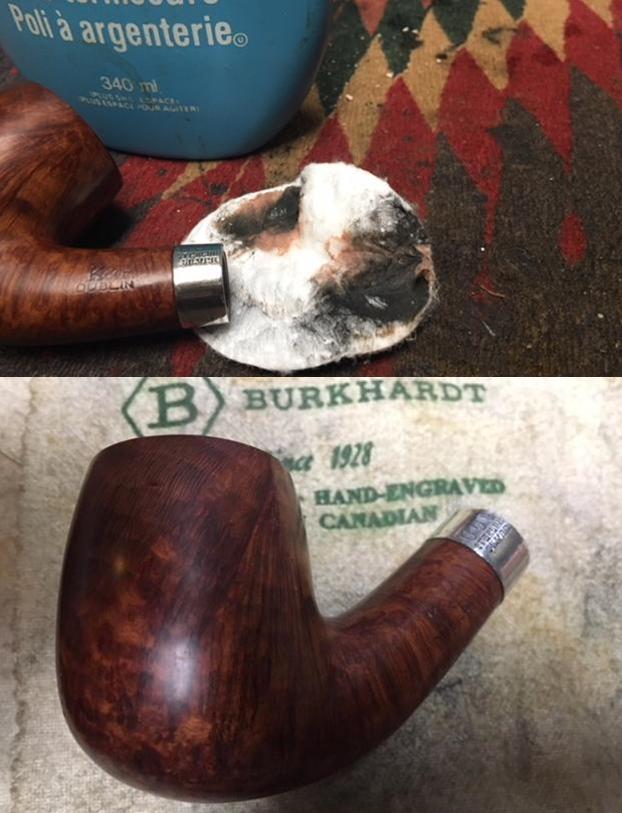
 Brian commissioned two pipes (See: For ‘Pipe Dreamers’ Only), a nice looking Jobey Hand Rubbed Dublin (next on the worktable) and the Oom Paul Sitter before me – both pipes benefit the Daughters of Bulgaria – helping women and girls who have been trafficked and sexually exploited. Thanks Brian! For a close-up look at the Oom Paul Sitter, I take several pictures on my worktable.


 The nomenclature is the simple L.J. PERETTI stamp on the left shank. This Oom Paul shares every single challenge that his former brothers had – the former steward seemed to have a scorched earth policy. The chamber is heavily caked, and the rim scorched. The rim challenges are the most daunting for this restoration. The stummel has a build up of grime and minor nicks from usual wear. The stem has significant oxidation and bit clenching and chewing which needs addressing. To begin the restoration of this, the last Peretti Oom Paul Sitter in need of a new steward, after cleaning the internal airway with a pipe cleaner dipped in isopropyl 95%, I put the stem in a soak with Before & After Deoxidizer along with 5 other stems. After some hours soaking, I fish out the Peretti stem and wipe off the raised oxidation with a cotton pad wetted with light paraffin oil (mineral oil in Bulgaria). The Deoxidizer seems to have done an adequate job.
  Next, I attack the chamber carbon cake build up using the Pipnet Reaming Tool. Putting paper towel down to minimize clean up, starting with the smallest blade head, I use 3 of the 4 blades available to me. I follow the blade heads by using the Savinelli Fitsall Tool to reach down into the chamber to scrape more carbon off the wall. Then, to clean the chamber and to bring out fresher briar, I sand the chamber using a piece of 240 grit paper wrapped around a Sharpie Pen. To remove the thick carbon dust left behind, I wipe the chamber with cotton pads wetted with alcohol. After clearing the cake away, a look into the chamber reveals no problems – no heat cracks or fissures. Good!

 Now to scrub the stummel surface and the rim with its thick lava I start with undiluted Murphy’s Oil Soap and cotton pads. I also use a brass brush on the rim to break up the lava crust. To scrape the rim, I use a pin knife as well as the straight edge of the Savinelli Fitsall tool. As I scrape the crust off, I also remove the scorched charcoal that is on the inside of the rim mainly on the left side of the stummel – the area where the former steward damaged all his pipes. The result is that the left side of the rim is narrower after the cleaning. The stummel is in great condition – the rim is the challenge.
 Before moving on with the rim repairs I continue with the internal cleaning of the stummel. Using pipe cleaners and cotton buds dipped in isopropyl 95% I go to work. I also employ a dental scalpel to scrape the internal wall. I’m pleased that there wasn’t too much resistance. At the end of my work day I’ll continue the cleaning process by giving the stummel a kosher salt and alcohol soak.
 Turning now to the stem, I begin addressing the tooth dents and chatter on the bit. With his brother Oom Pauls, there usually was some button damage too, but this guy’s in better shape in that regard. I first use the heat method to raise the vulcanite dents to make them less severe. By heating the vulcanite, it expands, and the dented vulcanite naturally seeks its original positioning. I use a Bic lighter and paint the upper and lower bit and after heating several passes, I do see a lessening of the severity of the dents as the vulcanite expands. As a result, I can sand the remaining dents out with both the upper and lower bit. Before the heating:
 After the heating:
 I sand out the damage using 240 grit paper.
 I move on to using 600 grit paper by wet sanding the entire stem. I follow this with 0000 steel wool sanding/buffing the entire stem.
 Moving forward with the stem, I wet sand using micromesh pads 1500 to 2400 followed by dry sanding with pads 3200 to 4000 and 6000 to 12000. To revitalize the vulcanite, I apply a coat of Obsidian Oil after each set of 3 pads. I love the glossy pop!
 Looking now to the stummel, I see a few very small, nicely camouflaged fills which are in good shape, but I see one significant cut into the briar that needs attention. To address it, using a toothpick, I lay a line of thick CA glue over the cut. I set the stummel aside to allow the patch to cure.
 After a while, the patch has set enough for me to work on the rim. The bad news is that the loss of briar on the left side of the internal rim from scorching is gone – it can’t be replaced. The good news is that the aesthetic imbalance of the rim as a result can be mitigated somewhat by creating a bevel around the entire rim. The bad news – there is additional loss of briar. In restoring a pipe there’s always this tension between loss and gain. With this Peretti, as with all his Oom Paul brothers, I did the same thing and they turned out well. I start the process by taking the stummel to the topping board to remove the damaged wood on the top. Topping an Oom Paul can be a challenge because the shank extends beyond the plane of the rim. So, to top the rim, the shank needs to hang off the side, so it isn’t unintentionally topped! I take a picture to mark the start. I turn some rotations on the board and check out the progress.
 I also utilize a small sanding block which allow me to focus on a certain area of the rim. After the 240 paper, I put 600 grit paper on the board and do a few more rotations. The pictures show this progress.
 Now, using a tightly rolled piece of coarse 120 grit paper, I begin beveling the internal rim edge – hoping to bring more balance to it. I take a bird’s eye picture first to mark the progress. I pinch the paper under my thumb as I move it in the areas of the rim to be reduced. While I work on equalizing the rim diameter, I’m also sanding down the chamber to taper the walls as they move downwardly. I’m looking for greater aesthetic balance. I come to the point where I’ve done all I can do. I think it looks much better. I do another bird’s eye shot for comparison.
 I take the stummel one more time to the topping board using 600 grade paper. I do this simply to reestablish the lines after the sanding.
 One more thing I want to do with the rim. I’ve worked on the inside balance, now I also introduce a very gentle bevel on the outside of the rim. I do this to soften the edge which is sharp after the topping. I use 120 grit paper then 240 and finish with 600 – each rolled tightly.
 With the rim repair done, I take the flat needle file and begin to file down the patch on the side of the stummel. When I bring the patch down close to the surface, I switch to using 240 grit paper to remove the excess patch to the briar surface, making the patch area flush with the surface. I then finish the sanding with 600 grit paper. The patch will blend well later.
 My day has ended and I will continue the cleaning process of the stummel with a kosher salt and alcohol soak. This freshens the briar and draws out more latent tars and oils from the briar. I fashion a wick from a cotton ball by pulling and twisting it. I insert it down the mortise and airway. I then fill the bowl with kosher salt, which has no aftertaste, and then put isopropyl 95% into the bowl until it surfaces over the salt. I wait a few minutes and top off the alcohol and turn out the lights.
  The next morning the soak has done the job through the night. The salt and wick show soiling from the tars and oils. I clean the stummel of residue salt with paper towel, blowing through the stummel, and to be on the safe side, I run a cotton bud with alcohol through the mortise to clean up any leftover remnants – after a couple of cotton buds I move on.
 The next step is to address the external briar surface of the Peretti Oom Paul Sitter. I filled the one cut I saw on the surface that stood out. There are other nicks and scratches that are normal from use. To address these, I use micromesh pads. I first wet sand using pads 1500 to 2400, then dry sanding 3200 to 4000 and 6000 to 12000. The grain looks good as the micromesh pads coaxed it out. The one bummer is the darkened wood from the scorching damage around the inner edge of the rim. That will not go away because it would sacrifice too much briar to accomplish it.
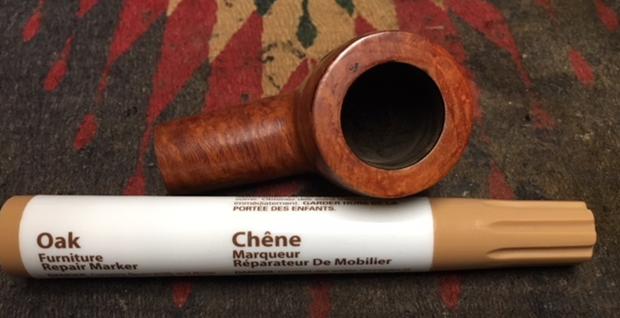
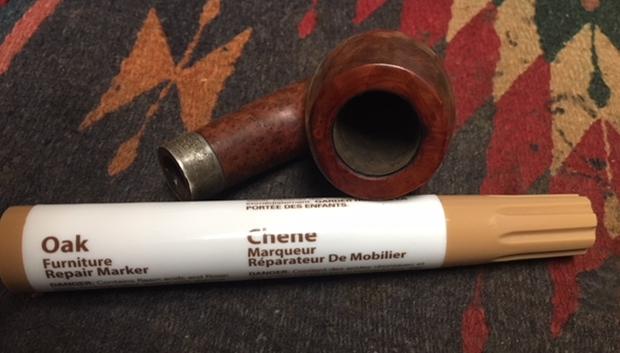
 Since the rim had been topped and sanded, it is a shade lighter than the rest of the stummel. To remedy this, I apply a maple color dye stick around the rim. I forgot to take a starting picture for comparison but here is the aftermath. It looks good and matches well.
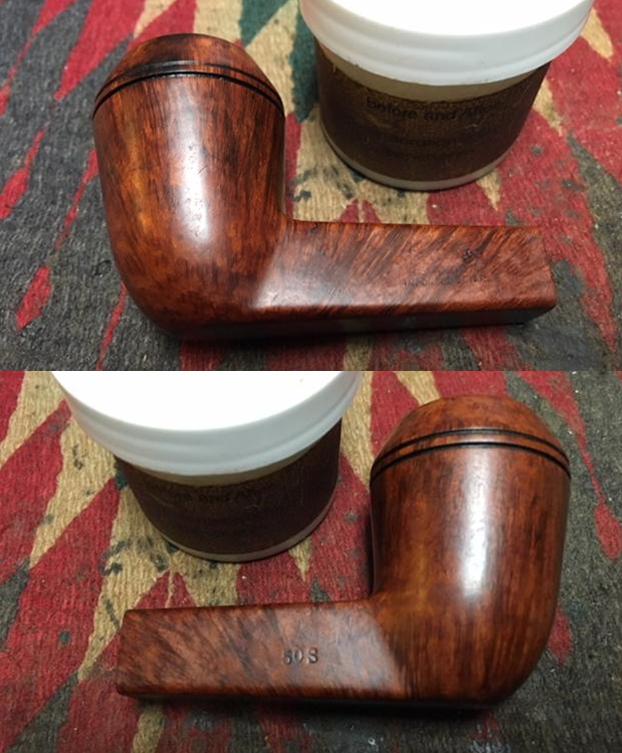
 As I’ve done with all the other Peretti Oom Pauls (and one Bent Billiard!) I restored, I kept the color true to the original as much as possible. To do this I used Before & After Restoration Balm on the briar and it does a great job deepening and enriching the color already there. I do the same with this Sitter. I squeeze some of the Balm on my fingers and work it into the surface. The Balm starts with the consistency of light oil but as it is worked into the briar it gradually thickens to a wax-like feel. After applying it fully and working it in, I set the stummel aside for a while, about 30 minutes to allow the Balm to do its thing and take a picture.
 After about 30 minutes I use a clean cloth to wipe and buff off the Balm. I’m pleased with the results. Turning now to the application of Blue Diamond compound, I rejoin stem and stummel, mount a cotton cloth wheel onto the Dremel, set the speed at 40%, and methodically apply the compound. After finished, I wipe the pipe with a felt cloth to remove compound dust in preparation for the wax. I mount a different cotton cloth wheel to the Dremel dedicated to applying carnauba wax, leave the speed at 40% and again, methodically apply a few coats of wax to stem and stummel. I finish the restoration of the Oom Paul Sitter by giving the pipe a rigorous hand buffing with a microfiber cloth to raise the shine.