Blog by Dal Stanton
This nice-looking Monarch Bent Ball shape came to me along with 65 pipes in an eBay acquisition which I’ve called the Lot of 66. The Bowl shape has a very nice feel in the palm with the dimensions an adequate: Length: 6 1/4 inches, Height: 1 1/4 inches, Bowl width: 1 3/4 inches, Bowl depth: 1 3/8 inches, Chamber width: 15/16 inches. This pipe got Andy’s attention in the special section on my blog site called “For ‘Pipe Dreamers’ Only!” where pipe men and women (and their significant others looking for special gifts!) can commission pipes. Andy is from the state of Maryland in the US and he and his wife attend church where I used to be the pastor – in a former life many, many years ago! Andy reached out to me via Facebook Messenger:
I really enjoy your posts with the restored pipes, and I’m wondering what might be available now and what the costs are. I really like the Oom Paul’s (and some of the other Peretti’s), and the Savinelli from May 29. Many years ago, I had a small collection which included a Comoy, and, if I recall correctly, a Peretti and a Savinelli. Sadly, they were lost somewhere along the way. Thanks for reigniting my interest (no pun intended). I looked at your website and found the answers I needed. What can you tell me about the Monarch Pat. 1989069 – 1074H Bent Ball shape on the Pipedreamer’s page? It looks very similar to one I had many years ago, and I might be interested in commissioning it if it’s still available. Thanks!
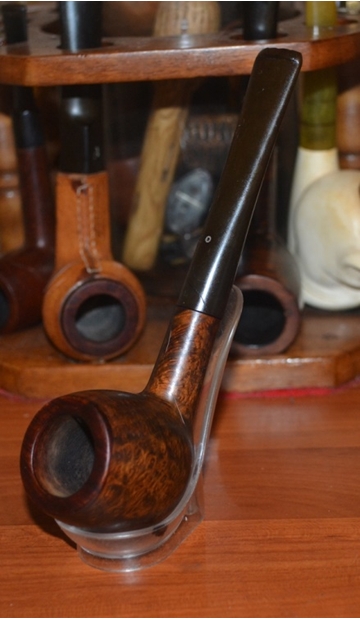
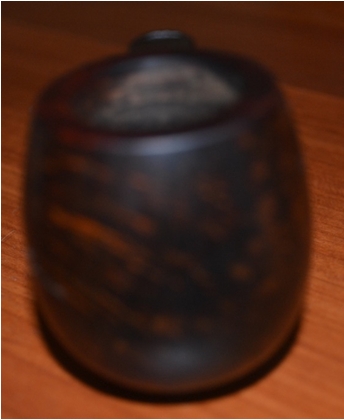
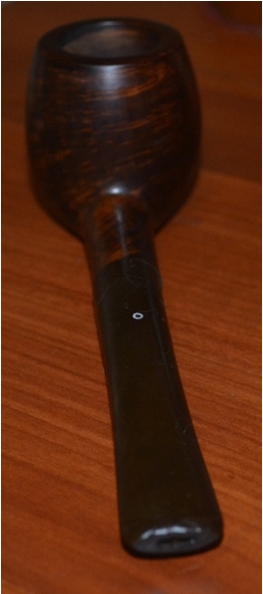
It’s amazing how pipes become so much a part of memories and associations in our lives! Andy and I dialogued, and he commissioned the Monarch and will have the first opportunity to acquire the Bent Ball when it is restored and placed in The Pipe Steward Store, benefiting the Daughters of Bulgaria. Here are the pictures that caught Andy’s attention. 


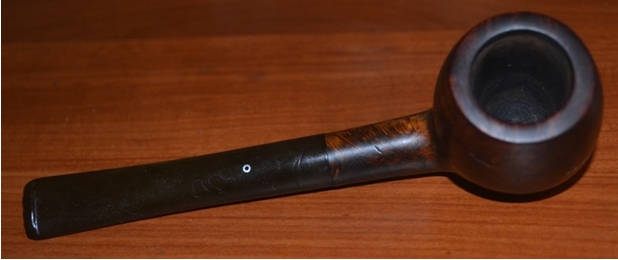
 The stampings on the pipe are distinctive: on the left side of the shank is stamped ‘Monarch’ in cursive script with swirly tail, over ‘PAT. 1989069’. The right side of the shank has ‘1074H’ stamped which I assume is a shape number. The stem has a dot marked on the top which I notice actually appears to be a vent – the black center of the dot is not solid but a hole. Interesting.
 A quick trip to Pipedia in search of ‘Monarch’ turns up useful information.
Monarch Pipe Co. was established in Hartford Con, most likely in the late 1930 by Fred Warnke, who obtained a patent on the system pipe on January 22 1935. The company moved to Tulsa Oklahoma at some point in the 1950s, after which Monarch Pipe Co was moved to Bristow, Oklahoma. The Monarch Pipe Co. also makes E.A.Carey Magic Inch and Duncan Hill Aerosphere Pipes.
So, the question in my mind was, are pipes still being produced by the Monarch Pipe Co. in Bristow, Oklahoma? After searching the internet, I found an interesting newspaper article from the The Oklahoman, published January 15, 1995, entitled, ‘Bristow Manufacturer Lives on Pipe Dreams Pipe Fitting As Fragile as a Smoke Ring, The Art Still Burns in Bristow’ (LINK). Excerpts from the article are enlightening and interesting:
Monarch has manufactured pipes in Bristow for 32 years. Once it employed 12 workers and produced 5,000 pipes a month; now the workforce is four, including Austin (a manager mentioned earlier).
Monarch was founded in 1929 in Connecticut. In 1962, a Tulsa businessman who ordered his pipes from Monarch discovered his source might close down, so he bought it. He and his partners moved it to Bristow…. Some 15 years ago, Carey bought the little enterprise.
This excerpt mentions Monarch’s parent company was the E.A. Carey of Ohio, company most well known for the ‘Carey Magic Inch’ pipes which boasts of a system that produces a drier, cooler smoke. Still wondering if Monarch currently was producing pipes, I search again, “Monarch Pipe Co.” and found an old business link from Buzzfile.com that gave information and a ,mailing address – no email or website. I plugged the Bristow, OK, mailing address in Google Maps and found this picture of the Monarch Pipe Co. The date of the photograph from Google is July 2012 – now six years ago.  Still desiring to know if Monarch pipes were being manufactured, I decided to try one more angle. The 1995 Oklahoman Newspaper article above said that E. A. Carey bought out the small Monarch enterprise 15 years earlier, in 1980. I searched for the Magic Inch E. A. Carey of Ohio name and found a website: http://www.eacarey.com. As I’ve successfully done many times in the past, I went to the sites ‘Contact Us’ page and used the email provided to see if anyone there knew anything about the Monarch Pipe Company? I received a reply from Danielle:
Thank you for the email. We are sorry, but the Monarch pipe company closed a few years ago. The woman who ran it has retired. We do still sell magic inch pipes, they can all be found on our website: www.eacarey.com Any pipes she made for us, we no longer have.
In reply, I went out on a limb asking if they had a Monarch Shapes Chart…. We’ll see what happens! (Addendum: Danielle responded in a few days to say that they had no information on Monarch pipes. Oh well!)
The closing lines in the 1995 Oklahoman article proved to be prophetic. The former manager of Monarch Pipe Co., Francis Austin was quoted:
Still, he said, Carey “realizes the stability of the smoking industry” is as fragile as a smoke ring, and is diversifying into such areas as children’s safety toys and goose down products.
Someday, concedes Austin, who’s 60, his artful pipes will be collectors’ items.
This Monarch Bent Ball is now a collectible! The other interesting aspect of the Monarch nomenclature is the patent number given: ‘PAT. 1989069’ which is for the system evident in the fittings of the Monarch ‘System’ pipe. I took the patent number to the United States Patent and Trademark Office site searched the patent number. I found that the patent was approved January 22, 1935 and a diagram that is also referenced by Pipedia, showing a cutout of a pipe with the system that remains in the Monarch on my worktable.  I was also intrigued by reading the full patent document submitted by Fred L. Warnke in 1931. I clipped the header from that document and placed it below. The first several paragraphs describes how the system would provide the holy grail of pipe technology – a cooler and dryer smoke!
  One last interesting item to note which I referenced earlier. The dot on the top of the stem is a hole or a vent air regulator which is labeled #25 in the Fig. 1 1931 patent diagram. I found this caption that I clipped from the patent document interesting as it describes the purpose of the vent and how it contributes to a ‘dryer and cooler’ smoking experience as it regulates the introduction of fresh air to the to the smoke. I really wish I could try out some of the pipes I restore to experience these inventions in practice!
 As I take a close look at the Monarch Bent Ball, the chamber has light cake buildup with some lava flow on the rim, but light. The stummel looks to be in good shape. I see no fills and only the normal grime that builds on the surface. I’m not quite sure how the internals of this system pipe work, I’ll have to experiment to see how to clean it. The stem has mild oxidation and some tooth chatter. So, with a better understanding of the provenance of this Monarch Bent Ball and the technology of the patent, I begin the restoration by cleaning the internal airway and air chamber of the stem with pipe cleaners and cotton buds then I add the Monarch stem to Before & After Deoxidizer along with five other pipes’ stems to address the oxidation.
 After some hours, I fish the stem out of the Deoxidizer and wipe off the Deoxidizer and oxidation with a cotton pad and light paraffin oil (mineral oil). I also clear the airway of Deoxidizer using a pipe cleaner dipped in isopropyl 95%. The Before & After Deoxidizer did a good job – the stem’s oxidation is removed.
 Turning to the stummel, I begin to clear the light cake using the Pipnet Reaming Kit. I take a picture to mark the start and spread paper towel to minimize cleaning. I jump over the smallest blade head with this large chamber and use the next blade to the largest blade head. I then use the Savinelli Fitsall Pipe Tool to fine tune the reaming by scraping the chamber walls where the blade heads missed. To get down to fresher briar, I then sand the chamber by wrapping a piece of 240 grade paper around a Sharpie Pen. Finally, to clean the chamber removing the carbon dust, I wet a cotton pad and wipe the chamber. Looking at the chamber wall – I see no problems. The pictures chronicle the progress.


 Turning to the external surface, I use undiluted Murphy’s Oil Soap to scrub with cotton pads and I also utilize a brass brush on the rim. After cleaning I rinse the bowl under tap water. The rim came out well with most of the lava removed.
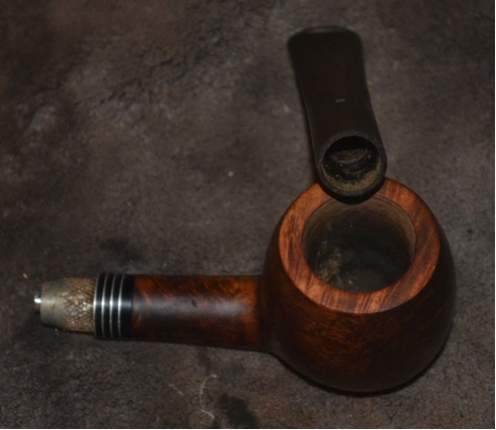
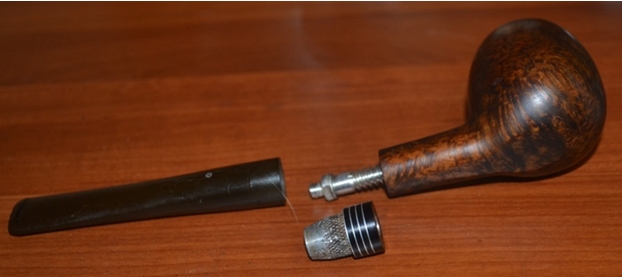
 I decide to explore the internals of the Monarch’s mortise. I first clean the nickel mortise airway tube with pipe cleaners and shank brushes. The tube was easily cleaned. After looking at the patent diagram again, mainly at figure five which shows the mortise fitting, I decide to see if it will come out. The base appears to be threaded. Carefully, I clamp down on the flat sided flange shown as #26, and gently rotate the stummel holding the mortise fitting stationary. It starts a bit sticky but then gradually loosens up until it is removed. What I’m looking at looks close to the 1935 patent diagram. I find that #15 is loose and comes off of the main threaded insert. I read in the patent document that this hardware was designed to enable an exact adjustment to position the stem with the stummel. We’ll see after I clean everything and reassemble how this works. I wanted to see if there was a crud trap at the end of the tubing near the draft hole. I am pleased to see that there wasn’t after plunging a few cotton buds down through the opened mortise. After cleaning and reassembling the mortise insert, it did take a bit to figure out how to work the adjustment mechanism. It was a combination of rotating the threaded insert (#14) so that the flange (#15) was loosened and could rotate a degree or so and tightened to change the alignment of the stem that would then be screwed on…. After a few tightenings and loosenings, I was able to align the stem as it should be! The new steward will have to figure this out! I take a picture to show the alignment.

 To address the stem’s tooth chatter, I first use the heating method to expand the vulcanite, thus reducing the severity of the indentations. I use a Bic lighter and paint both the upper and lower bit. I follow that by using a flat needle file to re-shape the button lips, both upper and lower, then I sand using 240 grit paper to erase the file scratches and to sand out the tooth chatter. Following the 240 grit paper, I use 600 grit paper to erase the scratches of the 240. Then, over the entire stem, I sand/buff using 0000 grade steel wool. The tooth chatter is removed, and the button’s new lines look good.

 The stem is ready for the micromesh process. Using micromesh pads 1500 to 2400, I wet sand the stem. Following this, I dry sand using pads 3200 to 4000 and 6000 to 12000. After each set of 3 pads, I apply a coat of Obsidian Oil to rejuvenate the vulcanite. The stem looks good – the glossy pop is what we aim for!
 The stem is waiting in the wings and I now look to the stummel. To begin, I decide to do a very light topping using 600 grade paper on the chopping board to refresh the rim lines and to remove the remaining lava traces. Inverting the stummel onto the board I only go a few rotations and I’m satisfied with the results.
 To remove the minor cuts and nicks on the stummel from normal wear, I use micromesh pads 1500 to 2400 and wet sand the stummel. Following this, I dry sand using pads 3200 to 4000 then 6000 to 12000. Well, at the beginning of the second set of micromesh pads while sanding, I spied a blemish in the briar that I hadn’t seen before (second picture below). It was a bit too large for me to be happy with the finished restoration, so I take a little detour. I apply a drop of clear CA glue on the spot. I spray it with an accelerator to instantly cure the patch. I keep the drop as small as possible so not to impact the surrounding briar. Surgically, I file and sand the patch down with a flat needle file, then use 240 and 600 grade papers and then play catchup with the spot with the first 3 micromesh pads. Finally, I then complete the micromesh process with the final six pads. The grain is looking good on this Monarch Bent Ball!


 At this point I decide to add a stain to darken the stummel, but to give it a nudge in a reddish direction. I decide to use Fiebing’s Saddle Tan Pro Dye to do this. For the staining process, I remove the Monarch System insert in the mortise. I then wipe the stummel with a cotton pad and alcohol to clean the surface. Using a hot air gun, I warm the bowl causing the briar to expand. This helps the grain be more receptive to the dye. After the bowl is heated, I use a folded pipe cleaner to apply the Saddle Tan dye to the briar. After I coat the stummel thoroughly, I flame the stain with a lit candle. This causes the alcohol in the dye to combust and to set the pigment in the briar. After a few minutes, I repeat the process of applying dye and flaming. I set the stummel aside to rest through the night. It’s a good idea, and I turn out the lights.
 The next morning has arrived and I’m anxious to ‘unwrap’ the flamed Saddle Tan crust encasing the stummel. I mount a felt buffing wheel on the Dremel and set the speed at the slowest and I use Tripoli compound to remove the layer. The felt wheel, coupled with the Tripoli, a coarser compound, removes the leftover stain as well as finely buffs the briar surface. I work the Tripoli compound methodically ‘sweeping’ the briar surface revealing the grain beneath. With my wife’s help, I include a picture of the process. At the end of the application of Tripoli compound, I give the stummel a light wipe with a cotton cloth wetted with isopropyl 95% to blend the new stain.
 Next, I rejoin stem and stummel and I mount a cotton cloth buffing wheel on the Dremel, turn up the speed to about 40% and apply Blue Diamond compound, a less abrasive compound. Completing this, I use a felt cloth and wipe the pipe removing the compound dust in preparation for applying wax. I mount another cotton cloth wheel to the Dremel, maintain the 40% speed and apply a few applications of carnauba wax to both stem and stummel. I complete the waxing with a rigorous hand buffing using a microfiber cloth.
My goodness! The grain on this Monarch Bent Ball just stands up and shouts! As one traces the patterns around the Ball’s bowl, there’s flame grain, some bird’s eye and a rippled stream of grain that reminds me tiger fur – a landscape of grain pleasing to the eye. The Monarch Ball shape fits naturally in the palm. Andy from Maryland commissioned this Monarch Bent Ball and he will have first dibs on it when it’s placed in The Pipe Steward Store. This pipe benefits the Daughters of Bulgaria – helping women and girls who have been trafficked and sexually exploited. Thanks for joining me!