Guest Blog by Robert M. Boughton
Member, International Society of Codgers
Member, North American Society of Pipe Collectors
http://www.naspc.org
http://www.roadrunnerpipes21.com
http://about.me/boughtonrobert
Photos © the Author
And old Boughton, if he could stand up out of his chair, out of his decrepitude and crankiness and sorrow and limitation, would abandon all those handsome children of his, mild and confident as they are, and follow after that one son whom he has never known, whom he has favored as one does a wound, and he would protect him as a father cannot, defend him with a strength he does not have, sustain him with a bounty beyond any resource he could ever dream of having.
— Marilynne Robinson (b. 1943), U.S. novelist and essayist, in “Gilead” (2006). She is the winner of the Pulitzer Prize for Fiction and the Library of Congress Prize for American Fiction, both this year.
BLOGGER’S NOTE: ALTHOUGH I READ AN EVELYN WAUGH NOVEL WHEN I WAS 17 AND COULDN’T HELP NOTICING THE MENTION OF A VILLAGE CALLED BOUGHTON, WHICH YEARS LATER I CONFIRMED EXISTS IN DEVENTRY, NORTHAMPTONSHIRE, “GILEAD” IS THE ONLY WORK OF FICTION IN WHICH I HAVE SEEN A CHARACTER WITH MY LAST NAME. BUT THE PART THAT TRULY GAVE ME THE WILLIES WAS FINDING WE (THE FICTIONAL PASTOR BOUGHTON AND I) SOMEHOW SHARE THE SAME GIVEN NAME AS WELL! I ALSO LIKE THE USE OF “BOUNTY.” ALL OF THE NAMES AND EVENTS IN “GILEAD” ARE FICTIONAL, AND NO RESEMBLANCE TO ACTUAL PERSONS, LIVING OR DEAD, IS INTENDED.
INTRODUCTION
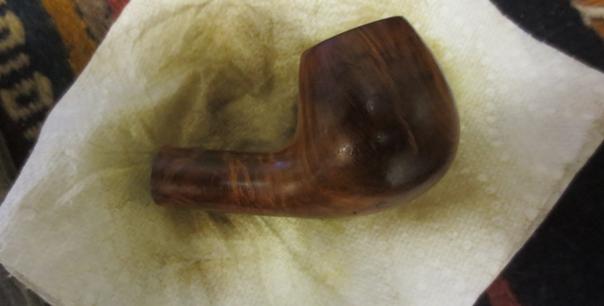
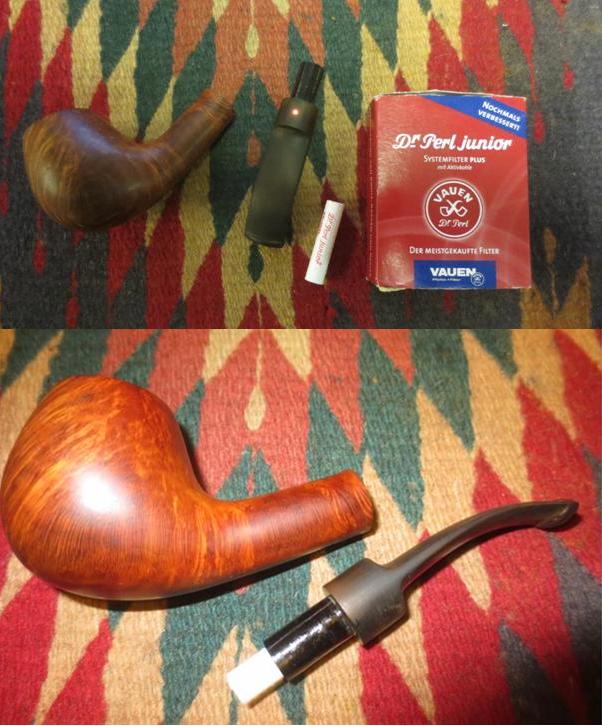
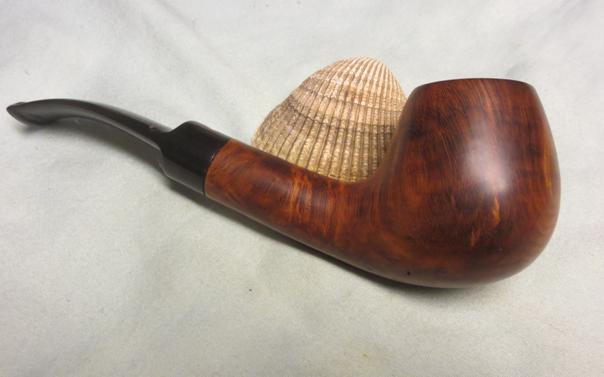
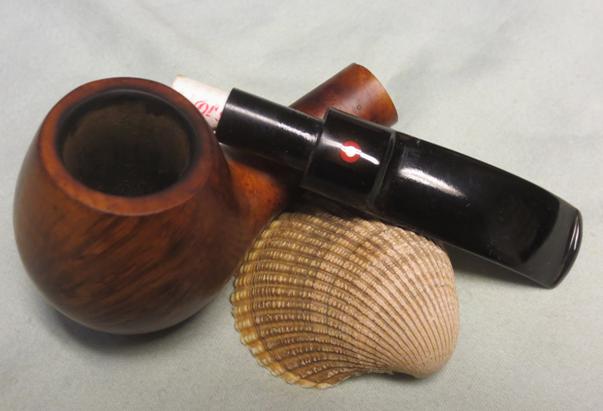
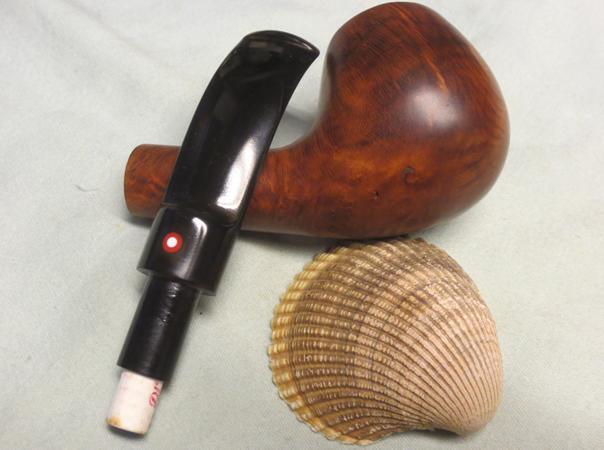
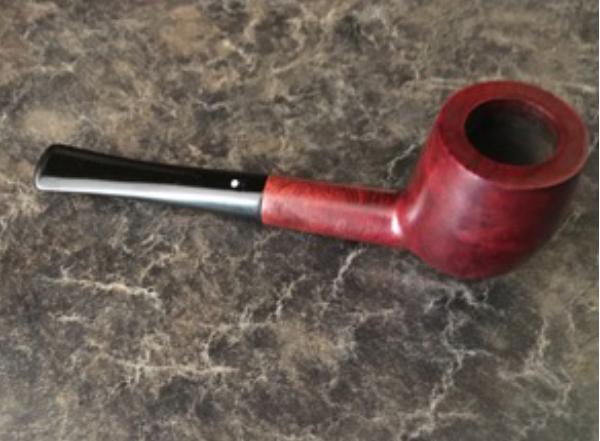
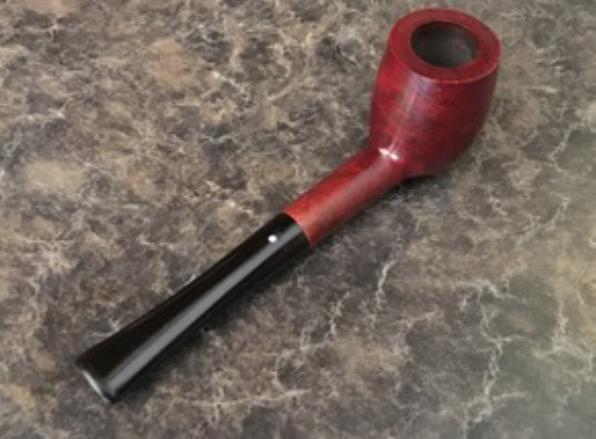
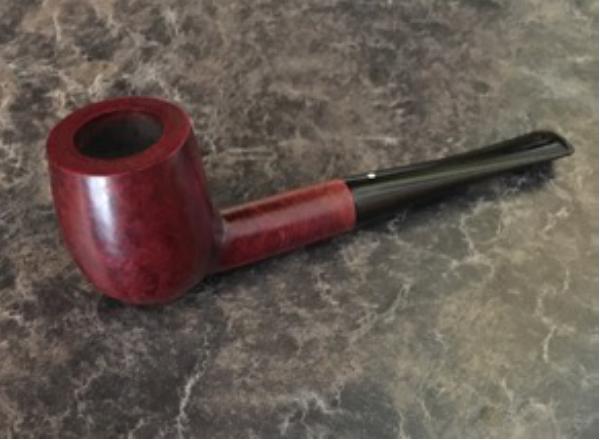
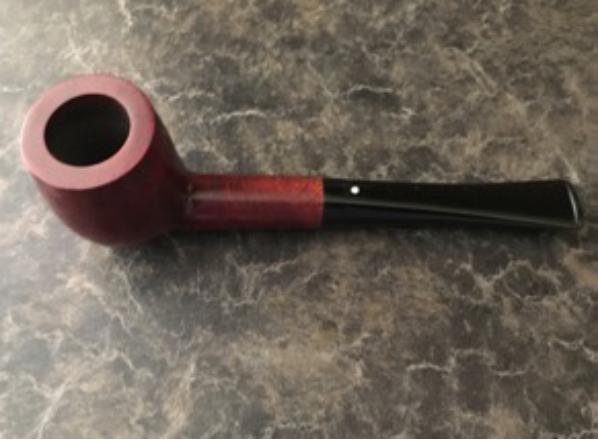
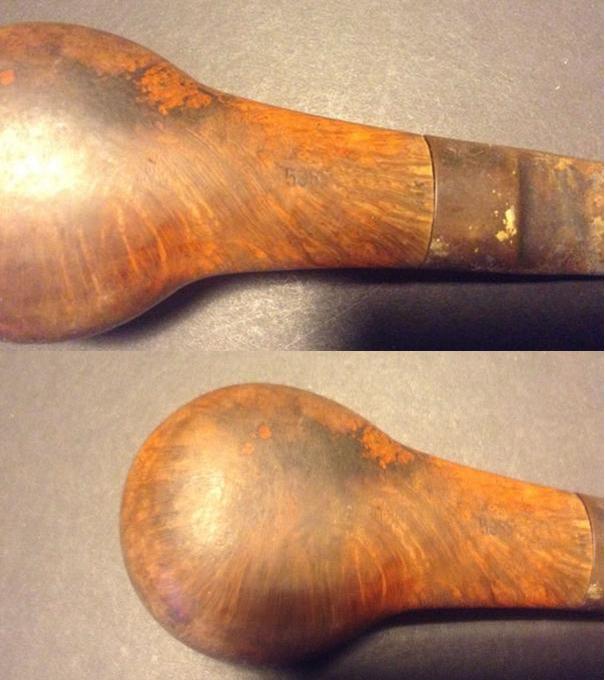
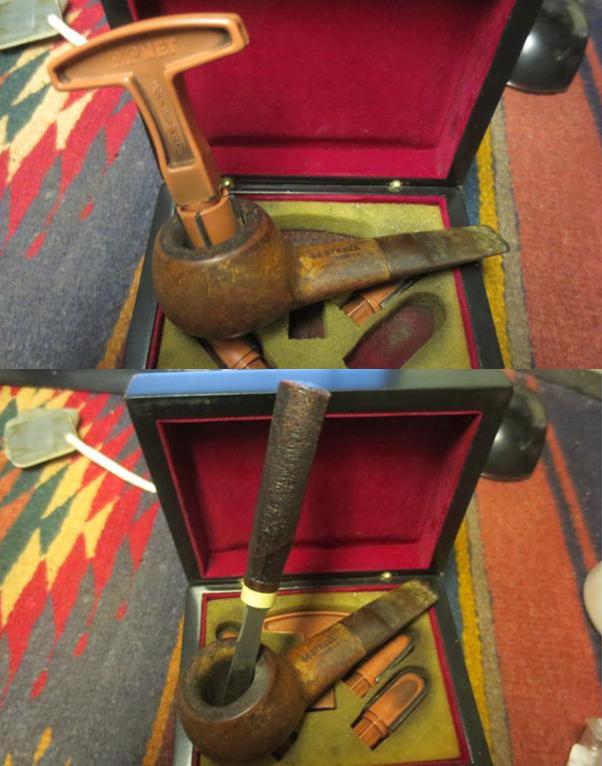
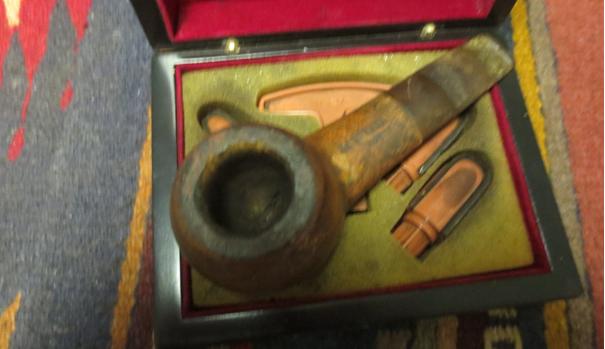
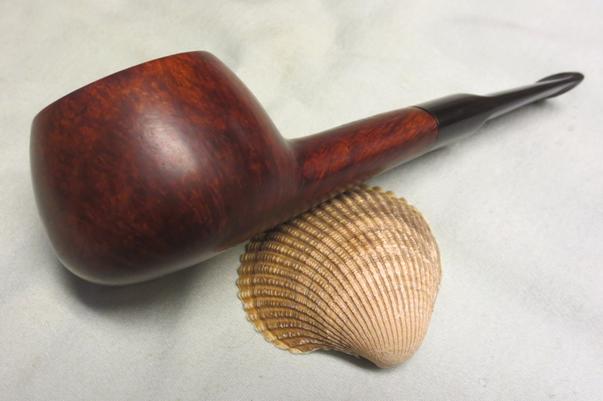
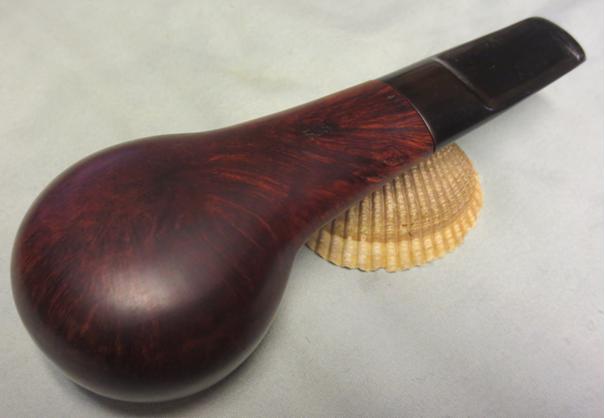
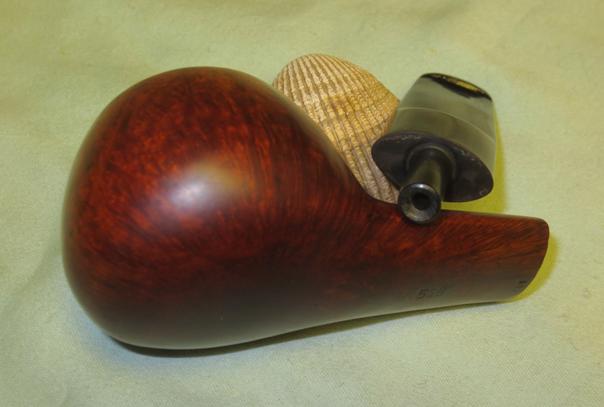
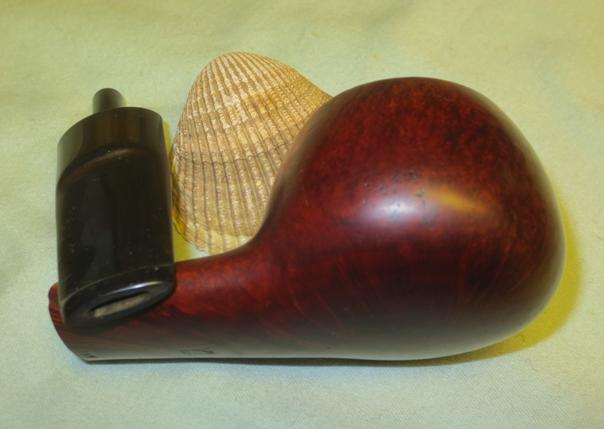
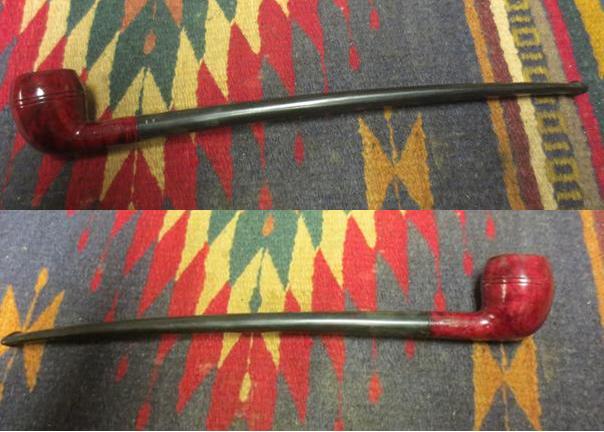
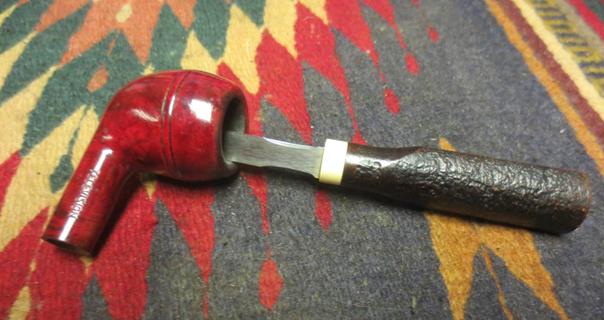
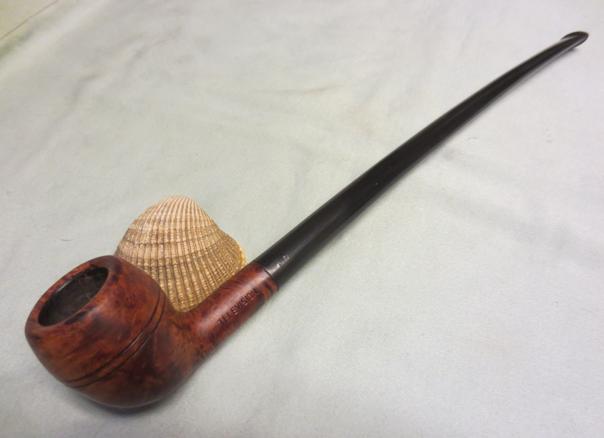
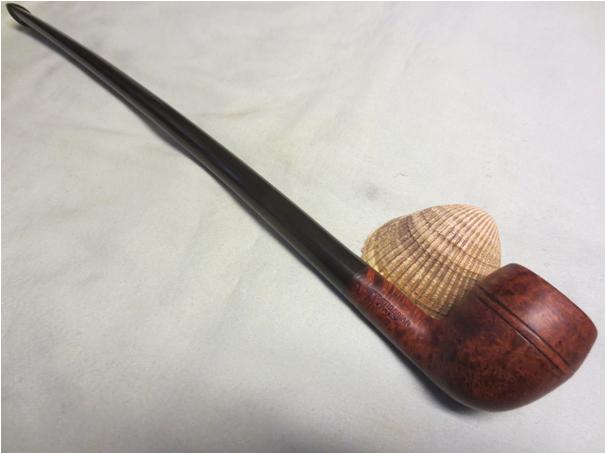
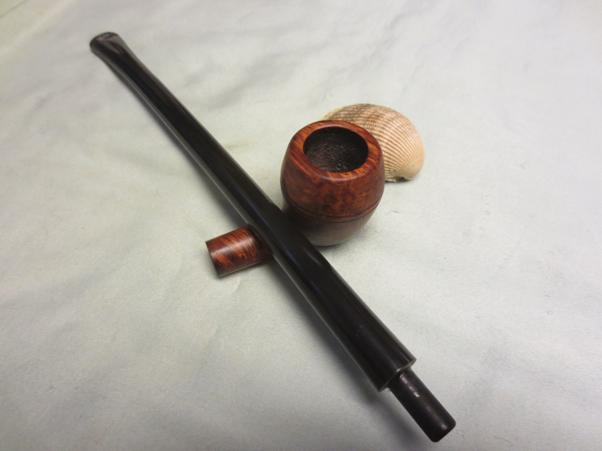
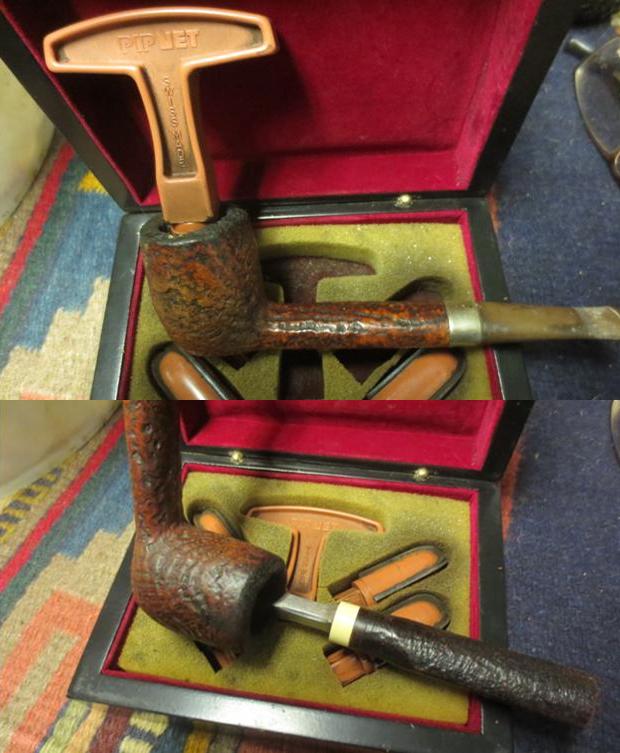
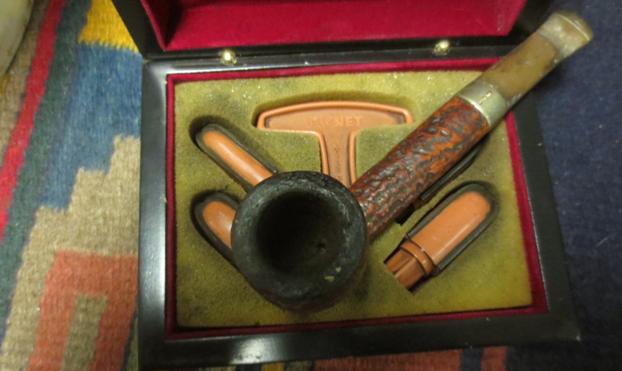
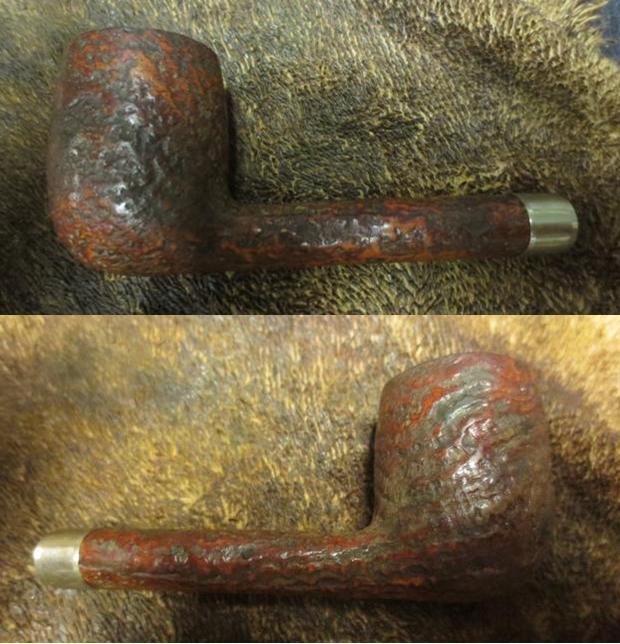
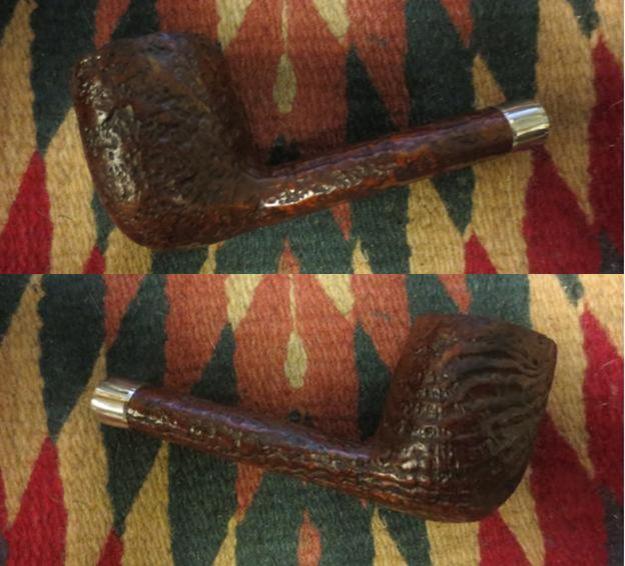
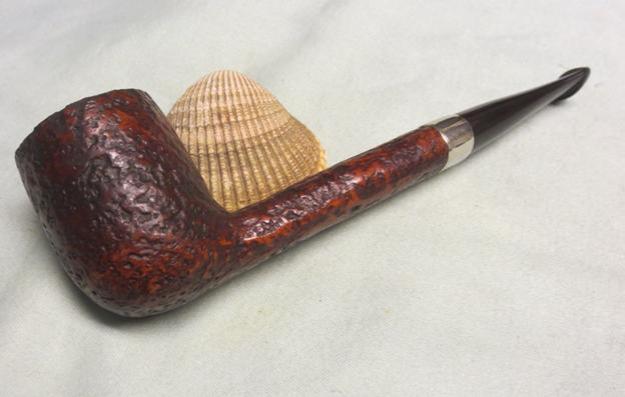
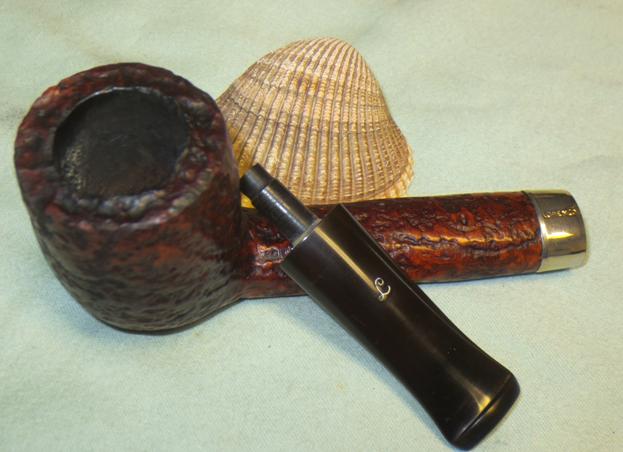
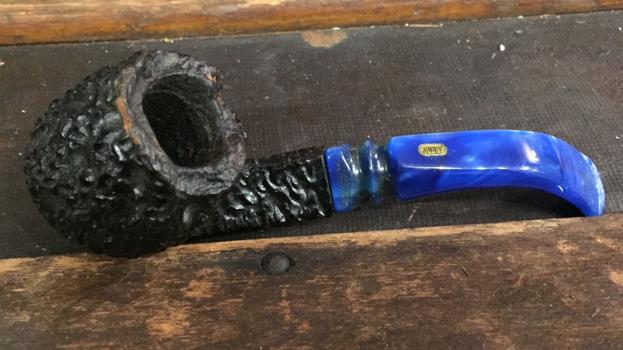
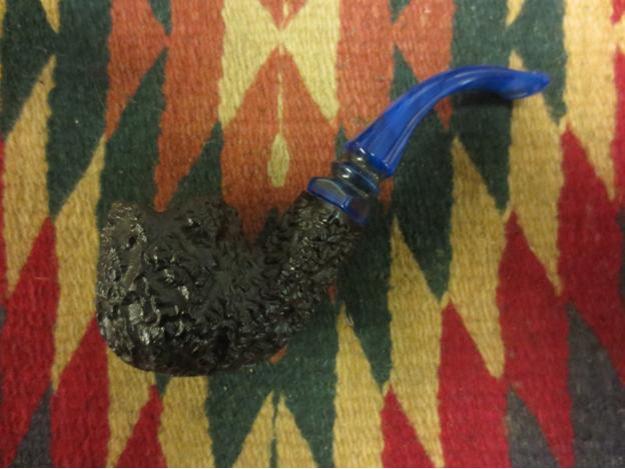
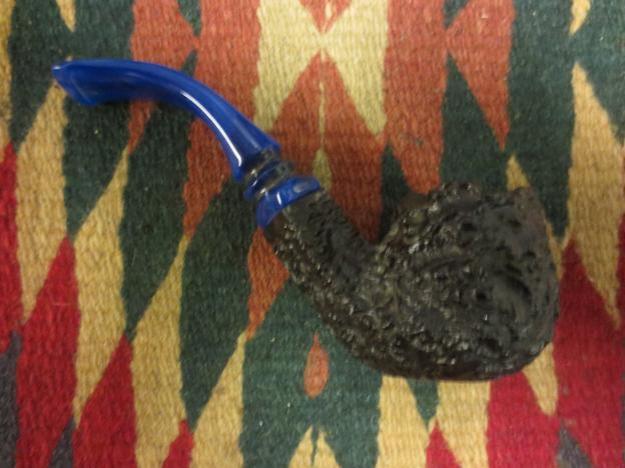
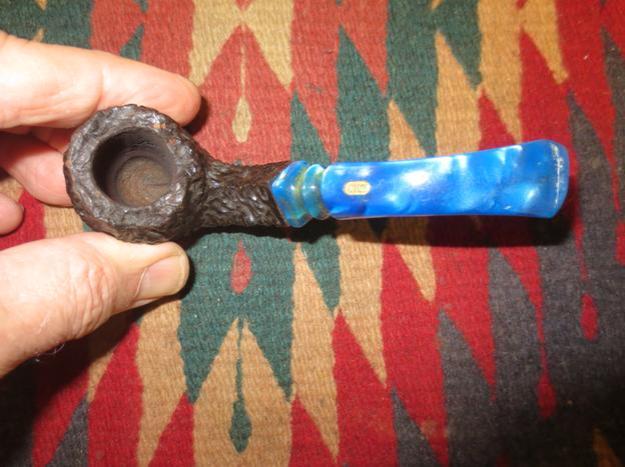
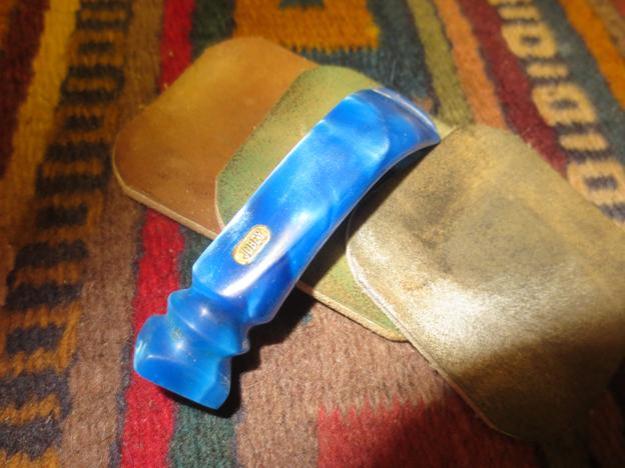
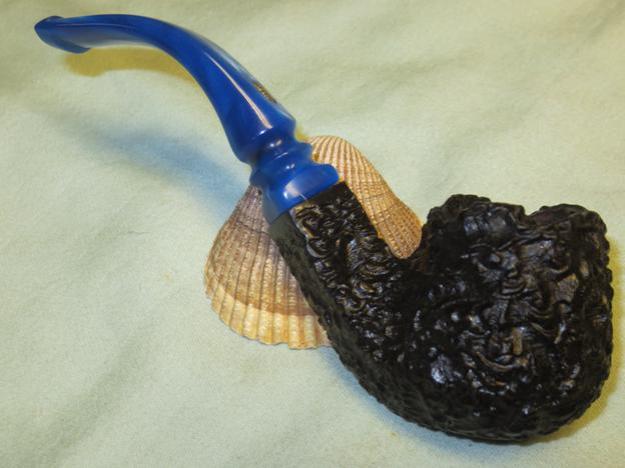
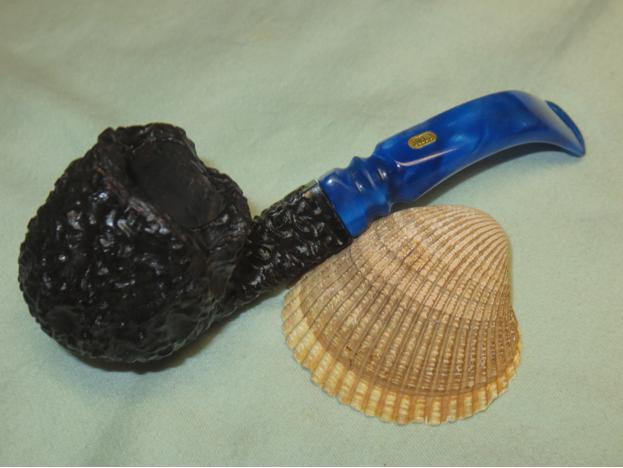
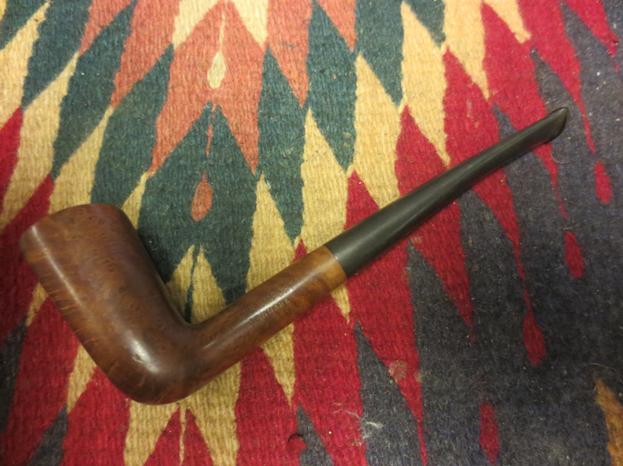
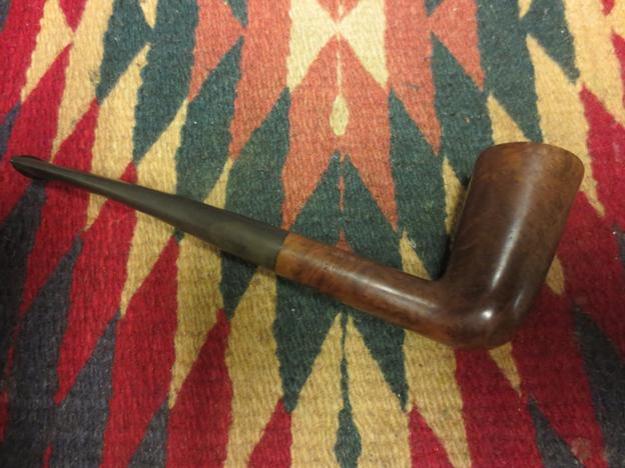
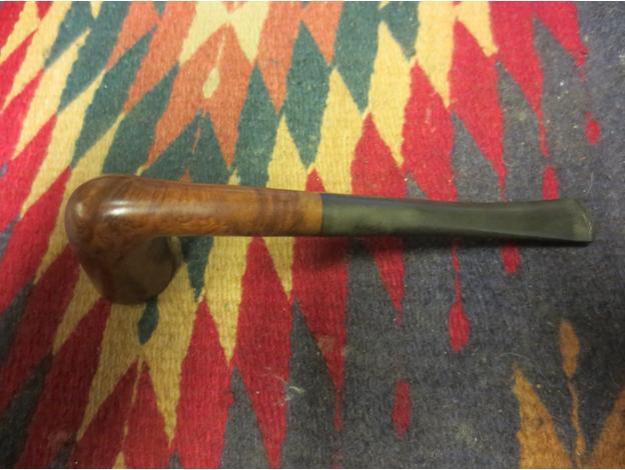
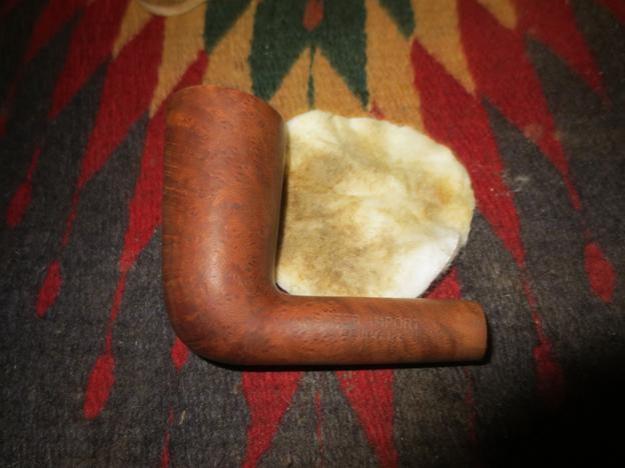
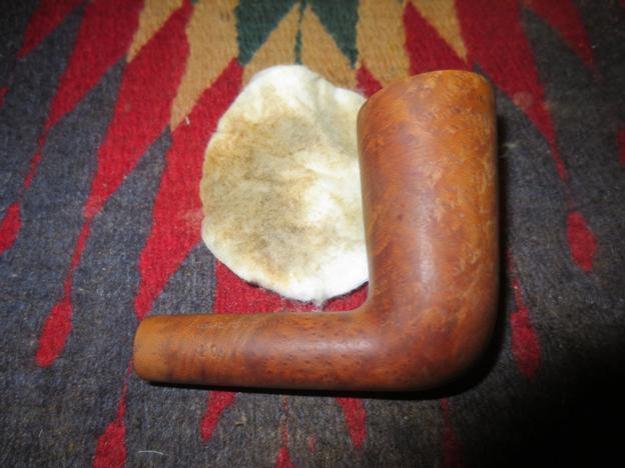
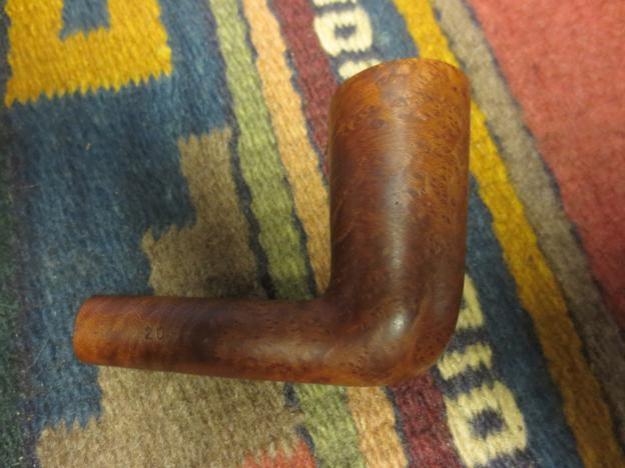
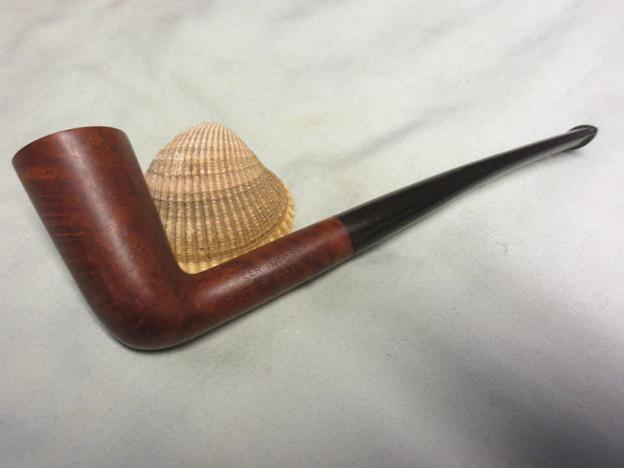
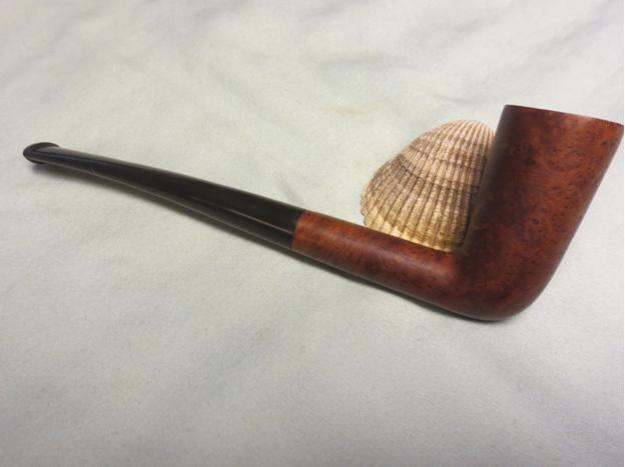
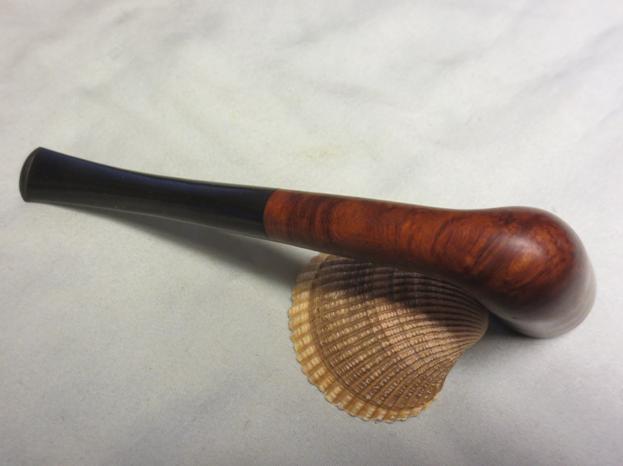
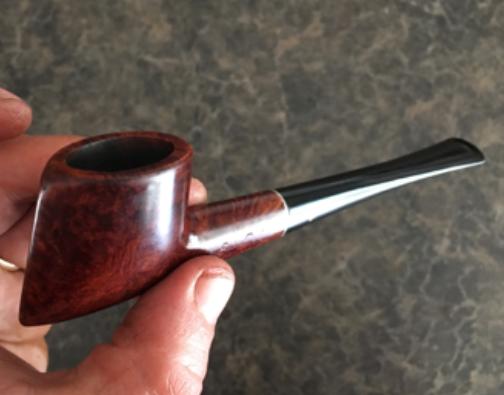
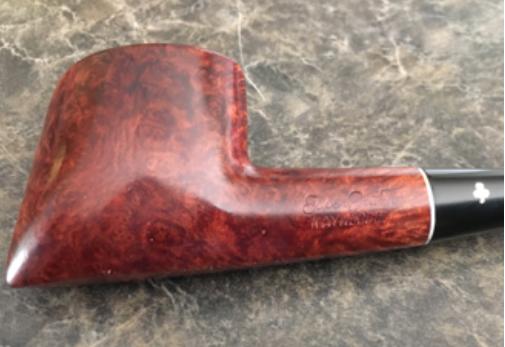
The Real Briar Bounty billiard marks the over-the-hump point of my series on ladies pipes, and a cursory examination of the well-crafted implement of exquisite pleasure as it looked when it came in the mail shows it appears almost good to go. 

 But everyone knows the frequent truth about appearances. I bought the pretty, shiny little Bounty, light in the hand and with a corresponding semblance of fragility, in 2014 among one of the many pipe lots I snatched up that single year. The brand name itself was an excellent use of the adjective, whether in the more plausible sense of a generous gift or bestowal, or the bigger mouthful, “Goodness shown in giving, gracious liberality, munificence, usually attributed to God, or to the great and wealthy….” [Oxford English Dictionary.]
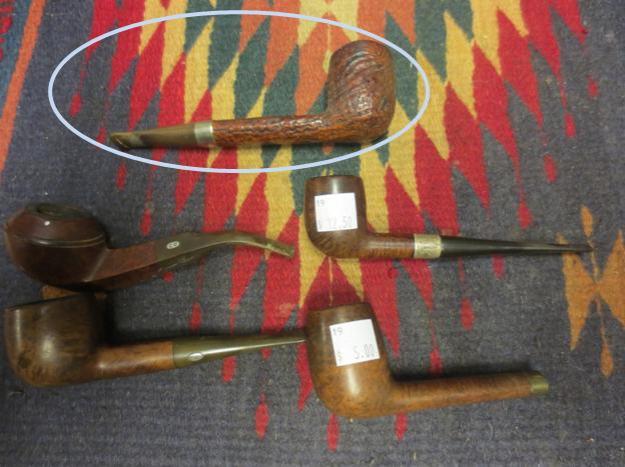
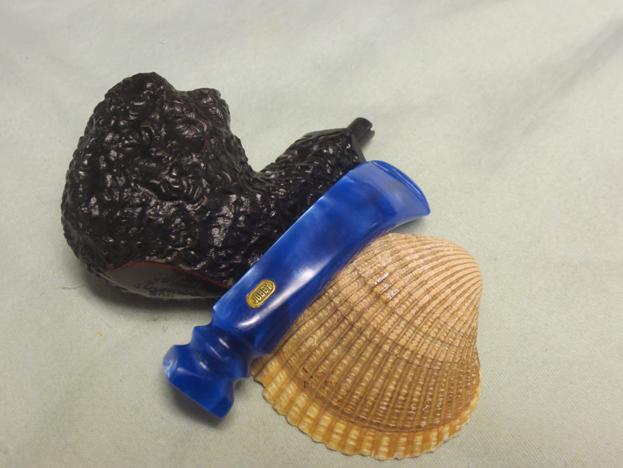
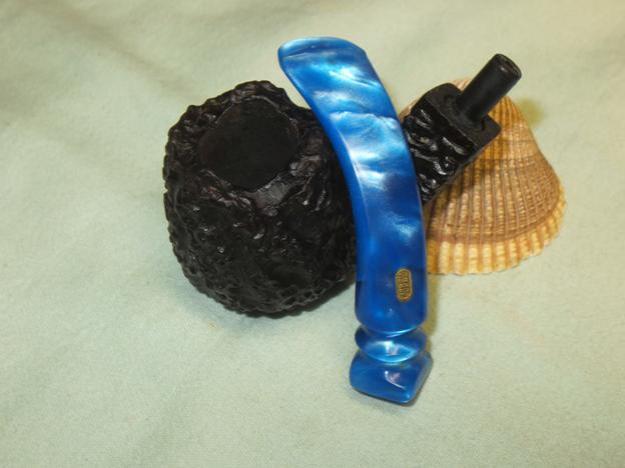
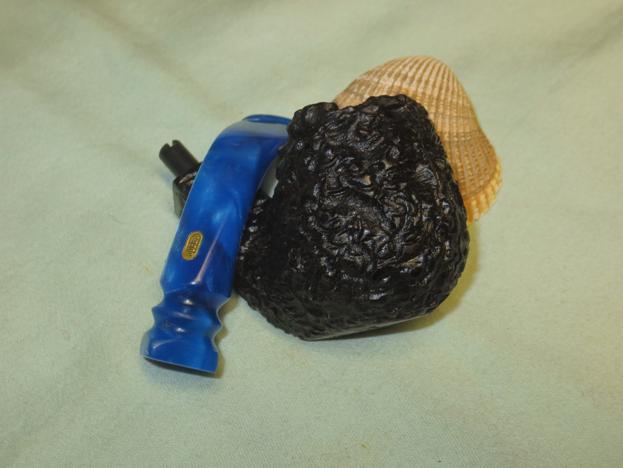
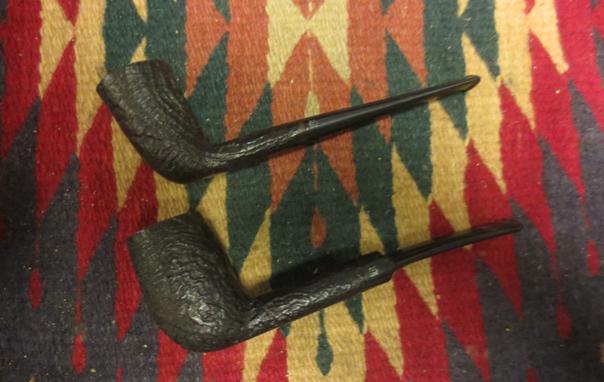
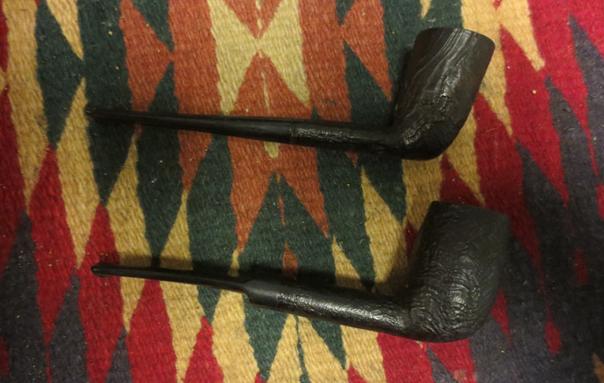
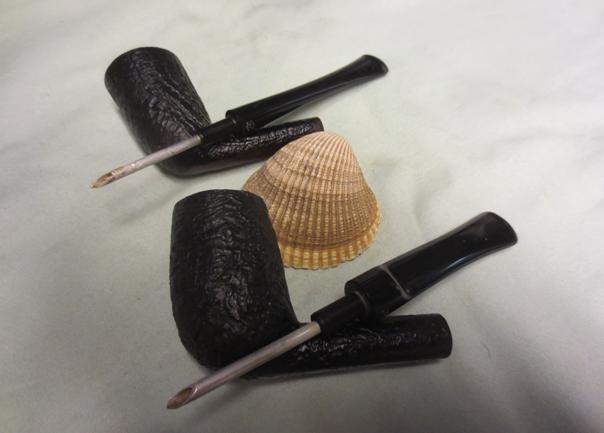
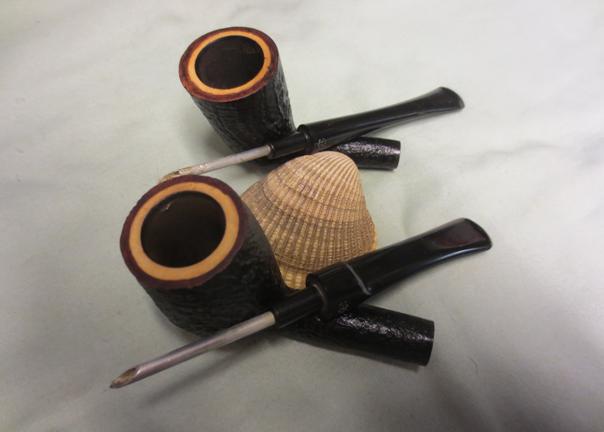
I still have more than a few of those pipes in need of restoration, although I’ve made quite good headway. Most of the 2014 parade of pipe lots, selling for an average of about $20 per pipe, included one, or more, good looking big brand names. For the most part the rest were nice or odd enough to warrant the purchase. There were, to be sure, a few total losses, with fatal cracks or burnouts, but little more than I could count on a hand. Take, for examples of both name brand and just plain interesting pipes, the following picture of 11 I acquired together, containing a Kaywoodie Rustic Silhouette bent apple [top row left] and a Spitfire by Lorenzo Mille [Italian for a thousand, appropriate considering its massive size, third row left). Then there’s the gigantic no-name Lorenzo pretender [by itself at the bottom], which may in fact be a reject from that Italian maker known for outrageous sizes. As I sit here editing the text of the finished blog, I hear a chime on my laptop and check the email. There is a new message from a gentleman I met last night who visited our monthly pipe meeting. I gave him a couple of samples of excellent new flakes I had and asked if he saw any of my restored pipes he likes. Alas, none of them was big enough for his taste! And so I recalled the Spitfire and its look-alike and described both to him, promising to send email photos for his information or consideration. Well, the gentleman just replied and accepted my bountiful offer of a very low price for the no-name. That, to my way of thinking, speeds past any notion of coincidence and stops on the dime at downright mysterious. We have arranged to meet Monday morning for the transaction. This photo is extraordinary to me on several levels more appealing than its dingy back-drop and utilitarian lack of artfulness. Have a gander at it yourselves, ladies and gentlemen, and if you have read the prior parts of this set of blogs you will hopefully recognize two of the pipes restored in them.
When you’re finished looking, they are, in order of their appearance in the photo: the Clinton Real Briar straight oval [top row, right] that sold to a young lady overcoming the social and medical blight known as cigarettes; the Real Briar Bounty billiard [fourth row, left] that I put on reserve for one genuine character of an older woman who belongs to a non-pipe related club of which I am a member and informed me in a Dr. Lecter sort of voice that her husband “used to smoke them all the time – but not anymore,” as well as how she quit cigarettes with the aid of her old misplaced pipe that she “also” learned to live without except for missing the feel of it in her mouth. The rather Faulknerian run-on segment of this passage begs the questions of whether the poor husband is not among the living at all and if not, why, or just not with the good lady, and other issues I dare not approach in this medium. And there is the Frasa, or FRASA as an acronym, French bent billiard [next to the Bounty], which I sold to my pipe club friend, Ashley. Another lady I caught smoking cigarettes was persuaded to purchase the Medico straight natural tiny acorn.
Wow! I just had a thought, the kind that makes me feel like an utter fool. Here I have been, wracking my brain to track down and interview unknown lady pipers in addition to Liz, and all along the obvious has been right in front of me: Ashley, the first female pipe smoker I met, in my own pipe club! Not that I don’t still need to collect some data that will allow me to get a handle on any patterns of experiences and difficulties faced by women who dare presume to invade one of the last existing perceived instances of a traditional male bastion; it’s just that now I understand I can simply post a thread on Liz’ Facebook forum asking for the input I seek from women, and then sit back and let it all pour in – or even chat with a few of the undaunted freedom fighters.
None of the ladies pipes in these blogs was picked by me for this project by looking at old photos, but rather by tunneling through the chaotic clutter on my work desk in search of diminutive pipes. Still awaiting restorations are a Willard Aristomatic rustic pot with U.S. Patent No. 2,461,905 issued in 1949, a Dr. Grabow Duke six-sided rustic panel and, last and least (in terms of length), la pièce de résistance, an Albertson Belgian bent black billiard. Try that five times fast.
Unconsidered by me at the moment of conception of the underlying theme of these blogs was any idea of ever writing such a series as this concerning the presence of women around the world who enjoy pipes every bit as much as men do, including the all-important contemplative aspect of the deeply personal experience. And so, while the details of inner visions of our most inviolate thoughts as we puff a pipe and tobacco may differ somewhat between the genders, the basic dynamic is a twin.
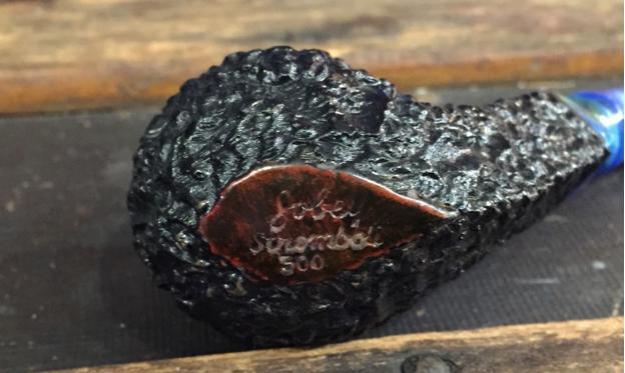
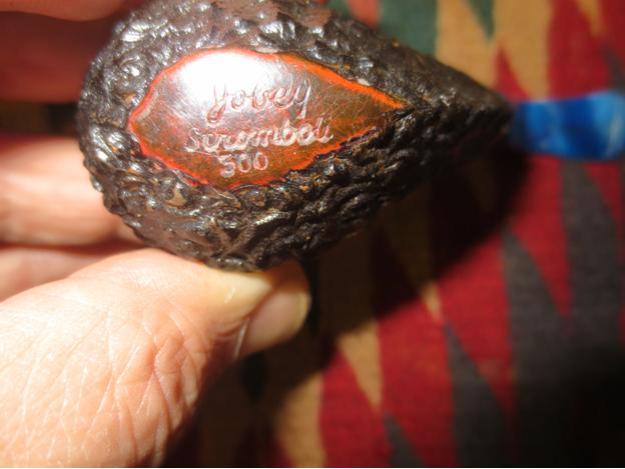
I do have a few words about Real Briar Bounty pipes. There are, in fact, few words I can write about the maker of these beautiful and varied works, samples of which I have found all over the Internet, for the most part members of sundry forums asking for information on the Bounty’s pedigree and receiving no coherent answer. [See Sources.] This omission of mine is not for lack of research but because of the apparent utter dearth of information. Based on the designs available for sale online, many were made for 9mm filters and some have originals included with the purchase. Then there are the references to separate ships in English history, both called The Bounty, each of which met with disastrous ends.
The few but important clues (9mm filters, an unusual number of the sources being in Europe – particularly several ebay.uk sellers – and the name itself, Bounty) embolden me to go out on a limb and suggest that the maker of this pipe is British.
A TEASER OF THINGS TO COME IN THE FINAL THREE BLOGS
For various reasons about which nobody still reading this would care to hear, I have yet to chat with any of the New Jersey Ladies of the Briar concerning their no doubt varied introductions to the wonderful world of pipes, but as I noted earlier I now have the solution to that I promise to get on it while preparing my fifth blog on the topic. To be more accurate, I should amend my previous statement with the note that my Smokers Forums U.K. friend, Liz, who founded the group, has been my sole source of information related to feminine tastes in the choices of pipes and tobaccos.
Our first few email exchanges were a bit odd. While Liz was open to my idea, at first proposing a single blog I soon knew would either turn into a New Yorker-length piece much longer even than my “The Young Man and the Pipe” tribute to Ernest Hemingway involving the restoration of a Thinbite. And so I decided upon a series. In those early emails, I remember describing, several times in different ways, the kind of information I wanted and any ideas how to go about getting it.
My mistake, a common one but inexcusable of someone with a reporter’s experience, was not asking specific questions of Liz. And so I at last understood and re-commenced with three questions.
The reply I received from Liz was candid, and also revealing of double standards and injustices I could never have dreamed up. My interests are eclectic, but there are certain areas to which I find myself constantly drawn. They include history, political science, law and, it goes without saying, everything related to pipes. I consider myself well versed in the real atrocities Mankind has committed against itself and the rest of the planet and the everyday varieties of rudeness and general foul play that abound daily. I just never considered the possibility that such attitudes had infiltrated our beloved pipe world to a real extent. Here is that first, ice-breaking, bare bottoms basic email Q&A.
Q: I know you have a penchant for minis, but what are some of your favorite pipes that you smoke regularly?
A: Currently, my go to pipe is a Dr. Plum mini Prince which I only smoke Lakelands in. Other pipes I tend to stick with are a huge Savinelli 320, Savinelli Lollo, Jirsa horn shape, Brebbia author shape and a no-name bent meer and corn cobs.
Q: What kind of pipe blends do you like?
A: I will smoke anything! But I love Lakelands and latakia blends the most. Aro[matic]s that I favor are mocha/coffee blends (McClelland 620 mocha black is my favorite) and also maple blends (Wilki Vermont Maple is my favorite). I tend to shy away from perique because it gives me a scratchy throat but I will smoke one bowl occasionally.
Q: When did you start smoking a pip? Were there any special circumstances?
A: I always wanted to smoke a pipe even when I was a child. I had seen photos of my dad smoking a pipe but he had quit smoking by the time I was born. I started smoking cigarettes in my early teens and the desire to smoke a pipe became stronger once I became an adult and started to do a lot of camping. I thought it would be very nice to sit by the campfire and smoke a pipe. But as a woman, I never felt comfortable or confident enough to go in a store and buy one. Finally in 2004 I got the nerve to go in the tobacco shop and buy a pipe. I used the excuse that I was buying it for my brother. I selected a 3/4 bent no-name Italian briar. I still have that pipe today although I don’t smoke it often since my taste is pipe shapes have changed. I had no one to teach me anything about smoking the pipe so what I learned I found on the internet. [Emphases added.]
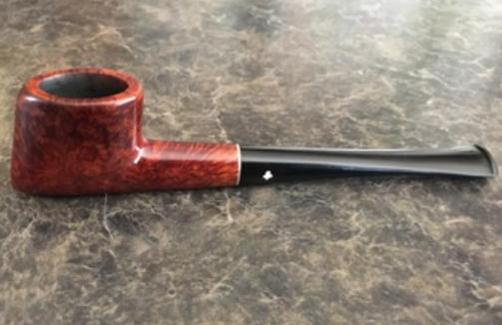
RESTORATION
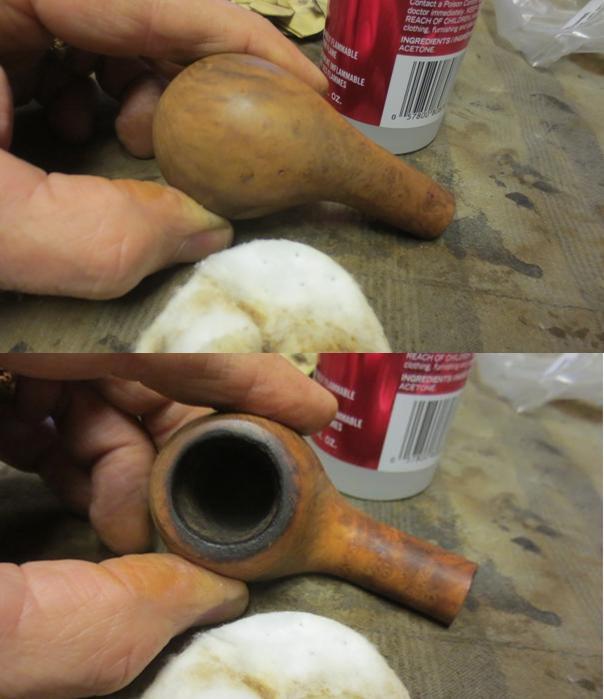
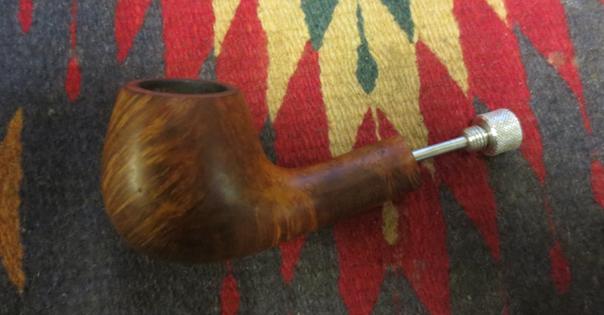
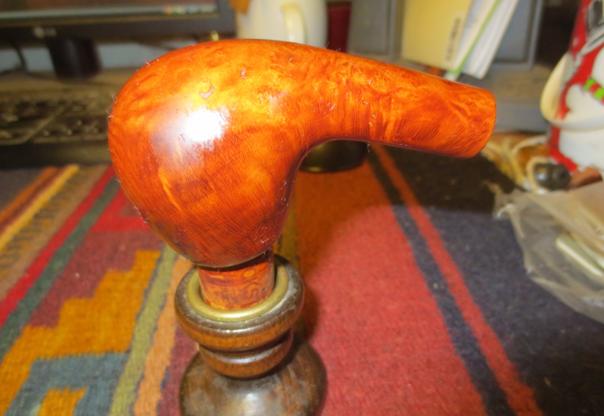
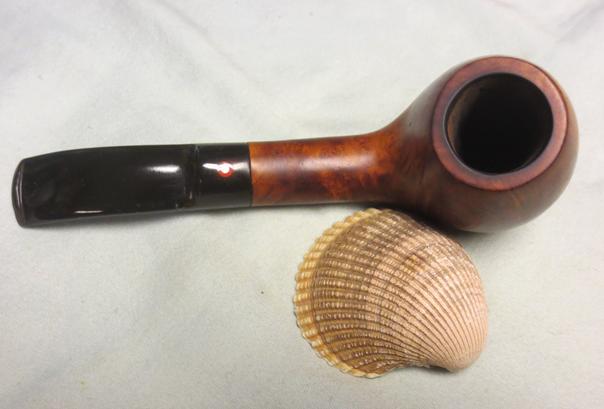
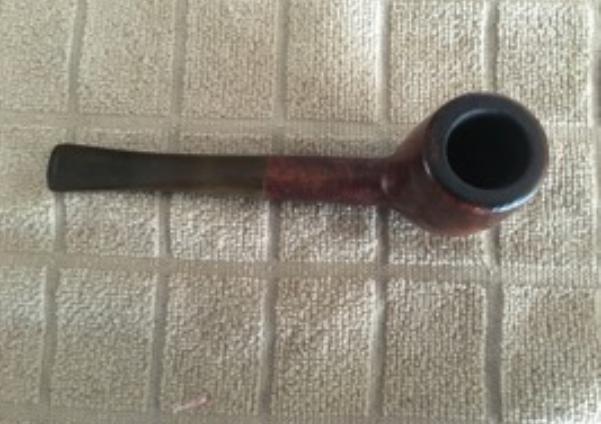
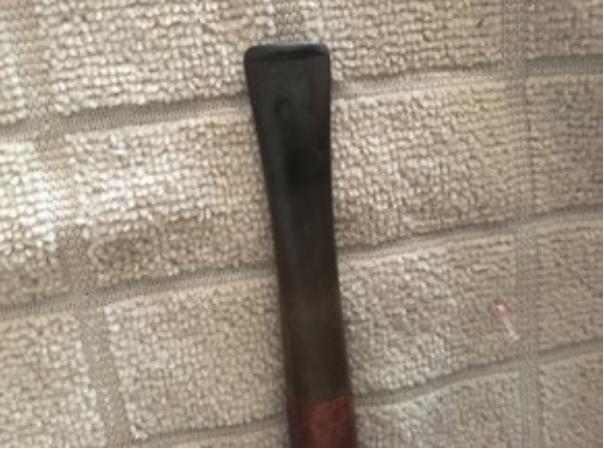
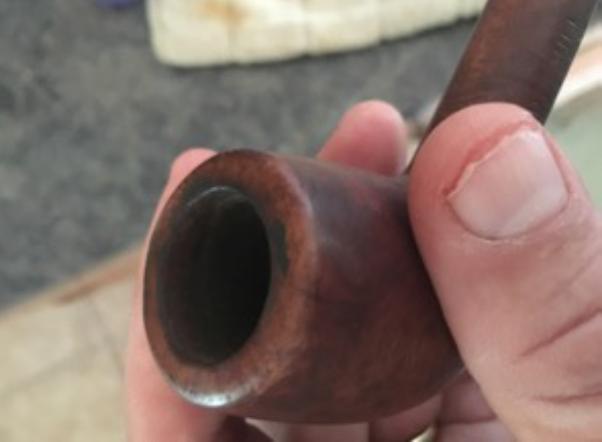
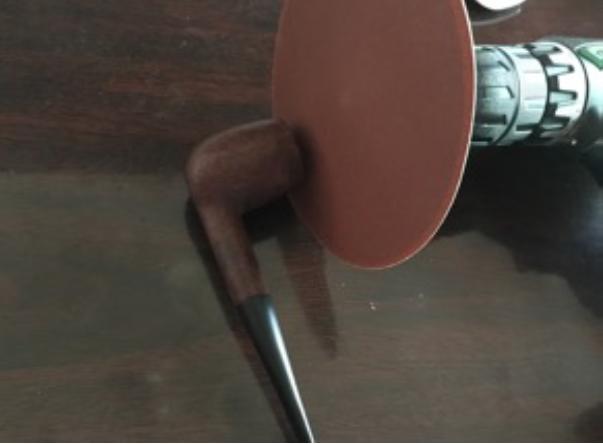
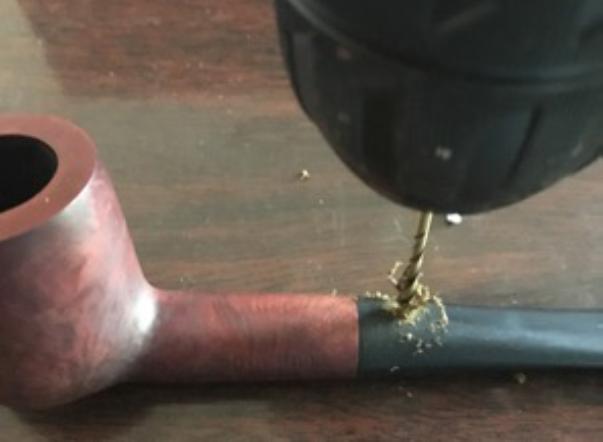
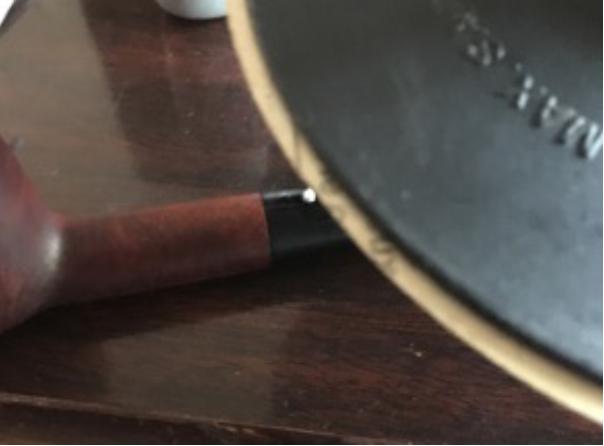
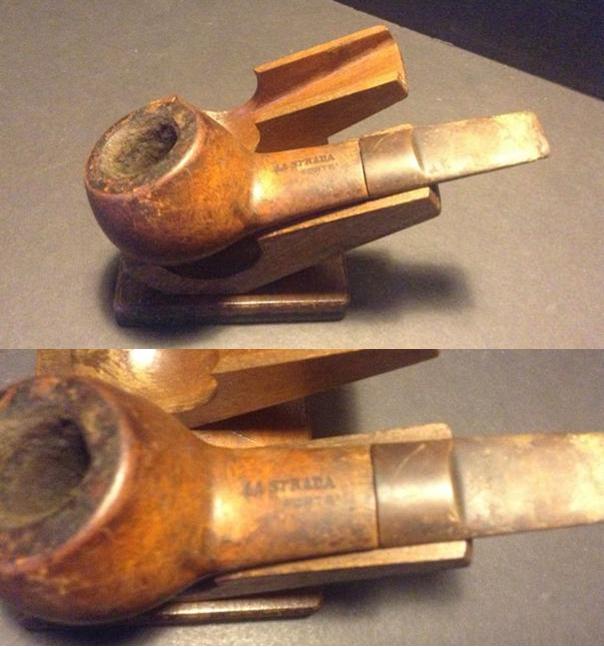
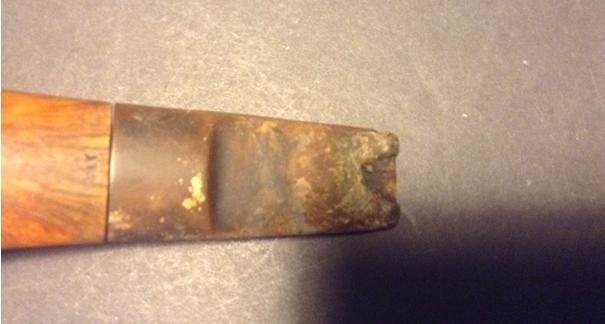
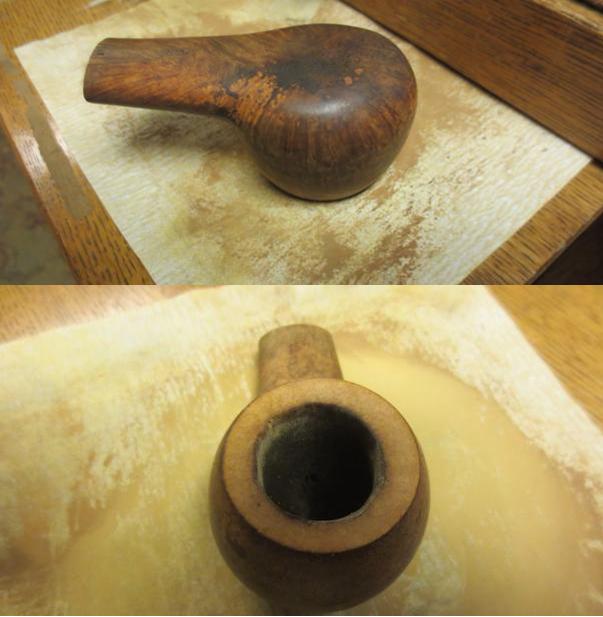
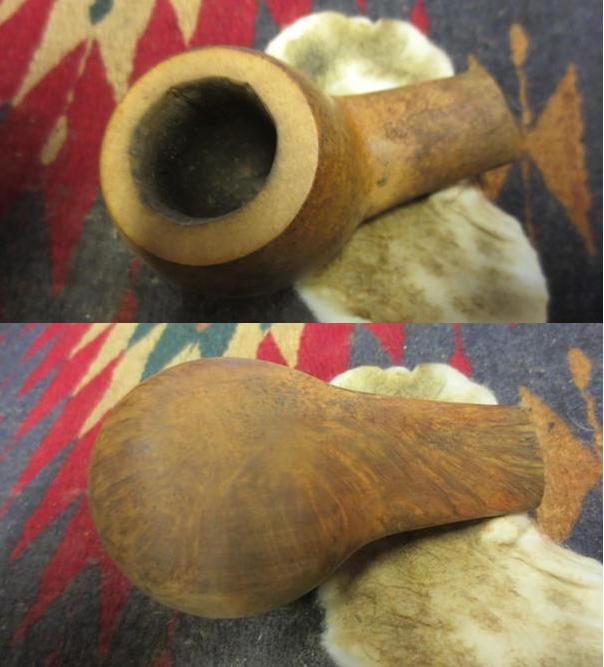
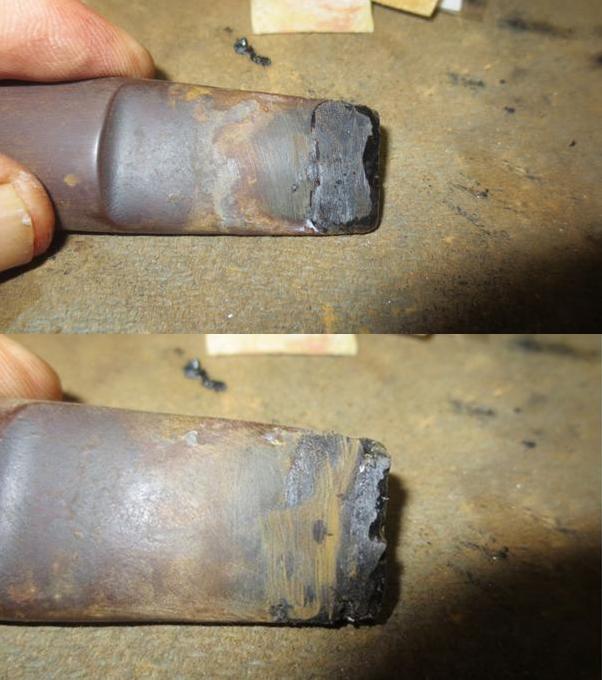
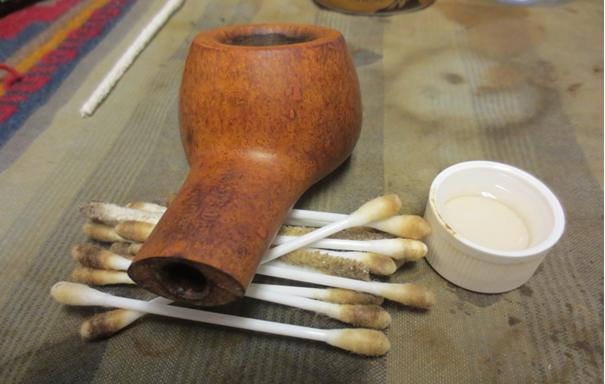
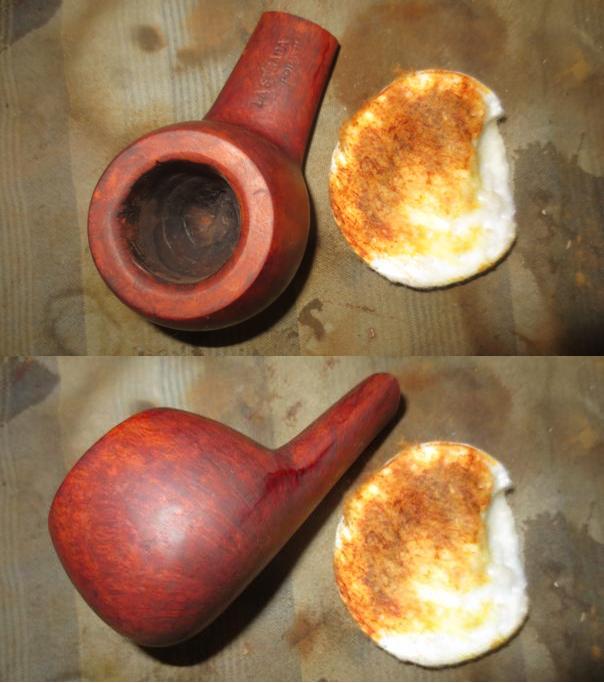
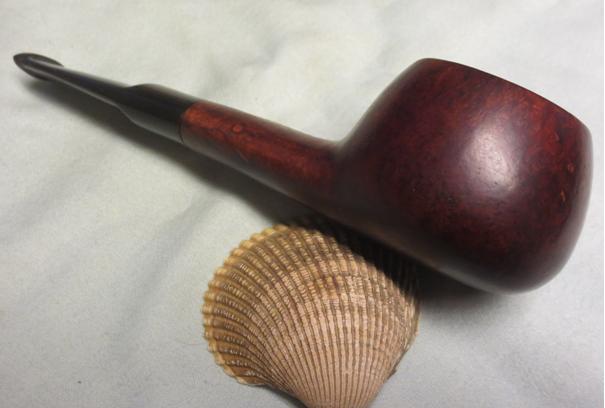
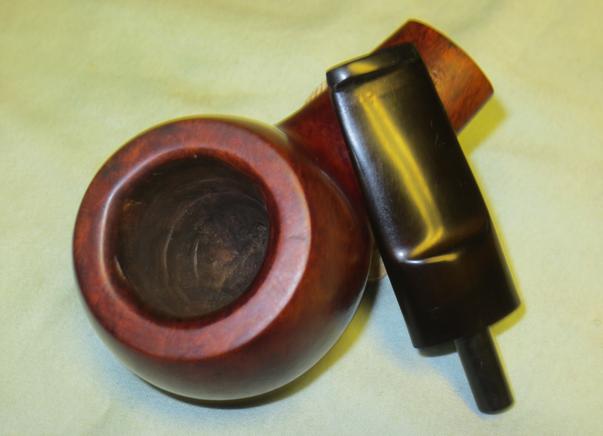
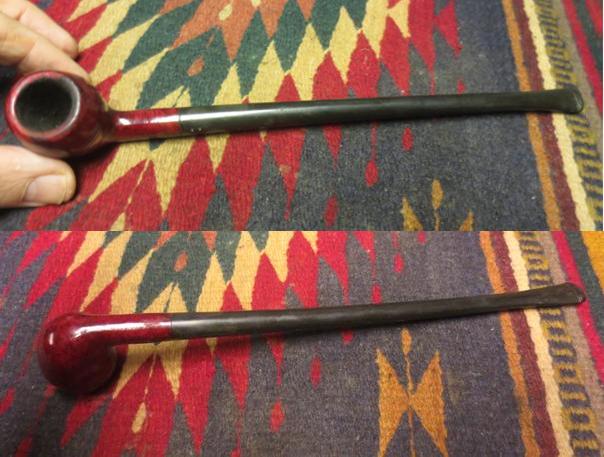
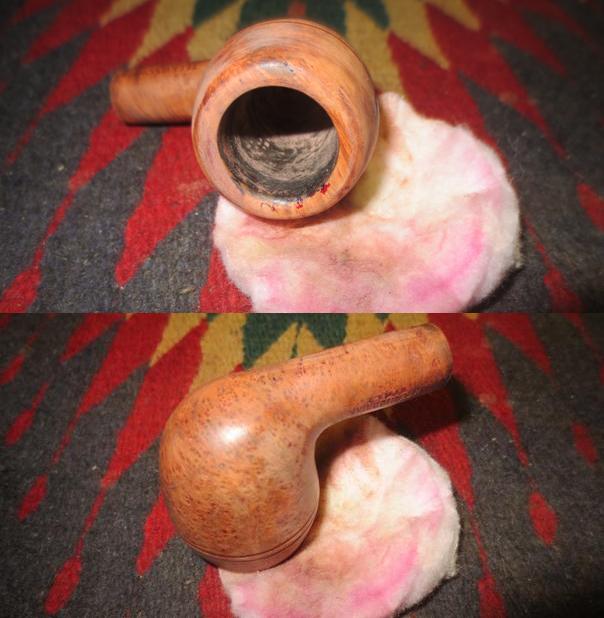
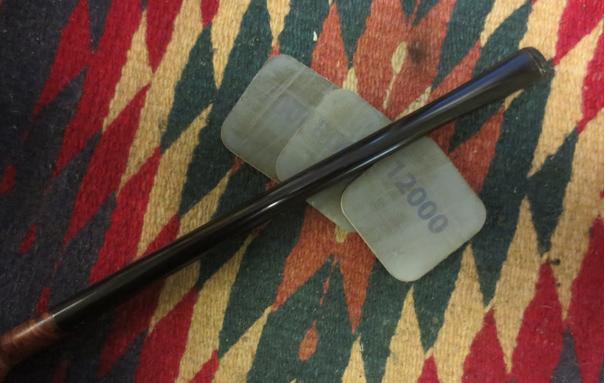
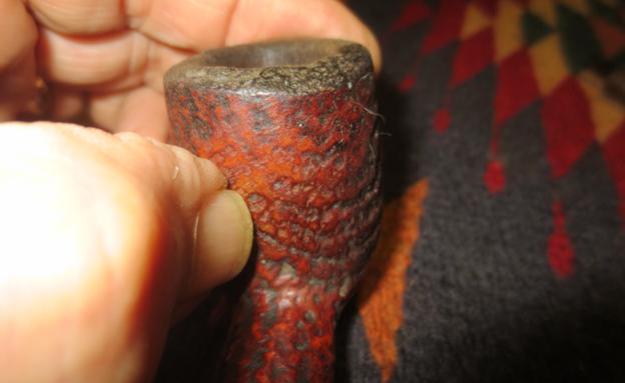
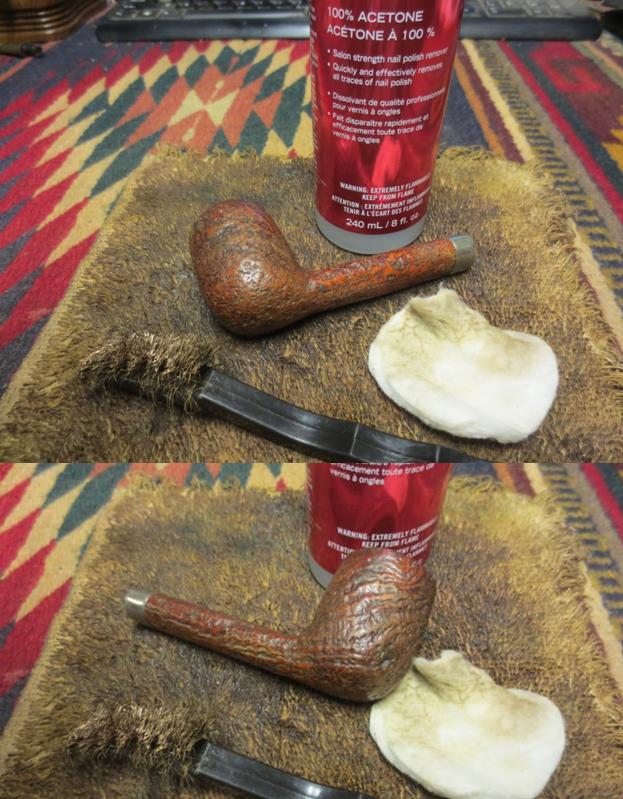
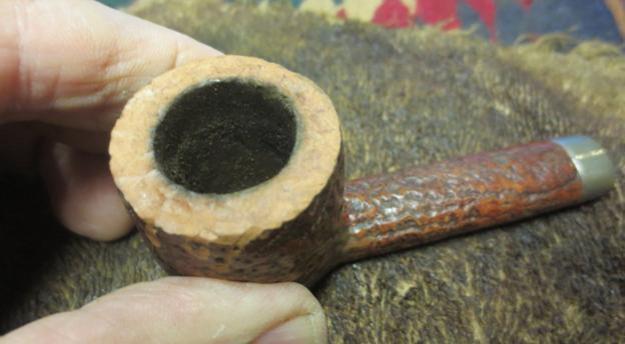
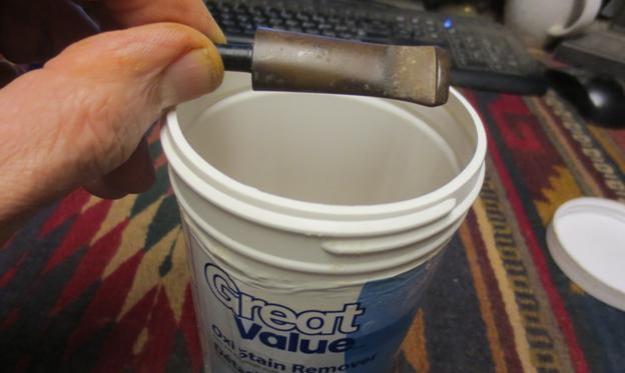
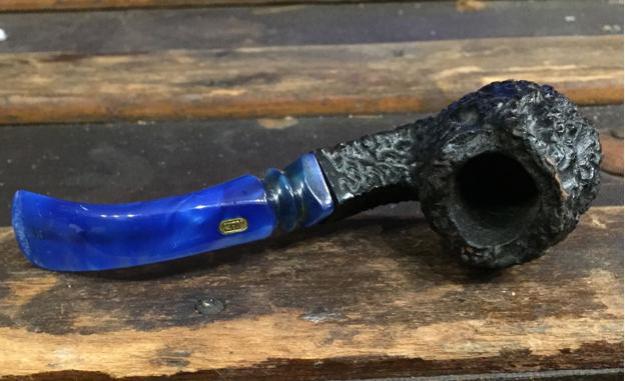
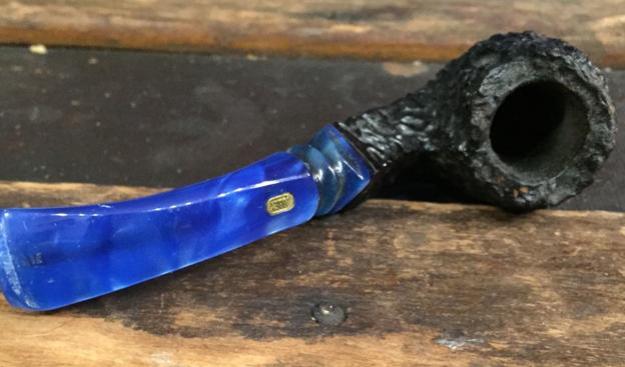
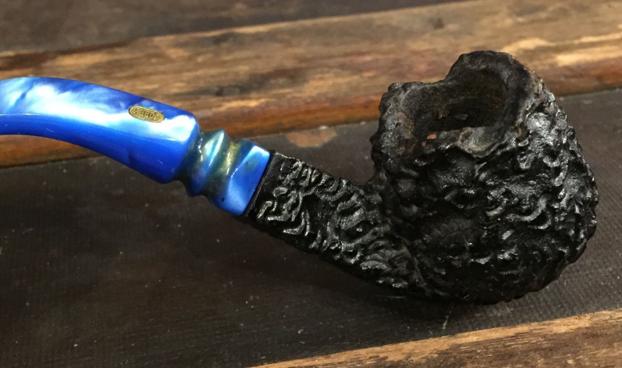
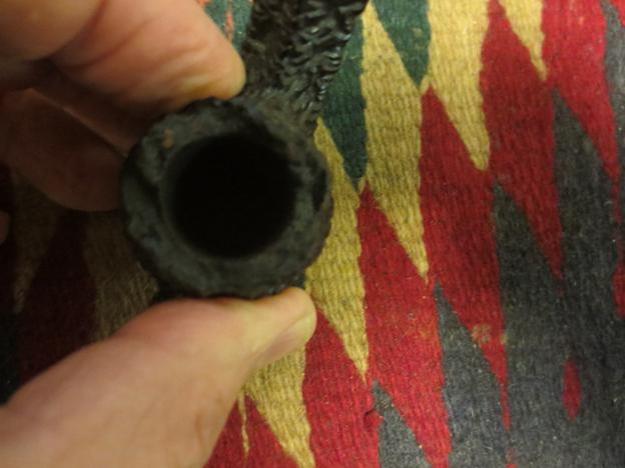
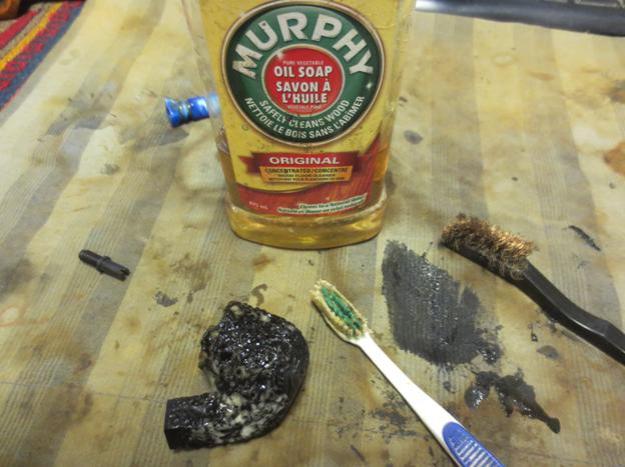
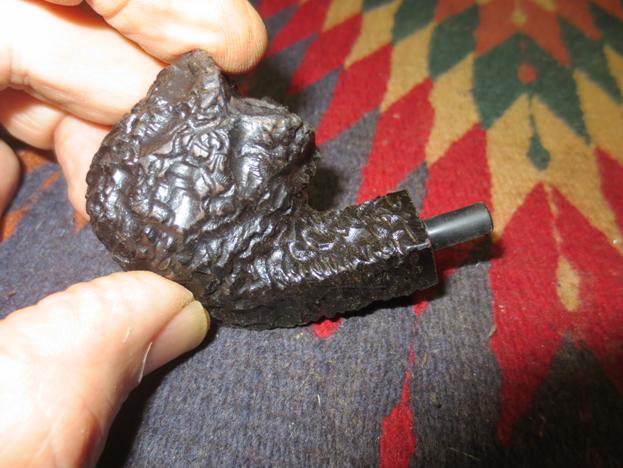
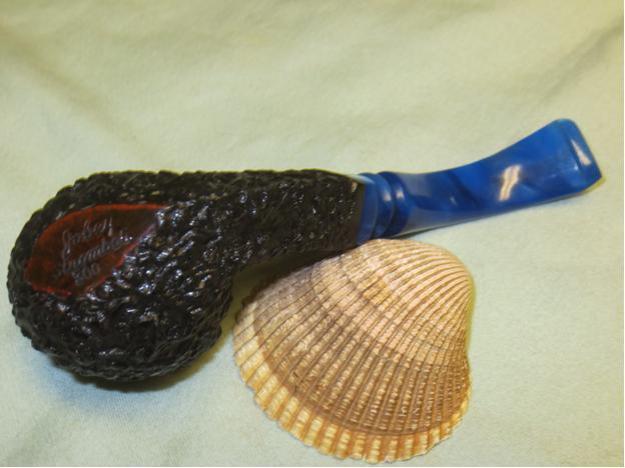
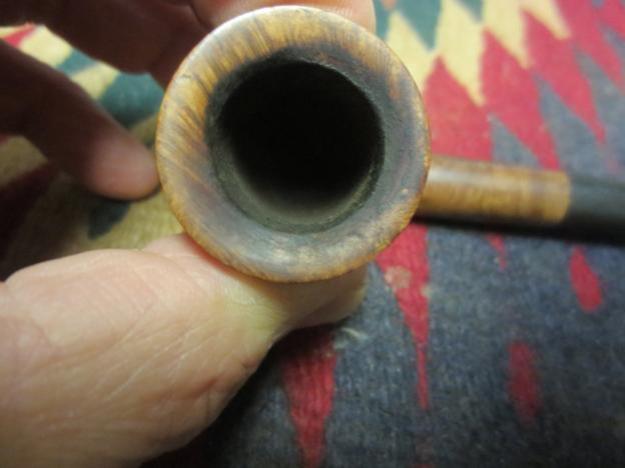
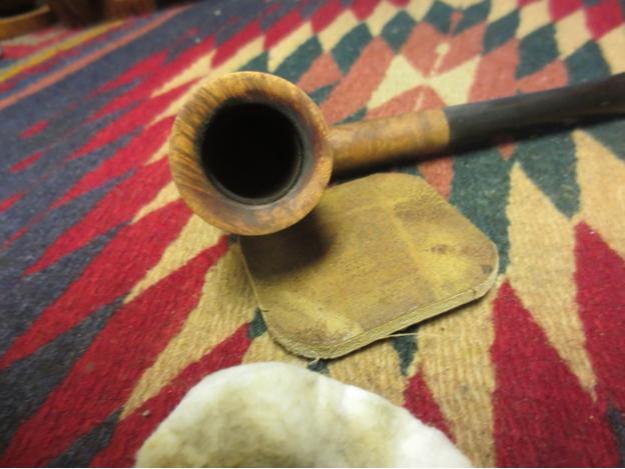
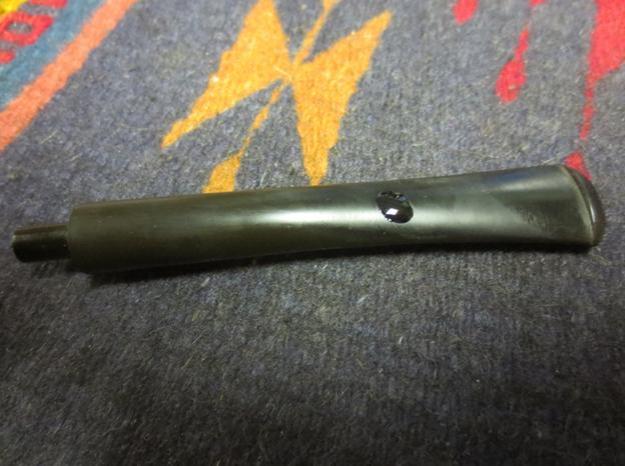
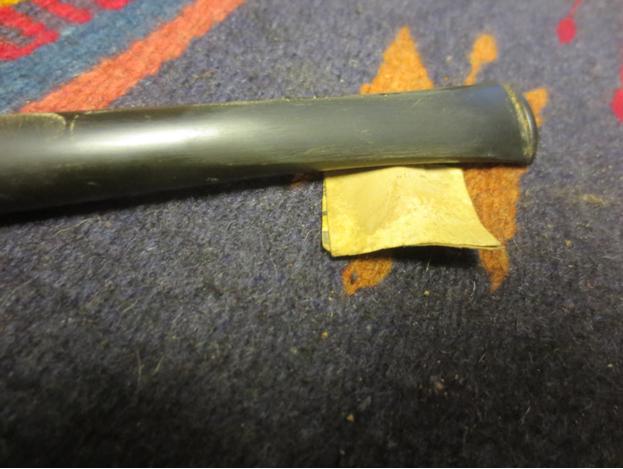
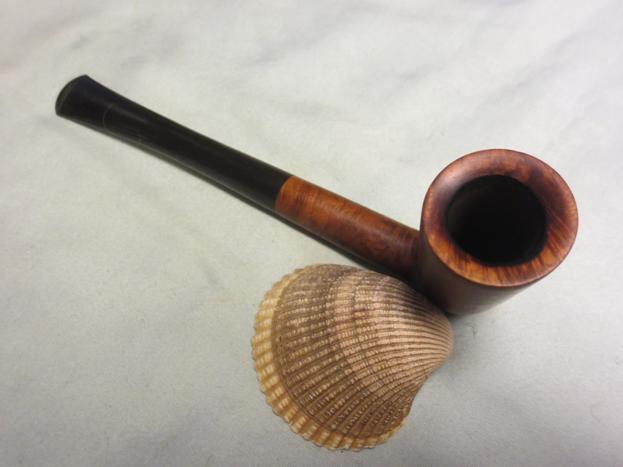
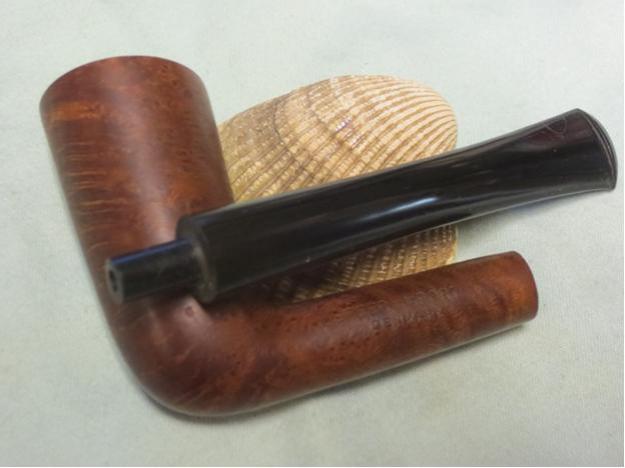
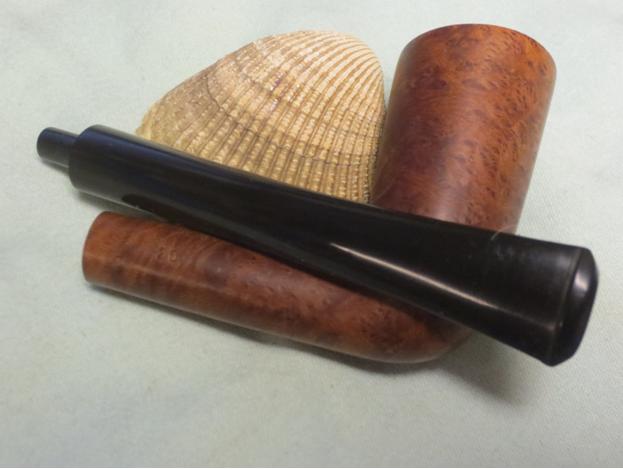
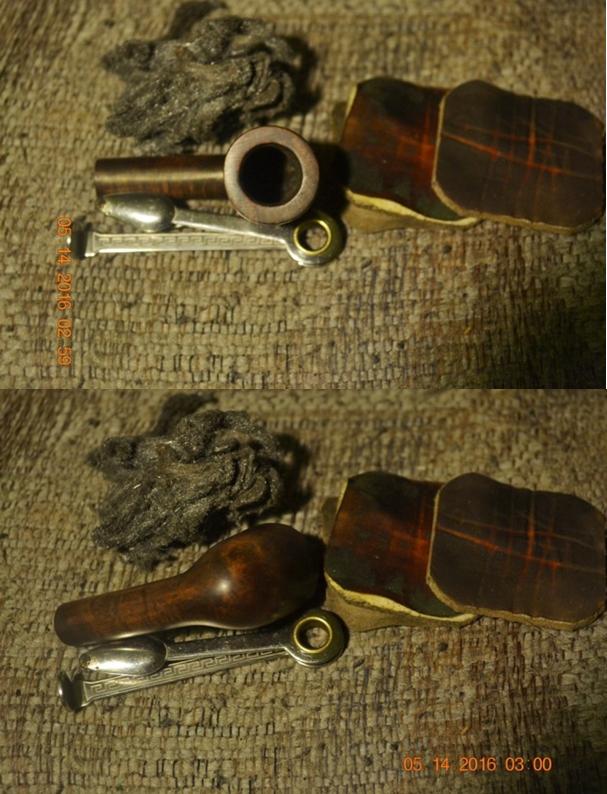
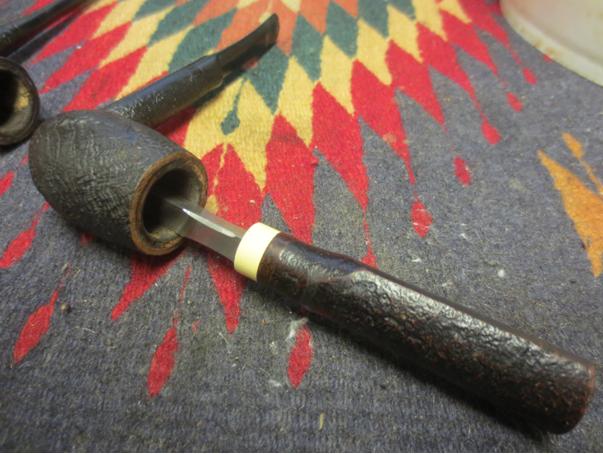
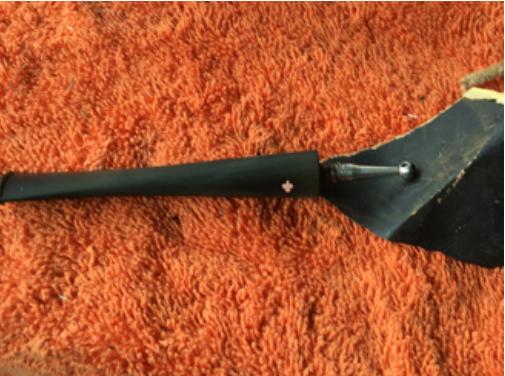
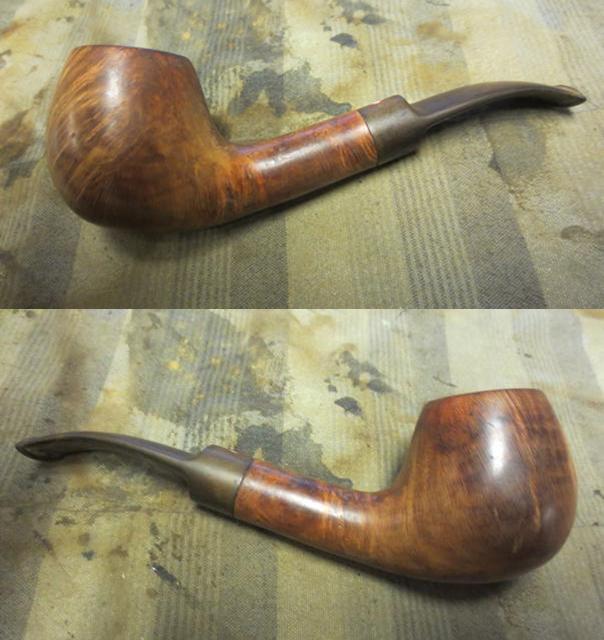
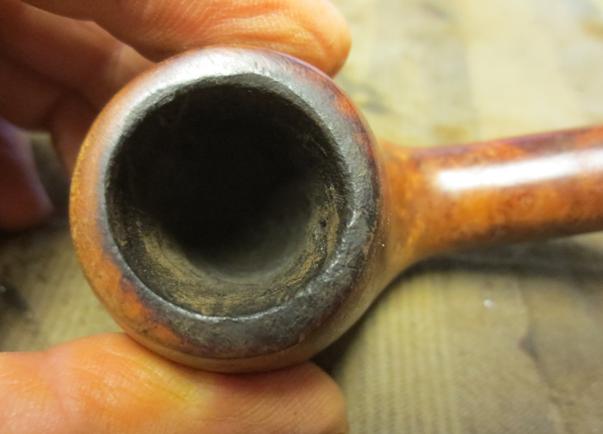
Earlier, I alluded to the smooth, fairly clean pipe with its nice glossy finish and unusually good though not thorough cleanliness. I also noted, during my first critical examination of the pipe, the bad gash on the rear of the bowl and other small scratches over the surface area. Out of nowhere, I had a bad feeling about the possibility that something other than a conventional alcohol-based stain might have been used, such as the bad habit in China of laying on Earl Scheib applications of regular varnish and – it hurts me to write this – even Shellac and, I’ve heard, paint! These coatings cause various serious damages, some of them being the destruction of the pipe’s ability to breathe, or to take in air, not to mention the inhibition of the wood’s natural expansion when it heats from use. The bit was freckled with discoloration.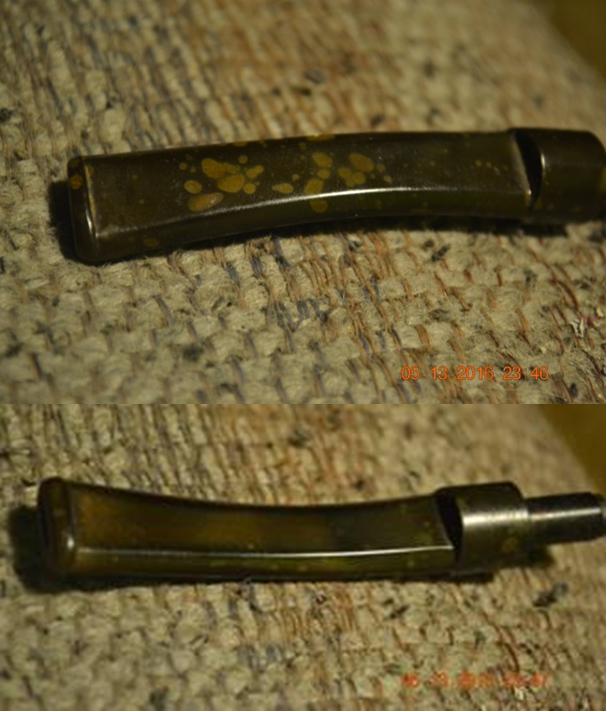 The obvious starting point was tossing the bit in an OxiClean bath and the stummel in Everclear.
 Then again, without the bit or the stummel, I had nothing whatsoever to do except to partake of a nice bowl of Mac Baren Bold Kentucky Flake in my Peterson’s silver band orange meerschaum Dublin. These are the times when pipe restoring can be so trying.
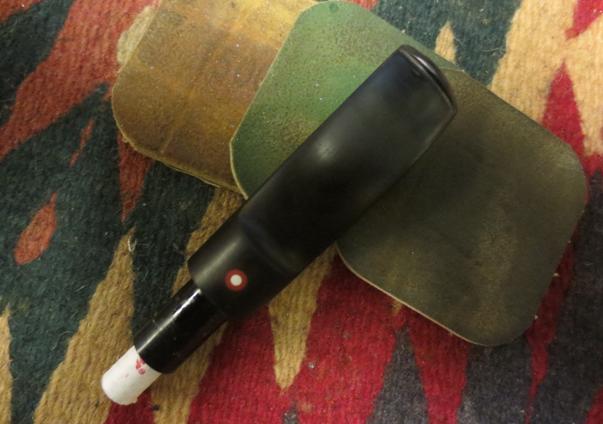
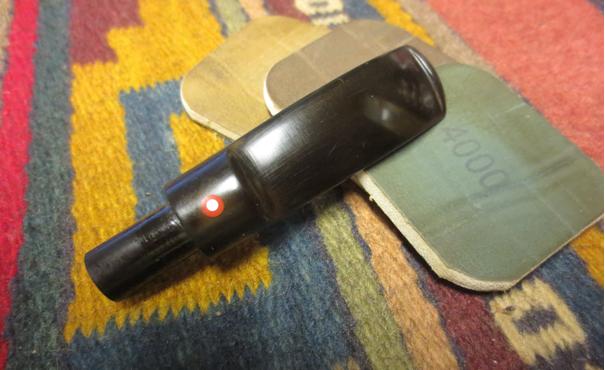
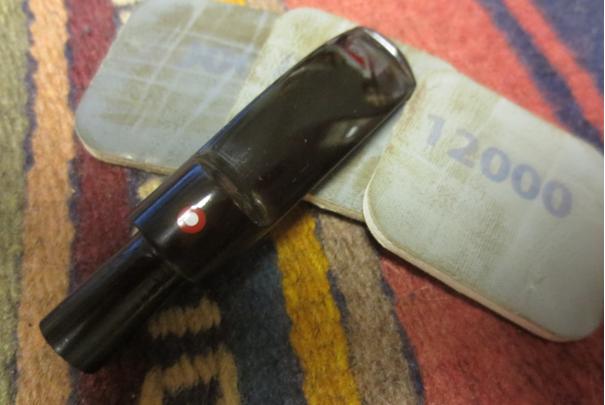
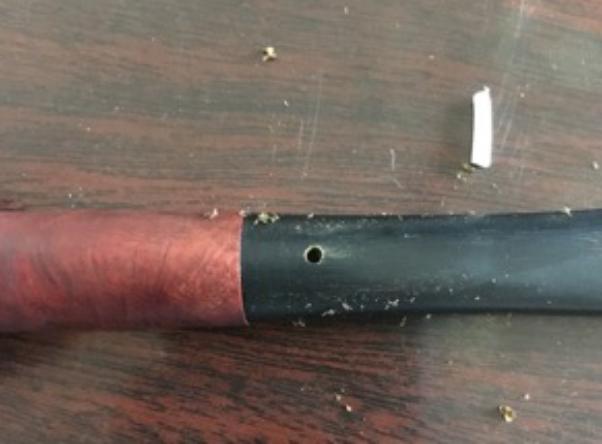
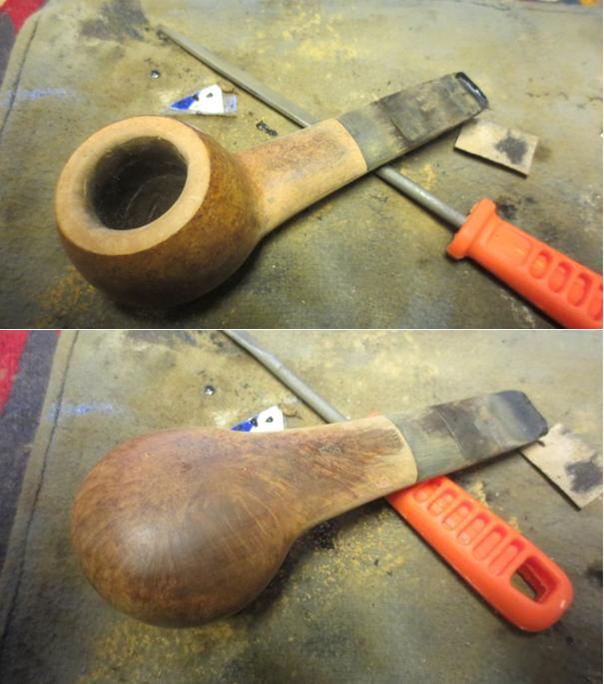
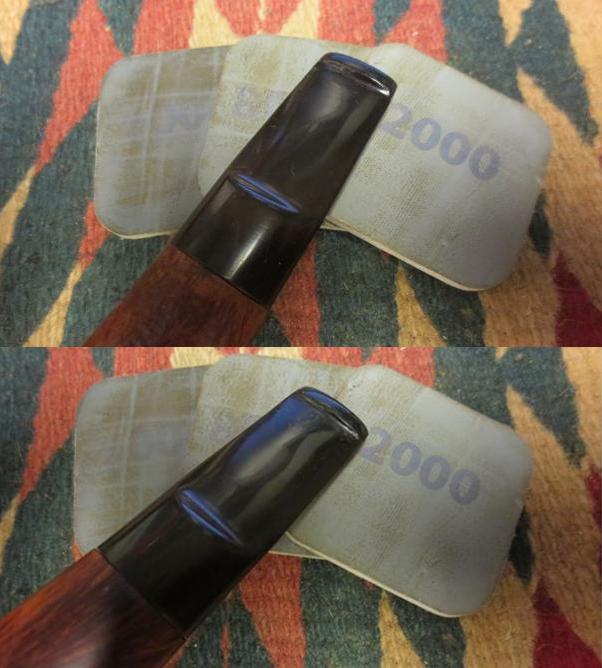
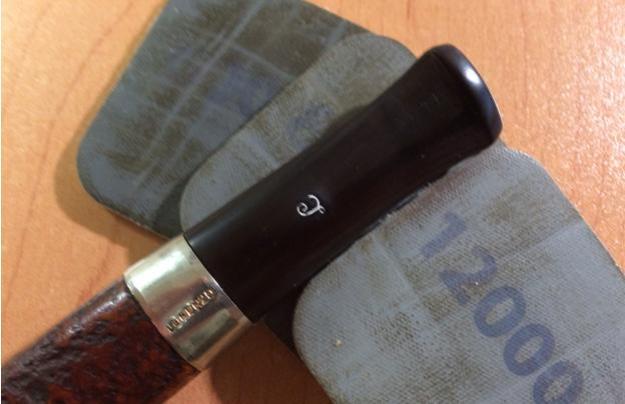
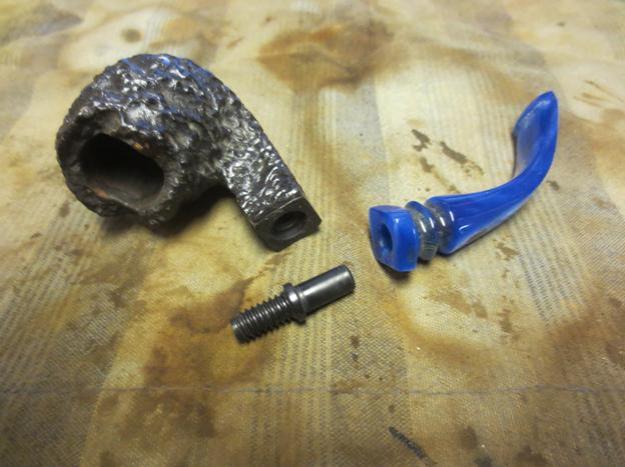
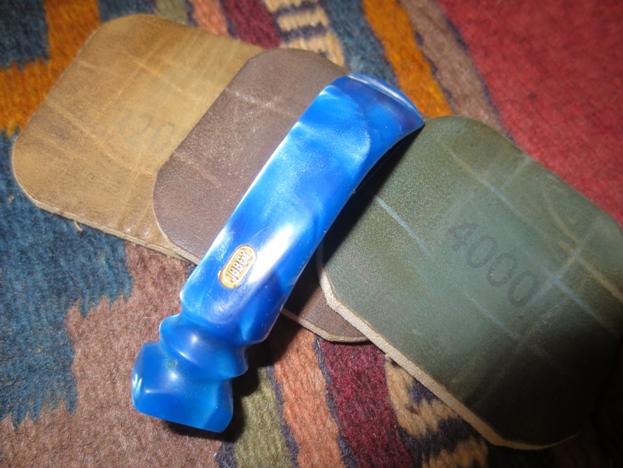
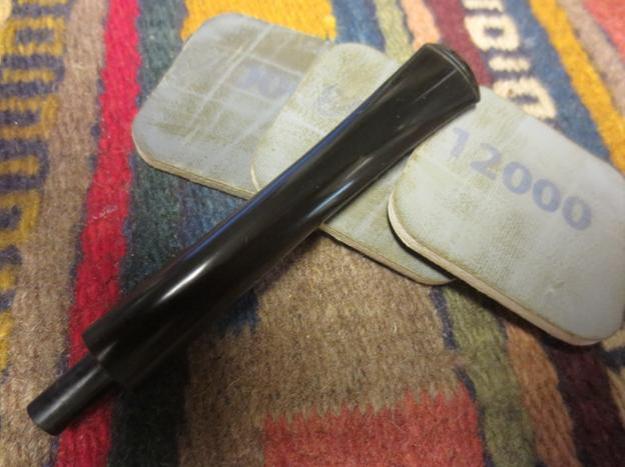
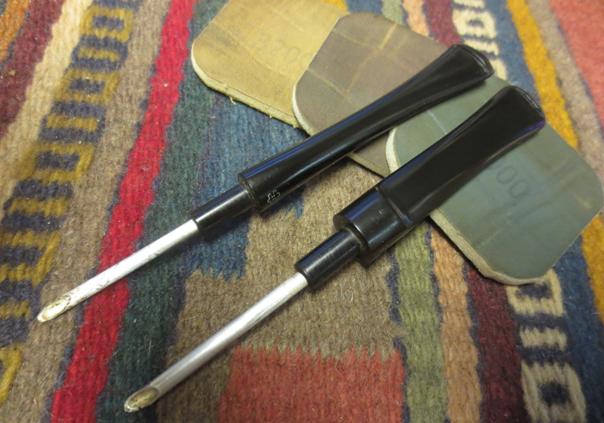
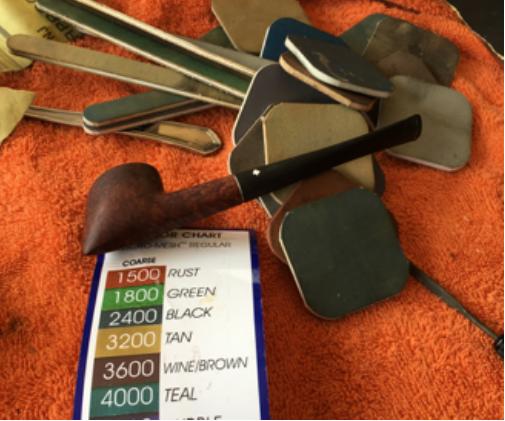
But I weathered the next half-hour with the stoic determination of an ancient mariner awash with kelpy brine, and got back to work. The bit was every inch a fright to behold, as I expected after its bath.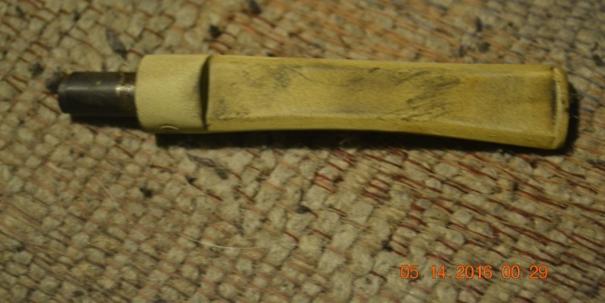 Nevertheless, I made it better with a bit of a makeover using 320-grit paper and the full progression of micro mesh.
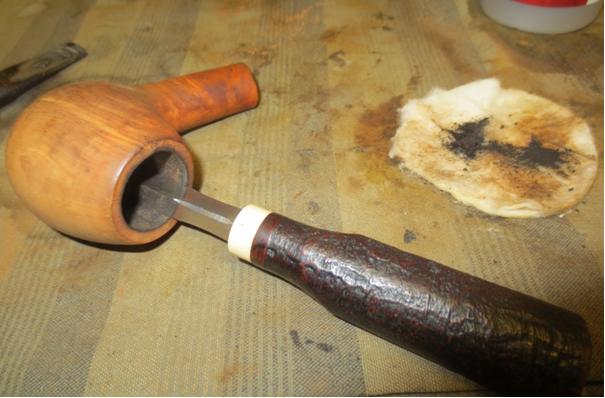
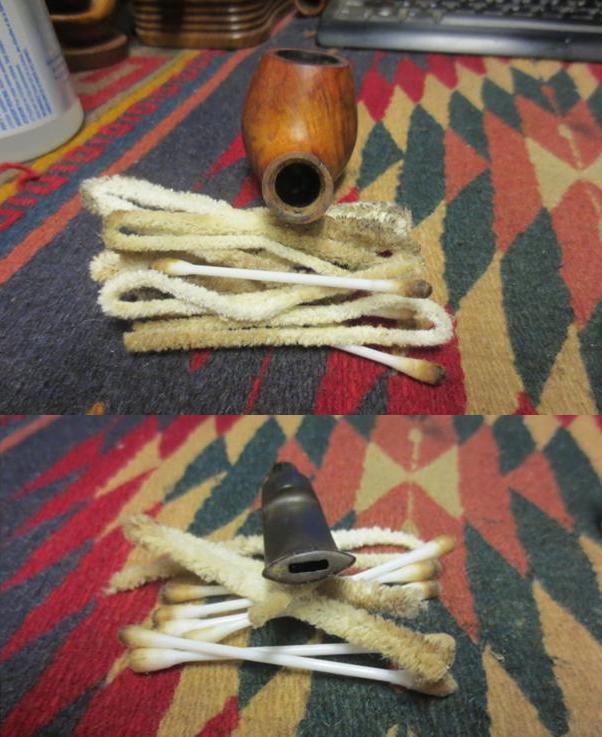
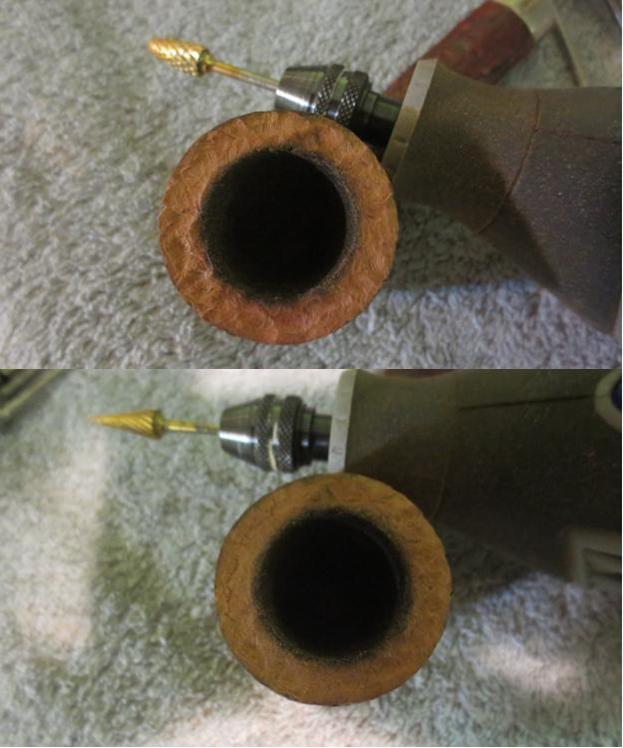
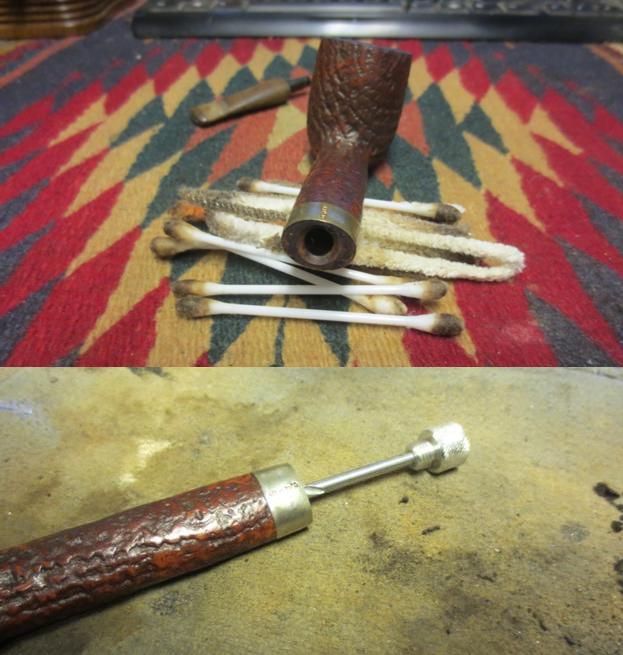
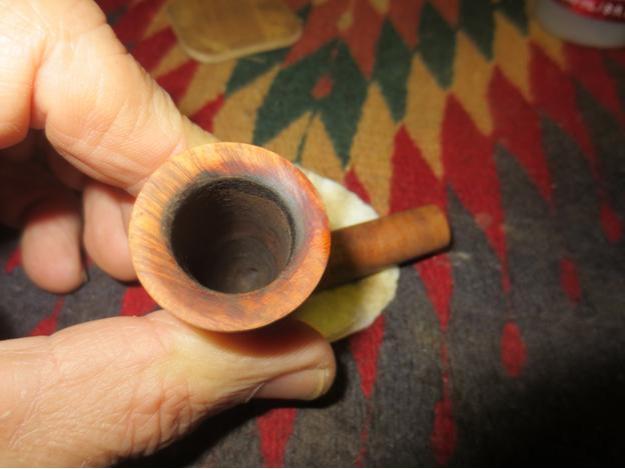
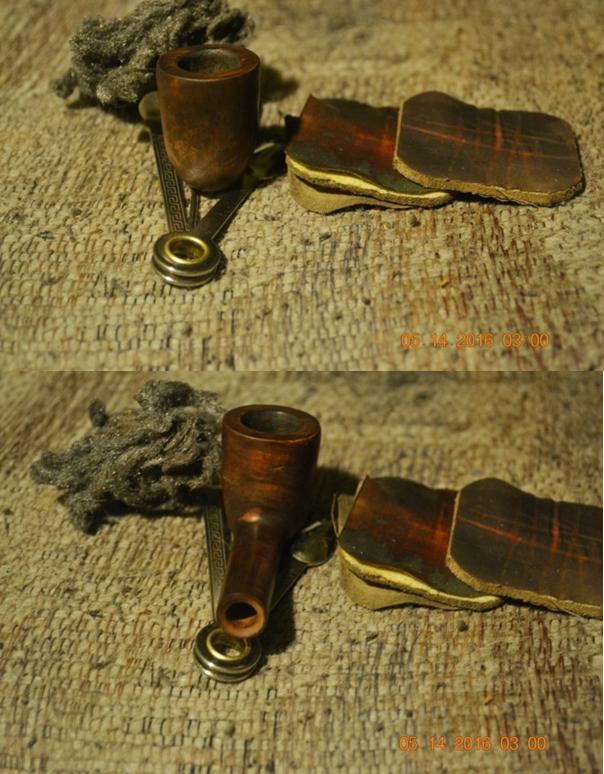
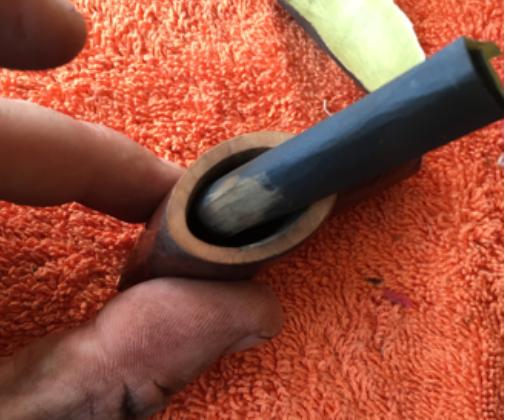
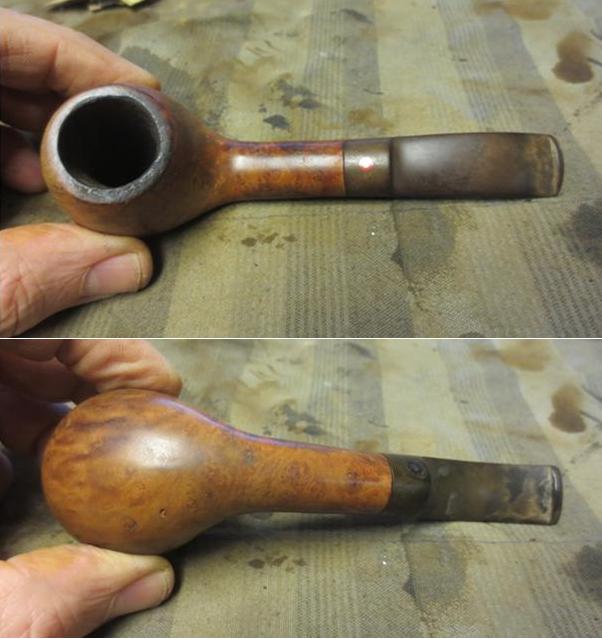
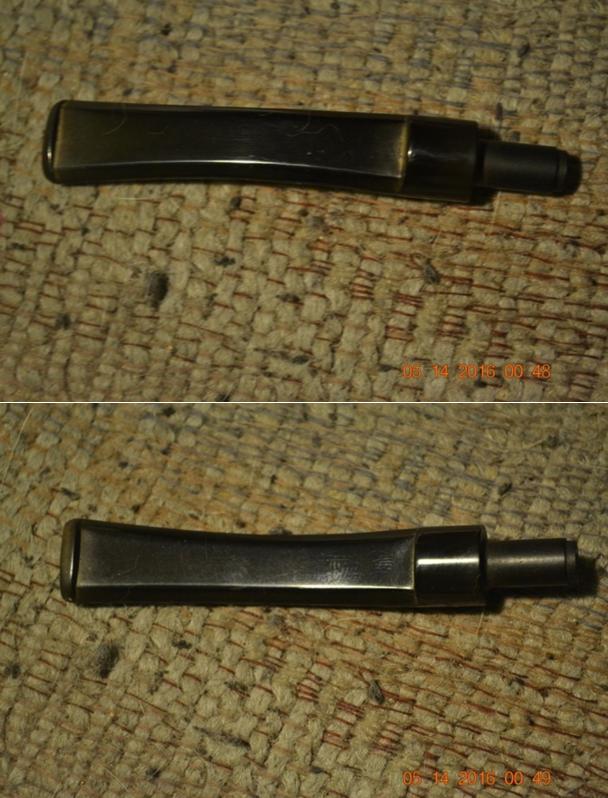 About that time, I removed the stummel from the Everclear and stuck a pair of small soft cotton cloth squares into the chamber to twist and shout out some of the loosened mess there. I ran two more cotton cloth squares over the stummel, sanded the outside with 220-grit paper taking care to avoid the nomenclature and micro meshed all the way. The chamber was too small to fit a reamer, and so I sanded it (using a pinkie) with 150- and 320-grit paper before using a tiny edge of 0000 steel wool to finish smoothing. I put a touch of Everclear on a two-ply cotton cloth square and scrubbed out the remaining soot.
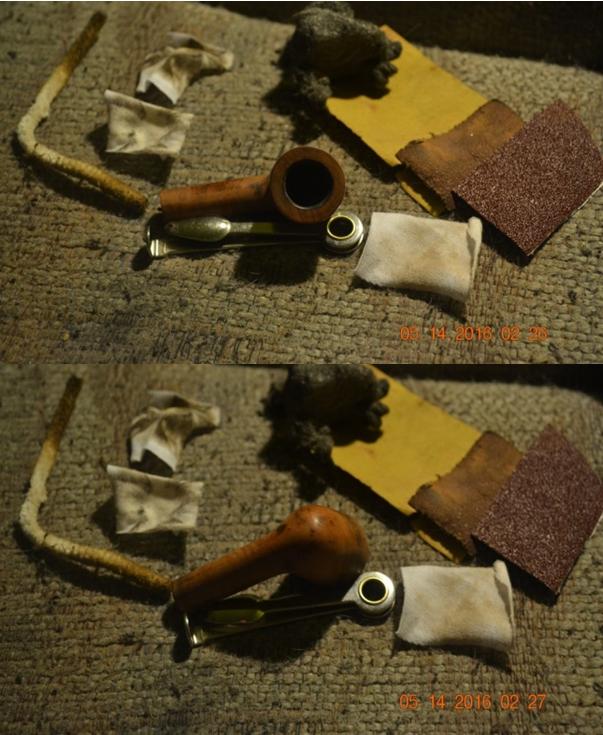
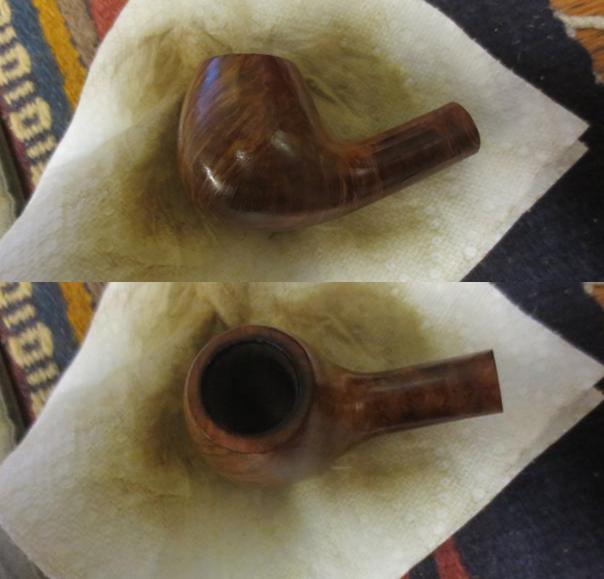
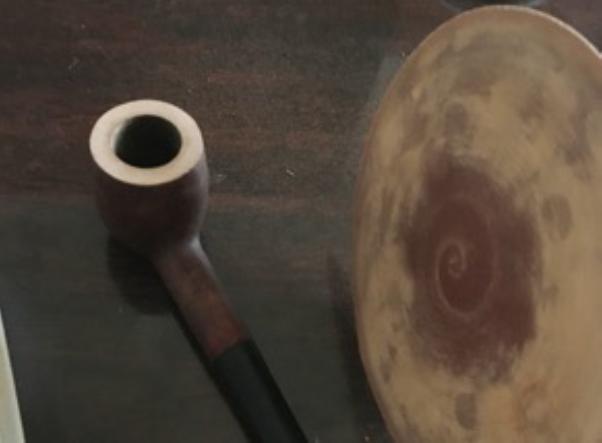
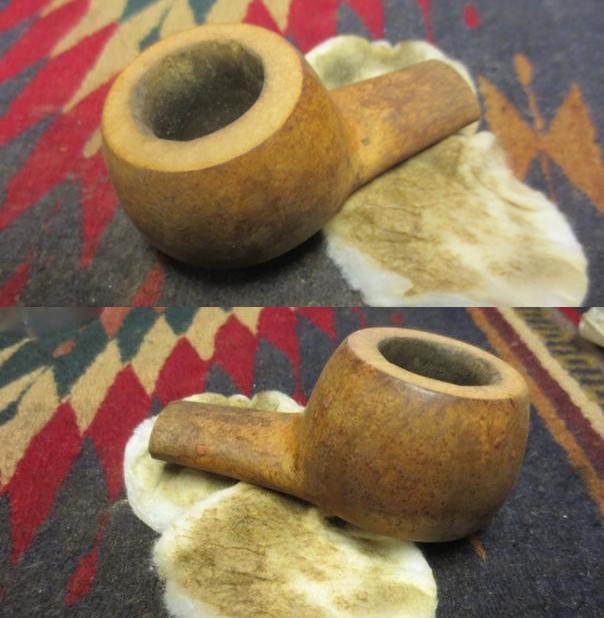
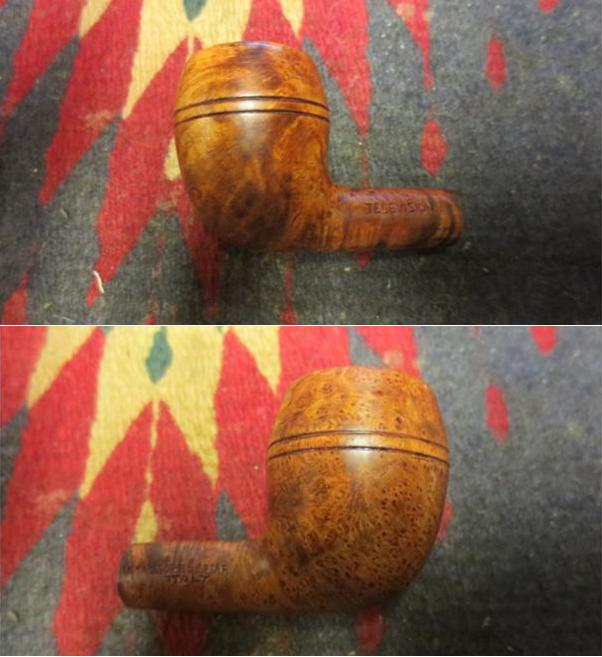
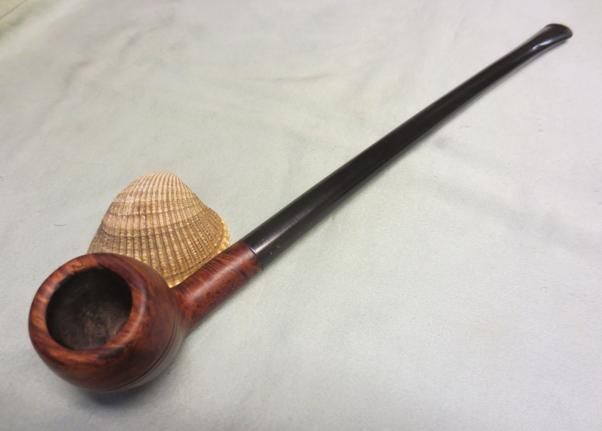
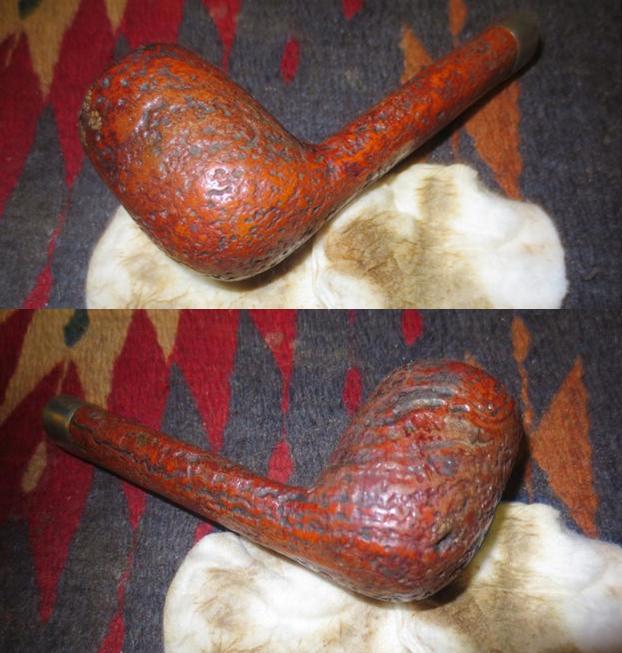
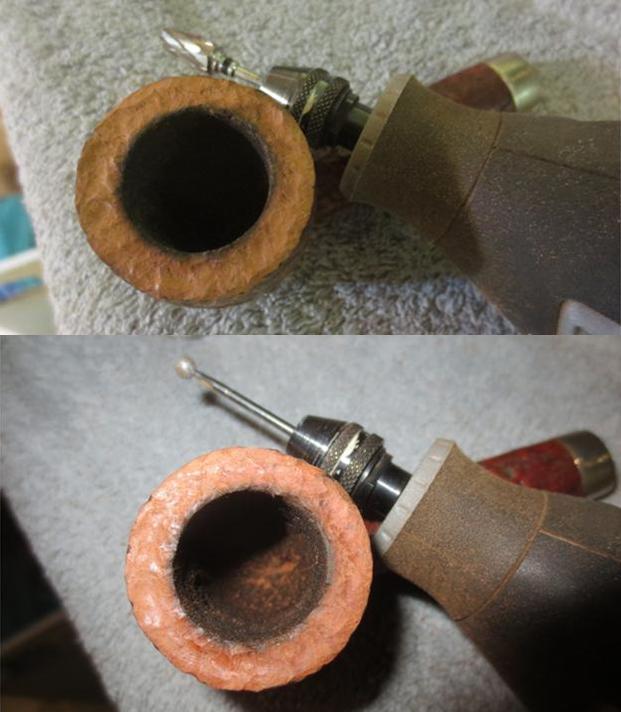
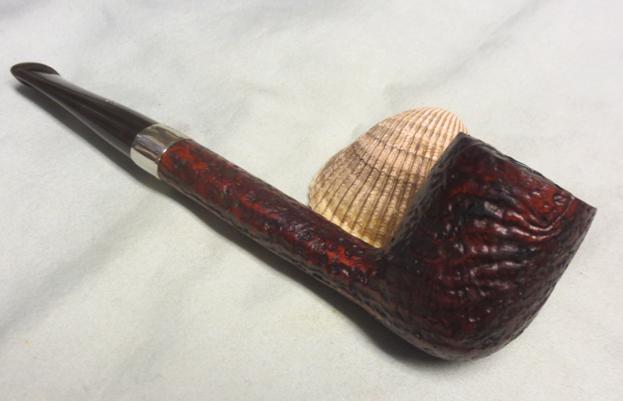
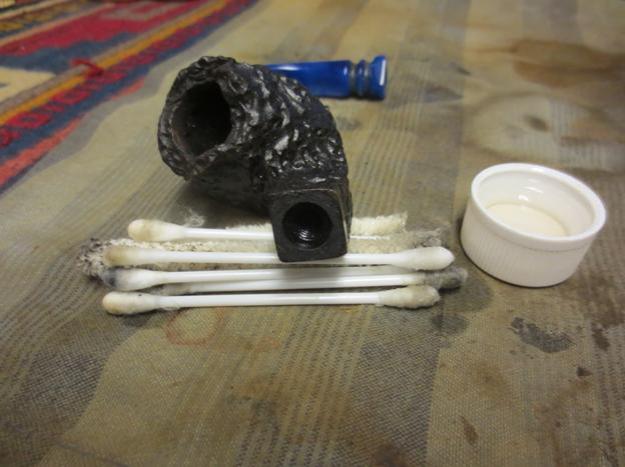
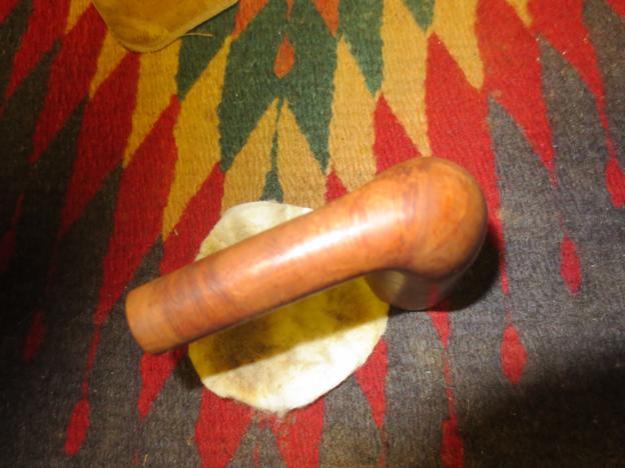
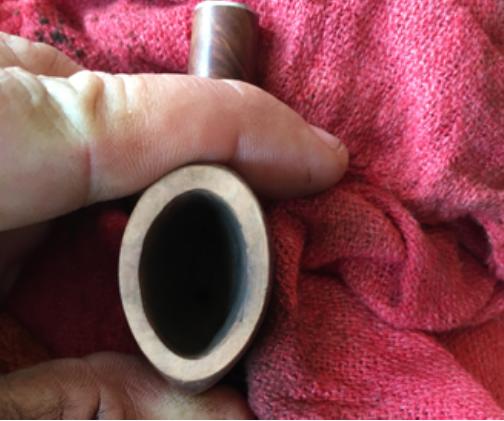
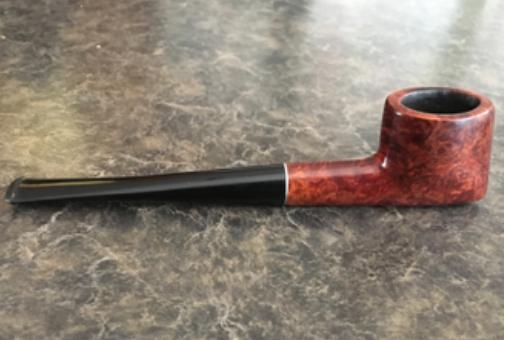
 Micro meshing with my full set of pads was fun as usual and gave the wood a very nice natural shine. But as you can see, part of the big ding on the back side of the bowl remained.
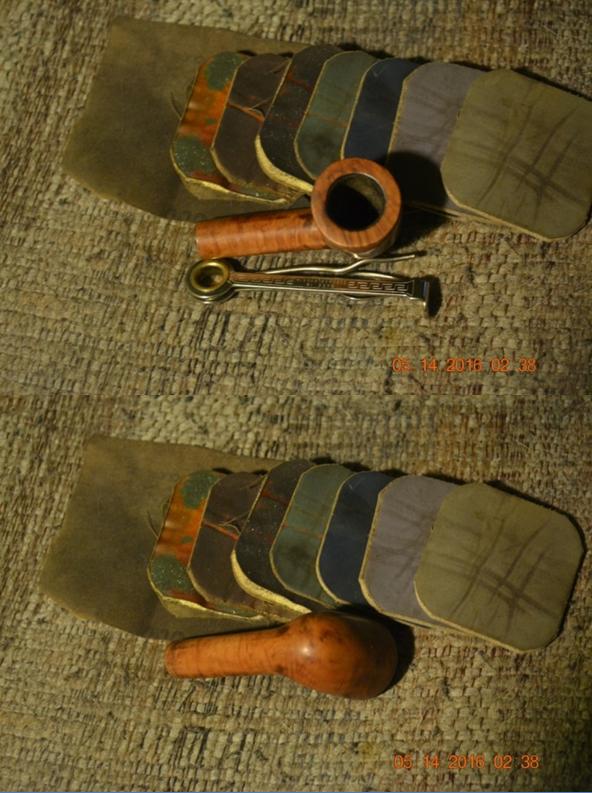
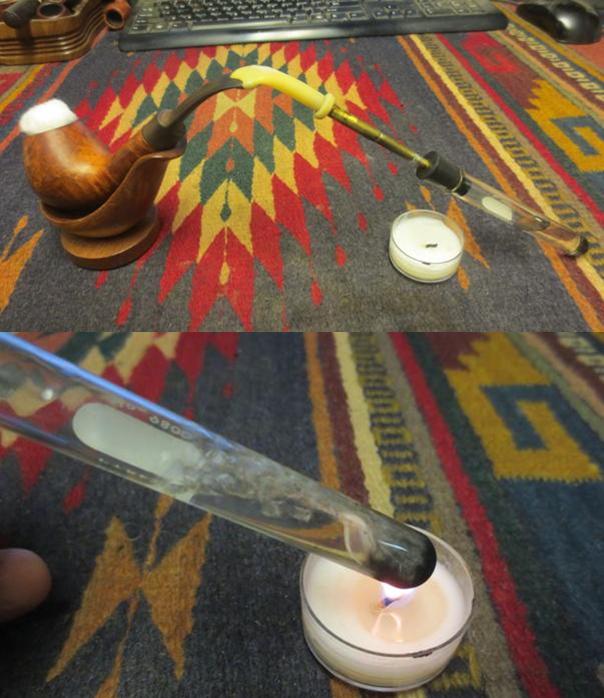
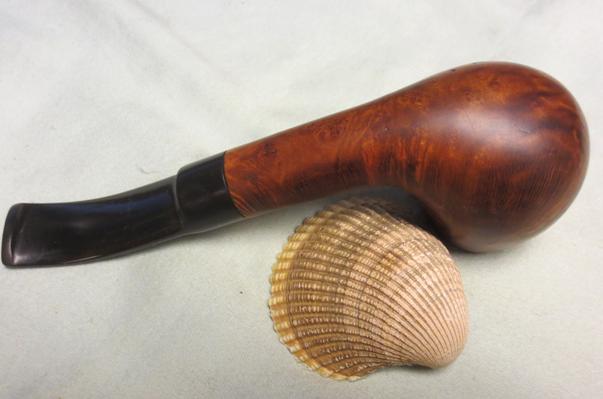
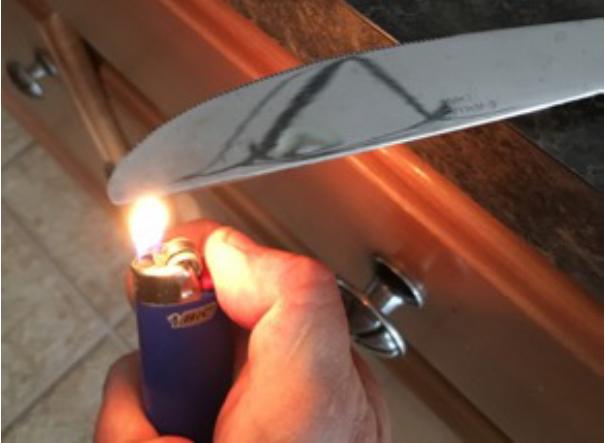
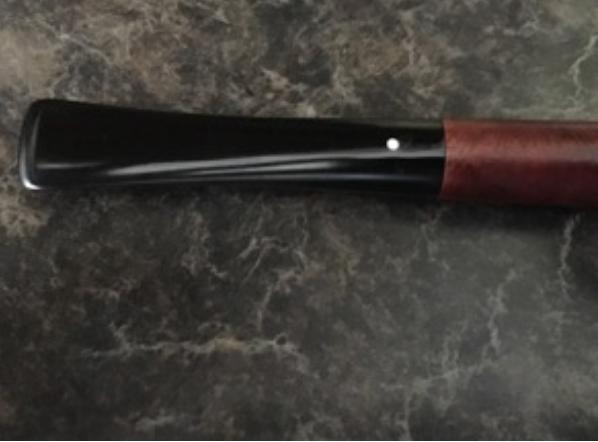
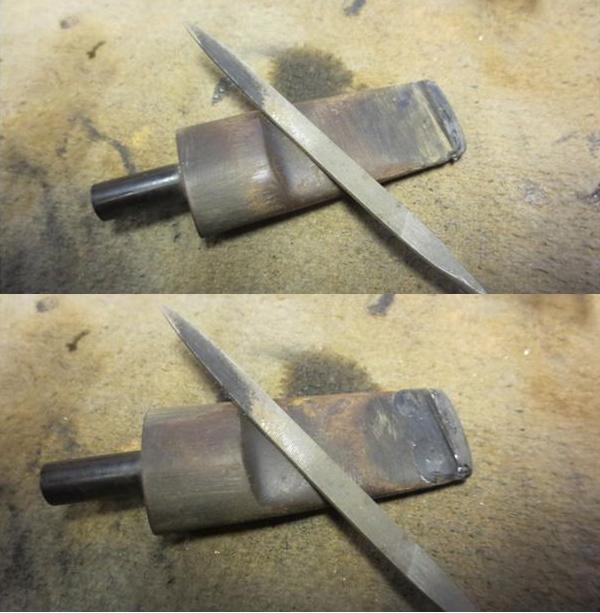
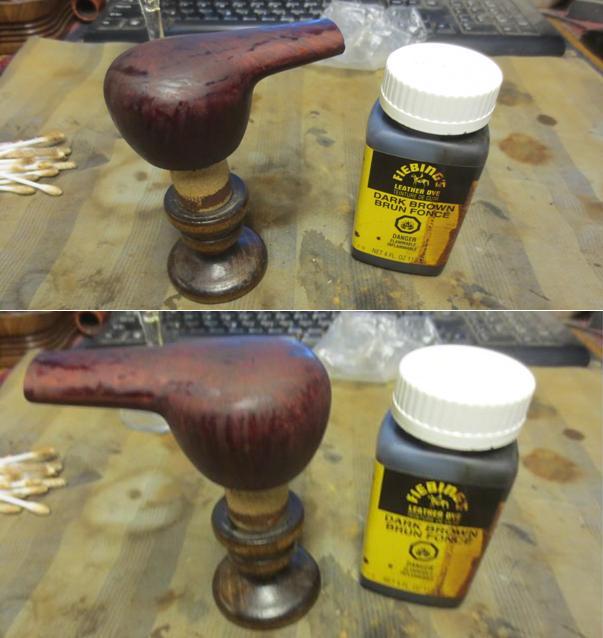
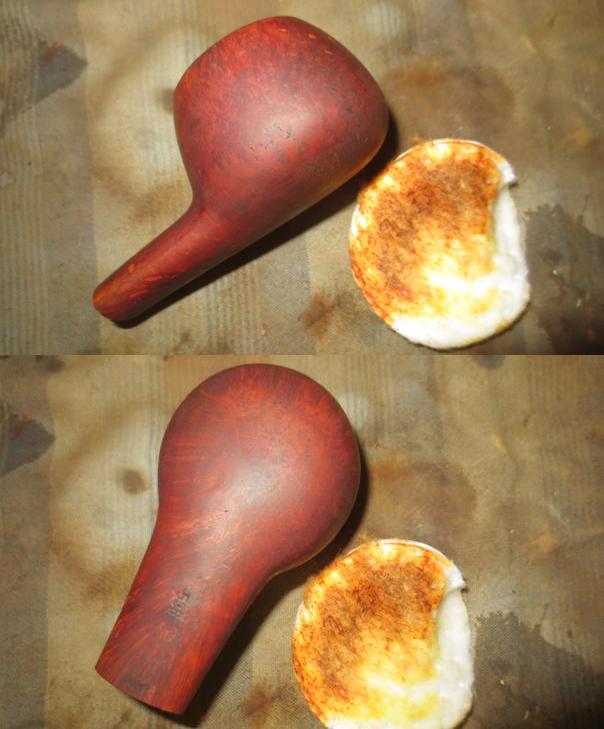
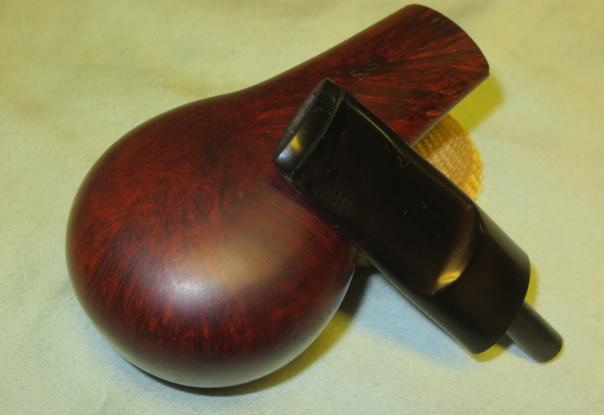
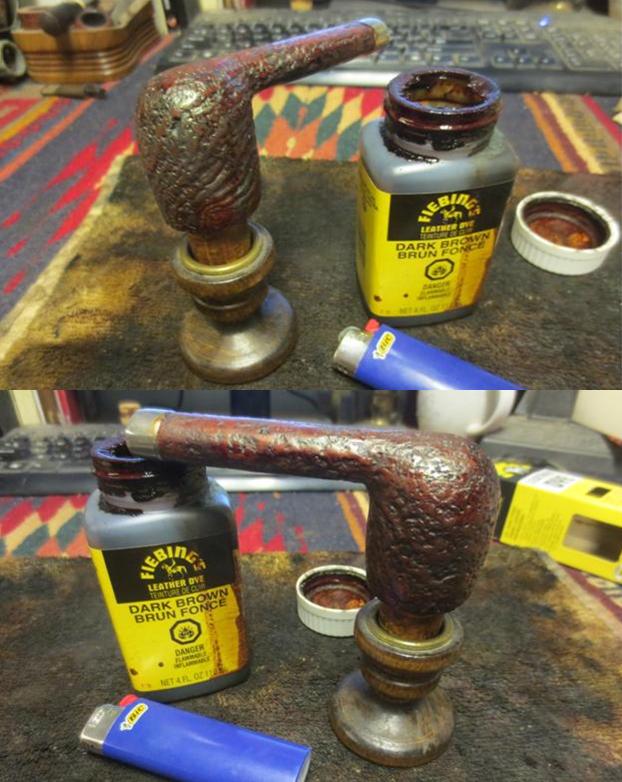
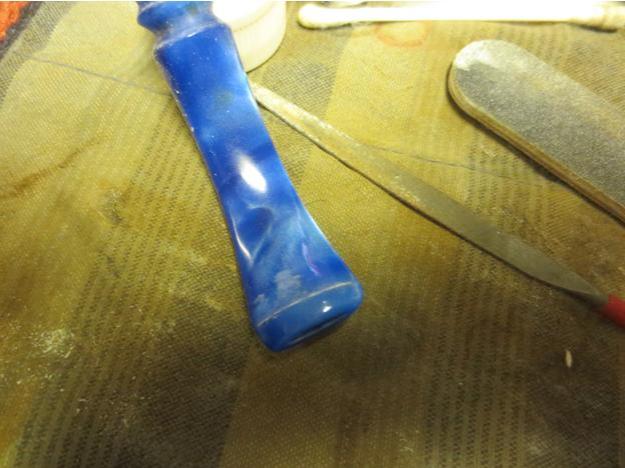
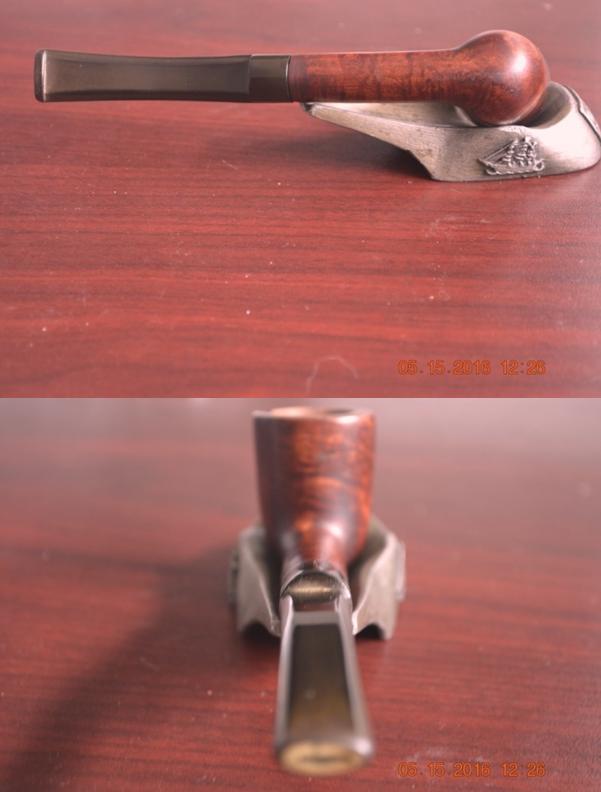
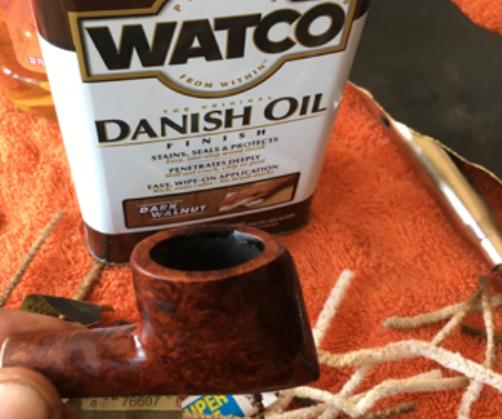
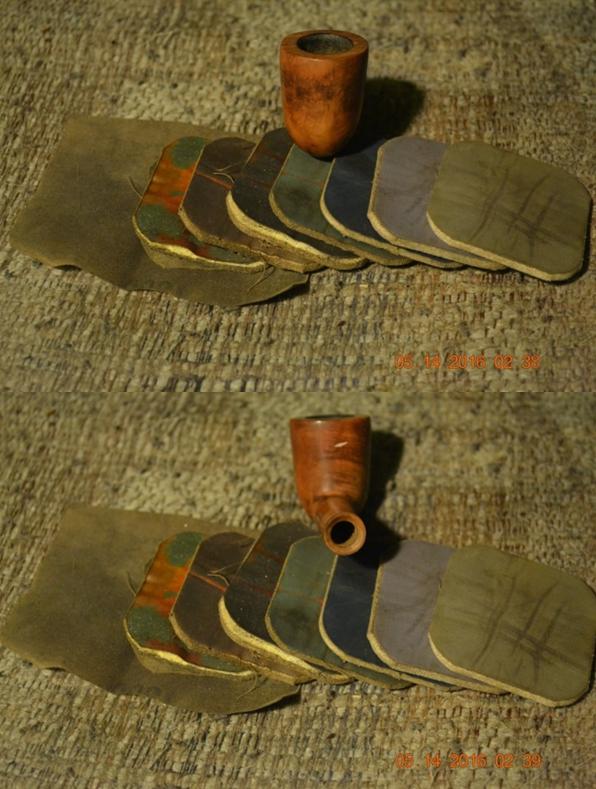 I spot-sanded the ding with little pieces of 320- and 500-grit paper and a lot of elbow grease, re-micro meshed it, then micro meshed the little light but smooth spot all the way again. The time to re-stain had arrived, but what color? Why, Lincoln Marine Cordovan! I flamed the quickly drying alcohol-based boot treatment and set it aside to cool.
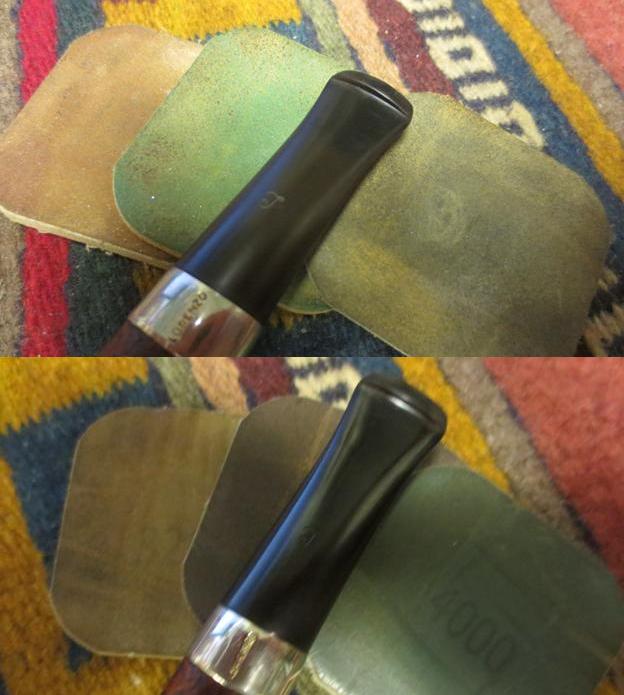
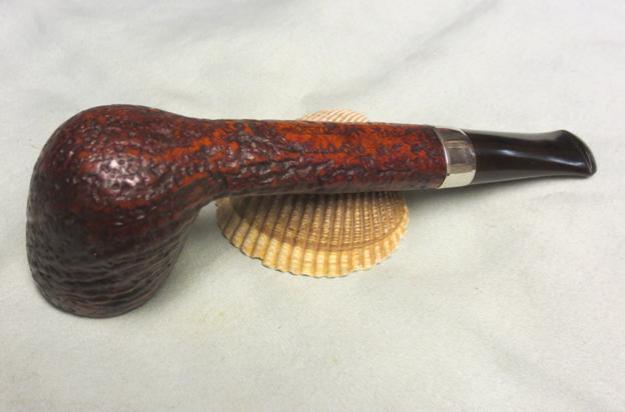
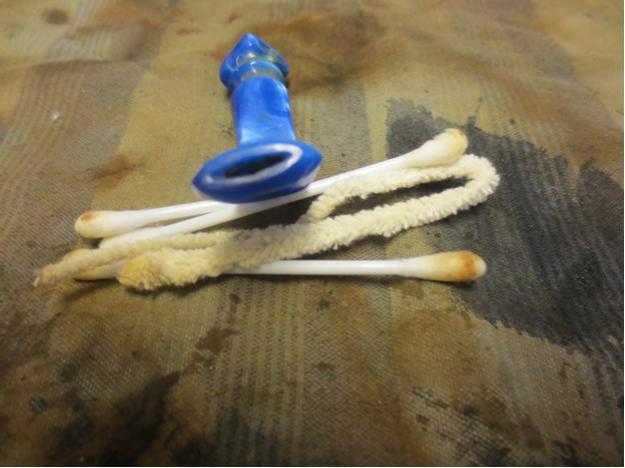
 With 2400 and 3200 micro mesh, I removed enough of the stain-concealed grain to make out faint lines, but the pads could not do more than that. Several light applications of four-ought steel wool brought out the grain where I wanted it.
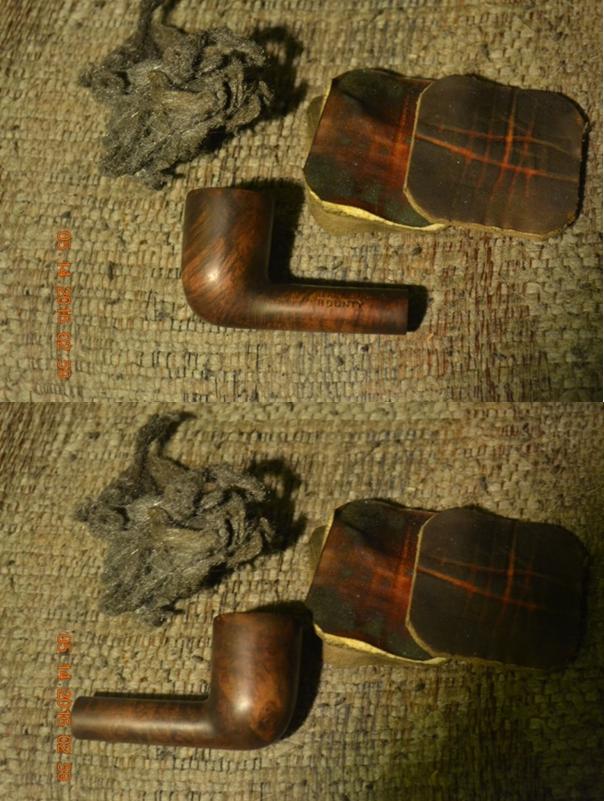
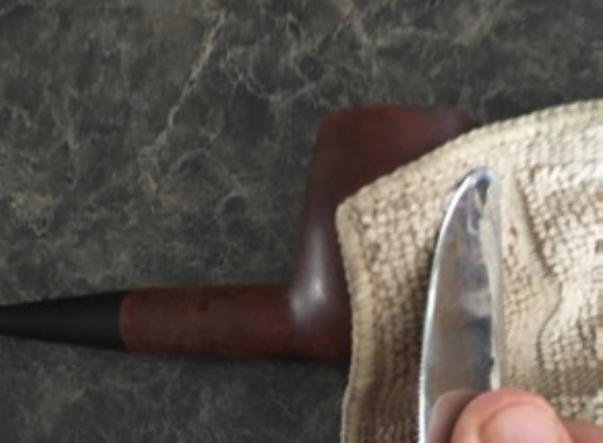
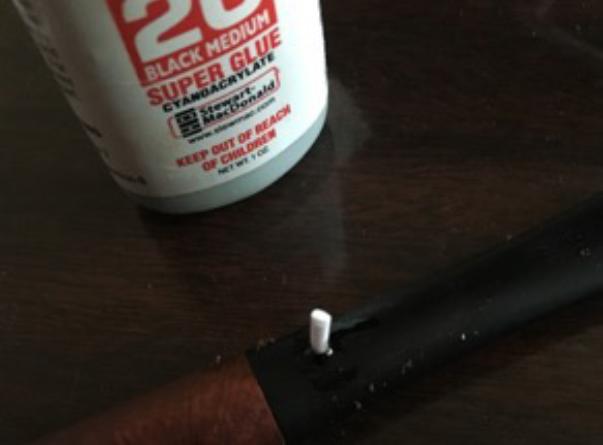
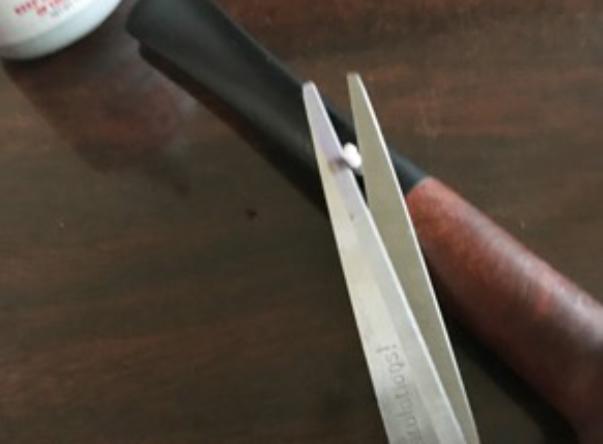
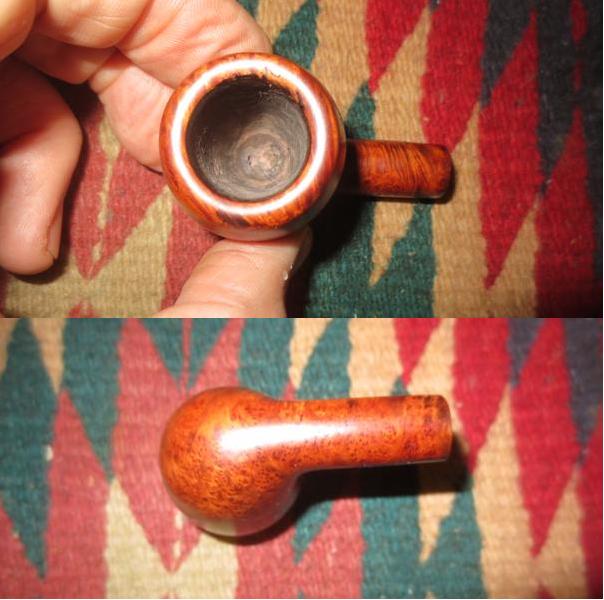
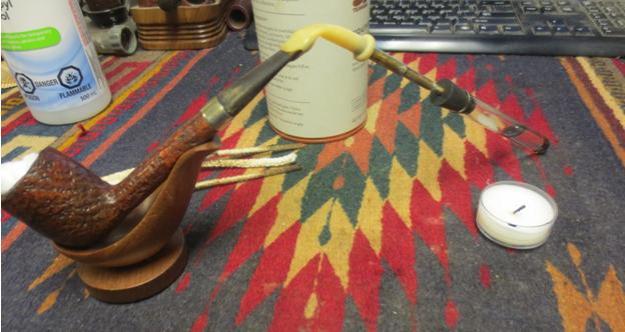
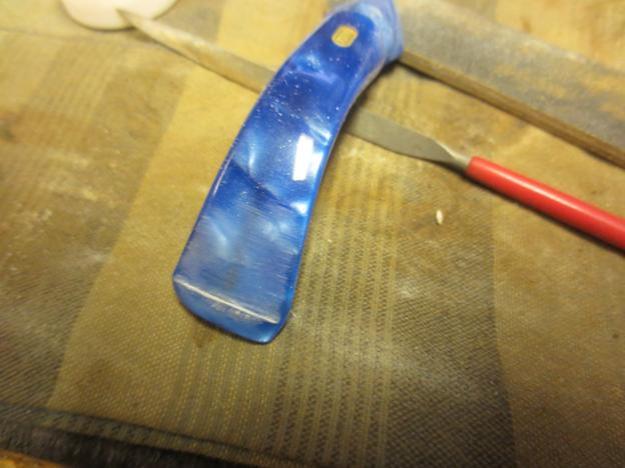
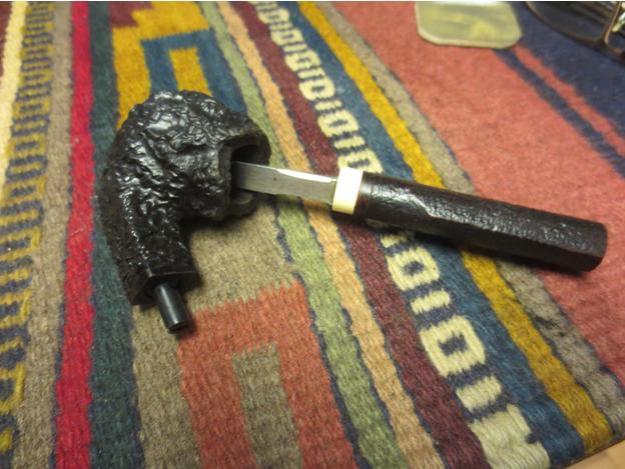
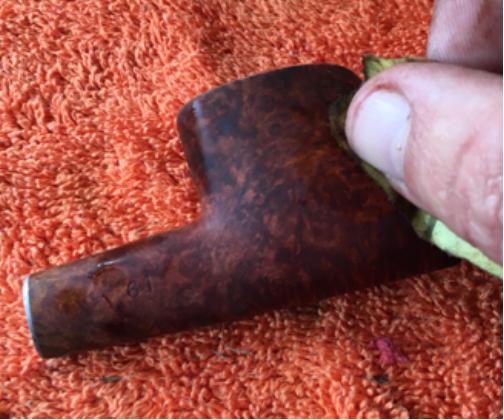
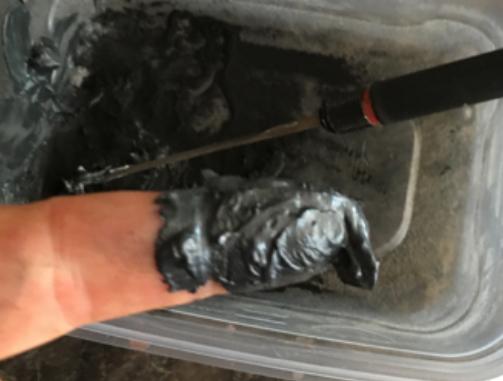
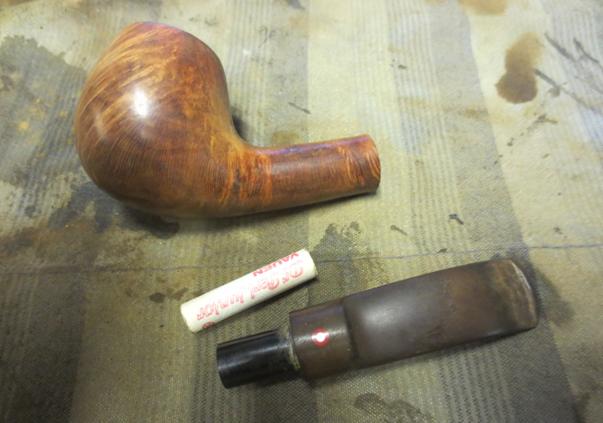
 After an easy but necessary retort, the time to repair to the electric buffers had come. I used the red and white Tripoli, White Diamond and carnauba on the bit, and all but the red Tripoli on the stummel.
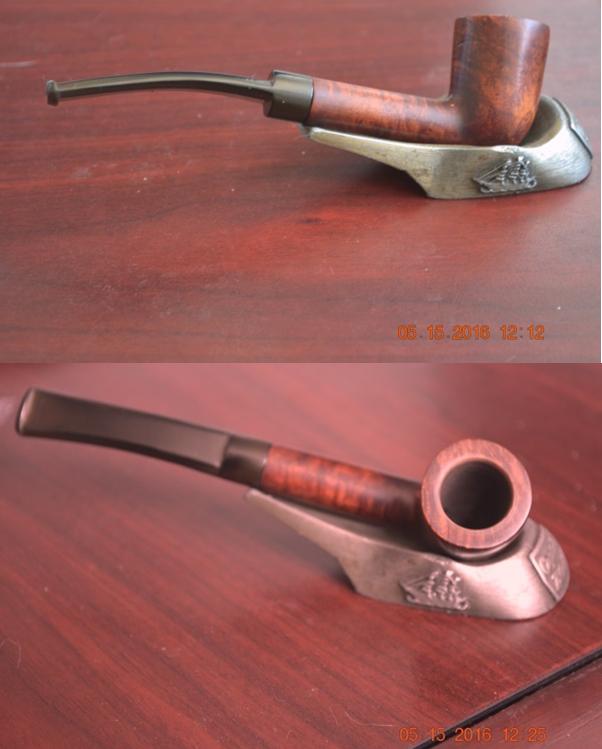
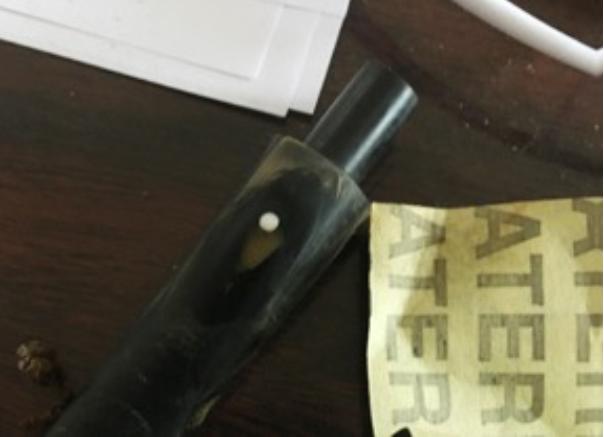
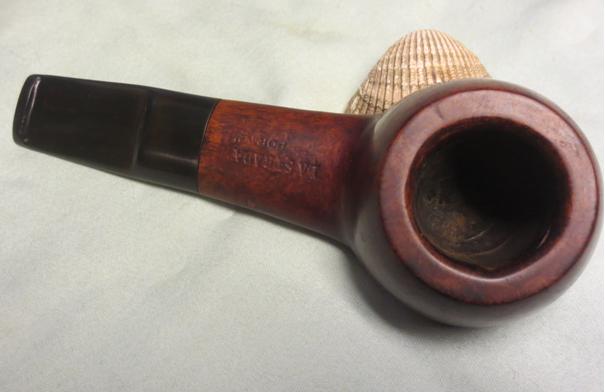
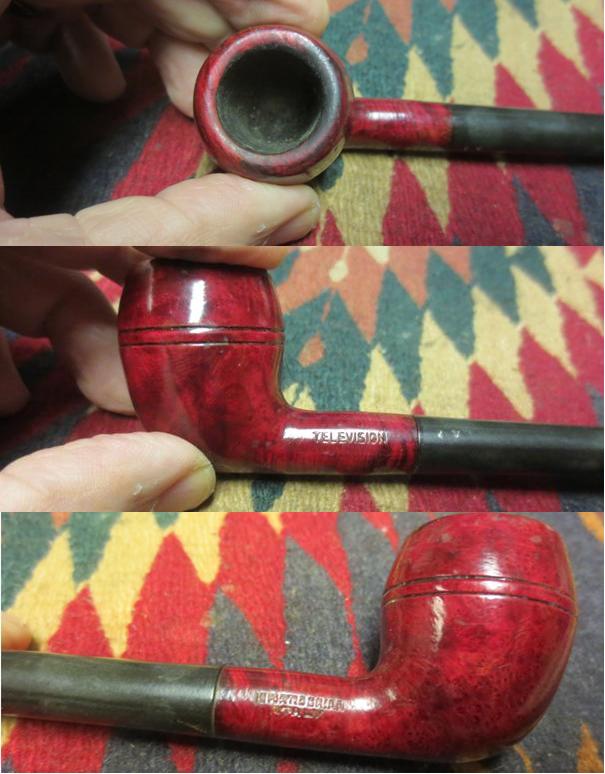
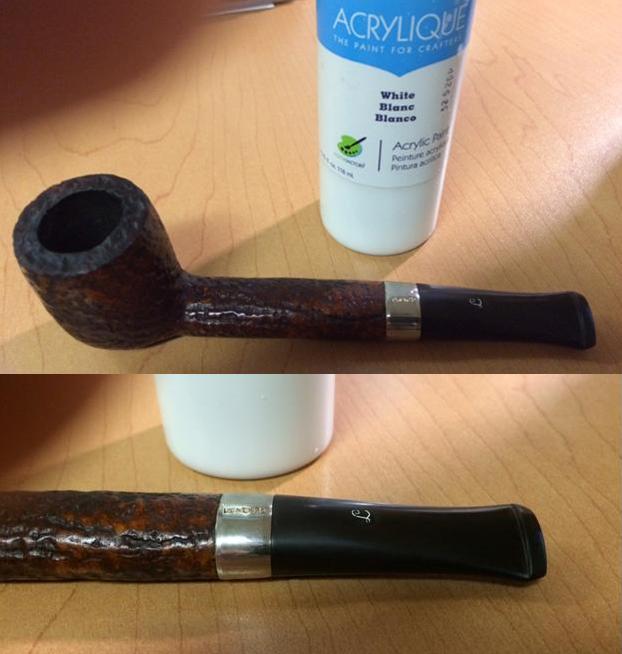
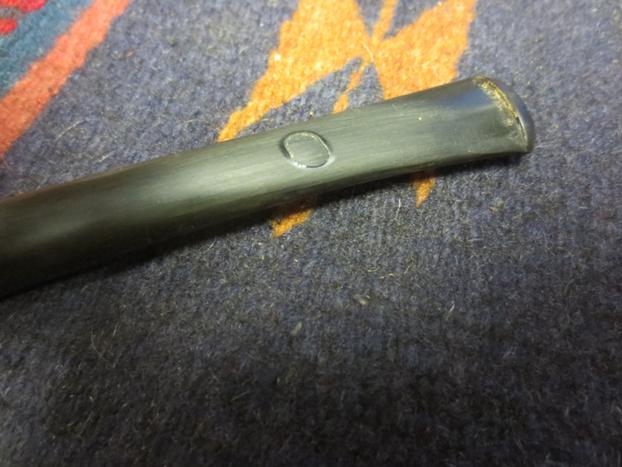
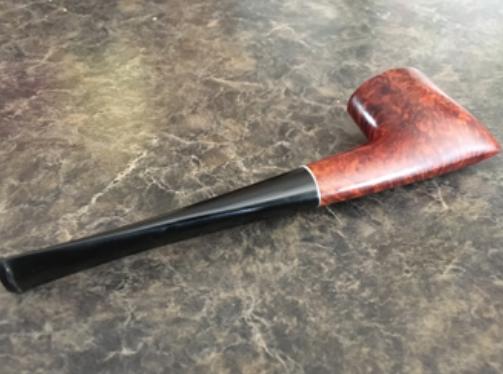
 The last step was to touch up the circle B bit imprint with a white grease pencil as well as I could.
CONCLUSION
Close your eyes for a moment. I want you to imagine yourself standing just outside your favorite neighborhood tobacconist. You know there’s a pipe inside that you’ve always wanted. A pipe with your name, as it were. You may never have seen the pipe, but you know it’s in there. Waiting for you to buy it. For your own use. Whispering, “Come save me. I’ll be yours forever.” Maybe you remember your father or grandfather with it, relaxed and comfortable between his teeth. He’s smiling, laughing, and in his mirth has to take the pipe from his mouth for a moment. You watch as the beautiful pipe in his hand moves down in front of his chest, where the smoke subsides, but there are still faint wisps curling gently upward. And your eyes are still glued to the mysterious object of art when the hand moves up again and almost magically, without the man even looking at it, the pipe finds its way back between his happy, content lips. You reach for the doorknob to go inside.
Now, imagine you’re a woman.
SOURCES
http://www.pipetrader.de/artikelauswahl.php?kat=Estate+Pfeifen~Bounty
http://www.bestsmokingpipes.com/beautiful-real-briar-bounty-meerschaum-lined-smokers-smoking-estate-pipe-8-39
https://www.willhaben.at/iad/kaufen-und-verkaufen/d/pfeife-real-briar-bounty-157047822/
http://www.worthpoint.com/worthopedia/026-bounty-real-briar-bent-estate-463731513 9mm
http://www.cnn.com/2014/06/12/us/hms-bounty-tall-ship-sinking-investigation/
http://www.history.com/this-day-in-history/mutiny-on-the-hms-bounty
http://law2.umkc.edu/faculty/projects/ftrials/Bounty/bountyaccount.html The true story of the 1789 mutiny on the Bounty
http://globalnews.ca/news/1390913/hms-bounty-sinking-coast-guard-blames-owners-captains-decisions/


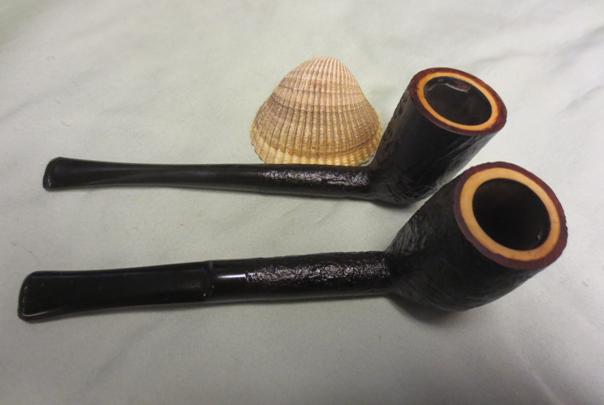
 From that link I checked out Chris Keene’s Pipe pages site for more information and found the following catalogue page. http://pipepages.com/2wf14.htm. Even thought the advertising page is for Hilson Fantasia Pipes it confirmed several facts for me that I had not previously known. First was that the meerschaum lined bowl was cut from block meerschaum and not a pressed meerschaum. That is probably why it had survived intact through the years. Second, that all Hilson Belgian pipes had the condenser tube in the shank. I also found a page from an Iwan Ries Catalogue from 1962 that showed meerschaum lined briar pipes. Sadly I could not view the page as the link was not functional.
 I carefully reamed out the cake in both pipes with the Savinelli Pipe Knife to take it back to the meerschaum lining. I did not want to gouge or chip the meerlining so I proceeded with caution. I sanded the interior of the bowl with a piece of 229 grit sandpaper around the cutting head of the PipeNet pipe reaming tool to take out all of the cake in the bowls.
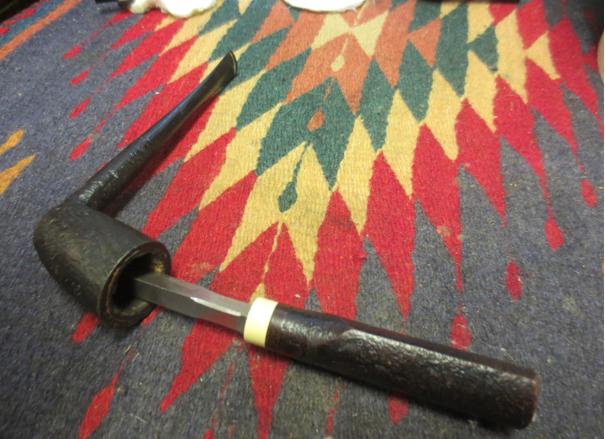
 Once I cleaned the bowls I decided to top the two pipes to remove the build up on the rim surfaces. Since both pipes appeared to have smooth rims topping them would not damage the original look of the pipe and would allow me to smooth out the top of the meerschaum bowl insert. I topped both bowls on 220 grit sandpaper on the topping board.
 When I finished topping them the meerschaum was clean the surface of the rim was smooth.
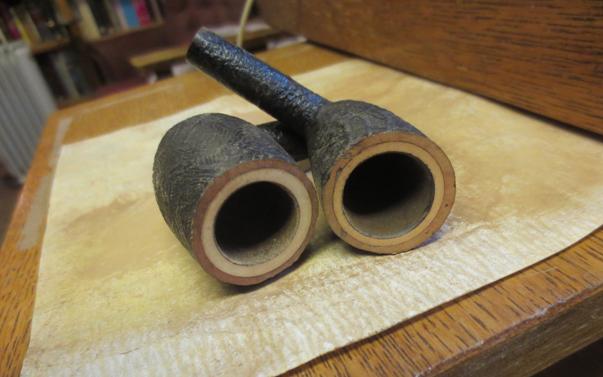 I sanded the rims with 1500-2400 grit micromesh sanding pads to remove the scratches left behind by topping the bowls. The polished rims looked really smooth and ready to be stained. I stained the rim of the briar outer bowl with a dark brown stain pen and a Sharpie black permanent marking pen to get the dark brown colour of the bowl.
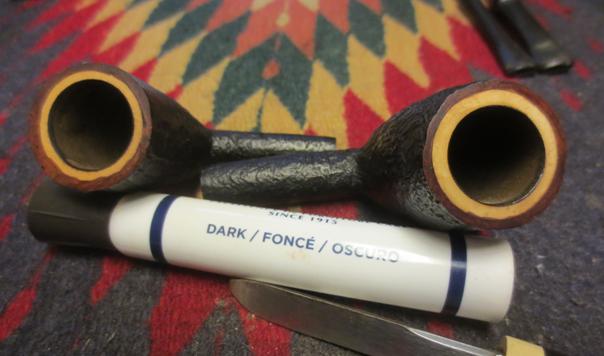 I scrubbed out the inside of the stem and the shank of the pipes with alcohol, pipe cleaners and cotton swabs. There was a lot of grime in both pipes. The condenser tubes on both were coated with tars and oils that I removed with 0000 steel wool. I had to reshape the open end of the tube in the Dublin stem as someone had tried to remove it with pliers. It was crushed and there were some marks from the jaws of the pliers. I reshaped it with an ice pick inserted and heated the tube with a lighter. I was able to bring it back to round. I was also able with the heating to remove both tube inserts and clean the stems before putting them back in place. I scrubbed the briar with a tooth brush and Murphy’s Oil Soap and rinsed them with tap water. I dried them off and both bowls were clean.
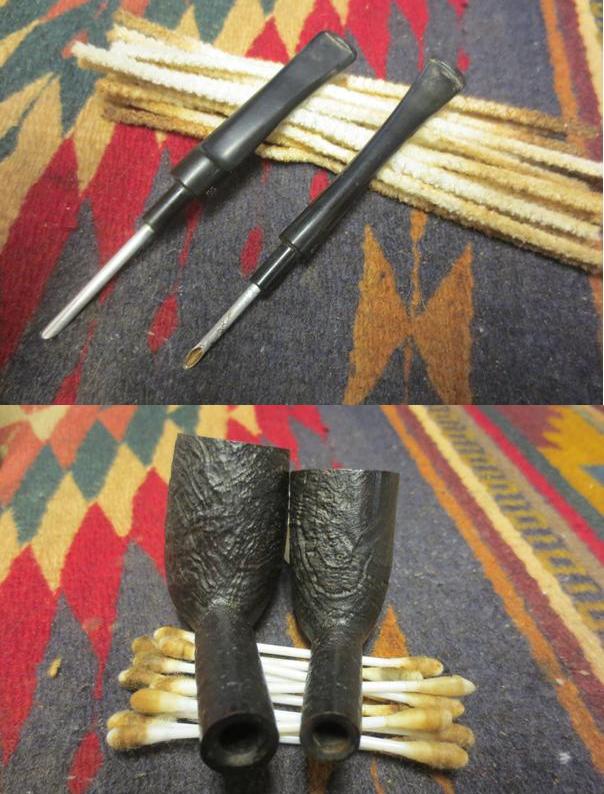 I sanded the tooth marks and chatter on the stems with 220 and 380 grit sandpaper and a medium grit sanding stick. I was able to remove all of the marks.
 I wet sanded the stems with 1500-2400 grit micromesh sanding pads and rubbed them down with Obsidian Oil. I dry sanded the stems with 3200-4000 grit pads and gave them another coat of oil. I finished sanding them with 6000-12000 grit pads and gave them a final coat of Obsidian Oil and let them dry.
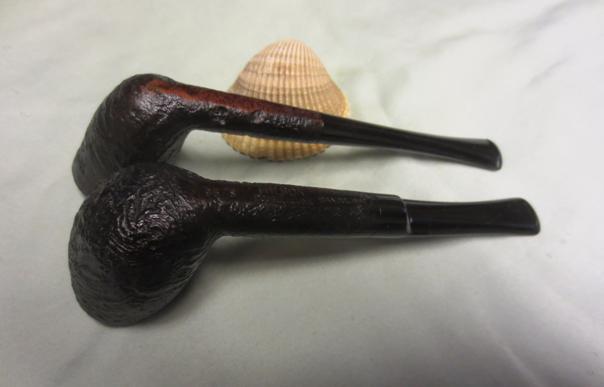
 I buffed the stems with Blue Diamond on the wheel and gave them both multiple coats of carnauba wax. I hand waxed the bowls with Conservator’s Wax and a shoe brush. I hand buffed both the bowls and stems with a microfibre cloth to add depth to the shine. The finished pair of Hilsons is shown in the photos below. They are a beautiful set of pipes and serve as a reminder of my recent Paris trip. Thanks for looking.
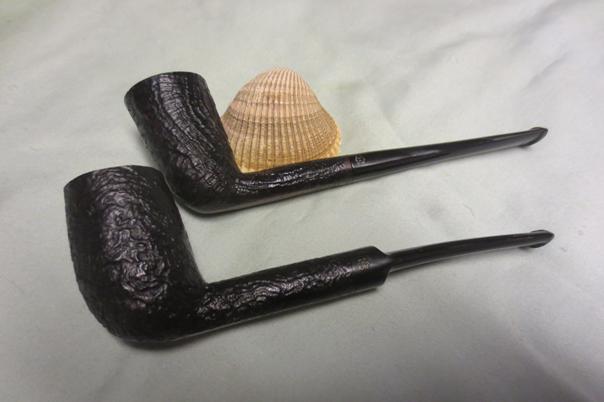


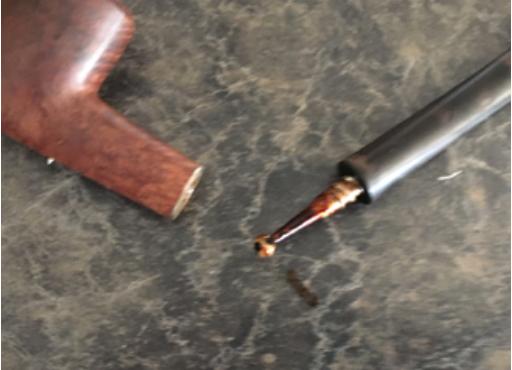


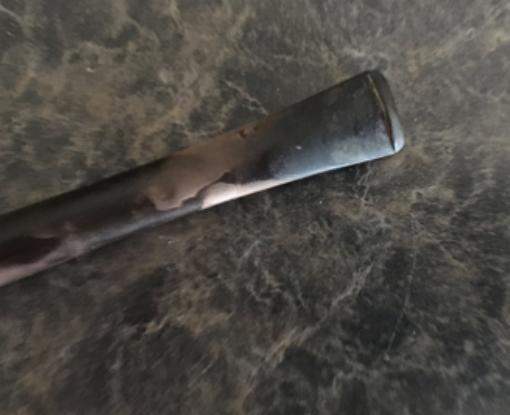


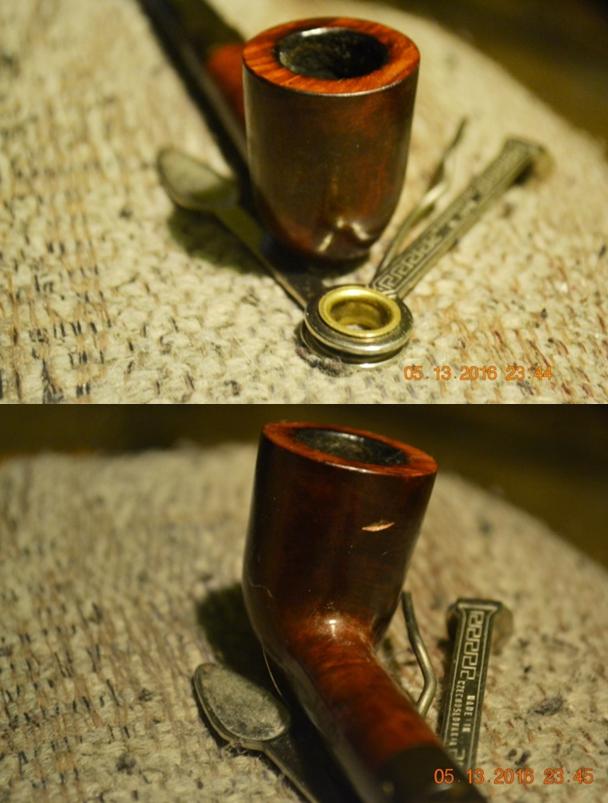
 On the underside of the right side of the pipe there was a burn mark in the vulcanite stem. It looked as if someone had laid the pipe down in an ashtray and a cigarette or ash had burned this spot on the stem. The first close-up photo below shows the burn mark. The second photo show the tooth chatter and marks on the stem near the button (The ones on the other side of the stem are not as deep). The third close-up photo below shows the rim of the pipe and the state of the bowl.
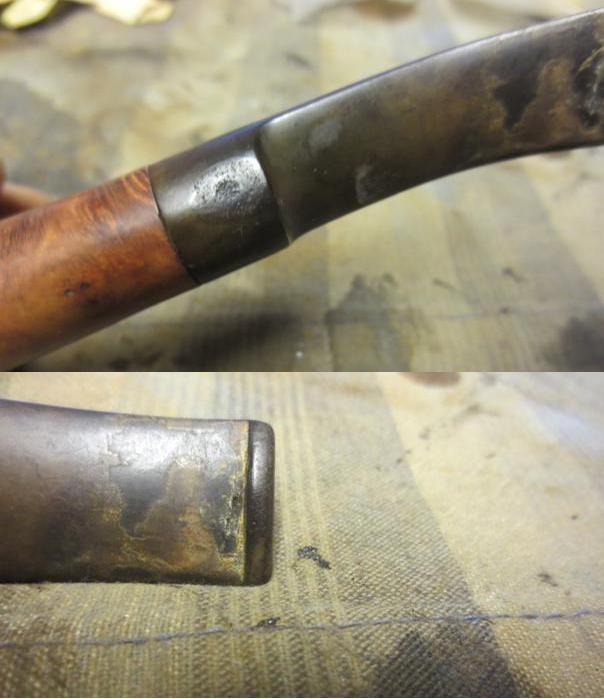
 I scrubbed the bowl surface with acetone on a cotton pad to remove the finish from the bowl. It removed the grime and oils from the original natural finish of the bowl and left it clean.