Tag Archives: refurbishing

A Unique Town and Country Squat Round Bottom Rhodesian – Robert M. Boughton


Guest Blog by Robert M. Boughton
Member, North American Society of Pipe Collectors
http://www.naspc.org
http://www.roadrunnerpipes.com
http://about.me/boughtonrobert
Photos © the Author

The pipe with solemn interposing puff,
Makes half a sentence at a time enough;
The dozing sages drop the drowsy strain,
Then, pause and puff – and speak, and pause again.
— William Cowper (1731-1800), English poet, in “Conversation,” 1782

INTRODUCTION
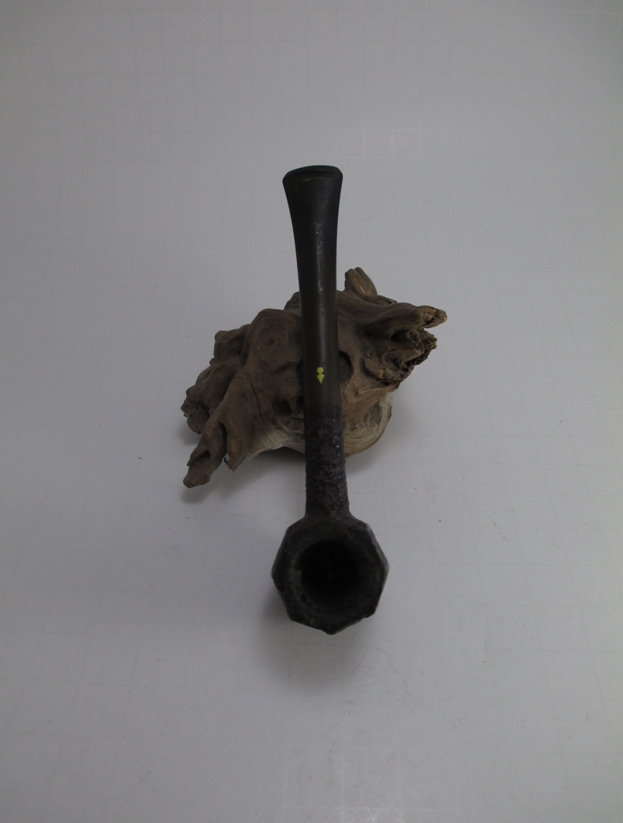
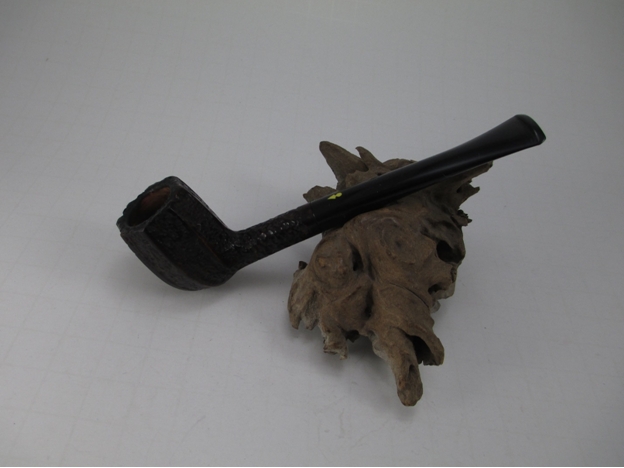
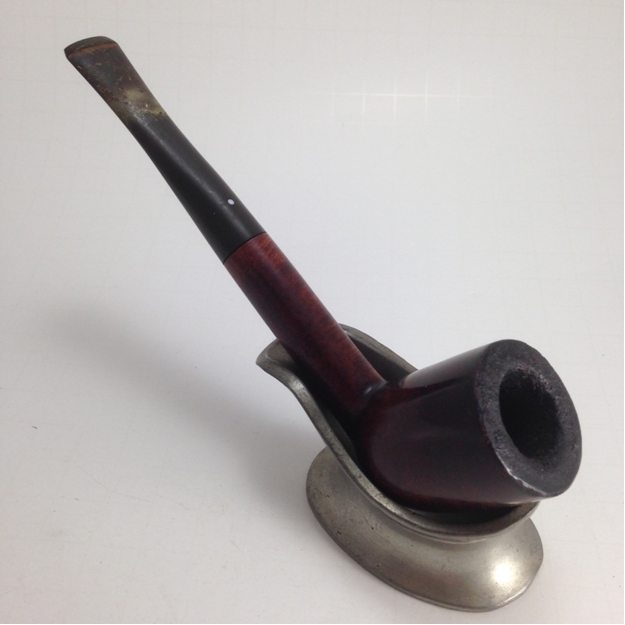
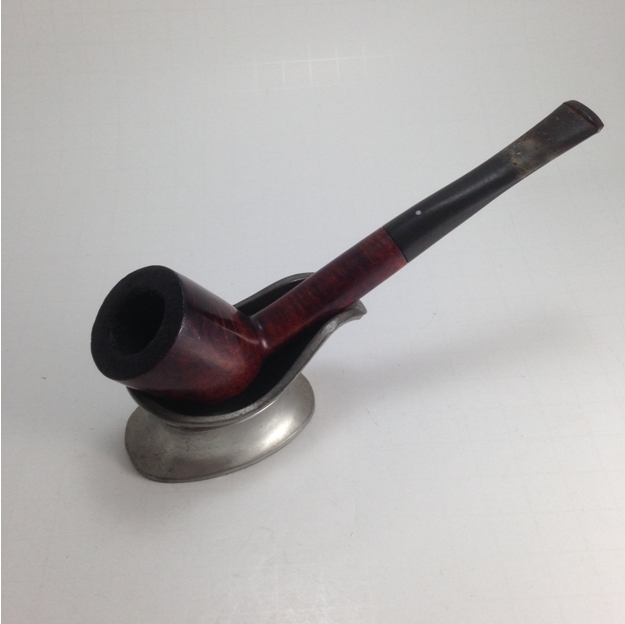
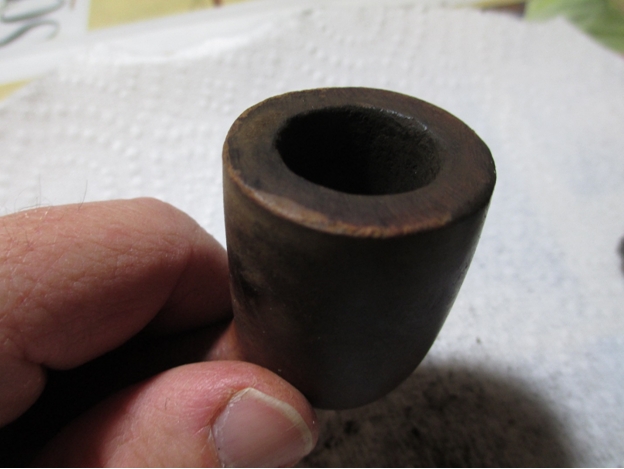
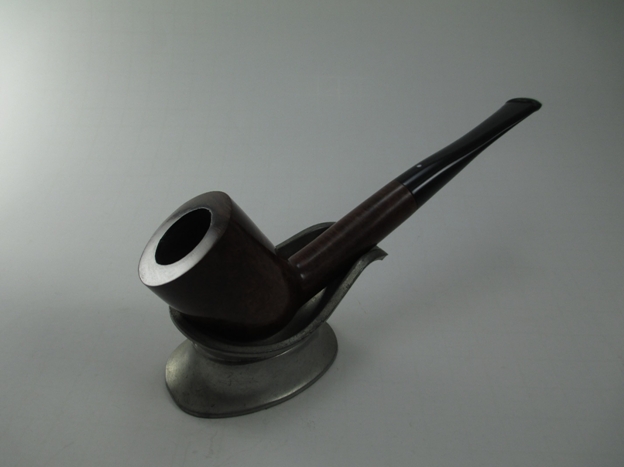
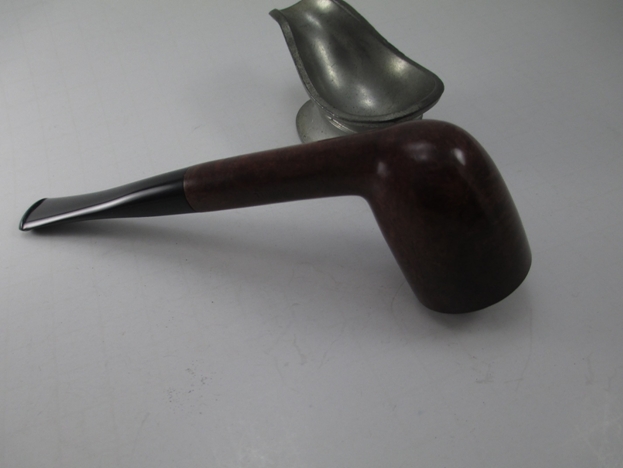
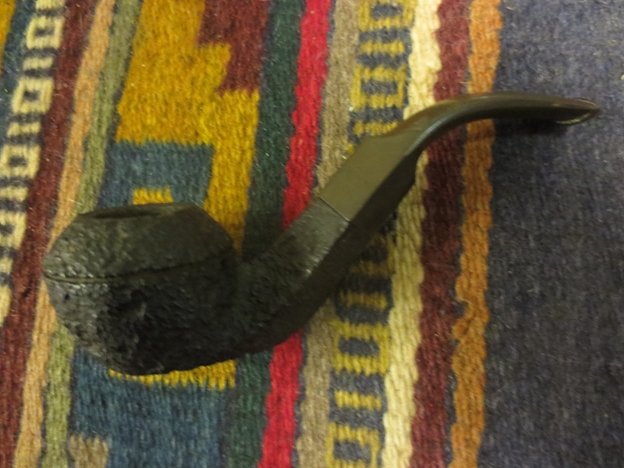
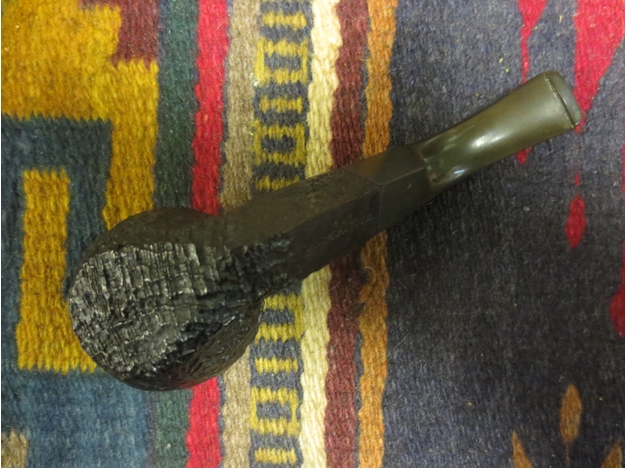
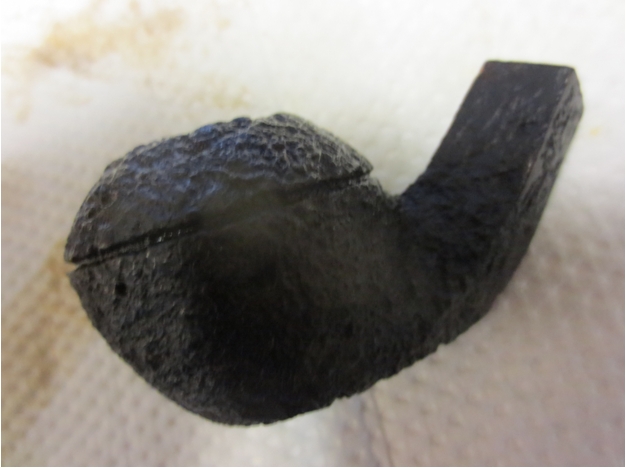
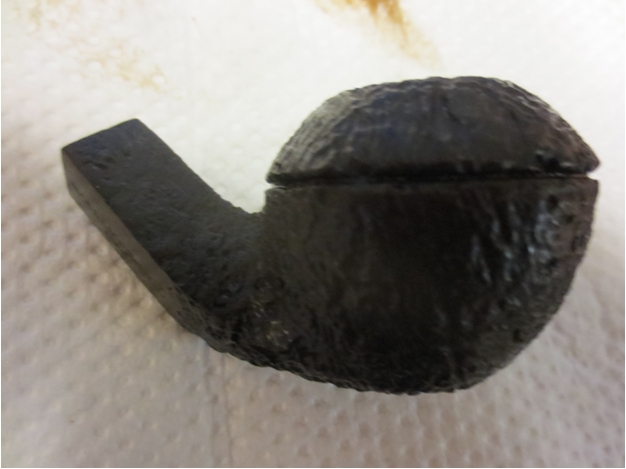
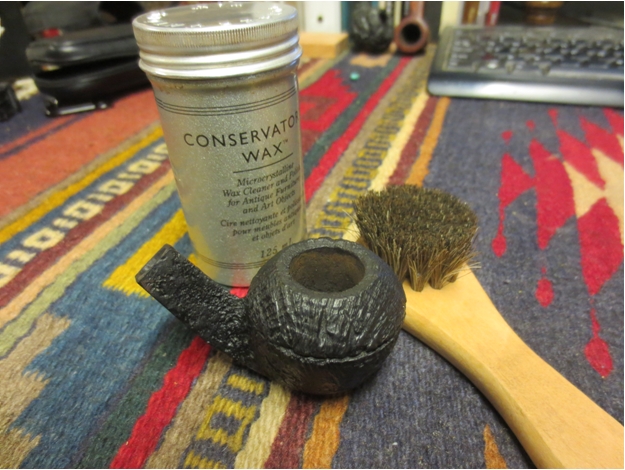
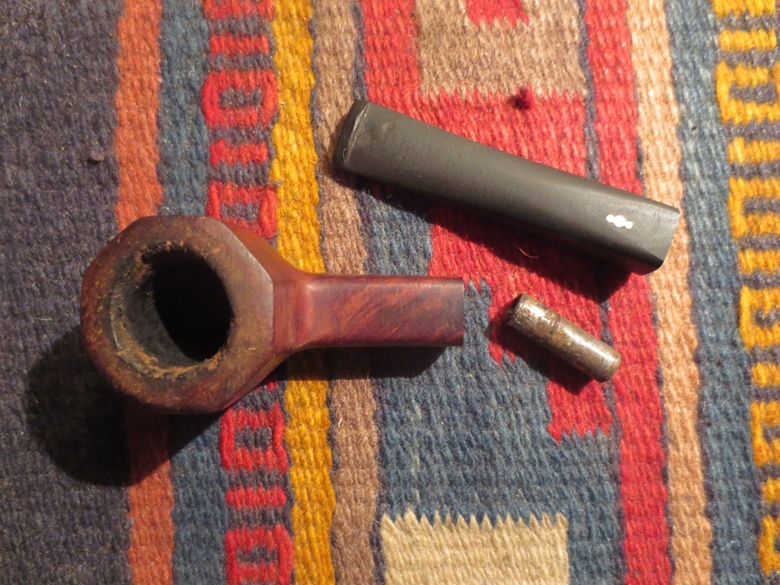
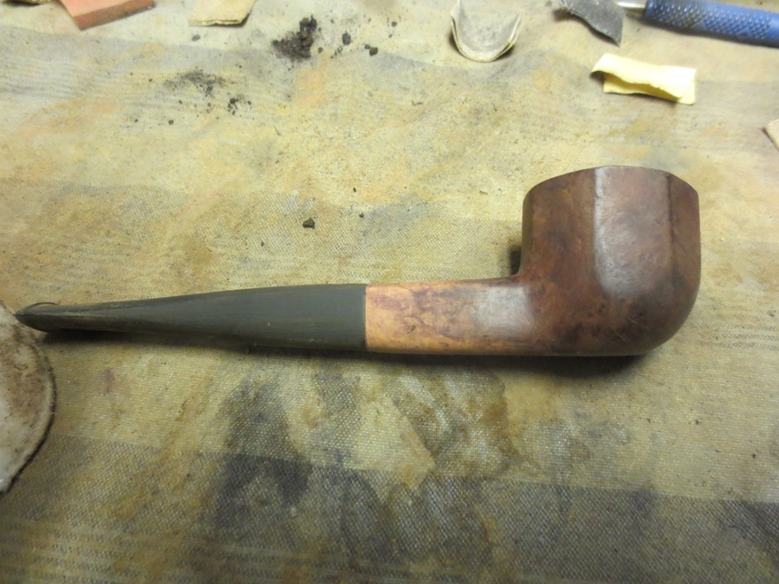
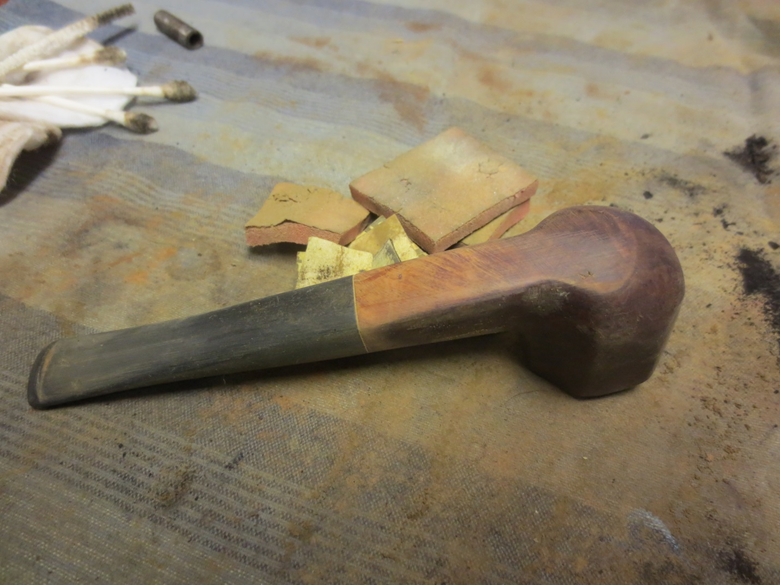
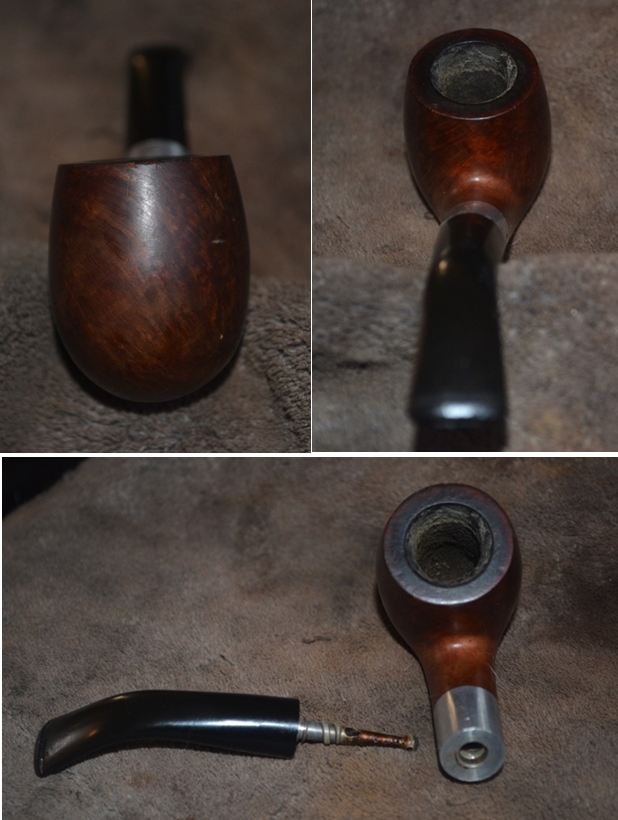
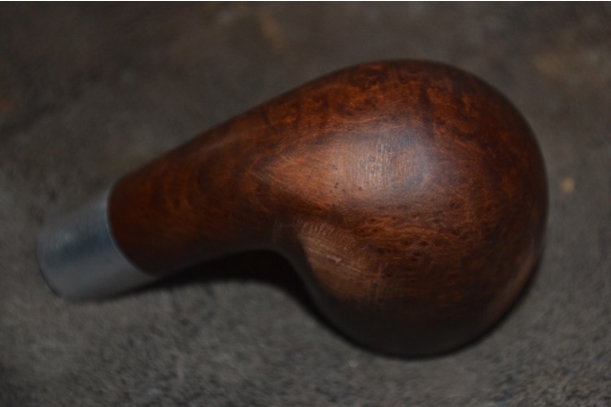
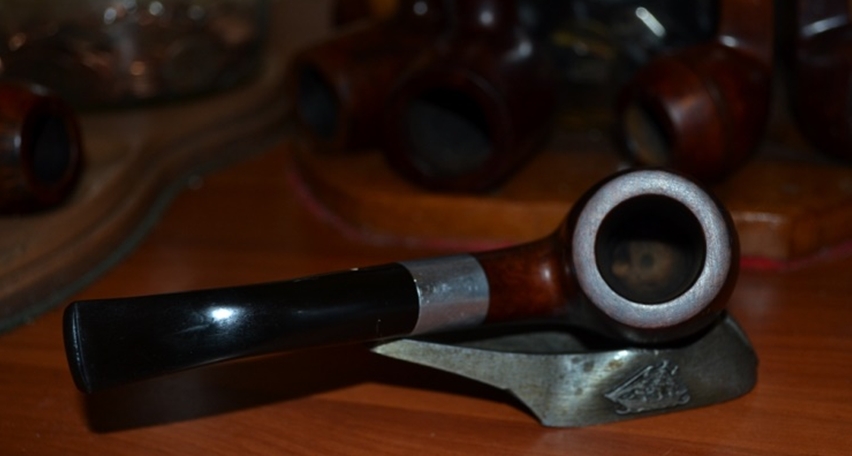
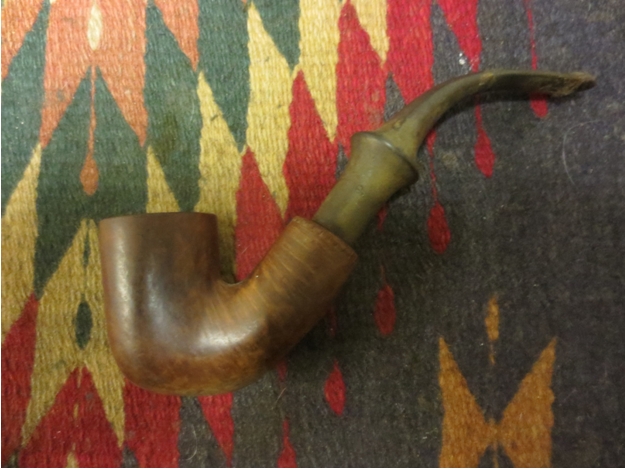
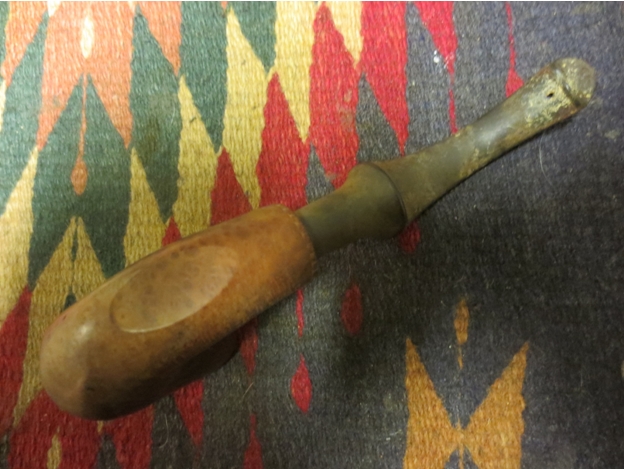
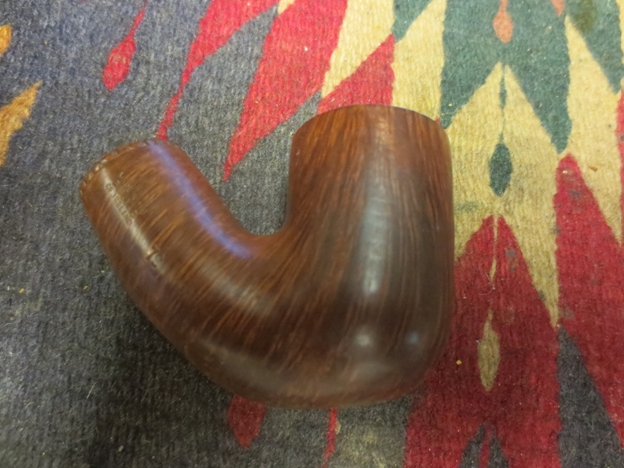
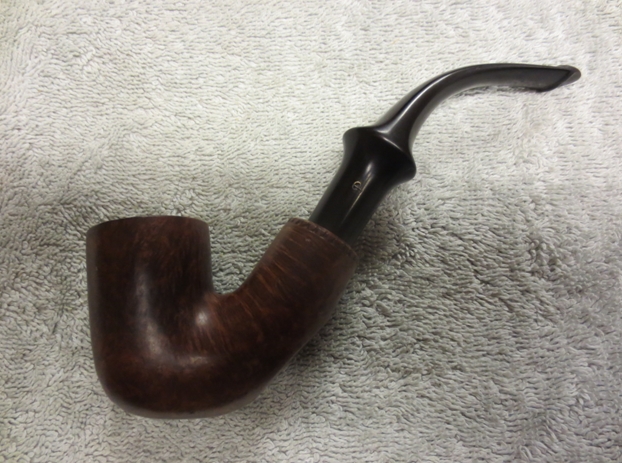
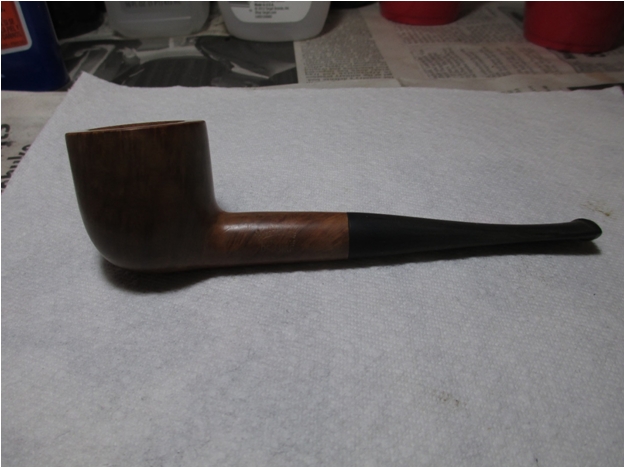
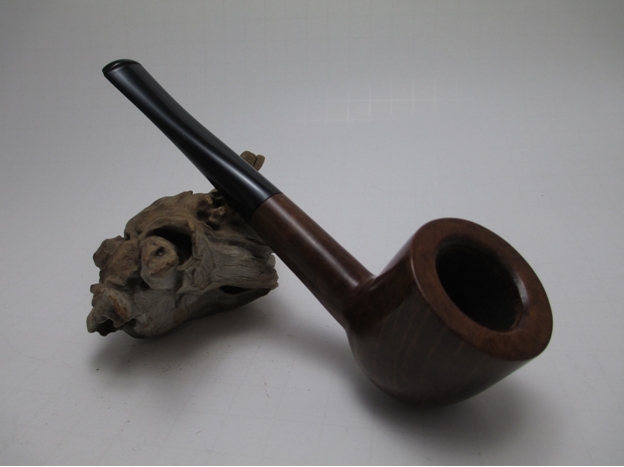
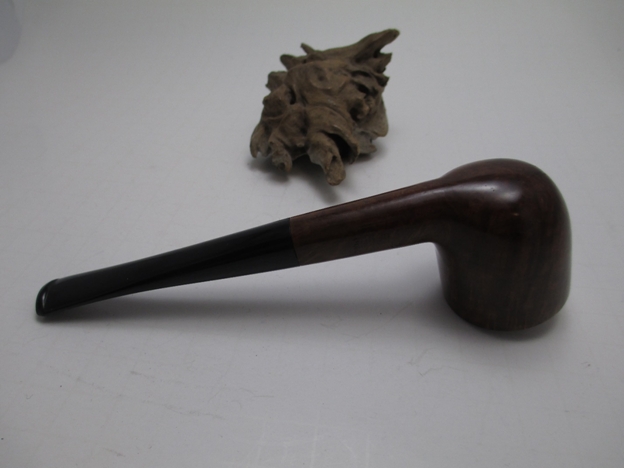
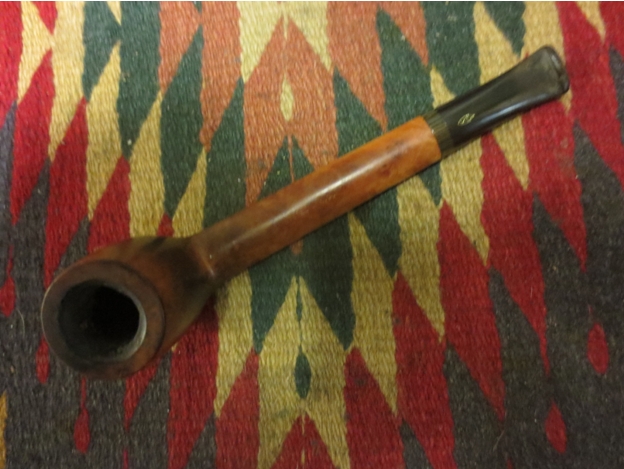
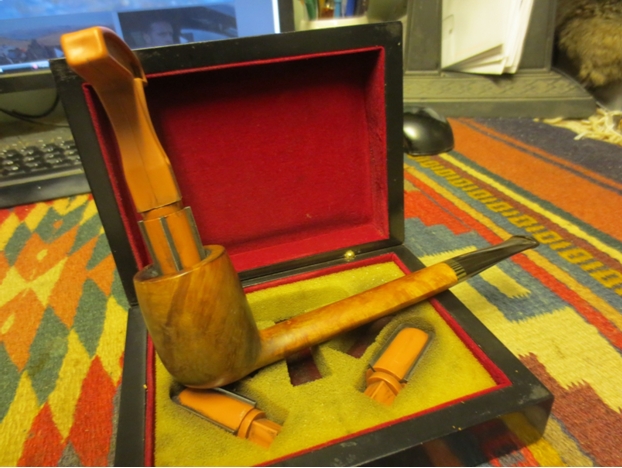
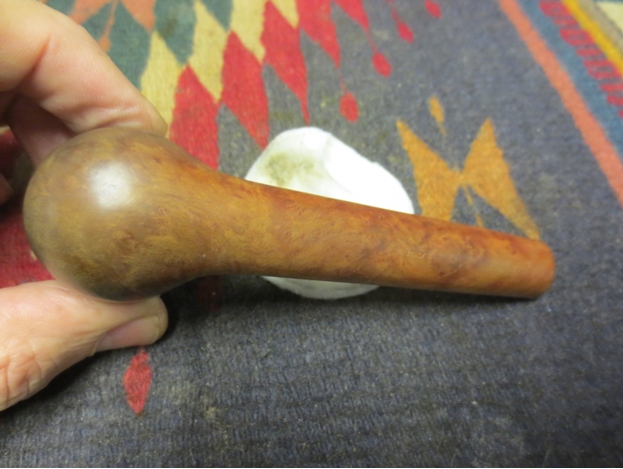
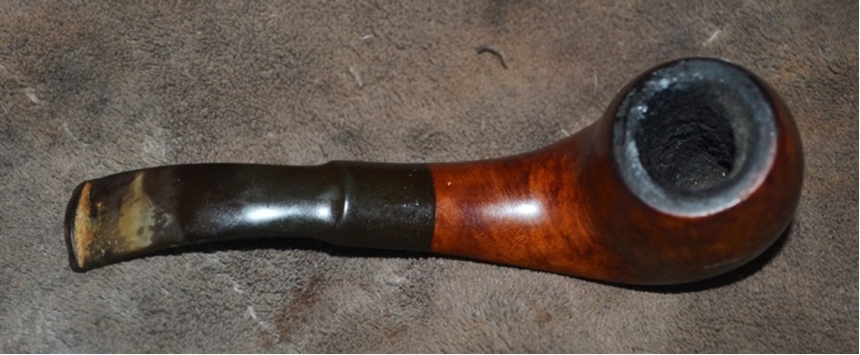
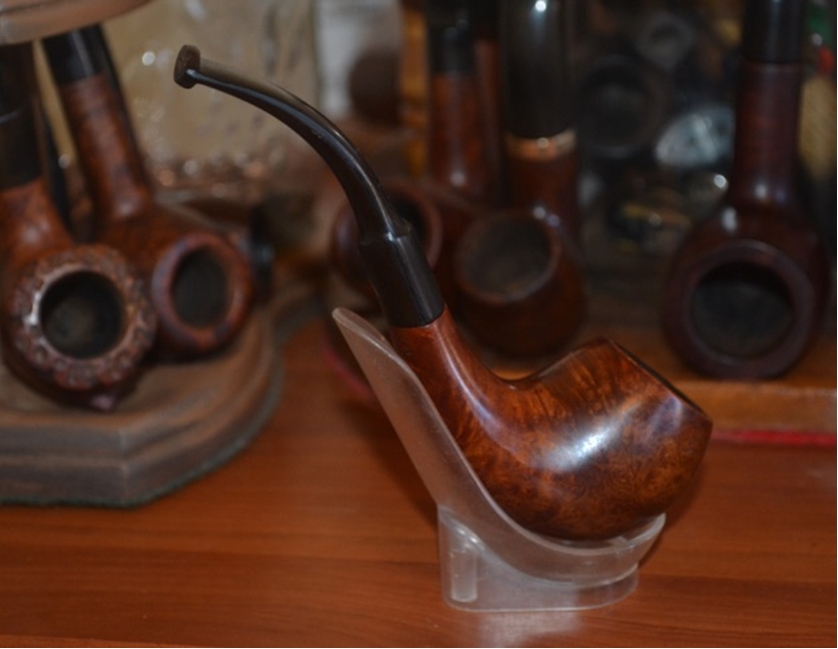
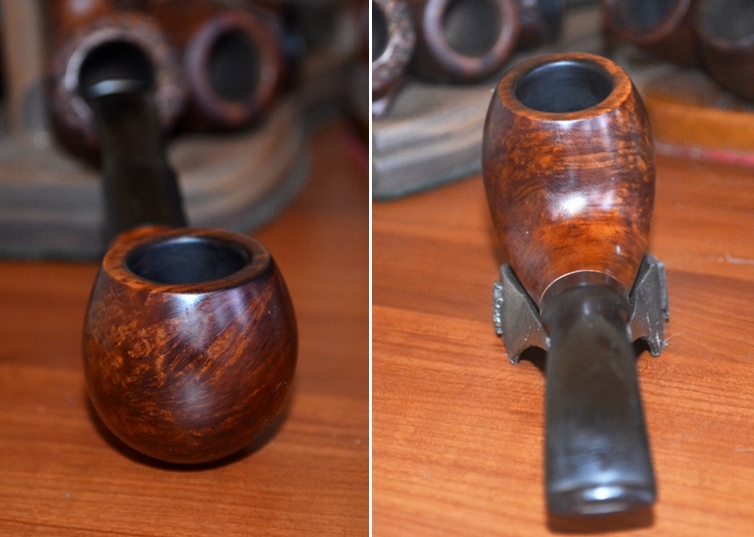
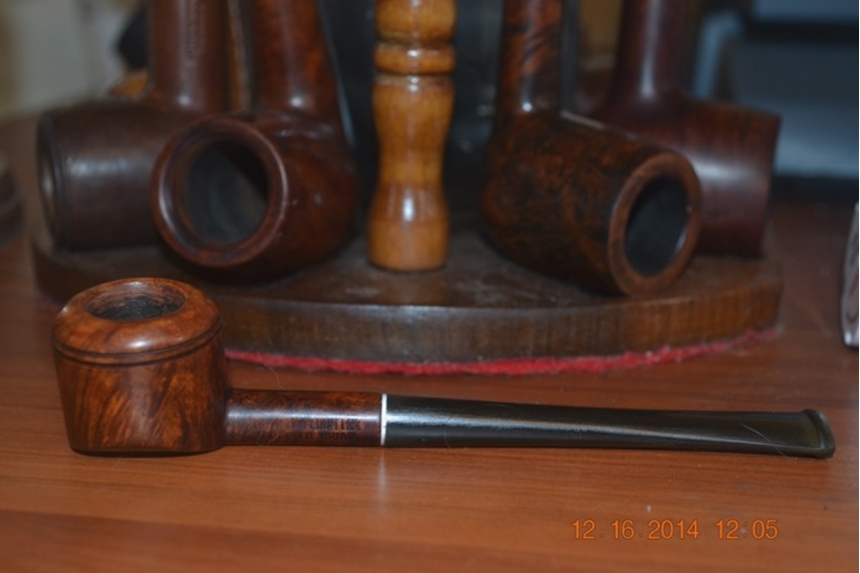
When this odd little pipe arrived in the mail a couple of months ago, as part of an estate lot, it stood out, to be sure. Amongst a beautiful Kaywoodie Standard mixed Sandblast/Smooth Grain Billiard, an elegant LHS Park Lane DeLuxe Dublin, a vintage WDC Full Bent Billiard with 14K ring, an Ehrlich Rusticated Billiard and two others – yes, it stood out. I will leave it to the reader to determine the nature of the deviation.

Still, it did force me to reconsider the true form and figure of a Rhodesian, and to imagine the turmoil I could incite if I threw this pipe as an example into the ongoing brouhaha that is the Bulldog versus Rhodesian debate. I do have a touch of Old Nick in me that way (and I don’t mean St. Nick).

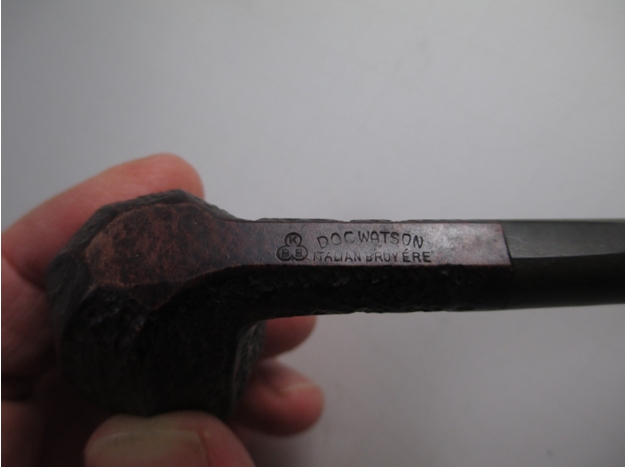
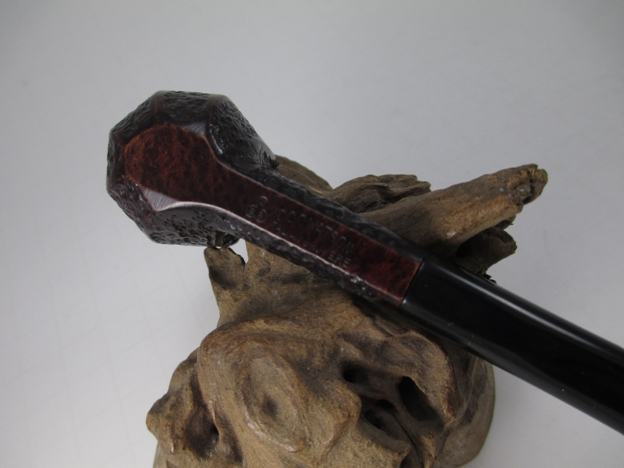
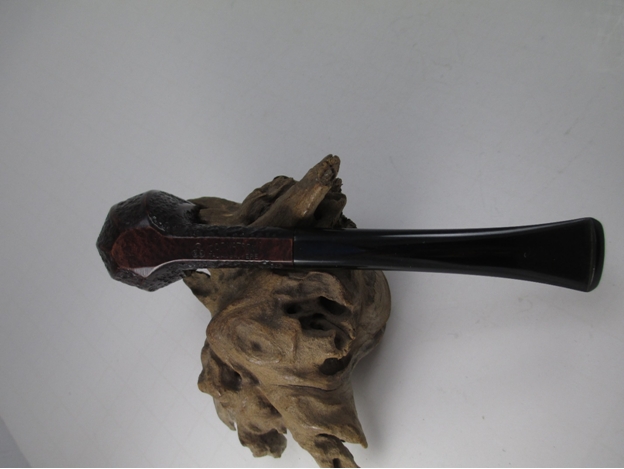
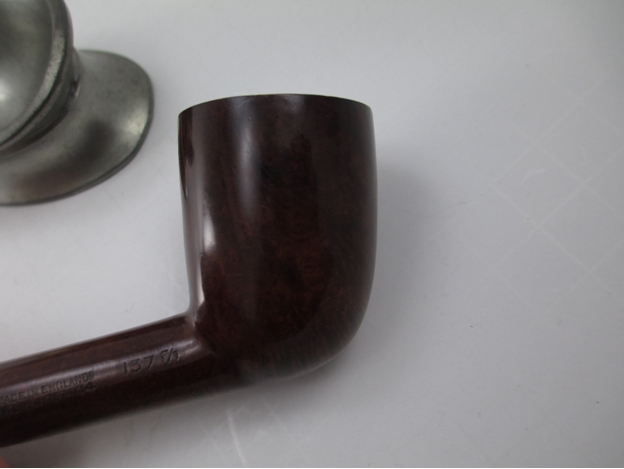
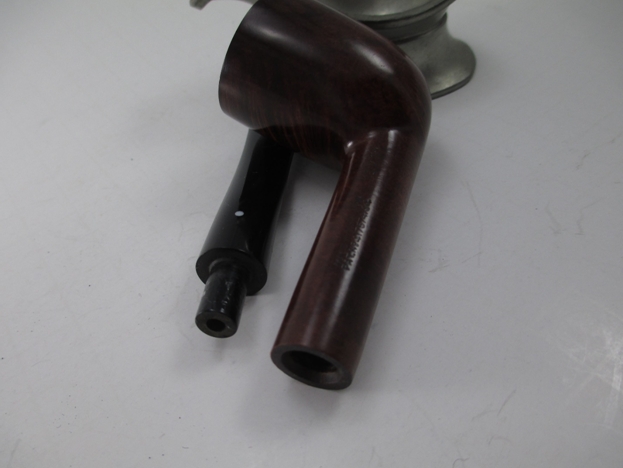
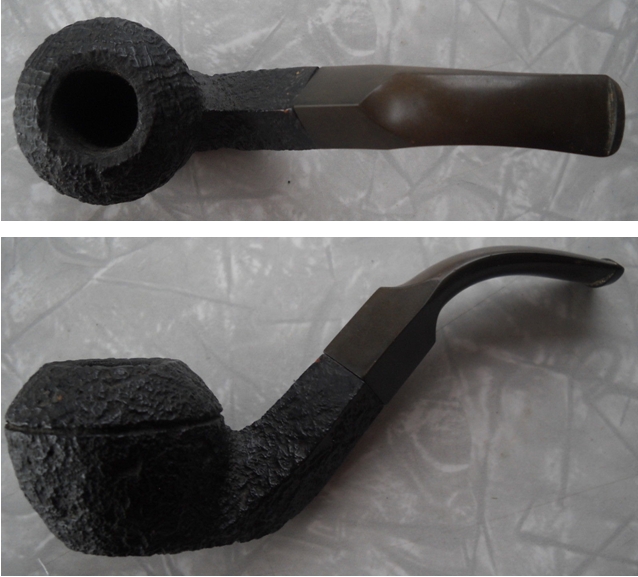
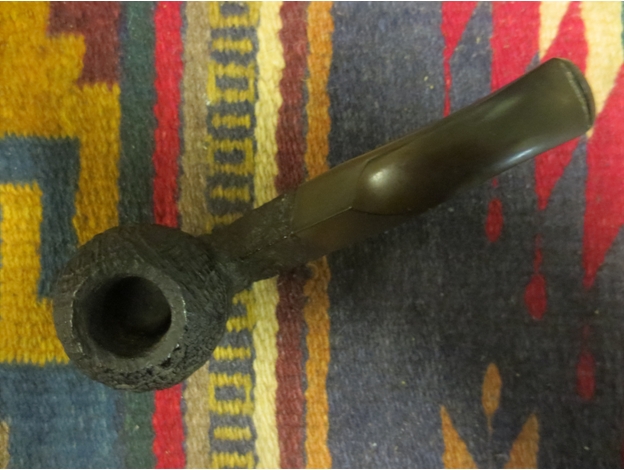
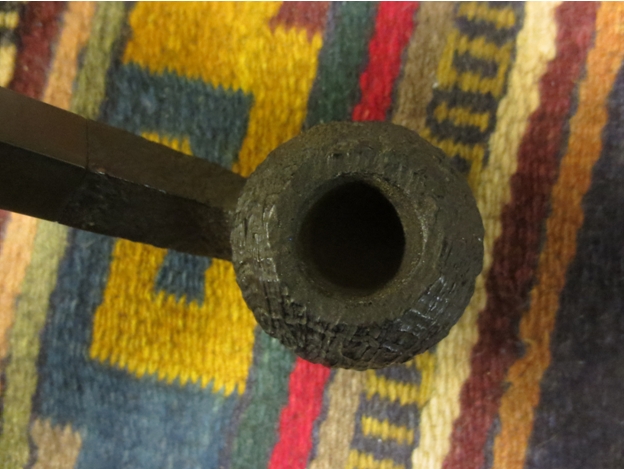
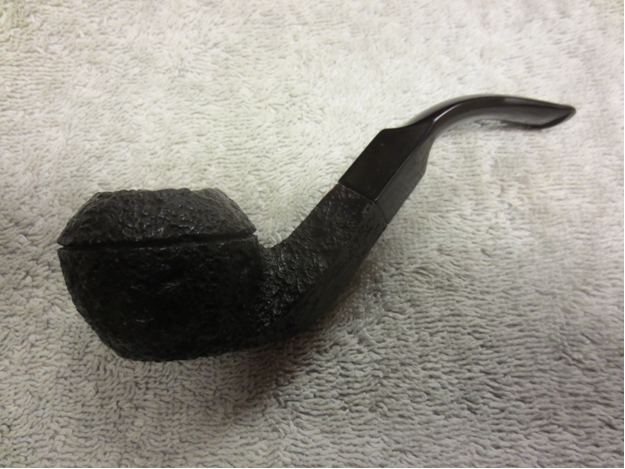
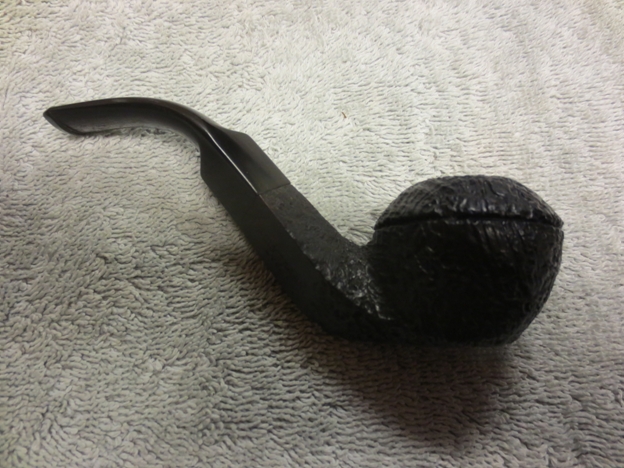
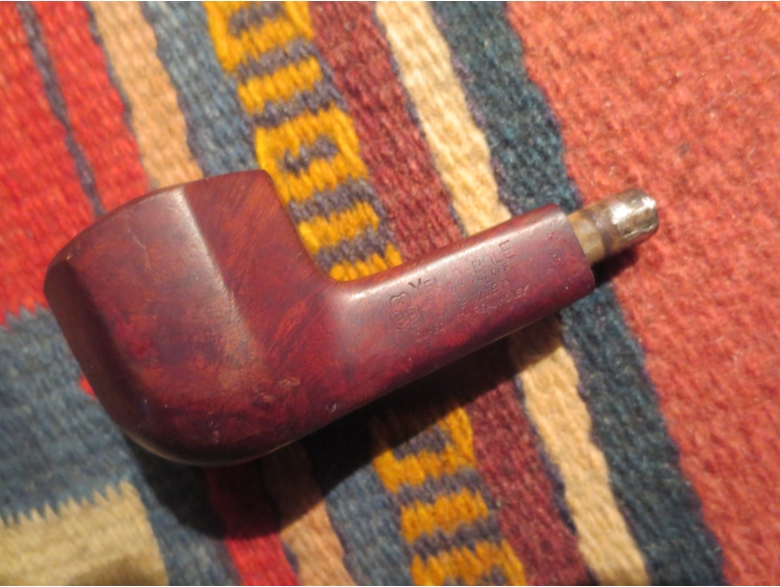
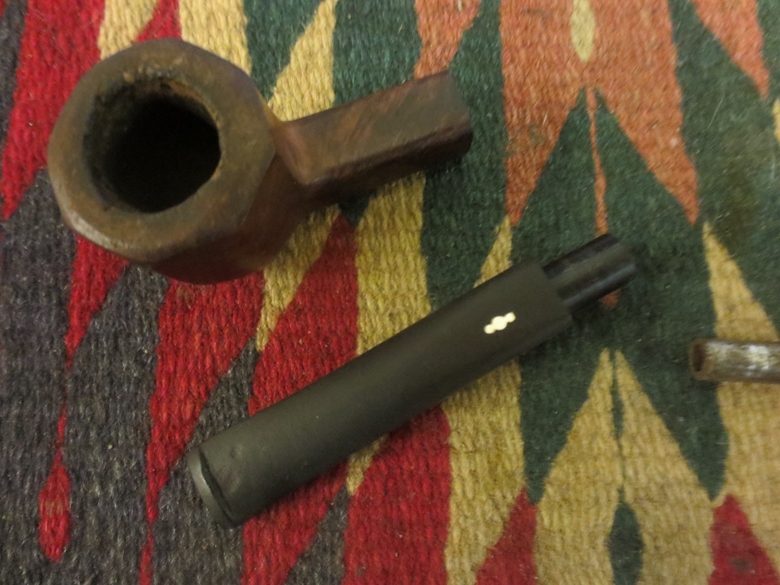
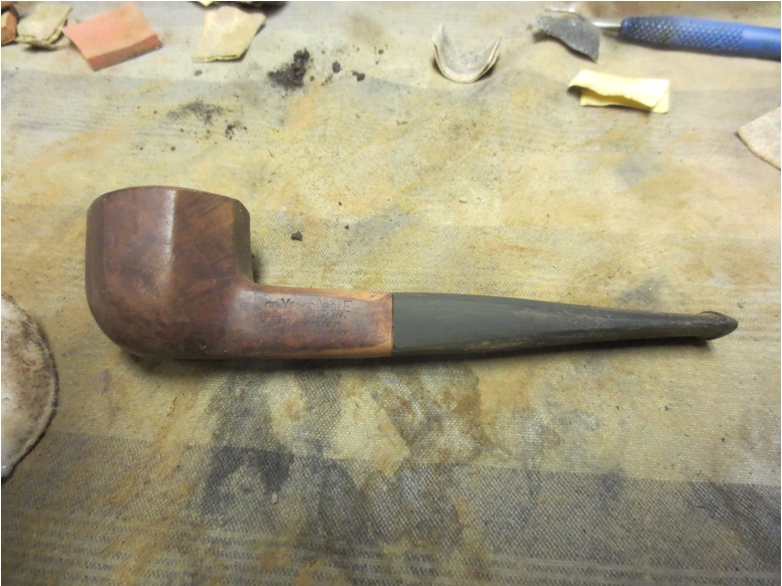
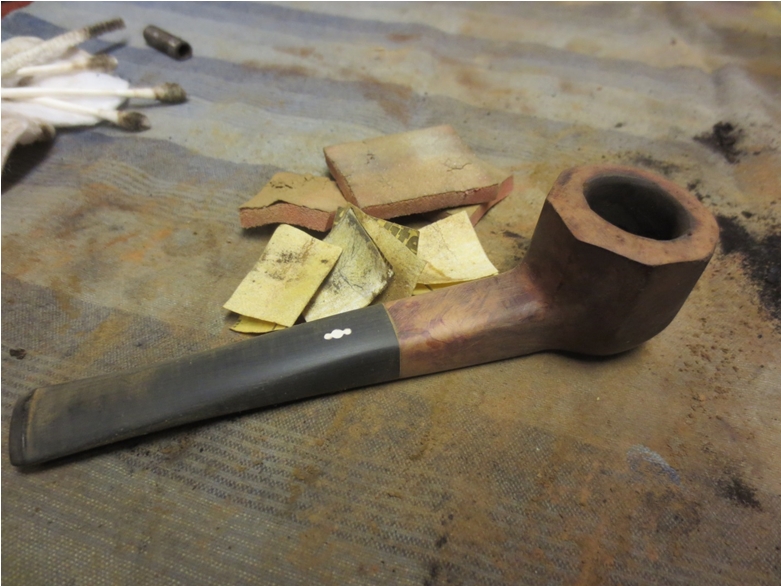
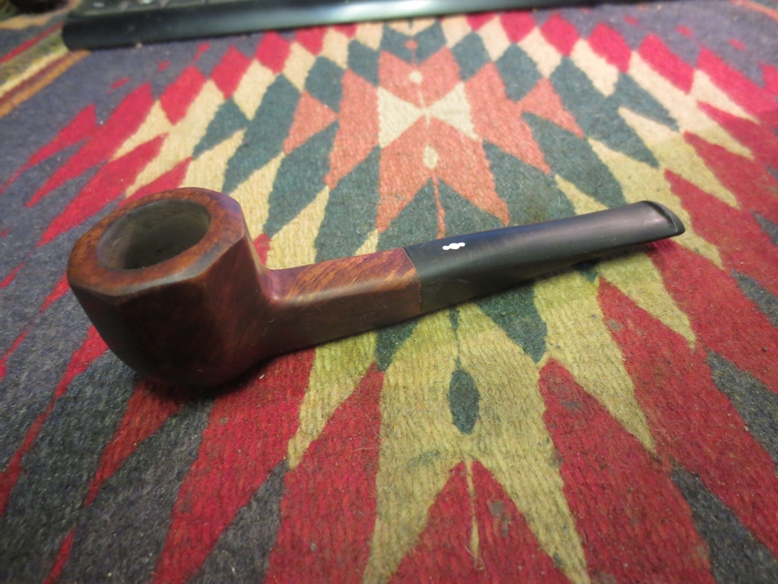
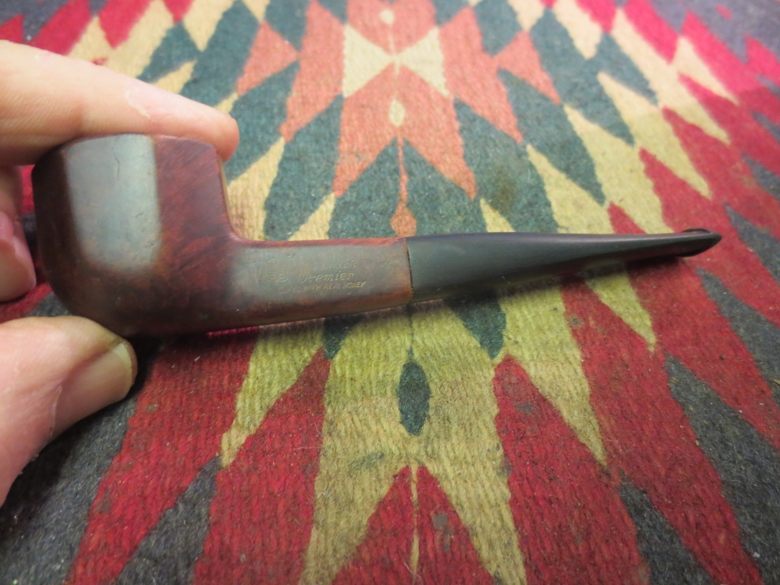
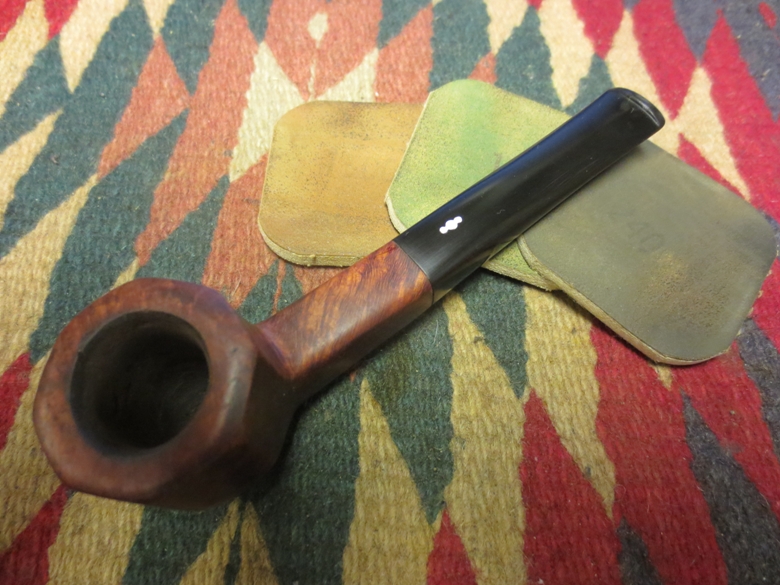
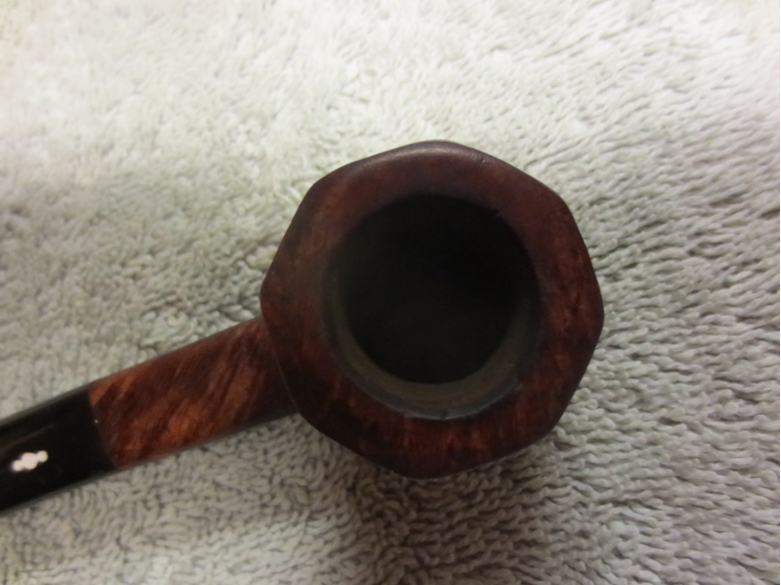
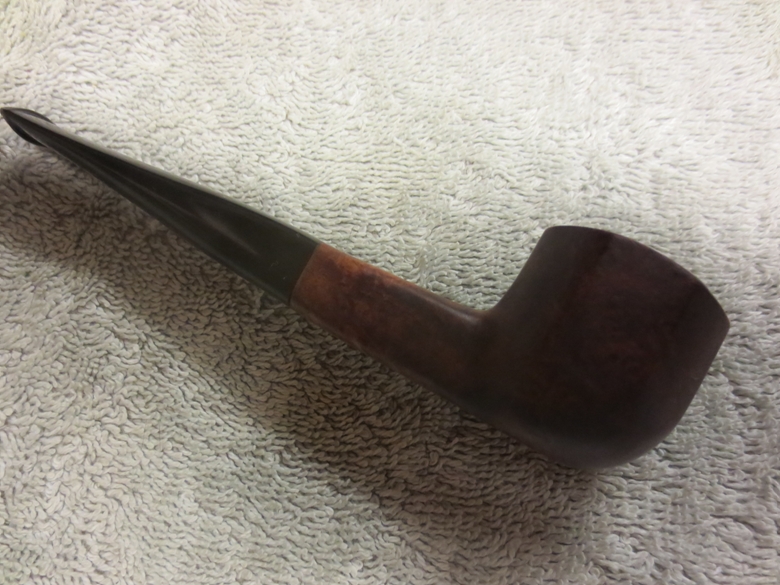
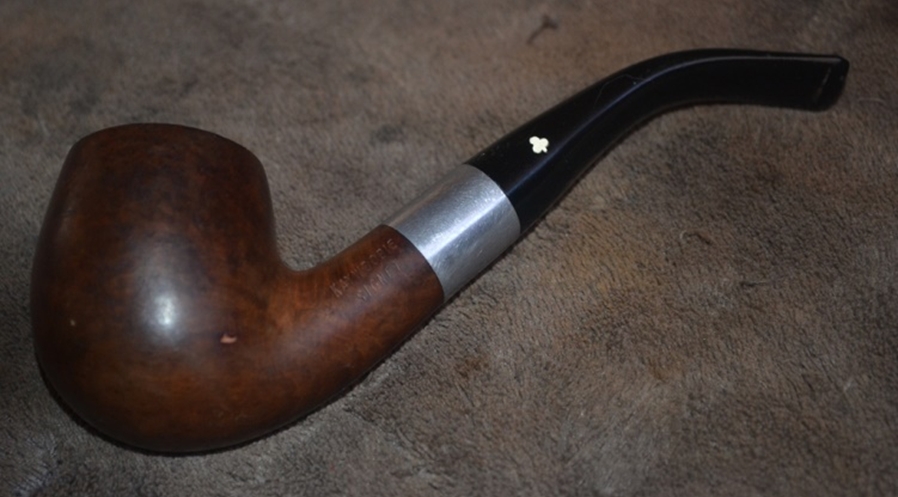
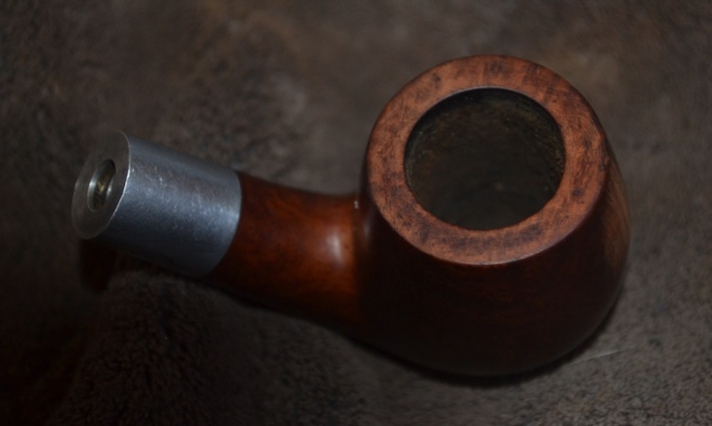
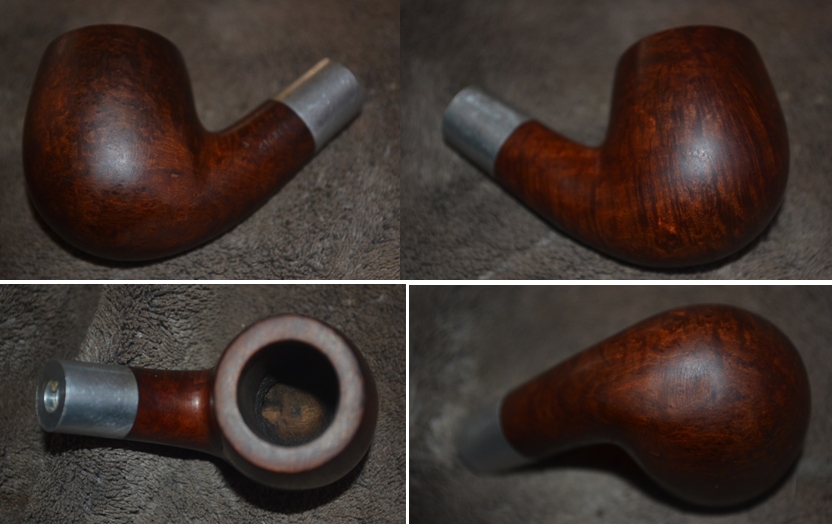
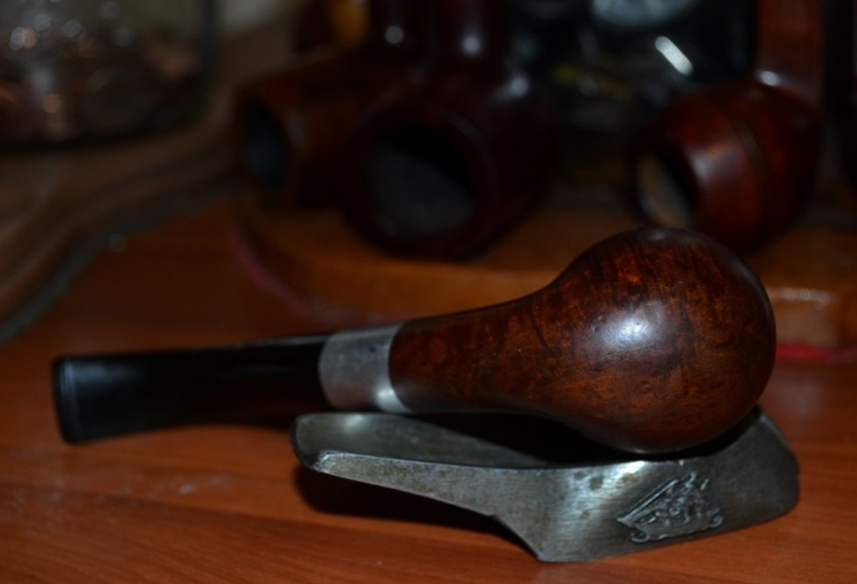
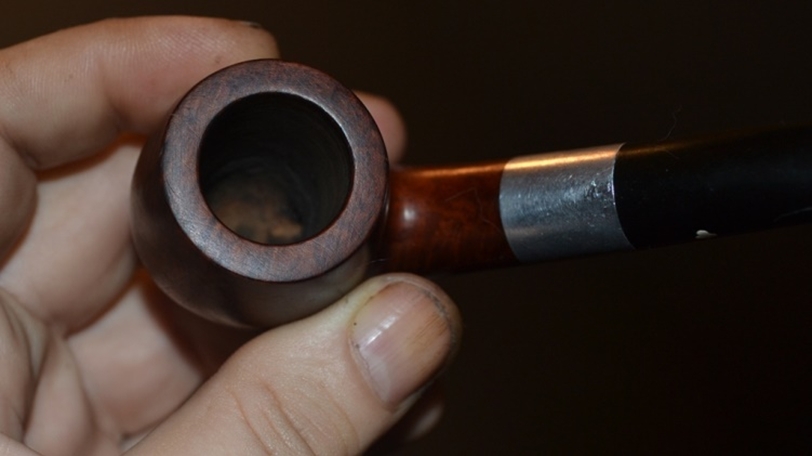
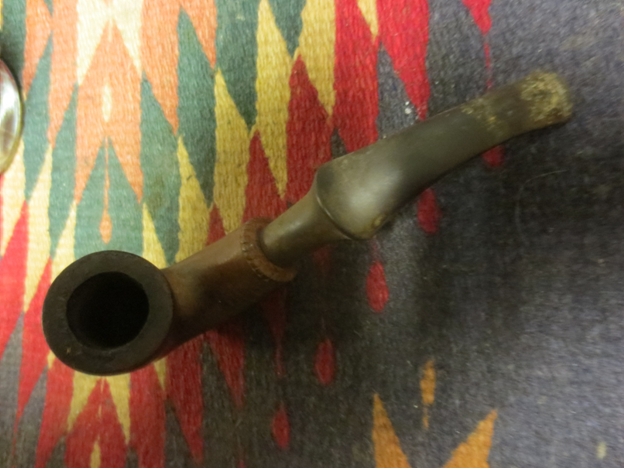
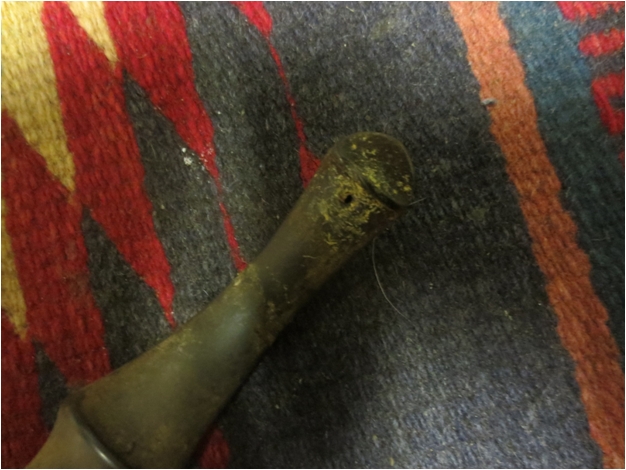
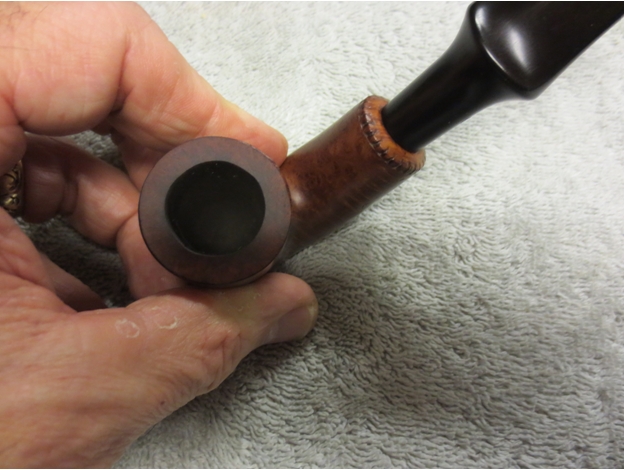
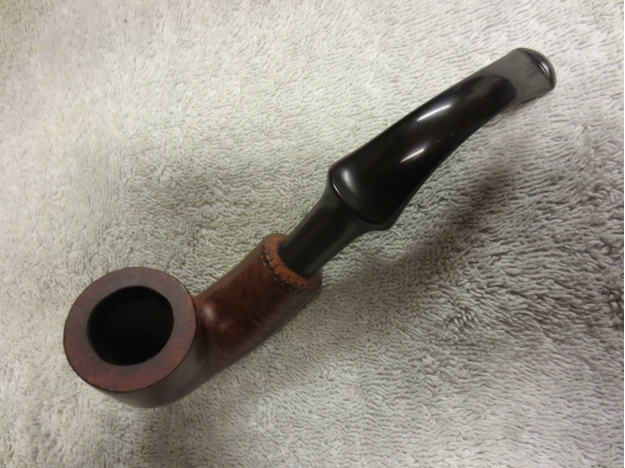
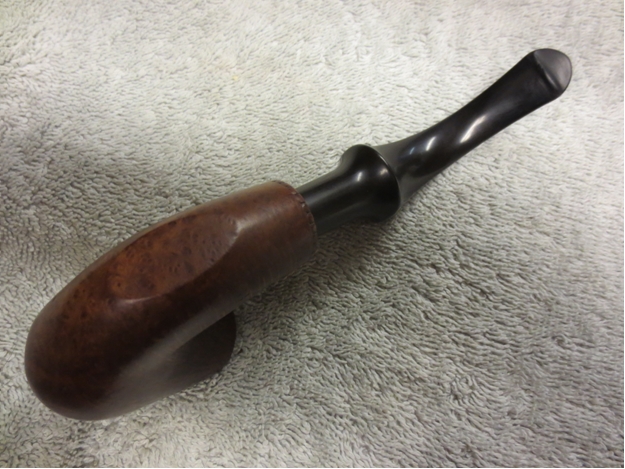
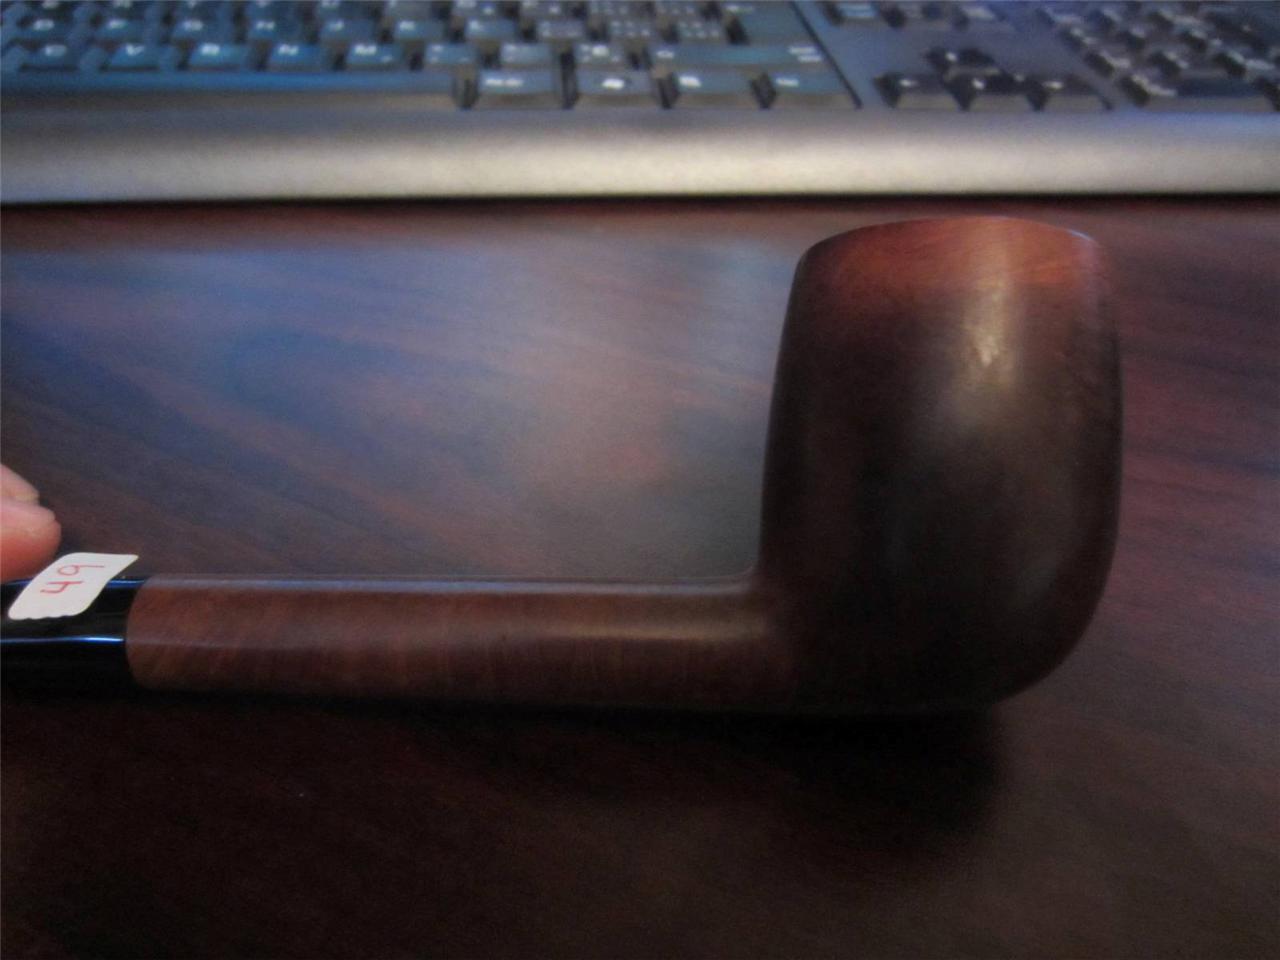
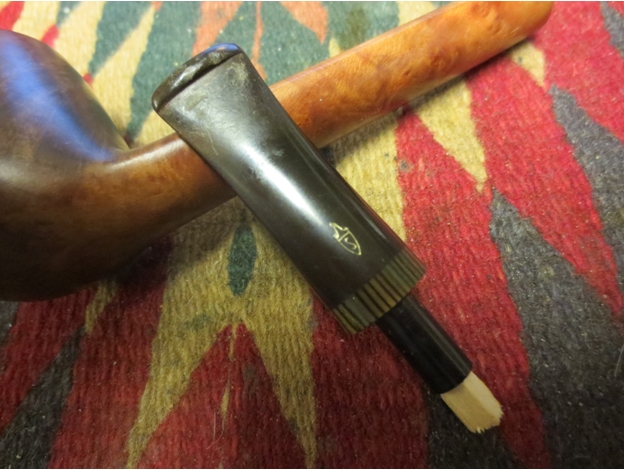
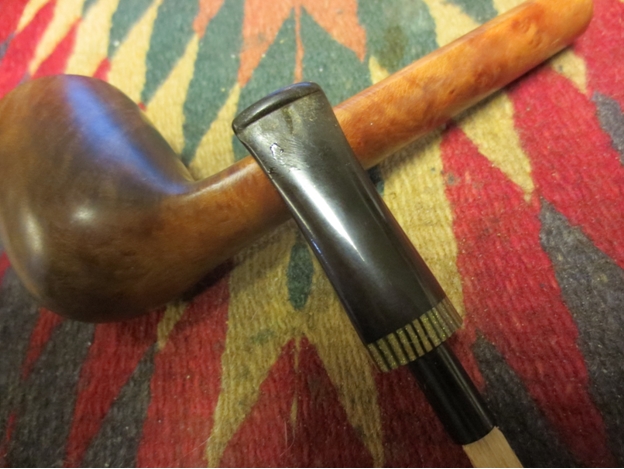
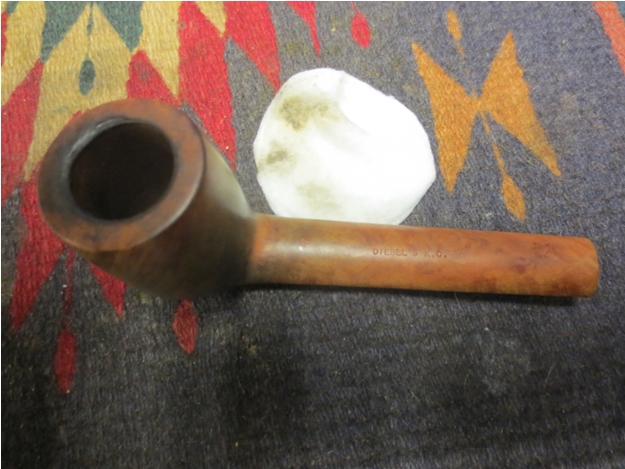
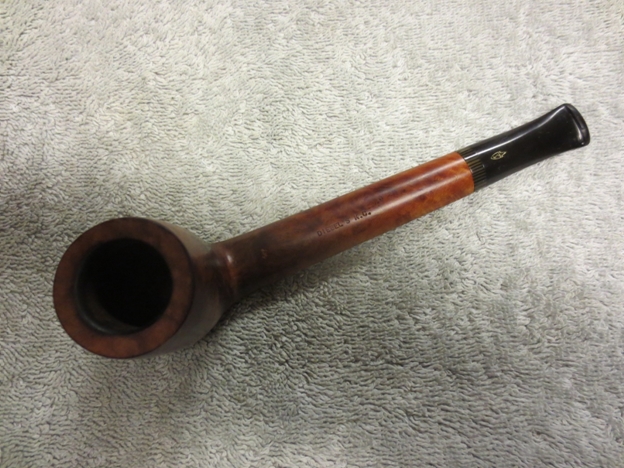
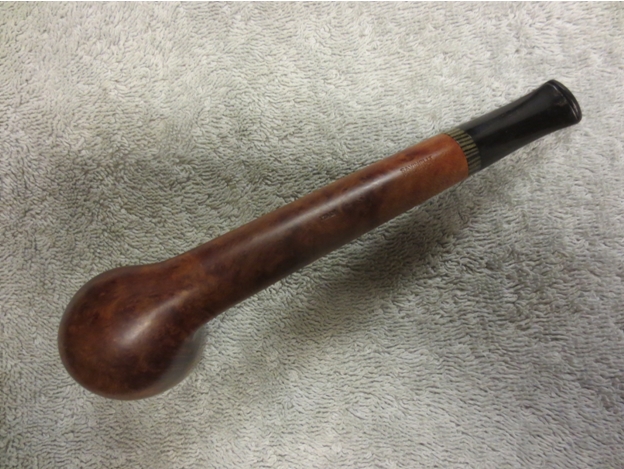
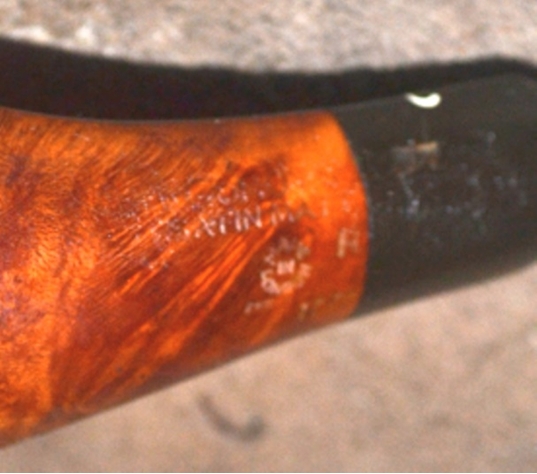
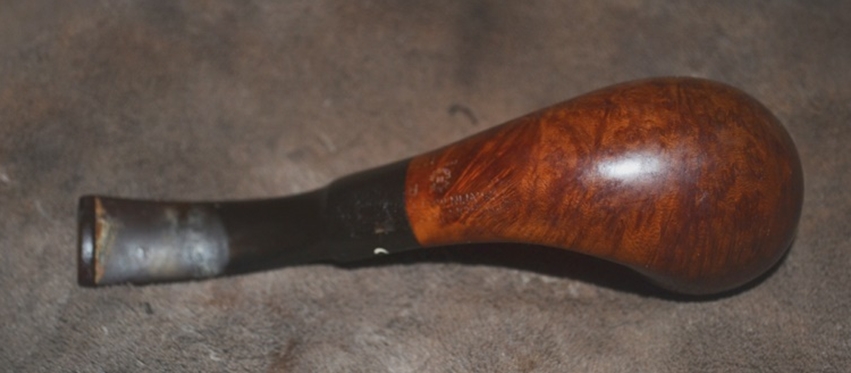
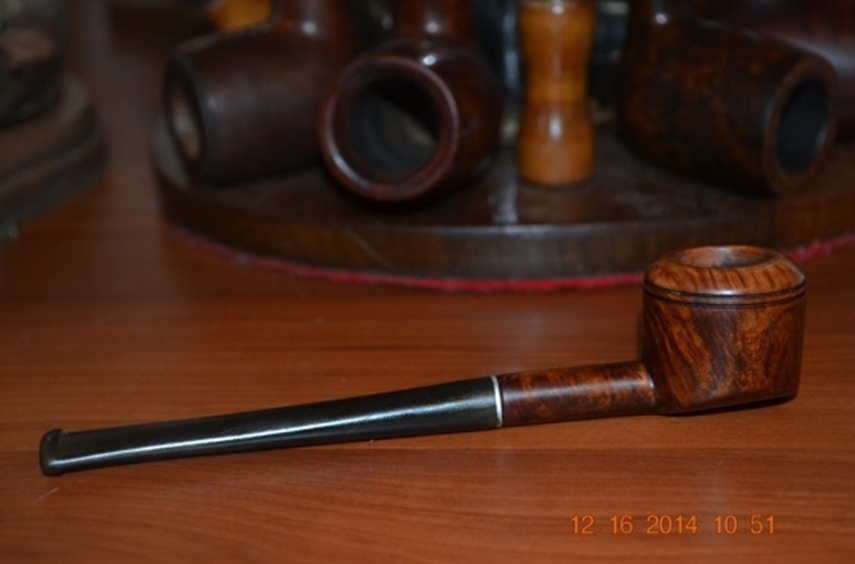
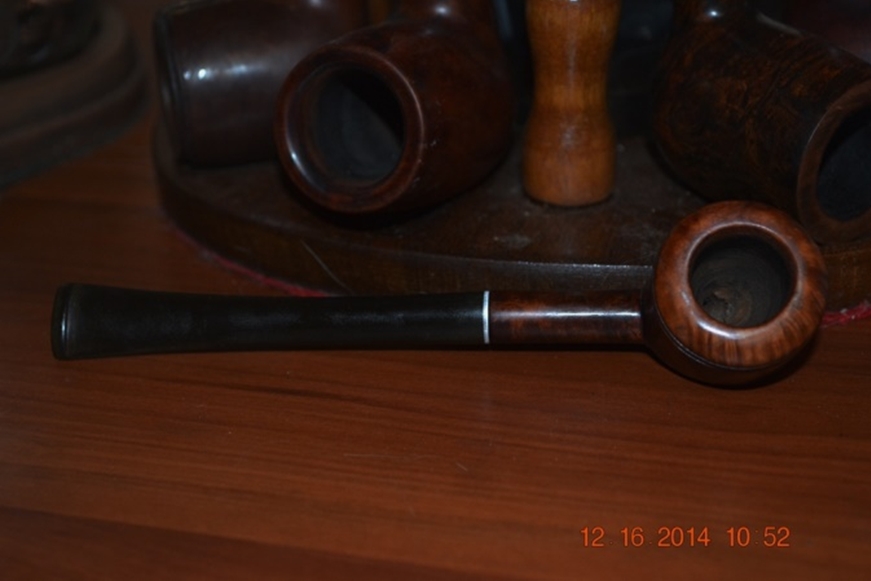
Yet how else can I describe this weird pipe, at its basest, but as a Rhodesian, despite the squatness of its stature and the roundness of the bottom of the bowl? The fact is that this Town and Country (made by the Bradberry Briar Pipe Corp. of New York) has a rounded bowl with two slits carved into its upper end below the rim and a round shank.Rob1

Rob2

Rob3

Rob4 RESTORATION
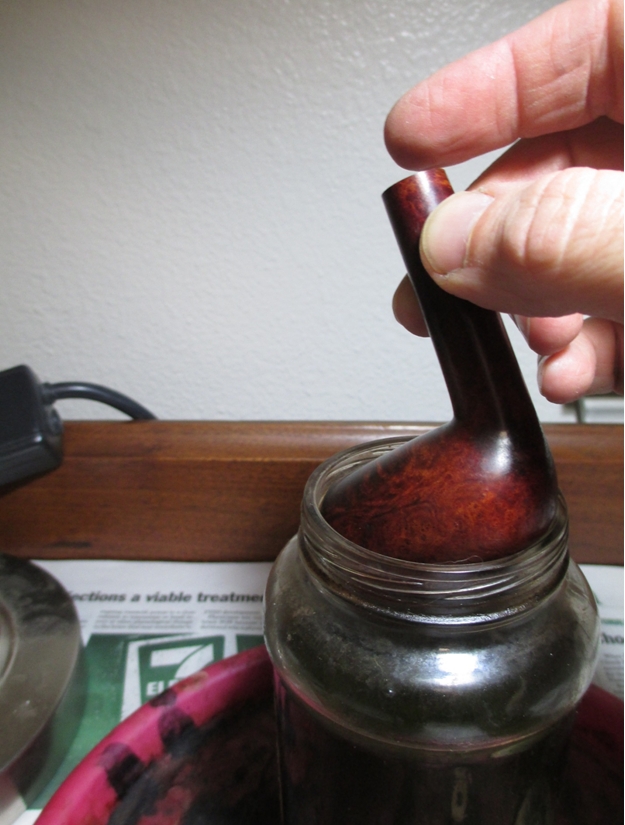
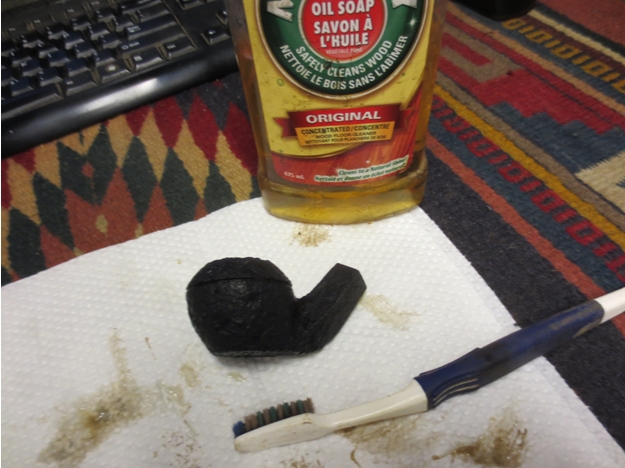
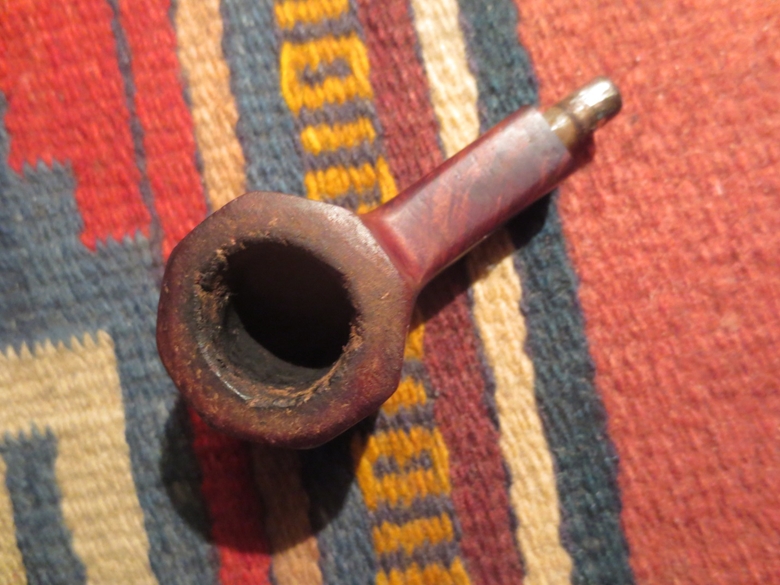
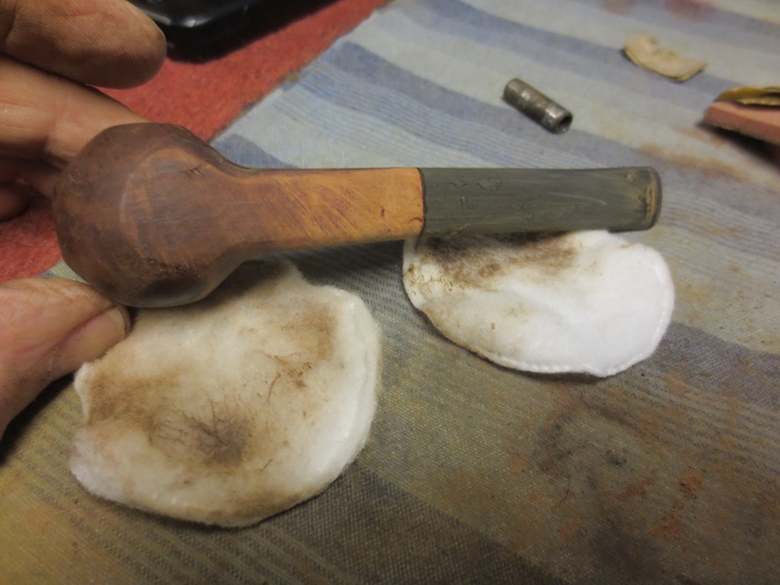
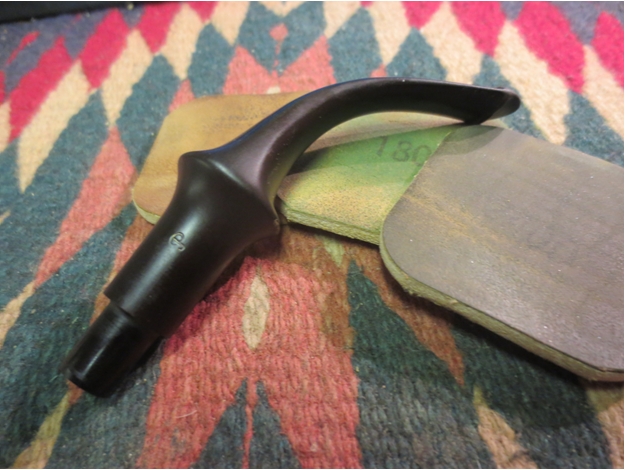
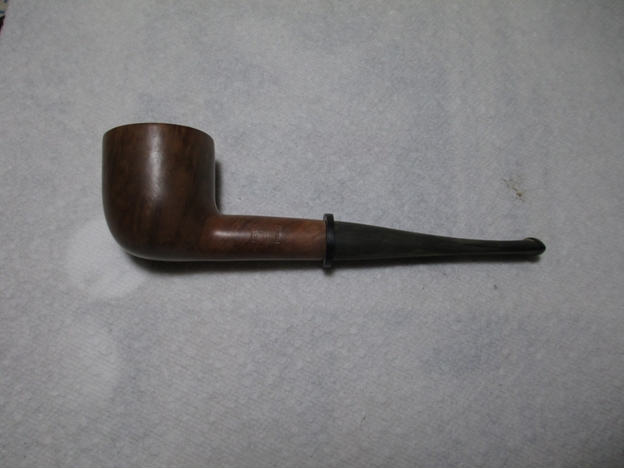
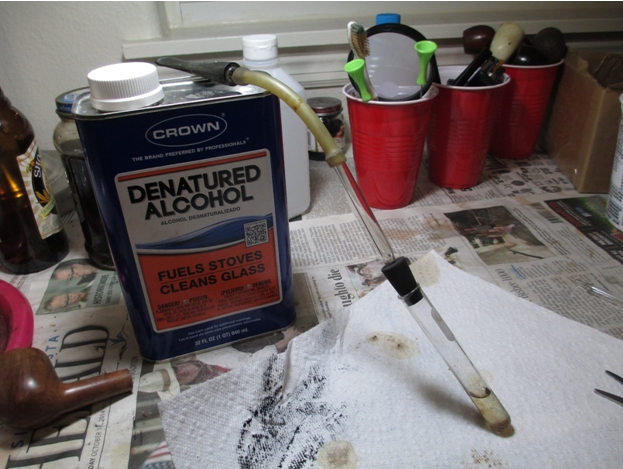
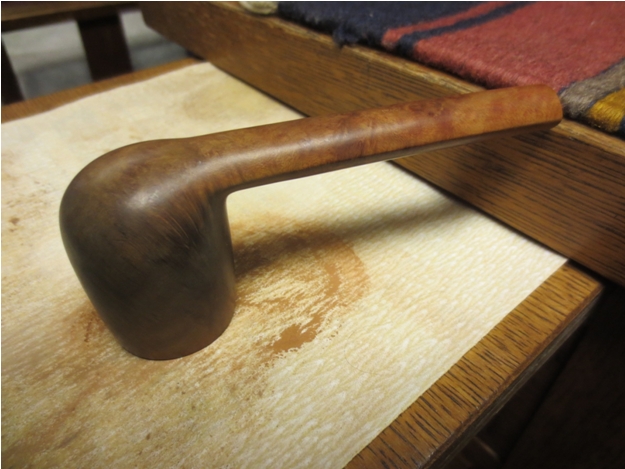
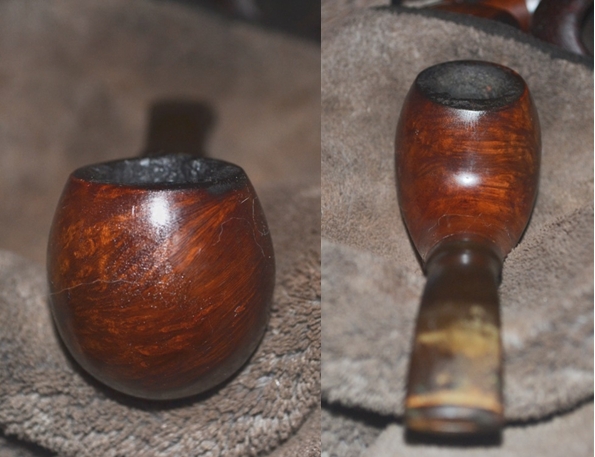
Part of me did not want to mess with the original stain, but some impulse screamed at me, “Drown this thing in Everclear and see what lies beneath!” And so, that I did. As it turned out, the voice was right. All kinds of scratches and other flaws became apparent where they were obscured before.Rob5

Rob6 
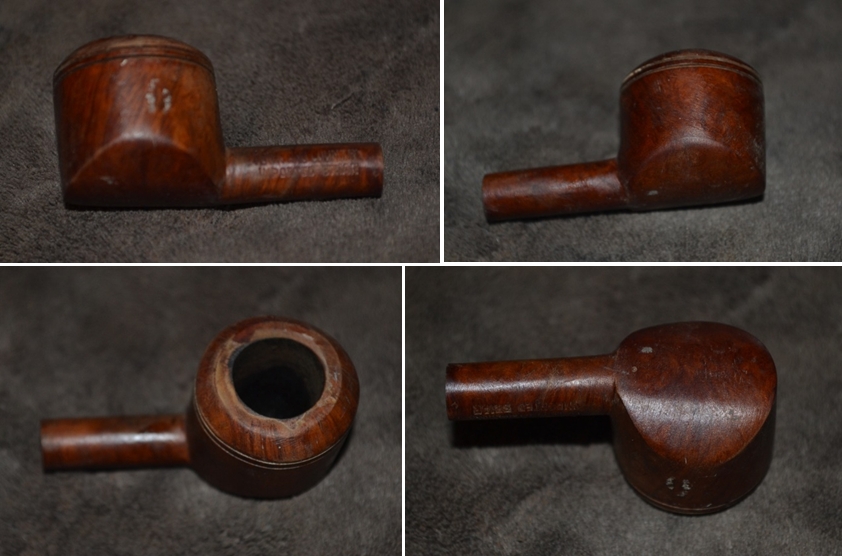
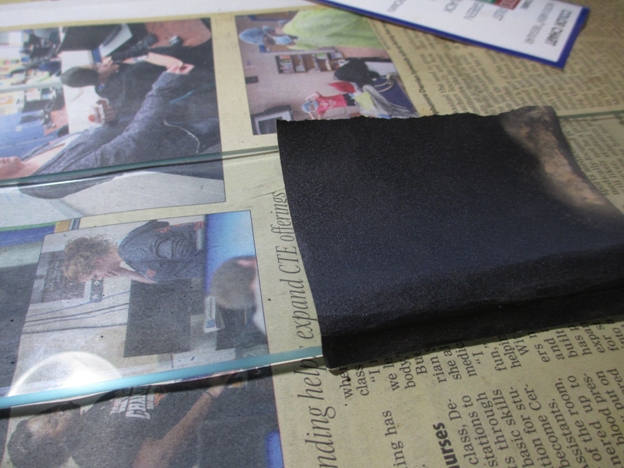
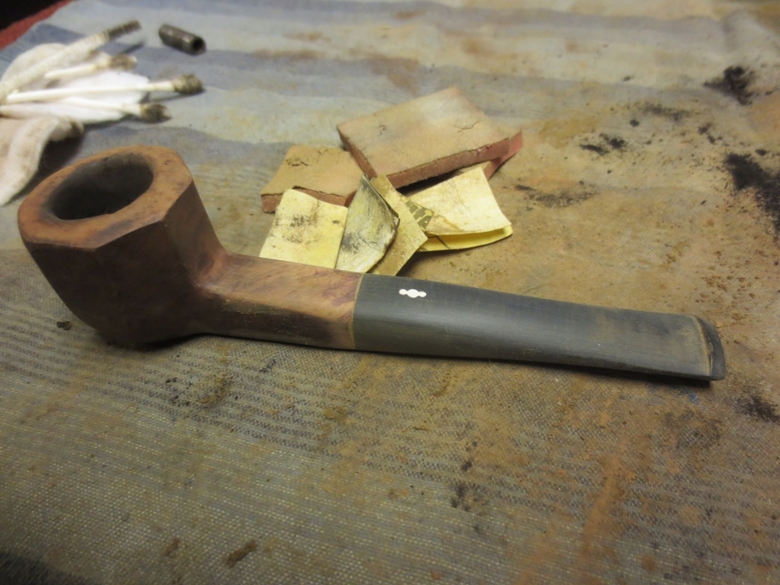
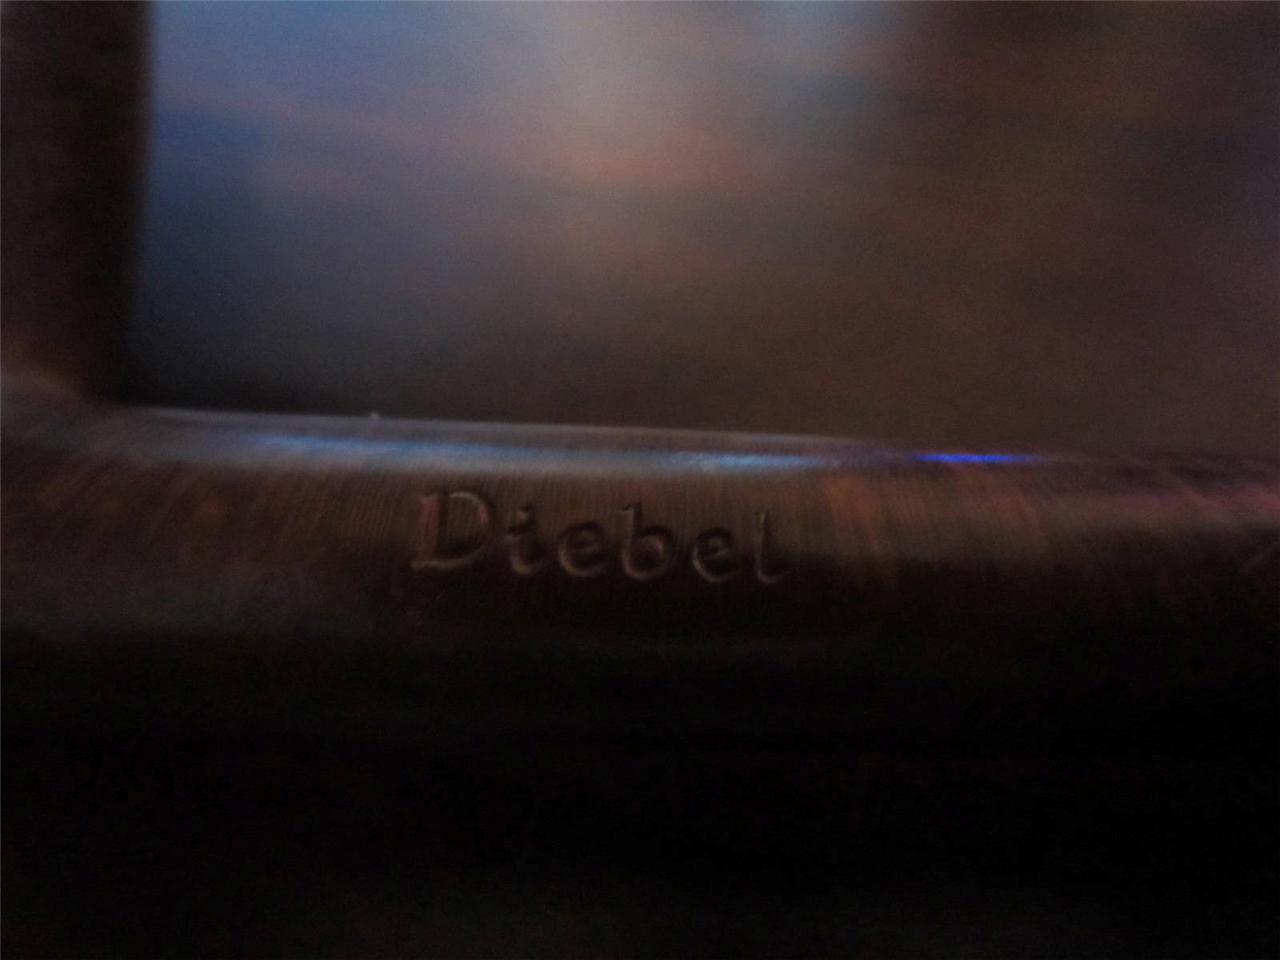
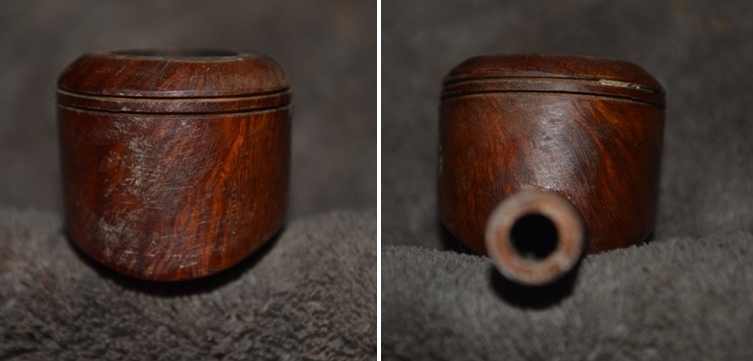
Beginning the process of removing the various blemishes with a thorough sanding (except for the nomenclature)using 220-grit paper, I was careful to make smooth, even runs in the directions of the grain. After some time at this task, rubbing the fine briar dust away with a rag as I progressed, I was at last satisfied with the results.

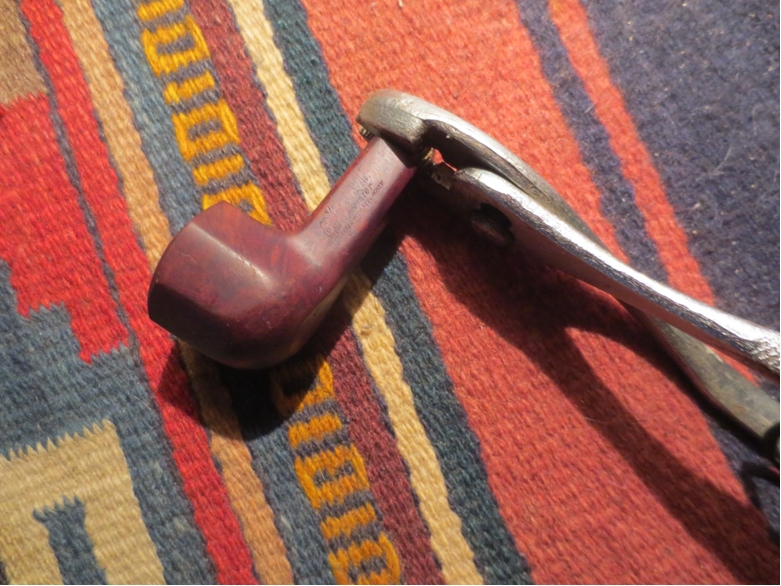
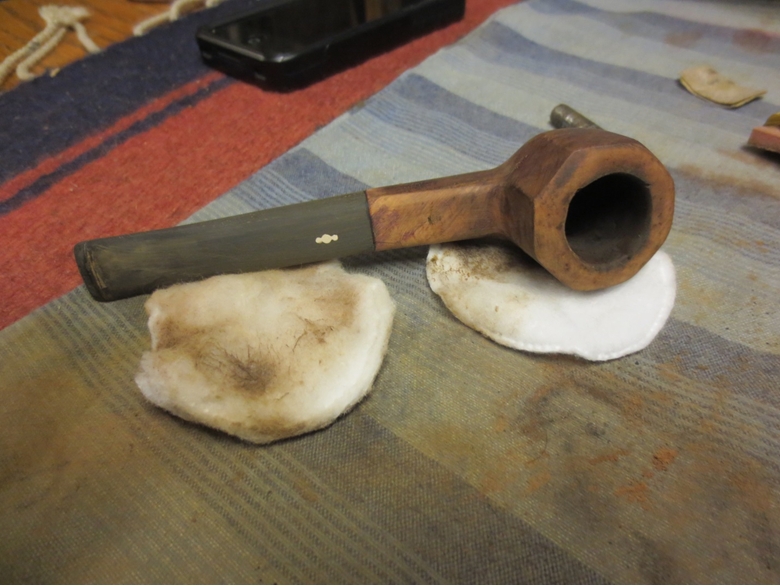
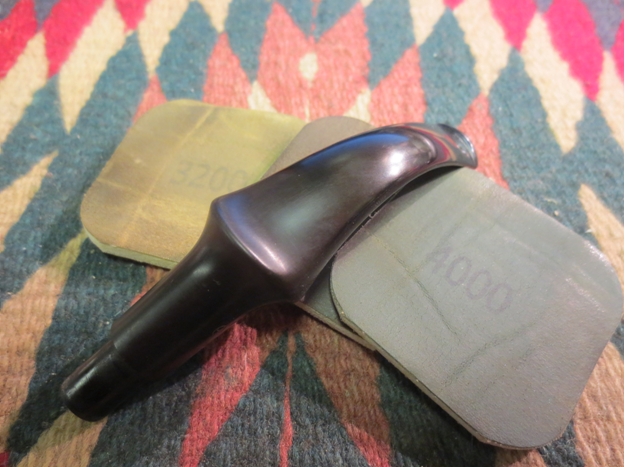
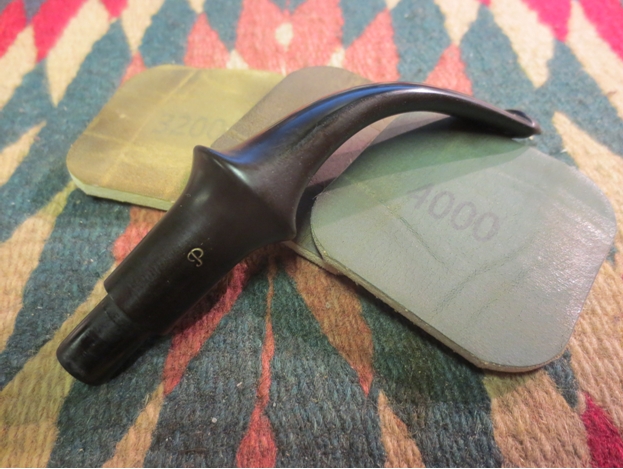
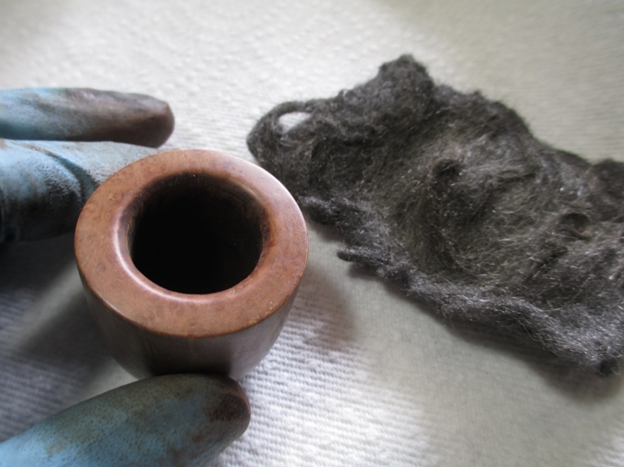
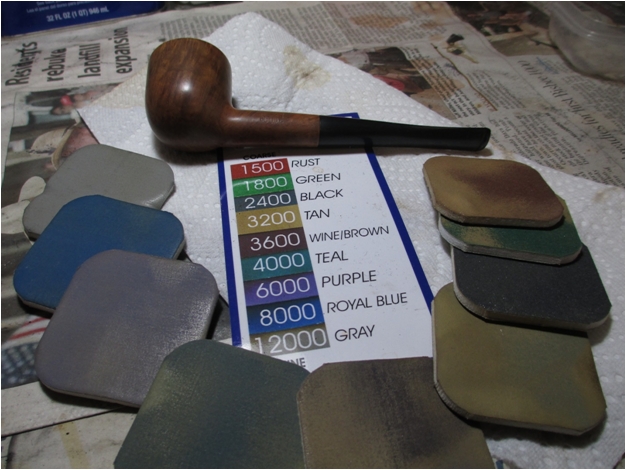
To prep the wood for staining, I brushed the surface with super fine steel wool, which returned the natural color of the briar and created a light sheen. Then I commenced a thorough de-wrinkling treatment with micromesh pads, starting with 1500, then 1800, 2400, 3200 and 4000. Again, I rubbed the wood clear of any residue between each micromesh pad.Rob7

Rob8 
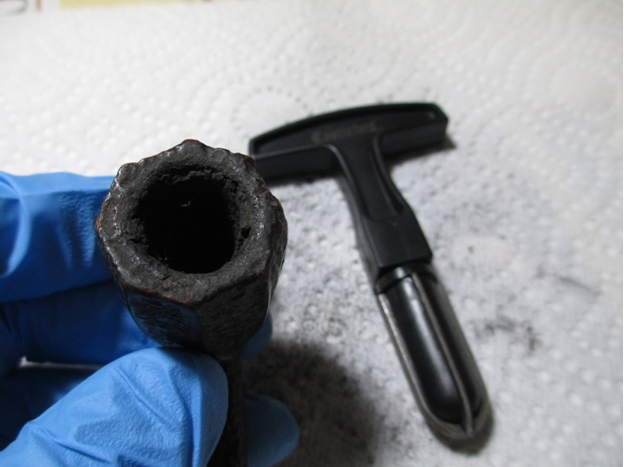
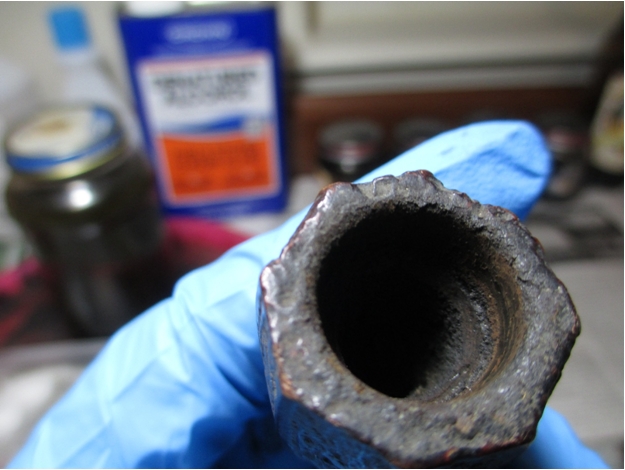
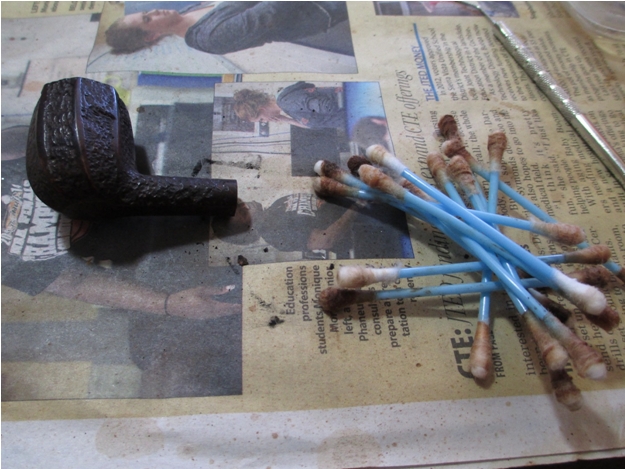
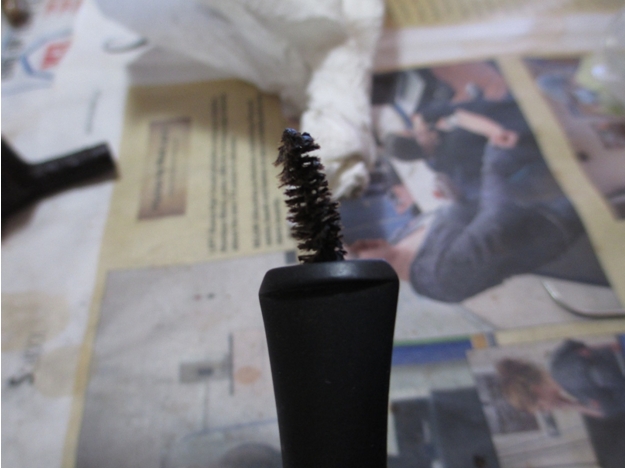
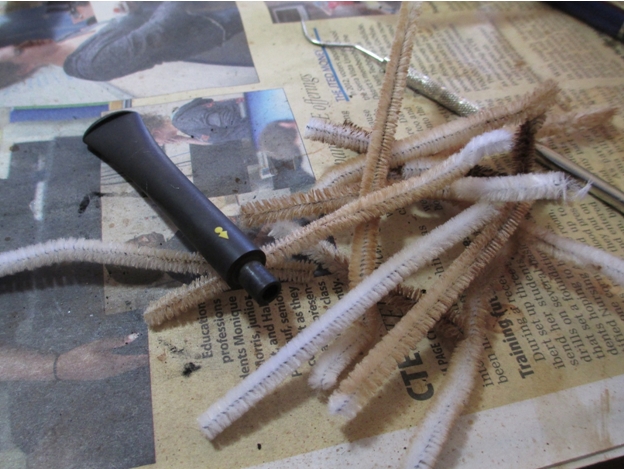
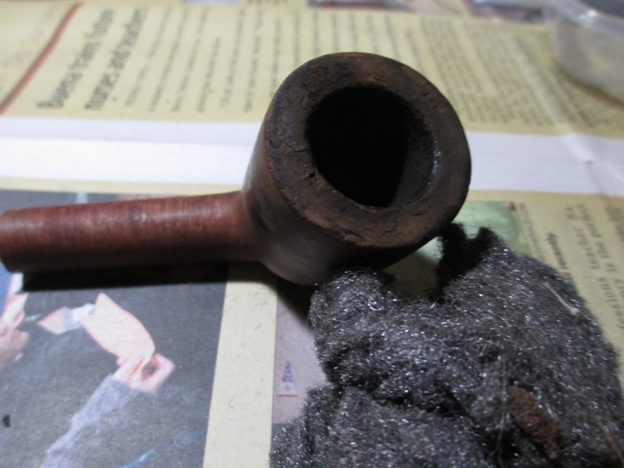
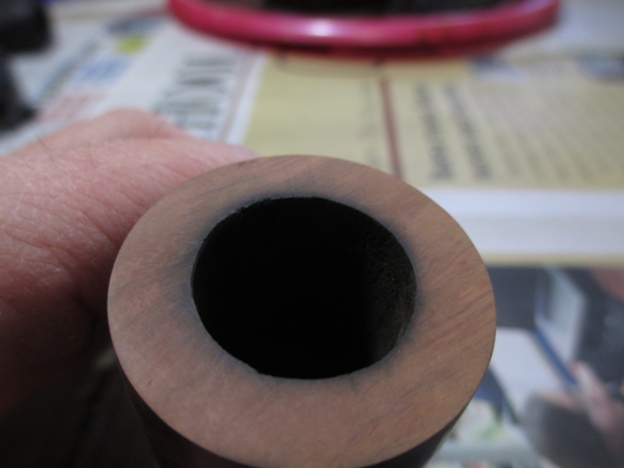
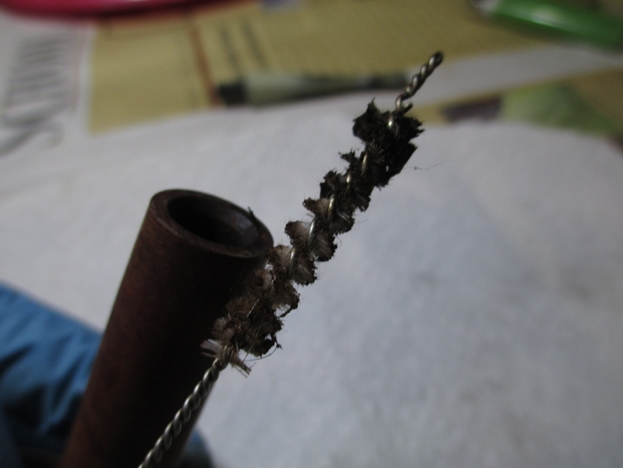
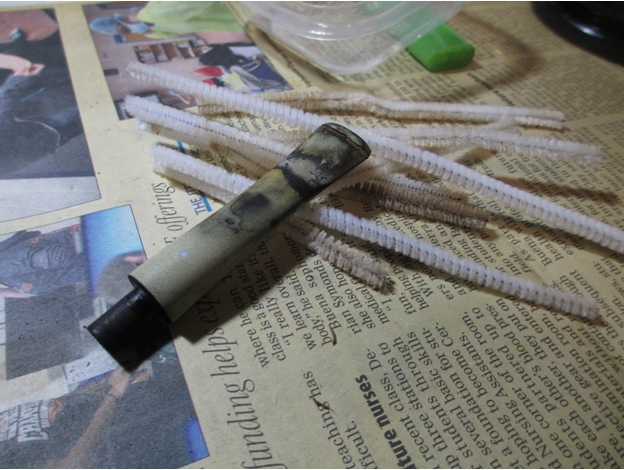
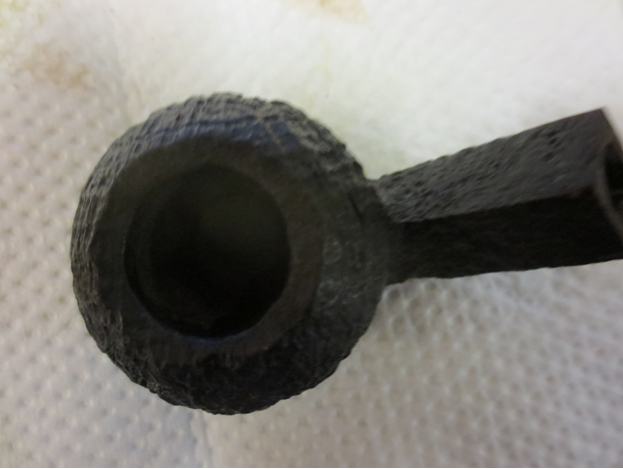
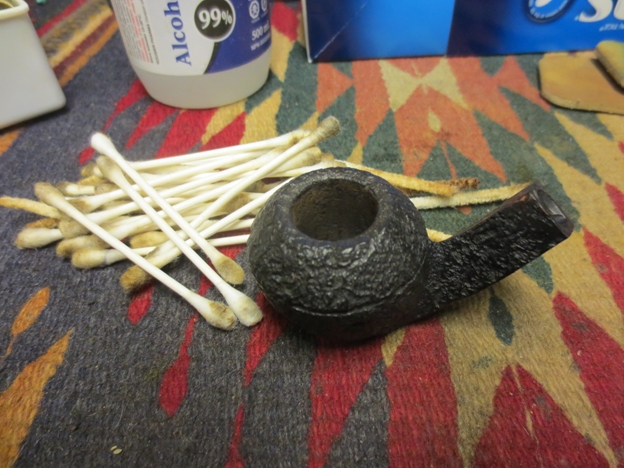
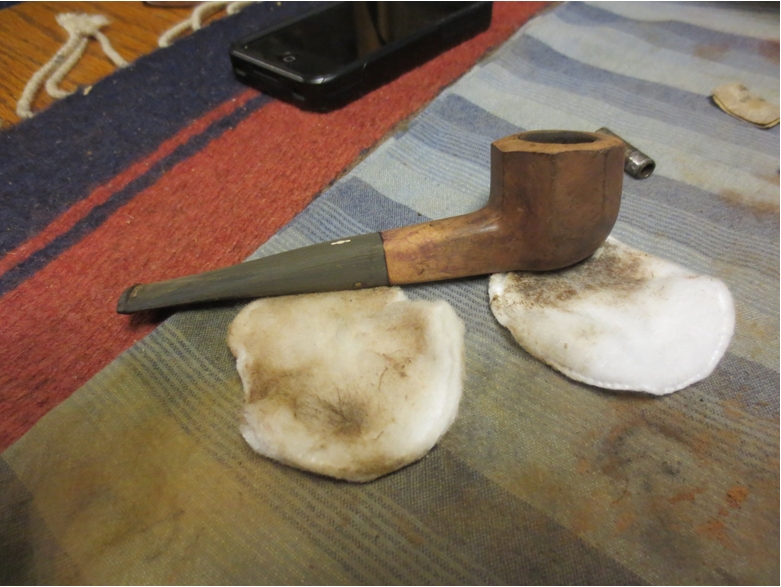
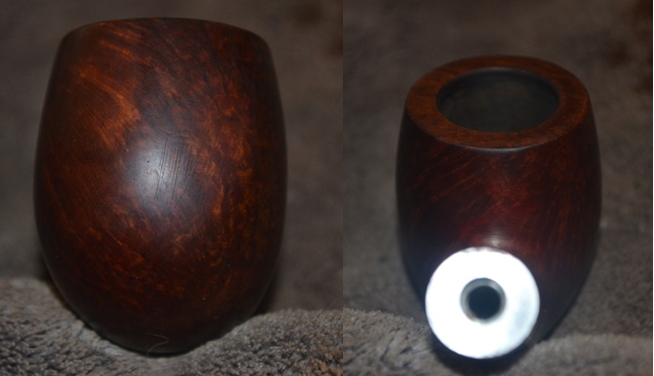
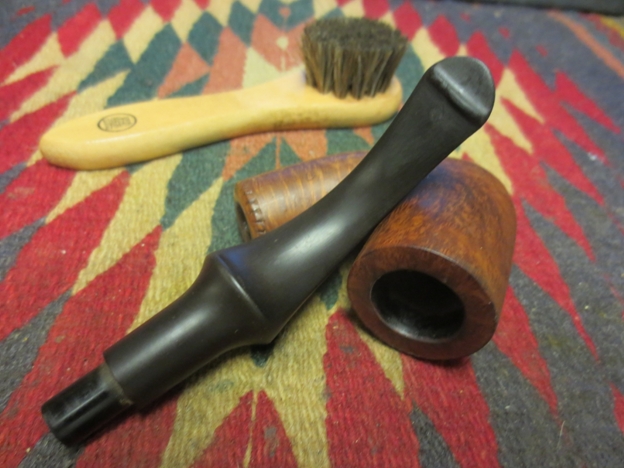
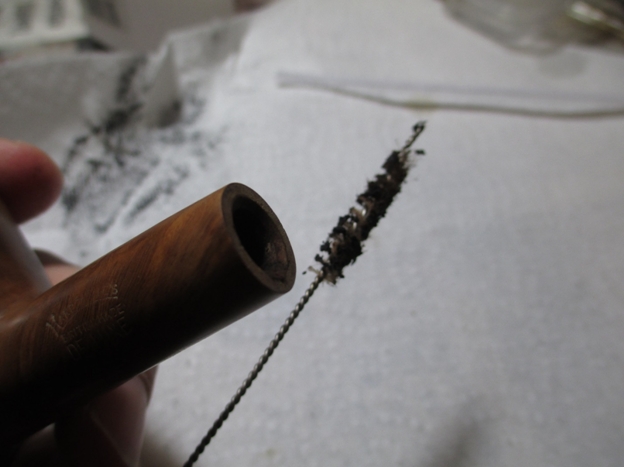
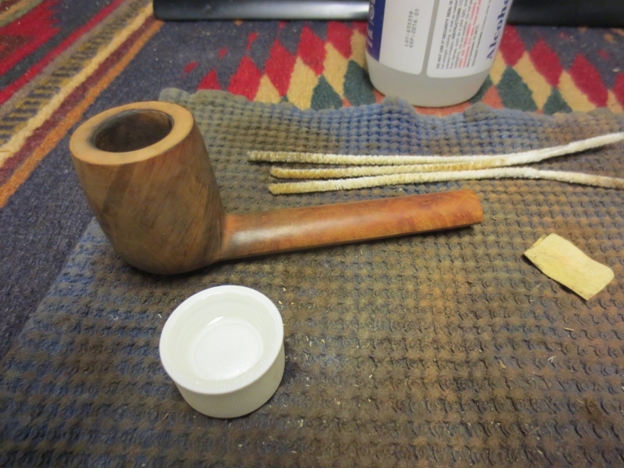
The obvious next step seemed to be a full cleaning of the pipe’s interior. Expecting to find the usual massive buildup of crud associated with the shanks of most estate pipes, I was in fact shocked to see the wire-handled, heavy-duty bristly cleaner, dipped in Everclear, emerge from the exercise almost un-befouled the first time and spotless the second.

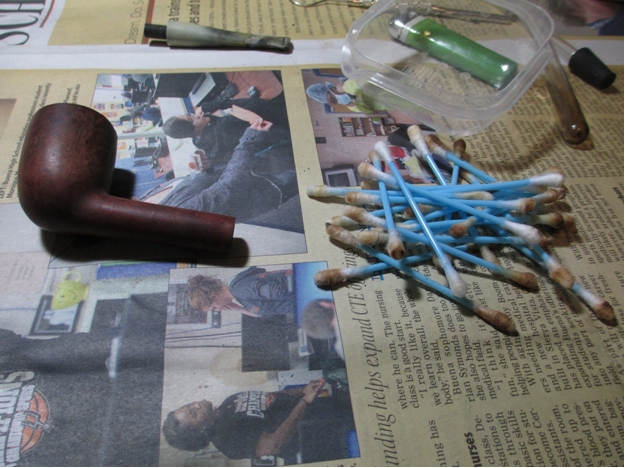
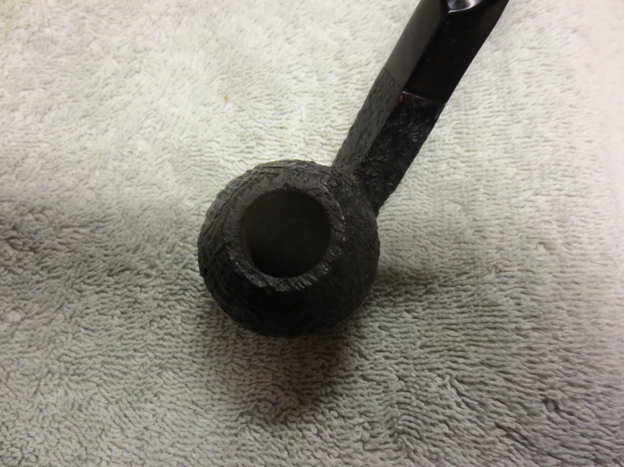
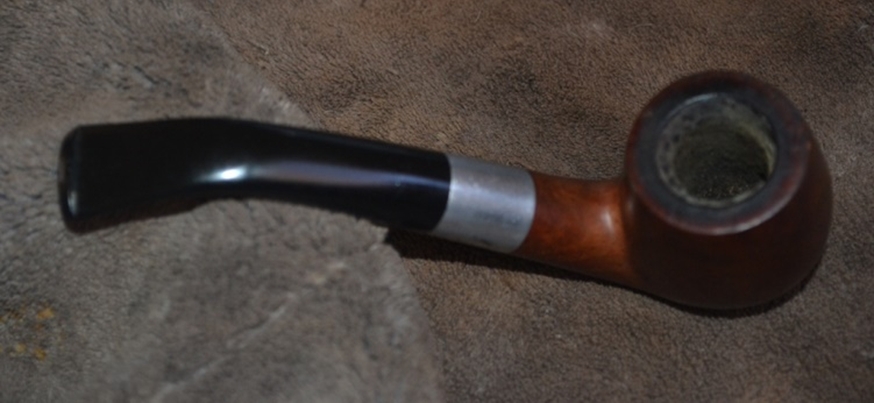
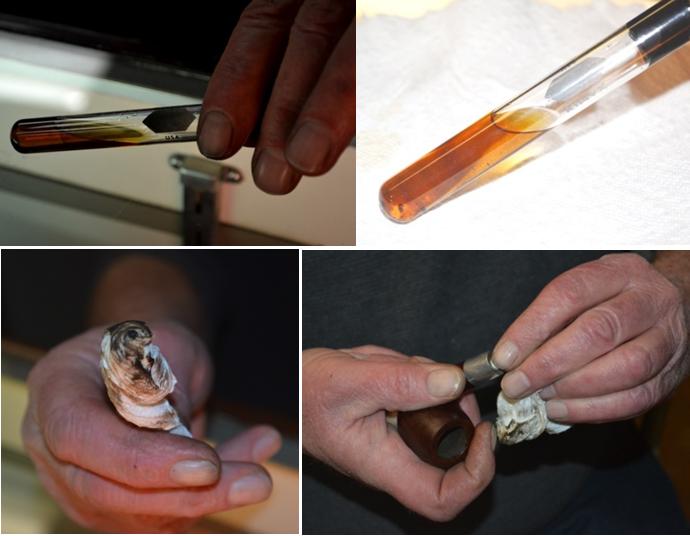
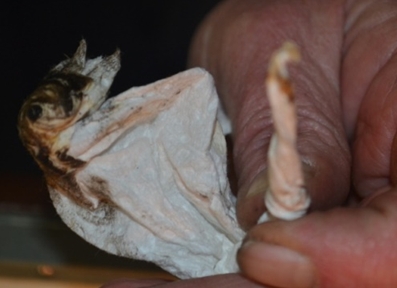
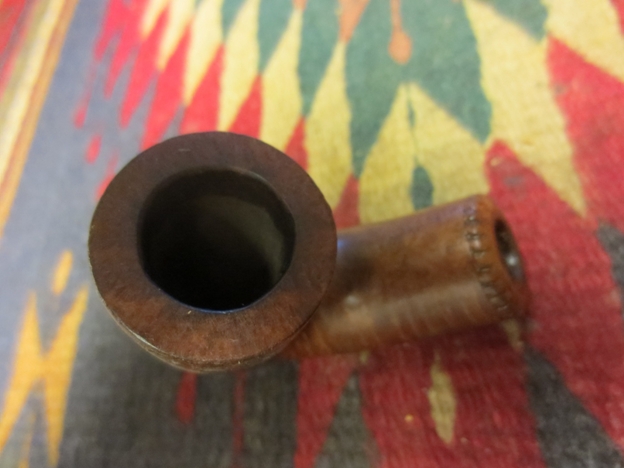
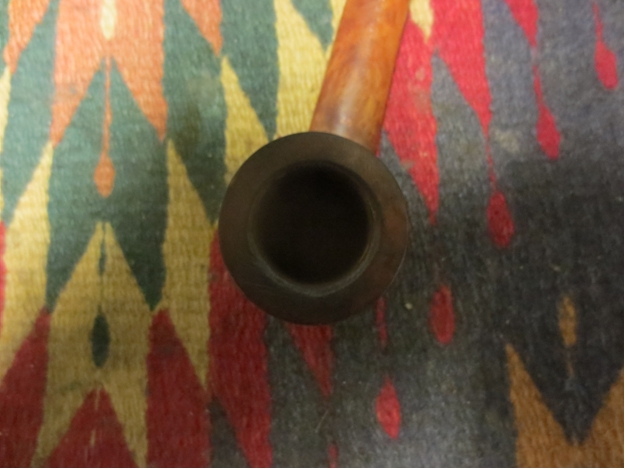
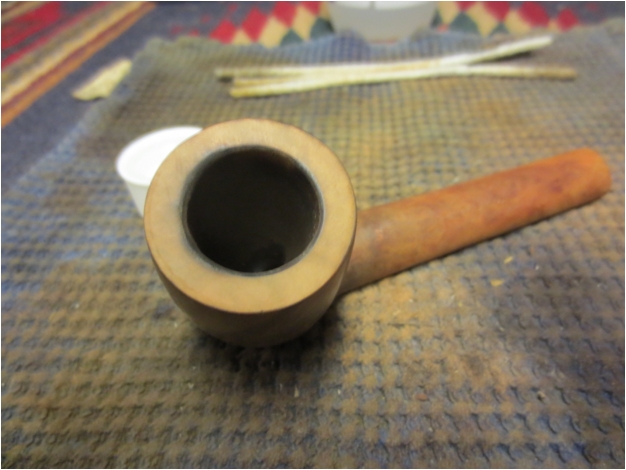
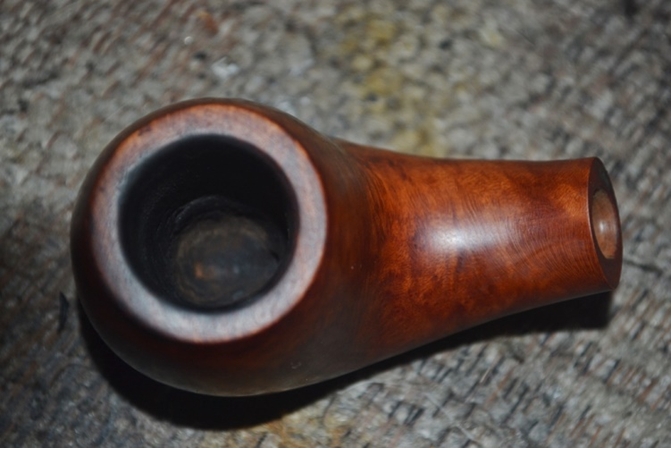
Still wary, I sanded the pinky-sized circumference of the chamber with a Lilliputian-sized scrap of 220-grit paper and succeeded in removing a fair amount of carbon. Then I inserted an alcohol-soaked square of gun cleaning cotton cloth and twirled it with the aforementioned pinky until most of the carbon residue was cleared from the chamber.

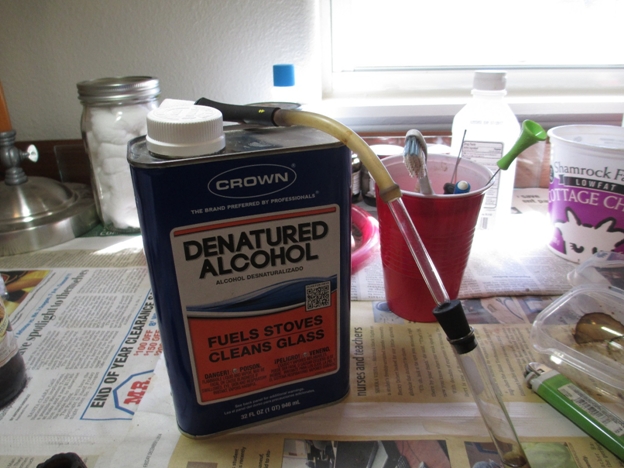
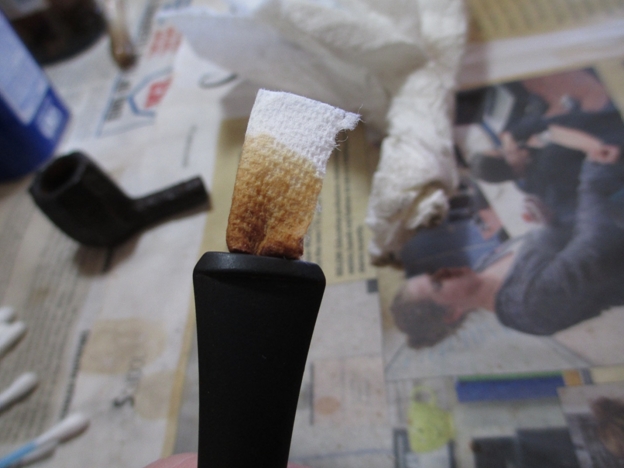
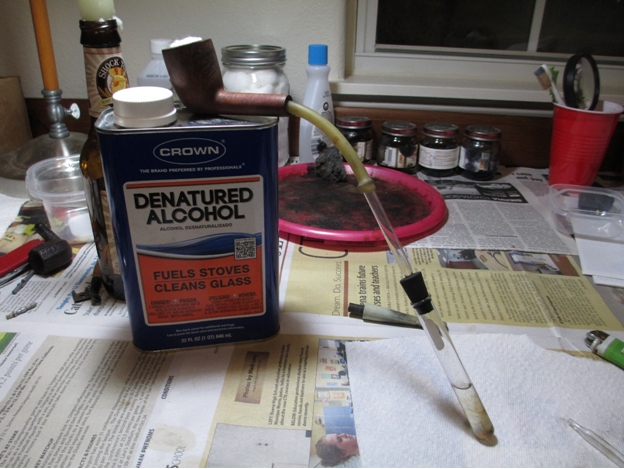
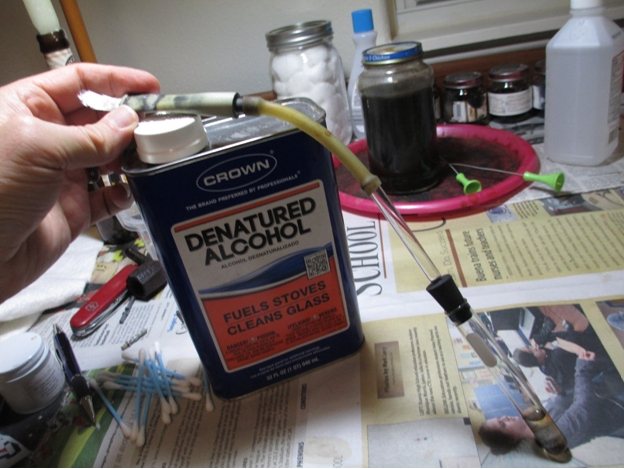
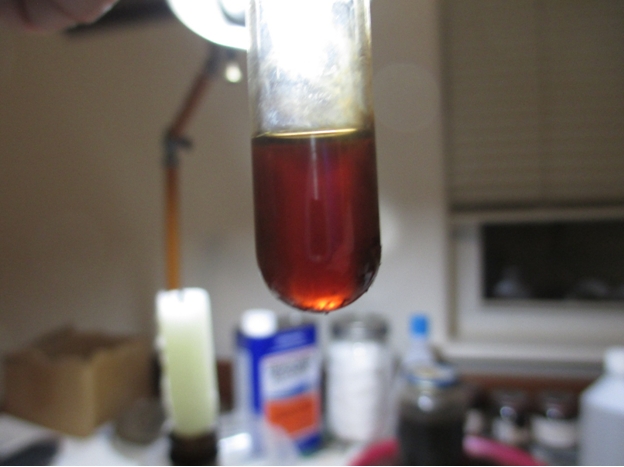
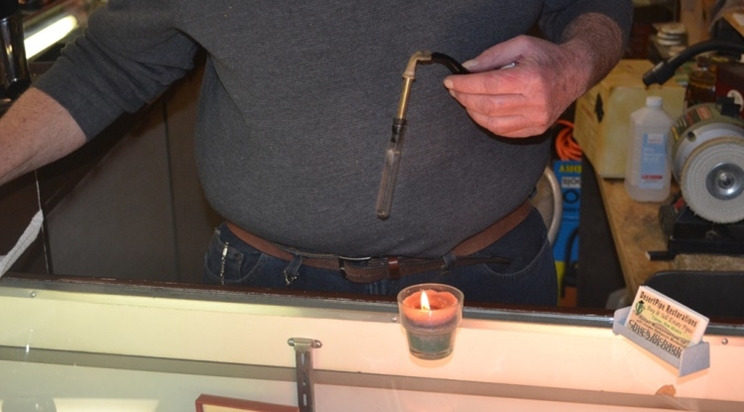
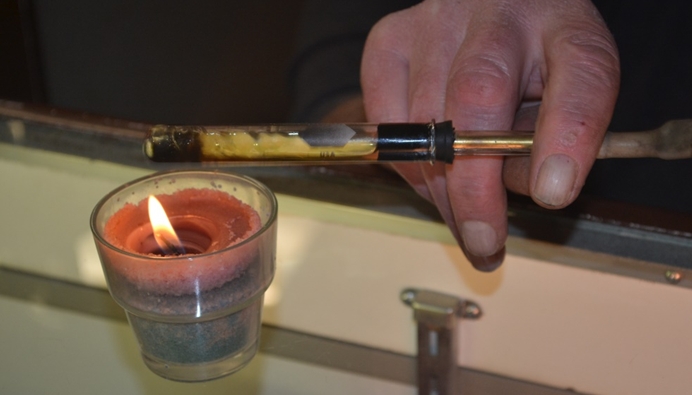
Despite the failure of the wire cleaner to dig up more than trace elements of old tobacco, and determined to assure the shank was truly ready to pass anyone’s test, I employed my newly acquired proficiency in retorting. To my utter dismay, despite my certainty that I had performed the retort without error, the remainder of the boiling alcohol – which had surged all the way into the chamber and left the cotton there somewhat dirtier than it started – returned to the Pyrex test tube clear enough to drink, if I were so inclined. Disbelieving the unheard of result, I re-boiled the alcohol in a second and sent it packing again whence it had returned once empty-handed, so to speak. The second try came back as clean as the first.

At last, my mind exploded in dizzying exultation, a clean shank at the outset!

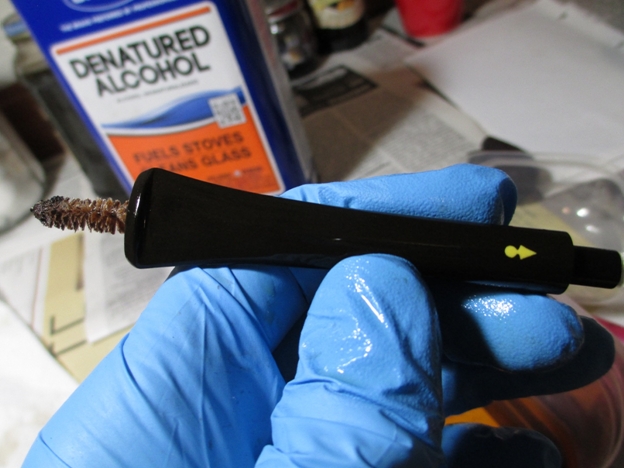
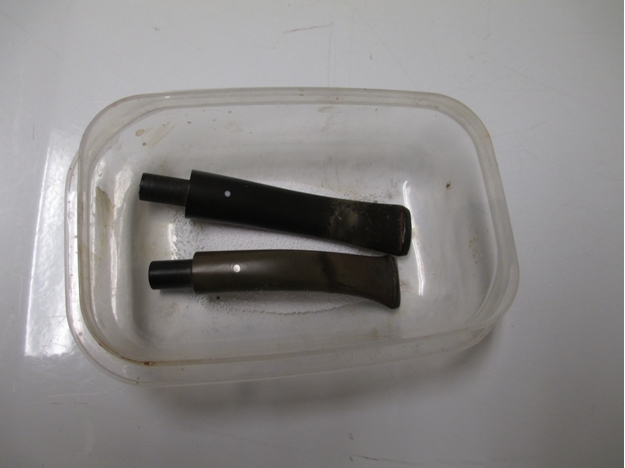
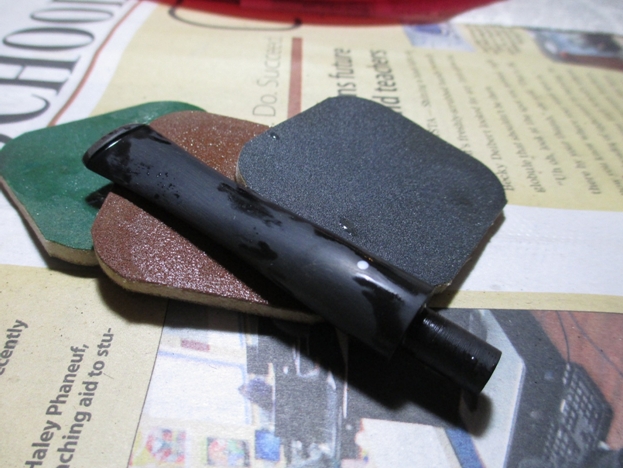
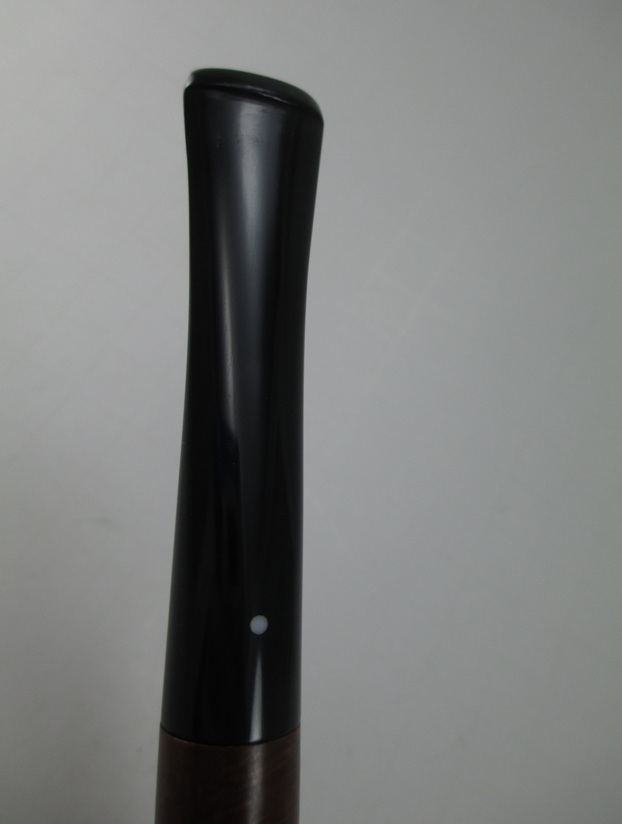
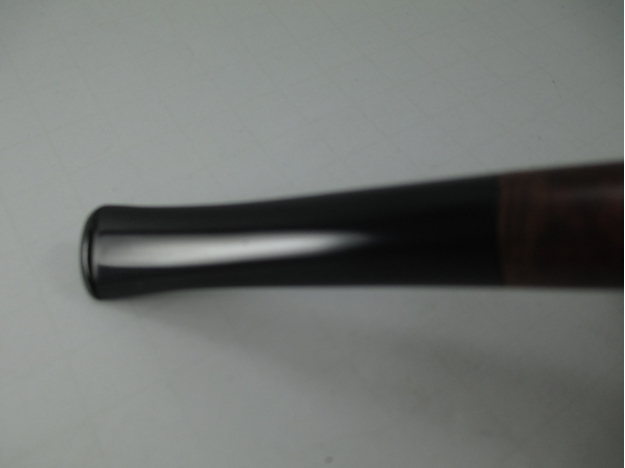
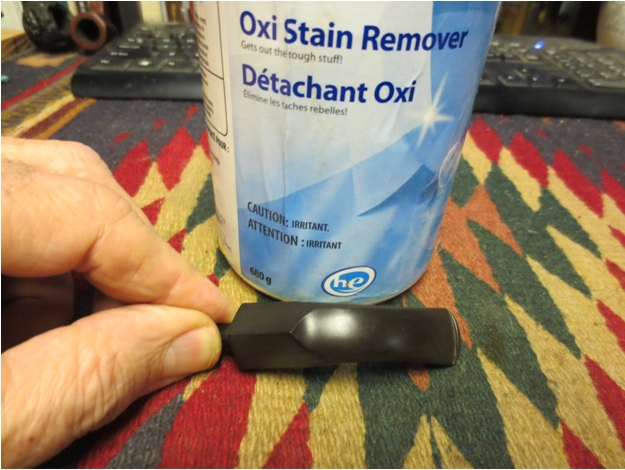
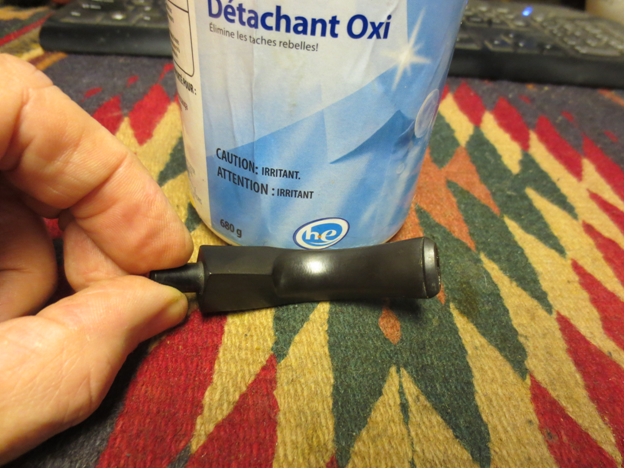
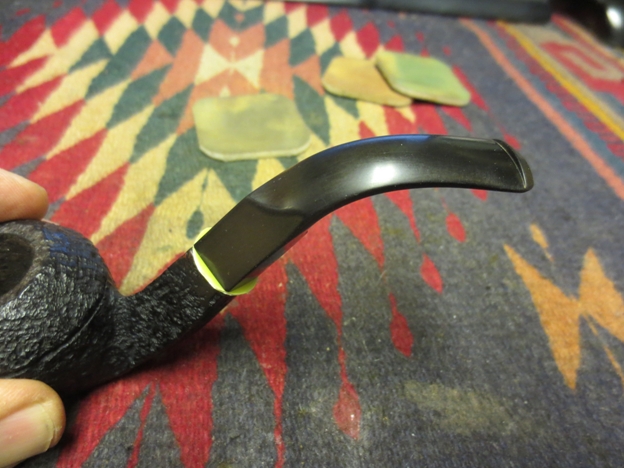
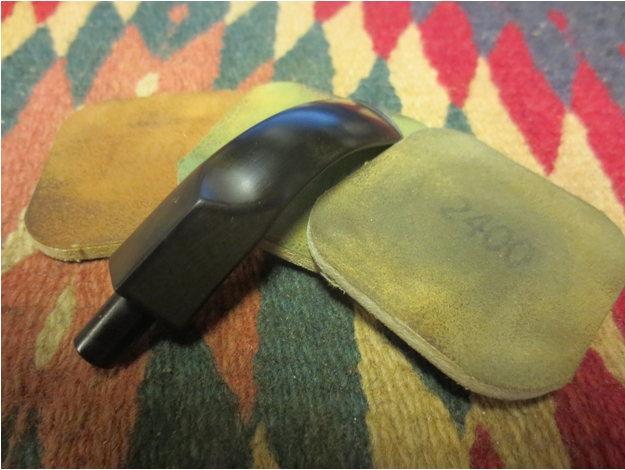
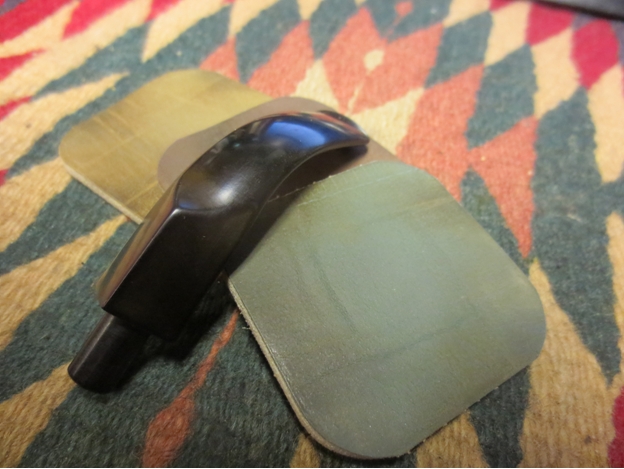
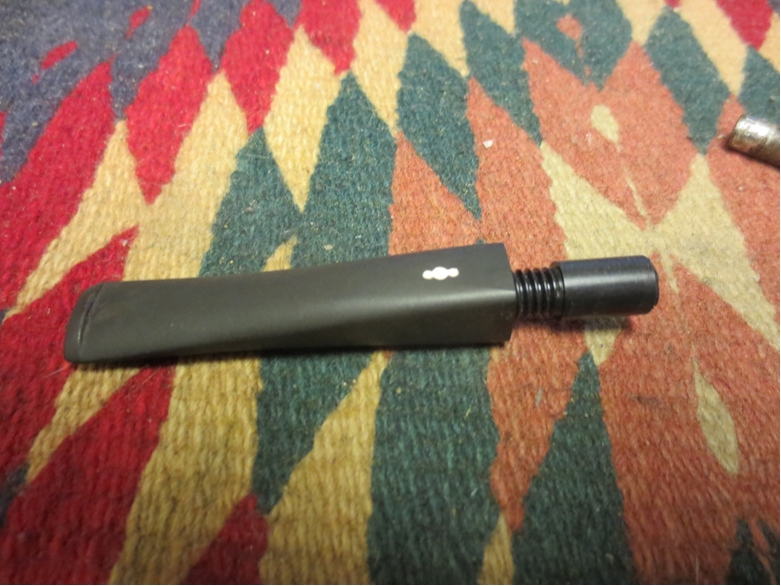
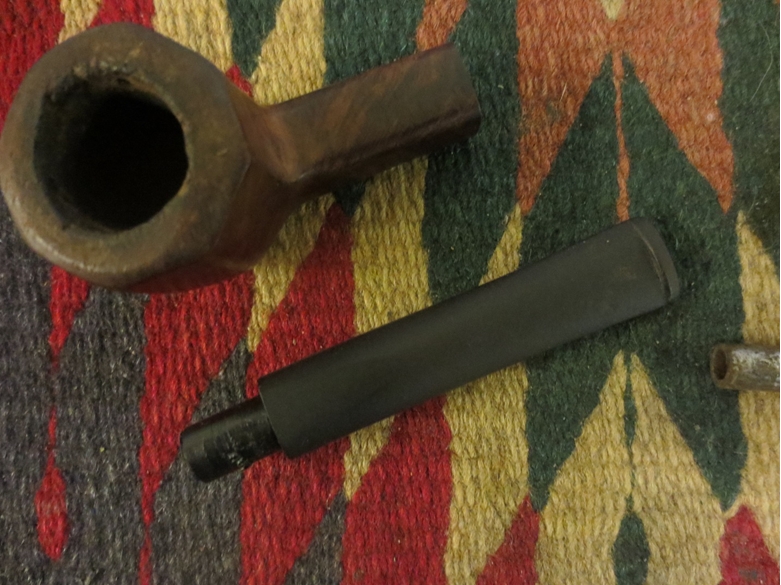
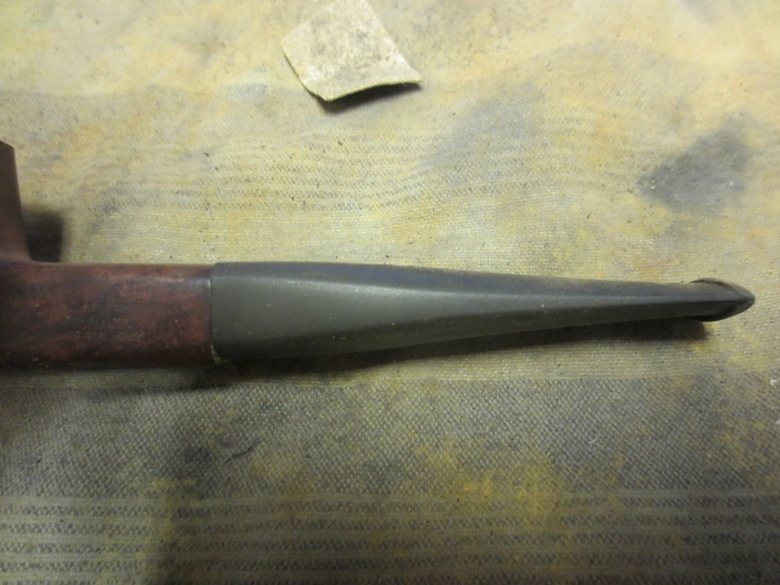
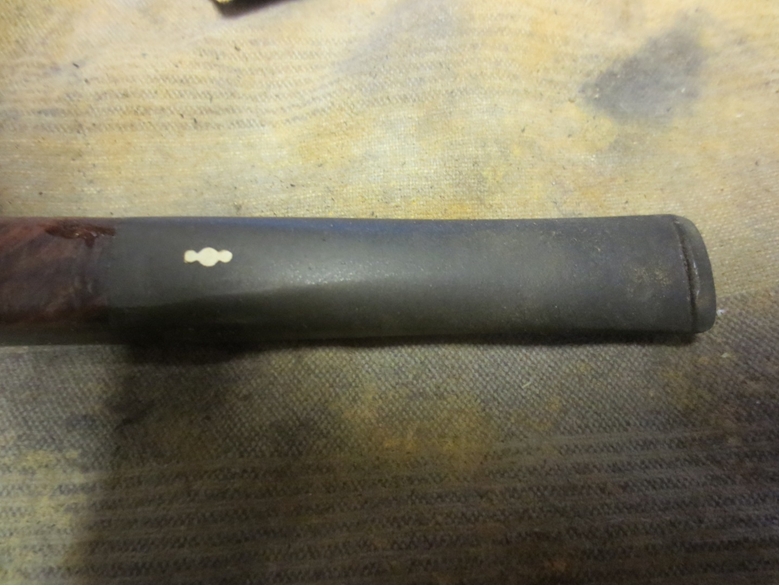
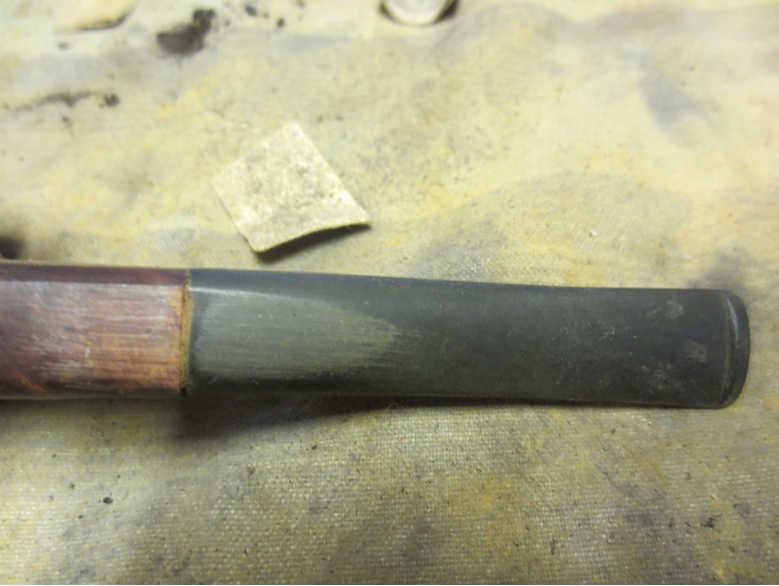
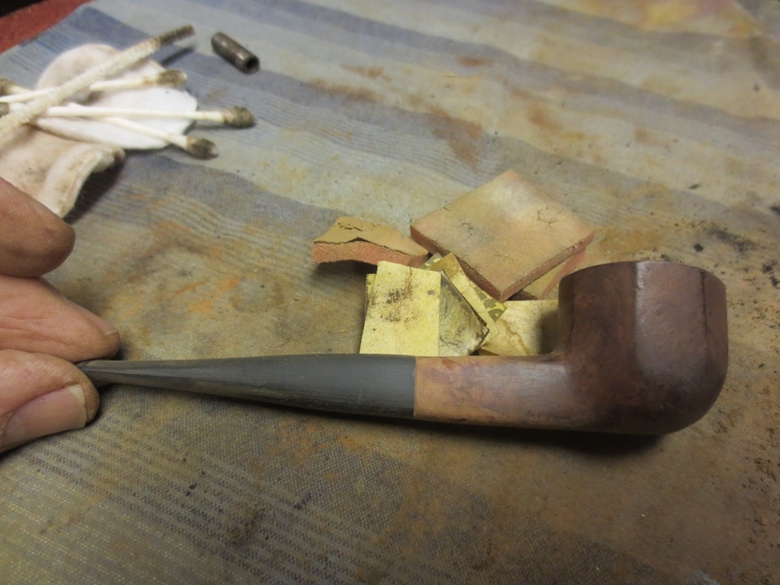
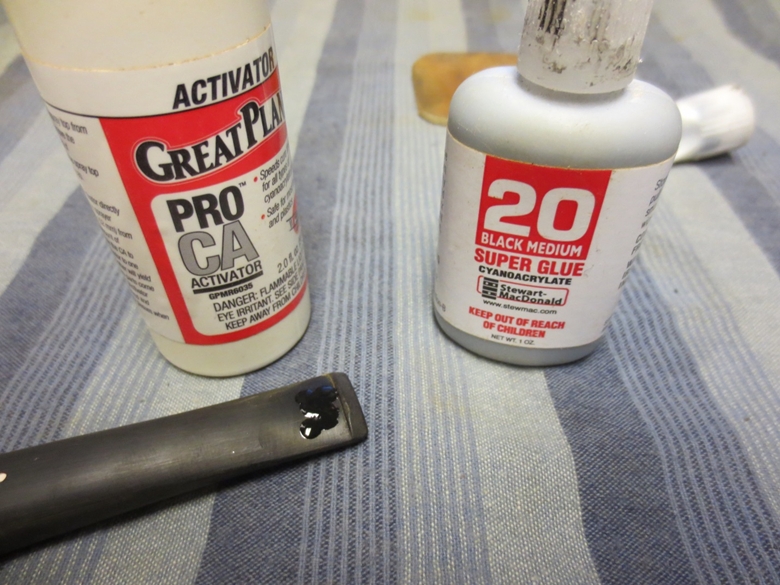
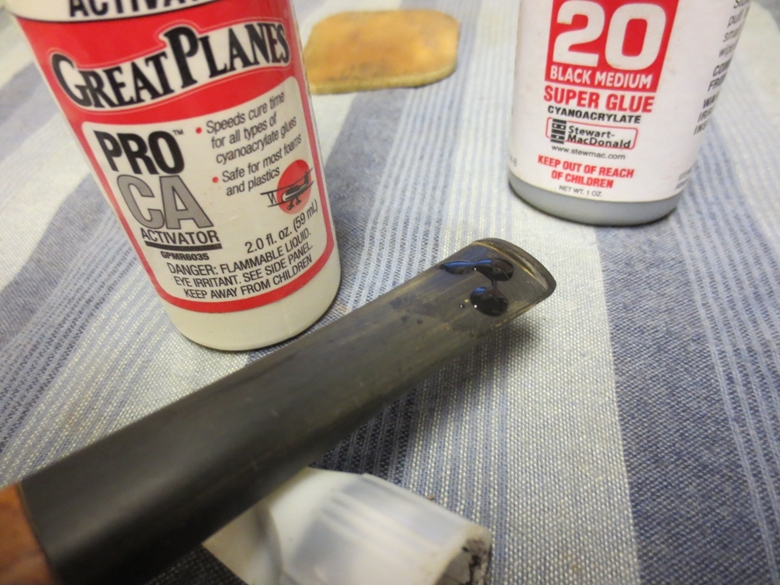
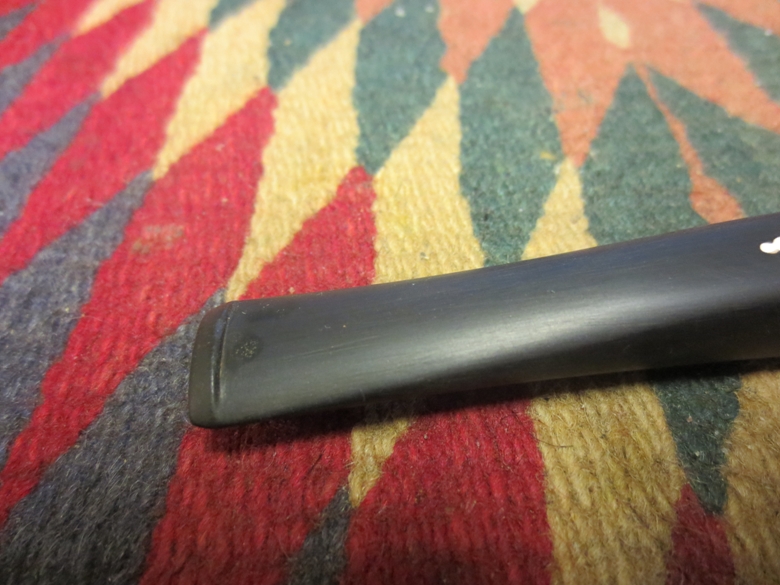
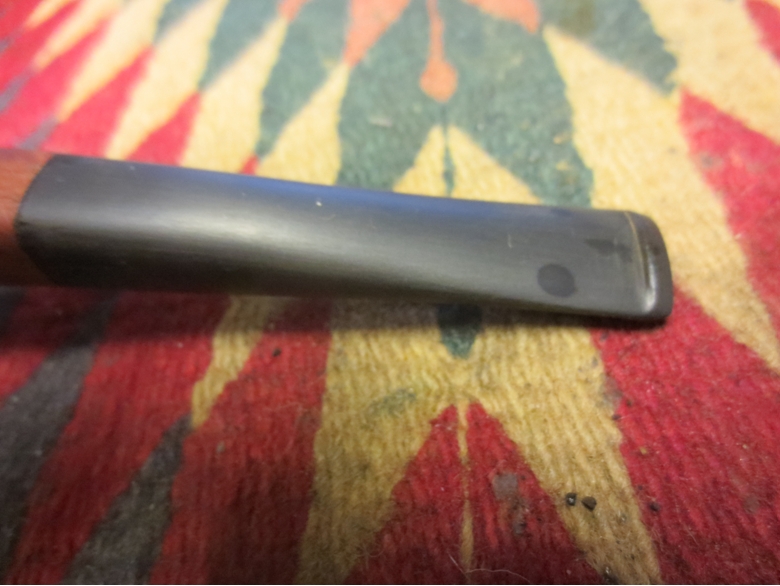
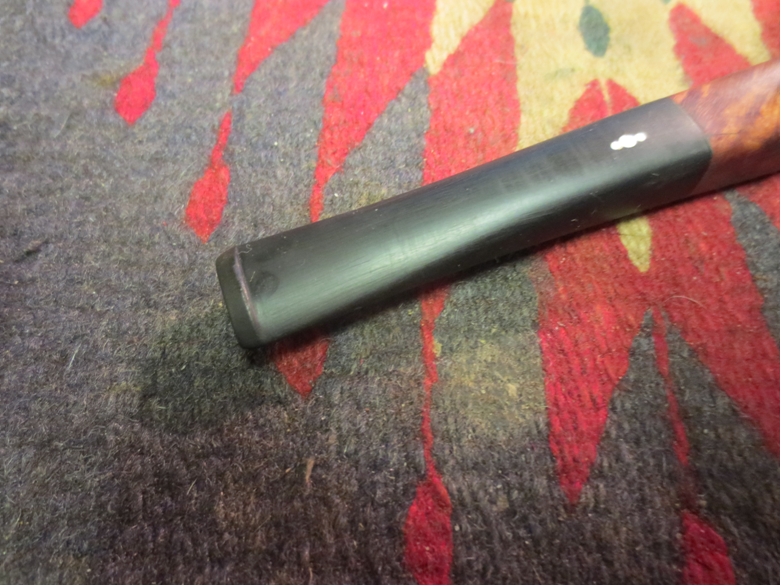
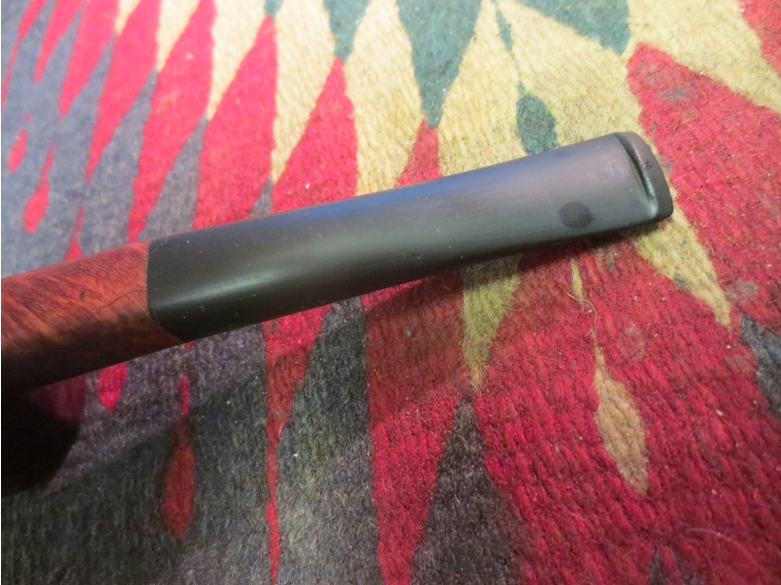
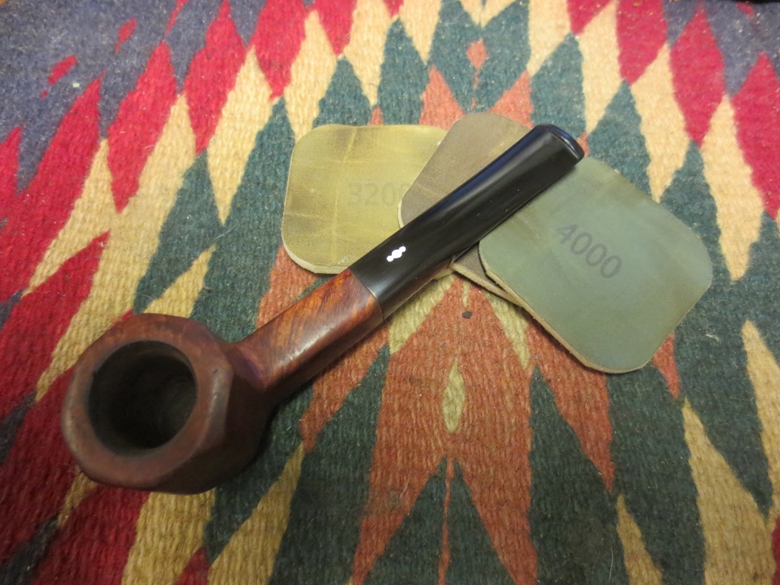
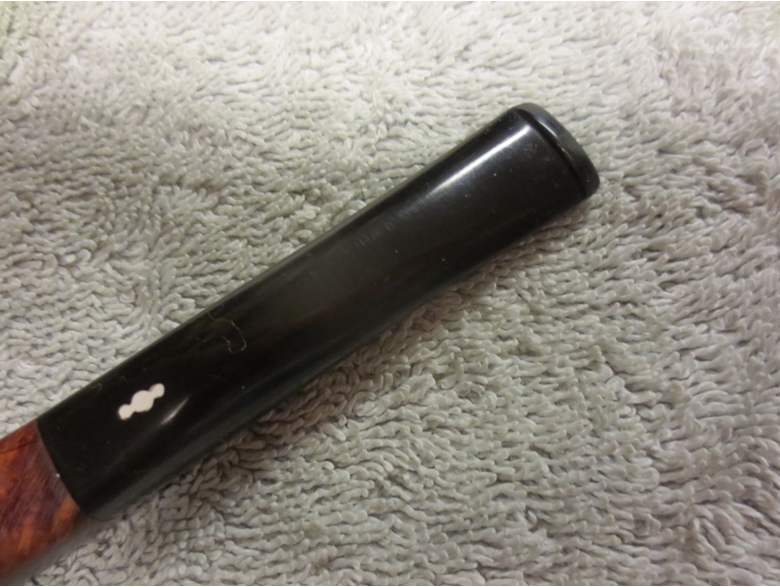
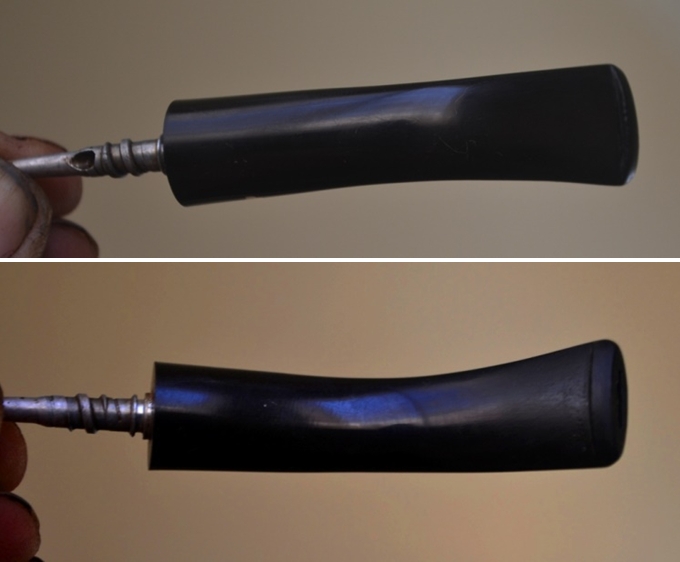
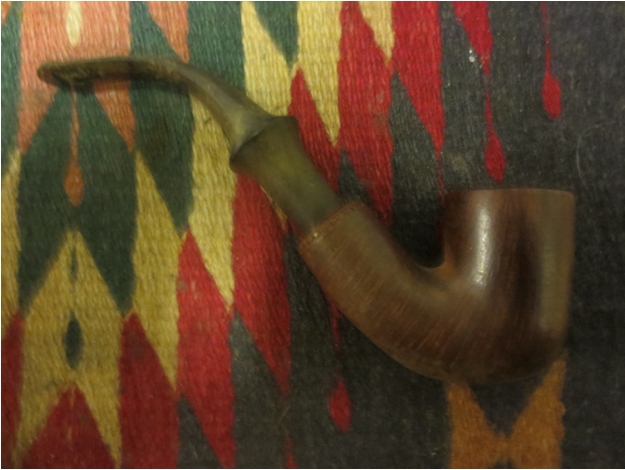
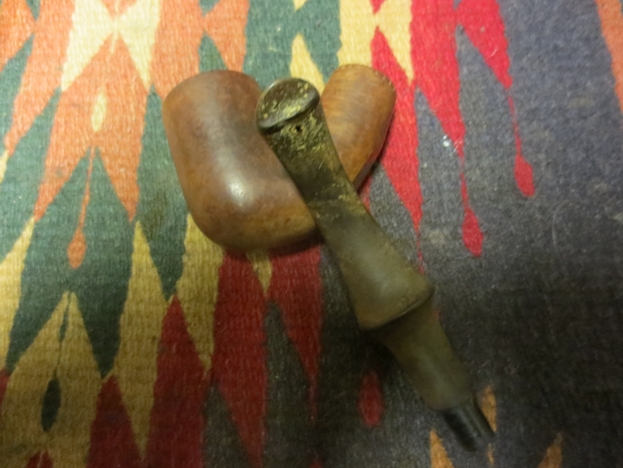
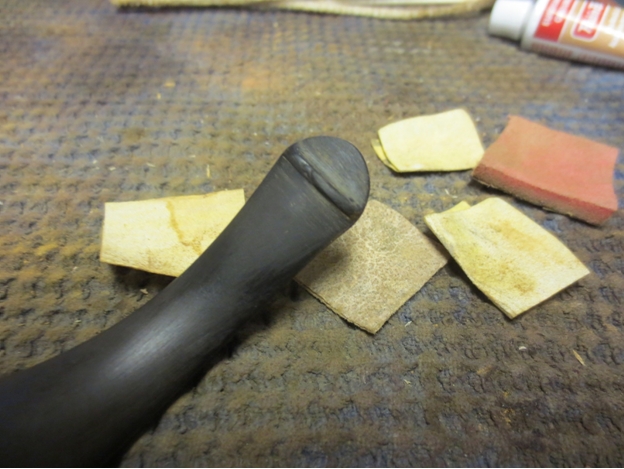
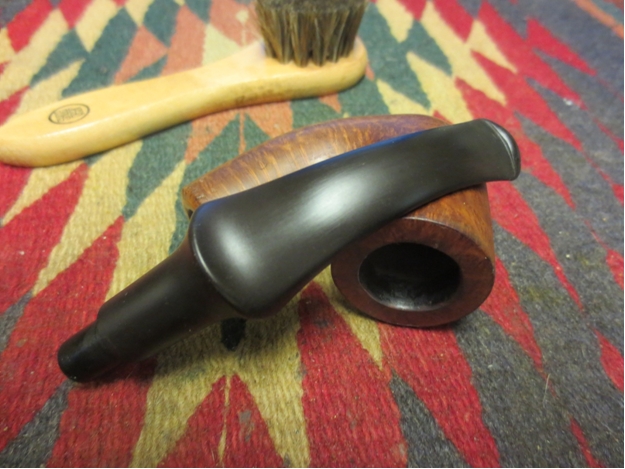
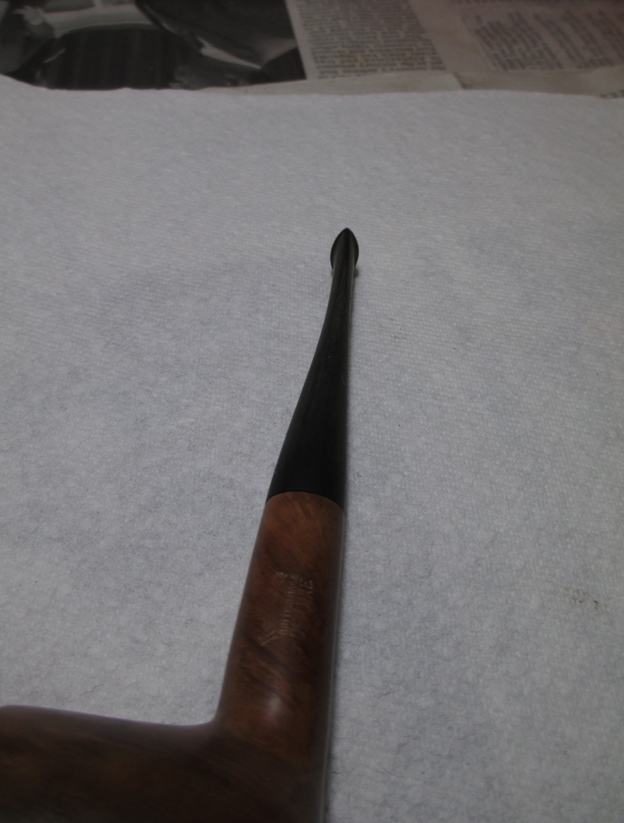
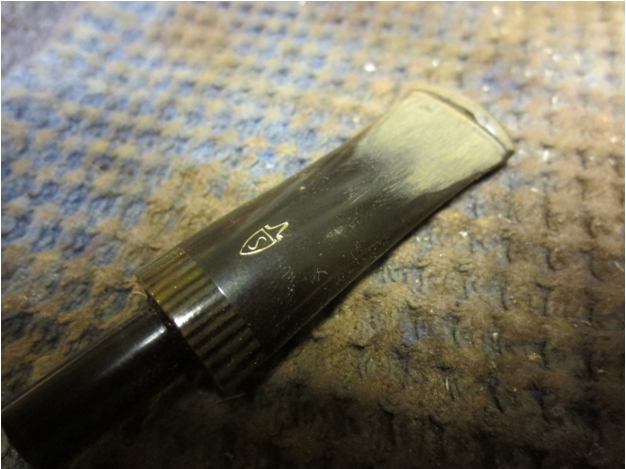
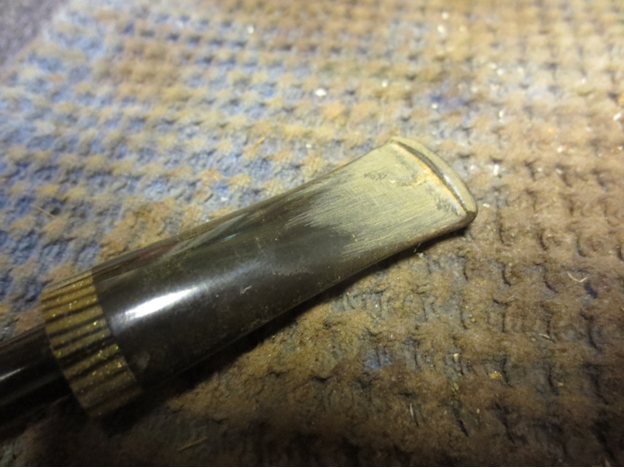
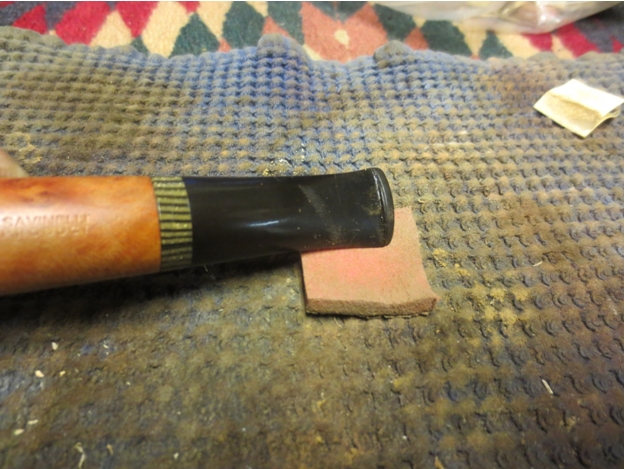
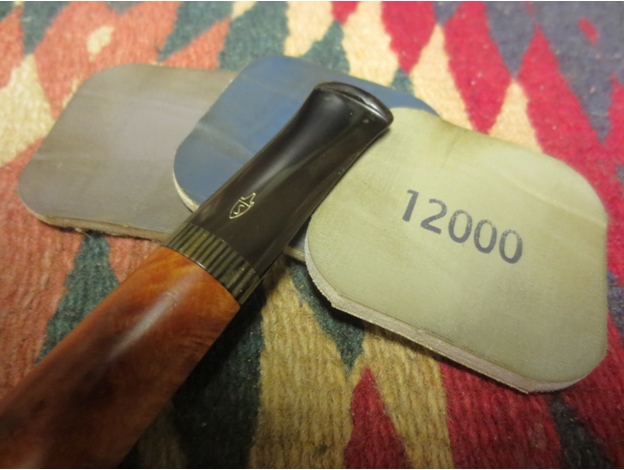
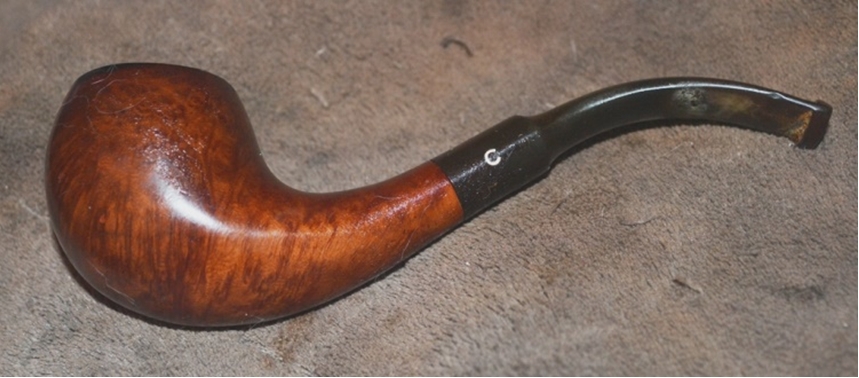
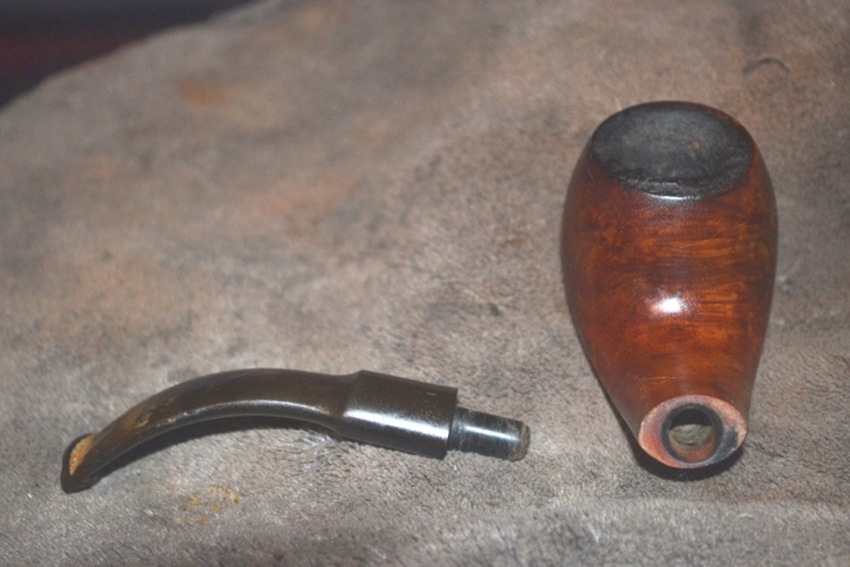
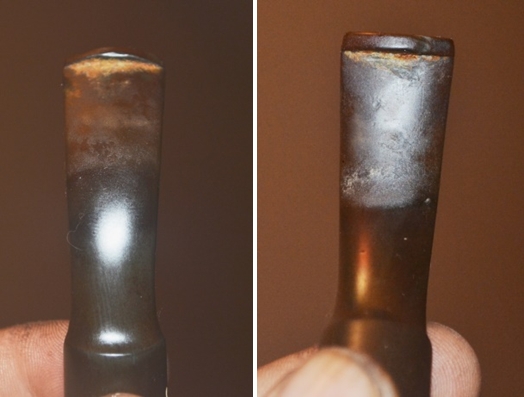
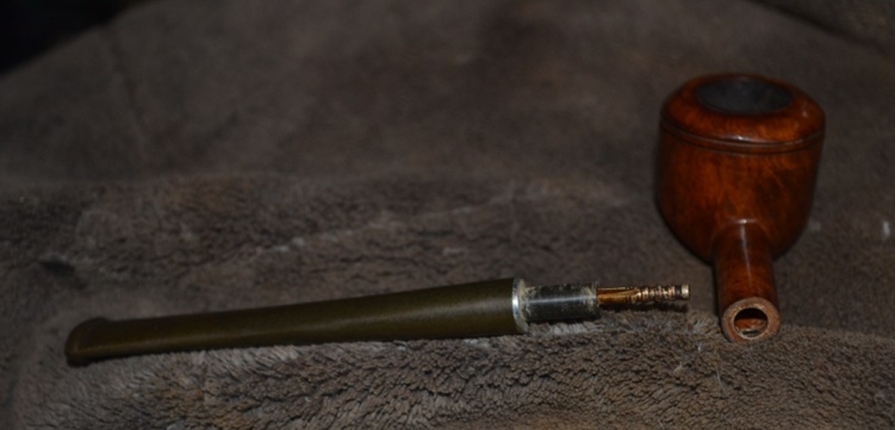
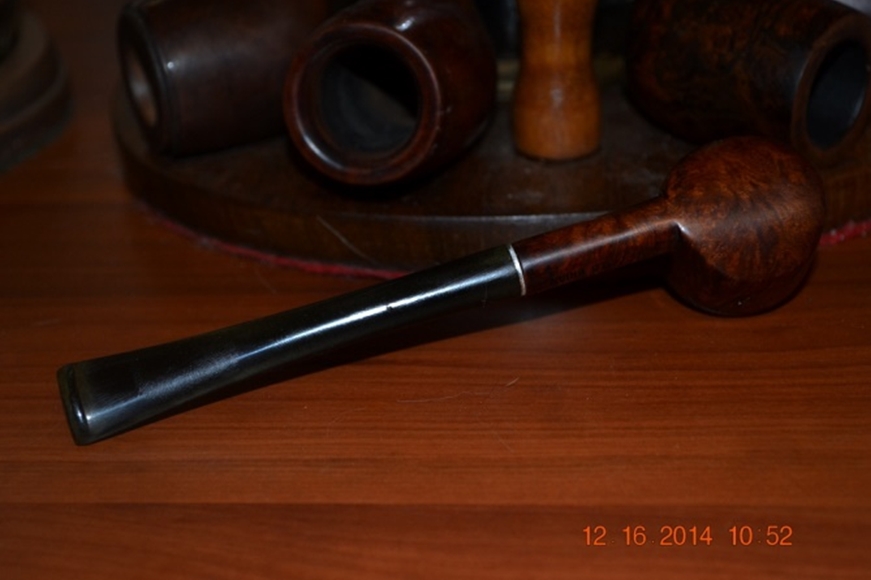
I turned to the stem, which, other than being a uniform military green, was all but devoid of scratches or chatter. There was one small ding, but given the usual mauling of stems I encounter, this one was a gift from Heaven. As I have yet to come up with a formula for a solution in which to treat stems, I was compelled to do it the old fashioned way: by hand, using 320-grit paper to restore the stem from green to black. This step required several passes, more and more localized each time.

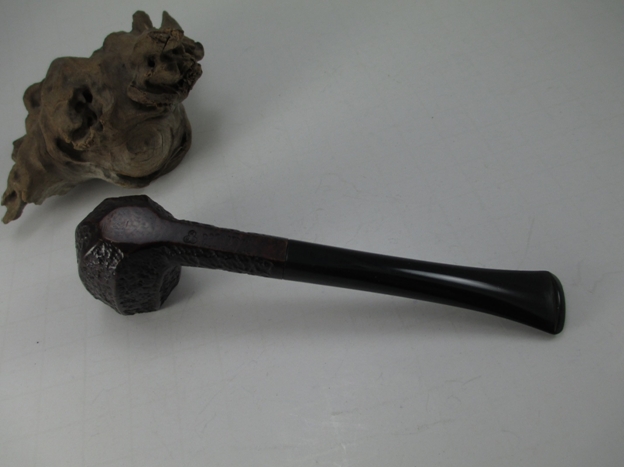
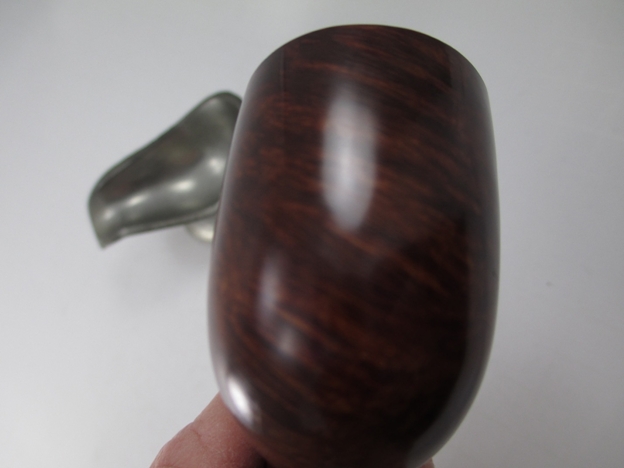
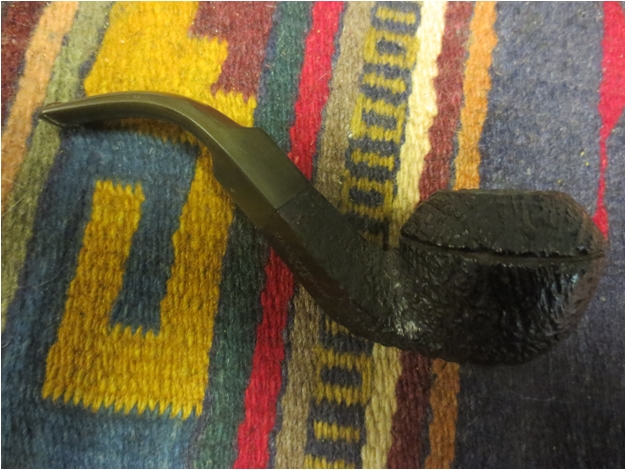
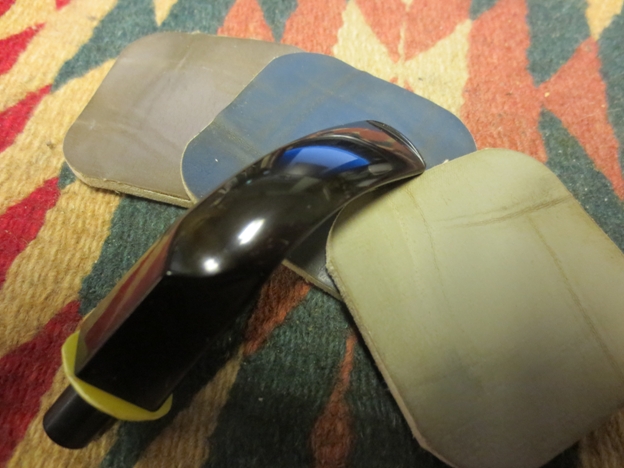
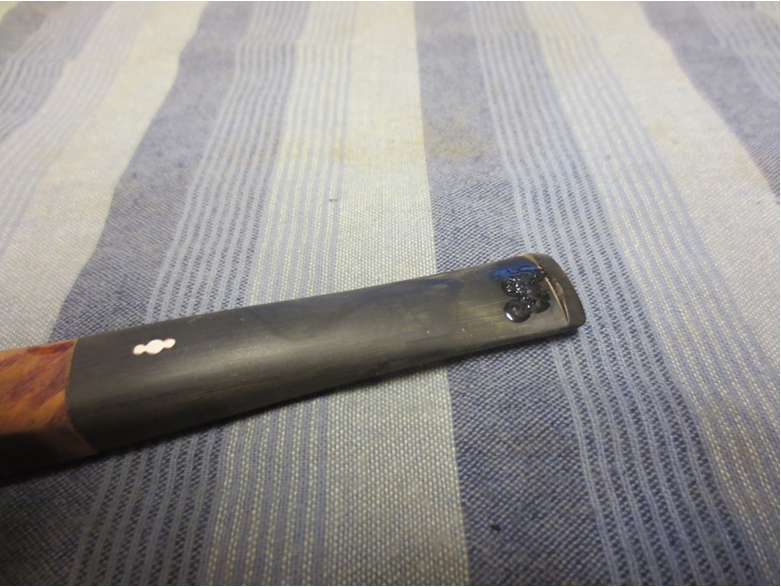
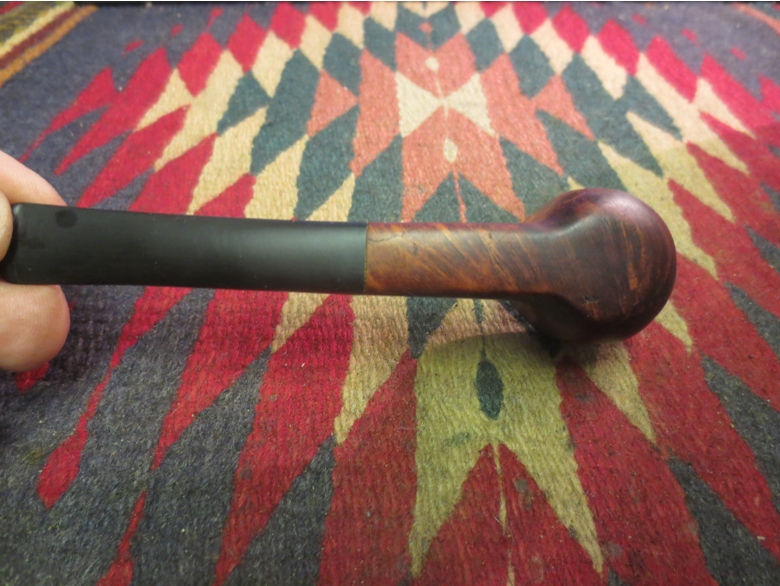
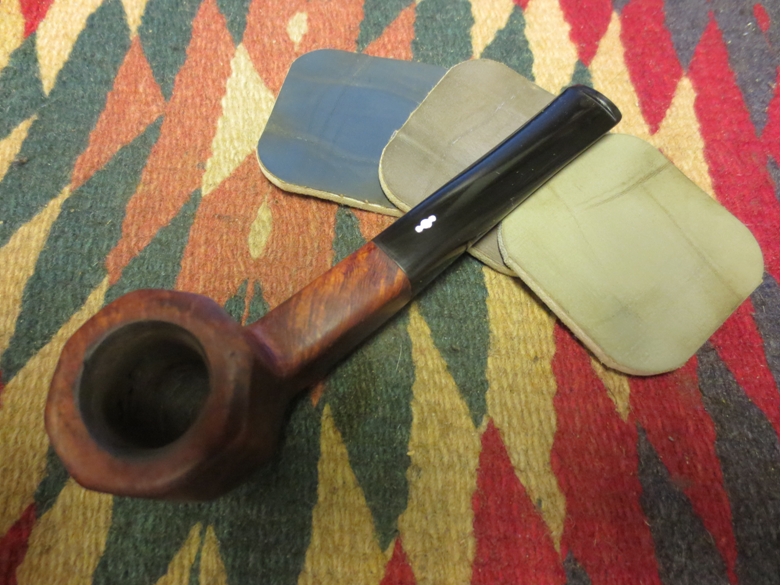
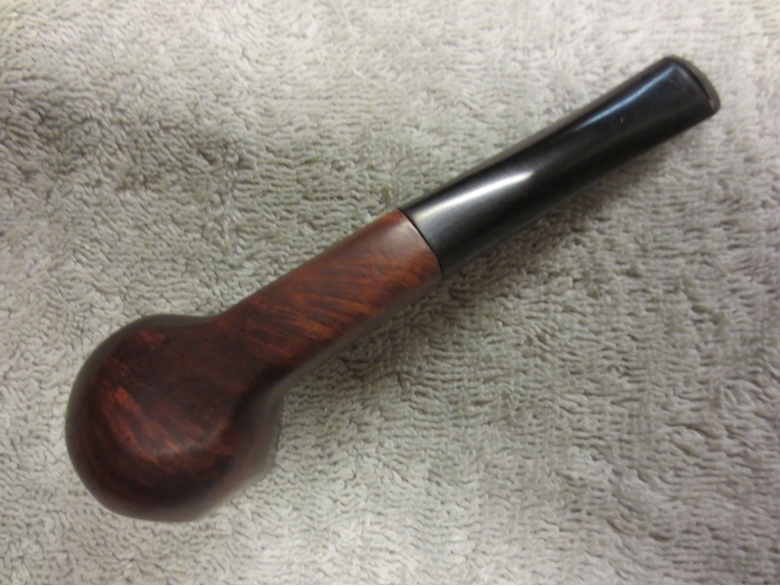
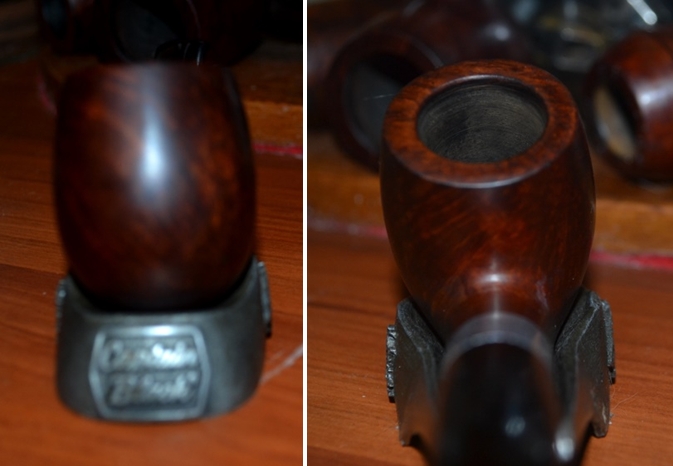
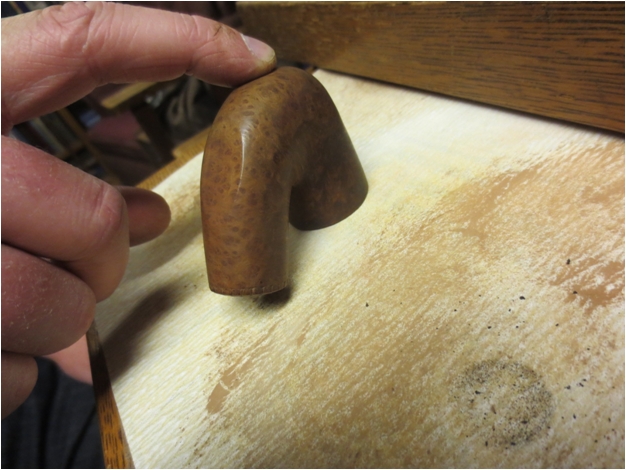
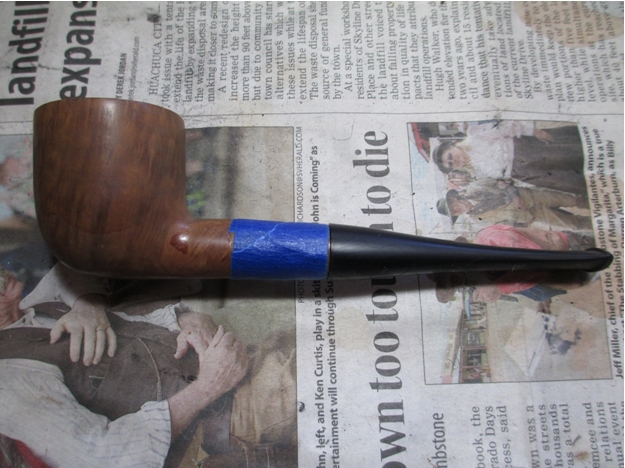
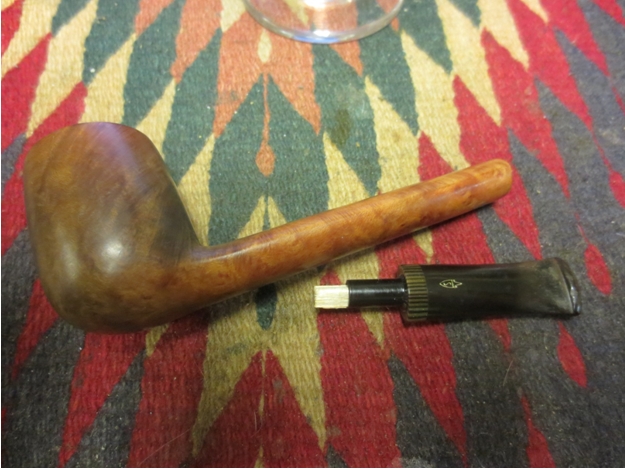
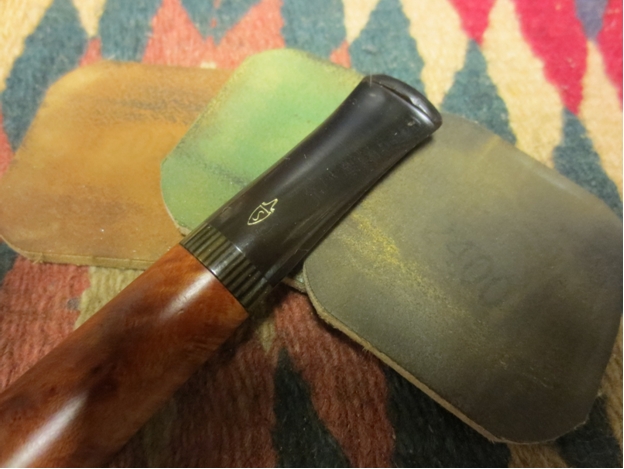
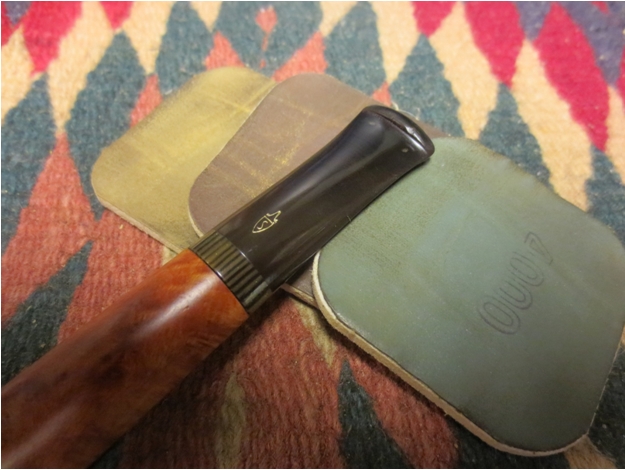
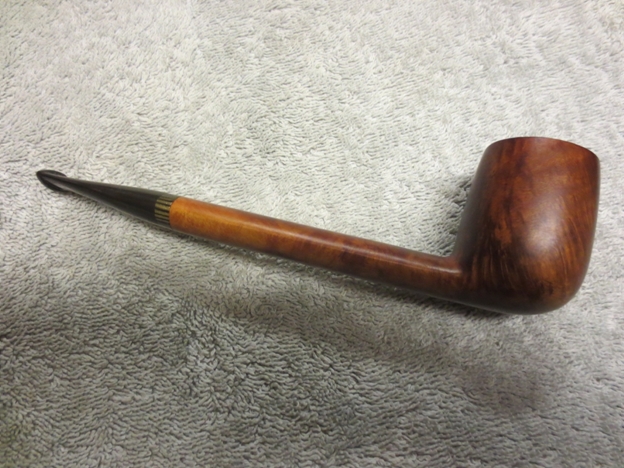
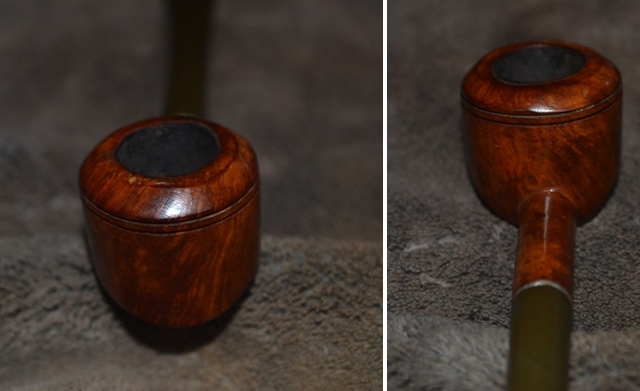
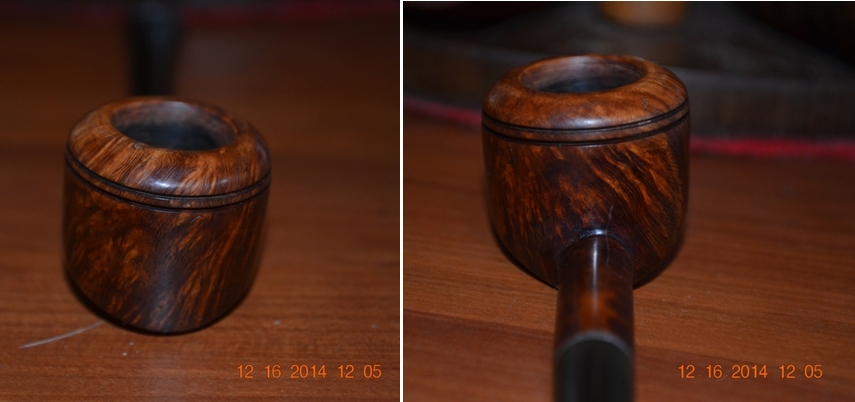
Next I turned to micromesh and gave the stem the same care I provided the wood: 1500, 1800, 2400, 3200 and 4000.Rob9 
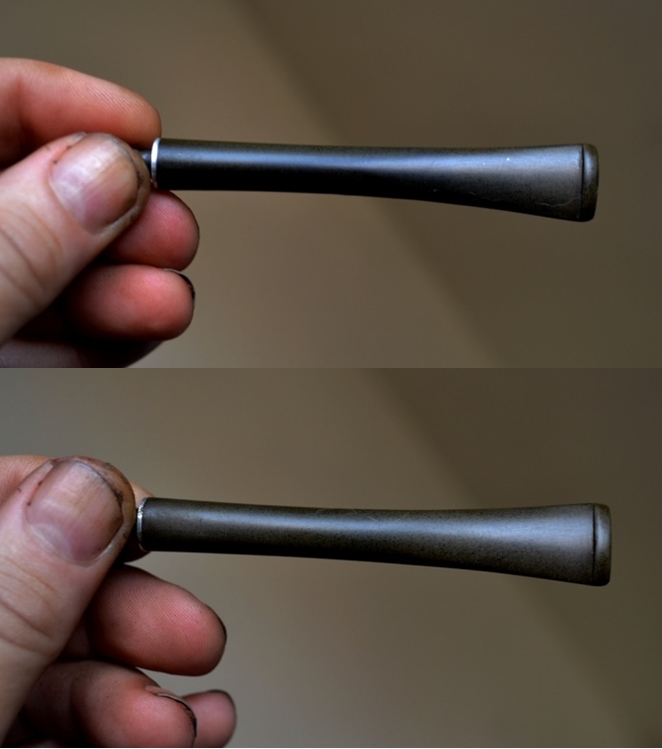
I tend to enjoy re-staining the wood of a pipe when necessary, and my biggest question so far had been what shade of brown to use if not marine (burgundy) red. This pipe I wanted to do as a two-tone, with the beautiful natural color and grain of the rounded rim left unchanged and the rest of the bowl and shank dark enough to show the difference. And so the only question was whether to use medium brown, which is darker than it sounds, or marine? I admit to having a fluttery, nervous feeling in my stomach when I opted for the marine. Although the result was better than okay, I won’t be showing it here for reasons that will soon be apparent.

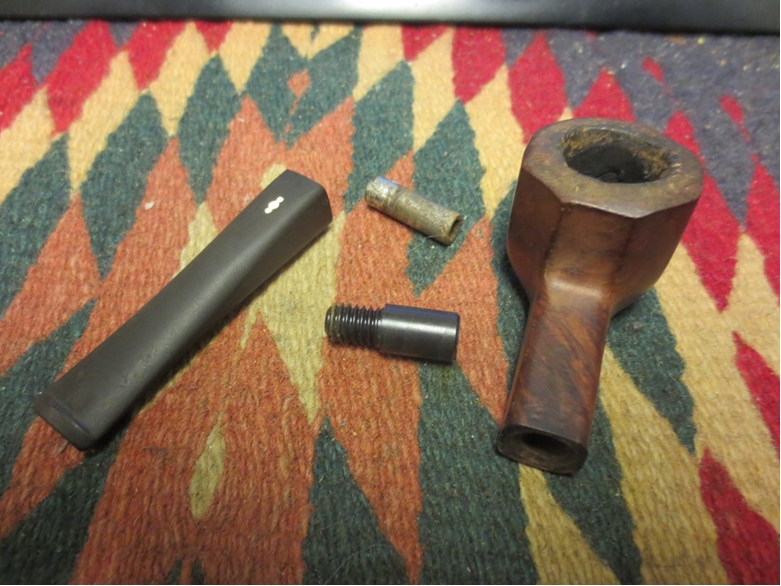
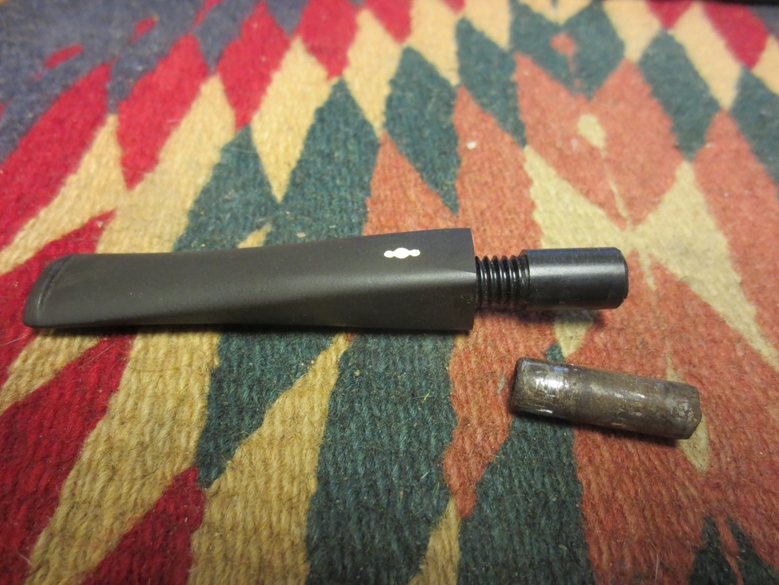
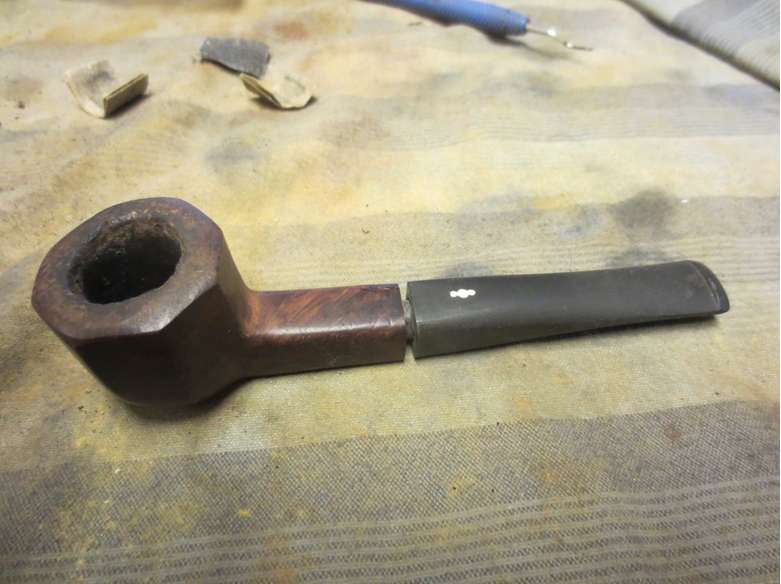
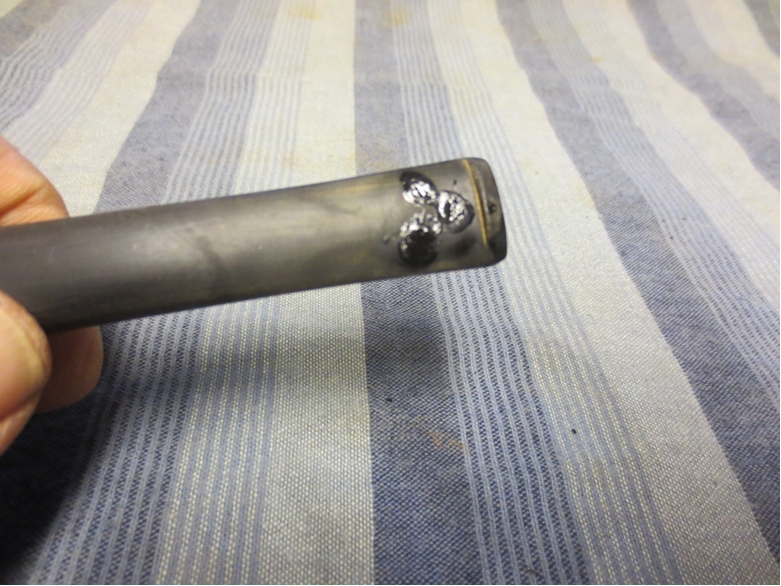
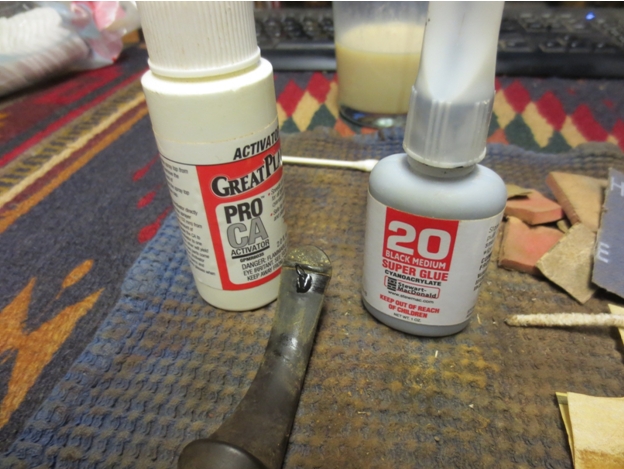
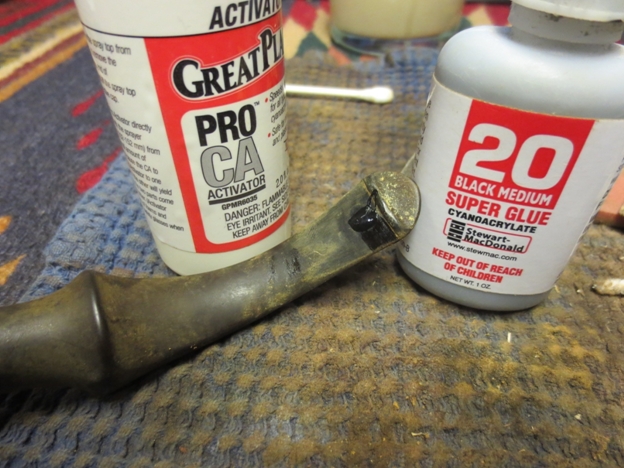
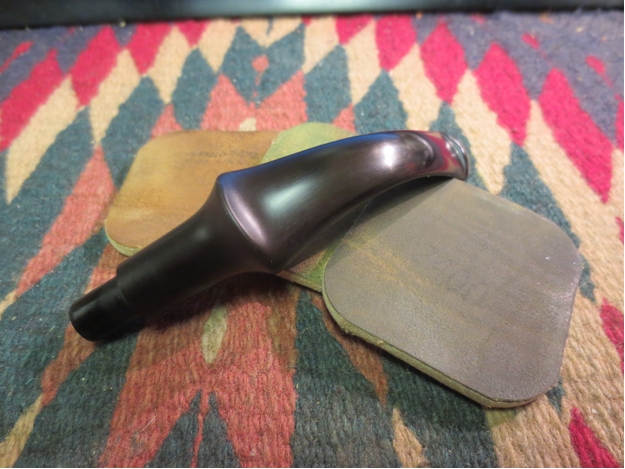
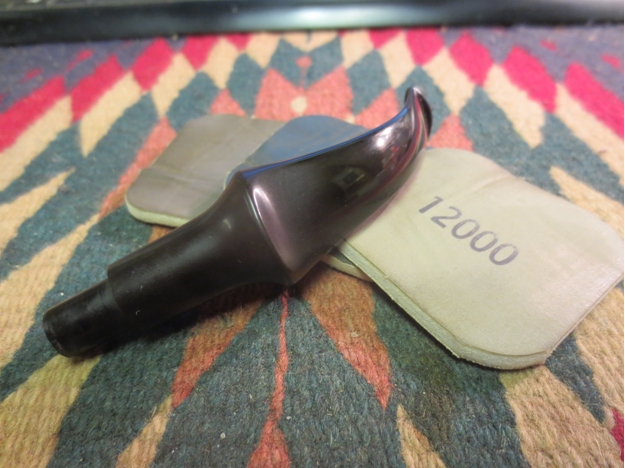
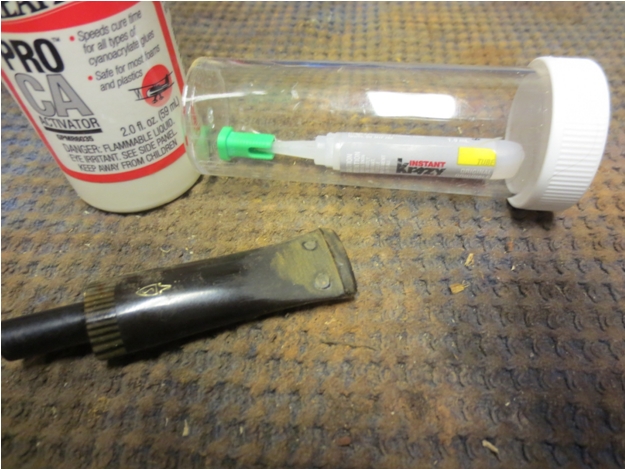
Having stained the majority of the wood marine and left the round rim plain, I flamed out the alcohol from the boot stain, buffed the greater part of the wood with its resulting ash using 3200 micromesh and then waxed the wood and stem – from which I had removed the superfluous metal tenon extension by heating it with my Bic and yanking it out – and achieved a definite high contrast. The grain still showed through the stain, but I knew it wasn’t right.

Therefore, wishing to have a little fun and test my mentor, Chuck Richards, I took the “almost finished” product to him for his opinion. True to form, Chuck scrutinized every angle of the pipe through his glasses and handed it back to me. His critique was like the ultimate New Yorker bad book review: no comment. He still has no idea how good that made me feel!

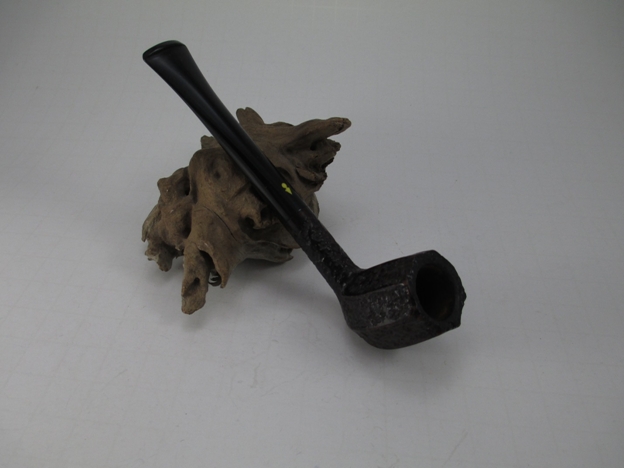
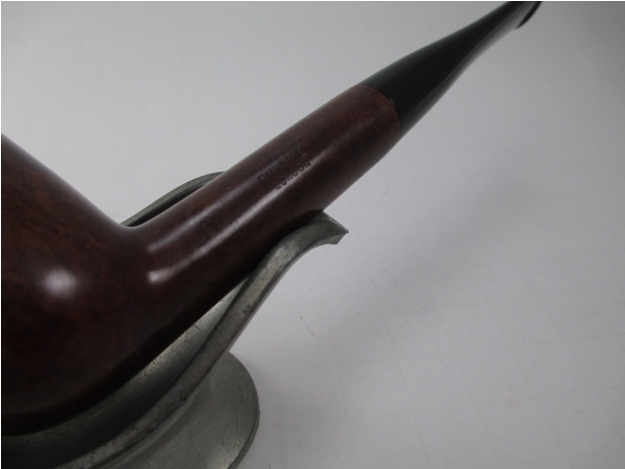
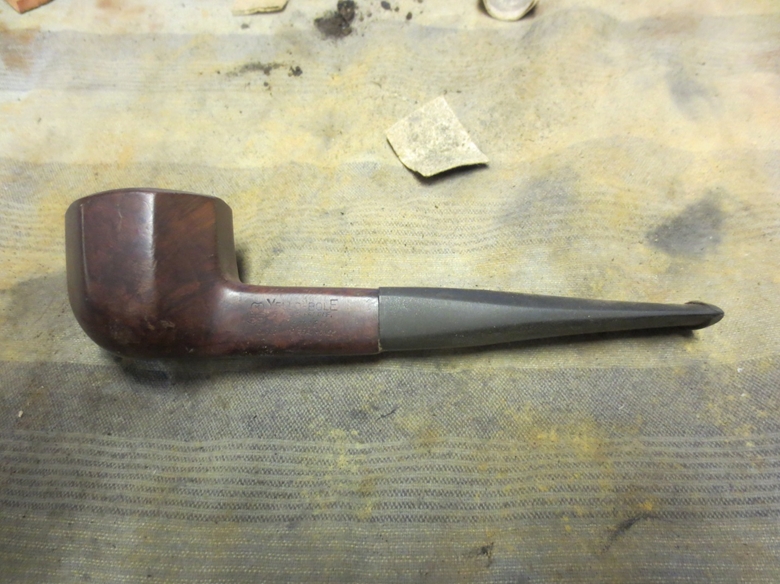
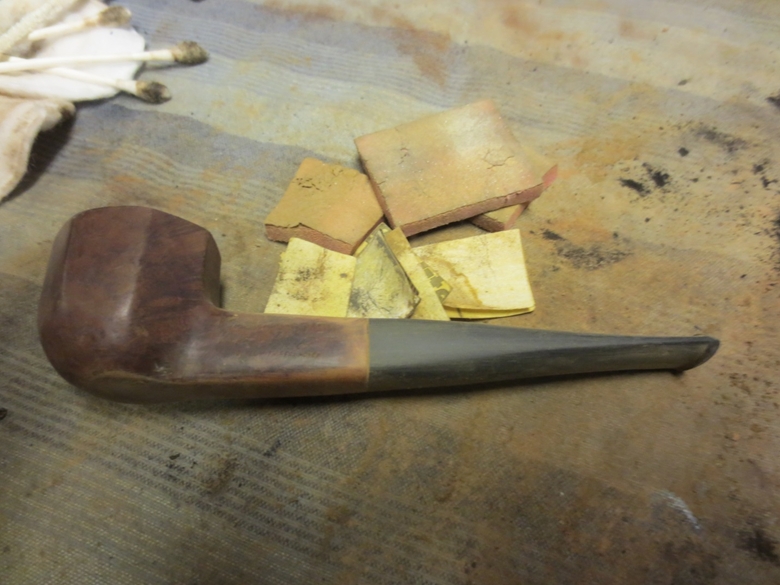
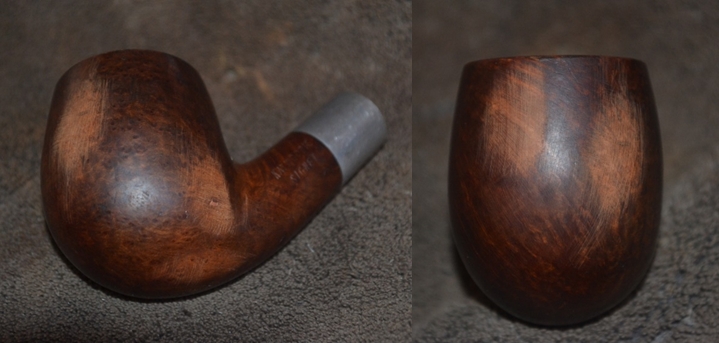
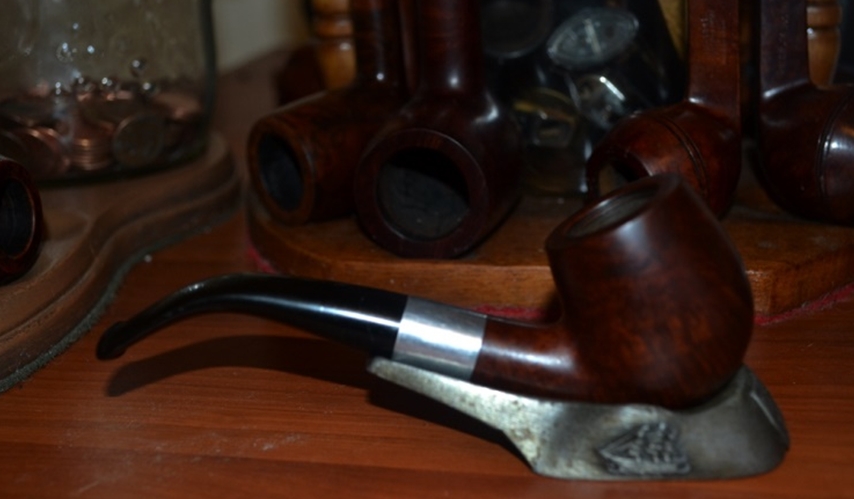
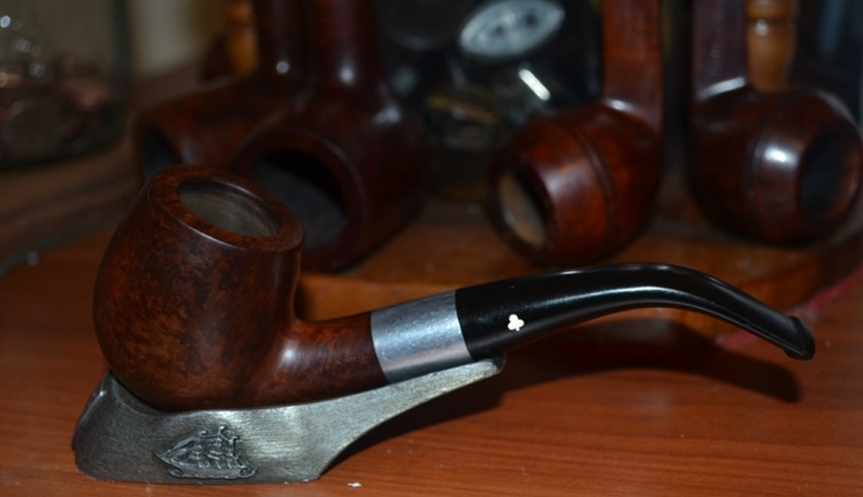
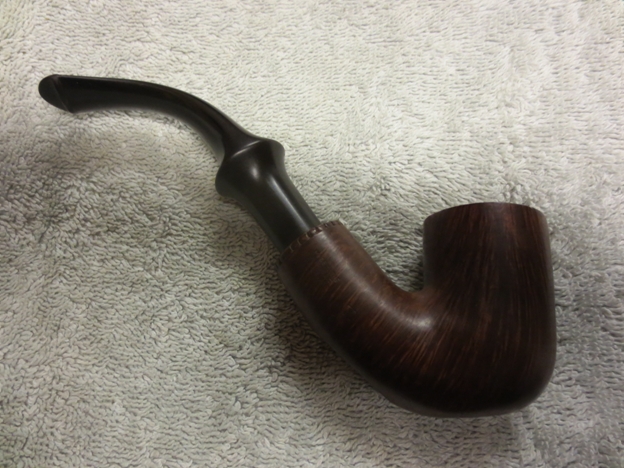
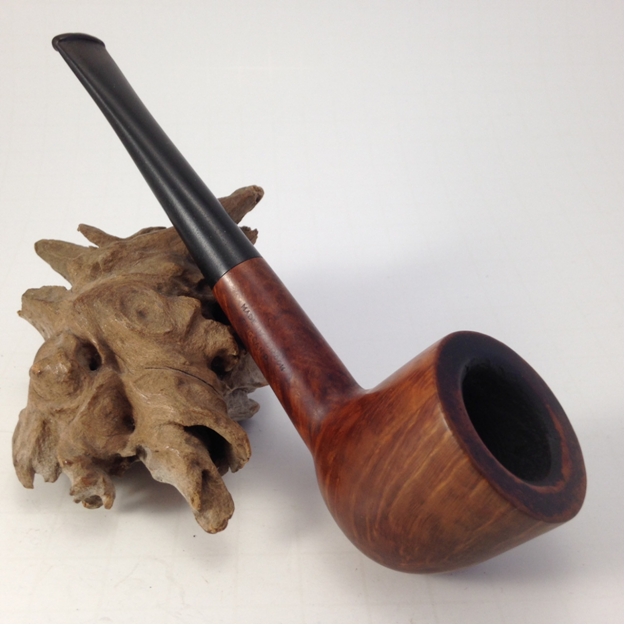
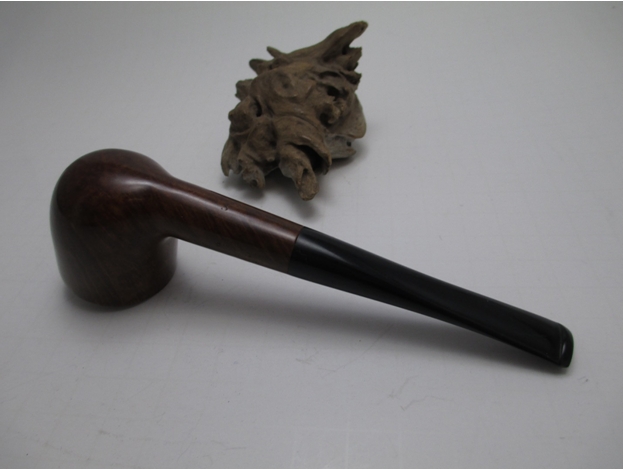
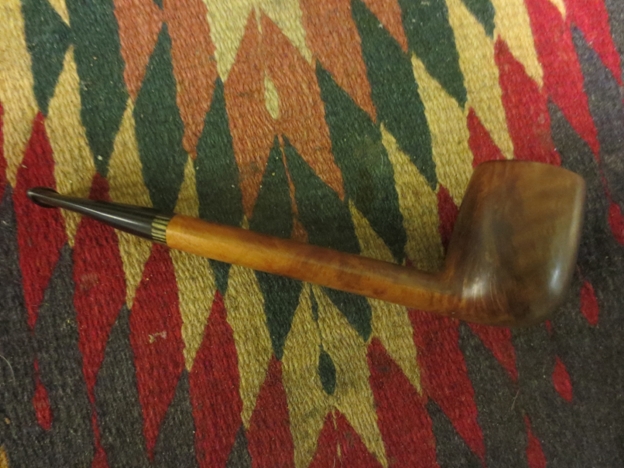
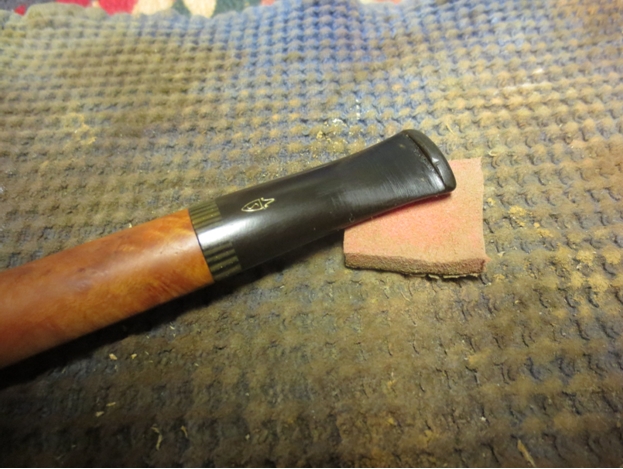
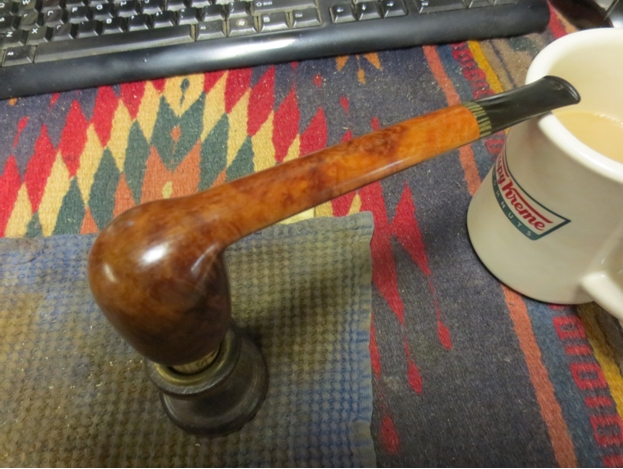
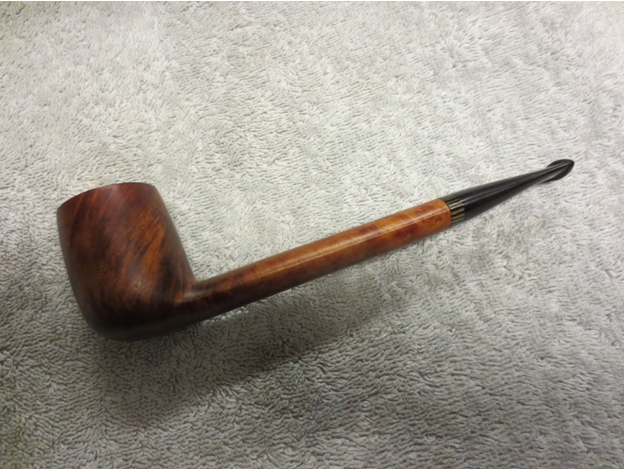
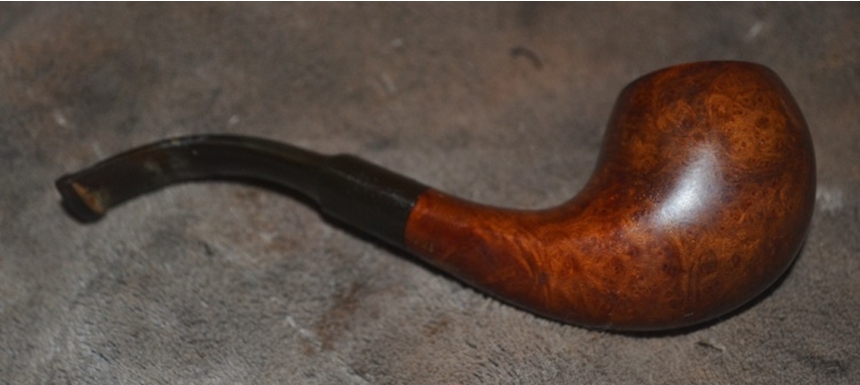
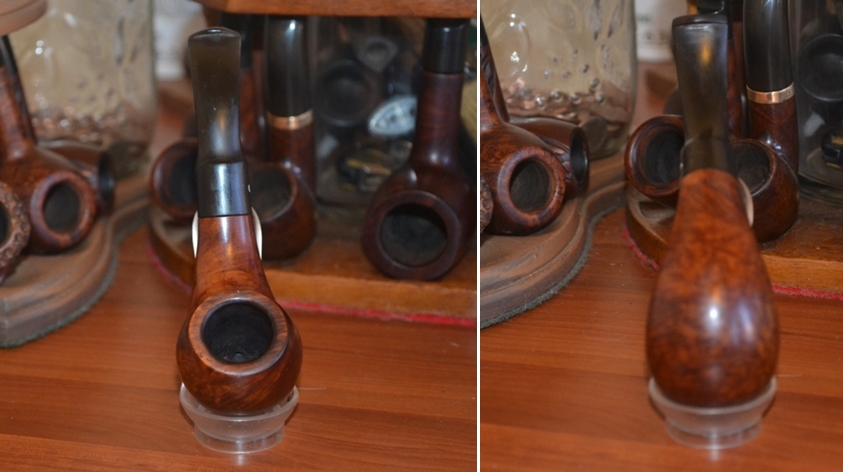
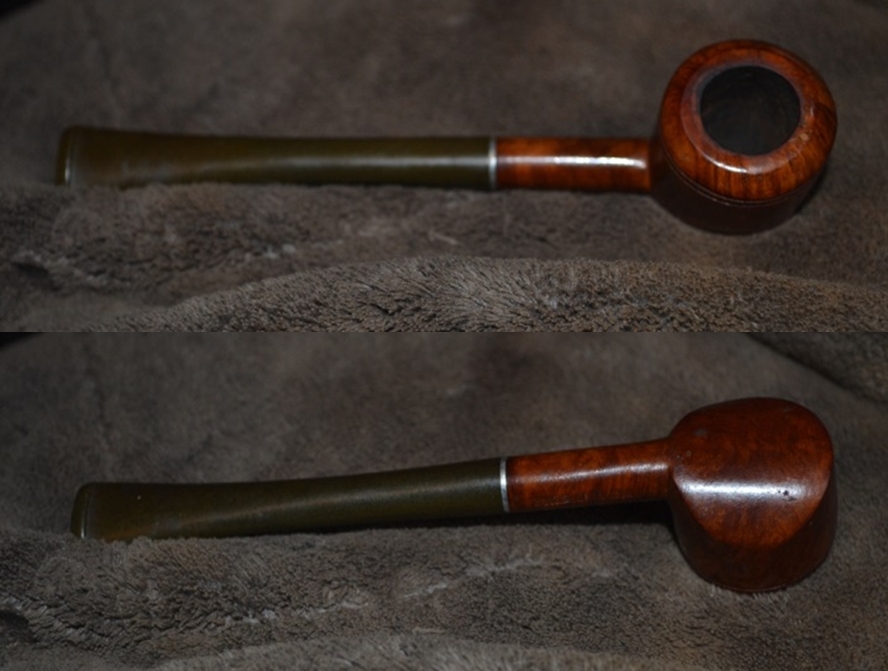
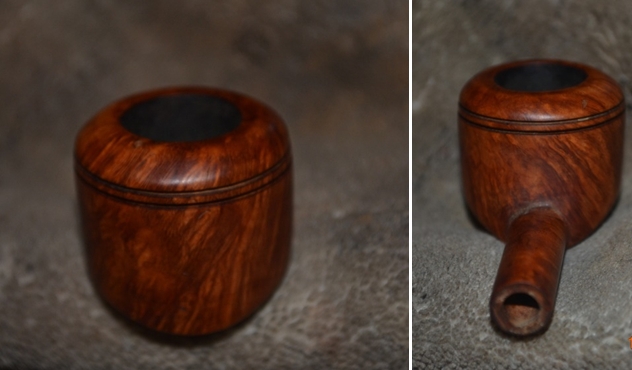
Pleased with myself, I later returned home with the dark red body of the pipe topped by a blond head and with care again applied the super fine steel wool to remove the wax and stain on all of the wood but the rim. Ready for the correct approach, I re-stained most of the wood medium brown, went through all of the steps as before to prepare it for waxing on my two buffer machines, and applied white and red Tripoli, White Diamond and carnauba. The result was much more satisfying, and I felt no need to run it by Chuck again before submitting this blog, as I had already messed with him enough, albeit unbeknownst to my good friend.
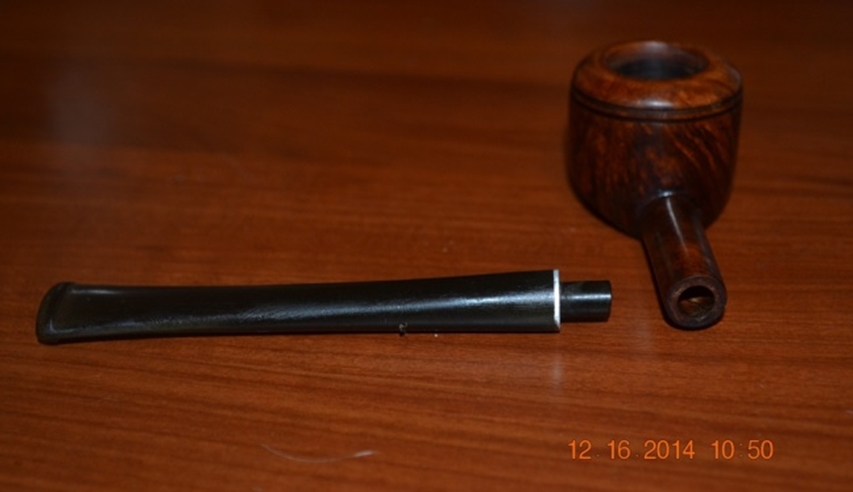
Rob10

Rob11

Rob12

Rob13

Rob14

Rob15 CONCLUSION
All fun and pranks with my big-hearted but not coddling mentor aside, I ended this restoration with more work than was necessary. I should have learned by now not to disregard the advice of that little fluttery feeling of unease I had in my stomach when I chose marine over medium brown. In the end, the stomach almost always wins in all matters over the mind.

Restoring a KB&B Doc Watson – Andrew Selking


Blog by Andrew Selking

My wife and I enjoy browsing antique shops and last weekend checked out a new shop. They didn’t have many pipes, most were worn out drug store pipes, but this one little pipe stood out. The first thing I notices was the fantail stem and interesting inlay on the stem. I picked it up and discovered that it was a rusticated panel billiard shape, unlike anything I’ve ever seen. I pulled the stem from the shank and saw a very unusual stinger/tube apparatus. The stem looked like it was hand cut, very thin and the button had nice clean angles. From what I found out about KB&B pipes, the clover leaf without the ampersand was from the 1930s. The best part was the price, $4.95! Here is what the pipe looked like, thick cake, but otherwise not too bad.KBB1

KBB2

KBB3 I missed some of the documentation process, but I cleaned the bowl with undiluted Murphy’s Oil Soap and a toothbrush. I decided to remove the stinger, which I accomplished with a heat gun, but still save it for the historical value. I then soaked the stem in Oxyclean. It had a lot of tar build up as you can see from this picture.KBB4 Next I turned my attention to the bowl. This is a very small bowl, my smallest reamer didn’t fit, so I ended up using a pen knife to carefully remove the cake.KBB5

KBB6

KBB7 With the bowl clean and the stem started, it was time for the retort. Normally when I put cotton balls in the bowl I can fit three or four, this bowl only fits one.KBB8 Although the stinger allowed for a lot of tar build up, it kept the shank much cleaner than most. After a few q-tips it was clean.KBB9 The stem was just as dirty as the shank, but the retort made the job of removing tar a breeze.KBB10 You can see from what boiled out just how much tar the stem had.KBB11 The first couple of fuzzy sticks dipped in rubbing alcohol came out very dirty, but it was mostly tar and it didn’t take long before they came out clean.KBB12

KBB13 Since the outside of the bowl was already clean, I used a progression of micro mesh pads, starting at 6000 and worked up to 12,000 to polish the bottom of the shank and the high spots on the bowl. I used 400 grit wet/dry with water to remove the oxidation from the stem then switched to micro mesh pads (1500-2200) with water.KBB14 I finished the stem with the full progression of micro mesh pads through 12,000 grit to get a nice polished finish to the stem. I tried something different this time. Rather than use the buffing wheel I just used the Halcyon II wax and a soft cloth. We’ll see how that holds up. Here’s what the finished pipe looks like.KBB15

KBB16

KBB17

KBB18

KBB19

KBB20

Restoring a Patent-era Dunhill 137 – Andrew Selking


Blog by Andrew Selking

I stumbled across this Dunhill while browsing eBay. A little bit of research indicated this was a desirable patent-era pipe from the collector’s range, which used a better of briar. The pictures indicated a lot of tar build-up (I actually don’t mind tar, it seems to protect the rim from some of the abuse of knocking out the pipe) and some dark spots that might hide scorch marks or burn through. The stem looked decent, free of significant chatter or bite through, so I decided to take a chance.

Here’s what the pipe looked like when it arrived.Dun1

Dun2 The first order of business was to loosen the tar and heave cake, so I dropped the bowl in the alcohol bath.Dun3 Next I turned my attention to the stem with the Oxyclean bath (yes it is taking a bath with another Dunhill stem, which I will write about later).Dun4 After a good long soak, I broke out my Castleford reamer and removed the cake back to the wood.Dun5 After cleaning the inside of the bowl, I used some 0000 grade steel wool in an attempt to remove the tar.Dun6 Usually that works, but there was some rim damage that necessitated topping. Dun7 I use a piece of glass that I found to ensure an even surface when topping.Dun8 I also use a relatively fine grit (400 grit) paper when doing something like this. I find that it makes the final sanding easier and I don’t inadvertently remove more than I wanted to. Here is what the bowl looked like after topping.Dun9 Next I tackled the inside of the shank using the retort.Dun10 There is nothing like boiling alcohol to loosen up built up tar and tobacco. This is what the brush looked like after the first pass.Dun11 In case you’re wondering what I do to clean the brush in between passes, I swish it in the jar I use for soaking the bowls. The sediment settles to the bottom and since soaking in alcohol is only one step in the process, I don’t worry too much about it.

Once the brush no longer captured a bunch of gunk, I moved on to q-tips dipped in rubbing alcohol. In my opinion, rubbing alcohol works fine for general cleaning, but it does not work well for mixing with stain or for doing the retort. As you can see, it took a good amount of q-tips before the shank came clean.Dun12 Next I used the retort on the stem. As always, I made sure to plug the end to ensure the dirty alcohol didn’t boil over and shoot out the end (that’s always hard to explain to your significant other).Dun13 The stem was pretty nasty, as you can see from the residual alcohol in the test tube.Dun14 After using a pile of fuzzy sticks (I get them in the craft section at Wal Mart, they’re cheaper than pipe cleaners and longer), the inside of the stem was finally clean.Dun15 Starting with the stem, I used 400 grit wet/dry sandpaper with water to remove the oxidation. I then moved on to 1500-2400 grit micro-mesh pads with water. I find that the wet sandpaper does a good job getting into the little crease on the underside of the button. It’s also helpful to occasionally dry the stem off and see if there’s still any oxidation left, it’s easy to overlook when the stem is wet.Dun16 I use the same progression of micromesh on both the bowl and the stem, although I don’t use water with the bowl. Here is the pipe after going through the entire progression 15000 through 12,000.Dun17 I stained the bowl with Pimo Pipe Supply’s mahogany stain, diluted with denatured alcohol and flamed to set.

Next I took the bowl and stem to the buffing wheel, where I used some white diamond and a couple of coats of carnauba wax. Here is the finished result.Dun18

Dun19

Dun20

Dun21

Dun22

Dun23

Dun24

Dun25

Dun26

DUN27

Dun28

A Wally Frank Sandblast Unique Sitter Reborn


Blog by Steve Laug

Every once in a while I get the urge to just sit and work my way through the estate pipes on the various Ebay sites. I rarely if ever pick anything up anymore unless it is something that is unique and just grabs me. The last time I did the scan of the various sales I came across this old Wally Frank sitter. It combined the look of a Rhodesian with a diamond shank like a Bulldog and a sitter base. It had a very English made pipe look in my opinion. The sandblast on the bowl and front portion of the shank appeared to be deep and craggy. The rustication of the last third of the shank, a feature that I find often on sandblasted Wally Frank pipes, looked good and the stamping was clear and readable. The bowl appeared to be in decent shape and finish looked good in the photos. The stem was oxidized and the seller noted that it sat off centre slightly or did not line up with the shank. I figured if it had a metal tenon that was fixable and if it was a push tenon it was a non-issue. I was hooked. I bid on it and won, only to find out that the shipper never shipped out of the US. We corresponded and he decided to send it on to me. For that I thank him. The next series of six photos were included by the seller in the Ebay write-up.Frank1

Frank2

Frank3 When the pipe arrived, I opened the box and removed the pipe. The blast was even better than the photos had shown. The stem oxidation was pretty much as shown above. The misaligned stem was no issue as the stem had a push tenon and was only a matter of turning the stem slightly. The airway was open but dirty with tars and grime. The bowl had a light cake that thickened toward the bottom of the bowl. The edges of the shank and the stem were sharp and clean showing that it had not been buffed much in its history. There were a couple of spots on the edge of the rim and shank at the union next to the stem where the stain was worn or missing. The rim itself was dirty with tars. The stem was clean though oxidized with no tooth marks or chatter. The button was crisp and sharp and the slot was an open oval that flared into the stem opening up into the airway like a funnel. I took a few photos of the pipe when I took it out of the box.Frank4

Frank5

Frank6

Frank7 The photo below shows the situation with the cake in the bowl. It was not centered or evenly built up around the bowl so it would need to be cleaned up and adjusted.Frank8 I reamed the bowl with a PipNet reamer and took the uneven cake back to bare wood. I used the smallest cutting head to begin with and worked my way up to the second cutting head. With these two I was able to clean out the cake. The bowl shape is kind of combination of a V and U shape. The sides are U-shaped to about a half-inch from the bottom of the bowl where it shifts to a V shape. I scrubbed the rim surface with a soft bristle brass tire brush to clean off the tars and oils built up there.Frank9

Frank10 I scrubbed the bowl and rim with Murphy’s Oil Soap and a tooth brush. Once I had scoured it with the soap I put a thumb over the bowl and rinsed off the soap with running water. The photos below show the pipe after I had scrubbed, rinsed it and dried it off with a soft cloth.Frank11

Frank12

Frank13

Frank14

Frank15 After cleaning the briar I gave it a coat of Conservators Wax which is a microcrystalline wax cleaner. I buffed it with a shoe brush to bring a shine to the bowl.Frank16 I put the stem in a jar of Oxyclean to soak and raise the oxidation to the surface. I let it sit overnight to soak. I then returned to the inside of the bowl. (NOTE: The reason I give the bowl a coat of wax before cleaning the inside of the shank and bowl is because I want to protect the finish when I am cleaning out the inside).Frank17

Frank18 I cleaned out the shank with isopropyl alcohol and cotton swabs and the airway with pipe cleaners. I cleaned it until the cleaners came out with no grime on them.Frank19 In the morning I took the stem out of the oxyclean and dried it off with a paper towel. The roughness of the paper towel removes the oxidation that has been raised to the surface of the stem. Once it was dry I slipped a plastic washer on the tenon and reinserted it into the shank of the pipe. The washer allows me to sand all the way to the edges of the stem without rounding the edges at the shank junction. I started with a medium grit sanding sponge and worked through a fine grit sponge and fine grit sanding block. I then wet sanded with 1500-2400 grit micromesh pads and dry sanded with 3200-12,000 grit pads. I rubbed down the stem between each group of three pads with Obsidian Oil and then moved onto the next set of three. When I finished I buffed the stem with White Diamond and gave it a final coat of Obsidian Oil and let it sit until it had dried.Frank20

Frank21

Frank22 (NB In the photo below I left the plastic washer in place on the stem while in the two above I removed it for the photo)Frank23 I put the stem back on the bowl and gave it a final buff with a blue polishing bar on the buffer. This polishing compound is a plastic polishing compound (Blue Diamond maybe, can’t remember the name). I finished by giving the bowl a buff of carnauba wax (light touch so as not to gum up the blast finish) and then multiple coats of the wax on the stem. I buffed the whole pipe with a soft flannel buff for the finished shine on the stem and the bowl shown in the photos below. The pipe is ready to be christened with its inaugural smoke this afternoon while I go for a walk in the neighbourhood. I have chosen a Virginia Perique blend called Pilgrim’s Muse that I purchased from the Country Squire Tobacconist. It is a great smoking tobacco with a good flavour.Frank24

Frank25

Frank26

Frank27

Frank28

The Resurrection of an old KBB Yello-Bole Premier Panel


Blog by Steve Laug

In a recent trade with Andrew Selking I received an older KBB Yello Bole Paneled billiard. When I removed it from the box there was something about the older KBB Panel that grabbed my attention. It was stamped on the left side of the shank with the familiar KBB logo and the Yello-Bole next to it. Underneath that it bore the stamp Reg. US Pat. Off. Directly below that was stamped Premier over Cured with Real Honey. The pipe had been repaired at some time in its ragged existence with what appeared to be a homemade repair job. The tenon had broken somewhere along the line and a previous owner had drilled out the stem and used a piece of stainless steel tubing to make a new tenon. The metal tenon was stuck in the shank of the pipe and the stem just sat loosely on it. The fit of the stem to the shank was off with the stem sitting high and to the right. The previous owner had tried to compensate for the off centered stem by sanding flat spots on the stem sides and bottom that broke the smooth lines of the square shank and stem. There were two small hairline cracks on the shank – top right and bottom left that would need to be repaired once the tenon was removed. The bowl was out of round with damage to the inner edge of the rim and a tarry build-up on the surface. The outer edge rim crown of the bowl was also compromised and would need some work. The stem was not too badly oxidized but it had tooth marks on the top and bottom near the button.YB1

YB2

YB3 Background Information
I wrote about the history of the KBB stamped Yello-Bole Pipes. The following link will give you the details: https://rebornpipes.com/2014/07/21/renewing-an-old-kbb-yello-bole-honey-cured-briar-billiard/
Yello-Bole pipes are one of my favorite older US brands doing the research would be enjoyable. As with other early brands made in the states I have found that older is better. A KBB in a cloverleaf stamp will date them back to the ’30’s. I have found through my reading that the 4 digit shape numbers are older than 2 digit ones. The pipes with the logo on top of the stem are older than ones that have them on the side. That is just some of the information that I found with a cursory read through the forums and a variety of websites.

The SM Frank website http://www.smfrankcoinc.com/home/?page_id=2 gives a wealth of historical information on Kaywoodies, Yello-Boles and the merger between KBB and SM Frank and later Demuth. It was a great read and I would encourage others to give the website a read. I also wanted to find some help in dating my old Yello-Bole Pipes and I came across this link to the Kaywoodie Forum: http://kaywoodie.myfreeforum.org/archive/dating-yello-bole-pipes__o_t__t_86.html . I am including some of the information I found there as it gives the only information that I found in my hunt to this point.
“…there isn’t a lot of dating information for Yello-Bole pipes but here is what I have learned so far.

– If it has the KBB stamped in the clover leaf it was made 1955 or earlier as they stopped the stamping after being acquired by S.M. Frank.
– From 1933-1936 they were stamped Honey Cured Briar.
– Pipes stems stamped with the propeller logo they were made in the 30s or 40s no propellers were used after the 40s.
– Yello-Bole also used a 4 digit code stamped on the pipe in the 30s.
– If the pipe had the Yello-Bole circle stamped on the shank it was made in the 30s this stopped after 1939.
– If the pipe was stamped BRUYERE rather than briar it was made in the 30s.”
Given the above information I discovered that the pipe I was working on was made sometime between 1930 and 1940. Thus it was an early Yello-Bole from the 1930s or 40s.

Restoration Process

I took the stem off the bowl and tried to remove the inserted metal tenon. It was firmly stuck in place and I could not move it even with pliers. I put the bowl in the freezer overnight hoping that the cold would contract the metal and briar differently (as is the case with the varied material and density). In the morning I took it out of the freezer and was able to turn the tenon out of the shank with pliers. Once it was removed it was clear to see that it had not been glued in the shank but merely stuck with the tars and oils of the tobacco in the shank.YB4 I found a threaded Delrin tenon in my box of tenon parts and it was a workable replacement for the metal tenon. I tapped the drilled out hole in the stem and screwed the threaded tenon into the hole. It was a perfect fit. I removed it once again and put some glue on the threads and screwed it into place and let the glue set. The diameter of the tenon would need to be adjusted as it was too big for the mortise. This was actually ideal in that I would be able to adjust the fit against the shank on the sides and the top. The bottom of the shank would take work to make a smooth transition.YB5

YB6

YB7

YB8

YB9

YB10 I sanded the tenon with a Dremel and sanding drum to remove the excess Delrin. I hand sanded it with 180 grit and 220 grit sandpaper to smooth out and fine tune the fit. I spread the hairline cracks with a dental pick and dripped superglue along the cracks and pressed them together until the glue set.YB11 The stem fit in the shank nicely. The photos below show the damage that had been done to the stem in the previous repair. It is especially visible in the photos of the pipe from the side and the bottom. The stem had been modified to the misfit of the previous tenon so work would need to be done to realign the fit against the end of the shank.YB12

YB13

YB14

YB15

YB16

YB17 I sanded the bottom, top and right side of the shank until the transition between the briar and the vulcanite was smooth. The left side was touchier in that I did not want to damage the stamping. I sanded this area while covering the stamping. The trick was to smooth out the transition without making a drastic dip in the briar – it just needed to be re-tapered until it flowed naturally into the stem. Sanding the top of the stem also took care as it had the insert of the white propeller. Too much sanding on the top would damage and compromise the insert. The photos below show the newly sanded and tapered shank/stem. I sanded with 220 grit sandpaper, medium and fine grit sanding sponges and a fine grit sanding block. I sanded the rim and curves of the rim with the same sandpapers. I folded a piece of 220 grit sandpaper and worked on the out of round bowl to clean it up as much as possible.YB18

YB19

YB20

YB21 I wiped the bowl and shank down with acetone on a cotton pad to remove the finish from the bowl.YB22

YB23

YB24

YB25 I cleaned out the bowl and shank with isopropyl alcohol, cotton swabs and pipe cleaners. I cleaned out the stem as well at the same time. I sanded the bite marks on the top and bottom of the stem with 220 grit sandpaper to minimize the damage and remove the tooth chatter. There were still some tooth marks that needed to be repaired.YB26

YB27

YB28

YB29

YB30 I scrubbed the areas around the bite marks with alcohol to clean the sanding dust and grit from around them. I then used black superglue to fill the bite marks and sprayed it with and activator/accelerator to harden it.YB31

YB32

YB33

YB34 When it dried I sanded the filled areas with 220 grit sandpaper to level them out with the surface of the stem. I sanded the stem with a medium and fine grit sanding sponge and a fine grit sanding block to further blend the patches into the stem surface. In the next two photos the patches are blended into the stem but the blackness of the super glue and the blackness of the unpolished stem do not match so they show up as spots on the stem.YB35

YB36 I stained the bowl and shank with a medium brown aniline stain thinned 50/50 with isopropyl alcohol. I wanted a medium brown wash to highlight the grain and show contrast in the finish. The wash provided just what I was looking for.YB37

YB38

YB39

YB40

YB41 I sanded the stem further with fine grit sanding blocks and also sanded the flat areas on the transition between the shank and stem to work towards a more seamless look. The next photos show the smooth transition and the smooth stem. The patches are fading more into the vulcanite of the stem as well at this point in the process.YB42

YB43 I moved on to sand the stem with micromesh sanding pads – wet sanding with 1500-2400 grit pads and dry sanding with 3200-12,000 grit pads. I rubbed down the stem between each set of three pads with Obsidian Oil and then continued sanding. I have found that sanding the stem while the oil is freshly applied allows the grit on the pads to cut into the finish and raise a shine.YB44

YB45

YB46The next two photos show the finished stem. After the final sanding I rubbed it down with Obsidian Oil and let it soak in before polishing it with the buffer. I gave it several coats of carnauba wax. The patches on the stem by this point are fully blended into the vulcanite and cannot be identified.YB47

YB48 The next photo shows the reworked inner edge of the rim to show my repairs on the out of round bowl. I sanded until it was as close to round as I could get it by hand. I bevelled the inner edge of the bowl with the sandpaper to make the transition smooth.YB49 The finished pipe is shown below. Thanks to Andrew for sending me this challenge. I really enjoyed bringing this old timer back to life. It will occupy a special spot in my older American pipe maker collection and join my other KBB Yello-Boles as favourites that I enjoy smoking. I buffed it with White Diamond and gave it multiple coats of carnauba wax and finished by buffing it with a soft flannel buffing pad to raise the shine. All that remains is to sit back and enjoy a bowl of an aged Virginia tobacco and read a good story!YB50

YB51

YB52

YB53

In Retort to Claims of Unclean Restored Pipes – Robert M. Boughton


Guest Blog by Robert M. Boughton
Member, North American Society of Pipe Collectors
http://www.naspc.org
http://www.roadrunnerpipes.com
http://about.me/boughtonrobert
Photos © the Author

“A thick skin is a gift from God.” —Konrad Adenauer (1876-1967), first Chancellor of West Germany

INTRODUCTION
During the course of my serious restorations, and by that I mean the short period of time since I created an online store with the primary goal of selling estate pipes I repair, direct feedback from my local customers has been 100% positive. That, of course, is always gratifying, and I did appreciate it.But those who have read my previous blogs know I am not in the business to be gratified by elliptical, kind words of others. The real motivation is my love of all things tobacco-related and in particular returning a well-used or even battered pipe to its original beauty, or as close as I can come.But being somewhat more thick-skinned than most folks (if everyone grew up in my dysfunctional household, the whole world would have my hide), I always prefer the truth, the whole truth and nothing but the truth. So help me God. That last phrase might better be read, God help me.

In the last couple of months, you see, word has reached me of an alleged problem with the cleanliness of pipes I sold. Now, don’t get me wrong. I only use the word alleged because, having as thick of a head as my dermis and consequent confidence in my work with pipes or on any other subject for that matter, until proven wrong, my impulse was to resist the claim. The problem was that I was not hearing any complaints from customers. Such forthright criticisms might have been disappointing, but being constructive would have been treated as any direct reports: with the professionalism I apply to the daily conduct of my business.

The most unpleasant part of this experience, which as I mentioned went on (and on and on) for a couple of months, was that the feedback I kept getting was not from any friends or fellow pipe club members to whom I sold pipes, but instead from my good friend and mentor, Chuck Richards, who, to my great surprise and initial sadness, was the only person my customers, without exception, seemed to trust with such vital information.

Thus I received the first “word” that I needed to be more careful cleaning my pipes. I can tell you, my pipes almost cleaned themselves when that was all Chuck could say before he was distracted and had to tend to something, giving me just enough time to become more than a tad miffed. Being familiar with Chuck’s occasional terseness, I knew he was only passing on the information and had my interests at heart. Still, my breath grew short, and the heat rose under my collar. Soon enough, I got more details, including the first name of the customer, which I didn’t recognize, and then a description of the pipe – a Londoner black rusticated bent bulldog – that I connected right away to a different first name because I had bent a rule by accepting his check. I realized he went by his second name.Robert1 Yes, I recalled the pipe and its delighted new owner, when he bought it, with clarity. The nice, rough little black bulldog was one of the few I took from my private collection, having enjoyed it for a while and then allowed it to fall back into a corner, unused and not of particular interest to my personal tastes. Could I have forgotten to clean it? The possibility existed, and although I wanted to remember following my usual routine of cleaning and sanitizing the pipe, I had no blog on which to fall back and check since it was in good condition when I decided to sell it for my growing business and dwindling selection.

Therefore, I explained this scenario to Chuck, and, having the address of the nice older gentleman who had purchased it, went to my bank for a cashier’s cheque in full refund and put it in the mail with a letter of sincere apology. I wrote that I also wished for him to keep the pipe and offered a 20% discount on his next purchase should he choose to give me a second chance. I even asked Chuck, who lived in the same neighborhood and was friends with the man, to tell him not to return the refund, as I knew where he banked and would only deposit it myself.

And so I thought the issue settled – but no. Word of my well-restored pipes with unclean shanks kept coming in, via Chuck. I think it is understandable that my mood simmered until, in time, the situation boiled over. When at last, one afternoon at the tobacconist’s, I grew so heated that I broke out in a sweat, I regret to admit I snapped at Chuck, the only person with the nerve to tell me to my face that a problem indeed appeared to exist. Of course, Chuck was only going by the words of others, but enough instances of the same complaint from a sufficient number of witnesses would convince almost anyone.

“I’m just telling you what I’ve been hearing, and not from one or two people but a good number now,” he said, and the grin, which had never left his face during my account of how many bristly cleaners soaked in Everclear I average per pipe until they come out clean, broke into his full gale force smile. I have always been, was then and suspect I ever will be defenseless against that wonderful expression of delighted amusement. It was, indeed, the best retort to my argument he could have made.
Robert2And that is how Chuck came to explain to me the relative inefficacy of bristles versus the boiled alcohol retort method that he had demonstrated to our pipe group a couple of years ago before I would have even thought of taking notes.

But enough of all that. This blog also concerns the restoration of a Kaywoodie Signet Bent Billiard, including a validation of the retort method by Chuck on the pipe I had thought was finished. I will describe and illustrate that process when the time arrives.

RESTORATION
I started this restoration under the impression that it would be just a typical exercise on a better than average estate pipe I bought, with the rim and chamber seeming to be the greatest challenges, except that the other problems (some minor scratches that disappeared with 1500-grade micromesh and deeper blemishes I fixed with high-grit sandpaper) were far fewer than usual.Robert3

Robert4

Robert5

Robert6

Robert7 I bought a new Castleford five-piece reamer set (with a T-handle and four attachable reamers ranging from 17-23mm) to see if it might be up to filling the boots of my old Senior Reamer, which fell in action during a restoration I blogged not long ago. Choosing the 17mm reamer, I went to work at a slower than usual pace to test the tool that was new to me, and seeing it worked quite well, I finished its part on the chamber.

Then I switched to 220-grit paper and sanded the inner wood to a smoothness relative to the mess it was in when I began, tamped out most of the remaining carbon, blew through the shank to clear some of the rest and rubbed a couple of small cotton squares soaked in Everclear around the chamber to pick up all but particles of the remainder. To the touch of a finger that I ran around the walls, the surface was still rough but could be finished later.

The rim burn came off with super fine steel wool, and scratches and pits uncovered from beneath the blackness were easy to deal with using 400-grit paper followed by 600, then micro-meshing using new 1500, 2400 and 3200 pads.Robert8 After finishing the chamber with 500-grit paper, dumping most of the carbon as I went, I blew through the shank to clear more and soaked a couple of thin squares of cotton cloth in Everclear to scrub the chamber. Only a small amount of residue remained, and to the touch of my finger the sides of the chamber felt silky and polished.

That was when I commenced what was my old way of cleaning the pipe. One after another, I dipped first one end of a bristly cleaner in Everclear and ran it through the shank, then the other end. After more than a dozen cleaners lay filthy in a pile and two more came out white, I repeated the process with the stem, except that it only seemed to require two or three cleaners.

To mix things up, compared to my usual routine, I followed my impulse to finish the stem and be done with it. I started with 600-grade micromesh on both sides just below the bit, and switched to 800, 1000, 1800, 2400 and 3200 micromesh. I buffed it on the wheel with red Tripoli and White Diamond.Robert9 I sanded small areas of the bowl with 400-grit paper to remove the deeper scratches, dings and pits.Robert10

Robert11 To remove the marks of sanding from the wood, I used super fine steel wool followed by my normal progression from 1500-3200 micromesh. I followed the same micromesh procedure on the entire bowl and shank.Robert12

Robert13 Finishing the wood with a buff of white and red Tripoli, White Diamond and carnauba, here is what I handed over to Chuck.Robert14

Robert15

Robert16

Robert17

Robert18 The time, at last, has arrived for Chuck’s brilliant demonstration and invaluable contribution to the restoration of this Kaywoodie Signet Bent Billiard, and my further education in pipe restoring, shown step-by-step in the following nine photos: 1) Chuck has prepared the pipe by filling the chamber with a piece of a paper towel, having no cotton available. He has also connected the retort’s Pyrex test tube, almost filled with 190-proof Everclear, and plugged with a stopper. The stopper leads to a copper tube which in turn attaches to a rubber passage that is connected to the pipe’s stem. 2)Chuck begins to heat the alcohol in the test tube at the base. 3) The alcohol begins to boil. 4) As the alcohol soon reaches full boil, Chuck tilts the test tube slightly to allow the hot liquid to bubble through the retort apparatus and into the pipe stem, and from there all the way to the chamber. The paper towel begins its rapid transformation from white to nasty brown. 5) When the test tube is empty, Chuck tilts the pipe back enough for the remaining, filthy alcohol to drain back into the test tube. 6) The lighter product of a second run with fresh Everclear. 7) After wiping dry the chamber, this is the residue. 8) Chuck snakes the other end of the piece of paper towel into the shank and twists it.
9) The residue from that.Robert19

Robert20

Robert21

Robert1

Robert22 And I take a close look inside the chamber of the Kaywoodie that is clean all the way to the bottom.Robert23 CONCLUSION
Although my skin is tough, like a fault on the mail of a dragon of legend, my weak spot was pierced. The wound was neither superficial nor deep but still stings a bit, being inflicted as it was by so many of my friends’ and associates’ lack of trust to confide in me. Had my experiences selling restored estate pipes until now been a scientific experiment, an analysis of the data would support the conclusion that friends are unwilling to express their findings of any serious flaws to the one person who could prevent the same mistakes from being repeated.

This reluctance, of course, is created by the risk of hurting the feelings of the friend whose sensibilities the paying customers would rather spare. Such a reaction by the person on the receiving end of the message is indeed real but necessary for a demonstration of true friendship. An unfortunate fact is that too few people understand how criticism is a two-sided razor, one cutting for the positive and the other for the negative. My mind has always been open to constructive, helpful criticism while it shuts like a steel trap against anything senseless and cruel.

Now, thanks to the good but misguided intentions of some of my friends, I am compelled by dual senses of honor and good business to contact everyone who has purchased a pipe from me, in person or online, with a carefully written explanation of the error and an offer of a free correction, postage included. But also thanks to these friends, and in particular my good friend and mentor, Chuck, I now have a backlog of “completed” restores on which I can practice retorting.

So far, they’re coming along well, with some new restores thrown in.

Reviving a Peterson Dunmore 79 with my Son in Law


Blog by Steve Laug

This past weekend my son in law came over with the Peterson Dunmore pipe that he had purchased on a recent pipe hunt in the US. He picked it up for $15USD so it was a good purchase. We finally got around to working on it. In a previous post on the Dunmore line I had found that the line from Peterson really is a stripped down pipe. The one that we worked on this weekend was in essence a system pipe. The lack of a ferrule is made up for by a stylized carving around the shank end. The stem sits snugly against the end of the shank but is not flush with the diameter of the shank. The saddle on the stem has a slightly different flair than a regular Peterson pipe. It had a Plip stem. It bore the stamping Peterson’s over “Dunmore” on the left side of the shank and Made in the Republic of Ireland and the number 79 on the right side of the shank.Dun1

Dun2

Dun3

Dun4 The pipe was in pretty decent shape under the grime and tars on the bowl and rim. It had some beautiful birdseye grain under the grime that would really stand out with a bit of work. The rim was damaged along the back outer edge with small nicks. The build up on the rim was hard and uneven. The bowl itself was out of round and would need to be adjusted. The stem was oxidized but under the oxidation on the saddle it bore the stylized P stamp. The top of the stem near the button had a few small bite marks and some tooth chatter. The underside of the stem near the button had a pin hole in it that would need to be patched.Dun5

Dun6 While my son in law, Lance worked on the bowl scrubbing and cleaning it I worked on the stem. I sanded it with 220 grit sandpaper to clean up the tooth marks. I wiped it down with alcohol to clean the areas around the hole. I daubed Vaseline on a pipe cleaner and inserted it from the tenon end of the stem and then used black superglue to repair the hole. I gave it several coats of glue to build up the repair, sprayed it with accelerator and let it dry between applications. Once I had the patch solidly in place I set it aside and let it cure. After curing for about 30 minutes I sanded the patch with 220 grit sandpaper to blend it into the surface of the stem. I sanded it with a medium and a fine grit sanding sponge to remove the scratches and further blend it. Dun7

Dun8

Dun9 Lance worked on the bowl while this was going on. He washed down the bowl with acetone on cotton pads to remove the grime and the remaining finish on the pipe. He softened the buildup on the rim surface and then lightly topped the bowl to remove the damage and the buildup. Once it was smooth, he sanded it with a fine grit sanding sponge and then wiped the bowl down with another wash of acetone.Dun10 We gave the bowl a coat of medium walnut stain mixed with Danish Oil and rubbed it onto the bowl and off again with a soft cotton pad. The bowl looked good when I had finished wiping it down and buffing it with a shoe brush. The grain is quite stunning.Dun11

Dun12

Dun13 I buffed the stem with red Tripoli and White Diamond to remove more of the oxidation. I rubbed it down with some Obsidian Oil and set it aside for the pictures below. At this point in the refurbishing the stem is looking quite good. I still need to sand with micromesh pads and then reapply the gold in the P stamp on the left side of the stem.Dun14

Dun15 I wet sanded the stem with 1500-2400 grit micromesh pads and then dry sanded with 3200-12,000 grit pads. In between each set of three pads I wiped the stem down with Obsidian Oil. I finished by buffing the stem with White Diamond and then gave it multiple coats of carnauba wax and buffed it with a soft flannel buffing pad.Dun16

Dun17

Dun18 After sanding it with 3200-4000 grit pads I used a gold paint and applied it to the P logo on the stem and then sanded it again with the same three grits of pad.Dun19

Dun20 I put the stem back in the shank and buffed the entire pipe with carnauba wax and with a soft flannel buffing pad. The finished pipe is shown below. The first four photos give a close up look at the bowl so that you can appreciate the beautiful grain on the pipe. The last four photos show the pipe in its entirety. It is truly a stunning piece of briar with no fills or pits. It is ready for its inaugural smoke by my son in law. It looks as good as new and the stunning birdseye grain gives the pipe a rich look. I look forward to hearing what he thinks of his restored pipe and even more what he thinks once he has smoked it.Dun21

Dun22

Dun23

Dun24

Dun25

Dun26

Dun27

Dun28

Re-stemming a Hardcastle Pot – Andrew Selking


Blog by Andrew Selking

I picked up this nice looking Hardcastle pot, but when it arrived I realized that it did not have the proper stem.Hardcastle1

Hardcastle2 Fortunately Steve bailed me out and sent a couple of likely replacements. The stem that I settled on had a slightly smaller tenon diameter and the outside diameter was noticeably bigger. This was going to be a fun challenge. I covered the shank with painter’s tape and started reshaping the stem with 100 grit sand-paper.Hardcastle3 Here is a shot after getting to about 80% completion.Hardcastle4 Next, I took the painter’s tape off and replaced it with Scotch tape (since it is thinner) at the end of the shank. At this point I was using 400 grit wet/dry without water.Hardcastle5 Once I completed that step, I took a rubber washer and placed it on the tenon to protect the end of the stem and shank. I used 400 grit to finish the last little bit, frequently taking the washer out to check the fit.Hardcastle This is what the pipe looked like once I had the stem sanded to fit.Hardcastle6

Hardcastle7

Hardcastle8

Hardcastle9Next I turned my attention to the bowl. I used the largest reamer to get almost to the bottom and finished it with the next smaller one.Hardcastle10 I used OOOO grade steel wool to remove the tar from the rim.Hardcastle11 Once the bowl was clean, I used my retort to clean the shank.Hardcastle12 This is why I am a firm believer in the retort, pipe cleaners dipped in alcohol came clean, but all this gunk was still inside.Hardcastle13 I used the retort on the stem. Although this picture does not show it, always plug the end of the stem to prevent the retort from boiling over and spitting nasty tobacco juice everywhere (ask me how I know this).Hardcastle14 After the stem was cleaned, I worked on polishing it. I started with 400 grit, then moved to 1500 through 2400 grit micro mesh with water.Hardcastle15 I used the 1500 grit through 2400 grit without water on the bowl, then finished both with a progression through 12,000 grit.Hardcastle16 Now the pipe was ready for stain. This time I used an aniline dye (light walnut) from Pimo Pipe Supply. I diluted the dye by 50% with denatured alcohol, applied it with a cotton ball, flamed it with a lighter, and repeated until I had the coverage I wanted.

After an uneventful trip to the buffer, where I used white diamond and carnauba wax on both the stem and bowl, this is the result. I am really happy how this turned out. Thanks again to Steve for his generosity in providing the donor stem.Hardcastle17

Hardcastle18

Hardcastle19

Hardcastle20

Hardcastle21

A New Pipe for me – a Diebel’s K.C. Canadian


Blog by Steve Laug

NonameThere is a bit of a back story to this pipe. For as long as I can remember (you have to remember that may not be that long when you reach a certain age. Memory plays tricks on you) I have had two copies of Carl Ehwa Jr.’s The Book of Pipes and Tobaccos. One I am saving is pristine and one that graces my shelf. The other is for lending out and referring to when I am looking for information. It is a book I have read and reread and never tire of in the process. In a recent thread on Smoker’s Forums Ken posted to a thread on a review of the book some interesting information tying the book to a Diebel pipe that he had in his possession. He posted the pipe and then the information that Carl Ehwa Jr. was formerly a Master Blender at Diebels Tobacco and founder of McClelland Tobacco. He received several responses – one from Chris noting that the book’s dedication reads, “For my grandfather, Dr. W. C. McClelland…” I remember meeting Mary McNeil and sharing a limo back to the airport after the Chicago Show. In our conversation I found out that she was married to Ehwa when they started McClellands. He passed away and she married Mike McNeil who has always been a part of things there I believe.

Thanks to Ken I was given the impetus to try to find a Diebel’s pipe. I searched on Ebay and found one – a Diebel’s Canadian – to add to the collection. It should arrive very soon and when it does I will load a bowl of Christmas Cheer and read Ehwa’s book yet again. Adding a pipe to the read will be just one more dimension to the experience.Diebel Canadian

Diebel canadian2

Diebel Canadian3 I was excited to receive the Diebel pipe in the mail so when it arrived I opened the box expecting to see the pipe above. I expected it to be a normal length Canadian with simply the Diebel stamping. When I unwrapped it I found a Diebel pipe but a different one than the one I had purchased. It was stamped DIEBEL’S K.C. on the top of the shank and had a Savinelli shield on the stem. It had a band of gold as part of the stem. On the underside of the shank it is stamped Italy and Savinelli Product. There were no shape numbers on the pipe but it was the long shank Canadian that is common with Savinelli. It measures 7 inches long. The briar was dirty and stained on the sides and the back of the bowl with oils. It was quite dark. It appeared to have a matte finish. The rim was darkened with tars and some scratches on the top front of the rim. The inner edge was darkened and had some burning.Diebel1

Diebel2

Diebel3

Diebel4The bowl had a thick cake that was rock hard. It significantly reduced the diameter of the bowl. The stem had two tooth marks on the top near the button and on the underside was a deep bite mark. I removed the stem and inside it had been drilled to receive the Savinelli balsa filter. There was a new filter in the tenon.Diebel5

Diebel6

Diebel7

Diebel8 Examining the old Diebel’s stamped Savinelli left me with questions that needed answering. I wanted to know more about the Diebel’s pipe shop. I wanted to know if Savinelli made all of their pipes or if some were actually carved in the shop itself. I wanted to know if the other pipe, the one I had actually ordered was made by Savinelli as well or if it may possibly have had a different manufacturer. You can see that the pipe left me with many questions that would require some research to find answers.

I did some digging and found the Diebels web site. On the site was a section on company history. The link follows: http://diebelsg.com/stores/company-history/

In reading through that section on the history of the company I learned that Fred Diebel learned pipe making from a local pipemaker, Fred Metz. He carved in house pipe made the way he had learned to make them from Fred. He also imported Savinelli and English made pipes. I am including a short section from that portion of the company history.

“When Fred Diebel returned from his World War II duty as a U.S. Navy pilot of lighter than air craft (blimps), he knew he wanted to own his own business. Diebel, who earned a degree in mathematics from Kansas City University (now UMKC), saved for his life’s ambition while working successively for two venerable retailers in Kansas City: Rothschild’s and Montgomery Ward.”

“In 1950, Diebel capitalized on his first entrepreneurial opportunity, buying into Afflick & Co., a tobacco shop located at 11th and Walnut in downtown Kansas City. The company was re-named Afflick & Diebel. There, Diebel became an avid pipe smoker and developed an interest in the arcane craft of pipemaking. He sought a noted local pipemaker, Fred Metz, to teach him the craft. Initially, the elderly German native refused. But eventually, Diebel’s persistence paid off and Mr. Metz consented, saying, “Young man, I will teach you to make pipes on these conditions. You buy the proper equipment and you promise to do it my way, the right way.””

“In 1954, Diebel determined it was time to strike out on his own. He saw the Country Club Plaza as a shopping and business district on the rise. So with a bankroll of $1,000, he purchased two display cases for $100 each, tools, tobacco product, and signed a lease. Fred Diebel, Pipemaker, Tobacconist was born at 4625 Wornall, across from Putchs’s Cafeteria (now Houston’s) and next to Renner’s Shoe Repair. The enterprise was successful from the beginning, though not in the way Diebel expected. He underestimated the strong demand for pipe repair and found little time for the pipe making work necessary to supply his retail pipe business. In order to manage the growth demand for new pipes, he began importing pipes from England.”

“For more than a decade, Diebel specialized exclusively in pipes, pipe repair, and pipe tobacco. Customers requesting cigars or cigarettes were politely but firmly referred elsewhere. Mr. Diebel’s philosophy may have been guided more by personal disdain for any smoking related product that did not involve a pipe than by visionary marketing theory. Nonetheless, he became one of the early niche retailing pioneers…”

“…The company also began manufacturing pipe tobacco. Conditioning, cutting, casing, blending, pressing and packing operations occurred in a warehouse located in the caves at Bannister and Holmes. Manufacturing continued through the early 1980’s. The business continued to grow as a family business, with Diebel’s wife plus his two sons and daughter working in the shops and manufacturing facilities during their teen and young adult years.”

I love learning the history of a brand. Further reading on other sites led me to the information that Savinelli made Diebel’s pipes. With that information I went on to clean up the pipe. I reamed it with a PipNet reamer, starting with the smallest cutting head and working up to the second head. I reamed the cake back to bare wood. The cake and bowl smelled of a heavily cased aromatic. The inside of the shank and stem was black with tars.Diebel9

Diebel10 I wiped the bowl down with acetone on cotton pads to remove the grime and the finish. The black grime came off easily with repeated scrubbing.Diebel11

Diebel12 Once I had cleaned the grime and tars off the rim I could see the darkened damaged area of the top of the rim and the inner edge of the bowl. Though it is hard to see there were some deep scratches on the top of the rim on the right front side. They were quite deep gouges. The bowl would need to be topped to remove the damage and minimize the burn marks.Diebel13

Diebel14 I set up a topping board with 220 grit sandpaper on top of it. I turned the top of the bowl into the sandpaper in a circular motion, clockwise until the damaged area of the gouges and burned area was gone. I sanded the rim with a medium and a fine grit sanding sponge to remove the scratches left behind by the sandpaper. I used a folded piece of sandpaper to remove the burn damage on the inner edge of the rim. I sanded the bowl with the medium and fine grit sanding sponges to clean up the remaining dark areas. I wiped it down a final time with acetone on cotton pads.Diebel15

Diebel16

Diebel17 With the bowl cleaned and ready to finish I set it aside and worked on the stem. I sanded the tooth marks with 220 grit sandpaper to smooth out the damage of the tooth marks.Diebel18

Diebel19 The tooth marks on the top of the stem cleaned up nicely, leaving behind two small divots that I needed to repair with super glue. The damage on the underside was much worse – the dent was deep and needed a large fill. The first photo below shows the repaired underside tooth mark. The second photo shows the repairs of the marks on the topside. I used clear super glue and an accelerator to harden it. Some might ask why I used clear super glue instead of black super glue and to be honest I am not sure why, I picked up the tube of clear glue and used it as it was closest to pipe at hand. Both work equally well for me.Diebel20

Diebel21 I sanded the glue patches with 220 grit sandpaper and then with medium and fine grit sanding sponges. I sanded until the surface of the patch was blended in with the surface of the stem. You can see from the photos that the clear glue worked well.Diebel22

Diebel23 At this point in the process I gave the pipe a coat of medium walnut Danish Oil stain. I set the pipe on a cork to dry while I went to work for the day.Diebel24 When I came home I buffed the bowl and shank with White Diamond and then worked on the stem with micromesh sanding pads. I wet sanded the stem with 1500-2400 grit micromesh pads and then dry sanded with 3200-12,000 grit pads. I buffed the stem with White Diamond and then rubbed it down with Obsidian Oil. Once it was dry I gave the bowl and stem several coats of carnauba wax and buffed it with a soft flannel buffing pad to raise a shine.Diebel25

Diebel26

Diebel27 The finished pipe is shown below. It is cleaned and ready to smoke. The overall look of the pipe is clearly a Savinelli to me. It is distinctively Italian. The taper of the stem, the sharper edges on the sides of the shank and the bowl shape all say Italian. The band on the stem is various sizes of gold stripes that encircle the stem at the shank union. The walnut stain gives the pipe a contrast look and makes the grain stand out. The finish is warm an earthy in tone and the smooth feel in the hand is comfortable. I am looking forward to loading up a bowl and enjoying an inaugural smoke.Diebel28

Diebel29

Diebel30

Diebel31 Now I am waiting for the arrival of the original pipe I purchased from the seller in Eastern Canada. I look forward to seeing if it is one of Fred Diebel’s own hand-made pipes. The look in the first trio of photos above is certainly different from the look of the Savinelli. When it arrives I will clean it up and do a write up on it and a comparison with the Sav.

Comoy’s Satin Matte Bent Christmas Pipe, In Four-Part Harmony – Robert M. Boughton


Guest Blog by Robert M. Boughton
Member, North American Society of Pipe Collectors
http://www.naspc.org
http://www.roadrunnerpipes.com
http://about.me/boughtonrobert
Photos © the Author

This blog is dedicated to my older uncle, Frank Lee Grannis (1945-2014), who was maybe Arlo Guthrie’s biggest fan. Frank once snapped a black and white photo of a teenaged Arlo, at an outdoor music festival somewhere in the countryside, smiling and signing an autograph for another fan who was about Arlo’s age. I lost the photo in my younger, wilder days, or I would include it here, but the image will always be in my memory.

Let’s get Santa Clause ’cause:
Santa Clause has a red suit
He’s a communist
And a beard, and long hair
Must be a pacifist
What’s in the pipe that he’s smoking?
—Arlo Guthrie, U.S. singer-songwriter-musician, in “The Pause of Mr. Claus” (1968)

INTRODUCTION
Now friends, tonight we’re gonna sing you a song, a Christmas carol in four-part harmony. The song…the Christmas carol is part of an album called “Arlo.” That’s my name. Some of you right about now might be thinking, thinking in your private thoughts there in your heads, well, this Arlo fella must have a pretty big ego. I mean, to go and name an album after himself, he must have let all that fame and fortune go to his head. I don’t know about the fame and fortune part, because all that doesn’t last long, but my head, my head is really sort of small. We’ve never actually met. All of you out there and me, that is.But that’s not what I came to talk about. Came to talk about a pipe. Remember the pipe? This is a story about a pipe.And I’ll get to it. In time, and four-part harmony.

So there I was, sitting on a bench, looking for a song to start with. I didn’t find it. I’m not proud…or tired.Out of all the songs I wrote, there I was, on the bench trying to pull just one verse from my head, but nothing would come.I knew right then and there I had to get ahold of Steve Laug, he’s a good friend of mine. We’ve never actually met. But we write emails back and forth to each other all the time. Now friends, if you ask me, that’s one hell of a way for folks to talk. Sort of like writing a story, in four-part harmony.

And then it hits me that it would be a friendly gesture to sing a Christmas carol about the guy who started it all. A guy in a red coat who has a beard, and all he does is give presents…for free…to all the rest of us. Must be something deranged about a guy like that.Living in Canada…living at the North Pole, it’ll do that to a guy.

Now, Steve and me, we never exactly said anything about any quote. All we talked about was the pipe. Remember the pipe? Anyway, I sent him a picture with the email, an eight-by-ten color glossy with all the details written down, and I said I thought it was what’s called a brandy shape, and Steve, he says it’s like a BBB he has that’s the same shape, only it’s a Christmas pipe. Well, I never heard of any Christmas pipe shape, but Steve knows more than I do. And later on he wrote back and sent a picture of his BBB, an eight-by-ten color glossy with all the details. And the two eight-by-ten color glossies with all the details were almost the same.

And the good news is, that’s when I remembered this Christmas carol I wrote, in four-part harmony, because it was about Santa Claus, even though it’s spelled with an “e” in the song. Don’t ask me why, you can figure it out. Now, everyone knows old Santa is all about Christmas. So that’s about how that story goes.

Now I’ll get on with the other story, about the pipe. Remember the pipe?

I got mixed up online with some poor fella who was selling seven pipes all together and didn’t have a clue what all was in there. ’Cause my eye went straight to one with a white C on the stem and even I knew what that meant. The listing, in micro-mini small print at the bottom of the page, that you’re not supposed to read, called it a “Como’s Bent Billiard,” but I took a closer look and made out the blurry Y after Como. So there I was, still sitting on the bench and having a good old time knowing how nobody else knew the Como pipe was in there with all the others, and that’s why the price was so low with time running out.Rob2 I’d like to dedicate this Christmas carol to all the pipe-abusing S.O.B.s out there who have been bad little boys and girls and ought to keep that in mind this coming Christmas. It’s called “The Pause of Mr. Como.” Now here’s how the song goes.

RESTORATION
Meanwhile, back to myself again after a brief diversion, I will describe the pipe as I received it. Although there were bad cake buildup in the chamber, rim burning, ubiquitous scratches on all sides of the bowl and a stem in dire need of work and polishing, the allure of this excellent Comoy’s example was almost intoxicating, and I haven’t tasted alcohol in 26 years – not that you could tell after reading my Introduction.Rob3

Rob4

Rob5

Rob6

Rob7

Rob8

Rob9 I like to start on a rim with super fine steel wool, as I did with this pipe. In general, this approach takes off most or all of the char and leaves the wood beneath without a single new scratch and often even shiny. This time I got nowhere with the regular method, and so I switched to 400-grit paper, which removed the char as well as dings and scratches I uncovered. Of course, the sandpaper also took off the old stain.

With the rim clean and smooth, showing the fine grain, I found my old Senior Reamer in its box and took on the chamber.This time, the reamer worked as it should. Almost all of the buildup was reduced to dust. A little quick sanding with 120-grit paper was needed before smoothing with 400.Rob10 Now, as I described earlier, the outer wood was scratched almost everywhere. I very much wanted to avoid ruining the good, light stain of the original. Having learned that micromesh can go a long way, from advice of my mentor, Chuck Richards, as well as our host and several previous readers, I put the theory to a tougher test than I had before.

And you know what? I think they’re on to something! Starting with 800-grade, I was able to eliminate all but the most insignificant scratches. I then worked my way up from 1000 to 1500 to 2400 and ending with 3200, leaving the briar– well, leaving the briar as smooth as it must have been the day it left the Comoy’s shop.

Taking on the stem only required heavy sanding and buffing with 1500, 2400 and 3200 micromesh.

Cleaning the pipe turned out to be the hardest part. I just kept dipping the bristly cleaners in Everclear one half at a time and scrubbing away until they came out of the shank and stem clear.Rob11

Rob12

Rob13

Rob14 CONCLUSION
If I had kept this fine example of Comoy’s craftsmanship, I would prize it as the best as compared to the two I own. However, as fate would have it, the pipe sold almost as soon as I posted it on my restored pipes Website. My only consolation is that I have reason to believe it is in adoring hands.