Guest Blog by Robert M. Boughton
Member, North American Society of Pipe Collectors
http://www.naspc.org
http://www.roadrunnerpipes.com
http://about.me/boughtonrobert
Photos © the Author
“As you know, Shibumi has to do with great refinement underlying commonplace appearances. It is a statement so correct that it does not have to be bold, so poignant it does not have to be pretty, so true it does not have to be real. Shibumi is understanding, rather than knowledge. Eloquent silence. In demeanor, it is modesty without pudency. In art, where the spirit of shibumi takes the form of sabi, it is elegant simplicity, articulate brevity. In philosophy, where shibumi emerges as wabi, it is spiritual tranquility that is not passive; it is being without the angst of becoming.”
― Trevanian (Rodney William Whitaker, 1931-2005), U.S. film scholar and writer, in “Shibumi,” 1979
INTRODUCTION
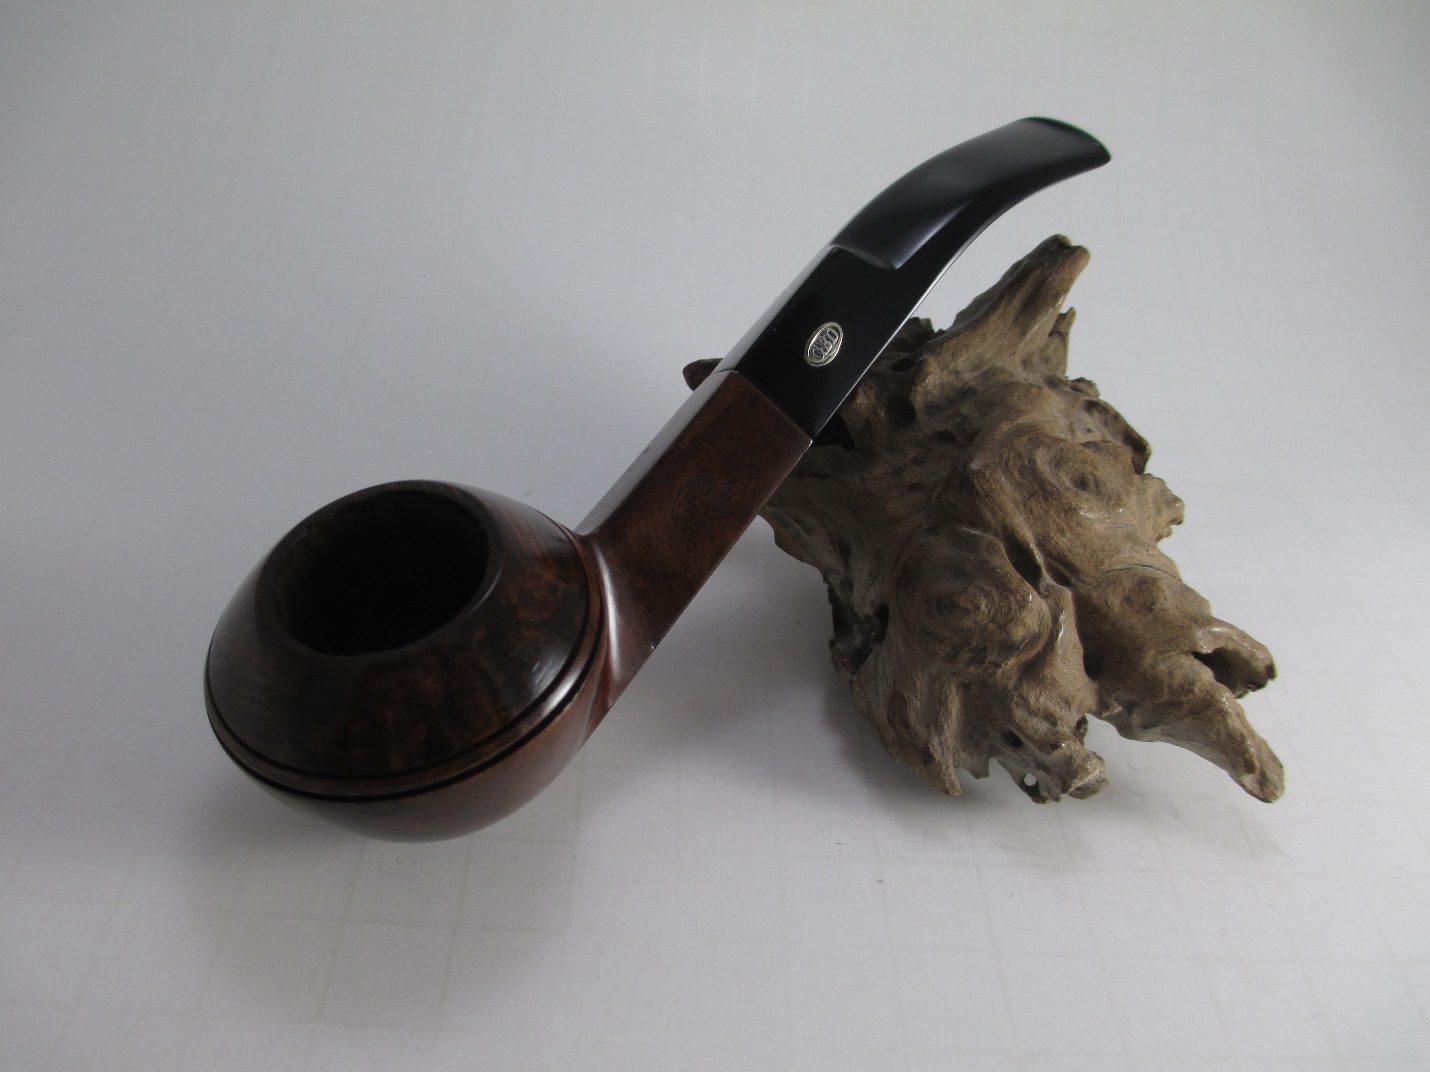
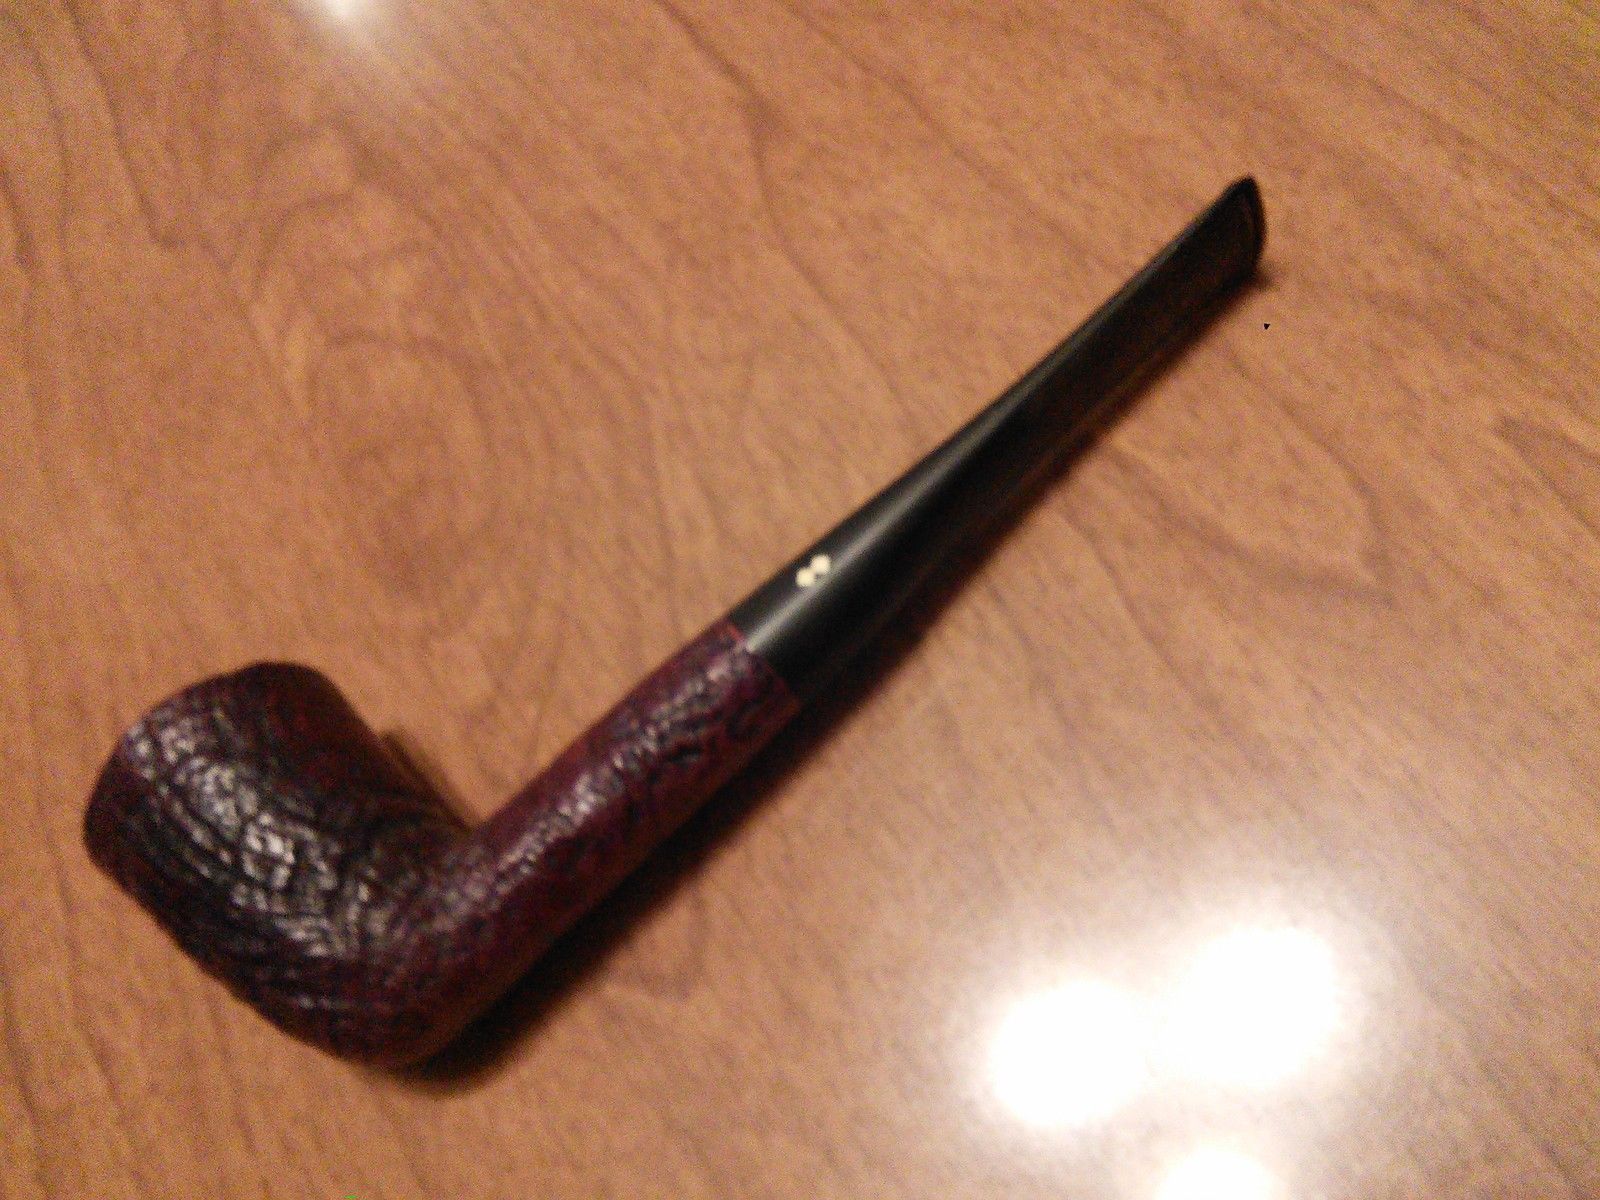
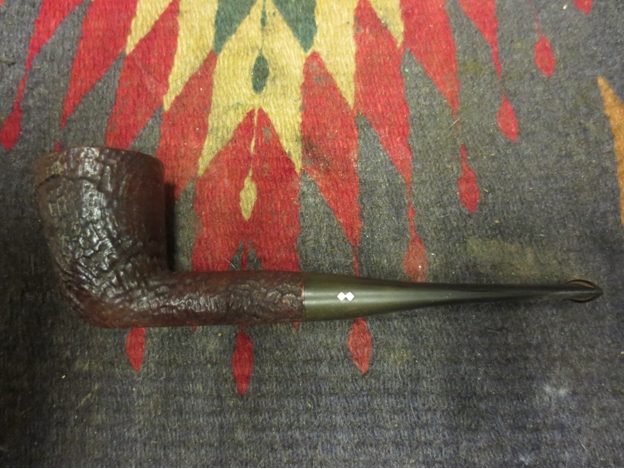
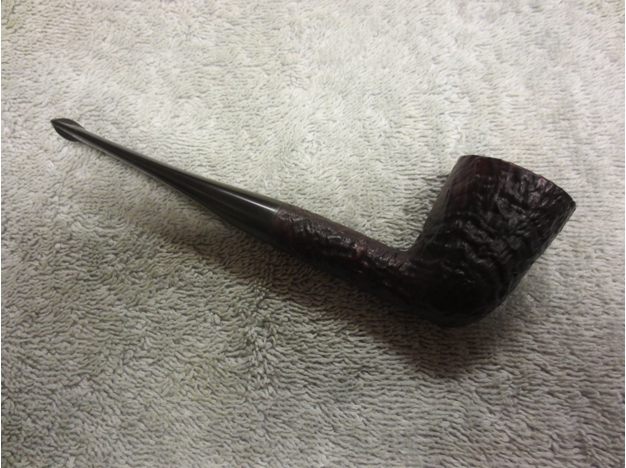
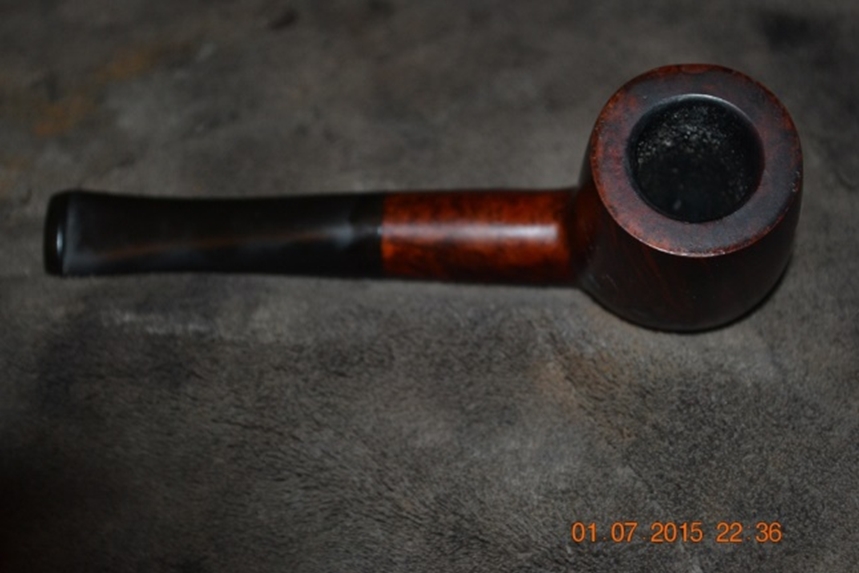
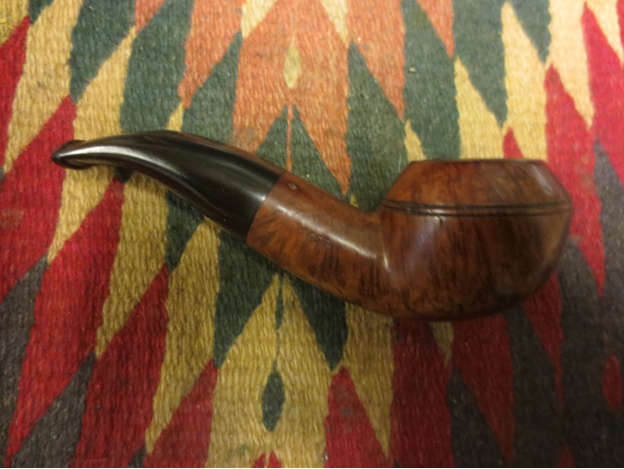
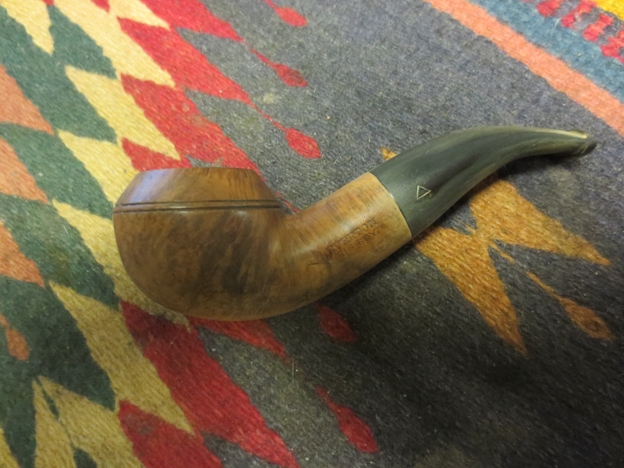
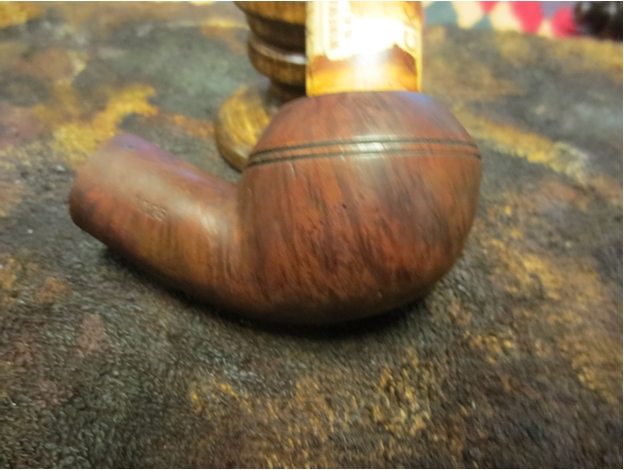
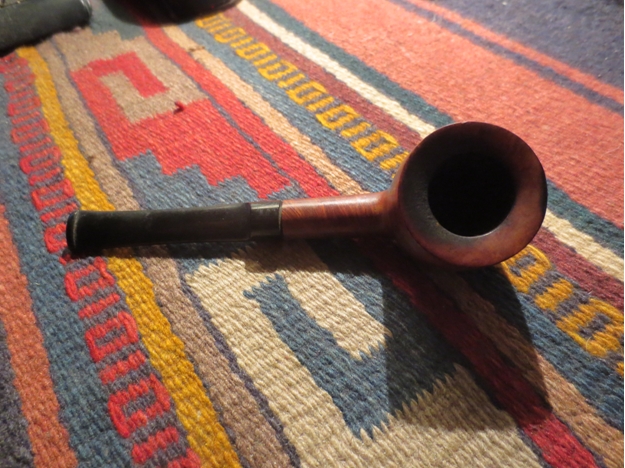
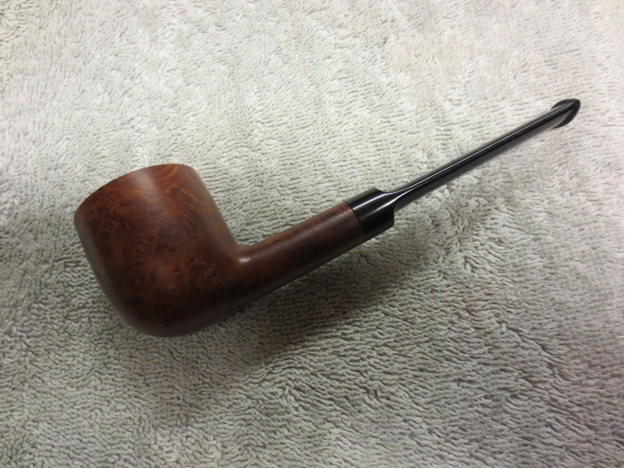
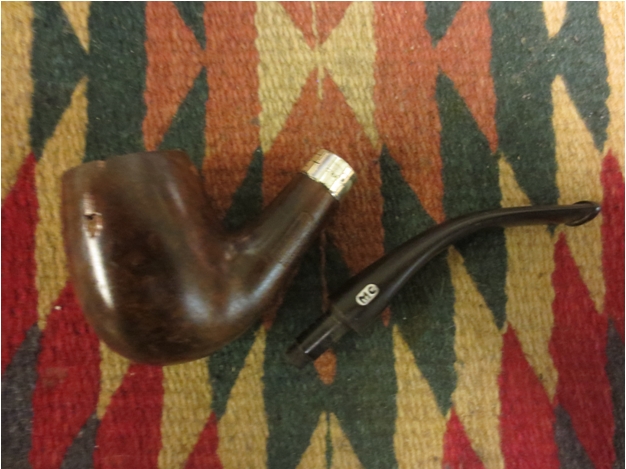
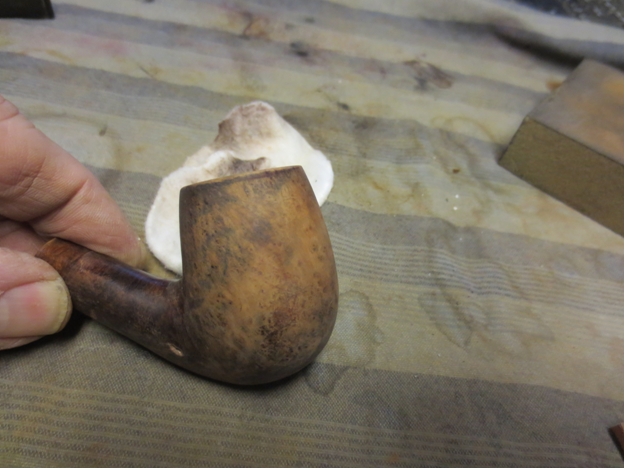
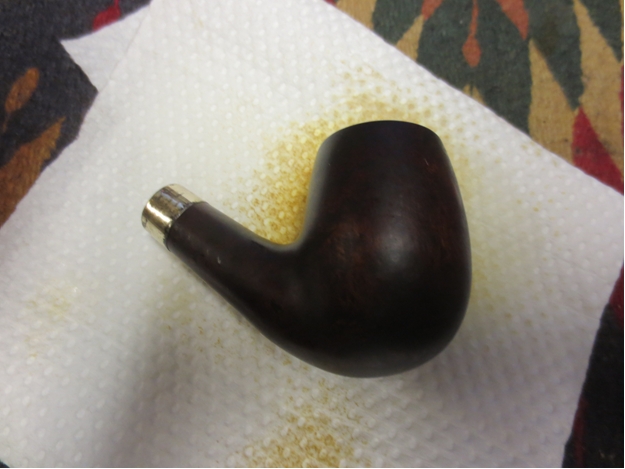
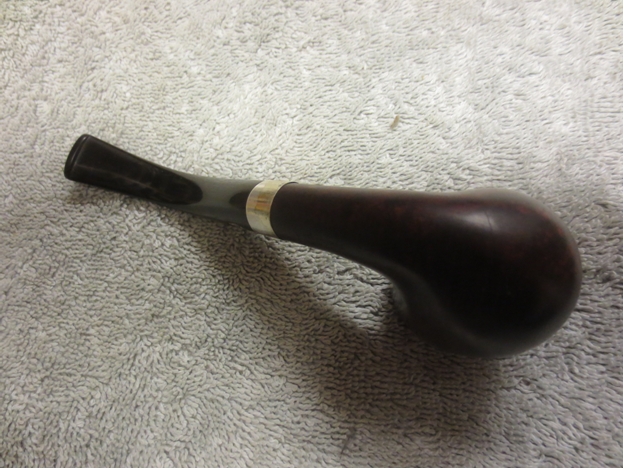
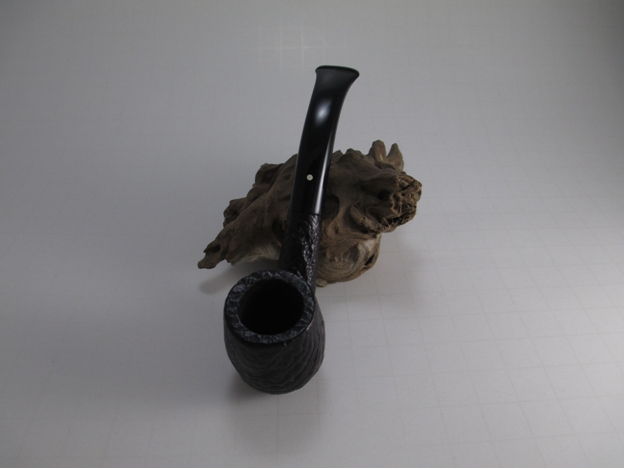
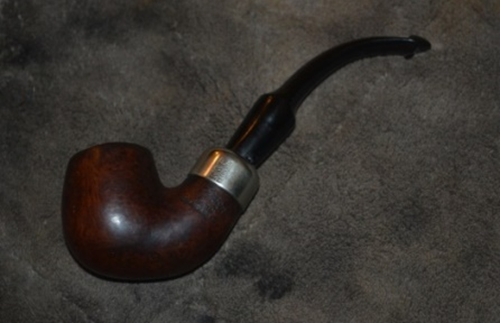
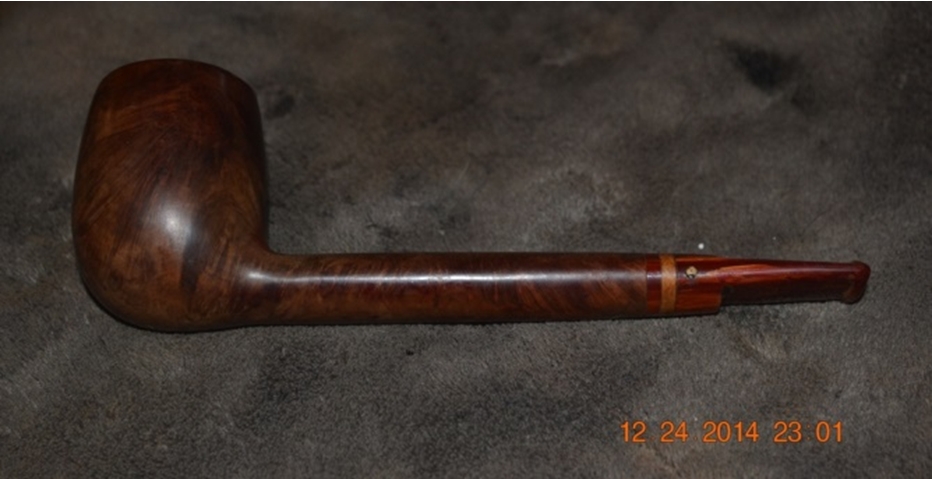
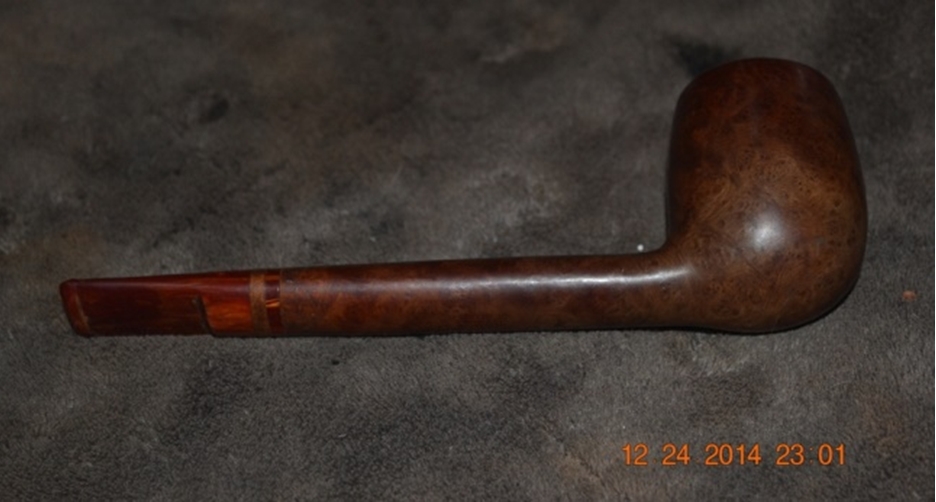
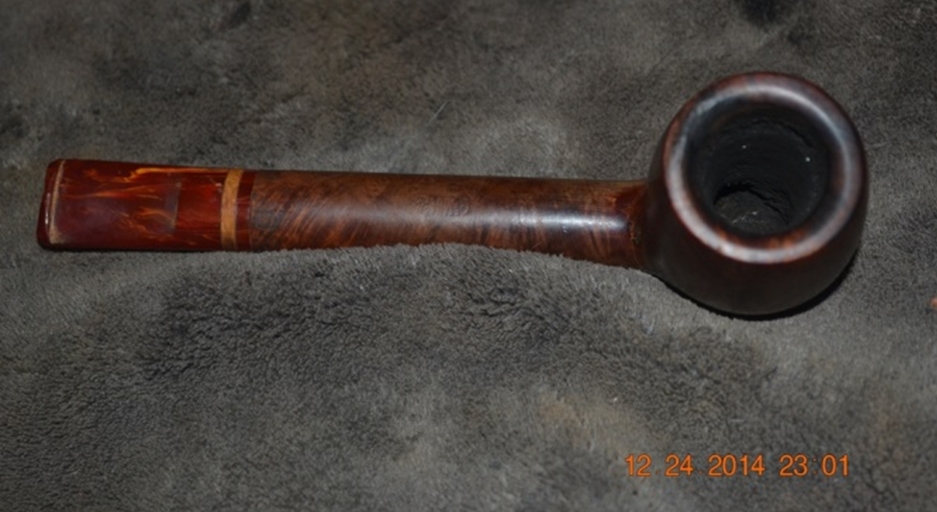
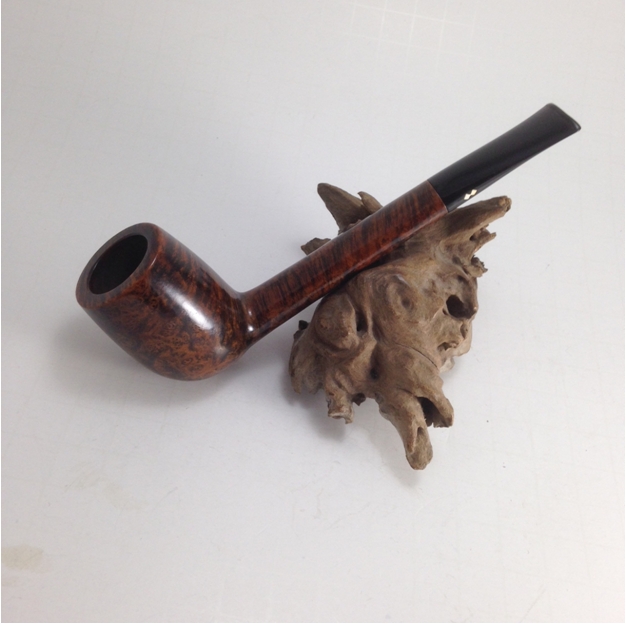
Although Trevanian, in the well-turned quote above from one of his diverse novels (in this case a spy story), is far less sesquipedalian yet just as articulate as the late great jack of all trades, William F. Buckley Jr., I admit I had to resort to my Oxford English Dictionary to look up pudency. To save anyone reading this the trouble, if he might be inclined to do as I did, I will say the word is defined as susceptibility to the feeling of shame, or bashfulness. I made it through that stage long ago. The passage as a whole is apt to the understated grace, style, artistry and charm, combined with simplicity and humbleness, of this lovely Savinelli Duca Carlo Straight Billiard,relative to higher end Savinelli beauties and their prices.
The circumstances surrounding my chance and fleeting but thoroughly pleasant encounter with the alluring implement for fine tobacco enjoyment are also appropriate for this preface. Had I not sought refuge at my local tobacconist in a fluky and serendipitous urge the other day, I might never have met Al, a 25-year-old student who is pursuing both a master’s degree in his field of study and new pipe experiences. And, of course, I would not be writing this account of my rewarding experience cleaning the Duca Carlo.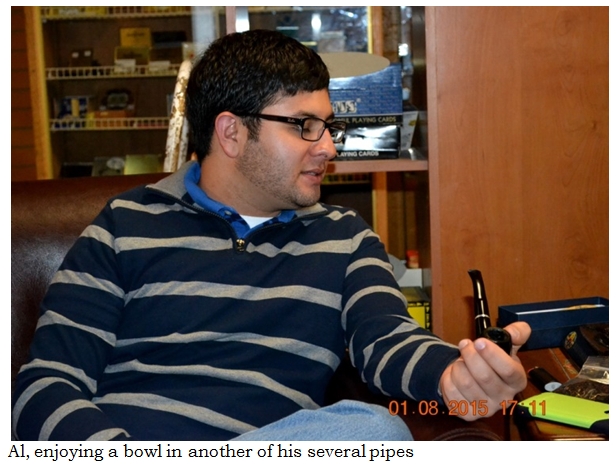 When Al introduced himself to me by his full first name, Alfred, and moved with spontaneous purpose from where he was sitting to the cushioned chair next to mine, I had been distracted, in deep concentration, working on something on my laptop. In most cases when someone can see I’m working, and still tries to engage me in conversation, I become a bit piqued. But something was different about Al. So outgoing and affable was his personality that I really can’t even remember now what had been so important to me the moment before his appearance beside me.
Al spotted the rather large, black bag on the floor by my side, which was made for carrying tools but is now my run case. In case I ever need to run to my tobacconist, to get away from the mounting pressures that consume the rest of my life, I always have my run case with its selection of pipes and jars of tobaccos du jour. It should come as no surprise that I also keep a stock of provisions within the many pockets of the run case, from an extra Bic in the event my regular pipe lighter runs out of butane to a cheap pipe nail against the times when I misplace my three-in-one tool; pipe cleaners; balsa, 6mm and 9mm filters, for the most part to have on hand for others who like to use them; sandpaper and micromesh for refurbishing on the go; a small digital caliper, and a 120-inch cloth tape measure, should I ever run into the Titanic of pipes and need to determine its exact specs. Basically, everything the OCD pipe enjoyer and restorer might want without notice. Sometimes my fellow tobacco enthusiasts poke fun at me– more often than not the cigar smokers – seeing me coming through the door with my run case and laptop in either hand like a circle and crosshair marking me as a target. Being a good former Boy Scout, I always say be prepared.
At any rate, Al somehow got the idea that I was serious about pipes, and being new to the attendant rituals, he enquired what was in the bag.As I am rather free with my tobaccos, I began taking out the jars, looking for something appropriate for a newcomer. Mostly that day I found stronger, more advanced blends such as McClelland’s Top Hat and C&D Bayou Morning (with a whopping 28% Perique content), but I also had C&D Joie de Vivre and Rattray’s High Society. Al’s sharp eyes noticed the Joie de Vivre plug, and he was intrigued. Thinking he might be up to that excellent, smooth and unusual English blend, I said so and suggested he give it a try.
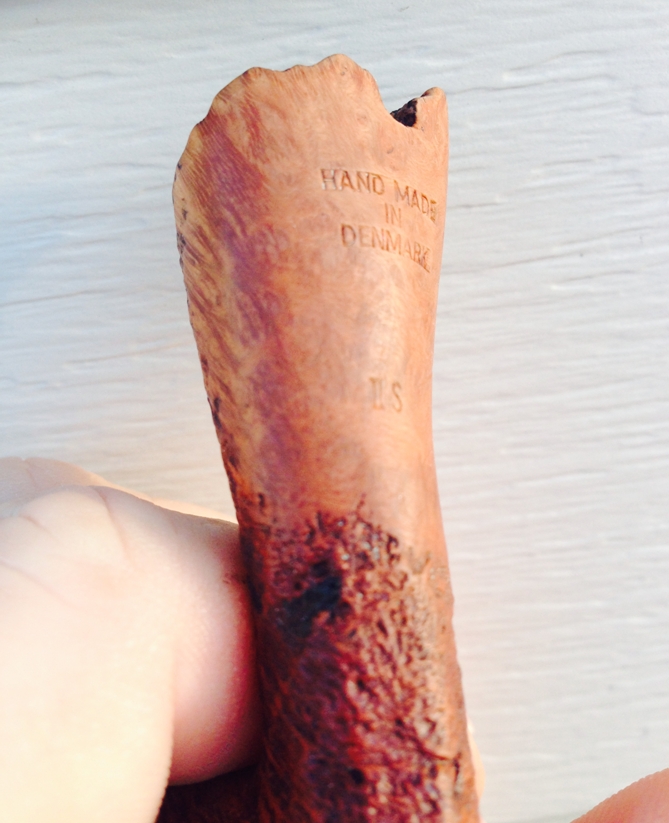
Well, the next thing I knew, poor Al was puffing away and suddenly looked a bit peaked. When he told me he had opted for a bowl of the Bayou Morning, I wasn’t surprised. As his composure returned, he brought up the subject of my pipes and ended up asking me if his was “very good.” He said a college friend had given it to him, knowing he wanted to quit cigarettes. Glancing at it in his hands, I said it looked Italian, and that a good pipe was anything that made its owner enjoy the tobacco. I added that if he took care of it, the pipe would last him a lifetime. Seeing the briar had faint nomenclature of some sort, I wanted to take a closer look, and perhaps sensing this, he held it out to me.
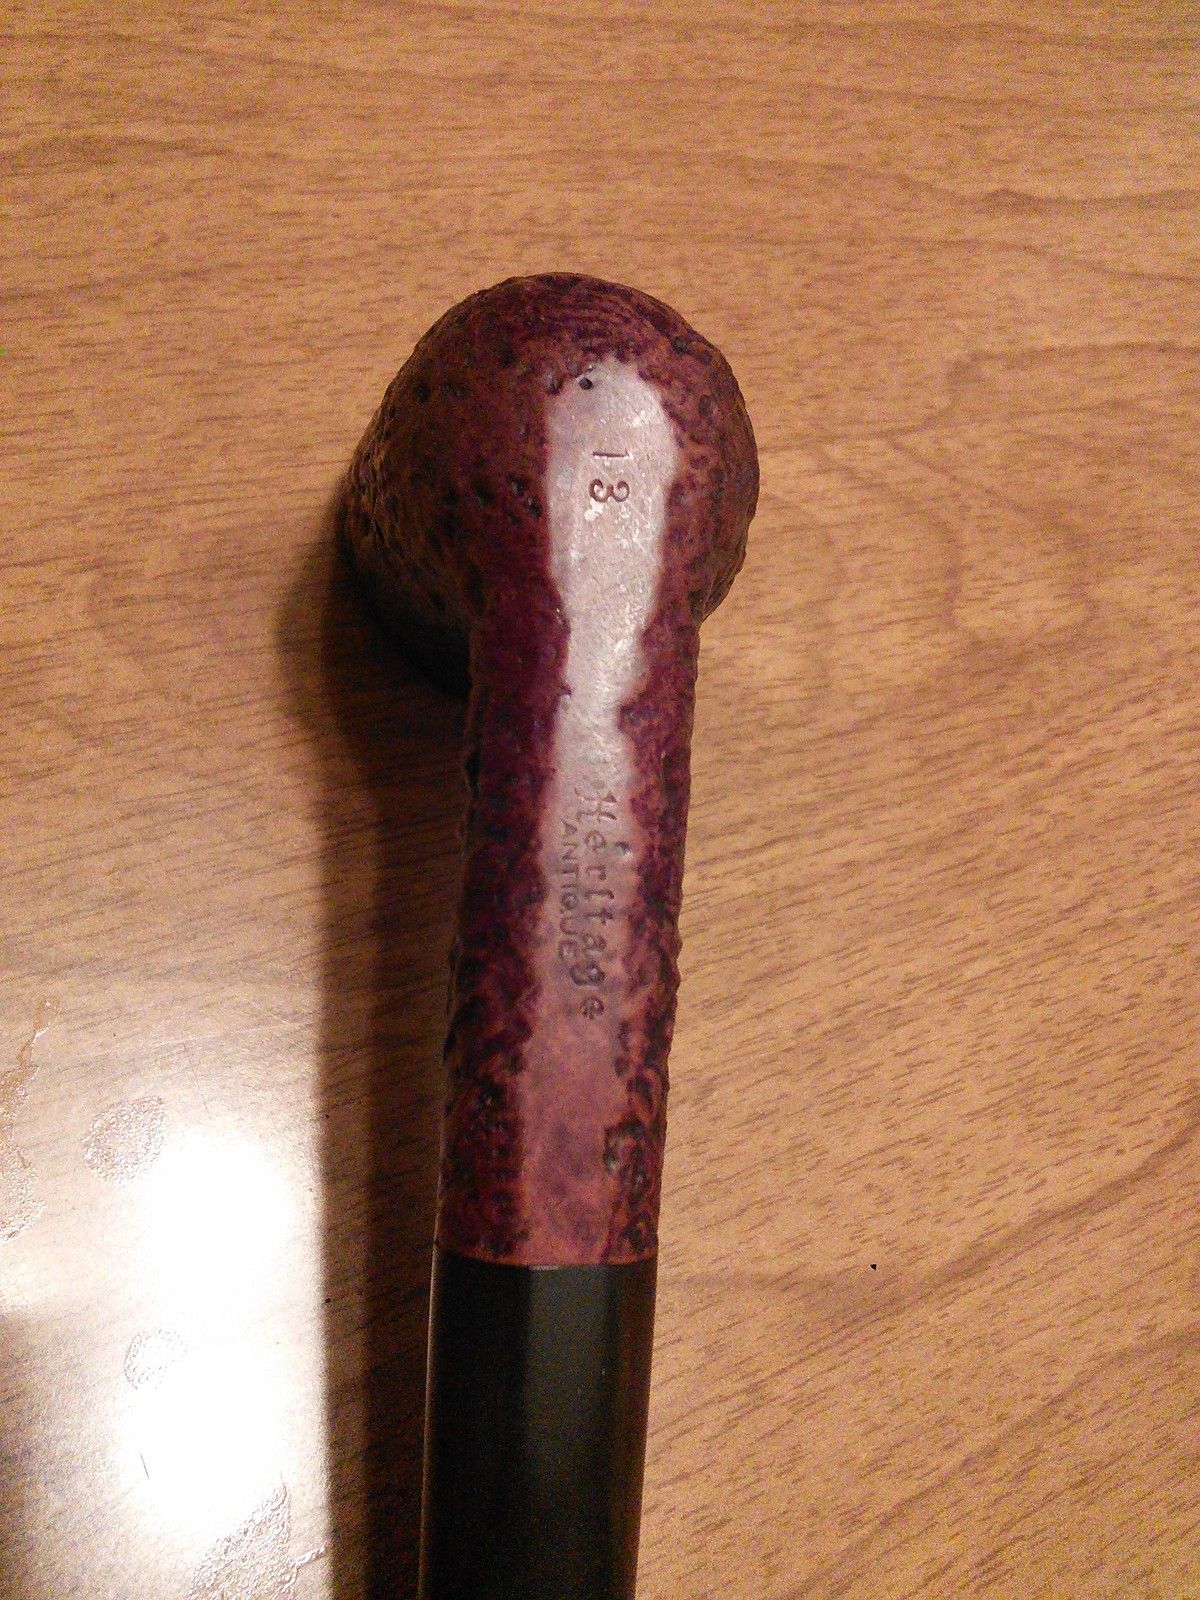
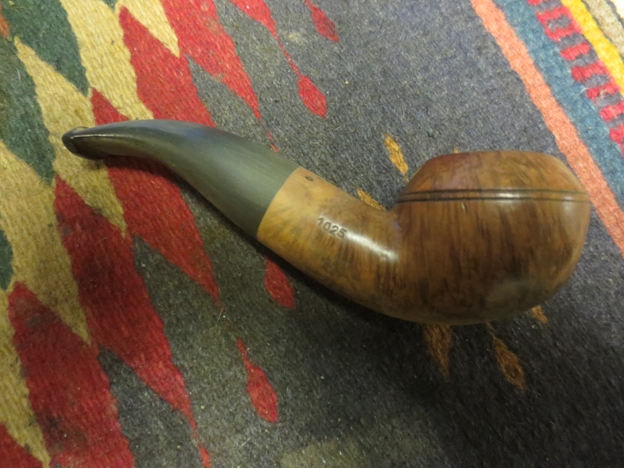
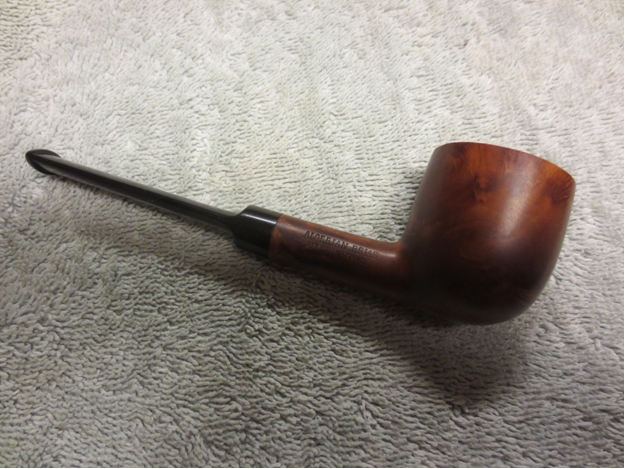
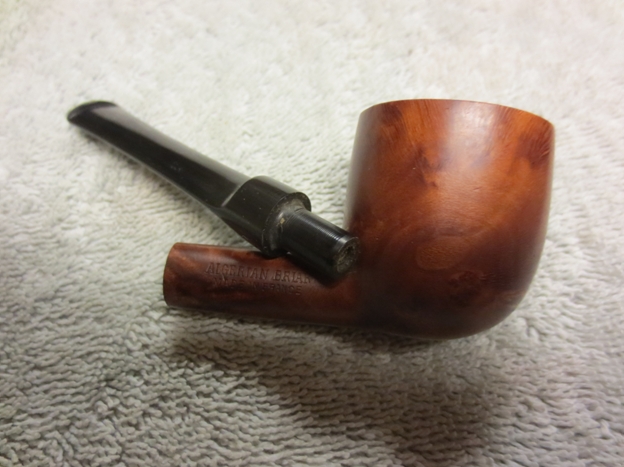
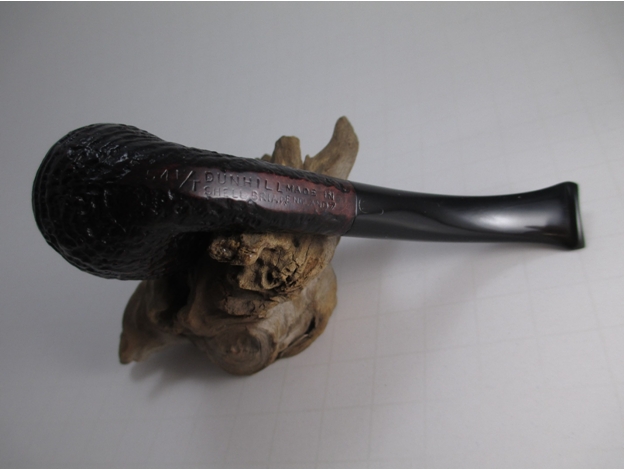
Squinting, I made out the words Duca Carlo on the shank and exclaimed something that some might consider inappropriate for this space. Understandably alarmed, Al asked if anything were wrong. I told him it was a Savinelli, and it was apparent the name meant nothing to him. I proceeded to explain a little about the well-known Italian maker and the quality of its pipes, noting that although his Duca Carlo was not one of the high-end varieties, it was a fine pipe indeed. That was when the magical moment happened. Al said he was thinking of having it professionally cleaned.
Hmm, I thought. Chuck was gone for the day, and I supposed I had a spare half-hour that night, so I offered my services to the young newcomer. Surprised, he asked how much it would cost, and I told him I would be happy to do it for free. While I have always been reluctant to charge people for anything I enjoy doing, I suppose there were several subconscious reasons behind my impulsive offer: Al is a young student working hard to assure a secure future, similar to another young pipe-smoking friend of mine who is now studying physics at Purdue, and for whom I bought two packs of my own tobacco mix – Sneaky Rabbit, sold by my tobacconist as a house blend – since he was enjoying it so much he was almost out both times during a recent visit to his hometown for the holidays; I remember how tight my finances were in my own college days; I had a sudden desire to pay forward the many similar favors my friend and mentor, Chuck Richards, and others in my piping community have done for me, and least of all, it was just good sense for the growing business Al knew I was in. Al still tried to resist, but there was no way I was going to take his money for a simple cleaning.
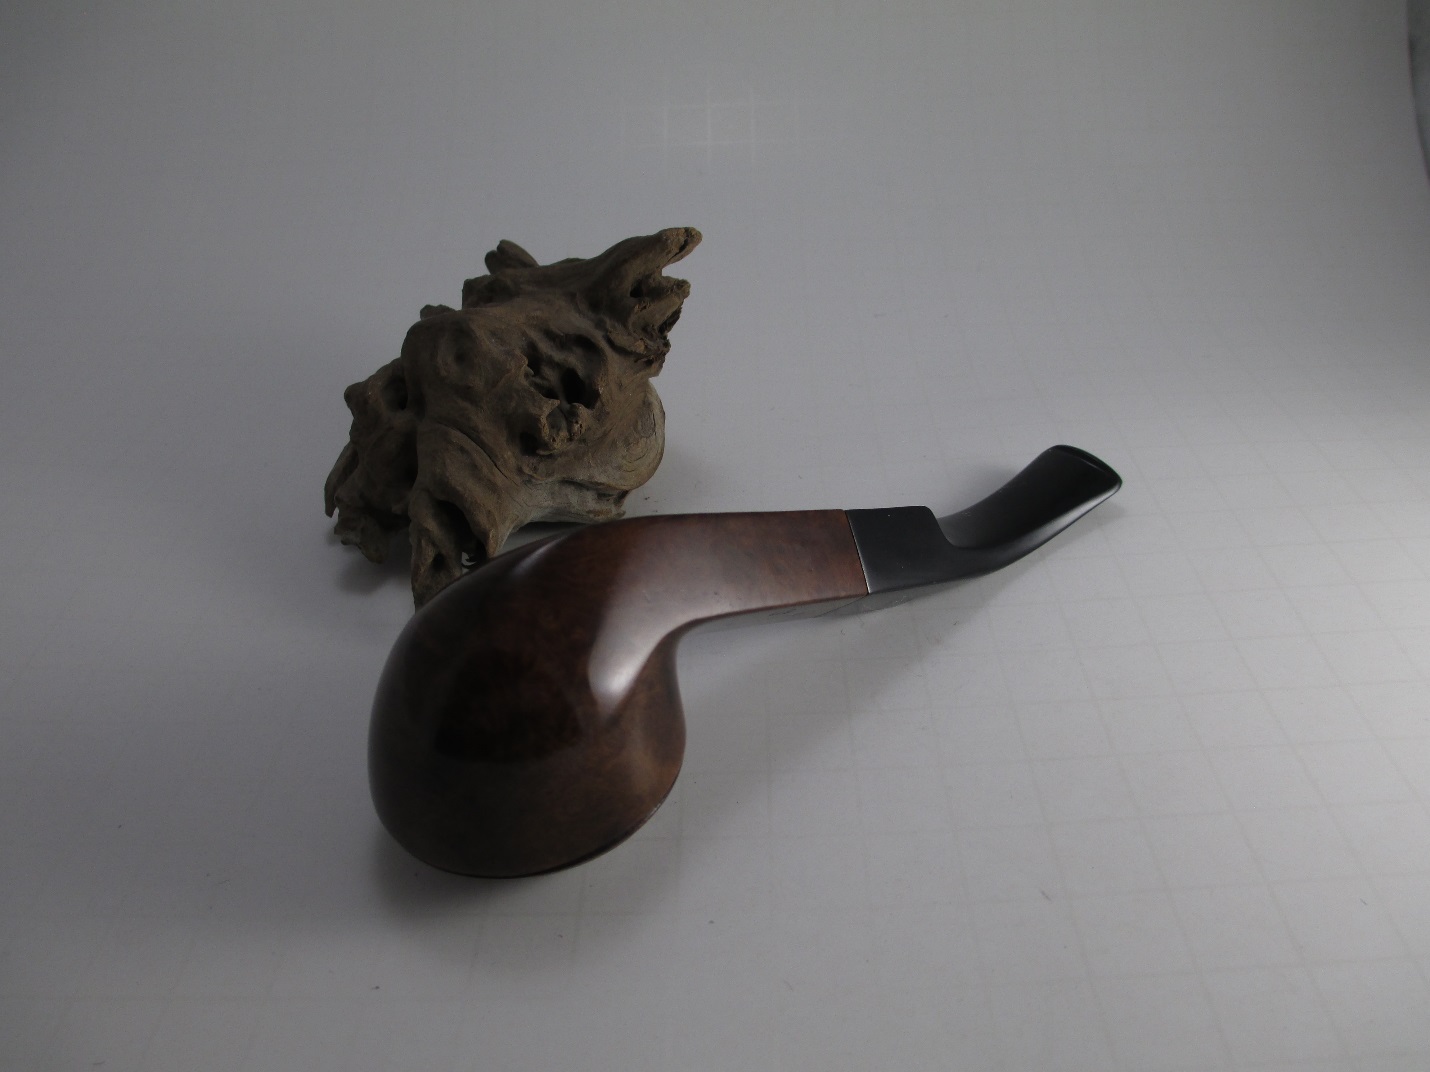
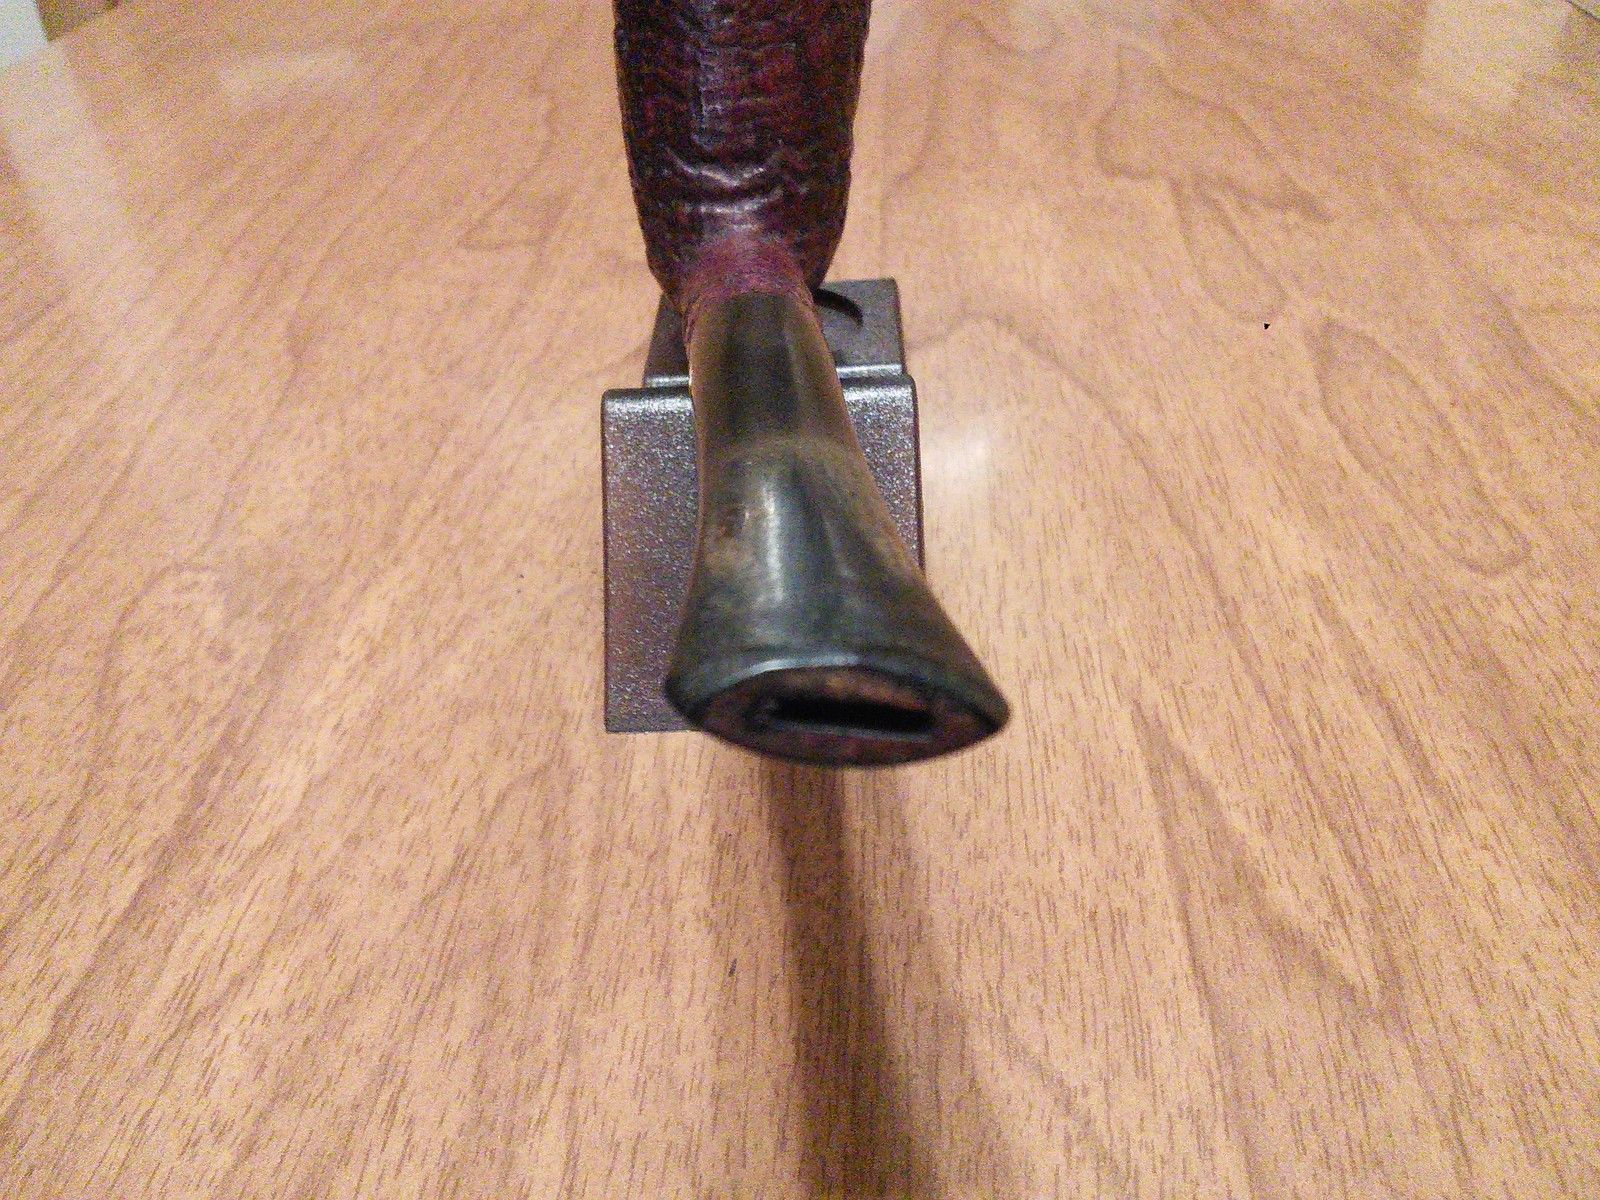
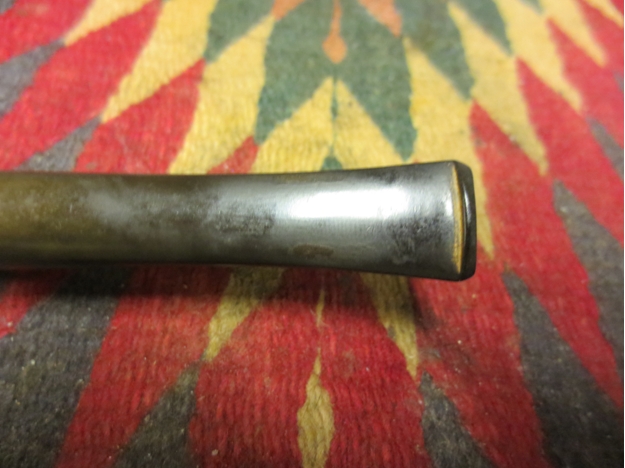
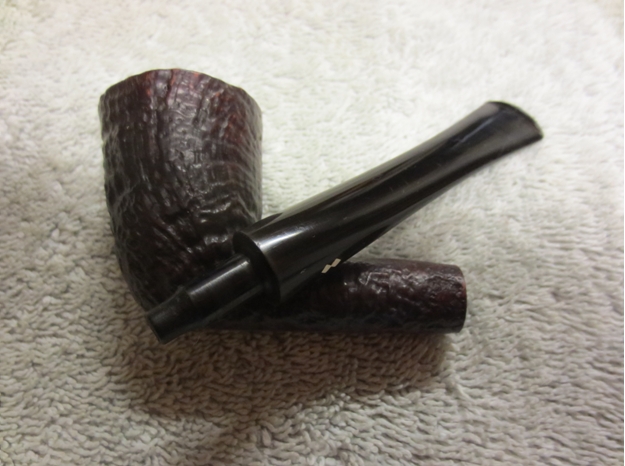
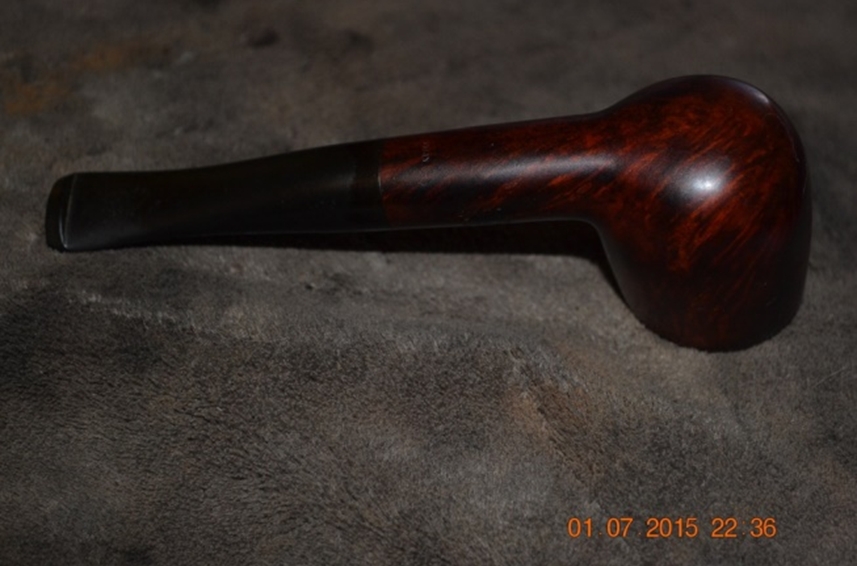
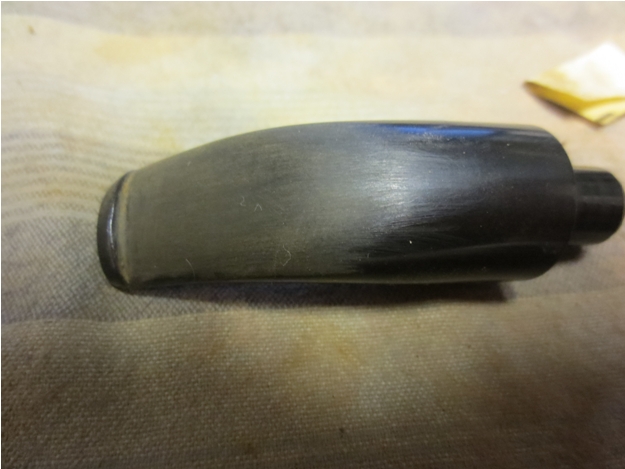
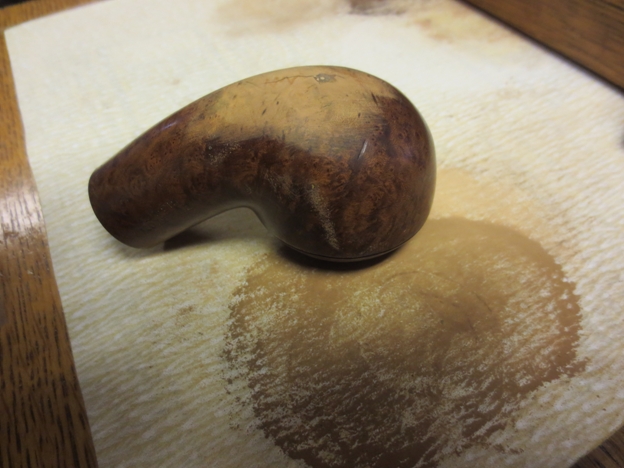
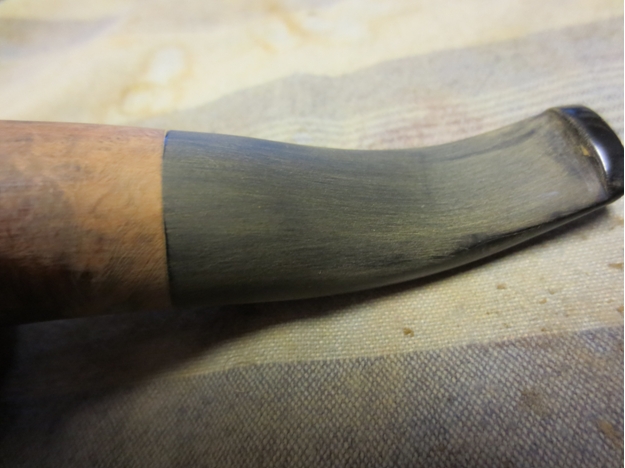
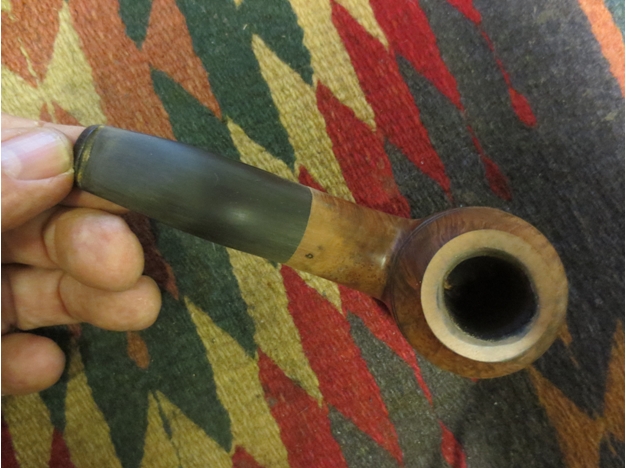
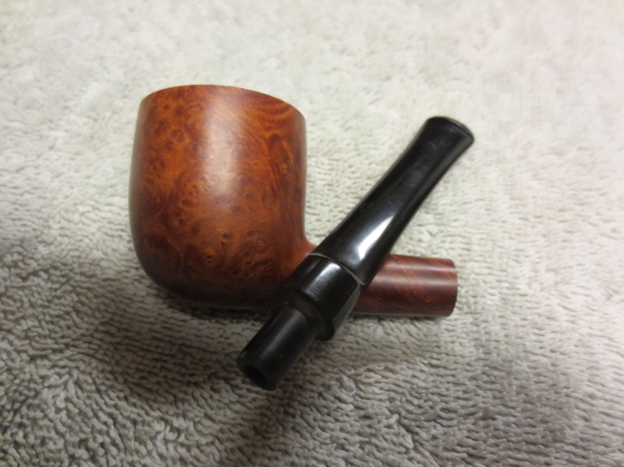
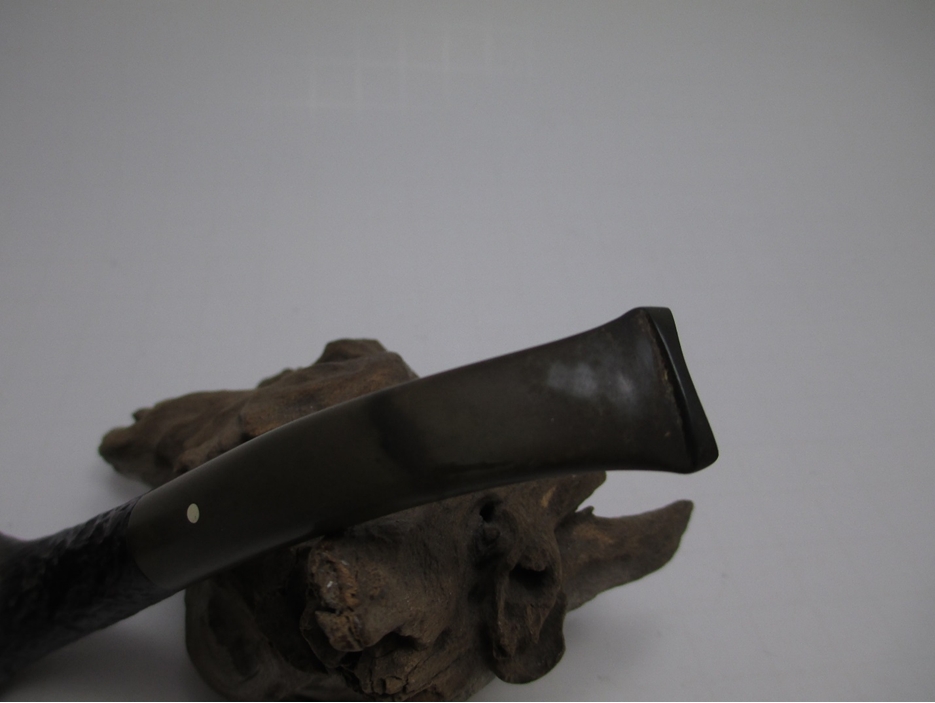
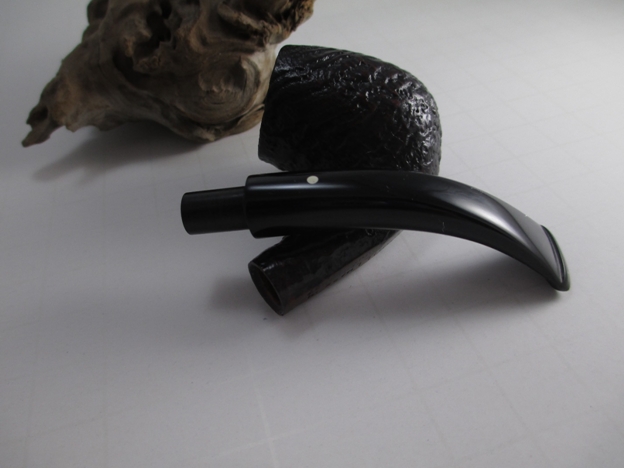
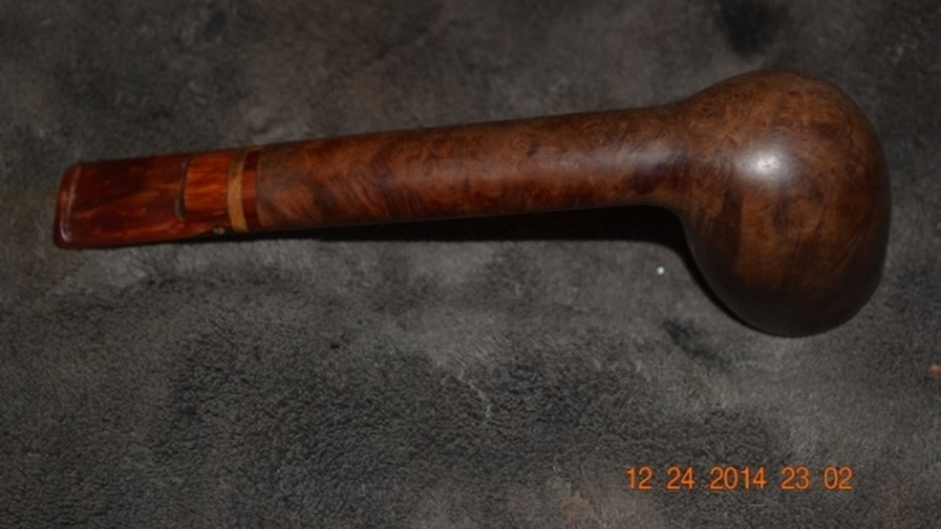
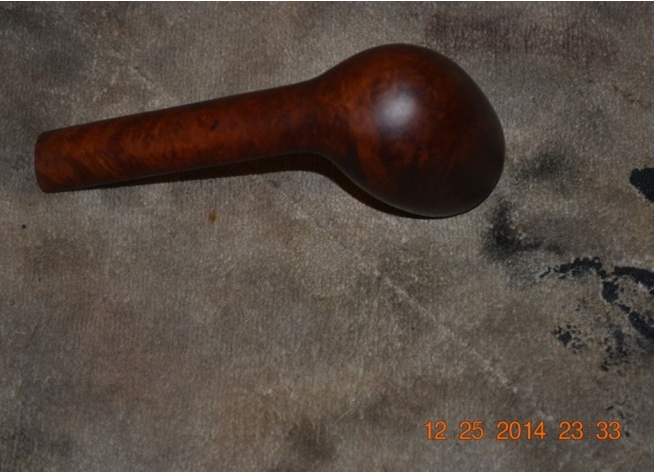
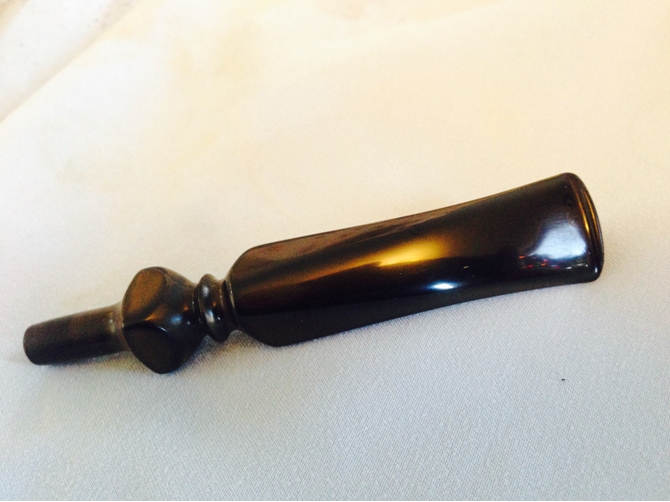
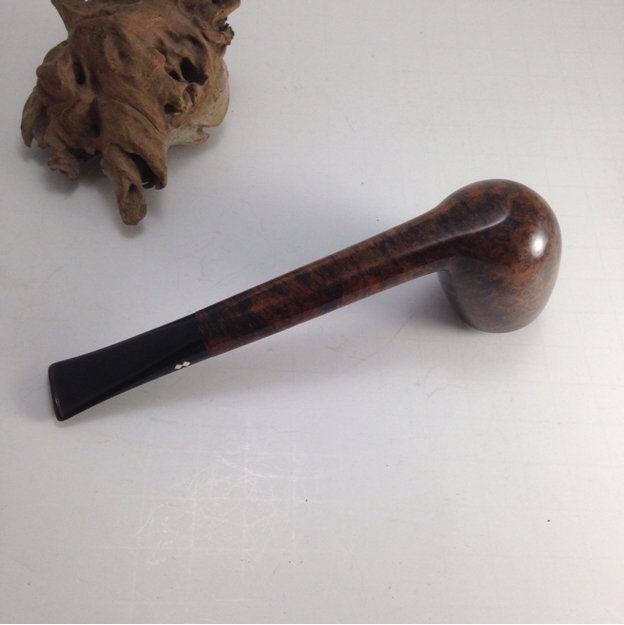
Having a similar but apparently newer Duca Carlo of my own, I showed him the picture of it stored in my laptop. Al told me what he really wanted was to see the stem (which was in excellent shape but a dull, faded gray with a thin shiny streak by the shank) sparkle all over. He said he had no idea if it would be possible. I could do that, I assured him, and return it to him the next day.
So that was how the adventure began. Still a little wary, however, when he handed the pipe over to my care as we left, Al said with the sincerest note of entreaty in his voice, “Please don’t break my pipe.” I knew exactly where he was coming from.
REFURBISH
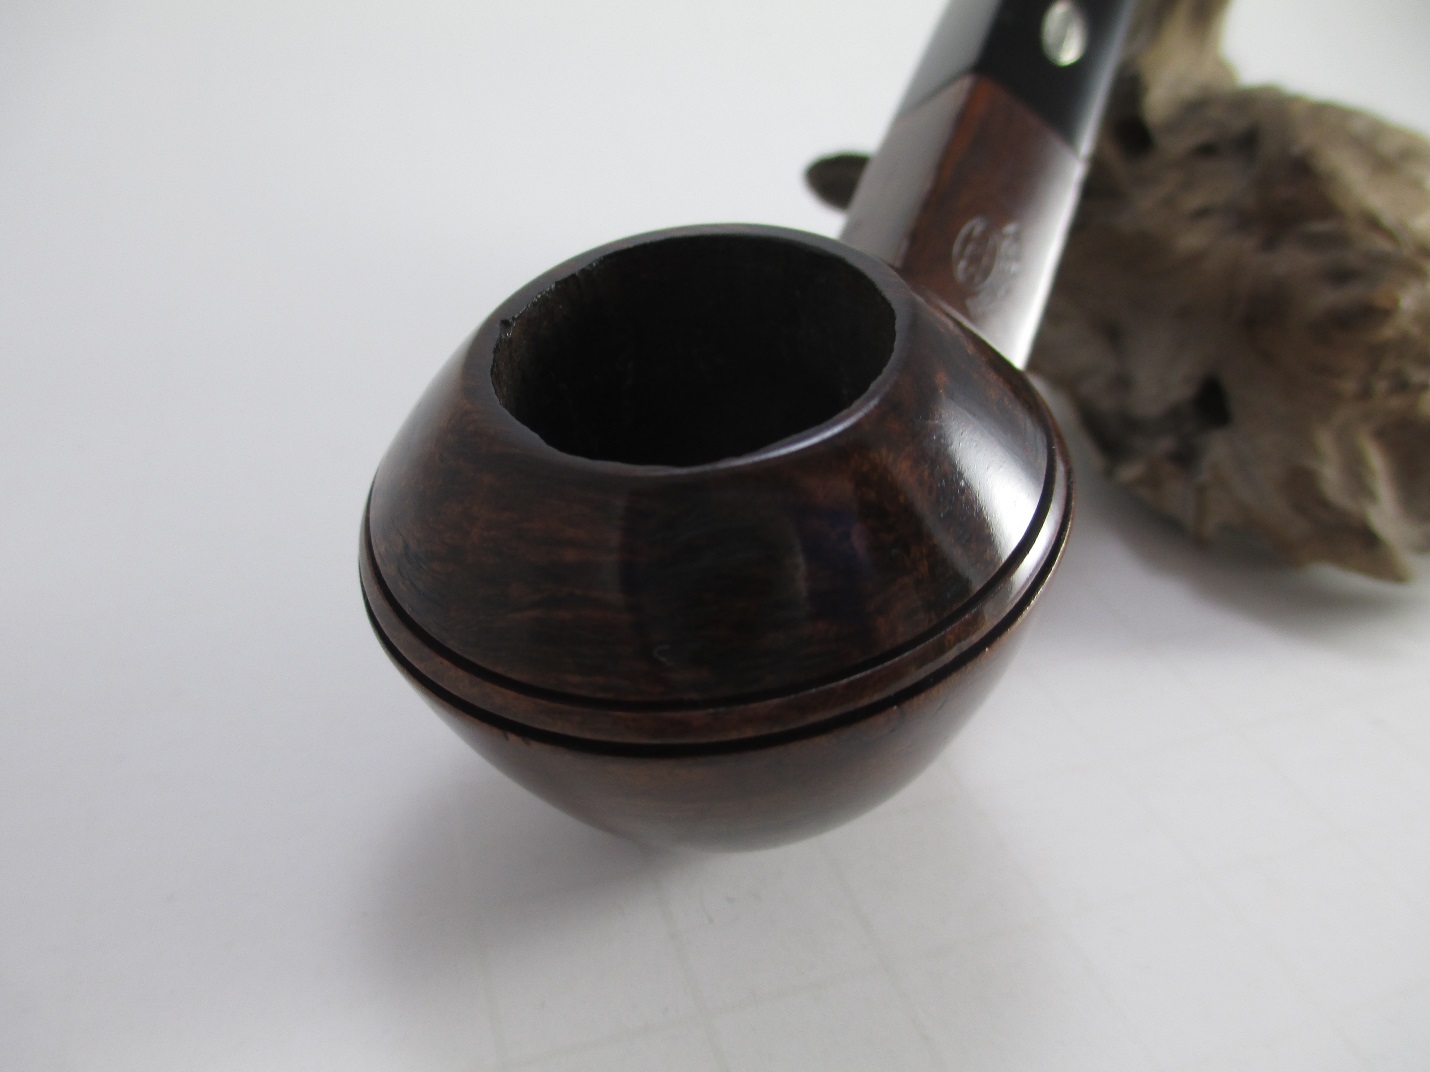
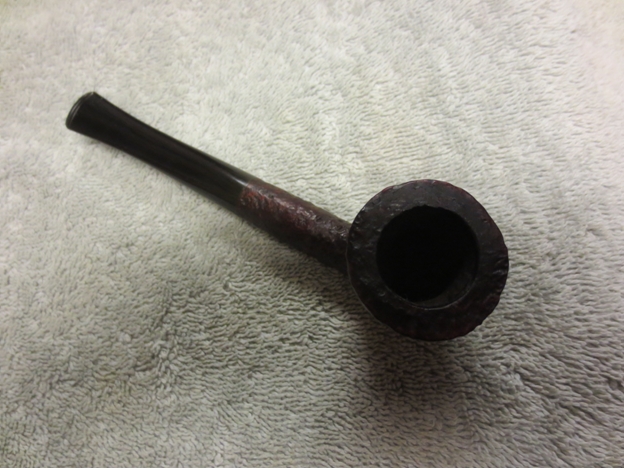
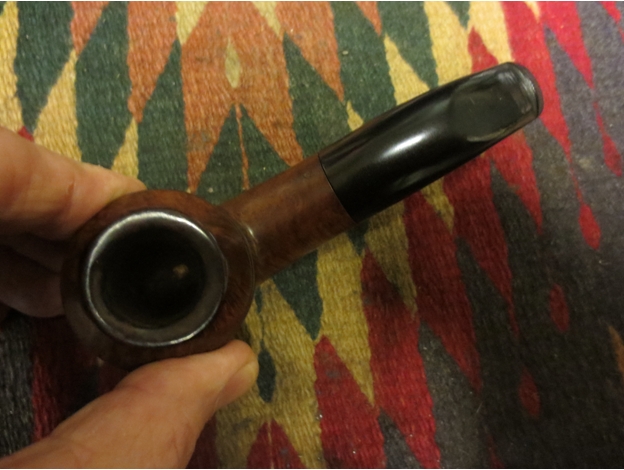
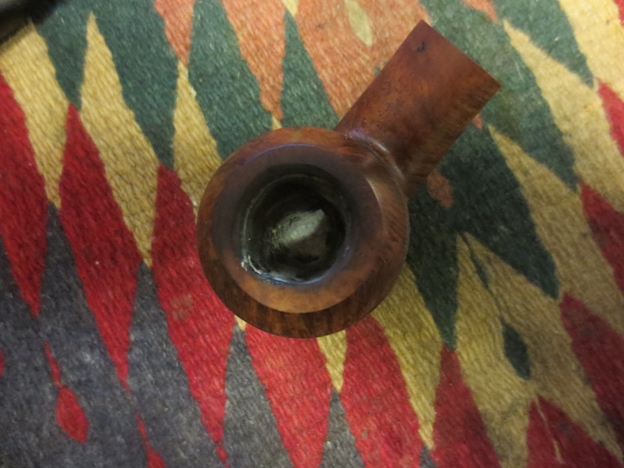
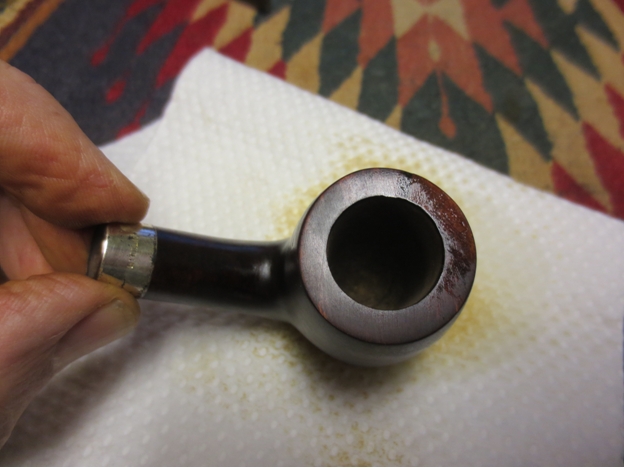
I knew from the beginning there was no way I would just buff the stem and clean and sanitize the pipe. After all, if Al were a paying customer of my business he would get the Basic Cleaning, which includes light refurbishing. All I could see the pipe needed was a little rim burn removal, touch-ups on slight scratches on the stem and bowl and a careful ream of the chamber to remove the small amount of excess cake buildup while leaving the optimal amount intact. The college friend who gave Al this pipe certainly took good care of it and knew what it was, but never said a thing of it his buddy. I liked that.


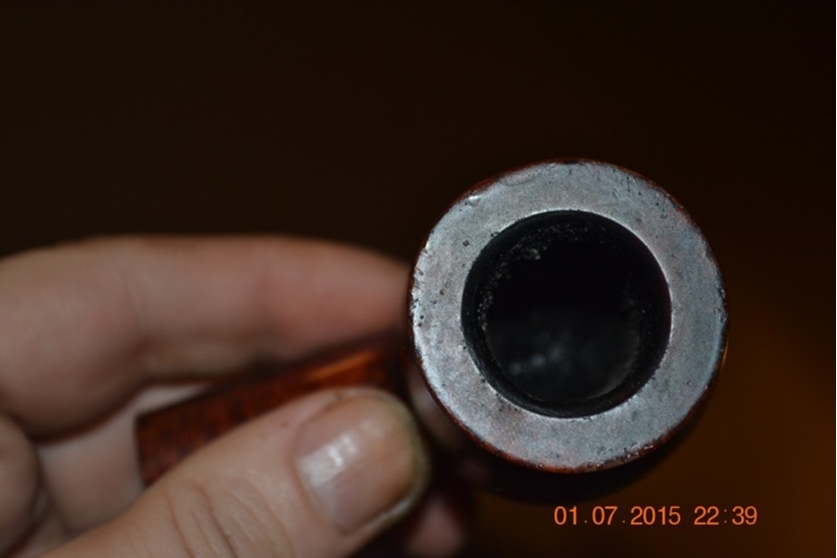
 Wishing to work with as much efficiency and economy of movement as possible, and having observed the minor burns and other blemishes on the rim, I chose 220 sandpaper to start.
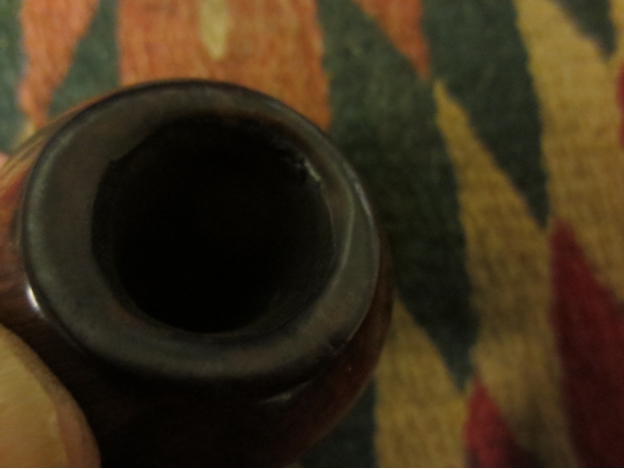
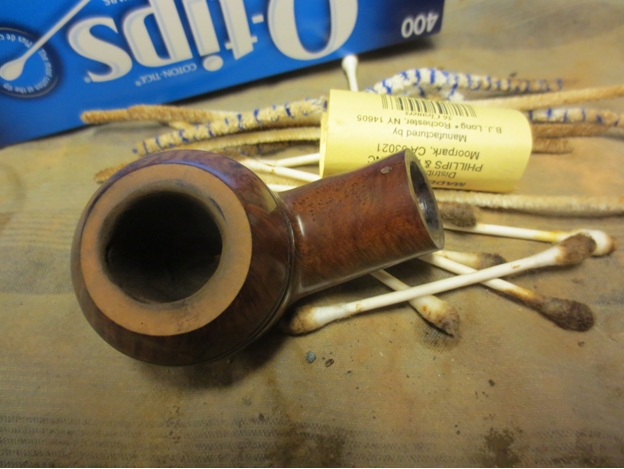
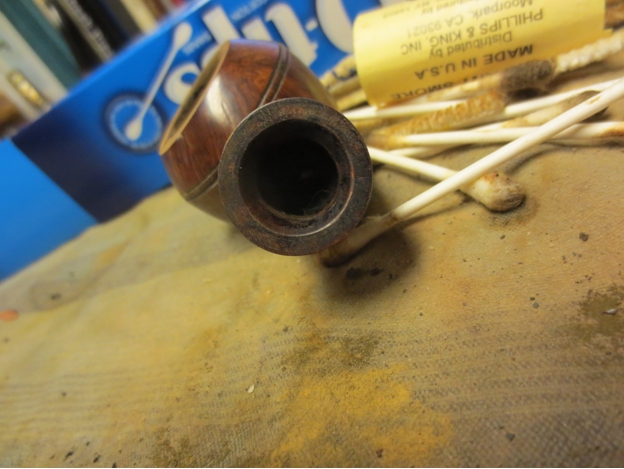
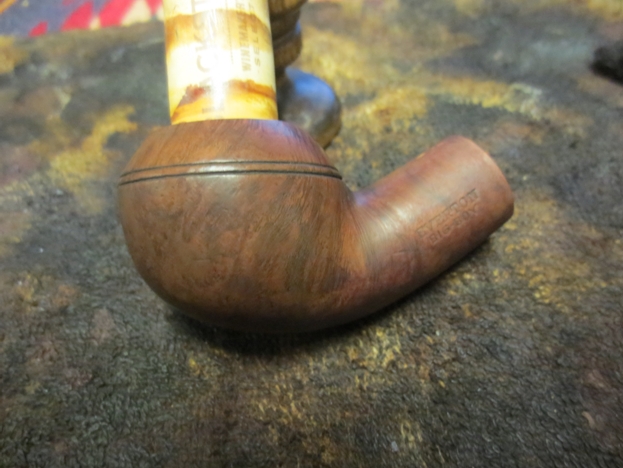
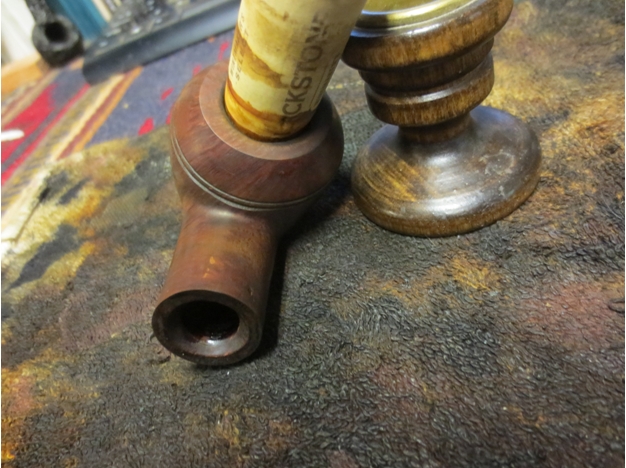
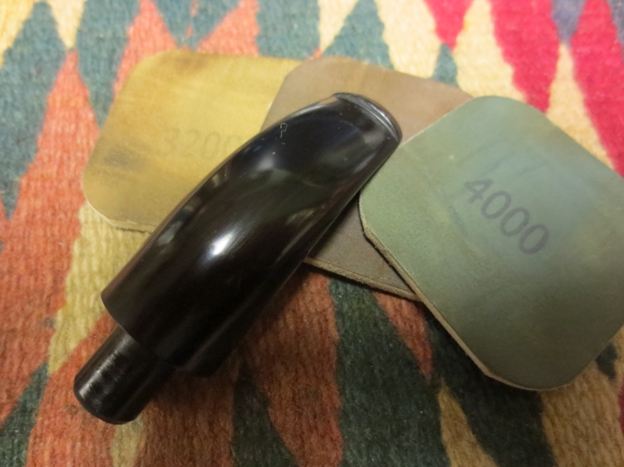
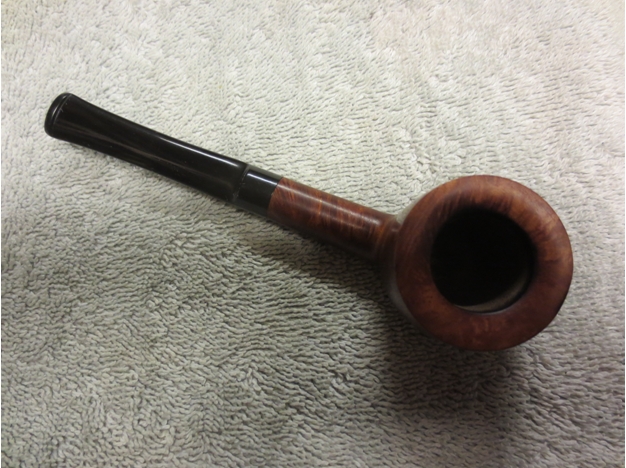
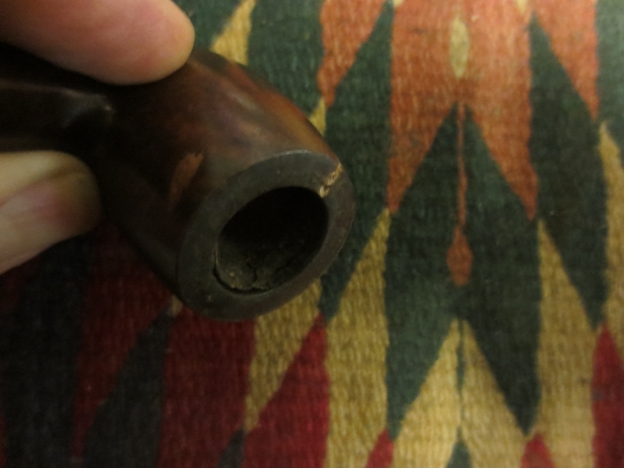
 The choice of paper worked just right in removing the blackness but of course required smoothing. First I used superfine steel wool, which returned a soft sheen and coloration to the nice grain, and followed that with micromesh, buffing upward from 1500 to 2400 to 3200 to 4000.The resulting rim glimmered in its natural pale shade.I also removed the black circle around the shank opening with the steel wool.
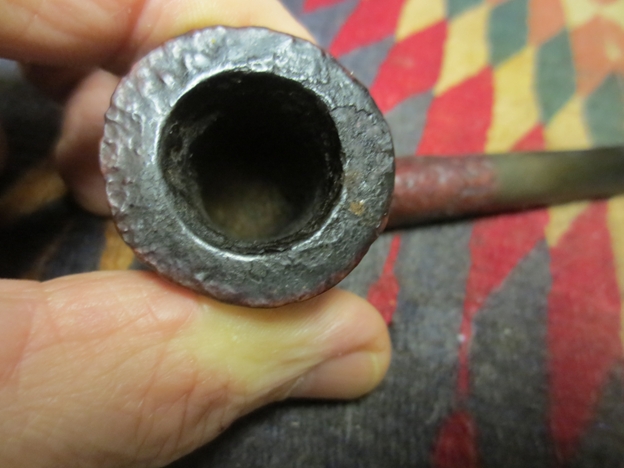
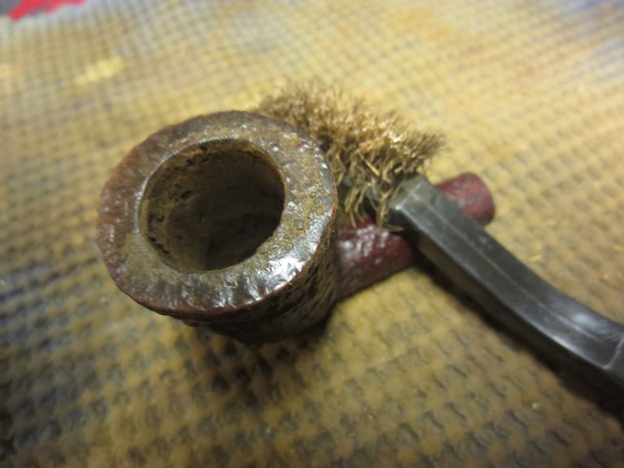
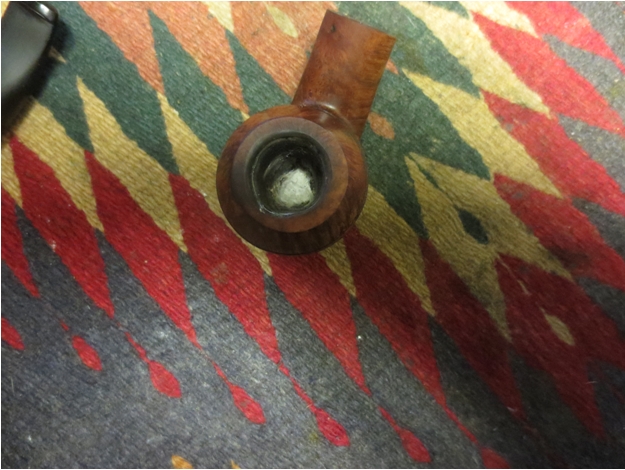
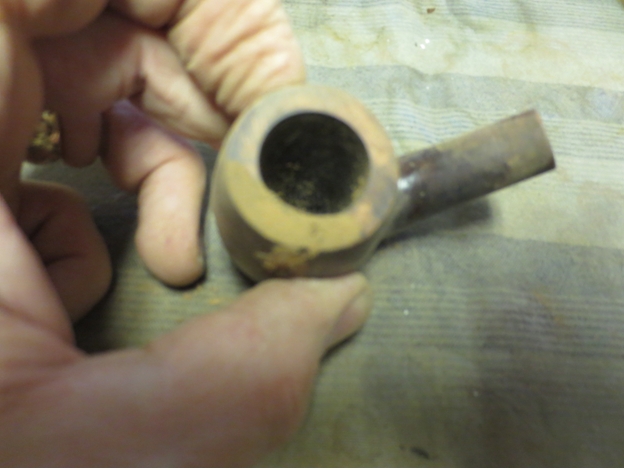
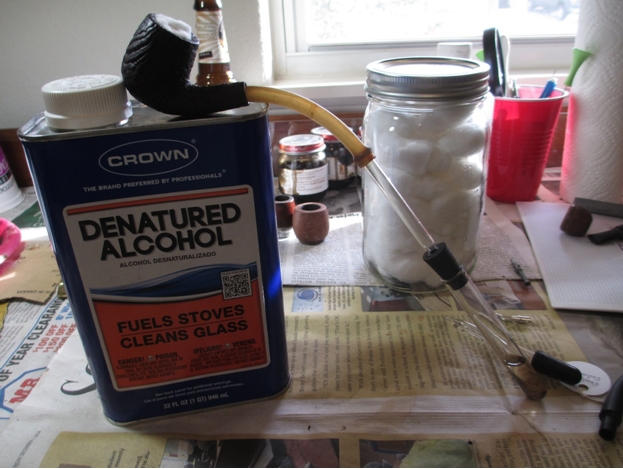
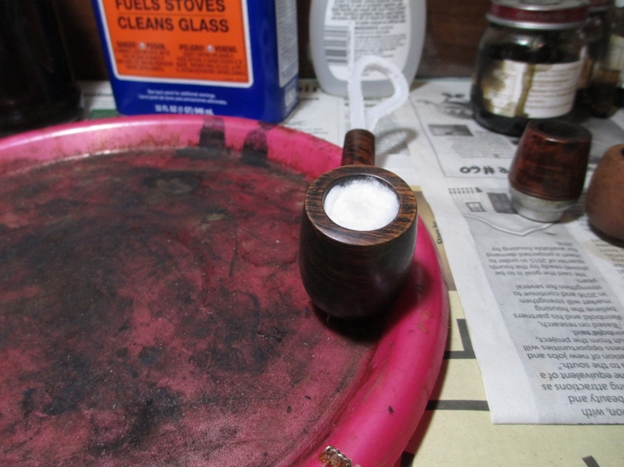
 To clear out the unneeded cake in the chamber, I used my smallest reamer, the 17mm, which was loose but close enough to gain a purchase on the walls. Several turns removed the majority of the cake, and followed by a little work with a small piece of 150-grit paper, the work there was done except for cleaning out with a swab of cotton cloth squares soaked in Everclear.
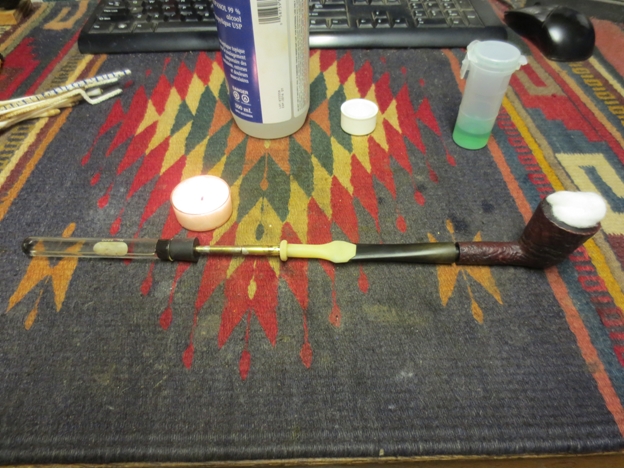
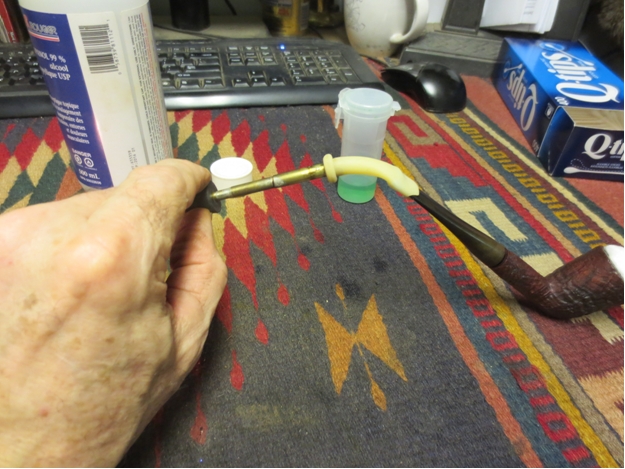
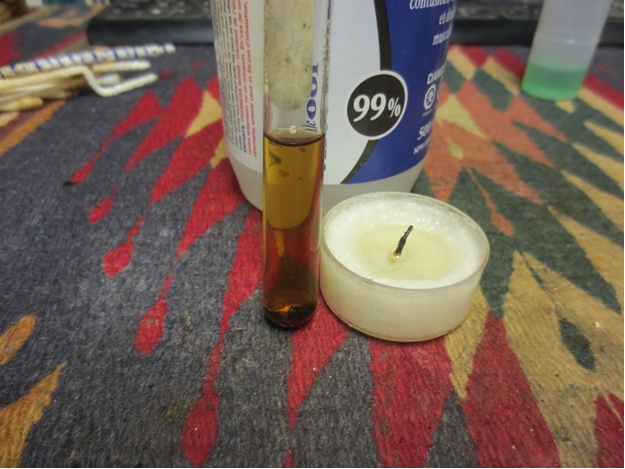
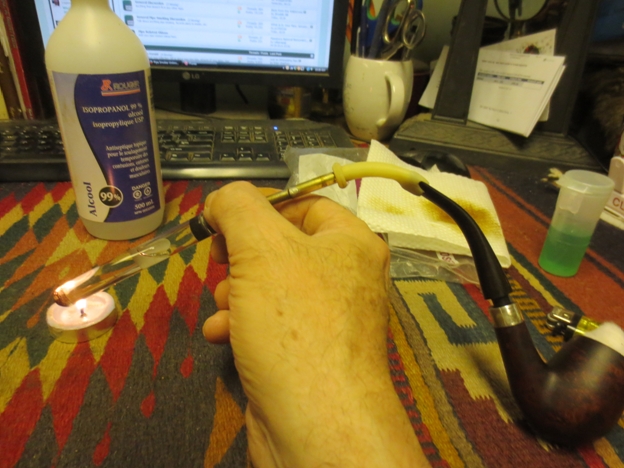
Believing the stem to be black Lucite, and also because of the thorough stripping of cake the procedure would cause, I opted against retorting. Instead I ran a single bristled pipe cleaner dipped in freshener through the stem, back and forth a few times, followed with a dry cleaner so as not to leave any possible unnecessary initial aftertaste.
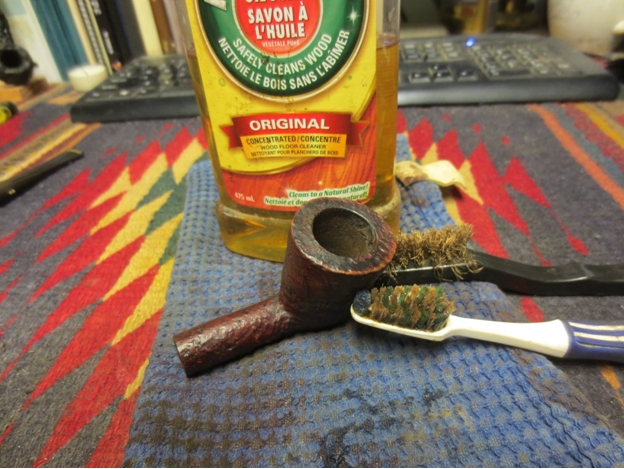
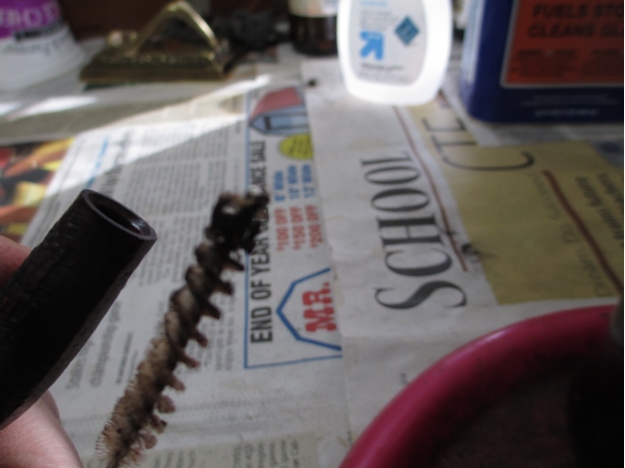
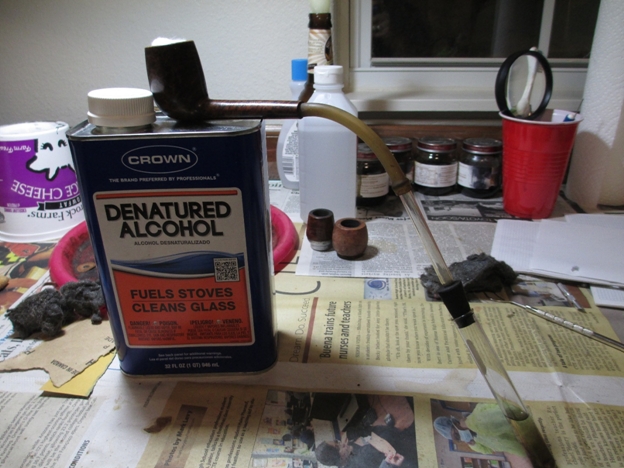
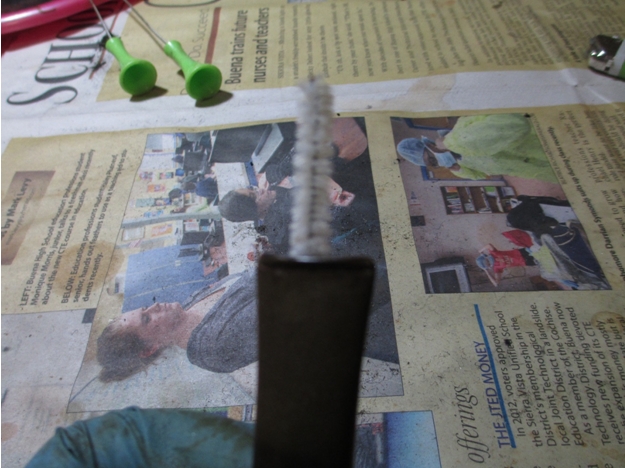
The shank I cleaned as well as I could, which ended up being quite well, with a wire-handled bristle brush that I ran through the narrow passage about ten times, dipping in a small container of Everclear between each run.
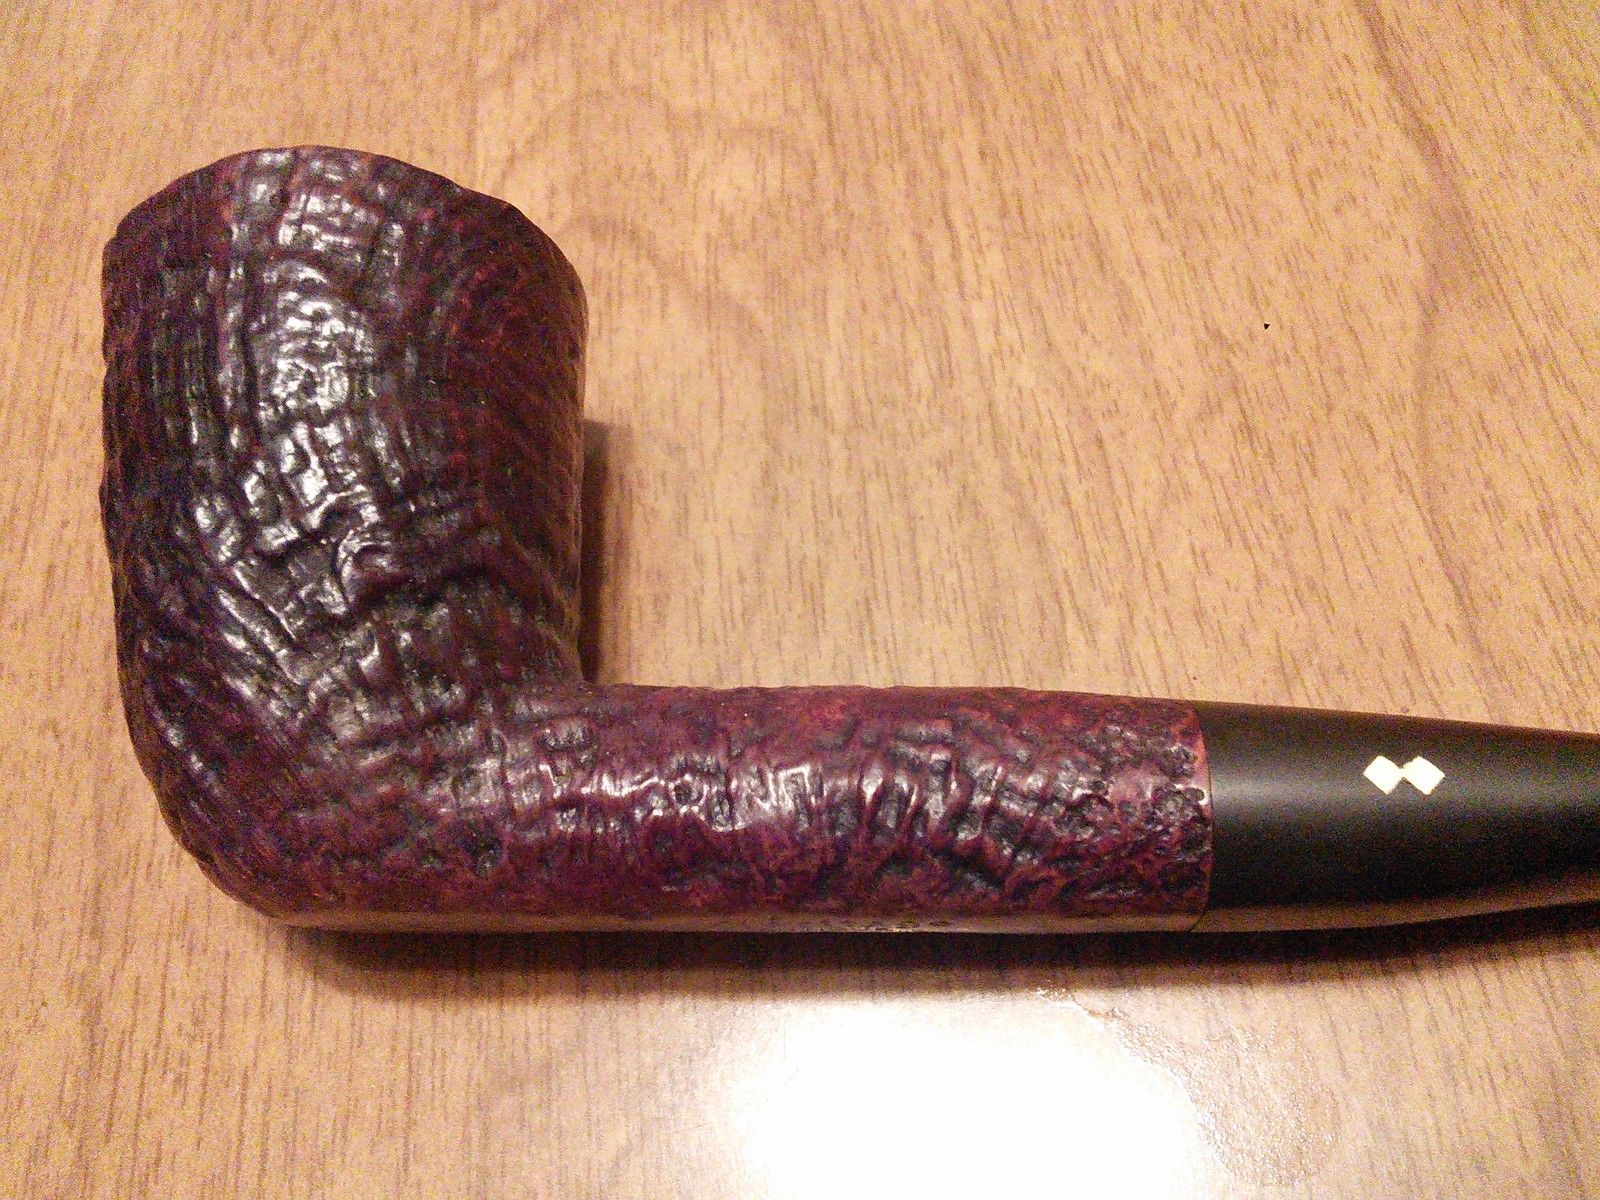
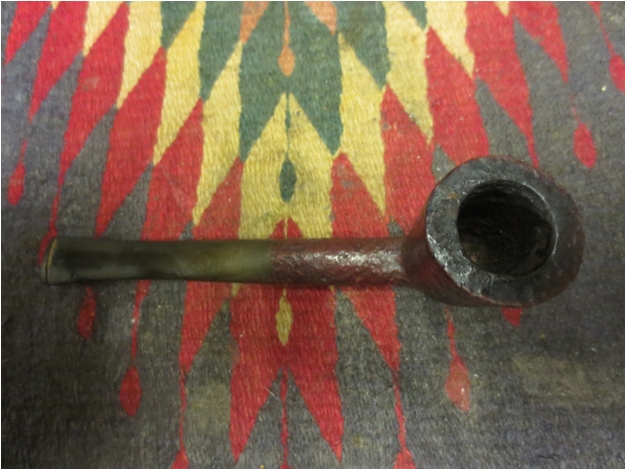
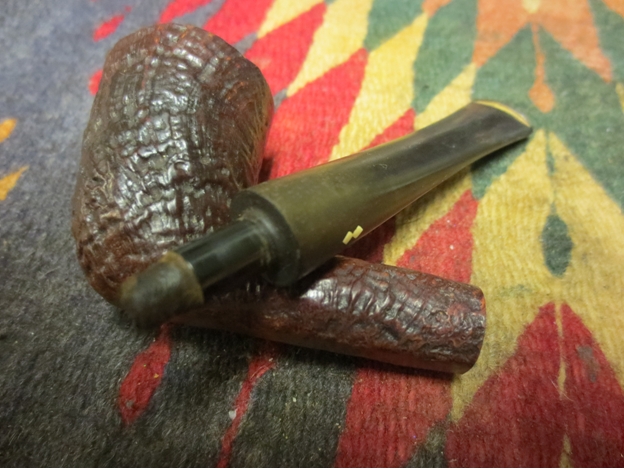
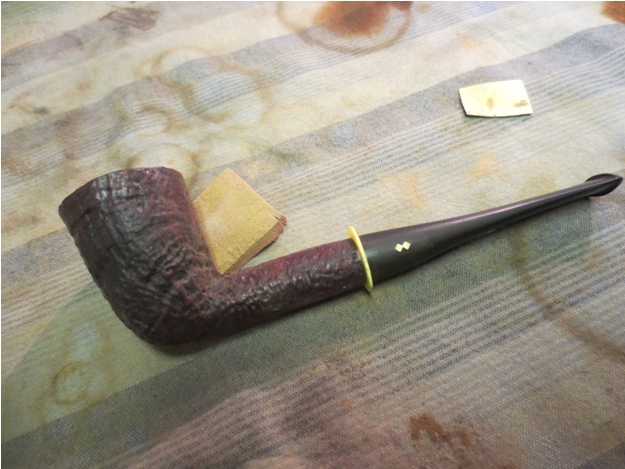
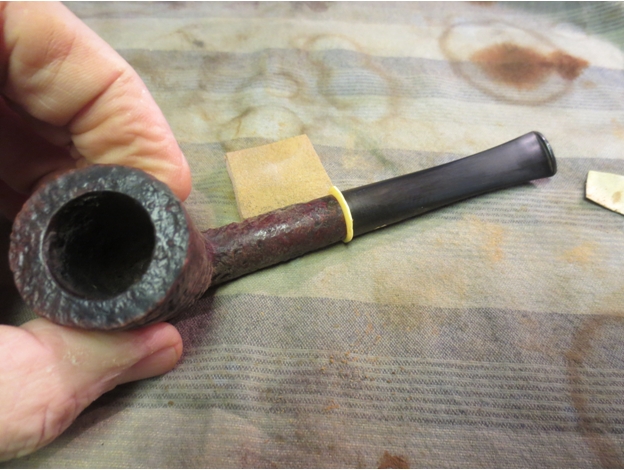
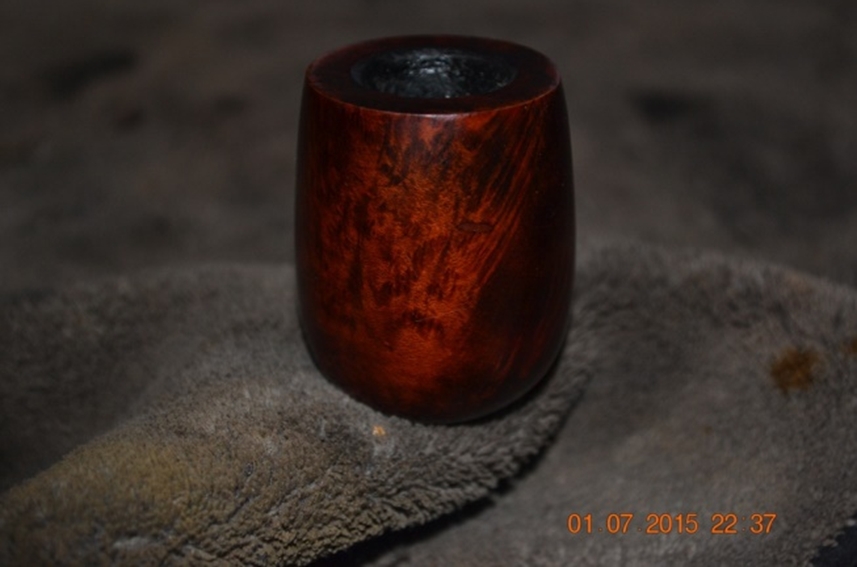
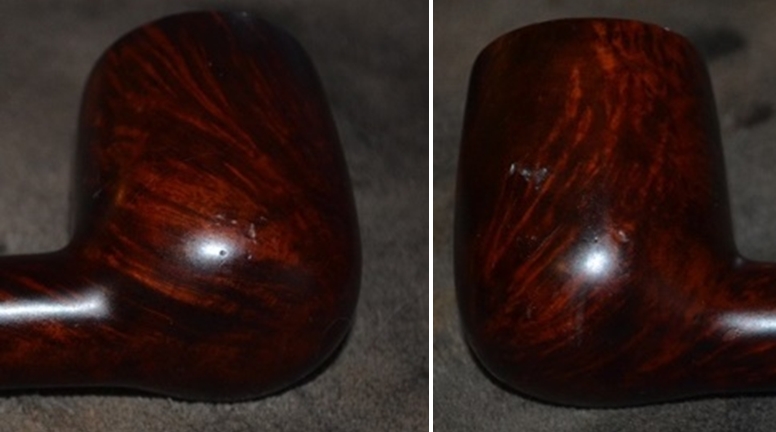
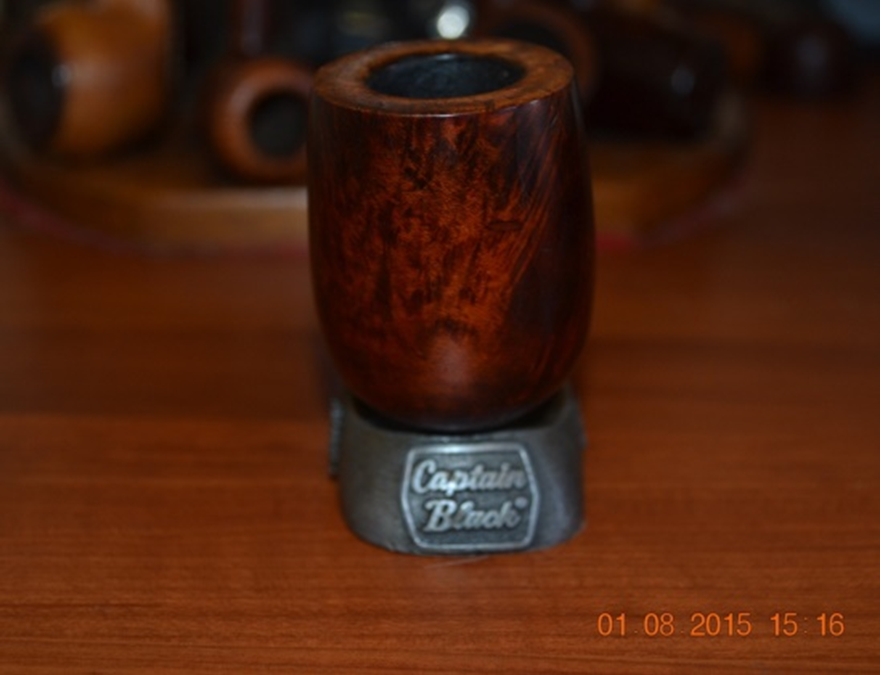
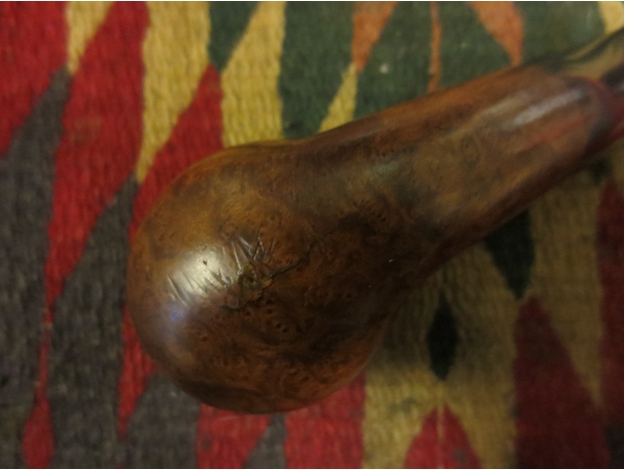
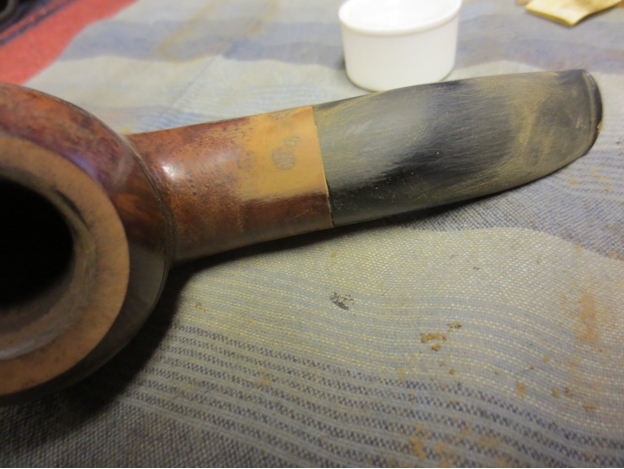
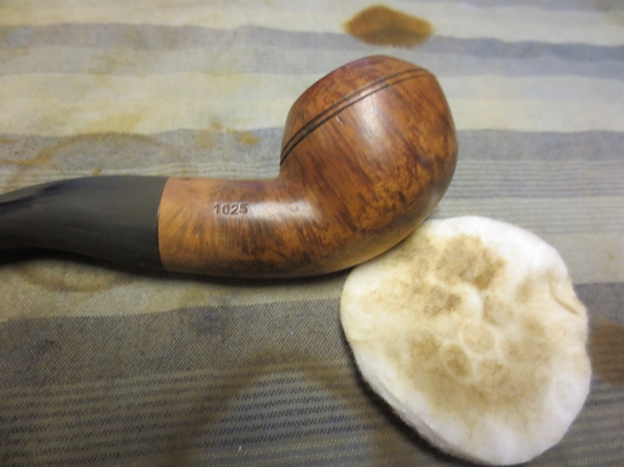
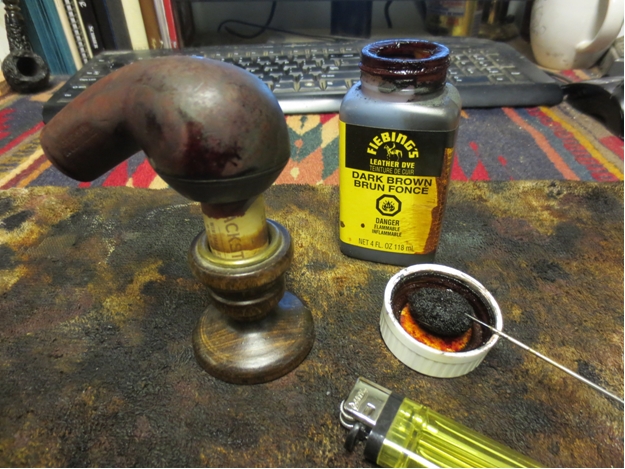
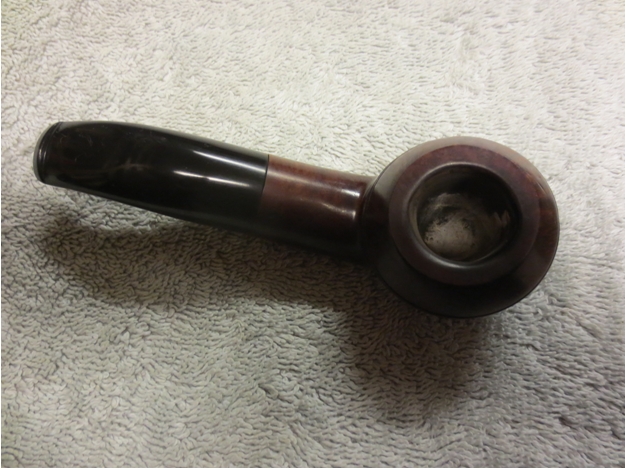
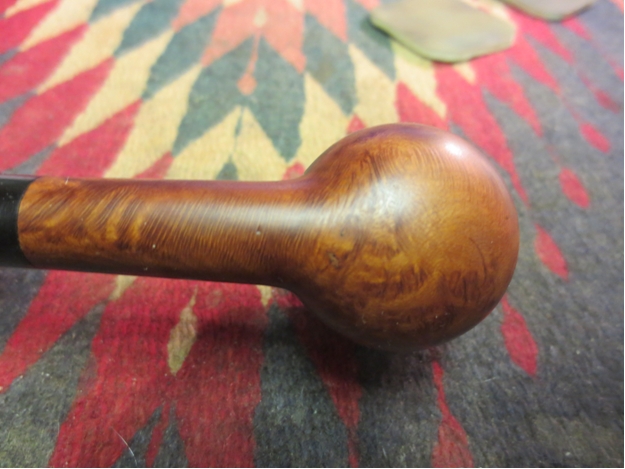
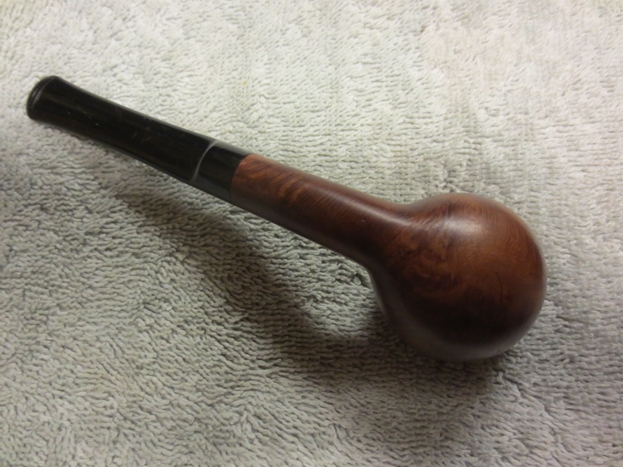
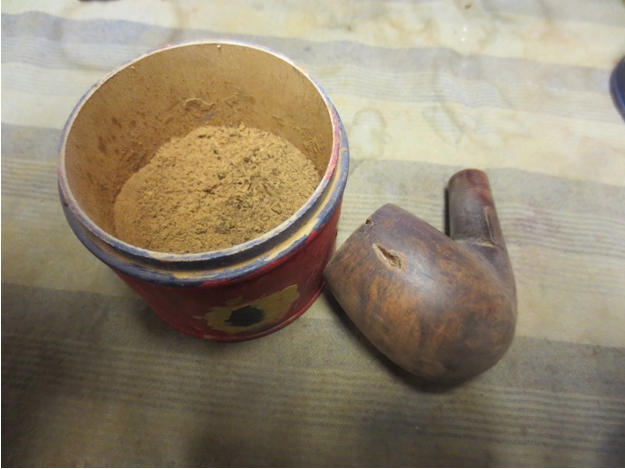
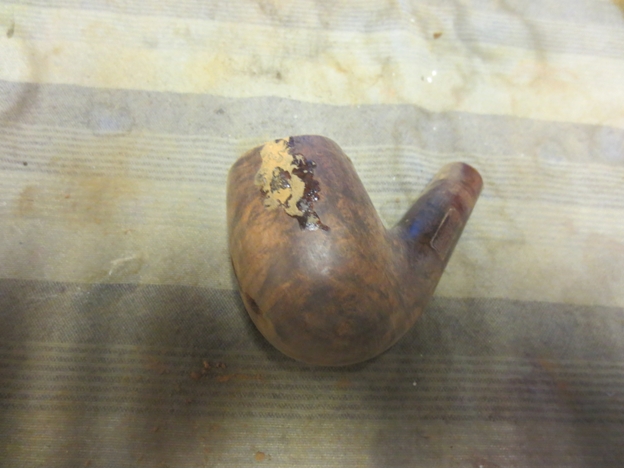
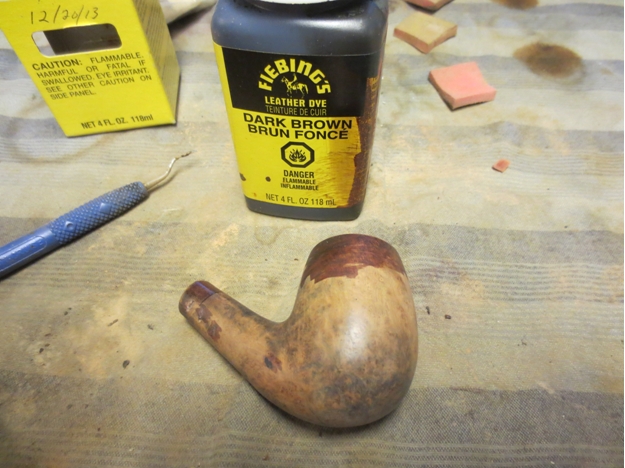
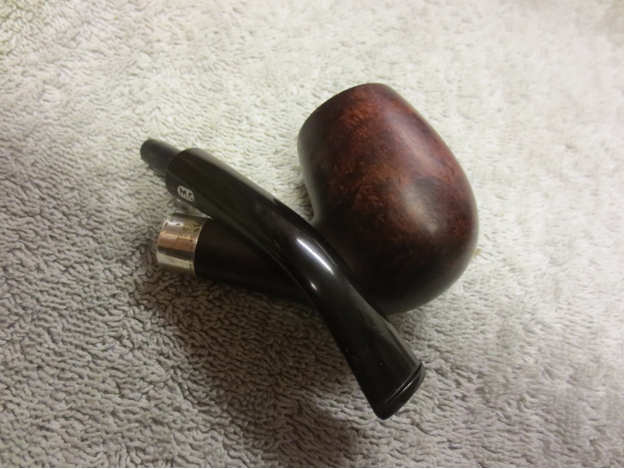
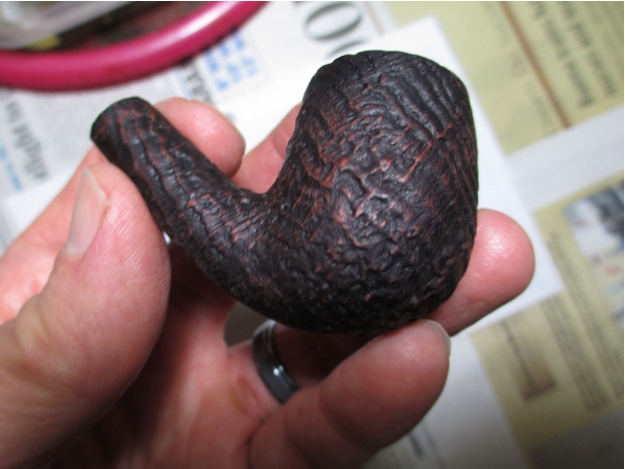
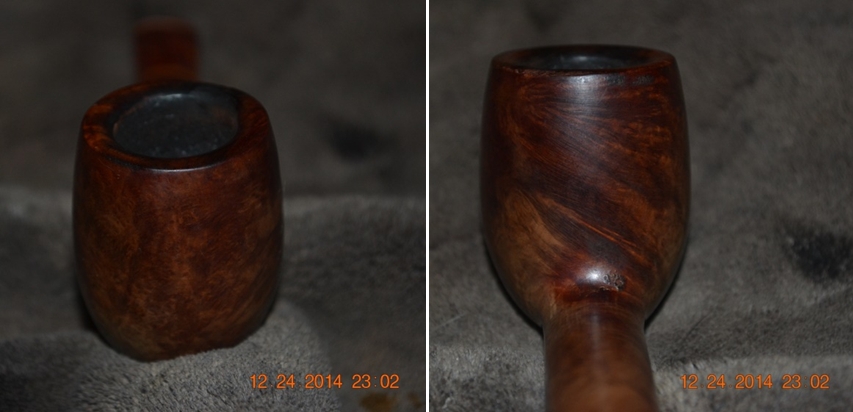
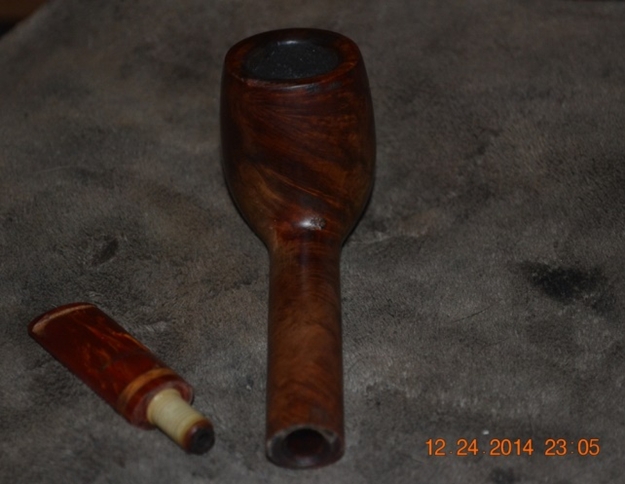
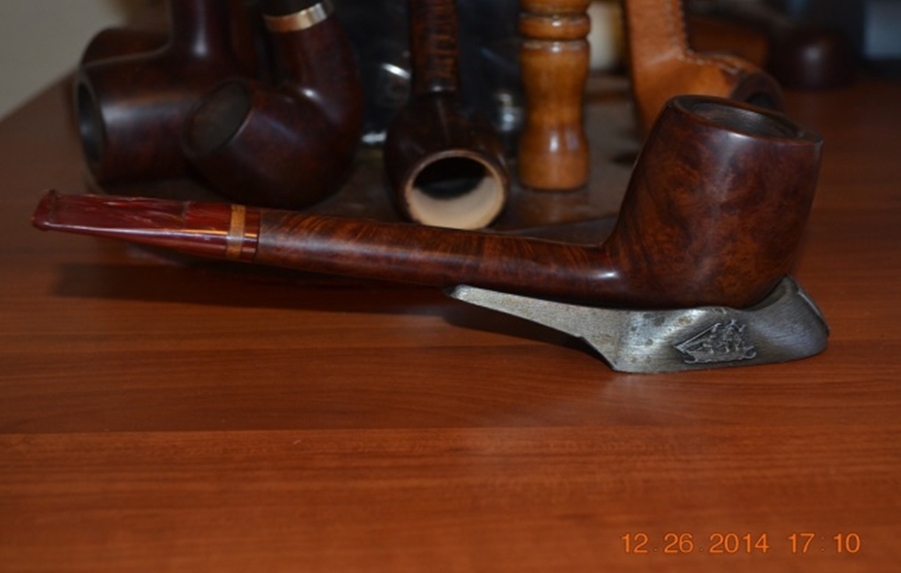
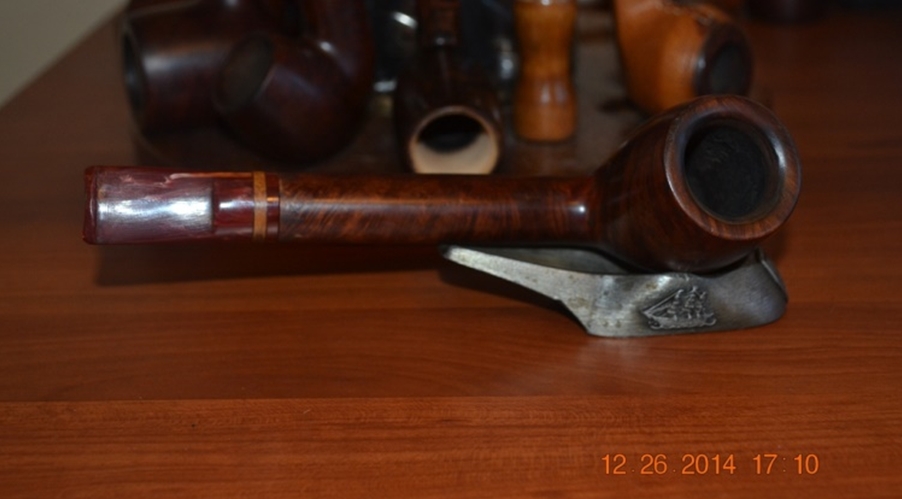
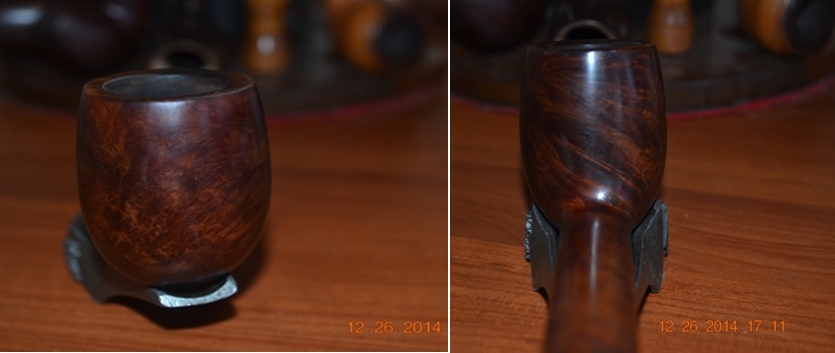
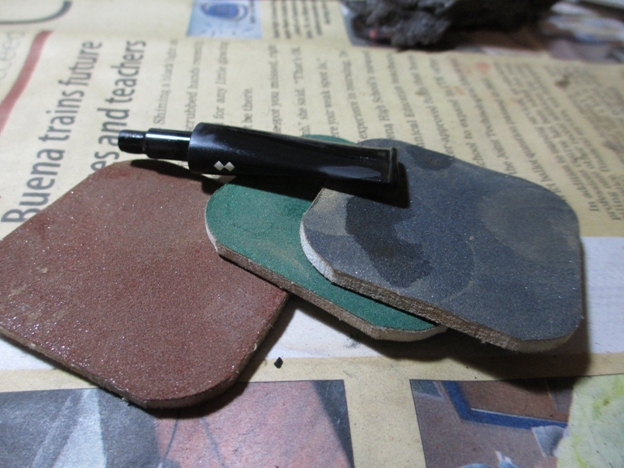
Next up were the only three halfway serious scars I found on the Duca Carlo, shown below before I gave the briar a bath with purified water. The scuffs on the right and lower left sides came off fast with micromesh using 1500, 2400 and 3200. The higher and deeper scratch on the middle left side of the bowl needed more surgical, localized work with 220-grit paper followed by the same micromesh progression. I then needed to re-stain the small higher spot on the left side using my Feibings dark brown leather dye.
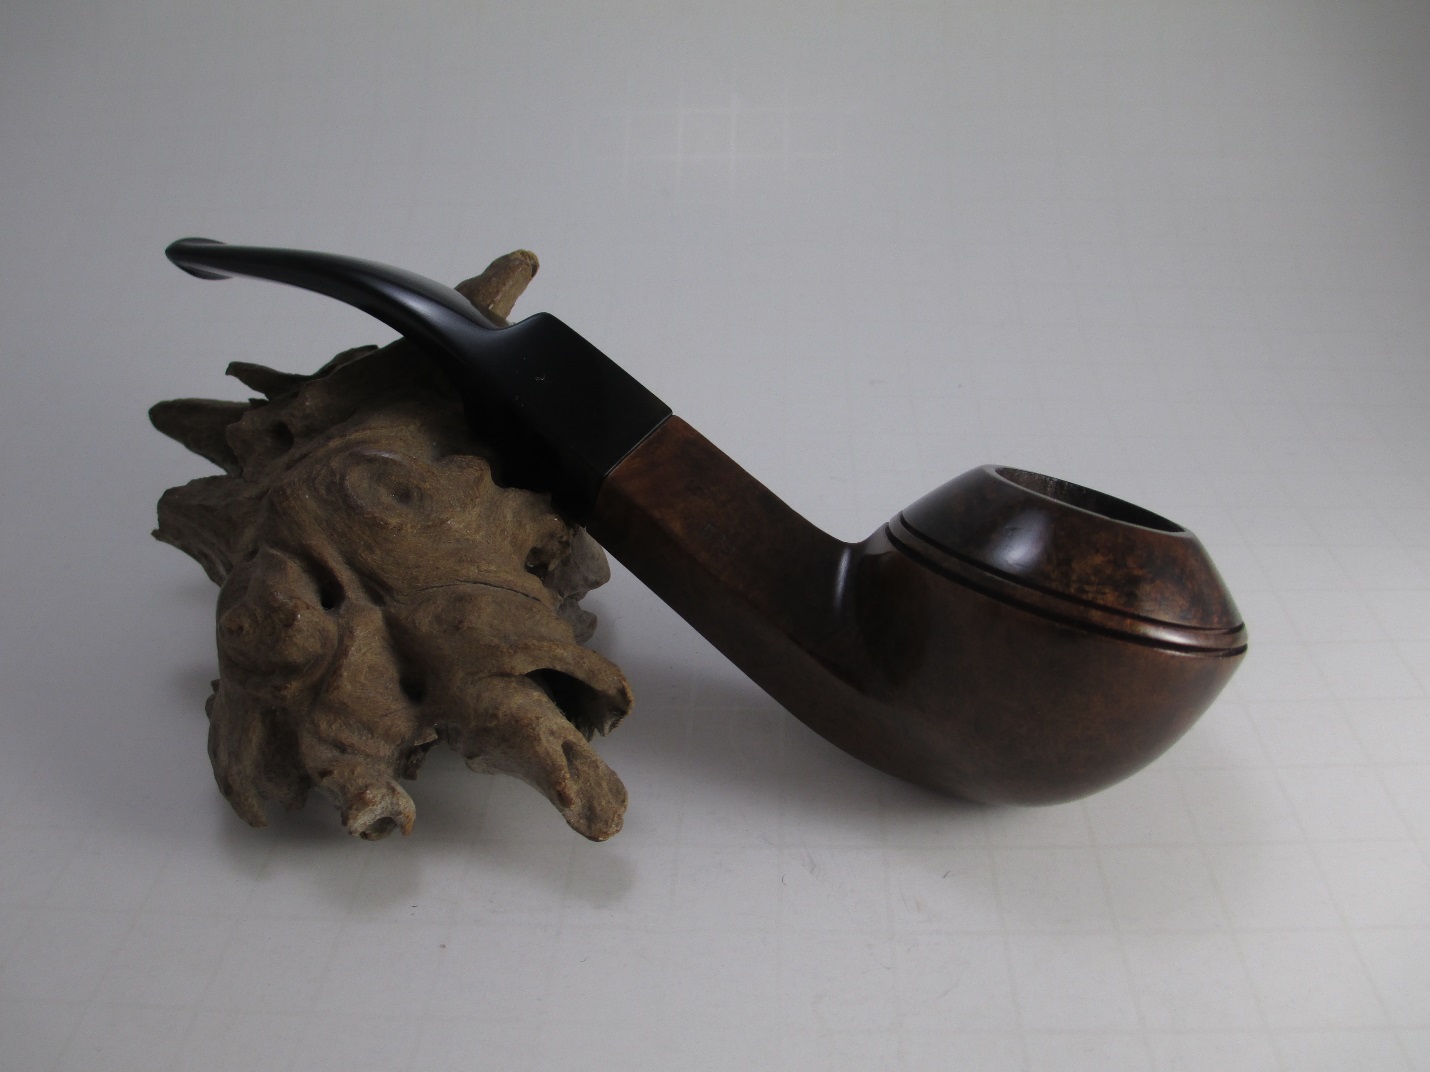
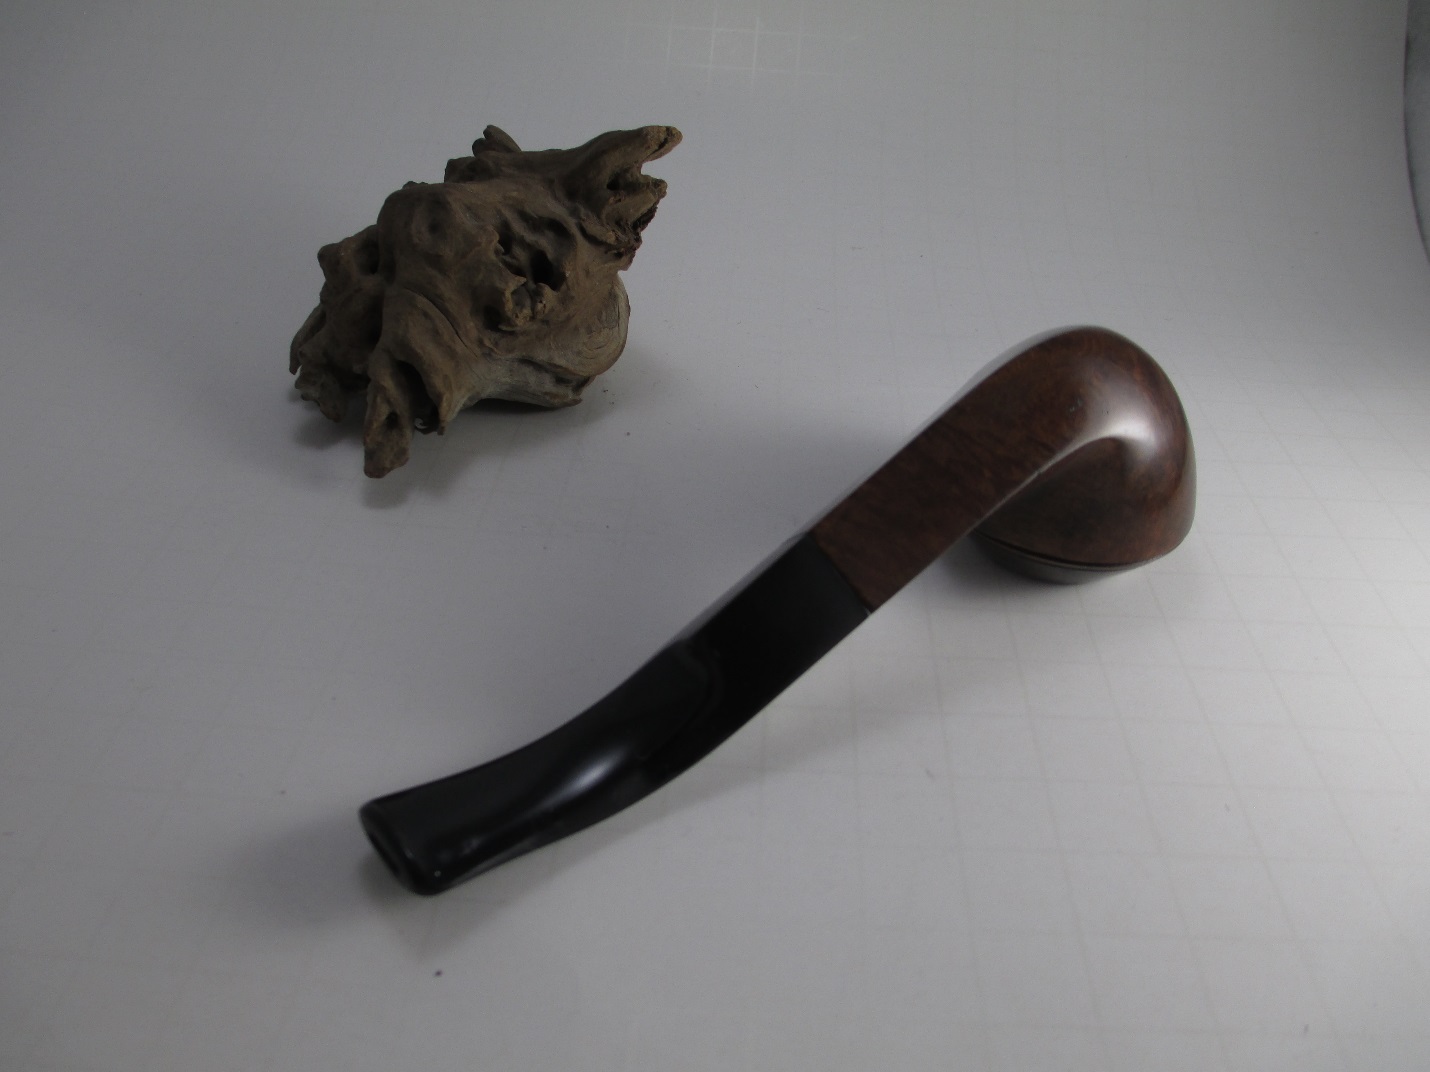
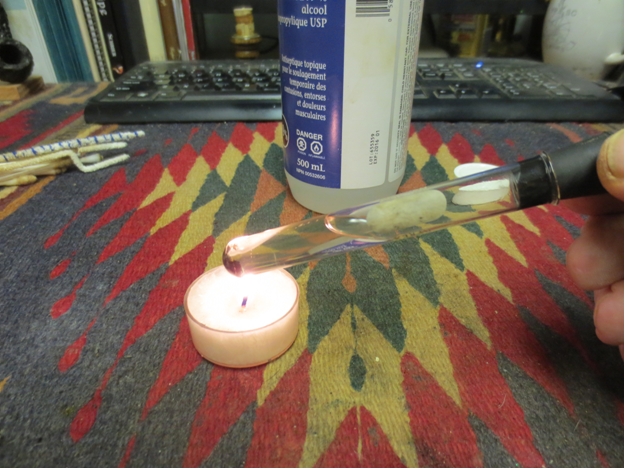
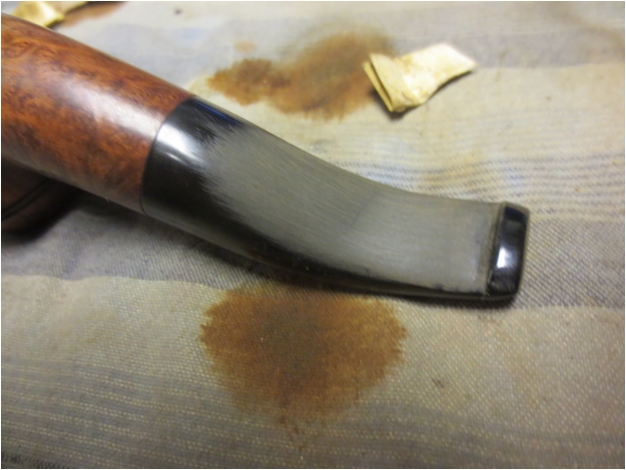
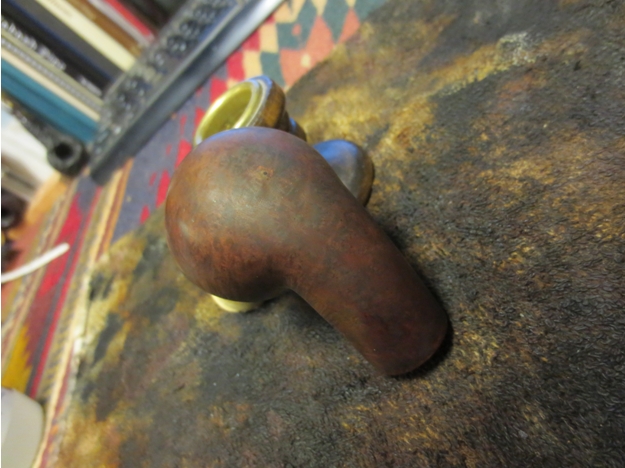
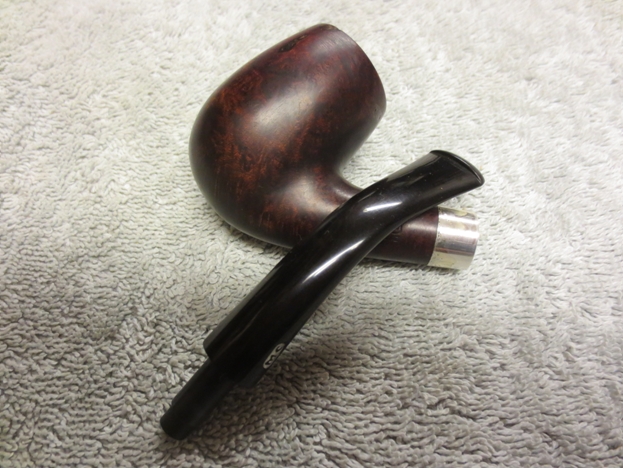
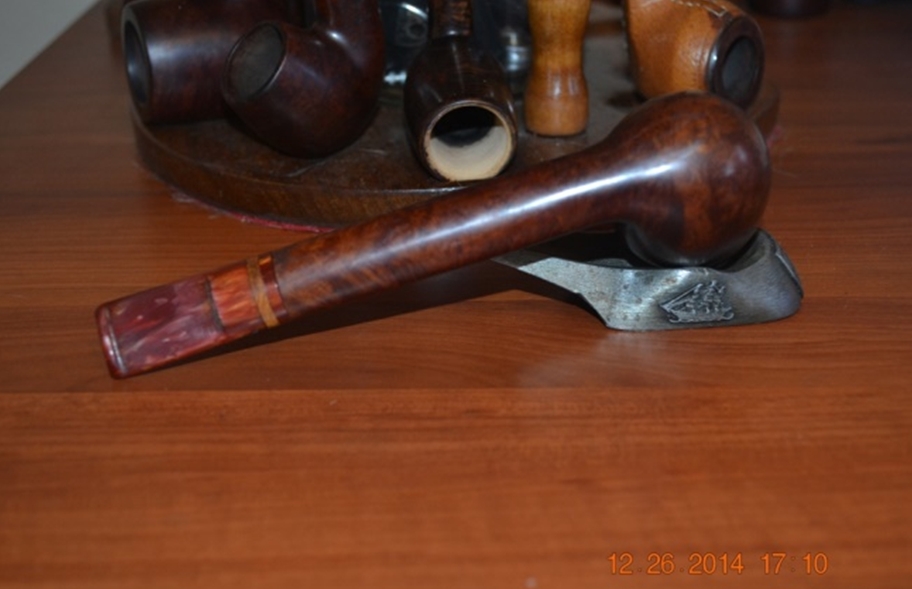
After flaming it with my Bic and letting it cool for a few minutes while I re-stained the rim (for which, again on impulse, I decided to do with some Lincoln medium brown dye I had on hand, to show off the nice grain there), I used 3600 micromesh to buff the side where the blemish had been until it appeared never to have existed. By then it was time to do the same to the rim, which, as I intended, was the wood’s natural lighter color but, to me at least, gave the pipe a cool two-tone effect.
While I used 3200 micromesh over the whole of the remaining bowl and shank to be sure it was all smooth and ready to put to the wheels, I was seriously eyeballing the new two-tone, almost sick with dread at the thought that Al would be disappointed by my summary decision to alter his pipe without even a consultation. But I let my gut ruling stand, if only with the knowledge that I could reverse it in a jiffy should Al indeed show even a hint of unhappiness.
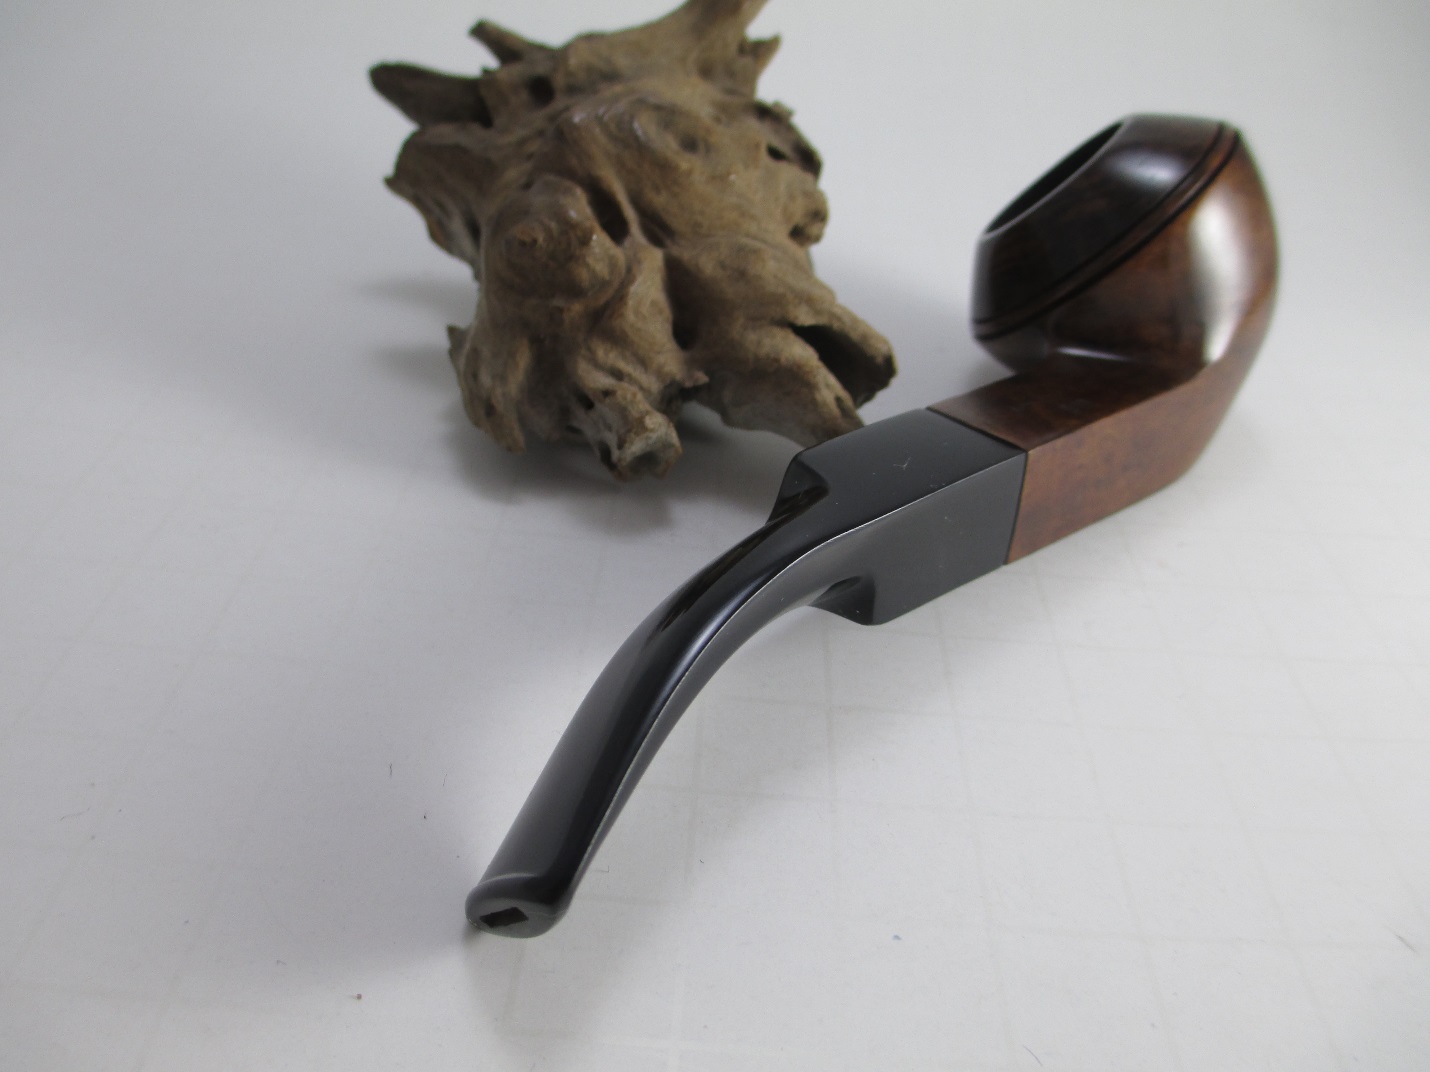
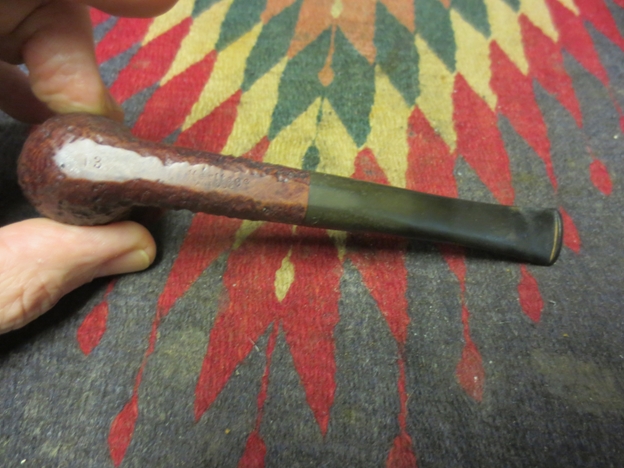
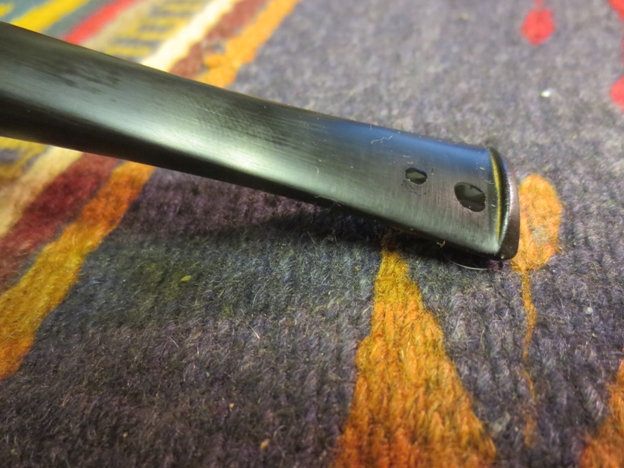
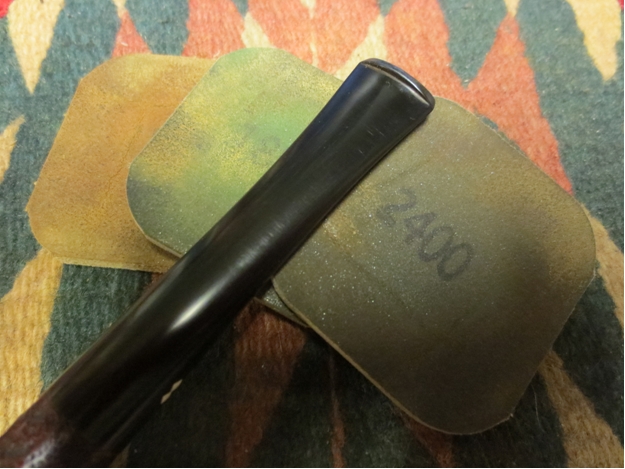
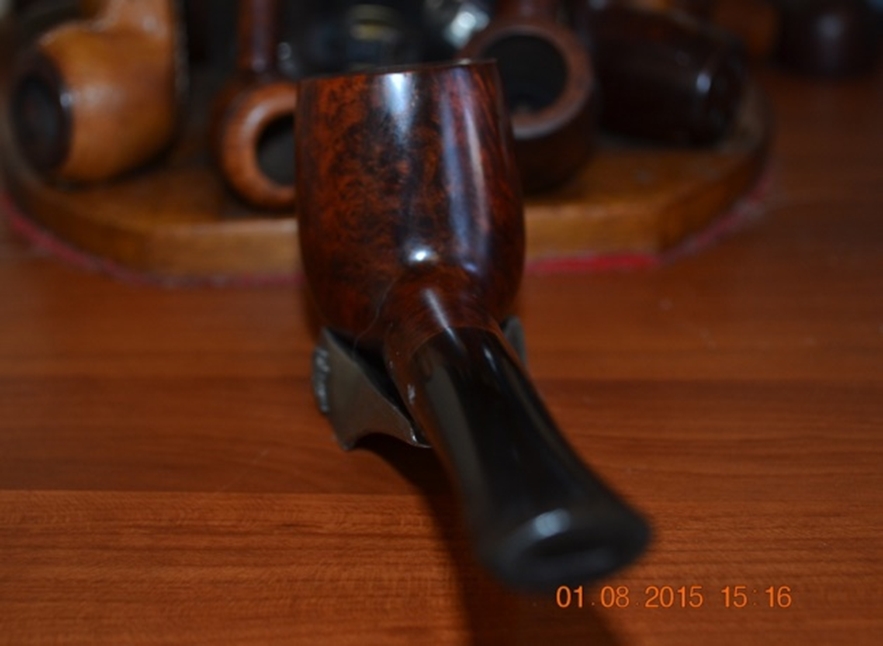
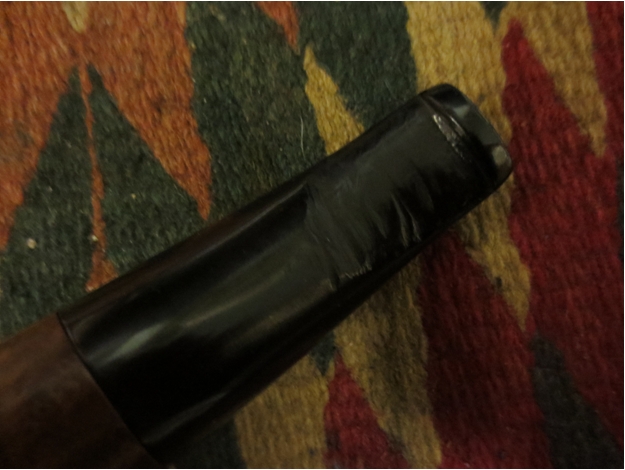
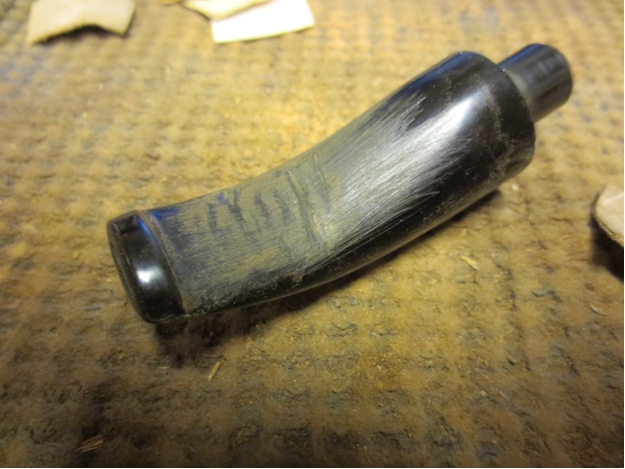
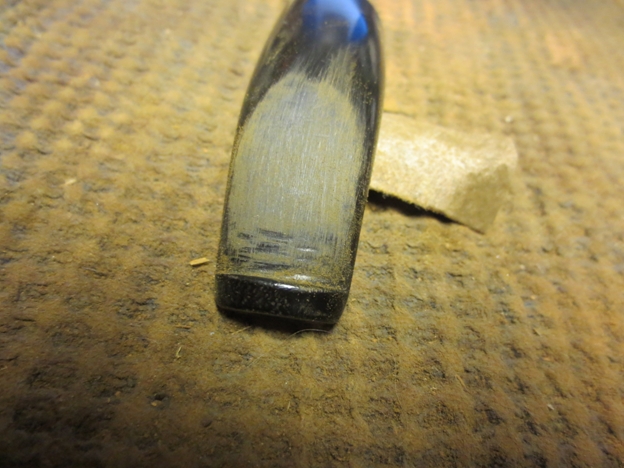
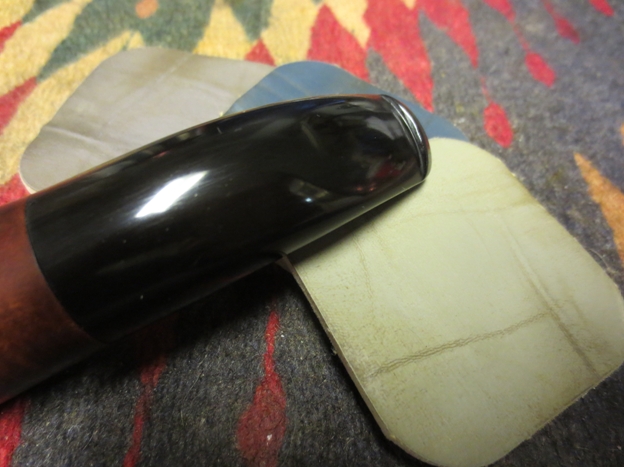
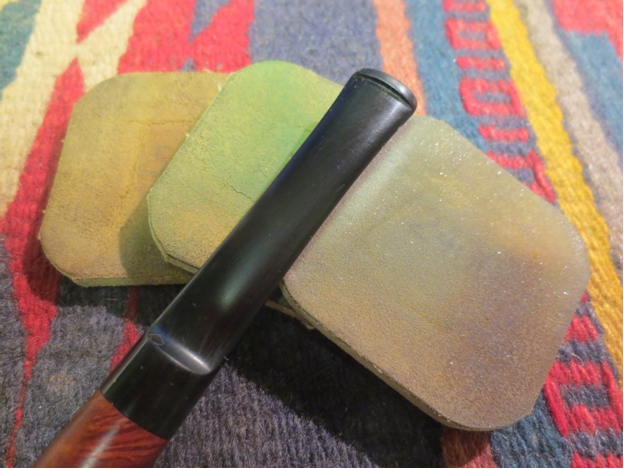
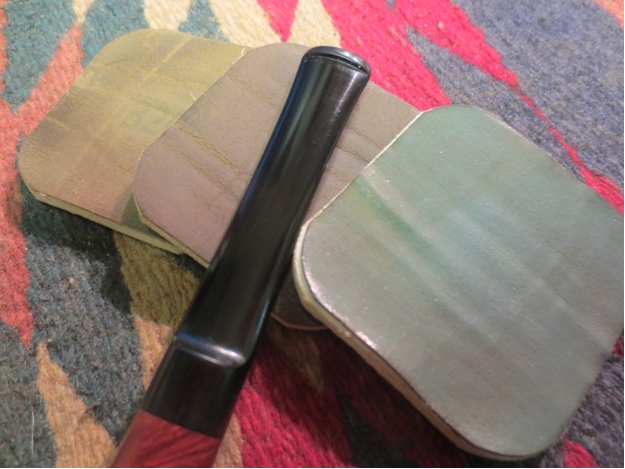
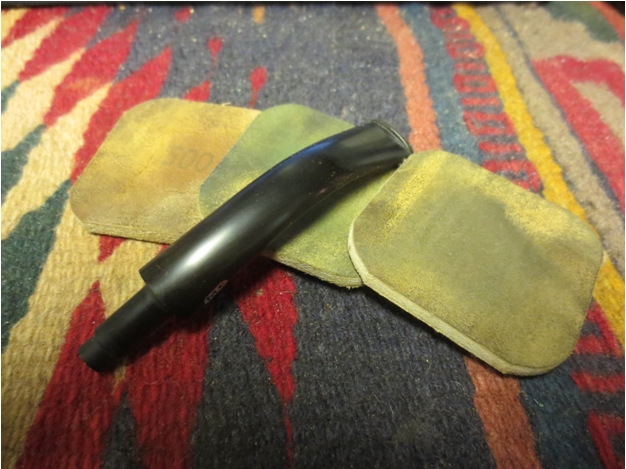
No kidding, I heard a faint drum roll when the moment came to address Al’s primary concern: the stem. As I noted several times already, this Duca Carlo was in great shape when it was entrusted to my care, and the stem, with the slightest of scratches just below the bit on both sides, was the least of the exceptions despite its almost complete lack of luster. Once more I remembered the advice of others wiser than I to use the least necessary force to correct a problem – advice I took to heart – and began with 1500 micromesh.
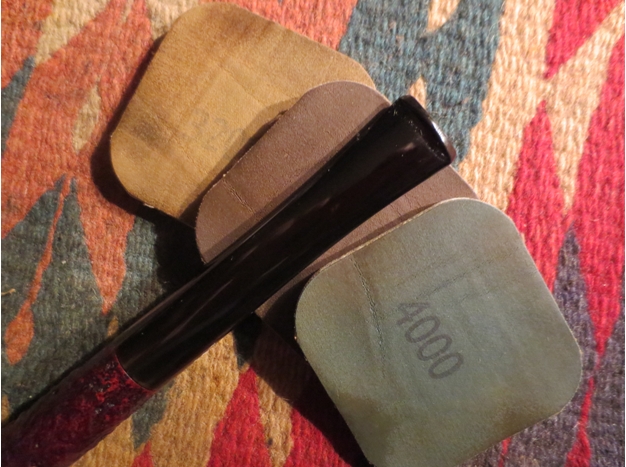
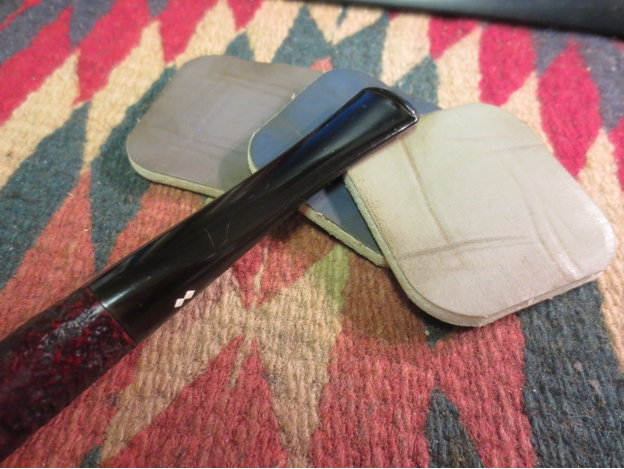
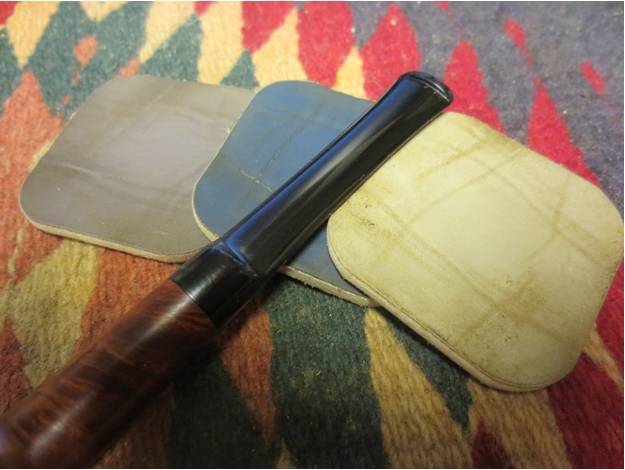
Tackling the miniscule scratches first, of course, I saw them vanish with the slightest of pressure before I continued over the rest of the stem to make it even and gave it a thorough rubbing with a soft cotton rag. Then I did the same with 2400, wiped it again, and finished at last with 3600. The prepped stem was looking good, and my heart began to beat harder, knowing I had to take the two precious parts to my single-speed wheels, where only God knew what might happen.
This project had become a labor of love to me, even greater than most of the much more difficult jobs I had performed without disaster before. And so I took a moment to collect my wits and think good thoughts.The phone rang. Dang! There went my happy thoughts.
I didn’t recognize the 575 Area Code and almost did not answer, as is my habit with unknown or Toll Free numbers because of the near certainty that they are spam or scam or other callers I wish would stop phoning me. But something convinced me to go for it. At first the voice on the other end failed to register, but then I realized it was – that’s right – Al. I gave him my card the night before but had no way to call him. There was a slight tone of anxiety in his voice when he asked how his pipe was doing. Relieved to hear his voice and understanding his concern more than he could have known, I almost laughed but choked it down. Feeling my own nerves settling, I told him I was just putting the final touches on the Duca Carlo and could meet him at the tobacconist between 3 and 3:30. At the end of our conversation, I realized I was calm again and good to go.
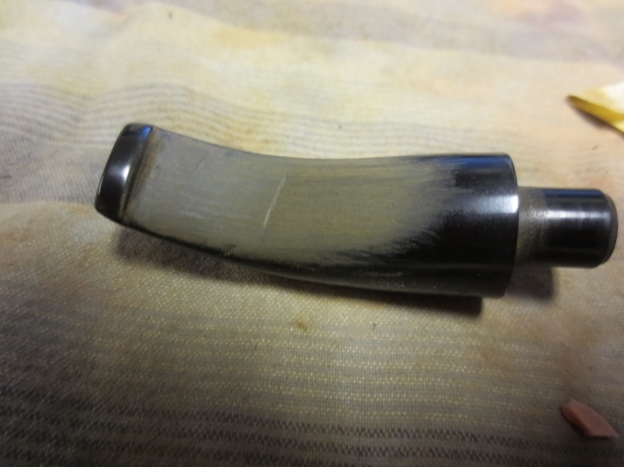
Proceeding from the living room, where I like to do most of my work in more comfort, to my workroom, with the pipe, stem, cotton rag and camera in my hands, I set everything down on my desk and turned to the small bench with my two buffing wheels. I threw the switch on the one with red Tripoli and without another thought to distract me picked up the smooth gray stem and held it in both hands with confident firmness (but not like a mother choking her child as she’s about to watch the poor kid go off to summer camp or college or wherever) and did what I knew how to do. The first step done, I wiped the stem down, removing the streaks, and flicked on the second wheel that had the white Tripoli. Ditto. Two-thirds of the way home with the stem, and seeing each buff give it a higher shine, I returned to the first wheel where I…yes, I finished it on the White Diamond pad, without a single incident or even slip through the whole process!
Stoked for the next part, I set aside the stem and went straight through the steps again with the bowl and shank, except that I used white Tripoli followed by White Diamond and ended with carnauba.
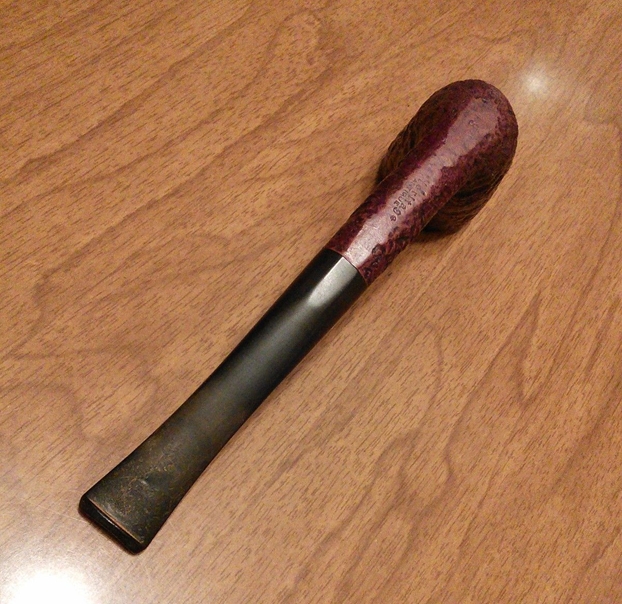
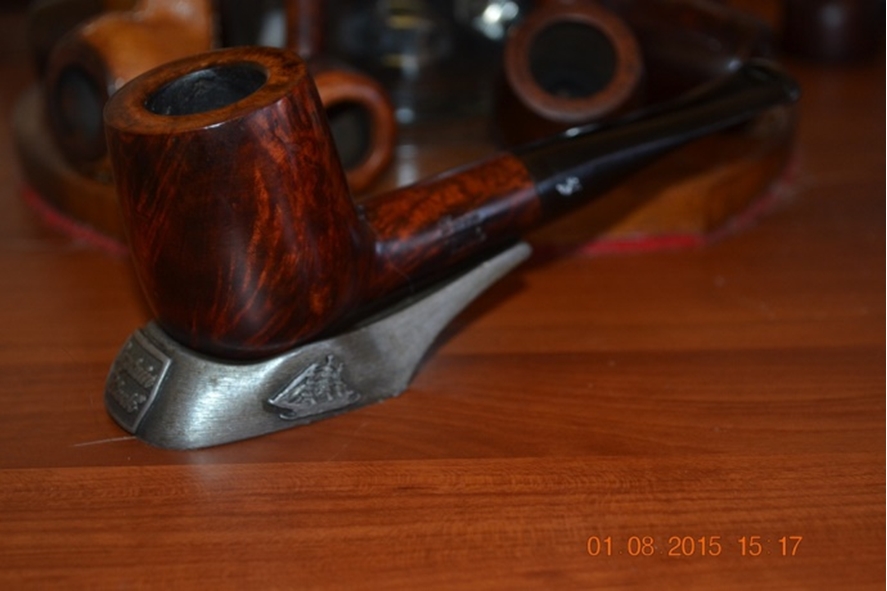
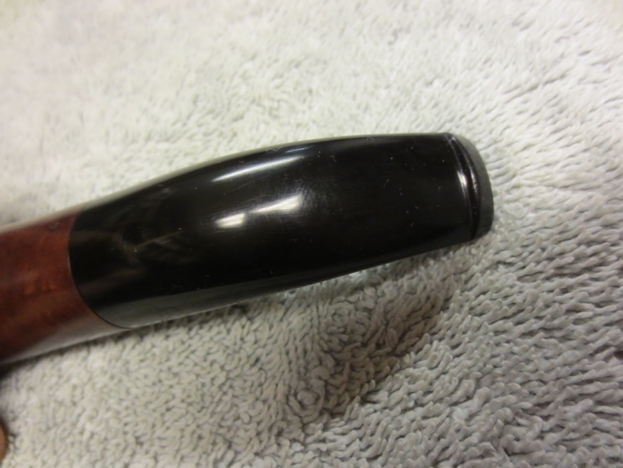
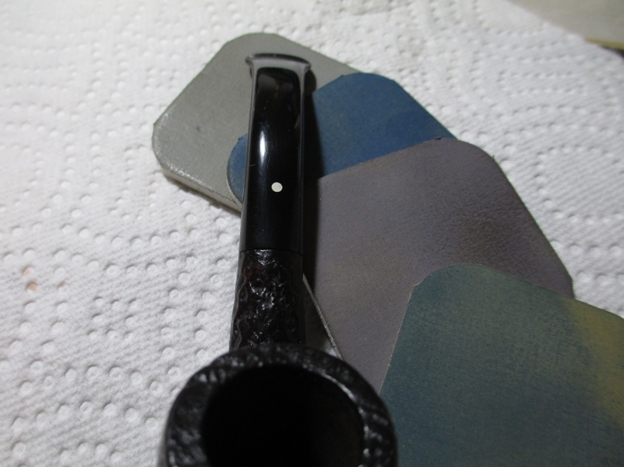
This Savinelli required one very last task, which is always a pleasure when I have the opportunity to do it. I always seem to forget one thing when I walk to my workroom ready to polish a pipe, and this time it was the white wax marker to fill in the outline of the crown on the stem. I retrieved it from my run case.Taking what I considered a well-needed rest in the office chair before my desk, I took the stem firmly in hand and, with my magnifying glasses on, scraped the little exposed end of wax first left to right across the crown, then turned the stem vertically and applied another layer top to bottom and finally added a third layer diagonally. Brushing aside a little of the considerable resulting excess wax, I pressed my thumb down across the whole blotch and waited for the heat of my skin to make the wax settle into the tiny grooves. After about a minute I lifted my thumb and used the cotton cloth gently around the edges and still more lightly over the area of the crown, which emerged visible with all of its points.
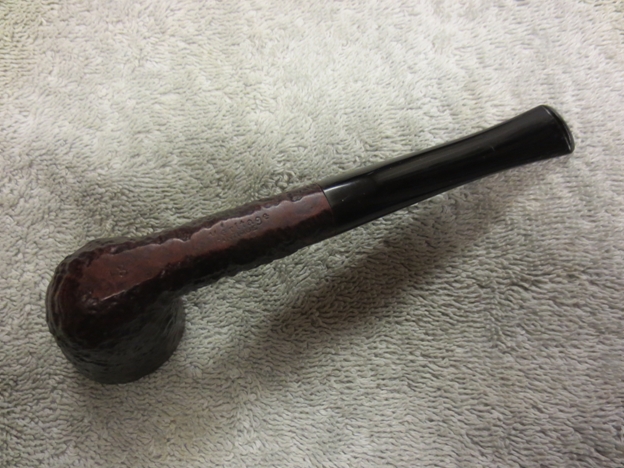
I attached the completed stem and briar and gave the fine pipe that was whole again a final wipe with the rag and millimeter by millimeter scrutiny with my glasses. It passed muster, despite my ever-growing attention to detail.


 CONCLUSION
The best laid plans of mice and men often go astray, and due to unforeseen circumstances I was a half-hour late to the tobacconist. Spotting Al sitting in the back of the shop almost as soon as I was through the door, I know he saw me, also, but pretended not to, playing it cool. I even had to say hello first as he stared at something, and when he looked up at me the forced smile told me he was sure I had broken his pipe. All of the good seats were taken by those dratted cigar smokers, except for Al sitting in his in misery that was clear to my keenly empathetic eyes.
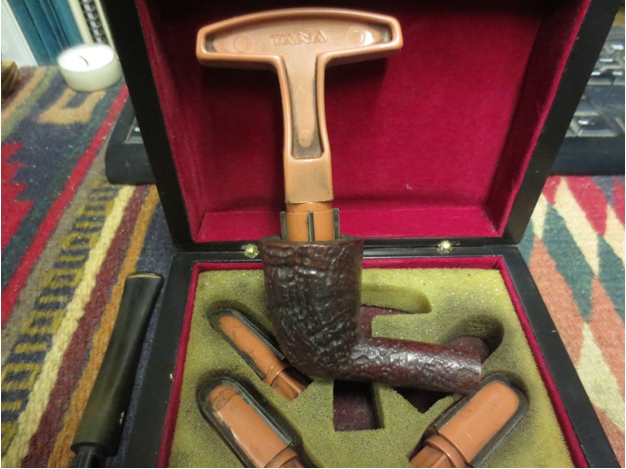
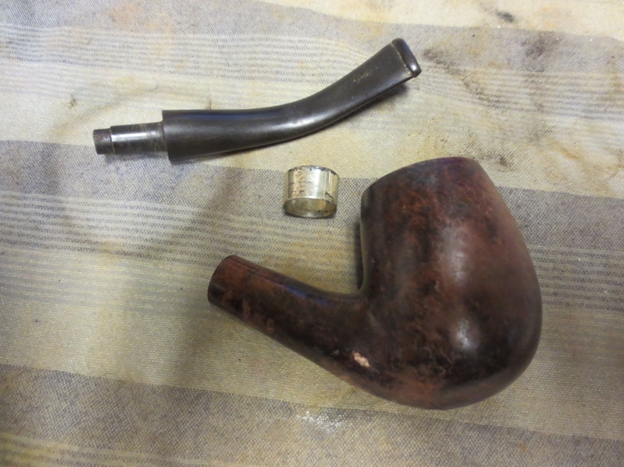
And thus it became my extreme pleasure to walk to his side and set down my run case and laptop. Before I stood straight again, I retrieved a dark blue Savinelli box inside of which was a light brown Savinelli cloth bag containing the refurbished Duca Carlo. Al’s eyes lit on the box in my hand. Yes, indeed, that had his attention. I could not, even to save my life, lose the grin on my face as I handed it to him and watched his real smile appear in what must have been extraordinary relief.
Then to watch Al open the box slowly, like a Christmas present, only to find the bag inside that he took out with care and reached inside the open end to pull his pipe out by the stem – well, the obvious shocked surprise as he saw the glistening, dark black stem emerge first, followed by the lustrous refurbished pipe, and the initial reaction of total speechless wonder, told me everything.
“Wow,” was his first word. He went on to expand on that dazed thought, but this seems like a good place to wrap it up.
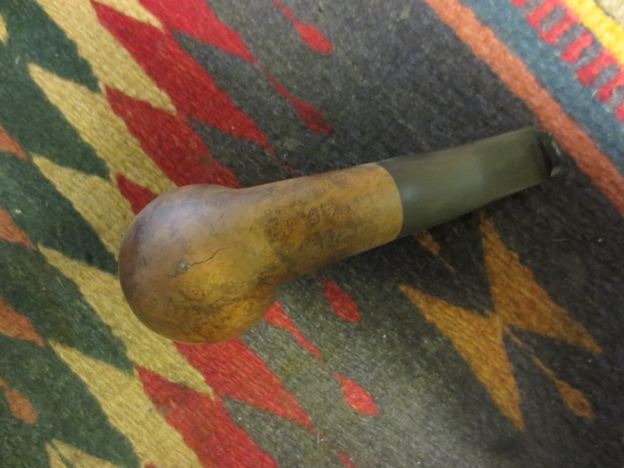
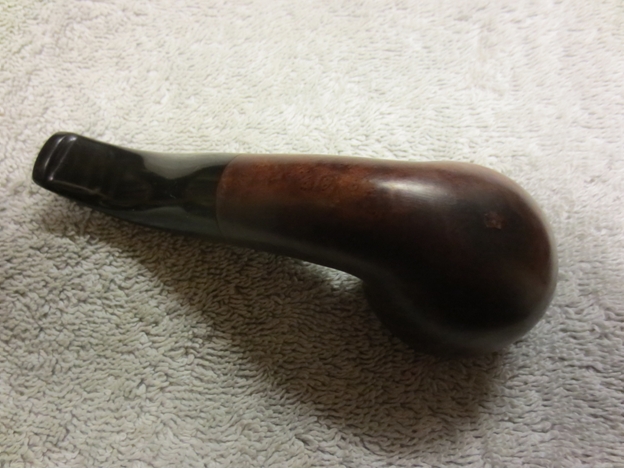
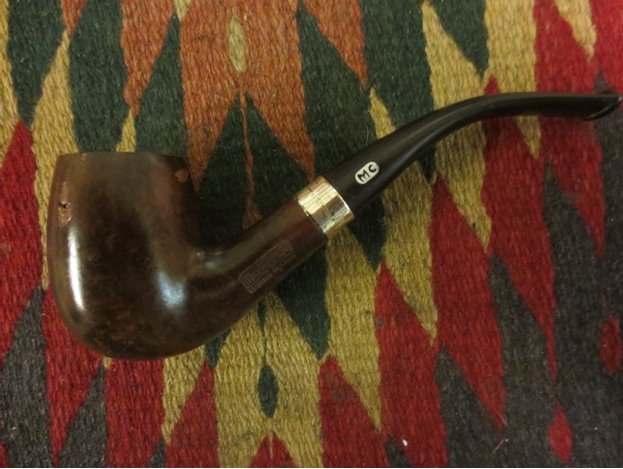
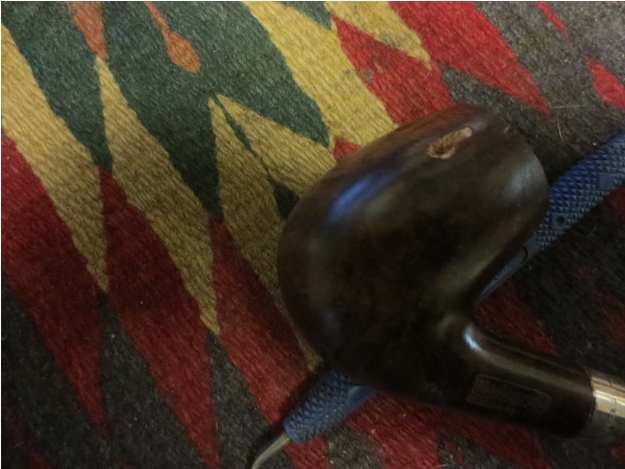
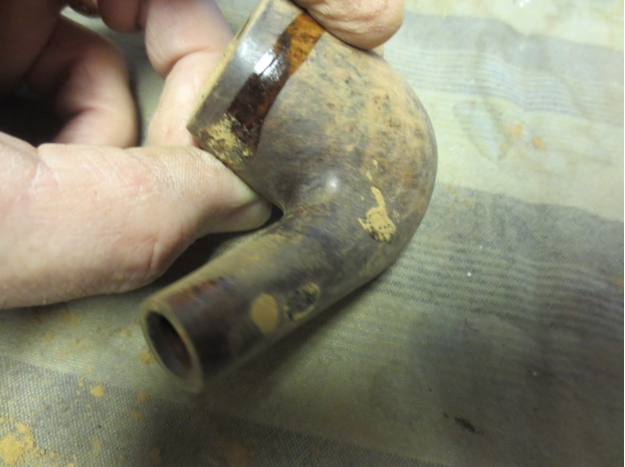
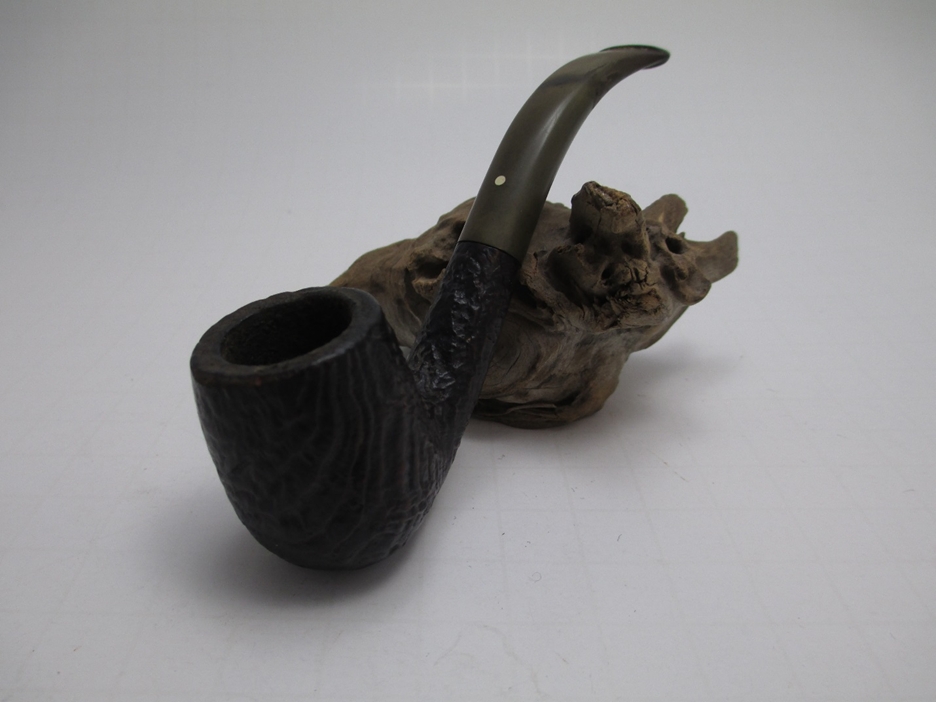
 I’m not sure whether it was a sense of overconfidence in my ability or naivety about the extent of the damage, but I bought the pipe. I realized when it arrived that if I couldn’t fix the scorch mark the pipe probably wouldn’t be worth my time. I nearly despaired when normal procedures failed to even lighten the mark. I put the pipe aside several times before finally deciding to take drastic measures and use a hand sander with 150 grit sand paper. I figured at this point there was nothing to lose and I knew I could still maintain the original shape if I was careful. After spending about a half an hour with the sander, I found myself at about an 80% solution. The mark was still too dark, so I took it to the next level of desperation: the rotary tool (that’s the generic name for a dremel that you buy at Harbor Freight Tools) with a sanding attachment.
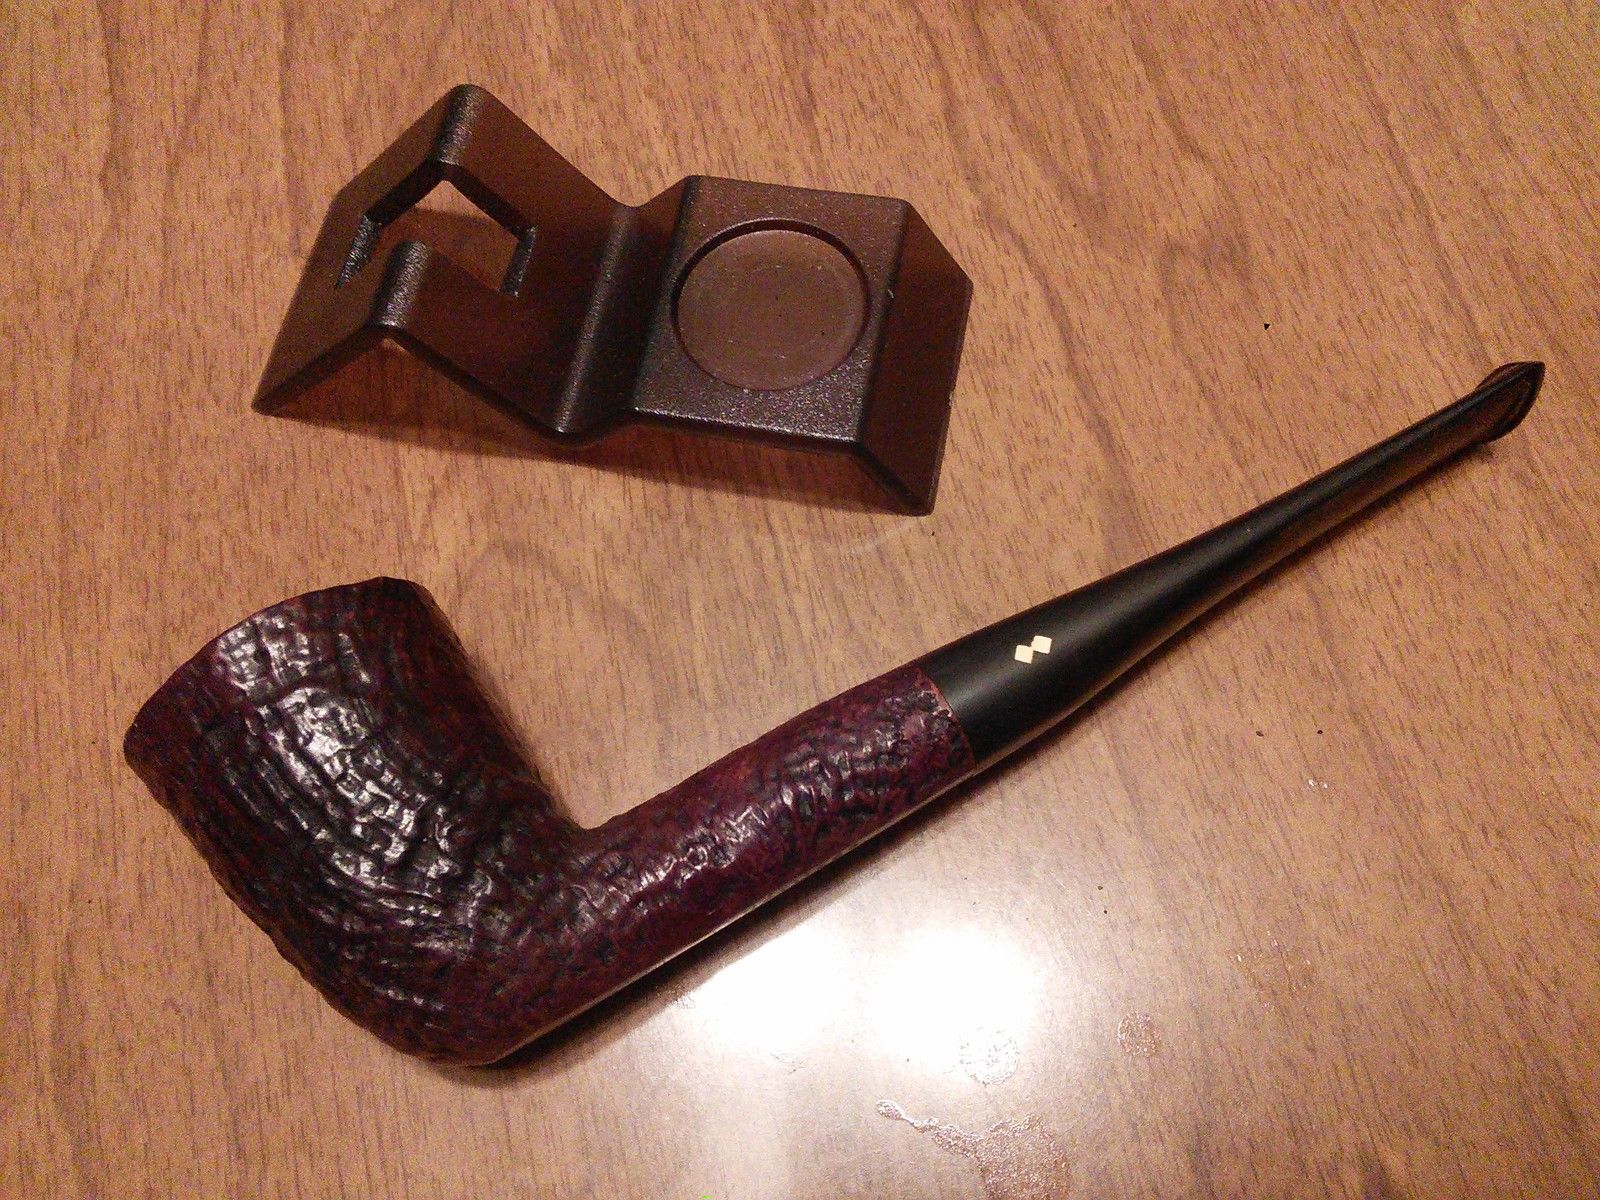
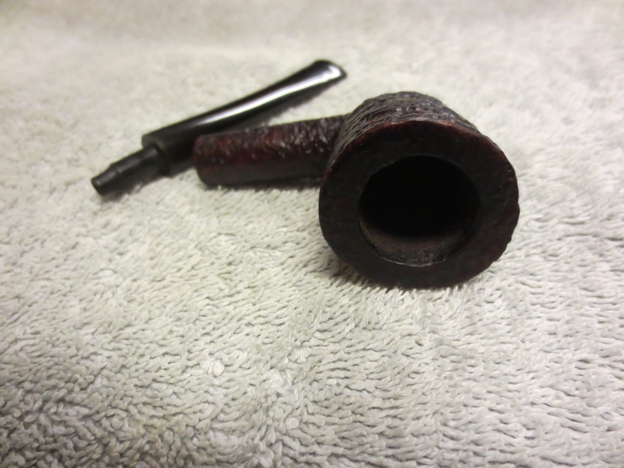
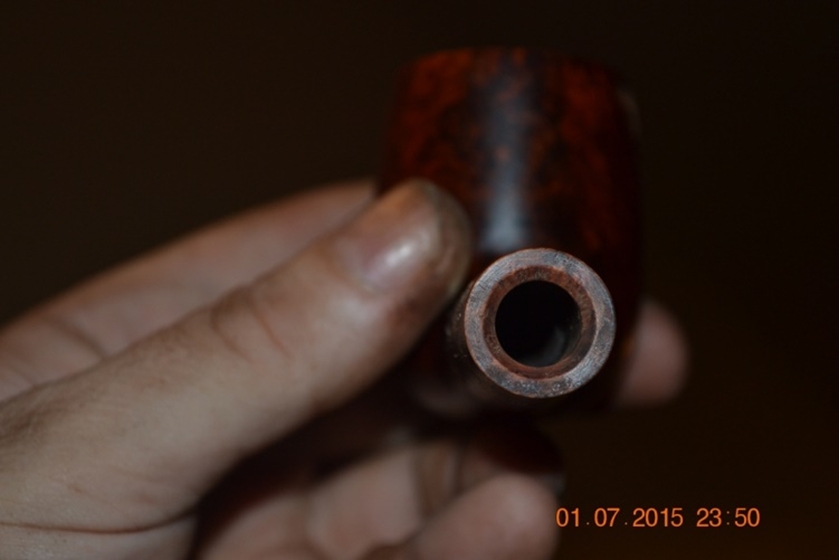
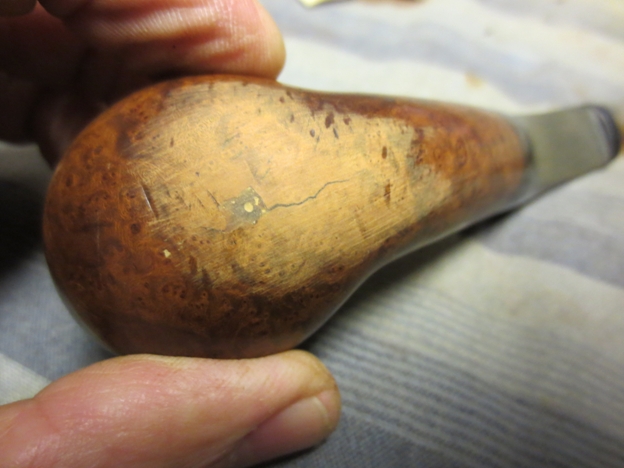
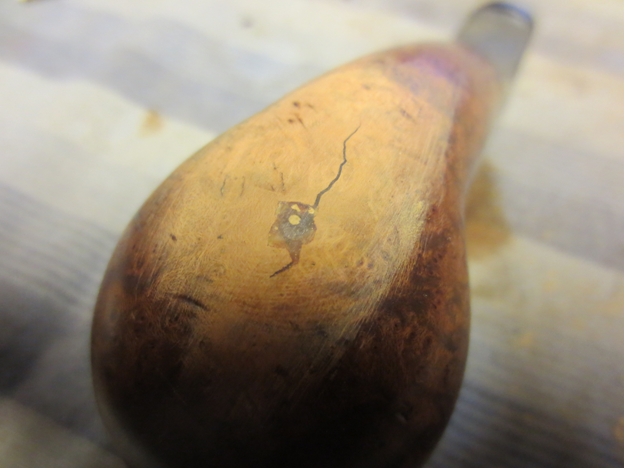
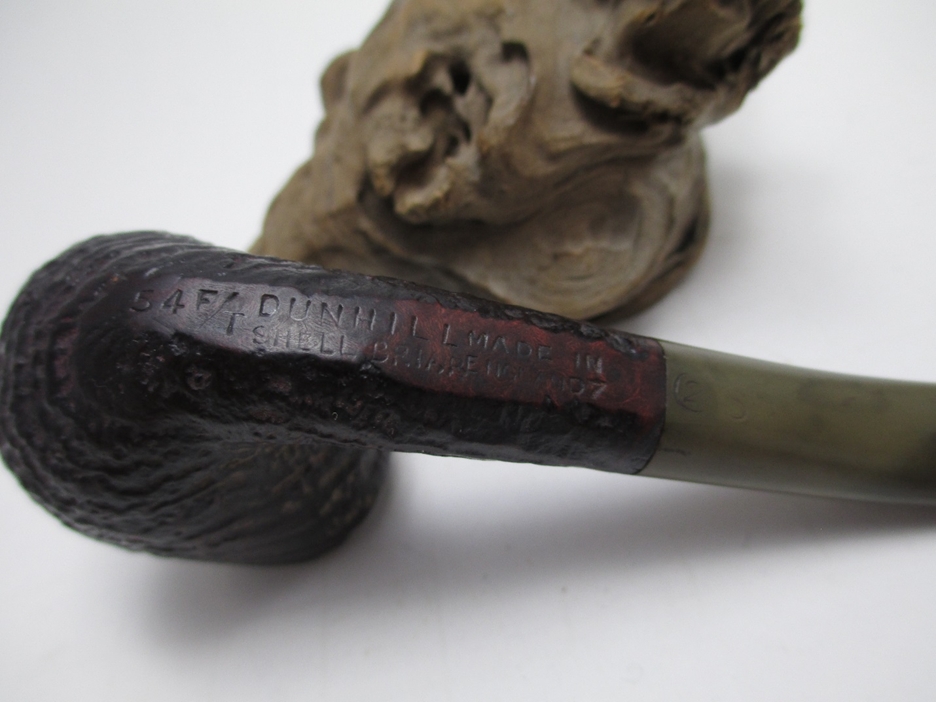
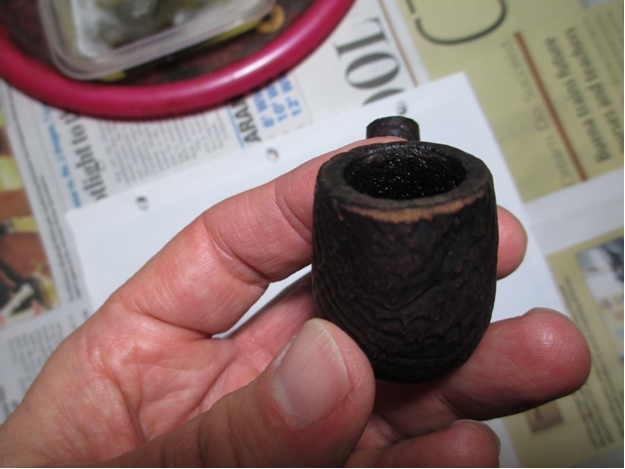
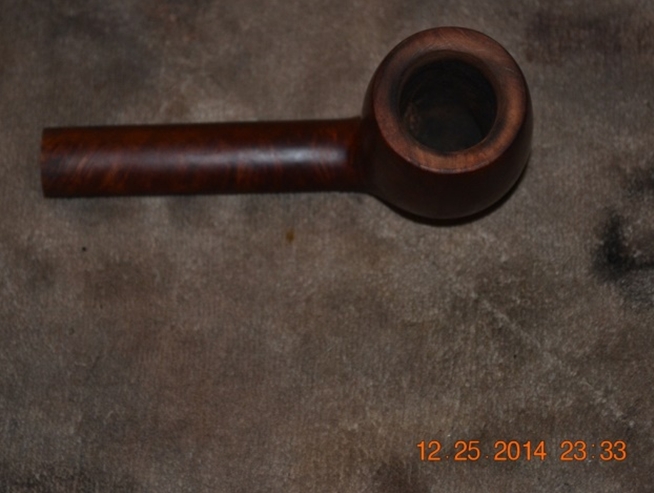
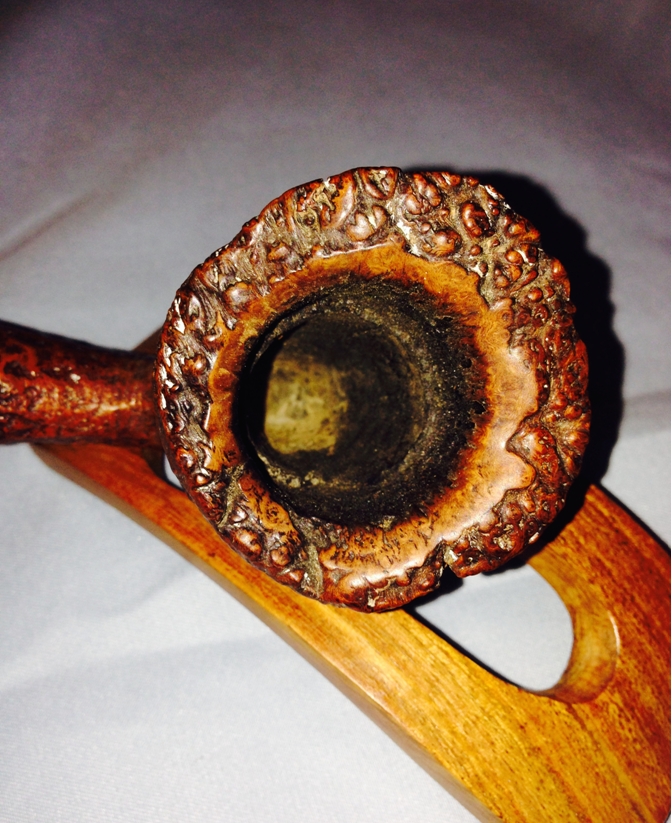
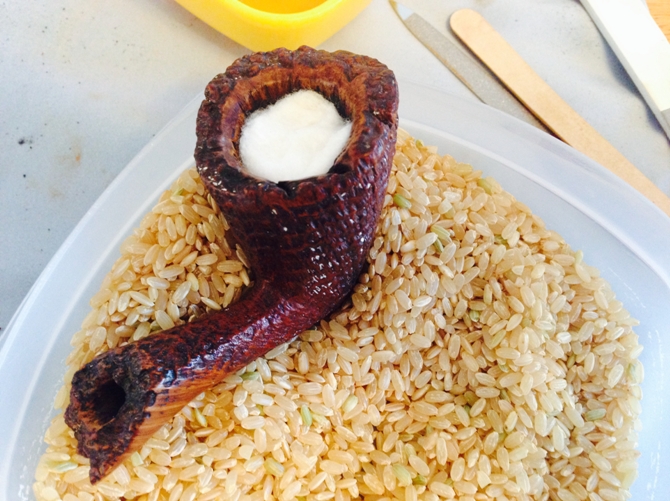
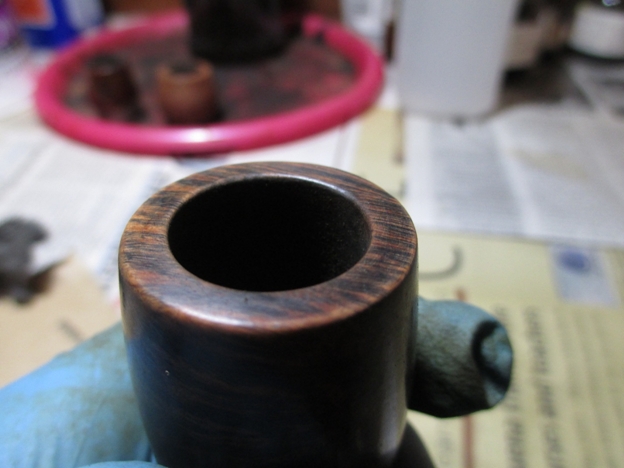
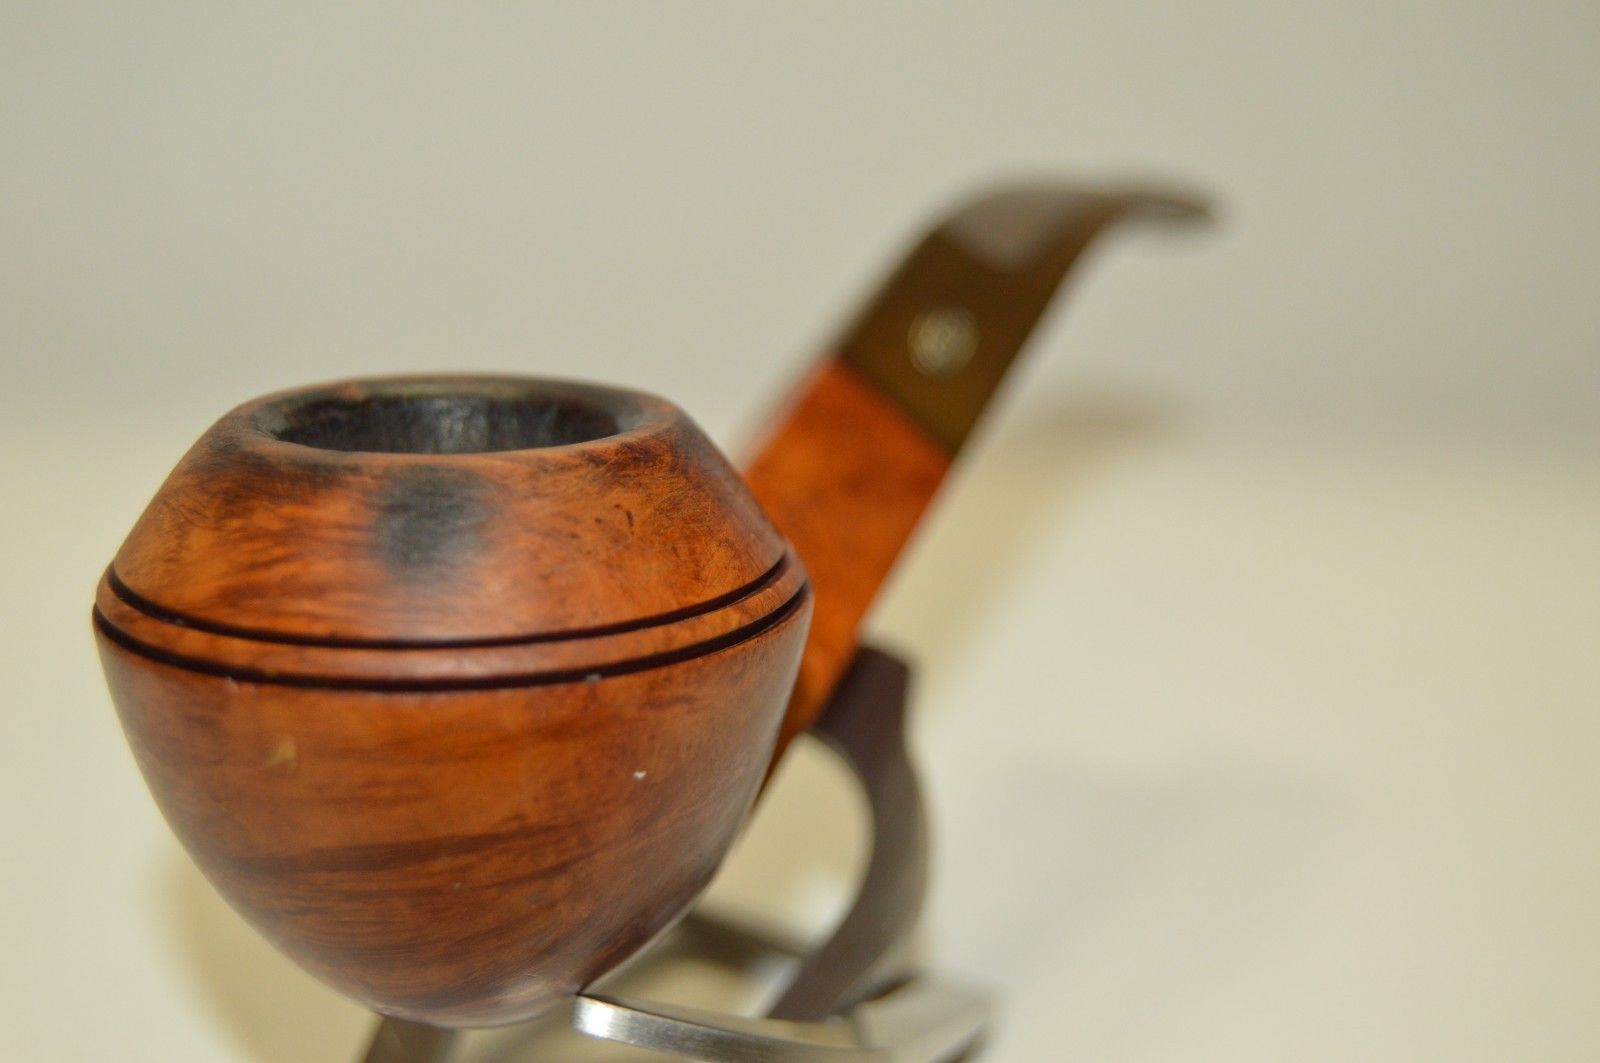
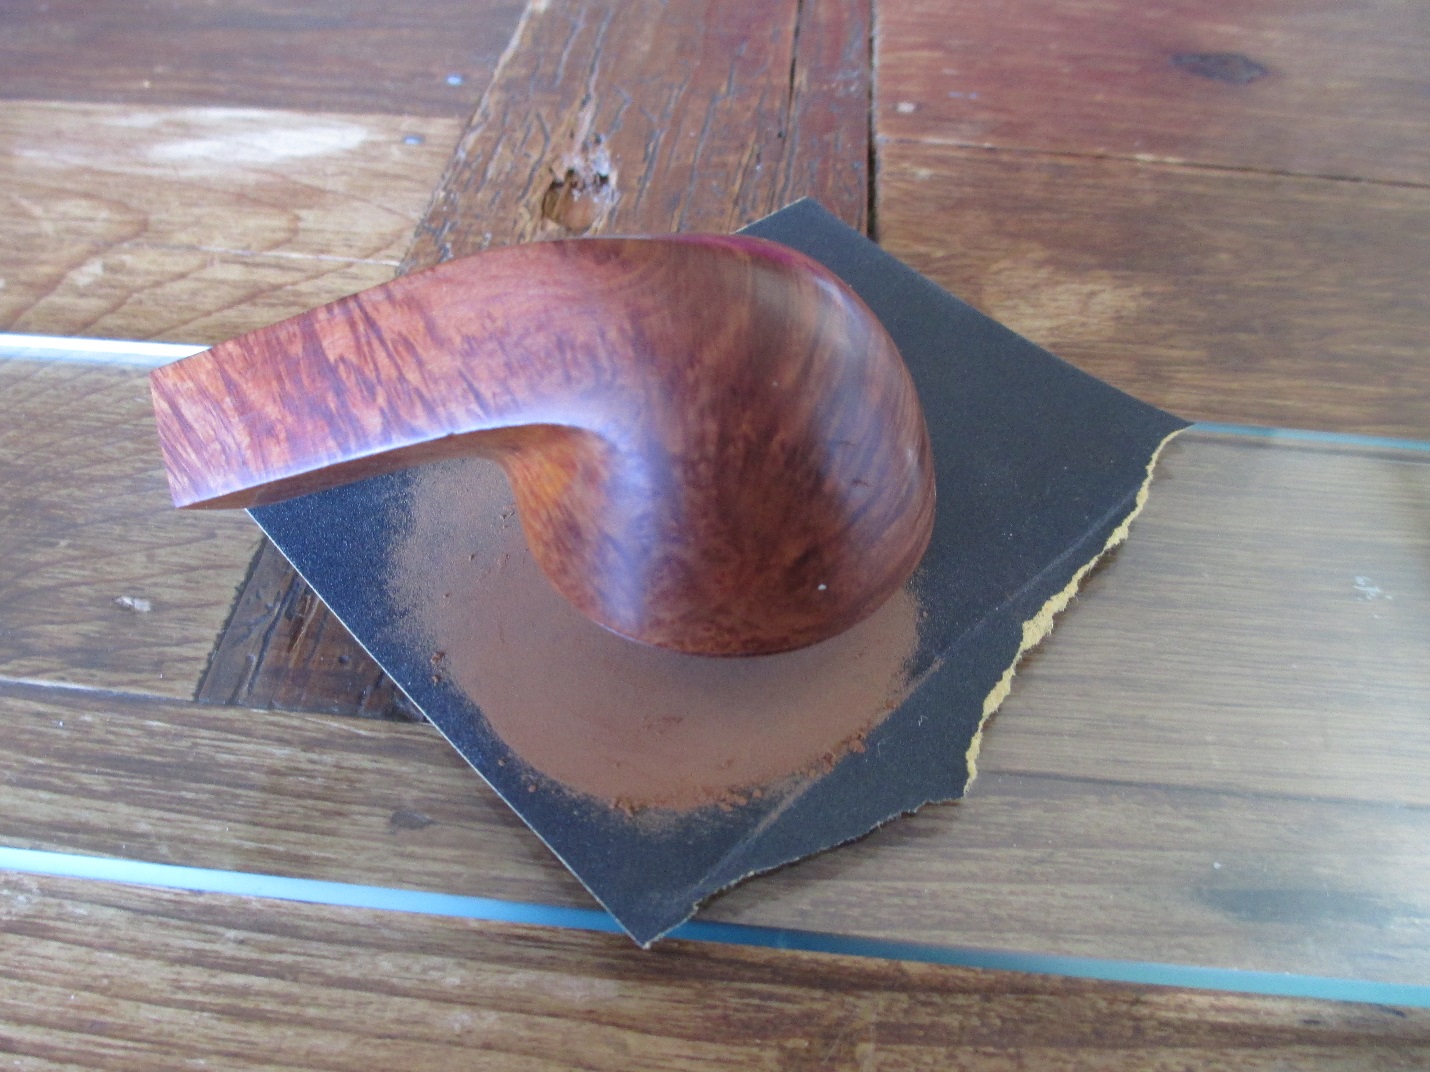 Normally I have a set order for restoring a pipe, but dealing with the scorch mark threw it all off. I don’t like to work on a pipe that has a dirty bowl, so I went ahead and reamed it. As you can see from this picture the scorch mark is fairly light.
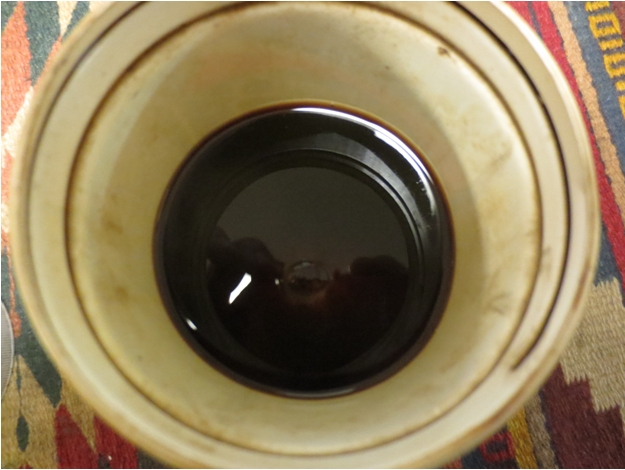
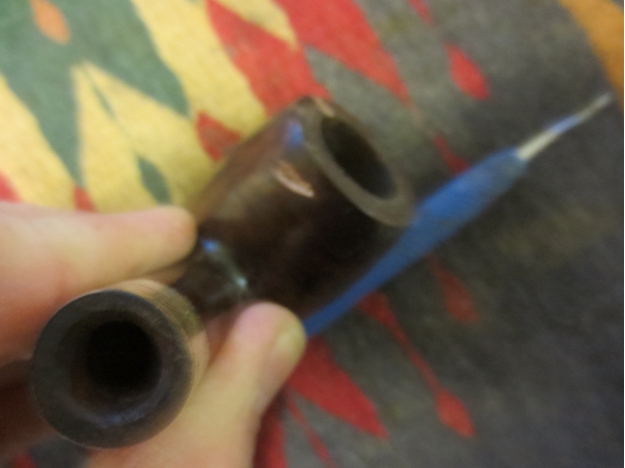
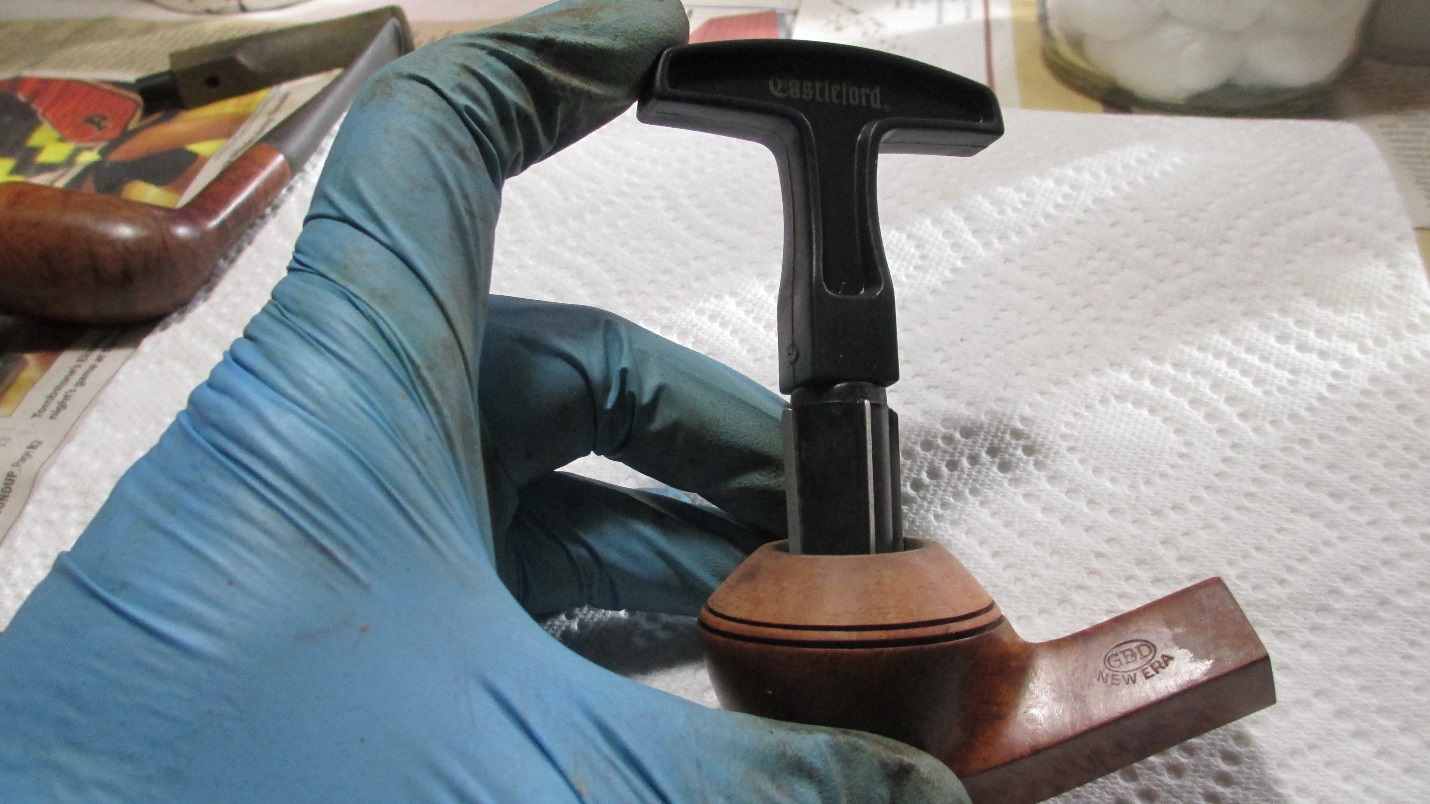 Next I retorted the shank.
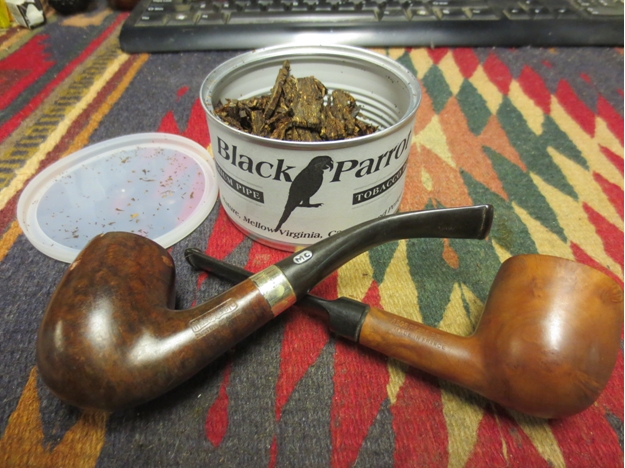
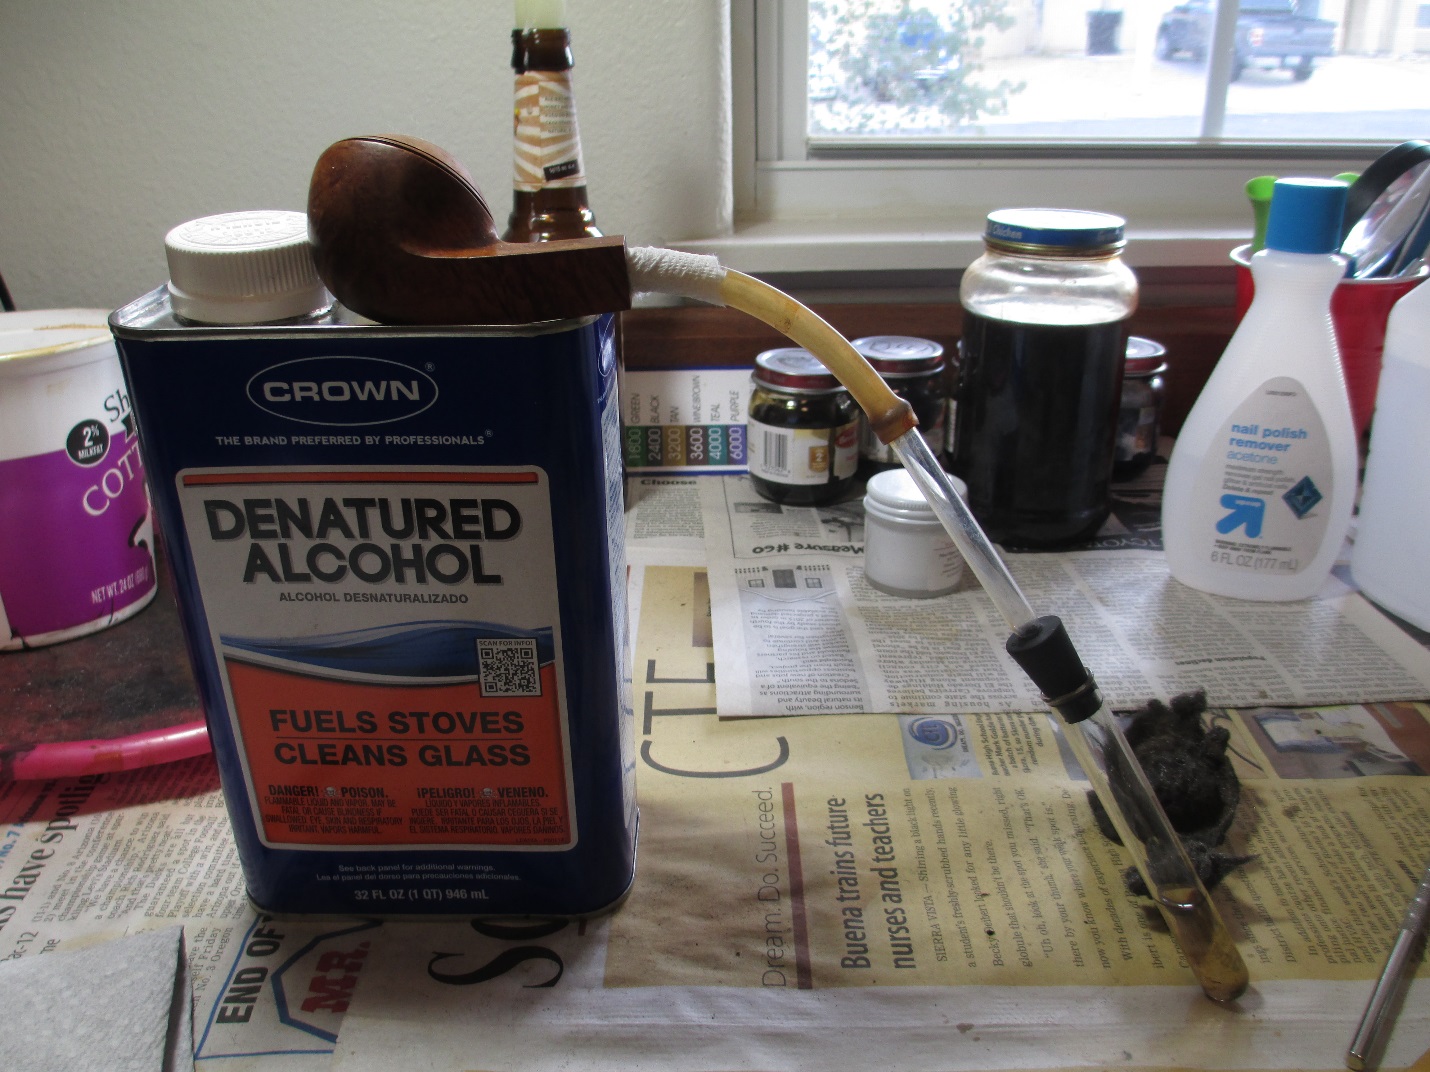 She was a dirty girl.
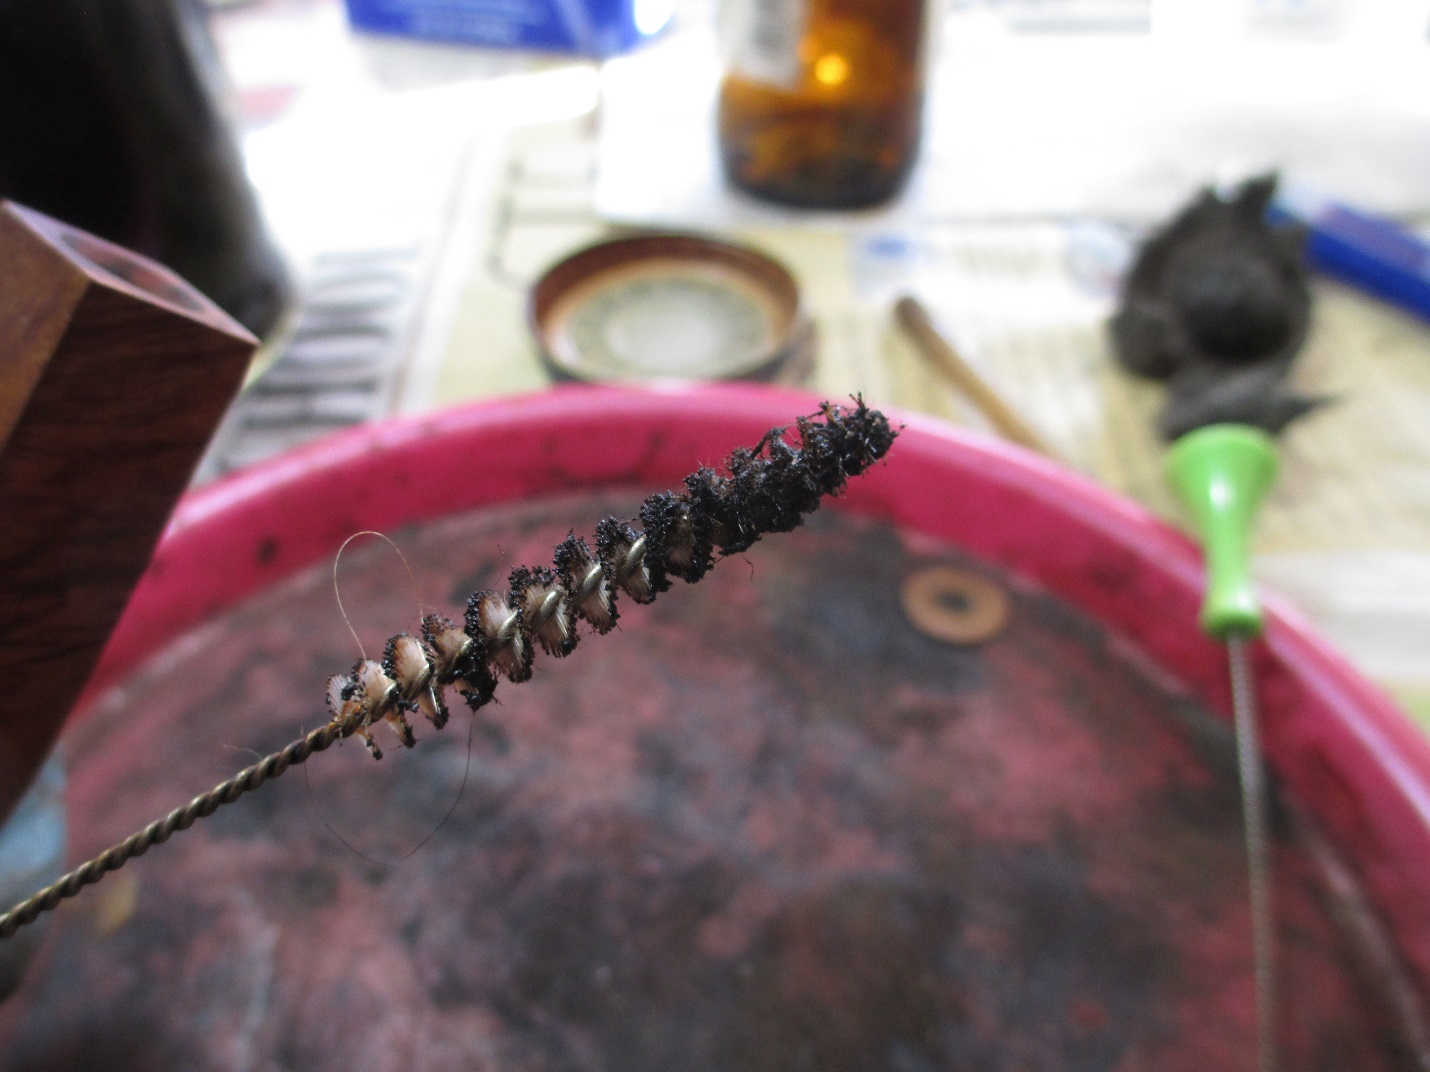
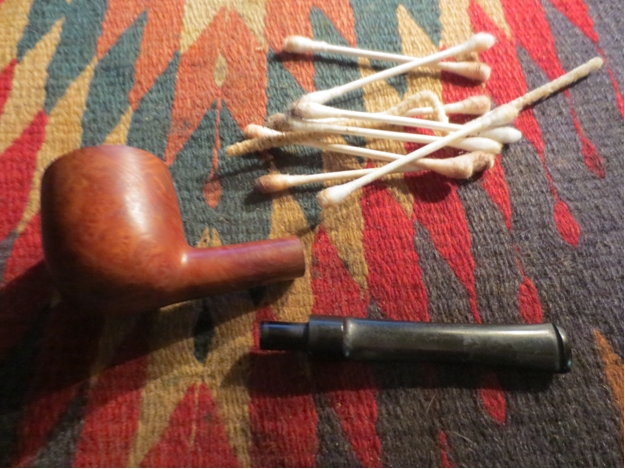
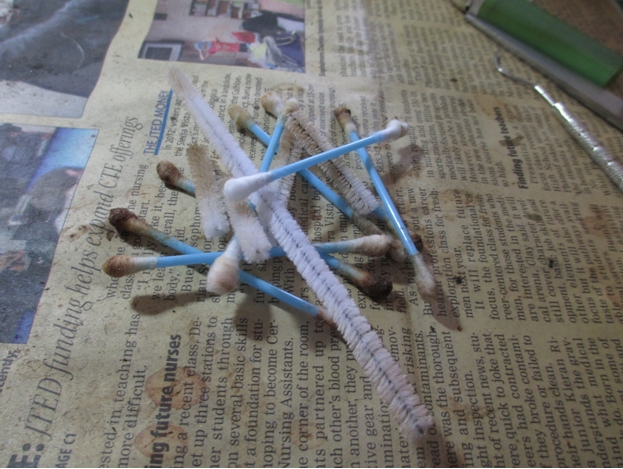
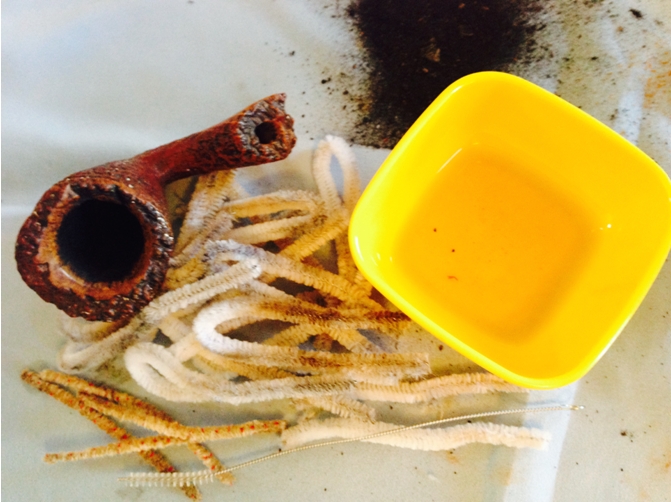
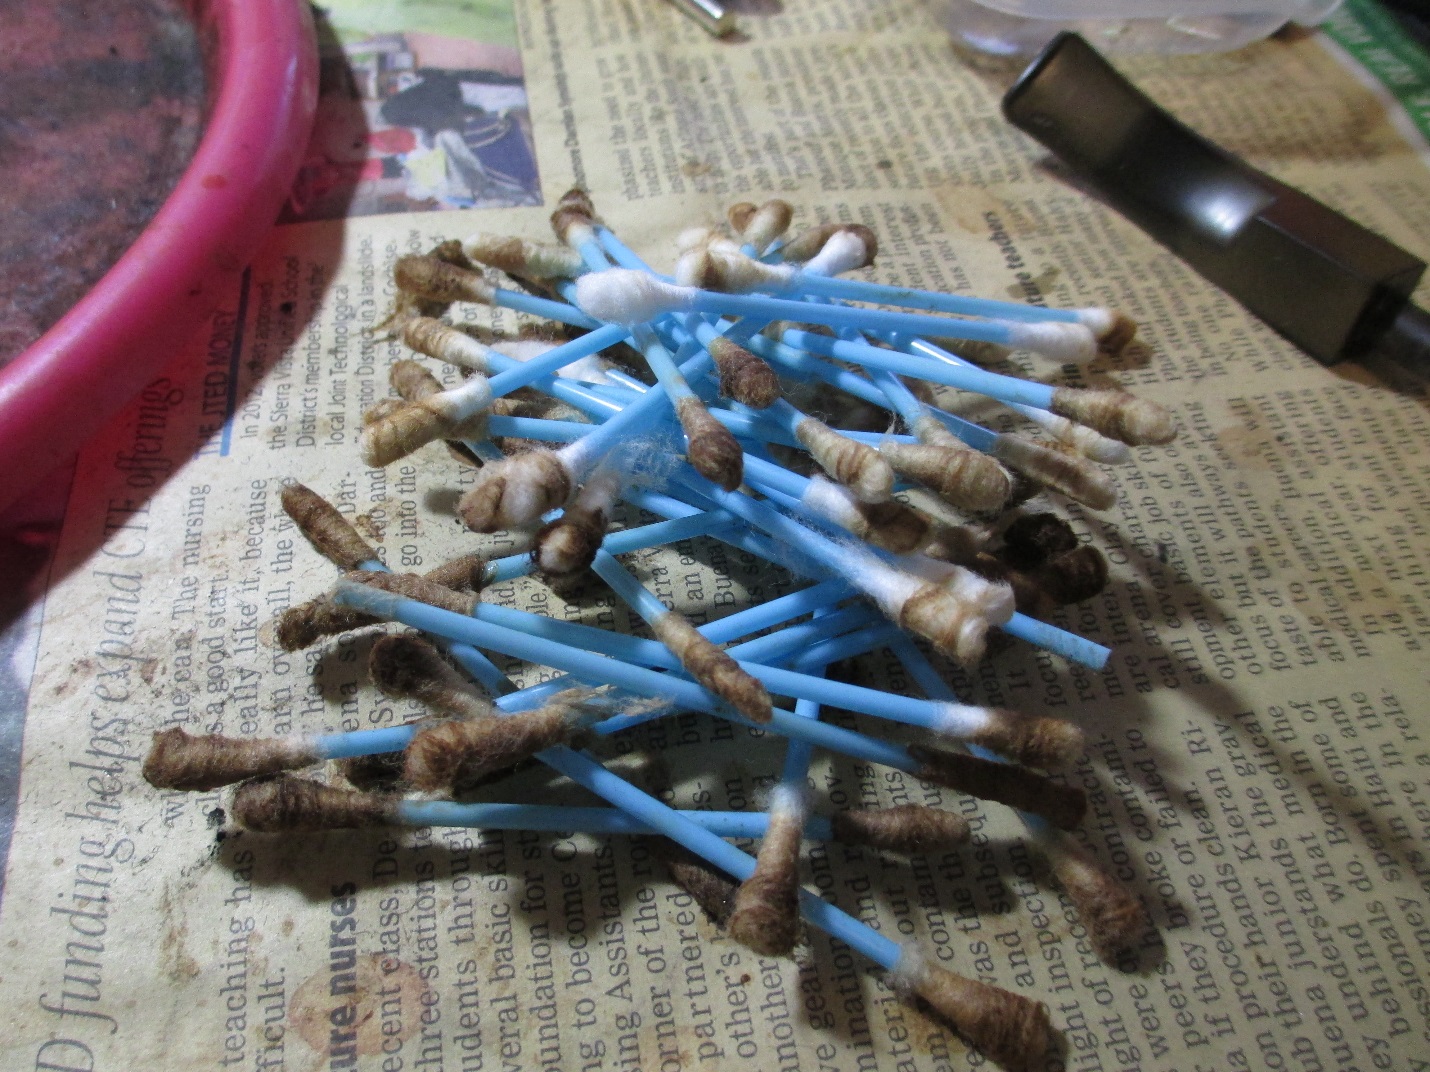 I retorted the stem after that, but did it four times. On a dirty pipe you can either spend time with lots of q-tips and fuzzy sticks, or do the retort multiple times.
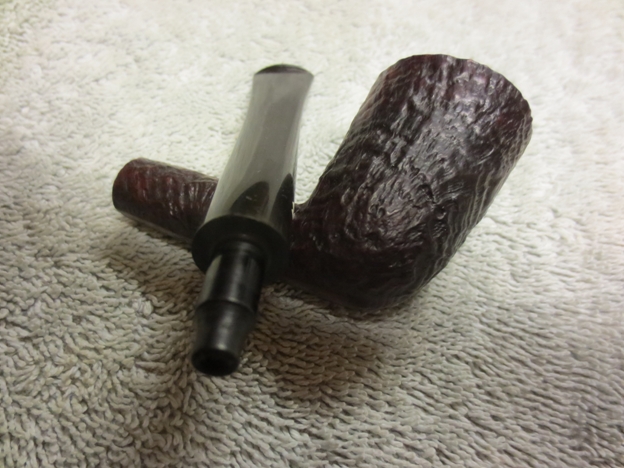
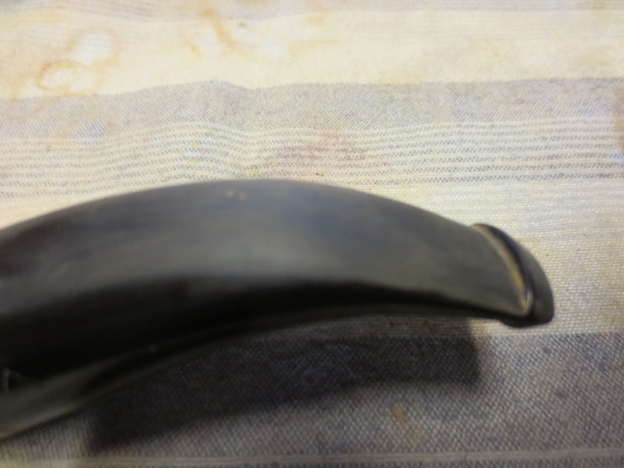
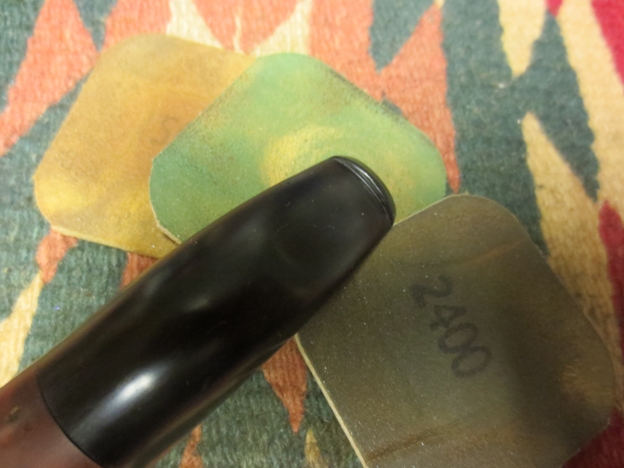
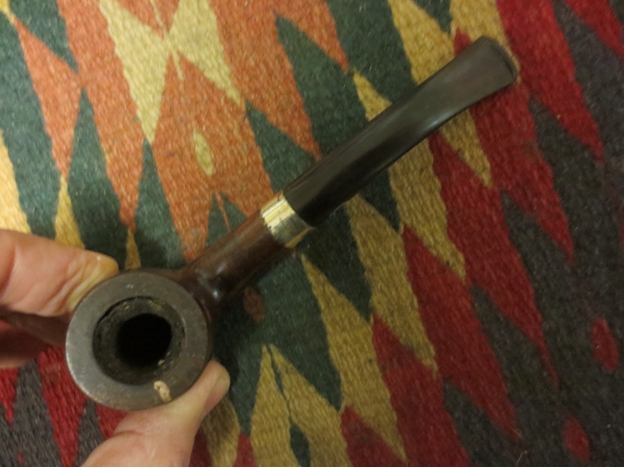
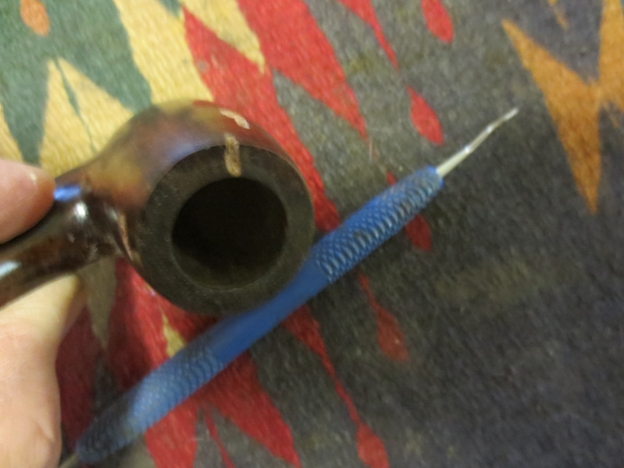
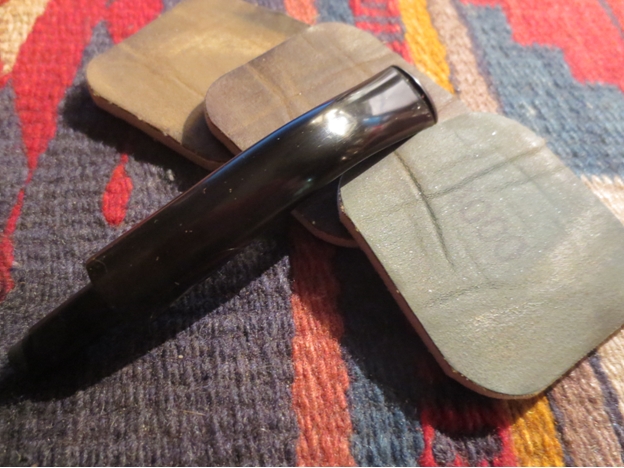
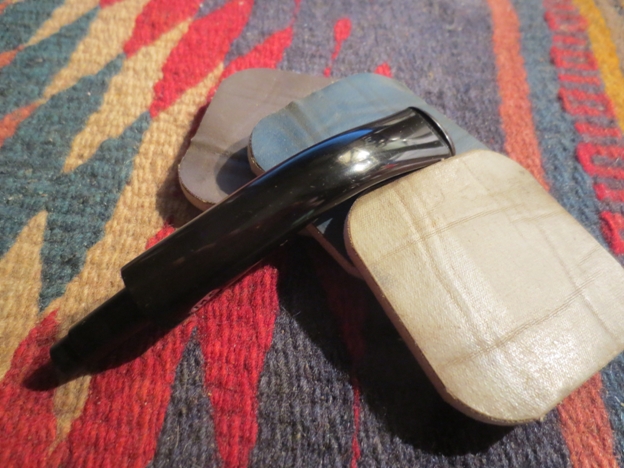
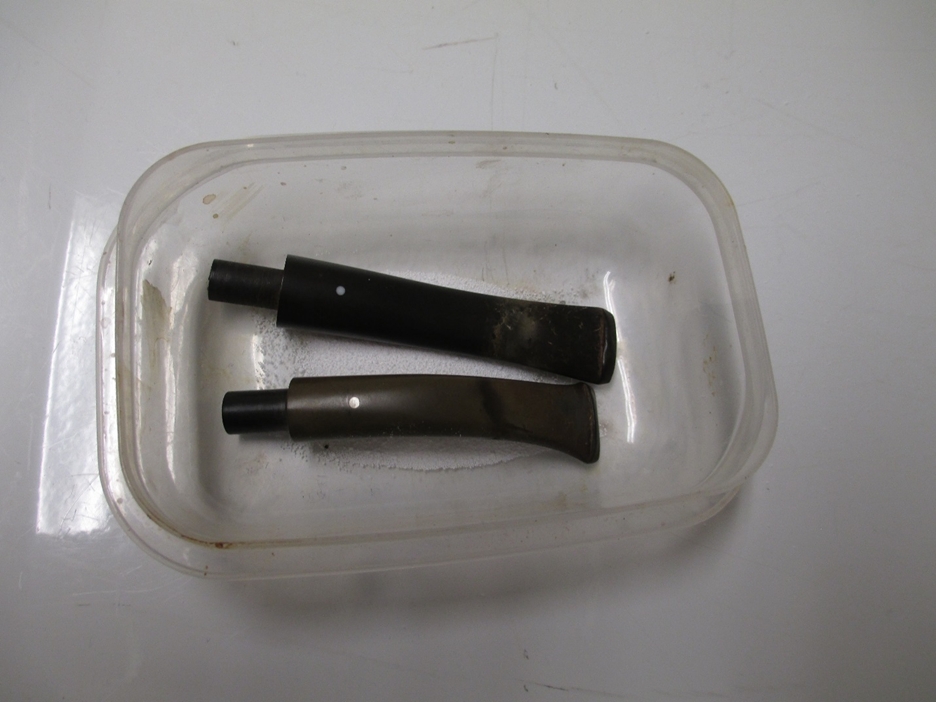
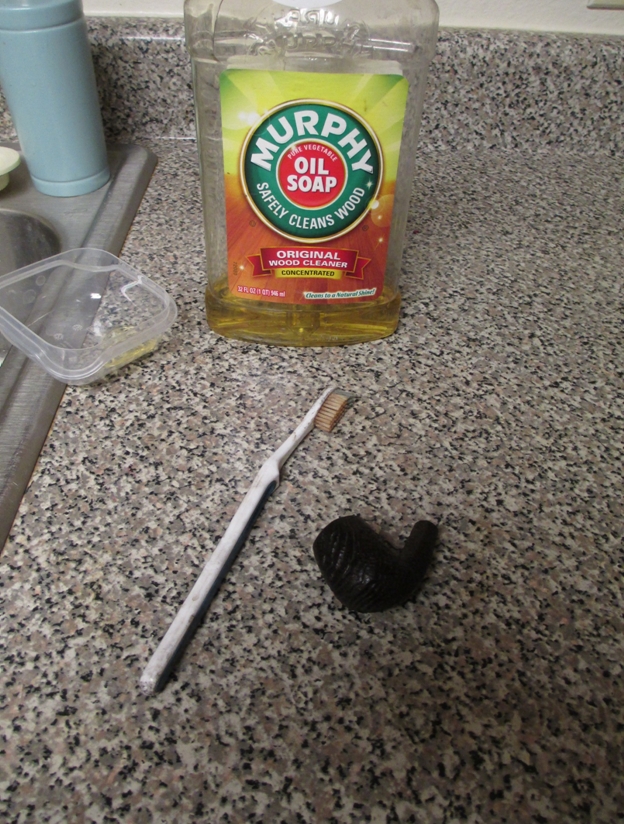
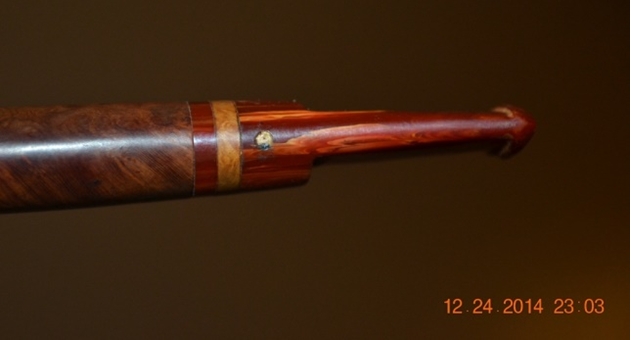
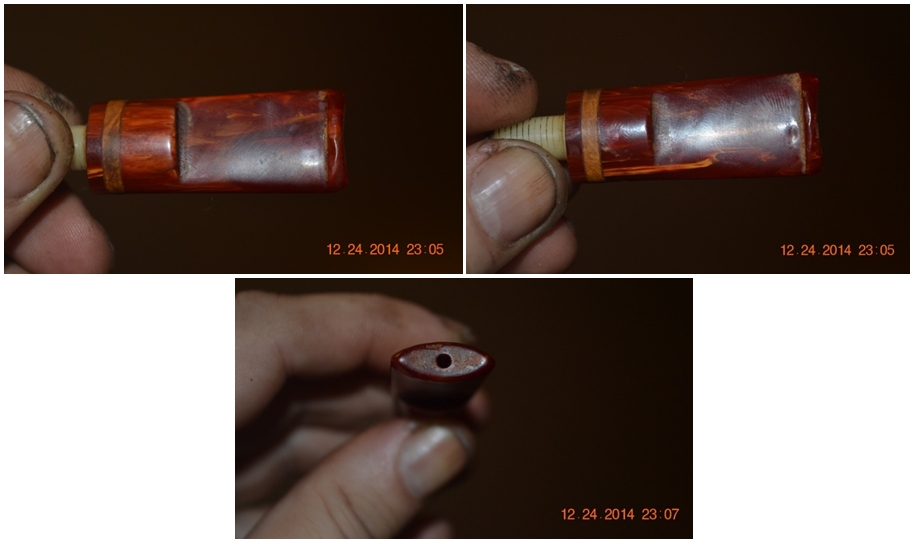
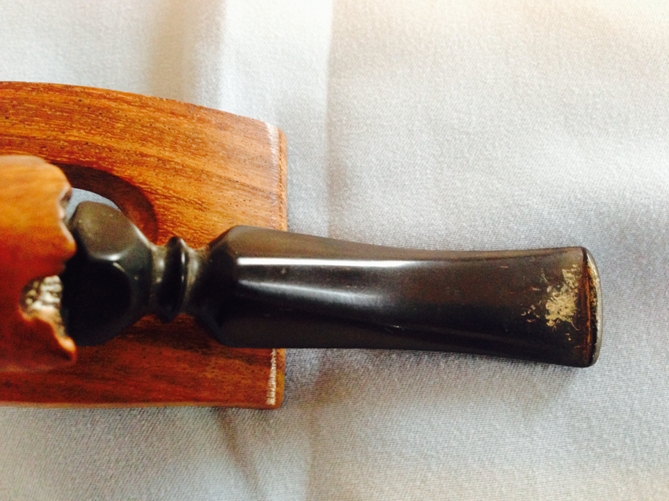
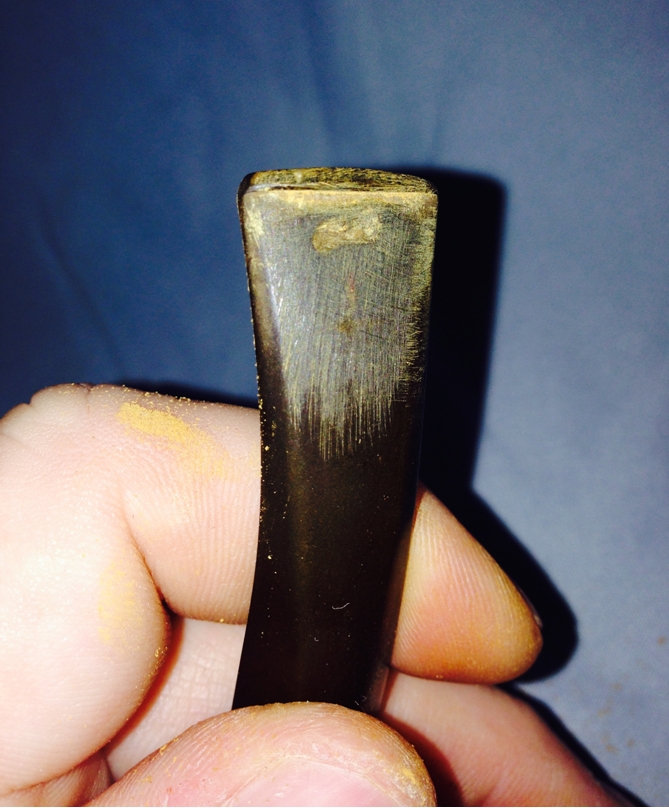
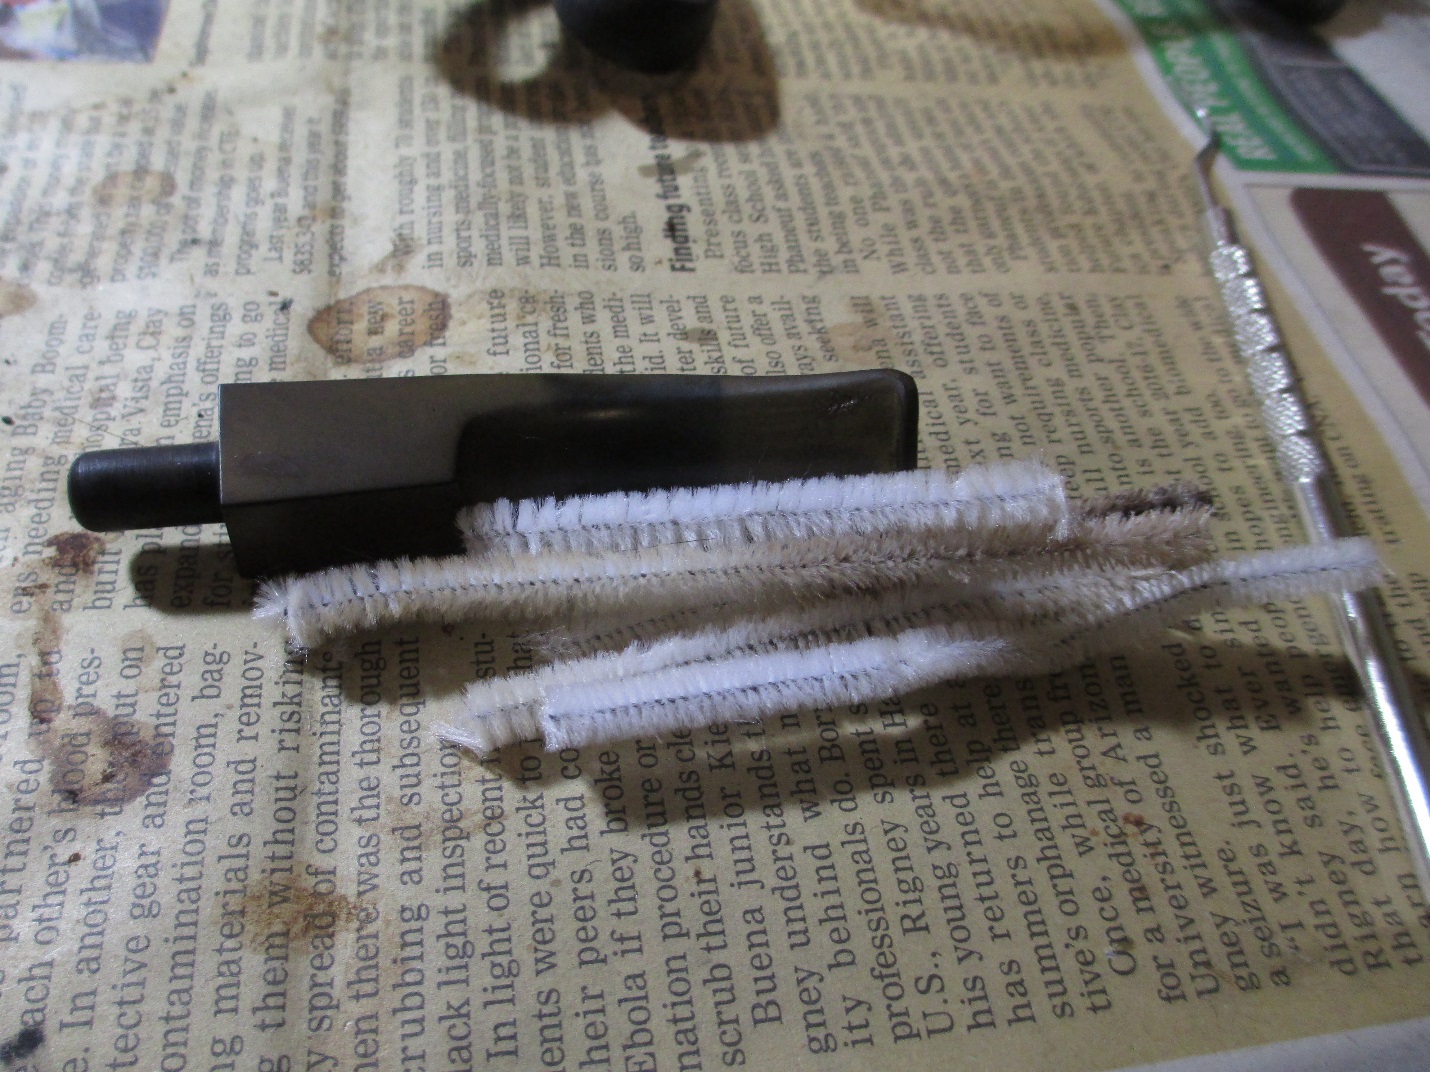 Now that I had the internals of the pipe cleaned, I turned my attention to the removing the oxidation from the stem. This stem was all angles and had some serious oxidation. I’ve felt for a long time that my stem work needed improvement. It’s especially difficult to clean the crease under the button and in the case of this stem the curved area where it meets the diamond portion. I know that when I work with wood I use a sanding block or wrap the sand paper around an object that would fit into the area to be sanded. With that in mind, I “borrowed” a small plastic scraper from the kitchen. You will notice that it has a beveled edge and fits the underside of the button perfectly.
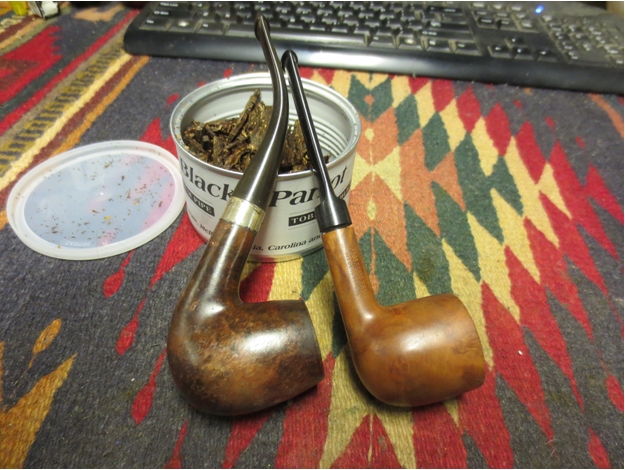
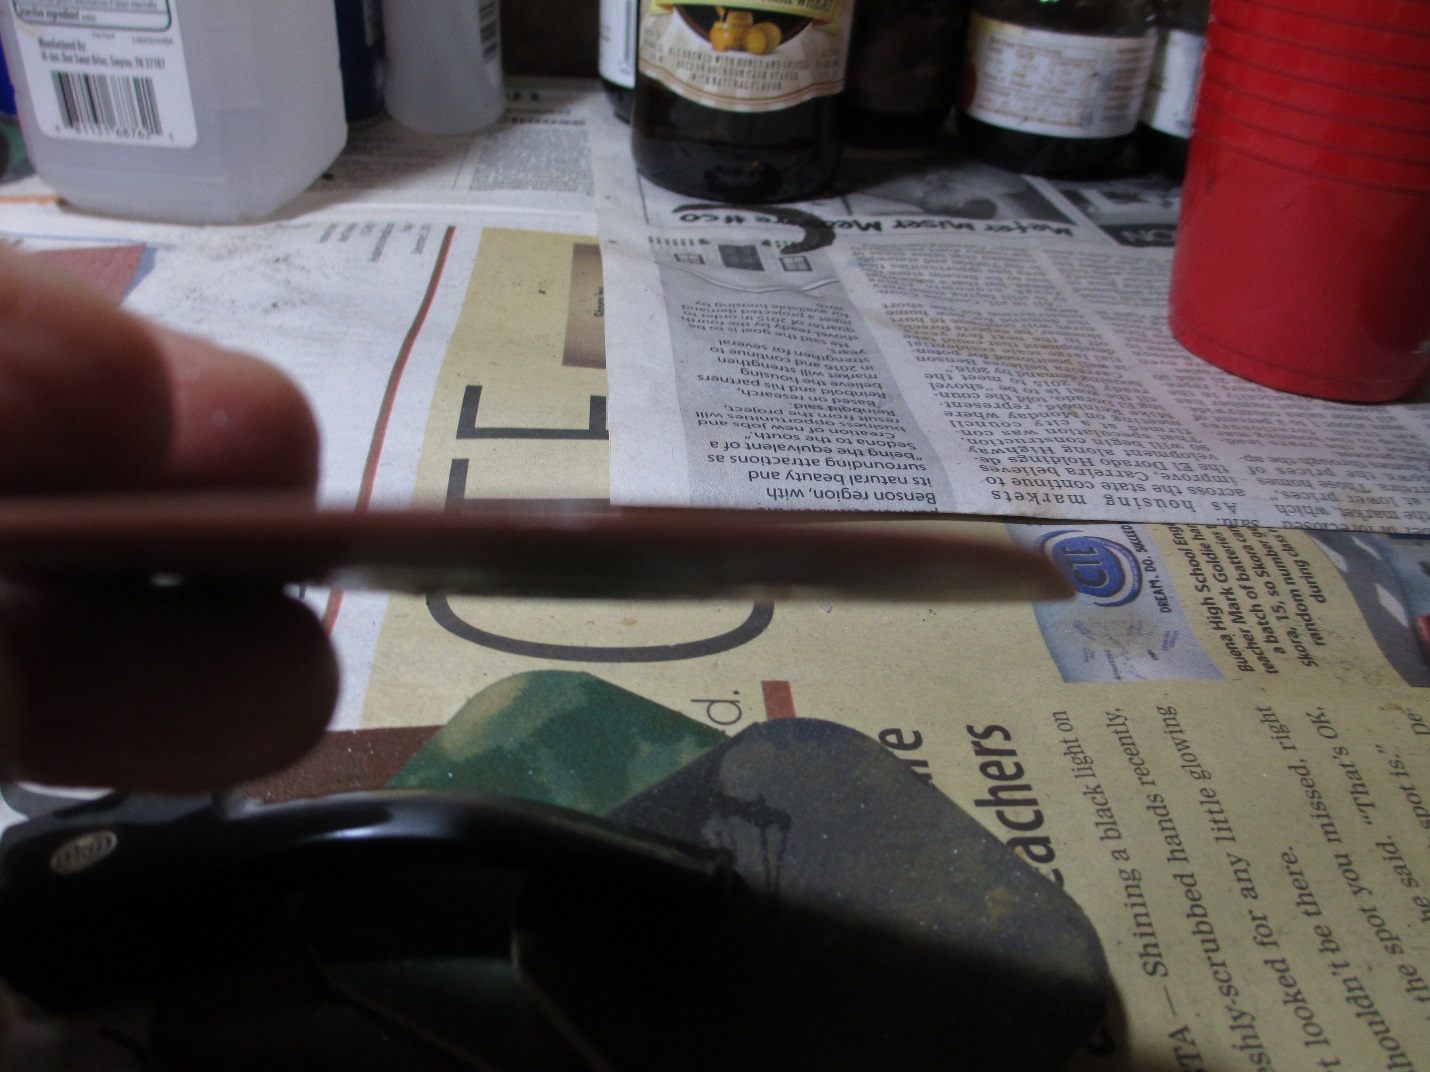 Using the scraper wrapped with 400 grit wet/dry and water, the oxidation was soon gone. I followed with 1500-2400 grit micro mesh pads and water.
 The bowl had a couple of dents so I decided to steam them out.
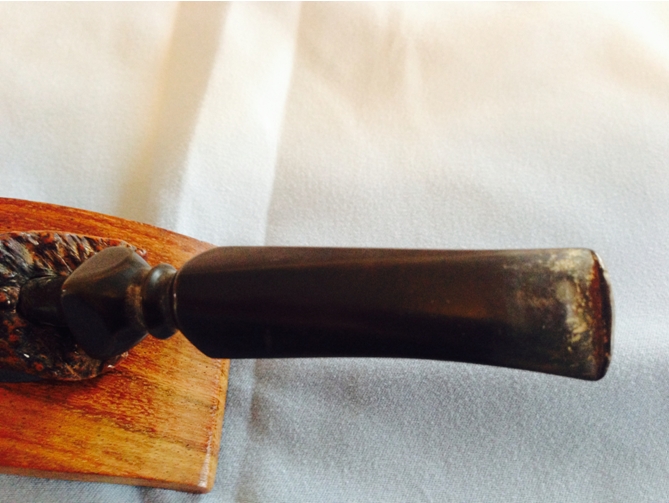
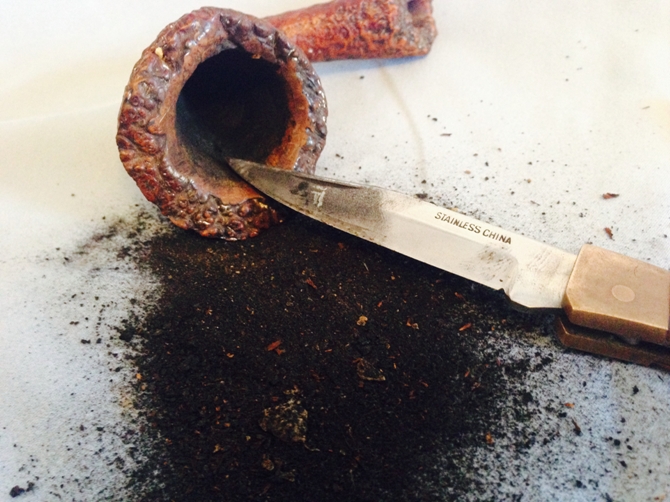
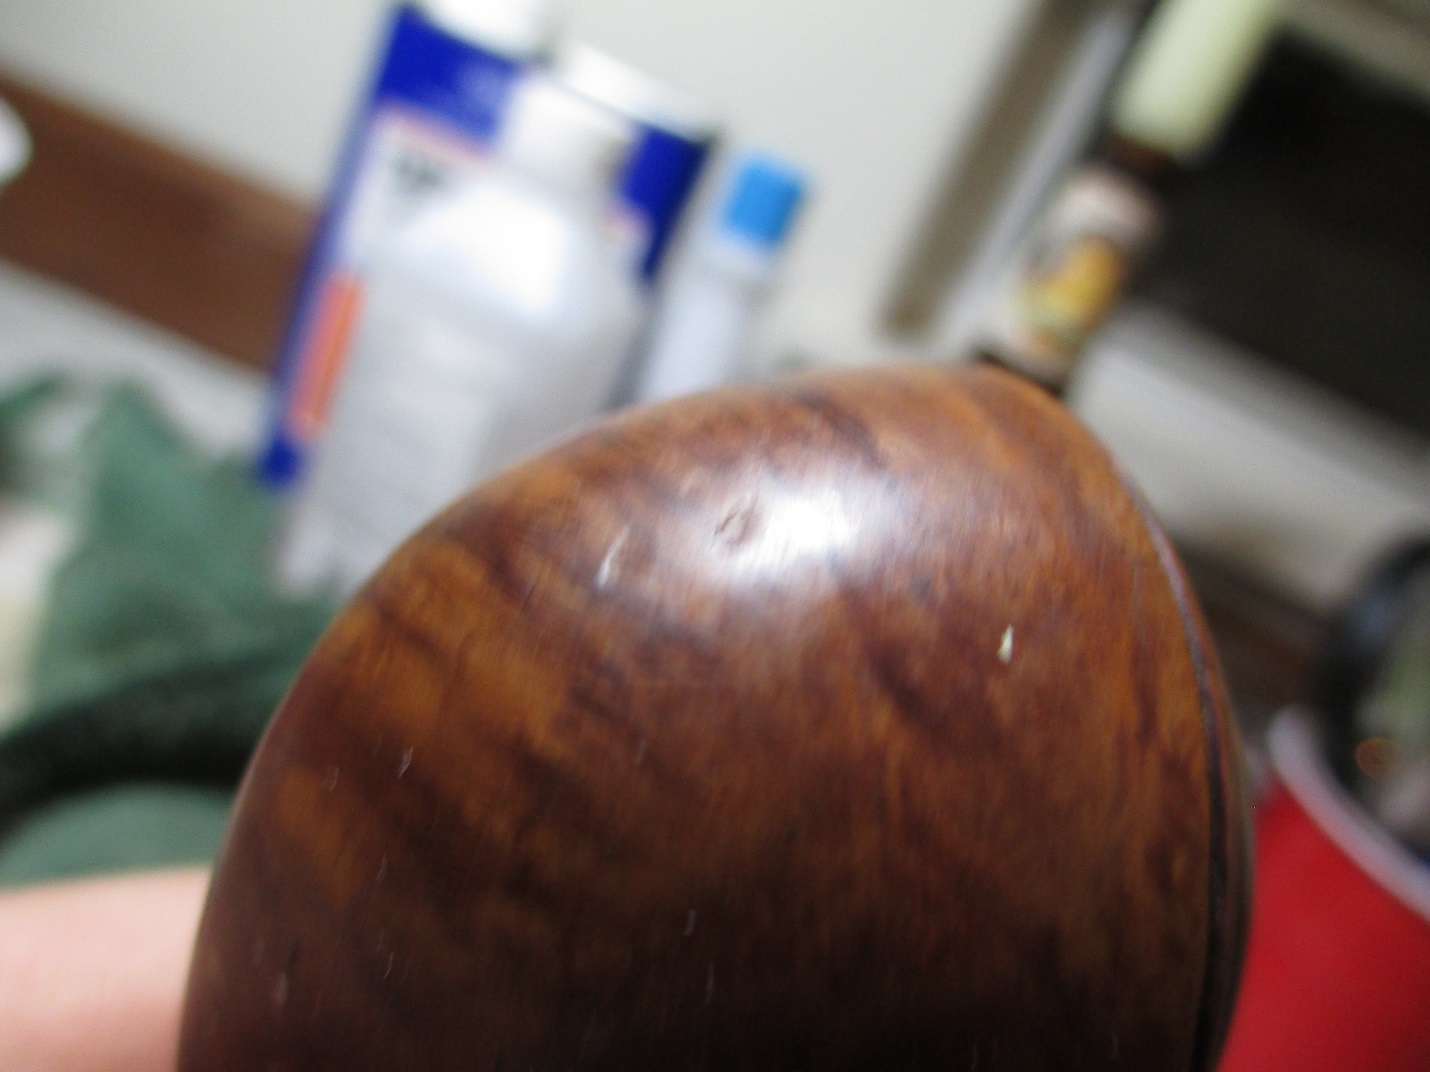 One of my essential tools for this type of work is an old butter knife.
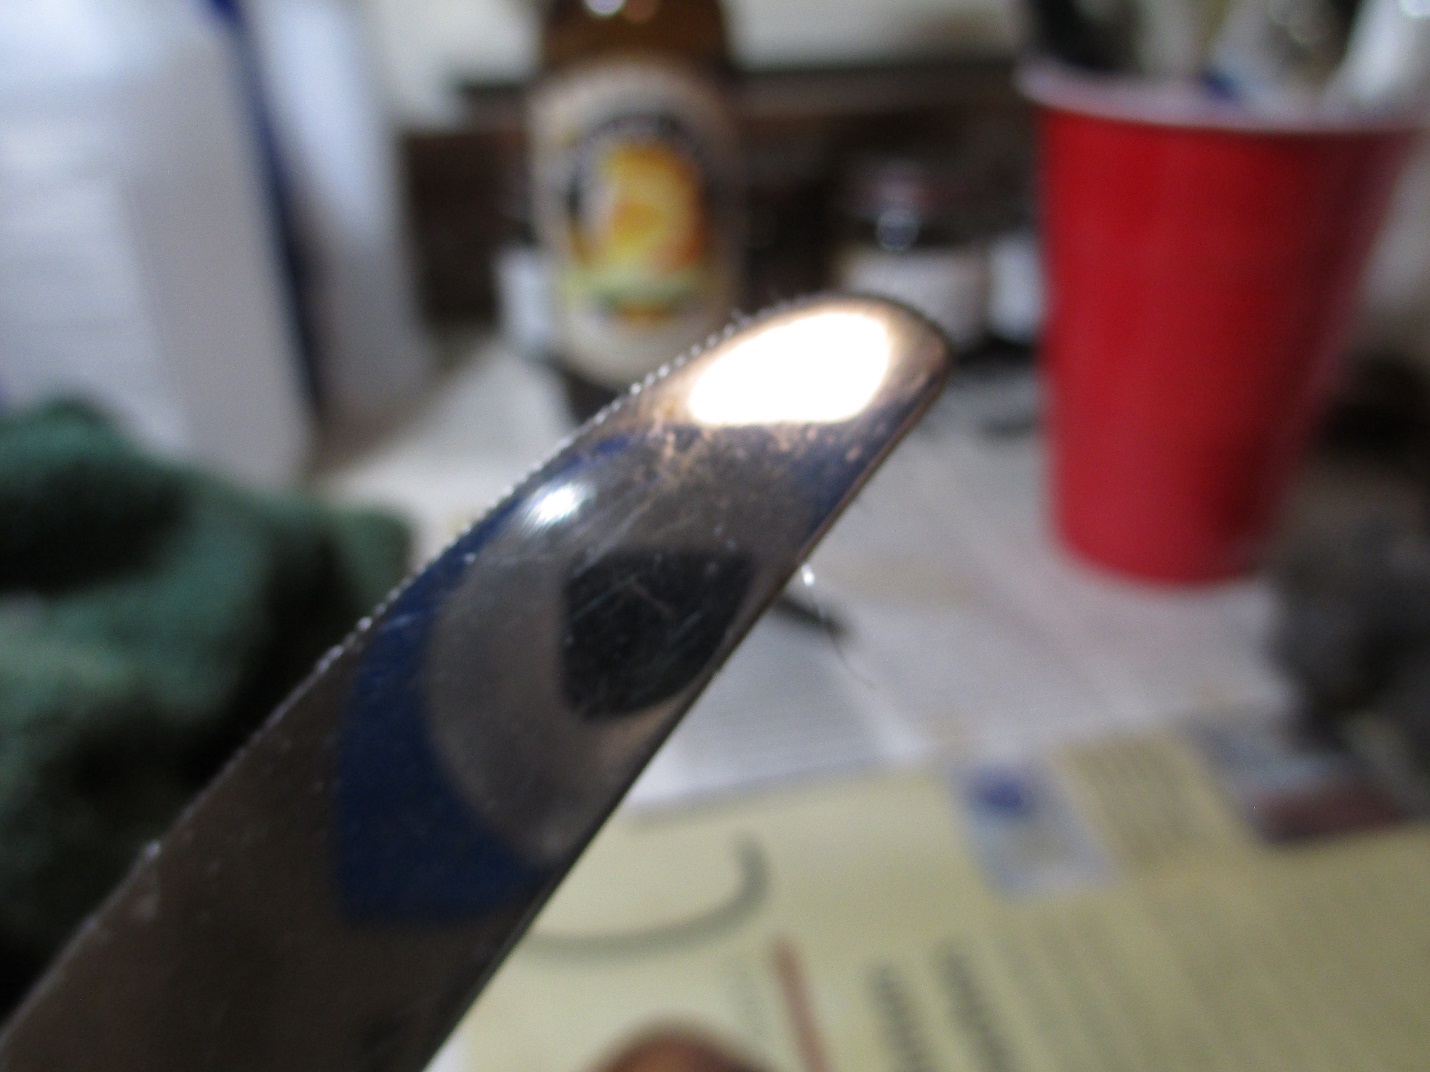 I used my heat gun to get the tip of the knife very hot, then applied it to a wet cloth directly over the dents. Here is what it looked like after several applications of steam.
 The dents still needed some work, so I sanded them smooth with 400 grit sand paper.
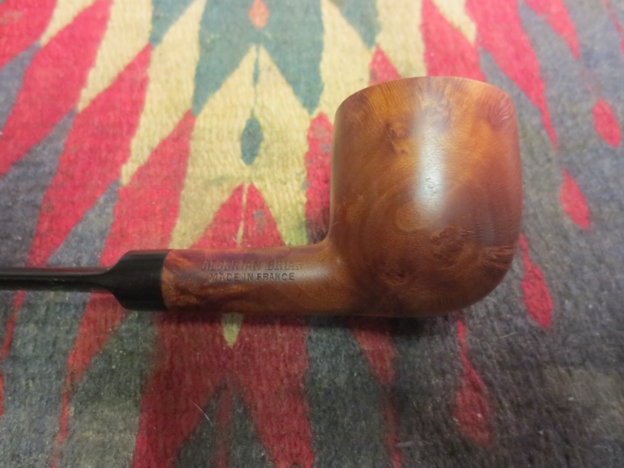
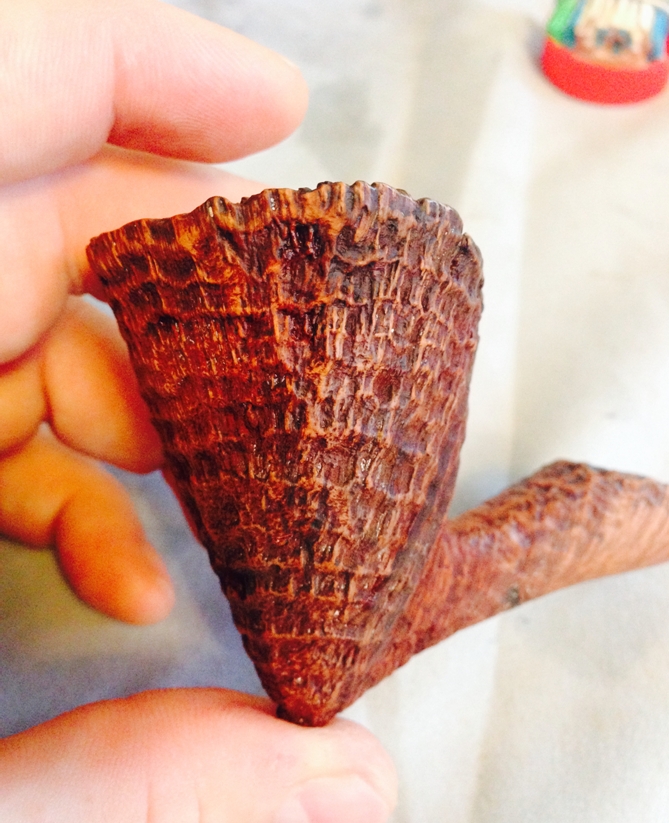
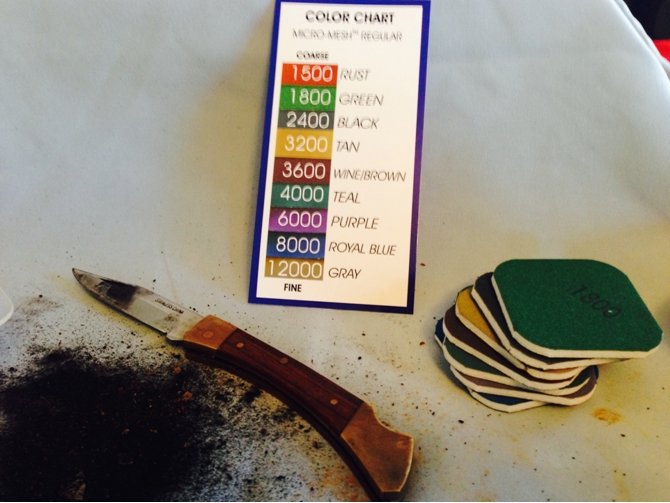
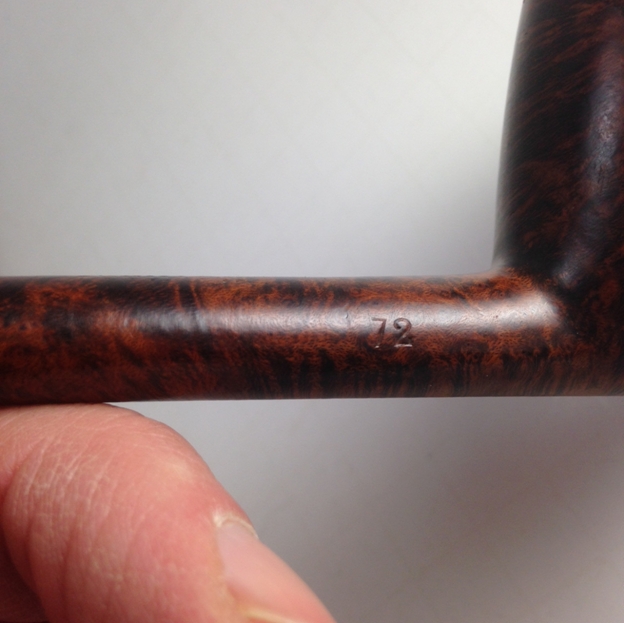
 By this point the finish was completely uneven, with bare wood on the rim and side of the bowl, so I used acetone and 0000 steel wool to remove the remaining finish. I find that if I’m careful with the stampings, that grade of steel wool cleans the wood without damaging the stampings.
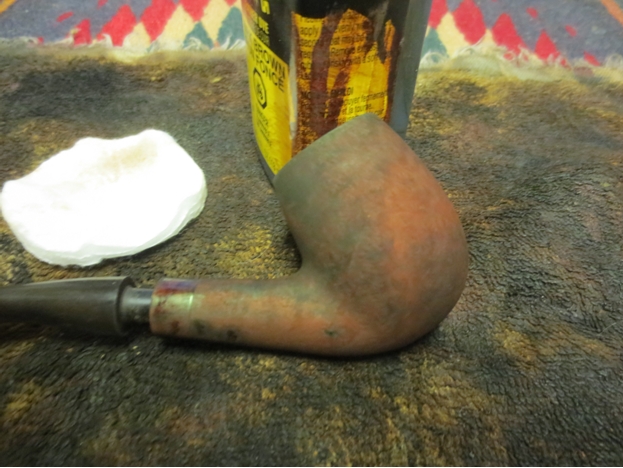
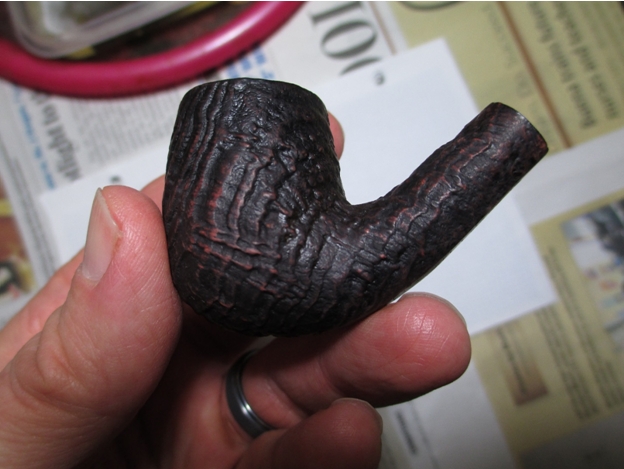
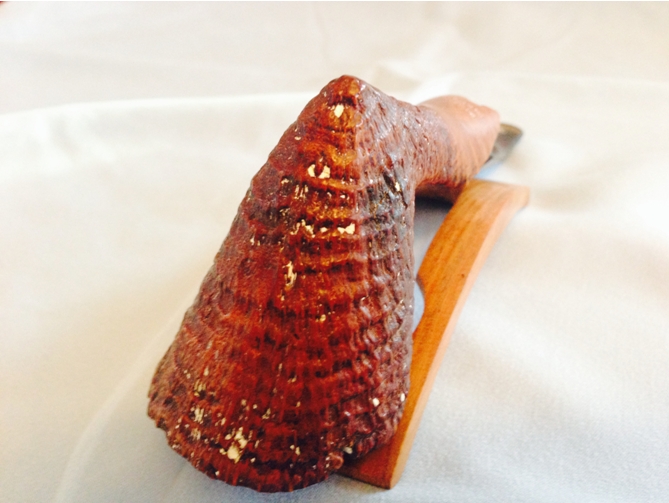
 This is what the pipe looked like after I took the bowl and stem through a progression of micro mesh pads, 1500-12,000.
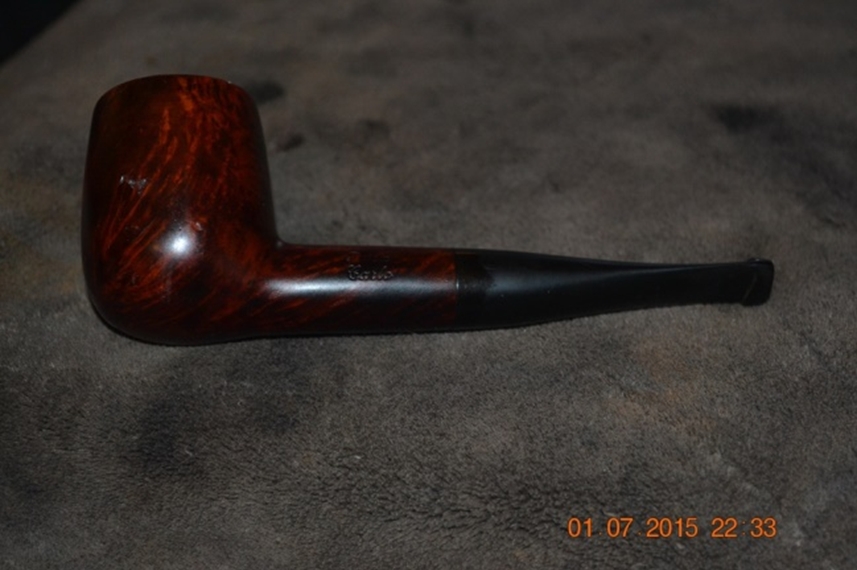
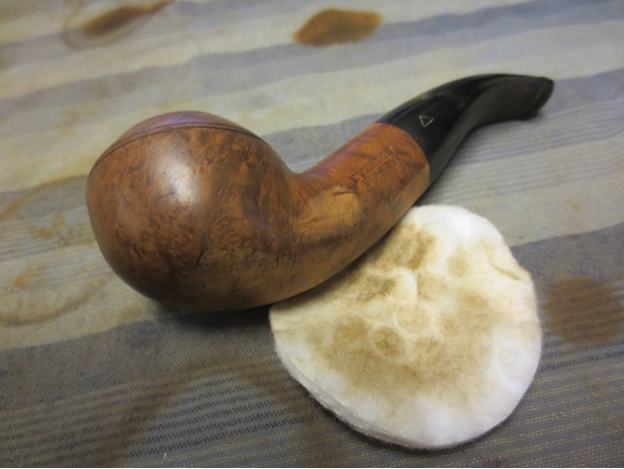
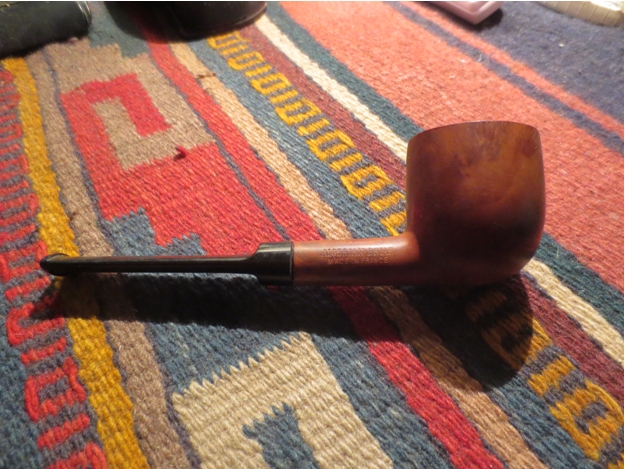
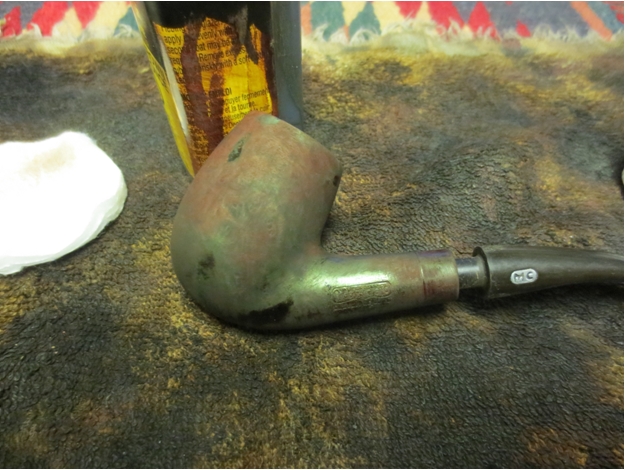
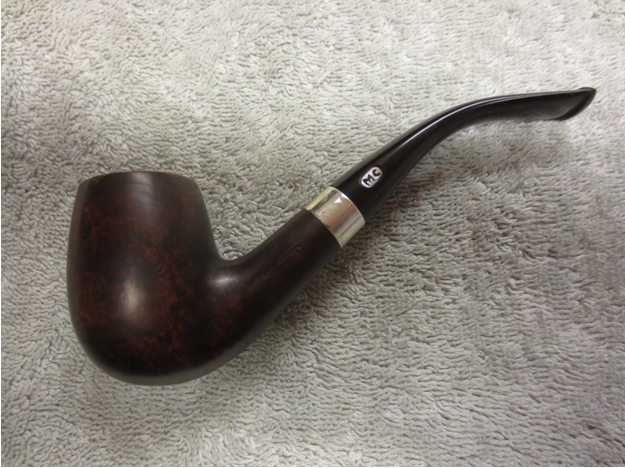
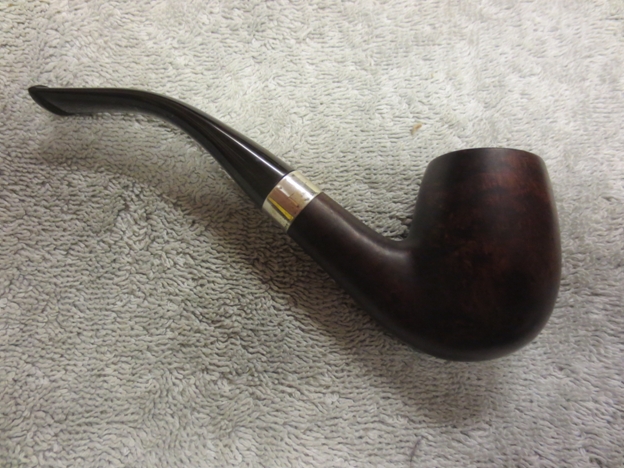
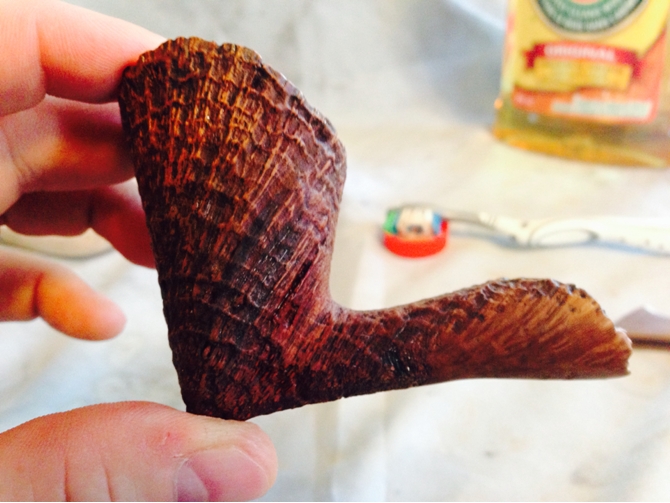
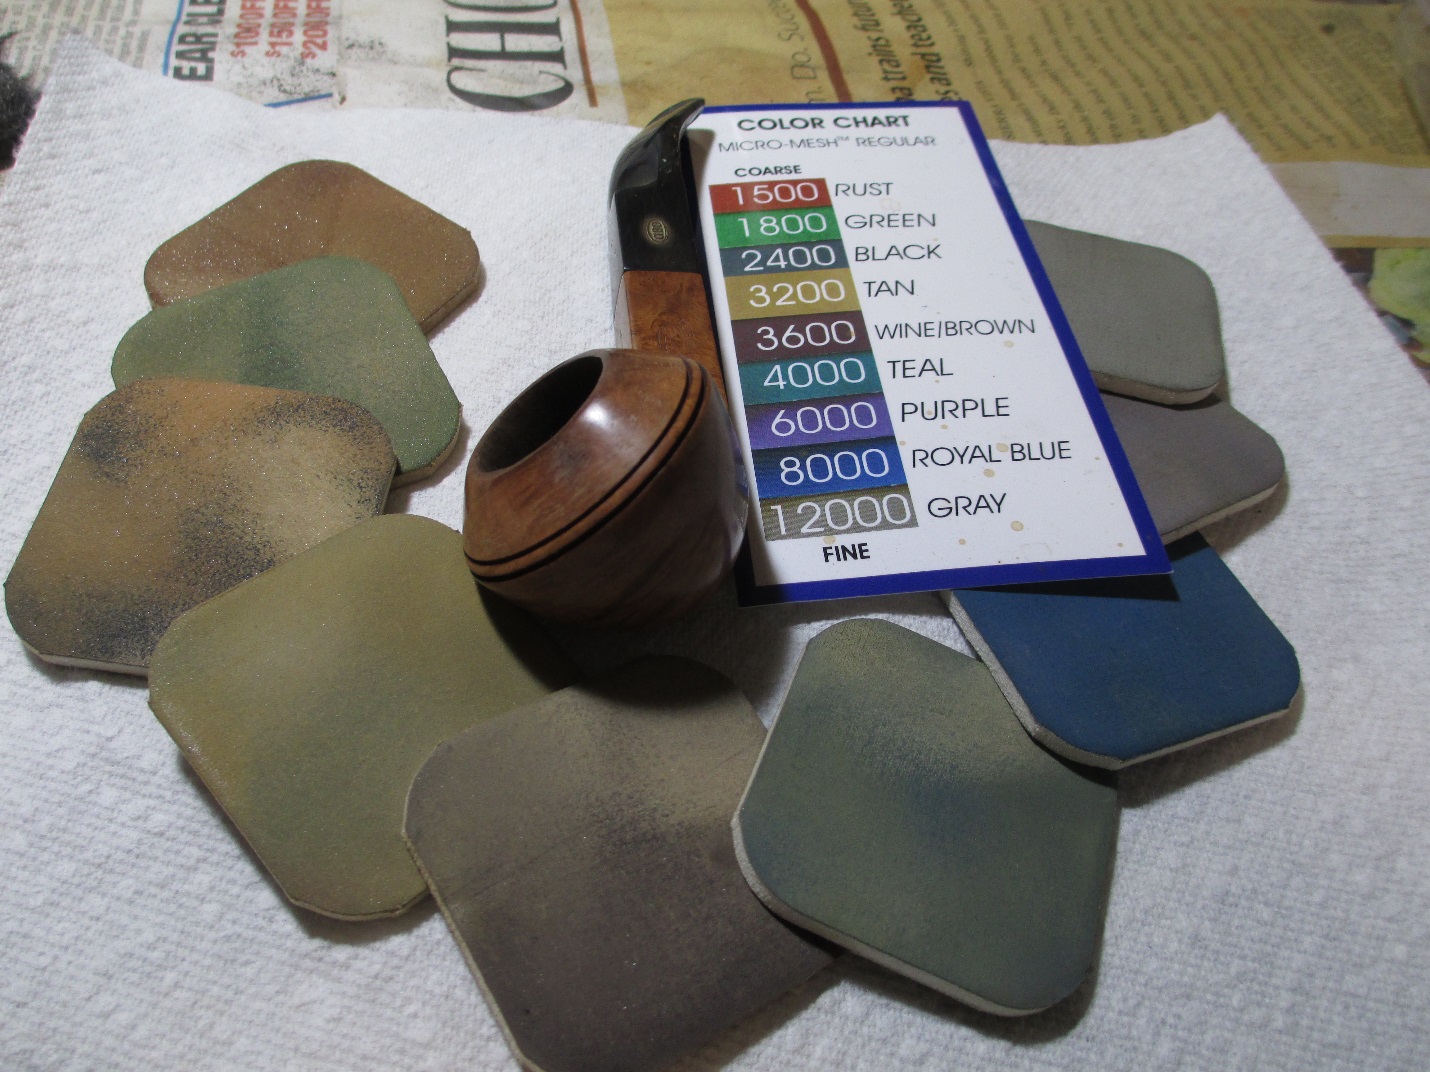 I decided to use a dark walnut stain from Pimo Pipe Supply to help cover the remaining scorch mark. Here is the bowl after the application of stain.
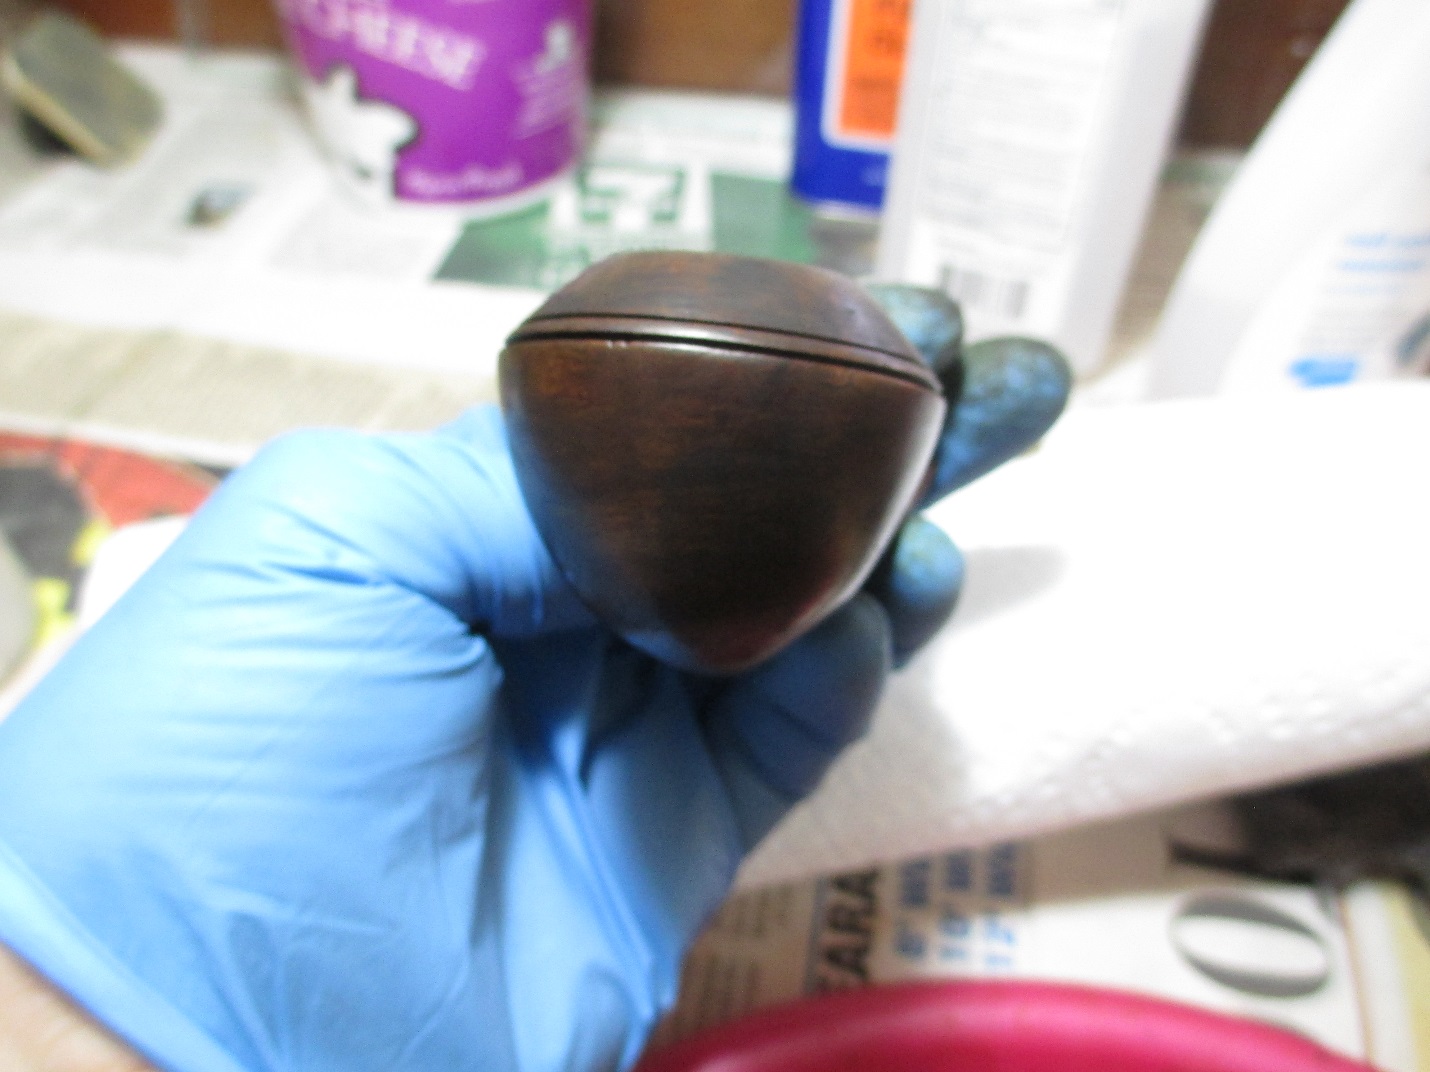 I used white diamond buffing compound on the buffing wheel to bring out a shine. Let me digress a bit about buffers. There are three things that a buffer loves, angles, stem inserts, and nice pipes. When spinning at 3450 rpm’s the buffer will catch anything with an angle and fling it at a high rate of speed onto the nearest hard surface. Alternately it will catch any type of stem insert and rip it out of the stem. Finally if you have a nice pipe that you’ve invested time in, the buffer has a tendency to shatter it just as you finish. This pipe had all of those elements, so I decided to try something different; my rotary tool.
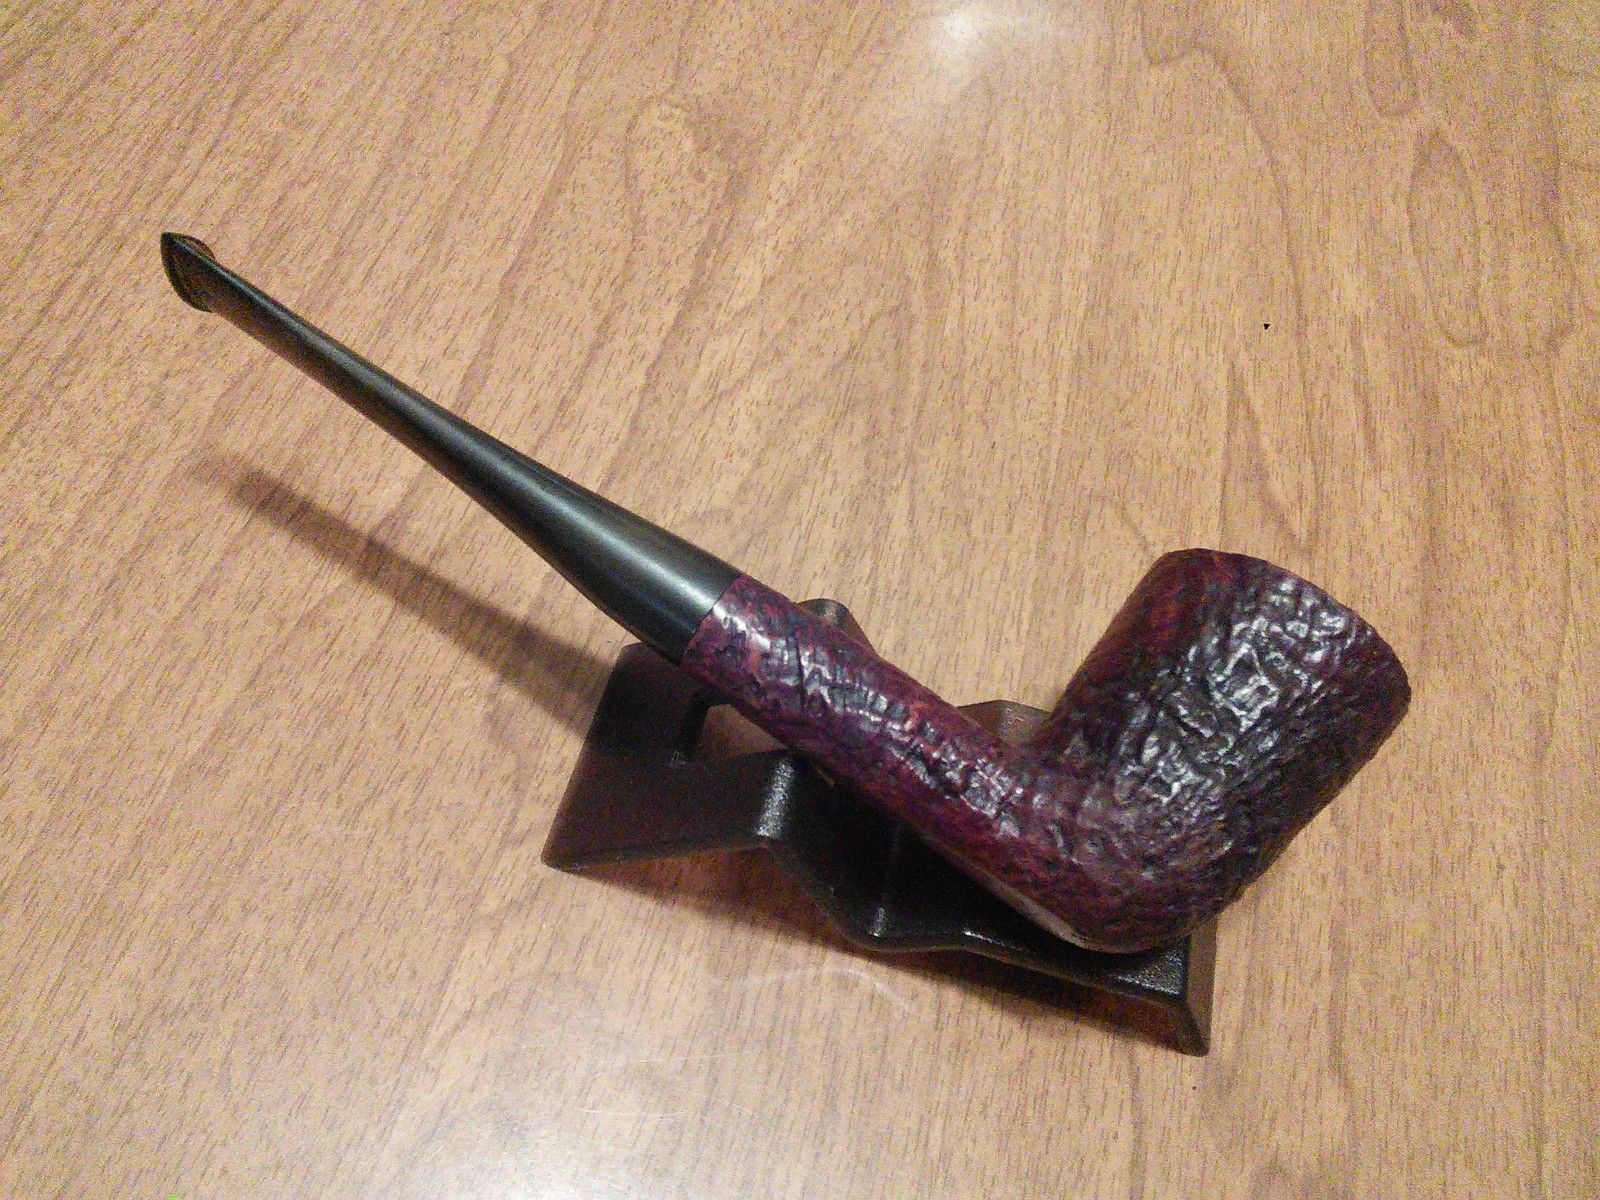
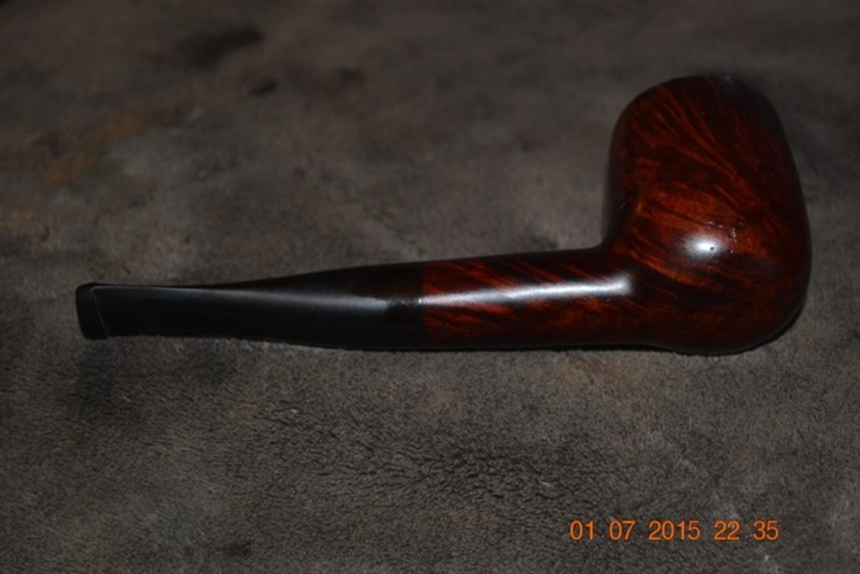
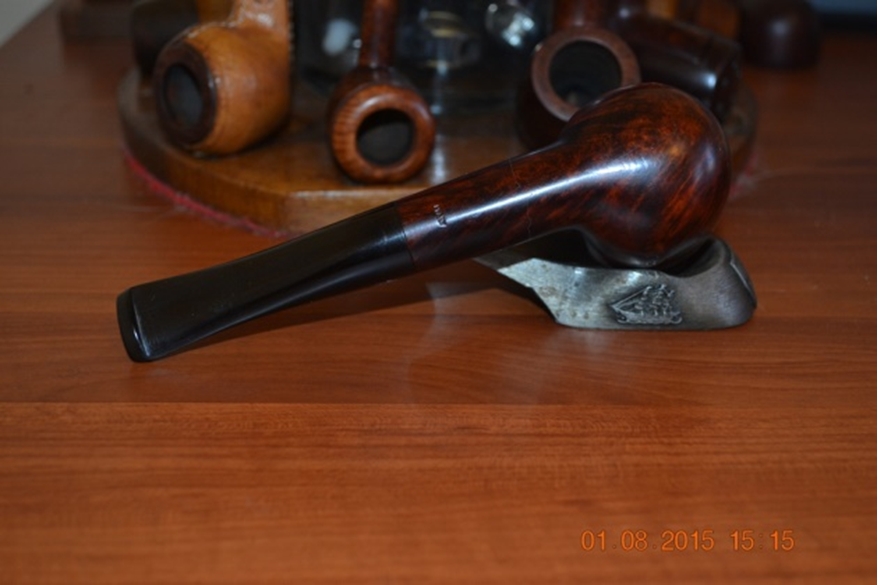
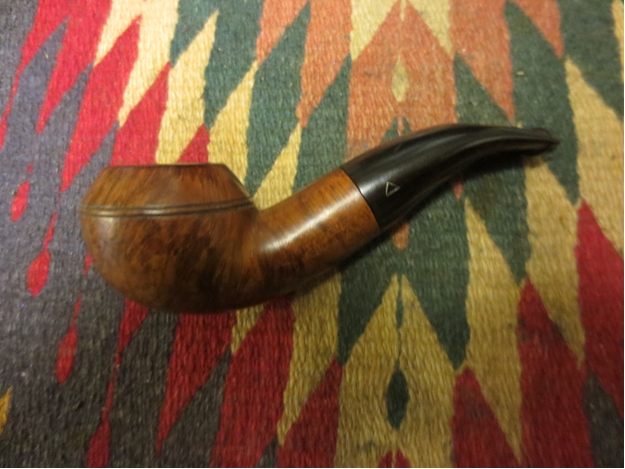
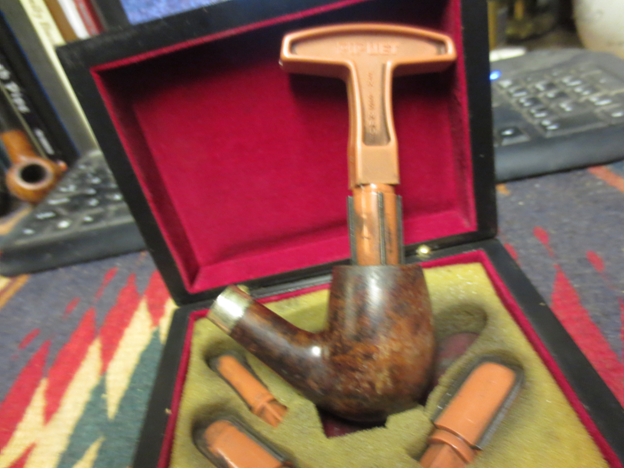
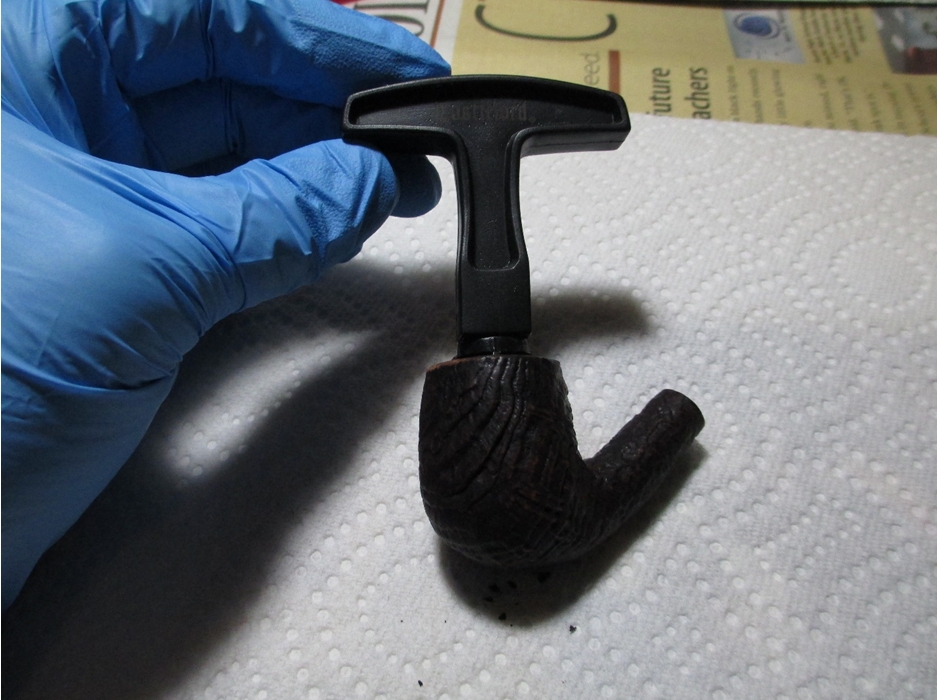
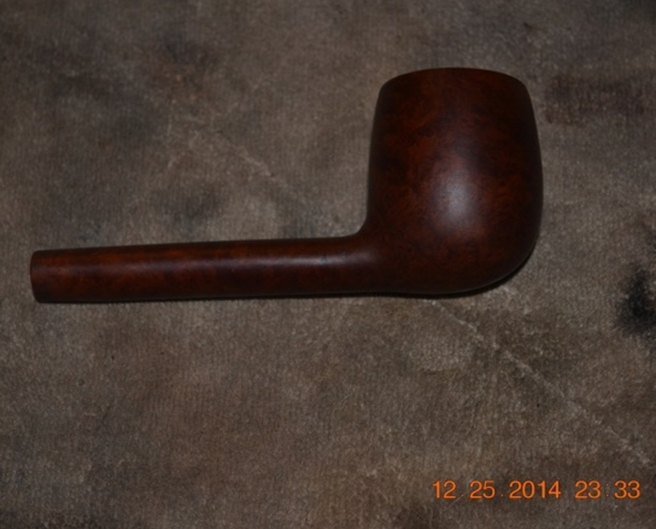
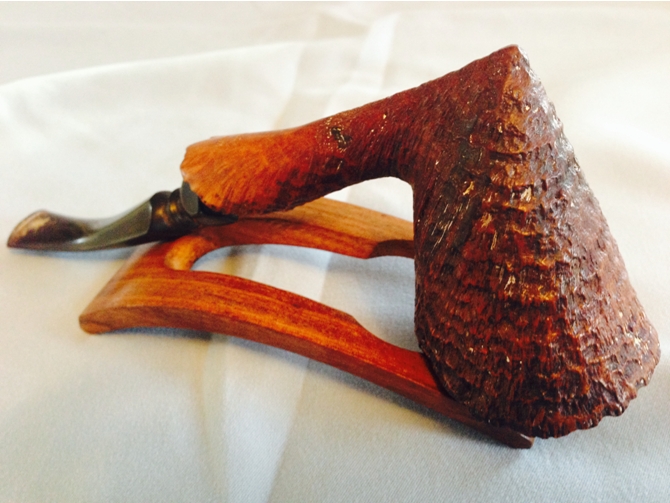
  I finished the bowl on the buffing wheel and here is the final result.