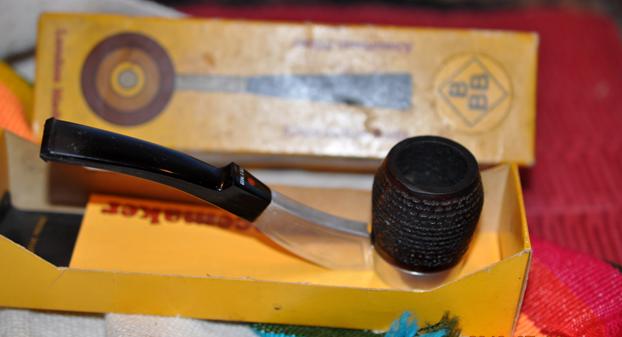
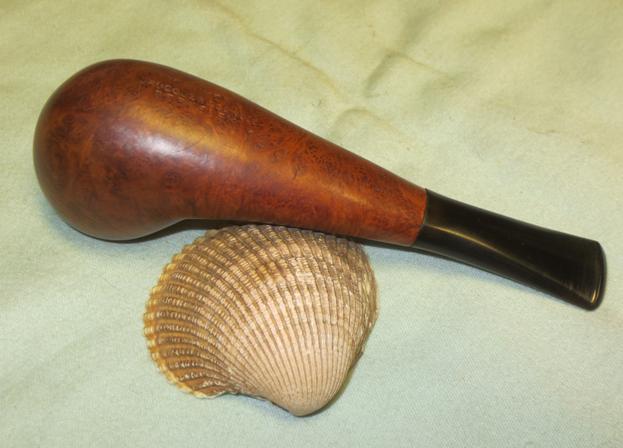
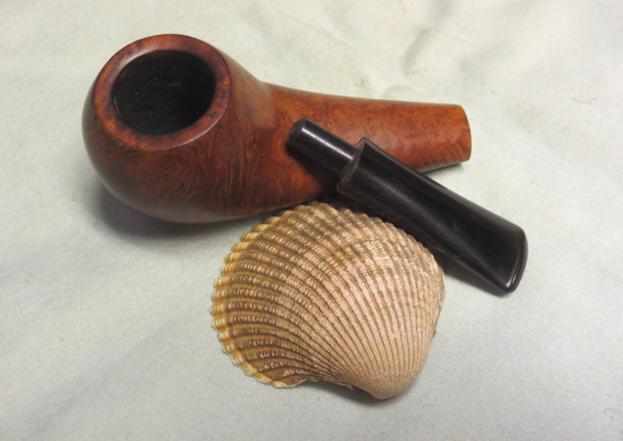
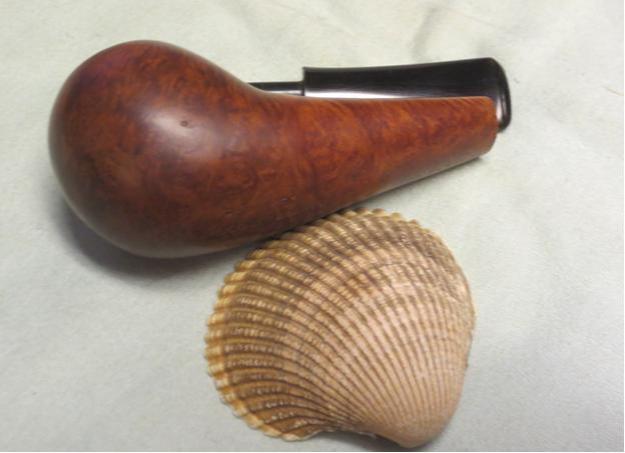
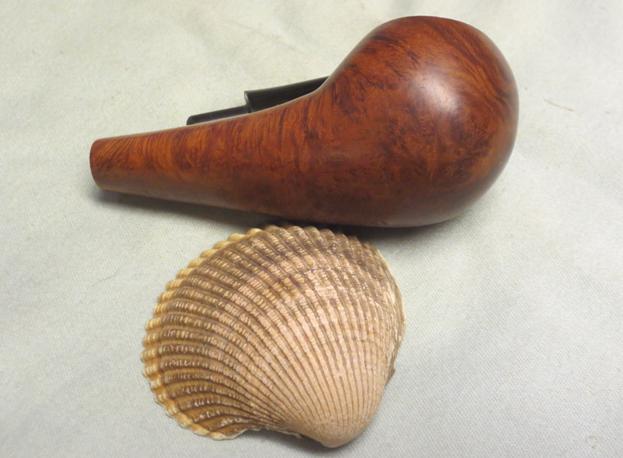
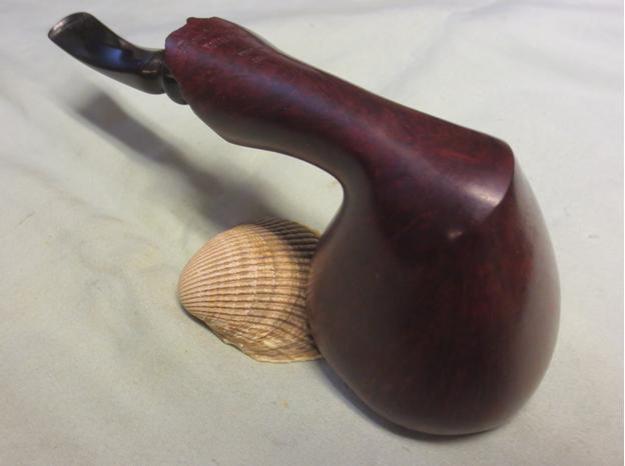
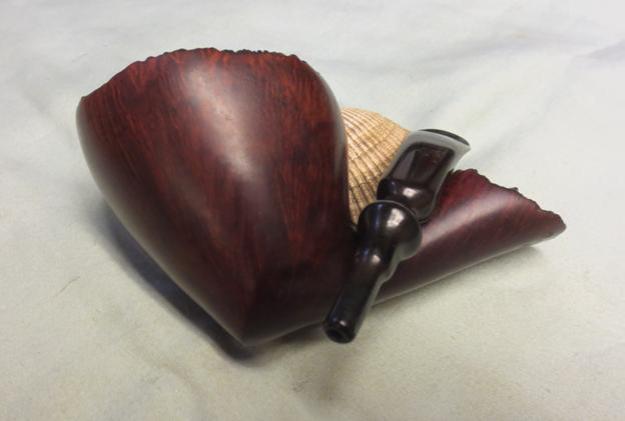
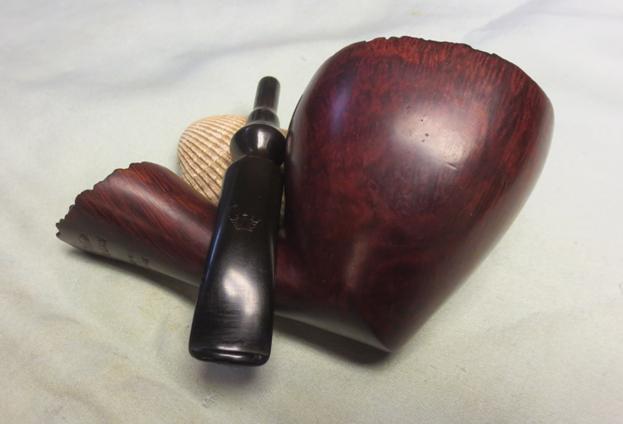
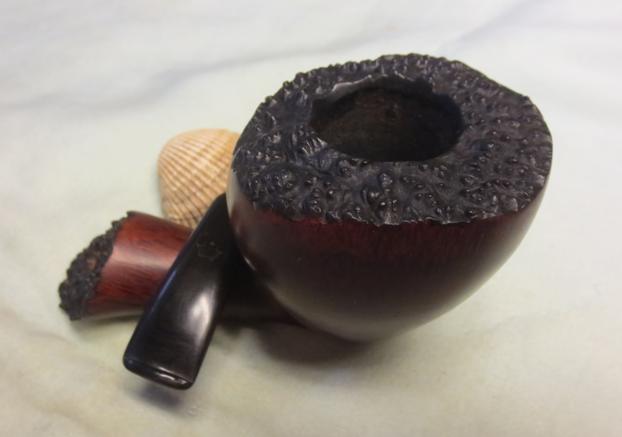
Tag Archives: refinishing

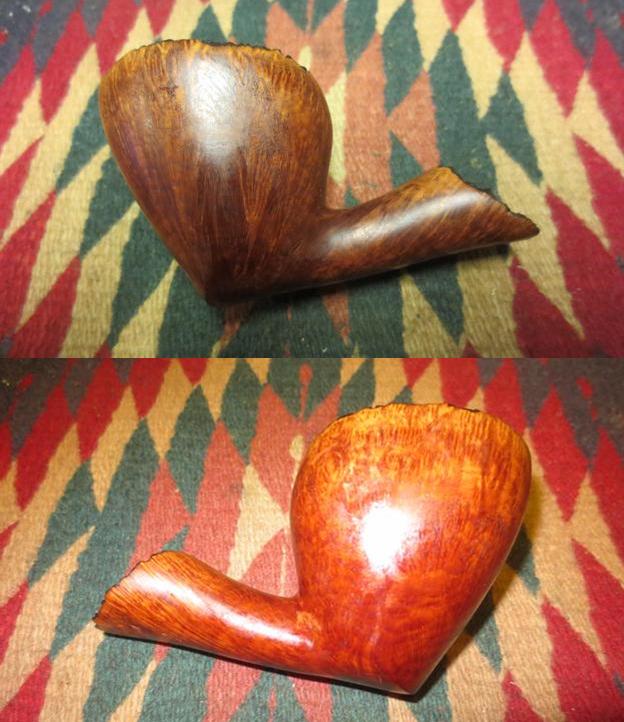
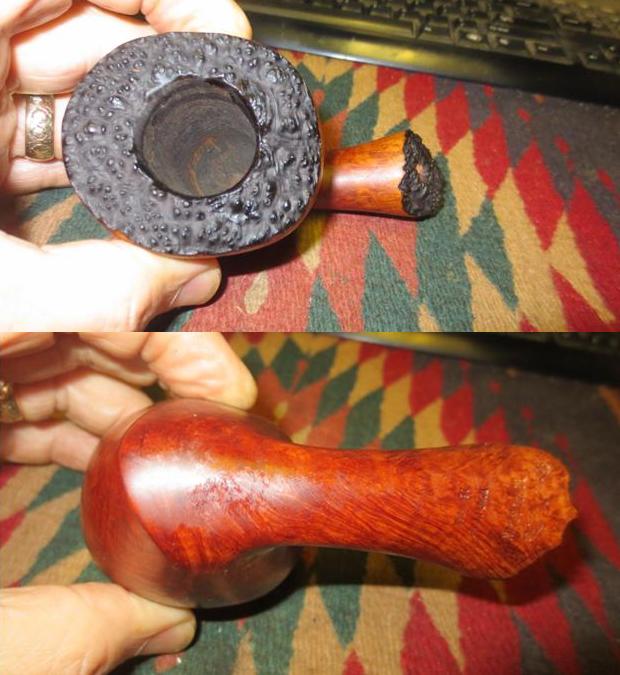
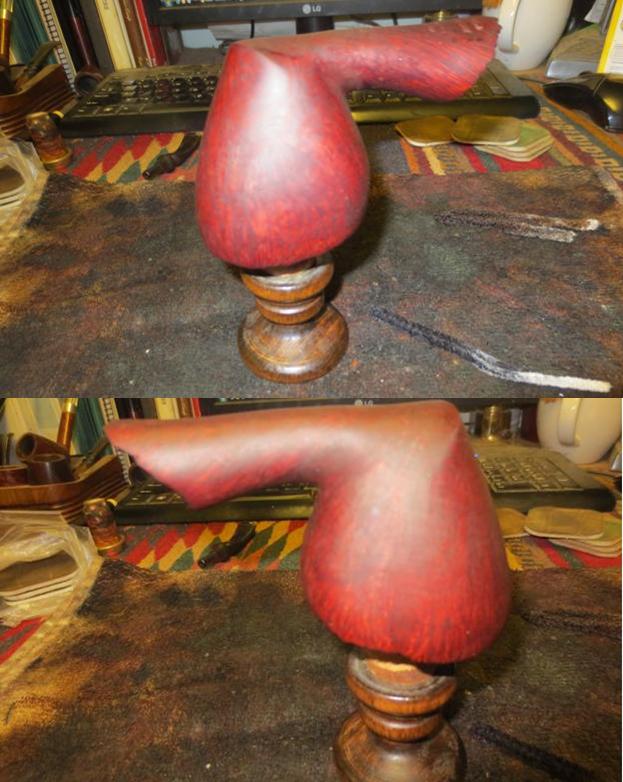
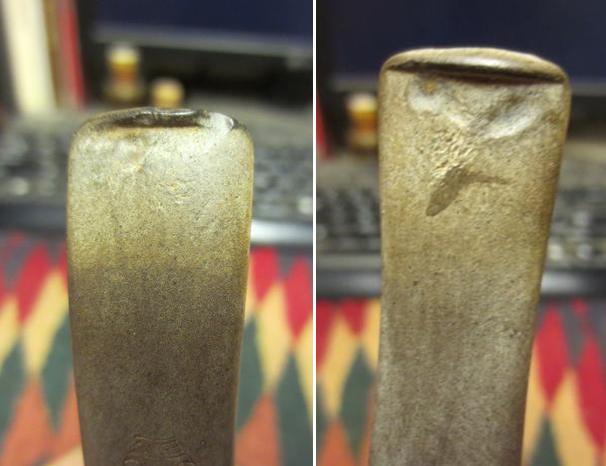
A Large Ben Wade Royal Grain Freehand brought back to life


Blog by Steve Laug

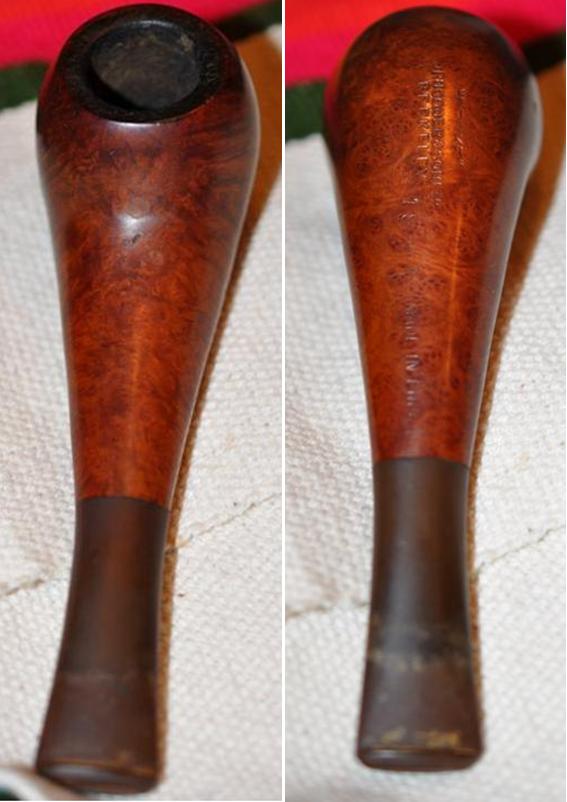
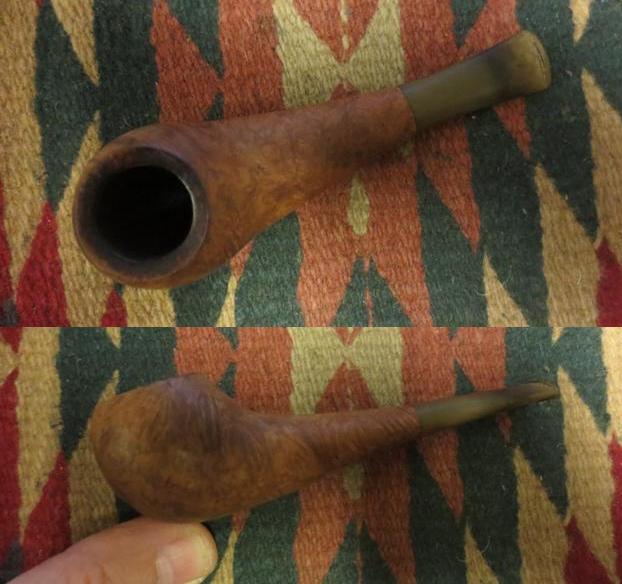
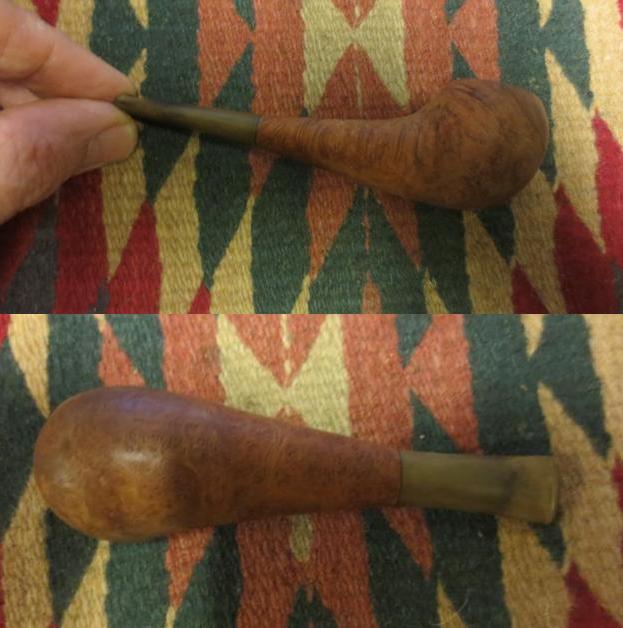
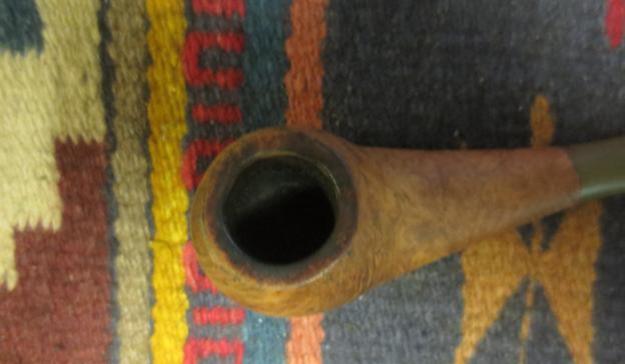
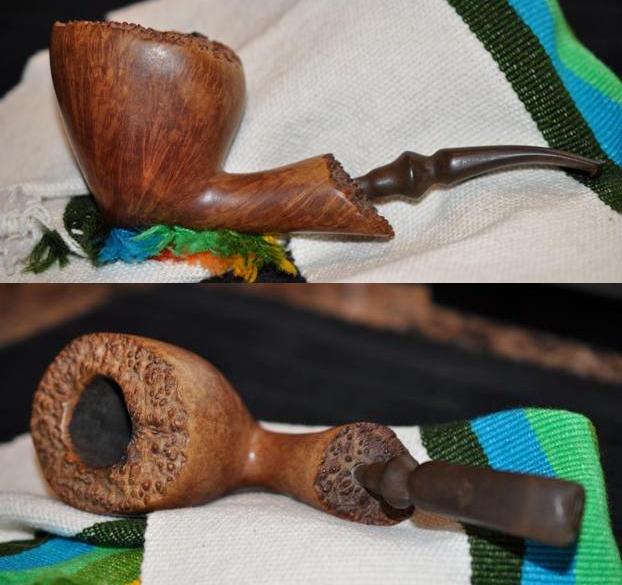
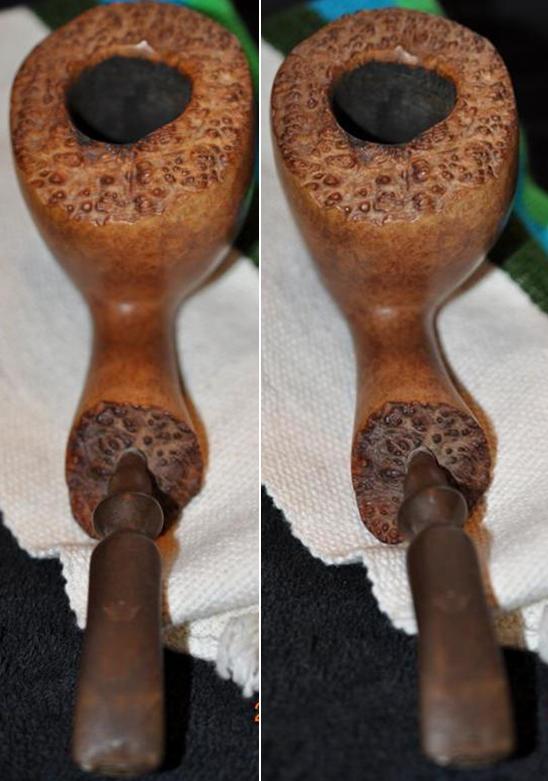
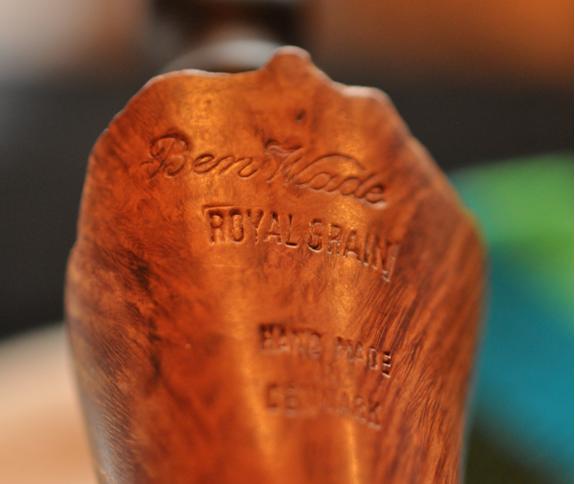
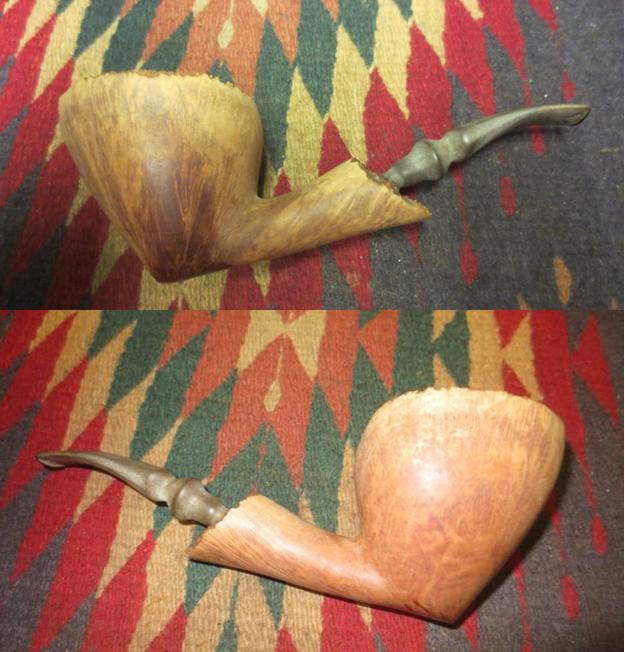
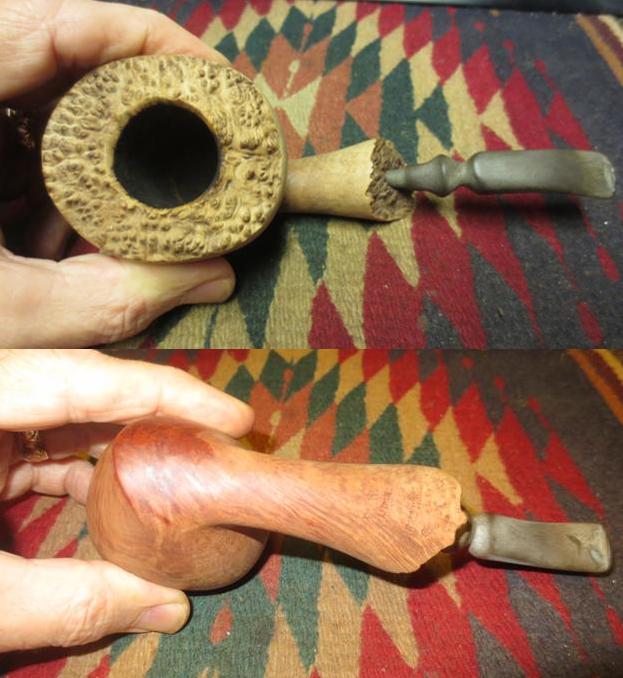
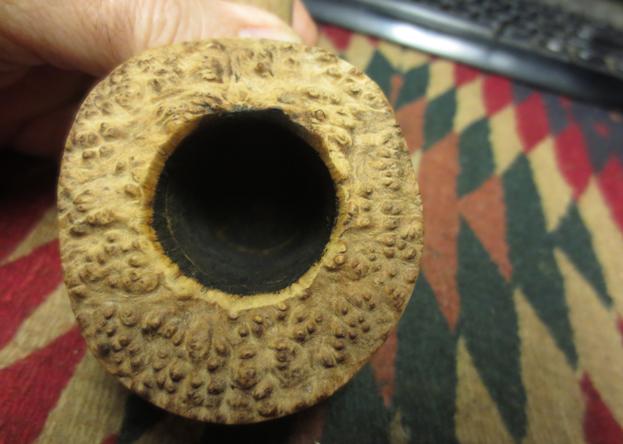
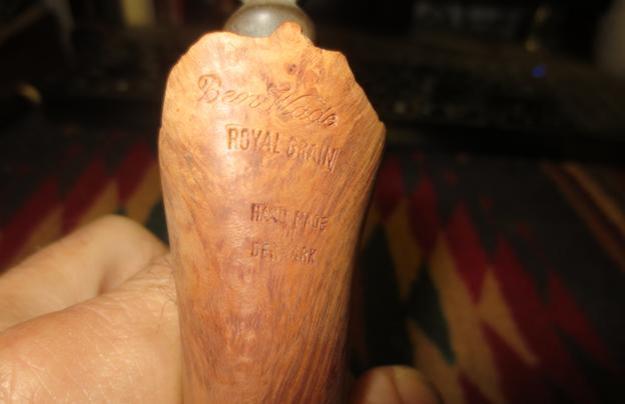
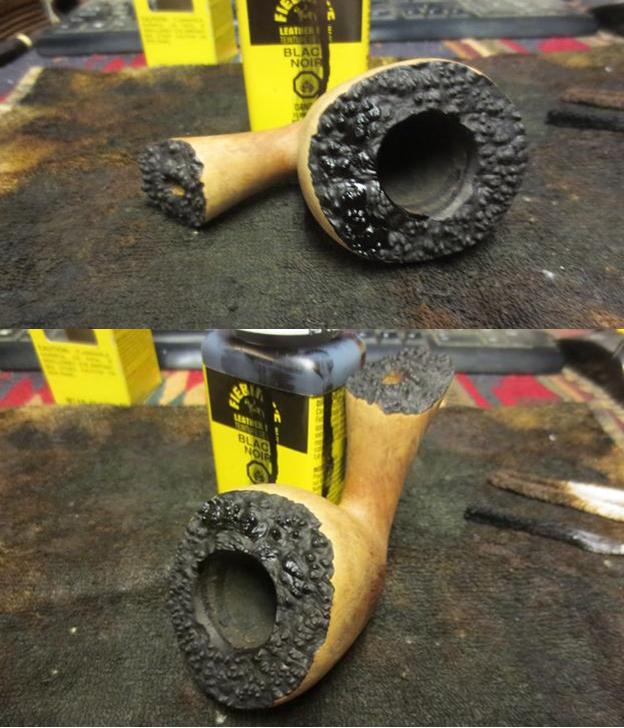
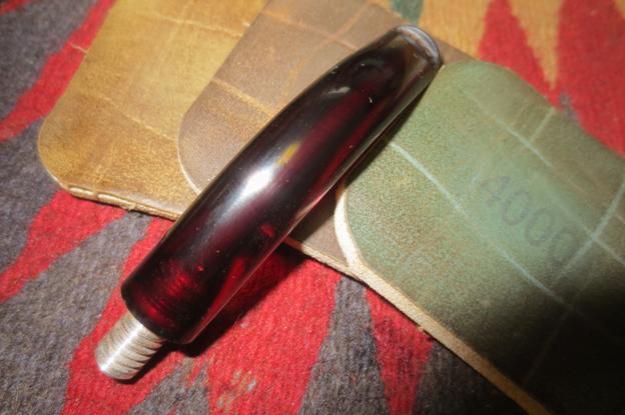
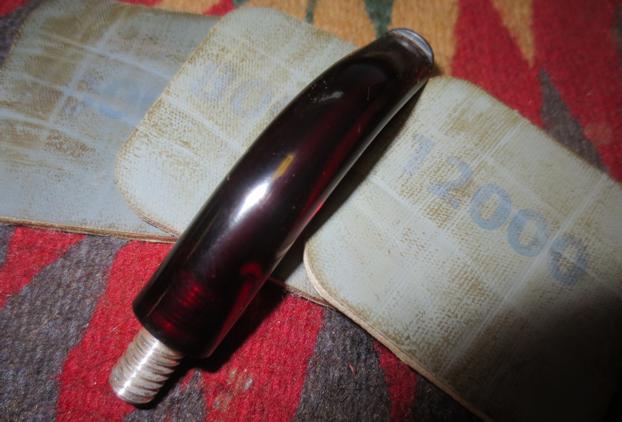
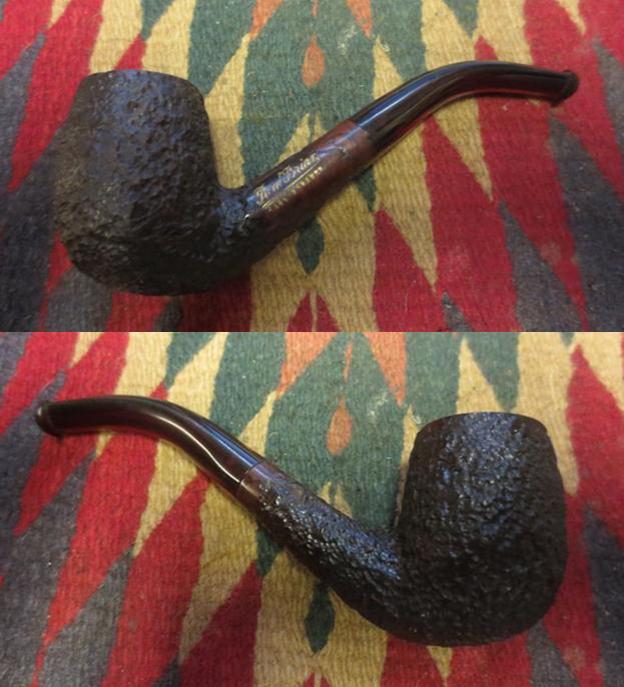
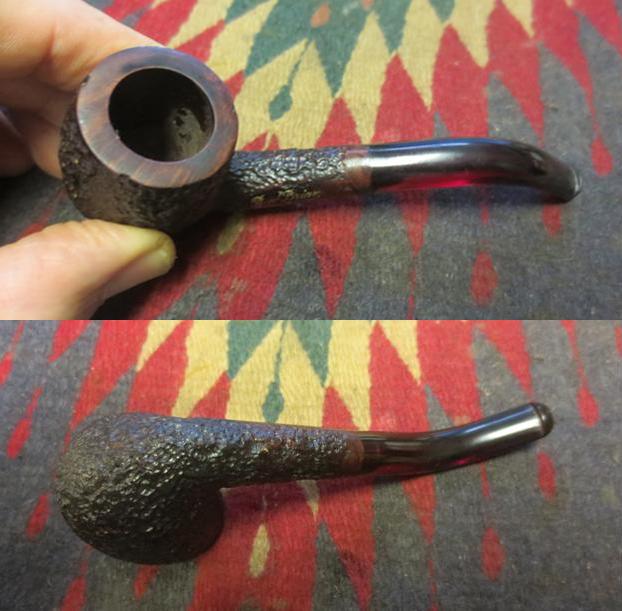
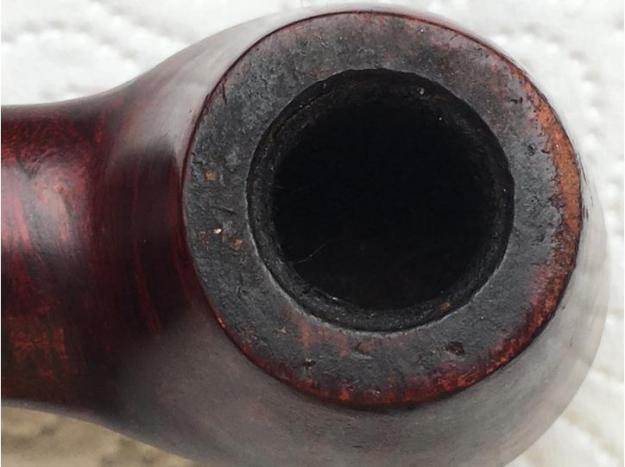
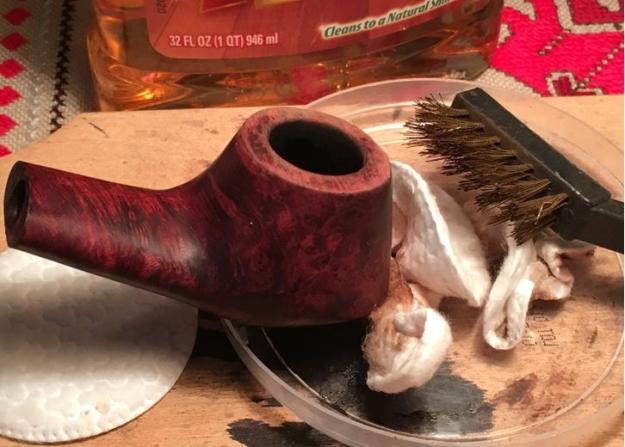
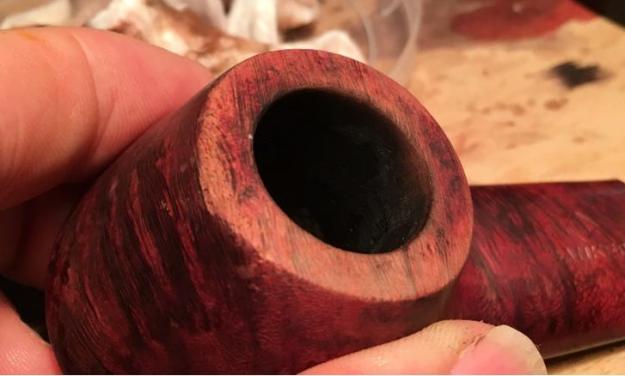
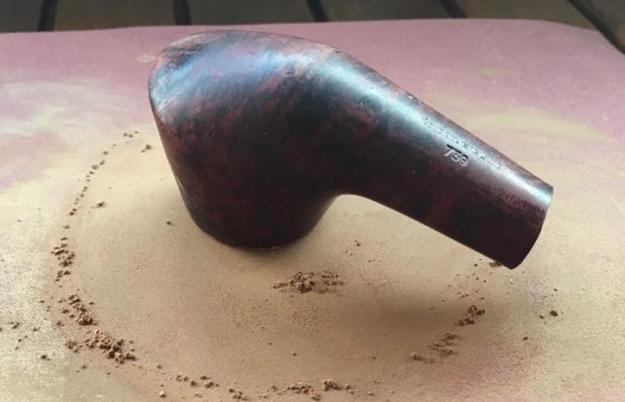
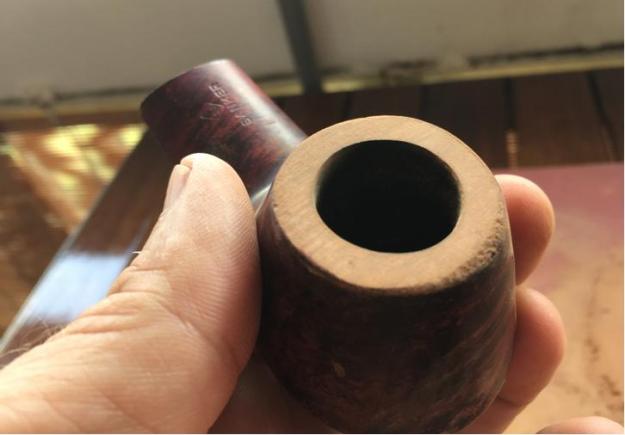
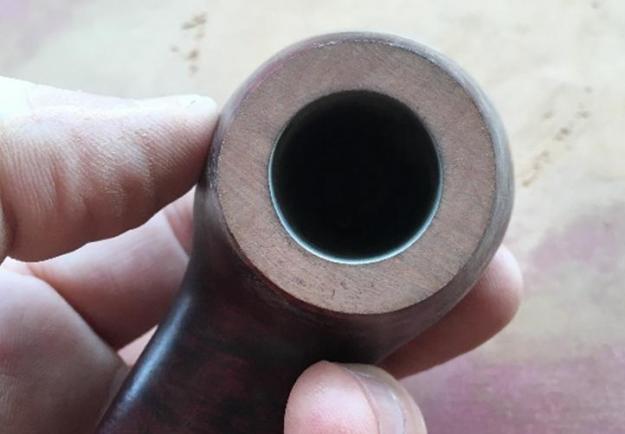
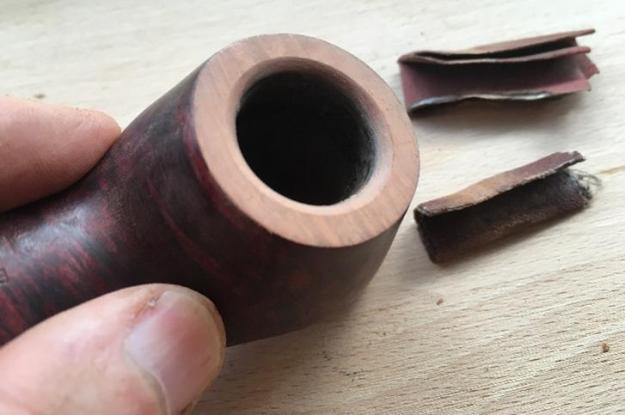
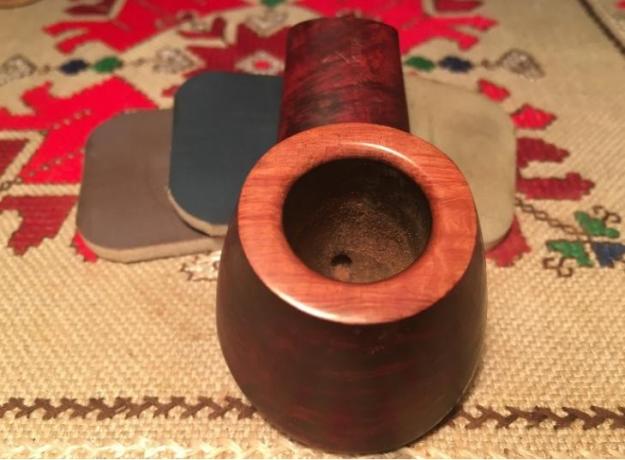
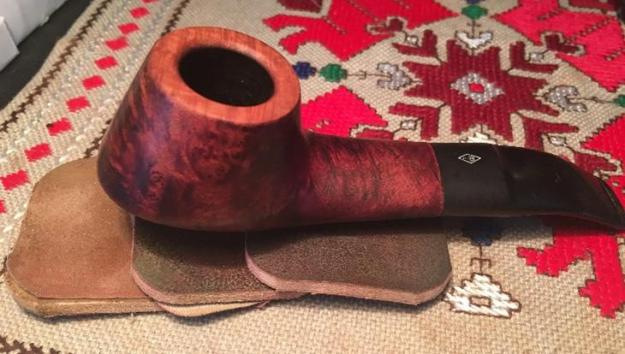
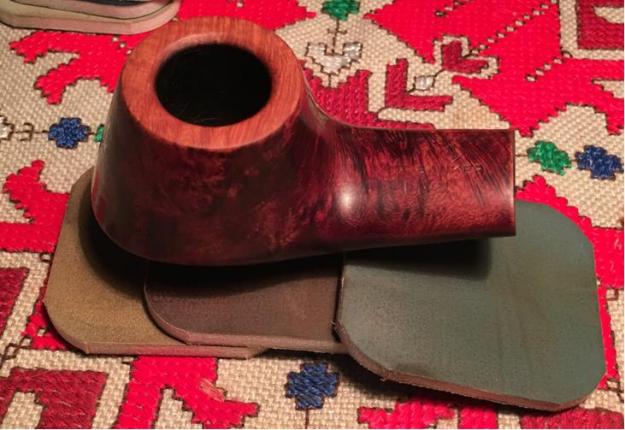
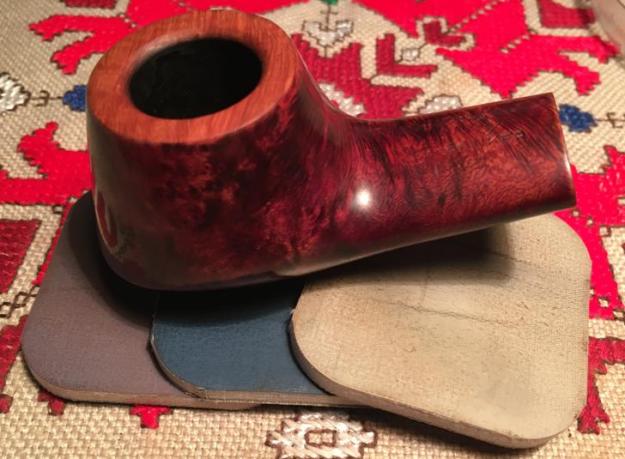
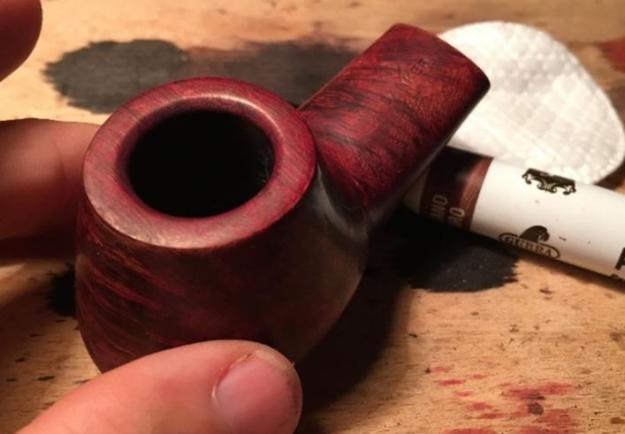
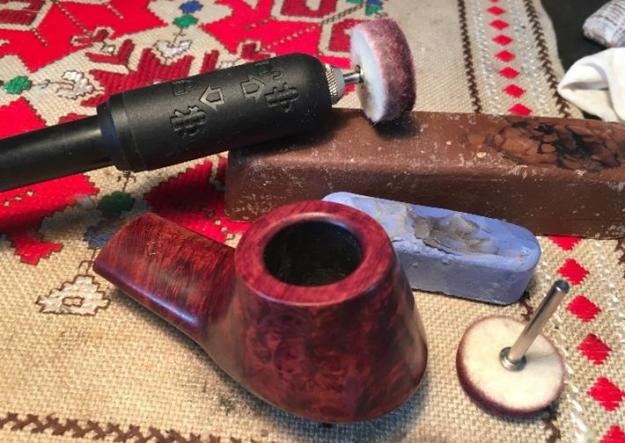
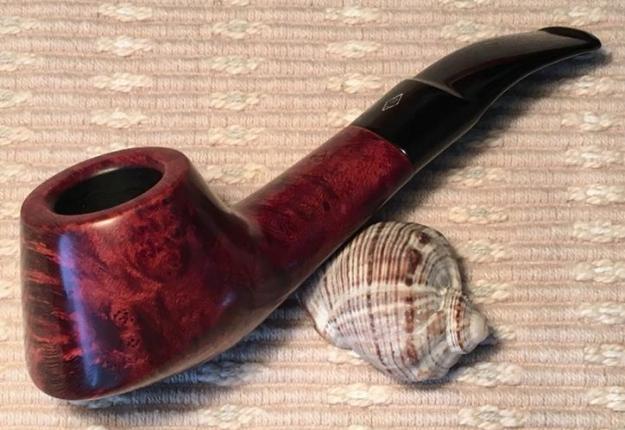
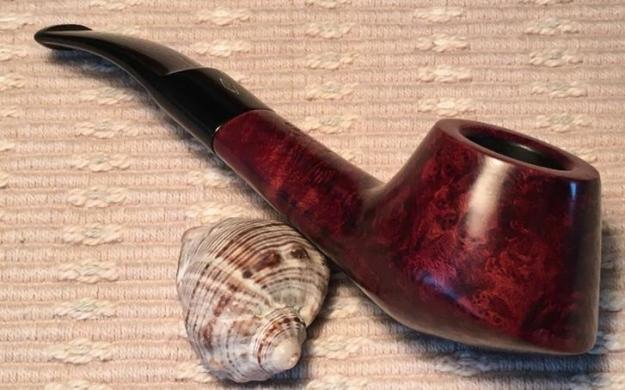
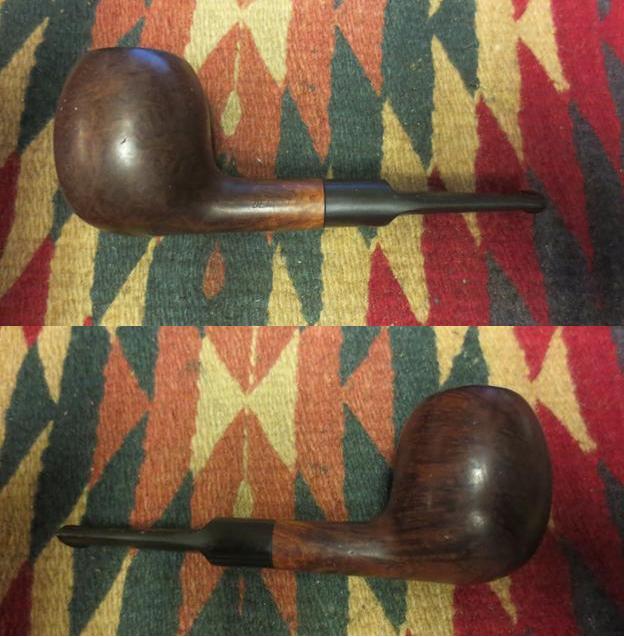
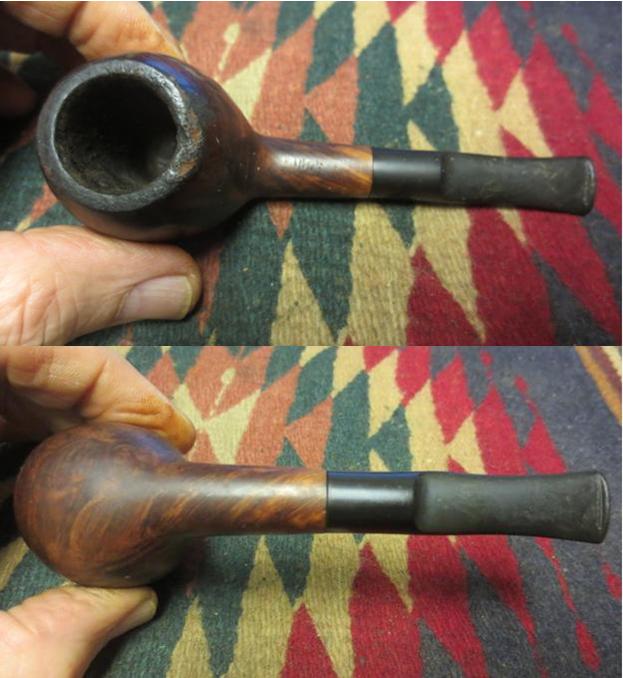
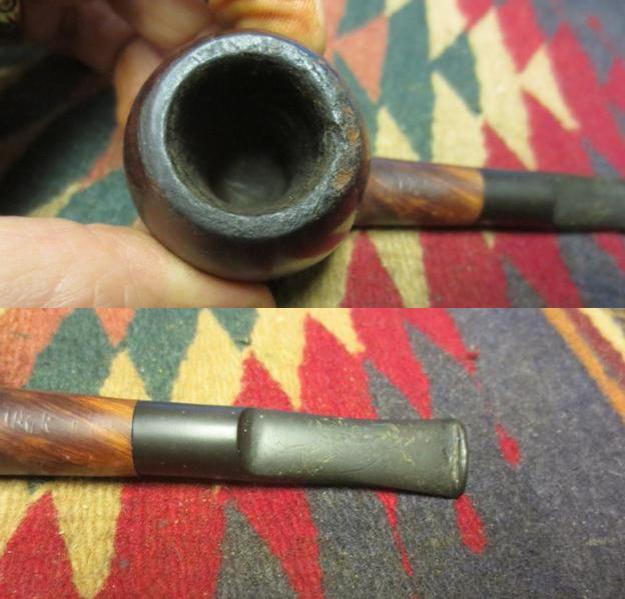
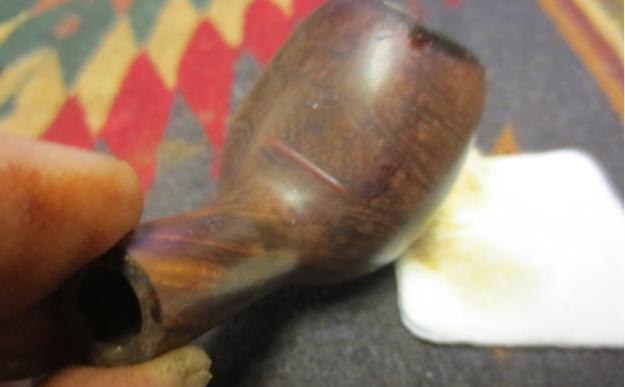
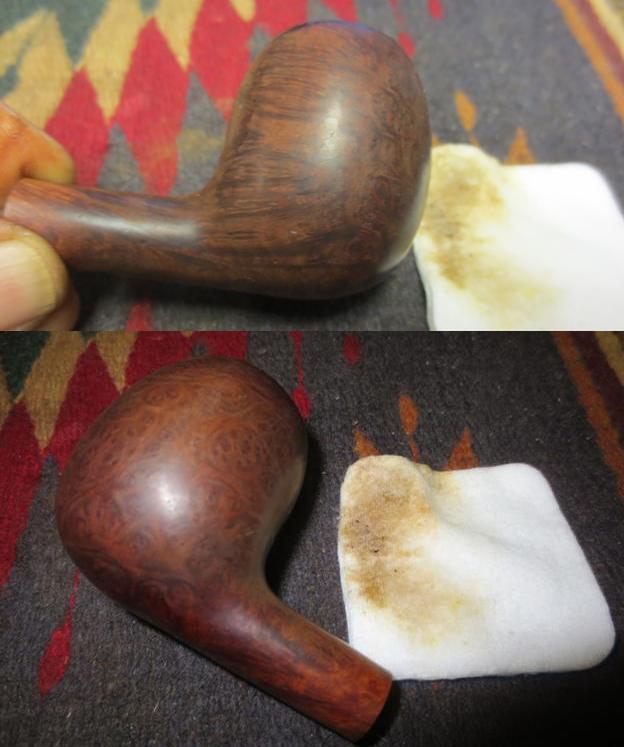
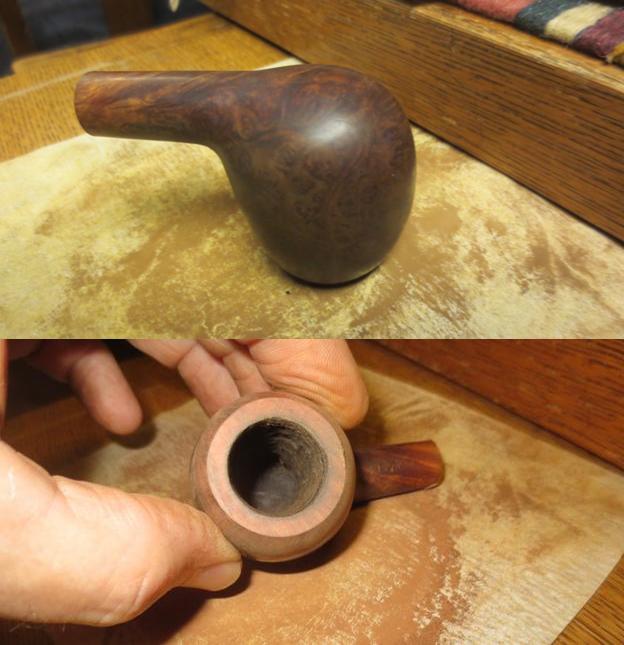
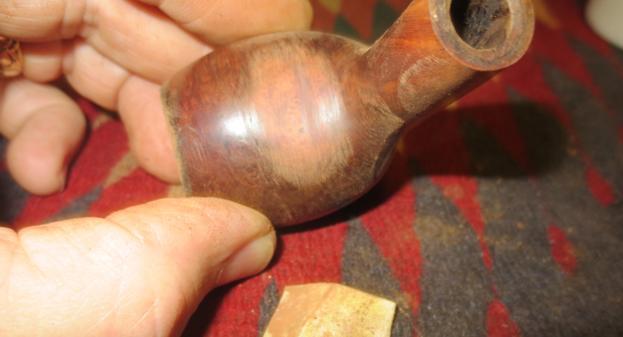
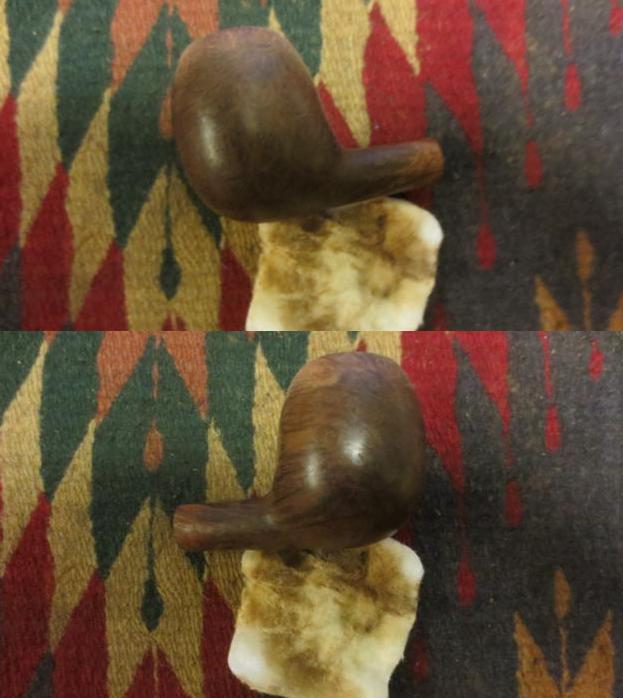
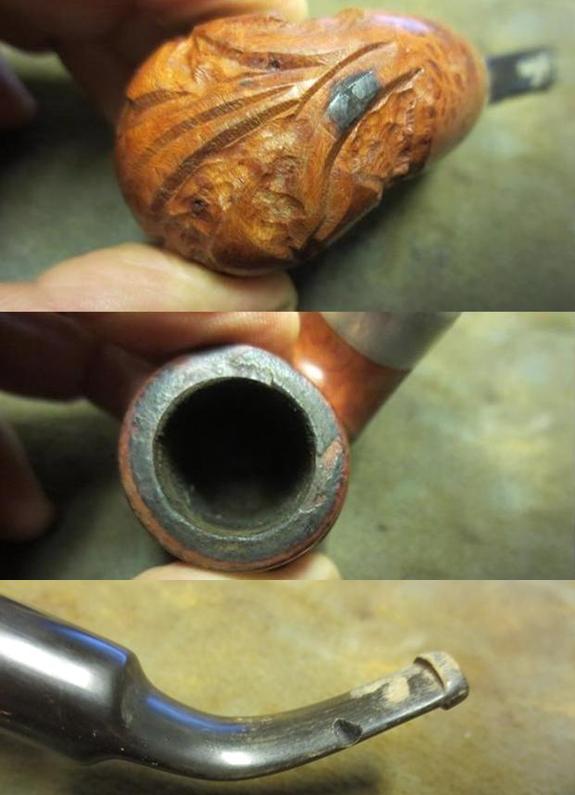
One of the recent acquisitions that my brother sent me is a beautiful freehand briar pipe. The briar is a piece of plateau with mixed flame and straight grain. The plateau is on the top of the bowl and also the end of the shank. The plateau was faded with most of the dark stain washed out. The smooth portions of the bowl were also faded and washed out. The stem was oxidized and had deep teeth marks on the top and the bottom of the stem near the stem. There were some scratches on the bowls sides but none of them were deep. The bowl was large – 1 inch in diameter. The inside of the bowl was also quite clean. The photos below show what the pipe looked like when my brother received it.Ben1 Ben2The pipe is stamped Ben Wade over Royal Grain over Hand Made in Denmark. The stamping is clear and readable.Ben3The next photo shows some of the scratches in the bowl. They are not deep but they are visible.Ben4My brother scrubbed the briar with Murphy’s Oil Soap and a soft tooth brush. He rinsed it under running water and cleaned out the interior with pipe cleaners, cotton swabs and alcohol.Ben5 Ben6I took a close up photo of the plateau rim. It is clean and undamaged. I took a close up photo of the stamping on the shank as well. The grain and the stamping are in great shape.Ben7 Ben8I stained the plateau on the rim and the shank with black aniline stain and flamed it to set it in the grain. I used a pipe cleaner to apply the stain because the fuzz on it went into the grain and high spots. I find that it works amazingly well to apply the stain.Ben10I wiped down the bowl with a little bit of olive oil to see what the grain looked like and also so I could sand the bowl with micromesh sanding pads. I sanded it with 1500-4000 grit sanding pads until it was smooth.Ben11 Ben12Once I had sanded the scratches out of the grain I stained it with a mixture of dark brown stain and alcohol – 50/50 mixture. I flamed it and repeated the process until the coverage was good. I kept the brown stain off of the plateau areas of the bowl and shank.Ben13My brother washed the stem with Murphy’s Oil Soap and rinsed it off. The oxidized stem has deep tooth marks on the top of the stem that crossed the top of the stem and the button on the left side. The underside had three deep grooves in it that did not penetrate into the airway. The fact that they did not break through into the airway was the only real blessing in the mess.Ben14I sanded the stem to smooth out the oxidation and to remove the debris around the tooth marks. I wanted the stem area clean so that I could patch it. I used black super glue and let it dry for one hour and then sprayed it with an accelerator to harden it.Ben15I used a needle file to recut the button edges and clean up shape of the button. I sanded it with 220 grit sand paper to remove the excess black super glue patch and blend it into the surface of the stem. The Ben Wade Crown stamp was faint but still slightly visible. I planned on maintaining it as much as possible.Ben16I wet sanded the stem with 1500-2400 grit micromesh sanding pads and rubbed it down with Obsidian Oil. I dry sanded the stem with 3200-4000 grit pads and gave it another coat of oil. I finished sanding it with 6000-12000 grit pads, gave it a final coat of Obsidian Oil and set it aside to dry.Ben17 Ben18 Ben19I buffed the bowl and stem with Blue Diamond on the buffing wheel and then gave the bowl and the stem multiple coats of carnauba wax. I buffed it with a clean buffing pad to raise the shine. I finished by hand buffing it with a microfibre cloth to deepen the shine. The finished pipe is shown in the photos below. It is a large pipe. The dimensions are: length – 7 inches, height – 2 ½ inches, inside diameter of the bowl – 1 inch, outside diameter of the bowl – 2 ½ inches. If this beauty is of interest to you send me a message or leave a response below. It could easily be added to your rack and provide years of service. If it is anything like my Ben Wade Freehand this is likely to be great smoking pipe. Thanks for looking.Ben20 Ben21 Ben22 Ben23 Ben24 Ben25 Ben26

Another for the strange but true hunt for a Cooler/Drier Smoker Collection


Blog by Steve Laug

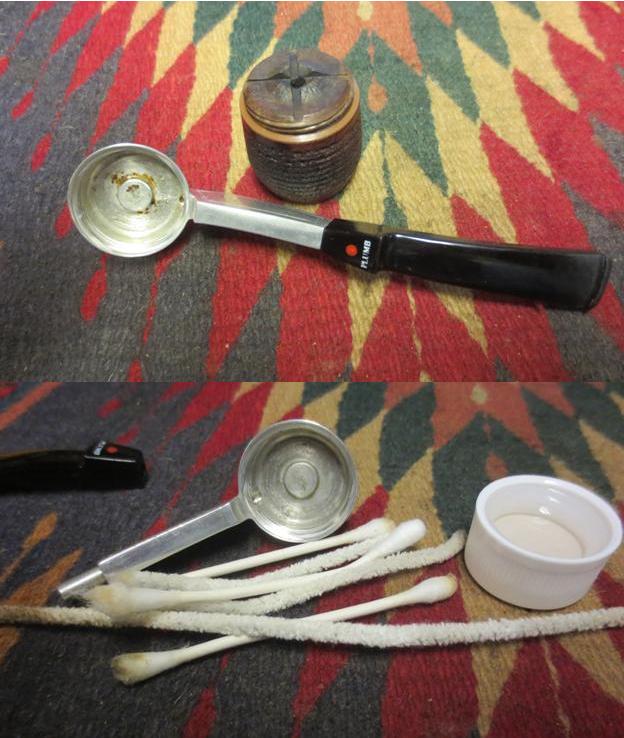
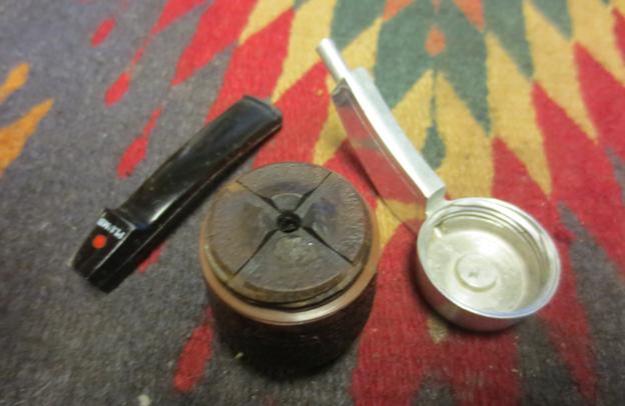
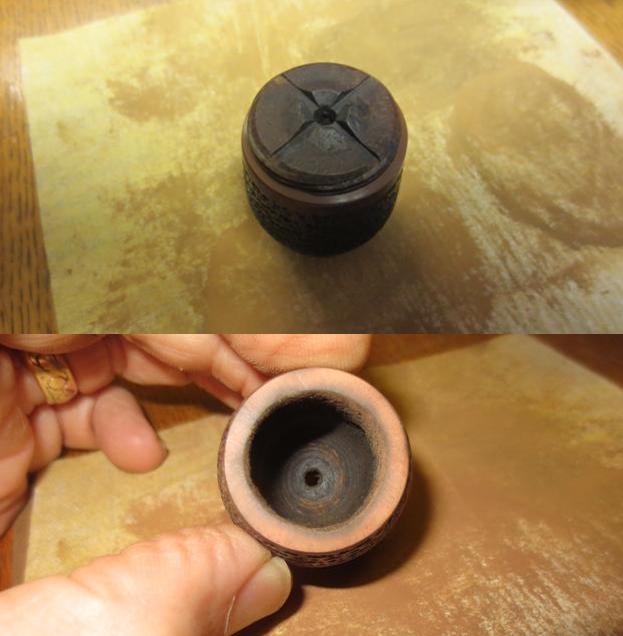
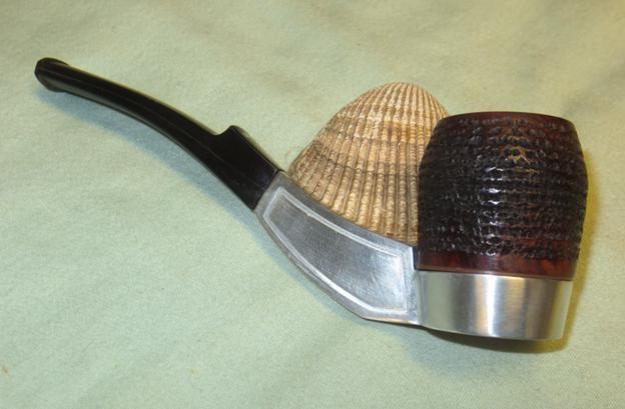
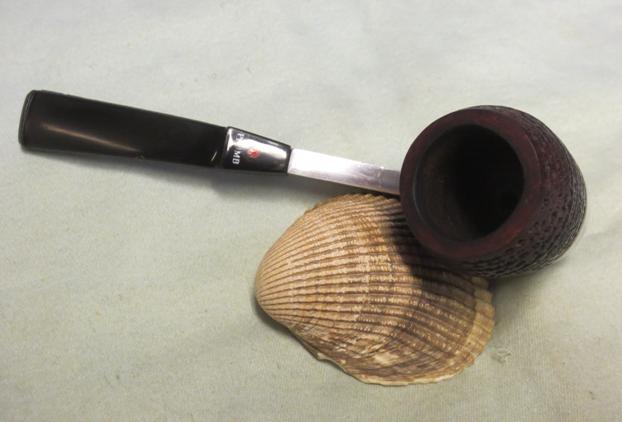
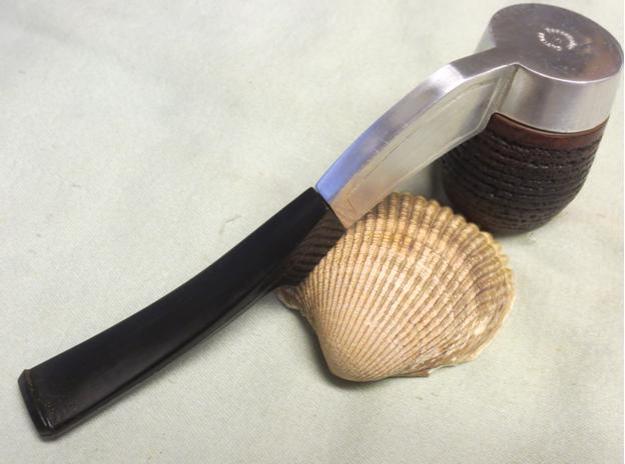
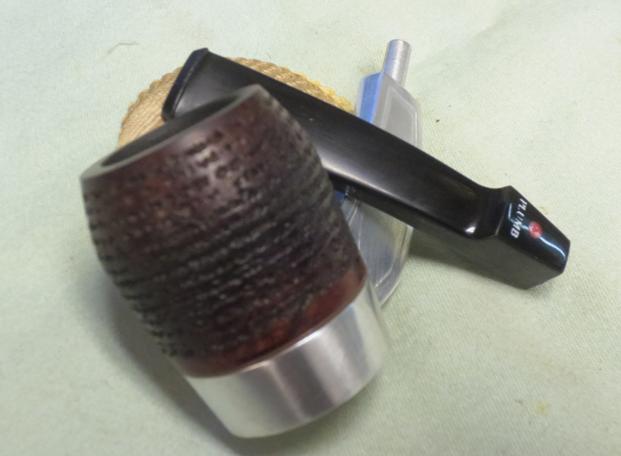
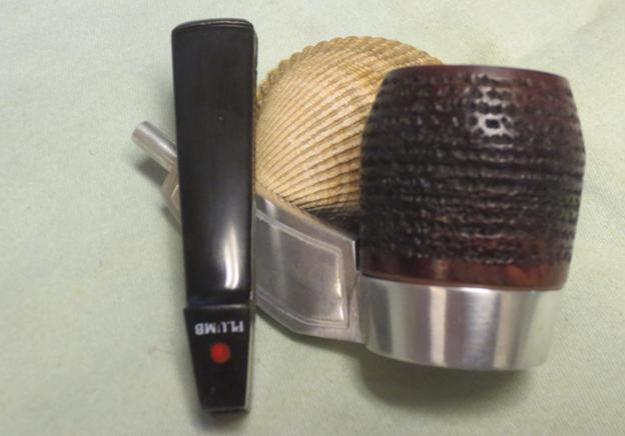
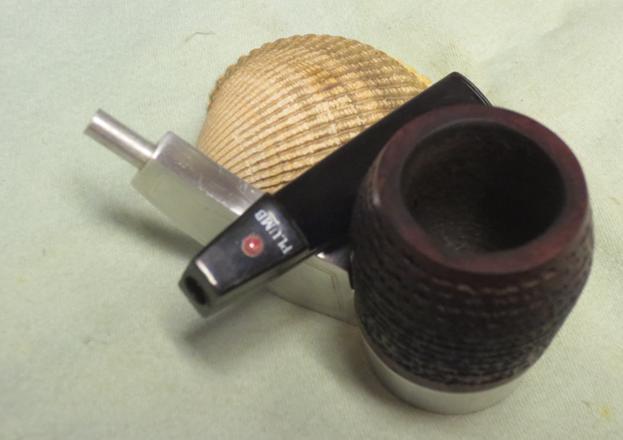
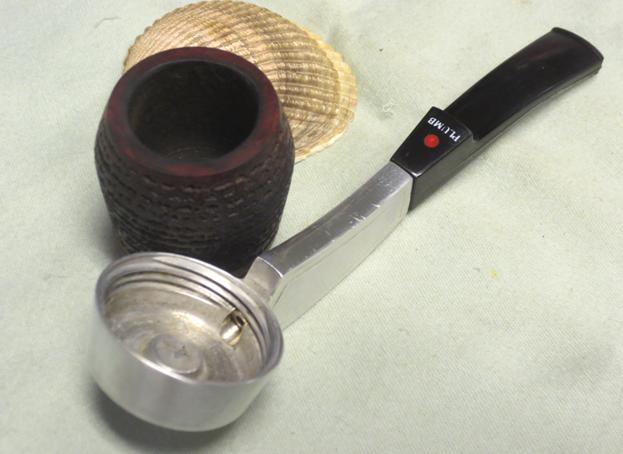
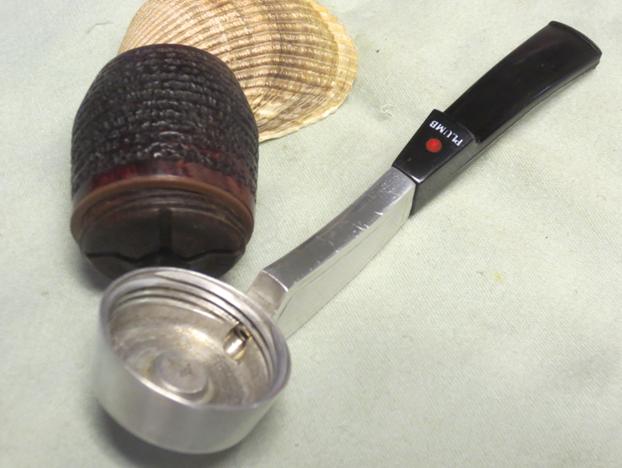
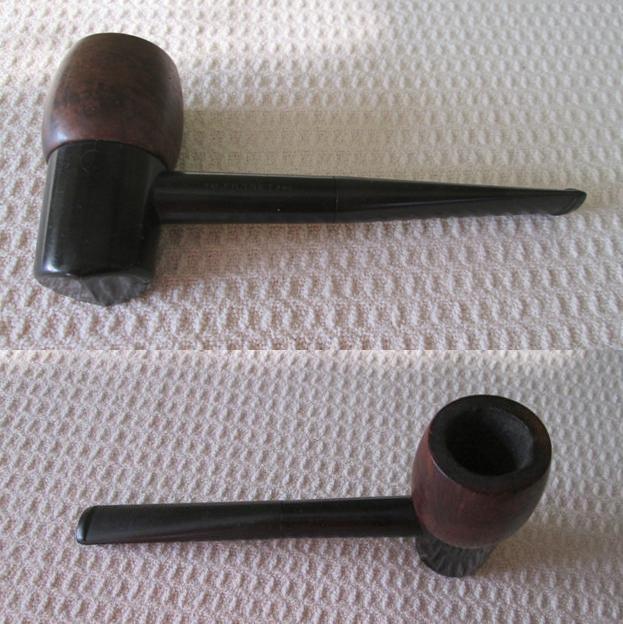
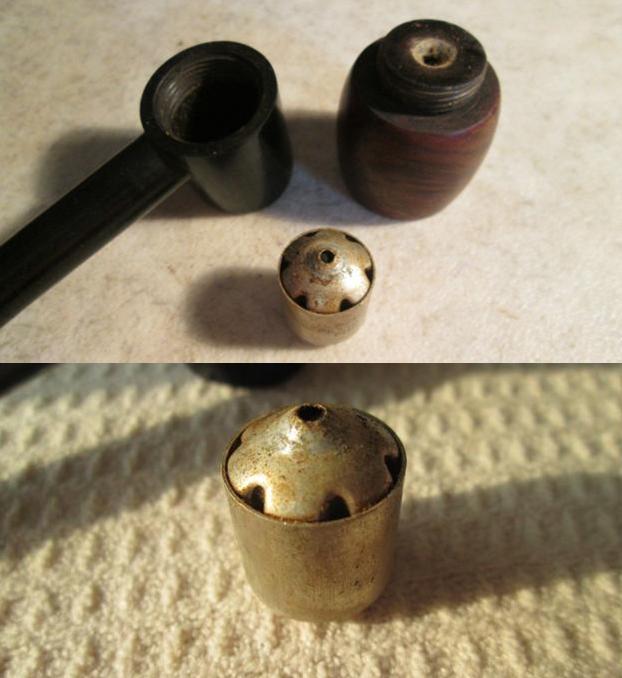
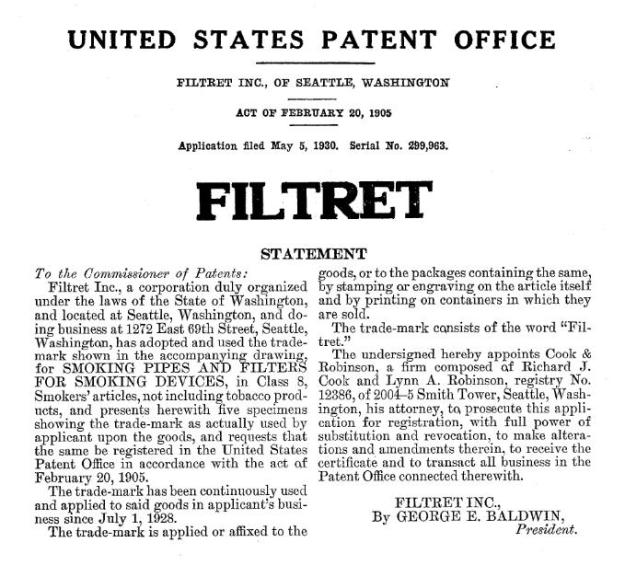
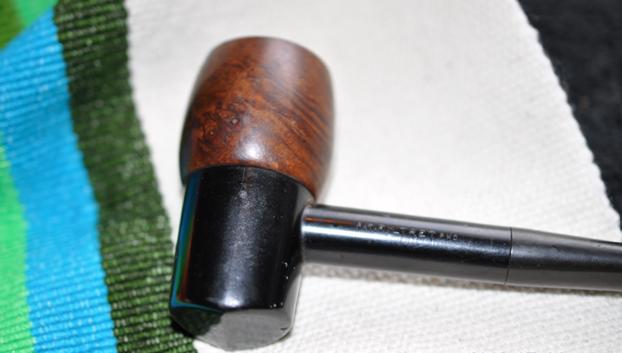
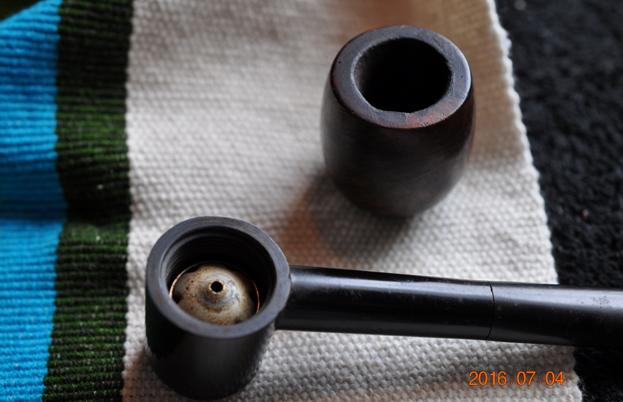
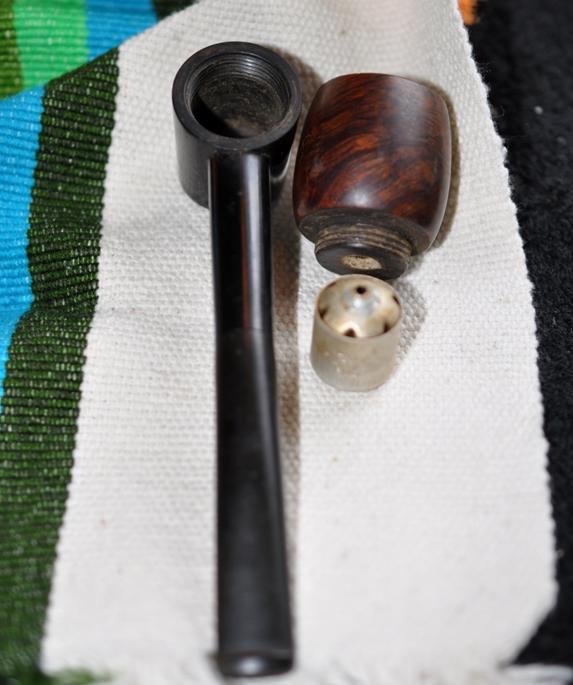
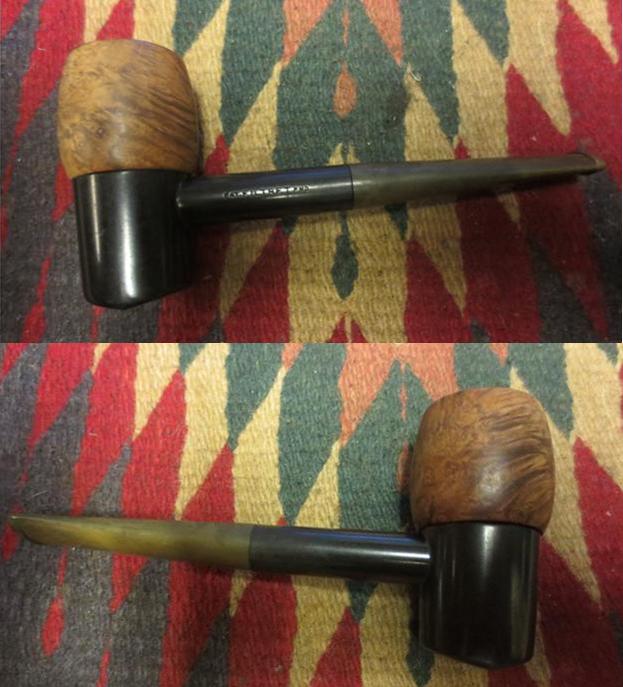
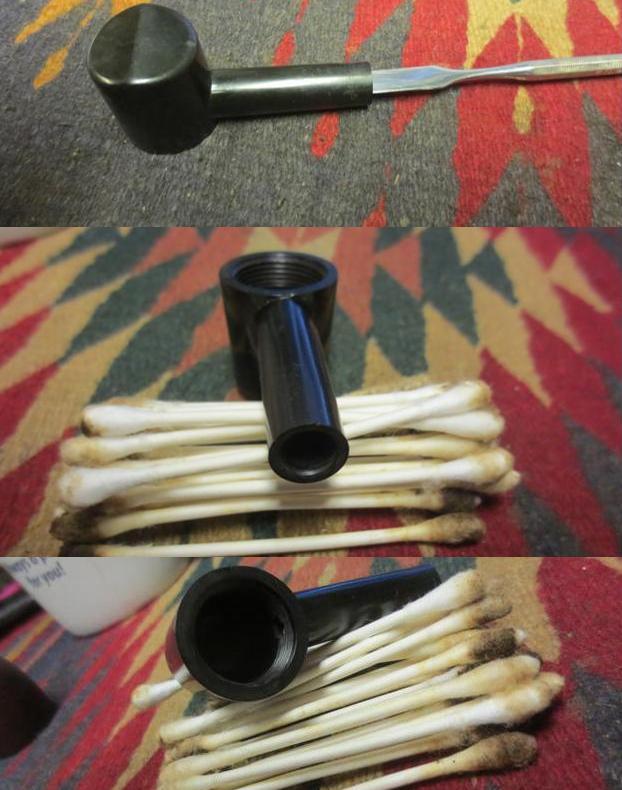
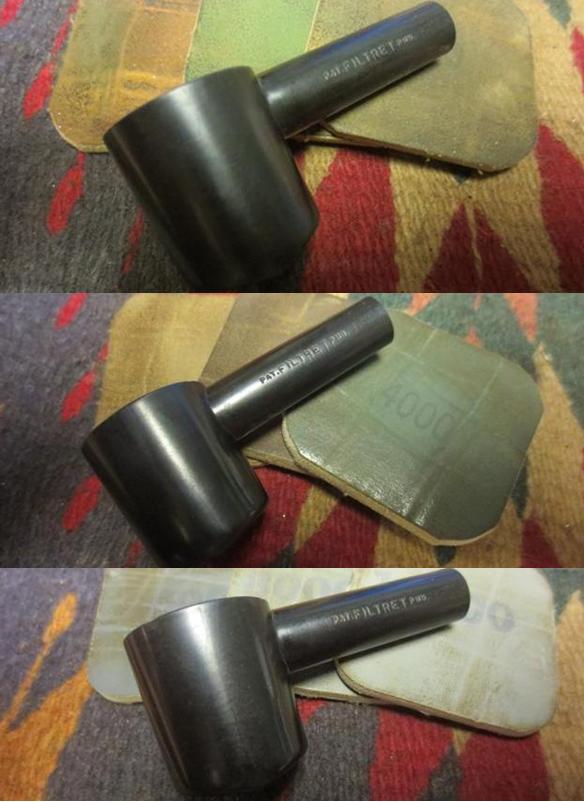
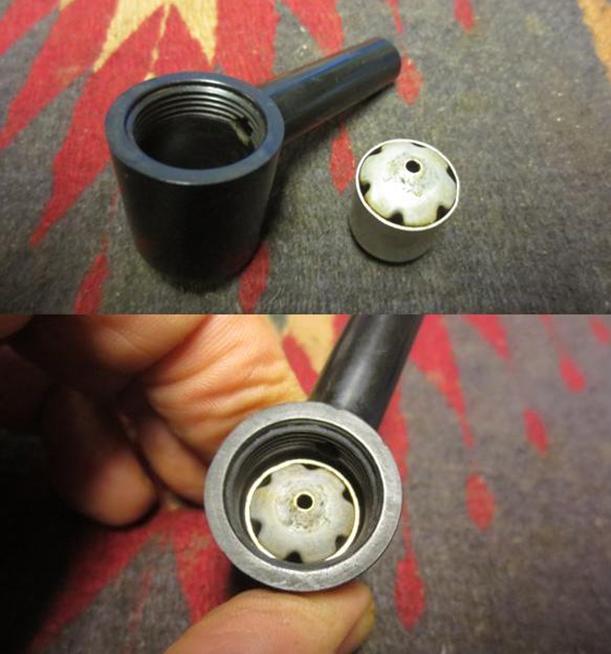
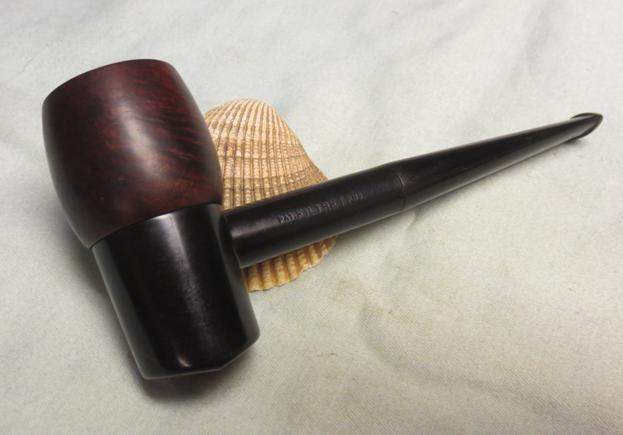
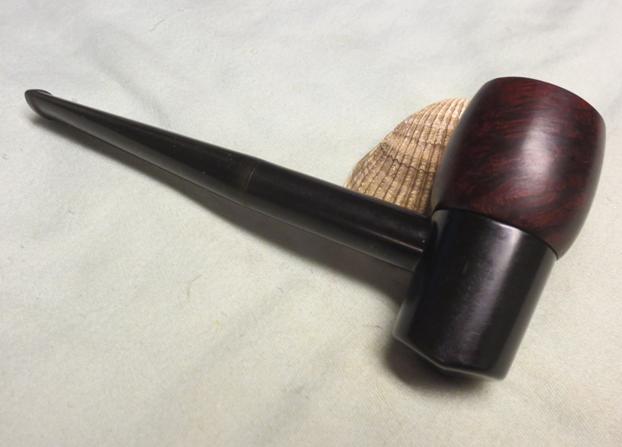
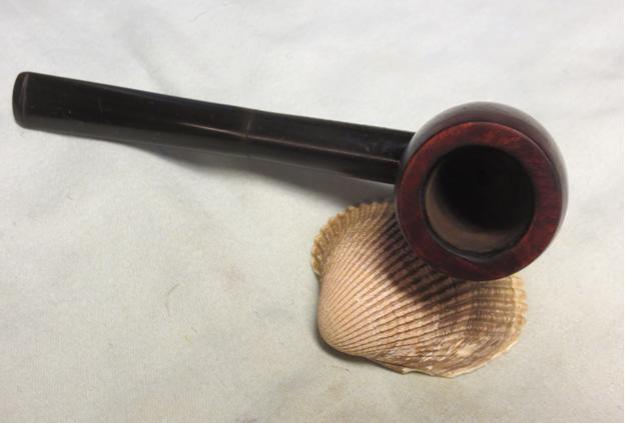
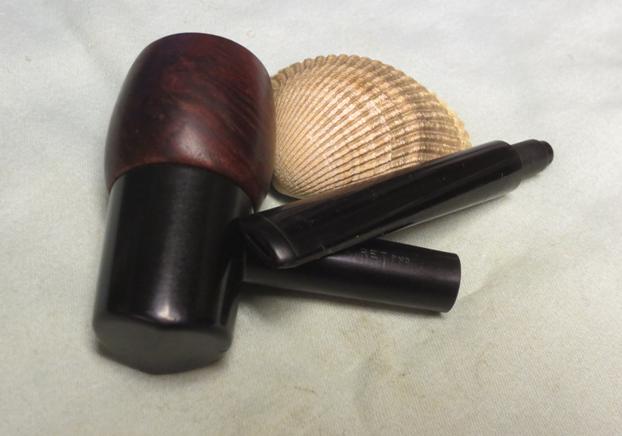
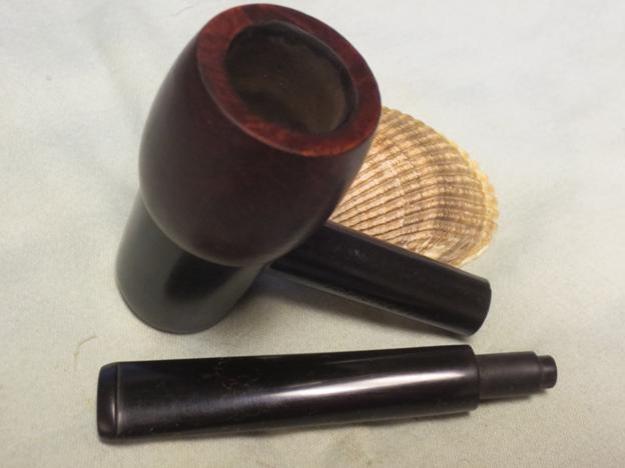
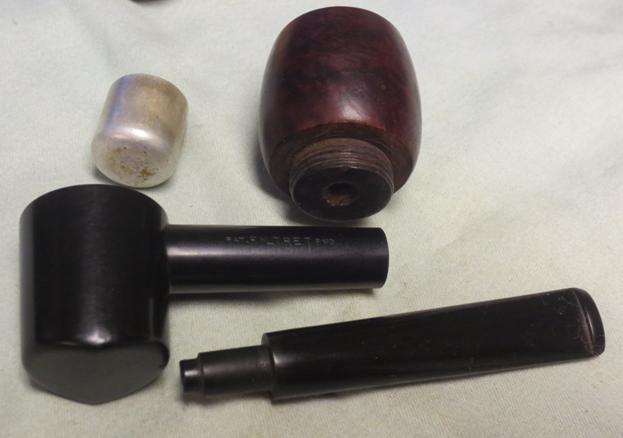
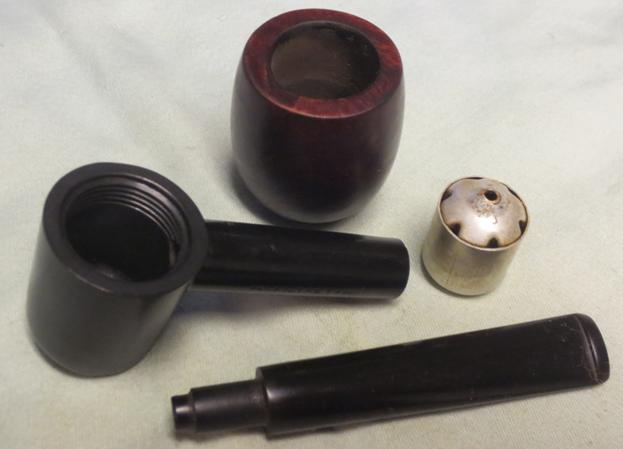
My brother sent me the links to this sale on EBay and I was hooked. It is probably the oddest pipe contraption I have seen in the many pipes that formed the pipeman’s dream of a cooler, drier smoke. There have been many over the years that vied for the oddest looking contraption but to date this one takes the prize. I have a few in my own oddity collection that would give this one a fair run for its money but I think this one is still by far the strangest. The T shaped look of the pipe is one thing but once it taken apart it is even odder. The only normal part of the pipe is the vulcanite stem. The Bakelite shank ends in a dropped down base that is part of the shank. It is as big as the briar bowl on the top.Filt1Inside the base is a metal canister contraption that has six wedge shaped holes around the edges and a single hole in the crowned centre. The crowned centre meets the hole in the bottom of the threaded briar bowl which is indented to hold the contraption in place.Filt2The Bakelite shank on the pipe is the only part of the pipe that bears any identification marking. It reads Filtre T with PAT. to the left of the name and PND. to the right. Thus the stamping is Filtre T Patent Pending. The Bakelite base is quite thick with threads extending into it to hold the bowl in place. The diameter of the opening is ¾ inches and the exterior 1 inch. The length of the base and stem is 5 1/8 inches. With the bowl in place the height is 2 ½ inches tall. The hang down base is 1 ¼ inches. The bowl itself is 1 ¼ inches. The filter canister is stamped with the same stampings as the shank PAT. over FILTRET over PND. and is made of aluminum.Filt3I did some hunting for a Patent on the US Patent site and found a written patent. The pipe seems to have been made by FILTRET Inc. of Seattle, Washington and the patent filed by George E. Baldwin, President on May 5, 1930. I cannot find the attached specimens mentioned in the document but this at least identifies the name and gives me a base date.

Filt43

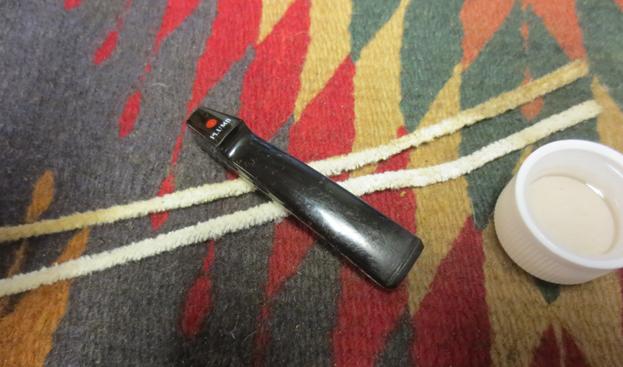
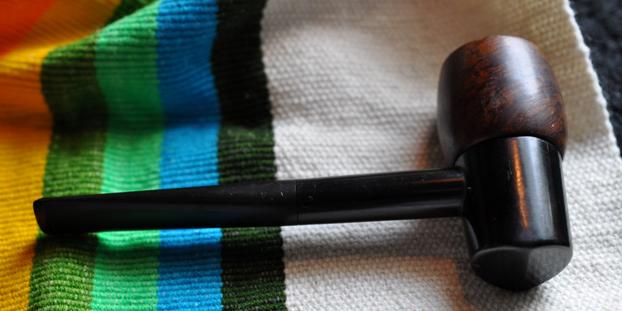
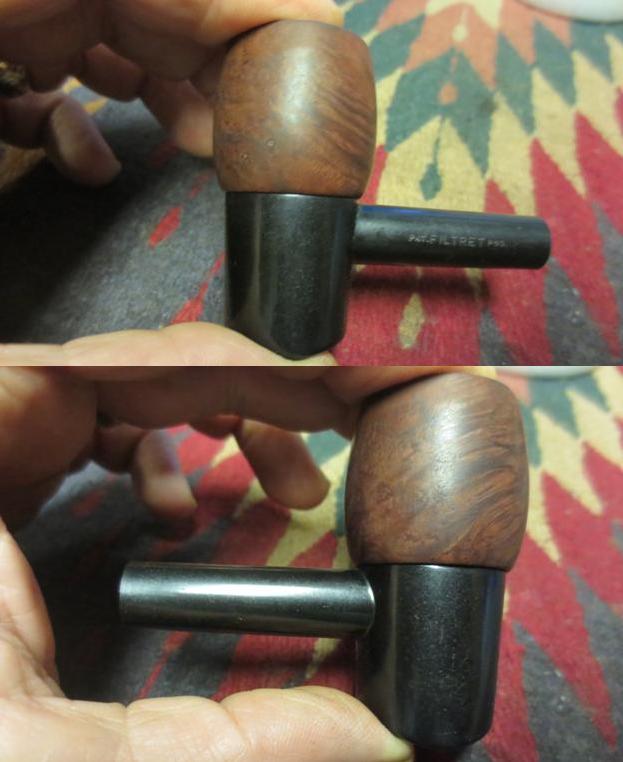
When the pipe arrived in Idaho my brother took some photos of it. The stem was slightly oxidized and it was stuck in the shank. It was underturned to the left and could not be straightened out. The rim was dirty with a tar build up and there was a cake in the bowl. The bowl itself was slightly out of round. The briar had a few small fills in it and the finish was dirty.Filt4 Filt5 Filt6When my brother Jeff took the bowl off the base the interior of the base was very dirty with tars and oils. The metal basket was also covered with debris of tars, oils and saliva. It looked to me that the way the pipe worked was that the air was drawn through the single hole in the top of the canister and then it came out through the wedges and into the airway in the shank.Filt7 Filt8 Filt9This pipe was a pleasure to work on because Jeff did the lion’s share of work on it. He reamed and cleaned the bowl. He cleaned out the stem with pipe cleaners and alcohol and the base with cotton swabs and alcohol. He flushed out the canister with alcohol and then water. He flushed it until it was clean. He scrubbed the bowl with Murphy’s Oil Soap and removed the finish and the debris from the surface of the bowl. He was able to remove much of the tar and oil on top of the bowl. The next set of four photos show the way the pipe looked when I unpacked it this afternoon. Thanks Jeff this was an easy clean up.Filt10 Filt11I took a close up photo of the rim top to show the damage to the inner edge of the rim. It is darkened and also has some burned areas on the top and inner edge.Filt12I also took a close up photo of the stem – it was stuck tight in the shank and it was underturned to the left. I tried to heat it with hot water to try to loosen it. It would not move. After taking this photo I put it in the hot water to soak and see if it would loosen the tars and oils in the shank that were holding it tight.Filt13I turned my attention to the bowl and the base while the stem soaked. I cleaned out the airway in the bottom of the bowl with a cotton swab and alcohol to remove the “gunk” that was clogging the airway and reducing the air flow.Filt14I topped the bowl on a topping board with 220 grit sandpaper. I topped it until I had removed the damaged areas on the rim surface.Filt15I rolled a piece of 220 grit sandpaper to sand the bowl and the inner edge to clean up the damaged inner edge and bring it back to round.Filt16I sanded the bowl and rim with a medium and a fine grit sanding block to remove the scratches in the briar. Once it was clean of scratches I stained it with a dark brown stain thinned by half with alcohol. I flamed it and repeated the process.Filt17I wiped the bowl down with cotton pads and alcohol to make the stain more transparent and to make the grain show through.filt18I took the stem and base out of the hot water and wiggled it until the stem turned. I removed the stem so that I could clean the inside of the shank and base.Filt19I used a dental spatula inside the tube of the shank to scrape away some of the thick build up on the walls of the shank. I then scrubbed it down with alcohol, cotton swabs and pipe cleaners until they finally came out clean. I also scrubbed down the inside of the base with them to remove the grime in the base.Filt20I used the micromesh sanding pads to polish the Bakelite base and the shank. I sanded it with 1500-12000 grit pads and then wiped it down with some Obsidian Oil.Filt21I scrubbed out the canister one more time and found that it was very clean. I dropped it in place in the base.Filt22With the canister in place I screwed the bowl onto the base and took some photos.Filt23 Filt24 Filt25It was ready to buff with Blue Diamond so I took it to the wheel and buffed the bowl and the base. I gave bowl several coats of carnauba wax and then buffed it with a clean buffing pad to raise the shine. Once I finish the stem I will give it several more coats of wax.Filt26 Filt27 Filt28I cleaned out the airway in the stem with alcohol, cotton swabs and pipe cleaners. After heating it with the hot water to loosen the stem a lot of grime came loose in the shank and ran down the stem.Filt29The stem had some tooth chatter along with the oxidation that I brought out with the hot water bath. I sanded it with 220 grit sandpaper to remove both the chatter and the oxidation. I wiped it down with Obsidian Oil.Filt30I wet sanded the stem with 1500-2400 grit micromesh sanding pads and rubbed it down with Obsidian Oil. I dry sanded it with 3200-4000 and gave it another coat of oil. I finished sanding it with 6000-12000 grit pads and gave it another coat of oil. I buffed it on the buffer with Blue Diamond polish and gave it a final coat of Obsidian Oil and set it aside to dry.Filt31 Filt32 Filt33I put the pipe back together and gave it a final buff with Blue Diamond and then gave it multiple coats of carnauba wax. I buffed it with a clean buffing pad and then by hand with a microfibre cloth to deepen the shine. The finished pipe is shown in the photos below. It is a true oddity but the more I worked on it the more I am intrigued with it. I wonder how the contraption works in real-time. Well, I may have to give it a try one day soon. Thanks for looking.Filt34 Filt35 Filt36 Filt37 Filt38 Filt39 Filt40 Filt41 Filt42
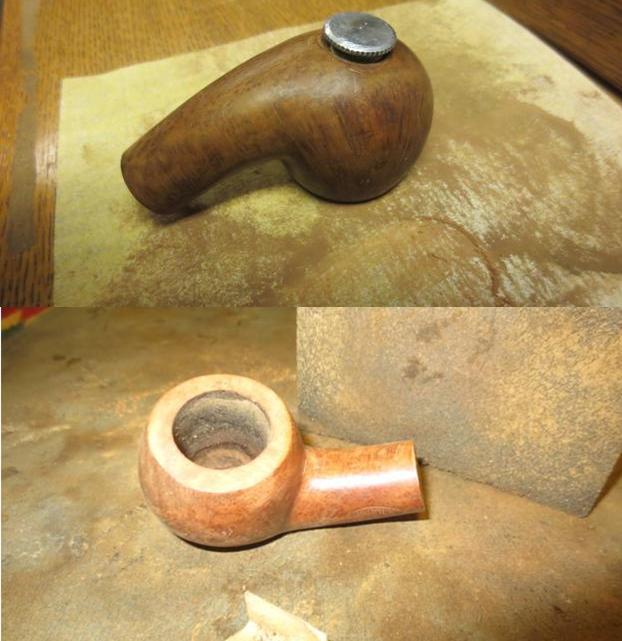
NOS Picadilly Brand Genuine French Rustique Briar


Blog by Steve Laug

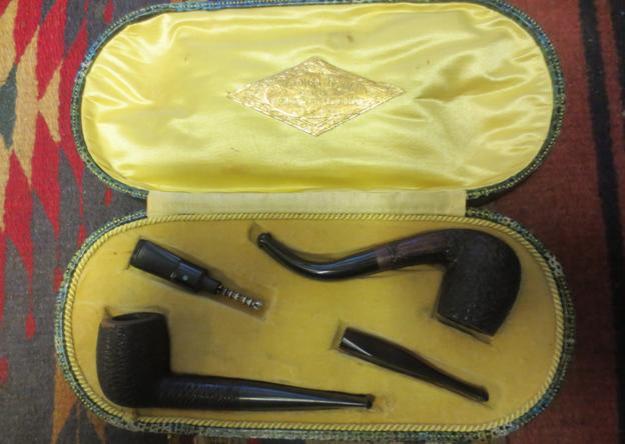
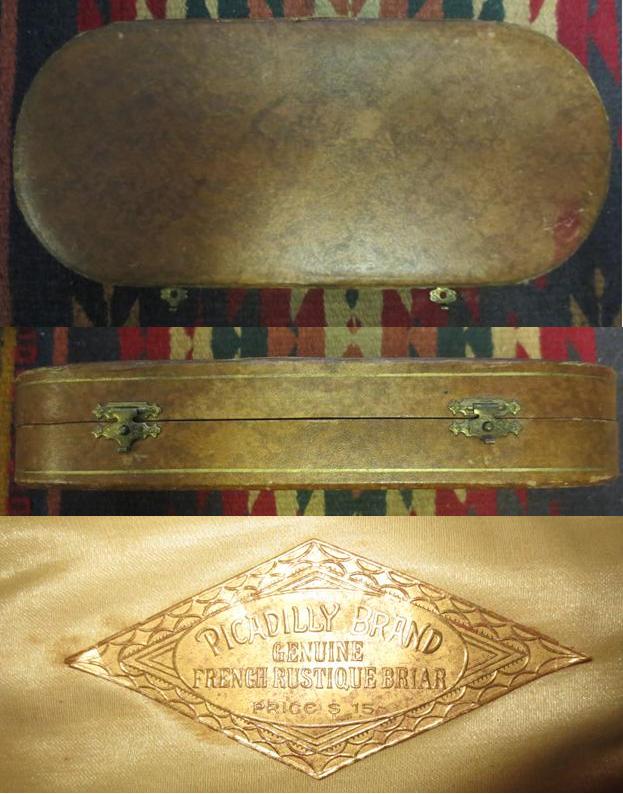
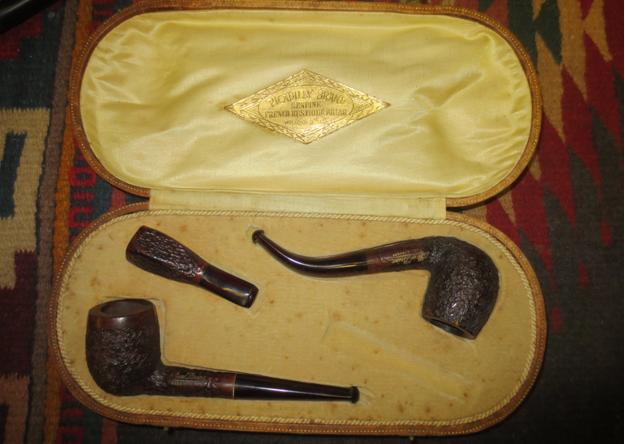
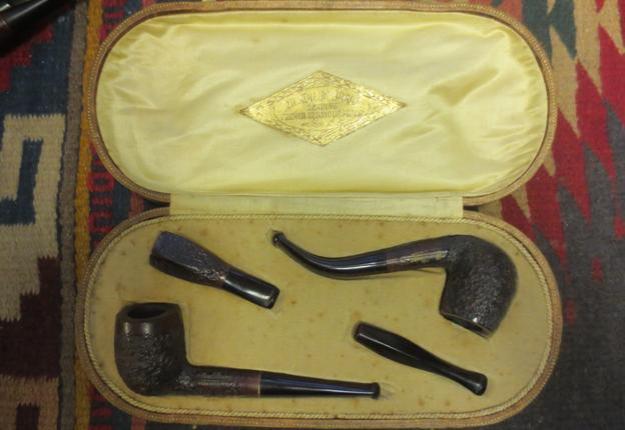
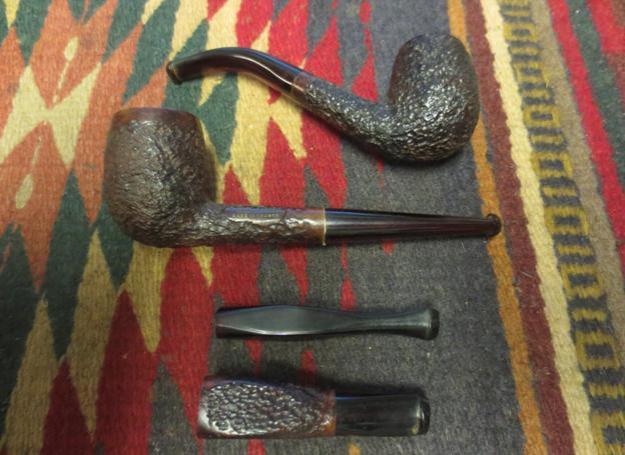
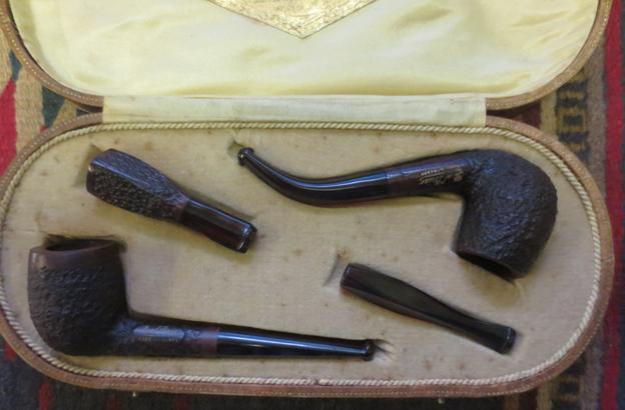
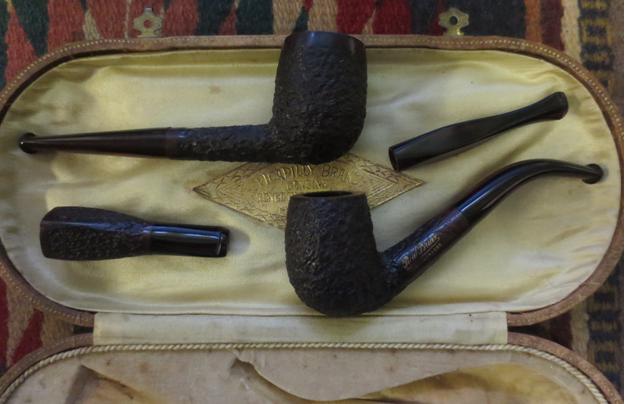
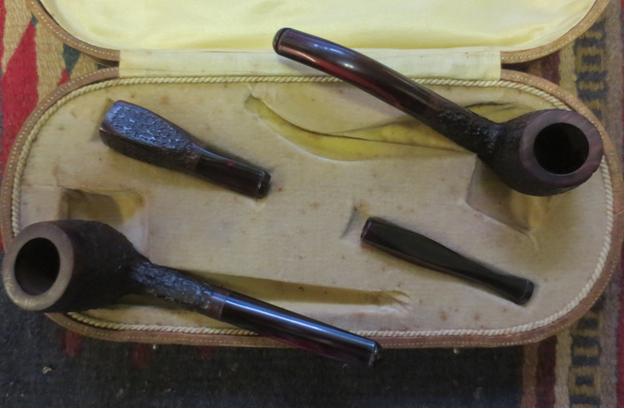
My brother bid on a boxed set of pipes that was in a box covered with a green alligator pattern material. Inside the box was a yellow linen lining with a diamond logo on the inside of the lid that read Picadilly Brand Genuine French Rustique Briar Price $15.Pic1When he received it in the mail and opened it the set of pipes inside was not quite what he had expected. There was Redmanol or red Bakelite cigarette holder, a bent billiard with a Remanol or Bakelite stem with an orific button. The shank was stamped Real Briar over Made in France. The stamping was set with gold. The second pipe in the box was a billiard with a vulcanite stem that was notably newer in age than the bent billiard. It was stamped on the underside of the shank with 7118 Berkley Club over London Made. At the bowl end of the shank the word England was stamped in an arc. The fourth indentation which should have had a cigar holder held a Lovat stem from a screw mount shank. It obviously did not go with this set. Thus looking at the set we could see that the cigar holder and the straight billiard were missing.Pic2Not long after receiving the set in the mail he was scanning eBay and found another boxed set that bore the same gold filigree diamond on the lid. It was in a brown vinyl box with a linen coloured lining. The exterior and the interior of the box were in great shape. This one had both the straight and bent billiard and the cigar holder but was missing the cigarette holder. We talked about it and decided to bid on it. He won it and soon it was on his desk next to the other one.Pic3 Pic4He put the cigarette holder from the first case in the second one. He compared the bent billiards and kept the one that came with the second case. The entire set was new old stock. It had not been smoked and it was in great shape. The only issues were that both Bakelite stems were overturned and the surface of each bowl that faced upward was dusty in the grooves and crevices. The bowls were pristine. The cigar holder also was unsmoked though it had obviously been held between someone’s teeth as there were some tooth marks in the top and bottom side near the button. The cigarette holder from the first set was also unused. Putting the four pieces together in the second box gave a full unsmoked new old stock collection. We were excited.Pic5I took the pipes out of the case and lined them up on the work table. The rustication on both billiard pipes was dusty on the exposed side. The rims on both were clean but had some sticky substance on the surface. The Redmanol/Bakelite stems were both oxidized and dull. The stamping on both pipes was gold. The Bakelite stem on both pipes had been overturned. The straight billiard had a paper washer between the shank and the stem to try to compensate for the overturned stem. The surface of the pipe stems and the cigarette holder were all free of tooth marks or dents. The cigar holder was also dusty on the exposed side and the Redmanol/Bakelite stem had some tooth dents on both sides near the button even though the holder was unsmoked. The stem was also overturned on the cigar holder.Pic6I decided to work on the straight billiard first. I took photos of the pipe before I started working on it. You can see the paper washer between the stem and the shank. You can see the sticky substance on the top of the bowl rim.Pic7 Pic8I took a photo of the gold leaf stamping on the shank. The Made in France stamping is double stamped on the Made In portion. France was single stamped.Pic9The tenon was metal and it had glue or something that had been added to the threads to try to align the stem and shank. I removed the paper washer and threw it away. I picked out the glue in the threads with a dental pick. The mortise was threaded directly into the briar.Pic10I used a 1500 grit micromesh sanding pad to remove the sticky substance on the rim top. It was hard and tacky so the micromesh worked well to remove it. The rim surface was clean and undamaged when I was finished.Pic11With the pipe and tenon cleaned up I used a Bic lighter to heat the metal tenon. Once the glue in the stem softened I screwed the stem back in place and aligned the stem and the shank.Pic12I scrubbed the rustication of the bowl and shank with Murphy’s Oil Soap and a tooth brush. I rinsed it under running water to remove the soap and debris.Pic13I wet sanded the stem with 1500-2400 grit micromesh sanding pads and wiped the stem down with Obsidian Oil. I dry sanded it with 3200-4000 grit pads and rubbed it down with another coat of oil. I finished sanding it with 6000-12000 grit pads, gave it a final coat of Obsidian Oil and set the stem aside to dry.Pic14 Pic15 Pic16I lightly buffed the stem with Blue Diamond and gave it several coats of carnauba wax. I gave the bowl a coat of Conservator’s Wax and hand buff it with a shoe brush. I hand buffed the whole pipe with a microfibre cloth to raise a shine. I took a few photos of the finished pipe before moving on to the second one.Pic17 Pic18I worked on the bent billiard next. It had not been smoked and was clean. The stem was overturned. The gold leaf stamping was in great shape and was single stamped. The stem had an orific button and was made out of Redmanol/Bakelite. It was oxidized but in good shape with no tooth marks or chatter. The bowl was in great shape and still pristine new briar. The rim had some sticky material on the top the same as the other billiard. The rustication was in good shape but it was dusty on the exposed side.Pic19Pic20I sanded the rim with a 1500 grit microfibre sanding pad to remove the hardened sticky substance on the top of the rim. I scrubbed the bowl with a tooth brush and Murphy’s Oil Soap to remove the dust from the rustication. I rinsed it under running water to remove the soap and debris and dried it off.Pic21I used the Bic lighter to heat the metal tenon until the glue in the stem was warm and then screwed the stem onto the shank to realign it. Once it was aligned I let it cool. I wet sanded the stem with 1500-2400 grit micromesh sanding pads and gave it a coat of Obsidian Oil. I dry sanded it with 3200-4000 grit pads and gave it another coat of oil. I finished sanding it with 6000-12000 grit pads, gave it a final coat of oil and set it aside to dry.Pic22 Pic23 Pic24I gave the bowl a coat of Conservator’s Wax and hand buffed it with a shoe brush. I buffed the stem with Blue Diamond and gave it multiple coats of wax. I buffed it with a clean buffing pad and then hand buffed the pipe with a microfibre cloth. I took the following photos to show the finished pipe.Pic25 Pic26I turned next to the cigar holder. It was in decent shape though it too had dust on the exposed side. The stem was overturned and there were some tooth marks in the surface of the Bakelite/Redmanol stem next to the button on the top and bottom sides.Pic27The inside of the holder was pristine and had not been smoked.Pic28I unscrewed the mouthpiece from the holder and cleaned up the threads with a dental pick and a tooth brush.Pic29I cleaned out the inside to remove the dust with cotton swabs and alcohol. I gave the threads a coating of clear fingernail polish. I wanted to build up the thread slightly so that the mouth piece would align correctly.Pic30I sanded out the tooth marks with 220 grit sandpaper. I wet sanded the stem with 1500-2400 grit micromesh sanding pads and gave the stem a coat of Obsidian Oil. I dry sanded it with 3200-4000 grit pads and gave it another coat of oil. I finished sanding with 6000-12000 grit pads, gave it a final coat of oil and set it aside to dry.Pic31 Pic32 Pic33 Pic34I gave the briar part of the holder a coat of Conservator’s Wax and hand buffed it with a shoe brush. I buffed the stem with Blue Diamond and gave it several coats of carnauba wax. I lightly buffed the holder with a clean buffing pad and then again by hand with a microfibre cloth. I set the cigar holder aside until I had finished the rest of the set.

I had one more item to clean up. The cigarette holder from the other box was oxidized and dull. There were no tooth marks or bite marks in the Redmanol/Bakelite. There were a lot of scratches in the surface of the holder that needed to be polished out to remove them.Pic35I wet sanded the holder with 1500-2400 grit micromesh sanding pads and gave the holder a coat of Obsidian Oil. I dry sanded it with 3200-4000 grit pads and gave it another coat of oil. I finished sanding it with 6000-12000 grit sanding pads, gave it a final coat of oil and set the holder aside to dry.Pic36 Pic37 Pic38I buffed the holder with Blue Diamond on the wheel and then gave it multiple coats of carnauba wax. I buffed it with a clean buffing pad and then by hand with a microfibre cloth. I set the finished cigarette holder in the case.

I put the pipes and holders back in the case and took some photos of the finished pipes in place in the case. It is a great looking set of pipes and holders and shows some age on it. I wish I could figure out who made it but so far I have not been able to find any information in my usual spots on the web. Thanks for walking with me through this refurb. Thanks for looking. If any of you have any information on the set let me know in the comment box below.Pic39

TtPic40Pic41

Another ‘Hole in the Wall’ Find – BBB Banker Bent Volcano


Blog by Dal Stanton

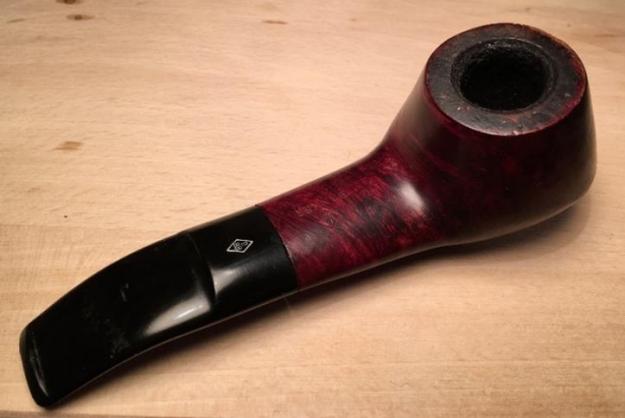
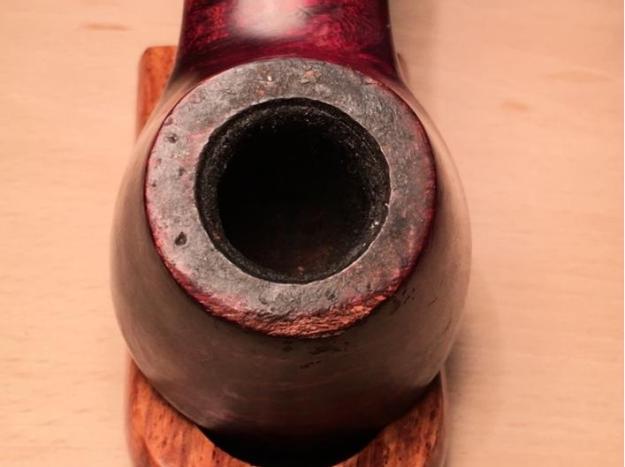
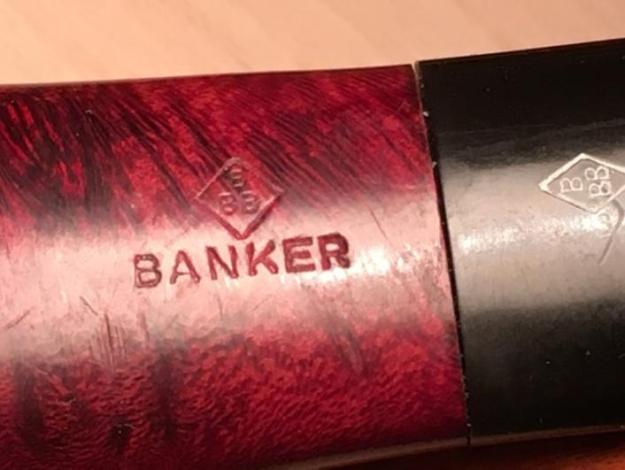
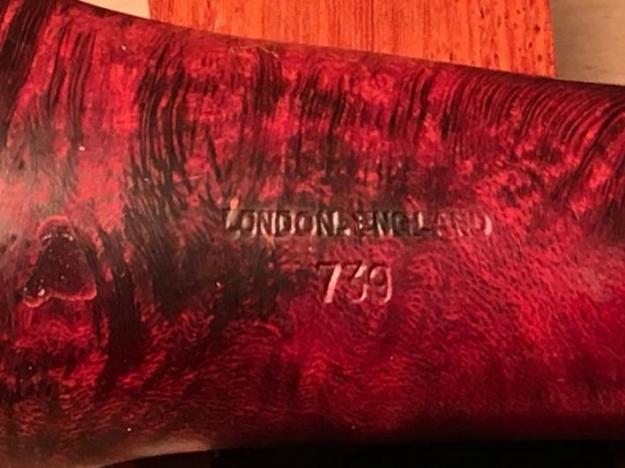
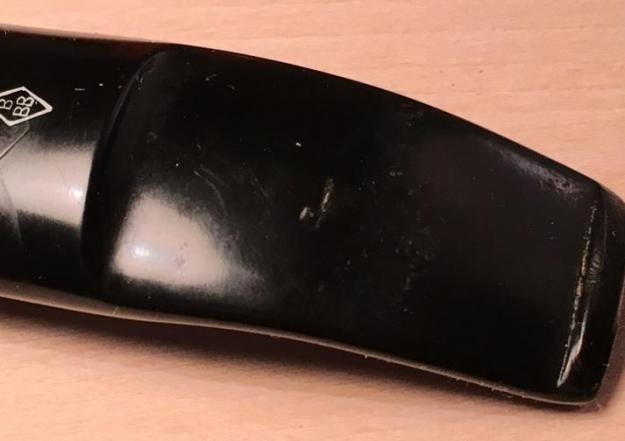
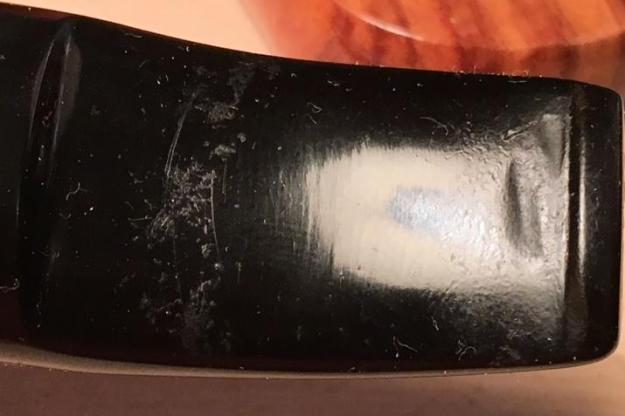
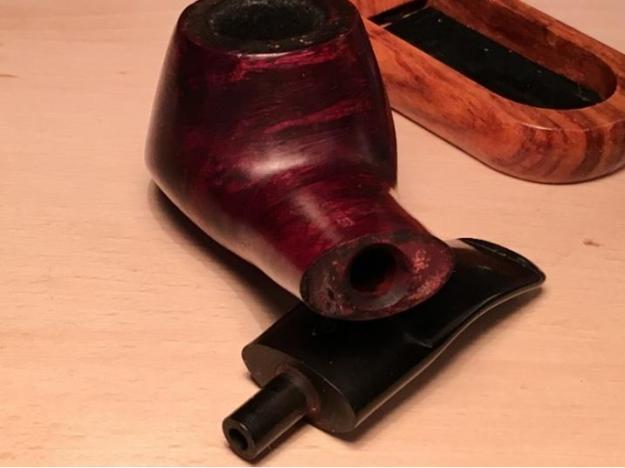
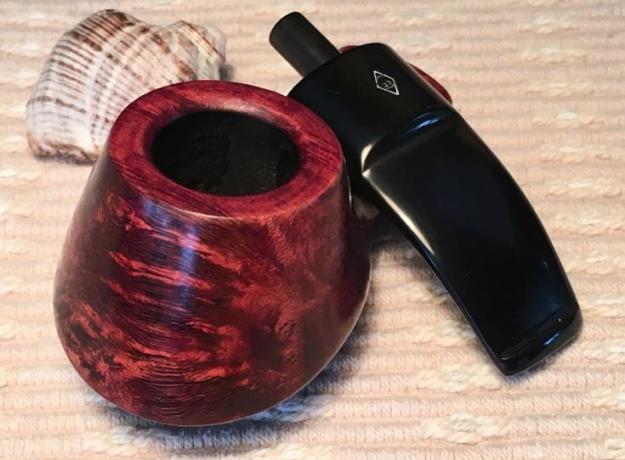
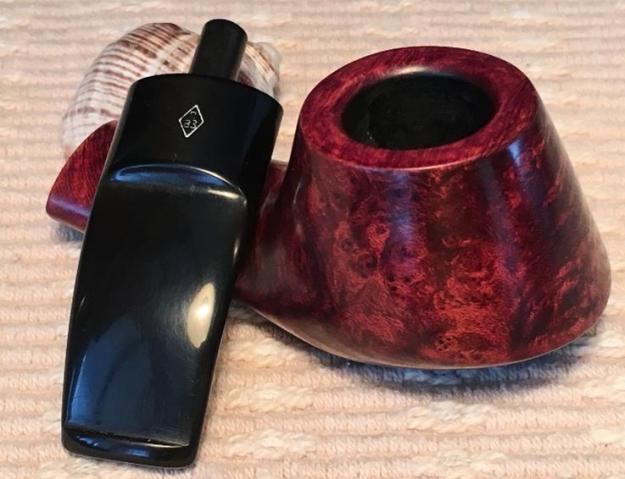
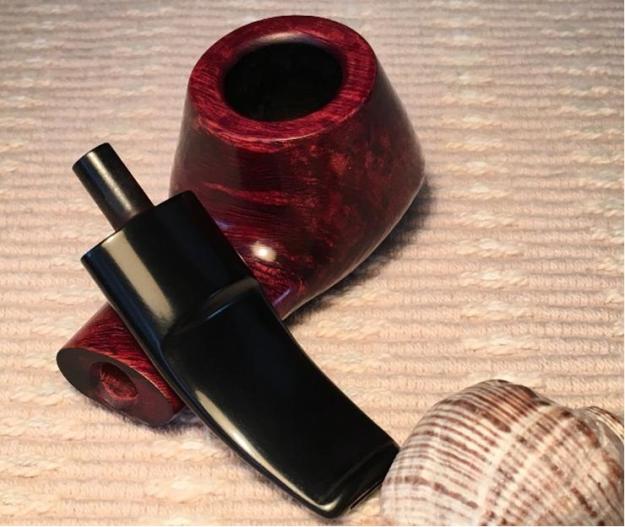
Last April, during one of my earlier visits to what I have affectionately named, ‘The Hole in the Wall’ antique store near the Zhenski Pazar (Women’s Market) in downtown Sofia, Bulgaria, my eyes locked on to a very handsome pipe that called out to me resolutely – “Take me home!”  The pipe was a slightly bent volcano shape, brandishing a broad flattened oval shank and stem that drew my attention.  In my small collection of pipes then, and even today, I have nothing like it.  After taking in the unique shape, the briar grain, obscured by layers of grime and old wax, gave me an internal ‘wow!’ that I carefully kept hidden from the shop owner who would see my excitement as potential greater profit for him – so I played it cool.  I looked at how the grain moves horizontally across the bowl and shank giving the appearance of a tiger pattern looking down on the shank.  Looking straight at the bowl the grain looked like horizontal flames terminating on the sides of the bowl with Birdseye patterns – I was anxious to work on this pipe.  The top of the shank was imprinted with the classic BBB diamond mark over Banker.  Underneath the shank had London, England over 739.  The stem top also had the white diamond BBB mark.  I also spied another pipe in the basket that looked like a good candidate to bundle with the BBB Banker, a French Jeantet Fleuron 70-7 which helped me negotiate 30 Bulgarian Leva for the pair – about 16US.  Not a bad deal at $8 a pipe!  The first picture is the Jeantet followed by the BBB Banker after I arrived home from the ‘Hole in the Wall’ with my newest acquisitions:Bank1 Bank2 bank3 Bank4 Bank5 Bank6 Bank7 Bank8 Bank9I found a lot on the internet about the BBB name.  The small blurb in Pipehill describes the evolution of the BBB moniker:

BBB: ” Best British Briar” is now a brand of the Cadogan Company (Oppenheimer group). American rights to use the brand name were sold to Wally Frank in 1980.

Founder of the brand in 1847: Louis Blumfeld. The oldest pipe brand name in the UK has been registered in 1876 (Blumfeld Best Briar).

Steve also posted a blog on the history of BBB pipes a few years ago using the French article:

https://rebornpipes.com/2012/08/05/history-of-bbb-pipes/

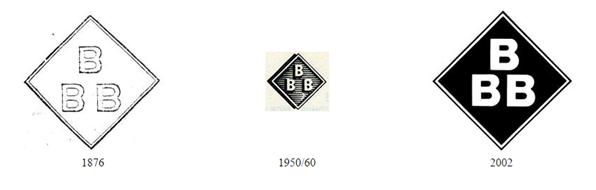
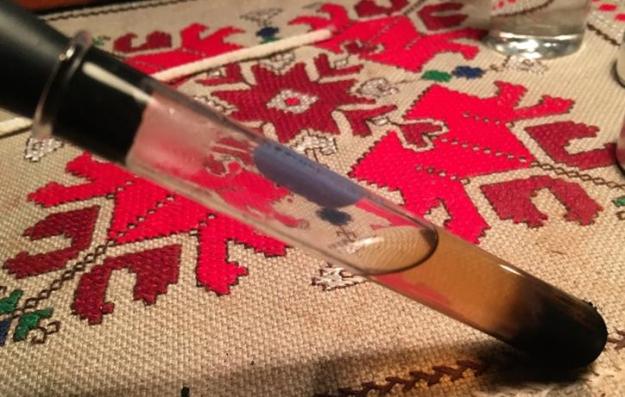
I discovered that there are many BBB collectors and enthusiasts in my research.  Unfortunately, I could find nothing helping me to date or place my BBB Banker except some informed guesses comparing to the BBB stamps (pictured below) depicted in the French article Steve posted above which would probably date the Banker at the earliest in 1989 when the Cadogan Company consolidated manufacturing its various pipe lines at Southend-on-the-Sea, but more likely in the 2000s – not a terribly old pipe (Can anyone help me on that?):Bank10The condition of the Banker is generally good.  There is some cake build up in the chamber but I still want to ream the bowl down to the briar for a fresh start and to be able to make sure there are no problems lurking beneath – which I really don’t expect.  The rim has light grime and lava on it, but a significant wearing down of the front lip so that bare briar is exposed.  The stummel looks to be in good shape – I detect one fill underneath but it looks to be solid and will blend well.  The stummel grain is dulled and obscured by grime and oil build up.  The stem is in good shape – showing almost no oxidation, but has a tooth dent on the lower side of the bit.  I take a fresh close up of the rim to mark the progress.  I begin with reaming the bowl with my Pipnet reaming kit.  As I’ve become accustomed, I try to do the dirtier part of the cleanup on the 10th floor balcony adjoining our bedroom where my work-station is here in Sofia, Bulgaria.  Sometimes I wish I had a basement work area, but we do what we must!  I use only the two smaller blades of the four blades available to ream the cake down to the briar.  I follow the use of the reaming blades with 120 grit sanding paper to clean the cake further and finish with 240 grit on the chamber wall.  The bowl looks good.  True confession – while I was reaming the bowl my thoughts drifted off to a Savinelli reaming knife – on the eBay block, that I’ve had my eye on – one like Steve often employs.  There are still a few days left in the auction and I’m hopeful that I might add it to the arsenal!  I’ll let you know!  In order to get a better idea of the rim’s condition, I clean the external stummel with Murphy Oil Soap and work on the grime covering the rim.  I use cotton pads with undiluted Murphy’s.  I also employ a brass brush to work on the rim.  After the cleaning, I take the stummel to the sink and rinse it with cool tap water.  The pictures show the progress.Bank11 Bank12 Bank13 bank14Ok, for you who have years of restorations under your belts, here are some newbie musings – your patience appreciated!  At this point I realize I need to top the bowl to repair the front lip of the rim – it won’t take much but it is needed.  When one takes the rim down to the bare briar, I’ve learned that one also must have a plan for matching the hue of the old stain if one desires to keep the old stain tone matching the bowl.  I like the color scheme of the BBB Banker and I desire to keep it.  To keep it, I need to match the rim color tone with the rest of the stummel AND I need to address the very minor scratches and wear marks on the stummel surface BUT NOT sand it aggressively to remove the stain.  It is in some ways much easier to take the briar down to the wood with acetone and sanding and then apply new stain and voila!  New surface and color all blended and ready to go.  I know this situation calls for use of polishing compounds and such, which is a more passive approach to dealing with the surface – more opportunity to learn new things!  So, I move forward with topping the bowl with the aim of maintaining the current rich, deep red tones – we’ll see how it goes.  I took the BBB Banker to the topping board – 240 grit paper on a chopping block and rotated it on the paper in a gentle clockwise circle not applying too much pressure – letting the grit do its work.  To make sure I wasn’t leaning into the damaged lip area as I rotated, I eyeballed that the damaged area was untouched during the early rotations which meant the topping was true – I took a picture at this point (second picture).  I took off only enough to clear out the front lip problems.  I think it went well and the bowl looks perfectly round.  As I often like to do, to add a classy touch to the rim I bevel the inside lip.  I make the initial cut of the bevel with 120 grit sanding paper followed by 240 grit.  I’m satisfied with the bevel – not too much but just an accent.  I use micromesh on the rim from 1500-12000 to complete the rim repair preparing it for stain later.Bank15 Bank16 Bank17 Bank18 Bank19Now, the stummel surface.  I have questions rolling through my mind regarding how aggressive I can be to remove small scratches and wear blemishes but maintain the original patina of the briar as it came to me.  I elect to micromesh the stummel surface and leave the small blemishes.  I do not start with the coarsest pad (1500) but at 2400 – gentle approach (though the first picture below shows the 1500 it was not used).  I’m not sure this is the best plan but I can always back up to a more aggressive posture if I’m not satisfied with the results.  After a quick email with Steve, I feel better about the course of action.  I continue on the stummel with micromesh pads 3200-4000 and 6000-12000.  I am loving the briar grain popping out through the micromesh process – one of God’s small creations each piece of briar.  The pictures show the progress:Bank20 Bank21 Bank22As I put the stummel aside to work on the stem, I realized that I was so involved in working on the externals that I forgot that I hadn’t cleaned the internal of the stummel nor stem.  Before working on finishing the stem I decide to use the retort to clean the internals.  Last time I used the retort, an alcohol saturated cotton ball was launched from the bowl during the process.  I was gun-shy of the retort to begin with when I first acquired it – the launch didn’t help.  Notwithstanding, I unwrap the retort, get out the vodka, and proceed to let the retort do its work.  The pipe was surprisingly clean.  After two retort cycles, I finished off with cleaning the internals of stummel and stem with Qtips and pipe cleaners dipped in alcohol.  I think it’s better to clean internals earlier in the process….Bank23 Bank24 Bank25Now to the stem externals.  Earlier, I applied black super glue to two significant tooth dents on the underside of the bit (visible in picture above).  I use 240 grit sanding paper to remove the excess super glue removing traces of the dents as  well as file marks after using a needle file to fine tune the shape of the button. There was very little oxidation on the stem or teeth chatter so I proceed to wet sand with micromesh 1500-2400 and apply Obsidian Oil to the stem.  I follow by dry sanding using 3200-4000 micromesh pads and then the same with 6000-12000 and apply Obsidian Oil and set the stem aside to dry.  I’m pleased with the vulcanite ‘pop’ – that wet reflective look is great.Bank26 Bank27 Bank28 Bank29Well, I mentioned earlier that I was hopeful to add a Savinelli pipe knife to my tool box.  Steve speaks highly of this tool and has increasingly put it to good use in his restoration work.  He also posted a blog describing it when it arrived on his work table in Vancouver.  When I saw one on the block in the eBay’s estate pipes in tobacciana listings a few days ago, I decided to watch the auction and see if I could snag it – it seemed to be calling out to me: “I want to live in Bulgaria!”  As you would guess, others were watching too.  I’m thankful that my bid was sufficient and my new Savinelli pipe knife will be delivered to my daughter and son-in-law who live in Denver.  They will carry it with them to Bulgaria (along with some other supplies I’ve ordered including 32 oz. of Lane BCA Cavendish tobacco which I discovered with great enjoyment on my last trip to the US) when they visit in September!  My son-in-law had no problem agreeing to find space in the suitcases when I bribed him with sharing bowls together of the Lane BCA!  So, I’ll look forward to their arrival for the additional reasons that they will be packing new supplies and my new pipe knife!Bank30The BBB Banker slightly bent volcano is now in the home stretch.  After topping and sanding the rim with micromesh, I left the rim the bare wood until I finished the sanding of the stummel. I did this so that the stain I would eventually apply to the rim would be more closely matched.  Using an Italian brand stick, I applied a dark Mahogany stain to the rim and before it dried, lightly wiped it with a dry cotton pad to remove uneven stain application – the first two pictures below show before and after application of the stick.  I’m very satisfied with the match up of stummel and rim and am anxious to finish the stummel.  Living on the 10th floor of a former Communist block apartment building and with my work station in my bedroom (shared with my gracious and understanding wife!) space is at a premium.  My Dremel high speed tool is my workhorse when it comes to the polishing wheel.  Starting with a felt wheel, I first purge the engaged wheel by using the flat edge of the Dremel’s metal tightening wrench against it.  This softens the wheel and rids it of residue Tripoli caking from previous jobs.  With the newly purged wheel, I begin the final polish of the BBB Banker applying Tripoli to the surface addressing the minor pits and scratches on the bowl surface that I did not sand out aggressively to guard the beautiful patina of this piece of briar.  Bank31 Bank32 Bank33Finished with the Tripoli and Blue Diamond, I change to a cotton cloth wheel for the Dremel and apply several coats of carnauba wax.  I use the slowest setting for the Dremel and keep a continuous circular rotation over the briar surface – oh my, does the grain pop!  I cannot say exactly when this pipe was made, but if it’s been since 1989, someone employed by Cadogan Company’s Southend-on-the-Sea pipe making plant did an amazing job with the choice of this piece of briar and the volcano shape it became.  The grain is beautifully showcased in horizontal movements laterally across the stummel so that one can see the horizontal flame grain facing the stummel straight on and then move to the sides of the stummel and see the grain emerge in Birdseye perspective and swirls.  In the beginning I described the top-down view of the broad, flattened oval shank as reminiscent of tiger fir to me – now as I look at it zebra also comes to mind.  Another example of the beautifully showcased briar grain in the Volcano shape is the broad landscape of its underside – from across the broad shank to the front lip of the volcano base, runs a robust dissecting flow of grain that is majestic from my vantage point.  Yes, I confess, I’m a briar grain junkie.  Its beauty reminds me of its Maker.  With my last application of carnauba wax on stem and stummel, I change to a clean cotton cloth wheel and buff the entire stummel and stem.  Then I give the BBB Banker bent volcano a brisk buffing with microfiber cloth to bring out the richness of this briar even more.  I’ve enjoyed this restoration and look forward to loading the BBB Banker with its first bowl of tobacco in my hands.  Thanks for joining me!Bank34 Bank35 Bank36 Bank37 Bank38 Bank39 Bank40 Bank41 Bank42


Restemming and Restoring a Made in Denmark Apple


Blog by Steve Laug

I got an email from a fellow in Dawson Creek, British Columbia asking if I would be willing to work on a pipe that he had that was one of his favourites. It was an apple that he really liked and he liked the patina on it as well. This is what he wrote to me: “Sir, I have a pipe in need of your skills. I was visiting City Cigar on a trip to Vancouver and William recommended you. I’ve inherited a pipe from my dad that needs to be refurbished. I wish to add a new curved stem. The old stem’s very loose. I will mail, or ship the pipe to you, as I live in Dawson Creek, BC. Once we discuss price & details. After leaving City Cigar, I was left with the impression that you’re “the guy” for the job.” 

I asked him to send some photos of the pipe and give me a look at the pipe. The next two photos are the ones that he sent to me. The saddle stem looked like a replacement to me. I had him send the pipe to me for a closer look.apple1When it arrived I could see that my assumption about a replacement stem was correct. Whoever had added the new stem had sanded the shank and removed half of the stamping on the shank. I could read that it said Made in Denmark and that there were no other stampings. The shank was significantly lighter in colour than the bowl. The rim was dirty and had a chip out of it and its top was damaged. There was some concrete rash on the back side below the chip where the bowl had been knocked on concrete.apple2 apple3I took a close up photo of the bowl top to show the extent of the damage and the uneven cake on the bowl sides. I also took photos of the stem and shank junction to show how the shank had been sanded to meet the stem diameter.apple4

I also took a photo of the back side of the bowl showing the horizontal line across the bowl. That line was a large fill that bulged and stuck out the surface of the bowl.apple5The bowl was covered with a thick grime and sticky material. I wiped it down with a cotton pad and alcohol to remove the grime and get back to the finish. The grain really began to shine through once I had removed the gummy buildup. The left and right sides of the bowl showed some nice birdseye. The front and back showed cross grain that ran along the top and bottom of the shank. The birdseye ran along both sides of the shank.apple6I topped the bowl on a piece of 220 grit sandpaper to remove the damaged portions of the rim.apple7I sanded the backside of the bowl to smooth out the bulging fill that ran across the bowl.apple8I sanded down the outer edge of the rim to remove the rim damage and also the burn and darkening on the edges. I scrubbed the bowl down with acetone and cotton pads to remove the finish so that once it was clean I could blend in the lighter portions with the rest of the bowl.apple9 apple10The owner wanted a new stem for the pipe so I went through my can of stems until I found one that would fit. He wanted a taper stem and the one I found would suit the bill. He also wanted it to have a slight bend in the end. This sharply tapered stem would make that an easy fit and fix. The stem was slightly larger in diameter than the shank so I would need to reduce it to match.apple11I took off the excess vulcanite with a Dremel and sanding drum. I worked on it until it match the shank diameter.apple12 apple13I took it back to the work table to hand sand it. I used 180 grit sandpaper and took back the excess stem material.apple14I sanded the stem further with 220 grit sandpaper until the transition between the stem and shank was smooth to the touch. I heated water in the microwave until it was boiling and put the stem in the water to soften it enough to put the bend in it. I bent it just enough to give it a jaunty look.apple15 apple16I used the medium and the dark stain pen to touch up the shank. The combination of colours matches the rest of the bowl colour.apple17 apple18I wet sanded the stem with 1500-2400 grit micromesh sanding pads to begin polishing it and to begin to remove the scratches. I rubbed it down with Obsidian Oil. I dry sanded it with 3200-4000 grit pads and gave it another coat of oil. I finished sanding it with 6000-12000 grit pads and gave it a final coat of Obsidian Oil. I set it aside to dry.apple19 apple20 apple21I buffed the bowl and stem with Blue Diamond on the buffing wheel and polished the briar and the stem. The polishing took out the last of the scratches in the vulcanite stem. The fill on the back of the bowl blends in perfectly now and it is smooth to the touch. The transition from the stem to the shank is also smooth. The slight bend in the stem works well with the pipe. It is finished and ready to go back to Dawson Creek. Hopefully the owner will enjoy the new stem and the virtually “new pipe”. It still carries with it the memories of his dad giving it to him. It still as some of the marks of its story but the look and the feel of the pipe are better than when we began the journey. Thanks for looking.apple22 apple23 apple24 apple25 apple26 apple27 apple28 apple29

Doing Shaping Work on a Comoy’s Grand Slam Pipe 66


Blog by Steve Laug

Recently I traded the Simpson Sandblast Billiard that I restored with a reader of the blog for a Comoy’s Grand Slam 66. It is stamped on the left side of the shank Comoy’s over Grand Slam over Pipe. On the right side it has the classic Comoy’s Circle Made in London over England Com Stamp and further along with the shape number 66. The finish was in decent shape though there was some sticky dirt buildup on the sides. The right side of the bowl had a small divot on the bottom front of the bowl. On the left side of the bowl there was a ring or a small trough that was indented in the bowl from the left rear of the bowl to left front of the bowl. It looked like a dent in the briar. It is very clearly shown in the second and the third photos below. The stem had some oxidation and three deep tooth gouges on the top of the stem and one on the button top. There were also some deep tooth marks on the underside of the stem and the button. The C stamp on the stem is a newer stamp in the vulcanite that is painted with a white paint.Comoy1 Comoy2 Comoy3I measured and studied the side of the bowl before I decided what to do with it. I was not sure if the trough was caused by and issue inside of the bowl so my brother and I both cleaned and checked that out and could see nothing. I turned to look at the outside of the bowl and noticed that the bowl actually bulged above and below the line. That line itself actually was the same height as the rest of the bowl apart from the bulge. The bulge was thus briar that needed to be removed rather than the line a dent of missing briar. I breathed a sigh of relief and began to work on restoring it to normalcy.

I sanded the side of the bowl with 220 grit sandpaper to try to minimize the groove in the bowl side. The photos below show the progress of the repair. The first photo shows the first sanding on the bowl side. With the initial sanding you can see length of the groove on the side of the bowl. I sanded the bowl side on both sides of the groove until the groove disappeared. I was actually surprised that I was able to remove the damage to the bowl without making the bowl any thinner in the process. It was almost as if when the bowl was turned in the factory the cutting head that turned the bowl slipped and left a hump above and below the groove. Thus the groove itself was actually level with the rest of the bowl other than the humps.Comoy4 Comoy5 Comoy6 Comoy7In the next photo you can see the slight divot at the 11 o’clock position at the top of the photo. It was a deep cut in the briar that must have happened when the pipe was dropped somewhere along process. I sanded it smooth and filled in the divot with clear super glue and briar dust. Once the repair cured I sanded it smooth with 220 grit sandpaper to smooth out and blend in the repair. I sanded it with a medium and a fine grit sanding block to remove the scratches in the briar.Comoy7a Comoy8The rim on the bowl had a light buildup of tars so I lightly topped it on the topping board to remove the buildup. I topped it against 220 grit sandpaper then against a medium and a fine grit sanding block.Comoy9 Comoy10 Comoy11 Comoy12I stained the bowl with a dark brown aniline stain thinned with alcohol to match the colour of the existing finish. I applied it to the surface and flamed the stain. I repeated the process until I had a good even coverage on the bowl sides.Comoy13 Comoy14I wiped the bowl and shank down with alcohol on cotton pads to even out the colour of the stain and make it more transparent. Once that was done, the finish of the bowl looked really good to my eye.Comoy15 Comoy16 Comoy17 Comoy18The stem was a newer style Comoy’s as noted above because of the style of the logo. It was stamped into the vulcanite and then painted. There were some significant bite marks on the stem that needed attention. The lighter tooth marks I was able to sand out with 220 grit sandpaper and remove them. There were others that were quite deep. I cleaned the surface of the stem and used a thick black super glue to fill in the tooth marks. Comoy19I sanded the repaired spots with 220 grit sandpaper and cleaned up the sharp edge of the button with a needle file. I was pleased with the overall look of the stem once the repairs had been sanded smooth.Comoy20I wet sanded the surface of the stem with 1500-2400 grit micromesh sanding pads to begin the process of polishing the stem. I rubbed it down with Obsidian Oil.Comoy21Before proceeding further with the micromesh I decided to touch up the “C” stamp. I used a fine bristle brush and white acrylic paint to fill in the letter. I sanded off the excess with the 1500 grit micromesh pad and went over that section with 1800-2400 grit to match the rest of the stem.Comoy22I dry sanded the stem with 3200-4000 grit pads and gave it another coat of Obsidian Oil. I finished sanding it with 6000-12000 grit pads, gave it a final coat of oil and set it aside to dry.Comoy23 Comoy24I polished the pipe and the stem on the buffing wheel with Blue Diamond polishing compound and gave the entire pipe several coats of carnauba wax. I buffed it with a clean buffing pad and then by hand with a microfibre cloth. The finished pipe is shown in the photos below. The adjustment to the left side of the bowl worked well to smooth out the bulges and crease and the pipe looks as it should have when it left Cadogan. Thanks for looking.Comoy25 Comoy26 Comoy27 Comoy28 Comoy29 Comoy30 Comoy31

A Pipe with a Story – an R.V.W. Handmade 5 pipe


Blog by Steve Laug

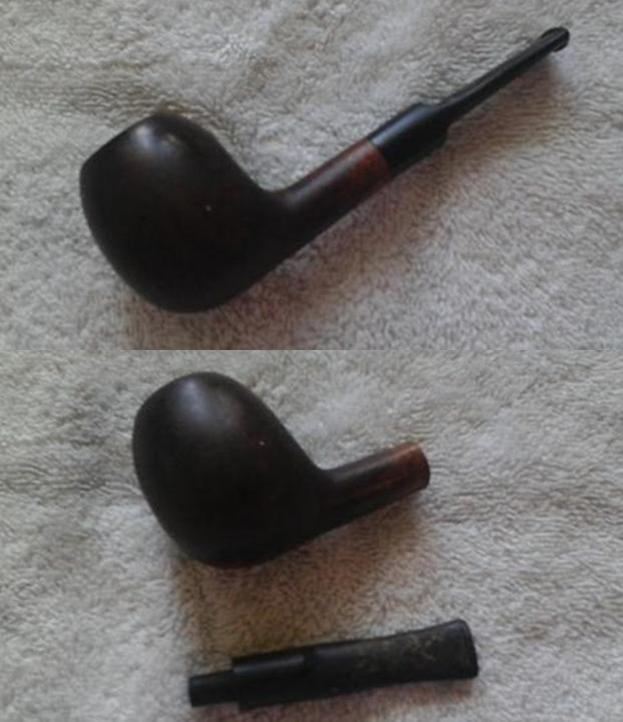
My brother sent me pictures of a pipe he found on eBay that grabbed his attention. It was not so much the pipe but the story of the pipe that caught his eye. He sent me the link and I had a look but was not sold on picking up the pipe. But he wanted it so he threw in a bid and won the pipe. He wrote to the seller and asked about it. He received a reply that the pipe had been found in Northern Michigan, US in a mud bank on the Rifle River – farm country in the middle of nowhere. They had no more information. The pipe was dark and looked like the mud bank it had been found in to my eye. The stem looked too long and the flow of the pipe did not work for me.R1The stamping on the pipe was pretty clear which surprised me. On the underside of the shank it read R.V.W over Handmade and then a 5 underneath that. That piqued my interest a bit so I decided to wait and reserve judgment until I saw the pipe.R2 R3 R4While I waited I did a bit of research and found out the pipe was made by Randy Wiley. I Googled to find his website and was directed to his Faceboook page. The link follows: https://www.facebook.com/wileypipes?__mref=message_bubble. I sent him a message on Facebook and related the story that my brother told me. I also included the above photos of the pipe supplied by the eBay seller. The next day I received a message back from Randy. Here is what he wrote: “Hi Steve, Wow, Glad there wasn’t a body with it. I’ll bet it was dropped while fishing. I’ve heard many stories. One day someone will find a pipe while scuba diving. I know the owner. This pipe is a second, RVW. It retails today for around $105.00”

When I first read his response I missed the part about him knowing the owner. This morning I read his response again as I was working on this blog and wrote Randy back regarding that line. I wonder if the original owner would want the pipe returned. We shall see.

When I was in Idaho I taught my brother to do the initial clean up on the pipes. It has been a real help for me. With the box of pipes to be refurbished filling up on this end it is really nice to have him work on them ahead of time. When I get them they have been reamed and the internals all cleaned so it makes my work much quicker. Because this one attracted his attention he really liked the cleanup of it. He reamed and cleaned the bowl and shank as well as the airway in the stem with pipe cleaners, cotton swabs and alcohol. He scrubbed the exterior of the bowl with a tooth brush and Murphy’s Oil Soap to remove the debris left behind by the mud bank. He took the following photos to show the pipe after his cleanup work. The straight grain on the left side, back and front of the bowl and the birdseye on the right side are beginning to show through.R5 R6 R7 R8 R9When I received the pipe I brought it to the worktable and took some photos of it before I began to work on it. While the grain was showing through it was still too dark to my liking. There were also many tiny nicks and pits in the surface from time spent in the mud by the river. These would need to be sanded out. The rusticated portions on the bowl sides and edges were also in need of deeper cleaning. The heel of the pipe had been knocked around and had many nicks and pits. The combination of smooth and plateau on the rim also needed deeper cleaning. The stem still seemed too long to me and if I end up either keeping the pipe or selling it I think I will make a second stem that is more proportional to the pipe in my opinion. The stem was oxidized but did not have any tooth marks or chatter.R10 R11I ran the Savinelli Pipe Knife around the inside of the bowl out of habit with little effect because my brother had done a great job reaming this one.R12The bowl had some white debris in the bottom which I think was water marks from its time in the mud. I used alcohol pipe cleaners and cotton swabs to remove that debris. I scrubbed the exterior of the bowl and shank to remove more of the dark stain with acetone on cotton pads and was able to remove some more dark stain. There was more work to be done in this area but I would keep trying.R13 R14I scrubbed the exterior with a bleach mixture to further remove the stain. The next photos show the effect of the bleach on the stain. The grain is beginning to show.R15 R16I went through my stem can and found a nice amber Lucite stem that was the right length to my eye and would be a great contrast with the bowl. I did not have to do any fitting or tenon work as the stem fit in the mortise perfectly from the start. The stem was bent too much and would need to be straightened and bent to match the flow of the bowl. You can see in the photo below that the new stem is about an inch shorter than the one that came with it when I got it. I put the stem in place and took some photos to get an idea of how the pipe looked with the stem. You can also see the effect of the bleach on lightening the stain on the bowl in these photos.R17 R18 R19I used a Sharpie pen to darken the plateau areas on the end of the shank and the top of the bowl. I also used it on the rustications down the bowl sides and front.R20 R21I used Watco’s Danish Oil with a Cherry Stain to stain the bowl. It is an oil based product and as it dries on the surface it darkens to a black cherry. I applied the stain with a cotton pad and let it absorb into the warm briar.R22When it had dried I buffed it off. The stain had darkened and with the natural darkening that had happened as the pipe lay in the mud the overall appearance almost a rich charcoal grey with red undertones.R23 R24I forgot to take photos of the process of rebending the stem but what I did was boil water in the microwave in a cup and then heated the stem until it was flexible in the hot water. I inserted the tenon in the mortise and then bent the stem to match the flow of the bowl. I held the stem under cool water to set the new bend. There was some tobacco stains in the stem from a previous pipe it had graced. I cleaned it out with pipe cleaners and cream cleanser/soft scrub cleanser until all of the stains were gone.R25There was a groove in the stem on the top side about a ¼ inch from the saddle that I sanded out with 220 grit sandpaper. I worked over the stem with micromesh sanding pads – wet sanding the stem with 1500-2400 grit pads and dry sanding with 3200-12000 grit pads.R26 R27 R28I sanded the bowl with micromesh sanding pads to try to lighten the dark cherry colour of the stain. I finished sanding it with 6000-12000 grit pads to polish the briar.R29While I was finishing polishing the pipe, I received an message from Randy regarding the previous owner of the pipe. He said that he had confused it with one that had been lost while scuba diving. So he could not remember who had purchased this one. I had also asked whether the stem was original and he was not certain.I actually found that to be good news as I did not like the stem that it came with.
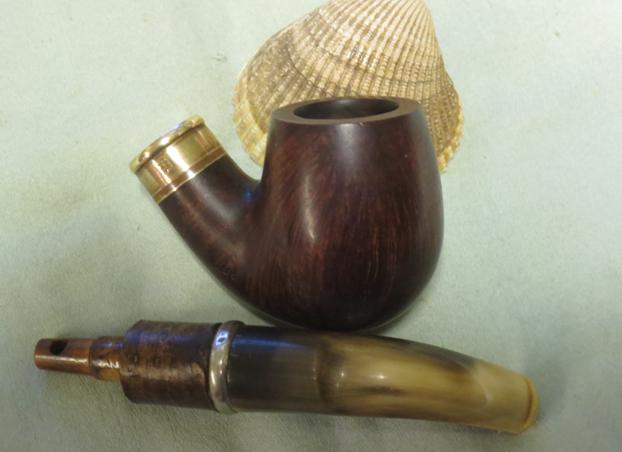
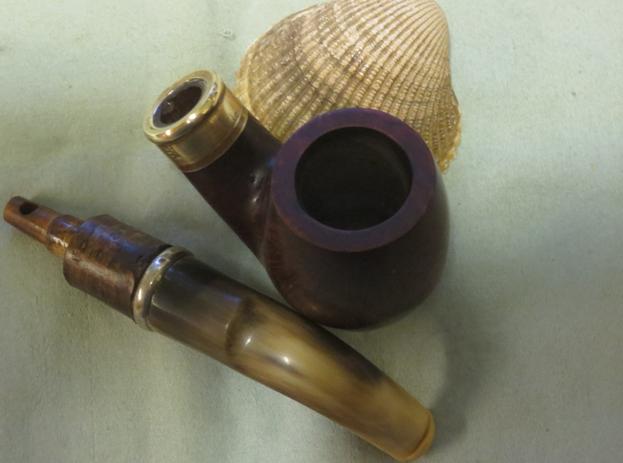
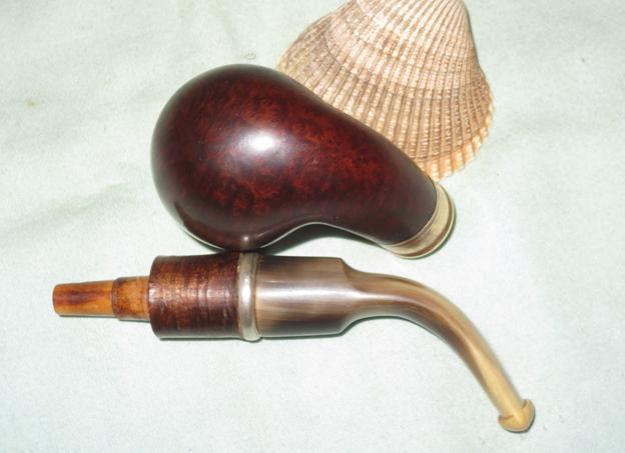
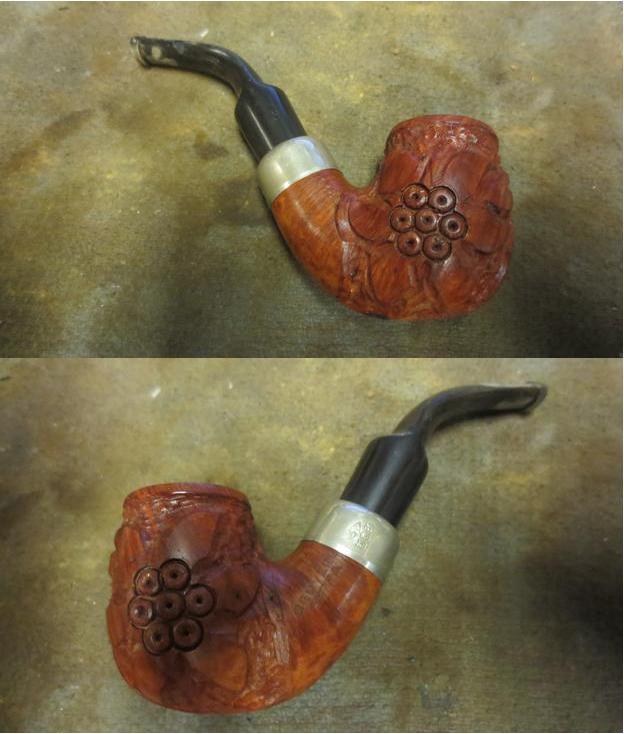
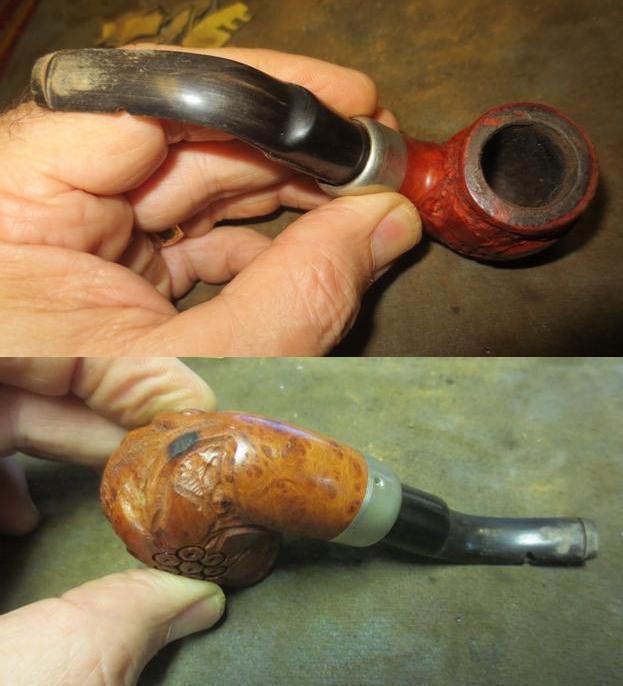
I took the pipe to the buffer and buffed the pipe with Blue Diamond and then gave it several coats of carnauba wax. The briar has many small pits in the surface that I am convinced came from its time spent in the mud alongside the river. Part of me wanted to sand them out and remove them but another part, the part that won decided to leave them to bear witness to the shadow life this pipe had before it was found. I took the next photos with the blanket background as it seems to allow the grain to stand out a bit.R30 R31 R32 R33The next photos I took against a light blue backdrop to show the contrast between the amber stem and the dark cherry stain. Thanks for looking.R34 R35 R36 R37 R38 R39

Marxman Jumbo Lovat


Blog by Aaron Henson

Several years ago when I was first getting into our hobby, I stopped into a local antique store looking for practice pipes.  This particular store did not have much and what few they did were dirty, heavily caked and $25 each. The dirt and the heavy cake didn’t bother me but dropping 25 clams on an old briar pipe for practice was not going to happen.

A few weeks ago, one of my jobs happened to take me past this same store. It had been two years since I had been in so I thought it might be time for another look.  After my last visit I wasn’t expecting much.  When I asked the gentleman behind the counter about pipes he directed me to the same old display case at the back of the store.  The same pipes were on display but this time the price tag had been changed.  Clearly the pipes had been in inventory too long and he wanted to move them because now they were two for $10.   Not one to pass on a deal this good, I selected four large bowl pipes including the Marxman below (shown second from the top) as well as a large caliber Emperor and an unmarked Custombilt look-alike. L1The Marxman is a truly large pipe (and not the largest of the three) with a bowl diameter of 1 1/2”, chamber diameter of 1” and a depth of 1 5/8”.  The shank is a whopping 7/8” in diameter and the bit is that same width. The following page from a 1946 ad for Marxman calls the large size a “Jumbo” but I do not have any way of telling what letter size it might be.L2For background, Marxman only made pipes from 1934 until 1953 before being bought out by Mastercraft.  But Bob Marx’s short run made an impact on Hollywood and on US pipe makers in general. Pipedia has a short article on Marxman.L3Taking the pipe to the work bench I started by cataloging the things that needed to be done.  The bowl had a thick cake built up. So much so that I had to start with the smallest head on my Castleford reamer (and the largest head was too small to be effective to finish reaming the bowl).  The rim had a significant buildup of tars and a couple burn marks.  The outside of the stummel was grimy and had some dents but nothing too devastating.  On the bottom of the bowl there were two dark burn marks.  They were located on the bottom side of the shank which made me think they were not burn-outs but with the bowl cake so thick I could not be sure.  When I removed the stem, I could see that the end of the tenon, the stinger and the inside of the shank were all coated with a heavy tar.  This was going to be an arduous cleaning job. L4 L5For as much build up as there was in the stummel there was little in the way of tooth chatter or marks on the stem.  One small tooth dent on the top side of the stem was all. The button was quite small but the slot was nicely formed. Aside from some oxidation, all in all the stem was in great shape.
I set the stem to soak in an Oxiclean bath to loosen the oxidation and the tar build up in the air way and turned my attention to the stummel. First I reamed the cake out of the bowl. I could not believe just how much there was!  I took it back to clean briar to make sure there was no burn through. After the largest reaming head, I still needed to finished off the chamber with 80 grit sand paper wrapped around a dowel. There was a slight loss of briar about half way down the bowl but no burn through. If I had to guess, the previous owner may have been in the habit of half loading the pipe early in its life.

I shaped a soft wood stir stick into a narrow spatula shape and used it to clean out the caked gunk in the shank. I also need a short piece of wire coat hanger to open the air way. I finished scrubbing the internals of the shank with bristled pipe cleaners dipped in alcohol and cotton swabs until they came out clean.

Now that the insides were clean I turned to the outside of the pipe.  The rim was heavily coated with crusted tar/lava.  I had hoped to clean up the rim without needing to top the bowl but that was not the case. There were some burn marks in the rim under the tar build up that were best removed at the topping board. When topping a bowl, I use 100 grit paper on a smooth flat surface and work the bowl in a circular motion. I have recently started rotating the bowl a quarter turn every 10 passes. This helps me keep the topped bowl level by ensuring I don’t put too much pressure on one side of the bowl all the time.L6I started cleaning the outside of the pipe by wiping down the briar with acetone. This removed the wax and grime build up. I had hoped that the burn marks on the bottom of the shank were superficial and would be removed with a light sanding but I was mistaken.  I am not sure what happens to the pipe but it appeared to have been exposed to a significant heat source because the burns were deep. The wood was not damaged, that is to say there was no charring.  After a significant amount of sanding with 220 grit I had removed as much of the burn as possible without significantly impacting the shape of the pipe. I was careful to sand the entire area around the burn to blend, or feather, the repair.  Even so, it did not completely remove all of the burn mark.L7Next I steamed out dents by wrapping the bowl with a wet terrycloth rag and applying a clothes iron. The important thing here is to keep your fingers away from the steam and the iron away from any stamping.
I finished the bowl by sanding the outside with 1500 – 3200 micro mesh pads. I also took the liberty of beveling the inside of the rim which I thought gave the large bowl some visual character.L8Even though I sanded the chamber back I could still smell some ghosts of the old tobacco so thought I would give the pipe a salt and alcohol soak. I let sit for 24 hours but there was still a residual odor.  Before I was done with the restoration, I had to run three tubes of grain alcohol in a retort through the pipe before the pipe was truly clean (sorry no pictures). L9

The original finish was very light colored, almost a natural. To hide the remnants of the burn I decided to go with a light brown stain and contract the worm grooves with a slightly darker stain to make them stand out.  This would also help hide the burn.L10The stem was an easy clean for a saddle bit. The Oxiclean bath had loosened the crud in the airway and a few passes with bristled than soft pipe cleaners took care of the internals. The outside I sanded with 1500 grit micro mesh then added a small drop of black super glue to the one small tooth mark and a another dent that I didn’t want to sand out. I had tried to raise both with heat first but with little success hence the super glue.  Continued sanding with micro mesh pads up through 12,000 grit. I kept the pipe assembled during this process in order to keep the shank-stem connection flush.L11

With sanding and polishing complete I coated the entire pipe in mineral oil and let sit overnight. The mineral oil seems to help hydrate the briar and vulcanite of the stem.L12After 12 hours I wiped off any remaining oil and took the pipe to the buffer.  I went over the whole pipe with red diamond then applied multiple coats of carnauba wax.  As a finishing touch I decided to apply a bowl coating to the chamber.  I wiped the inside with maple syrup then add a table spoon of charcoal powder.  Placing the heel of my palm over the rim I shake the pipe until the charcoal evenly coats the inside.  I let the pipe dry for a week before dumping out the excess charcoal.

Now it’s time to “Relax with a Marxman”.  Thank you for taking the time to look.L13 L14 L15


Restoring ‘The Professor’ – WDC Milano Hesson Guard


Blog by Dal Stanton

This pipe was gifted to me in 1980 while a seminary student.  I was Professor Freundt’s student assistant and I spent much time with him in his office which was a virtual jungle of books, papers and journals – heaped in piles here and there yet the professor knew where to find the most obscure minutia.  Added to the smells of old books and leather covers were the tobacco and smoke that regularly provided an upper layer haze in his work space.  The Professor introduced me to the art and enjoyment of smoking pipes – now some 36 years ago.  I was young and eager, soaking in the ambiance of academia at a post-graduate level and pipes I discovered, were very comfortable partners in this environment.  Professor Freundt gave me the Hesson Guard, showed me how to pack its first bowl in my hands, and I smoked it, adding my offerings to the perpetual haze.  After these days, pipe smoking was put aside until last fall when Steve reintroduced me to it.  At this point, 3 pipes made up my collection: a corncob I also bought during those seminary days to use while fishing and duck hunting, a Willard I received after my grandfather’s passing (a future restoration), and the WDC Milano Hesson Guard that I had tucked away in drawers over the past three and a half decades.   Anxious to put a pipe back into service last fall, I grabbed the Hesson Guard, to clean it and do what I thought then were needed repairs….  I made a mess of the pipe – cracked the shank, reamed out the mortise so that the metal tenon was too loose – sloppy repair with super glue….  I’m anxious now to return to ‘The Professor’ (its given name) and try to make amends for the rough treatment he received last fall!

The right side of the shank is stamped with the well-known WDC inverted triangle next to Milano over Real Briar.  The left side holds Hesson Guard.  The bottom of shank had PAT. 1855800 which enabled me quickly zero in on the dating of the pipe.  The patent application was submitted by the inventor of the special internals, William W. Hesson, in 1930 and granted two years later.  An excerpt from the patent documentation describes the essence of the design:

The principal object of the invention is to provide a pipe which will eliminate contamination of the natural aroma of the tobacco through noxious secretions and which will remain sweet and clean.  A further object is to devise a construction of pipe which will be simple and inexpensive to manufacture and which. will be devoid of pockets to harbor noxious elements.  The principal feature of the invention consists in the novel arrangement of a tubular resilient member surrounding and embracing a metal stem which extends from the pipe bowl to the mouth piece and forming a seal to prevent the seepage of moisture around the metal stem.

(https://www.google.bg/patents/US1855800?dq=1855800&hl=en&sa=X&ved=0ahUKEwibqa2KsOjNAhUFVBQKHZ1DAvMQ6AEIGjAA)

I was curious to compare my Hesson Guard with the patent diagram which essentially is a long metal tenon meeting up with a metal sleeve at the base of the bowl and shank junction.  This design, along with many other designs, was to eliminate the moisture build up, gurgle and gunk.  Figure 1 (below) is followed by my overlay comparison picture – the tube inserts quite a way according to the 1930 design.  Following are pictures telling the current story of The Professor:H1 H2 H3 H4 H5 H6 H7 H8 H9 H10 H11The pipe is attractive and has a good feel in my hand.  The free-hand sculpting on the bowl gives the appearance of flames rising and is showcased in 3 paneled murals around the bowl. I notice that one of the panel dividers has been damaged at the top by cutting the briar.  It looks like they were seeking to connect the panels – not sure.  That will need to be filled in.  The rim will also need some gentle repair to what appears to be nicks created by wear and tear.  The cracked shank will need repair to keep it from growing and cleaning up the metal tenon and creating a good fit with the mortise might be a challenge.  The bit has very mild tooth chatter.  The last picture above captures not only the crack in the shank but the metal sleeve deep in the mortise that the chamfered tube/tenon docks with to create a dryer smoke – according to the patent information.  Before any cosmetic restoration takes place I first must deal with the major issues of the shank crack repair and the tenon/mortise fit.  I start the crack repair by drilling a small hole at the end of the crack to keep the crack from creeping up the shank.  I use my Dremel tool and a 1.5mm drill bit to make the hole. I utilize a magnifying glass to trace the crack which had become a ‘hairline’. I’m careful not to drill too far and breach the mortise wall.  Next time, I want to use a 1mm drill bit to leave less of a footprint.  Next, after inserting the tenon into the mortise to expand the crack area for glue penetration, I create a mixture of briar dust and CA Instant Glue filling the hole and running a line of glue along the crack.  I then sprinkle briar dust over the entire area and wait to dry.  The timing worked out well as my wife just called me for lunch!  After lunch, I work on cleaning up the tenon removing the old superglue with fingernails, Winchester knife, brass brush and 240 grit sanding paper – back in pristine shape. H12 H13 H14Well, after about a week, I return to the Milano Hesson Guard after my wife and I take advantage of the summer opportunities at the Black Sea coast.  We enjoy some days at the beach near our favorite coastal fishing town, Sozopol. While at the beach, I thought about the Milano and how best to approach the overly loose tenon/mortise fit.  Instead of applying clear nail polish around the metal tenon, which is what I did before, I attempt to rebuild the mortise wall by applying a very gentle coat of superglue on the inner wall of the mortise, rotating it as I applied superglue to achieve, what I hope, will be an even texture around the mortise wall.  Amazingly, this seems to have worked!  After drying, I gently reach into the mortise to remove some superglue ‘bumps’ with a needle file and I use a tightly rolled piece of 240 sanding paper carefully to smooth things down.  I don’t want to inadvertently remove too much of the restored mortise wall! I also give the crack repair a light, strategic sanding with 240 grit paper, careful to guard the stampings. I refit the stem and to my relief, a snug fit was restored.H15 H16 H17With the stem refitting correctly and inserted, I return to the shank crack to finish sanding it to remove the excess superglue – I do this with stem in so as to not create unevenness between the mortise and stem shoulder.  Satisfied with the shank crack repair and rebuilding the mortise wall, I put the stem in an Oxyclean bath for a soak to soften up the moderate oxidation buildup. I move my attention to the bowl to ream the mild cake down to the briar and then move to rim repairs and then to the panel repair.  I want to have all these completed before looking at the general stummel cleanup and refinishing. I move out to the 10th floor balcony adjoining my bedroom work station with Pipnet reaming kit to minimize the airborne cake soot – maximizing happy wife status!  I started with the smallest reaming blade moving to use 3 of the 4 blades available to remove the moderate cake in the bowl.  I finished the reaming by employing 120 grit paper on the chamber wall to remove remaining cake and smoothing the wall.  I took a close up of the chamber and rim to show progress and to get a good idea of how to approach the rim repair.  Inspecting the rim, I place a drop of superglue on one particular ‘dent’ that reached significantly down the external side of the bowl.  I’m hoping that this small fill will enable me not needing to take as much off during the bowl topping to repair the rim.H18 H19 H20 H21After the superglue sets up on the rim dent fill, I top the bowl using 240 grit sanding paper on top of a chopping block.  Since the day is beautiful, I again move to the 10th floor balcony to do the work. With the rim having no burns, I expect the surface to plane off evenly without pulls toward softer burned areas of the rim.  I rotate in a clockwise circular even motion and take off only as much as needed to remove the damaged area of the rim.  As I like to do, I create a small bevel on the inner wall of the rim to give a more finished, classier look.  I use 120 grit paper to form the initial bevel angle followed by 240.  I also decide to give the outer rim edge a slight sanding to round off the lip which seems to be consistent with the original Milano design.  Again, I make the initial cut on the lip with 120 grit paper and finish off with 240.  I have grown to appreciate more the rim presentation in finished pipes.  To me, the rim, it’s nuances, are the first thing the eye is drawn to when looking at a pipe – much like the first thing one sees when looking a person are the eyes, then one follows by taking in the general appearances.  The following pictures show the Milano’s rim progress.H22 H23 H24 H25You can see in the immediate preceding picture the rim superglue fill spot at the 11 o’clock position of the rim and the ongoing panel repair just below it (to the left in the picture).  Before moving to the stummel finishing, I now need to resolve the panel repair. I realize at this point with all the stummel repairs (cracked shank, topping and panel line), I will be removing the finish and refinishing the surface in order to achieve an even briar tone appearance.  Now, continue to ‘heal’ the panel cut – earlier I applied superglue to it to build it up.  I take a close up of the panel as it is now in order to know what I have. In order to blend more, I rough up the original superglue with a Dremel stone sander instrument. I apply on top of it a thick mixture of superglue and briar dust to form the restored surface that will join the side briar panel with the solid ring around the top of the bowl. I use toothpicks to mix, spread and tamp the mixture into place. I want this briar dust putty to setup well so I put the stummel aside for the time and turn to the stem which has been soaking in Oxyclean.H26 H27 H28The Oxyclean bath did the job of bringing the oxidation to the stem surface. I attack this initial layer with 000 steel wool and then use 240 grit paper to address the minor tooth chatter – I take pictures of bit top and bottom before starting to show progress. In order to have a good match between the mortise and the stem, I want to eyeball what the fit looks like before I proceed further.  As I suspected, with all the superglue applied to the mortise area, the fit between mortise end and stem was not flush.  I took the stummel back to the topping board and gently rotated the shank end on the board to regain a flush docking between stummel and stem.  After a few rotation cycles and testings to eyeball things, I am satisfied.H29 H30 H31 H32 H33 H34Before starting the micromesh cycles for the stem finishing, I need to remove the lip that I discovered with the shank end over the stem.  With the topping of the shank end, I enlarged the circumference of the end just a bit so that it was a bit larger than the circumference of the stem shoulder – primarily on the lower side of the shank.  I use 240 grit paper to even out the difference between the shank and stem – leaving the stem in place to assure a good, smooth transition! I am careful to use my thumb to cover and protect the nomenclature as I move around the shank with the sanding paper.H35Now to the panel repair below the rim. Using 240 grit sanding paper I bring the hardened superglue and briar dust mixture down to the bowl surface careful to maintain a rounded surface and not to flatten out the area of sanding focus.  The pictures show the progress.H36Dal

I like the panel patch and it will blend with a darker stain.  On a roll, I launch into the clean-up of the stummel and especially the ‘flame murals’ which are filled with grit and dust.  I use a tooth brush with Murphy’s Wood Soap undiluted and work over the entire stummel with special focus in the fire sculpting to remove the surface finish.  I follow this with rubbing down the stummel using cotton pads and tooth brush with acetone to remove the finish deep in the grain of the briar.  I finish my clean-up of the surface by picking the carved crevices with a dental tool.  Using micromesh sanding pads, I sand the high points of the stummel.  Using 1500-2400 I wet sand.  Following, 3200-4000 dry sand and finishing dry-sanding with 6000-12000.  The pictures show the progress – I’m liking the briar grain the micromesh process is bringing out.H38 H39 H40 H41 H42At this point, I have two questions about how to proceed before staining the stummel.  First, I need to clean out the ‘flame’ sculpting and use a black fine tipped permanent marker to darken the flames to give more contrast after the stain is applied.  The other question was how do I treat the stampings of the WDC Milano – Hesson Guard?  Do I protect it from the stain?  Do I cover them with Vaseline?  What? Upon closer inspection, I notice that the left side stamping, Hesson Guard, appeared to have gold left over in the ‘Hesson’ lettering – the rest having worn off (picture below) after the crack repair.  After a quick email to Steve, his input revealed that both sides would have originally born the gold lettering.  So, from my model kit (I’ve been involved in a project for several years building the USS Constitution sailing ship) I discover a bottle of Testors Gold Enamel Model Paint and my wife finds a small brush which I trim with my knife to create a more distinct point.  With Steve’s counsel stored in my mind, I applied the paint over the lettering and wiped off the excess.  To my relief and joy, the gold paint adhered to the crevices of the lettering and the overflow came off with the paper towel.  My first stamping restoration with paint worked well!  Steve also said that there was no need to worry about the new lettering during staining – that the gold paint would repel the stain.  Careful to avoid the new gold lettering, I clean the bowl with isopropyl using a tooth brush to get rid of the residue from the sanding and then I move to highlighting the flame sculpts to bring greater definition to the paneled murals in the finished pipe.  The pictures tell the story.   H43 H44 H45 H46 H47Time to stain and I decide to use a mixture of an alcohol-based Italian stain I found here in Bulgaria with a color description of dark nut.  I want this as the base, but I mix it with a mahogany color water based stain to bring out a slightly more redish tone in the briar.  I think the red will work with the flame sculpting motif and I think this will look good – but of course the briar does what it will with the hues!  After mixing the stains in the shot glass, I apply the mixture to the stummel mounted on the cork and candle stick with cotton balls making sure to cover everything and getting a good thick coverage.  After applying stain, I use the butane lighter to flame the stain.  With the mixture that I made, the alcohol content was too low to ‘flame’ so I evenly moved the lighter flame across the surface to evaporate the alcohol setting the dye in the grain of the briar.  I repeated the process again and set the stummel aside to dry.H48With the stummel put aside, I turn again to the stem.  I re-inspect the button area after the earlier sanding to remove the teeth chatter.  I decide that the button needed a little more attention.  I use 240 grit sanding paper and a needle file to fine-tune the shape of the button before starting on the micromesh cycles.  I wet-sand the stem using 1500-2400 and complete the cycle by applying Obsidian Oil.  While still wet from the oil I continue to dry sand with 3200-4000 micromesh pads, again concluding the cycle by applying Obsidian Oil. The final cycle, 6000-12000 is used and a final coat of Obsidian Oil and I put the stem aside to dry.  I love watching the shine of the stem progressively make it to the surface getting that final wet, reflective look in the stem.  Nice!  The stem pops.  The pictures capture the progress!H49 H50 H51 H52For me, beginning the process of finishing the stummel after the staining dries, is like opening a Christmas present.  The anticipation is to see what actually is under the crust of flamed stain and what the briar grain will reveal.  With the Dremel tool, I begin to remove the ‘wrapping’ using a felt wheel.  Also with a felt wheel I polish beginning with Tripoli and then move to Blue Diamond.  I focus on bringing out the contrast of briar ‘flames’ showcased in the three panels.  I switch to a cotton cloth wheel and apply carnauba wax to both stummel and stem.  After several coats of carnauba, I complete the job by giving the pipe a clean cotton cloth wheel buff followed by a rigorous buffing with a micro-fiber cloth to bring out the deep tones of the briar.H53 H54I’m pleased with the revitalization of ‘The Professor’, WDC Milano Hesson Guard.  I think Professor Freundt, if he were alive today to comment, would agree.  The rich dark tones of the briar, with the hints of deep reds, reminds me of the myriads of leather bindings and books that filled his hazy office.  I’m pleased with the results.  Thanks for joining me!H55 H56 H57 H58 H59 H60 H61 H62


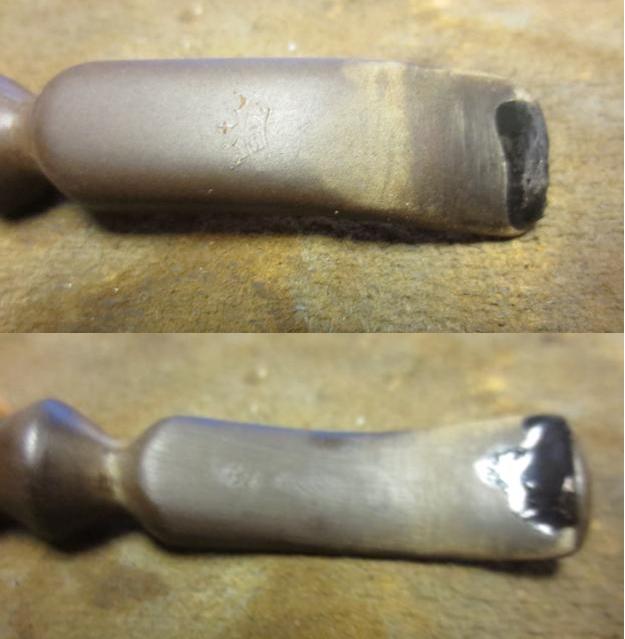
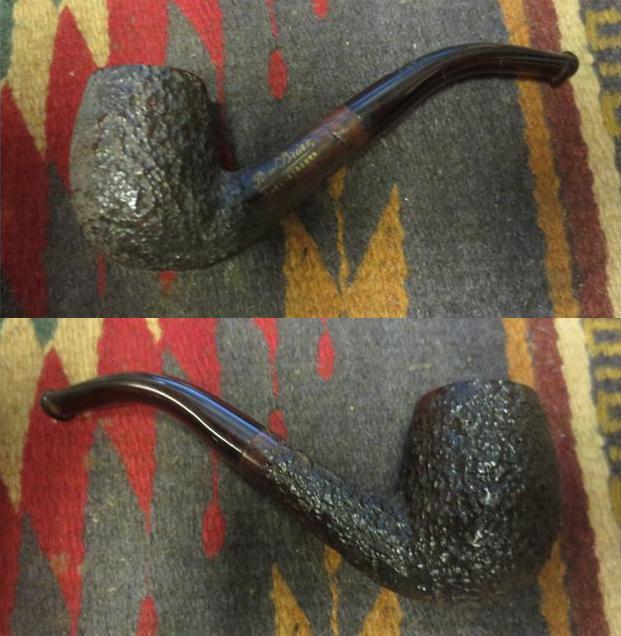
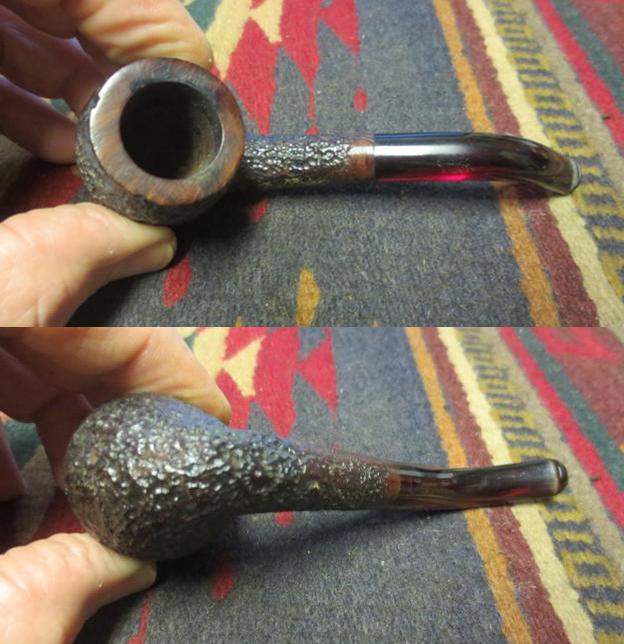
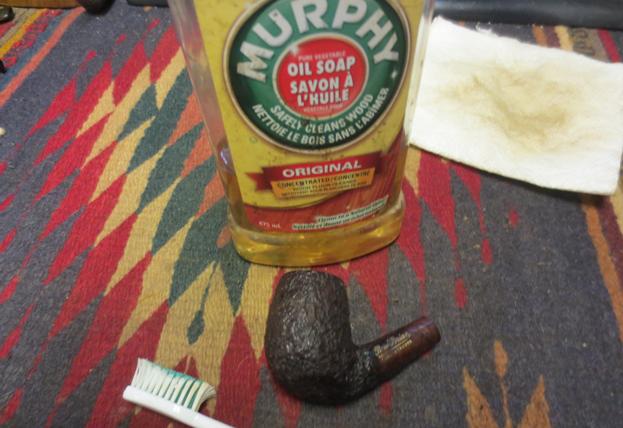
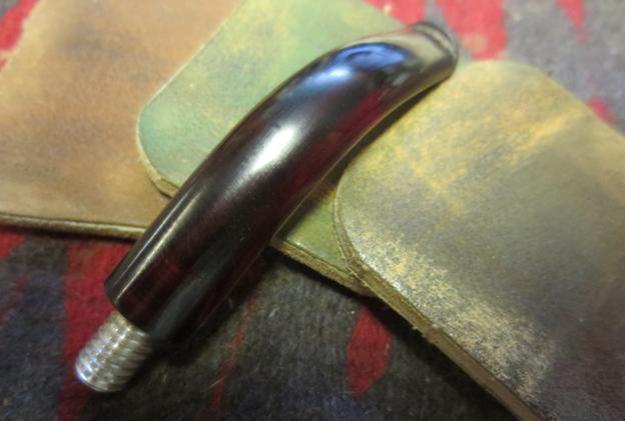
Easy Cleanup of a M&T Bent Horn Bulldog


Aaron Henson – 7/23/16

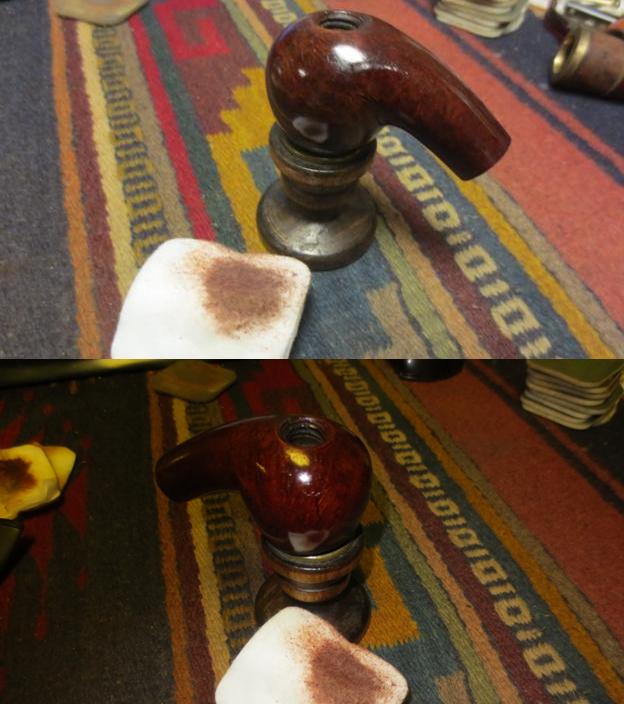
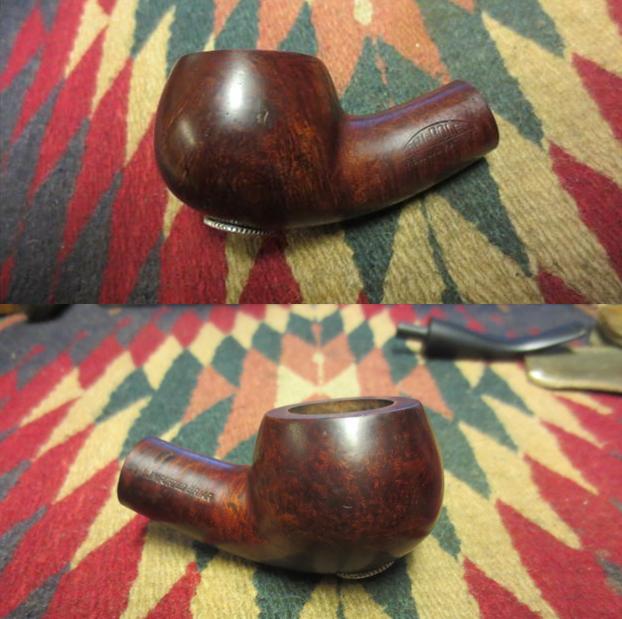
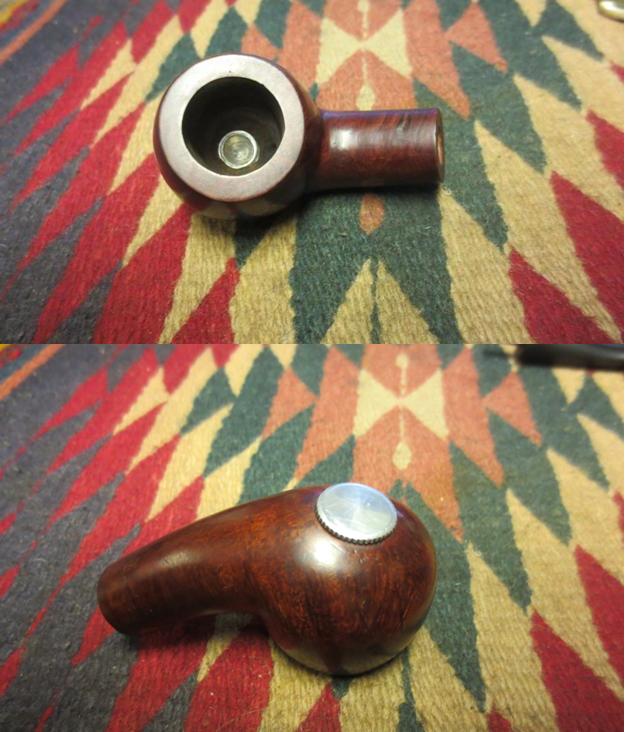
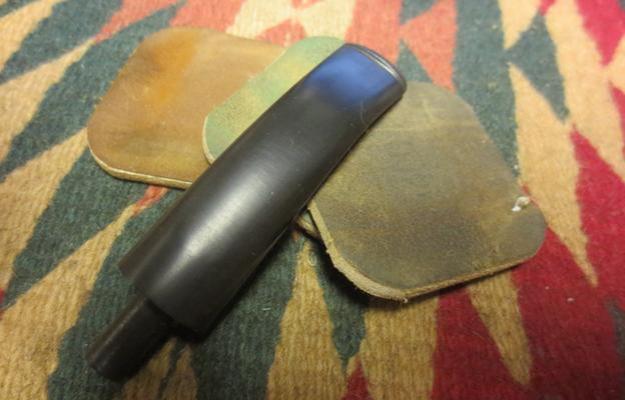
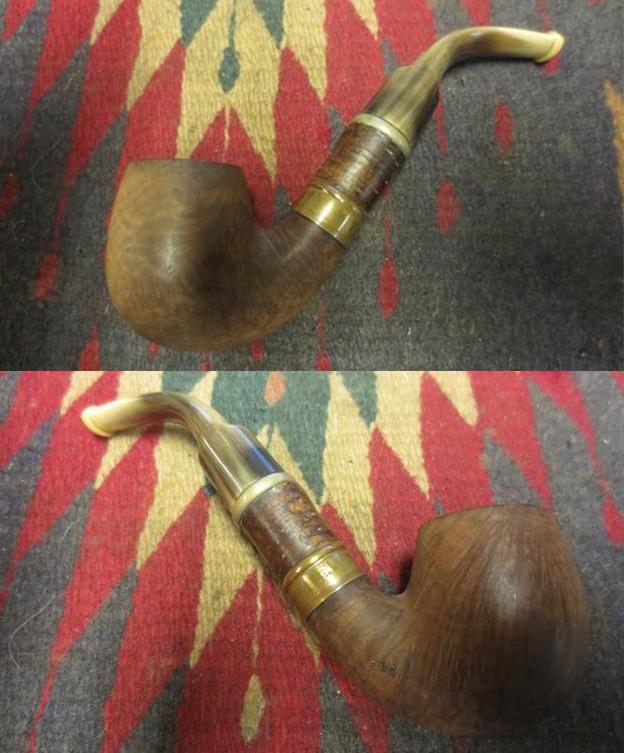
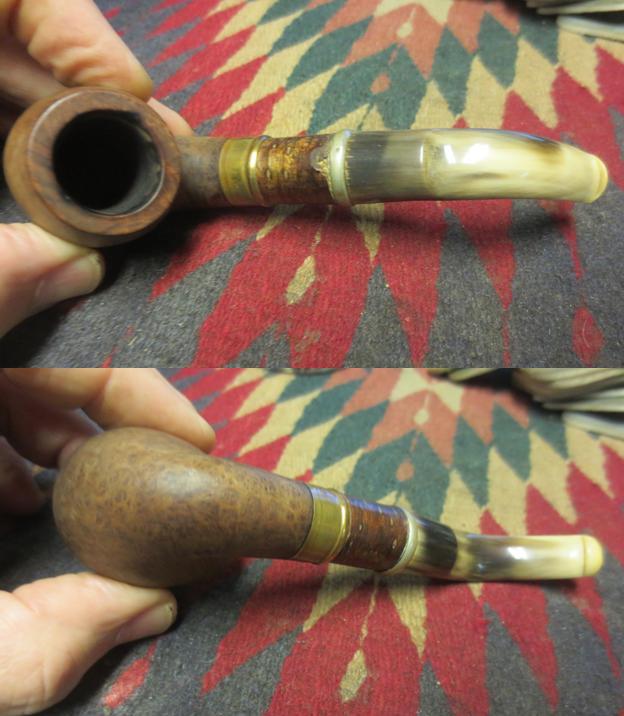
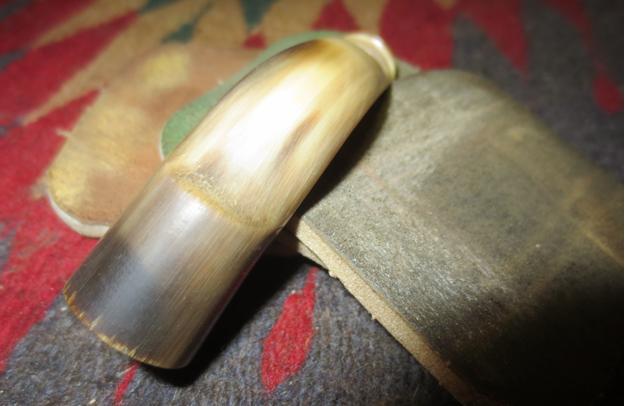
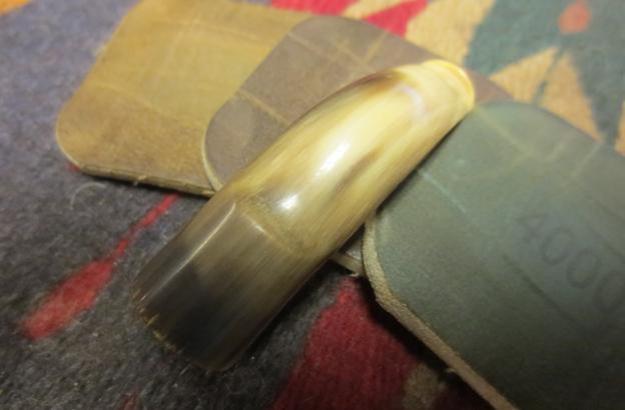
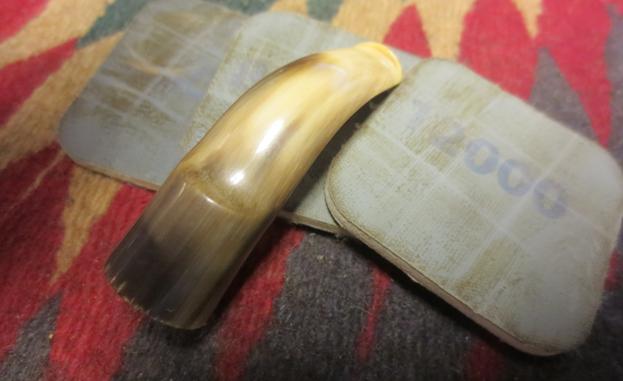
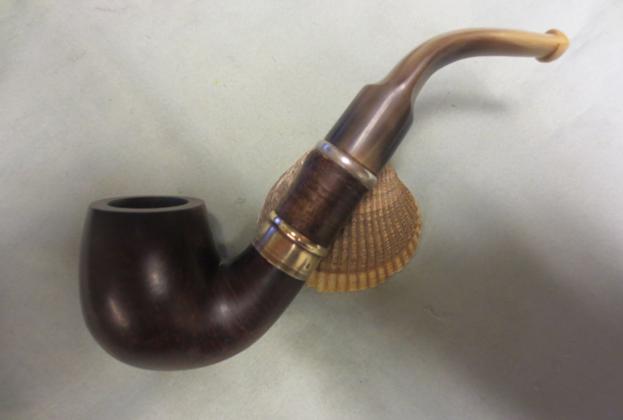
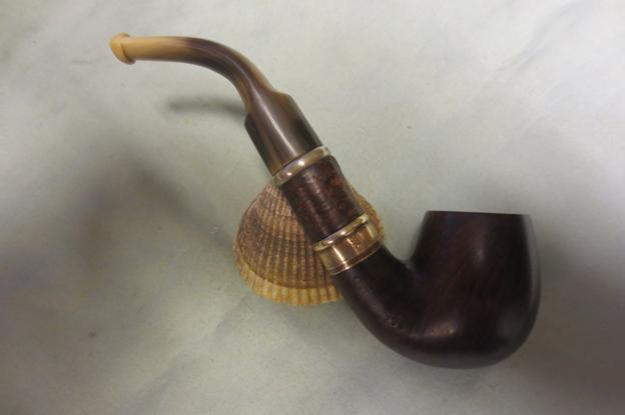
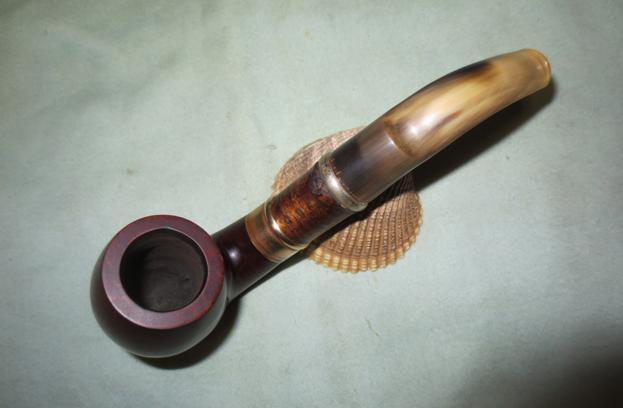
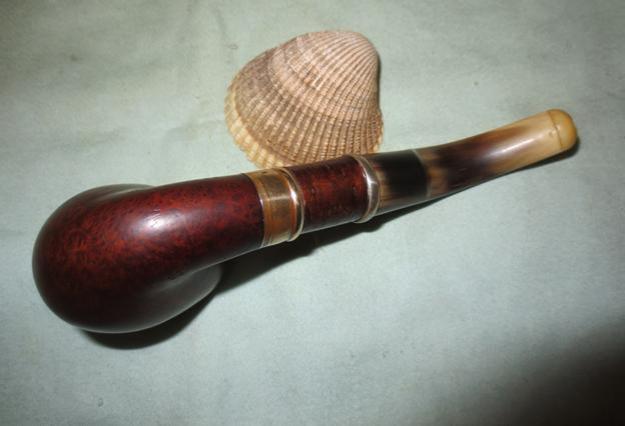
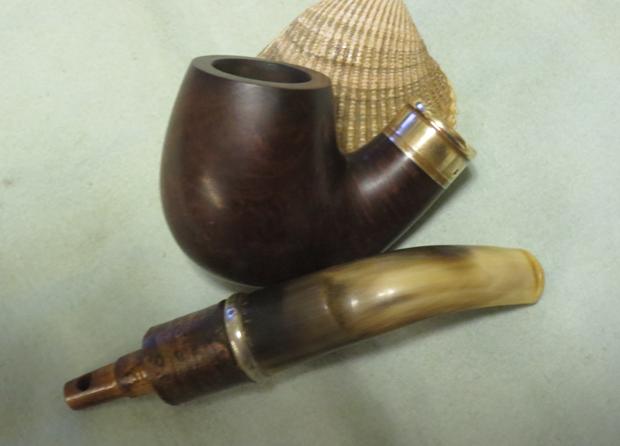
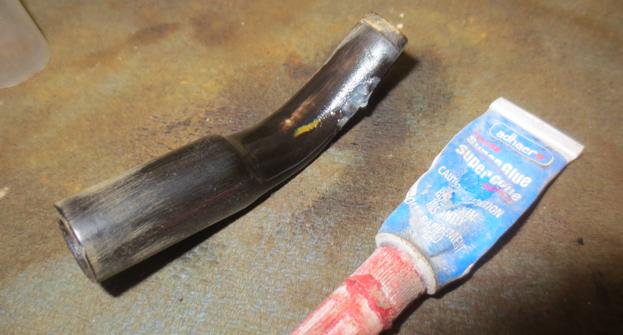
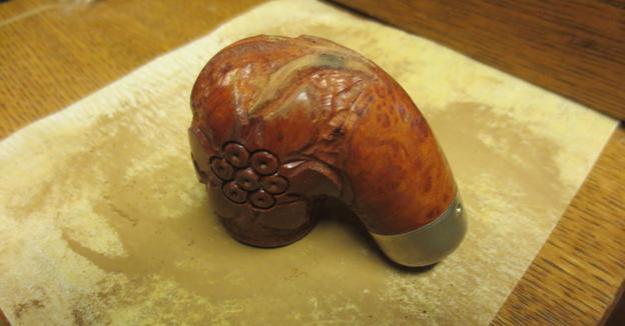
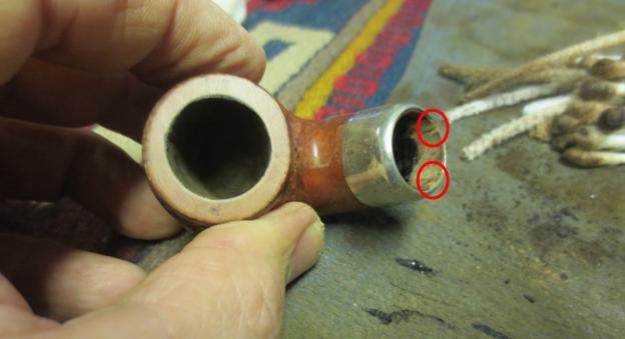
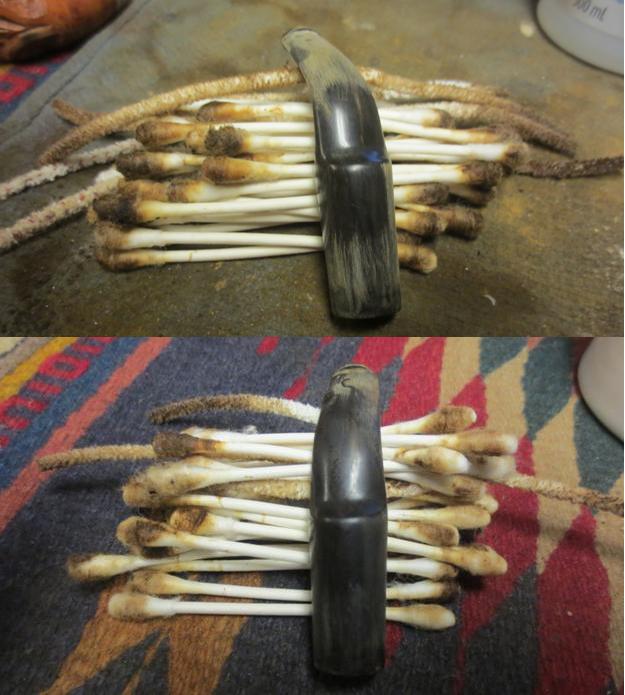
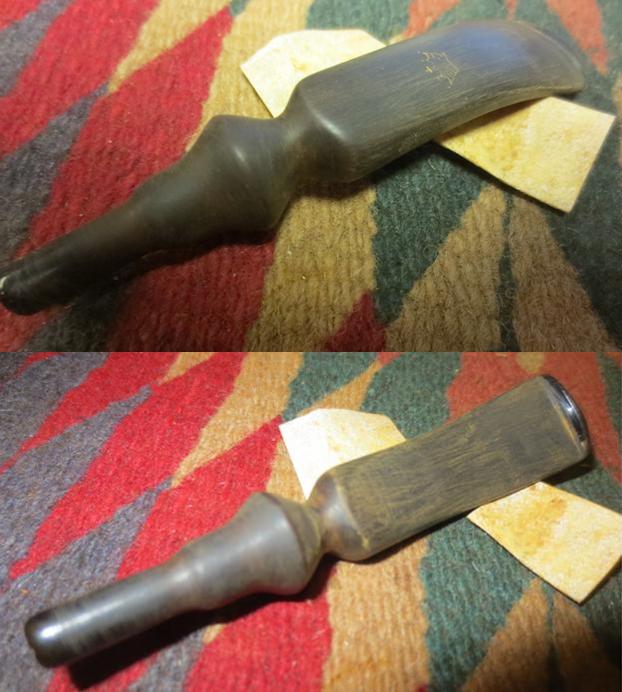
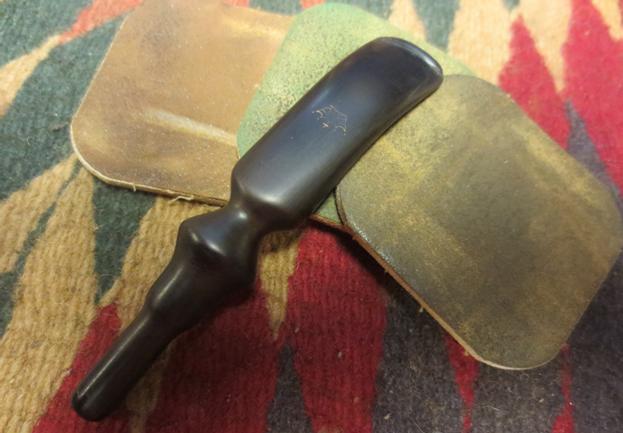
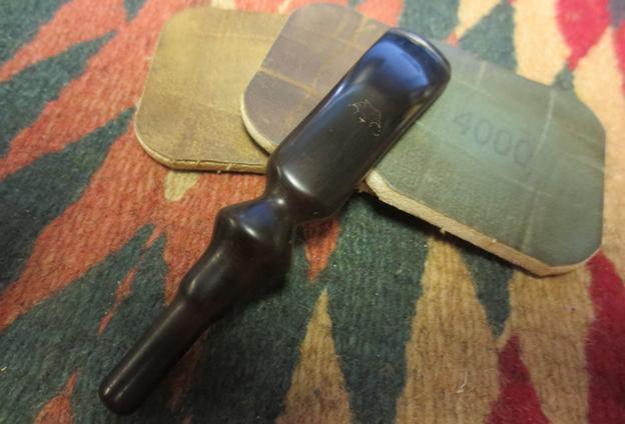
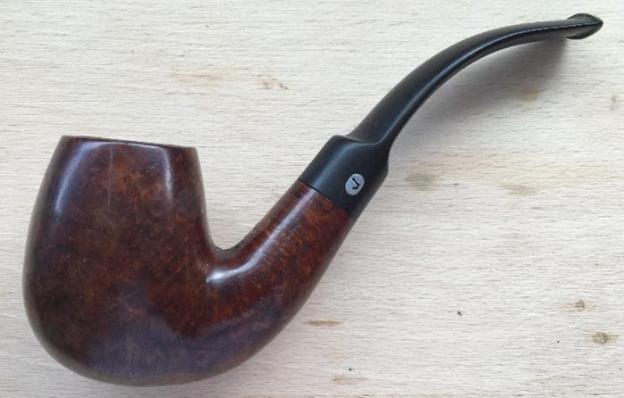
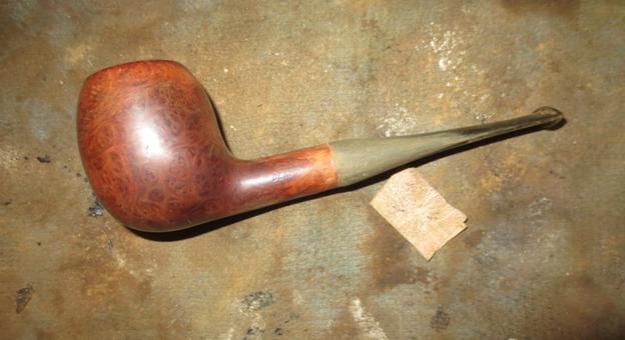
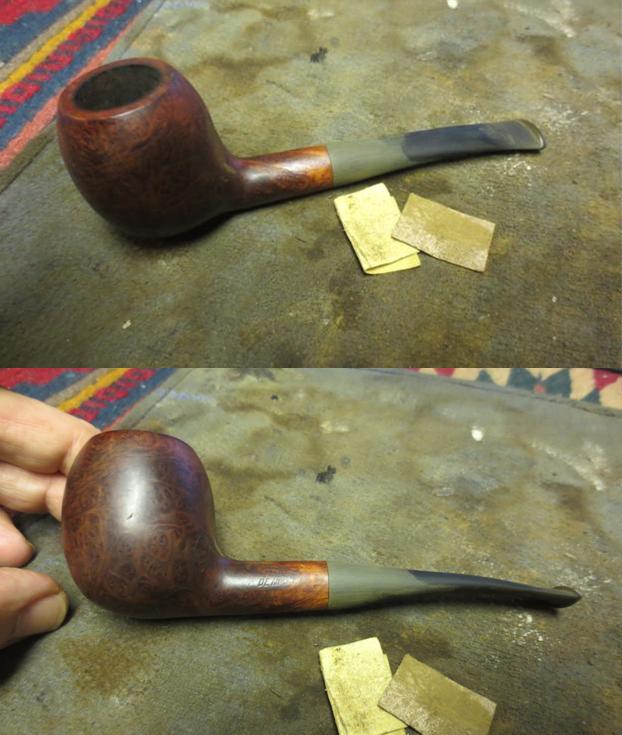
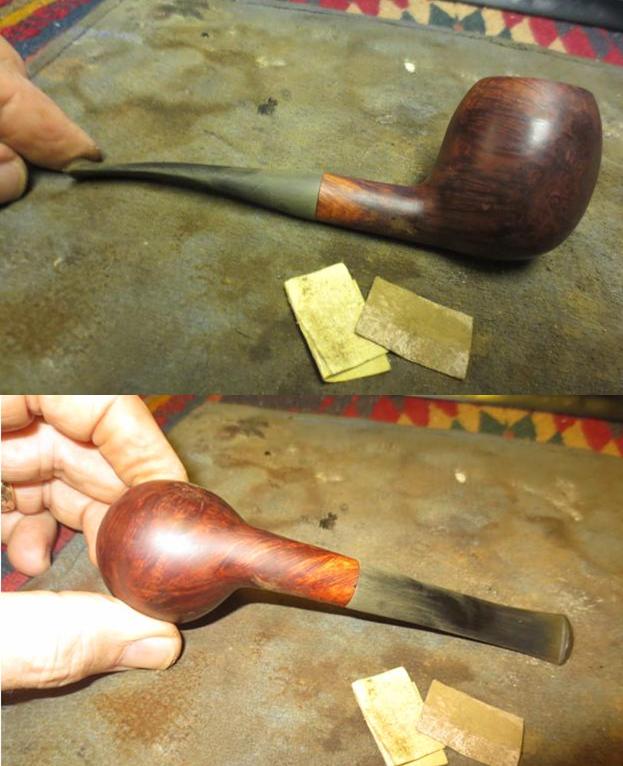
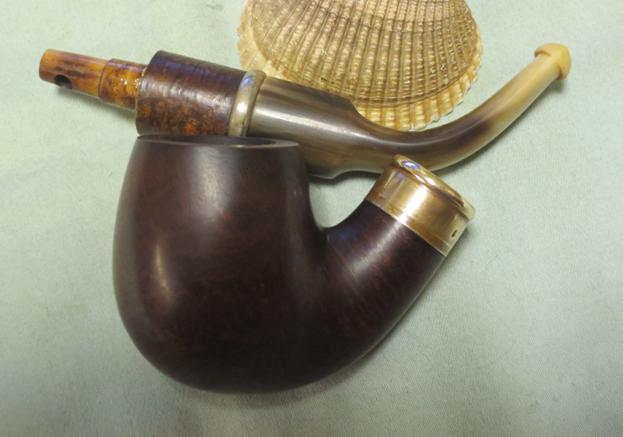
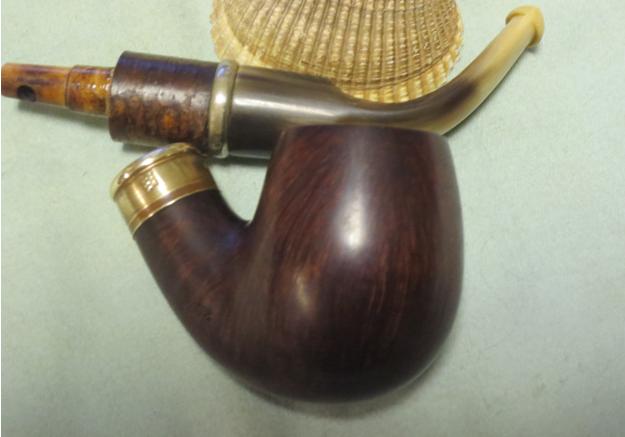
I have not been very good at documenting my last few restorations. Once I get into a project I tend to get so focused I forget to take pictures, especially if it’s a repair that is technically challenging or that I have not done before. The most recent example of this was an unsmoked M&T bent bulldog with a horn stem.  Even though it had never been used (it still had the factory purple putty bowl coating) it had a few issues to be addressed from its 40+ years of tumbling around in a drawer.M1When I saw the pipe in the case at the antique store the first thing that caught my eye was the horn stem and I knew I wanted it. In all honesty, I wasn’t one hundred percent sure that it was horn until I got it home. A couple of passes with a 2400 micro mesh pad and a sniff test confirmed my suspicions – it’s the same smell as when you use an emery board on a finger nail. M2I started with a little research into the brand.  The only M&T that I could find was the German pipe maker Müllenbach & Thewald.  They made pipes from 1830 until the 1972.  The company still exists but is solely devoted to mineral mining.  You might think this strange but M&T was known originally for clay pipes. In 1860 they branched into making wood pipes.  A short article on M&T can be found on Pipedia.

I began the restoration by performing triage of the issues to be addressed. The bowl was clean but had a dull finish that was marred with some dents and minor scratches. The factory bowl coating was starting to chip and a there were three small fills on the outside of the bowl that needed to be repaired. A close inspection of the shank revealed a small crack where the aluminum tenon inserted (seen in the picture below). I had assumed the narrow band was original to the pipe but perhaps it had been added to reinforce the shank?  I may never know the answer to that.  All in all the bowl was very good condition.M3The stem too was in almost “like new” condition.   A few scratches but the button was well define and, of course, no tooth chatter. The aluminum tenon was a little rough around the edges but the fit to the shank was fine.

I started by applying a thin coat of mineral oil on the stem. This seemed to ‘hydrate’ the horn and give some bite to the micro mesh pads. I worked through the 1500 to 12000 pads stopping to apply oil as the horn dried out. The button was quite large and the edges sharp, a bit more than I like. But I kept it original and only slightly smoothed the corners while polishing. I smoothed up the edges of the tenon and set the stem aside.

The first order of business was the cracked shank. Using a 1/64 drill bit, I drilled a hole at the end of the crack to stop its spread then filled the crack with clear supper glue.  Then I picked out the three putty fills and using a super glue and briar dust mixture, refilled the pits. Once cured I sanded the repair smooth.M4I steamed the dents out of the briar with a clothes iron applied to a wet cloth wrapped around the stummel – keeping away from the stampings and fingers.  I sanded the entire stummel up to the 3200 micro mesh then wipe down with alcohol before I stained.  In this case I tried to match the original color with several coats of different browns aniline dyes.

Before reassembling I decide to remove the factory bowl coat and leave it bare briar. Then I wiped the whole outside of the pipe with mineral oil and set it aside for twelve hours before taking to the buffer.  The oil seems to hydrate the briar and brings out a nice shine when waxed.  I first buff with red diamond, wipe off the residue with a soft cotton cloth then apply three coats of carnauba wax giving the pipe a little rest between each coat.

The bent bulldog is one of my favorite shapes and I love the horn stem.  I’m not sure when I will get around to breaking it in.  It might just stay unsmoked for a while.M5 M6 M7 M8