Blog by Dal Stanton
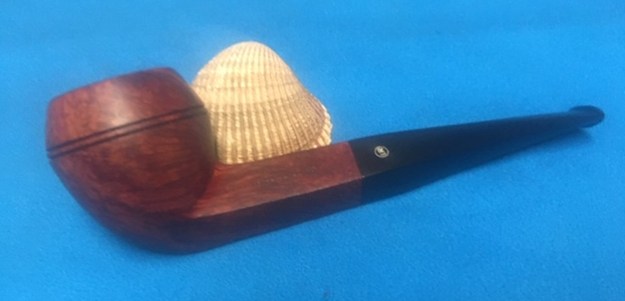
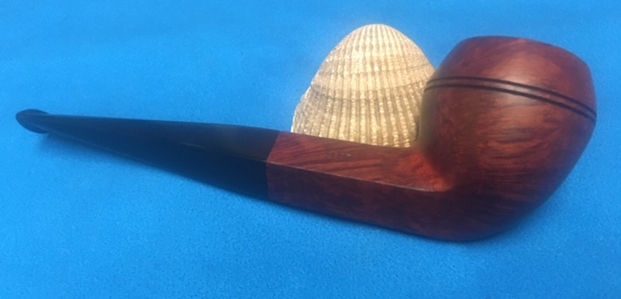
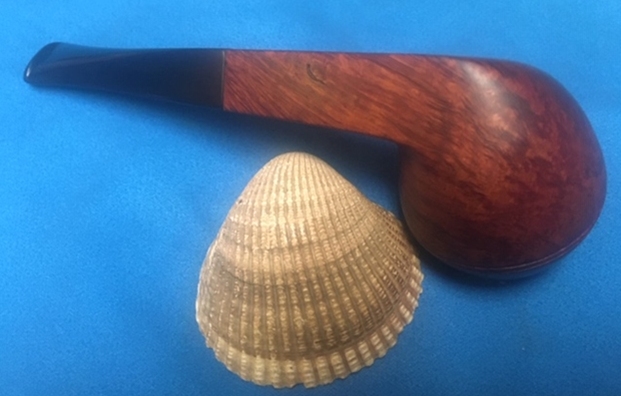
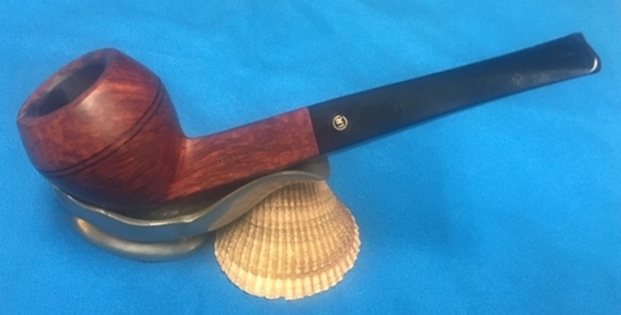
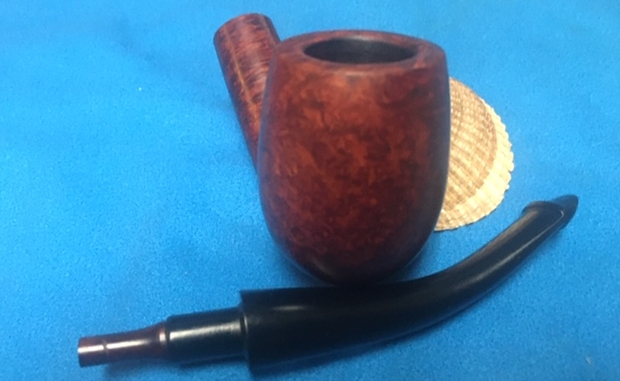
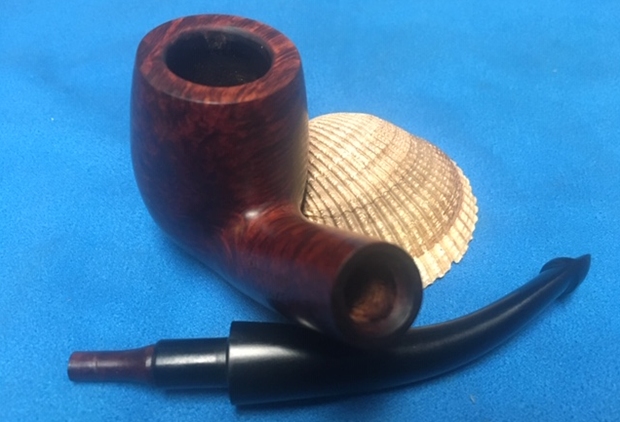
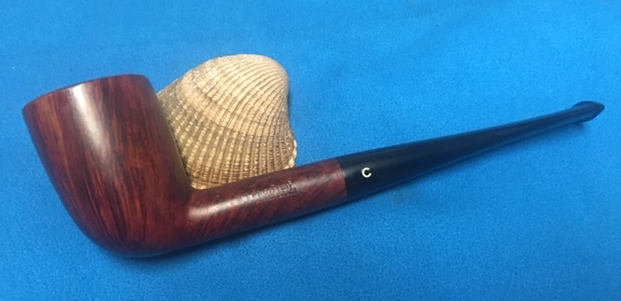
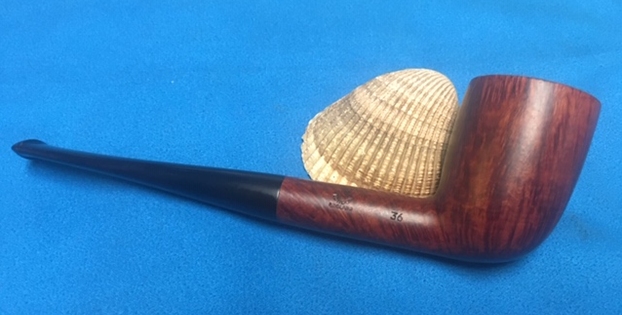
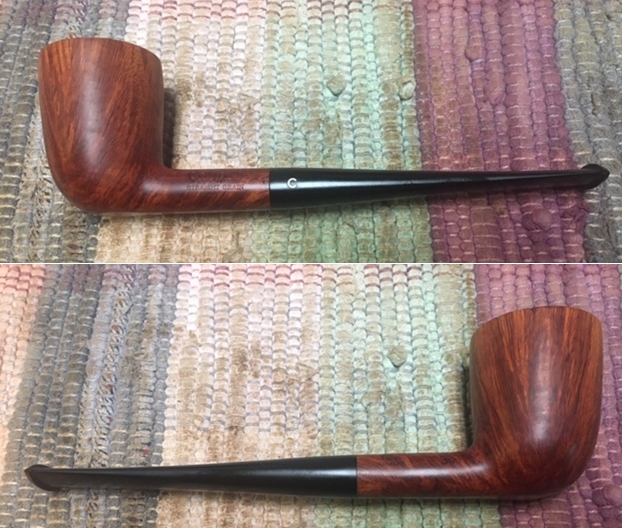
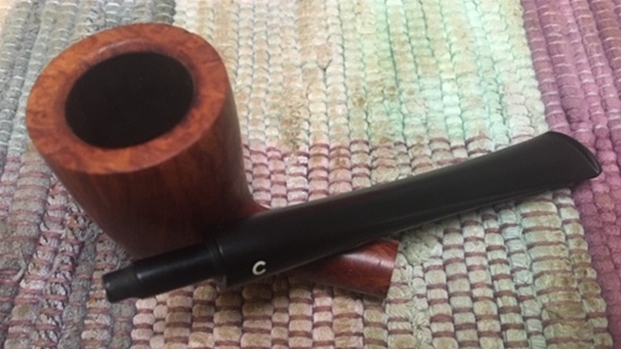
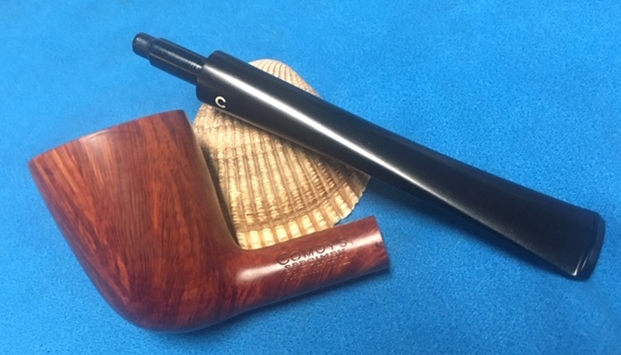
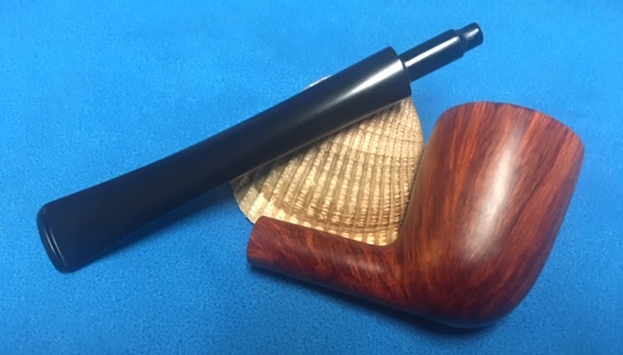
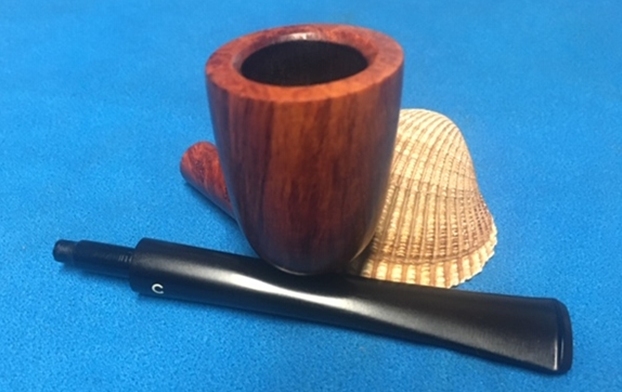
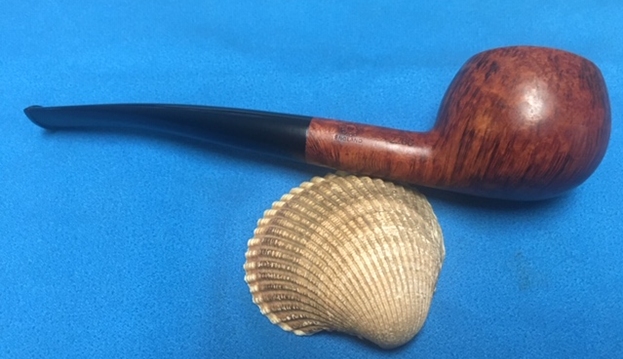
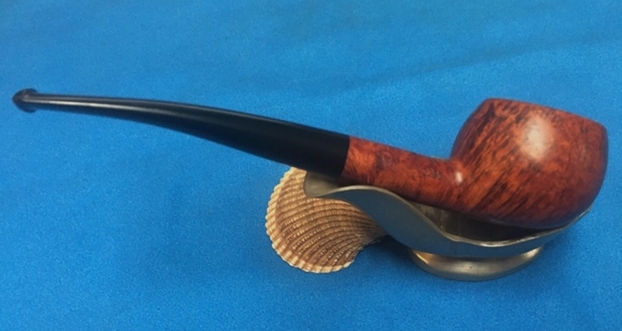
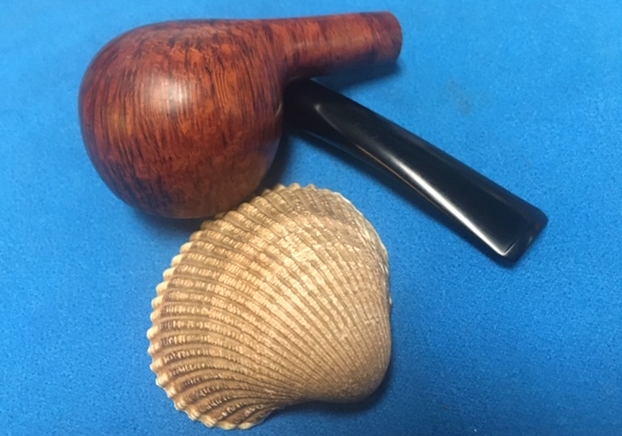
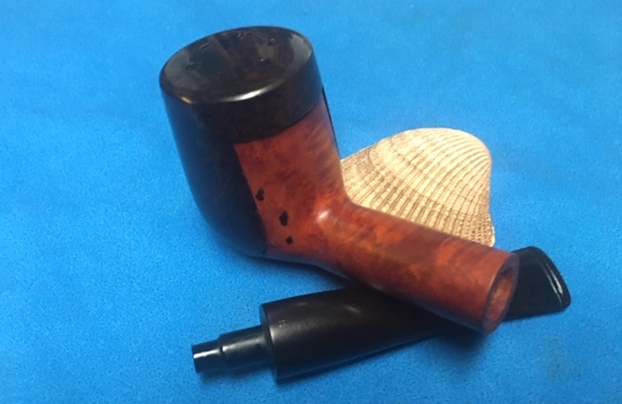
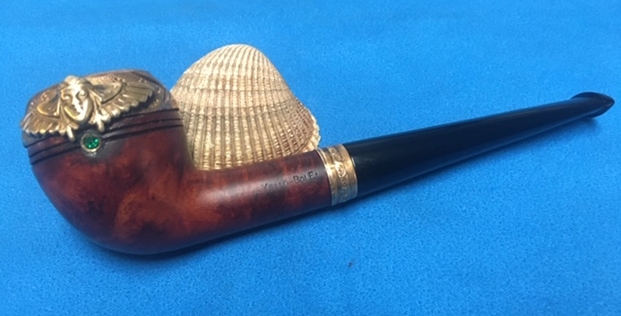
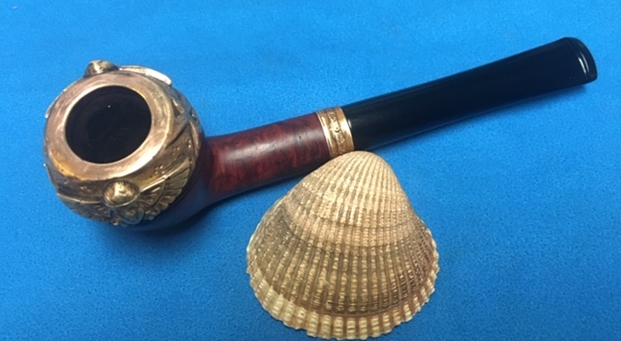
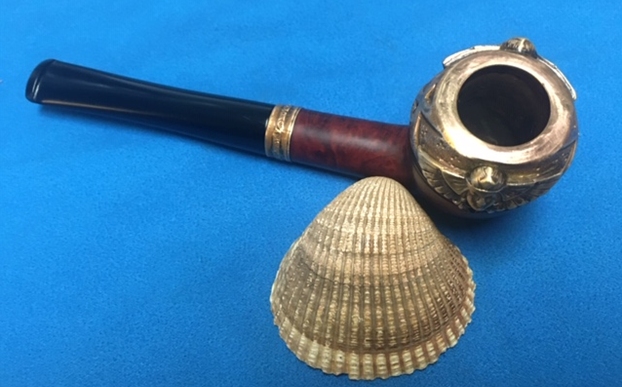
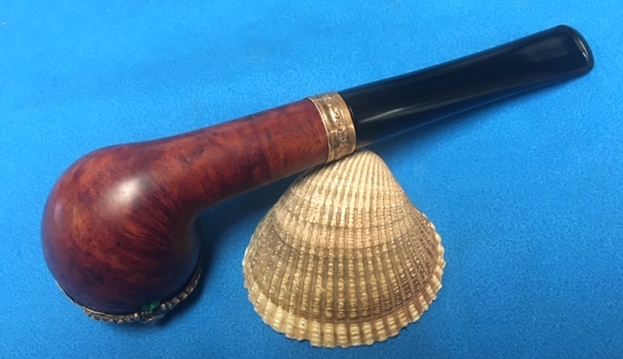
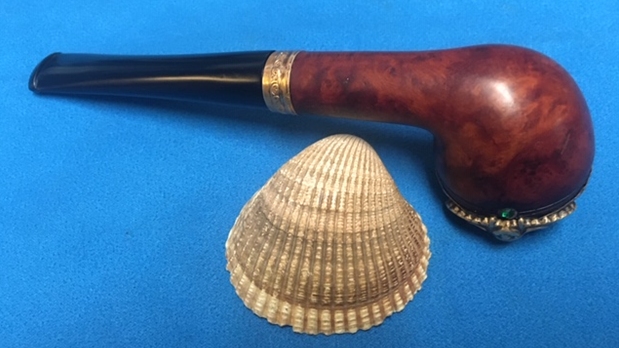
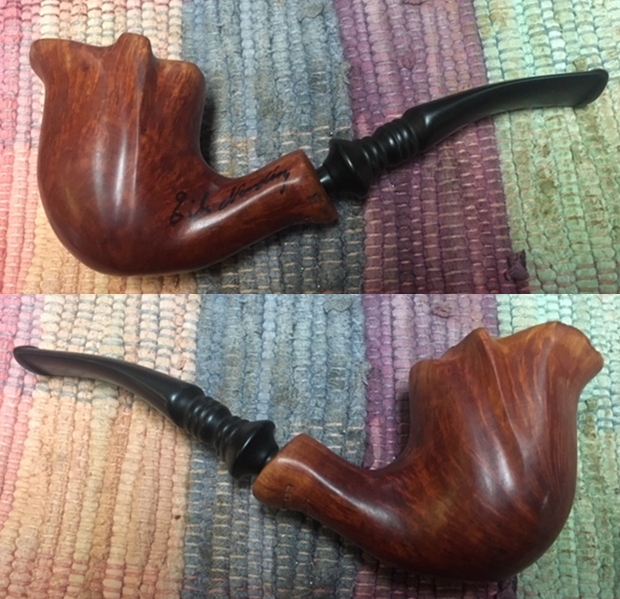
This is the second commissioning project for the pipe man, clam man, Jon, from South Florida. His first commissioning (see: A Striking Savinelli Fiammata 2 Briar Calabash for a Clam Man Pipe Man) turned out to be a diamond in the rough! He had commissioned this pipe not from the usual perusal of my online ‘Help Me!’ baskets in the For “Pipe Dreamers” Only! collection, but he had visited us here in Sofia, Bulgaria, along with a team of folks from his church. During this visit, Jon went through the boxes and baskets of the inventory and found the Savinelli Fiammata and pulled him aside to commission. During this visit, Jon also saw my personal collection of Churchwardens and offered to give one of them a new home! In the end, Jon also commissioned a CW project which also benefits the Daughters of Bulgaria, our work here in Bulgaria working among women and girls who have been trafficked and sexually exploited. This was also important to Jon, who as a father, had brought his daughter with him to Bulgaria. My goal in fashioning Churchwardens from bowls that were either orphaned or in their current states had little hope of being put in service again. I liken it to Santa’s mythical island of misfit toys. Repurposed bowls mounted on CW stems can rise from ash heap, as it were, to live and serve again. I sent Jon a picture of different bowls to see which would speak to him as his new Churchwarden. He had told me he preferred a bent shank – here were the candidates with differing characteristics. Our emailing back and forth between South Florida and Bulgaria to identify the bowl speaking Jon’s name, resulted in the French Blasted Dr. Geo Deposée, the second pipe pictured above. I acquired the Dr. Geo during one of our summer vacations on a pipe picking expedition to the Bulgarian coastal city of Burgas on the Black Sea. I found the ‘Burgas Lot of 9’, at a secondhand shop on the main walking street. The Dr. Geo is at the end of the line of 7 pipes pictured below which were part of the haul – 2 others were added to these that were eventually posted in the For “Pipe Dreamers” Only! collection from which pipe men and women can choose and commission.
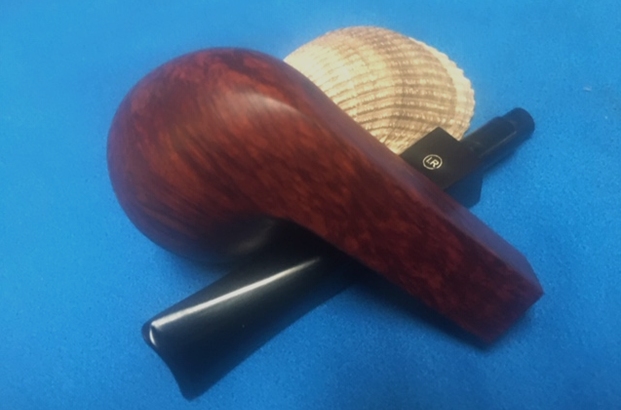
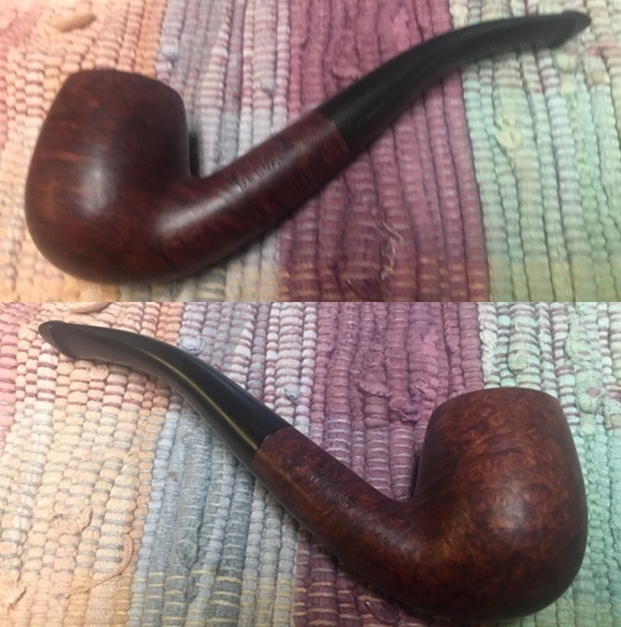
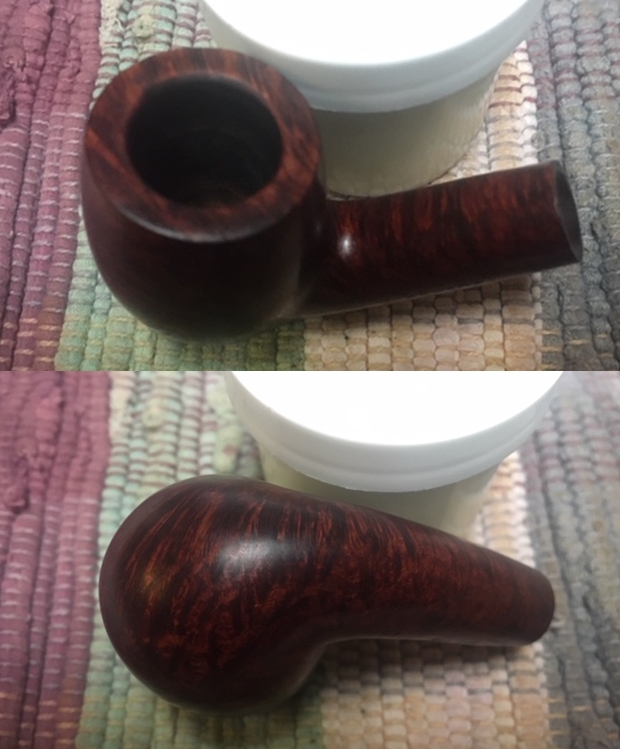
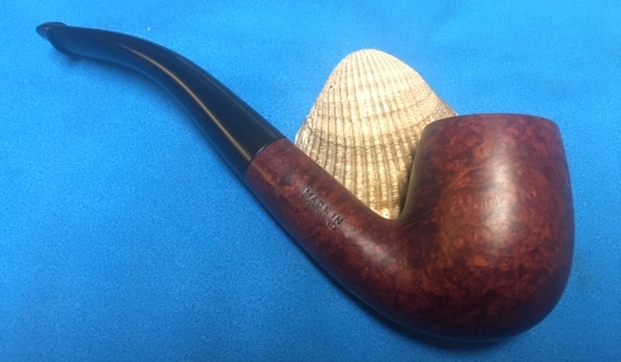
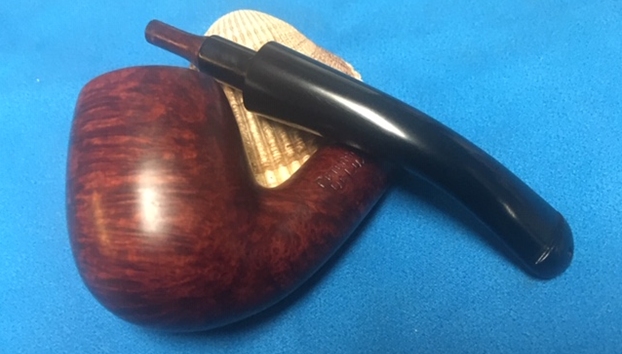
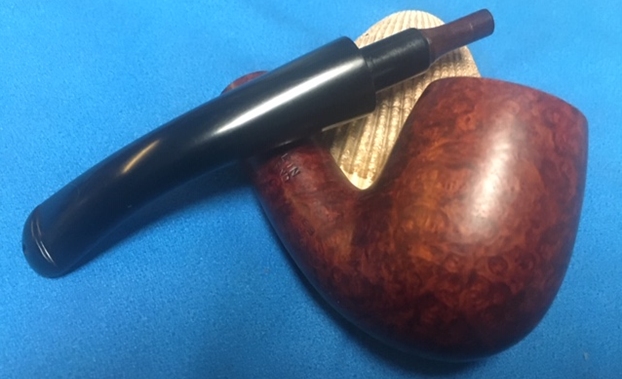
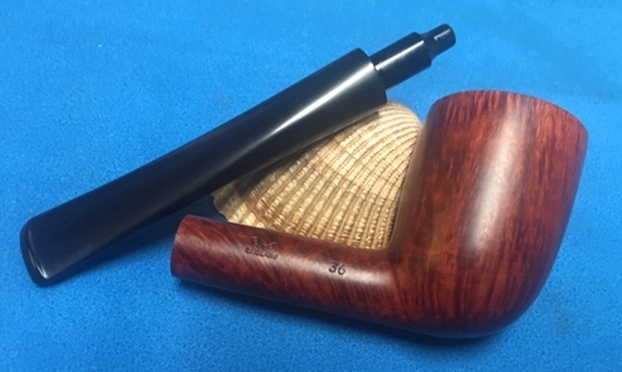
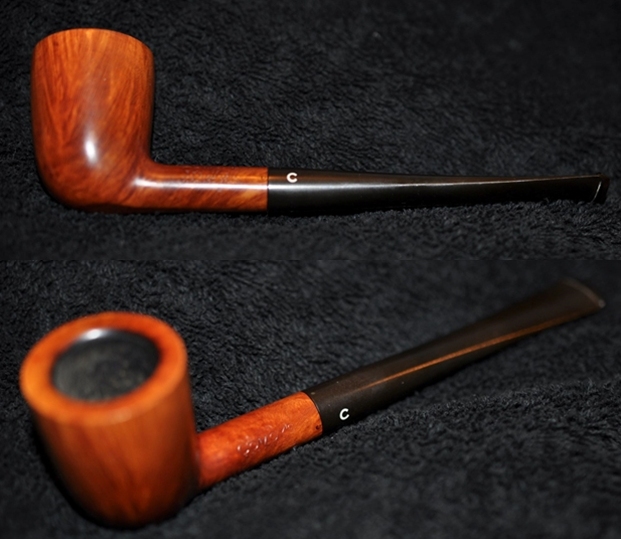
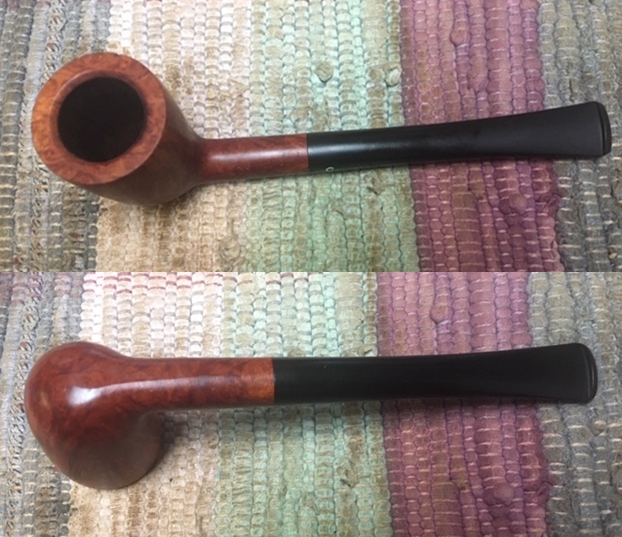
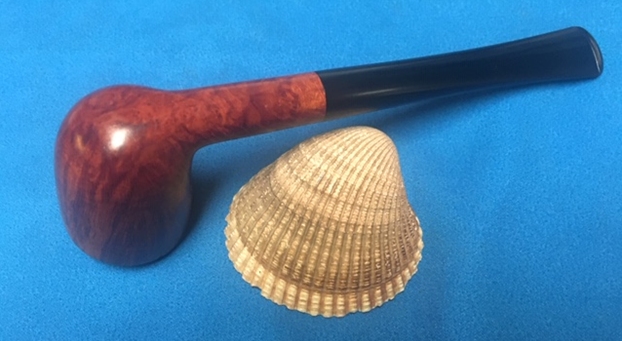
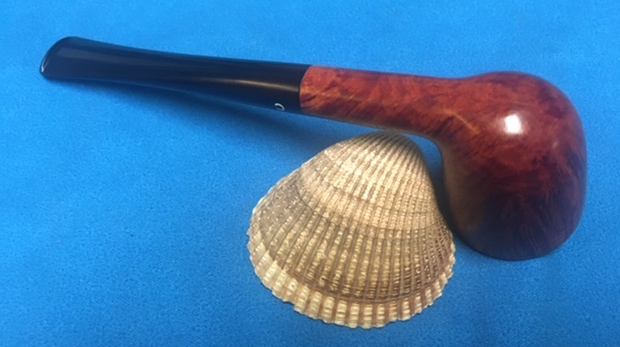
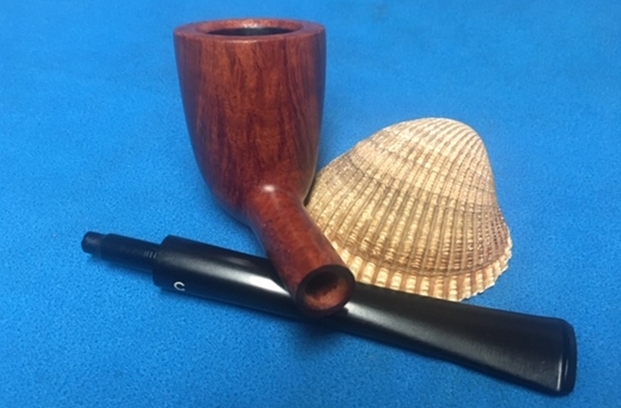
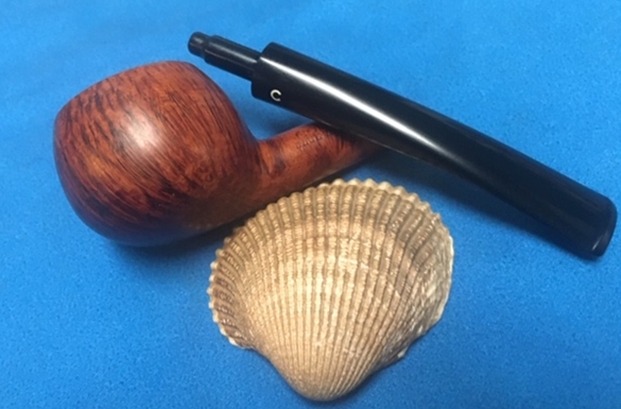
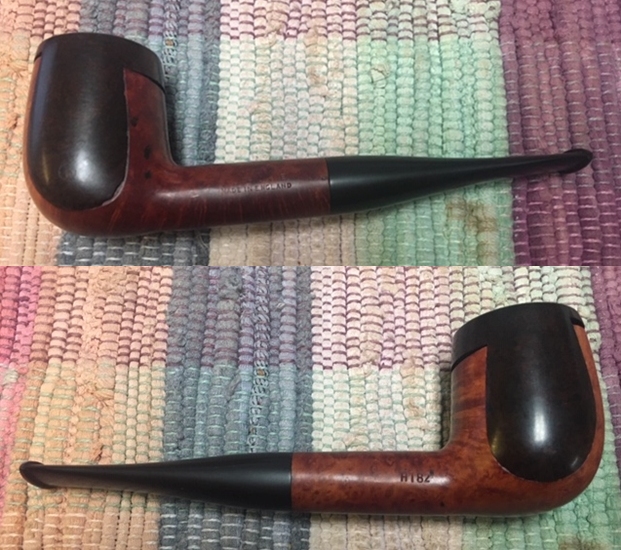
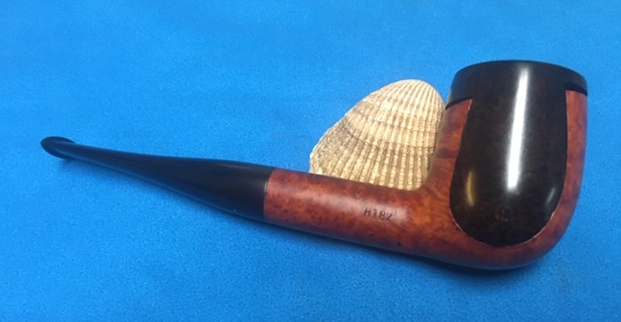
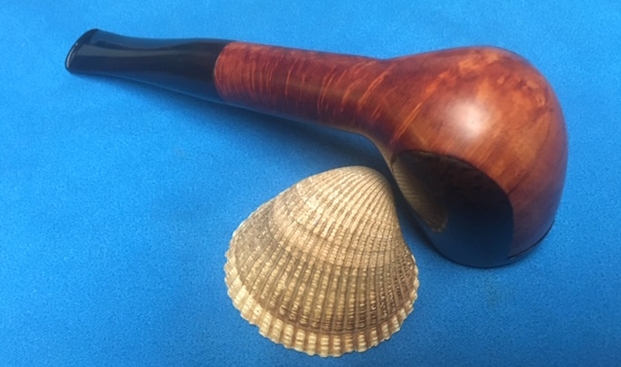
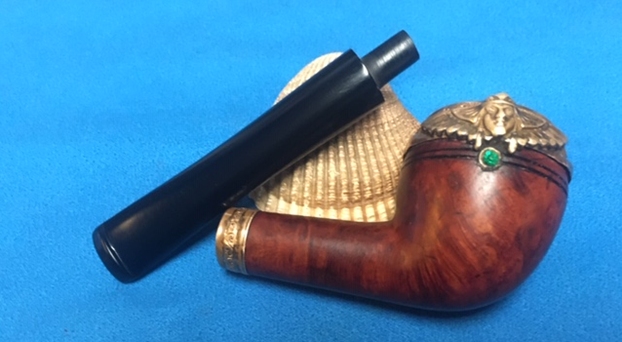
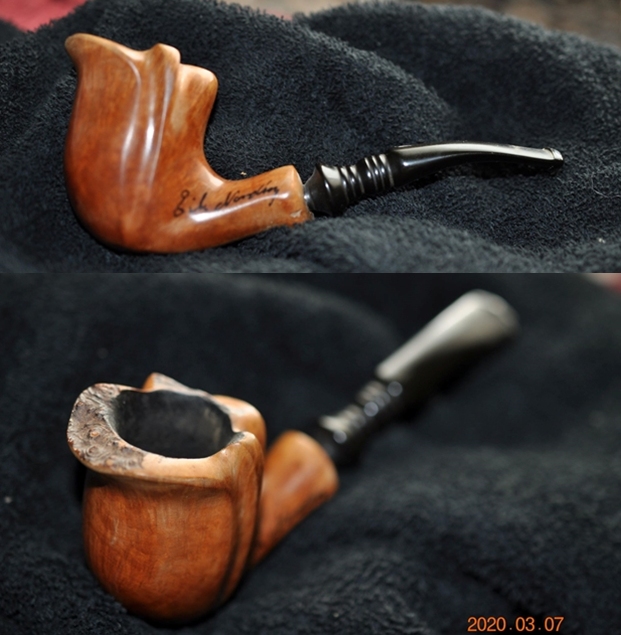
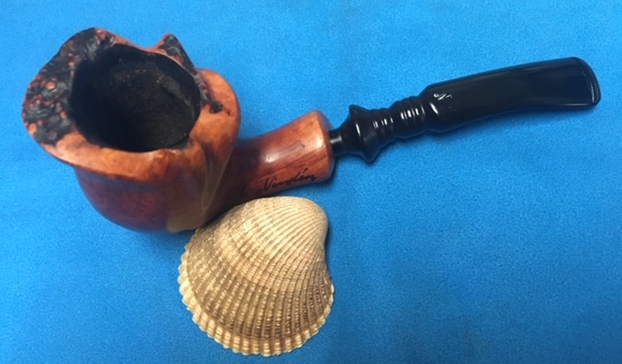
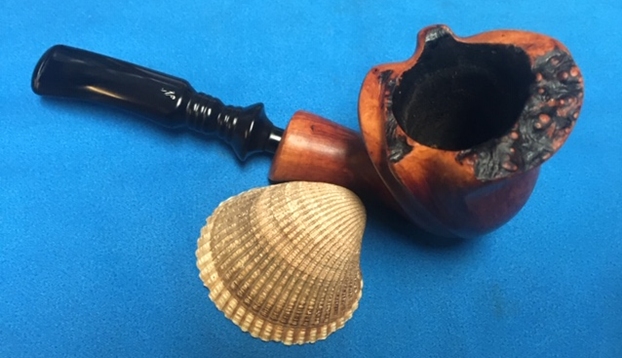
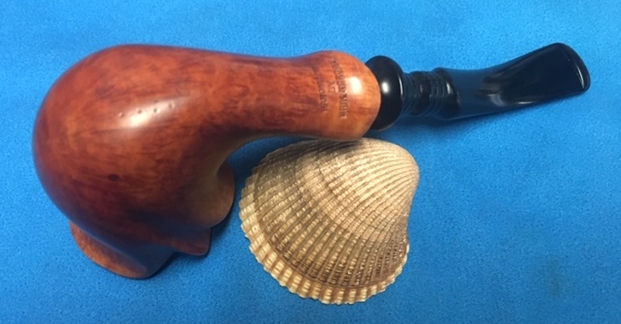
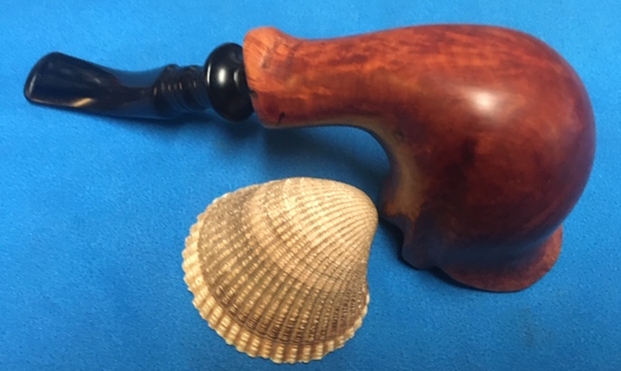
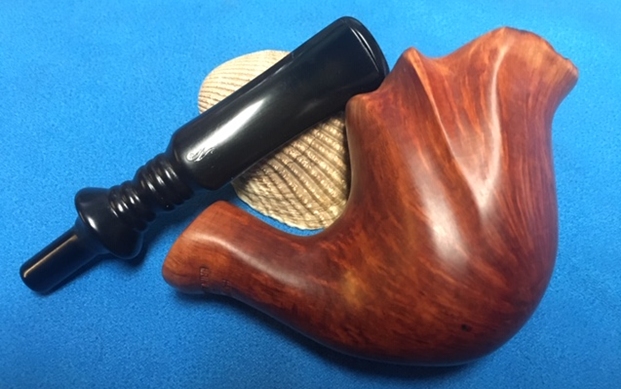
 The Dr. Geo I acquired I called a Prince shape. I knew nothing about a Dr. Geo line, but what attracted me to the pipe was the blasted bowl – it was tired and dull, but had potential, though the pipe itself was unimpressive and attracted no attention when it had its time in the Dreamers collection.
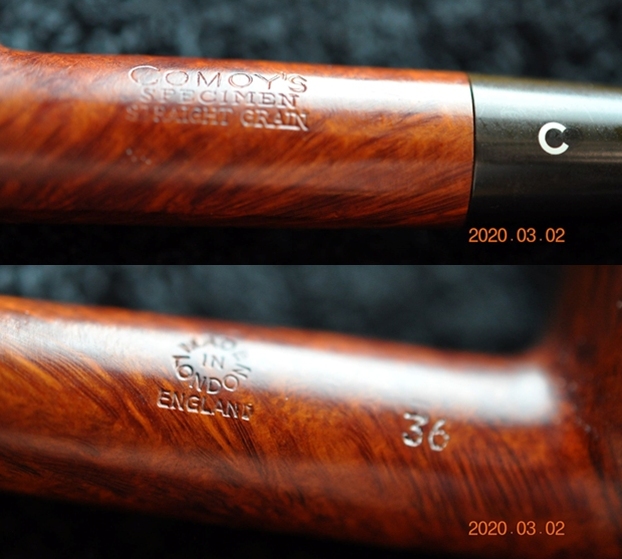
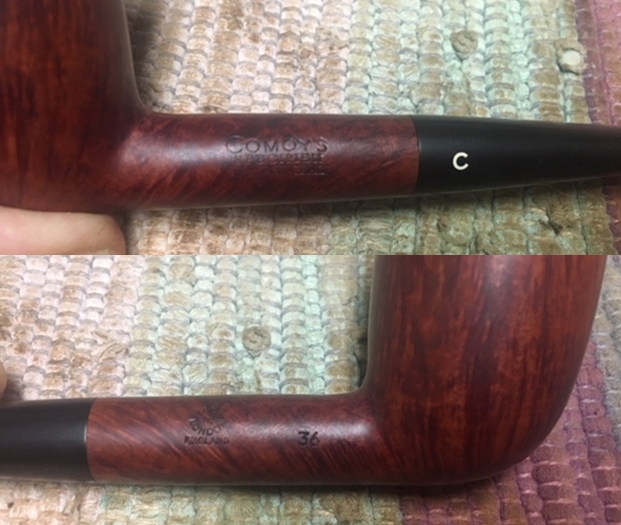
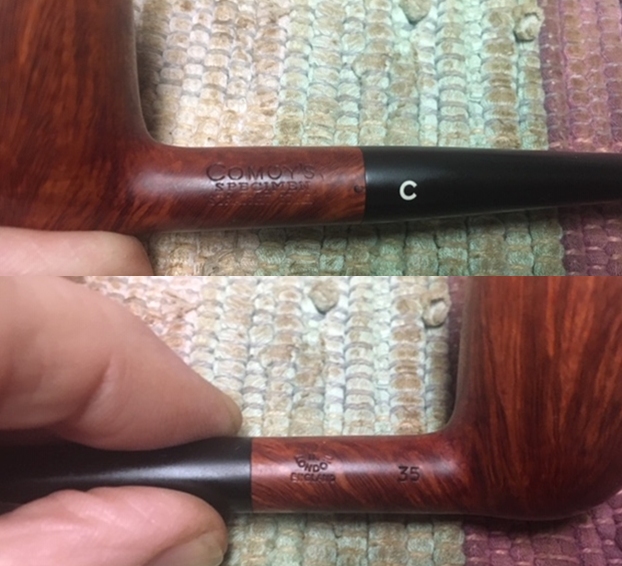
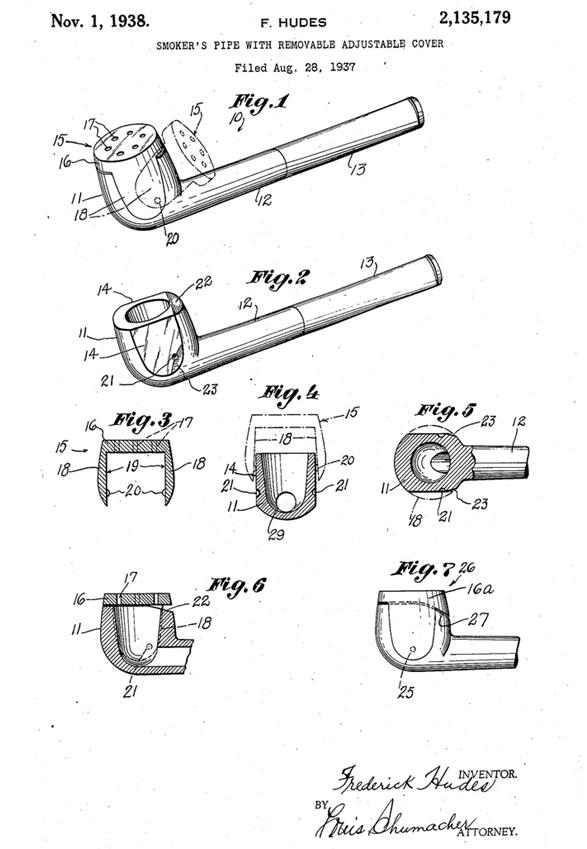
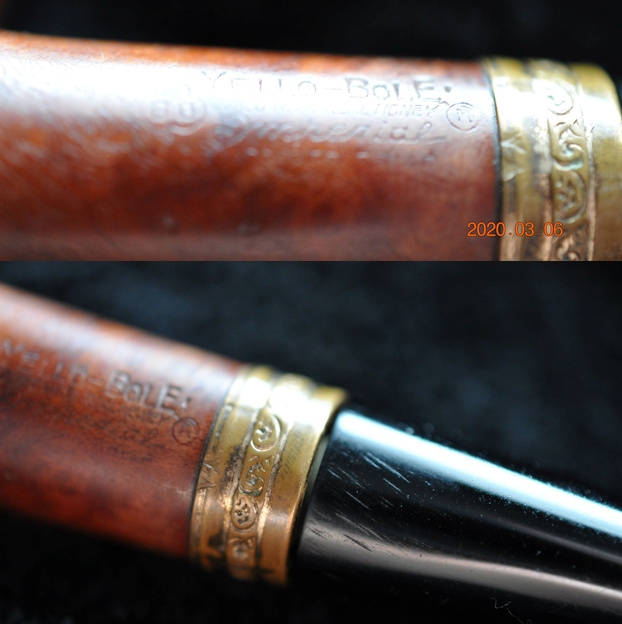
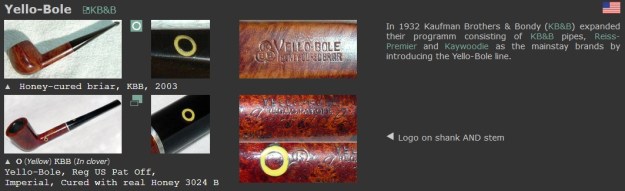
 With the bowl now on my worktable to transform into a Churchwarden, I found some information online about the origins of Dr. Geo Deposée. Pipephil.eu’s panel gave some information confirming that it was of French origins from the Gichard & Cie Company.
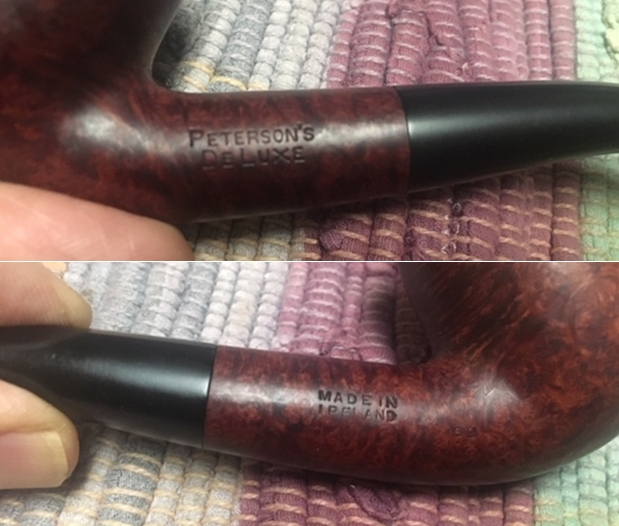
 Pipedia adds some additional information in its list of French made brands. It lists that Dr. Geo was produced in the 1940s from Guichard & Cie, and later sold by M. Marmet Regge, with Ebonite stems. Interesting to me is that my guess is that The Dr. Geo I’m looking at was from the later, M. Marment Regge ownership with the specific reference to the use of Ebonite stems. I have another Dr. Geo in my Dreamers inventory from another Lot I purchased from France, it has a horn stem, which most likely places it in the earlier dating when rubber was in short supply during WW2. The listing for Marmet in Pipedia, called M. Marmet-Regge, also sold the Dr. Geo brand which were produced in Saint-Claude.
  The meaning of the French, “Deposée”, attached to Dr. Geo is a bit cryptic, at least to one who is relegated to Google Translate to make sense of the meaning. The direct primary English translation provided is “deposited” which is a past tense rendering. Looking at other definitions provided by Google Translate, the possible meaning could be tied to the idea that “Dr. Geo” attests to o
 r is behind the goodness of this pipe brand like Dr. Grabow! It seemed like I was grasping at straws until I see the ‘info link’ on the Dr. Geo panel provided by the Pipephil. The link goes to a French site called ‘Ces pipes pas comme les autres’ (These pipes like no other) to a May 2006 listing selling ‘Two Doctors’ pipes with information about each. A ‘Dr. Geo’ is described as one of the doctors with the possible clue pointing to a rational for the sub-name of ‘Deposée’:
Many pipe brands have earned the doctoral title. This makes smokers smile during these times of heightened hunting.
During the post-war years this title was more a guarantee of seriousness or of a search for perfection rather than the sign of a healthy practice. We did not allow ourselves to be disturbed by medical considerations. Everyone knew that smoking was not very healthy and took responsibility. But that has changed a lot today with the new globalized MacCarthyism.
José Manuel Lopes (1) counts seventeen brands of pipes that bear the famous title! I would like to introduce you to an 18th: Dr Arthur recognizable by his “A” circled on the pipe. No further information on this doctor there Maybe you thought I was going to present you with a leather-wrapped pipe, stamped with the most famous of these doctors? It would be bad to know me. But fear not: in this section you will not escape the famous Franco-English doctor whom I have already mentioned in the section of Cavalier pipes.
The pipes of Dr Géo – French brand of Gichard & Cie which is no longer produced – do not have an exceptional notoriety but sufficient to be cited here and there.
(1) José Manuel Lopes (President of Pipe Club of Portugal), Pipes, Artisans and Trademarks. Quimera Editores, 2005
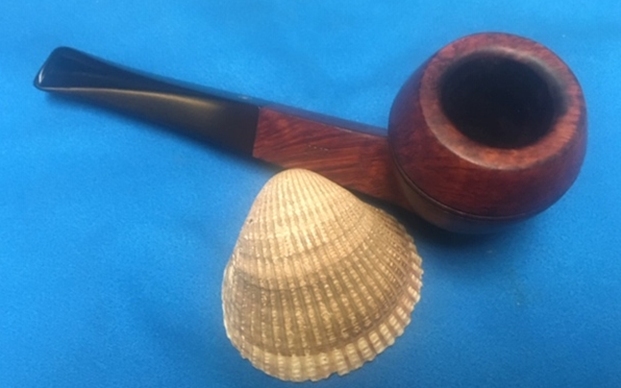
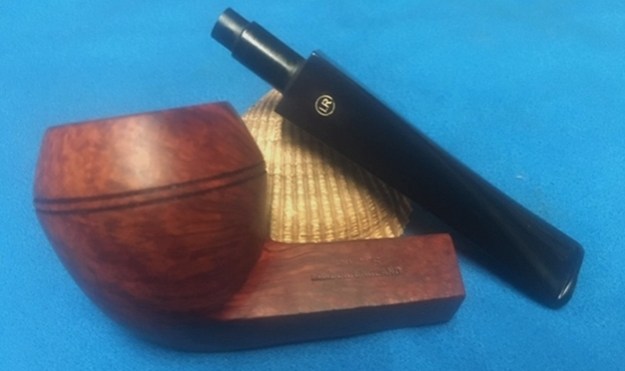
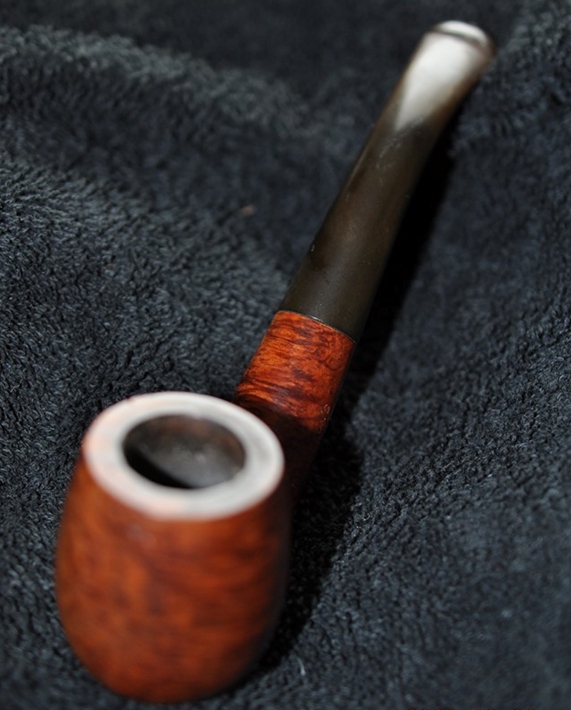
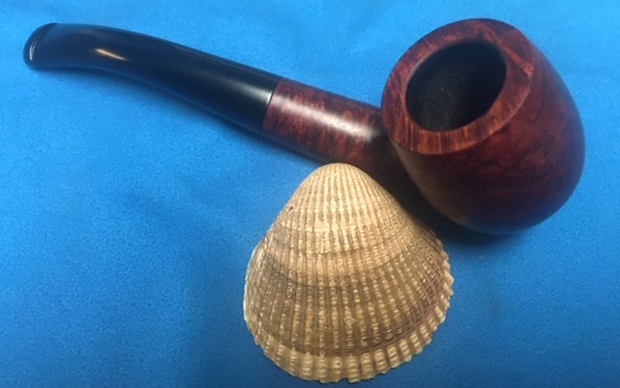
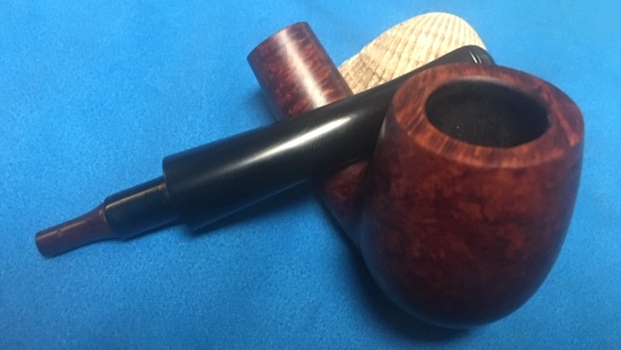
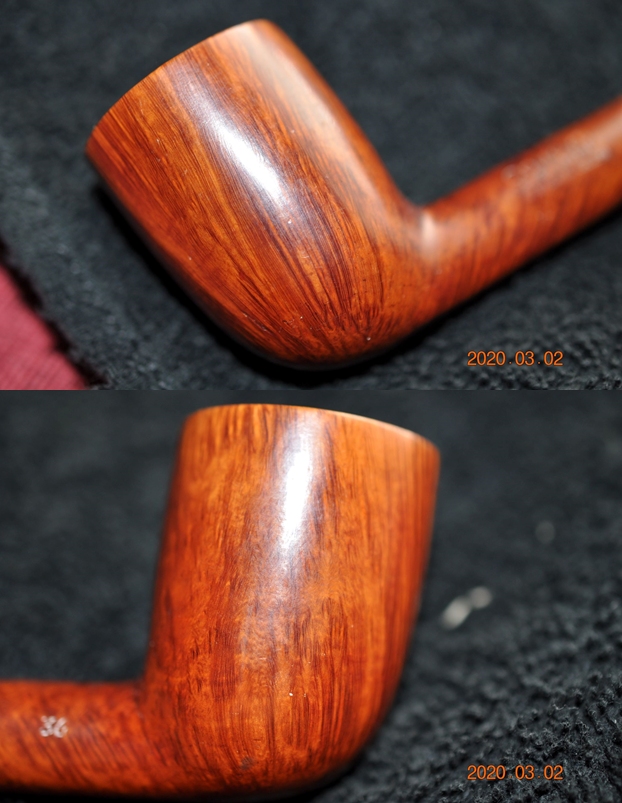
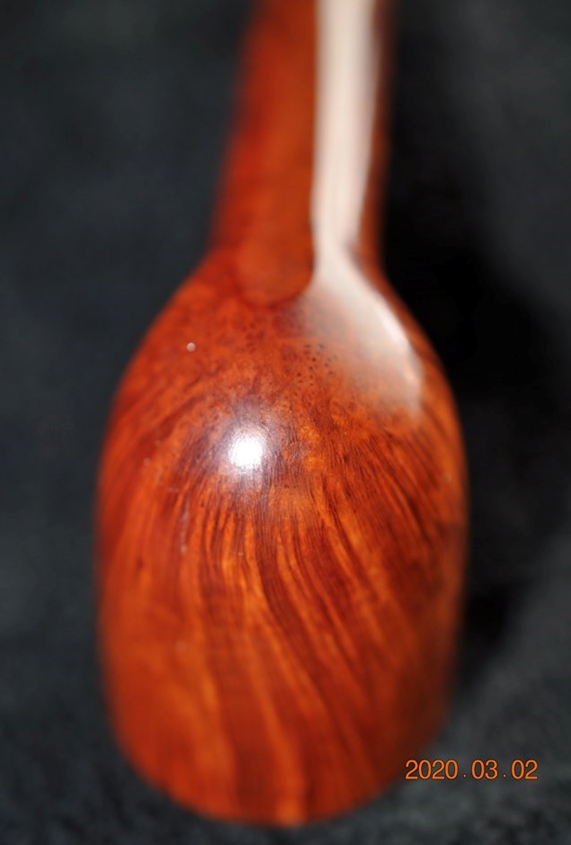
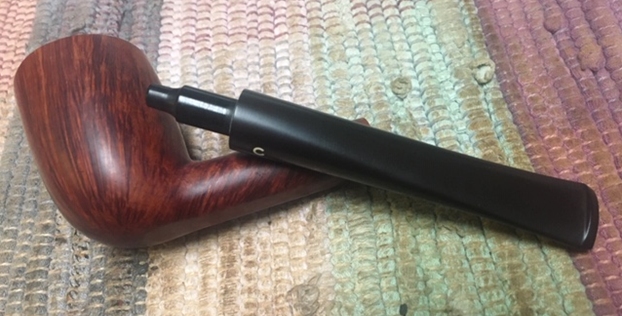
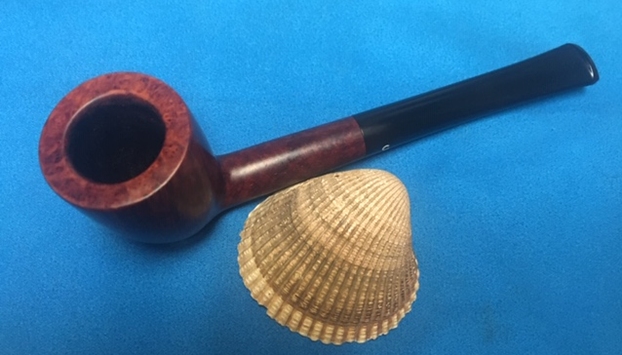
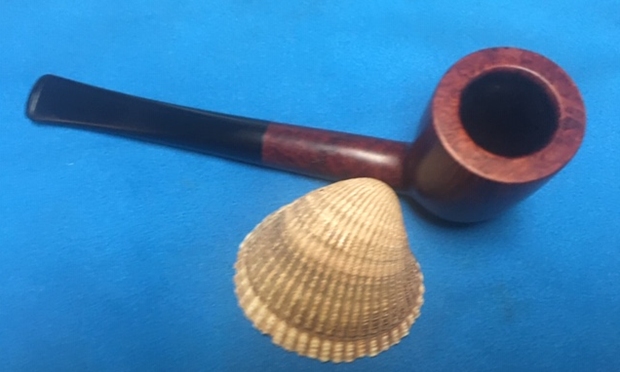
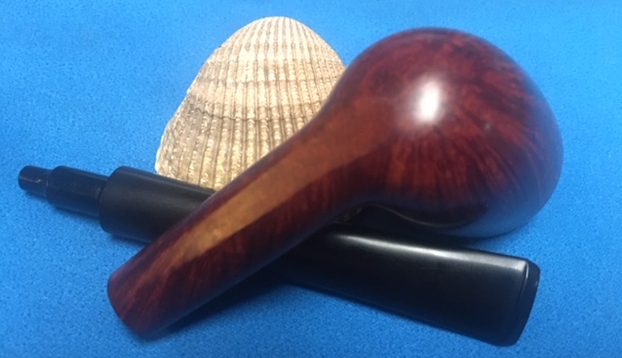
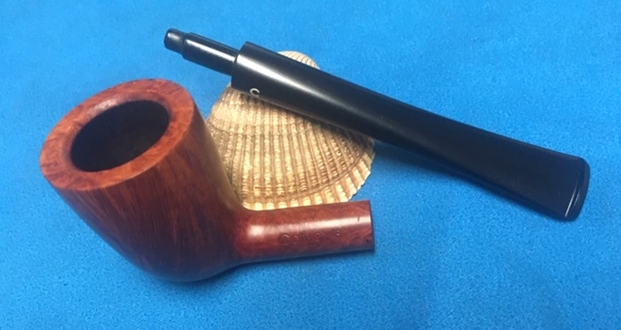
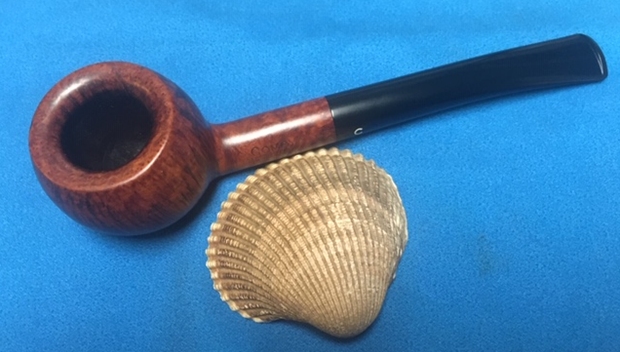
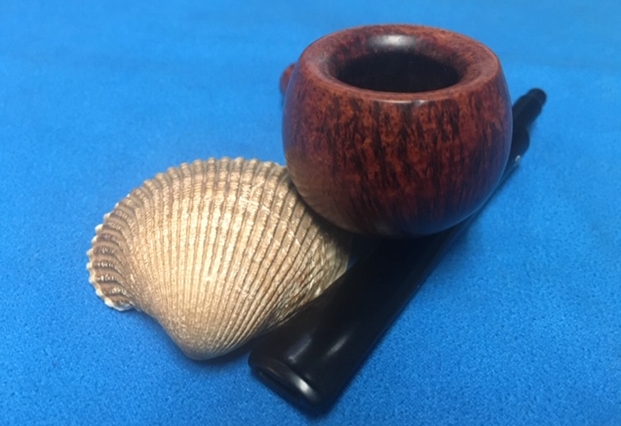
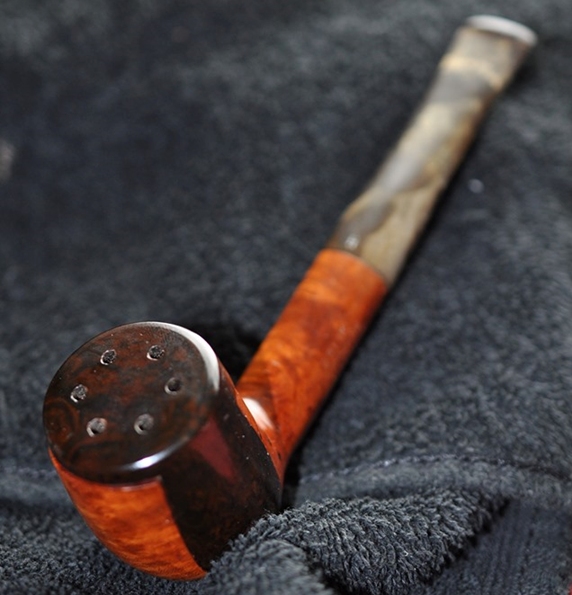
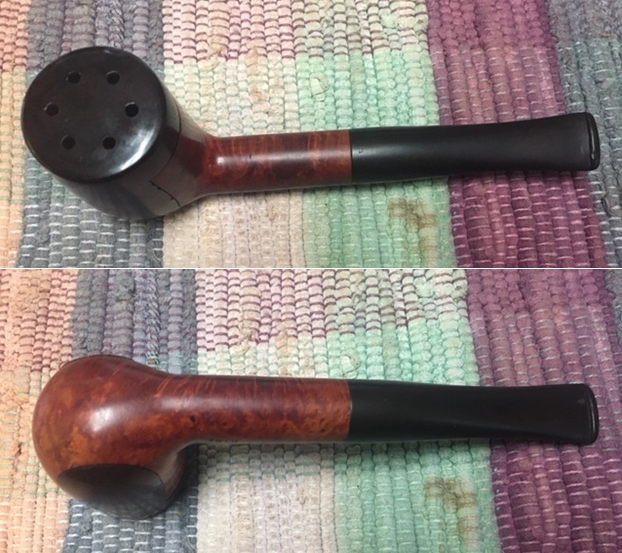
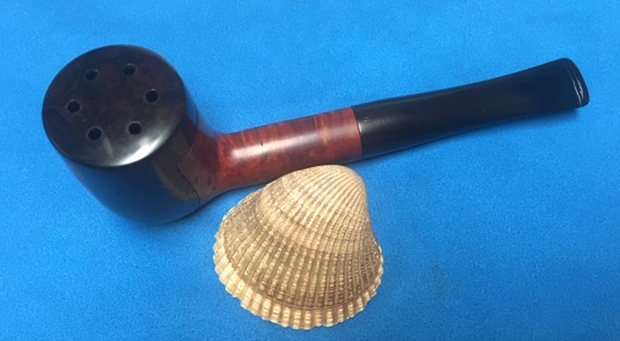
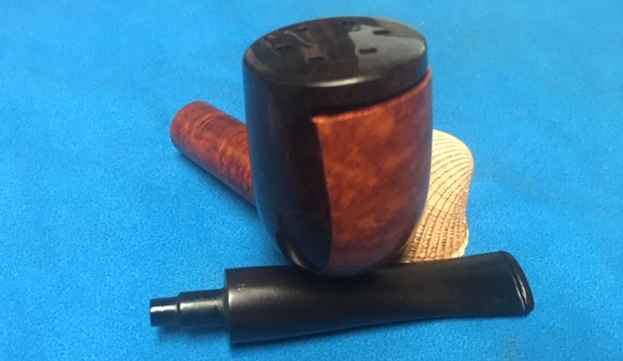
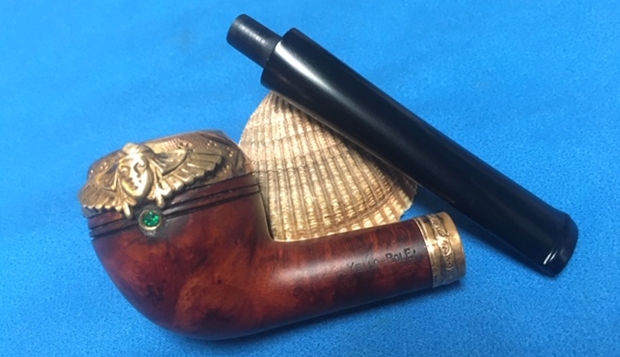
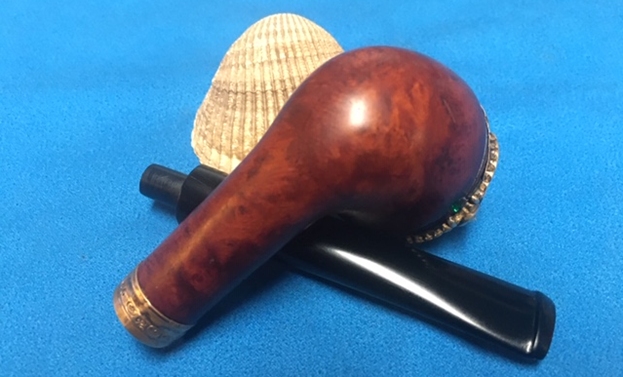
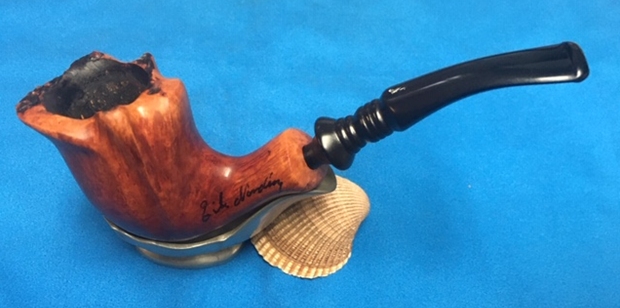
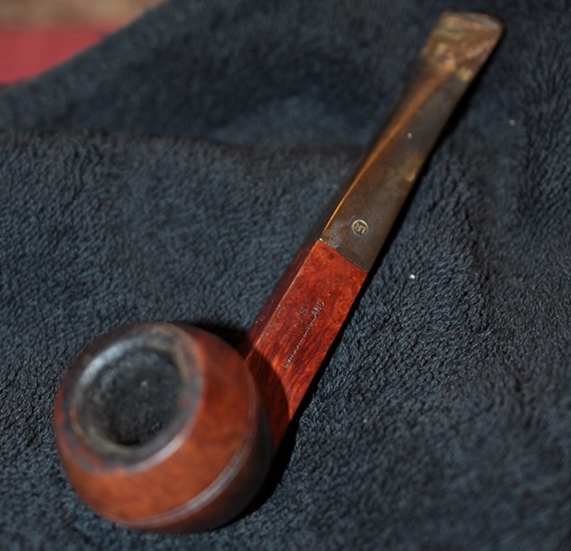
The listing shows a picture of each Doctor cited with dimensions and a pricing. I find interesting the dismissive gesture for the listing for the Dr. Geo: “…no longer produced – do not have an exceptional notoriety but sufficient to be cited here and there”. My hope is to change the demeanor of the Dr. Geo Blasted Prince bowl on my worktable transforming him into a Churchwarden. Churchwardens as a classic pipe shape are unique among pipes. Bill Burney’s description of Churchwardens on his great Pipedia shapes page, describes why they are unique among pipes: Working on my Man Cave 10th floor balcony, I take a few more pictures to get a closer look at the Doctor Geo Prince bowl, which is essentially an Apple shape without the Prince stem – hmmm, an exception to the CW stem principle?
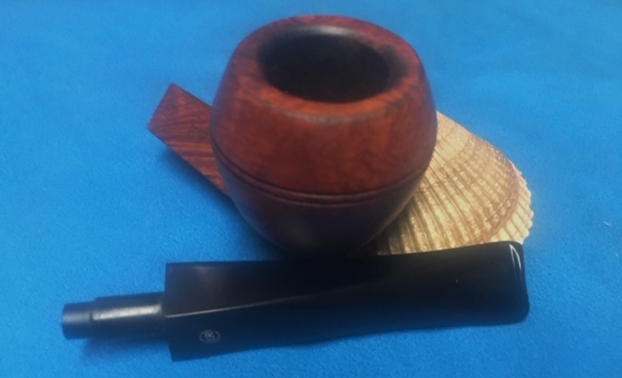
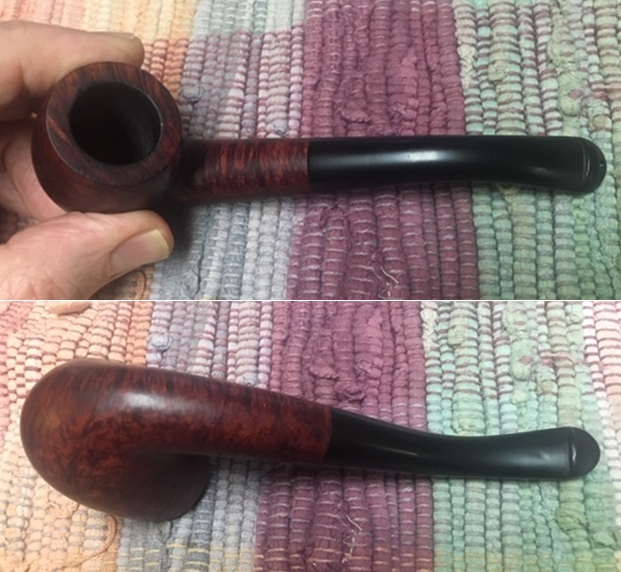
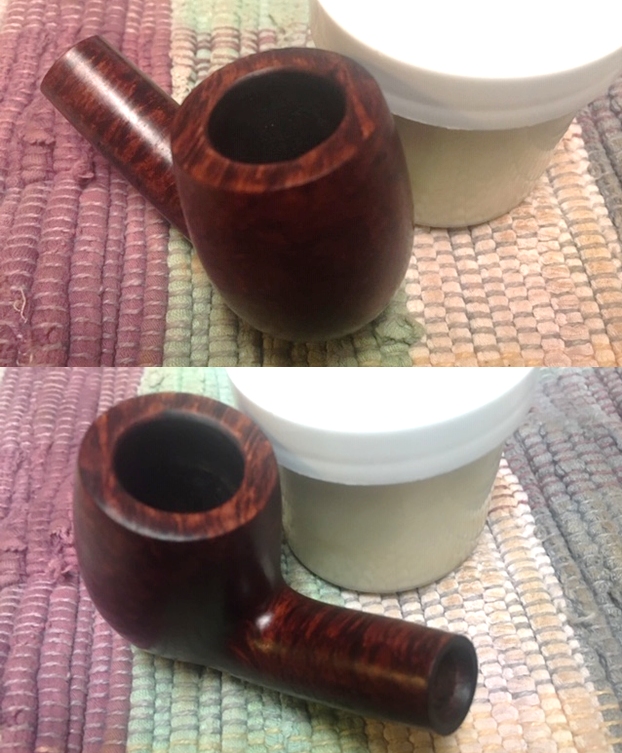
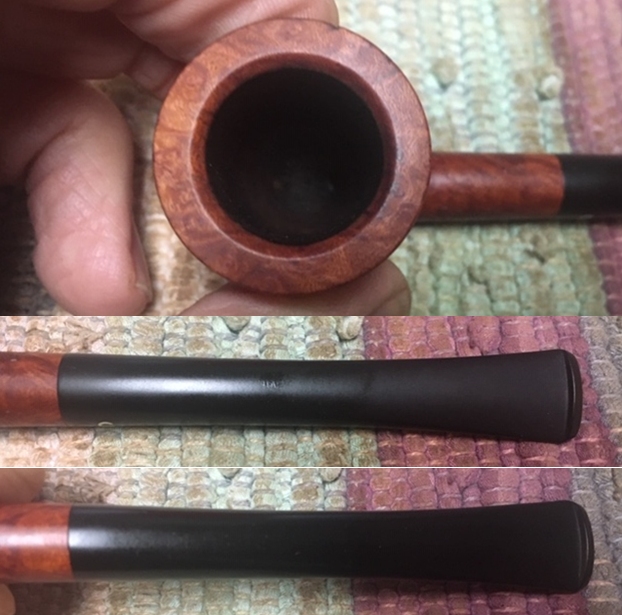
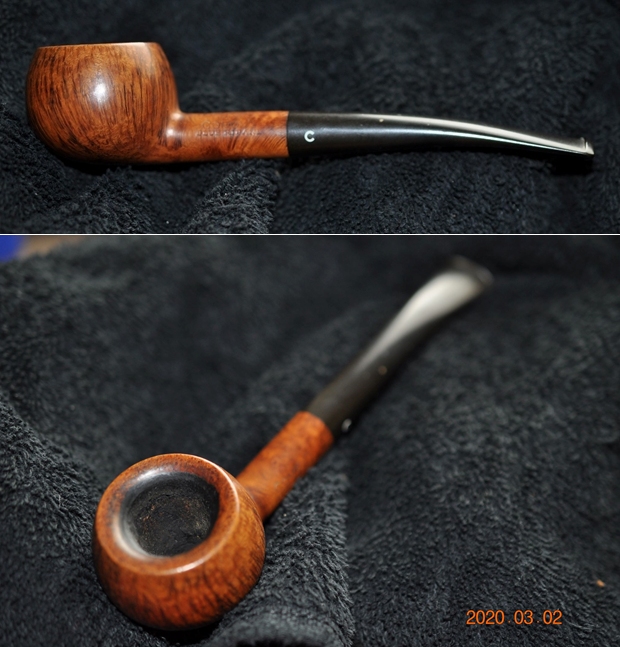
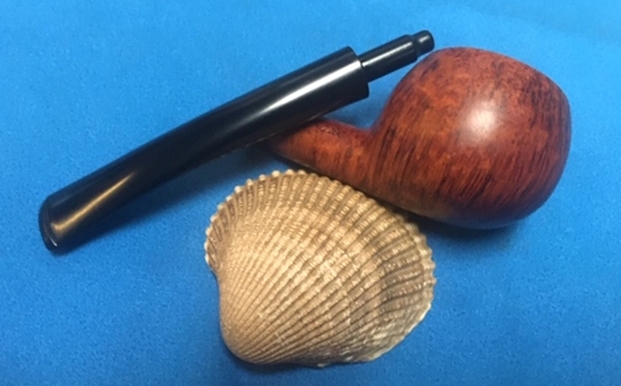
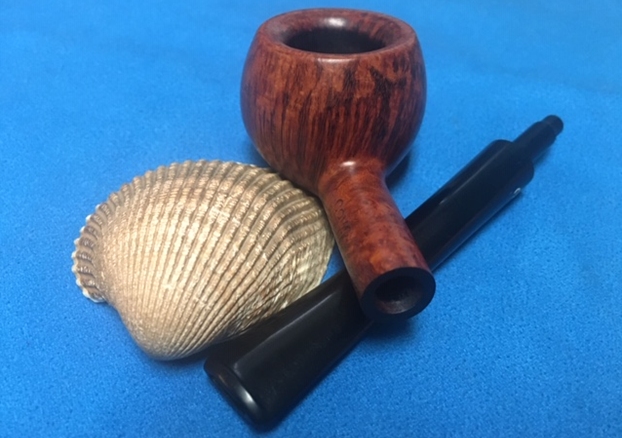
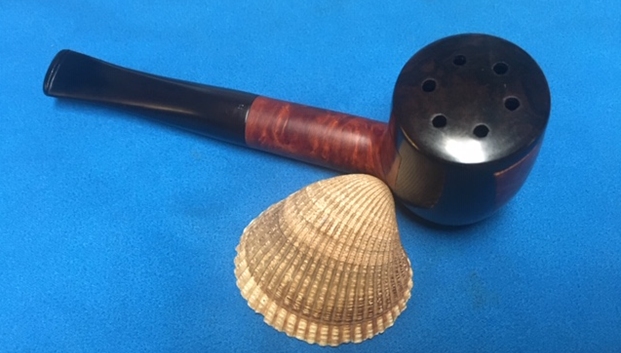
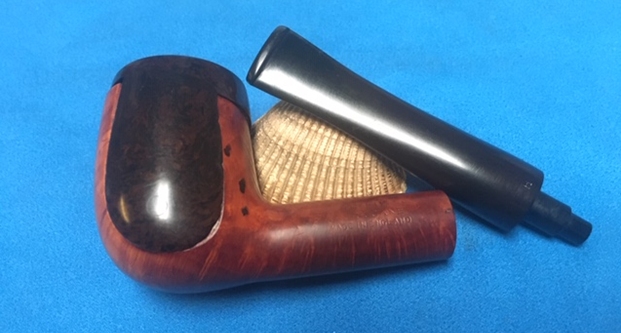
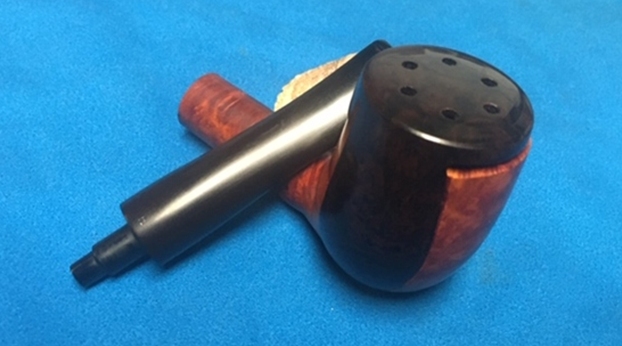
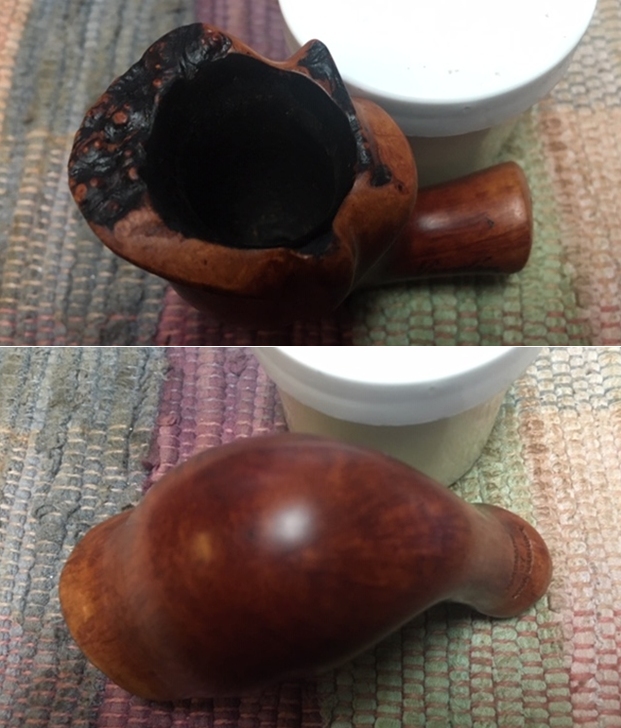
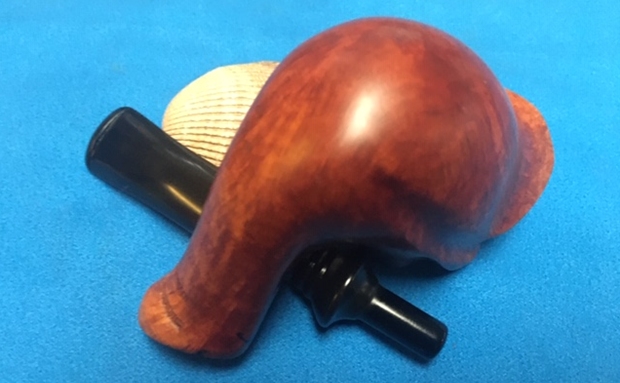
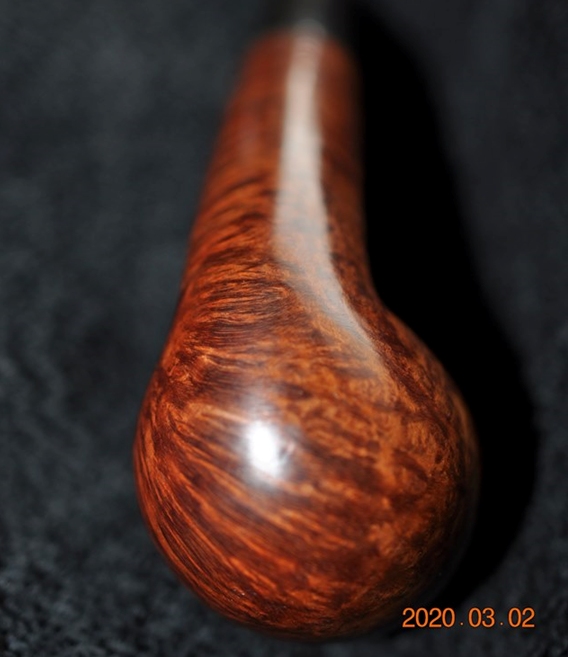
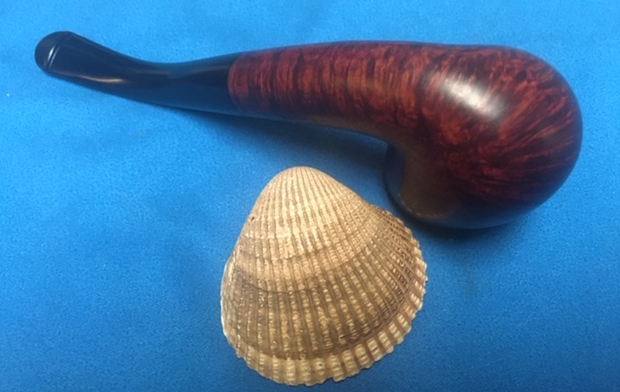
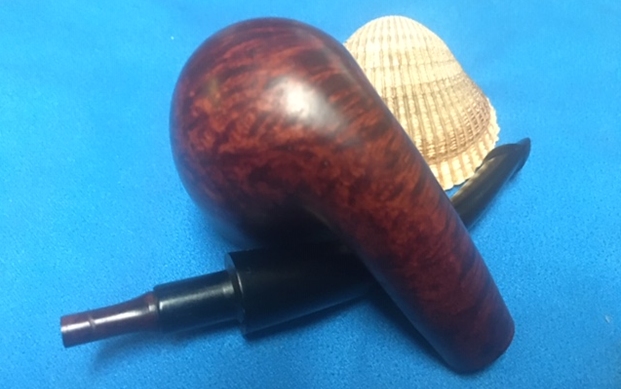
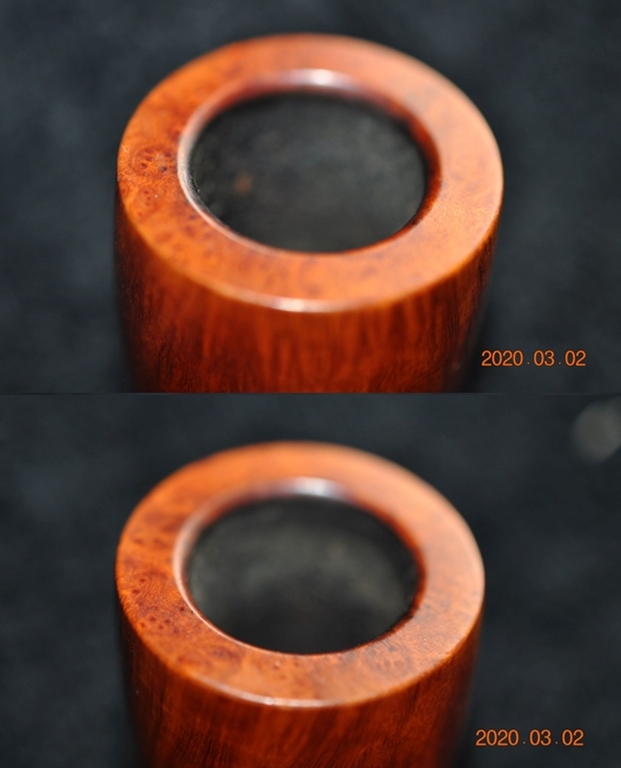
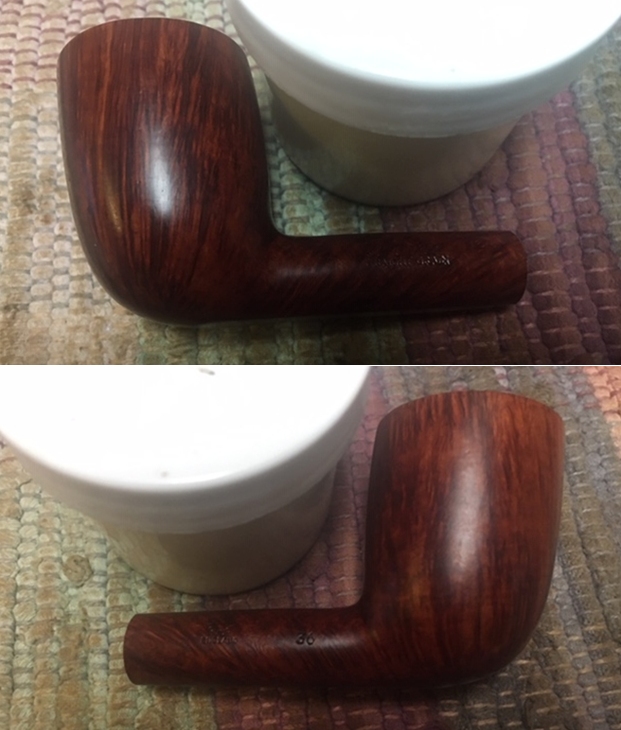
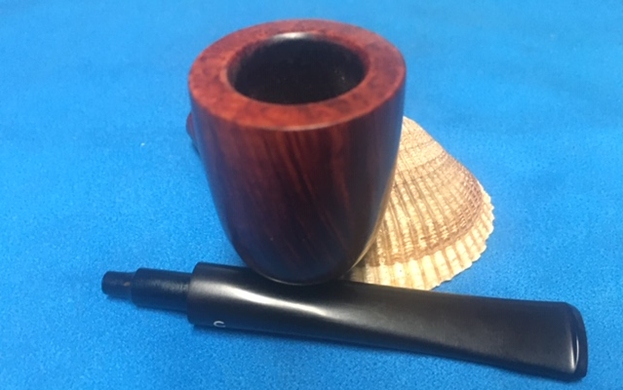
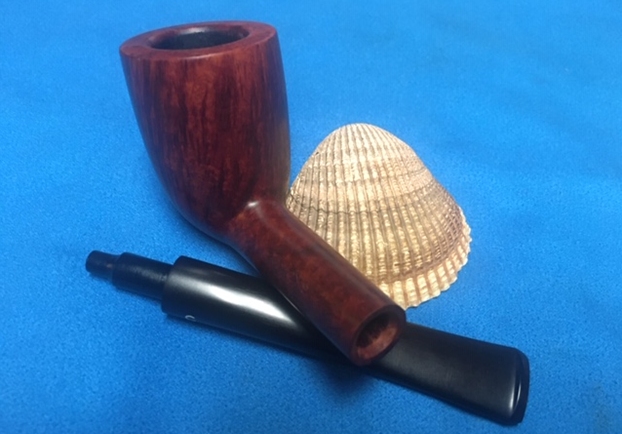
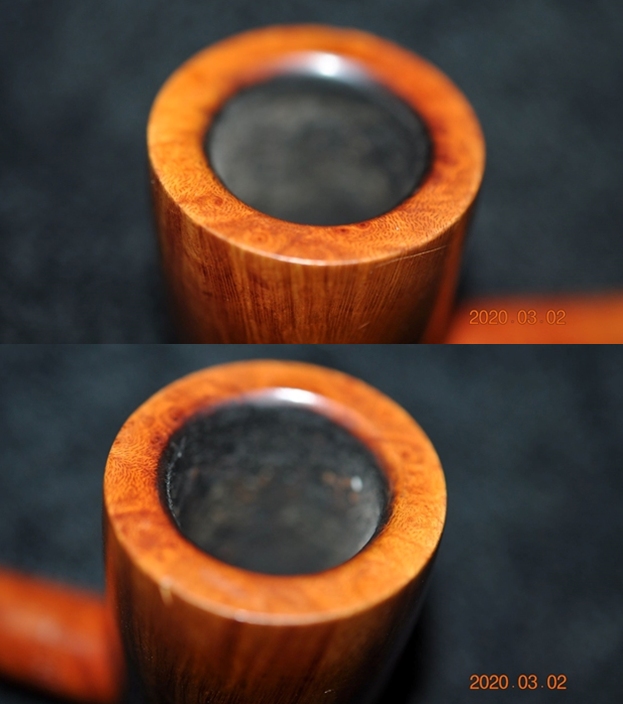
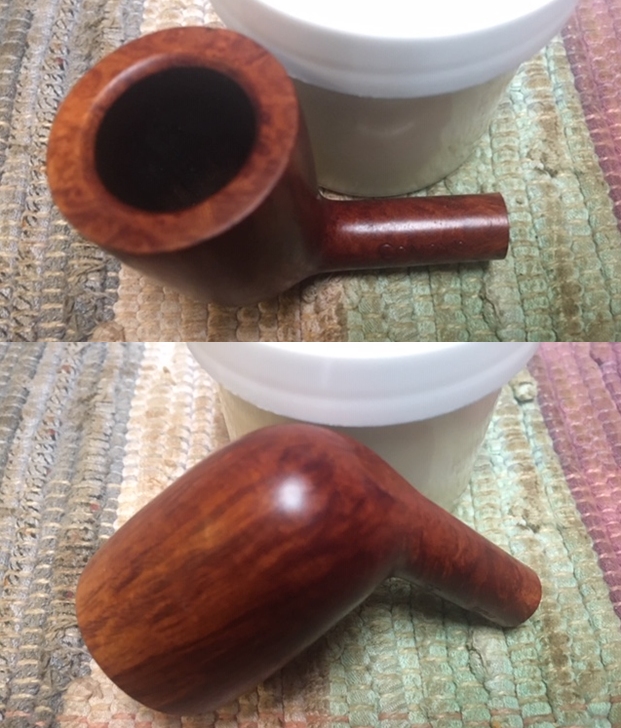
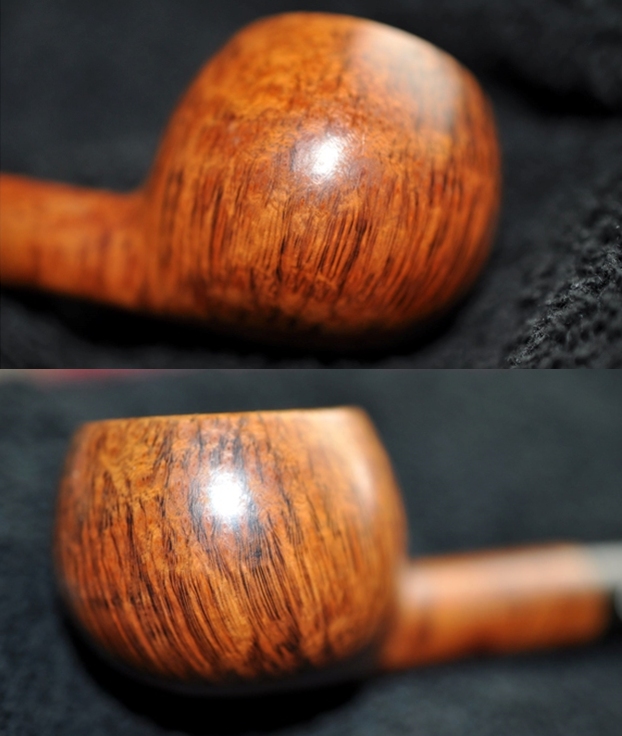
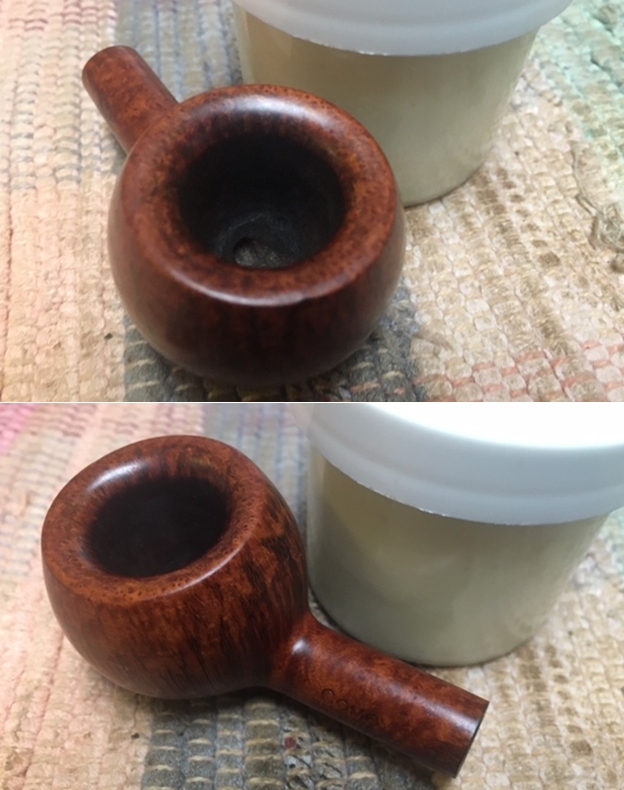
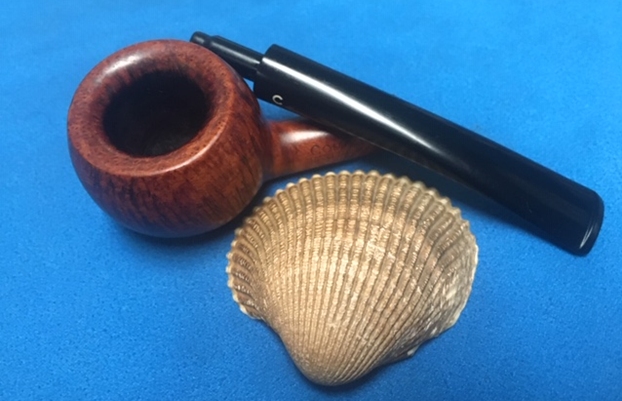
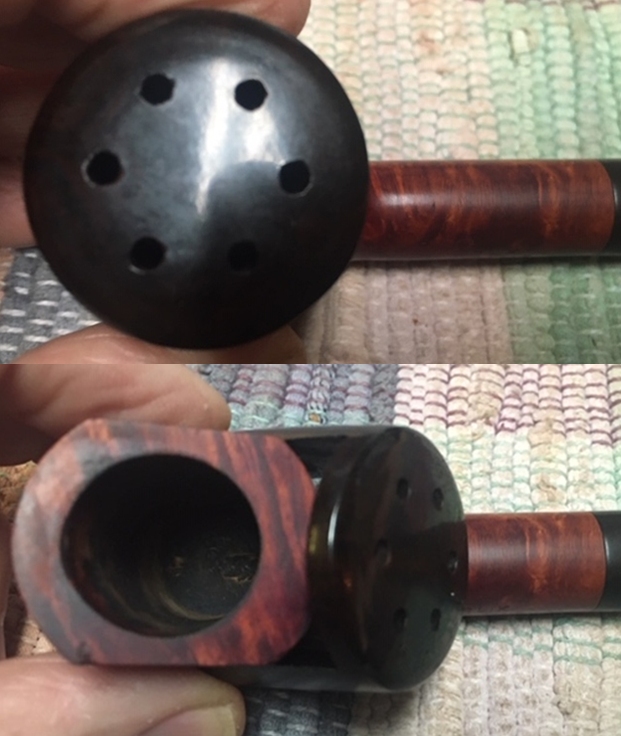
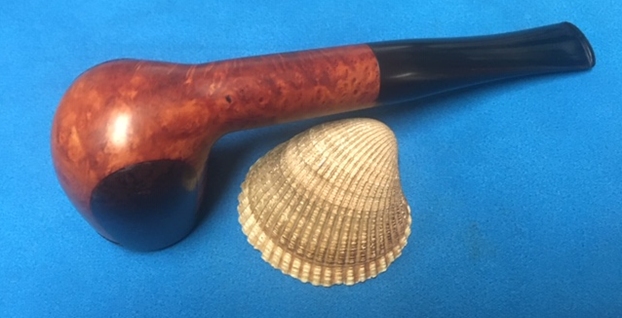
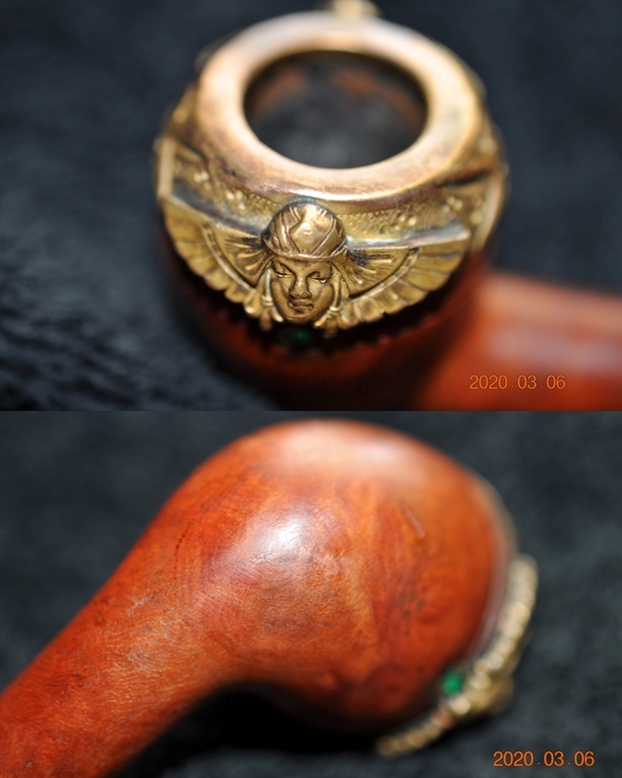
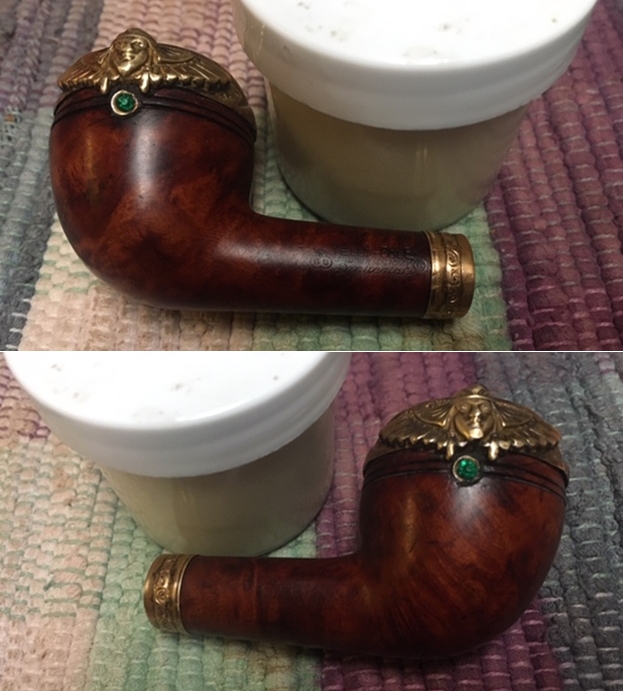
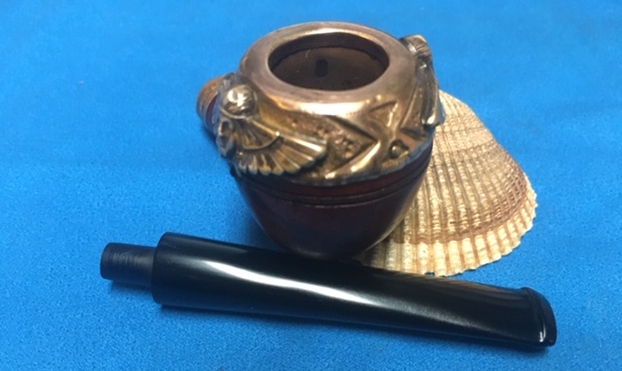
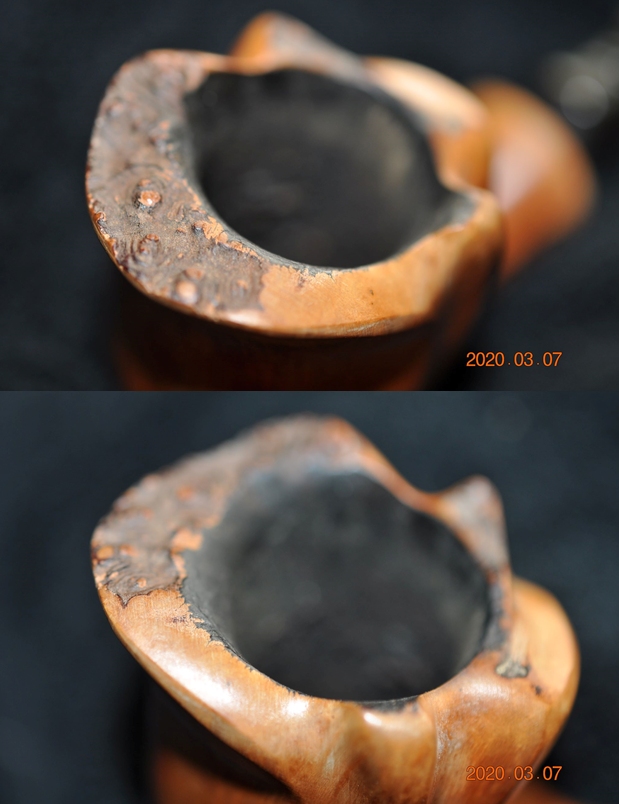
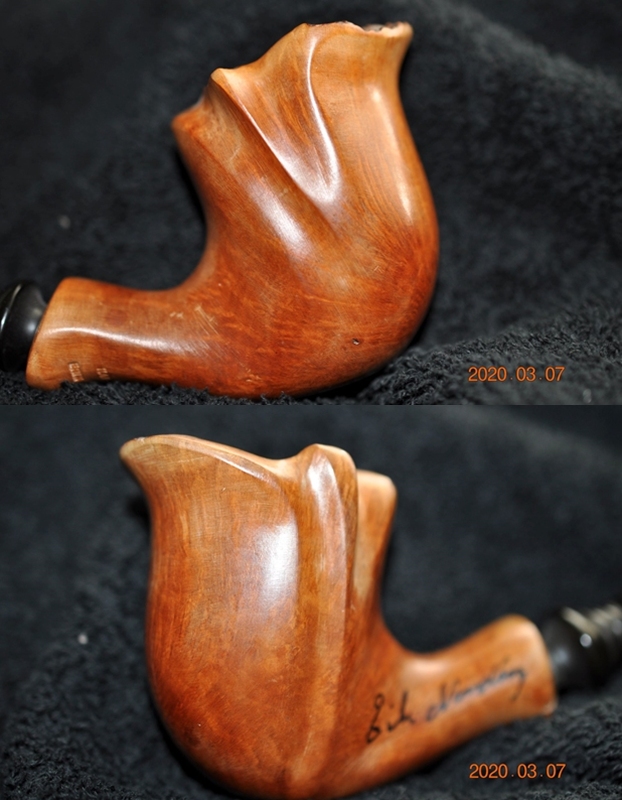
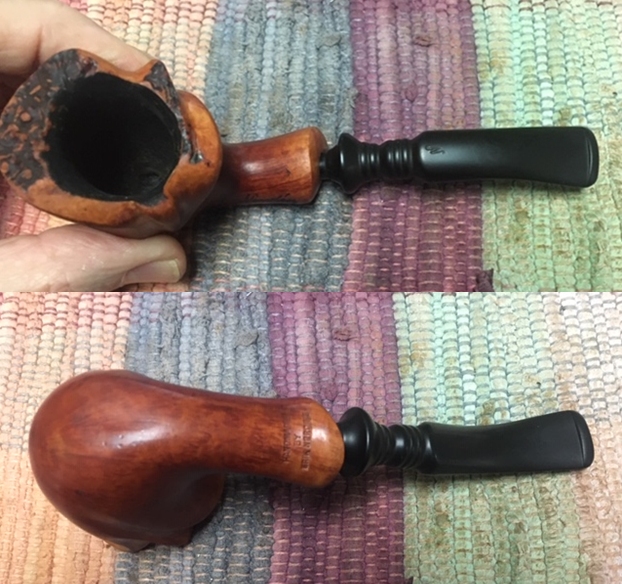
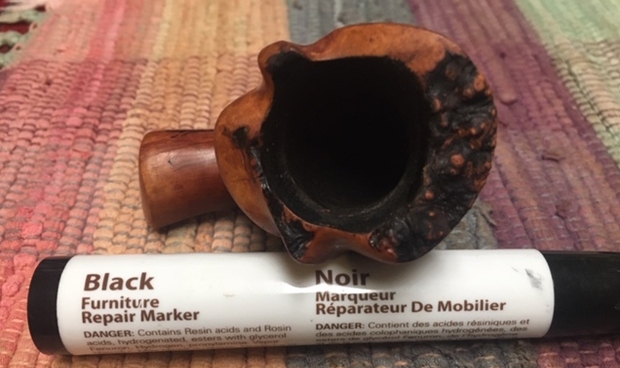
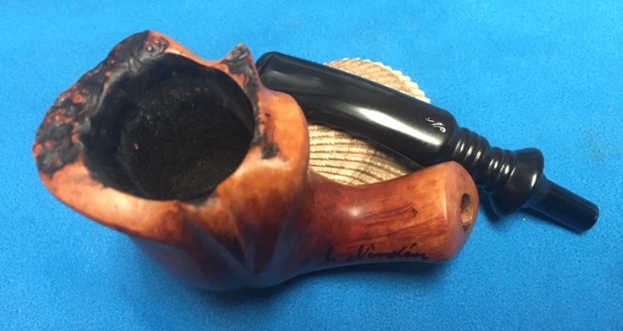
 The blasted finish is nice – the smooth 3-D picture of the bowl’s grain structure is nice. The finish on the stummel appears to be a very dark brown. There are minuscule red flecks visible through the cloudiness of the old finish. At this point, my thinking is to refresh the finish seeking to apply the ‘Dunhill’ finish that I learned from fellow-restorer and rebornpipes contributor, Paresh. First, after applying all the paces in cleaning the stummel, I’ll assess the condition of the stummel and how to proceed. Following this, fashioning the CW stem will come. To start, the Dr. Geo chamber is moderately caked.
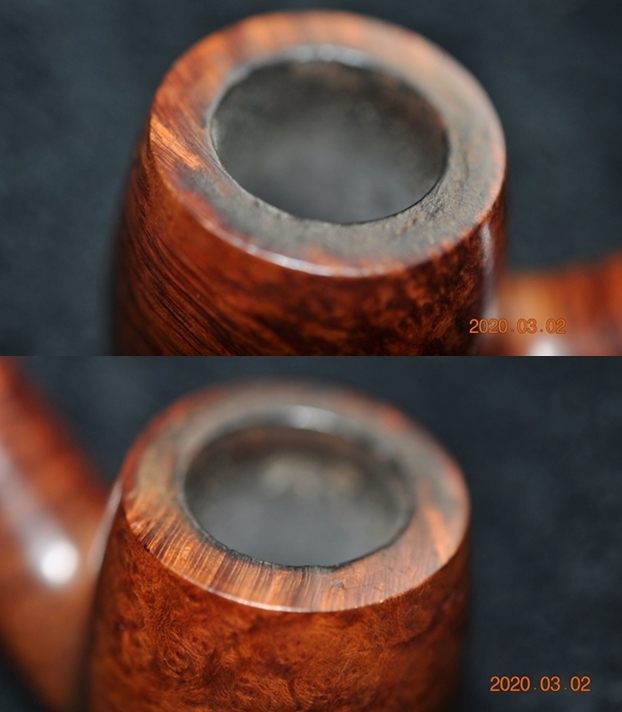
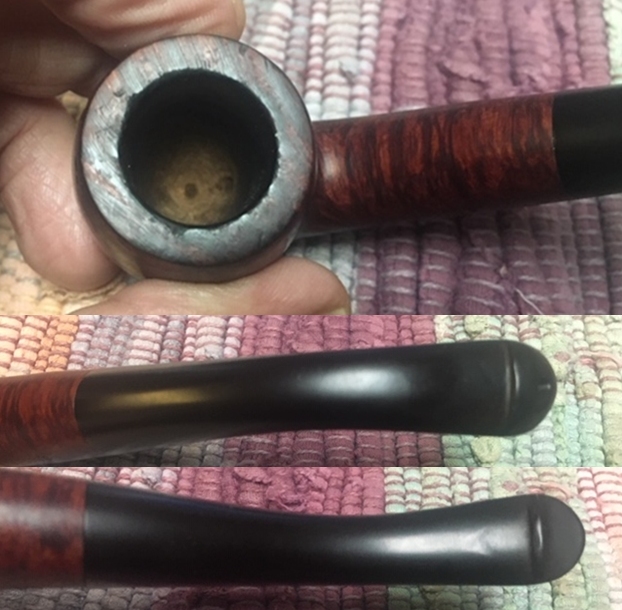
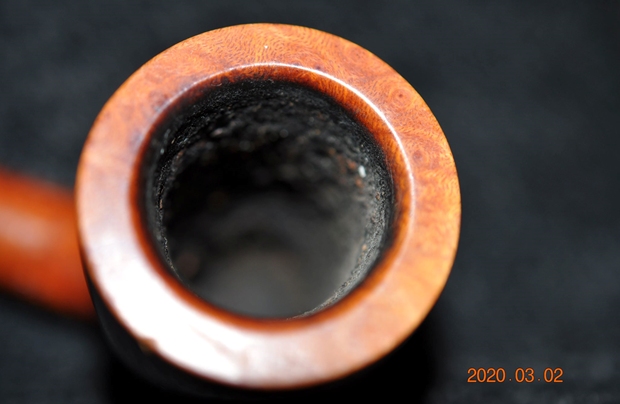
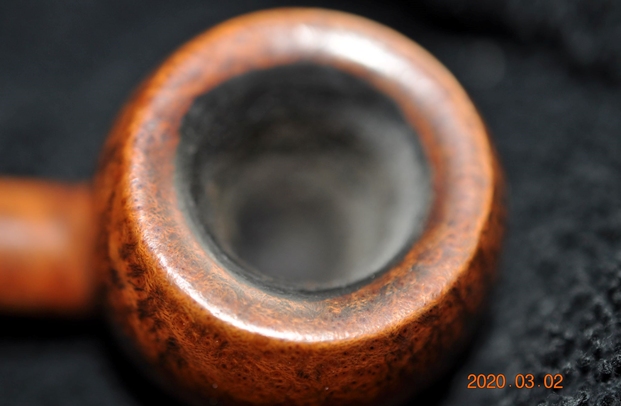
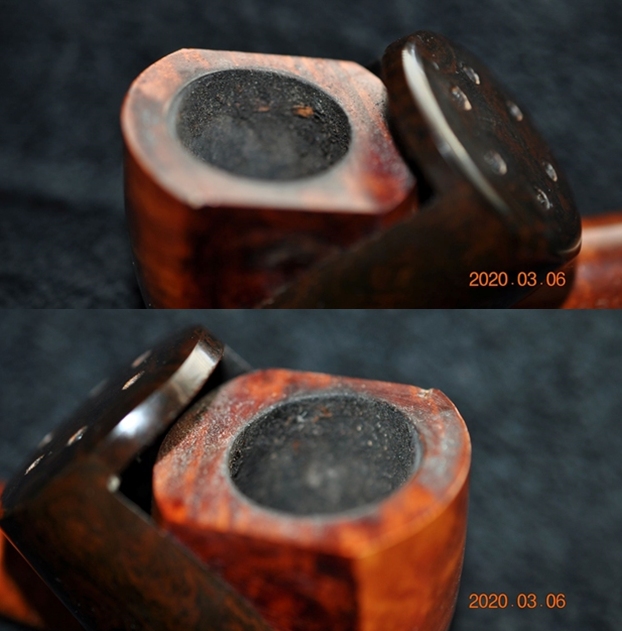
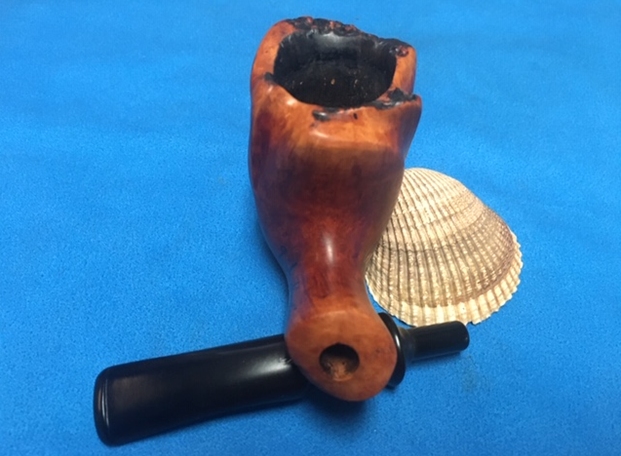
  To address this, I employ the Pipnet Reaming Kit using only the smallest of the 4 blade heads available in the kit. I follow by scraping the chamber walls with the Savinelli Fitsall Tool and complete the carbon cake removal by sanding the chamber walls with 240 grade paper wrapped around a Sharpie Pen.
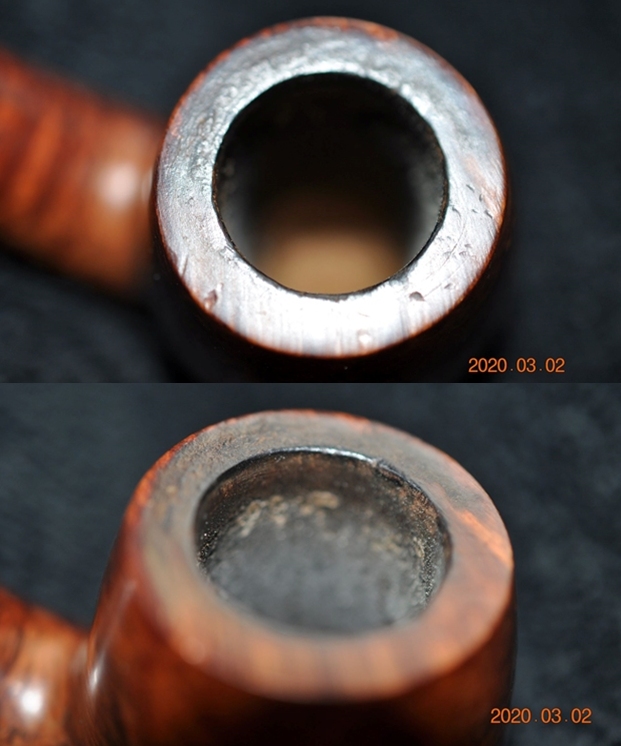
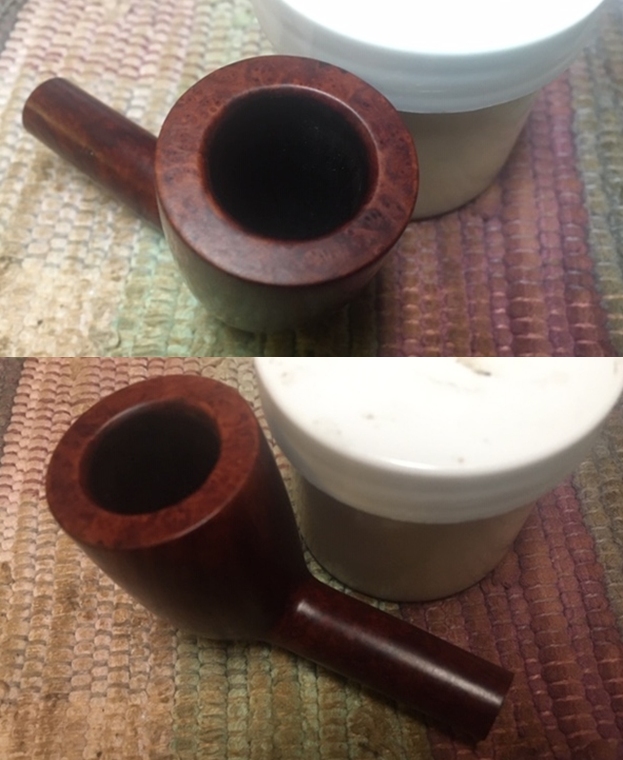
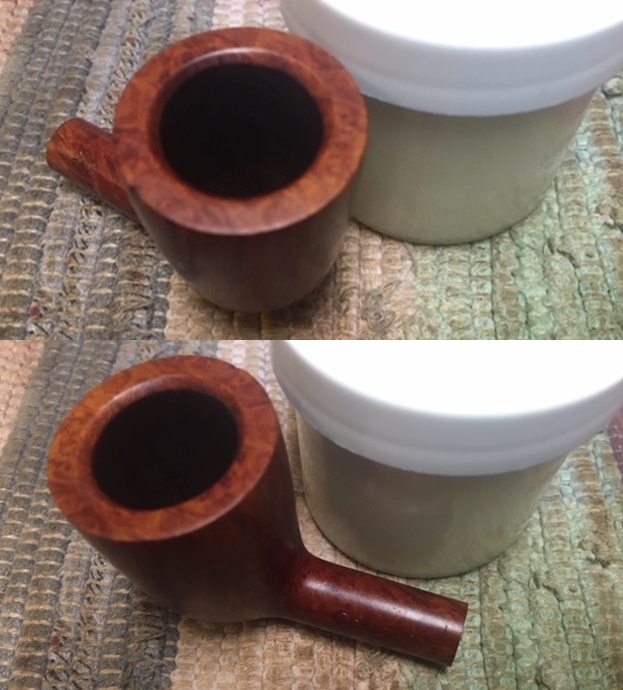
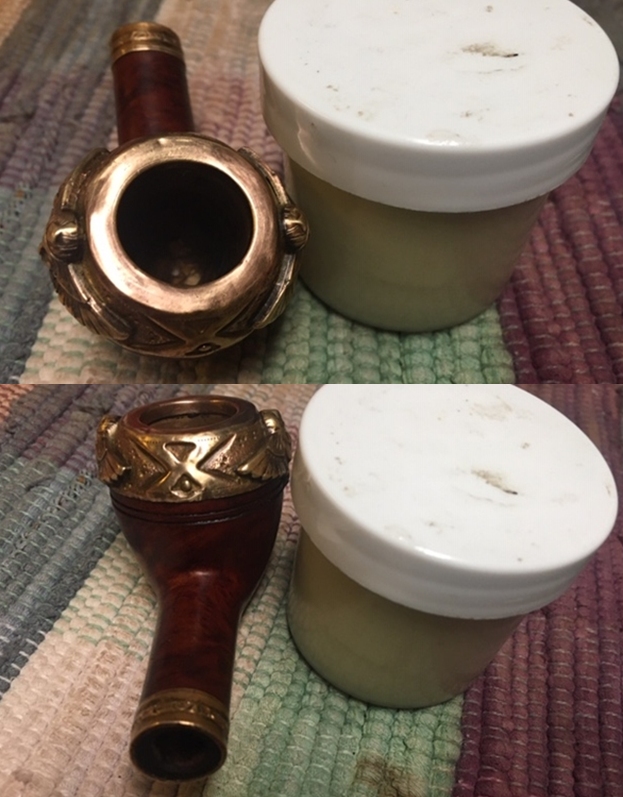
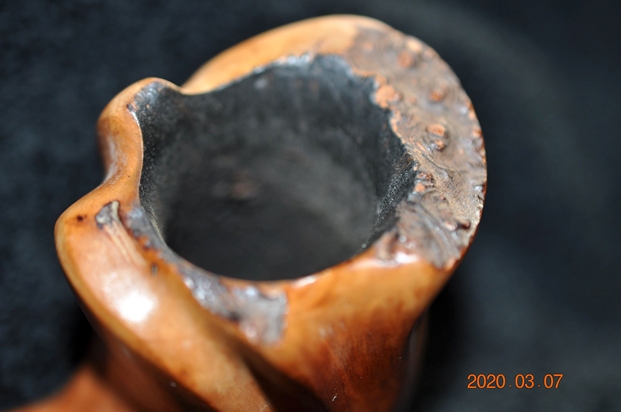
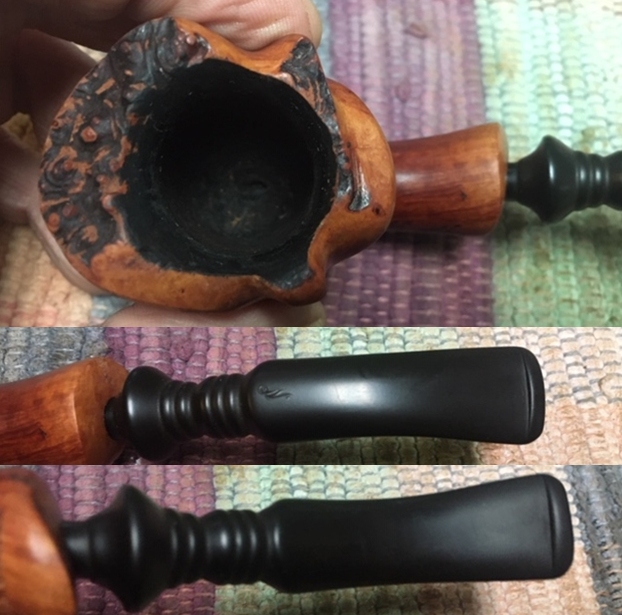
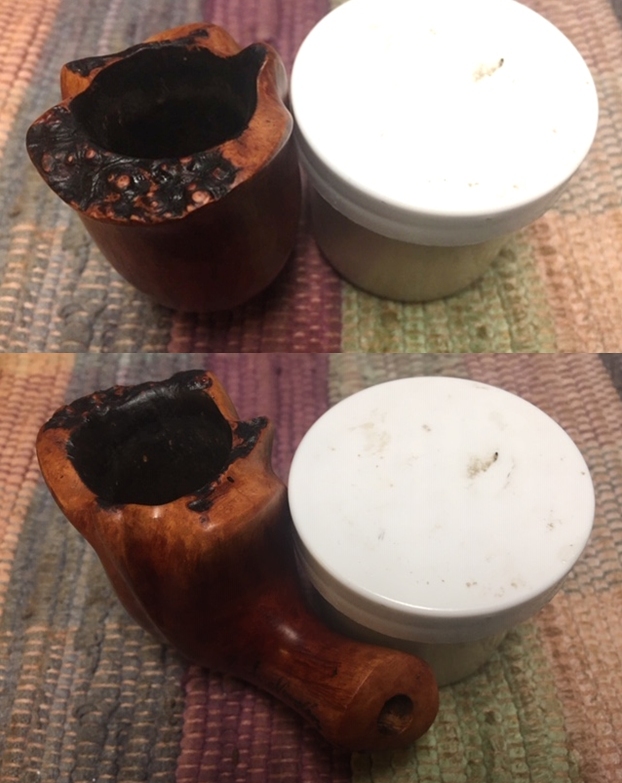
  After wiping the chamber with a cotton pad to remove the carbon dust, an inspection reveals a healthy chamber.
 Transitioning to cleaning the exterior surface, using undiluted Murphy’s Oil Soap, I go to work using a cotton pad and a bristled toothbrush. The brass bristled brush also works on the rim.
 Next, I take the bowl to the kitchen sink to continue the cleaning with shank brushes and anti-oil liquid dishwashing soap to clean the internal mortise and airway. After giving the bowl a thorough rinsing with warm water, I transfer it back to the worktable.
 Through the cleaning, the finish has started to come off. This is an indicator that a fresh start is needed. The finish is old and unstable.
 I decide to remove the old finish to get to the fresh briar beneath. Isopropyl 95% is the first agent I try scrubbing the blasted finish with a cotton pad. It is not effective.
 Transition next to using acetone is much more effect. The cotton pad is evidence of the old stain which appears black and purple. I decide to put the entire stummel into an acetone soak to fully remove the finish. I leave it in the soak for a few hours.
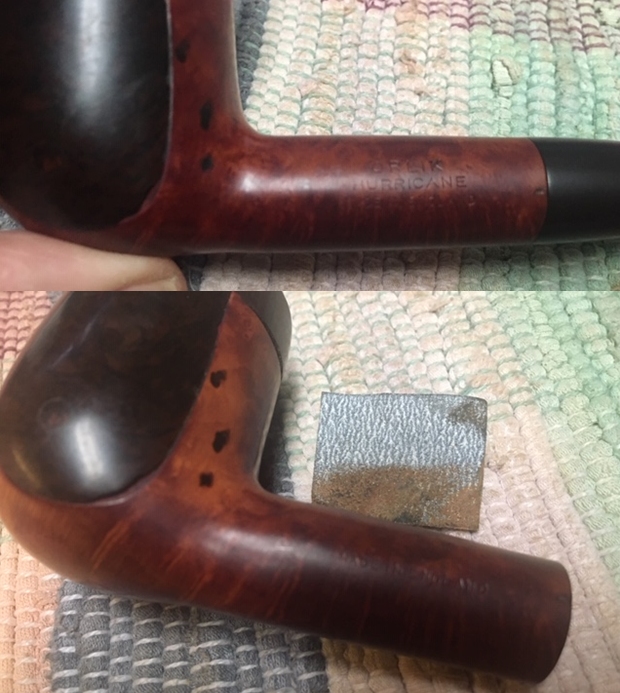
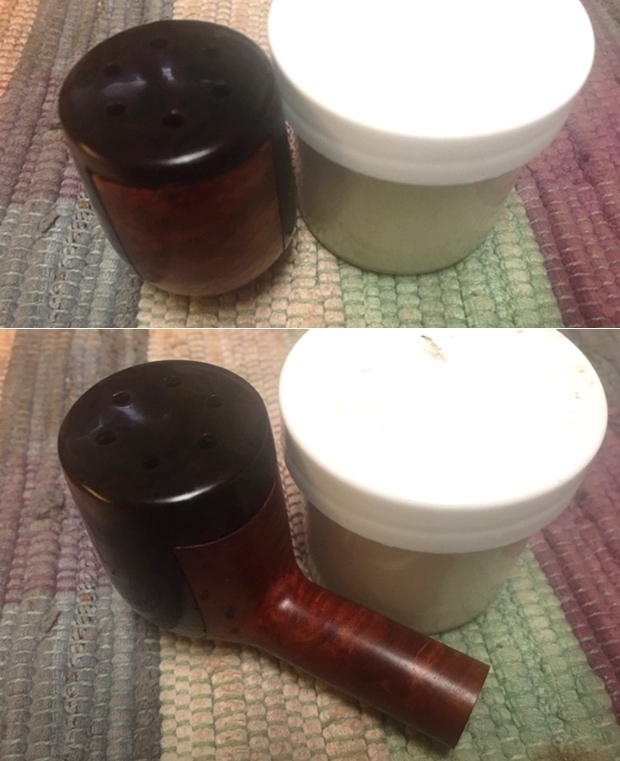
 After a couple hours the jar containing the stummel soaking in acetone is clouded with leeched finish. After taking the stummel out, I use a cotton pad to continue rubbing the finish off as well as employing a little steel wool.
  The light spots that appeared first are areas that were filled, at least partially, with wood putty which have weakened due to the cleaning. I use a sharp dental probe to test the fills and they are solid. With the rough texture of the blasted surface, these areas will not be visible after applying new dye to the stummel.
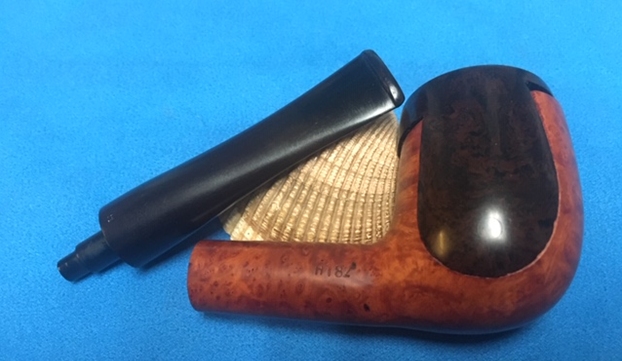
 Before doing more work on the stummel, I switch the focus to fashioning the CW stem. The first thing I do is to bring out the electronic caliper and measure the diameter of the mortise which gives me the target size of the tenon that needs to be shaped. This measurement is 7.81mm. I add about 40mm to this to form my ‘fat target’ – the size I’ll cut the tenon and then follow by sanding to form a customized fit to the mortise. The fat target is about 8.20mm.
  Next, with the drill bit provided by the PIMO Tenon Turning Tool, I predrill the airway to accommodate the guide pin of the TTT.
  Next, after mounting the PIMO tool on the hand drill, I do a test cut on the raw tenon of the precast CW stem and measure it – 8.01mm on the button. Whoops – that is 20mm less than I was aiming for as the ‘fat target’ but I decide to cut the tenon at this size and then sand. This gives less margin of error, but I’m not too concerned.
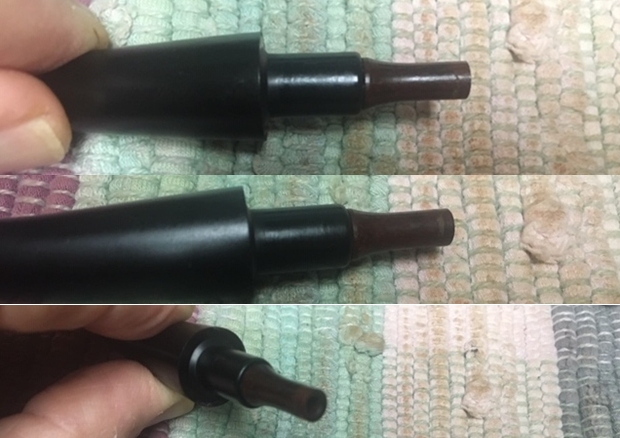
 Keeping the same adjustment of the PIMO tool, I continue the test cutting to form a I have made several Churchwardens and one of the mistakes I have learned is to cut the tenon all the way through the precast uneven molding to create a true stem facing. Not to do this will leave what appears to be shouldering over the edge of the stem facing. The picture below shows a sharp 45-degree angle which is the goal.
 Next, using 240 sanding paper, I sand the newly cut tenon to bring it closer to the target mortise size – 7.81mm. The rough end of the precast tenon is flattened and smoothed using the flat needle file.
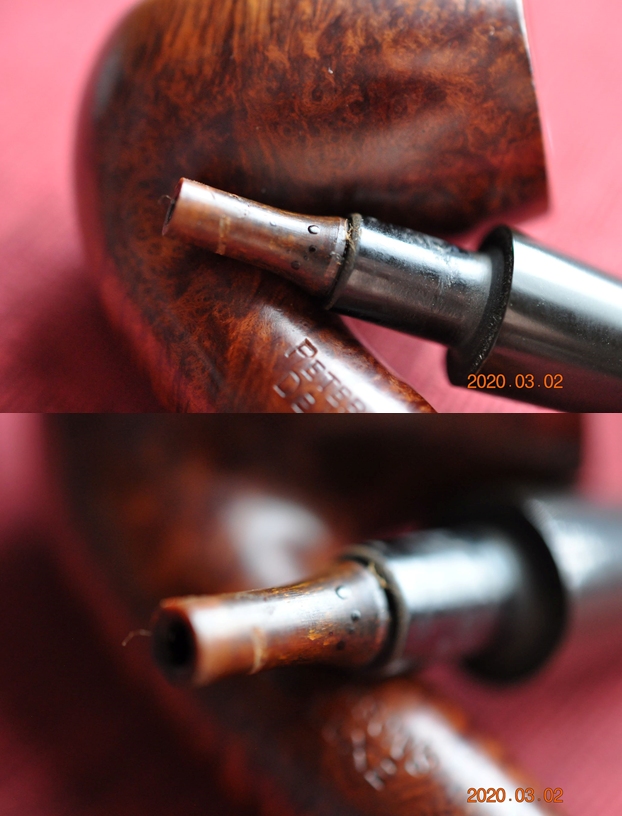
 After a short time of sanding and fitting, the tenon seats into the mortise.
 Looking closer, there is a small gapping on the right side which I can close during the fine-tuning sanding.
 What is also the case is that there is a small overhang of the shank over the seated stem. This will need to be sanded so that the transition between stummel and stem is smooth.
 I use masking tape to protect the nomenclature as well as to give a sanding boundary around the shank.
 I start the sanding on the shank/stem transition. What is helpful shown in the picture below is that it shows what the ‘low-spot’ is in the pre-cast stem in the darker area passed over by the sanding indicating where sanding continues to be needed. As often is the case with the pre-cast CW stems I purchase, the shank facing along the casting seam has a dimple. This is a pain because these dimples simply mean more sanding required at those points.
 Progression with the dimple – I don’t want to take off more than needed. Note, the darkened area has disappeared on the stem indicating that the sanding paper is making seamless contact between shank and stem.
 With the shank/stem transition sanding completed, I move to sanding the entire pre-cast CW stem. To start, I use a coarse 120 grade paper to do the initial sanding. The casting seams along both sides of the stem need to be erased. The following picture again shows the differences in the surface of the pre-cast stem. The pre-cast stem has ripples – unevenness, even though it is new. The dark stretch below shows a ‘valley’ in the rippling that means I sand more there to bring the edges of the valley flush with the valley floor. The following pictures show the progression in the 120 sanding.
 With the CW stem smoothed after the 120 grade sanding, I switch to fine-tuning the button. As with the stem, the button is rough. The bit needs filing to flatten it and to bring more definition to the button edges. The slot facing on these CW stems is curved and the upper button extends out a bit more than the lower. This helps in identifying the up/down orientation of the stem. The pictures show the progression with upper and lower bit. Upper first:
 Lower :
 After the main filing is completed, 240 grade paper is employed to fine-tune the bit and button as well as to sand the entire stem after the 120 sanding. Upper and lower first:
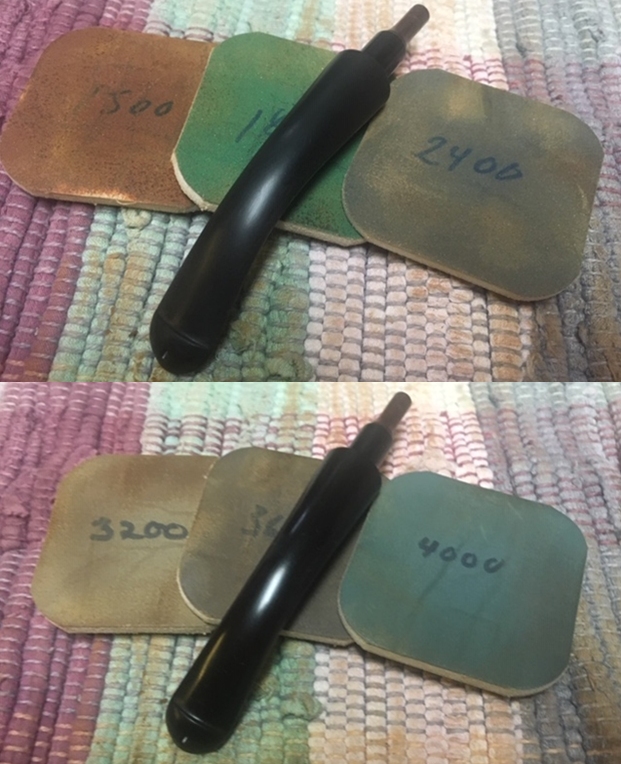
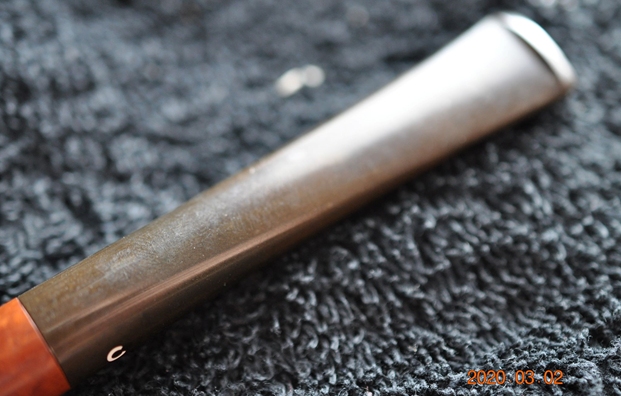
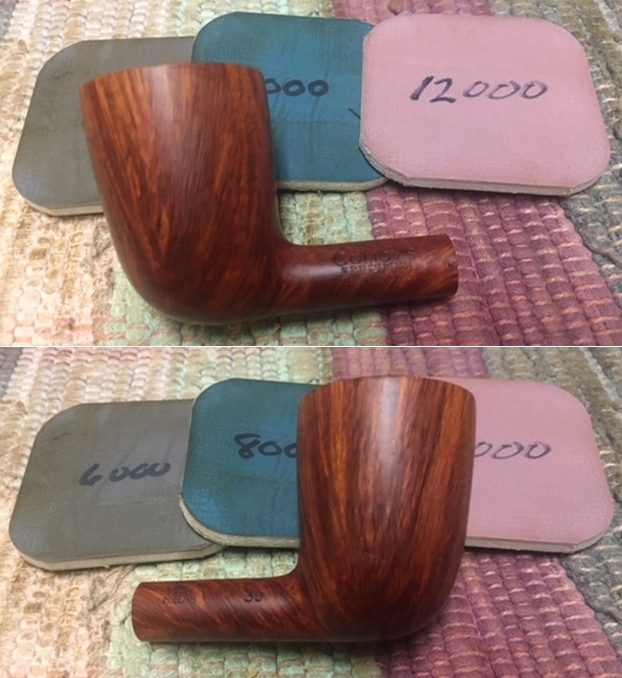
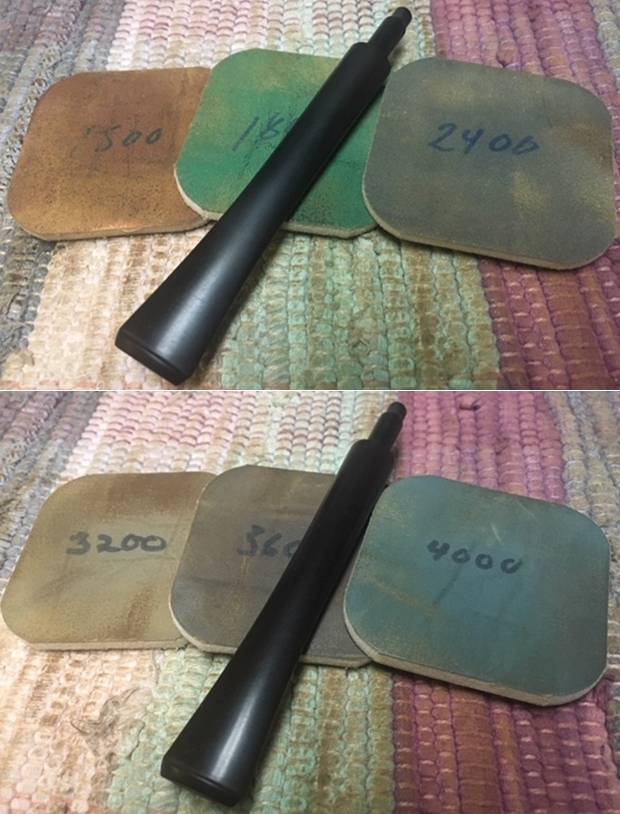
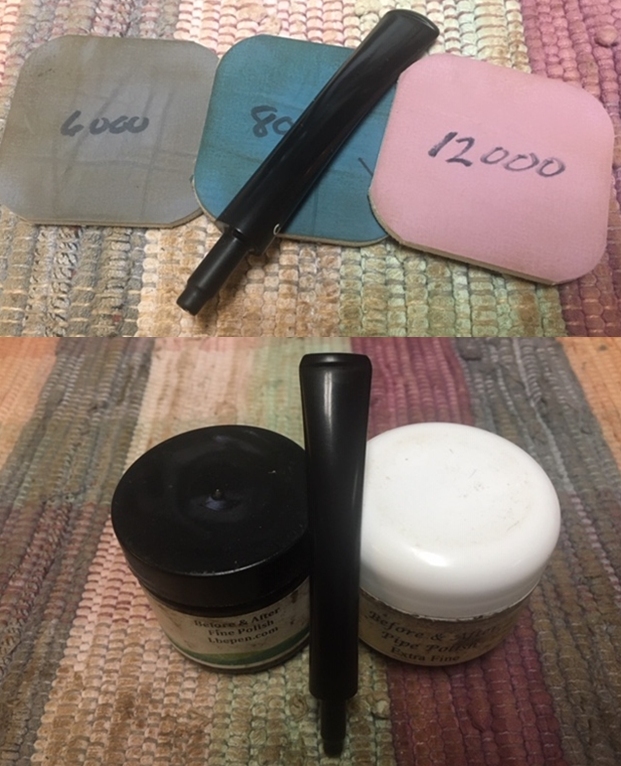
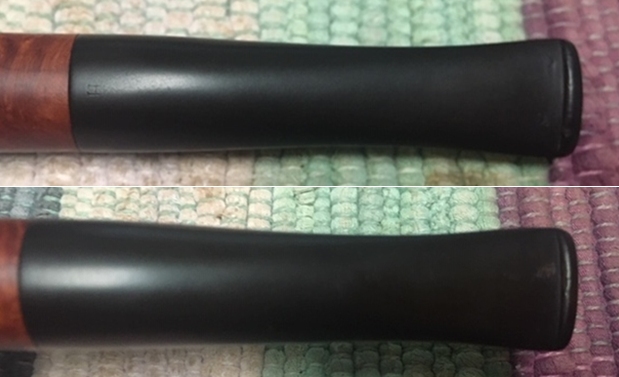
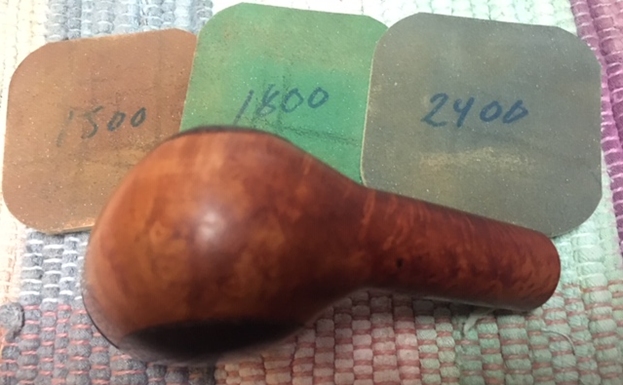
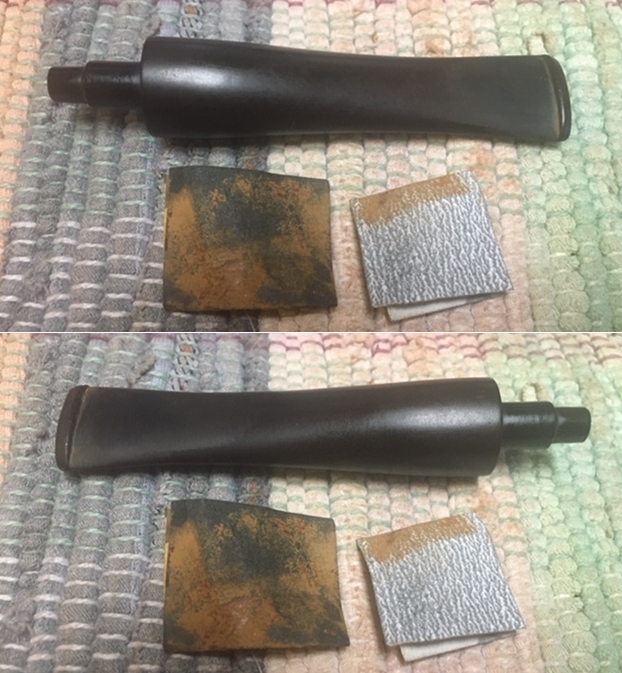
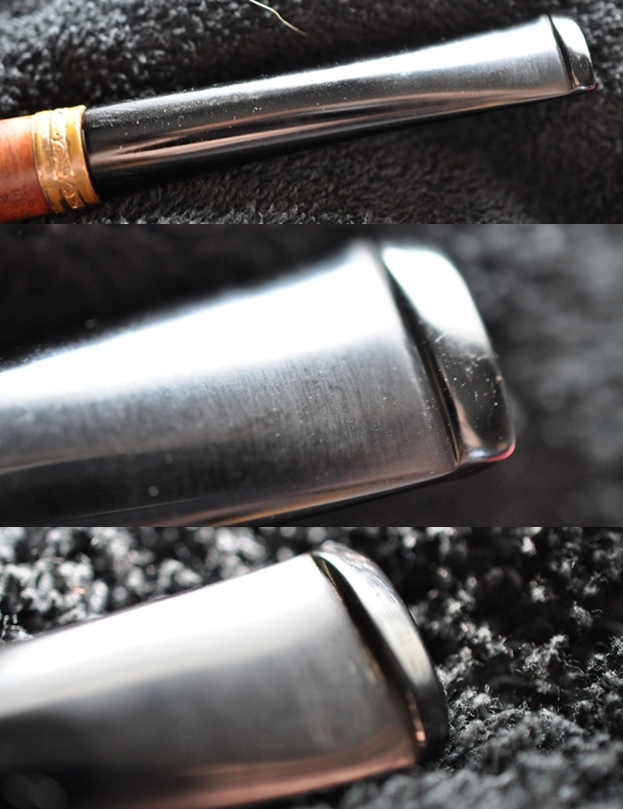
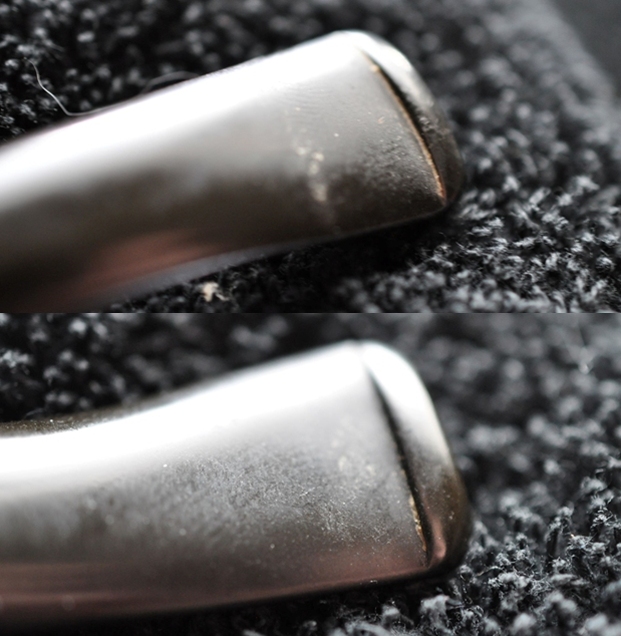
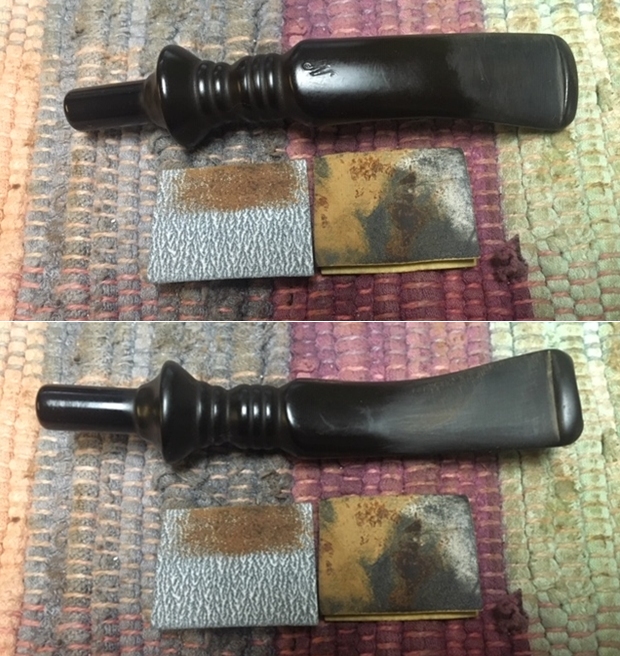
 Next, to continue the smoothing, 600 grade paper is used to wet sand the entire stem. This is followed by applying 000 grade steel wool.
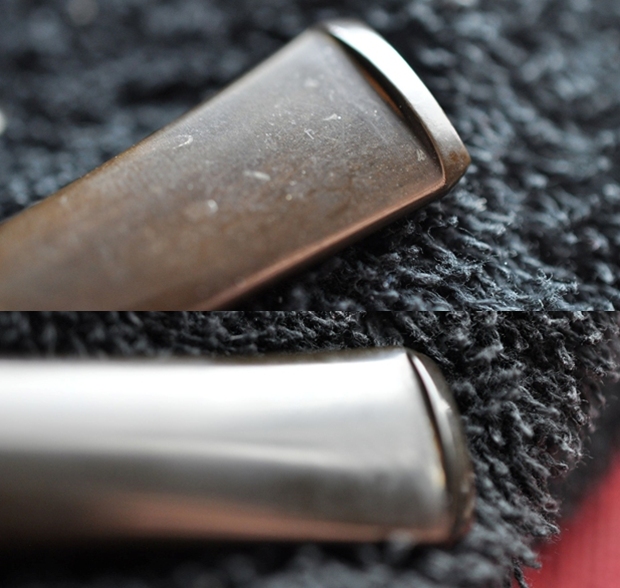
 A closeup of the button area shows the nice progression!
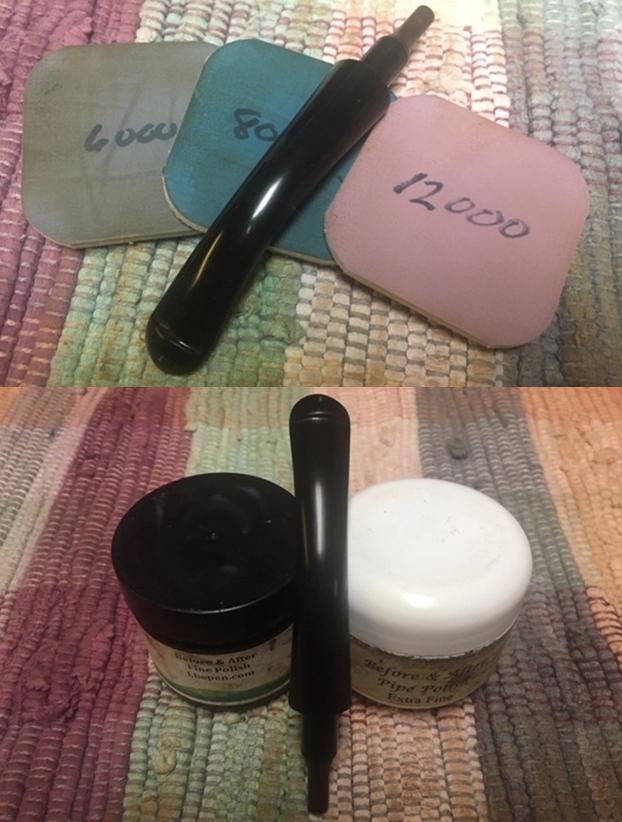
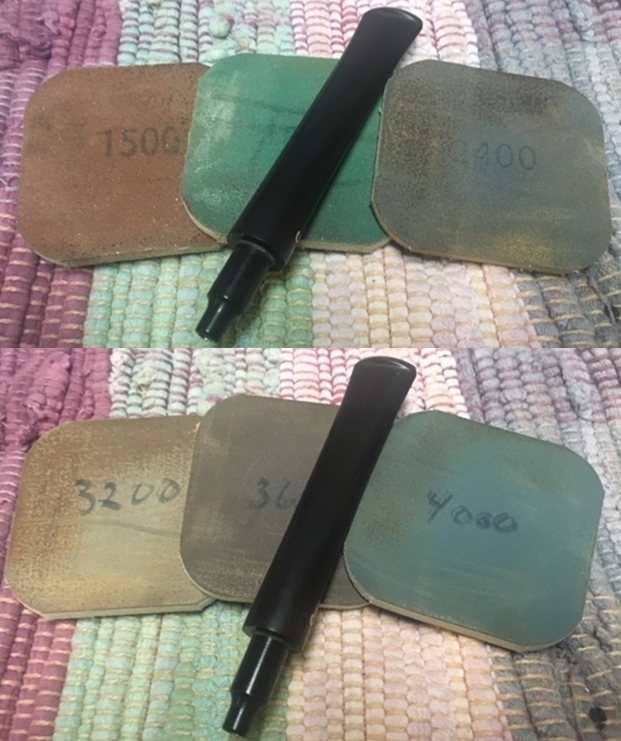
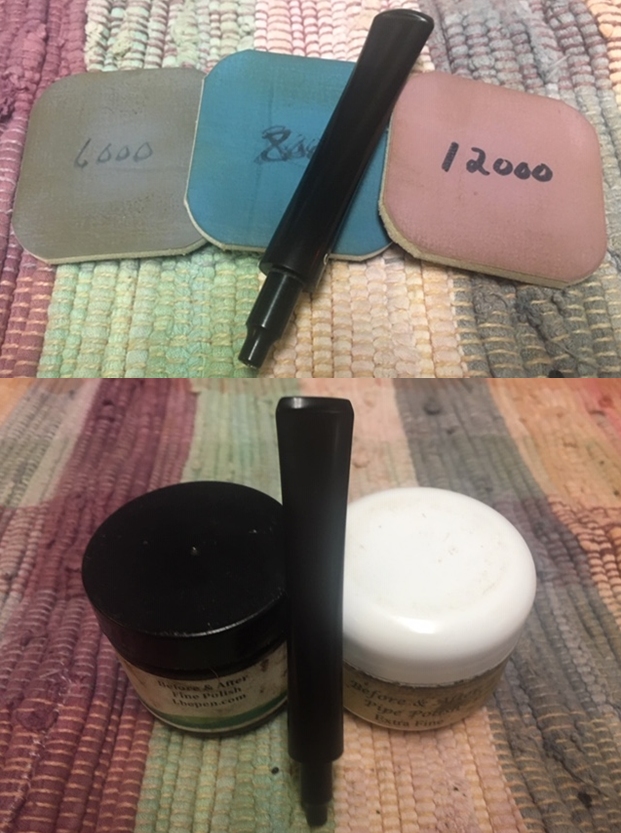
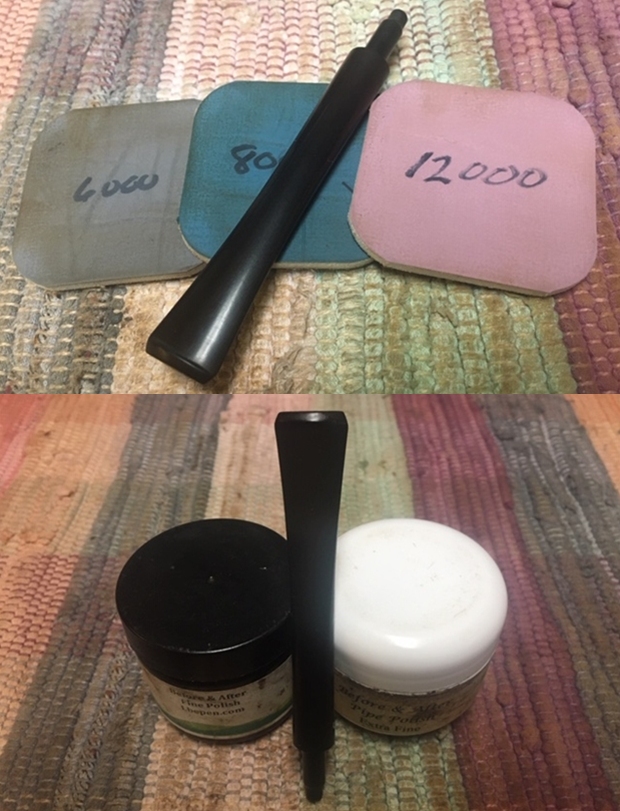
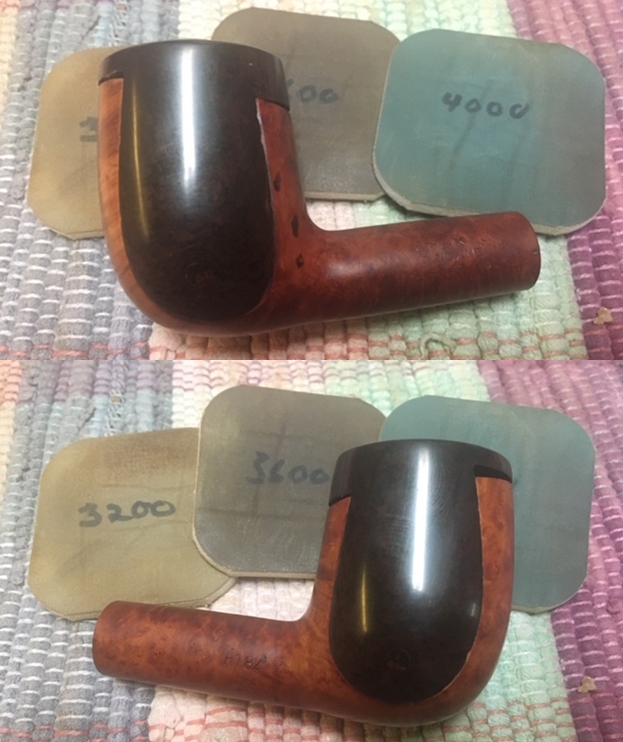
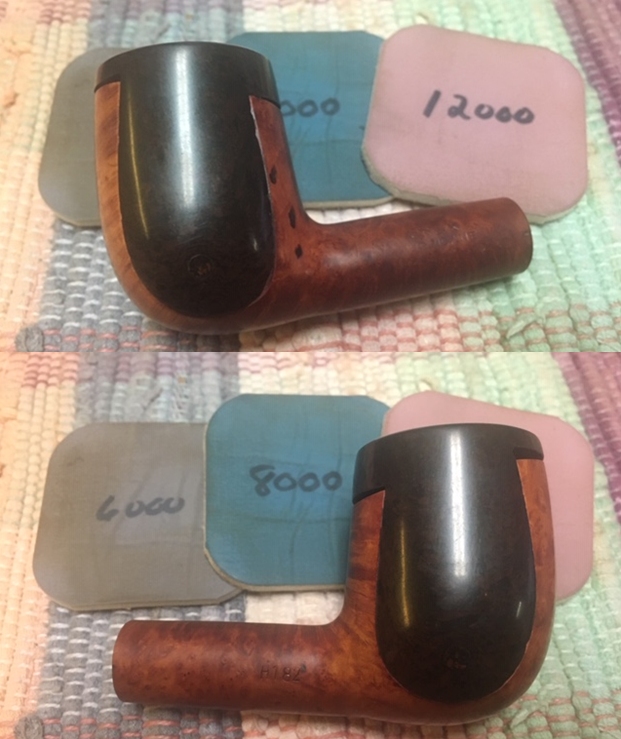
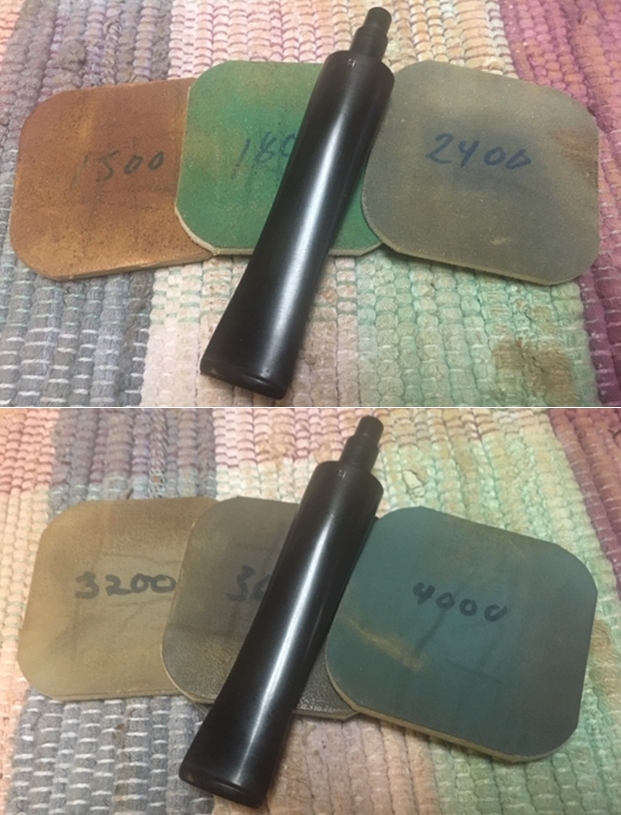
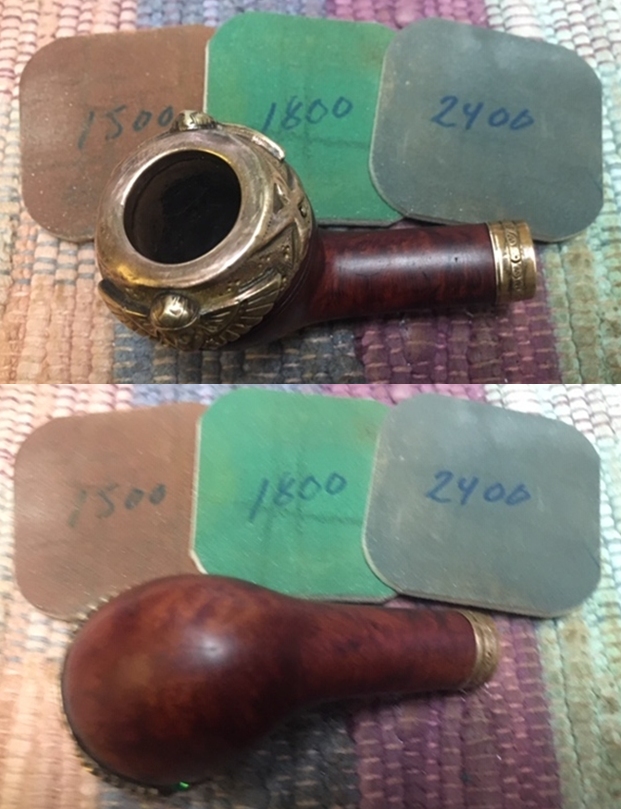
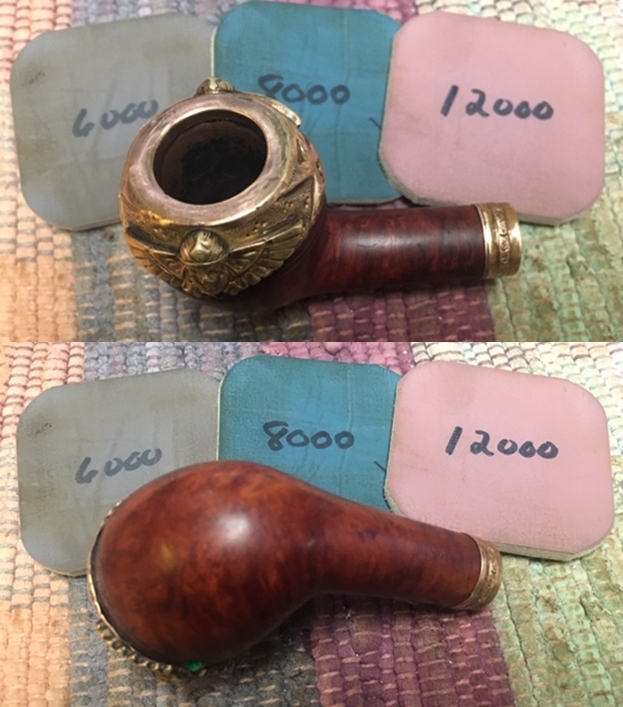
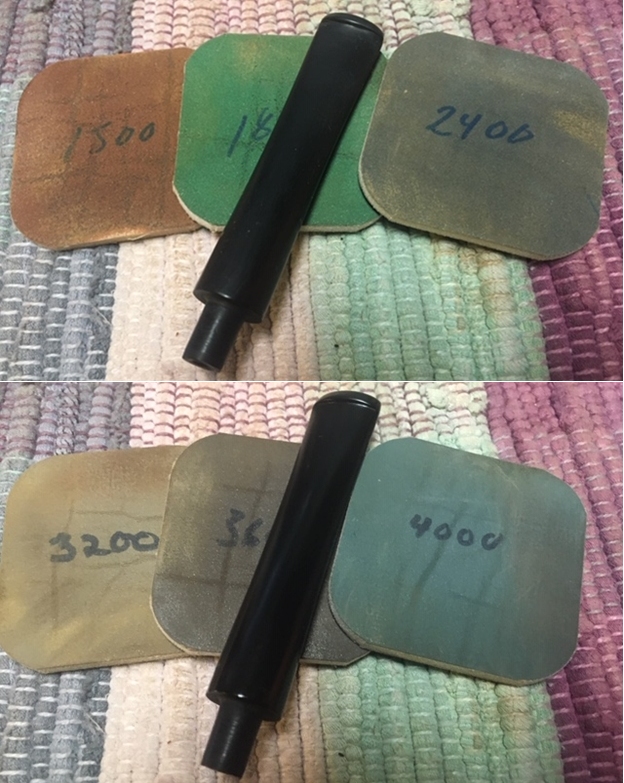
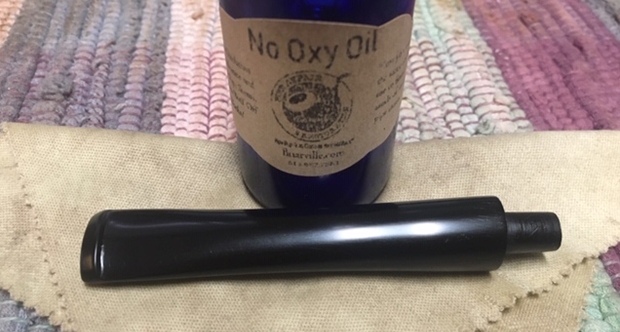
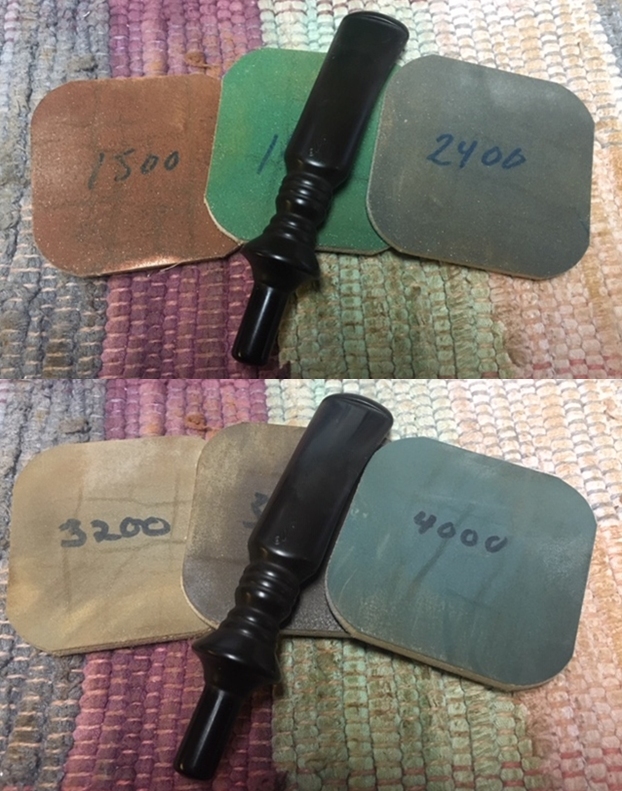
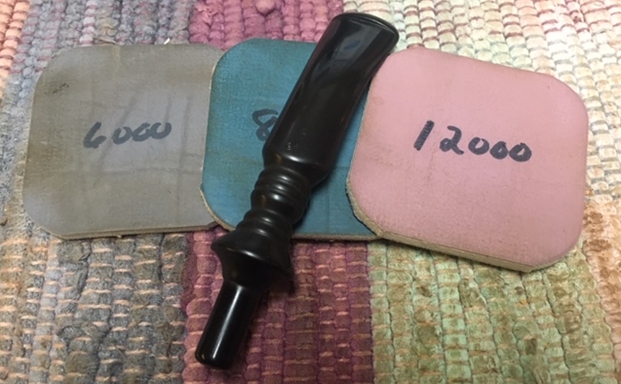
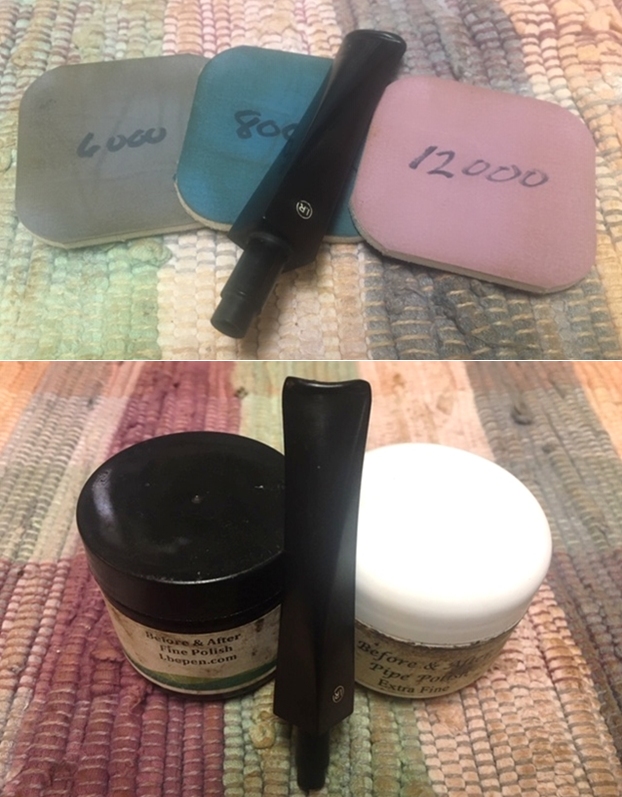
 Next, the full regimen of 9 micromesh pads is applied from 1500 to 12000. Between each set of 3 pads, Obsidian Oil is applied to condition and protect the vulcanite from future oxidation. I only show one orbital view and a couple closeups of the finished process focusing on the upper and lower bit.
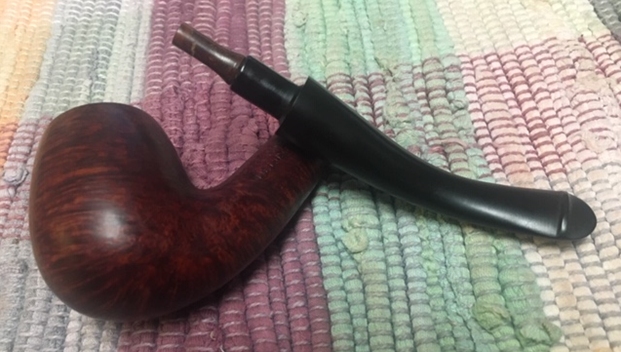
  With the CW stem’s sanding completed, its time to bend the stem. The general principle I follow in stem bending is that the mouthpiece at the end of the stem, should be generally on the same horizontal plane as the rim. It’s helpful for me to draw templates to visualize the finished stem.
 Where the original stem template starts with and estimation of where the bend should take place.
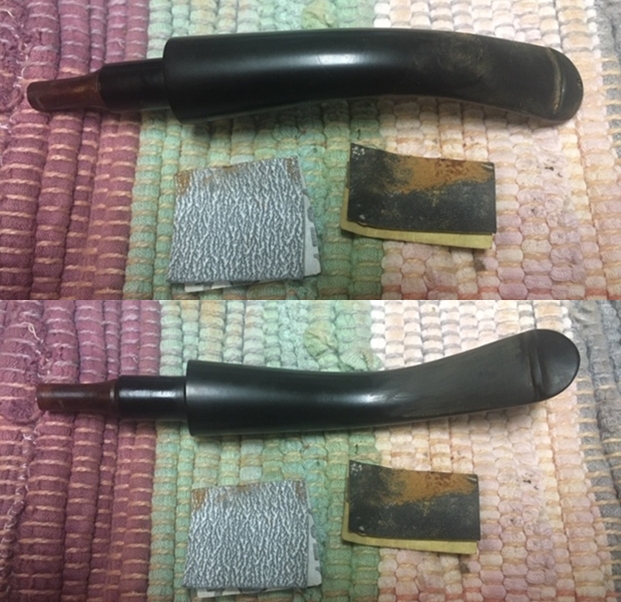
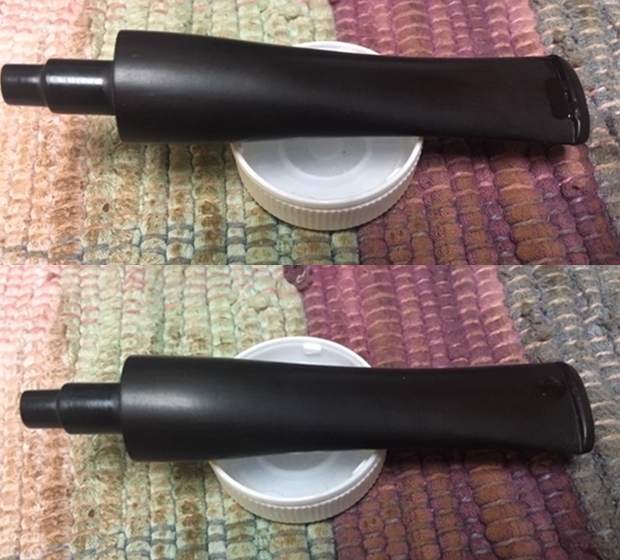
 I use the hot air gun to focus the heat on the lower side of the stem first – the thicker part. I want it to become supple before heating the upper, thinner area of the stem which heats faster and wants to be the first place the bend begins. I want the bend to start in the thicker part of the stem then followed by the thinner.
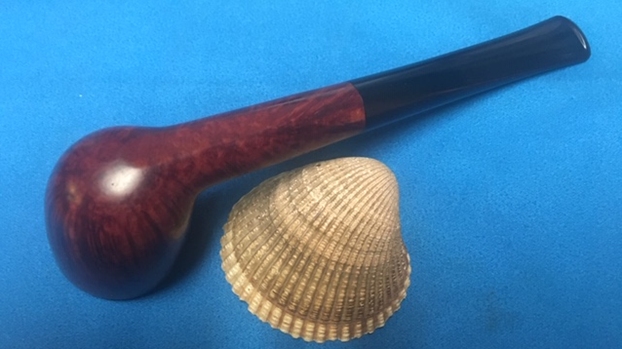
 As the stem warms over the hot air gun, I gently coax the bend as the stem softens. After bending to a point that looks good, I bring the stem to the template holding it there for some minutes for the orientation to take hold. I then take the stem to the kitchen sink and run cool water over it to solidify the bend. The first try works well. I like the look and feel of the pipe in my hand.
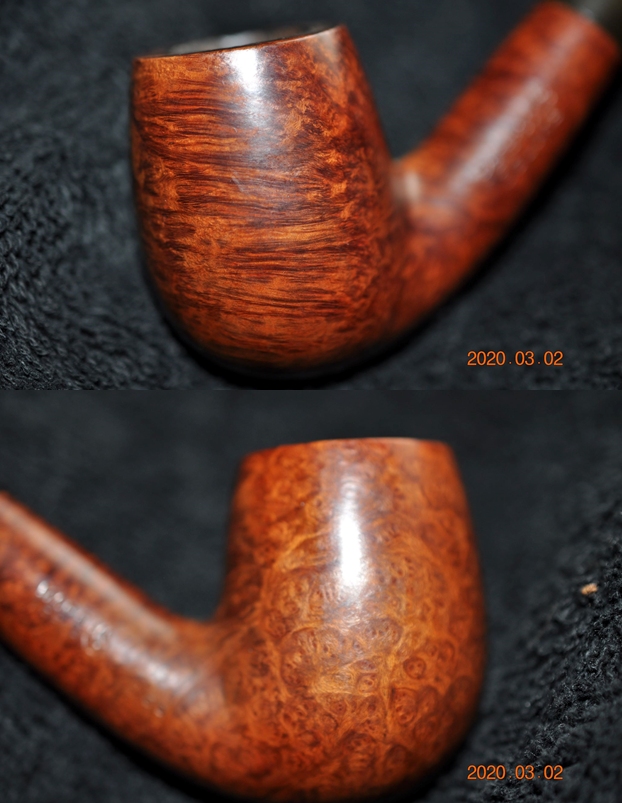
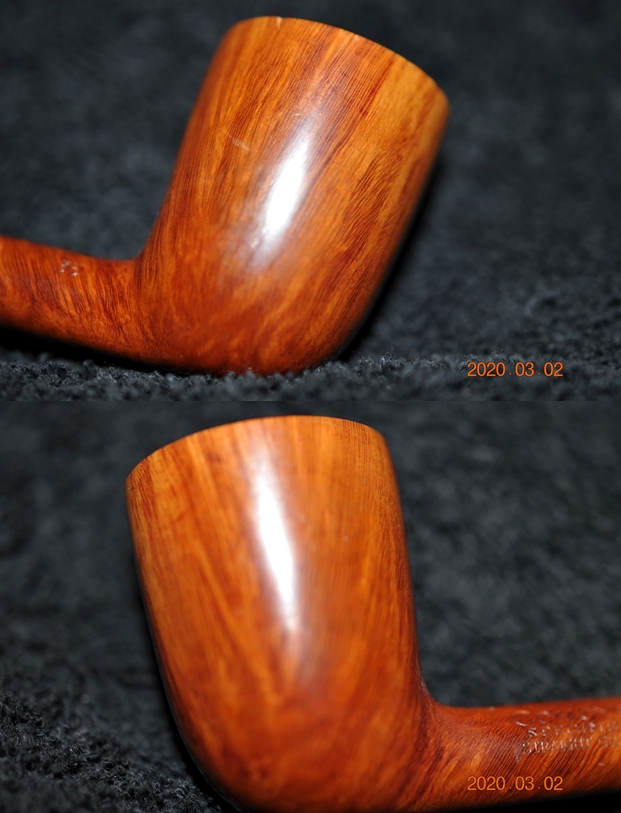
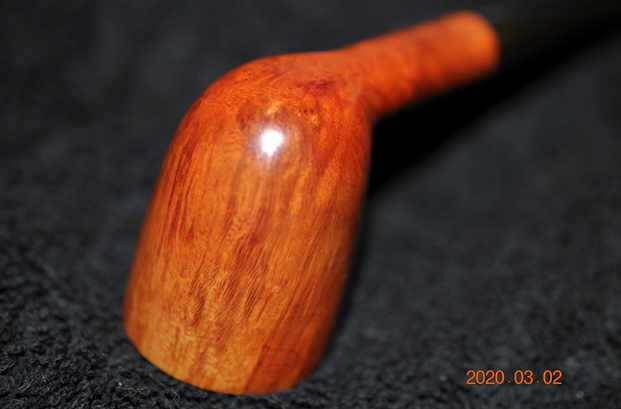
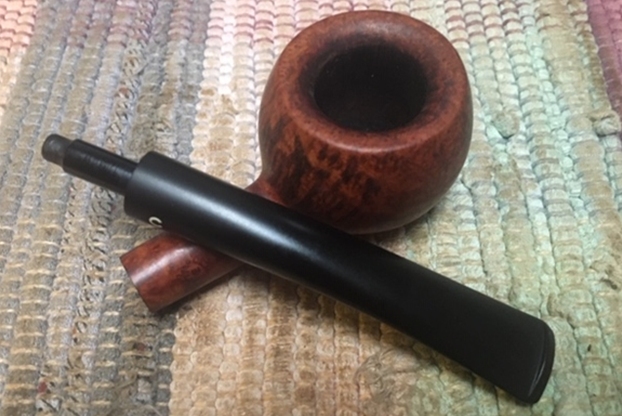
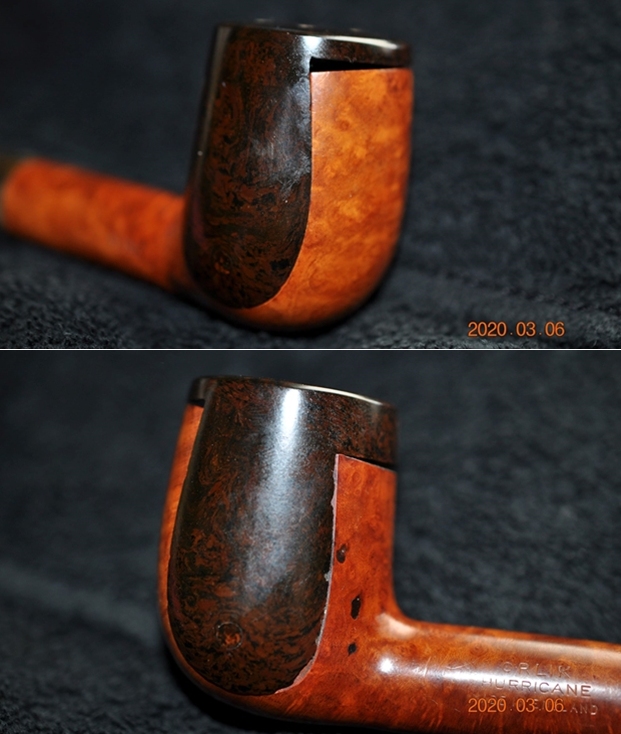
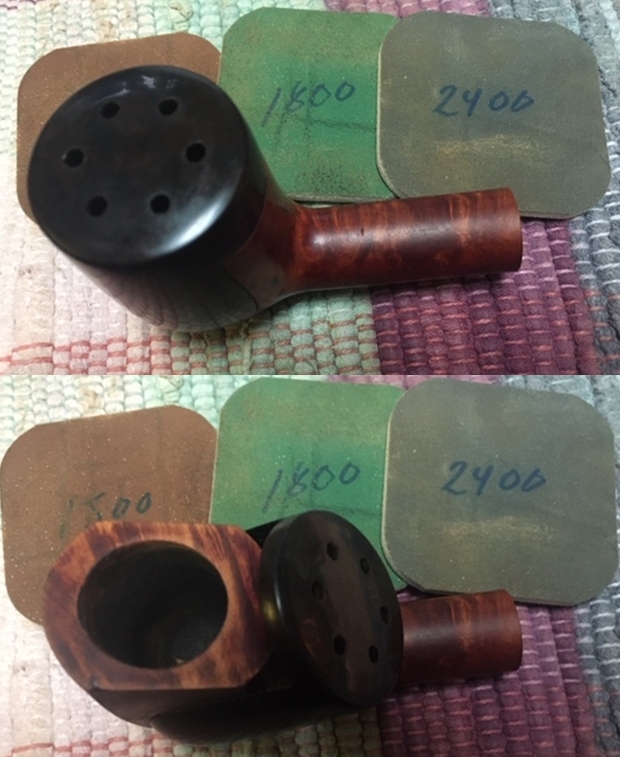
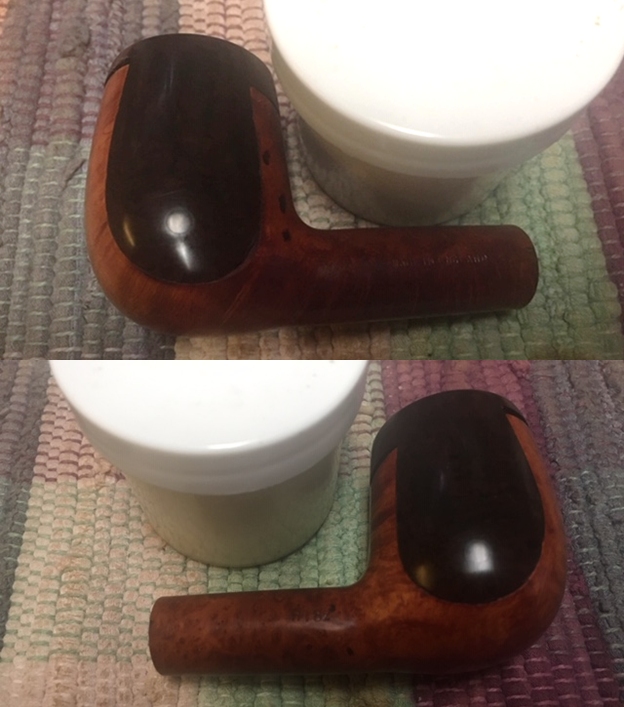
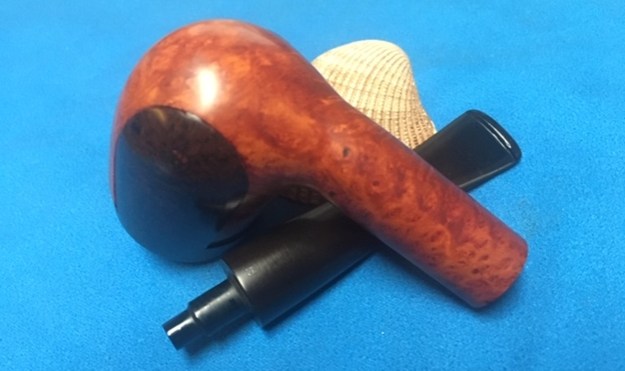
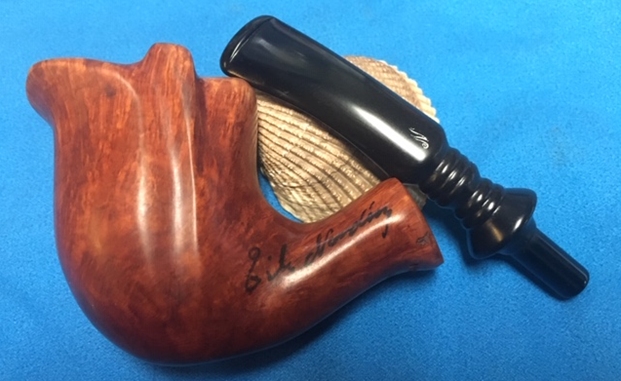
 With the stem sanding and bending completed, focus is again transitioned to the Dr. Geo blasted bowl. Before moving to the staining process, the stummel needs some preparatory work. One of the things I really like about working with a combination of blasted and smooth briar surfaces is the contrast that this produces. I love to see both presentations of the grain – the smooth 2-D viewpoint as well as the rough, blasted 3-D viewpoint of the grain. This bowl provides an opportunity for the striking contrasting. The rim is angled in a beveled slope from the external rim’s edge downward toward the chamber to the internal rim’s edge. This rim, I believe, will look great after it is sanded to bring out the smooth briar contrast.
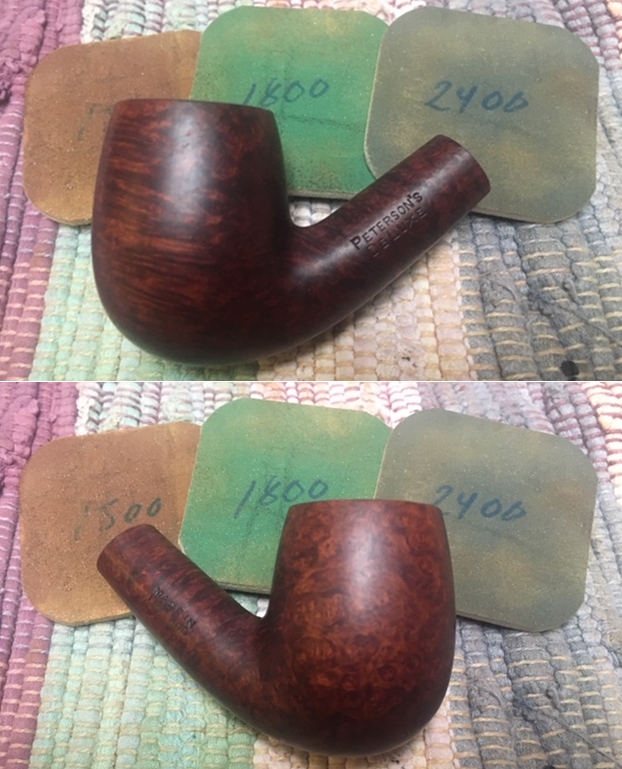
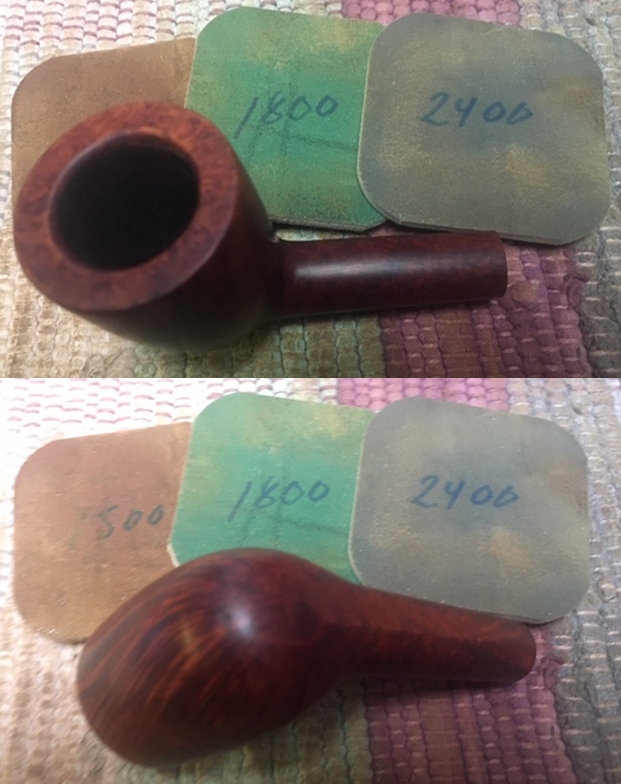
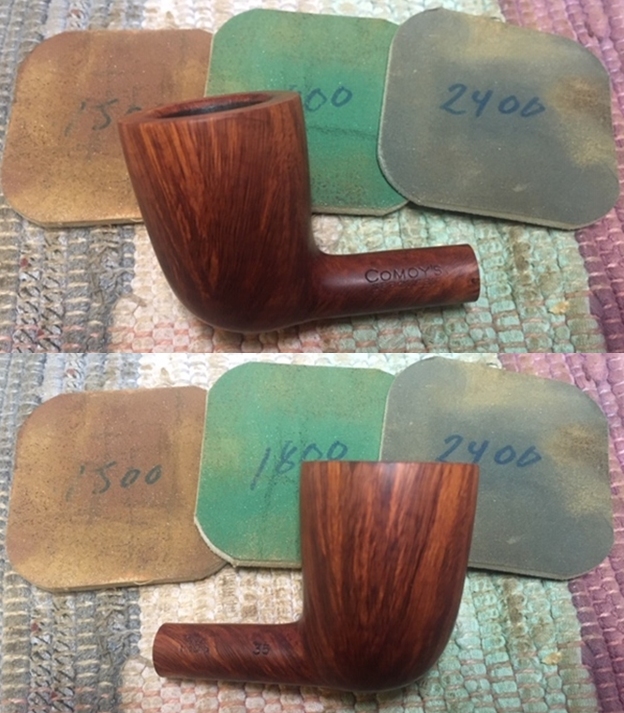
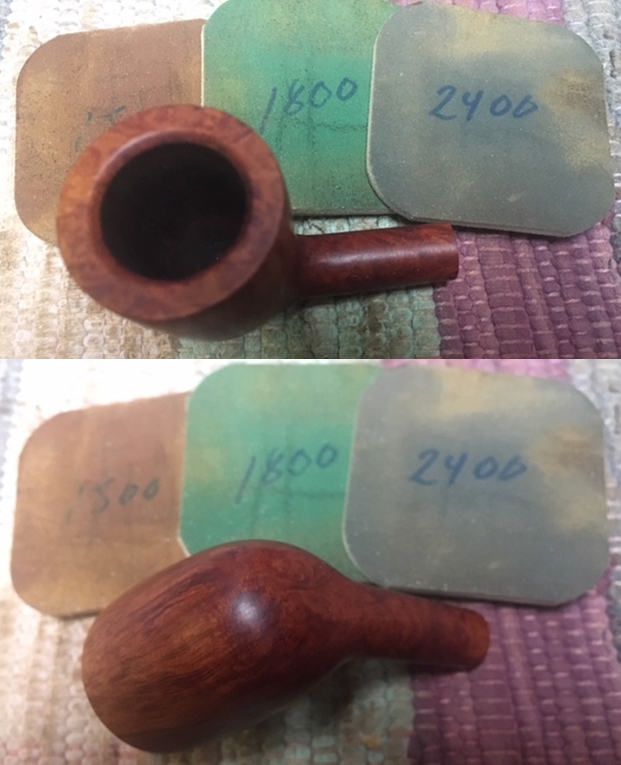
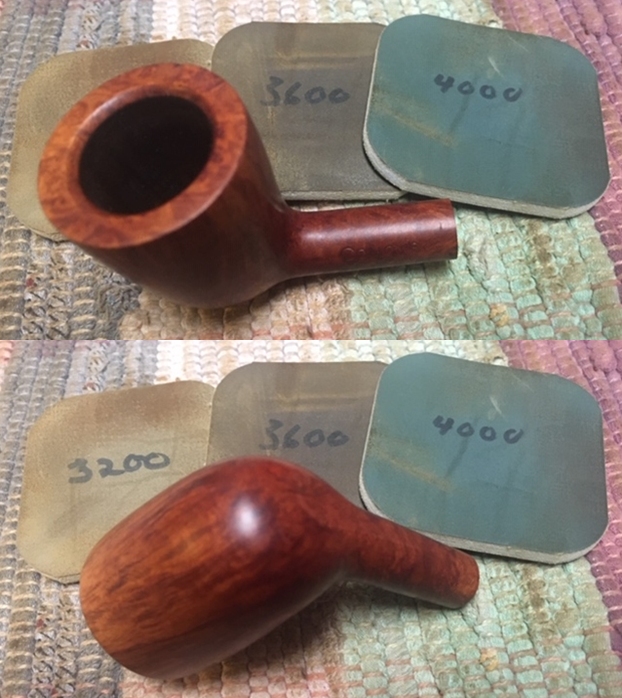
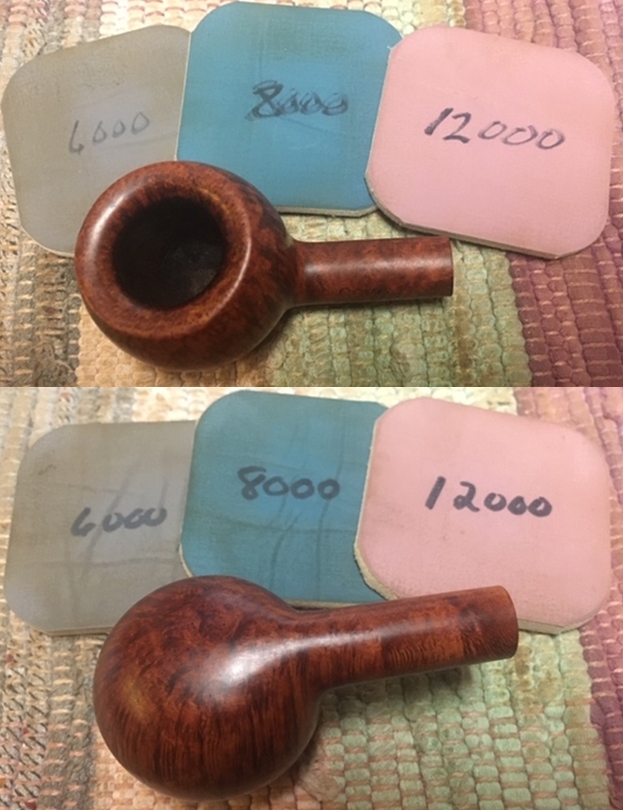
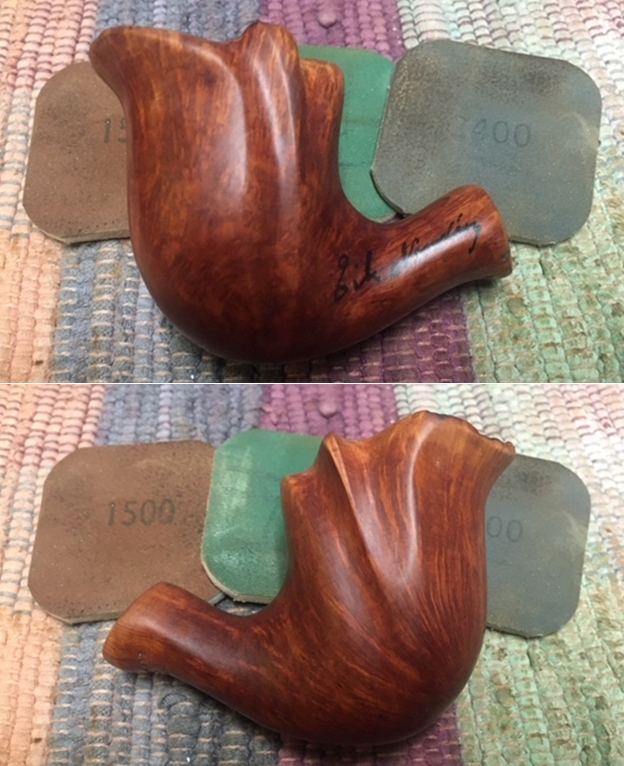
 The other sanding will bring out smooth grain over the nomenclature panel on the left shank flank as well as the newly sanded area transitioning to the stem. To begin, 240 grade paper is used on these smooth briar patches followed by dry sanding with 600 grade paper.
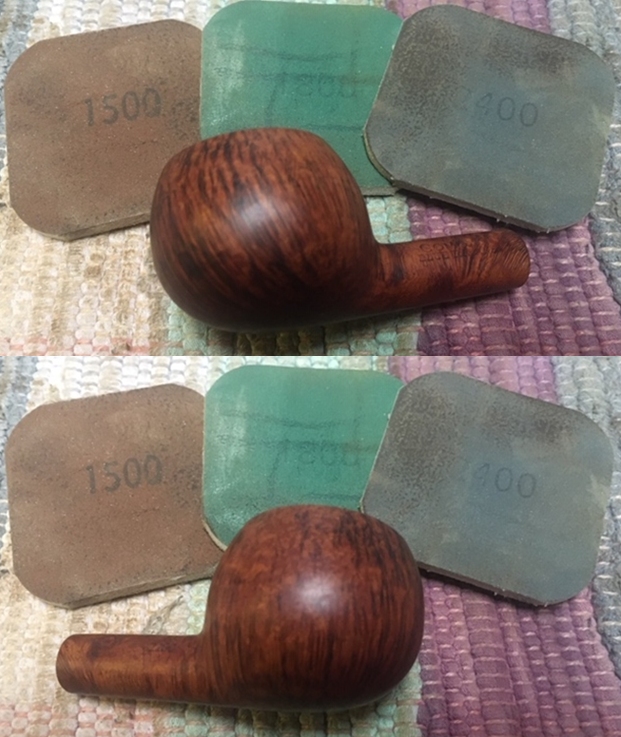
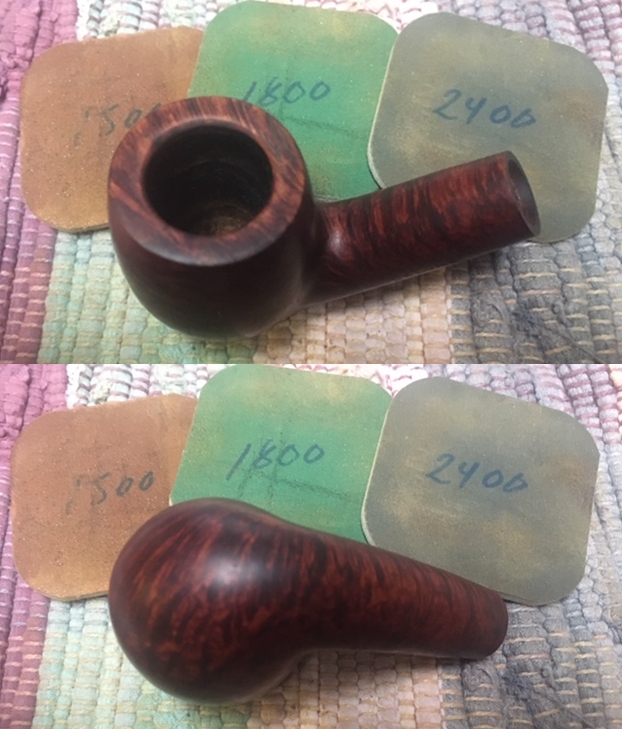
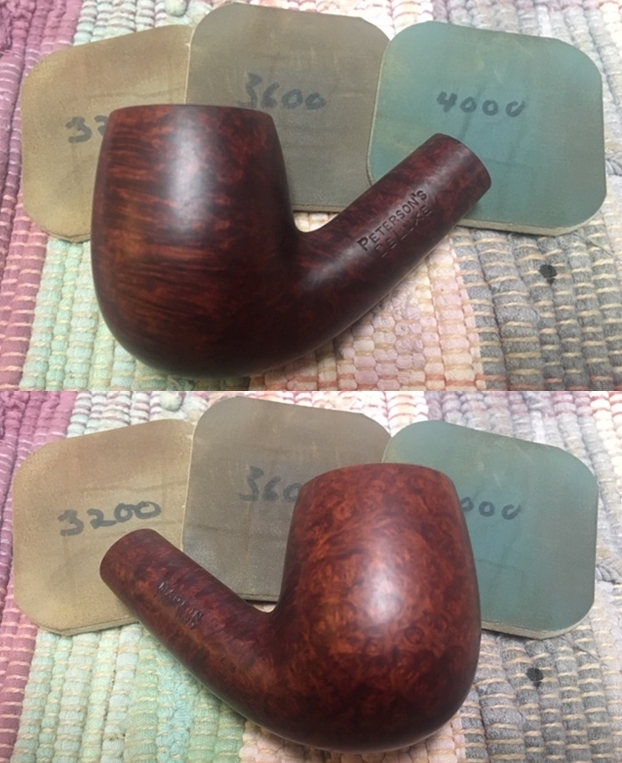
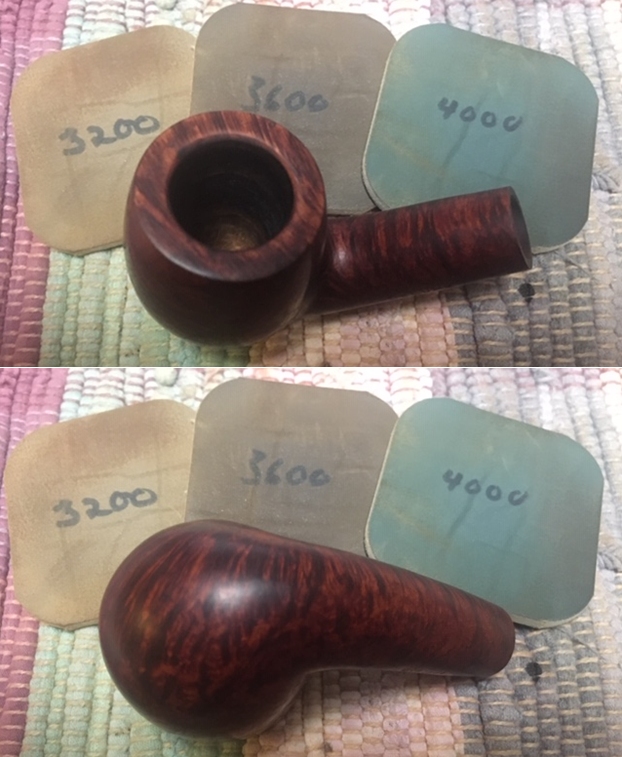
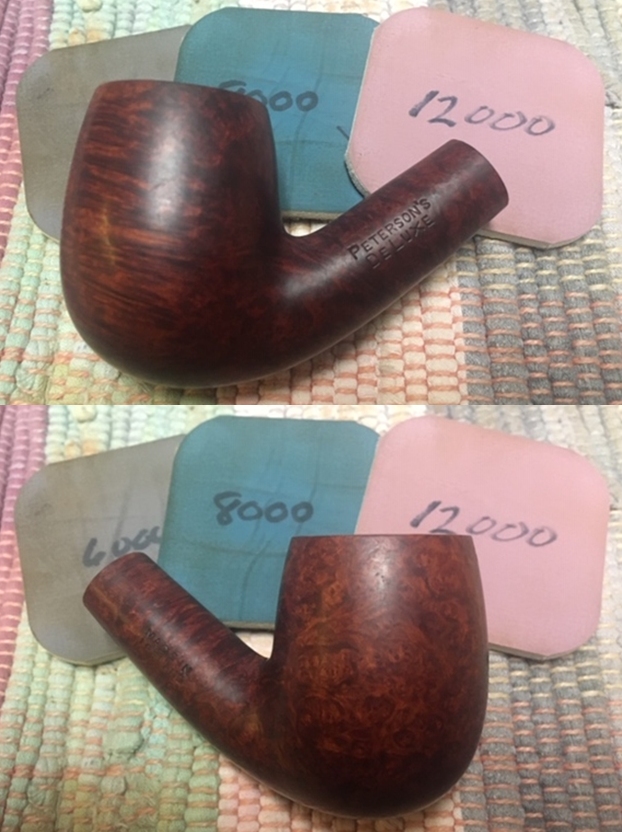
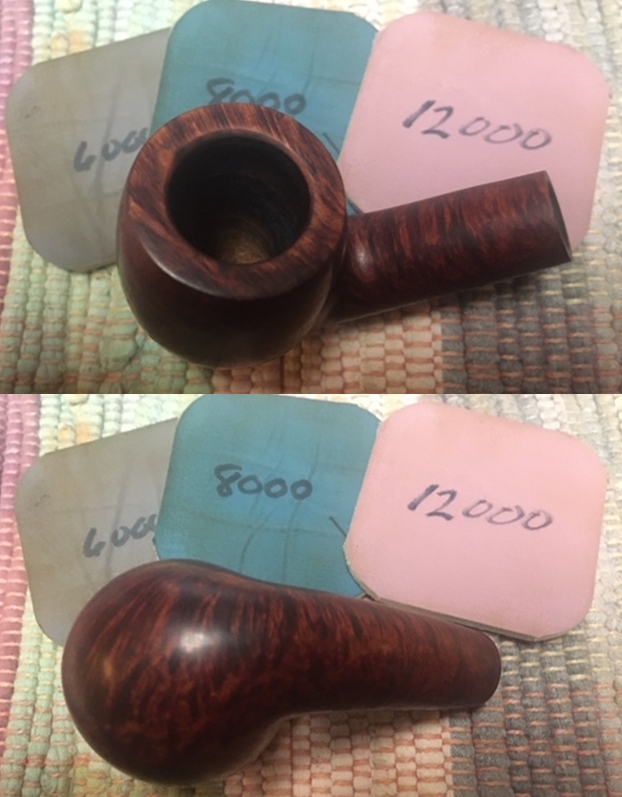
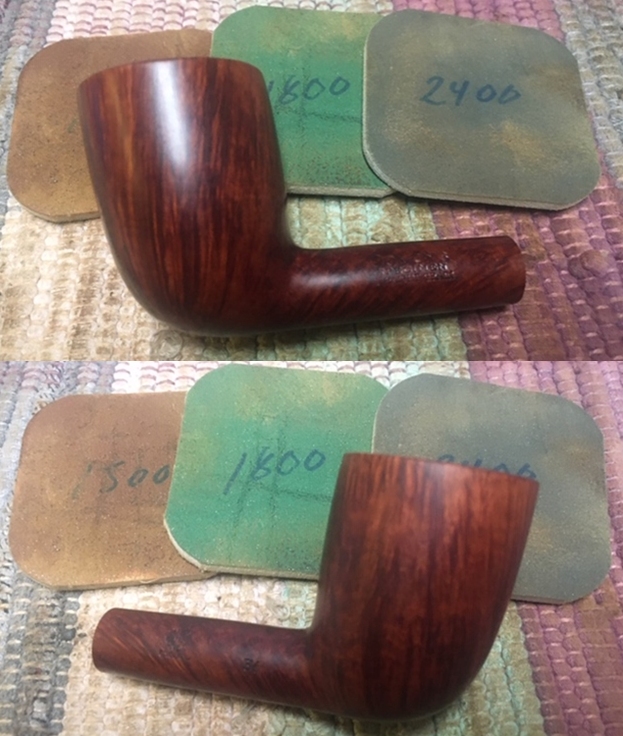
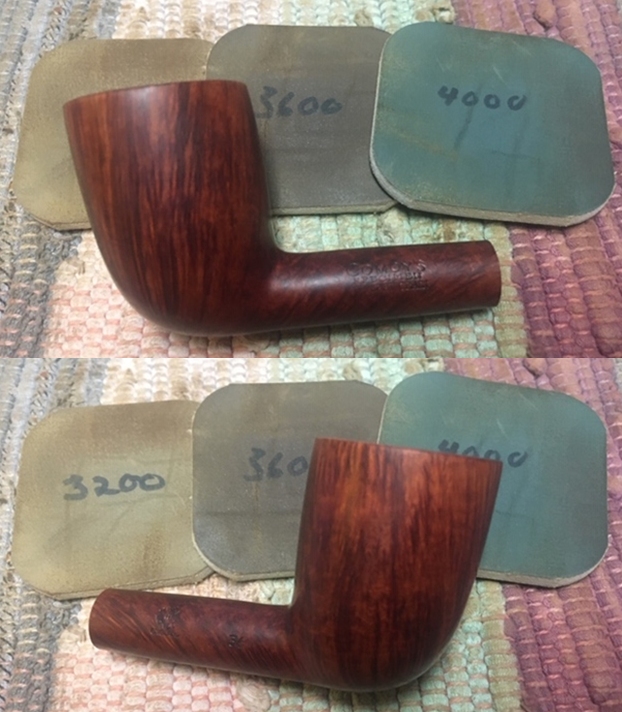
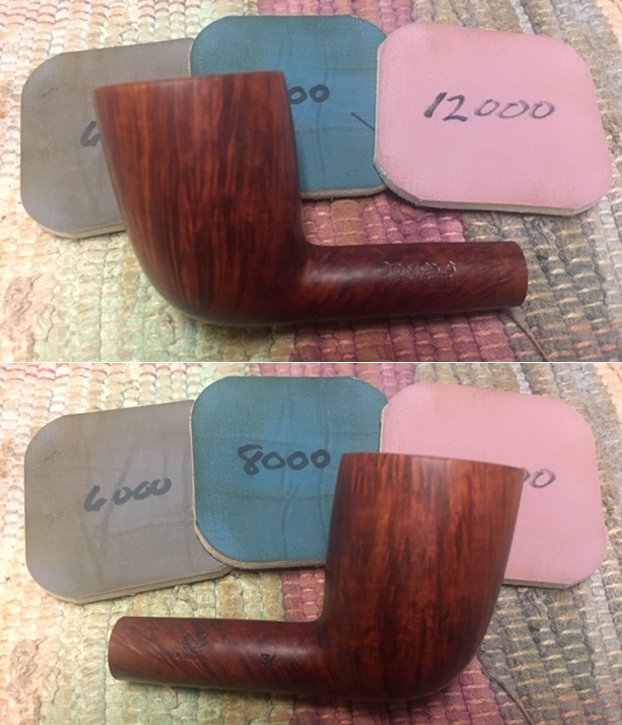
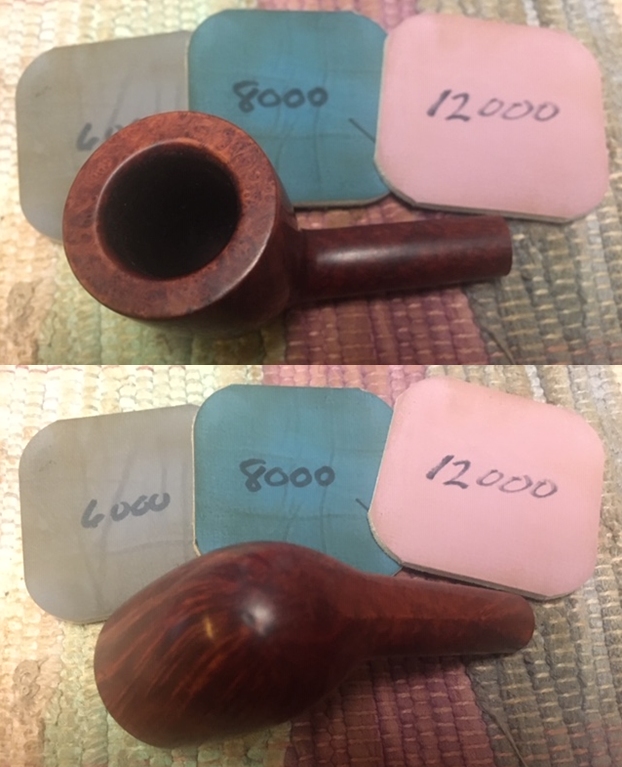
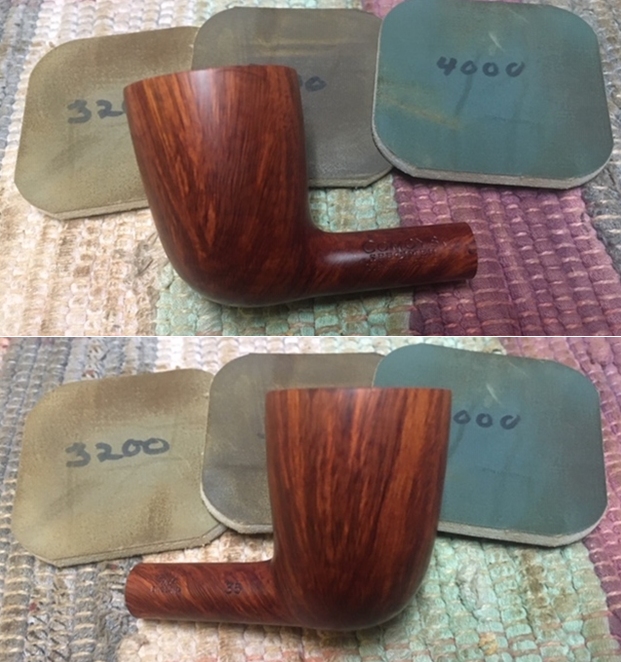
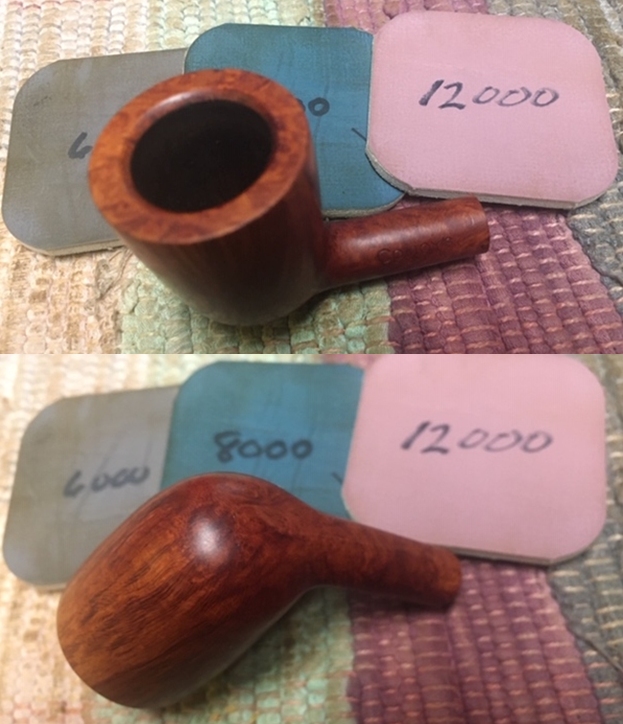
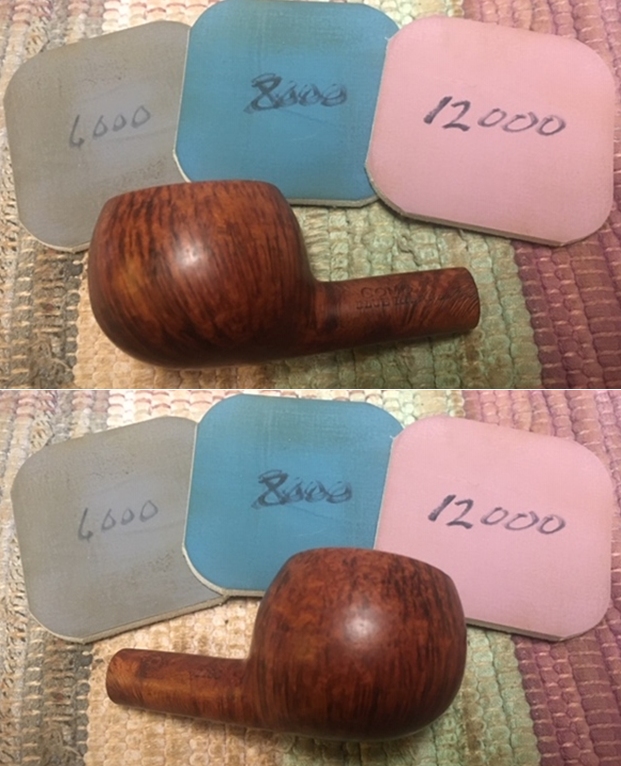
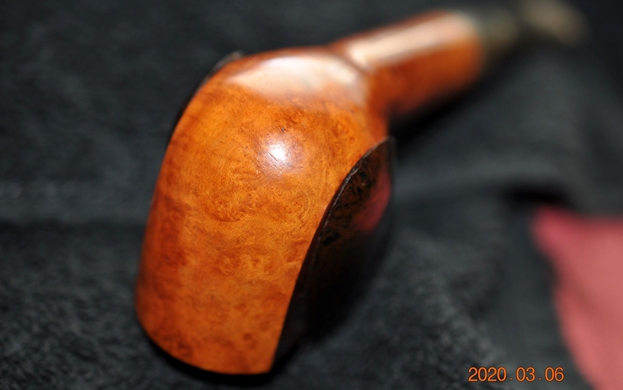
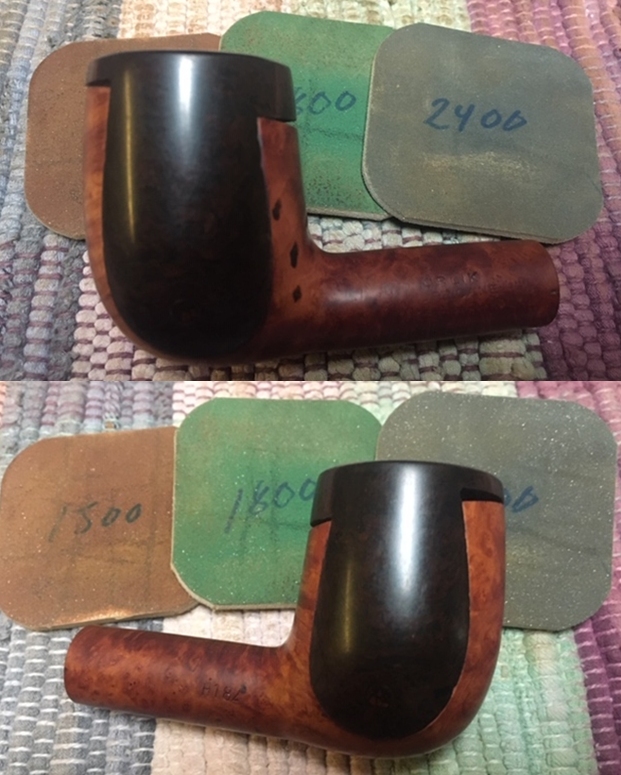
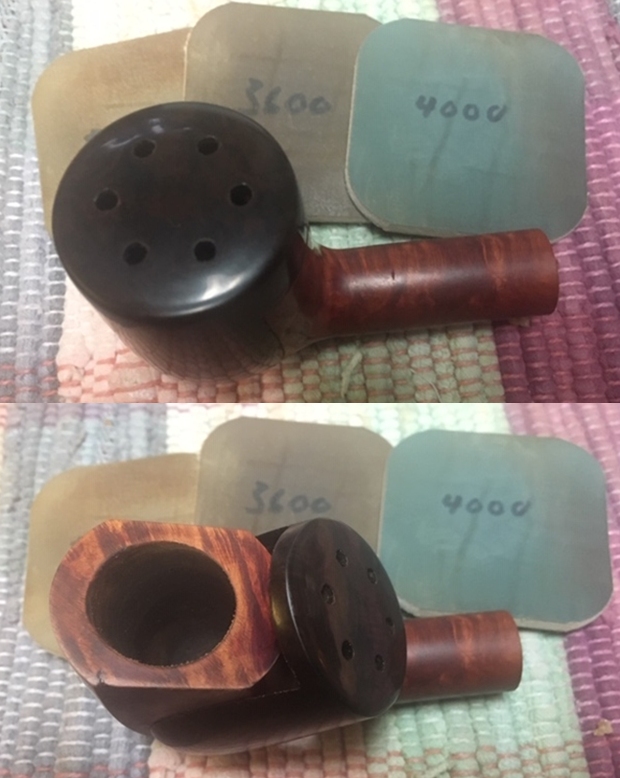
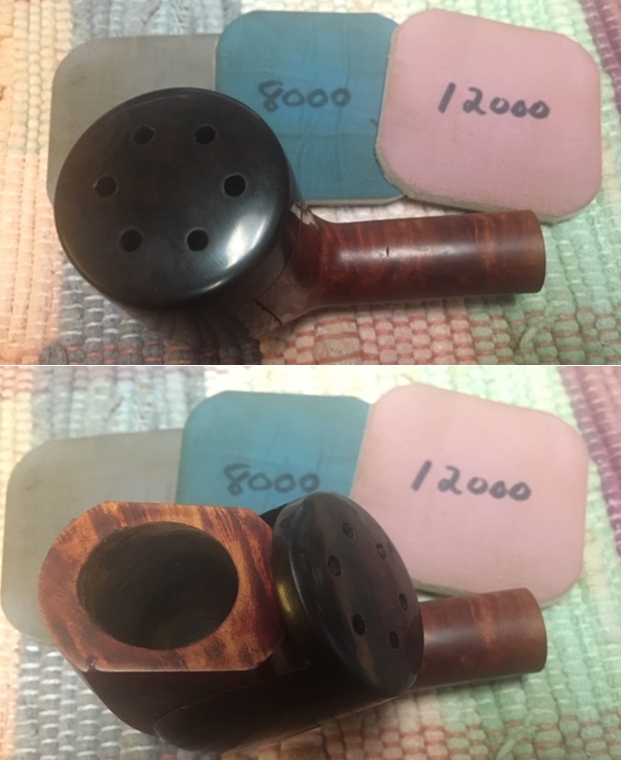
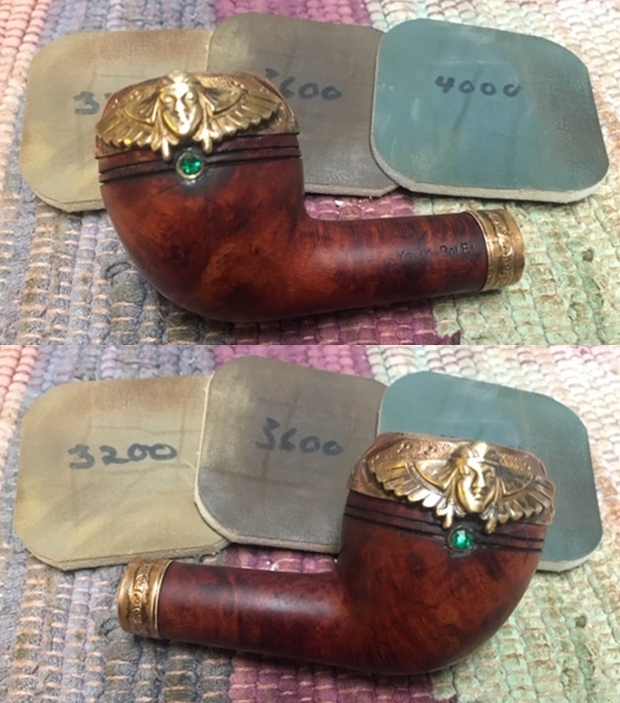
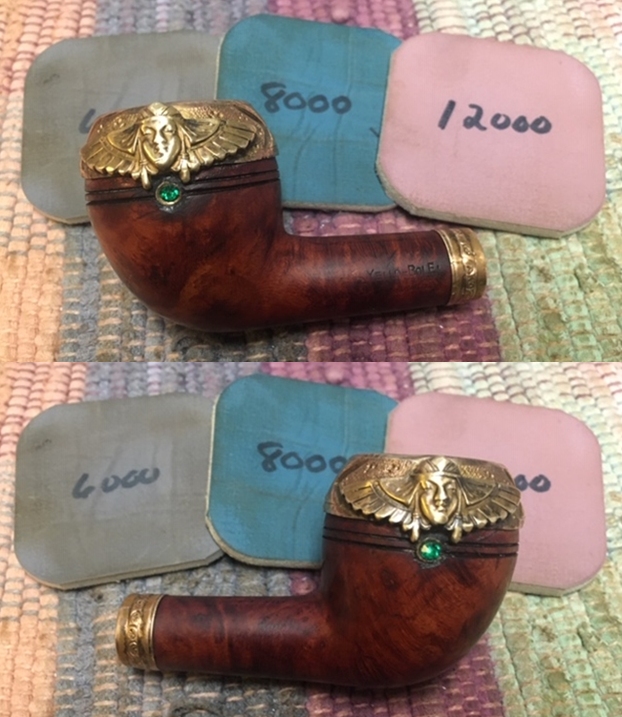
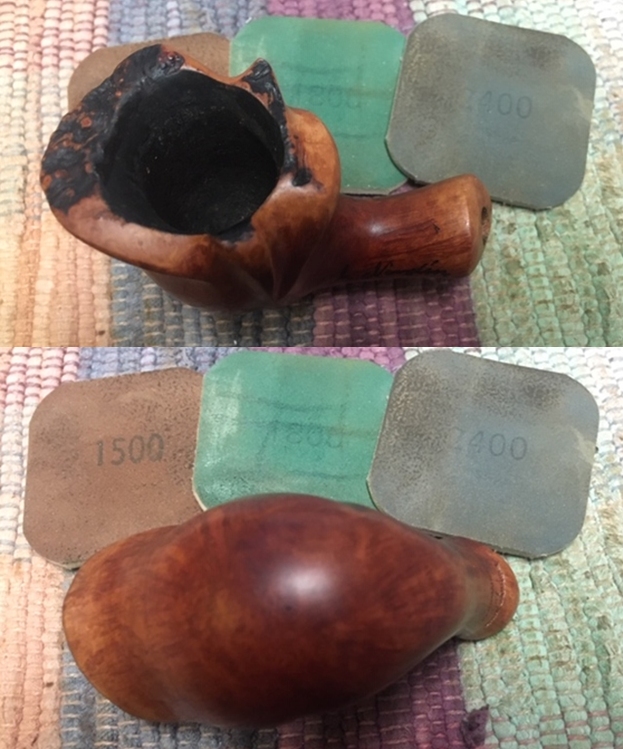
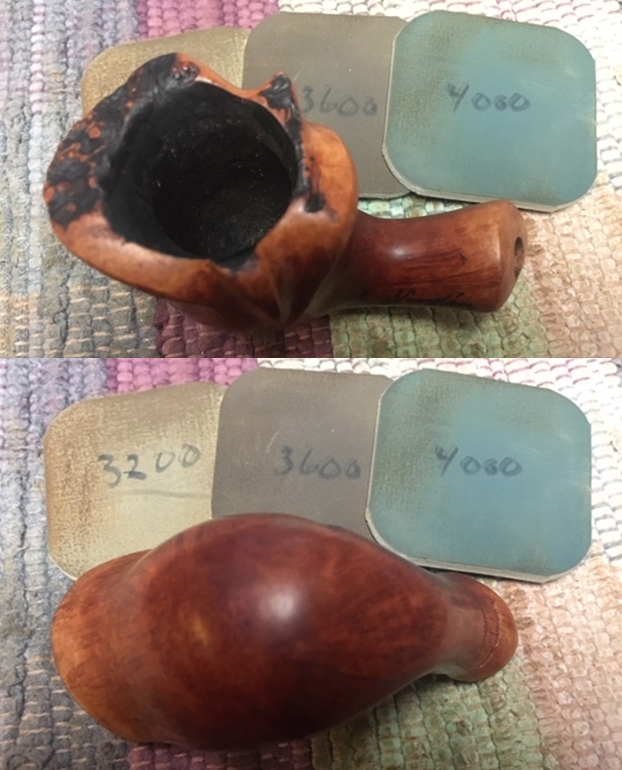
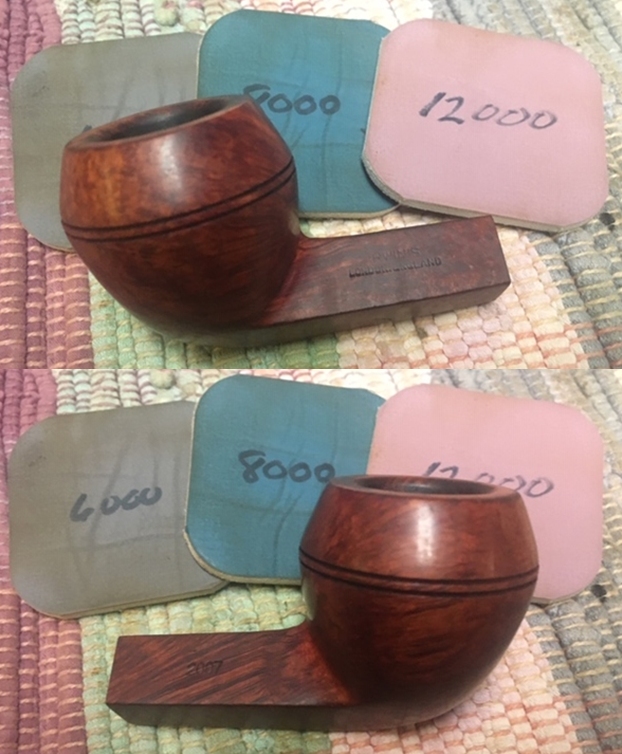
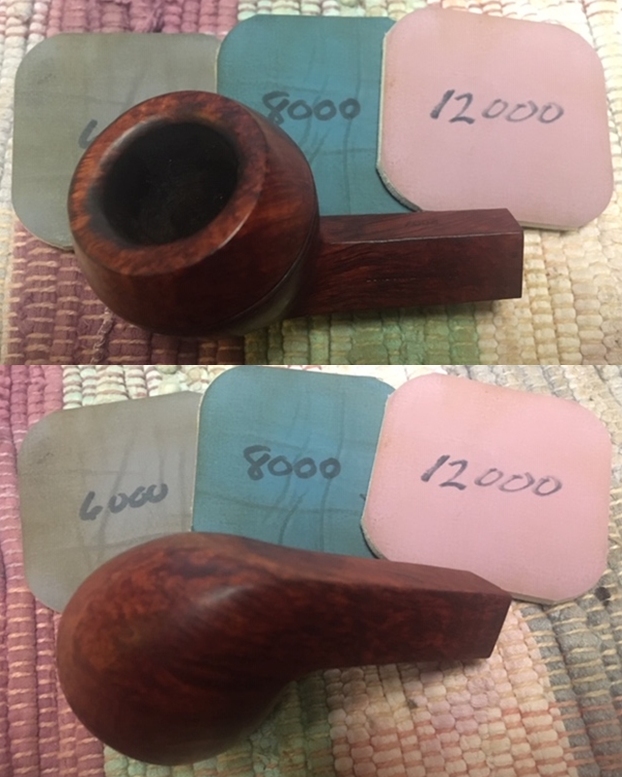
 The full regimen of 9 micromesh pads, from 1500 to 12000, is applied to the smooth briar patches next.
 I’m loving what I’m seeing! That grain contrast is great. In the second picture, the rough area from the old fill is still visible and looks shaky, but it should disappear as it blends with the surrounding briar after the staining process.
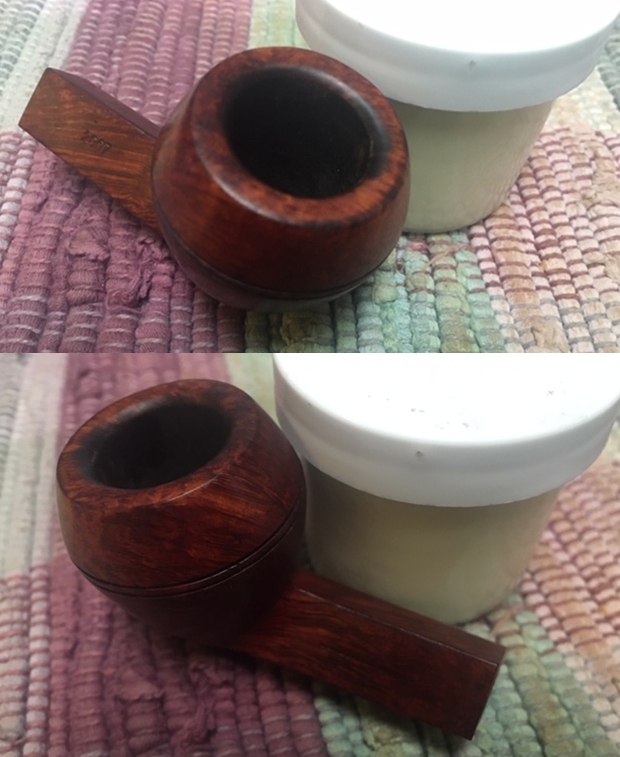
 The staining process is next. I assemble my desktop staining module with all the component parts. I recently used the method I learned from my fellow restorer from India, Paresh, of creating the rich Dunhill look. With this bowl being originally darker, I thought that this approach would be good. It starts with an undercoat of Fiebing’s Dark Brown Leather Dye that is followed with the washing with red dye.
  After wiping the bowl with a cotton pad wetted with alcohol to clean it, I warm it with the hot air gun to open the briar helping it to be more receptive to the dye which is applied using a folded over pipe cleaner.
  Using the pipe cleaner, I paint sections of the bowl with the Dark Brown Dye and then immediately ‘flame’ it with a lit candle. This combusts the aniline dye burning away the alcohol leaving the dye pigment embedded in the briar. After applying the dye, the stummel is set aside for several hours – through the night, for the dye to ‘rest’ and settle in. This helps the dye to take hold in the briar.
 The next morning, it’s time to ‘unwrap’ the flamed stummel. To do this, a felt cloth buffing pad is mounted onto the Dremel set at the slowest speed, and Tripoli compound is applied to help remove the crusted shell exposing the dyed briar beneath.
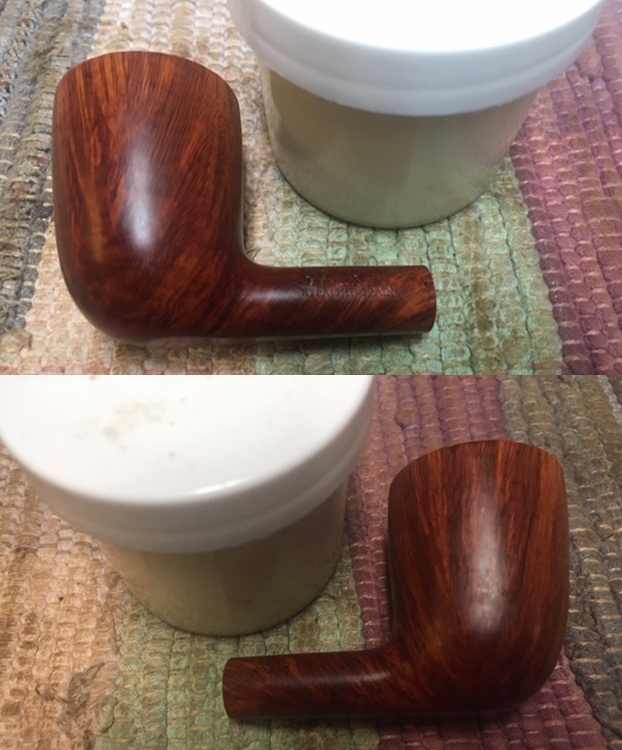
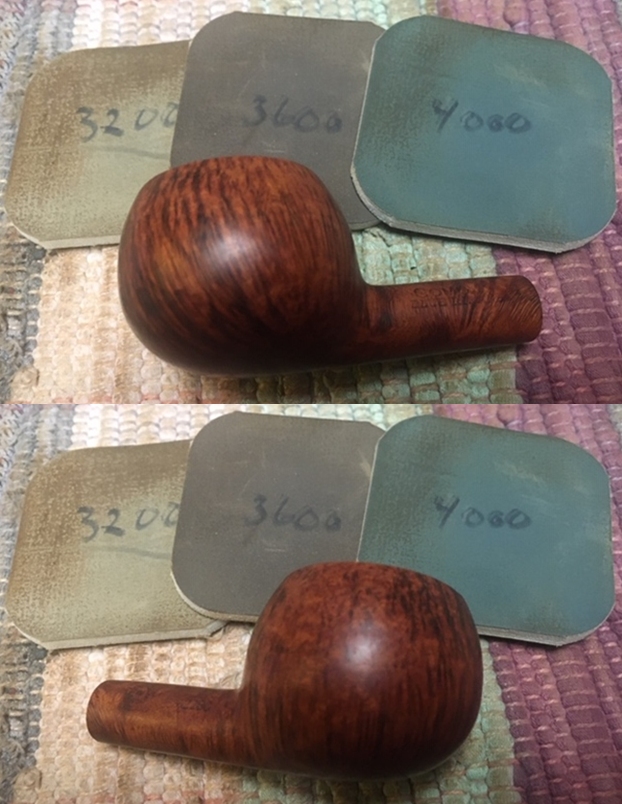
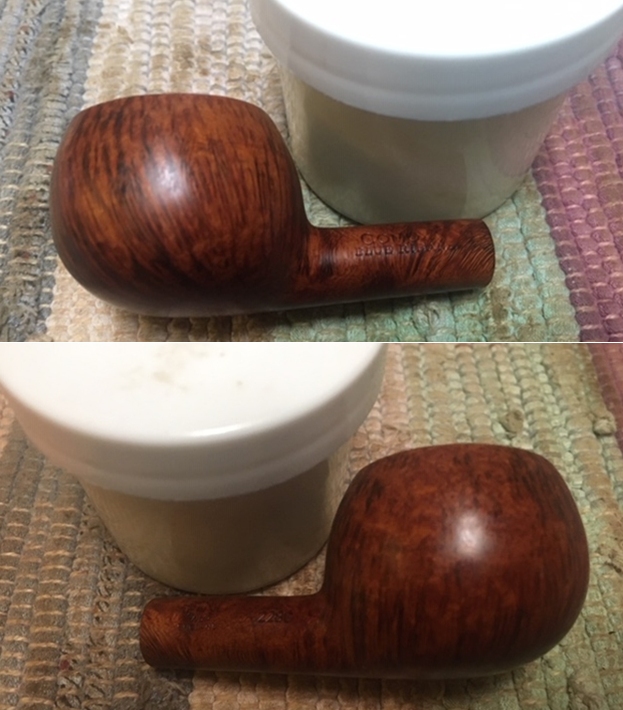
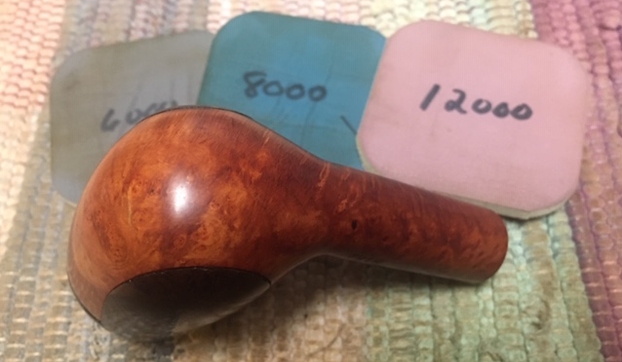
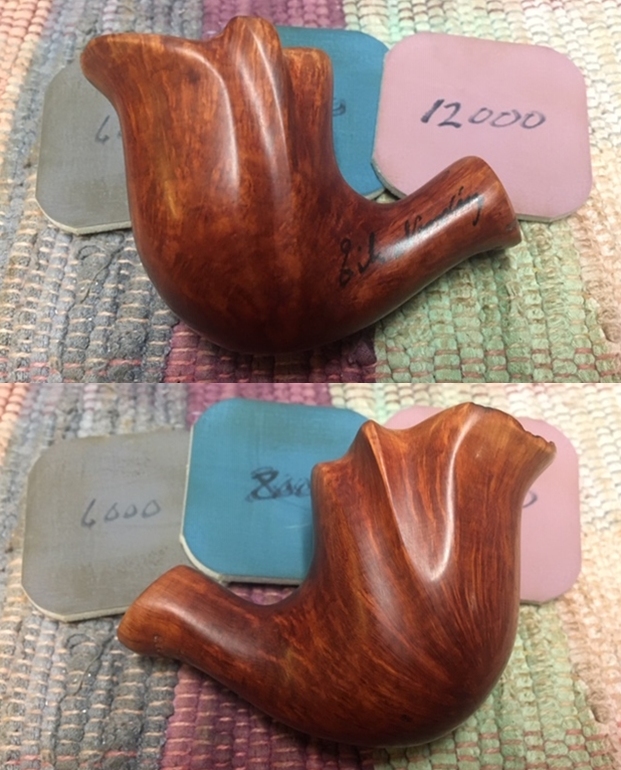
 After the Tripoli compound removes the flamed crust, I wipe the bowl to rid it of the compound dust. When this is completed, I apply a wash of red overcoat to the briar surface and lightly wipe it with a cotton cloth. I apply and wipe until I’m satisfied with the hue. I like what I see. The rich red tones give a depth to the blasted finish.
 Next, since it’s easier to handle the stem and stummel separately, after mounting a cotton cloth buffing wheel to the Dremel set at about 40% full power, Blue Diamond compound is applied to the long Churchwarden stem and Dr. Geo bowl.
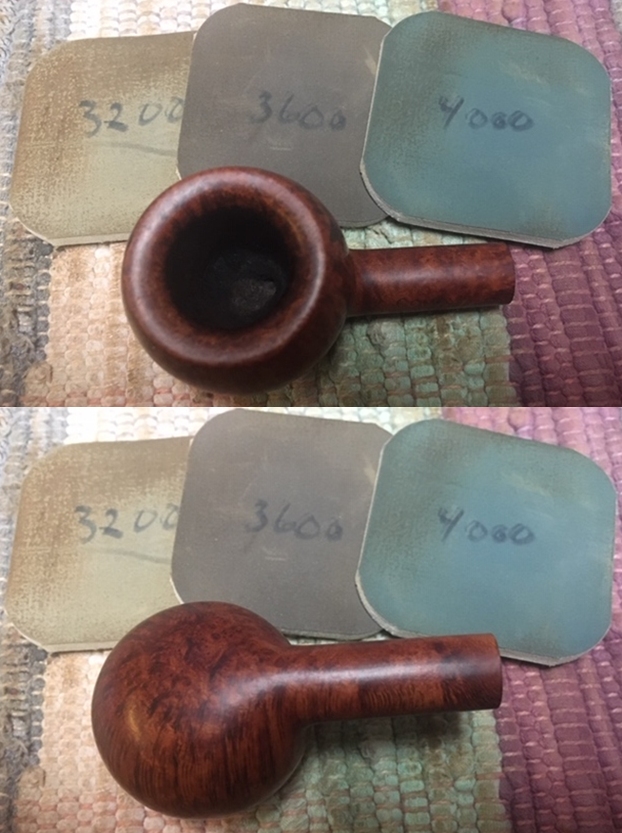
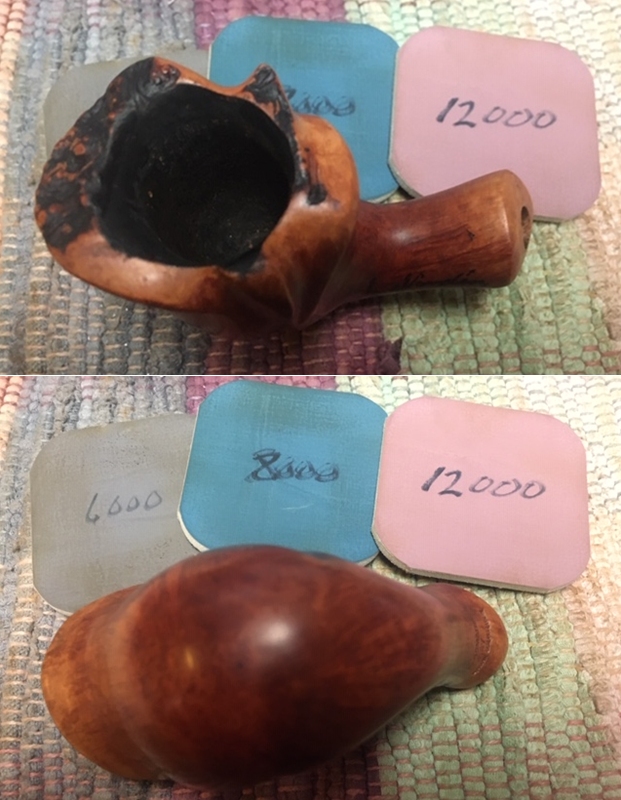
  One more step to guard against dye leeching. Often, bowls that have been newly stained, dye will come off on the steward’s hand the first times the bowl is heated up and put into service. To emulate this, I heat the bowl with the hot air gun and then wipe it with a cotton cloth to pick up leeched dye. Hopefully, this will keep the bowl from leeching later!
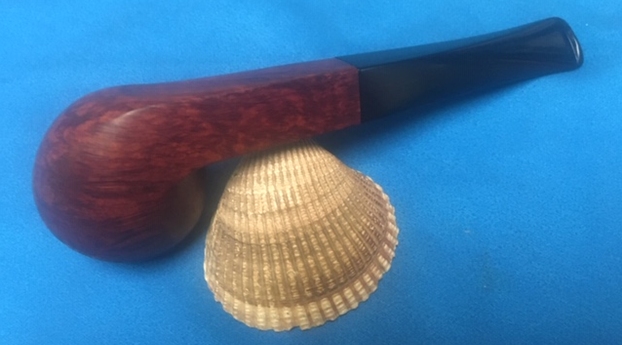
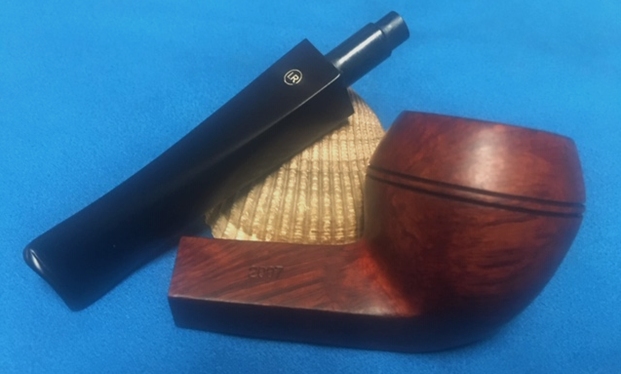
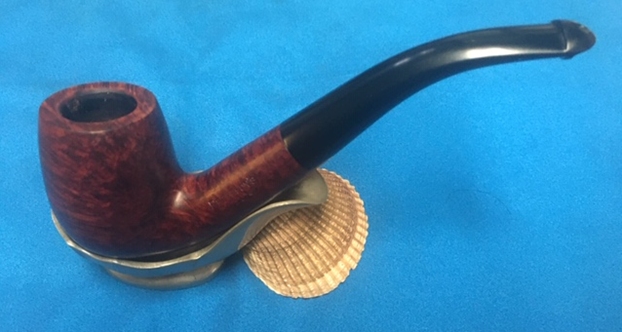
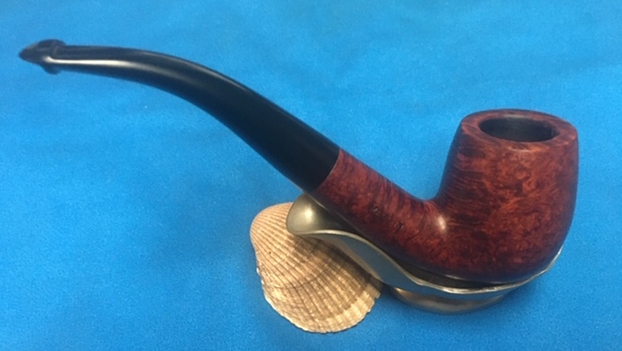
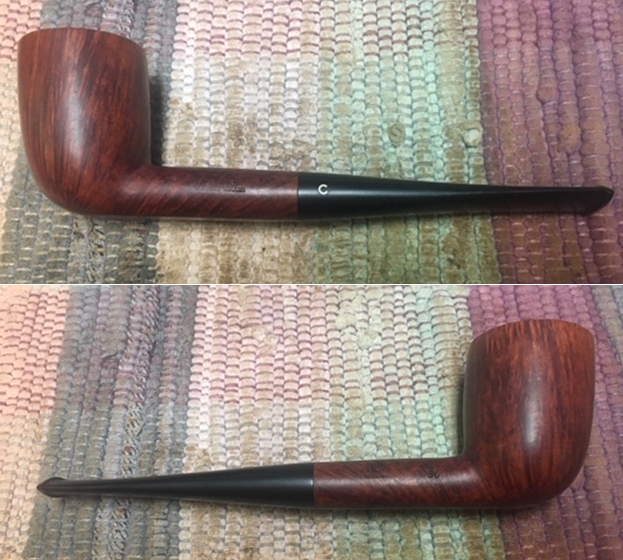
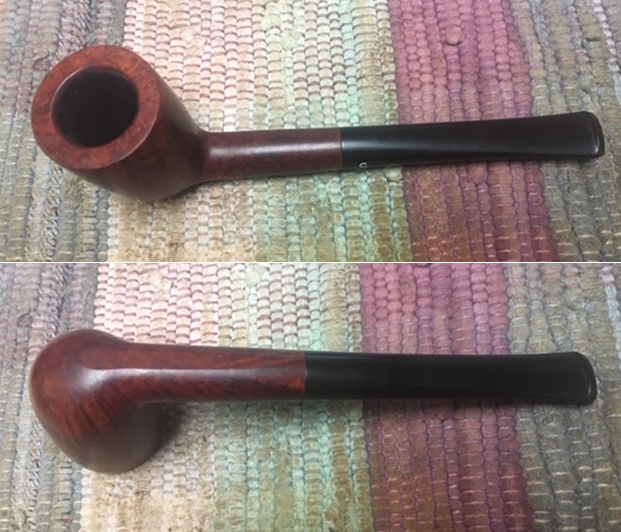
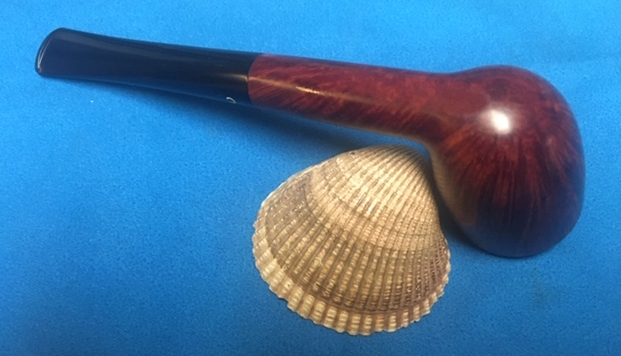
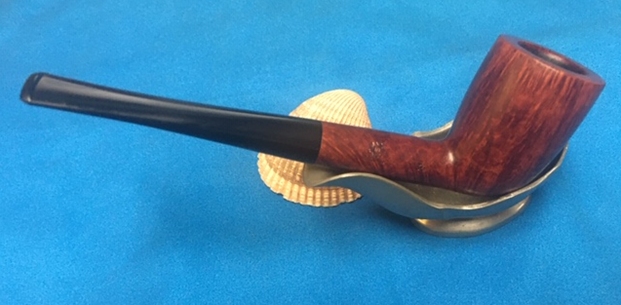
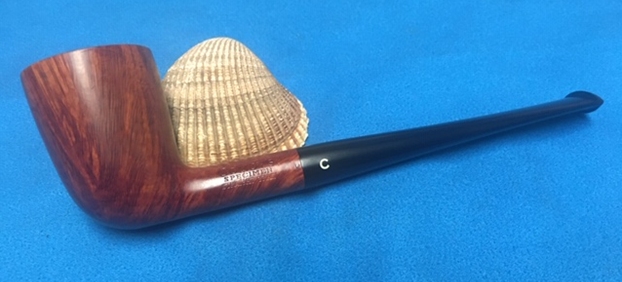
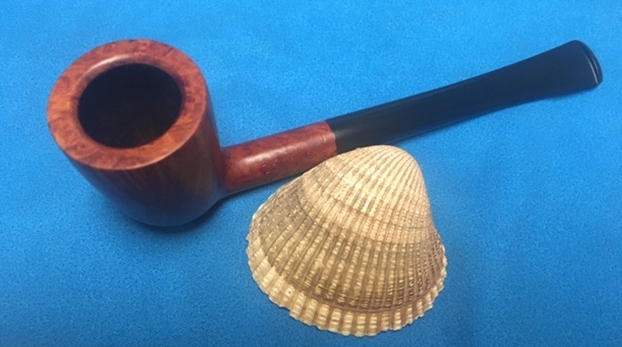
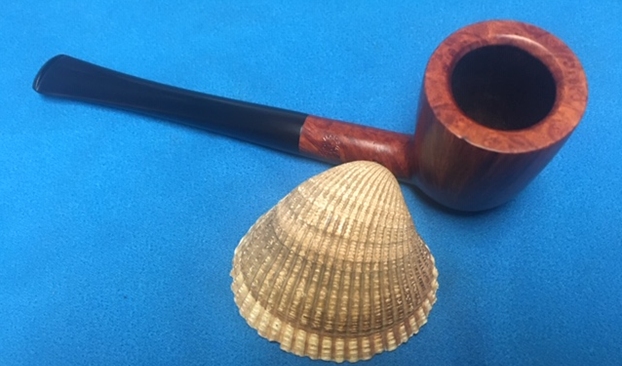
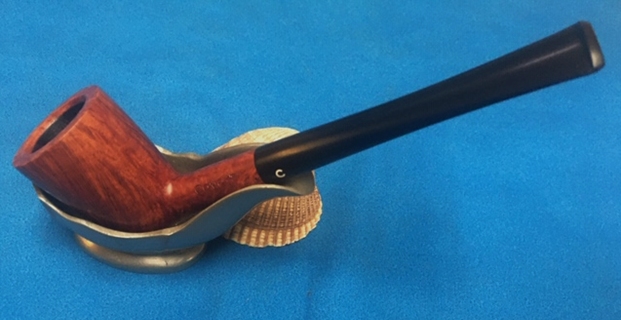
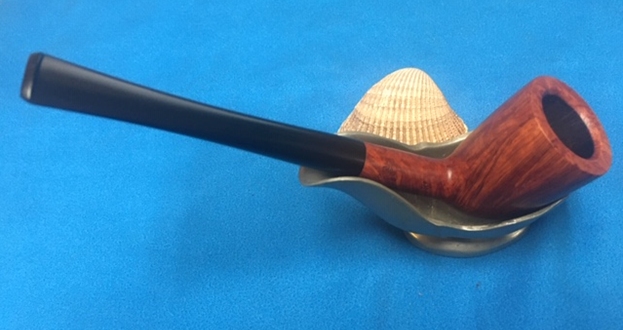
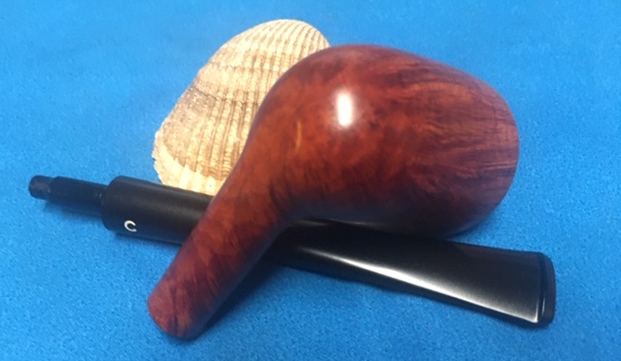
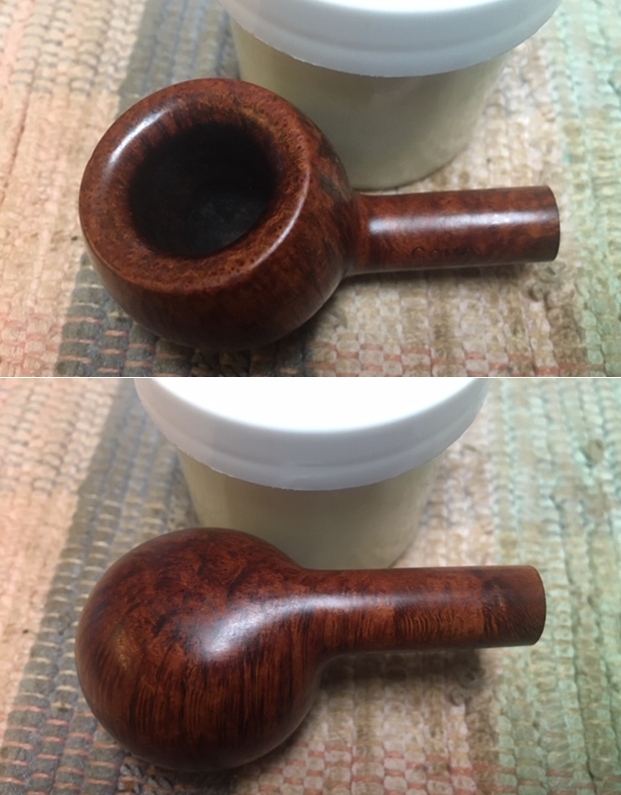
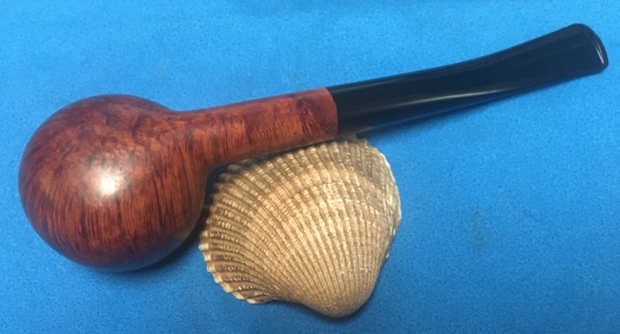
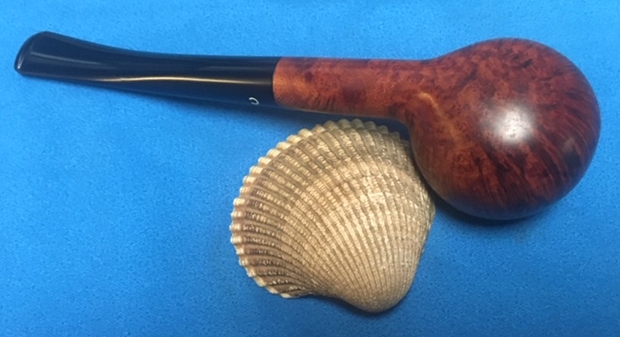
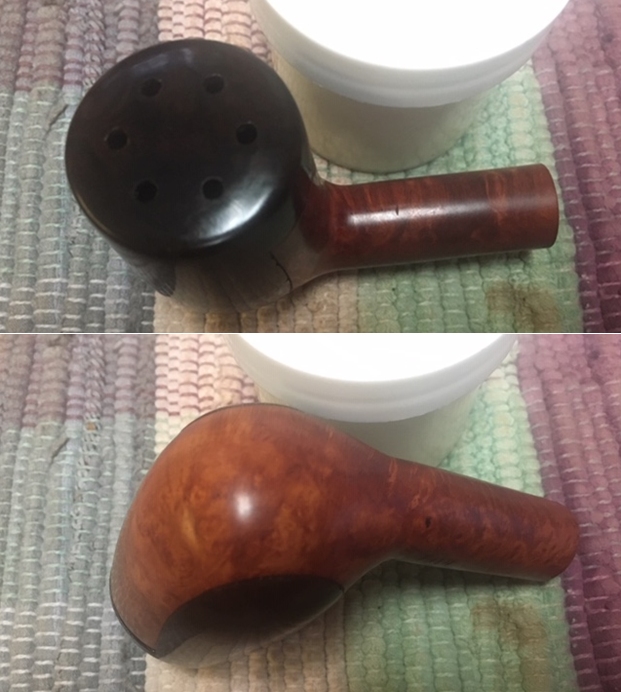
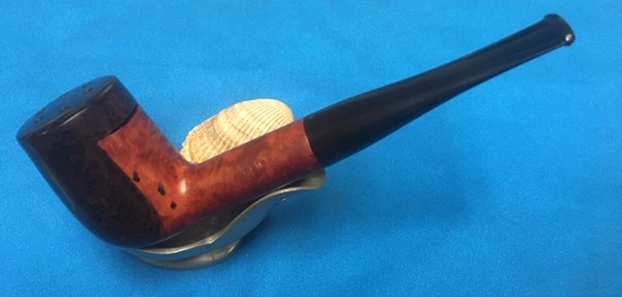
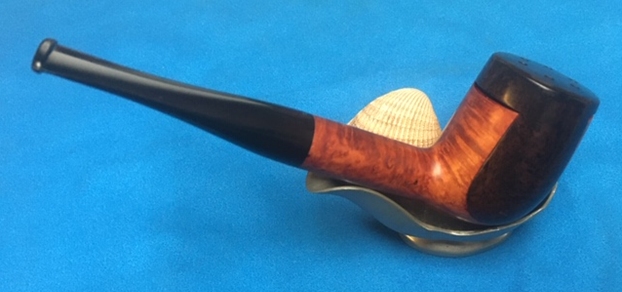
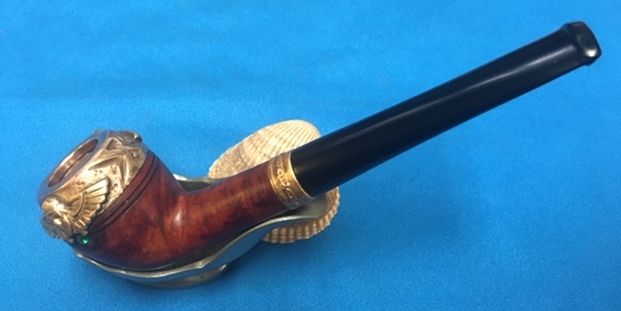
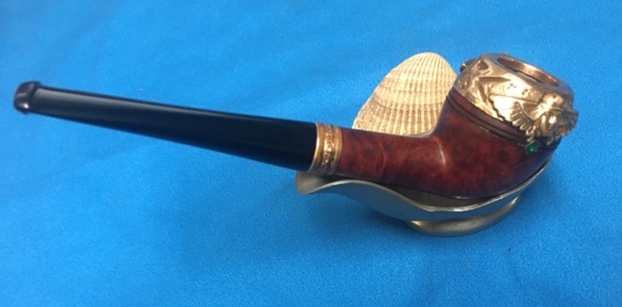
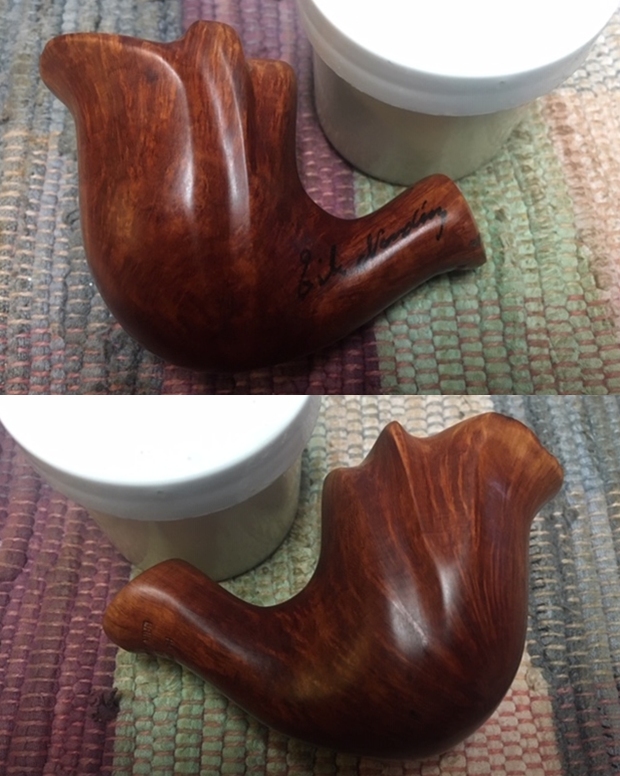
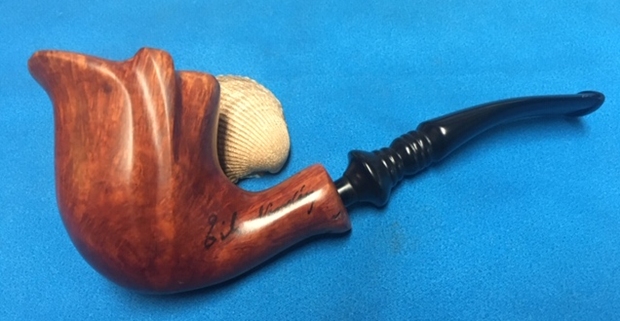
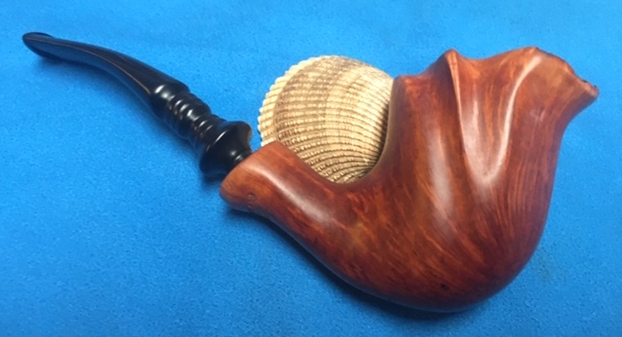
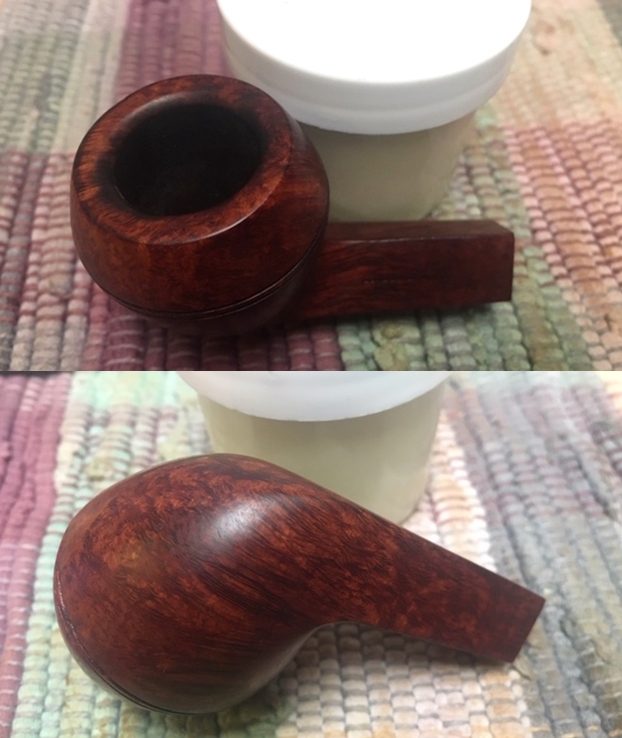
 I complete the fashioning of the Dr. Geo Churchwarden by giving the reunited stem and bowl a vigorous hand buffing bringing out the shine. I’m very pleased with the results of the ‘Dunhill’ approach to finishing the bowl that I learned from Paresh. The Dr. Geo Prince bowl serves well mounted on a long, flowing Churchwarden stem. The contrasting with the smooth and blasted briar surfaces also work very nicely. This was Jon’s second commissioned pipe and he will have the first opportunity to claim this French Dr. Geo Churchwarden from The Pipe Steward Store benefitting the Daughters of Bulgaria – women and girls who have been trafficked and sexually exploited. Thanks for joining me!


 Even with the COVID-19 warnings rolling in incessantly I am still working on pipes! It keeps my mind busy and focused. There is no reason to not enjoy the time alone at the work table bringing these old-timers back to life. After brief foray restoring pipes from several other estates I am back to Bob Kerr’s estate (his photo is to the left). If you have not “met” the man and would like to read a bit of the history of the pipeman, his daughter has written a great tribute that is worth a read. Because I have included it in over 65 restorations to date I thought that I would leave it out this time. Be sure to check out some of the recent Dunhill restoration blog (https://rebornpipes.com/2020/01/01/restoring-the-last-of-bob-kerrs-dunhills-a-1962-dunhill-bruyere-656-f-t-bent-billiard/).
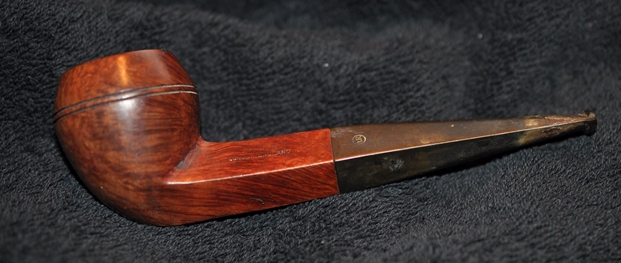
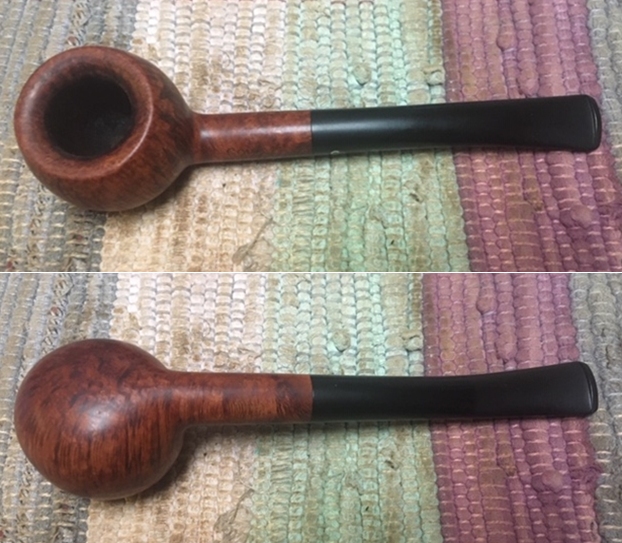
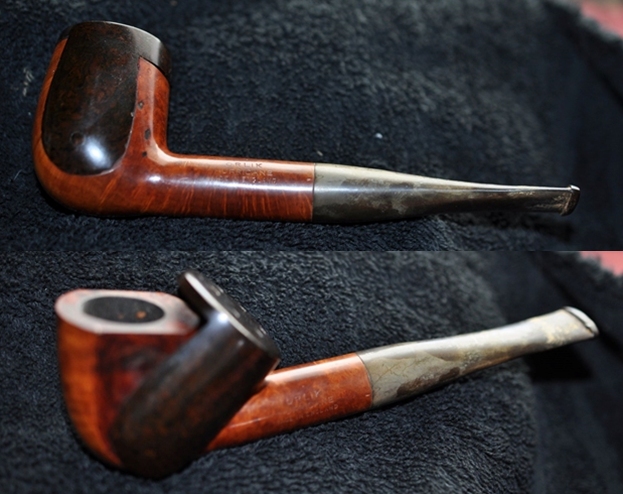
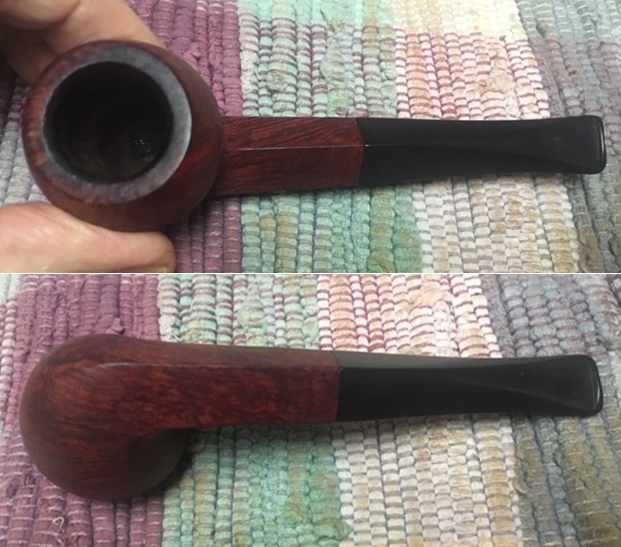
 He took photos of the bowl and rim top to show their general condition. You can see the thick cake in the bowl with the lava overflowing on to the rim top. The inner edge of the bowl is beveled inward and thickly lava coated. It is not clear if there is damage to the bowl but it does appear to be slightly out of round.
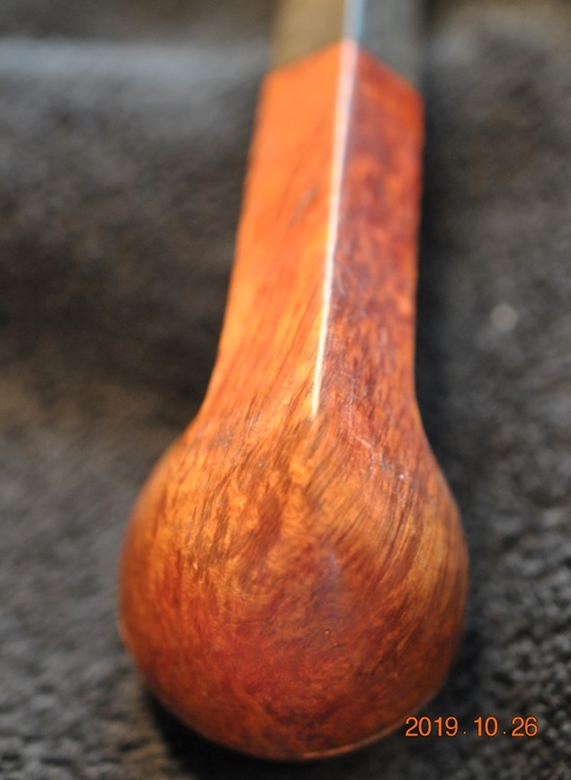
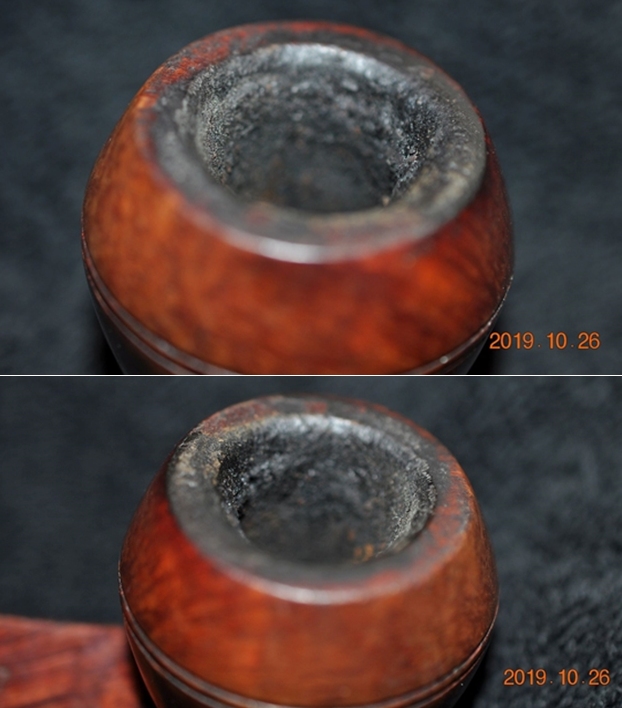 Jeff took some photos of the sides and heel of the bowl to give an idea of the grain on this particular piece of briar. It is amazing and I cannot wait to see what it looks like once it is polished and waxed.
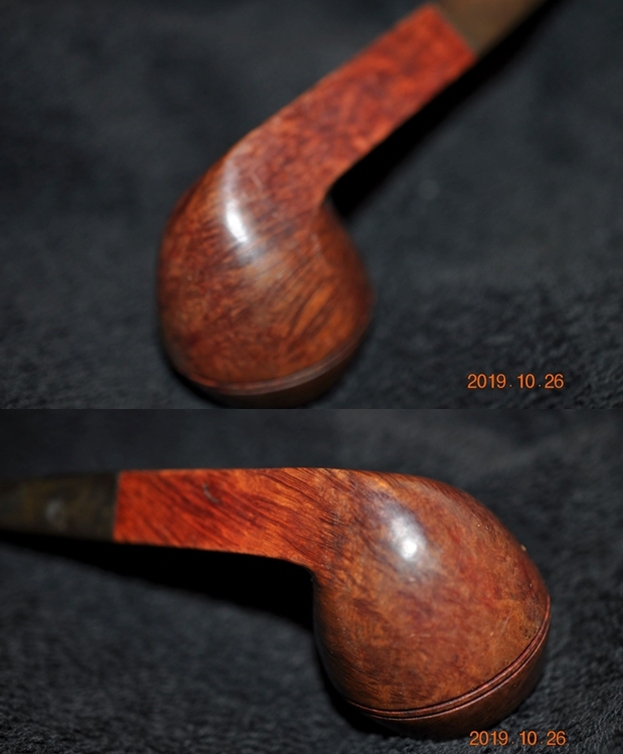
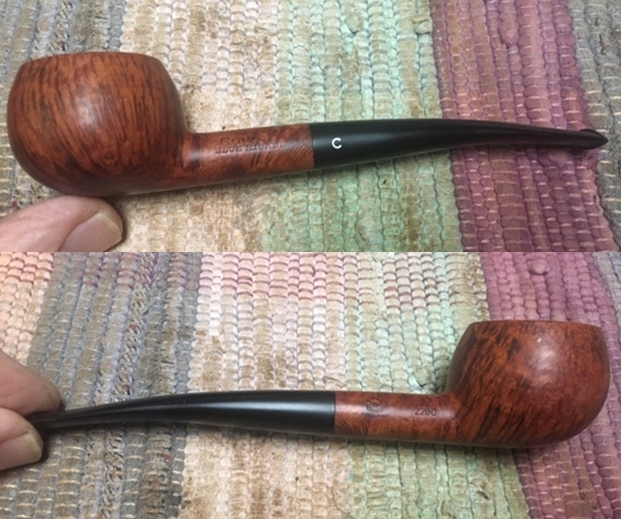
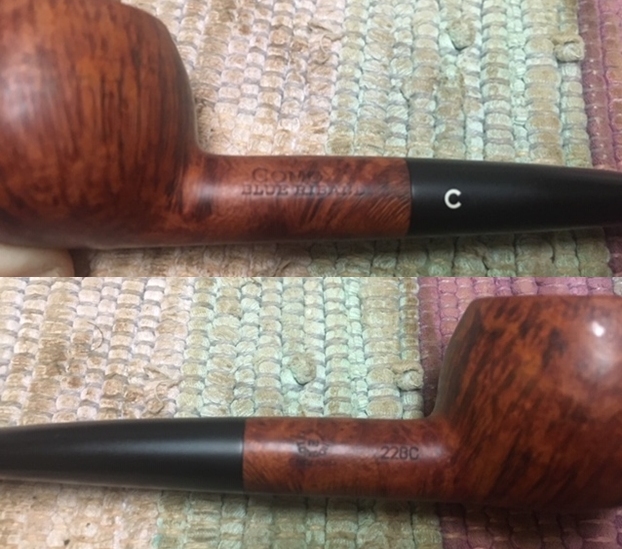
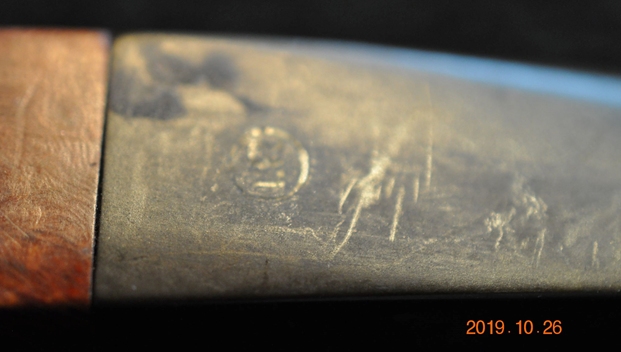
 He took photos of the stamping on both sides of the shank to capture it for me. The first photo shows the left side of the shank and the stamping as noted above. The second shows the right side of the shank with the 2007 stamp. The final photo of the set shows the faint LR in a circle stamping on the left side of the diamond taper stem.
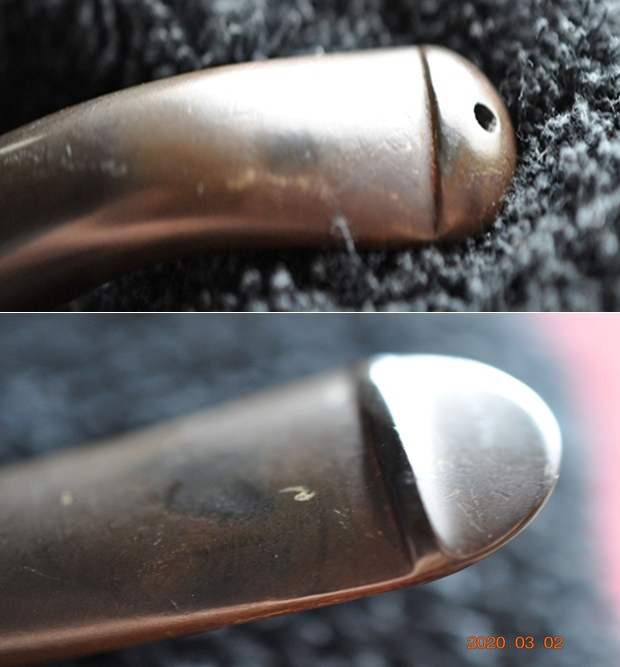
 This pipe has a diamond tapered stem that is heavily oxidizes and has some calcification on the button end. There seems to be some tooth marks and chatter on the top and underside.
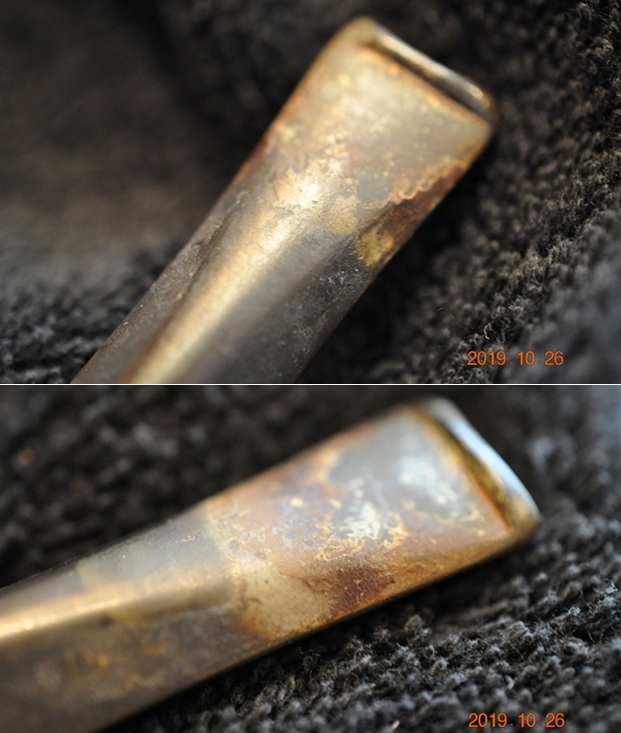 I turned to Pipephil’s site to get a quick overview of Irwin’s pipes. I remembered that they were a seconds of GBD pipes and this confirmed that (http://www.pipephil.eu/logos/en/logo-i.html). I have included a screen capture of the pertinent section from the site.
 I clicked on the link on the site to the section on GBD (http://www.pipephil.eu/logos/en/logo-gbd.html). There was a brief history as well as a list of GBD seconds. You will note that the Irwin’s brand is listed there.
  I turned to Pipedia and reread the history of the brand there. I also turned to the link on the shape numbers to see if I could clear up the question whether 2007 was a date or shape number. (https://pipedia.org/wiki/GBD_Shapes/Numbers). I found the section listing the 2007 as a straight bulldog with a diamond shank. I did a screen capture of that section and included it below:
  So now I knew with certainty that I was working on a GBD made Bulldog – straight, diamond stem. The 2007 was the shape number. The one thing I am not clear about is what mad this pipe a second and not a GBD regular. That information would not be forthcoming. I moved forward to work on the pipe itself and see what I had to do with it. It had come back looking far better than I expected. Even the stem looked remarkably good with most of the tooth chatter gone. I was impressed. Jeff had done his normal thorough clean up – reaming, scrubbing, soaking and the result was evident in the pipe when I unpacked it. I took photos of the pipe before I started my work on it. Just look at the grain on this pipe. Stunning!
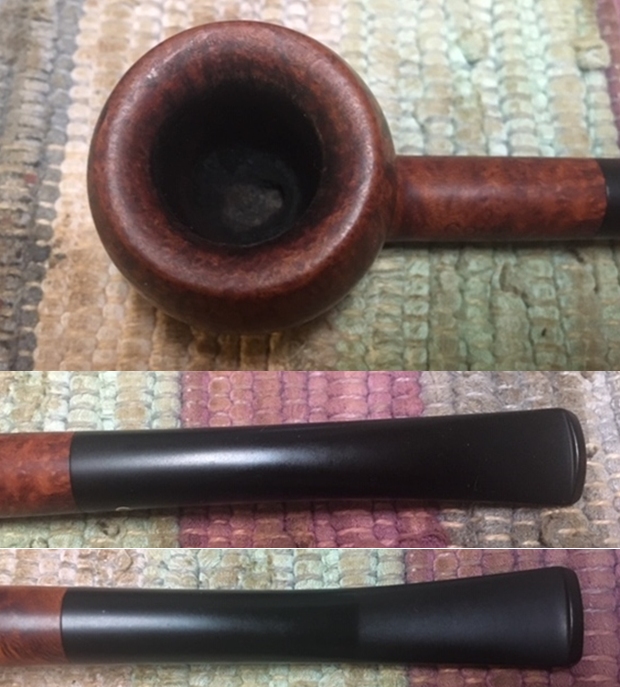
 I took some photos of the rim top and stem. The rim top and bowl looked very good. The cake and lava overflow were gone. Jeff had been able to get rid of the darkening and lava and tars. The rim top had nicks and marks and the inner edge of the bowl was damaged and out of round. The close up photos of the stem shows that it is a much cleaner and better looking stem. The light tooth chatter was gone and the stem looked really good.
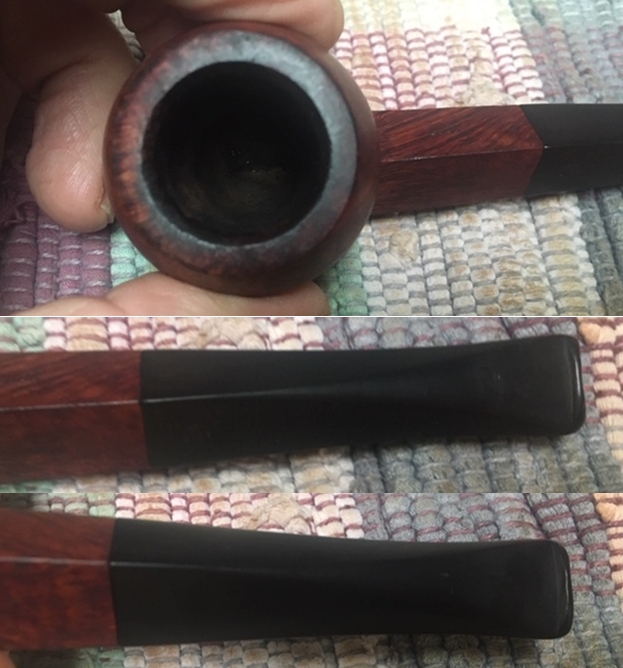 I took some photos of the stamping on the shank sides to show the condition after the cleanup. Often the stamping takes a hit with the cleaning and is lessened in it clarity. Jeff does a great job in leaving the stamping looking very good.
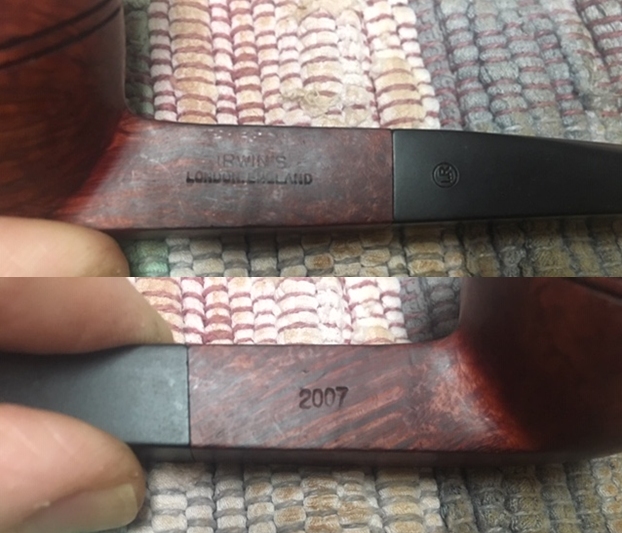 I started my restoration work on this pipe by addressing the out of round inner edge of the bowl and the damage to the rim top. I used a folded piece of 220 grit sandpaper to clean up the edge and clean up the bevel. The next series of photos tell the story of the work on the rim. The first photo shows the rim as it was when I started. The second shows the folded sandpaper when I worked it over. I smoothed out the sanding with a 1500 grit micromesh sanding pad (photo 3). The final photo in the series shows the rim top after the work.
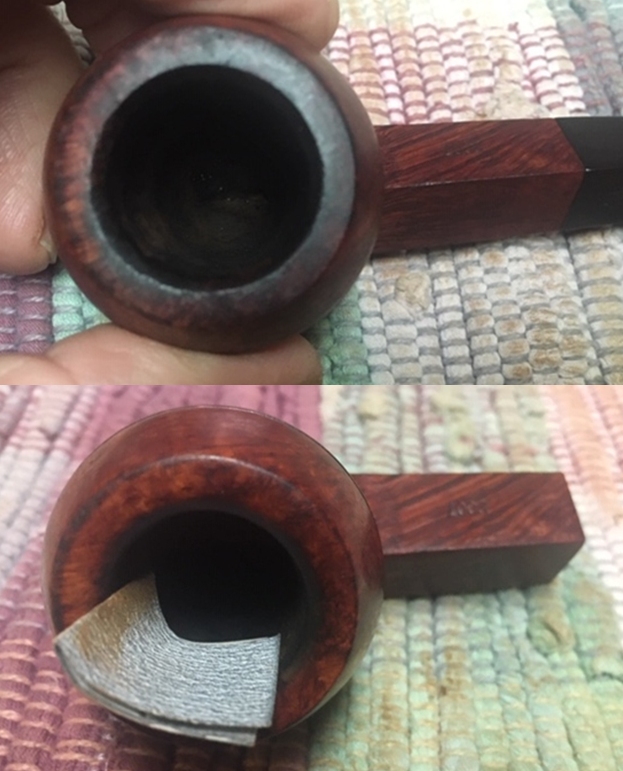
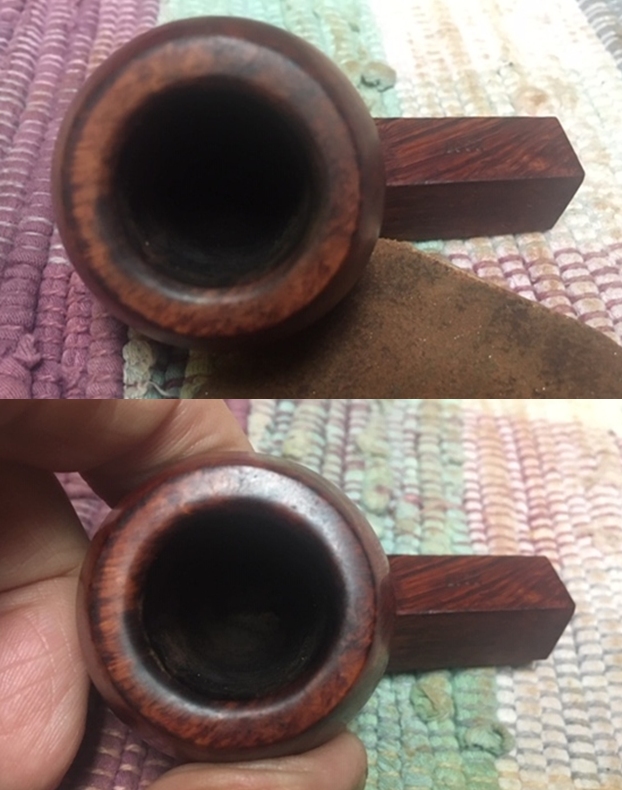 With the rim in order I started my polishing regimen on the bowl. I used nine worn micromesh sanding pads and dry sanded the bowl with 1500-12000 grit pads. I wiped the bowl down with a damp cloth after each pad. The bowl really shines by the final three pads.
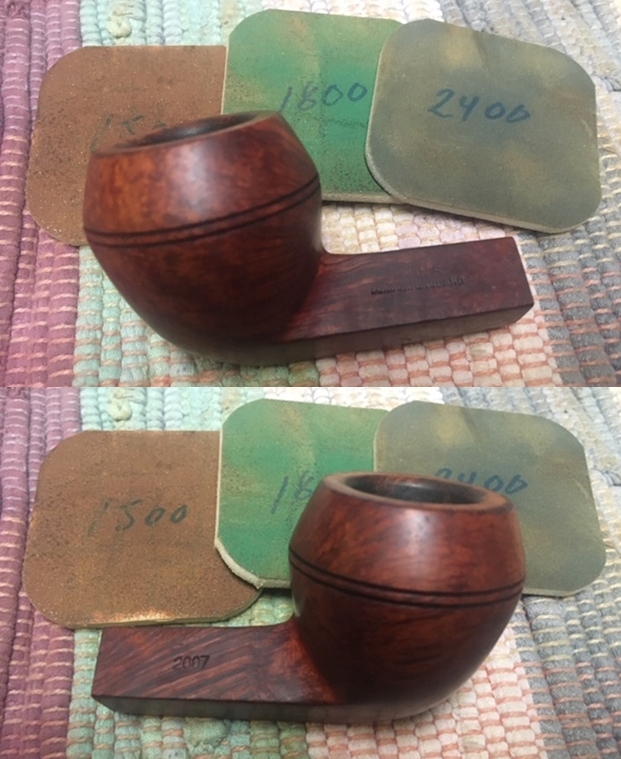
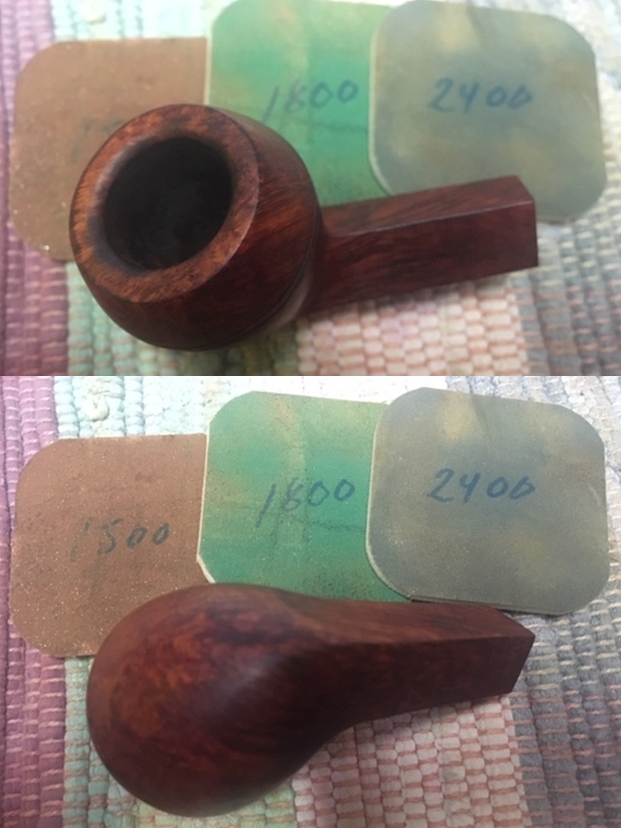
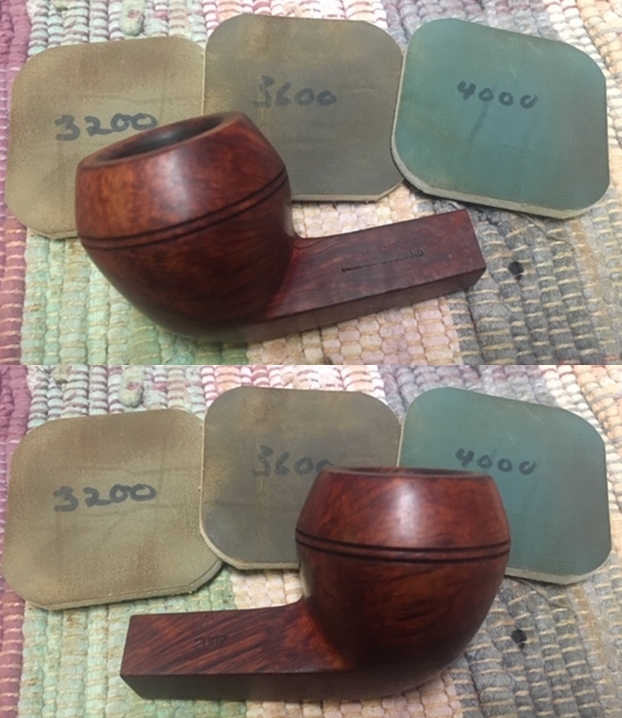
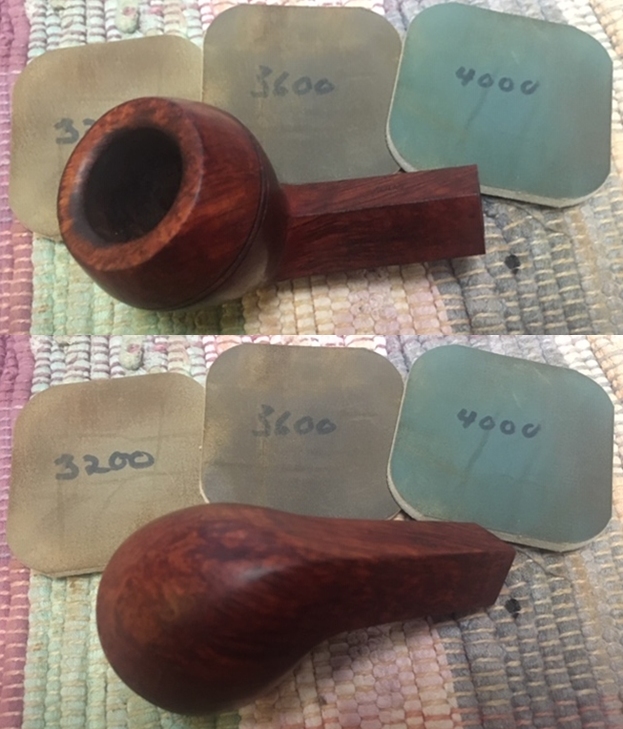
 I worked some Before & After Restoration Balm into the surface of the briar with my fingertips to clean, enliven and protect it. I let the balm sit for a little while and then buffed with a cotton cloth to raise the shine. The photos show the bowl at this point in the restoration process.
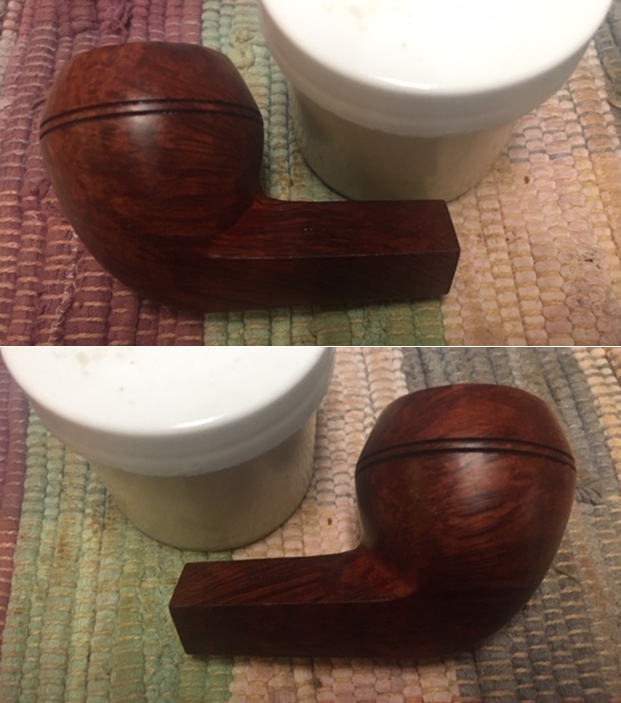
 I set the bowl aside and turned my attention to the stem. I sanded out the tooth chatter and blended in the repairs with 220 grit sandpaper and started to polish it with a folded piece of 400 wet dry sandpaper. Once it was finished it was smooth.
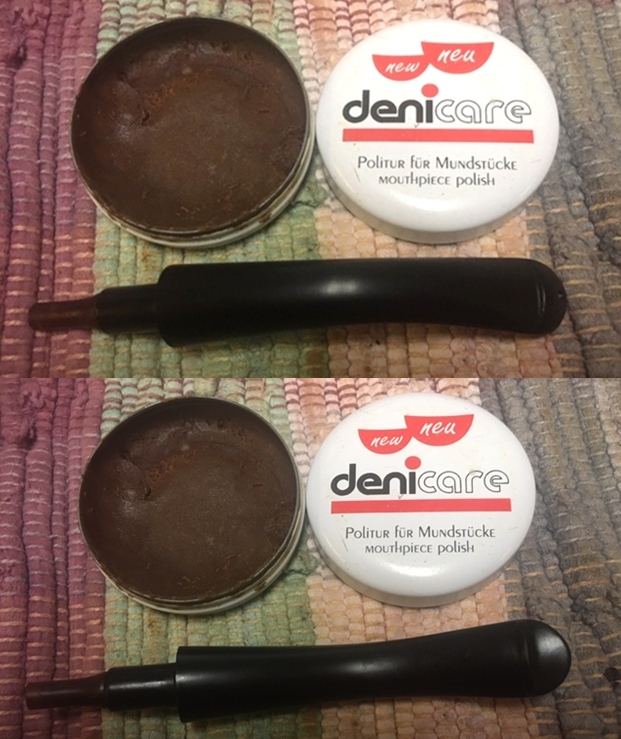
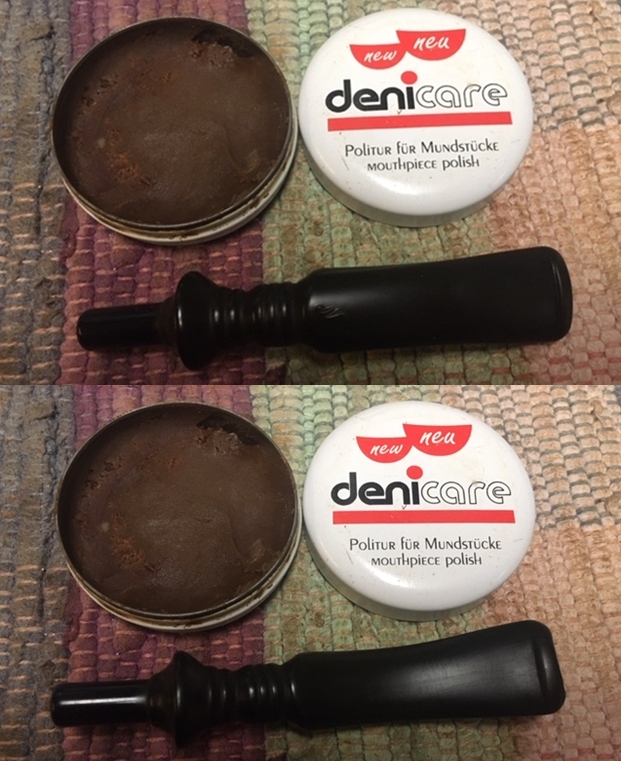
 I used some Denicare Mouthpiece Polish that I have in my kit to start polishing out some of the scratches and remaining oxidation on the stem. I rubbed it in with a cotton pad and my finger tip and buffed it off with a cotton pad.
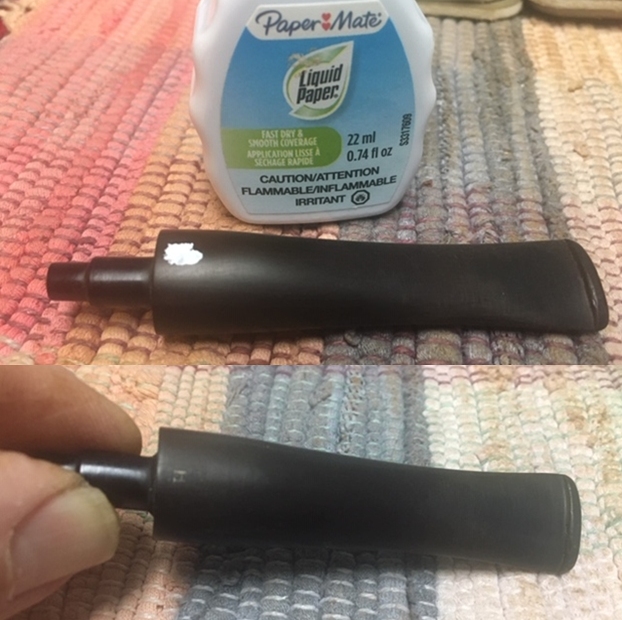
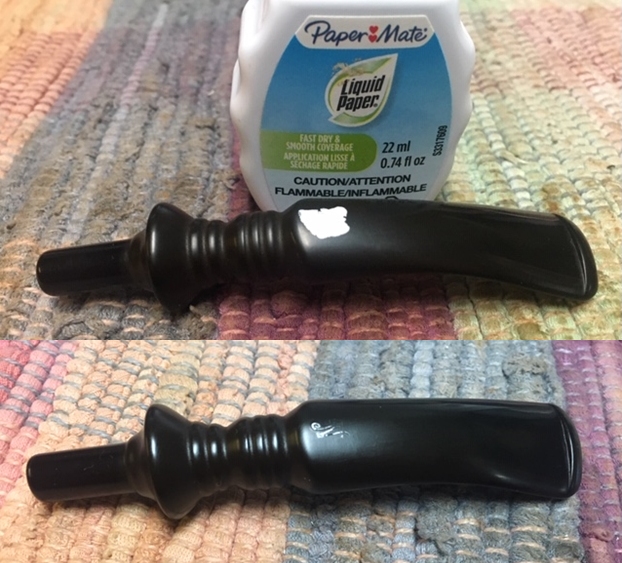
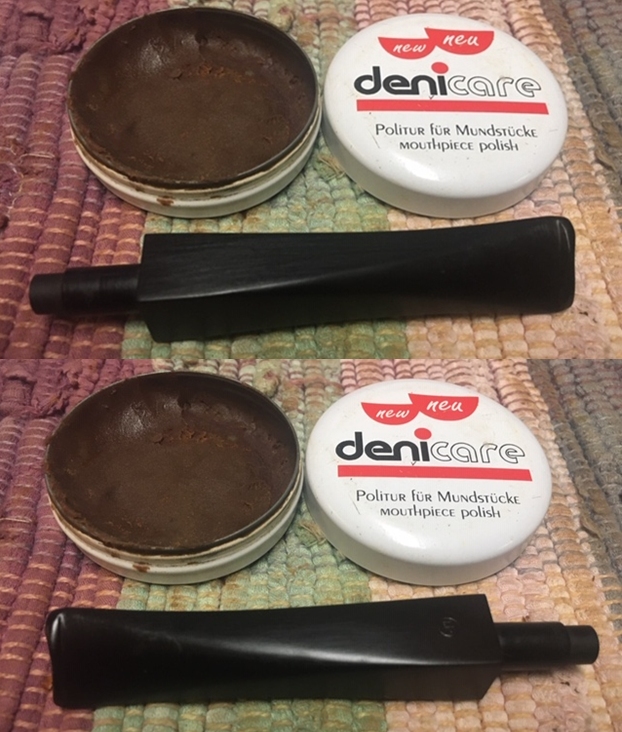 I used some liquid paper to touch up the LR stamp on the left topside of the diamond stem. Once it dried I scraped the excess off with a tooth pick to show the renewed stamp on the stem.
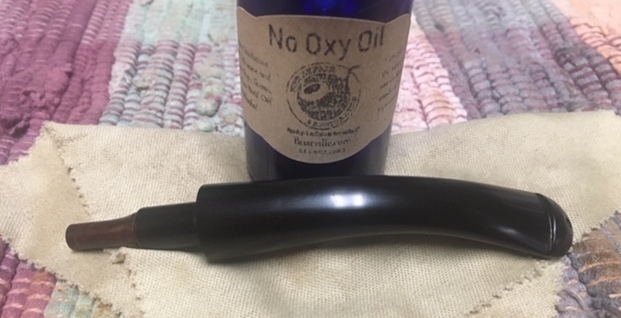
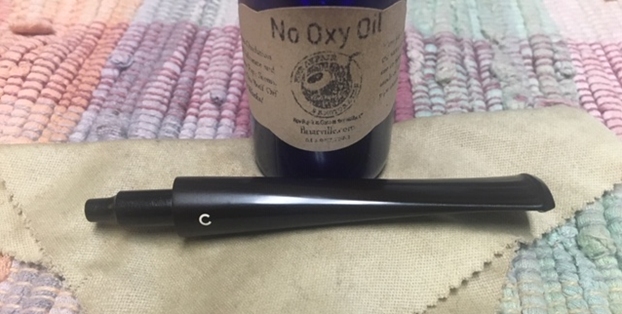
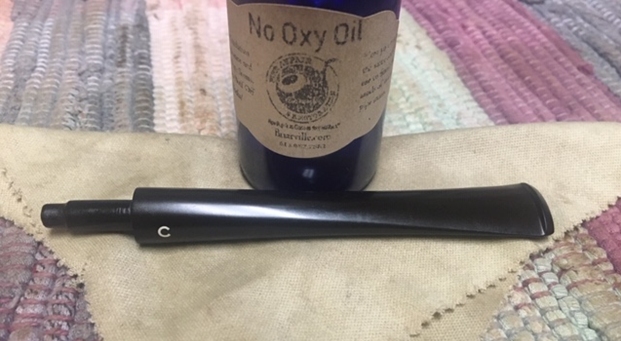
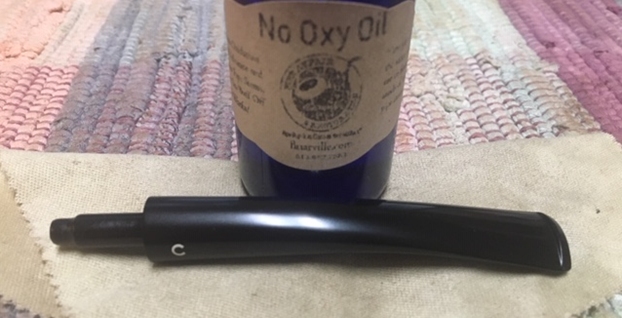
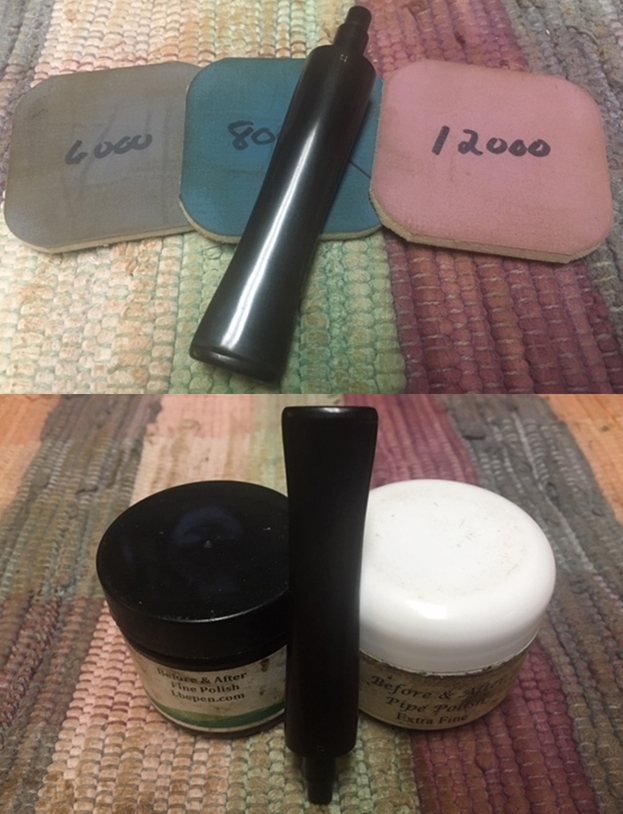
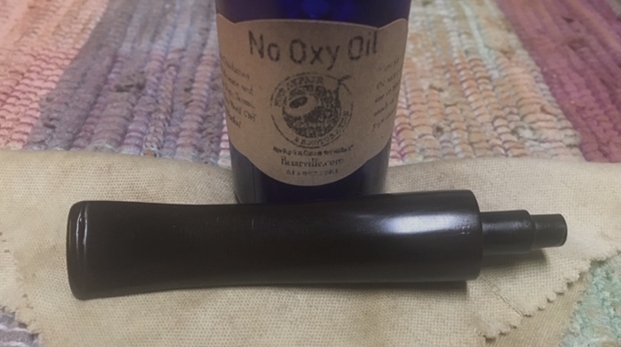
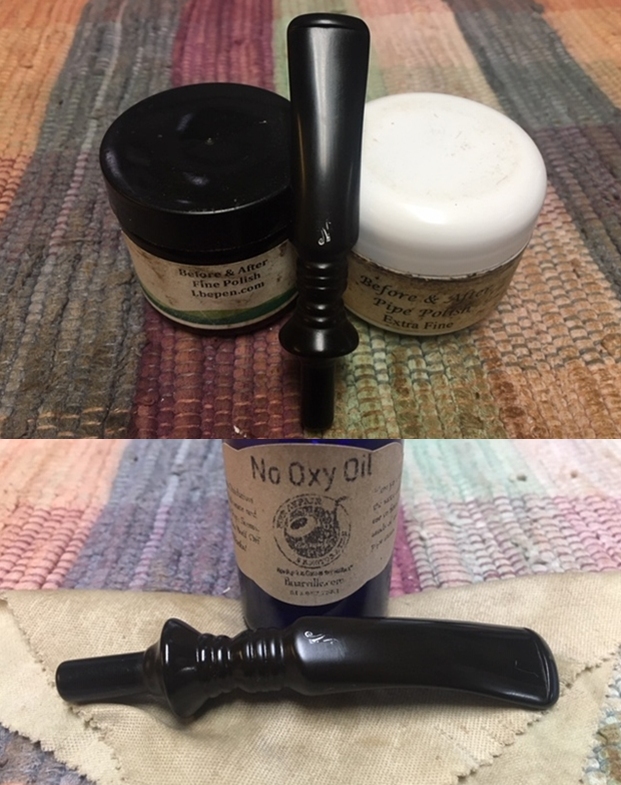
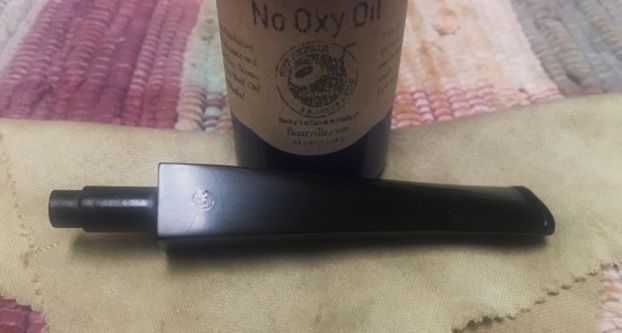
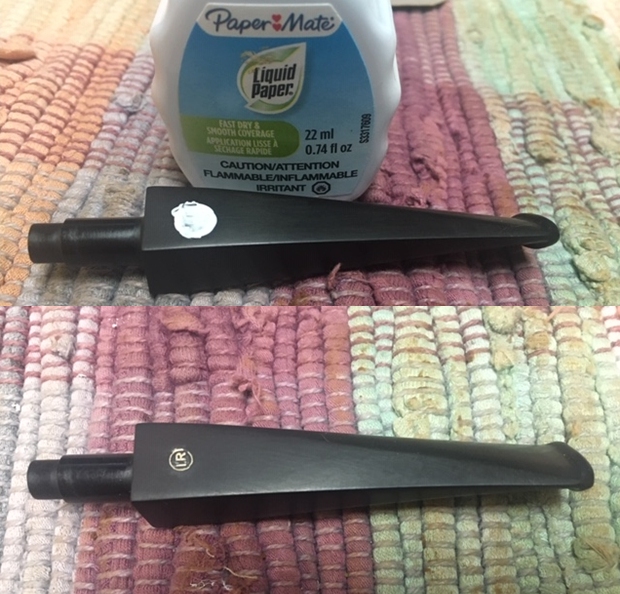 I polished the stem with micromesh sanding pads – dry sanding with 1500-12000 grit sanding pads. I wiped it down after each sanding pad with a cloth containing some Obsidian Oil. I finished polishing it with Before & After Pipe Stem Polish – both Fine and Extra Fine and buffed it off with a cotton cloth. I gave it a coat of Briarville’s No Oxy Oil to preserve and protect the stem.
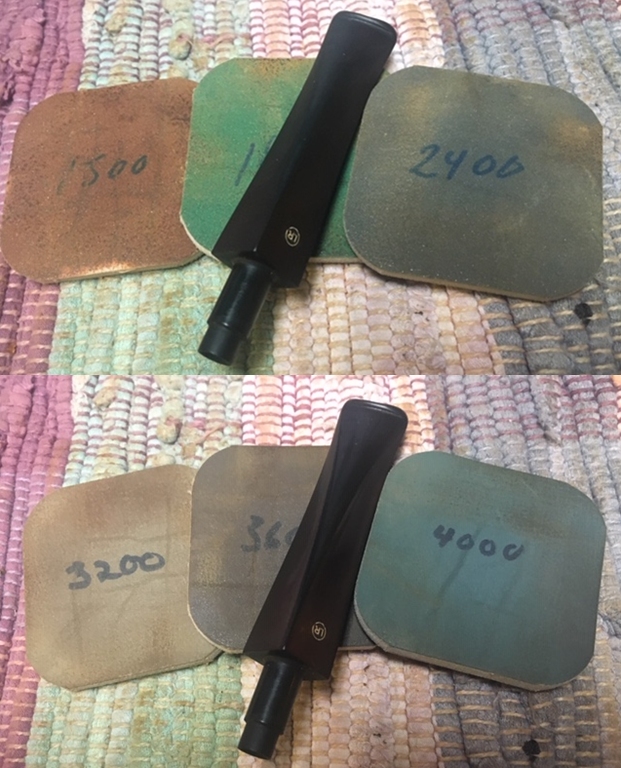
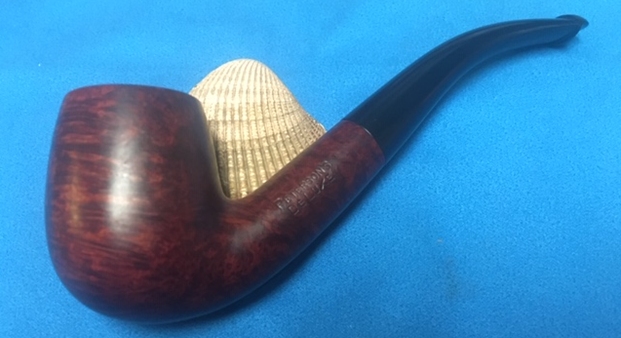
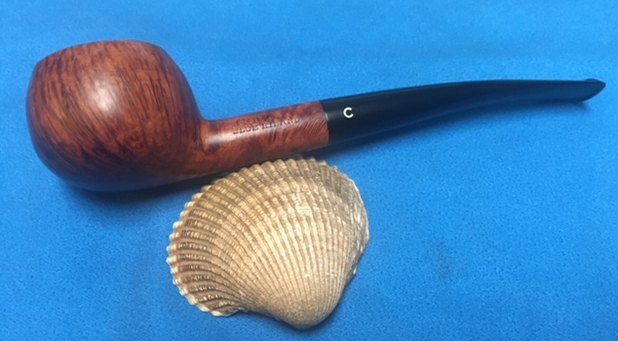
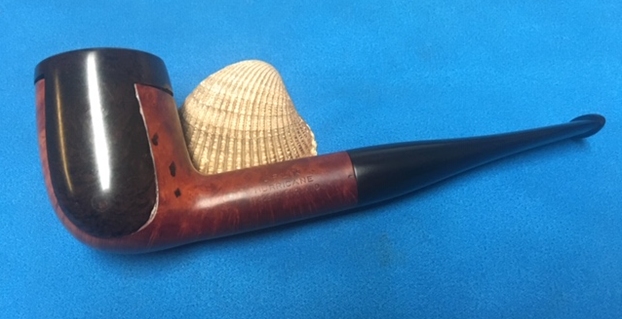
 I don’t know how many times I have said this but I have to say it again with this pipe. I love it when I come to the end of a restoration and all of the parts come together and the pipe looks better than when we started the cleanup process. I put the stem back on the bowl and buffed the pipe with Blue Diamond on the buffing wheel. I carefully avoided the stamping on the shank sides during the process. I gave the bowl and stem multiple coats of carnauba wax on the buffing wheel and followed that by buffing it with a clean buffing pad on the buffer. I hand buffed the pipe with a microfiber cloth to deepen the shine. The finished pipe is a great looking British Bulldog made by GBD and sold as second – an Irwin’s 2007 shaped Bulldog. Once again the grain and the way the shape follows the grain is amazing. Give the finished pipe a look in the photos below. I can only tell you that it is much prettier in person than the photos capture. The dimensions of the pipe are Length: 5 ½ inches, Height: 1 ¾ inches, Outside diameter of the bowl: 1 ¼ inches, Chamber diameter: ¾ of an inch. This GBD made Irwin’s Bulldog is a great addition to someone’s rack that price will be very reasonable. Thanks for walking through the restoration with me as I worked over another beautiful pipe. This one will be will be going on the rebornpipes store shortly if you are interested in adding it to your collection. Thanks for your time.