Blog by Dal Stanton
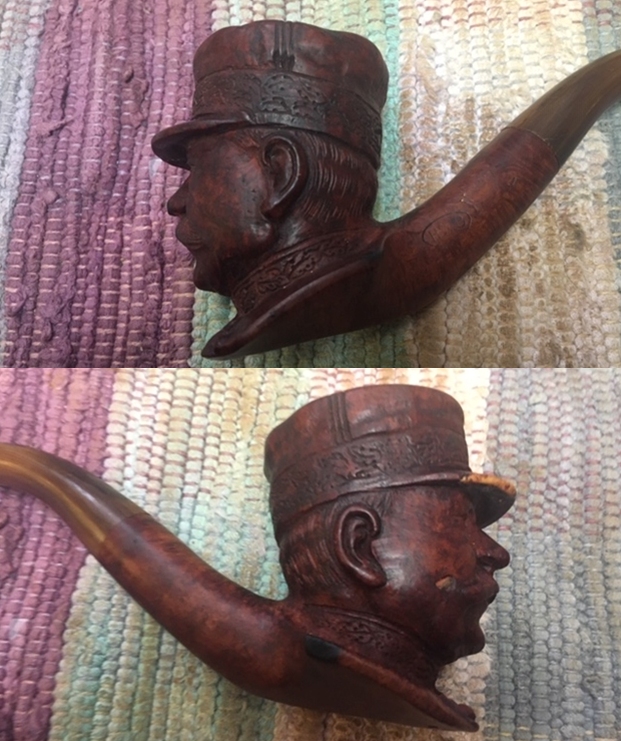
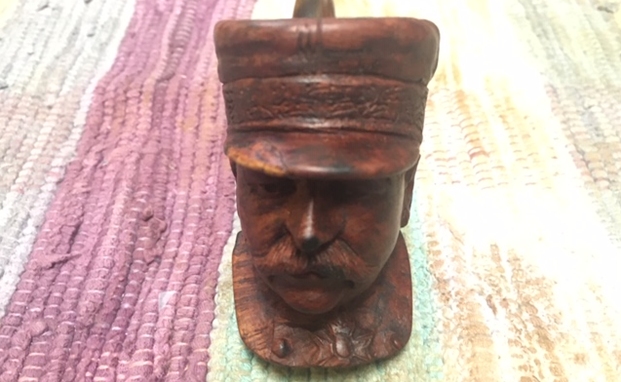
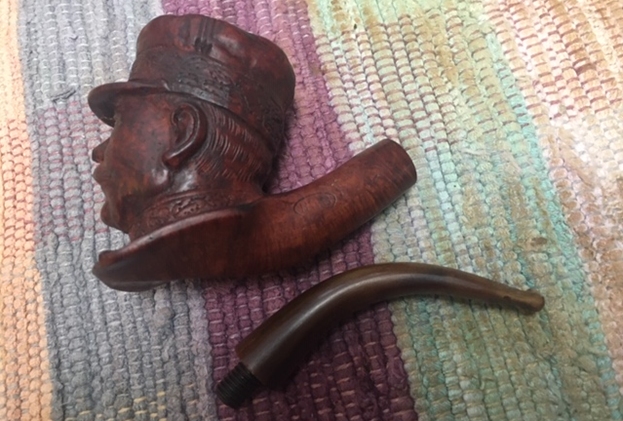
As I begin this restoration, my mind is replaying the plethora of experiences that were shaped and riveted into my memory of my visit last year to India. Not many ‘good’ experiences in life can be described as ‘life changing’. These kinds of changes are usually reserved for the difficult times – like now, as the world is navigating a pandemic that creates confusion and uncertainty about life and the future. Yet, Paresh’s invitation to me, along with the rebornpipes’ trust, Steve and Jeff Laug, to visit his home and family was an experience that was life changing for me. It wasn’t just the sights and sounds of a different cultural context or the different foods the pallet experienced tasting Indian cuisine. What was so profoundly and wonderfully life changing was the depth of loving hospitality Paresh and his wife, Abha, provided to us during the visit. Meeting and enjoying his family, along with their two daughters, Mudra and Pavni, was truly an experience that will walk with me in the life I continue to enjoy by God’s grace. Of course, I cannot fail to mention the ‘reason’ for our travels where West met East! Paresh asked that we collaborate in the restoration of one of his heirloom pipes, an unbelievably fun and enriching experience that produced this story, perhaps my favorite: West Meets East in India to Restore a Grandson’s Treasure – an 1846 BBB!  How does an Italian Savinelli Punto Oro heading to India enter this story? It has to do with an Italian American L. J. Peretti pipe that I noticed in India – basking nonchalantly among the historic pipes of Paresh’s unbelievable heirloom collection he received from his grandfather. The Peretti that got my attention was not from his grandfather’s collection, but a pipe that Paresh had acquired himself. Since doing my first restoration of a L. J. Peretti, I have become somewhat of a collector of these blue collar ‘shop pipes’ from the second oldest tobacconist shop located in downtown Boston. I had never seen a Peretti Cutty shape before and hence, the Savinelli Punto Oro makes his debut on the stage.
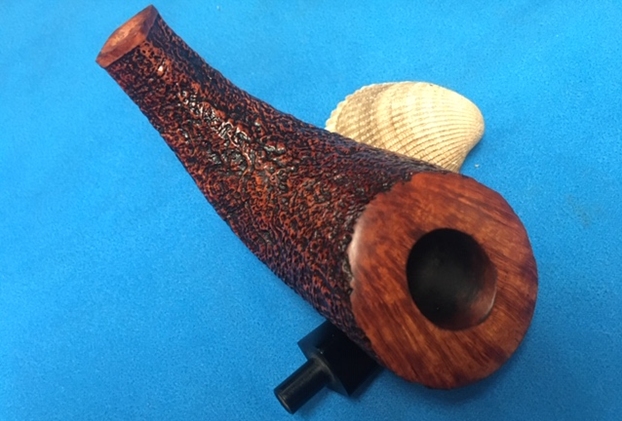
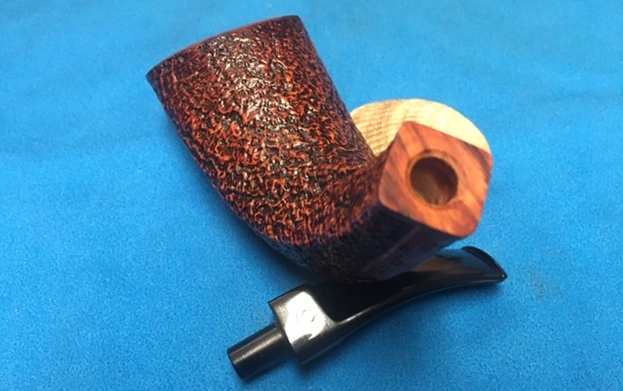
 One of the great things about ‘Pipedom’s’ smaller subset, pipe restorers, is that it is special and an honor to have pipes in your personal collection that have come from other restorers who you’ve learned from and appreciated. I have pipes in my rotation from Steve, who introduced me to the world of pipe restoration and is a good friend who has visited me here in Sofia and I’ve had the privilege of visiting his home terrain, Vancouver. When I enjoy fellowship with one of his pipes with my favorite blend stoked in the bowl, the relationship is always the focus of the reflection during those paused moments. I managed to secure one very special pipe for my collection from Charles Lemon of Dad’sPipes, who I’ve also learned much from in his restorations and appreciated that his health has allowed him to come back from hiatus.
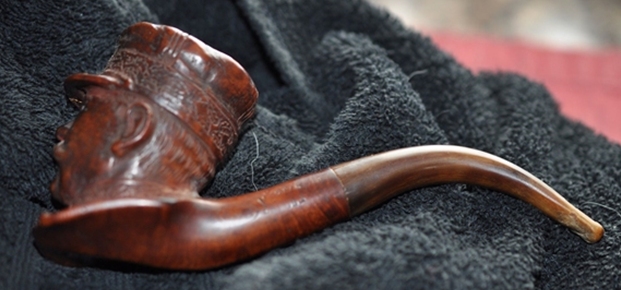
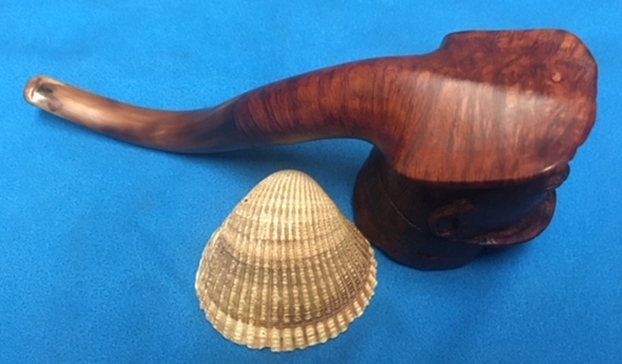
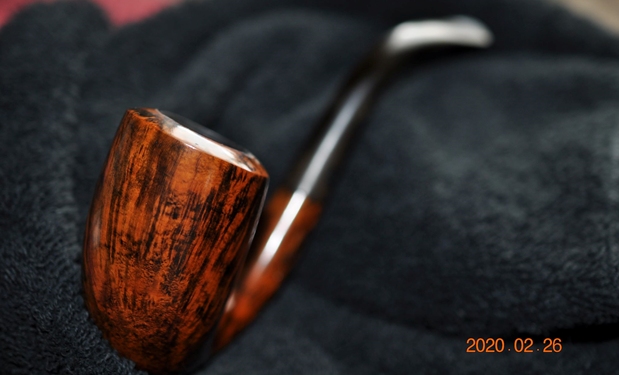
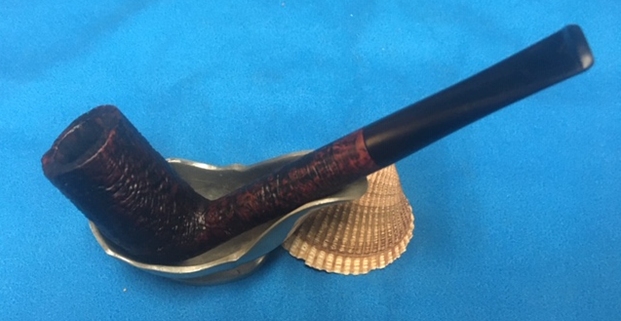
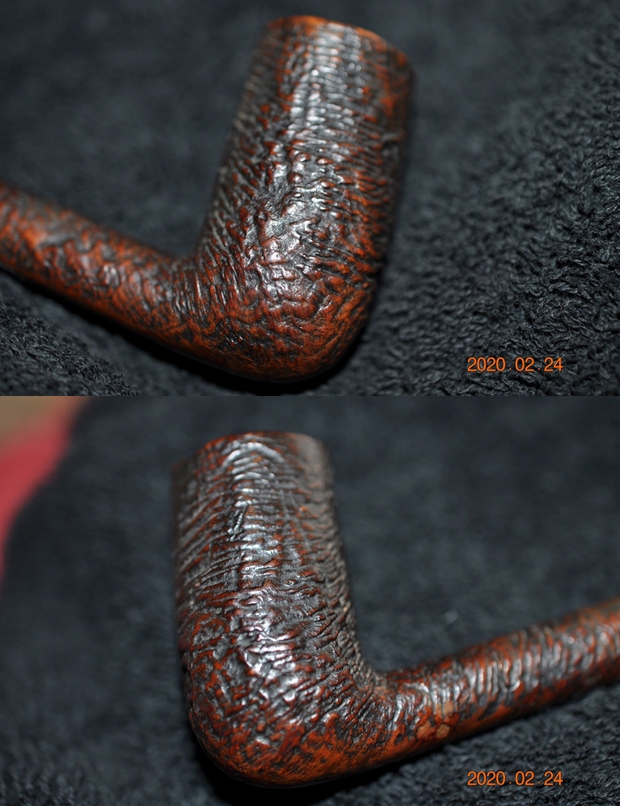
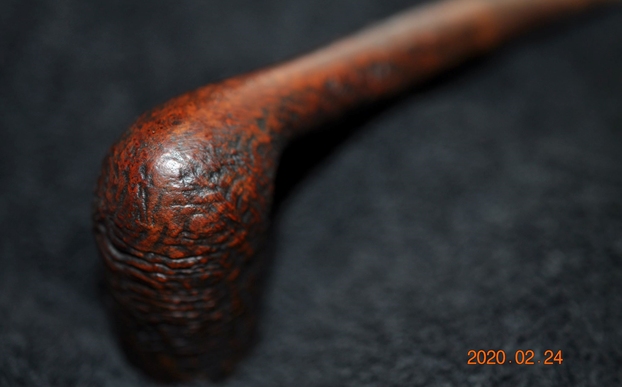
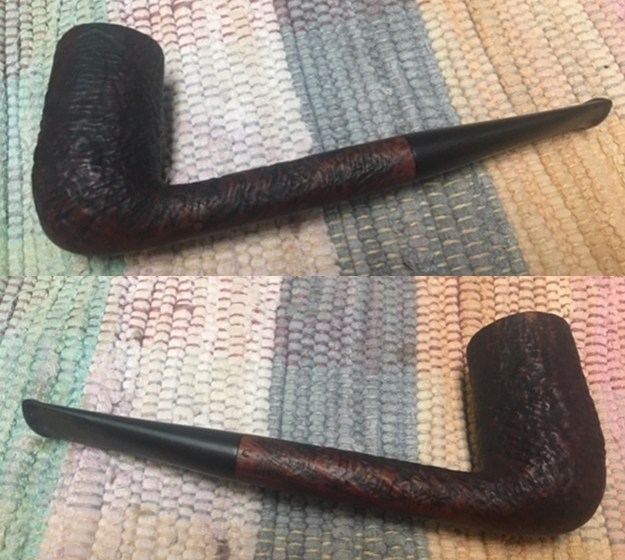
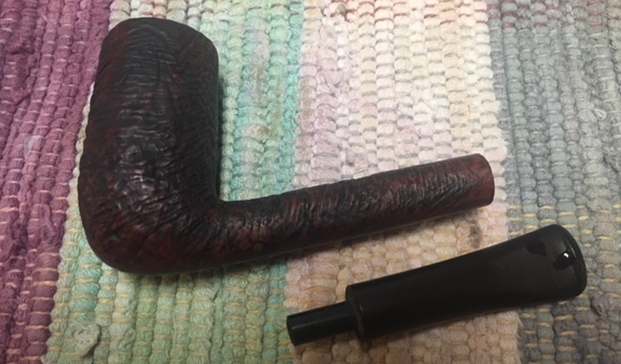
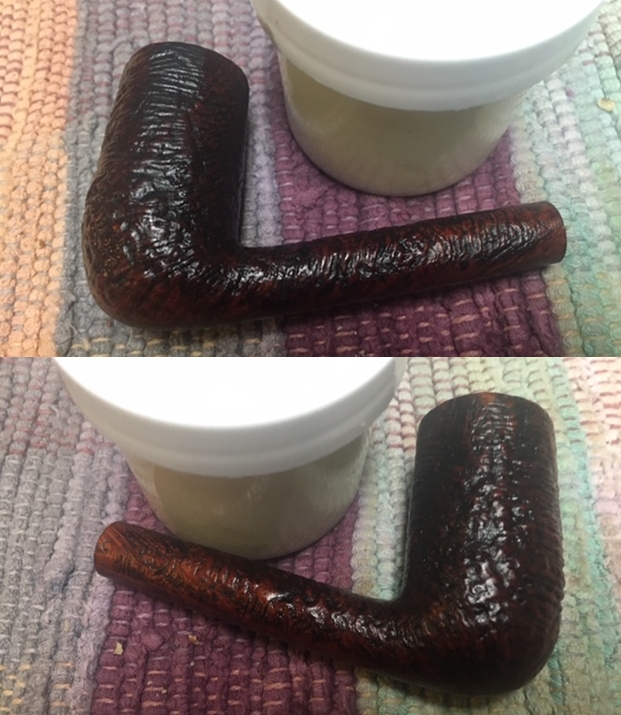
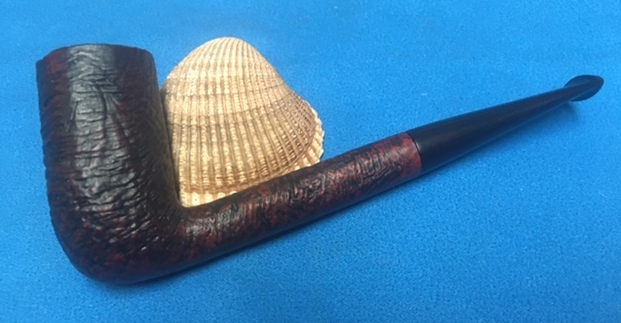
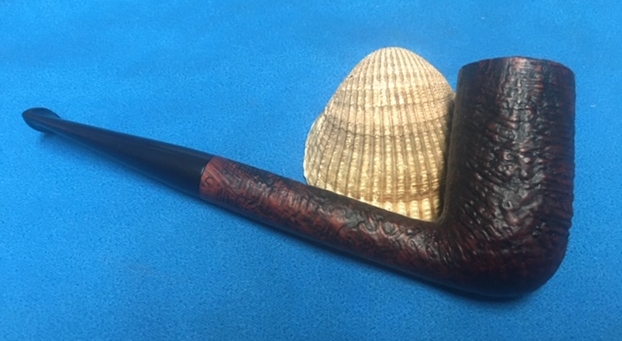
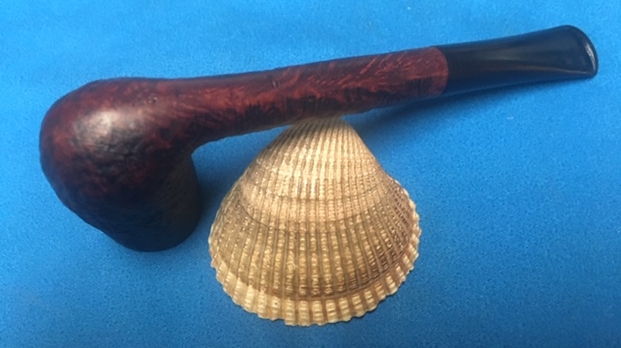
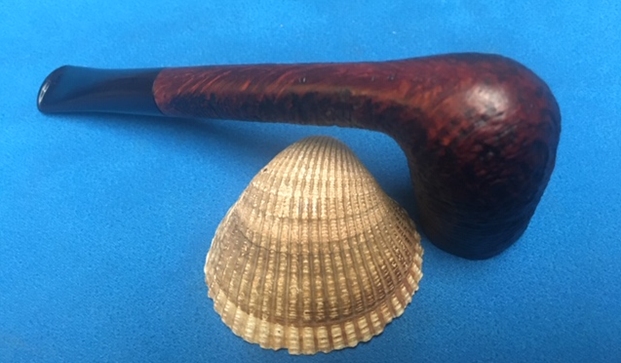
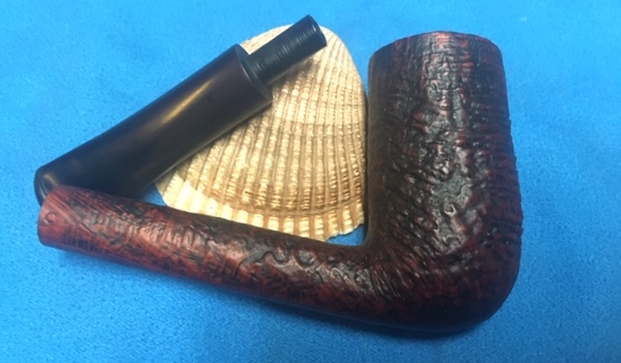
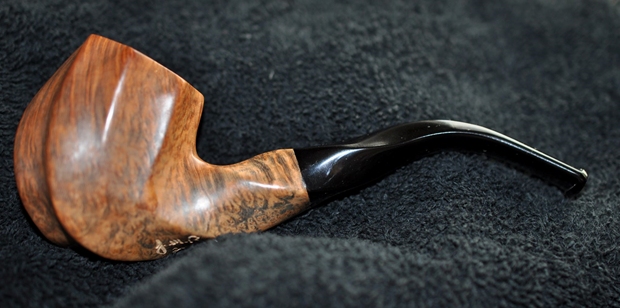
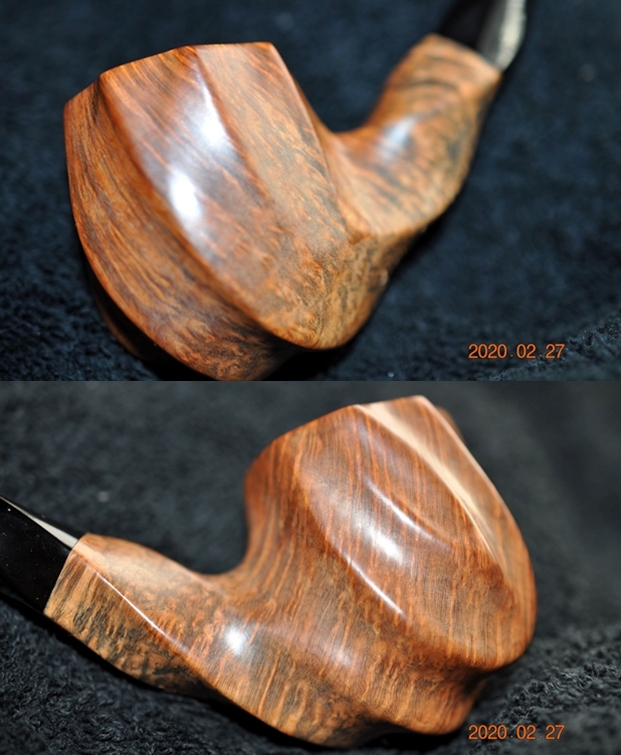
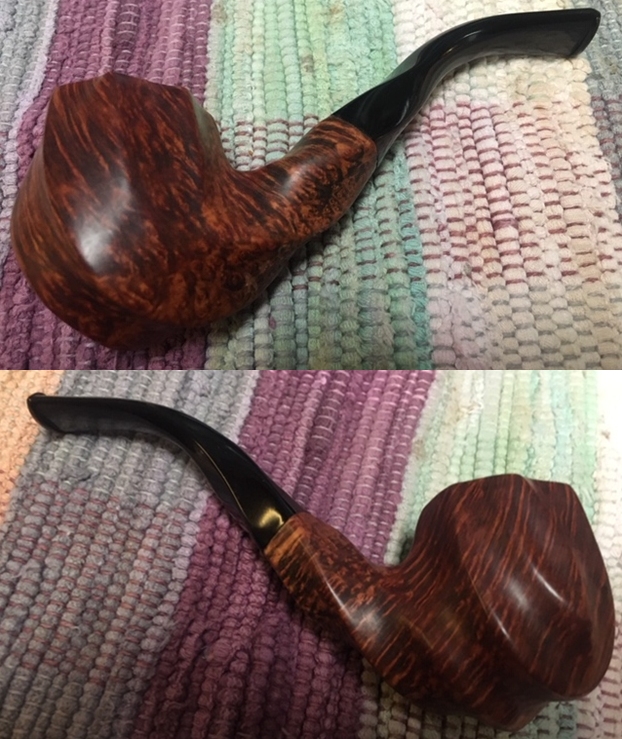
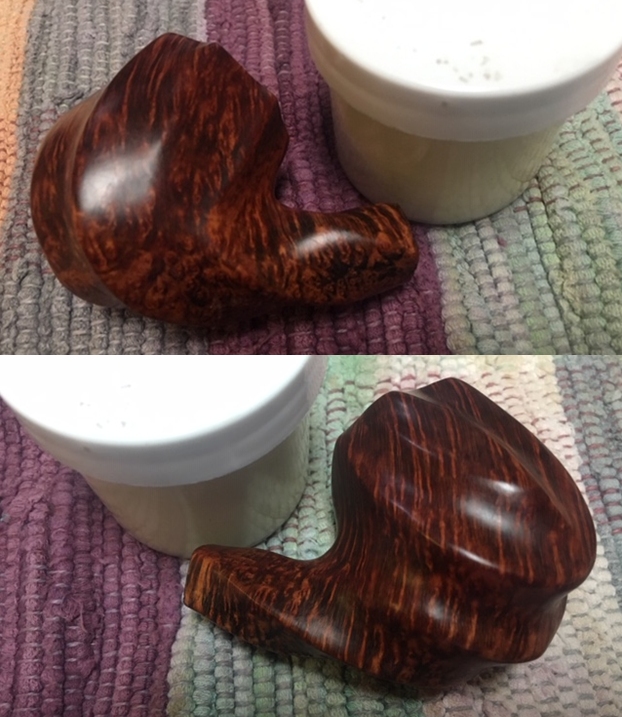
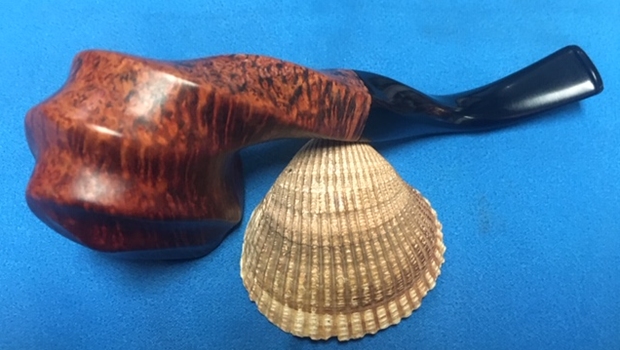
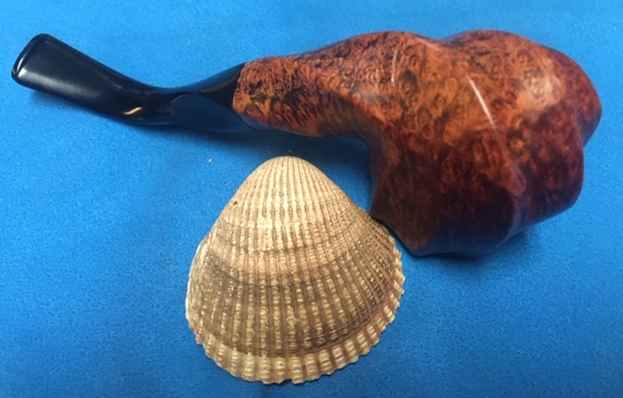
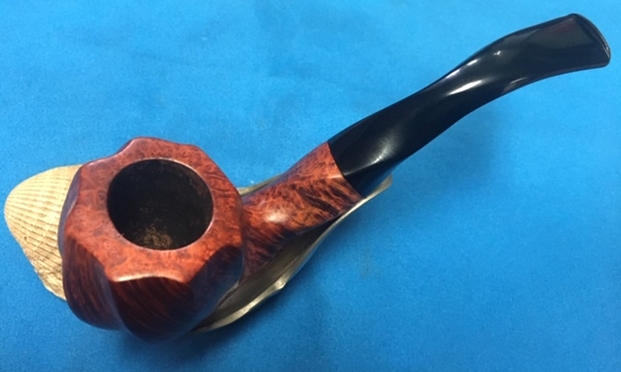
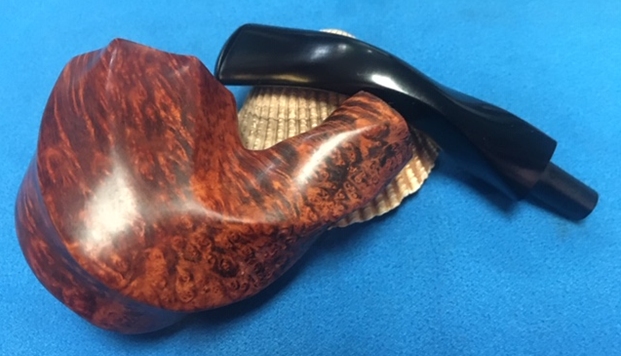
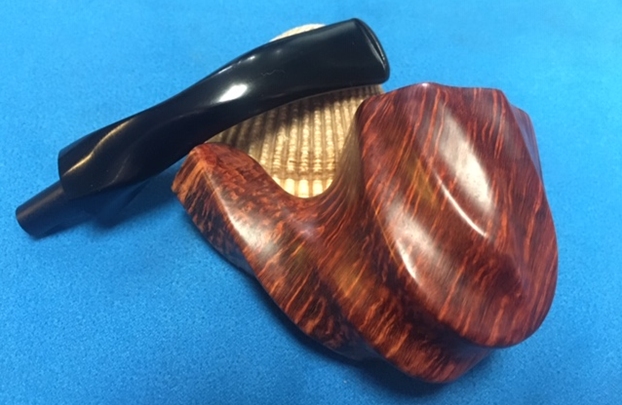
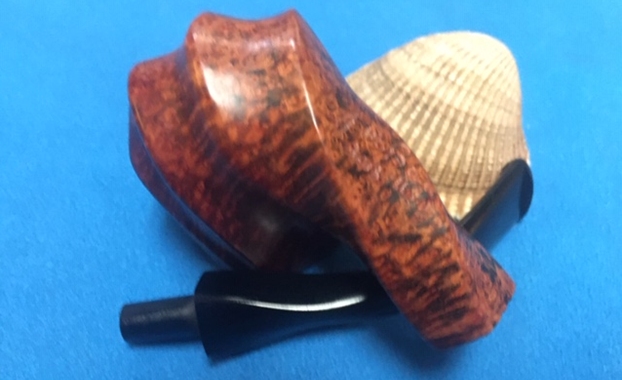
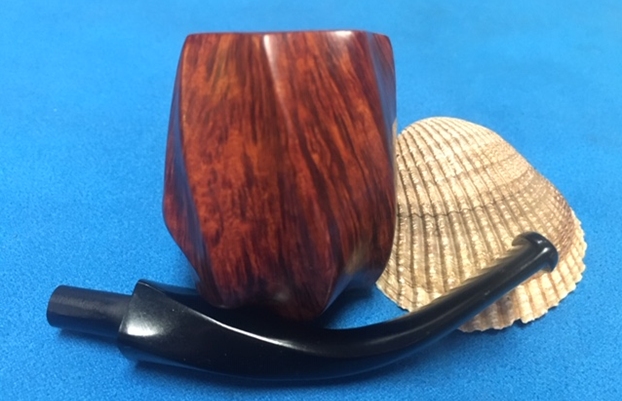
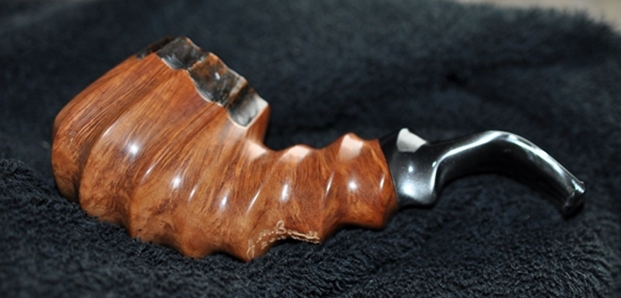
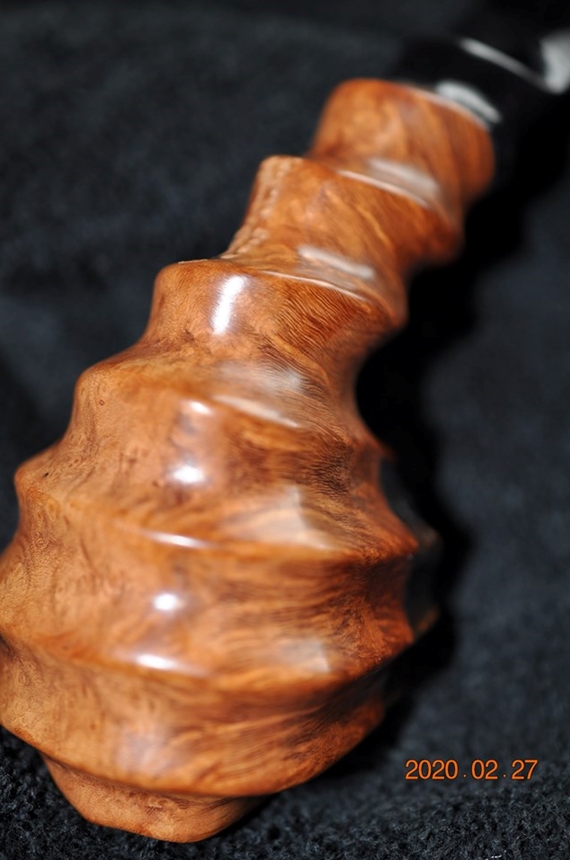
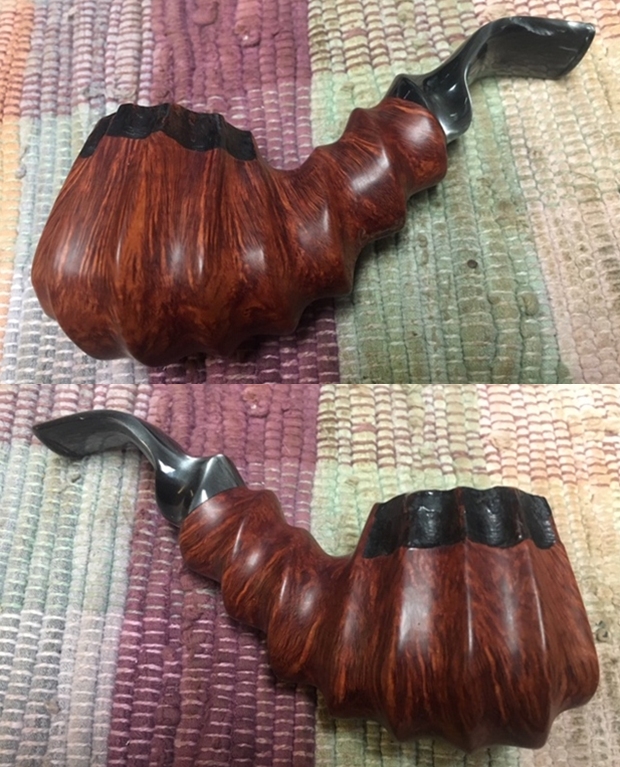
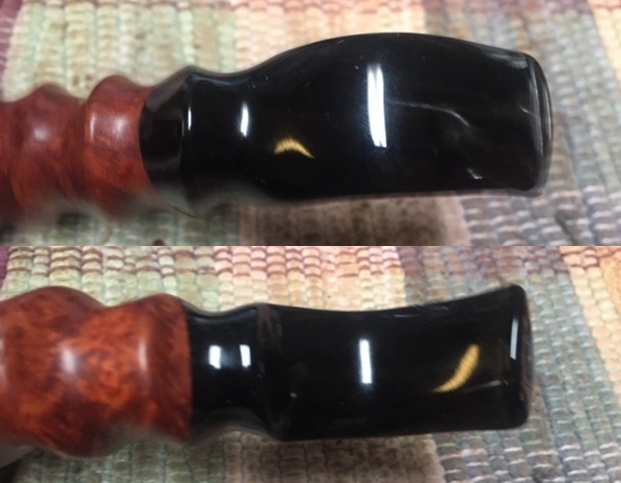
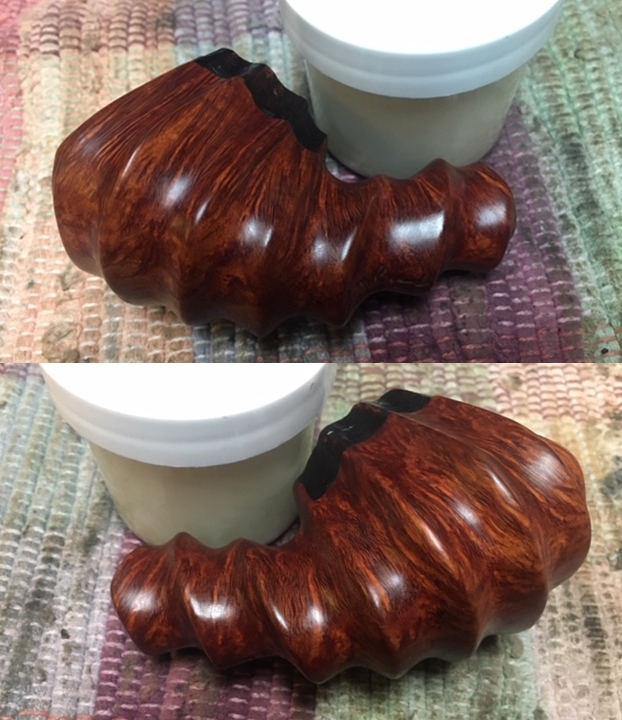
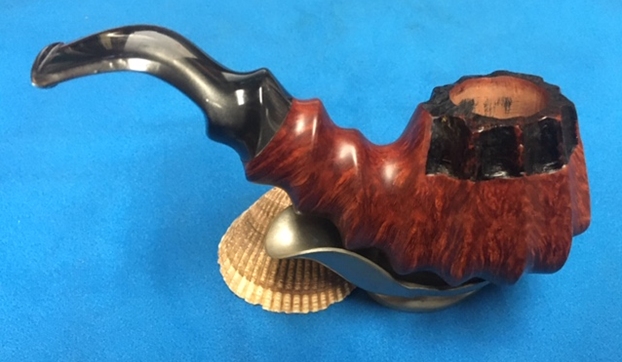
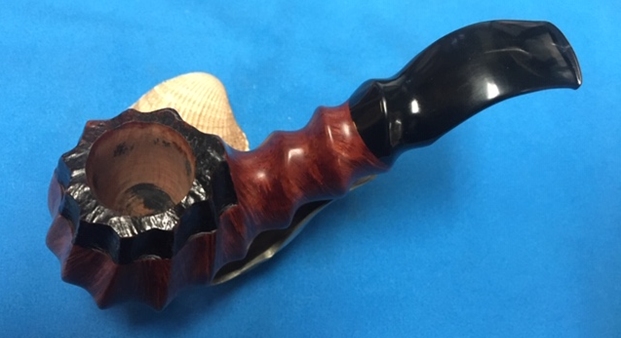
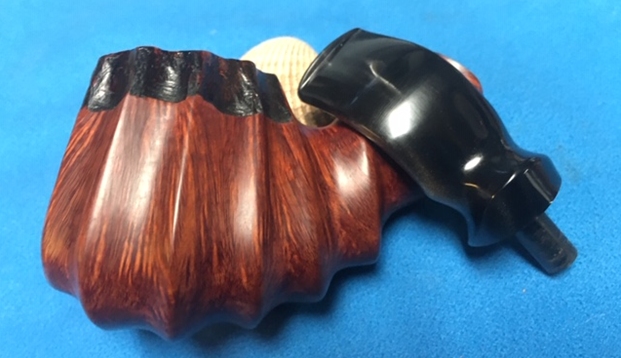
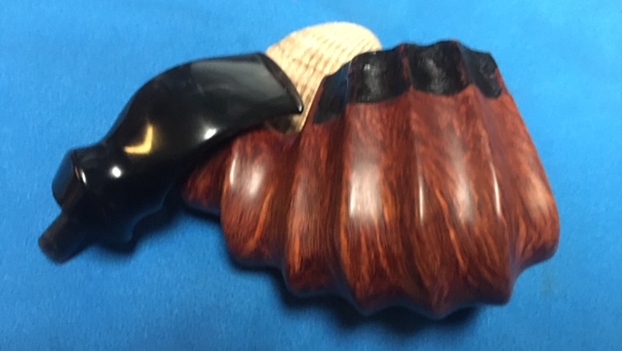
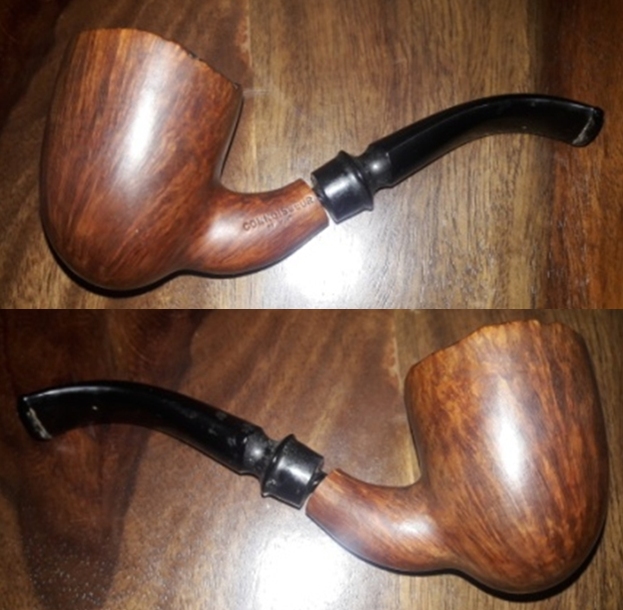
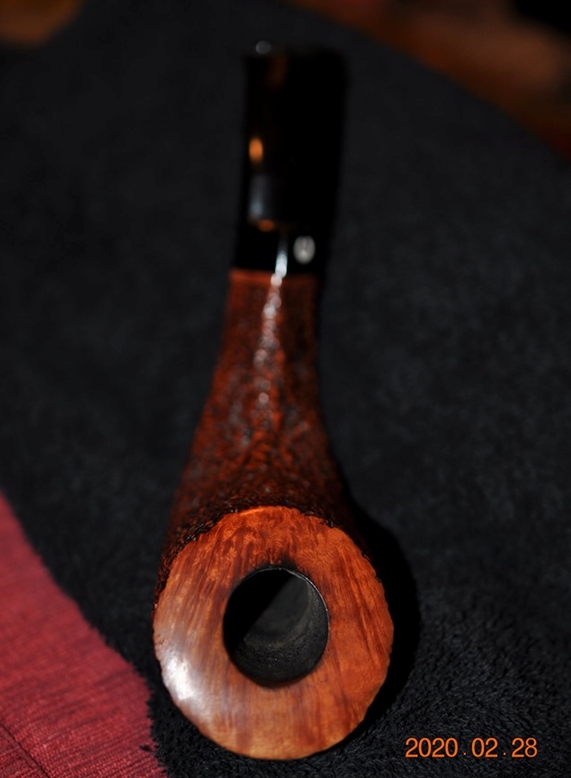
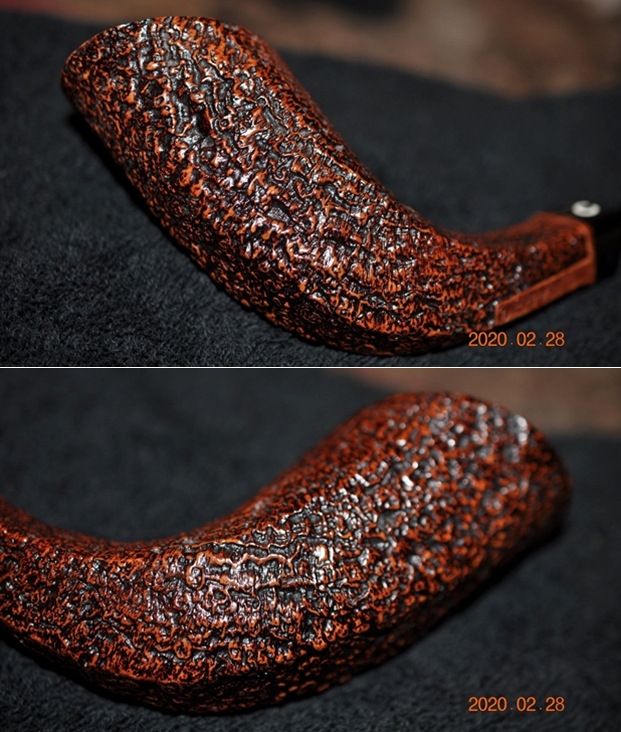
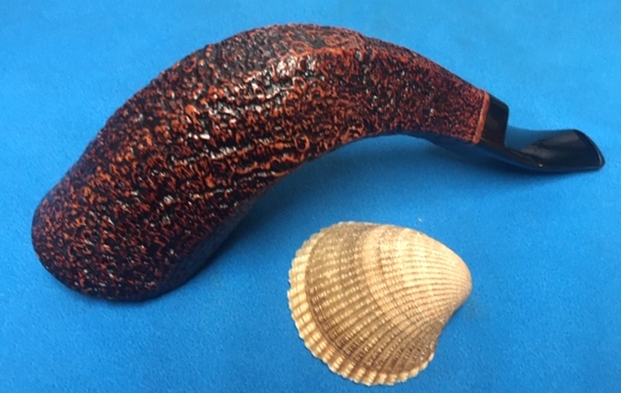
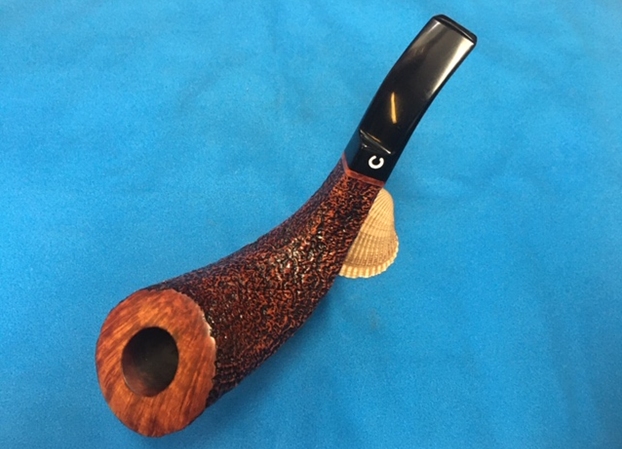
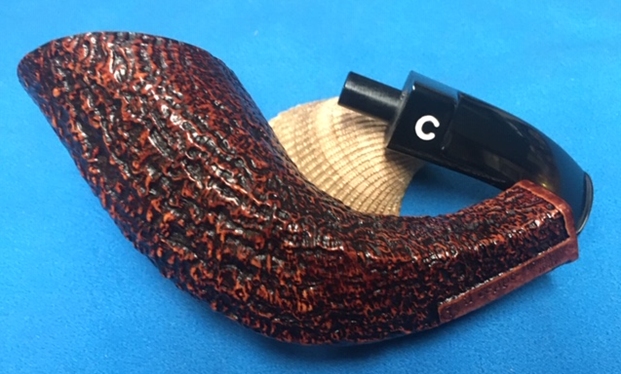
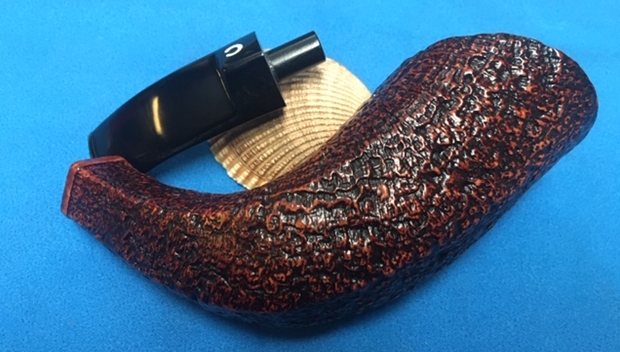
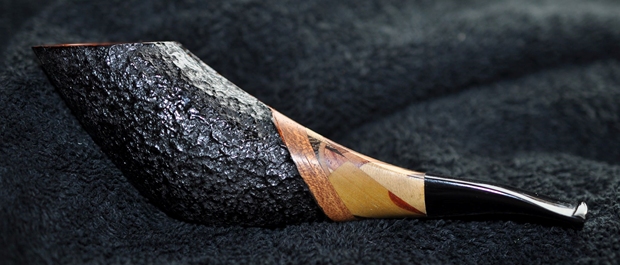
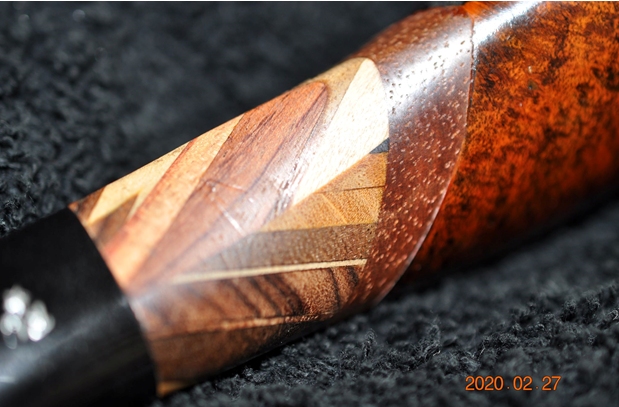
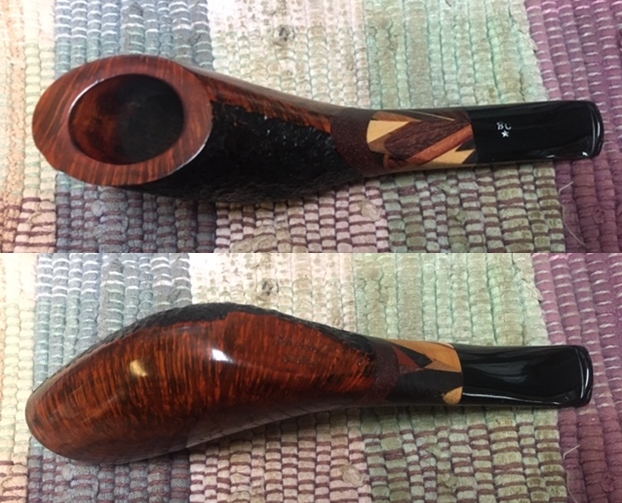
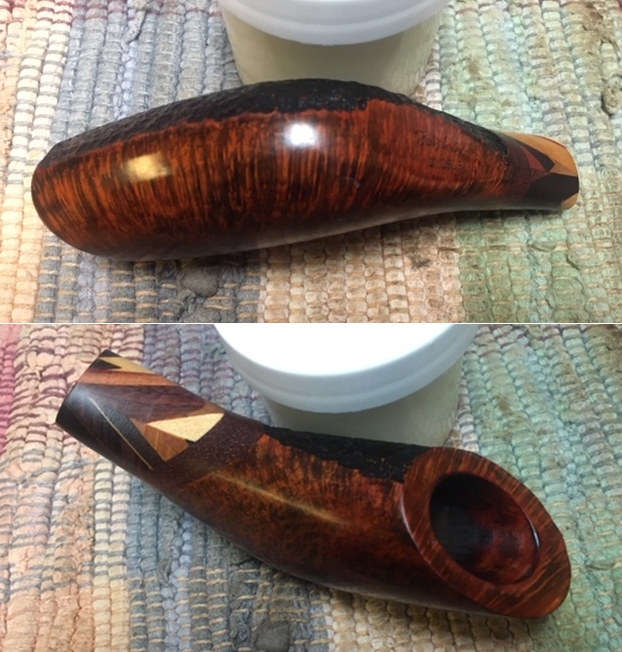
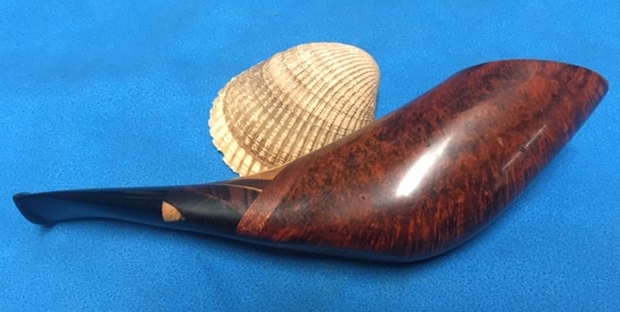
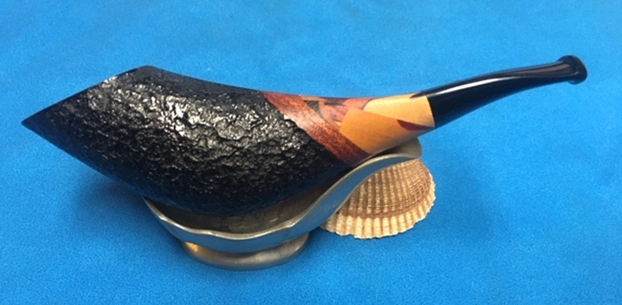
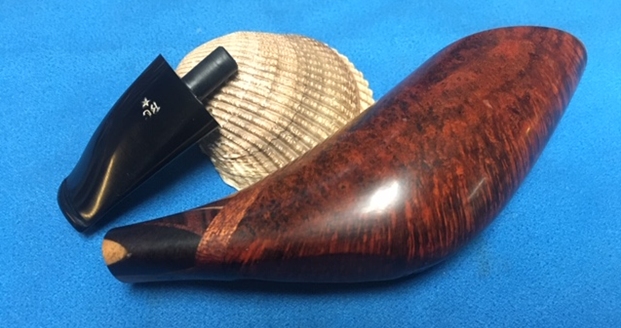
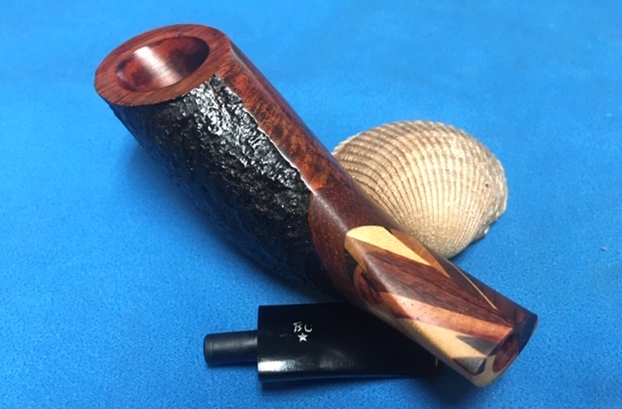
When Paresh became aware of my attraction to his L. J. Peretti Cutty, the accord we ratified between us was to do a reciprocal gifting from our personal collections. Paresh gifted me his Peretti Cutty which I brought home to Bulgaria from India. After getting back to Bulgaria, I chose a pipe from my personal collection for him. The special pipe I chose for Paresh was a Savinelli Punto Oro that was in my personal restoration queue – for a LONG time. The problem of restoring pipes primarily for others is that sometimes it’s difficult to work on your own trove of treasures! When I saw the Punto Oro on German eBay located in Bühl, I was drawn by the elegant lines of this Savinelli offering.  The shape is unique with the Dublin-esque bowl, but not quite. In my initially assessment of the pipe, I was calling it an oval shank, slightly Bent Billiard – but not quite. The shank was not actually a true oval but a compressed oval – an American football or rugby ball shape. The unique shape created a lined definition running down the sides of the shank transitioning into and through the stem – flow and balance! With so much attention on focused the shape, the fact of the striking fire grain showcased throughout the pipe – was reminiscent for me of a tiger’s fur, flowing even through the shank composition. This only added frosting on this Savinelli Punto Oro cake! Very nice! Unfortunately, it has taken me a few years to get to this beautiful pipe, but it was waiting. It was patiently waiting in the ‘Help Me!’ basket and when it came to mind as a comparable reciprocal gift for Paresh, his debut on the worktable became a reality. Here are more pictures of a very nice Savinelli Punto Oro yet having some daunting issues.


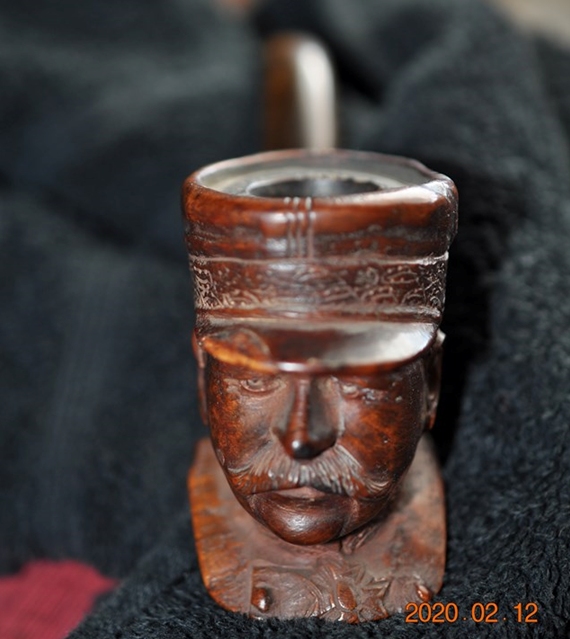
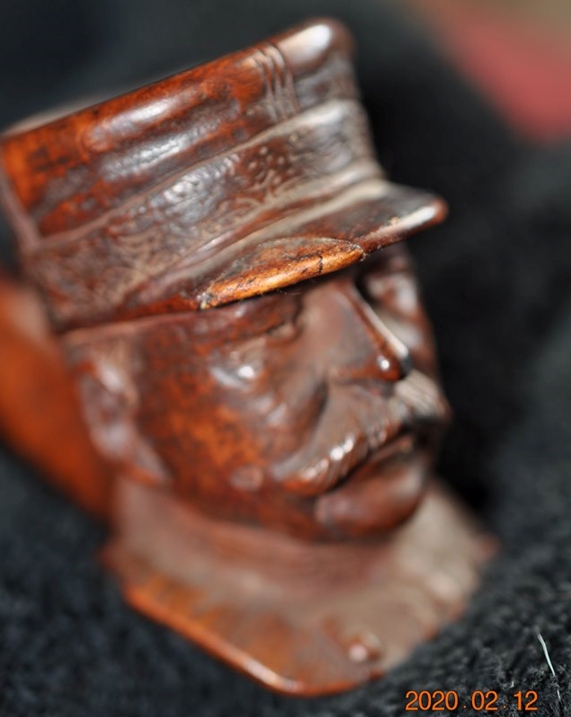
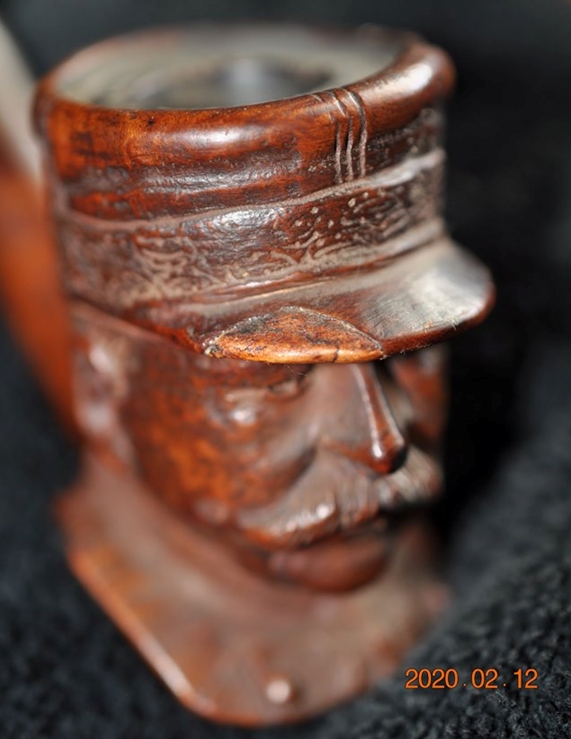
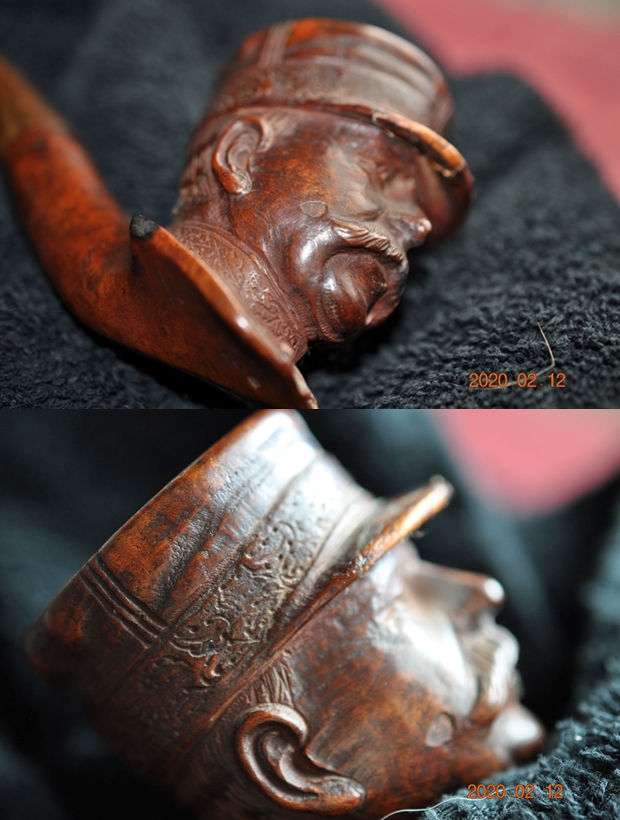
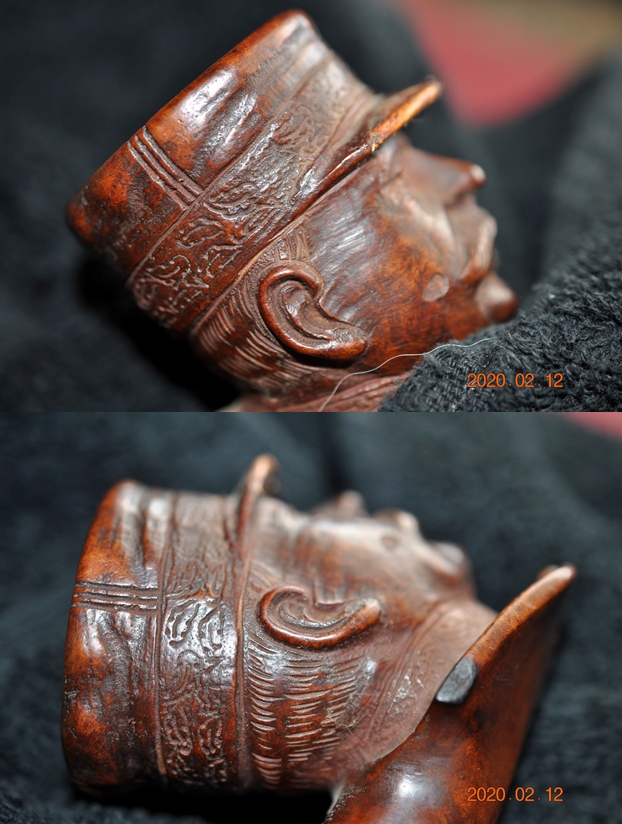
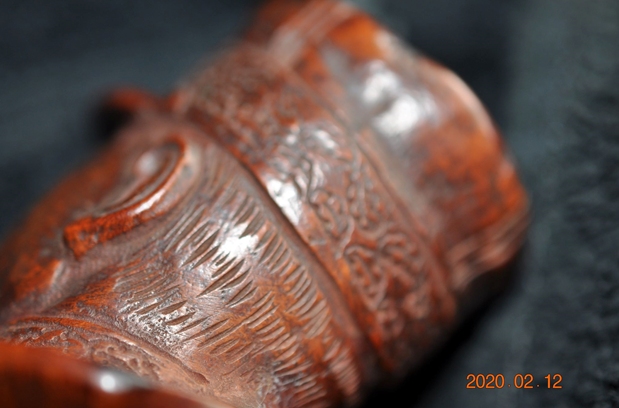
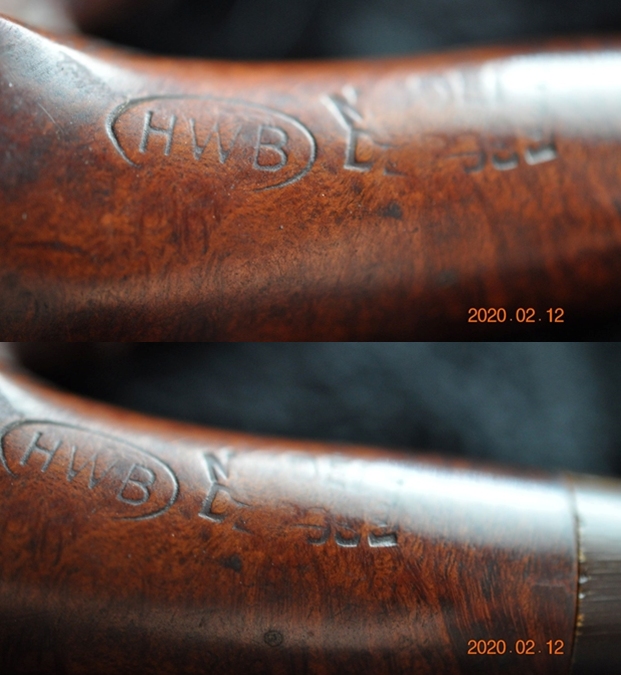
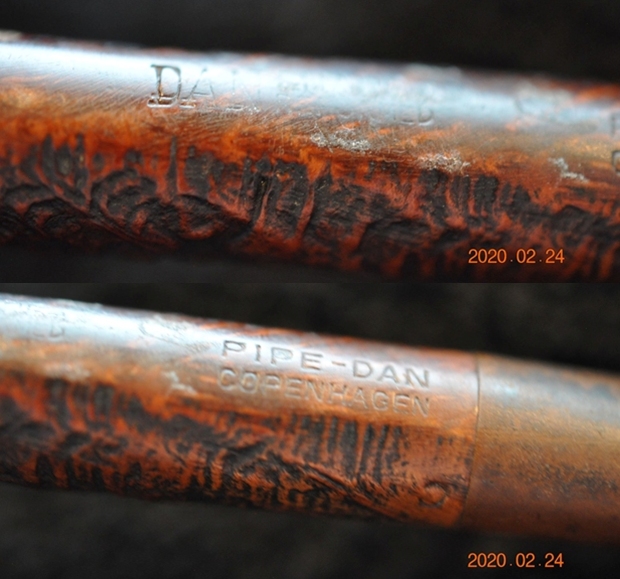
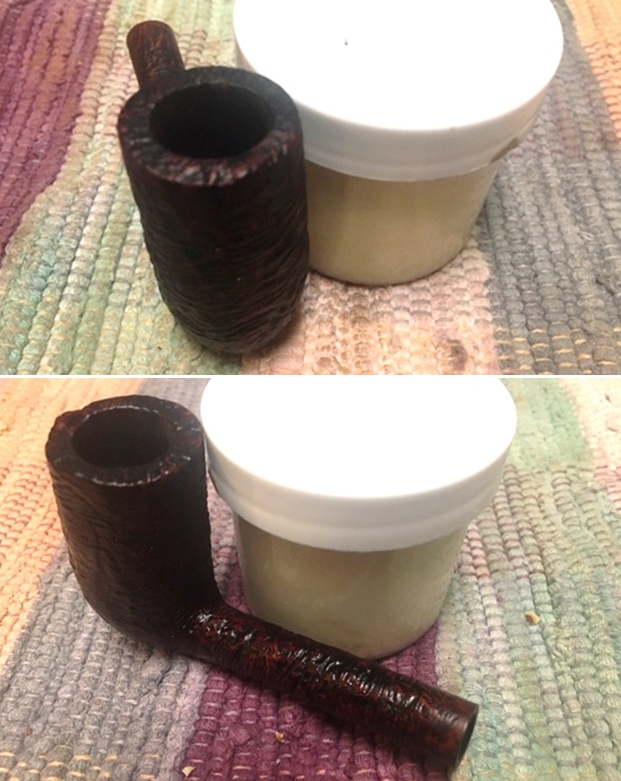
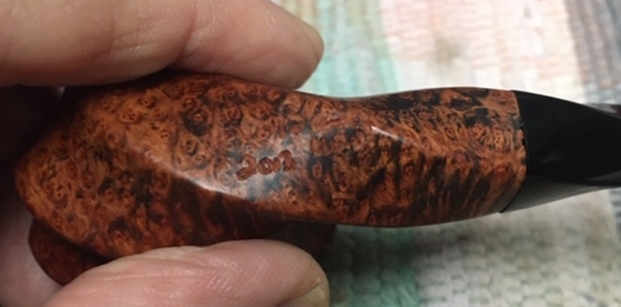
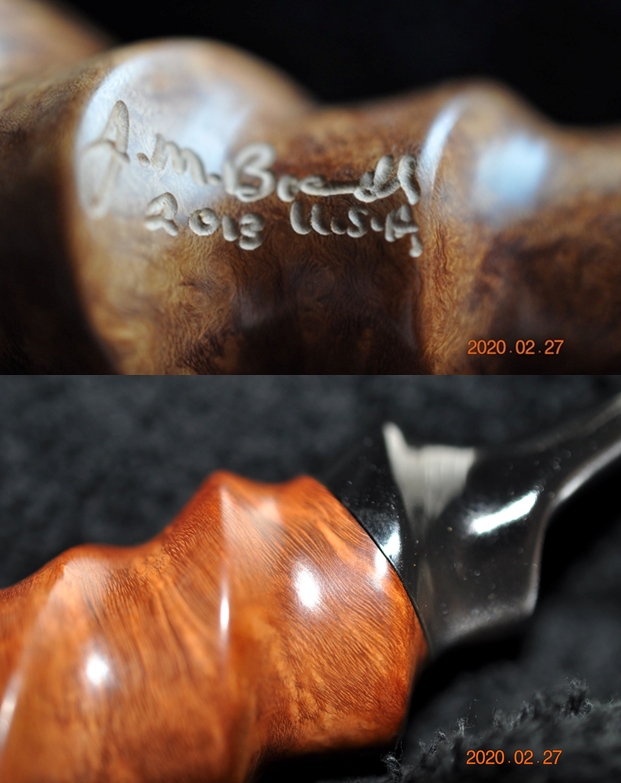
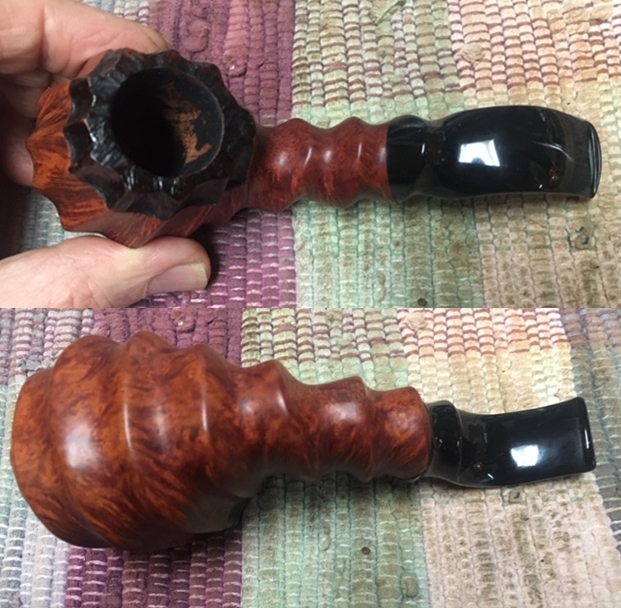
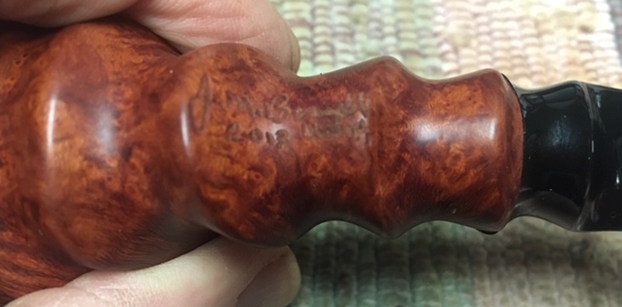
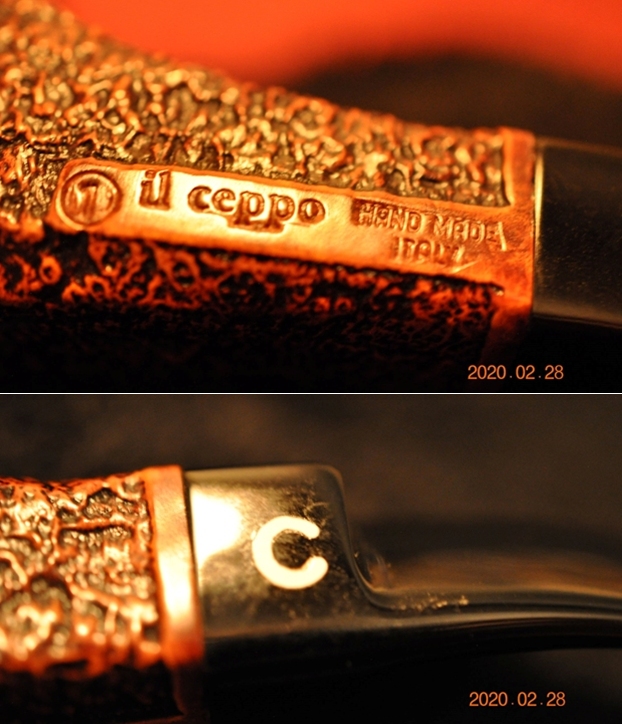
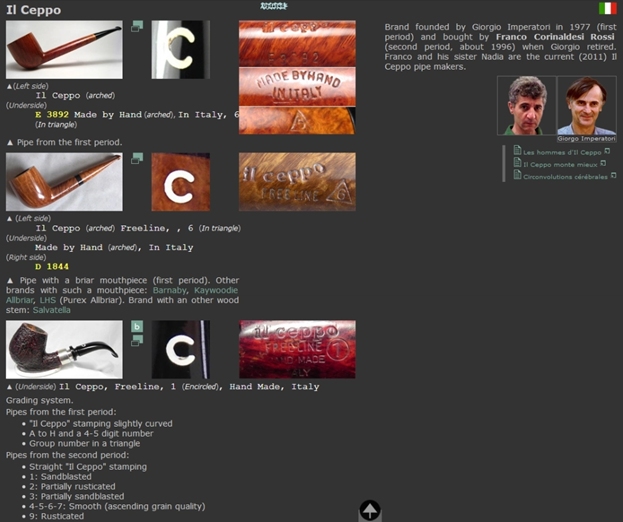
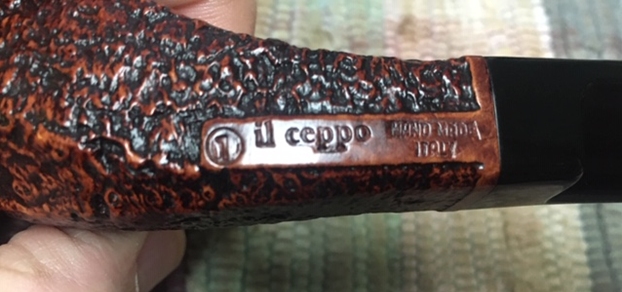
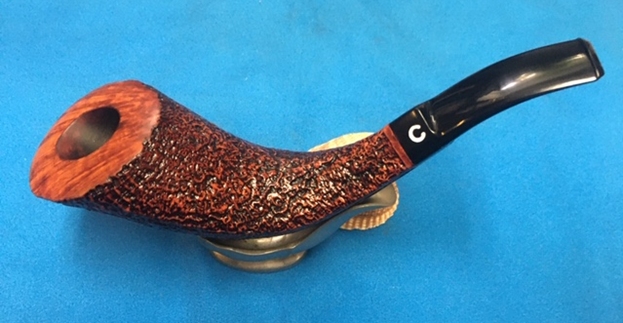
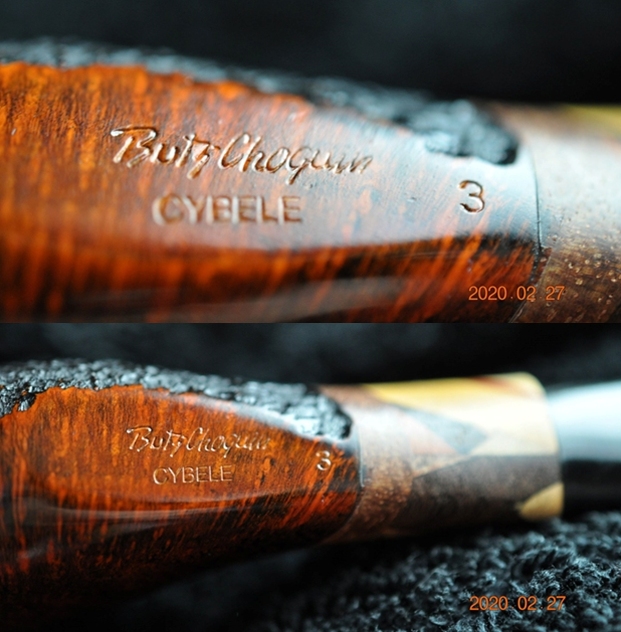
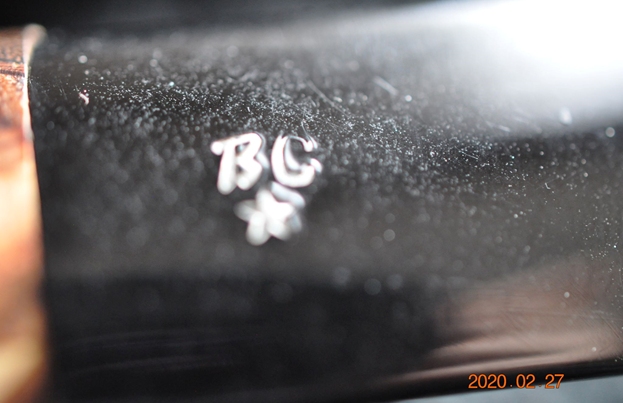
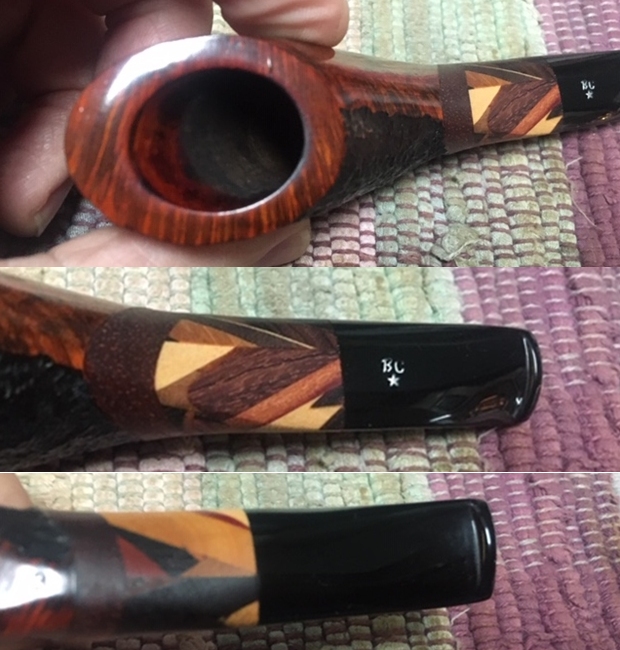
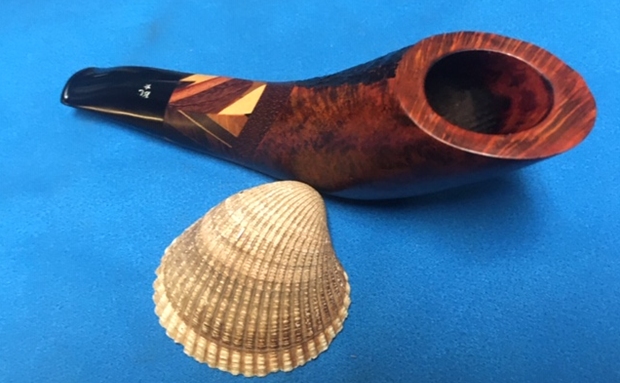
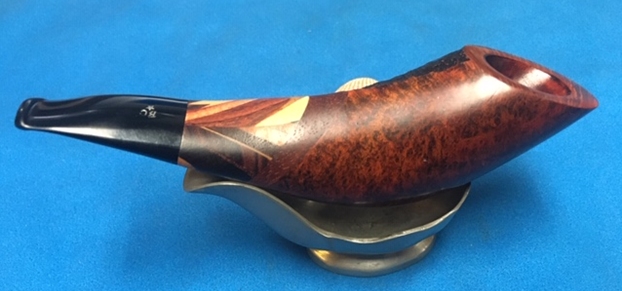
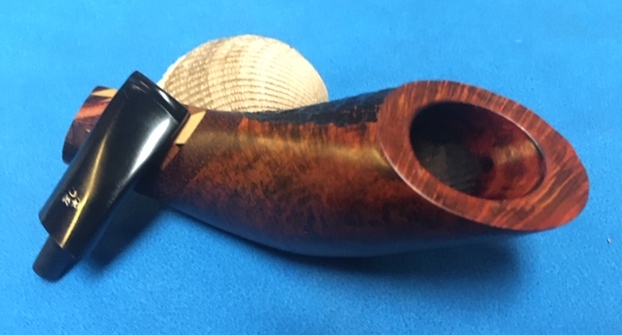
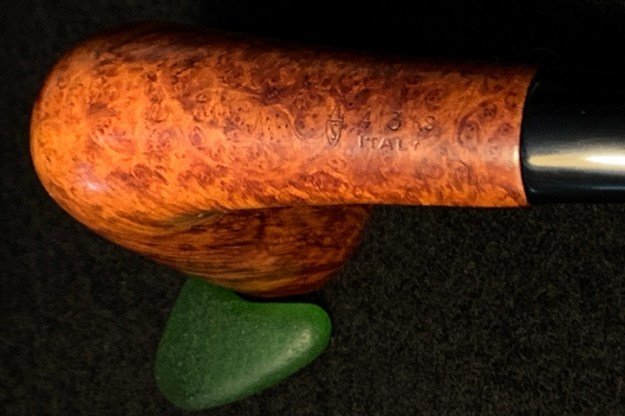
 The nomenclature is on the upper shank and it reads, SAVINELLI [over] PUNTO ORO, (Gold Point). ‘Gold Point’ may also be referencing the single gold point brass dot embedded on the upper stem panel.
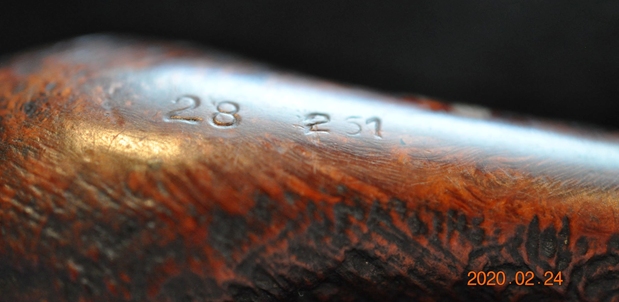
 The lower panel section is stamped with the encased ‘S’ in Savinelli’s well known and recognized symbol. The Savinelli symbol is to the left of the shape number, 413KS [over] the COM, ITALY. The shape is found in the Savinelli shapes chart found in the Pipedia article on Savinelli, but the chart offers no names for the shapes, only numbers. This 413 is designated as a ‘King Size’ by the KS. Whatever the shape is, I like it!
 Not satisfied with my lack of definition on what to call this shape, I sent a note off to Steve asking for his opinion – Calabash, Dublin, fancy Billiard? Steve’s response settled the question directing me to Savinelli’s website – my first thought, why didn’t I think of that? In the Savinelli line up of shapes or models, the 413KS is described as a Woodstock (pictured below). Nice! Bill Burney’s description of the Woodstock in his Pipedia shapes discussion is helpful and includes all the variations I was contemplating!
Zulu/Woodstock – The Zulu shape combines the canted bowl of the Dublin with an 1/8 bent stem. The shape is sometimes referred to as a Woodstock, Yacht or Yachtsman. The gentle bend makes the pipe more comfortable to hold in the teeth than a straight pipe. This popular style is made by most pipemakers and is widely available on the estate market. My first restoration with the Italian name of Savinelli stamped on the pipe was a Tortuga, which was a very sharp looking pipe. During that initial exposure to the name Savinelli, I learned that before and after WW II, when Italian pipe production was known more for volume than for quality, and not considered by many in the same league with other European pipe makers, Achille Savinelli Jr.’s ambition took shape to make Savinelli one of the premier names in pipe making today. This clip from the Pipedia Savinelli article summarizes this well:
 Savinelli Pipes began production in 1948 and, although the pipes were of a superior quality and unique in their aesthetic, the brand wasn’t an immediate success. Few new brands are. It takes time for the public to catch on. Retailers were skeptical of placing Italian pipes alongside their best sellers from England or France, and customers, in turn, were hesitant to purchase a Savinelli over pipes by already established, foreign brands. Achille Jr. stood by his product, however; he knew it was only a matter of time before the world realized that these pipes were of a far superior quality, capable of competing with even the most well-established pipe manufacturers in the world. As it turns out, he was right. In less than a year, Savinelli pipes gained prestige in markets all across the world—heralded for their delicate balance of innovation and tradition, of form and function. Savinelli pipes were placed alongside the likes of Dunhill and Comoy’s in tobacconists from the United States to Europe, and, in time, this exposure modified Italy’s reputation; it was not only the premier exporter of briar, but now a premium source of fine briar pipes.
 The Punto Oro line is considered a top shelf Savinelli offering. When I first acquired this pipe, wishing to know more especially about the Punto Oro line, I emailed rebornpipes contributor, Al Jones, for his input. His response was helpful.
Dal:
I’m sorry to say that I have very little expertise in the Savinelli world, save the Guibileo d’Oro or Autograph lines (and only cursory in those).
Here’s an interesting thread about that line on the Pipesmagazine.com forums (I’m a moderator there) http://pipesmagazine.com/forums/topic/opinions-sought-savinelli-punto-oro. Older ones, like yours appears to be, were a pretty high grade, from what I can gather.
If your stem is vulcanite and non-filter, it should have been made before 1981 (looks that way to me). In ’81, they switched to filter pipes.
I’ll look forward to your restoration!
Al
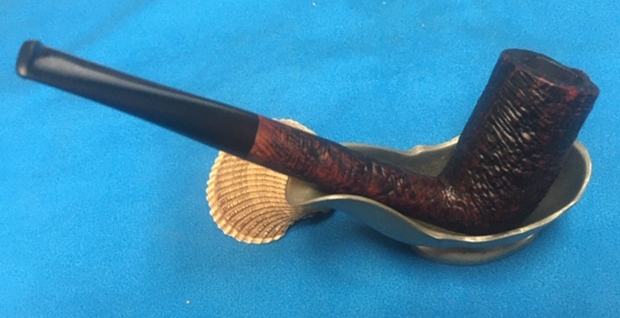
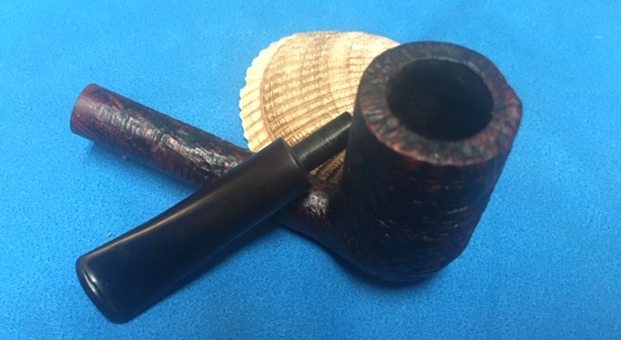
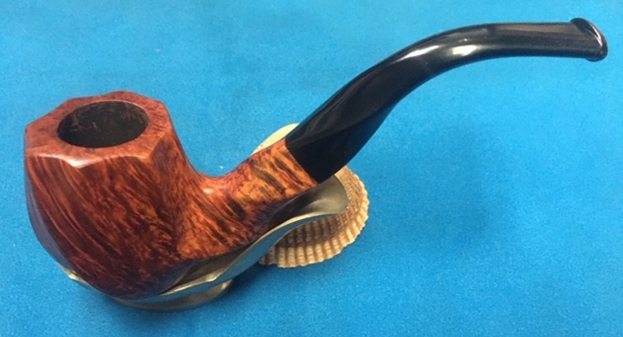
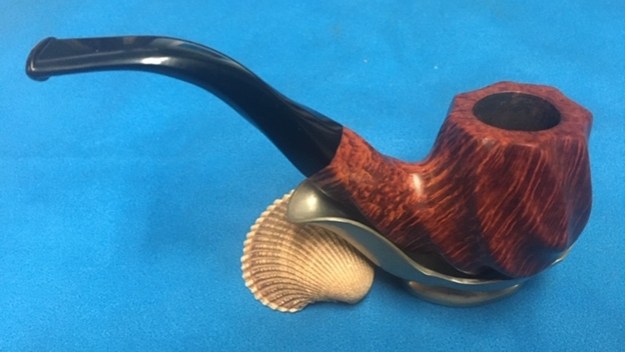
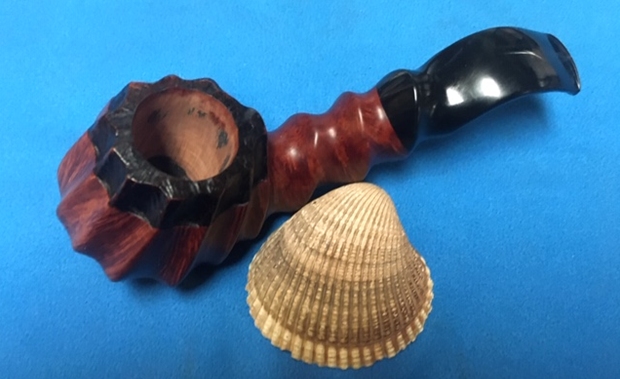
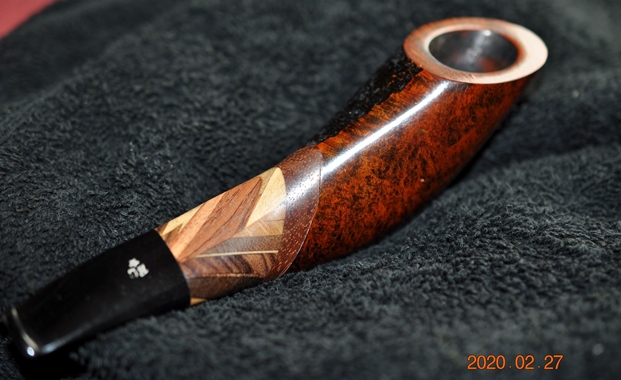
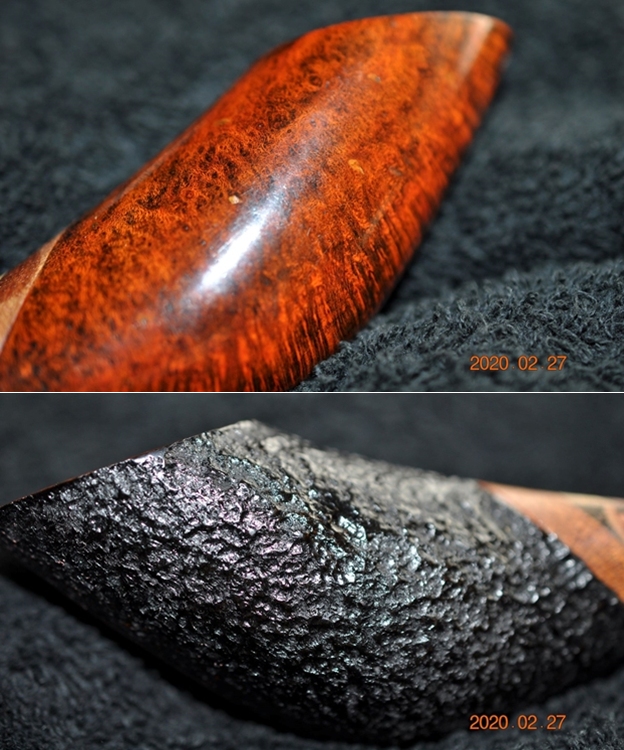
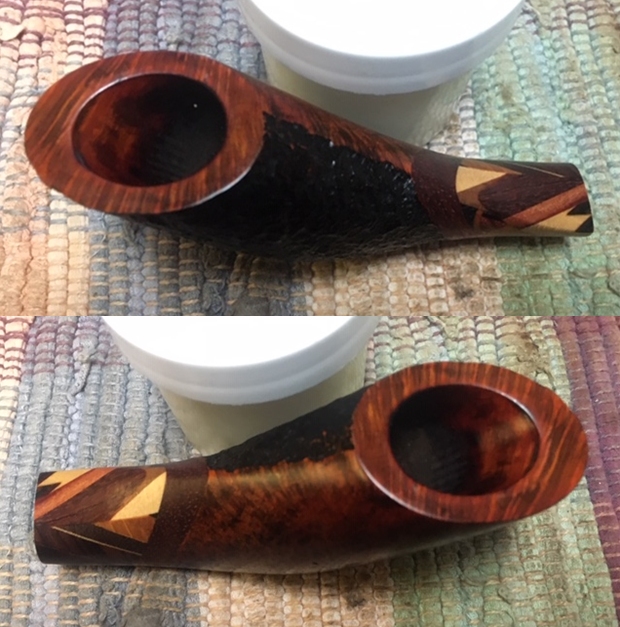
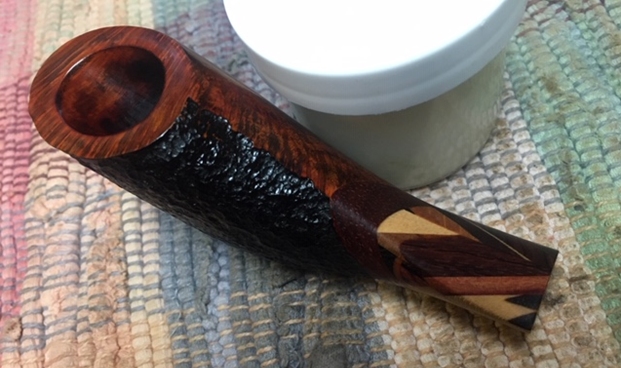
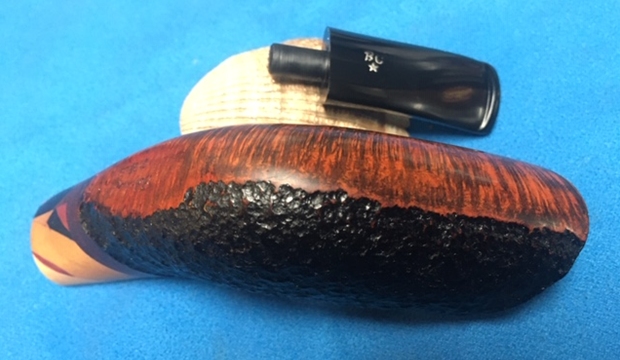
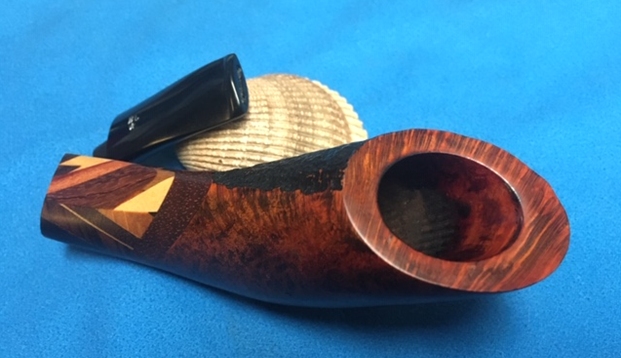
The thread from PipesMagazine.com Forum was helpful. The general impression from the thread was that the older Punto Oro pipes were on the upper shelves of Savinelli offerings, just under the Guibileo D’Oro and older Autographs. The Punto Oro catalog ad on Pipedia describes the quality of this Savinelli line and the processes involved in the producing the quality finish. I found interesting that the ad describes the two finishes available with the Punto Oro line – “Rich Mahogany and genuine Sandblast”. With the smooth surfaces, the hue is mahogany – the pipe on my table fits this described hue with flare!
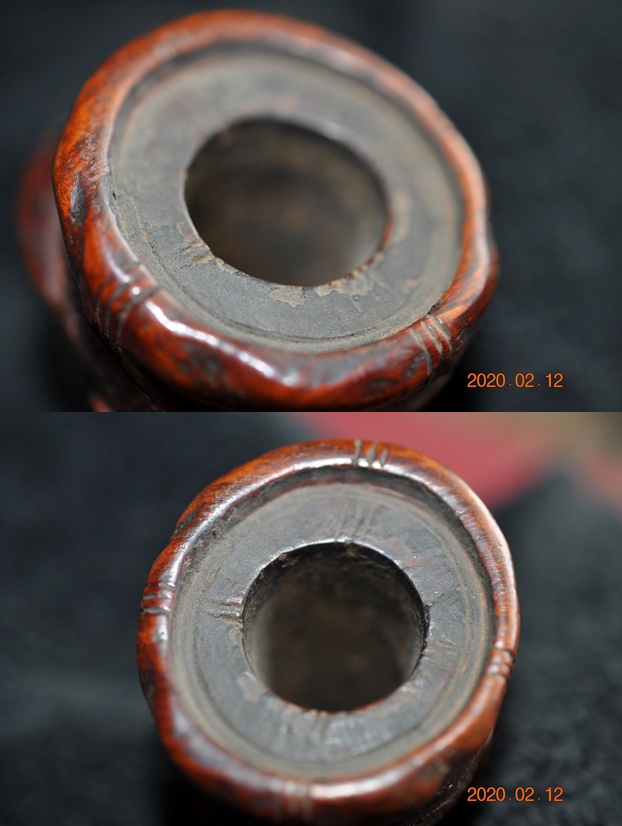
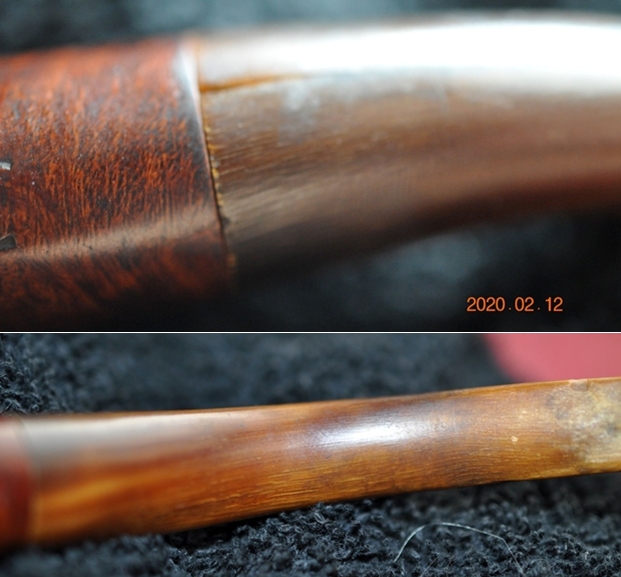
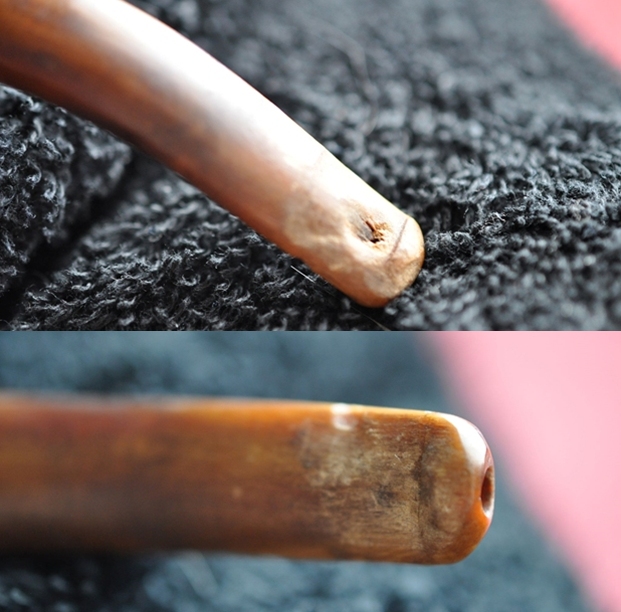
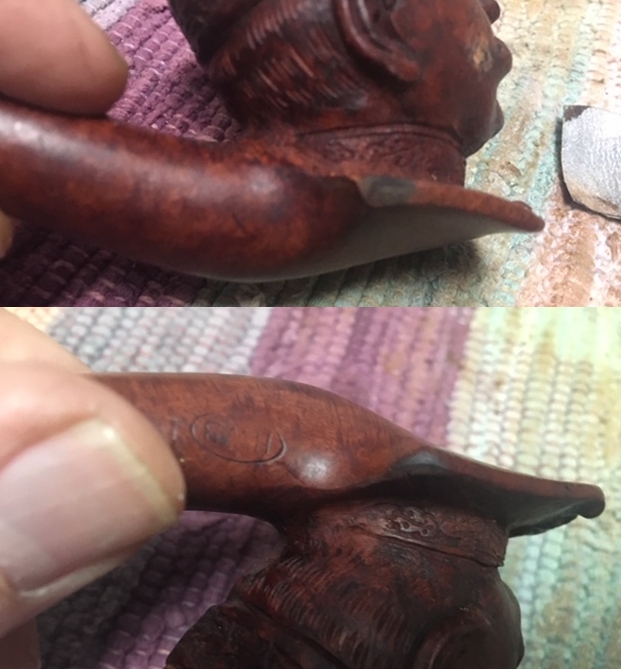
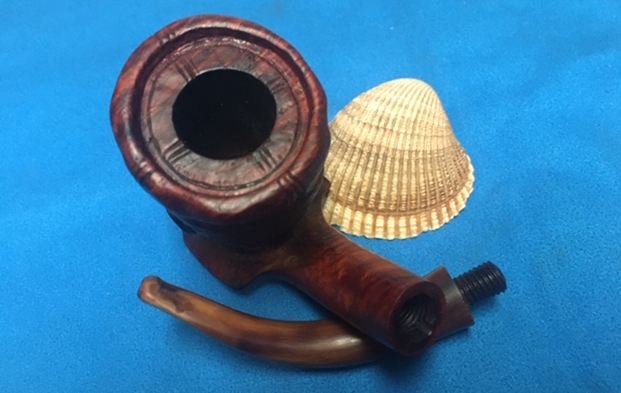
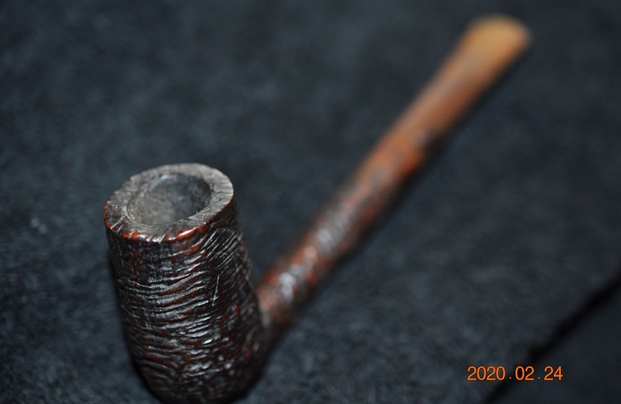
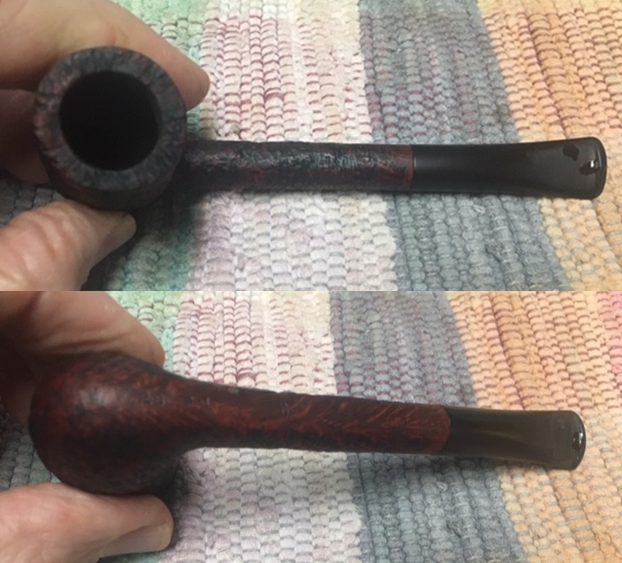
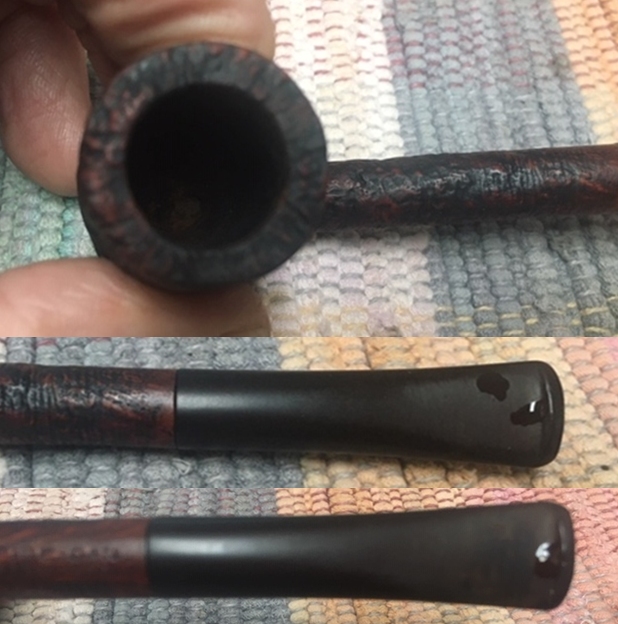
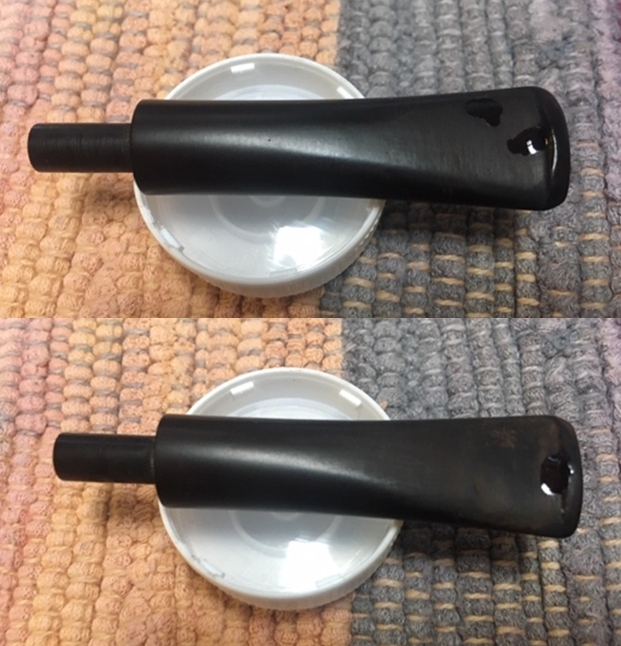
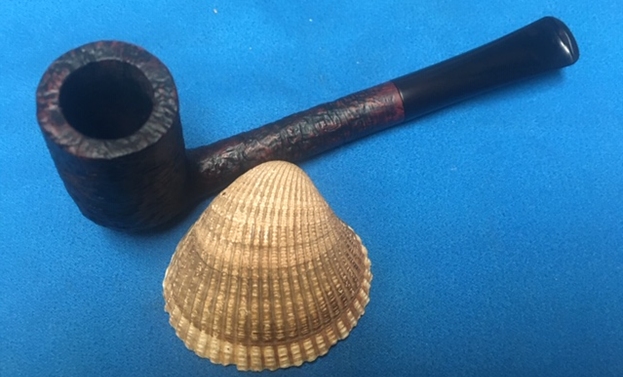
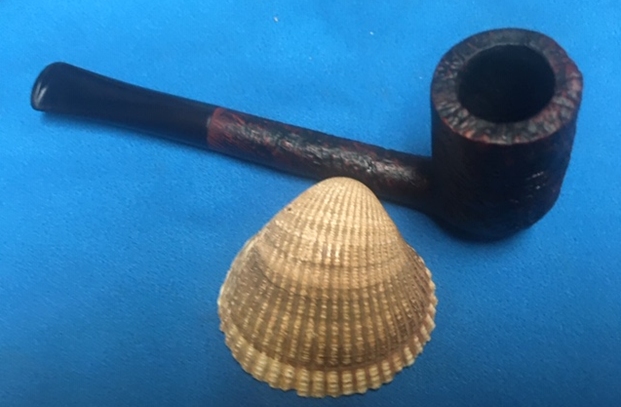
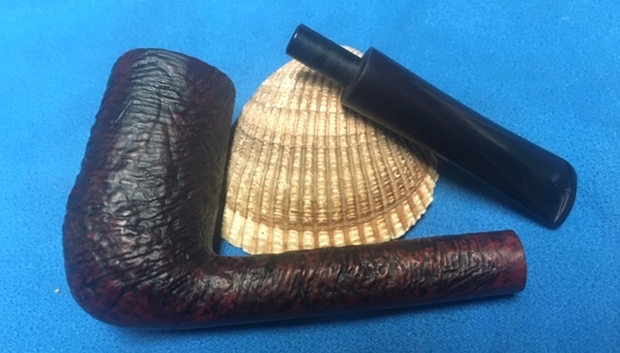
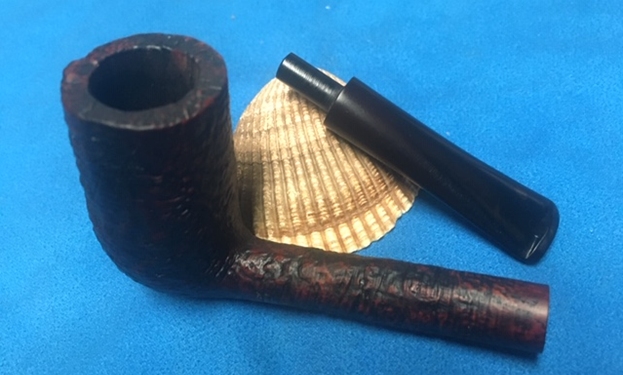
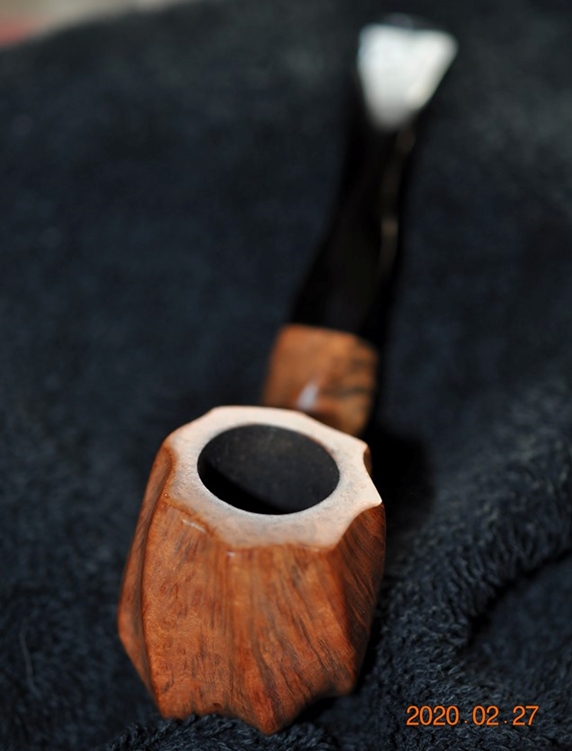
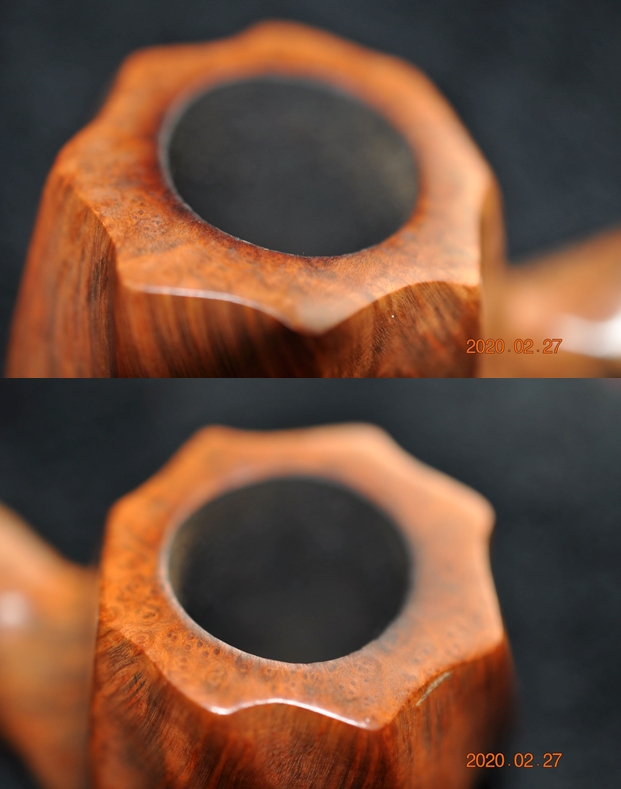
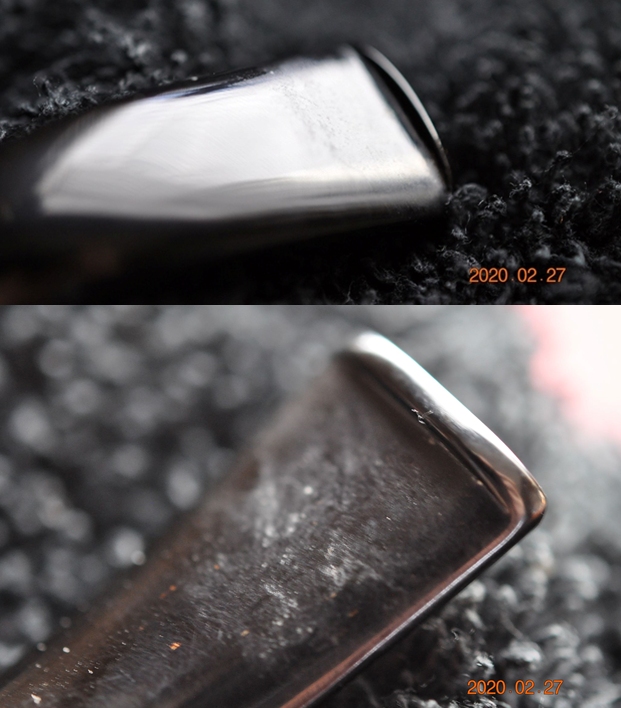
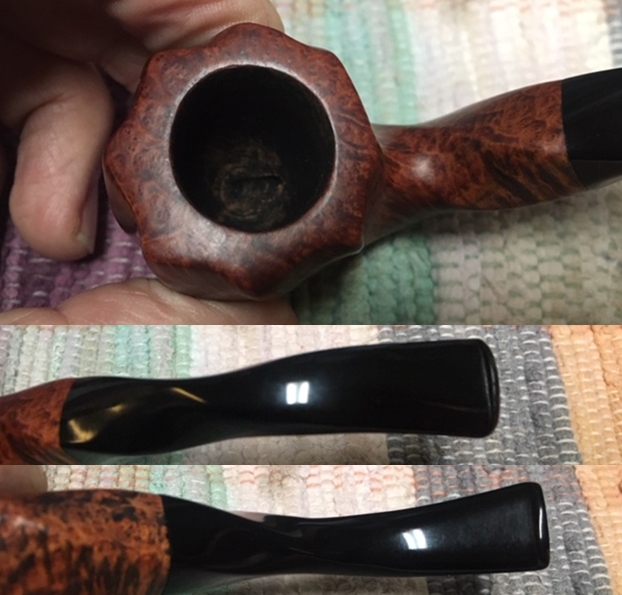
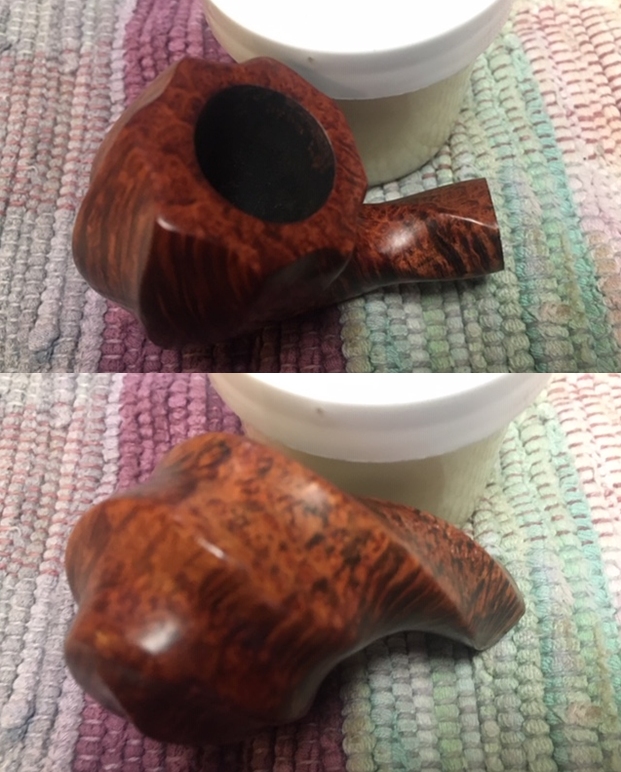
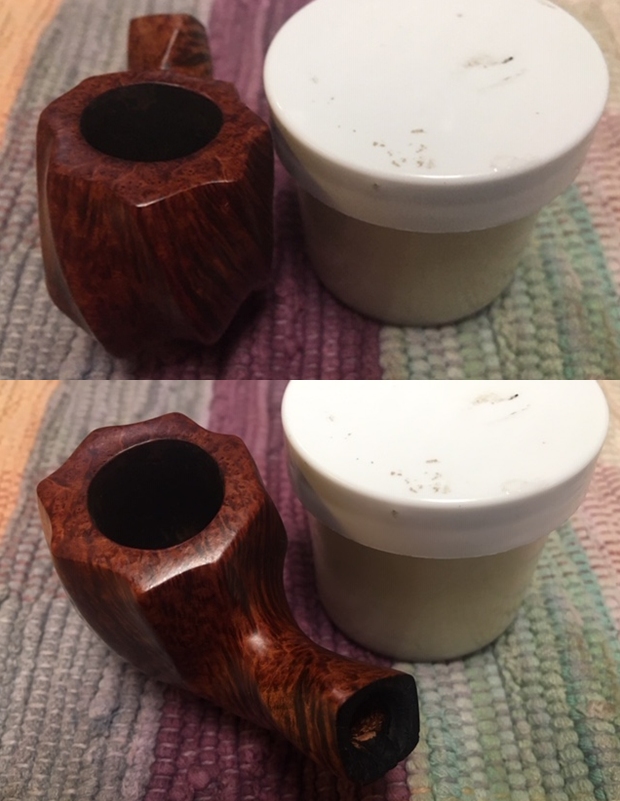
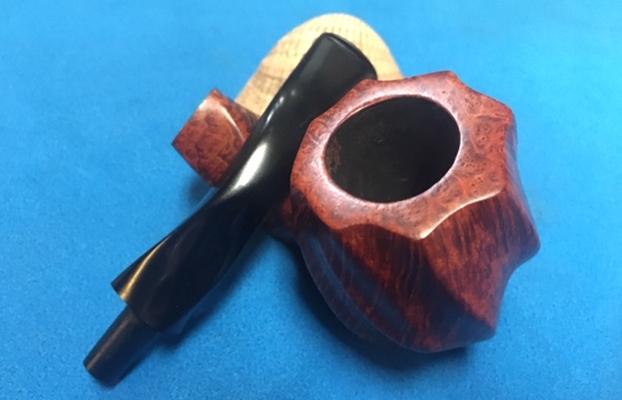
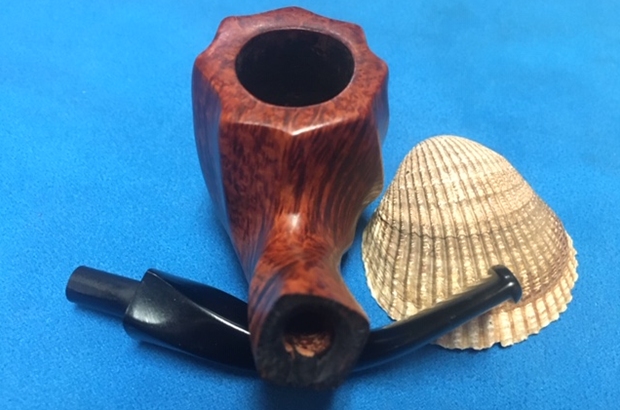
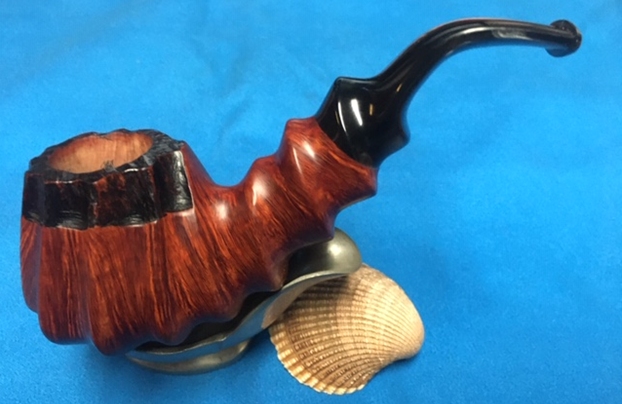
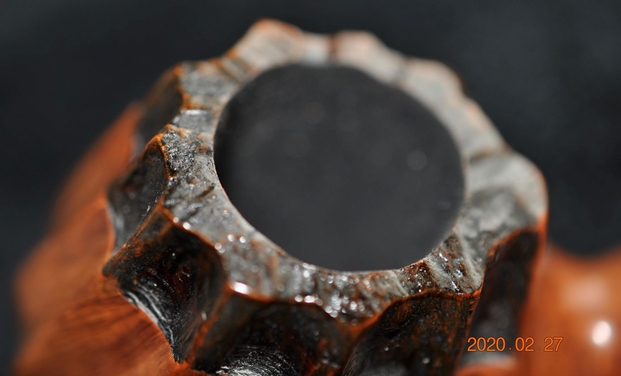
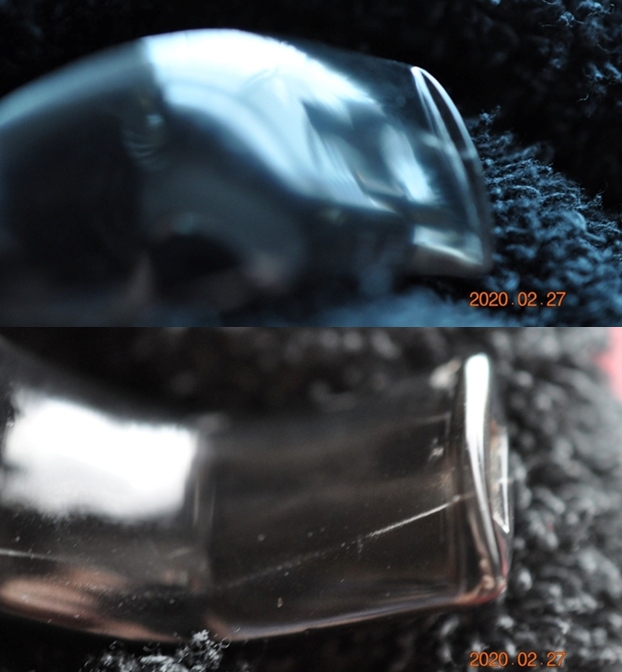
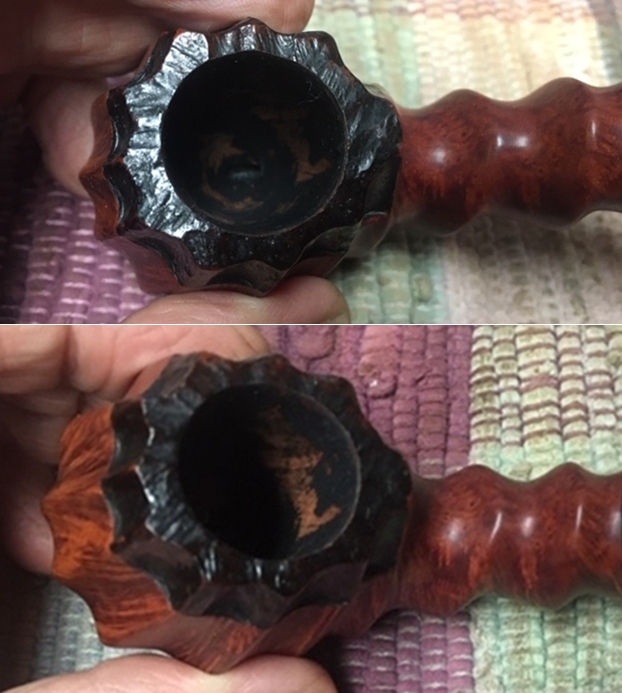
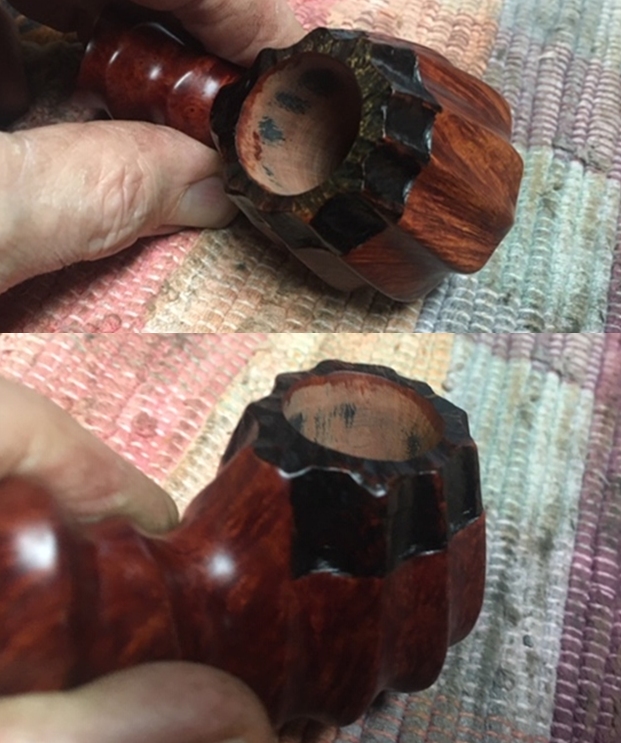
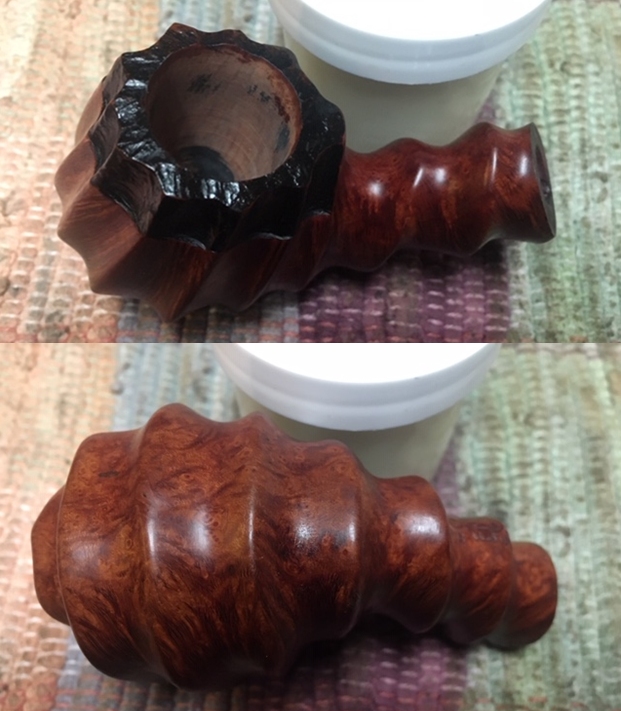
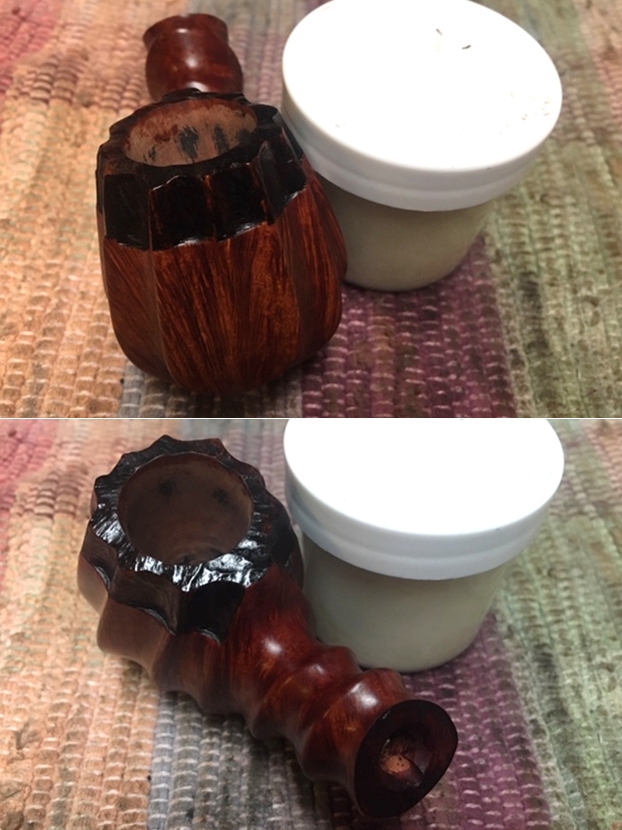
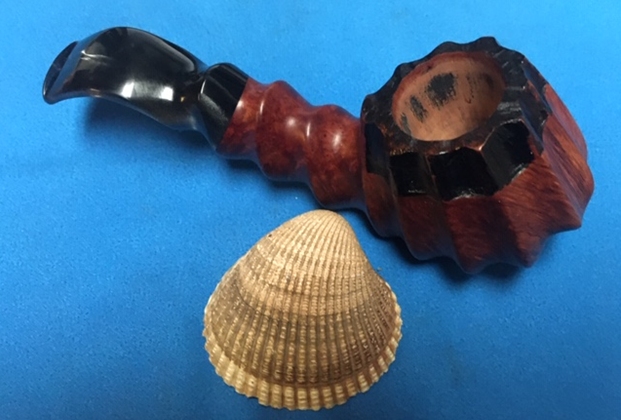
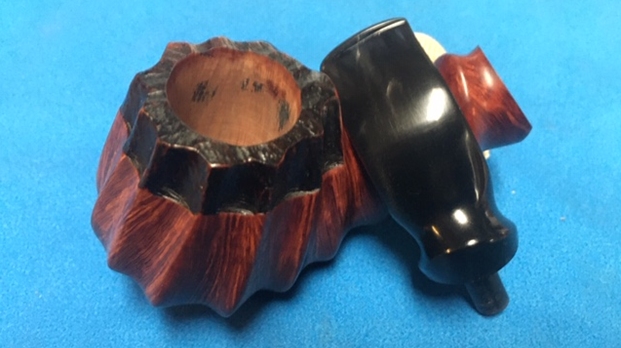
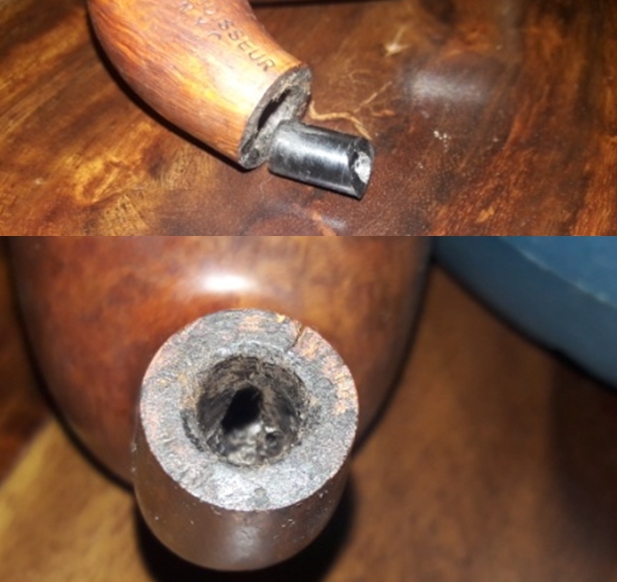
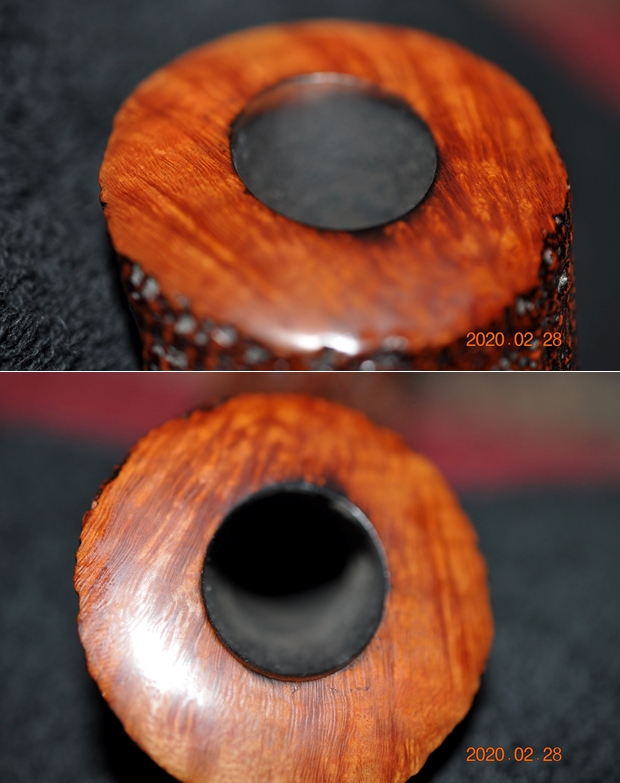
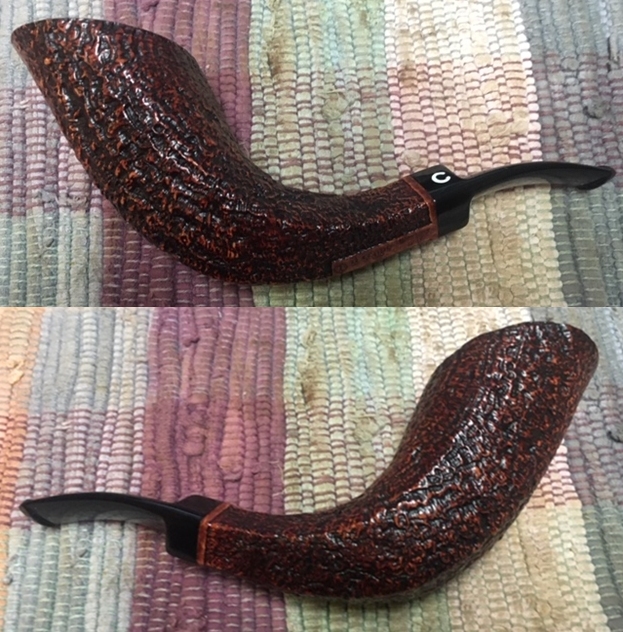
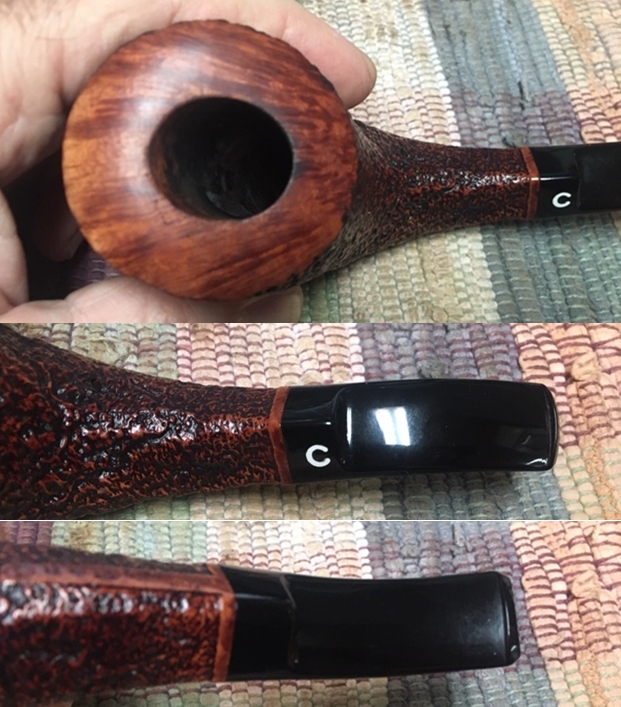
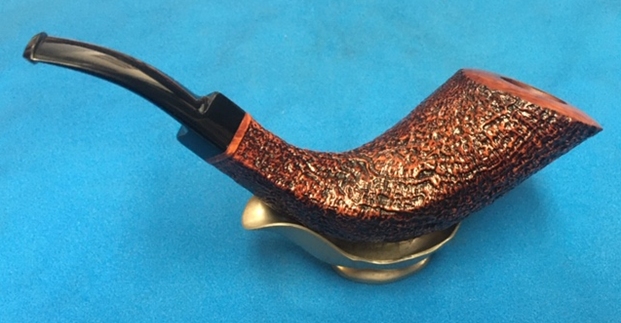
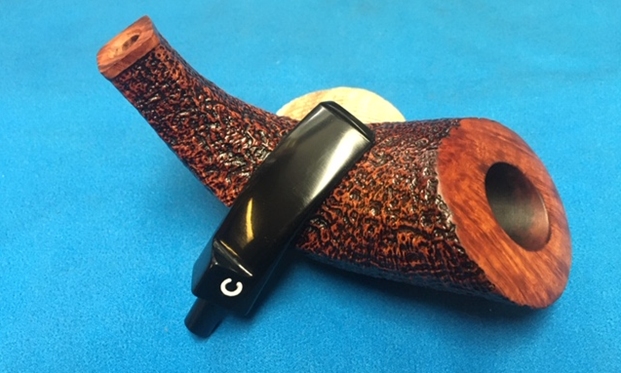
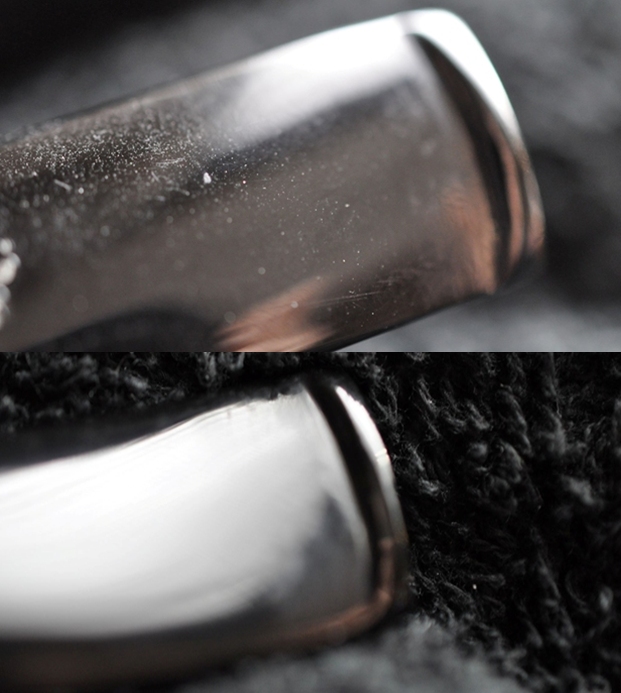
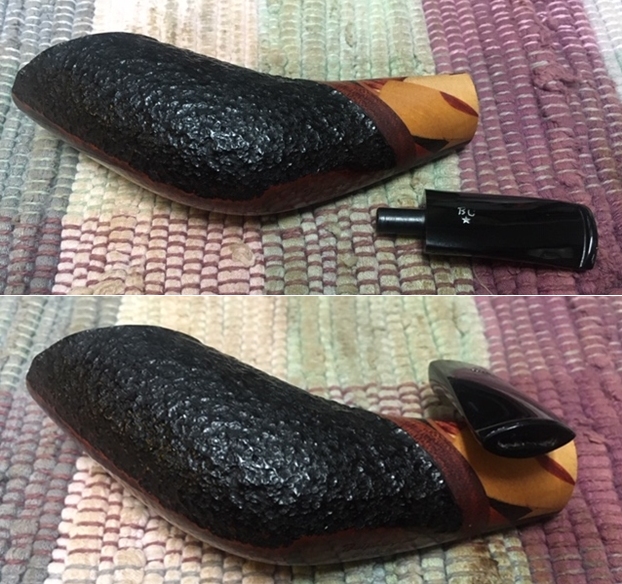
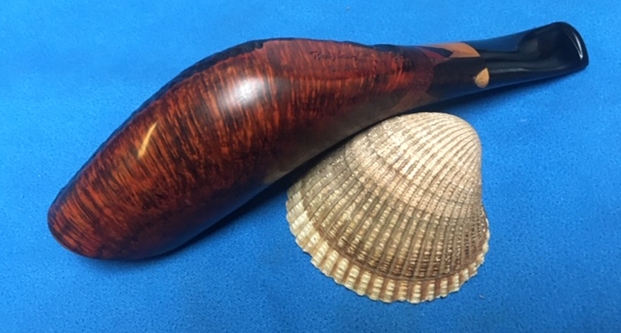
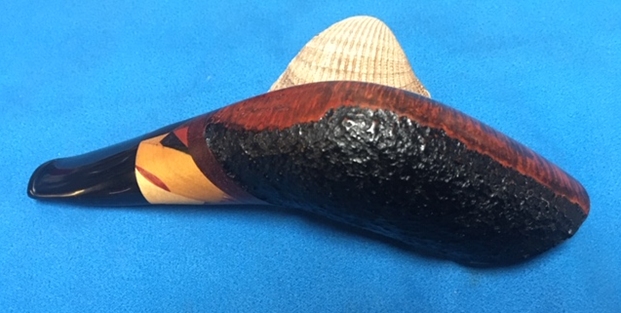
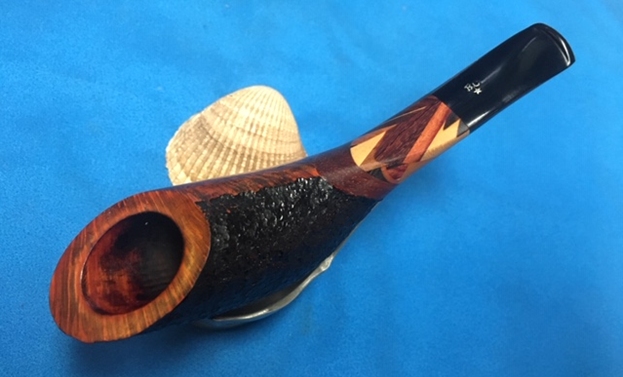
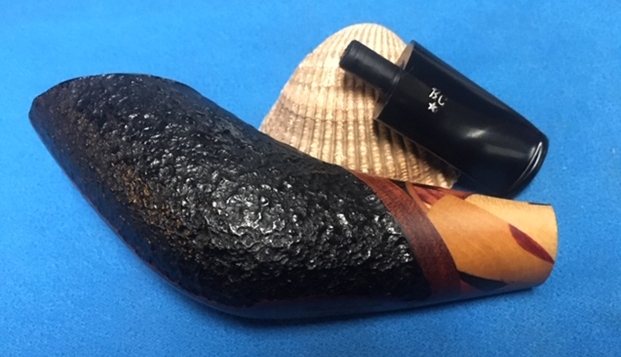
I like this pipe – a Woodstock (!) a lot and I think it will be a good addition Paresh’s collection although a lesser, humbler cousin in that collection to be sure! Looking at the state of the Punto Oro’s condition, the briar landscape is beautiful – no issues that I can see. The chamber has very light cake – the appropriate dime-width that is recommended. I’ll remove it for the briar to have a fresh start and to inspect the chamber condition. The rim reveals the lighting practices of the former steward – over the aft rim surface where it’s darkened and caked with crusted lava flow. The picture below looks at the chamber and rim. The major issues with the restoration of this Punto Oro are with the stem. The upper bit has tooth compressions on the bit and button.
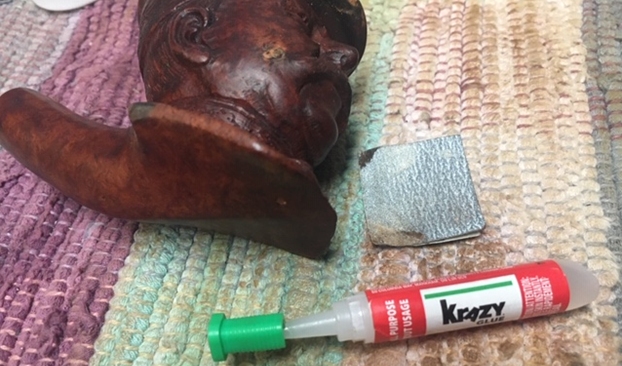
 The lower bit is where all the fun is hiding! The lower button has broken off and the break migrates down the stem – it will be no small button rebuild to address this moon crater! There is also tooth chatter evident on the lower bit. To restore the usefulness of this original Savinelli ‘Gold Point’ stem, which to me is critical, requires a button rebuild. Rebuilds are never as strong as the original stem, of course, but I’m hopeful of building in some strength as I do this rebuild.
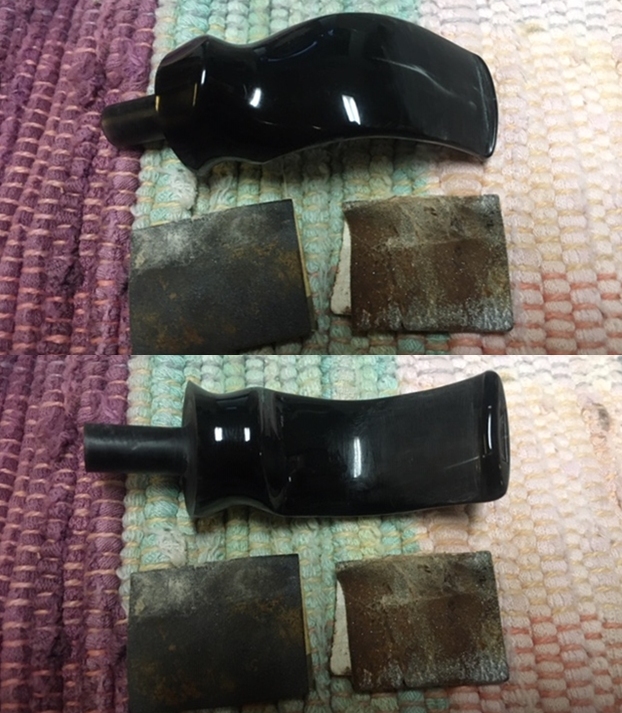
 I begin the restoration of this gift for Paresh by cleaning the Savinelli stem airway with a pipe cleaner wetted in isopropyl 95%. It takes one cleaner to do the job.
 The oxidation on the stem is deep. I use grade 000 steel wool with CIT, a product like SoftScrub, to work on the oxidation before putting it into the soak of Before & After Deoxidizer. I like this product but when the oxidation is deep I’ve found that the soak alone is not sufficient to remove the oxidation. The steel wool gives a head start for the Deoxidizer to break up the oxidation.
 The stem is then added to the soak of Before & After Deoxidizer along with several other pipes in the queue and their stems. I let the stem soak for a few hours.
 When I fish out the stem after a few hours, I let the Deoxidizer fluid drain off the stem and I also squeegee the stem with my fingers. Using a pipe cleaner wetted with isoproypl 95%, the airway is cleaned of the Deoxidizer. I also wipe off raised oxidation from the stem with a cotton pad wetted with alcohol.
  To help to rejuvenate the vulcanite stem, I also apply paraffin oil and set the stem aside to soak in the oil.
 Turning now to the stummel, I use the Pipnet Reaming Kit to begin the removal of carbon cake from the chamber. After taking a picture showing the starting point, I use 3 of the 4 blade heads available in the kit.
  The chamber narrows at the bottom, consistent with a conical shape of the Woodstock crafted stummel. I use the Kleen Reem Tool that more easily reaches to the floor of the tapered chamber. The Savinelli Fitsall tool continues the scraping and finally the chamber is sanded with 240 grade paper wrapped around a Sharpie Pen.
 After wiping the chamber with a cotton pad wetted with alcohol to clear the carbon dust, an inspection reveals heat veins in the chamber briar. These are fissures that form from overheating the stummel. The veins are not substantial enough to repair, but I will complete the restoration by applying a coating of yogurt and activated charcoal mixture to the chamber that will protect the chamber wall and encourage the formation of a protective cake.
  Switching now to the external briar surface, undiluted Murphy’s Oil soap is used with a cotton pad to scrub the stummel.
  The thick, crusted area on the aft of the rim is stubborn. With the solvent working, I also carefully scrape with my thumb nail, with the edge of my Winchester pocketknife, and with a brass wired brush.
  After working on the scrubbing of the external briar surface, I then transfer the stummel to the kitchen sink and using warm water, I scrub the internal mortise and airway with shank brushes and anti-oil liquid dish soap. After a thorough rinsing, I take a picture back on the worktable. The stummel cleaned nicely, but the darkened area remains on the stummel’s rim. I’ll continue to work on that with minor sanding later.
 I turn now to focus on the internal cleaning. With only one cotton bud and one pipe cleaner wetted with isopropyl 95%, the fact of the internal cleaned condition is established. Nice!
 With the stummel cleaning completed, I turn now to the stem. The daunting aspect of the restoration is the button rebuild. Before starting on this, I first focus on the tooth chatter and compressions on upper and lower bit. I go in this order because the approach in rebuilding the button introduces the CA glue and activated charcoal patch which has a different composition from the vulcanite stem. Since I’m beginning with the heating method to erase as much as possible the chatter and compressions, this involves the heating and expanding of the vulcanite. This is better done before the patch is applied in the button rebuild. Using a Bic lighter, I paint the upper and lower bit to heat the vulcanite and through heating the rubber compound expands to reclaim its original disposition – or closer to it. After going through the painting procedure and comparing the before and after pictures, the heating method did not help a great deal with the composition of this vulcanite stem. It helped some, but not a great deal it seems to me.
 With pictures showing the starting point for the upper and lower bit, it’s interesting to me to see where the tooth chatter is on the lower bit. It extends about a quarter of the way down the stem! I think what this indicates is that a frustrated steward, after he crunched the button, refused to put one of his favorite pipes aside! Just like in American baseball, he ‘choked up’ on the stem, to keep using his pipe even though the button had endured catastrophic failure.
  Now I turn my attention to the button rebuilding procedure. First, I fashion a cone that inserts into the airway having a pipe cleaner running through the cone into the airway. The cone is covered with scotch tape and then petroleum jelly is put on the tape. This helps the cone not to get stuck after the patch material is applied.
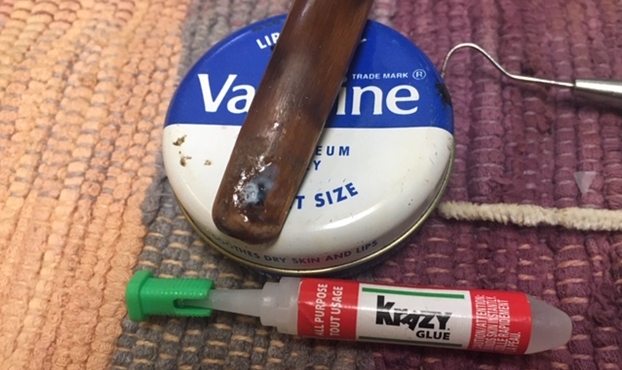
 The patch material is a mixture of activated charcoal that is in capsule form and CA glue.
 After placing the charcoal in a small pile from the capsule, the glue is placed in a small puddle next to it. The toothpick is used to mix the charcoal and glue by gradually pulling charcoal into the CA glue while mixing. As the charcoal is mixed in, the patch material thickens. After it reaches the consistency like molasses, I apply the charcoal putty to the button using the toothpick as a trowel. I intentionally use a mixture that is a bit thinner at the beginning so that is will seep down around the cone filling in the open spaces. This is important to create as much strength as possible in the rebuild. I apply more than is needed to build a mound that will later be filed and sanded to shape the new button.
  After enough patch material has been applied, I put the stem aside overnight allowing the button build to cure. The lights go out!
 Well, the next morning held some surprises! When I examine the button rebuild, looking forward to starting the process of filing and shaping, I discover that the new CA glue that I used did not cure to a solid state! The patch was reminiscent of a bite guard – pliable rubber. With some tugging and peeling, the repair came off in two pieces…. Interestingly, nowhere that I can find on the labeling that this glue does not harden, unless the “Extra Durable and Versatile” on the front label implies this?
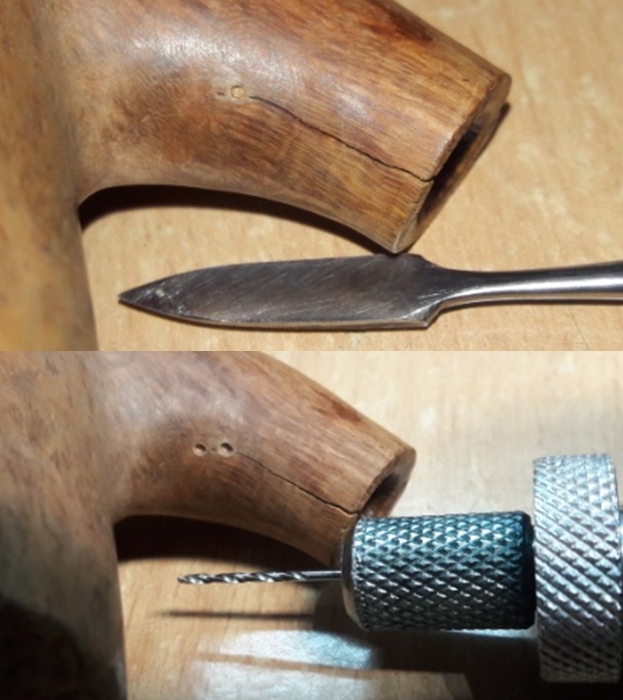
 The good news is that the cone was removed without trouble and is ready to go again for button rebuild patch attempt number two! I’ll spare the reader of all the pictures to record this second process but will jump forward. What I did do differently after examining the large area of the patch, was to better engineer and strengthen the resulting rebuild. I carefully applied rounded and flat needle files to the edge of the break. I filed to taper downwardly the edge toward the break.
  My thinking is that this small innovation perhaps will strengthen the patch by providing more of a shelf or footing upon which the patch material can rest. It seems that this engineering would inherently provide better buttressing than a straight vertical edge drop. I’m thinking also that this will help in the sanding and blending of the patch. The sketching below illustrates my thinking. I also file and clean out the entire button cavity and clean it with a cotton pad wetted with isopropyl 95% in preparation for the new patch.
  Before starting on the button patch, I decide to do a quick fill of the upper bit and button lip where there were compressions. I use medium-thick black CA glue to do the filling. To quicken the curing and to hold the patch in place I use an accelerator.
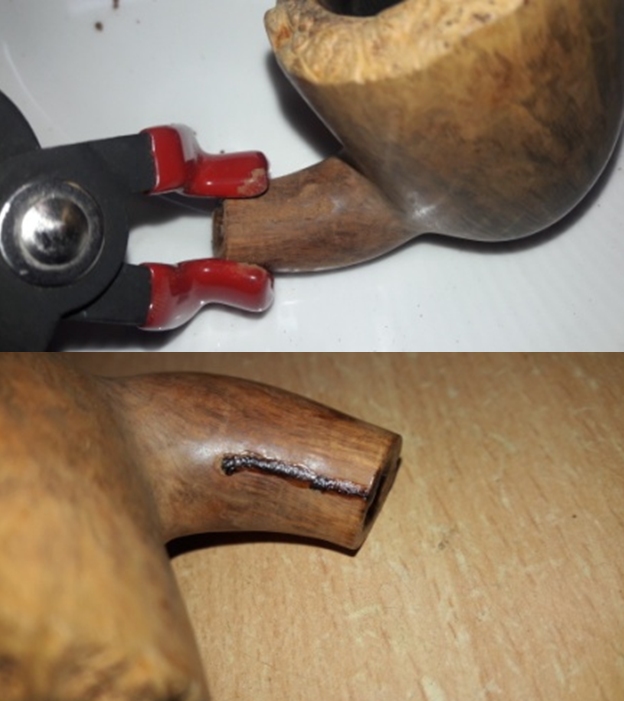
 The next pictures show the second finished button rebuild patch with the engineering changes beginning the curing process.
 After the second button rebuild patch is cured, using the flat needle file, the patch on the upper bit and button lip are filed down flush with the vulcanite stem surface.
 Switching to the underside, filing and shaping begin on the button rebuild. I start with the slot facing to flatten it by removing the excess patch material. Then, cutting the line shaping the button lip is next.
 Filing continues with the main bit patch and button shaping. I’m careful to allow a rounded patch and not filing straight across horizontally. This would weaken the patch – thinking of the difference between an arched bridge’s symmetry rather than that of a flat bridge’s. Maintaining the patch thickness is critical to its strength.
 With the filing phase completed I transition to using 240 grade paper starting first on the upper bit and button lip fills.
 The 240 grade sanding fine tunes the button rebuild further. I’m careful not to sand too much on the patch and continue to round it to maintain thickness. A slightly thicker lower button lip purchases some strength as well. I focus on sanding the seams of the patch so that they are flush with the vulcanite surface. The patch is still rough but making progress!
 I use the flat needle file to shape and smooth the slot as well. It’s almost a given that air pockets will emerge as the sanding continues to shape the button.
 A careful examination of this cross-section view of the slot facing shows the added buttressing effect of the earlier tapered filing. Arrows help to show this.
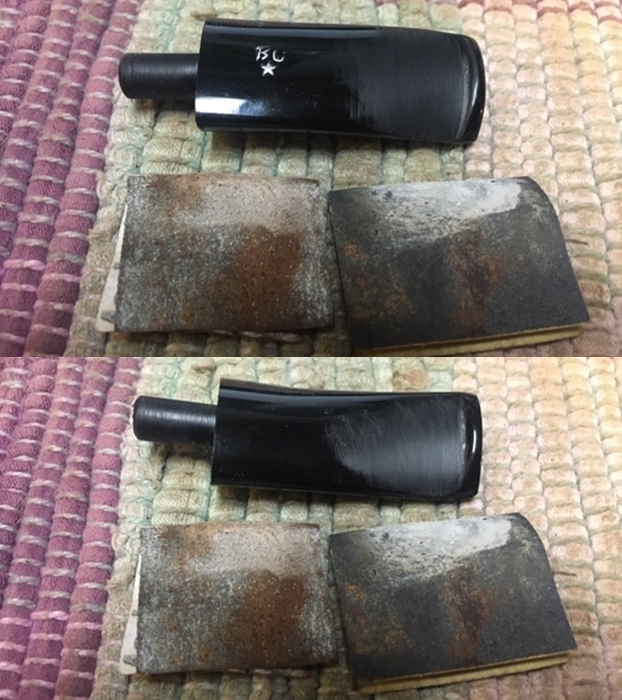
 With the 240 grade sanding paper still in play, I sand the entire stem to remove any residual oxidation. Deep oxidation always seems to appear during the fine sanding and polishing phases. Sanding the stem with 240 now will hopefully address this as well as the remnants of tooth chatter remaining on the bit. I use a plastic disk that I fabricated to be able to sand the stem facing without shouldering the edges.
 Next, I sand the entire stem by wet sanding with 600 grade paper and following this, 000 grade steel wool is applied.
 The upper bit and button repairs are looking great – the sanding is erasing the contours of the patch and blending nicely.
 Work on the lower stem side is a bit more of a challenge with the huge button rebuild patch material. The stem is looking great, but the challenge is to blend the large patch area.
 Air pockets are the most common side effects of patching. Air bubbles are trapped in the CA glue and activated charcoal as it is mixed and these air bubbles become visible as sanding dissects and reveal the pockets.
 The many microscopic air pockets are not easy to remove. I use a clear acrylic nail polish to try to fill and erase the pockets. CA glue can be used to do the same.
  I use the brush provided by the nail polish and I paint over the pockets almost covering the entire patch. I let it dry and repeat the process for a second coating.
 After the acrylic polish cures, I apply 000 steel wool to the patch and the picture below shows the results. The nail polish does an amazing job but there remain some pockets. These are very small and I’m doubtful that more coating will erase them. I’m satisfied now with leaving them and moving on! They remain as a testament to the catastrophic button failure and this noble attempt to recommission this beautiful Savinelli Punto Oro Woodstock! Moving on!
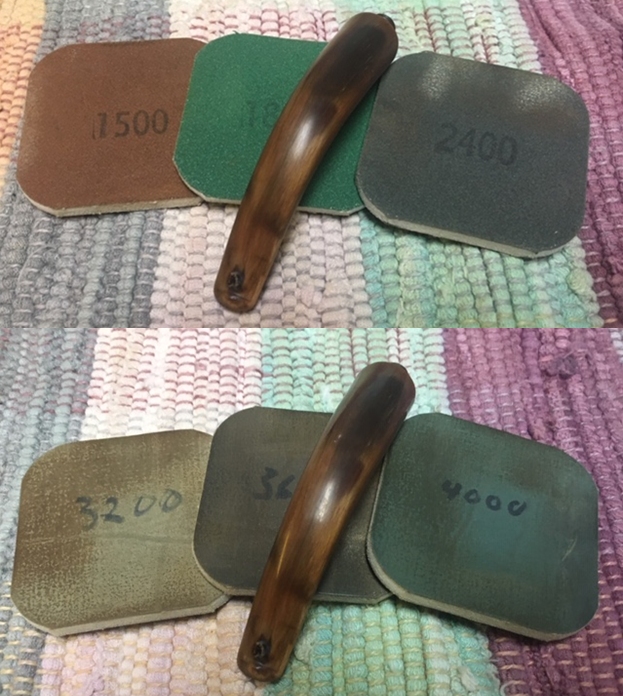
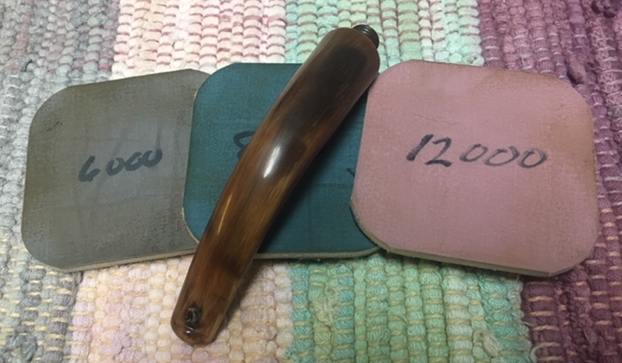
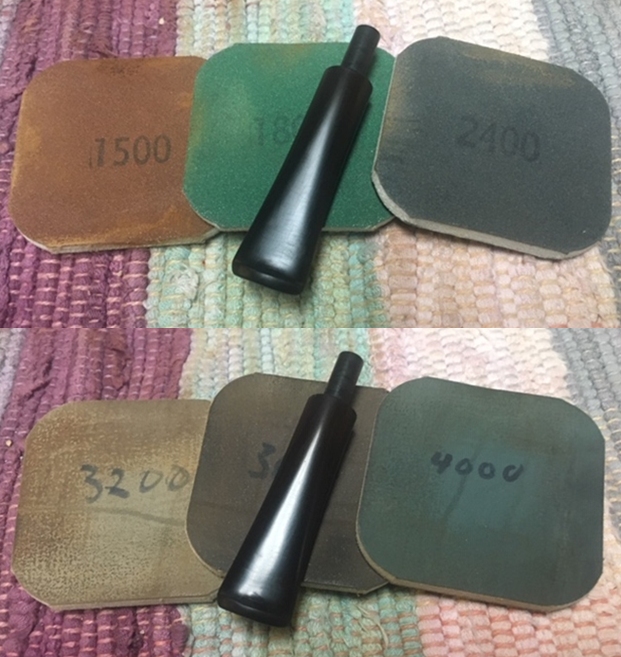
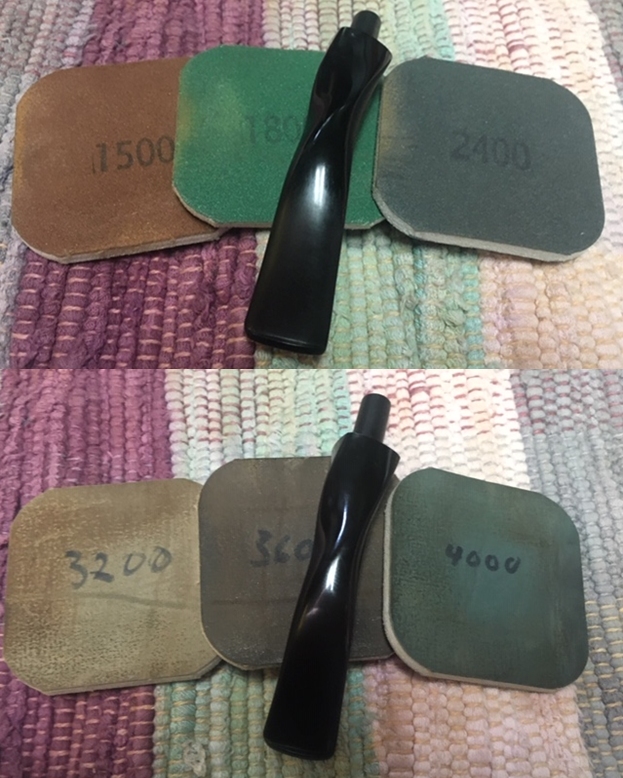
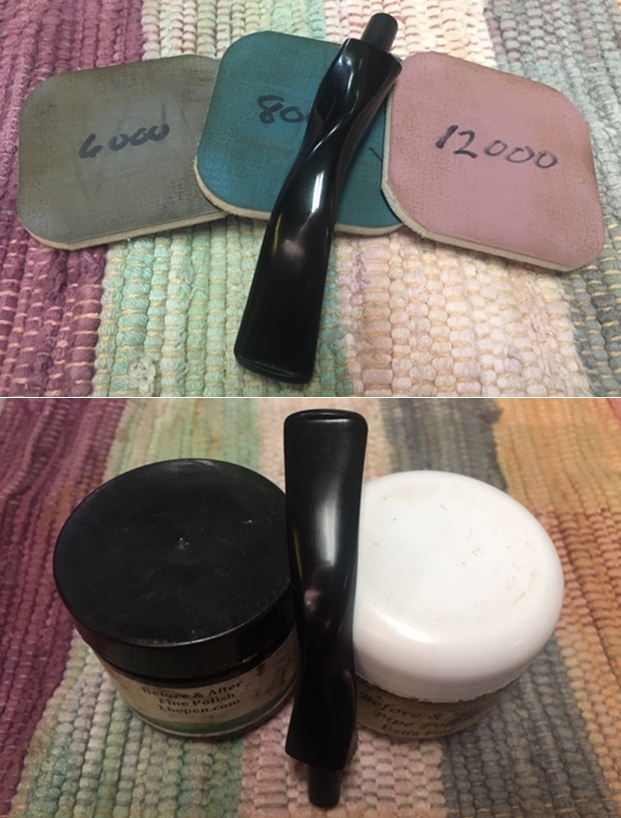
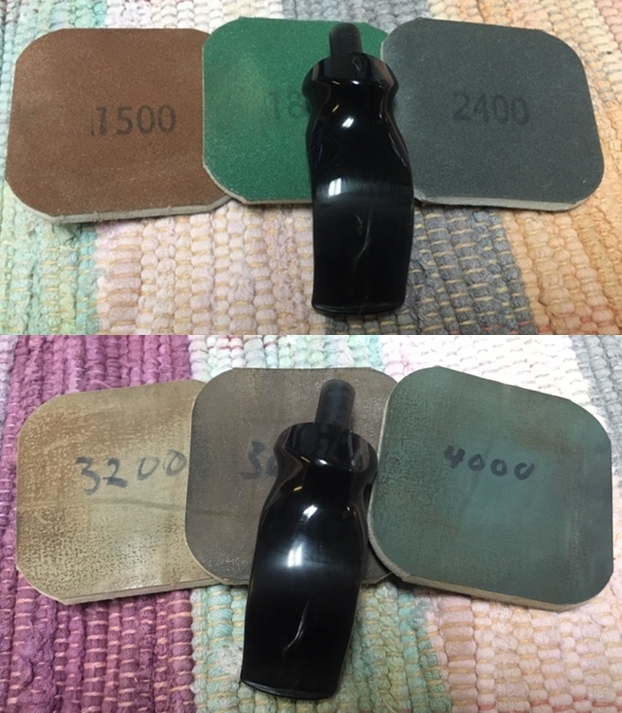
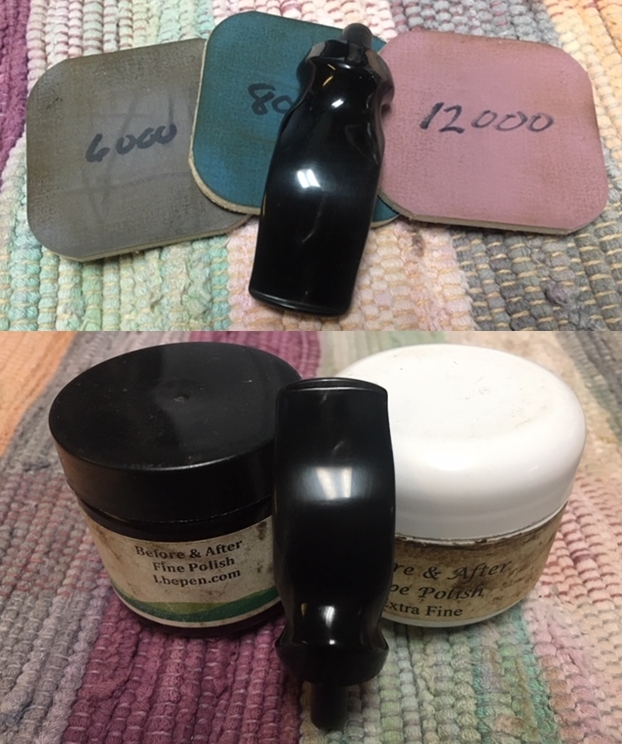
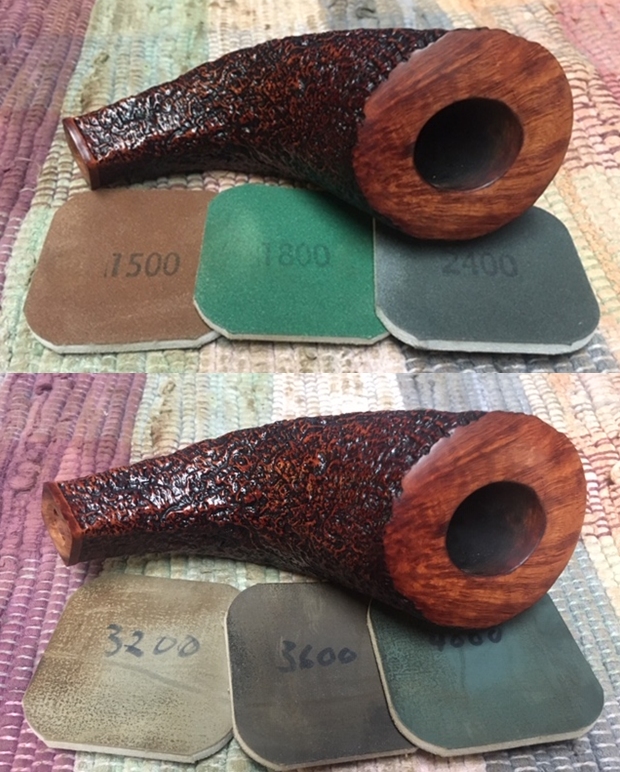
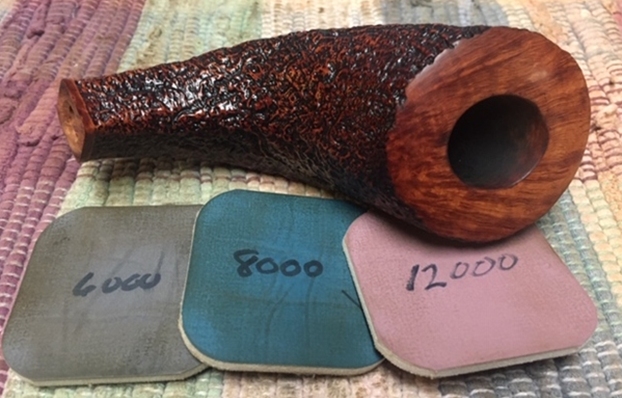
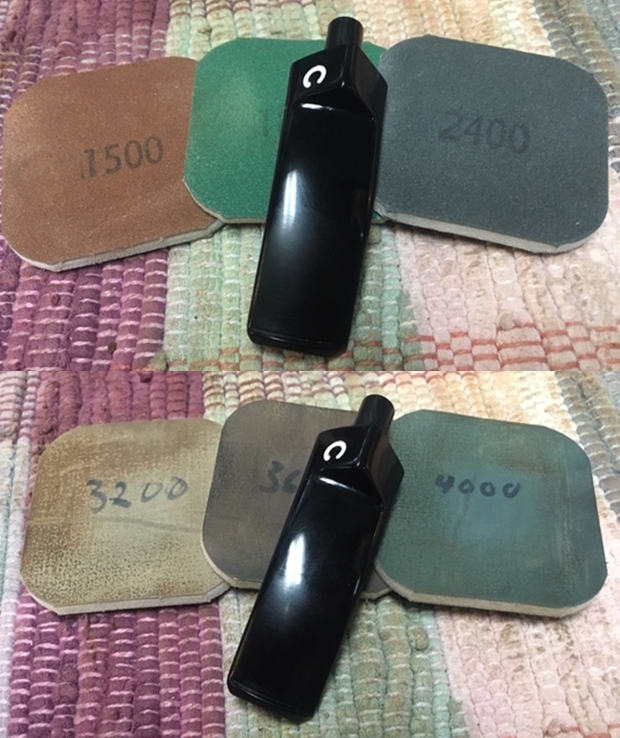
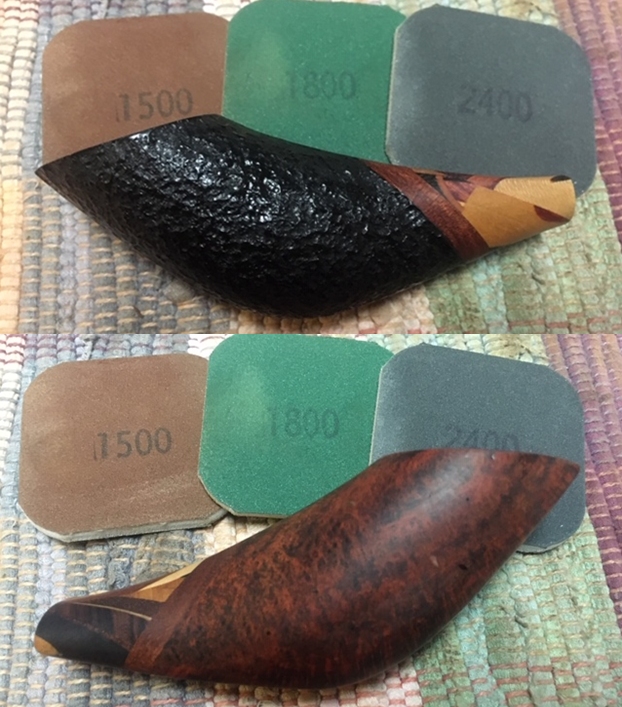
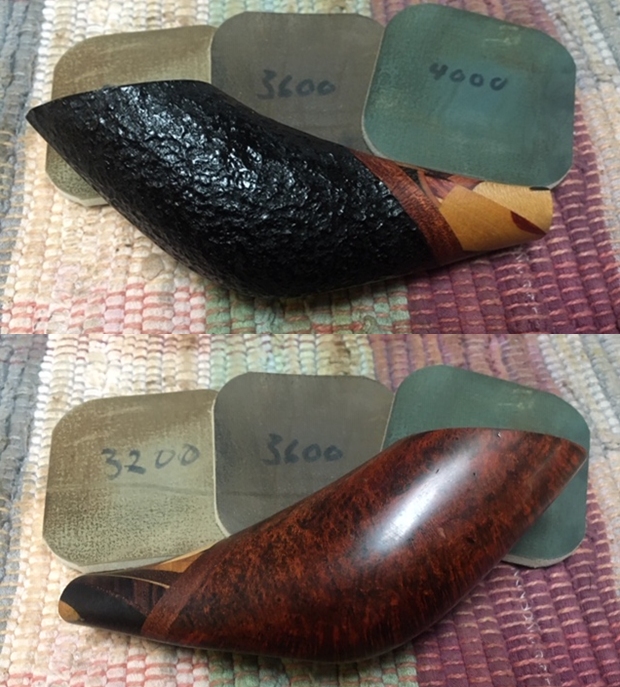
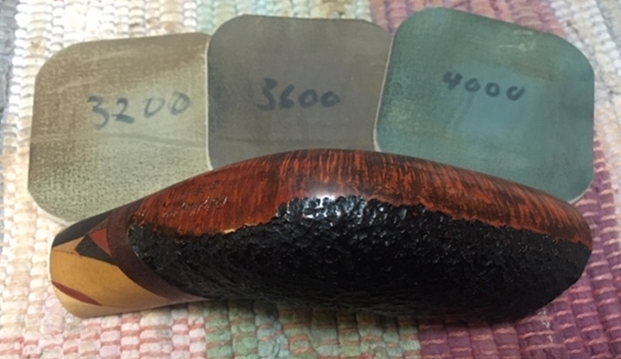
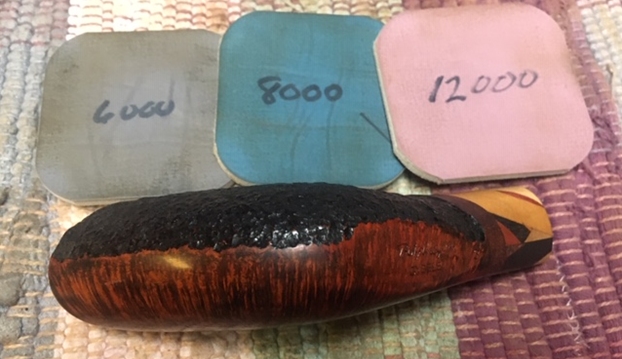
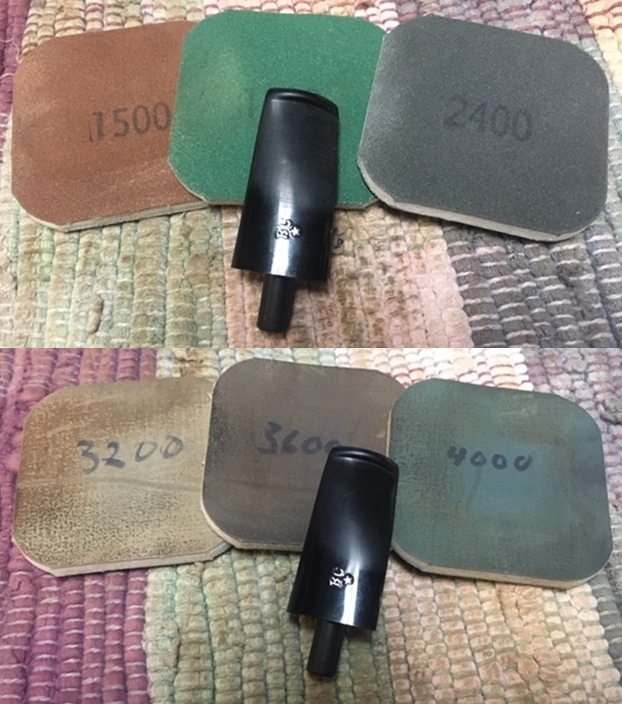
 I move on to applying the full regimen of micromesh pads to the Woodstock stem. I begin with wet sanding using pads 1500 to 2400 and follow by dry sanding with pads 3200 to 4000 and 6000 to 12000. Between each set of 3 pads, Obsidian Oil is applied to condition the stem and to protect it from oxidizing. The stem is looking great.
 With the stem sanding completed, looking now to the stummel, I focus first in cleaning up the rim. There remains darkened briar from the lava flow earlier cleaned on the aft quadrant of the rim. The inner rim edge is also darkened at places with the normal nicks from wear and tear. The outer edge of the rim is also with some normal nicks and dents – all very small.
  To clean the rim, I first start by using 240 sanding paper and doing a very light inner and outer rim bevel – just enough to clean the edge of the rim. After this, I also use the 240 paper to lightly ‘feather sand’ the aft part of the rim to clean the darkened surface. I run the sandpaper lightly around the full rim plane surface to clean the briar, not to remove it.
 I follow the same procedure with the rim edges and the rim plane with 600 grade sanding paper. The rim is shaping up very nicely.
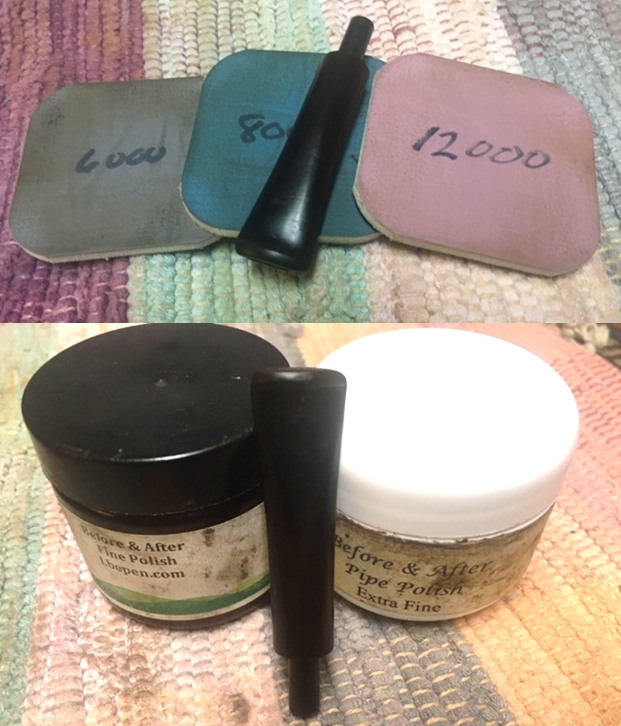
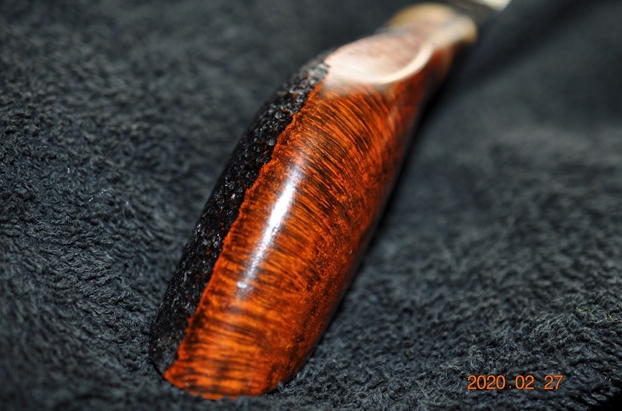
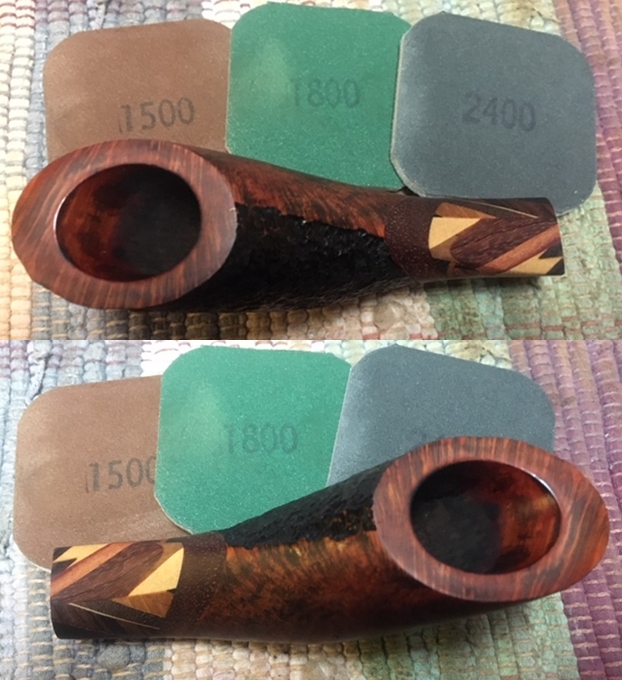
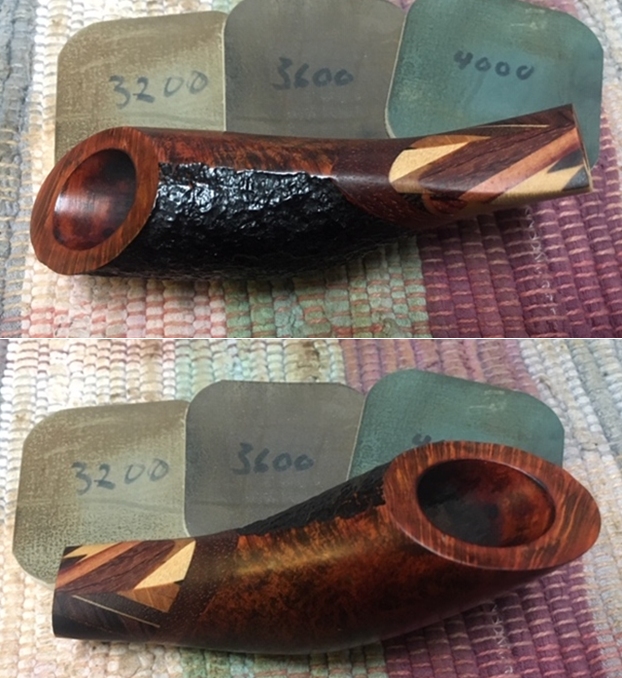
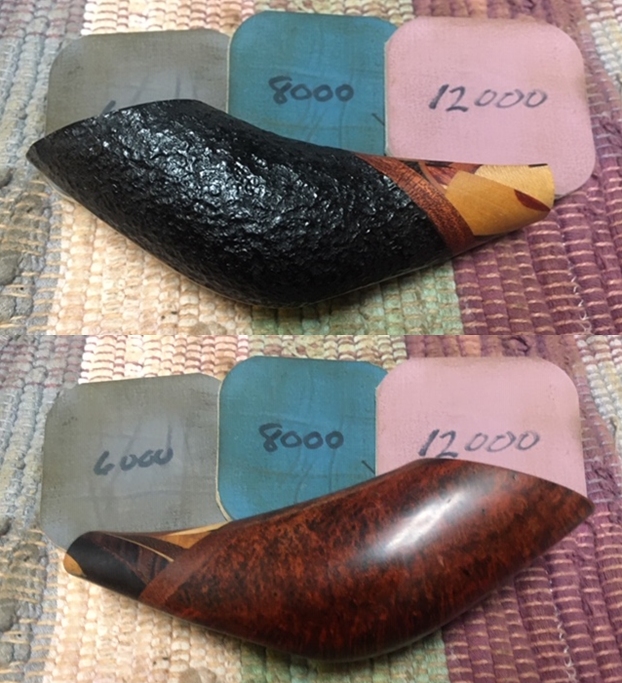
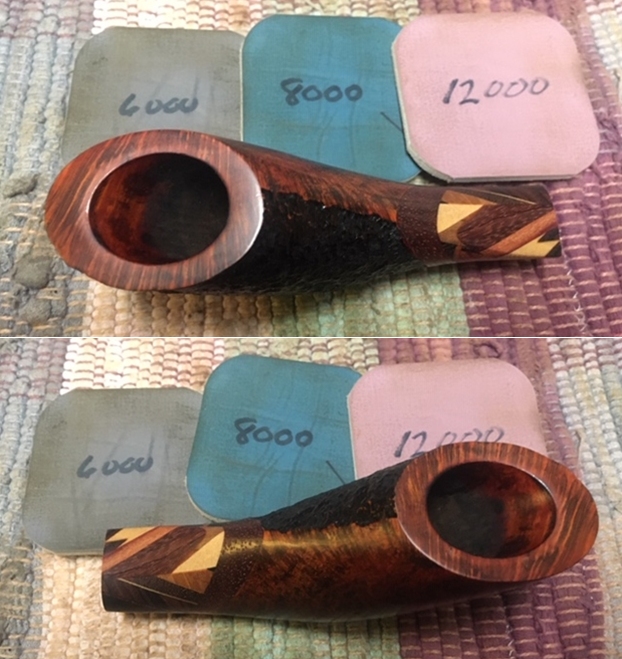
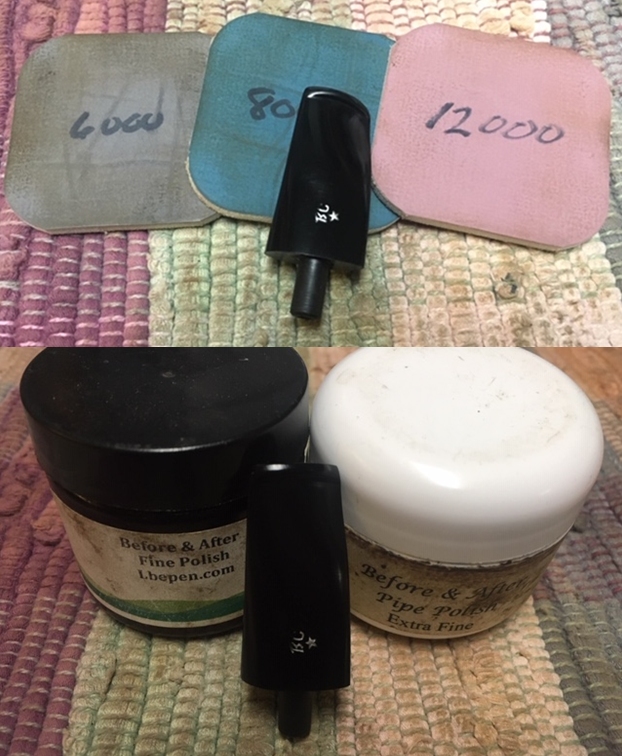
 Next, I use micromesh pads to do fine sanding on the Savinelli Gold Point stummel. I begin by wet sanding with pads 1500 to 2400 and then dry sanding with pads 3200 to 4000 and 6000 to 120000. The fine sanding brings out the grain and restores the mahogany finish for which the Punto Oro line is known. Very nice indeed!
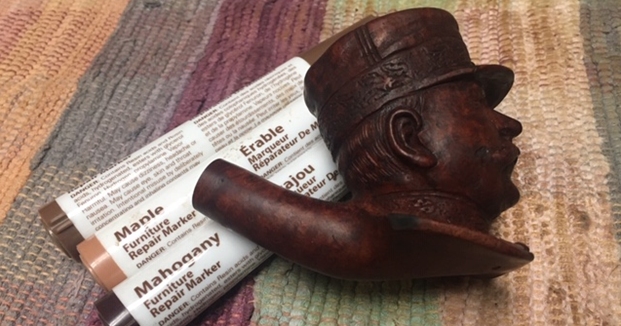
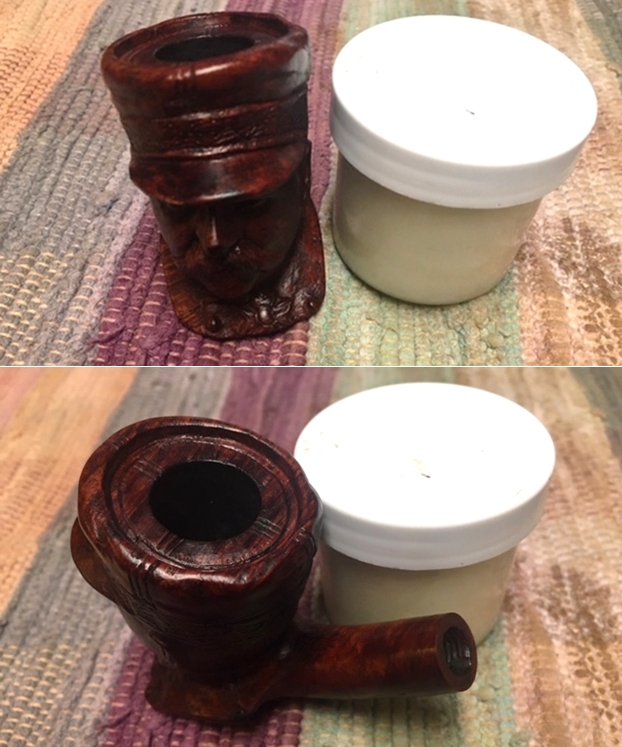
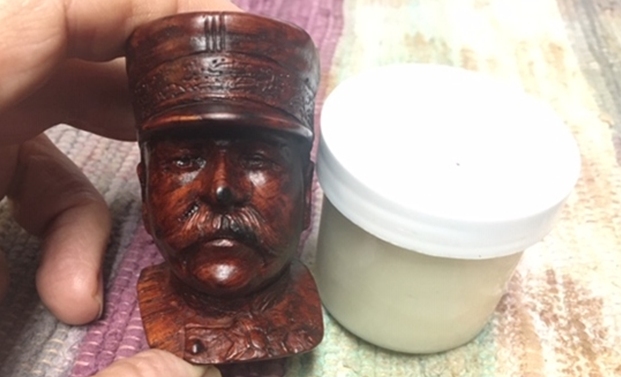
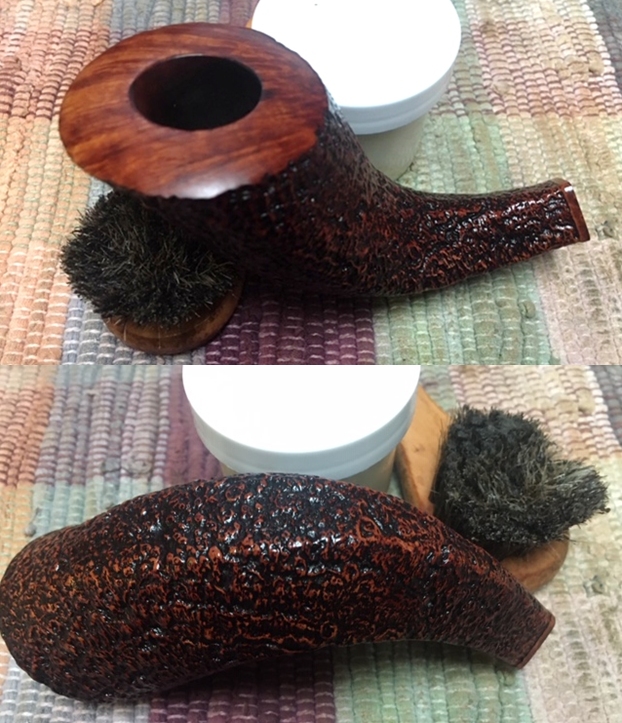
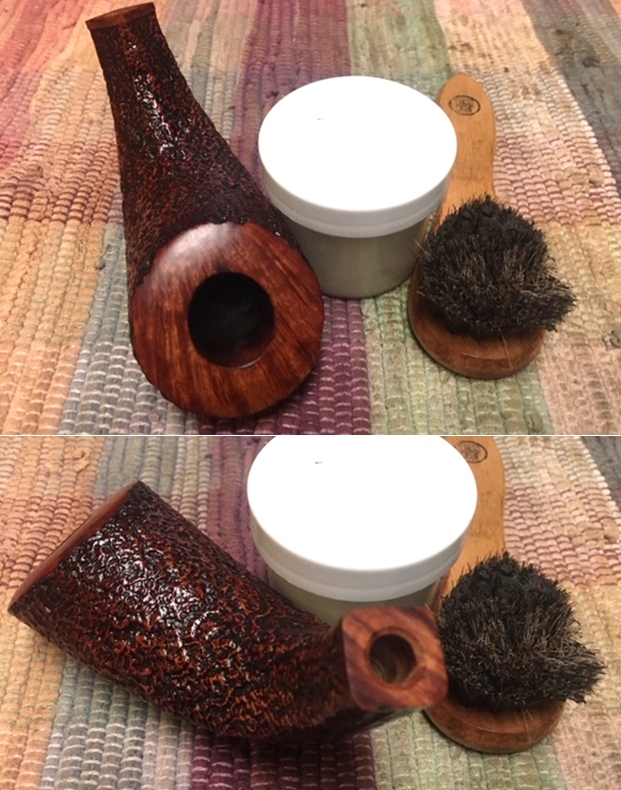
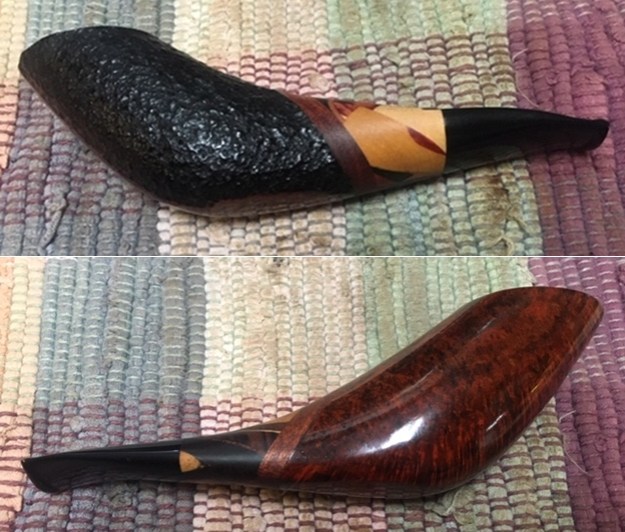
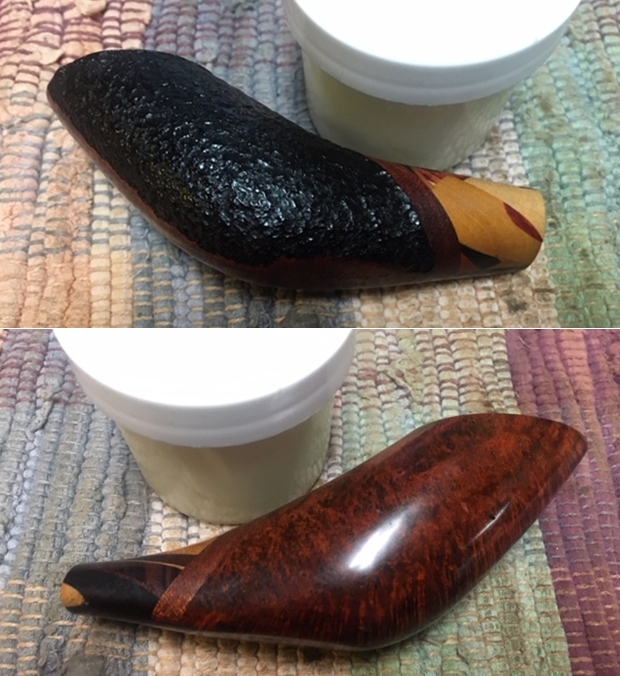
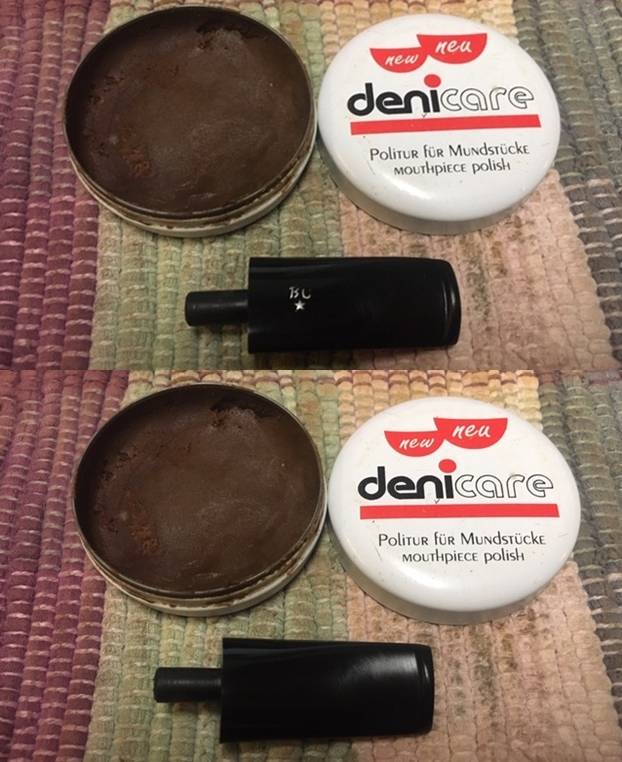
 To deepen the natural hues of the briar, Mark Hoover’s Before & After Restoration Balm (www.ibepen.com) does a great job. I put some of the Balm on my finger and work it into the briar surface. The Balm begins with a cream consistency and then thickens into a waxy consistency as it is worked into the stummel. After working the Balm thoroughly into the surface, I put the stummel aside for about 20 to 30 minutes as the Balm is absorbed into the briar. The picture below was during this period. Afterwards, I wipe off the Balm with a cloth dedicated to this, and then the stummel is buffed up using a microfiber cloth.
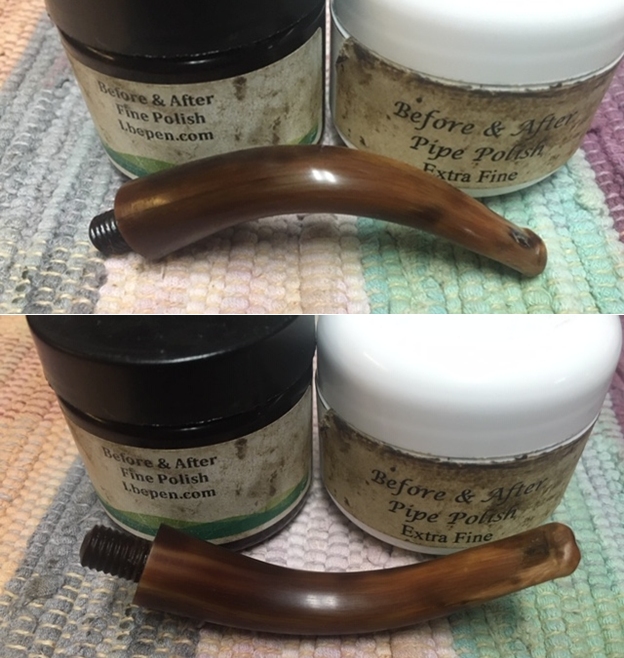
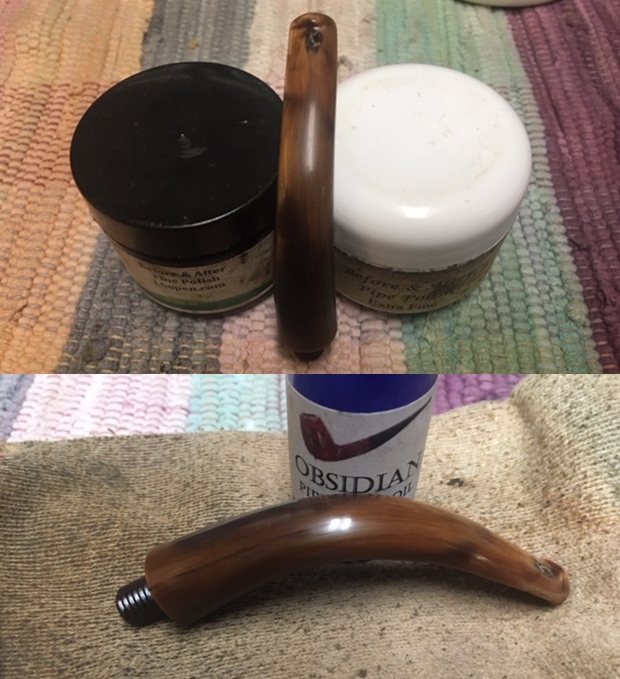
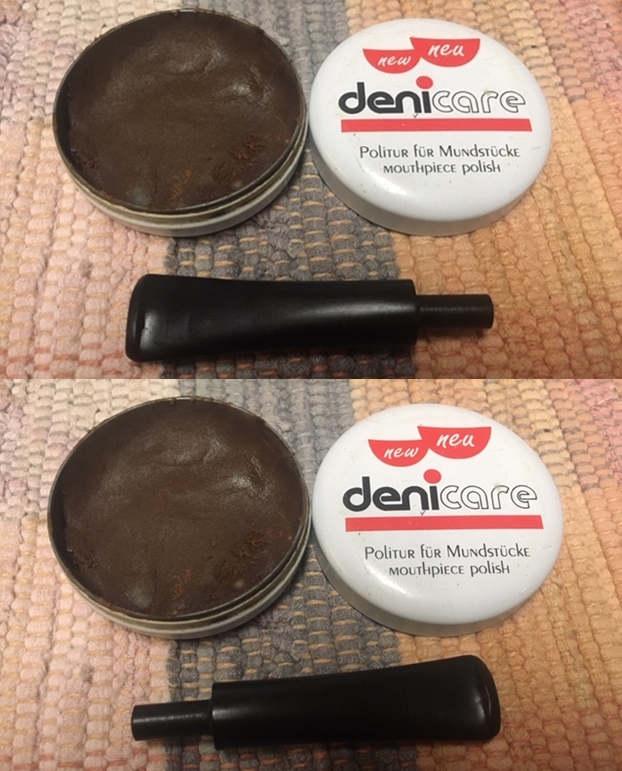
  The stem also is a beneficiary of Before & After Fine Polish and Extra Fine Polish. The polish helps further to condition the vulcanite and to rid the stem of oxidation. Starting with the B&A Fine Polish, I work the black oily liquid into the stem – the liquid has a gritty texture. Afterwards, I let the stem absorb the polish for 15 minutes and then wipe the excess off with a paper towel. I follow by applying the Extra Fine Polish in the same manner. Again after 15 or so minutes, the excess is wiped off and the stem is buffed with a microfiber cloth.
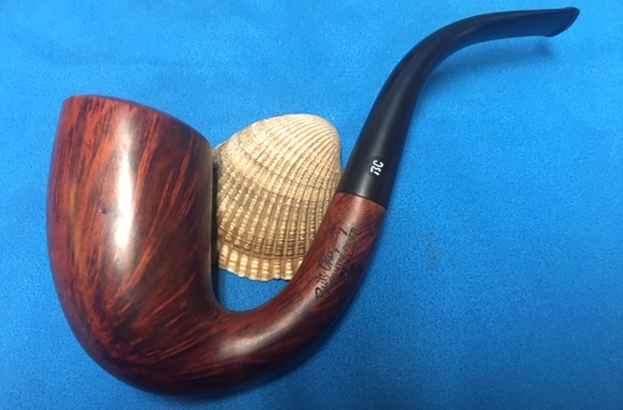
 Now, the homestretch. After reuniting stem and stummel and mounting a cloth buffing wheel to the Dremel setting it at about 40% full power, Blue Diamond compound, a fine abrasive, is applied to the pipe. After this, the pipe is wiped down with a felt cloth to clean it of compound dust before application of the wax. Next, after mounting another cotton cloth buffing wheel onto the Dremel at the same speed, carnauba wax is applied to the pipe. Following the wax application, the pipe is given a vigorous hand buffing to further raise the shine.
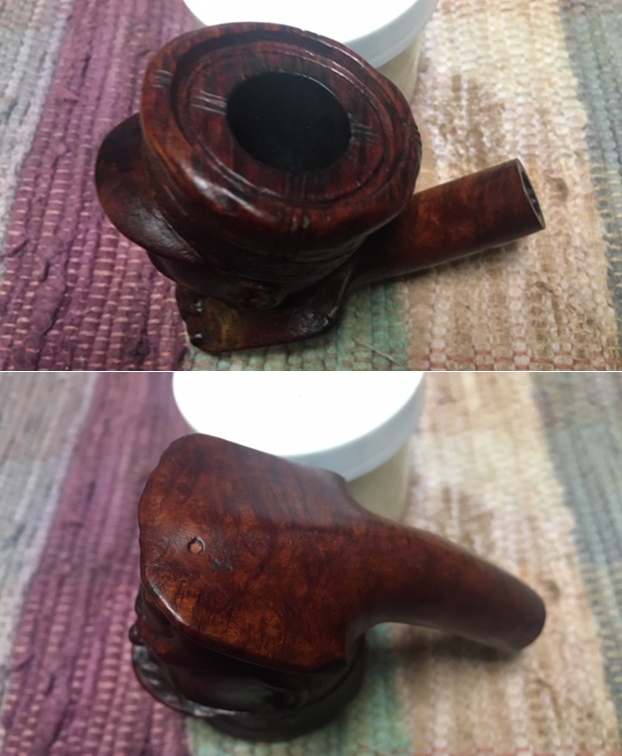
After the buffing, one project came to mind that I had almost forgotten. Earlier, after inspecting the chamber and finding some heating veins, I had decided to apply a coating of natural yogurt and activated charcoal powder mixture to the chamber wall. This mixture, after applied to the chamber, hardens into a protective layer to help protect the briar as well as encourage the formation of a protective cake. I mix some charcoal powder with a small amount of natural yogurt. After the yogurt and charcoal are mixed and is somewhat thickened – not running but with the consistency of mud, and after inserting a pipe cleaner to keep the draft hole cleared, I use the pipe nail and spread the ‘mud’ over the chamber wall. After it is covered, since it is late, I put the pipe aside to allow the mud to dry through the night and the lights go out!
 The next morning, after applying the pipe mud mixture to the chamber, I give the pipe one more rigorous hand buffing to raise the shine and my gift to Paresh is complete.
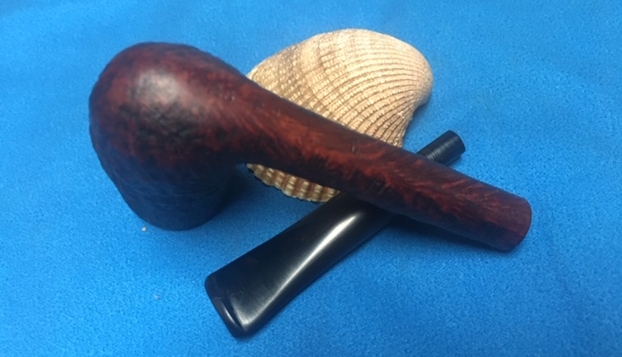
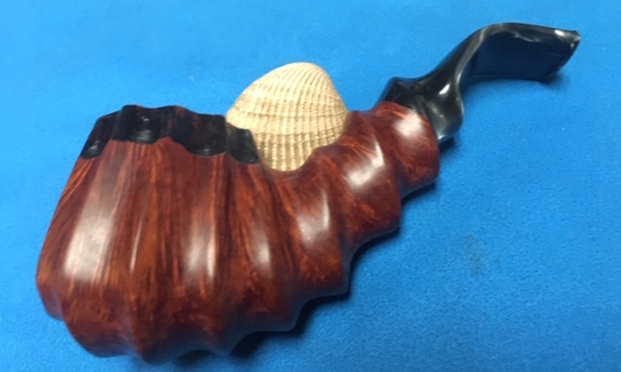
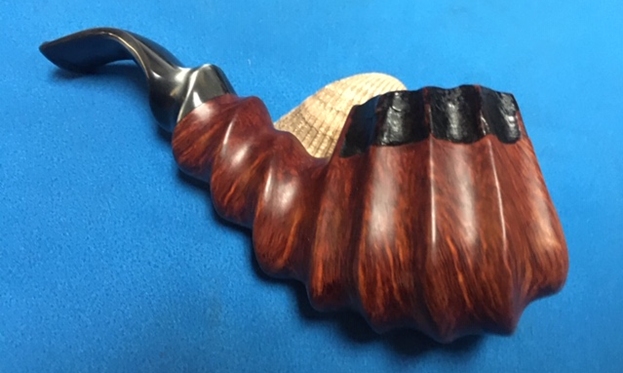
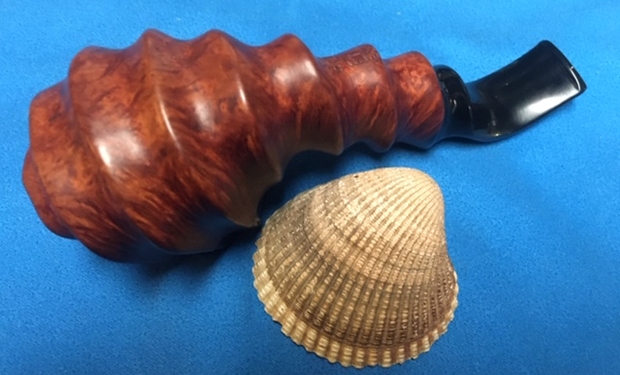
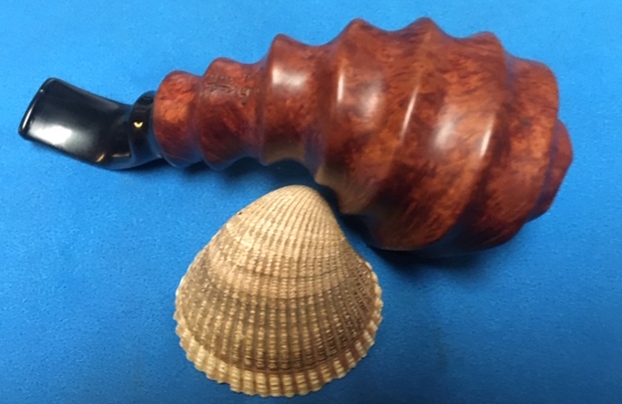
The button rebuild was, without doubt, the most technically demanding part of the restoration of this striking Savinelli Punto Oro Woodstock. The grain is beautiful, and I am especially drawn to the Woodstock shape with the lines guiding the eyes down the sides of the pipe, taking in the movement of grain and shape. I’m thankful for my L. J. Peretti Cutty that I received from Paresh when I was in India. I have yet to put the Cutty into service here in Bulgaria – it has been waiting for my gift to Paresh to make it to India. It still needs to be refreshed and a little polishing work, and my plan and hope is that Paresh and I will share our first bowls together with our gifted pipes to each other, perhaps not in person, but via video conferencing, today’s miracle bringing people together throughout our ever shrinking world. After the pandemic issues are behind us, I’ll be mailing the Savinelli Punto Oro Woodstock to India. Thank you for the Peretti Cutty, my friend! 


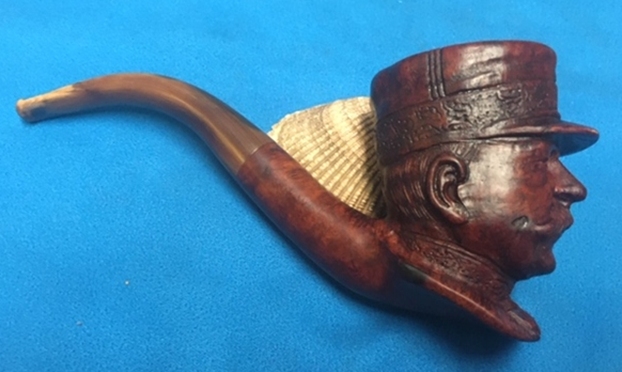
 Jeff opened the case and took a photo to show the embossed label in the cover of the pipe case. It was an oval that with a circle holding BRC split into three quadrants in the centre. On either side it was flanked by Genuine Meerschaum. The case was lined with plush red material and the exterior was covered in a worn brown leather.
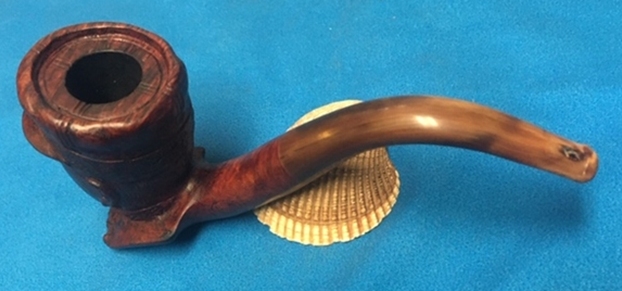
 He took a photo the pipe as he removed it from the case and after he laid it on the table before he did the clean up. The pipe is actually very dirty. There is a thick cake in the and an overflow of lava on the rim top. There appear to be scratches in the rim top surface as well. The bowl is dirty and heavily scratched. The twin rings around the bowl are damaged and filed in with grit and grime. The shank and the lower part of the bowl was starting to get a nice patina. The silver band was very dirty and oxidized. There is no stamping on the shank or the band. The stem is not amber nor is it newer acrylic. I believe it is Amberoid – a man made amber material that was a material consisting of small pieces of amber or sometimes other resins united by heat and pressure. It appears to be the original stem as the fit to the shank is perfect and it is threaded for the bone tenon. There are light tooth marks and chatter on the surface of the stem ahead of the button. Otherwise it is a clean looking stem.
 Jeff took close-up photos of the bowl and rim top from various angles to capture the condition of the bowl and rim top edges. There was a very thick cake in the bowl and you can see the overflow of lava and scratches in the rim top and edges. You can also see the nicks and damage to the cap of the bowl.
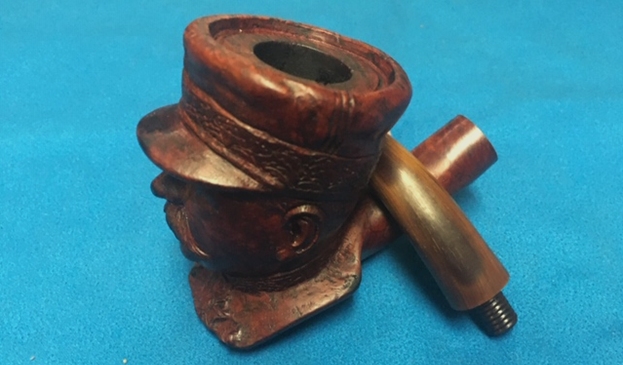
 Jeff took photos of the sides and heel of the bowl to show condition of the meer. You can see the damage to the rings on the right side and the many scratches around the sides and heel of the bowl.
 Jeff took photos of the shank stem junction with the tarnished silver band. The shape of the stem is perfect for the shank and band. If it is a replacement stem it is very well done.
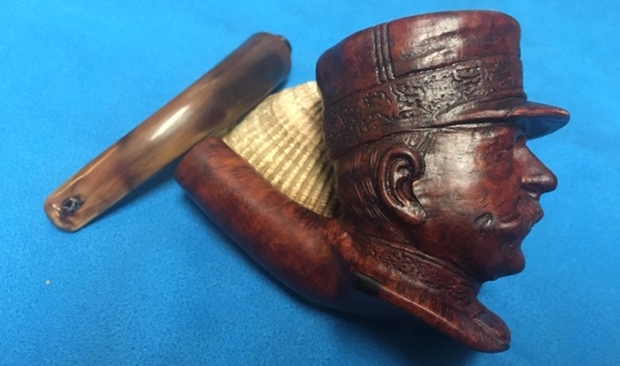
 The next photos of the stem to show the general condition of the amberoid stem shape. The flow of the stem is perfect for the diamond shank Bulldog. He took photos of the top and underside of the stem to show the light tooth chatter on both sides near the button. He also shows the orific button on the end of the stem.
 I looked for the BRC brand on Pipedia and on Pipephil with no luck. I have no idea if the pipe is English, French, Austrian or otherwise. There was nothing to help me identify the maker. Ah well it is a well made mystery. If any of you can help out with information on the make I will greatly appreciate your help. Thank you.
 I opened the case and took a photo of the pipe inside.I was astonished to see how clean the pipe was. The pipe appeared to be very clean. The scratches in the meerschaum looked to have lessened a bit but I was not sure.
  Now it was time to take it out of the case and have a look at it up close and personal. Jeff had done another incredible job in cleaning up this meerschaum. He had carefully reamed the bowl with a Savinelli Fitsall Pipe Knife, scraping away the thick cake on the walls of the bowl. He also scraped off the lava on the rim top. Though there were still scratches it was clean. He scrubbed the exterior of the bowl with Murphy’s Oil Soap and a tooth brush to remove the grime on the bowl and rim and was able to remove much of the grime and dirt. He cleaned out the interior of the bowl and shank with pipe cleaners, cotton swabs and alcohol until they came out clean. The rim top looked much better when you compare it with where it started. There is some still some darkening and scratching but the bowl was clean. He cleaned the stem with Soft Scrub to remove the grime on the exterior and cleaned out the airway with alcohol, cotton swabs and pipe cleaners. I took some photos of the pipe as I saw it.
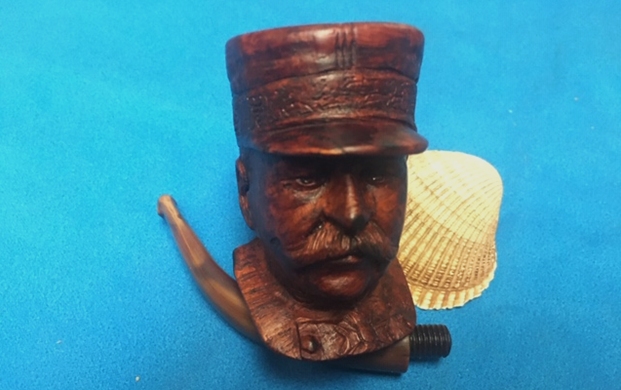
 To show how clean the rim top and stem really was I took a close-up photo of the rim and stem. The bowl was clean and cake free. The rim top is quite clean and the inner edge of the bowl has all of the lava removed. There is still some scratching in the meerschaum on the rim top that I would like to remove but it is very clean. The rich golden amber coloured stem looks very good. The surface and the button edge look really good. There are no issues that are there to address. The tarnished silver band had a rich shine to it now as well.
 I removed the stem from the bowl and took photos of the parts. When I unscrewed it the stem came off the tenon. In this case it was made that way. It was older style bone tenon and it had been anchored in the shank of the pipe. The stem was threaded and screwed on and off the stationary tenon.
 I decided to address the darkening and scratching on the rim top and edges first. I also worked over the bowl and shank to polish out the scratching as much as I could. I polished it with the micromesh sanding pads – wet sanding with 1500-12000 grit pads to remove the darkening and the scratches on the rim top and bowl. I wiped it down with a damp cloth to remove the sanding dust. When I finished the bowl and rim top looked significantly better.


 I have had a jar of Clapham’s Beeswax Polish here for quite a while. I have used it quite often on meerschaum pipes in the past and it works great. I just had forgotten about it until today. I applied several coats to the meerschaum and buffed it out by hand.

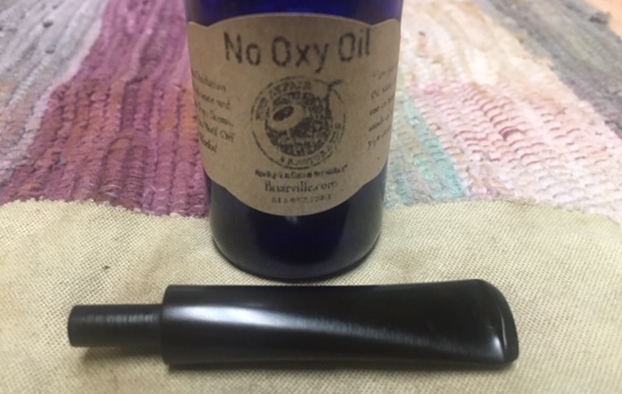
 The bowl was finished so I set it aside and turned my attention to the stem. Since it was quite clean I decided to polish it with micromesh sanding pads – dry sanding with 1500-12000 grit sanding pads. I wiped the stem down after each sanding pad with a cloth containing some Obsidian Oil. I finished polishing it with Before & After Pipe Stem Polish – both Fine and Extra Fine and buffed it off with a cotton cloth. Even though the stem is amberoid I decided to give it a coat of Briarville’s No Oxy Oil to preserve and protect it.

 I put the bowl and stem back together again and buffed it with a microfiber cloth to raise the shine on the meerschaum and the acrylic stem. The hand buffing adds depth to the shine. I had already given the bowl multiple coats of Clapham’s Beeswax Polish so I buffed the stem with some Carnauba on the buffing wheel. The Beeswax Polish is a soft wax that I can apply with a soft cotton pad and buff with a microfiber cloth. The colours of the pipe came alive and looked great to me. It has a great feel in the hand and the interesting patina should continue to develop as the pipe is smoked. The finished pipe is shown in the photos below. The dimensions of the pipe are Length: 5 inches, Height: 1 ¾ inches, Outside diameter of the bowl: 1 ¼ inches, Chamber diameter: 5/8 of an inch. This Meerschaum Bulldog has some age on it and it is a beauty whose scratches and dings tell a story of its journey. To me they make it interesting. It should make someone a great pipe. It is one that will be on the rebornpipes store very soon. If you are interested let me know. Thanks for reading this blog and my reflections on the pipe while I worked on it.