Blog by Steve Laug
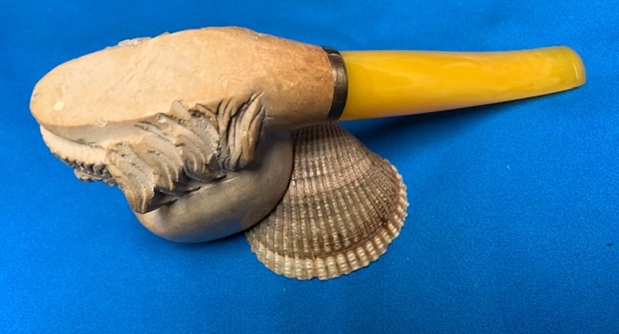
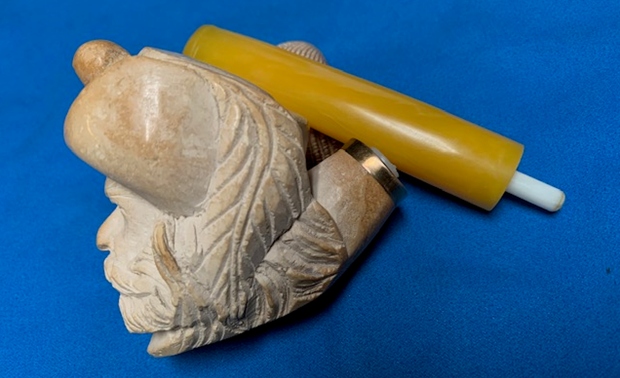
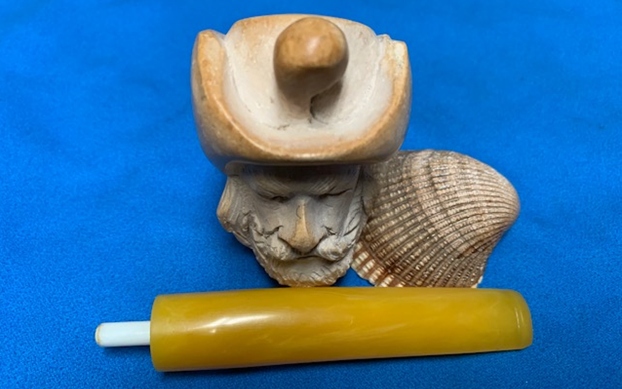
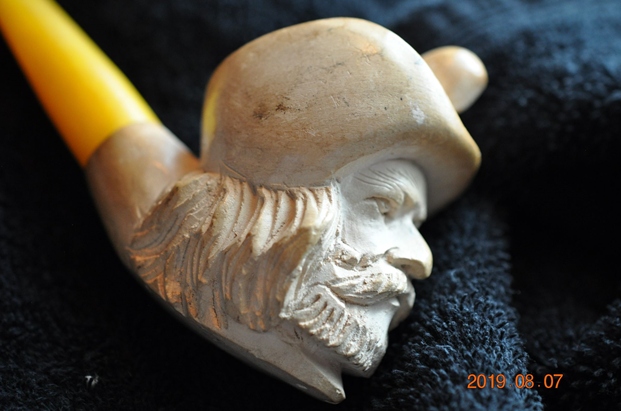
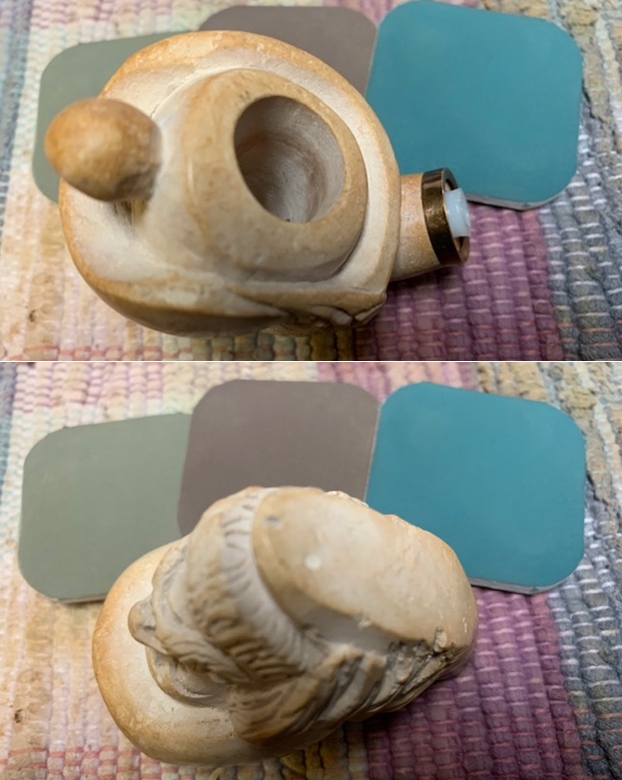
The next pipe on the work table came to us from a fellow in Columbus, Michigan, USA. The pipe is an interesting carved figural meerschaum with a dashing figure that reminds me of one of the Three Musketeers. The pipe is well shaped and has a great figural head carved in the bowl. The pipe does not have any stamping or identification on the shank or shank end. It is a bit of a Turkish mystery pipe. There was a grime and dust in the feather, the hair and the features of the figure. The bowl and the rim top and edges we virtually unused and looked very good. There is some nice patina developing around the bowl and shank. There is a crack on the left side of the shank and it shows up on the shank end. The taper yellow acrylic stem was dirty and had scratches on the top and underside from the shank to the button. The pipe showed a lot of promise but it was very dirty. Jeff took some photos of the pipe before he started his cleanup work. 
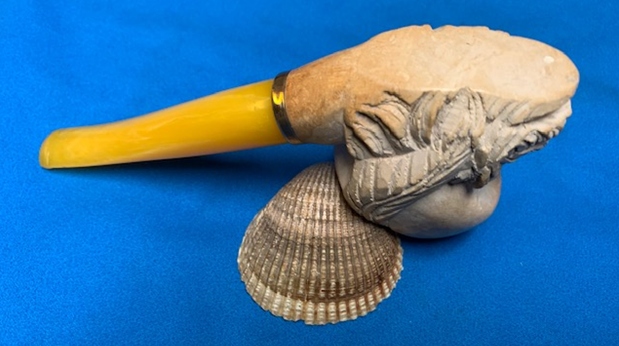
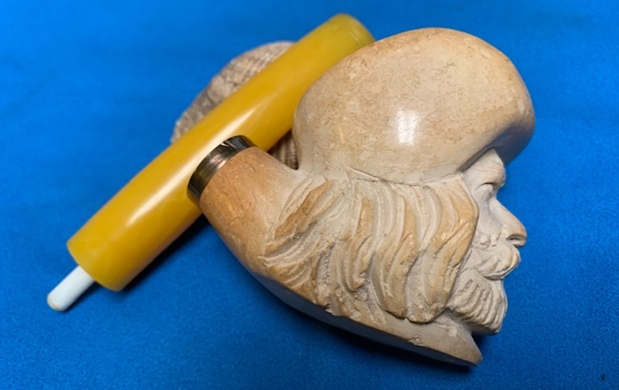
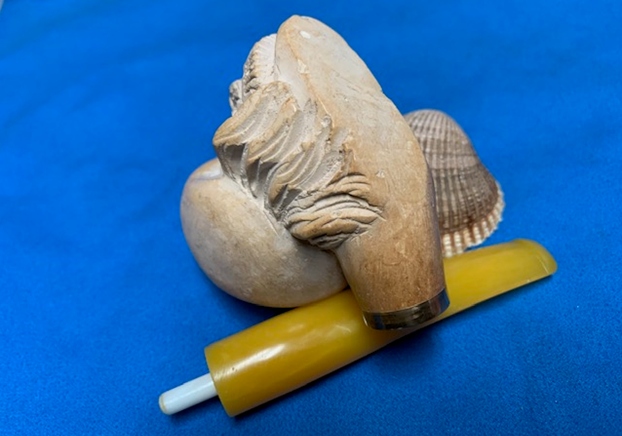
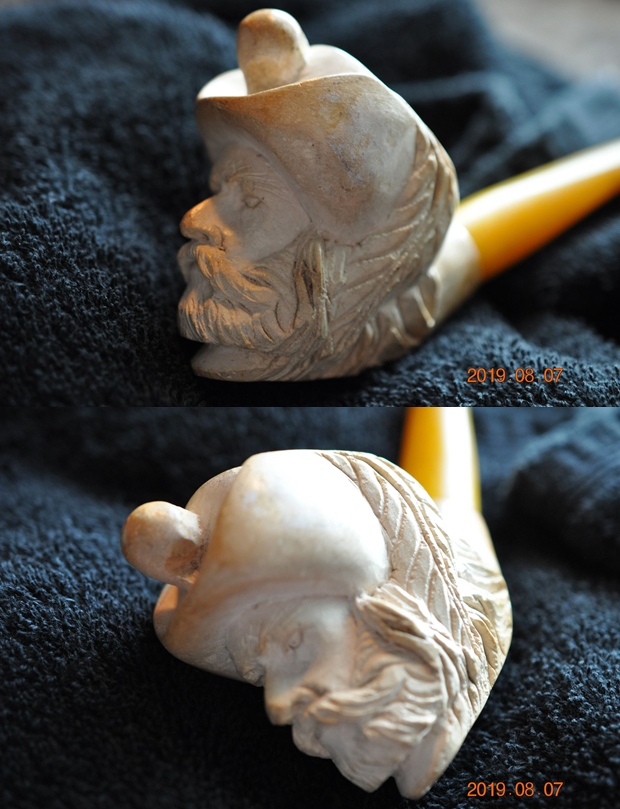
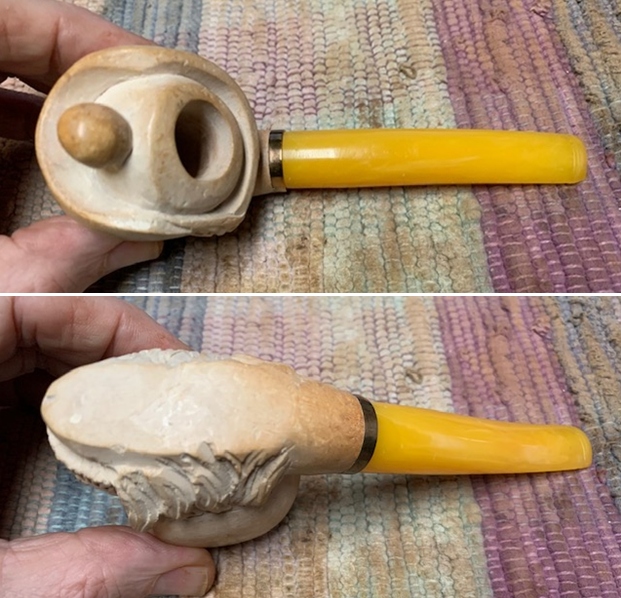
 Jeff took some closer photos of the features of the carving around the bowl face and sides. It is dirty and worn looking but the features are very well done. The carving of the facial expression and the hairs of the beard, mustache, eye brows and hair around the face is well done.
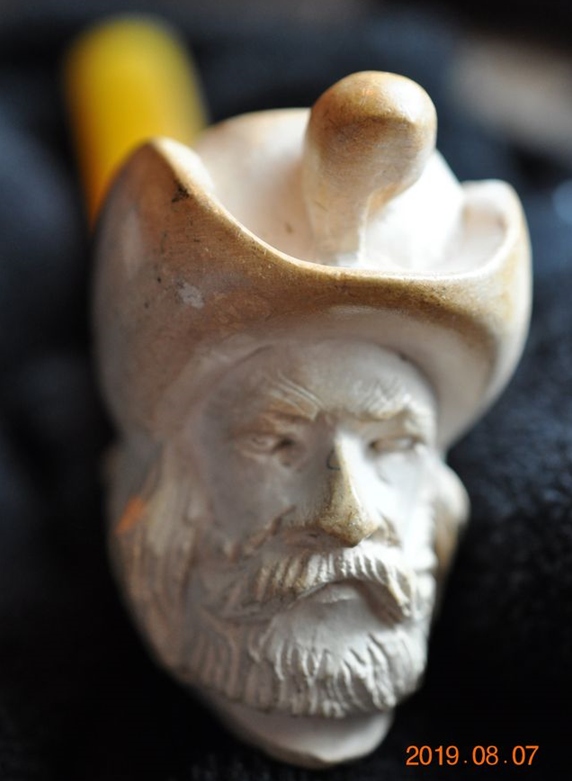
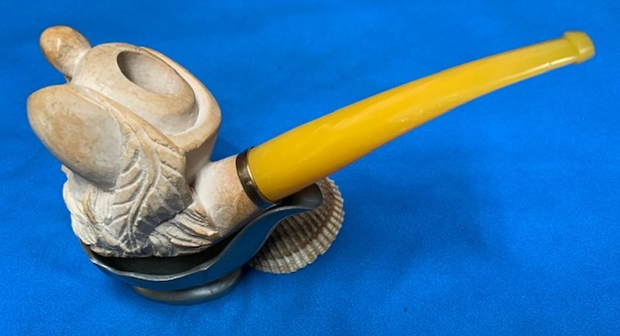
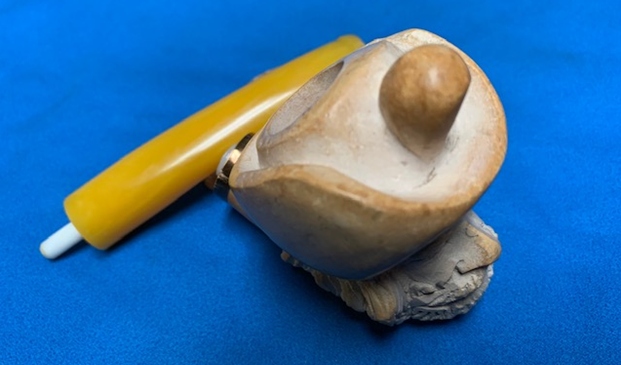
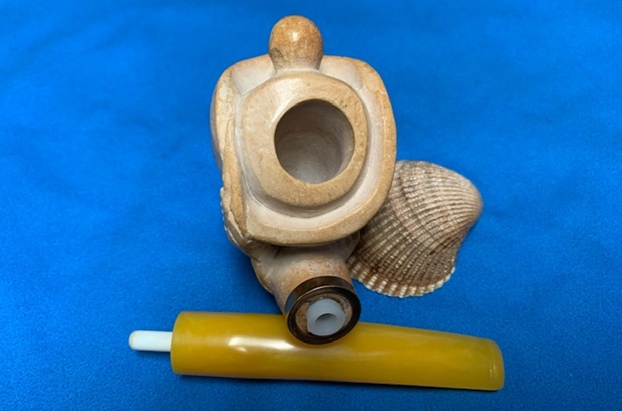
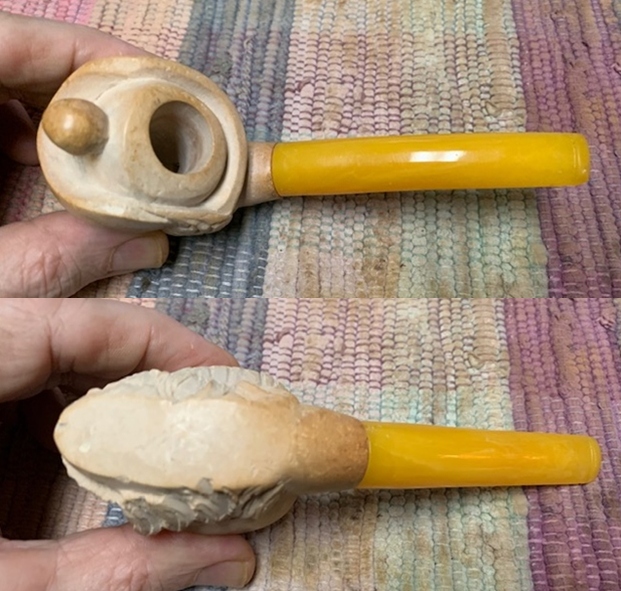
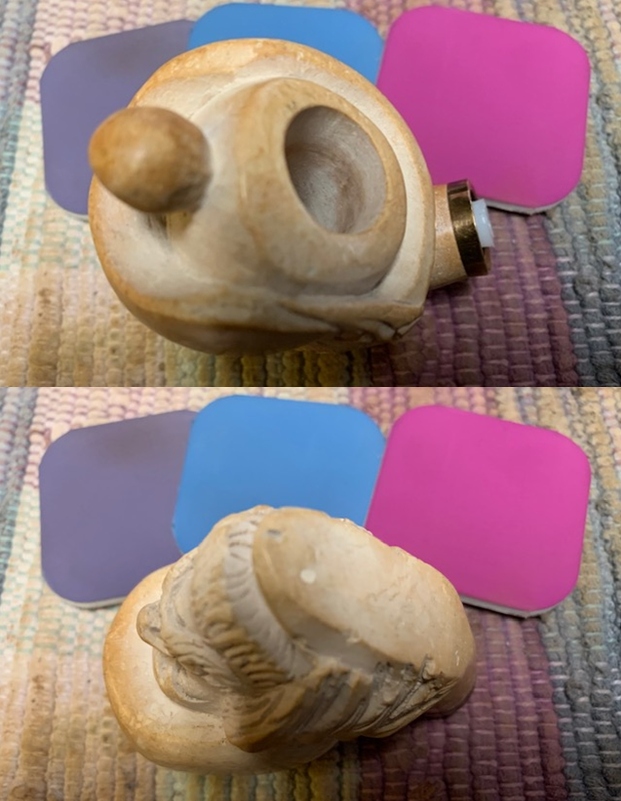
 He took a photo of the underside of the bowl and shank is smooth. There are a few nicks and scratches around the edges of the bottom but it still looks very good.
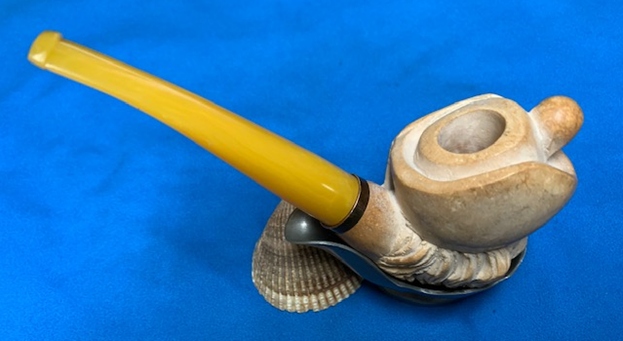
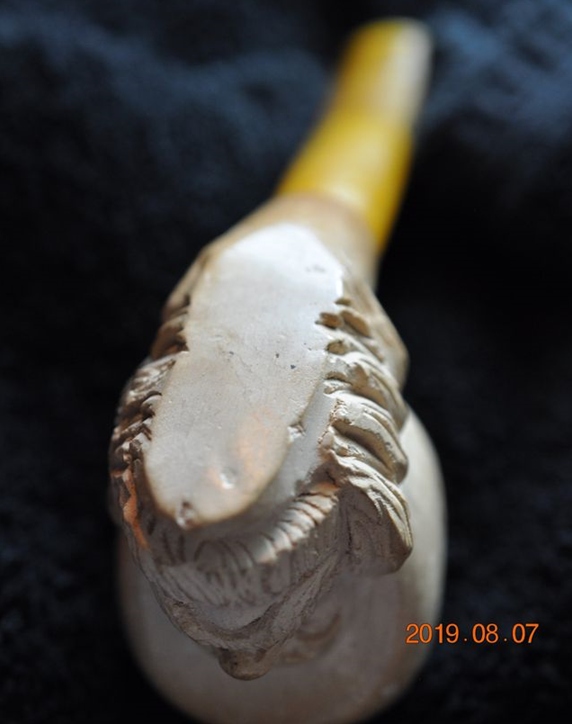 He took some photos of the stem to show the overall condition. It was very clean and the light scratches would easily polish out when I worked on it.
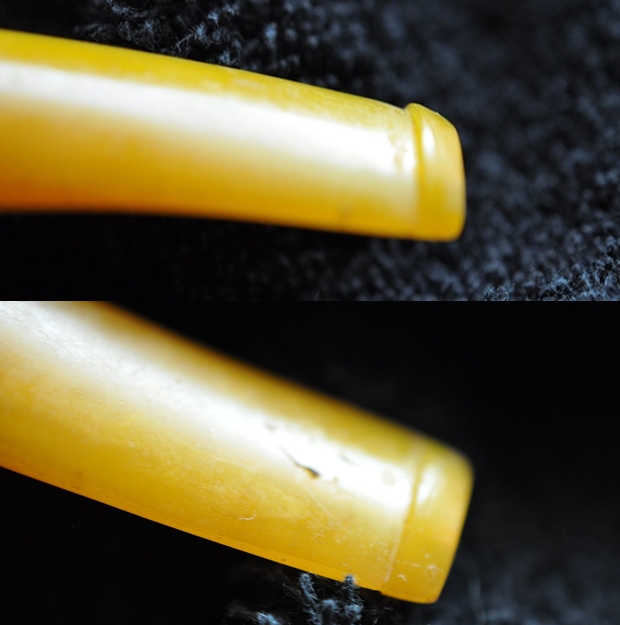 Jeff took the stem off the shank and it appears to be a threaded tenon. I have seen this before and I am pretty certain that it is a push tenon that has come out of the stem. I would know more once I saw it in person. My guess is that the other side of the tenon sticking out of the shank is threaded. It is a threaded fitment that is threaded and screwed into the shank. The part that is showing is threaded as well and screws into the stem.
 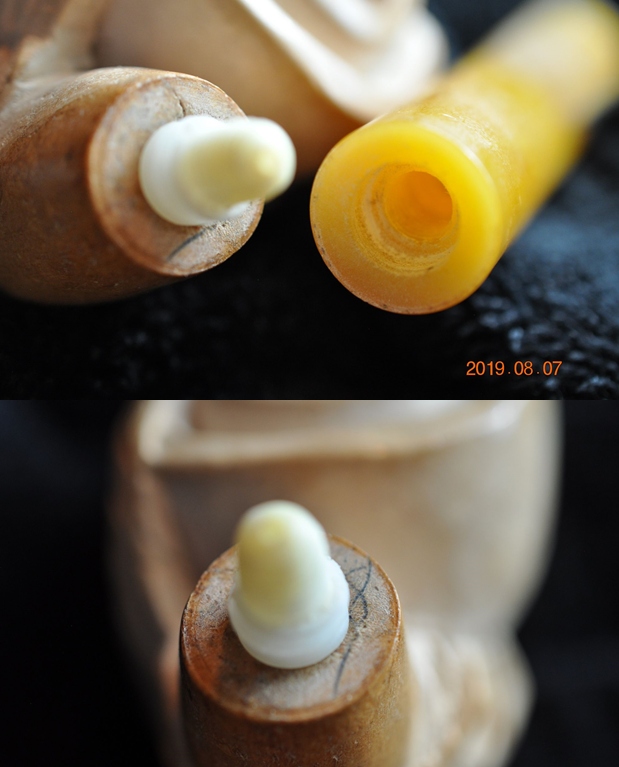 I decided to have a look on the web and see what I could find out on the Three Musketeers. I found an article on Wikipedia (https://en.wikipedia.org/wiki/The_Three_Musketeers). I quote a portion of the article below to give a bit of context for the pipe.
The Three Musketeers (French: Les Trois Mousquetaires [le tʁwɑ muskətɛːʁ]) is a historical adventure novel written in 1844 by French author Alexandre Dumas. It is in the swashbuckler genre, which has heroic, chivalrous swordsmen who fight for justice.
Set between 1625 and 1628, it recounts the adventures of a young man named d’Artagnan (a character based on Charles de Batz-Castelmore d’Artagnan) after he leaves home to travel to Paris, hoping to join the Musketeers of the Guard. Although d’Artagnan is not able to join this elite corps immediately, he is befriended by three of the most formidable musketeers of the age – Athos, Porthos and Aramis, “the three inseparables” – and becomes involved in affairs of state and at court.
The Three Musketeers is primarily a historical and adventure novel. However, Dumas frequently portrays various injustices, abuses, and absurdities of the Ancien Régime, giving the novel an additional political significance at the time of its publication, a time when the debate in France between republicans and monarchists was still fierce. The story was first serialised from March to July 1844, during the July Monarchy, four years before the French Revolution of 1848 violently established the Second Republic.
Jeff had cleaned up the pipe with his usual penchant for thoroughness. He scrubbed out the interior of the bowl and the exterior of the pipe with undiluted Murphy’s Oil Soap with a tooth brush. He rinsed it under running warm water to remove the soap and grime. He cleaned out the inside of the shank and the airway in the stem with alcohol, cotton swabs and pipe cleaners. He scrubbed the stem Soft Scrub All Purpose Cleaner and rinsed it off with warm water. I took photos of the pipe before I started my part of the restoration work. 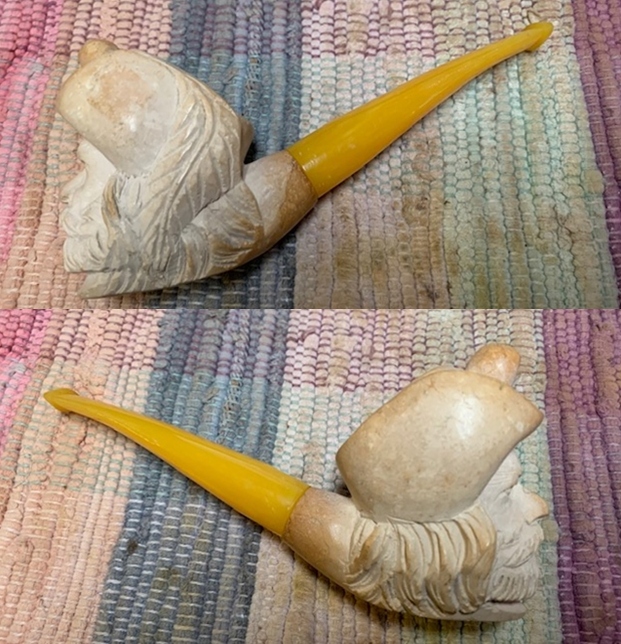
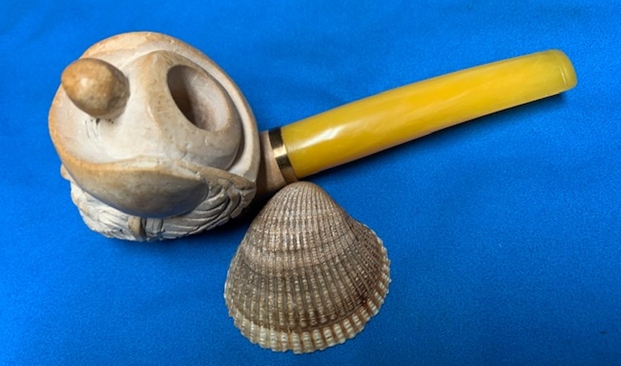
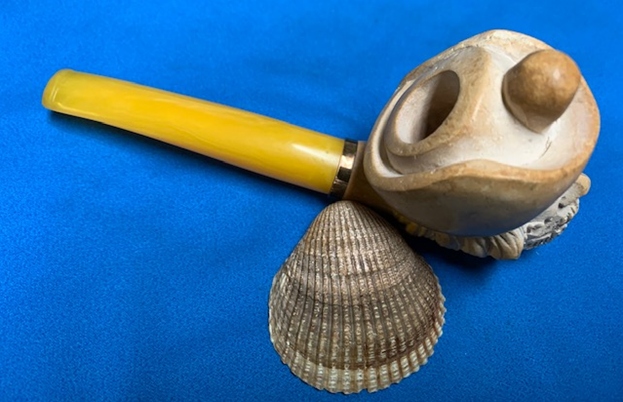
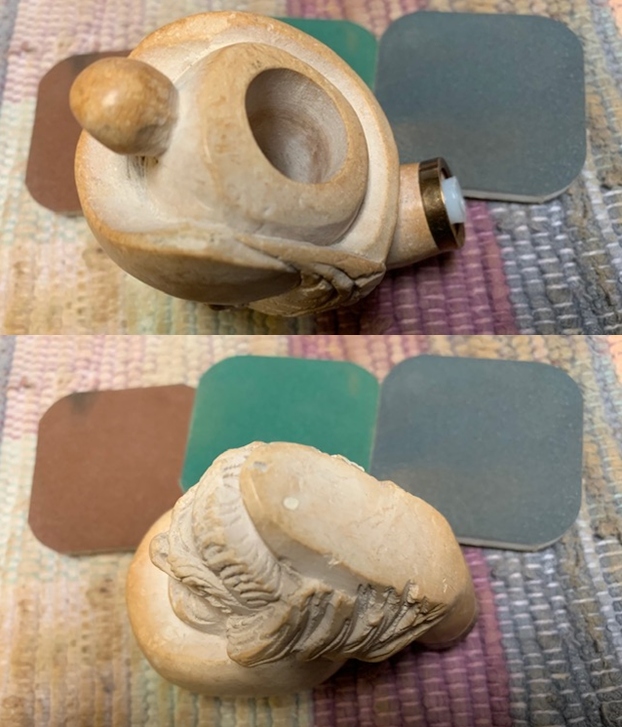
 I took a photo of the bowl and rim top as well as both sides of the stem. They were clean and would polish up very well.
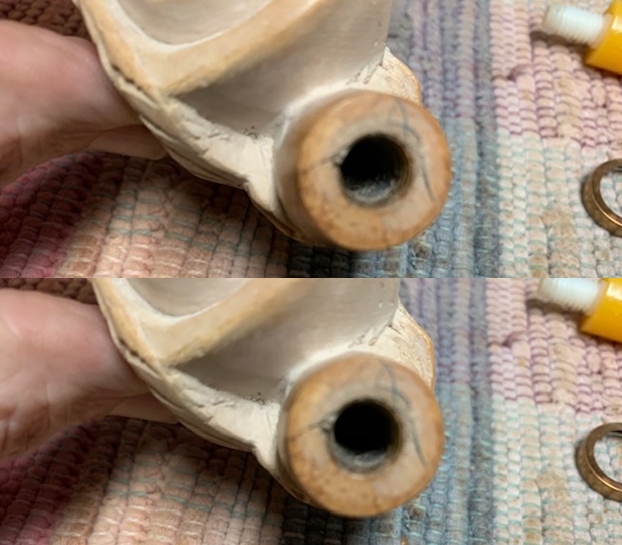
 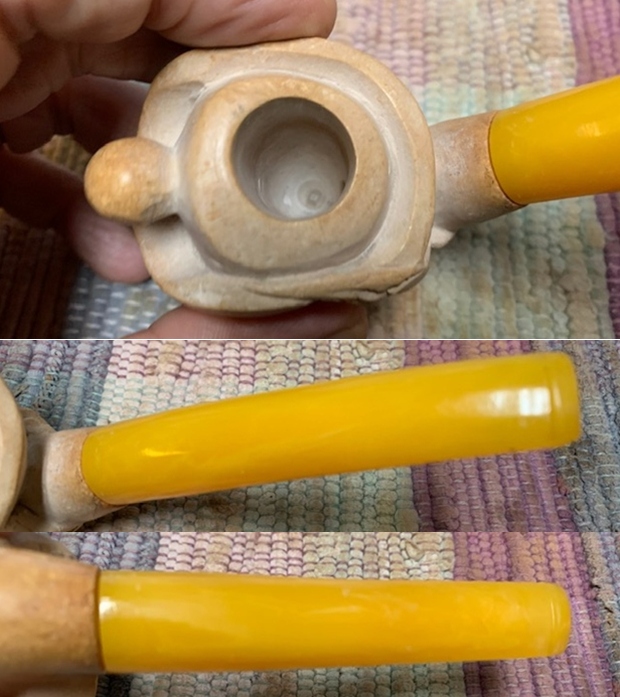 The first photo below shows the crack in the shank side. It is a tight hairline crack that I need to address so it will be a pretty easy fix. I unscrewed the stem from the shank to deal with the crack in the shank side.
 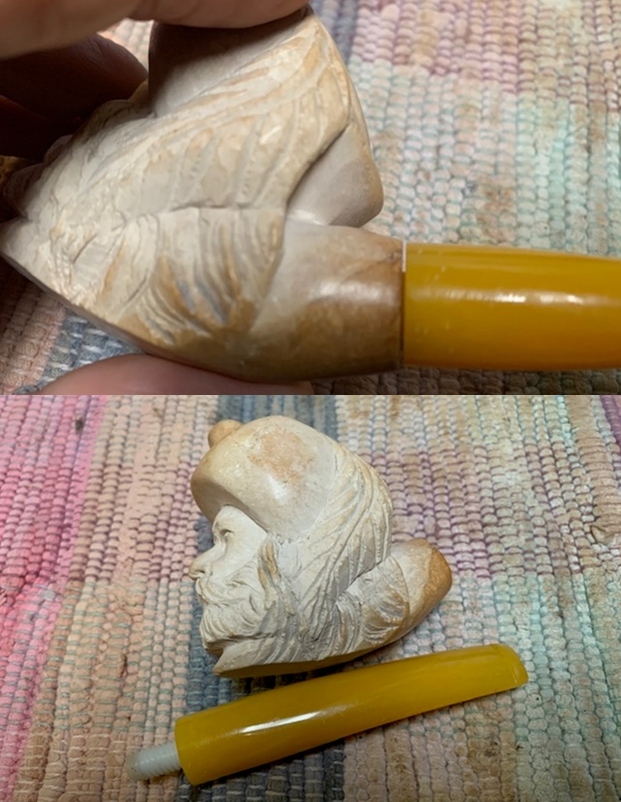 I went through my brass bands and found the one that would fit the shank and bind the crack in the shank and shank end together more permanently. The second, third and fourth photos below show the crack clearly.
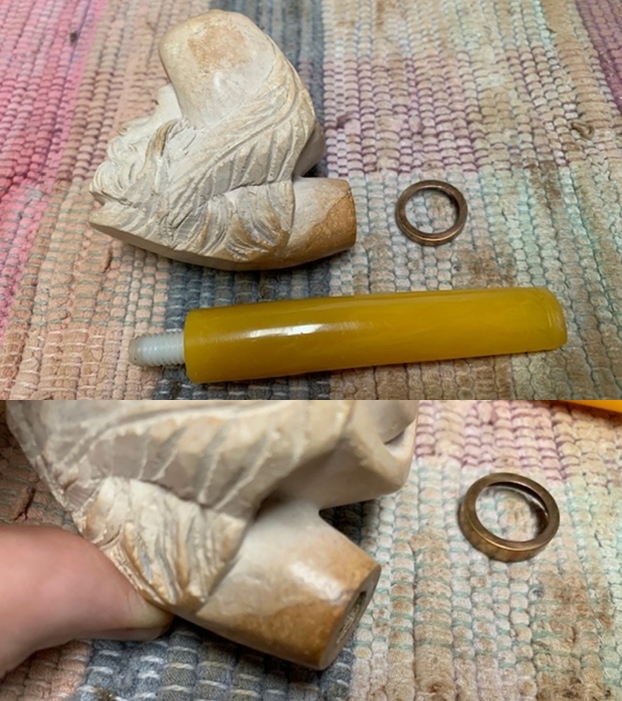
 I pressed the band onto the shank end by pressing it against the mat on my desktop. I took photos of the pipe after I had banded it.
 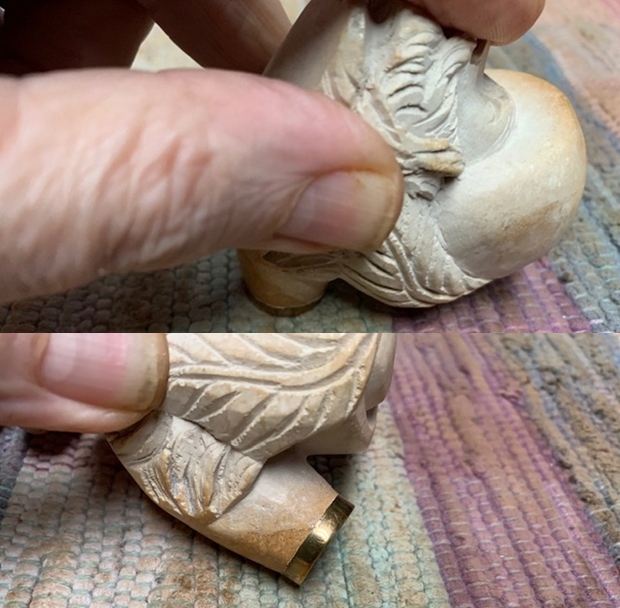 I took a photo of the shank end to show the band and the threads in the inside of the shank. It was pretty clear that my assessment of the stem/tenon situation was correct.
 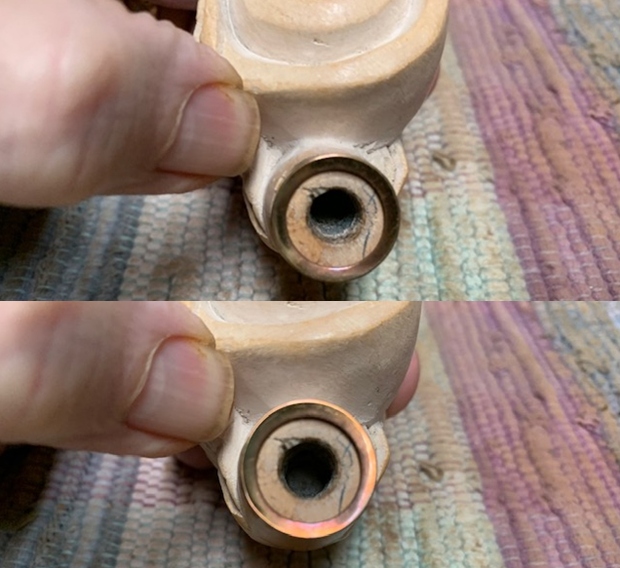 I turned the stem onto the shank to get the fitting in the shank. I twisted the stem out of the shank. Sure enough it was a push tenon with a threaded fitment that fit in the shank end. I put a bead of glue on the fitting and let it set.
 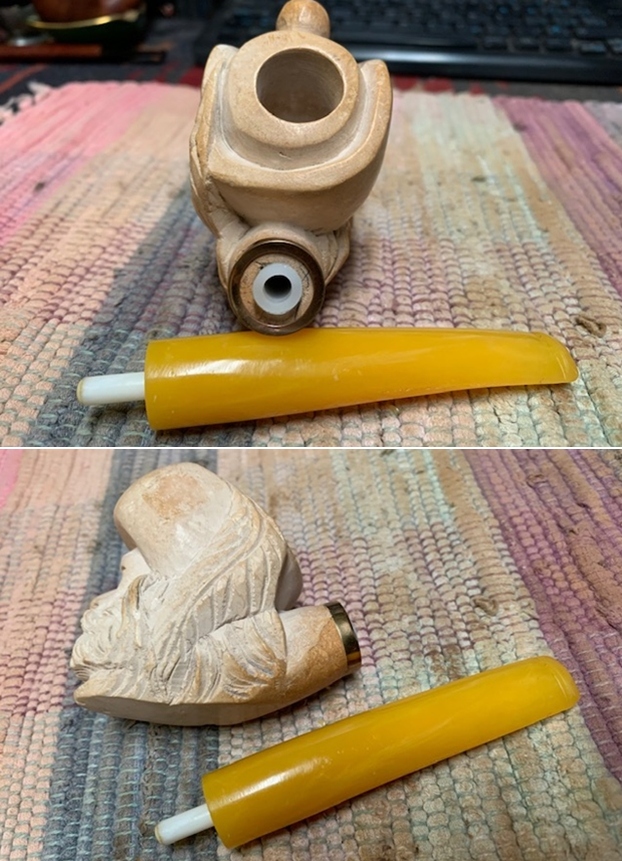 I put the stem back on the shank and took pictures of the pipe with the band the stem. It looks quite good.
 I polished the meerschaum bowl with micromesh sanding pads – dry sanding with 1500-12000 grit pads and wiped it down after each pad with a damp cotton pad.
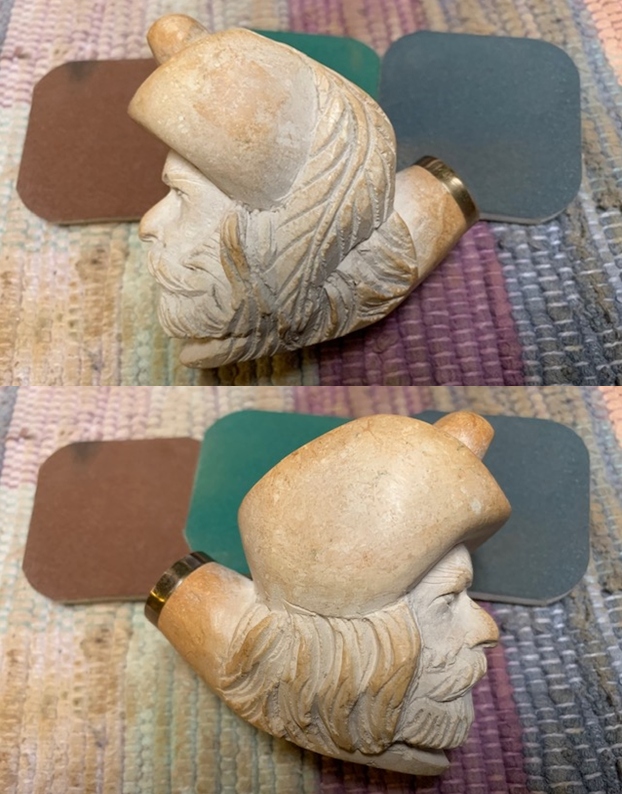


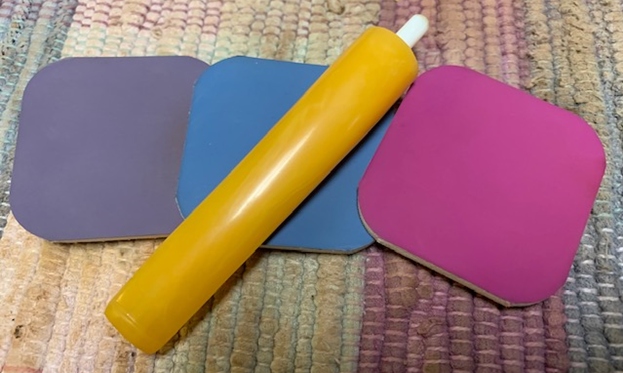
 I polished the acrylic stem with micromesh sanding pads – wet sanding with 1500-12000 grit pads. I wiped it down with a damp cloth to remove the sanding dust between each pad. I wiped the stem down with Obsidian Oil after the stem was polished.
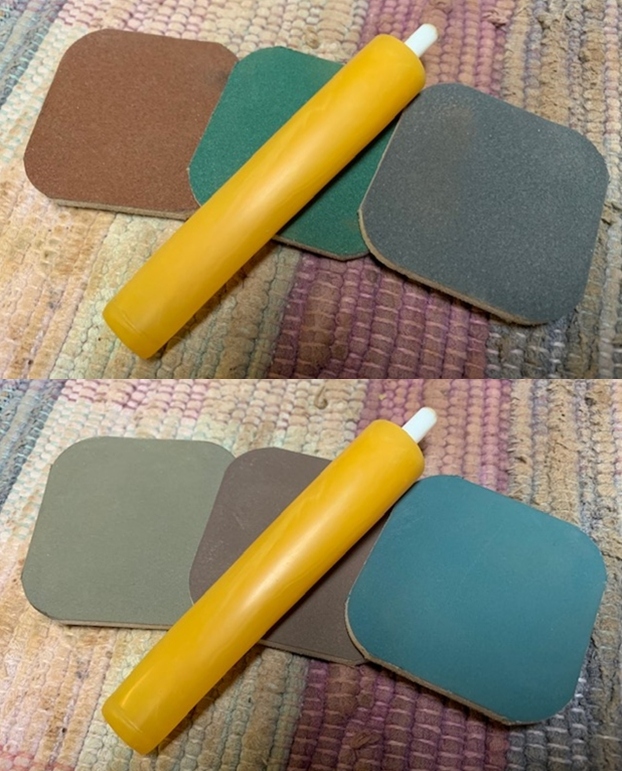
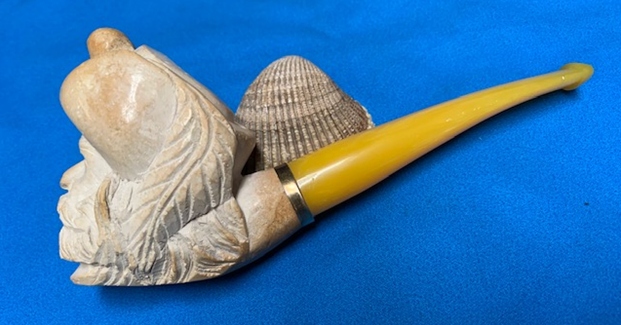
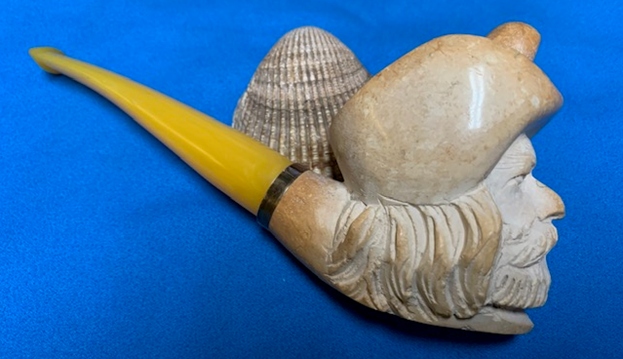
 I put the stem back on the bowl and buffed the carved d’Artagnan Meerschaum with some Blue Diamond on the buffing wheel carefully working to avoid letting it build up in the grooves of the carving. The meerschaum polished up well and the patina came to the surface. The golden, buttery coloured acrylic stem polished well and took on a rich glow. The small brass band worked well to repair the cracked shank and also gives a touch of class to the pipe. The unsmoked bowl looks very good and the pipe is ready to load with your favourite tobacco and break it in for yourself. The Figural Meerschaum looks very good. The dimensions of the pipe are Length: 6 inches, Height: 2 ½ inches, Diameter of the bowl: 1 ¾ inches wide x 2 inches, Diameter of the chamber: 5/8 of an inch. The weight of the pipe is 90grams/3.25oz. If you would like to add this pipe to your collection send me an email or a message and I will put it aside for you. Thanks for walking through this restoration with me it was a pleasure to work on.