Blog by Steve Laug
I have finished many of the pipes on my desk for refurbishing or repair and decided it was time to do something a little different that was a lot less work. I turned again to the group of 42 pipes that Jeff and I purchased from a pipeman who can no longer smoke because serious illness. It is a pleasure to be able to support this Brother of the Briar in this very hard season of his life. He had some beautiful pipes in his collection and with some work we will get them cleaned up and into the hands of other pipemen and women who can carry on the legacy of the briar.
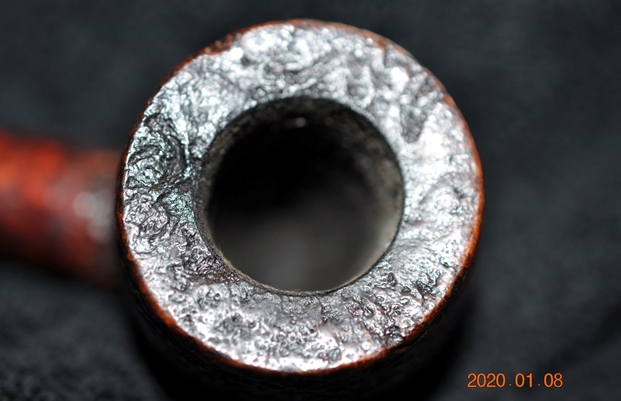
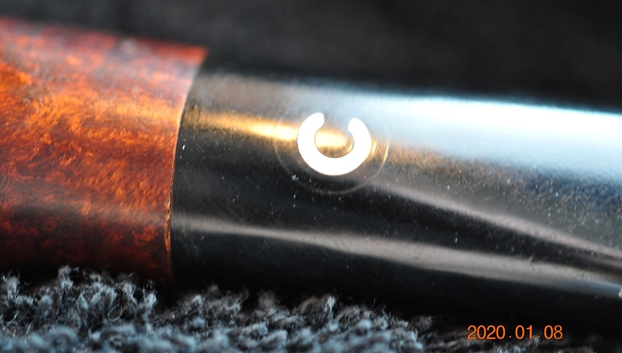
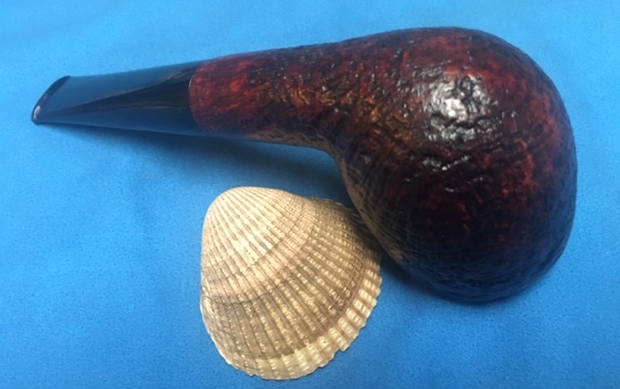
The fourth of the pipes that I am working on is a large Il Ceppo Sandblast Billiard. It has a very nice sandblast with different brown stains highlighting the peaks and valleys. It is stamped on the left side of the shank Il Ceppo in an arch. On the right side of the shank it is stamped C3068. On the underside of the shank it is stamped Made by Hand over in Italy. Just over that stamp there is a small triangle with a 1 in the center. It is another nice piece of briar that is shown by the sandblast. The tapered stem is acrylic and has a large C inlaid in the top. When it arrived at Jeff’s house and he opened the box he could see it was a beautifully grained piece of briar and an interestingly carved pipe. The pipe was dirty but there was no significant damage to the bowl or stem. The rim top had darkening and tars in the sandblast of the inward beveled rim. But it did not appear to be burned or charred. There was a thick cake in the bowl. The acrylic stem was in good condition – just a little dirty and tooth chatter on both sides of the stem near the button. There was also a small chip in the left side of the button on the underside. Overall the pipe was a beautiful and a dirty pipe that must have been a favourite smoker. Jeff took photos of the pipe before he started his clean up work.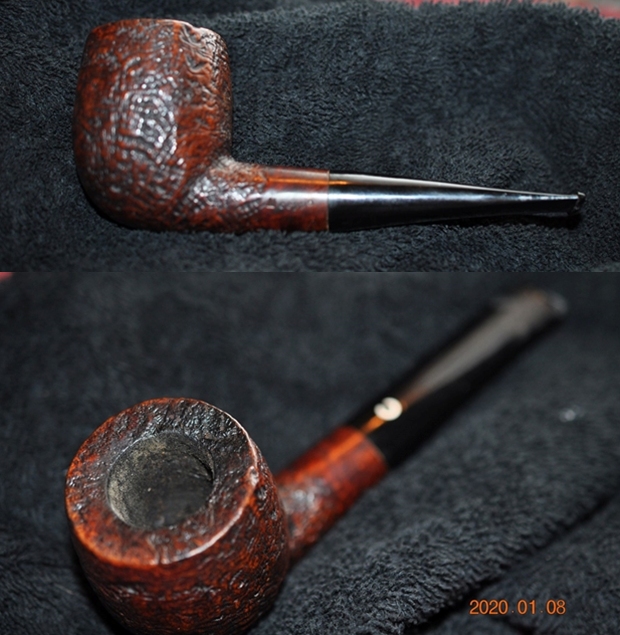 Jeff took photos of the bowl and the rim top to show the condition of the bowl and rim. You can see the lava and darkening on the rim top. You can also see the cake in the bowl and the tobacco debris stuck to the walls.
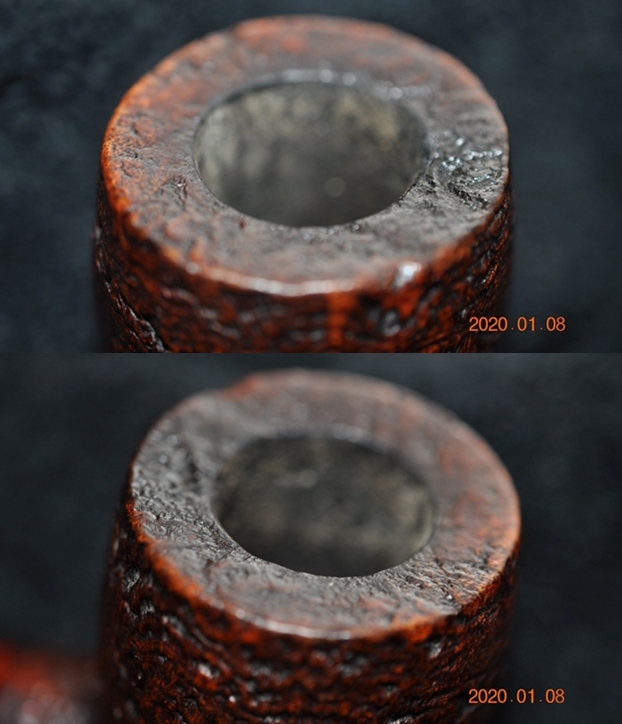
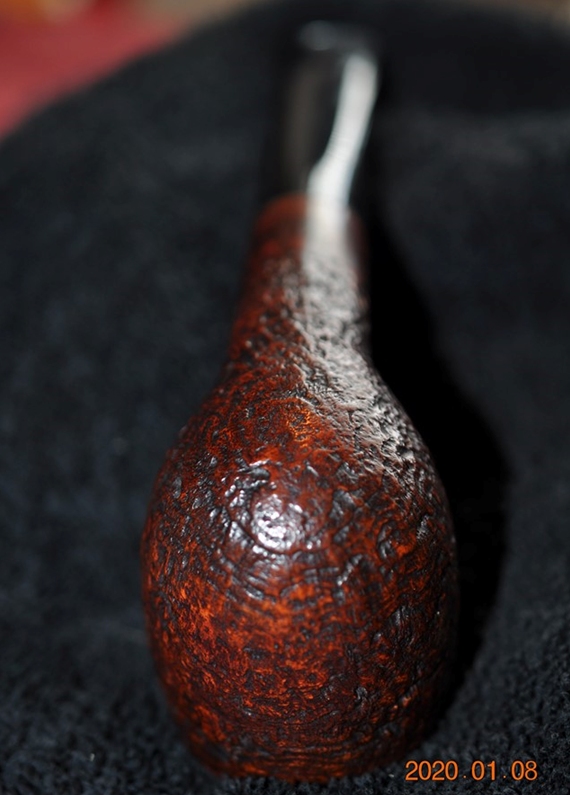
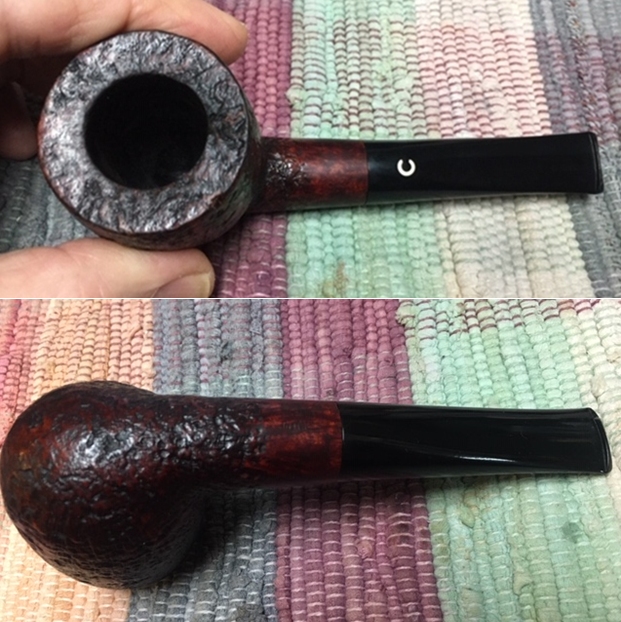
 Jeff took photos of the sides and heel of the bowl to show the condition of the finish – the grime and grit all over the sides and bottom of the bowl. The overall finish looks good. It is a dirty pipe but the sandblast grain is absolutely stunning.
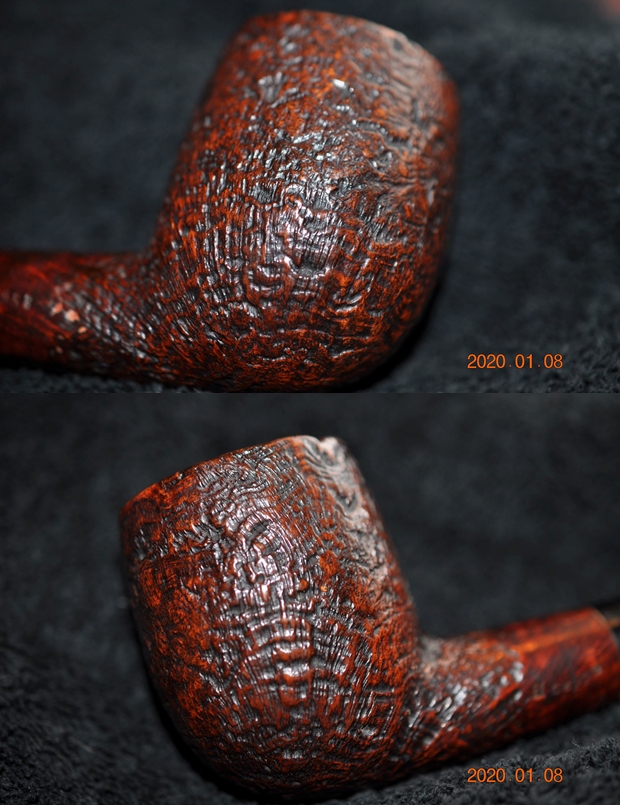
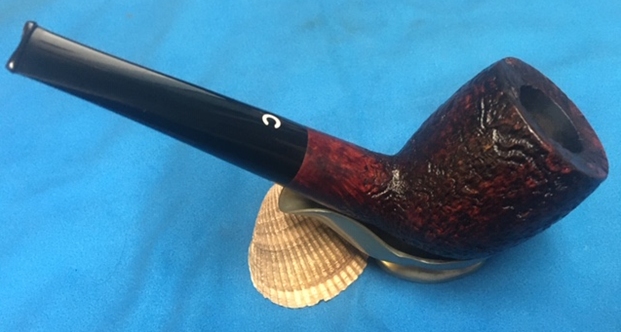
 He took photos of the stamping on the left and underside of the shank. He missed the number on the right side of the shank. The stamping was very readable as noted above. It is a beauty! The acrylic stem has an inlaid C inlaid top side.
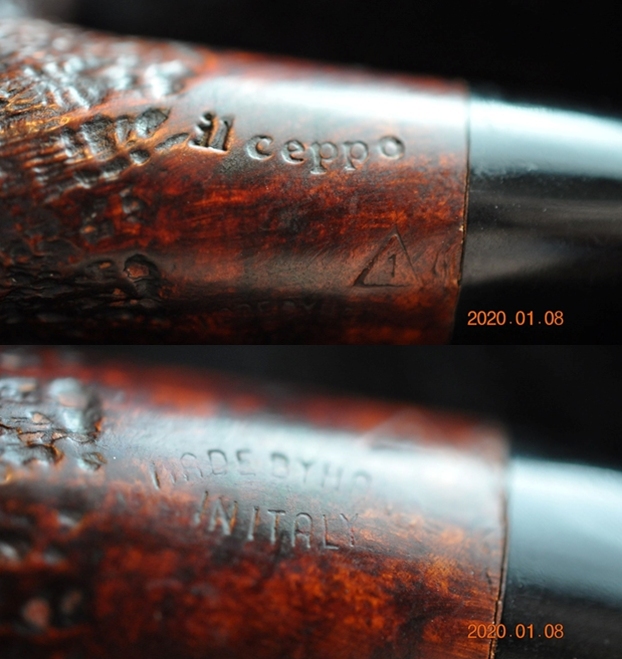
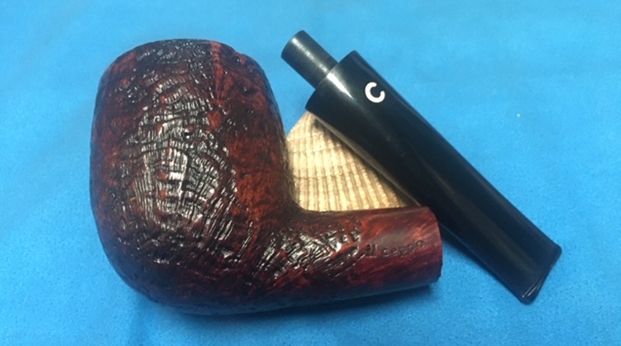
 He took some photos of the acrylic stem surfaces to show their condition. There were not any tooth marks just some calcification and light chatter ahead of the button on both sides. You can also see the chip on the underside of the button. I have pointed it out with a red arrow to help identify it quickly.
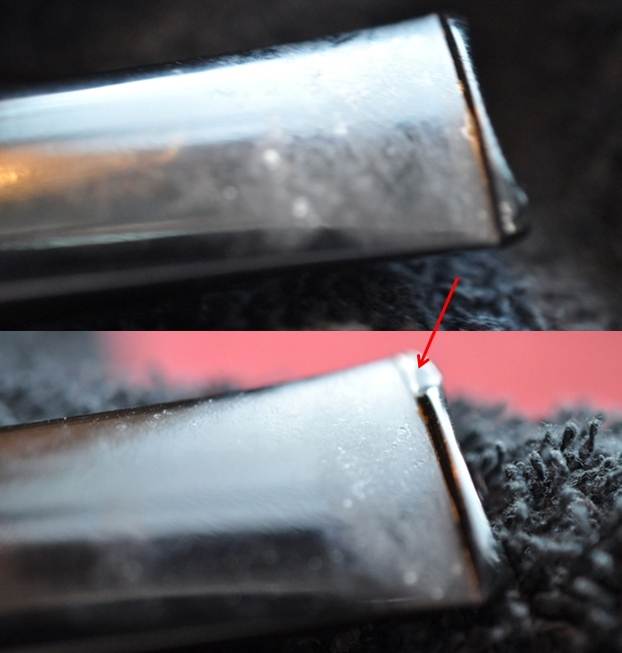 I turned then to Pipedia to see what I could find out about Il Ceppo pipes. I read through the Il Ceppo page written by the pipemaker and then the next section of the page written by RD Field. Here is the link to that page on Pipedia (https://pipedia.org/wiki/Il_Ceppo). I will quote from the section on the line below.
The IL CEPPO brand has been in production since the late 1970’s but, in spite of its overall good value, is not well known in all parts of the United States. Partly this is because of a limited supply of pipes and partly because the brand has not been put in front of the pipe smoking public through a national venue.
The Il Ceppo brand is made in Pesaro, Italy and is part of the famous Pesaro school of design that has also produced Mastro de Paja and Ser Jacopo. That all three brands have similar characteristics can be seen at a glance, but they all have significant differences as well.
Giorgio Imperatori, an architect, had a passion for pipes, and in 1978 began to design and make Il Ceppo. Always considered a good value and very good for smoking, the brand did not make folks stop and take notice until 1995 when Franco Rossi joined the firm. He brought with him a true elegance of design and a unique flair that now helps Il Ceppo stand apart. Giorgio has retired to his farmhouse, and the pipes are now all made by Franco and his sister Nadia.
Individuals involved in the creation and continuation of the Il Ceppo brand are; Giorgio Imperatori (now retired from pipe making); Franco Rossi who, along with his sister Nadia, are the current Il Ceppo pipe makers; Mario Lubinski, the distributor of the Il Ceppo brand in Italy; Massimo Palazzi who worked with Il Ceppo until 1998 when he founded his own brand, L’Anatra.
I turned to Pipephil’s site (http://www.pipephil.eu/logos/en/logo-i.html) to gather additional information. I have included a screen capture below of the section on the brand. From the notes on that page it confirms RD Field’s information. Brand founded by Giorgio Imperatori in 1977 (first period) and bought by Franco Corinaldesi Rossi (second period, about 1996) when Giorgio retired. Franco and his sister Nadia are the current (2011) Il Ceppo pipe makers.
I also found that the section on the grading system on the Pipephil site was really helpful in identifying and reading the stamping on the pipe in my hands.
Grading system.
Pipes from the first period:
“Il Ceppo” stamping slightly curved
A to H and a 4-5 digit number
Group number in a triangle
Putting together all of the information on the pipe I can summarize what I have learned. I knew now that the pipe on my table war from the First Period (1977-1996). The Il Ceppo stamping is slightly curved on this one. It is also stamped on the right side of the shank C3068. The group number in the triangle on this one is 1.
Now I had the information I wanted to know on the brand it was time to begin to work with it and clean it up. It really is a beautiful pipe. I am getting more and more used to Jeff cleaning up the pipes before I work on them. So much so that when I have to clean them it is a real chore! This pipe was dirty just like the other ones in the collection. I did not know what to expect when I unwrapped it from his box. He reamed it with a PipNet pipe reamer and cleaned up the reaming with a Savinelli Fitsall Pipe Knife. He scrubbed out the internals with alcohol, pipe cleaners and cotton swabs until the pipe was clean. He scrubbed the exterior of the bowl with Murphy’s Oil Soap and a tooth brush to remove the grime and grit on the briar and the lava on the rim top. The finish looked really good once it was clean. There was no damage and the sandblast stood out with stark contrast around the bowl. The rim top showed some beautiful sandblasted birdseye on the beveled surface. He cleaned the stem internals and scrubbed the exterior and the result looked very good. When the pipe arrived here in Vancouver for the second stop of its restoration tour it was impressive. I took photos before I started my part of the work.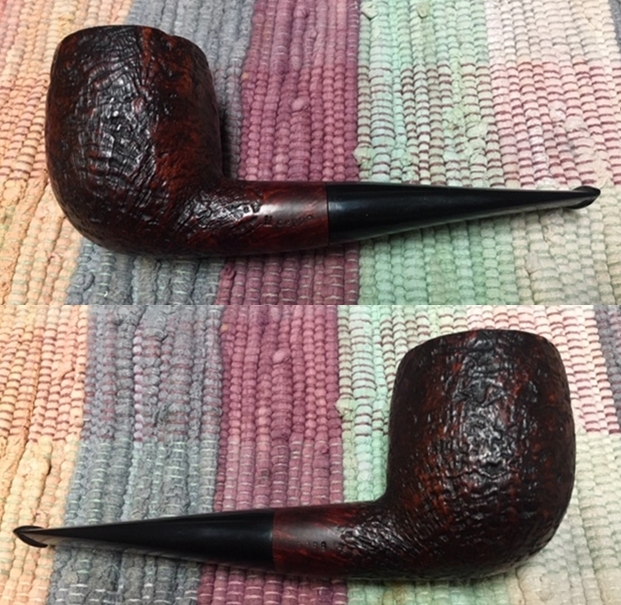
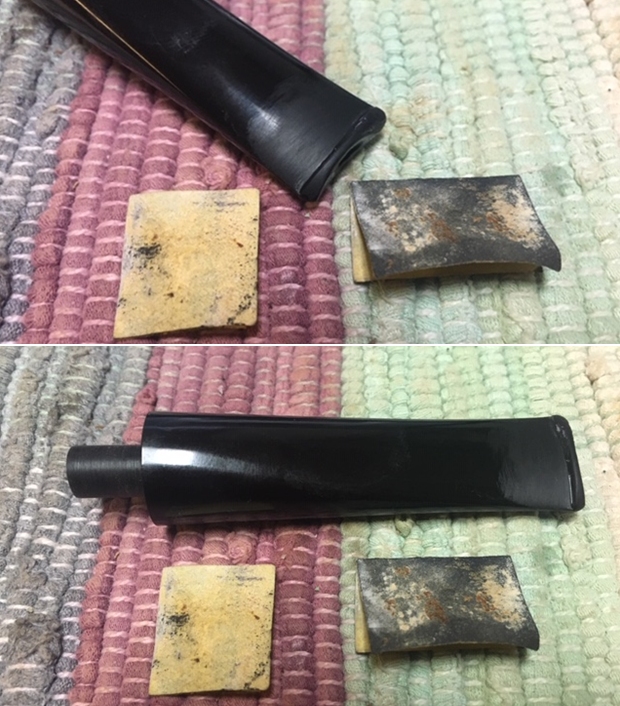
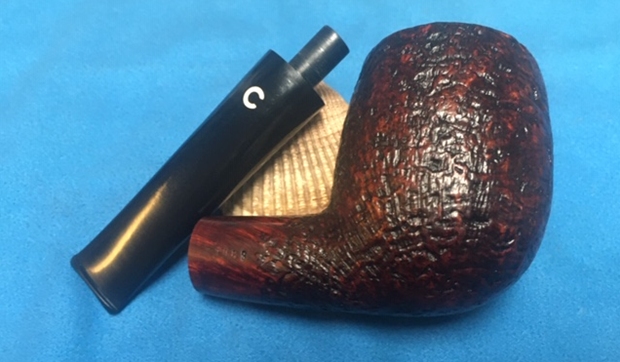
 I took some close up photos of the rim top and also of the stem surface. I wanted to show what an amazing job Jeff did in the cleanup of the rim top. It was a real beauty. The sandblast really highlighted the grain patterns on the rim top and they were very clean! I also took close up photos of the stem to show condition it was in. It would not take a lot of work – just sanding out the light tooth chatter and polishing with micromesh sanding pads. There was also a chip out of the underside of the button on the left that needed to be addressed. (I have pointed it out with a red arrow.)
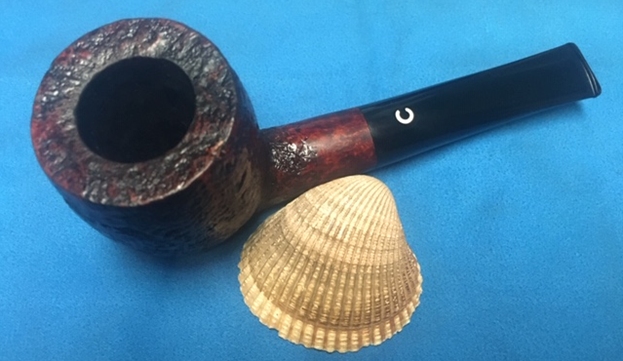
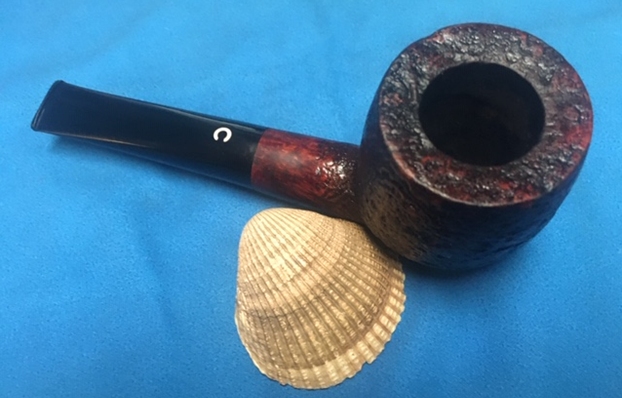
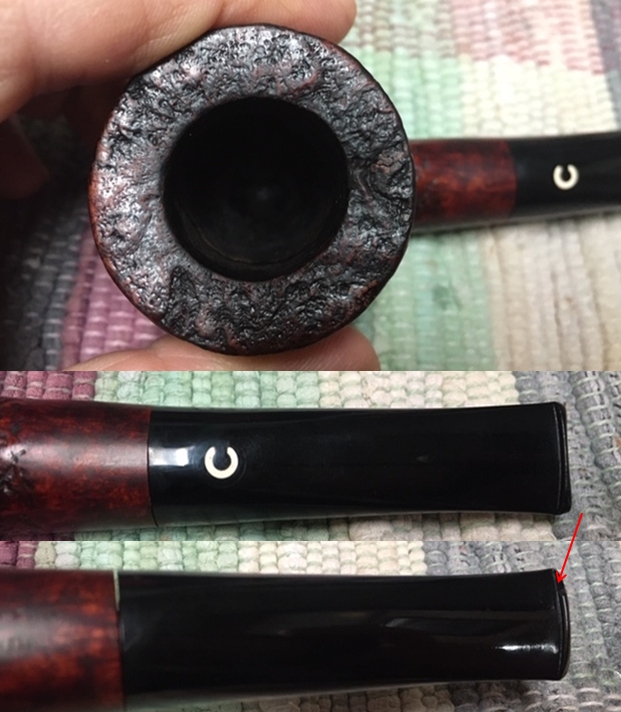 I took photos of the stamping on the shank of the pipe. On the left it read il ceppo. On the right side was the number as explained above – C3068 and underside of the shank it reads Made by Hand in Italy.
  Because Jeff had done such a great job cleaning this pipe and the end result really shone my work on the bowl was very minimal. I worked some Before & After Restoration Balm into the finish of the bowl, the rim top and shank with my fingertips and a horsehair shoe brush to clean, enliven and protect it. I find that the balm really makes the briar come alive again. The contrasts in the layers of stain really made the grain stand out. I let the balm sit for a little while and then buffed with a cotton cloth to raise the shine. The pipe really looks good at this point. I am very happy with the way the pipe is looking at this point in the process.
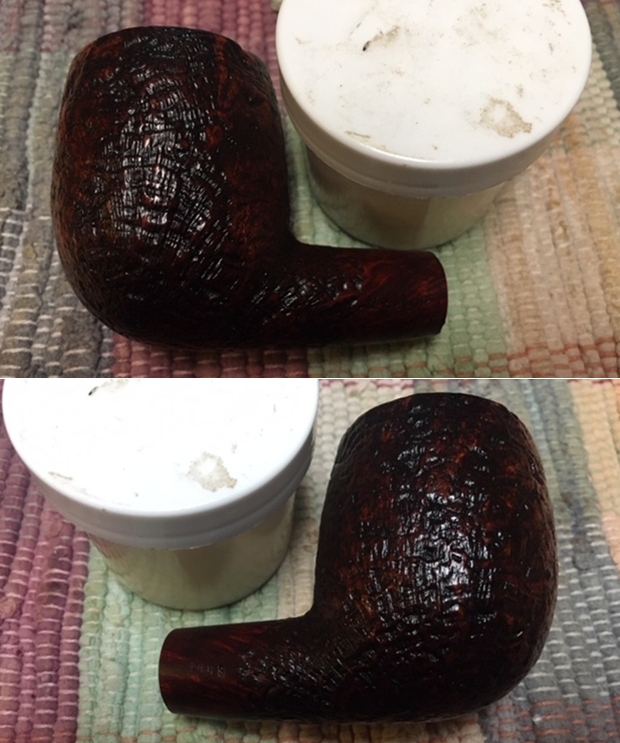

 I set the bowl aside and turned my attention to the stem. I filled in the chipped area on the button with clear Super Glue first as it hardens very quickly and provides a solid bond to the existing acrylic material. I followed that with several layers of black Super Glue to get the transition right. I used a needle file to recut the button and shape the area. I sanded it with 220 grit sandpaper to finish shaping and started polishing it with 400 grit wet dry sandpaper.
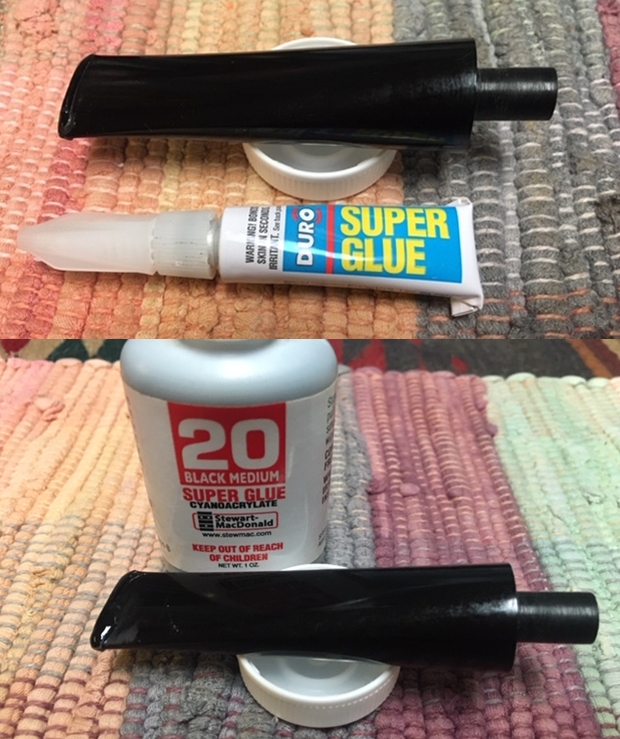
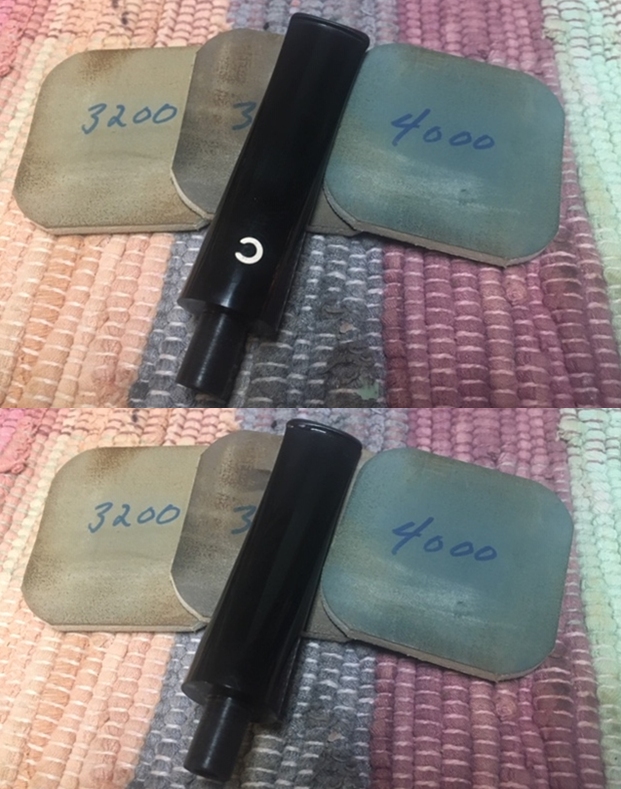
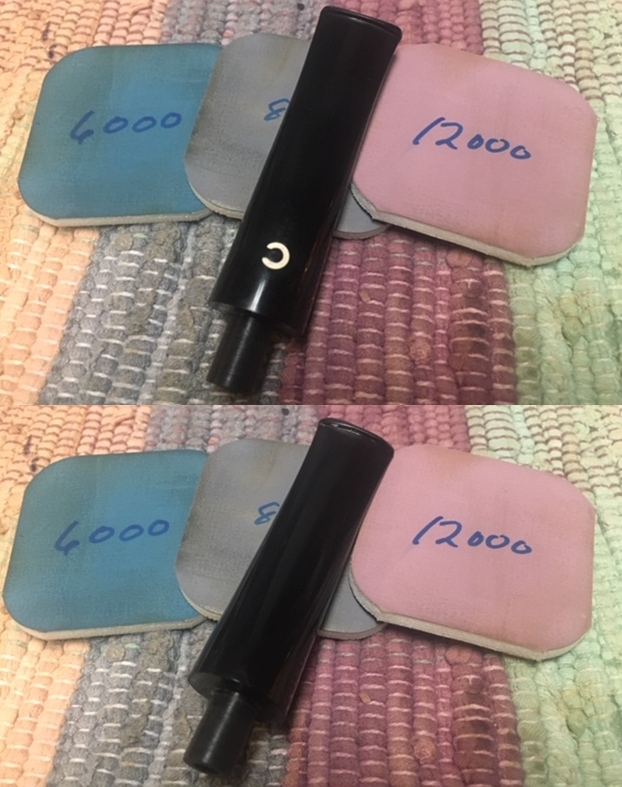
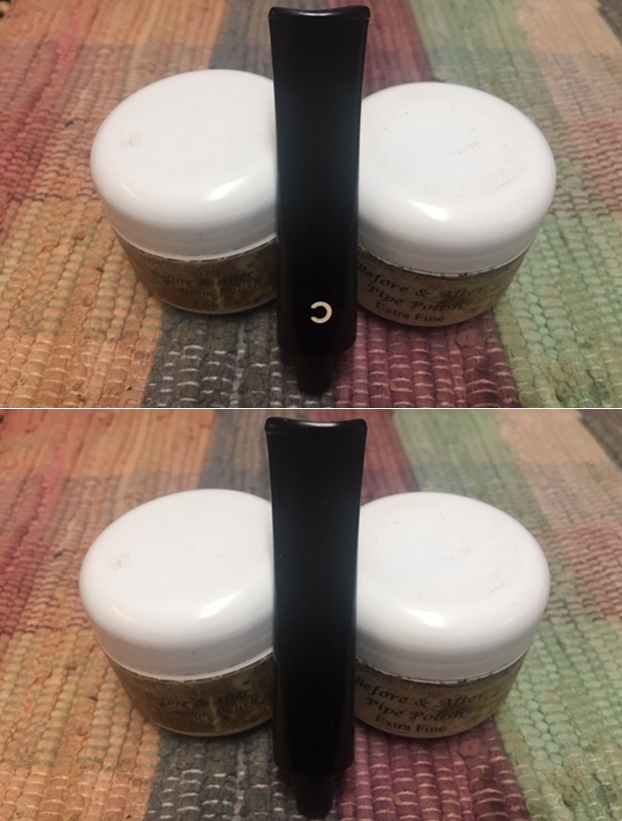
 I sanded the light tooth chatter on the top side and the repaired area and sanded area on the underside of the stem with micromesh sanding pads – wet sanding it with 1500-12000 grit pads. I wiped it down with a damp cloth after each pad to remove the sanding debris. I polished it further with Before & After Pipe Stem Polish – both fine and extra fine. I hand buffed it with a cloth.
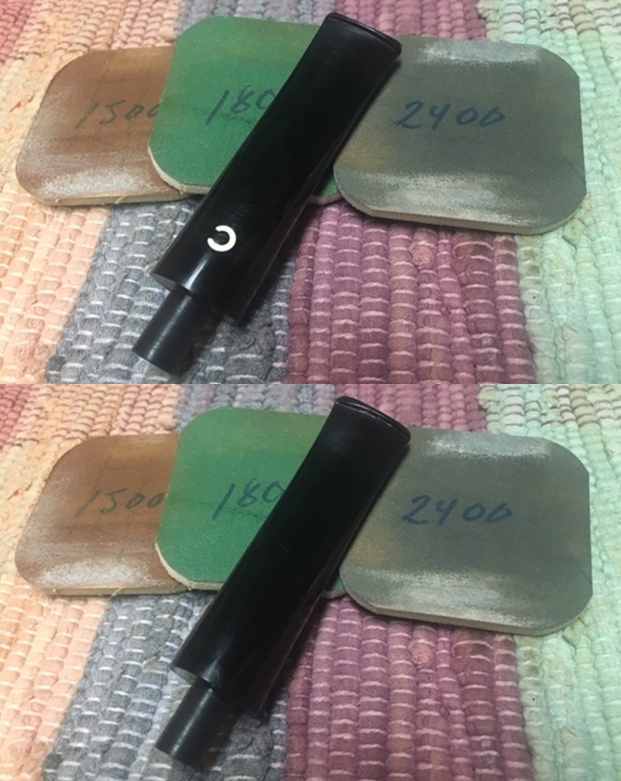
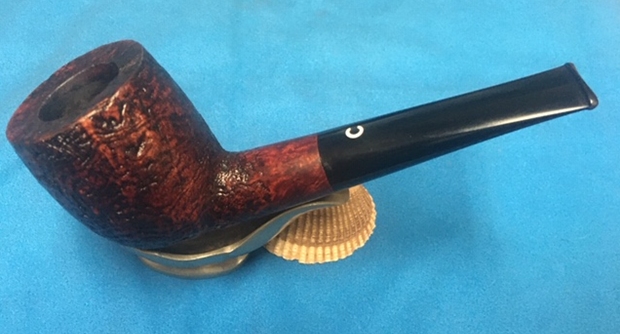
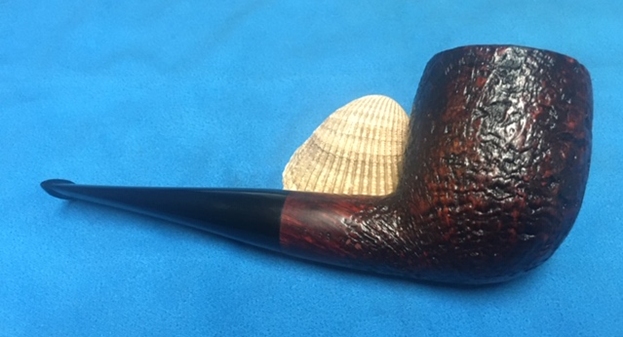
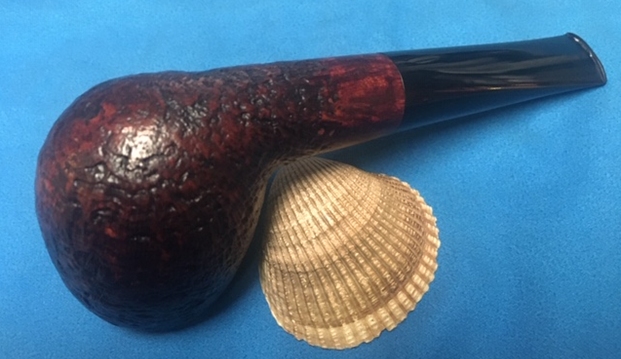
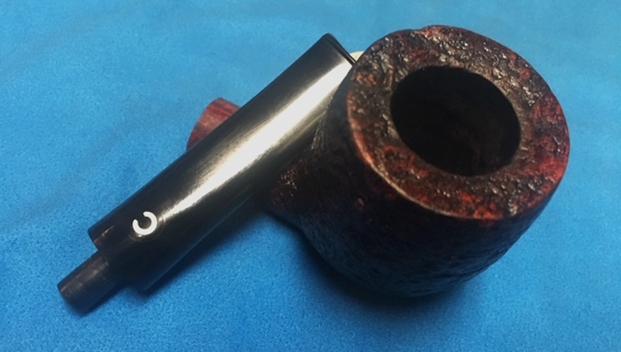
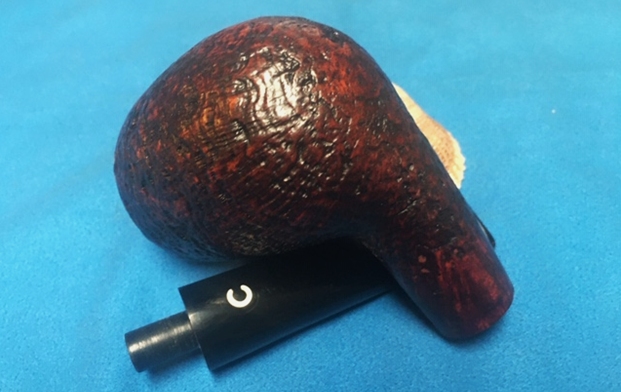
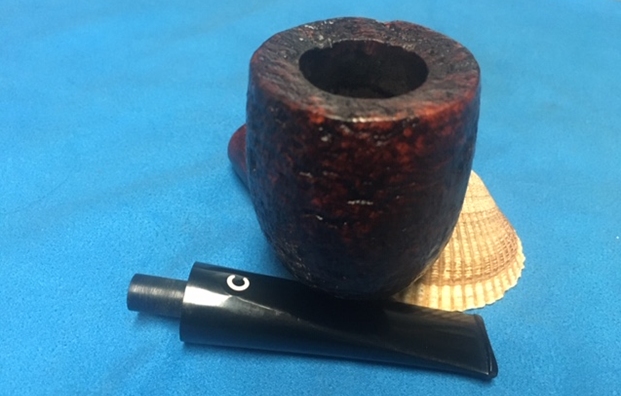
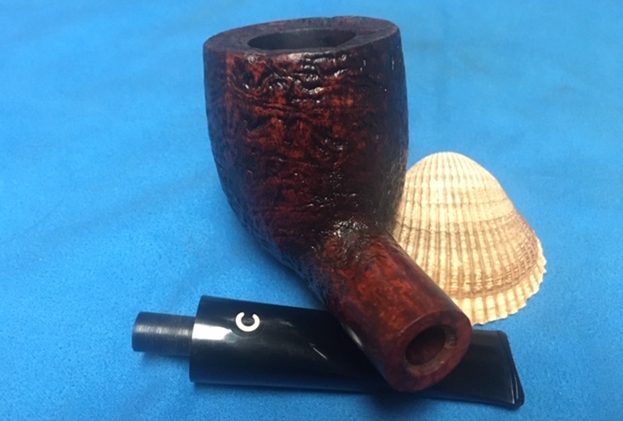
 This was another fun pipe to work on since Jeff had done the heavy work in cleaning it. Once I was finished I put the acrylic stem back on the bowl and polished the bowl and stem with Blue Diamond polish on the buffing wheel. I gave the bowl multiple coats of Conservator’s Wax and the stem multiple coats of carnauba wax. I buffed the pipe with a clean buffing pad to raise the shine. I hand buffed it with a microfiber cloth to deepen the shine. The dimensionality of the sandblast is vibrant. The pipe polished up really well. The polished acrylic stem seemed to truly come alive with the buffing. This is a big pipe and it feels great in my hand and I am sure that the sandblast finish will make feel even better radiating the heat of a good smoke. It must have been a fine smoking pipe judging from the condition it was when we received it from the pipeman who we bought it from. Have a look at it with the photos below. The dimensions are Length: 6 inches, Height: 2 ½ inches, Outside diameter of the bowl: 1 ¾ inches, Chamber diameter: 7/8 of an inch. This is one beauty that is eye catching. I will be putting it on the rebornpipes store shortly. If you are interested in adding it to your collection email or message me. Thanks to each of you who are reading this blog. Remember we are not pipe owners; we are pipemen and women who hold our pipes in trust until they pass on into the trust of the next pipeman or woman.
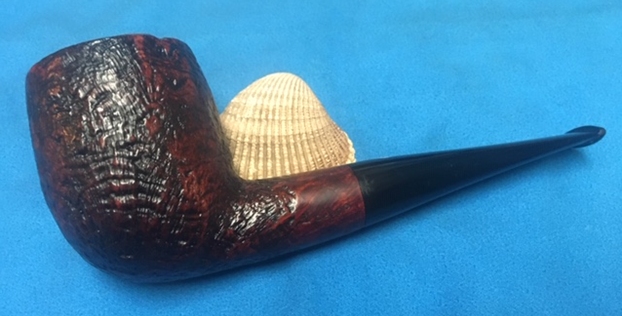


Pingback: An Easy Restore – an Il Ceppo 1 Hand Made Paneled Horn | rebornpipes