Blog by Dal Stanton
I acquired this beautiful Sculpted Sultan Meerschaum on a pipe picking expedition at the Homestead Antique Mall in Arvada, Colorado – a suburb of Denver, last year (2018) when my wife and I were in Denver celebrating Christmas with our family. The expedition was very fruitful with the acquisition of two exquisite pipes – a Gourd Calabash and the Sculpted Meerschaum now on my worktable. The Calabash is still in my inventory and is available to be commissioned! I haven’t had the time to post pictures of it in the online collection, For “Pipe Dreamers” Only! A picture of the fruit of that pipe picking day was taken on the counter at Homestead Antique Mall. One year later, Christmas of 2019, our daughter, Johanna, and her husband, Niko, came to Bulgaria to celebrate Christmas with us! Niko and Johanna were Joined by our son, Josiah and his friend, Katie. We’ve had a great time together and I’m thankful that they have been with us. I fashioned Churchwardens for both Niko and Josiah and gave them as gifts for Christmas. Here is first, Josiah’s then Niko’s Christmas Churchwardens – which turned out very well.
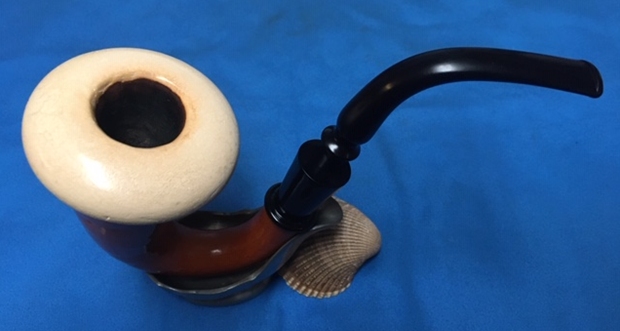
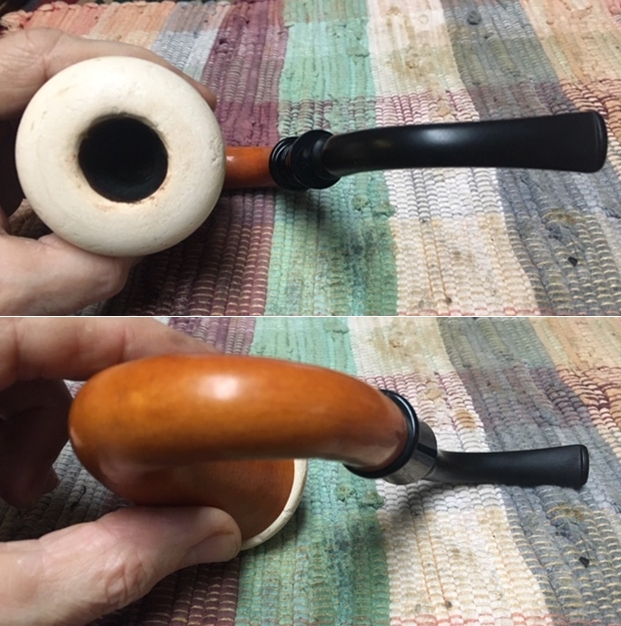
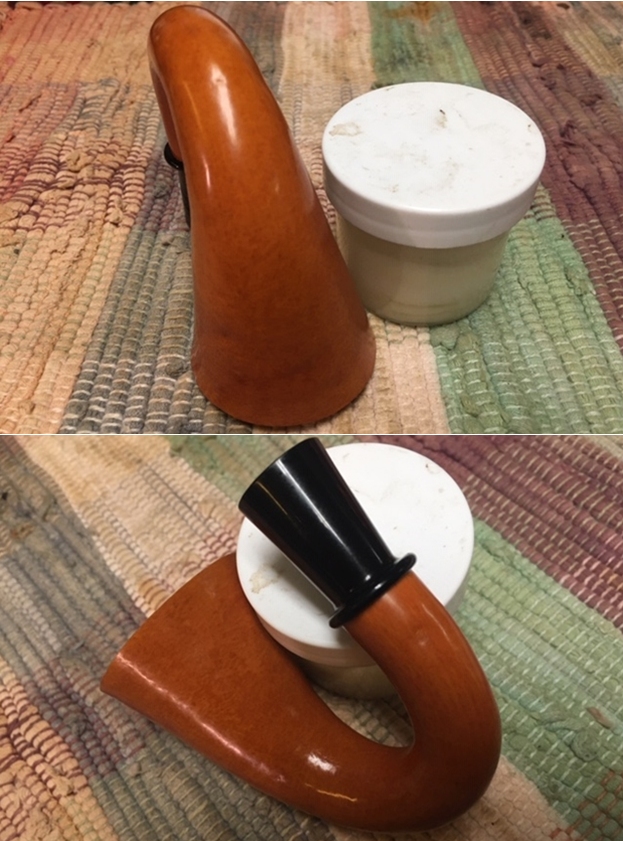
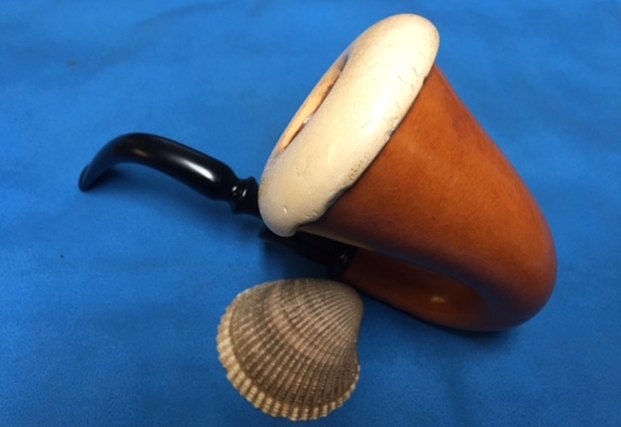
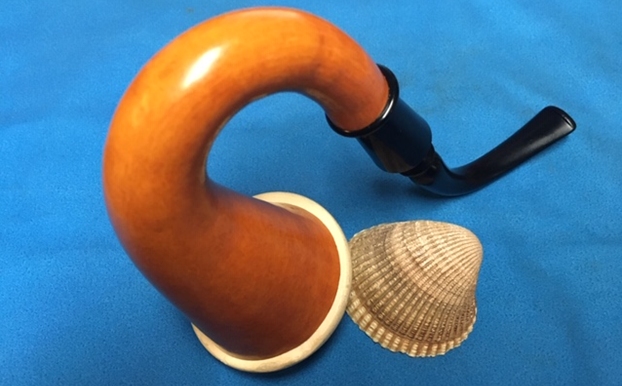
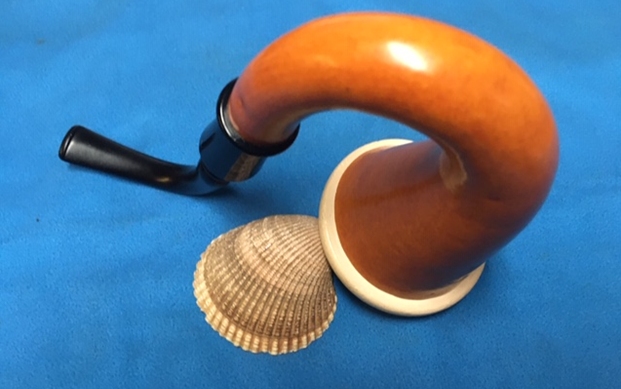
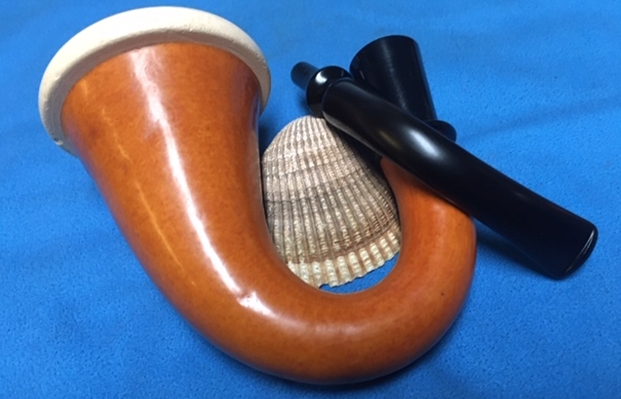
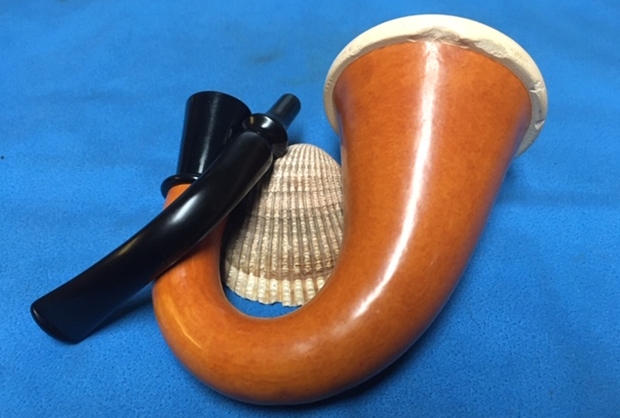
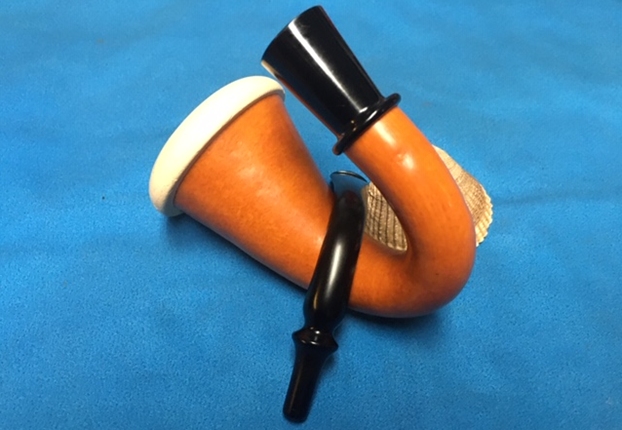
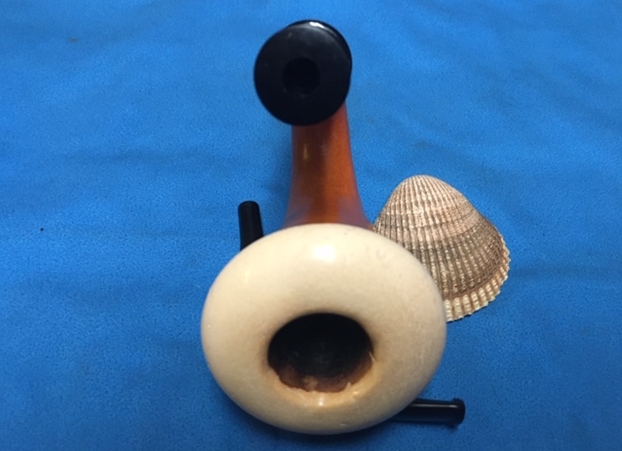
 When Niko came to Bulgaria, through our conversations he described his priorities for his growing pipe collection. One was a Churchwarden – which Christmas gifting took care of. The other was to add a Meerschaum to replace a cheap Meer that he had that disintegrated in his hand while using! I showed him the Sculpted Sultan Meerschaum in my Pipe Steward inventory and he decided to commission it benefiting our work here in Bulgaria with the Daughters of Bulgaria – women and girls who have been trafficked and sexually exploited. I was glad to do this, but the challenge was to refresh the Meerschaum before Niko and Johanna leave on their return trip to Nashville, where they live. Here are pictures of the El – Iş Sculpted Sultan now on my worktable.


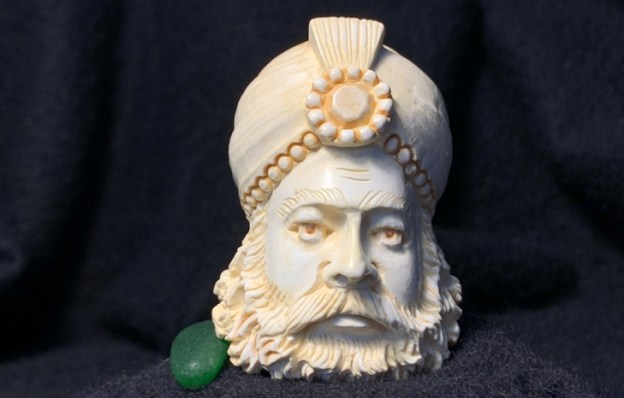
 The detail of this sculpted Meerschaum is exquisite. It bears a traditional face which is seen in the offerings of Meerschaum carvers in Turkey. I’ve visited Istanbul many times and am always amazed at the variety of Meerschaum pipes one can find. When I found this Meerschaum in Arvada, Colorado, at the Homestead Antique Mall, it was with the original box. This box gave
  the information that is often missing from unmarked Meerschaum pipes. The name on the top of the box was ‘El – Iş’ Ferit Urersoy, 1, Kordon 1382 So – 2/B, Izmir. I’ve had the opportunity to visit Izmir which is located south of Istanbul on the Aegean coast. In the Bible it is the city of Smyrna made famous in the book of Revelation as the city of many poor and those who were suffering from tribulations.
Looking on the internet to find more information about the ‘El – Iş’ name and manufacturer. Google Translate offers a rough translation of ‘El – Iş’ as ‘Hand Business’ or ‘Hand Made’. Ferit Urersoy most likely is the carver or possibly company owner with the address of a shop in Izmir following. Using Google Maps, I was unable to isolate anything with the address given, but I discover that ‘Kordon’ is given as a general name to the much of the costal section that runs along the city bordering the Aegean (see: Wikipedia – Kordon). Even with this help, the address is not helpful in identifying a specific location in Izmir. Doing simple searches of ‘El – Iş’ and ‘Ferit Urersoy’ render many Meerschaum pipes with the same identifying information, but no primary information pointing to the Turkish manufacturer whose name is on many Meerschaum pipes in circulation.
One very interesting piece of research that came up was a full-page description of the origins of Meerschaum and its care once a pipe. The name El – Iş is prominent throughout but unfortunately, it offers no additional information. (See link: https://www.sportscards.com/) I was about to give up on locating a shop in Izmir when I recalled the Wikipedia reference to Kordon provided the information of a region in the city of Izmir – Alsancak. I entered this information into the Google search engine, and it resulted in a side bar link to Google Maps which I followed.
  What I didn’t see before was that many of the streets are labeled with numbers fitting the 4-digit pattern which identified the El – Iş reference to 1382 as a street number. It took a little detective work, but I finally found street no. 1382 in the center of the Google Map pictured below with the yellow highlight.
 I employed Google Map street view and came to the end of my search. I believe this is the block of buildings, on the beginning of street 1382 numbering where 2/B would be located (green highlighting in the picture above). I cannot find a shop here in this section, but it is possible that it was here but now is long gone. This is as far as this search will take me!
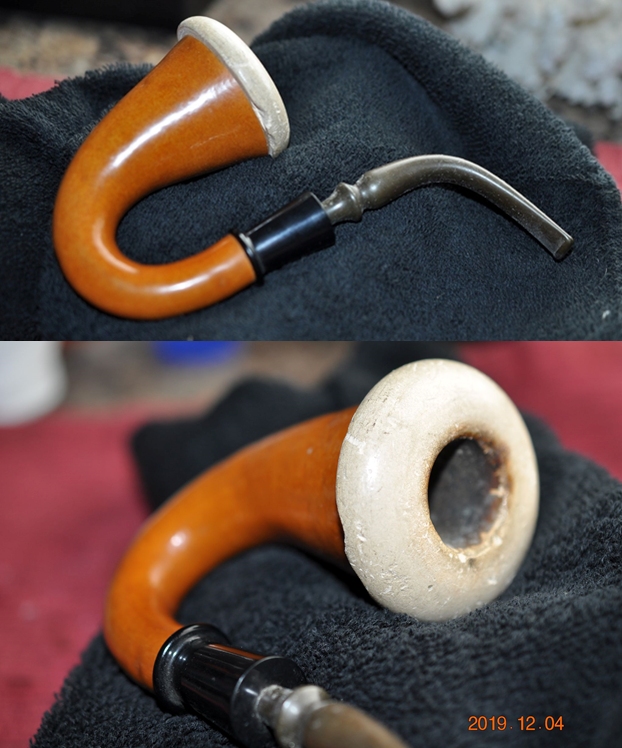
 With the elusive origins of this El – Iş Block Meerschaum Sculpted Sultan research finished for now, I look more closely at the pipe on my worktable. The black acrylic stem has some minor tooth chatter on the upper and lower bit.
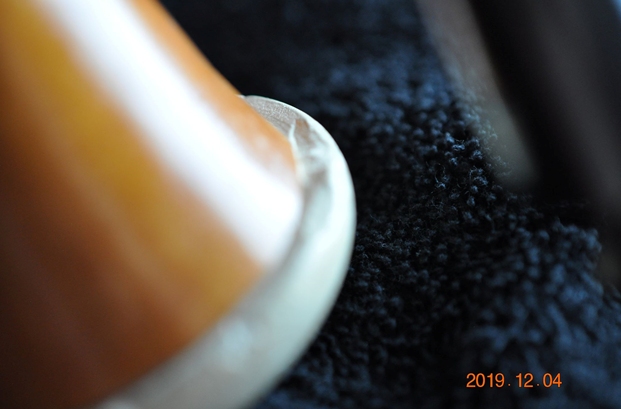
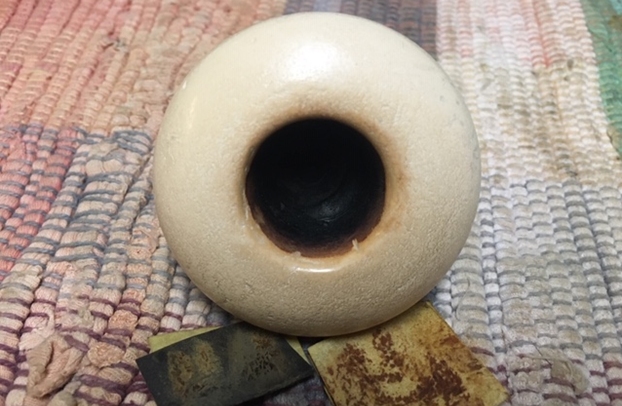
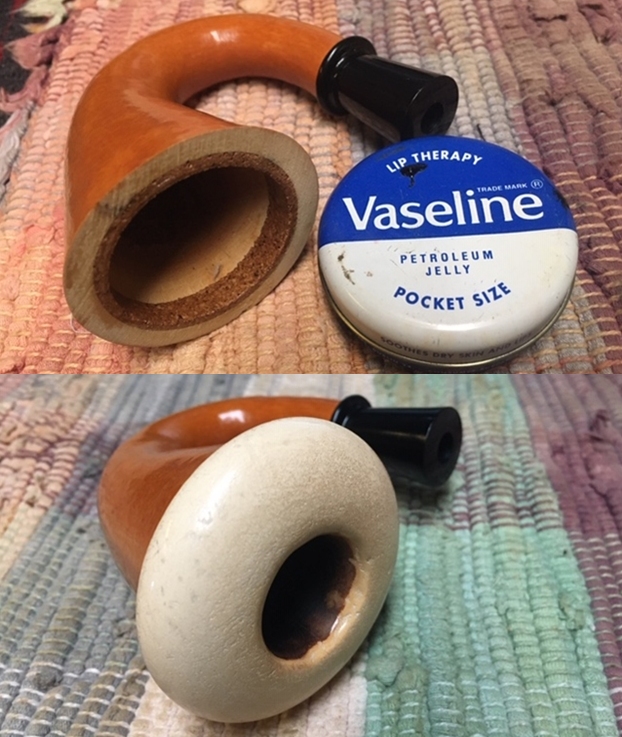
 The Meerschaum surface on the shank has some signs of wear with some scratching which should easily sand out. The Meerschaum shows no signs of developing the coveted patina which usually first starts showing on the shank. This would indicate that the pipe has not been smoked a great deal.
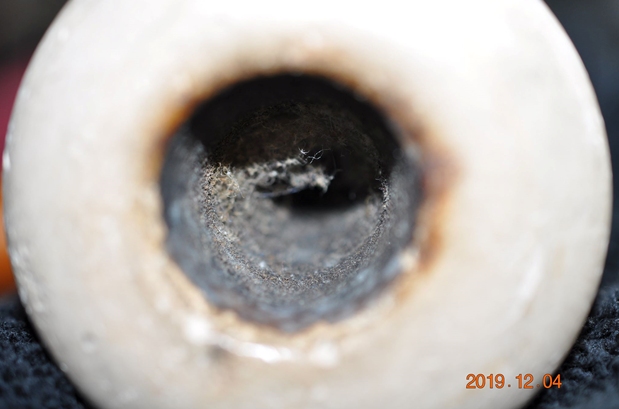
 The chamber has some minor buildup of carbon – normal for a Meer. Meerschaum, a soft stone, requires no carbon cake to protect the surface as with the briar chamber. Meers are popular for this reason – they do not need to be broken in nor do they need to be rested between use. Smoke a bowl, reload it and he’s ready to go! I’ll remove the buildup bringing it down to the Meer surface. The rim has minor darkening which should clean up.
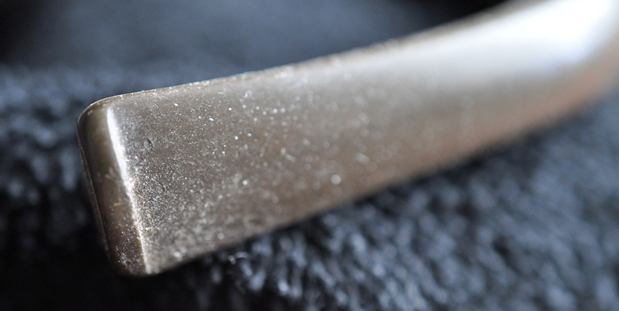
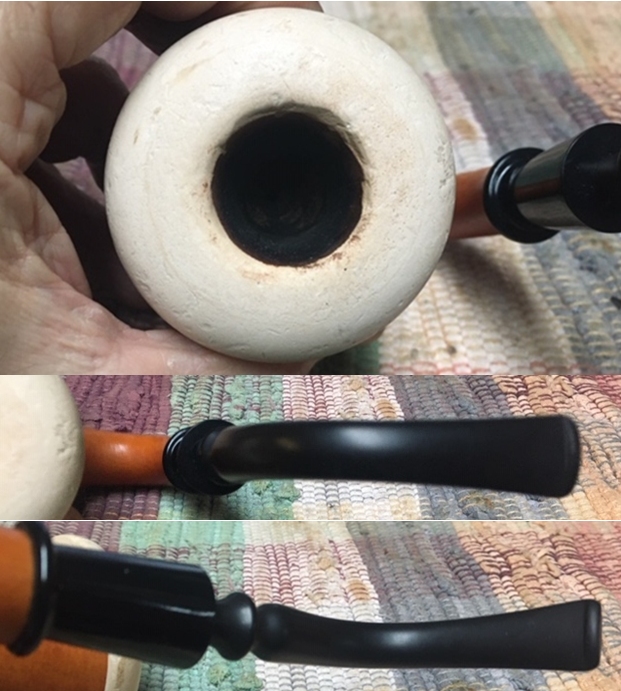
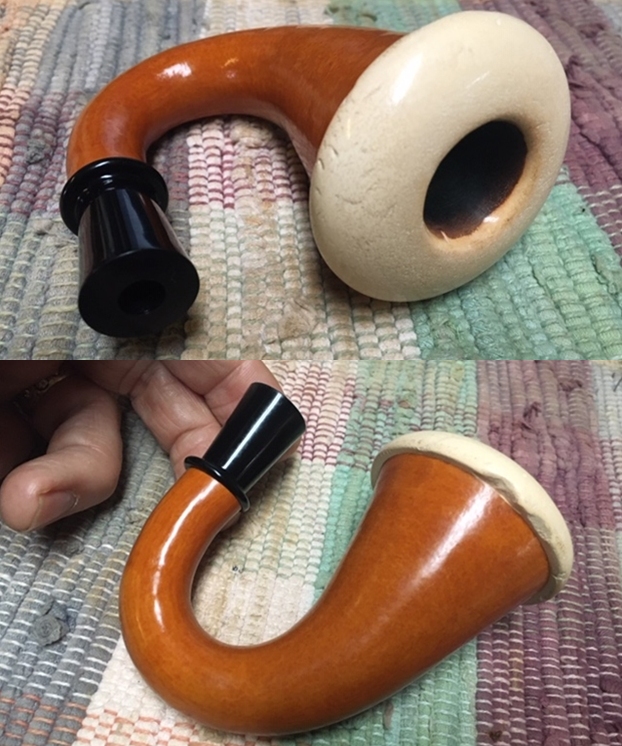
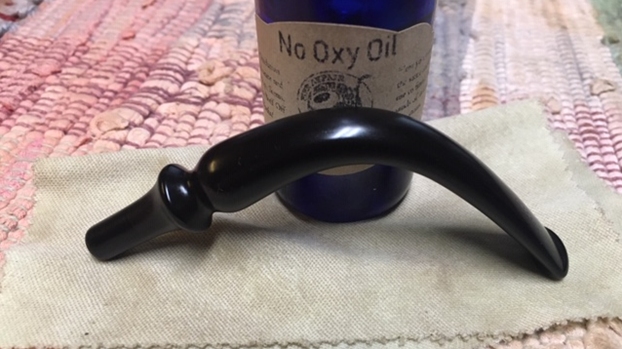
 I see one other issue regarding the stem. The screw in tenon has worn some and is over-clocked slightly. I’ll see if I can back it up to have a straighter orientation.
 I start the sprucing up of the El – Iş Sculpted Sultan by cleaning the chamber. I first scrape the chamber walls with the Savinelli Fitsall tool which produces very little. I follow by sanding the chamber with 240 grade paper wrapped around a Sharpie Pen to clean the chamber further. As the picture below shows, there was very little buildup in the chamber – this is good. I wipe the walls with a cotton cloth wetted with isopropyl 95% to clean it of the sanding powder. The chamber looks good and I move on.
 The Meerschaum surface looks good. To clean it I use undiluted Murphy’s Oil Soap on a cotton pad to clean. I also employ a bristled toothbrush to get into the crevasses of the sculpted detail of the face and especially the beard. I rinse the stummel with cool tap water.
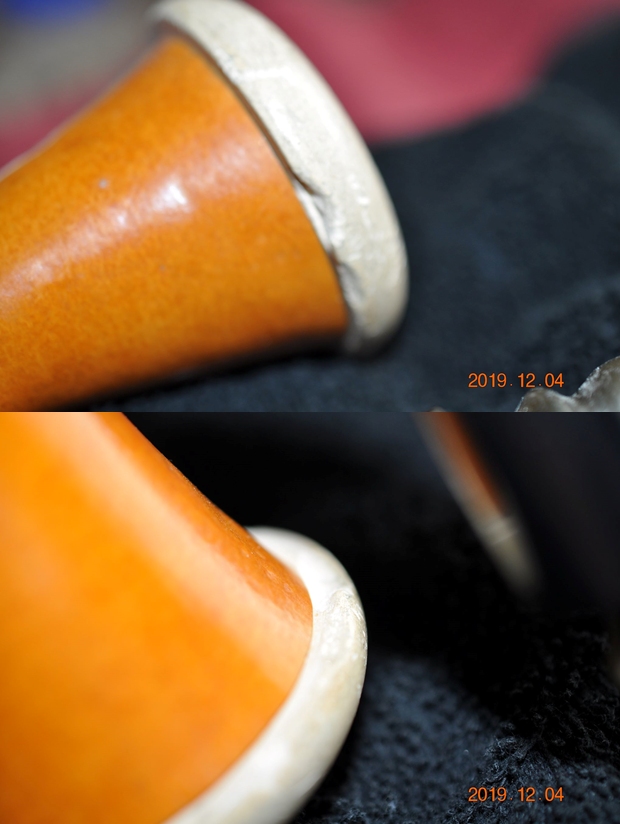
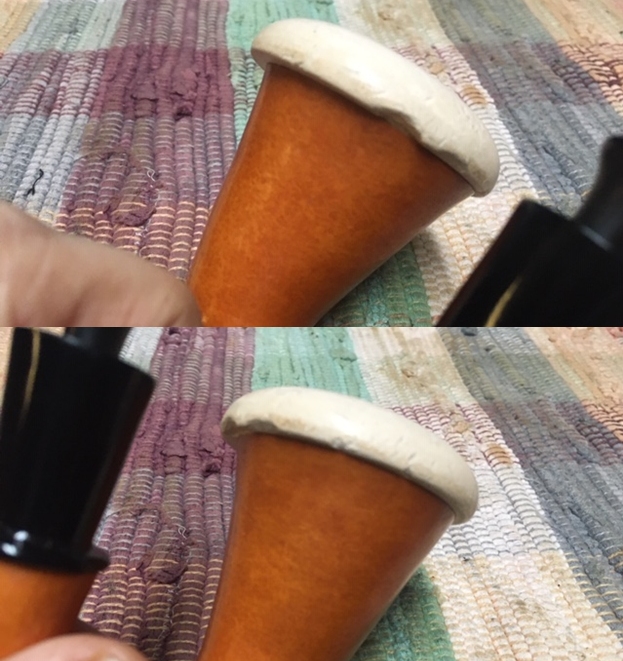
 Next, I address the traumas on the left side of the shank. They are not too noticeable but using micromesh pads to sand, should erase the blemish.
 I use the first and most abrasive micromesh pad, 1500, to sand out the marks. I continue around the shank using the micromesh pad simply to clean up the shank.
 I also address some of the discoloration around the top of the chamber, though the reality is, it’s not really a problem and I’m not trying to remove the coloring fully.
  I finish by taking the shank and the top of the turban through all the 9 micromesh pads to clean and to smooth.
 Unlike briar pipes, Meerschaum does not use carnauba wax to finalize the finish. The practice of using bees’ wax to shine the Meer is the standard practice. A blog of Charles Lemon at Dad’s Pipes is in my file box to use as my guide for this procedure (See: Quick Clean-up of a Tulip Meerschaum Sitter – Dad’s Pipes). I mentioned before how Meerschaum pipes change color as they are smoked, and this patina increases the value of the pipe. Not only does bees’ wax shine the Meer but it also enhances the growth of the patina as one uses the pipe and the tobacco oils are absorbed into the Meerschaum. I reattach the stem to the stummel but place a pipe cleaner between the stem and shank to tighten against. This creates a gap so that wax does not get on the stem and the stem acts as my handle.
  I keep the congealed bees’ wax that has been used previously in a mason jar. Using the hot air gun, the wax is reheated and liquefies. The stummel is also warmed with the air gun.
  Using a cotton bud, I paint the stummel with the liquefied bees’ wax and carefully work it into all the nooks and crannies of the Sultan’s carved face and beard. When the bees’ wax is applied, the stummel is put on a cloth for it to cool. The pictures show the bees’ wax application.
 With the stummel to the side, I remove the stem and refocus on the tooth chatter on the upper and lower bit. Using 240 grade sanding paper I sand the bit area removing the small compressions. Then I remember…!
 Well, as I started to sand, the nagging in my mind finally surfaced. I had been so focused on the external surface of the Sultan, that I forgot to clean the internals of both the stummel and the stem…. So, after putting the sanding paper down, the stem’s airway is cleaned with a couple pipe cleaners wetted in isopropyl 95%. I’m relieved that the stem cleaned very easily. Unfortunately, the stummel’s internal cleaning might be a bit more difficult while attempting to protect the newly waxed finish!
 Returning to sanding the upper and lower bit, 240 grade paper dispatches the tooth chatter quickly.
 Following the 240 grade, I wet sand with 600 grade paper over the bit area alone – upper and lower. Following the 600 grade sanding to erase the 240 scratches, applying 000 steel wool smooths the bit area further.
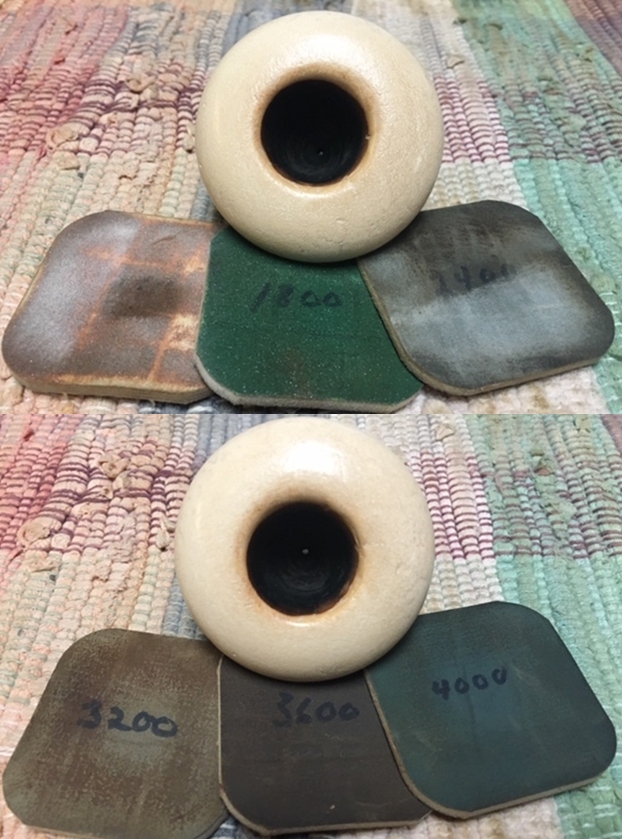
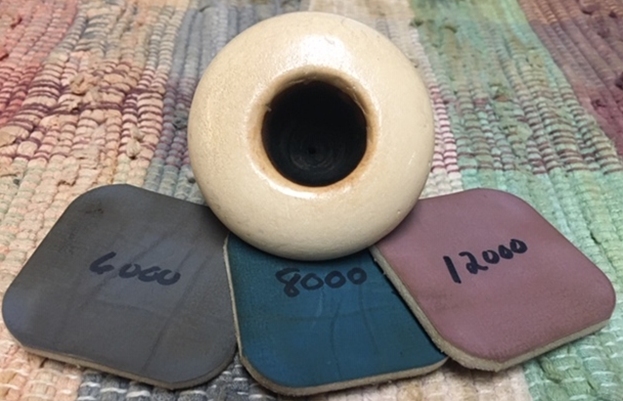
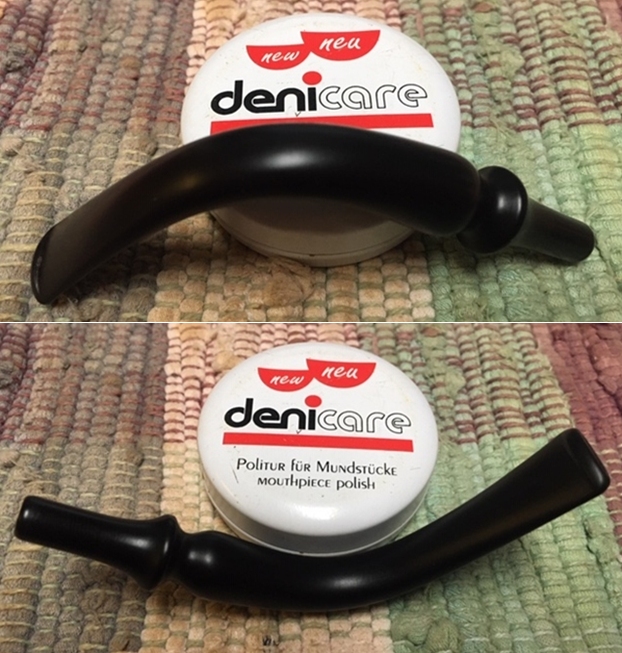
 Now, addressing the whole stem, wet sanding with micromesh pads 1500 to 2400 is then followed by dry sanding with pads 3200 to 4000 and 6000 to 12000. Between each set of 3 pads, Obsidian Oil is applied to the very nice looking black acrylic stem.
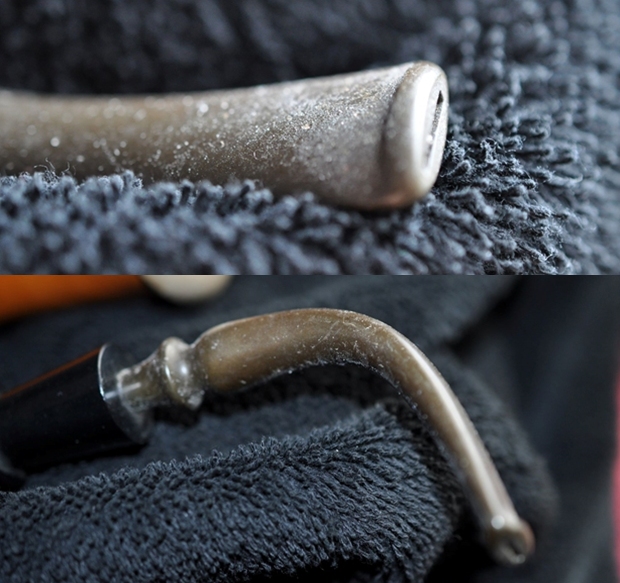
 Earlier, I took the following picture that shows the stem over clocked by a small amount. This often happens with screw in tenons of all materials as the rubbing wears the mass away and the interlocking pressure lessens – producing a stem that screws in a bit too much.
 An easy way to address this is to apply an acrylic material to the threads of the acrylic tenon. CA glue can serve this function, or as I use, clear acrylic fingernail polish does a good job. Using the fine brush that comes with the bottle, the acrylic liquid is painted on the threads. When cured, the mass of the threads is increased slightly which translates into the tenon tightening a bit sooner which hopefully corrects the orientation of the stem! After applying the polish, the stem is set aside for the liquid to fully set.
 Going backwards a few steps in the process, I decide to leave the now cooled and congealed bees’ wax in place on the stummel while I clean the internals – which should have been earlier in the process! Thankfully, as with the stem airway, the internals are cleaned with two cotton buds and one pipe cleaner! Moving on.
 Now focusing on the cooled bees’ wax stummel, I use a clean cotton cloth to wipe off the excess bees’ wax which is not an easy task. The congealed excess wax takes some firm wiping to be removed. With most of the excess removed, a hardy hand buffing with a microfiber cloth finishes the removal of excess wax and the Meerschaum surface responds by shining up as well as absorbing the honey-colored bees’ wax which encourages the development of patina. After buffing with a micromesh cloth, a new, clean, cotton cloth buffing wheel is mounted onto the Dremel to apply a final buffing to the Sultan sculpting. With the Dremel’s speed set at about 60% full power, faster than usual, the added heating of the high speed buffing helps further to dissolve and work the bees’ wax into the Meerschaum.
 With the buffing complete, I rejoin the black acrylic stem with the Meerschaum stummel. I had applied acrylic fingernail polish to the threads to tighten the grip and to correct the overclocking of the stem.
 As hoped, the stem tightens sooner and I’m able to leave the stem in a correct orientation. I’ve already told Niko to be careful not to over-tighten the stem – which will result in overclocking!
 With the stem remounted, I load another cotton cloth buffing wheel to the Dremel, setting the speed at 40% full power, and apply Blue Diamond compound to the stem. After completing the application, I wipe the stem with a felt cloth to remove the compound dust from the stem before waxing.
 Next, another cotton cloth wheel is mounted, and carnauba wax is applied to the stem at the same speed.
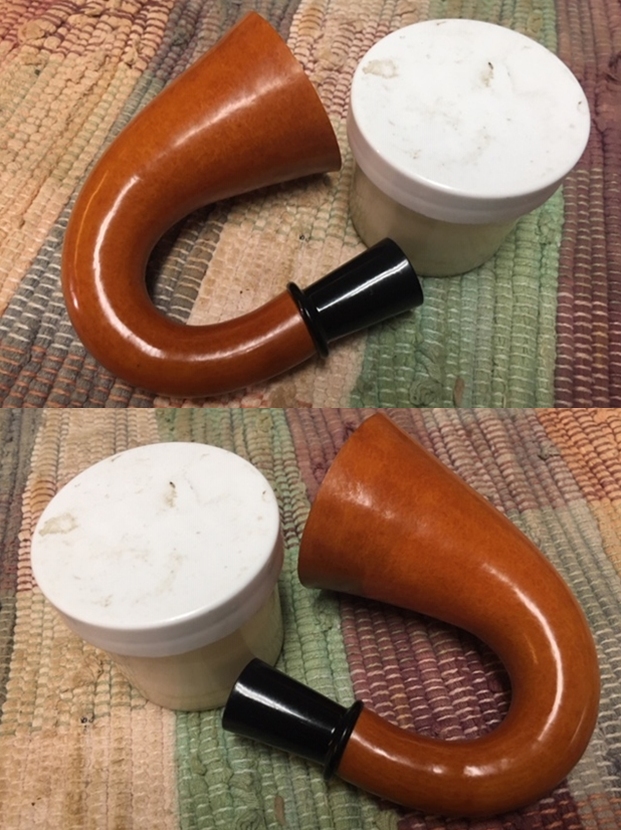
 To complete the sprucing up of the El – Iş Sculpted Sultan Meerschaum, I give the entire pipe a rigorous hand buffing with a microfiber cloth to raise the shine.
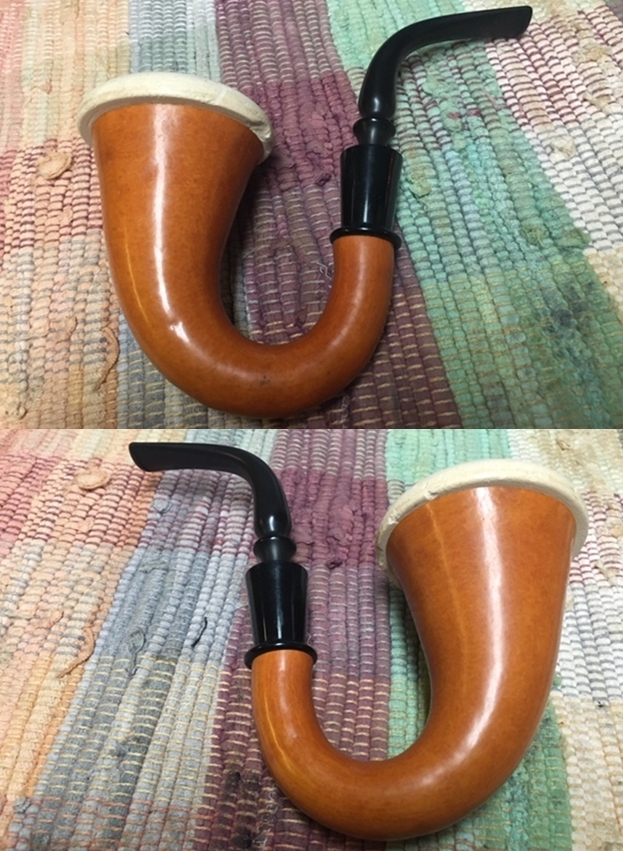
I’m pleased with the results of refreshing this very detailed Sultan Meerschaum sculpting. The black acrylic stem contrasts well the light Meerschaum stummel and causes the sculpting to pop. The bees’ wax did a great job teasing out the coveted patina. My son-in-law, Niko, commissioned this pipe which benefits the Daughters of Bulgaria. It’s already packed in his bags along with the Churchwarden he found under the Christmas tree here in Bulgaria! Thanks for joining me!