Blog by Steve Laug
 After brief foray into restoring a couple of other pipes I am back to Bob Kerr’s estate (his photo is to the left). If you have not “met” the man and would like to read a bit of the history of the pipeman, his daughter has written a great tribute that is worth a read. Because I have included it in over 60 restorations to date I thought that I would leave it out this time. Be sure to check out some of the recent Dunhill restoration blog (https://rebornpipes.com/2020/01/01/restoring-the-last-of-bob-kerrs-dunhills-a-1962-dunhill-bruyere-656-f-t-bent-billiard/)
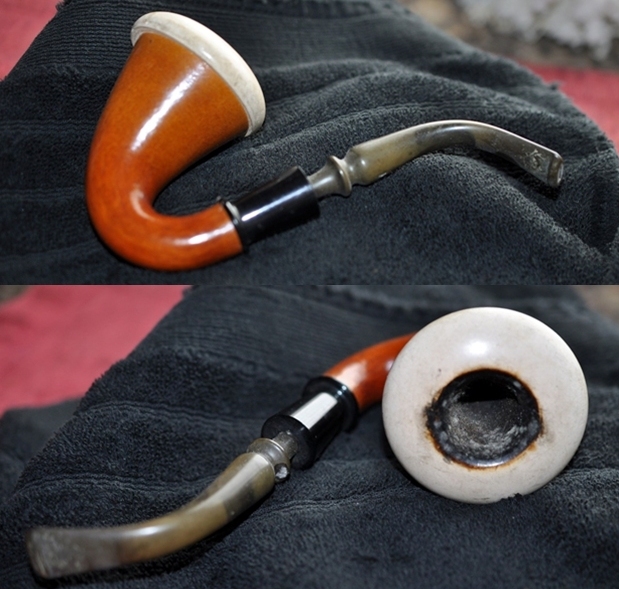
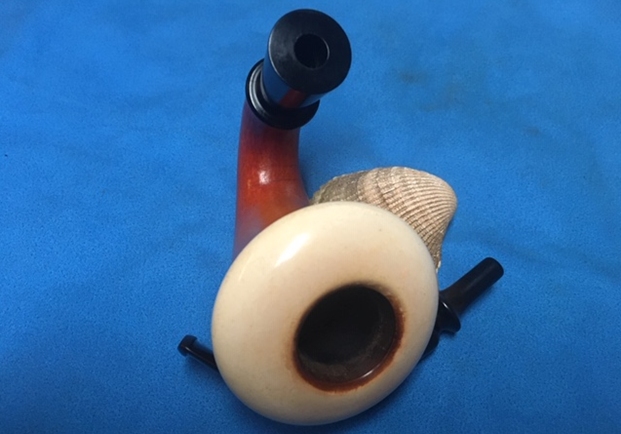
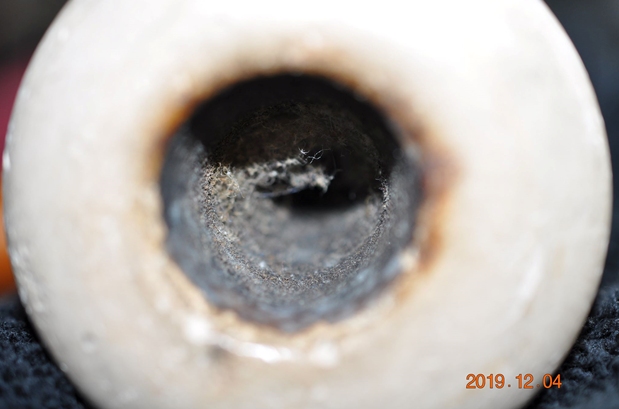
This is the second of the two Gourd Calabash pipes that he had that were rough looking. The pictures below show what they looked like when I shipped them to Jeff to do his cleanup magic with them. If the first pipe was in rough shape this one was beyond rough. It was horrible. The stem was oxidized. Once again the black plastic/acrylic ferrule was probably the cleanest part of the pipe. The meer cup was absolutely gross. There was a coat of dust, maybe even mold on the thick cake in the bowl. The pipe smelled horrid. The inner edges of the rim were badly chipped and dirty. The outer edges had chips and chunks of meerschaum that were missing. The top of the meer cup was pitted with nicks and scratches. It looked rough. With the cup removed the calabash gourd interior was black with scum and tars and looked horrible. It reeked just like the previous pipe. The smell of old tobacco tars surrounded the pipe akin to the smell of an ashtray overflowing on a pub table… some of you will certainly remember those! The gourd exterior was dirty but surprisingly undamaged. The stem was oxidized and covered with tooth chatter but none of the deep tooth marks I have come to expect from Bob’s pipes. Jeff took the following photos to document the mess!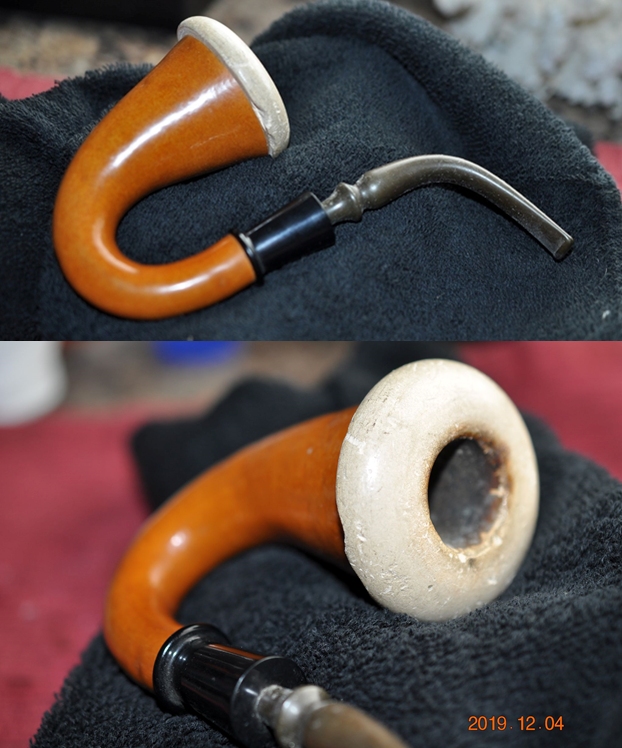 Jeff took some close up photos of the bowl cup to show the condition. Once again the photos capture the visual well but actually the other senses are not even brought into the equation. It was really nasty. The thick cake was growing things!
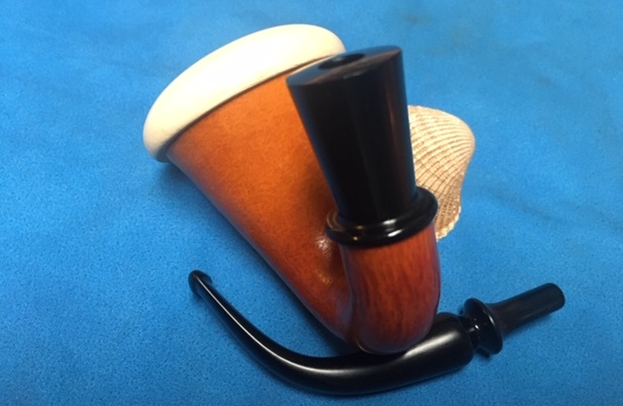
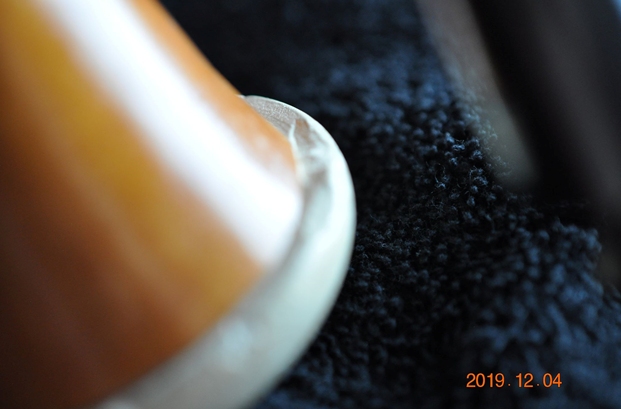
 Jeff took several photos of the under edge of the cup and the gourd sides to show the condition of the cup and the gourd. You can clearly see the chips in the meerschaum.
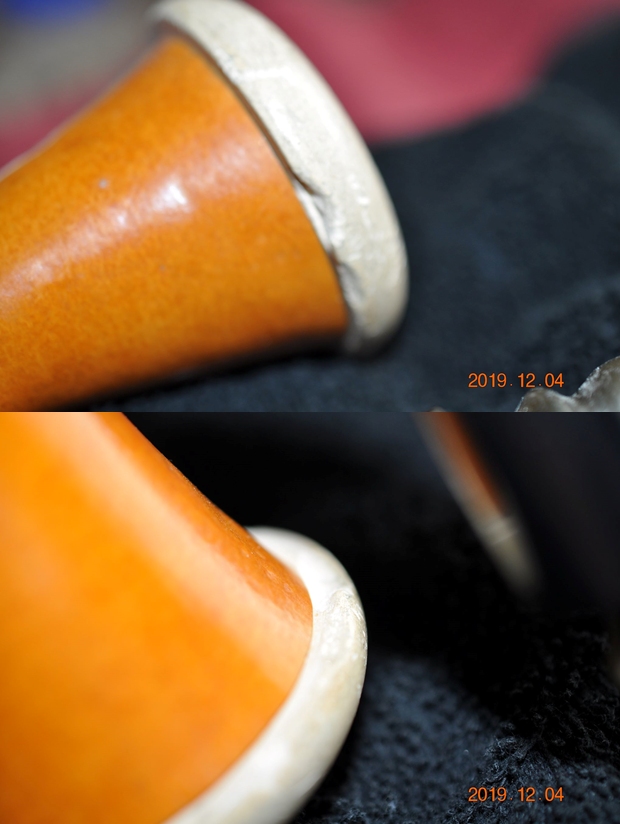
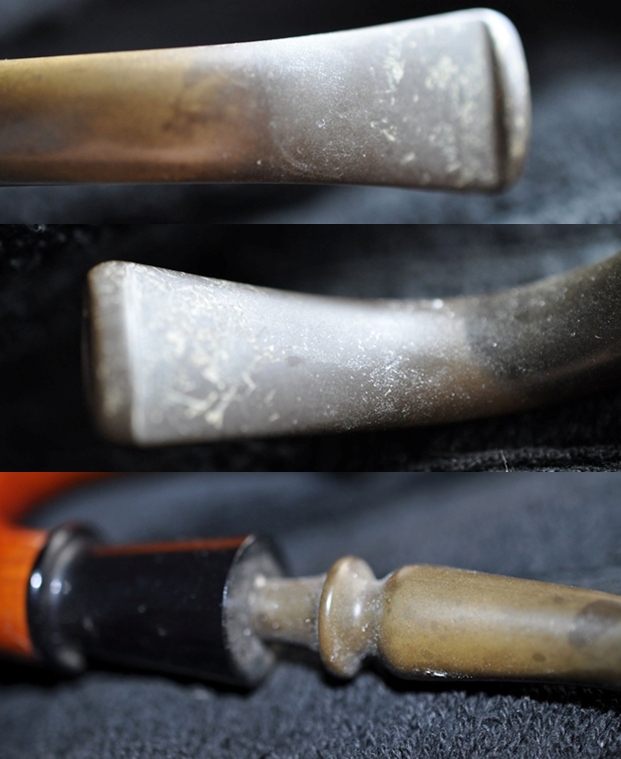
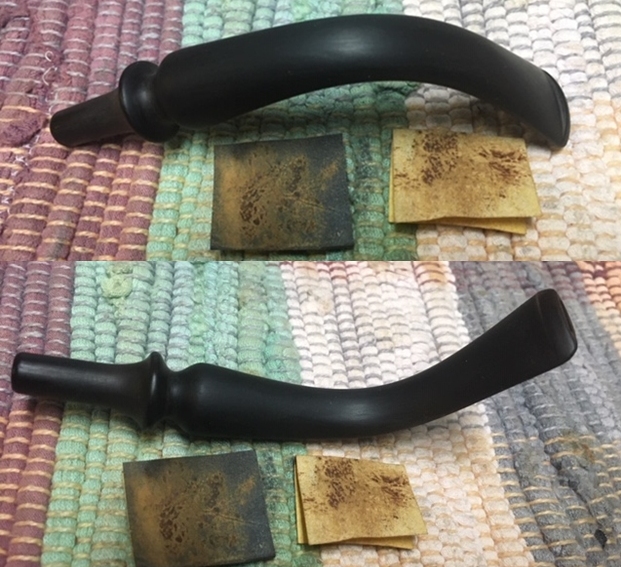
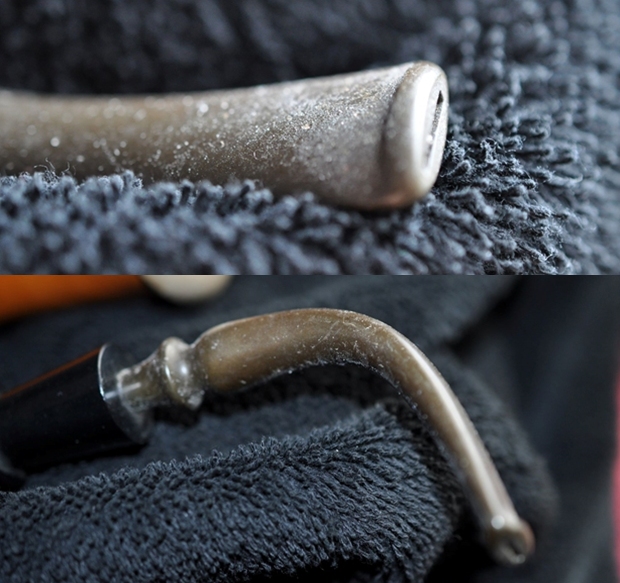
 The stem once again was surprisingly good for this estate. There were not any deep tooth marks in the vulcanite. We only had to deal with the oxidation and calcification. There no deep pits in the surface of the rubber. The third photo shows it in comparison to the ferrule so you can see how far from black it gone.
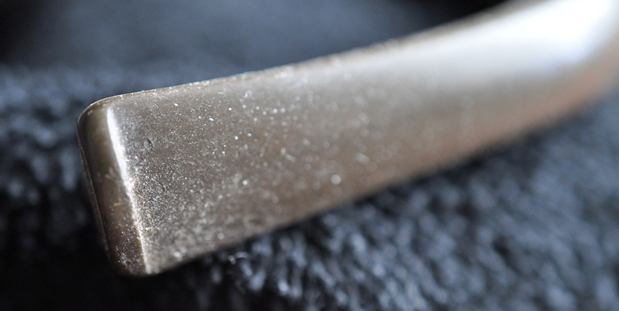
 I don’t think I would have been done with over 60 of Bob’s pipes without Jeff’s help on cleaning them. It was a mammoth task to say the least and they were all extremely dirty and had been sitting since the early 90s in boxes. He does cleaning job and leaves the rest to me. This one was no different. He thoroughly cleaned this filthy pipe in all of it parts. This one was a real mess and I was looking forward to seeing what he had done with this one when I took it out of his box. It looked amazing and CLEAN. He carefully reamed the meerschaum cup with a Savinelli Fitsall Pipe Knife. He scrubbed out the internals of the gourd and the shank with alcohol, pipe cleaners and cotton swabs until the pipe was clean. He scrubbed the exterior of the gourd with Murphy’s Oil Soap and a tooth brush to remove the grime and grit. The gourd and meer cup look really good. The stem looked a lot better. Jeff soaked the stem in Before & After Deoxidizer to remove the oxidation on the rubber. The pipe was ready for me to carry on the next part of the process.
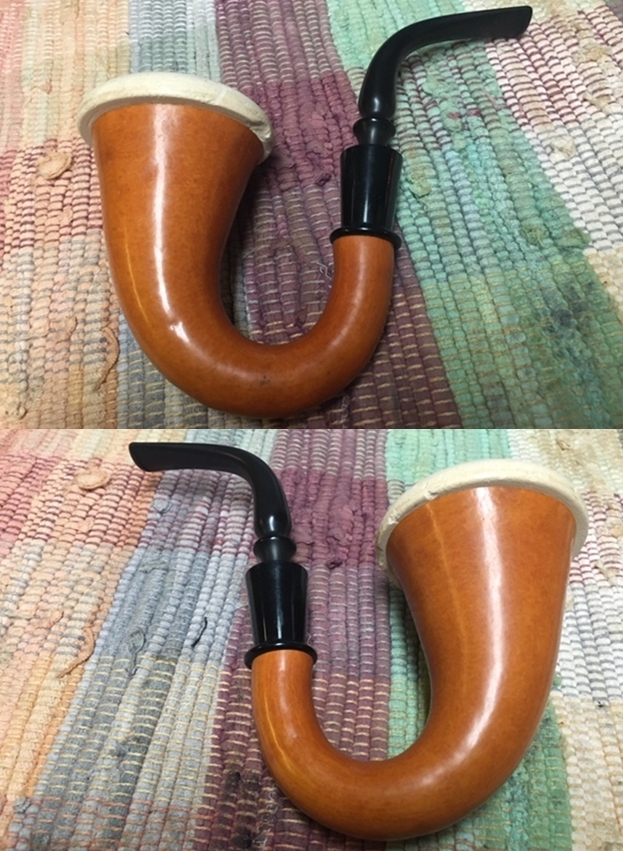
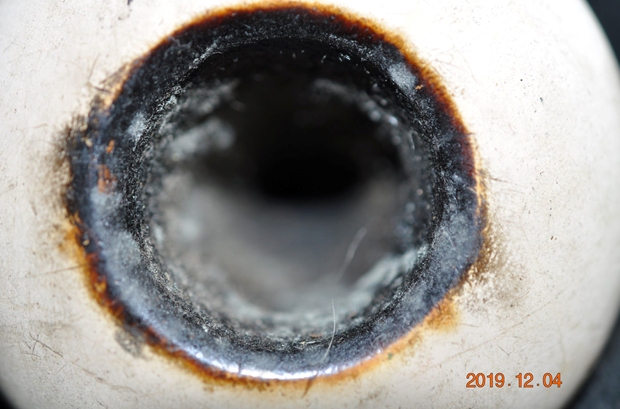
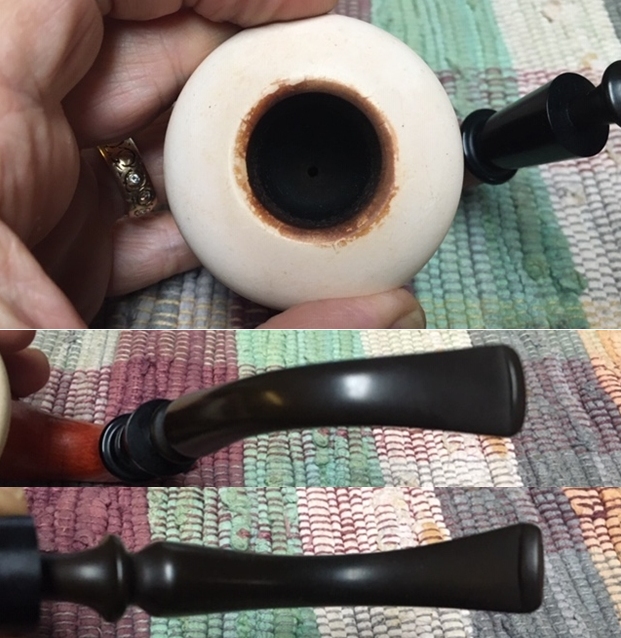
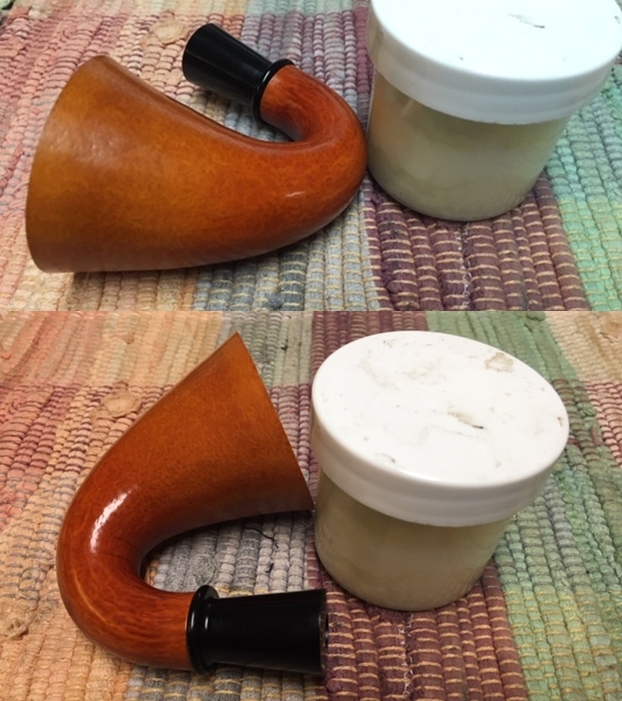
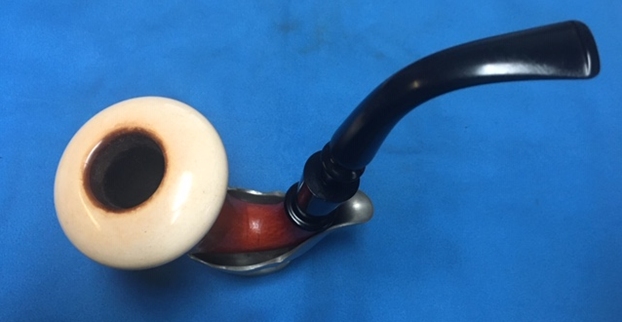
 I took some close up photos of the meerschaum cup and also of the stem surface. I will tell you what; I am absolutely amazed at how good this pipe looks. I wanted to show how well it had cleaned up and what needed to be done. The cup was still in pretty rough condition but it was clean! The surface was pitted and nicked. The inner edges of the cup looked like someone had reamed it with a pocket knife sometime in its history. The bevel was worn and nicked with cuts but there was no darkening. Otherwise it was beautiful. The stem actually looks very good in the photos. There was no chatter or toot marks on the stem surface. But it too was amazing… the whole pipe is a surprise to me. Looks good, smells good and should smoke well!
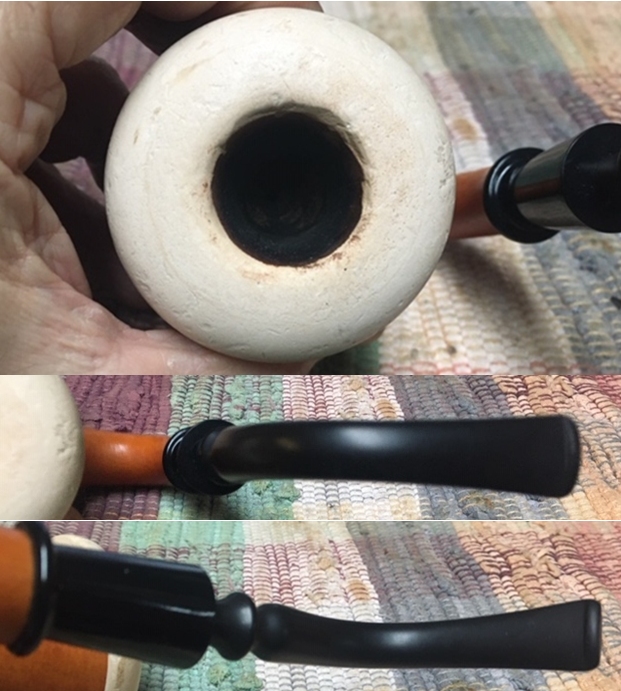 I took photos of the chips on the underside of the cup on the backside. I took a photo from both sides to show the extent of the damage.
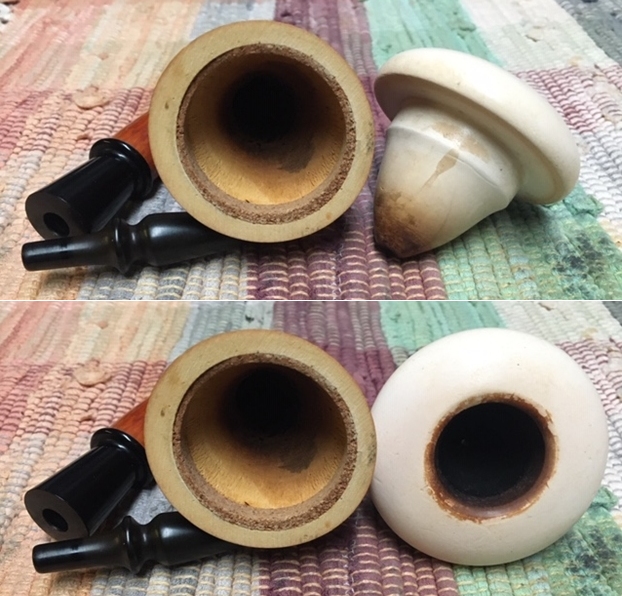
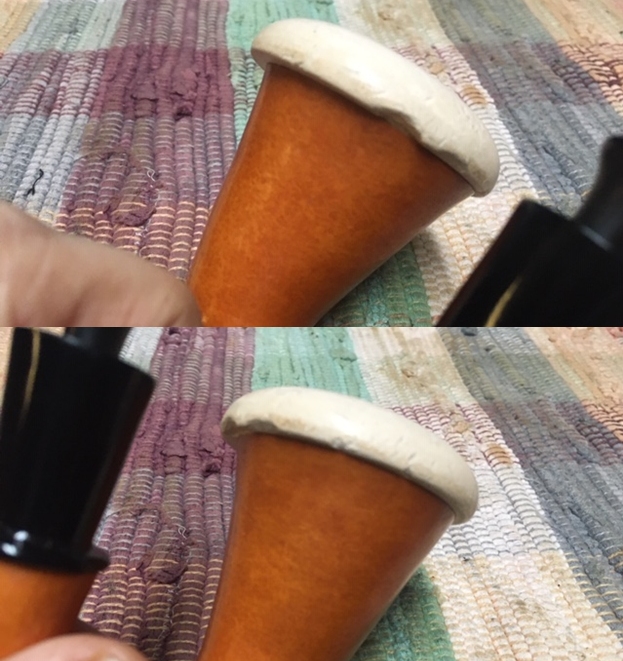 I popped the meerschaum cup out of the gourd to check out the interior. It was stunningly clean. The cork gasket was dry but whole. The underside of the cup was stained but it too was very clean.
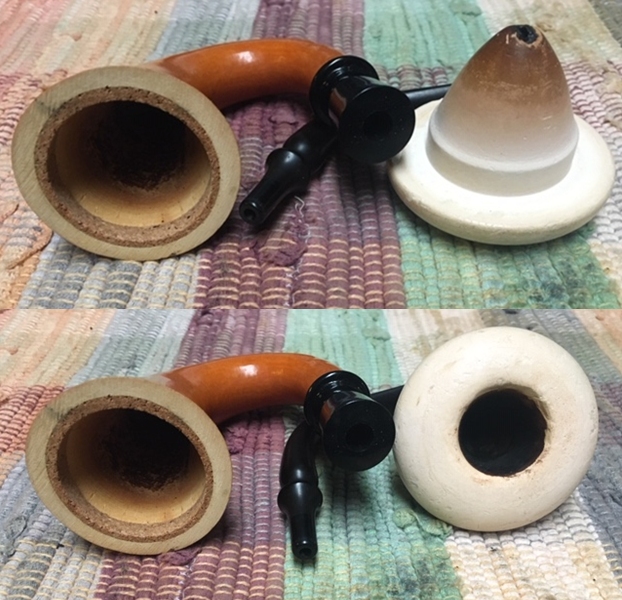 I worked on the rim edge with 220 and 400 grit sandpaper to minimize the damage to the inner bevel. I could not total remove the damage but it certainly looks better than when I started.
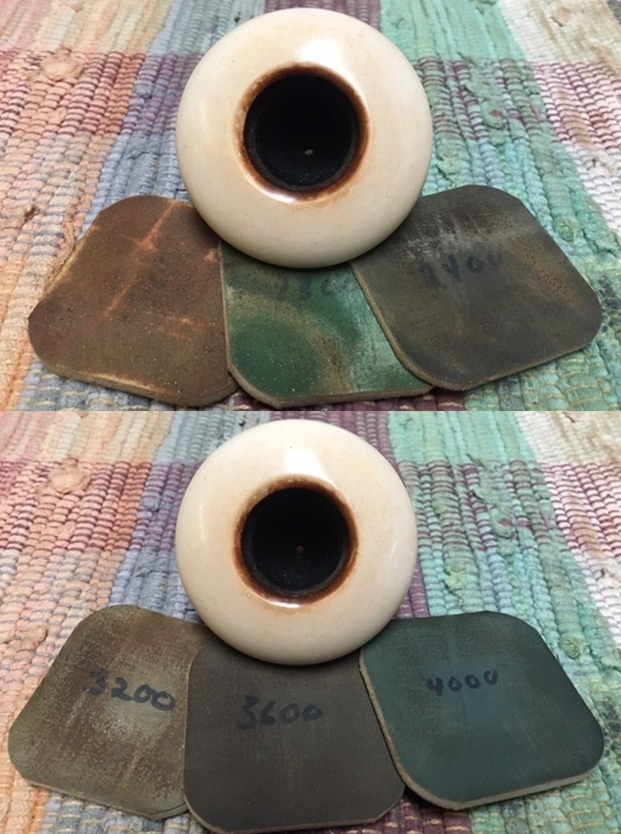
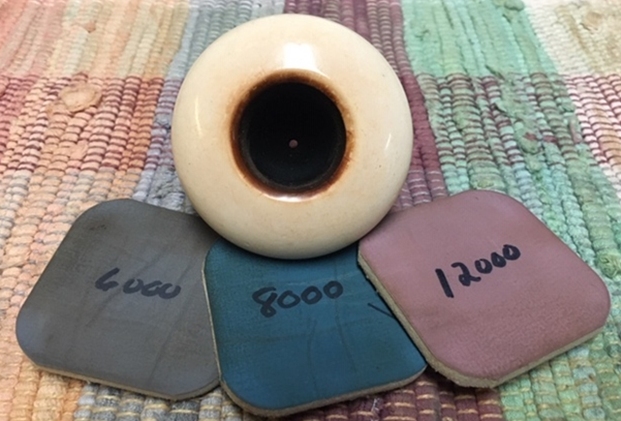
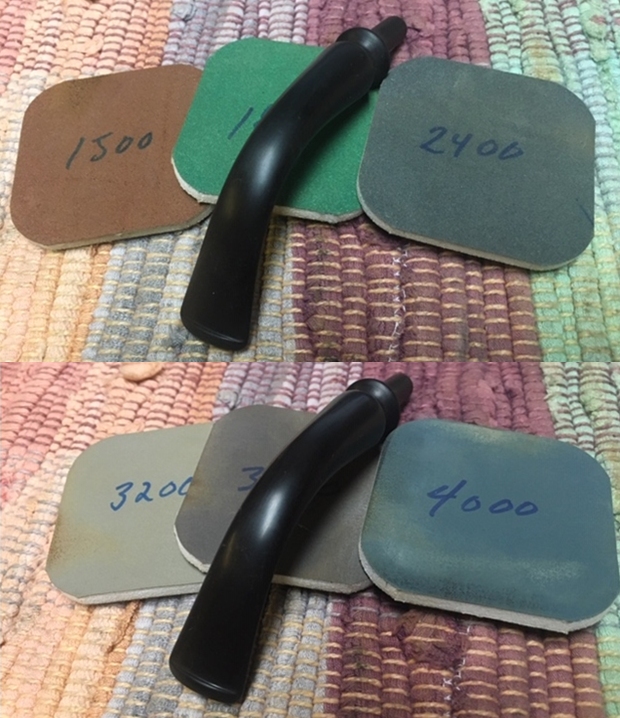
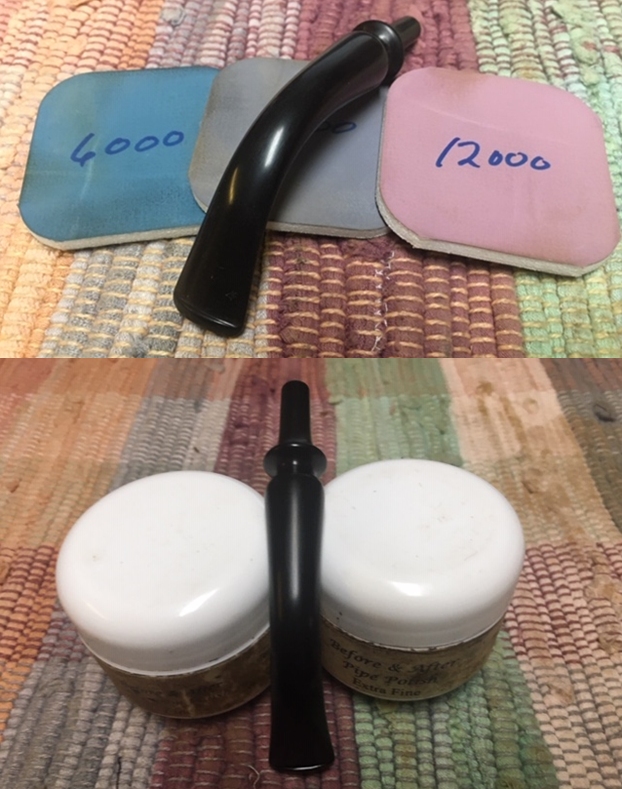
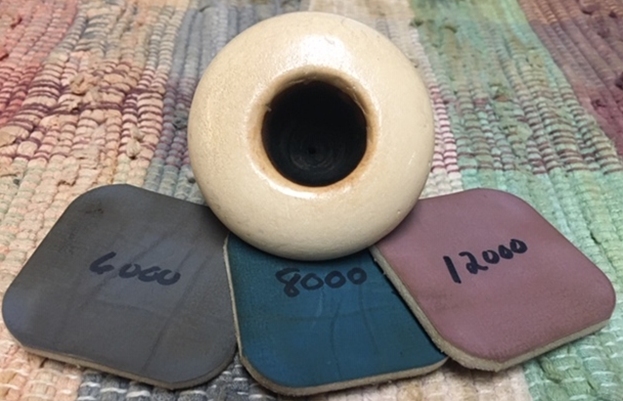
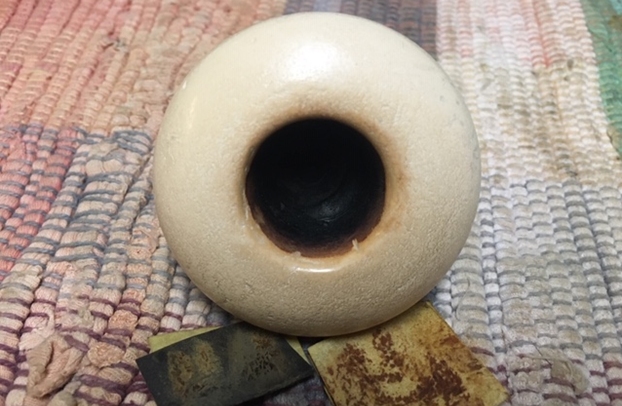 I polished the meerschaum bowl with micromesh sanding pads. I wet sanded the edges and surface with 1500-12000 grit sanding pads and wiped the surface down after each pad. The meerschaum really became smooth and took on a deep shine. The pits in the top surface are still present but significantly softer and less noticeable. The inner edge of the bowl looked much better and was smooth.
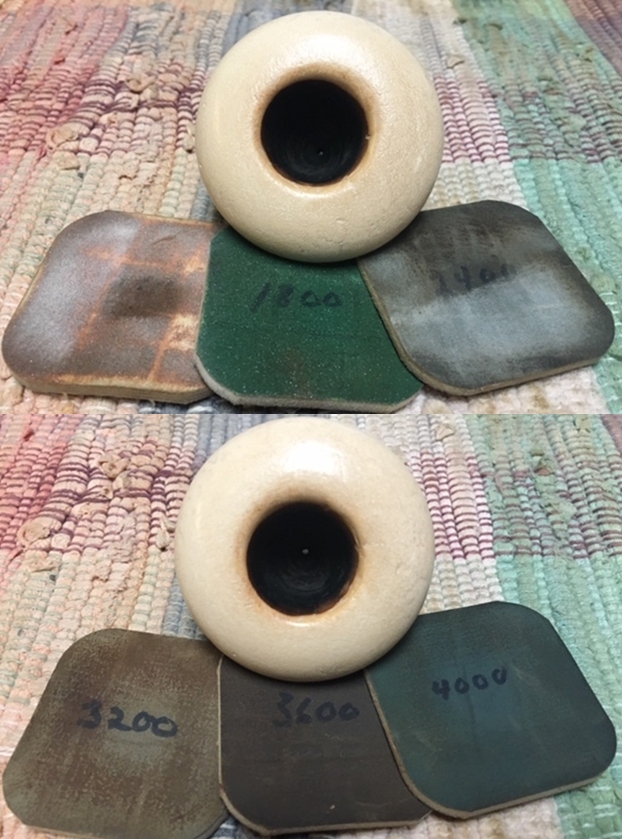
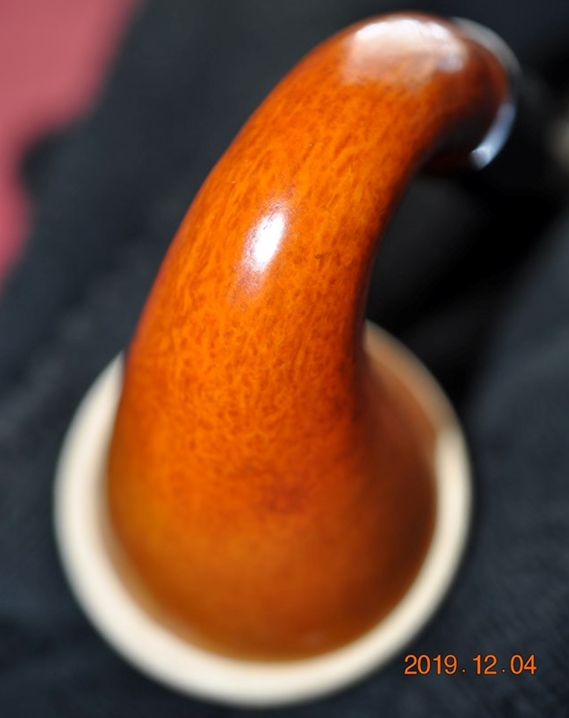
 I set the cup aside and rubbed down the gourd with Before & After Restoration Balm. While it was designed for enlivening and protecting briar it works wonders with a piece of dried gourd calabash. I worked it into the surface of the gourd with my finger tips and let it sit for about 10 minutes. I buffed it off with a soft cotton cloth.
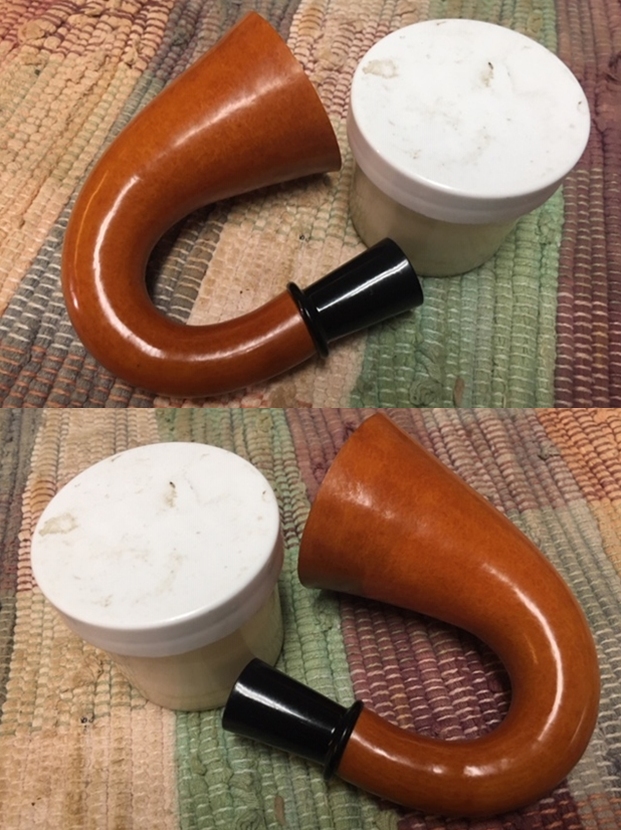

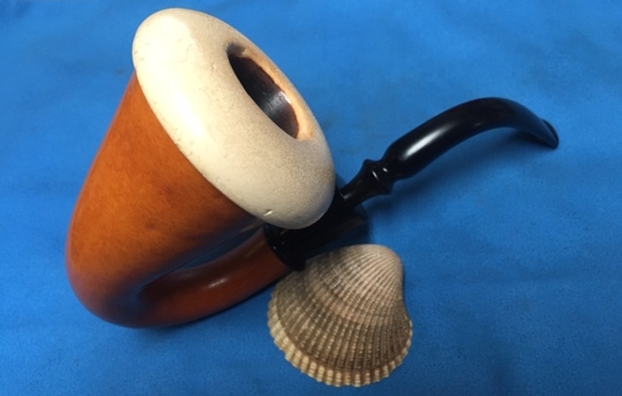
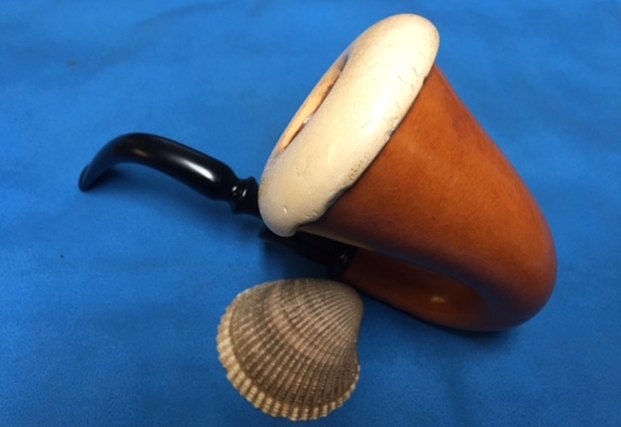
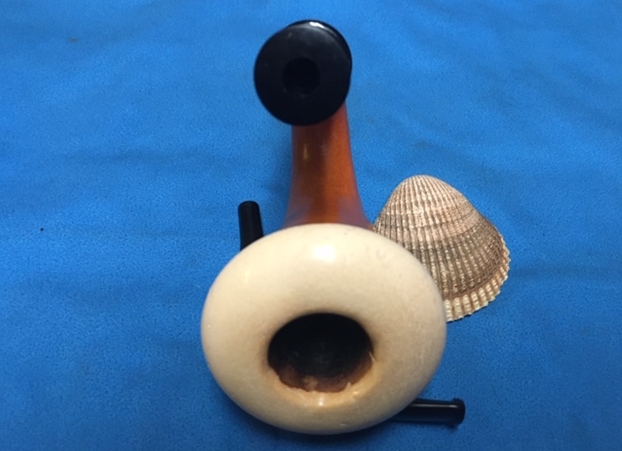
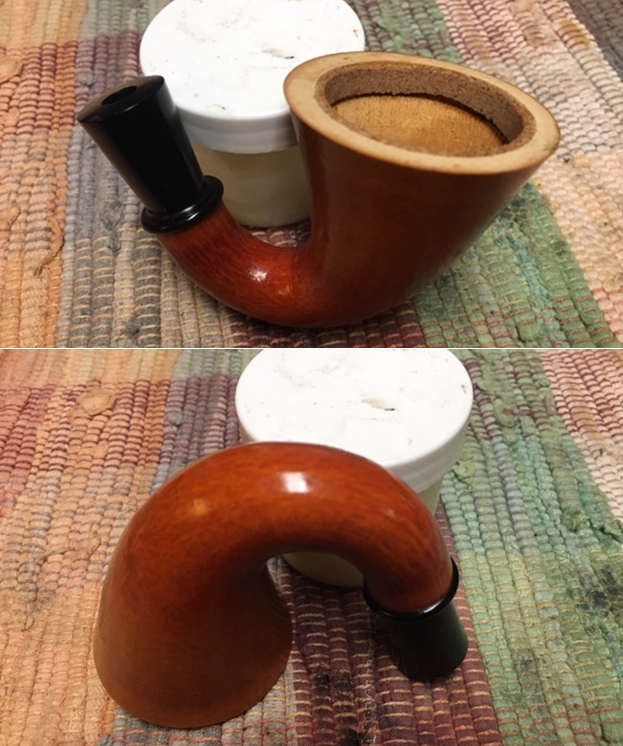
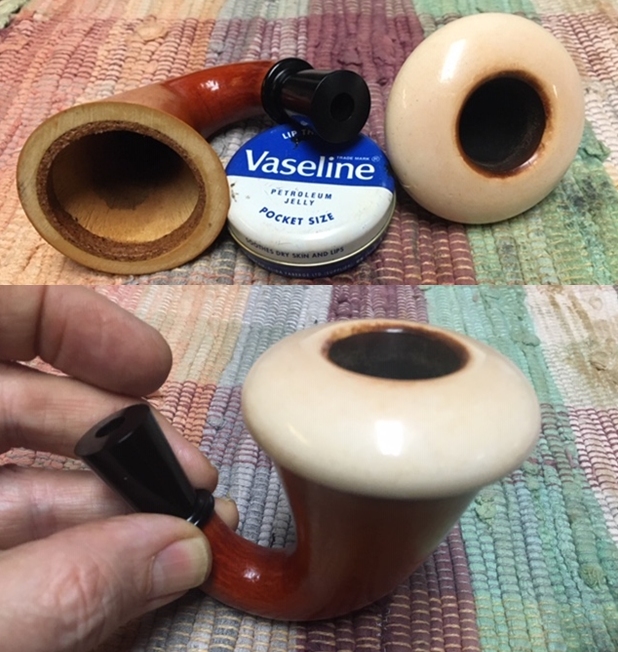
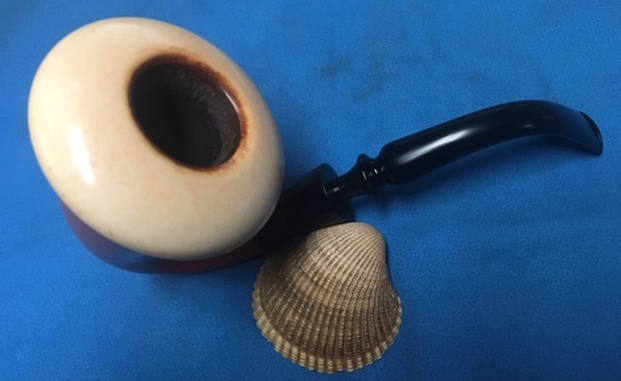
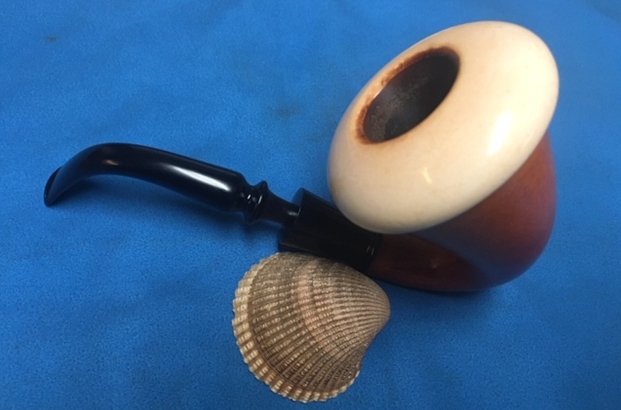
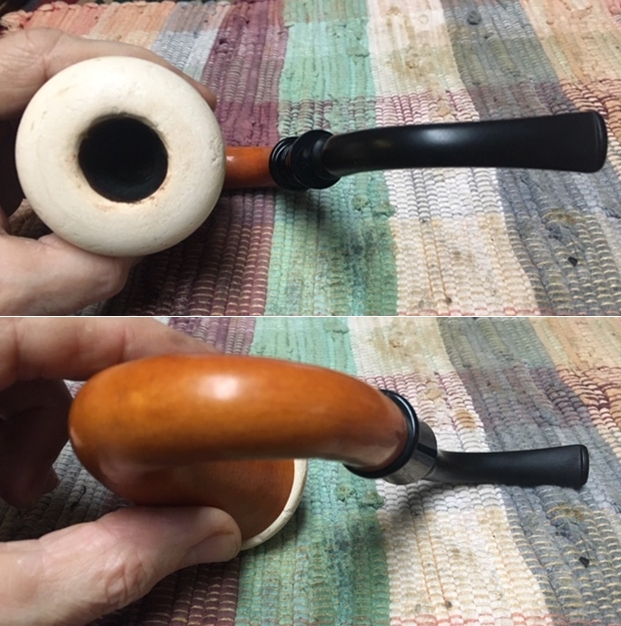
 With the gourd cleaned and polished and the meerschaum cup cleaned and polished it was time to put that part of the pipe back together. I like to rub the cork gasket down with some Vaseline Petroleum Jelly to put some life and elasticity back in the cork. I rub it down with my finger tip and let it sit for about five minute so that the cork absorbs the jelly. Once that is done I can easily insert the cup without fear of damaging the cork. I took photos of the cup in place. You can see the surface of the rim top – lightly pitted but smooth and the chips on the underside in the last photo. This will be a great for someone looking for a deal!
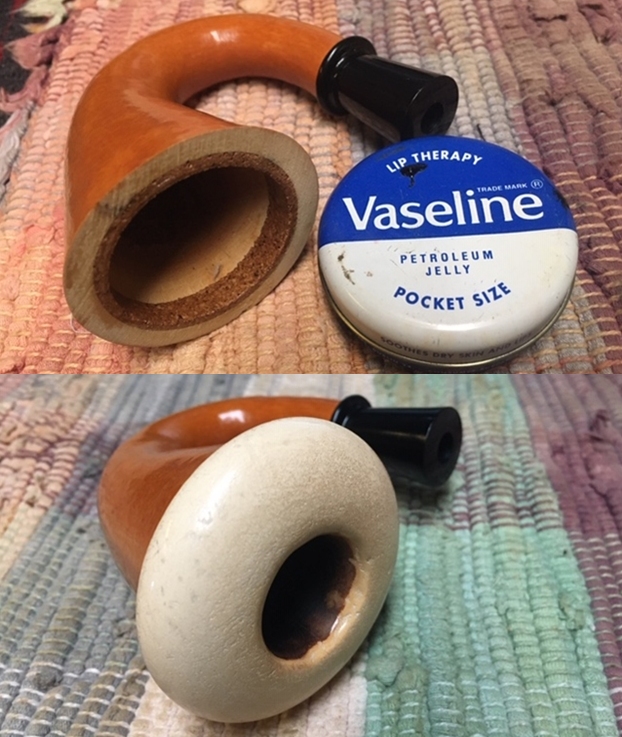
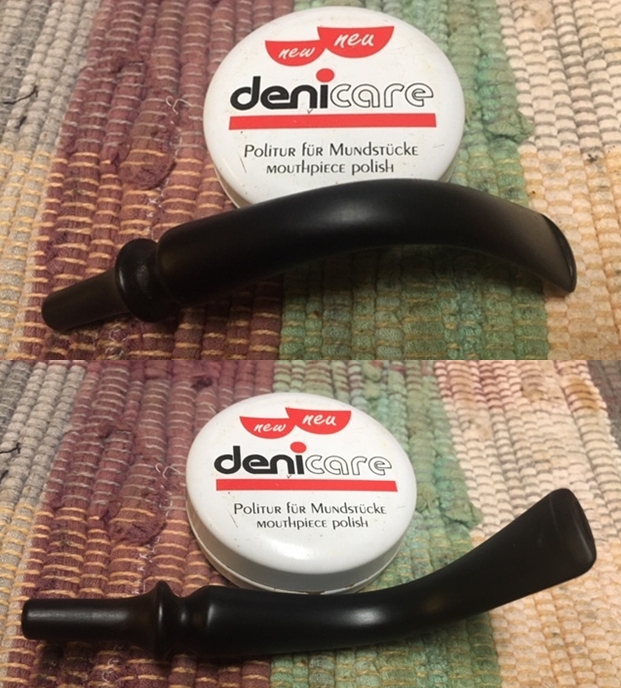
 With the bowl done it was time to address the stem. It was in pretty decent condition and the oxidation was gone on this one. I started the process by rubbing the stem down with Denicare Mouthpiece Polish. I have found it is a great pre-polish for my use as it shows me areas that I need to work on with the micromesh sanding pads.
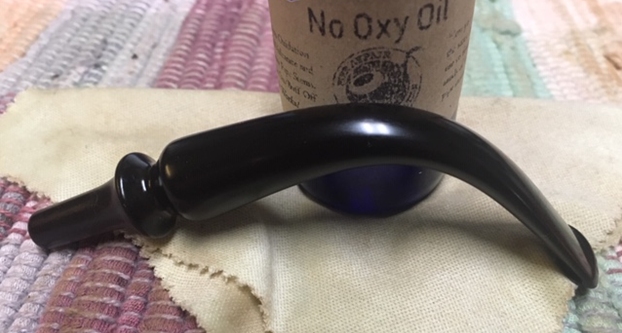
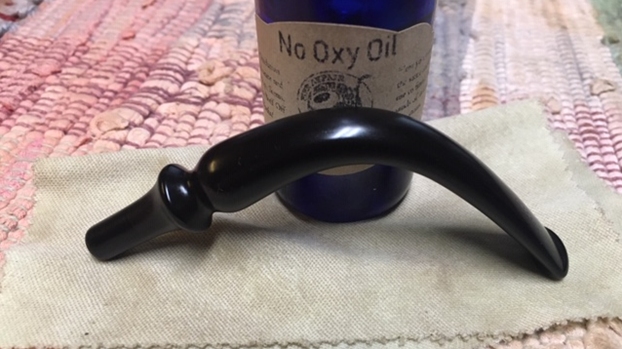
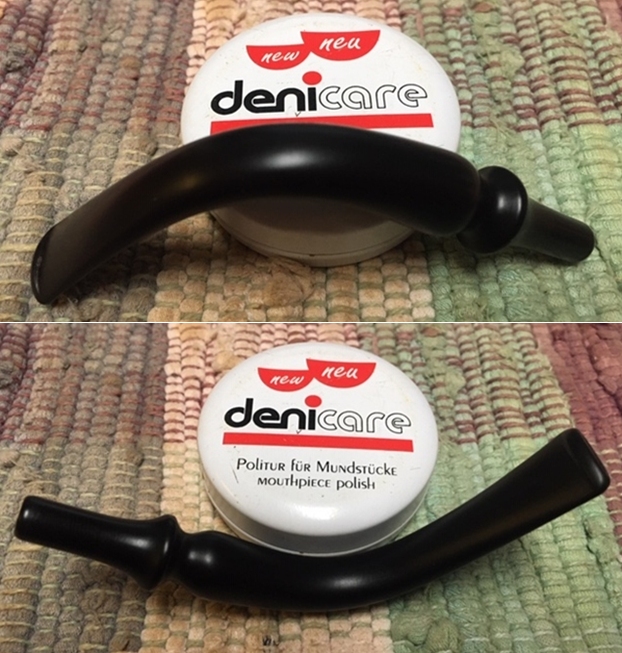 I polished the stem with micromesh sanding pads – wet sanding with 1500-12000 grit sanding pads. I wiped it down after each pad with a damp cloth to remove the sanding dust. I polished it further with Before & After Pipe Polish – both Fine and Extra Fine. I finished by rubbing the stem down with some “No Oxy Oil” to protect the vulcanite. I am continuing to experiment with the product from Briarville and tracking how it works so I can write a review of it.
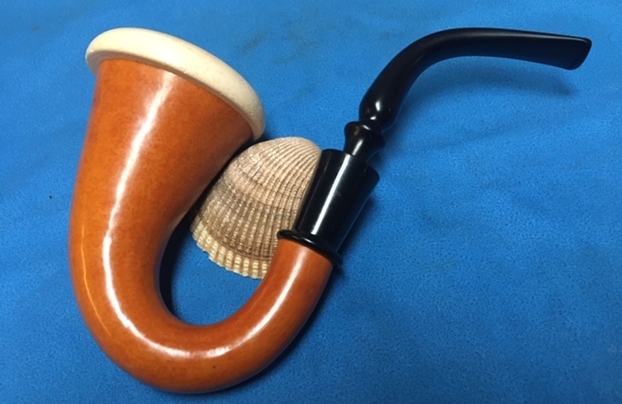
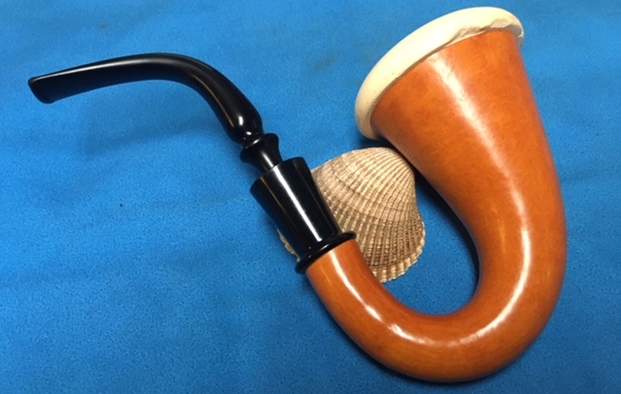
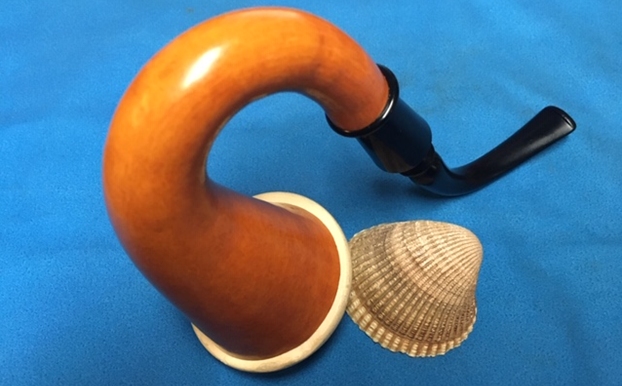
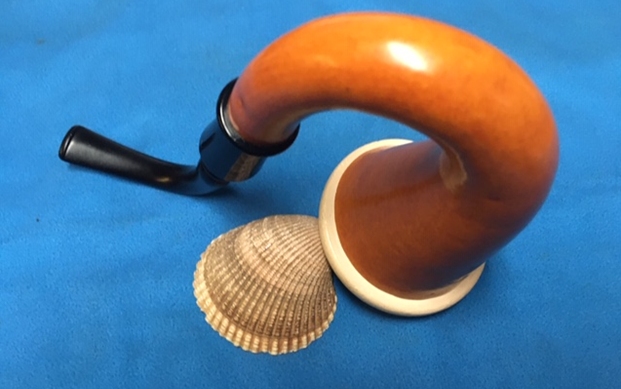
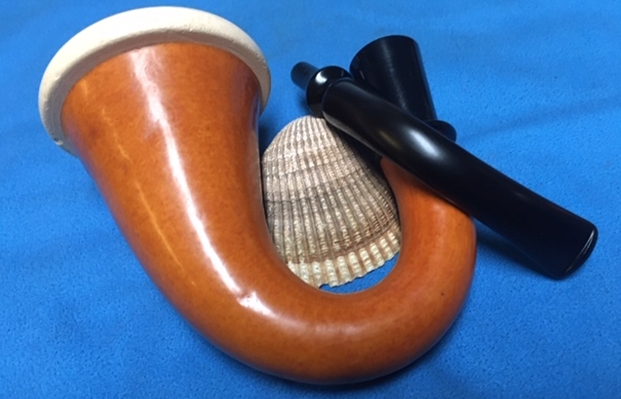
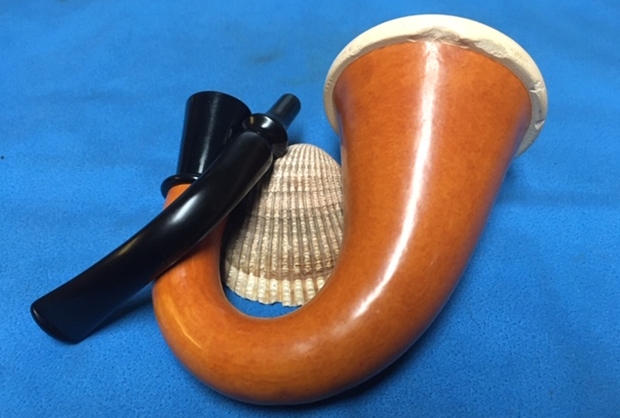
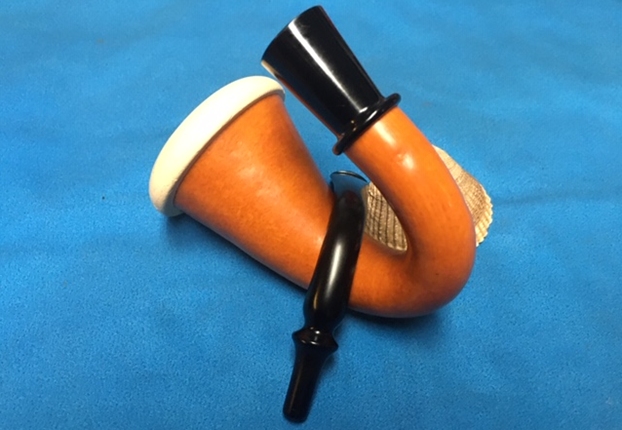
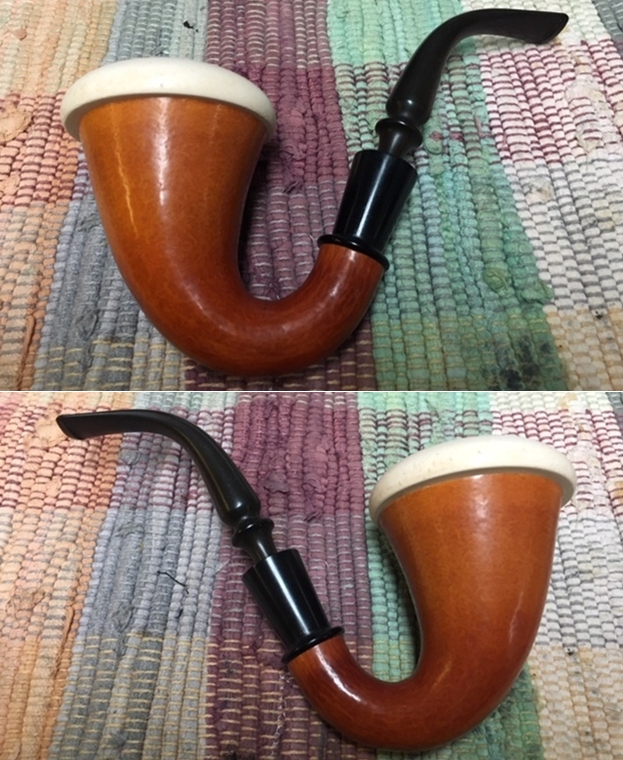
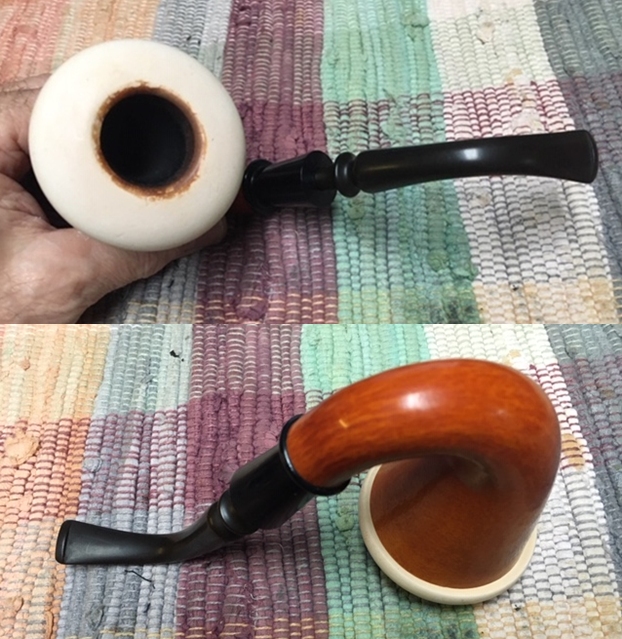
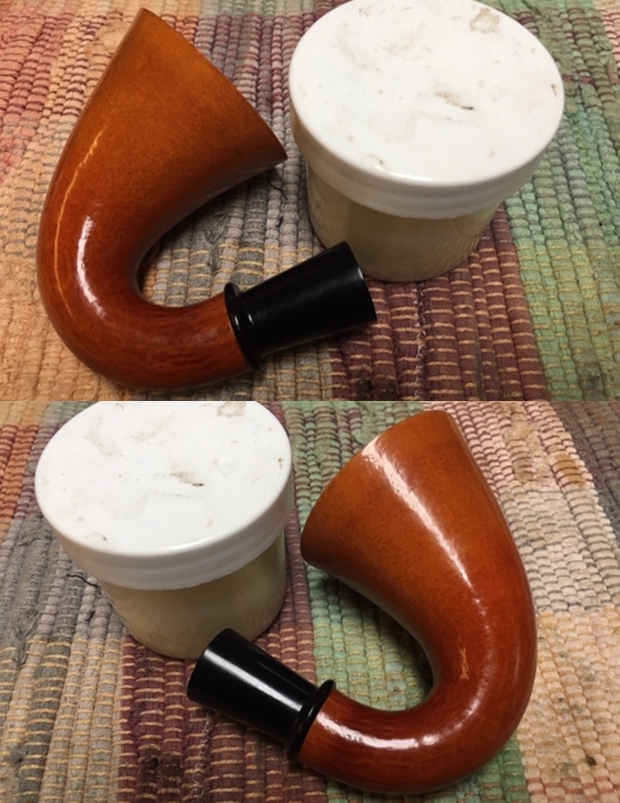
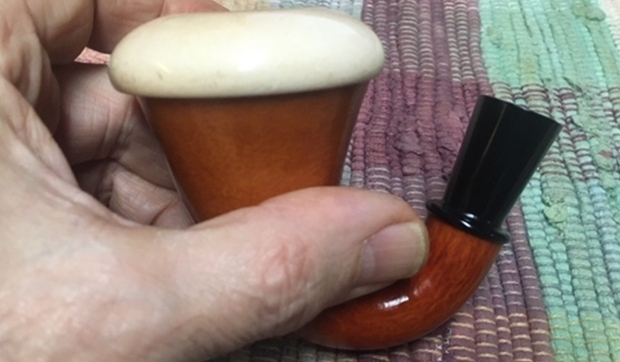
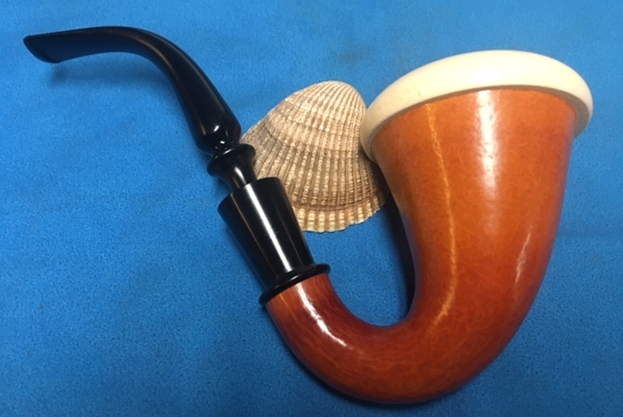
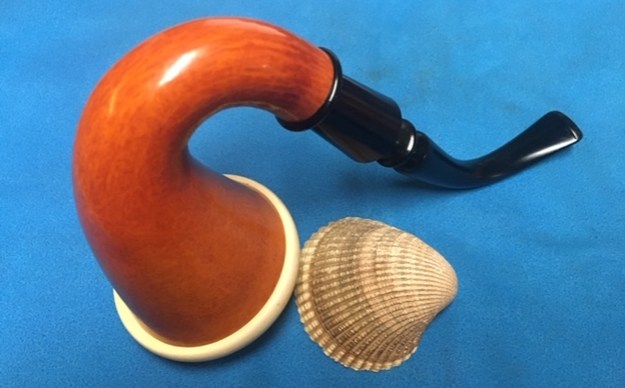
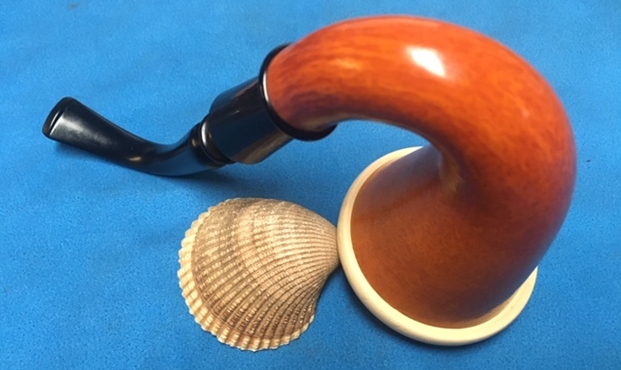
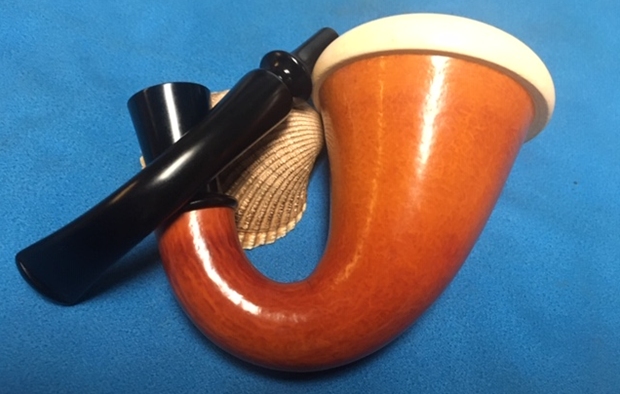
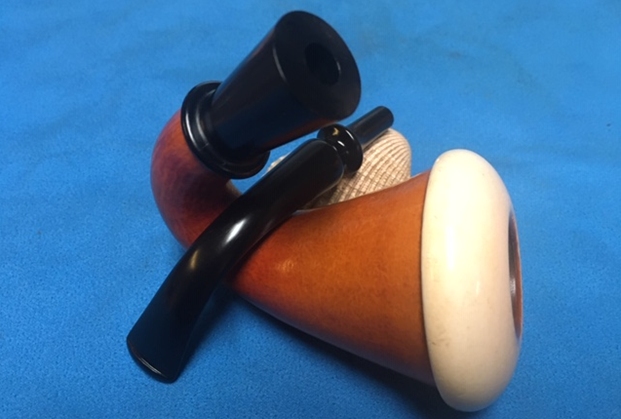
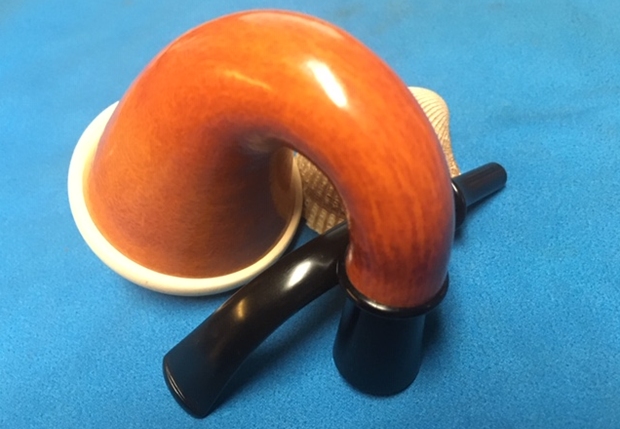
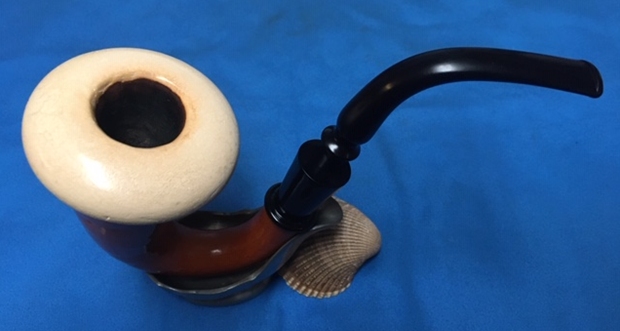
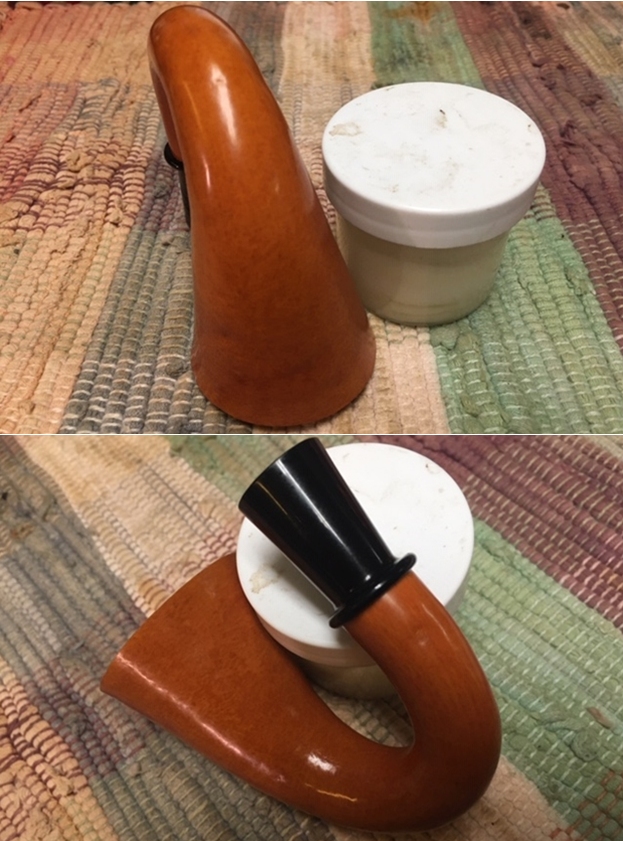
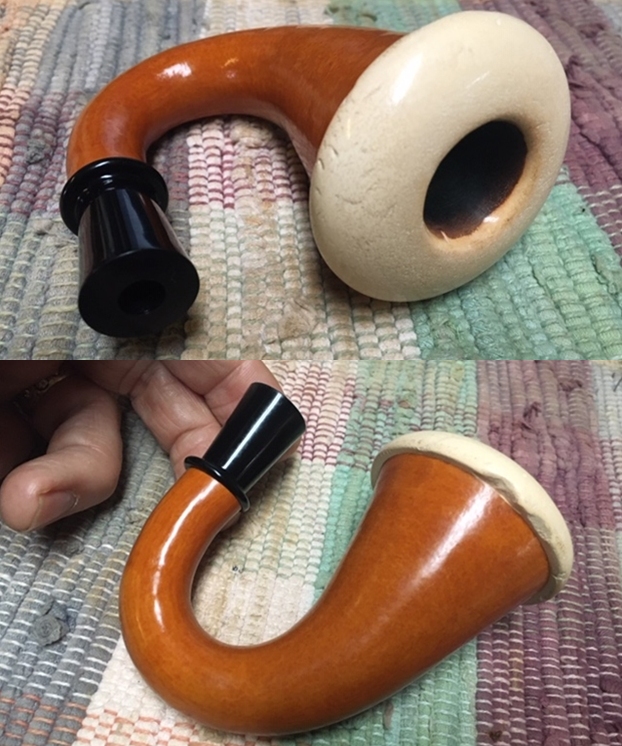
 I am so glad to be finished with the second and last of these Gourd Calabash pipes. When I received them I was not sure we could get any life out of them at all. This second one also proved me wrong. It came out really nicely and looks really good. It will make a good, inexpensive entry pipe for someone wanting to try out a Gourd Calabash pipe. The look of it makes me think is a Pioneer but no way to be sure of that. It would fit the 1960s and 70s. Like each of the pipes in Bob’s estate I really look forward to this point in the process when it is put back together, polished and waxed. I put the bowl and stem back together. I carefully gave the bowl and the stem multiple coats of carnauba wax. I buffed the pipe with a clean buffing pad to raise the shine. I hand buffed it with a microfiber cloth to deepen the shine. The pipe polished up pretty nicely. The gourd has character and a deep shine that really came alive with the wax and polish. The meerschaum cup looks good on it and the black of the fancy vulcanite stem is a beautiful contrast to the golden gourd and white meerschaum. This turned out to be a lot of fun to work on thanks to Jeff’s cleanup work. The pipe is comfortable pipe to hold in the hand. The finished pipe is shown in the photos below. The dimensions of the pipe are Length: 6 ½ inches, Height: 3 ¾ inches, Outside diameter of the bowl: 2 ½ inches, Chamber diameter: 7/8 of an inch. This beautifully shaped Calabash is a great introduction to the world of Calabash pipes. It is a beauty that should last for many more years. It is one that will be on the rebornpipes store very soon. If you are interested let me know. I have a lot more of Bob’s estate to work on of various brands. Perhaps one of those will catch your attention. Thanks for reading this blog and my reflections on the pipe while I worked on it. This is an interesting estate to bring back to life.