Tag Archives: polishing a stem

Celebrating the Re-Opening of My Store with a Restoration


Guest Blog by Robert M. Boughton
Member, International Society of Codgers
Member, North American Society of Pipe Collectors
http://www.naspc.org
http://www.roadrunnerpipesnm.biz
http://about.me/boughtonrobert
Photos © the Author

“The people like to be humbugged.”
“Unless a man enters upon the vocation intended for him by nature, and best suited to his peculiar genius, he cannot succeed.”
“Nobody ever lost a dollar by underestimating the taste of the American public.”
“The noblest art is that of making others happy”

― Phineas Taylor Barnum (1810-1891), U.S. showman, businessman, politician, celebrated hoaxer and founder of the Barnum & Bailey Circus

INTRODUCTION
P.T. Barnum was a man of contradictions, as the quotes above suggest, making him an obvious two-time Republican candidate for state legislator in the Connecticut General Assembly, both of which races (at different periods of his eventful life) were successful. Business, however, was always his first love, and by the age of 12, in Bethel, Connecticut, he earned enough money selling snacks and homemade cherry rum to buy his own livestock. By 21, he owned a general store and a newspaper called “The Herald of Freedom,” and ran a small lottery.

The Greatest Showman on Earth, who insisted his customers were willing participants in his obvious pranks and hoaxes, never said the line most attributed to him: “There’s a sucker born every minute.” Hence the first quote above. Barnum’s fame began with the 1835 purchase of a blind slave named Joice Heth, whom he advertised, in one of his greatest hoaxes, as being 161 years old and the one-time nurse of George Washington. During her tour of New York City and New England, throngs of gawkers paid to hear the old woman spin tale of “dear little George.” To heighten the already wild frenzy around Heth, Barnum later spread the rumor that she was, in fact, an automaton manipulated by ventriloquists. At Heth’s autopsy in 1837 – to which Barnum sold tickets – medical examiners determined that she was probably 80 at the oldest.

Despite his purchase of a slave, to whom he no doubt gave far better treatment than her former owners, as a legislator in later years Barnum was a strong advocate of equal rights for African-Americans. And likewise, giving up all liquor, including the cherry rum that started his long run in business, Barnum became a devout supporter of the Temperance Movement and remained committed to it until he died.

Other than Heth, three of Barnum’s best-known “exhibits” were a child dwarf he called General Tom Thumb, who was even granted a royal audience by England’s Queen Victoria; the Fejee Mermaid [see “The X Files,” S2, E20, “Humbug”], or the top half of a dead monkey sewn to the lower part of a fish, and his giant, six-ton African elephant named Jumbo, which was bought under wide protest from the London Zoölogical Society and led to the adjective jumbo, or large.

There are far too many more titillating examples of Barnum’s contradictory exploits and far too little space to go into any of them here, but you get the point. At least I hope you do. In a market-driven economy, advertising, publicity and flair are everything, and they form the unabashed purpose of this blog: to celebrate the grand re-opening of my online pipe restoration and sales business with the latest addition to its stock.

The selection has diminished in size during the past few months that the webstore was down, due both to continuing sales the old-fashioned way – hand-to-hand – and a plethora of personal issues, including moving again and several pressing legal matters in which I am prevailing through appeals despite being up against real attorneys, that have until recently eaten away at the time I prefer to devote to pipe work.

As the Steve Miller Band might have sung had they been writing of my better spent daily life:

This here’s a story about Bobby Mike and his stew,
One young lover with nothin’ better to do
Than sit around the house, smoke his pipes, and watch the tube
And here is what happened when he decided to cut loose….

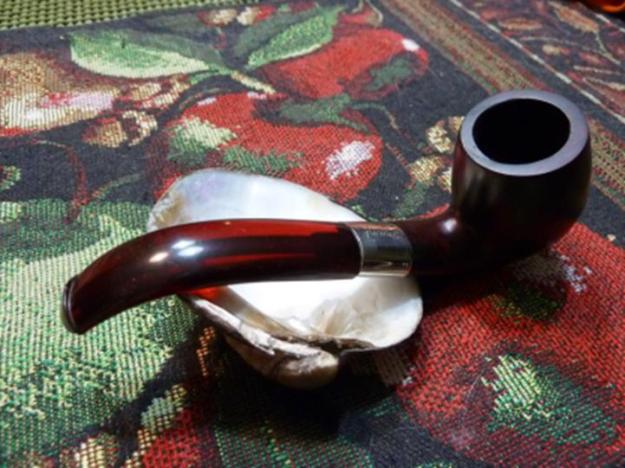
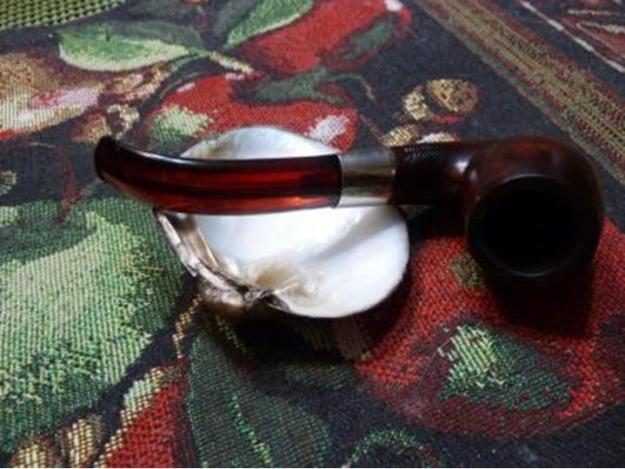
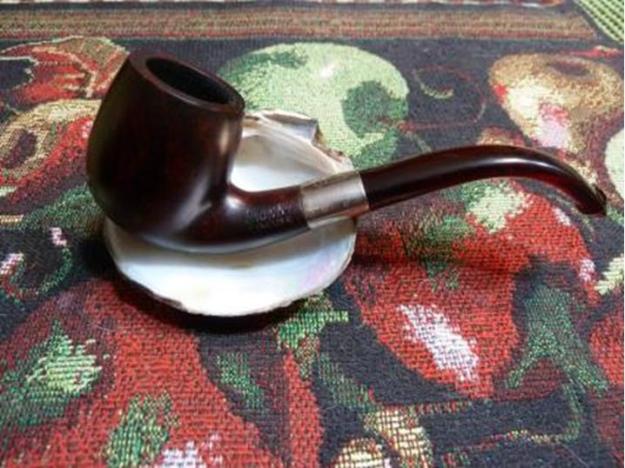
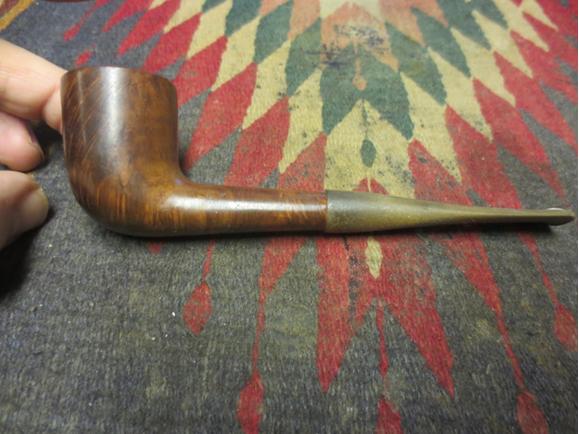
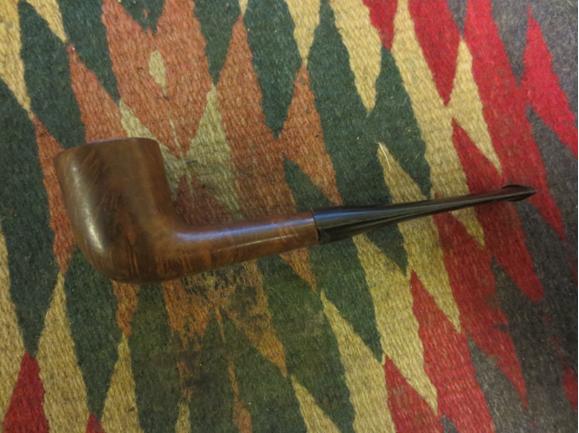
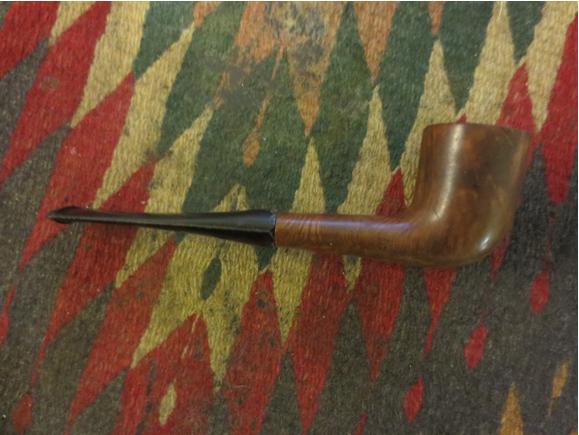
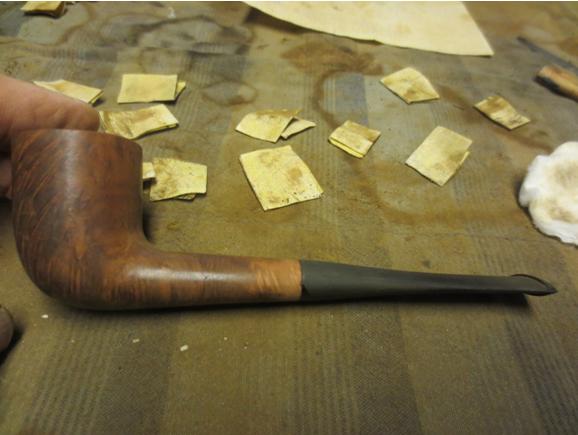
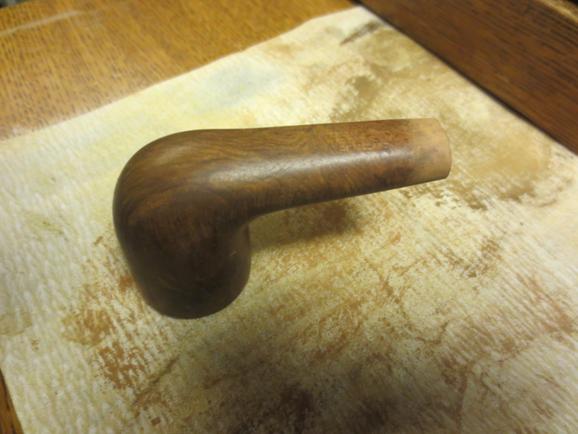
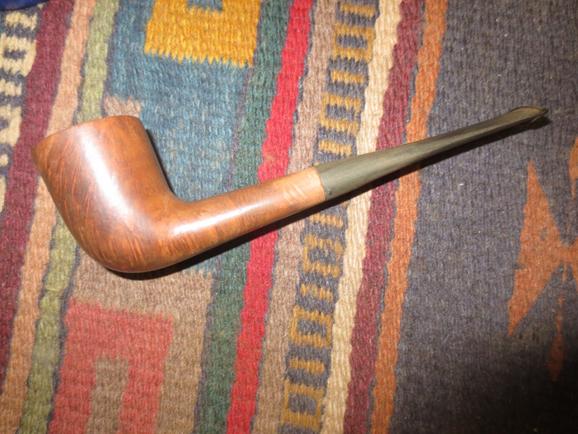
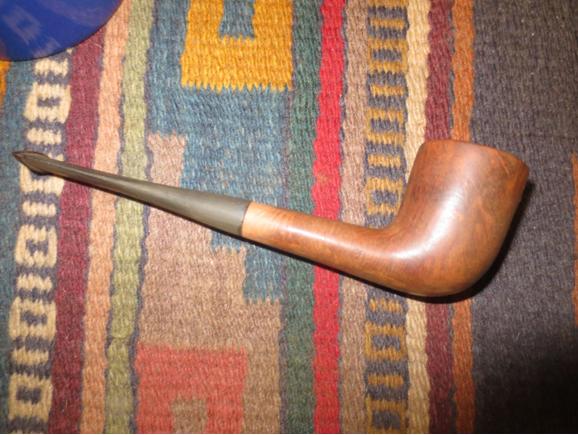
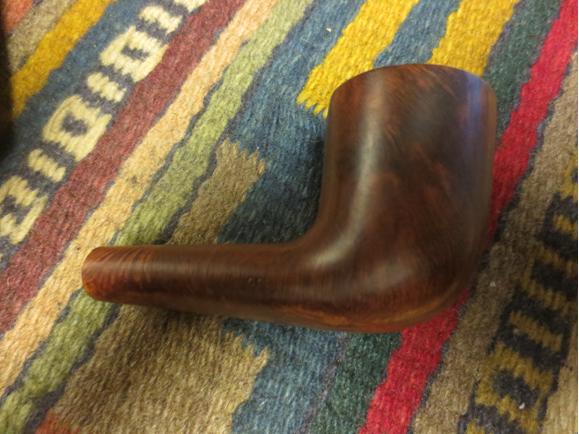
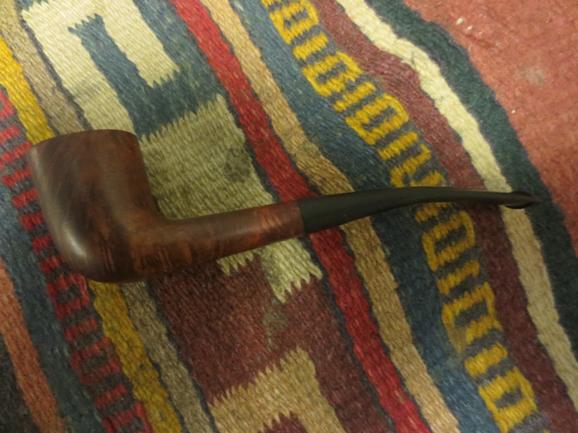
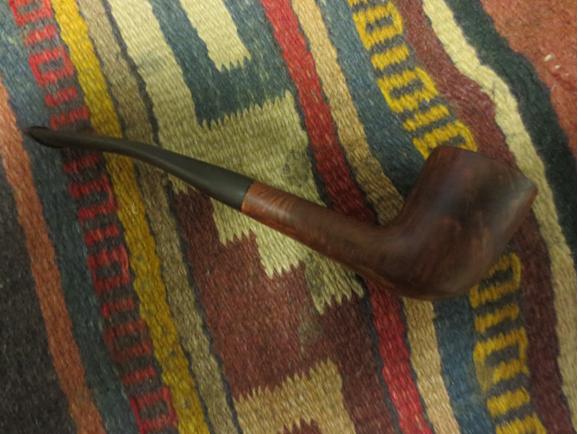
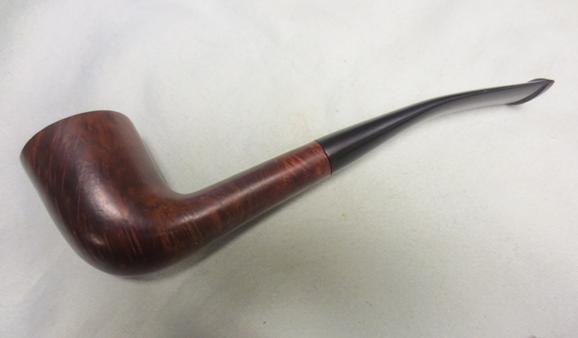
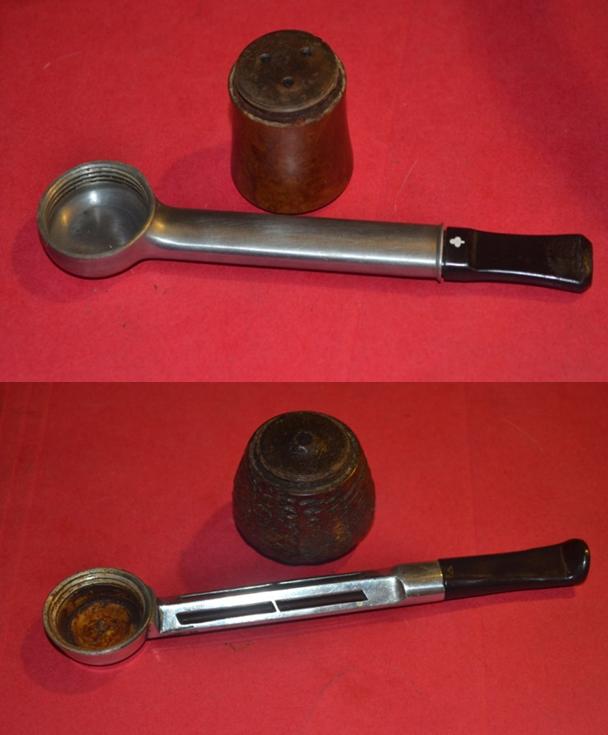
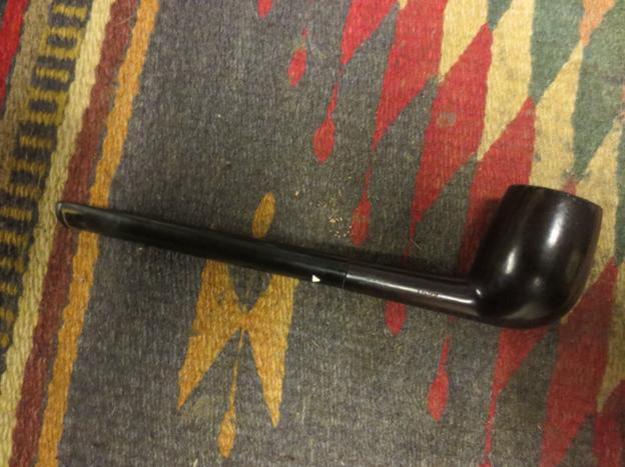
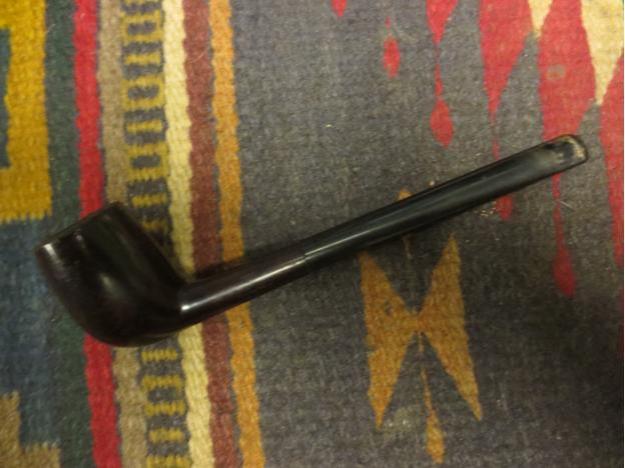
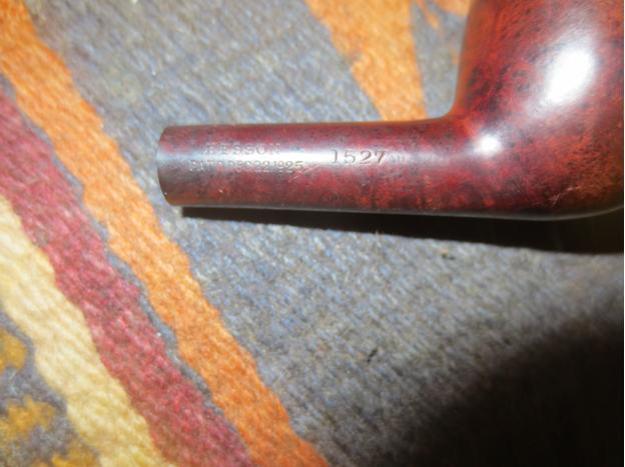
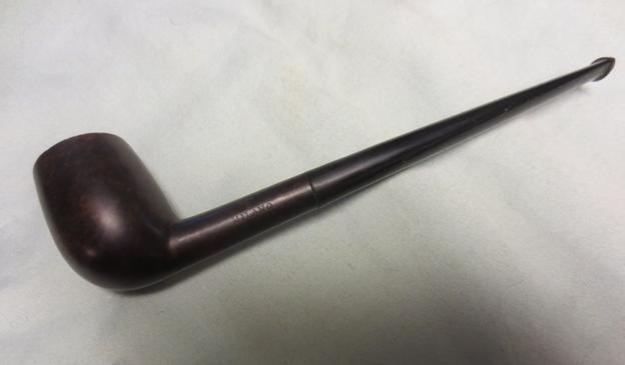
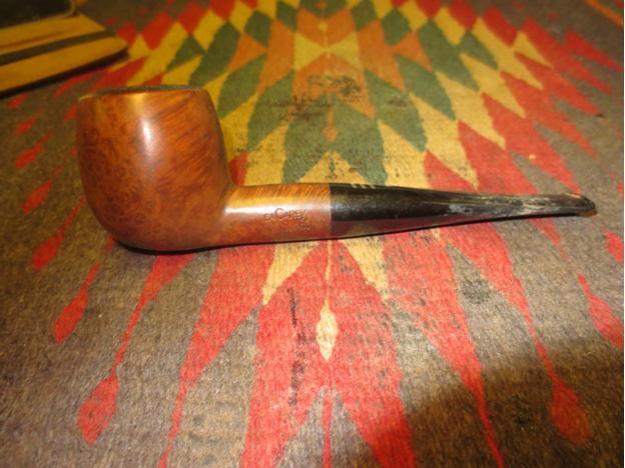
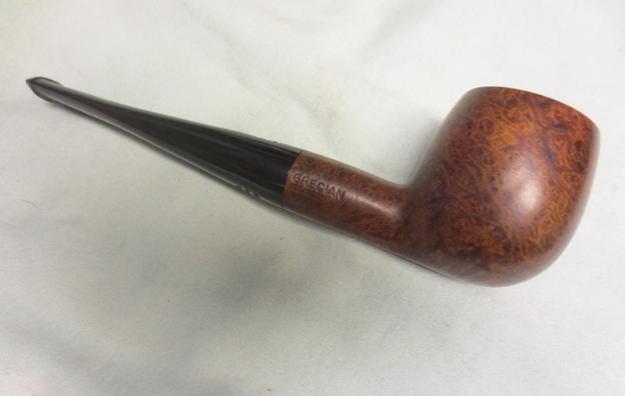
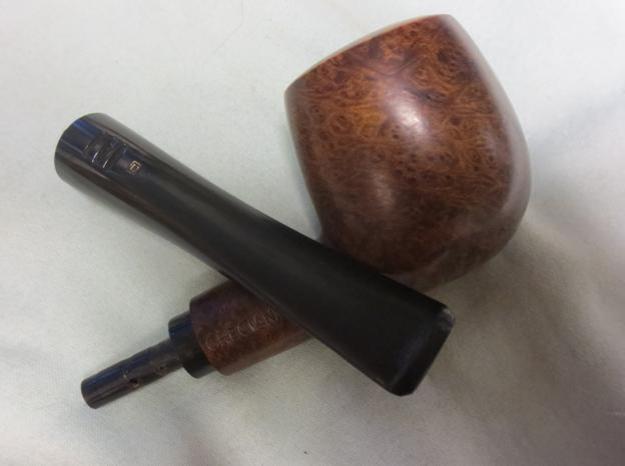
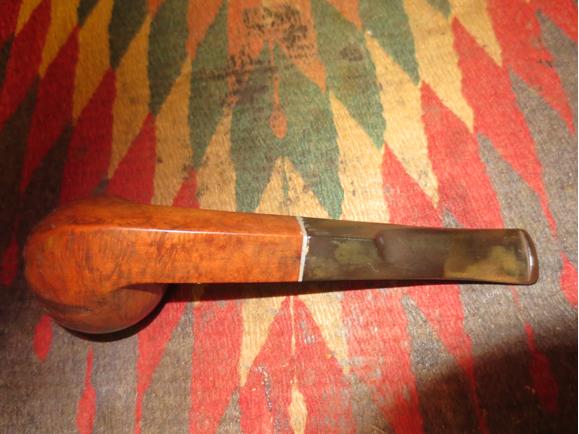
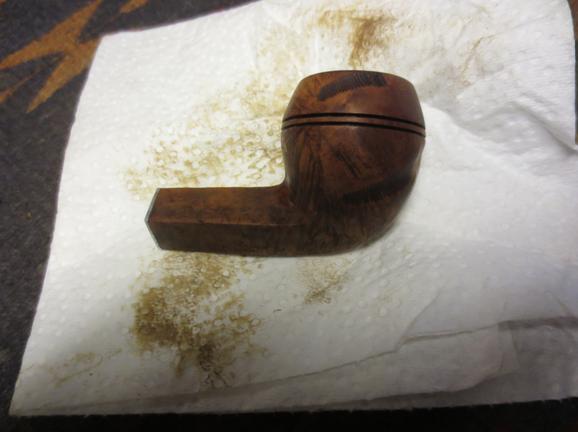
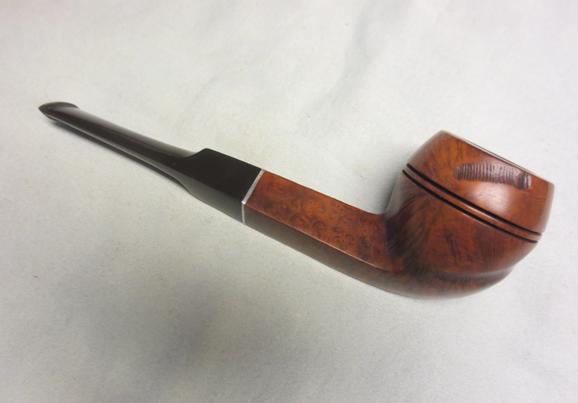
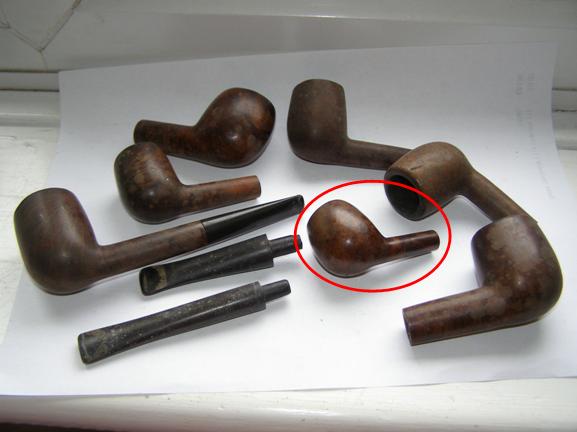
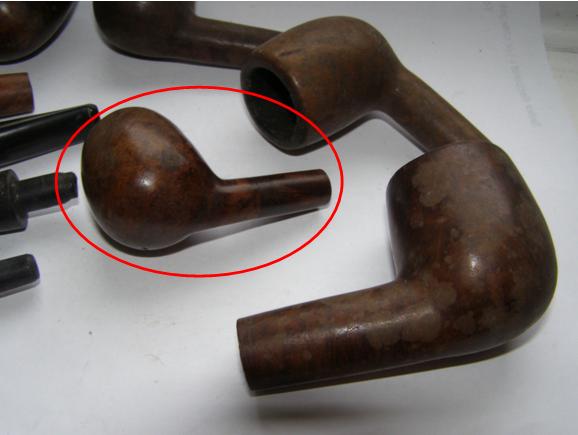
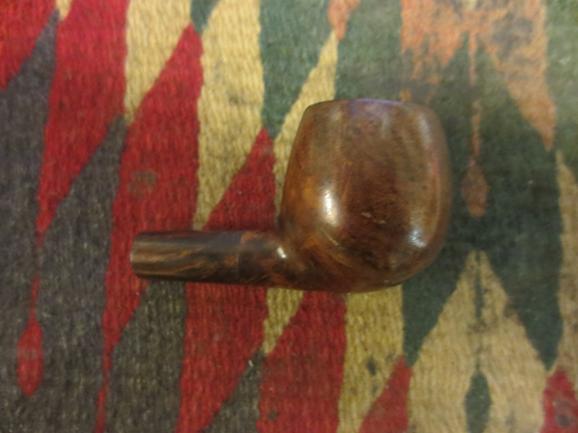
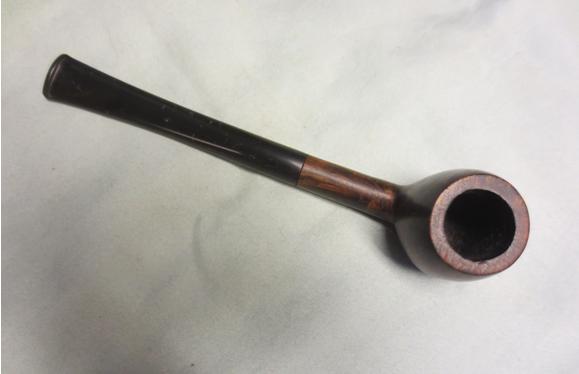
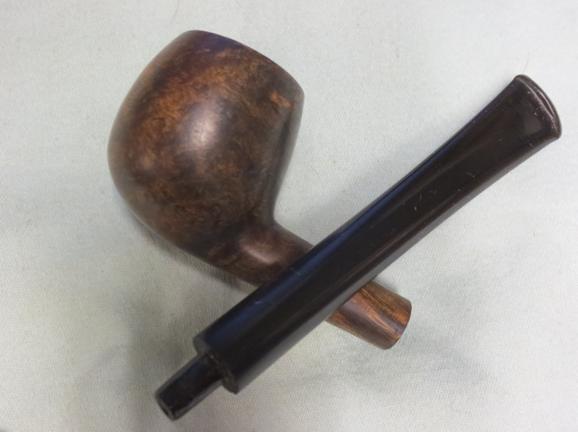
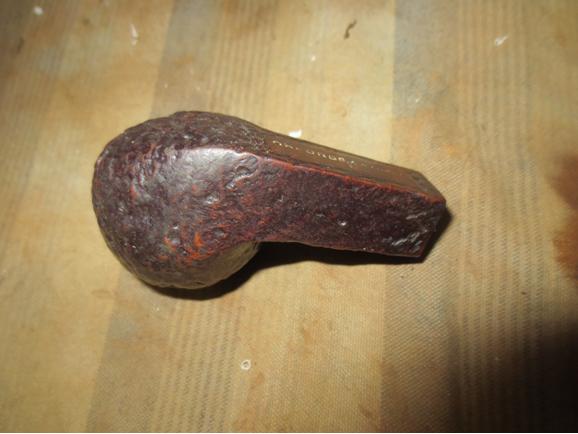
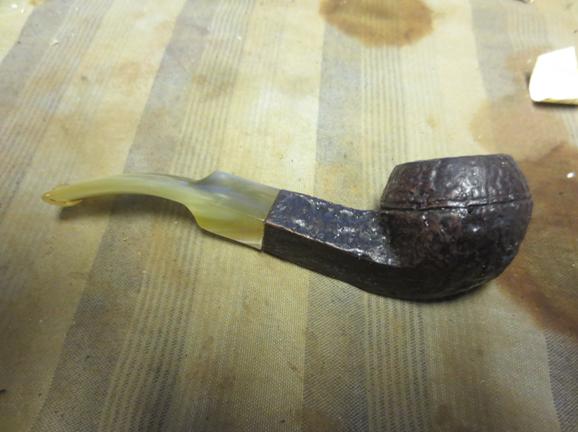
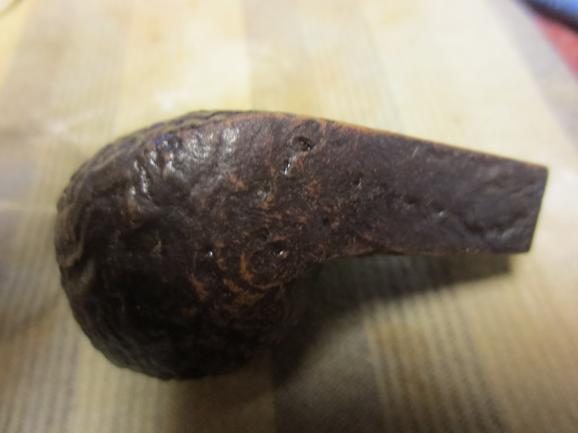
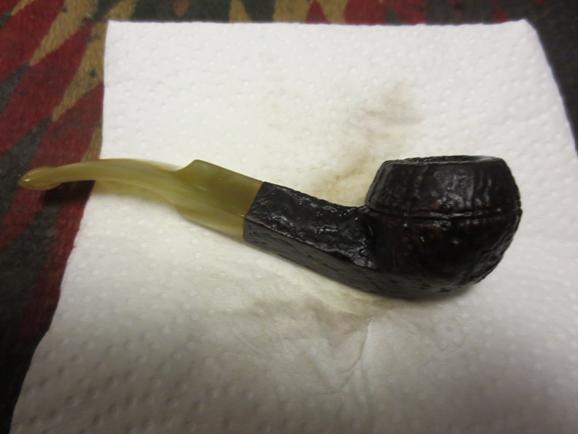
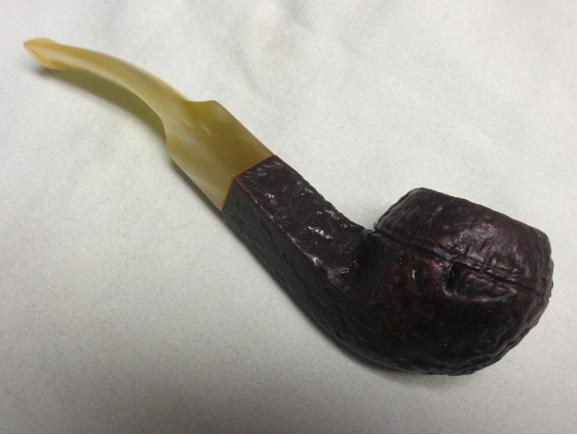
With no further ado, I am pleased to call out in a booming voice, though it be in written words, “La-dies and gen-tle-men, who are children of all ages, welcome to the greatest, most amazing, daring, thrilling and spectacular show on Earth! The circus known round the world as pipe restoration! And now…in the Center Ring…turn your eyes toward the wonderful and awe-inspiring silver-banded bulldog ! All the way from England, measuring an astonishing six inches in length and a 6/8” x 5-1/4” chamber diameter, and called the Atwood Hall of Fame Natural #5, of the world-renowned Comoy’s family!”

RESTORATION
Rob1

Rob2

Rob3

Rob4

Rob6

Rob7

Rob8 
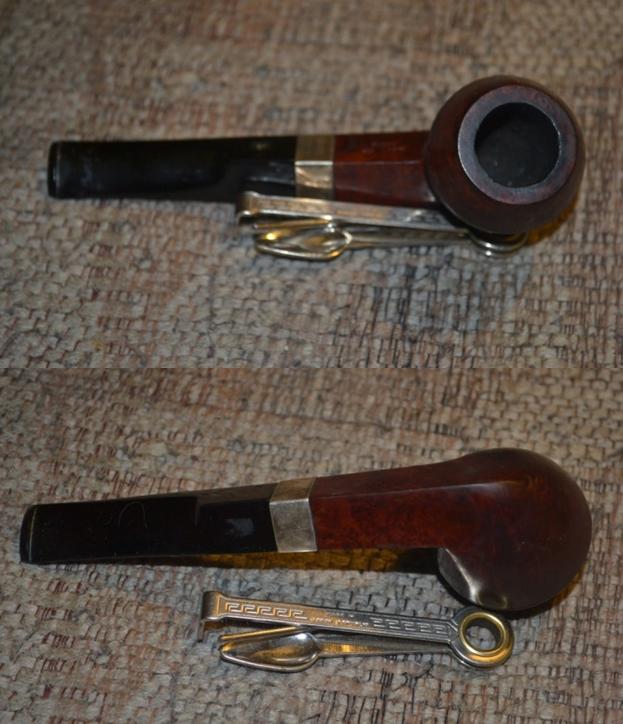
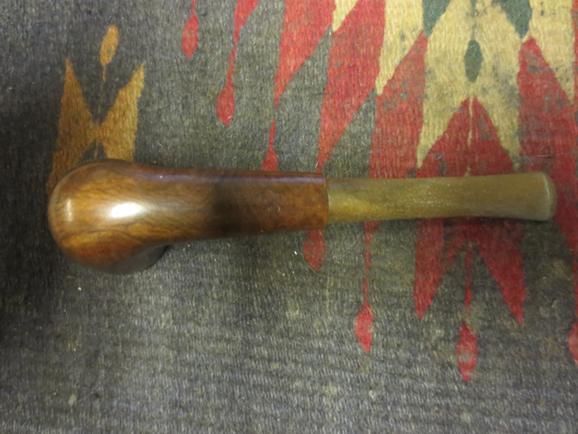
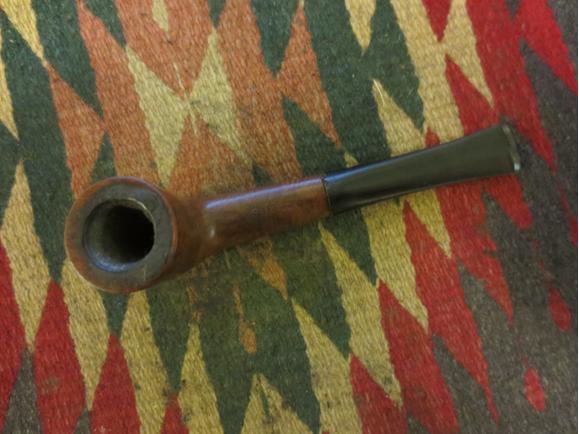
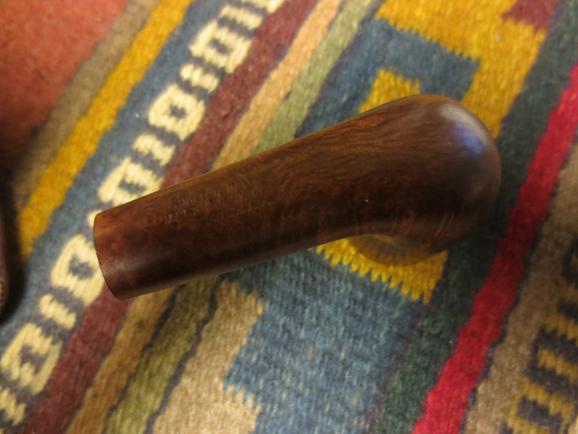
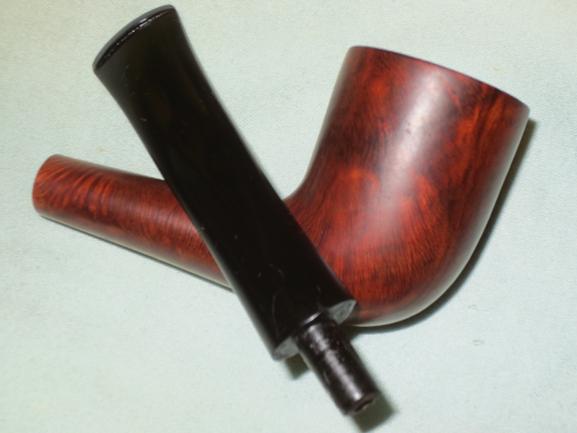
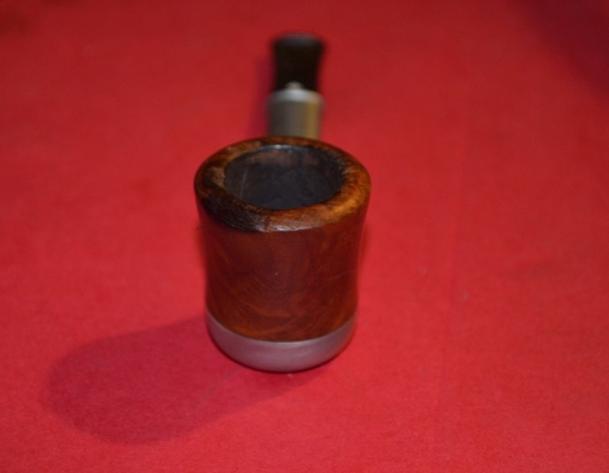
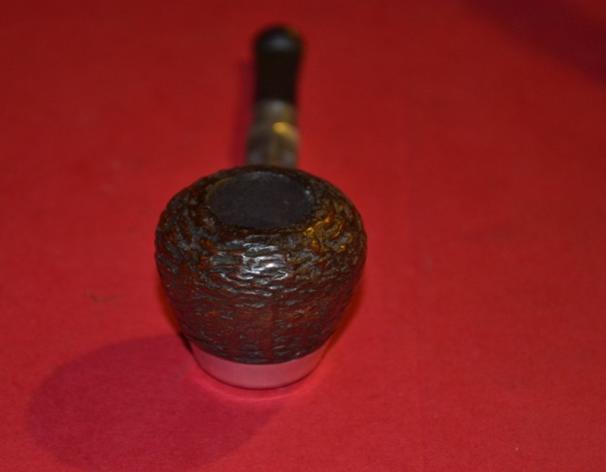
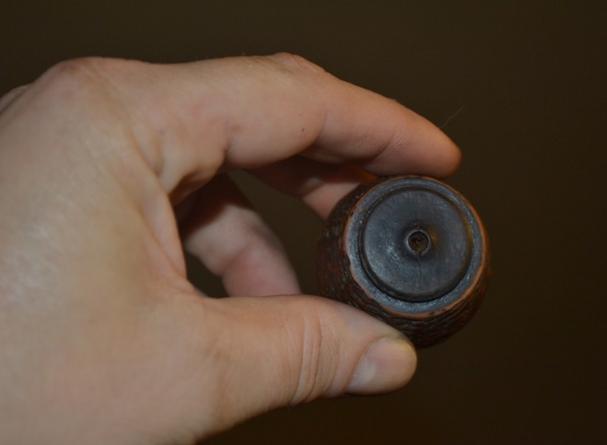
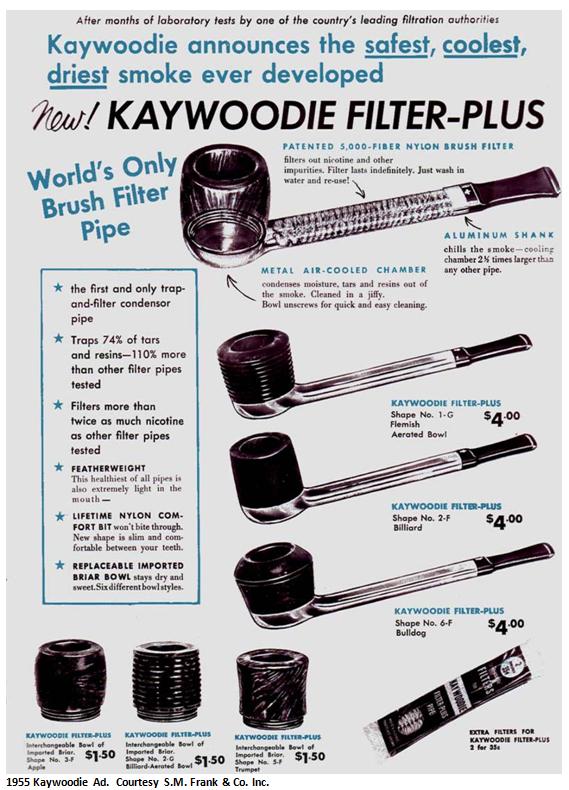
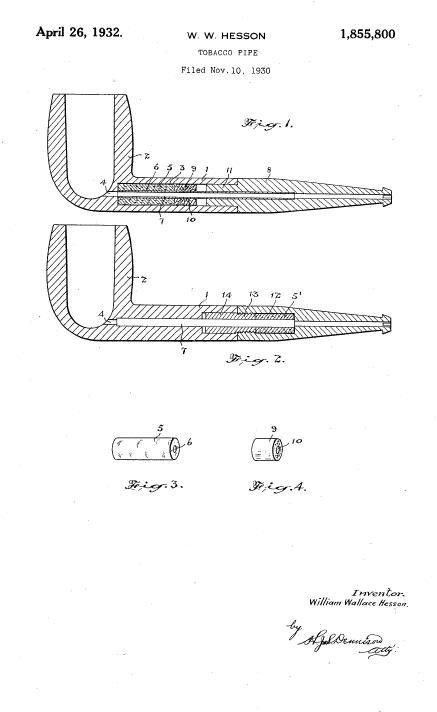
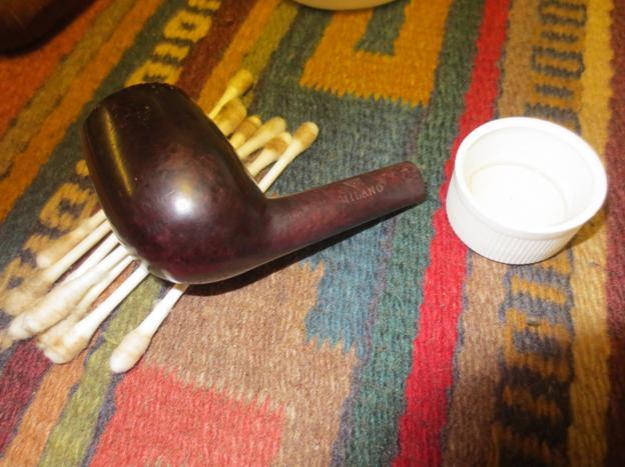
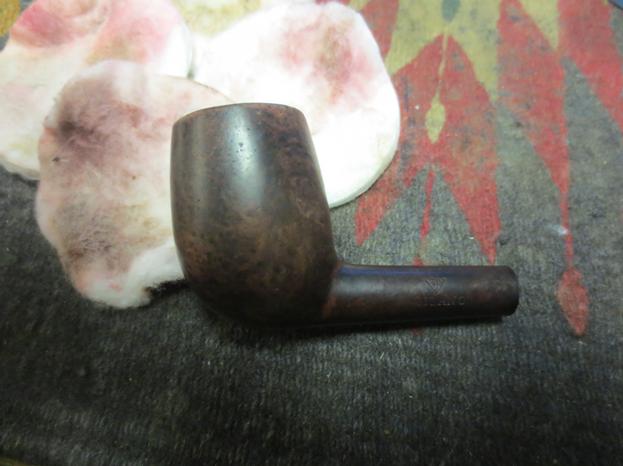
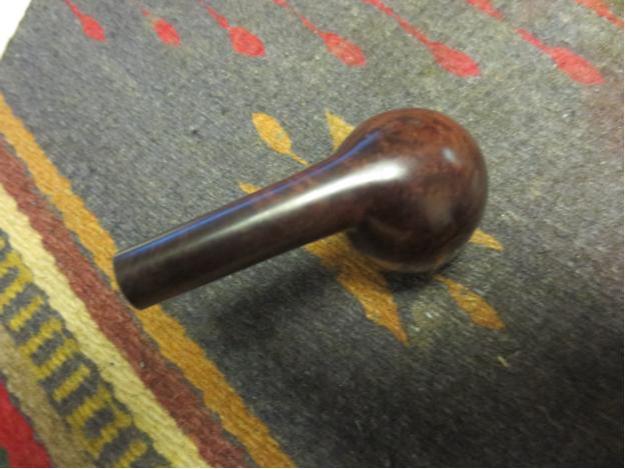
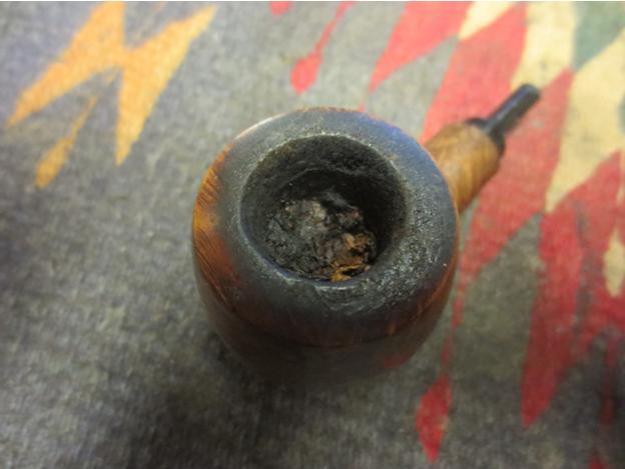
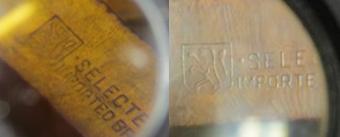
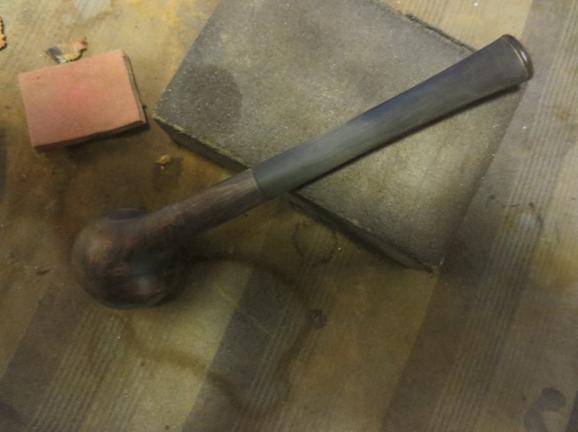
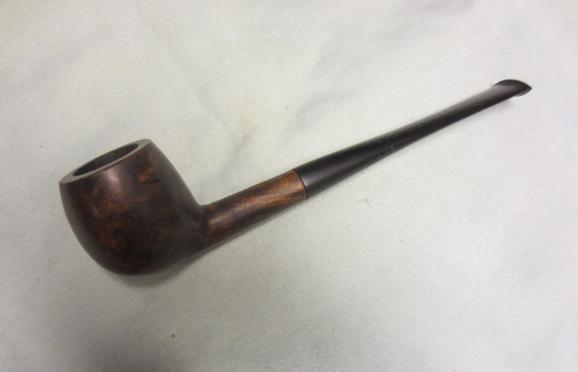
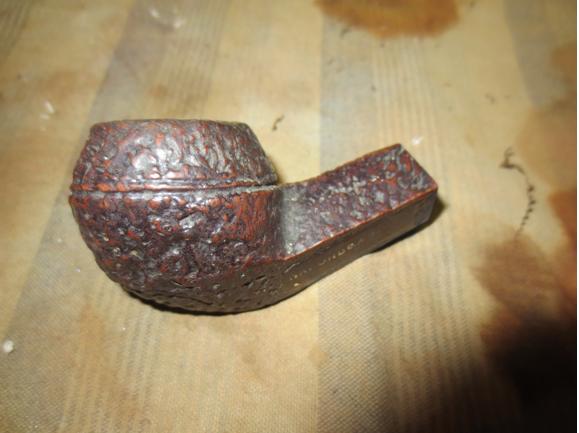
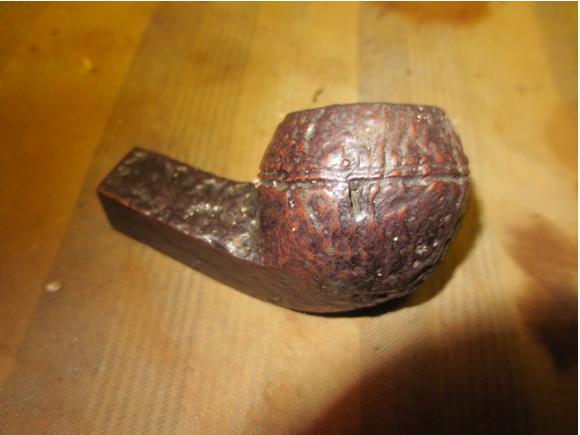
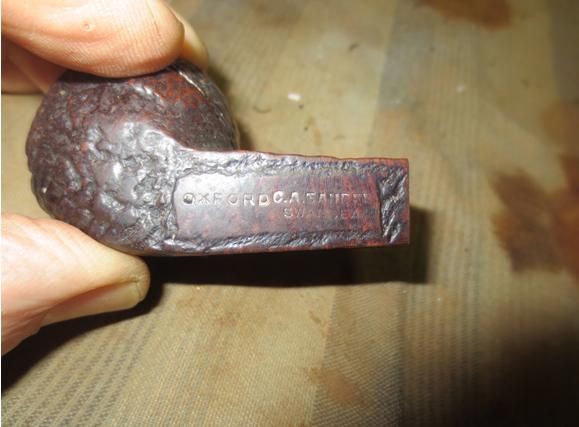
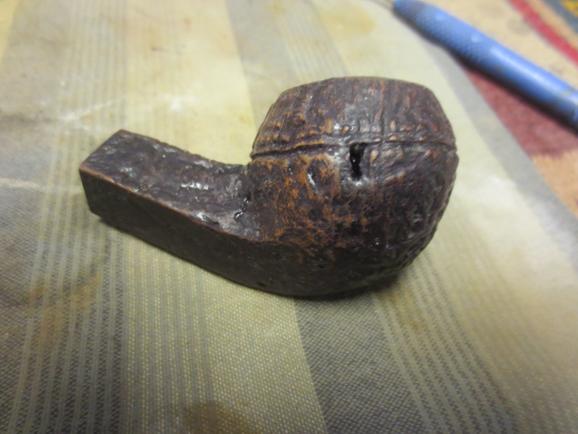
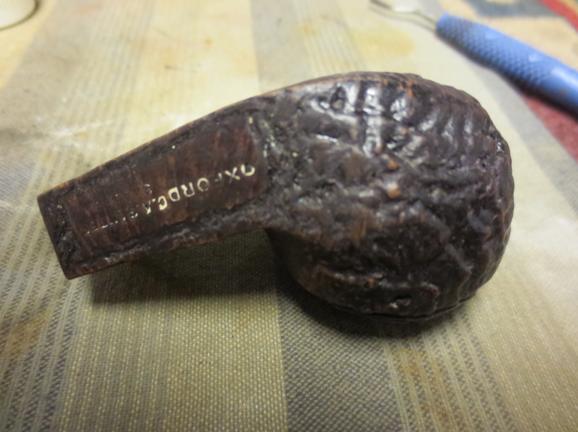
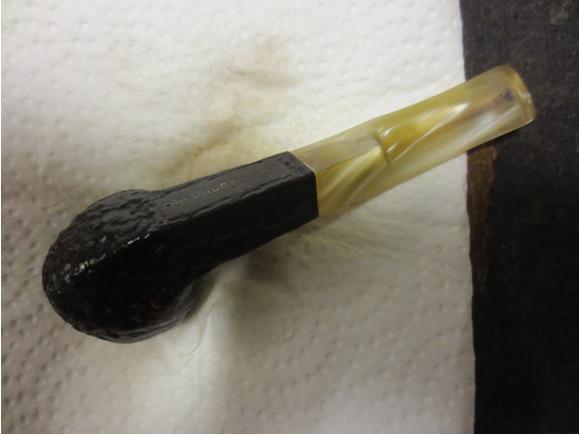
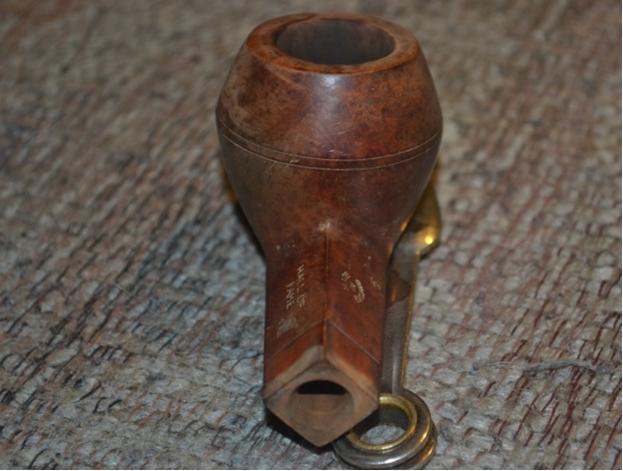
Sixty-three years after it was made and, my intuition tells me, loved by a single owner, there are numerous signs of wear and tear. Still, scratches on almost every inch of the stummel and bit, not to mention a few outright dings, are the pith of the blemishes, not counting the almost inevitable loose sterling silver band. These flaws are negligible considering the venerable pipe’s age and obvious regularity of use. Even the band – which, given the thinness of the inherently fragile material itself, invites heavy tarnish, bending and total obliteration of any hallmarks or stampings – was almost pristine, and is once more, still showing showing the single word of its substance, STERLING, and by more careful examination three hallmarks – something I can’t make out following by a T and a 5. Here is the first page of the original (and apparently only) Atwood U.S. Patent, showing the same design of the Hall of Fame 1953 Brandy.

Atwood
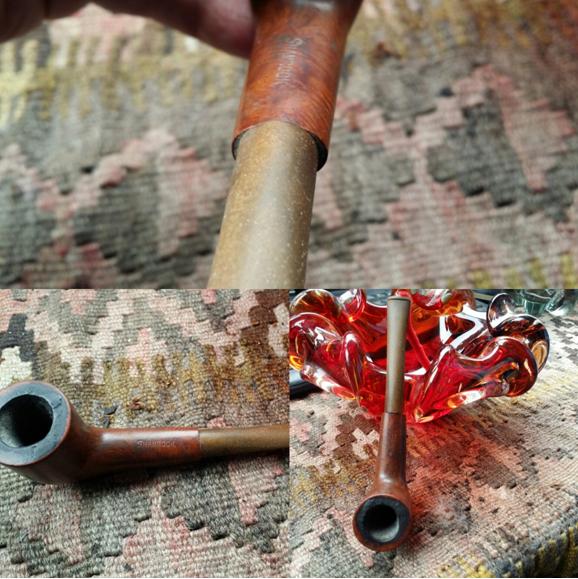
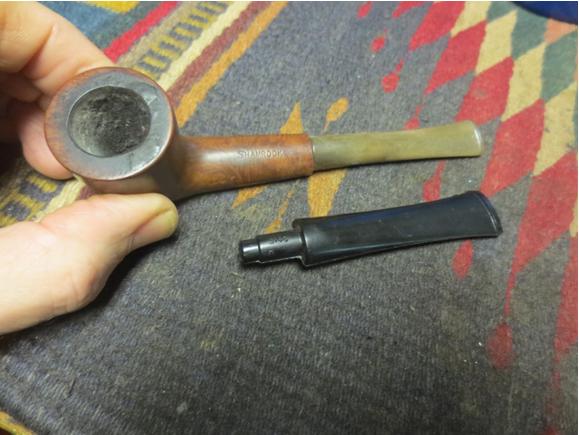
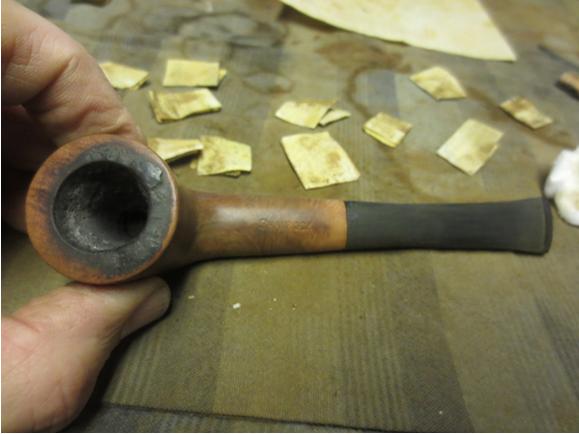
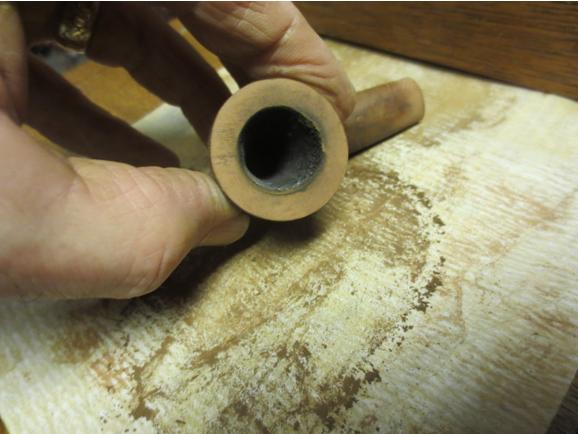
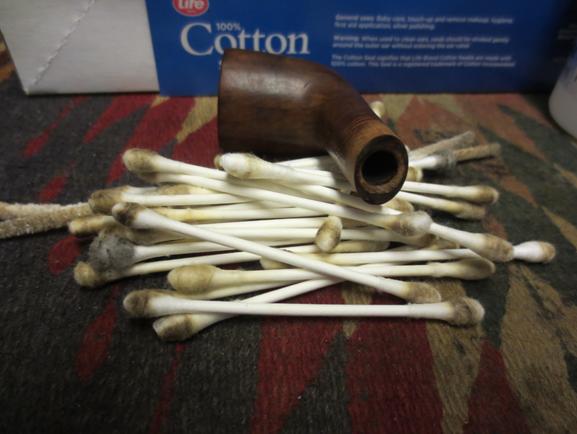
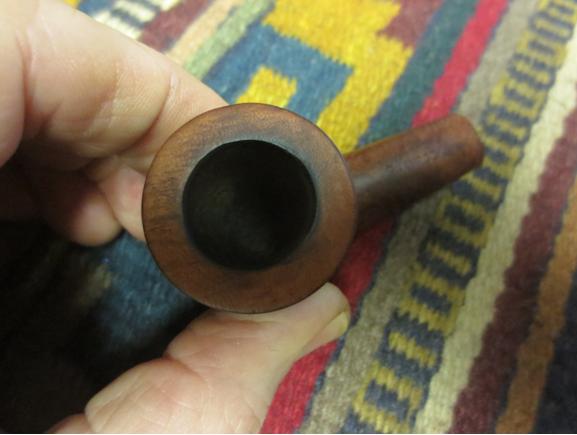
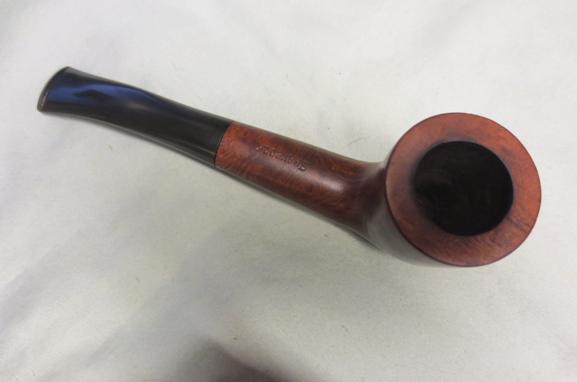
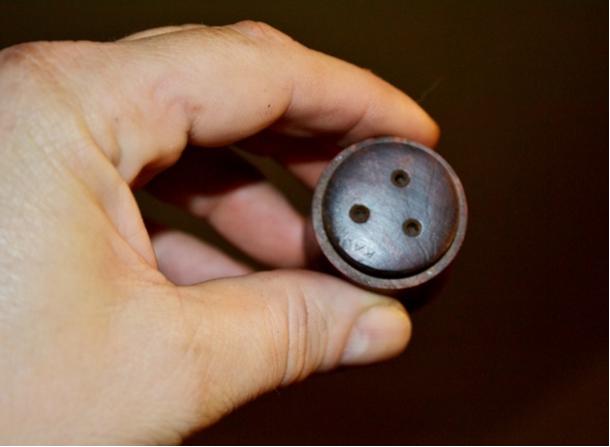
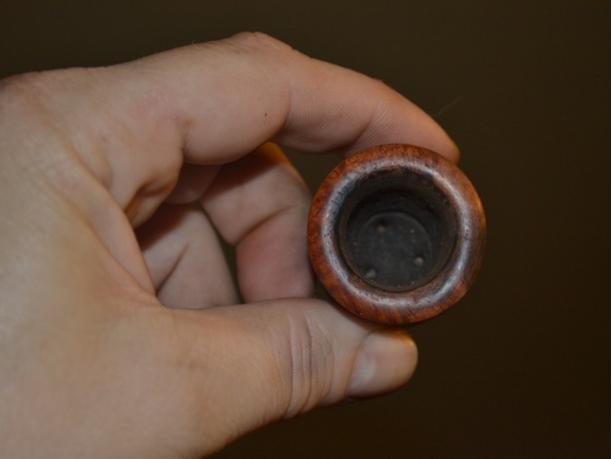
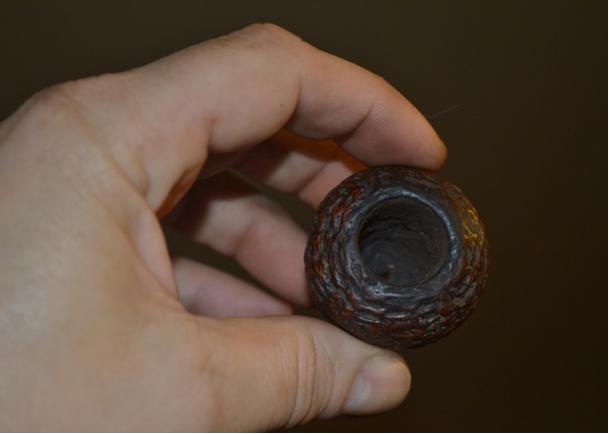
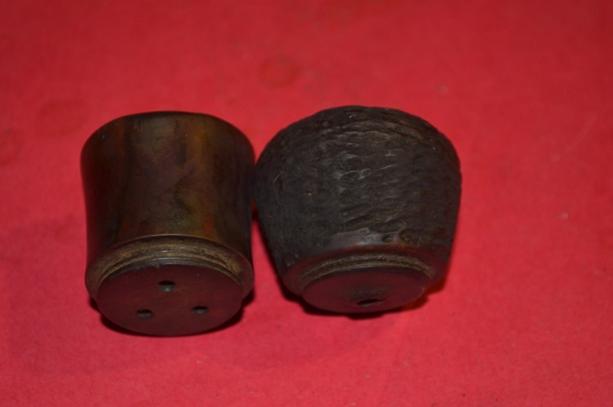
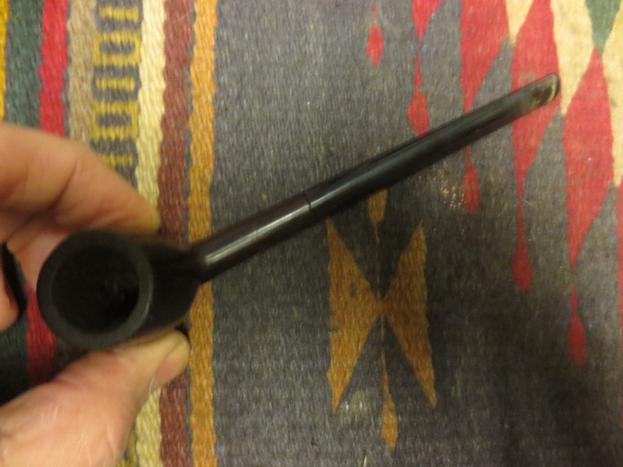
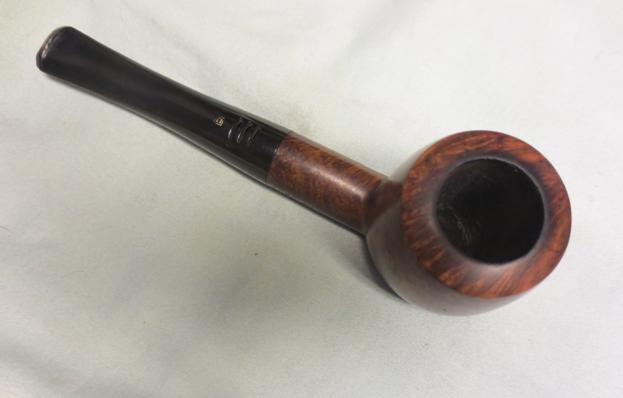
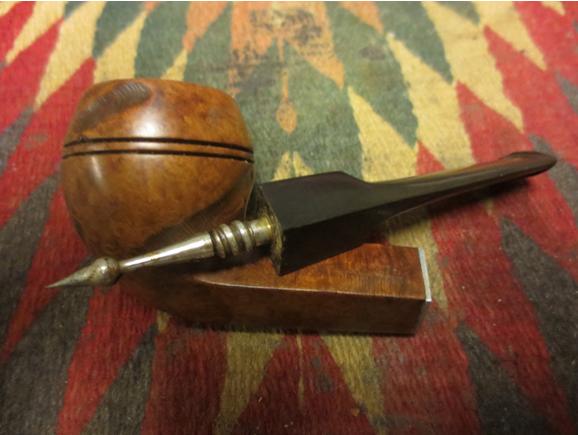
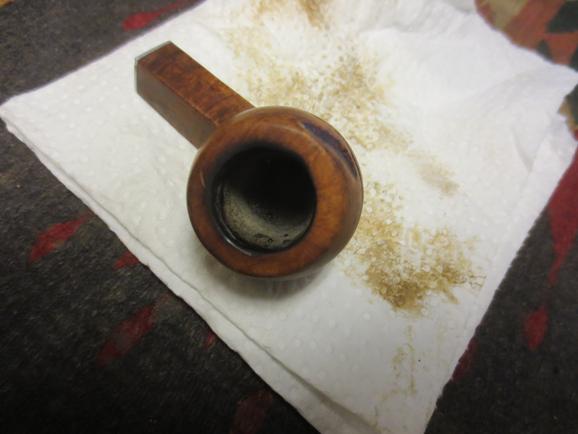
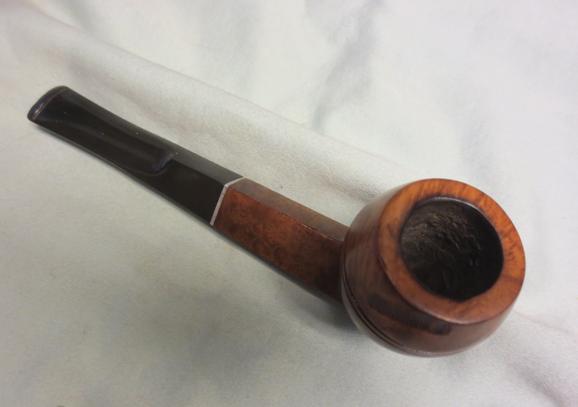
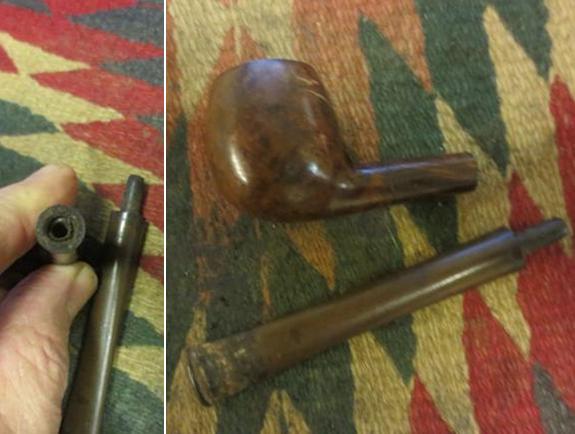
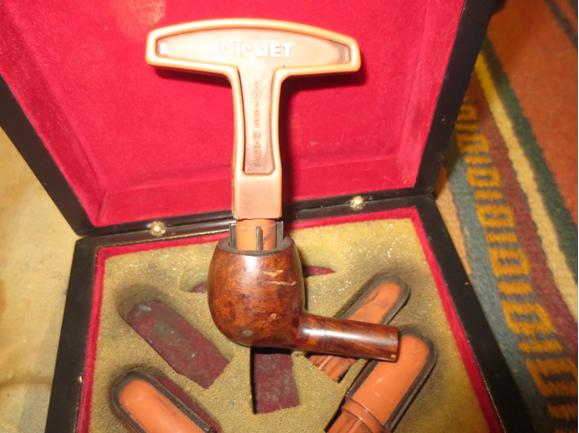
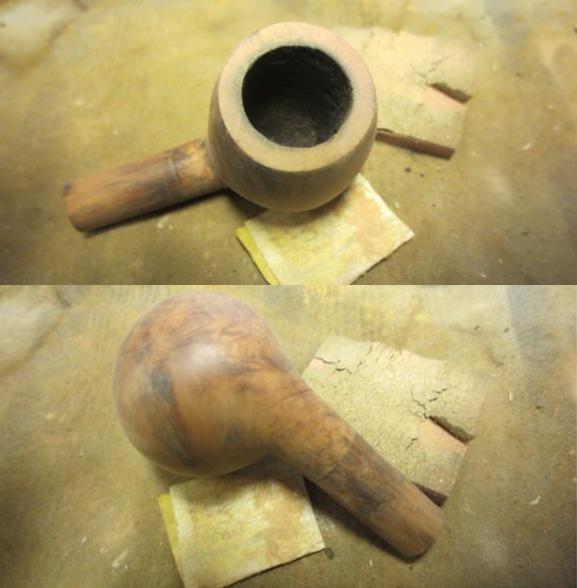
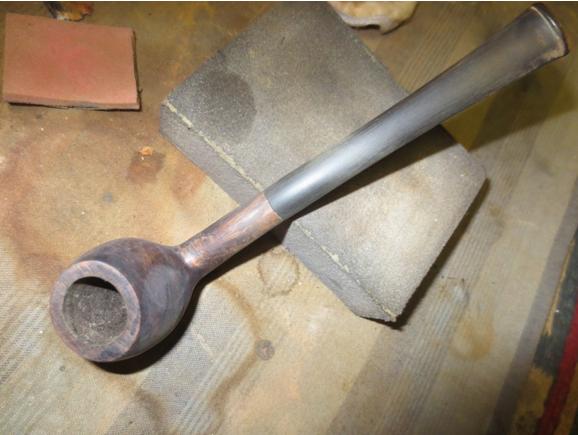
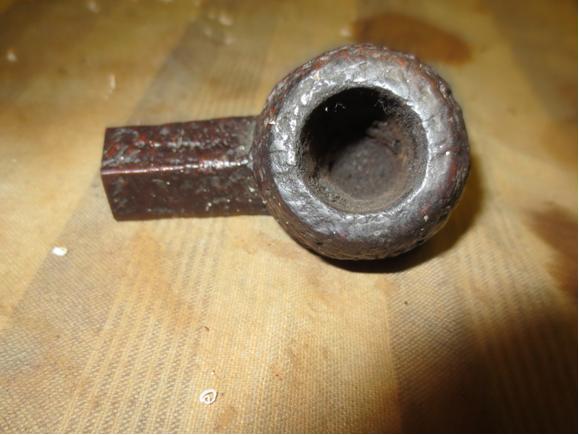
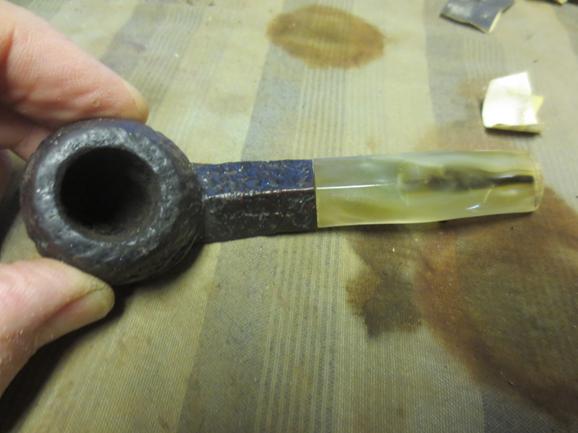
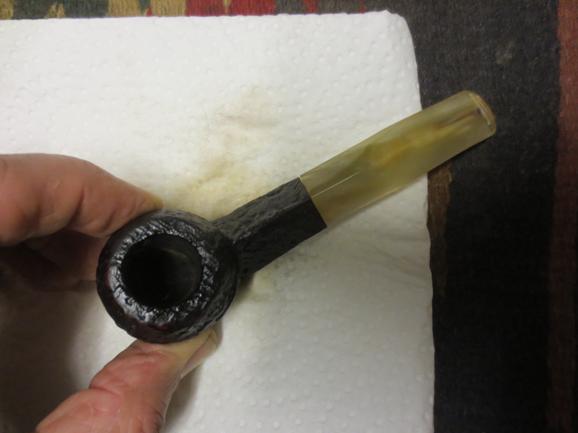
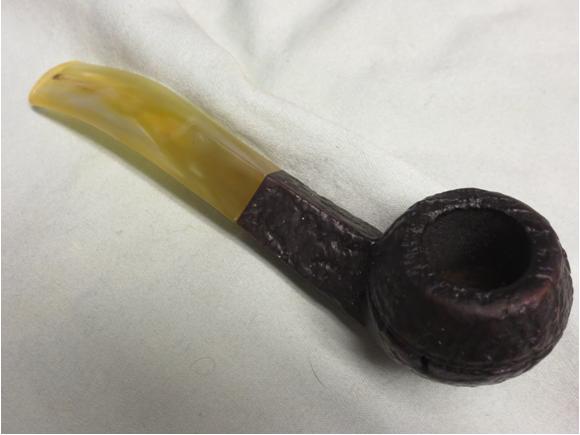
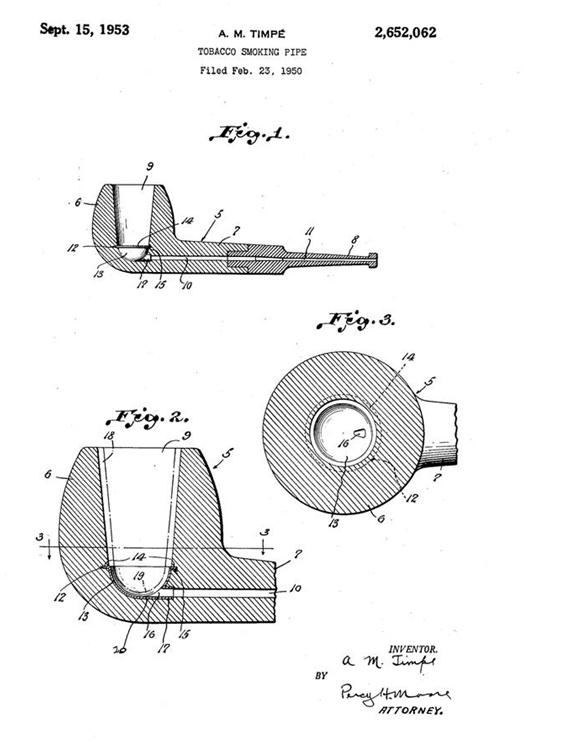
Atwood pipes came with “a permanent aluminum cup at the base of the chamber, with a bore hole.” [http://www.pipephil.eu/logos/en/logo-a9.html] The cup and bore hole, after cleaning, indeed are intact.

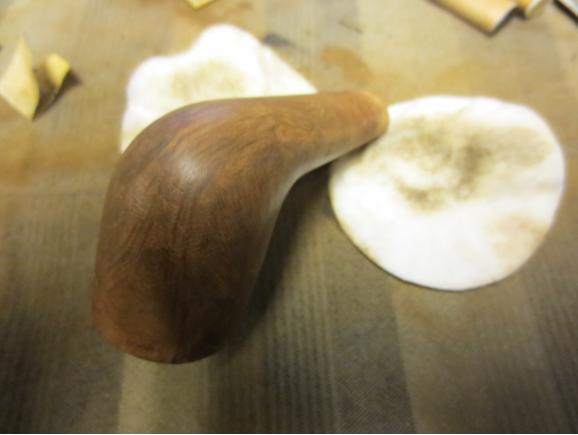
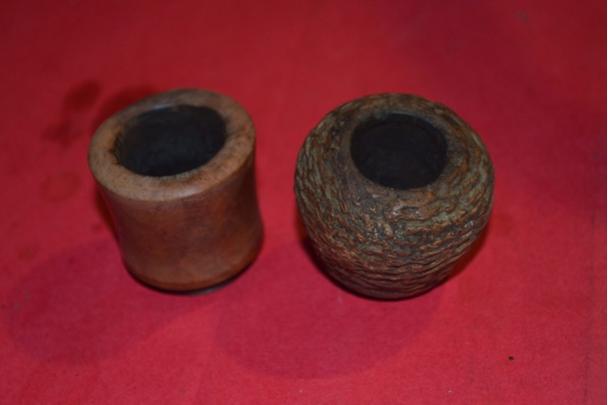
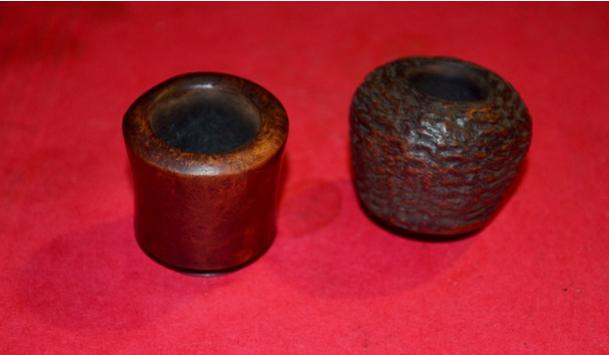
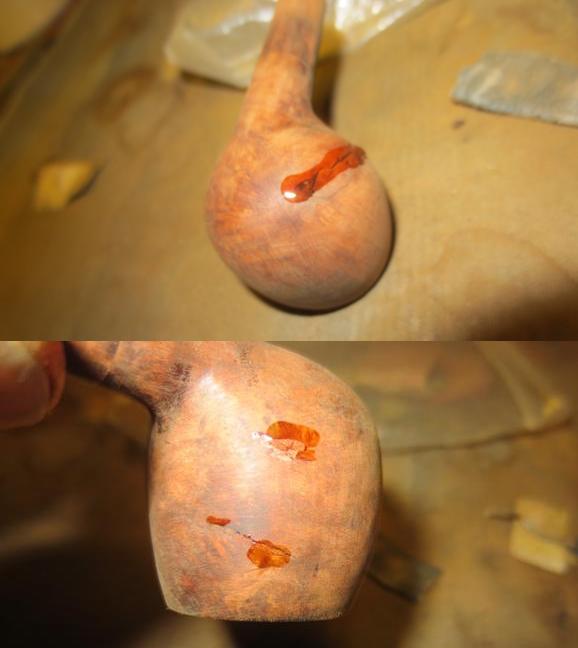
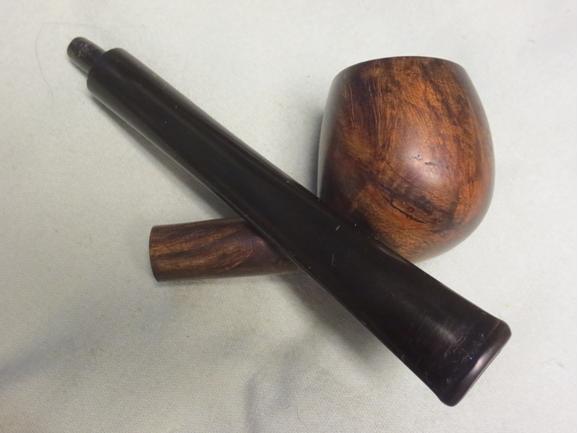
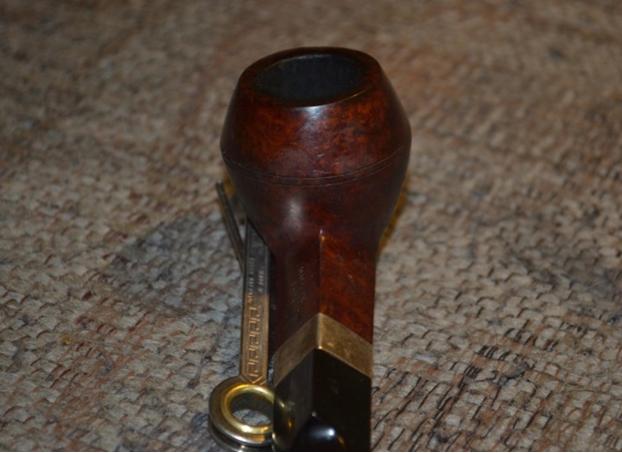
Although, by virtue of Atwood being a Comoy’s second, I was not over-concerned with the possibility of finding fills in the wood if I were forced to strip the original polish and stain, but I nevertheless took every measure I could conceive to avoid that step. At worst, I was convinced, the reason for the oppressive stain was to hide unfortunate grain. As will be shown, this proved to be the case.

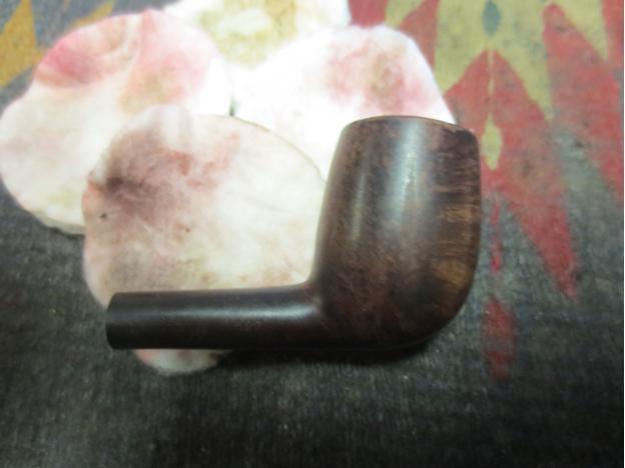
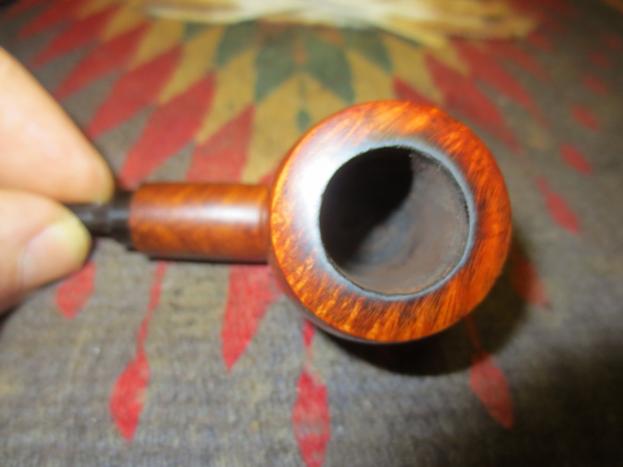
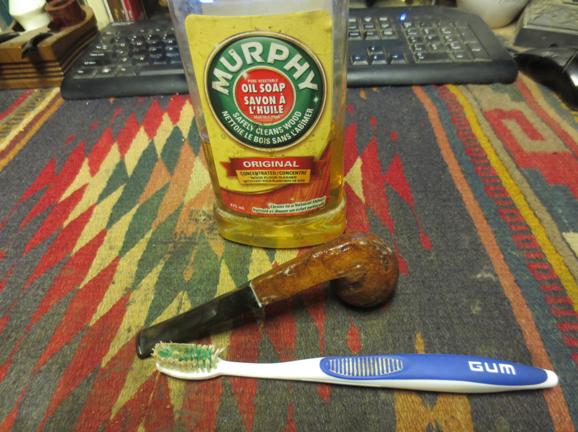
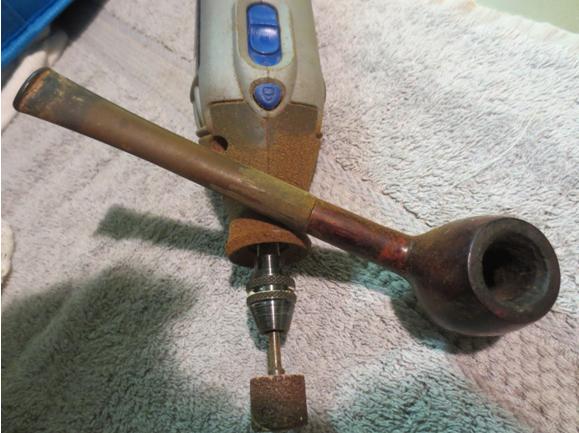
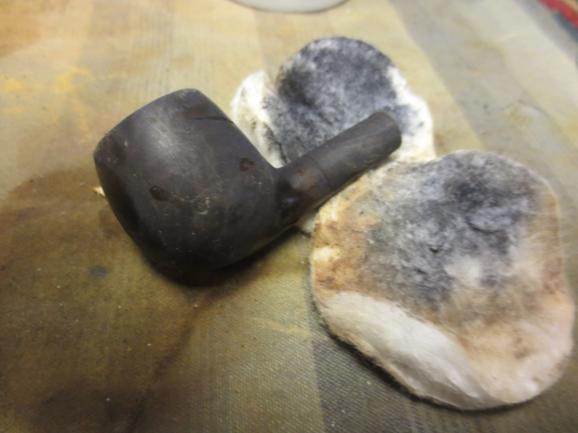
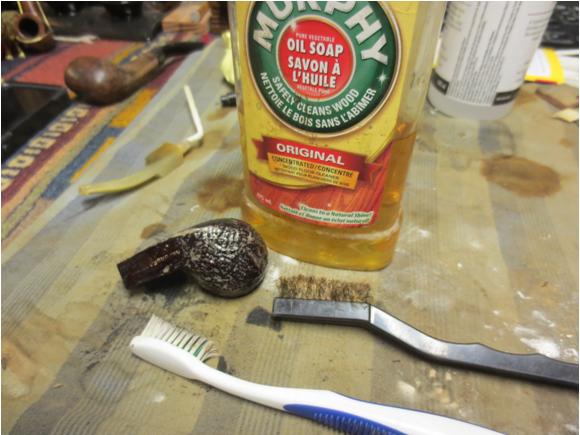
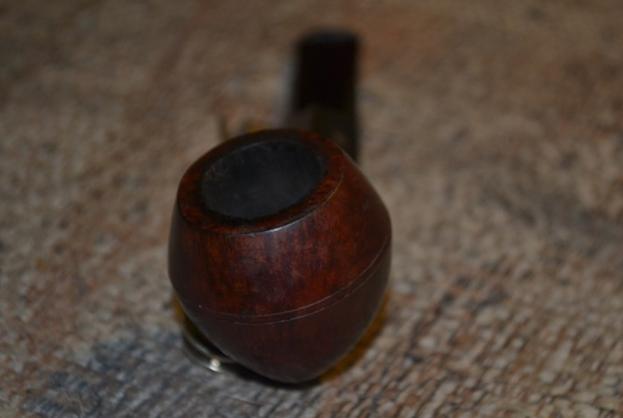
I began by removing almost all of the rim burn with concerted rubbing using 2400 and 3200 micromesh freshly cleaned by a long soak in purified water.Rob9 
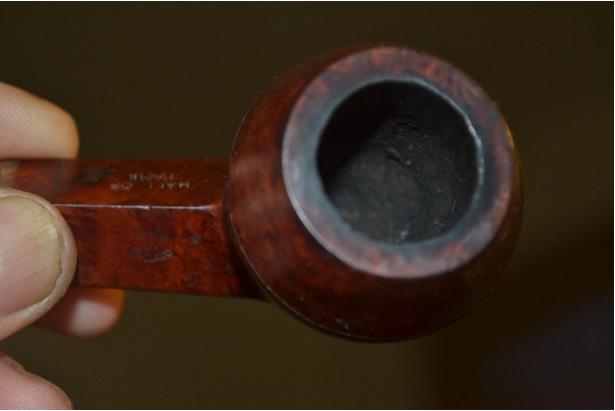
An unsuccessful but still incomplete attempt to fix the remaining rim burn and scratching led me to an acceptance at that point of the fact that, though I might otherwise rid the rim of the remaining char, the remaining scratches, not just on the rim but everywhere else on the stummel, were sufficient to necessitate a low enough grit of sandpaper to take it down to bare wood. Having learned that sandpapering the entire wooden surface of a pipe can and often does lead to more problems, I chose the more efficient and reparable measure of an Everclear bath.Rob10

Rob11

Rob12

Rob13

Rob14 
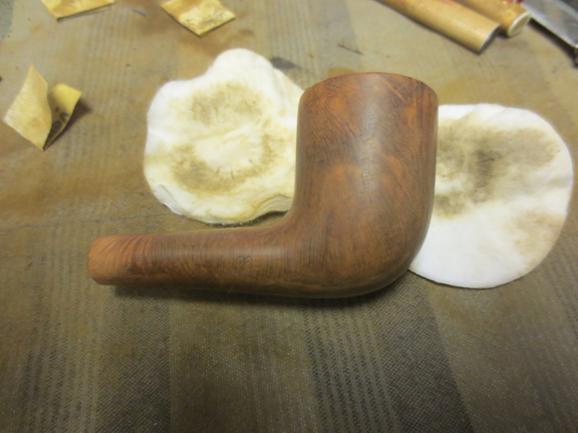
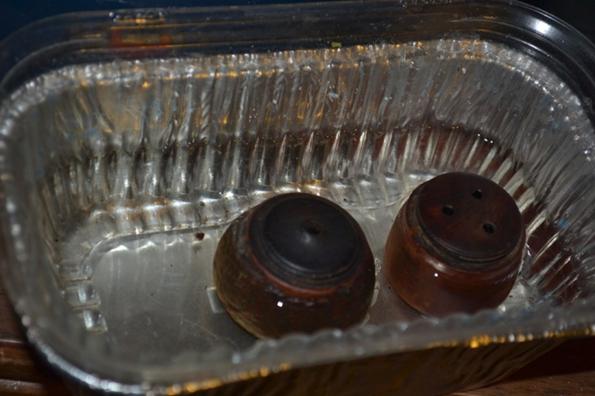
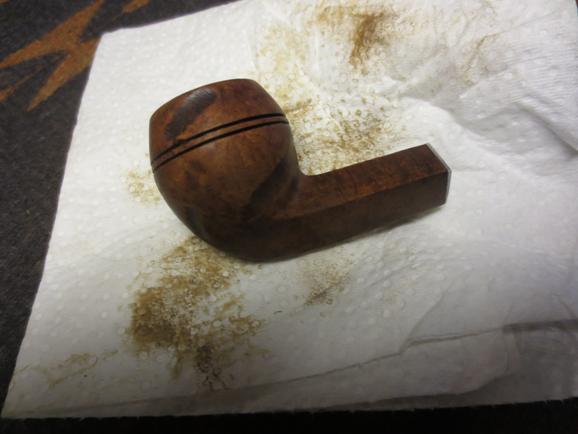
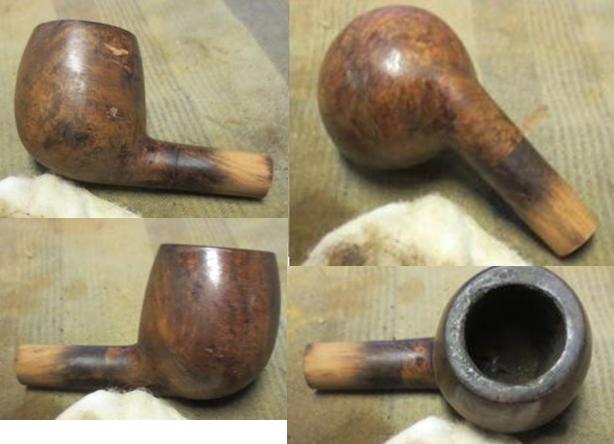
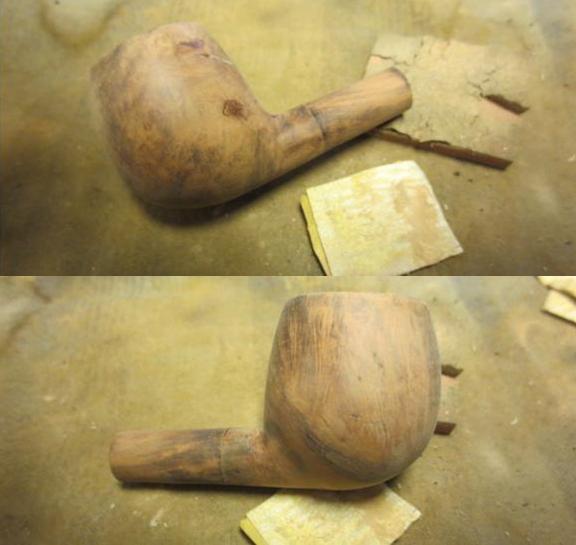
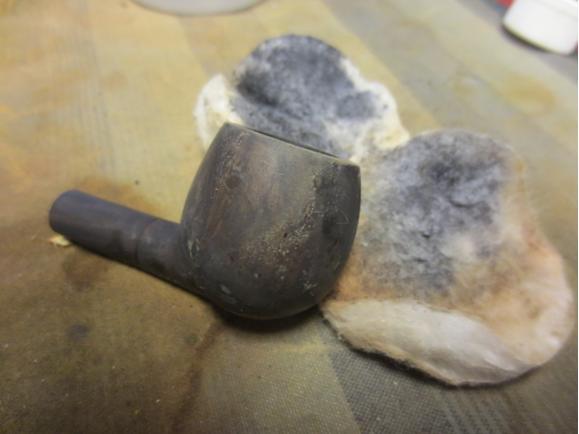
The Everclear was a complete success in revealing that there were, indeed, no fills, but even finer scratches than even my minute examination of the briar beforehand, using a jeweler’s magnifier headset, had caused me to suspect could exist. And so I tried the superfine 0000 steel wool first, which at least took off the rest of the old artificial color and some of the less pernicious scratches. But 200-grit paper was unavoidable, in careful spot sanding, to banish the rest of the marks and pocks, followed by another soft buffing with the steel wool.Rob15

Rob16

Rob17 
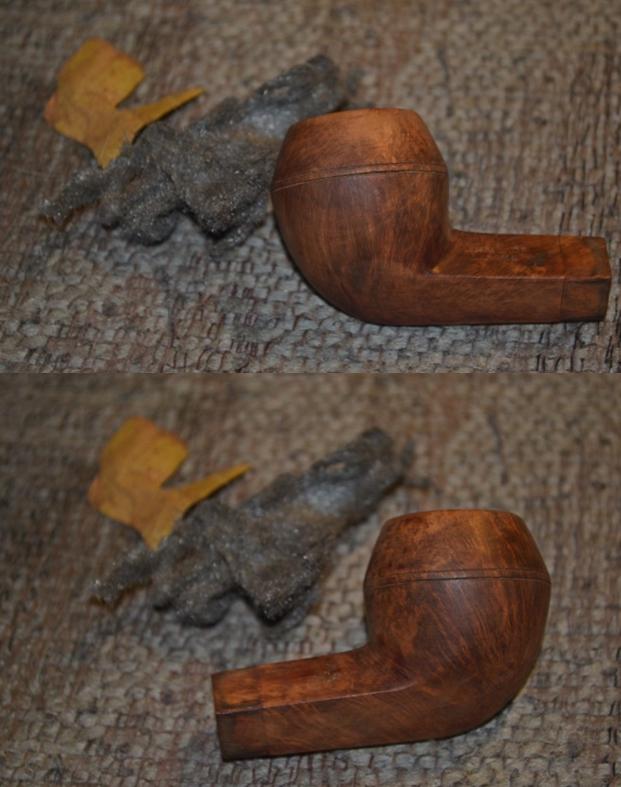
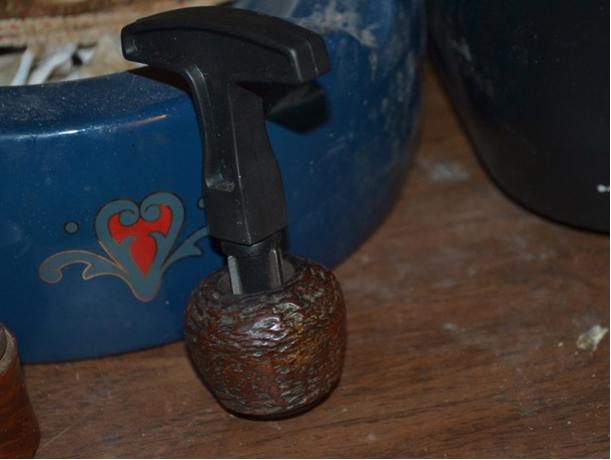
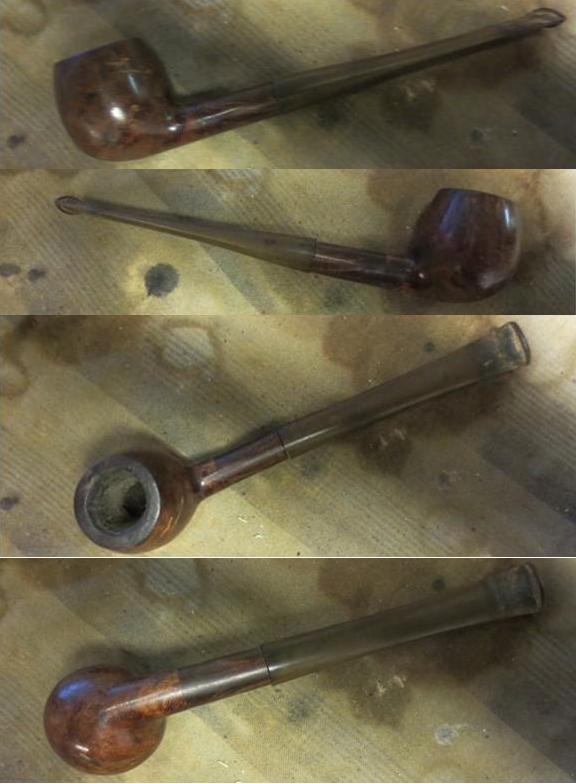
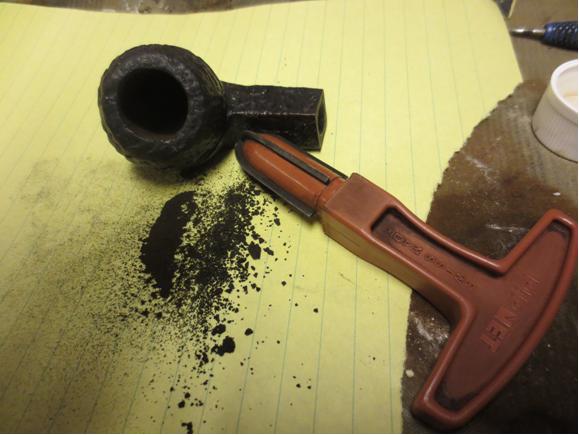
The next steps seemed to be an easy crank or two of a 21mm reamer in the chamber followed by 320-grit and 500-grit paper, and a retort.Rob18

Rob19

Rob20 
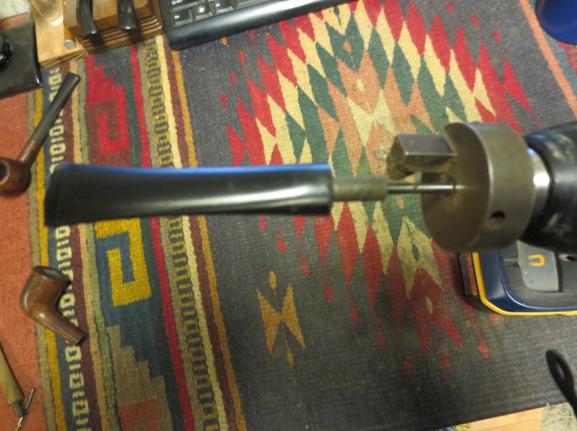
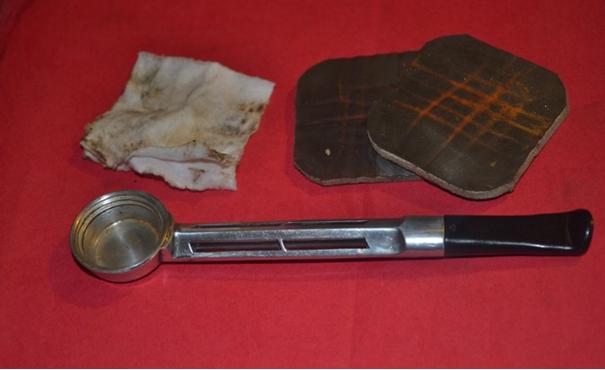
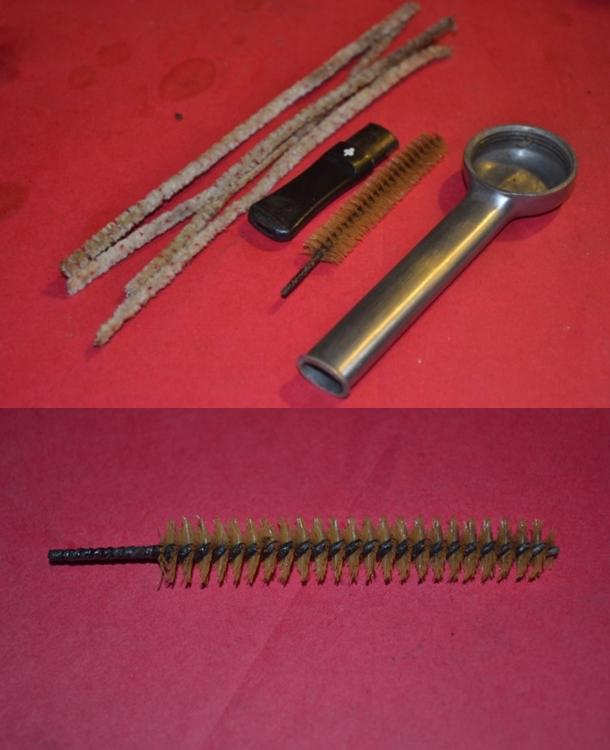
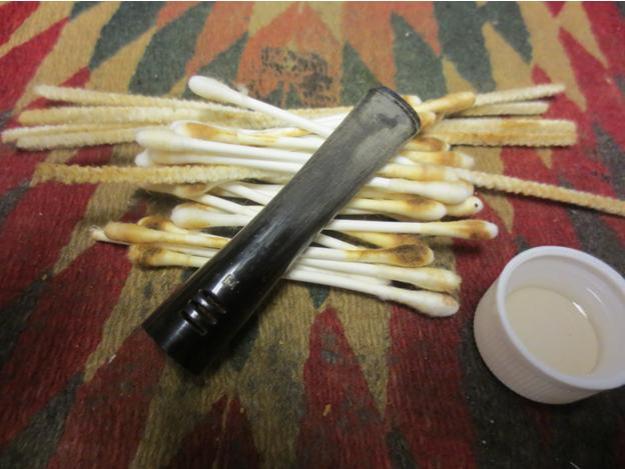
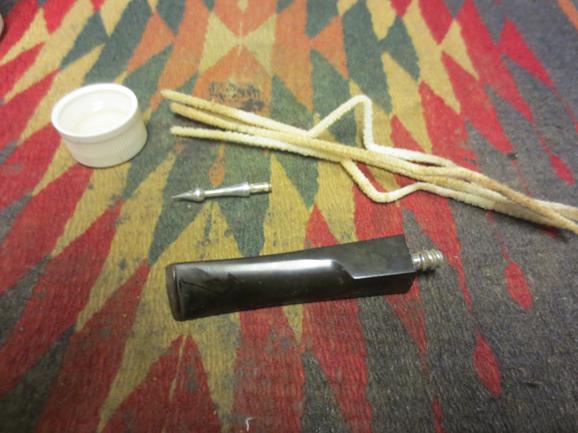
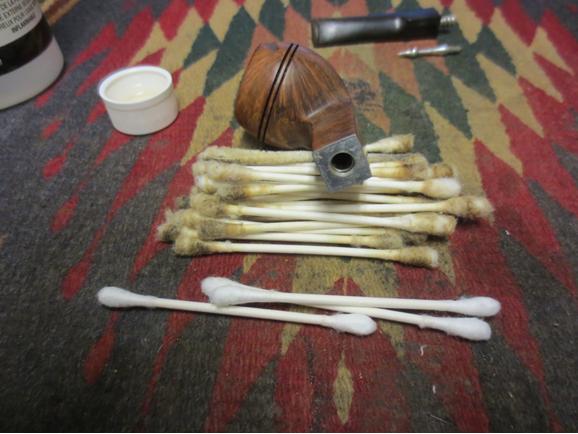
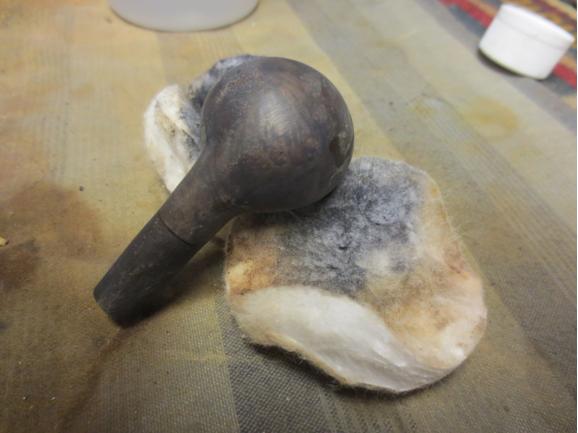
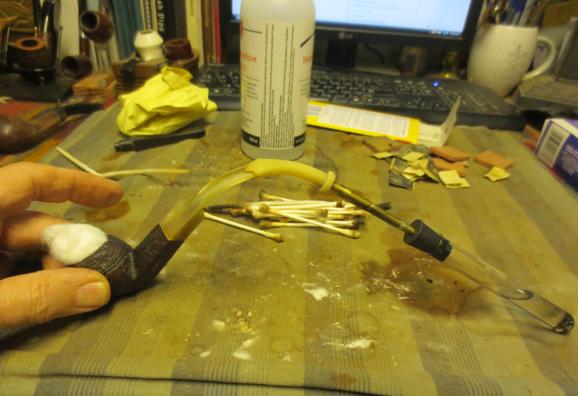
The retort required two test tubes full of Everclear, but only because of the way the first tube-full always seems to remain in the pipe’s inner bowels after a few boils. At any rate, immediately following the retort, I ran a bristly cleaner through the bit’s air hole, which came out remarkably light, and used both ends of a fluffy pipe cleaner on the inner shank to soak up the wet residue of various accretions still in the shank. I removed the cotton ball from the chamber and swabbed it thoroughly with small white cotton gun cleaning cloths. Then I finished the chamber with a final wipe using 500 paper and more thin cotton swabs soaked in Everclear. The chamber was silky smooth.

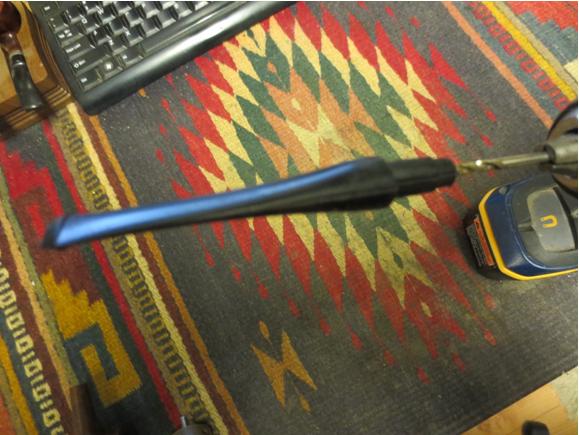
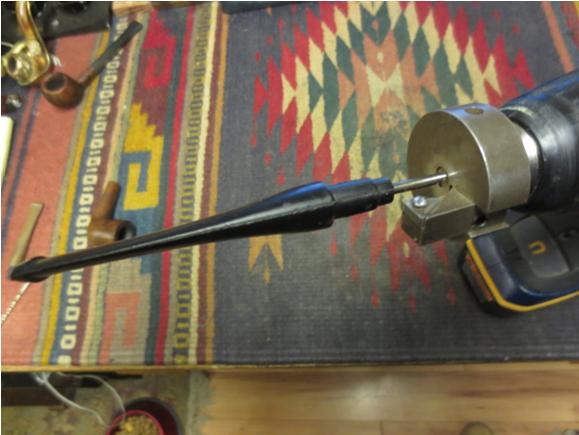
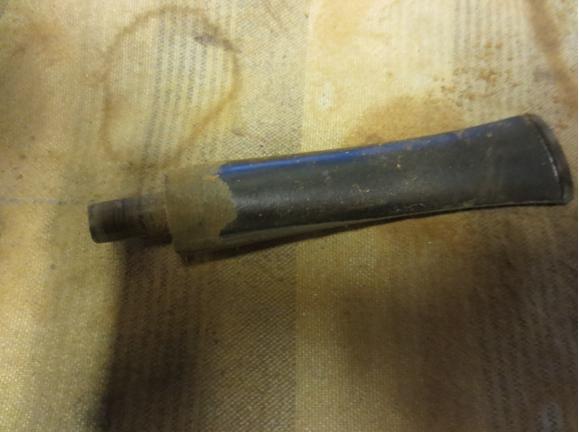
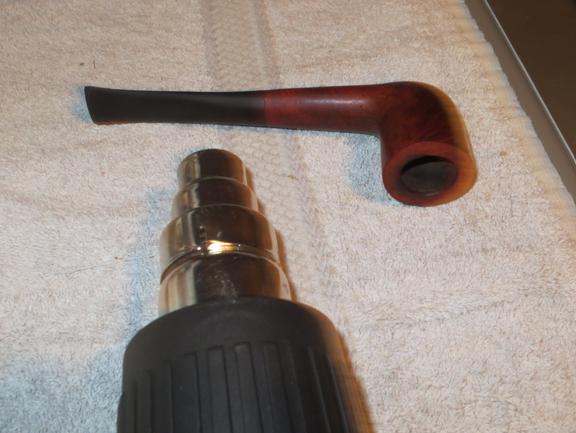
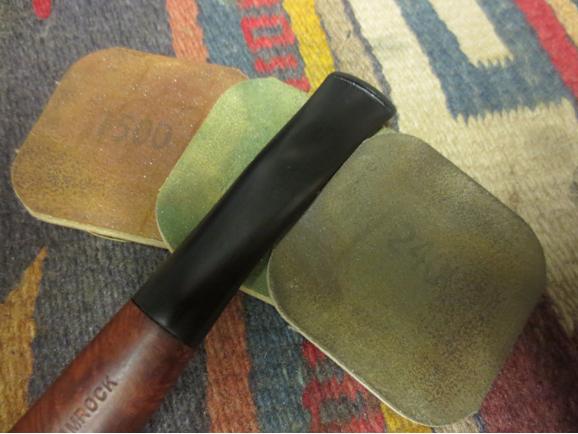
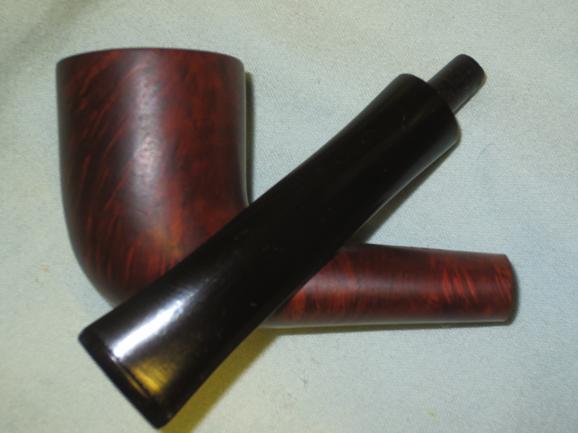
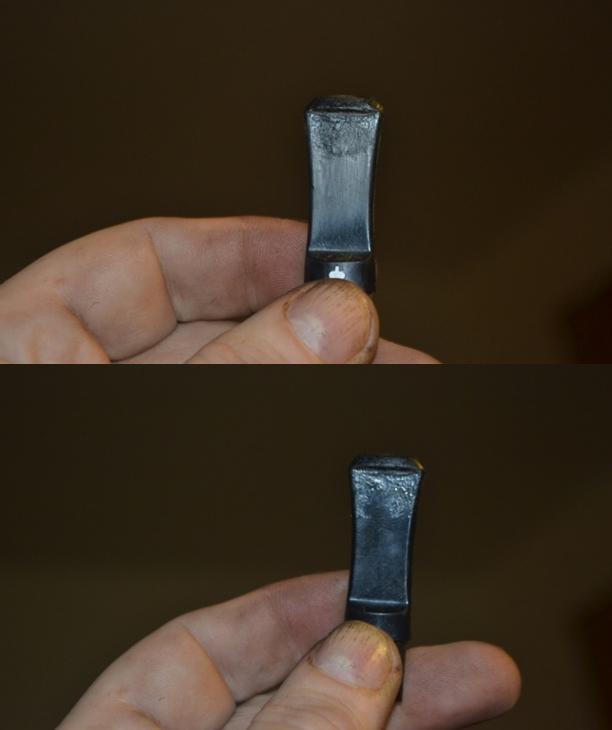
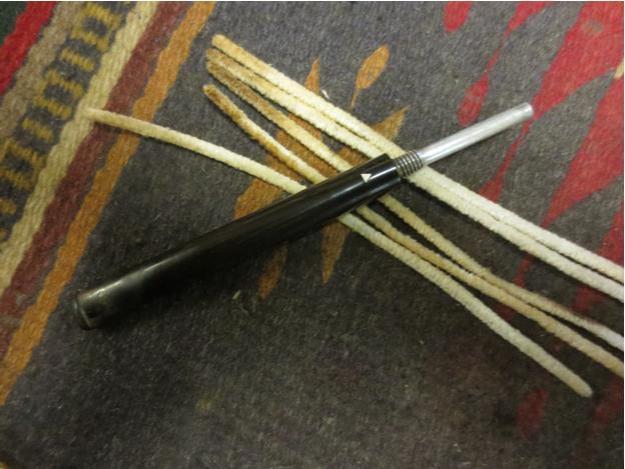
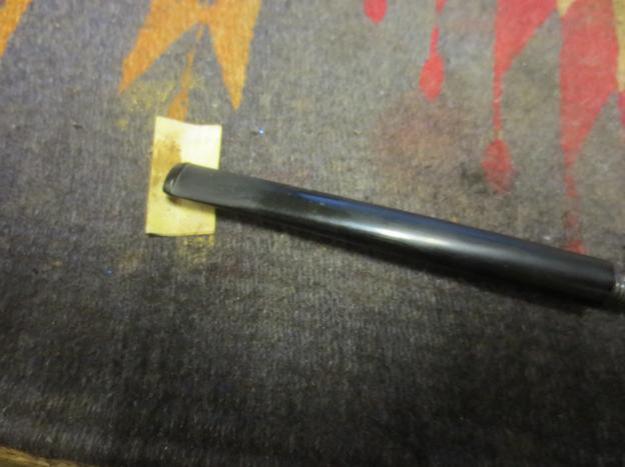
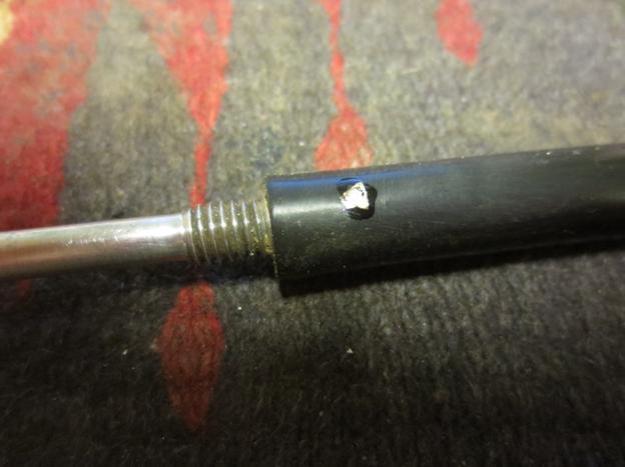
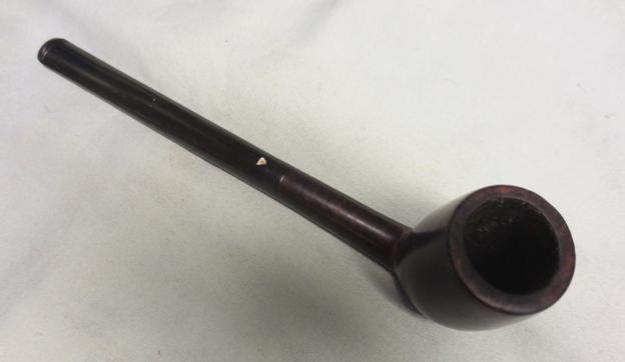
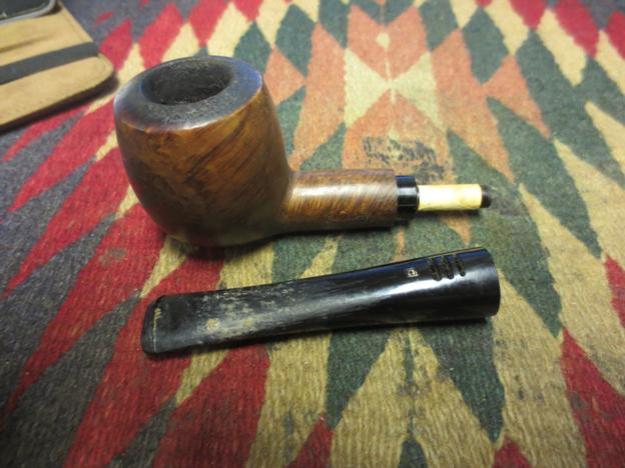
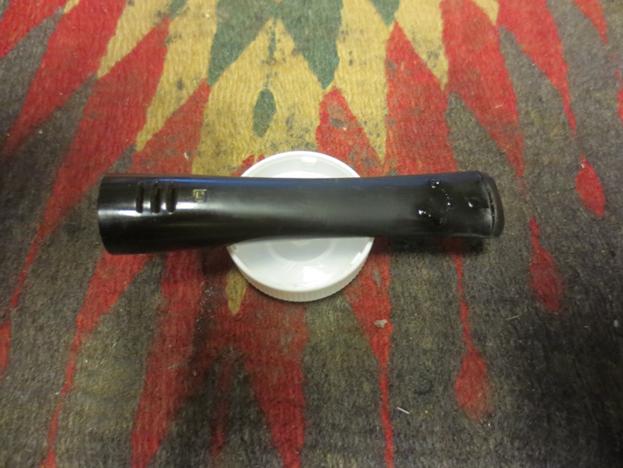
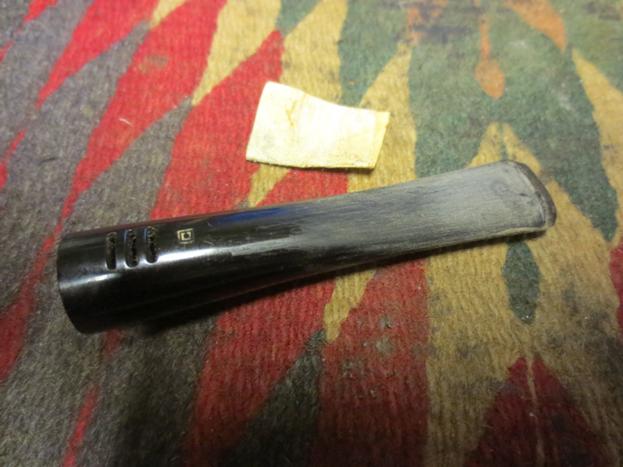
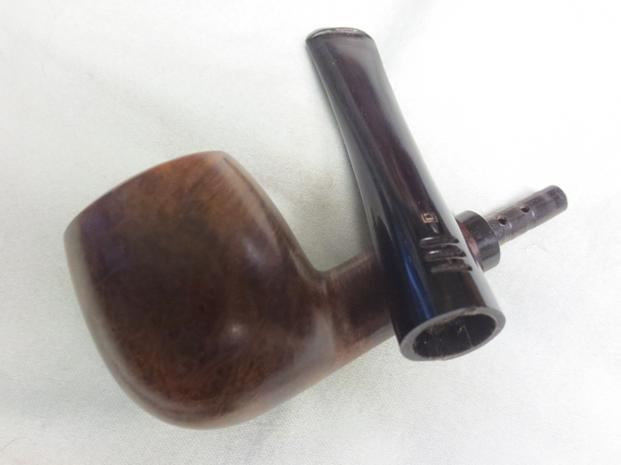
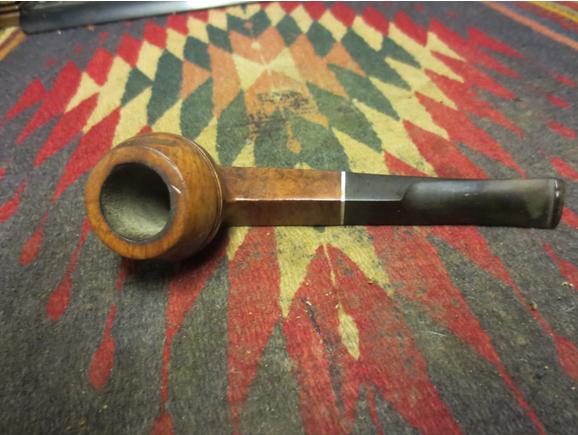
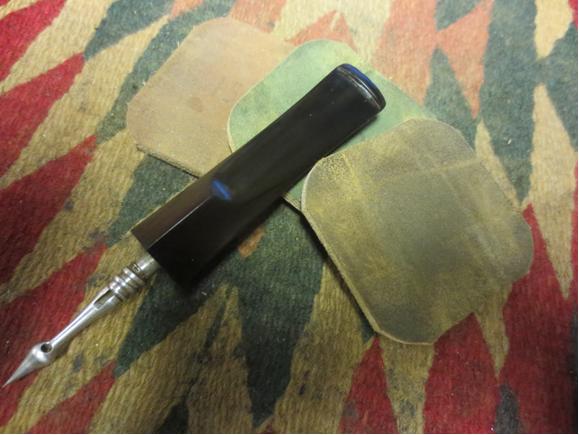
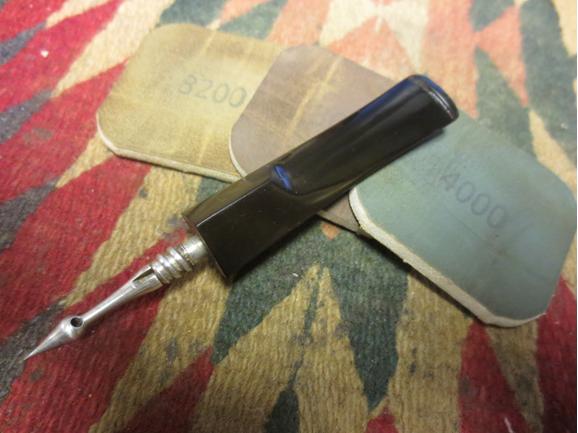
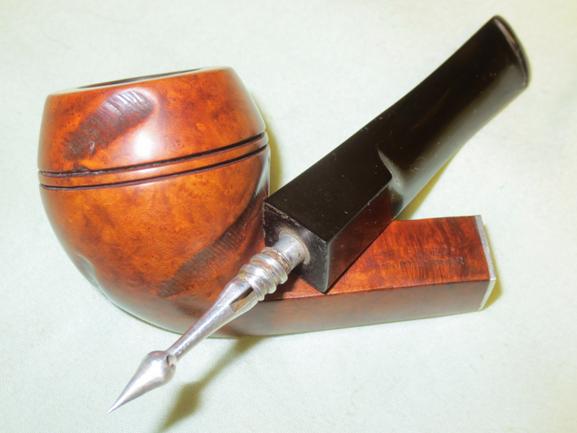
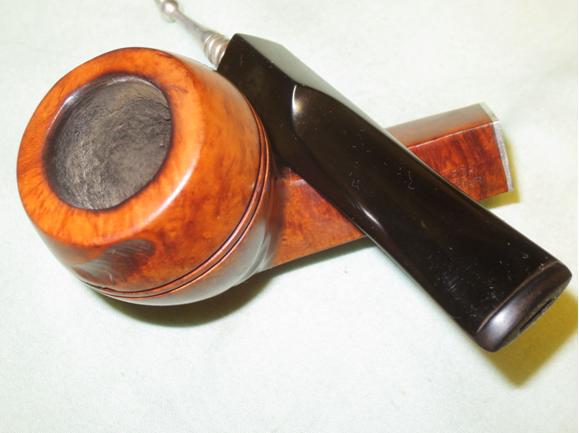
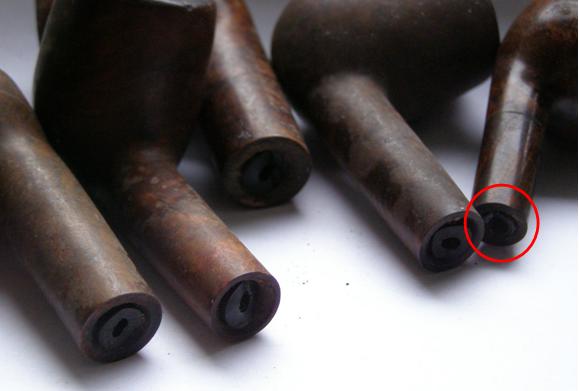
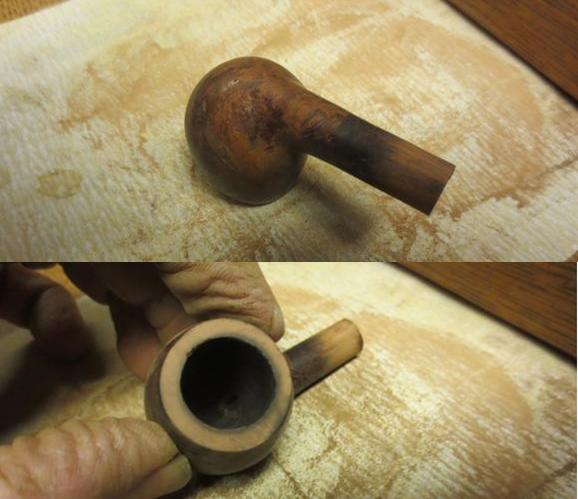
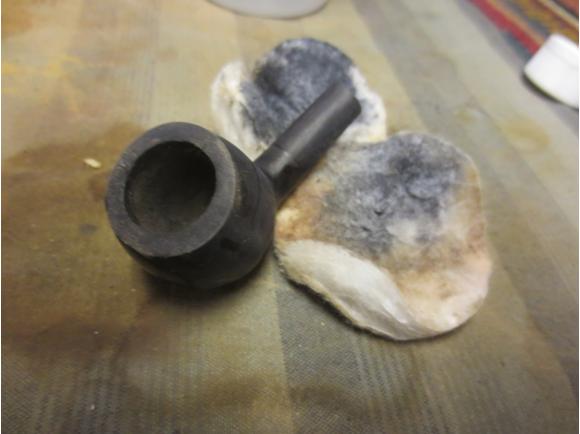
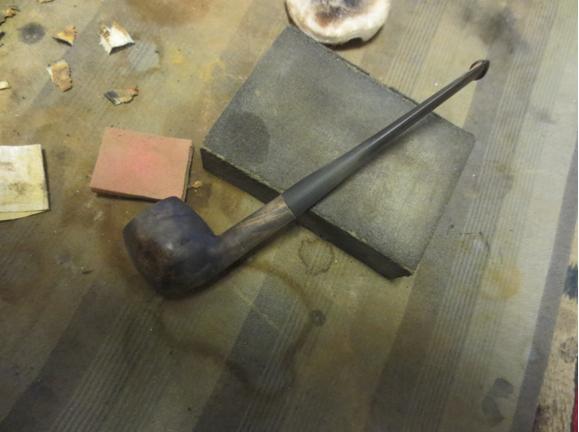
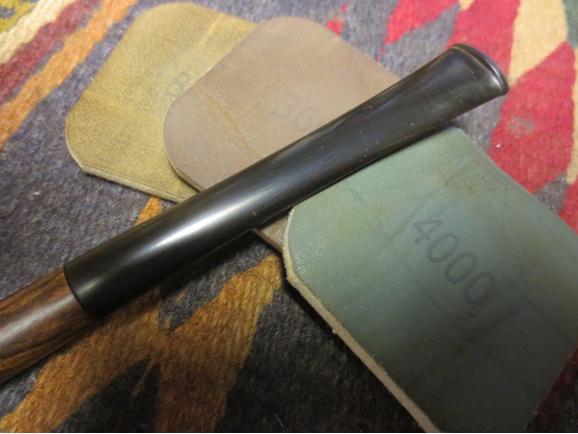
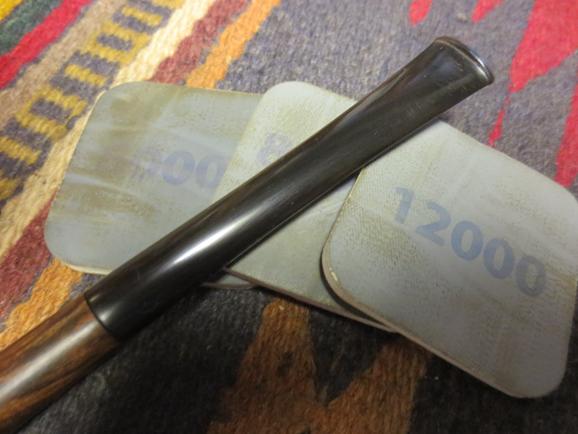
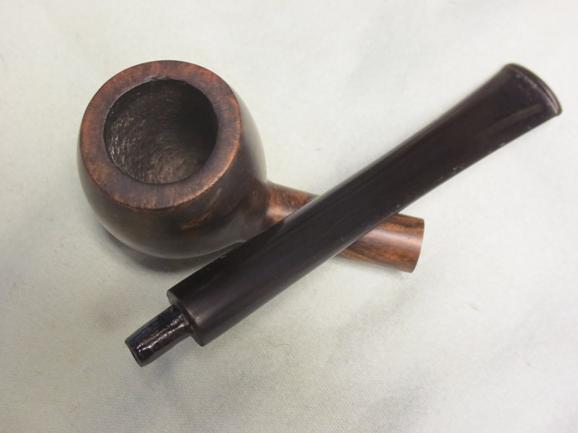
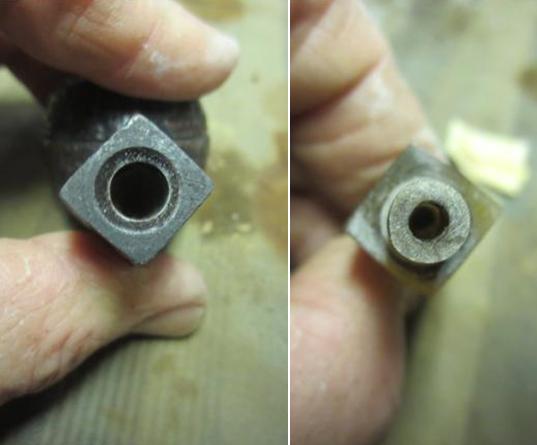
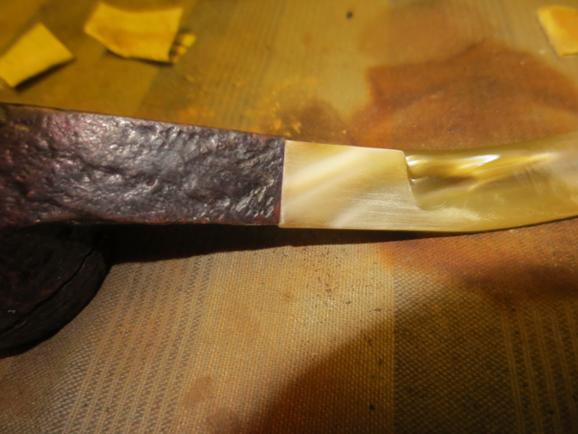
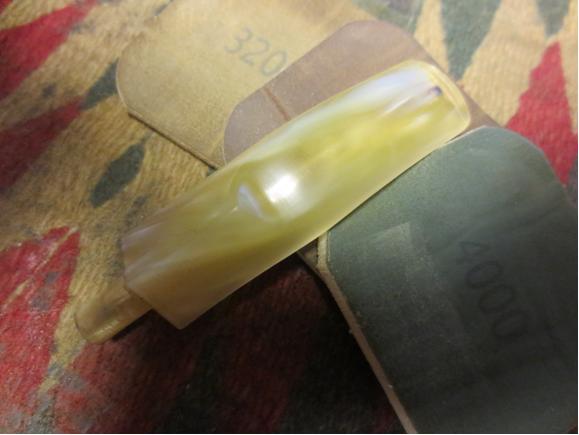
“This pipe is clean!” I said to myself, out loud in fact, thinking of the tiny lady of “Poltergeist” fame, who sought out and did her best to dispel dead but still malicious souls.Rob21 At last, I turned my attention to the bit. It was in pretty good shape, but notice the bad scratch in the second photo below.Rob22 
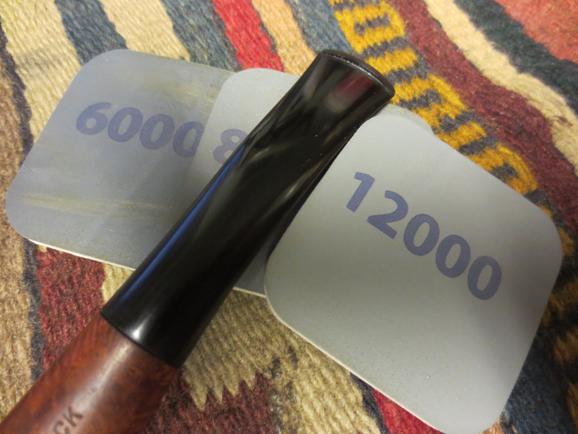
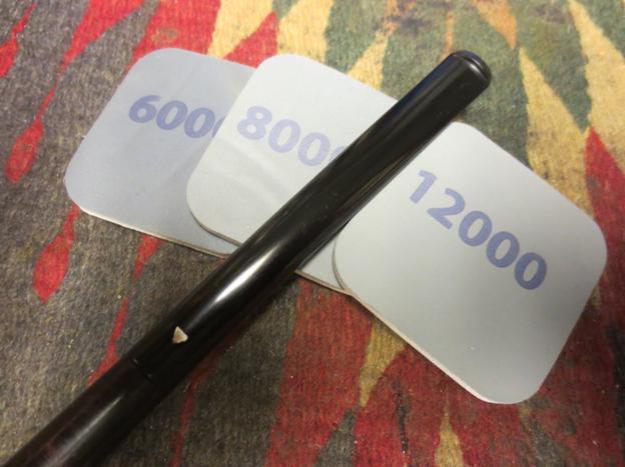
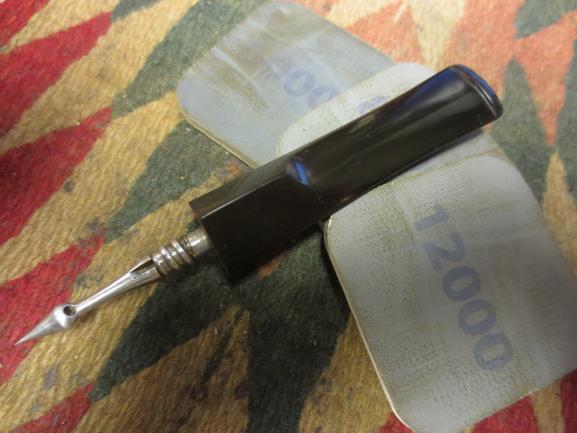
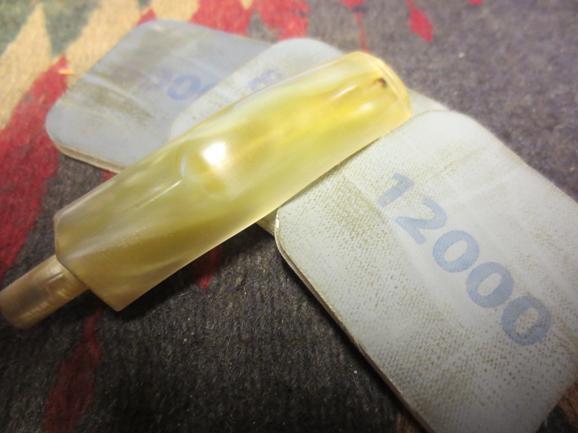
Every micromesh pad I have, still damp after the soaking from which I removed them some time earlier, was employed to make the bit shine again.Rob23

Rob24 
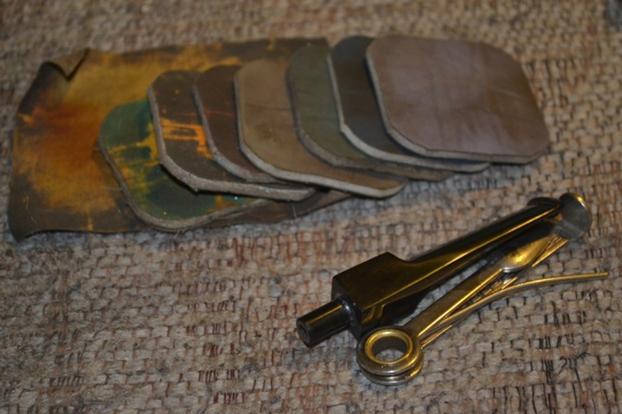
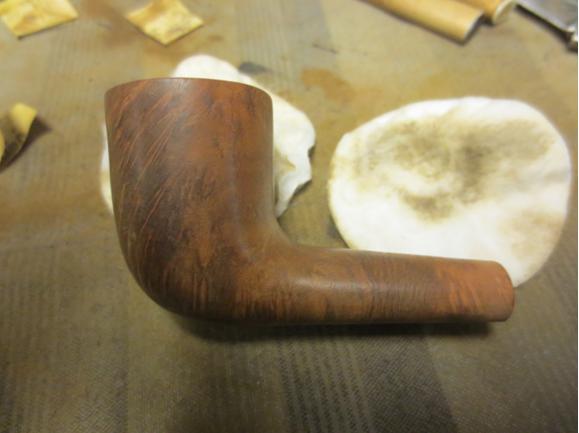
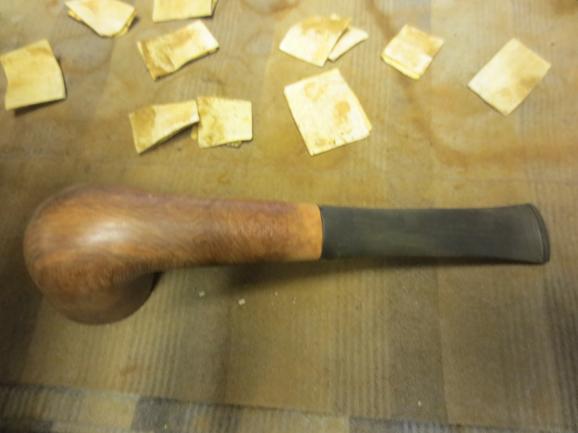
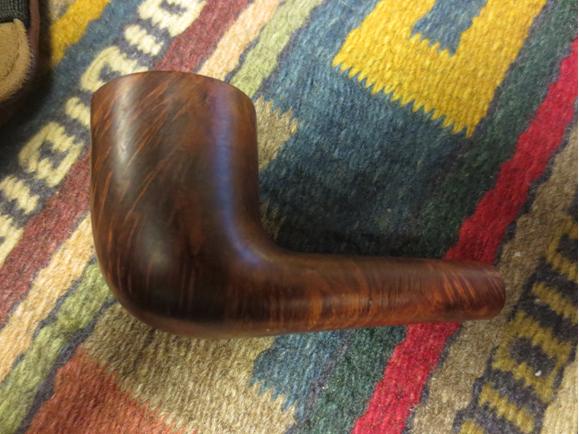
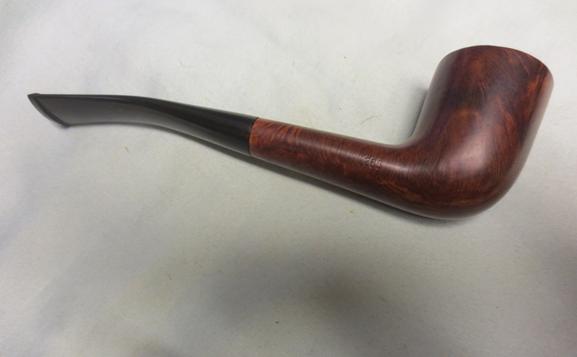
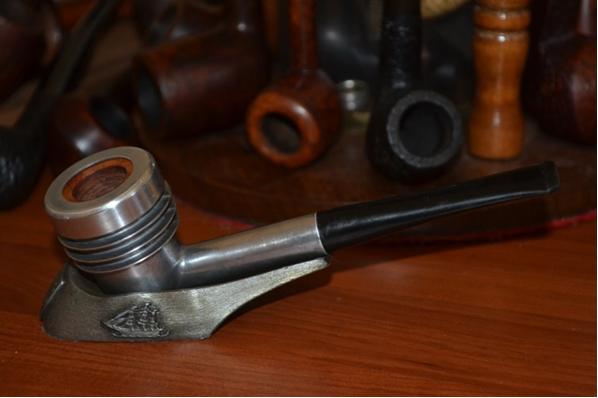
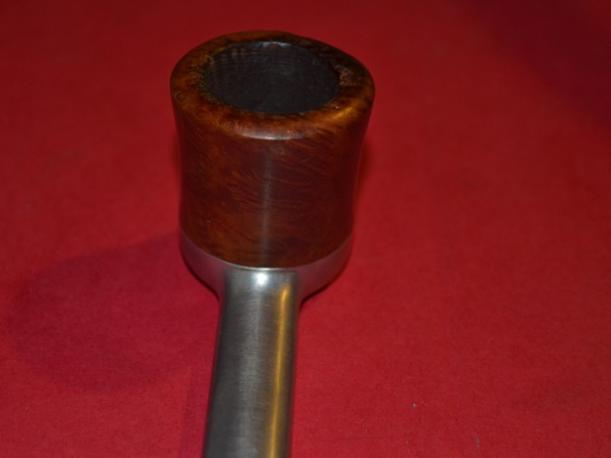
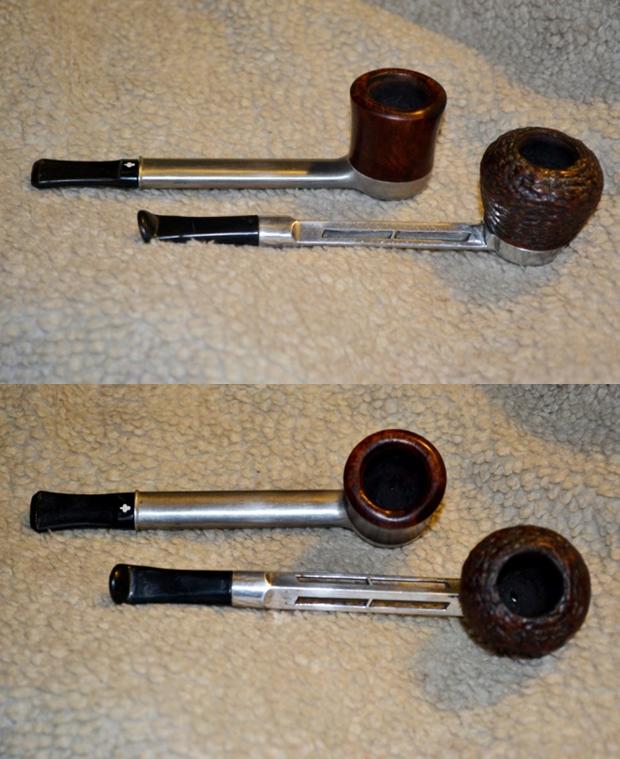
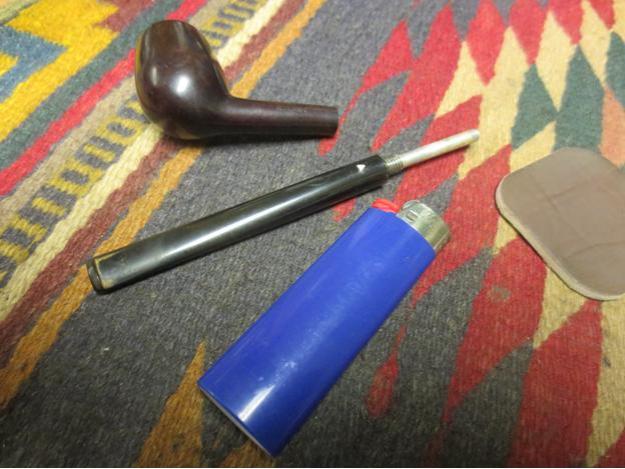
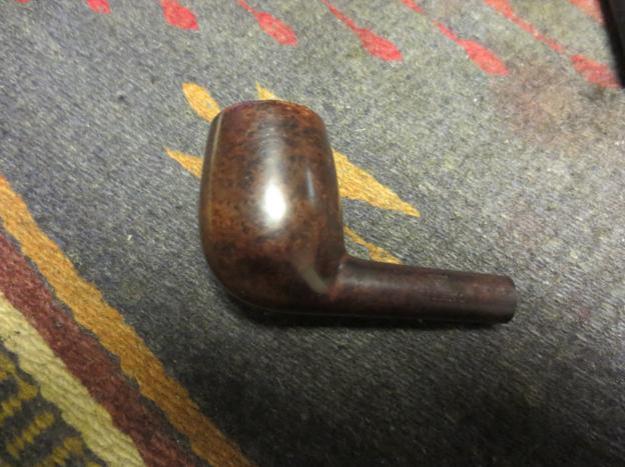
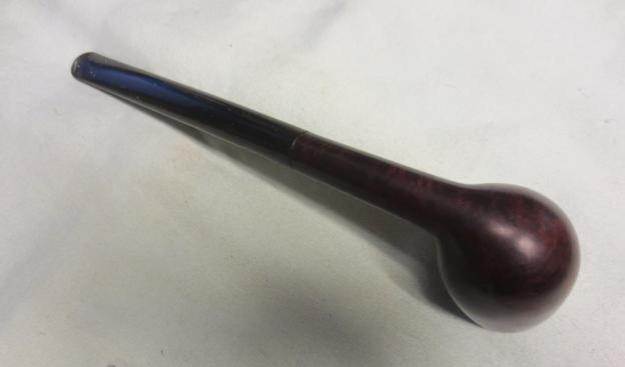
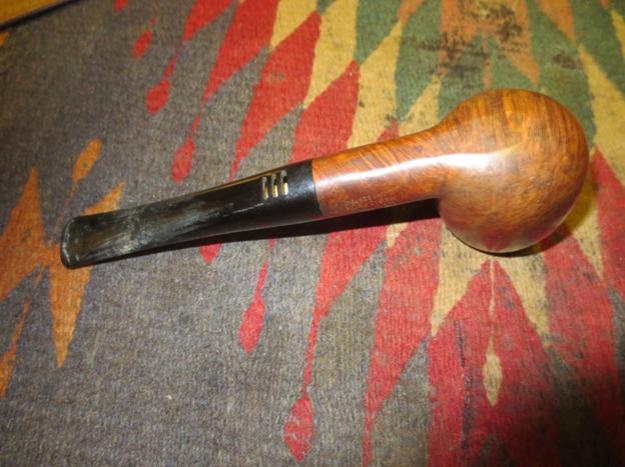
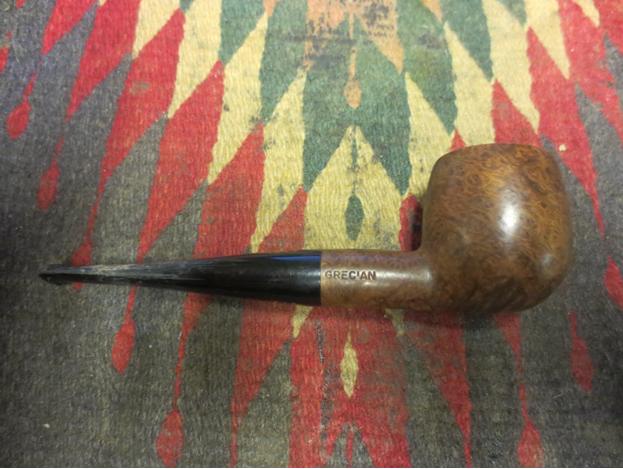
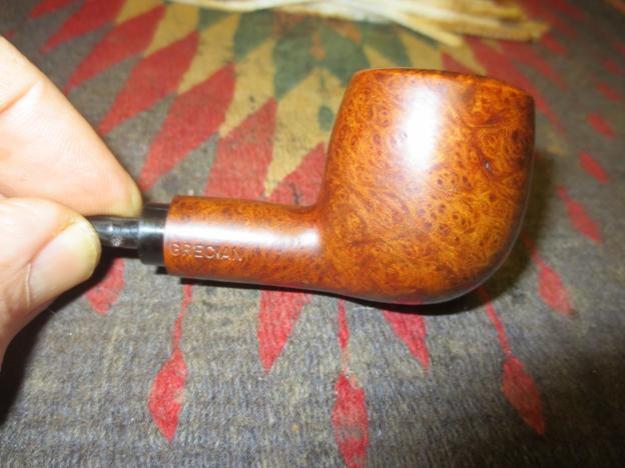
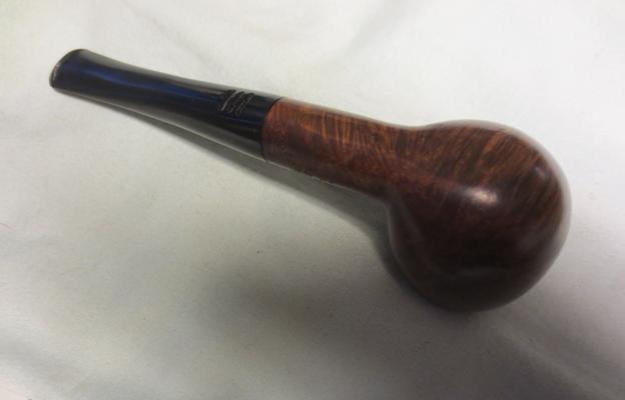
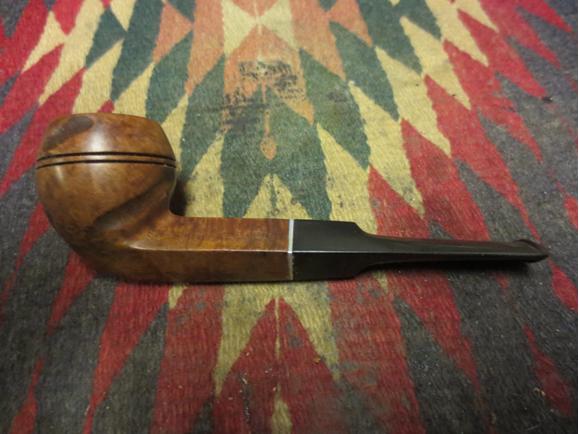
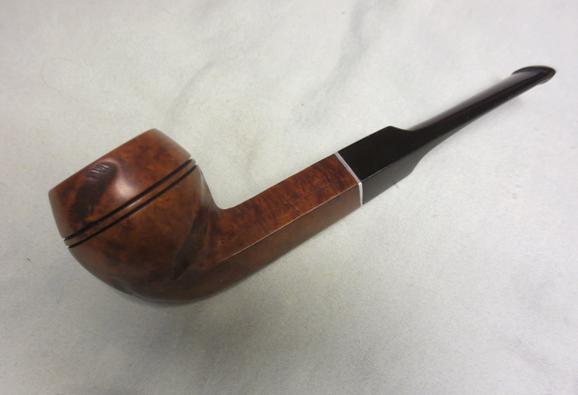
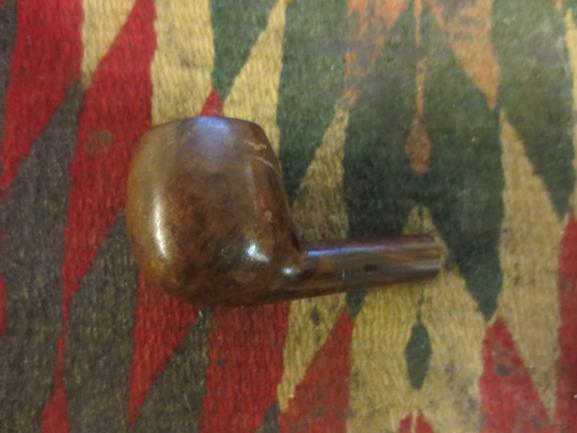
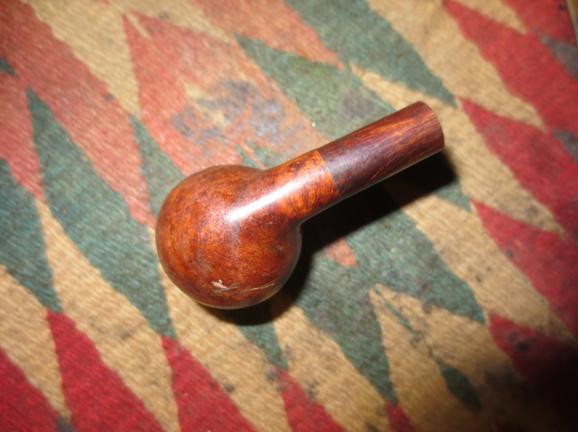
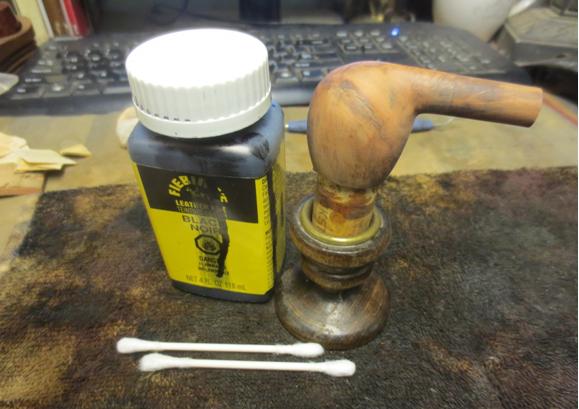
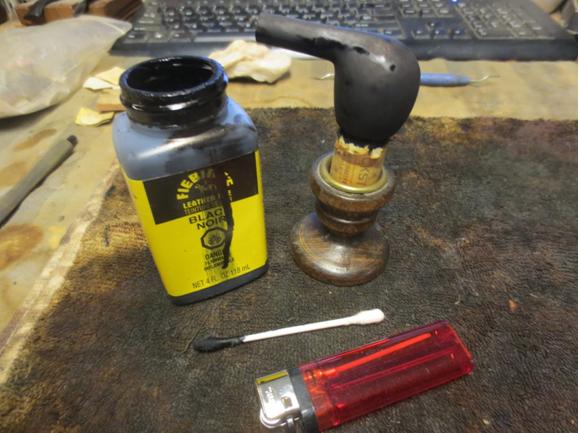
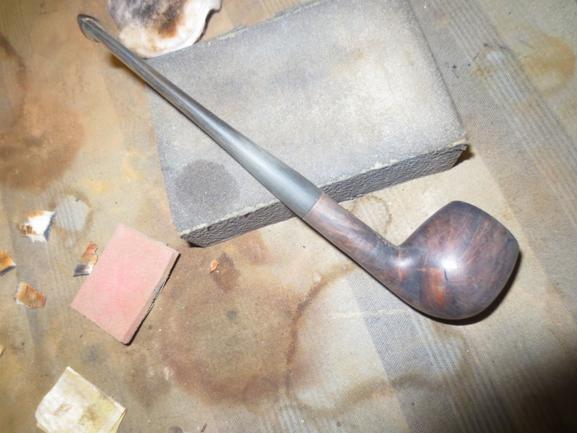
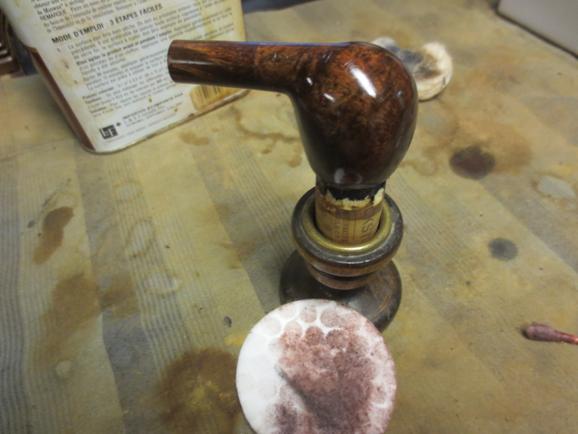
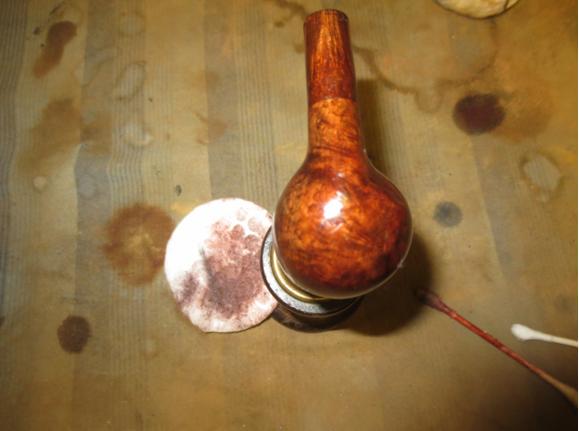
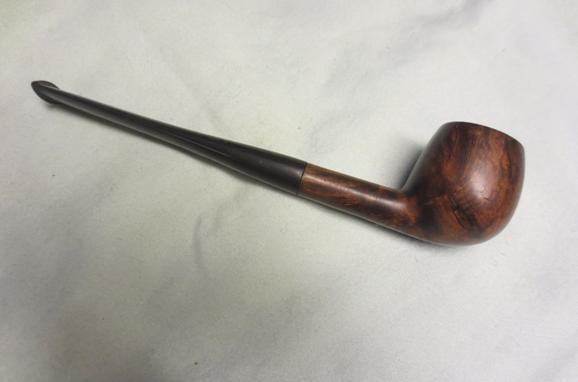
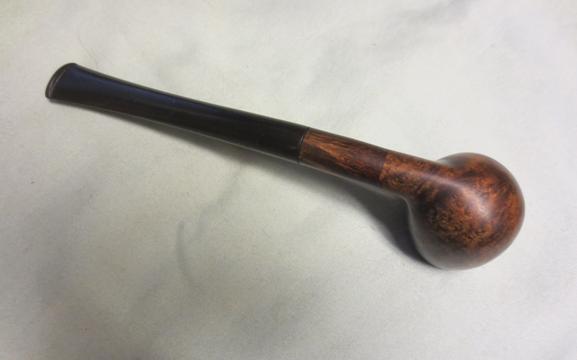
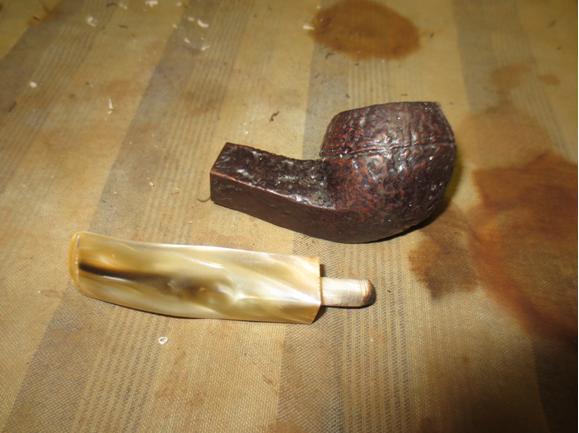
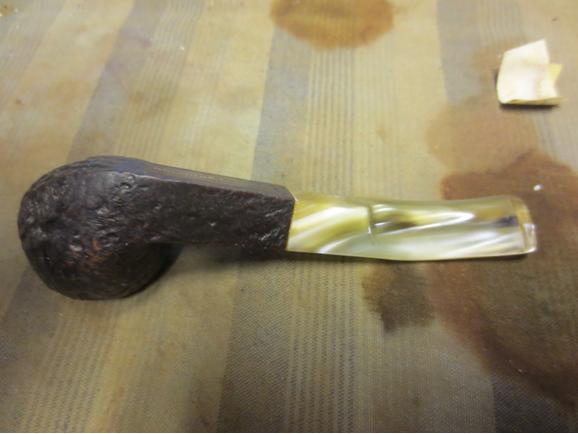
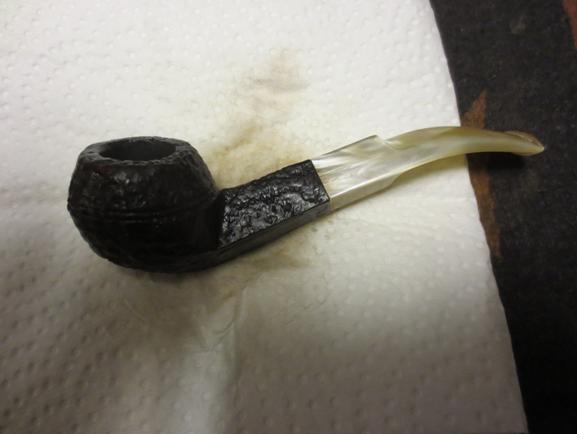
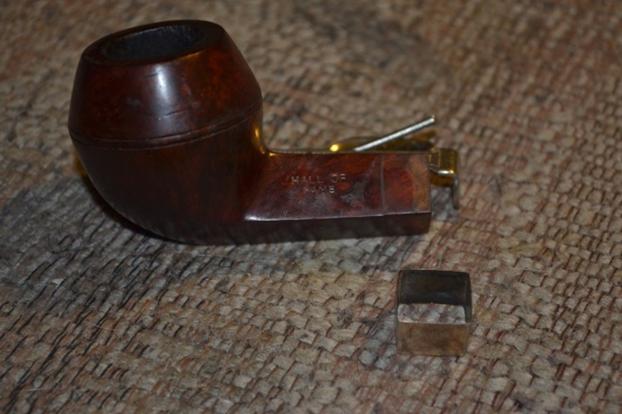
The distinctive A for Atwood was perfectly ingrained and intact. I had made the rounded top of the bulldog bowl lighter than the rest of the stummel on purpose, and as the time for re-staining had come, I chose Fiebing’s Brown leather stain for the top and Lincoln Medium Brown (darker) for the rest.Rob25 Applying the Fiebing’s with care to the top, I flamed it with my Bic, then did the same to the rest of the stummel with the Lincoln.Rob26 
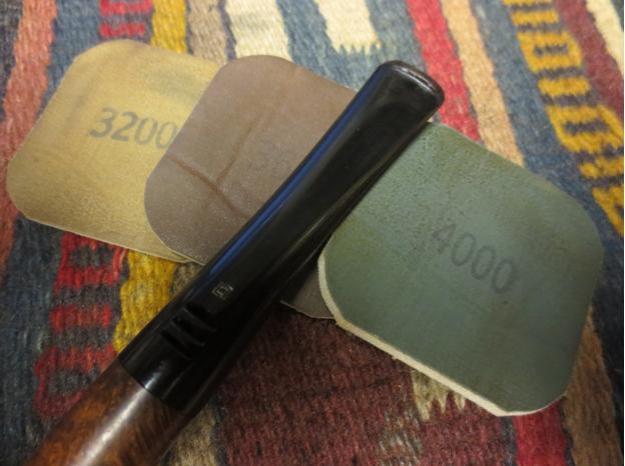
After a short sit to cool off (both the wood and me), I gently buffed the whole surface with 3000 and 6000 micromesh.Rob27

Rob28

Rob29

Rob30

Rob31

Rob32 
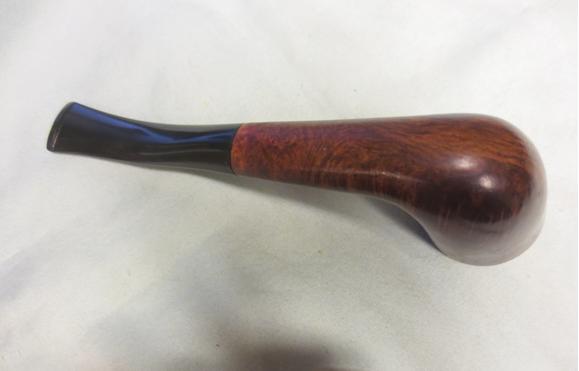
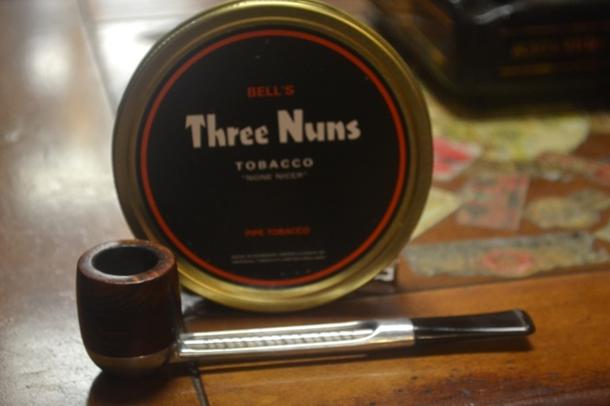
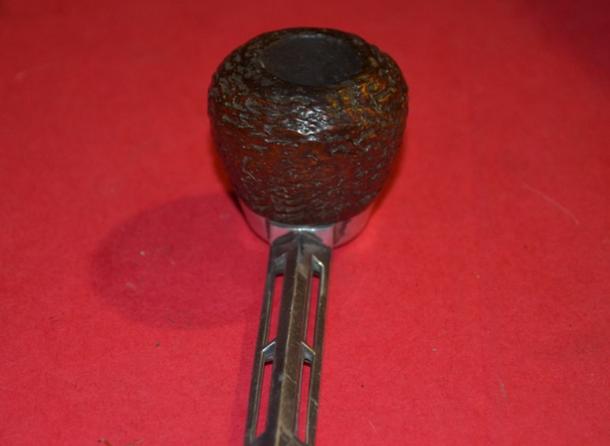
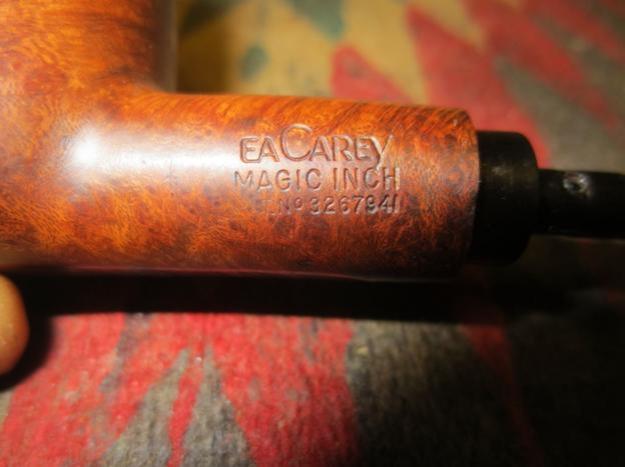
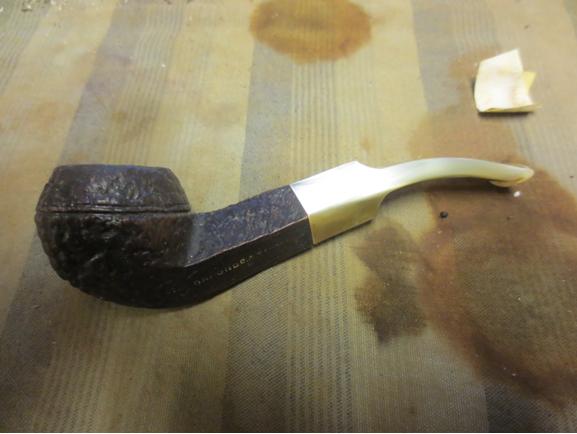
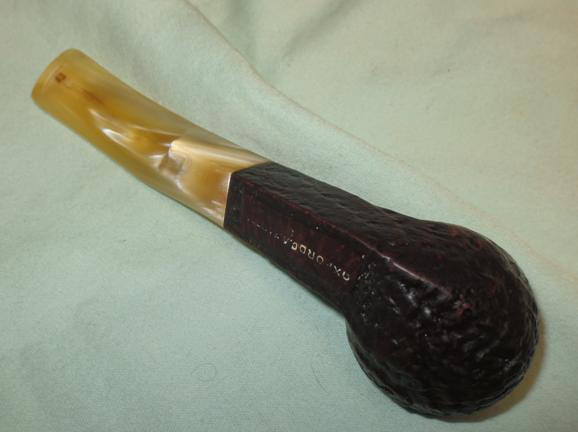
The final step before buffing was re-attaching the band to the shank, mindful of placing the STERLING/SILVER stamp in small letters on the upper left side, where it had been.Rob33 
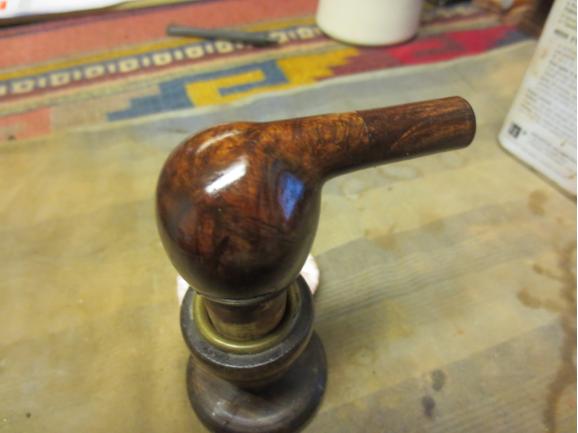
Oh, glorious moment! The time was nigh to retire to my office, wherein rests my electric buffers. Observing the clock on the wall, which told me it was already 2 a.m., I considered the neighbors opposite that side of the apartment and, understanding the way my building is laid out, realized they would hear nothing from their bedroom. I used the customary red and White Tripoli on the bit, with the clean buffer between each, and white Tripoli, White Diamond and carnauba on the stummel, again separating each with the clean buffer. For the band, I used a very fast turn on the clean buffer.Rob34

Rob35

Rob36

Rob37

Rob38

Rob39
SOURCES
http://www.history.com/news/10-things-you-may-not-know-about-p-t-barnum
http://www.azlyrics.com/lyrics/stevemillerband/takethemoneyandrun.html
https://en.wikipedia.org/wiki/Ringmaster_(circus)

UPCOMING RESTORES
Rob40

Rob41

Rob42Rob43Rob44

Reborn S.M. Frank Bakelite Bent Billiard


Blog by Pam Otto

This week’s refurbing adventure comes courtesy of an eBay estate lot, for which the seller accepted my “Best Offer” bid. The transaction occurred on a Sunday and by Wednesday the pipes had arrived. This is the photo that accompanied the listing:Pam1 All of the pipes appeared quite old, with orifice bits, and two of them really jumped out at me: a KB&B Blue Line that would need to be restemmed, but otherwise appeared to be in decent shape, and a C.P.F. Chesterfield that looked to be, and indeed is, positively enormous.

The other two pipes were older S.M. Franks. One is stamped Genuine Amber on the shank but as the stem on it is quite dark I’m going to guess it’s a replacement. The second one is stamped Frank Bakelite on the shank. It has a lovely bent red stem, way overturned, and a metal band stamped EP Silver. A few dings and a couple scratches on the bowl, and no tooth marks on the stem. I’m thinking this one, for whatever reason, was not a favorite.

Even though I’m anxious to get the Blue Line and Chesterfield cleaned up and smokable, the Frank Bakelite, with its simple needs, beckoned. It moved to the front of the queue.

I don’t know old this particular pipe is, but if it dates to the same era as the KB&B Blue Line, it could well be past the century mark. Thoughts, anyone?

At any rate, the stem of this old boy seemed like a logical place to start. I took a couple of pictures of it in its overturned state, then unscrewed it completely to see if an internal problem was to blame. Thankfully, the bone tenon was clean and solid.Pam2

Pam3

Pam4Knowing I’d read how to tackle overturned stems, I looked to Steve’s blog and, sure enough, there it was in clear, easy-to-follow directions. Following the steps he listed, I filled a cup halfway with water, leaned the stem against the side of the cup and put it in the microwave. I used the highest setting and, because the cup was only half full, set the time for 1 minute—plenty of time to get the water boiling.

In those 60 seconds, two things happened that I hadn’t really counted on. One, it worked (not that I had any doubts in the recommendation; it’s just that I rarely get things right the first time). And two, whether because of the vigorous bubbling of the boiling water, or because my microwave is a carousel, or even because the Bakelite was so smooth, the stem fell all the way into the water.

The material itself was fine; in fact, some of the debris from the airway got cleaned out by the bubbling water. However, the heat caused the bent stem to straighten.

Reheating the stem to restore the curve was no big deal; all I had to do next was re-bend it over a rounded object. But as I hadn’t foreseen this step, I didn’t have many options from which to choose. Paper towel tube? Nope, too flimsy. Peanut butter jar? Too big.

Then I saw it, sitting amid the excelsior of a near-empty holiday gift basket: a small summer sausage. It had a slightly narrower diameter than I’d hoped for, but it was a solid cylinder and certainly convenient. I heated the stem in boiling water again, laid it across the curve of the sausage, and applied slow, steady pressure.Pam5

Pam6

Pam7The results weren’t perfect, but they could be worse. Or wurst, har har. The stem feels good in my mouth, and the curvature looks okay. However, it’s not quite as deep as it was originally, and that bothers me just a wee bit. If I can find the rolling pin I know I used to have, I may try re-curving the stem at some point in the future.

To make the tenon fix on the stem permanent I dunked the tenon-stem assembly once again in boiling water—this time holding onto the stem so it couldn’t submerge completely. I twisted it tightly onto the pipe, counting on the slightly swelled tenon to grab hold inside the shank and the slightly softened glue in the stem to let go. I untwisted and, sure enough, the stem came off while the tenon stayed in the shank.

I dried the tenon with a soft pipe cleaner and applied super glue sparingly to the narrow threads, then twisted it back into the stem. Satisfied with the alignment, I put the pipe down to let the glue cure.
The following evening I unscrewed the stem from the bowl and the tenon withdrew from the shank just fine. I screwed it back in to make sure the repair held, then removed it once again and set it aside.
I took the bowl over to the sink and scrubbed the outside with a toothbrush dipped in Murphy’s Oil Soap. I wiped it down, then took it back to the table and rubbed it good with cotton balls soaked in 91% isopropyl alcohol.

The rim had a pretty good chip—maybe 1mm or so deep–missing at about the 8 o’clock position as you look at the bowl from the shank. While an extreme topping of the bowl would smooth things out, I felt it could also compromise the bowl’s shape. So after sizing it up from all angles, and finding that there really wouldn’t be much chance of tobacco being in contact with that area, I decided to try filling it instead.Pam8

Pam9Before proceeding with the fill, I thought it might be good to first address the inside of the bowl, which had minimal cake but a troubling bit of what looked like fuzzy mold or fungus. I didn’t want any spores getting into the fill, so I wiped everything down with 190 proof alcohol, then wrapped a piece of 220 grit sandpaper around my finger and sanded the interior thoroughly. More alcohol, then the addition of a flame. Take that, moldy fungus! After another heavy swabbing with Everclear I declared the inside done.

Back to the rim patch… I cleaned the area to be filled with alcohol, then scrubbed it with a green Scotch Brite pad to remove any dirt and debris. I was glad I used a wide pad like that because the briar on either side of the chip was loose and came off when I scrubbed.

The fill would need to be a little wider but not any deeper—not a big deal. I packed some briar dust along the rim, then reached for the super glue to drip onto the patch.

I’ve done this many times but am still perfecting the technique. This time I learned an important lesson: Don’t attempt a maneuver like super glue-dripping, which requires a certain degree of precision, with a parrot perched on your shoulder.

(Time out for a side note: I have a large macaw named Tom who is a frequent observer of my pipe renovations. I don’t let him near smoke or fumes but other than that he’s close by pretty much all the time. He normally sits on his stand and looks down on the proceedings, but this particular night he was on my shoulder.)

Anyway, Tom shifted just as I was letting a little drip drop onto the pipe. I totally missed the briar dust and watched as the dribble made its way down the inside of the bowl. Shazbot.

I tried again, Tom shifted again, and I dripped on the outside of the bowl. Arrrr!

Fool me once, fool me twice… I wiped up the outside drip as best I could and put Tom over on his stand. I sat down and, with steadier hands, I dripped the glue a third time—on target—and after sprinkling on a little more briar dust, set the bowl aside to cure overnight.Pam10 The next morning I took a flat needle file to the overfilled fill to jump start the removal of material. After that a thorough sanding with 220 grit sandpaper, first with the paper in my hand and then on my topping board, got the fill flush with the side of the bowl as well as the adjoining rim surfaces.

Follow-up sandings with 400 and 600 grit smoothed things out even more, but also revealed a couple of small holes in the fill. I probably had left some small air pockets in the briar dust; I couldn’t pack it down as tightly as I normally would due to its location on the rim. I refilled the fill using minute amounts of briar dust and applying the superglue with a toothpick.Pam11 While these tiny patches dried, I took on the task of shining up the metal band. I wiped it down with white vinegar, then ran through the sequence of 1500-12000 micromesh pads to make it good and shiny. Using the same pads, I polished the stem as well.Pam12 To give the patches a little more time to cure, I set about cleaning out the shank. Two—count ‘em, TWO—pipe cleaners, one bristle and one regular, dipped in alcohol was all it took.

I don’t know why the former owner didn’t smoke this pipe much, but as I set about sanding the patches I started coming up with scenarios. One, maybe it’s a crappy smoker. Only time will tell on that one. But other situations came to mind too. Maybe the stem was a problem from the get-go. Maybe it overturned after only a few smokes. Maybe the bend didn’t feel right. (Not that that will be problem any more. Ha.) Maybe it gurgled.

Whatever the reason for its nearly new condition, the pipe was rapidly coming back together again. Even with a 20 minute detour to sand off my super glue mistake inside of the bowl, the end was in sight.

I sanded the outside of the bowl and shank with 400 and 600 grit paper and followed up with the 1500 micromesh pad to take care of some slight scratches and dings. Next I got out the aniline stains to even up the color of the briar. Although much of the bowl was still quite dark, it was lighter on either side of the rim patch. I wiped on some oxblood stain, flamed it, wiped on dark brown and flamed again. A little bit of dabbing here and there with the dark brown and the staining was complete.

I slipped the metal band on the shank, screwed on the stem, smiled when it stopped right where it should, and headed over to the buffer.

(New development here at Casa Otto: Aided by a couple of gift cards from my brother, I invested in a Foredom M.BL—a small bench lathe with a variable speed motor that tops out at 7,000 rpm. I haven’t gone over what I estimate is about 1,200 rpm, based on the intervals marked on the speed control, and the results have been outstanding. Not only is it a fabulous machine, but it’s also small and fits nicely on the kitchen counter. It’s a huge improvement over my jerry-rigged drill press buffing station in the garage, and on a day like today when the outside temp is 2°F, a heck of a lot warmer too. Next step: Setting up the buffer in a spare bedroom. Upside to this will be getting counter space back. Downside is that the spare room is quite a distance from where the beer and snacks that fuel all good pipe projects are stored.)

I first buffed the assembled pipe with White Diamond, wiped it down with a flannel rag, then gave it three coats of carnauba, buffing with a clean wheel after each application.

This old pipe didn’t see much action during its go-around. But today, chip-free, moldy fungus-free and with a stem that sits where it should, it stands ready for a new century of service.Pam15Pam14Pam13

A Peterson’s Product 268 Zulu Restemmed and Restored


Blog by Steve Laug

This pipe came to me with the Meerschaum Sultan that I restemmed. It is stamped Shamrock on the top of the shank and “A Peterson’s Product” Made in the Republic of Ireland on the underside. On the right side near the bowl shank union it was stamped 268. I looked the number up and it is the shape number for a Zulu shape. The gentleman in Chile wrote: “I only have the bowl (I’m not acquainted with the minor brand) with an inappropriate mouthpiece which makes it impossible to smoke. I don’t remember how it got into my collection and certainly it’s not a pipe I purchased myself. It has a heavy cake and is a second-hand. If a proper mouthpiece could be made and a proper tune-up, it could make a fine pipe.” He included the following pictures.Shamrock1 When it arrived I took it out of the box to deal with when I had finished repairing the Sultan Meerschaum pipe. It was a nice piece of briar with mixed grain and a worn finish. The stamping on the top of the shank was clear and sharp. The stamping on the underside showed clearly on the left side as you read it but as you got to the right side it was fainter. The rim was dirty and had a flaky coat of lava overflowing from the inside of the bowl and the thick cake there. The inner and outer rim looked good with no dents or chips. The bowl sides, front and back had some light dents in the finish. The stem was a billiard stem that had been stuck in the shank. It fit snugly but absolutely did not match the oval shank.Shamrock2

Shamrock3

Shamrock4

Shamrock5 I took a close up photo of the rim and the bowl to show the thickness of the cake. Toward the bottom of the bowl it got thicker and reduced the size of the bowl at the airway.Shamrock6 I looked at several Peterson shape # 268 Zulus to get an idea of what the stem looked like originally on this pipe. I went through my can of stems and found several that would work on this pipe. The one that was the closest to matching the diameter of the shank of the pipe was a brand new stem blank that still had the castings on the sides and end of the button. The slot was constricted but the length and shape would be easy to match to the shank.Shamrock7 I drilled open the airway to accept the rod of the PIMO tenon tool. And then set up the tenon tool on a cordless drill. The current tenon was too long for the tool to cut all the way to the end of the tenon so I used the Dremel and sanding drum to shorten the tenon. I put it on the tool and adjusted the set screws and took off the first round of material. I did three adjustments to turn the tenon down to a fit in the mortise. I fine tuned the fit with 220 grit sandpaper.Shamrock8

Shamrock9

Shamrock10 The fit in the mortise was snug. The diameter of the new stem was large on the sides and the bottom. The top would take the least adjustment to get the fit correct.Shamrock11

Shamrock12

Shamrock13 I took off the majority of the excess vulcanite with the Dremel and sanding drum. I put it back in the shank and the fit was better. The rest of the work would have to be done by hand sanding.Shamrock14 I hand sanded the stem until it was smooth and the transition between the shank and stem needed some fine tuning then set the stem aside and worked on the bowl. Contrary to my normal pattern I wiped off the outside of the bowl and shank with acetone on cotton pads to remove the finish and the grime that had been ground into the briar. Once it was gone there was some nice grain showing through.Shamrock15

Shamrock16

Shamrock17

Shamrock18 I put the stem in place and took a few photos so that I could see where I stood at this point in the process. The pipe was looking good and with a few tweaks would look even better.Shamrock19

Shamrock20

Shamrock21

Shamrock22 The top of the bowl was caked and the lava was very hard. I tried to scrape it carefully with a pen knife and gave up. I resorted to lightly topping the bowl on the topping board to remove the thick lava build up.Shamrock23

Shamrock24 I reamed the bowl with a PipNet reamer starting with the first cutting head. I finished with the second cutting head which was the same diameter as the inside of the bowl. I cut the cake back to bare briar so I could assess the inner bowl walls. They looked very good with little burn or damage. The cake had protected them.Shamrock25

Shamrock26 I fine tuned the sanding on the stem and shank fit with 220 grit sandpaper and shaped the stem to match the oval of the shank. The flow of the bowl and stem were looking really good at this point in the process.Shamrock27

Shamrock28

Shamrock29

Shamrock30 I cleaned out the inside of the mortise and the airway in the stem and shank with alcohol, cotton swabs and pipe cleaners.Shamrock31 I used the dark brown stain pen to touch up the rim and the end of the shank to match the stain colour on the rest of the pipe. I rubbed it down with a light coat of olive oil to give some life to the dry wood. I gave the bowl a quick buff with Blue Diamond and then gave it one coat of carnauba wax and hand buffed it with a microfibre cloth. The “new” look of the bowl is shown in the photos below.Shamrock32

Shamrock33

Shamrock34

Shamrock35 With the bowl stained and oiled I used a heat gun to bend the stem and get the proper angles that I had found online on the 268 shaped pipes. I heated the stem until it was pliable and then bent it over a round can to get a smooth angle. I took photos of the pipe with a bent stem to give a feel for the finished look.Shamrock36

Shamrock37

Shamrock38 I fine tuned the fit of the stem to the shank by beveling the inner edge of the mortise in the shank and then cleaning the area around the tenon stem joint. I wet sanded the stem with 1500-2400 grit micromesh and then rubbed the stem down with Obsidian Oil. I dry sanded it with 3200-4000 grit micromesh pads and gave it another coat of oil. I finished sanding with 6000-12000 grit micromesh pads and gave it a final coat of Obsidian Oil. I laid the stem aside to dry.Shamrock39

Shamrock40

Shamrock41 I put the stem on the pipe and buffed the entirety with Blue Diamond and then gave it multiple coats of carnauba wax. I buffed it with a clean buffing pad and then by hand with a microfibre cloth. The finished pipe is shown in the photos below. It is ready to go back to Chile. Sometime early this week I will pack the two repaired pipes up and make the trip to FEDEX to send them back. I look forward to hearing what the two of them smoke like for the Chilean pipeman. I like the new looks of both of these pipes and I think he will as well. But I have to tell you I am a sucker for the Zulu shaped Petersons. This one is a beauty!Shamrock42

Shamrock43

Shamrock44

Shamrock45

Shamrock46

Shamrock47

Shamrock48

I Got the Kaywoodie-Delta Blues


Guest Blog by Robert M. Boughton
Member, International Society of Codgers
Member, North American Society of Pipe Collectors
http://www.naspc.org
http://www.roadrunnerpipesnm.biz (Coming Soon)
http://about.me/boughtonrobert
Photos © the Author

The Delta blues is a low-down, dirty shame blues. It’s a sad, big wide sound, something to make you think of people who are dead or the women who left you.
― David “Honeyboy” Edwards (1915-2011), U.S. Delta blues guitarist and singer

INTRODUCTION
I’ve been sitting on these two nice metal pipes, different brands but modeled after the original of their kind, designed by Frederick Kirsten, a U.S. professor of electrical engineering at the University of Washington who was transferred to the aeronautics department and promptly changed the course of aviation history with the creation of the Kirsten Wind Tunnel for subsonic aerodynamic testing. He also upended the tobacco pipe industry and generally rocked the world of pipe enjoyers with his 1936 invention of a sleek aluminum radiator frame with interchangeable bowls. The patented revolution in a box was more or less a way to quit cigarettes by exercising his boundless creativity. He puffed cigars as well.

Maybe I’m just not as daring as the good professor. Whenever I find myself on the edge of pipe restoration territory I haven’t charted, I hesitate. I don’t panic or freeze in terror. I just pause to survey the terrain and get my bearings; to triangulate my coordinates, find my footing, and then one day, as if on an impulse but really because I’m good and ready, I take the next leap, with some faith.

And so it was last night that I looked at the Kaywoodie Smooth Billiard and Duncan Delta Rusticated Brandy with a dental lip – again – and without thinking grabbed them. The next thing I knew, I was looking around for the implements of cleaning and restoring I might need for the combined tasks and remembered another aluminum pipe I fixed up once, an Aristocob, and how I used a solution of white vinegar and baking soda to soak the metal. Although I had bought enough of each for a lifetime when I did the Aristocob, I discovered they were lost in my latest necessarily hasty move.Delta1 The nearest Walmart would close in about a half-hour, at midnight. All of Sam Walton’s children here used to stay up round the clock, but now there are less than a handful that do, and only one within any kind of reasonable distance. They had too many problems with thievery and other shenanigans, you see, mostly through the dock doors, if you follow me. I armed myself against the natives, threw on a coat, petted my cats as they were curious about the sudden hullabaloo and hurried out the door. I was back before the witching hour.

As part of the map checking I did in comforting if only perceived preparation for these restorations, I noted that the Duncan Delta, of the English metal genre, as it were, came with a non-removable bit, as did the two Falcons in my personal collection. At this point I made that greatest of mistakes: I assumed there were no exceptions to the rule.Delta2

Delta3 To be fair to myself, I showed the Kaywoodie and Duncan Delta to my friend and mentor, Chuck Richards, who is usually infallible, and asked how the bits come off for cleaning. In hindsight and an extended spirit of fairness, I’m not sure he looked all that closely at them.

“They don’t,” he said, with a certain amused grin he has. “You just have to work through them.” Or something to that effect.Delta4 Taking a seat on the couch with the supplies I would need to proceed, I had no idea what I was in for. I can’t wait to show Chuck the mind-boggling discovery I tripped over, figuratively speaking – about halfway through the restorations. To those in the audience who know the astonishing secret of a certain rare Kaywoodie metal pipe made from 1955-1959, with this particular surprise only included during the first year or so of that period, Shhhh! Don’t spoil the revelation for others when it comes, in good time.

RESTORATIONS
Delta5

Delta6

Delta7

Delta8

Delta9

Delta10

Delta11

Delta12

Delta13 I had prepared an empty macaroni salad tub, by cleaning it with scalding water and dish soap, for the vinegar-baking soda soak of the aluminum pipe bodies. It was the widest container I had but also deeper than it needed to be. Into the tub I measured about a tablespoon of baking soda, then added the vinegar and watched it fizz madly until the powder dissolved. I placed the two parts in the mix and added more vinegar until they were almost covered. Considering the possible effects on the bits, I spontaneously chose the bolder path and pushed down a little on each one until they were submerged. The bubble action was really something to see – much more active of an interaction than an OxiClean bath – but I had other things to do.Delta14 The bowls needed cleaning in the worst way, the bases in particular. The moisture from tobacco creates steam, and Kirsten’s system, which is used in metal pipes still today, traps and cools the steam in the stem. Much of the resulting very sticky, cloying gunk ends up on the bottoms of the bowls and can be cleaned in seconds by anyone who enjoys these pipes. But as Steve put it perfectly in one of his blogs on a particularly messy Generation 1 Kirsten A, I’ll just quote him: “The cleaning in seconds must not have been something that the previous owner of this pipe ever read or understood.” https://rebornpipes.com/tag/kirsten-pipes/

Taking also from this great blog the idea that metal pipes are, for the most part, sturdy things that can outlive generations of a single family of pipe enjoyers, I launched a three-pronged assault on the bottoms of the bowls alone. First I swabbed them and the rest of the bowls’ exteriors with cotton gun cleaning squares soaked with purified water; then the same with Everclear swabs, and next superfine steel wool on the bases and rims. The Delta base, being metal and somewhat pocked with corrosion, needed a little more work with sandpaper before another round of steel wool.Delta16

Delta17

Delta18

Delta19 An odd trick of sight makes the rusticated Duncan bowl, which indeed has a wider outer diameter than the smooth Kaywoodie (about 5” compared to 4-3/8), appear as if it would need a bigger reamer to clean out most of the excess cake. But the Duncan only took a 19mm fixed reamer while the Kaywoodie held a 21mm.Delta20 I smoothed the chambers with 320-grit paper followed by 200, followed by long and careful consideration of the next step. While I started restoring pipes with the habit of stripping the old finish completely, I have taken to avoiding that step for the most part on different levels of thinking, primarily two. One, I never know for sure what I’ll find beneath the finish that might have been better left uncovered, and two, I have become more purist in my approach, liking the idea of imitating the original.

Nevertheless, I concluded I just didn’t care for the light brown shade of the Kaywoodie or the dark brown of the Duncan. As the former was of U.S. origin and the latter of British make, I reasoned, that would make them cousins, as some folks on either side of the Pond refer to each other. But I wanted them to be more like brothers. Therefore, “Off with their stains!” I heard a voice cry in my head, and dunked both bottoms up into an Everclear bath, careful to leave the bases above the alcohol level.Delta21 While the 190-proof alcohol changed from clear to something else, I removed the frames from their long vinegar-baking soda soak, rinsed them thoroughly and began to “work through” the Duncan frame with pipe cleaners dipped in more Everclear, still shocked, as always, at the filth that came out. Seriously, how hard is it to run a cleaner through your pipe now and then? Are restorers the only people who do it? Deep breath; exhale. I suppose that’s a rant better left for my upcoming Encyclopedia of Pipe Trips. Still, seven bristly cleaners through the frame later, and three swabs soaked with alcohol to clean out most of the mess in the round bowl connector, not to mention having to use my wire cleaner to dig out the muck in the grooves of said connector, I thought I was finished with that part.Delta22 But now, looking at the photo above, I see it needs a little more work. I’m going to soak the connector in Everclear and scrub it some more. Give me a few minutes to make it shine better, and I’ll be right back with another picture.Delta23 There. That was easy, and I for one feel better. Plus the picture tells the whole story!

Anyway, enough time had passed to take the bowls out of the Everclear and scrub them cleaner and dry inside-out with more cotton swabs.Delta24 I used the steel wool again on both, lightly on the Kaywoodie to make it shine before heightening the effect with a micromesh progression, and vigorously to take the finish of the rusticated Duncan down still more until it was actually reddish, for which I had hoped.Delta25 Re-staining both with Lincoln Marine Cordovan (Burgundy) boot stain, I flamed them with my Bic and set them aside.Delta26 Now, at last, I near the dramatic moment I know you have all been waiting for! Is that the faint fade-in of a drum roll I hear, or an auditory hallucination? Due to my slight deviation from following the restorations of each pipe part by part – starting when I cleaned the Duncan frame and instead of moving on to the Kaywoodie, continued to the bowls – I did not learn the wonderful nature of the Kaywoodie until I attempted to work through it with bristly cleaners as I had the Duncan…

…and the whole thing came apart in my lap! There were the bit that wasn’t supposed to come off and some bizarre, vile, noxious looking thingamabob that looked like a wire brush. I picked it up with distaste and tossed the whole dark, stained mess in the leftover Everclear from stripping the bowls. I knew that would clean it up somewhat, and it did. With the brush out of the Kaywoodie frame, by the way, the metal was quite easy to clean. That should have been a clue, but my first thought was that someone had stuck the brush inside the frame as a makeshift filter. (It is truly scary how close and yet so far from the truth I can be sometimes in my denser moments.)Delta27 At least I had the sense to recognize that the resulting hole in the frame was gaping wide, and turned to pipephil.eu for help, which I found as I almost always do. It was the second metal “filter” pipe in the Kaywoodie models A-K section, the Filter Plus, made from 1955-1959. A convenient link to Smoking Metal led me to the rest of the story. http://www.smokingmetal.co.uk/pipe.php?page=133

As it turns out, the brush is not a fluke, of course, but an original Kaywoodie nylon brush filter that was only included with the pipe during the first year or so of its four-year run. The filter brush has 5,000 fibers. Now, I want y’all to think on that fer a spell. Finding a pipe with one at all, much less intact, is a miracle. It’s no wonder Bill Feuerbach, president of S.M. Frank & Co. Inc., owner of Kaywoodie, is quoted at the link above as saying of the Filter Plus, “It is one of the most indestructible and durable pipes I have ever run across.”

Check out the advertisement below from the first year the Filter Plus was made. Considering how easy it was to clean the frame of the pipe itself, despite (or because of) the dirty condition of the filter brush, it’s a shame they stopped making them. As the ad shows, the pipe cost $4, or $35.42 in today’s money. http://www.usinflationcalculator.com/. Replacement or additional bowls were $1.50 ($13.28), and two-packs of the filter brushes were 35 cents ($3.10).Delta28 Getting close to the finish line always makes my blood start to race! I buffed the two bowls with 4000 and 6000 micromesh.Delta29 Then there was the Kaywoodie bit, which was looking a little rough.Delta30 I sanded it with 200- and 320-grit paper before working my way up the micromesh trail, and moved on to putting a little Halcyon II wax on the Duncan. During a few of the 15 minutes or so it set in, I took the Kaywoodie Filter Plus billiard bowl and the bit (which indeed is removable) into my office. I buffed the bit with red and white Tripoli, then White Diamond, using the clean wheel between each; then the bowl with white Tripoli, White Diamond and a good coat of carnauba, again using the clean wheel in between.

Really only ten minutes more passed, at most, as I sat back on my couch, screwing the Kaywoodie bowl in and out of the frame threads and wiping it down, over and over, because it seemed like the minute hand on the clock was stuck there to spite me! Maybe that’s because I kept eyeballing it. But the time did pass, and I carried the Duncan bowl into the office for a quick spin on the clean wheel only. That was my reward for being so patient and all.Delta31

Delta32

Delta33 CONCLUSION
Well. Now that it’s all said and done, all I really have to add is that this pair of restorations was just plain fun. And full of surprises. And I learned a few new things I never imagined, too, and can’t wait to show Chuck!

ADDITIONAL SOURCE
https://www.reddit.com/r/PipeTobacco/comments/3a5hf9/info_on_falcon_pipe_markings/ Info on FD18 stamp

Cleaning up a WDC Milano Hesson 1925 Long stem Billiard


Blog by Steve Laug

One of the pipes my brother sent me this past week was this long stemmed little billiard. The stem was over clocked almost ½ a turn in the shank and the stem was frozen in the shank. It was dark coloured and the finish was dingy. The rim was covered with an overflow of cake from the bowl but it did not look to be damaged either on the inside or outside edge. The bowl itself had a broken cake lining it – thicker in the middle and the back edge than at the top or the bottom fo the bowl. There was some small pin prick sized marks around the back side of the bowl near the top edge but they were not rough. The stem itself was quite clean – good rubber so it had hardly oxidized. There were two small tooth marks – one on each side of the stem. The WDC white triangle in the stem had lifted and would need to be repaired. The stamping on the shank of the pipe is what got my attention. On the left side it had the WDC in a triangle logo over MILANO. I have seen quite a few WDC Milano pipes over the years. On the other side it is stamped Hesson over Pat’d Dec 22, 1925 and the shape number 1527.Hesson1

Hesson2

Hesson3

Hesson4 I was not sure what kind of connection I was dealing with on the tenon on this old Milano. Other ones I had worked on were push aluminum tenons and sat in the shank. The aluminum oxidized and the tenons often were bound to the shank when I got them. But there was something about this one that was different. I could not turn it either direction so I put it in the freezer overnight and let the different expansion/contraction rates of briar and metal do their work. In the morning I carefully worked it back and forth and it seemed to give a little. I decided to see if it was a threaded tenon so I held the shank tightly next to the stem and the turned the stem counter clockwise and it came free. Once it was out I could see that I was dealing with a slightly older Milano Hesson system than any of the previous ones I had worked on. This one had a threaded tenon with a long tube attached to the end. The tube extended right up to the entry of the airway in the bottom of the bowl. The shank was also was threaded but the threads had been cut into the briar. There was no mortise insert in the shank.Hesson5 I looked at the documents I had from the other WDC Milano Hesson pipes that I had restored. This one was slightly different. I have included the Patent drawing for your comparison. The differences are readily notable. The patent is from 1932 and the pipe is stamped 1925. The major difference that I see is the internal of the shank and the tube on the tenon in the 1925 edition.Hessiona I decided to use my tried and true method for correcting over clocked stems. I heated the tenon with the flame of the lighter and tried to turn it. It did not work. No matter how long I held the lighter in place it did not heat the glue in the stem enough to allow me to align the stem with the shank. I set up a heat gun and heated the tenon on low heat. It did not take long and I was able to screw it into the shank and align the stem properly. I set it aside and let it cool with the stem in place while the glue hardened again. I took the following three photos to show the properly aligned stem.Hesson6

Hesson7

Hesson8 I cleaned out the shank with cotton swabs and alcohol until it was clean. I ran a pipe cleaner through at the entry of the airway into the bowl. The end of the metal tube sat against the entry so it was pretty clean. Most of the grit and grime were in the threads on the walls of the mortise.Hesson9 I reamed the bowl with a PipNet reamer and the smallest cutting head to take the cake back to the briar.Hesson10

Hesson11 With the inside clean I worked on the bowl finish. It was dirty but it also had a coat of varnish on the surface that had gone opaque. The grain was invisible underneath it. I lightly sanded the bowl and rim with 1500 grit micromesh to break up the surface of the varnish and then wiped the bowl down with acetone on cotton pads until I had removed the grime and varnish coat and the grain was visible. The stain on the pipe was oxblood so it had a rich, deep red hue to it.Hesson12

Hesson13

Hesson14

Hesson15 I scrubbed the metal tube with 1500 grit micromesh and used a brass tire brush on the threads to clean up the grime and oxidation that was present on it. I cleaned out the inside with pipe cleaners, cotton swabs and alcohol.Hesson16 I buffed the bowl with White Diamond (very lightly around the stamping on the shank) and gave it a coat of carnauba wax.Hesson17

Hesson18

Hesson19

Hesson20 I took close up photos of the stamping on the shank. The left side shows in the first photo. The right side of the shank is shown in the second. It is sharp and very legible.Hesson21

Hesson22 I worked on the stem with 220 grit sandpaper to remove the small tooth marks on the top and the bottom sides. I then sanded it with a medium and fine grit sanding sponge to minimize the scratching.Hesson23

Hesson24

Hesson25 I started to polish the stem with micromesh sanding pads. I wet sanded with 1500-2400 grit pads and then rubbed the stem down with Obsidian Oil. I was just starting to sand with a 3200 grit pad when the edge of the pad hit the edge of the triangle (it sat high on the stem as it appeared to have lifted) and sent it flying. The white triangle was nowhere to be found so now I faced a new dilemma.Hesson26 I filled in the empty triangle in the stem with liquid paper. It is the same white as the previous triangle. It shrinks as it dries so once it was dry I put a drop of clear super glue on top of it to form a bubble. Once it dried I could sand it down to the surface of the stem and I would be good to go with the replacement triangle.Hesson27 Once the glue dried I sanded the fill down to match the surface of the stem and the new triangle looked pretty good. I cleaned out the threads on the tenon with alcohol and a cotton pad and then screwed it back into the mortise. I sanded the newly filled and area with 1500-2400 grit pads and then continued with 3200-4000 grit pads. I rubbed the stem down with Obsidian Oil and then dry sanded with 6000-12000 grit pads. I gave it a final coat of Obsidian Oil and let it dry.Hesson28

Hesson29 I buffed the stem and bowl with Blue Diamond on the wheel and then gave it multiple coats of carnauba wax. I buffed it with a clean flannel buff to raise the shine and then hand buffed it with a microfibre cloth. The finished pipe is shown in the photos below. It does not look too bad for a pipe from Dec. 22, 1925. Thanks for looking.Hesson30

Hesson31

Hesson32

Hesson33

Hesson34

Hesson35

Hesson36

Another Painful 70s Era E.A. Carey Magic Inch Apple Restored


Blog by Steve Laug

Reading the title of this blog you might wonder why I called it another painful Carey pipe. As this refurb description unfolds I think it will become clear what I mean by the title. In the Montana pipes that my brother Jeff sent me there were four E.A. Carey Magic Inch Patent pipes. I worked on the first one in the photo below, the Freehand and found that the bowl was a piece of cake. Getting the plastic apparatus cleaned in the shank was a challenge that took a lot of pipe cleaner and patience to move through. Because of that I have honestly been avoiding working on any of the others in the foursome. I have worked on a lot of others that have been sitting just because the cleaning is a pain, but more importantly trying to clean up the chewed up stems and getting any kind of shine on them is painstaking. The plastic cleans up well enough and I am able to repair the bite marks. The dents will not raise with heat, the inside of the stem takes a lot of scrubbing and is cavernous so lots of cotton swabs are sacrificed and lots of pipe cleaners. The plastic does not take kindly to the boiling alcohol of a retort so I am left to do the work by hand. Then once cleaned polishing the stem feels like an impossible challenge. I don’t remember how many hours of sanding with micromesh pads and then carefully, lightly buffing with the buffer went into bringing the shine on the Freehand so the lot just sat taunting me in my refurb box.

Finally, a few days ago I went through the remaining threesome to see if I had any sudden urge to work on one of them. I looked them over one at a time, examining the internals, the condition of the rim and the briar and also the stem….argghh. The stems on all of them have identical chew and bite marks. All were a mess. One of them stood out to me though and I ventured into working on it. It is the second pipe down from the top in the photo below (I have circled it in red).Carey4
Carey5Before I jumped into working on it I figured I better take some of the advice noted in the photo to the left. These Carey’s are time consuming and I find myself frustrated often in the process of polishing the stem.

I knew without looking to deeply at this old pipe that it would be another one that drove me to the edge. The finish on the briar was dull and dirty. There was some interesting grain poking through – birdseye on the sides and cross grain on the back and front. The stamping was very clean and sharp. The rim was crowned and had a significant lava overflow build up on the top. The good thing was that there was no damage to either the inner or outer edge of the rim. The bowl still was half full of unsmoked tobacco but appeared to be heavily caked. It was hard and dense. The stem was a mess. Once I took it off the apparatus extending from the shank there was still a dirty papyrate filter in place on the tube. The inside of the stem was dark and oily. The outside was covered with deep tooth marks and also a generous case of tooth chatter. There was also a gummy substance on the clean top half of each stem that probably came from price tags that were in place at the antique shop where my brother found them.Carey6

Carey9

Carey8

Carey7 I took the next two photos to show the set up of the apparatus with the papyrate filter in place and the state of the bowl and the rim.Carey10

Carey11 The lava overflow on the rim took a lot of elbow grease to scrub it clean. I used Murphy’s Oil Soap and cotton pads to scrub it until I had it clean. I wiped down the rest of the bowl with the soap and then rinsed it with running water. I dried of the bowl and then cleaned out the shank with pipe cleaners and alcohol.Carey14

Carey15 With the briar clean and the internals of the bowl and shank clean I gave the bowl a light wipe down with olive oil so that I could see the grain more clearly. I took the next photos to show the beauty of this bowl.Carey16

Carey17

Carey18 The next photo shows the stamping on the left side of the shank. The right side is stamped Grecian.Carey19 I set the bowl aside to work on the stem. I sanded it with 220 grit sandpaper and a fine grit sanding sponge to clean off the tooth chatter and the grime. I wiped it down with alcohol on the outside to prepare it or the repairs on the deep tooth marks. I used black super glue and put drops into the dents, leaving a bubble so that when it dried and shrunk down the dents would be filled and could be sanded.Carey20

Carey21 When the glue dried I sanded the stem with 220 grit sandpaper once again to blend the patches into the surface of the stem.Carey22

Carey23 Before going any further I decided it was time to clean out the inside of the stem. I used cotton swabs, pipe cleaners and alcohol to clean out the internals.Carey24 With the inside cleaned and the repairs smoothed out I sanded the stem with a medium and a fine grit sanding sponge. They removed many of the scratches and the stem was beginning to take shape. I was not getting too excited however as this was when the tedious work really started.Carey25 I wet sanded the stem with 1500-2400 grit micromesh sanding pads and then gave the stem a coat of Obsidian Oil. It does not absorb into the stem material so I use it to give me more bite between the various grit pads of micromesh. I dry sanded with 3200-4000 grit pads and gave it another coat of oil. I buffed it lightly with White Diamond and then finished sanding with 6000-12000 grit pads. I gave it a last coat of oil to wipe down the dust and then hand buffed it.Carey26

Carey27

Carey28 I buffed the pipe with Blue Diamond Polish on the wheel and then gave it multiple coats of carnauba wax. I buffed it with a clean flannel buff and then buffed it by hand with a microfibre cloth. I don’t know how many hours I have in this stem but it certainly seemed to take forever. The bowl cleaned up great and the briar is quite remarkable. The beauty of the grain comes through clearly and the finished pipe looks great. I have two more Carey’s to clean up but I think I will wait awhile to tackle them. This one gets me half way through the lot. The finished pipe is shown in the photos below. Thanks for looking.Carey29

Carey30

Carey31

Carey32

Carey33

Carey34

Carey35

Cleaning an American Made Selected Bulldog


Blog by Steve Laug

I have had a straight bulldog in the refurbishing box for a long time now. It is an interesting older pipe that has the characteristic worm trail rustication on the sides of the bowl and cap but total only 5 trails. The rest of the bowl is a nice piece of briar. The shank is smooth with no rustication. It appears to be unstained and natural or if stained a light tan colour. The trails on the bowl sides and cap are slightly darker in colour. The bowl was lightly smoked and the bottom half still clean briar. There was no cake in the bowl. There was some burning on the inner edge of the rim on the back left side of the bowl. The stamping on the shank of this bulldog is standing lion inside of a shield and next to that – SELECTED – over Imported Briar. I have searched on the web and in my books for this logo and cannot find it or the company it refers to. Any help would be appreciated. select1 The stem was in good shape with a little oxidation but no teeth marks except for two on top of the button itself. There was an internal stinger apparatus and a metal threaded tenon. The tenon screwed into a metal insert in the shank. The airway from the mortise to the back of the bowl was quite open to give room for the stinger apparatus. I took the following photos of the pipe when I brought it to the work table this morning.Select2

Select3

Select4

Select5 I took the pipe apart to show the inner apparatus on the stinger. It is unusual in terms of shape. The spear end is very sharp! It is pressure fit into the stem so it should come out for a thorough cleaning of the stem.Select6 The briar was dirty and had what appeared to be the gum from a price tag stuck to it in several places. I scrubbed the bowl and rim with a tooth brush and Murphy’s Oil Soap to clean off the grime.Select7 I wiped it down with a paper towel. A lot of grit and grime came off. I rinsed it with warm running water and dried it off with a towel. The photos below show the grime on the paper towel and the clean bowl.Select8

Select9

Select10

Select11 I heated the stinger with a lighter to soften the tars that held it in the threaded tenon. Once it was warmed I wiggled the stinger free and was able to clean it and the tenon.Select12 I scrubbed the inside of the tenon and the airway in the stem with pipe cleaners and alcohol. I used a brass bristle brush to clean the stinger and the threads on the tenon.Select13 The inside of the shank was wide open and served as a chamber for the stinger. It worked like a condensation chamber to collect the moisture before the smoke move through the holes and slot in the stinger and up the stem. Because of that it was very dirty. I cleaned the bowl and the shank with pipe cleaners, cotton swabs and alcohol until no more grime would come out. The photo below shows the first batch of swabs. There were about that many more used before it was clean.Select14 I lightly sanded the stem with 220 grit sandpaper to break up the oxidation and then with a medium and a fine grit sanding sponge. I wet sanded it with 1500-2400 grit micromesh sanding pads and then gave it a coat of Obsidian Oil. I dry sanded the stem with 3200-4000 grit micromesh pads and then gave it another coat of oil. I finished sanding with 6000-12000 grit pads and gave it a final coat of Obsidian Oil. I set it aside to dry.Select15

Select16

Select17 I put the pipe back together and buffed it on the wheel with Blue Diamond and gave it several coats of carnauba wax. I buffed it with a clean flannel buff to give it a shine. I brought it back to the work table and hand buffed it with a microfibre cloth. The finished pipe is shown below. Thanks for looking.Select18

Select19

Select20

Select21

Select22

Select23

A Tiny Apple Reborn – new stem and new finish


Blog by Steve Laug

This morning I decided to work on an interesting little pipe that I picked up in an eBay batch from England. All of the bowls in that batch had broken tenons stuck in the shank. All were no name bowls or so worn that the name had long since worn off. This one was the smallest pipe in the batch. The bowl and shank are 2 ½ inches long and 1 ½ inches tall. The bowl is drilled at 5/8 inches and I can insert my little finger. The shank was spliced somewhere along the way and done quite well. It is a smooth splice. I wonder if it was a repair or if it came out that way when briar was scarce during the war. The finish was spotty – varnish was peeling from the bowl and shank. The tenon appears to have had a metal tube in the middle of the vulcanite and both had snapped off when they broke. I have circled this bowl in red in the next three photos. The first shows the batch of pipes that I picked up. The second is an enlargement of the bowl itself and the third photo shows the snapped tenon in the shank.Apple1
Apple2
Apple3 The photos above came from the seller. I took the next series of photos before I worked on the pipe this morning. The rough finish is visible in the photos as are the fills on both sides of the bowl. They were shrunken and hard so they would have to be repaired. You can also see the splice in the shank about 2/3 of the way up the shank to the bowl. The bowl had a thick cake that was crumbly and rough. The bowl still was half full of tobacco that had been stuffed into it evidently before the stem broke. The rim had lava overflow and some damage to the inside edge and the top of the rim.Apple4
Apple5
apple6
apple7 For a stem for this pipe I turned to my stem can and found a long narrow stem that needed a little adjustment to the tenon and the diameter of the stem at the shank before it would fit. I turned the tenon with a Dremel and sanding drum and finished by sanding it by hand.Apple8 The photos below show the stem in the pipe. The diameter of the shank and the diameter of the stem do not match.Apple9 I used the Dremel and sanding drum to reduce the stem diameter to match the diameter of the shank. I always rough in the fit with the Dremel and then fine tune the fit by hand sanding.Apple10 I reamed the bowl with a PipNet pipe reamer and took the cake back to bare wood. I wanted to look at the inside of the bowl and rim to see what needed to be done at those points.Apple11
Apple12 I stripped the finish off the bowl with acetone on cotton pads. With all of the fills and dents in the no name bowl it was another candidate for sanding and refinishing. Looking down the shank with a light it appears that the splice of shank was done with a metal tube in the shank. The bowl and the added shank also appear to be different wood.Apple13 I topped the bowl to remove the rim damaged and to clean up the edges of the rim.Apple14 I tried to pick out the fills on the bowl but they were tight and were rock hard. I cleaned up around them and filled in the shrinkage with clear superglue.Apple15 I sanded the repaired areas and the rest of the bowl and shank with 220 grit sandpaper. I sanded the repairs smooth and followed up by sanding with a fine grit sanding sponge.Apple16
Apple17 I gave the bowl a black under stain to help hide the fills and the splice. They would always show but the dark under stain would blend them into the finish better. I applied the stain and flamed the bowl and repeated the process to get good coverage.Apple18
Apple19 I wiped down the bowl with alcohol and cotton pads to remove the black from the surface of the briar and leave it in the grain patterns.Apple20
Apple21
Apple22
Apple23 I sanded the bowl with a fine grit sanding block and the stem with the fine grit sanding sponge and fit it in the shank to get a feel for the new look. I took the next series of photos to see how the pipe was developing. I liked what I saw. The black stain had done a good job covering the fills and the splice. I used a black permanent marker to fill in some light spots and drew in some grain lines in the bald spots.Apple24
Apple25
Apple26
Apple27 I gave the bowl a top coat of Danish Oil with Cherry stain and then again used the permanent marker to fill blank spots and darken the fills. I wiped the Cherry stain over the bowl several times until the coverage was good and then set the bowl aside to dry.Apple28
Apple29
Apple30 While it dried I worked on the stem with micromesh sanding pads. I wet sanded it with 1500-2400 grit pads and gave it a coat of Obsidian Oil. I dry sanded with 3200-4000 grit pads and gave it another coat of oil. I finished with 6000-12000 grit pads, gave it a final coat of Obsidian Oil and let it dry.Apple31
apple32
Apple33 I buffed the pipe with Blue Diamond on the wheel and then gave it multiple coats of carnauba wax. I buffed it with a clean flannel buff and then by hand with a microfibre cloth to deepen the shine. The finished pipe is shown in the photos below. I like the looks of it with a long thin stem. It is a like a pencil shank Bing with an apple shaped bowl. Thanks for looking.Apple34
Apple35
Apple36
Apple37
Apple38
Apple39
Apple40

My Second C.A. Sander of Swansea Bent Bulldog Restemmed and Restored


Blog by Steve Laug

When I was working on the previous C.A. Sander of Swansea straight bulldog that I restored (https://rebornpipes.com/2015/12/13/an-interesting-welsh-pipe-find-a-c-a-sanders-sandhurst-bent-bulldog/) I was looking for information on the brand. In my search on the internet I came upon this small bulldog bowl on eBay. I had found that there were at least two different names stamped on these pipes – both the ones I found were sandblast finishes. The earlier one was stamped Sandhurst and this one is stamped Oxford. Other than that the stamping on both is the same – the name then CA Sander over Swansea. I wrote the seller to see if he had any information on the brand and he replied that he did not. I put a bid on the pipe and ended up winning it. It arrived here on Tuesday this week. I have included the photos that the seller had posted on eBay below. It appeared to be in very good shape even though it did not have a stem.CA1

CA2

CA3

CA4

CA5 When the pipe arrived it was in excellent shape. The seller’s photos were absolutely correct. The bowl had a light cake in it and the rim was dirty with lava overflow and carbon. The shank was dirty and the finish had dust in the crevices of the blast. The stamping was exactly the same as the Sandhurst I restored other than the Oxford name that was present. I took the next series of photos to show the pipe on arrival before I started working on it.CA6

CA7

CA8

CA9

CA10 I went through my can of stems to find one that would work on this bowl. Diamond shanks are notoriously hard to match a stem to as each side and angle is very individual and hardly ever align with used or estate stems. I would have to find one that had a close fit and modify it to match the angles. With that in mind I found several stems that could have worked. In looking at the tapered stems I pulled all seemed too long to go with the petite size of this bowl. None quite aligned at the shank and modifying them was not an option as one or more of the sides did not have enough material to modify. I had several saddle stems that had the same issues. Then in the bottom of my can I remembered that I had a Lucite saddle stem that might very well work. I took it out and measured the sides of the diamond. I have to tell you I was very surprised – this stem was almost a perfect fit. I would need to shorten the tenon slightly and take a little material off to get a snug fit. Only the bottom right side was a little larger than the shank. Everything else matched. The stem is a pearlised cream coloured Lucite that actually would go well with the colour of the bowl once I had it cleaned up.CA11 I used the PIMO tenon turning tool to reduce the diameter of the tenon to get a close match and finished the fit by hand sanding. I shortened the length of the tenon with a Dremel and sanding drum to the same length as the mortise. In doing so I removed the damaged end of the tenon and the rounded right side. Once I had the work done I put the stem in place in the shank and took the photos below. You can see the great fit that the stem had in terms of the width of the sides of the diamond. I was fortunate in terms of the amount of work that would need to be done to fine tune this one. It would take very little work to make a good fit.CA12

CA13

CA14

CA15 I took a photo of the end of the shank and the end of the stem and put them side by side for comparison sake to show how close the two diamonds came to matching each other. This is a very rare occurrence in my experience.CA16 I sanded the bottom right side with 220 grit sandpaper to adjust the fit on that side. I needed to remove enough material to align the bottom of the diamond with the bottom of the diamond on the shank. All others point on the diamond aligned perfectly but this one. It did not take too much sanding before I had the alignment and the fit against the side of the shank perfect.CA17 I reamed the cake in the bowl with a PipNet reamer and took it back to bare briar.CA18 I scrubbed the bowl with Murphy’s Oil Soap and a tooth brush on the sides and bottom of the bowl and shank and with a brass tire brush on the rim.CA19

CA20

CA21

CA22

CA23

CA24 I put the stem on the bowl, put a cotton ball in the bowl and then set up the retort to clean out the internals of the pipe. I boiled alcohol through the pipe and after two tubes of alcohol the airways were clean. The retort also removed some of the staining in the stem airway. I removed the retort and scrubbed the internals of the bowl and shank with pipe cleaners and cotton swabs to remove the remaining alcohol and grime in the shank. In the end the shank and airway were clean and the pipe smelled fresh.CA24A I cleaned the stem with pipe cleaners and alcohol and also pipe cleaners dipped in Bar Keepers Friend powder to scrub out the tar stains in the airway. It took a lot of scrubbing but I got the majority of the stains out. I did not want to darken the stain on the bowl but wanted to highlight the contrasts in the finish. The combination of dark brown and medium brown on the high spots worked well for me. To keep that and add life to the bowl I wiped it down with a light coat of olive oil and rubbed it into the blast pattern. I took the following photos with the stem in place on the bowl. The pipe is taking shape.CA25

CA26

CA27

CA28 The stains at the button were stubborn and hard to remove. I found that there was a small lip where the slot in the button met the airway in the stem and it collected tars and oils. The pipe cleaners and scrubbing did not touch that as it did not reach into the small crevice there. I used a needle file to flatten out the lip at the junction. With that gone I was able to remove more of the stain from the stem. All that remain was a small spot on the top and the bottom that I could not get out no matter how hard I worked it.CA29 I sanded the stem with micromesh sanding pads to polish and remove the scratching. I wet sanded with 1500-2400 grit pads and dry sanded with 3200-12000 grit pads. As I sanded the stem with each successive micromesh pad it left a richer luster in the pearlised stem.CA30

CA31

CA32 I buffed the bowl and stem with Blue Diamond on the wheel (lightly on the sandblast bowl as I did not want to flatten the blast) and gave the stem several coats of carnauba wax. I hand waxed the bowl with Halcyon II wax and then buffed the bowl and stem with a shoe brush and a microfibre cloth to raise the shine. The finished pipe is shown in the photos below. It is a petite bulldog – only 5 inches long from bowl to button and 1 3/8 inches tall from rim to point on the bowl bottom. The drilling on the bowl is 5/8 inches. I like the contrast that the Lucite stem gives with the blast on the bowl. The colours work well for me. The stem length works on this bowl and the overall effect is a balanced small sandblast pipe that looks great. At least it does to me! Thanks for looking.CA33

CA34

CA35

CA36

Addendum: 06/06/18 I received an email from Andrew  in answer to a question I asked in my two blogs on CA Sander pipes. I quote in full his email because of the information that it includes.

Comment: You asked about C A Sander

C A Sander were tobacconists based in Wind Street Swansea. I don’t know exactly when the business started but it it passed to my Grandfather from his father (both were C A Sander) and by the 1920 was a successful and well established retail business with shops all over south wales. They were importers and blenders (if that is the term) of tobacco and the shops sold smoking paraphernalia. At my grandfathers retirement late 60’s to business went to my uncle again C A Sander but known generally as Jim. He developed a business supplying cigarette machines around South Wales and moved out of retail he eventually sold the business to Rothermans and went into other business ventures, I expect that was when the limited company you found was formed. Uncle Jim has now retired but still lives in the area.

Hope this helps with your research.

Andrew I received this followup email from someone who would like to get in touch with you. Here is her email

Hi there – I stumbled upon your website when looking for anything to do with C.A. Sander tobacco shop and I saw the pipe you restored – which is amazing! and then saw the comment below left by Andrew. Since that shop was owned by my grandfather, and Andrew’s grandfather – it would seem that we are cousins – but we have never met. I would love to get into contact with Andrew. Would you be able to assist in that? If possible, could you ask him to contact me at my email address pianokey88@hotmail.com?
Many thanks for your help! Georgina


A Dr. Grabow Color Duke Billiard Renewed


Blog by Steve Laug

Most of the Dr. Grabow Color Duke pipes that have come across my worktable have been in rough shape. The paint has been chipped and the finish ruined. This is the second one lately that I have worked on. The first was the Cherry Apple Red Dr. Grabow Viscount that my brother found for me. This second one is a White Billiard with a saddle stem. It is one that was made for a paper filter rather than a stinger/spoon apparatus. The pipe is stamped Color Duke over Dr. Grabow on the left side of the shank and Imported Briar over Adjustomatic over Pat. 2461905. The Patent Number is for the Adjustomatic tenon.

The pipe came to me from a friend quite awhile ago and I just got around to working on it. It was in pretty decent shape other than being dirty. The finish has some dents in the bottom of the bowl on the right side. There was some staining on the right side of the shank at the stem/shank junction. The rim was dirty and had some darkening and a few spots where the finish was worn off. The bowl had a cake that would need to be removed. The screw in tenon was dirty but the stem aligned with the shank perfectly. The stem itself was dirty inside and out. There was tooth chatter on the top and underside of the stem near the button. On the underside was a deep tooth mark in the center about ½ inches from the button. The next photos show the pipe when I brought it to the work table.Duke1

Duke2

Duke3

Duke4 I took some close-up pictures of the rim and the dents on the bottom of the bowl to give a clear picture of the issues with this pipe.Duke5

Duke6 I reamed the bowl with a PipNet reamer and took the cake back to the bare briar. I used a pen knife to clean up remaining cake that the reamer left behind.Duke7

Duke8 I scrubbed the finish with cotton pads and Murphy’s Oil Soap as I did not want to use anything that potentially would damage the painted finish on the bowl. My intent was to get the grime off the finish and to remove as much of the rim darkening as possible without compromising the paint on the rim or edges.Duke9

Duke10 I rinsed the bowl with warm water and dried it off with a towel. Here are some photos of the cleaned bowl.Duke11

Duke12

Duke13

Duke14 I cleaned the inside of the shank and the stem with pipe cleaners, cotton swabs and alcohol until they came out clean.Duke15 With the bowl cleaned inside and out it was time to address the stem. I sanded the surface of the stem to clean off the dirt and tooth chatter. I wiped it down with a cotton swab and alcohol to remove the dust and to examine the dent on the underside.Duke16 After the deep dent was cleaned I filled it with a few drops of clear super glue.Duke17 Once the glue dried I sanded the repair to make it flush with the stem surface using 220 grit sandpaper.Duke18 I sanded the entire stem with medium and fine grit sanding sponges. The repair spot is beginning to blend in very well.Duke19

Duke20 I sanded the stem with micromesh sanding pads – wet sanding with 1500-2400 grit pads and then rubbing it down with Obsidian Oil. I dry sanded with 3200-4000 grit pads and gave it another coat of oil. I finished by dry sanding it with 6000-12000 grit pads. I gave it a final coat of Obsidian Oil and let it dry.Duke21

Duke22

Duke23 In the past buffing the painted bowls and the Grabow stems has caused me a lot of grief. I have found that these stems can take very little heat that the buffing pads generate so I hand buff them with Paragon Wax and a shoe buffer. I buff the bowls the same way using the shoe buffing brush and a microfibre cloth. The finished pipe is shown in the photos below. If you are interested in this pipe email or message me and make an offer. It could easily join your rack. Thanks for looking.Duke24

Duke25

Duke26

Duke27

Duke28

Duke29