by Steve Laug
A few weeks ago, I received an email from a friend in Salmon Arm, BC. We have worked together on pipes over the past few years either ones that I have sold to him or those he has picked up on auctions or sales that I have restored. He wrote that he had some pipes that needed restoration.
I also have some of those old estates I still need to send to you for restoration. Hopefully I will be able to pack them up and get them off to you this week. Thank you again, Steve! – Sonny
He followed that up with another email regarding what he wanted done on the various pipes. I have included it below.
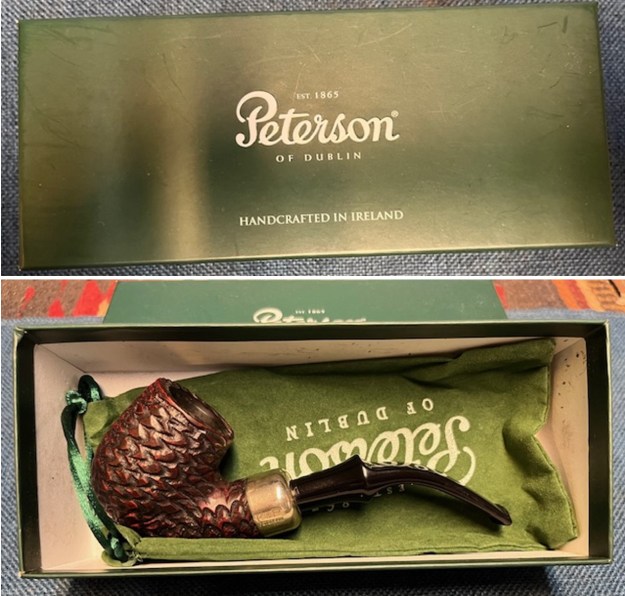
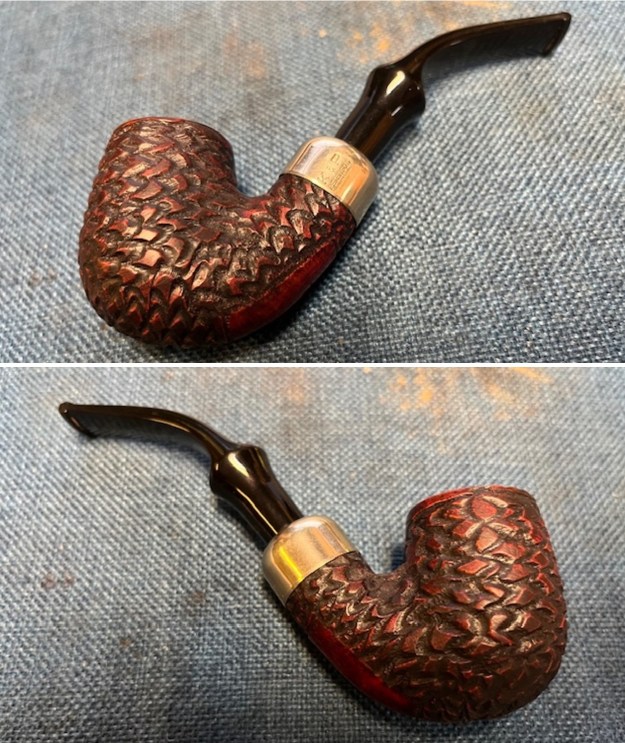
I would like the Vauen bent ball shape to have no band on it. It looks like it may have had a band there at one time and I’m not sure why. And if any of them needs to be stained again, I would like them to be black, especially the Peterson 309 and that ball Vauen. Let me know what you think.
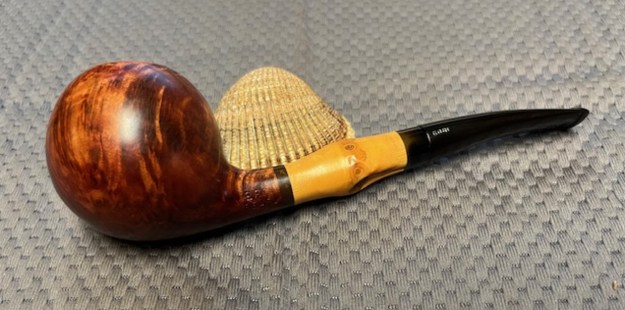
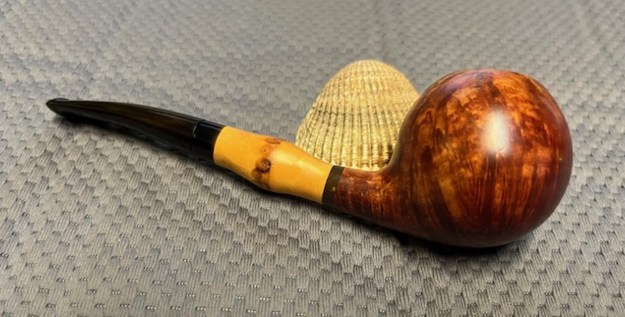
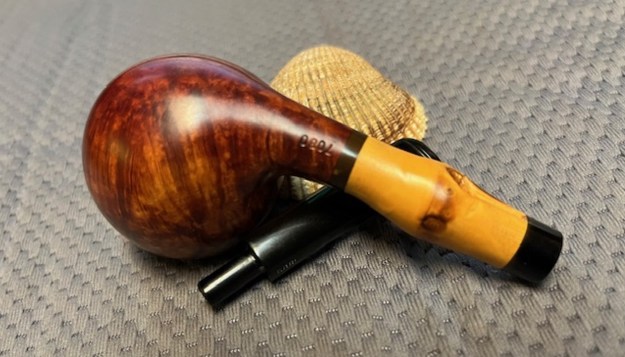
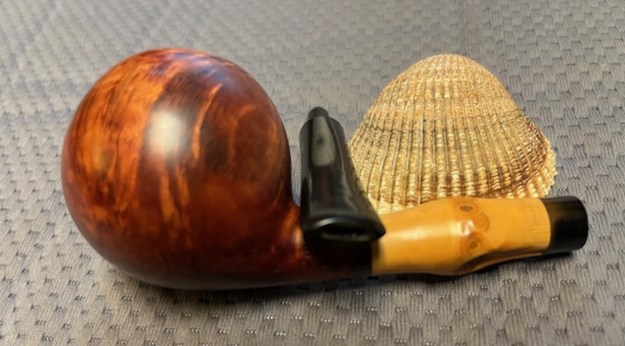
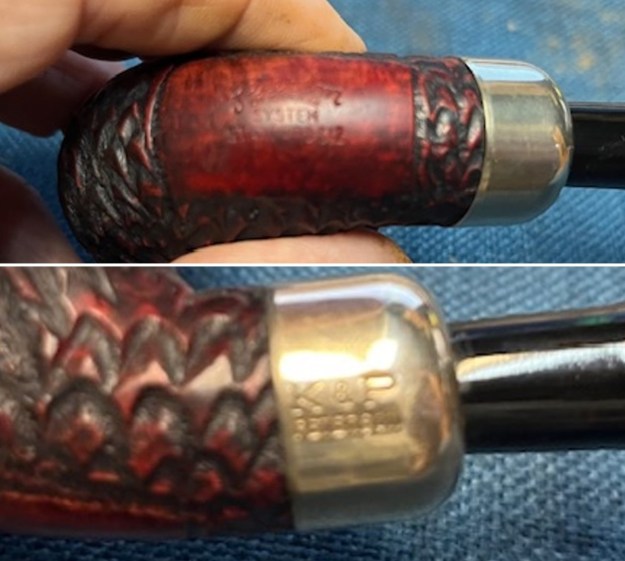
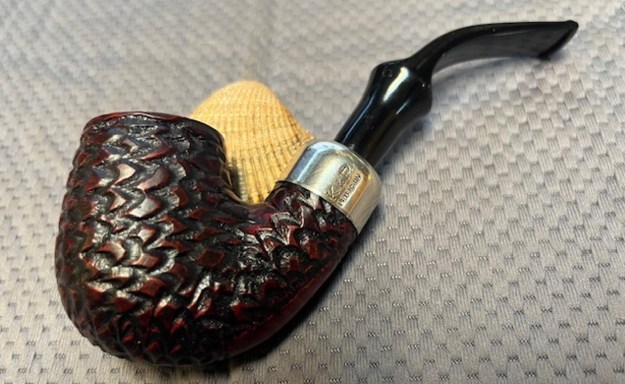
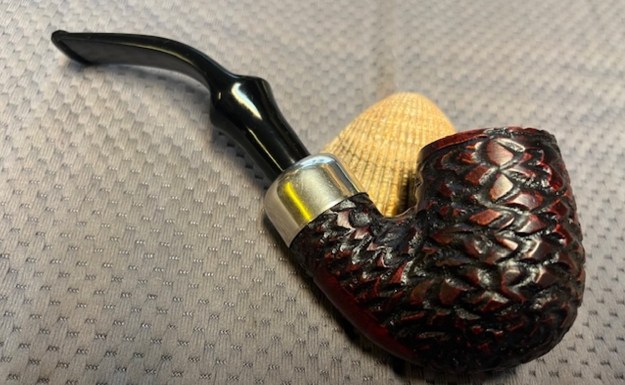
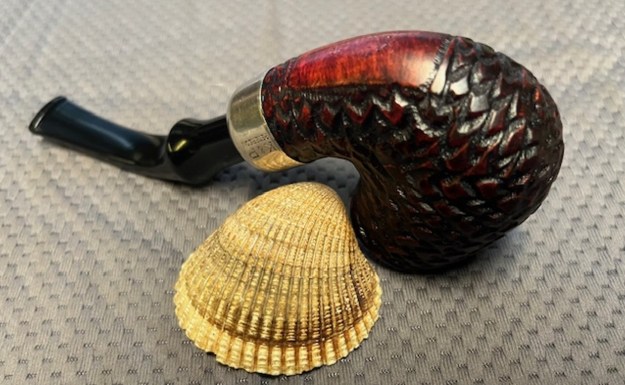
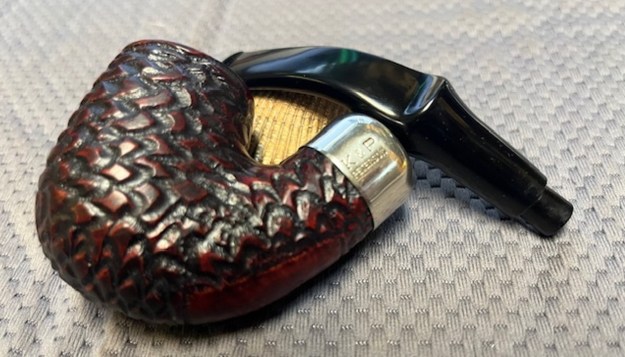
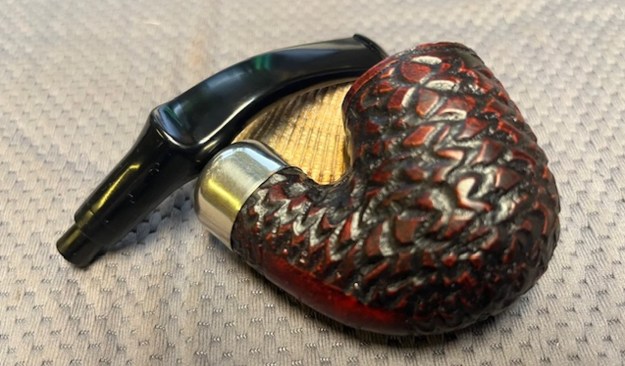
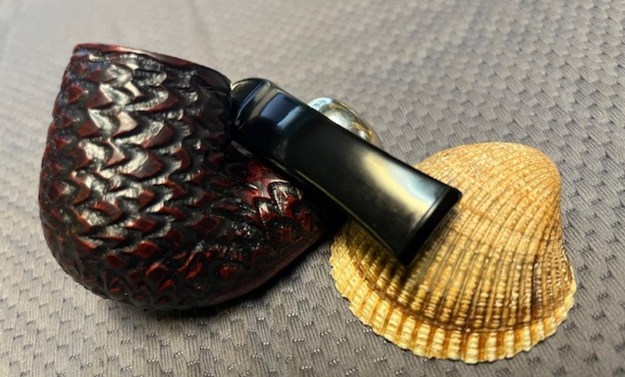
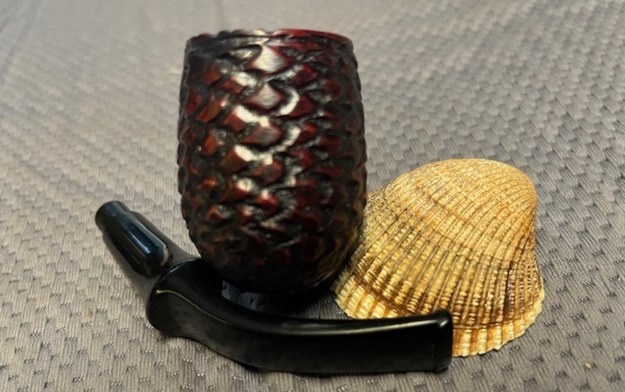
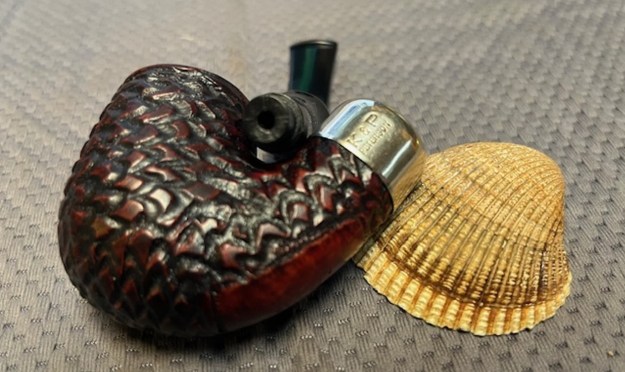
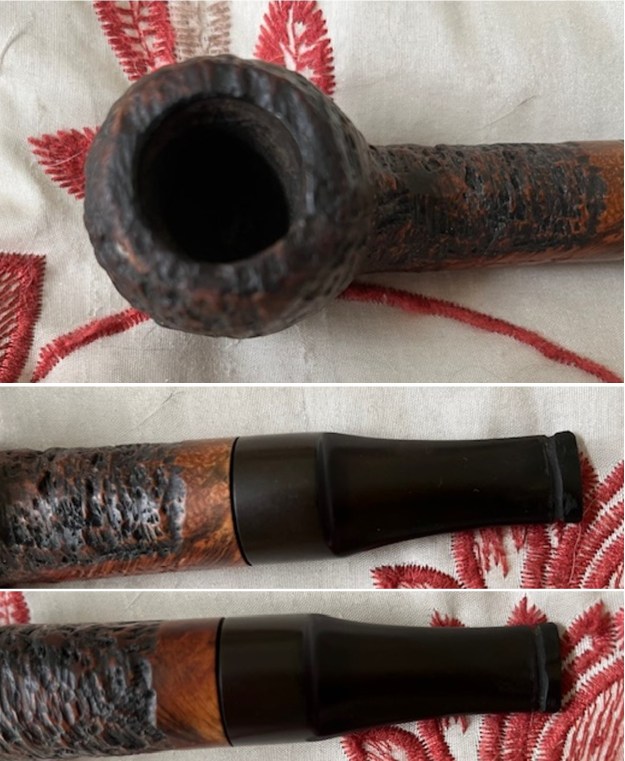
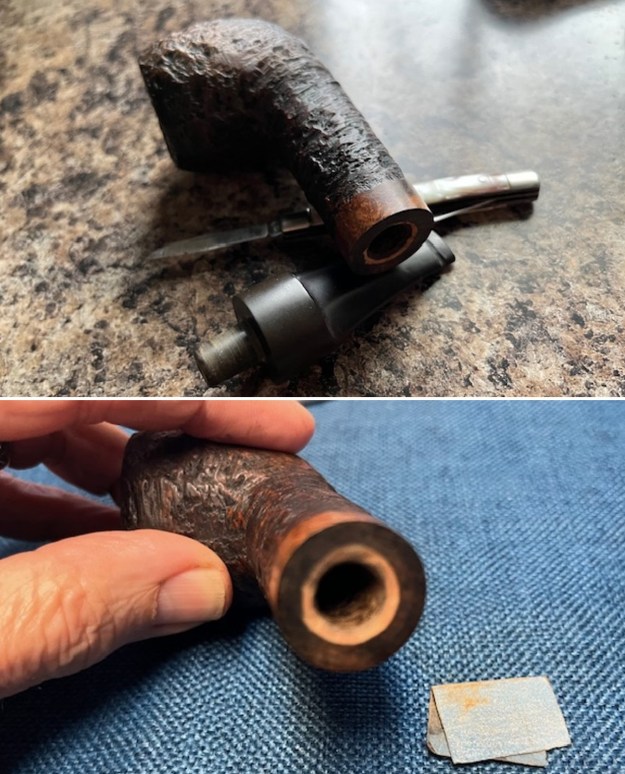
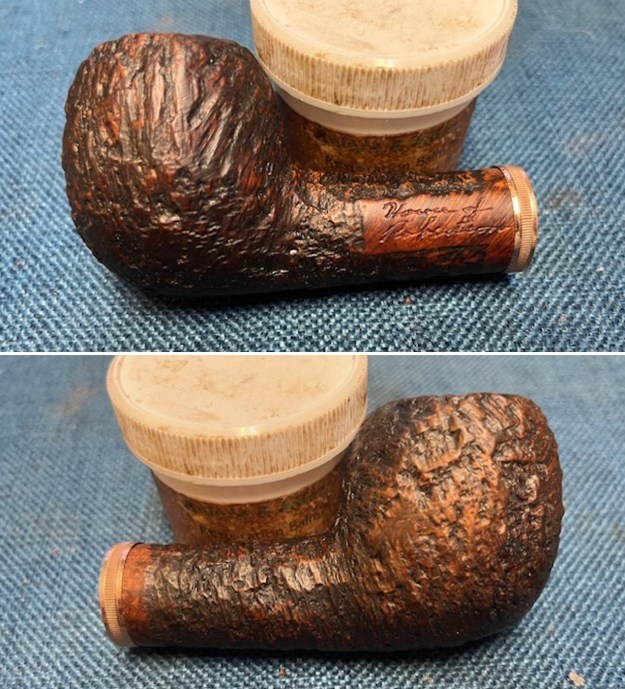
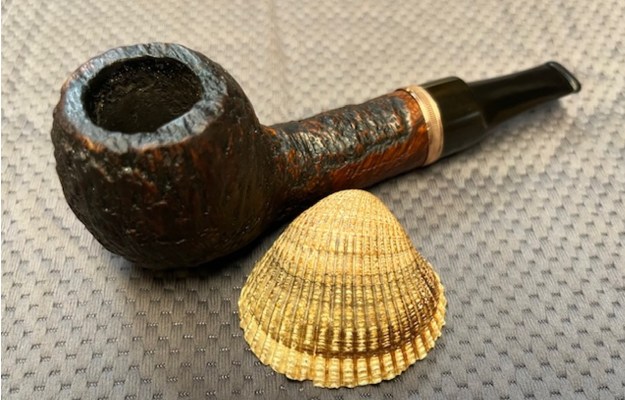
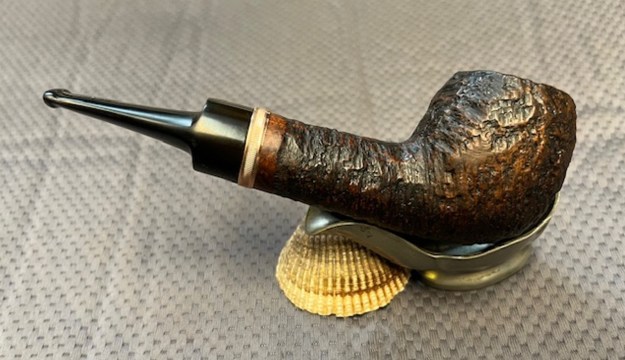
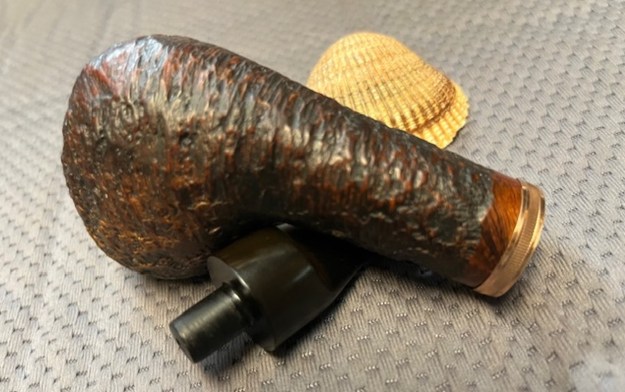
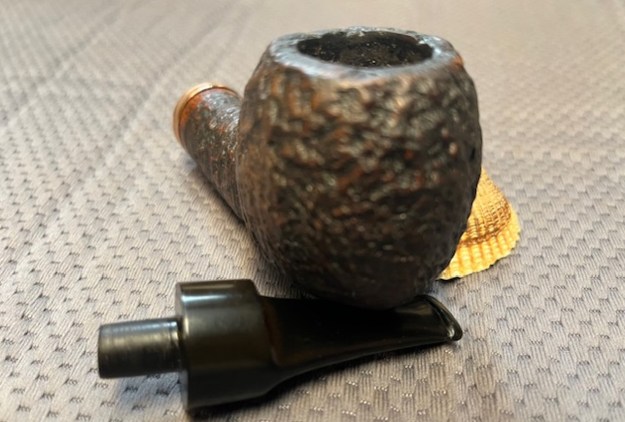
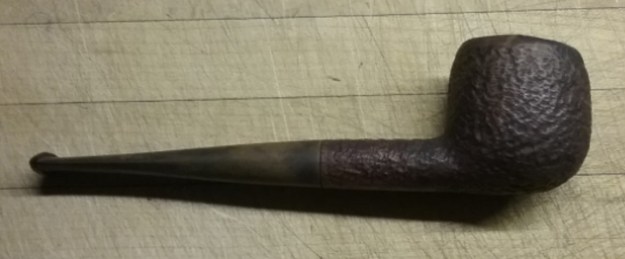
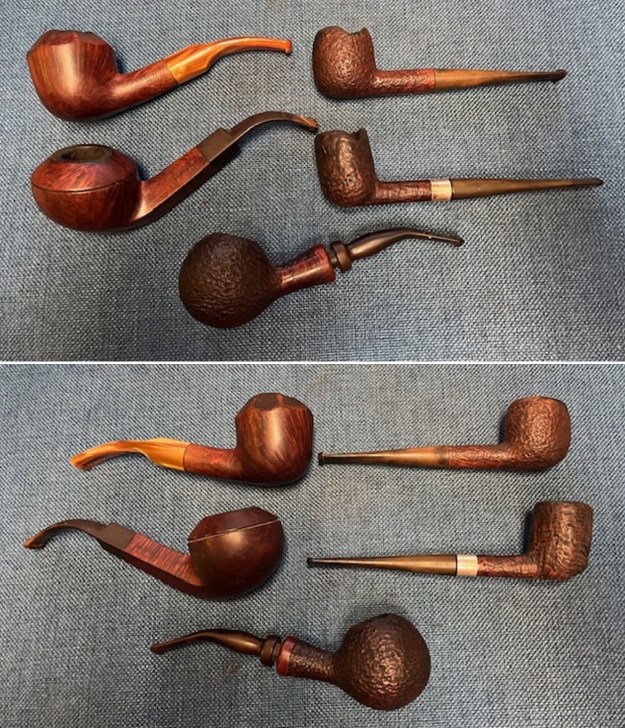
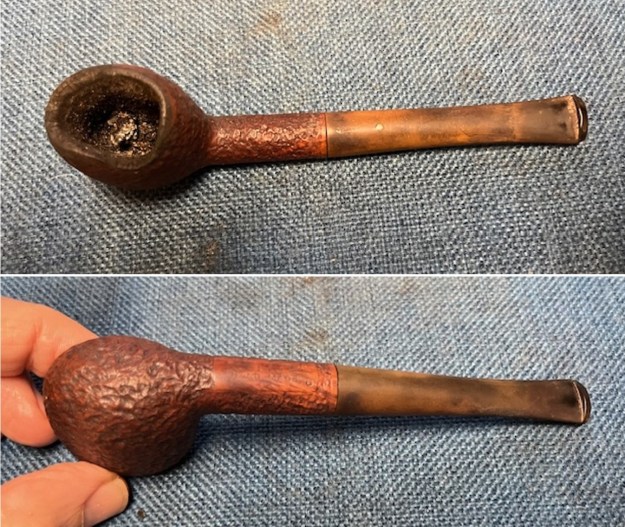
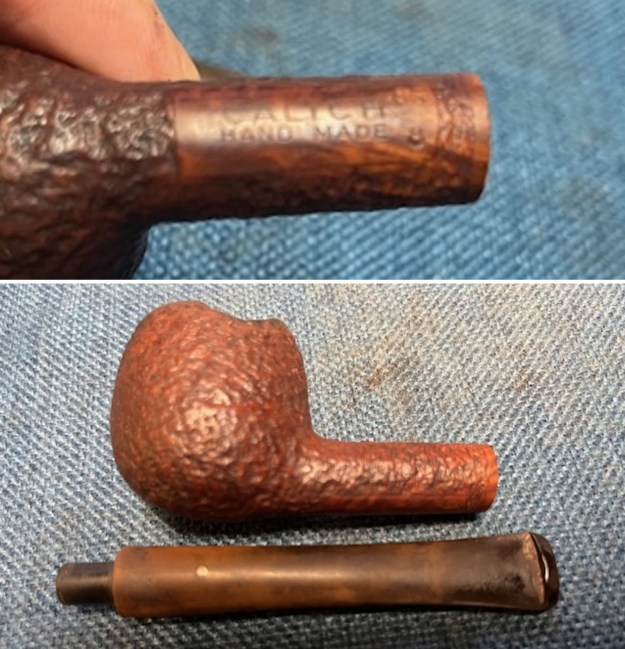
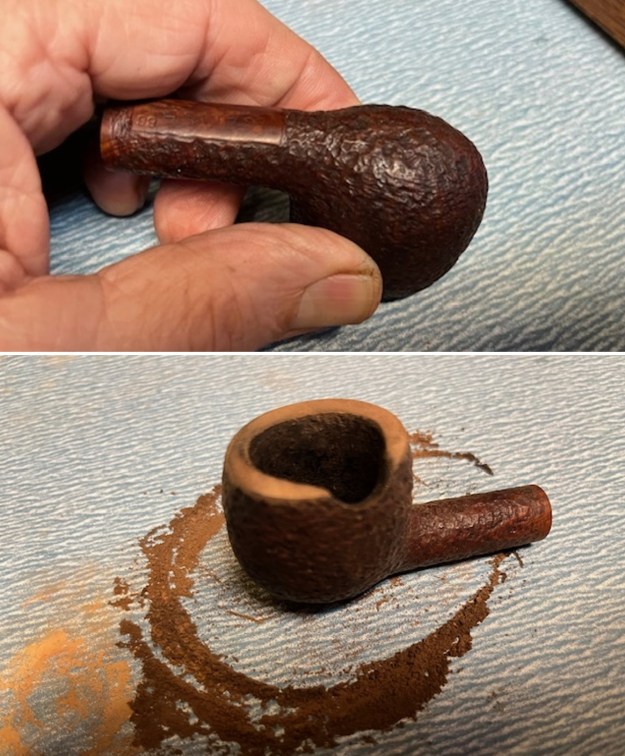
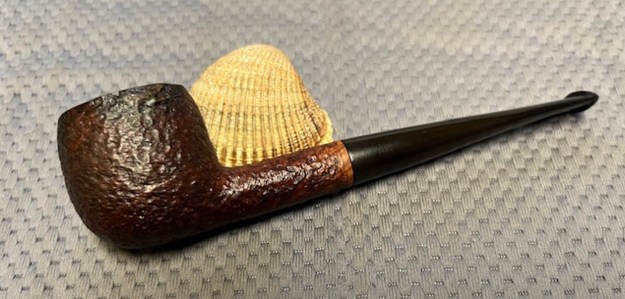
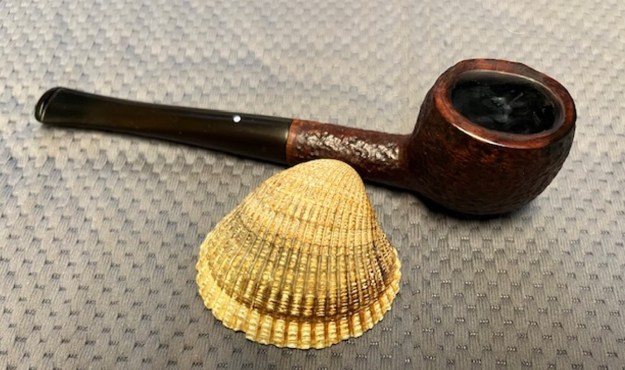
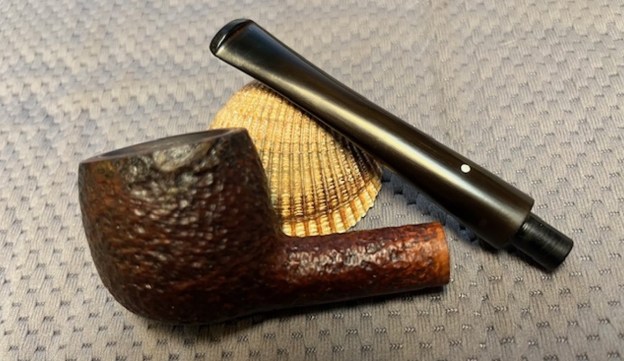
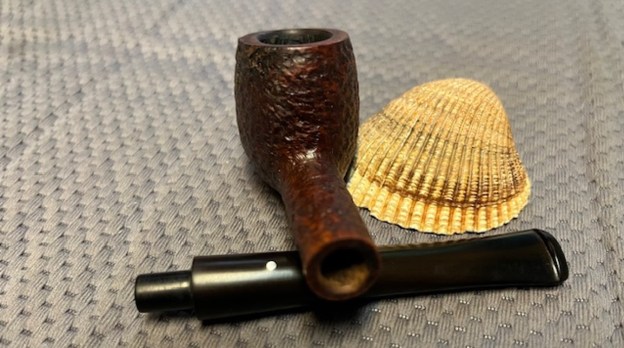
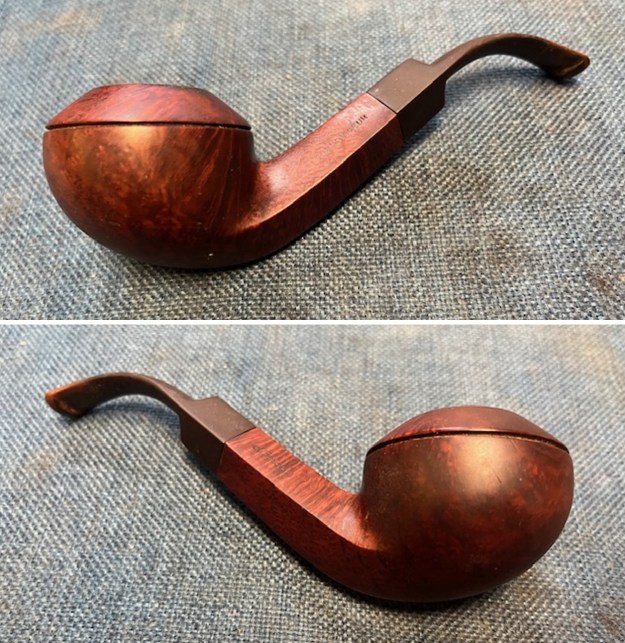
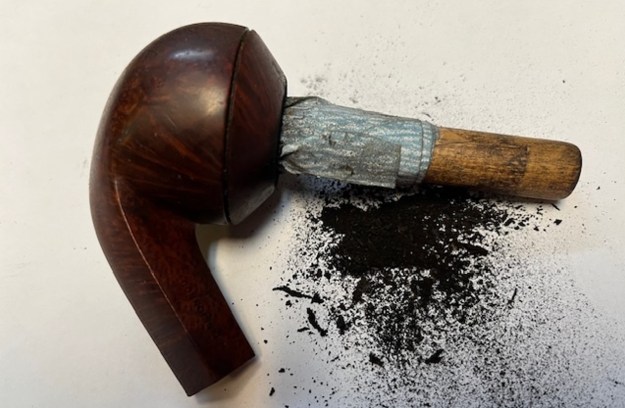
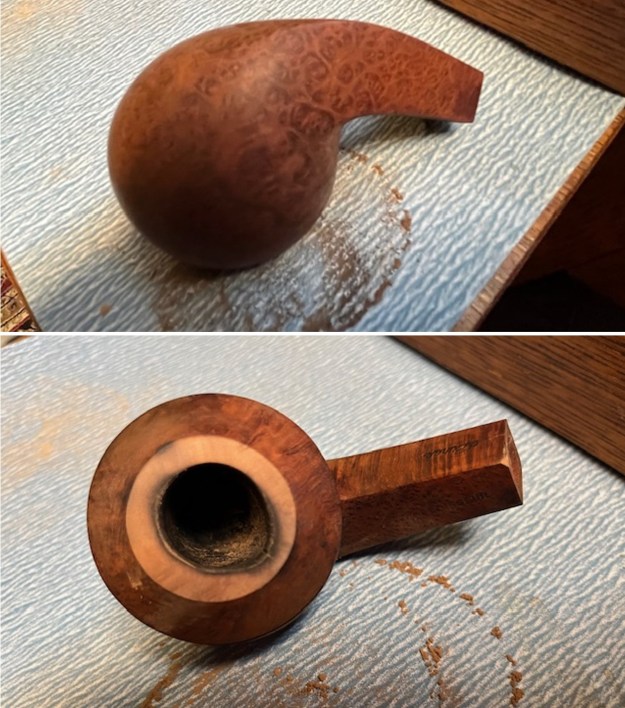
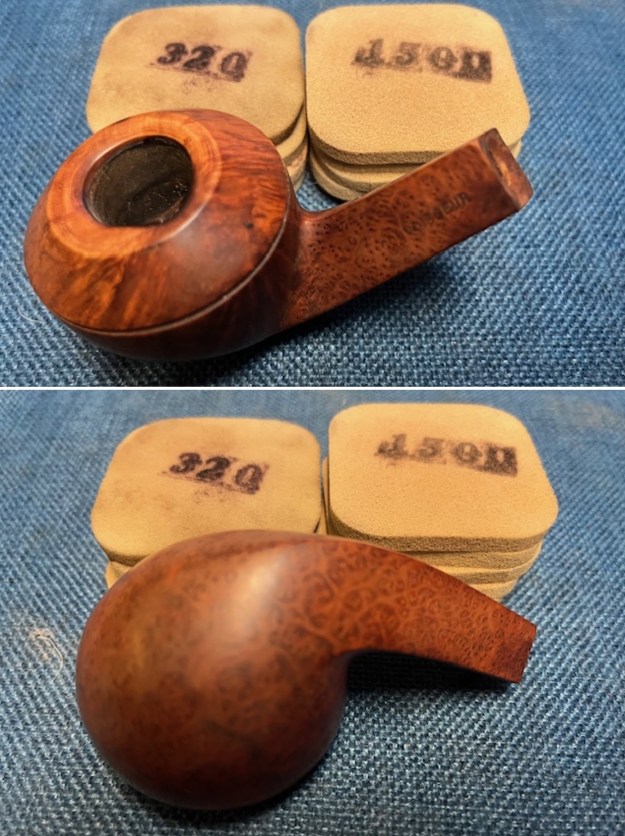
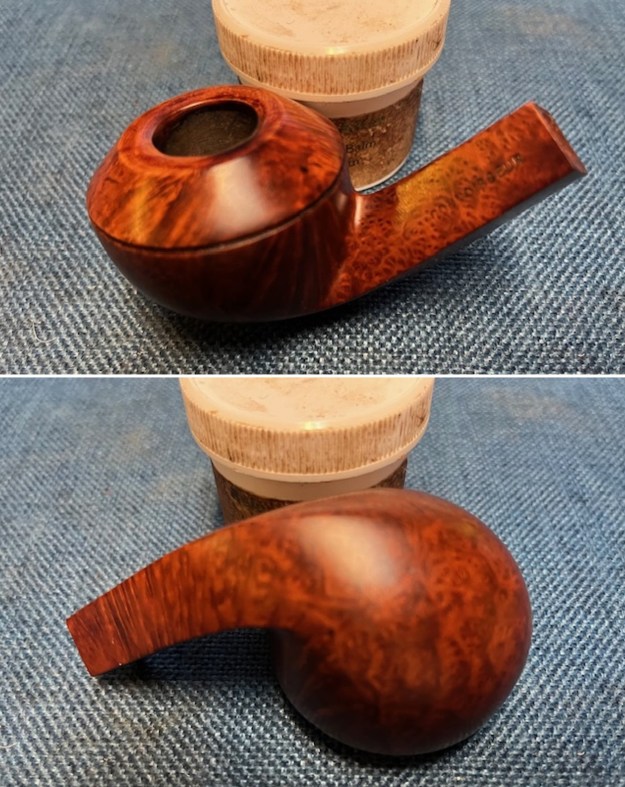
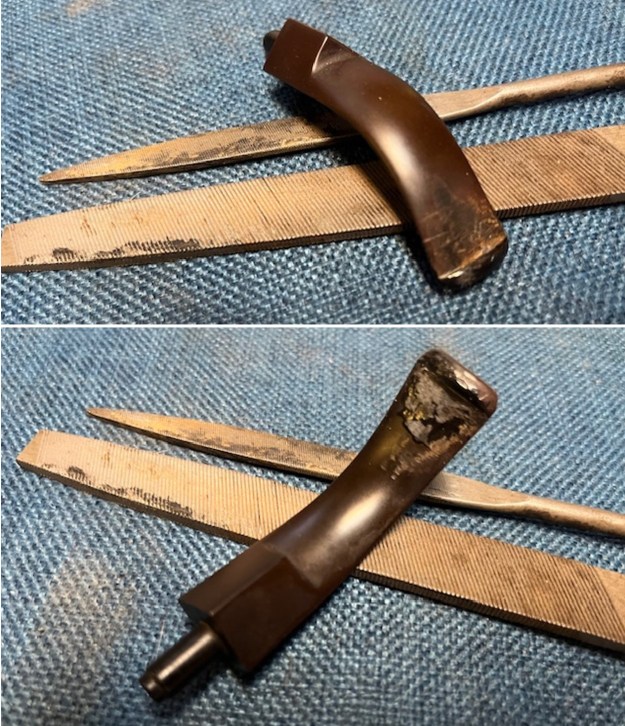
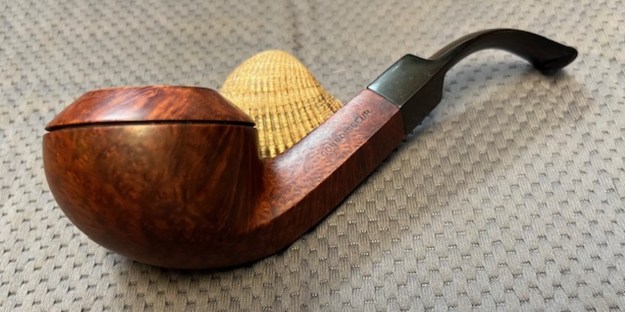
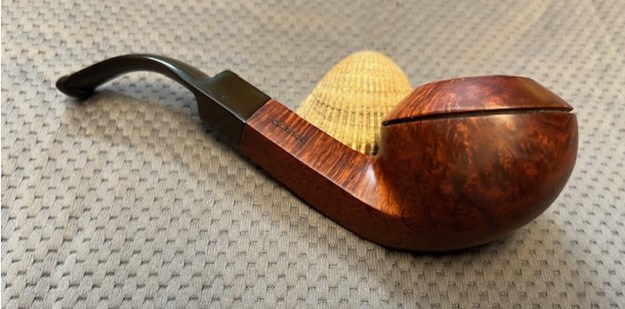
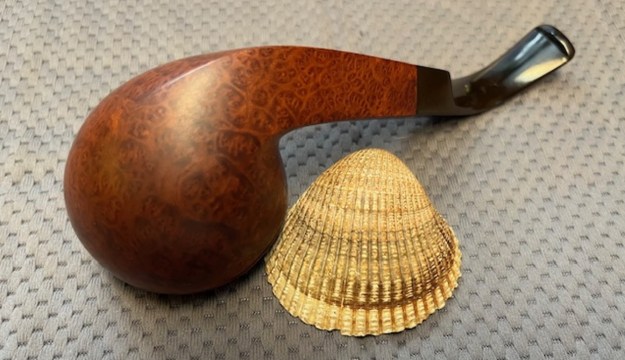
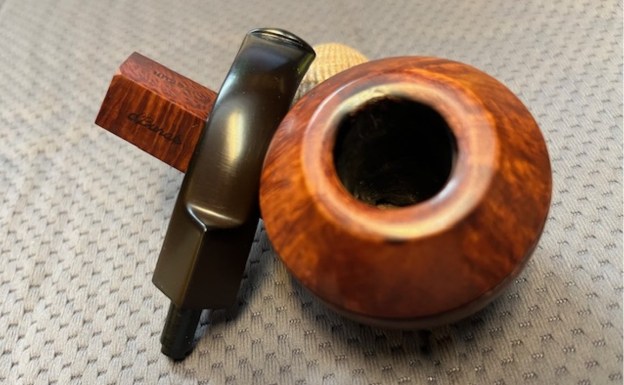
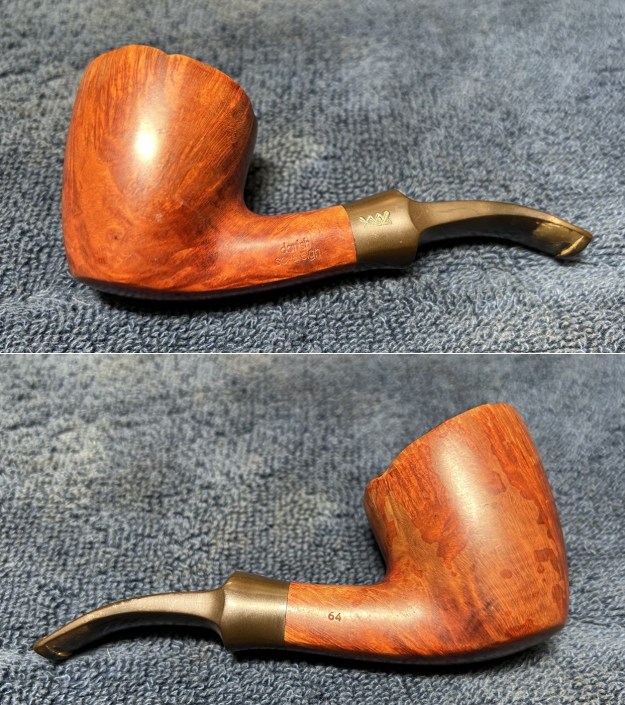
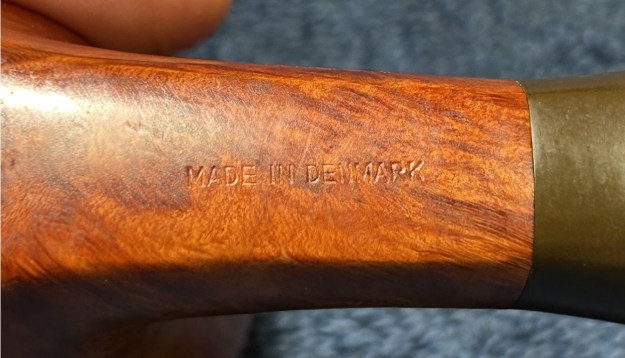
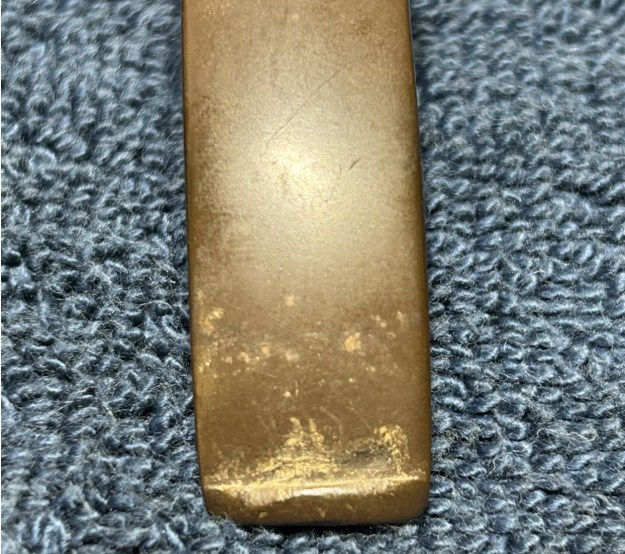
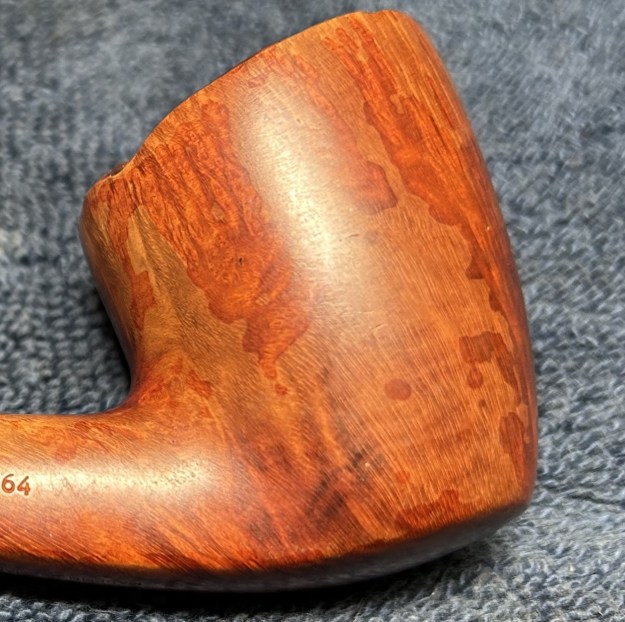
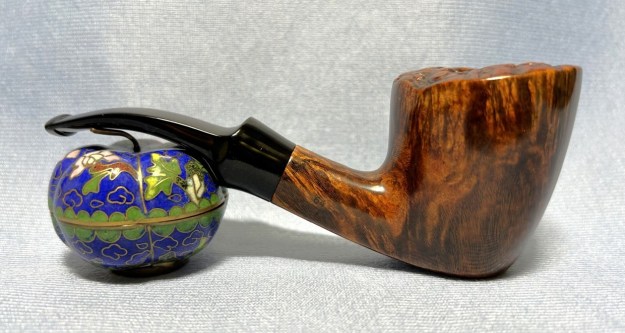
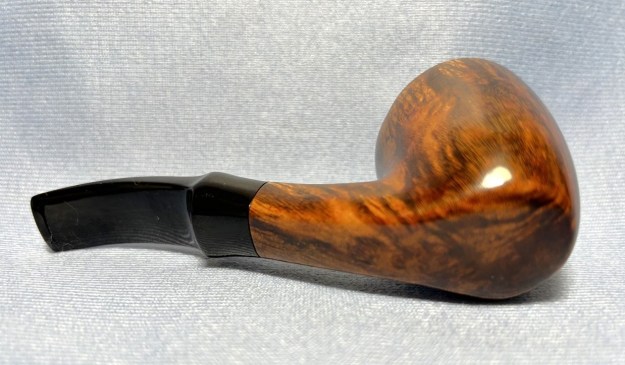
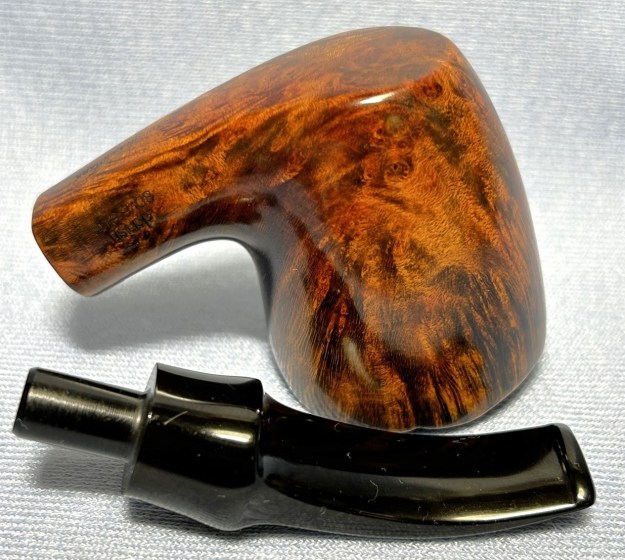
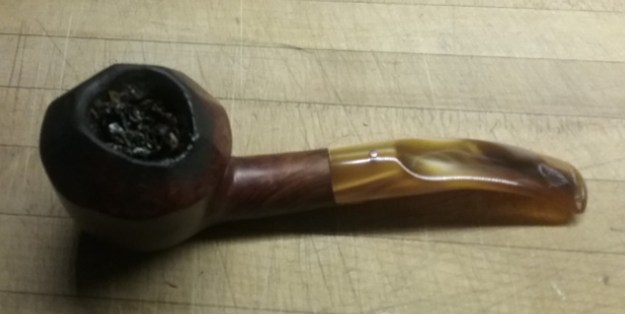
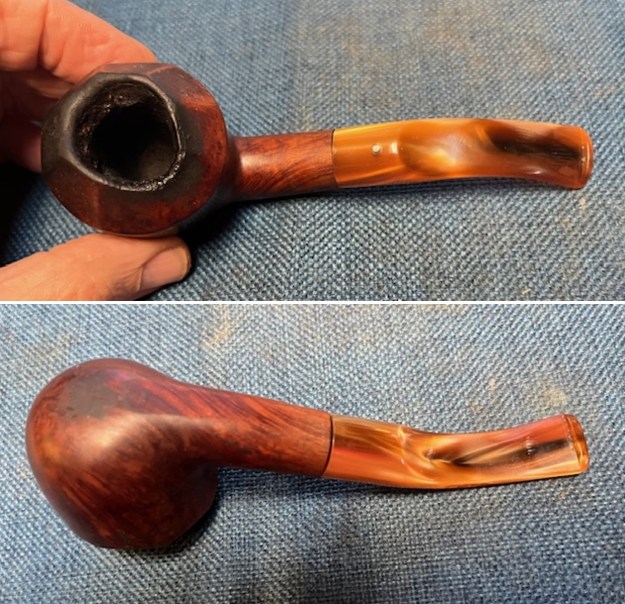
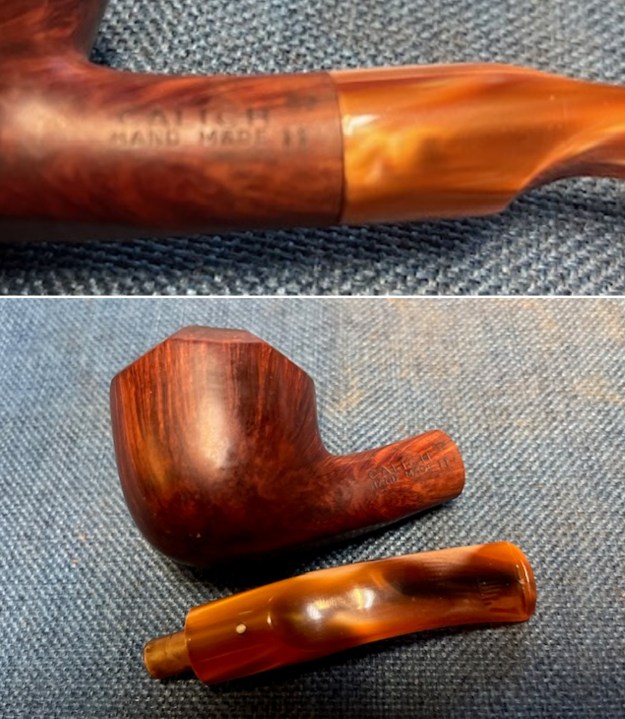
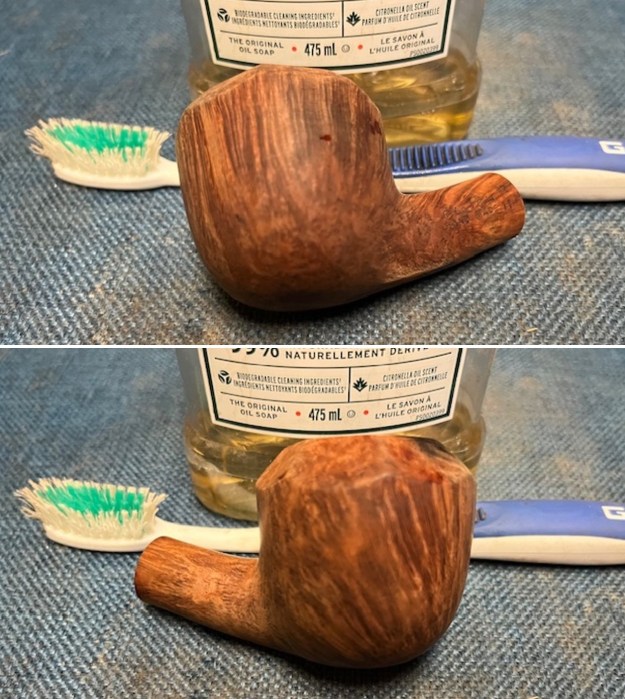
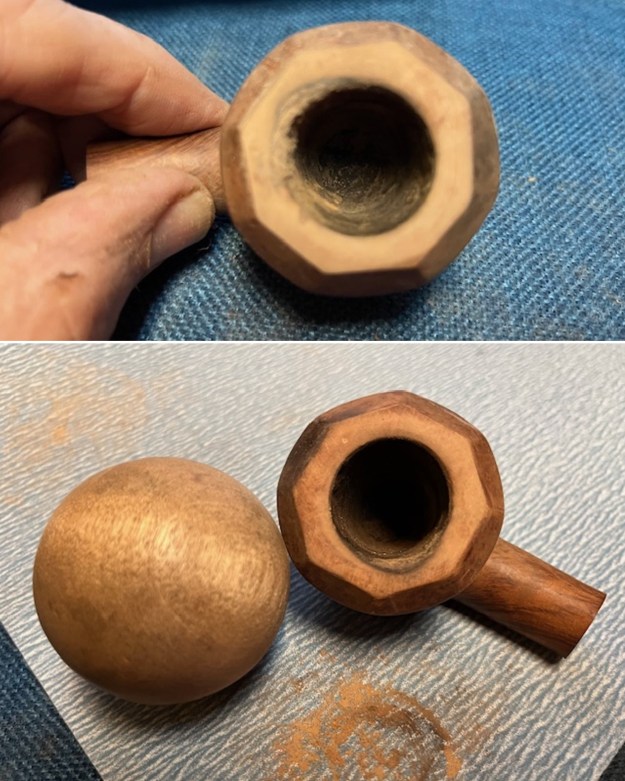
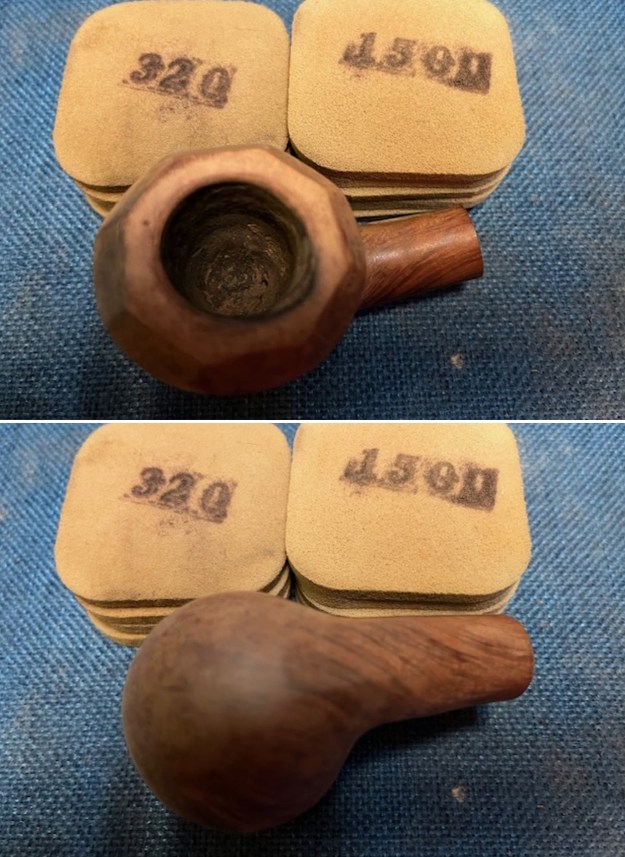
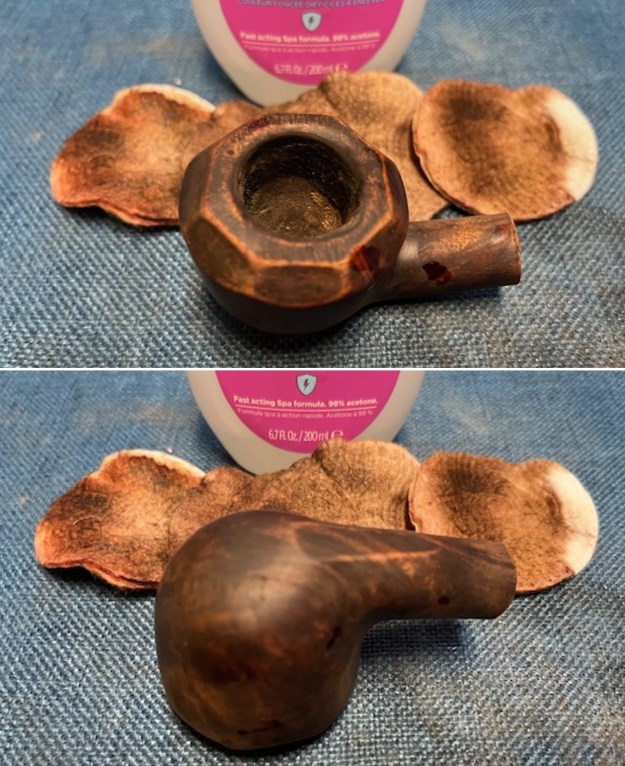
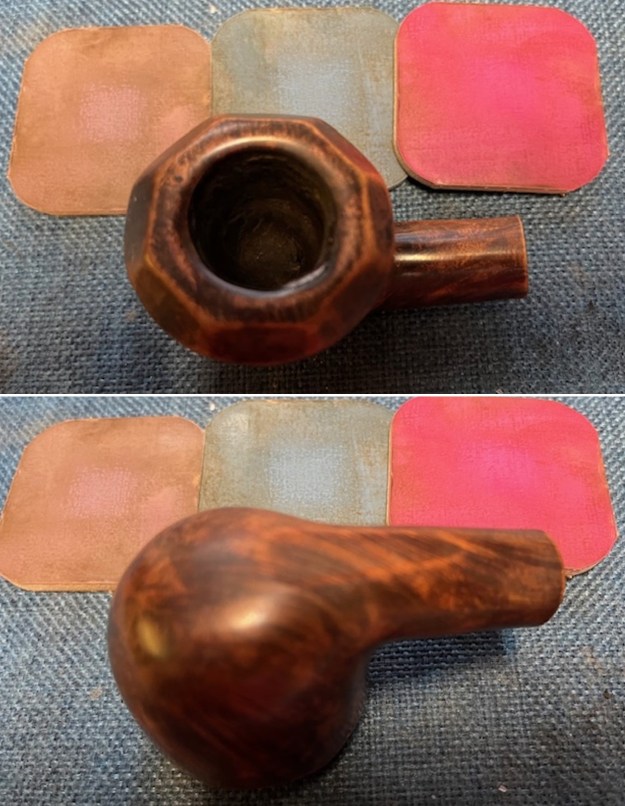
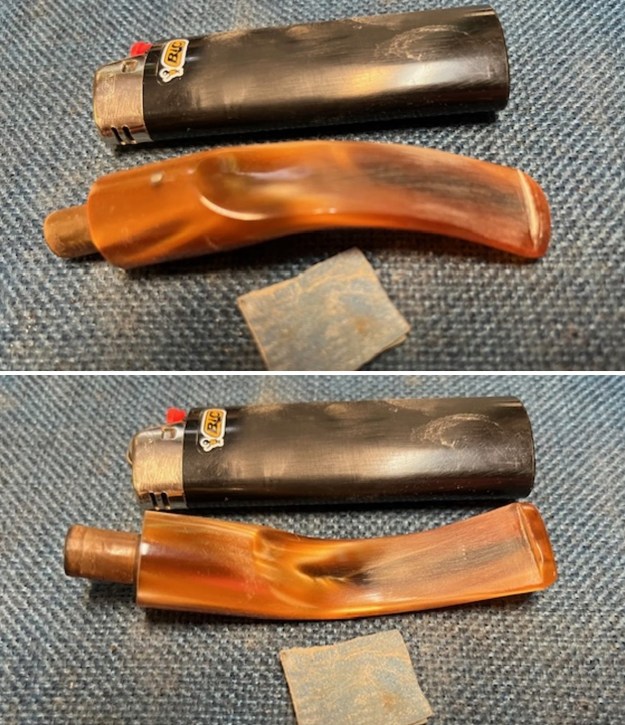
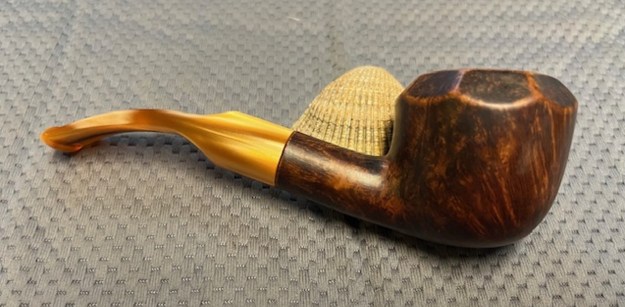
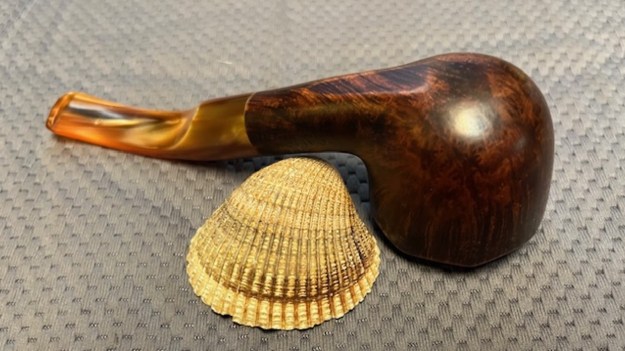
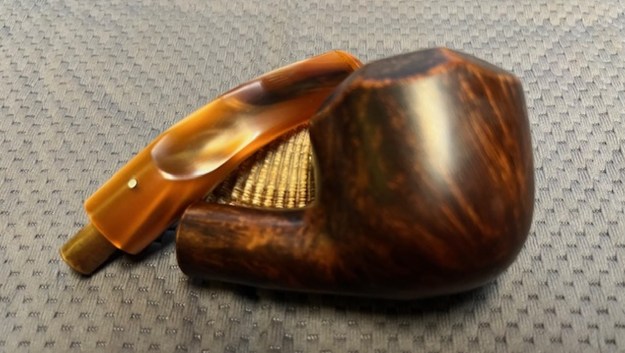
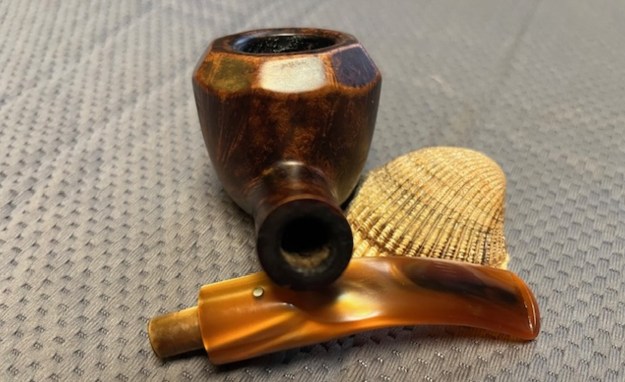
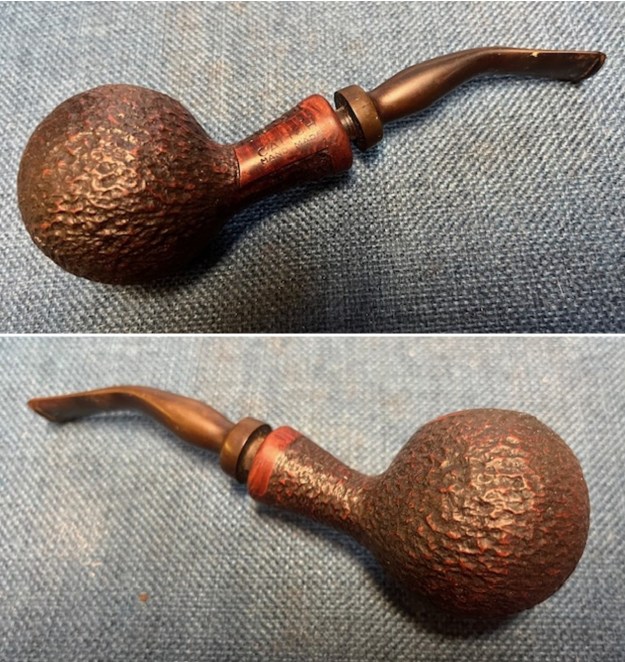
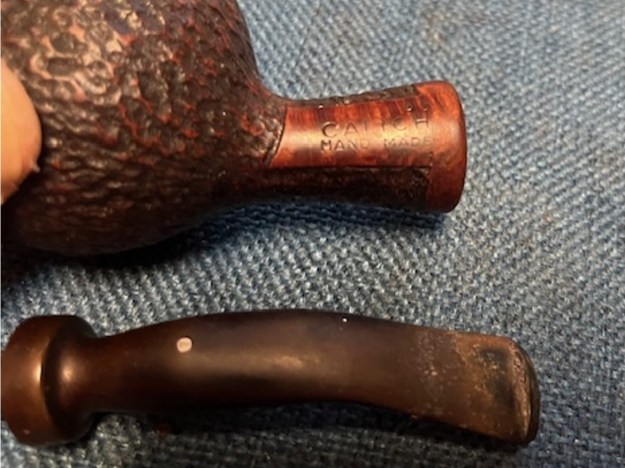
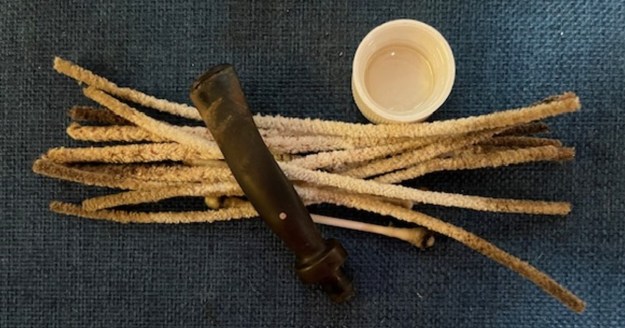
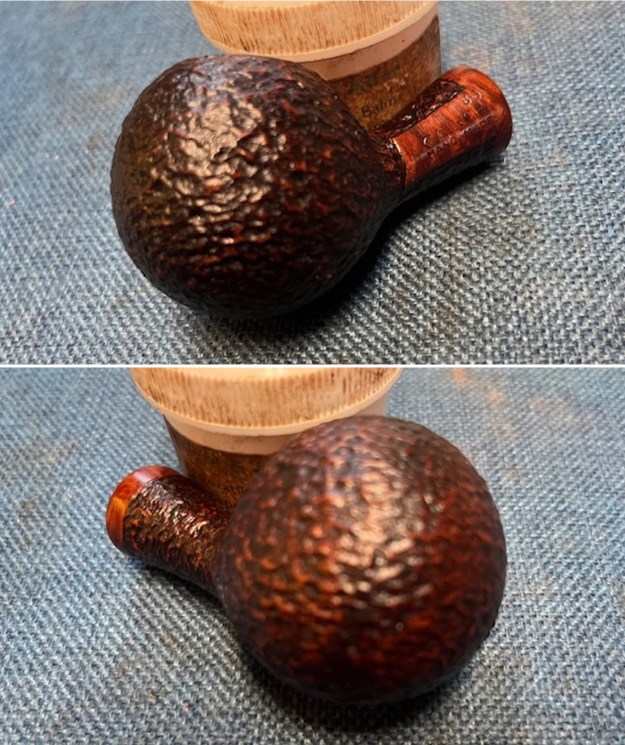
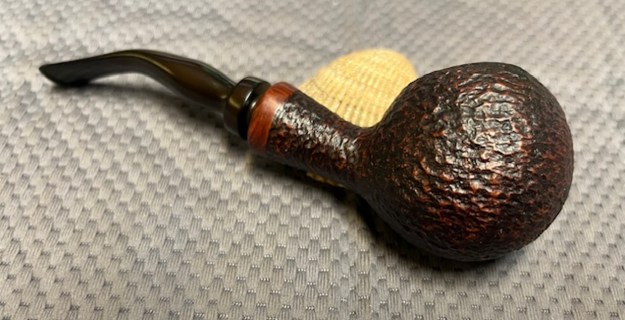
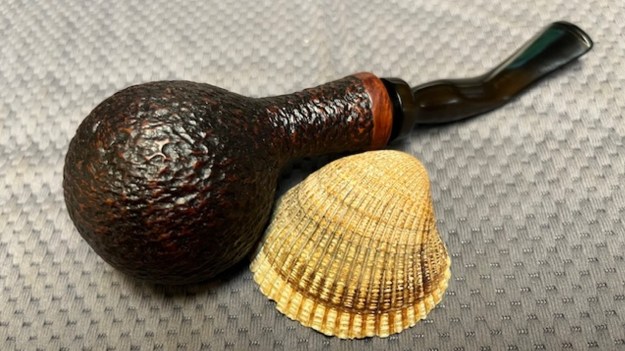
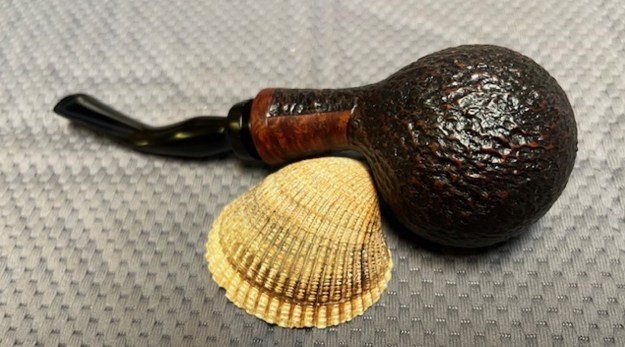
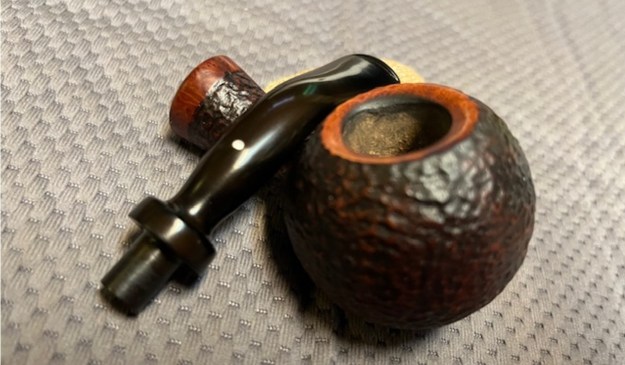
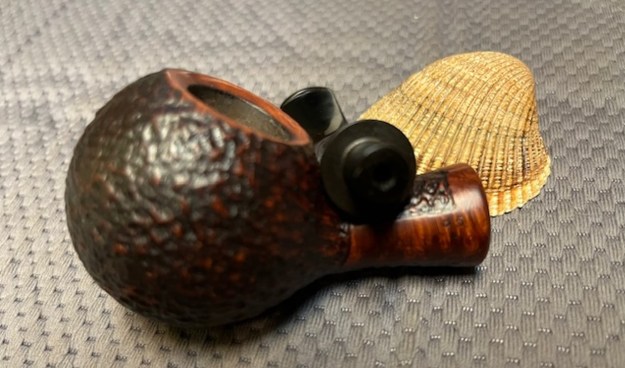
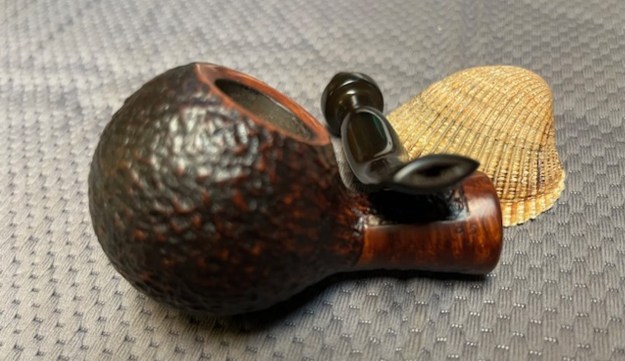
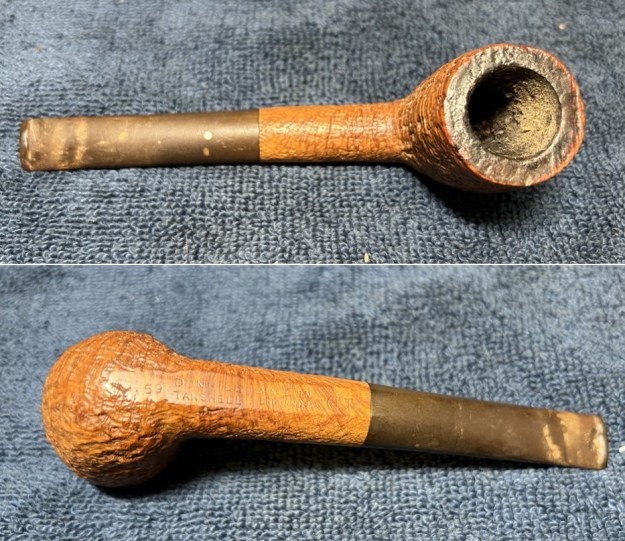
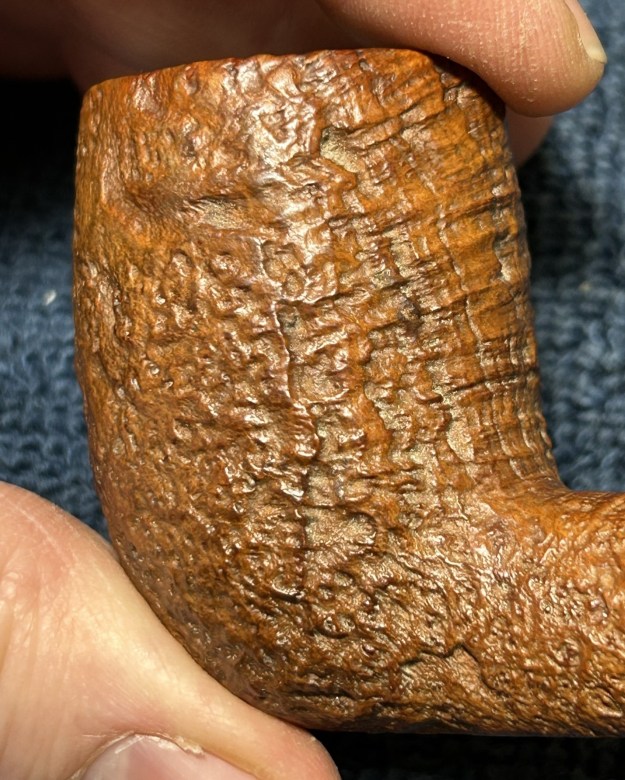
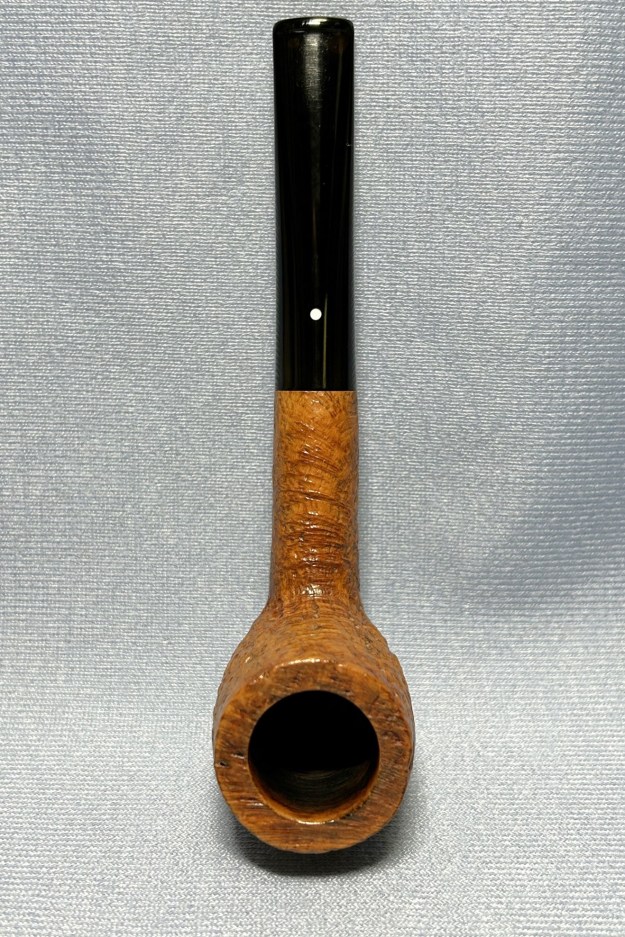
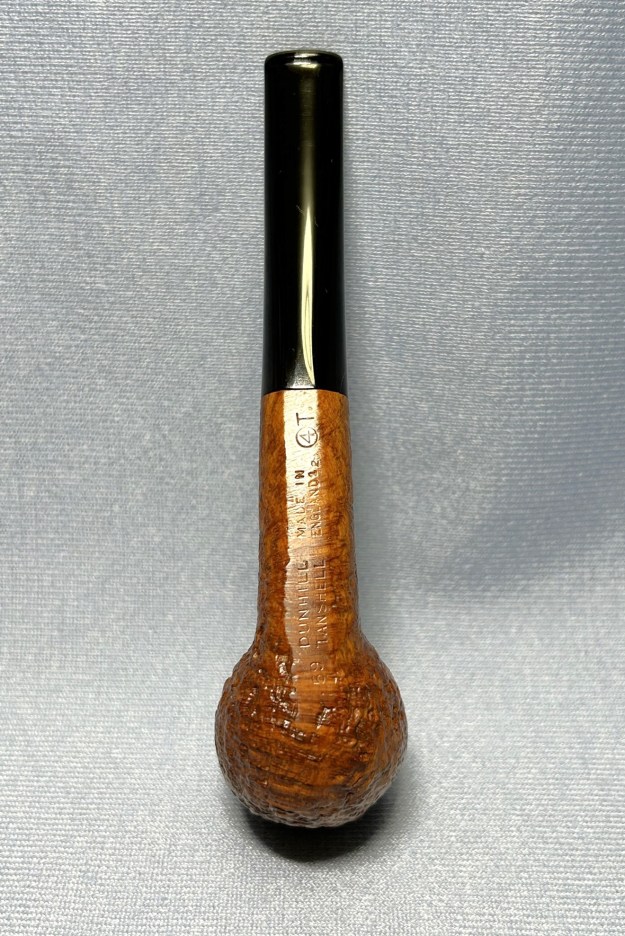
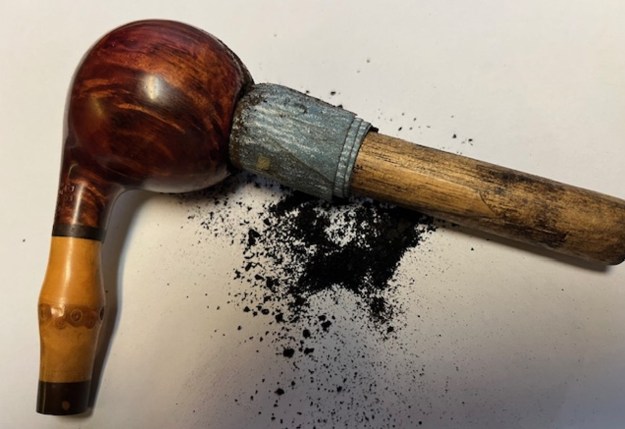
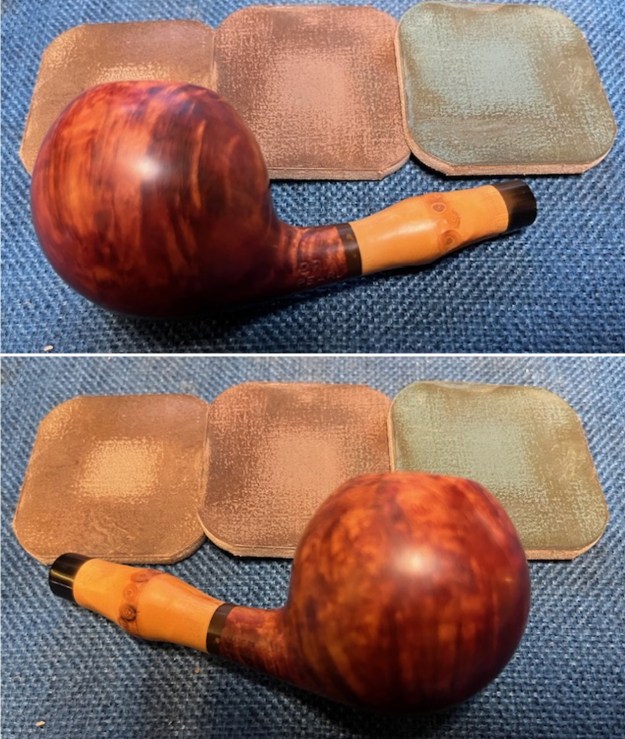
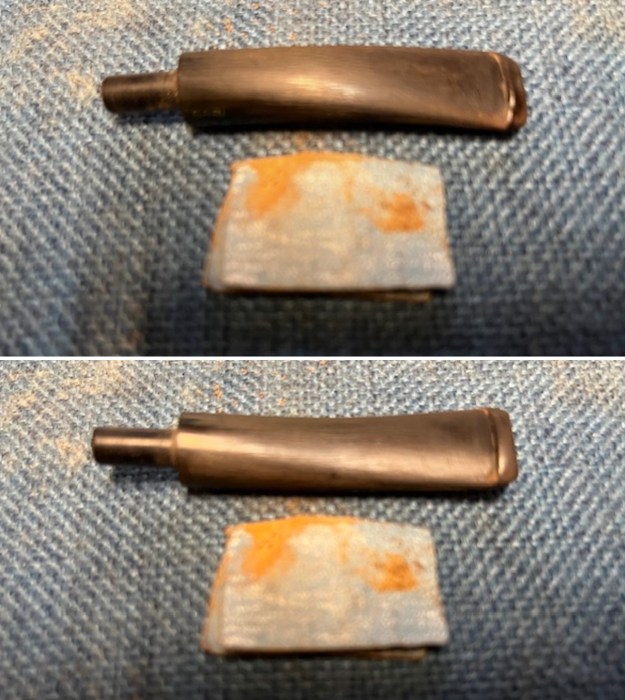
I took a photo of the box of six pipes once I unwrapped them. There were 6 interesting pipes – a Vauen Luxus Bent Ball, a Vauen Dr. Perl Billiard, a Sand Blast Vauen Dr. Perl Pot, a Parade News Briar Shop Oom Paul, a Bari Pearl Bamboo shank Ball and Peterson’s System Premier 309 Bent Billiard. All were in need of various degrees of restoration.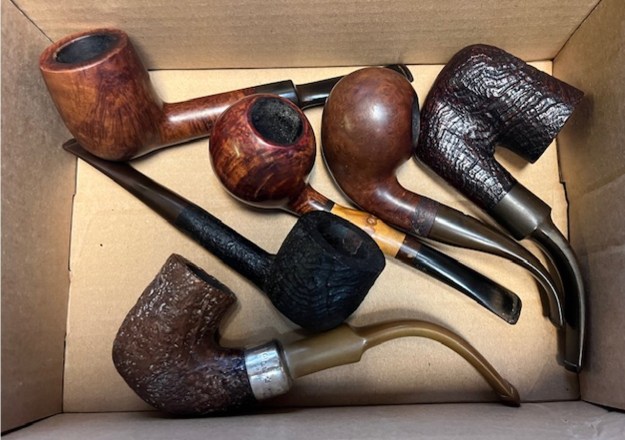 The second pipe I chose to work on was the Bari Pearl 7080 Bamboo Apple. It is stamped on the left side and reads Bari [over] Pearl. On the right side is stamped Made in [over] Denmark [over] the shape number 7080. The taper stem is stamped Bari on the left side of the taper. The pipe was dirty but the bamboo shank has some nice patina. The vulcanite ahead of and following the Bamboo shank is oxidized and almost brown. The finish was shiny but very dirty with lots of grime ground into the surface of the briar. The bowl had a moderate cake and debris in it and there was some lava on the rim top. The stem was very dirty with oxidation, calcification on the surface and light tooth marks and chatter on both sides ahead of the button. I took these photos before I started my work on the pipe.
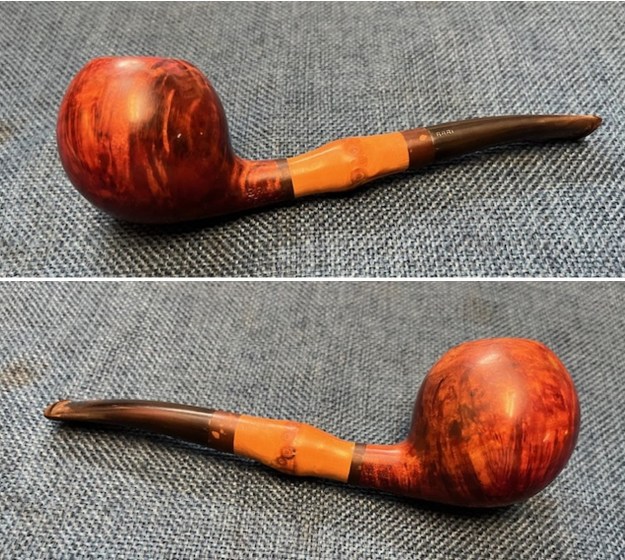
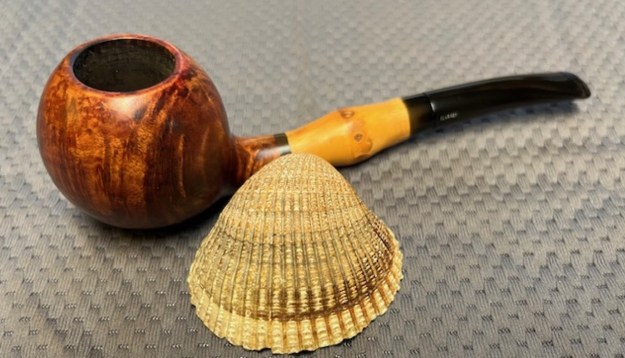
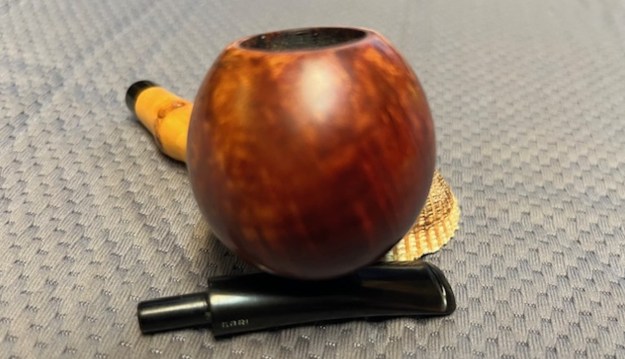
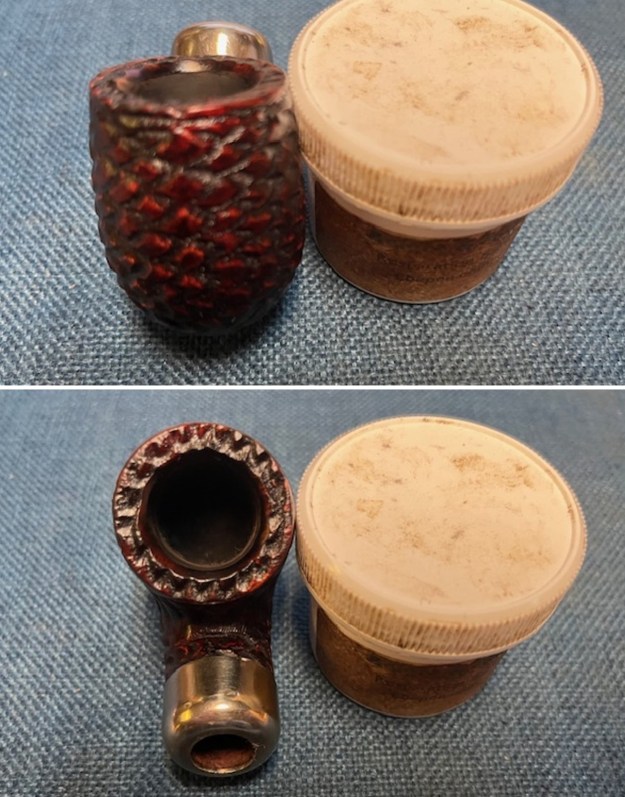
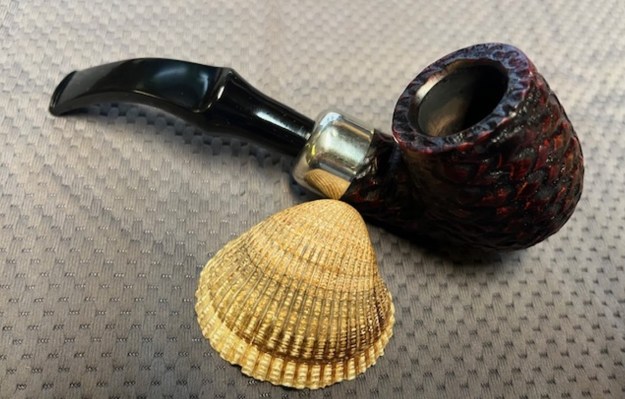
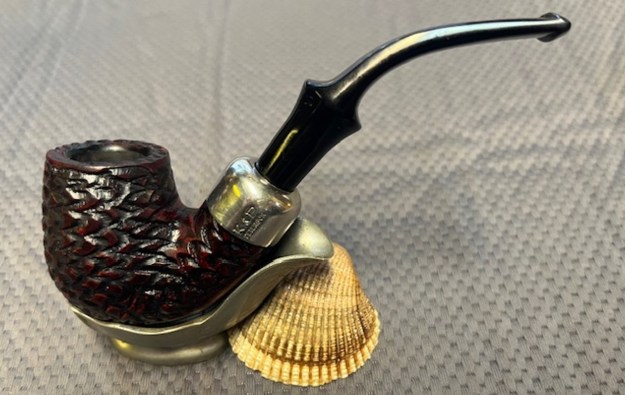
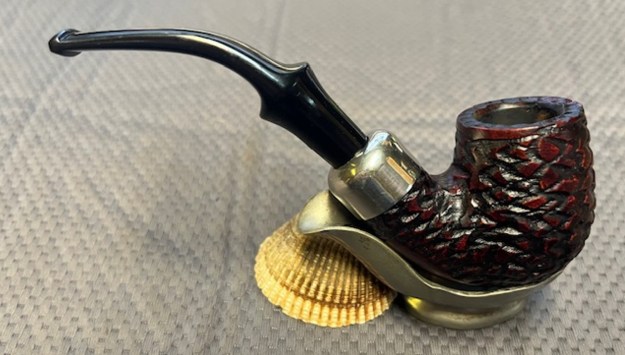
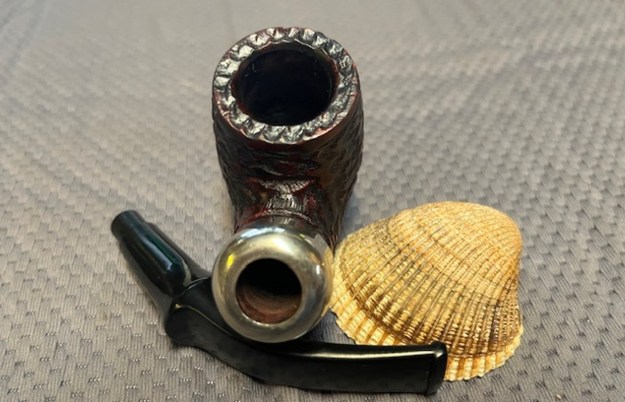
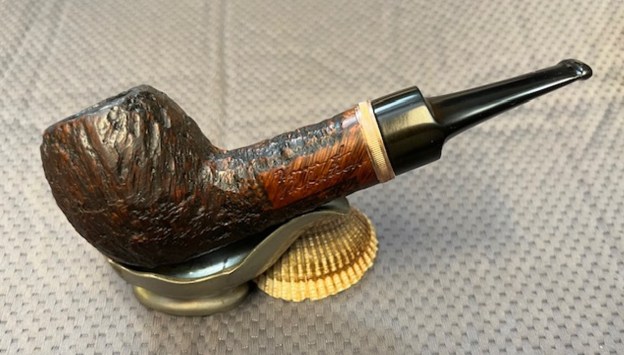
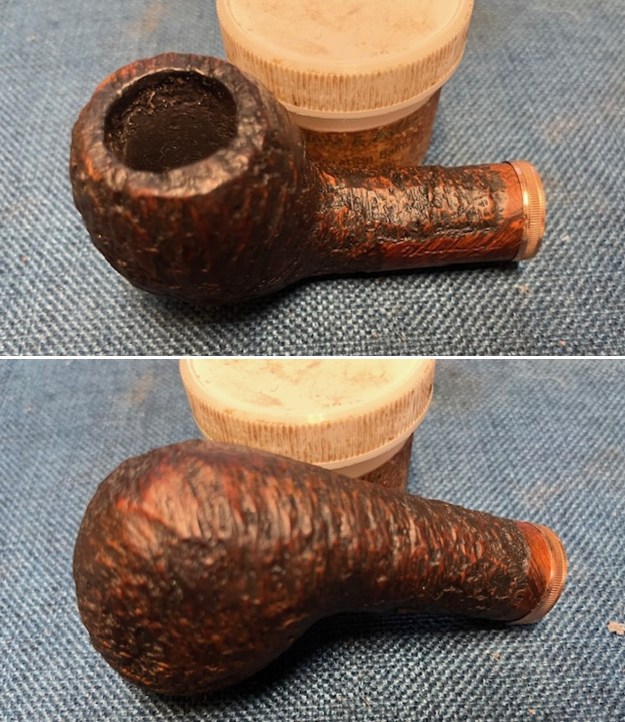
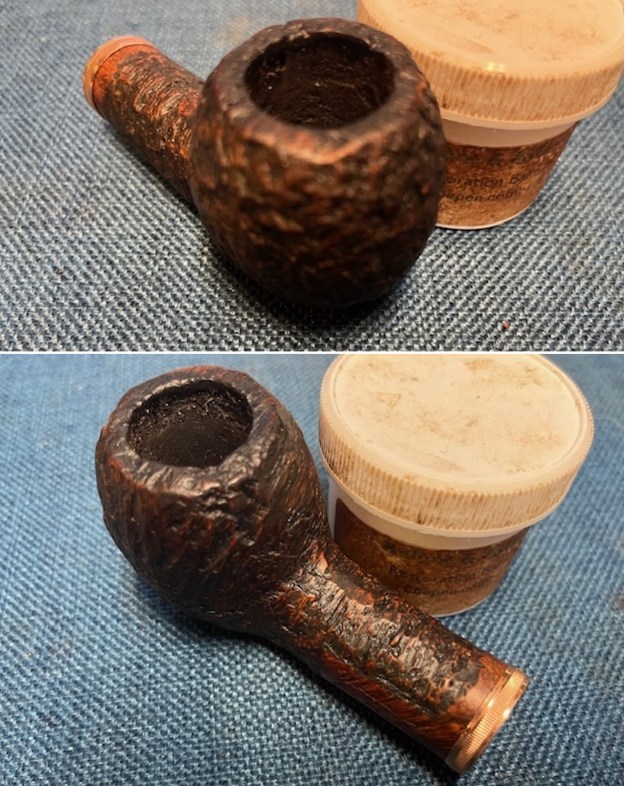
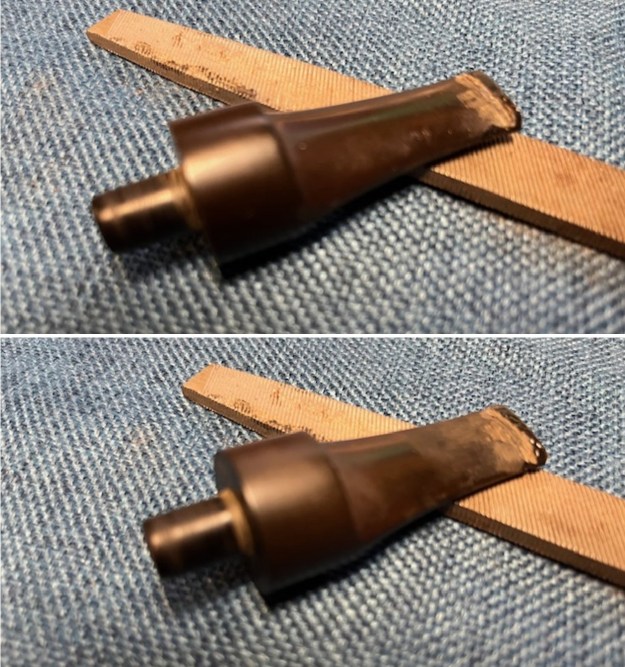
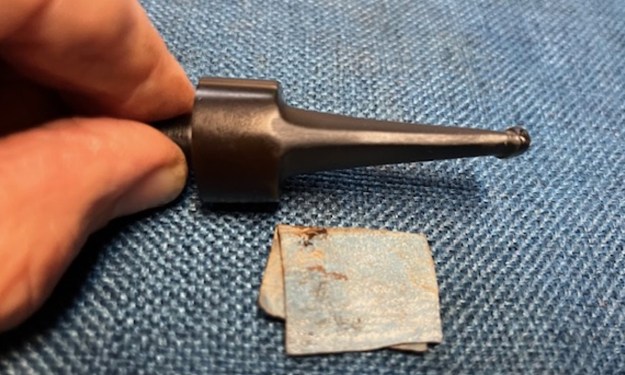
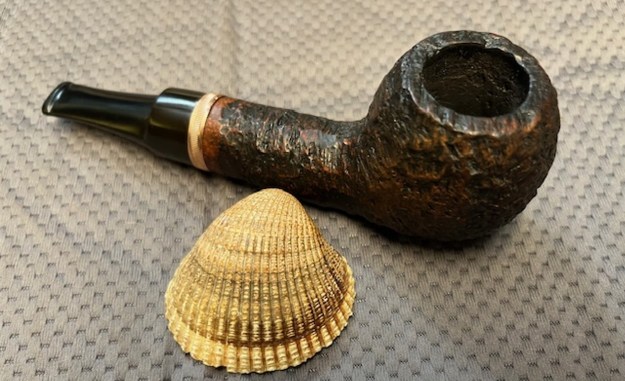
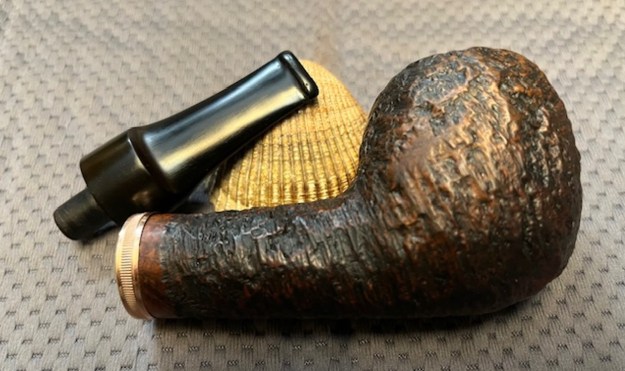
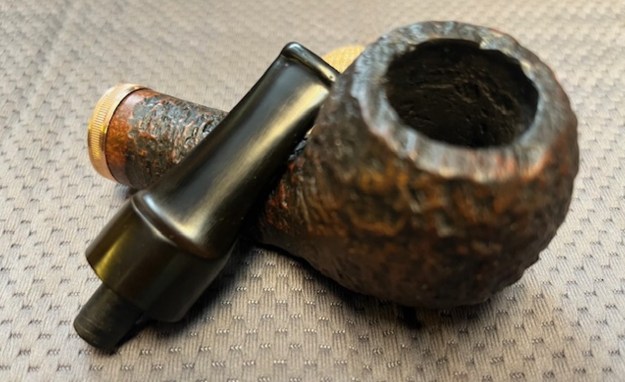
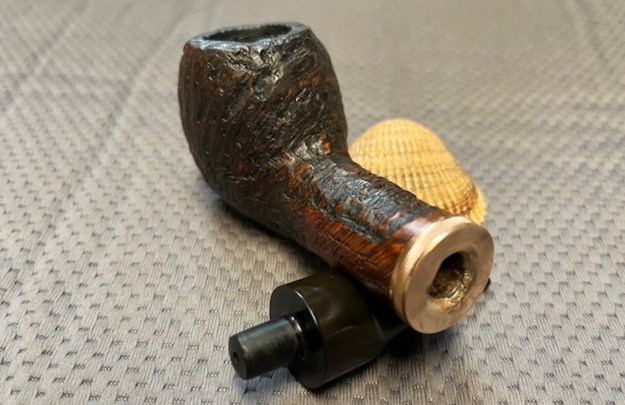
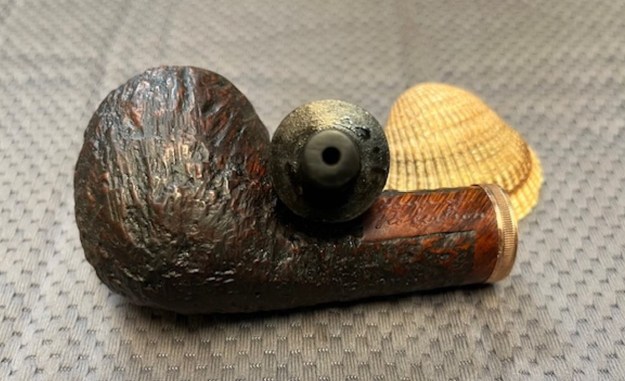
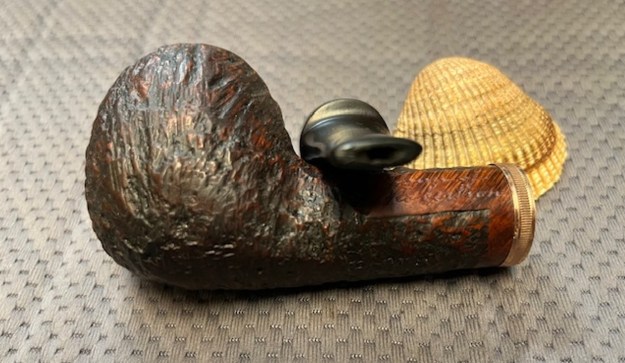
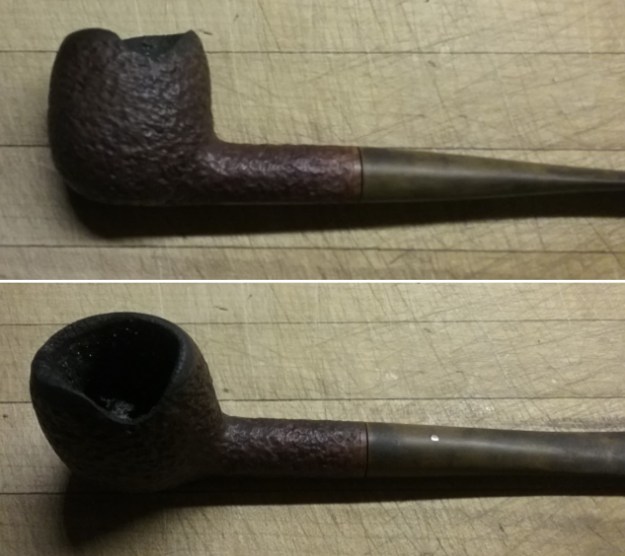
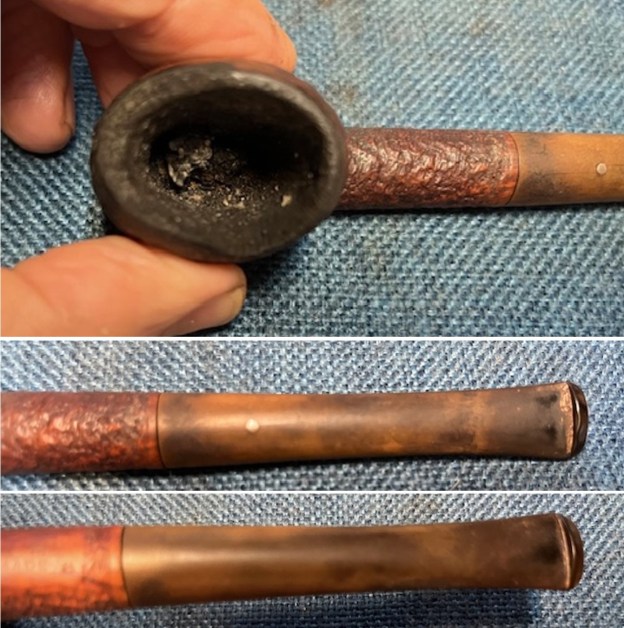
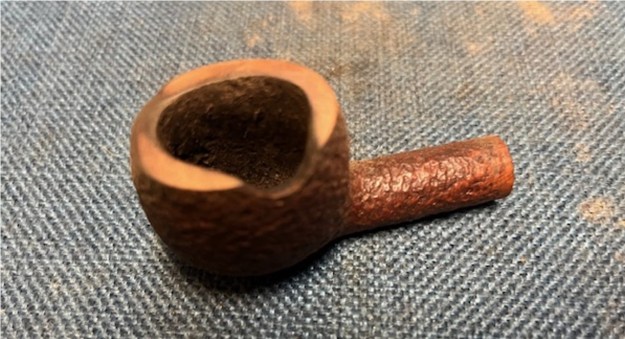
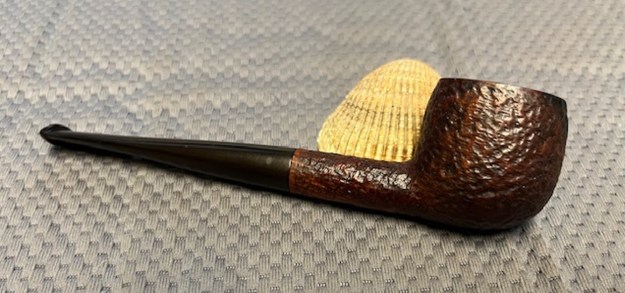
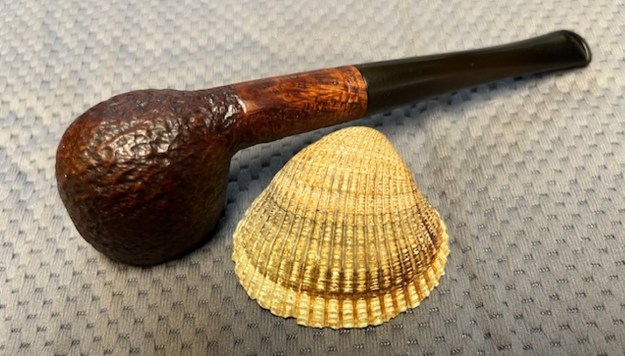
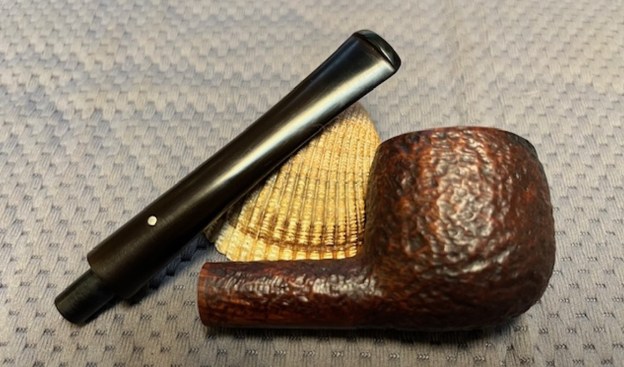
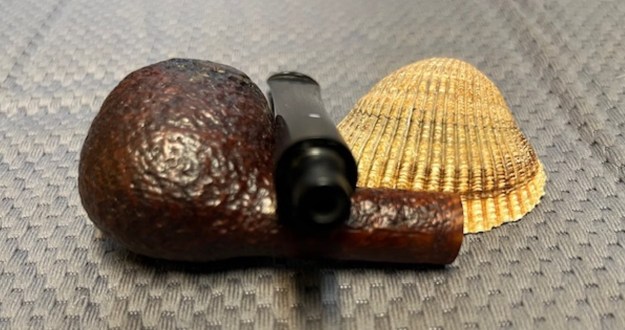
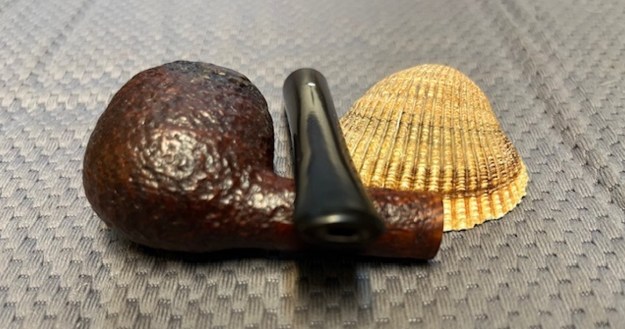
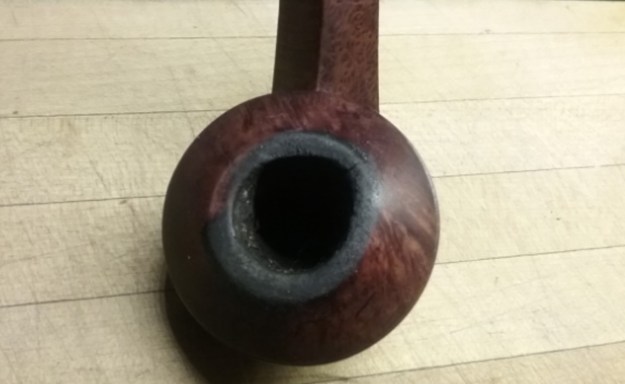
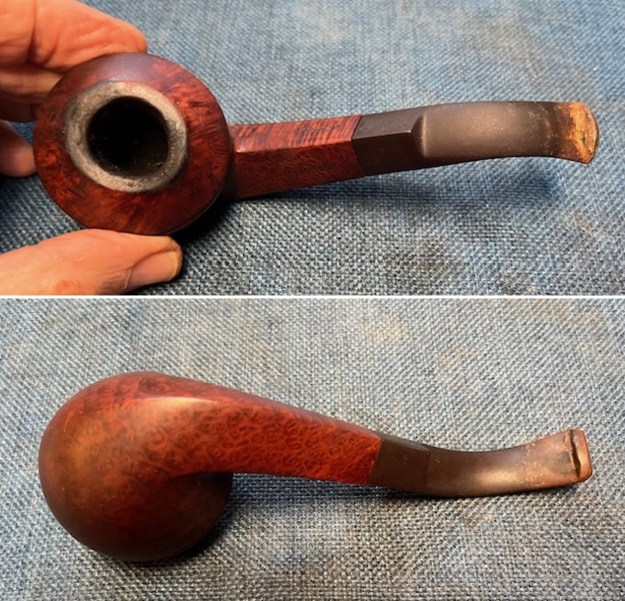
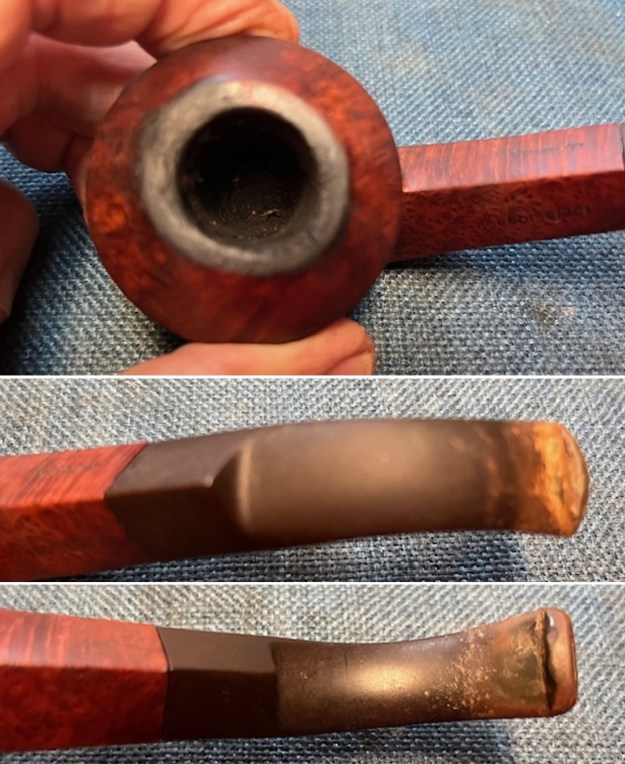
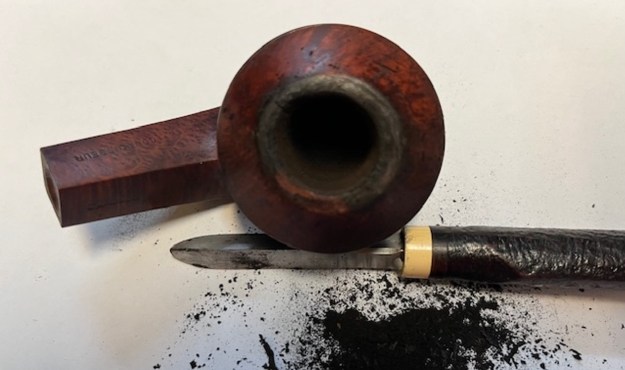
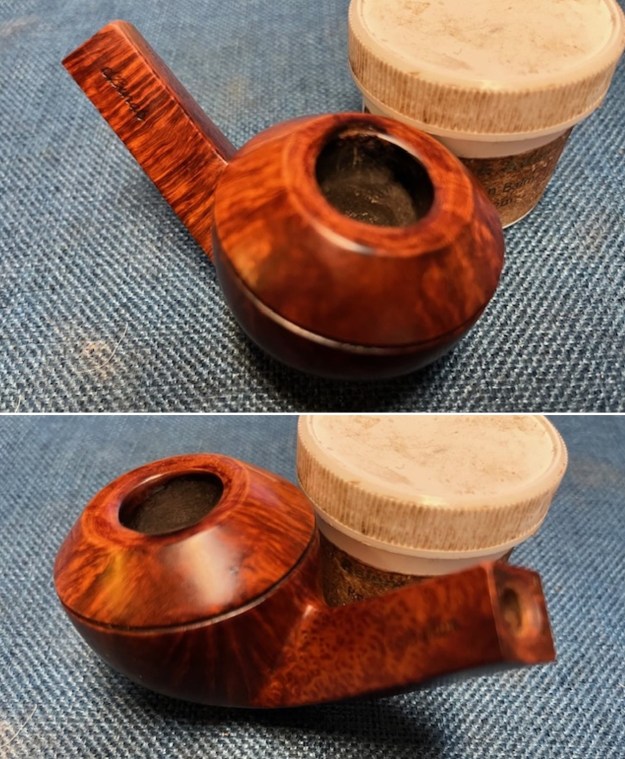
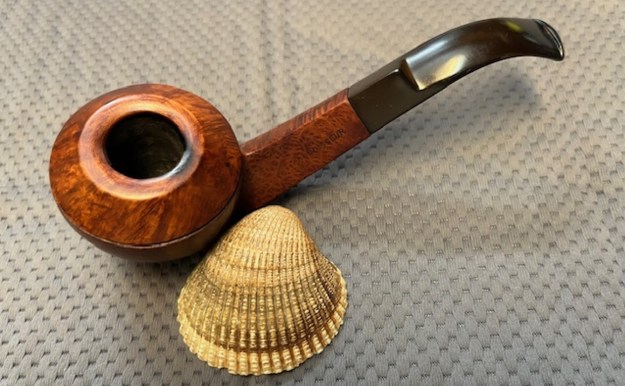
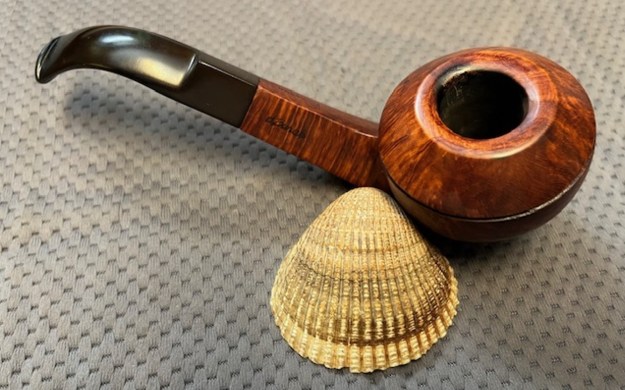
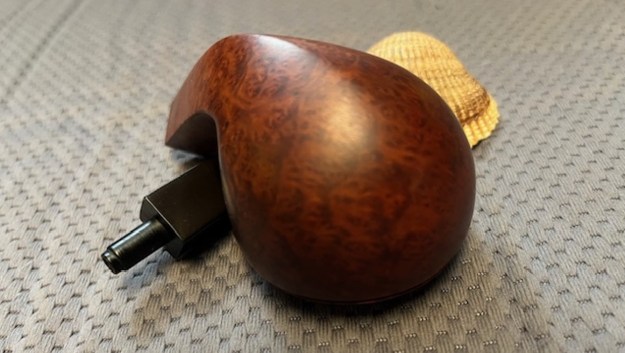
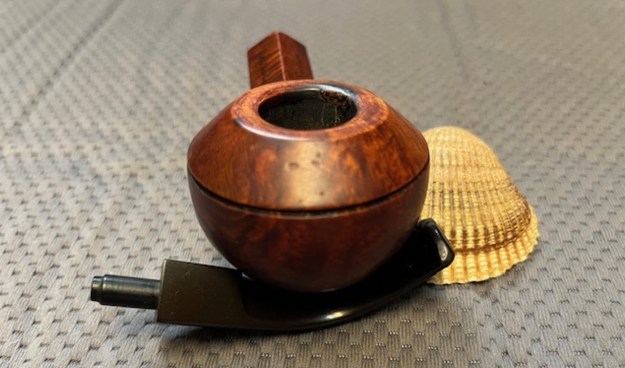
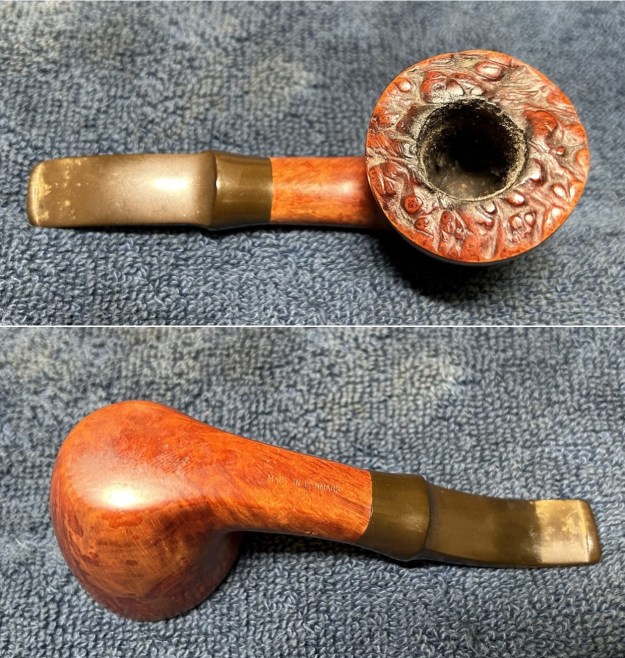
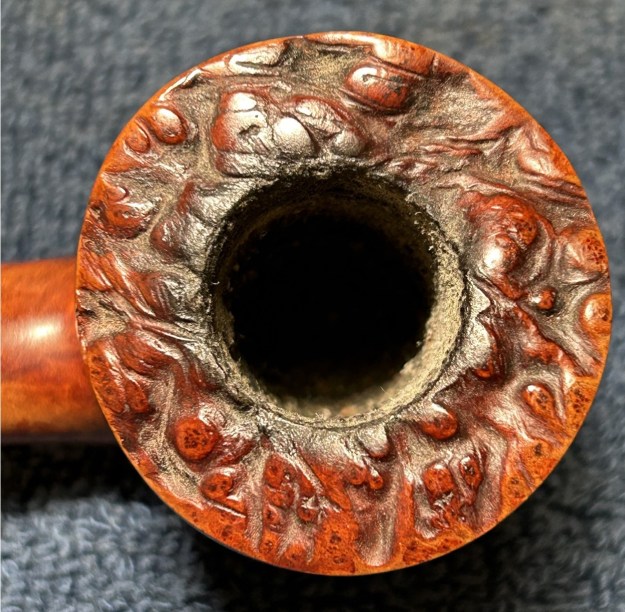
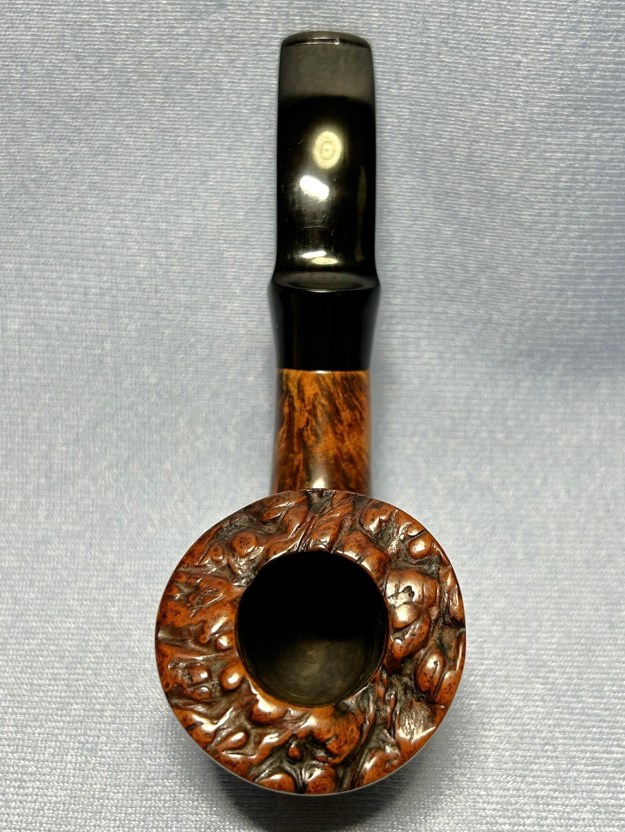
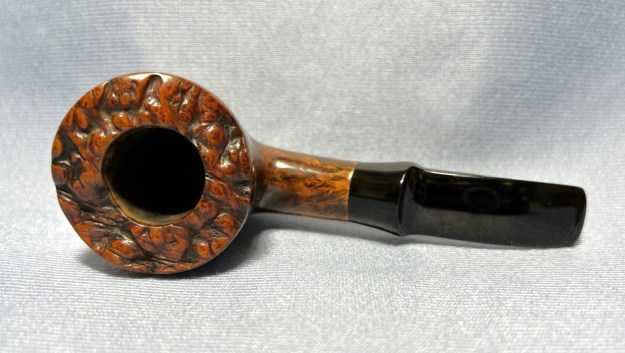
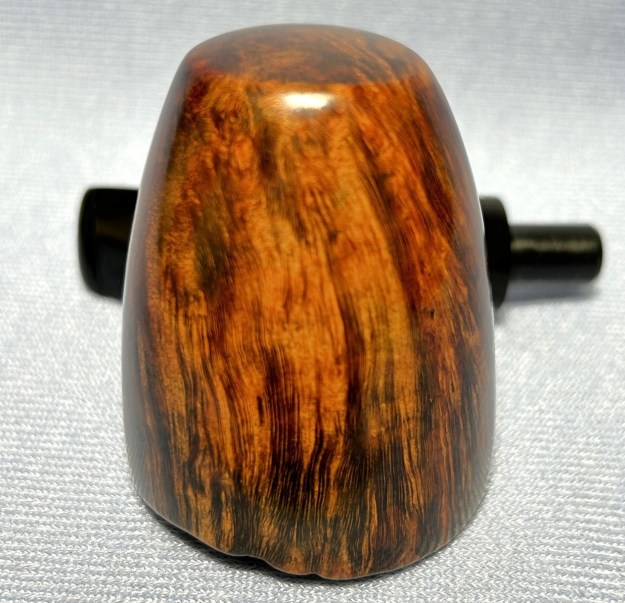
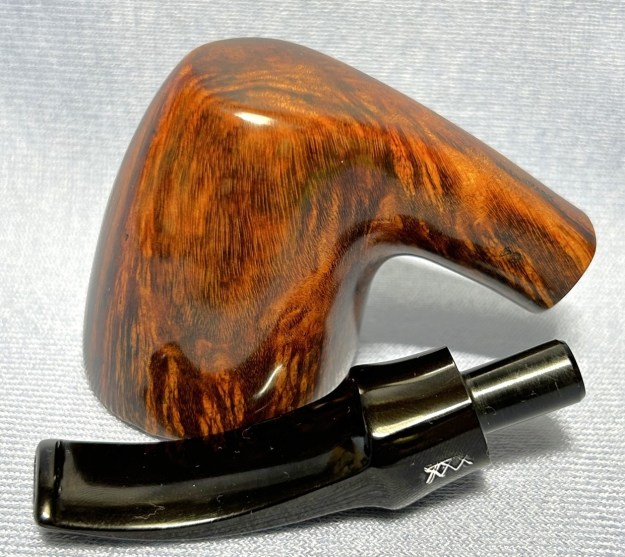
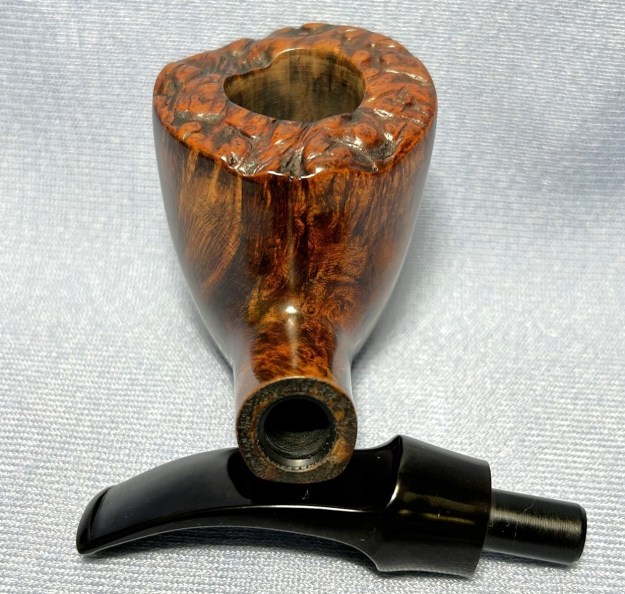
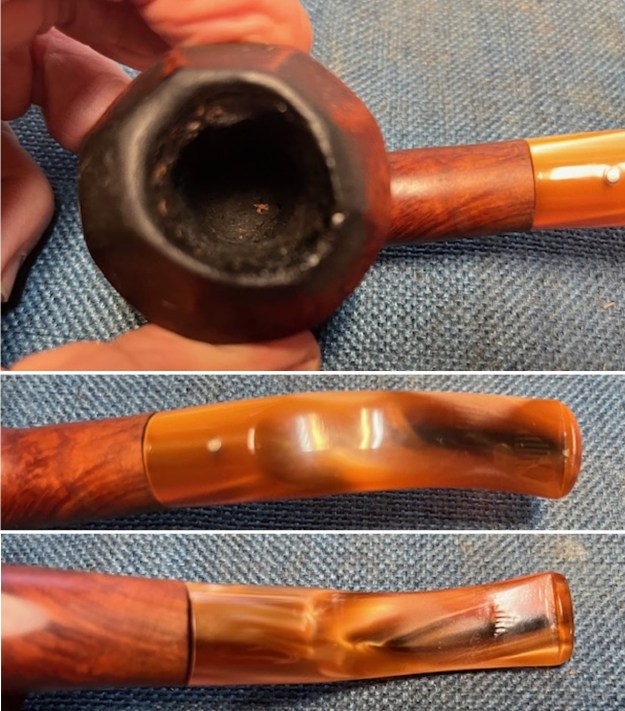
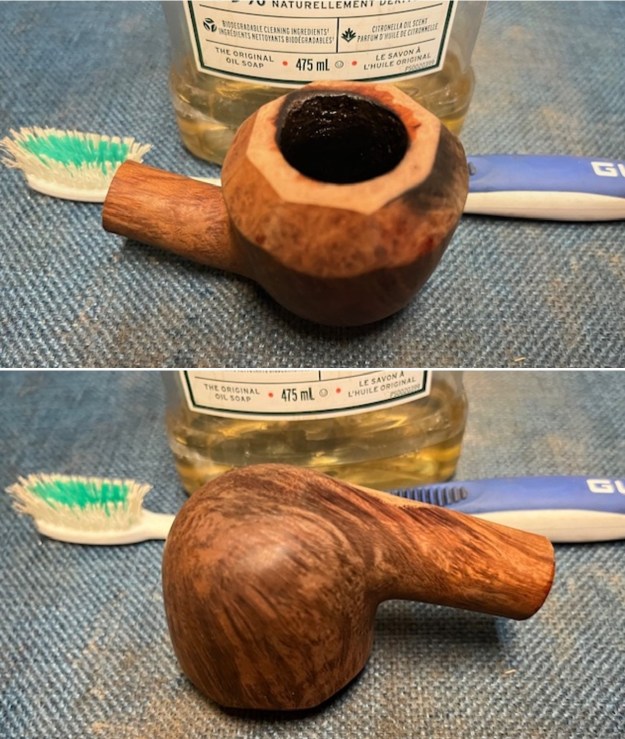
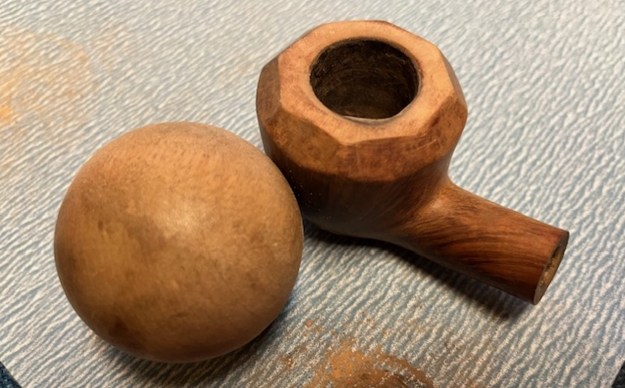
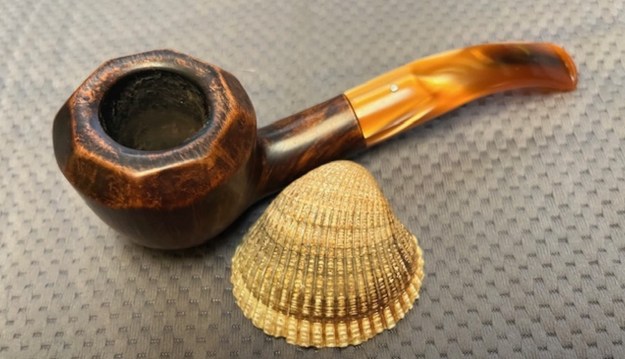
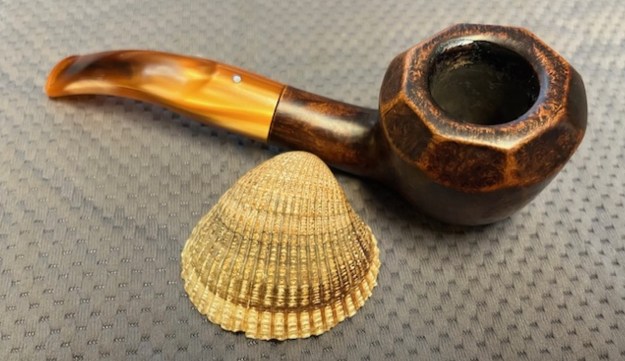
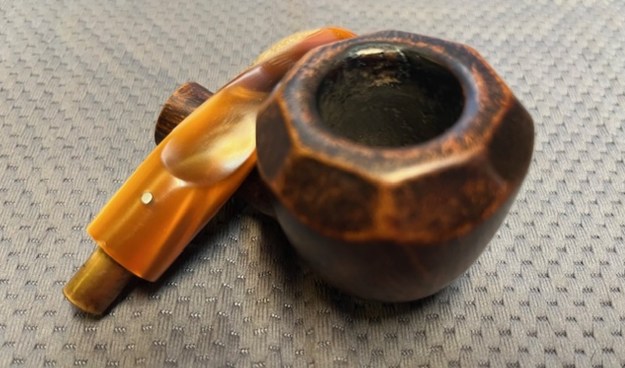
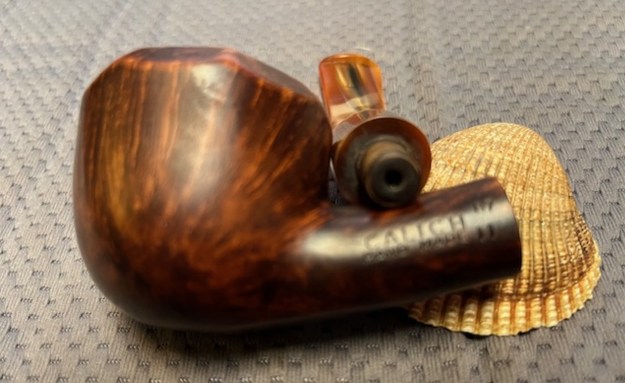
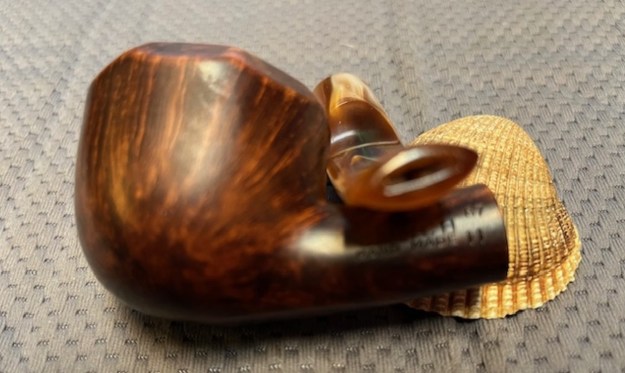
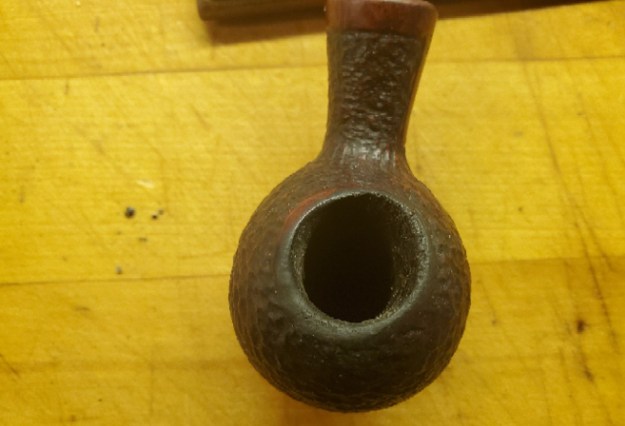
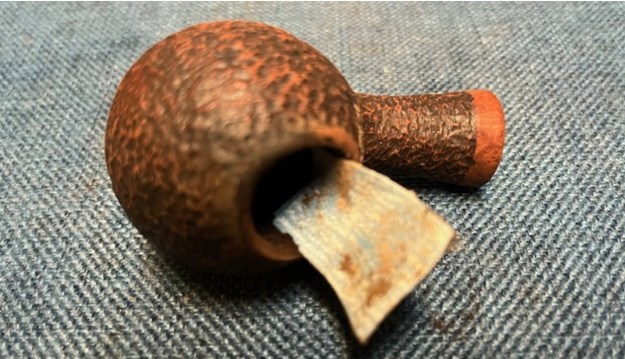
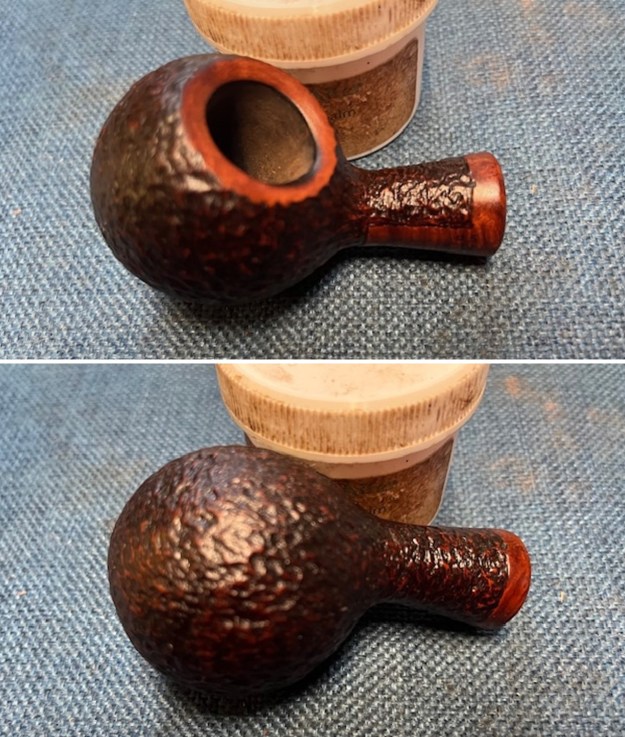
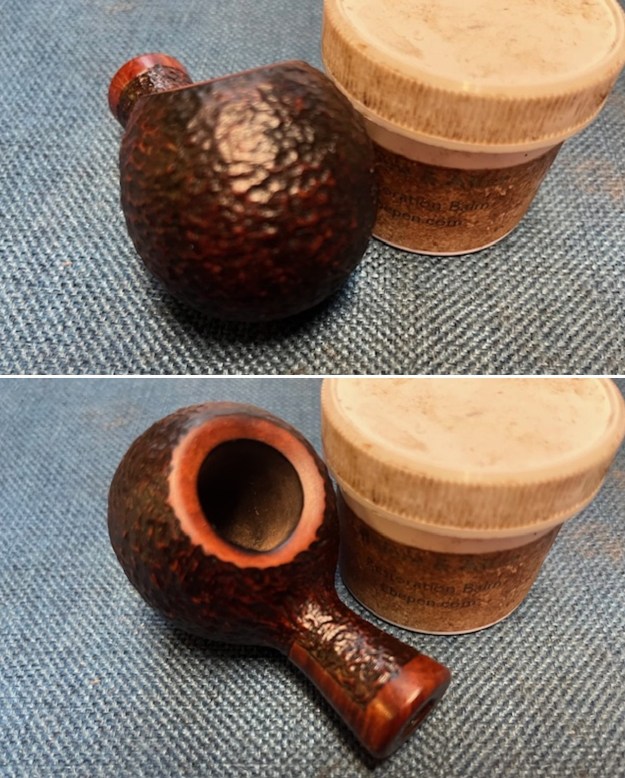
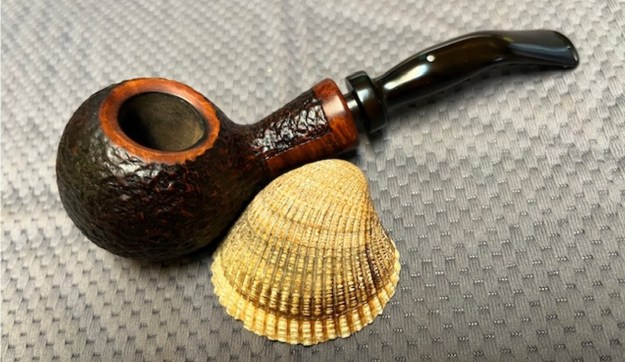
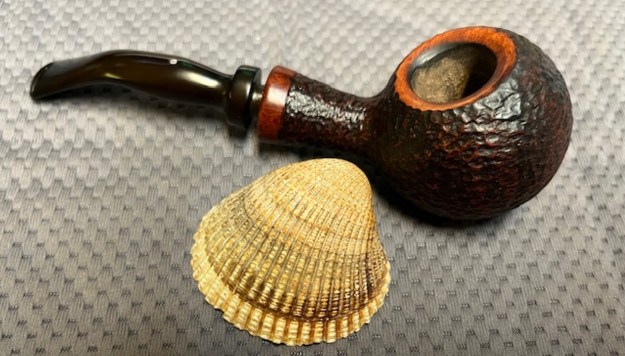
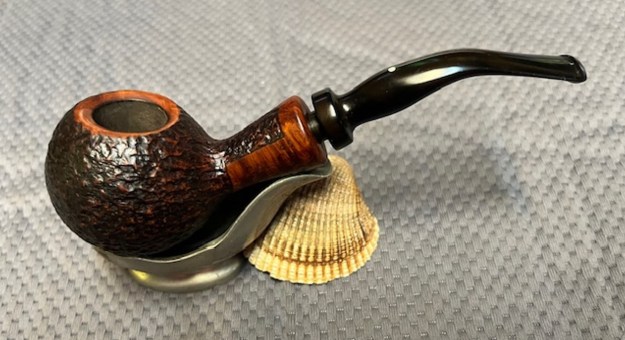
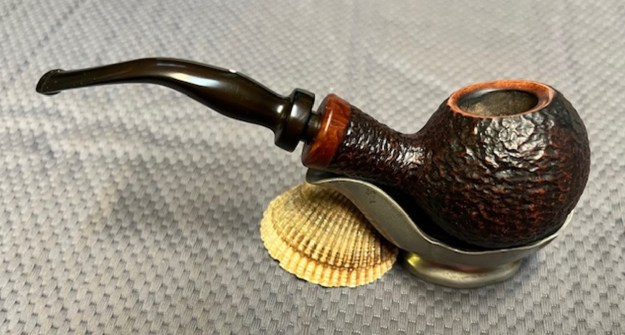
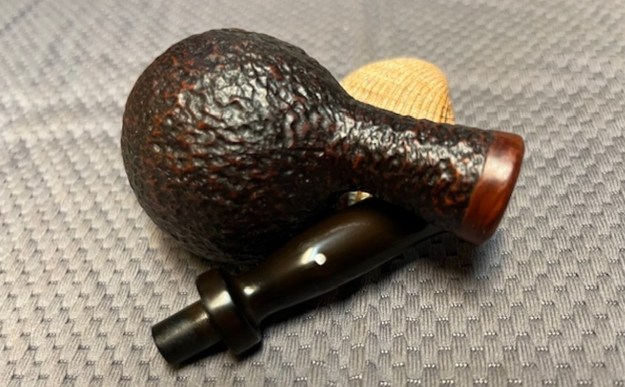
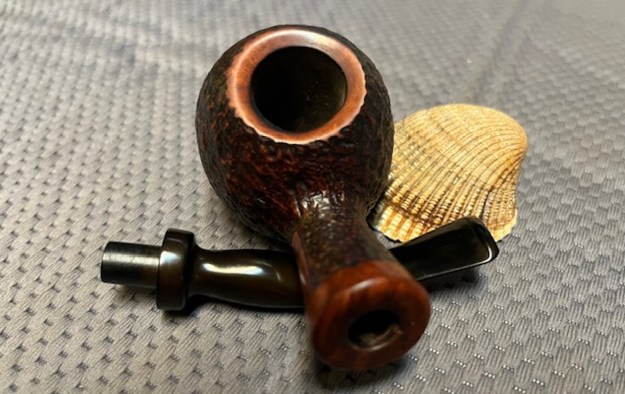
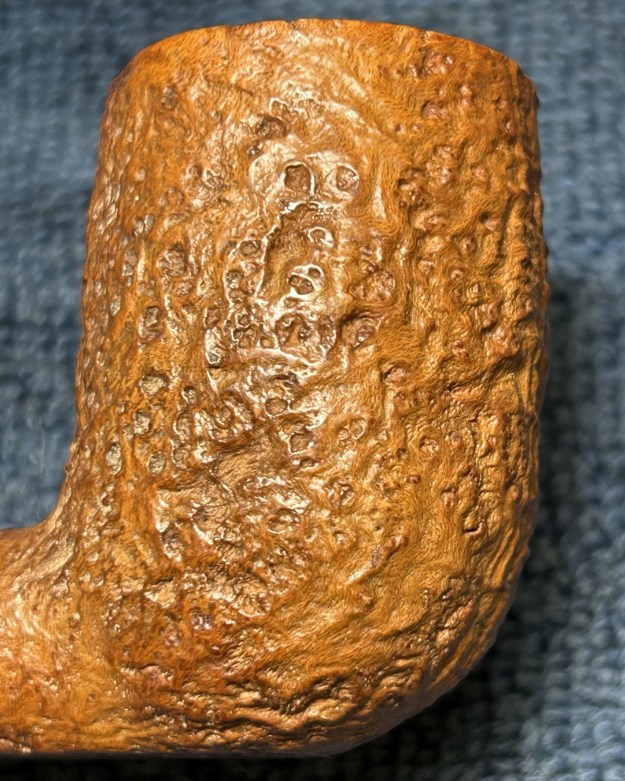
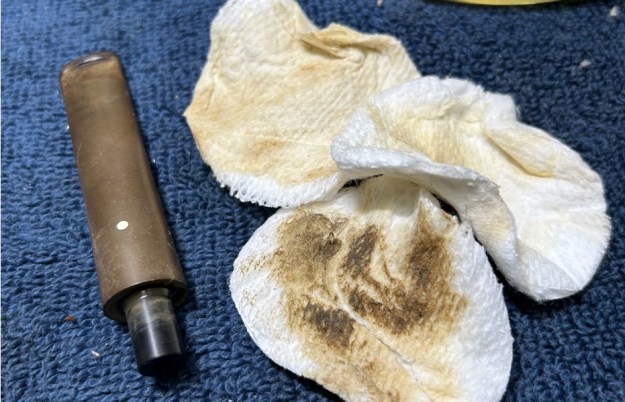
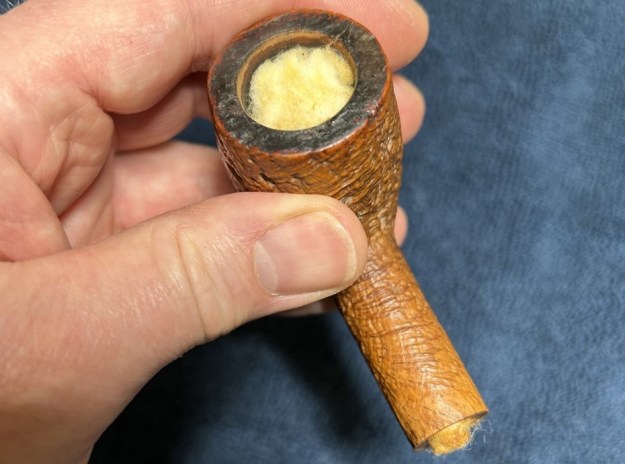
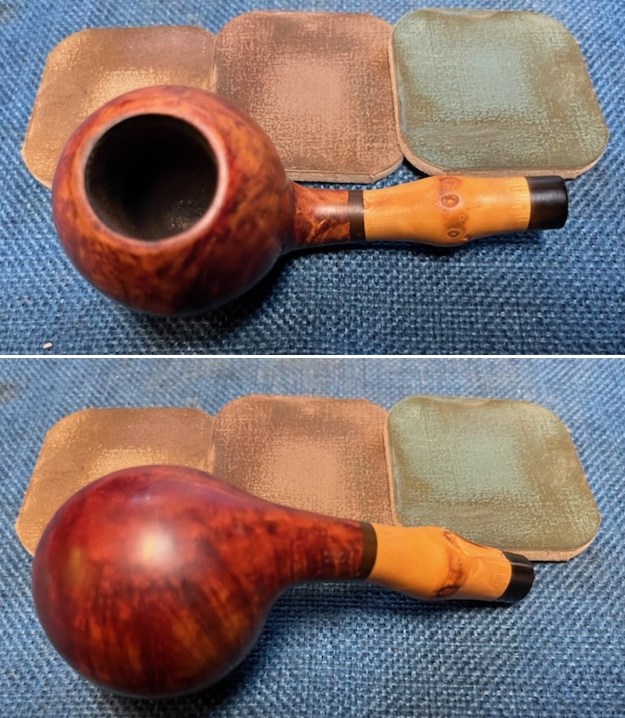
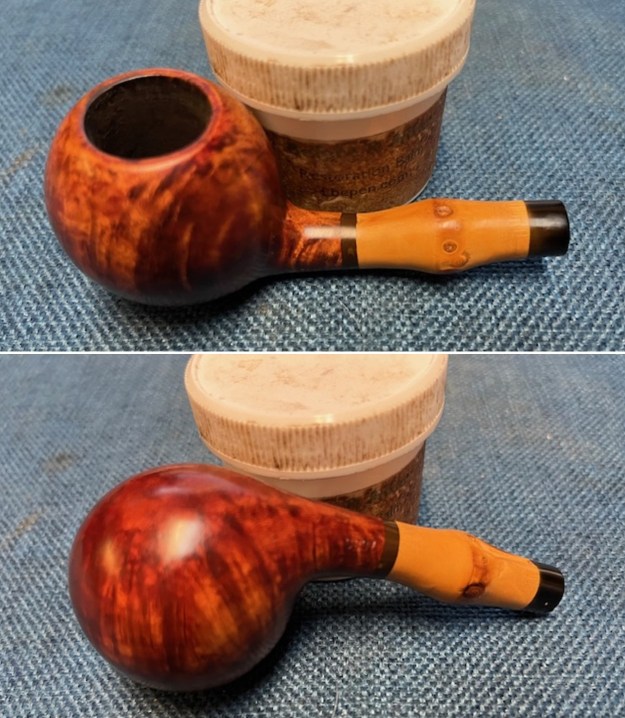
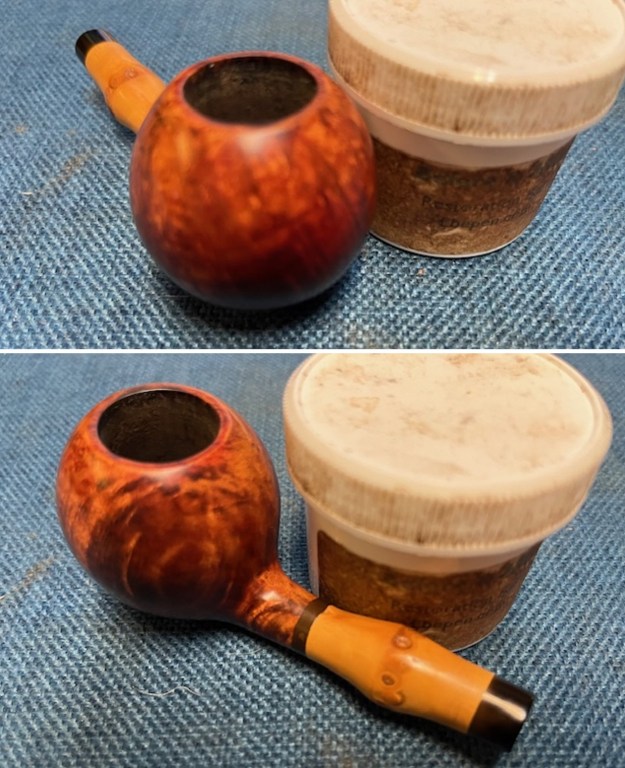
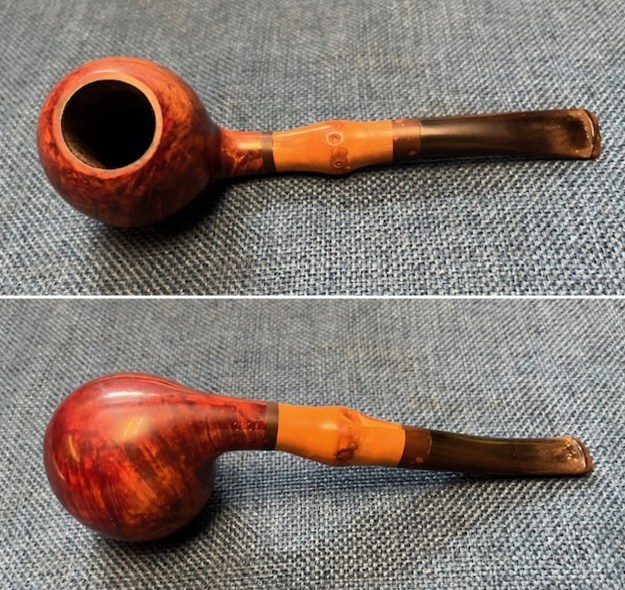 I took a photo of the rim top and bowl to show the condition of both of them. There is a moderate cake in the bowl and some lava on the thin rim top. There is also debris in the bowl. The photos of the stem show the oxidation, calcification and tooth marks/chatter on both sides ahead of the button.
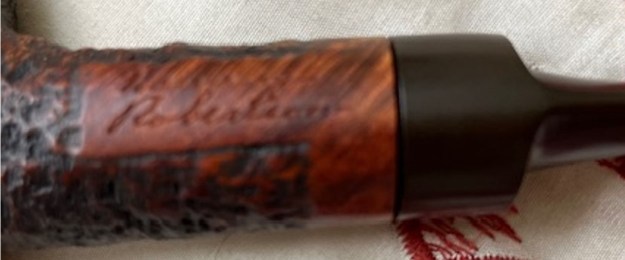
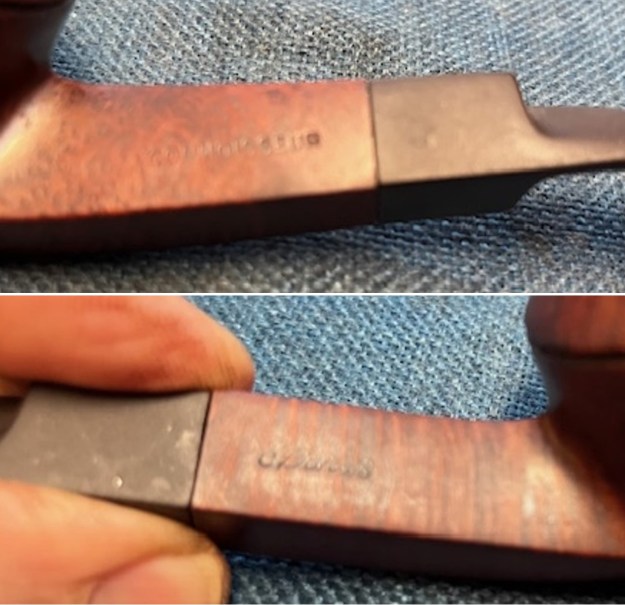
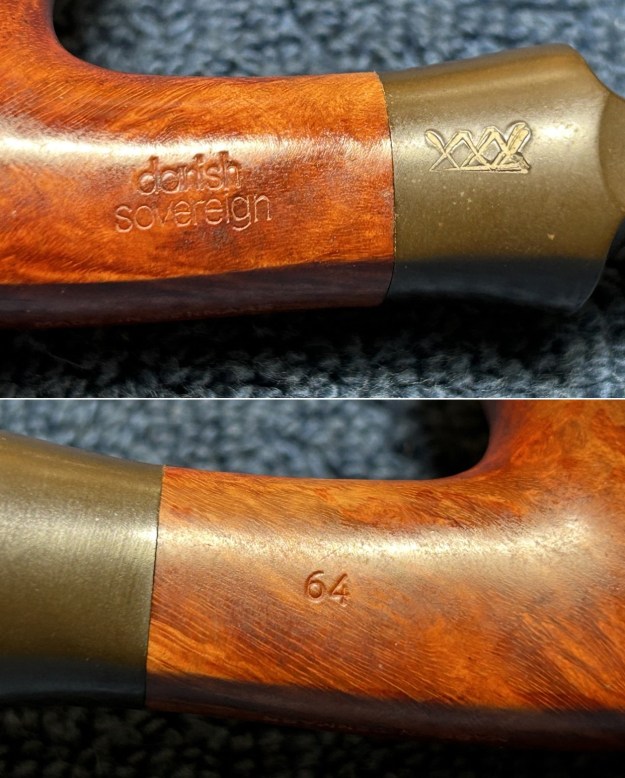
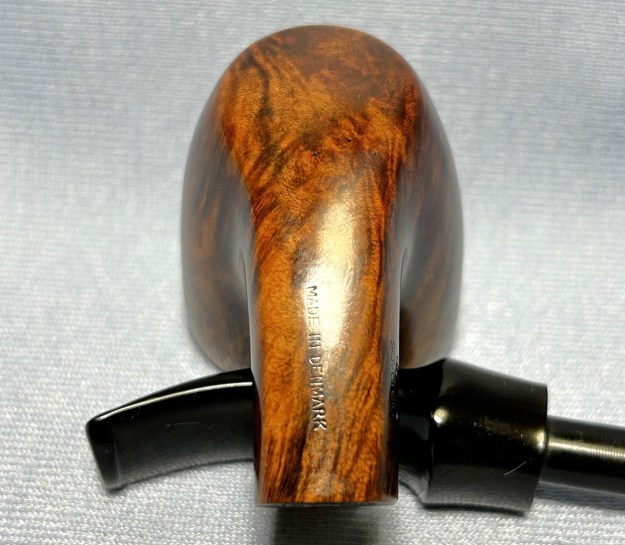
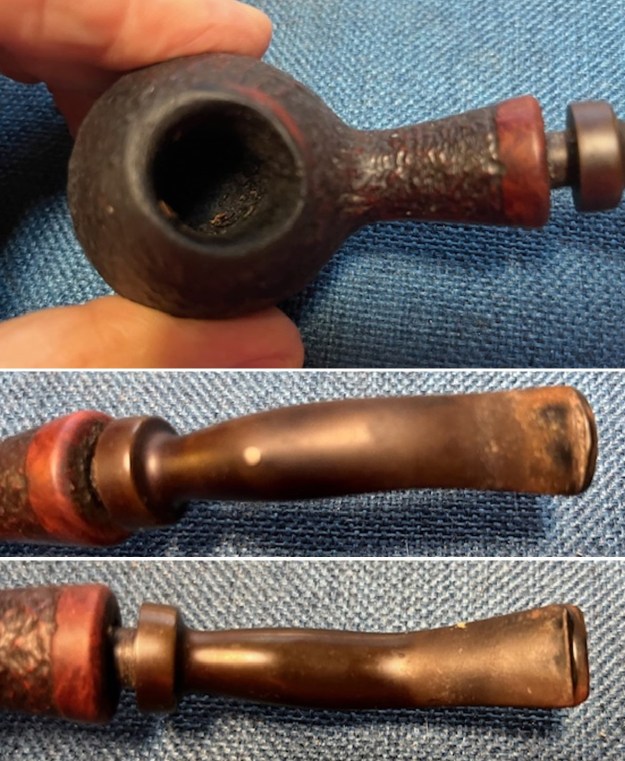
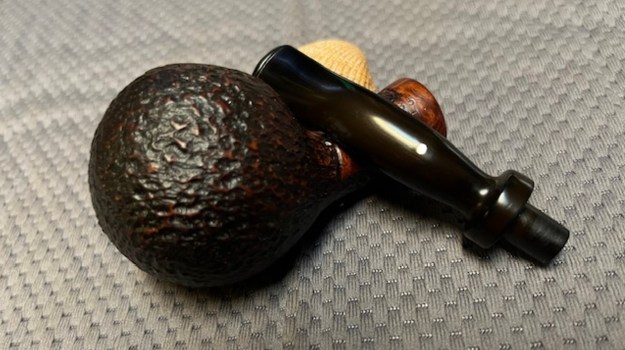
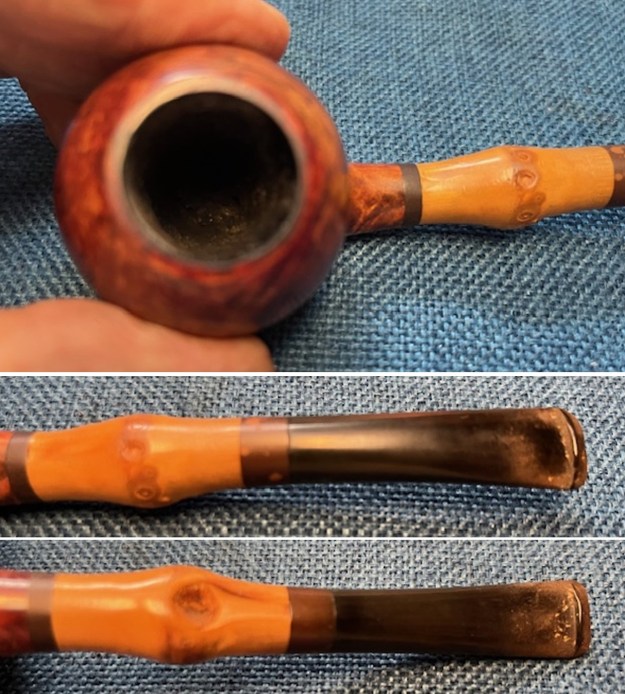 I took photos of the stamping on the left side and the right side of the shank. The stamping was clear and readable as noted above. It is much clearer in person but is hard to capture on the curve of the shank. I removed the stem from the shank and took a photo to show the proportions of the pipe.
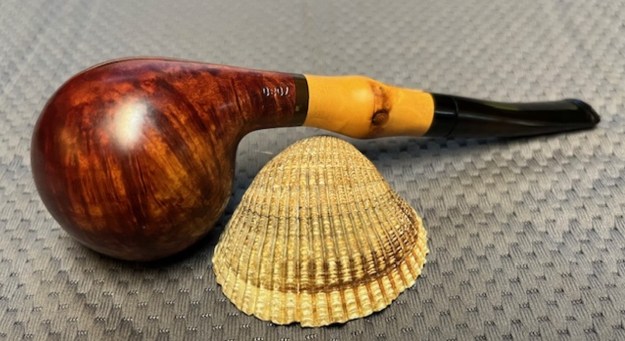
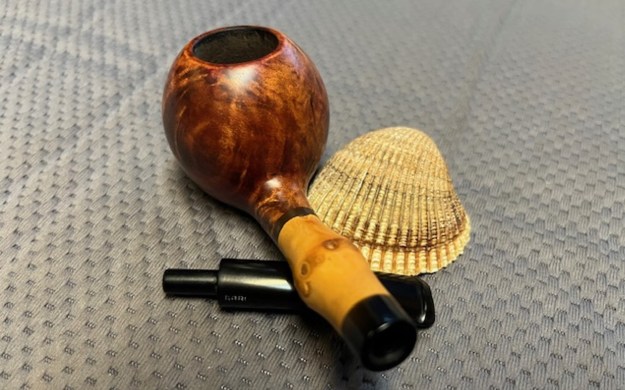
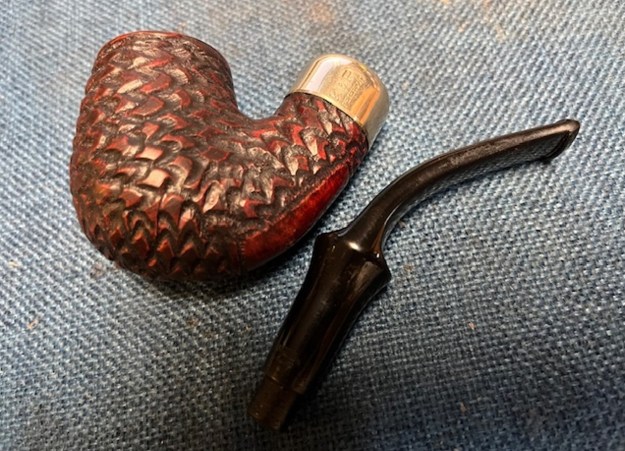
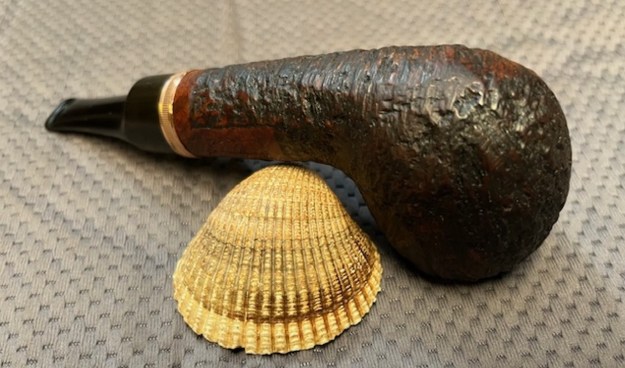
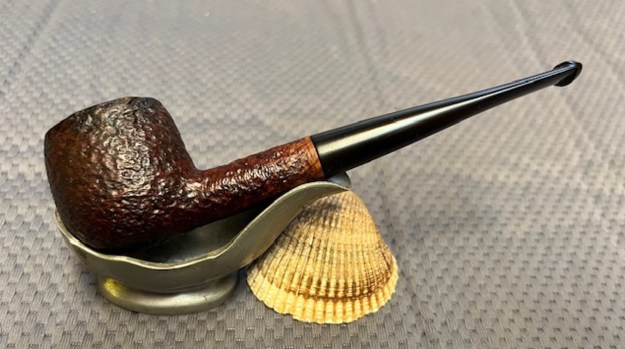
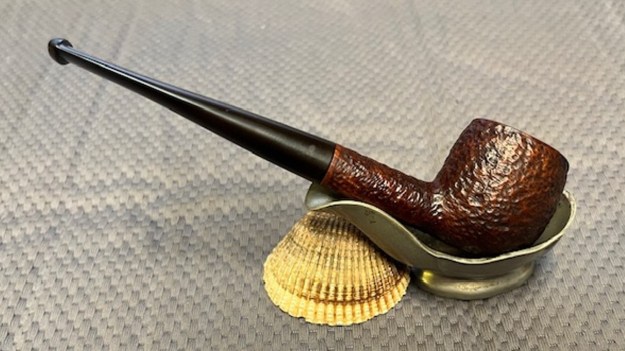
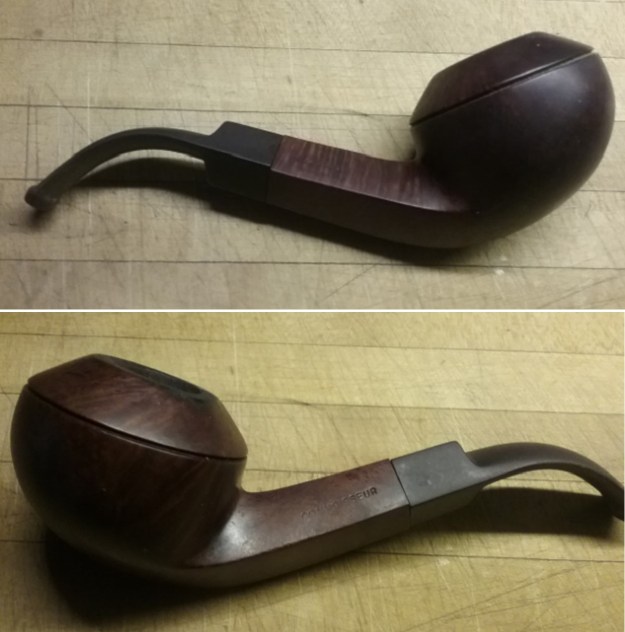
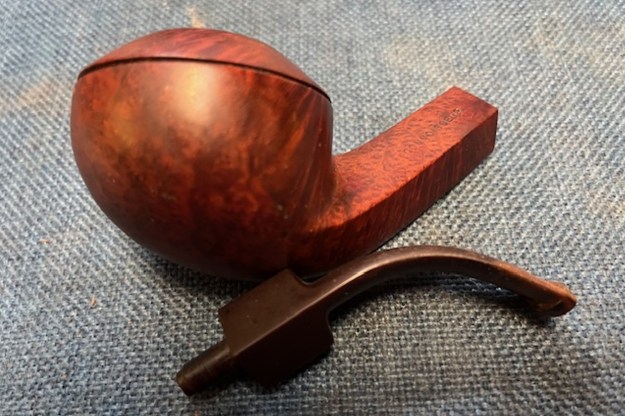
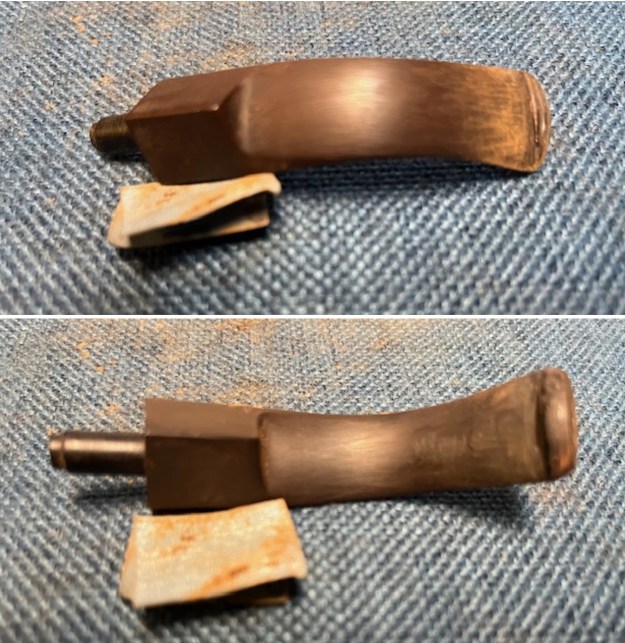
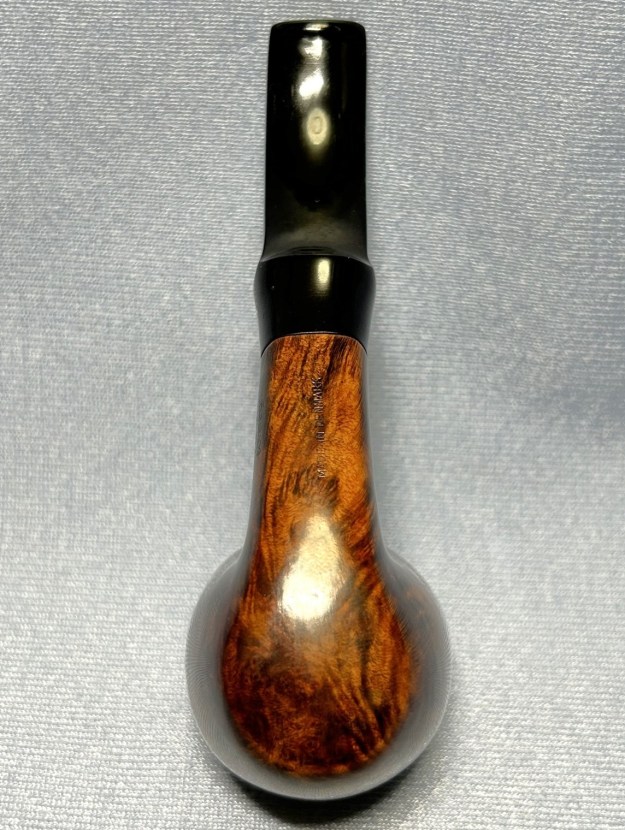
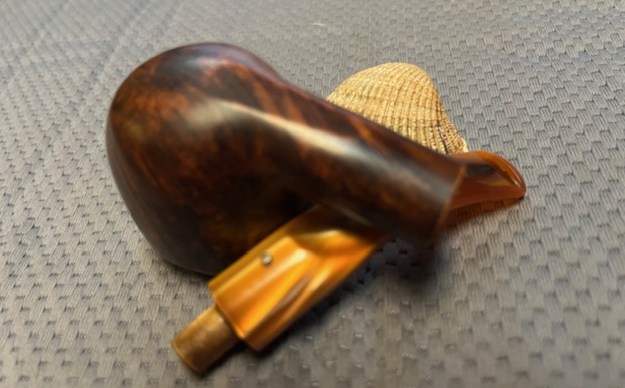
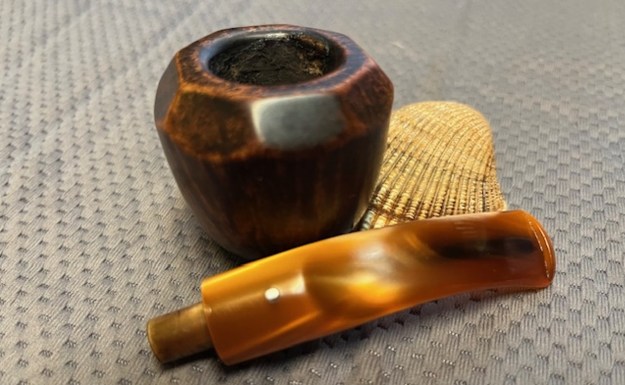
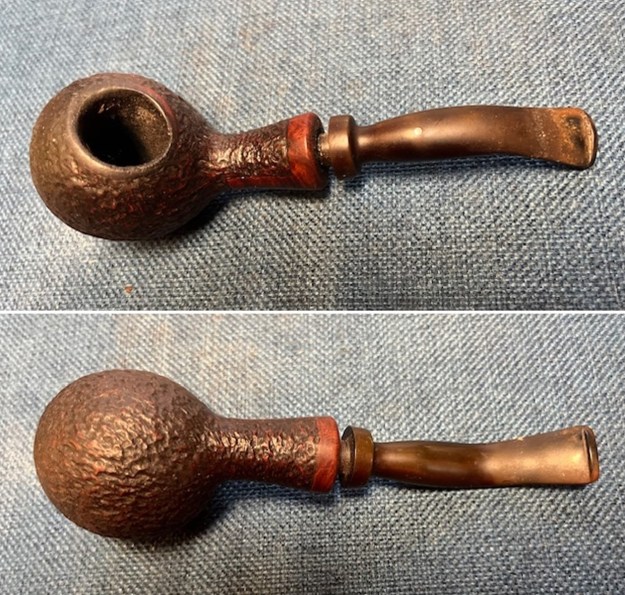
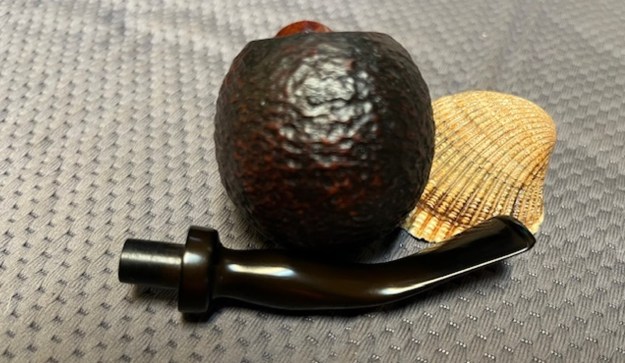
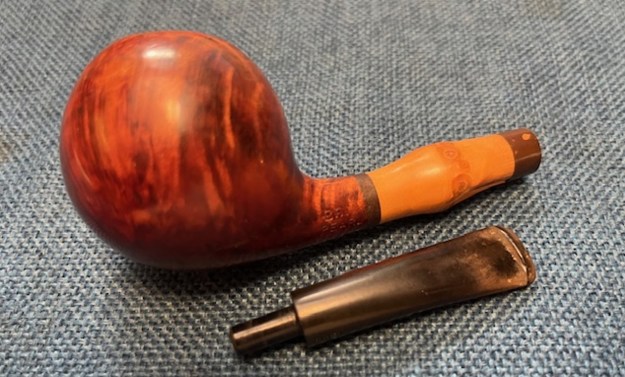
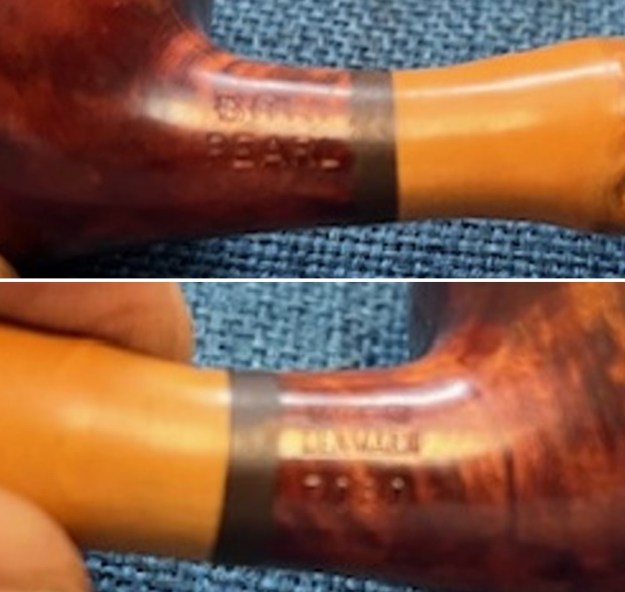
 I turned to Pipephil to see if I could find information on the Pearl model but there was nothing there on the model (http://pipephil.eu/logos/en/logo-b1.html). I quote from the sidebar below and also have included a screen capture of the information.
Brand founded by Viggo Nielsen in 1950 and sold to Van Eicken Tobaccos in 1978. At this time Age Bogelund managed Bari’s production. The company has been bought in 1993 by Helmer Thomsen. Bari’s second: Don, Proctus.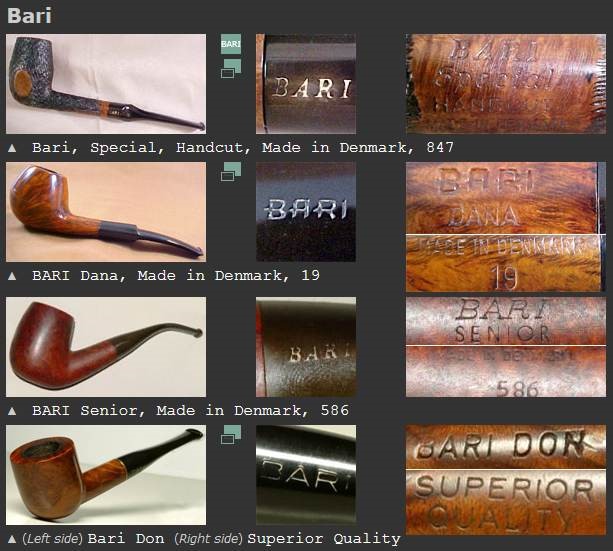 I then turned to Pipedia for some history of the brand and also to see if there as information on the Pearl model (https://pipedia.org/wiki/Bari). I have included the history below. There was also a photo that was done by Smoking Pipes.com and had a copy right so I did not include it. It did help me determine the kind of stem to use on the pipe.
Bari Piber was founded by Viggo Nielsen in Kolding around the turn of 1950/51. Viggo’s sons Kai Nielsen and Jørgen Nielsen both grew into their father’s business from a very young age and worked there till 1975.
Bari had very successfully adapted the new Danish Design that had been started mainly by Stanwell for it’s own models. When Viggo Nielsen sold Bari in 1978 to Joh. Wilh. von Eicken GmbH in Hamburg Bari counted 33 employees.
From 1978 to 1993 Åge Bogelund and Helmer Thomsen headed Bari’s pipe production. Thomson bought the company in 1993 re-naming it to Bari Piber Helmer Thomsen. The workshop moved to more convenient buildings in Vejen. Bogelund, who created very respectable freehands of his own during the time at Bari got lost somehow after 1993.
Bari’s basic conception fundamentally stayed the same for decades: series pipes pre-worked by machines and carefully finished by hand. Thus no spectacular highgrades but solid, reliable every day’s companions.
The most famous series are the smooth “Classic Diamond” and the blasted “Wiking”.
I did a quick Google search for the Bari Pearl pipe and found that Smokingpipes.com had quite a few different shapes of the model. It was interesting that all of them had a single knuckle like the one that I was working on and that the bamboo had been shaped and tapered on the front toward the bowl and toward the shank end. All of them had a vulcanite space on both ends of the bamboo. They were pretty pipes.
I then turned to Pipedia for some history of the brand and also to see if there as information on the Pearl model (https://pipedia.org/wiki/Bari). I have included the history below. There was also a photo that was done by Smoking Pipes.com and had a copy right so I did not include it.
Bari Piber was founded by Viggo Nielsen in Kolding around the turn of 1950/51. Viggo’s sons Kai Nielsen and Jørgen Nielsen both grew into their father’s business from a very young age and worked there till 1975.
Bari had very successfully adapted the new Danish Design that had been started mainly by Stanwell for it’s own models. When Viggo Nielsen sold Bari in 1978 to Joh. Wilh. von Eicken GmbH in Hamburg Bari counted 33 employees.
From 1978 to 1993 Åge Bogelund and Helmer Thomsen headed Bari’s pipe production. Thomson bought the company in 1993 re-naming it to Bari Piber Helmer Thomsen. The workshop moved to more convenient buildings in Vejen. Bogelund, who created very respectable freehands of his own during the time at Bari got lost somehow after 1993.
Bari’s basic conception fundamentally stayed the same for decades: series pipes pre-worked by machines and carefully finished by hand. Thus, no spectacular highgrades but solid, reliable every day’s companions.
The most famous series are the smooth “Classic Diamond” and the blasted “Wiking”.
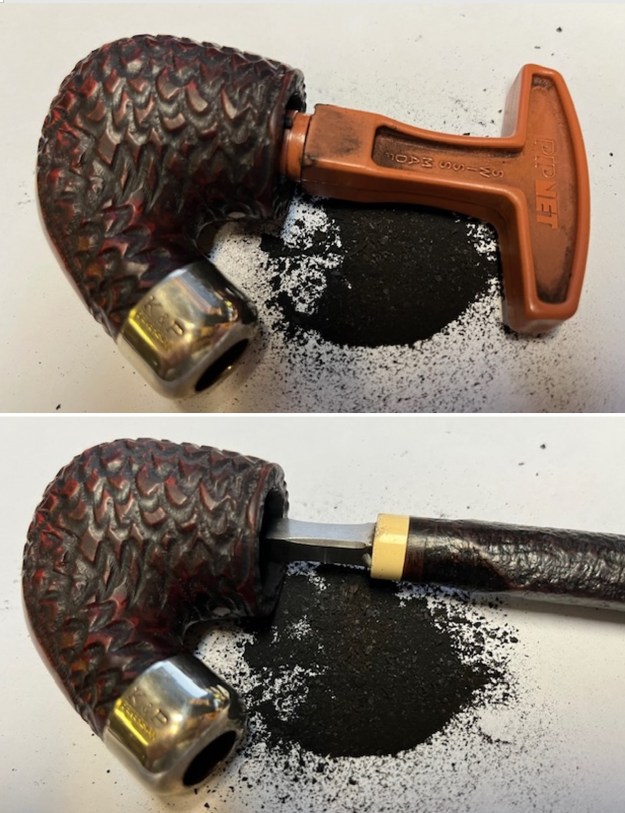
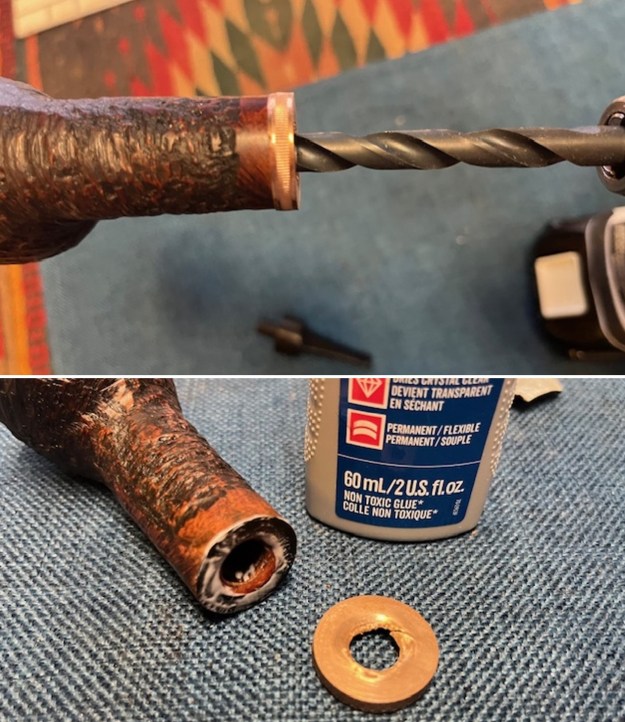
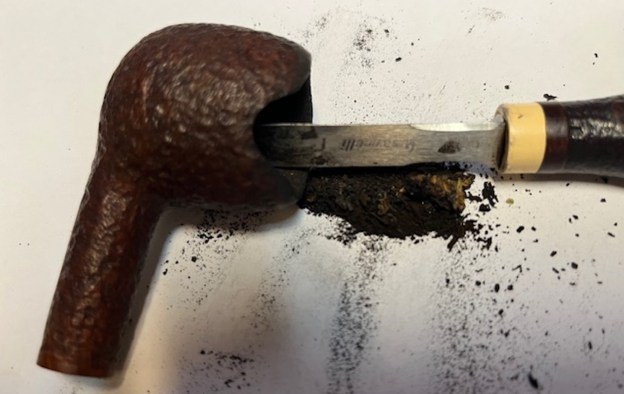
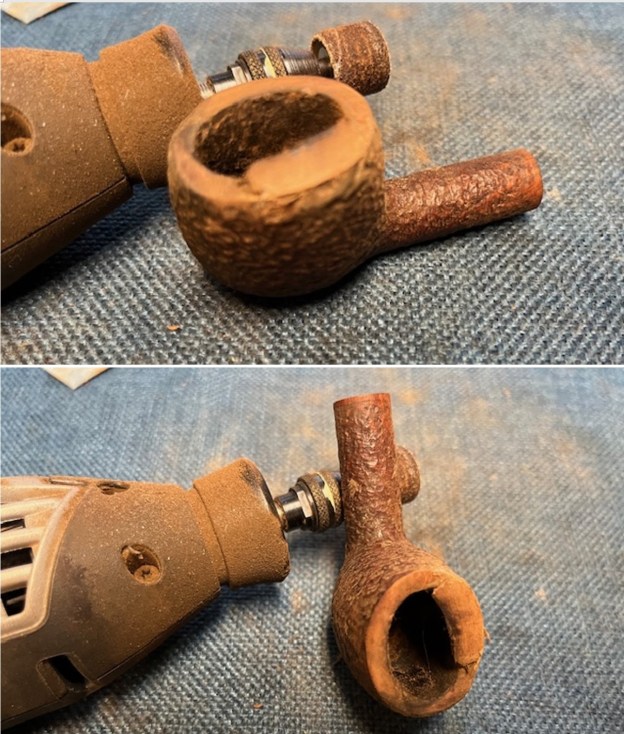
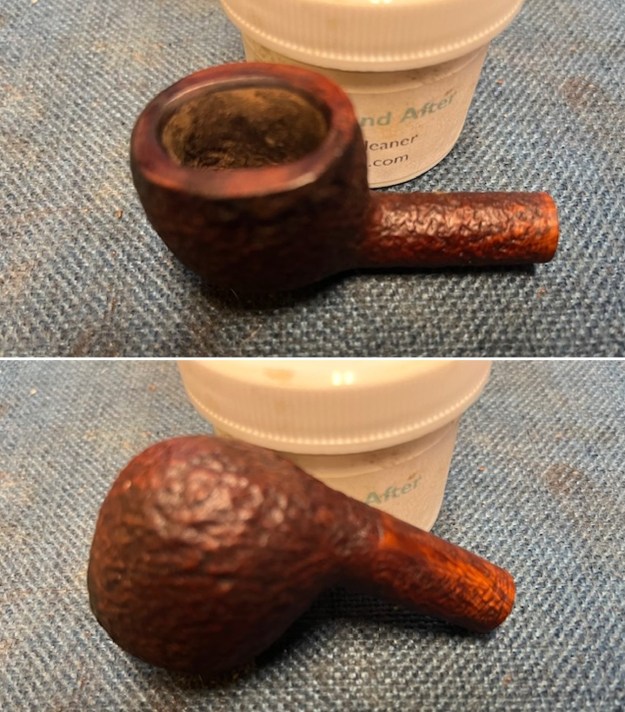
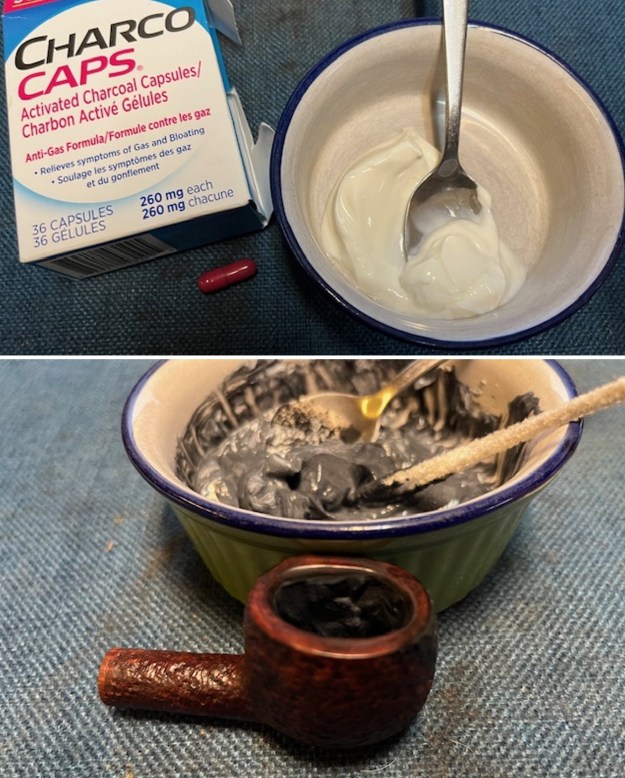
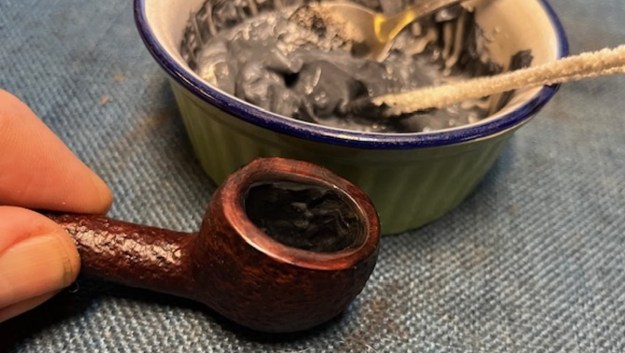
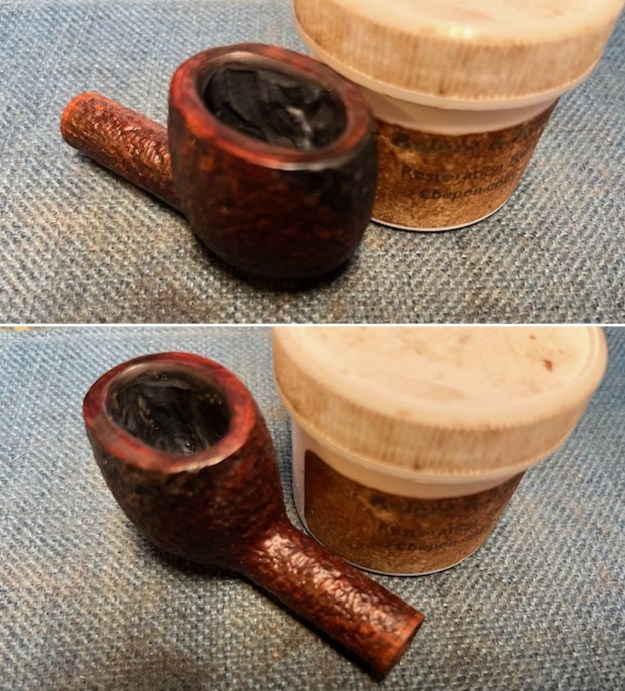
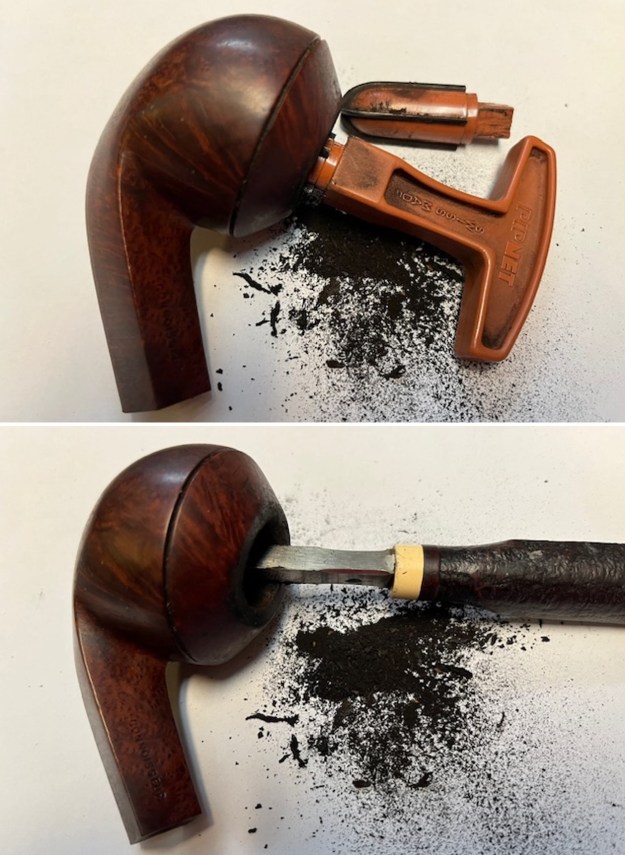
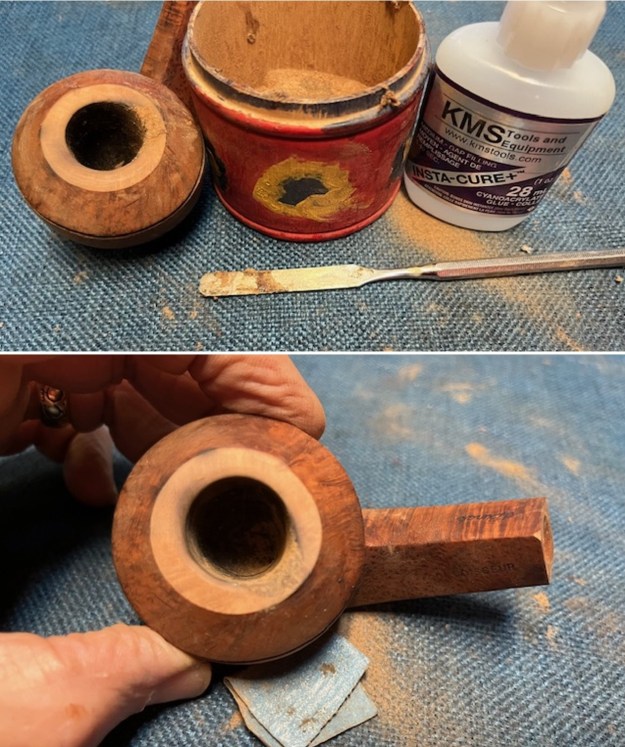
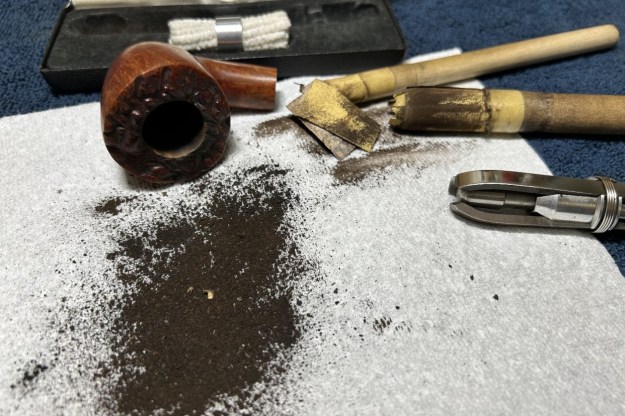
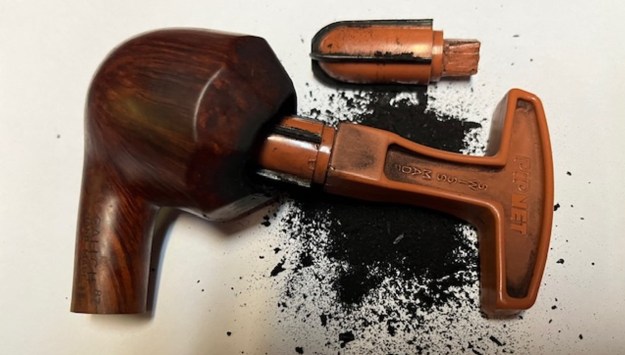
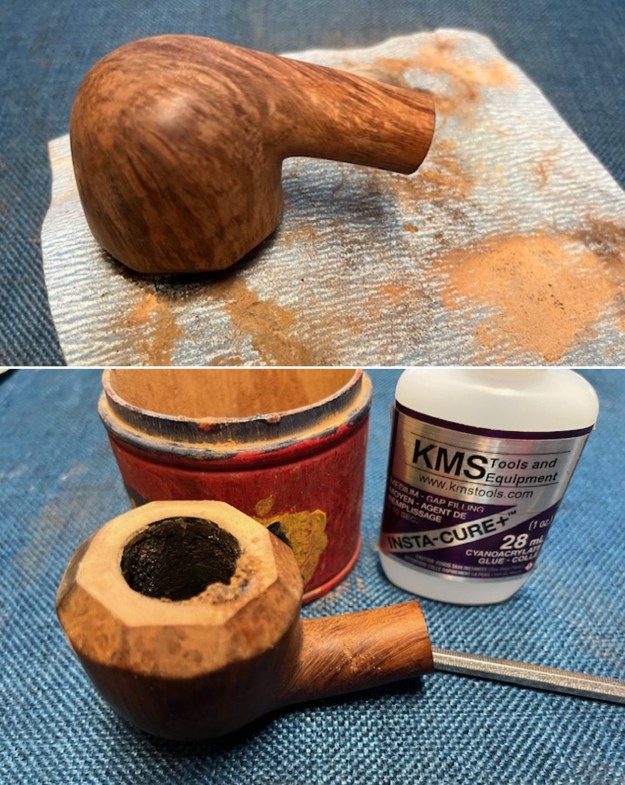
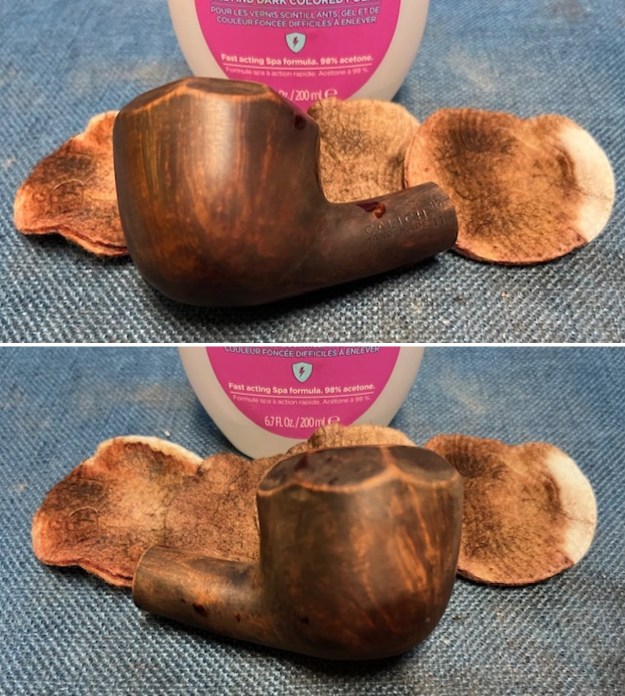
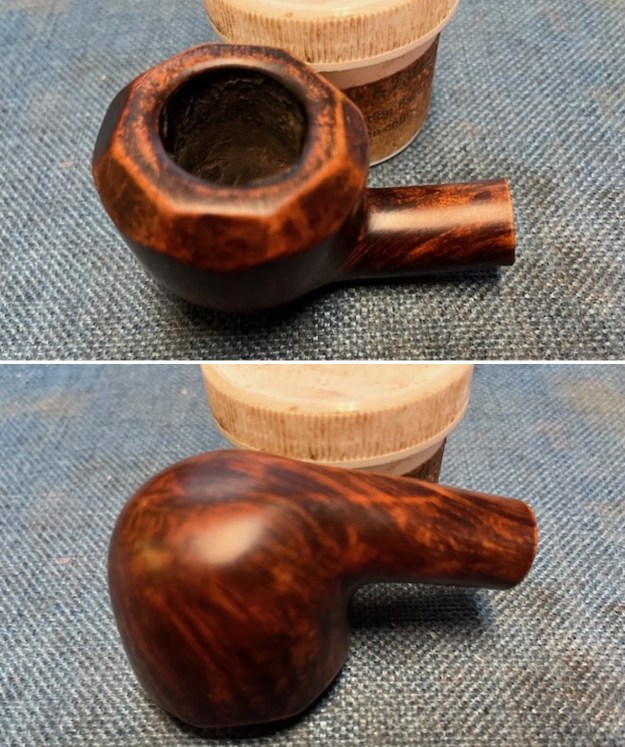
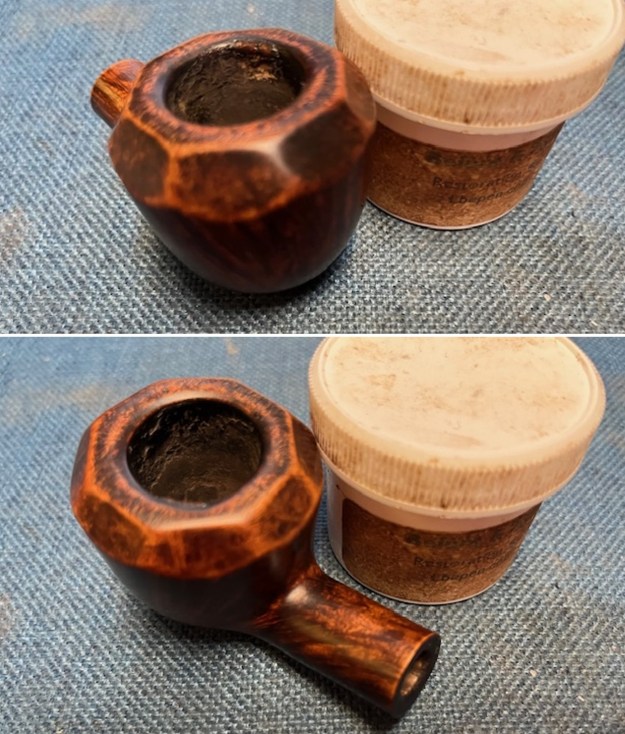
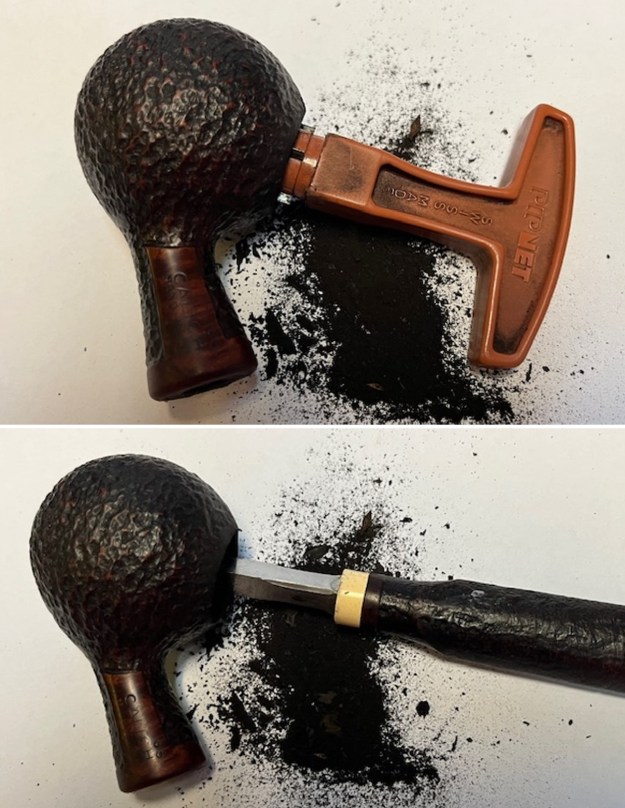
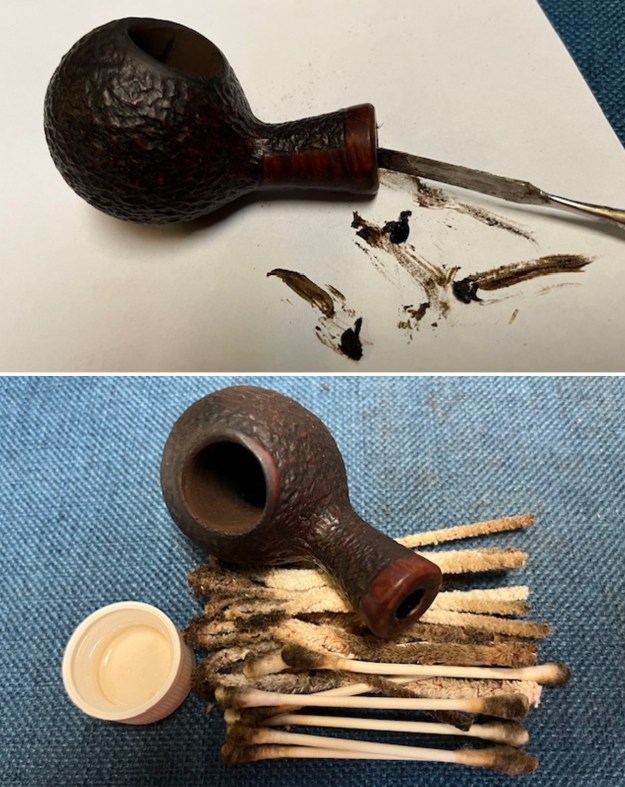
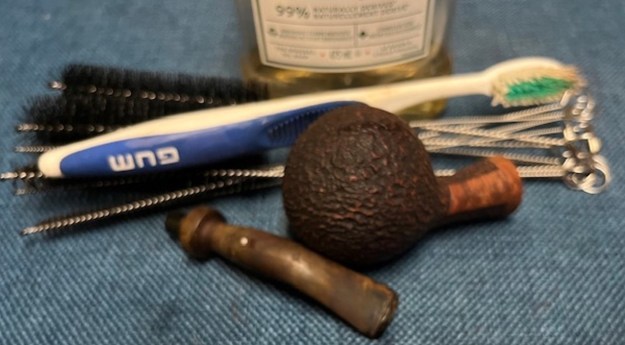
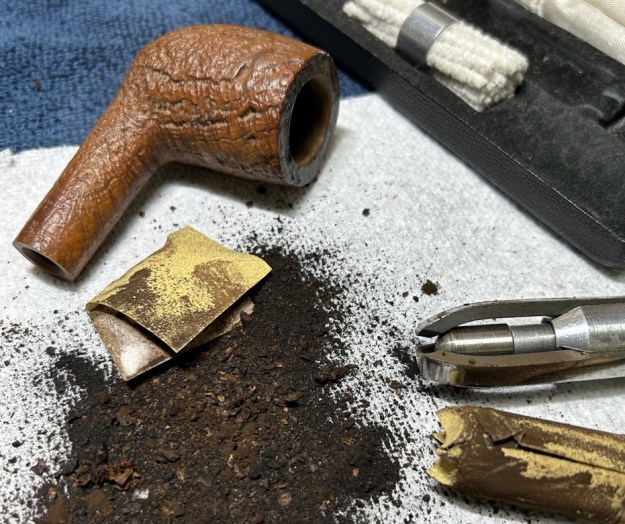
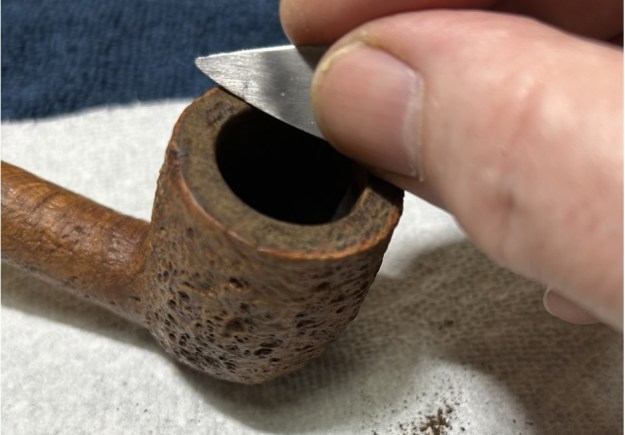
Armed with that information I turned my attention to the pipe itself. I reamed the bowl with a PipNet reamer to remove the cake. I cleaned up what remained with a Savinelli Fitsall Pipe Knife. I sanded the walls of the bowl to remove any remnants of cake with 220 grit sandpaper wrapped around a piece of dowel. Once finished the inside of the bowl was smooth.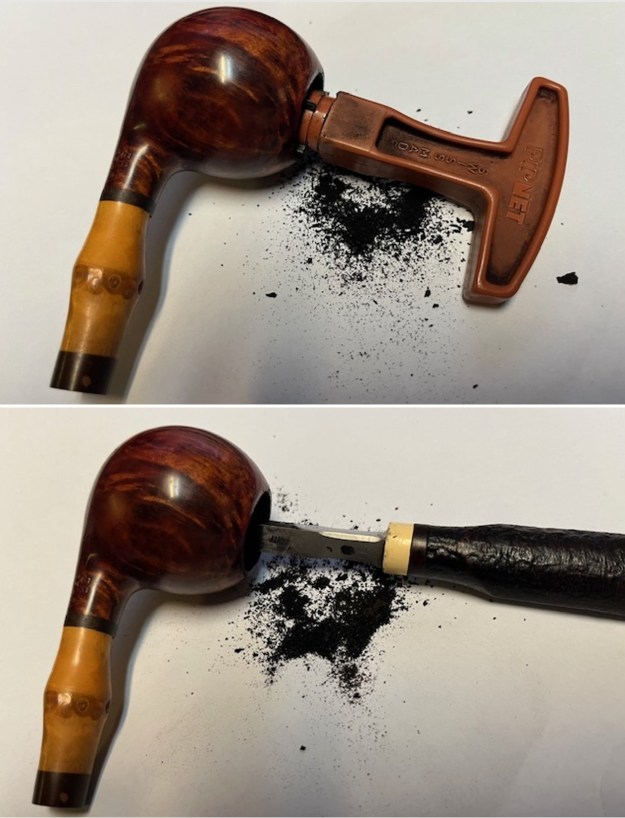
 I cleaned up the inner edge and top o f the bowl with a folded piece of 220 grit sandpaper to remove the lava coat and the darkening. It looked much better.
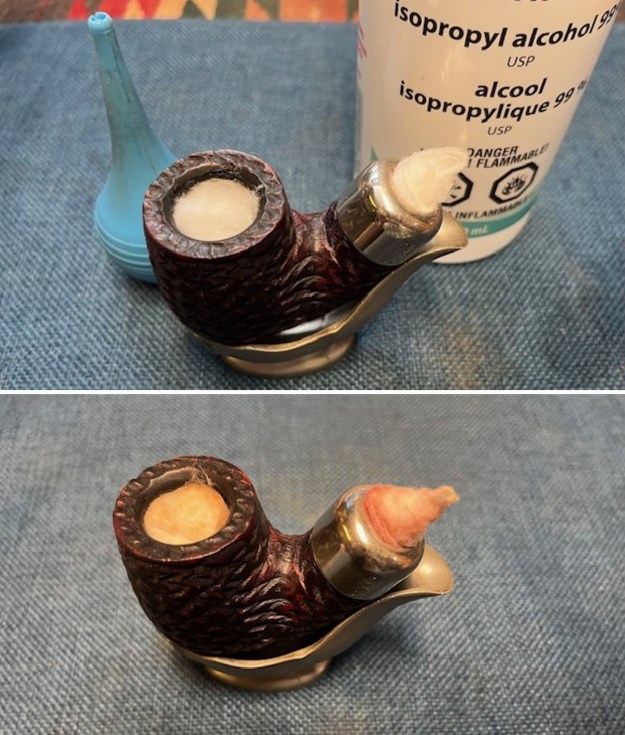
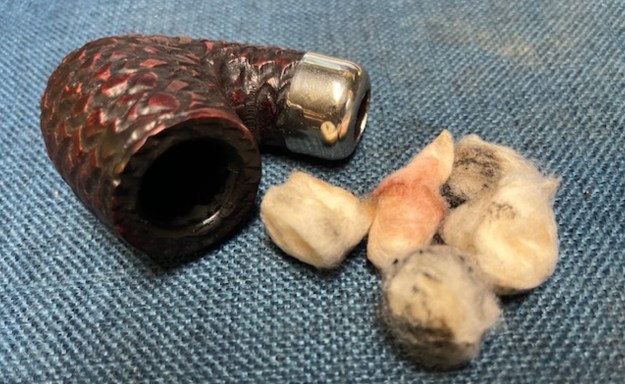
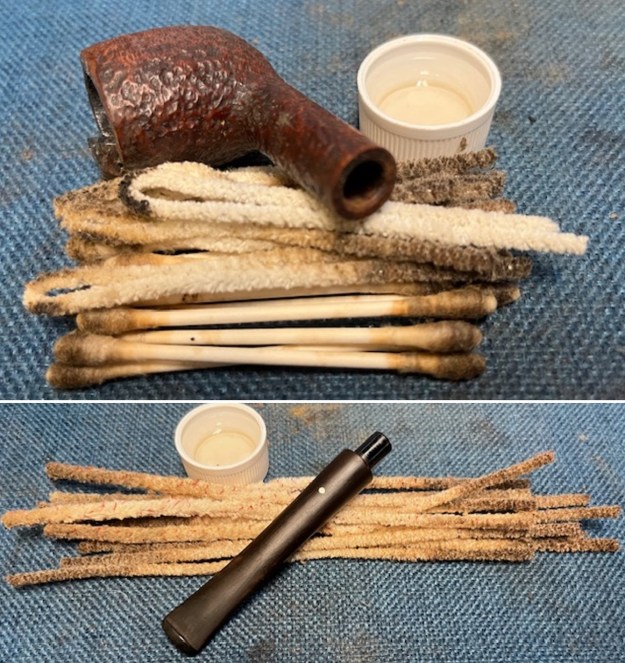
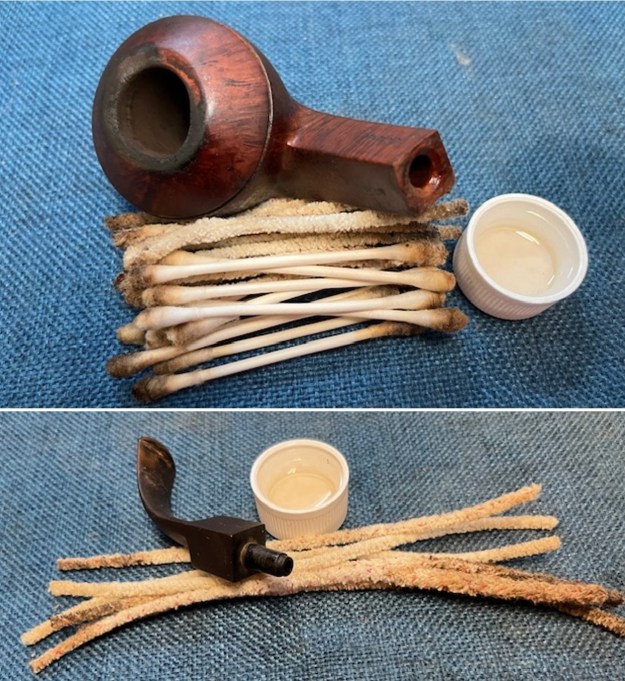
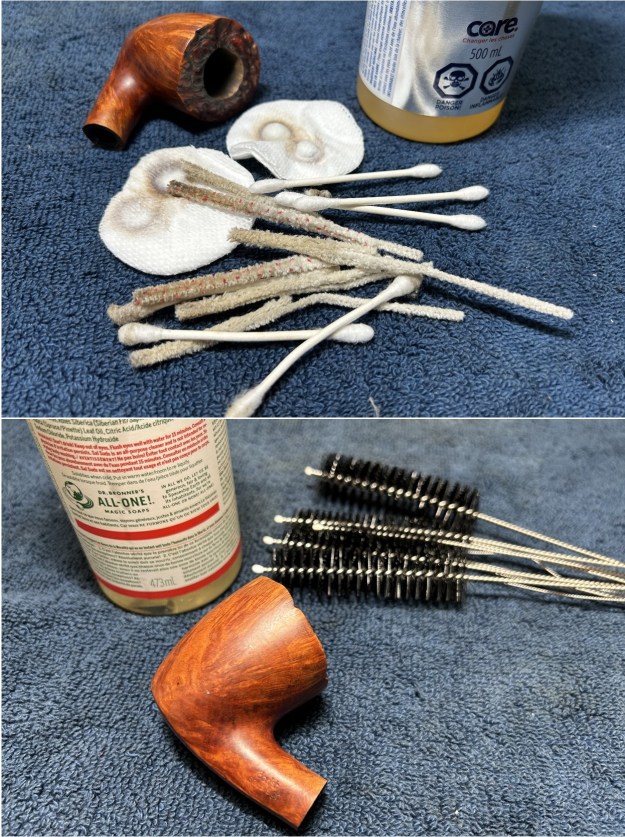
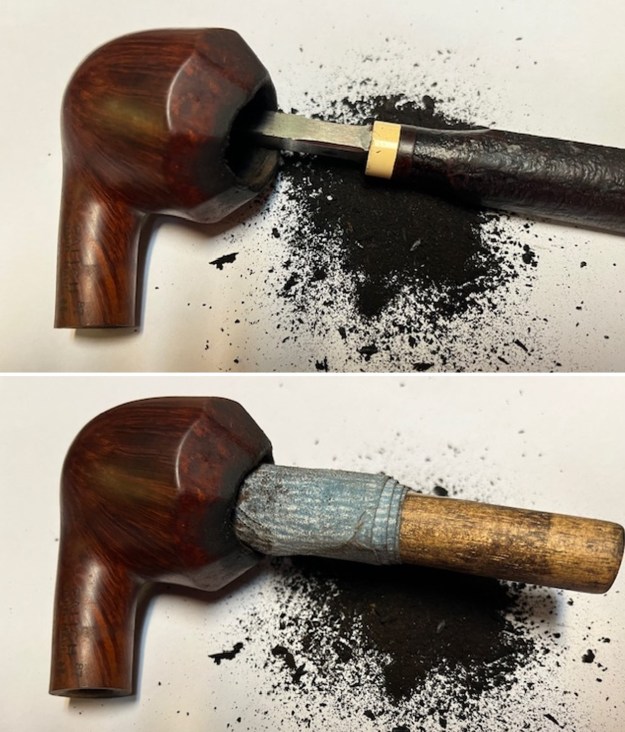
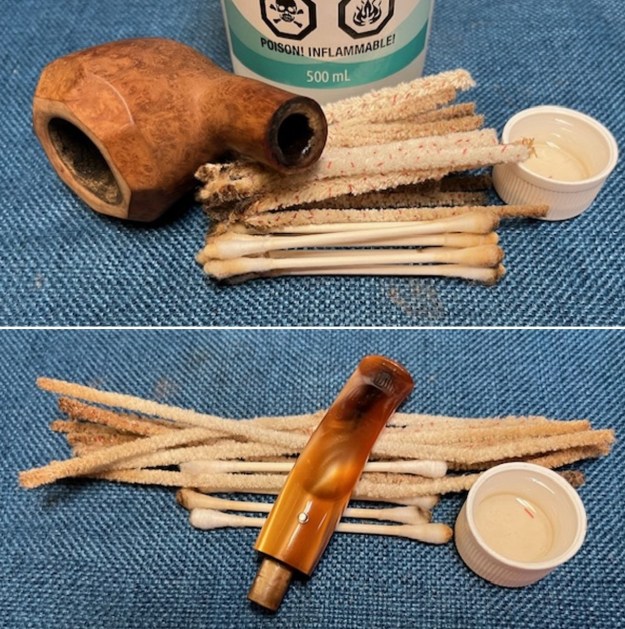
 Once the pipe was reamed and clean I took the opportunity to work on the internals – the mortise and airway in the shank and stem. I cleaned out the airway to the bowl, the mortise and the airway in the stem with pipe cleaners, cotton swabs and alcohol.
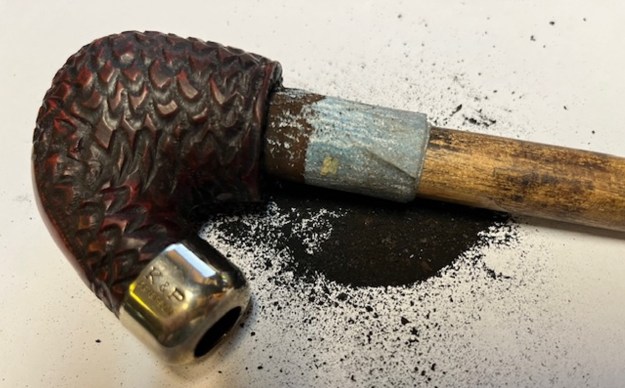
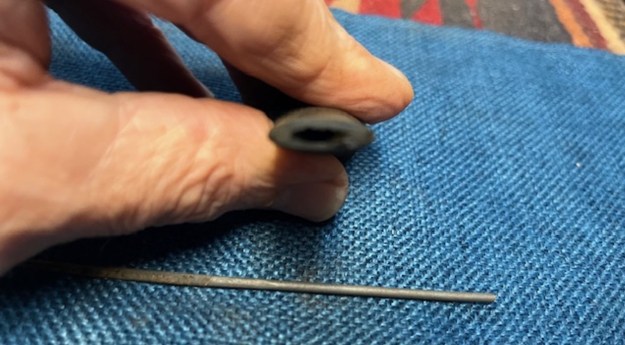
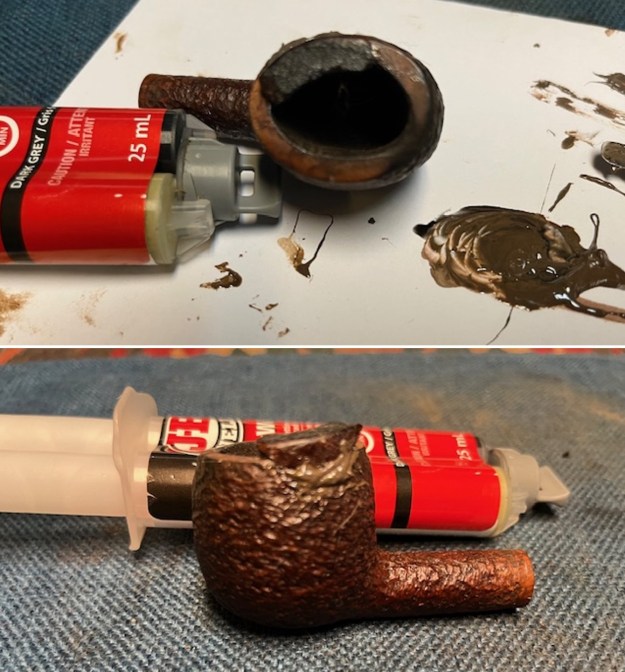
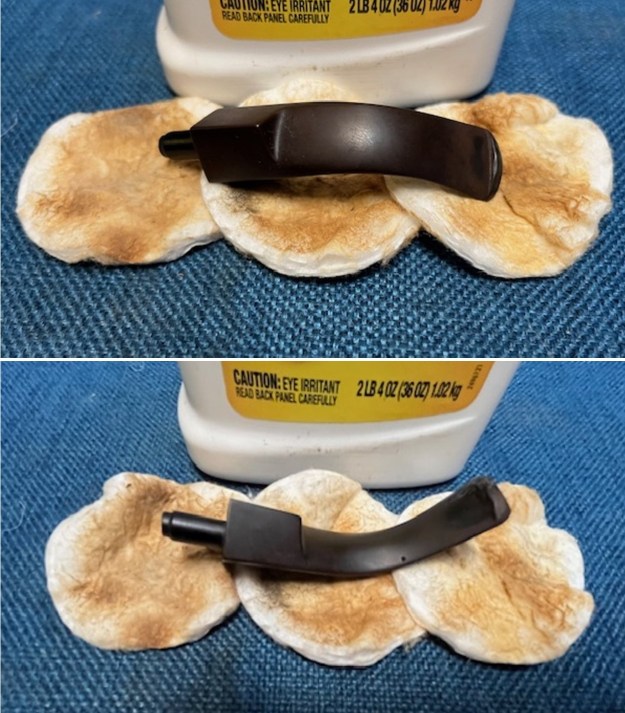
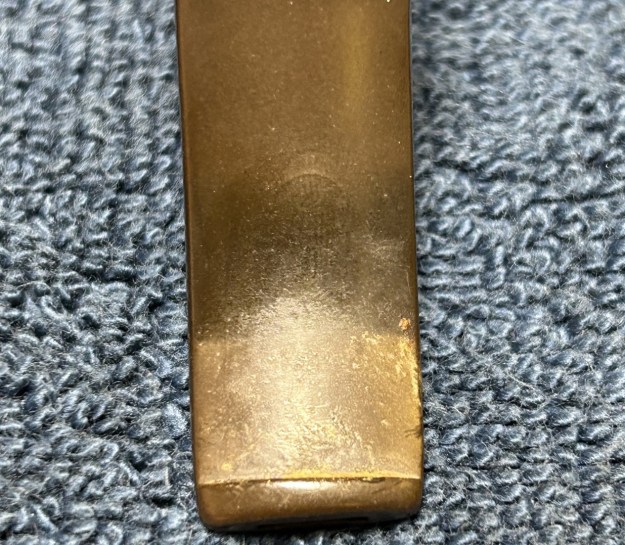
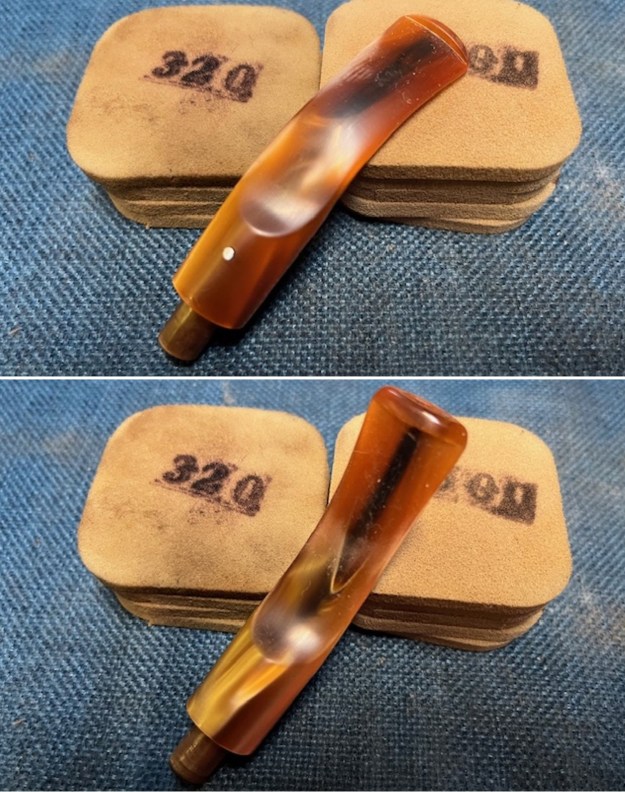
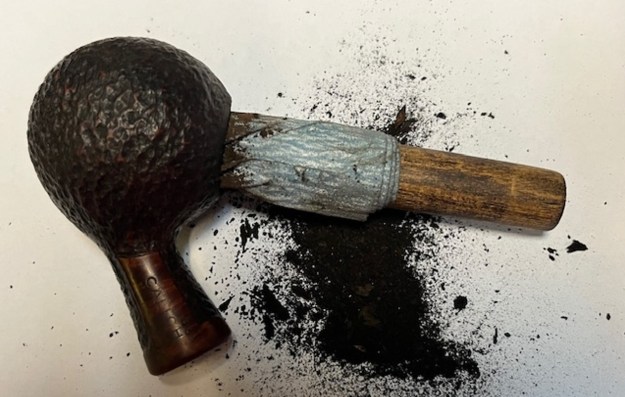
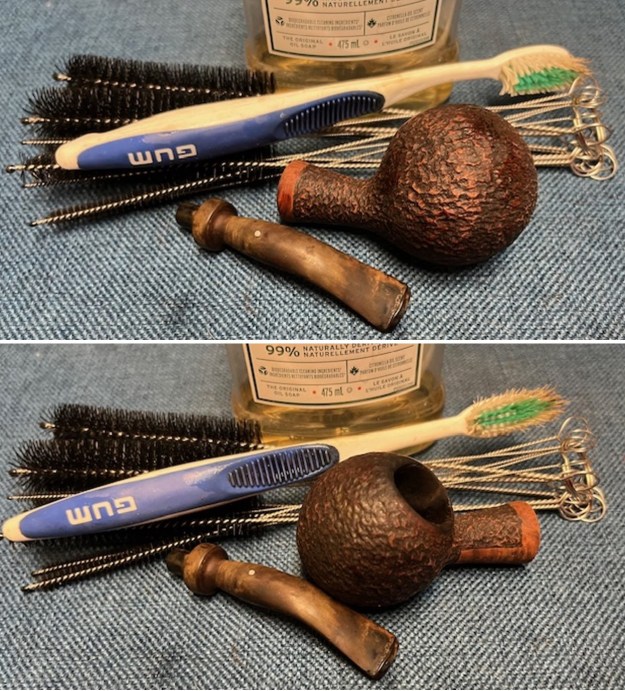
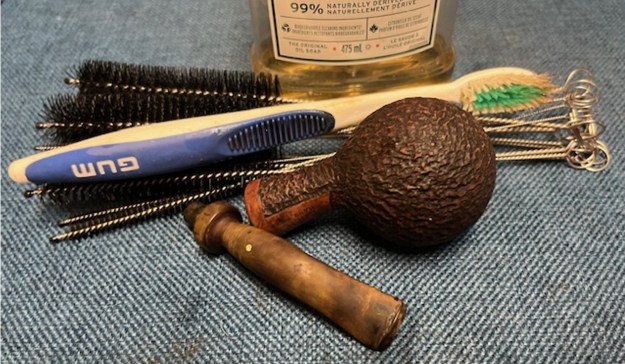
 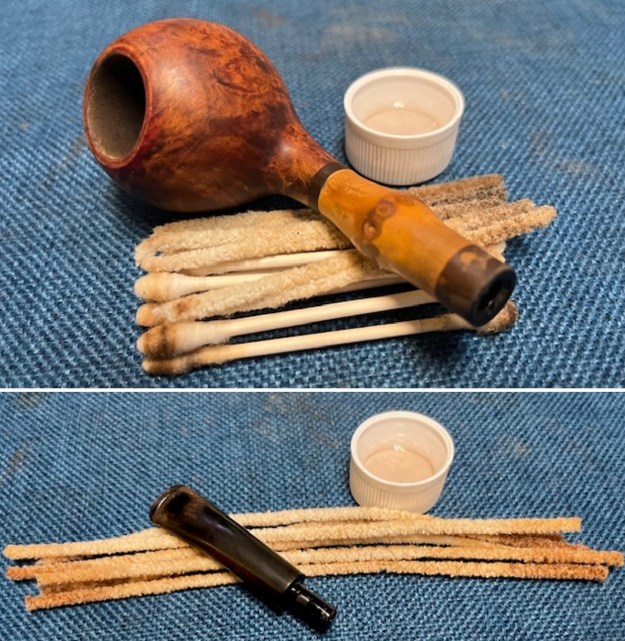 I worked on the vulcanite spacers on both ends of the bamboo shank. I scrubbed them with Soft Scrub and cotton pads. While it is still lightly oxidized it is looking better.
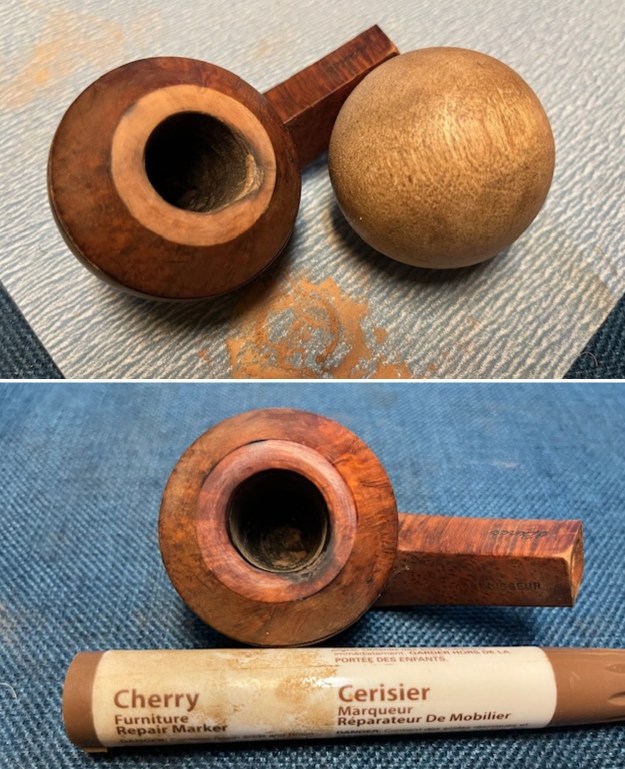
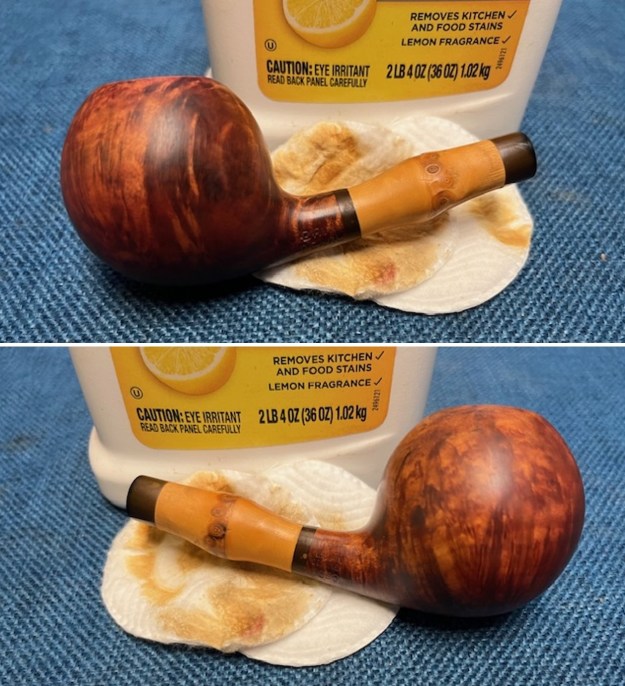
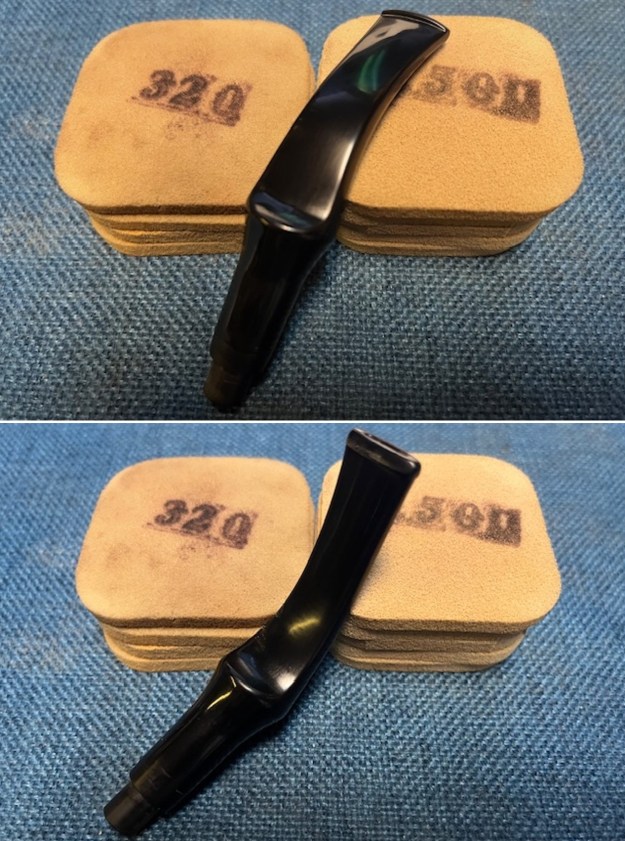
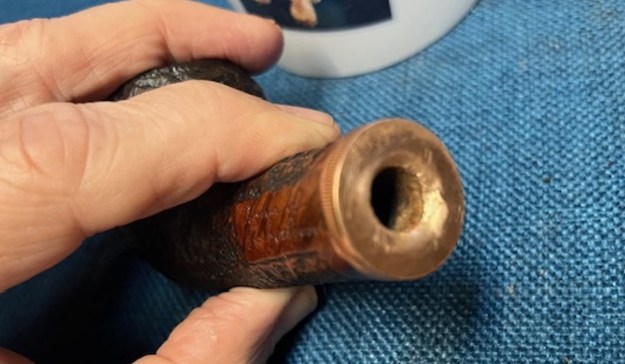
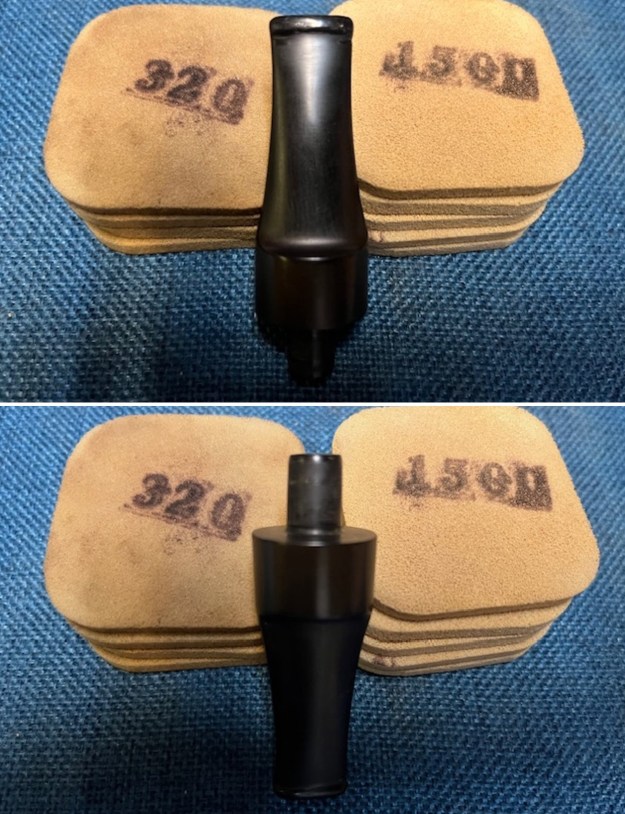
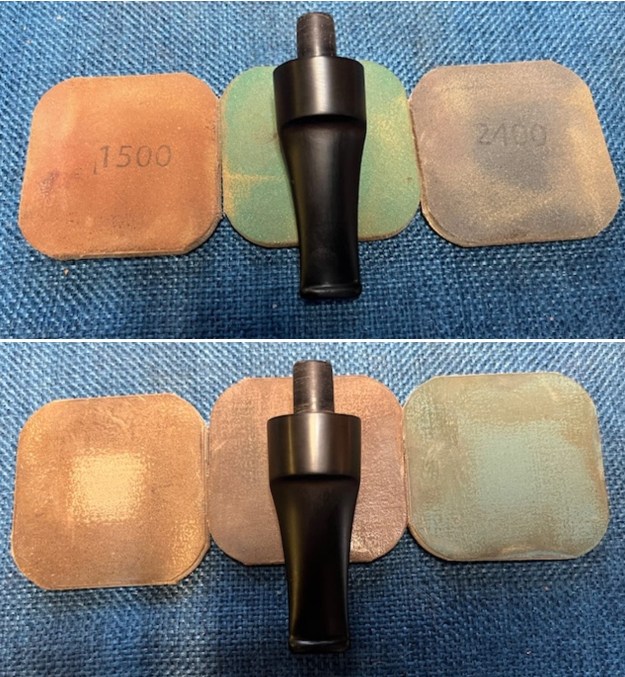
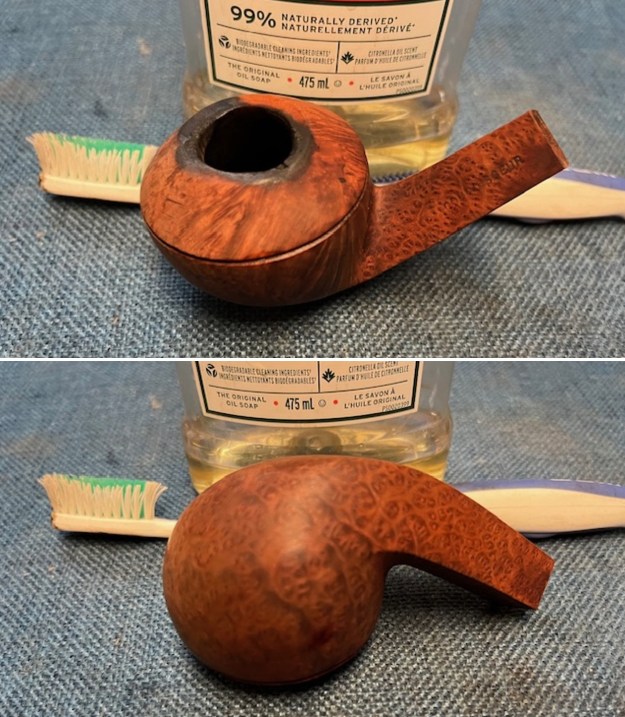
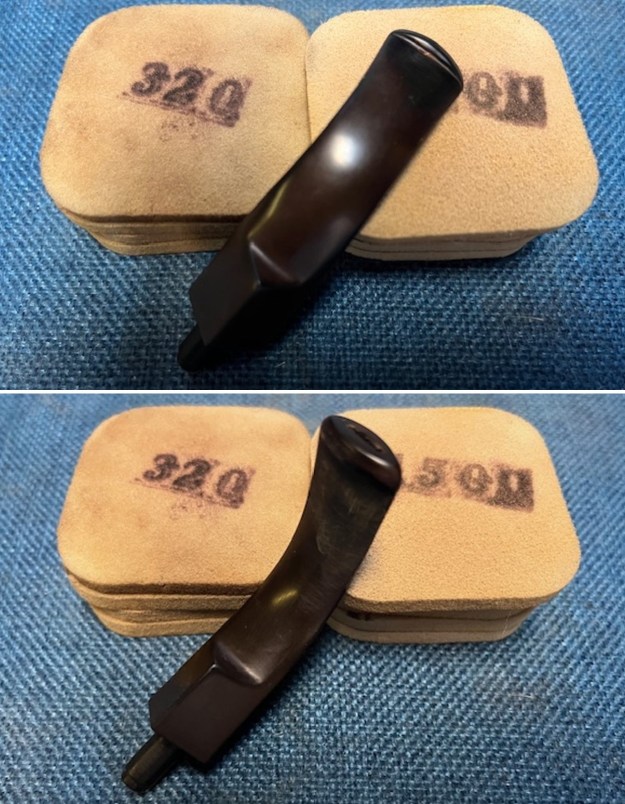
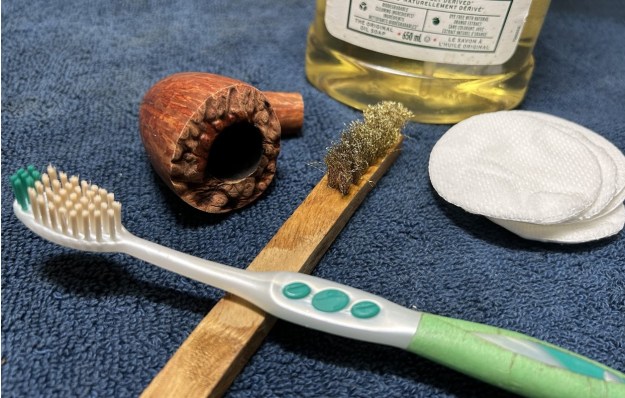
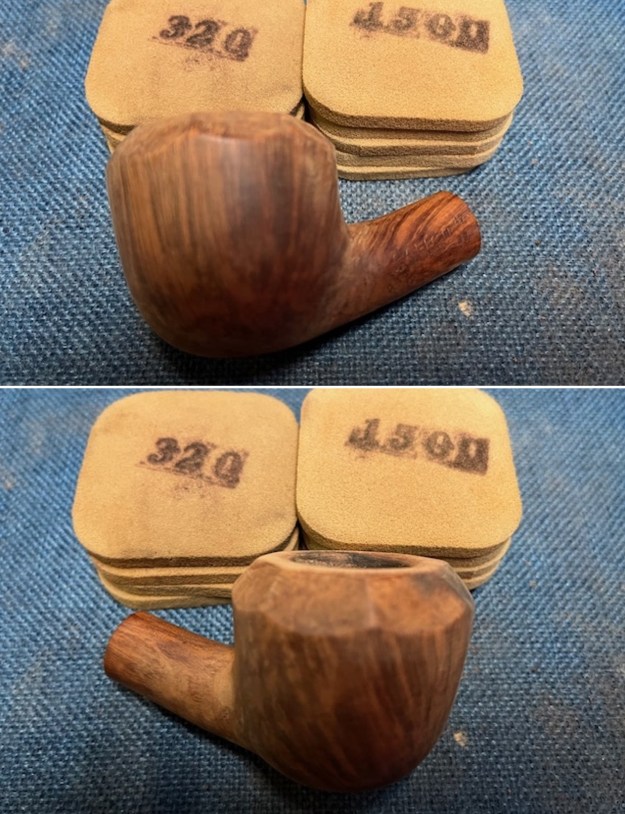
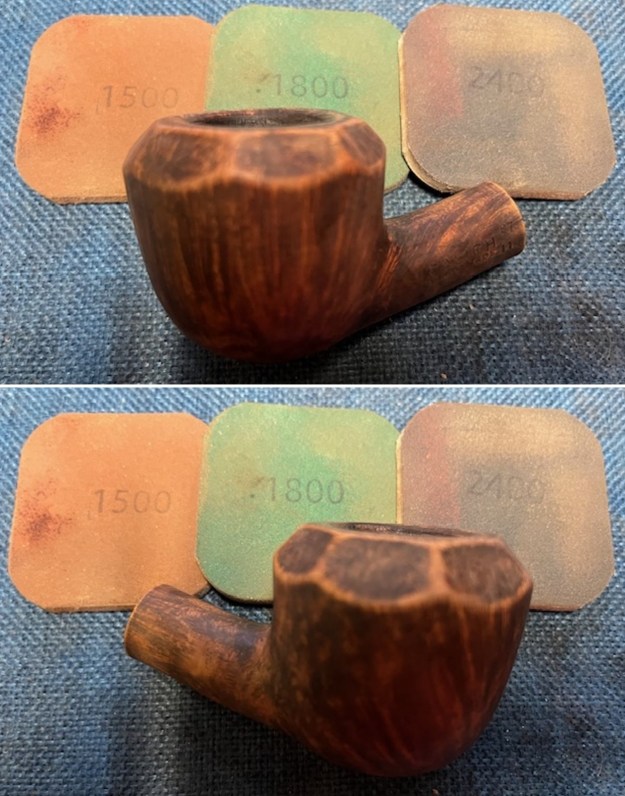
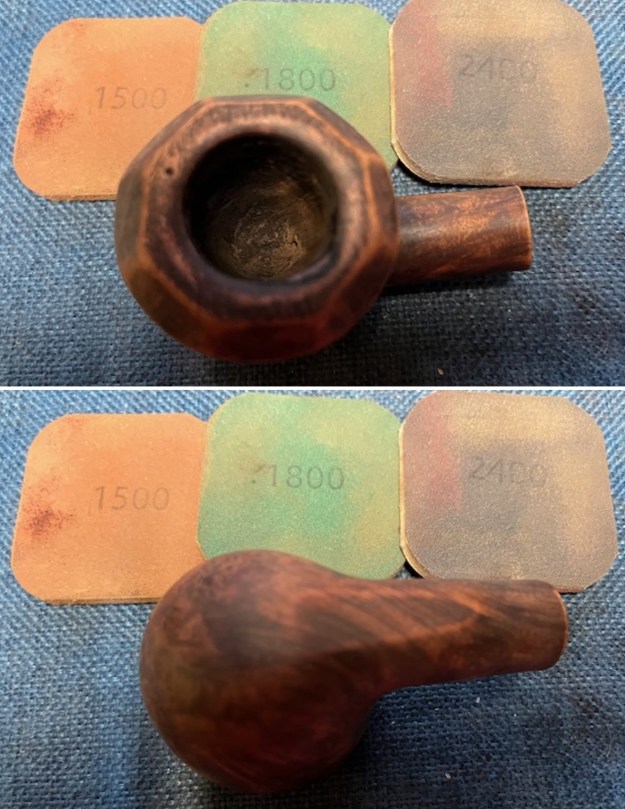
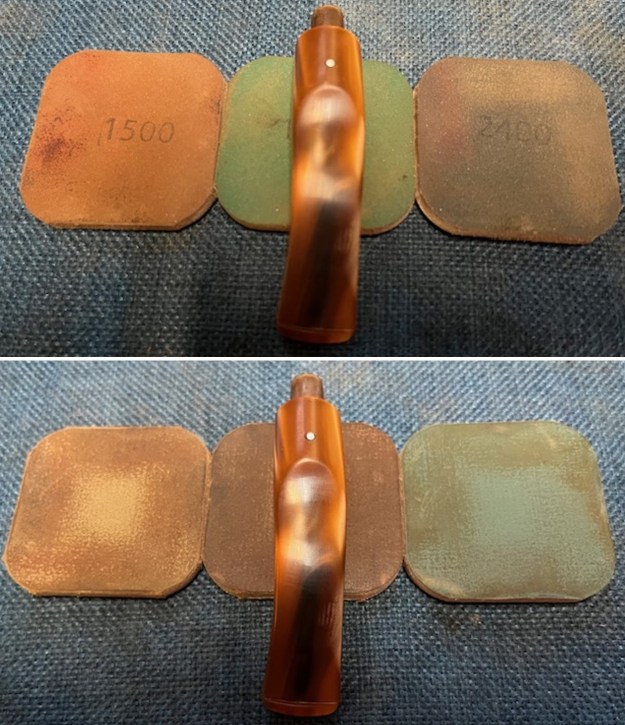
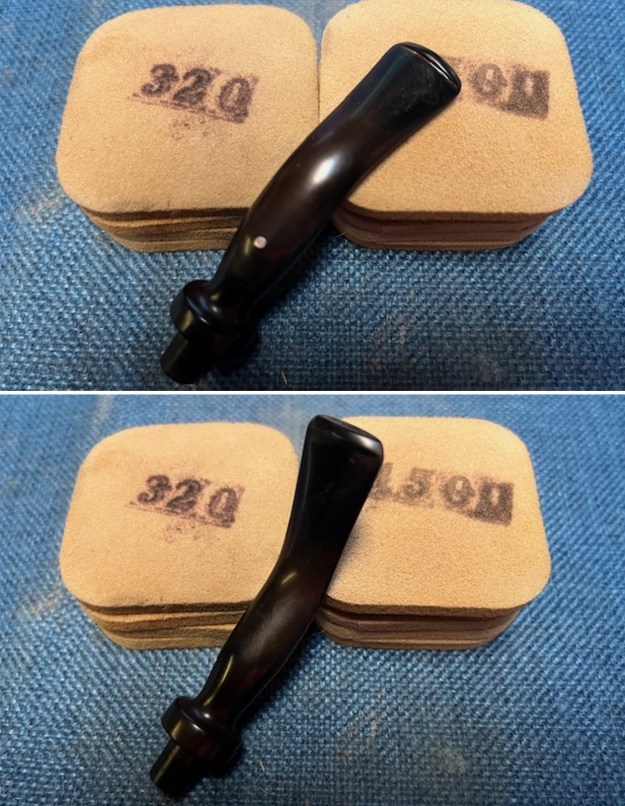
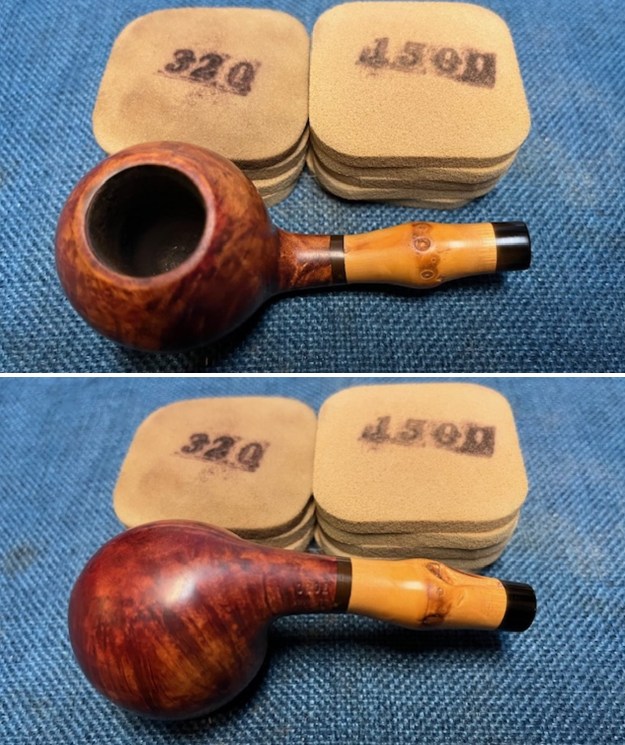
 I sanded the bowl and the vulcanite shank spacers with 2 x 2 inch sanding pads using grits 320-3500 to remove oxidation on the shank spacers and the remaining finish on the bowl. It worked well and the pipe and shank look much better at this point in the process.
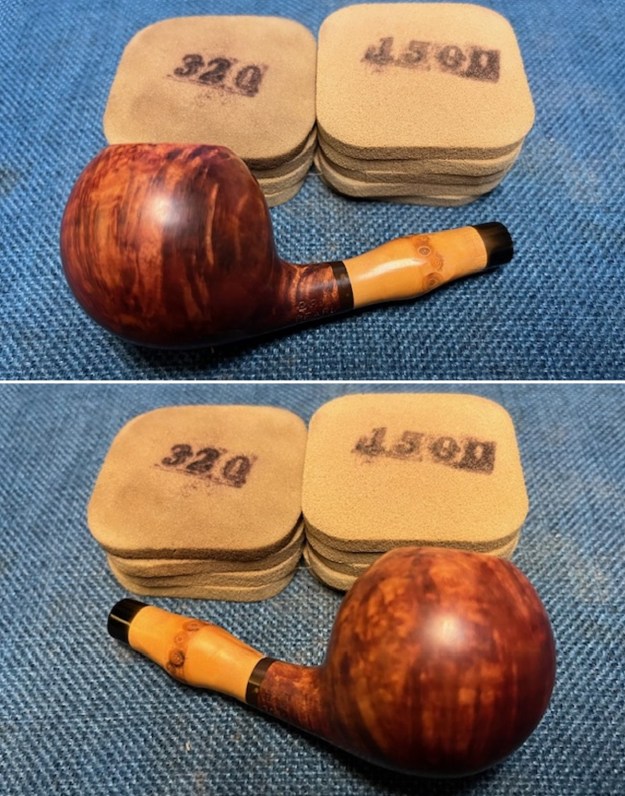
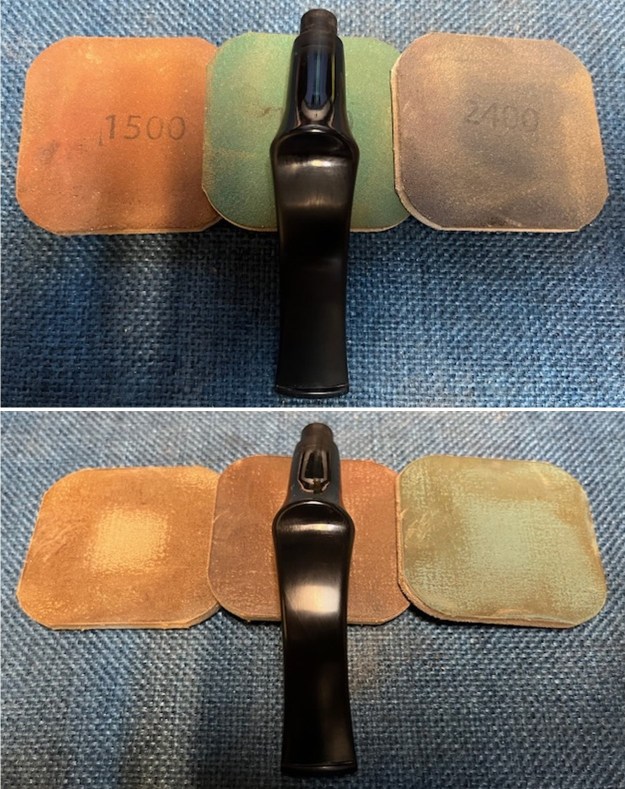
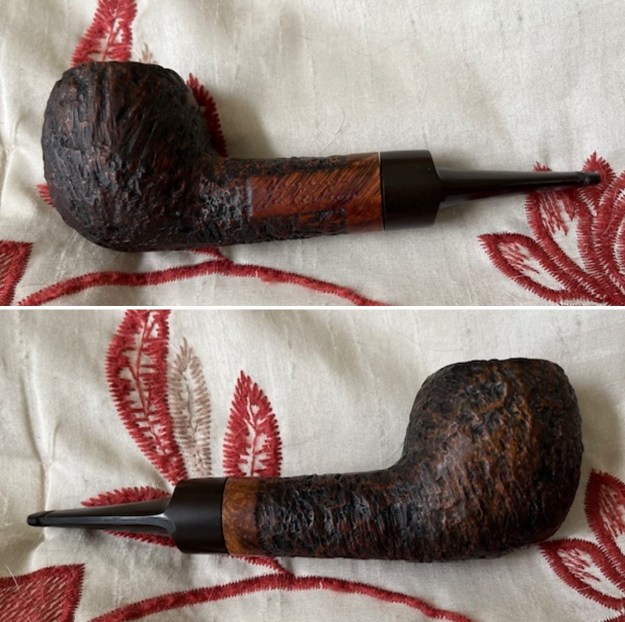
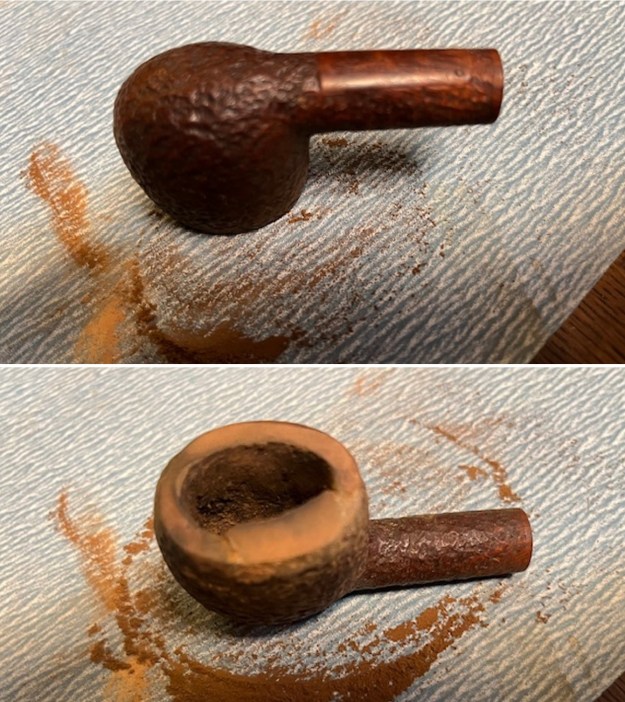
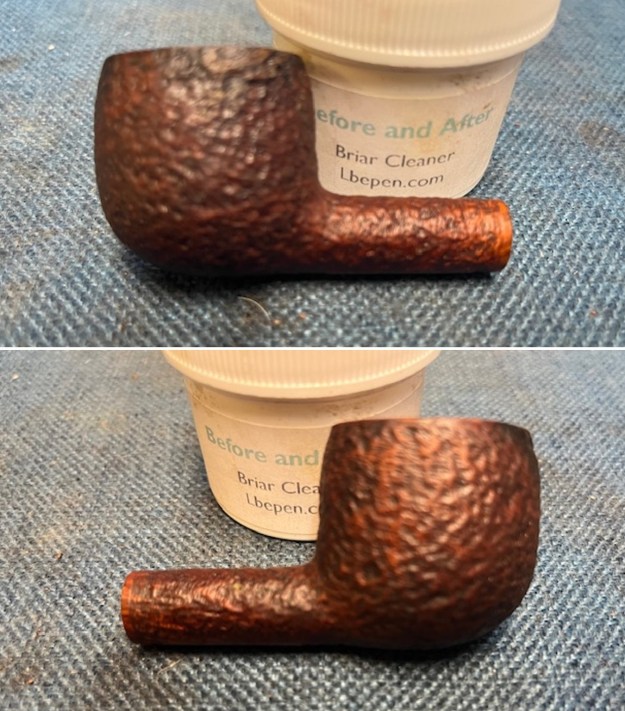
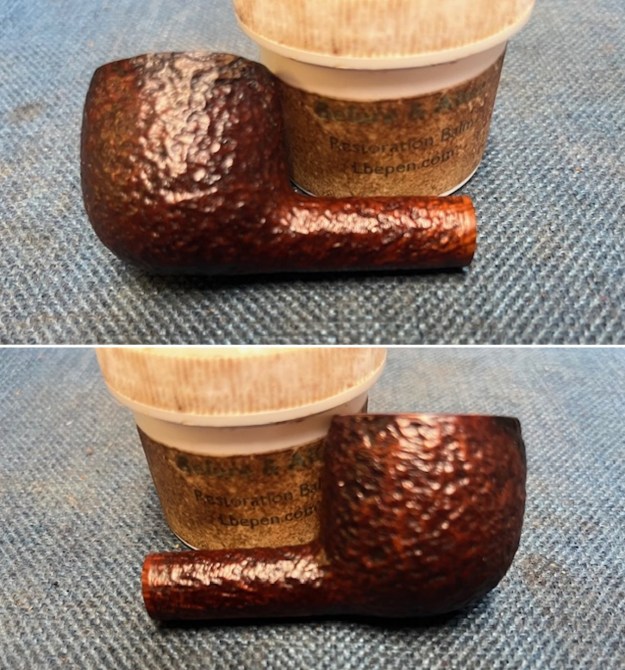
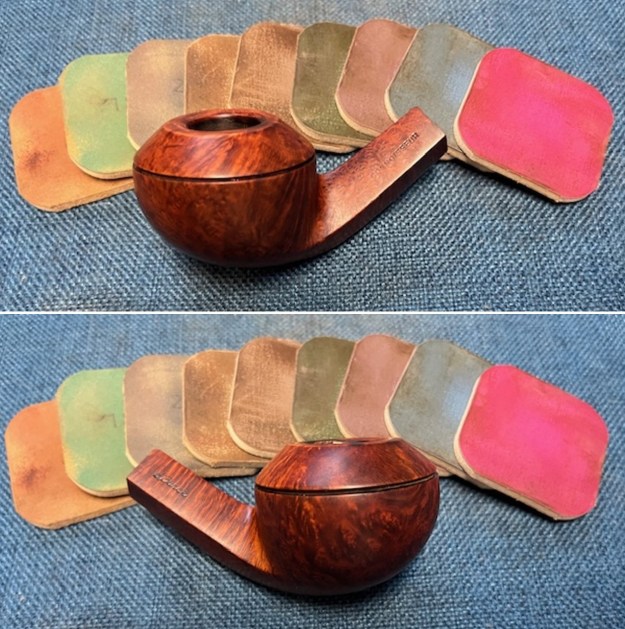
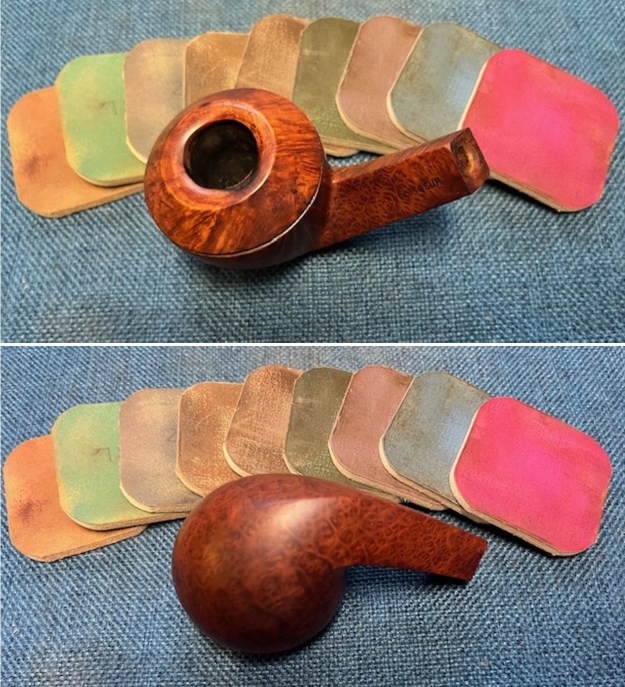
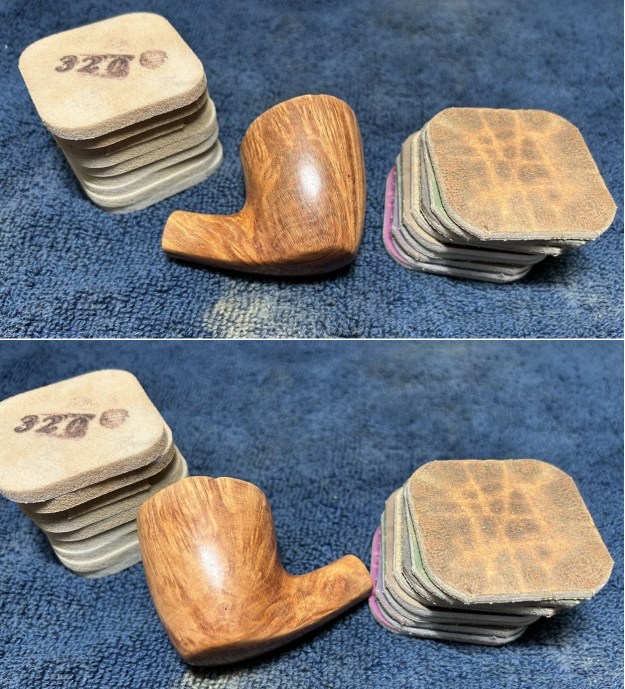
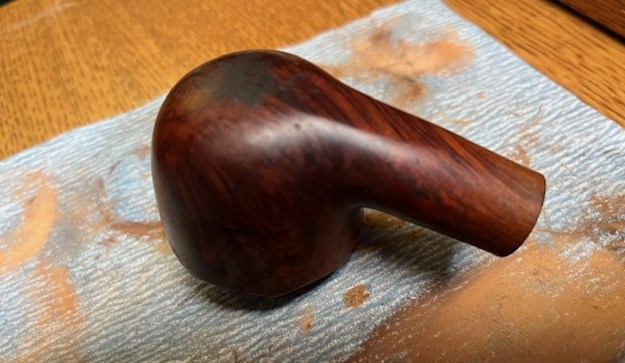
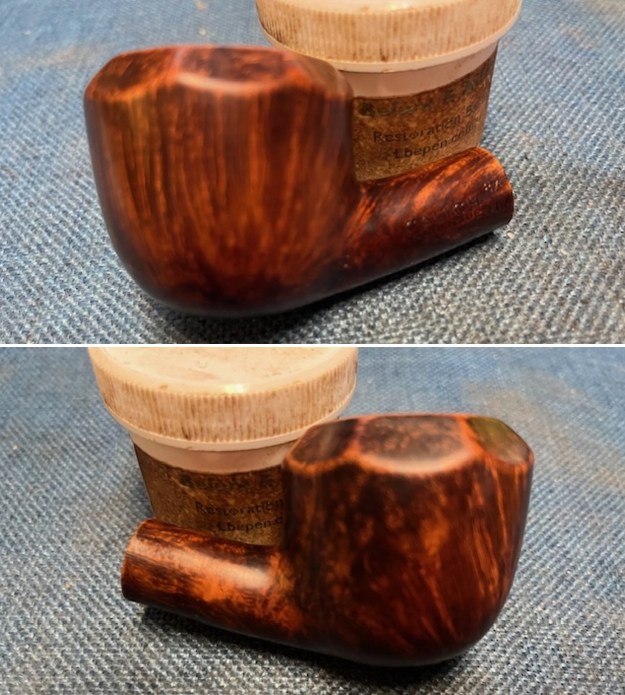
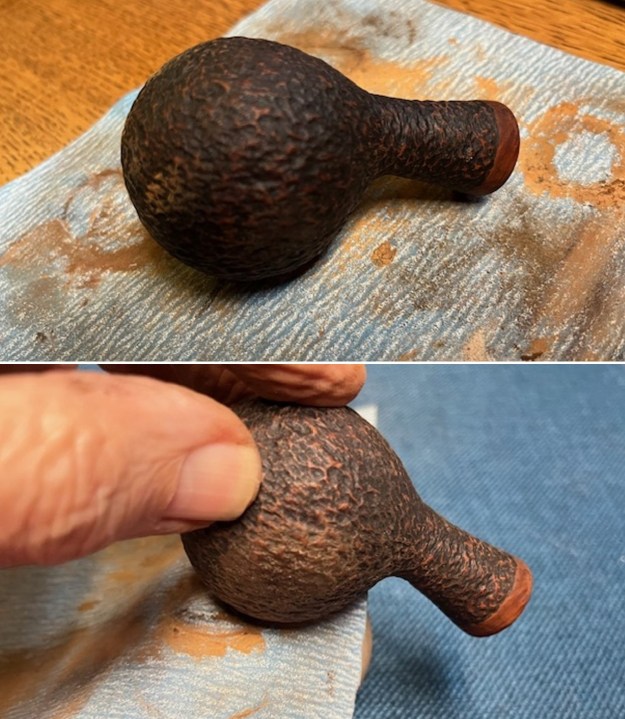
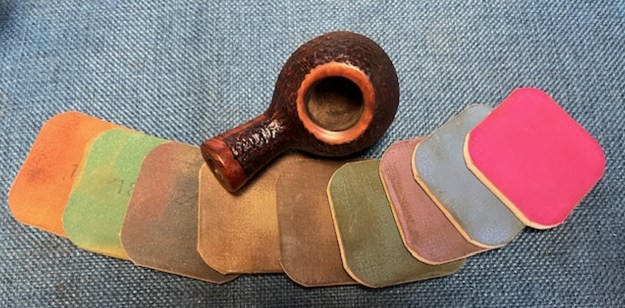
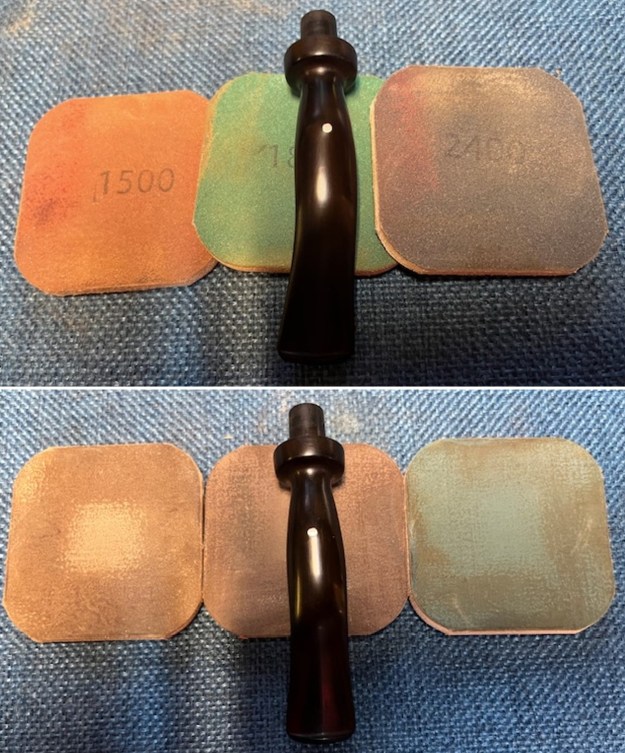
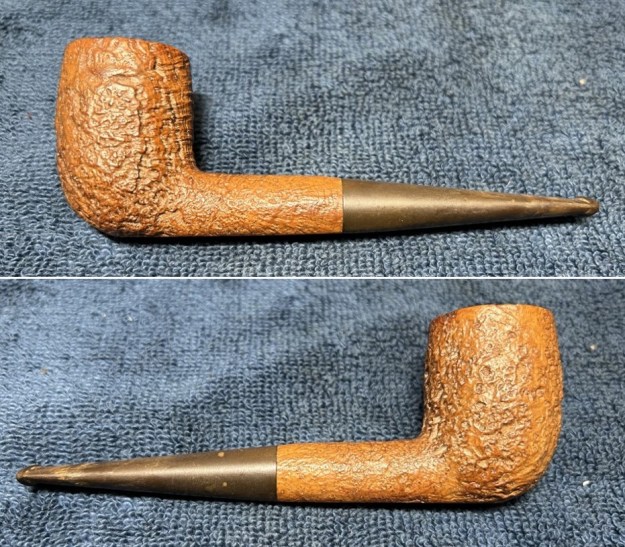
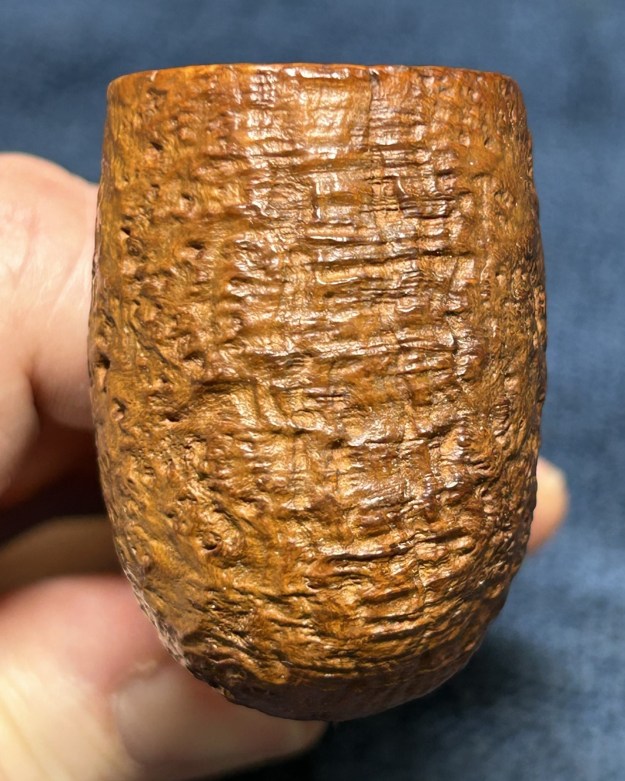
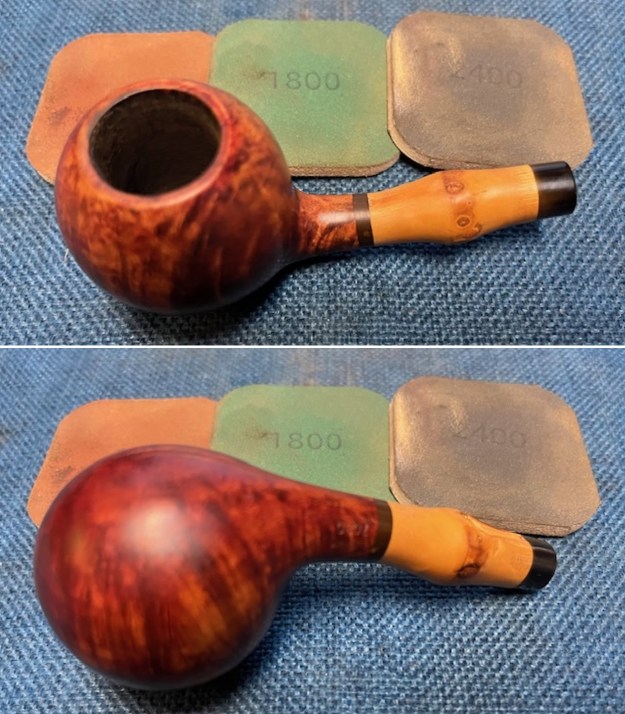
 I sanded the bowl with the micromesh sanding pads 1500-12000 grit to smooth out the finish and to allow the grain to stand out clearly. I dry sanded the briar rather than wet sand it. I prefer to use the pads dry and find they work very well on the briar. I sand with each pad (9 in total) and group them by threes for ease of reference. I wipe the bowl down with a damp cloth after each pad to remove the sanding debris and check the briar. I love seeing the developing shine on the briar as I move through the pads. I include many photos of the bowl so you can see the change. Pay attention to the changes in the briar in these photos as you work through them.
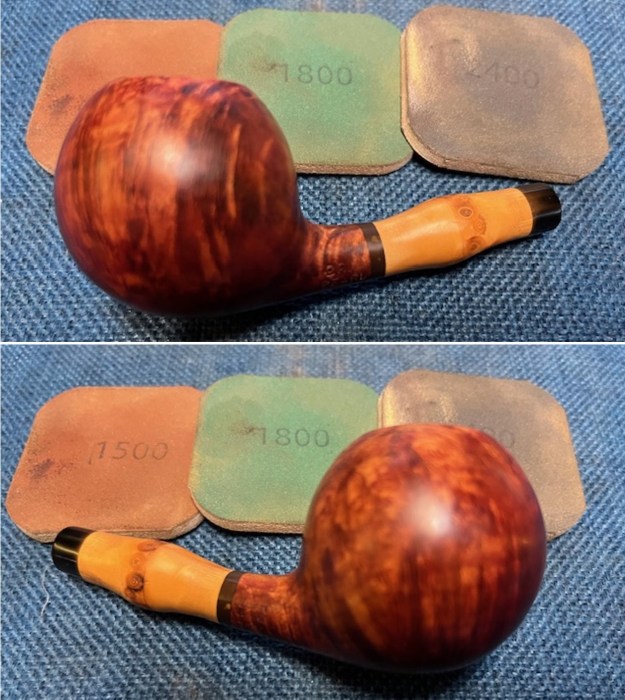
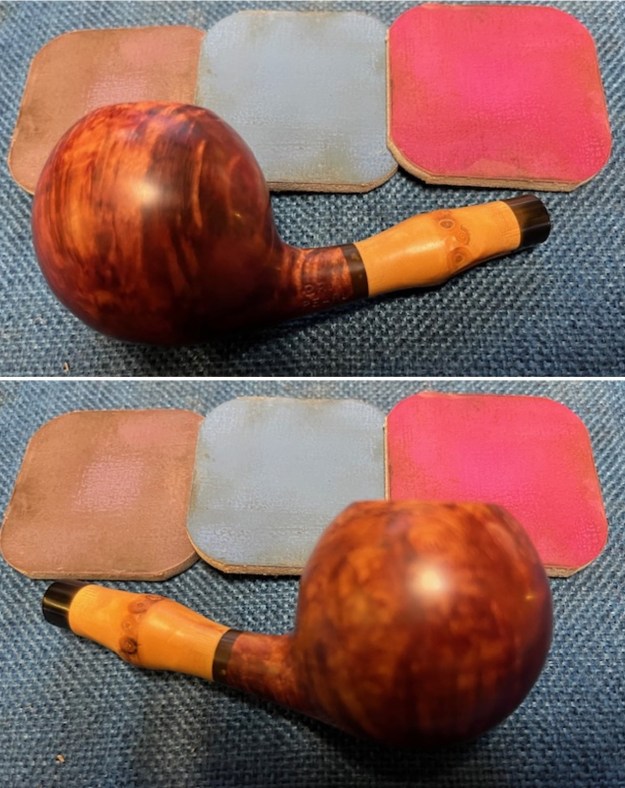
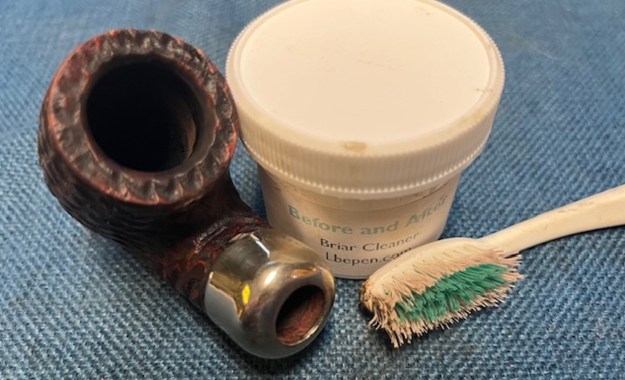
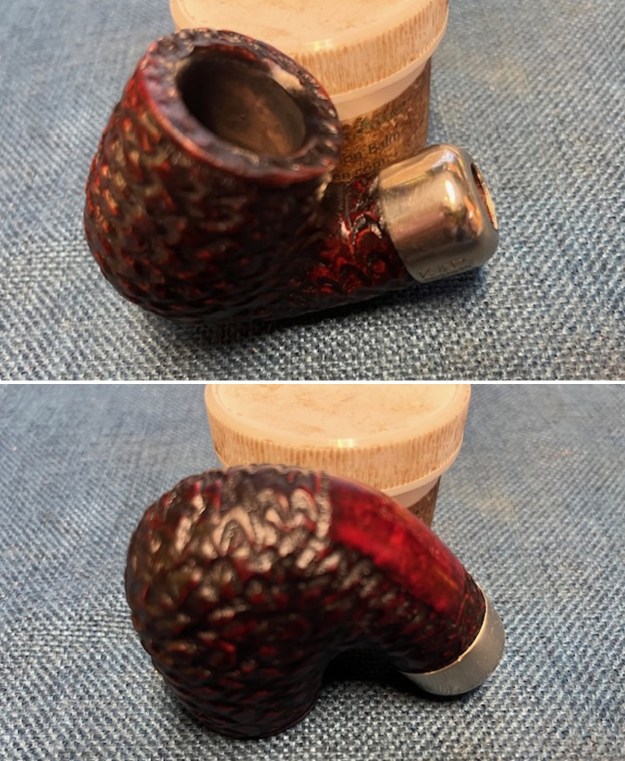
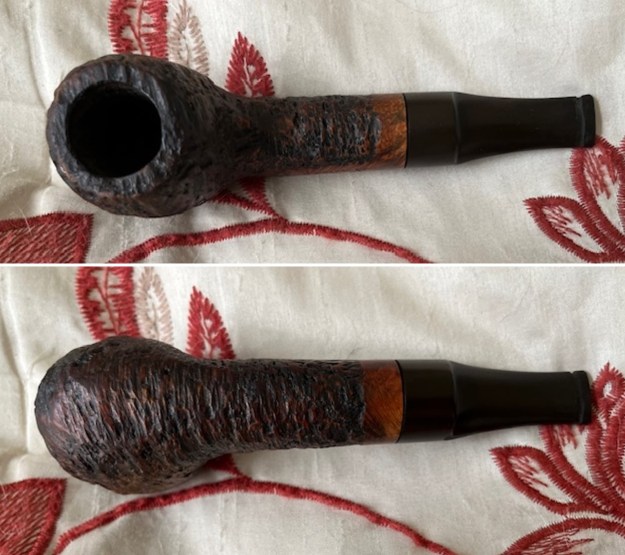
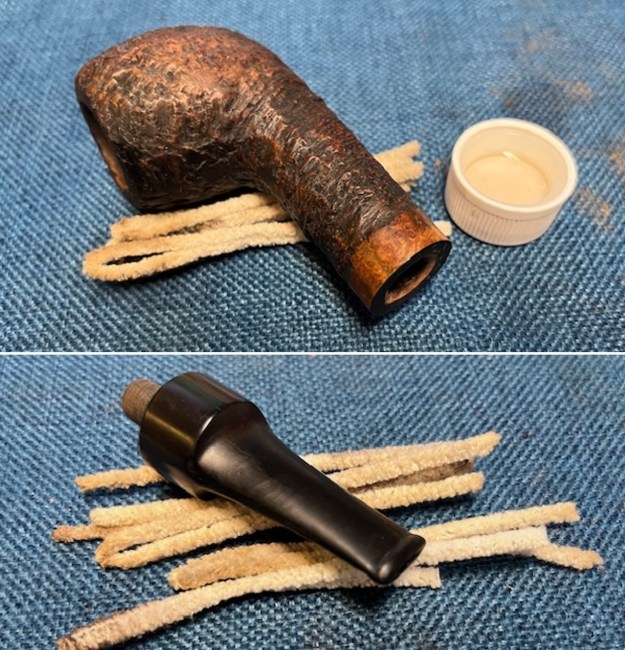
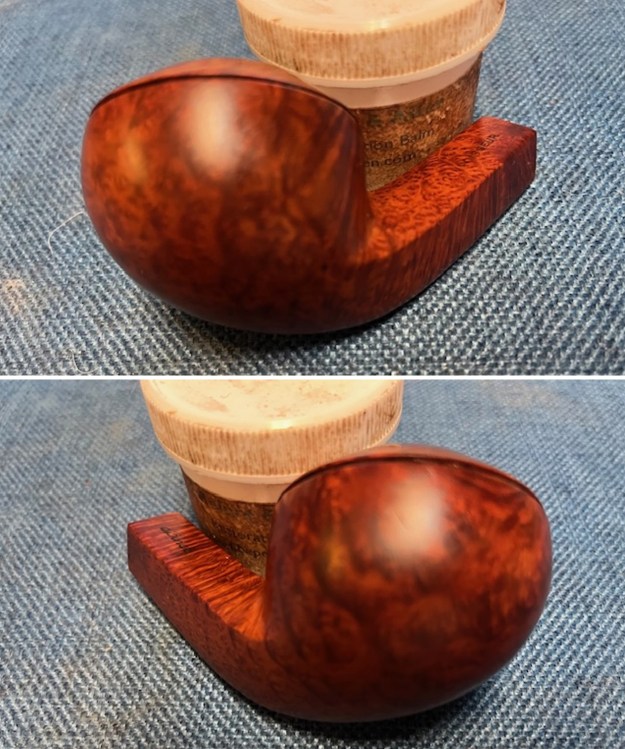
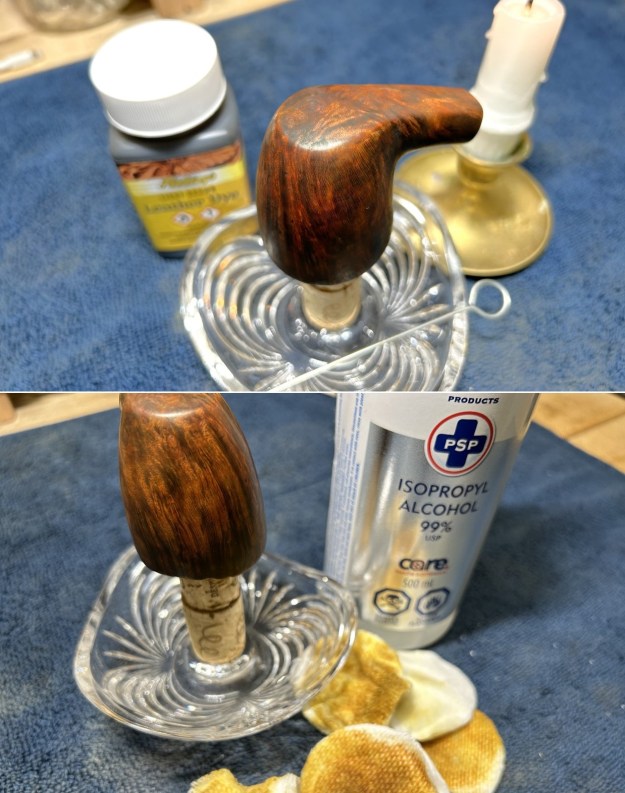
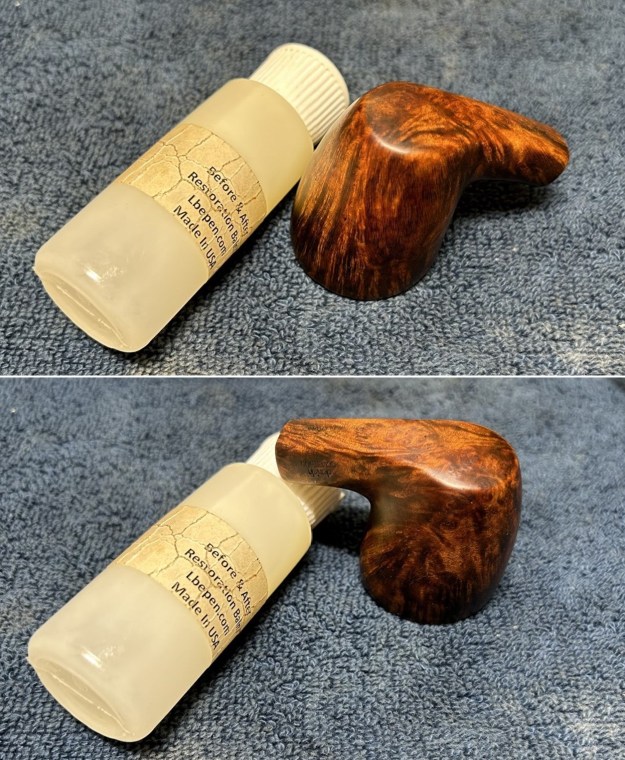
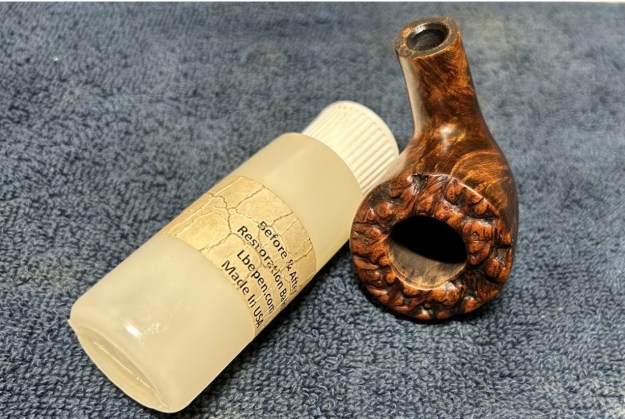
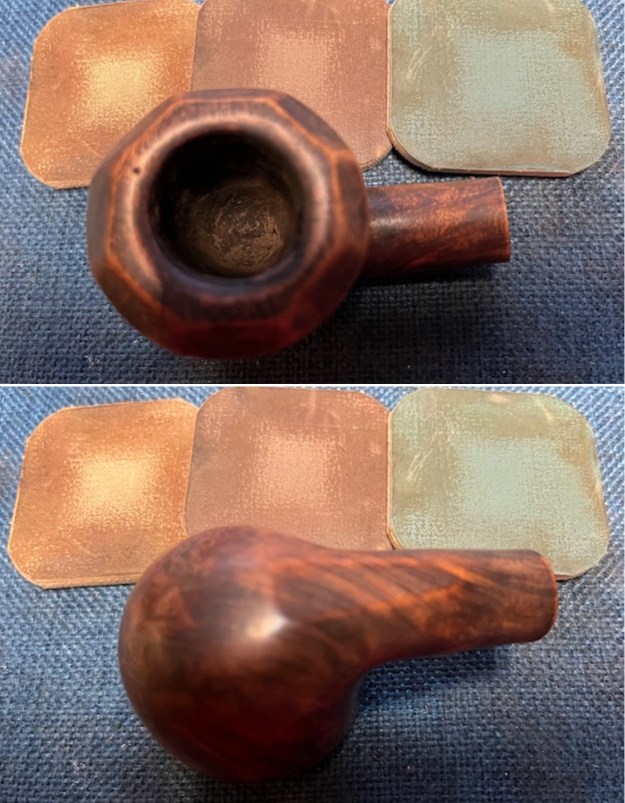
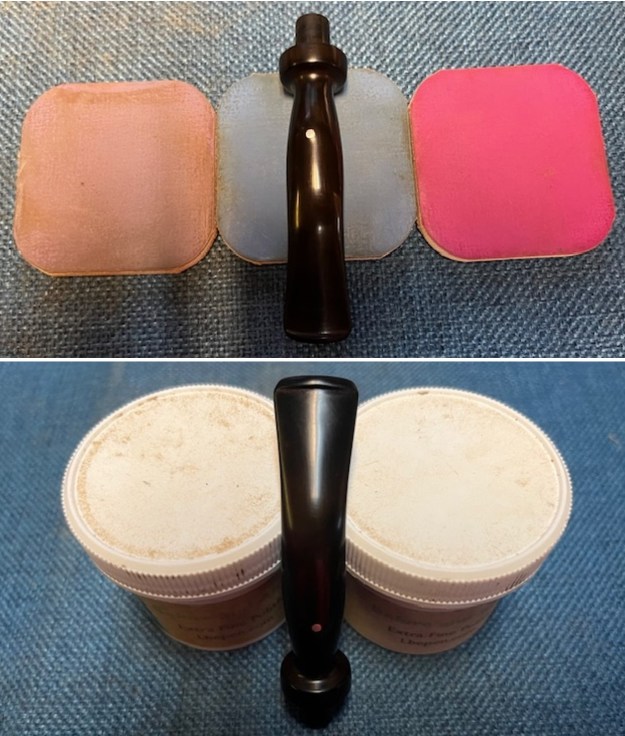
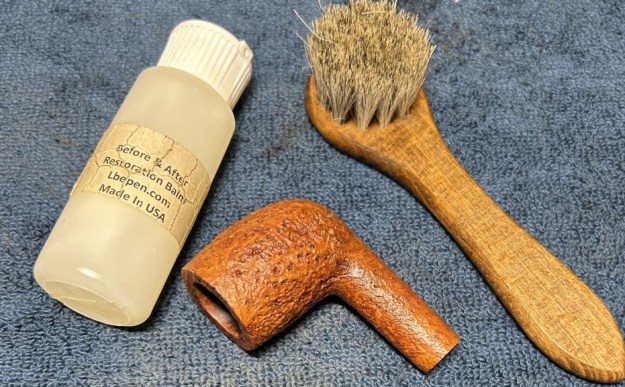
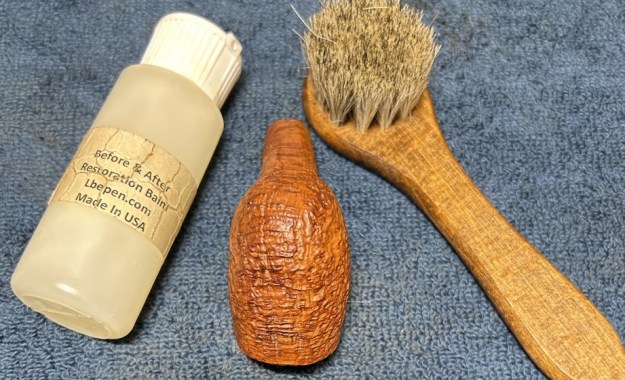
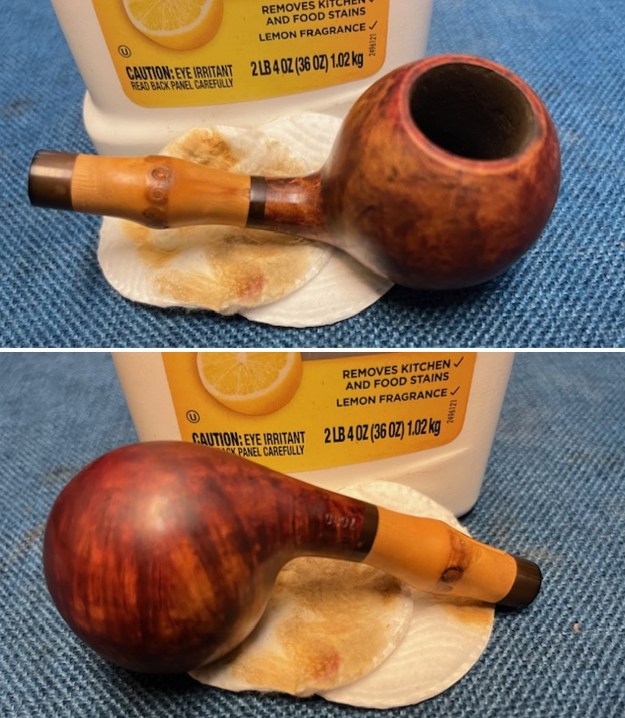
 When I get the bowl to this point in the process I use Before & After Restoration Balm. It is a paste/balm that works to deep clean the finish, enliven and protect the briar. I work it into the briar and the bamboo with my finger tips to make sure that it covers every square inch of the pipe. I set it aside for 10 minutes to let it do its work. Once the time has passed I wiped it off with a soft cloth then buff it with a cotton cloth. The briar really began to have a deep shine. The photos I took of the bowl at this point mark the progress in the restoration. You see the shine that the briar has taken on and the way the grain just pops. It is a gorgeous pipe.
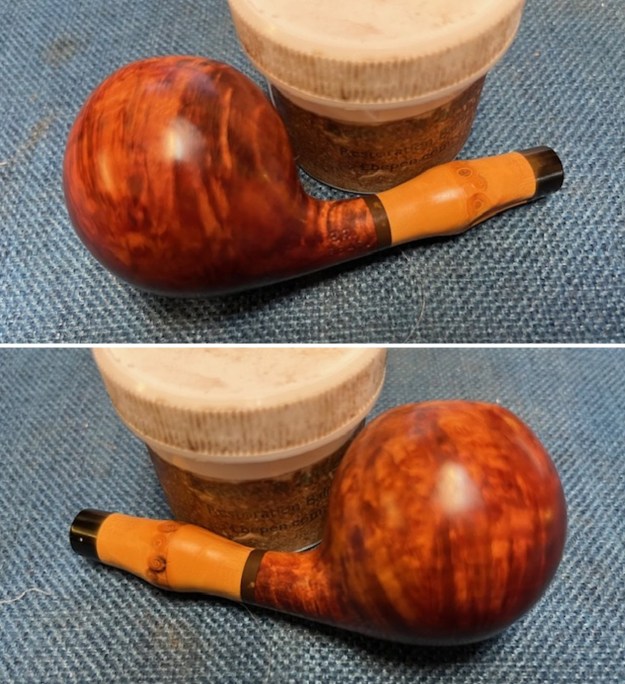
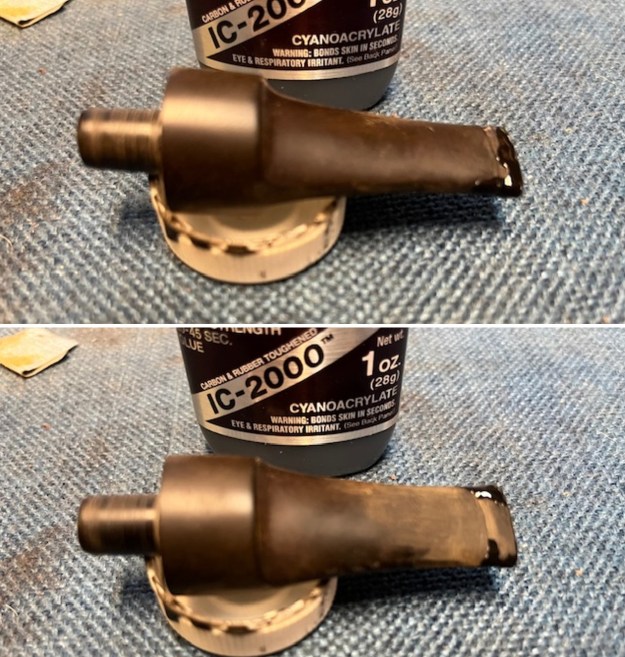
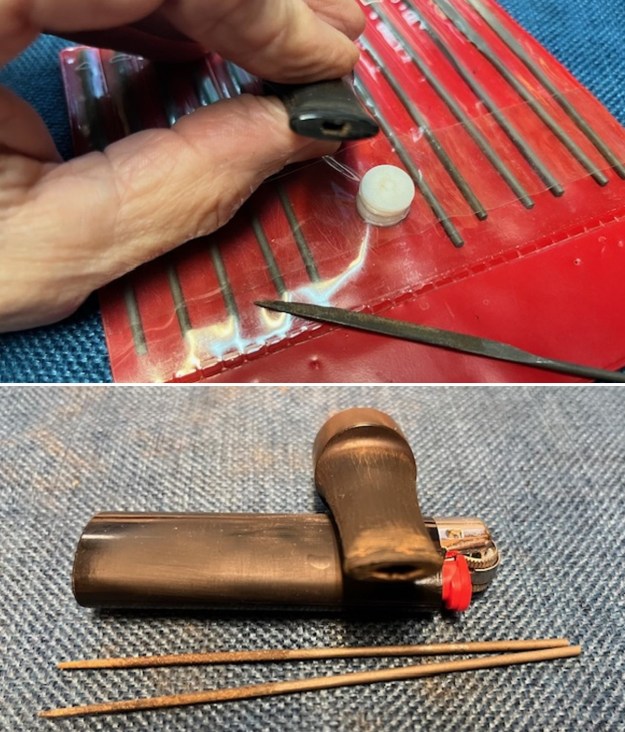
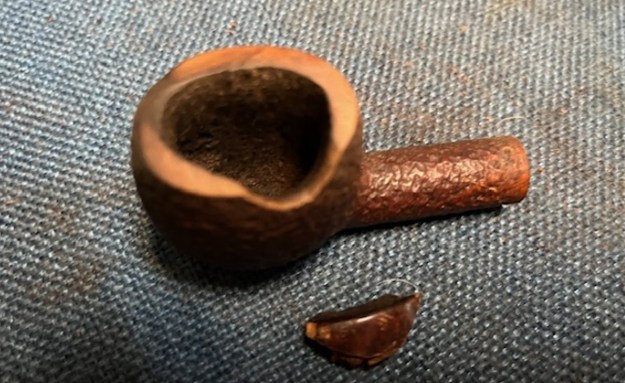
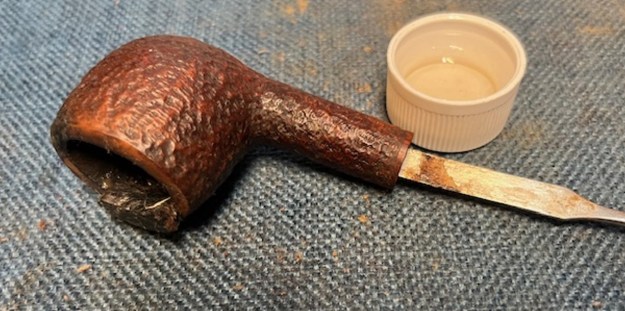
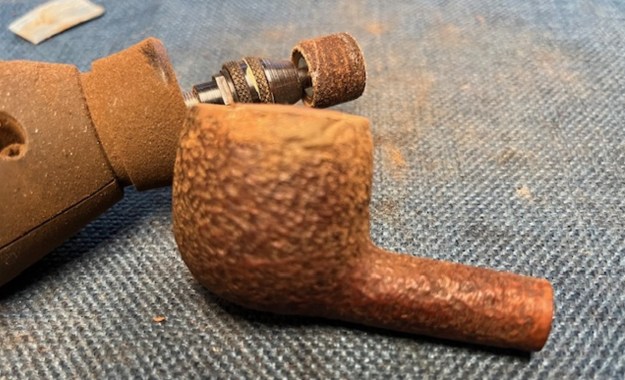
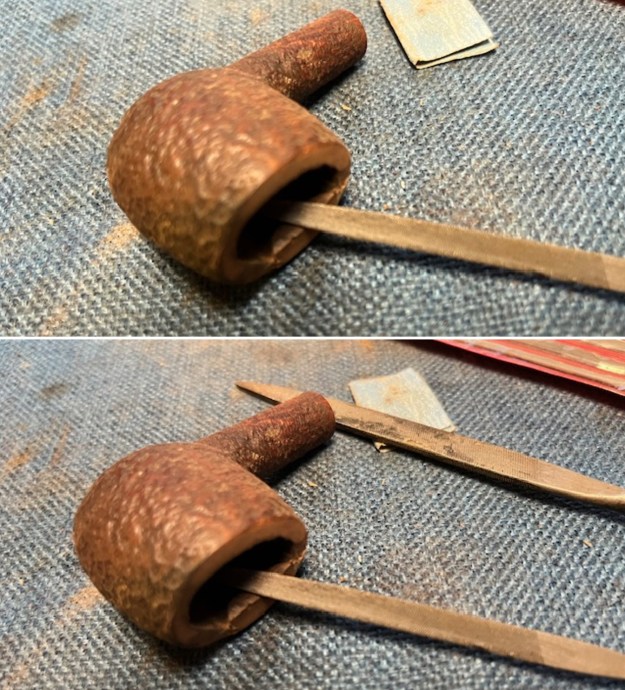
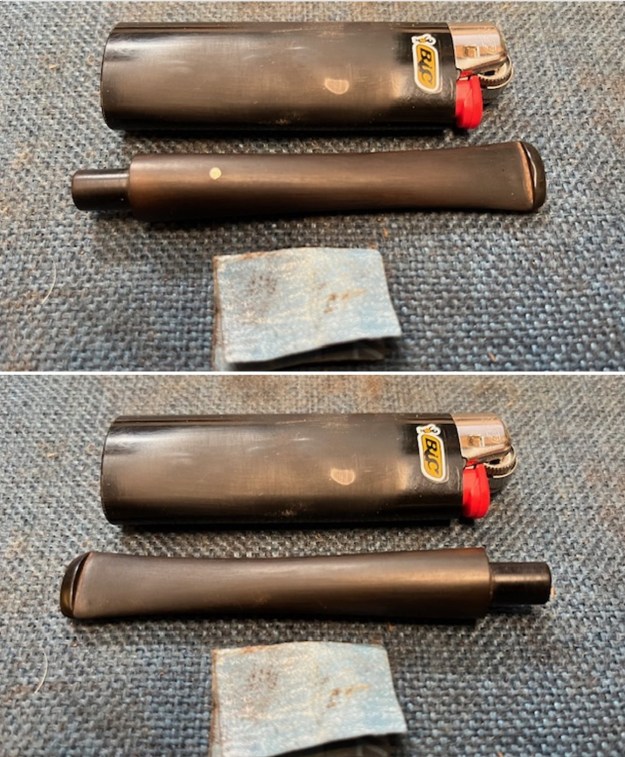
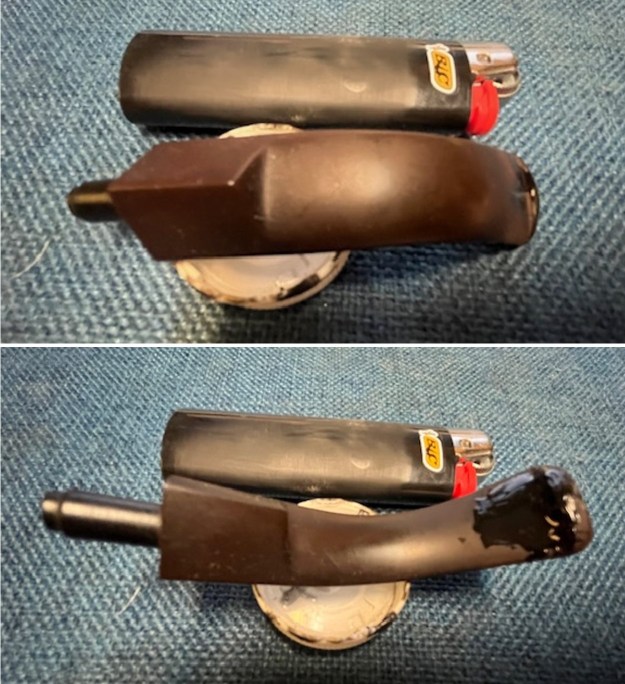
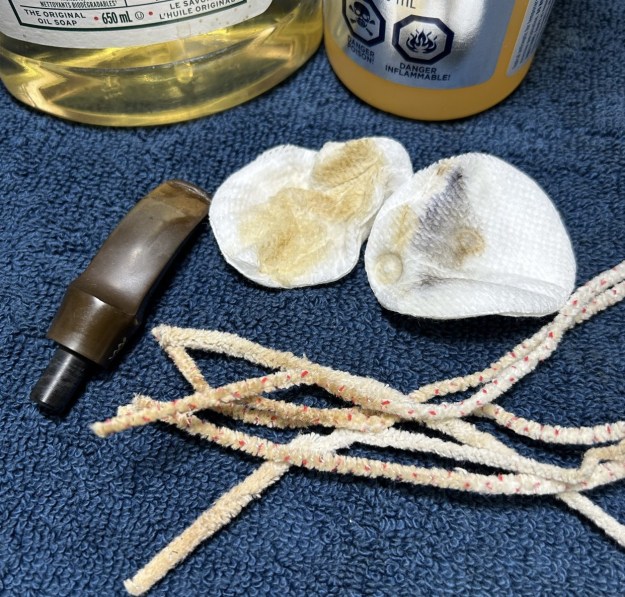
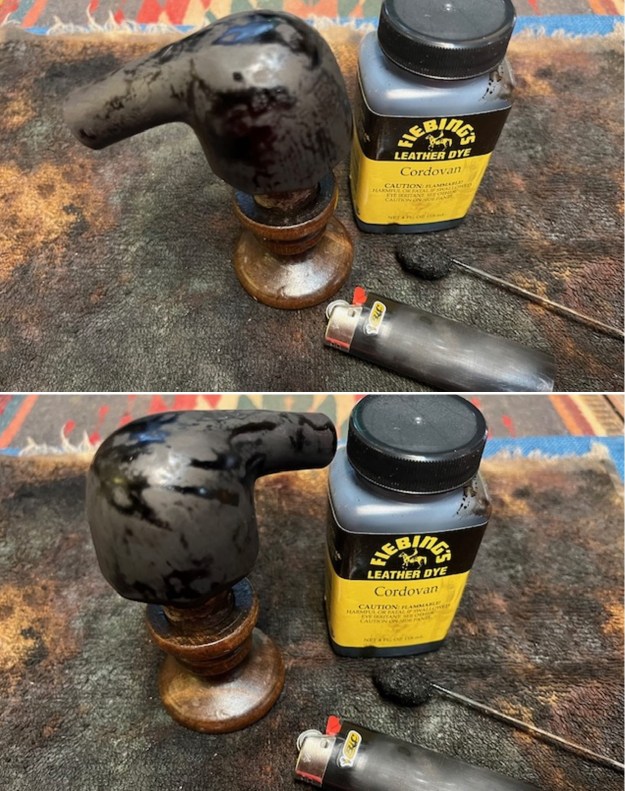
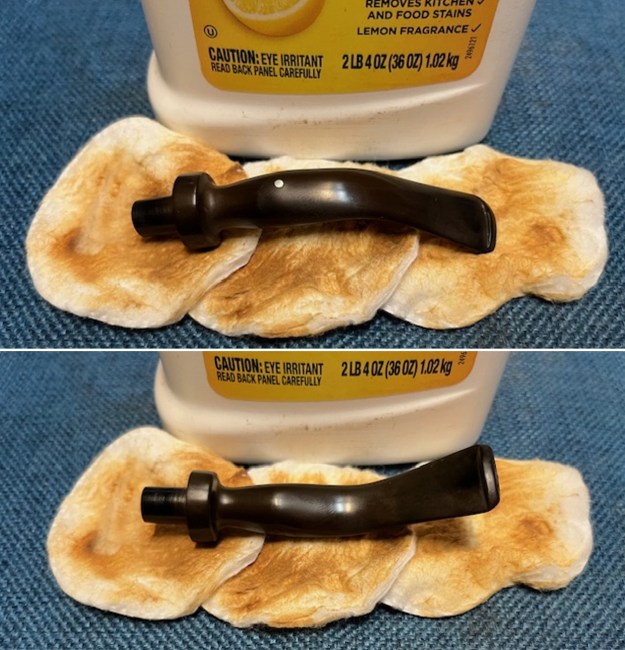
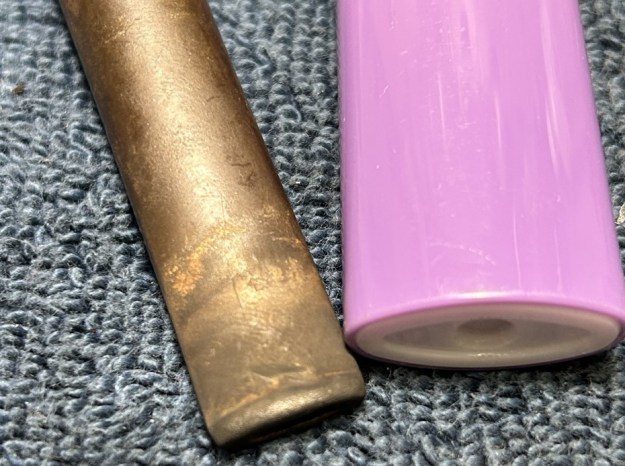
 I set the bowl aside and turned my attention to the stem. I pained the stem with the flame of a lighter to lift the tooth marks and was able to lift them all. I sanded out those that remained along with the oxidation and calcification with a folded piece of 220 grit sandpaper.
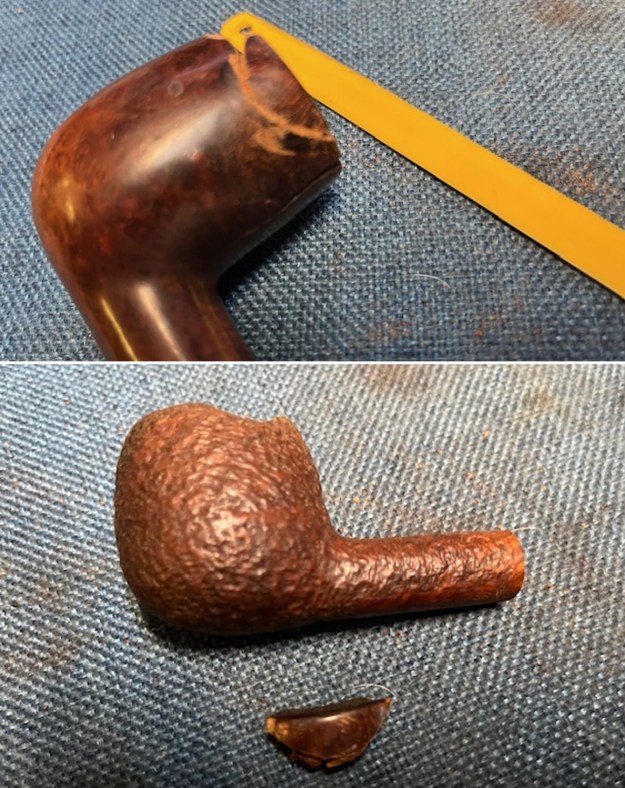
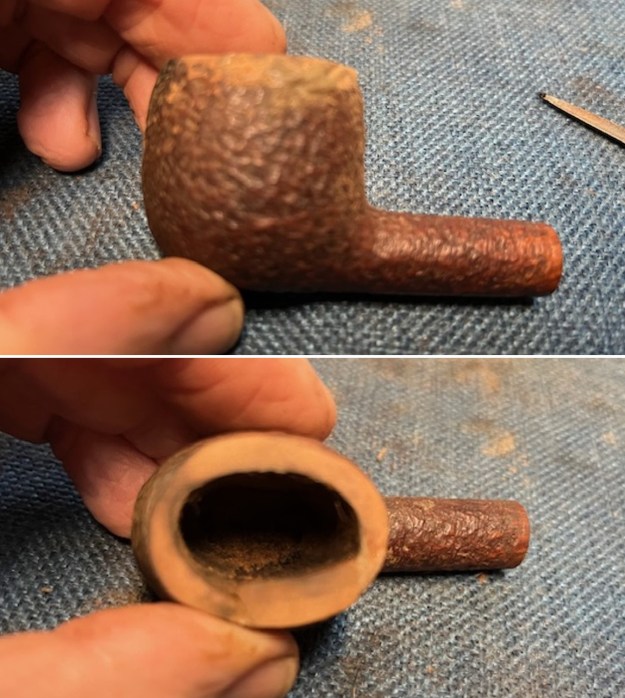
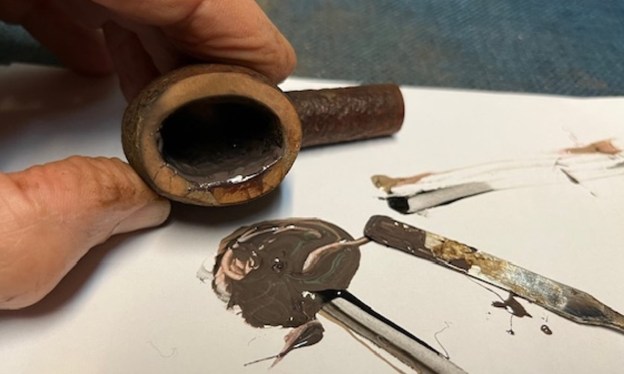
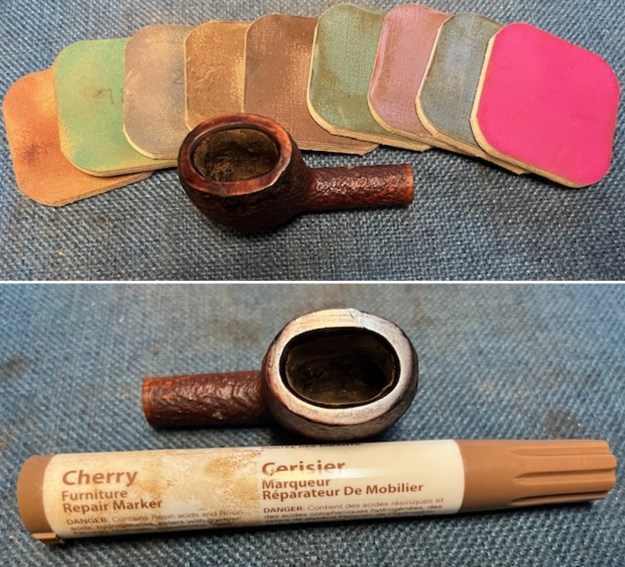
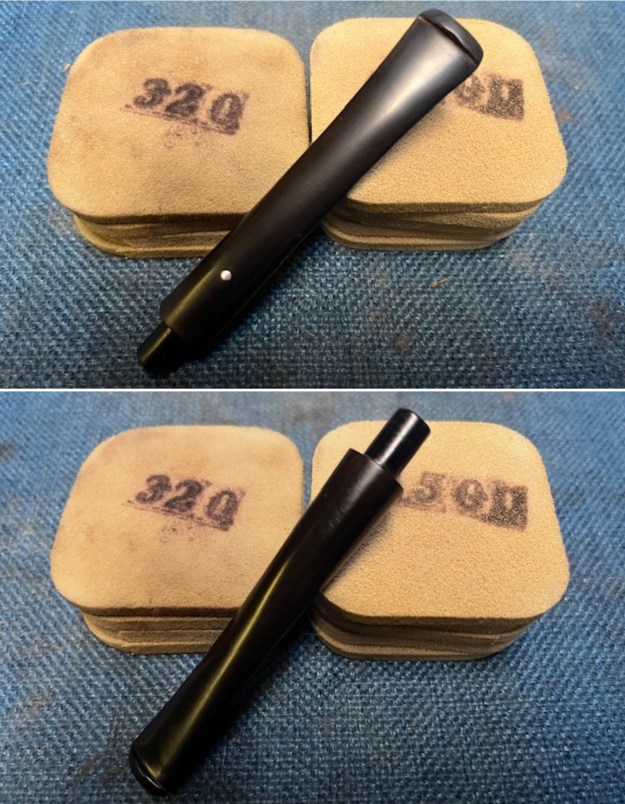
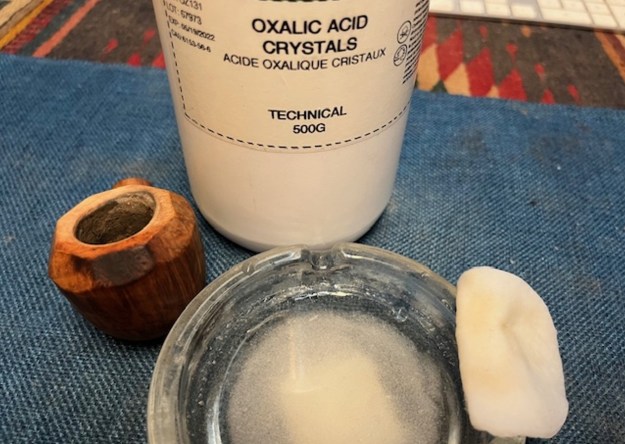
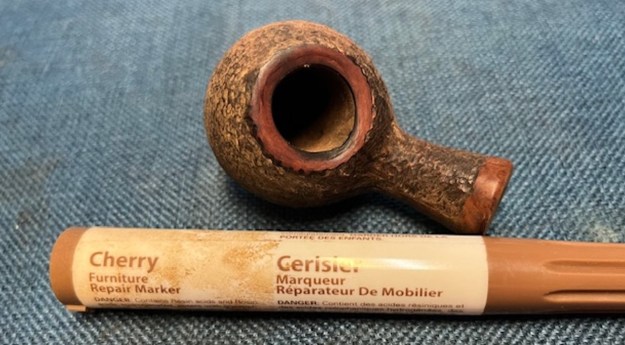
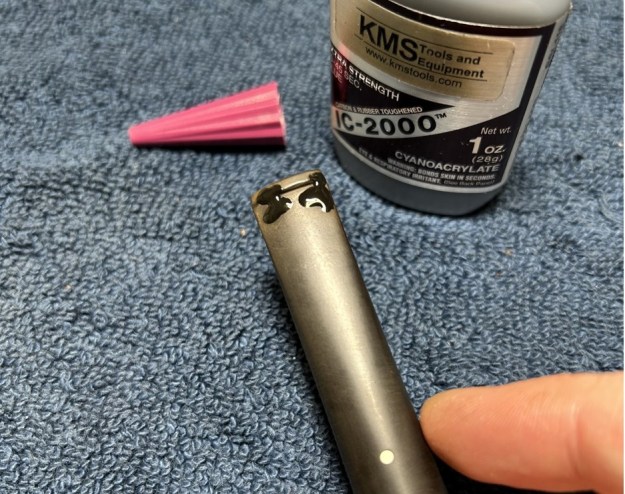
 I touched up the faint Bari stamp with some white acrylic fingernail polish to see if I good get it a bit more legible. Once it dried I scraped the excess off and sanded it with a worn 400 grit sanding pad. It was better, but still a little faint.
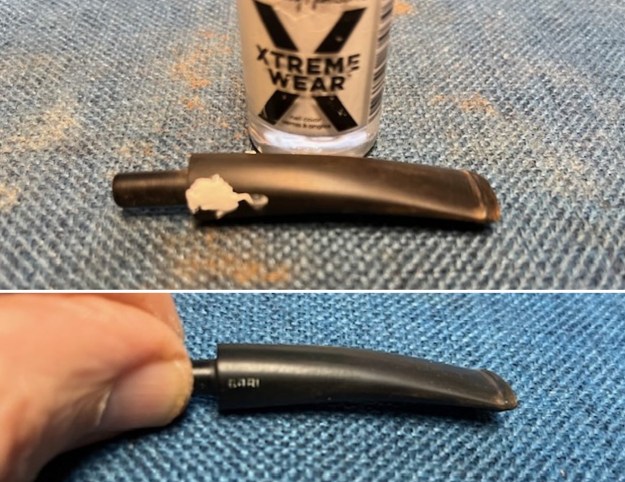 I sanded the stem with 320-3500 grit sanding pads to break up the remaining oxidation. I wiped it down after each sanding pad with a soft cloth. It began to look good.
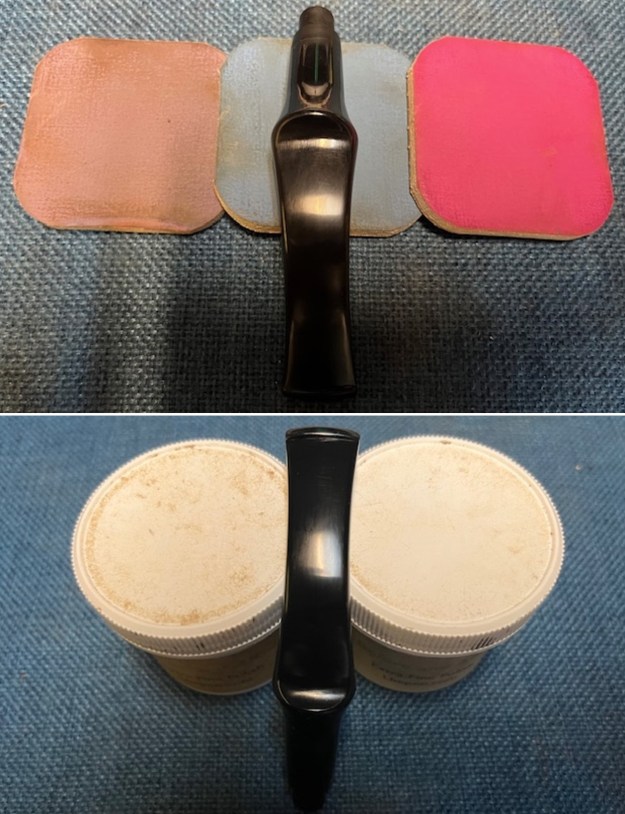
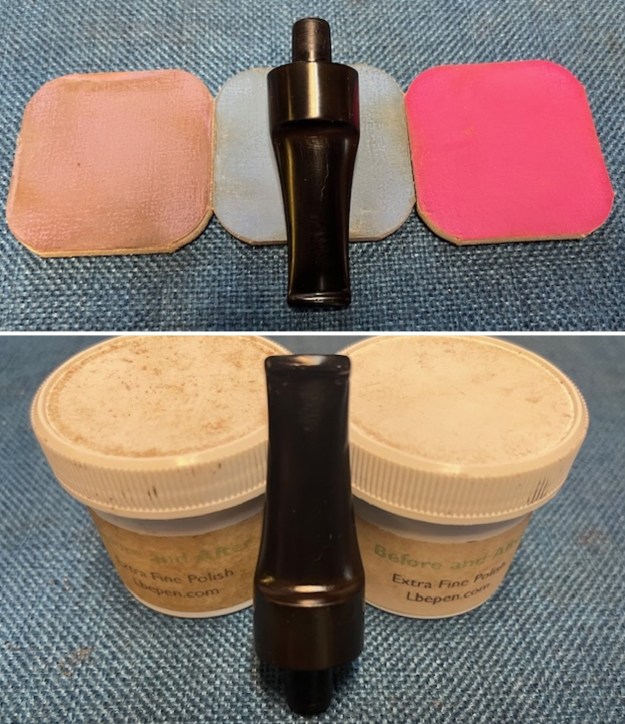
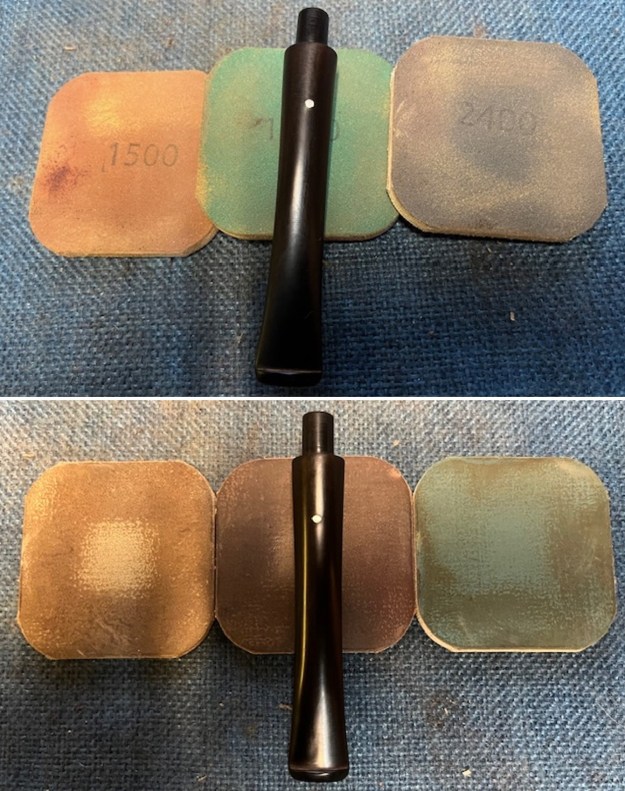
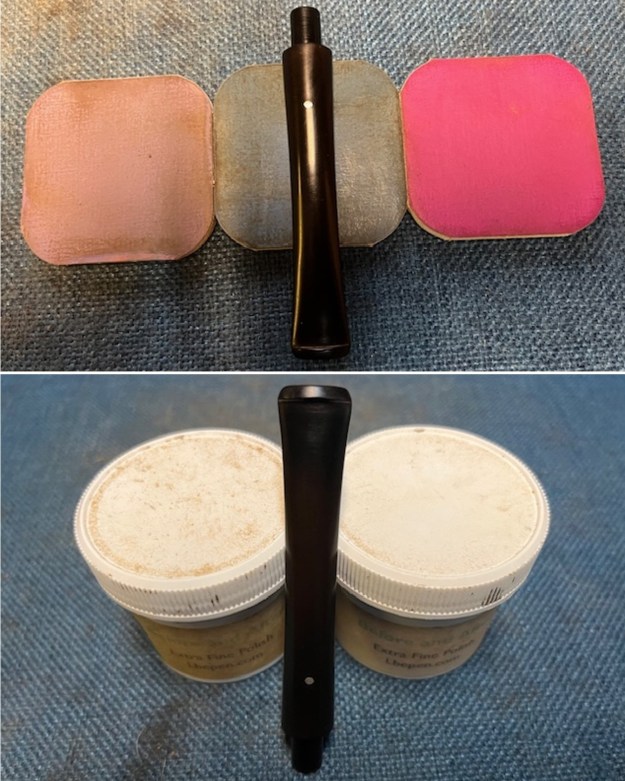
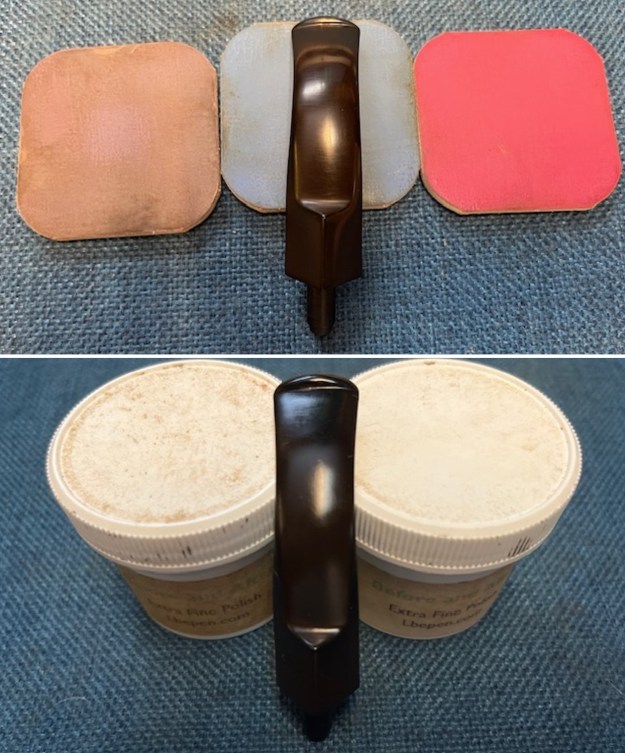
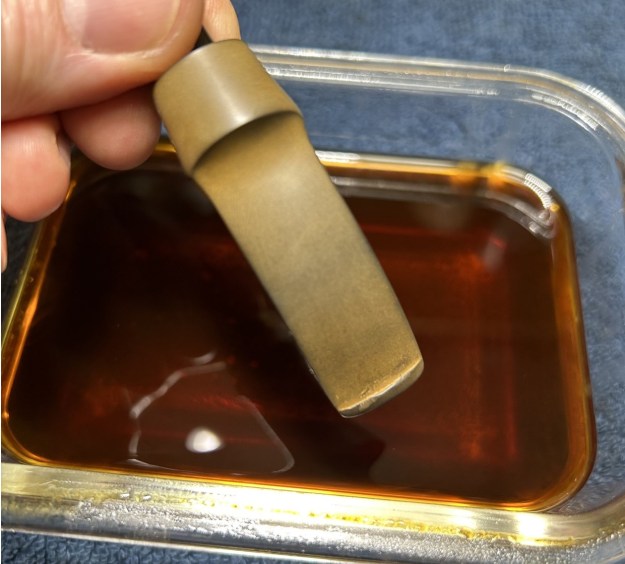
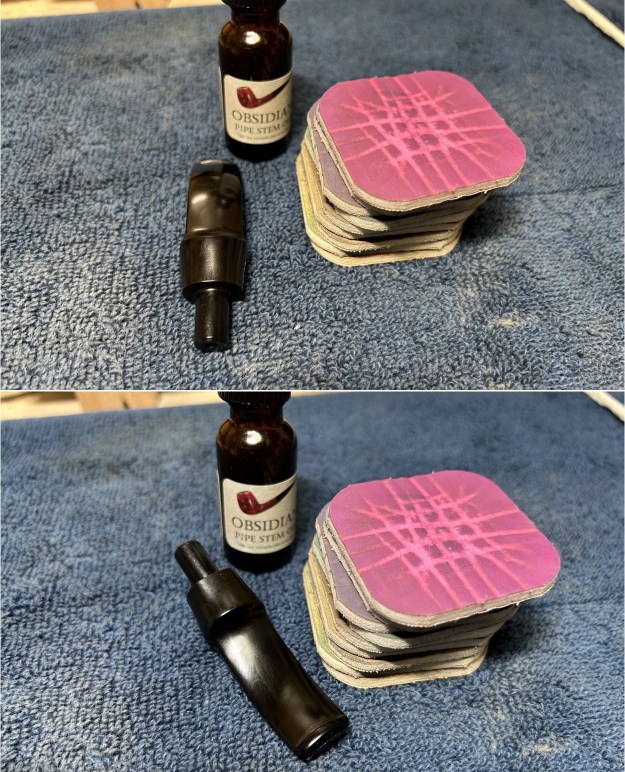
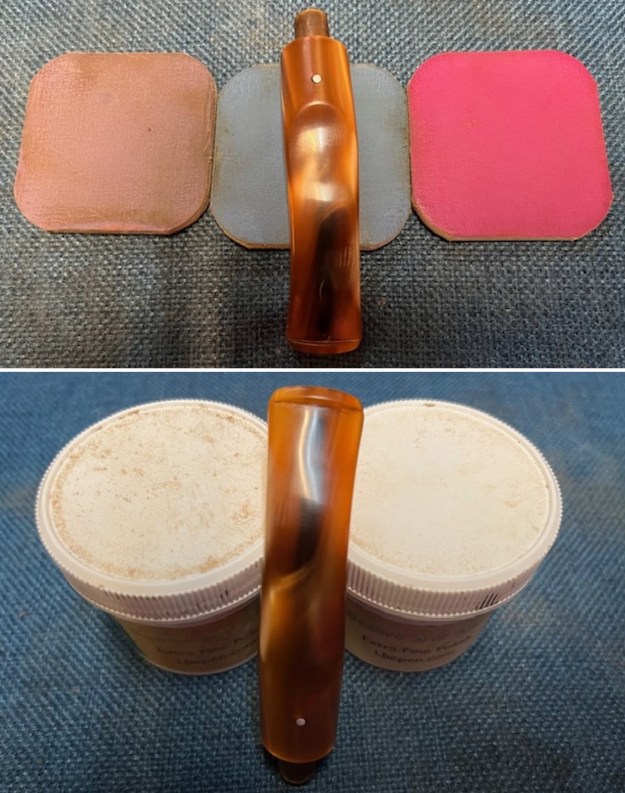
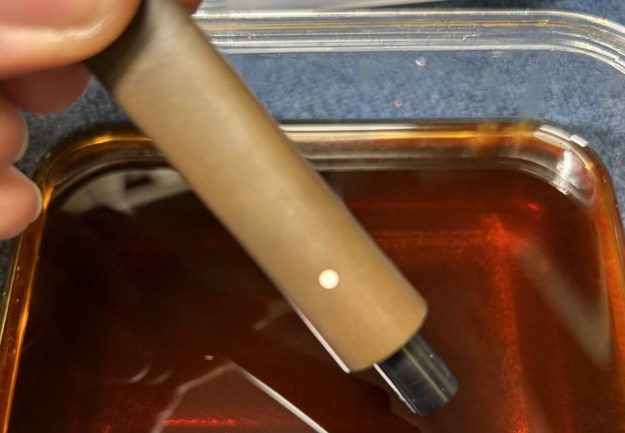
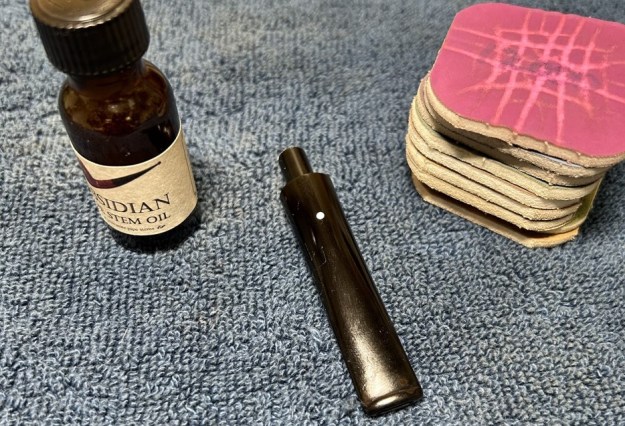
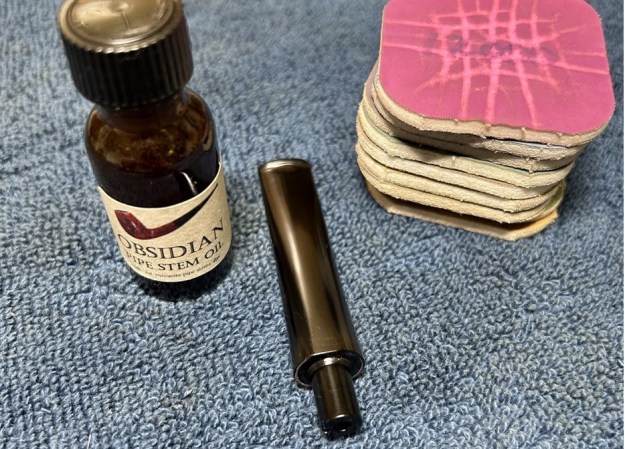
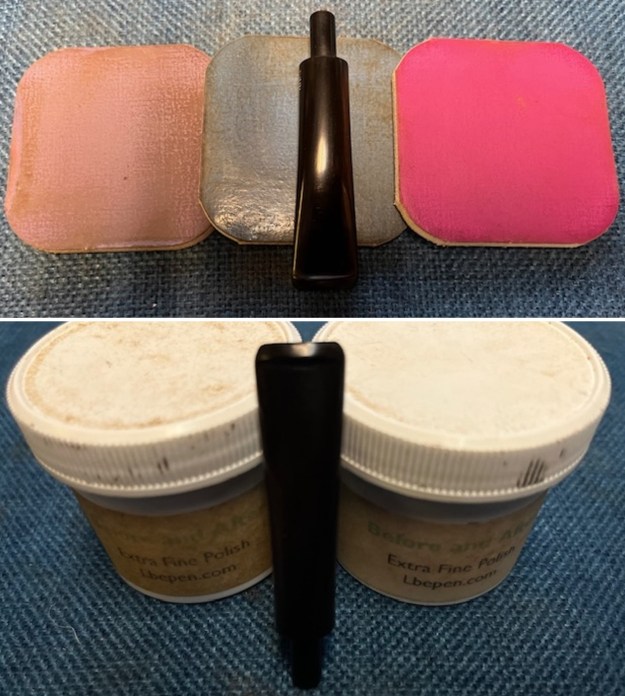
 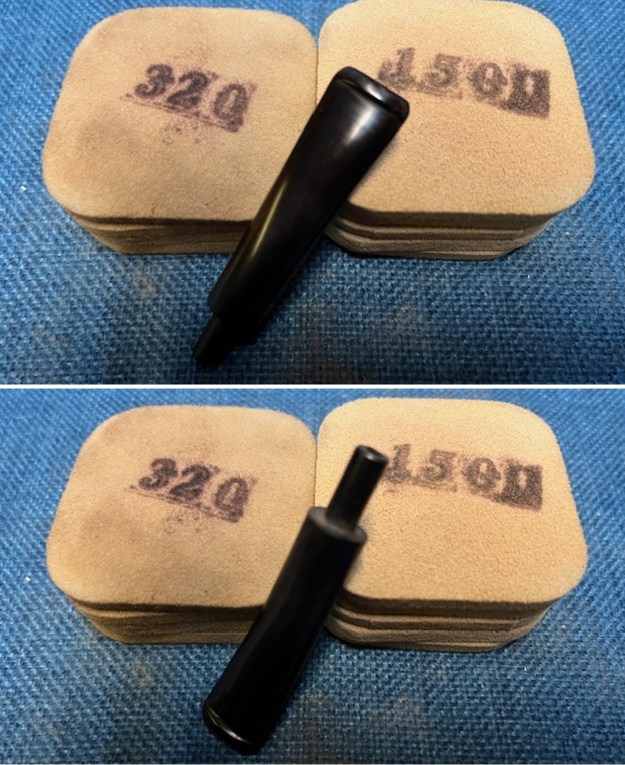 I polished the stem with micromesh sanding pads – dry sanding with 1500-12000 grit pads. I wiped the stem down after each sanding pad with Obsidian Oil. I polished it with Before & After Pipe Stem Polish – both Fine and Extra Fine. Once I had finished the polishing I gave it final coat of Obsidian Oil and set it aside to dry.
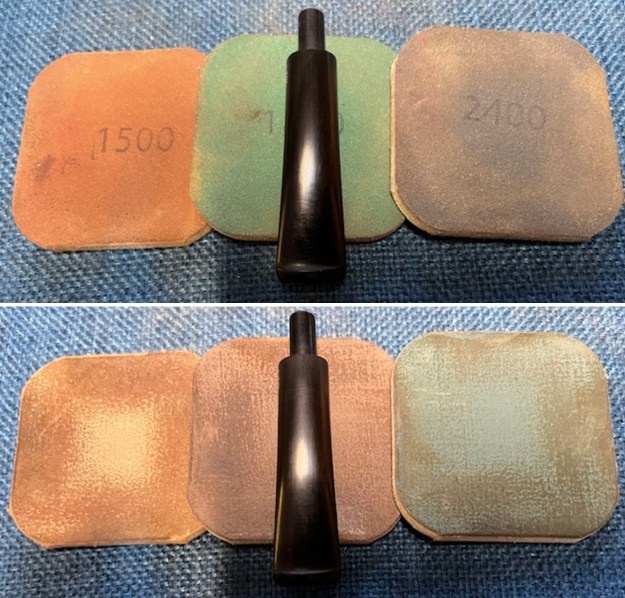
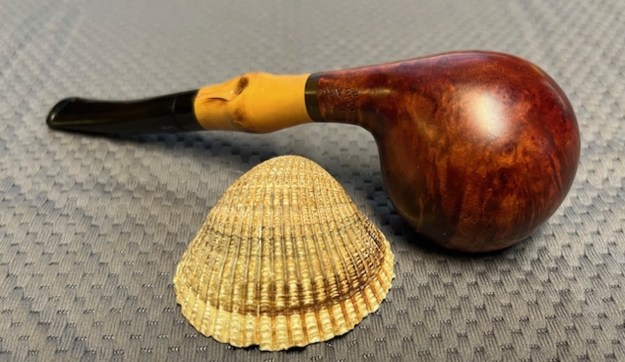
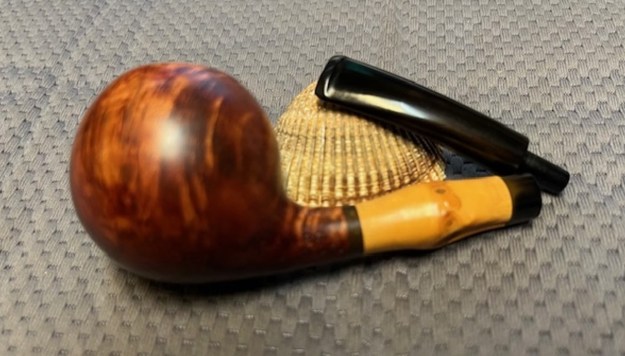
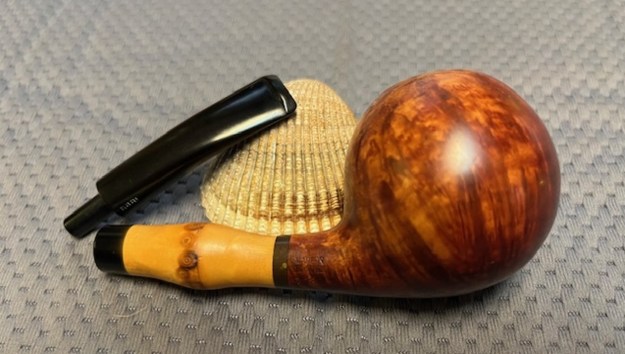
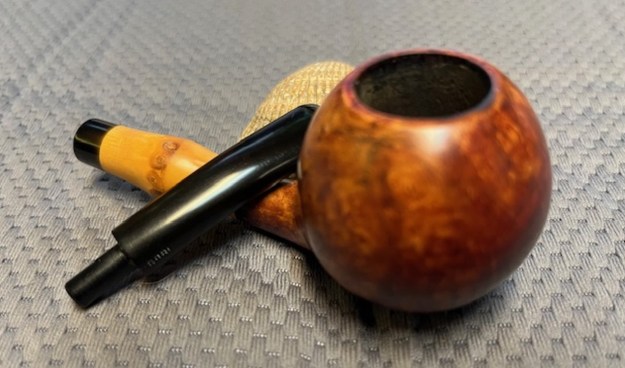
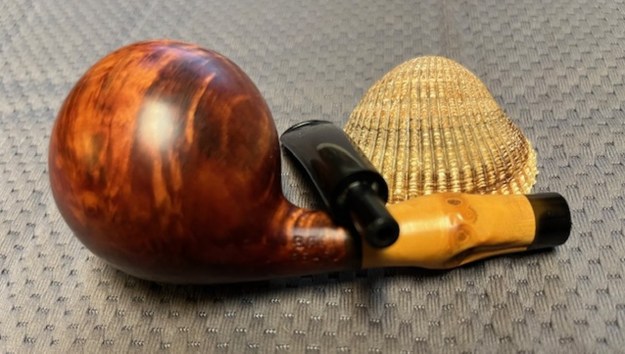
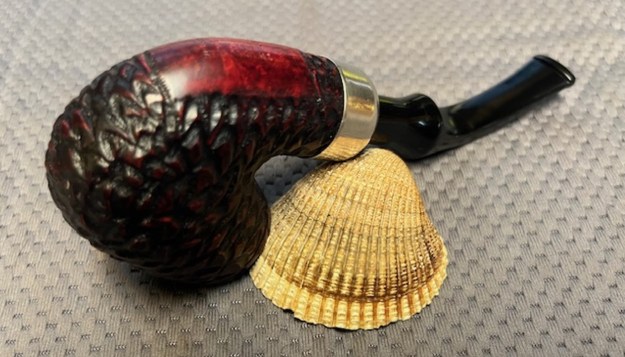
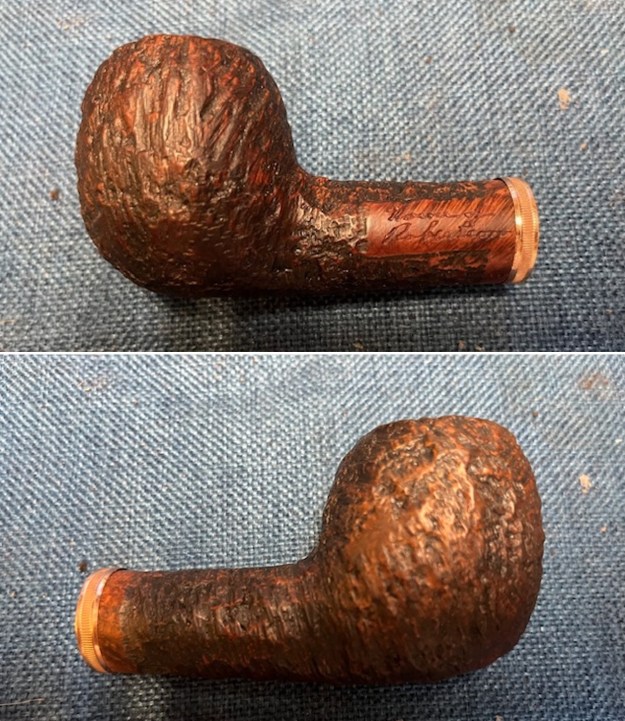
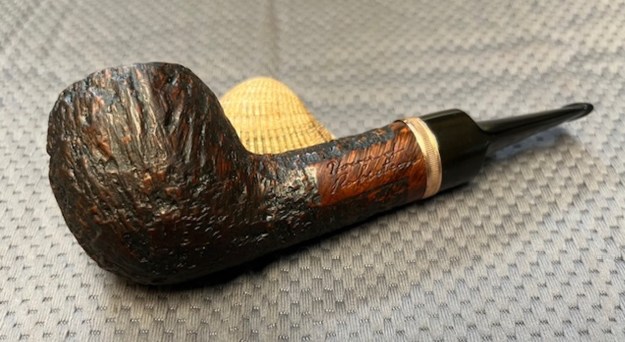
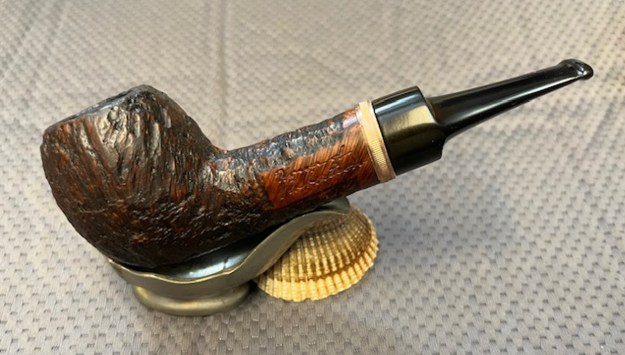
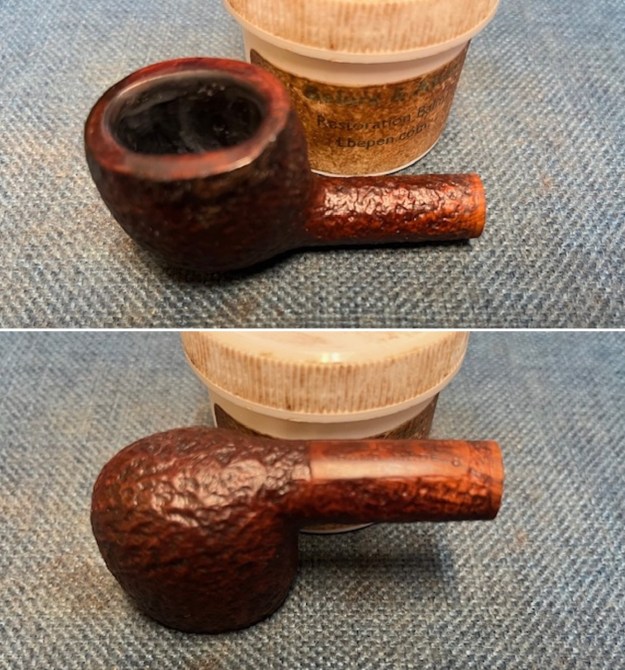
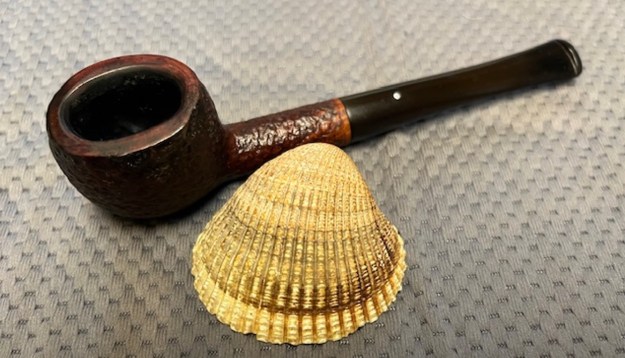
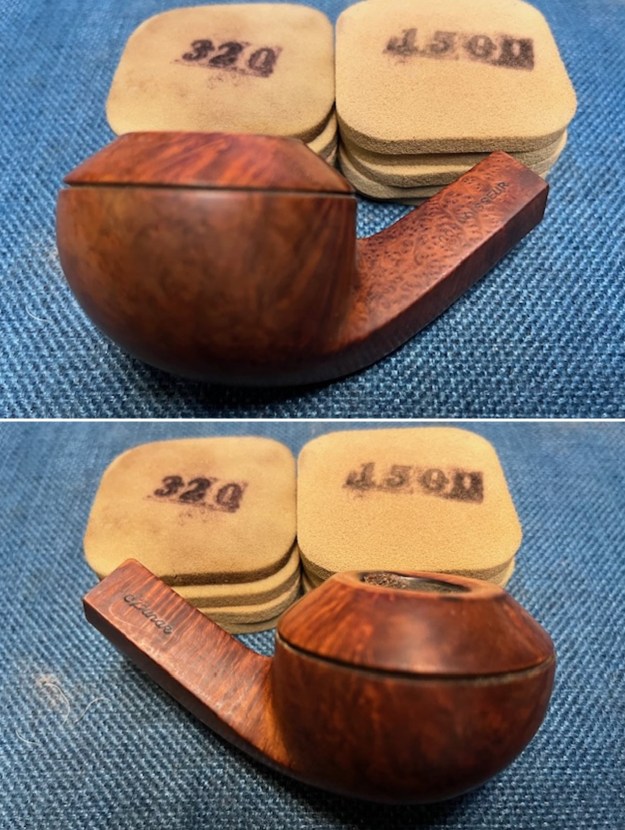
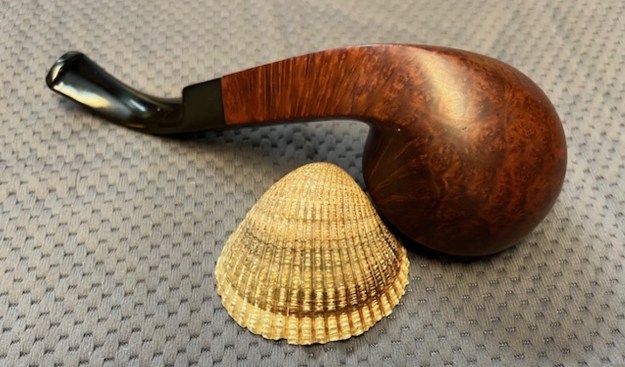
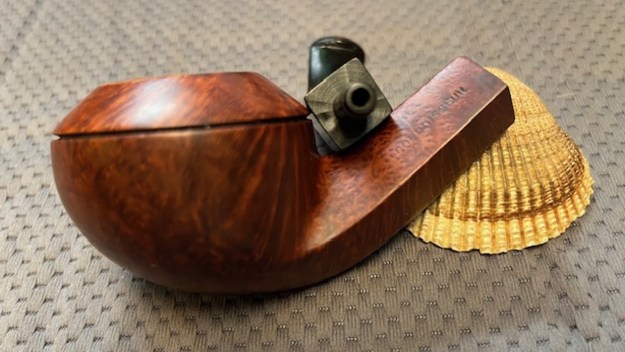
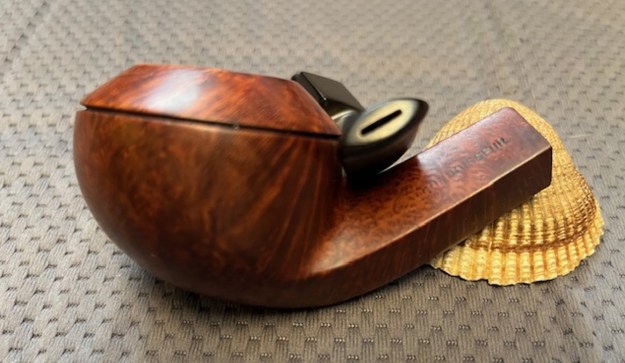
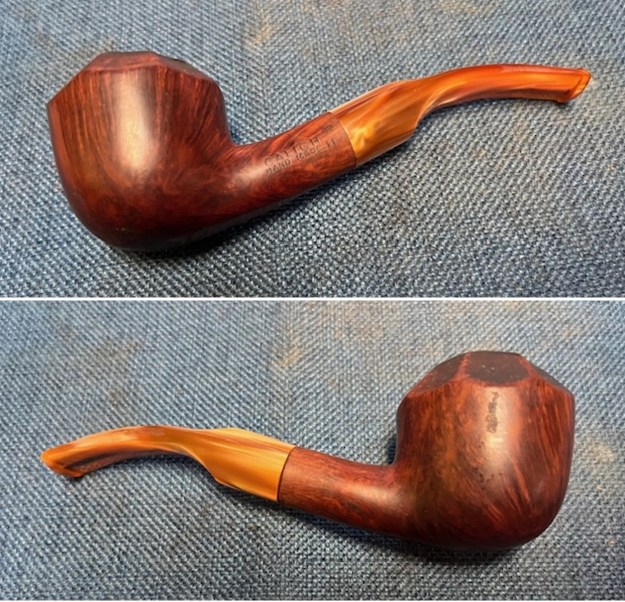
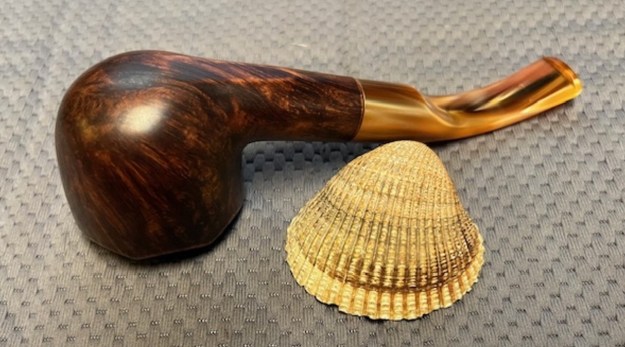
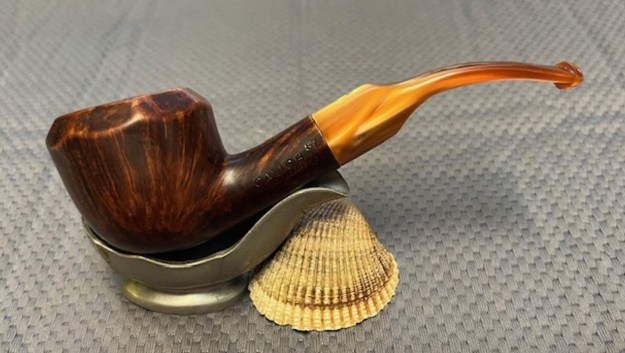
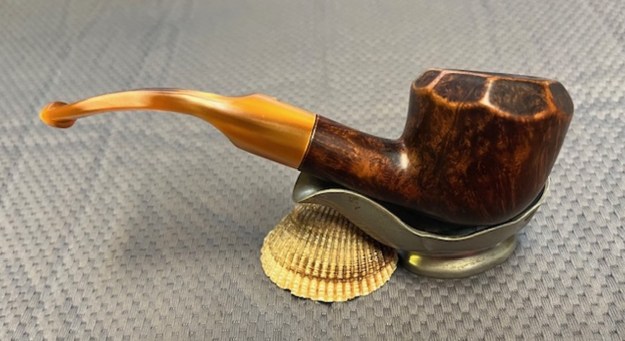
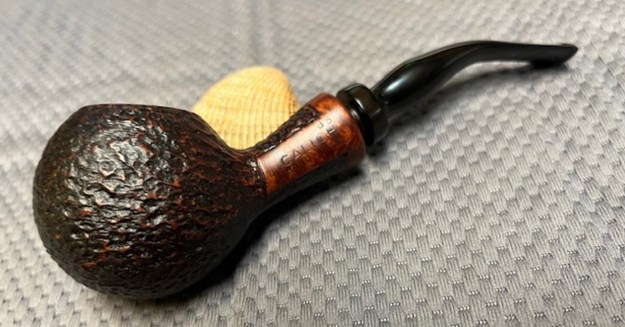
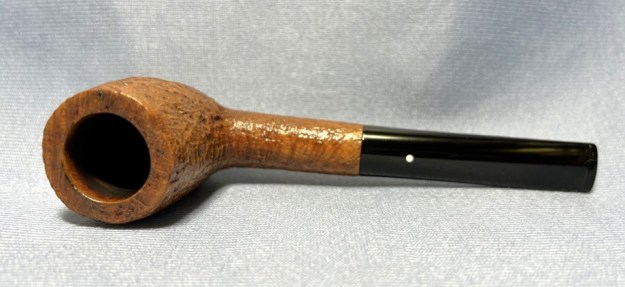
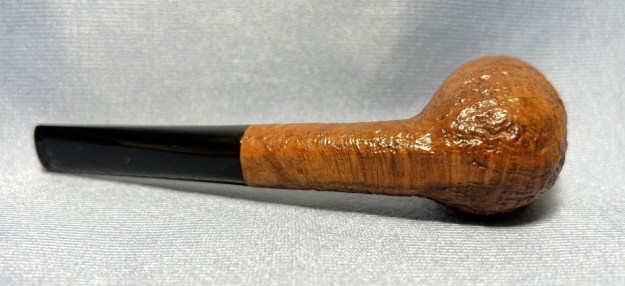
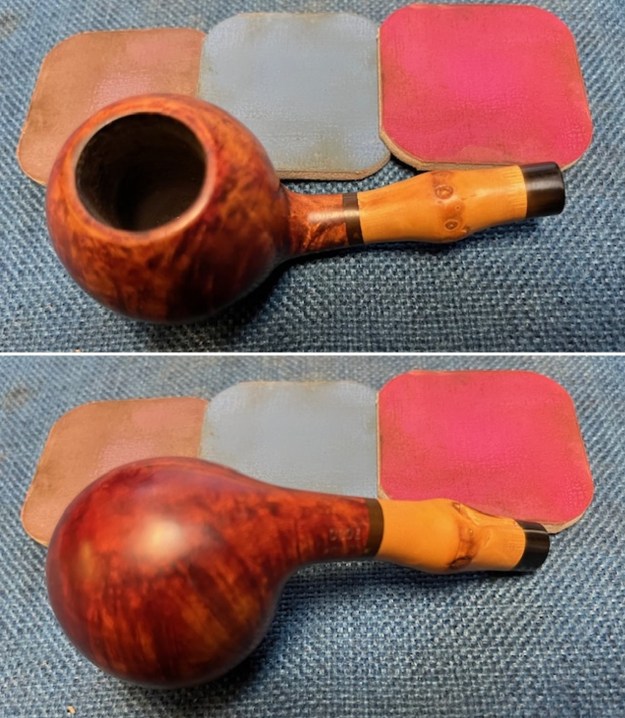
 I am excited to finish restoration of this Bari Pearl 7080 Bamboo Shank Apple. I put the pipe back together and buffed it with Blue Diamond on the buffing wheel. I gave the bowl and the stem multiple coats of carnauba wax. I hand buffed the pipe with a clean buffing pad to raise the shine. It is fun to see what the polished bowl looks like with beautiful mixed grain all around it. The polished grain on the pipe looks great with the black vulcanite stem. This smooth Bari Pearl Bamboo Shank Apple is great looking and the pipe feels great in my hand. It is light and well balanced. Have a look at it with the photos below. The dimensions are Length: 5 ½ inches, Height: 1 ½ inches, Outside diameter of the bowl: 1 ¼ inches, Chamber diameter: ¾ of an inch. The weight of the pipe is 45 grams/ 1.59 ounces. It is a beautiful pipe that I will be sending to a friend of mine who included this pipe among the six he sent to me for restoration. I look forward to hearing what he thinks of it. As always, I encourage your questions and comments as you read the blog. Thanks to each of you who are reading this blog. Remember we are not pipe owners; we are pipemen and women who hold our pipes in trust until they pass on into the trust of those who follow us.