Tag Archives: Oxidation

Selected Straight Grain (Comoys) Restoration


By Al Jones

Several months ago, a thread on the SmokersForum.uk about the Comoys “Selected Straight Grain” pipes piqued my interest. Member Dirigo (Tom) was kind enough to share with me how to identify these interesting pipes. I was able to grab this Shape 13 via Ebay last week, which corresponds with the Comoys shape chart. That shape looked to be in decent shape, with the exception of one putty fill. I assume this flaw made the pipe unworthy of the Comoys stamping. There were only the slightest tooth marks and no pesky stem logo to worry about.

From the Ebay picture, you can see the ugly fill.

There was only minimal cake inside the bowl so it was lightly reamed and soaked with Everclear and sea salt. The top of the bowl was scarred, so that was going to take some work.

While the bowl was soaking, I started on the stem, which had been soaking in a Oxyclean solution. I went thru my usual 1500/2000 grit wet paper that onto the final four micromesh grades. The stem was then buffed with white diamond and a final plastic polish. Removing the light chatter was pretty straight forward. The button was worn, so I used a needle file to slightly reform the edges.  Unfortunately, I was unable to remove the oxidation without making the edge of stem slightly rounded.  I need to learn how to avoid this issue.

Once the bowl was done soaking it was moved to an alcohol bath to remove the stain. I spoke to Steve prior to this step and he recommended the fill be corrected using the superglue & briar technique he recently posted on Reborn Pipes. That solution worked well and I used two steps to fill in the pit. After restaining, the fill is just slightly visible, a big improvement from the factories solution using the bubble-gum putty.
The Super-Glue and briar dust patch.

I used a two-step stain process to highlight the grain, also a recommendation from Steve. First I “painted” on some black stain, after the bowl was warmed to open the grain. Then, the bowl was sanded with micromesh and a very diluted application of Medium Brown stain was applied. The bowl was than buffed with Tripoli and white diamond, followed by a final buff with Carnuba wax. I was careful on all steps not to diminish the stamping, which is quite legible.

Thanks to Steven Laug for his help with this one and Tom for information on this interesting Comoys niche.

Keyser Hygienic Patent Pipe


Blog by Steve Laug

Over the past year I have been picking up these Keyser Hygienic pipes on EBay. This one makes the third one I have picked up at a reasonable price. They are made in England and sold exclusively in South Africa. The word is that they were designed to be virtually indestructible for farmer pipe smokers in SA. All versions of the pipe have the same stem – one size fits all. They seem to be made of nylon and rubber or some combination. They are tough and take tooth wear very well. Two of the three I picked up are older and both had the original stems on them. They had tooth chatter and minor dents. Steaming would not raise the dents at all. I had to deal with them with sandpaper and micromesh sanding pads.

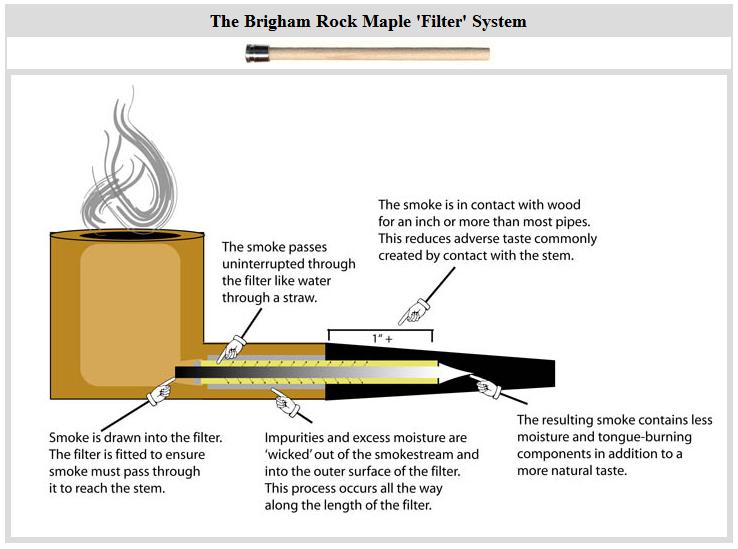
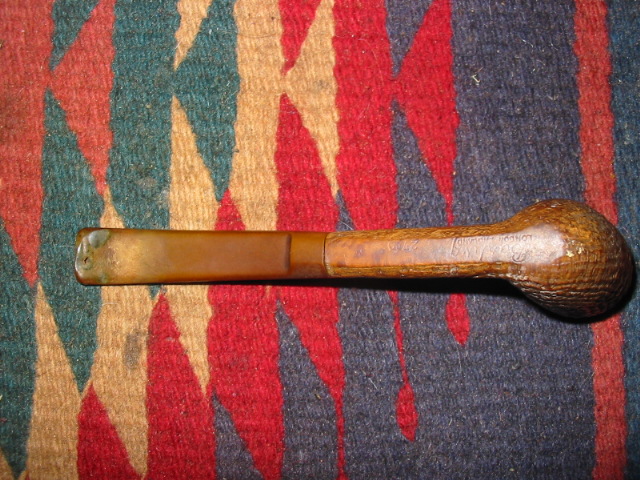
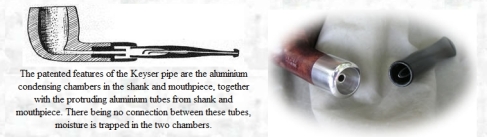
The photo below came from the web and pictures a cutaway picture of the pipe and the unique condensing chamber that makes up the patented portion of the pipe. The shank has an aluminum condensing chamber with a tube in the centre that lines up with the tube inside the stem. It is pointing downward so air swirls around in the chamber formed by the military bit stem and the shank. Moisture is trapped and the smoke is cool and dry without loss of flavour.

Image

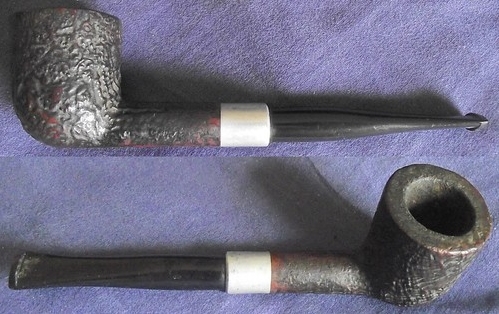
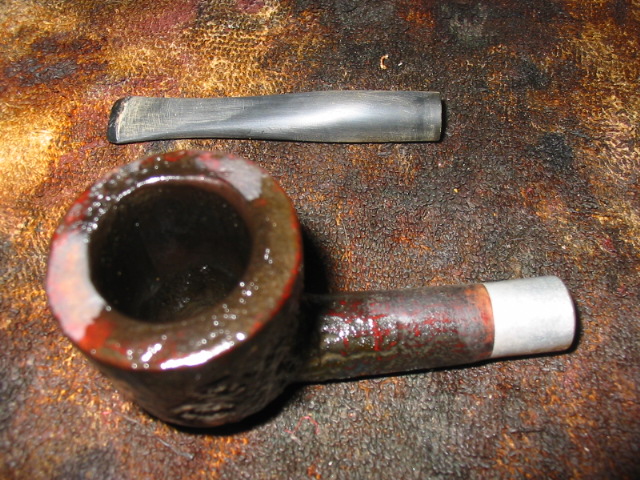
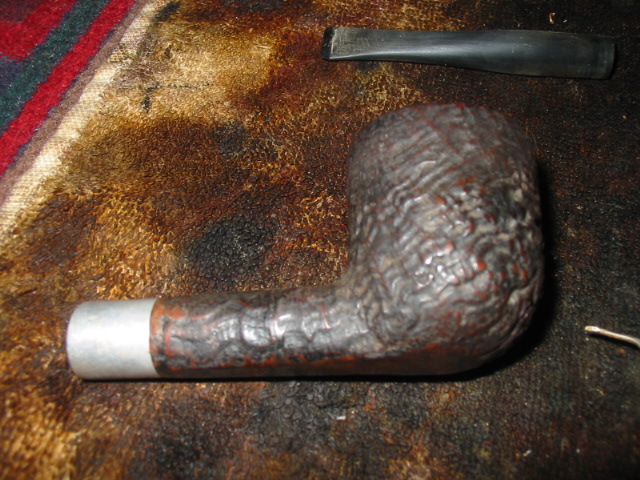
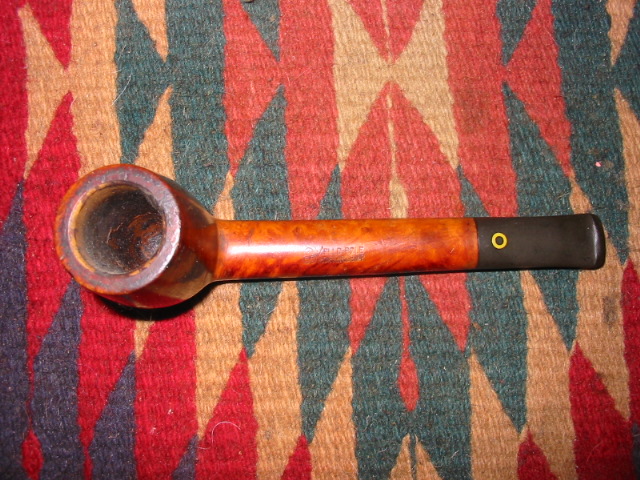
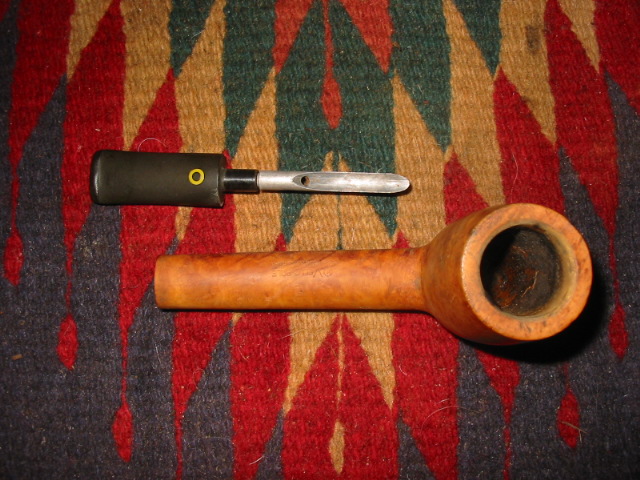
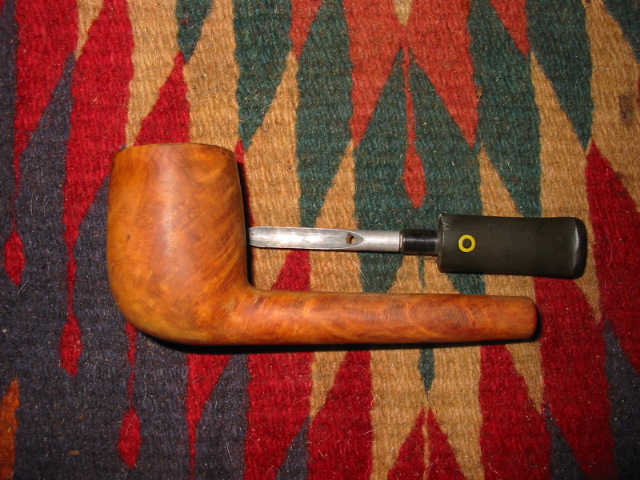
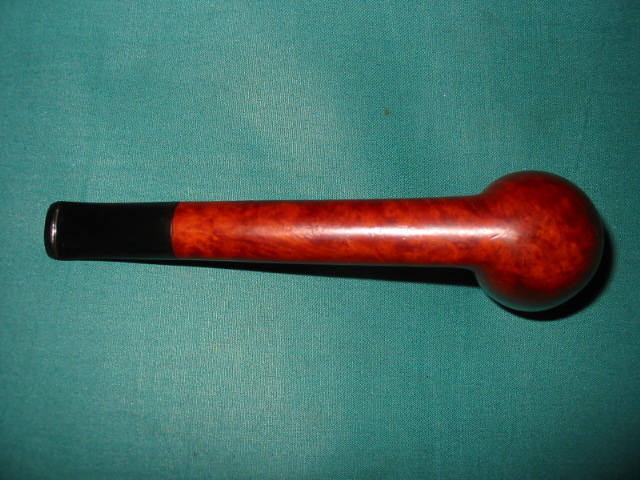
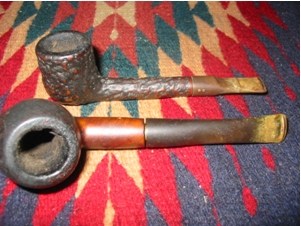
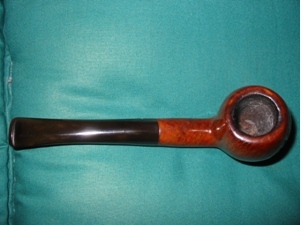
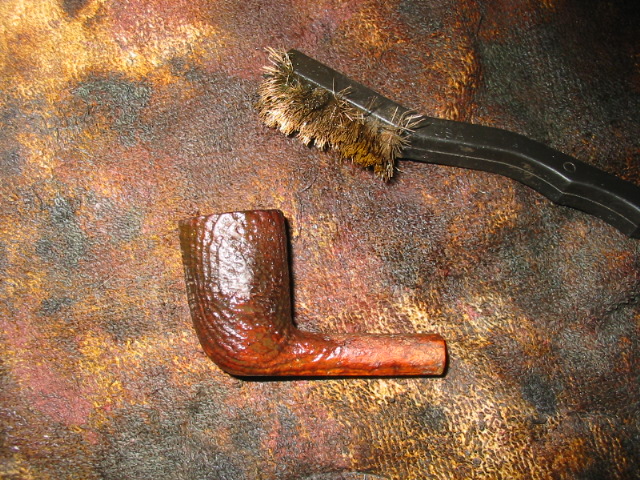
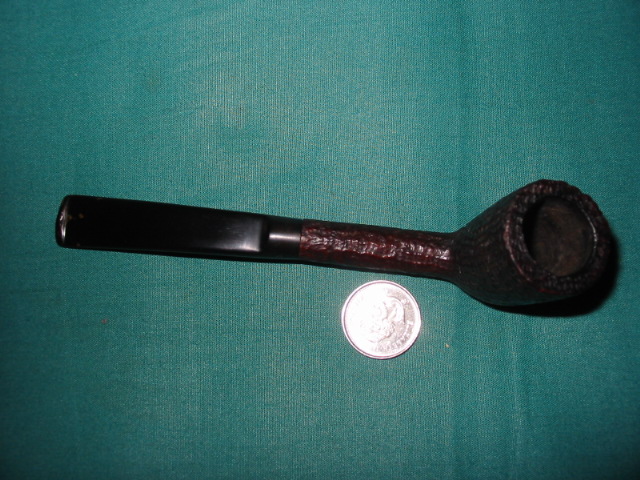
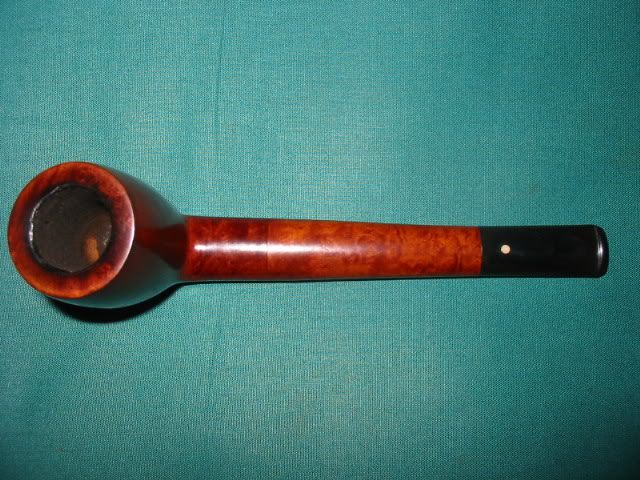
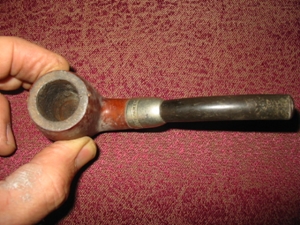
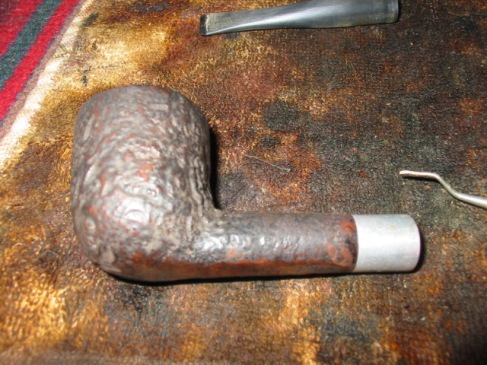
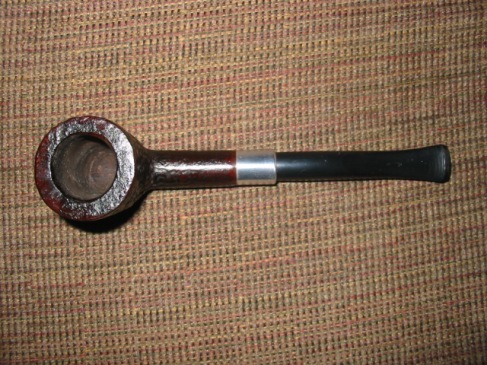
The pipe I am working on this time is a pot shaped sand blasted pipe. The aluminum was oxidized and dull the blast was dirty and the crevices filled with dirt and grime. The stem was in pretty clean shape other than the tooth chatter near the button. The rim of the bowl was tarred and caked. The cake was uneven and tapering in the bowl – almost as if the bowl was only half filled and smoked that way the majority of the time. The upper portion of the bowl had a very thin layer of cake and the lower portion a thick uneven cake. The condenser in both the stem and the shank were filled with a dark brown tar and the airway was constricted in the shank and clogged in the stem. The photo below shows the condition of the bowl and the stem and highlight where the work would be needed to clean up the exterior of this pipe.

Image

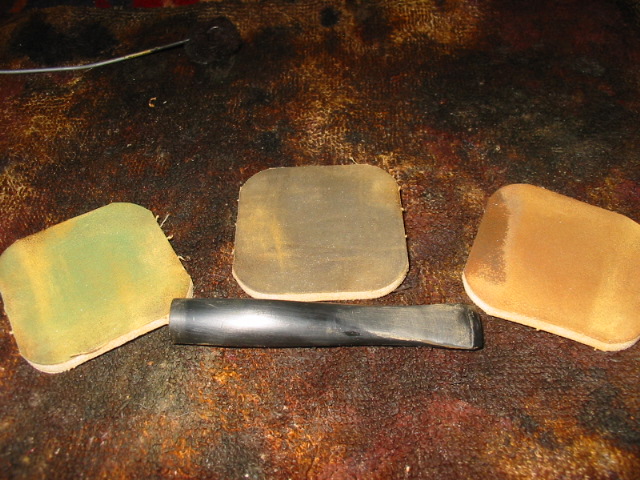
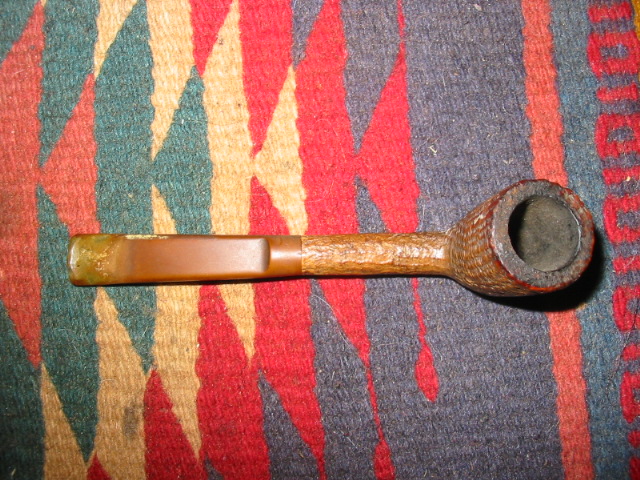
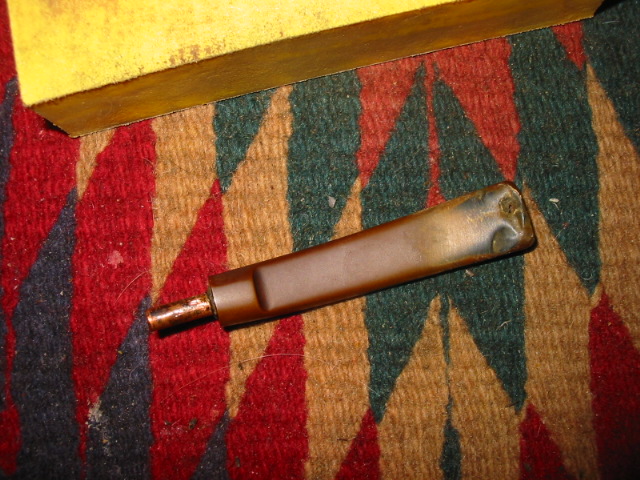
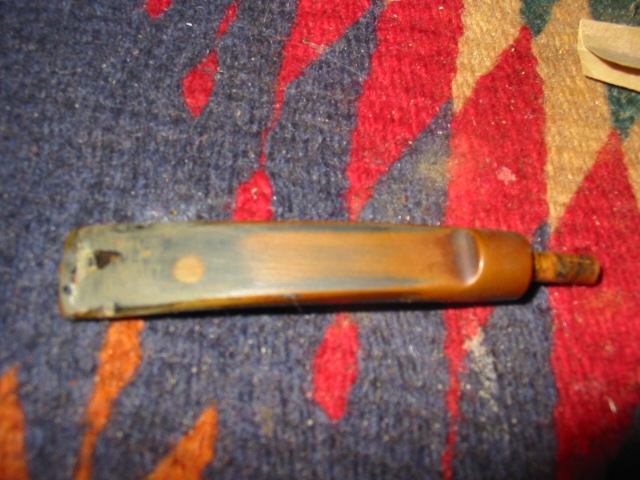
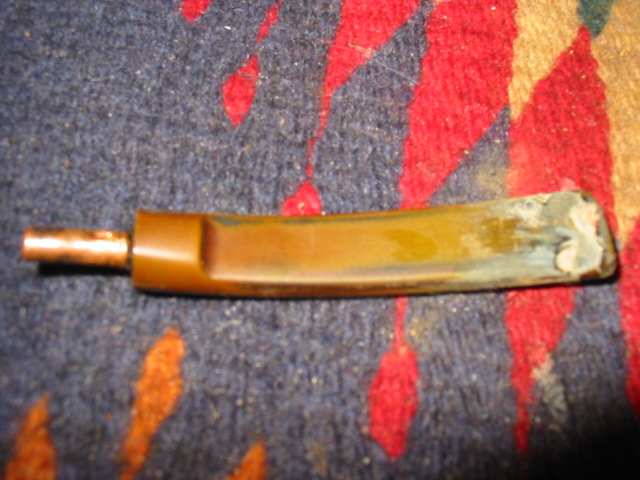
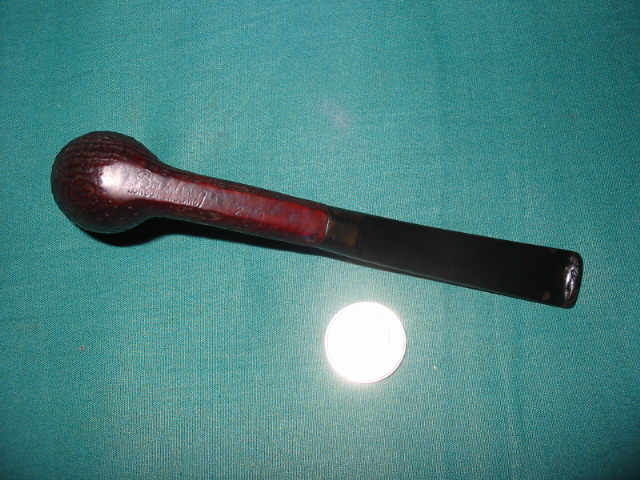
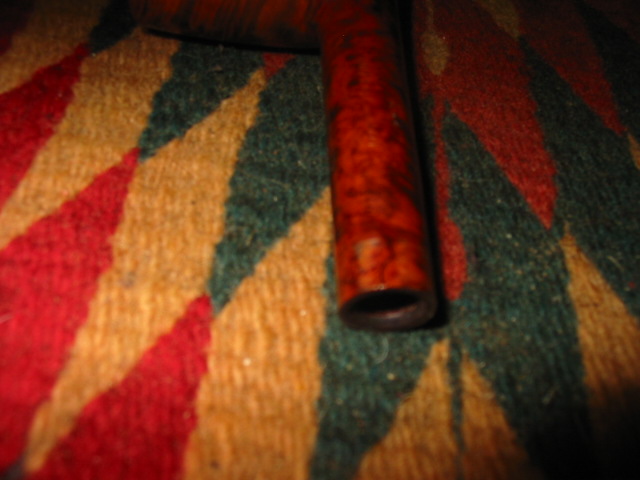
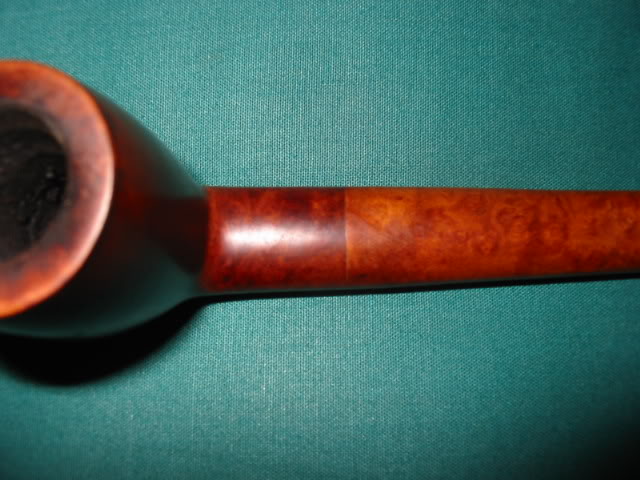
I reamed the bowl back to bare briar and scrubbed the blast surface with a brass tire brush to clean out the crevices. I also used a soft bristle tooth brush to finish cleaning the surface off. Once that was done I put the bowl in the alcohol bath to soak while I worked on the stem. The next two photos below show the stem after I used 240 grit sandpaper to remove the tooth marks and slight dents. I then used micromesh pads from 1500-6000 grit to polish the stem and work out the scratches. I have learned the hard way that you cannot buff these stems on the buffer as a little bit of surface heat from the buffing pads melts and distorts the surface. So these stems are totally buffed and polished by hand.

ImageImage

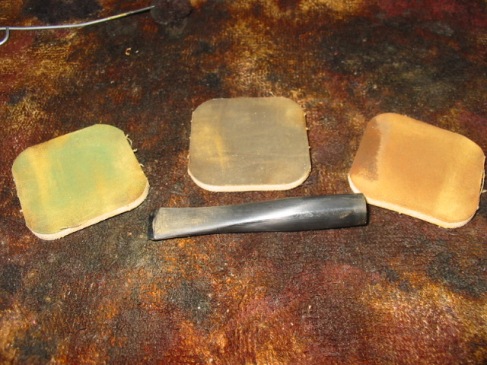
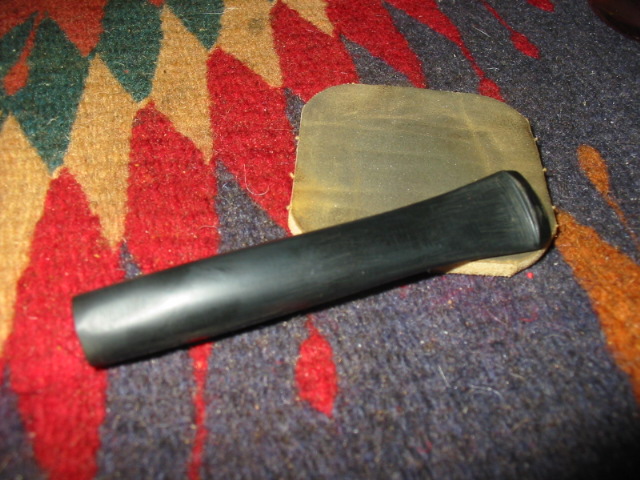
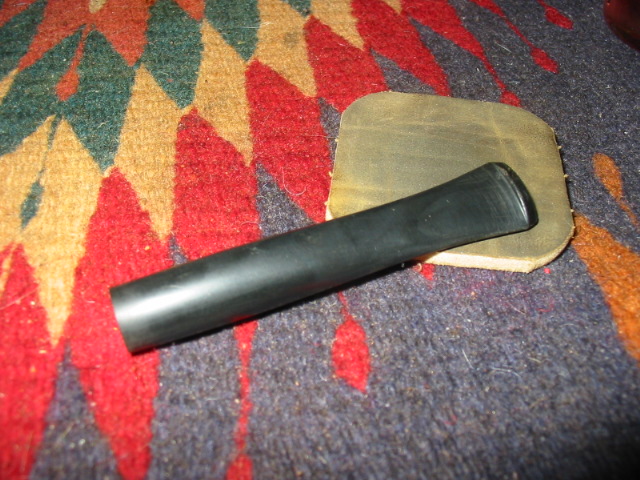
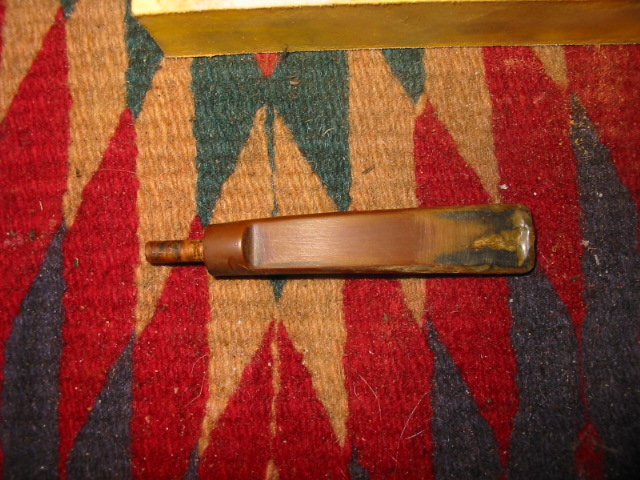
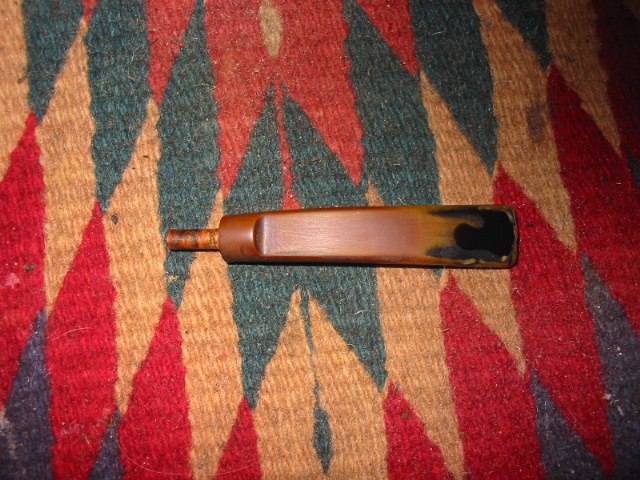
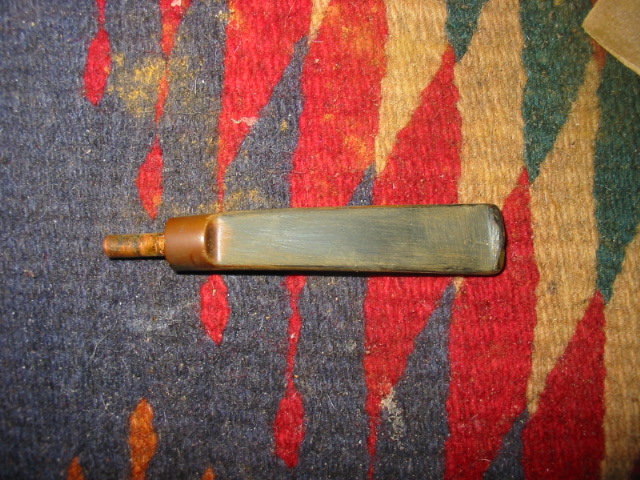
The next two photos show the stem after it has been sanded up to the 3200 grit micromesh pad. The stem is beginning to get a shine and the scratches are disappearing with the sanding. From this point I went on the sand the stem through the remaining micromesh grits and when finished I gave it a coating of Obsidian Oil to penetrate the surface and give it a deep polish. Once that dried I buffed it by hand with some carnauba wax in paste form that I purchased from Walker Briar Works.ImageImage

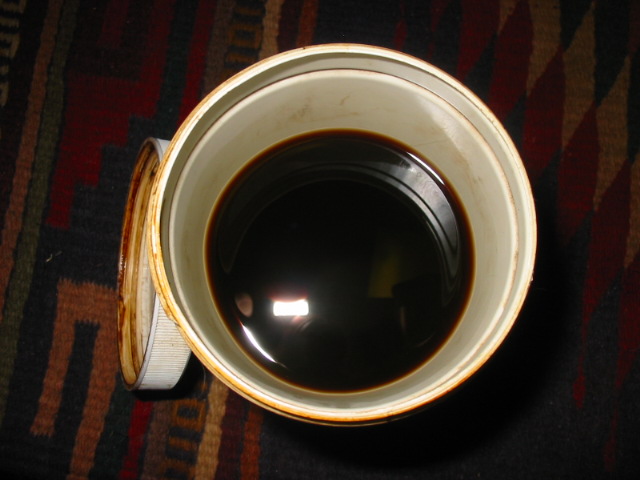
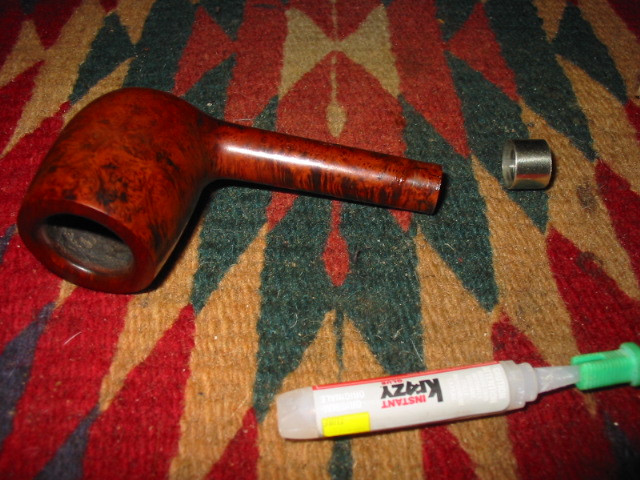
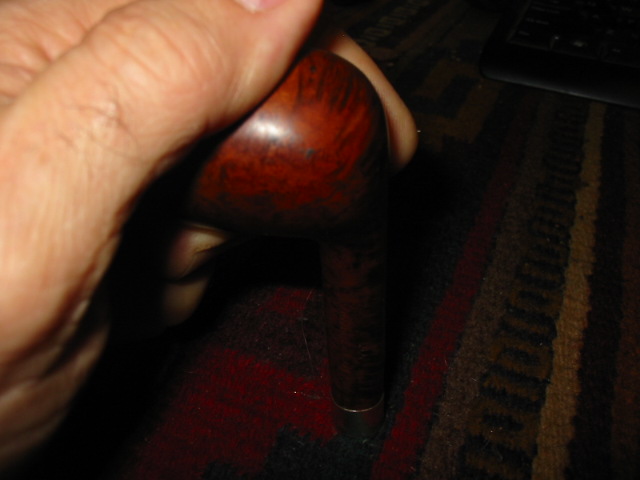
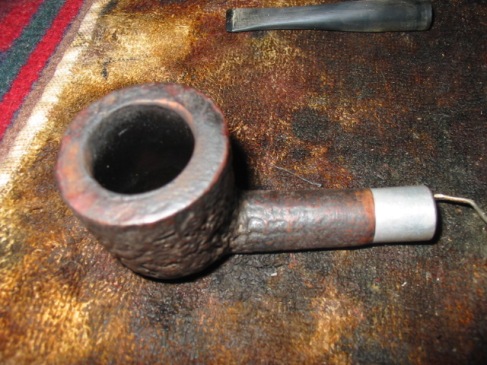
From the next series of photos you can see that I interrupted my work on the stem to remove the bowl from the alcohol bath. I did that because I was curious to see how it was cleaning up. You will notice in these photos the brownish grey sludge in the grooves of the blast. I used the tooth brush once again to scrub the surface with Isopropyl from the alcohol bath. Once the grime was removed I washed the bowl down with clean Isopropyl and dried it off.

ImageImageImage

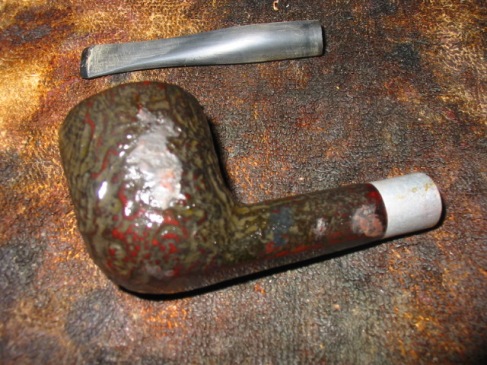
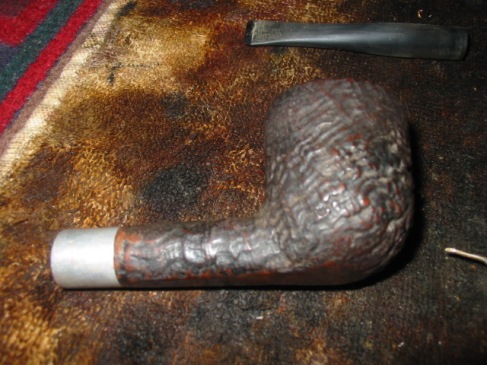
The next series of photos show the dried bowl. The grime is gone and the finish is now down to the stain. Even some of the top coat of stain has been removed and you can see the briar. I laid the bowl aside and finished up the stem as I described it above.

ImageImageImage

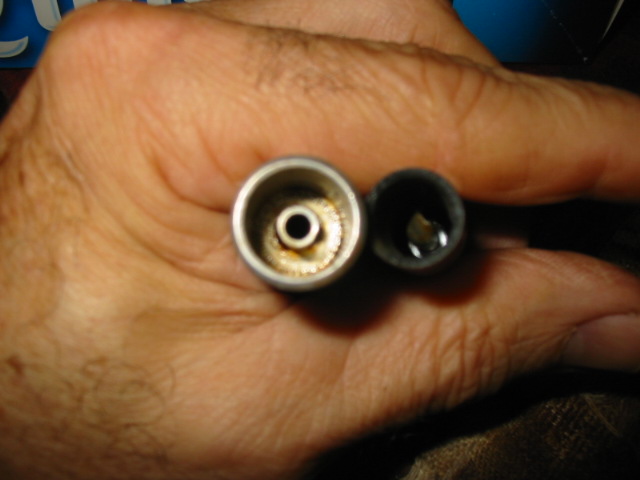
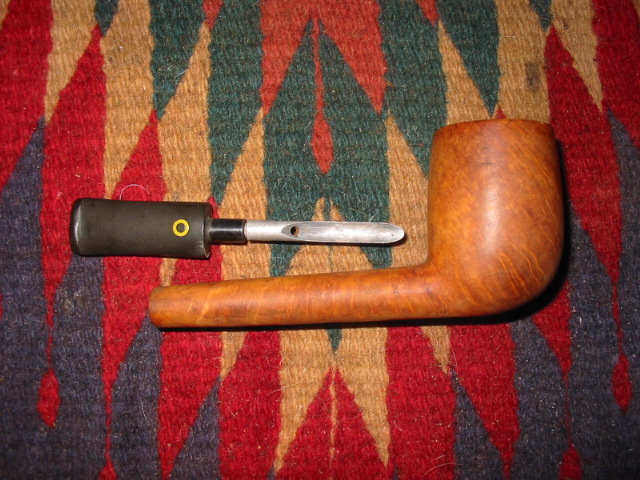
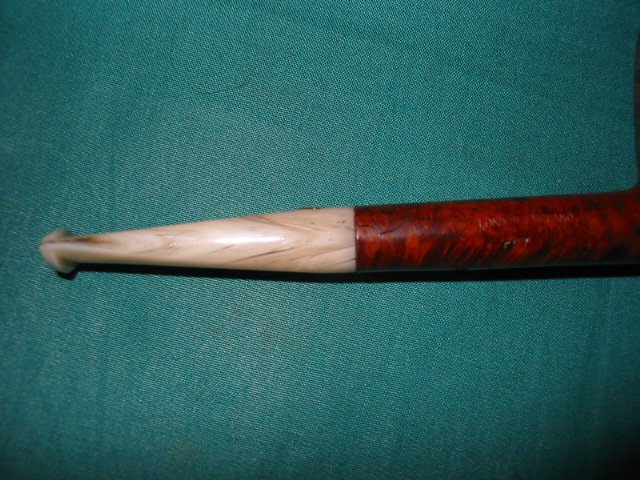
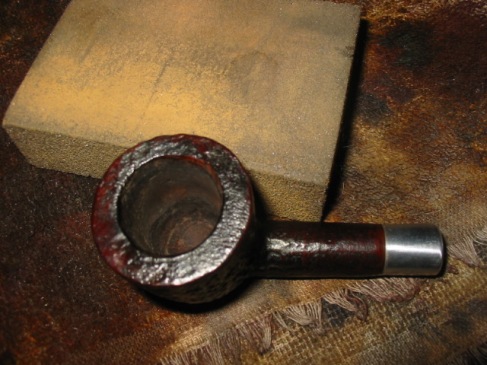
The aluminum condensing chamber on the shank and the chamber in the stem needed much work. I used cotton swabs that I flattened to clean the area inside the shank around the airway extension and the same in the stem. Once that was clean I polished the oxidized aluminum with the micromesh pads to burnish the aluminum and get the shine back.

Image

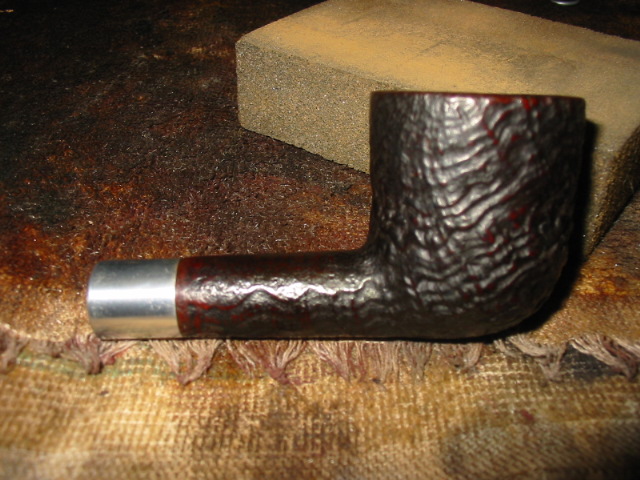
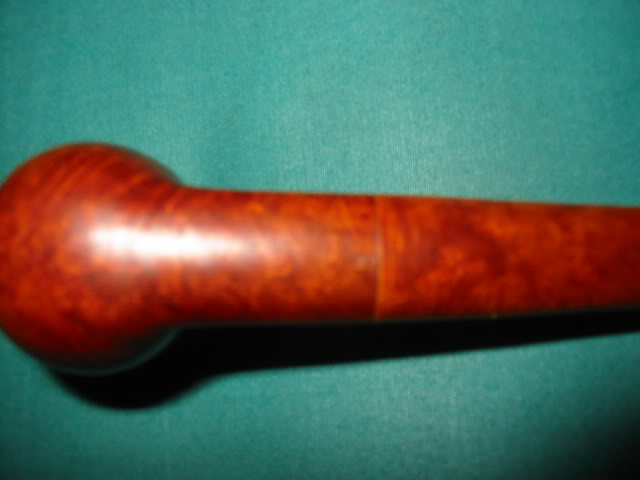
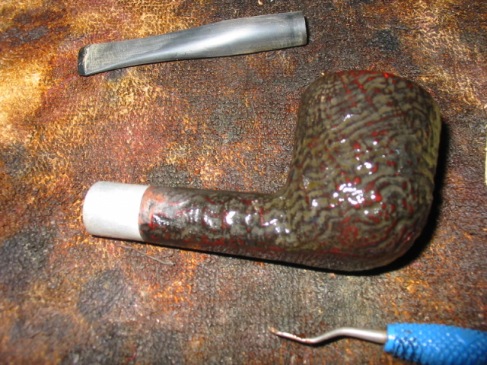
I then restained the bowl with a dark brown stain, knowing that when I buffed it the reddish brown undercoat would shine through on the high spots and the dark would fill the crevices and give the pipe a contrast stain. The next series of three photos show the staining and the way the various grains took the stain. The right side of the bowl has a great ring blast that is fairly deep and craggy. The left side is more of a blast on birdseye. It is an interesting looking blast. The bowl rim came out clean as well and shows an interesting contrast in the light of the flash.

ImageImageImage

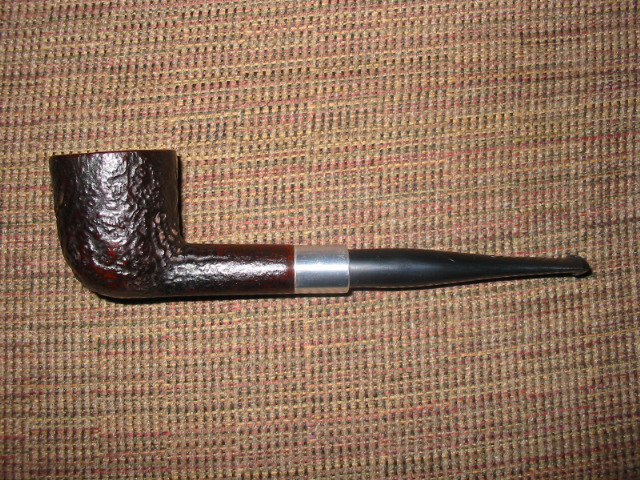
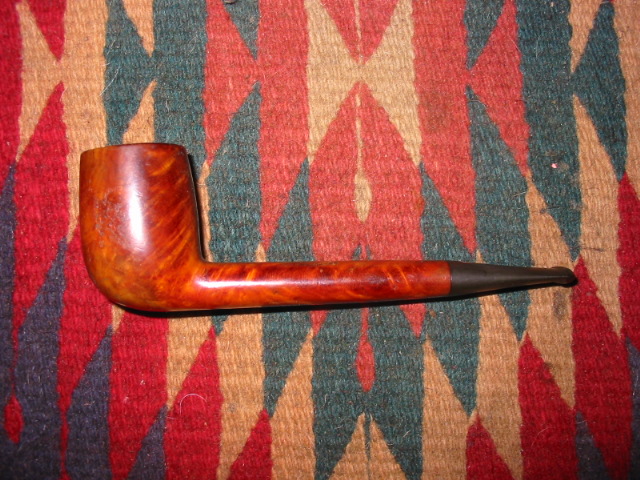
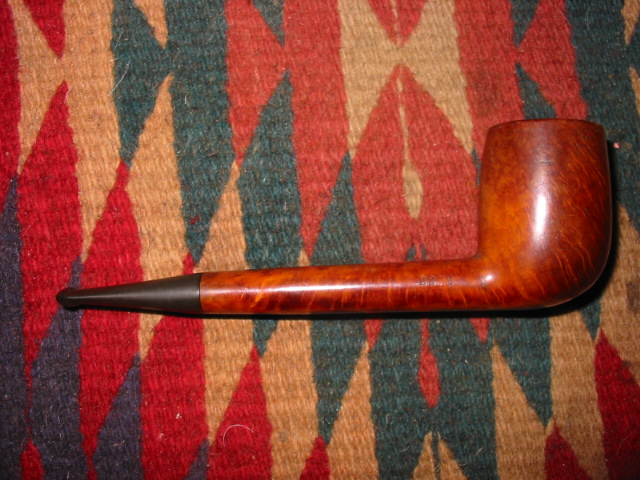
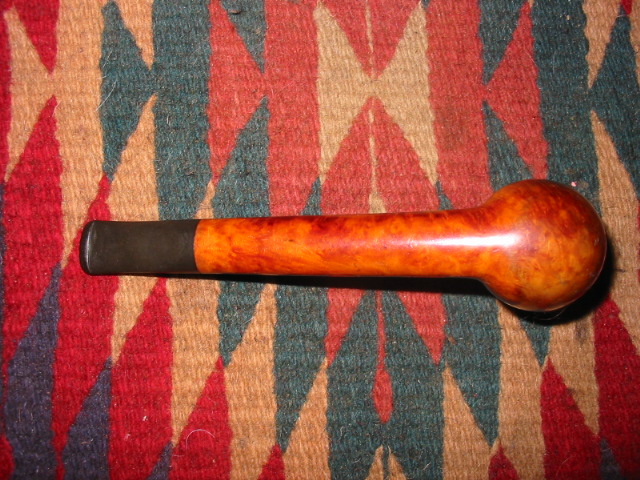
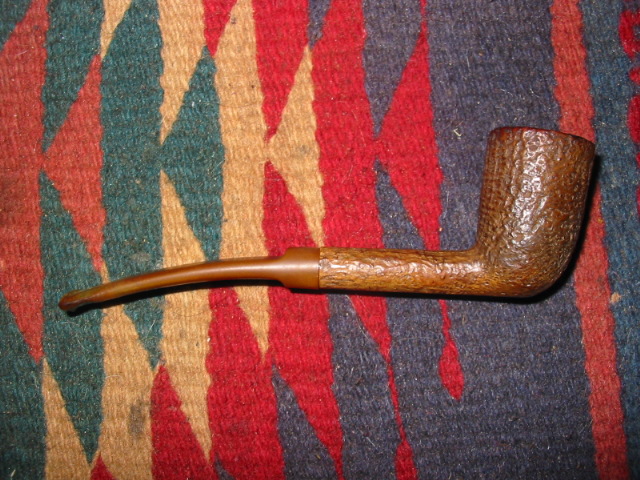
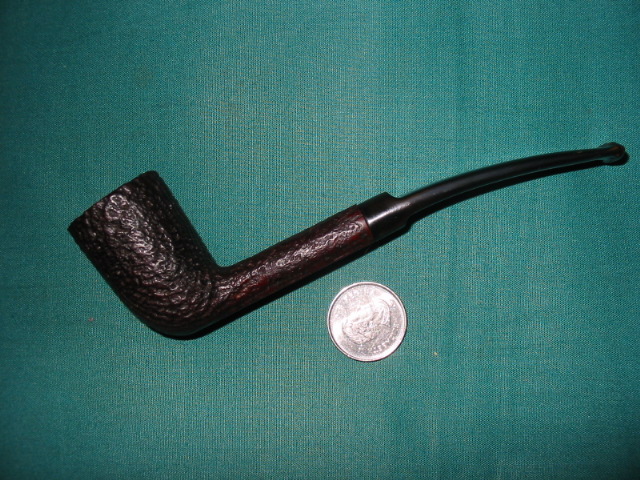
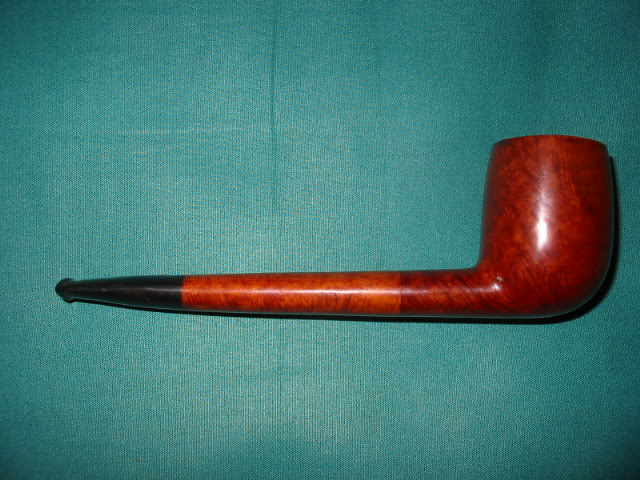
The final series of four photos show the finished pipe. The entirety has been given a coat of wax. I used Halcyon II on the blast to polish it without leaving the white residue in the grain of the blast when it dried. I buffed it by hand. The stem received another hand applied coat of carnauba wax and a buff by hand. The pipe pictured is clean and ready to smoke.

ImageImageImageImage

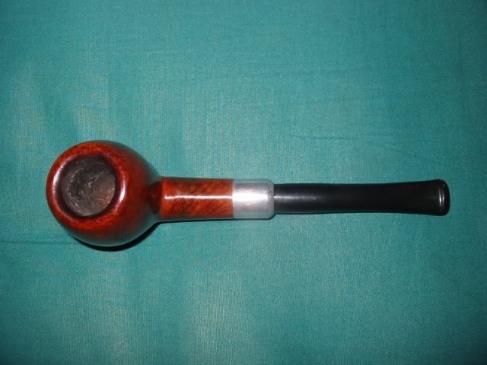
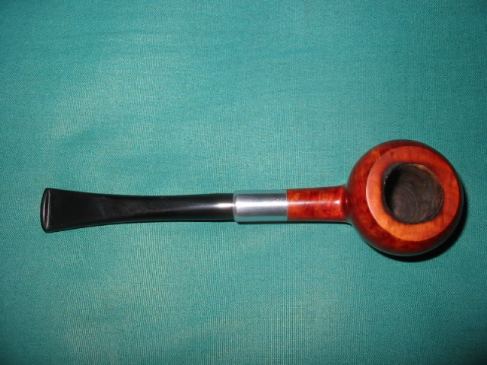
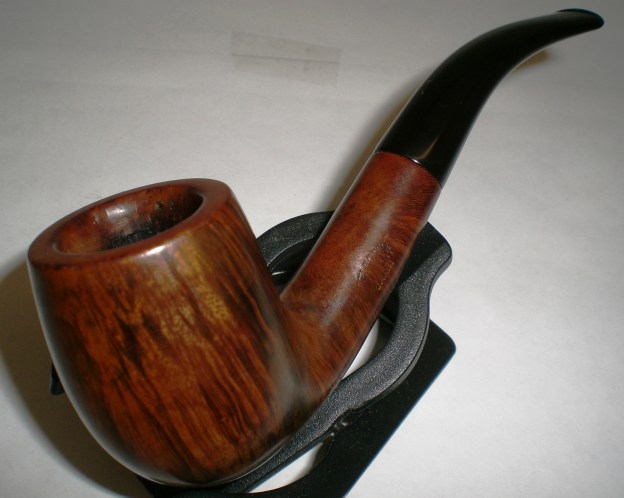
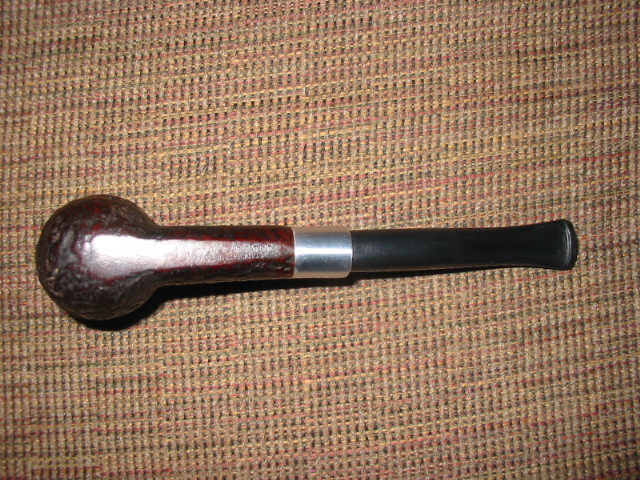
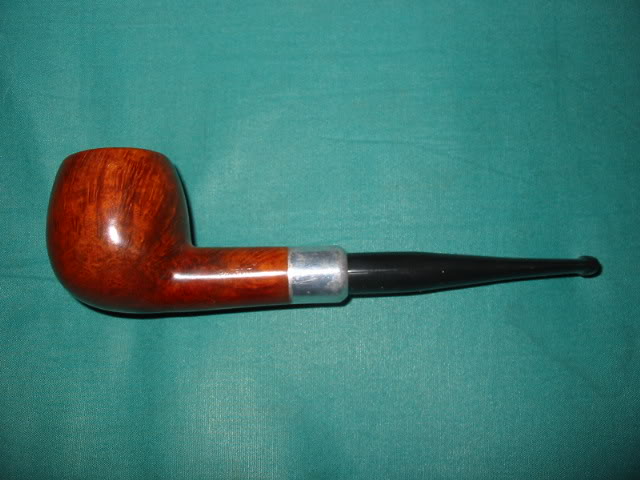
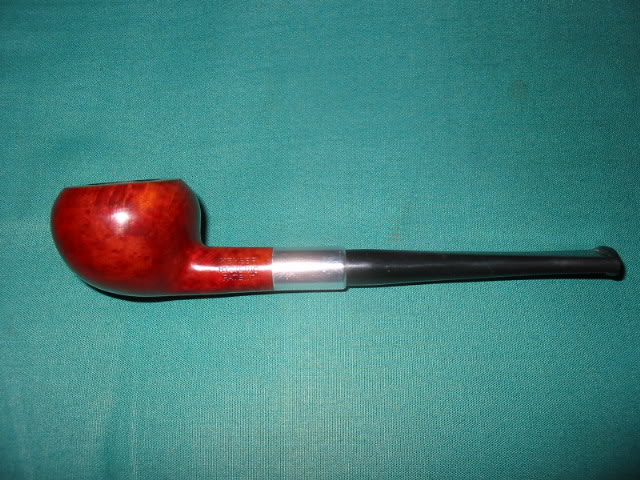
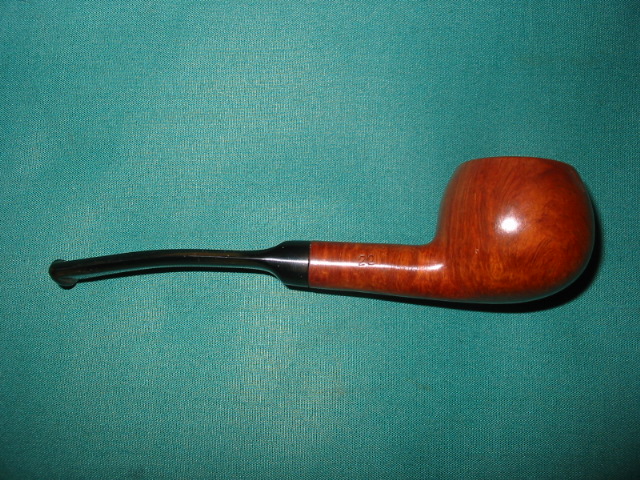
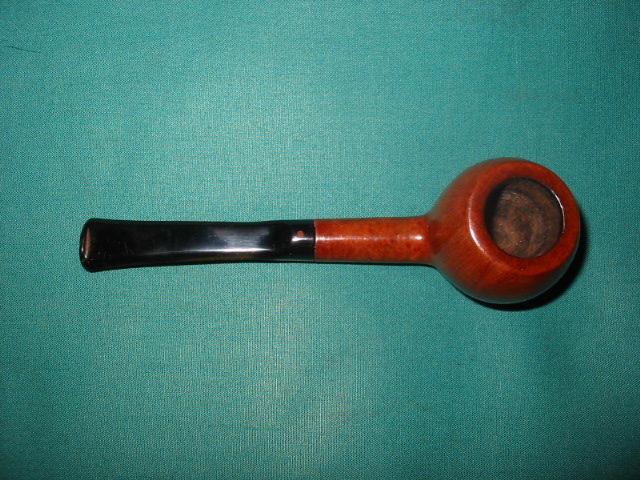
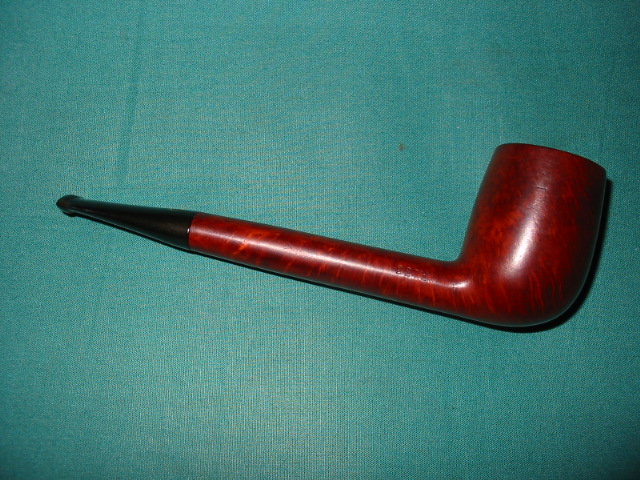
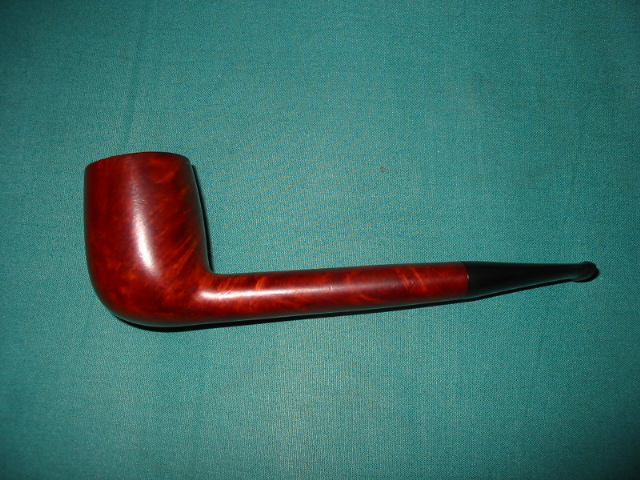
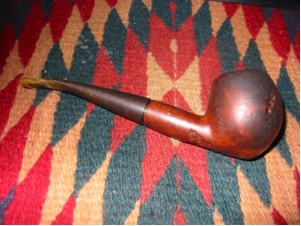
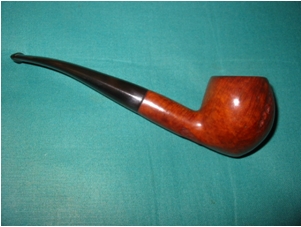
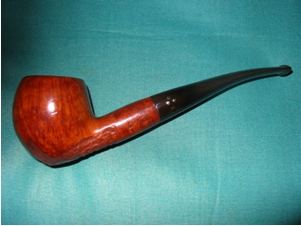
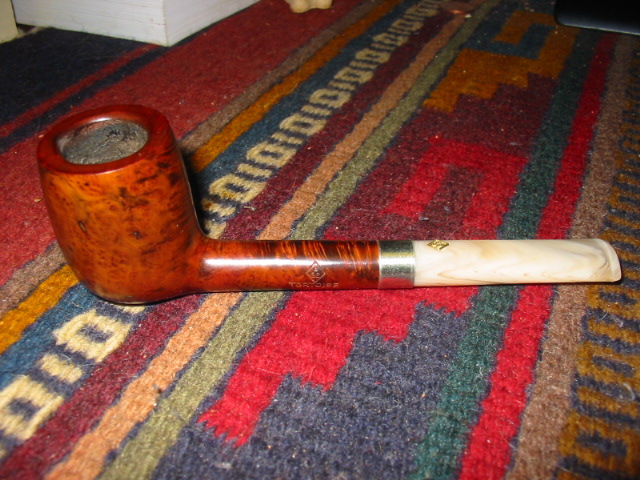
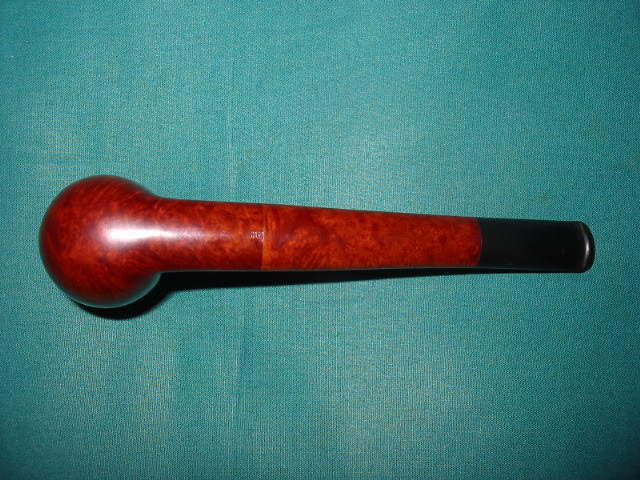
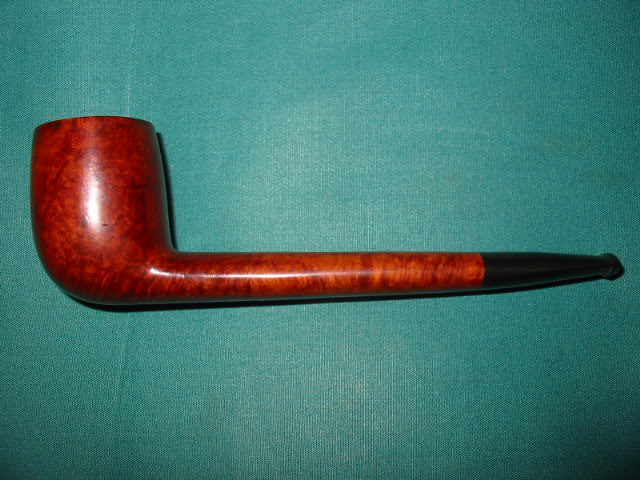
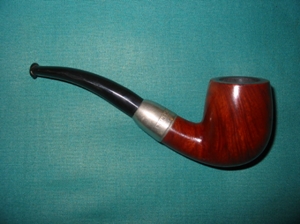
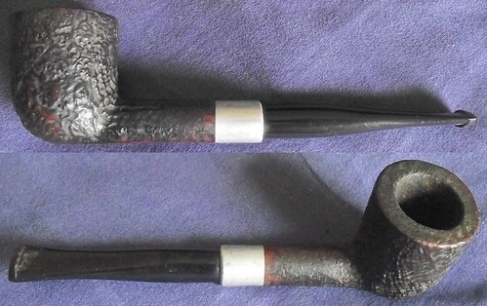
I have included pictures below of the other two Keyser pipes that I picked up and refurbished. The top one is an apple with really nice grain. I have been smoking this one and enjoying the dry and cool smoke that it gives. The second is a smaller prince shape that is no longer available. It had some burns on the rim that are still visible but it too smokes very well. One day will rework the rim a bit and minimize the burn marks. Till then I will smoke these Keyser’s and keep an eye for more of them.

ImageImageImageImage

Refurb on a Dr. Plumb Tween Size Prince


Blog by Steve Laug

Off the workbench today is a nice little Dr. Plumb Tween Size Prince (that is what the stamping on this one says). It was pretty rough looking as can be seen from the before shots. I had reamed it before I remembered to take the photos, so the bowl is very clean in the photo below.

Image

The bowl, in fact, was very dirty with tars and crumbling cake as well as a thick white “gunk”, for lack of a better word, in the bowl and all the way through the shank. I have no idea what it was other than the fact that it had a plastic feel to it. It was stringy and literally all over the inside of the bowl and shank. I had never seen anything like this in the years I have been refurbishing pipes. It came out with the reaming of the bowl and out of the shank with alcohol soaked pipe cleaners and a shank brush. It took some time to clear it out. Many pipe cleaners later it was clean. The state of the bowl when I got it told me that obviously this little guy (5 inches long, group one sized bowl) was a great smoker.

I stuffed the bowl with cotton bolls and filled it with alcohol using an ear syringe.

Image

I removed the stem and put a cork in the shank so that the alcohol would go all the way into the shank. I wanted to make sure that all of the remnants of white stuff and tars were removed from the bowl before I went further in cleaning it. I left it overnight and the next morning removed the cotton bolls and plug and cleaned out the bowl and stem with pipe cleaners. The bowl smelled fresh and almost new once that final cleaning was done and the alcohol evaporated. The bowl was then dropped in an alcohol bath for a soak. While it was soaking I went to work on the stem.

The stem took quite a bit of work to restore as it was badly oxidized. I had soaked it in Oxyclean while I worked on the bowl so now when I took it out the oxidation had softened. I buffed it with Tripoli, sanded with 240 grit sandpaper, buffed again with Tripoli, sanded with 400 and 600 grit wet dry sandpaper until I was able to get the grit off and then polished with micromesh pads from1500-6000 grit. Each level of micromesh gives the stem a deeper polish and shine to the stem. In buffing a stem by itself, I always avoid the saddle area or the area next to where it joins the shank as it is very easy to over buff this area and make rounded shoulders on the stem and ruin the stem/shank junction. Once that was finished I laid it aside with a coat of Obsidian Oil and turned again to the bowl.

I removed the bowl from the alcohol bath and dried it off. The bath removed the remnant of finish and all of the oils and grime on the bowl. I used the 3200 and 4000 grit micromesh pads to sand down the bowl, being careful to not damage the stamping. Once it was smooth, I wiped it down with a soft cloth dampened with Isopropyl alcohol to remove the sanding dust and then stained the pipe with a light cherry coloured aniline stain. (I mixed the stain by adding Isopropyl to the oxblood stain until it was basically a light cherry coloured wash.) I flamed it and then put the stem on and buffed both the bowl and stem with White Diamond and finished it with several coats of carnauba wax. Here is the pipe ready to smoke!

ImageImageImage

New Life for a Yello Bole Canadian


On a recent trip to the US to visit my parents I also visited several antique malls in their city. I have three that I usually have on my list when I go there. The one I want to focus on in this post is in an old grain elevator and has three floors of many “antiques” which always surprise me because many are the same age as I am!  Anyway, on the second floor I found a booth with two pipe racks containing over a dozen older pipes. Most were junk in that they had cracked bowls and broken shanks etc. But also in the midst of it was this old Yello Bole Canadian. It had some beautiful briar in it. Yello Bole is the grade down the line for KayWoodie, or so I am told. Pipes that don’t make the grade for KW will often be stamped with the Yello Bole brand. This one was stamped KBB in a cloverleaf on the top of the shank and next to it Yello Bole over honey cured, over imported briar. The stem has the yellow circle inlaid in the vulcanite. If memory serves me correctly this is one of the older pipes in the line.

ImageImage

The bowl was in pretty clean shape. The yellow coating was still visible in the bowl and the bottom half of the bowl was very clean with just a bit of darkening to the yellow coating. The rim was dirty and dented. There were tars on the rim and some deep scratches to go along with the dents. The bowl however, was still round, it had not been ruined by a reamer going a muck. The stem was oxidized and was slightly brown. There was light tooth chatter but no dents on the surface of the stem. The overall finish of the pipe had light spots and dark spots where the finish seems to have been exposed to light or was wiped down and finish removed. There was no over coat of varnish or of lacquer just solid clean briar with a spotty stain.

ImageImage

I broke the pipe down as seen in the pictures below. The stinger apparatus can be seen in the pictures. It is an aluminum shovel like contraption with the hole near the tenon and a long shovel like extension that extends through most of the shank. I cleaned out the bowl with an alcohol scrub on cotton swabs and cleaned out the shank with a shank brush, bristle pipe cleaners and fluffy pipe cleaners and alcohol. When they came out clean I worked on the outside of the bowl. I used cotton balls and acetone to wipe down the outside of the bowl and shank. I wanted to remove the rest of the finish so that I could prepare it for restaining. I applied the acetone until the bowl was free of the stain and finish. The pictures below show the cleaned surface of the bowl. I also used the acetone and some 400 and 600 wet dry sandpaper to clean the top of the bowl and rim. A folded piece of sand paper was used on the inner edge of the rim to clean the beveled edge. Before I stained the pipe I decided to clean and polish the stem. I used the Bic lighter method mentioned in an earlier blog post to get rid of the oxidation. In the pictures below the stem has the majority of the oxidation removed using that method. I then used 400 and 600 grit wet dry sandpaper with water and my usual list of micromesh pads from 1500-6000 grit to polish the stem.

ImageImageImage

Once the stem was cleaned and polished by hand I inserted it into the bowl and used it to hold the pipe while I restained it. I used a medium brown aniline stain on this pipe to approximate the original stain and to highlight the grain. I applied it with the dauber that came with the stain and then flamed it to set the stain. I then took it to the buffer and buffed it with Tripoli to remove some of the opacity of the medium brown stain and bring the grain to life. Once that was done it was buffed with White Diamond. Both the stem and the bowl were buffed. Care should be exercised in the buffing process to not obliterate the stamping. I use a light touch when buffing around the stamping. The four pictures below show the finished pipe – ready to load with a favourite tobacco and enjoy!

ImageImageImageImage


The Alcohol Bath and New Life for a Brigham Acorn


The work on this older Brigham 4 Dot Acorn gives a clear picture of how the alcohol bath can remove the grime and prepare the older worn pipe for a restain that brings it back to life. When I am dealing with this kind of wear and tear on the finish of an estate pipe, it is generally my opinion that it is easier to take the pipe back to an unfinished condition rather than try to work with the existing finish and have any hope of restoring it. It also is a shortcut method to remove the finish without the labour intensive sanding that would normally be required. I have a pint jar with a lid on it that I keep on my work bench that is full of isopropyl alcohol. It is now brown but I find that it works well in removing the finish but also it seems to add depth to the stains I use. I recycle the alcohol monthly by pouring it off slowly and rinsing and scrubbing away the sediment in the bottom of the bath. Thus it is always clear – just with a brown tint.

ImageImage

The pipe I am using to illustrate the process is a Brigham Acorn. It has the standard Brigham style rustication on the bottom edges and on the side of the bowl. It was used to give the pipe character and hide flaws in the briar on an otherwise nicely grained pipe. This one was in rough shape. The bowl was incredibly grimy inside and out. I reamed it and cleaned the bowl and shank. Then it went into an alcohol bath overnight so the alcohol would do its work cut the grime and dirt as well as any remaining finish.

ImageImageImage

While the bowl was in the bath I turned my attention to the stem. From the pictures above you can see that the stem was another story. The first ¾ of an inch around the button was heavily caked with a lime like build up. I generally find this under stems that have used the softy bit to protect them from bites. Most folks who use them never remove them to clean them and this is the result. It is hard stuff to remove. I mixed a solution of Oxyclean and hot water – 1 scoop of the powder to a pint of water. I shook it and stirred it to get it dissolved and dropped the stem in it for several hours. I had other pipes to work on during the wait so it was not a problem. I find that the Oxyclean softens the oxidation and particularly this kind of lime scale. Once it is softened it is easily removed with the buffer and sandpapers.

I took it from the wash and went to work on the inside of the stem. On a typical pipe this is an easy thing to do. But on a Brigham the tenon is the length of the shank and is made of aluminum. It is designed to hold the Brigham filter system which is a hard rock maple tube that fits in the tenon. 

Image

Where there was normally a Brigham filter in this pipe it was gone and the tars had built up to the point that the stem was closed off and did not fit all the way into the shank. It took a lot of pipe cleaners and alcohol to get it clean. The outside aluminum shank was sanded 0000 steel wool and with micromesh pads to remove the oxidation and darkening of the metal. The stem was sanded with my normal list of sandpapers – 240 grit to break up the oxidation on the surface, 400 and 600 grit wet dry sandpaper with water to finish removing the problem and then the micromesh pads – 1500 to 6000 grit to polish and shine the stem. Upon completion the stem was set aside to be buffed when the bowl was finished. 

I removed the bowl from the alcohol bath the next morning. I dried it and looked it over for any remaining finish or grime. I wiped it down with a soft cotton cloth and some clean isopropyl then gave it a quick buff with Tripoli to smooth the surface. I took it back to my work table and restained it. For this one I used an oxblood or cherry stain, rubbed on and rubbed off several times until I got the colour I was looking for. I let it dry and then took it to the buffer to be polished with Tripoli and White Diamond. After that it was polished with a coat of carnauba wax. Here are some pictures of the finished pipe.

ImageImageImage


Giving New Life to a Barling’s 2729 Fancy Bent Dublin from 1962


I picked up this old Barling’s shape 2729 in a lot I bought on EBay. From what I could find out about it on the internet it came out in 1962. You can see from the pictures the state it was in when it arrived. It was the kind of challenge I like to work on in these old estate pipes. There is a deep satisfaction in bringing them back to life and restoring them to a spot on the pipe rack and the weekly rotation. The finish was gone, though in the grooves of the blast there was some darker brown/red stain. The blast was obscured on the sides and rim by the grime that filled the valleys in it. The rim was intact and not beat up at all – just incredible dirty. The bowl had been lightly reamed and was still round!! The stem was well chewed with deep dents on the edges of the stem and deep dents in the top and bottom. There were also holes chewed through the stem on both the top and bottom as well. The oxidation was very heavy and deep. The Barling’s Cross was all but gone on the stem but under a bright light it was faintly visible so the stem was clearly the original.

ImageImageImage

I took the stem off the pipe to work on and placed the bowl in my alcohol bath for overnight. Before submerging it in the bath I wet it with alcohol and scrubbed it with a small brass tire brush that is readily available at most Wal-Mart stores or online through Amazon. I find that the soft brass does not damage the ridges and valleys on the blast finish but really loosens the grime when used with Isopropyl alcohol. I generally dip the bowl and then scrub it before leaving it to soak. When I remove it from the bath I scrub it once again and wash off the bowl with some fresh alcohol to remove any residual grime. Once the bowl was dry it was utterly lacking any finish. It was ready to restain. I set it aside and turned my attention to the stem.

Image

The stem was a mess on this pipe as I mentioned above. Below are four pictures of it after I soaked it in Oxyclean to soften the oxidation on the surface. The pictures show how reddish brown that oxidation was when I started. I sanded the surface to highlight the bite marks and holes in the stem. The stem was badly chewed and could have been a candidate for replacement but it was an original Barling’s stem so I wanted to see if I could save it and reuse it. I cleaned the surface and picked the grit and grime out of the holes with a dental pick. I washed the surface down with Isopropyl to give a good clean surface. The button was virtually chewed away and there was a fair sized hole on the underside of the stem. The tooth marks were very deep and there was not much to work with in lifting them with heat. This made them a candidate for a patch with black super glue.

ImageImageImageImage

The picture below shows the top of the stem with the black super glue fill in the bite marks and holes. The idea is to slowly fill them and build up the surface of the stem. I also continued to fill them until there was a good slope from the stem surface to the top of the button. Once it was dry my plan was to use needle files to recut the button.

Image

The next picture shows the glue after it has dried and I have done the initial sanding to smooth out the surface of the stem. I still have not recut the button at this point.

Image

The picture below shows the underside of the stem after the glue has dried and I have done the initial sanding on the stem. It is still pretty rough but the holes are filled and the button is built up. Note in this picture the very visible copper tenon on the stem. The previous owner must have broken the tenon and had it replace with this thin copper tubing. The tenon is very delicate on this stem so the copper is actually an interesting fix in terms of durability. I have never seen a repair like that. The tubing was scored and inserted into the stem and held with an epoxy. After the soak in Oxyclean it was loose so I removed it, cleaned it and since it was a good tight fitting tenon/mortise union so I decided to reuse it. It is a wonder that he did not put a copper band around the button end of the stem as well to repair the bite through and tooth marks.

Image

The next two pictures show the stem after sanding the stem surface smooth with 240 grit sandpaper. My purpose in using that grit is to get a clean surface to work with as I move to rework the button on the top and bottom of the stem. I had yet to work on the saddle of the stem in these pictures. I will often save that until the rest is finished.ImageImage

I failed to take pictures of recutting the button on the stem but you can see the new button in the finished pictures below. I cut and shaped it with a flat needle file and a wedge needle file. I like the clean angles of a new button so I was aiming for that with just a little wear to match the age of the pipe. I finished the sanding and polishing of the stem using 400 and 600 grit wet dry sandpaper and then used the normal list of micromesh sanding pads from 1500-6000 grit. I keep a bowl of water close by to dip both the paper and the pads in as I sand as I find it more effective in removing the scratches and remaining oxidation. Once the stem was finished I put it on the pipe bowl and gave it a buff with Tripoli and White Diamond to get a good sheen to the surface. I never buff a stem apart from a pipe as I do not want to damage the stem shank junction by rounding the clean edge of the stem. Once I finished I set it aside and went back to restain the bowl.

I did a bit of research (that is a part of the process I really like) to find out about the original finish and colour of stain used on this particular pipe. I learned that it was more of a reddish tone and really wanted to get close to that reddish brown colour on the finished pipe. I used some oxblood stain and a bit of medium brown stain (both aniline stains) and gave the bowl a coat of the brown first and then flamed it and buffed it. After that I gave it a coat of the oxblood stain and flamed it. I reinserted the stem and took it to the buffer and with a light touch buffed it with Tripoli and White Diamond. I did not want to soften the ridges of the blast but wanted to buff it enough to get a contrast in the stain.

I used some Obsidian Oil on the stem and then Halcyon II wax on the bowl. Once they dried I hand buffed the stem and the bowl with a soft cotton cloth. I added a coat of wax to the stem when it was finished as well. In the pictures below you can have a look at the finished pipe. I took pictures with a .10 cent piece/dime below the pipe to give an idea of the size. It is a dainty little pipe with a pencil shank. I hope to smoke it this week end and enjoy a nice bowl of aged 5100 in it.

ImageImageImageImage

Repairing a cracked shank


Blog by Steve Laug

I received this older BBB Tortoise that was in pretty good shape. I did a topping on it and a restain that is posted in a separate blog posting. But in the cleaning process I also found that the shank had a crack in it. In the picture below you can see that the crack is quite long and is open. I know that others repair these with a shank insert and glue the crack together, but I have not ventured into that avenue as yet. On this kind of crack in the shank my normal process is to glue the crack with super glue and then band the pipe. In this essay I want to describe that process for you.

Image 

I removed the stem from the shank and cleaned out the shank with pipe cleaners and alcohol. I want the surface to be grime free. I also wiped down the crack with an alcohol wipe to make sure the outer surface was also grime free. I then pried the crack open by inserting my dental pick in the mortise and giving it a small bit of pressure to open the crack. The key at this point is not to apply to much pressure as it will continue to crack. Being gentle and taking your time is critical at this point or you will make the problem a bigger one. Once the crack is open I drip super glue into the crack and then hold it together with the stem removed in order for the glue to bind the crack. Once that is done I wipe off the outside of any excess glue that will extend beyond the width of the band and set it aside.

ImageImage

I heat the band with my heat gun and pressure fit it onto the shank of the pipe by pressing the band and shank into the piece of carpet pictured in the photos. It is important to keep the pipe absolutely vertical and straight as you press the band into place. You will want to press the band on the shank until the lower edge is flush with the end of the shank so that the stem fits properly. With the band heated this is not difficult to do. The band will pretty easily slide up the shank with the pressure you apply. Check for a good fit and then let it cool for a few moments.

Image 

Once it is cooled the stem can be fit to the shank. I find that with the band the tenon will need a slight bit of sanding to fit correctly. I use some 220 grit sandpaper to remove a little of the material. I make one pass with the paper and then try it for a fit. It should slide in snugly so you must be careful not to remove too much material. Often just one pass is enough and the stem should go in perfectly.

Image 

With the stem refit the pipe is ready for a buffing and polishing. Avoid buffing around the band on the buffer as it will cause the pad to go dark and leave a black/grey haze on the briar around the shank and band area. I buff the shank avoiding the band and then polish the entirety with a light touch on the carnauba wheel. Below is the banded and repaired pipe.

Image 

This One is a Mystery Pipe – Is it a ?Dunhill?


You will notice from the title of this blog piece that the Dunhill title is framed with question marks. The pipe is a mystery to me all the way around. There is nothing straightforward with it in terms of stamping or composition. It is composed of three distinct pieces (stem, shank and shank/bowl) that have been joined together at some point in the pipe’s history. From the pictures below you can see the junction of the bowl and the shank. The stem on the shank is a white dotted Dunhill stem. How did this pipe come to be and how did it incorporate at least two different pipes? It would be great if this old timer could tell its story because I am sure that it would be an interesting tale. Did the original owner break the shank on his pipe and then have a repair man do the fix? If so, did the repairman use a second pipe shank to add to the bowl for the repair or did the original owner take two of his pipes (both broken) and have them put together in this creative fashion? Did he take the bowl from one and the longer shank and stem from another and join them to form a new third pipe? Was the original of both pipes a Canadian or was the one that the bowl came from a billiard? I don’t think I will ever know the answer to those questions and even others if I took the time to think it out. But I do know that this is part of the pleasure I derive from working on estate pipes. I enjoy trying to put together the story of an old pipe.

I picked this one up from EBay. I was the only one bidding on it. I think the seller had marked it a Dunhill Canadian for sale so it had many viewers but no other bidders. I knew from a quick look at the pictures the seller provided that it was probably not a Dunhill. I could not be certain but the shape of the bowl did not quite measure up to other Dunhill Canadians that I have and the flow of the stem and bowl was different to my eye. Others may be able to point out other inconsistencies that they see but that is what I felt as I looked at the pipe. What caught my eye though and caused me to put in a minimal bid were the shank construction (reconstruction) and the flow of the pipe. I liked the looks of it. I was also curious to see how it was done. It looked like a well done repair, if indeed it was one. I wanted to see it close up and study it. The white spot on the stem was a bonus though I could see from the photos that it was not likely a Dunhill.

When it arrived I took it from the box and did a quick field dress cleaning of the pipe. Reamed the bowl, wiped down the outside with an alcohol damp cloth so that I could see the stamping or remnants of stamping that remained. The bowl portion (the section from the front to the union on the shank) has stamping on the bottom of the shank that looks to be what remains of a Sasieni stamp or at least the last few letters “ieni”. That is a bit mysterious to me in that the other Sasieni Canadian I have has the stamping running in the opposite direction. So my guess is that this one is upside down – not unheard of but interesting nonetheless. The shank and stem portion (from the junction backward to the stem) are definitely from the same pipe. The fit of the stem to the shank is absolutely perfect with no sanding or shaping marks, no gap and no change of profile to the stem. Under a bright light is possible to make out faint stampings on the shank remnant – and I do mean faint. They appear to be the last four letters of Dunhill – “hill” and under that there are the four letters “land” which could be then end of the word England. From that I would conjecture that what I have is a combination of a Sasieni and a Dunhill pipe. The Sasieni contributed the bowl and part of the shank and the Dunhill the rest of the shank and the stem. Whoever did the union of the two old pipes did a superb job as the joint is very well done. The grains of the two parts of the shank are very different and the staining does not match. But other than that it is a flawless union.

ImageImageImage

With the mystery still unsolved I went to work on the ?Dunhill?/Sasieni. I gave it a better reaming and also cleaned it. The bowl had been very caked when I initially cleaned it so I did a deeper reaming taking it back to the wood. It had a very heady smell of Lakeland style tobaccos so I wanted to remove the remnant of that in the cake and prepare it for the tobacco that I would smoke in it. The shank and stem were tarry and restricted by the gunk inside them. I used a shank brush and many pipe cleaners to clear out the airway. I also tried to shine a light down the bowl to see if there was any evidence of how the repairman had done the union of the shank pieces. But the light would not shine that far down the shank. From the ease with which the pipe cleaners slid down the shank and the smoothness of the airway it was clear that the job was very well done. I also used a drill bit on my KleenReem reamer and ran it through the shank with no catches.

Obviously this was a favourite pipe for the previous owner. It was well cared for, repaired and put together and well smoked. I cleaned it with Isopropyl 99% and then sanded out the tooth chatter on the mouth piece. I wiped down the bowl and shank with undiluted Murphy’s Oil Soap and scrubbed it with a tooth brush. It removed the grime from the bowl and the rim. Once dry I cleaned off the remaining lava on the rim with 400 and 600 grit wet dry sandpaper. Once the bowl and shank were clean I wiped the entirety down with acetone. I wanted to get as much of the stain out so that I could try to get a bit better match on the two parts. I re-stained it with a cherry stain I have in the shop as it seemed likely that it was that colour from what was under the grime. The union of the two is still very visible even with a re-stain. The two parts took the stain very differently. I finished by buffing it with Tripoli and White Diamond before giving it multiple coats of Carnuba wax. I am happy with the results. I have smoked it quite often since the refurbishing and find that it is a great smoker. It is lightweight and comfortable in the mouth and the hand. The only thing that would make it even better in my opinion is to have the whole story behind this pipe. Ah well… I am going to go and fire up a bowl of good Virginia and enjoy adding my story to this pipe.

ImageImageImageImage

A BIC lighter and Oxidation


Blog by Rob Hardy and Steve Laug

Thanks to a serendipitous discovery by a friend of mine, Rob Hardy (incoinnu on Smokers Forums), who also does refurbishing as a hobby we have worked out a very different method of dealing with oxidation on vulcanite stems. The long term effects of the procedure are still in the process of being worked out though it is hard to imagine any long term effects as the heat is not left on the surface of the stem for a significant amount of time at all. The short term benefit is pretty astounding.
BIC
This is what he wrote regarding his new process with my additions and after thoughts. “Those of us who love refurbishing have spent too many hours trying to remove oxidation from vulcanite stems. We all longed for some magic solution that would reverse the process of oxidation. We have tried one or all of these products in our efforts to fight back the dreaded green brown, noxious discolouration of the stem – Oxyclean, sodium hypochlorite solution from 1-12%, Armorall, Armorall Tire Foam, olive oil, stem oil, automotive lens cleaner, eye of newt, toe of frog, etc. These liquids served to either soften the oxidation or disguise it. None of them remove the problem and under a strong light or magnification it was still there. Many of us have sanded using a variety of sandpaper grits both dry and wet, micromesh sanding pads or paper, and toothpaste with micro abrasives until our fingers were sore and raw. The overall effect of this process served merely to level the surface of the stem until the oxidation would be sanded away. It is very effective but also very time consuming. Over time the shape and sharp angles of the stem are changed. There had to be a better way of dealing with this that was still effective and less labour intensive. I was fortunate to be able to purchase a lot of 17 estate pipes from my local B&M, over half of them had heavily oxidized stems. After refurbishing the Savinelli Punto de Oro that was in the lot I was considering taking up refurbishing as a new hobby. I then started on the Dunhill and K&P Peterson. The Peterson was cleaned and reamed and was ready for the stem work. There was a minute tooth mark near the button that I wanted to remove so I was using Steve Laug’s technique of applying heat to the indentation to raise the dents. Usually I do this after I have removed the oxidation and work on a clean stem. This time however, for who knows what reason the stem had not been clean at all and was an oxidized mess. To raise the tooth dent I applied the heat from a BIC lighter with the flame 1/2″ from the stem. The indentation lifted…AND THE OXIDATION DISAPPEARED! Wow! I could not believe my eyes so I continued for the length of the stem and it worked – the oxidation was gone. I used short strokes with the flame of the lighter and wipes with a wet paper towel. After each wipe the paper towel came out with yellow stains. This seemed too good to be true. Out came my jewellers’ loupe for closer examination. I had to see this close up and personal. Under the magnification I could see that the heat had evened out the surface of the vulcanite and pitting and oxidation were gone. There was only BLACK vulcanite. I stayed up until one o’clock in the morning sanding the stem up through 8000 grit micromesh. I left the waxing until this morning. This stem now looks like it did when it left the factory over 60 years ago. I was and still am amazed at the results. I had to try it again this morning on a Stanwell stem. I used the same technique with the lighter and the wet paper towel. I used a lot of caution around the logo, covering it with a wet paper towel to protect it while heating with the lighter). It took only ten minutes to clean the stem of the oxidation! What a difference in the amount of time it took to clean this stem. It is cleaned and now ready for sanding and buffing. I tried it on a third stem. I moved over the stem with the lighter, six seconds per inch of stem, before wiping with a wet paper towel. Again the towel came out with the yellow colouring of the oxidation and all that remained behind was the black vulcanite. Each of the three stems took little time to clean and all that remained to finish them was to sand and smooth and then buff and polish.” Here are just a few important pointers that Rob and I have learned in the process:

  1. Do not leave the flame in one spot, keep it moving – burning vulcanite stinks and you will ruin the stem.
  2. Use a slow 1″ side to side sweep with the flame half an inch below the stem. Repeat until the stem is completely black and then sand.
  3. As the flame moves across the surface there is a light sulfur smell that is given off as the oxidation burns.
  4. In sanding the stem use a variety of grits of sandpaper (400 and 600 grit wet dry and higher grits if you choose) then micromesh pads or paper (1500, 1800, 2400, 3200, 4000, 6000) before buffing with Tripoli and White Diamond. I have also used 0000 steel wool and found that it is a good first step before the wet dry sandpaper is used.

Refurb on an old Morell Mackenzie Bent


Blog by Steve Laug

Yes a Morell Mackenzie. That is how the pipe is stamped and I had no idea what I was dealing with. I have a thing for collecting late 1800 and early 1900 pipes so when this one came up on EBay I just naturally hit the bid button. When it arrived I decided to do a bit of research on it and uncovered the following information. This is taken from a paper on BBB pipes by Jacques Cole:

“Probably one of the first filter pipes (paper filter) was the BBB “Sir Morell Mackenzie‘. That this pipe was made before 1900 is shown by a letter dated August 27, 1891 from Sir Morell Mackenzie regarding these models with longer mouthpieces. The brand survived into the 1960s.”

That is pretty clear information and fascinating as well. I had no idea of the time frame of the introduction of the paper filter in pipes. But this is a nice little pipe. It has the orific button on the mouthpiece (the round hole instead of the slotted airway). It is also a military mount stem. Inside there is a reservoir for the paper filter to sit in. It has a sterling silver shank cap and is stamped Morell Mackenzie. The briar is a nice flame grain and the bowl is well done and well drilled.

I cleaned out the reservoir and the airway to the bowl. Took a bit as I had to work a paper clip through the airway and then a shank brush and finally bristle and fluffy pipe cleaners. The shank and reservoir are now clean!! The stem was an interesting proposition. It was pretty clean as it is built to hold the other end of the paper filter. I cleaned and swabbed it out. The stem needed to be sanded to remove tooth chatter and oxidation. Then I sanded with micromesh pads and buff with Tripoli, white diamond and finally carnauba.

Here are pictures of the pipe before the cleanup:

ImageImage

Here it is after the refurbishing

ImageImageImage