Tag Archives: Oxidation

No Name Pot Brought Back to Life from the Brink


This bowl came to me with a batch of bowls needing different degrees of work. This old-timer needed cleaning as the buildup of grime and grit that was ground into the bowl was thick. The surface was coated with a greasy black substance all around the top of the bowl and the sides. The bowl/shank junction was incredibly grimy. The inner rim was out of round and the outer rim and the top of the rim were in rough shape. The outer edge had been hammered around the sides and the top had dents and cuts in the surface. The shank looked to be slightly shorter than I have come to expect on this shape of pipe; though the drilling and the mortise were original. The shank had definitely not been shortened. The bowl was caked and the buildup thickest around mid bowl. There were quite a few small pink fills around the bowl sides. There was no stamping or identifying marks on the pipe. There had been some sanding done around he shank and it had left behind some fairly deep scratches.
IMG_5732

IMG_5733

IMG_5734

IMG_5735
I went through my can of stems and found one that fit quite well. It did not need work on the tenon diameter as the fit was snug. The stem was bent and would need to be straightened to give it a proper fit to the bowl. Once the stem was in place it was clear that the shank was out of round. The bottom edge of the shank was somewhat thicker than the stem at the same spot. I would need to work on the flow of the shank from the bowl to the stem union to insure that the fit was smooth and the transition seamless.
IMG_5736
The stem was badly oxidized so I figured heating it to straighten it would actually soften the oxidation and bring it to the surface. I used a heat gun on the low setting to heat the stem. I generally hold it about 4 or more inches above the heat source and hold so it bends in the correct direction as it softens. In this case it did not take long for the vulcanite to heat and the stem to return to the original straight position. I decided to leave a slight bend in the stem as I like the look of on the pipe.
IMG_5737
The next two photos show the stem after heating and straightening. The variation in the diameter of the shank and the stem is also clearly visible in these two photos.
IMG_5738

IMG_5739
Since the shank had no stamping to preserve I decided to sand the shank and the stem to even things out and to bring the shank into round. I used 220 grit sandpaper to remove the excess briar and to shape the taper on the stem. I sanded the stem as well to remove the softened oxidation and make the cleanup simpler.
IMG_5740

IMG_5741

IMG_5742

IMG_5743
I set up a topping board and anchored a piece of 220 grit sandpaper on the surface to provide a flat straight surface to sand the top on. I twisted the top into the sandpaper in a clockwise motion to remove the tars and rim damage on the bowl.
IMG_5744

IMG_5745
I wiped down the surface of the bowl with acetone on cotton pads to remove the grimy buildup on the finish. The black tarry substance took some elbow grease and hard scrubbing to remove. The inner rim would need some work to bring it back into round but that would wait until after I reamed the pipe.
IMG_5748
I sanded the bowl with 220 grit sandpaper and medium and fine grit sanding sponges to further remove the finish and the grime. I worked on the inner edge of the rim with a folded piece of 220 grit sandpaper to bevel the inner edge into the bowl. This minimizes the appearance of the bowl being out of round. It also removes burn damage and smooths the look of the rim as a whole.
IMG_5749

IMG_5750

IMG_5751

IMG_5752
I decided to try something different on this bowl in terms of stain. It had some great cross grain and some nice birdseye grain that I wanted to highlight. It also had some ugly pink fills that I did not want to pick out and refill. This led me to try a black aniline stain. Before I stained it I used a black permanent marker – a sharpie to line through the pink fills. I blended them into the grain of the wood with the pen. I heated the bowl with the heat gun to open the grain and then applied several coats of black aniline stain, flaming the stain between each application. Once the stain was dry I wiped the bowl down with isopropyl alcohol on cotton pads and then sanded the bowl with a medium grit sanding block. I wanted to remove the black stain from the higher/harder areas of the briar while leaving it in the grain patterns.
IMG_5753

IMG_5754

IMG_5755
I sanded the bowl with a medium grit sanding sponge and then wiped it down with isopropyl alcohol to remove the dust. I remarked the fills with the black Sharpie. In the four photos below the marked fills are visible and the finish has about all the black removed that I wanted to take off.
IMG_5756

IMG_5757

IMG_5758

IMG_5759
I rubbed the bowl down with Olive oil on a paper towel and rubbed it into the finish. I sanded the bowl with micromesh sanding pads – 1500-2400 grit, while the oil was wet as the oil gives the pads a bit more bite. I worked on the marked areas to blend them in with the sanding pads. I also sanded the stem with the micromesh sanding pads and the Olive oil at the same time. The next four photos show the finish after it had dried over night. I then buffed it on my buffer with White Diamond and gave the bowl several coats of carnauba wax. You can see how well the black sharpie blended into the finish. The pink fills have all but disappeared in the finish.
IMG_5760

IMG_5761

IMG_5762

IMG_5763
I sanded the stem with my usual array of micromesh – the difference this time was all pads were used to dry sand the stem – 1500-12,000 grit. In between each grit I rubbed the stem down with Obsidian Oil and rubbed it into the vulcanite before sanding with the next grit pad. Once I had finished with all grits I gave the stem a final rub down with the Obsidian Oil.
IMG_5764

IMG_5765

IMG_5766
I gave the pipe several more coats of carnauba wax on the buffer and then buffed it with a soft flannel buff to bring out the shine. I was aiming for a stem shape similar to what I had seen on the Castello 55 shape and wanted that slight bend downward in the final look. While the pipe is certainly no Castello, I like the final look of the stem and the bowl. It certainly has come a long way from the bowl that came in the lot I received in the mail. This one should make a good addition to someone’s rack once it leaves here. The next four photos show the finished pipe.
IMG_5767

IMG_5768

IMG_5769

IMG_5770

A Hilson Meerlined Tall Dublin Reborn into a Briar Calabash


Blog by Steve Laug

I received this old briar bowl from a friend and decided to see what I could do with it. It was in pretty rough shape. The shank had been damaged and repaired with some kind of epoxy as the gel surface of the crack was hard as rock. The repair was actual the most substantial part of the bowl. The bowl had an amazing deep and craggy blast to it but the finish itself was worn. Fortunately the wear was not deep and the cragginess was not too badly affected. The rim was smooth but the edges were slightly worn. The bottom of the exterior of the bowl showed the most nicks and damage to the finish. There were marks from looked to be a band on the shank. The inside of the bowl was quite clean. Originally it looked as if it had a meerschaum lining and the glue that had held that bowl in place was gone and just a small remnant of the glue was on the interior walls of the bowl. The bottom of the bowl was stained with tobacco so evidently the meerschaum lining must have crack and seepage darkened the bottom of the bowl.
IMG_5393

IMG_5394

IMG_5395

IMG_5396

I cleaned out the inside of the bowl with cotton swabs and isopropyl alcohol. Once I had it clean I worked on the resin on the shank repair. I sanded it until it was flush with the surface of the rest of the shank so that it did not bulge. I continually checked to see if I was weakening the repair but the shank was solid. I used the dental pick and my modified Philips screwdriver rusticator to rusticate the area around the resin repair. I also found a band in my box that fit the shank perfectly and pressed it into place. The band was more for bling than as the shank was not cracked or damaged. I also went through my stem can and found a stem that fit the diameter of the shank, turned it with the PIMO tenon turning tool and fit is in place. It would need to be reduced slightly in diameter to fit well with the band. I wiped down the bowl and shank with isopropyl alcohol on a cotton pad. I did not want to chance acetone as I was worried about it dissolving the resin on the shank repair. As I did not know what was used in the repair I did not want to chance further damage.
IMG_5397

I stained the bowl with a dark brown aniline stain. I applied it, flamed it, applied it again and flamed it again. To get an even coverage on the sandblast finish it would take more than three applications and flamings to make the stain even. The photos below show the bowl after three coats of the stain. It would need to be repeated later in the process to get the rough places stained.
IMG_5398

IMG_5399

IMG_5400

IMG_5401

I sanded the stem with 220 grit sandpaper and with a medium and fine grit sanding sponge to make the fit against the band work well. Once the shape and the fit of the stem were correct I used a heat gun to bend the stem to an angle that worked well with the look of this pipe. For the angle I used the curve of my buffer to press the softened stem over. When I had it bent I held it as it cooled and then set the bend with cool water.
IMG_5402

IMG_5403

IMG_5404

IMG_5406

IMG_5407

After bending I resanded the stem with the sandpaper and sanding sponges. Once the majority of the scratches were gone it would need to be sanded with the micromesh sanding pads but I wanted to do some more work on the bowl and shank before finishing the stem.
IMG_5408

IMG_5409

IMG_5410

IMG_5411

I roughened the shank some more to give it a closer look to the sandblast of the bowl. I heated the bowl with the heat gun to warm up the briar before giving the bowl and shank yet another coat of the aniline stain. I gave it the fourth coat of the stain, flamed it and the coverage was finally what I was looking for on the pipe. The shank and the bowl bottom took the stain this time and matched the rest of the bowl.
IMG_5412

IMG_5413

I hand buffed the bowl with a shoe brush and then gave it a light buff with White Diamond on the buffing wheel. I took it back to the work table and gave it several coats of Halcyon II wax which works well on sandblast and rusticated finishes. I buffed it with the shoe brush to bring up the shine. The next three photos below show the bowl after the final stain and light buff.
IMG_5415

IMG_5416

IMG_5417

At this point in the process I used a cotton swab dipped in stain to touch stain the places on the shank the underside of the bowl that were lighter than the rest of the bowl. I let it dry completely over night and then hand buffed the bowl.

In a phone call with Tim West of J.H. Lowe Pipe Repairs I discussed the possibility of making this pipe a Briar Calabash. I gave Tim the dimensions of the bowl and he happened to have a bowl that was originally made for Pioneer Calabash pipes that was the correct dimensions. He sent along several strips of cork that would be used for making a gasket to give the meerschaum cup a snug fit in the briar bowl.
IMG_5501

I cut a strip of cork and glued it to the bowl with super glue. I used a small piece of the cork to fill the gap between the ends of the strip. Once the glue dried I sanded the cork gasket until it was the proper diameter for the briar bowl.
IMG_5502

IMG_5507

I used some Vaseline and lubricated the cork gasket and then used my finger to coat the inside edge of the briar bowl where the cork would sit. I then pressed the meerschaum cup into place in the briar bowl. The finished Briar Calabash pipe is shown in the photos below. The polished gloss of the white meerschaum bowl looks great against the sandblast dark brown briar bowl. The silver band gives a bit of contrast to the pipe. The draught on the pipe is perfect and the feel of the new Calabash in the hand is great. The pipe is still light in weight and the thin pencil shank and stem work well. Now all that remains is to load it up and have the inaugural smoke.
IMG_5508

IMG_5509

IMG_5510

IMG_5511

An Edwards 7377 Pipe Cleaned & Repaired


I first talked with Morty from Ontario on Pipe Smokers Unlimited online forums (PSU). She had found an old Altesse Briar with an Amber stem and found that I had the same pipe. In fact from what we could find and the responses we got we had the only two around! We exchanged quite a few emails and I did a few repairs and some stems for her. She has caught the refurbishing bug and has posted quite a few pictures of her work on the PSU Pipe Restoration Forum. She has been smoking a pipe off and on most of her adult life. She enjoys buying old estate pipes and cleaning them up and refurbishing them. She says that she has learned much from the blog and from other members on PSU. I have enjoyed seeing her work and have asked her to write-up some of her work and post it on rebornpipes for others to enjoy. Thanks Morty for being willing to do this for us. Enjoy this first post she has provided. I love the lines of this old pipe and the grain. Morty did a great job on restoring it. Without further introduction I give you Morty’s own words regarding this refurb.

I bought this Edward 7377 Long Bent Stem Pipe that was in bad condition and needed quite a bit of TLC.
morty1

I first reamed the bowl, did an alcohol and salt treatment. The bowl shank had a crack that was mostly covered by the silver band. I sanded the bowl with 100 grit, 220 grit sandpaper, and used medium and fine grit sanding sponges. I also topped the bowl as it had some slight char and some nicks that the topping easily dealt with.

I continued sanding the bowl with very fine grit sand paper before I dealt with the crack.
The crack in parts went right through, I wiped down the bowl with acetone to remove any remaining dirt and dust. I super glued the crack. allowing some to soak through to the inside.
I left this to set overnight.
morty2

I soaked the stem in Oxy Clean overnight as well. The next day I first removed most of the raised oxidation by scrubbing it down with a Magic Eraser, I find this makes the next steps easier and go much more quickly. The Magic Eraser removed most of the oxidation, I wet sanded with 1500 – 2400 grit, dry sanding with 3200 – 12,000 grit micromesh pads. Cleaned the inside of the stem with a test tube brush, and with many soft and bristle pipe cleaners, making sure the button is also spotless. Finally when the pipe cleaners come out spotless I will run a soft pipe cleaner through with Rum 151, this not only sanitizes the stem it can also grab any missed gunk.

I cleaned the silver band with fine steel wool. The next day I worked on the crack that was set now with the super glue. I sanded this down carefully and replaced the now clean silver band. The bowl cleaned up well as did the stem. I decided to use Olive Oil to bring out the grain, but also to darken the bowl a bit. Following Coastie’s (John William’s) method, I applied a small amount, rubbed it in with my hands, removed any excess and let it sit overnight. The next day buffed with a micro fiber cloth, and wow. !!! This had really brought the grain out and left a nice rich color to the bowl. I polished the bowl with Paragon Wax. I am pleased with the results on this very nice old Edwards Pipe.
Morty3

morty4

morty5

Restoring a Second Lumberman Deluxe Canadian by Comoys


Blog by Steve Laug

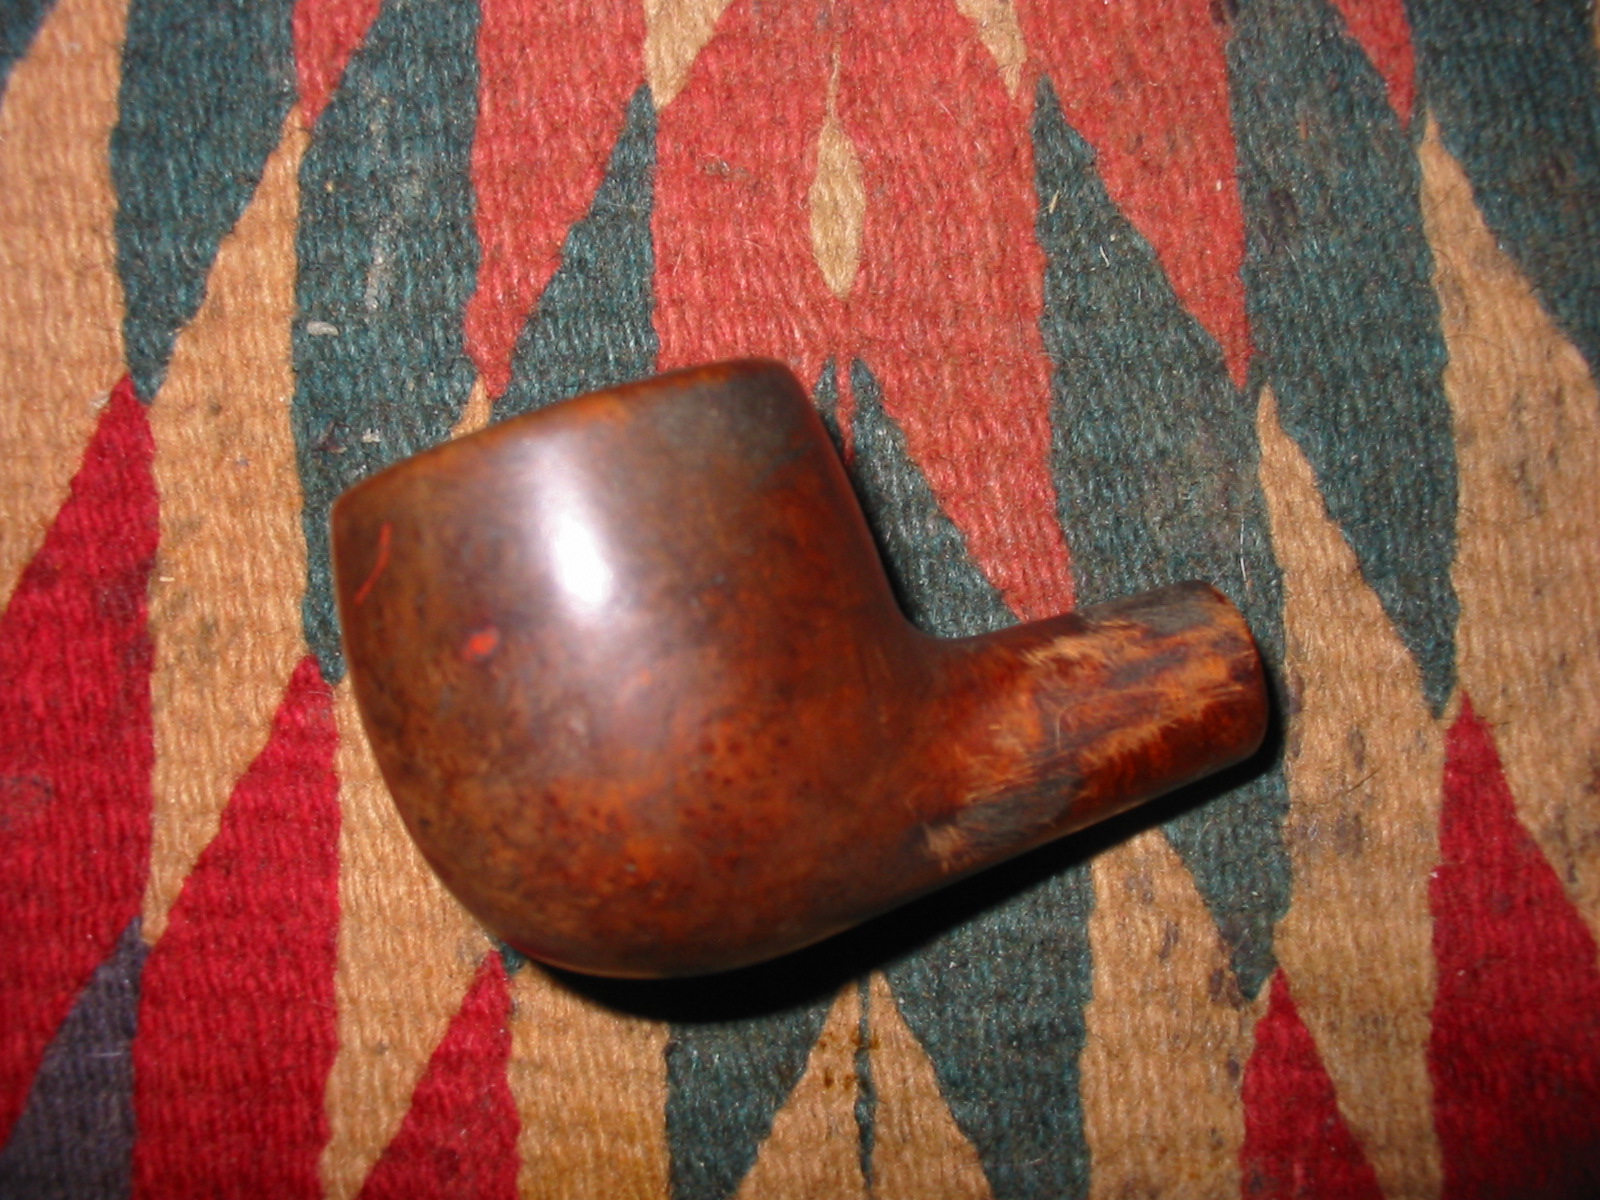
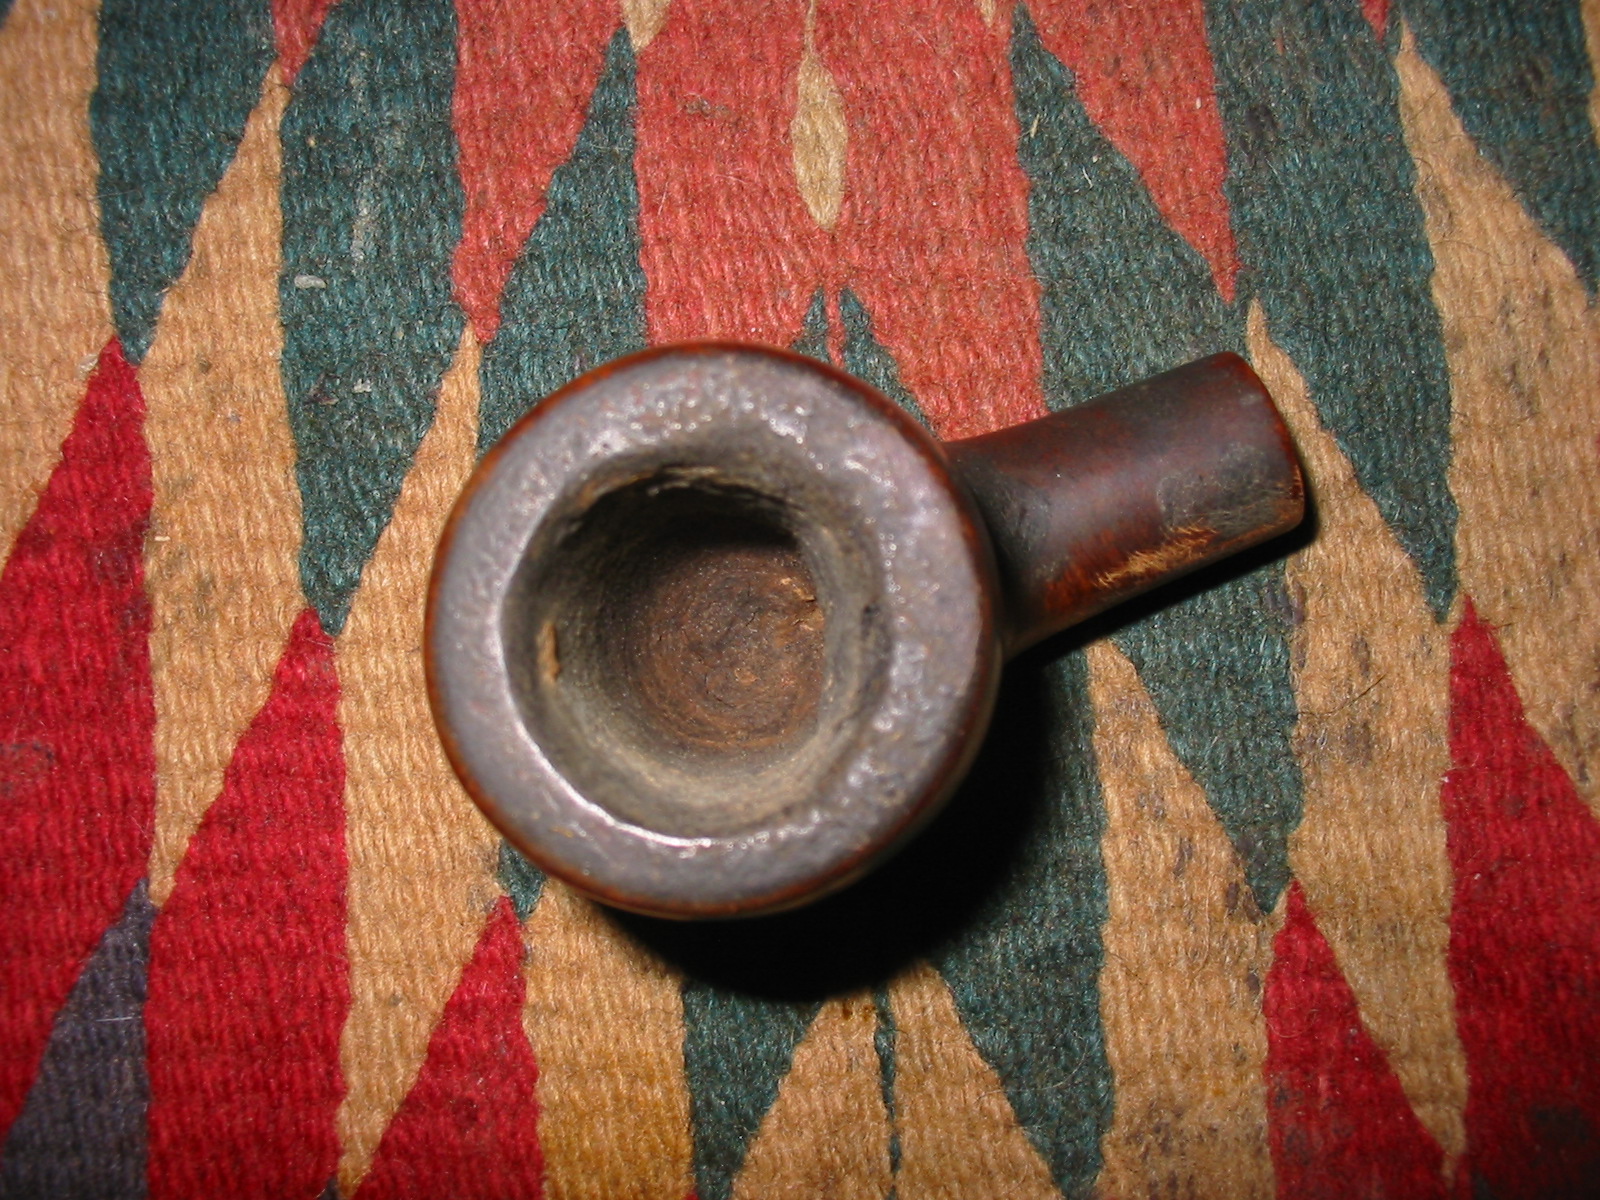
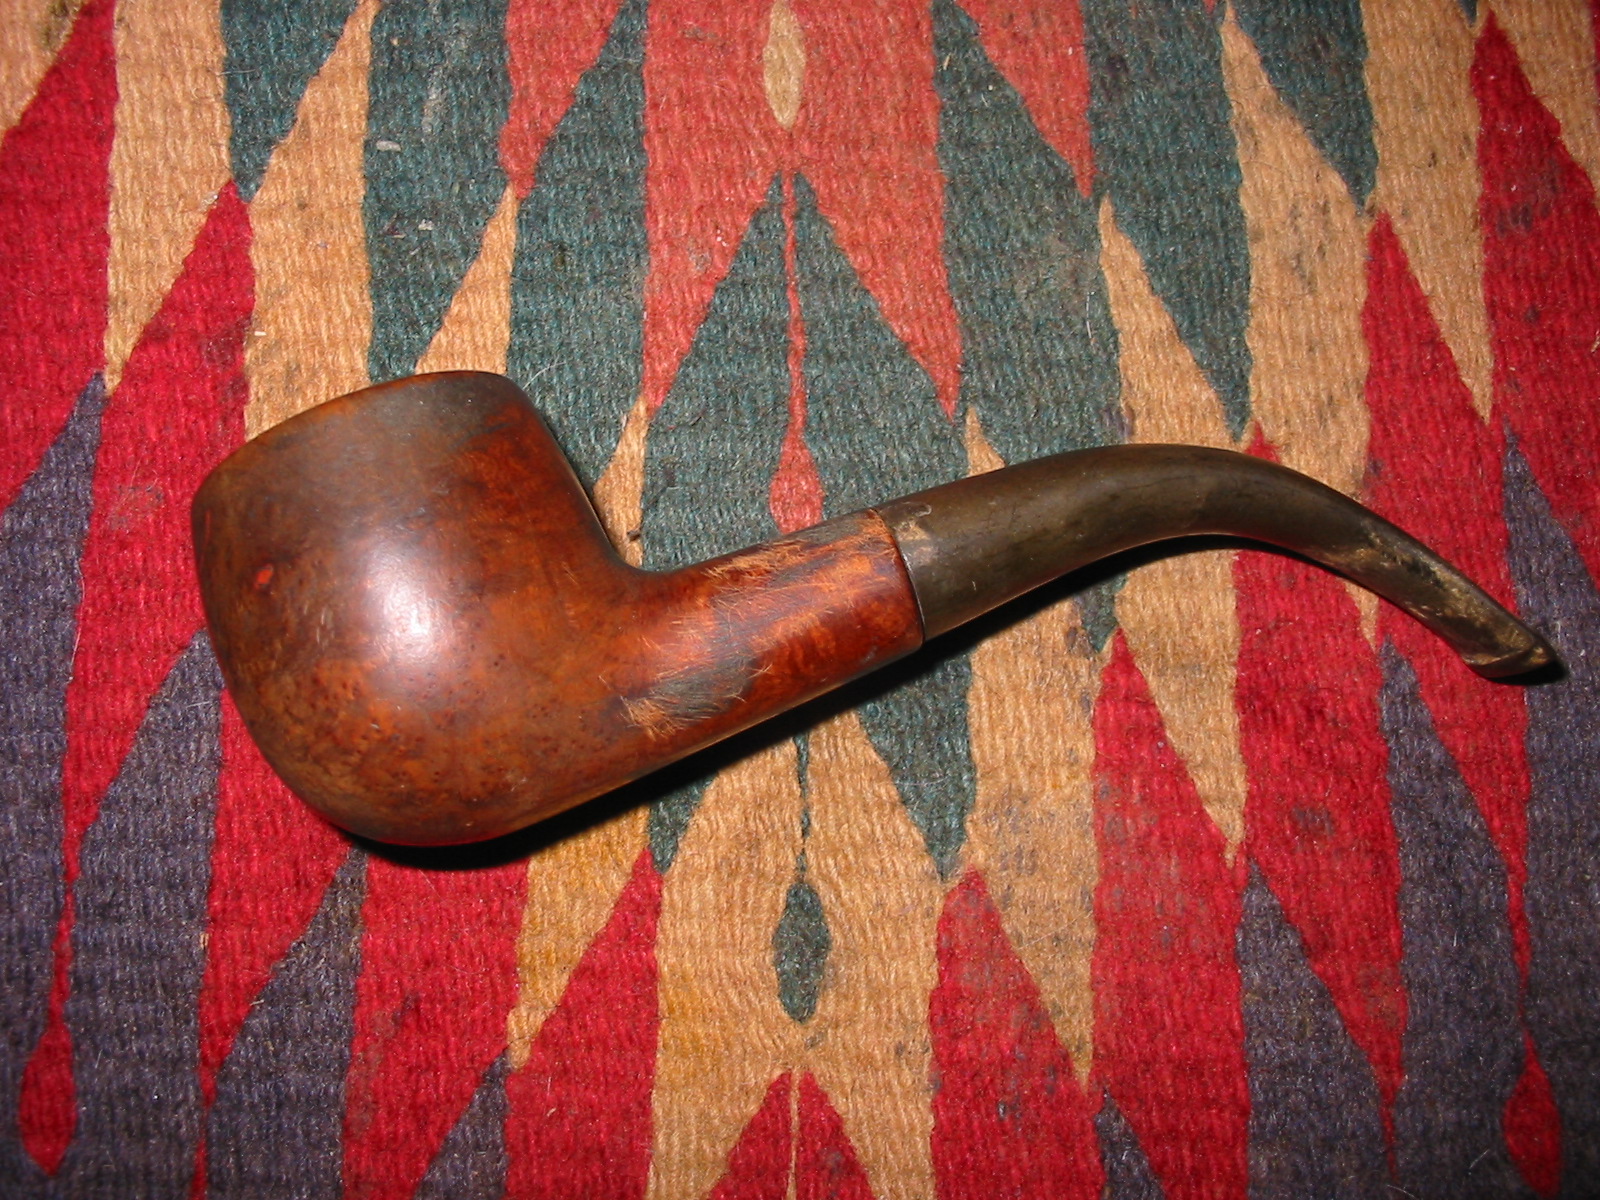
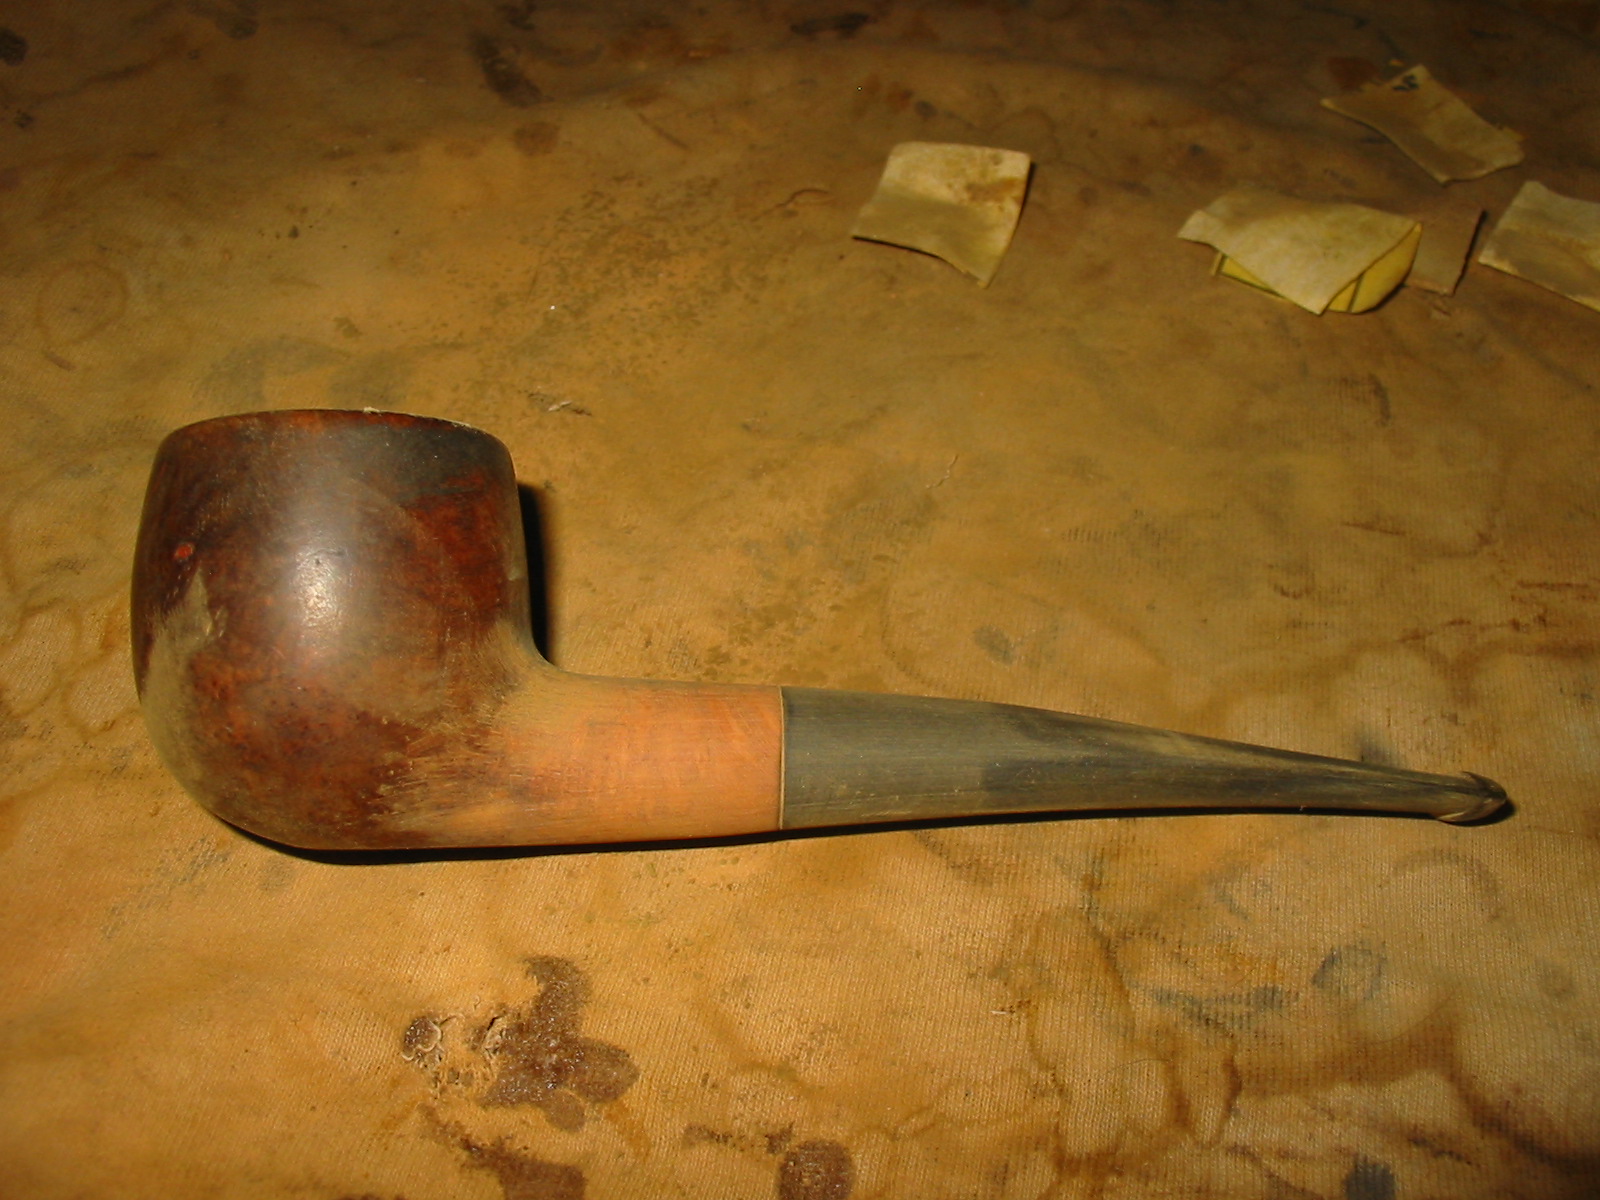
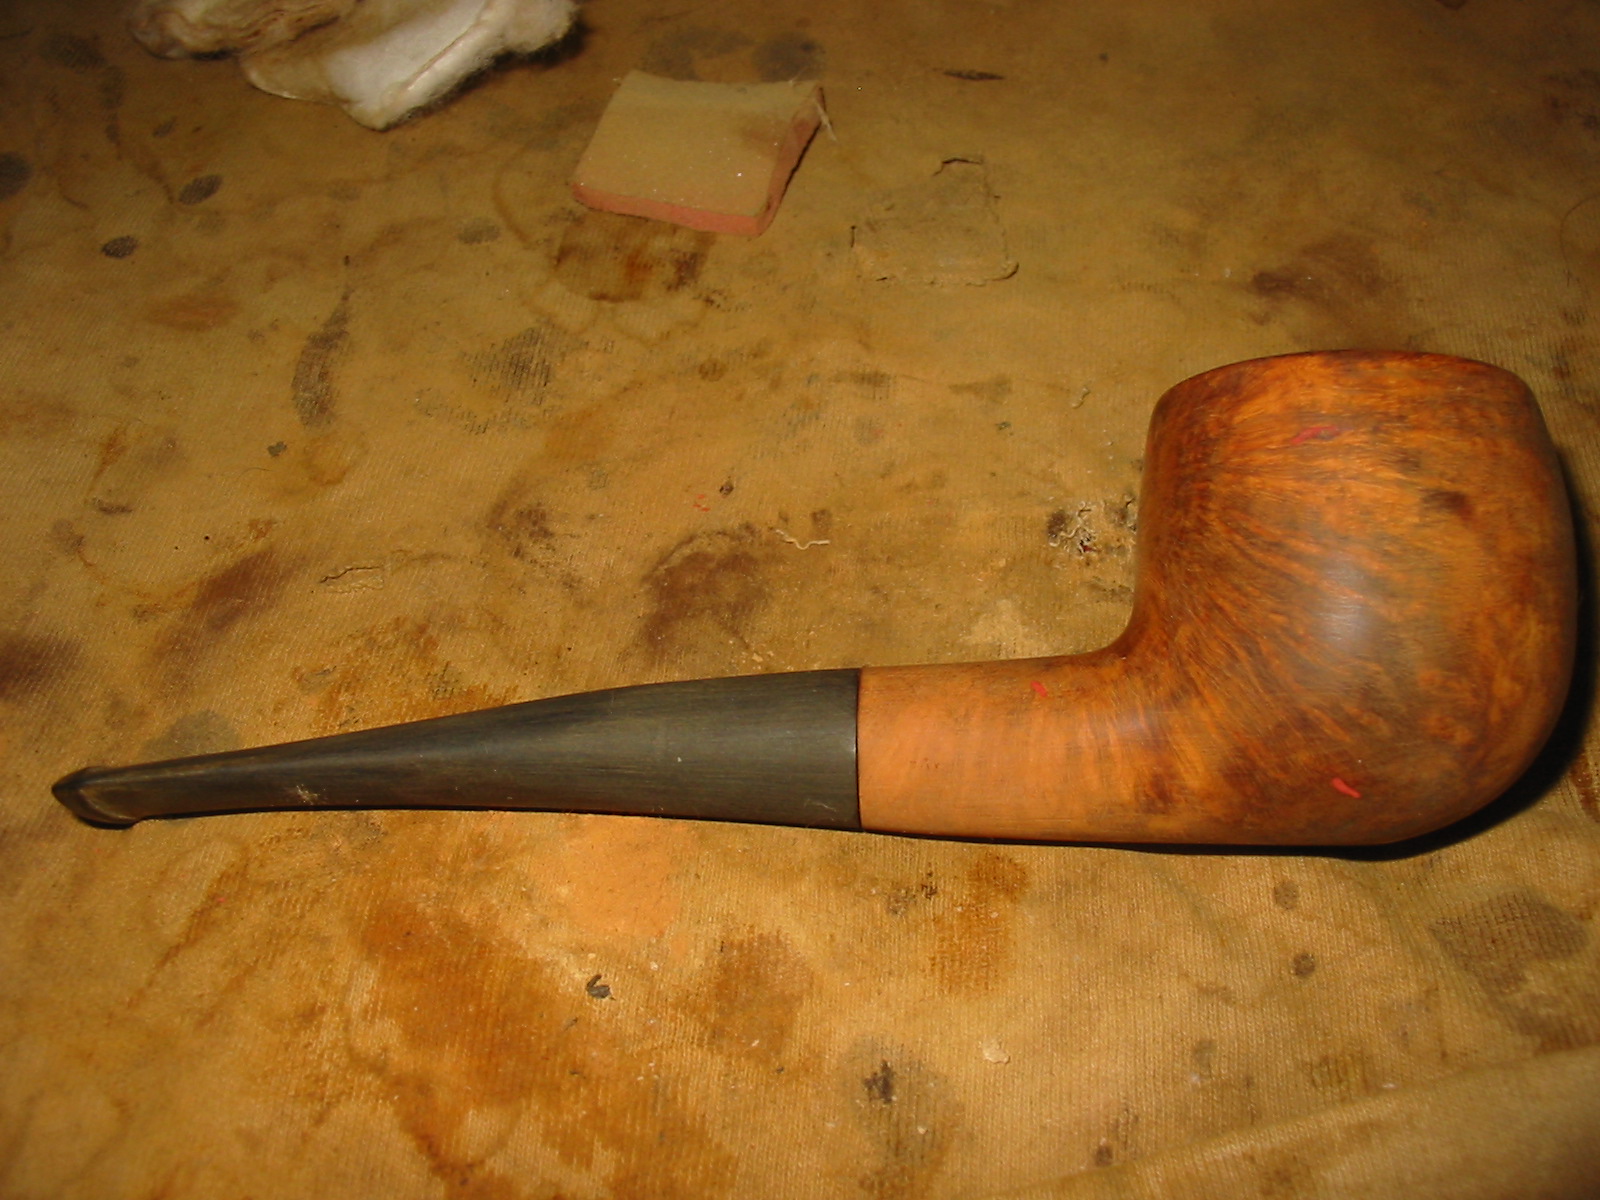
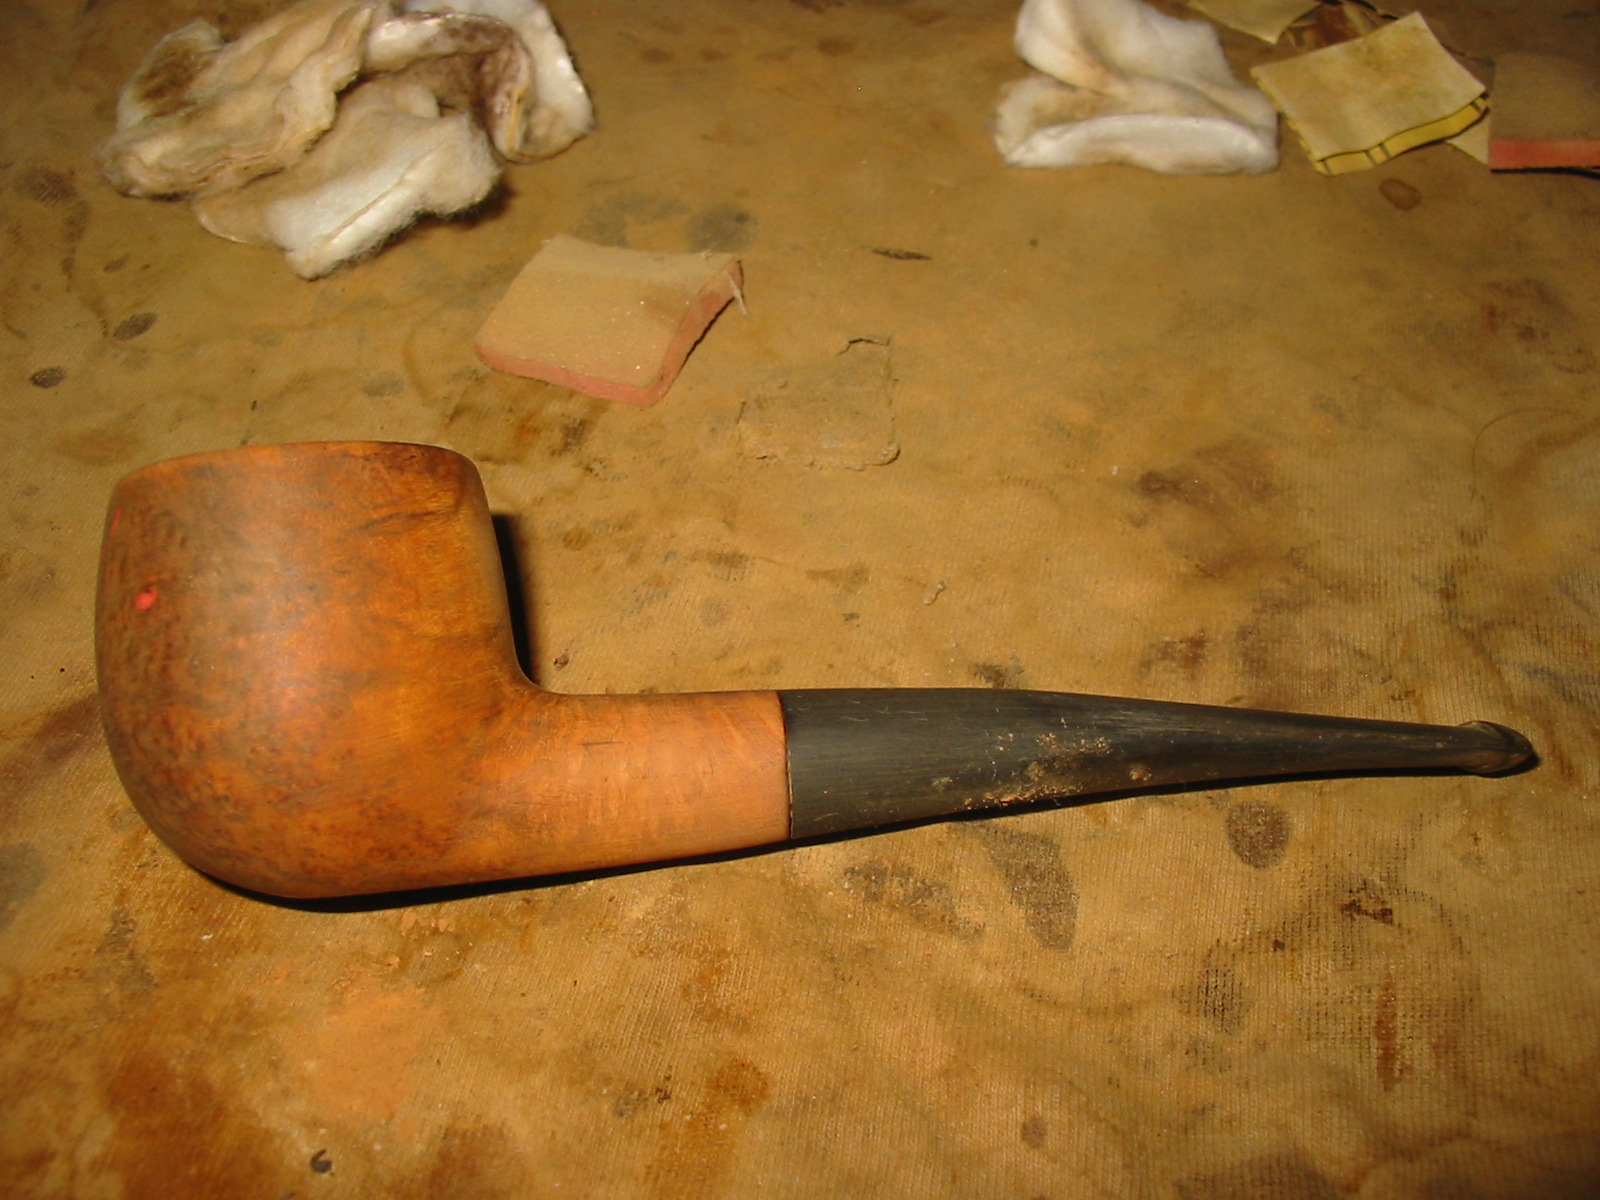
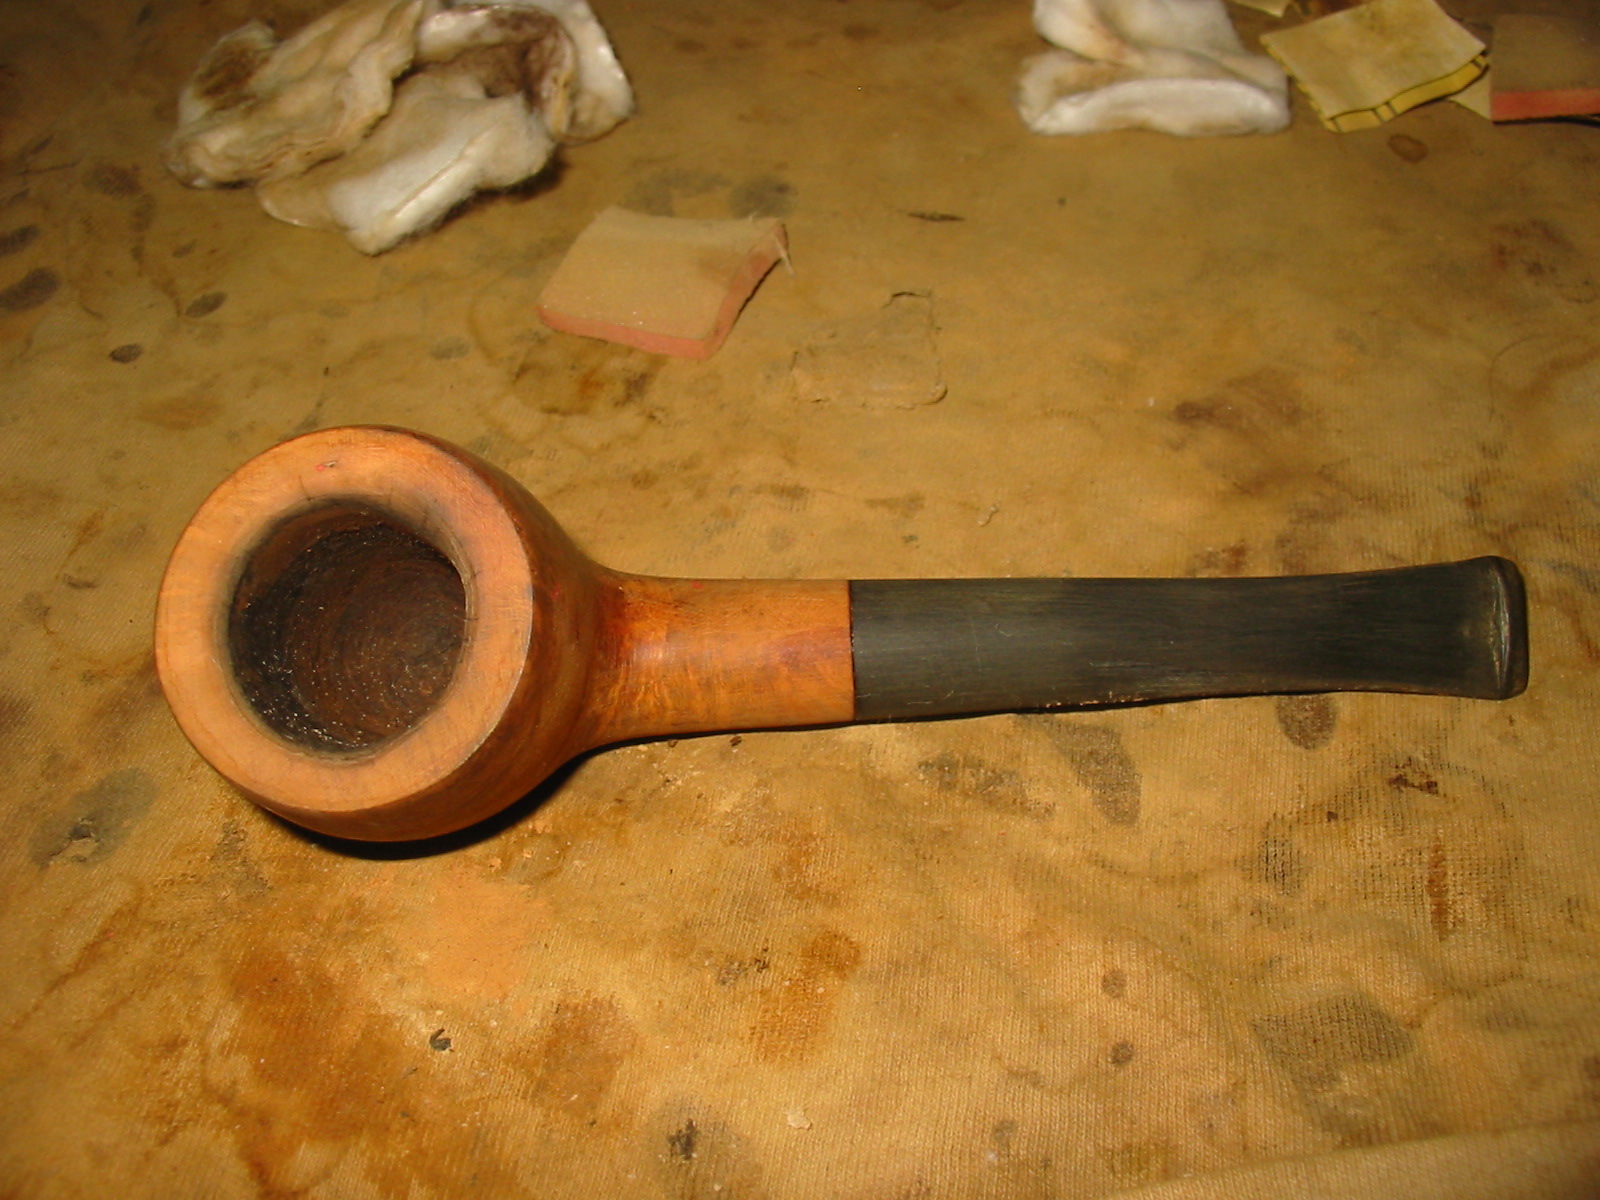
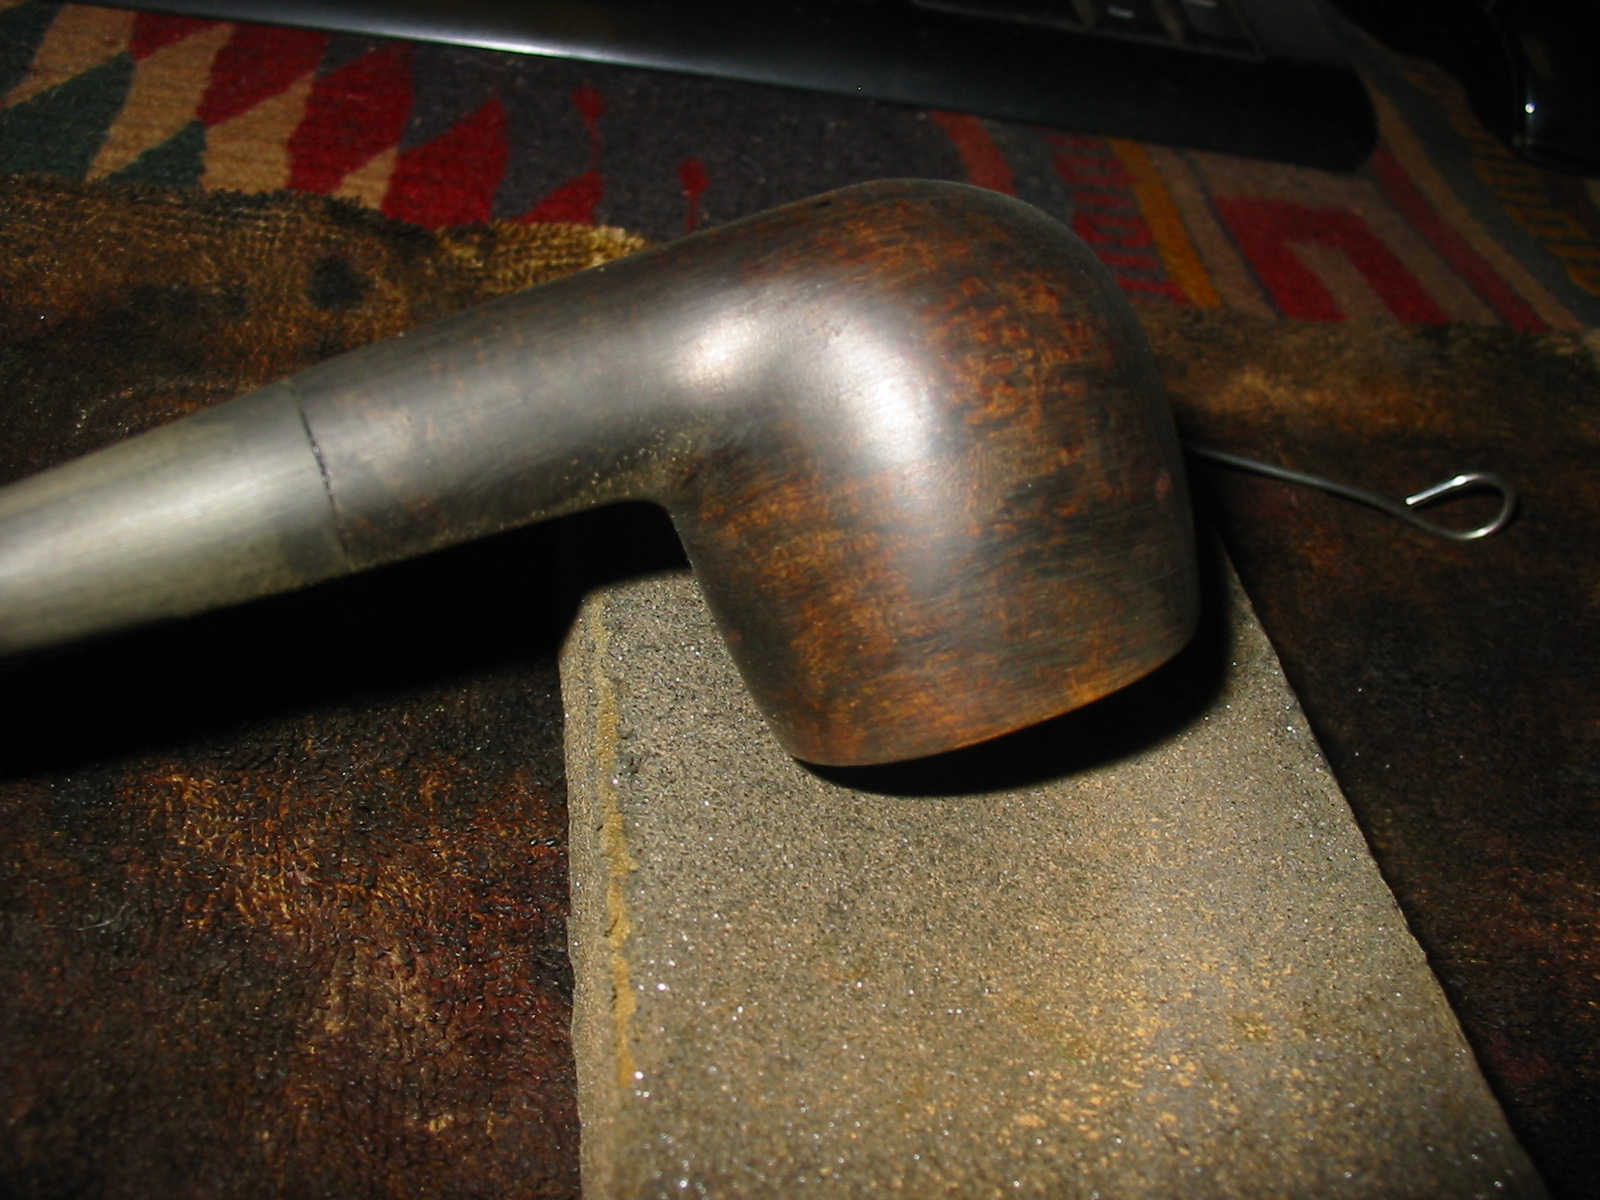
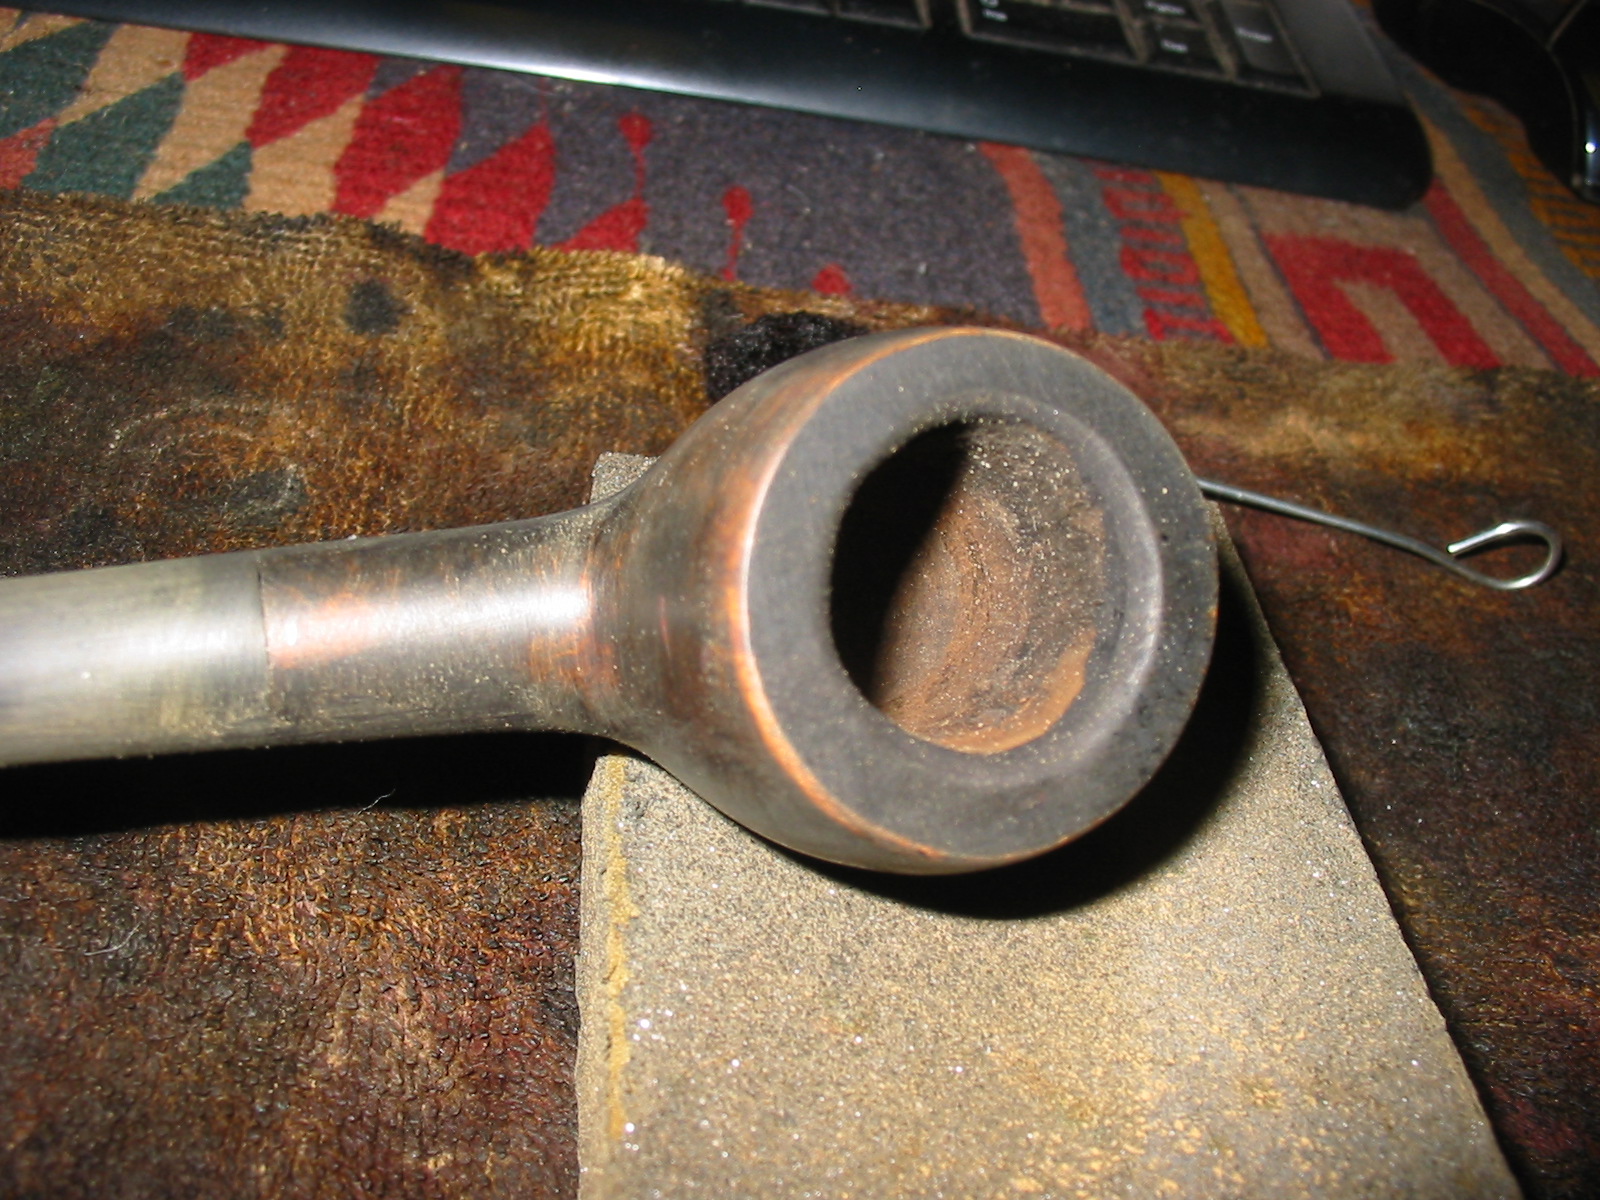
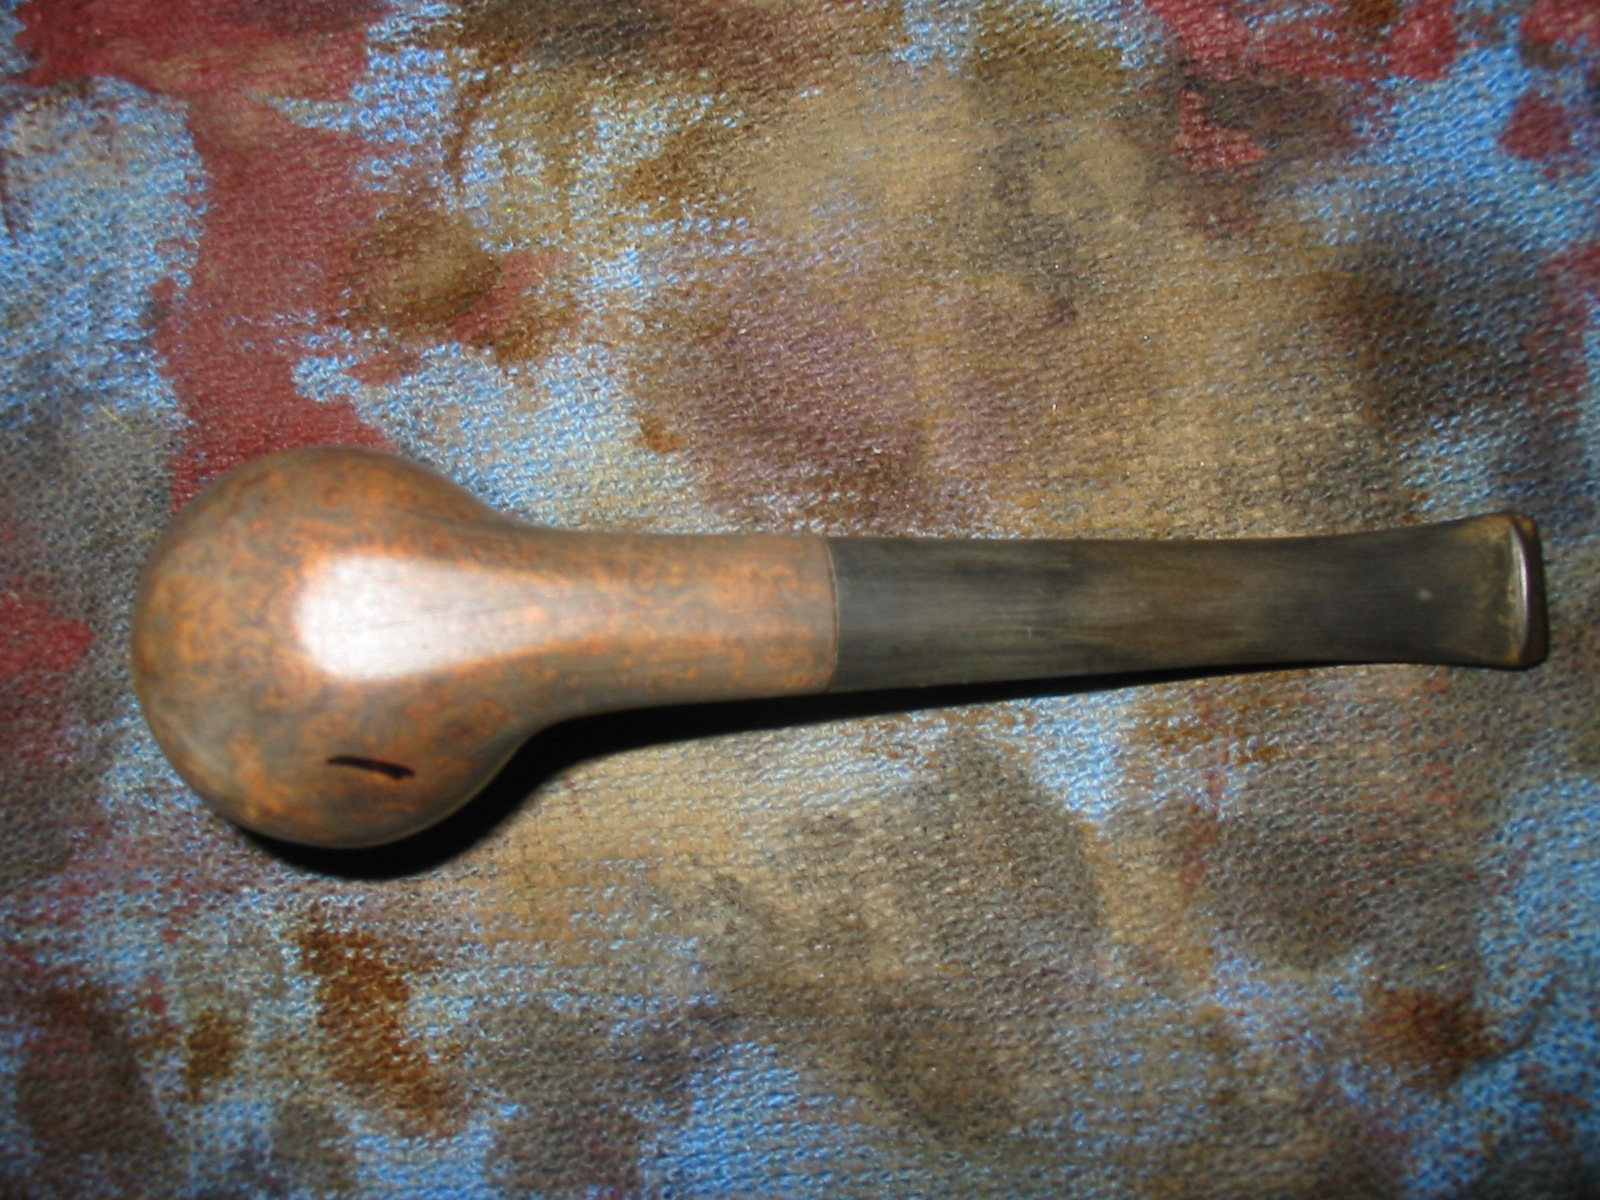
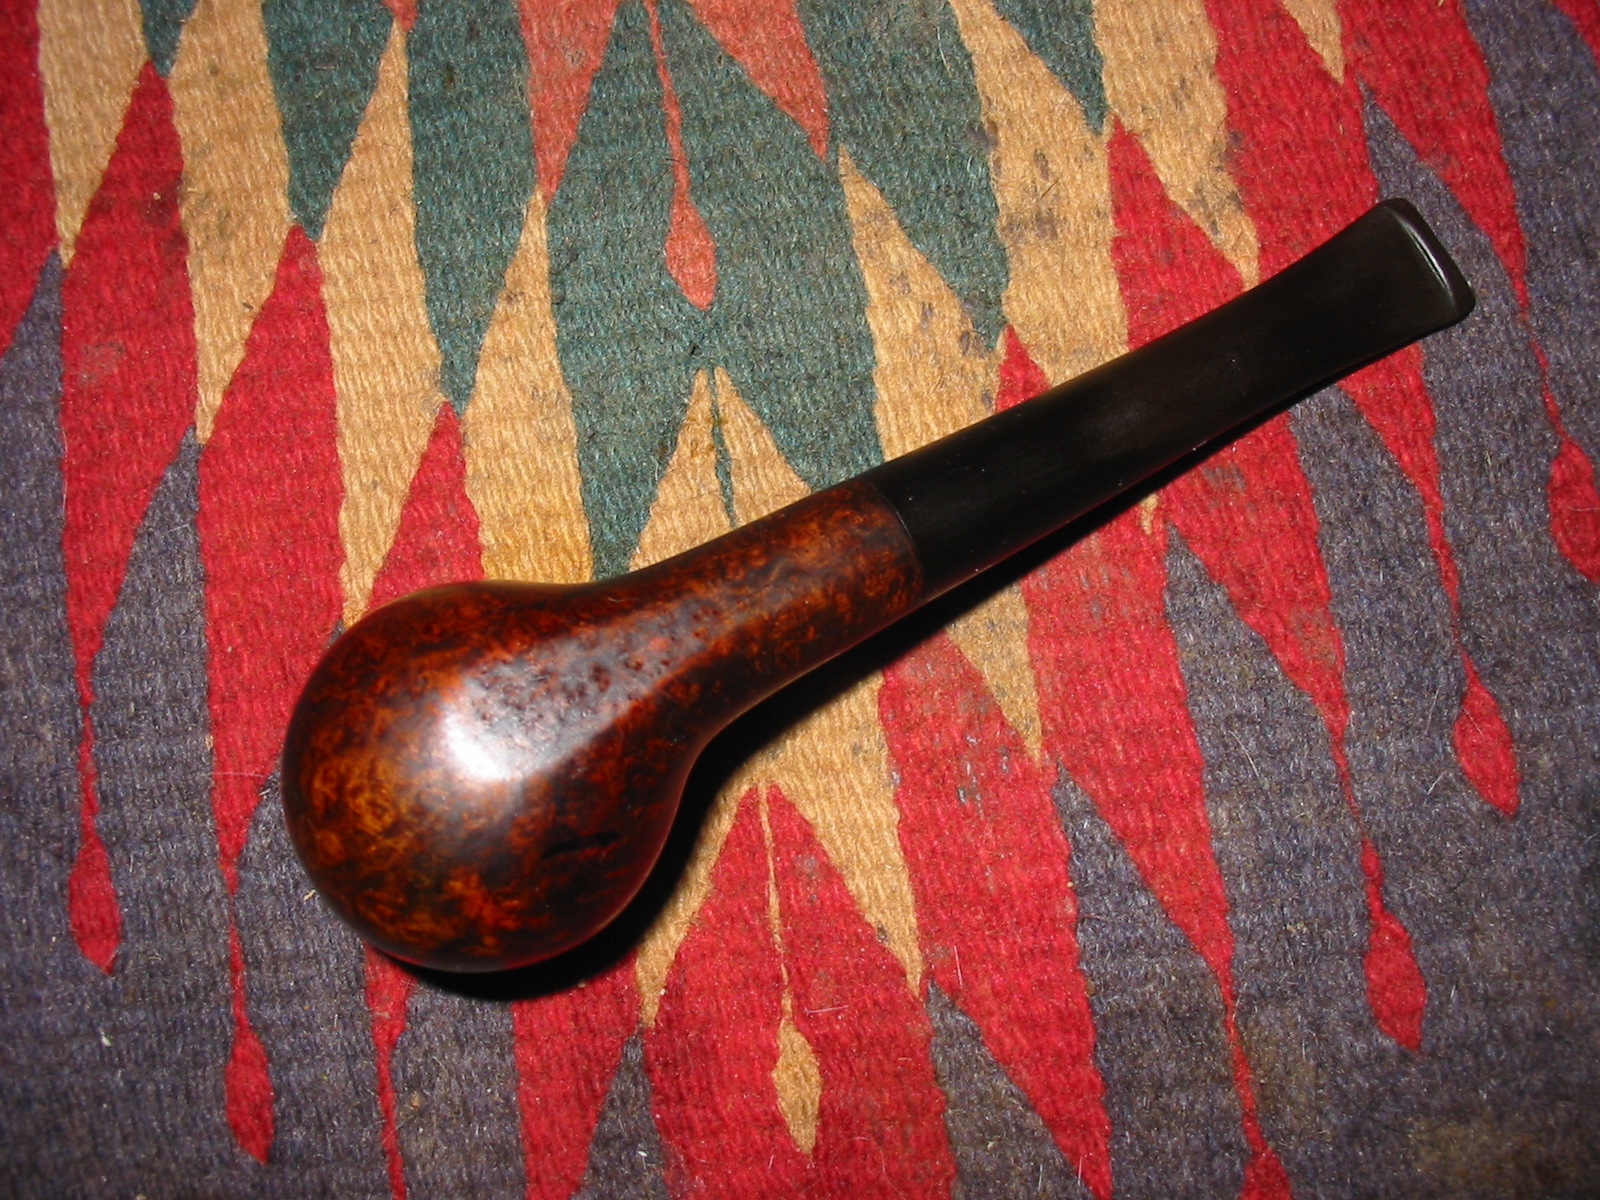
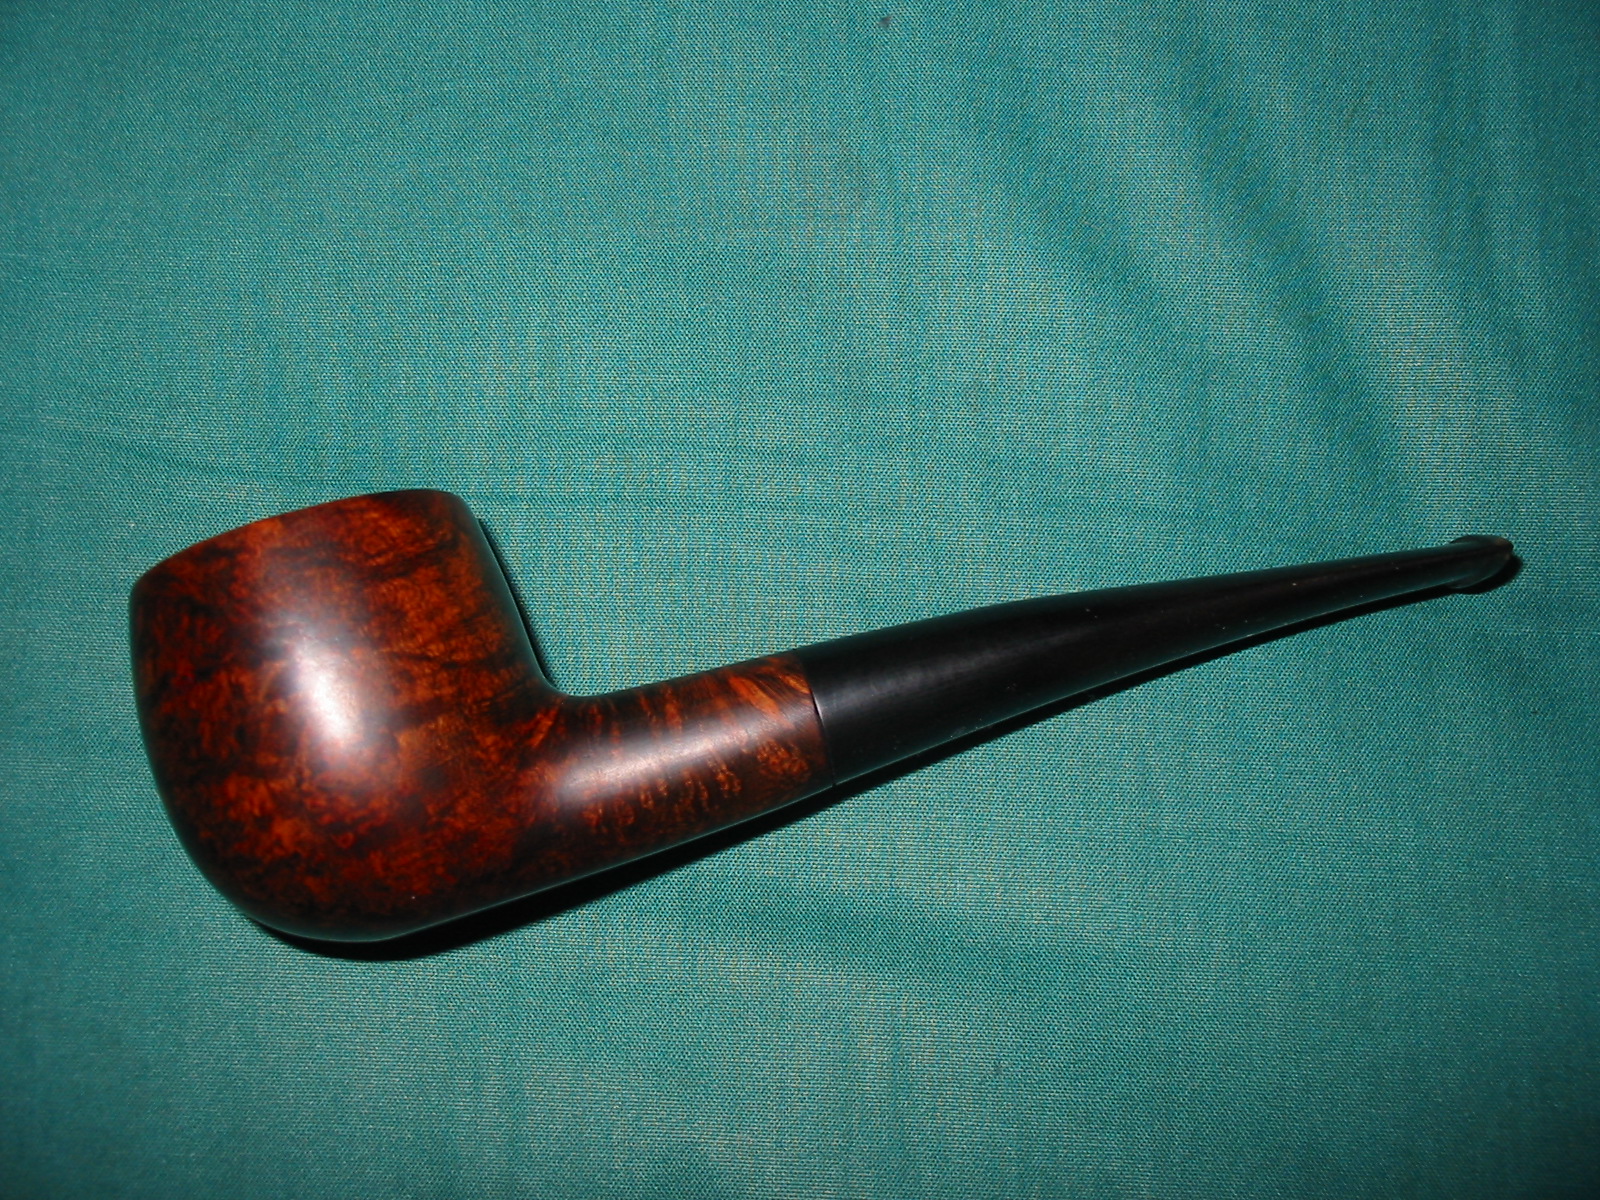
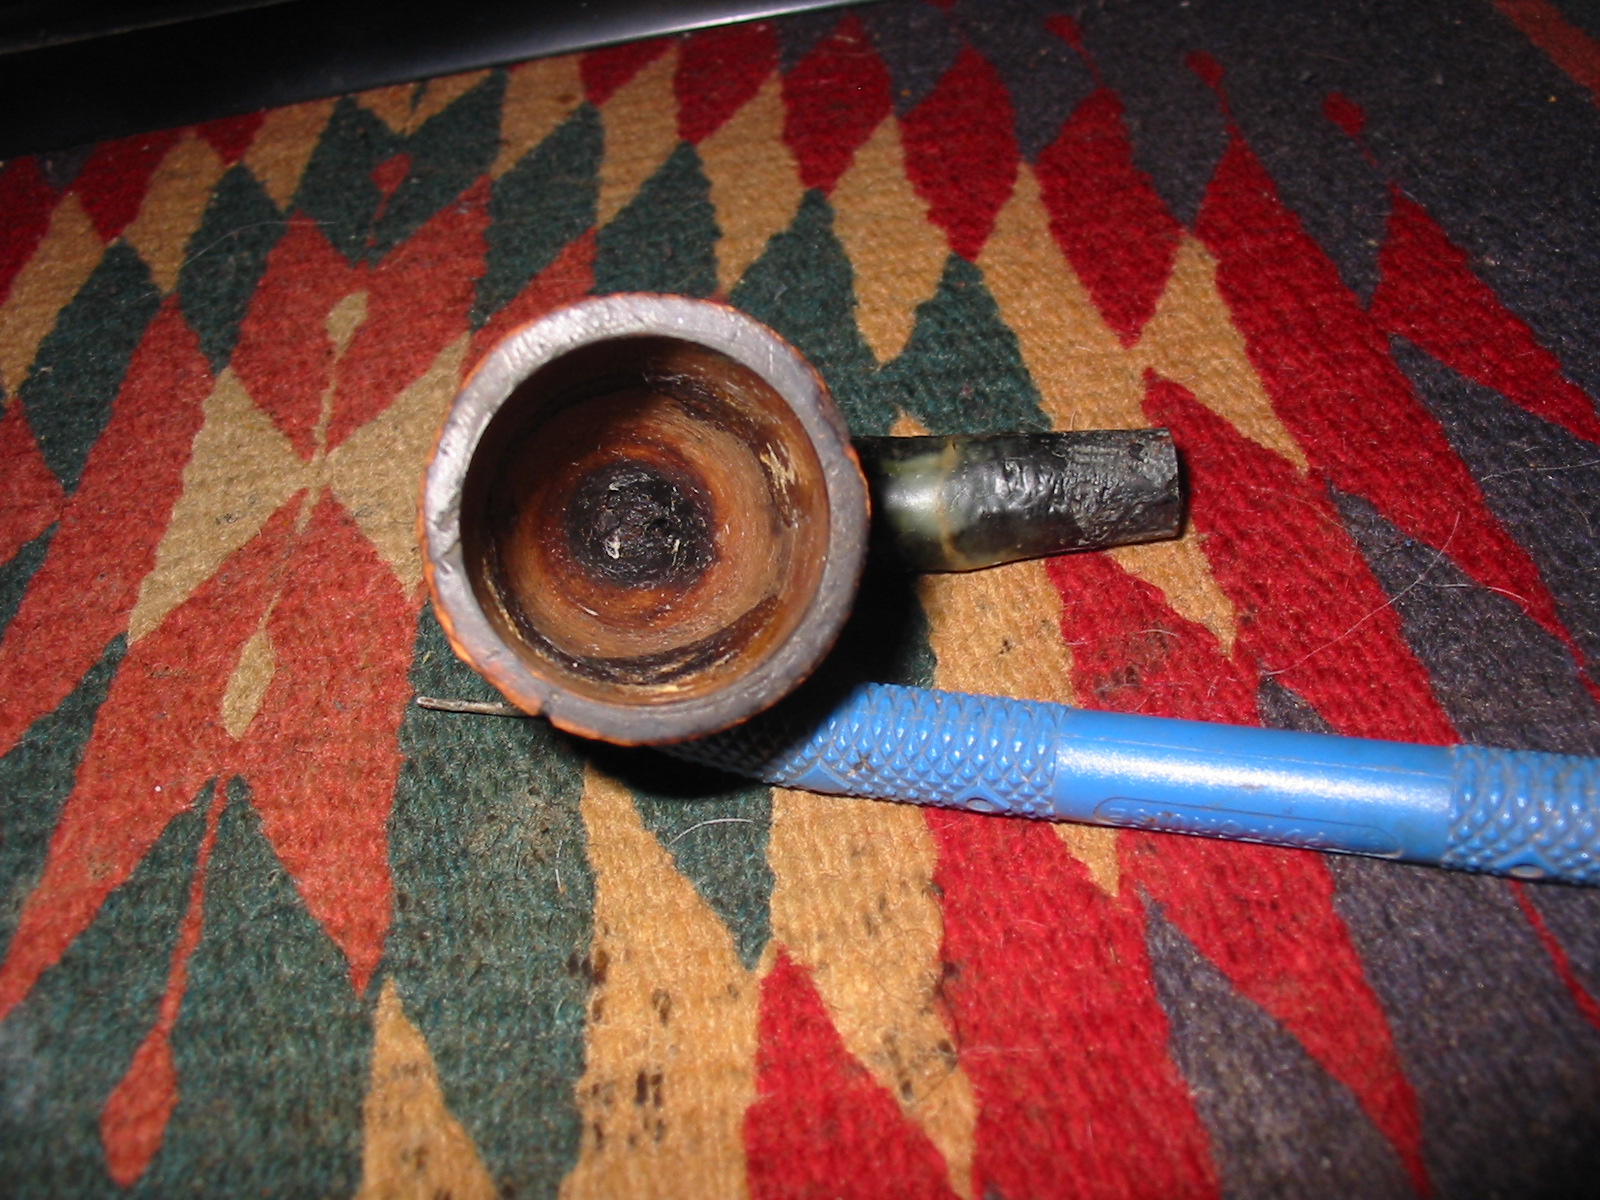
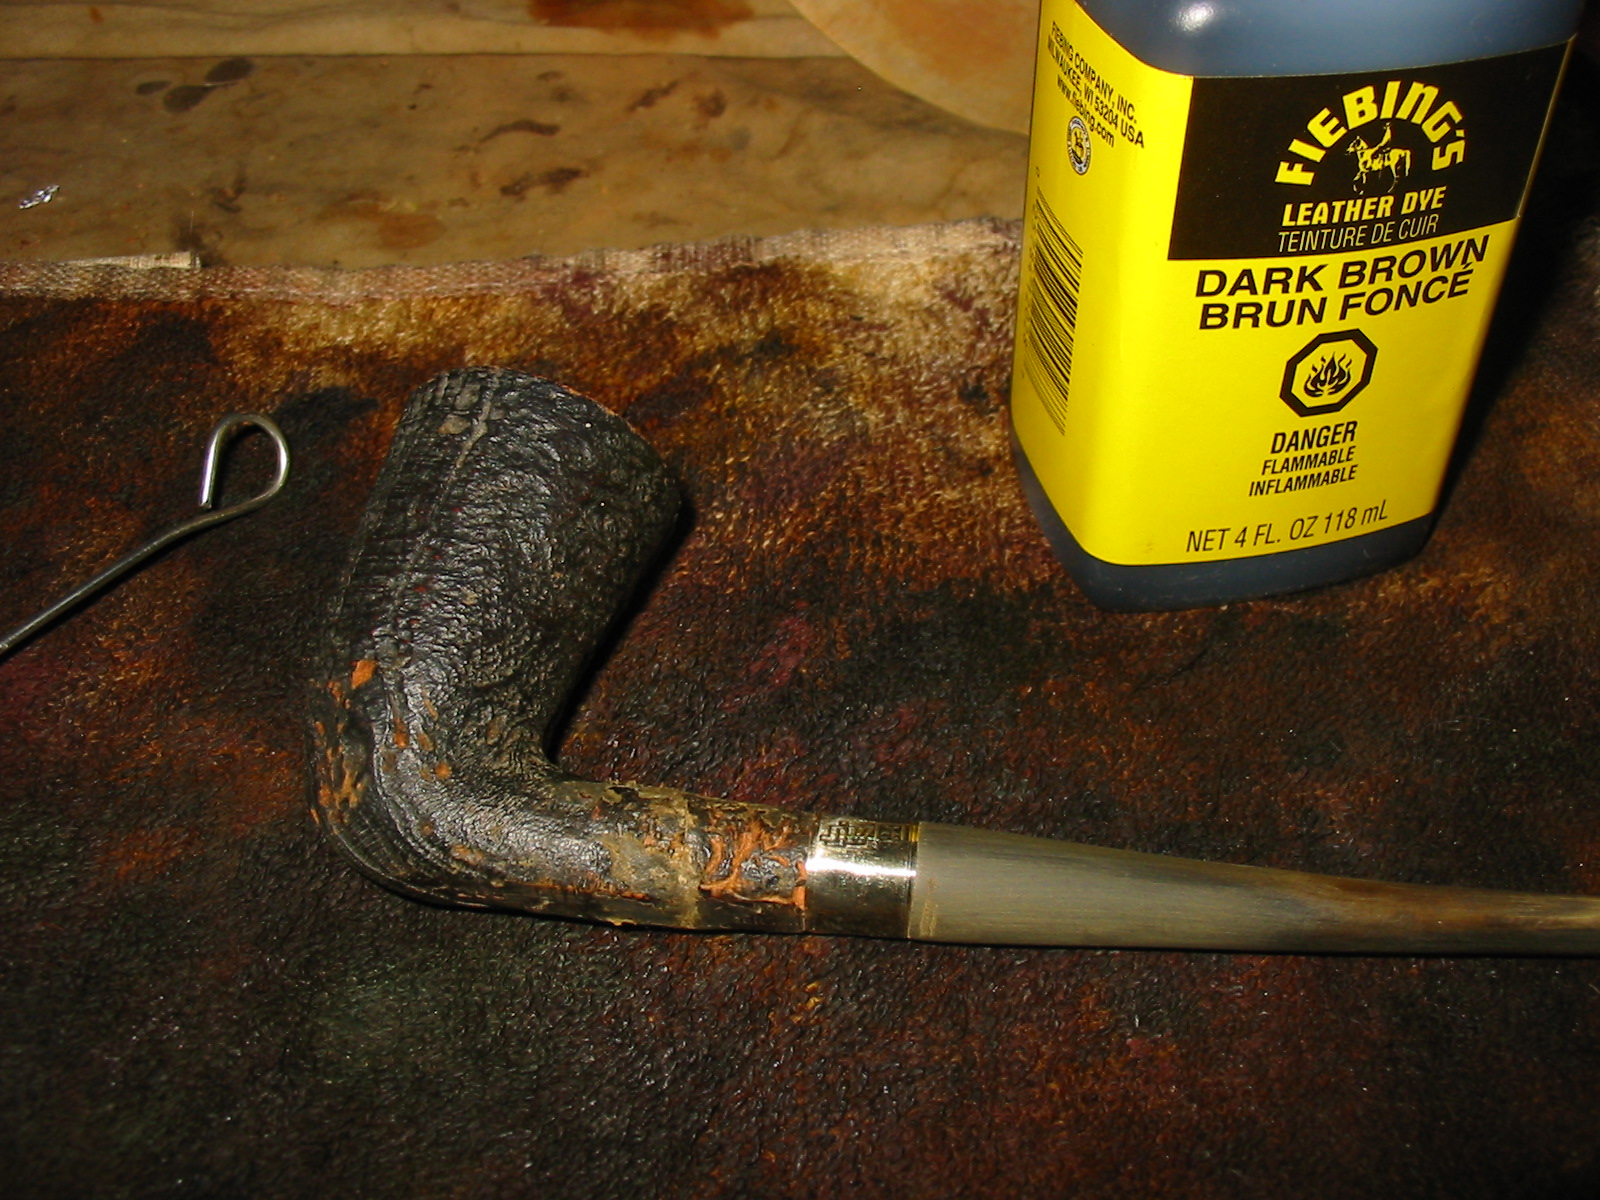
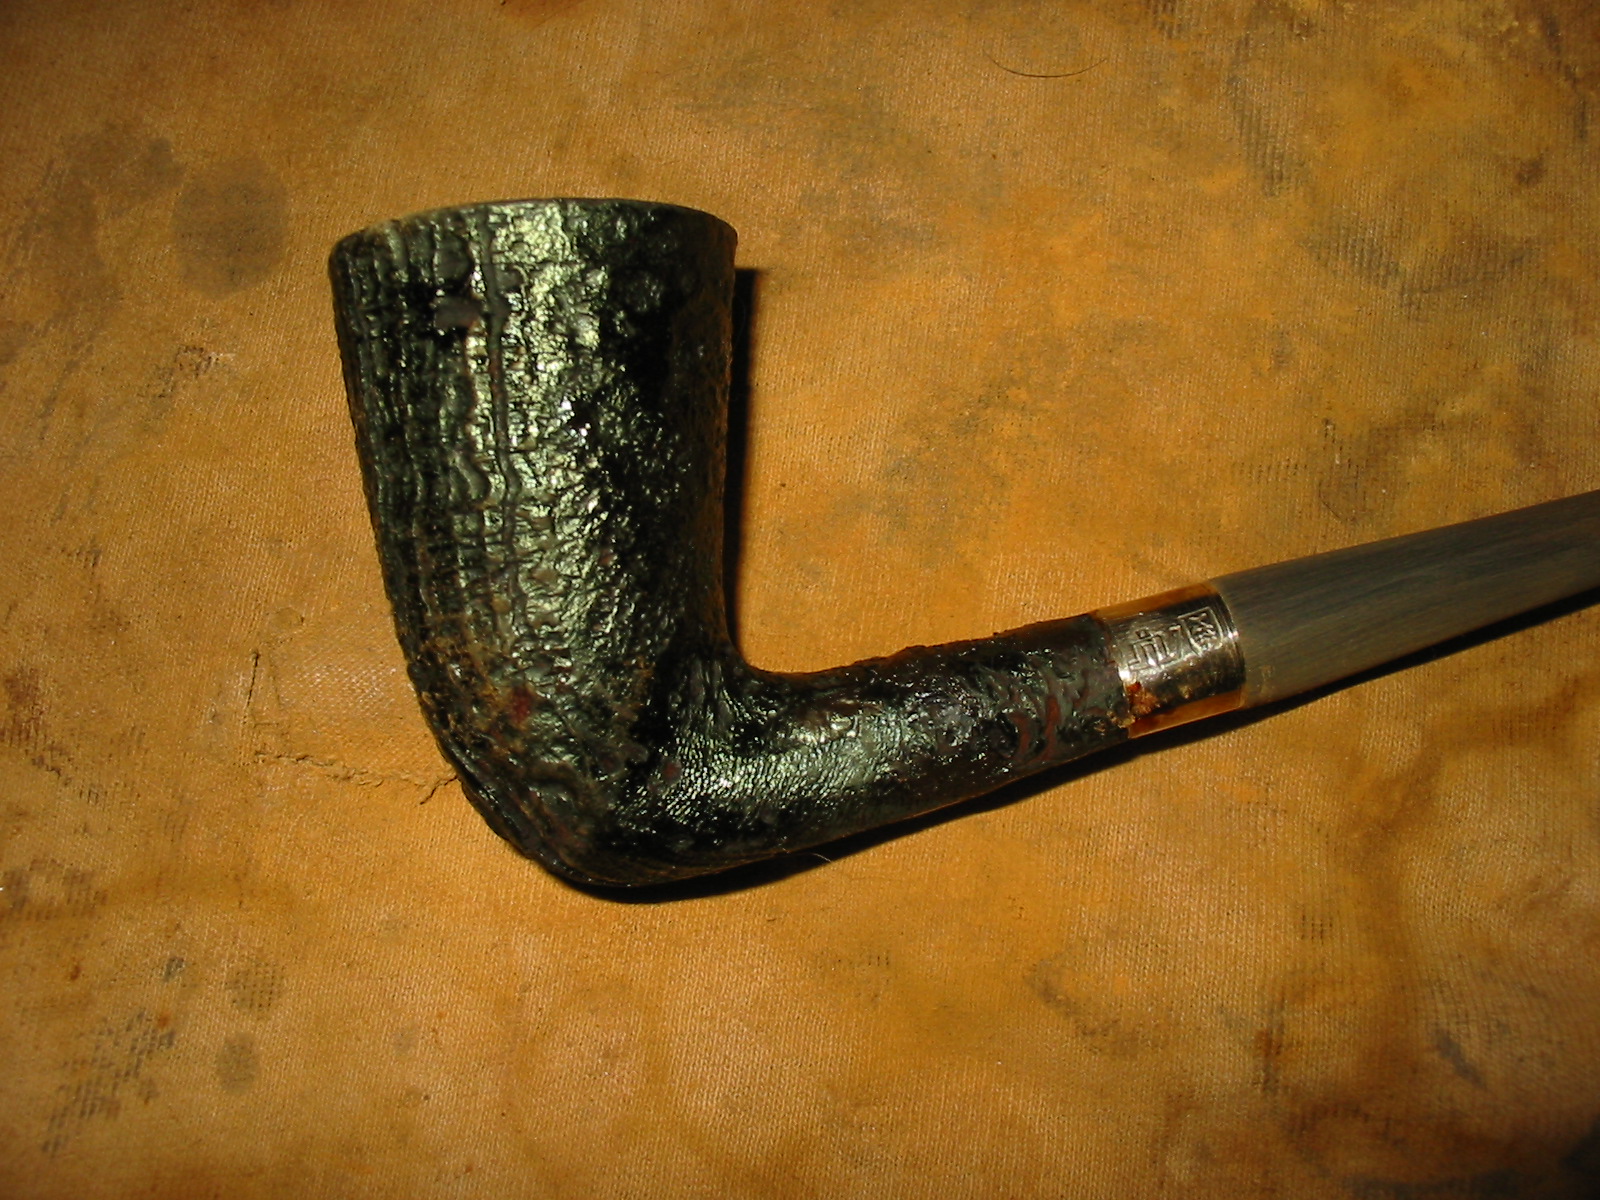
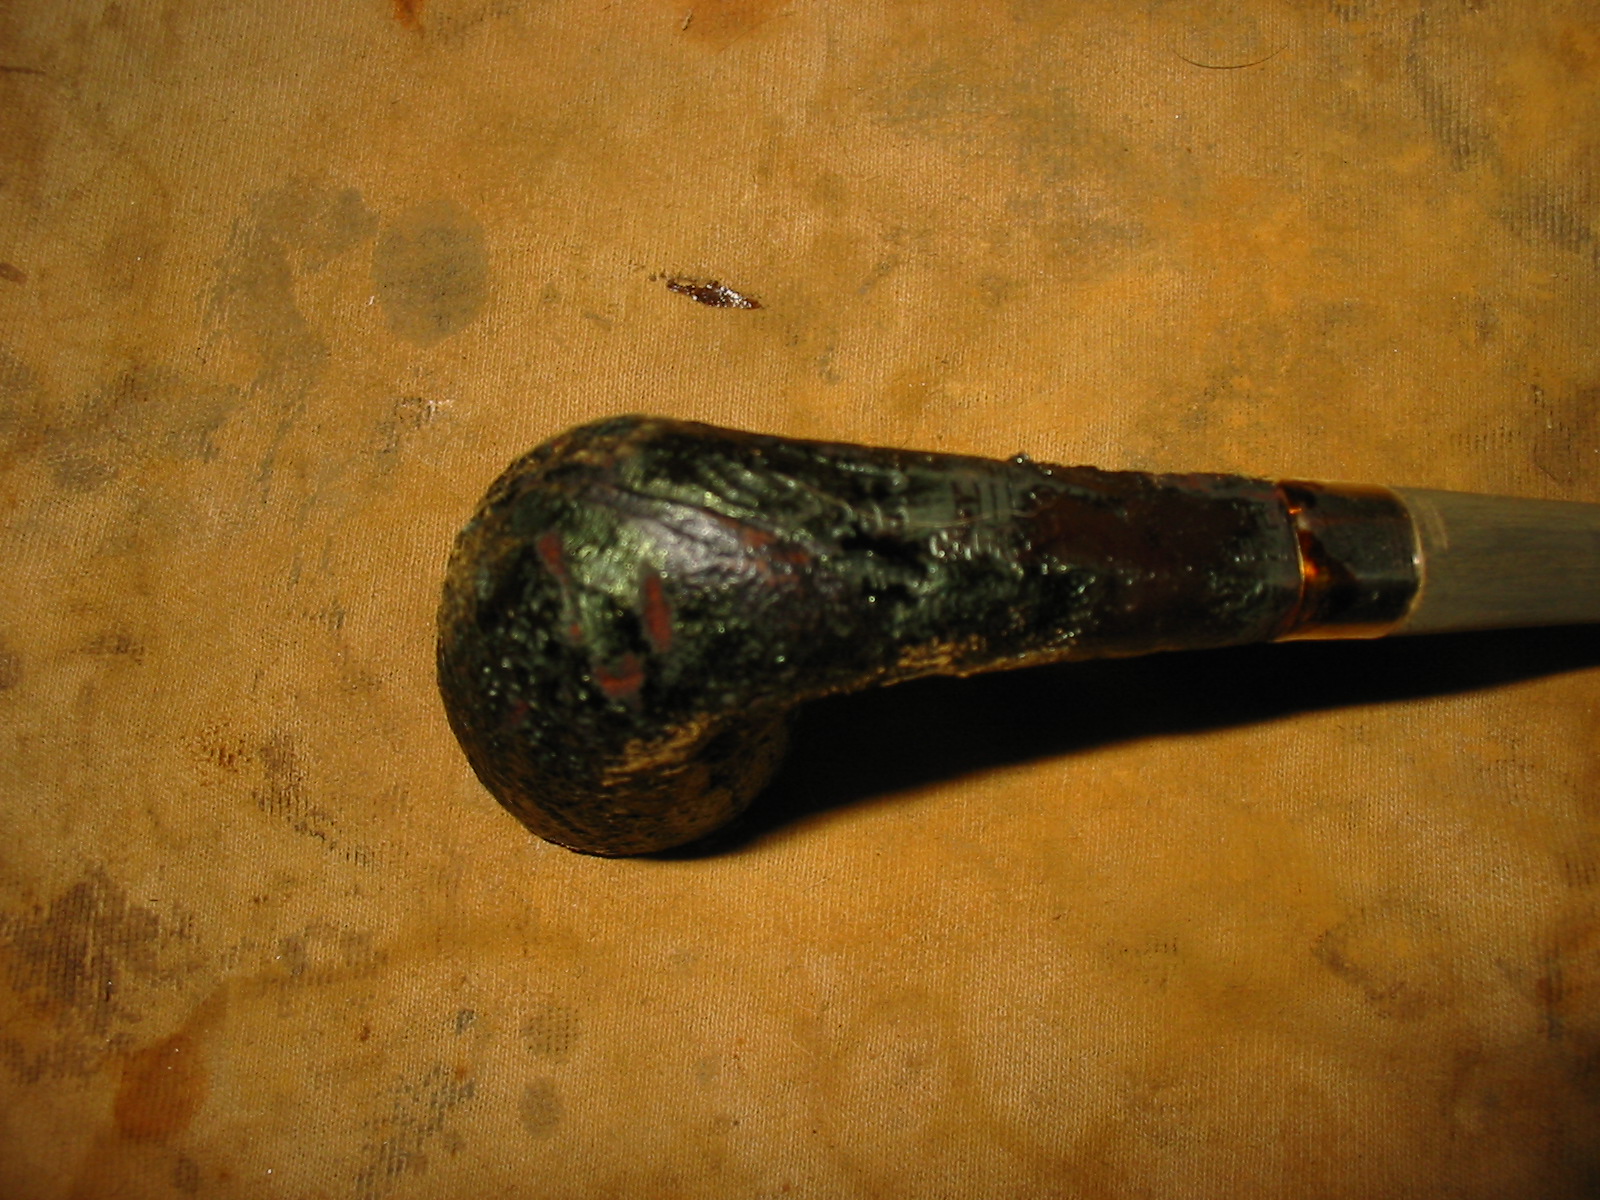
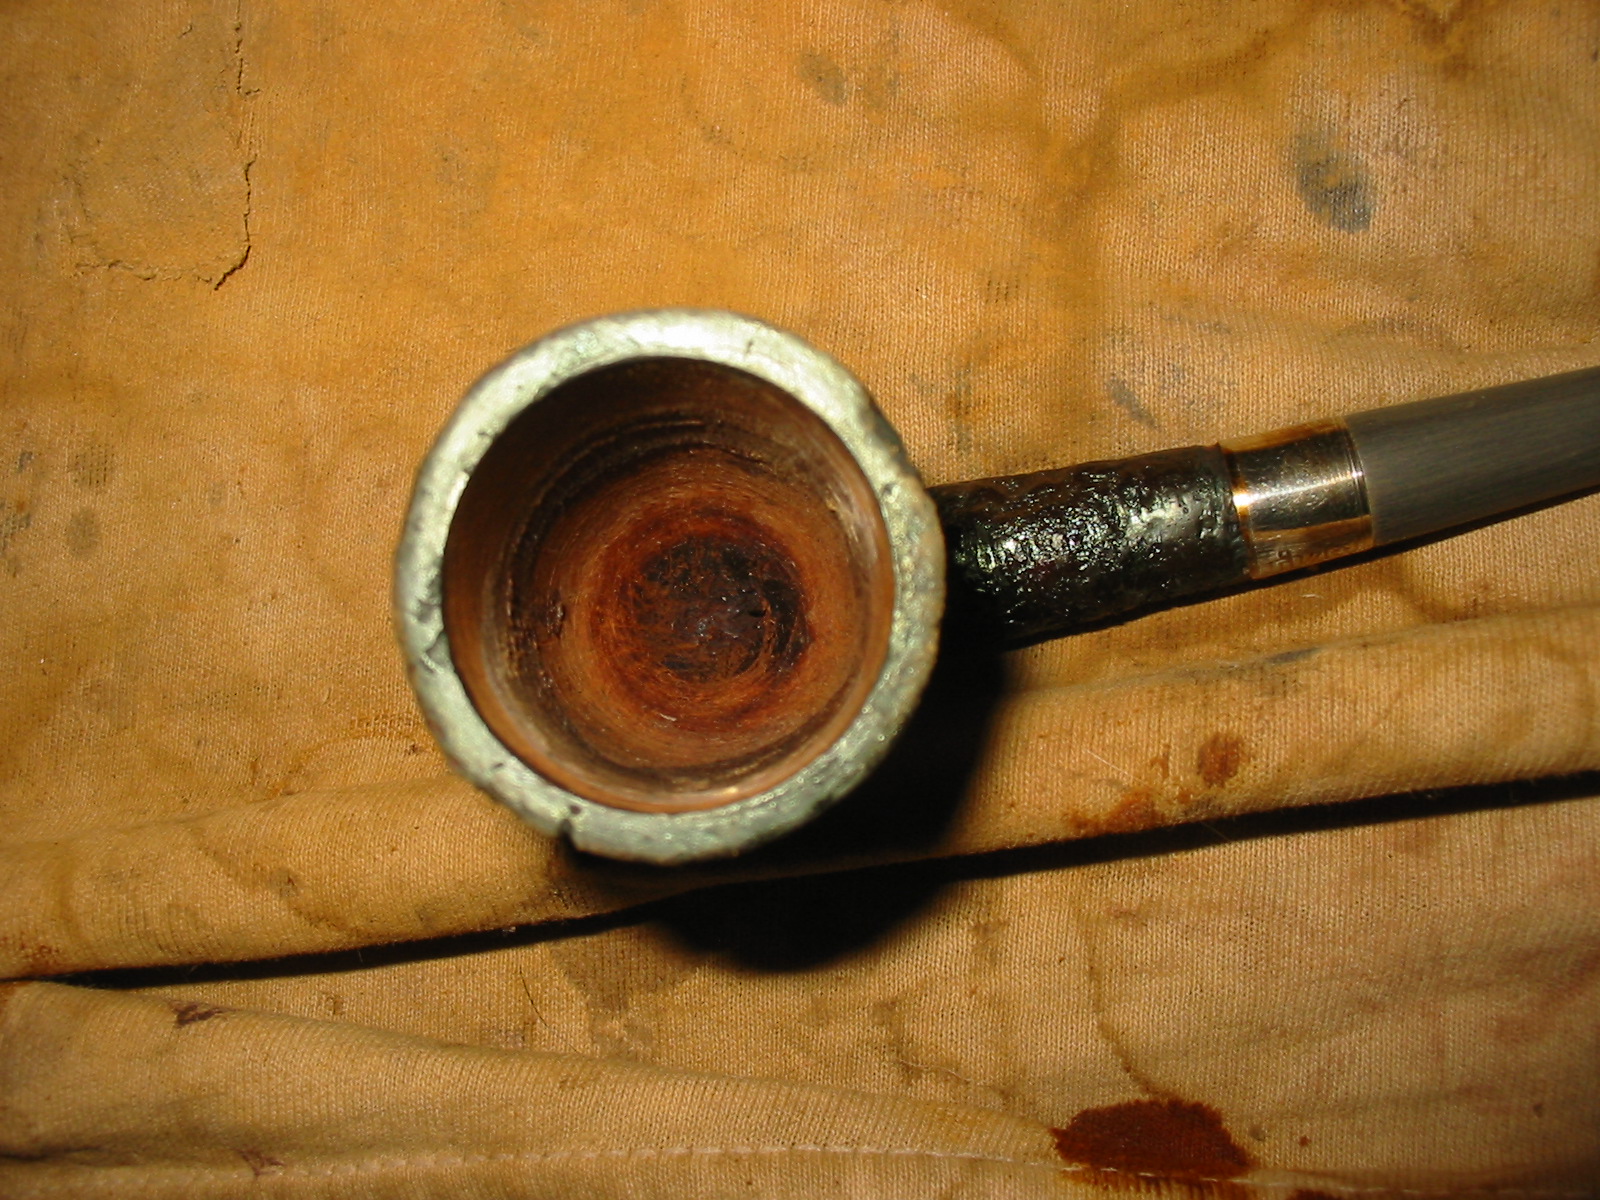
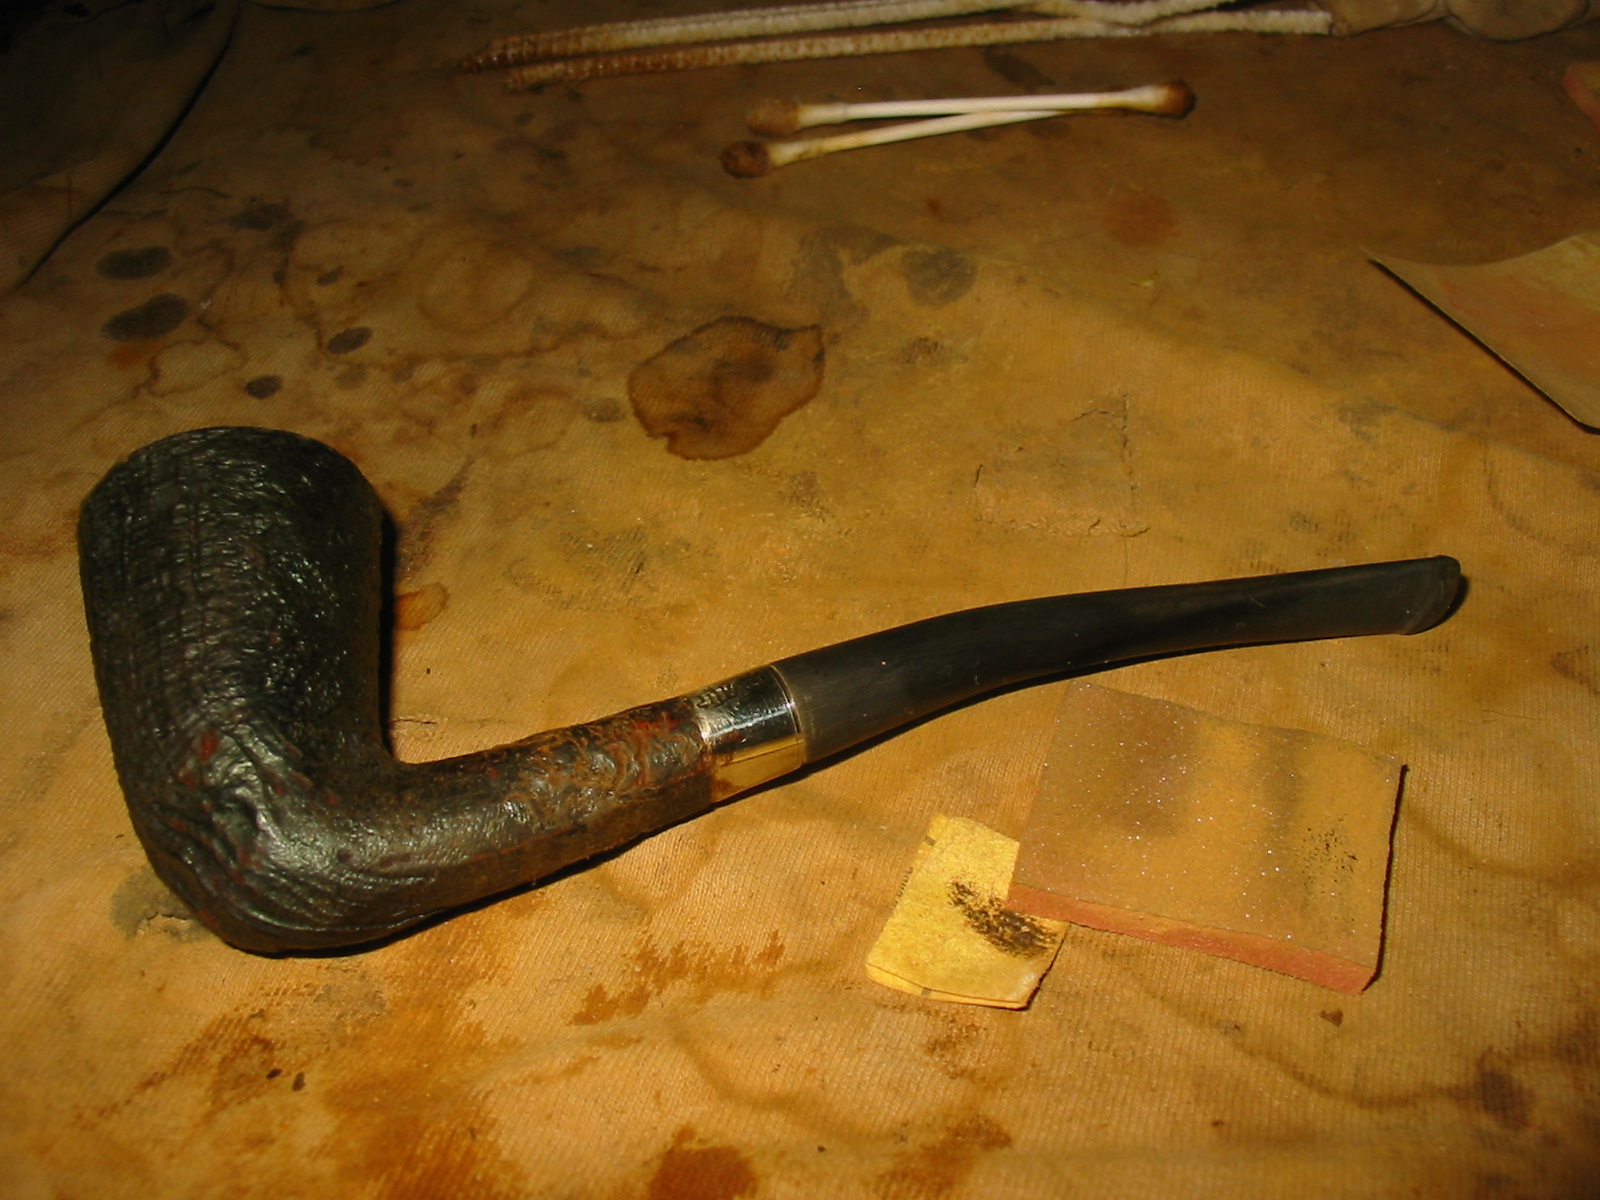
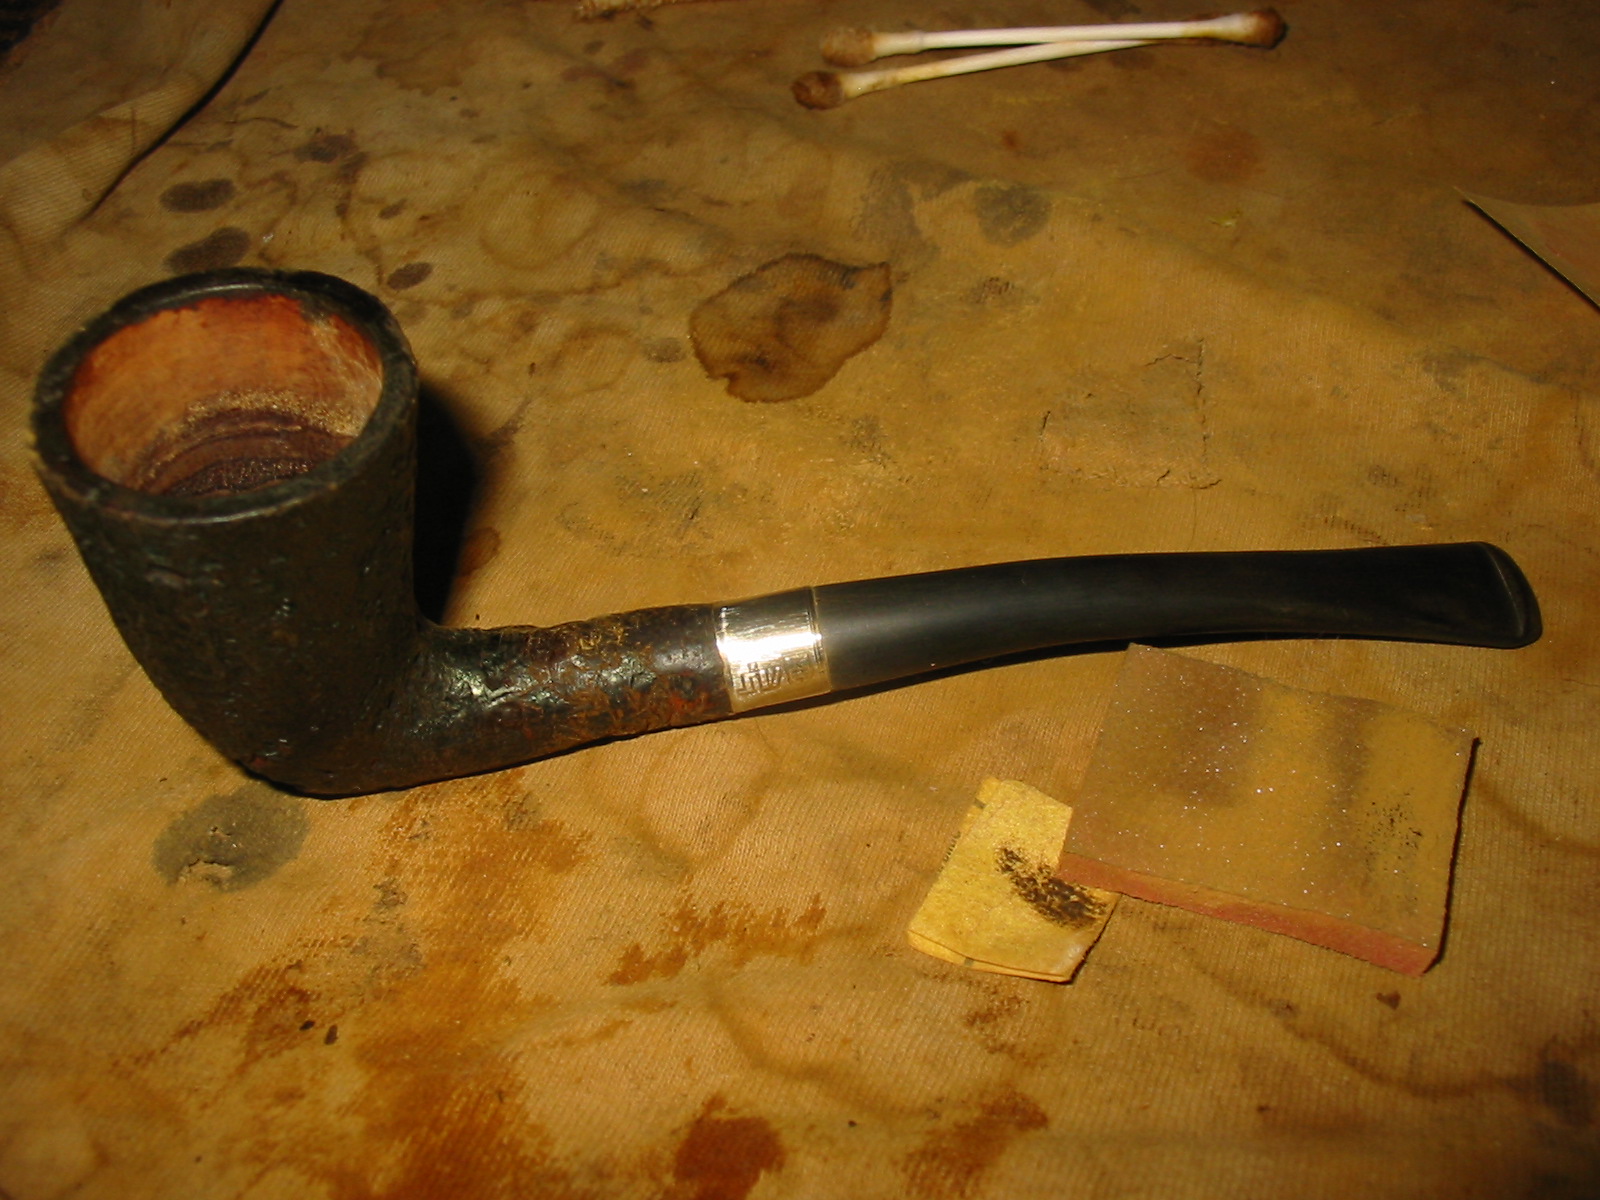
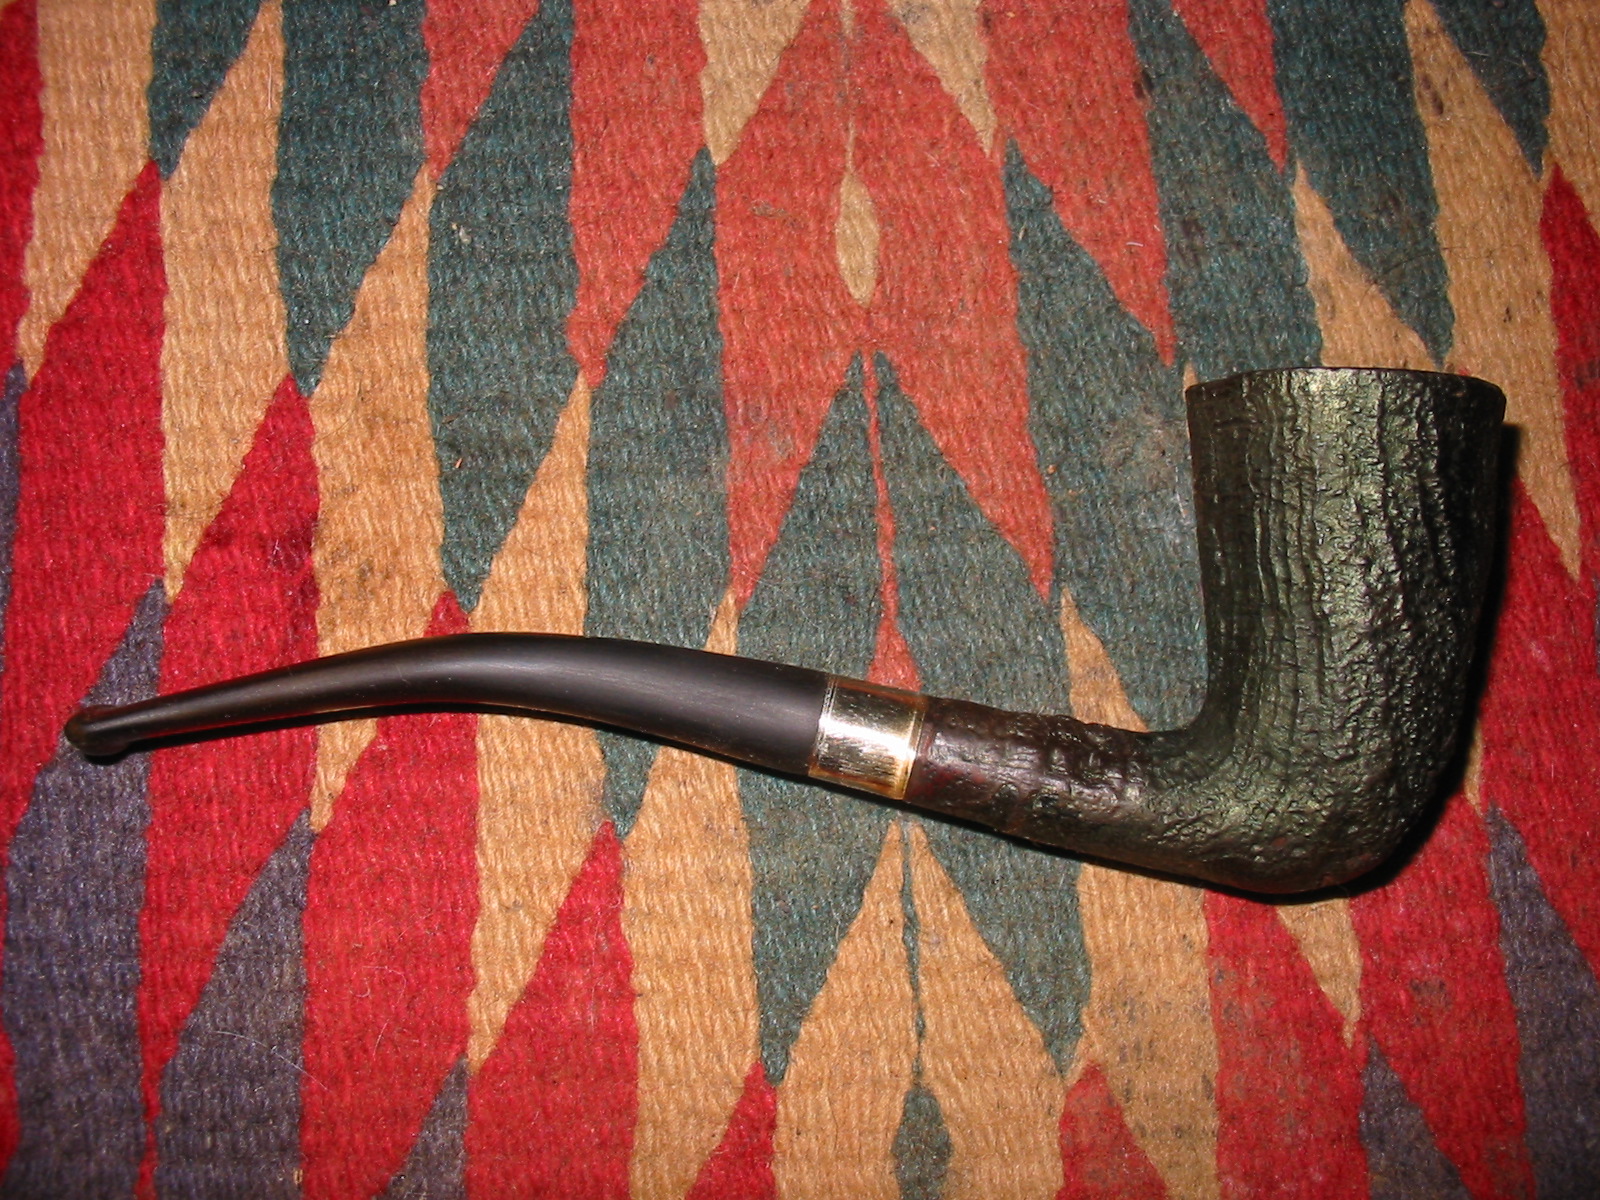
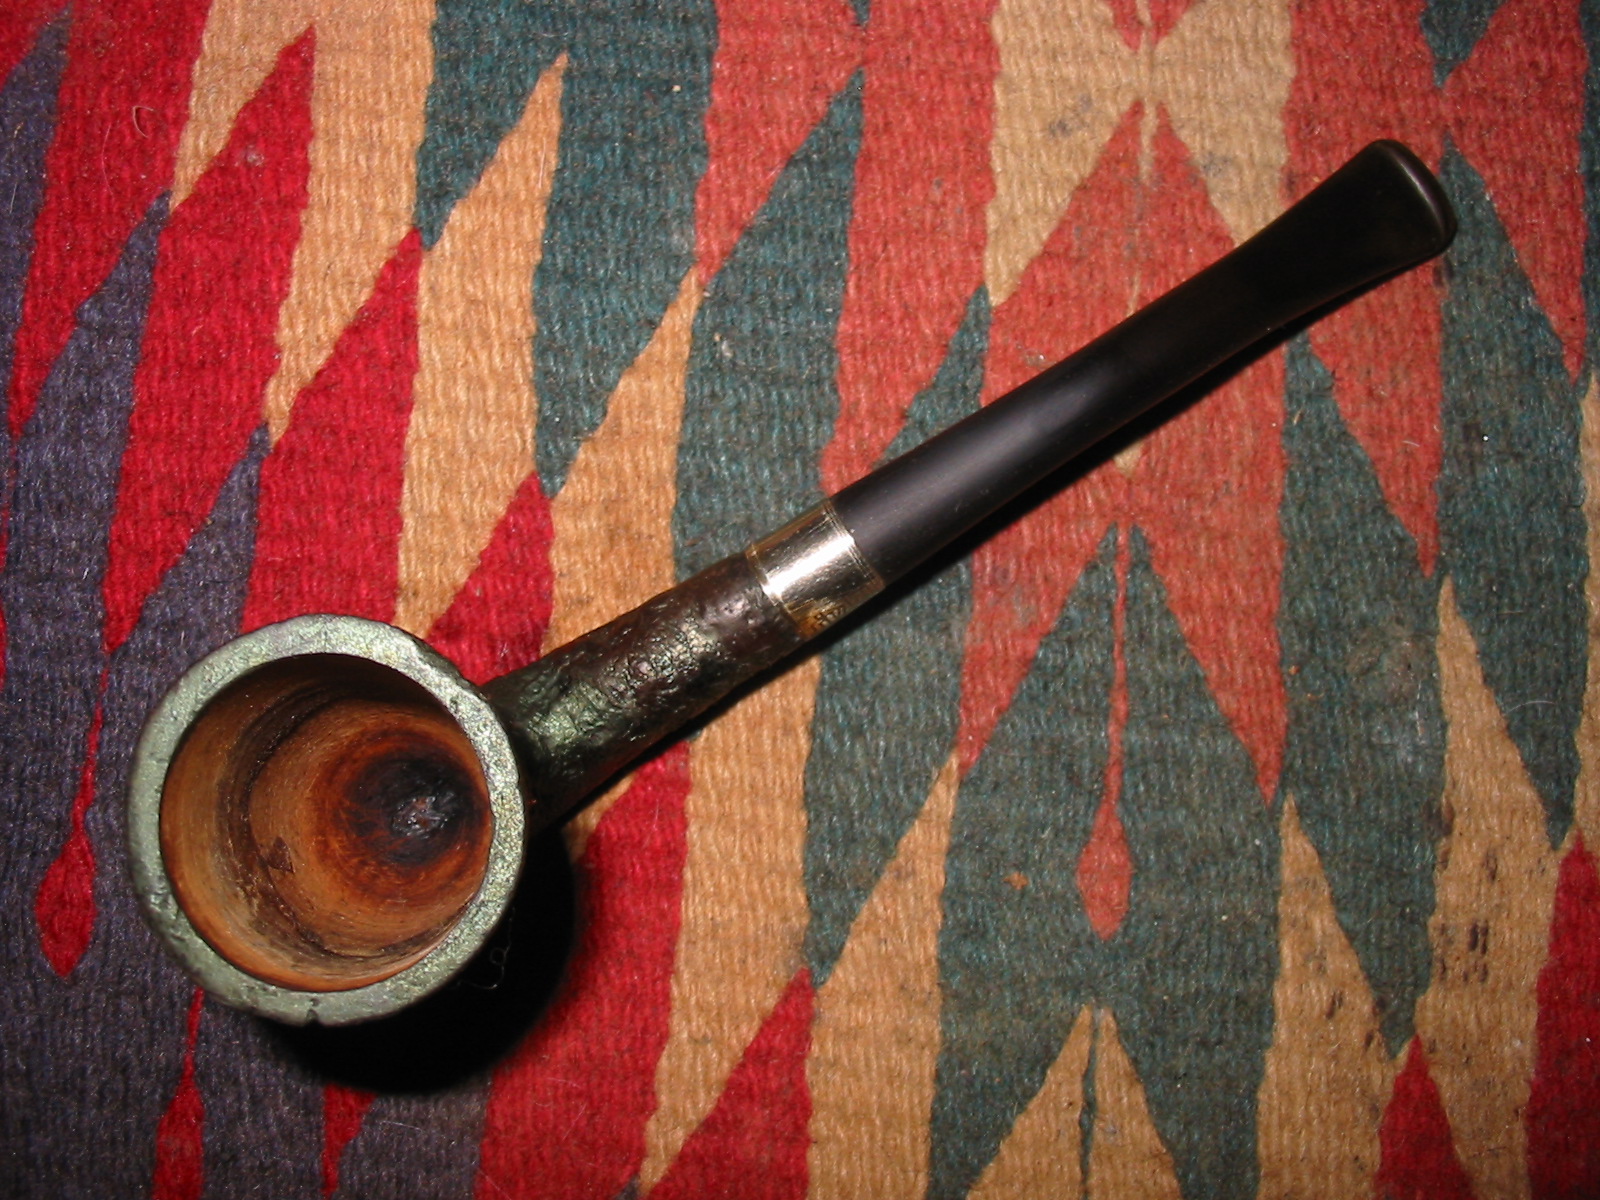
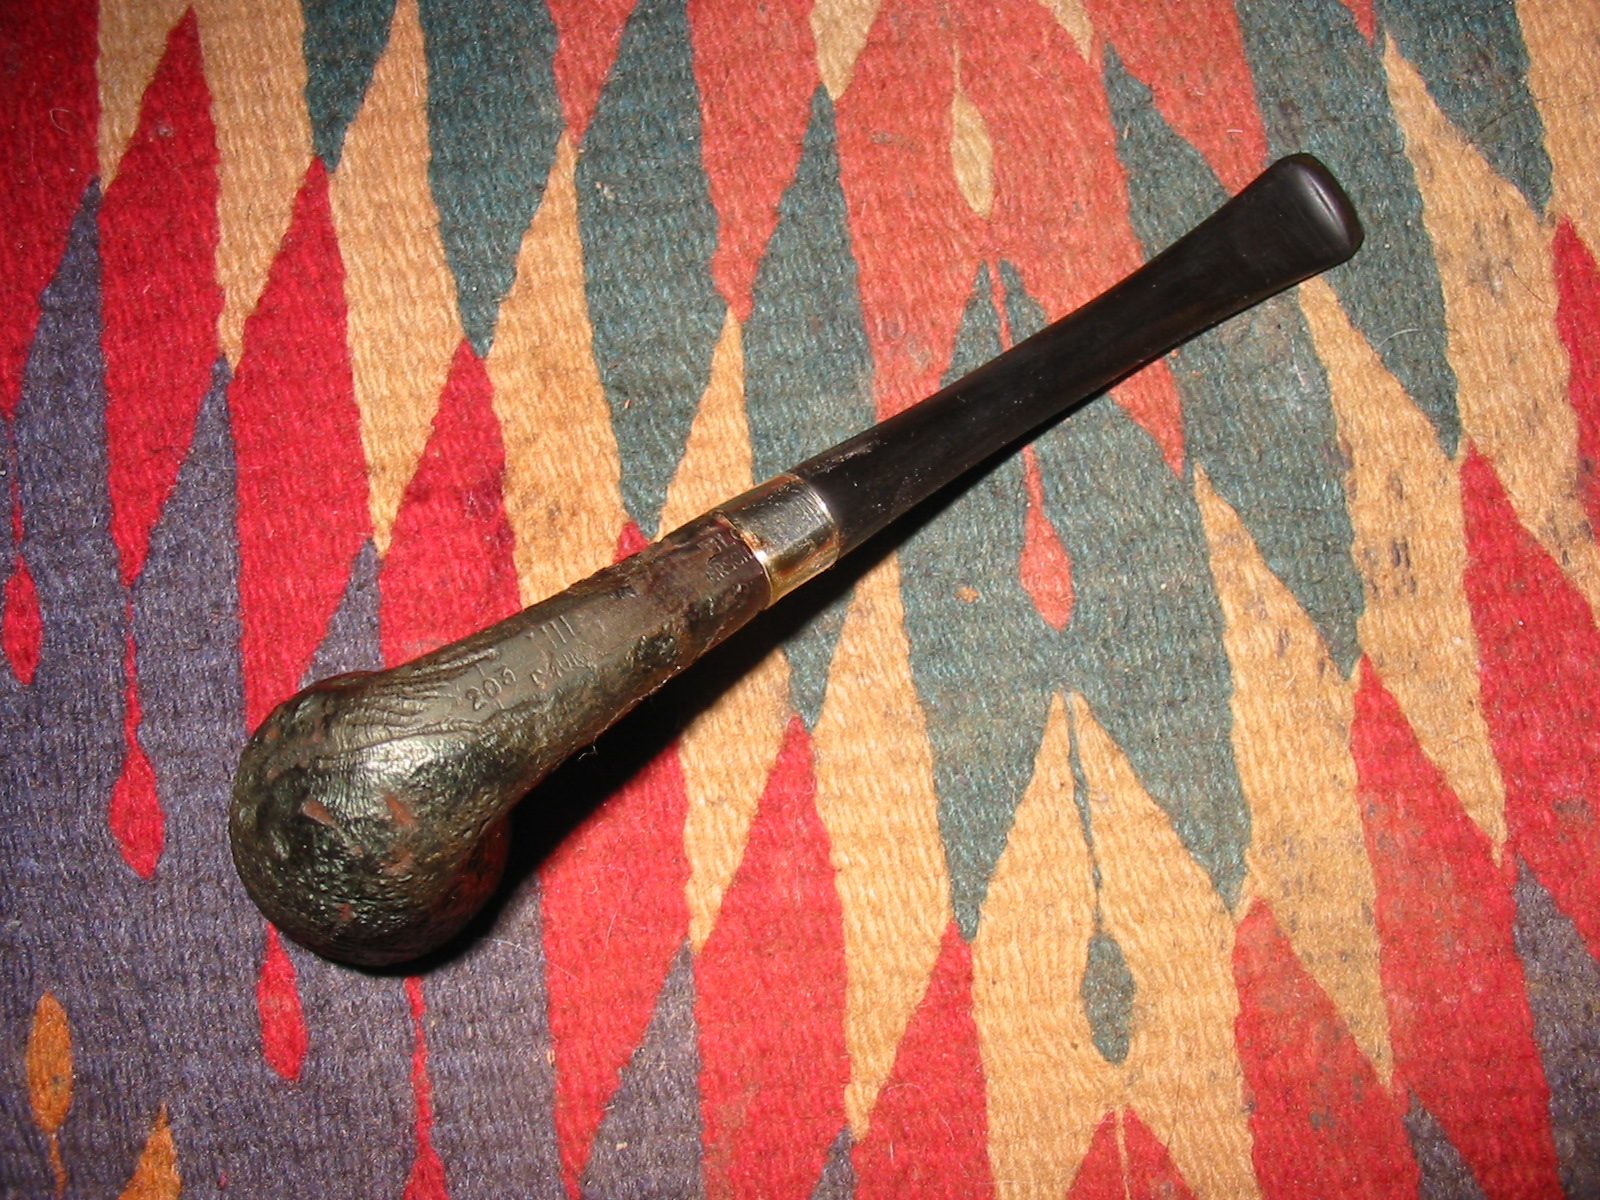
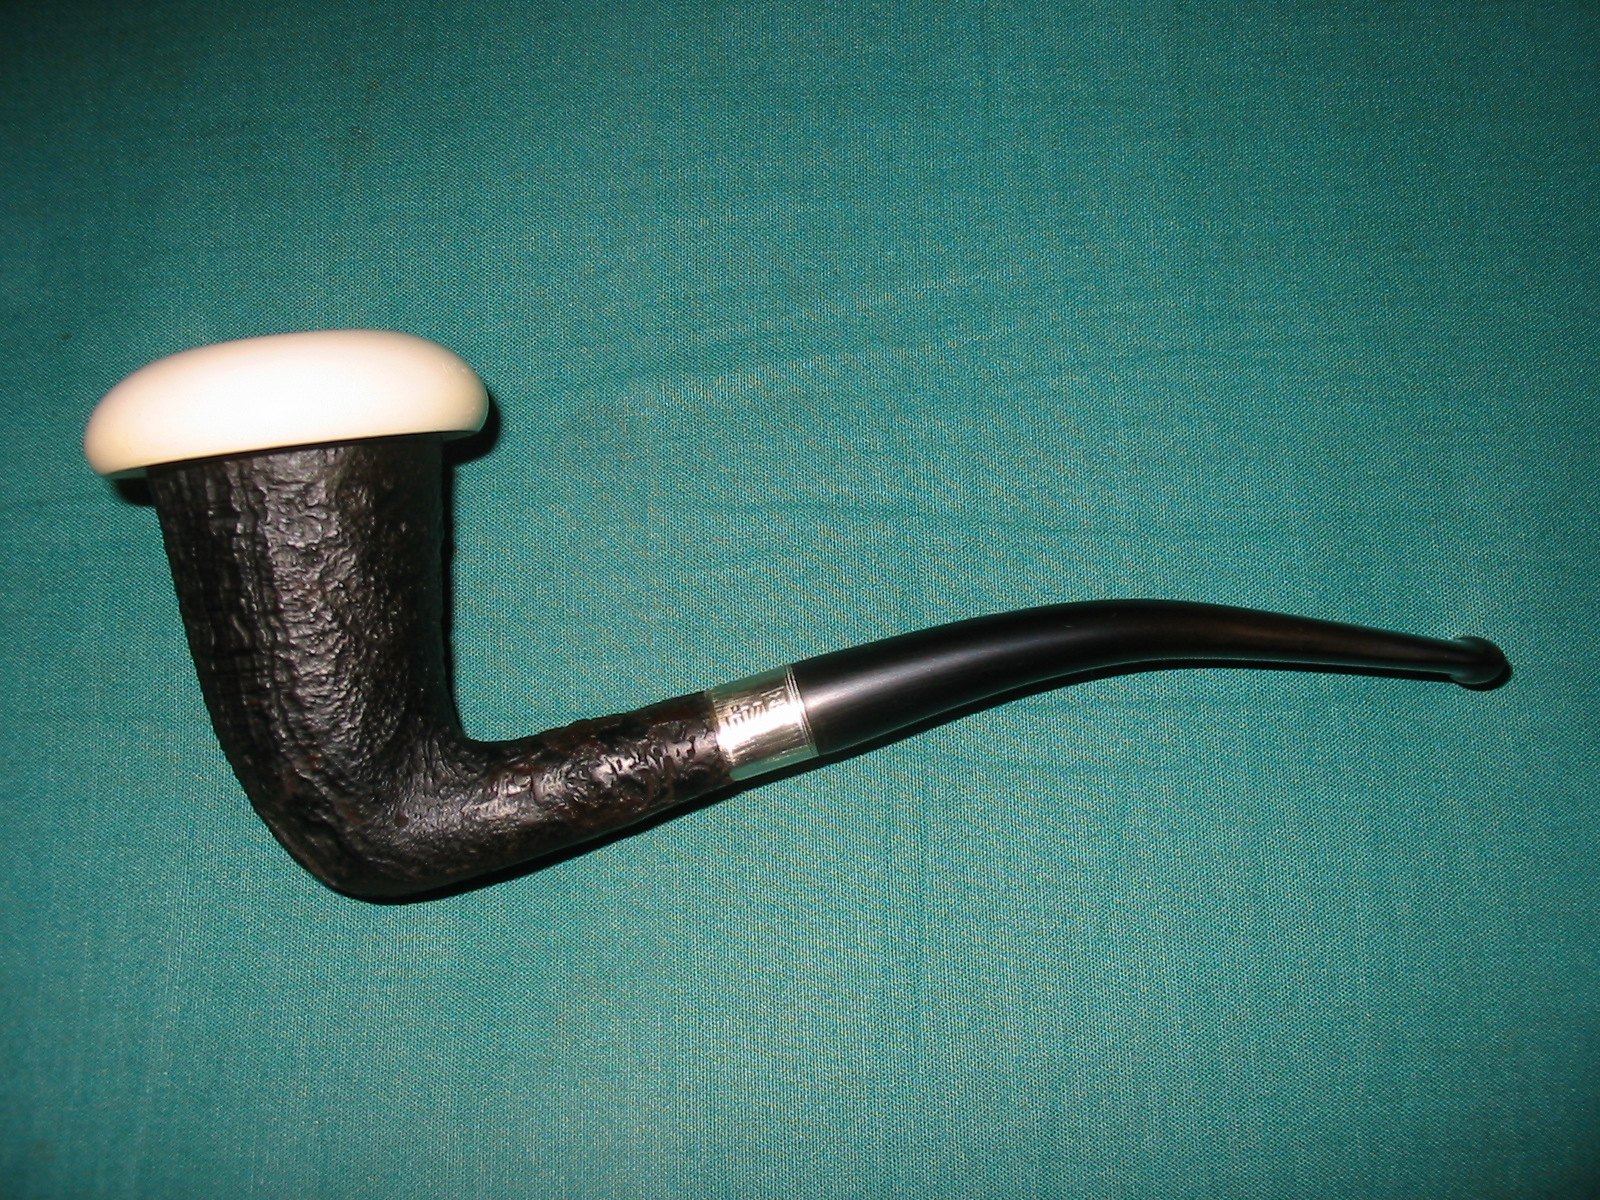
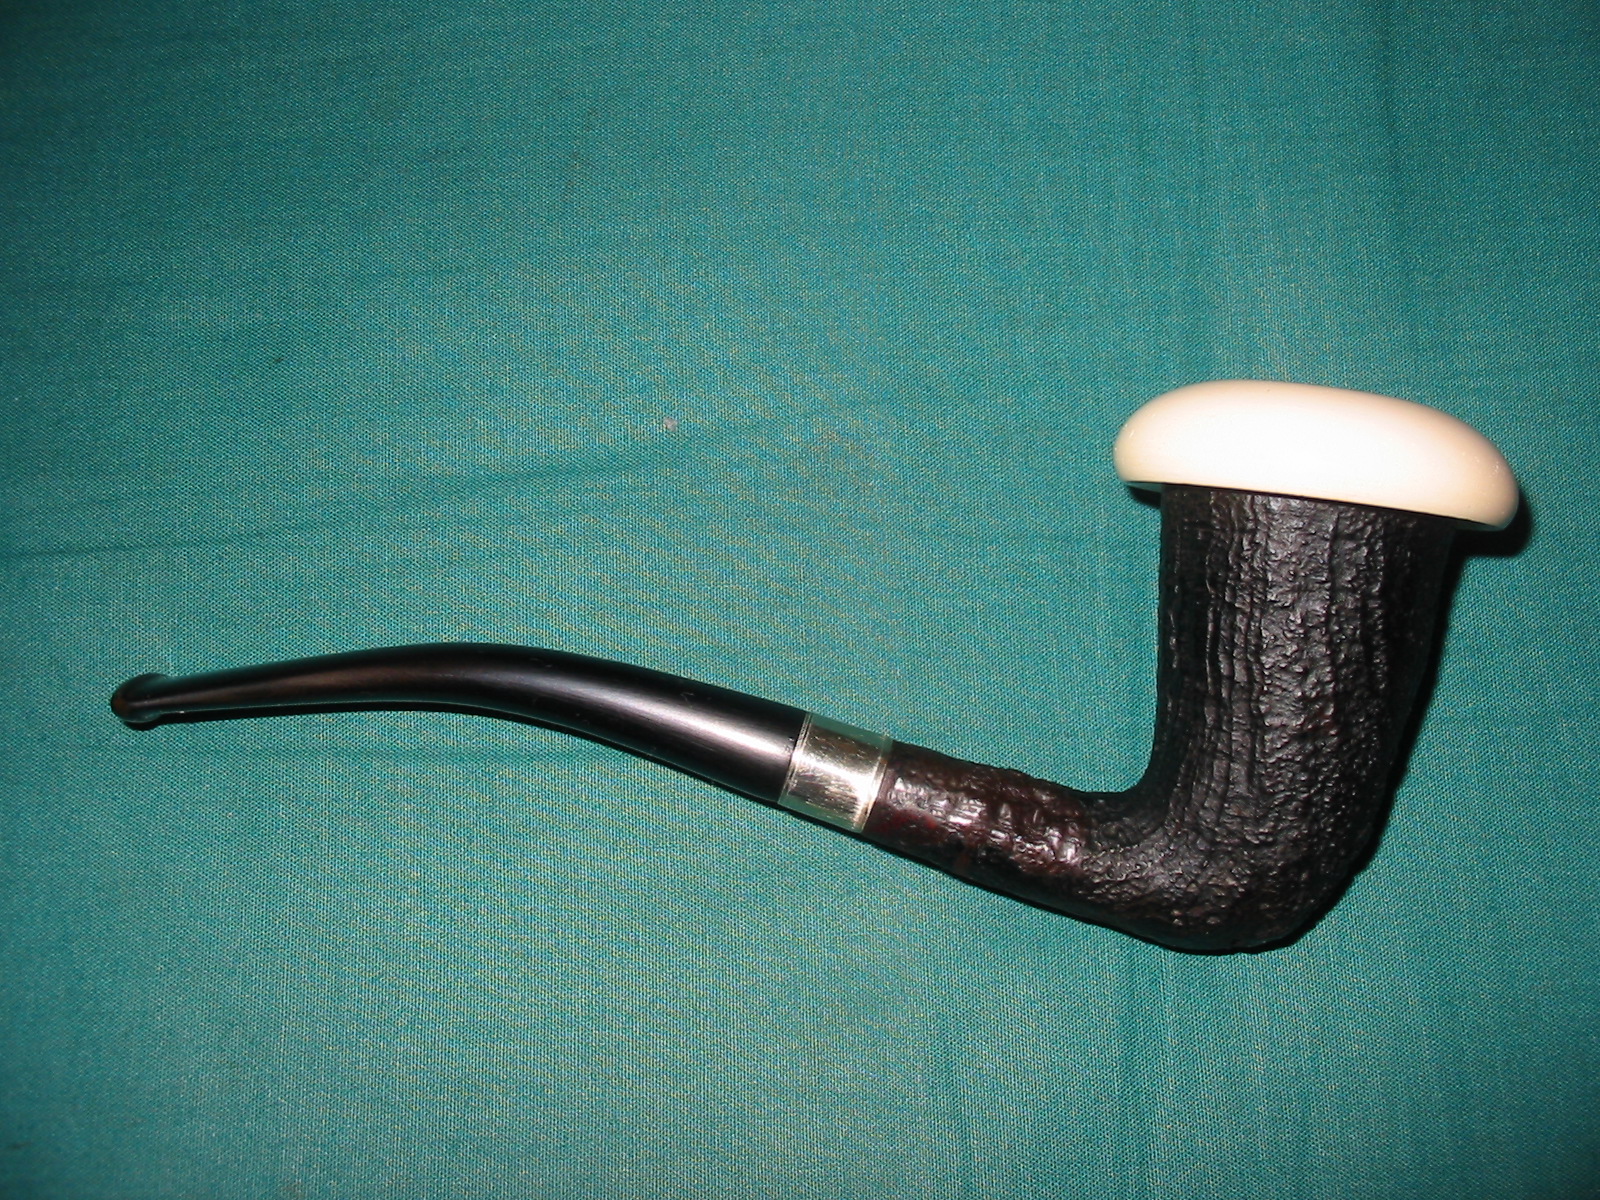
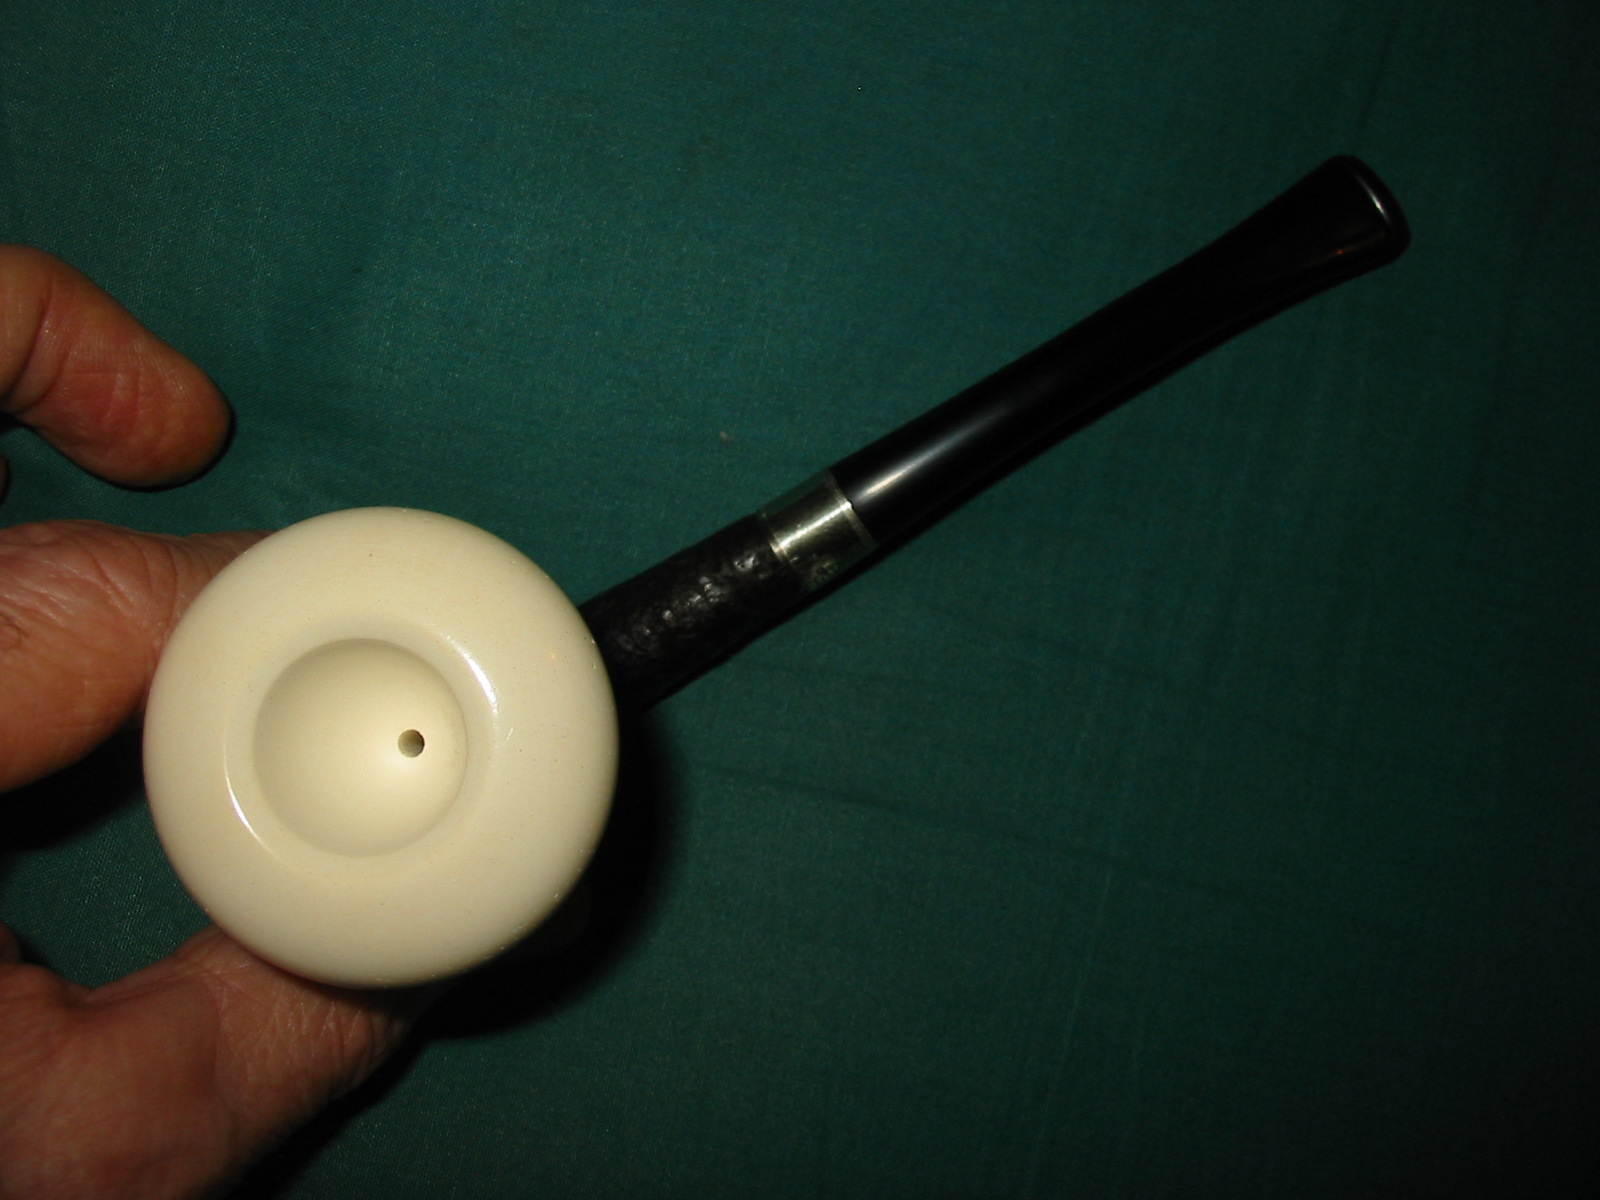
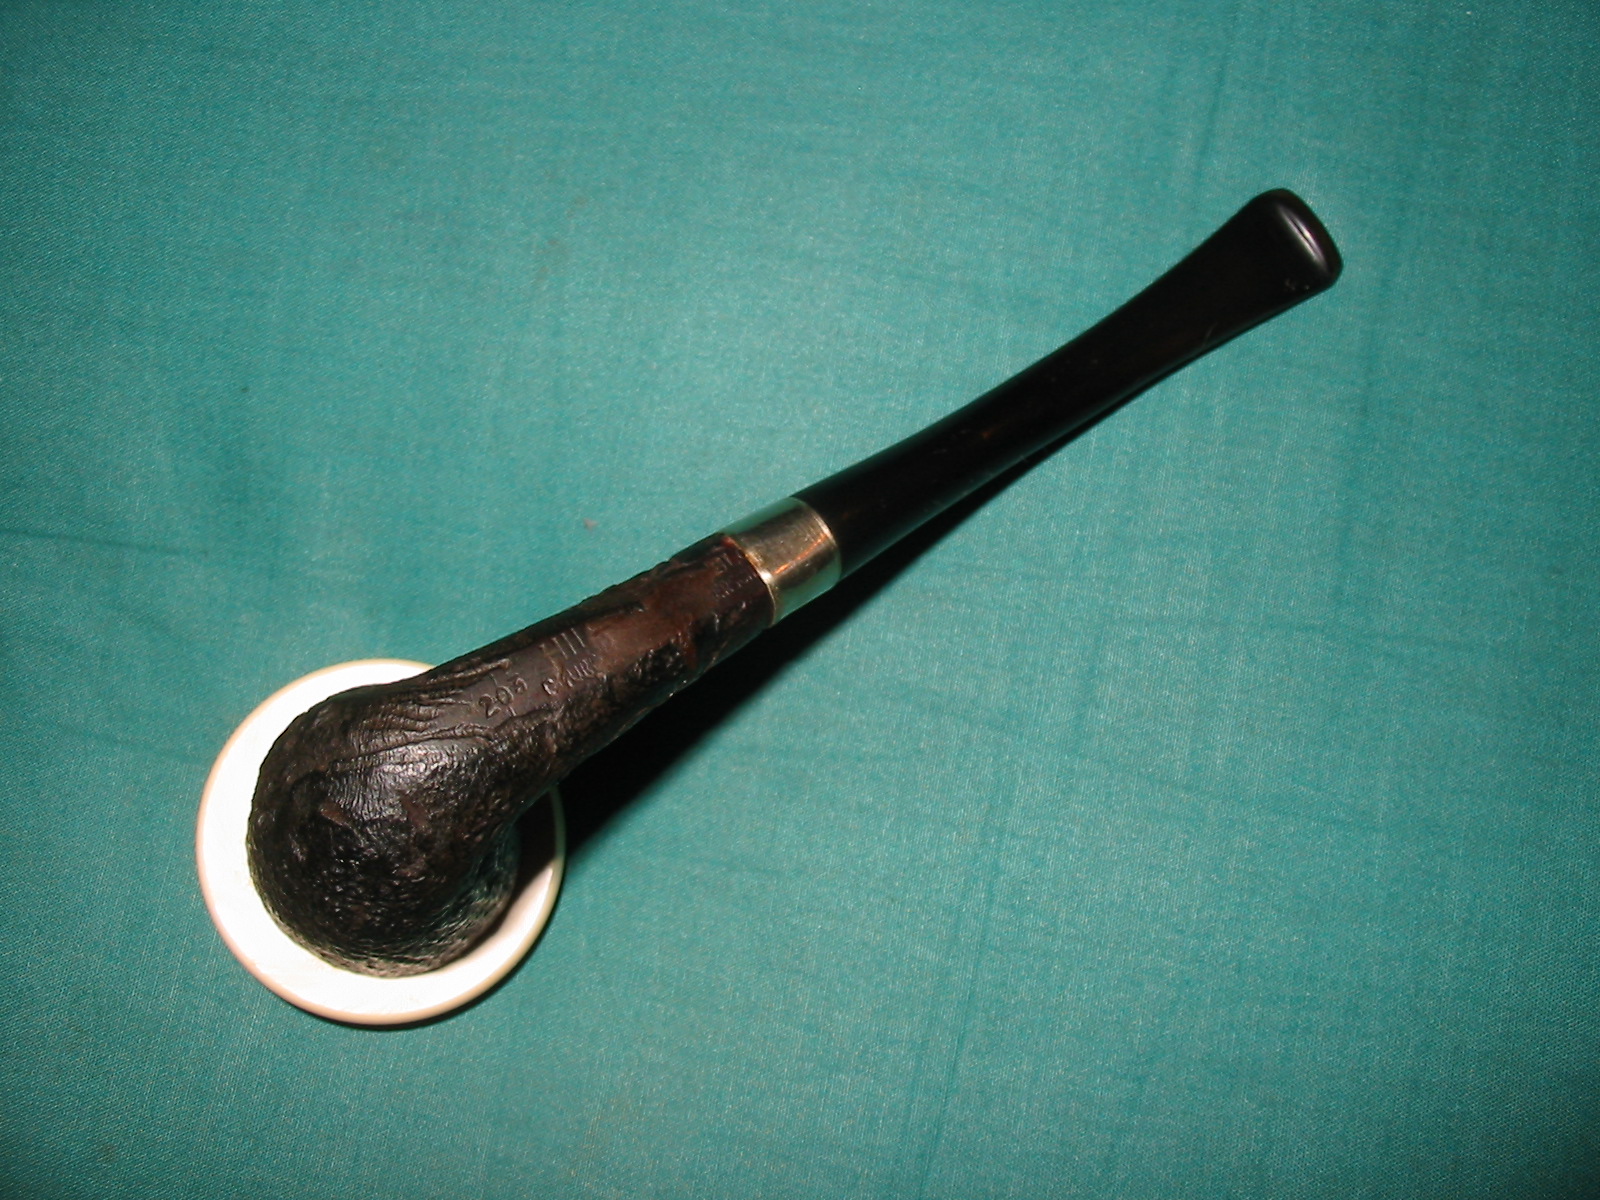
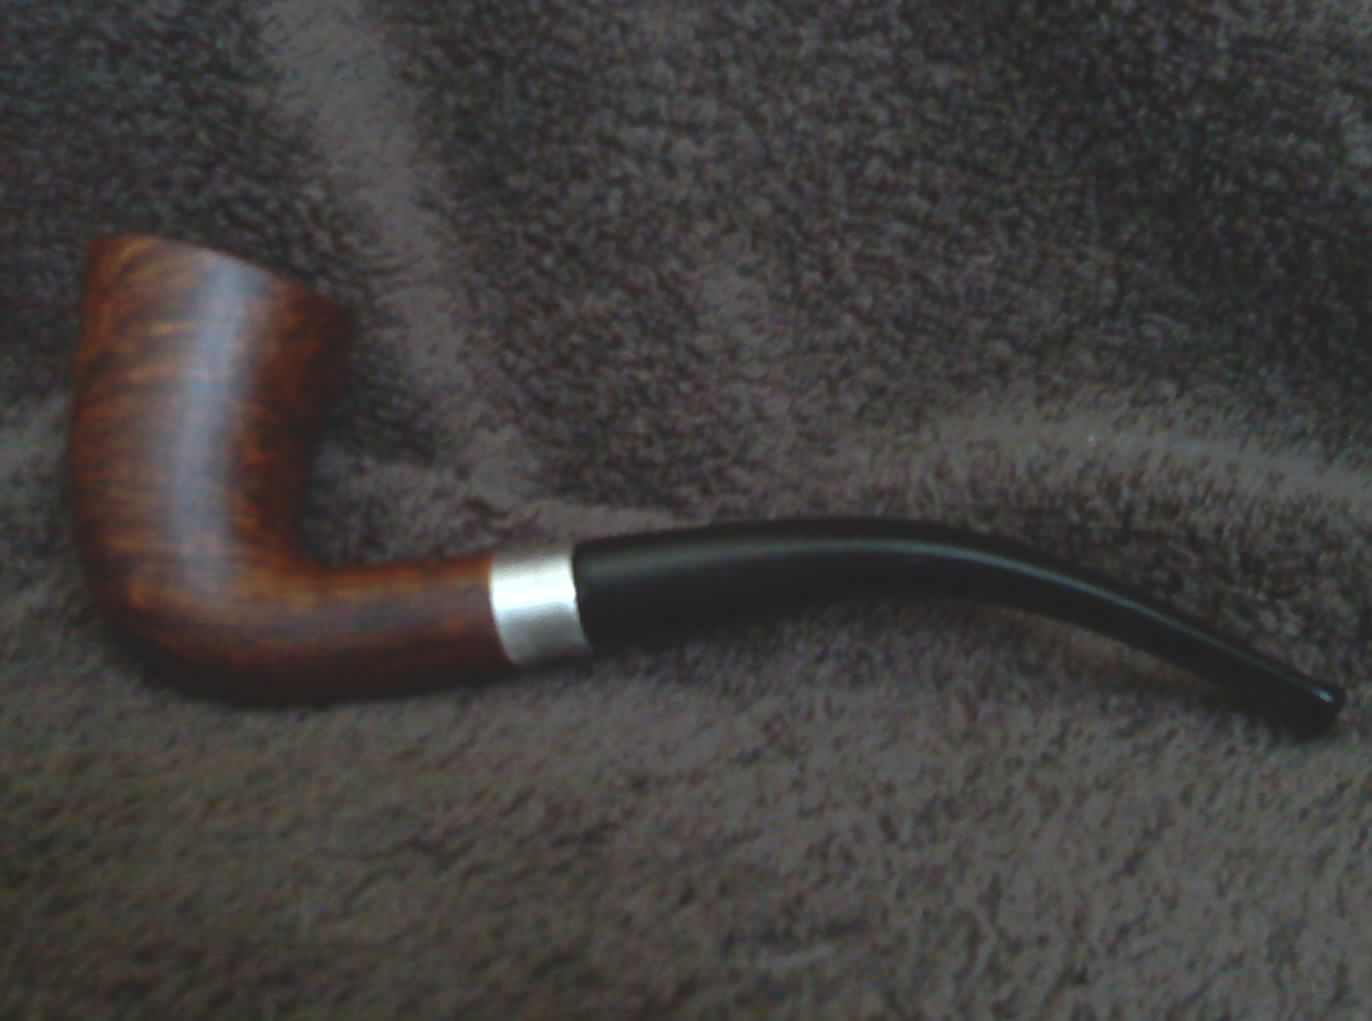
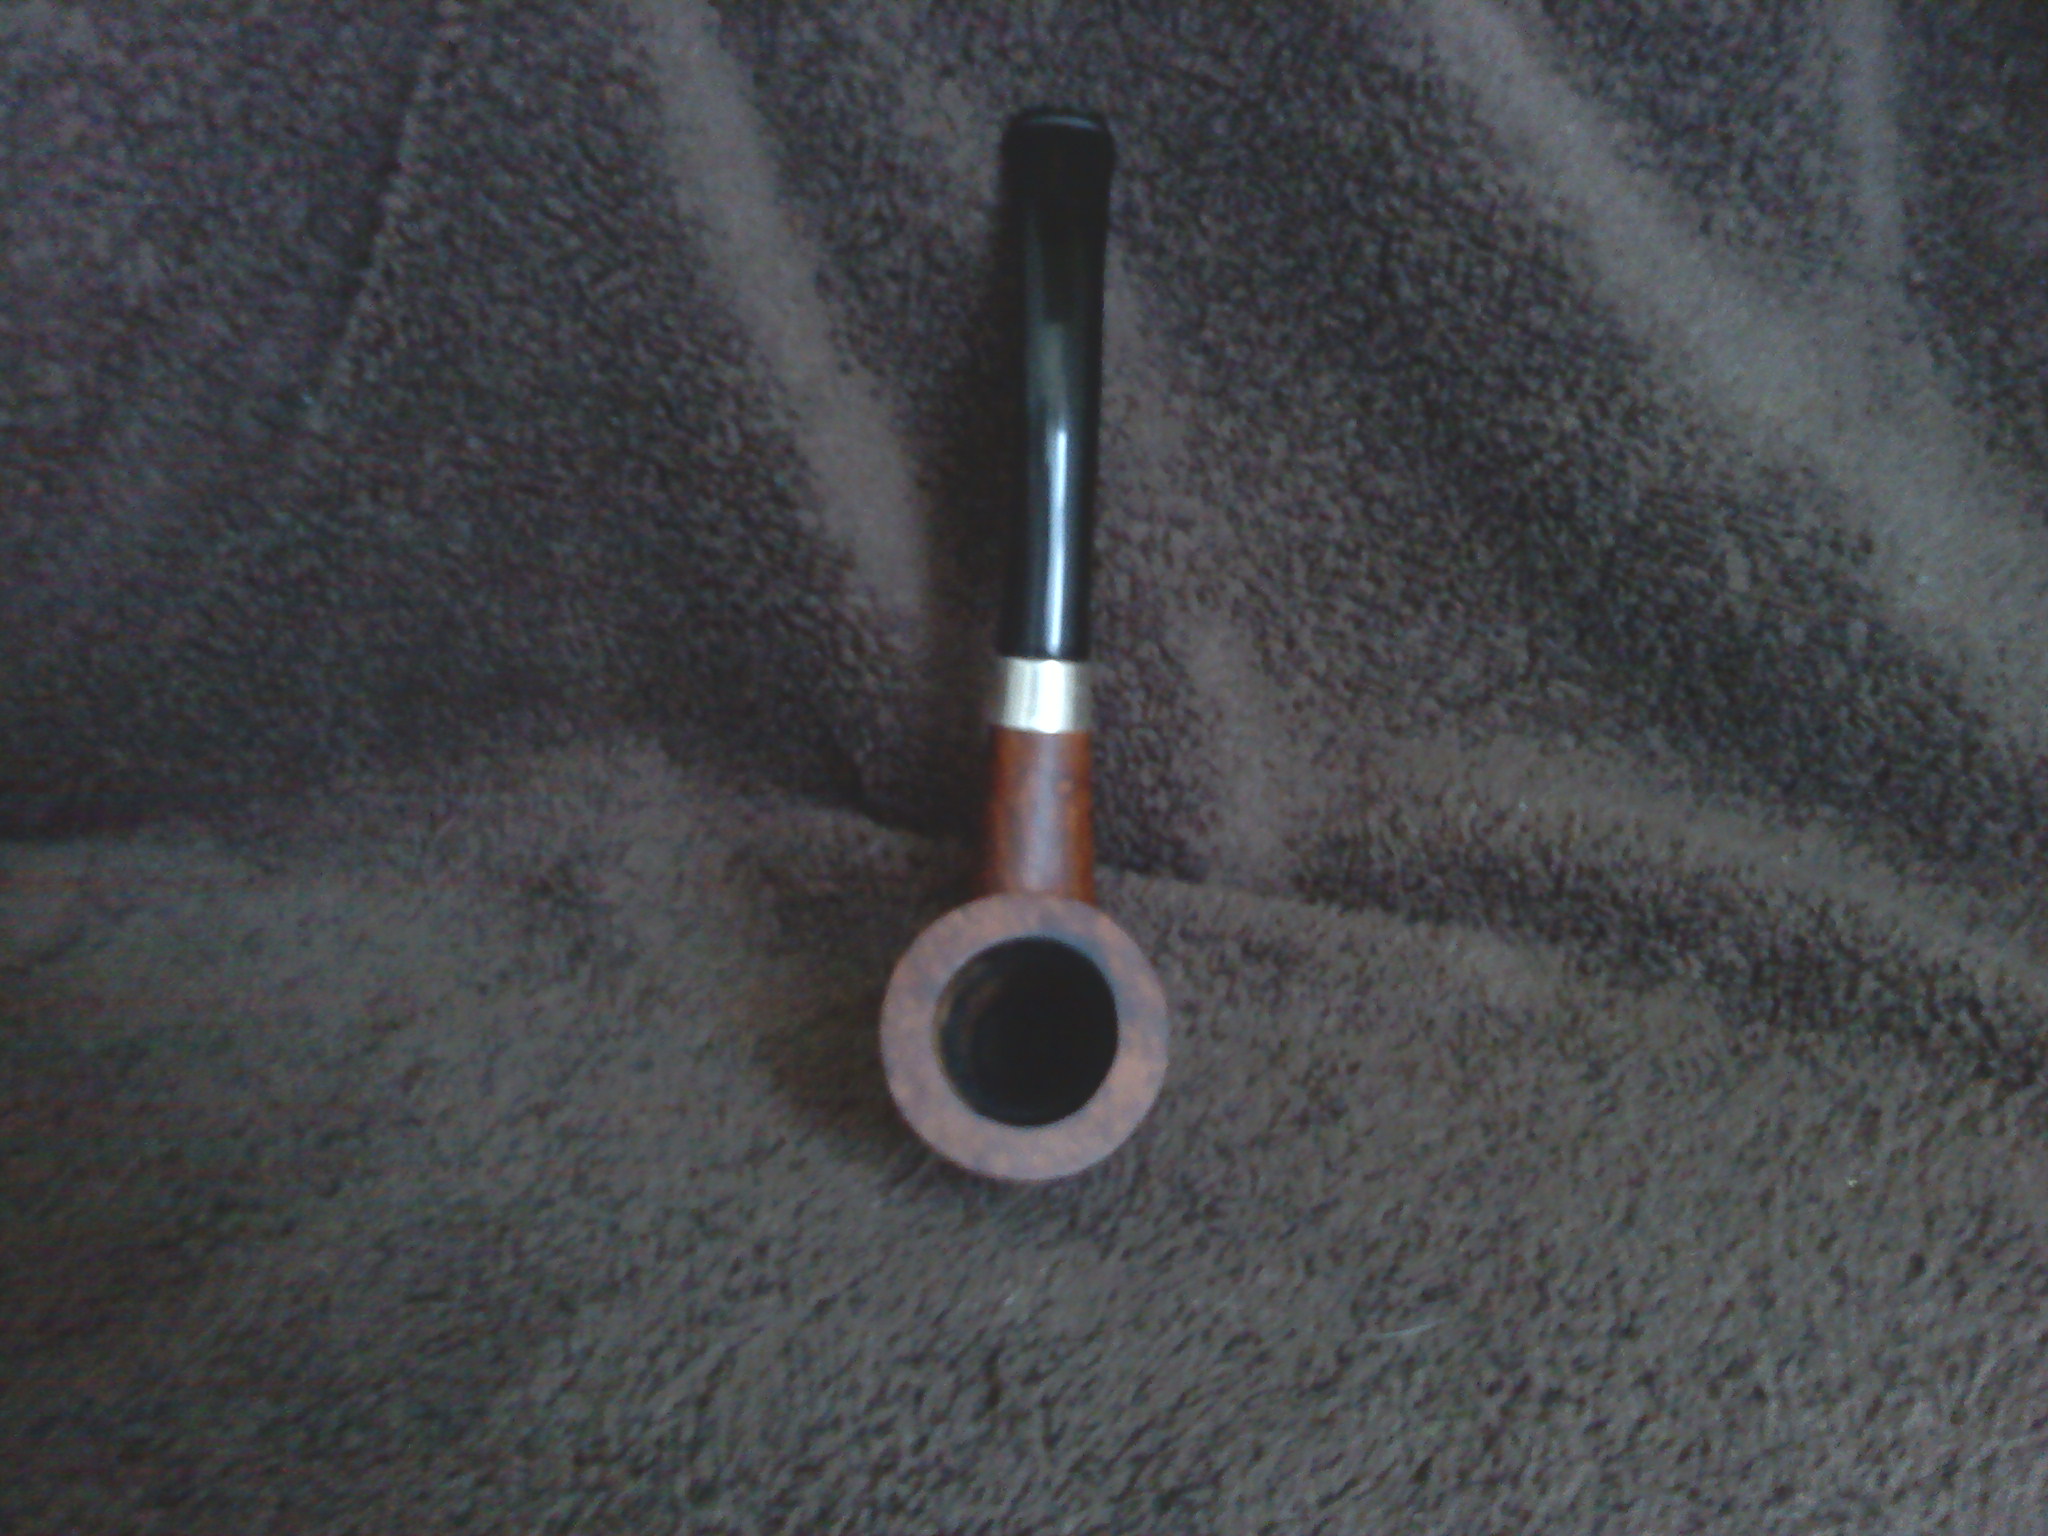
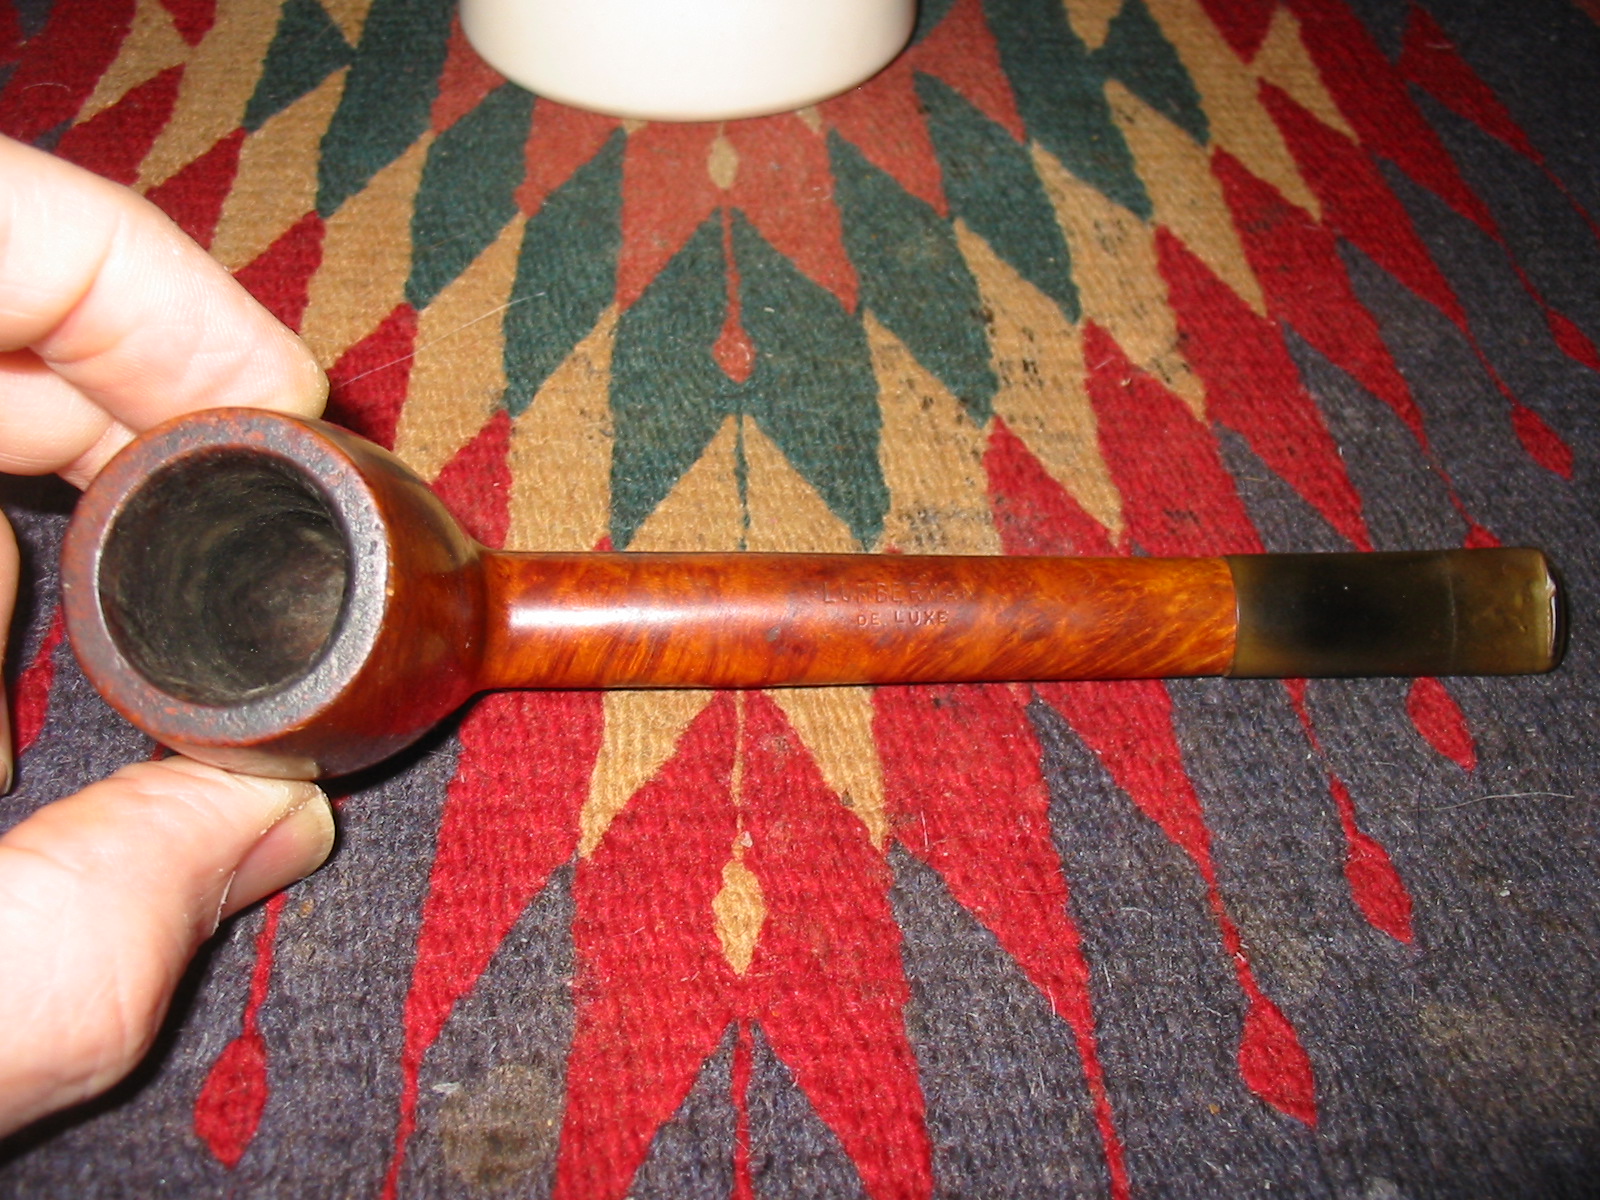
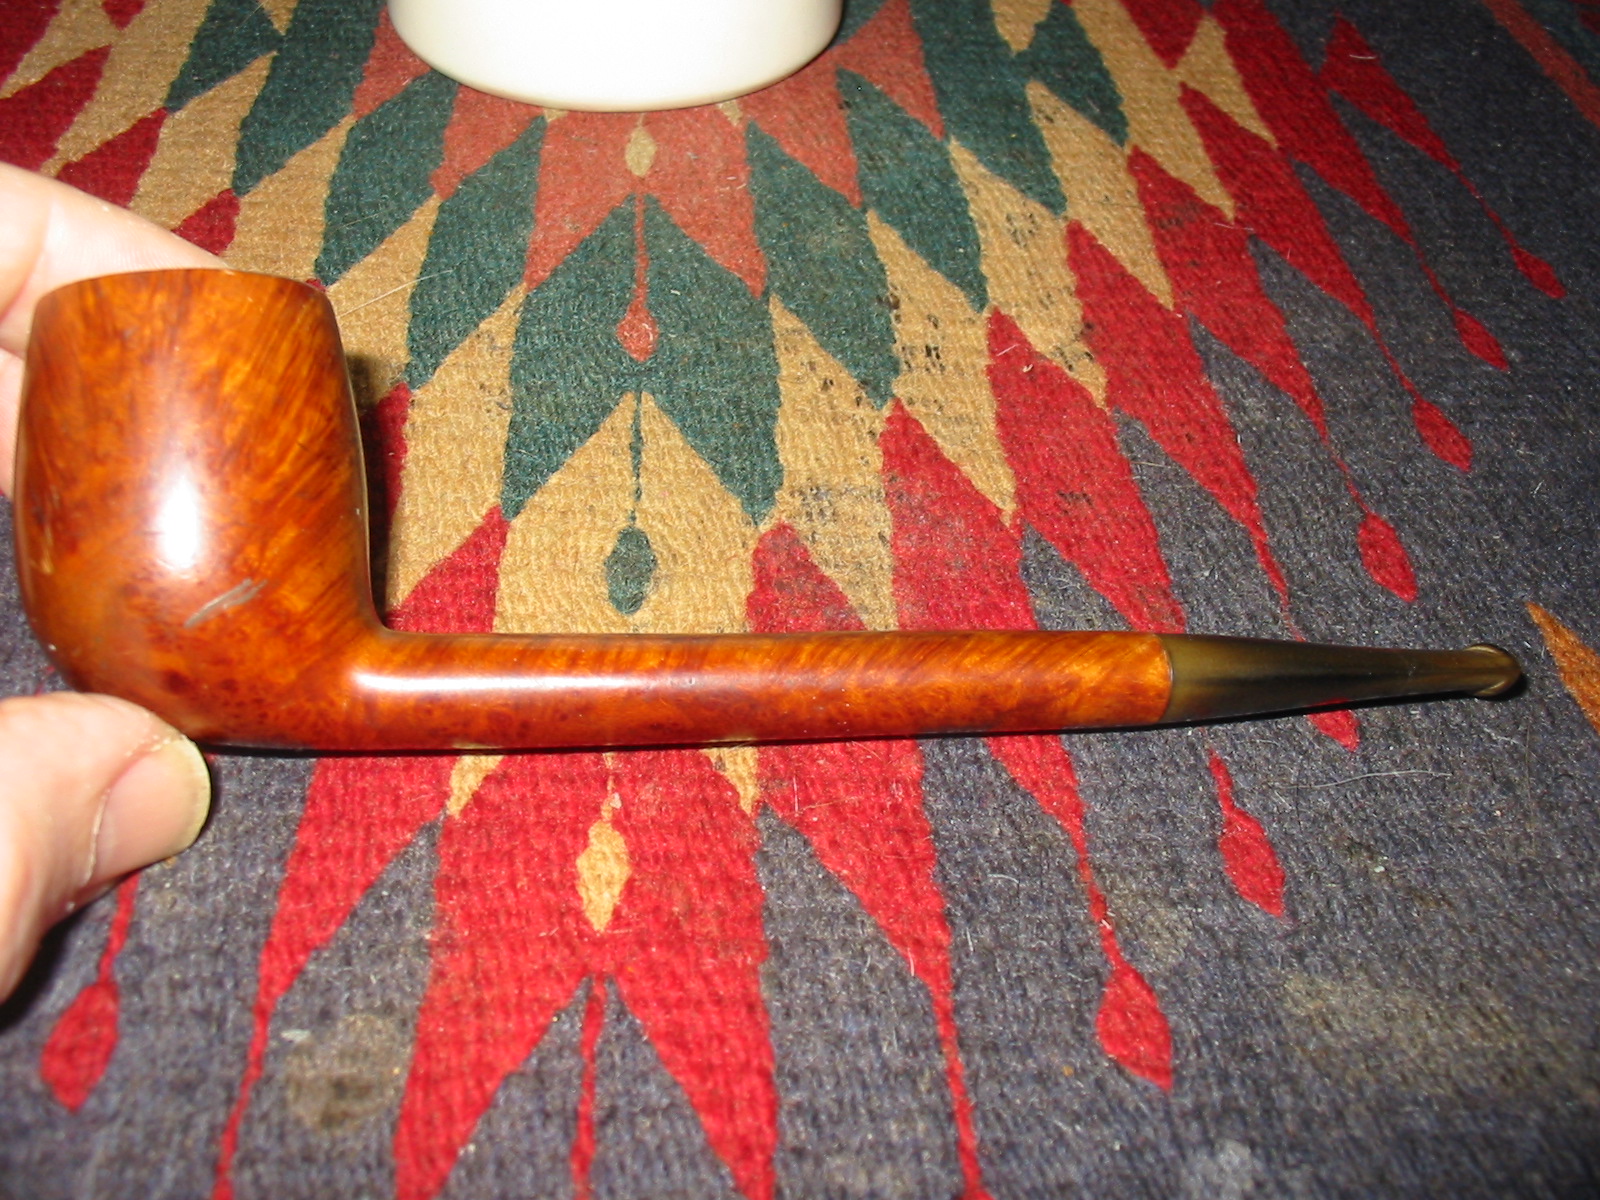
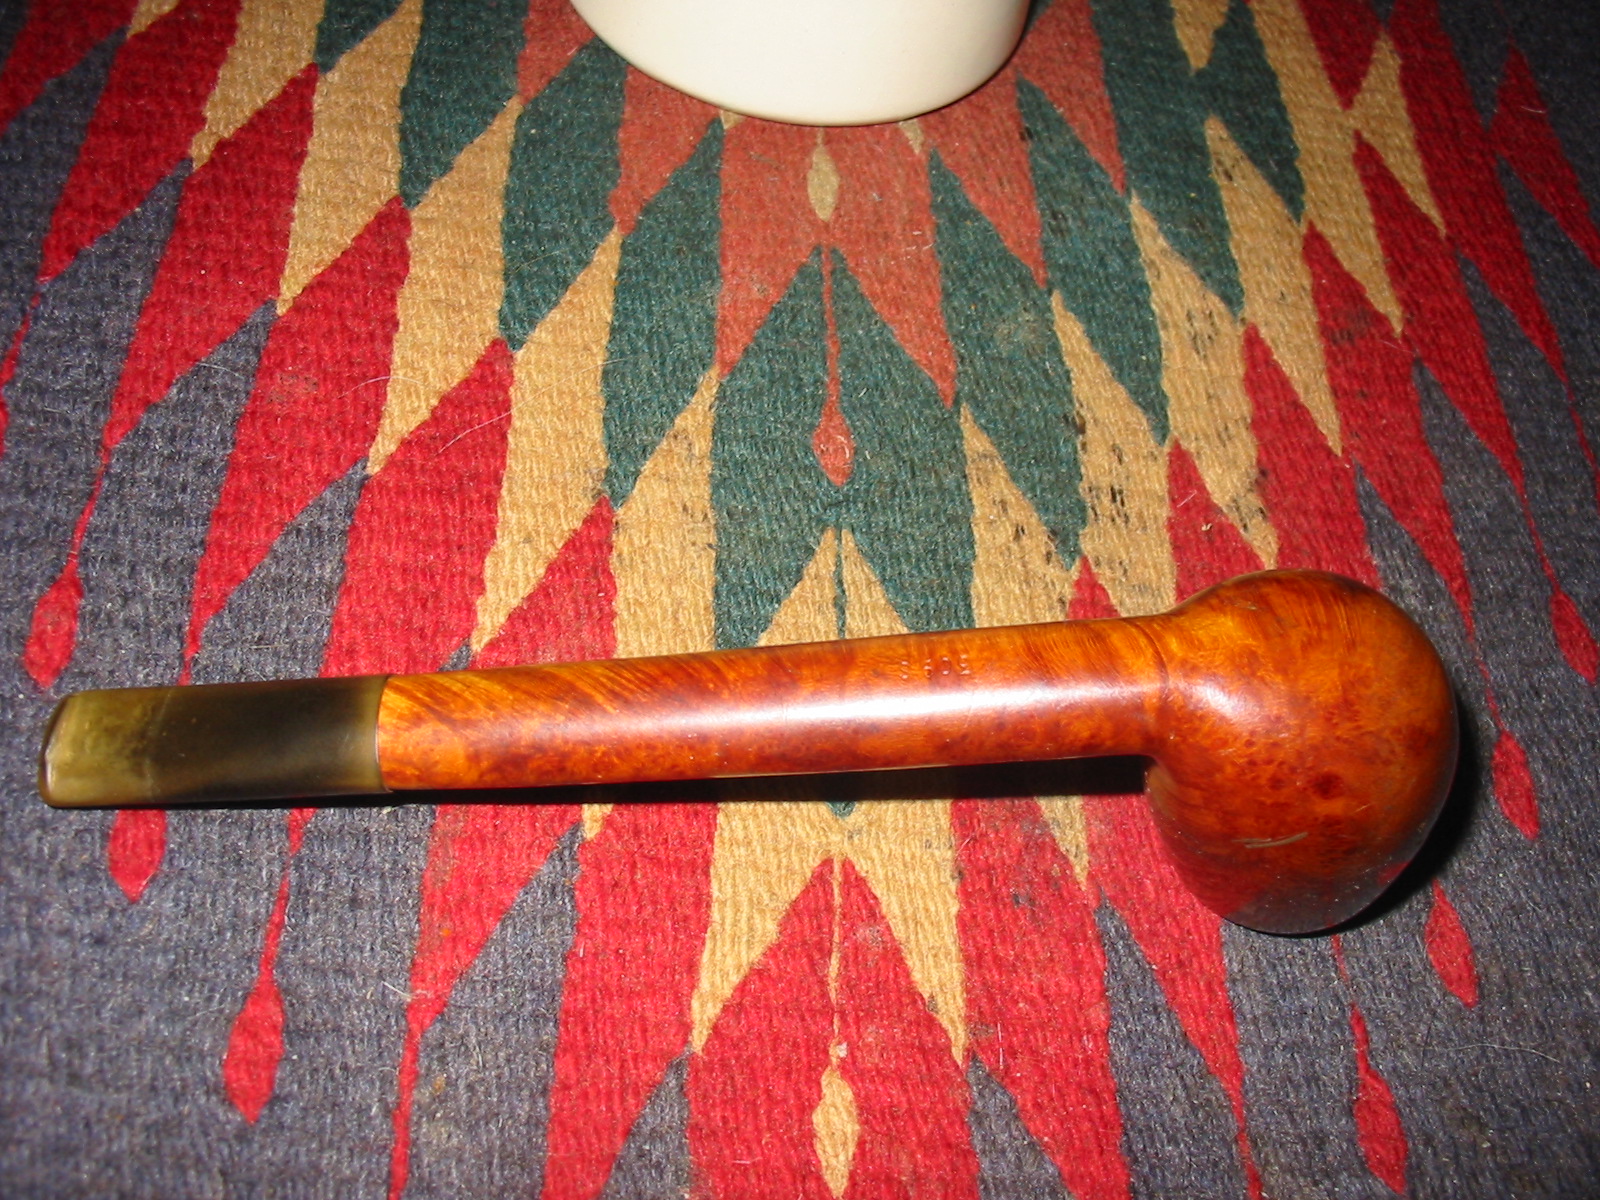
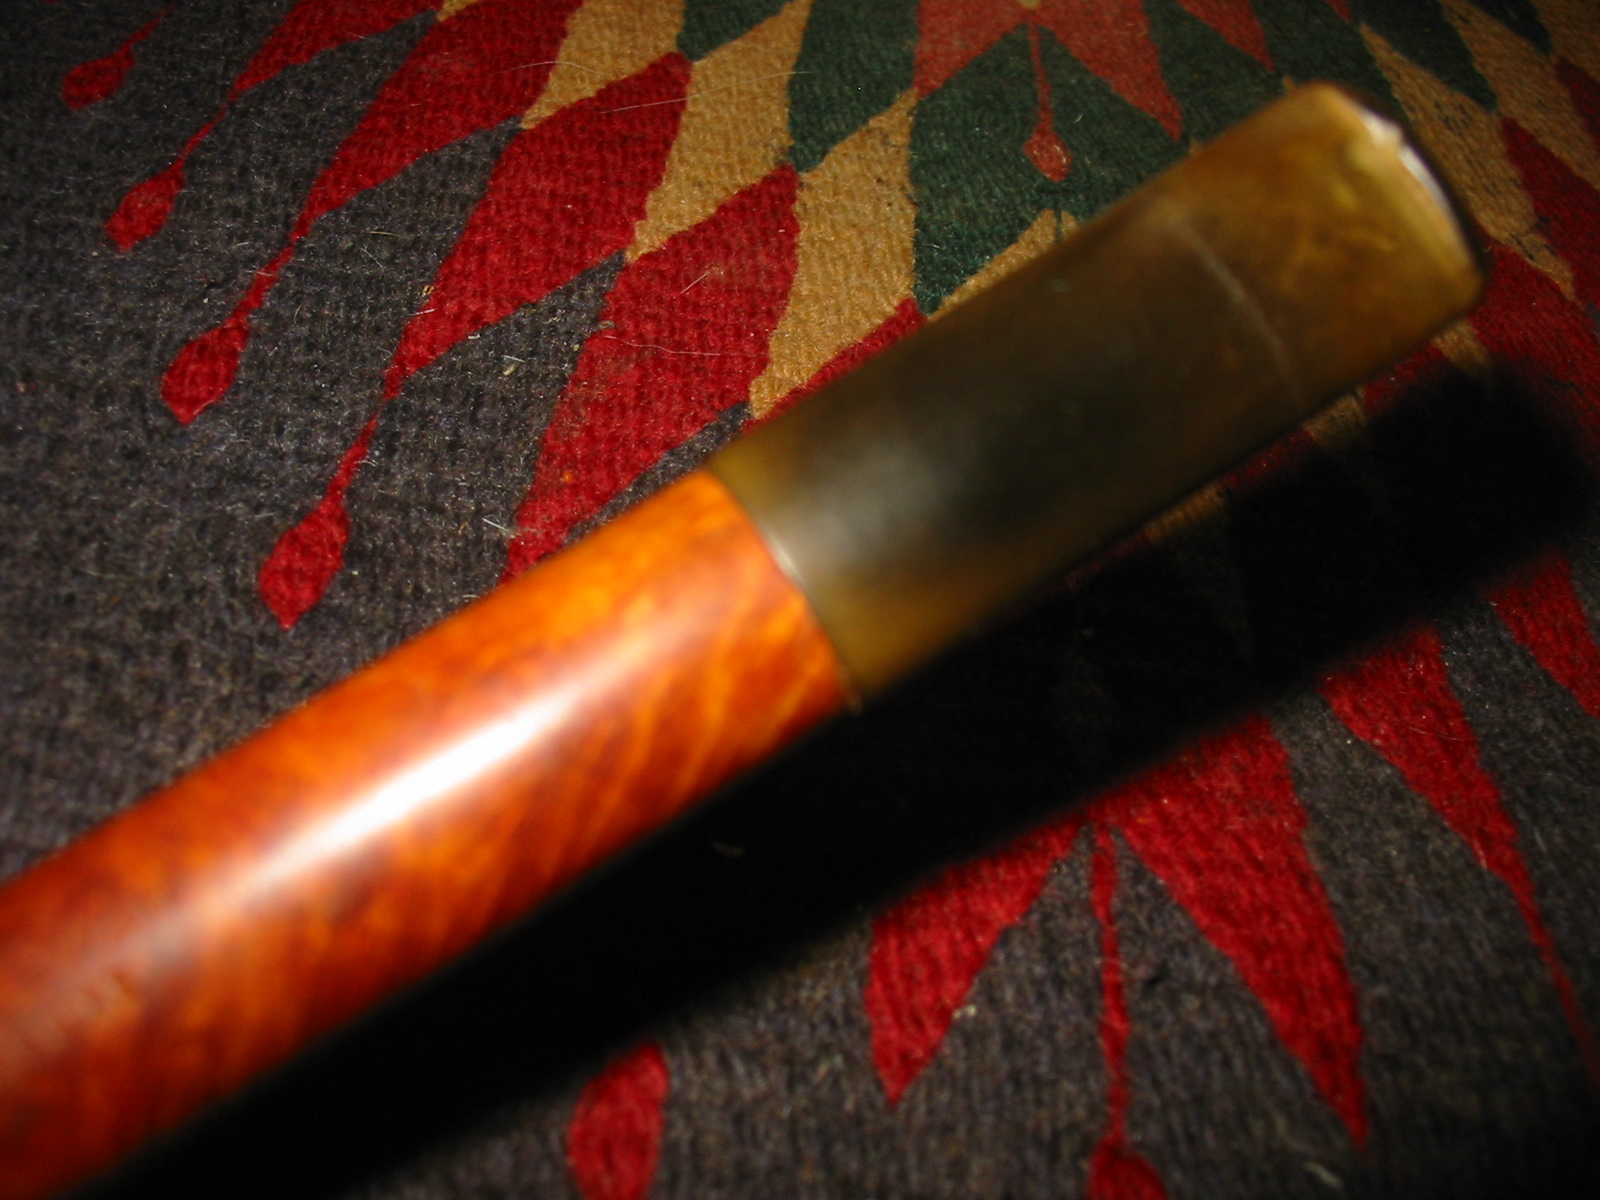
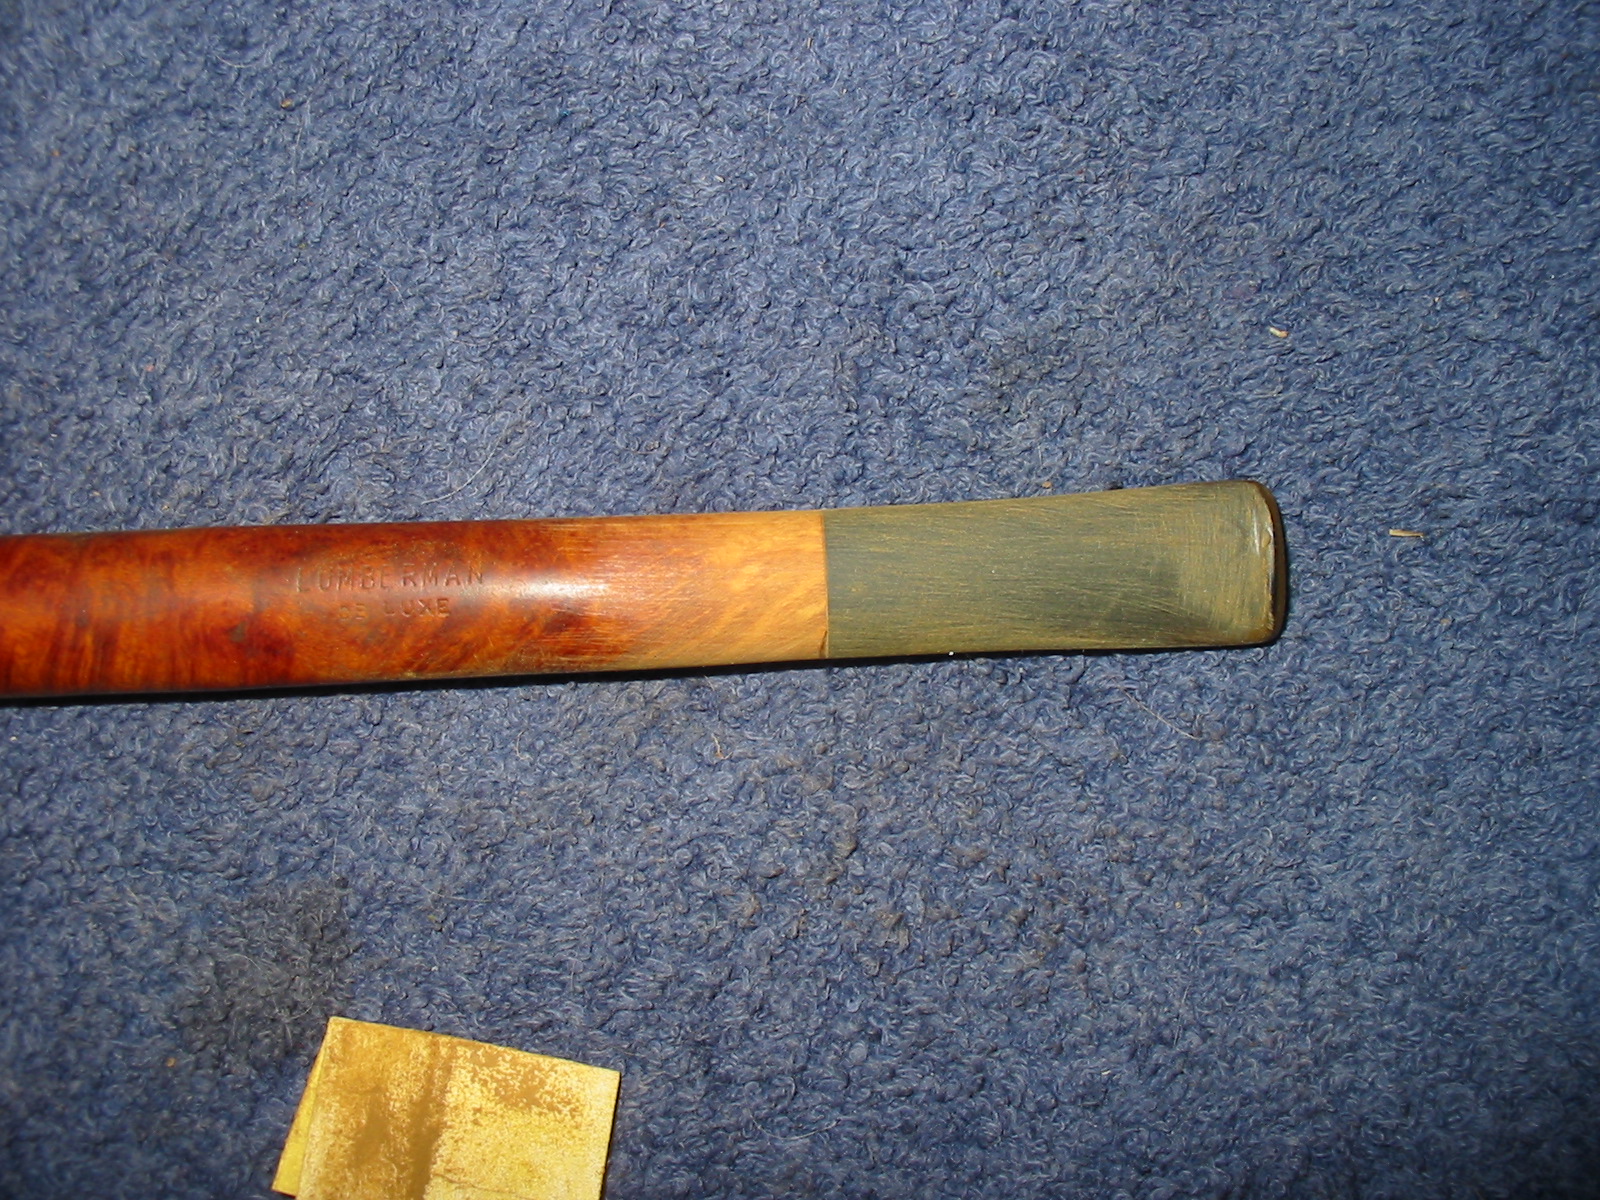
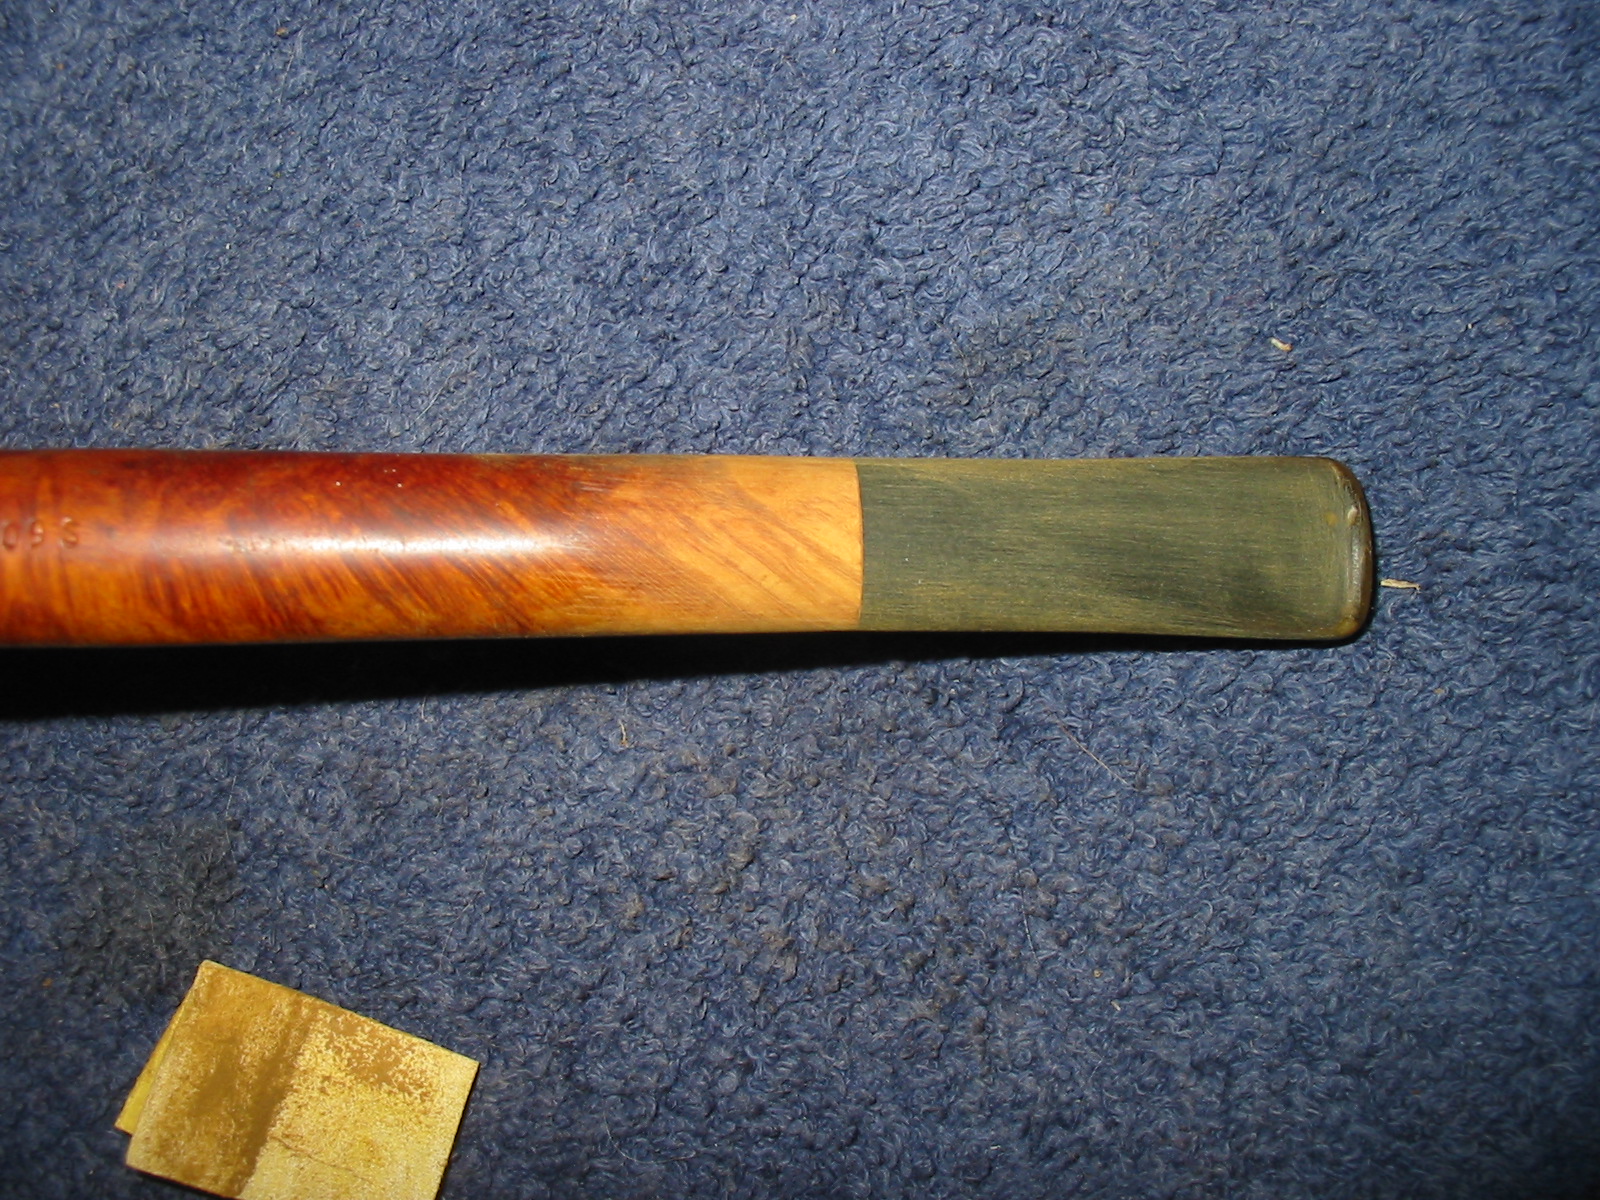
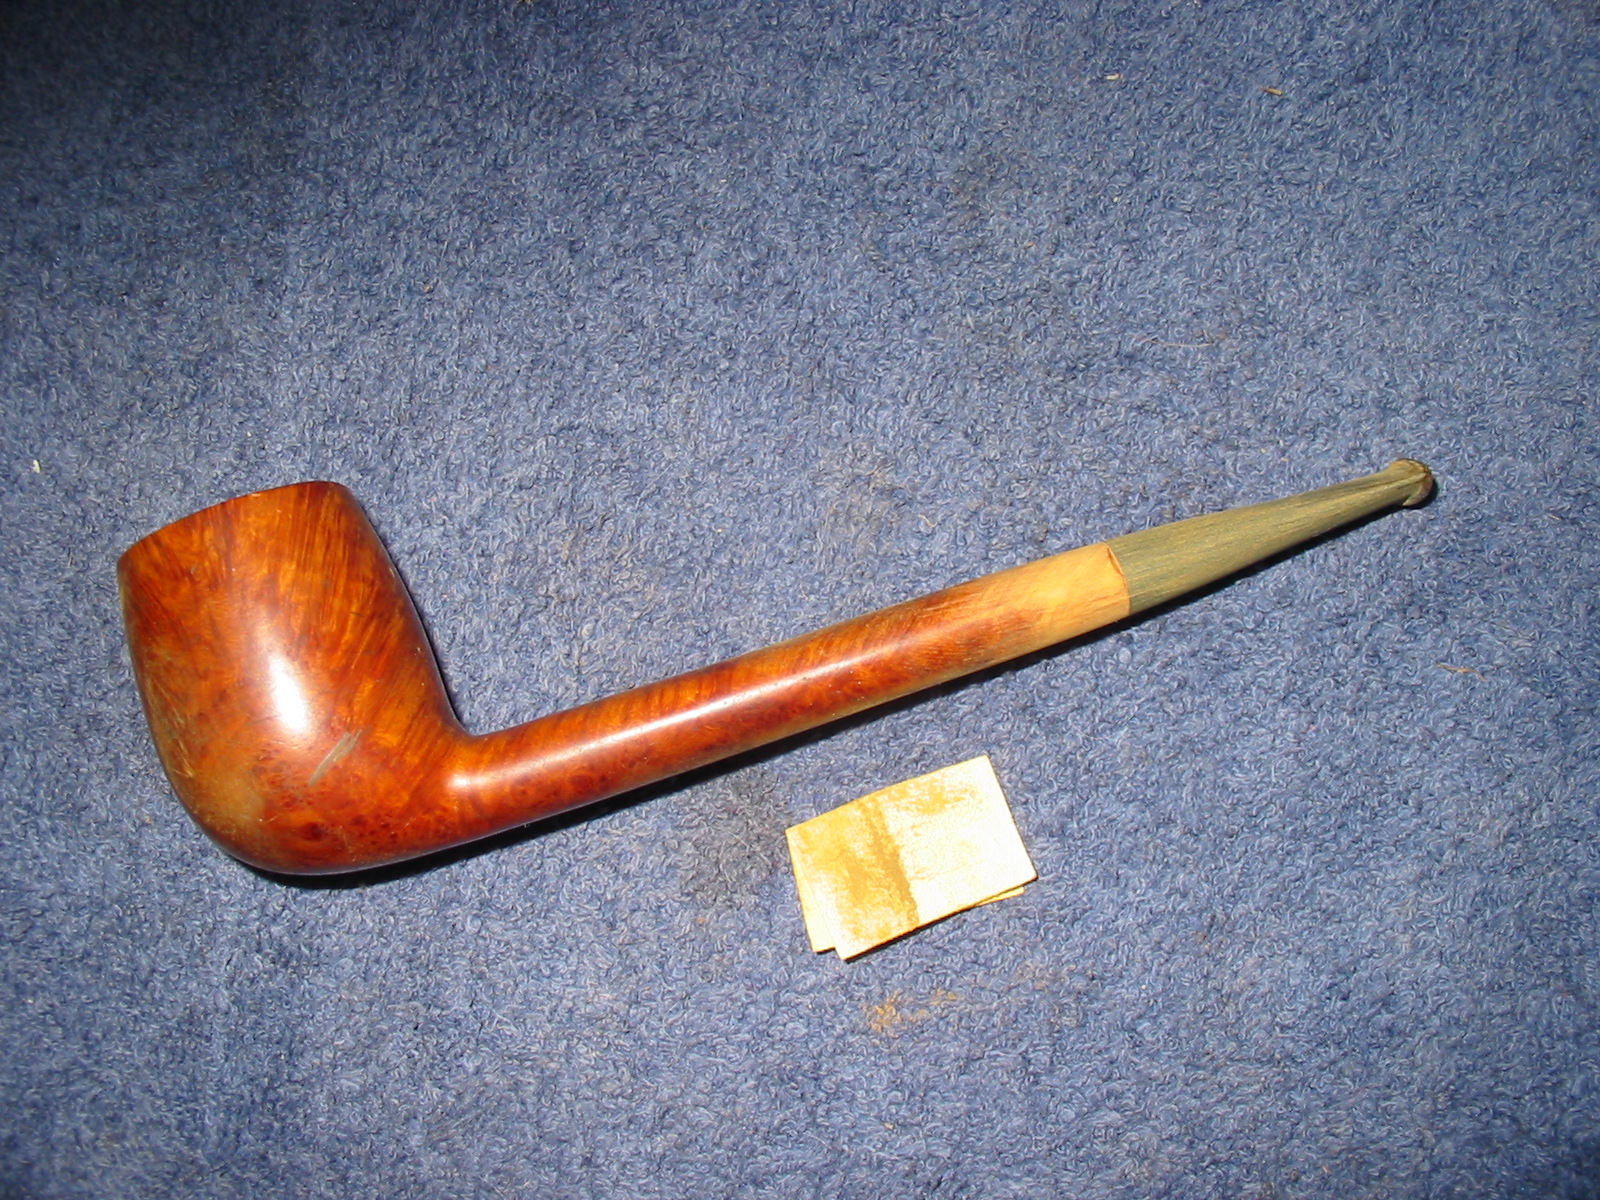
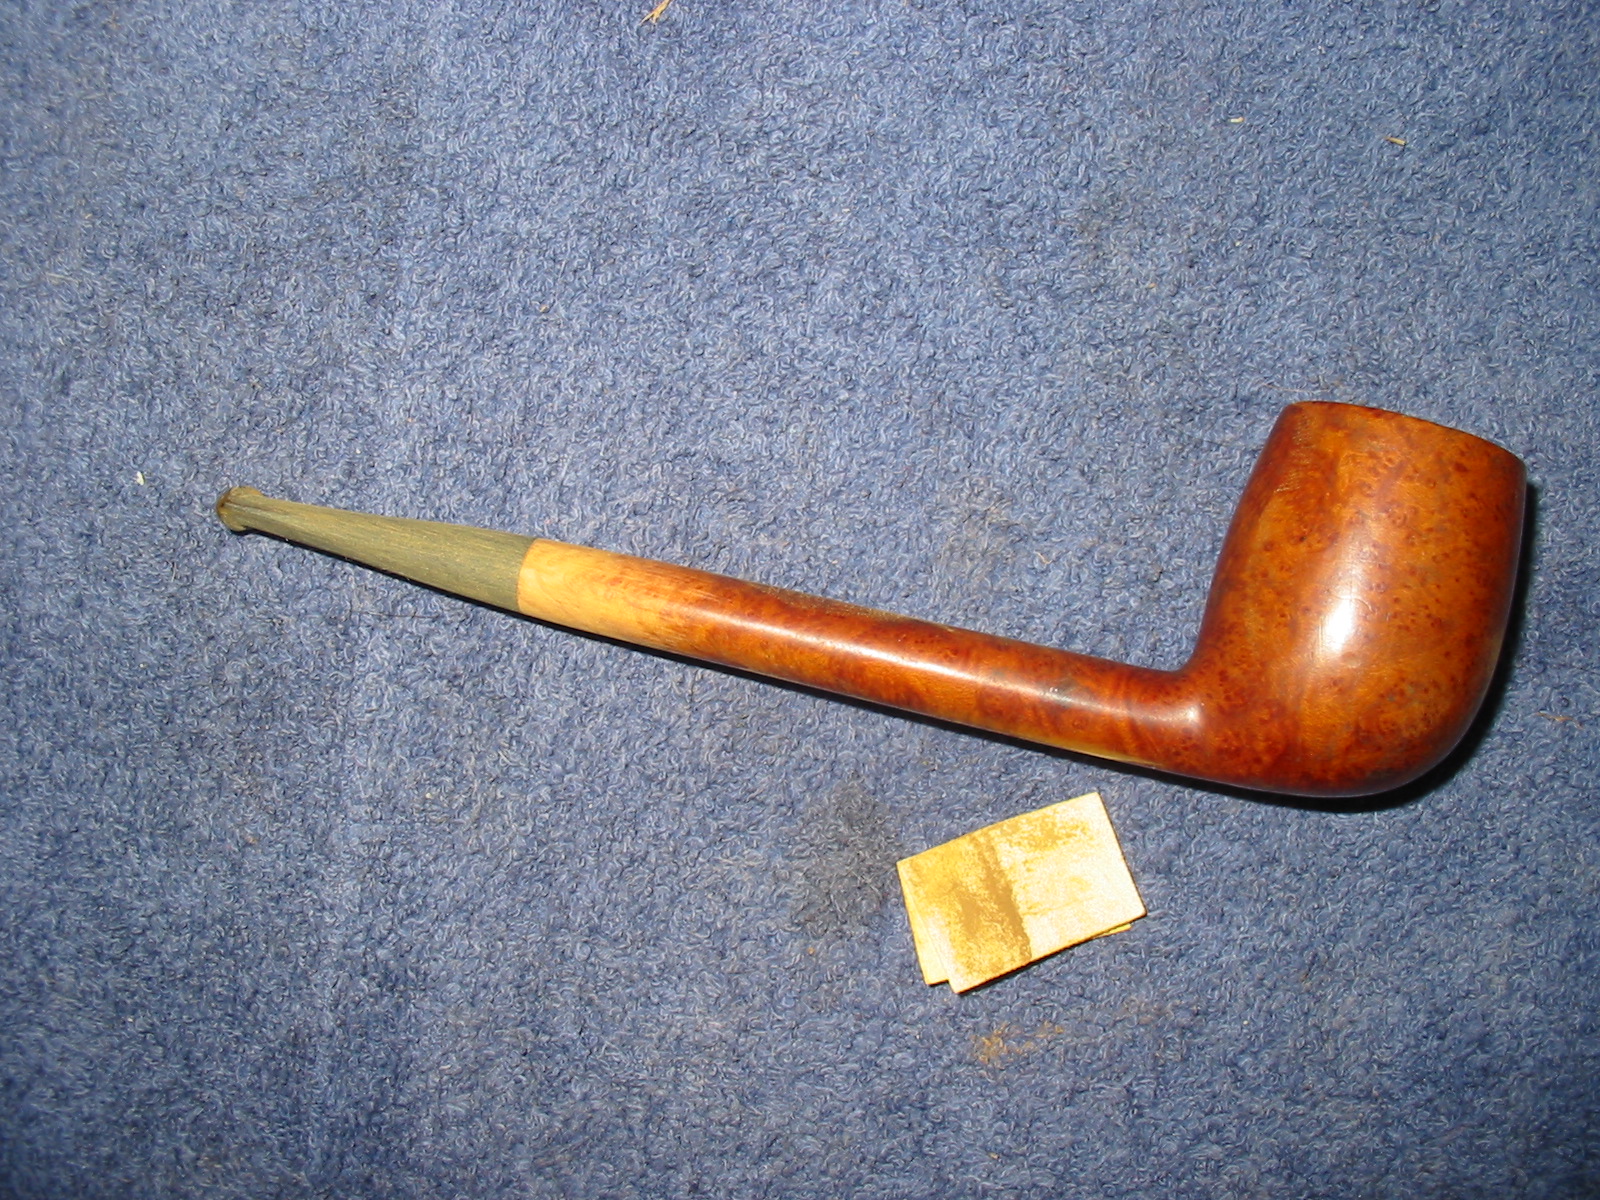
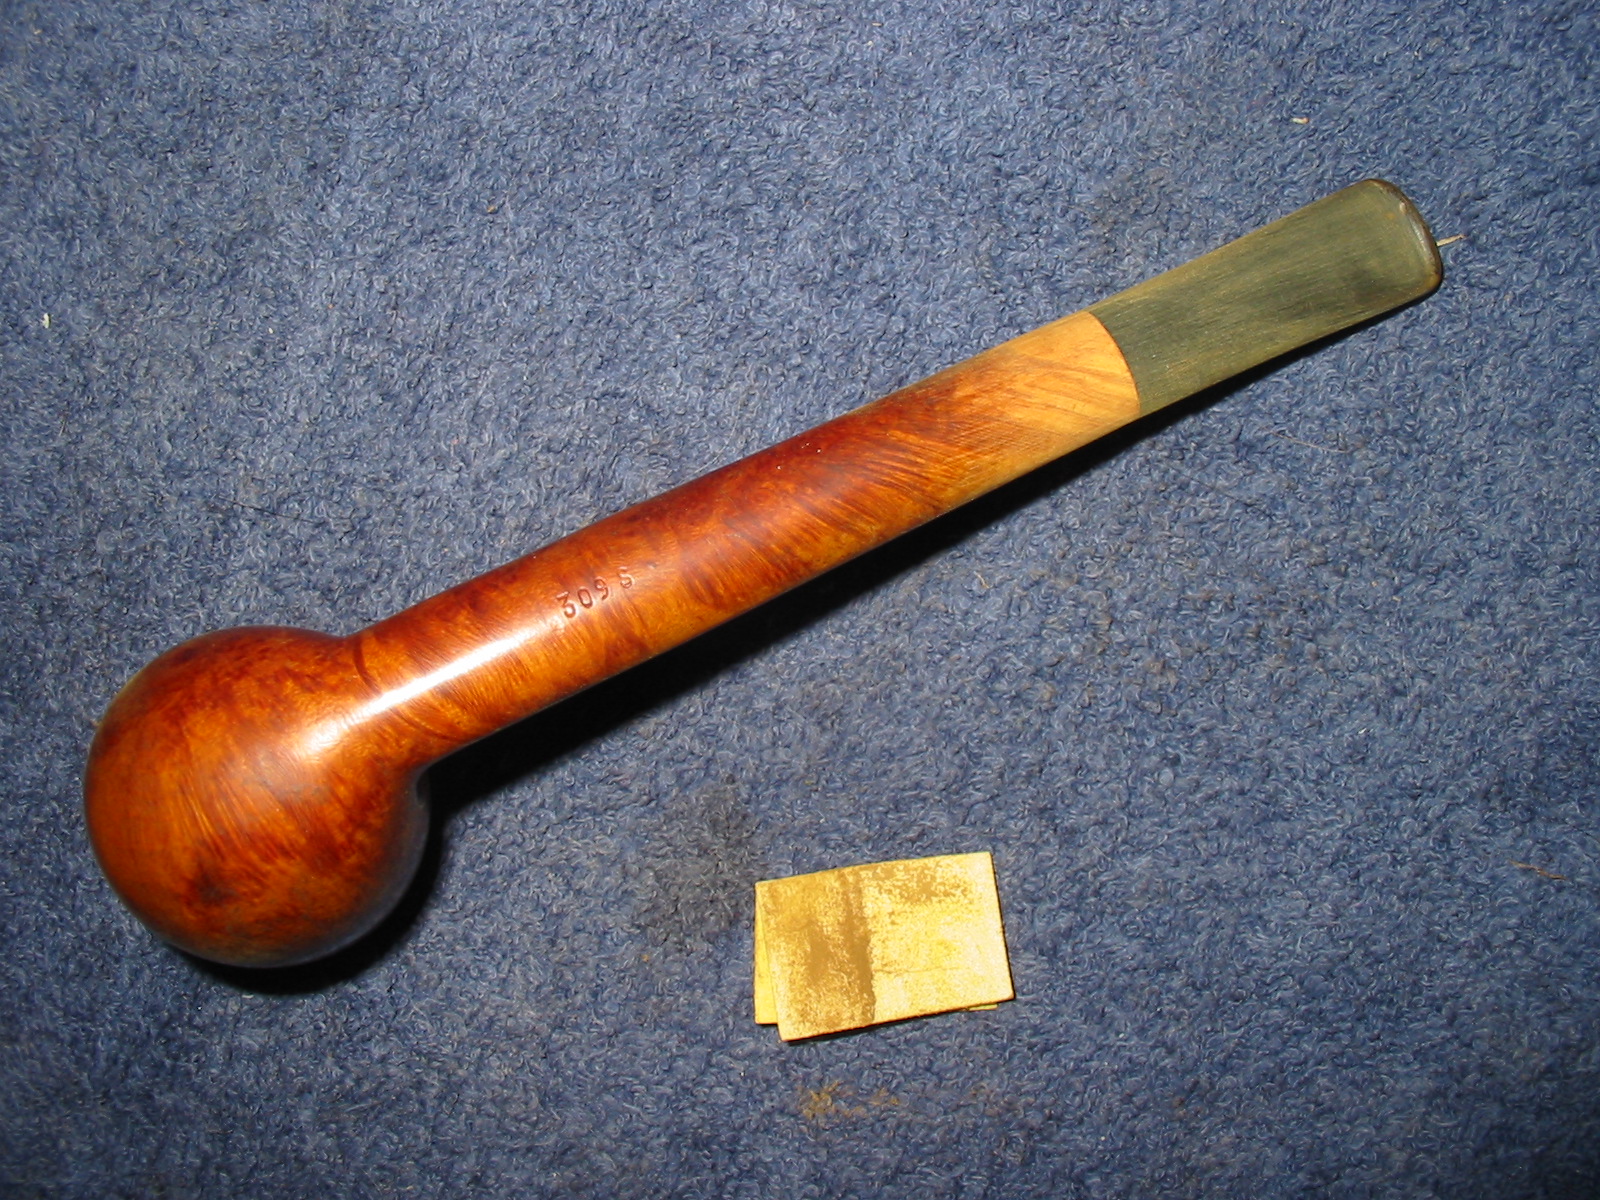
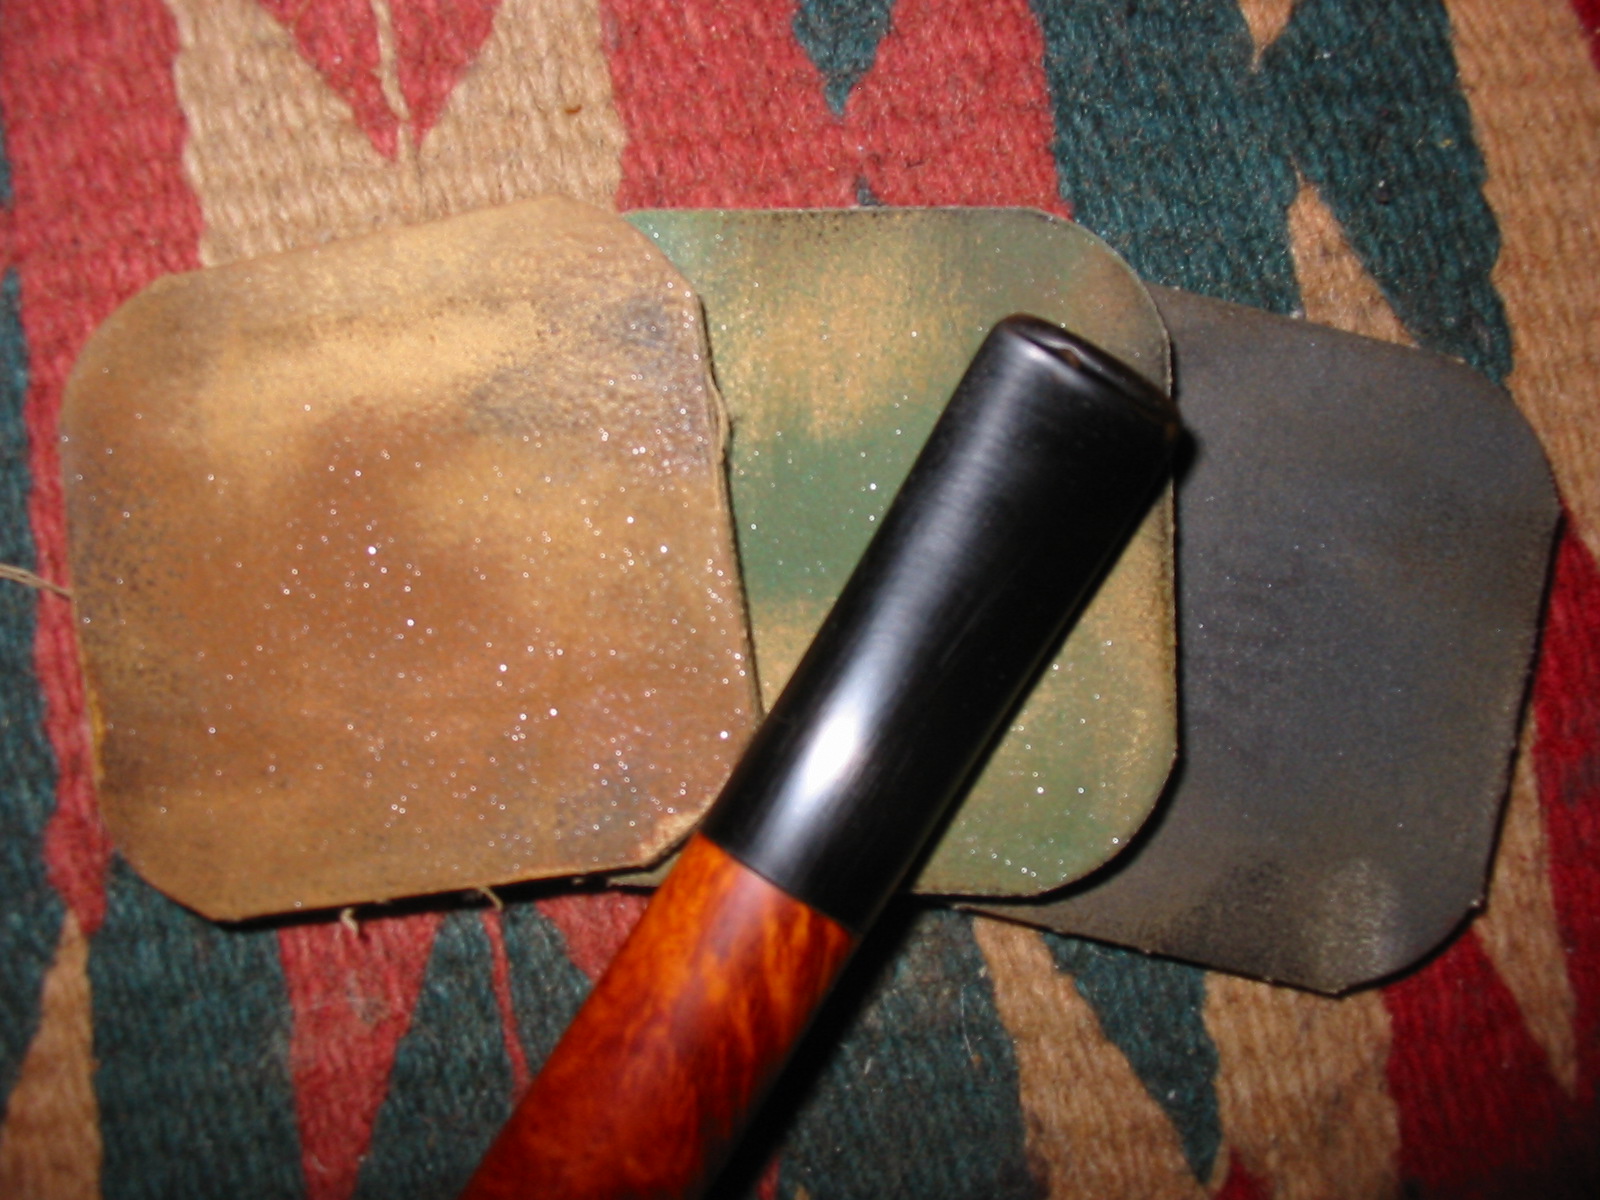
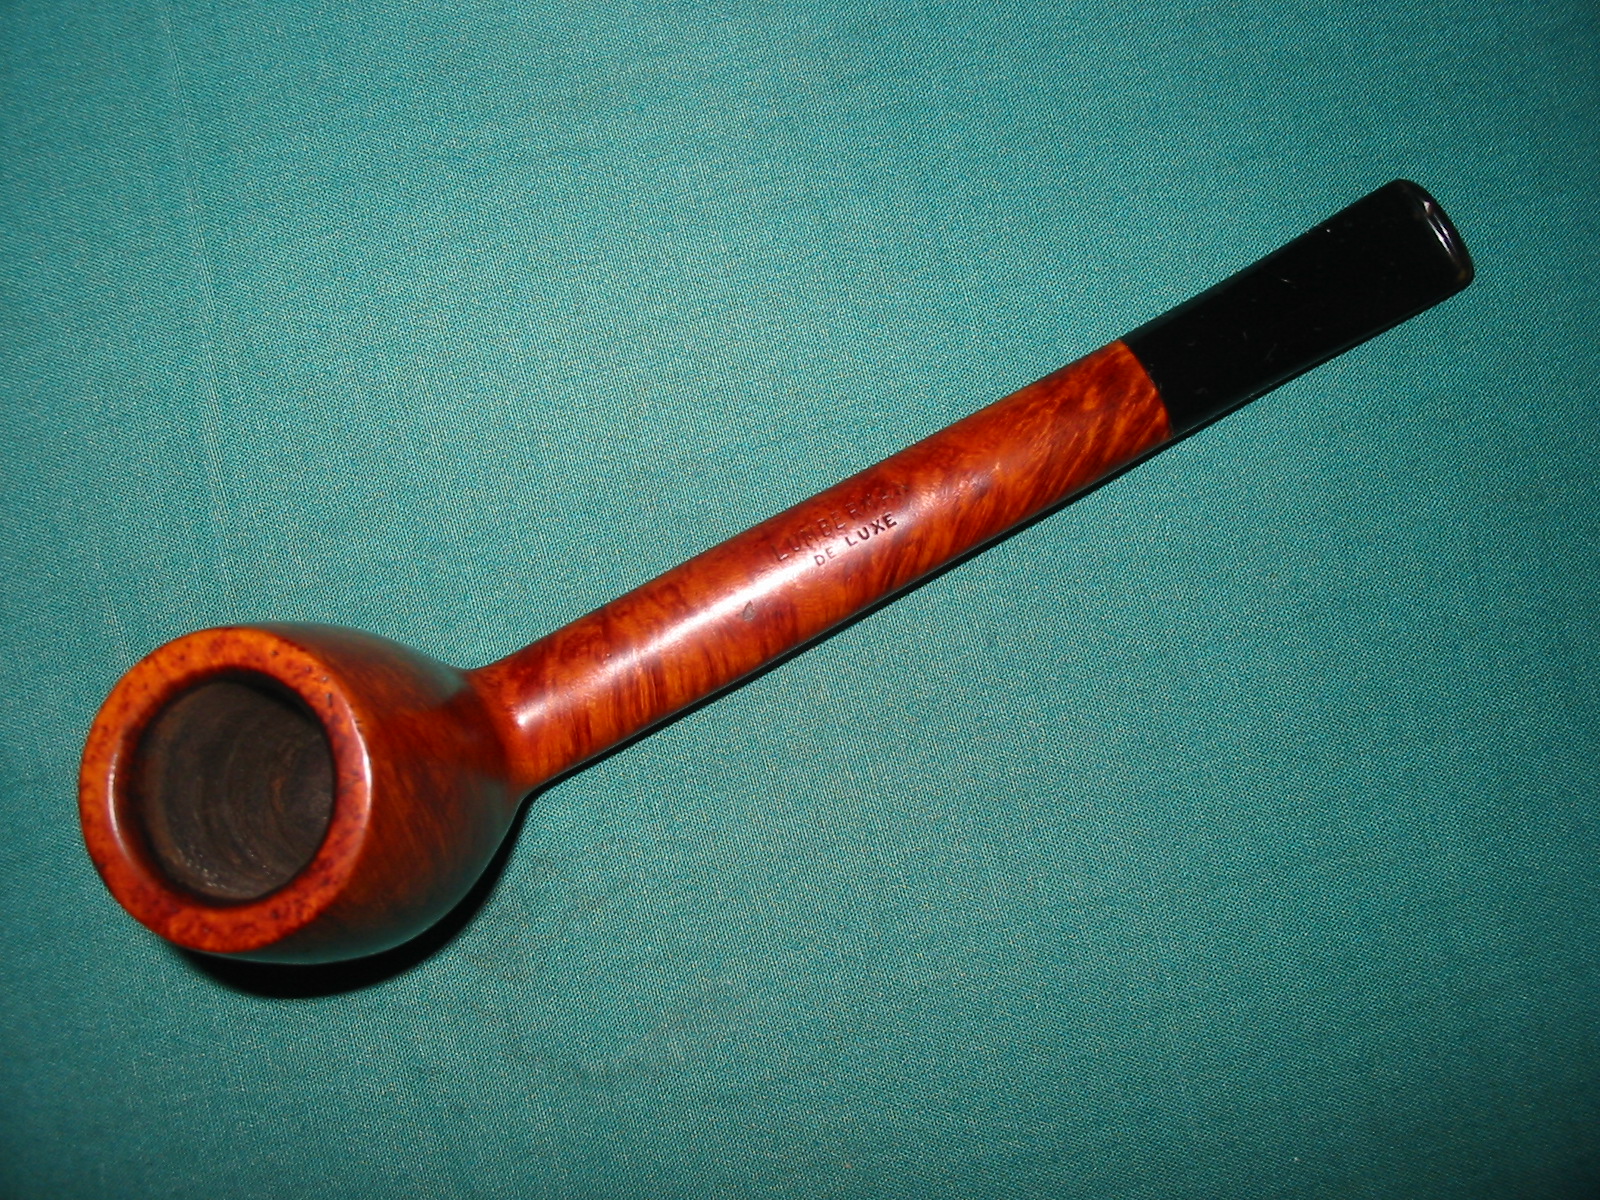
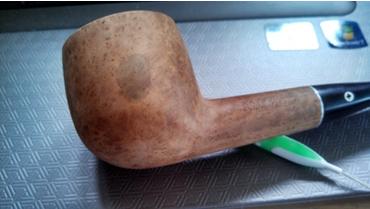
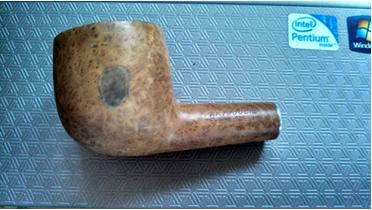
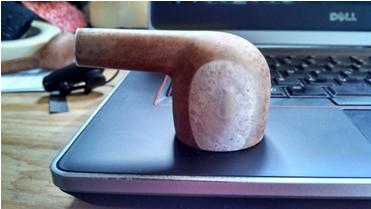
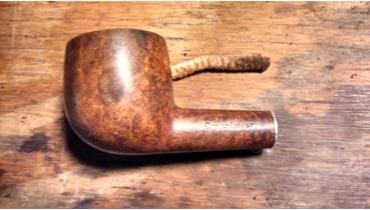
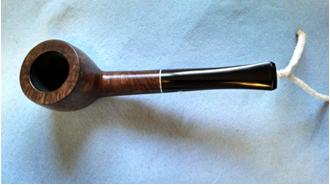
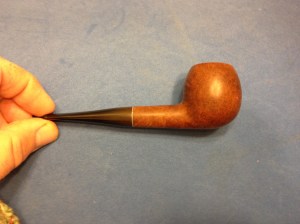
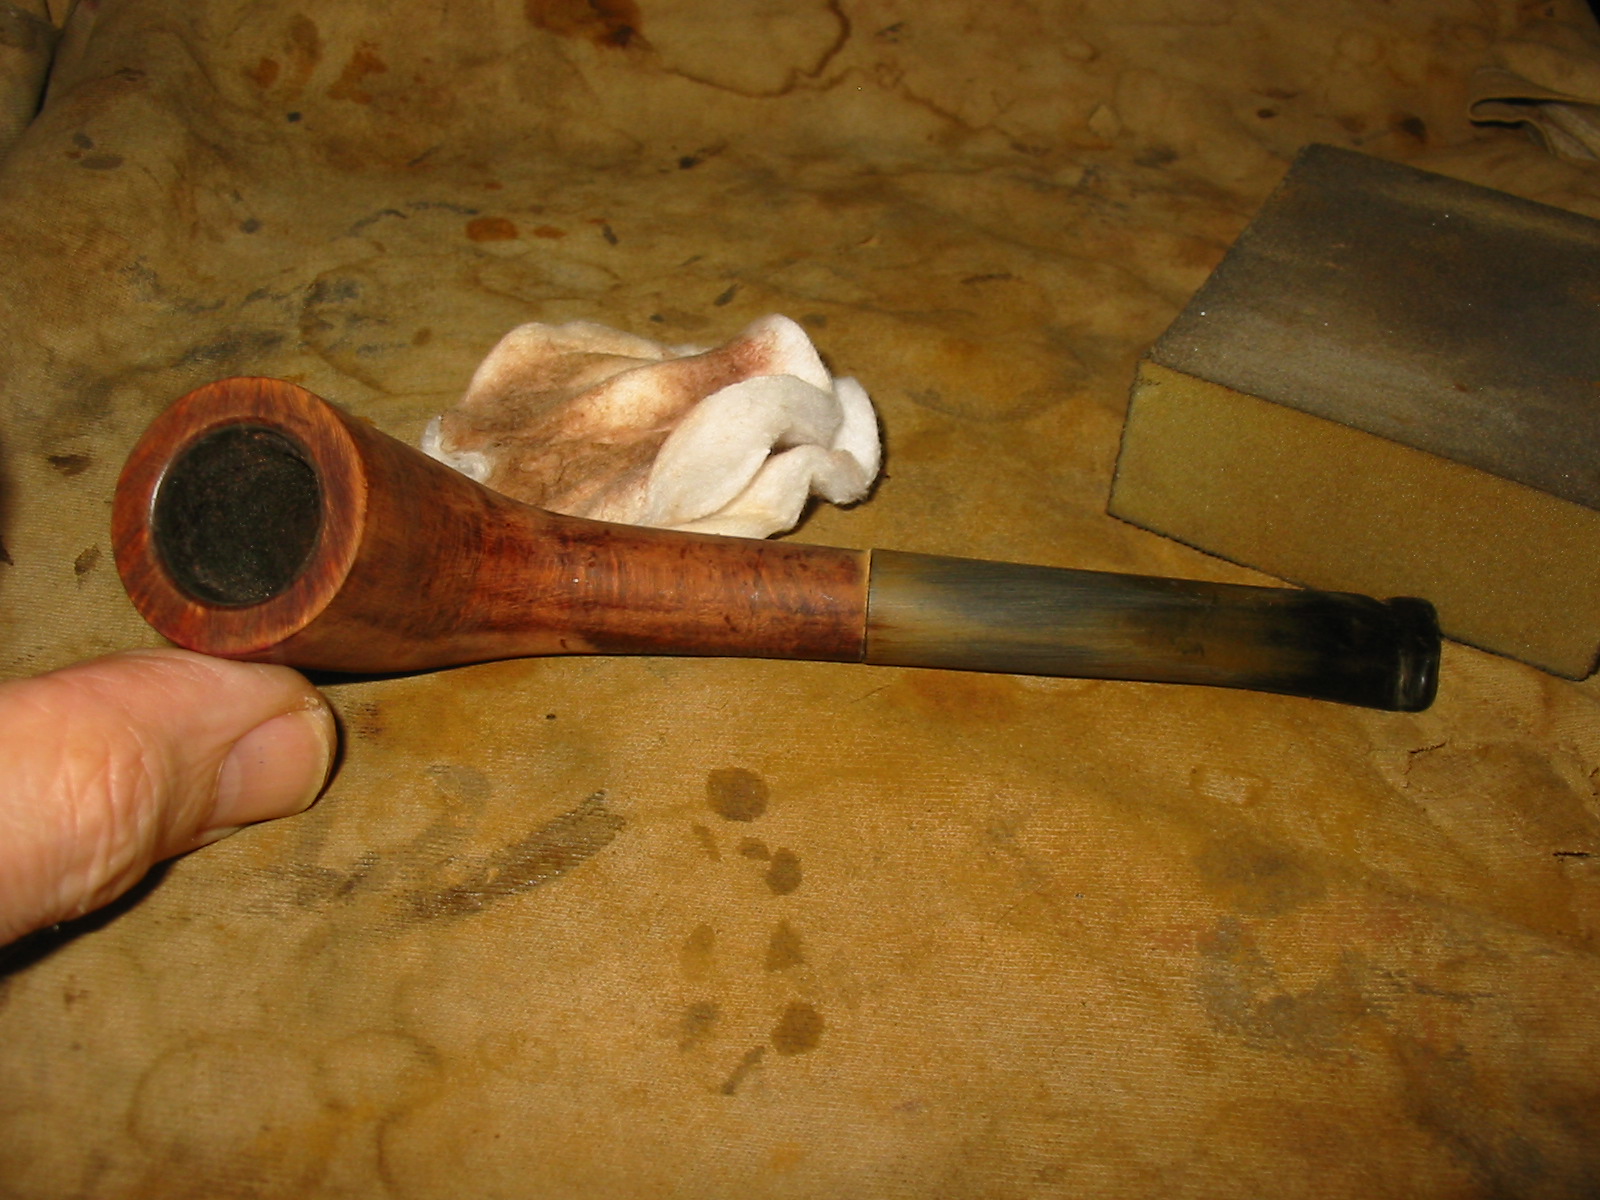
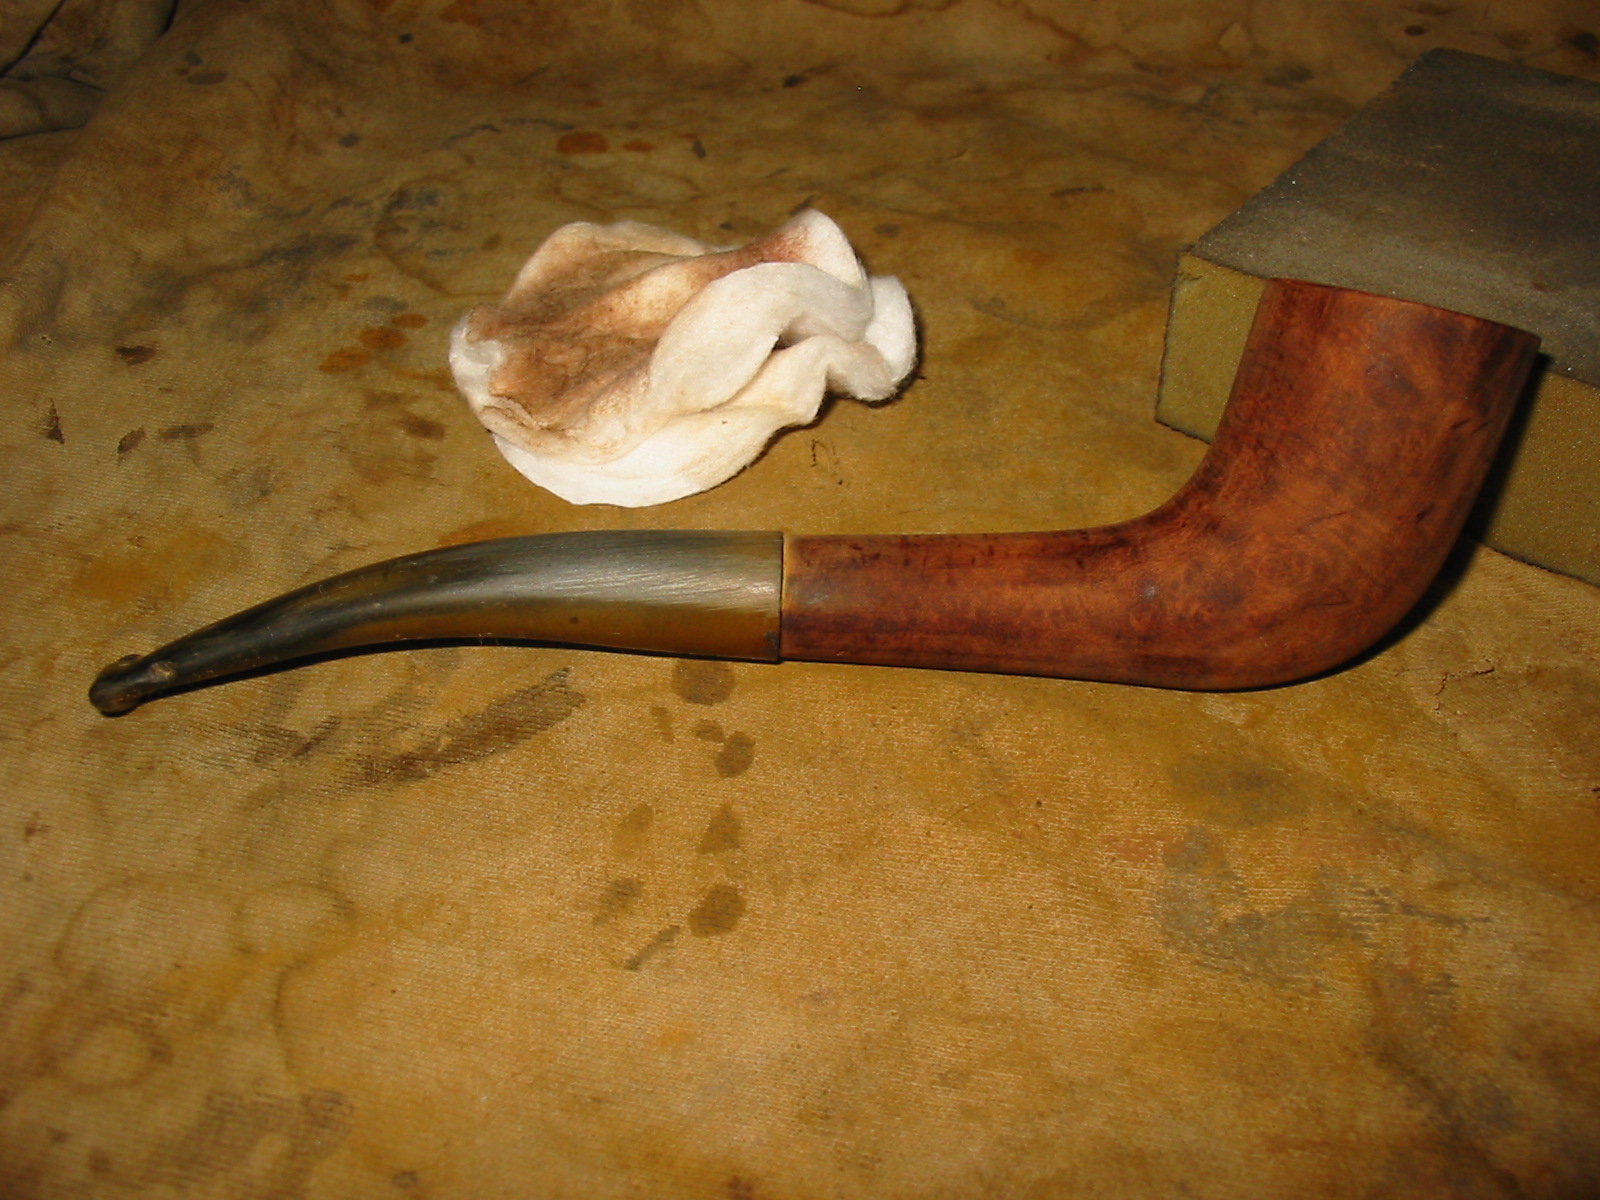
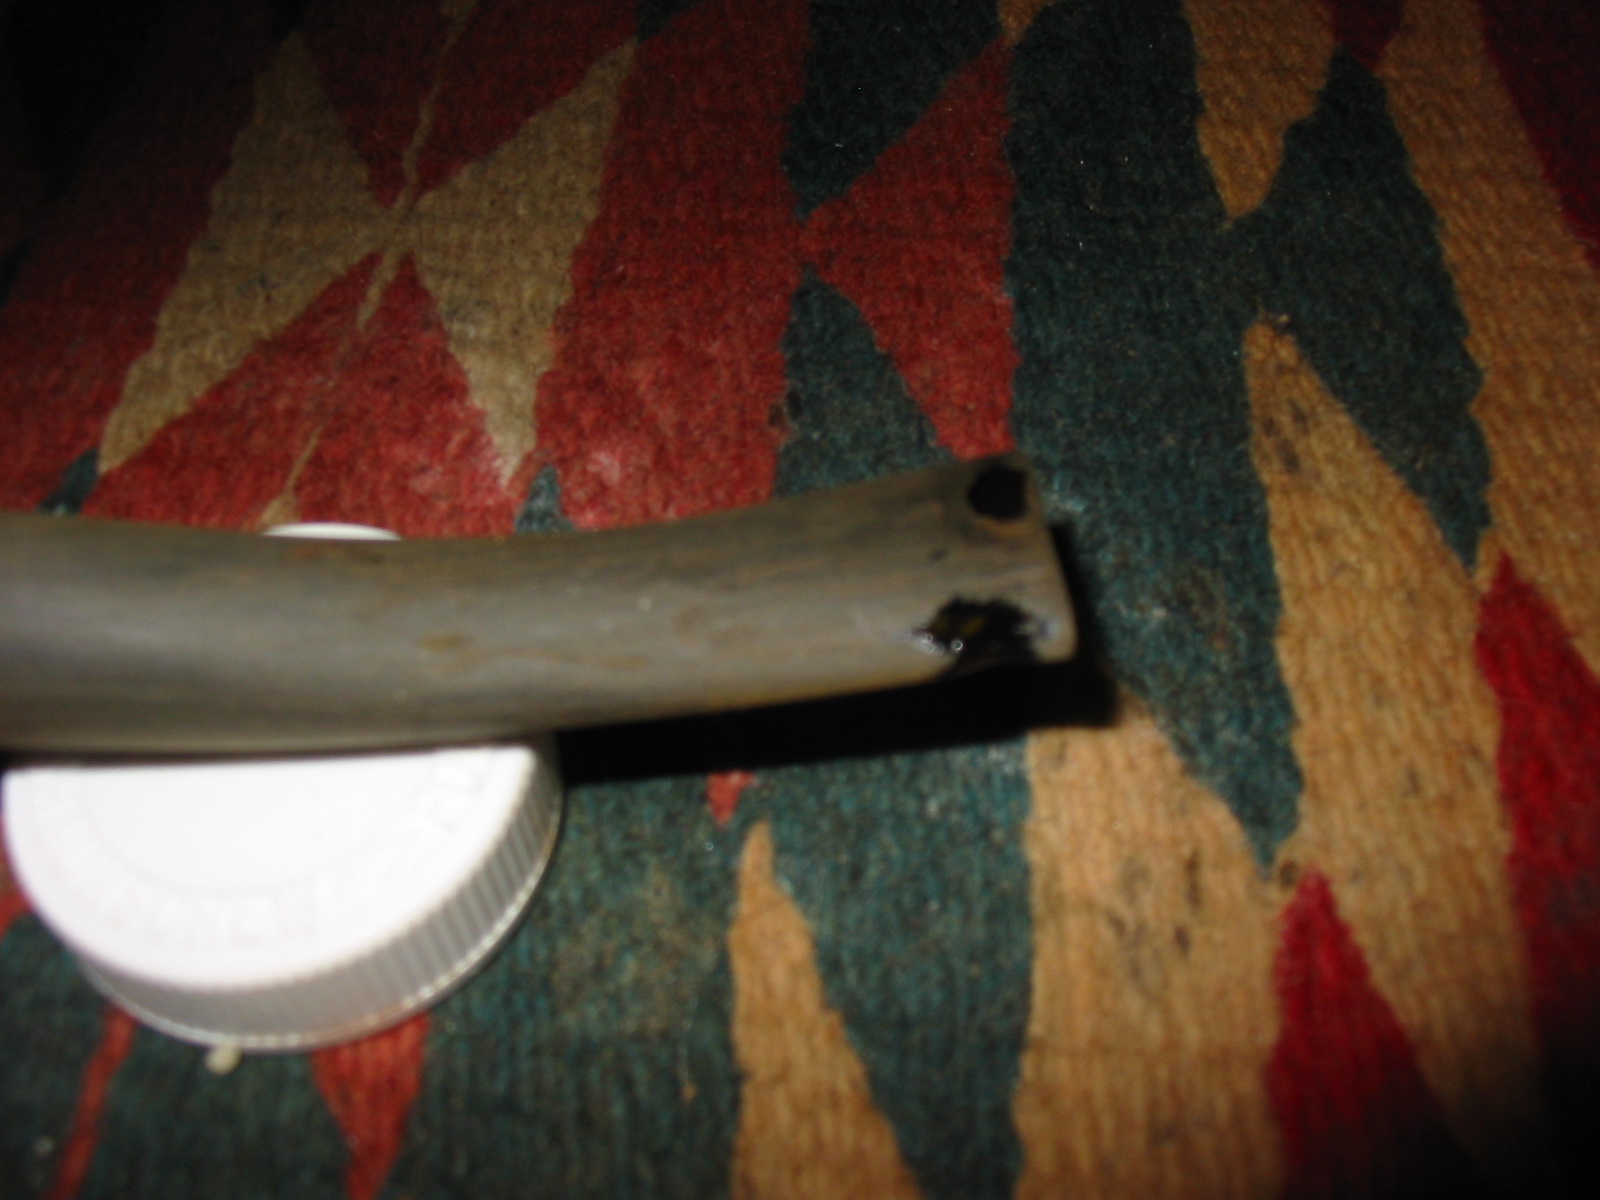
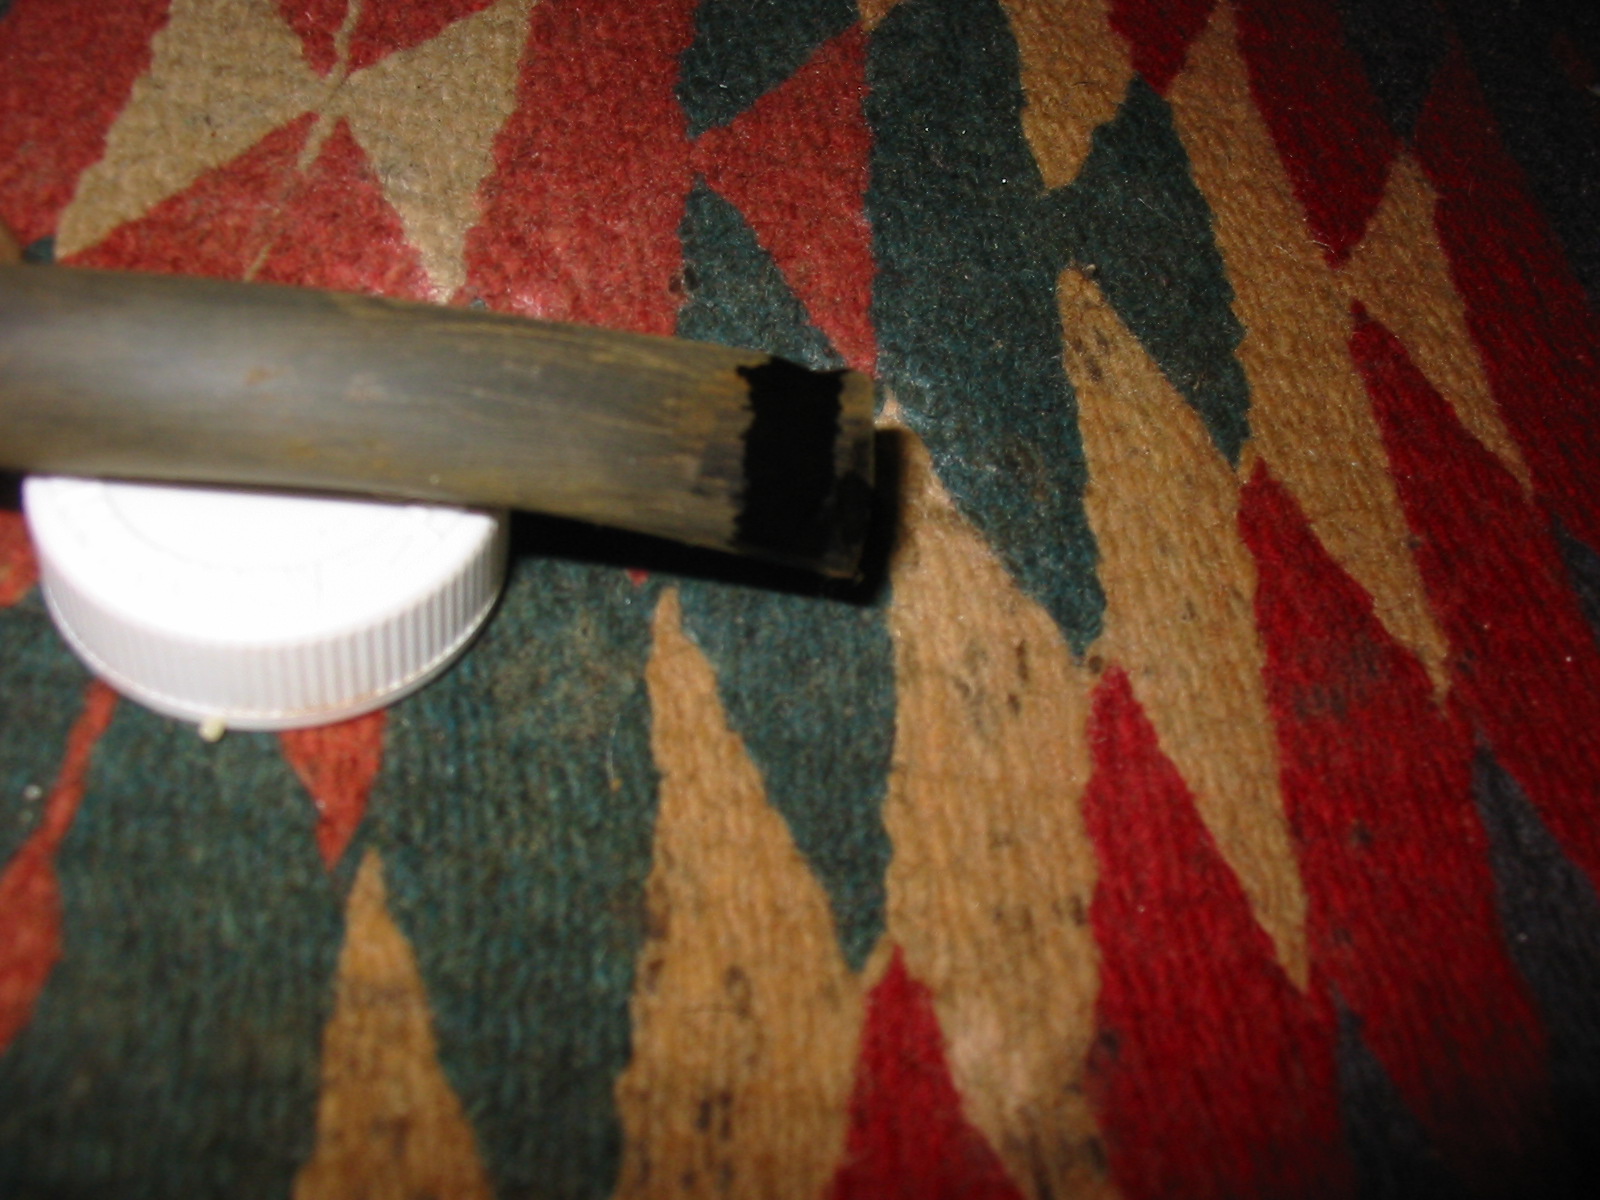
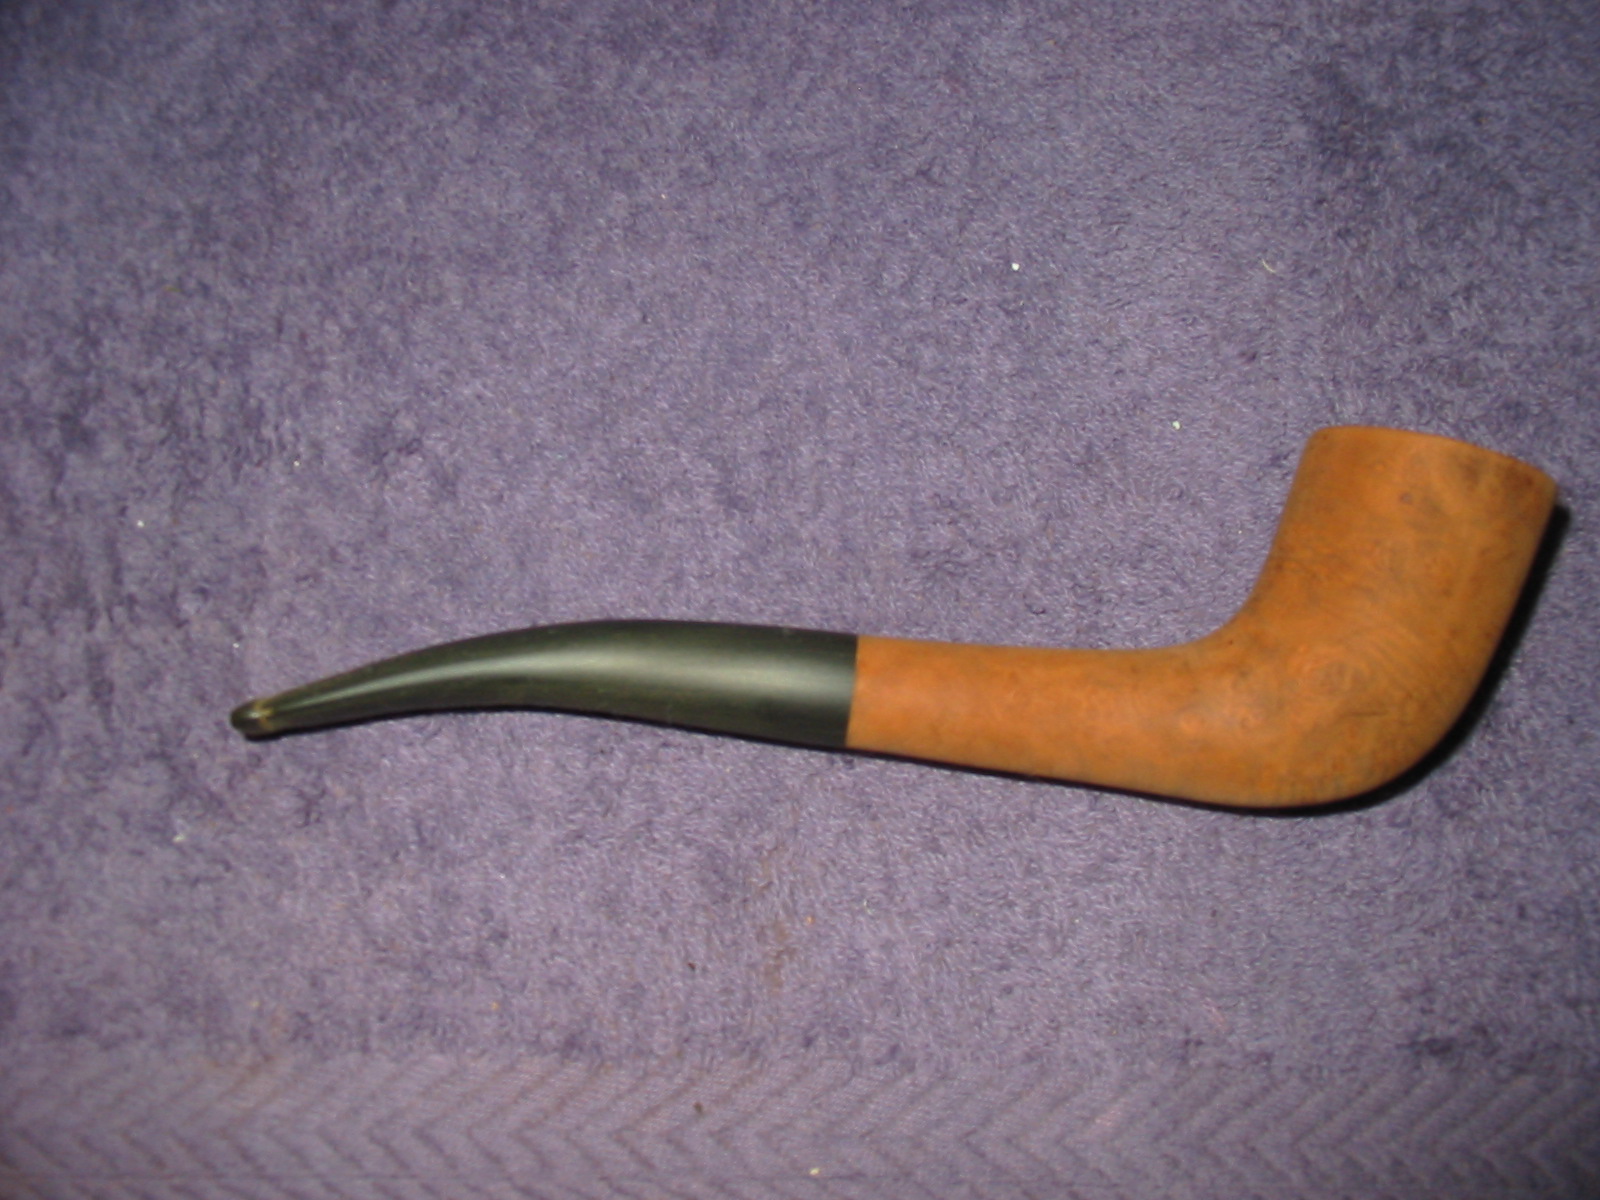
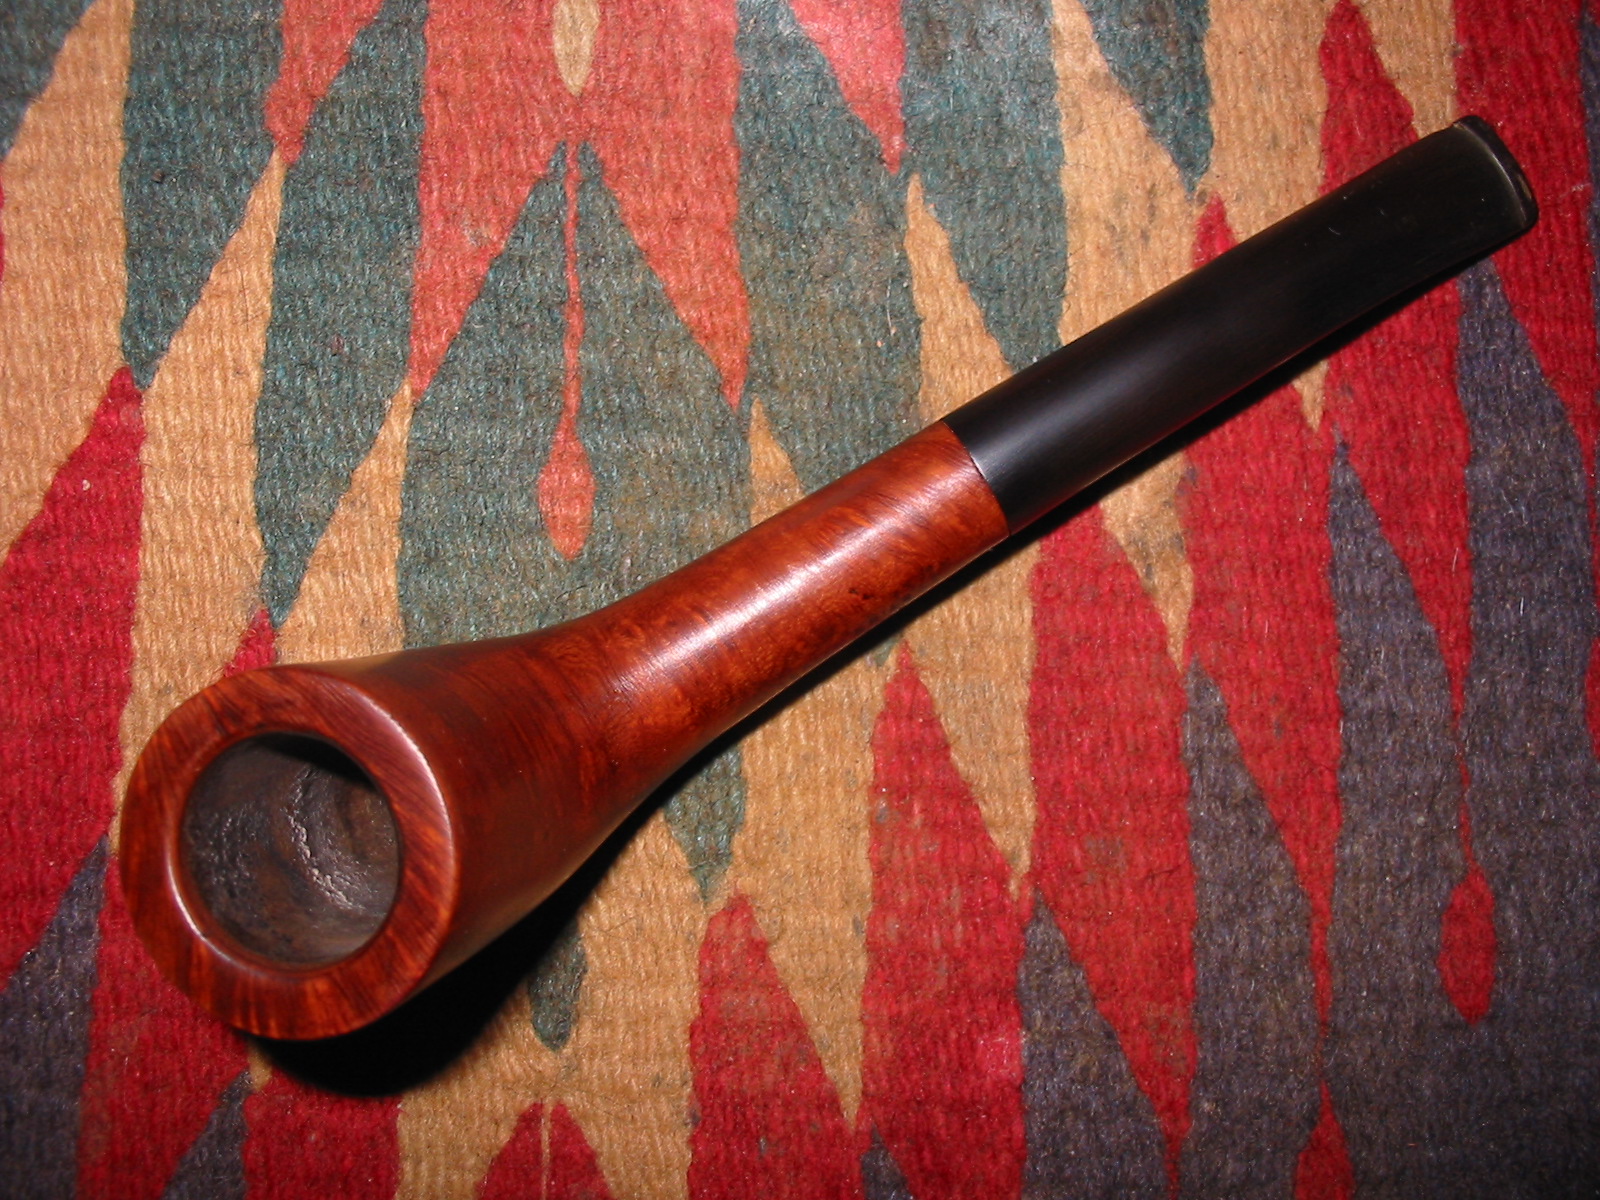
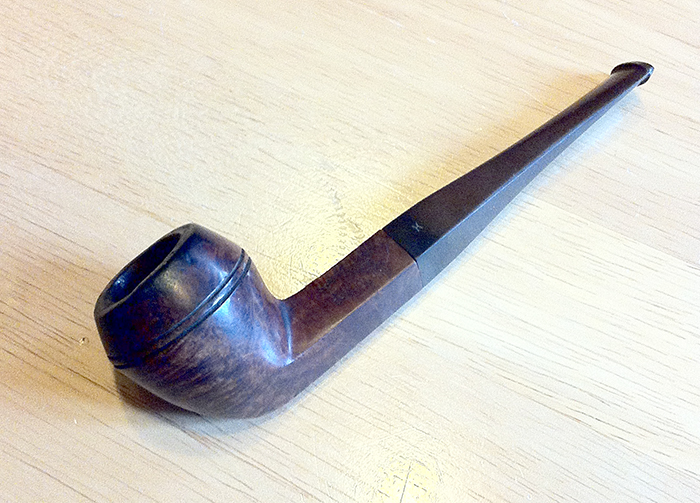
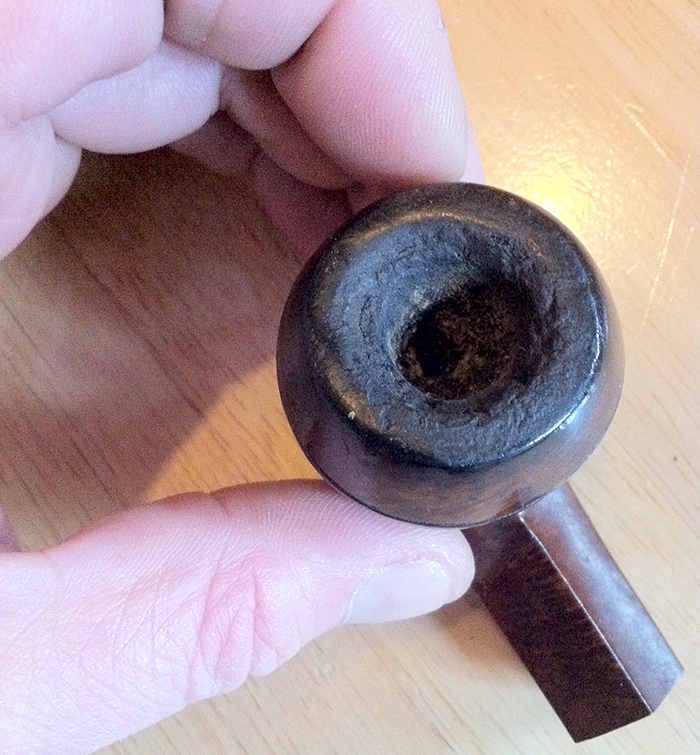
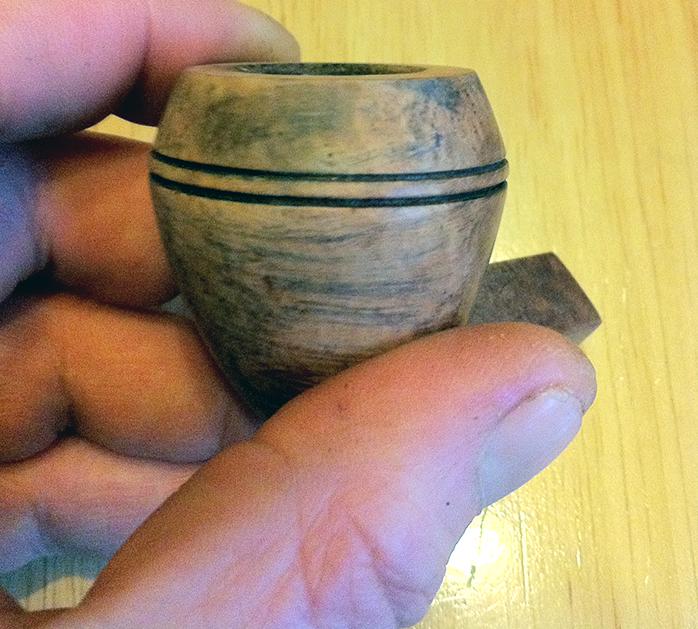
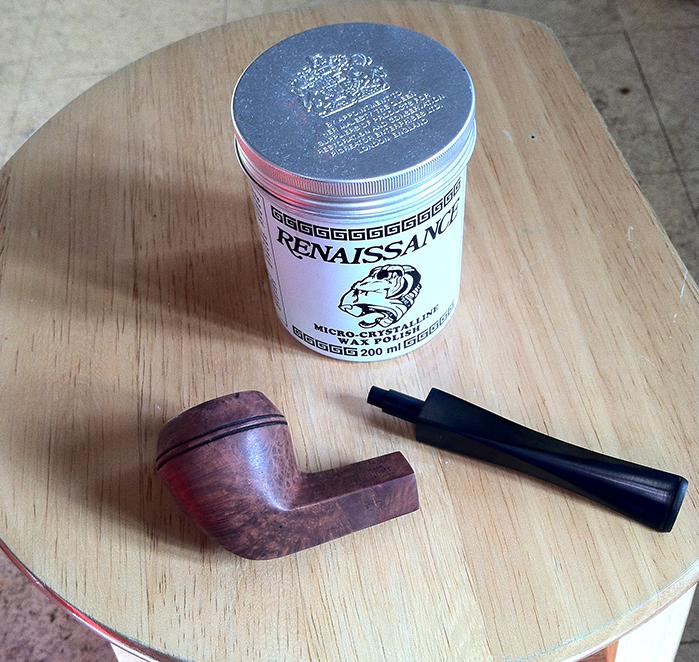
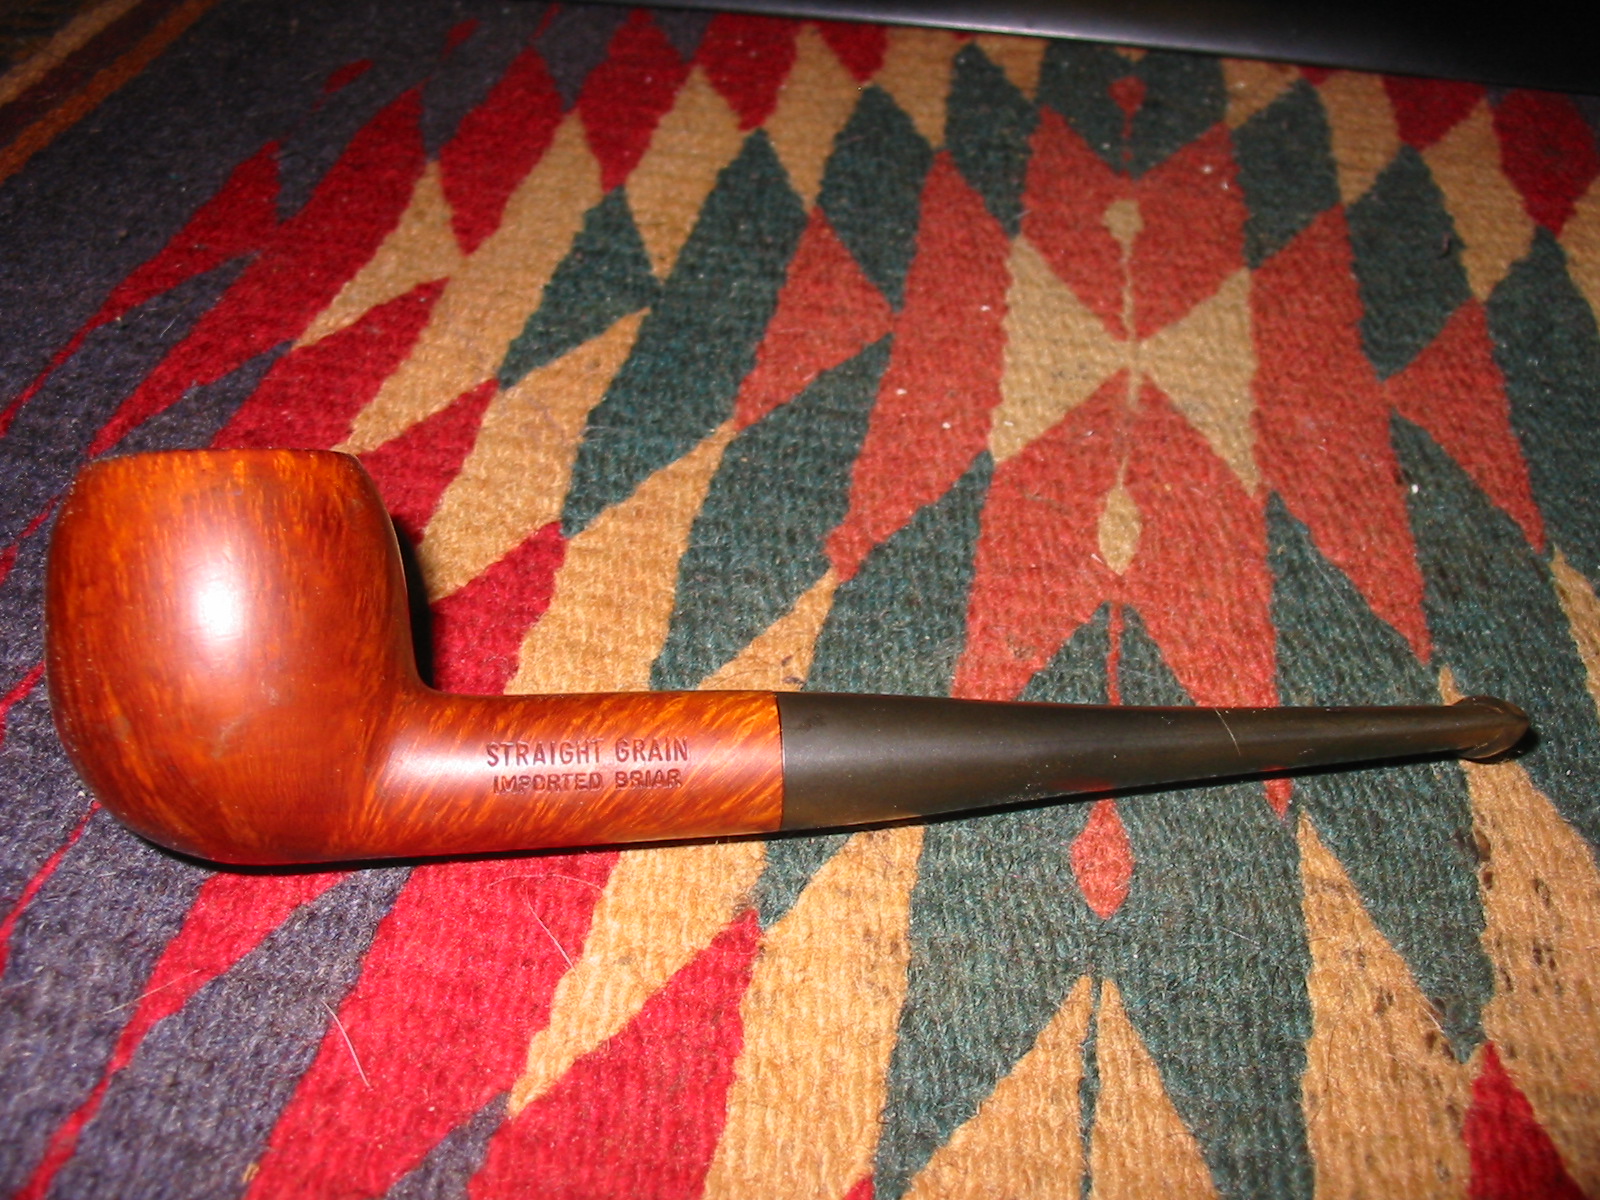
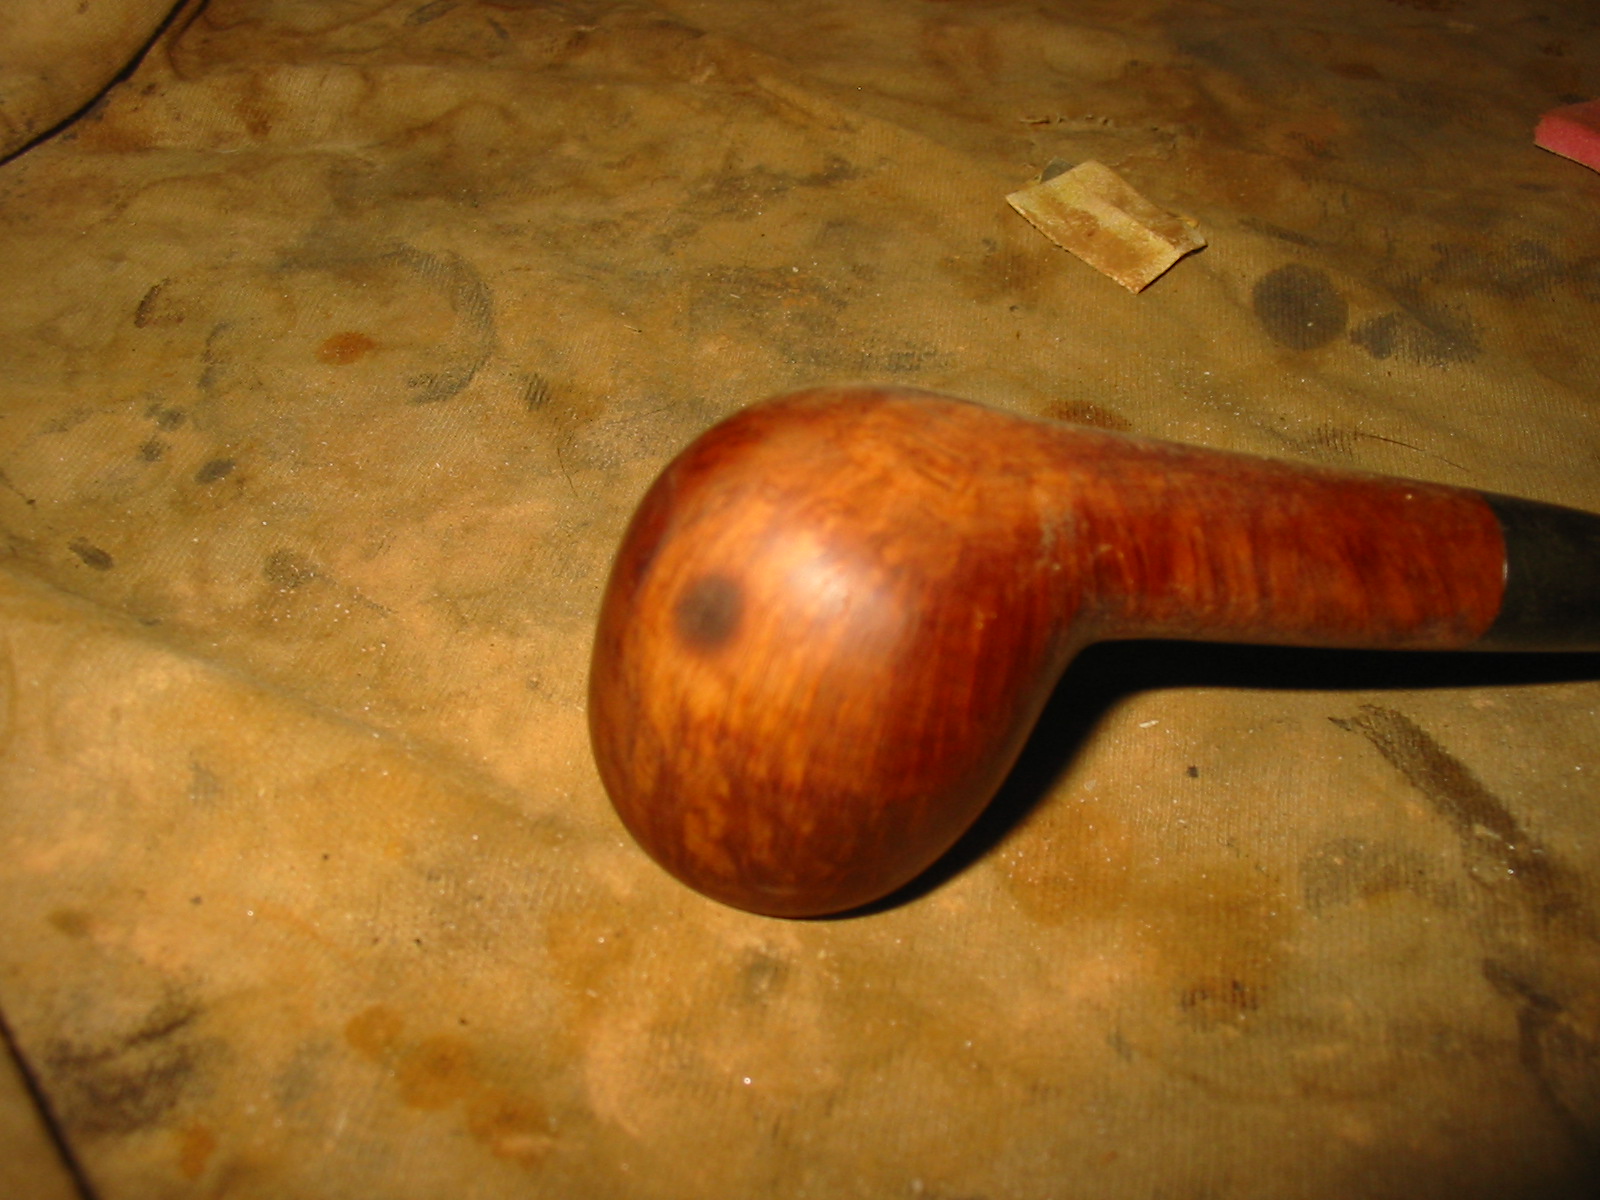
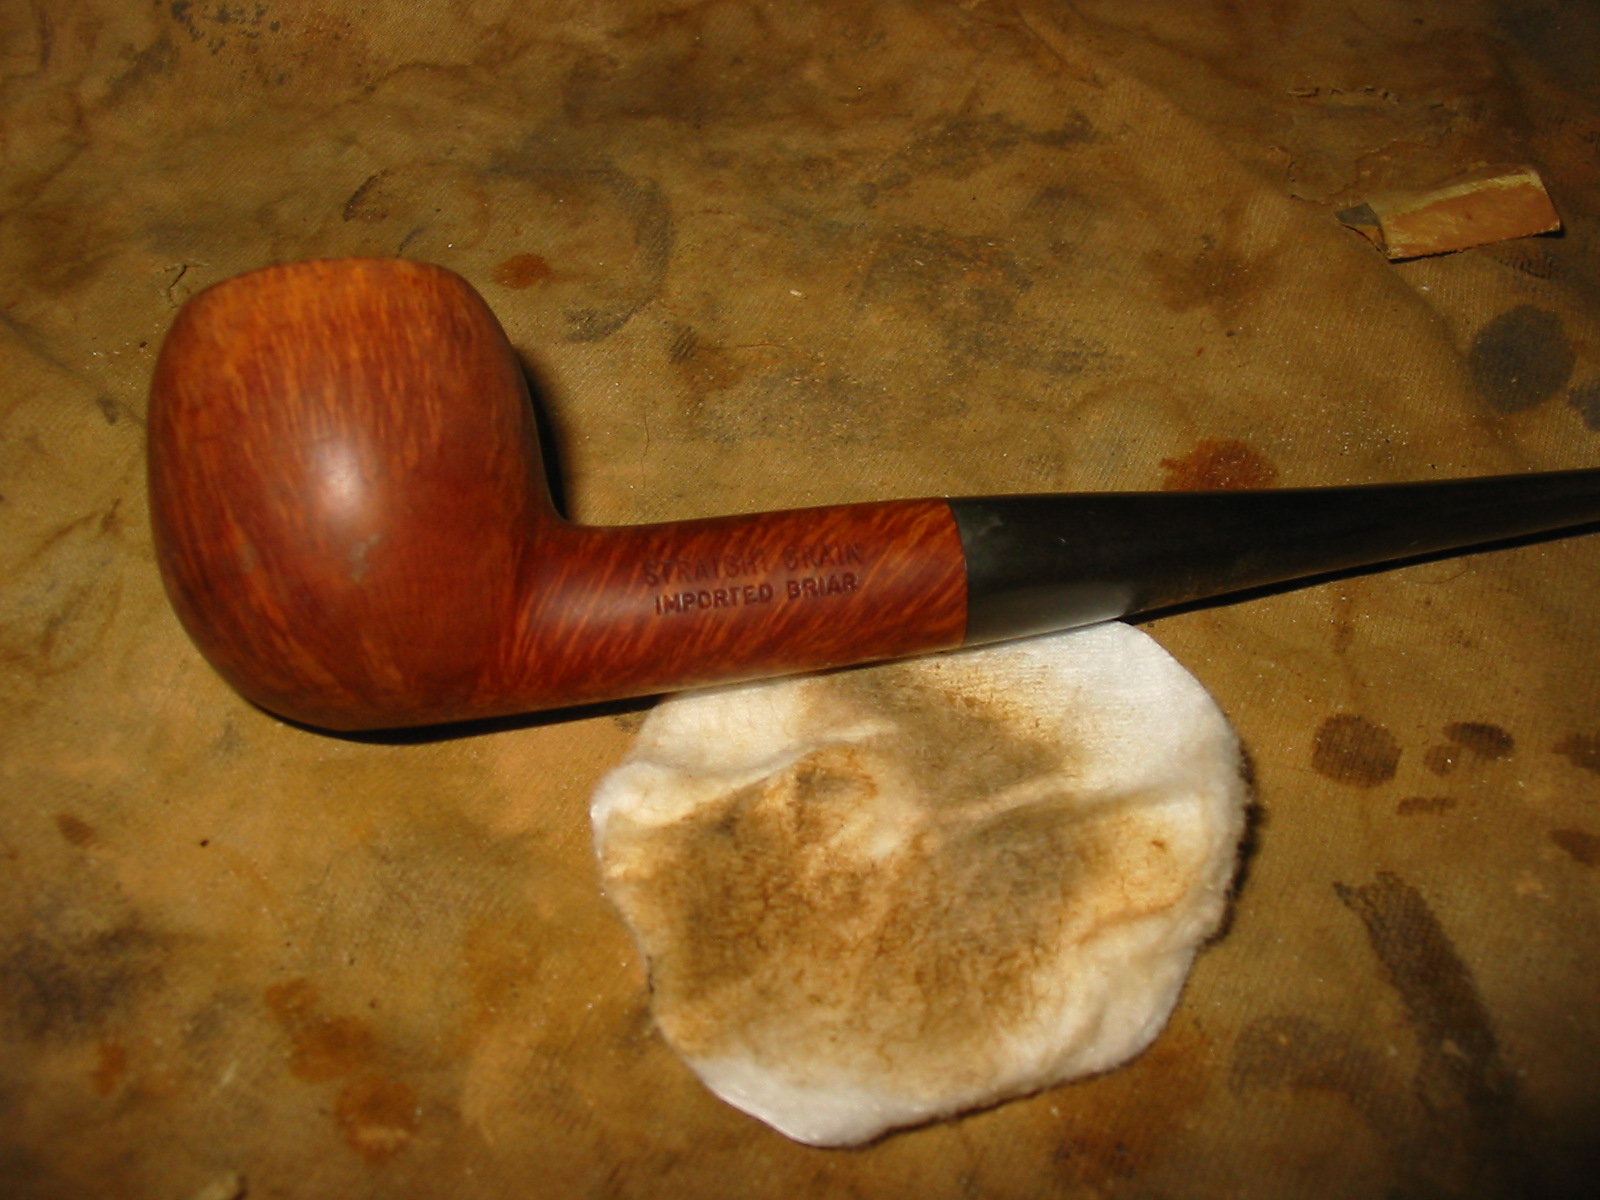
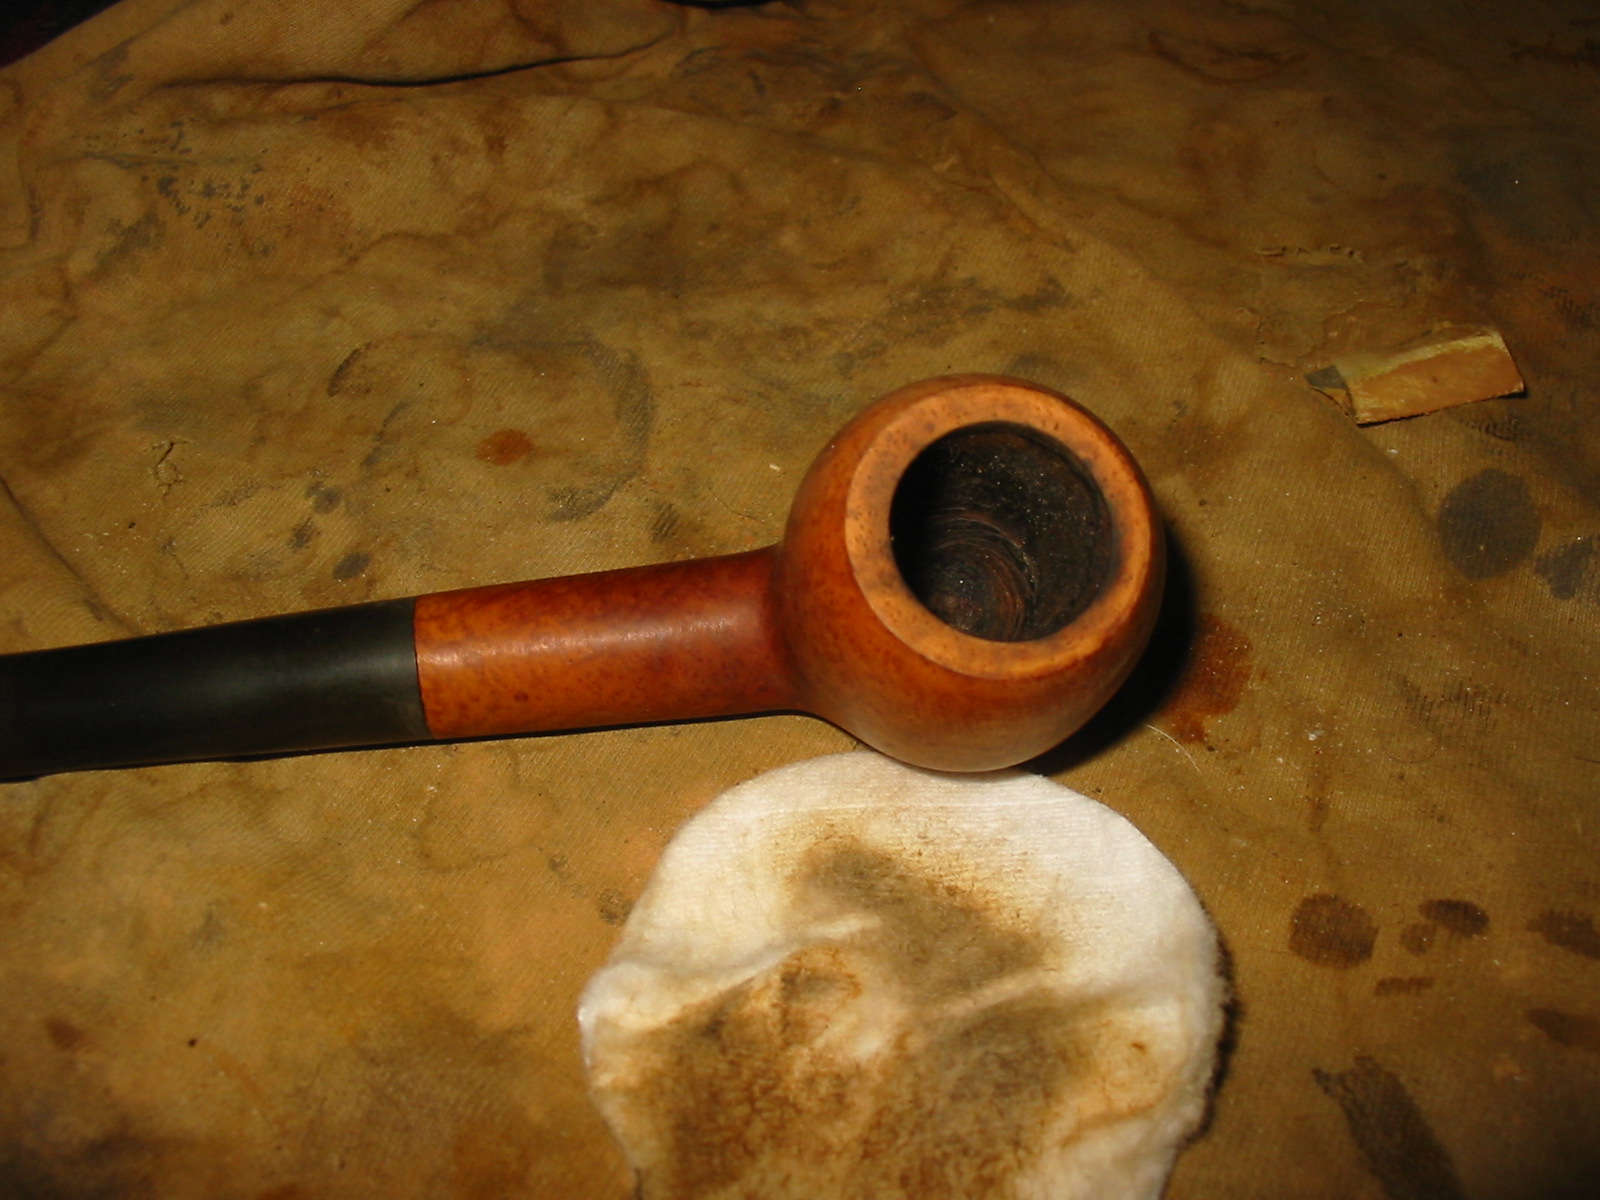
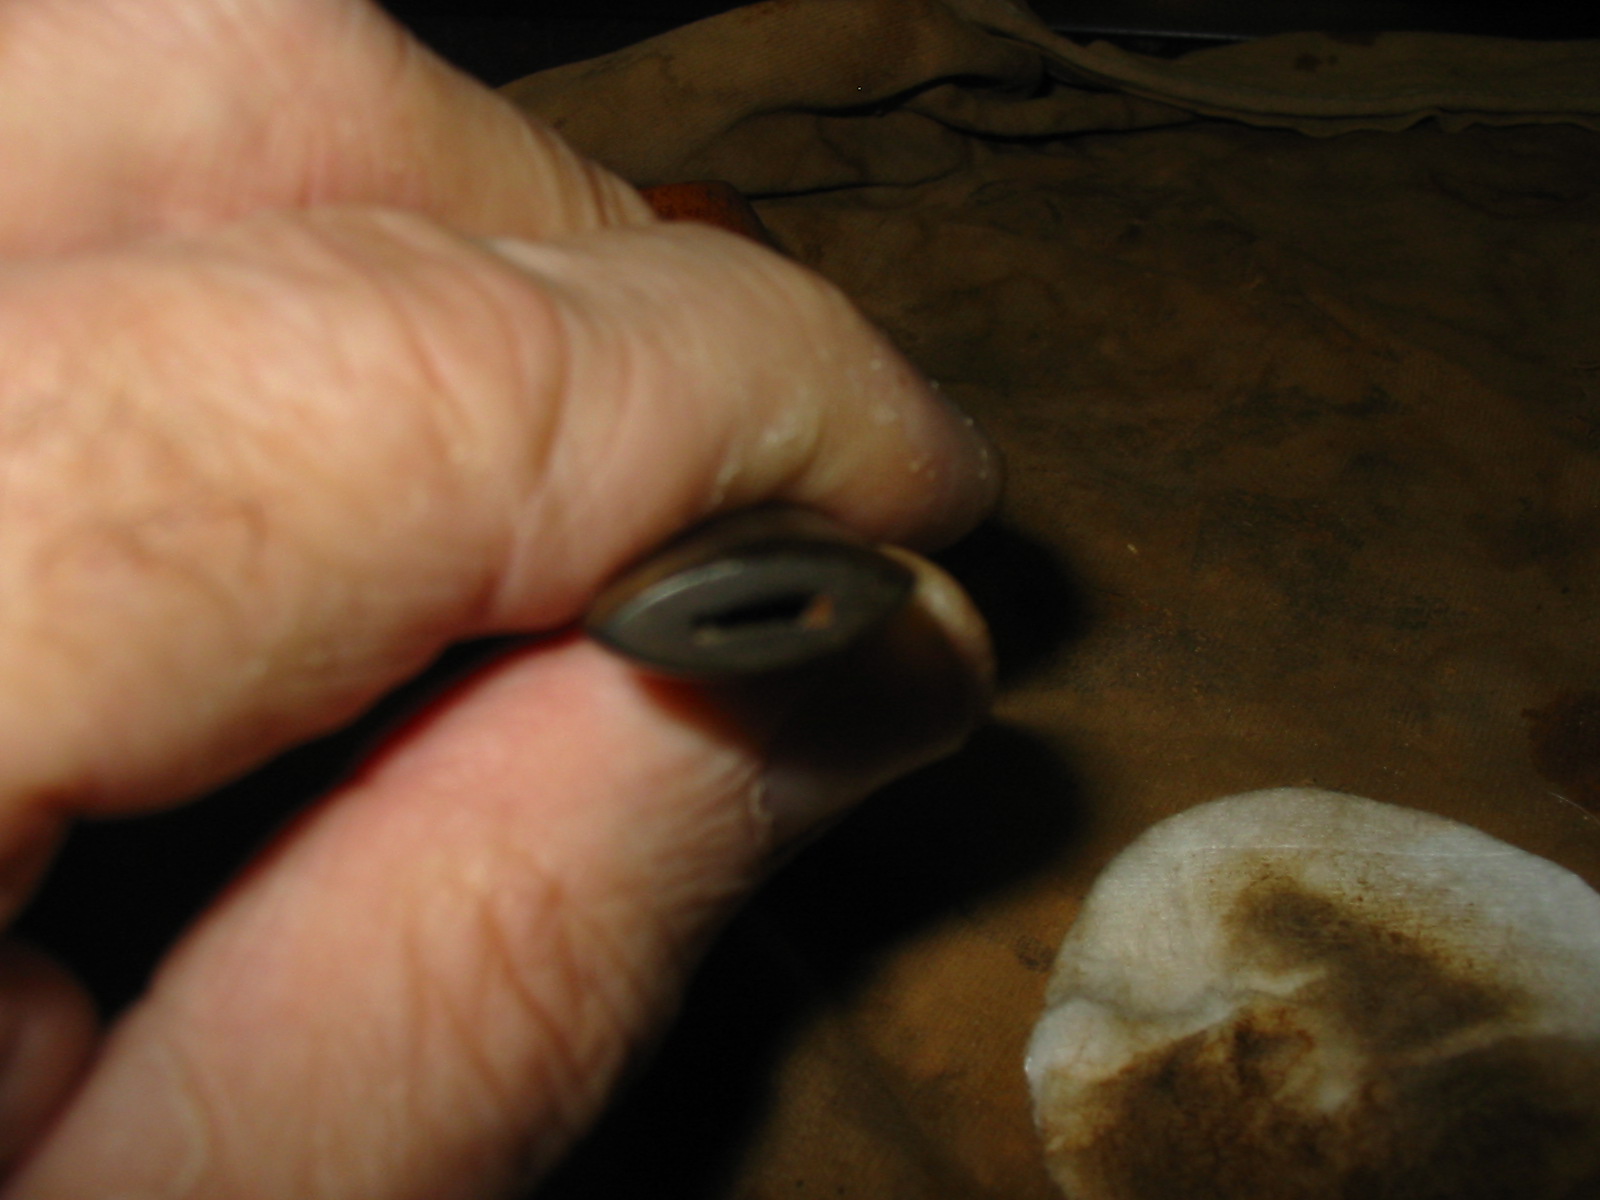
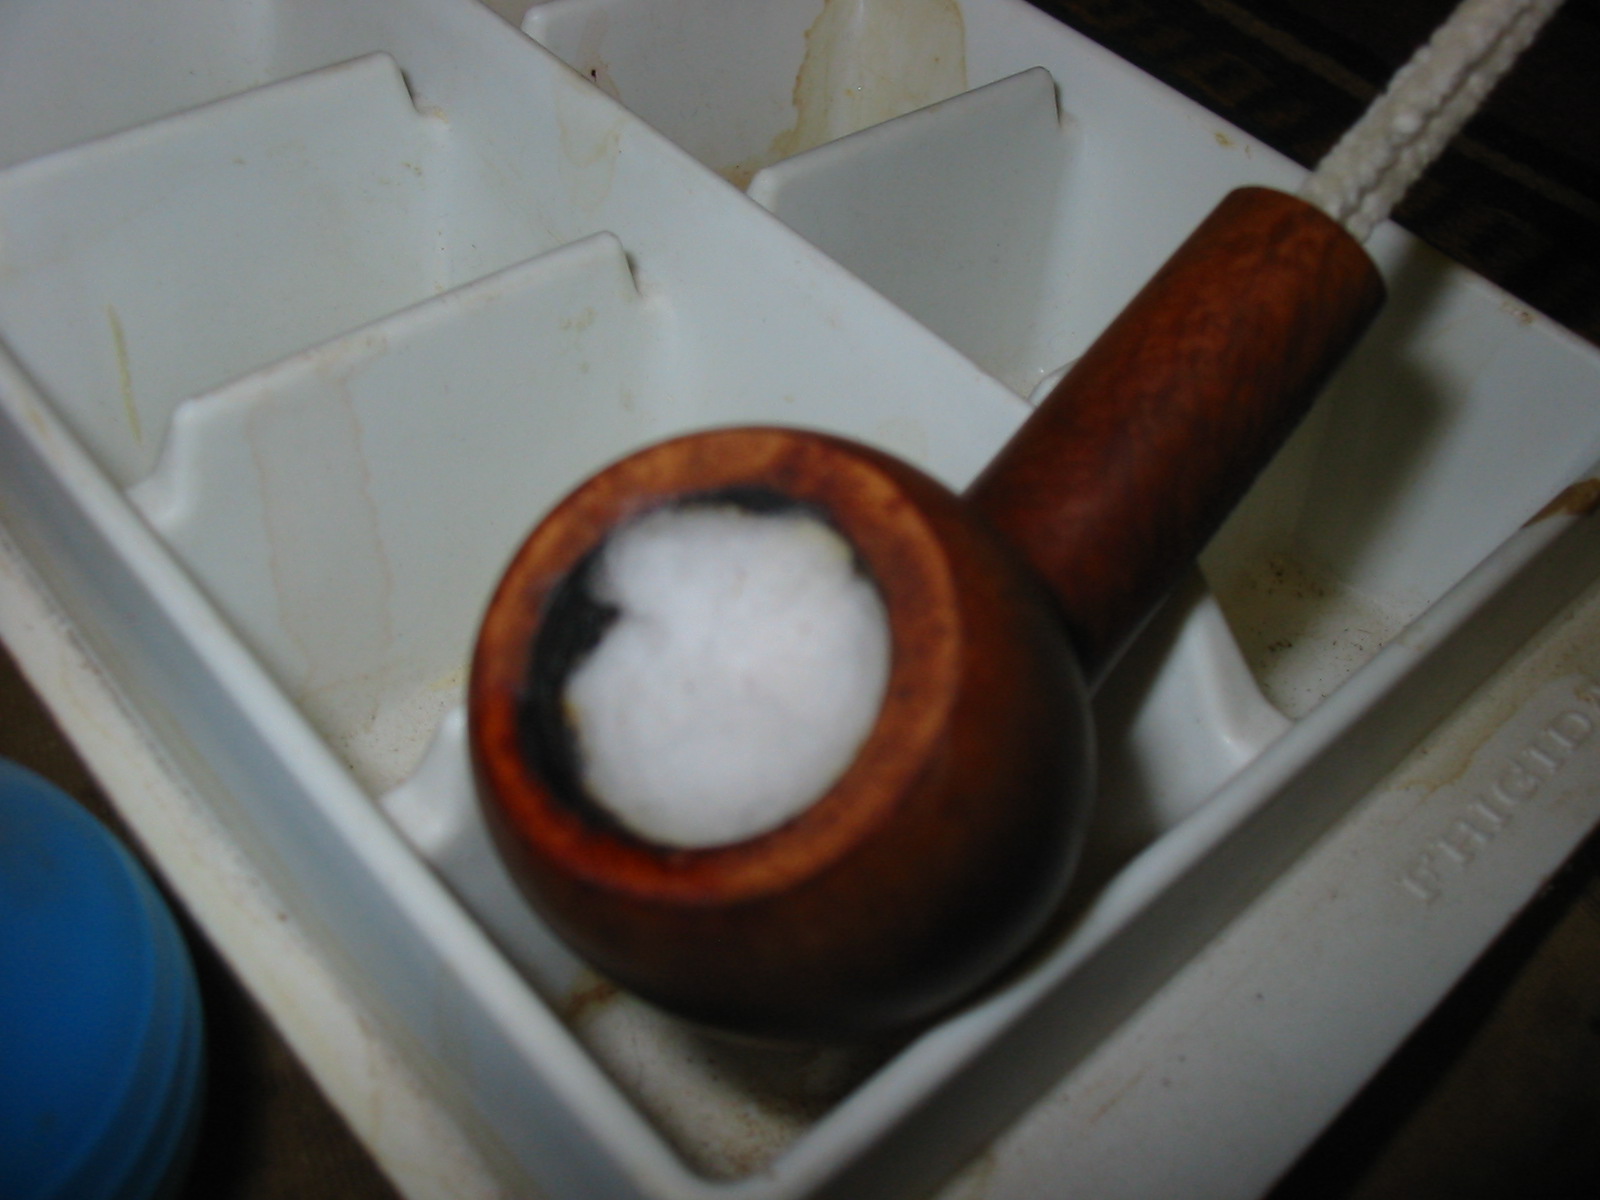
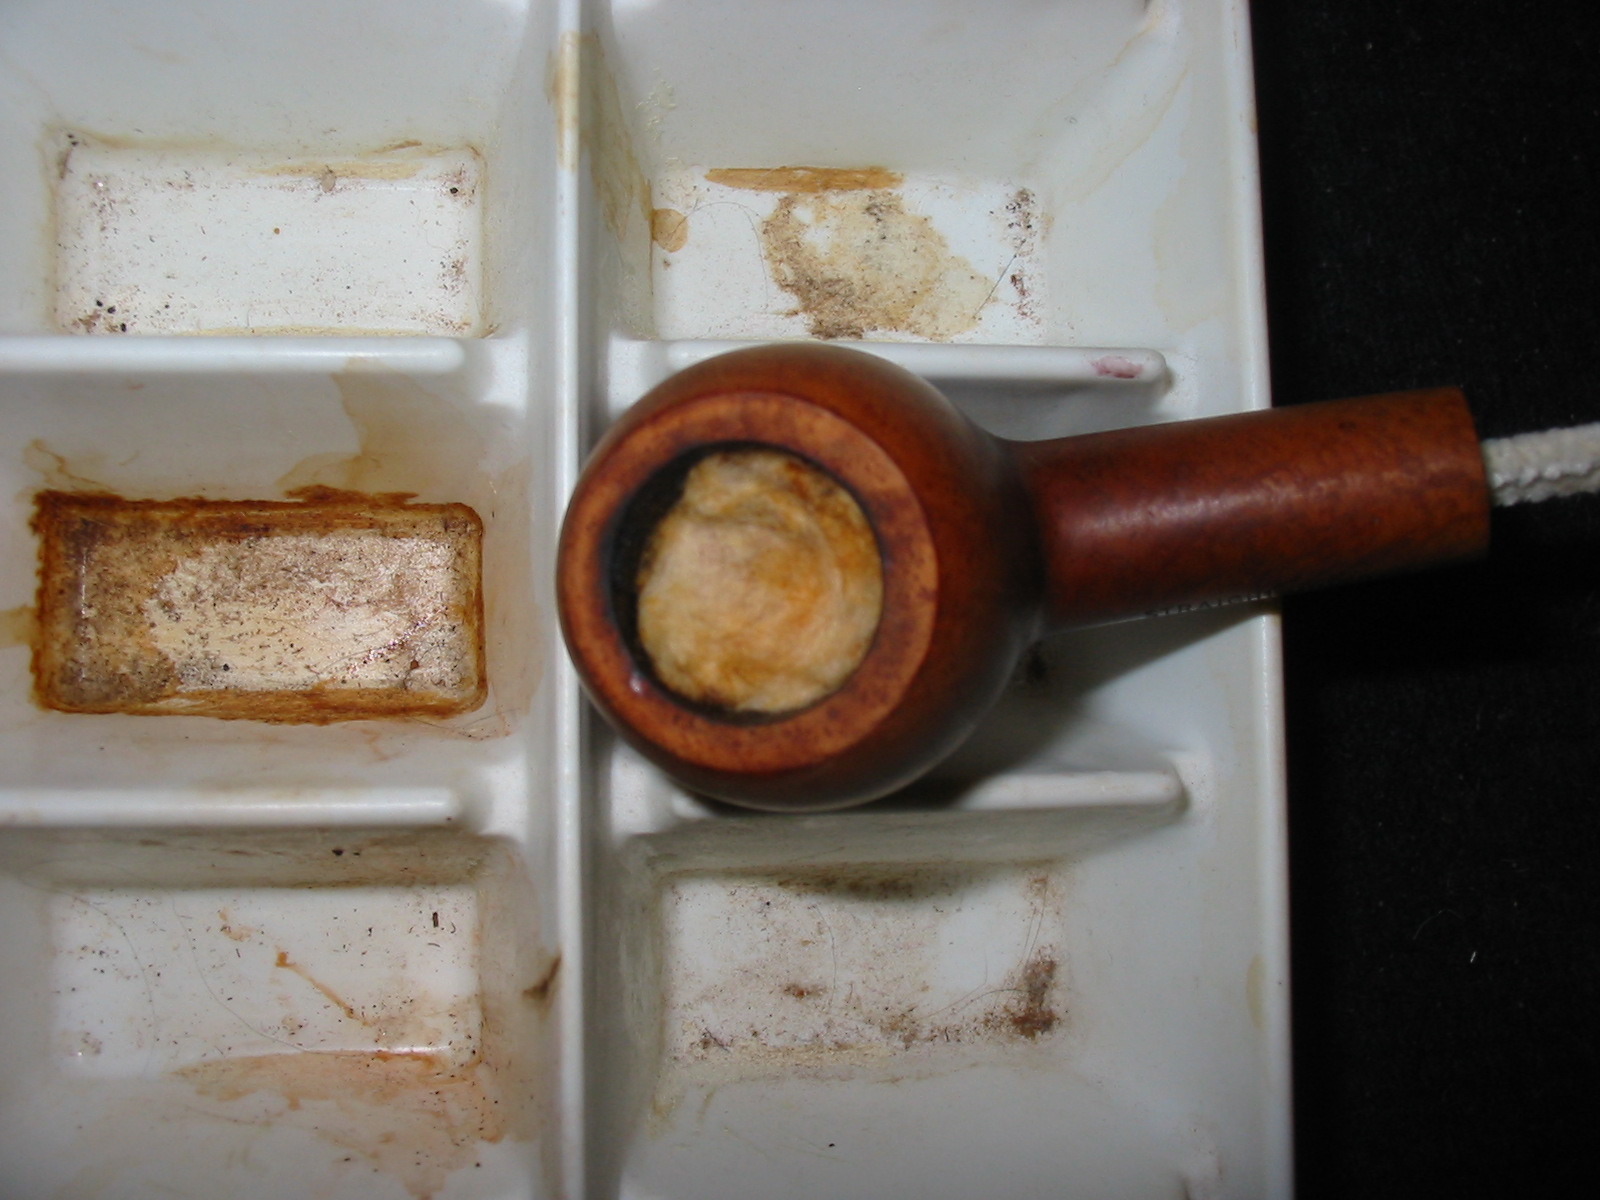
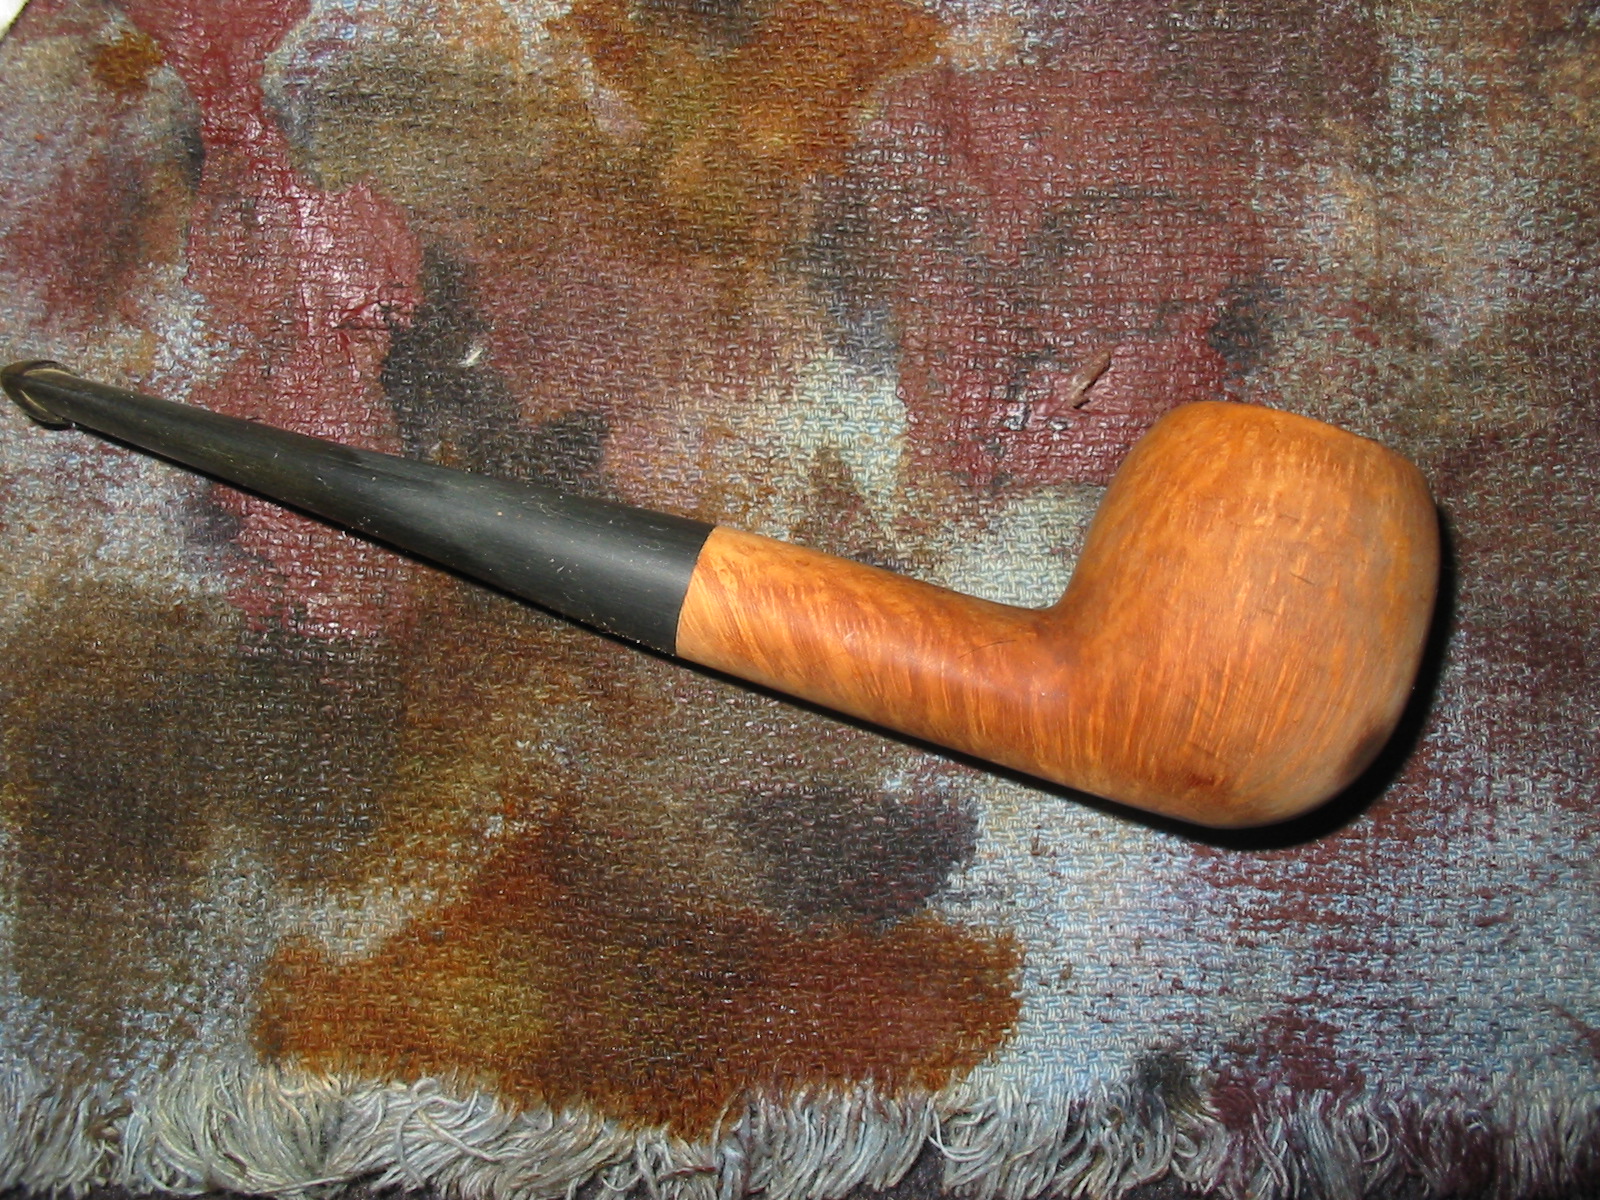
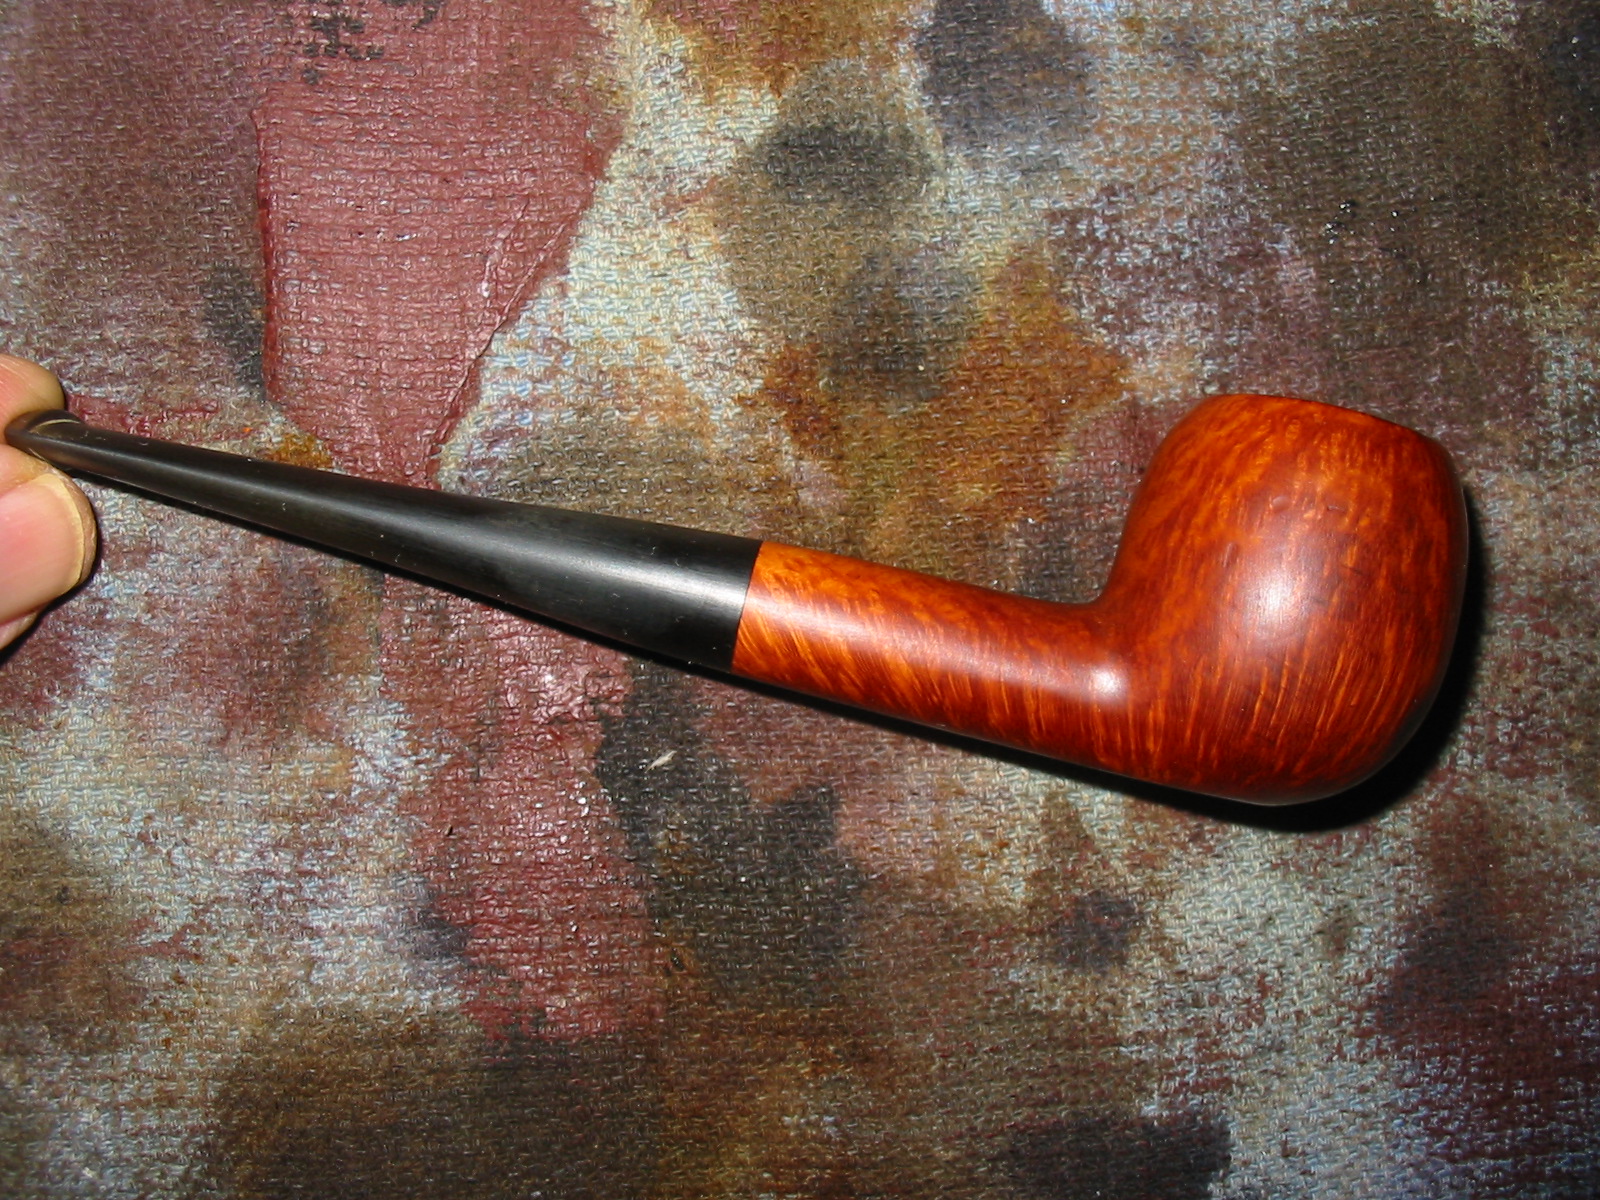
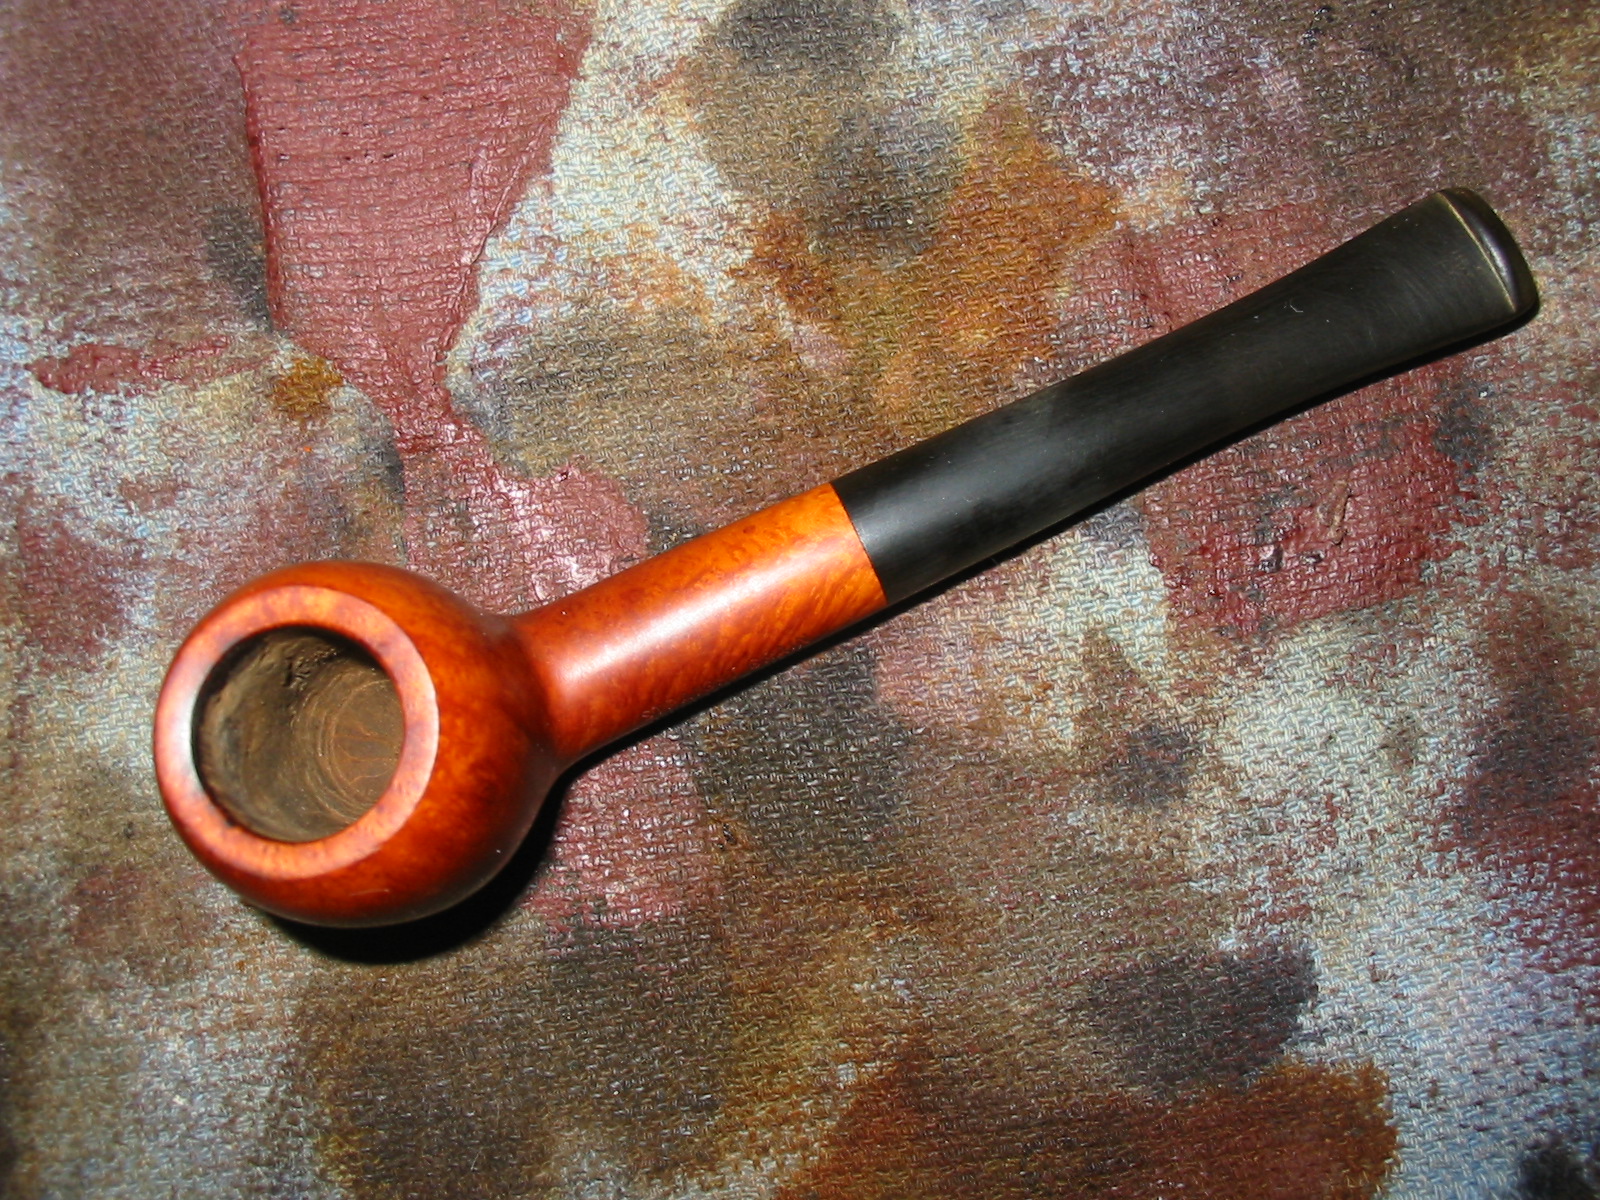
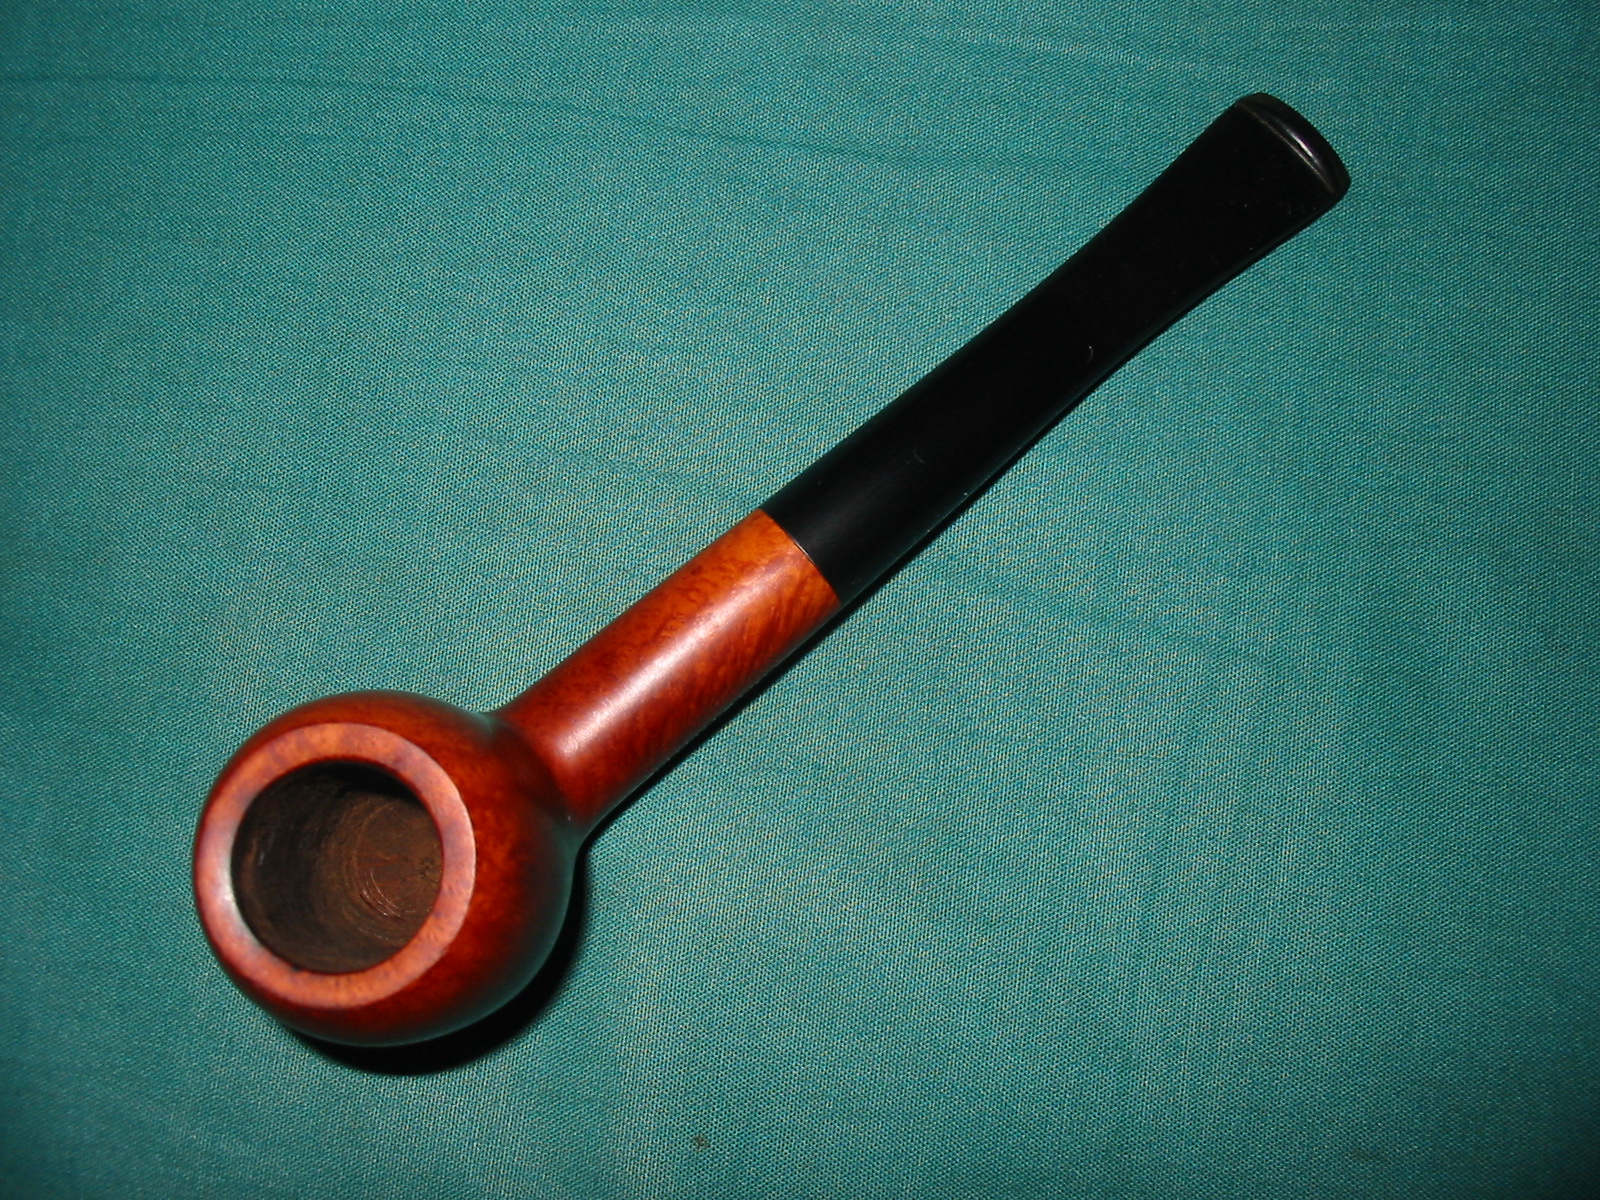
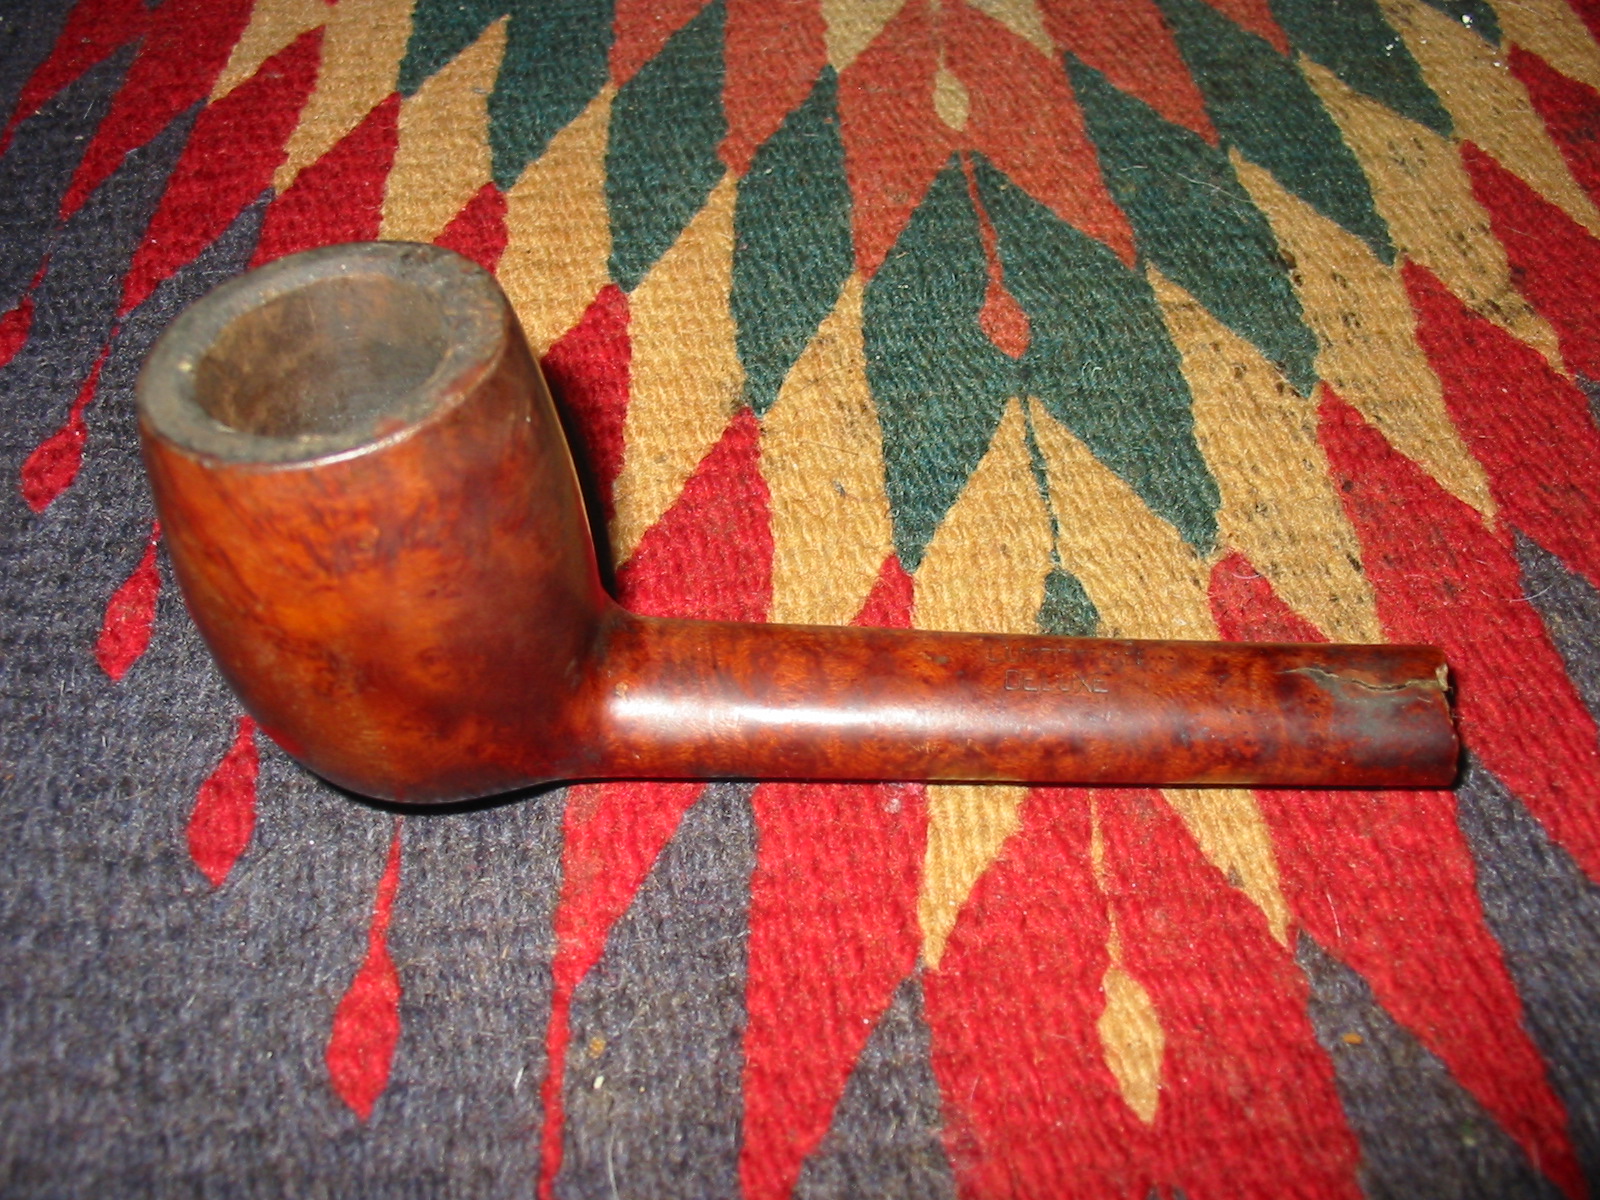
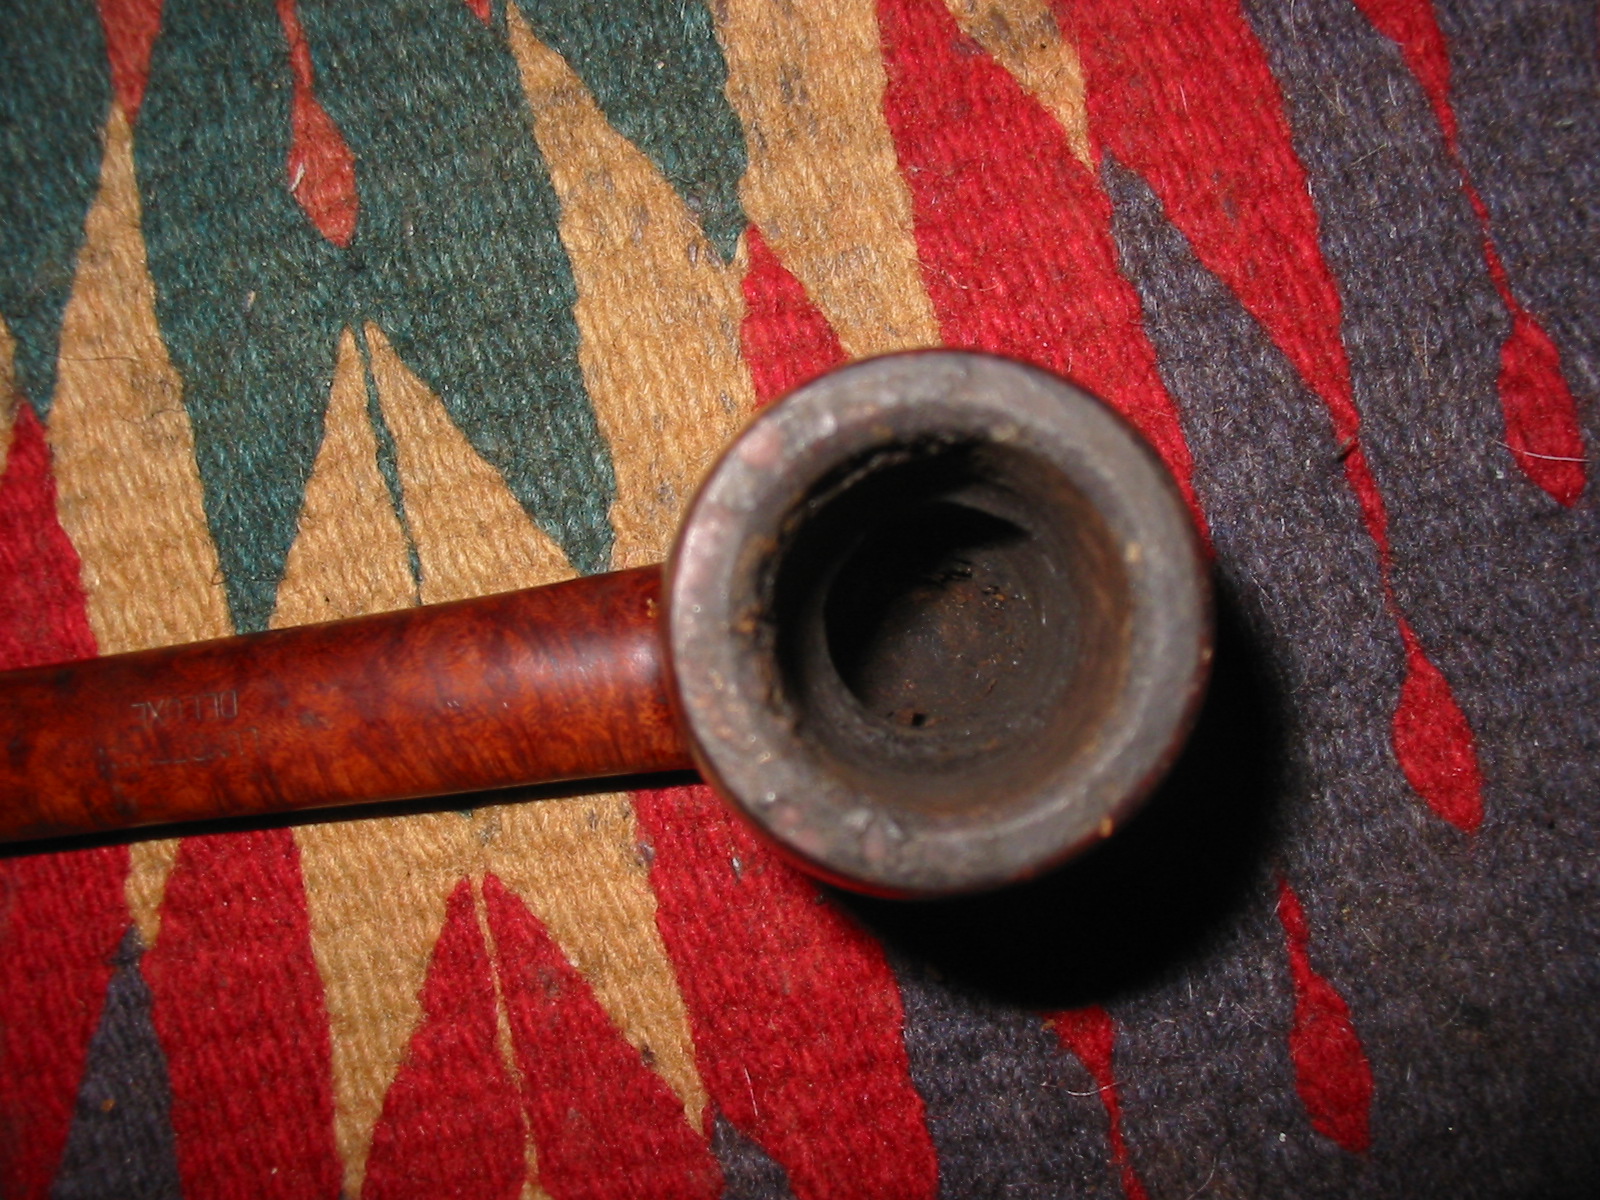
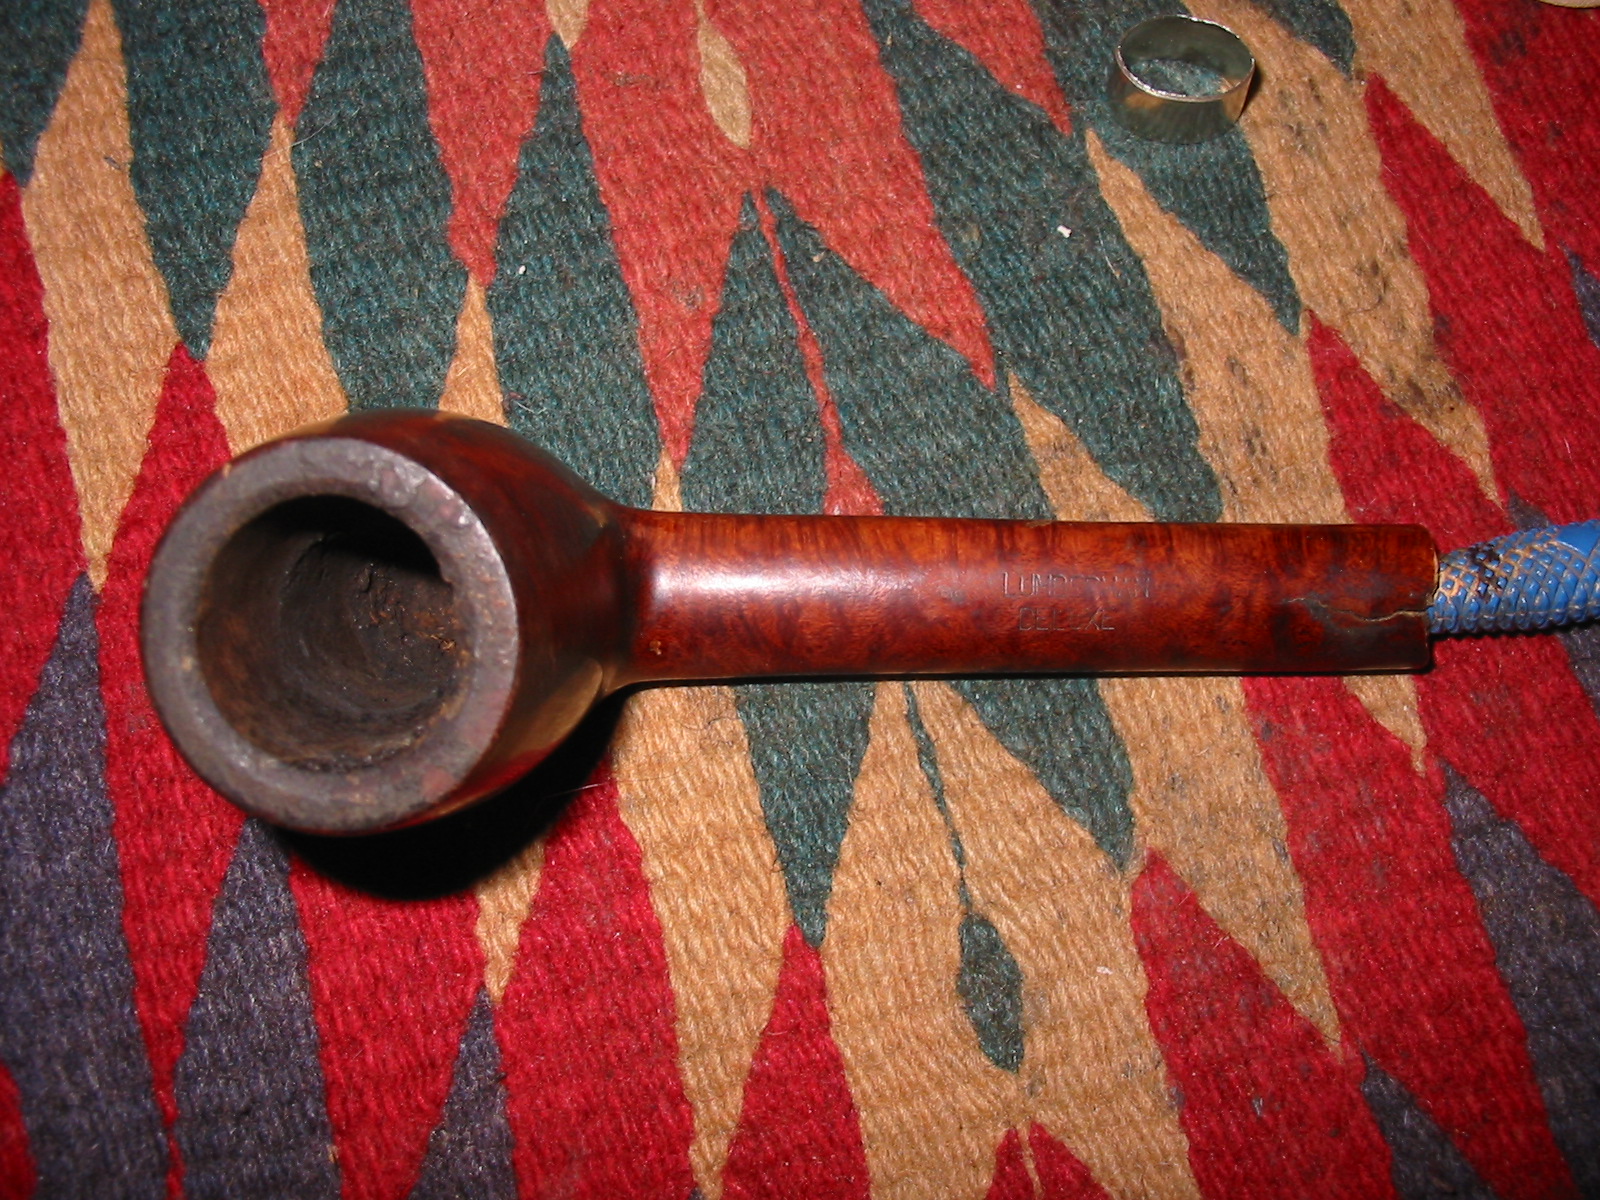
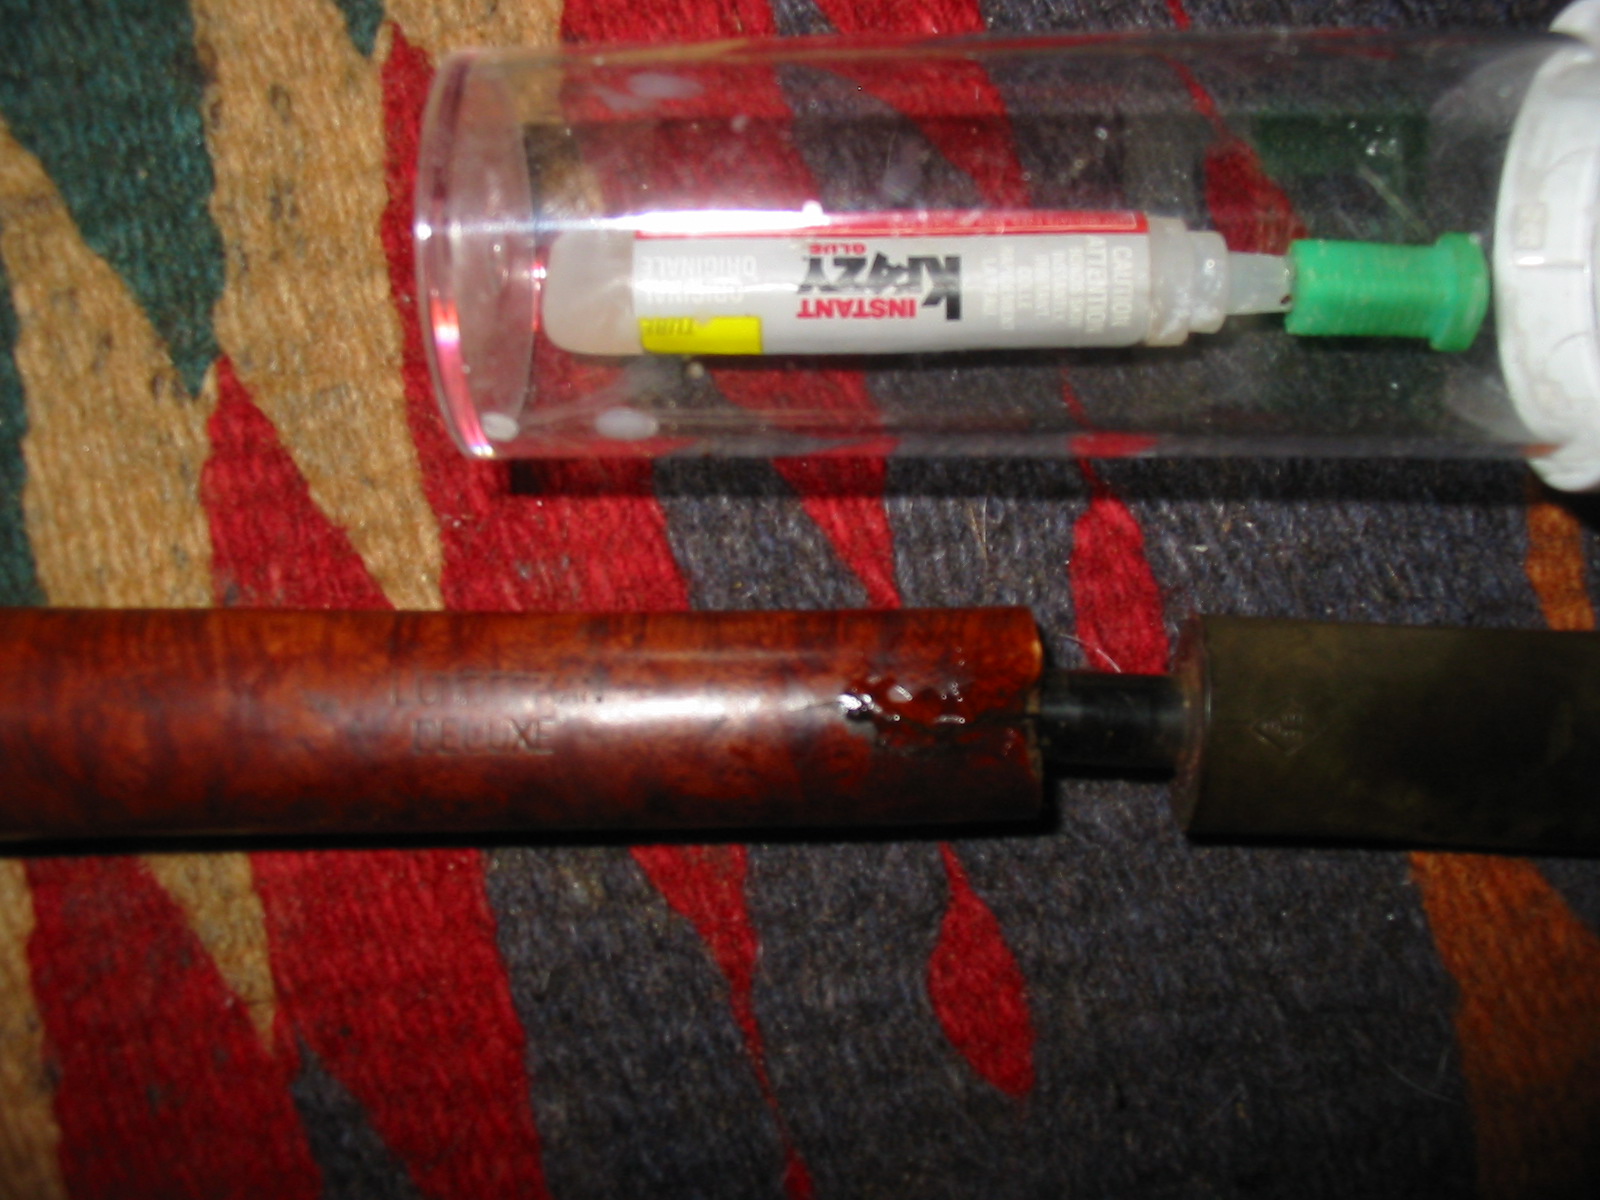
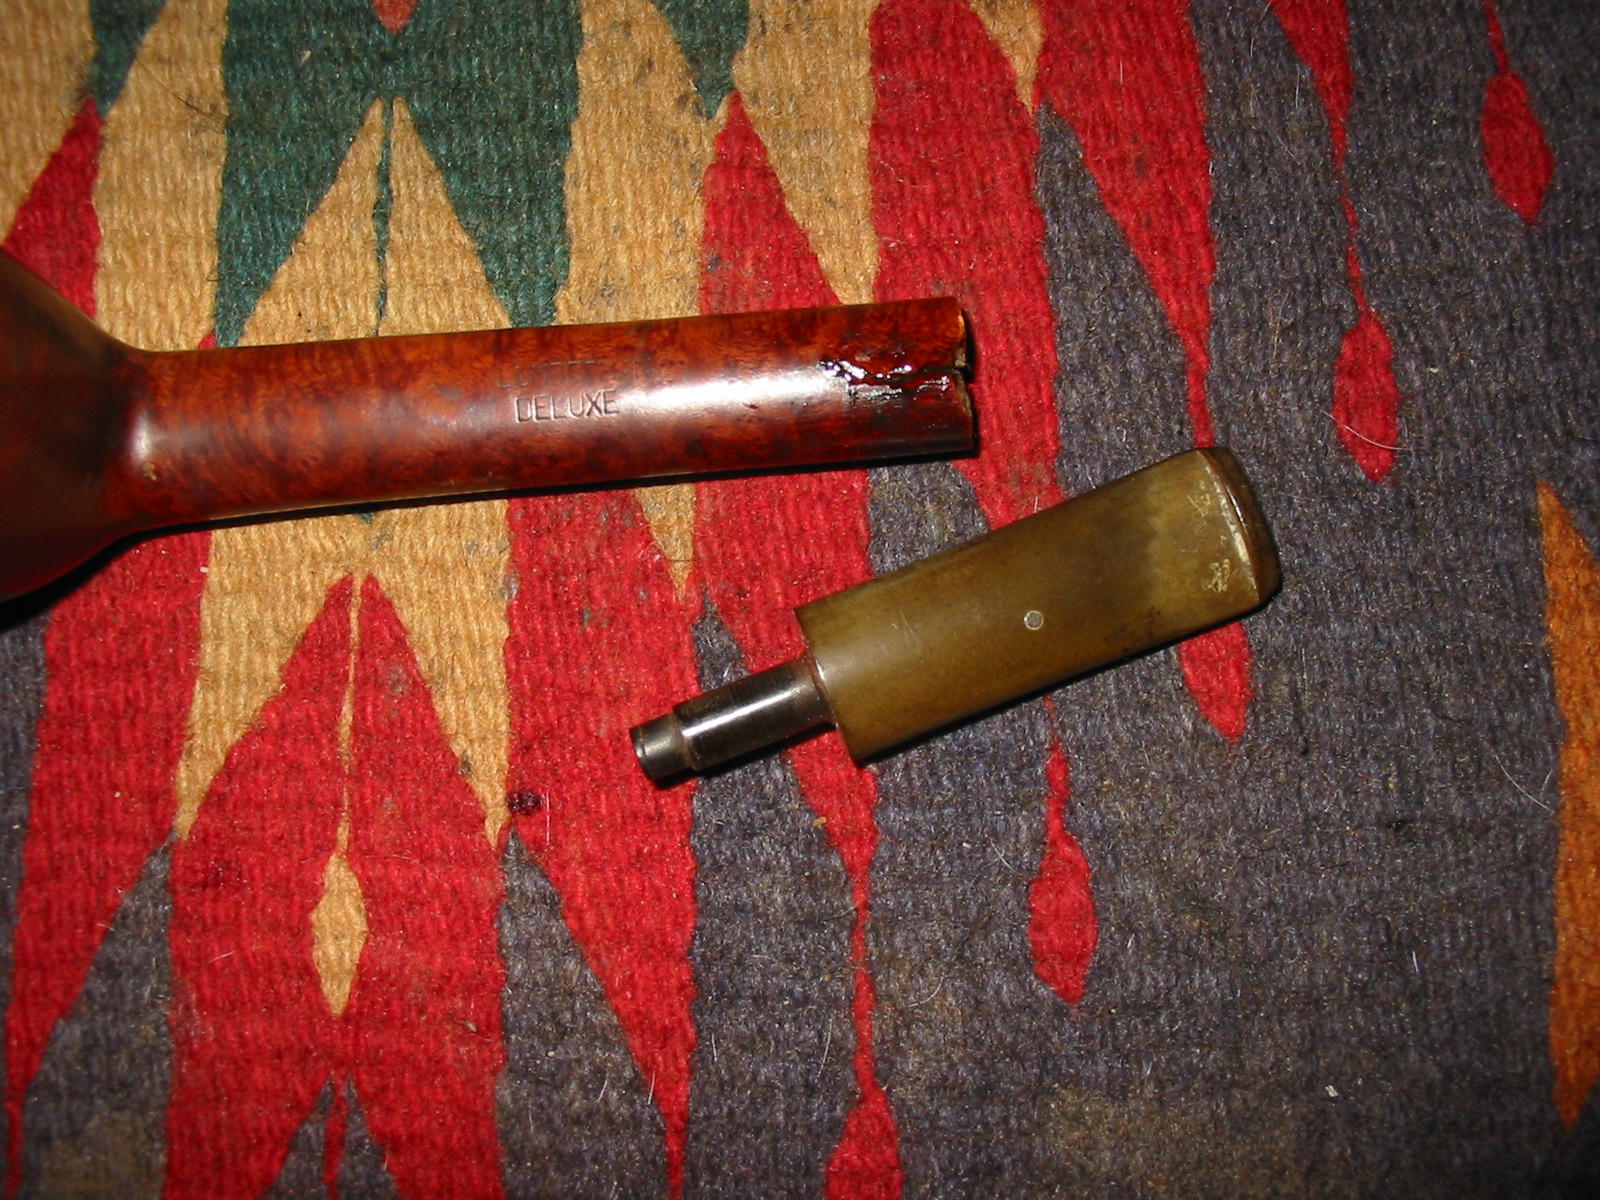
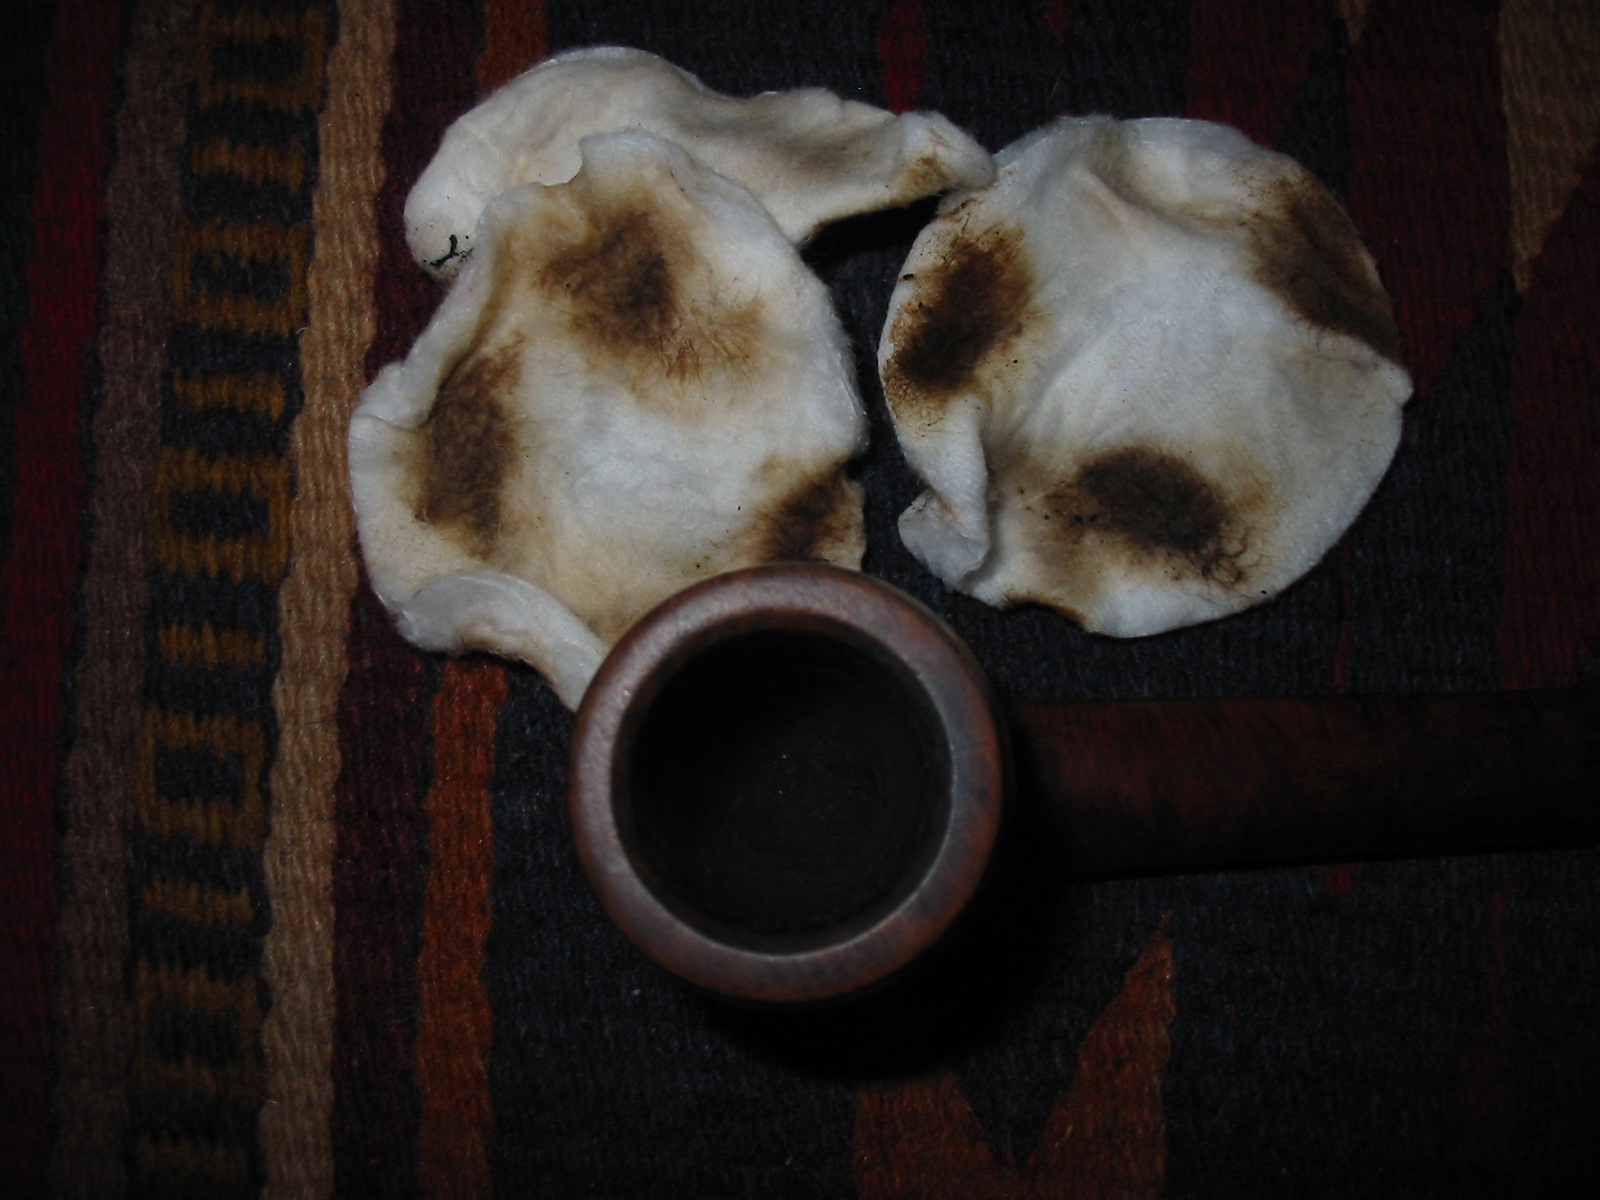
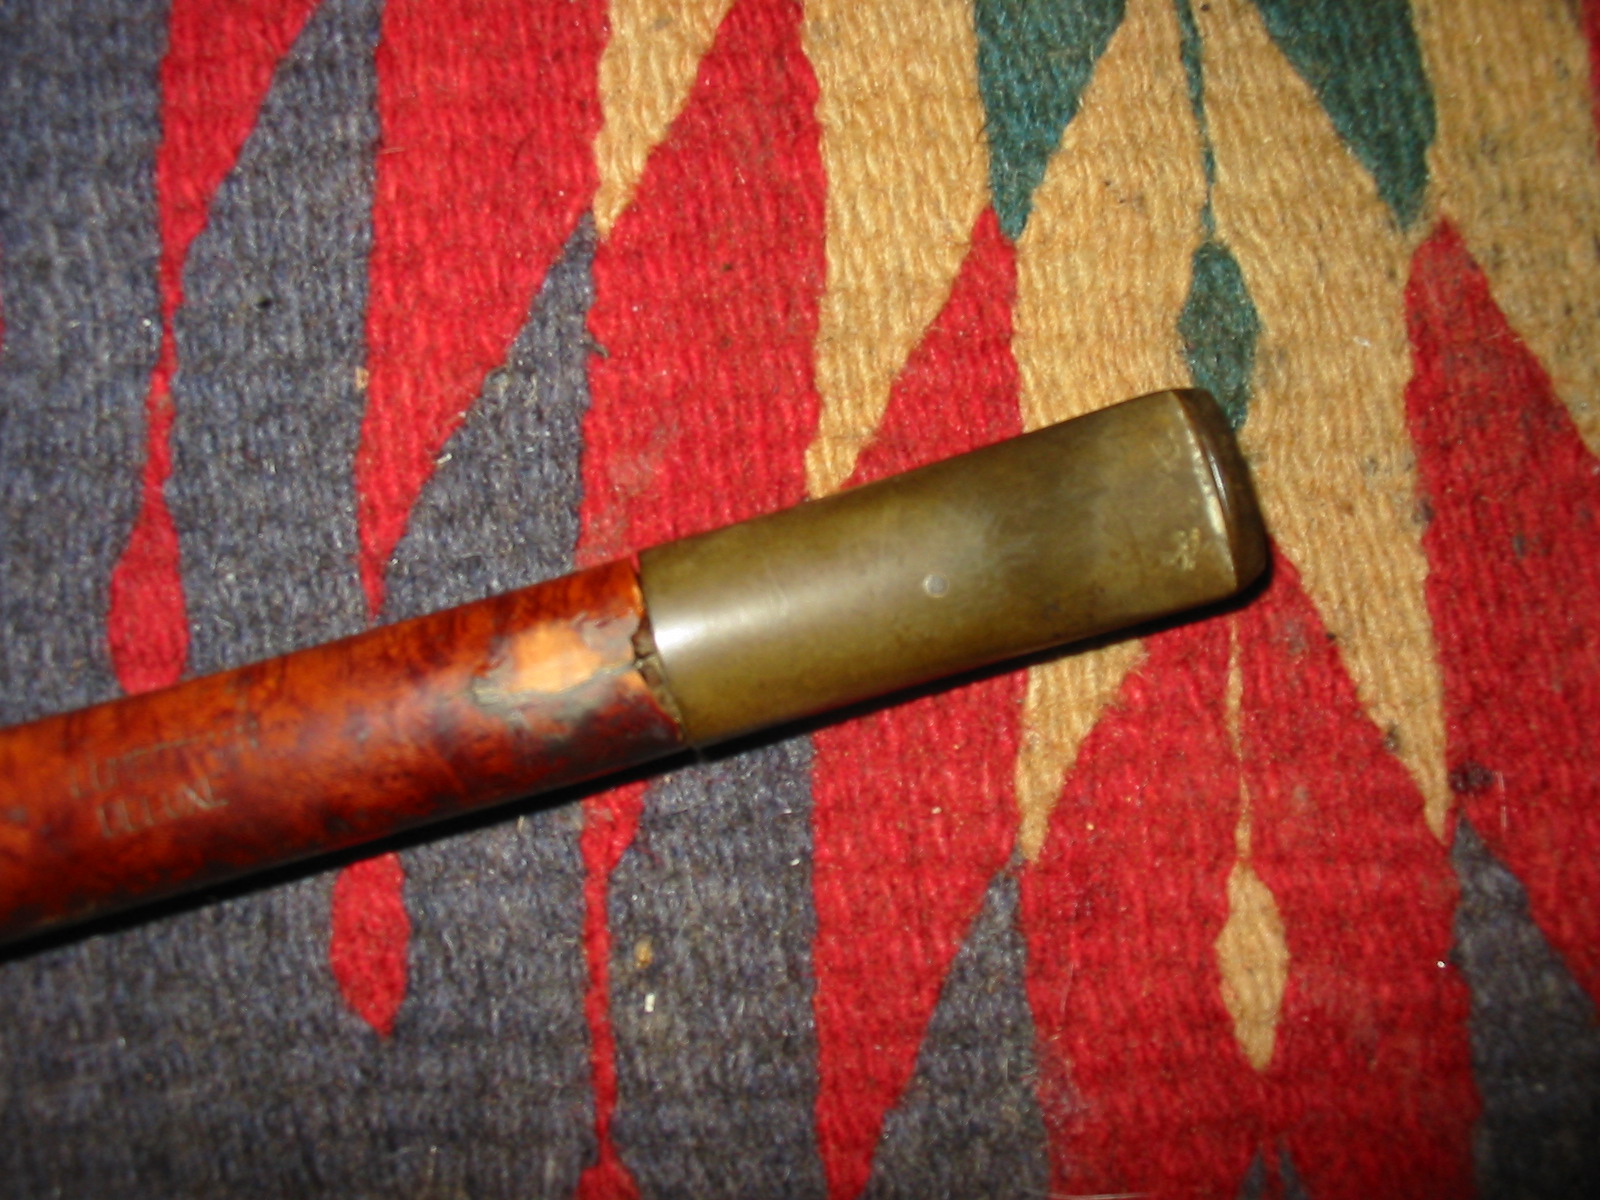
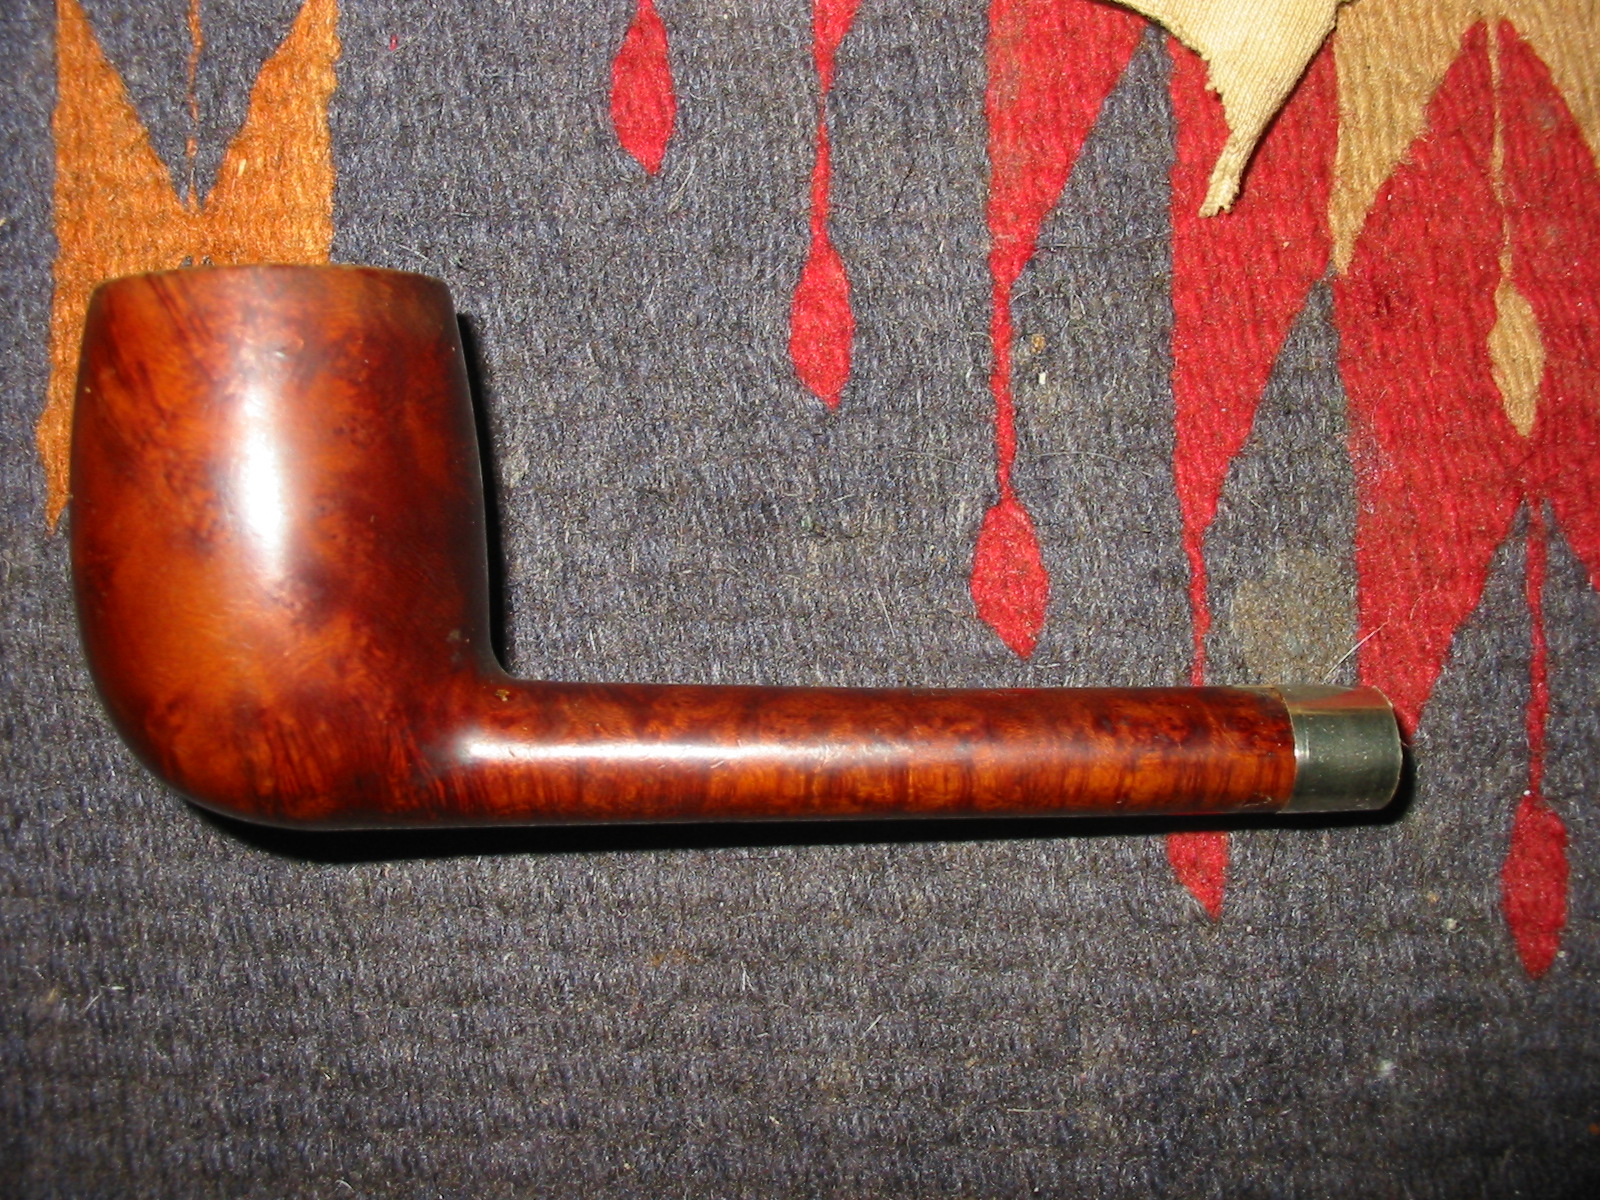
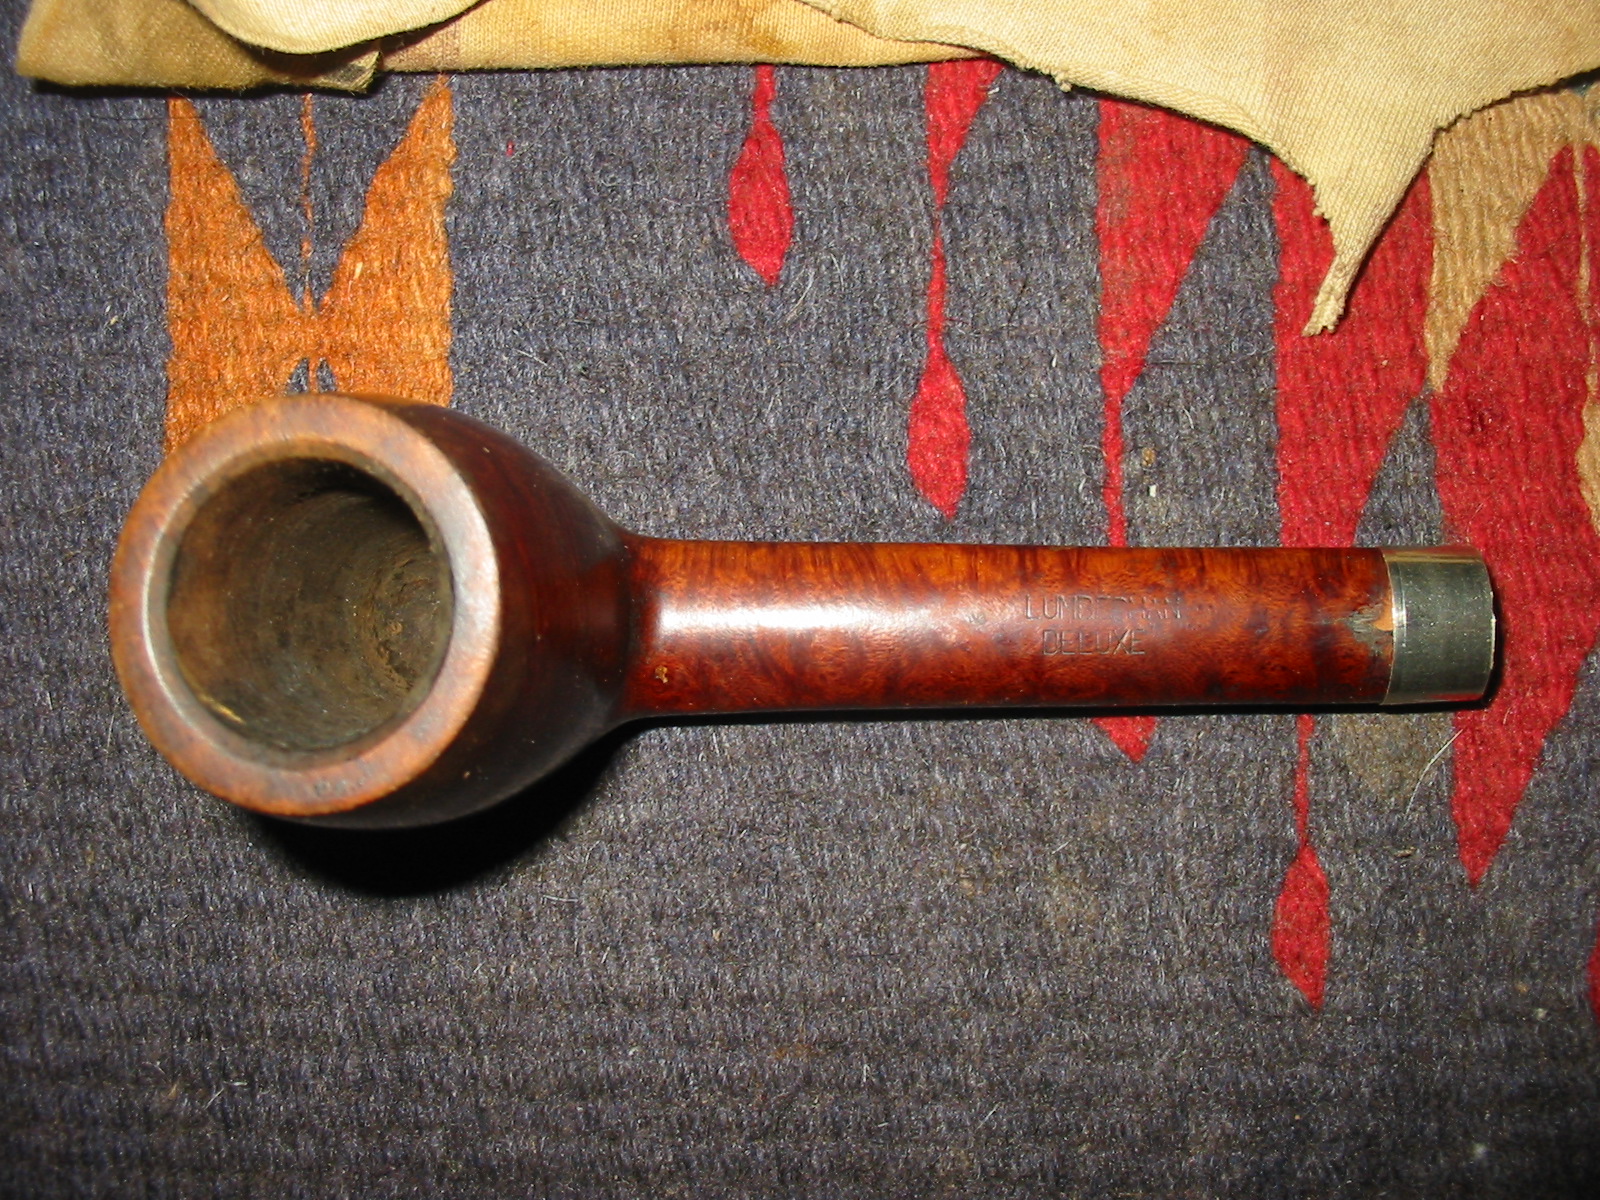
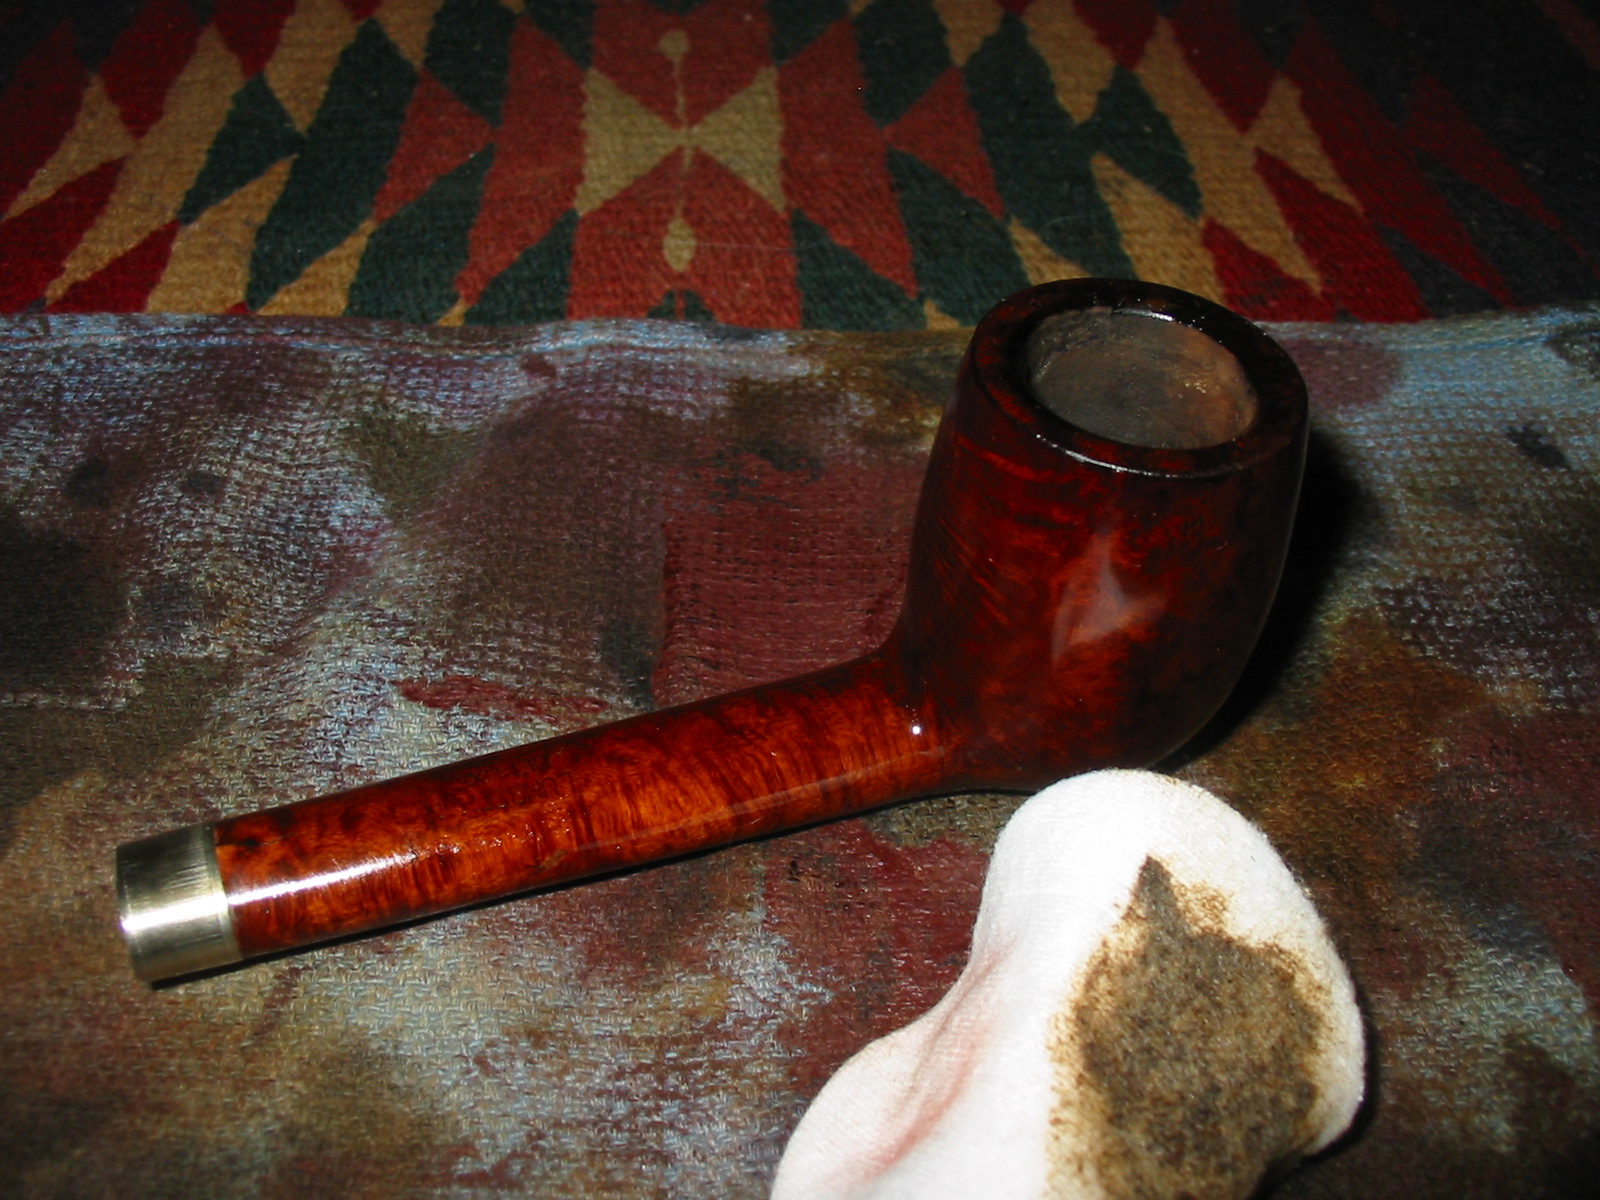
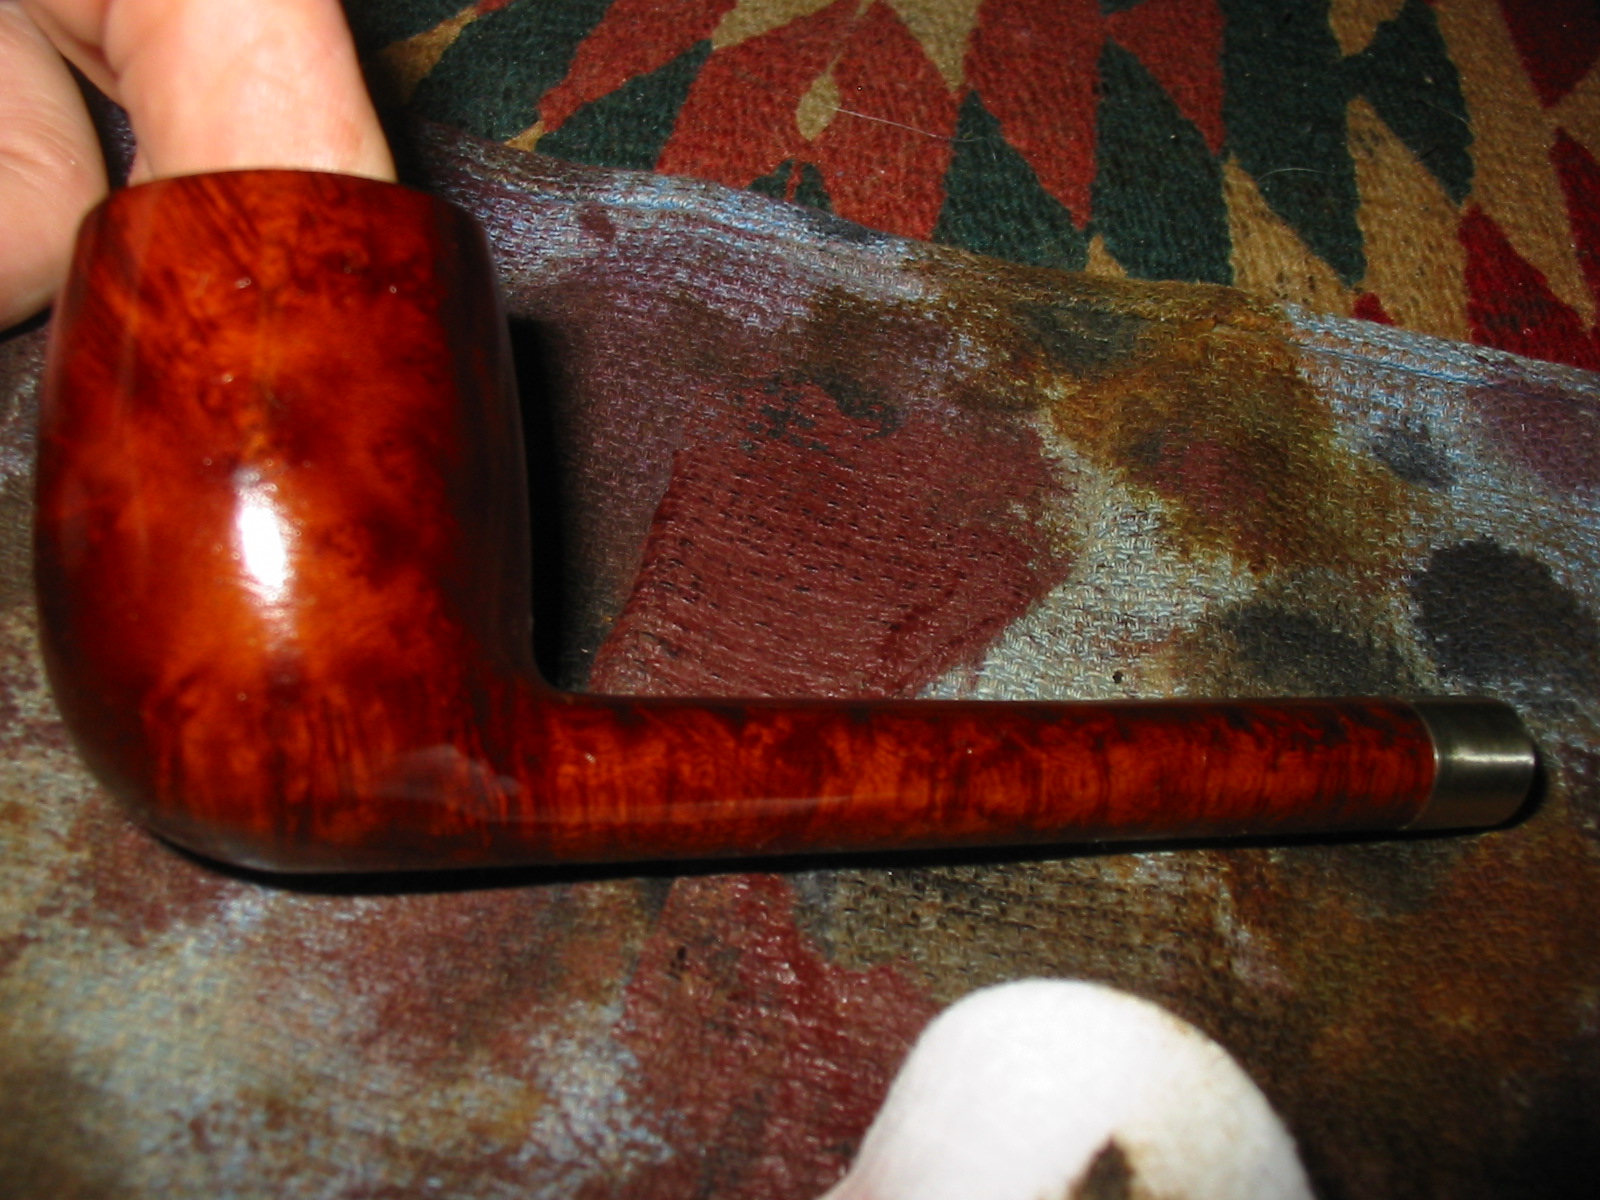
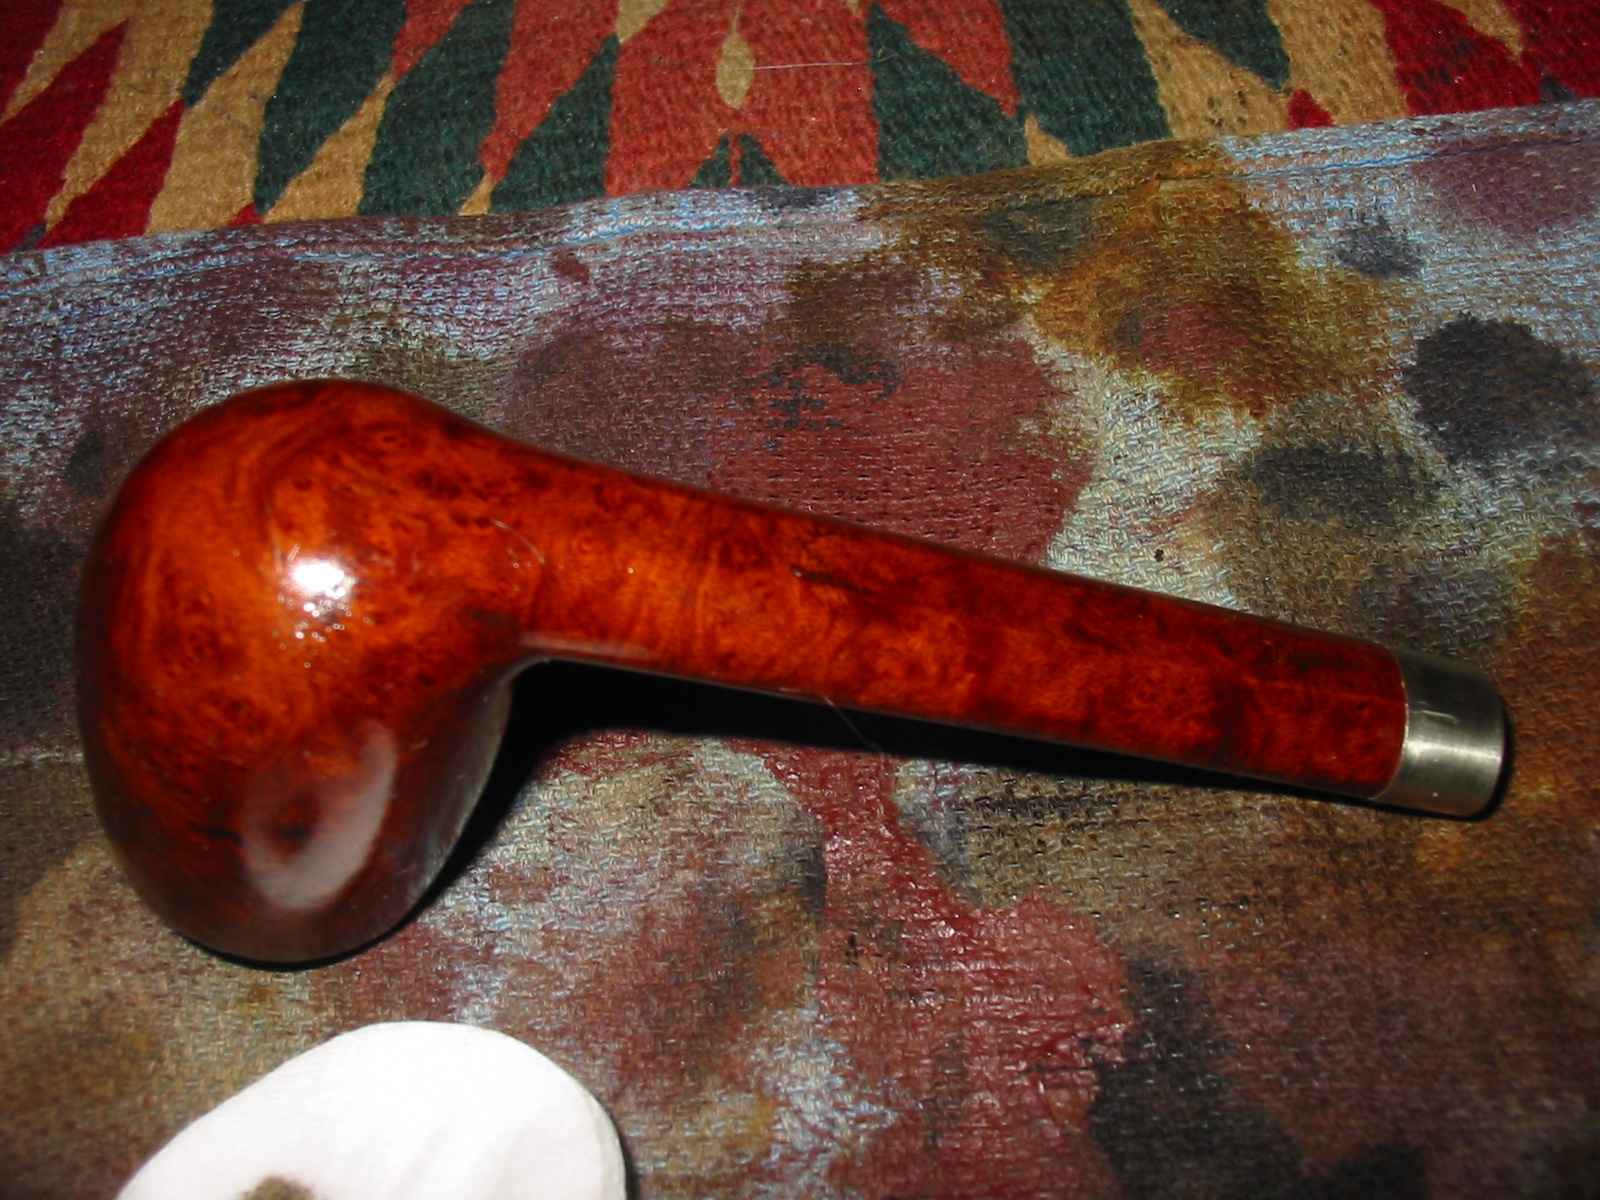
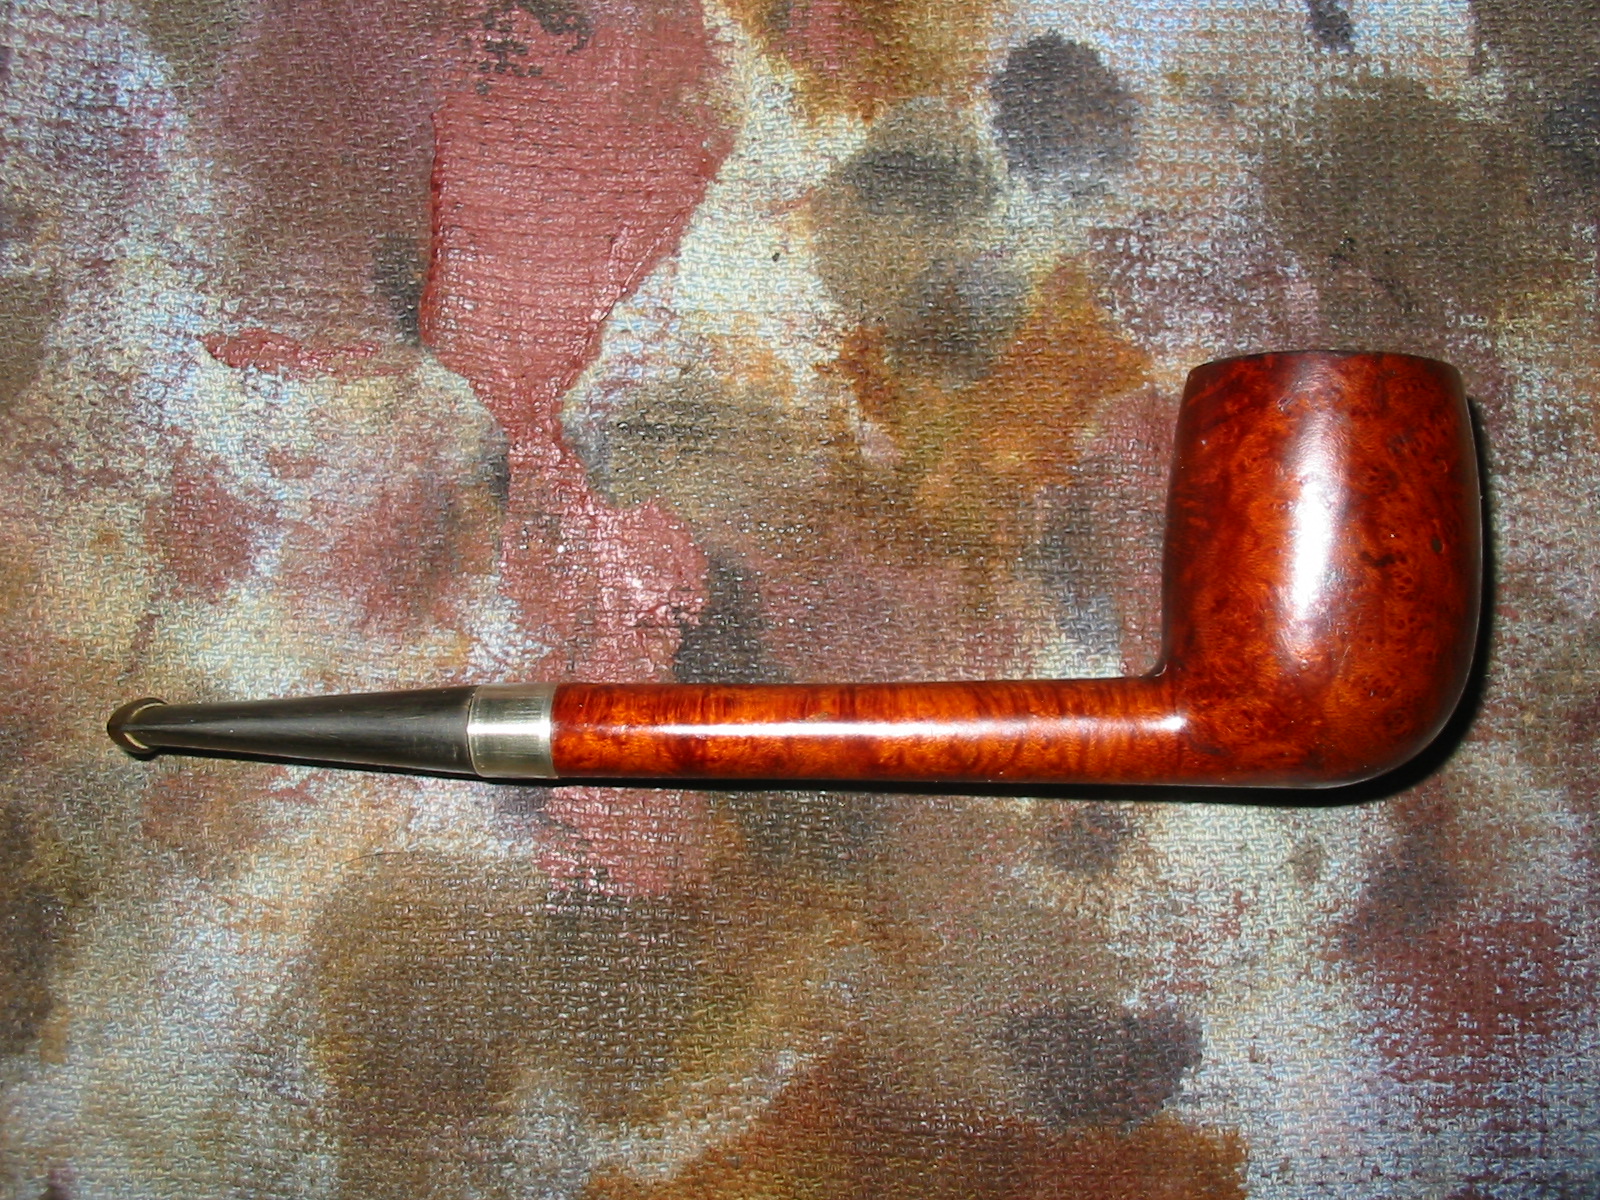
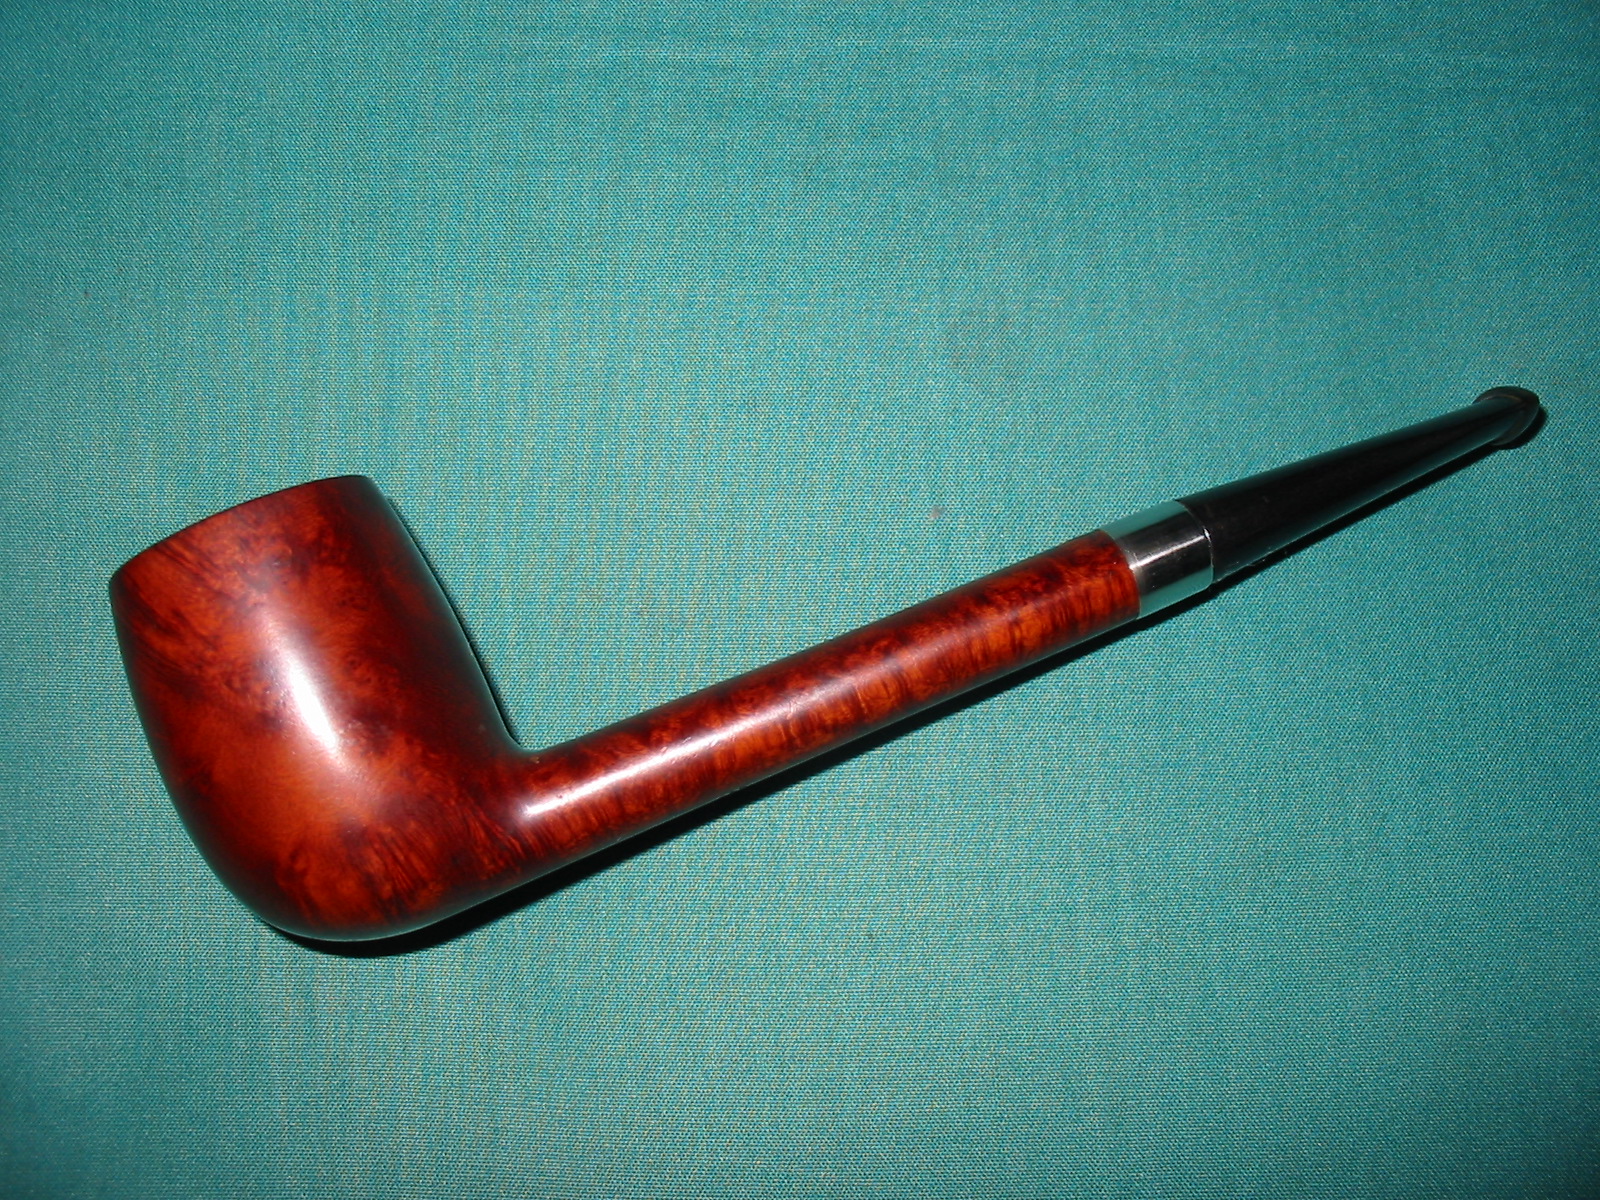
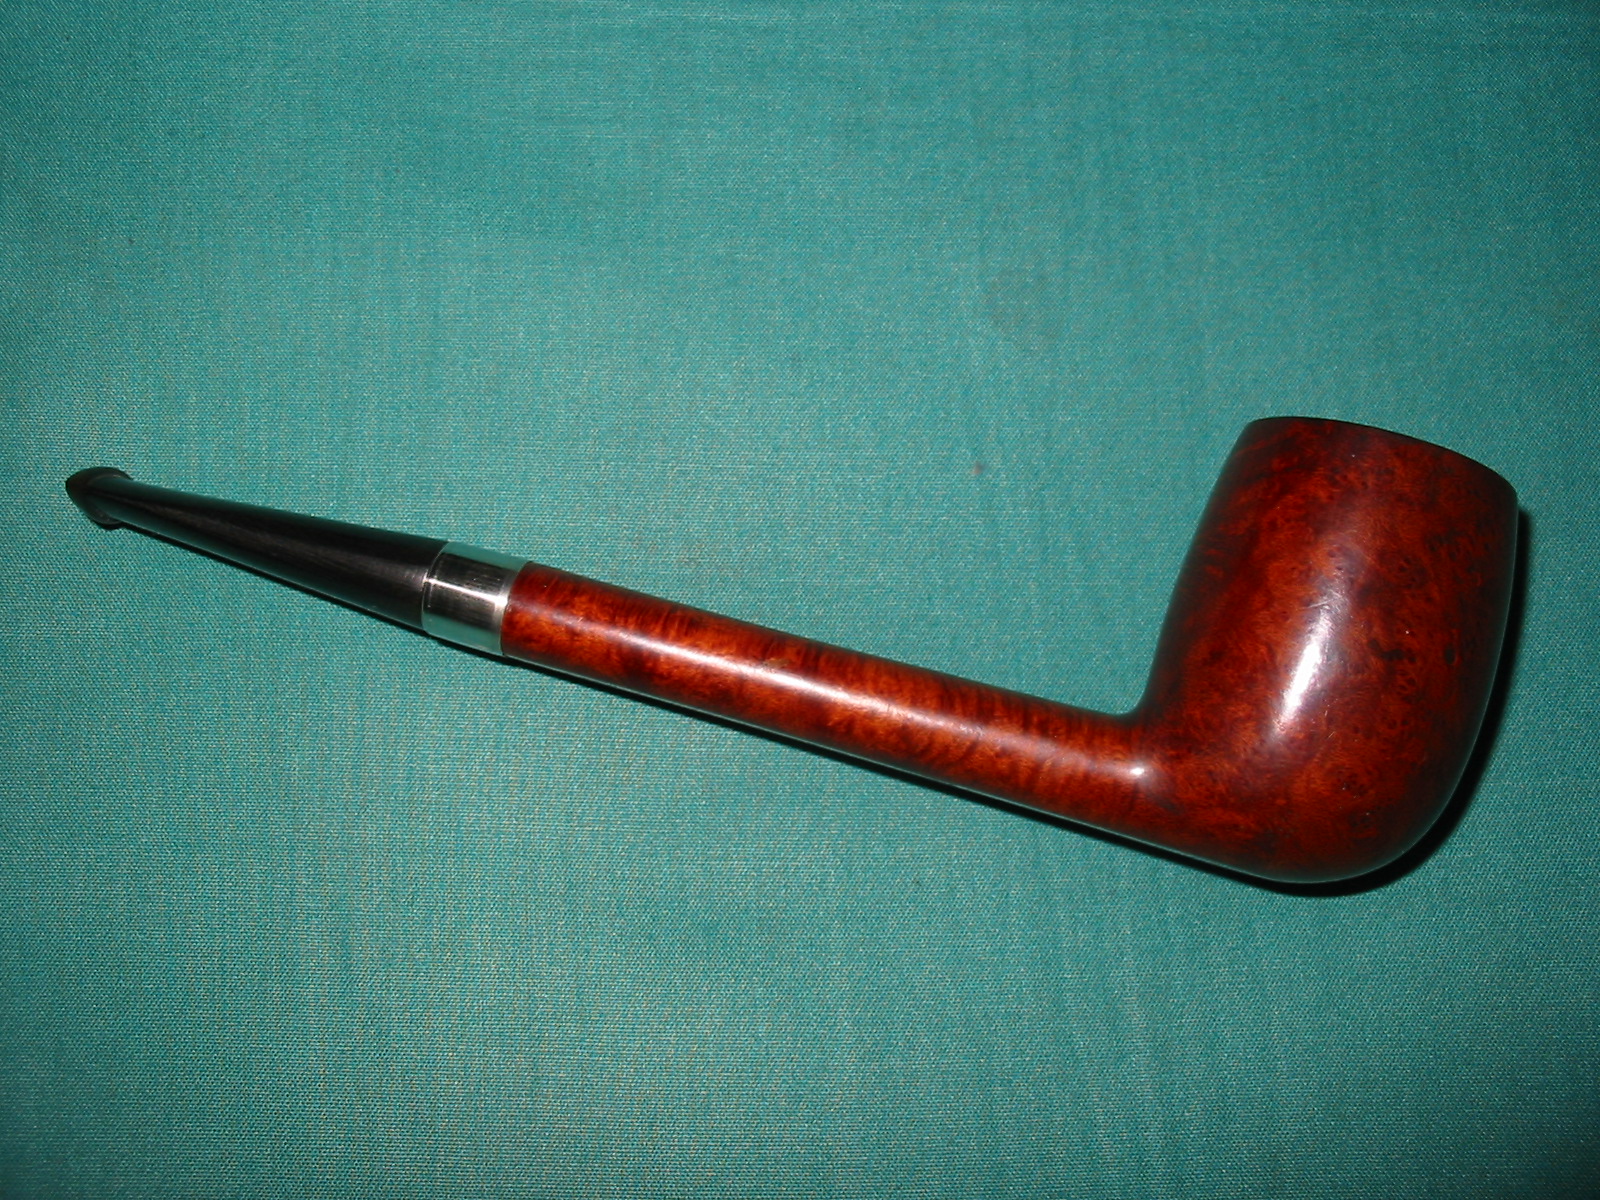
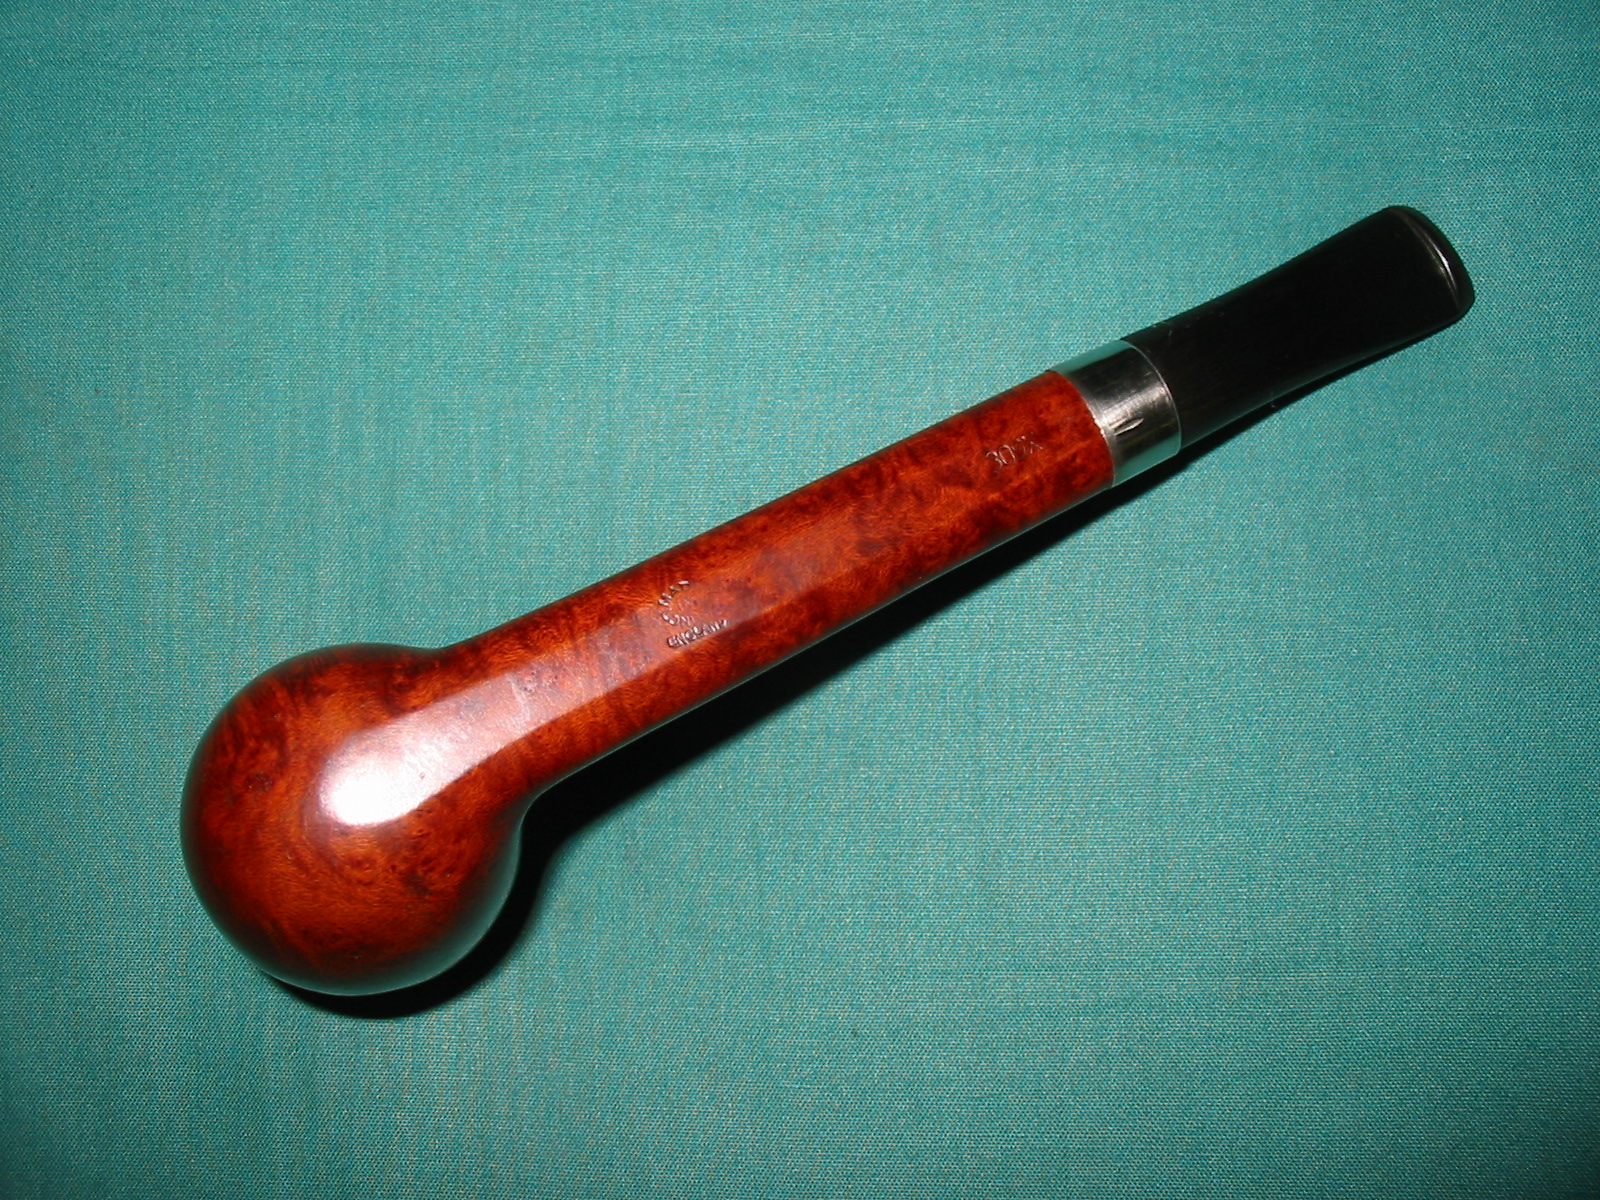
Andrew had a second LUMBERMAN DELUXE that he mentioned to me in a previous email when he sent me the other Lumberman to restem. He graciously gave the second one to me. In the photo below it is the one with the stem. It is slightly larger than the first one and also slightly longer as can be seen from the photo. It is stamped LUMBERMAN over DELUXE on top of the shank and on the underside there is no Made and London circle stamp. It is only stamped 309S. The pipe was in very good shape. There were no cracks in the long shank. There was one small sand pit in the top near the stamping. The bowl was slightly caked and the rim had some carbon buildup and many tiny pin pricks in the surface of the rim. The finish was dirty and had several sticky spots on the sides of the bowl. It was a gummy spot that seemed like the residue left behind by a price sticker. The stem was larger in diameter that the shank. It extended beyond the edge of the shank on both sides of the stem and also slightly on the bottom edge. The top edge fit well. There were also two tooth marks – one on top and on matching on the bottom of the stem near the button.
lumbermans

Before seeing these two pipes I had not heard of the Lumberman brand so Andrew had sent along some information that he had found on the web regarding the brand. He had gleaned the information from a Mr. Can EBay listing. In the previous blog post on the first LUMBERMAN I included Andrew’s information. I am also including it now as a quick reminder of the provenance of the brand. That posting read as follows:

“This Collectible Briar pipe is unique, extremely rare Comoy’s 309XL – a classic Canadian Shape. It has the arched Comoy’s nomenclature stamped over Deluxe (just as it appeared in the early 1930’s) both of which were stamped over Lumberman. For anyone already familiar with the stamping of Comoy Canadians that is enough to recognize that this is a rare and collectible Comoy.”

“During its history, Comoy’s has had three distinct sets of nomenclature, though they became somewhat blended in later years. The earliest Comoy nomenclature either had no Comoy stamping or a scripted, signature like forward leaning Comoy’s beneath which were featured names instead of shape numbers. Few of those names (Like Leman, Naval, Adelaide, and so on) are recognized even by the most ardent collectors. Then after World War I when Comoy began introducing what is sometimes called their Old Nomenclature (featuring the Prima, as the Top of the line with other lines like the Old Bruyere, Grand Slam, Lions Head, Lumberman, Lumberman Special and so forth) and arched Comoy’s stamping was used. In the 1930’s the Prima gave way to the Deluxe as the top of the line Comoy. Then just before World War II newer nomenclature started to appear (like Blue Riband, Specimen Straight Grain, and so on) and the Deluxe was replaced by the Royal Comoy. That New Nomenclature expanded dramatically after the War and blended with the modern nomenclature today.”

“The use of the arched Comoy’s ended with World War II and was replaced after the War with a straight line Comoy’s (along with the now famous country of origin stamping of a circular “Made In London” over a straight line “England”.”

“Prior to World War II with manufacturing facilities in both France and England, Comoy had pipes made in both locations. Most were easily identifiable by their country of origin stamping. There were several versions of Comoy’s Lumberman made in France and/or England. (They might have been the dame pipe but with different nomenclature.) “The Lumberman” and “The Lumberman Special were made in both factories. But none had the arched Comoy’s stamping.”

“After WWII Comoy’s reintroduced the Deluxe, discontinued the arched Comoy’s and continued various versions of the Lumberman. Perhaps Comoy’s best graded Lumberman was stamped Lumberman Deluxe – but it had no Comoy stamping. Lumberman was always stamped over Deluxe.”

“Normally Comoy offered to Canadian sizes designated by shape numbers 296 and 309. The difference was in the length of the Canadians. The 309 shape was Comoy’s longest Canadian and the 296 was shorter. However, the extra long Canadians were upgraded with the additional stamping of XL and the very longest were sometimes stamped XXL. Either upgrade was rare.” – The above was taken from correspondence Andrew included when he sent the pipe to me.

The previous blog post can be found at this link: https://rebornpipes.wordpress.com/2014/01/29/repairing-and-restoring-a-lumberman-deluxe-canadian-by-comoys/

The difference between this pipe and the previous one was that the stamping on the underside of the pipe lacked the Comoy’s circle Made in London stamp and also bore the shape designation of 309 but instead of X or XL it is stamped “S”. It is larger than the previous LUMBERMAN but the stamping appears to be a bit of an anomaly.

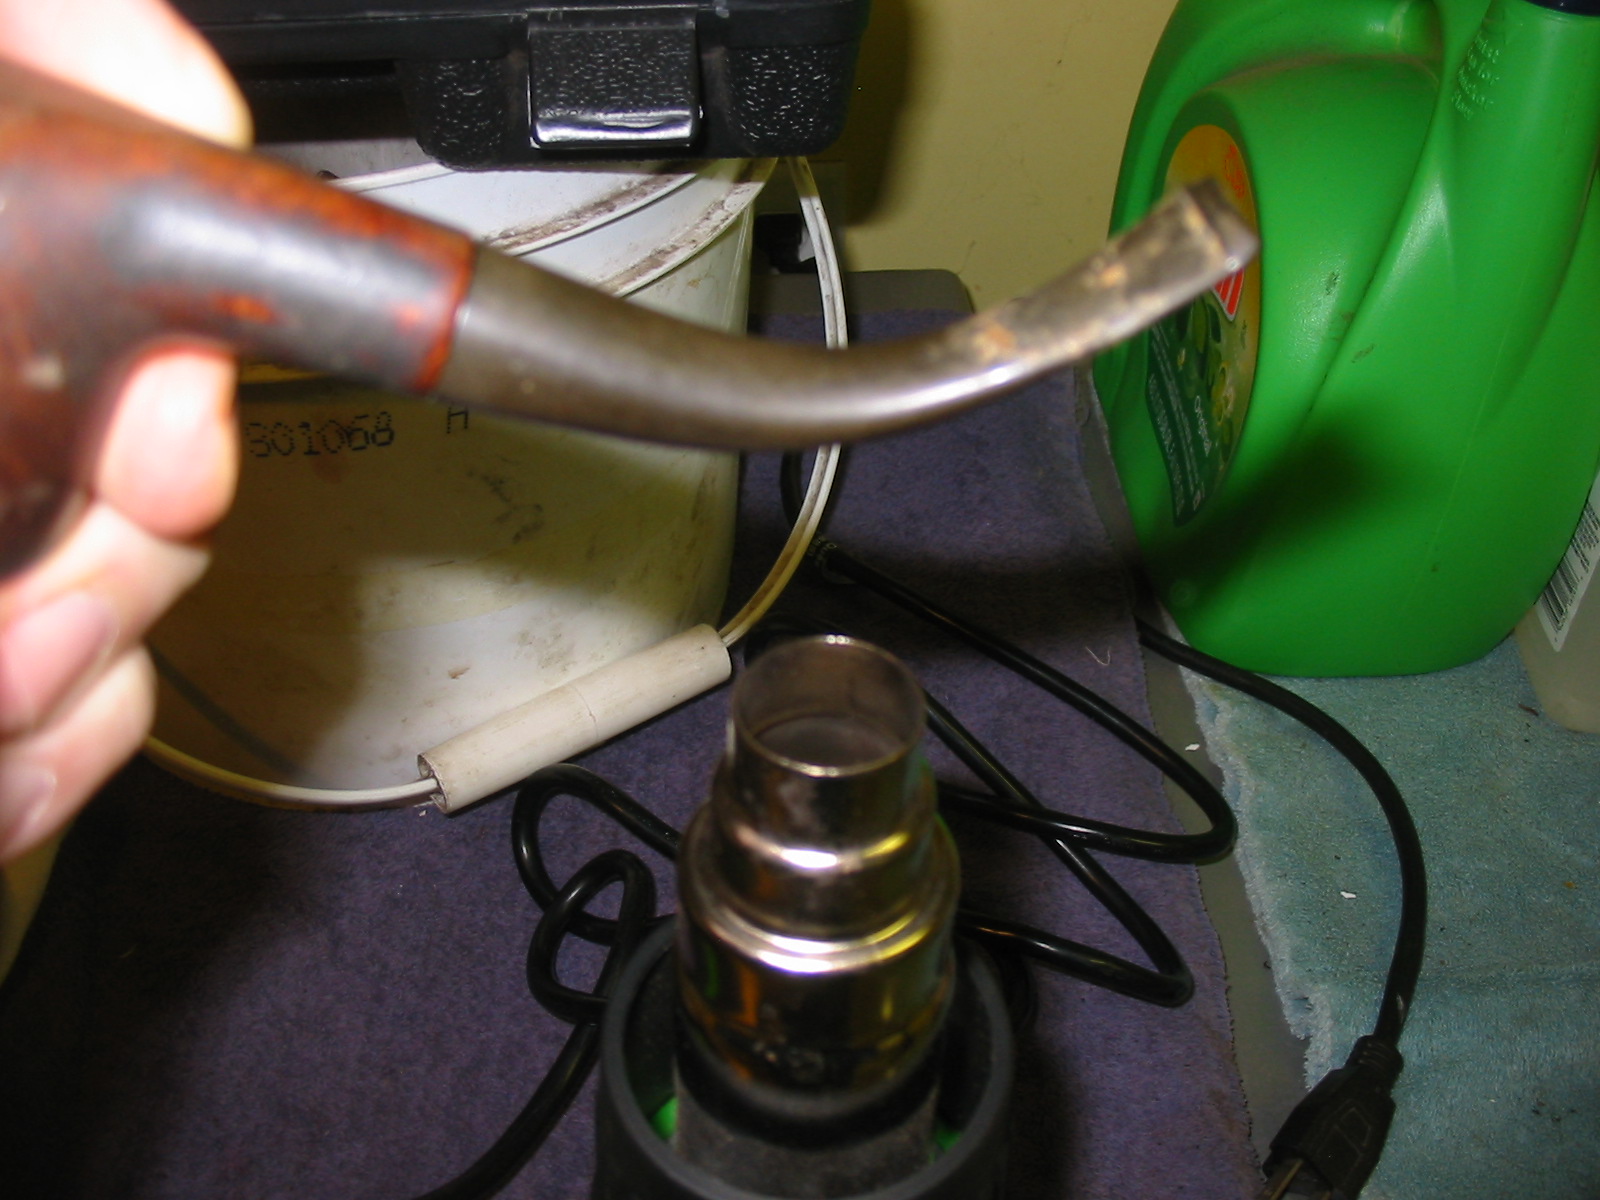
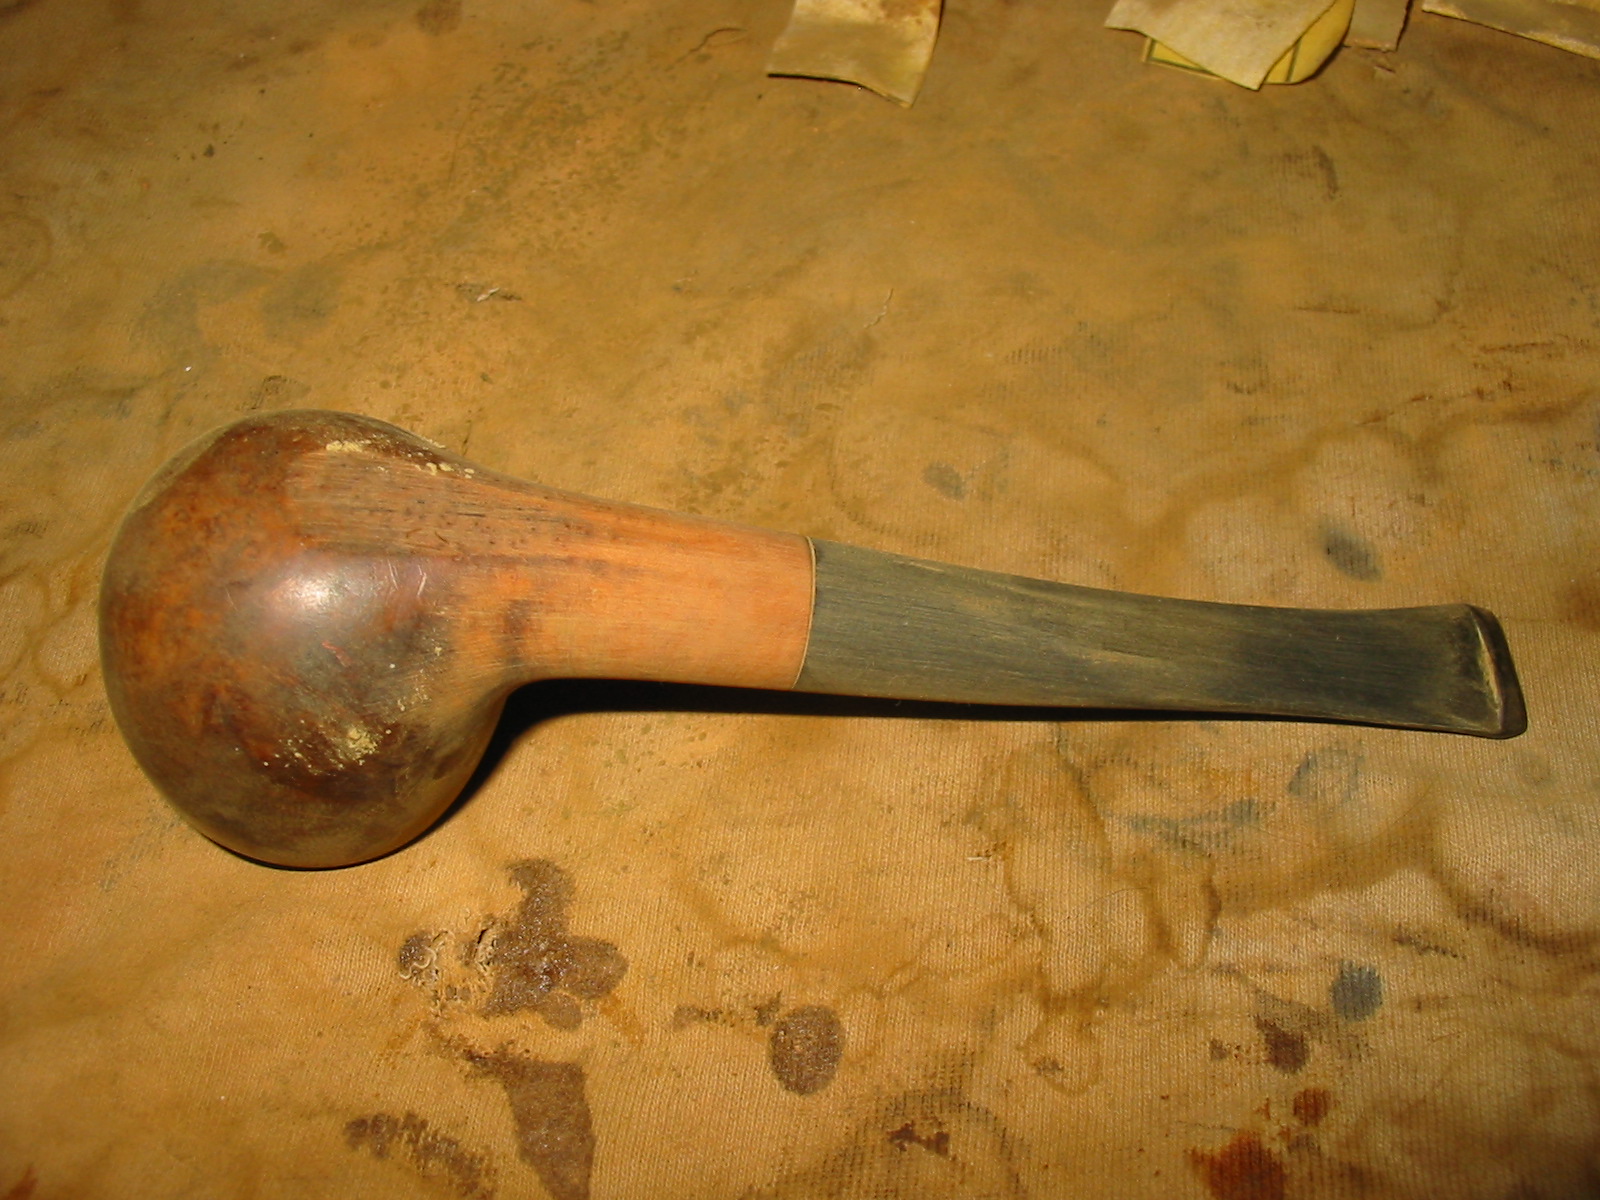
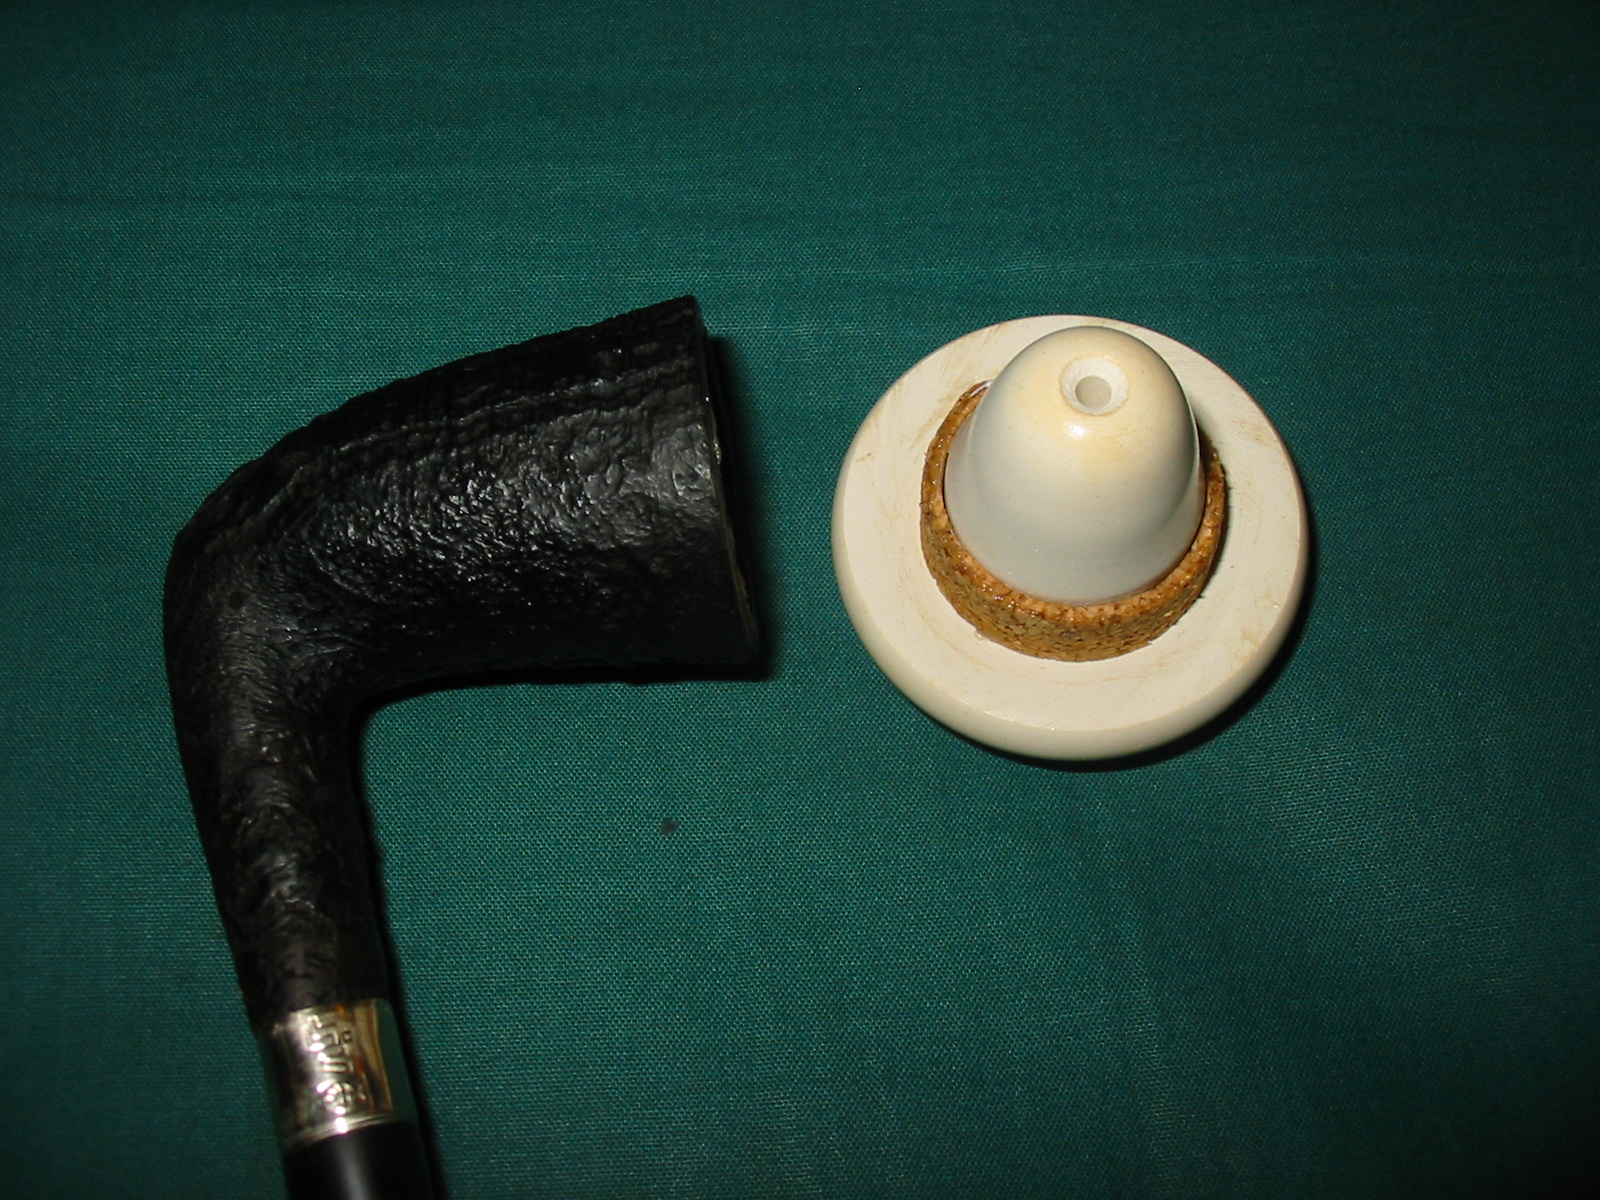
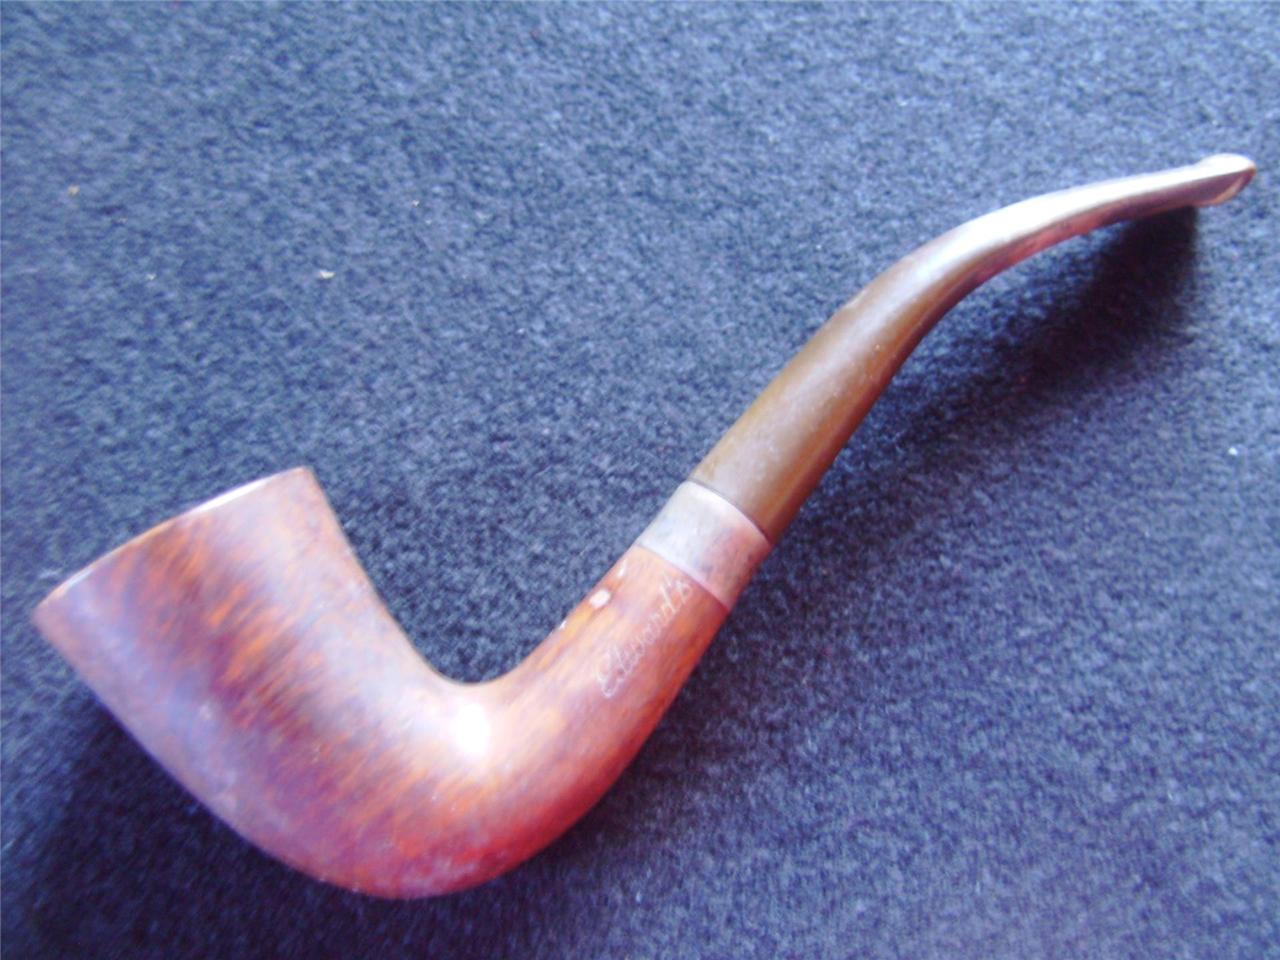
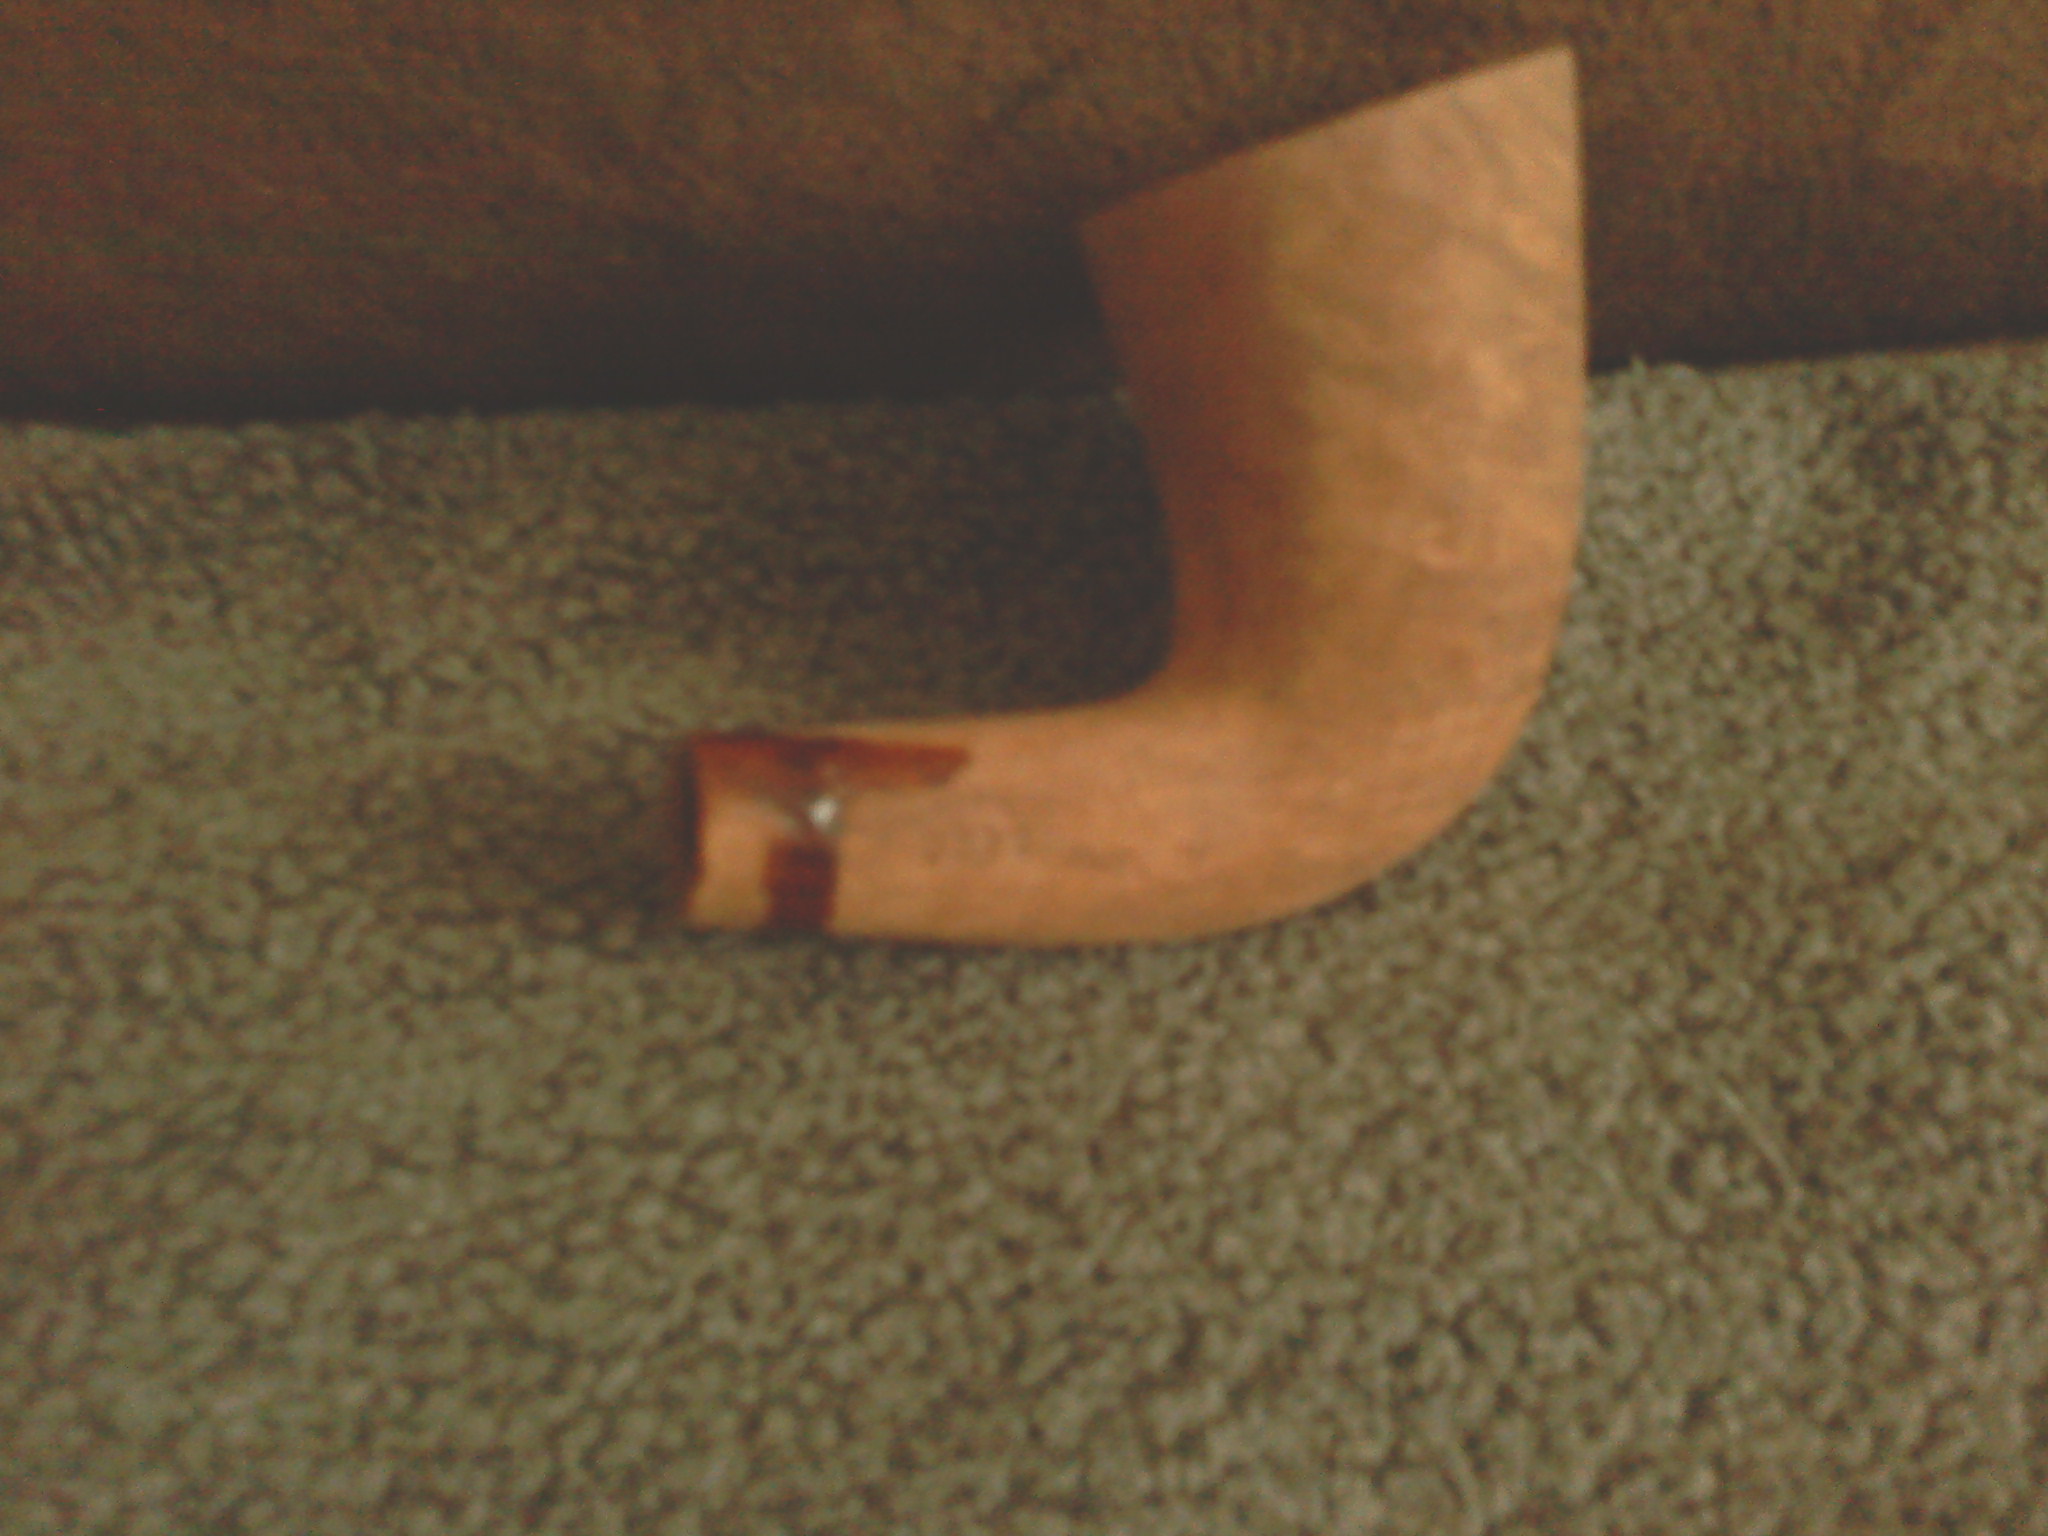
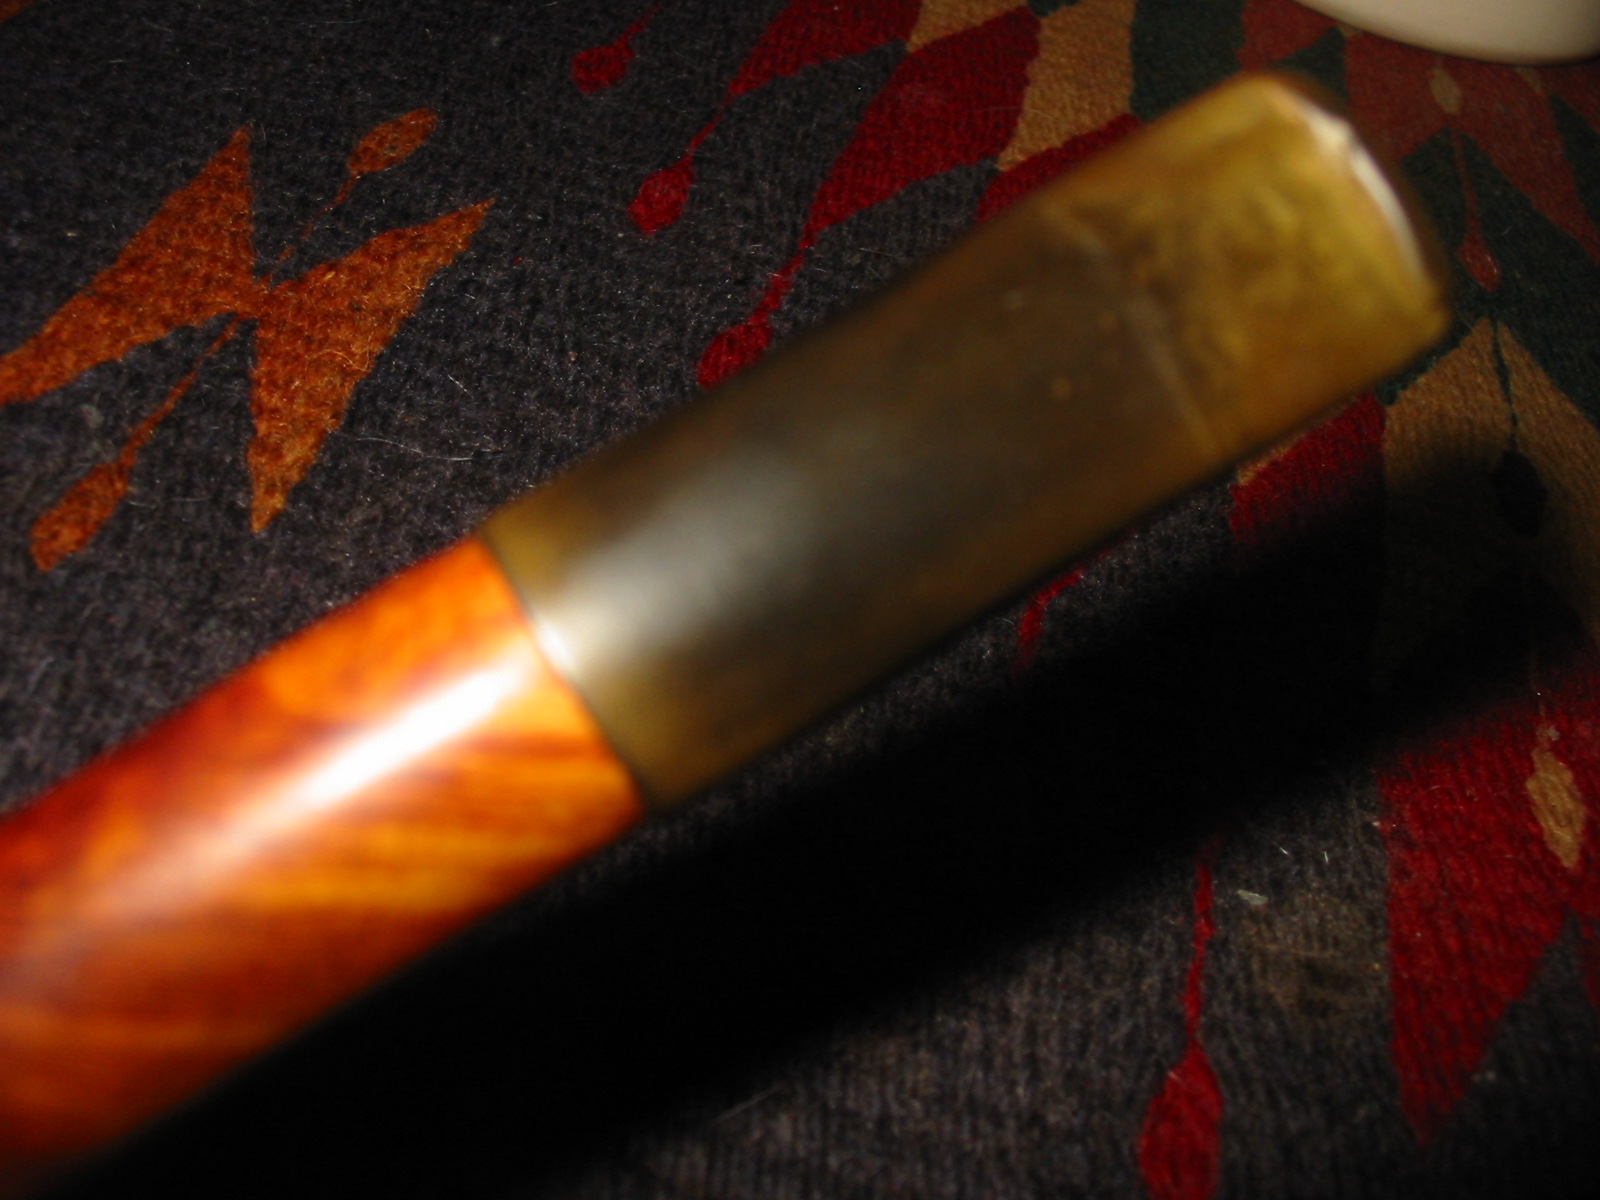
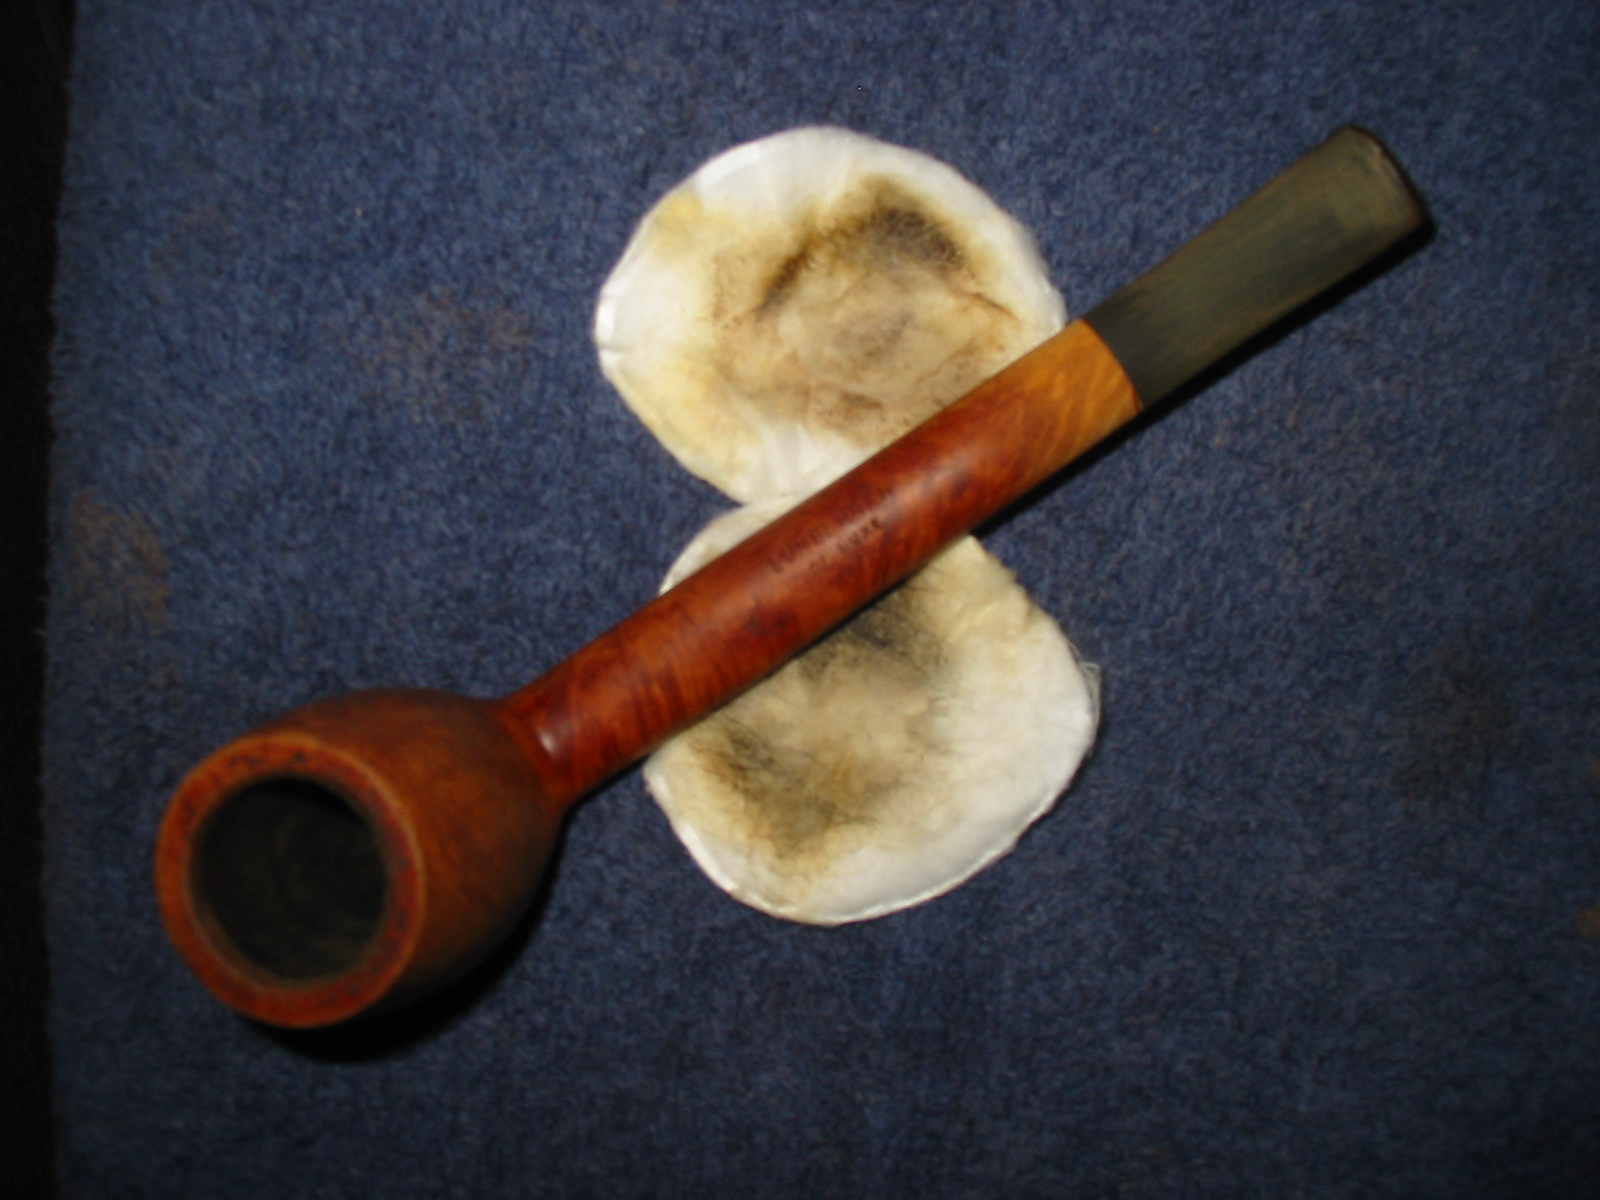
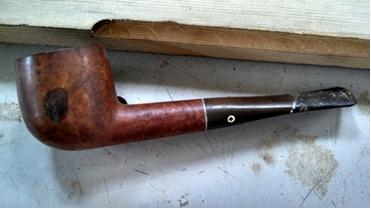
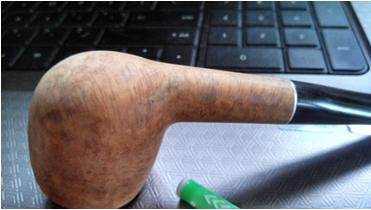
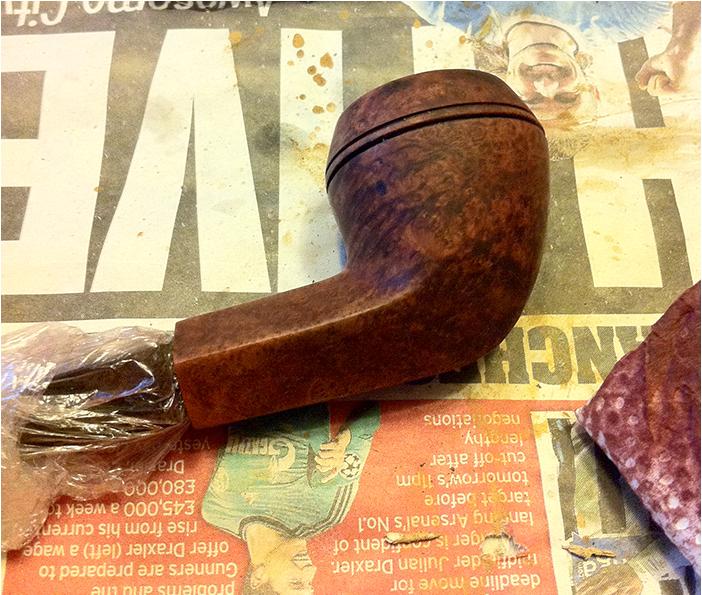
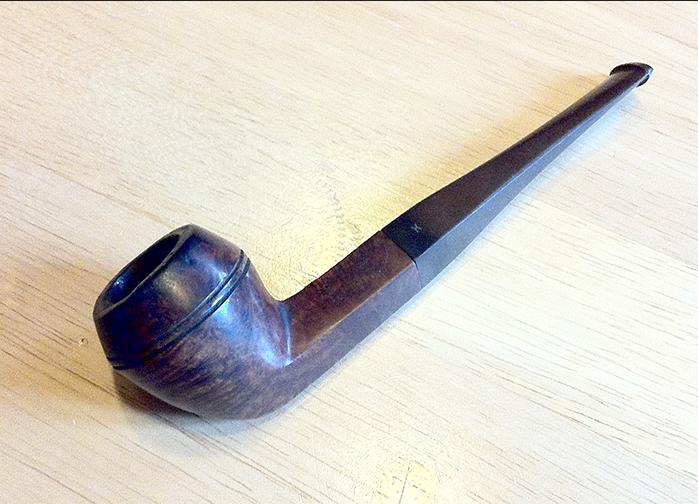
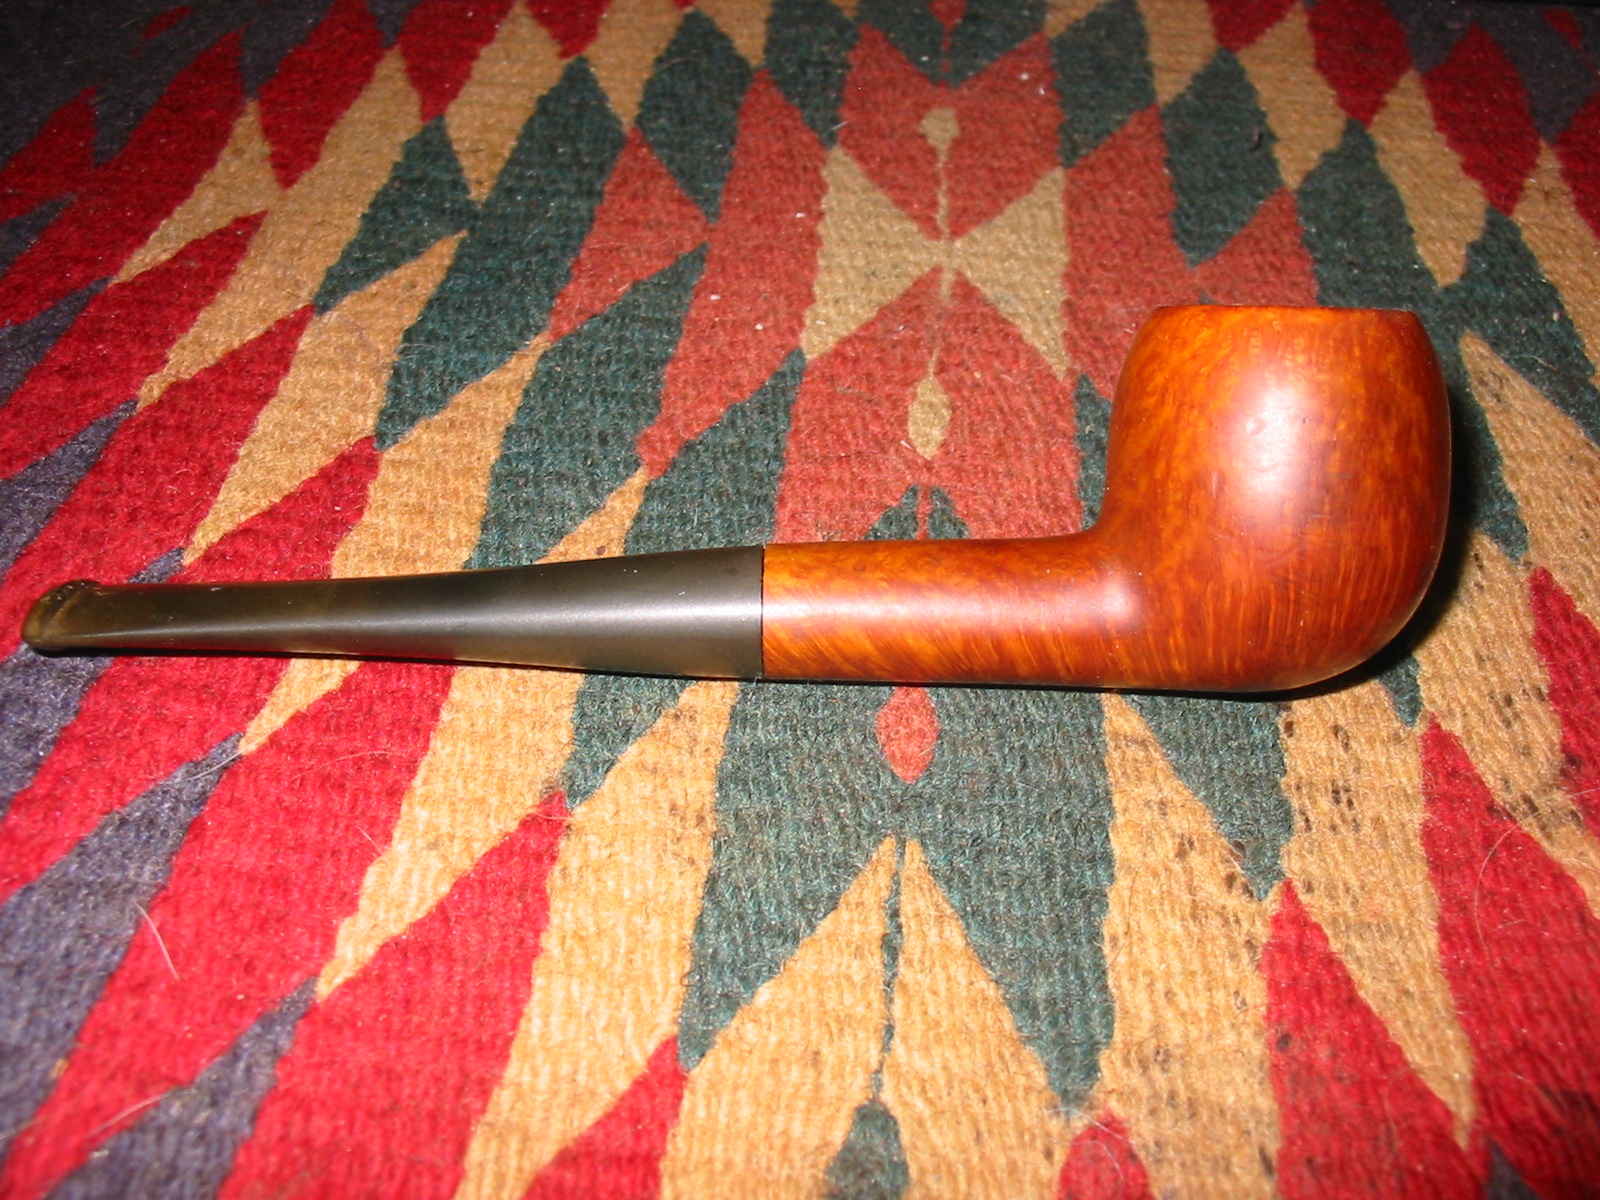
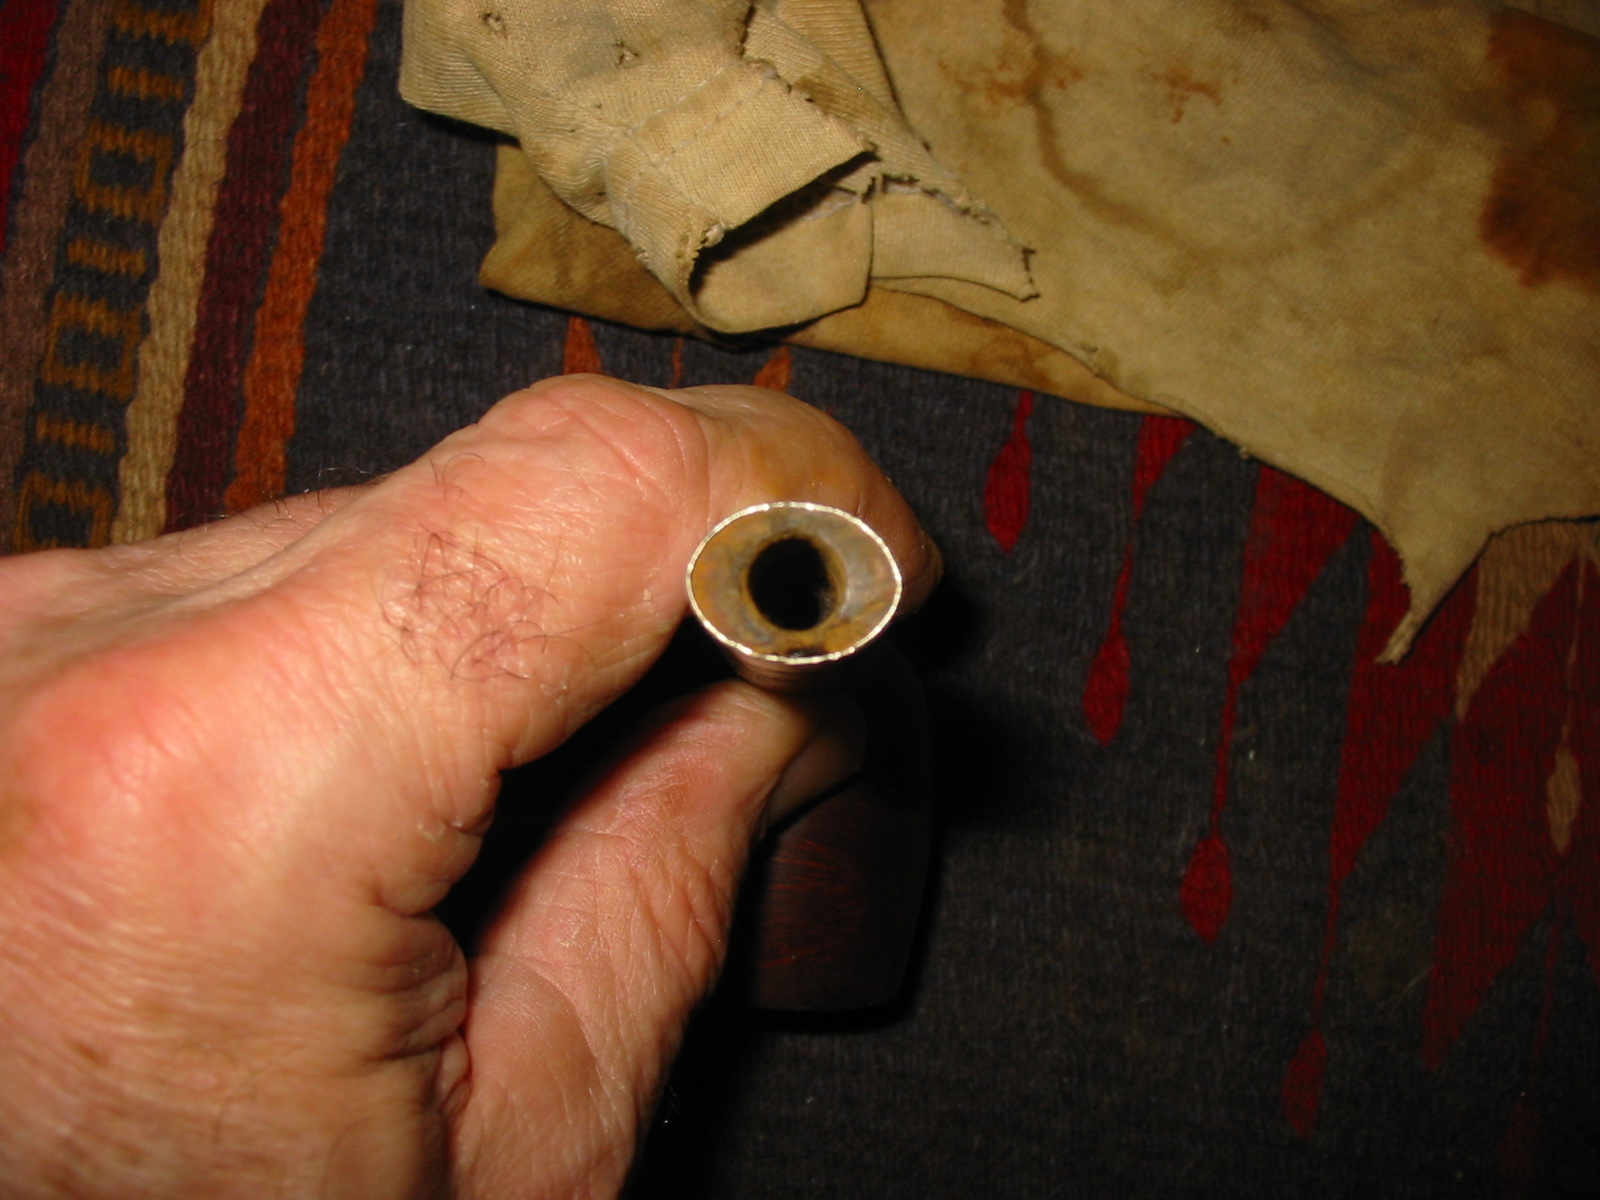
The next series of photos show the pipe as it appeared when I received it from Andrew. There was slight oxidation on the stem and the stem was larger as noted above.
IMG_5199

IMG_5200

IMG_5201

IMG_5202

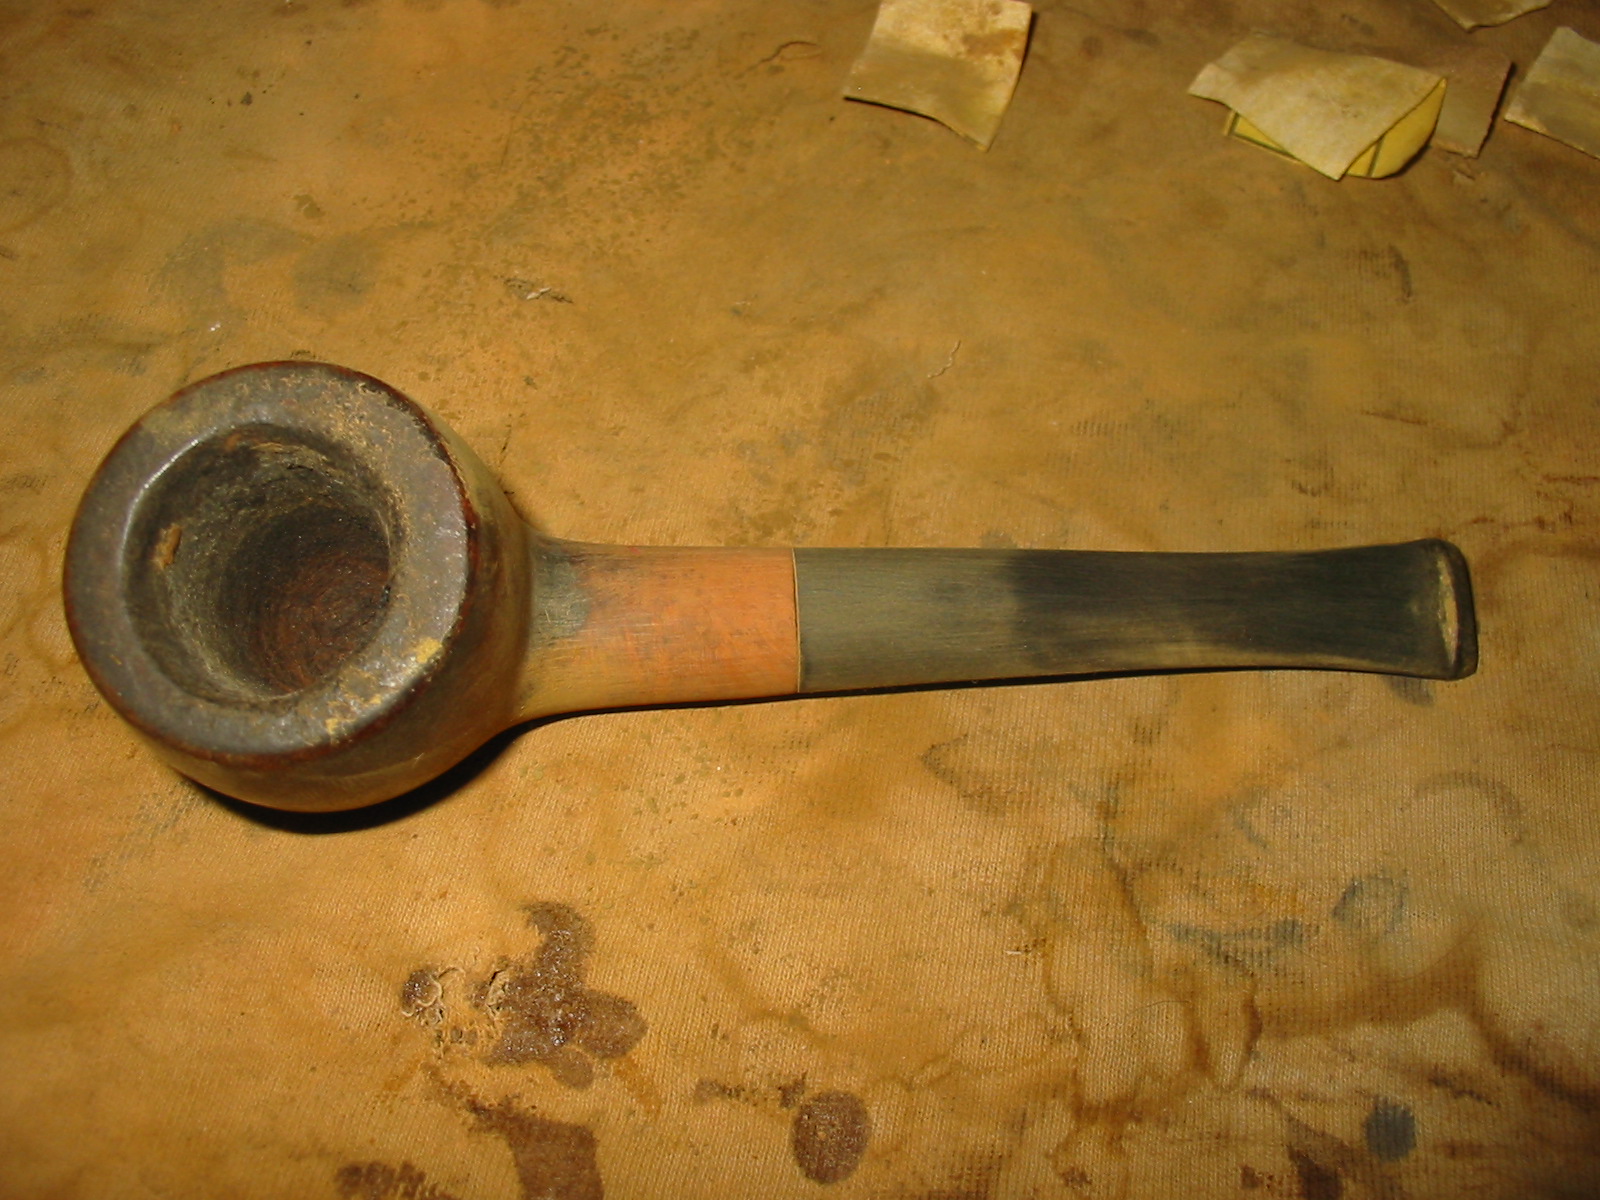
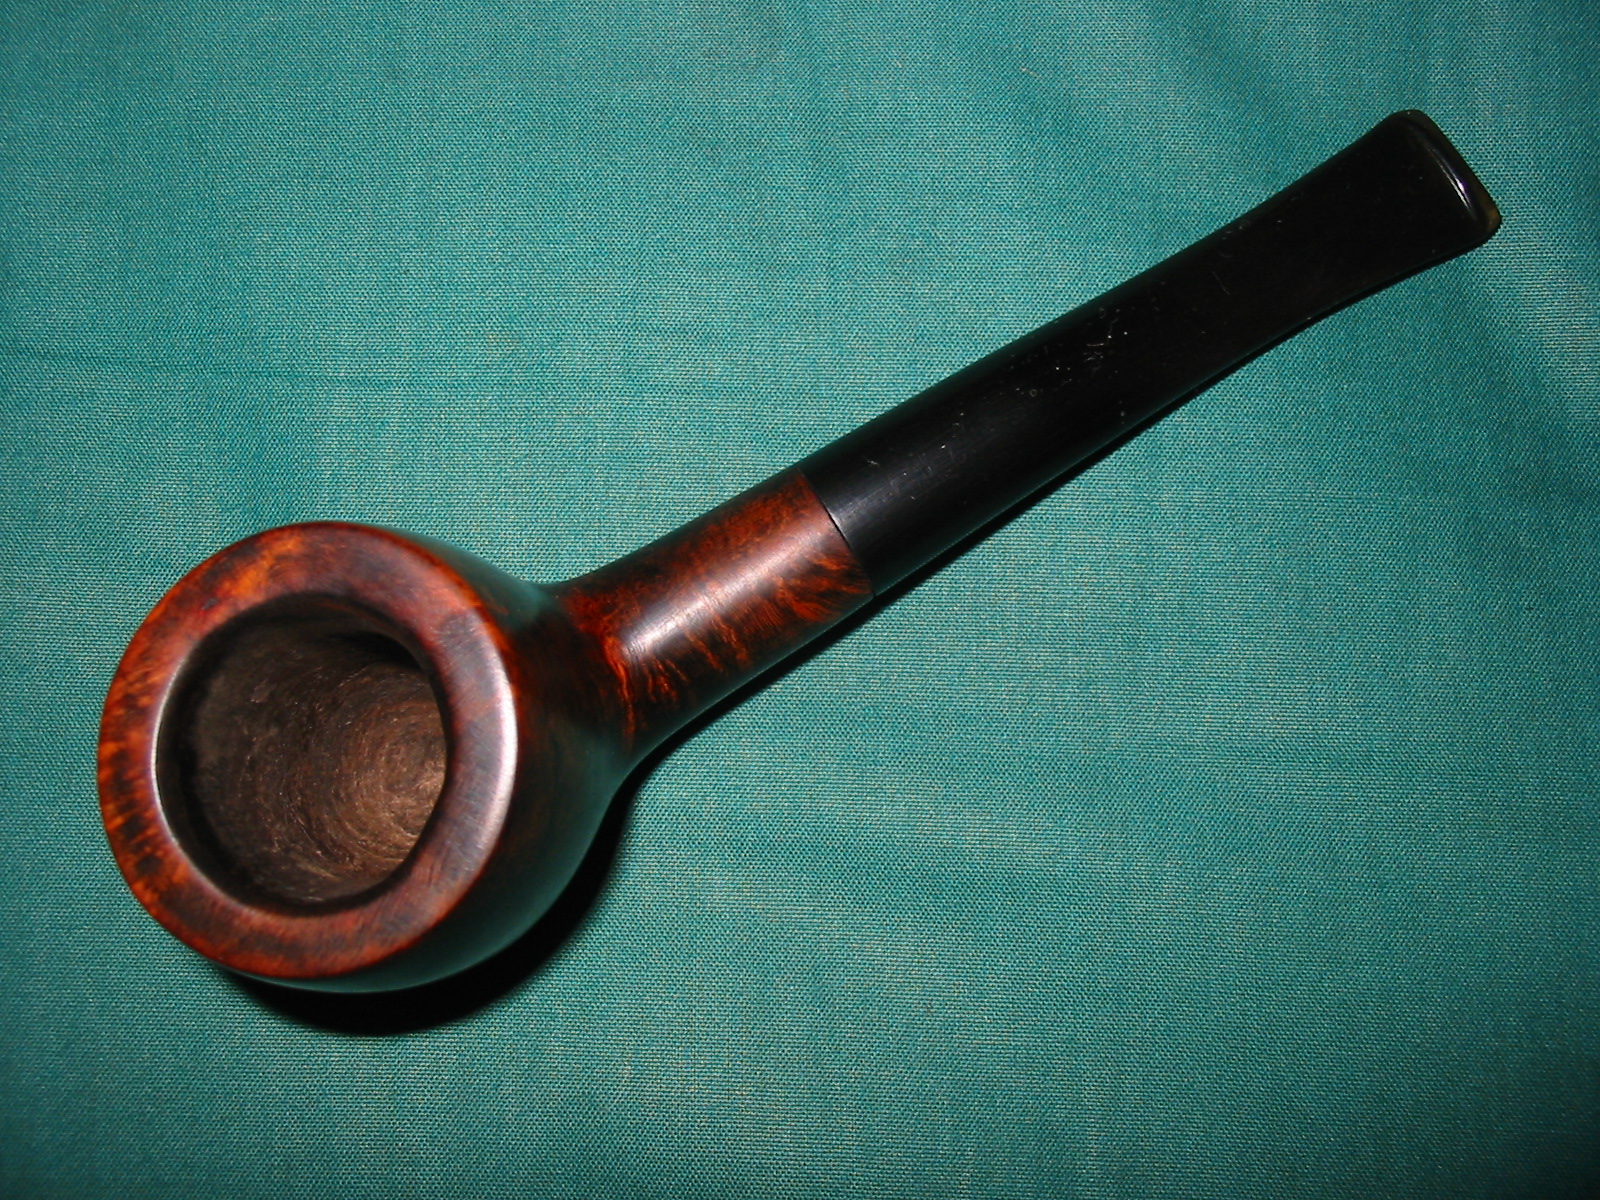
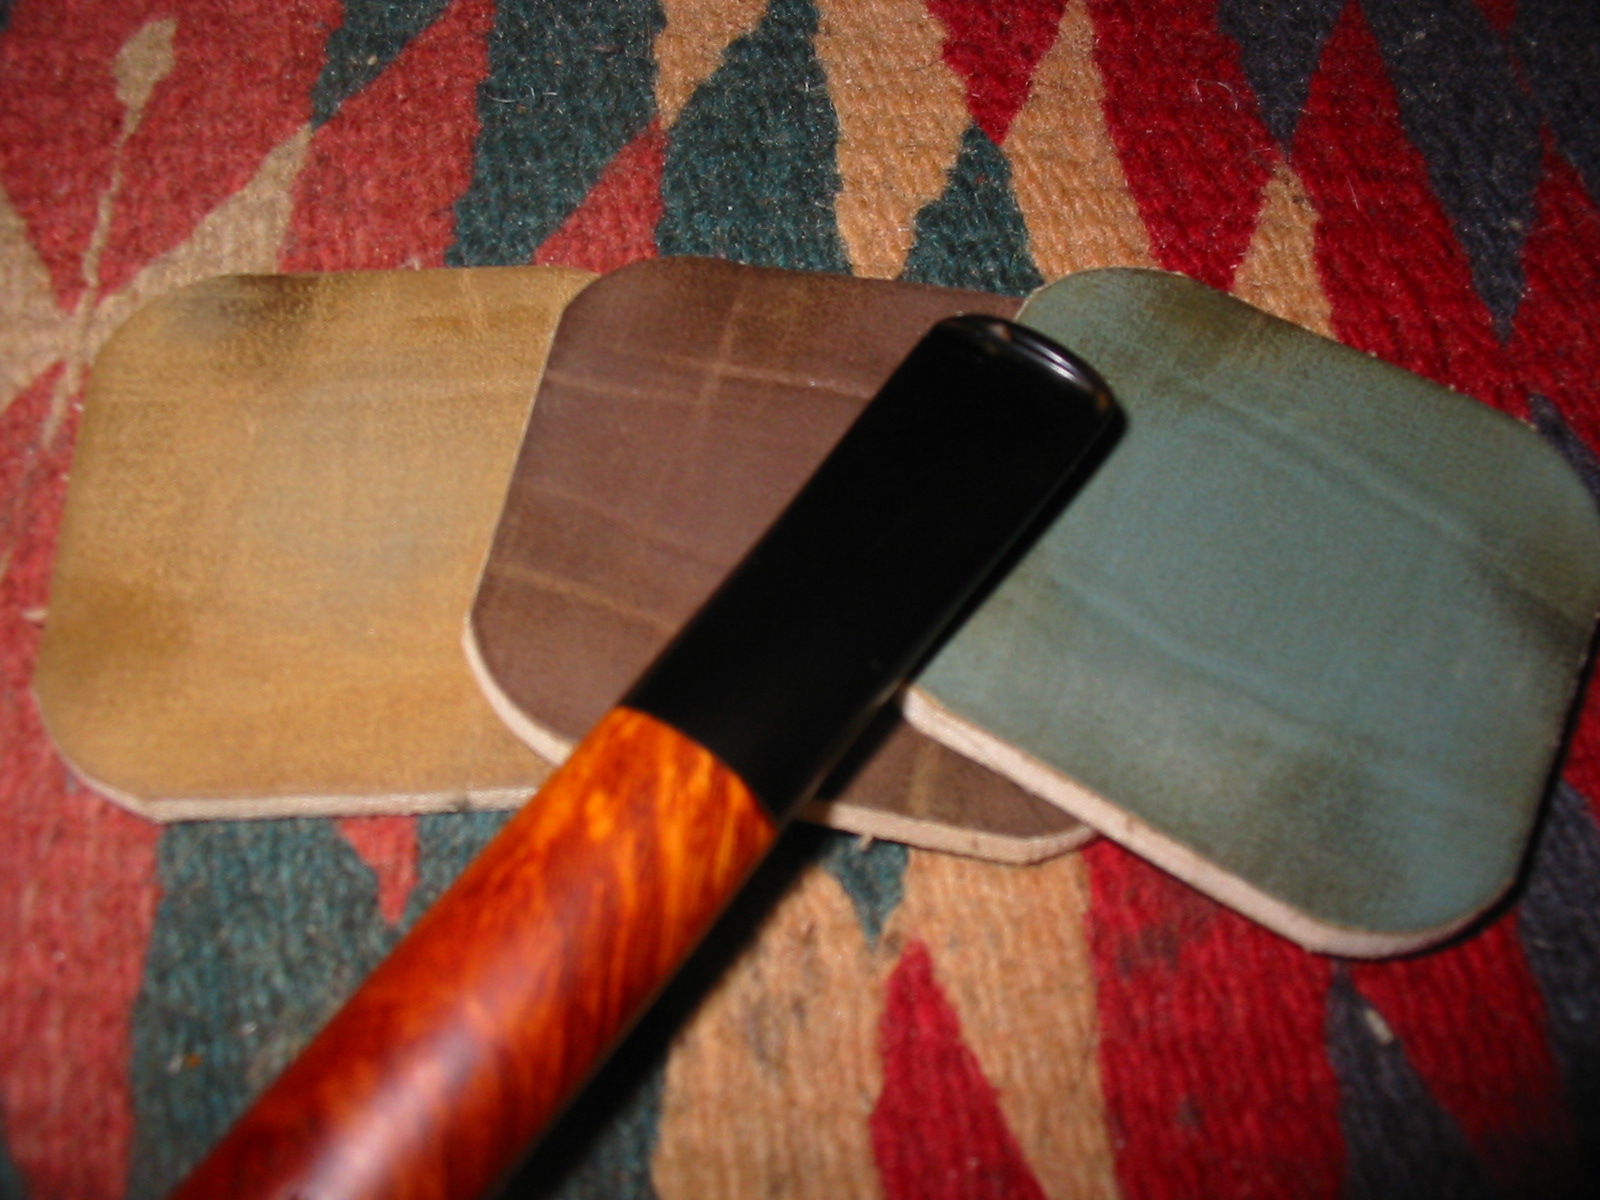
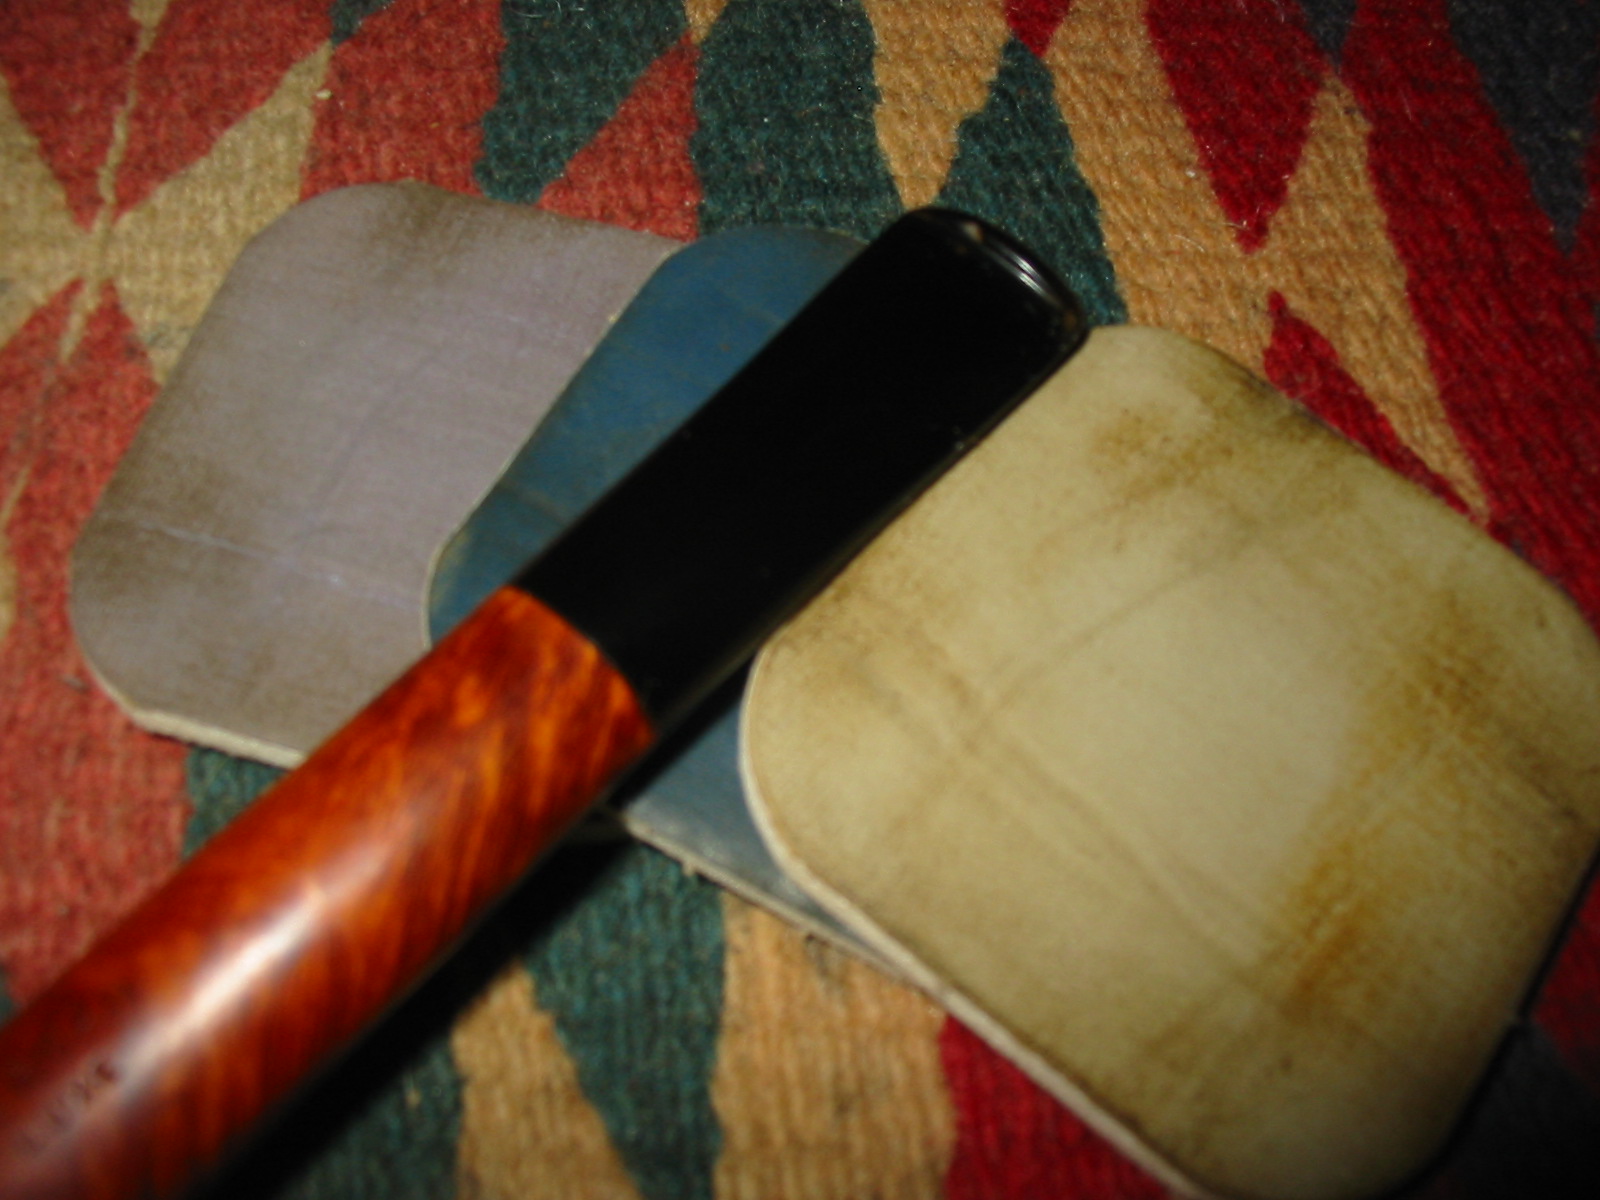
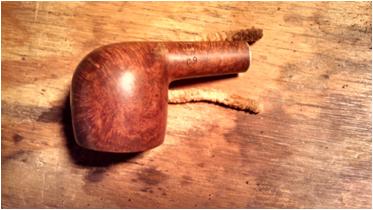
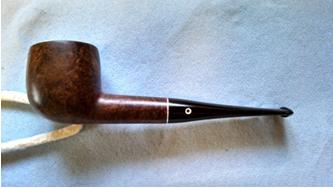
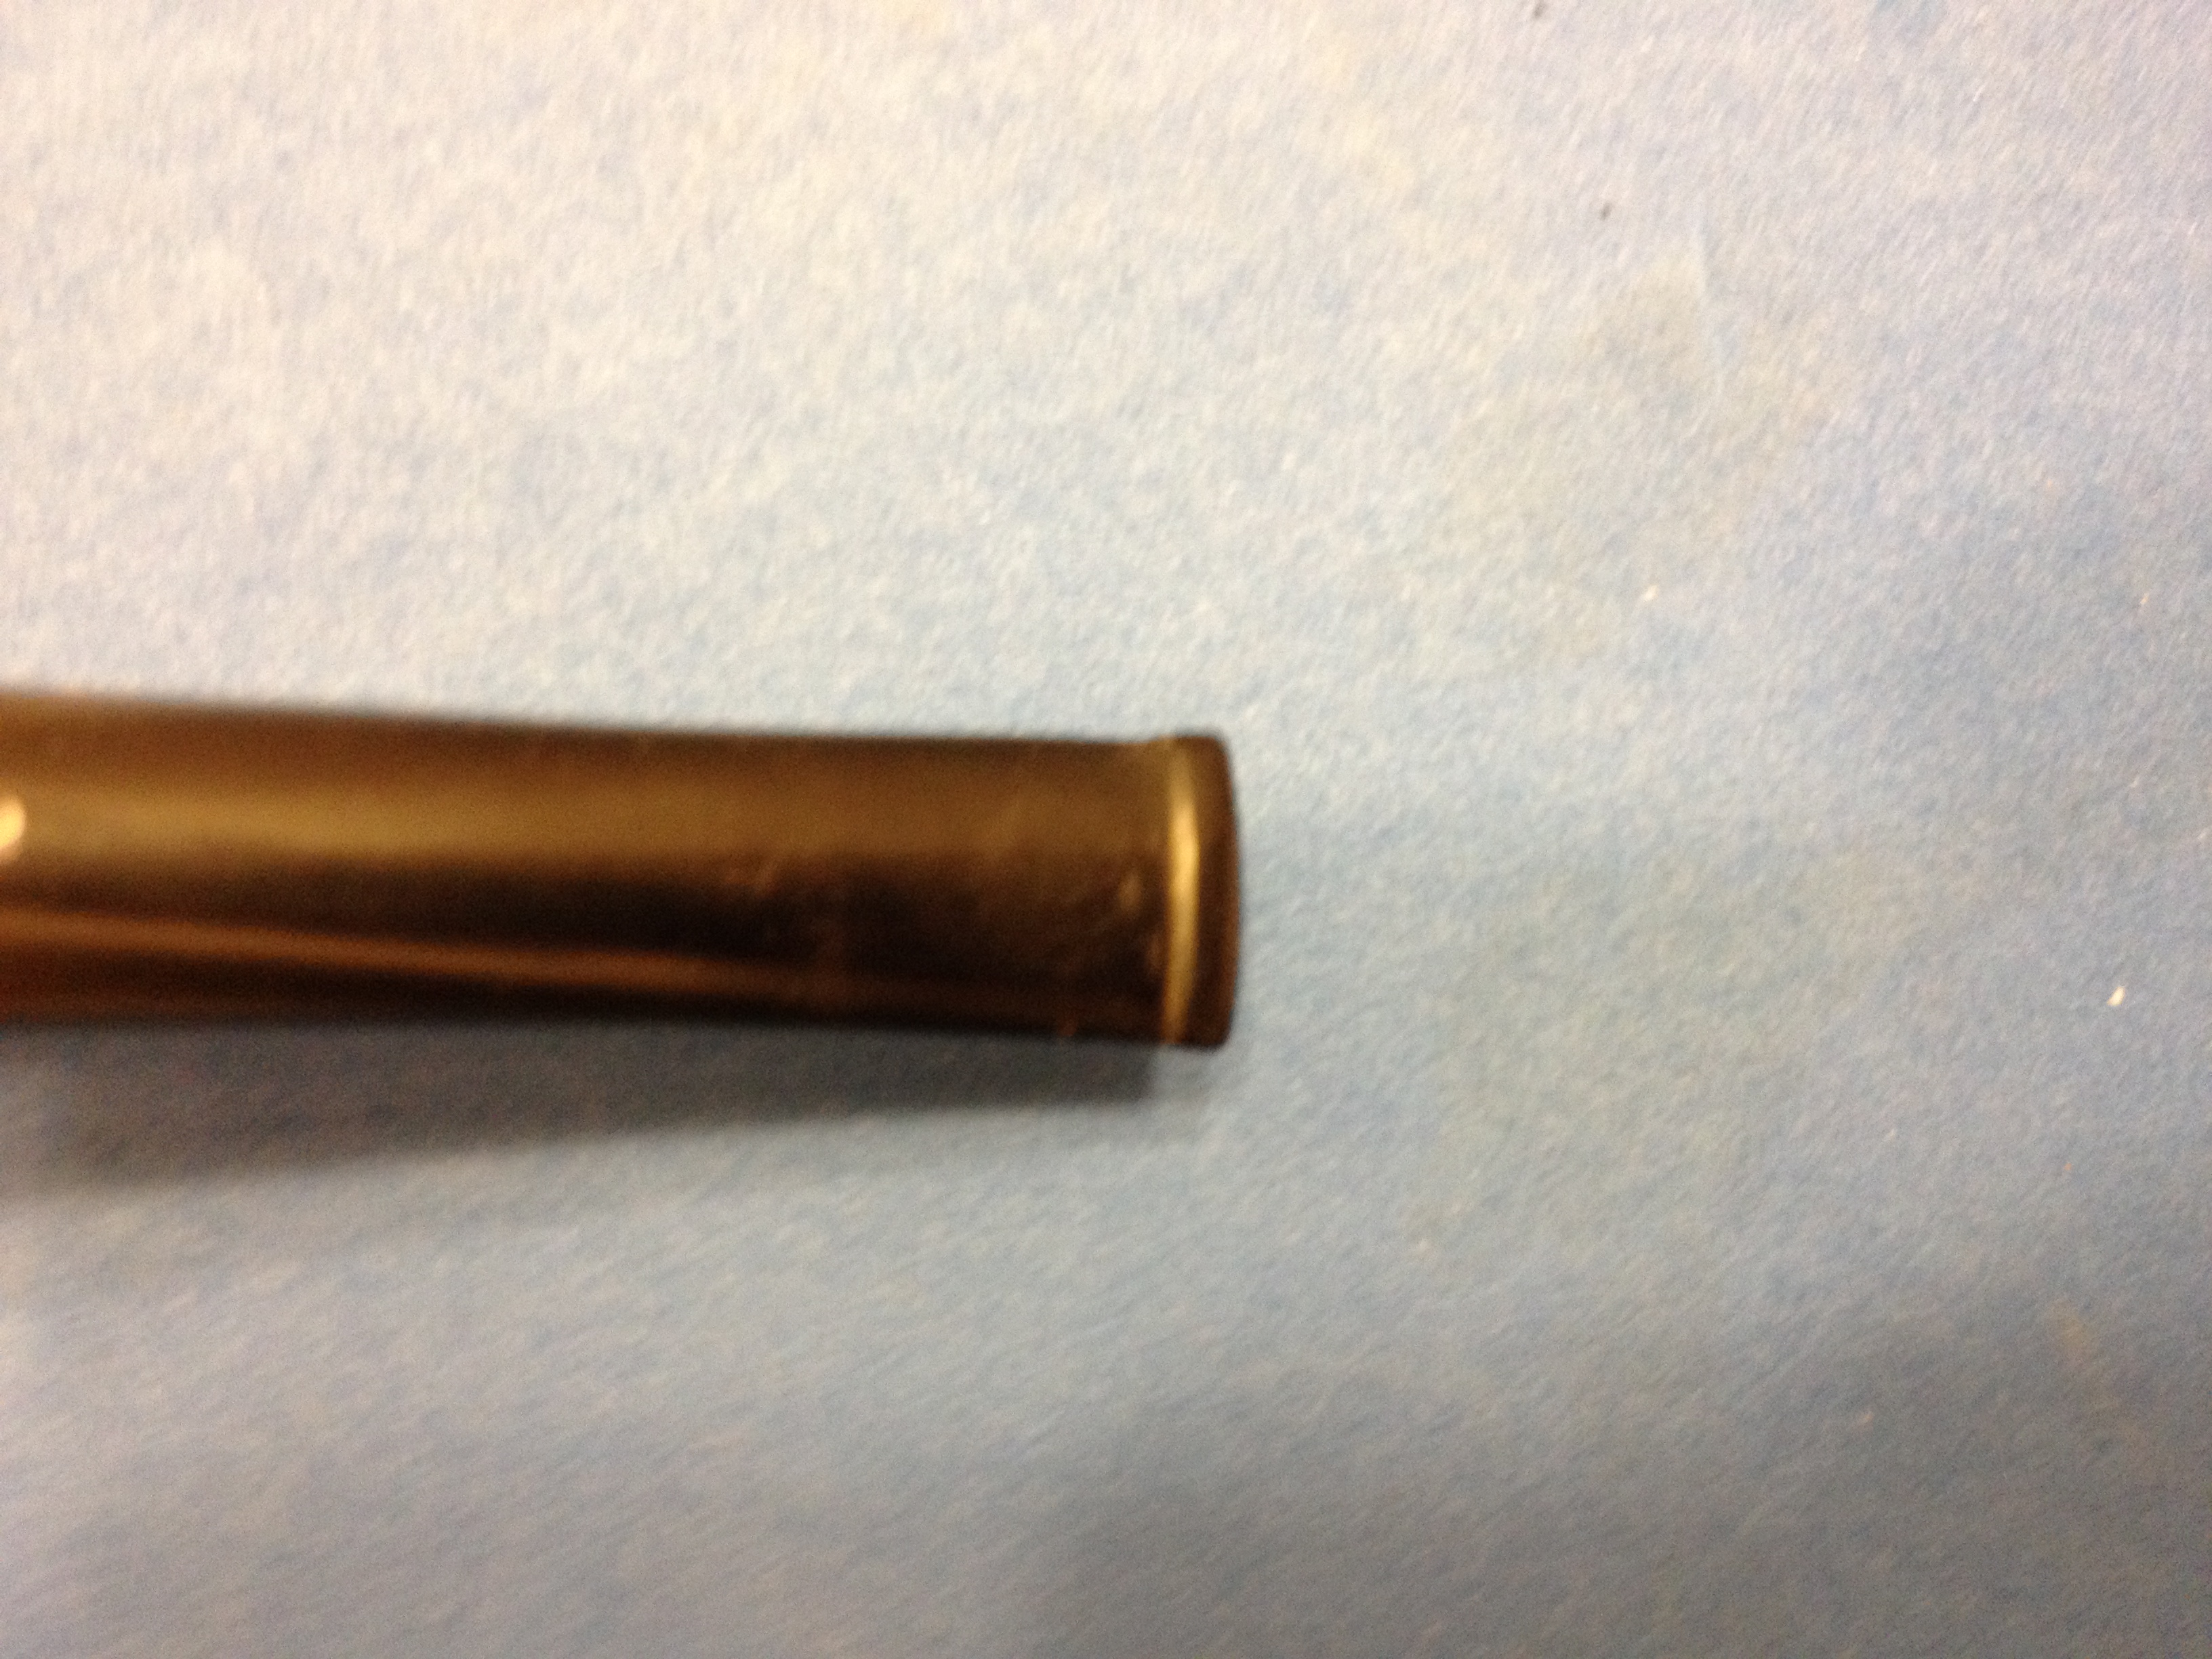
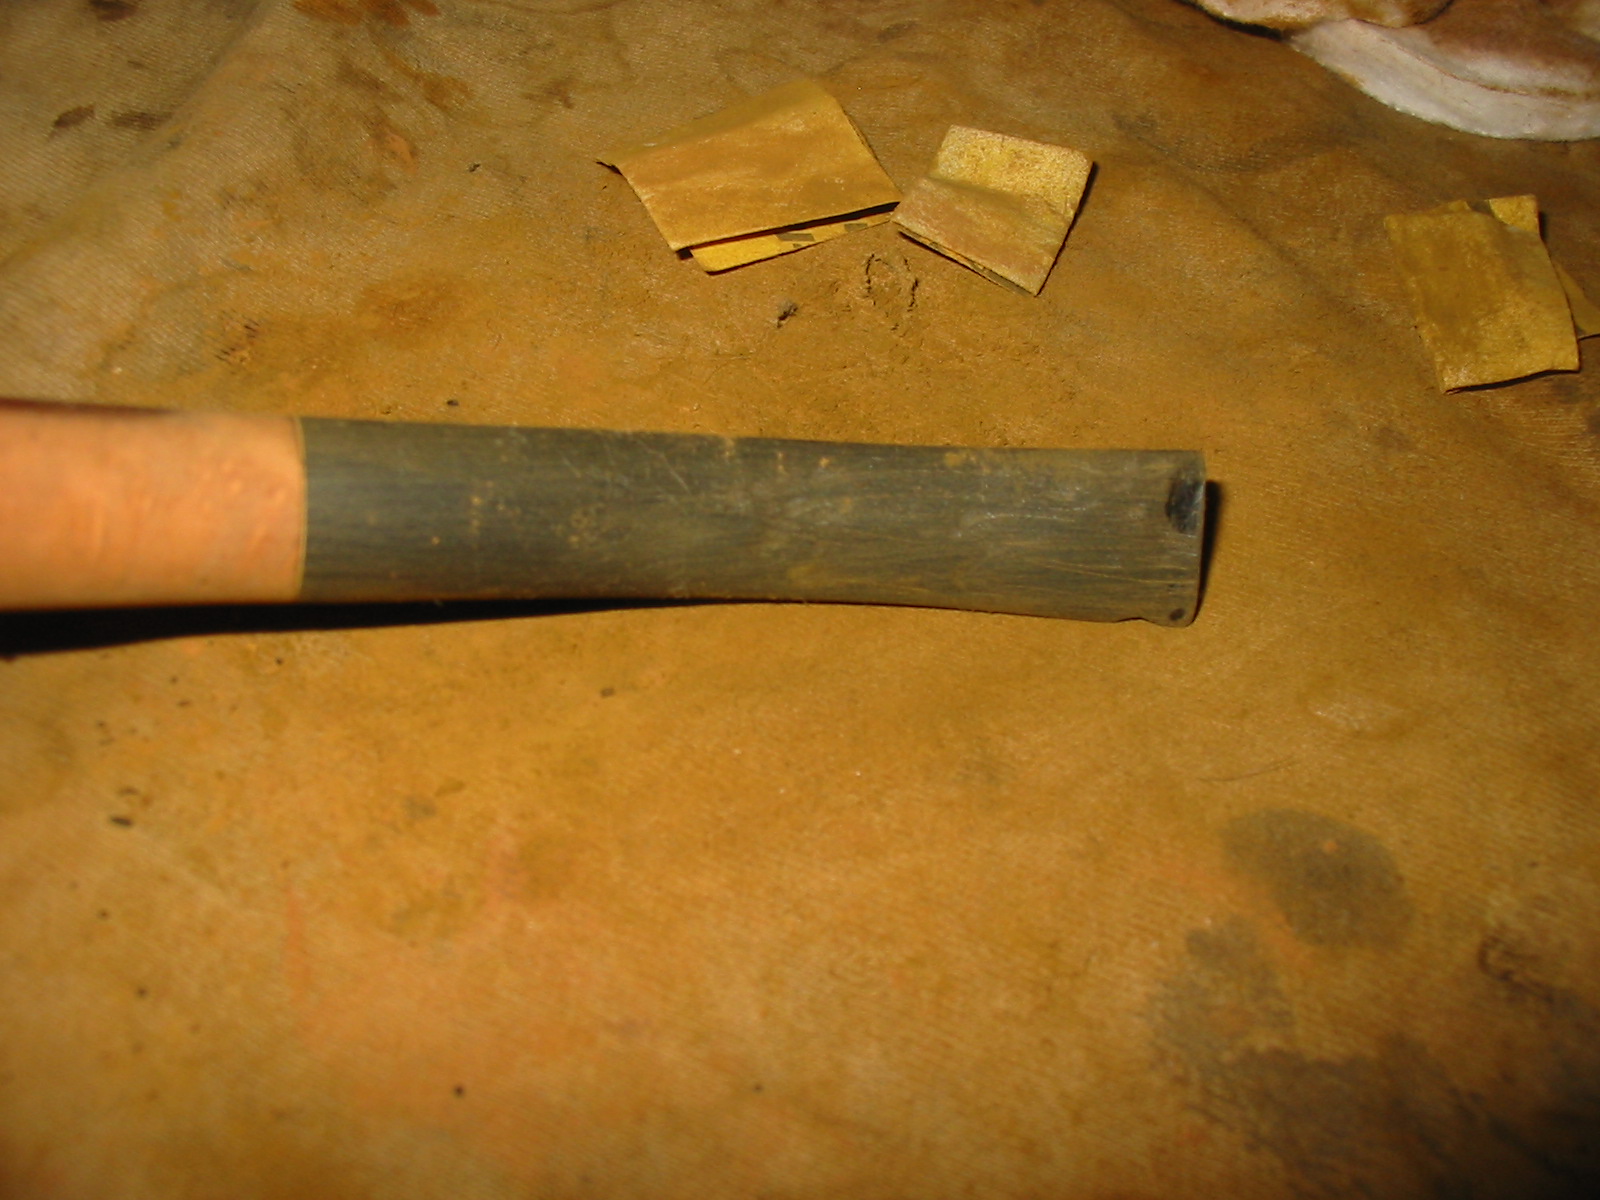
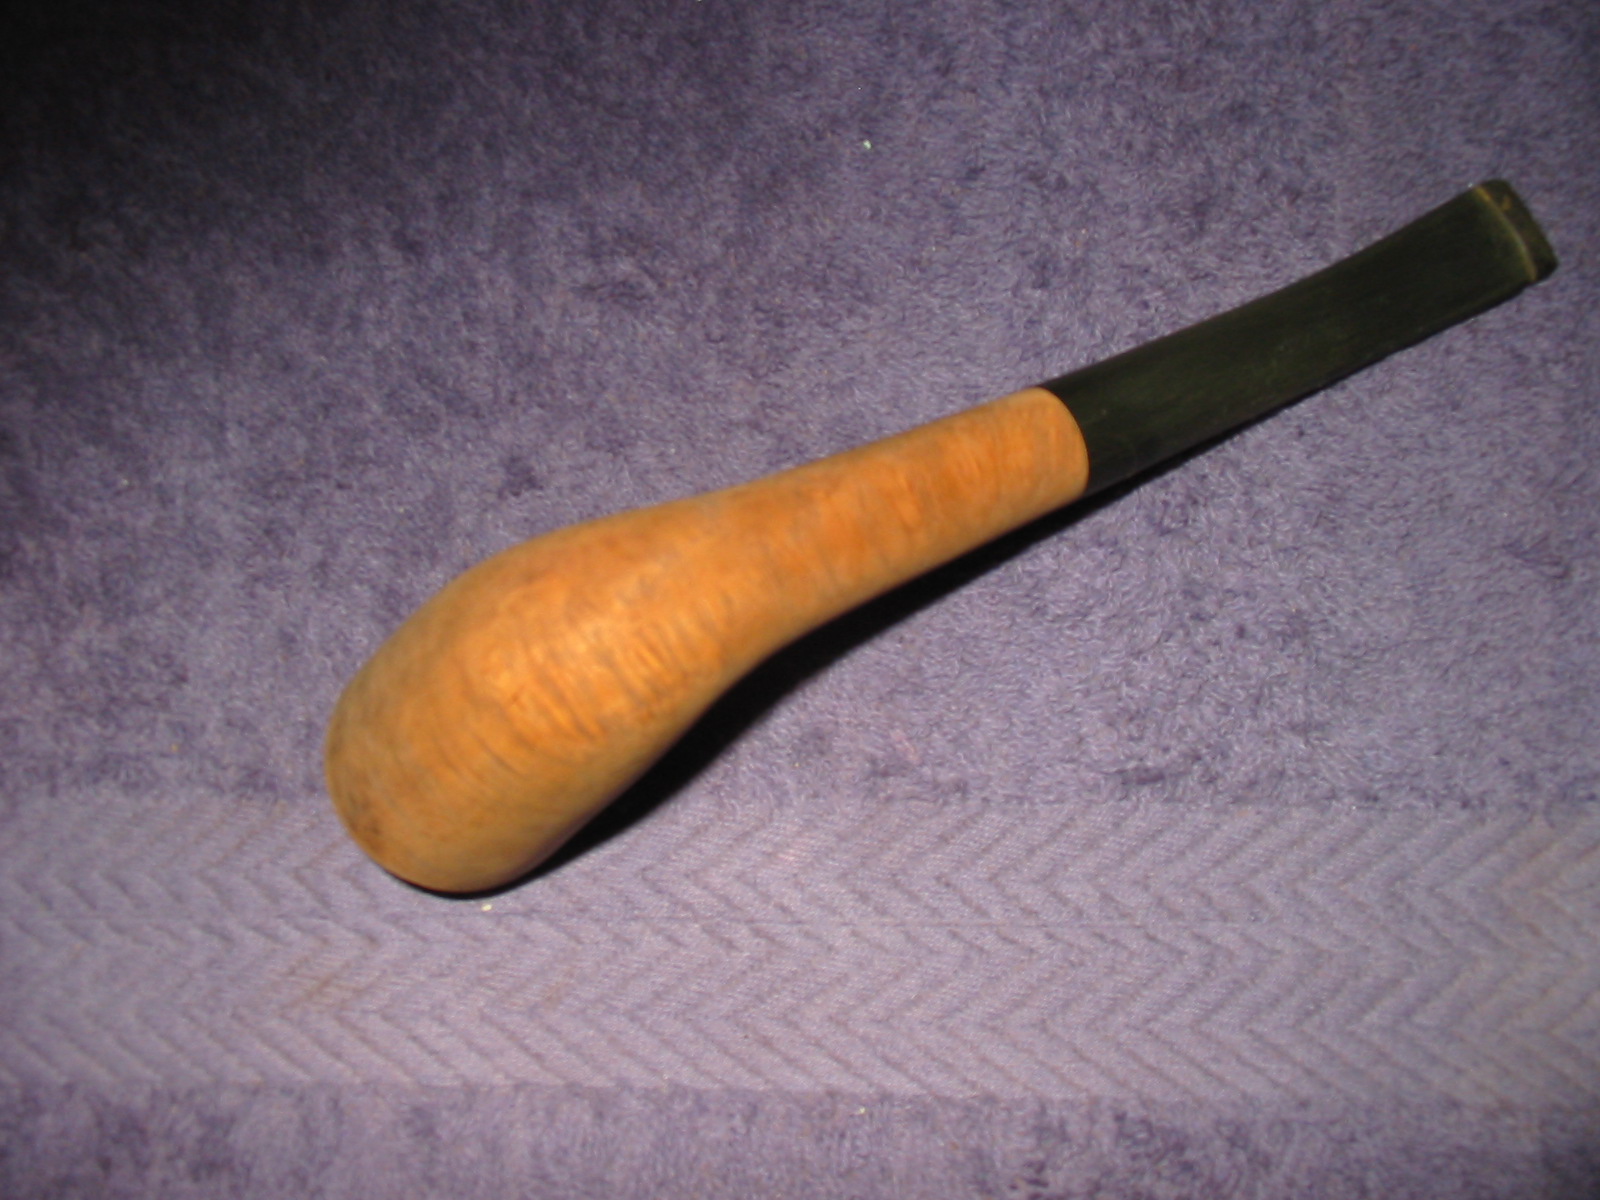
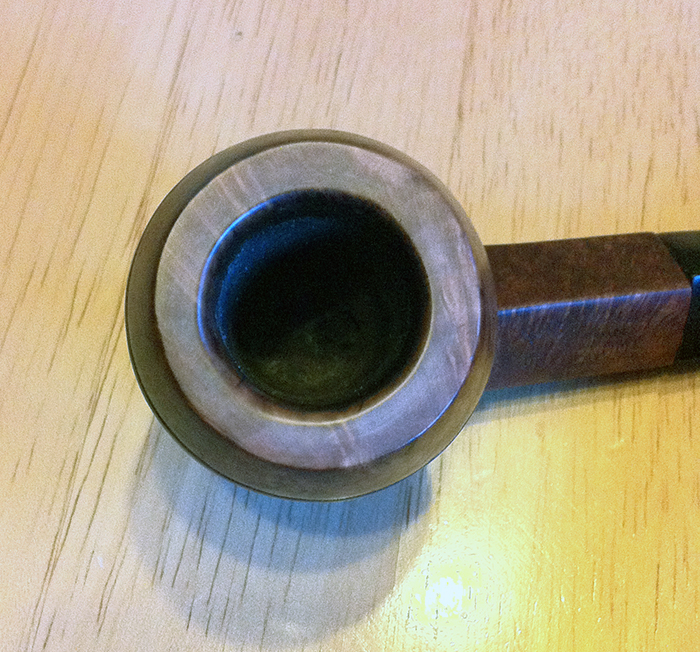
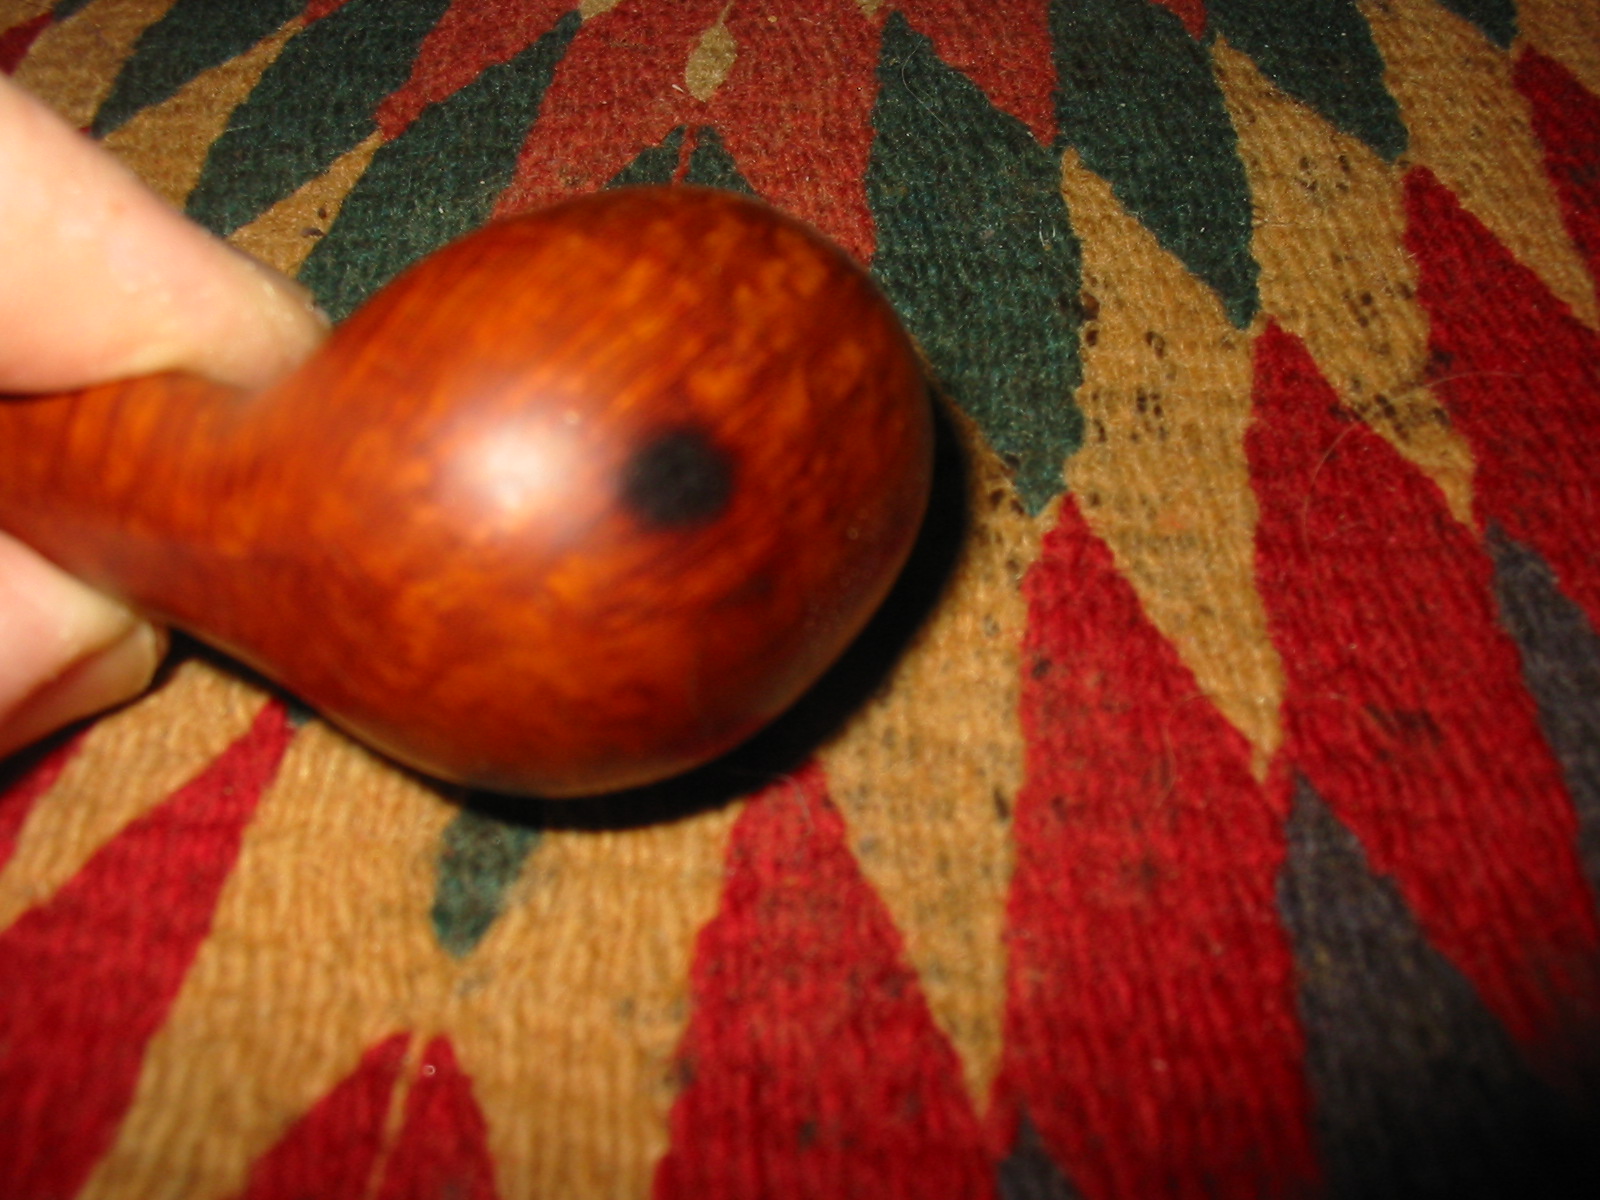
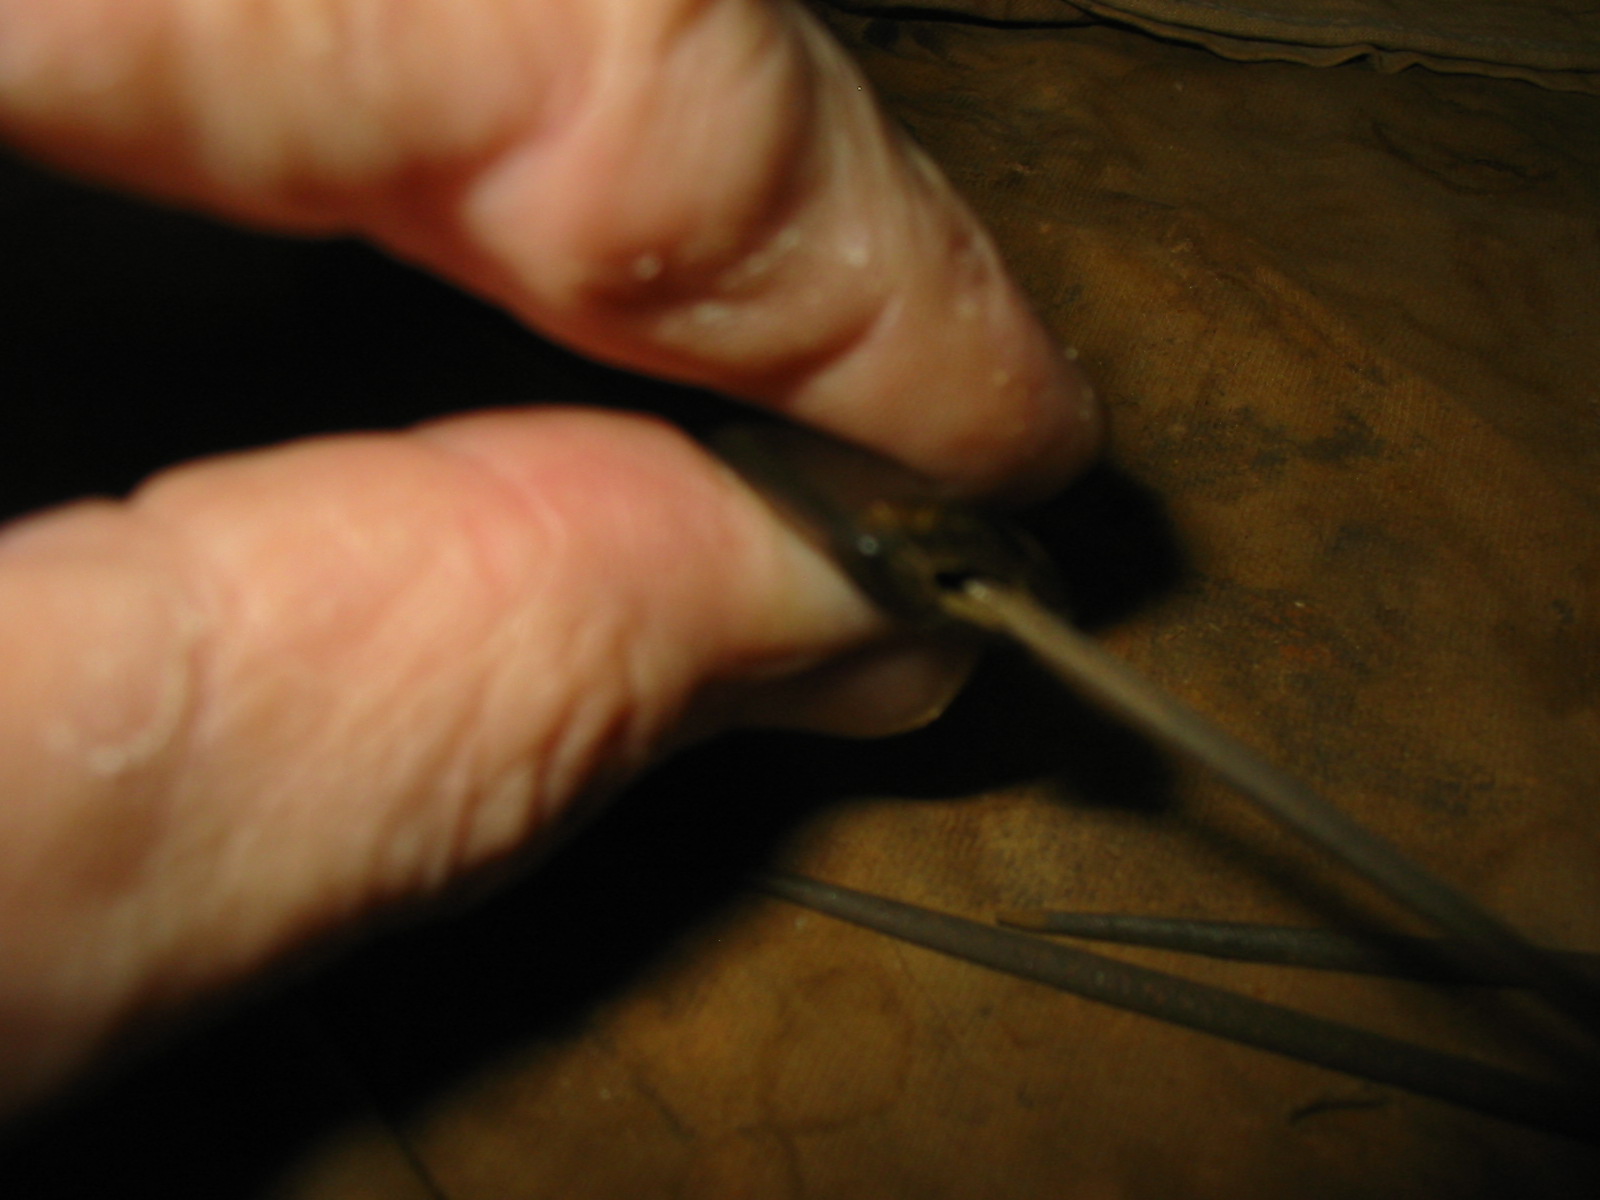
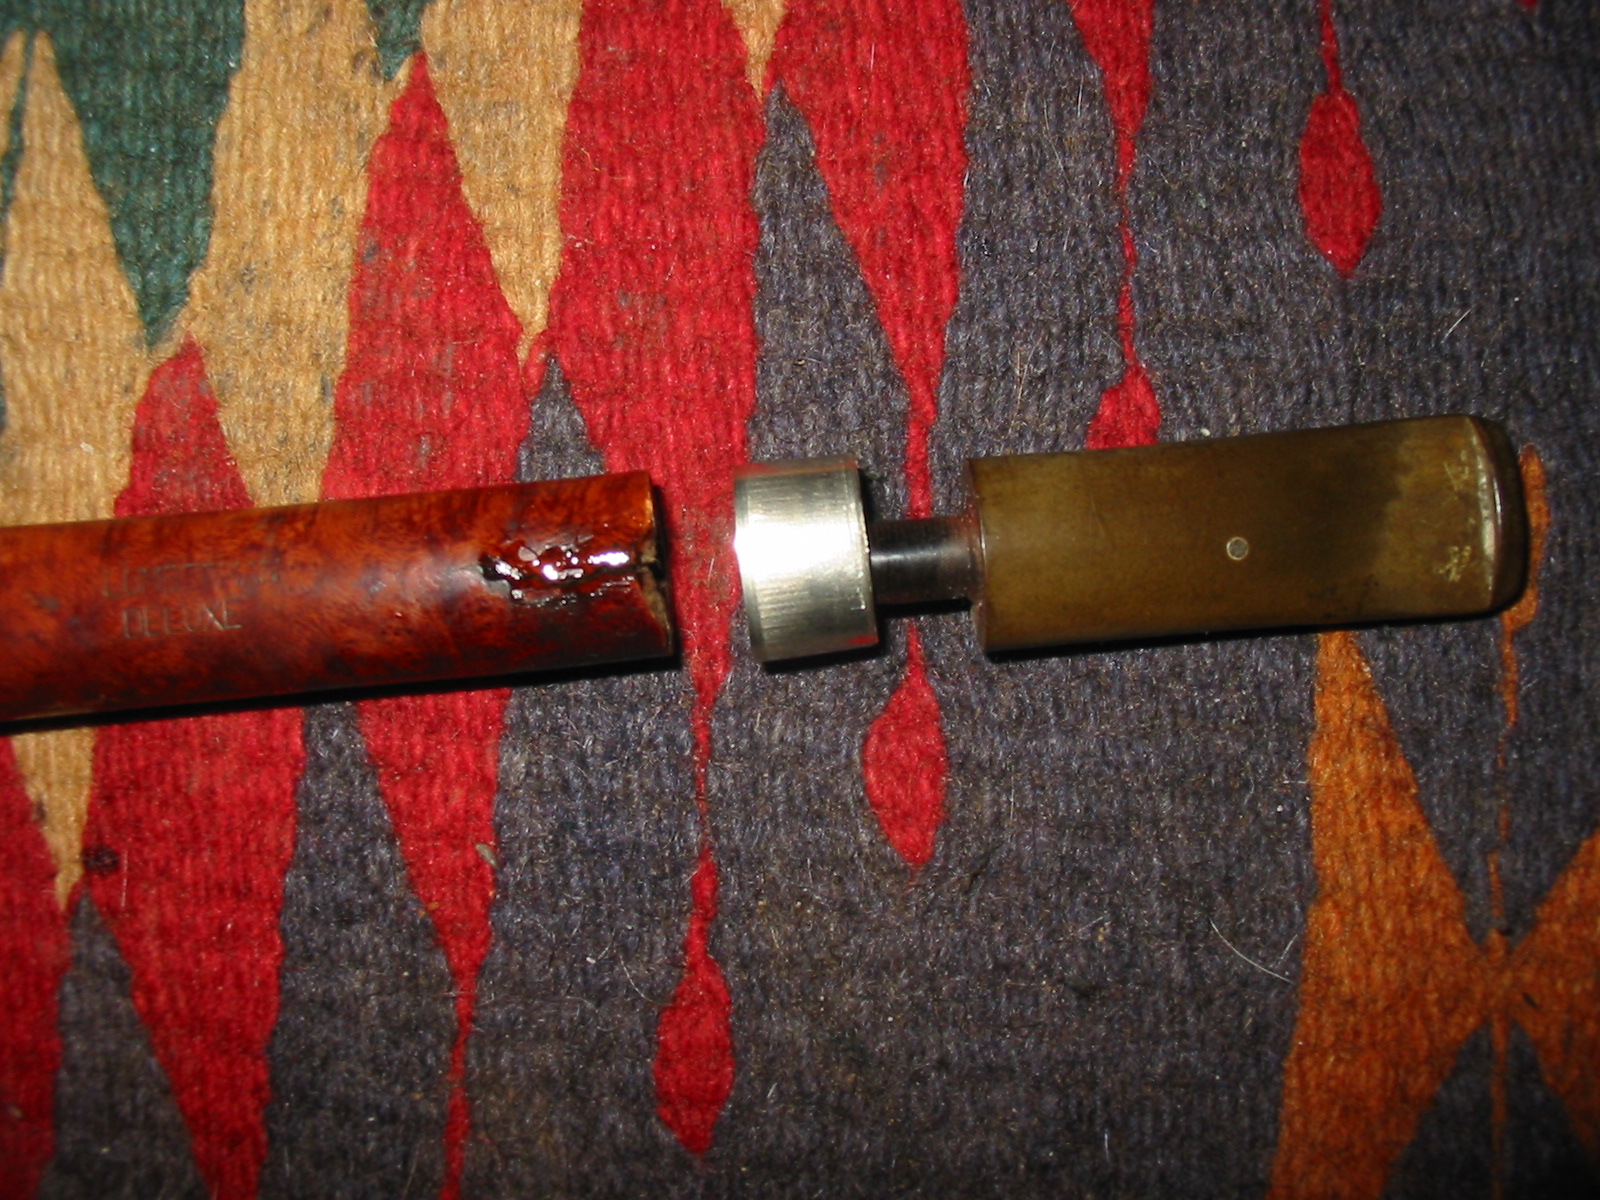
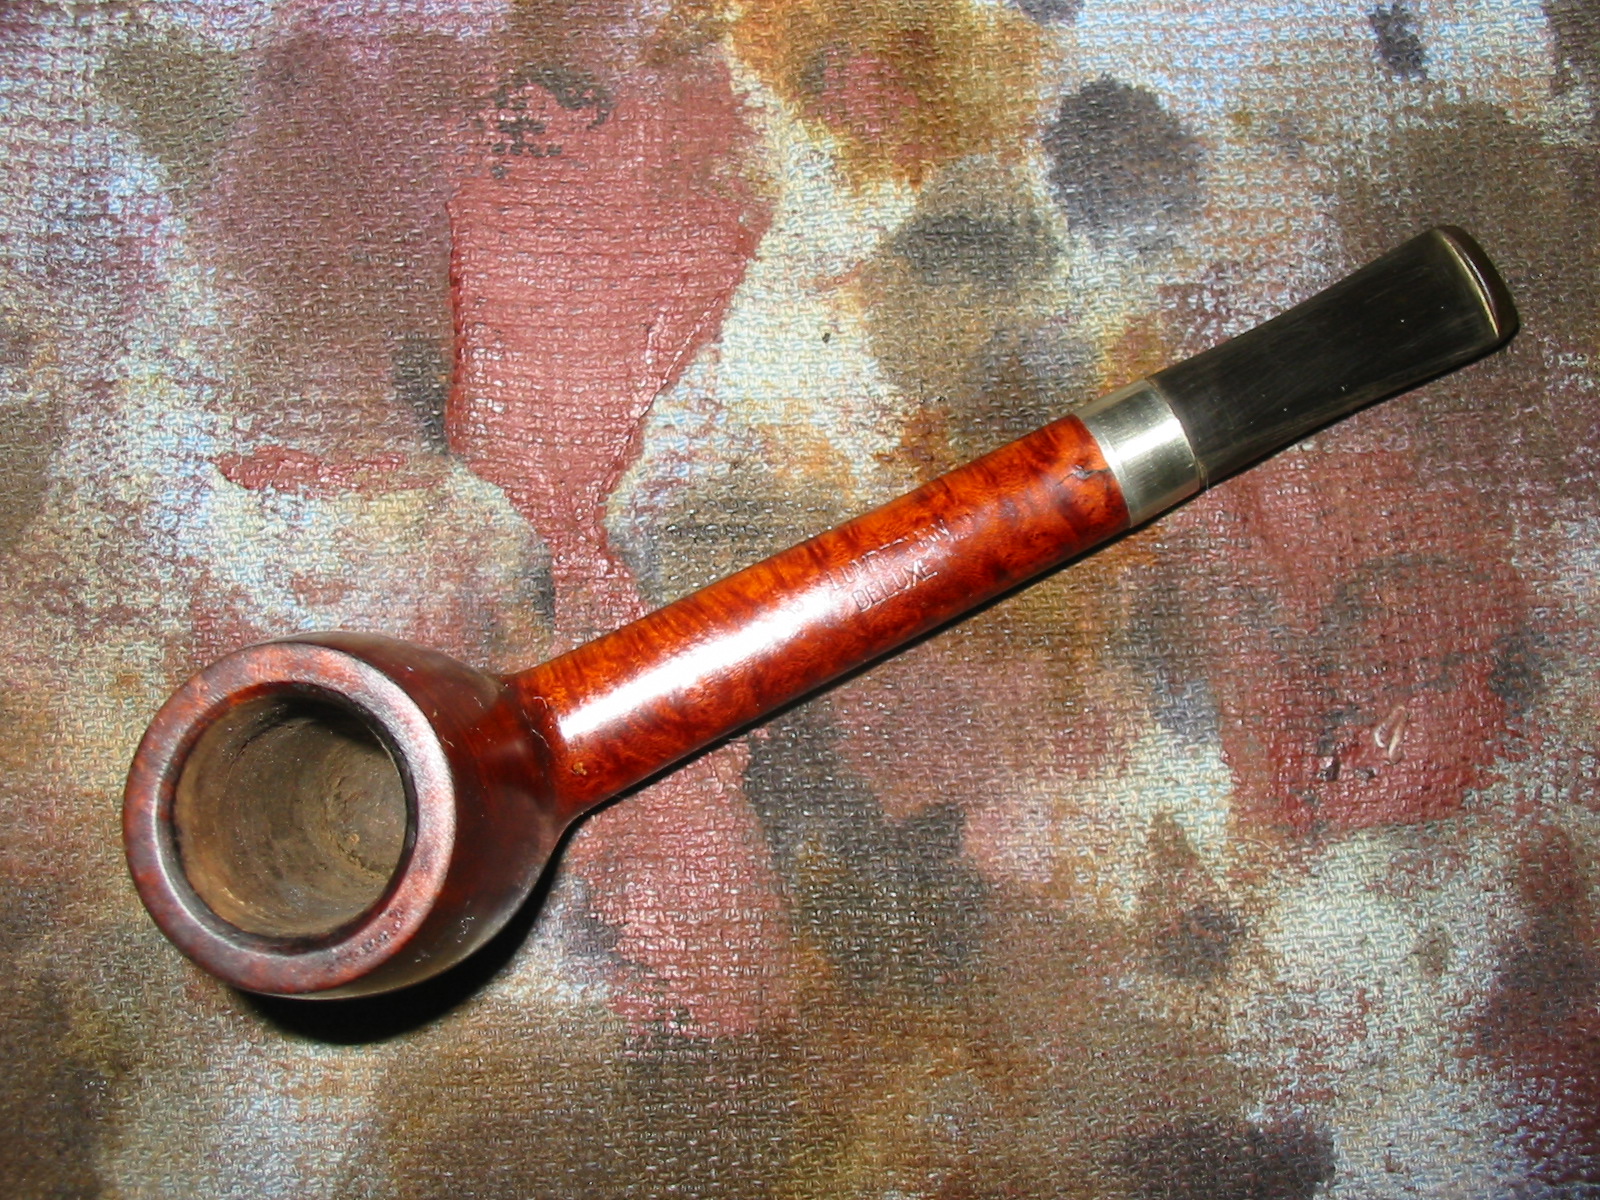
I took several close-up photos to show the fit of the stem and how the sides and the bottom edge of the stem was larger than the diameter of the shank.
IMG_5203

IMG_5204

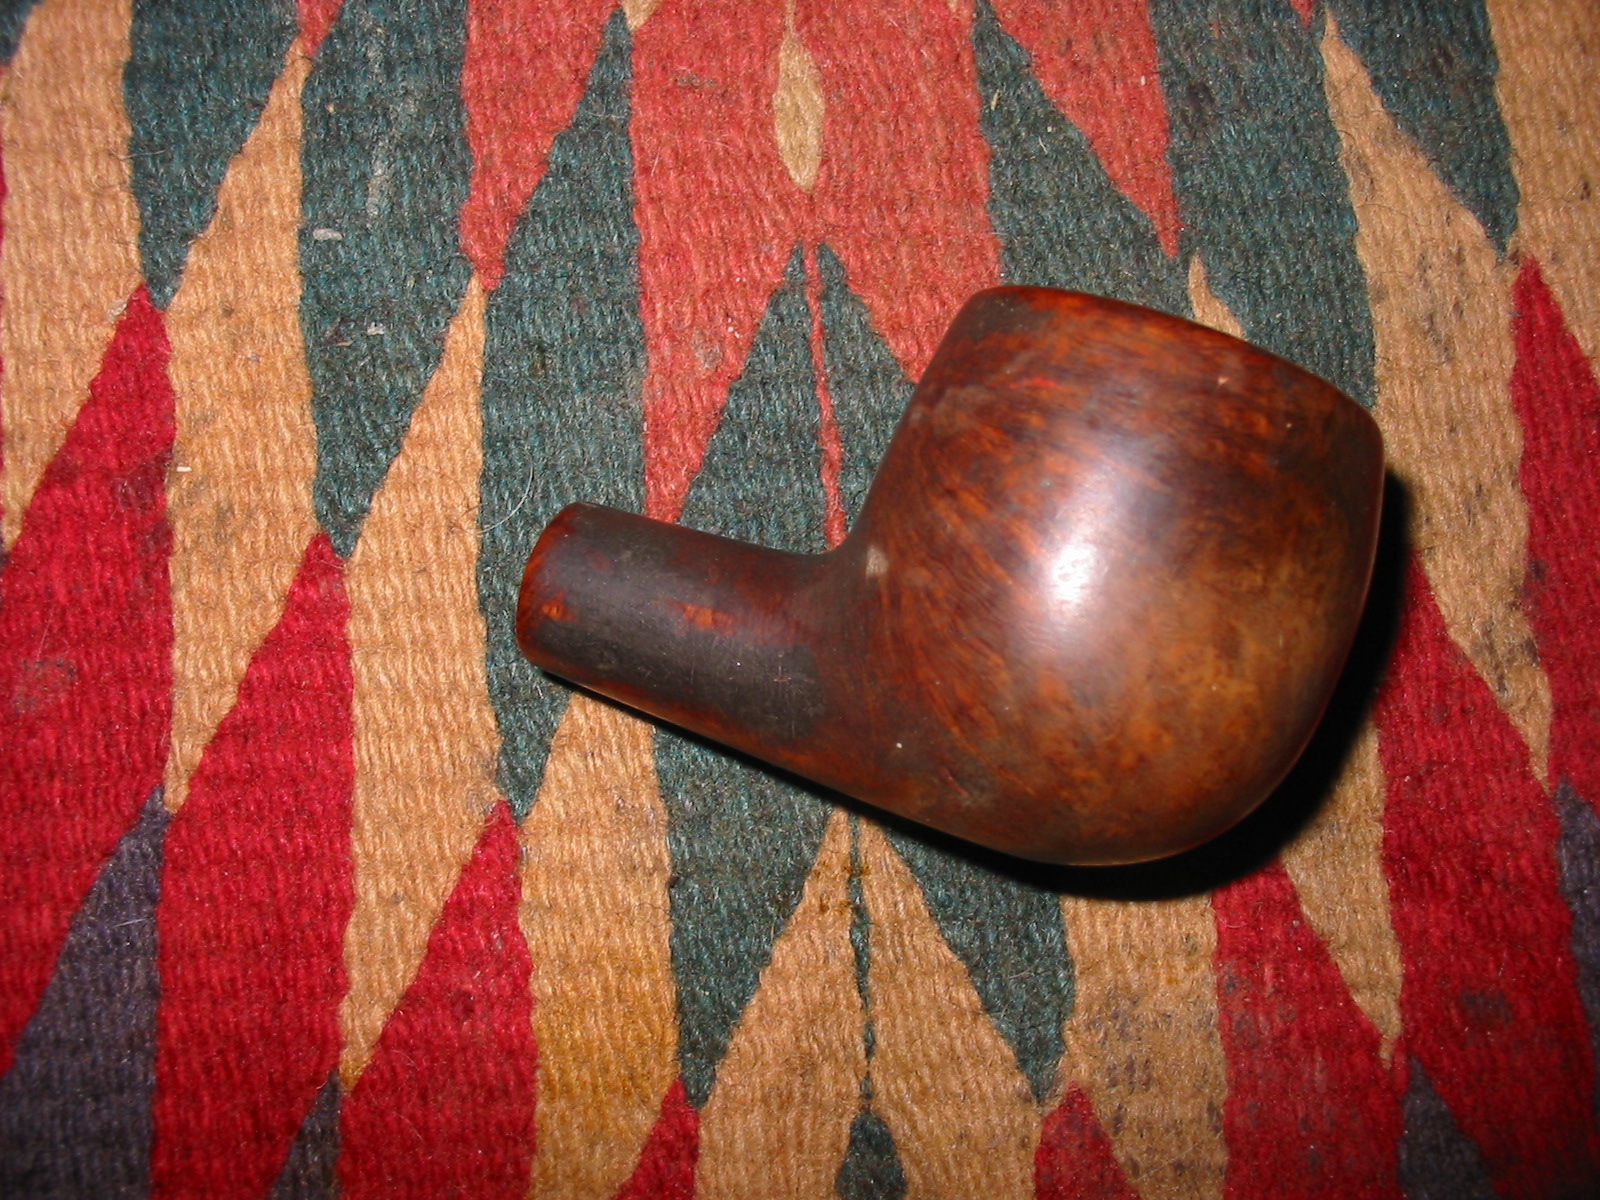
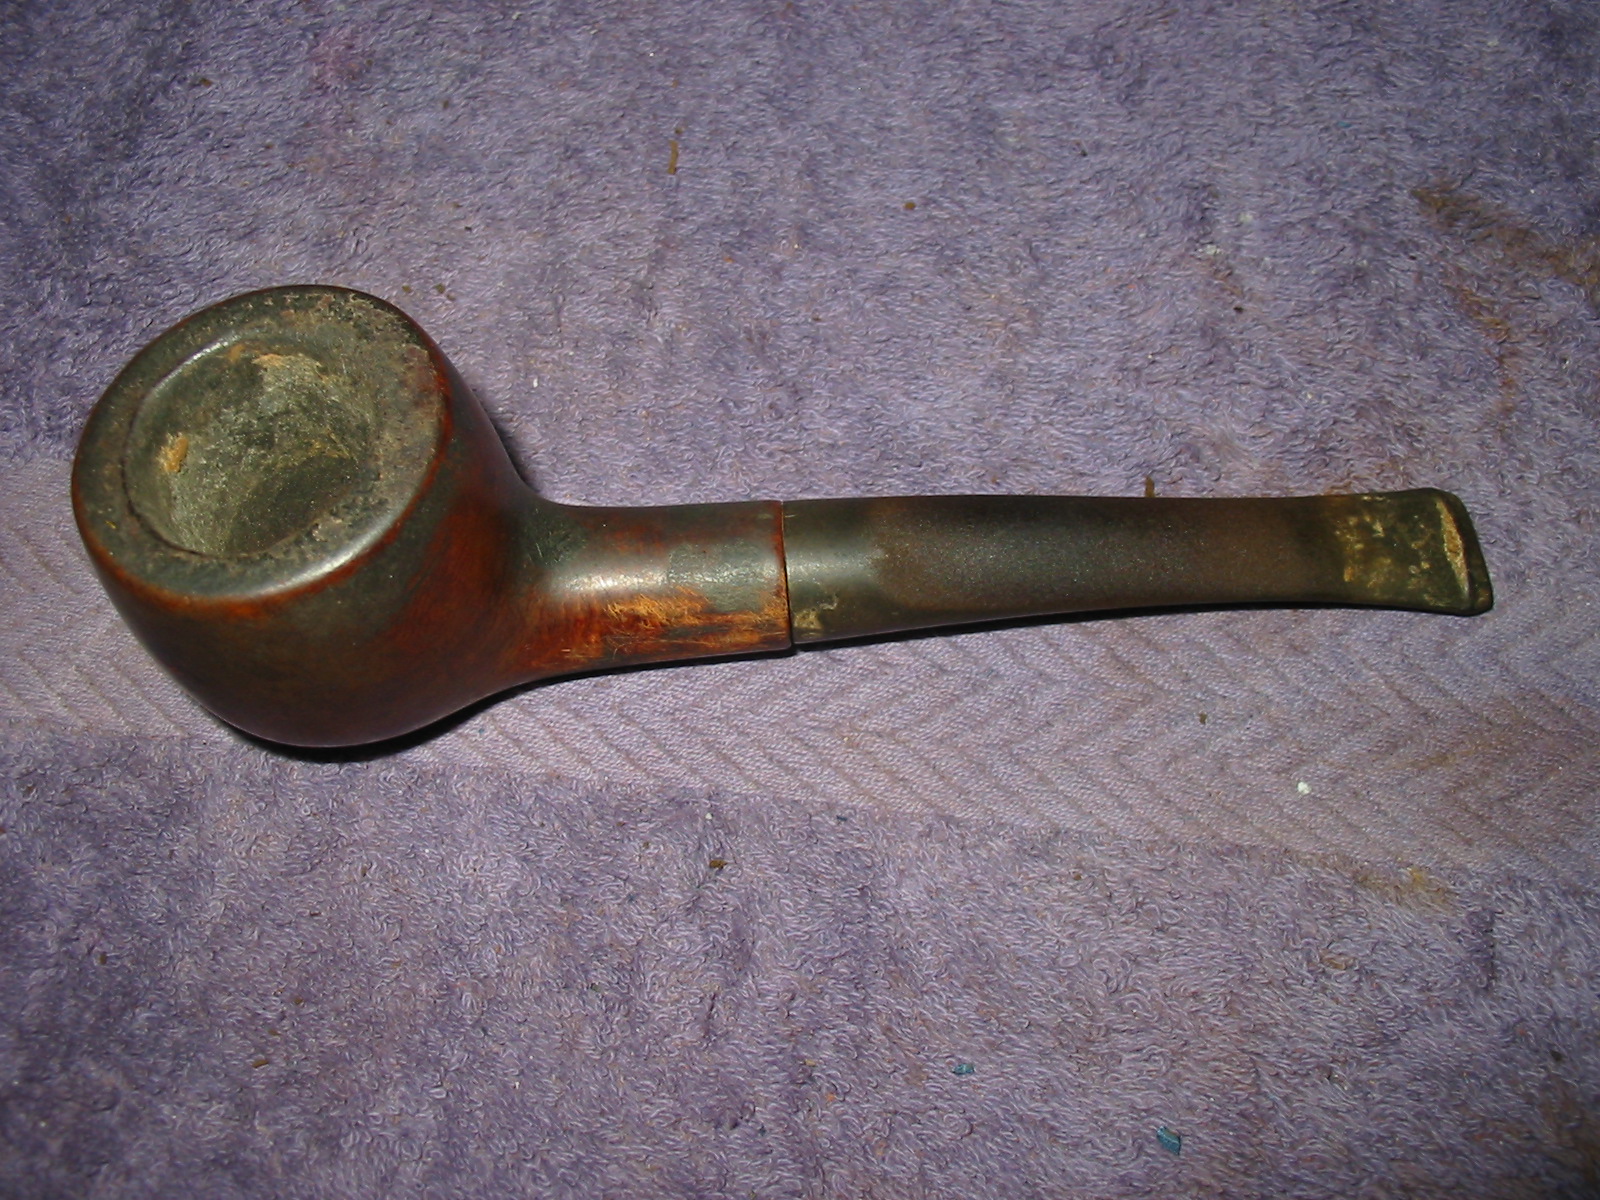
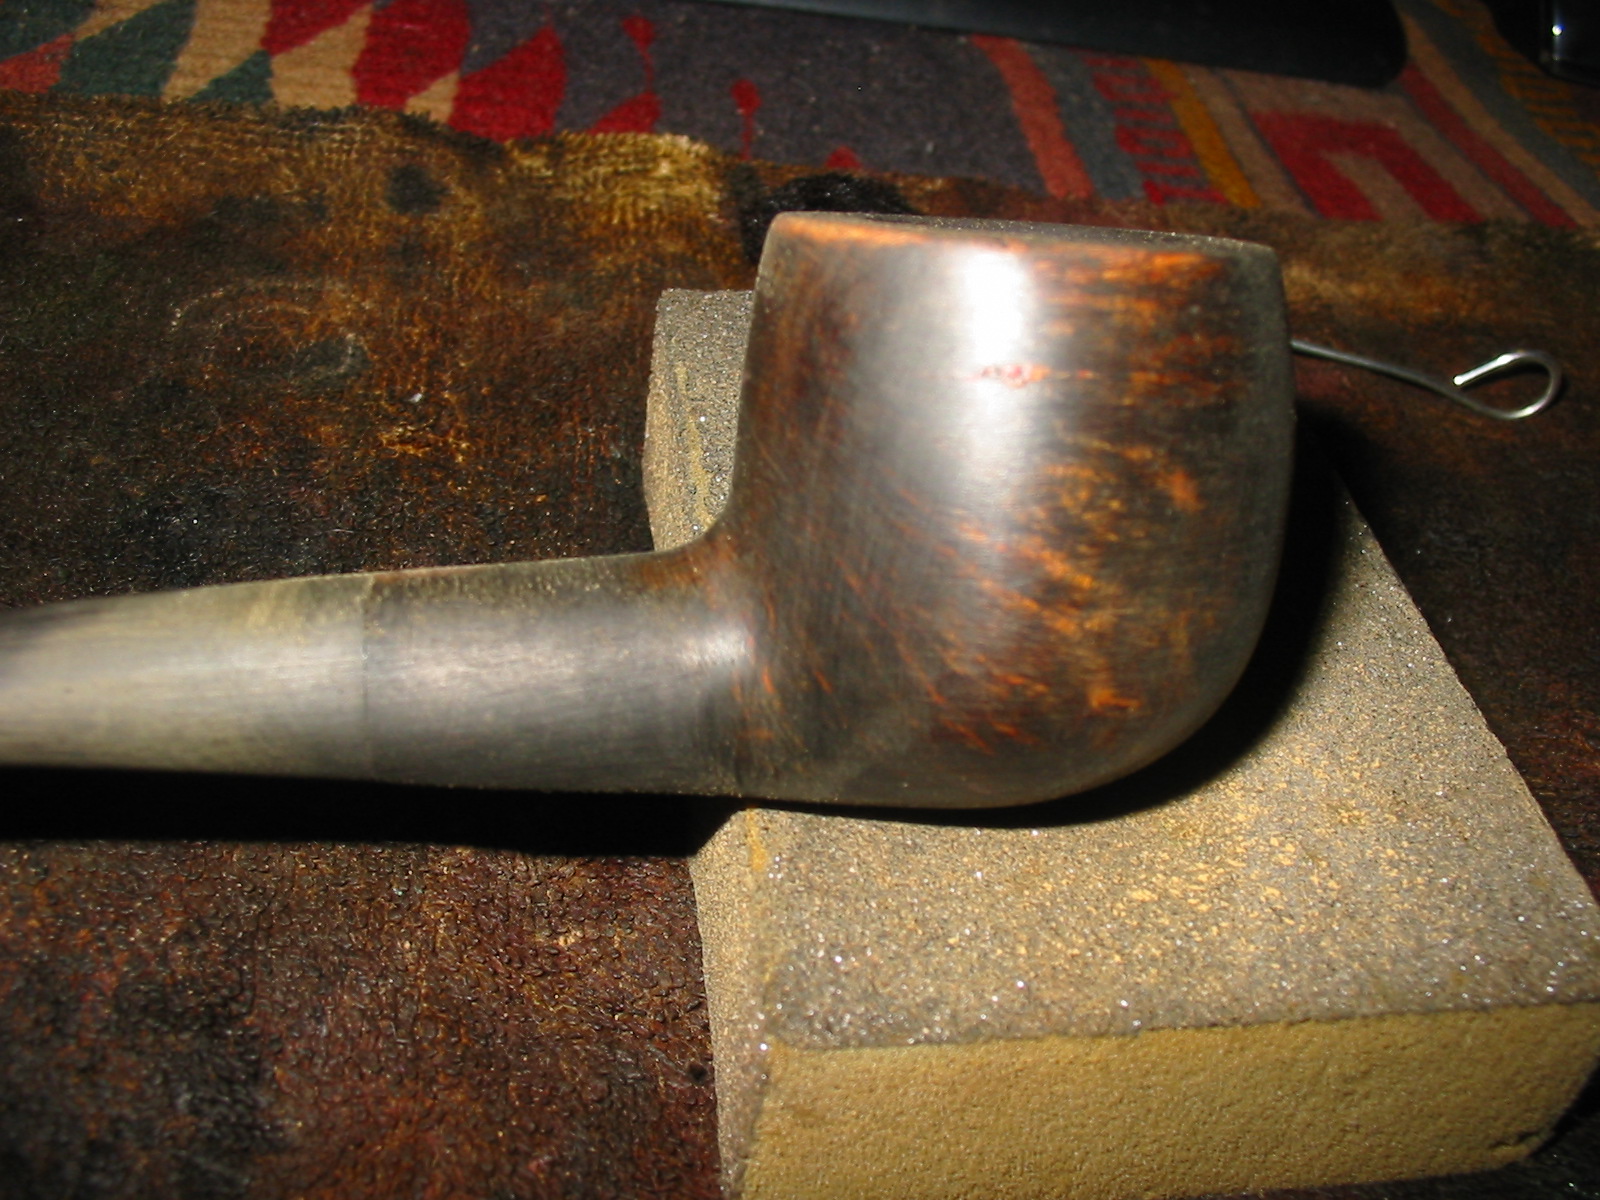
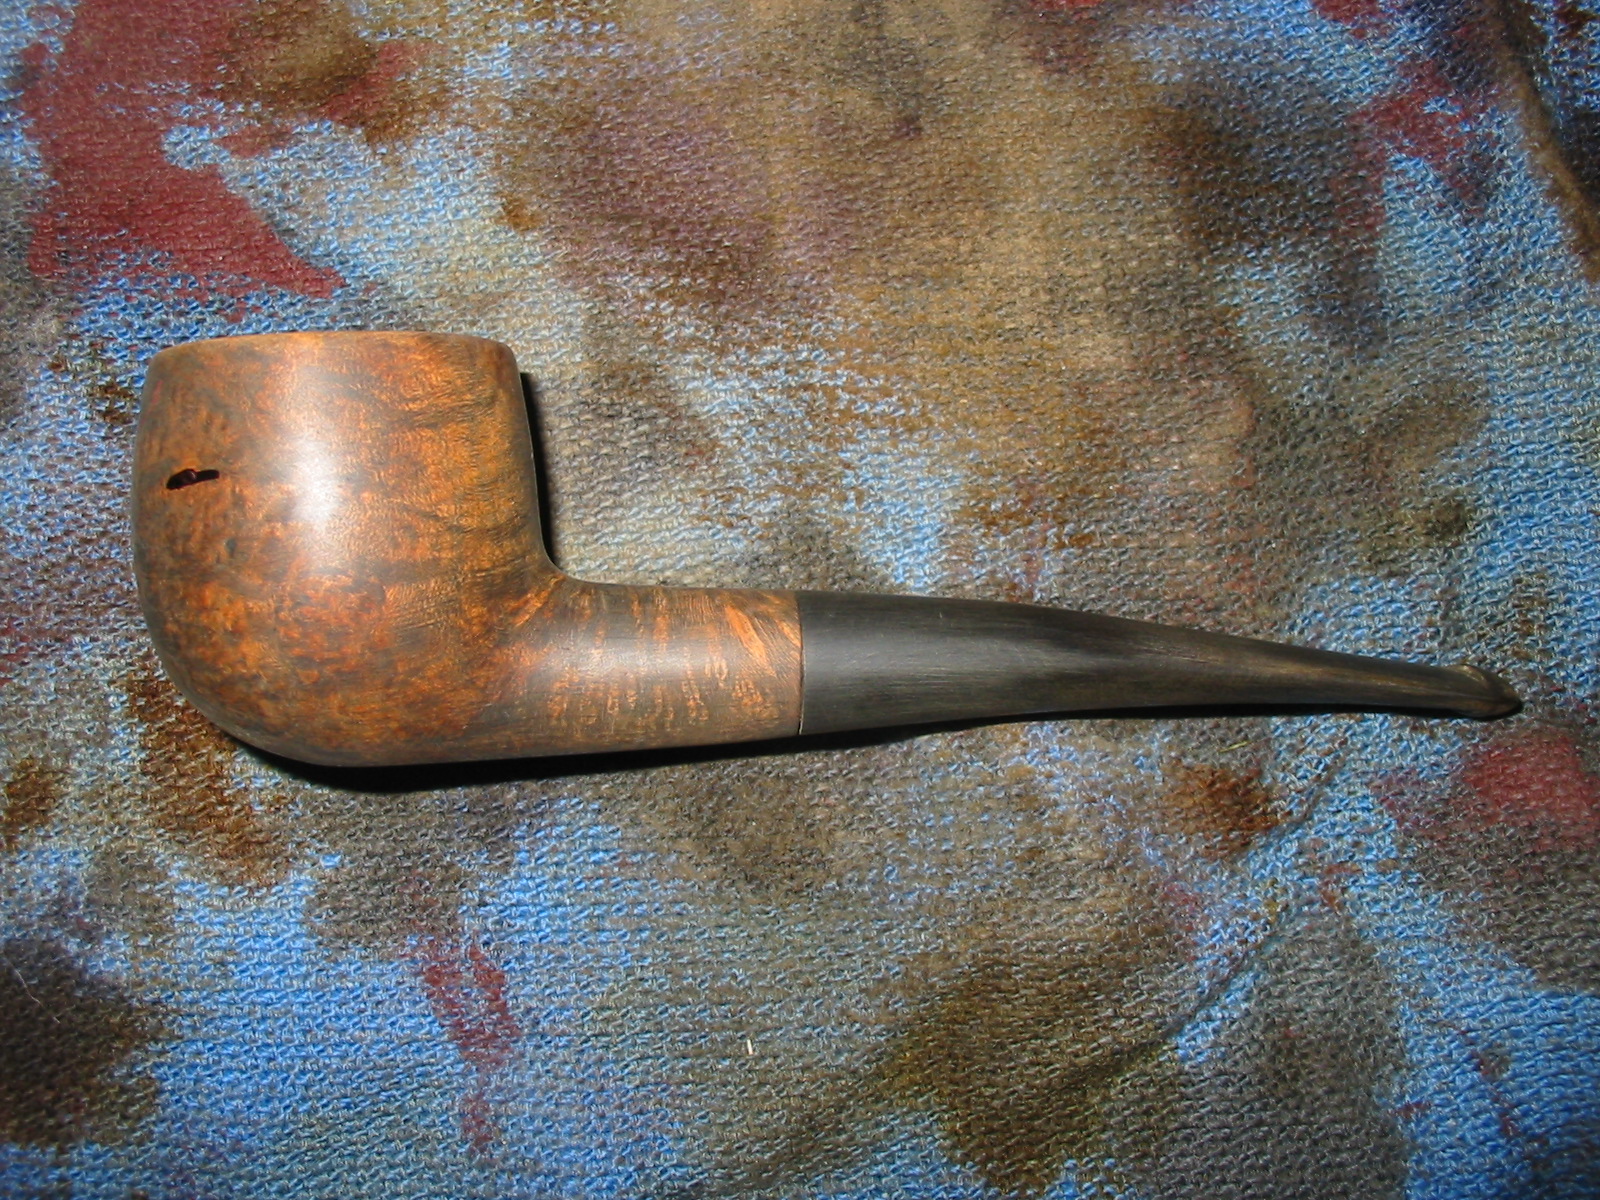
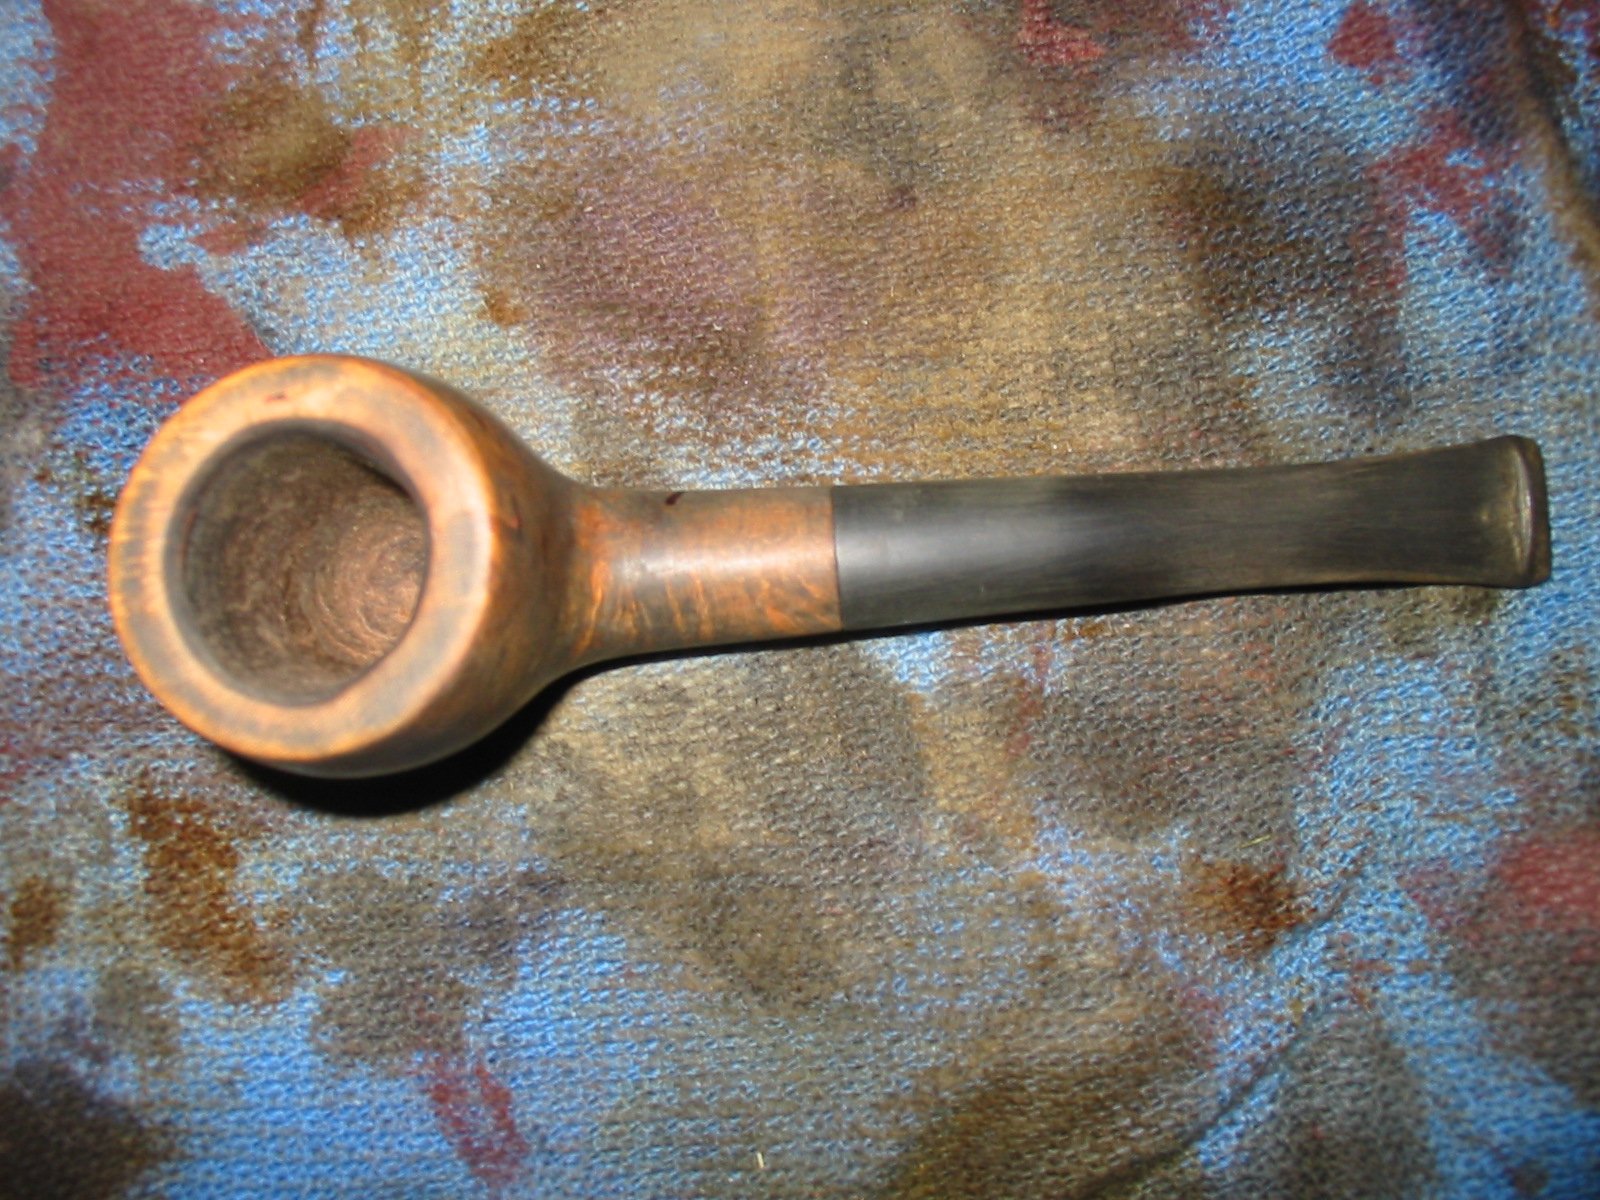
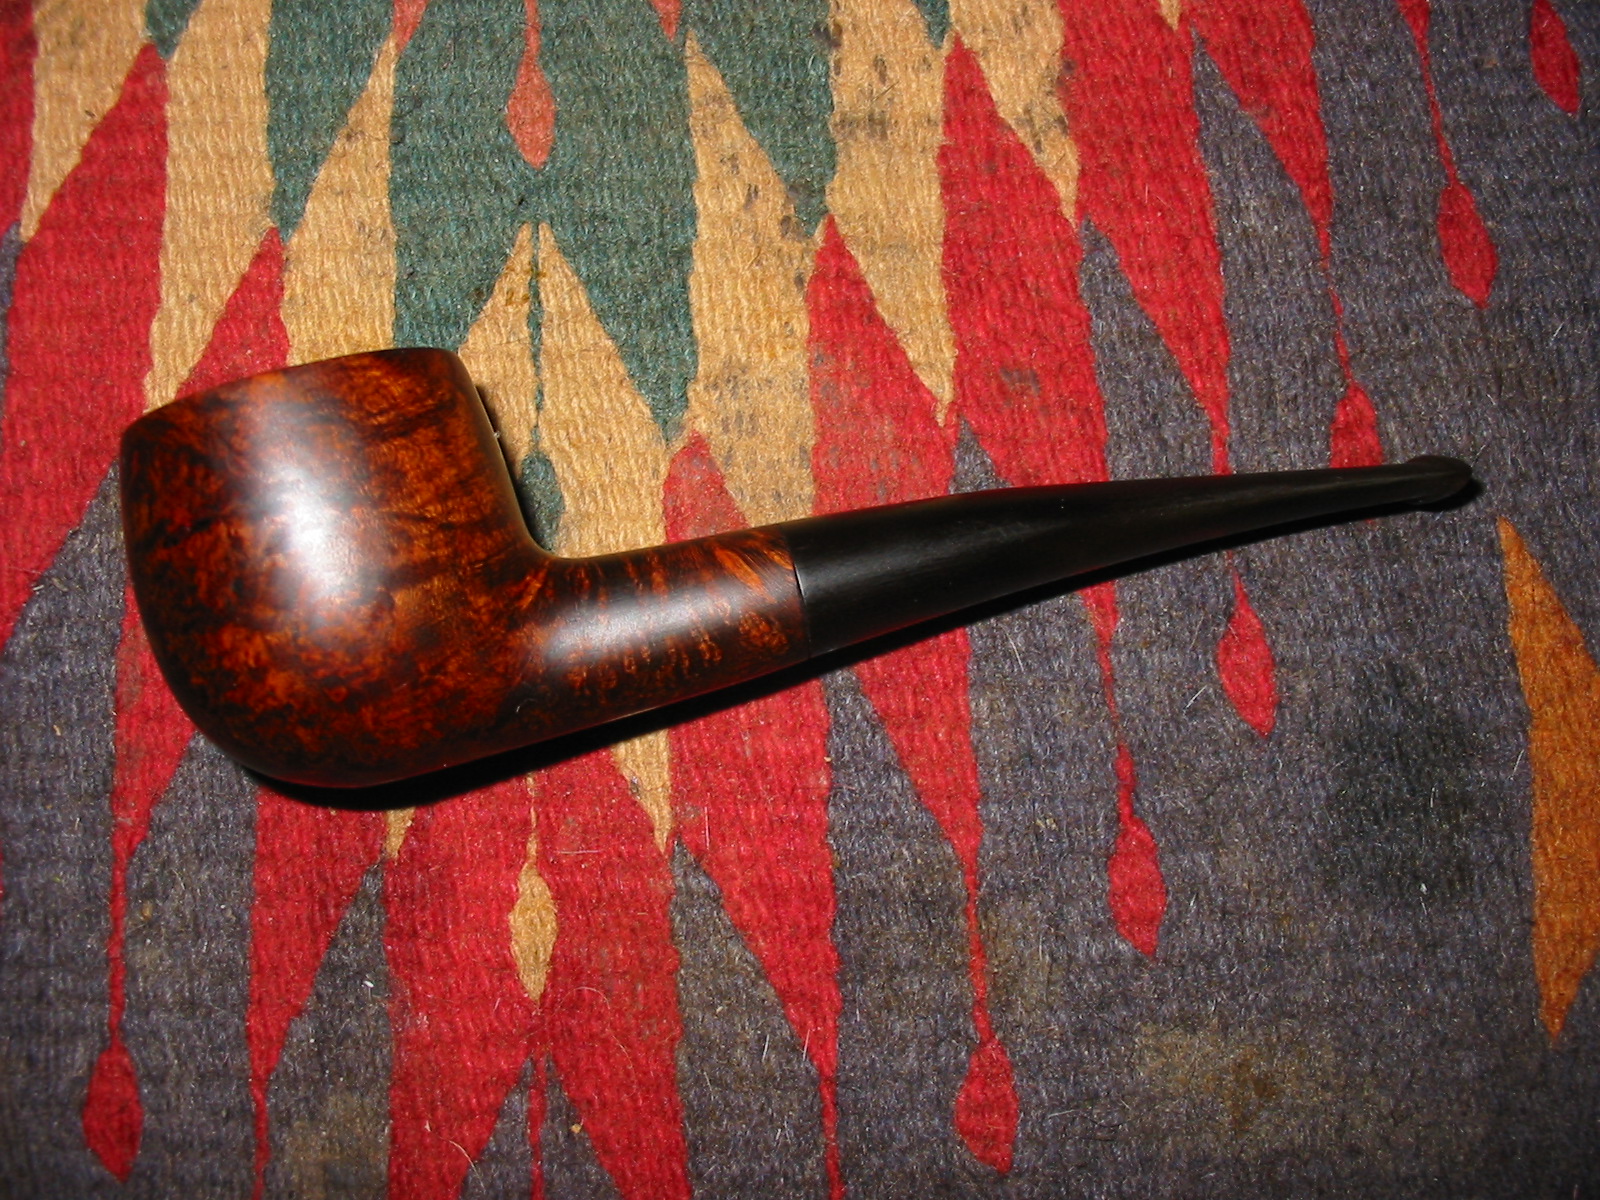
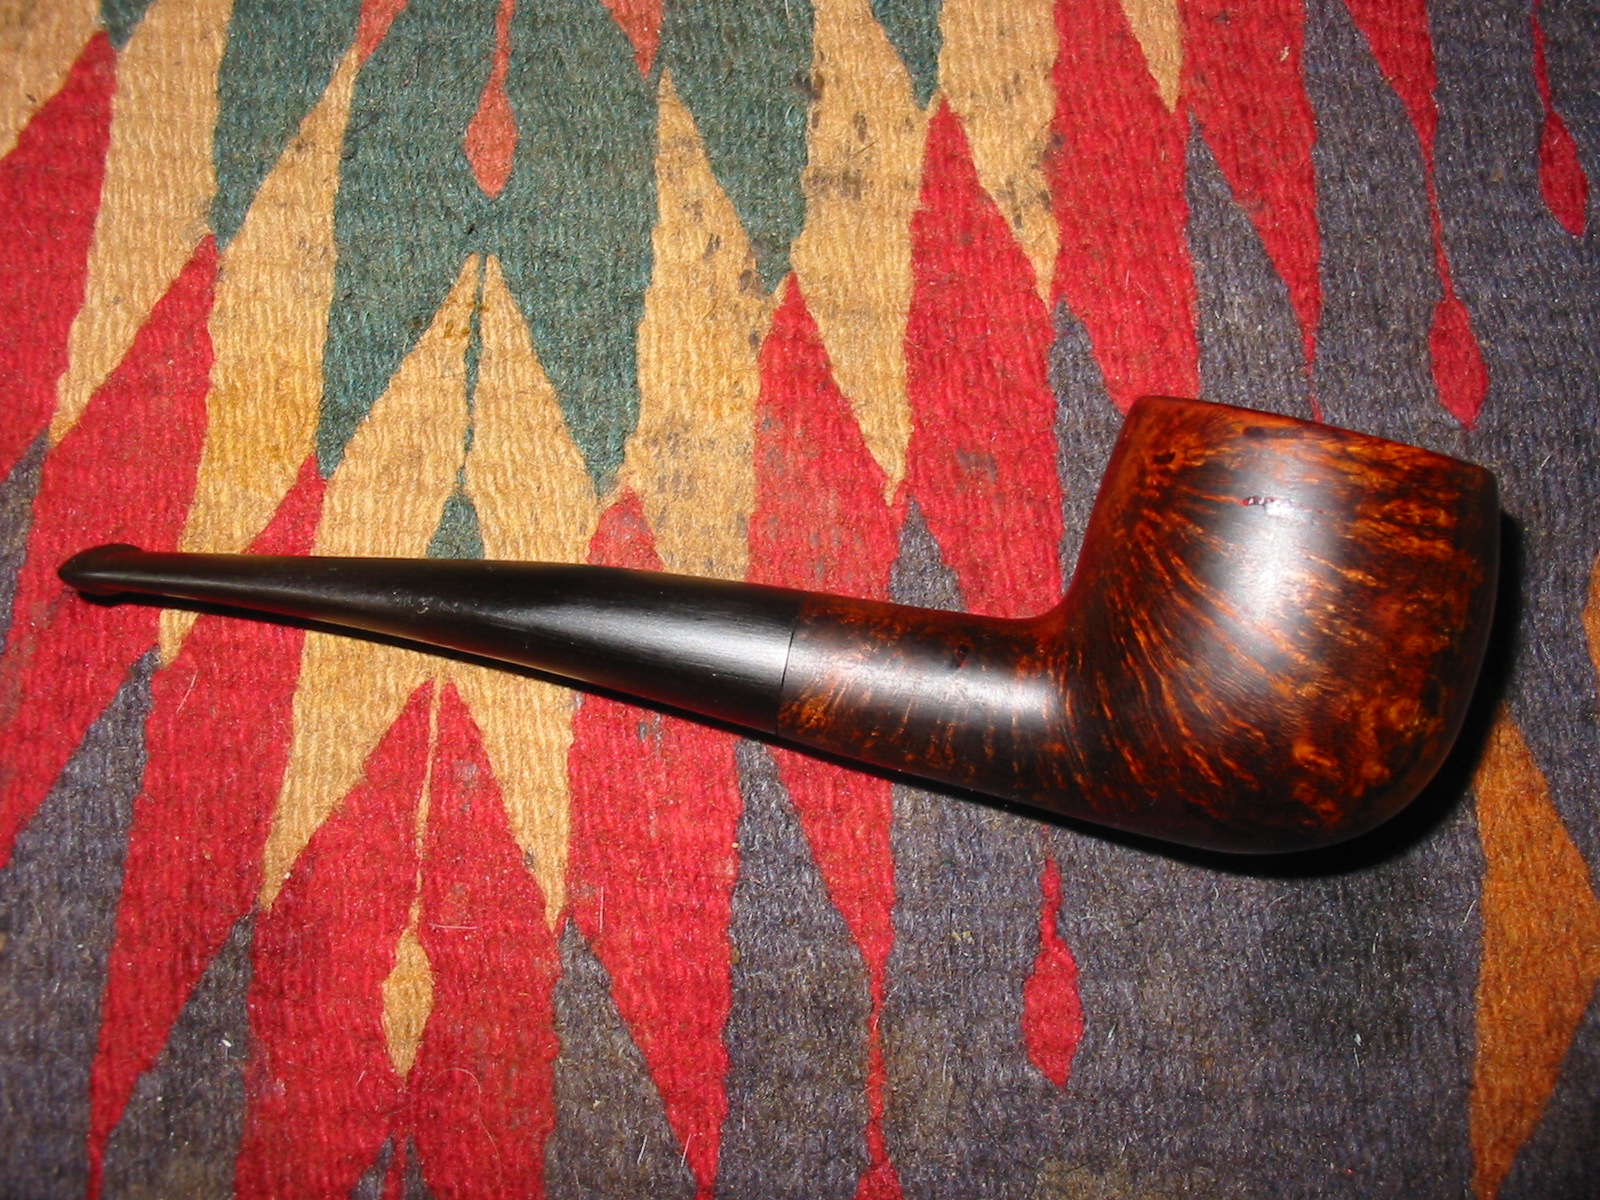
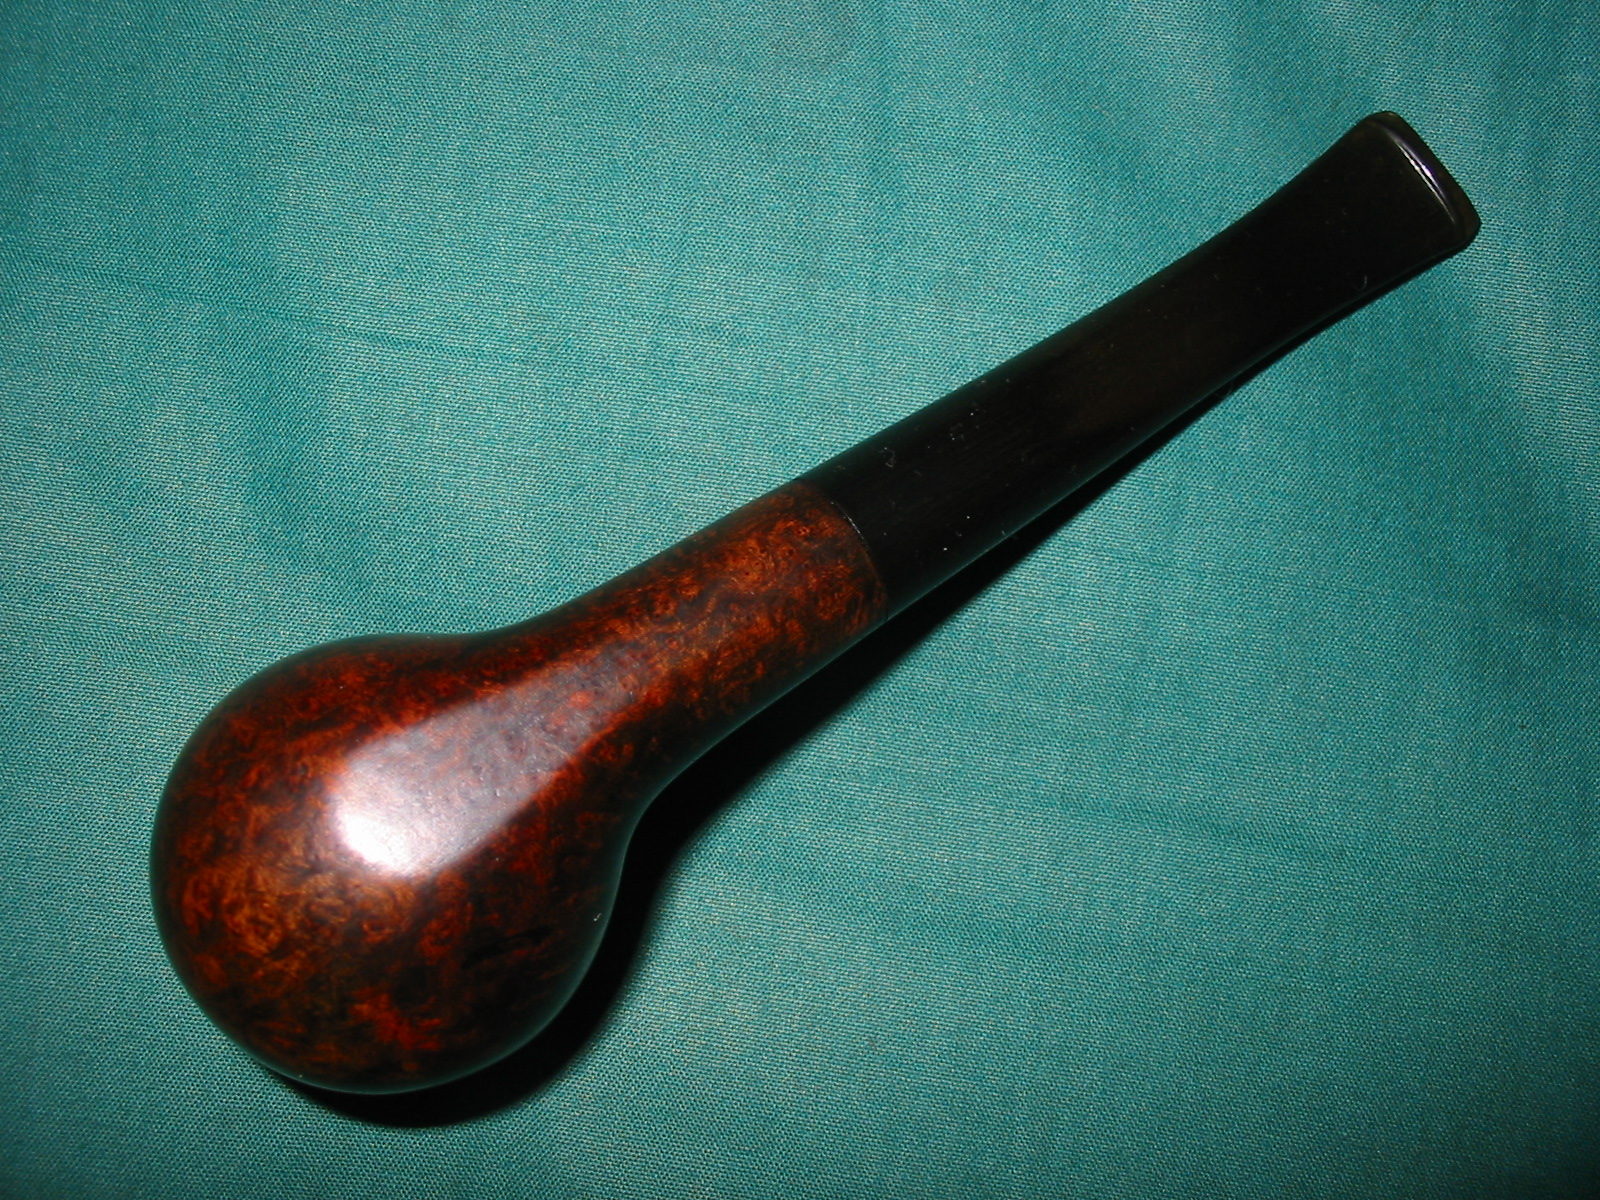
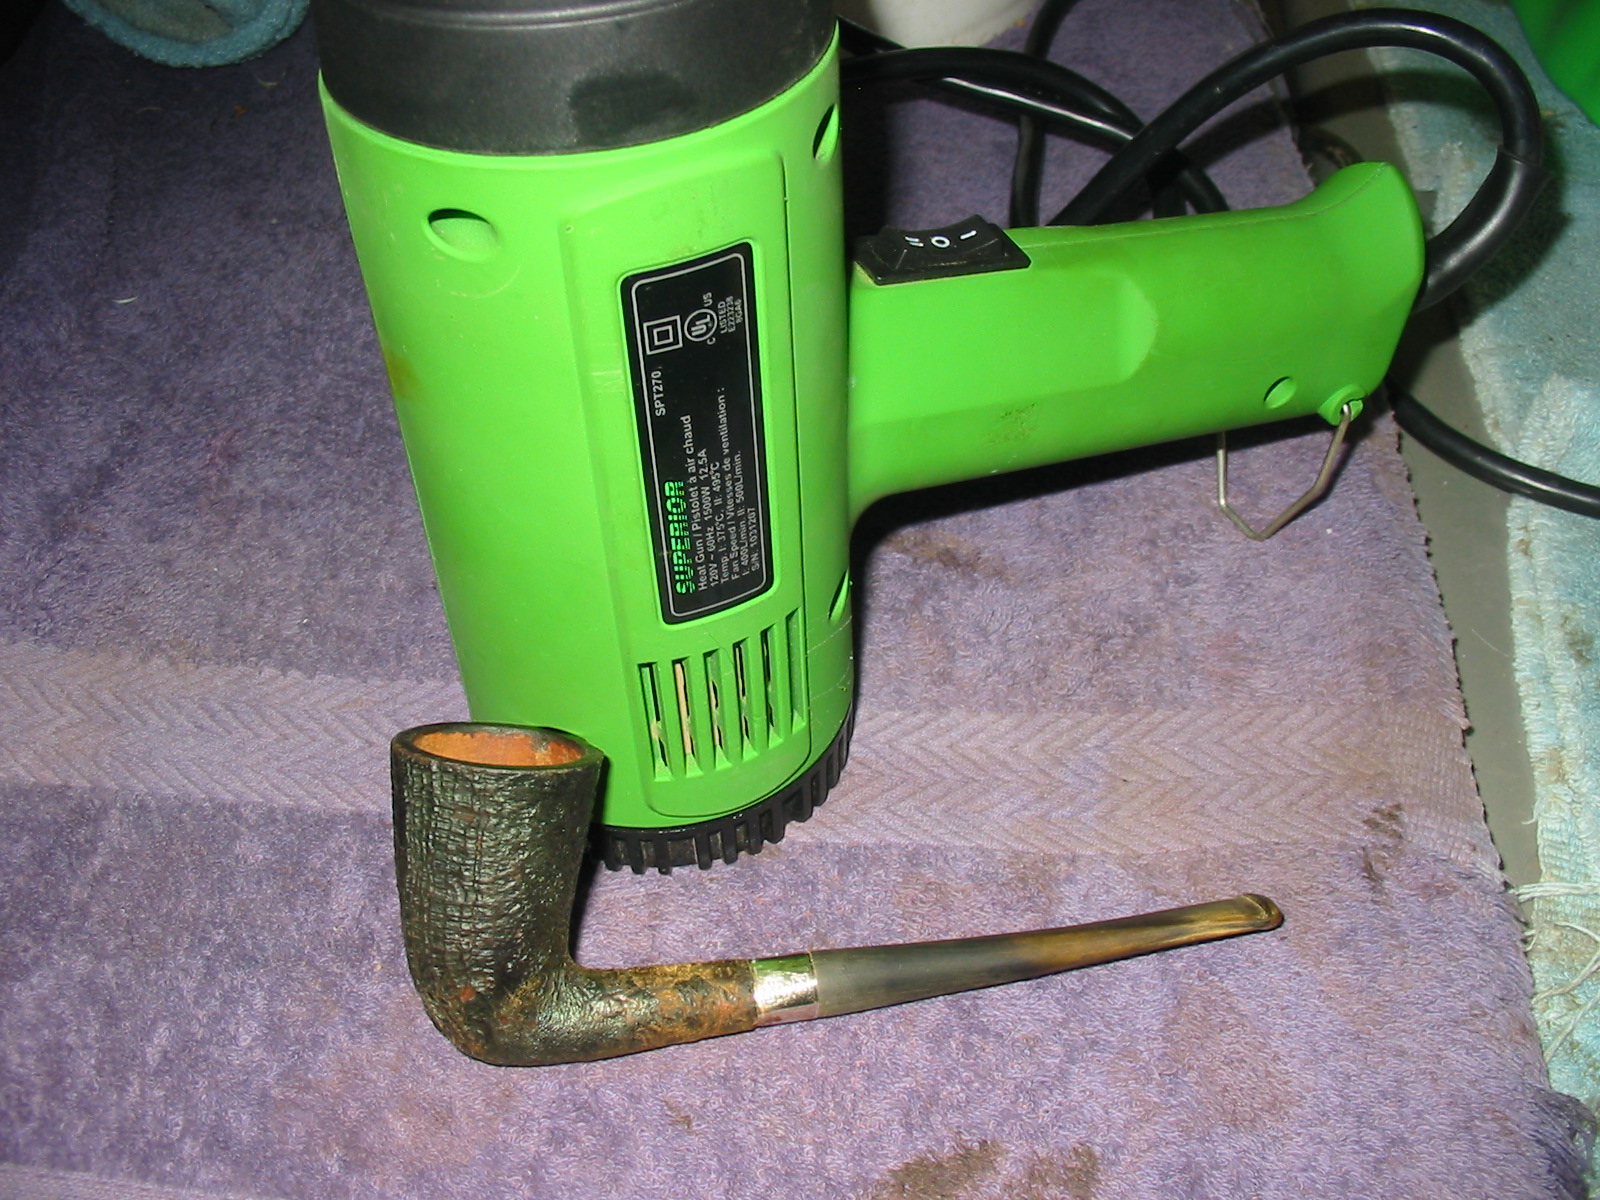
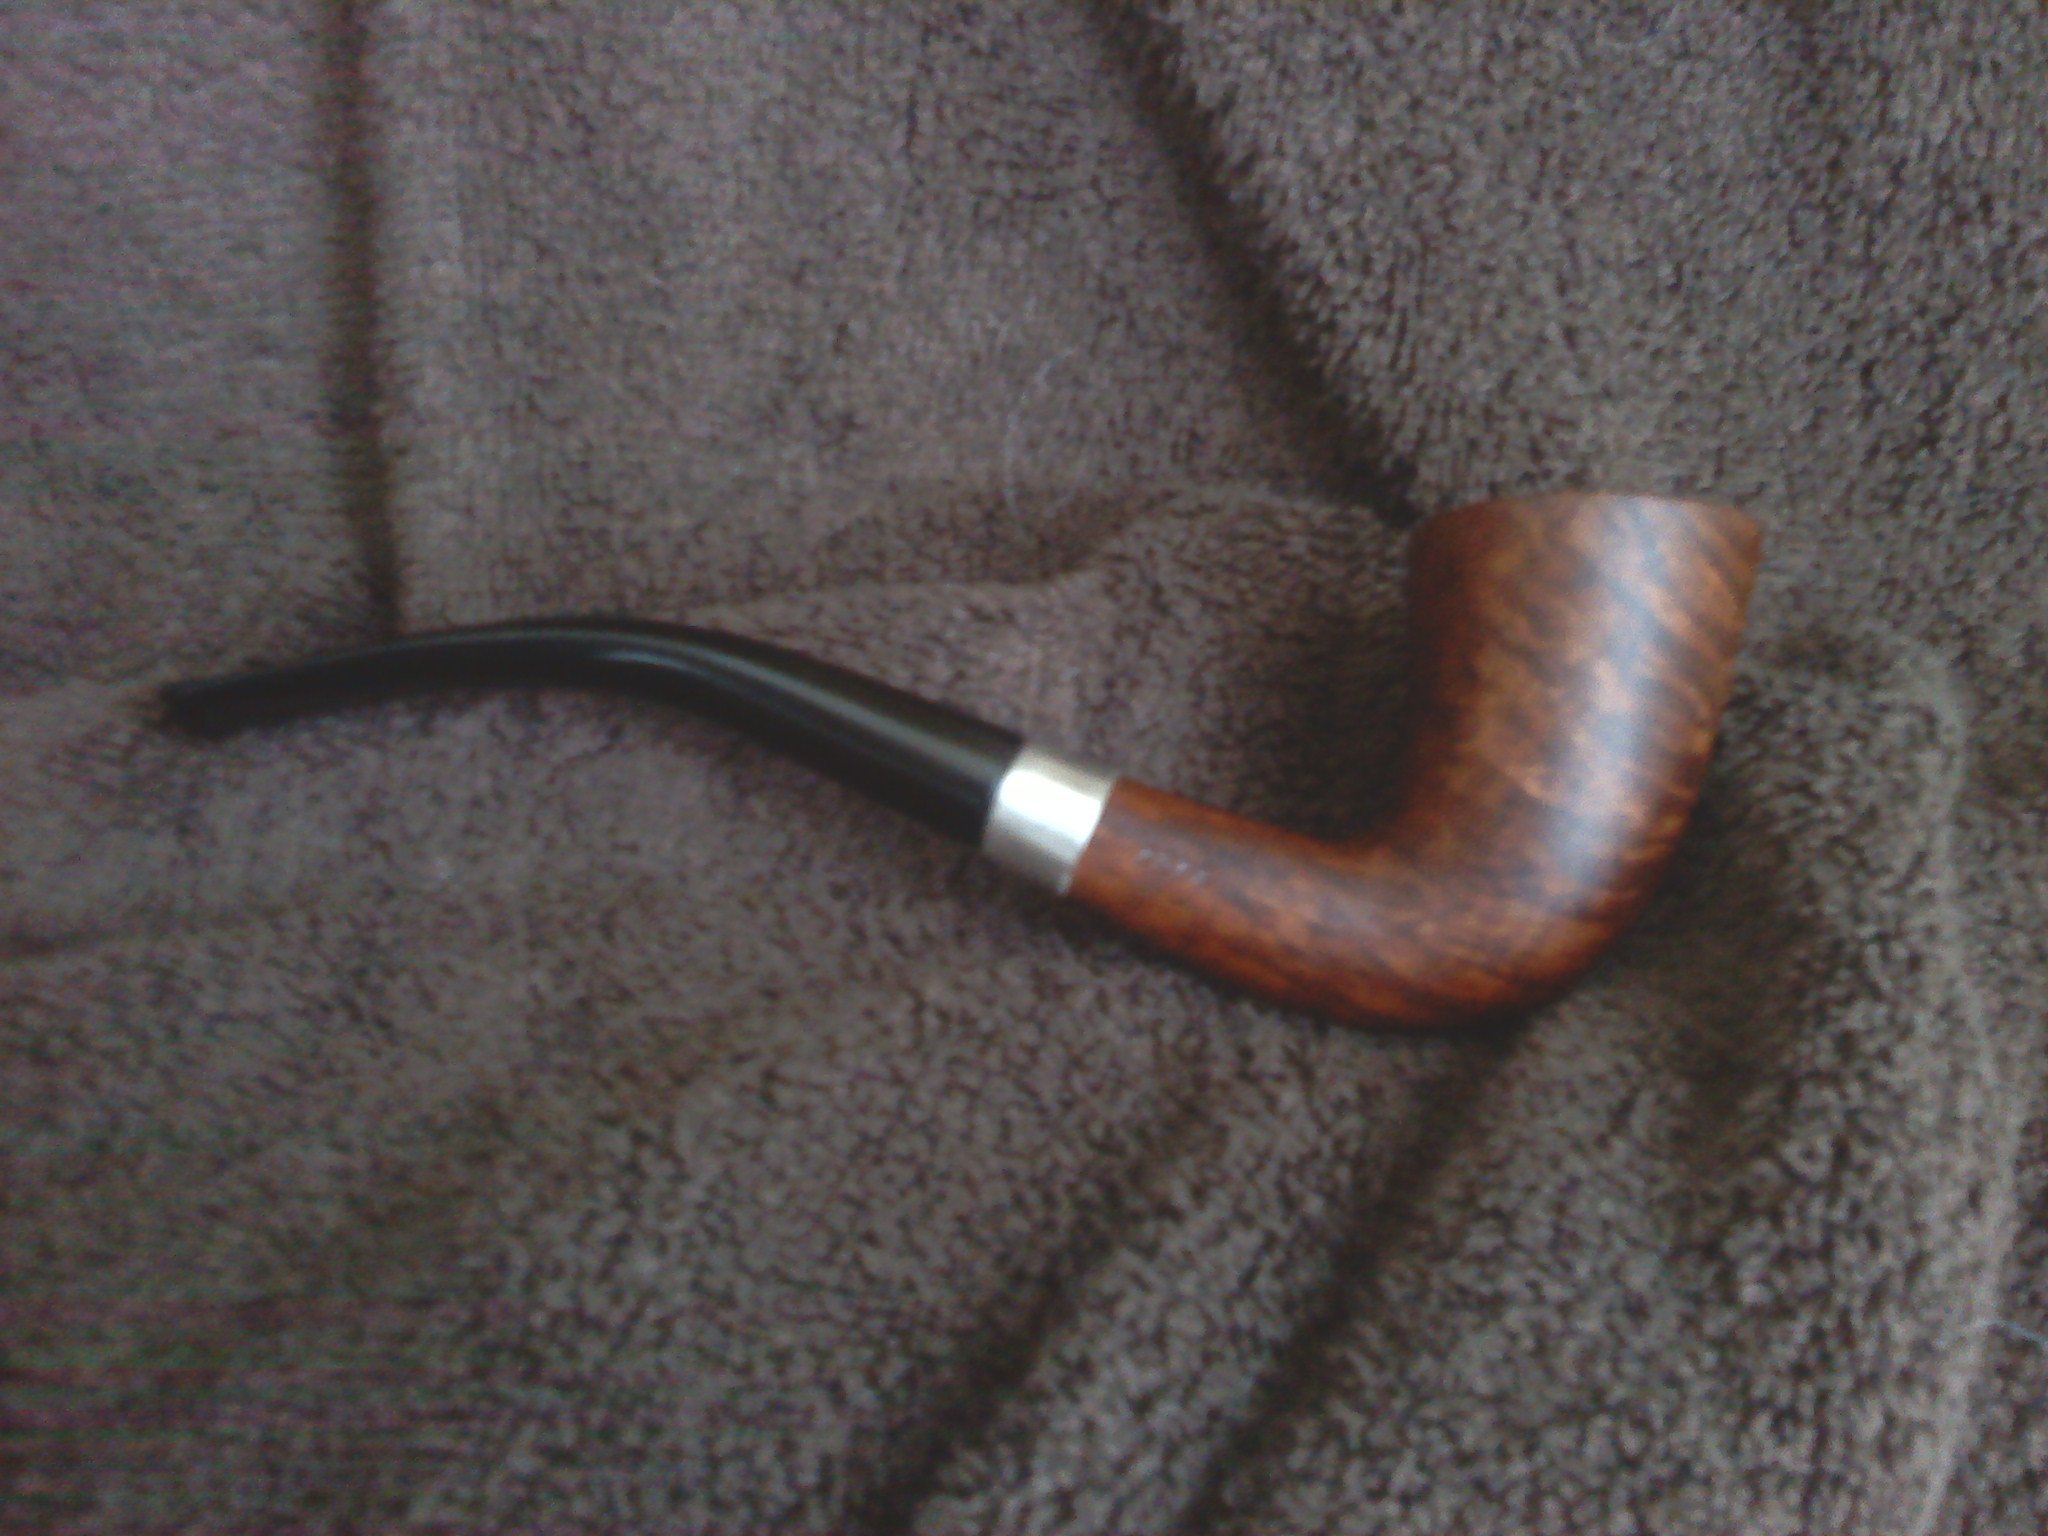
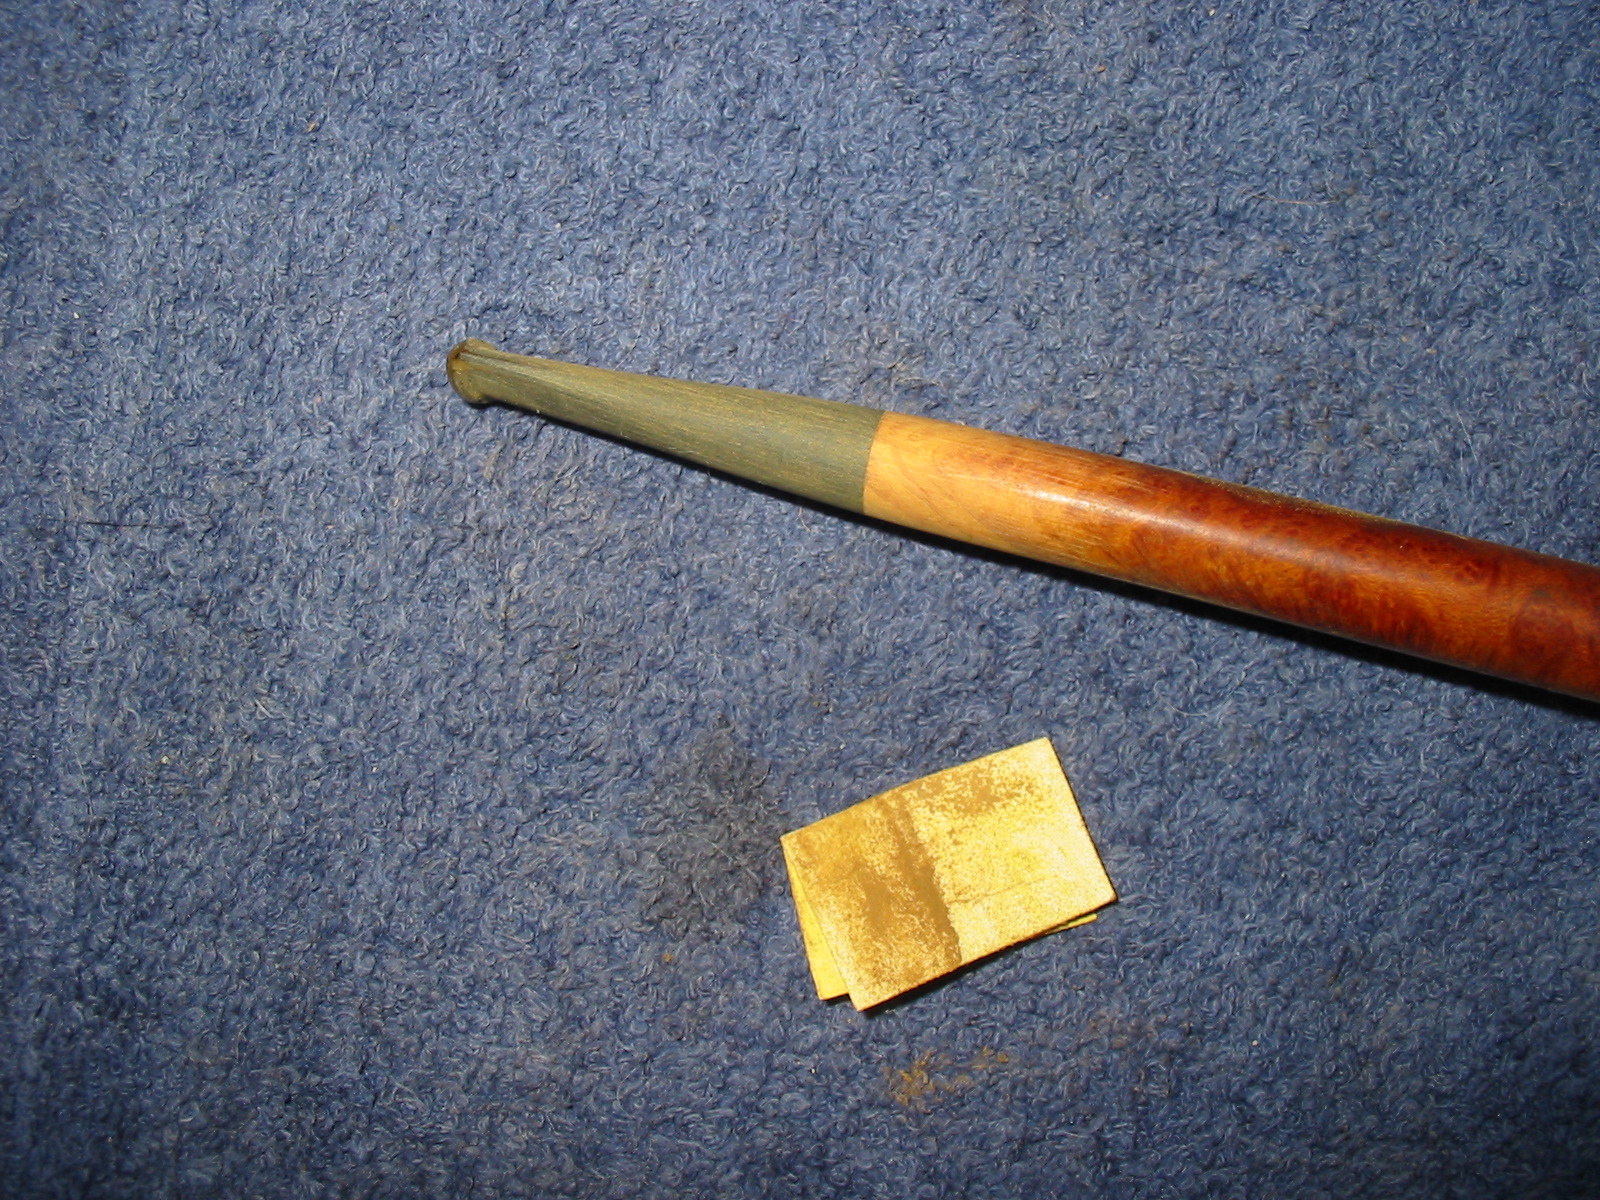
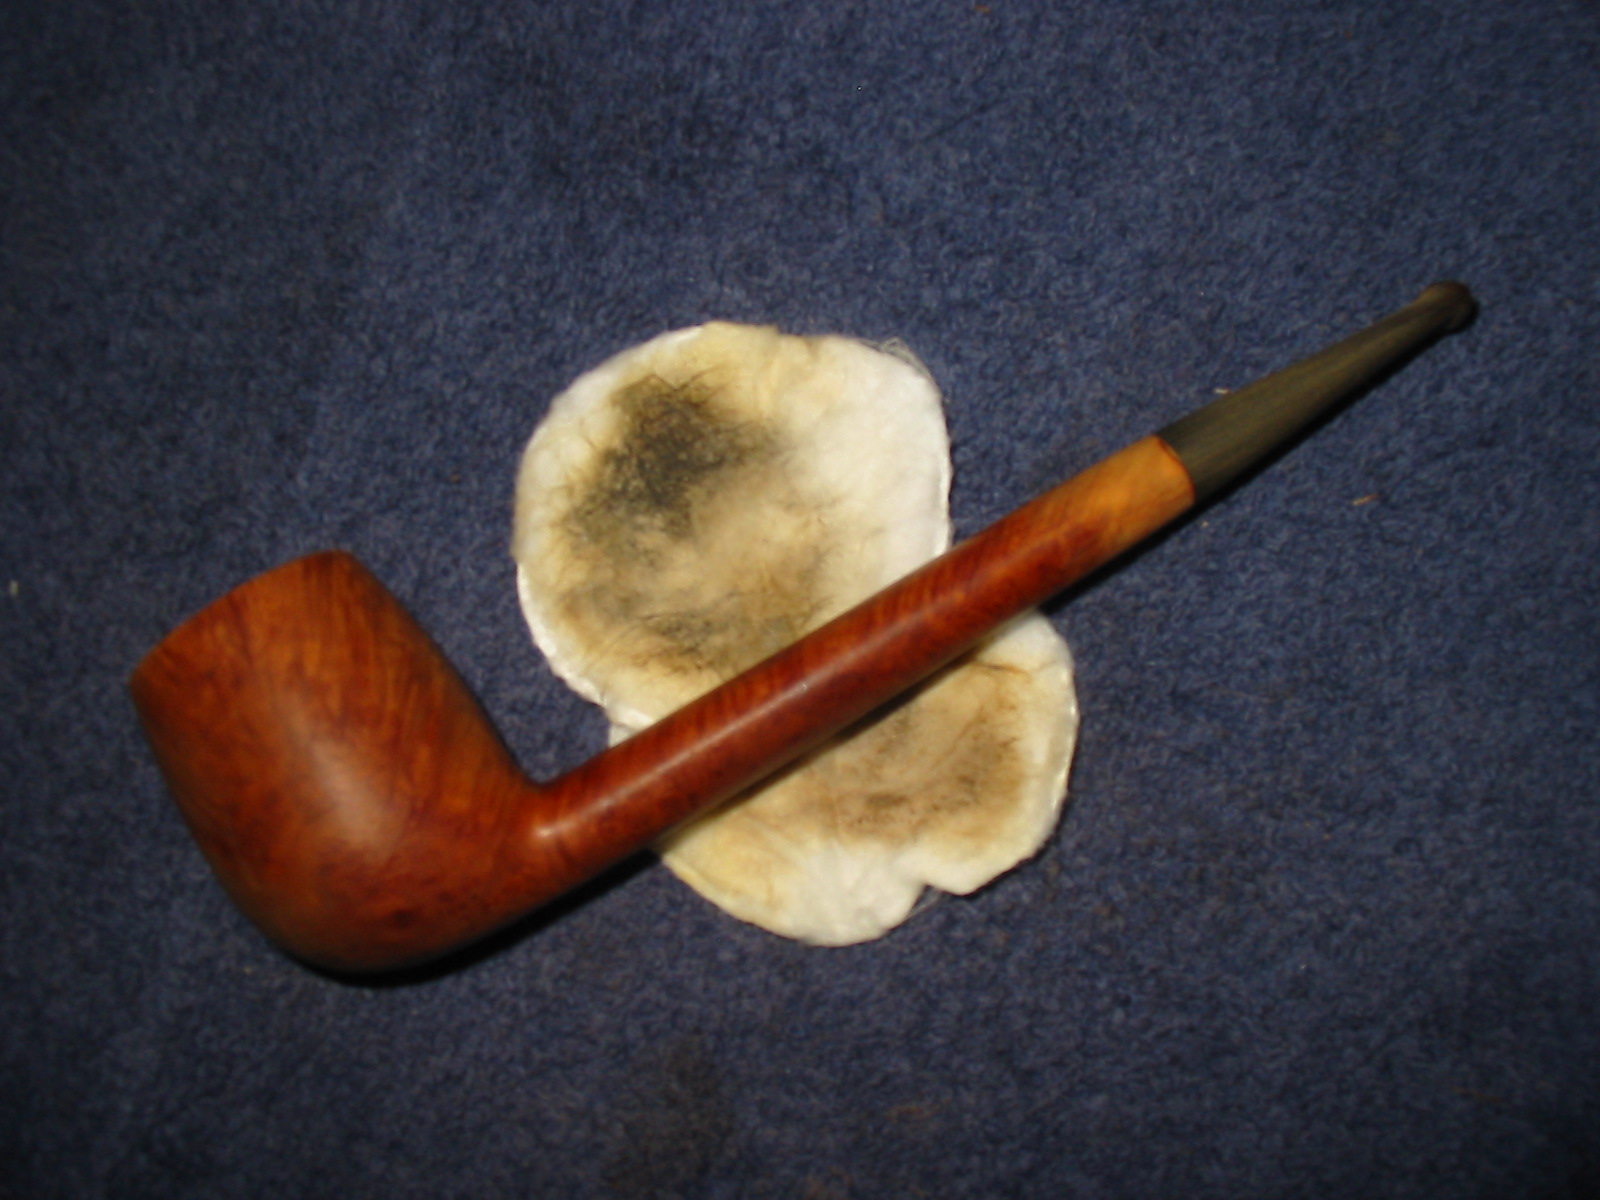
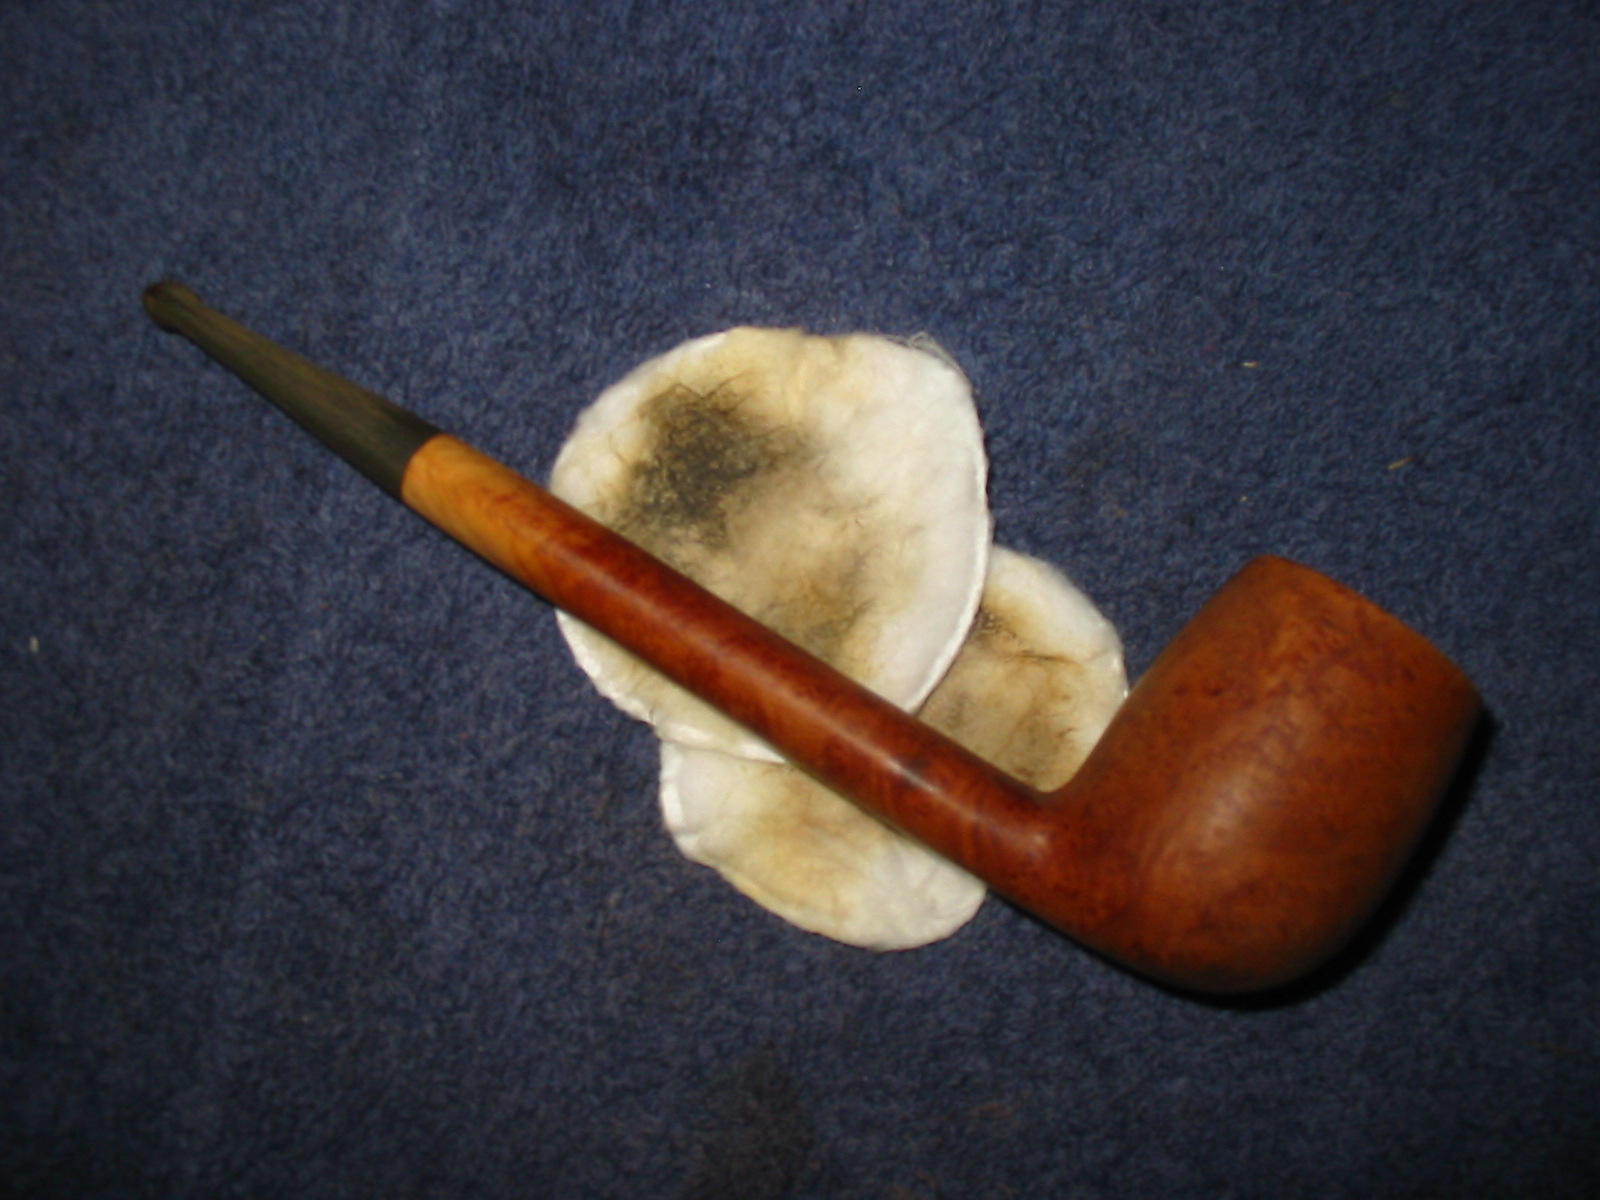
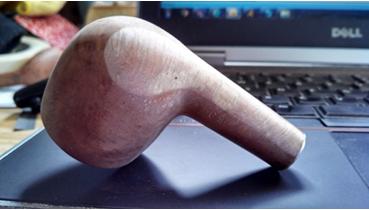
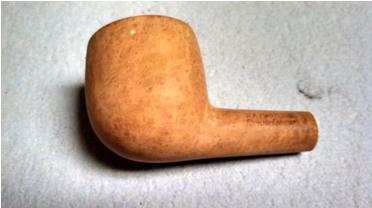
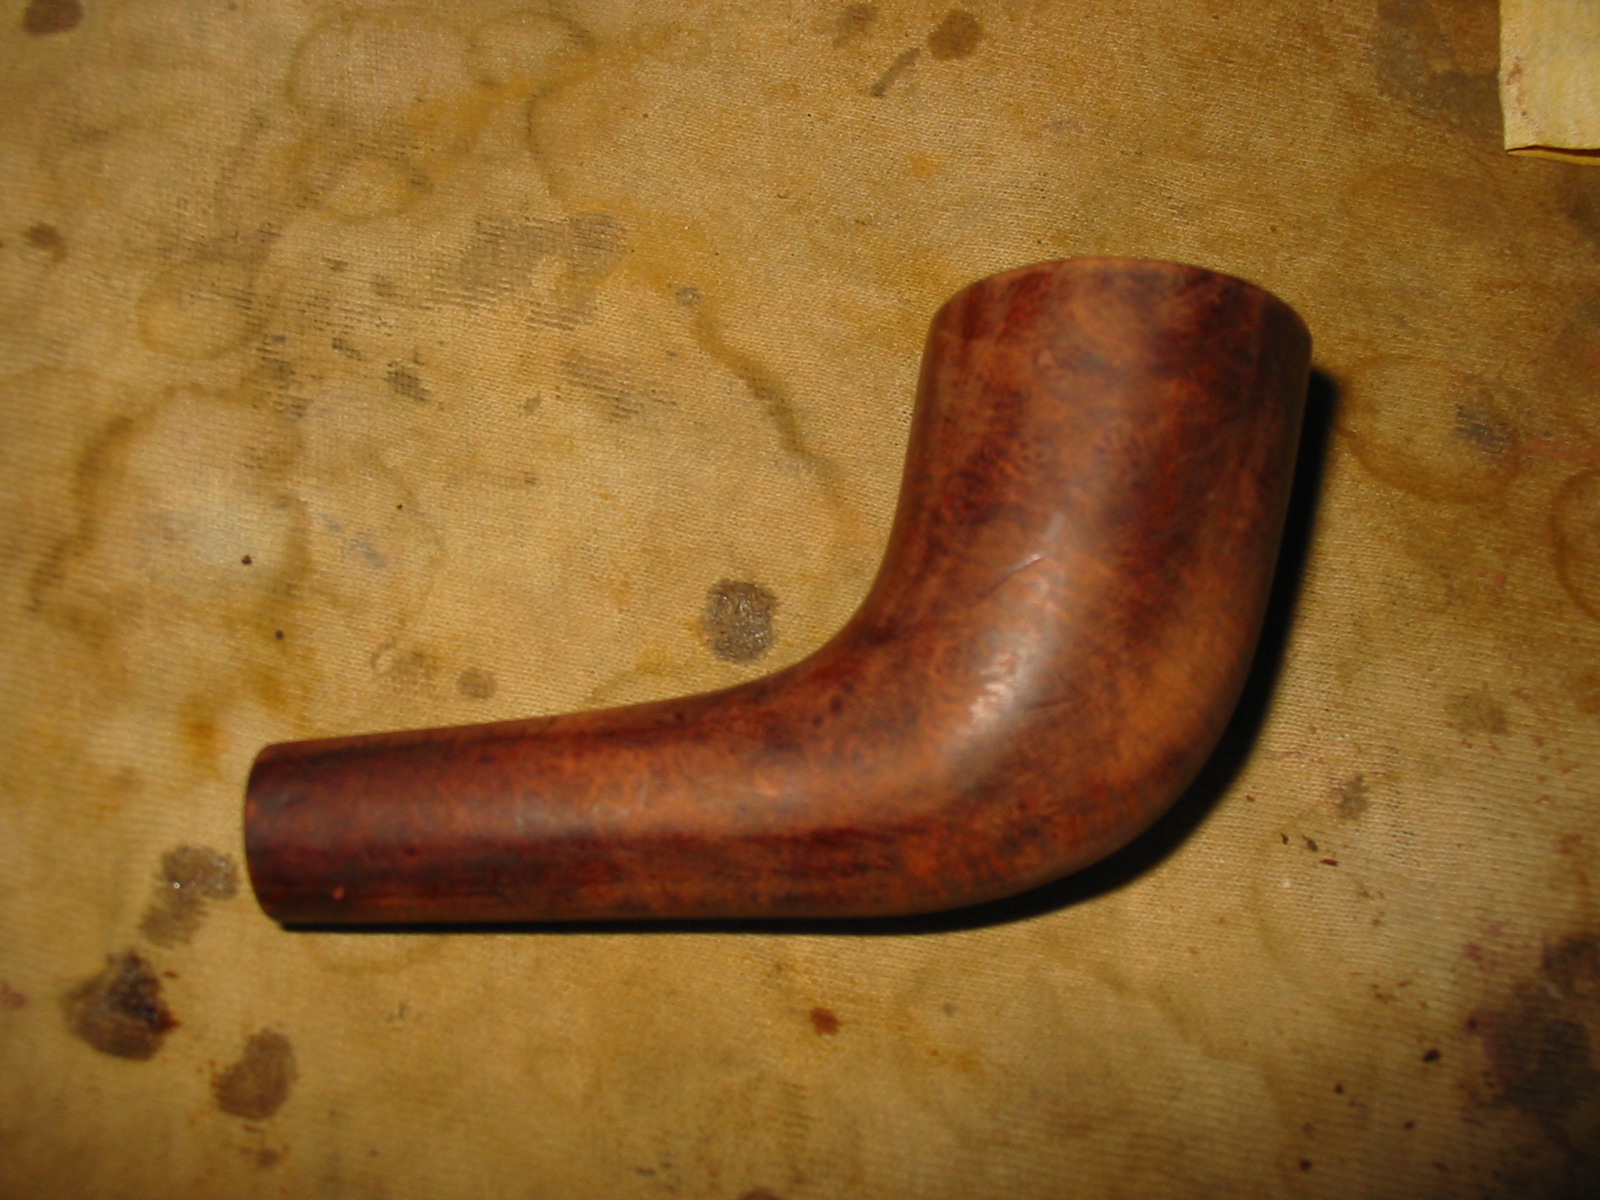
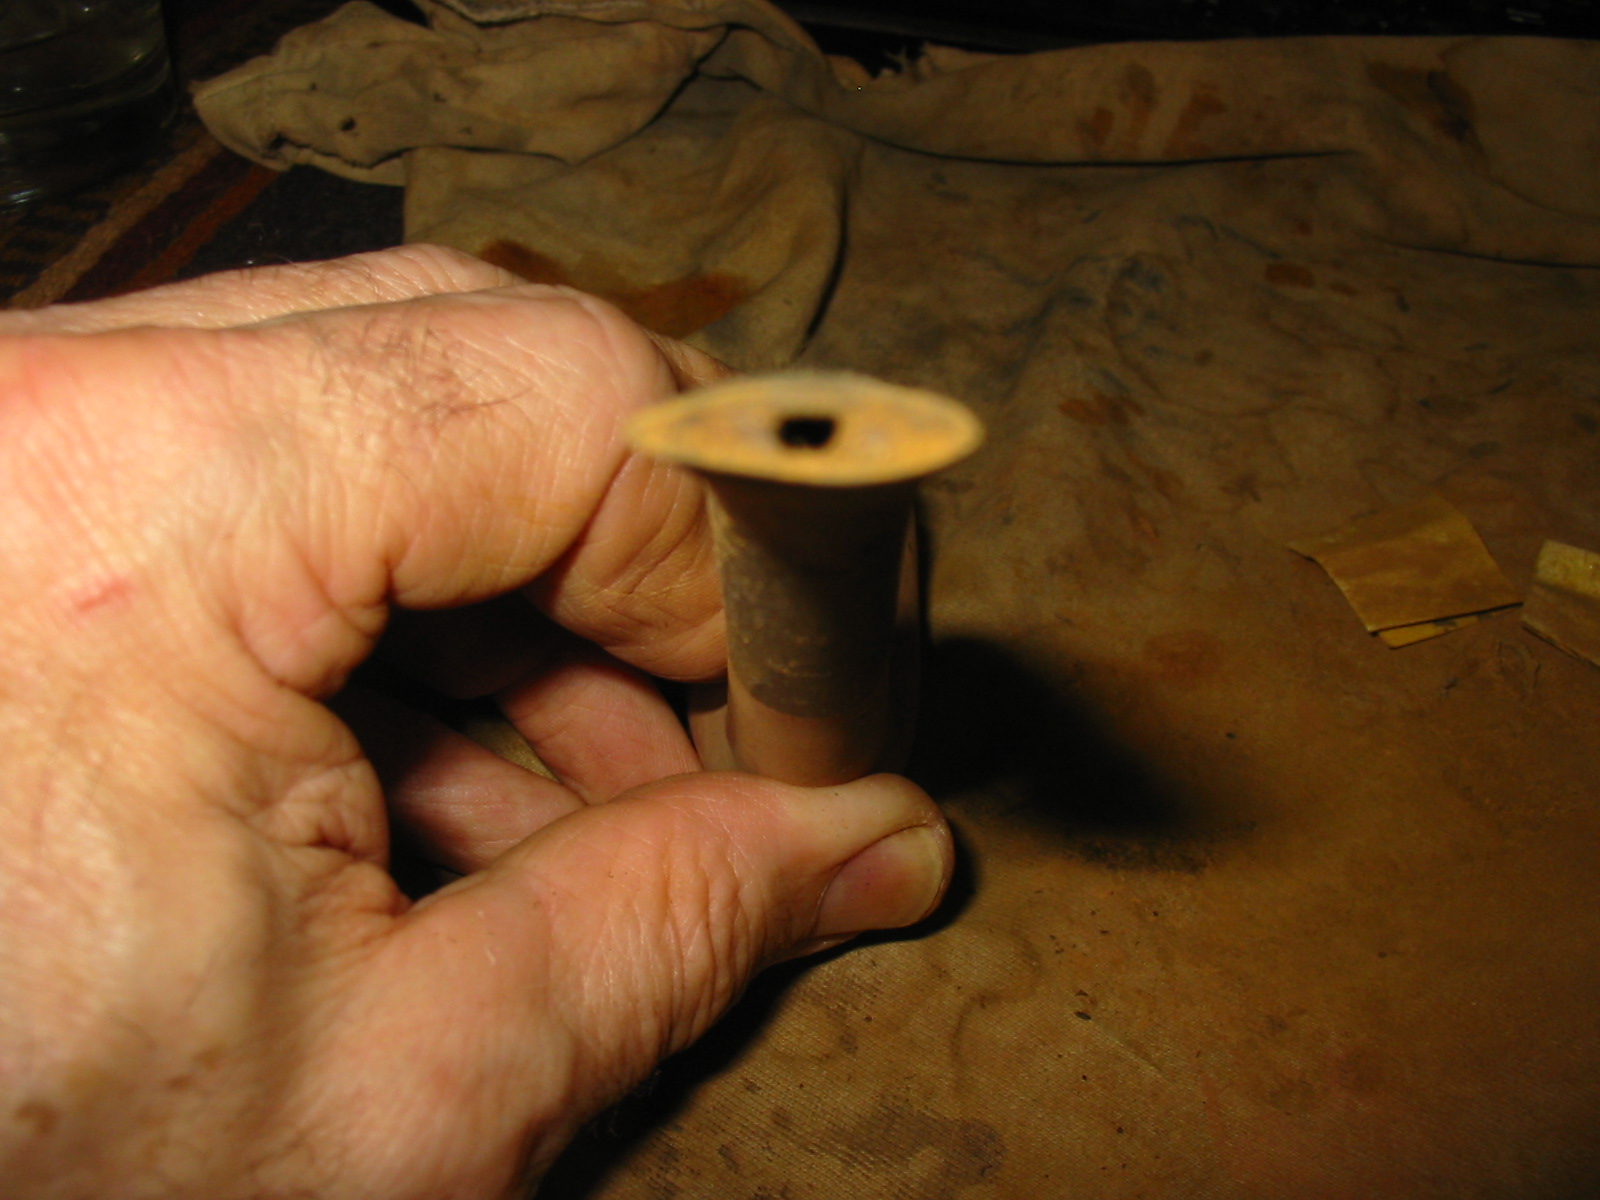
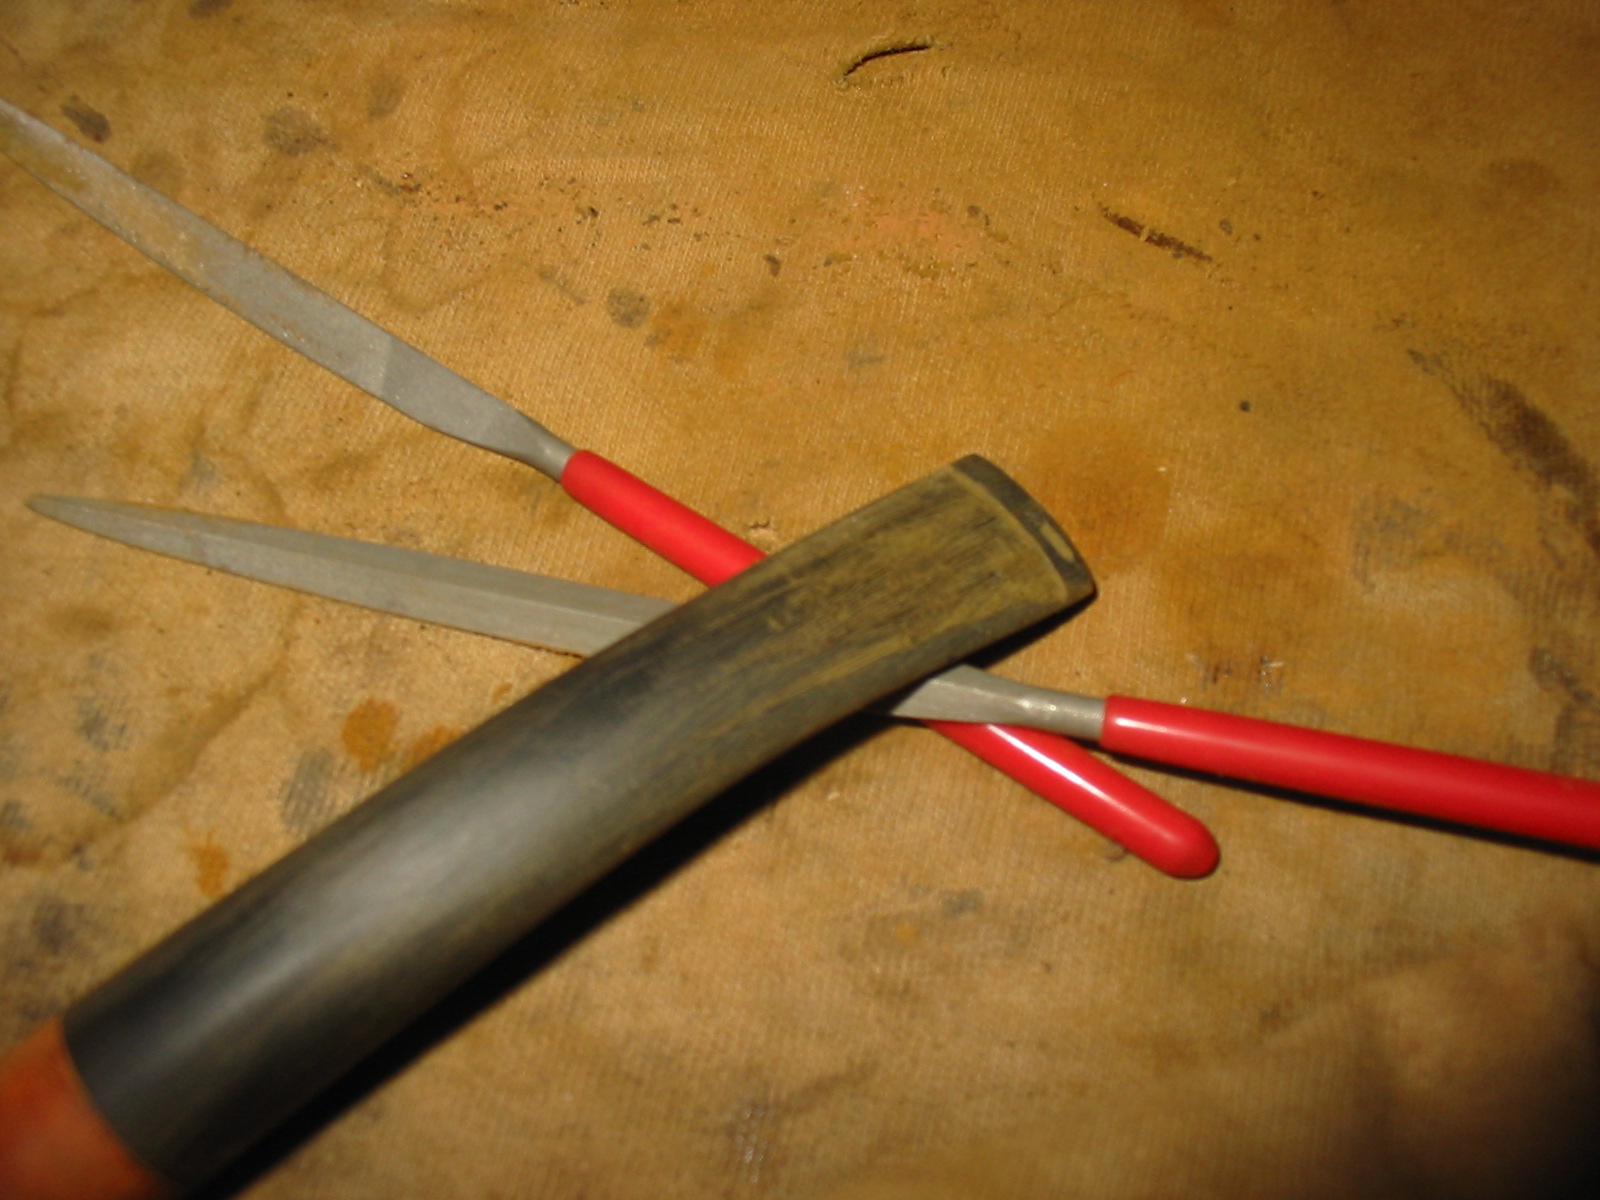
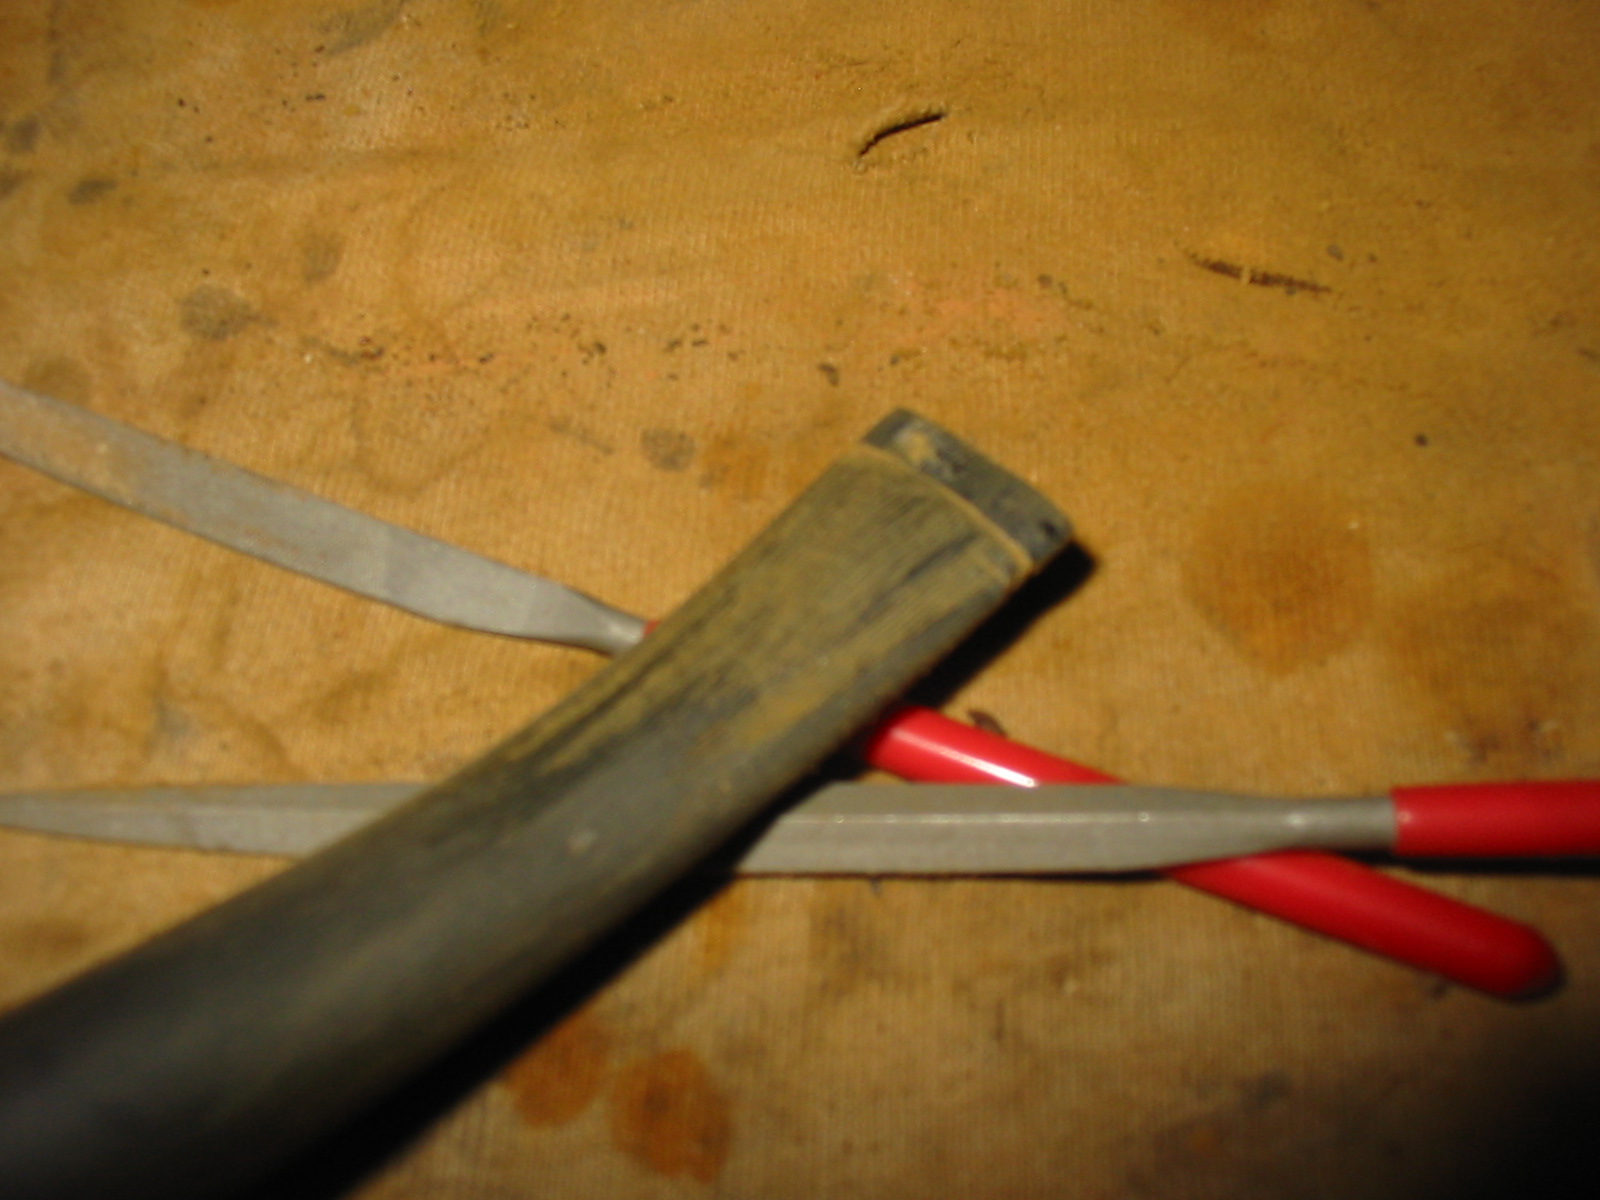
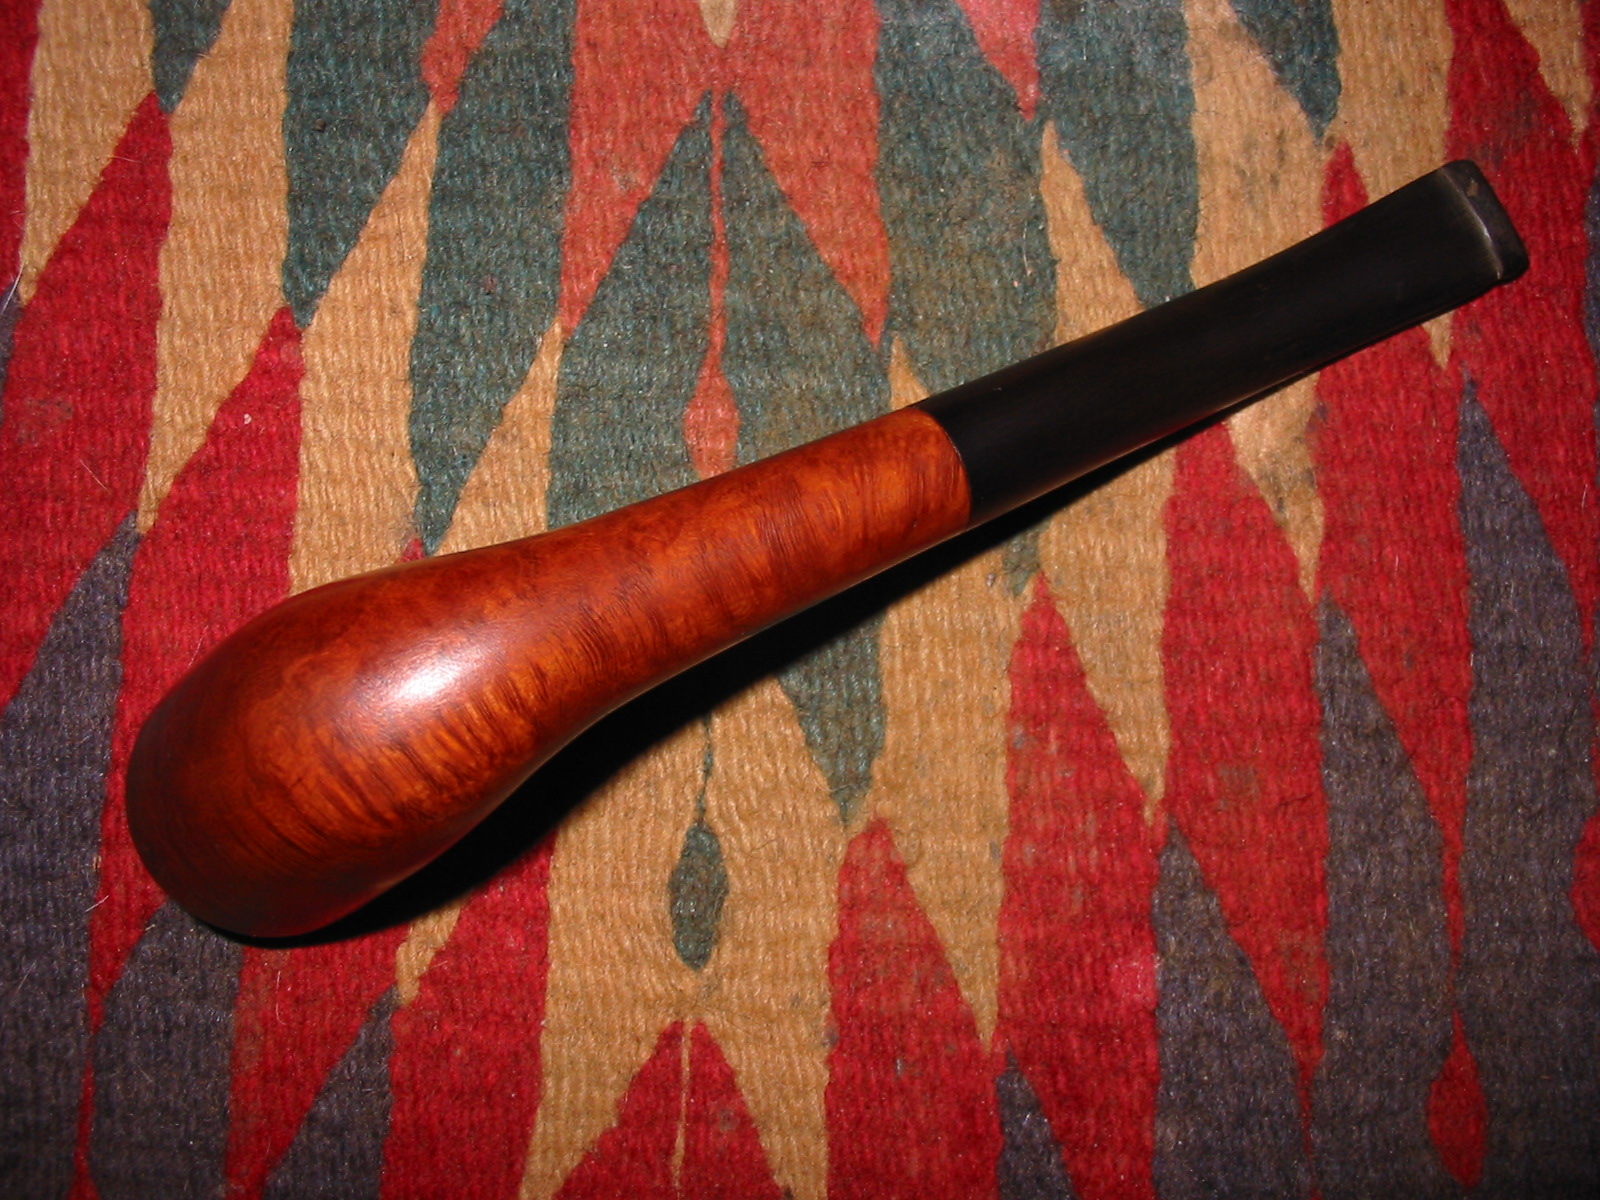
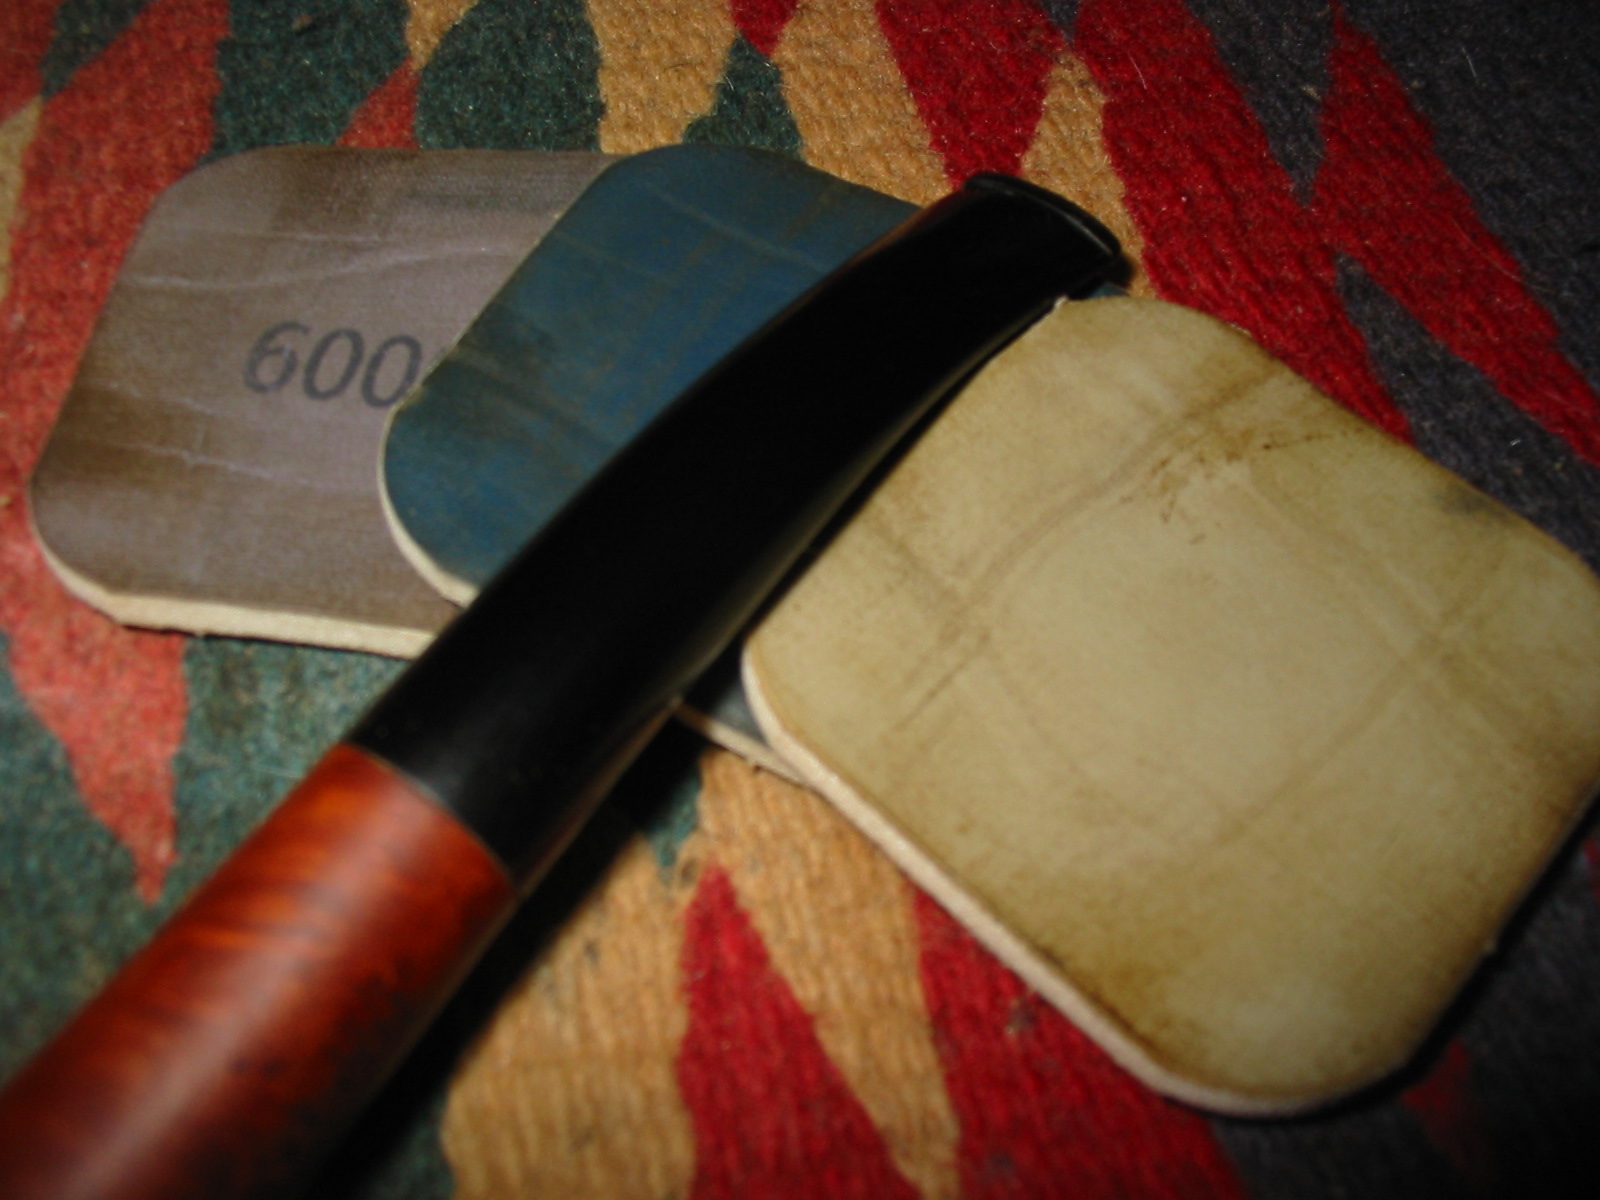
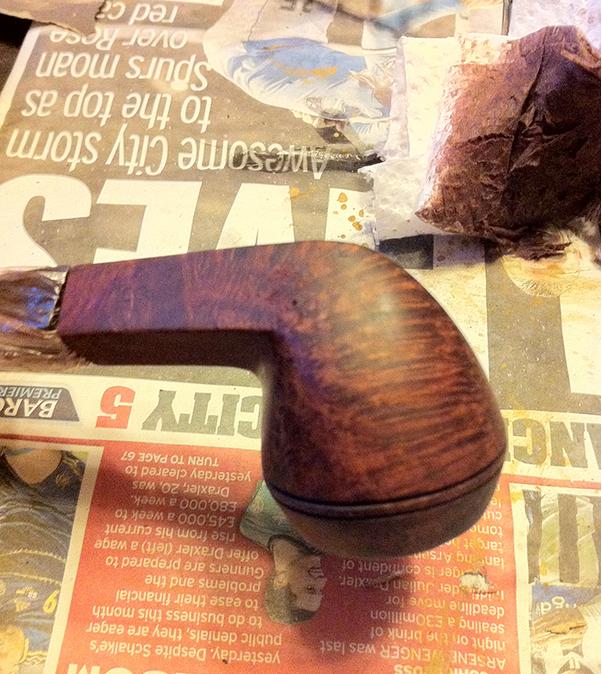
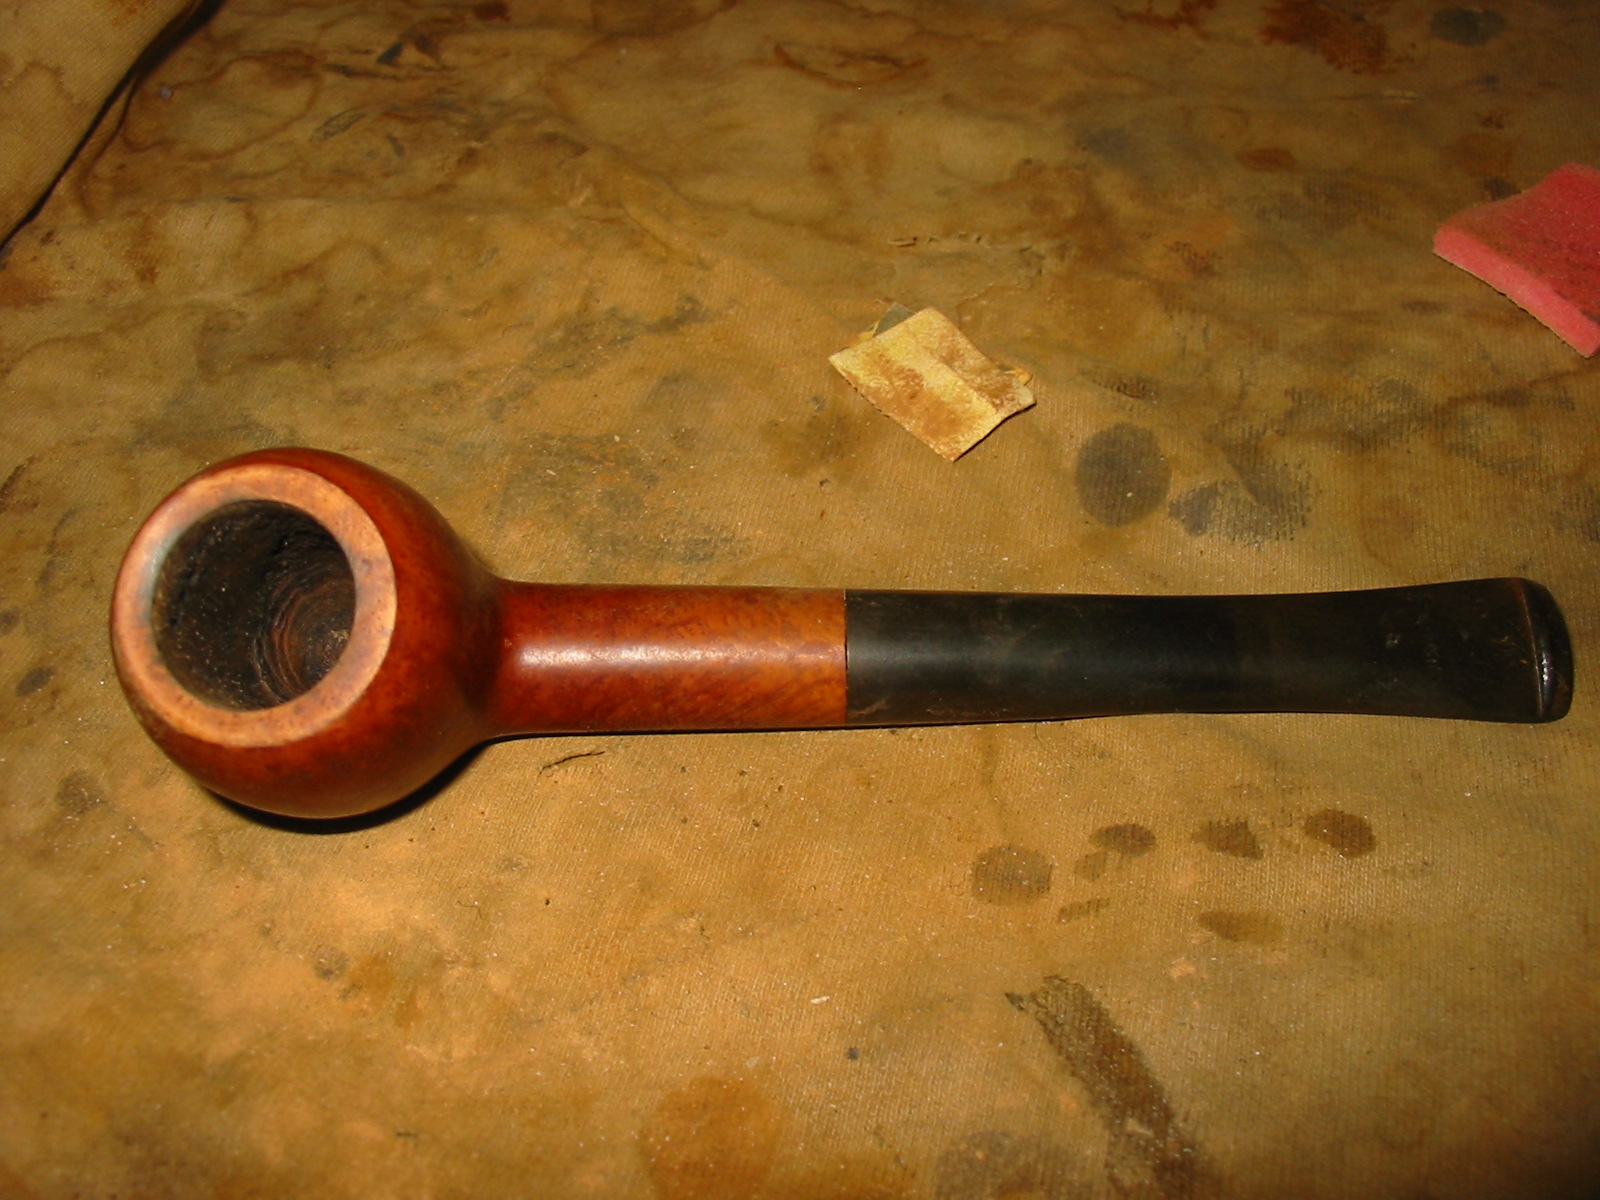
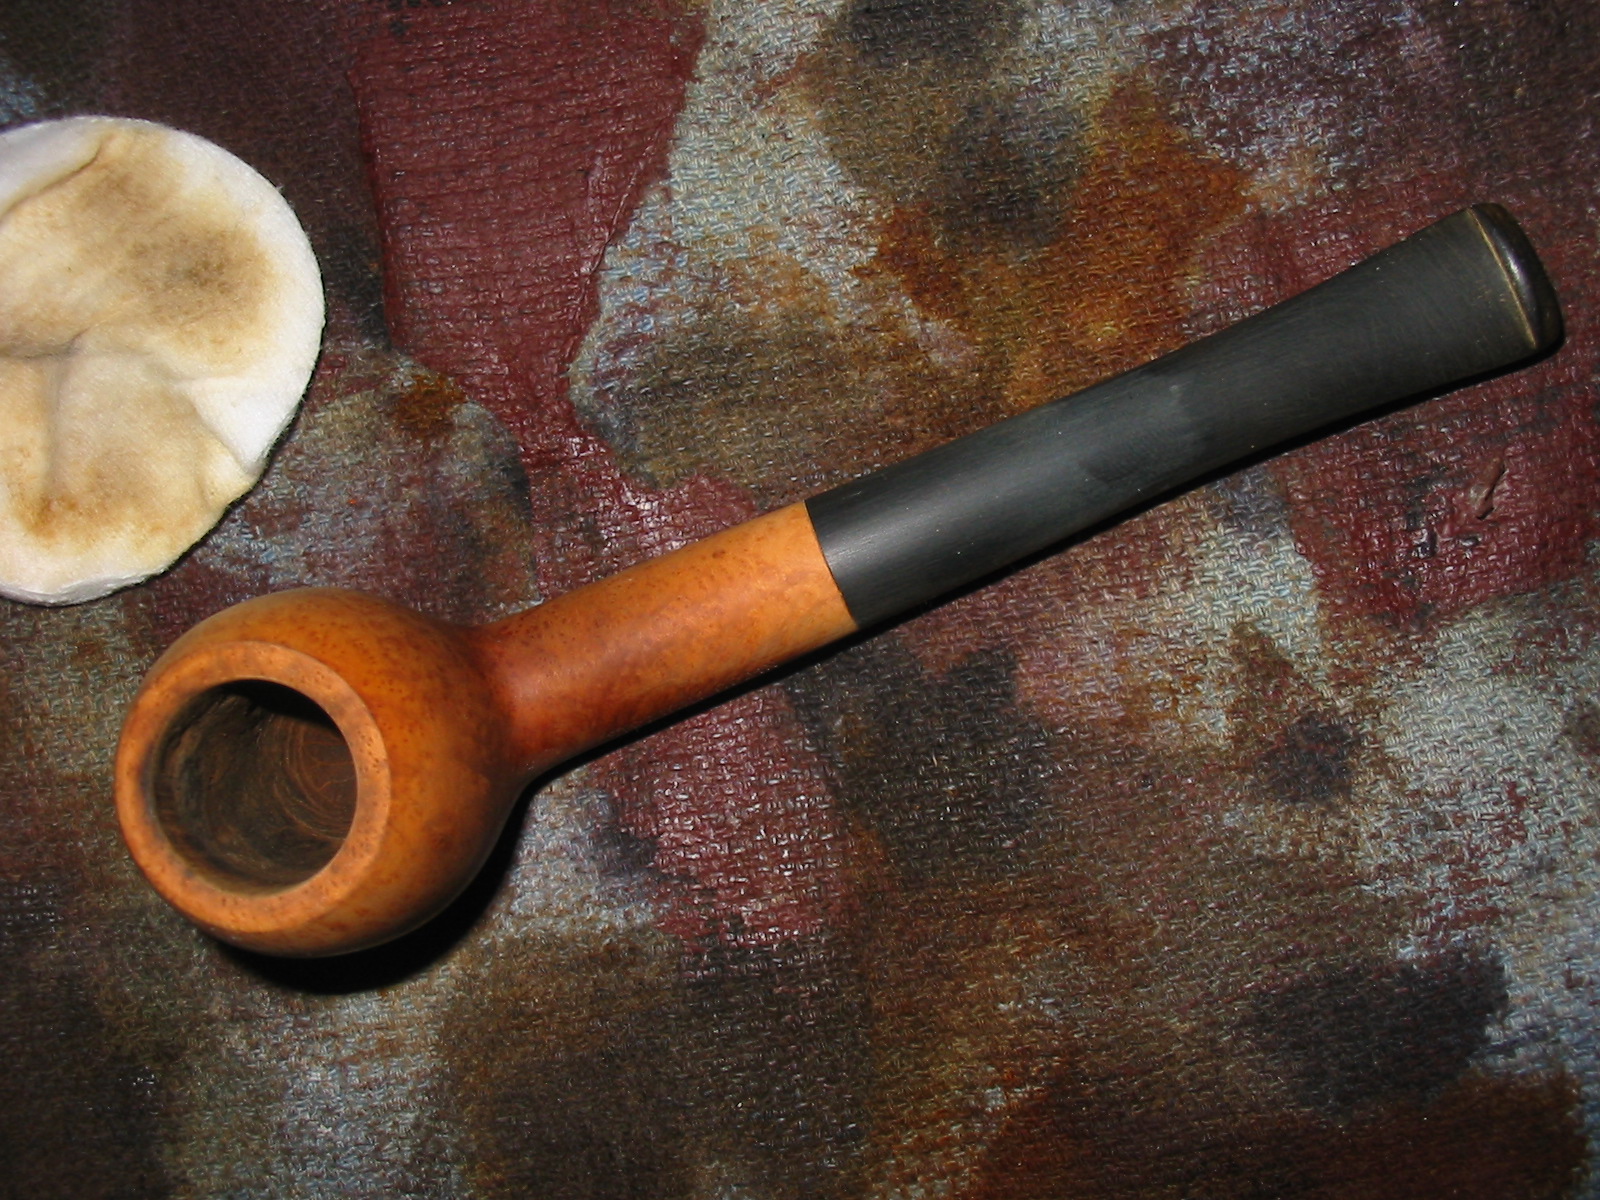
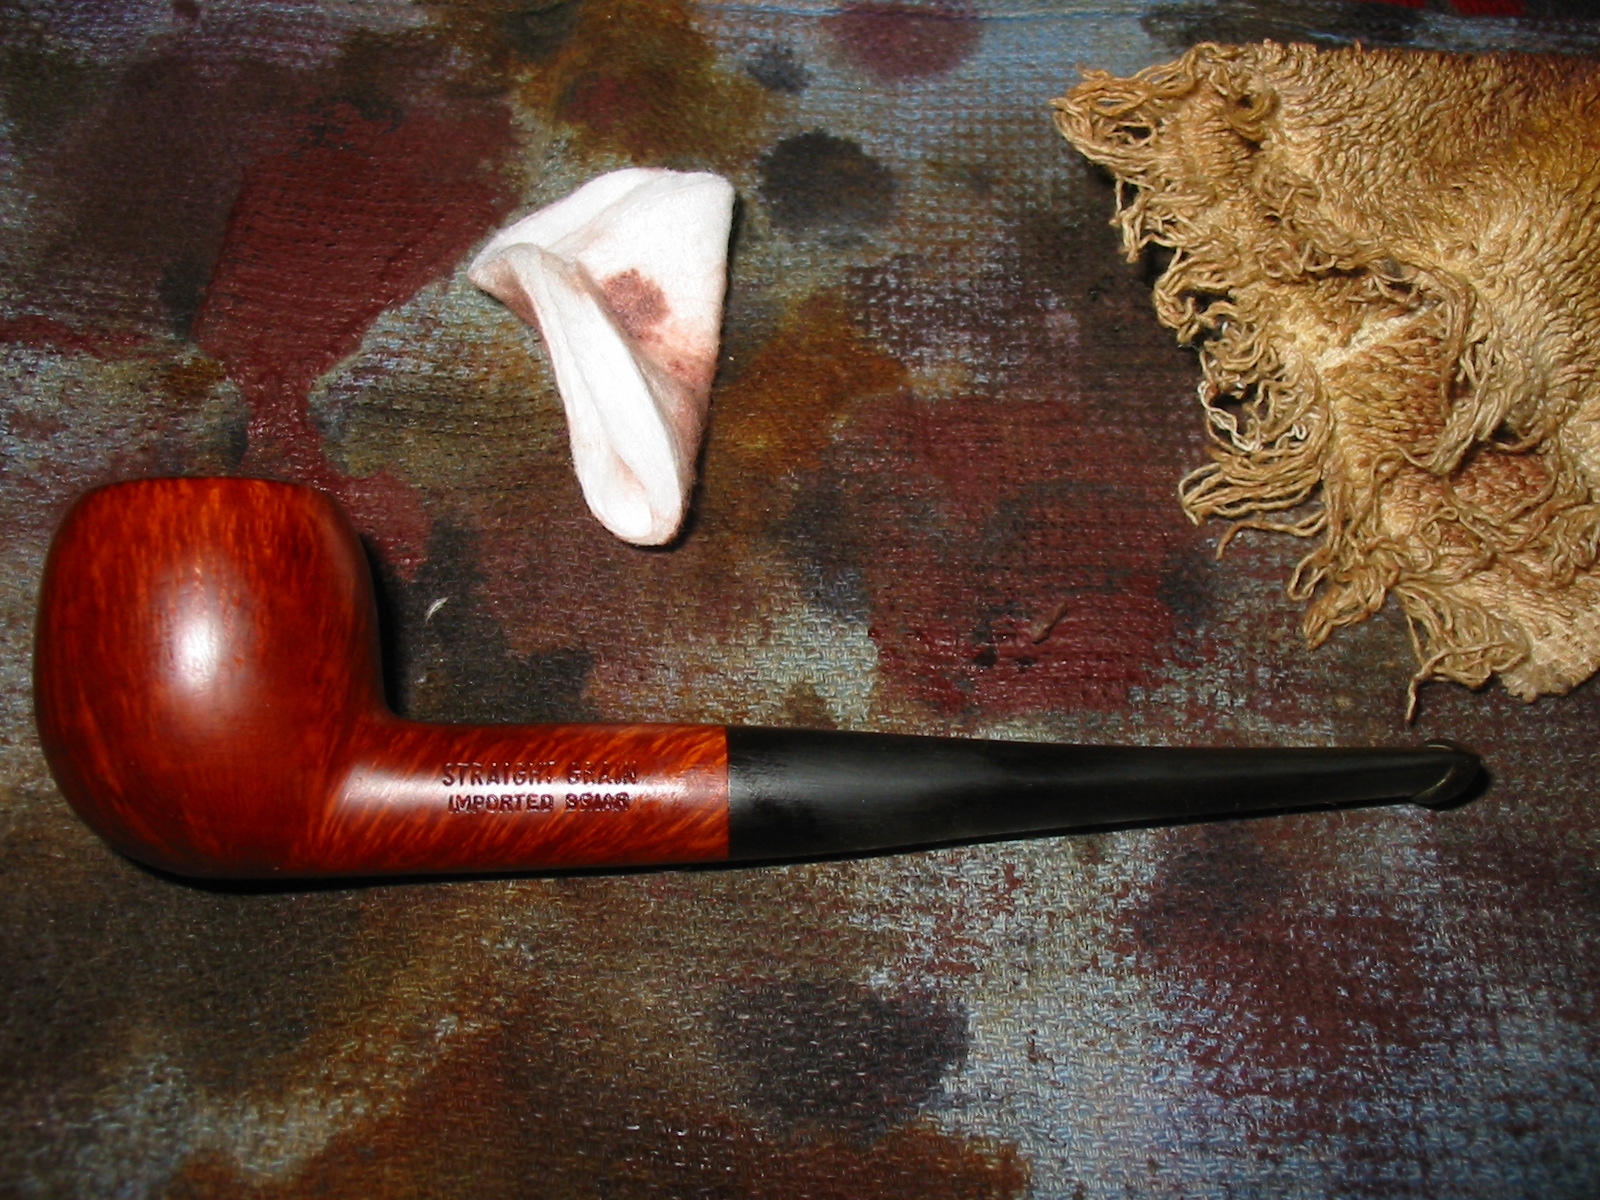
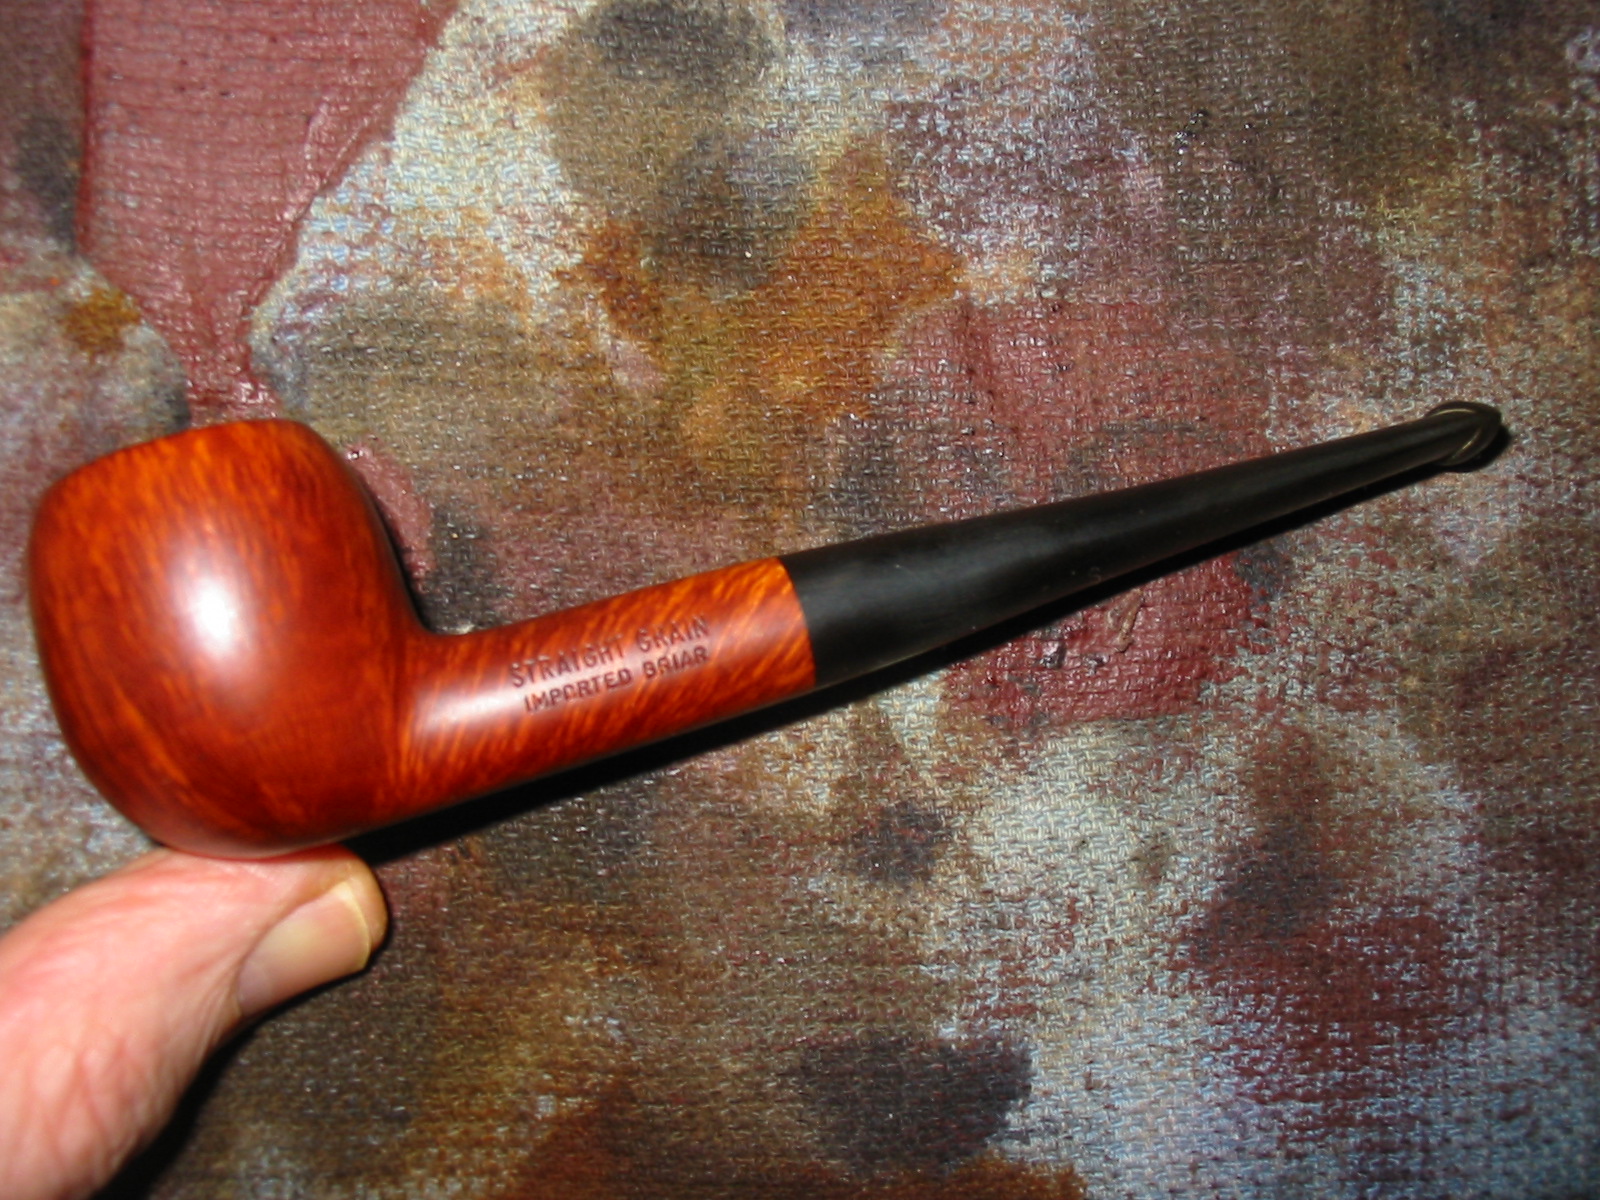
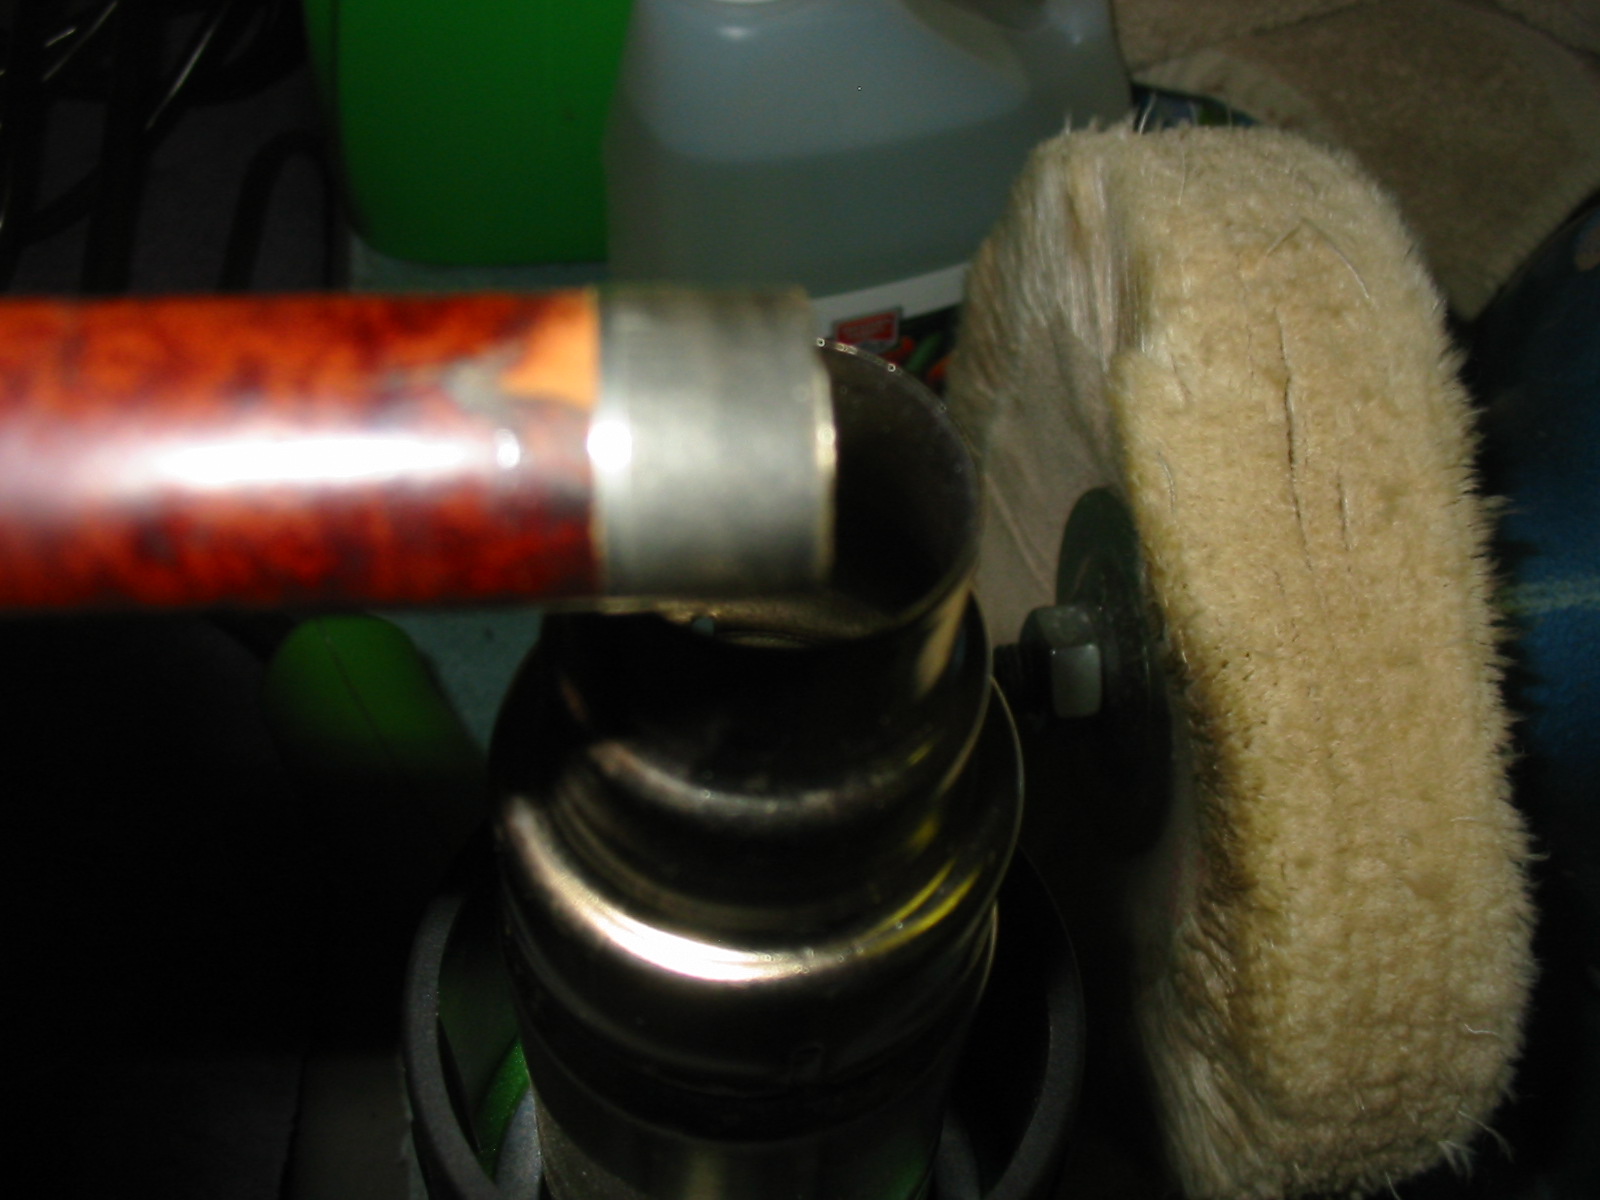
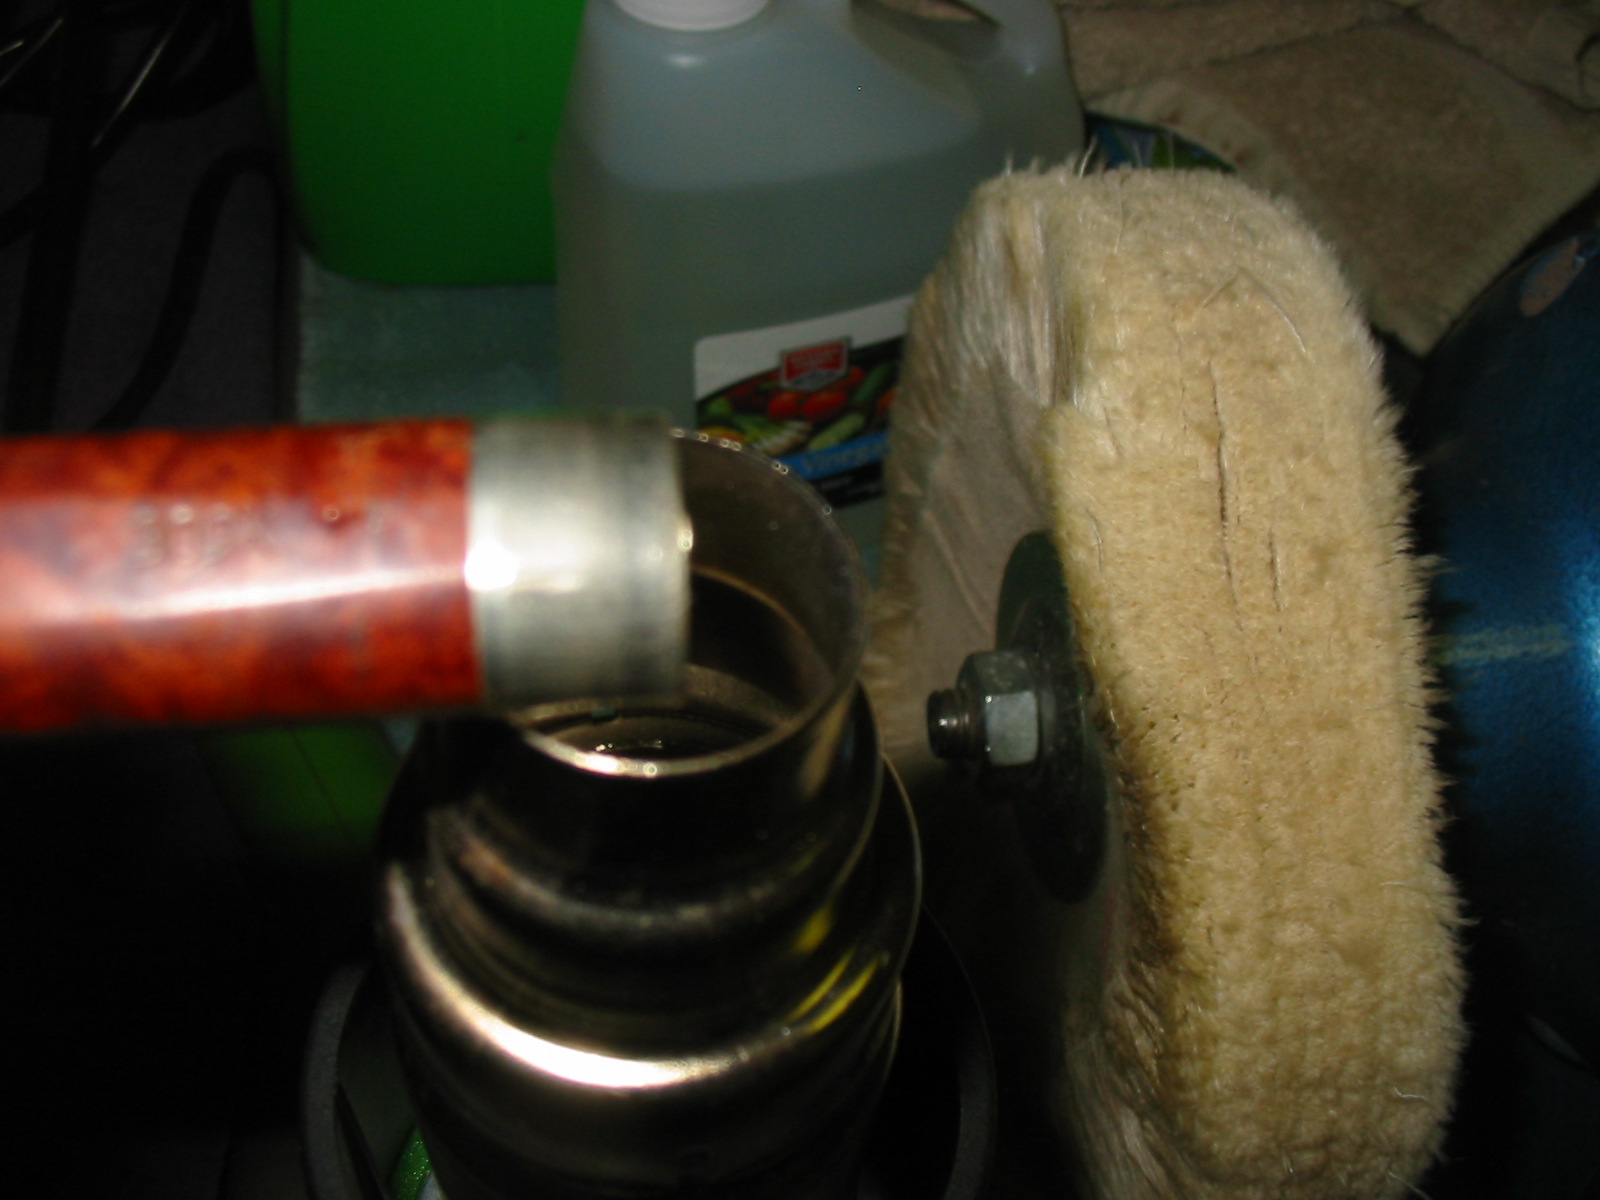
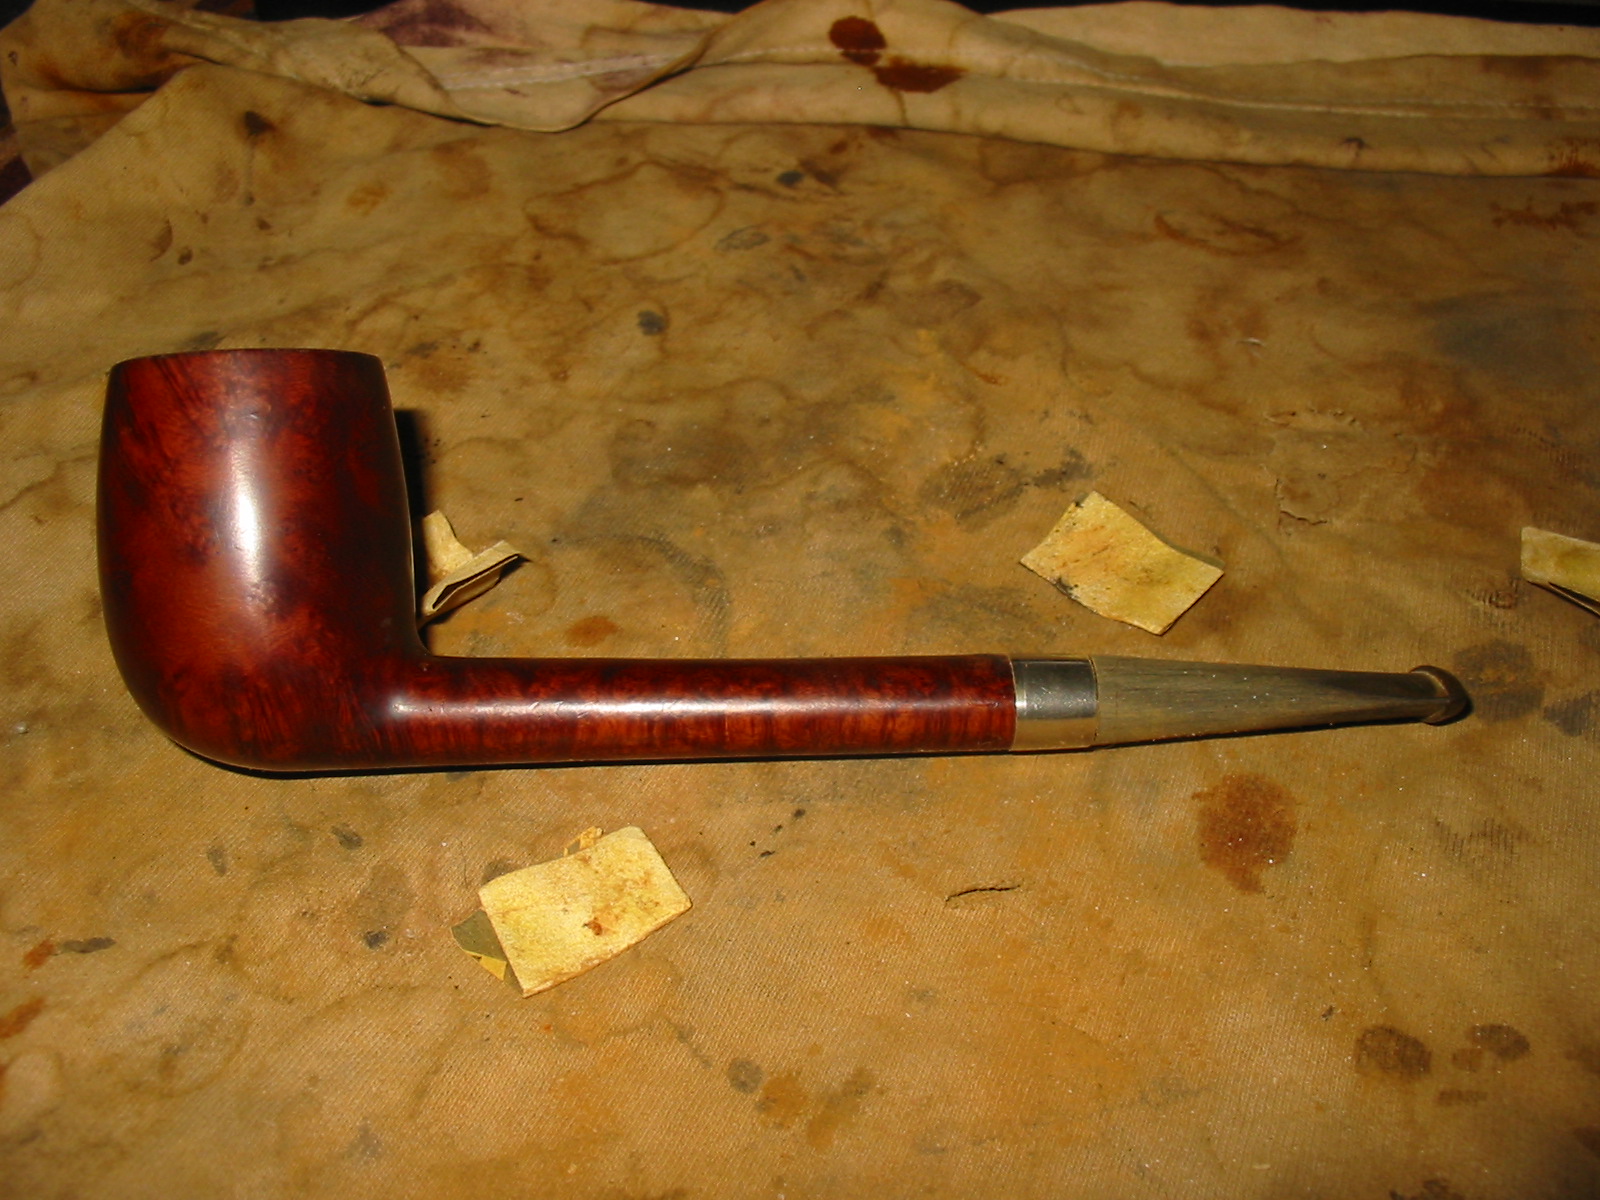
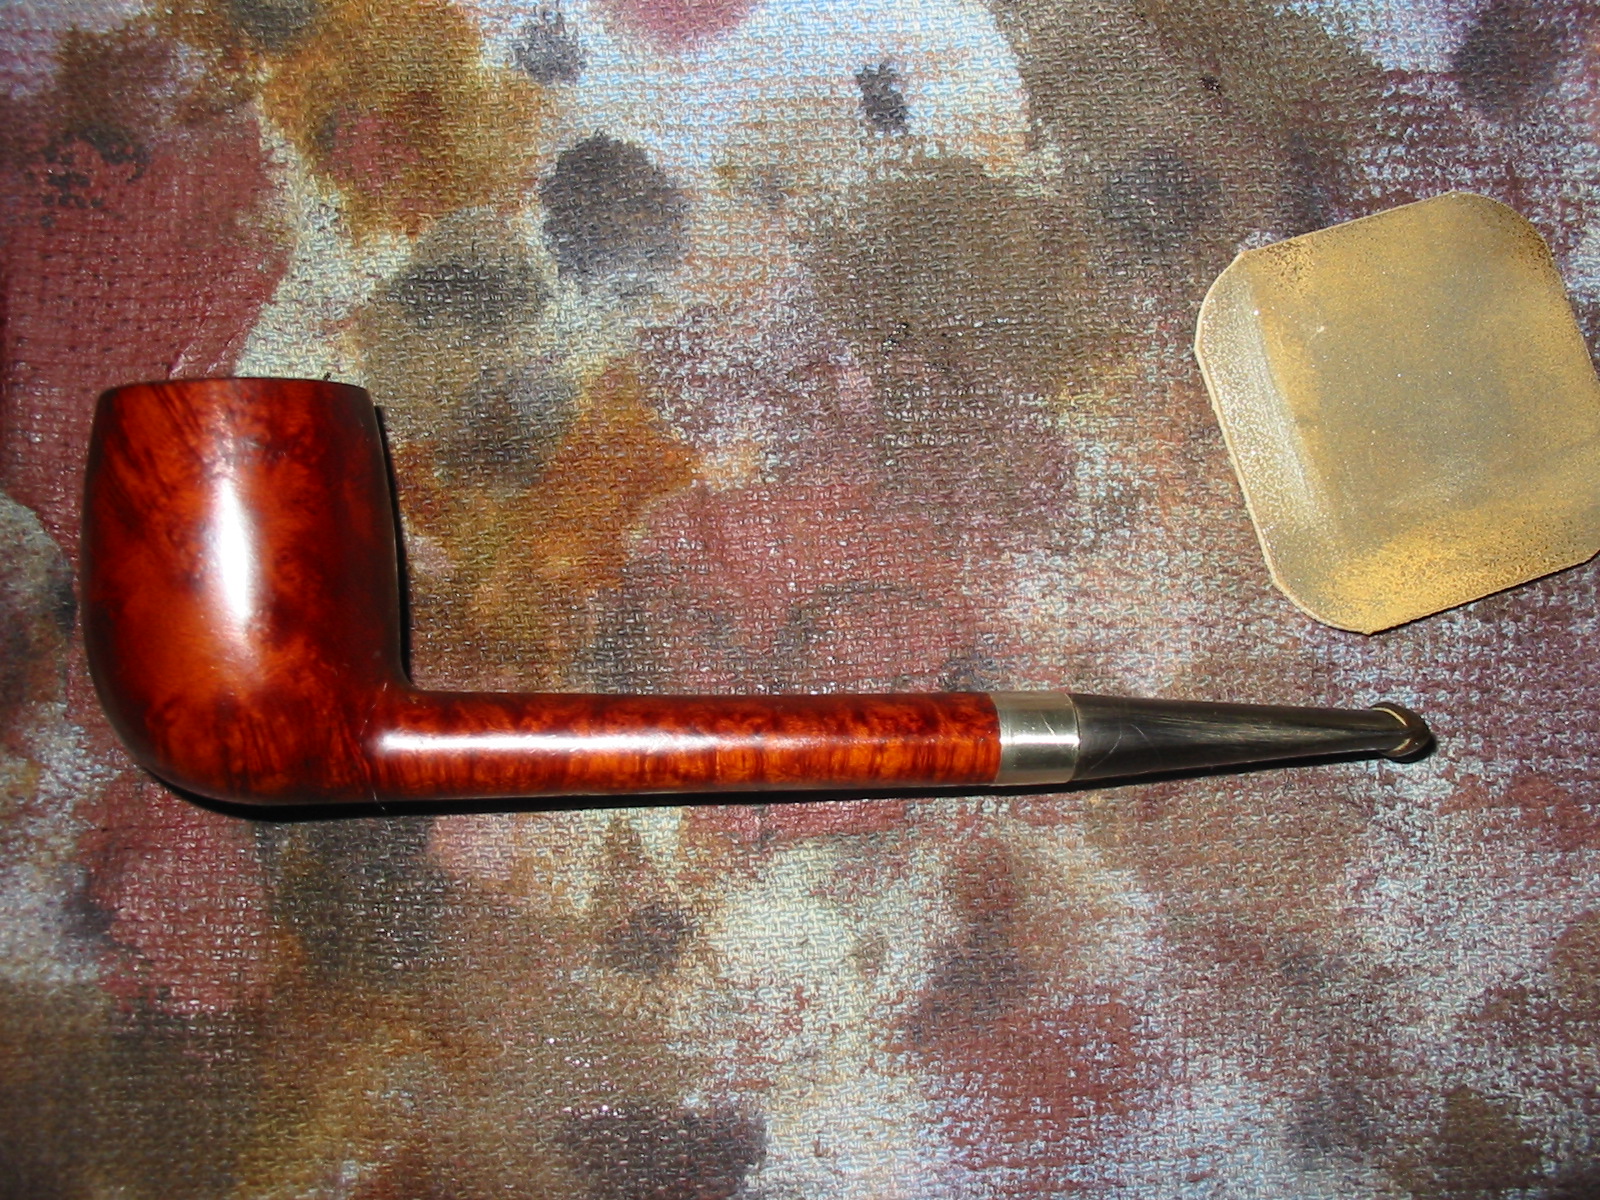
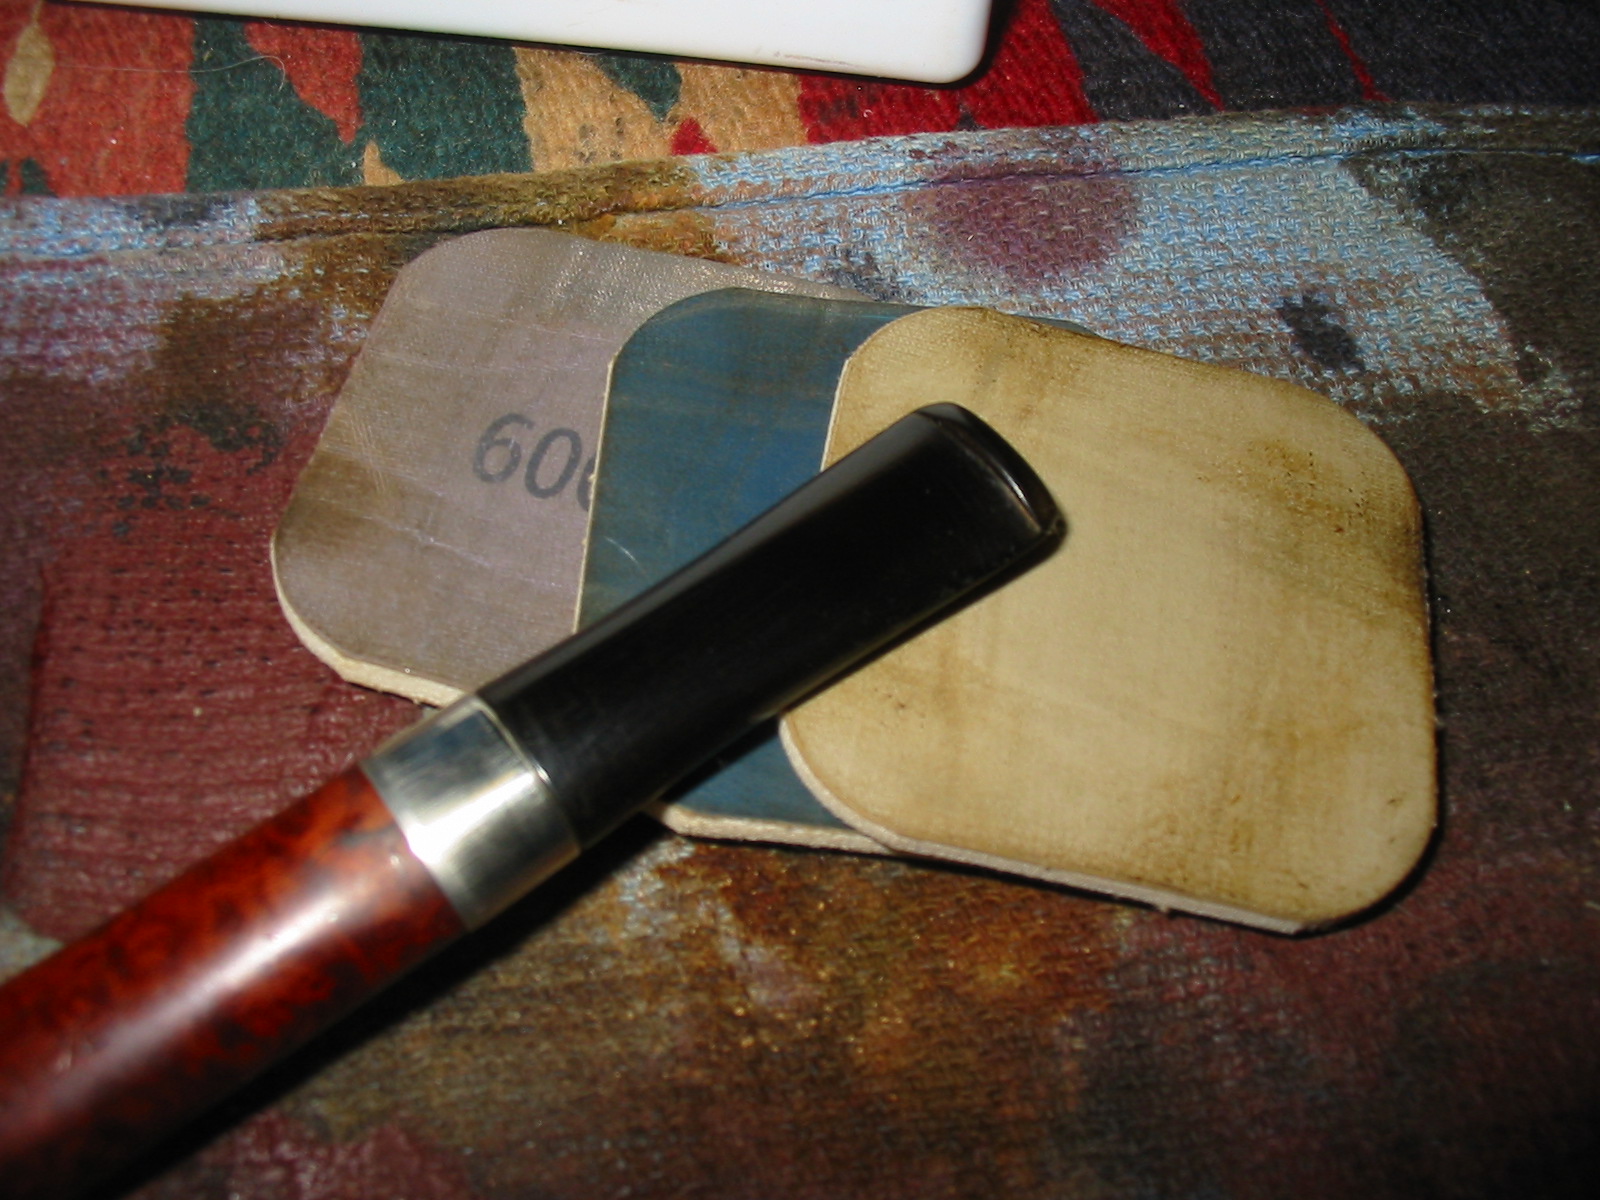
I refit the stem and sanded the sides of the stem until it matched the shank. I also sanded the shank lightly in order to make a smooth transition between the two. I used 220 grit sandpaper to take off the excess vulcanite and bring the stem in line with the shank. At the same time I sanded the tooth marks on the top and bottom of the stem at the button and was able to remove them.
IMG_5206

IMG_5207

IMG_5210

IMG_5212

I sanded the stem and shank with a medium and a fine grit sanding sponge and then a fine grit sanding block. The refit stem is shown in the next series of four photos.
IMG_5205

IMG_5208

IMG_5209

IMG_5211

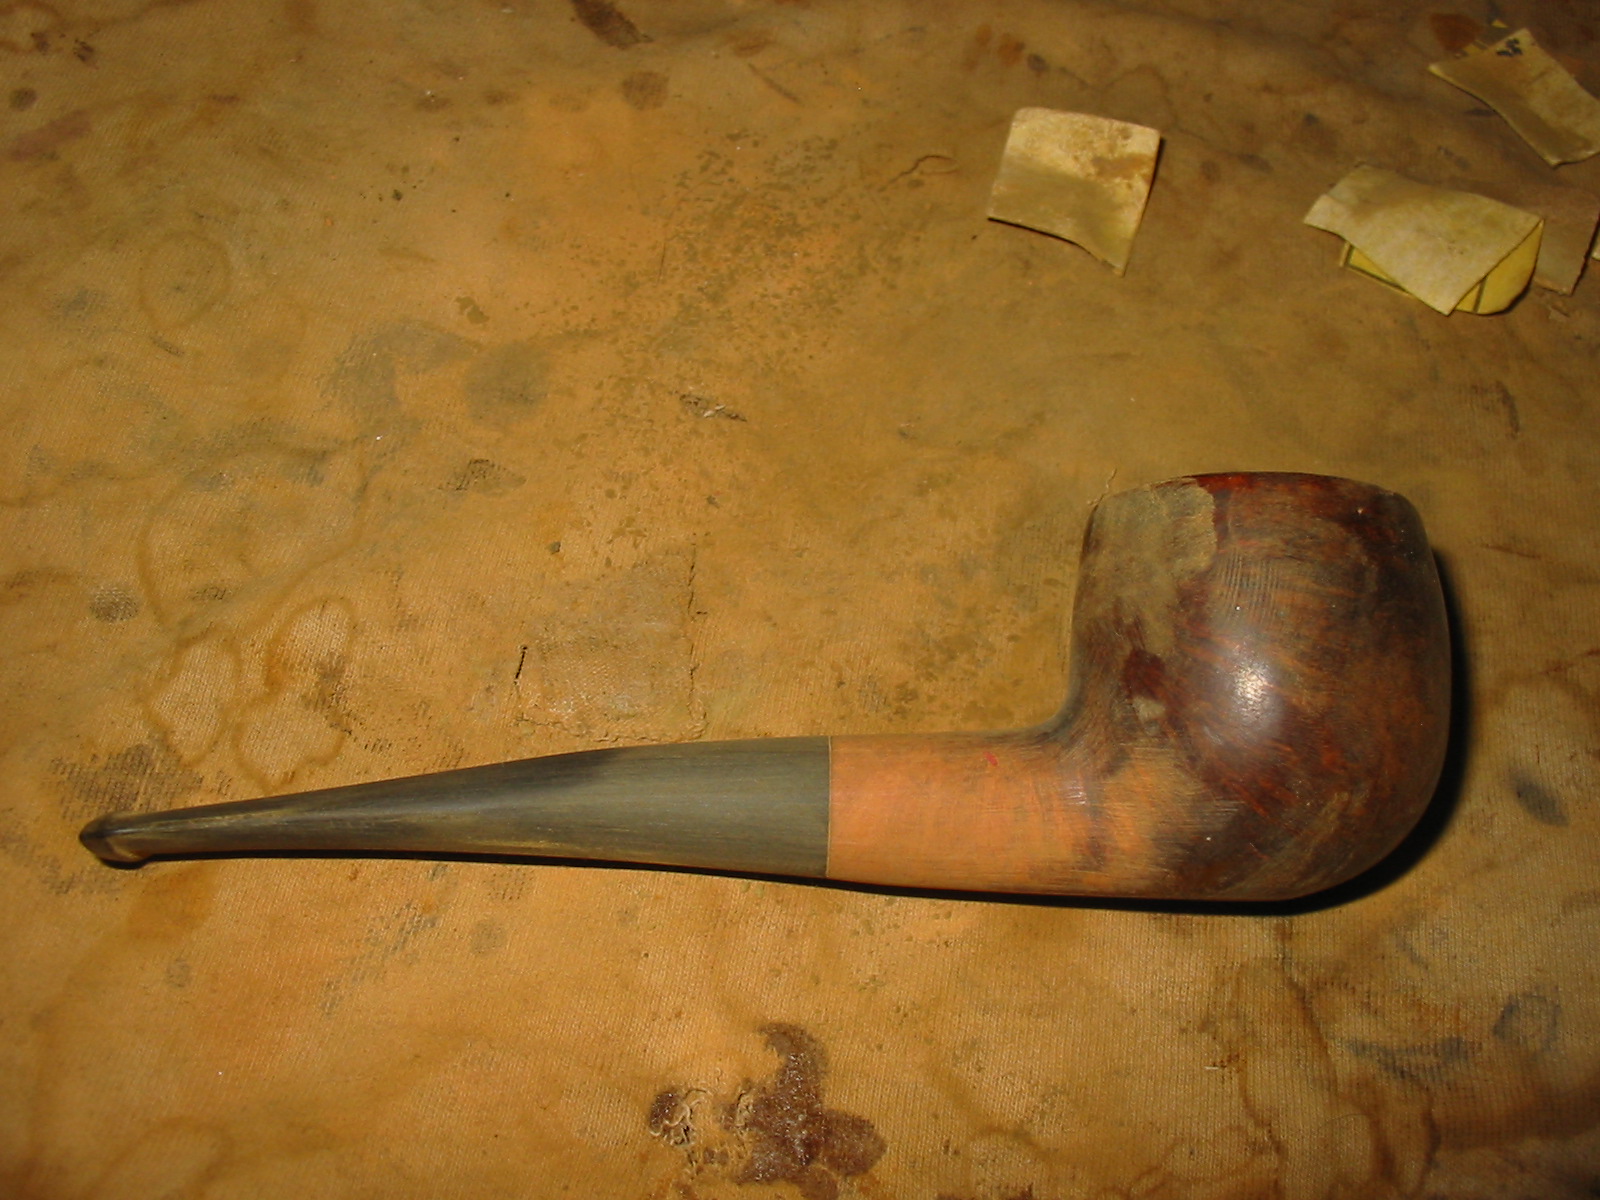
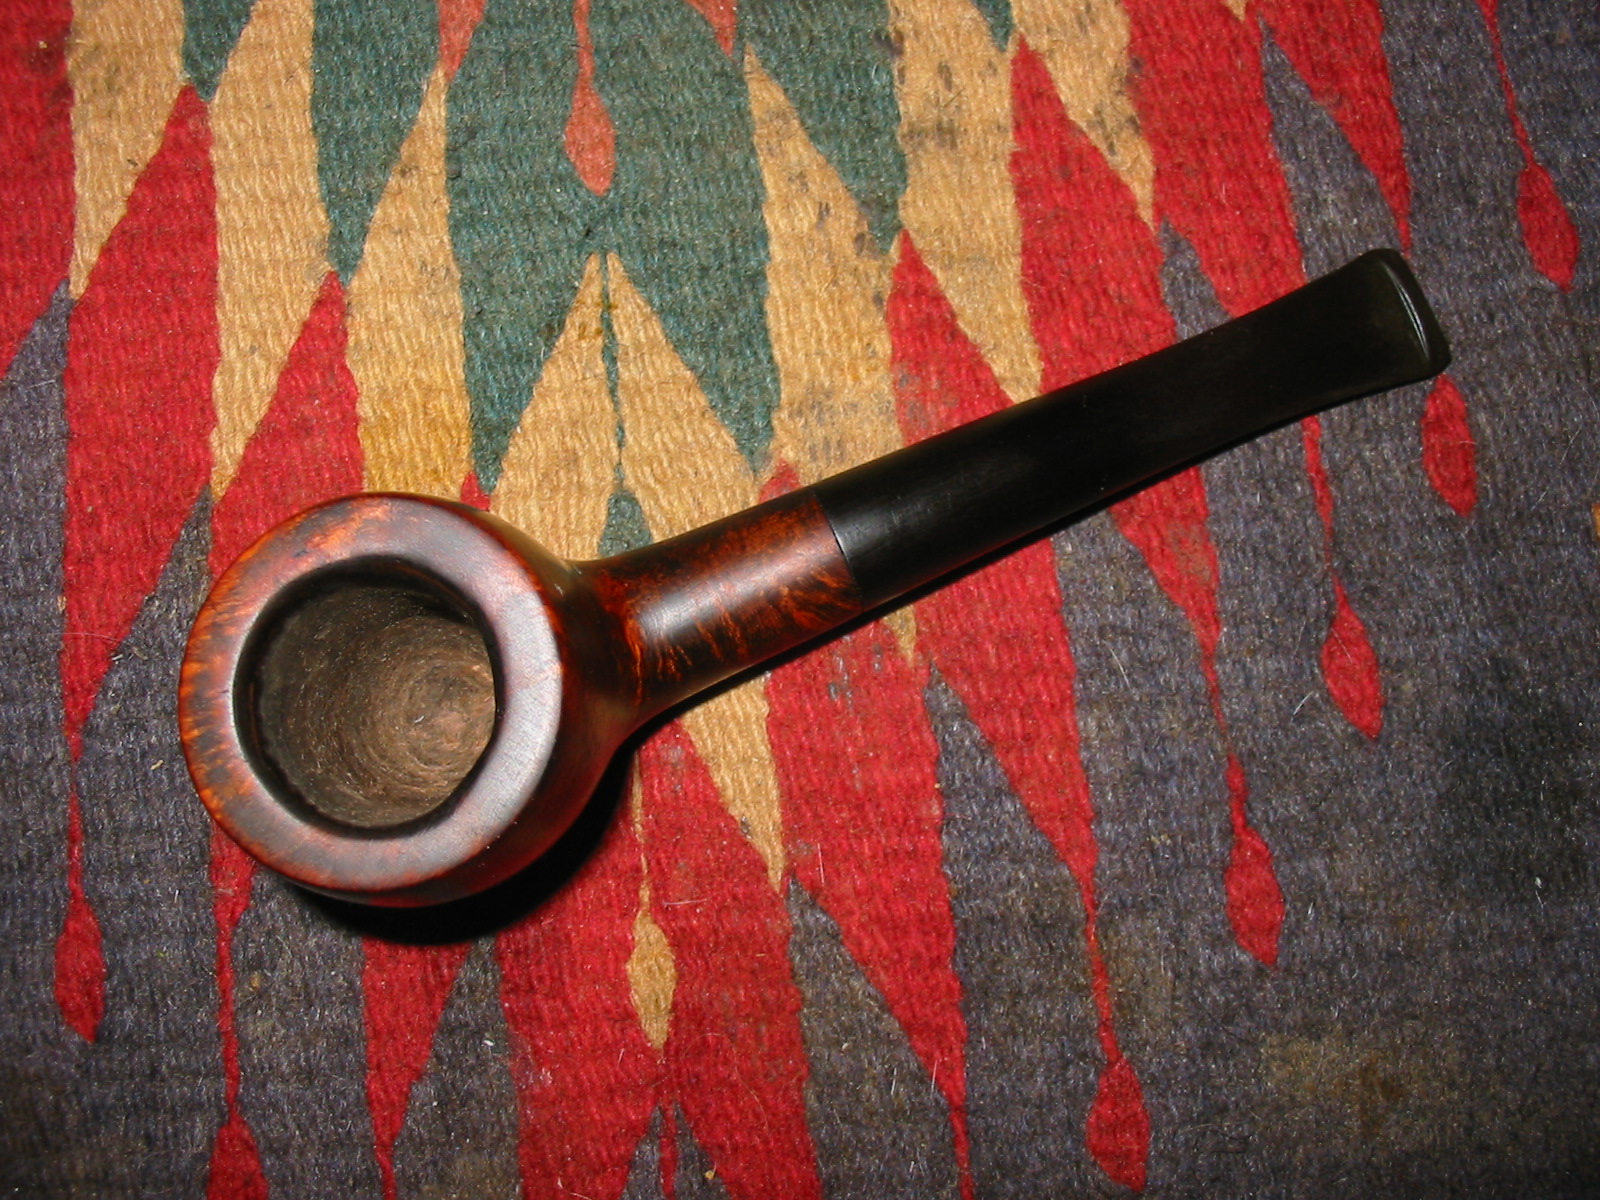
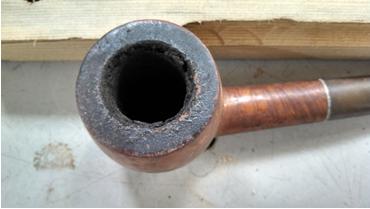
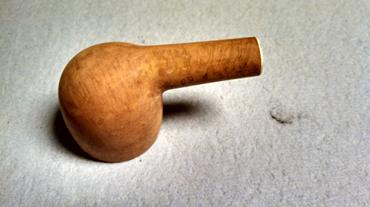
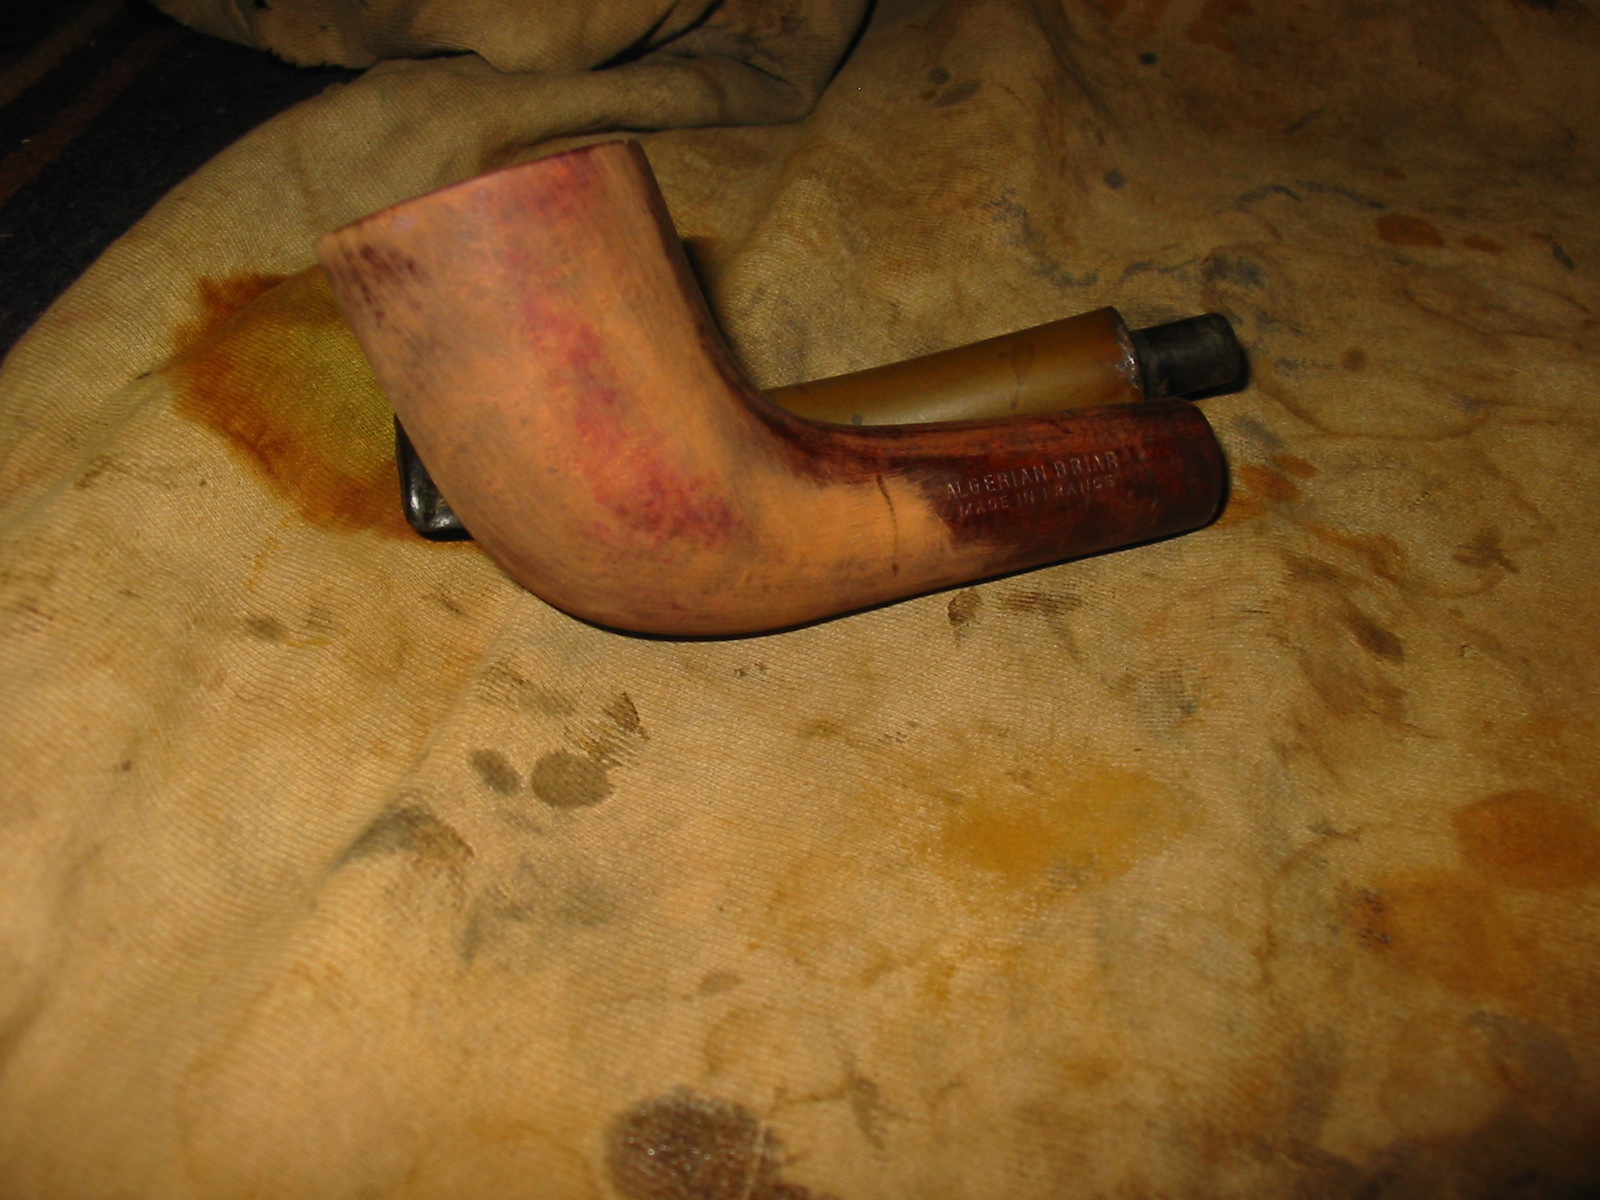
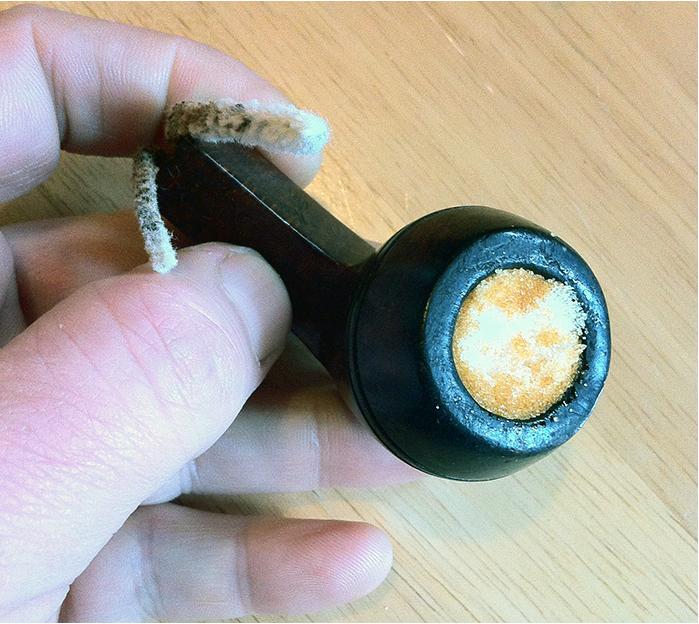
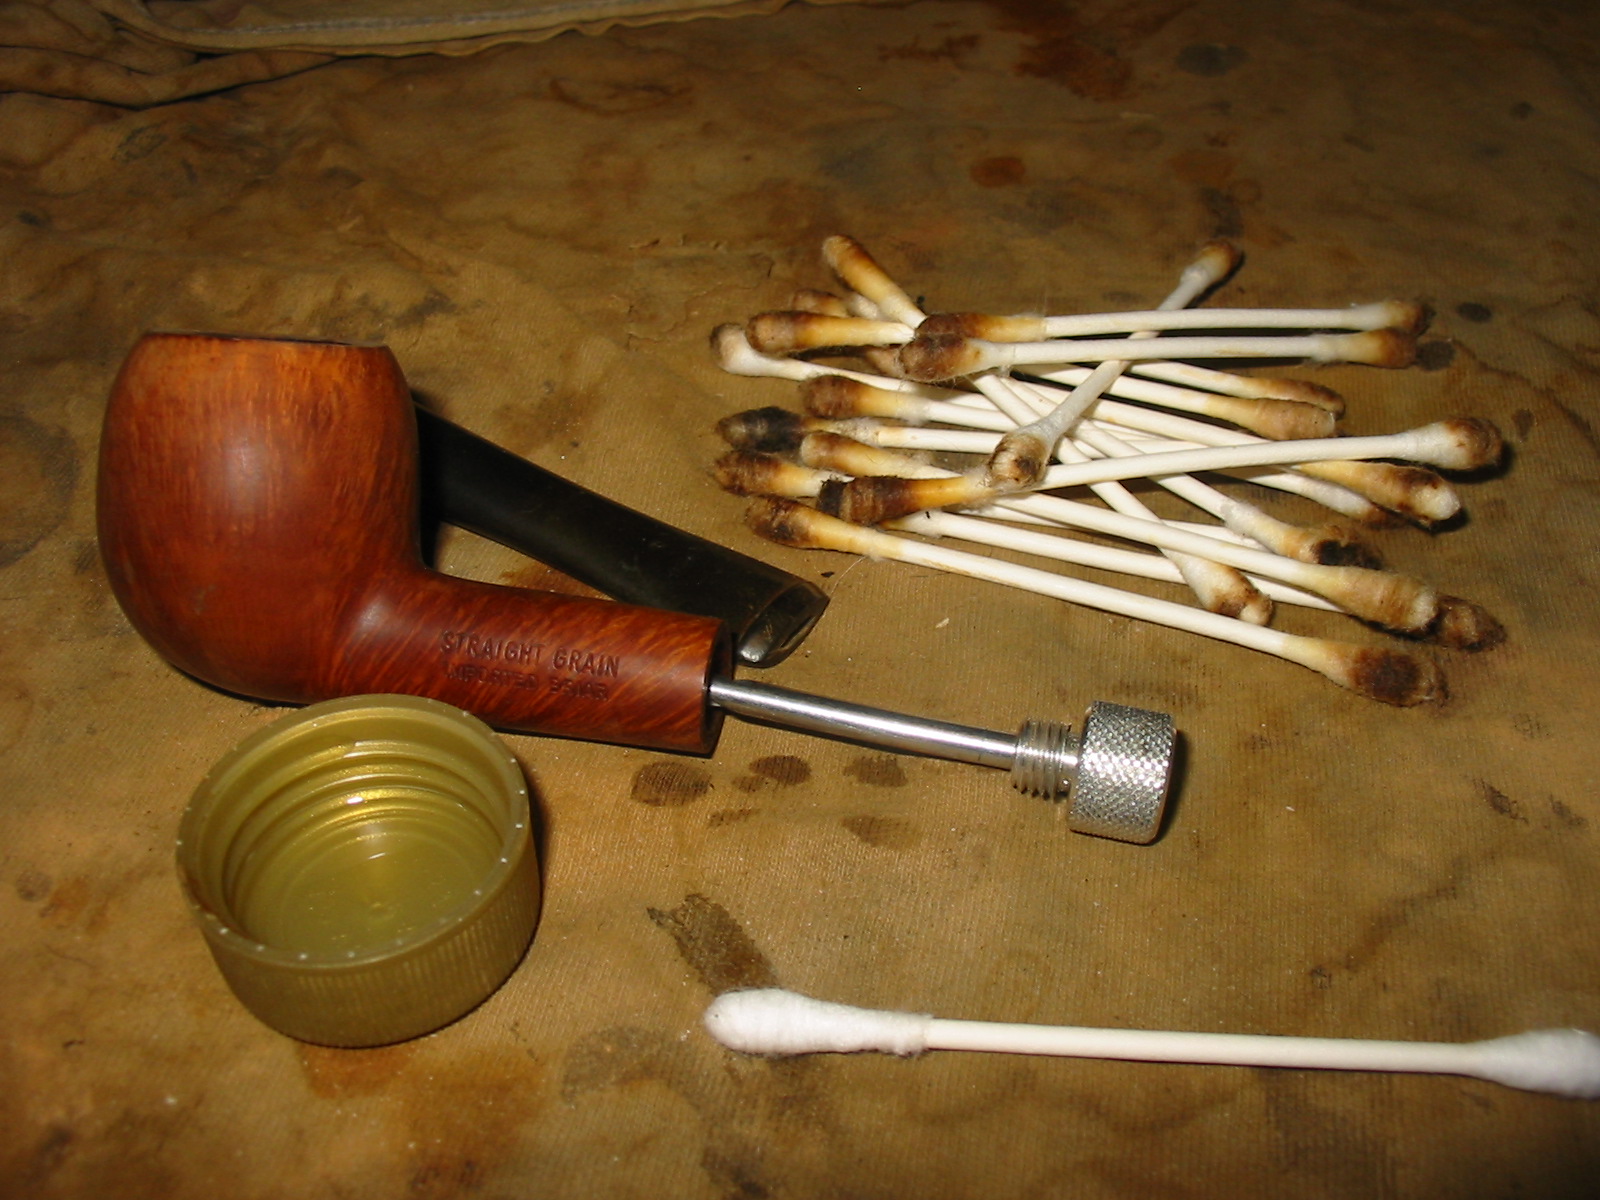
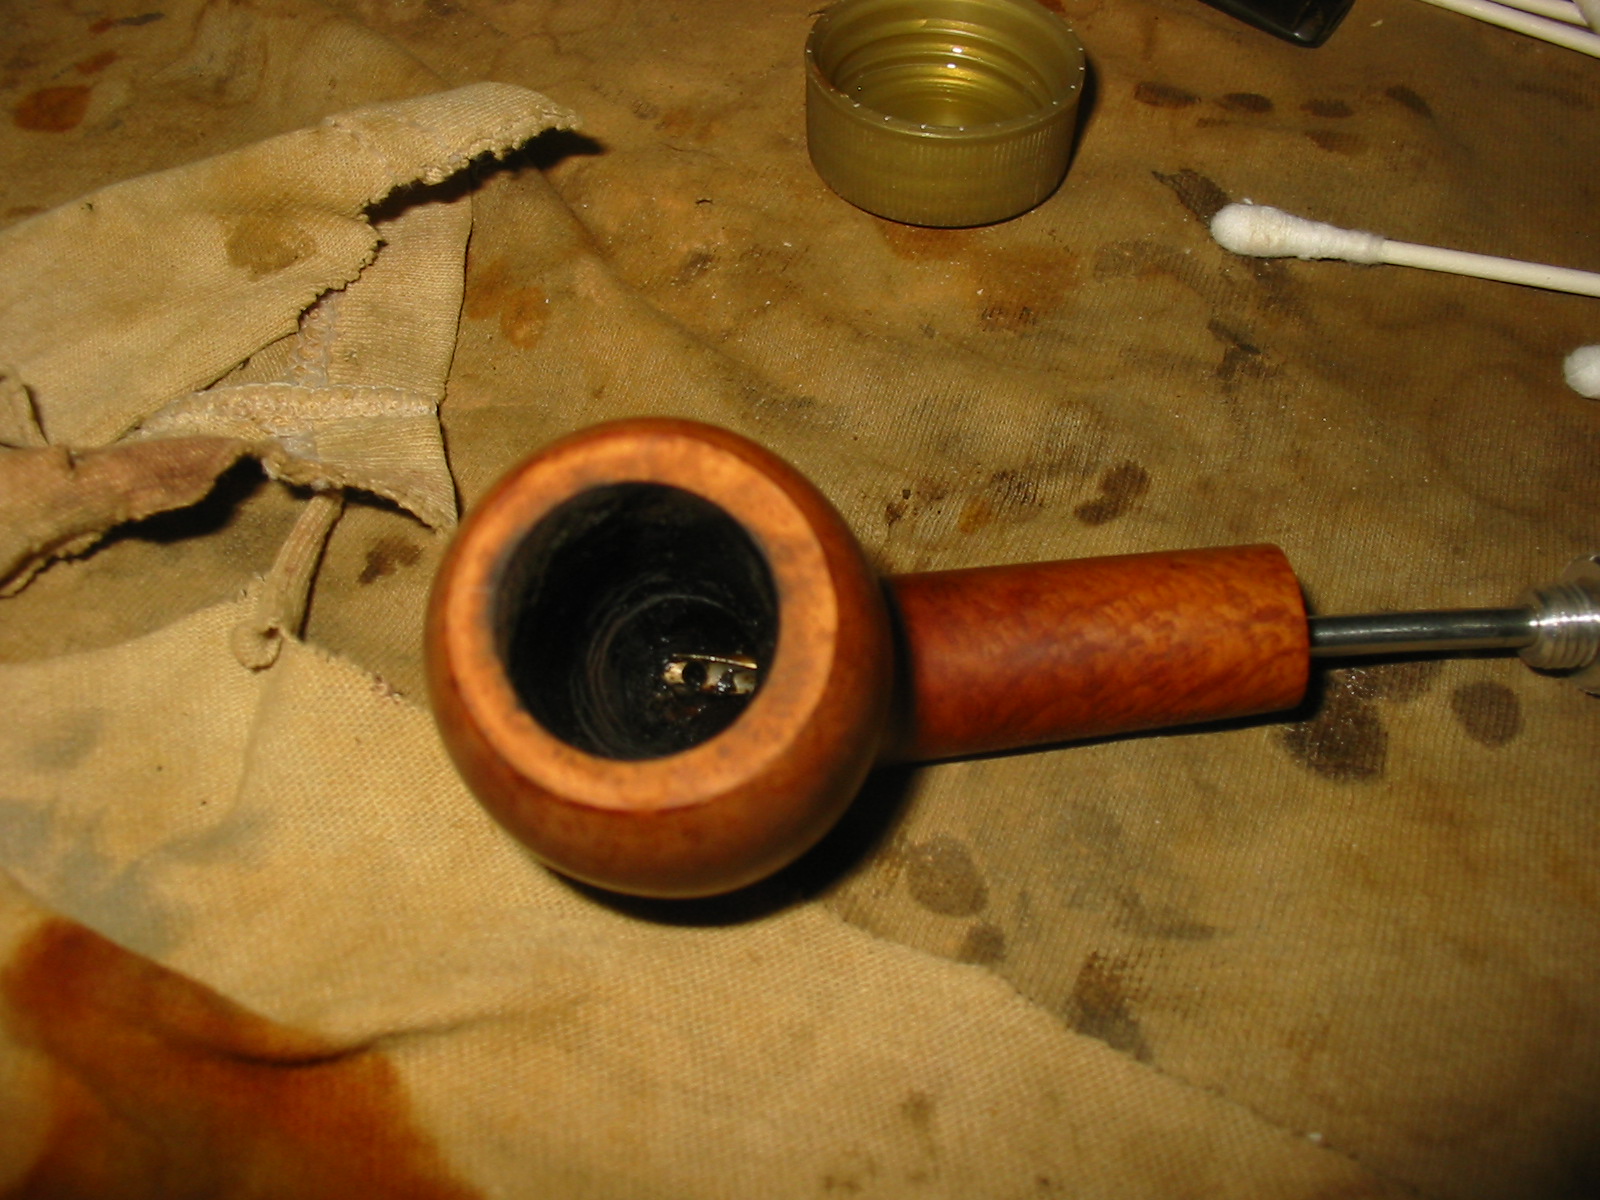
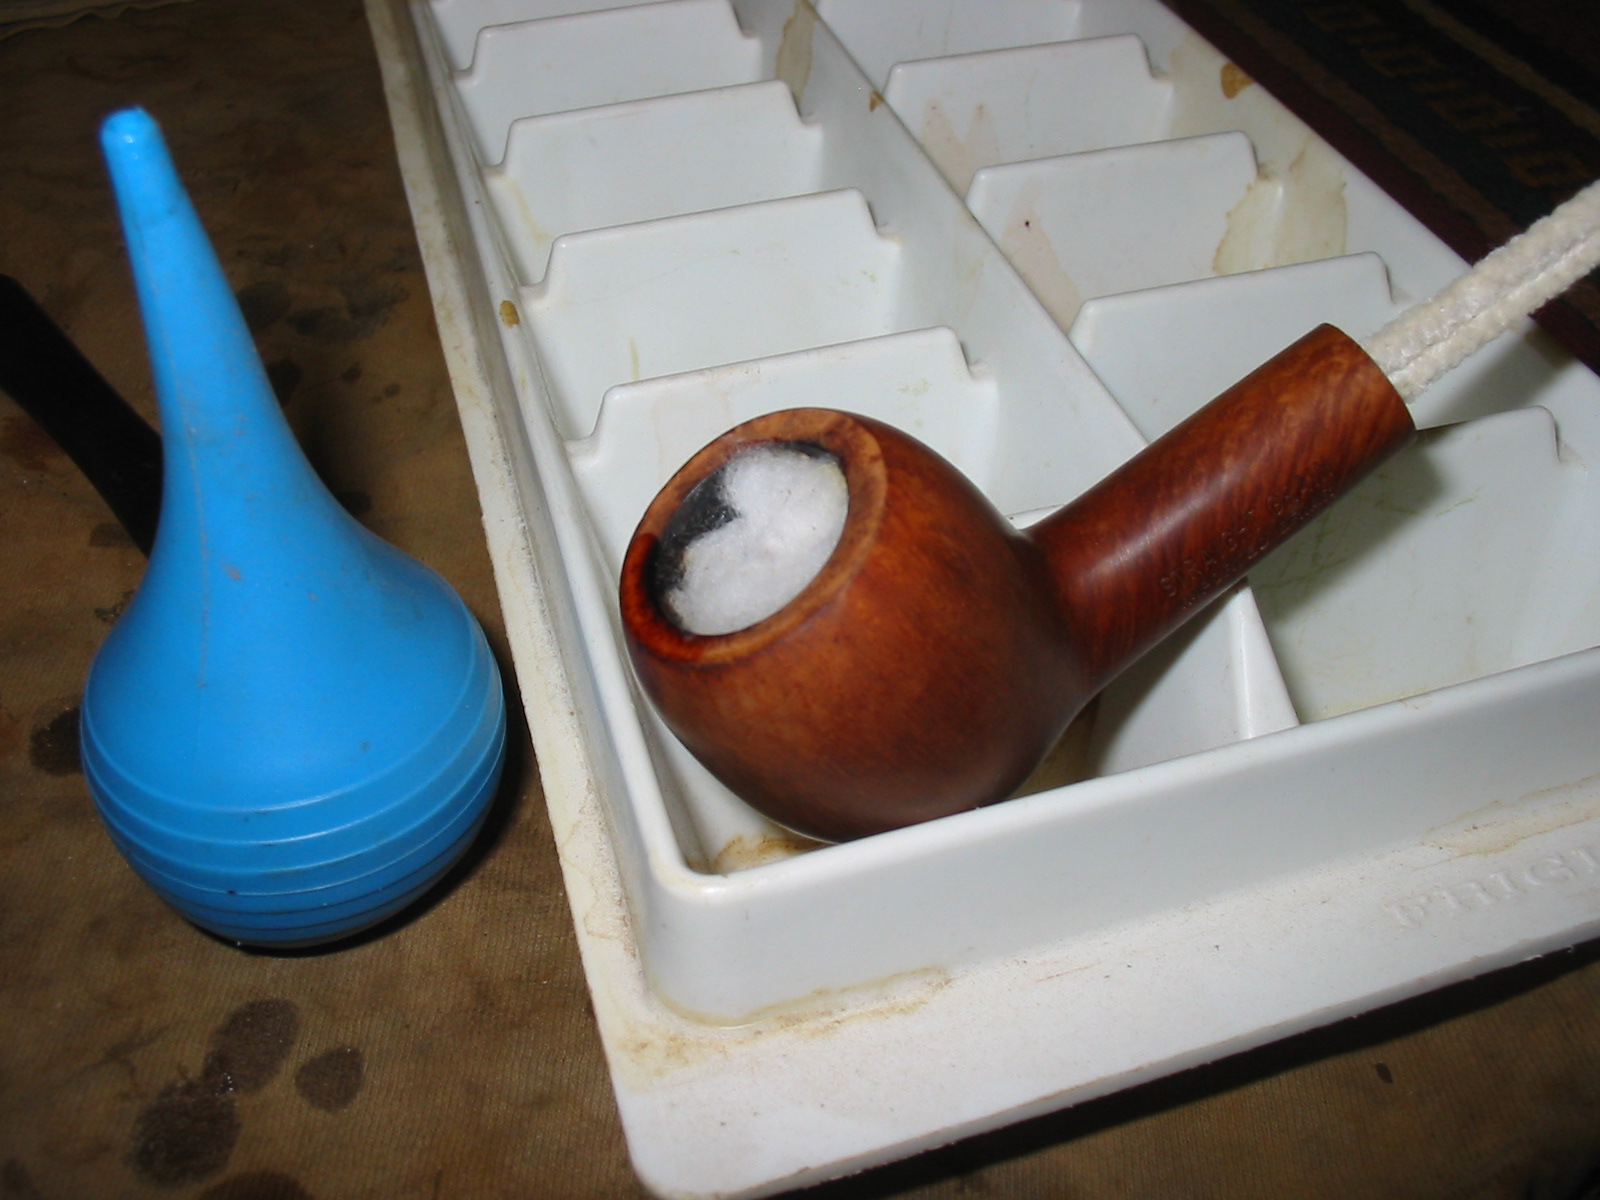
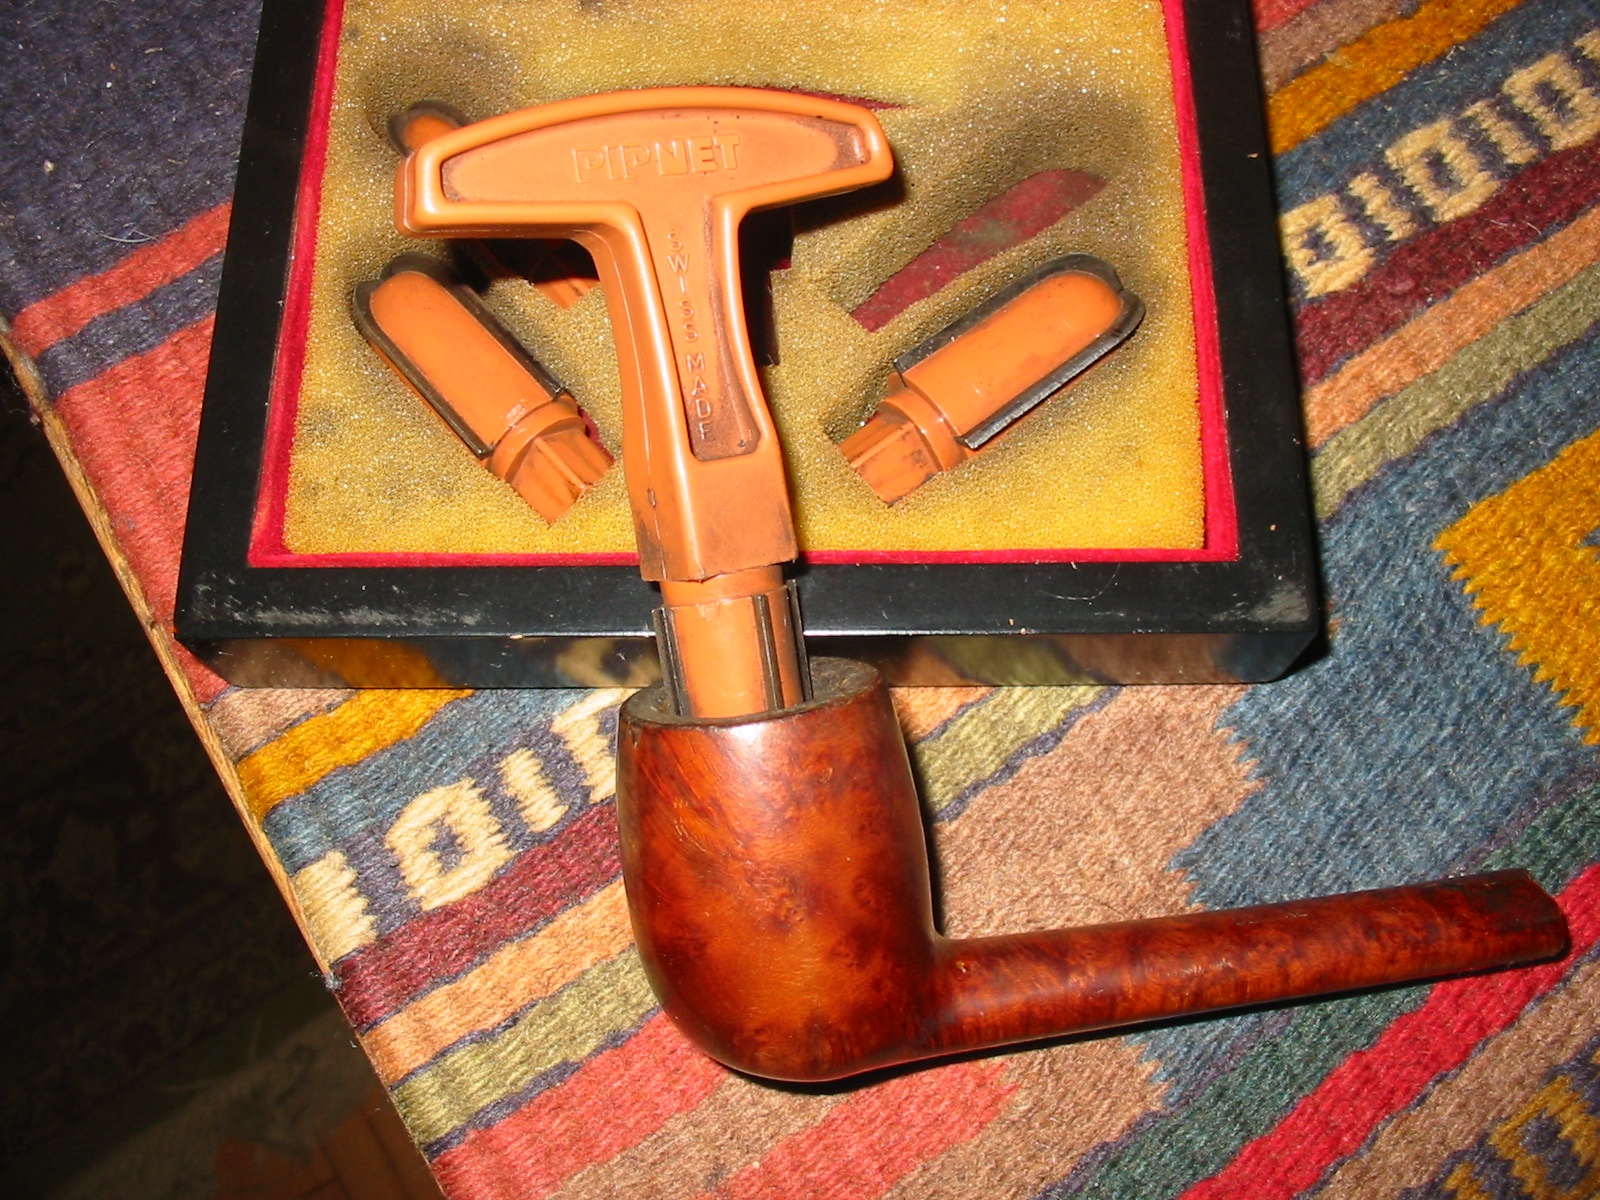
I wiped the bowl and shank down with acetone and clean the stem and shank with isopropyl alcohol and pipe cleaners. I reamed the bowl with a PipNet reamer to take the slight cake back to the wood and even the buildup on the walls. It seemed to have a slight ridge of cake mid-bowl and I wanted the walls clean so that I could build up my own cake.
IMG_5213

IMG_5214

IMG_5215

IMG_5216

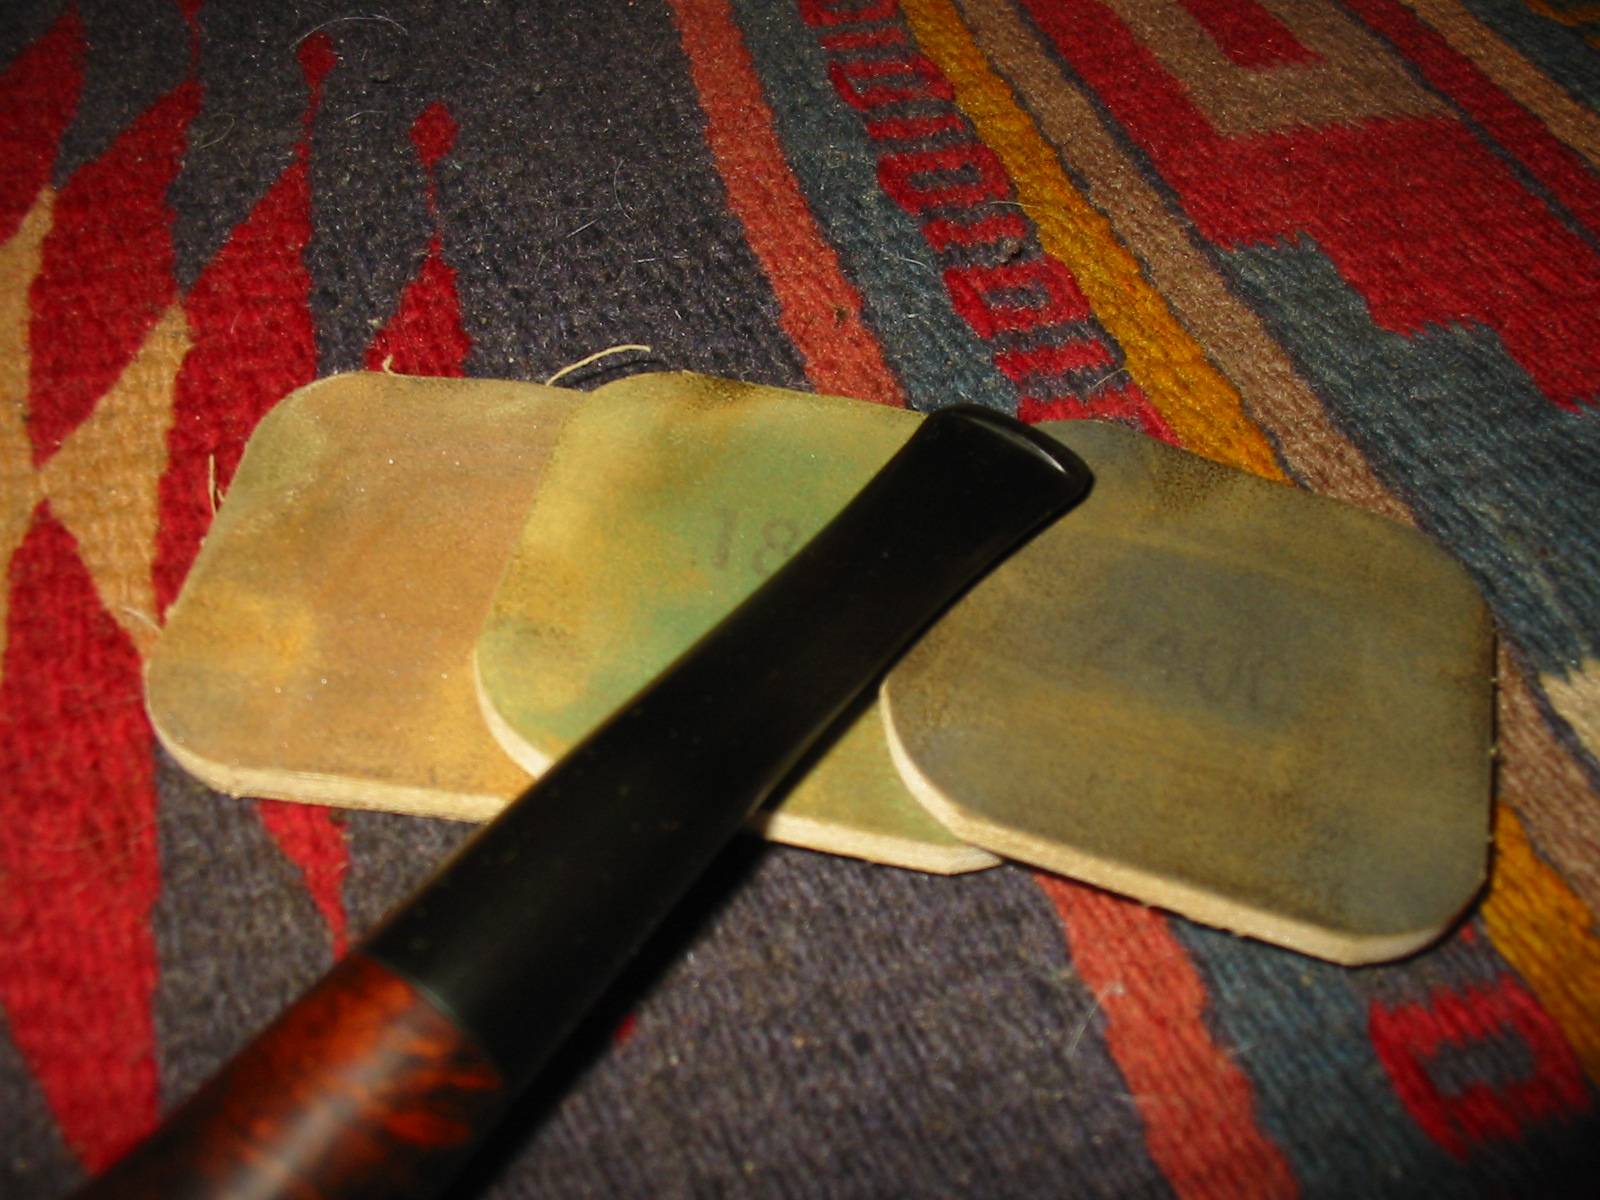
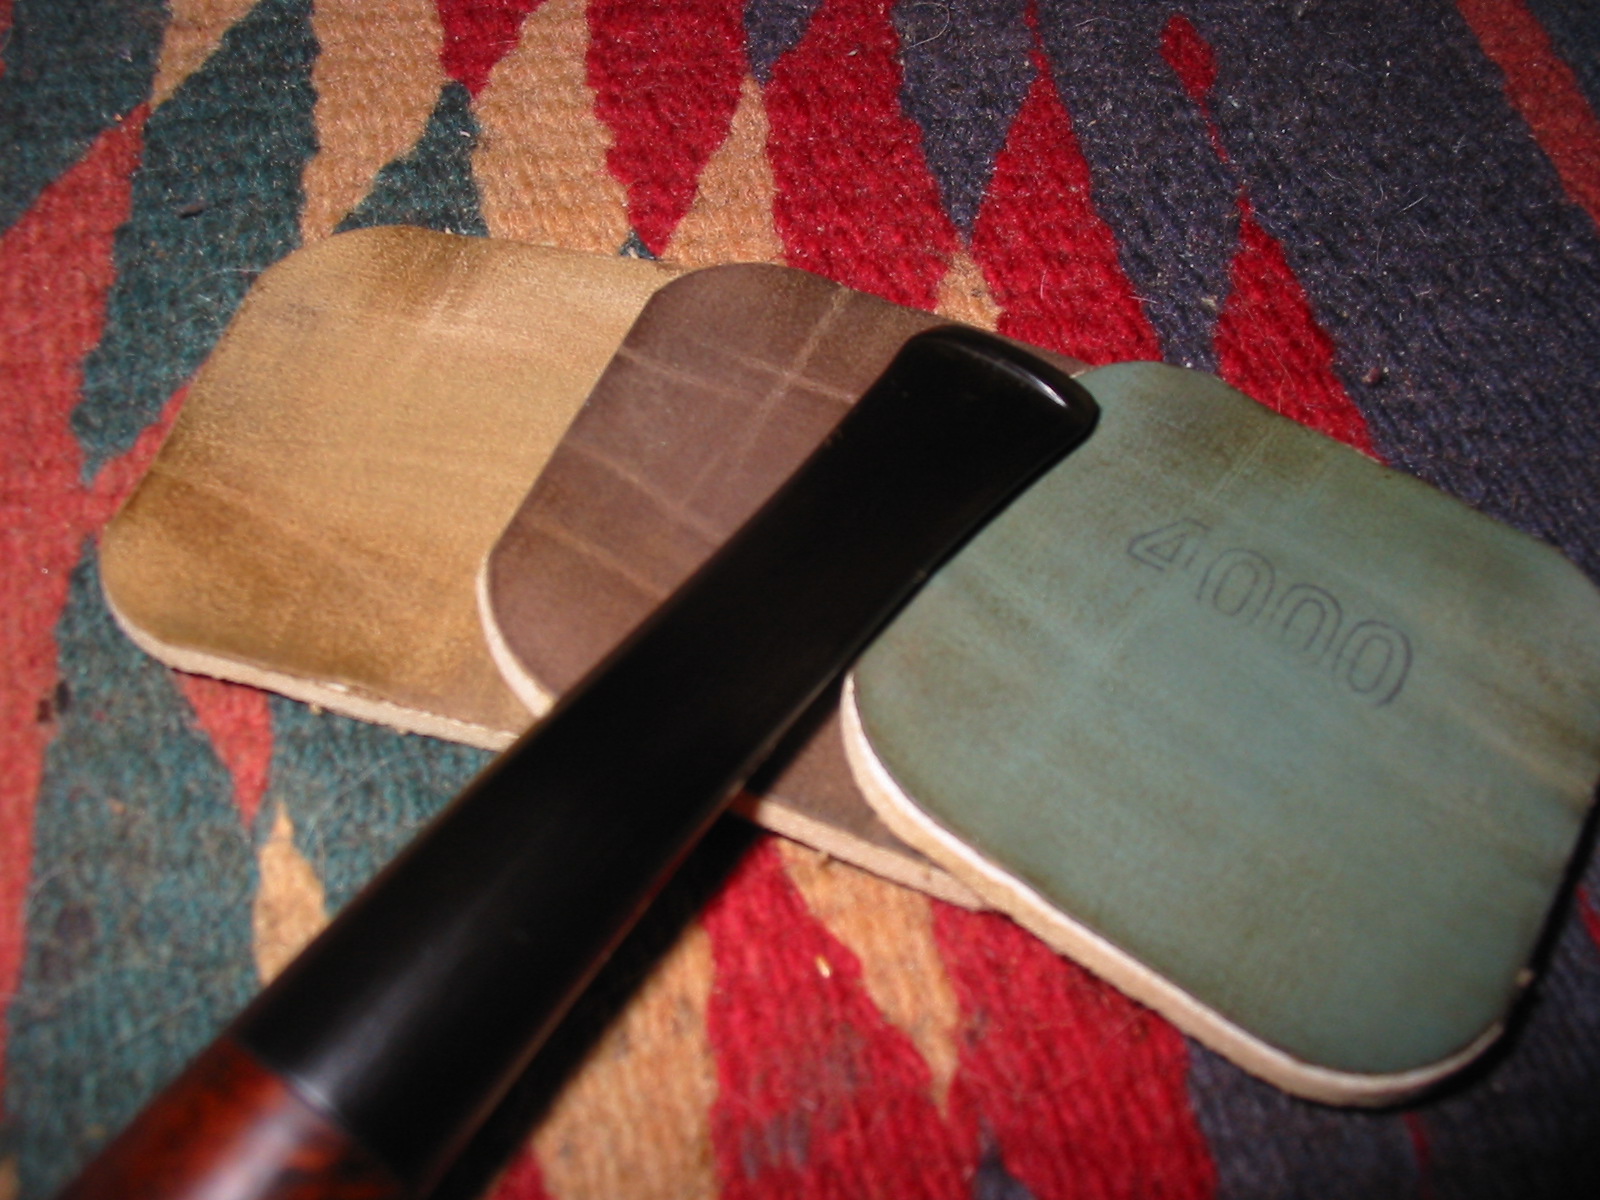
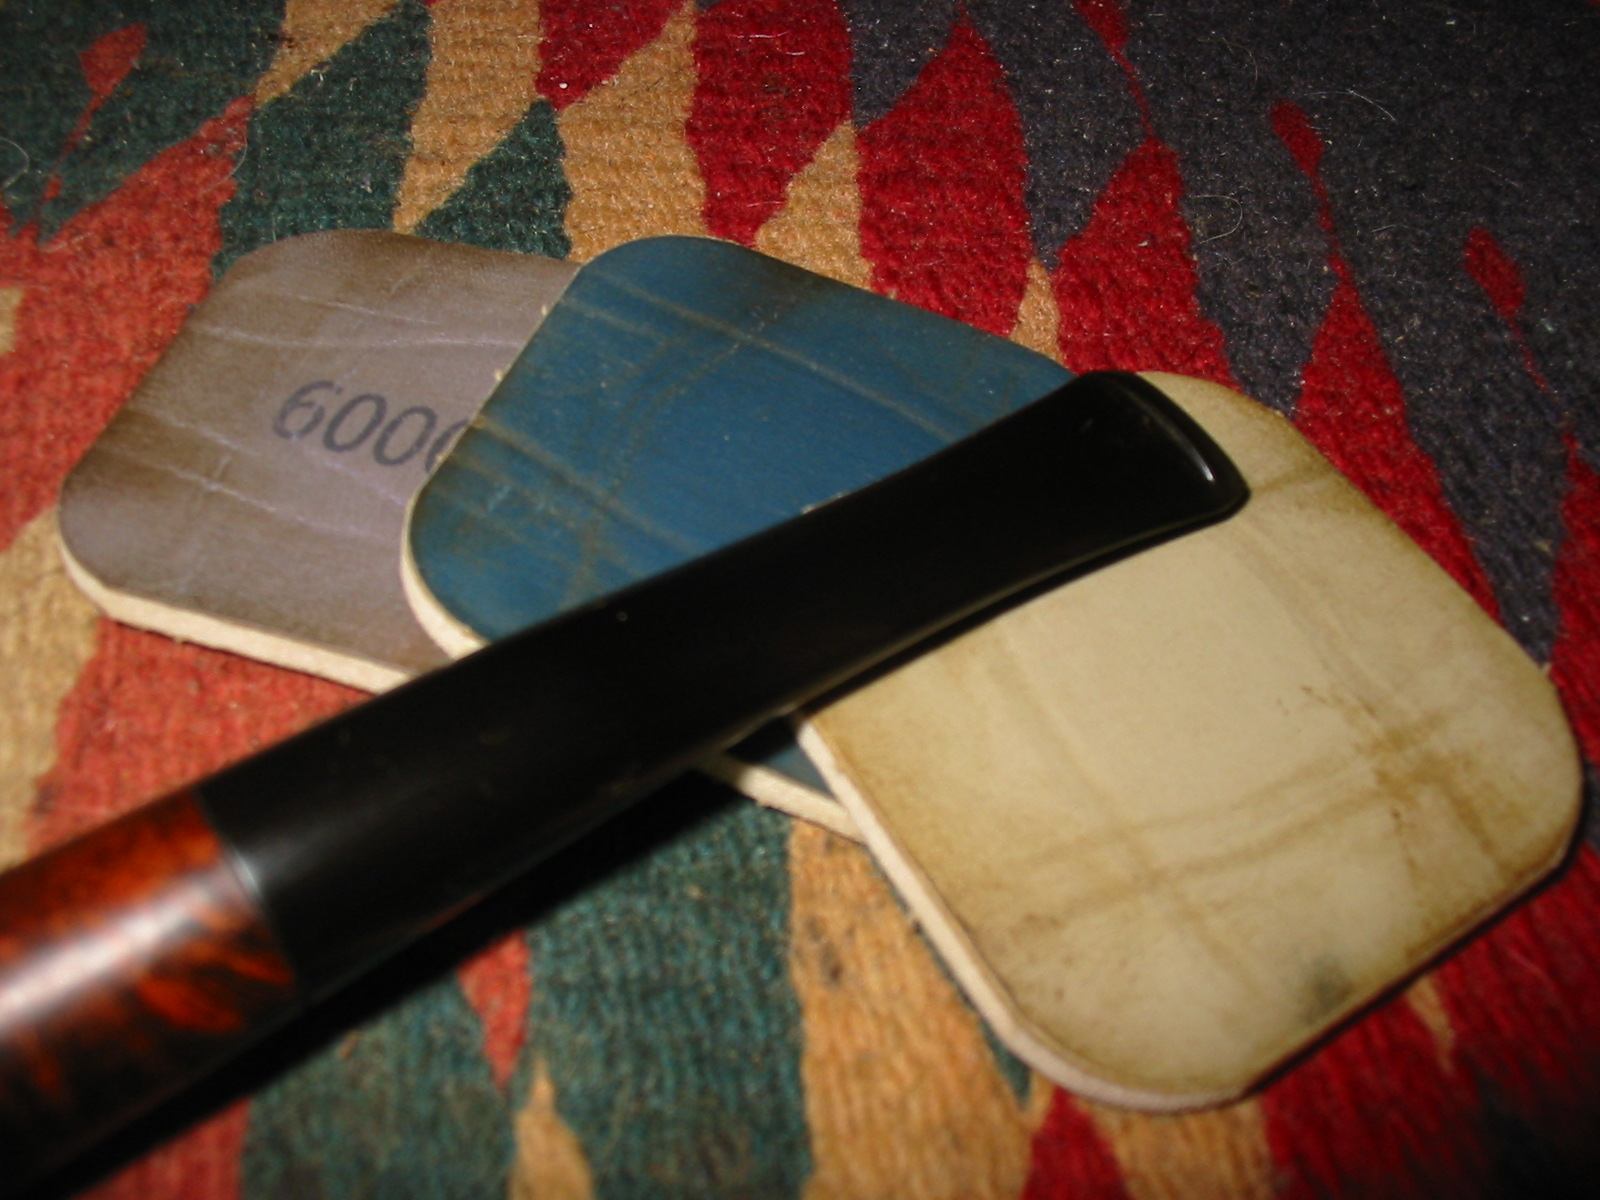
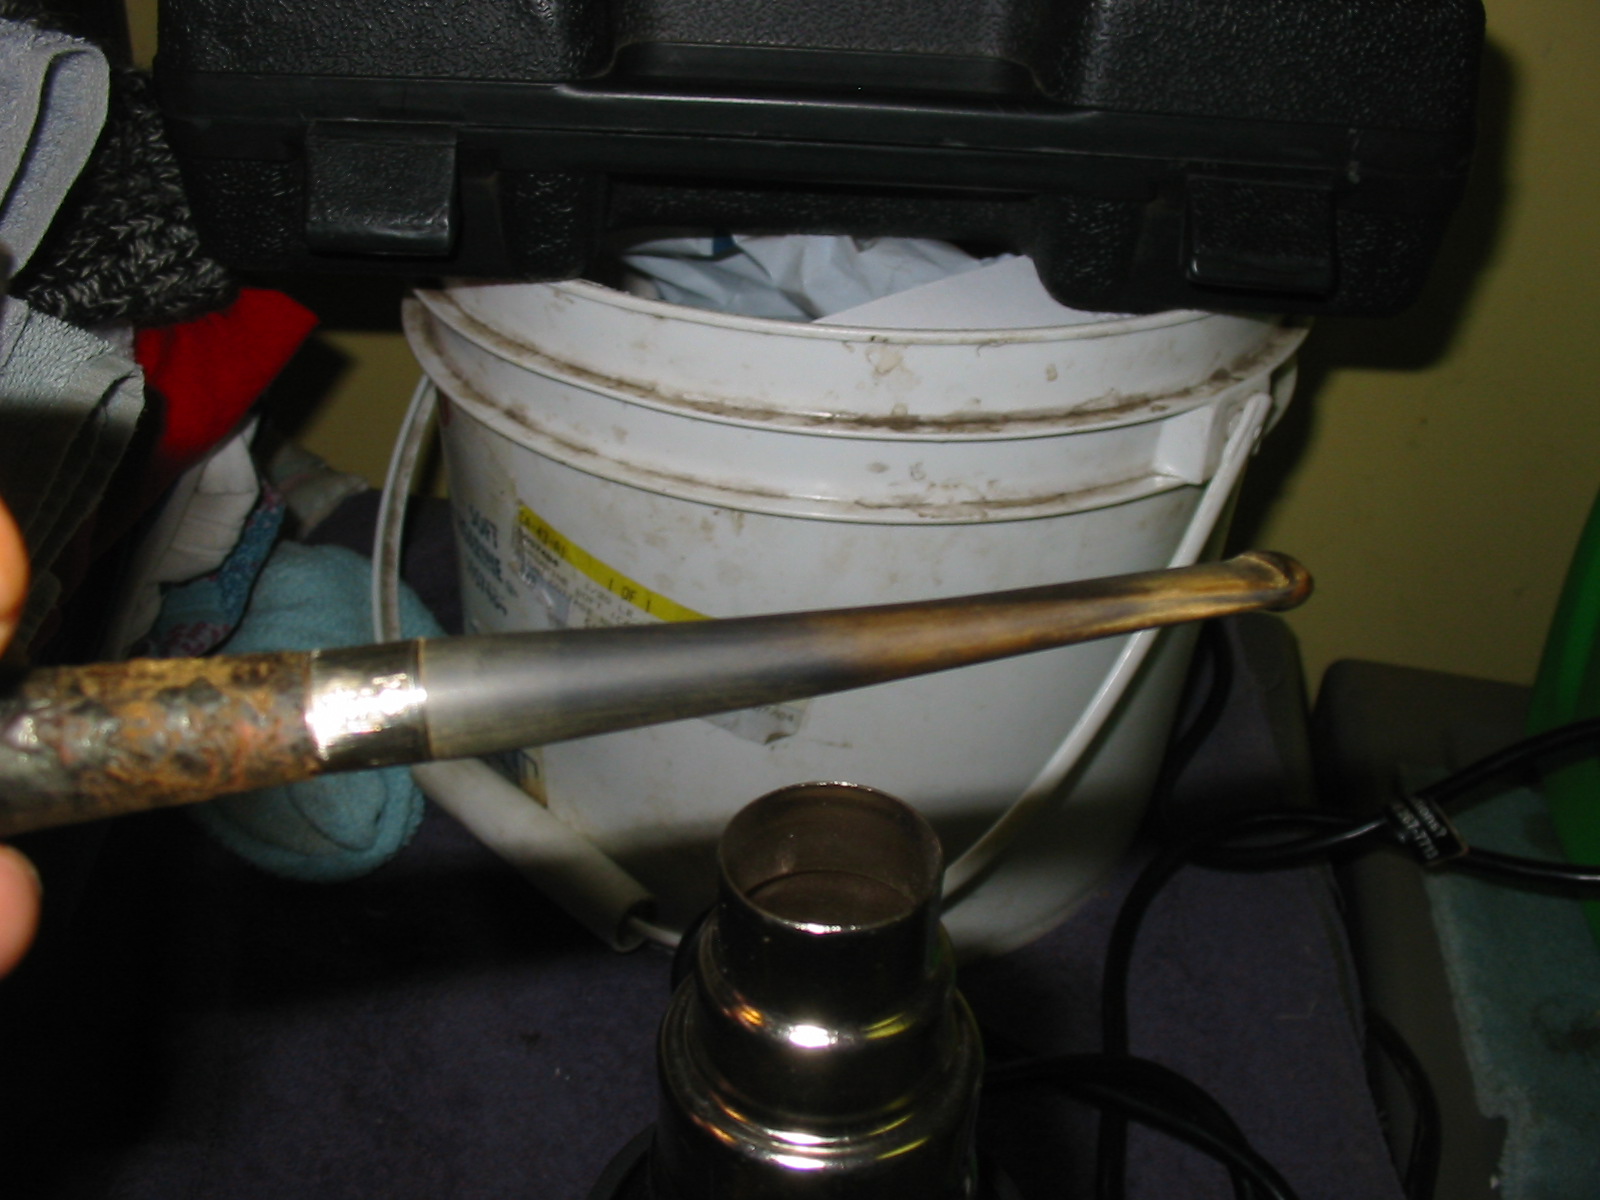
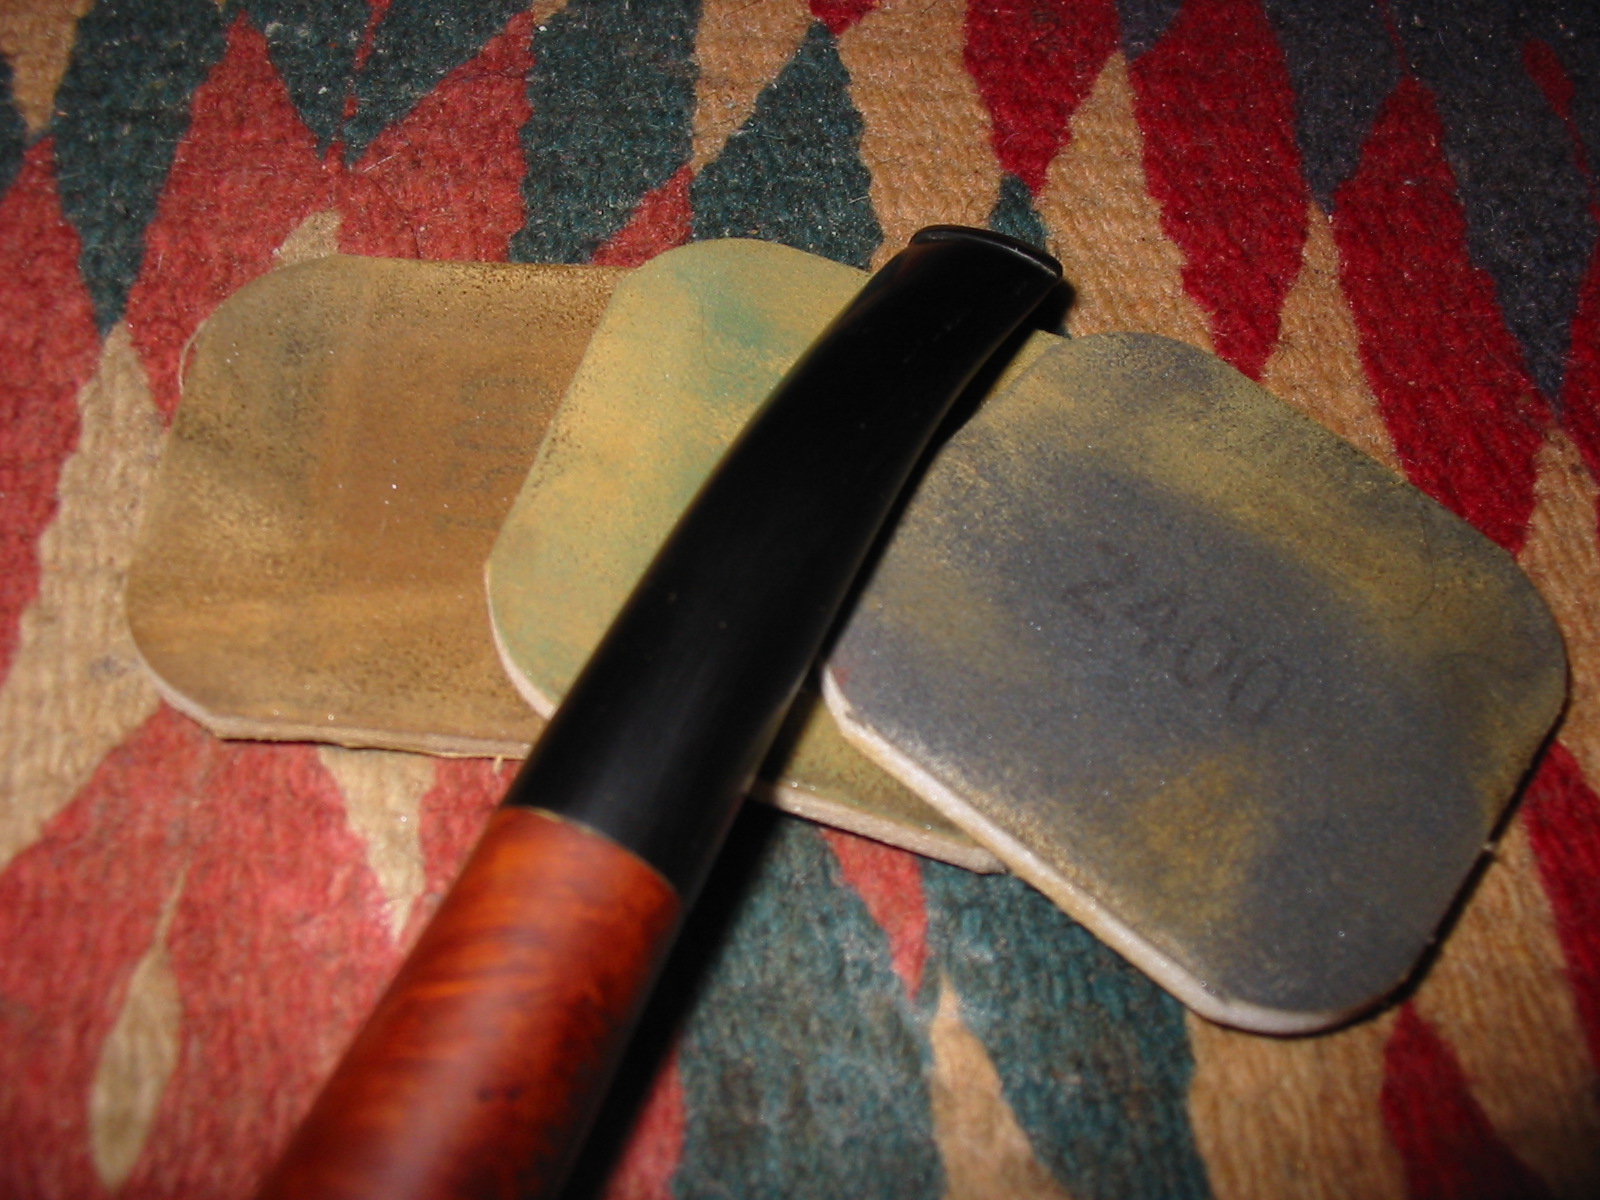
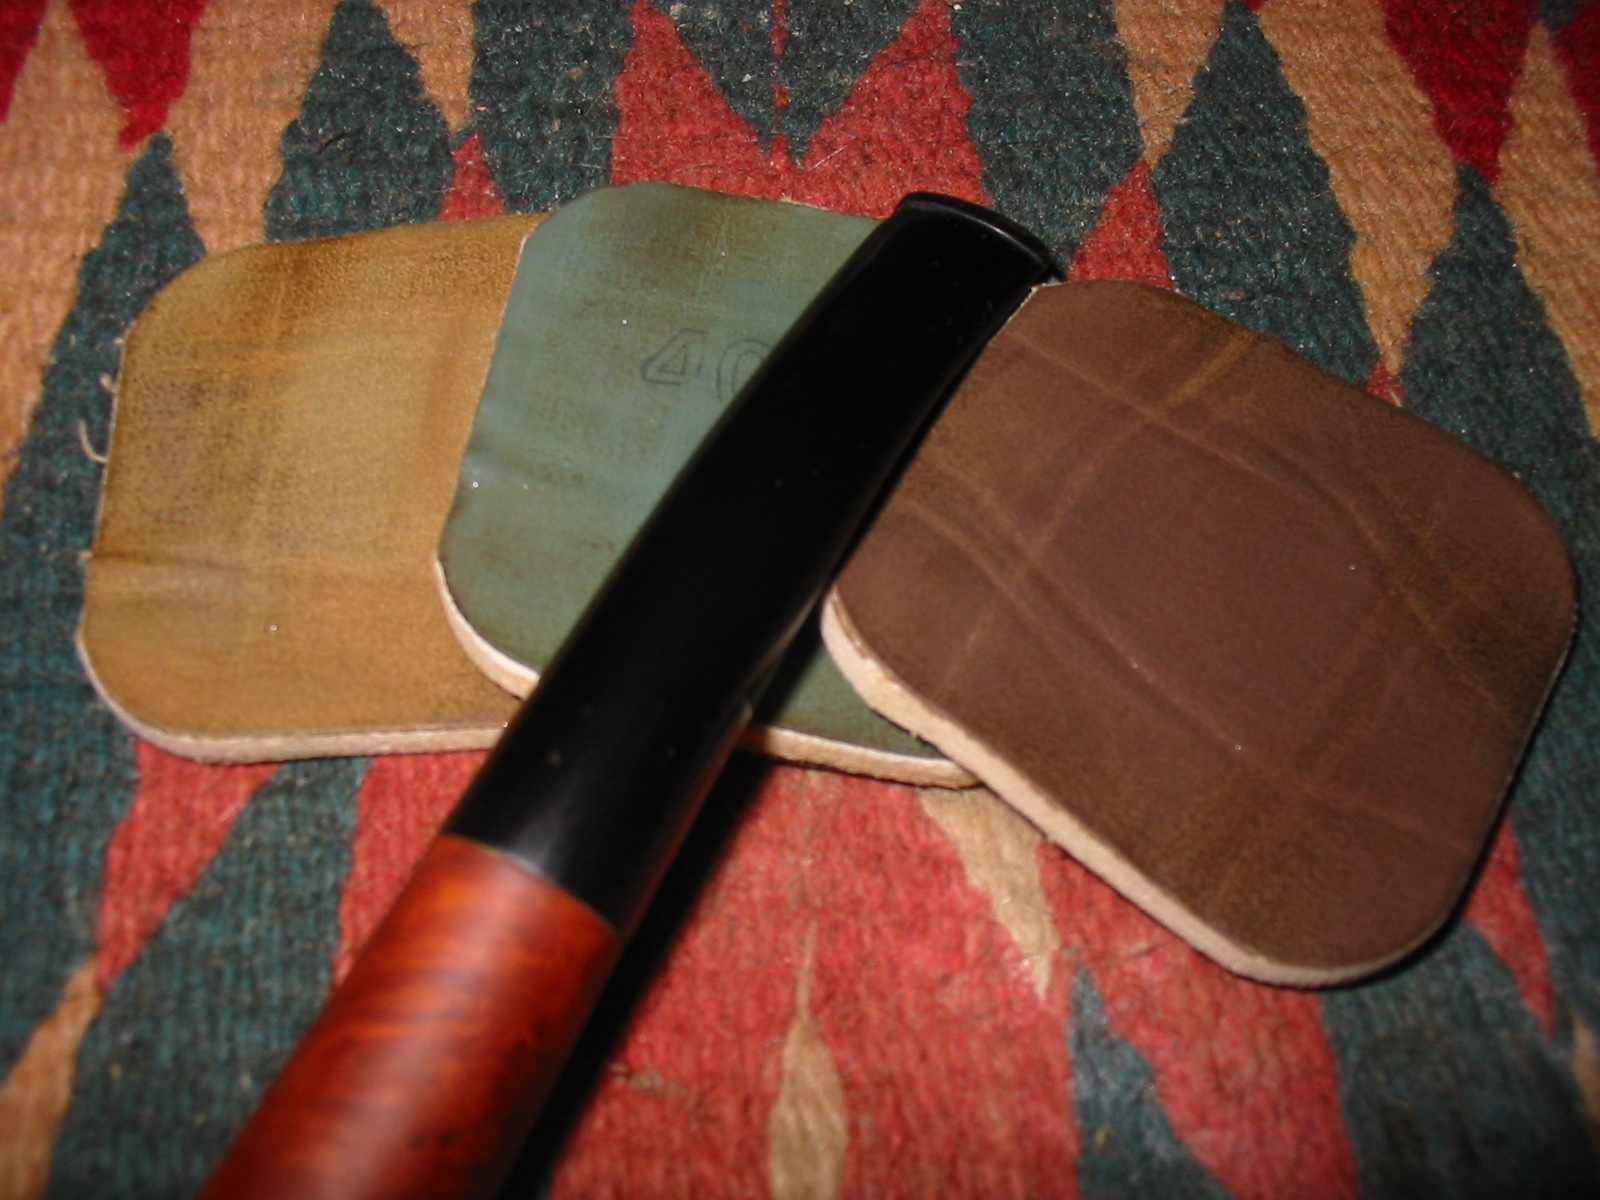
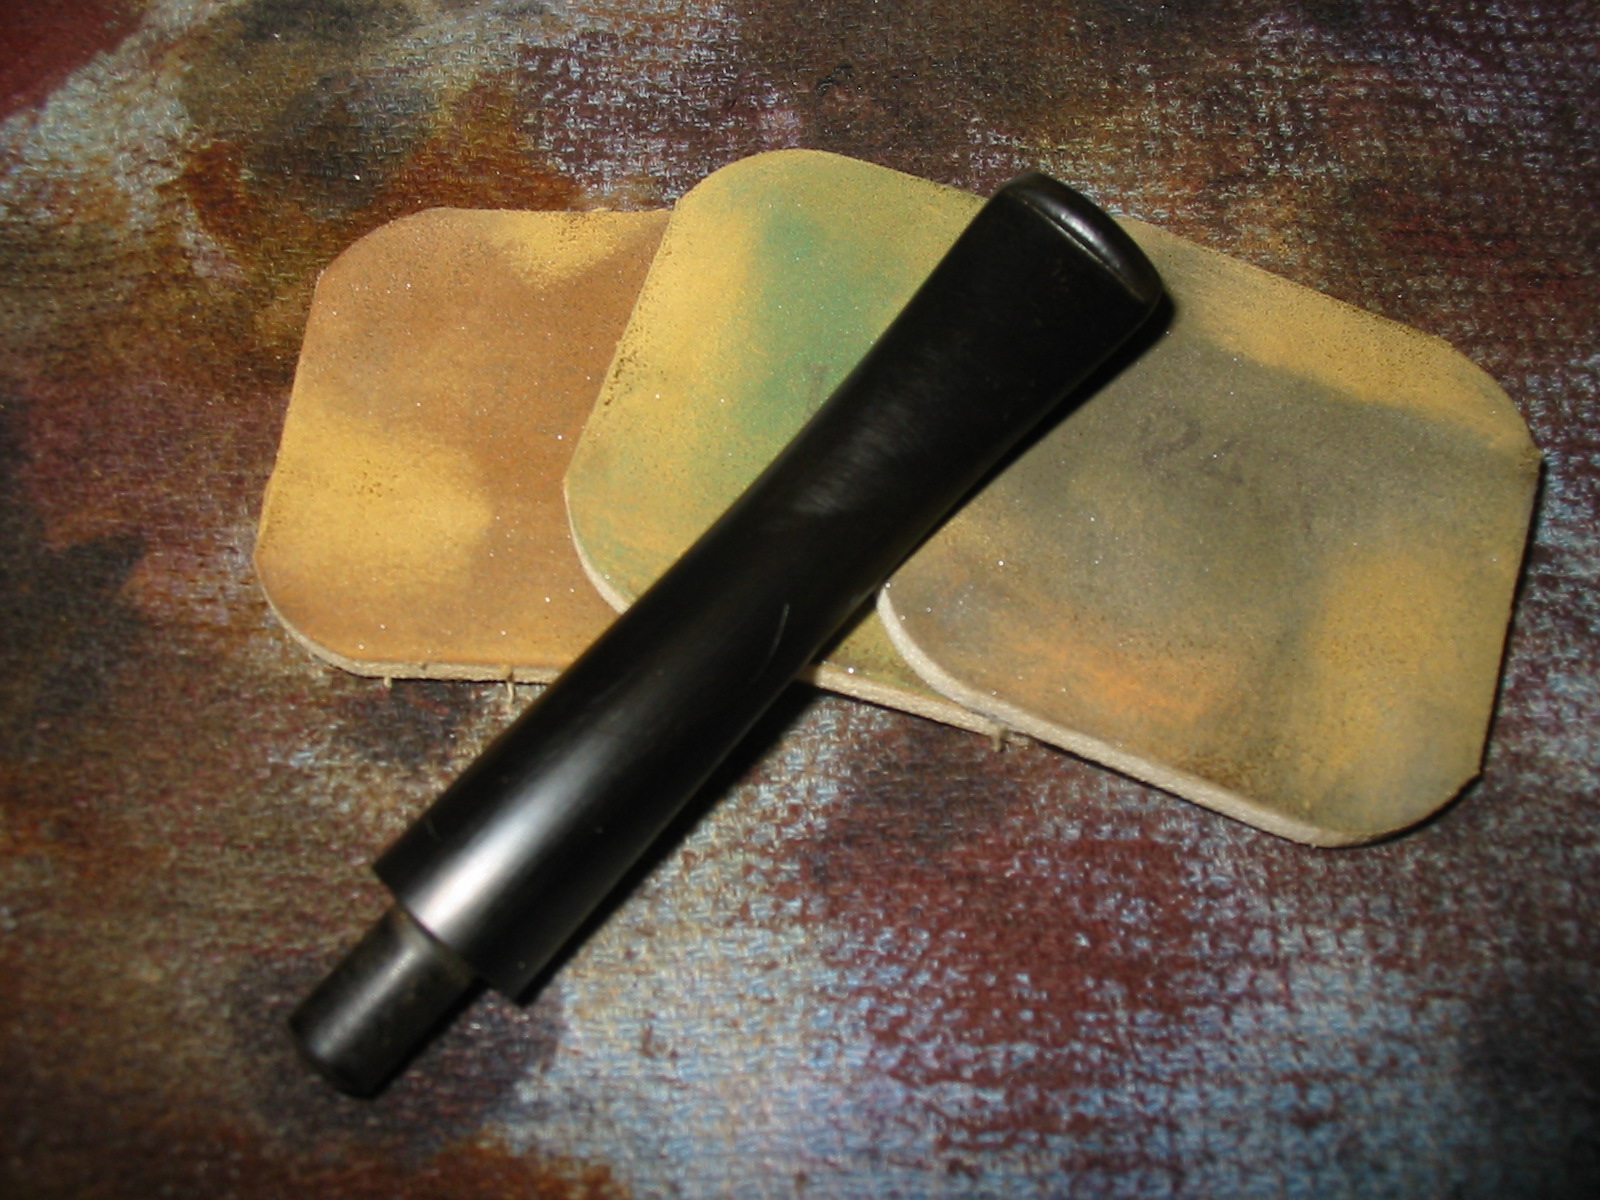
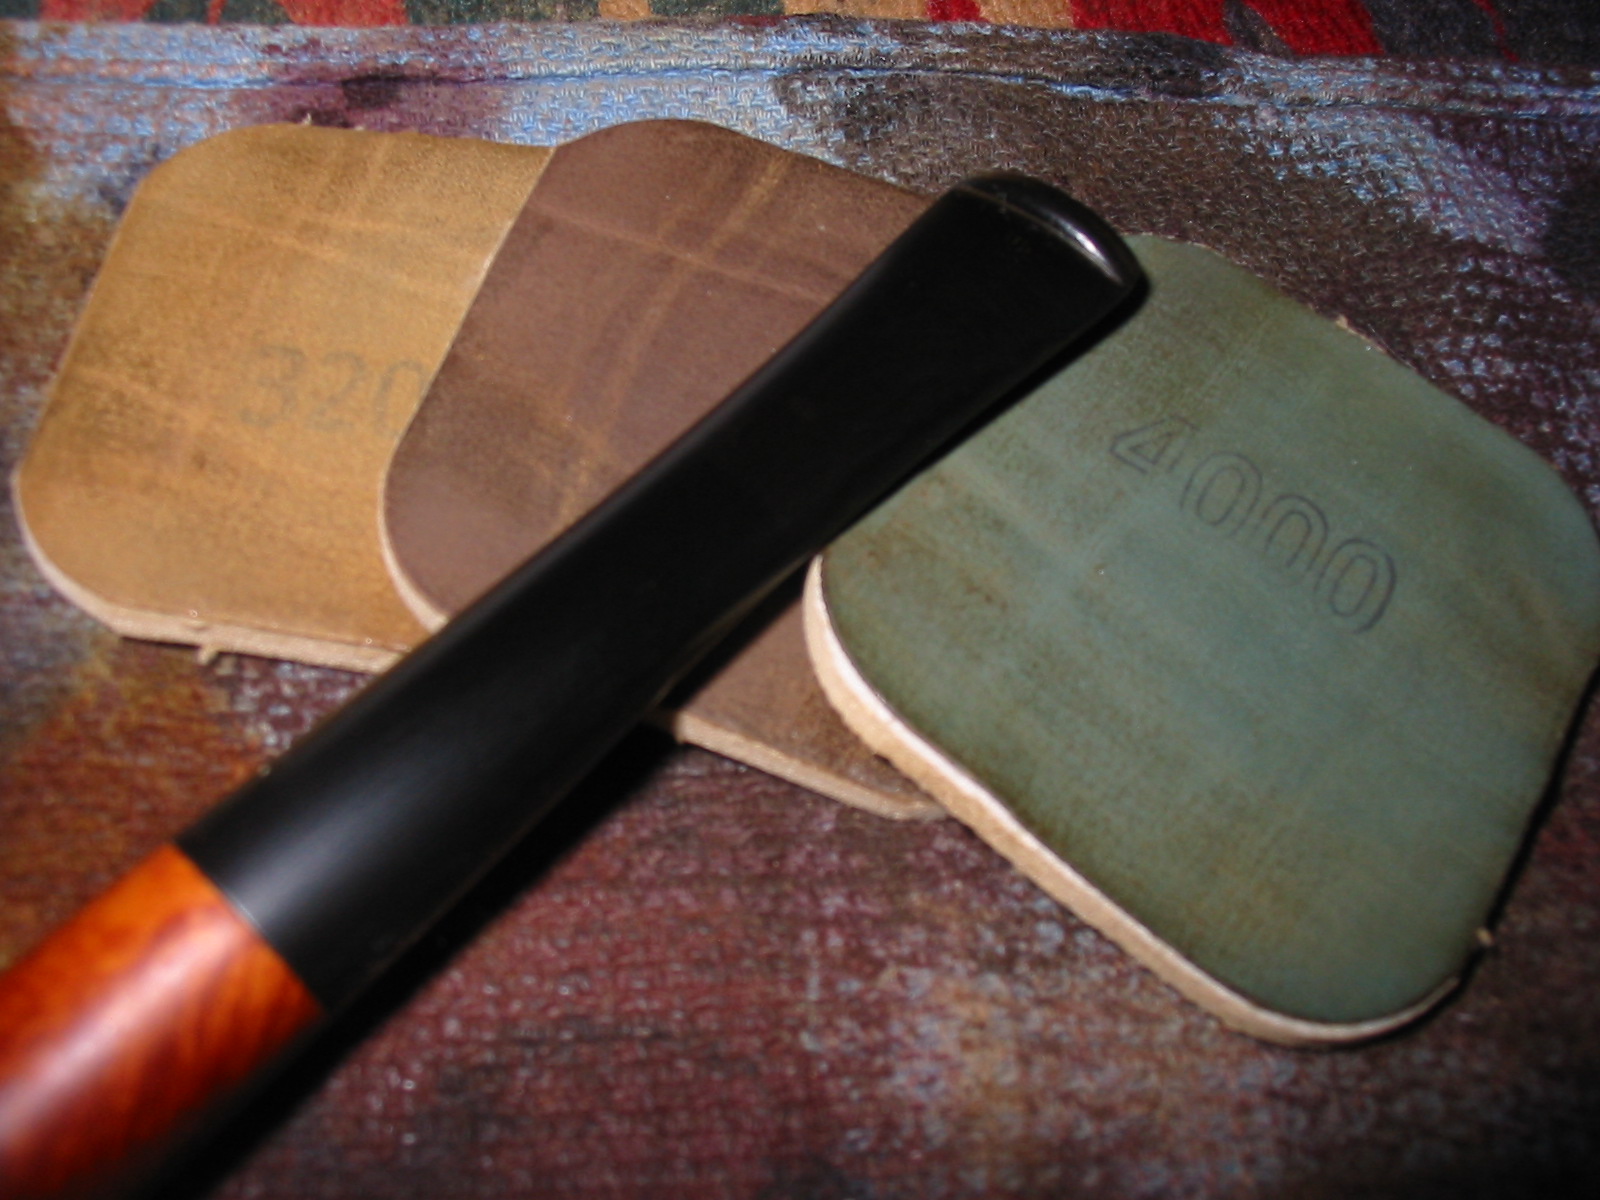
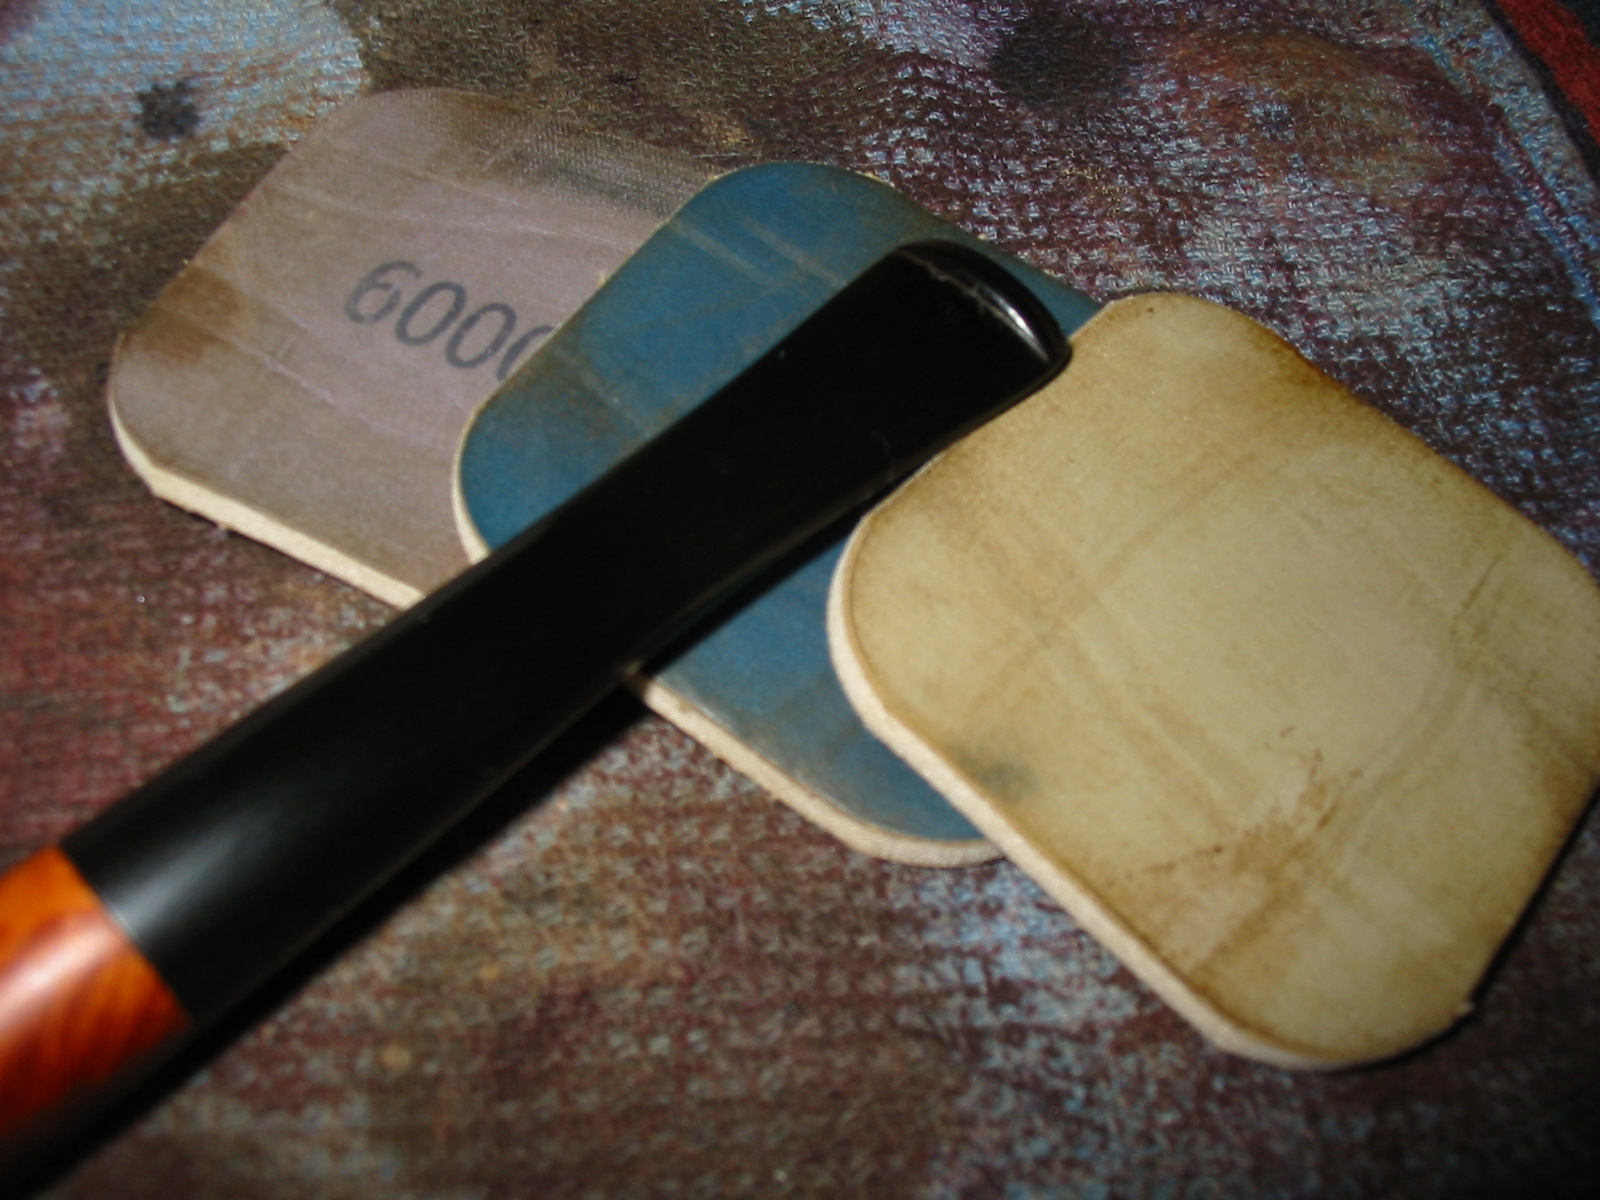
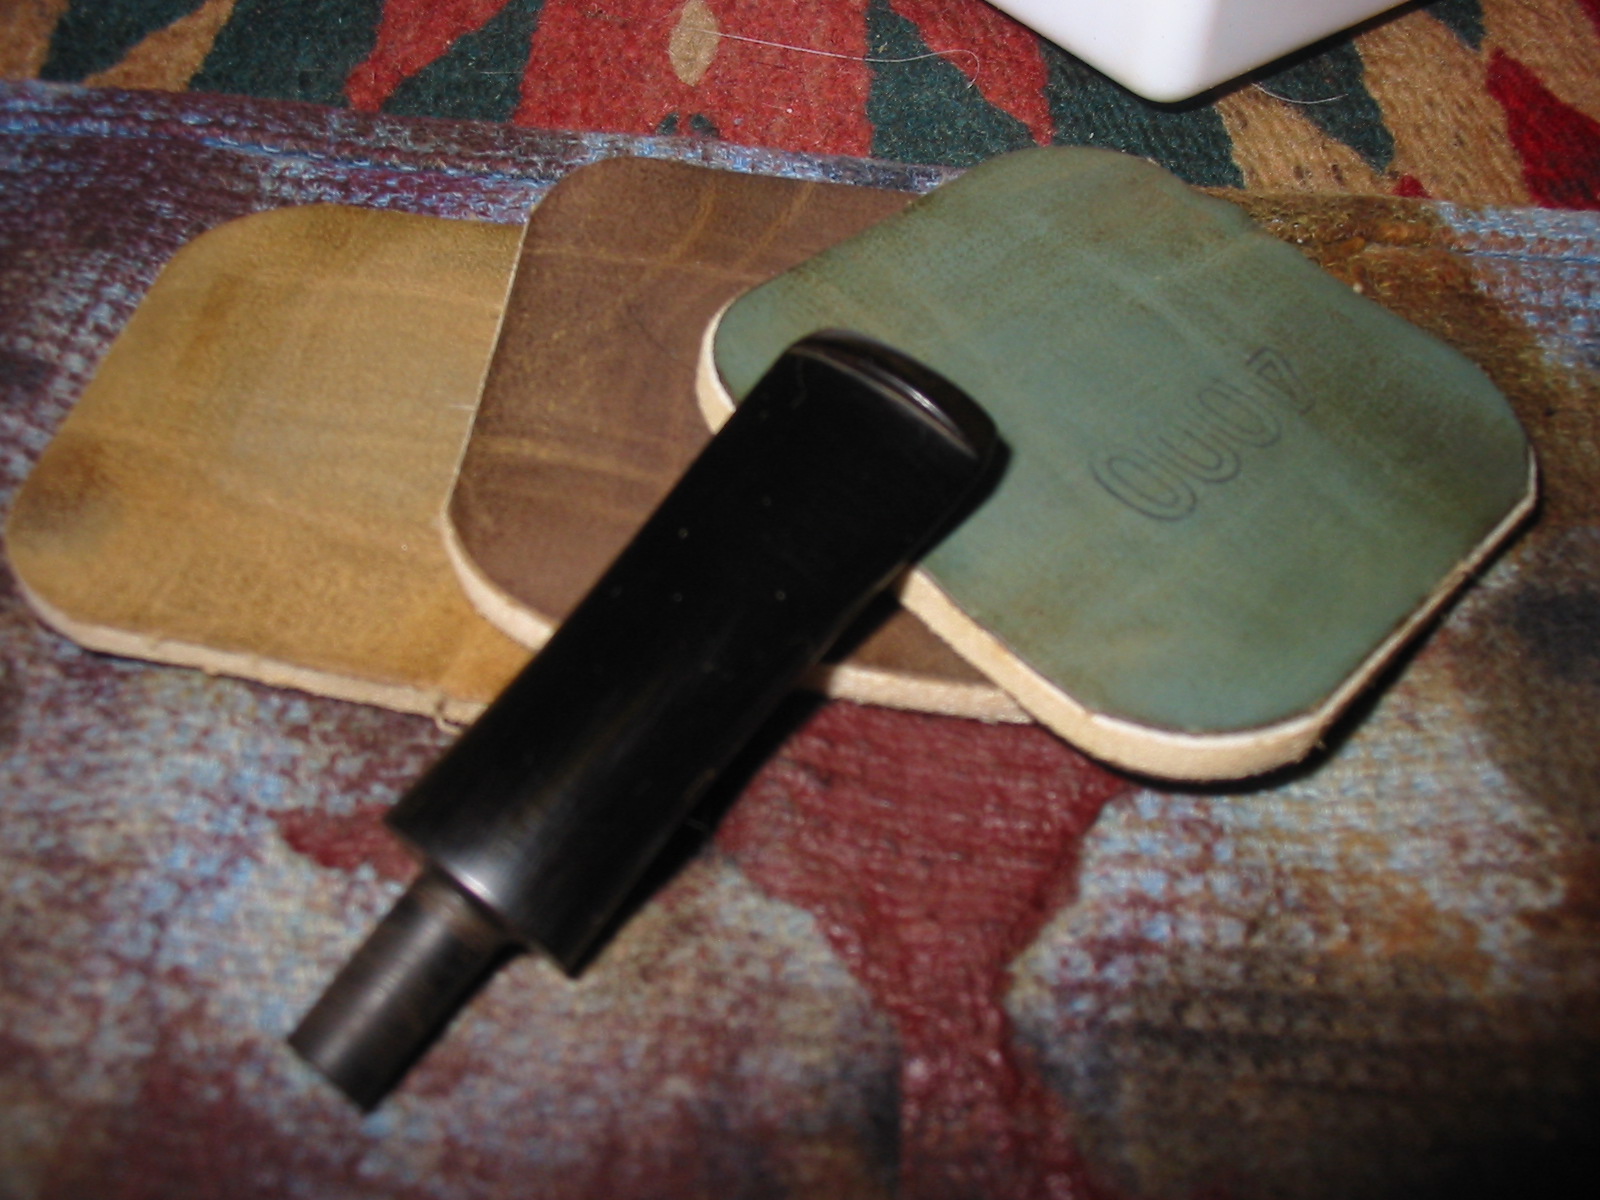
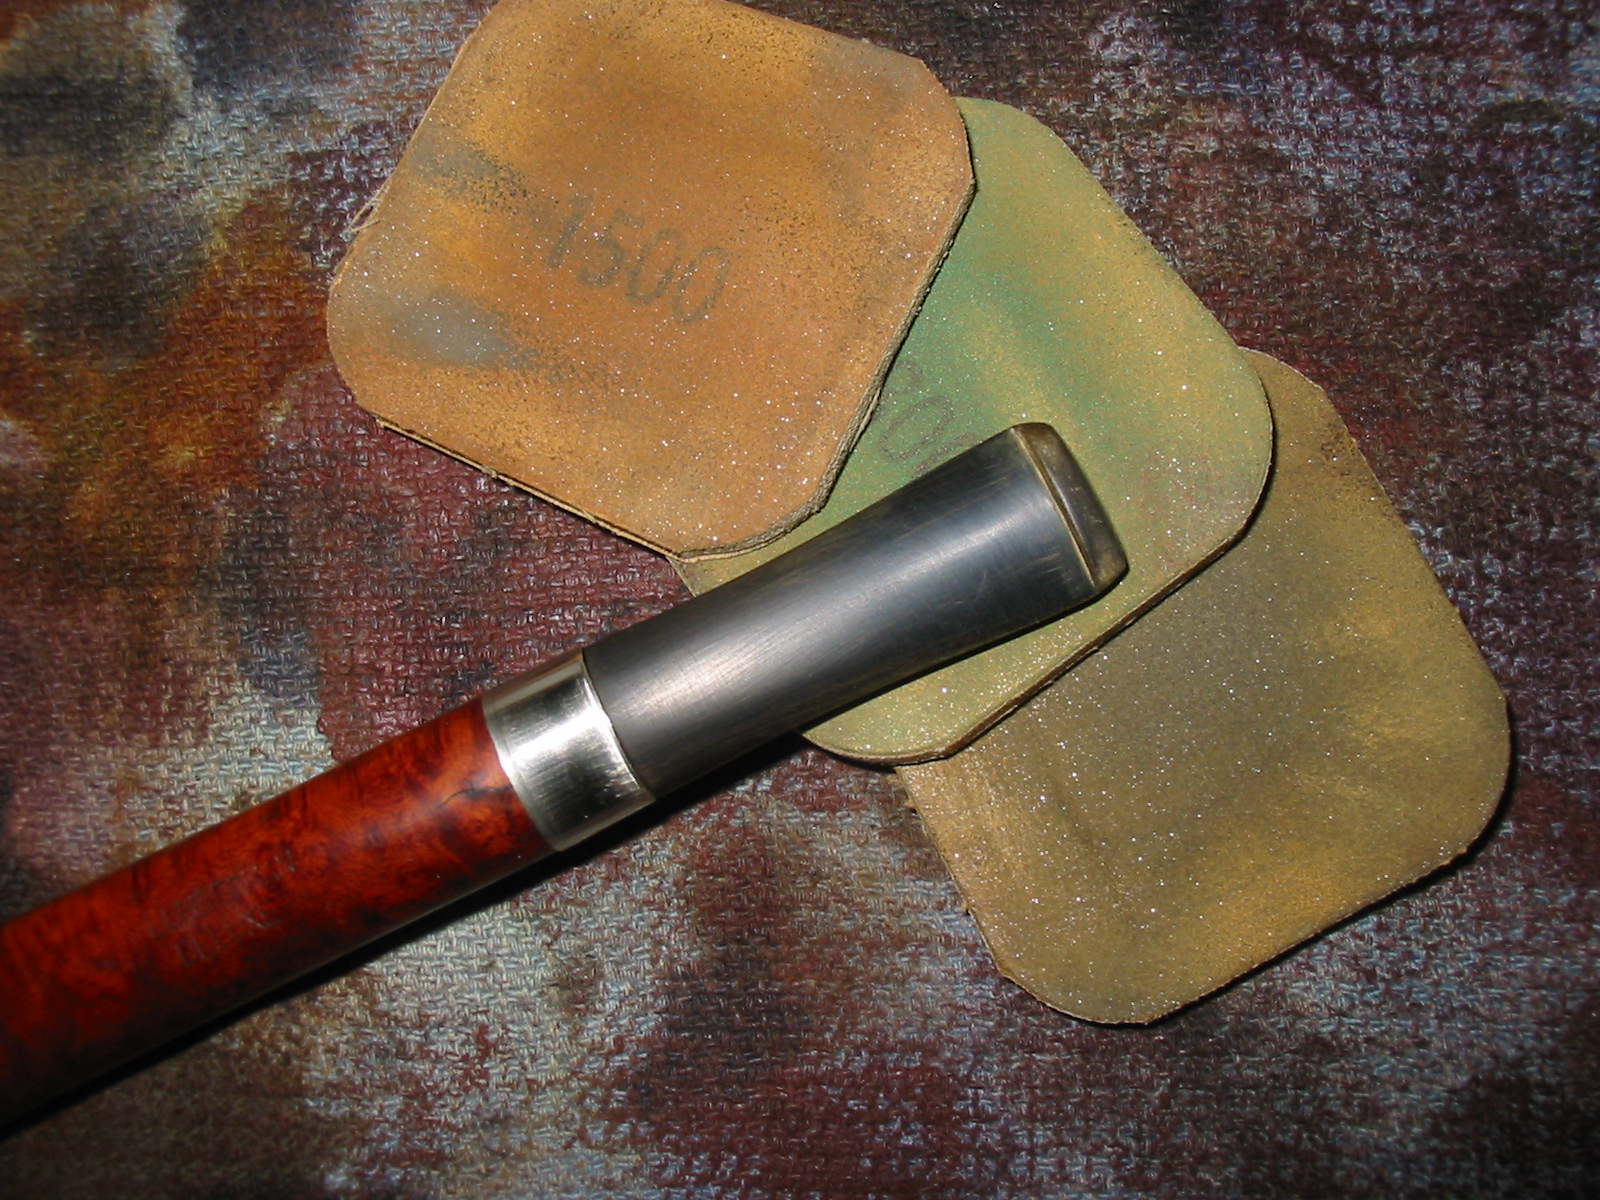
I sanded the stem down with medium and fine grit sanding sponges and then used my usual array of micromesh sanding pads. I wet sanded with the 1500-2400 grit pads and dry sanded with the 3200-12,000 grit pads.
IMG_5220

IMG_5221

IMG_5222

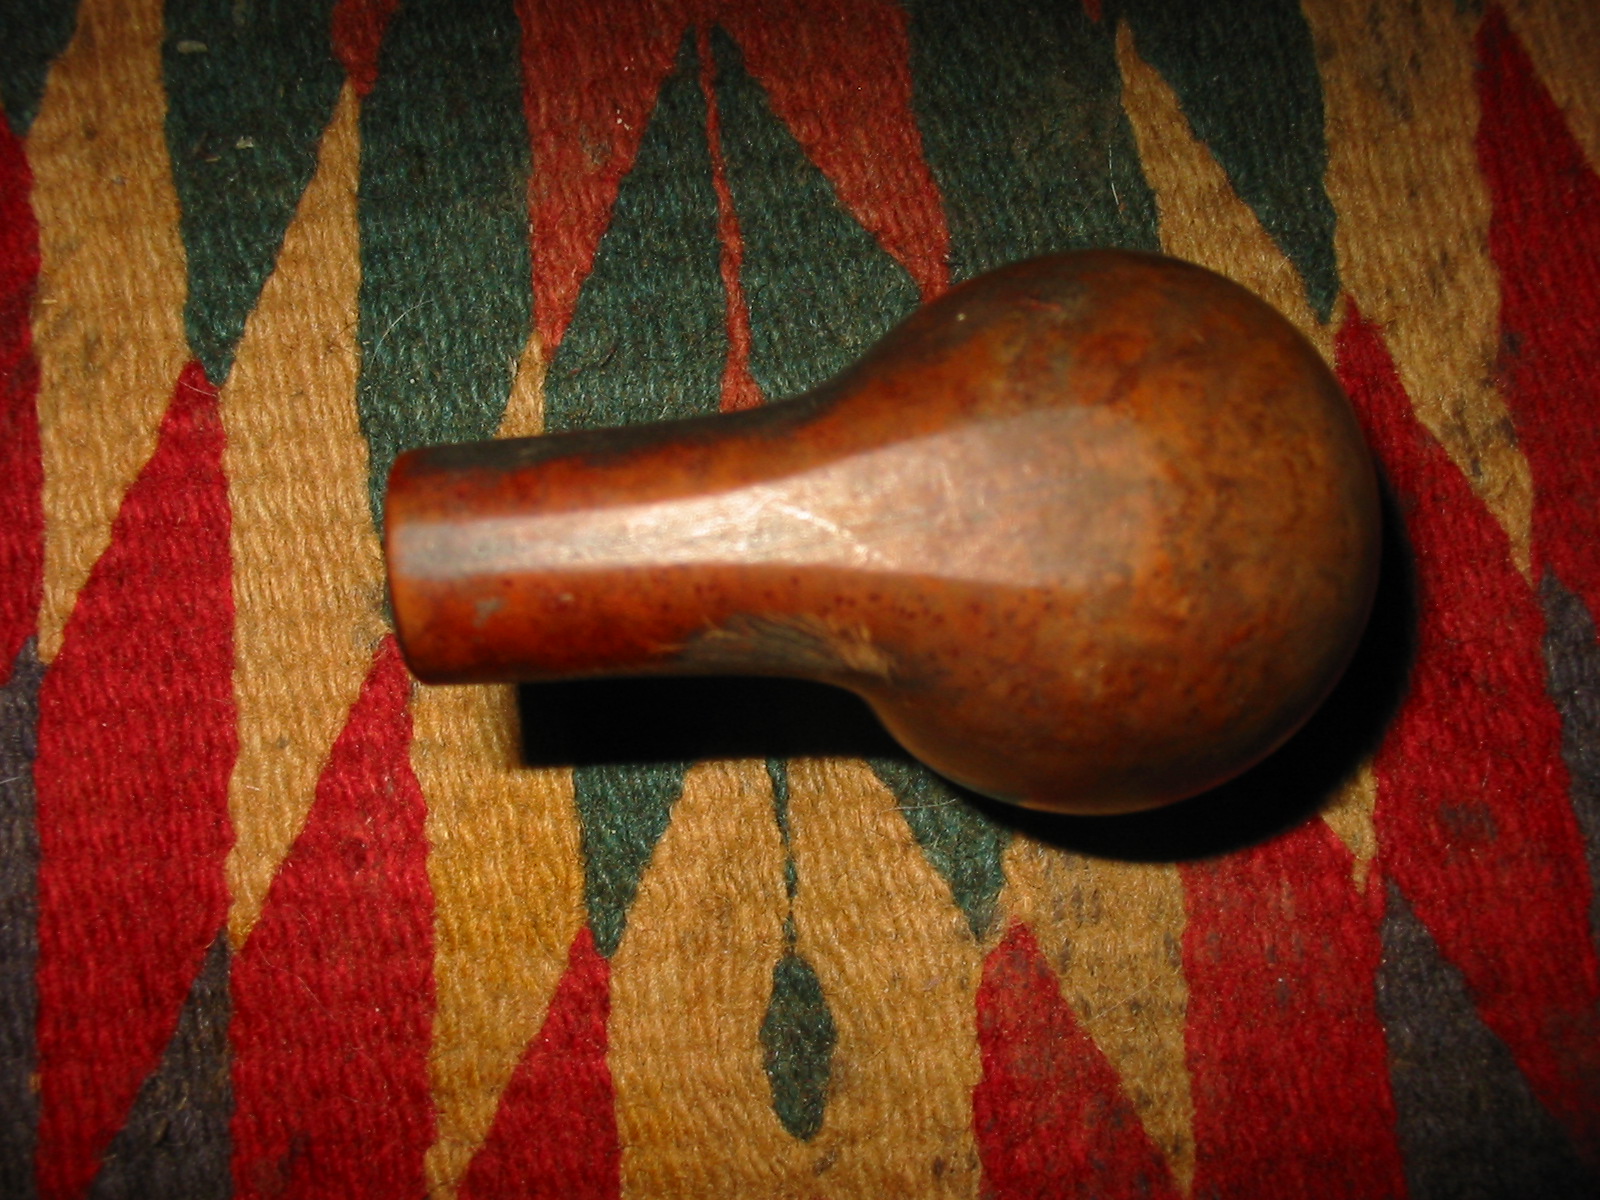
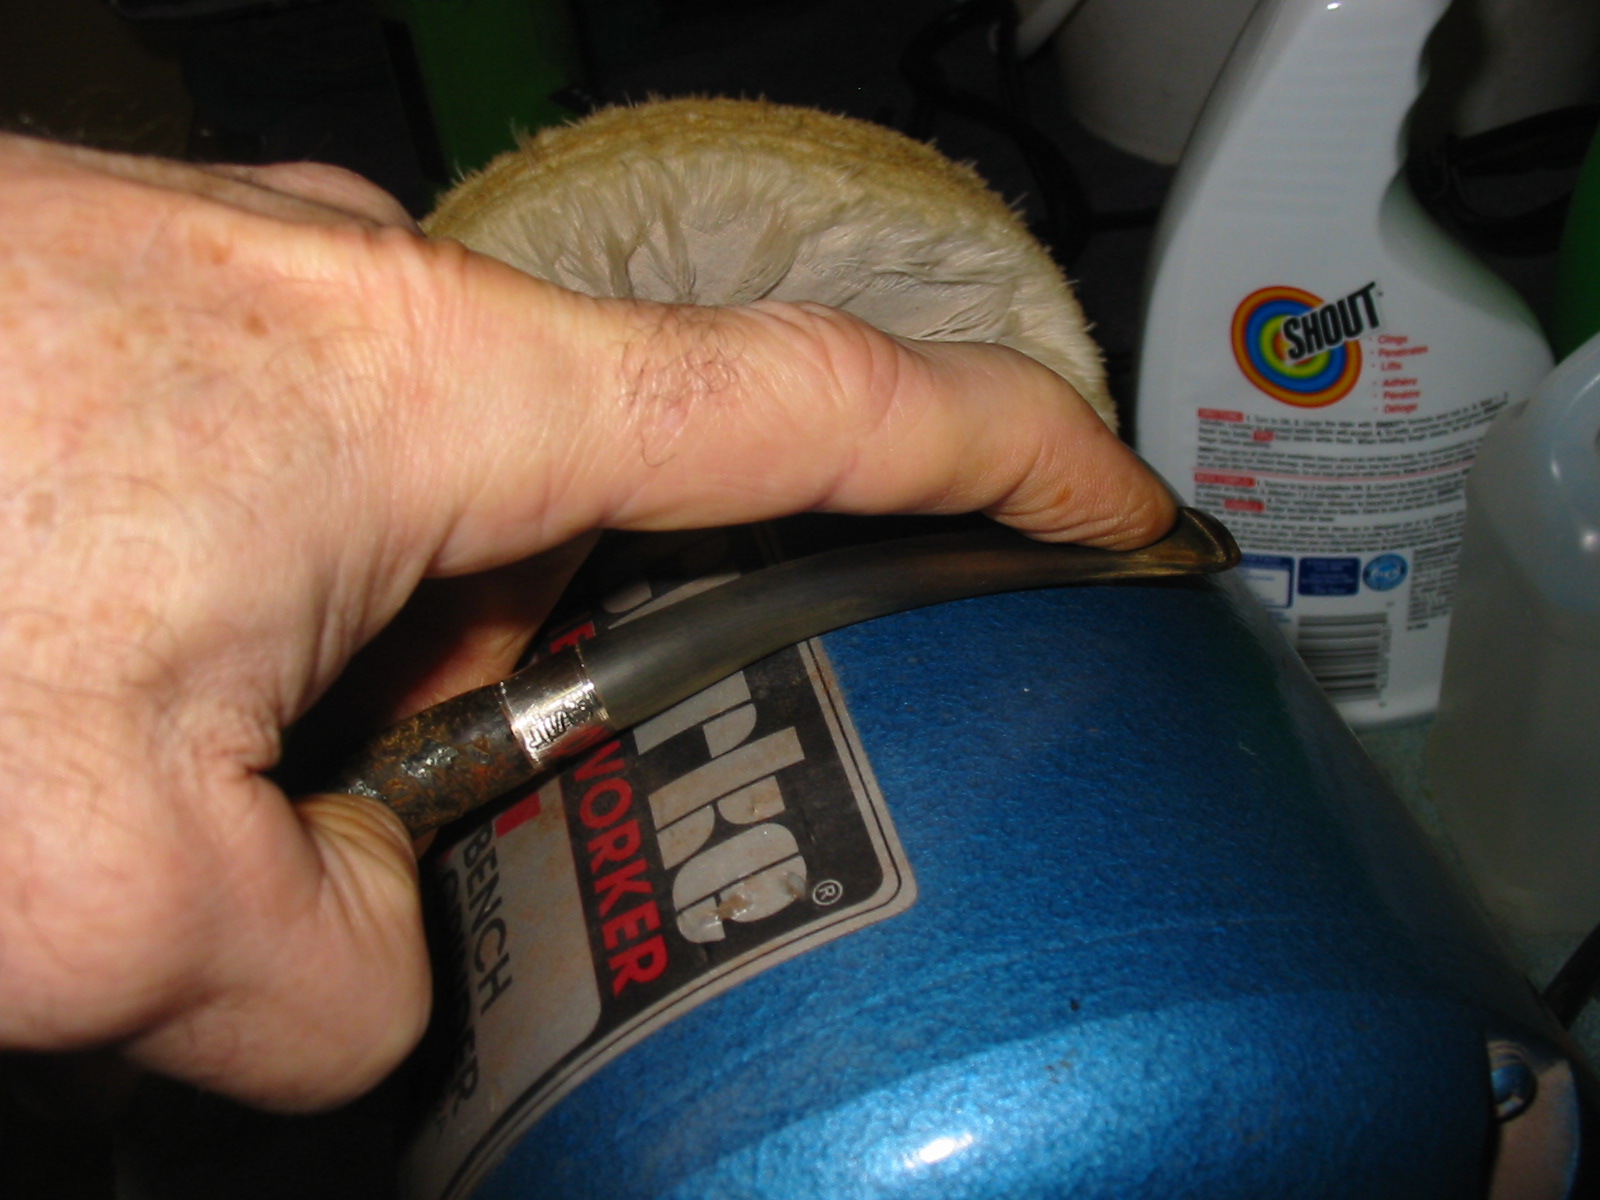
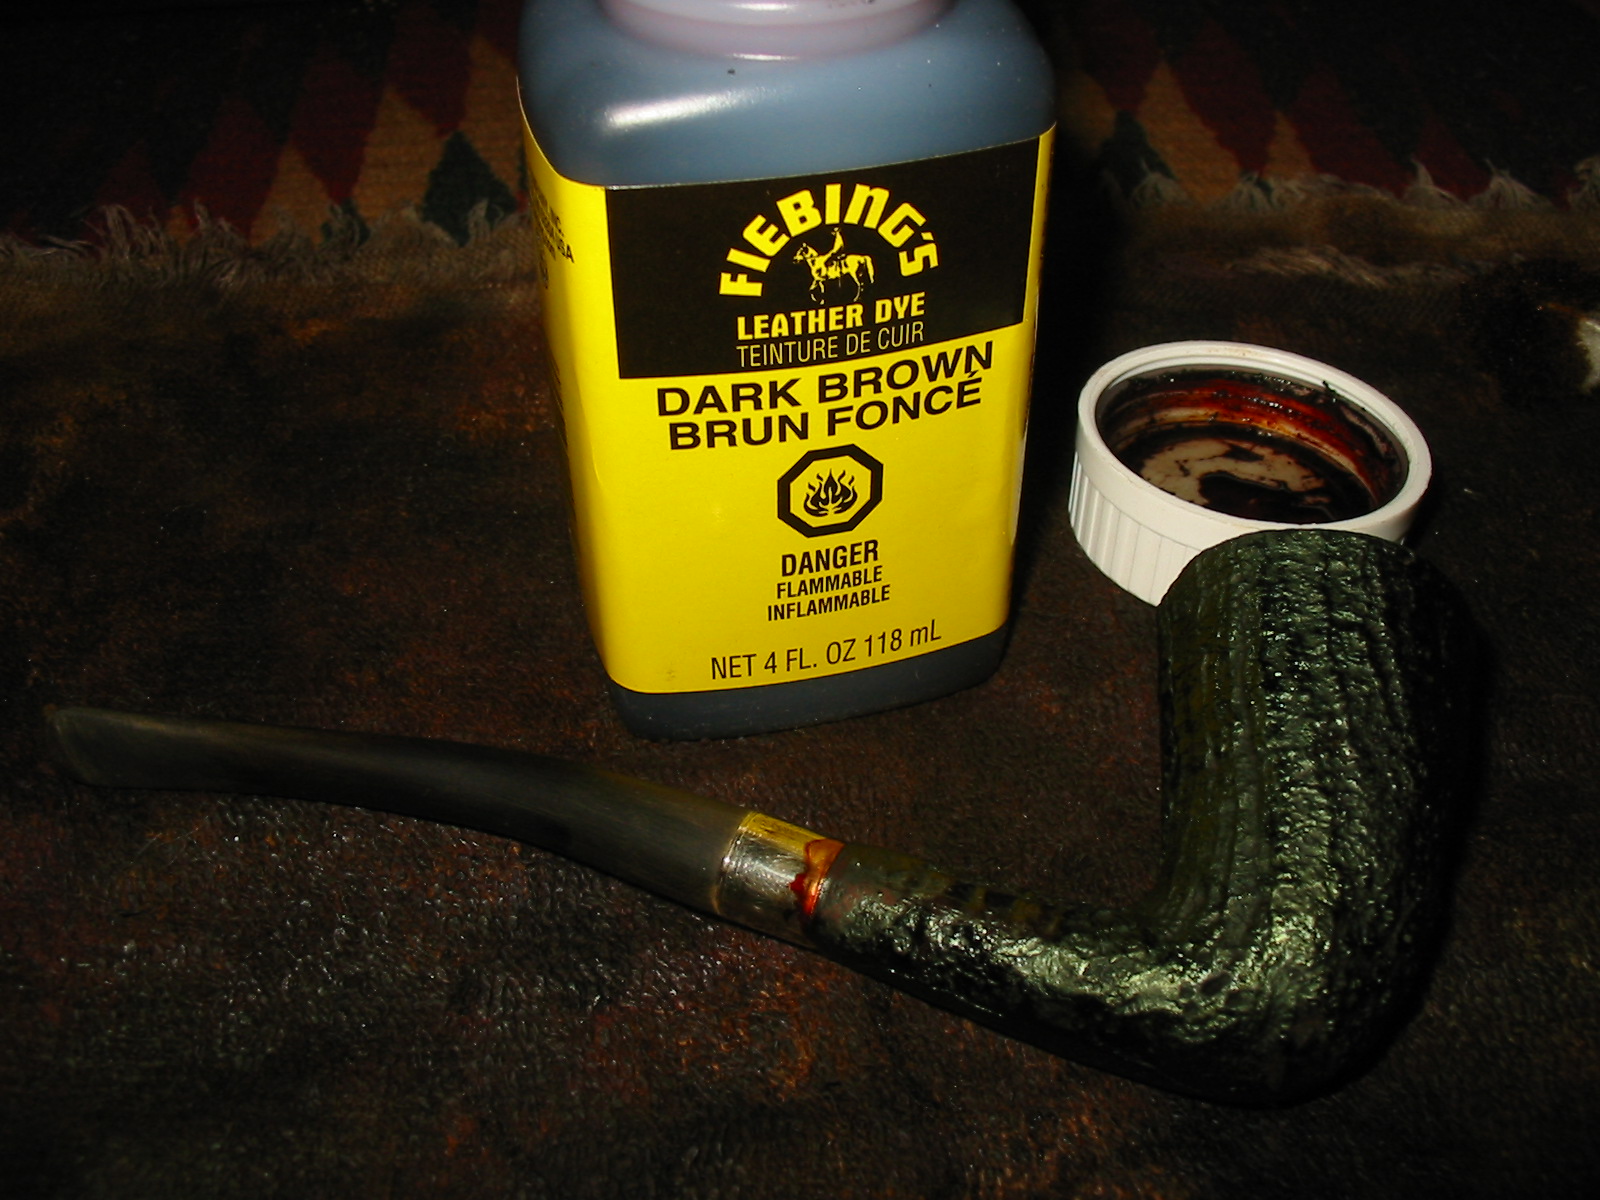
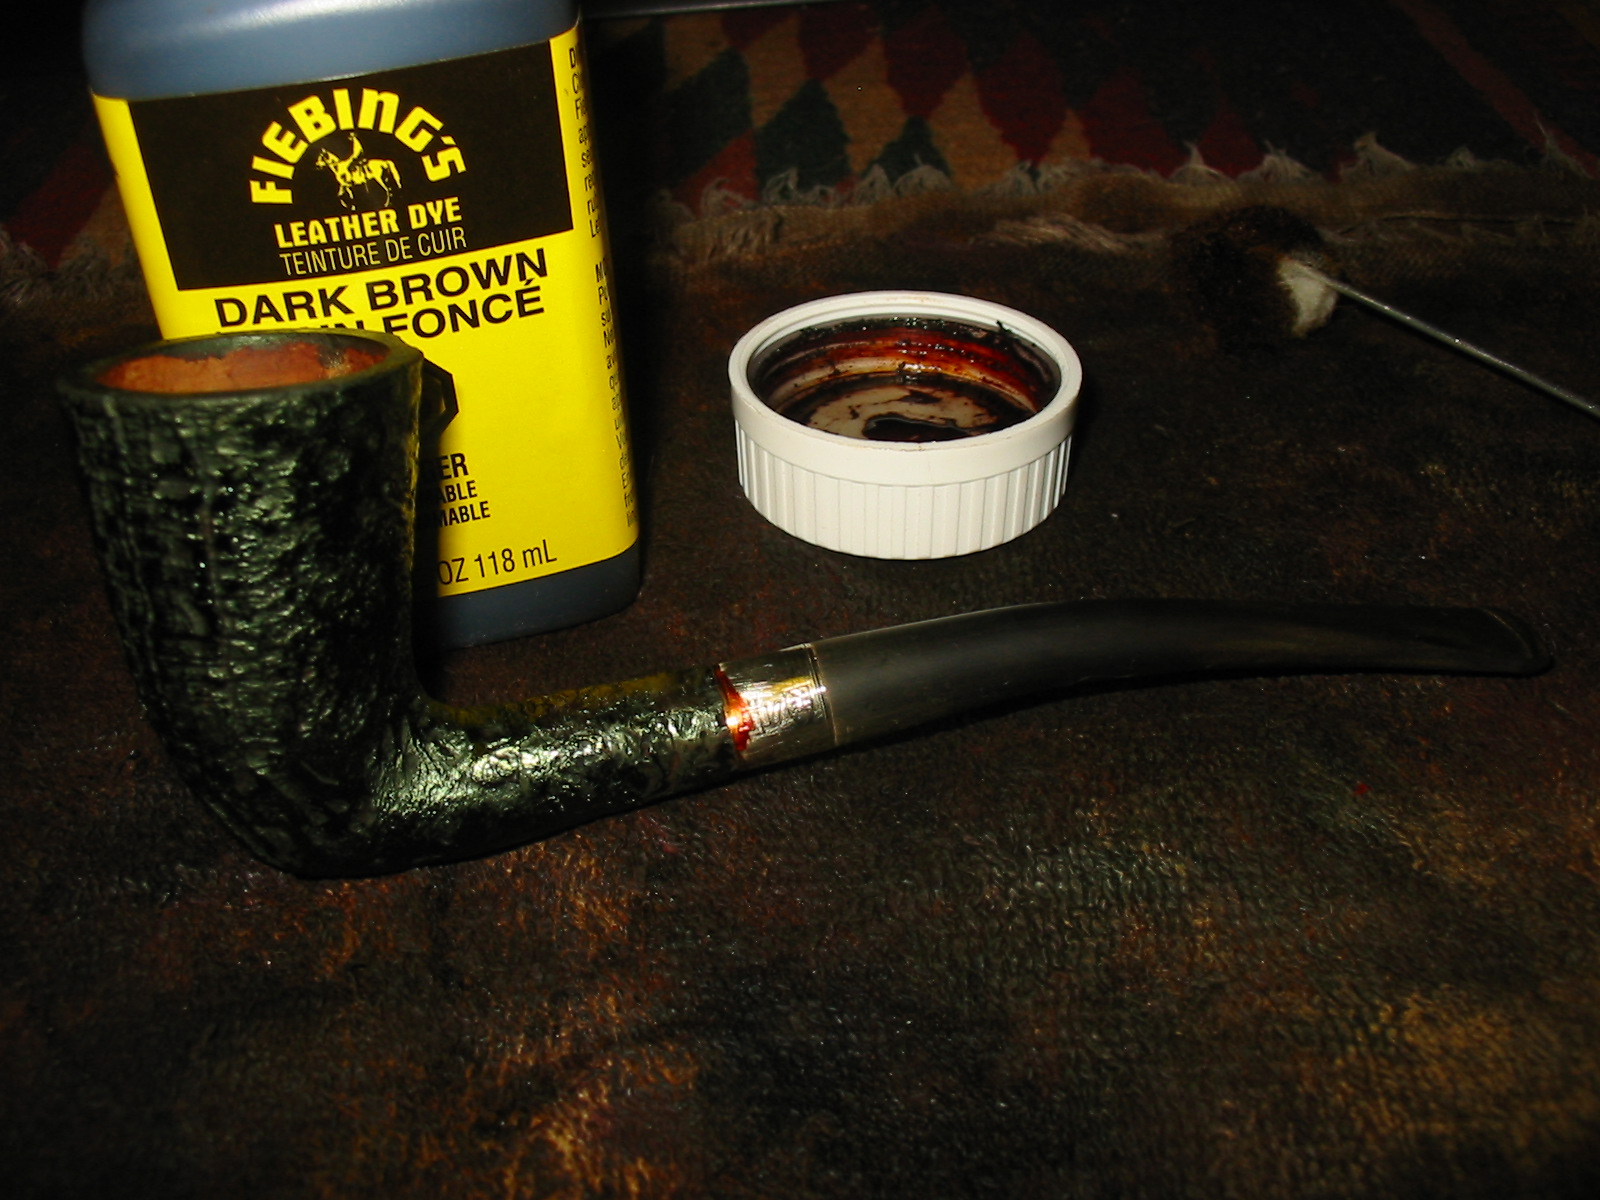
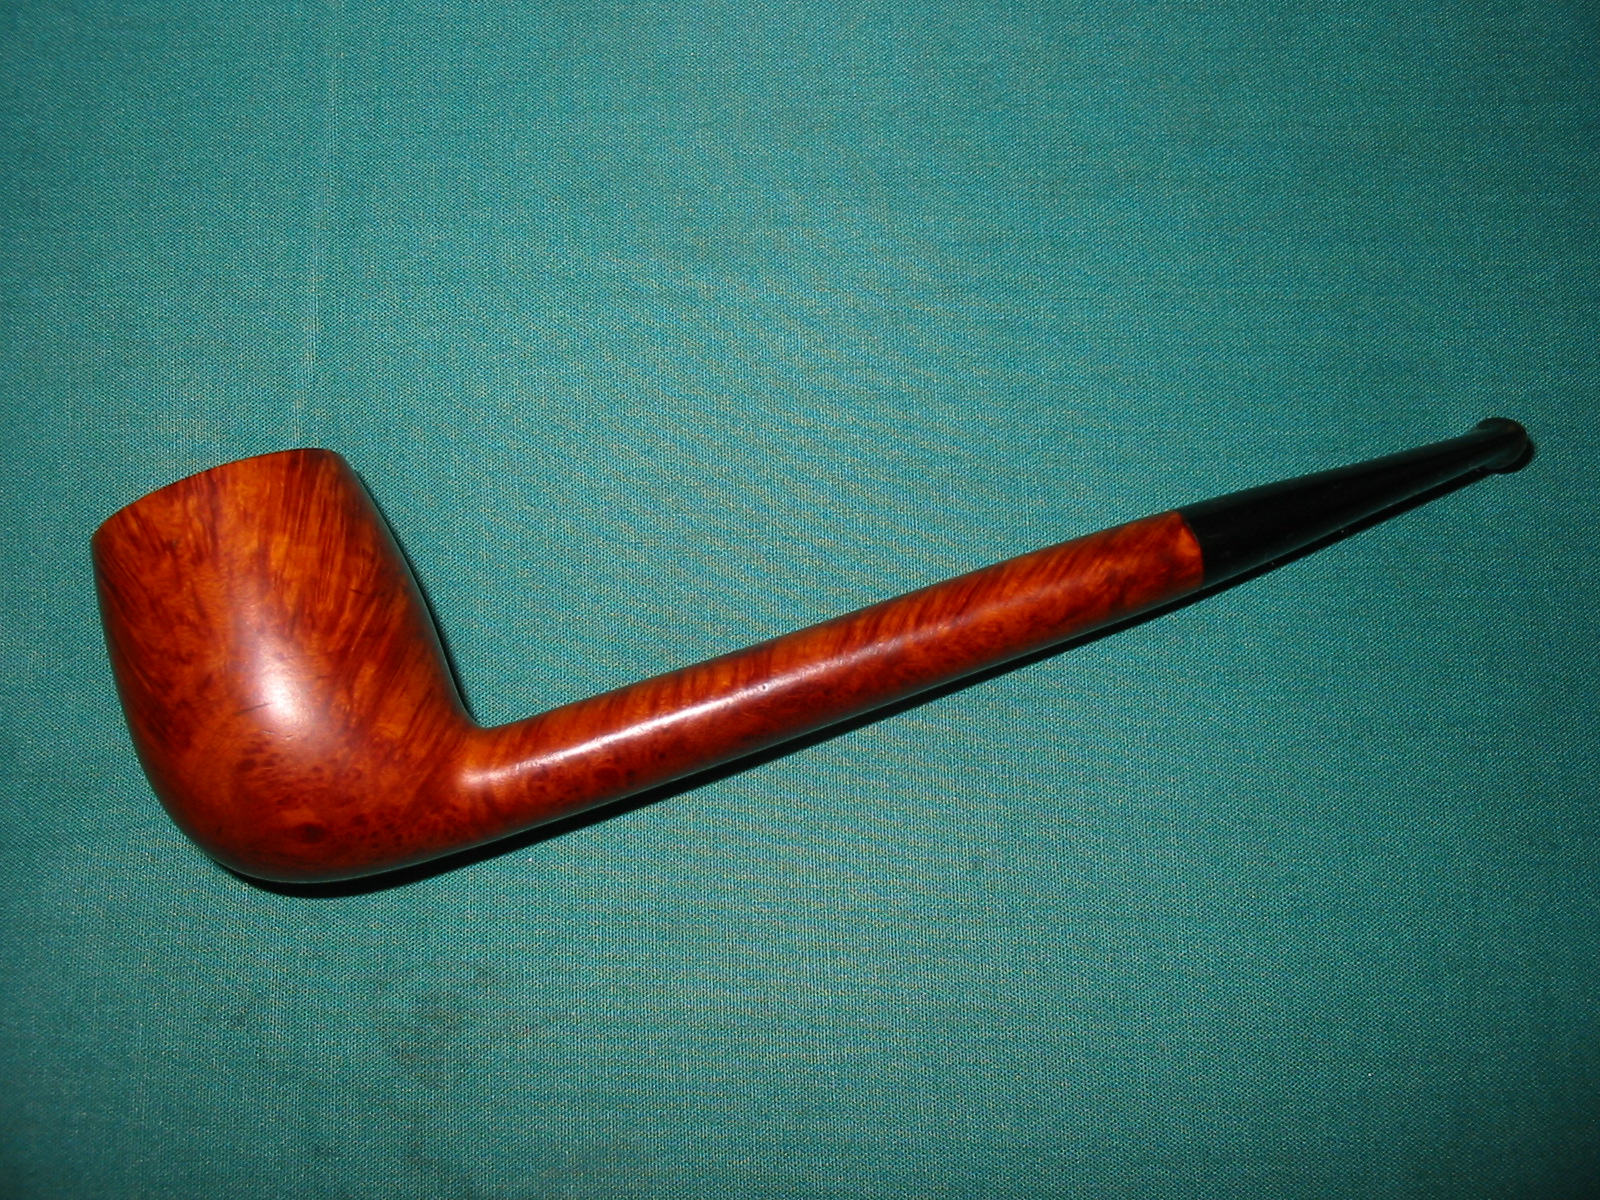
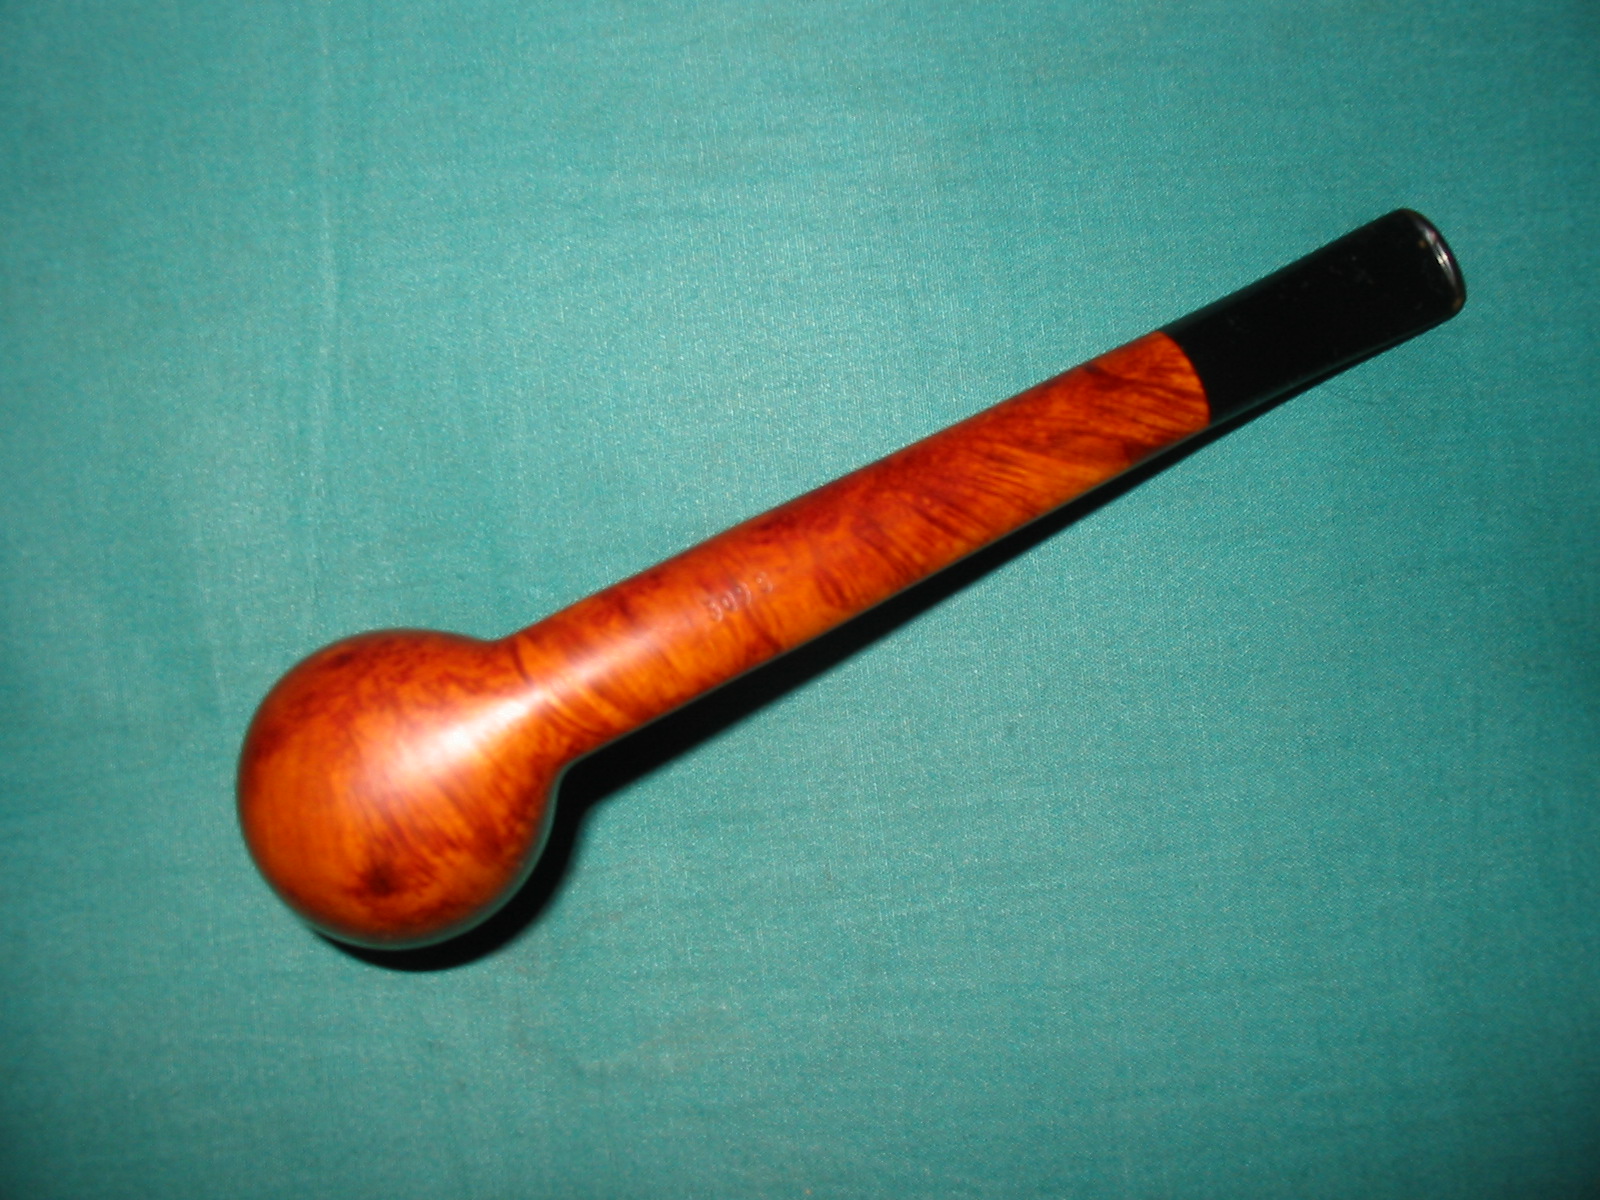
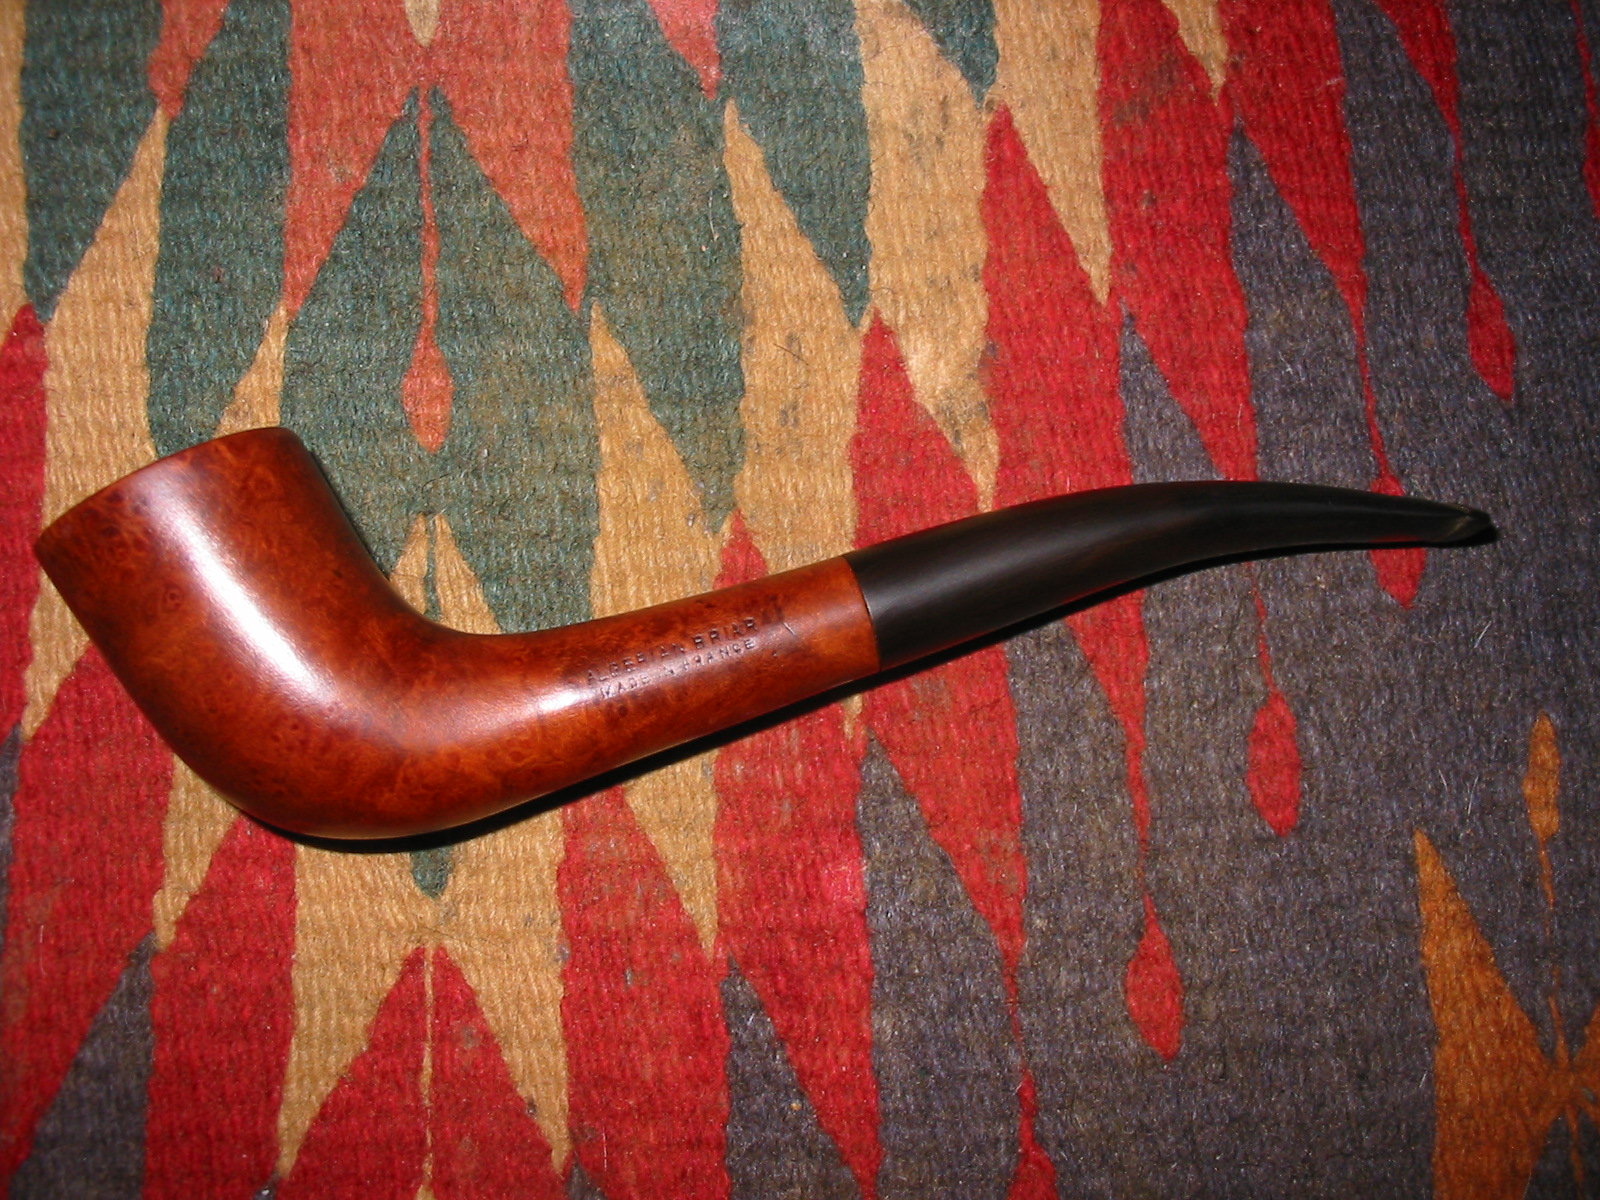
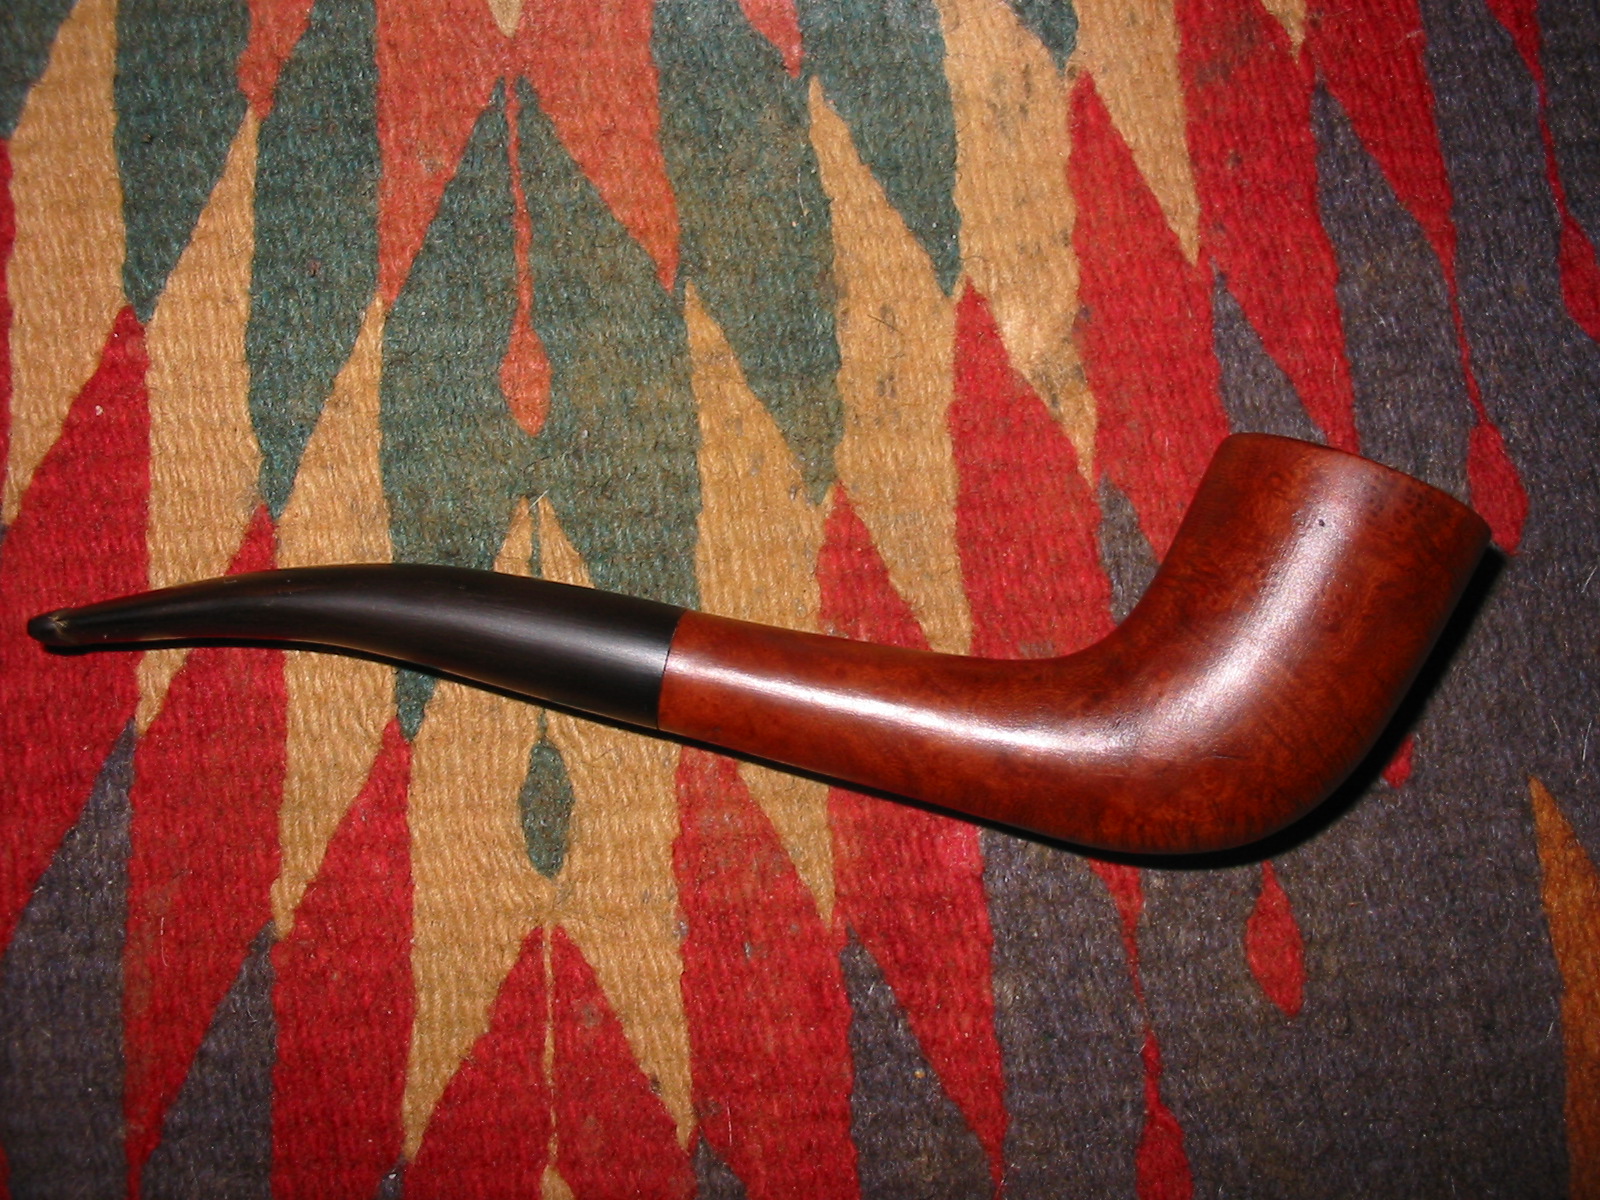
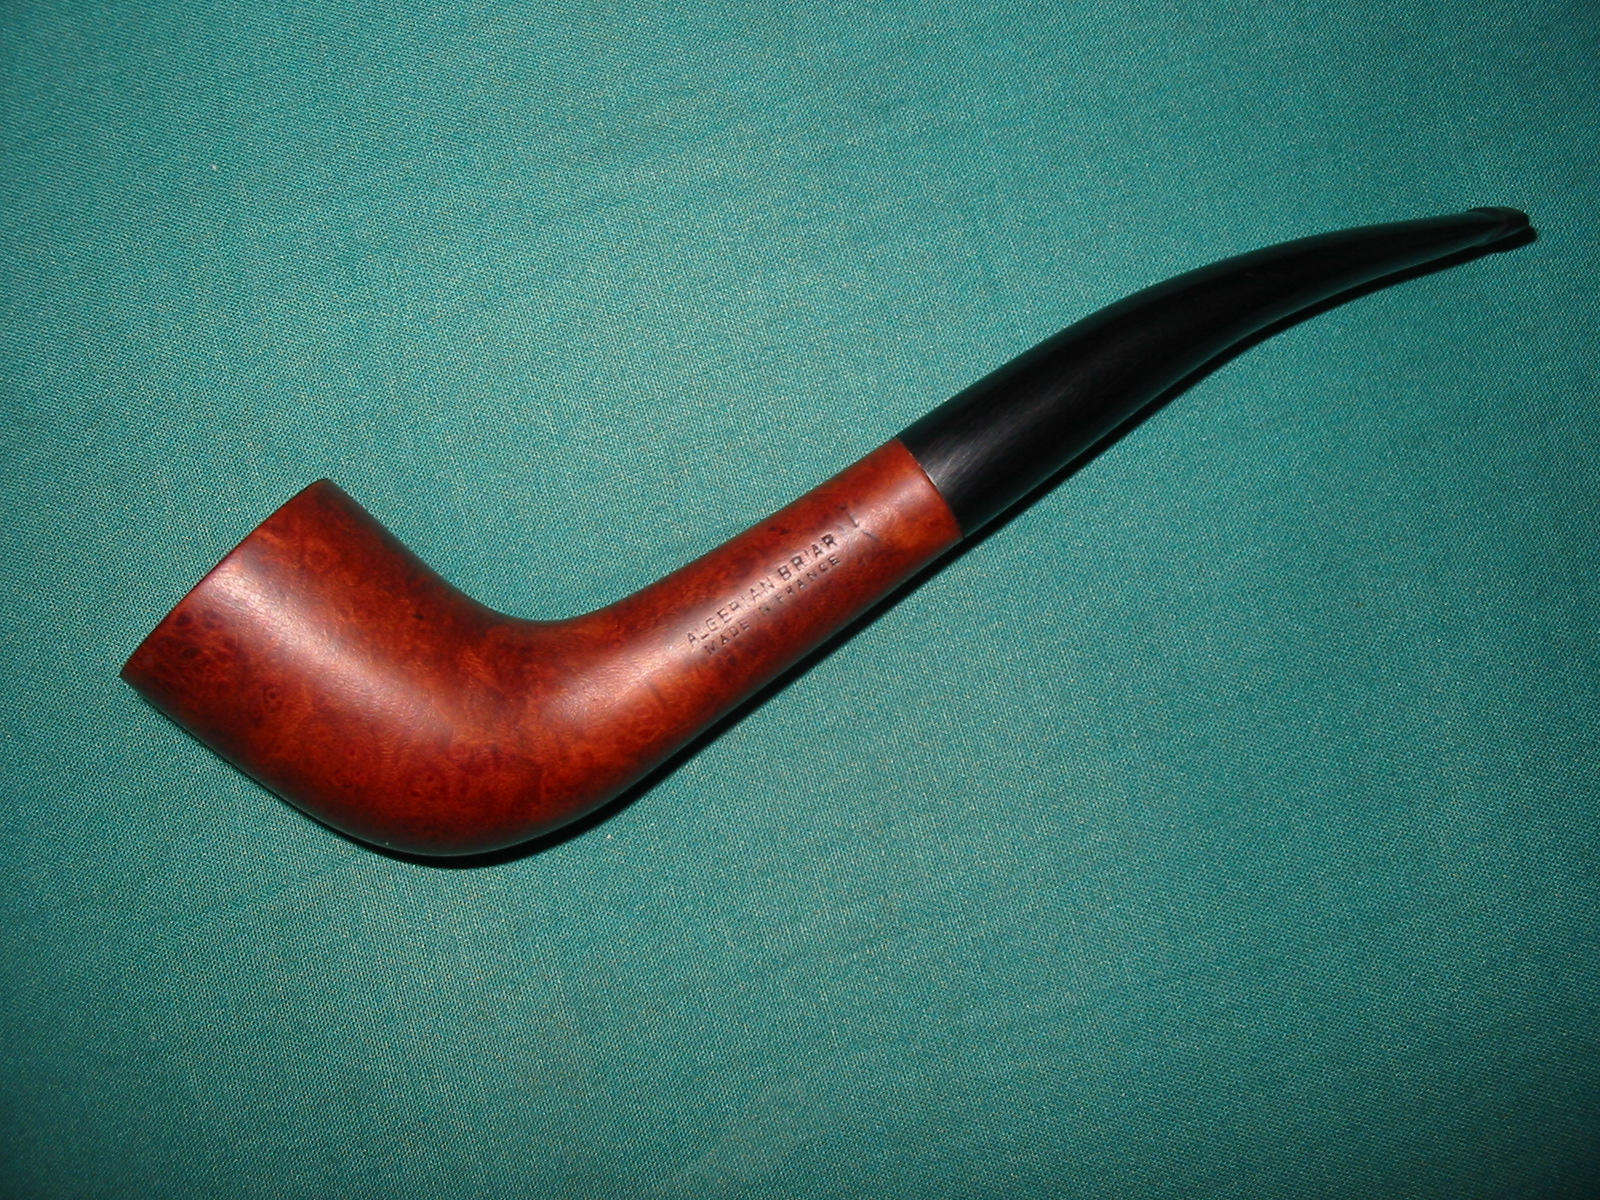
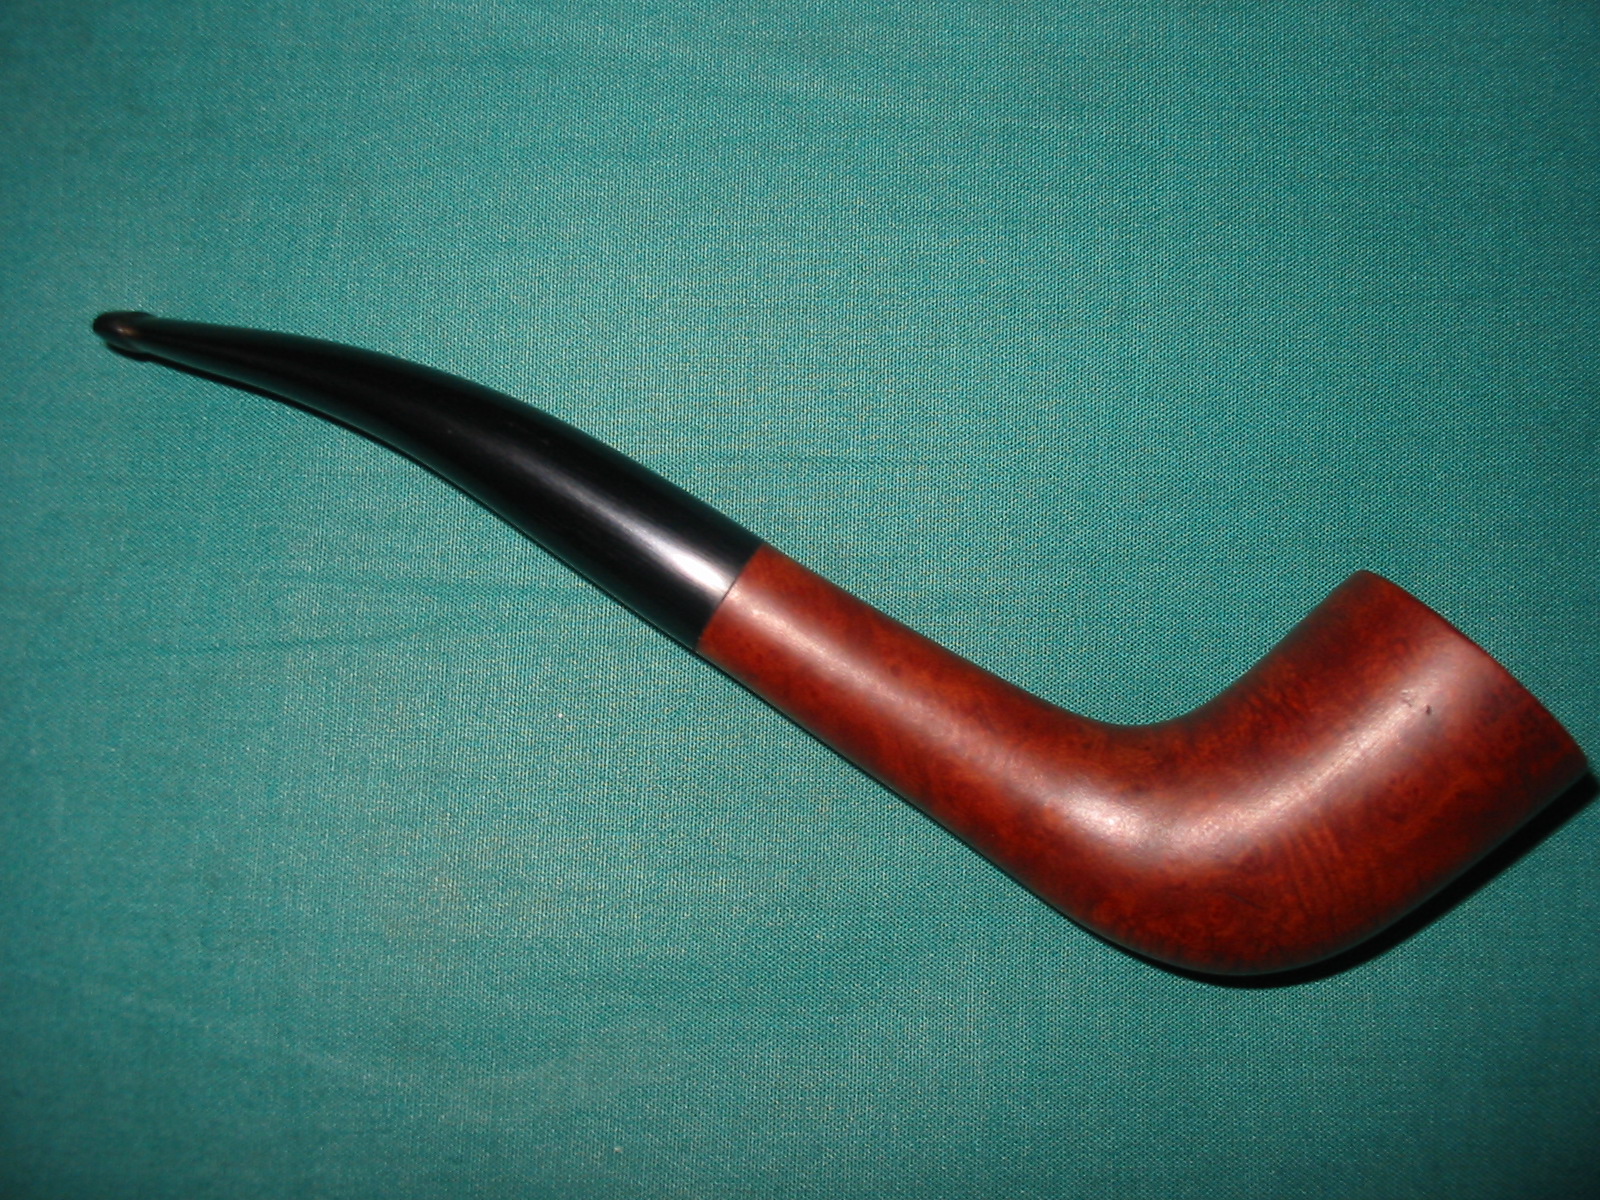
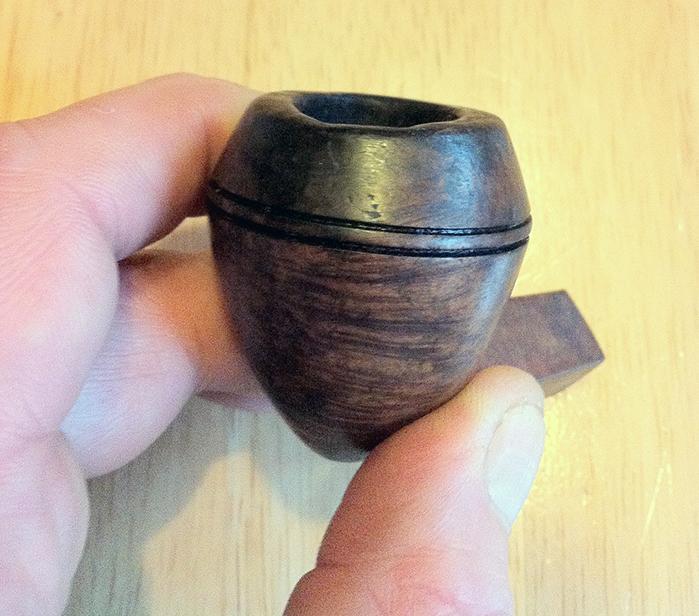
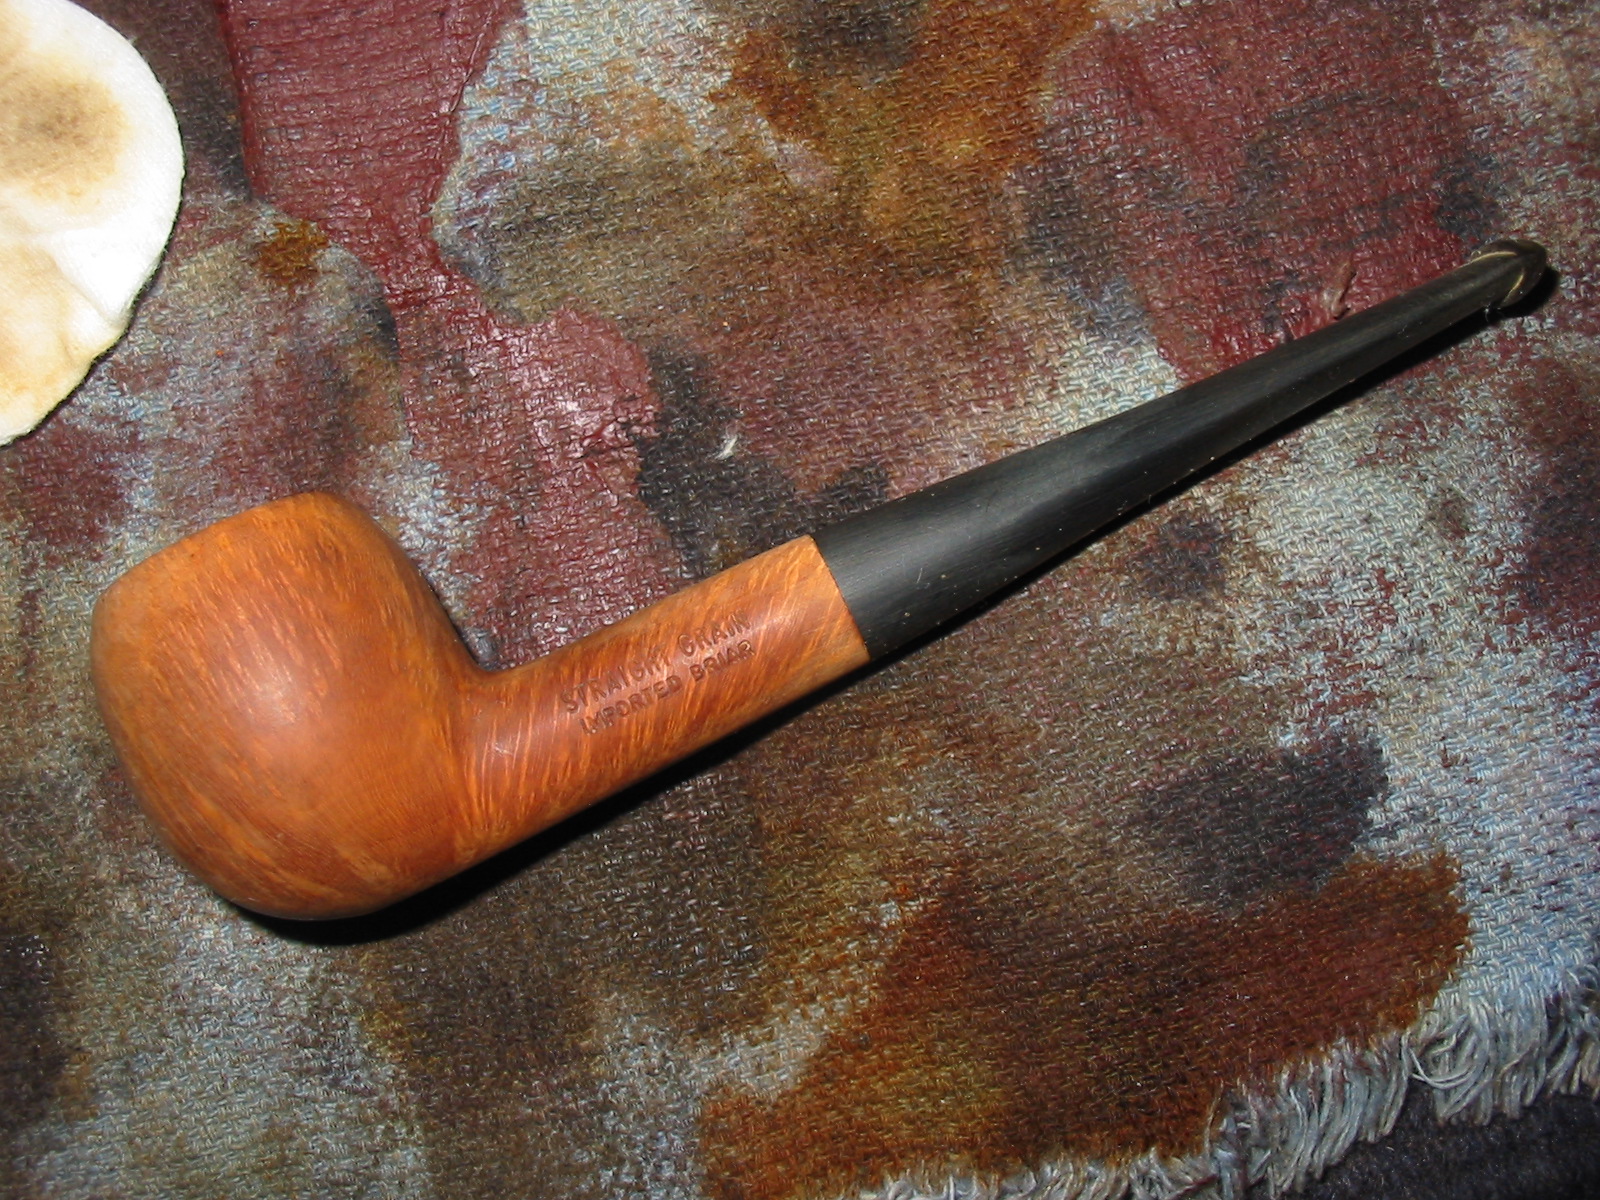
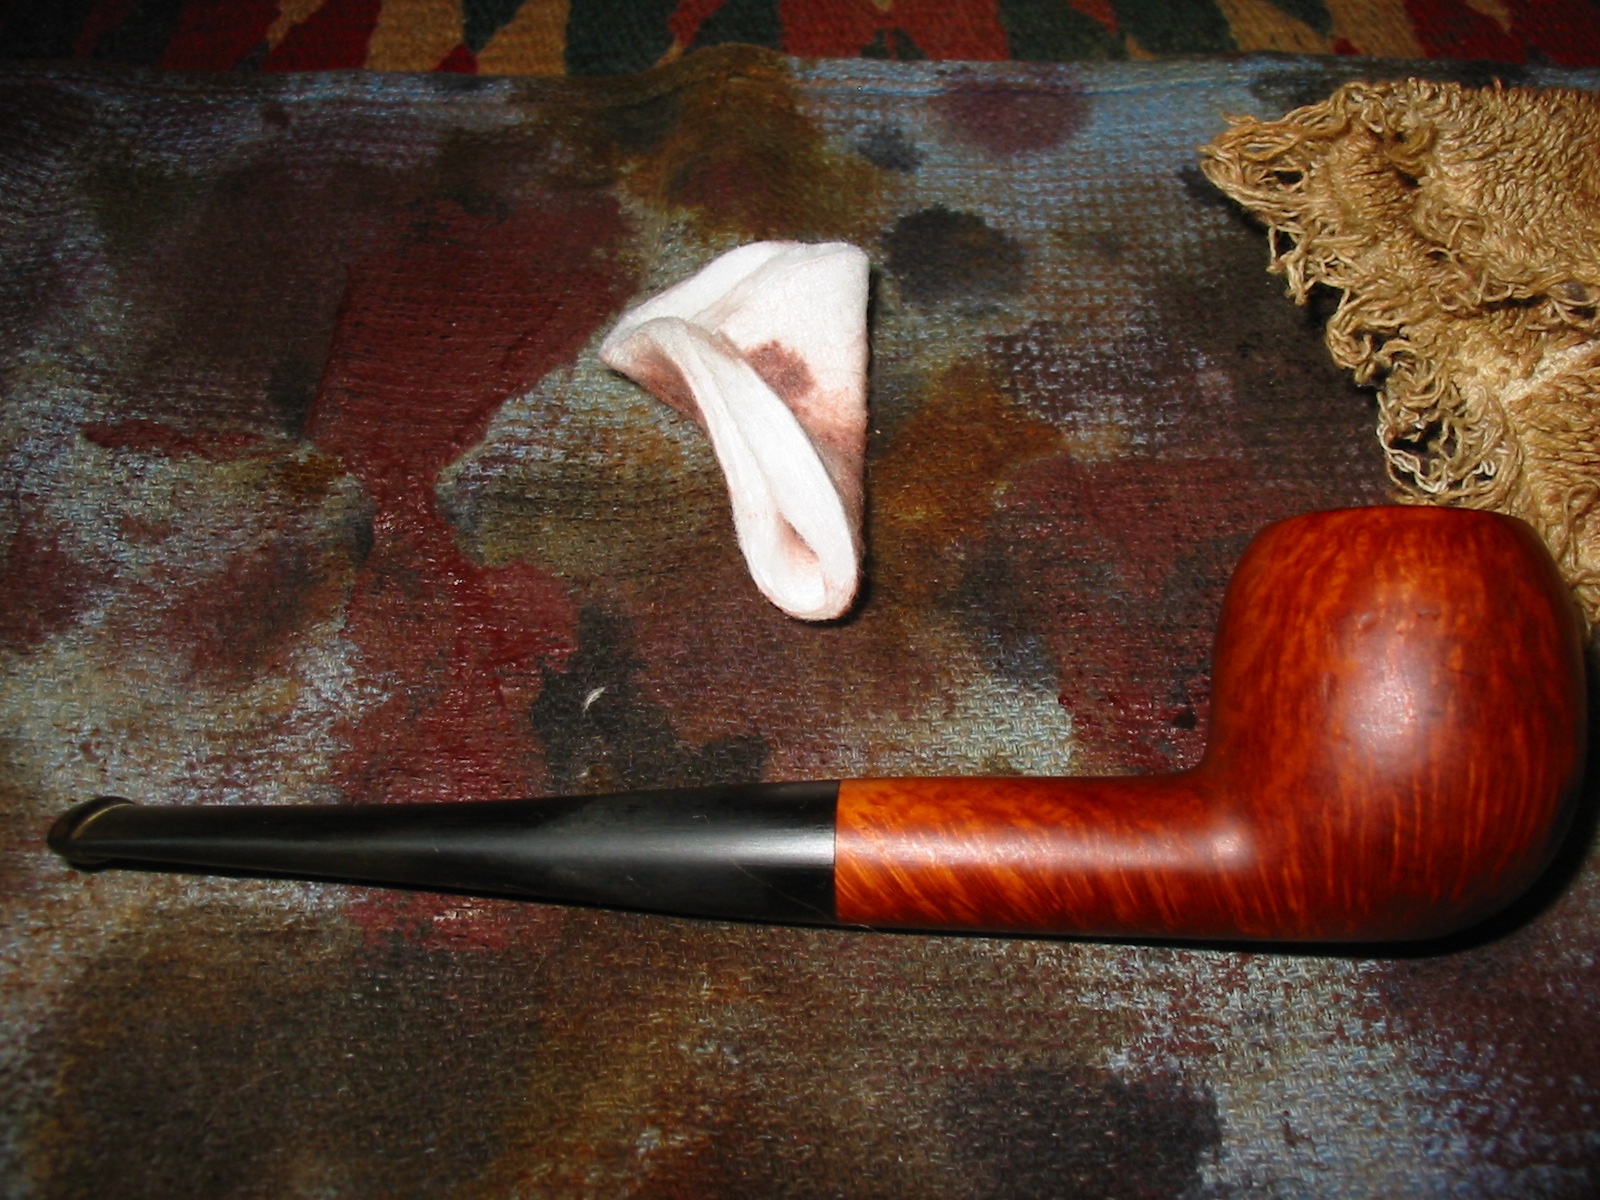
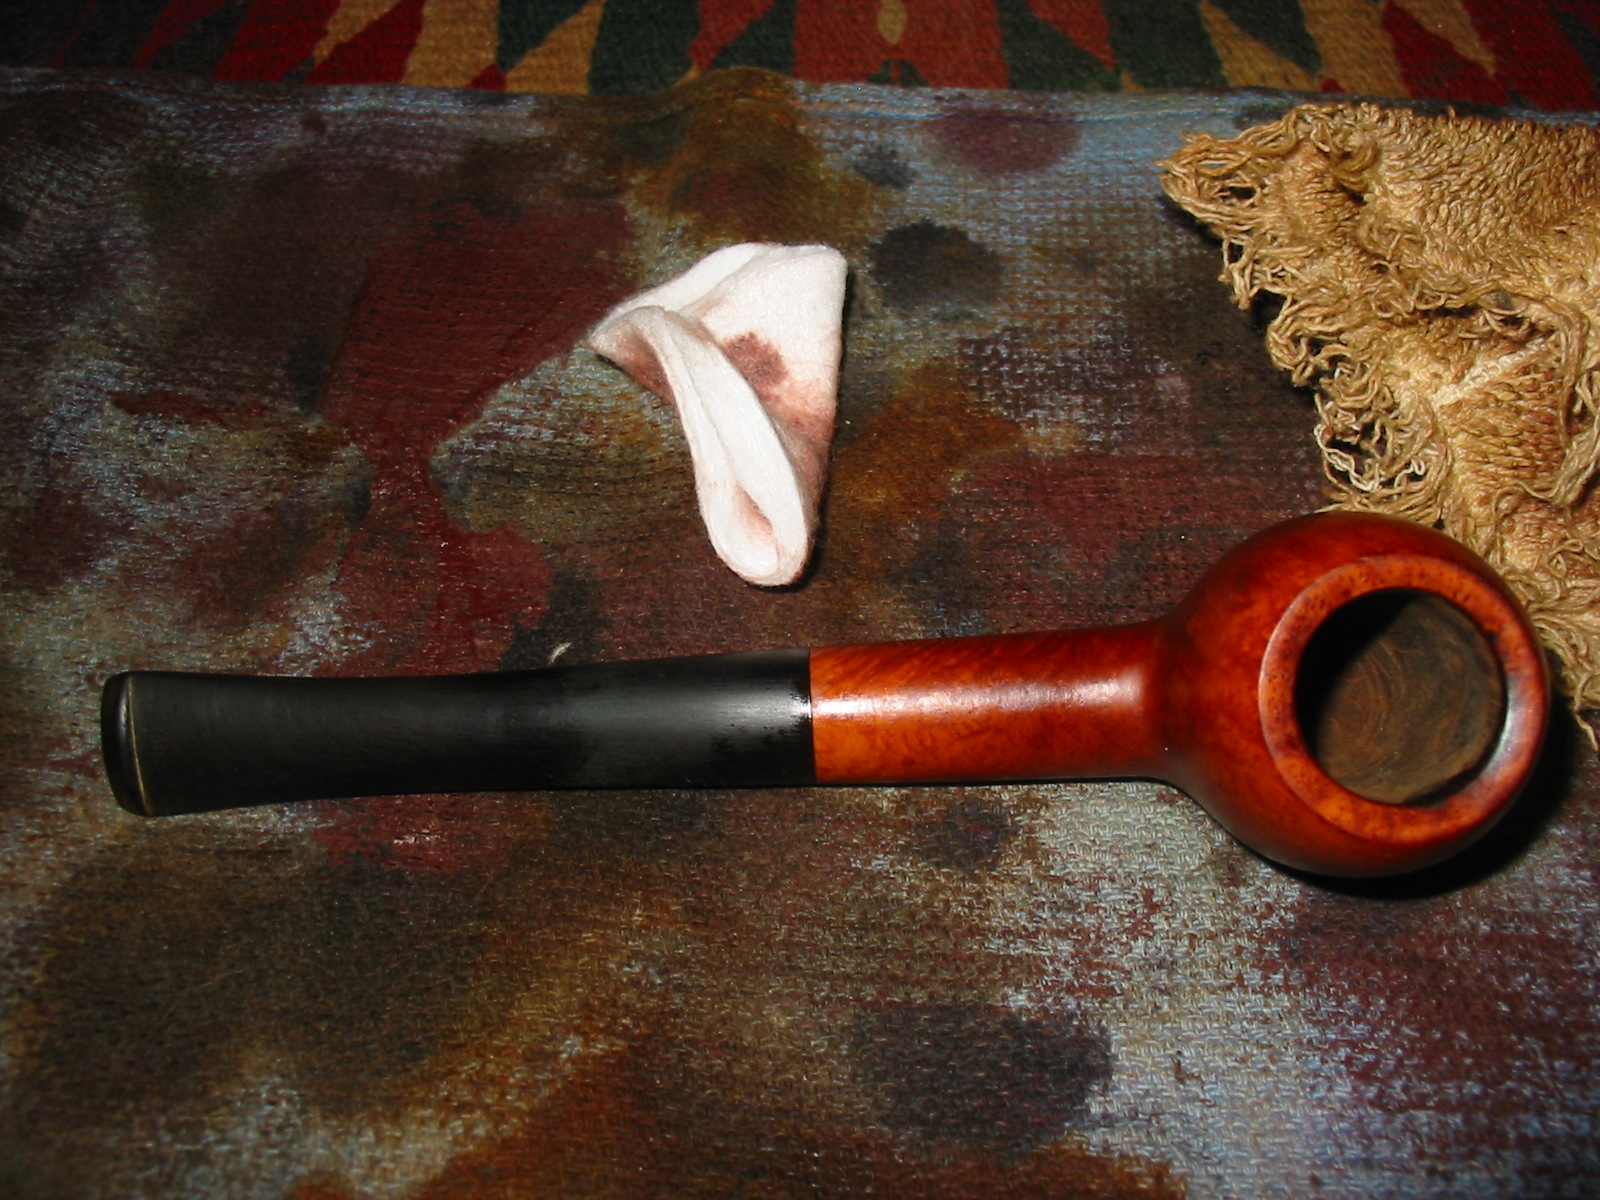
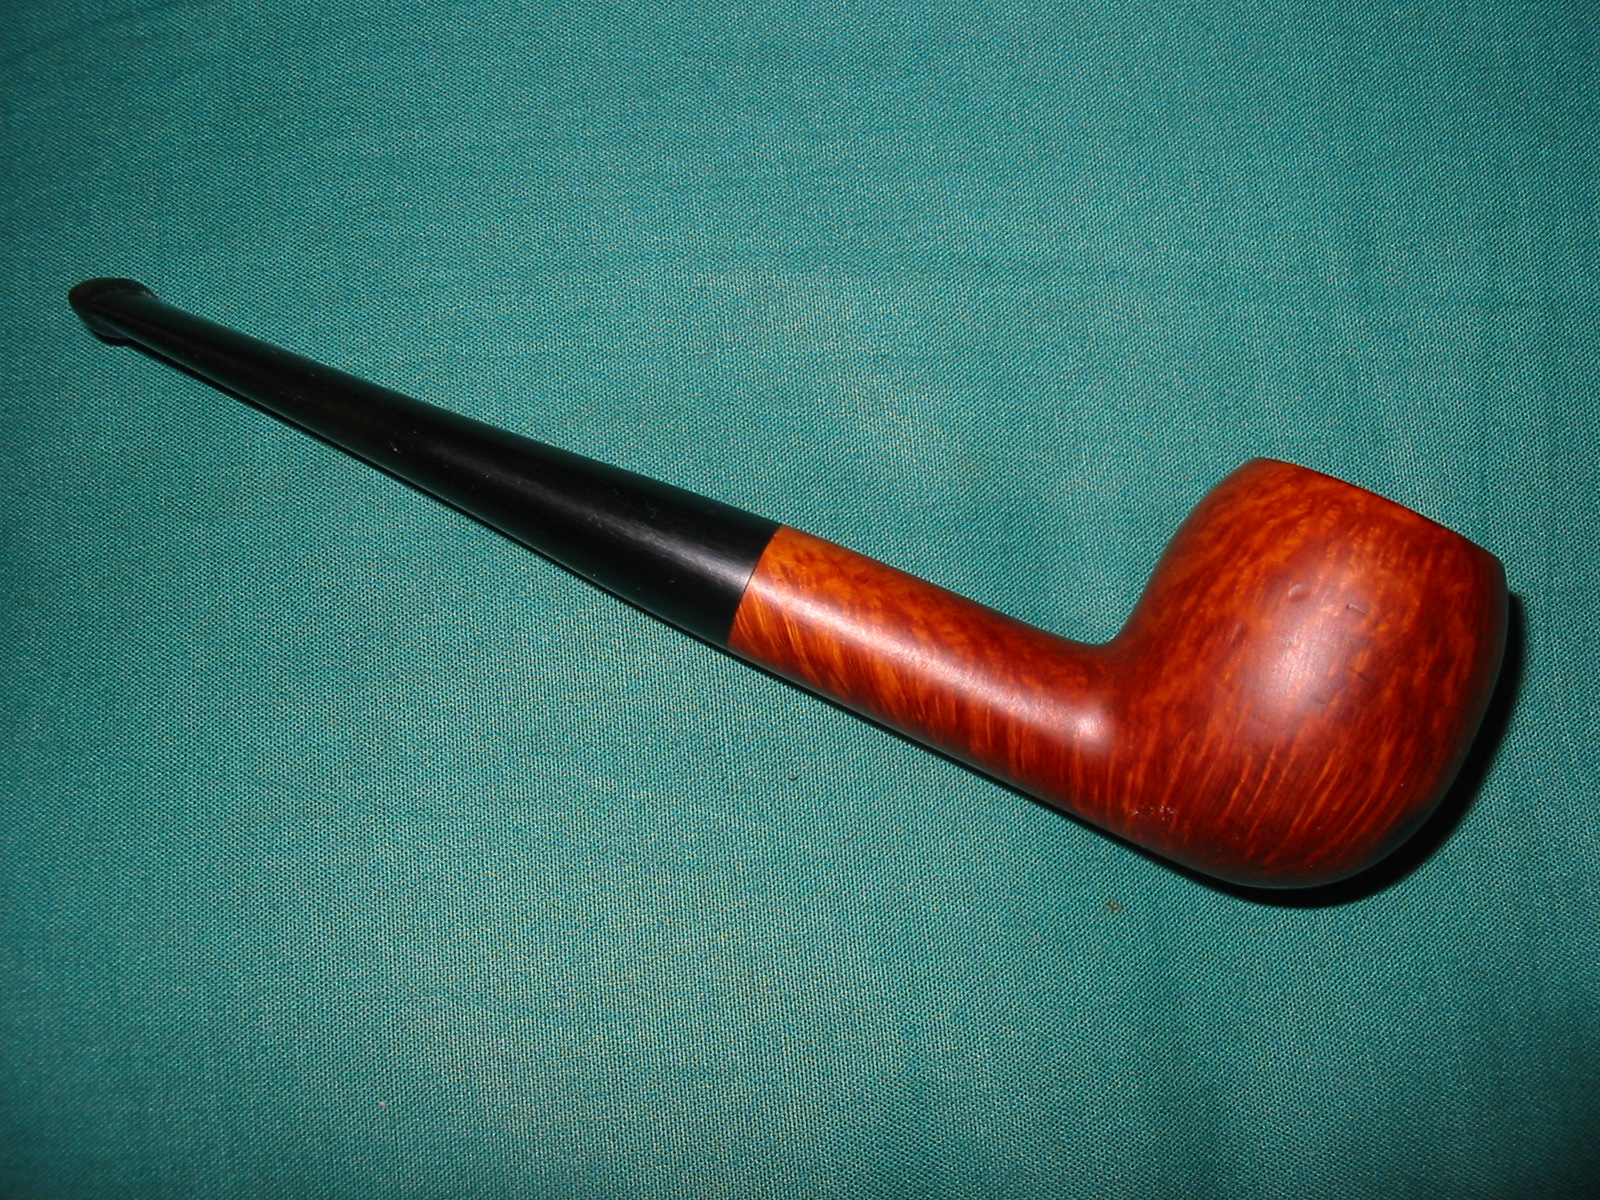
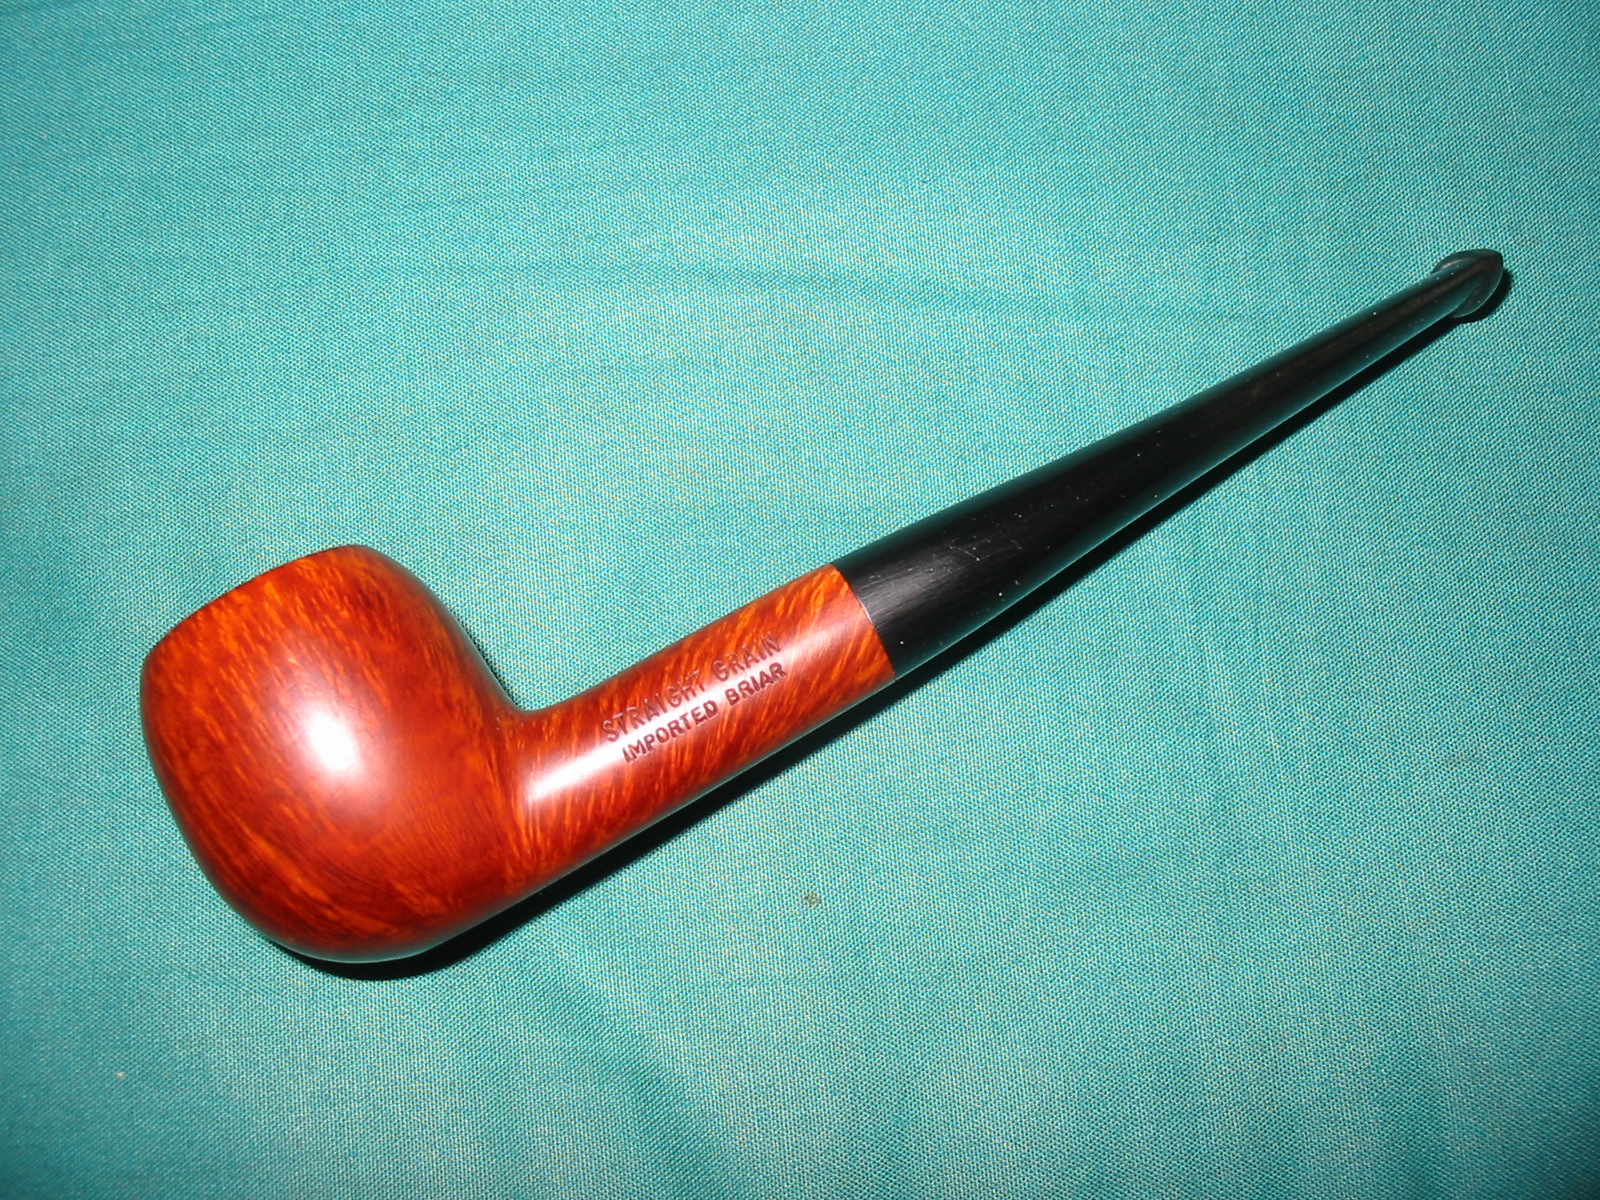
I rubbed the bowl down with a light coat of olive oil and the stem down with Obsidian Oil. Once it had been absorbed in both places I took the pipe to the buffer and buffed it with White Diamond on the wheel. I gave bowl and stem multiple coats of carnauba wax and then buffed the pipe with a clean flannel buff to give it a finish shine. The finished pipe is shown in the photos below. The fit of the stem matches the lines of the pipe and the oiled finish gives the pipe a look that is fresh and new. It is ready for its new maiden voyage.
IMG_5223

IMG_5224

IMG_5225

IMG_5226

ADDENDUM – I am copying this from the responses below so that it gets more readership.

Here is the info from the link Jacek supplied. Very helpful additional information. Thanks Jacek.
As many realize, Comoy is one of the oldest London Pipemakers with production started in France in 1825. Francois Comoy started making smoking pipes with his brothers in St. Claude, France in 1825. His son, Louis, took over the company and in 1848 helped guide it into the era of power-driven machines beginning what Comoy called a “Century of Progress.” His son, Henri, followed in the footsteps of his father and grandfather and moved Comoy’s to Clerkenwell in the City of London in 1879, and thus began “Comoy’s of London.” And his son, Louis, was the last family member to run the company.

During its’ history, Comoy’s has had three distinct sets of nomenclature, though they became somewhat blended in later years. The earliest Comoy Nomenclature either had no ”Comoy” stamping or a scripted, signature-like (forward leaning) “Comoy’s” beneath which were featured names instead of shape numbers. Few of those names (like the “Leman”, “Naval”, “Adelaide” and so on) are recognized even by the most ardent Comoy collectors. Then after World War I when Comoy began introducing what is sometimes called their “Old Nomenclature” (featuring the “Prima” as “Top-of-the-Line” with other lines like the “Old Bruyere,” “Grand Slam,” “Lions Head,” “LUMBERMAN,” “LUMBERMAN SPECIAL,” and so forth) an ARCHED “COMOY’S” stamping was used. In the 1930s the Prima gave way to the “DE LUXE” as the “Top-of-the-Line” Comoy. Then, just before World War II newer nomenclature started to appear (like “Blue Riband,” “Specimen Straight Grain,” and so on) and the “DE LUXE” was replaced by the “Royal Comoy”. That “New Nomenclature” expanded dramatically after the War and blended with the modern nomenclature of today.

The use of the ARCHED “COMOY’S” ended with World War II and was replaced after the War with a straight line “Comoy’s” (along with the now famous Country of Origin stamping of a circular “Made in London” over a straight line “England”).

Prior to World War II with manufacturing facilities in both France and England, Comoy had pipes made in both locations. Most were easily identifiable by their Country of Origin stamping. There were several versions of Comoy’s “LUMBERMAN” made in France and/or England. (They might have been the same Pipe but with different nomenclature.) “THE LUMBERMAN,” and “THE LUMBERMAN SPECIAL” were made in both factories. But NONE had the ARCHED “COMOY’S” stamping!

After World War II, Comoy reintroduced the “DE LUXE,” discontinued the ARCHED “COMOY’S” and continued various versions of the “LUMBERMAN”! Perhaps Comoy’s” best” graded “LUMBERMAN” was stamped “LUMBERMAN DE LUXE” – – – but it had no “Comoy” stamping. ”LUMBERMAN” was always stamped over “DE LUXE”!!!

Now look at the stamping on this Comoy Canadian – – – the ARCHED “COMOY’S” is stamped OVER “DE LUXE” (just as it would have been on a “Top-of-the-Line” Comoy’s De Luxe” in the early 1930s! In addition, that stamping is OVER “LUMBERMAN”!!! This Canadian is the only one I have ever seen with such stamping(s)!!!

Comoy offered truly elegant Canadians that were always perfectly shaped, light weight and fitted with “wafer thin” mouthpieces that are easy to hold in the mouth. Of course, they came in different lengths and finishes.

Normally, Comoy offered two Canadian sizes designated by Shape Numbers 296 and 309. The difference in the length of the Canadians. The “309” Shape was Comoy’s LONGEST CANADIAN, and the “296” was shorter. However, EXTRA LONG Canadians were ”upgraded” with the additional stamping of “XL” (creating a “309 XL”) and the very longest were sometimes stamped “XXL”!!! Either upgrade was rare, and this exceptional Canadian is stamped “309 XL”!!!

So looking at the title of this description one would expect to see a long, sleek Canadian of special length. It is not! It is a mere 6 3/8” LONG which is barely longer than average for most pipe makers!

The grain is not exceptional nor is the size (although the Bowl is a large Dunhill Group 4/5 Size which is larger than most “average” Canadians). But the Pipe has a HAND RUSTICATED RING around the Rim as well as a small HAND RUSTICATED “ARROWHEAD” or “TRIANGLE” on the bottom of the Shank! Both are unusual for any Comoy and ensure that this Canadian is UNIQUE (if only because no two rustications are identical).

Combining these features, you are looking at an EXCEPTIONALLY RARE, UNIQUE COMOY “LUMBERMAN”!!!

We cannot be certain of a date for this Comoy. It is an ARCHED “COMOY’S” over “DE LUXE” which dates it from the early 1930s. It is also a “LUMBERMAN” with a COMOY’s 3-PIECE “C” LOGO in the Mouthpiece dating it to the post-World War II timeframe; and it has the newer Country of Origin stamping which did not exist before World War II. So it would seem that this Comoy Lumberman/Canadian most likelydates from the late 1940’s which would seem to be the most reasonable time for such a Pipe to appear.

As the pictures reflect, this Canadian remains in PRISTINE CONDITION! The STRONG NOMENCLATURE confirms that! There are NO chips, dents or scratches to detract from the exterior finish. NO varnish, lacquer or shellac has been used to improve the appearance of the Pipe for the pictures (and temporarily fill scratches and toothmarks). And, NO coating has been applied to the inside of the Bowl to hide cracks, heat fissures or even burnouts. The Pipe shines as it did when it left the factory in London over 60 Years Ago!!!

This Canadian measures 6 3/8″ LONG with a Bowl 2″ TALL!!! The nomenclature is crisp and clear: “COMOY’S [arched and over] DE LUXE, LUMBERMAN, MADE IN LONDON [in a circle and over] ENGLAND, 309 XL”. The Famous Comoy’s 3-Piece White “C” Logo is inlaid in the Bit. So what you are viewing is an EXCEPTIONALLY RARE, and COLLECTIBLE COMOY CANADIAN!!! The fact that it is in PRISTINE CONDITION with particularly STRONG NOMENCLATURE makes it worthy of consideration by those desirous of accumulating a special Comoy collection!

Out Damned Spot!…or at Least Hide – By Josiah Ruotsinoja


Josiah and I have been emailing back and forth on this old Kaywoodie for quite a while now. I asked him to do a write up for the blog on it as he tried some different ways of minimizing stains to the briar. Each method he used has its own application and effect. Josiah did a great job writing this up and demonstrating the way the method worked and the results of the application. Thanks Josiah for the great work. I look forward to reading more about your refurbishing in the days ahead.

This last August, I acquired a Lot of estate Kaywoodies. All were in fair condition. Some looked like old, loved friends and a couple hardly smoked at all. One was unsmoked with the price sticker still on the stem. I’m guessing that all came from the same estate judging from the burn pattern on the rims. The main issues to be dealt with were the moderate burns on the rim and some spots from sitting in something wet. These spots proved to be the more serious problem, as you may gather from the title.
Among them was this Connoisseur #69 pot.
Josiah1

Josiah2

As you can see, there was quite a lot of grime and a large dark spot on the left side of the bowl. Another, less severe spot was on the bottom of the shank. However, it appeared to be in good condition overall with nice thick walls and no deep dents or scratches. The bowl had some very nice birdseye on both sides. Visions of a nice blond or honey colored stain immediately jumped into my head.

Time to restore! My first steps were to ream the bowl and put it in an alcohol bath and soak the stem in an Oxyclean solution. The stem came clean and polished up nicely without much trouble. I heated up the stinger and screwed it in to the mortise while still warm to correct the alignment.

The grime on the rim came off quickly, but there were a couple pretty deep scorch marks. I started off topping the bowl with 220 grit sandpaper, but it quickly became apparent that it was going to take forever with that fine a grit. So I started over with 80 grit until most of the burn was removed and worked my way up through 600 until it was gone. Then I put a slight bevel on the outer and inner rim.

Now for the real problem. The water marks (I kinda think old motor oil) hadn’t come out in the alcohol bath as I had hoped it would. Having never dealt with removing such marks from wood, I decided I needed to consult someone with more experience. I sent an email off to Steve here at the blog for advice. In response he suggested a few options: lemon juice, bleach, oxalic acid and as a last resort sand paper.

First, I tried lemon juice.That worked to a degree, but the stains were still clearly visible. Here are the marks after the lemon juice.
Josiah3

Josiah4

I figured anything I could see would be more visible after applying stain, but I decided to give it a try anyway. I sanded the entire surface from 220 up to about 6000 grit. I applied stain and flamed it to set the stain. Below is the first attempt…not so successful.
Josiah5

Josiah6

So I sanded off the stain again and went for bleach. I almost ruined the whole project here by leaving the bowl in the bleach too long. It raised the grain quite a bit and penetrated further than I expected.
Josiah7

Josiah8

After sanding, I managed to get most of the white patched off and the surface smooth again.
Josiah9

Josiah10

On to attempt #2 with stain…
Josiah11

Josiah12

Better results, but the stains were still clearly visible. I moved on to oxalic acid crystals. I mixed a paste of crystals and water, applied it, let it dry and sanded the dried mixture off. Use a particle mask when sanding this stuff. It’s not something you want to inhale.
Josiah13

Josiah14

I tried once more with stain and the results were similar to the second attempt. I seem to have lost the pictures for this, but by this time, you get the idea. This last unsuccessful attempt made it clear to me that I must admit defeat and give up my dreams for a shapely blond and give a brunette a try. The repeated sanding, staining and sanding again had taken its toll on the nomenclature and the side profile was starting to flatten out. In order to save the now faint stampings, I chose a nice deep espresso color and success! The pesky spots are now hiding well in the rich stain. I think that only a very well trained eye, or one that knew the stains were there in the first place, would be able to spot them.
Josiah15

Josiah16

So after a lot of work, I have myself a beautiful Kaywoodie pot. Disaster almost struck in its inaugural smoke, however, when the Kaywoodie club fell out of the stem, the original glue having lost its glue-iness after the soak in the Oxyclean. I managed to find it where I had been sitting and it’s safely superglued back in place.

Many thanks to Steve for his suggestions. Even if it didn’t turn out the way I planned originally, I now have options for tackling similar problems in the future and about a pound of oxalic acid to try to remove the stains my 13 year old has left on her bedroom window sill.

A Kaywoodie Reworked, with a Little Mystery!


Blog by Greg Wolford

This year has not been a banner one, so far, for me personally. The harsh weather, an accident, and a failure of one of my orthotics has had me mostly sidelined since the first of the year. My workshop is downstairs, in the garage, and it isn’t exactly the warmest, most comfortable place to work in the temperatures we’ve had, not to mention the difficulty of actually getting myself up and down the stairs … but I digress … so I’ve been able to do very little work on either of my hobbies so far in 2014.

Last week my wife had a little pity on me and allowed me to bring a few necessary tools and supplies up to the kitchen so I could work on a few old pipes; leather work is out of the question until the temperature and my body cooperate. I think she knew I was getting a bit restless, not being able to get into any of my projects. When I said she “allowed” it, she corrected me with “I didn’t say you could do that” but she didn’t send it all back down to the shop either, so I take that as permission I told her! LOL

Now, I must admit that my photographs, when I remember to take them (that’s a preview hint that I haven’t remembered as often as I should have), aren’t as good as I would like but I don’t have as good a set-up as I normally do. So, I ask you to bear with me on the quality and quantity of them.

Sometime back I acquired an older Kaywoodie model 33. It is an apple shape with a rounded bowl-top. The pipe was in pretty good condition other than the front edge was damaged from being knocked-out and the bottom of the stem had been bitten off. because of the stem damage I put off working on this pipe for months; I wanted to save the stem but didn’t have the black super glue yet, which I planned on using, to do the job. Here are a couple of photos (all I could find) of it before I started working on it.

Kaywoodie Apple (10) Kaywoodie Apple (11) Kaywoodie Apple (13)

Unfortunately all I can find are some photos that I used it as a “prop” in and one of the underside of the stem. You can see the pipe itself wasn’t too bad but the stem was another story.

Initially I tried to patch the chip with black super glue; I tried this three times: the first attempt the pipe cleaner I was using as a plug absorbed all the glue and the other two times, using different materials for the plug, the patch failed. It turned out that the chip was just too large for me to patch well so I decided to cut it off and file a new button since there seemed to be plenty of room to work with on this stem.

I used a hacksaw on a small frame to remove just behind the bite through. When I looked at the air hole I noticed two things, neither good: first I had closed off the airway accidentally with the glue and second the air hole wasn’t drilled center. I fixed the glue-plug problem quickly by drilling out the hardened glue with a pin vice and then picking out the small fragments that were left. One problem down – now onto forming a new button and slot.

I used various needle files to shape the new button, being timid about not getting it too thin. I recently bought a new set of Kobalt needle files, a big upgrade from my old ones, and found that this (only my second or third time making a whole new button and transition) went much smoother and faster than in the past. I also used the files and a bit of sandpaper to open and funnel the slot, again I was a bit timid in not going too thin; I have done that once and suffered a cracked bit afterward. This is a fair representation of what I ended up with:

Kaywoodie Apple (8)

Once I had the stem to my satisfaction I turned to the stummel.

I had at some time past already reamed the bowl lightly, it had very little cake, and cleaned the shank and stem. I now began by cleaning the stummel with acetone wetted cotton pads to remove the old finish and dirt. After the acetone I moved on to some alcohol wetted pads to lighten up the grime on the bowl top. When it was sufficiently clean I decided to use some 400 grit sandpaper to lightly smooth the edge damage. I didn’t know it at the time – because I failed to look first, a fault I have all too often – but the rim was supposed to be rounded. Luckily I liked the general look of the rounded top and thought it might be the way it was supposed to be so I wanted to keep it rather than topping the entire bowl. I personally like, in general, the less sharp lines on a bowl top so this was an easy choice – one that turned out to be a good one as well.

Once I had reduced the damage to the rim and front, keeping the shape as close to original/symmetrical as I could, I moved to micro mesh pads to sand and polish the bowl top. After getting through the first two grades I thought the entire pipe would look nice just polished with the micro mesh. At this point I reassembled the pipe and began to look for nomenclature to avoid during my polishing; this is when I discovered my “mystery”.

On the bottom of the stem, a origianl Kaywoodie, three-hole stinger with white clover logo, I saw something I had never seen before: there was stamping on the vulcanite “D-2”. This immediately intrigued me; I knew I would have to find out more about that … but lets’ wait a paragraph or two on that.

Kaywoodie Apple (9)

I polished the entire pipe with all of the micro mesh grits in order from 1500 – 12000, avoiding all of the stamping, including on the stem. I wet sanded the stem (only) through 4000, then polished the stem with plastic polish, before finishing the entire pipe through 12000 grit. I then applied Halcyon II wax to the entire pipe and hand buffed it. I was really pretty pleased with the results, considering I didn’t have access to my buffer and this was, more or less, my first experience with the Halcyon wax.

Kaywoodie Apple (2) Kaywoodie Apple (3) Kaywoodie Apple (5)Kaywoodie Apple (4)Kaywoodie Apple (6) Kaywoodie Apple (7) 

I missed some file marks on the stem, and the “bits” near the bit; I figure when I can properly buff the pipe I will get those taken care of, as well as put a better shine on it with some carnauba wax. But until then I am enjoying this old gal just as she is!

The stem still has oxidation near that stamping, which I began to research after I finished the work on the pipe. None of the other Kaywoodies I have, or have ever had, have any stamping on their stems like this one does. I scoured the ‘net and asked as many folks as I could think of to no avail … well, almost none. I am a member of the Kaywoodie Pipes Group on Facebook and one of the members there is Bill Fuerbach is as well. He saw my question that I posted about the stamping in that group and replied as follows:

Hey guys. I’ve seen this also on some older Kaywoodie stems. unfortunately at this time I don’t know what the significance is. :(:(

So unfortunately there is not yet an answer to what the stamping means or its significance is – and the mystery remains …  If by chance anyone what reads this knows the answer I would really appreciate it is you would leave a comment with the answers!

Edit

I received an email from Chris at PipePages about this question. He said in his personal opinion, and that it is only a guess, that it could be a factory replacement stem and the number was a style/guide for the repairman to know which stem to use. Although it is only a shot-in-the-dark type of guess, it seems like a plausible answer to me.

Refurbishing an Old Zulu Bowl


I was gifted a few pipe bowls that needed to be restemmed and refurbished by a friend. The first of these that I decided to clean up and restem was an old Zulu bowl. It is stamped Algerian Briar over Made in France on the left side of the shank and no other identifying marks. Thus the maker remains a bit of a mystery that I am not sure can be solved. The bowl itself was in fair shape. The cake in the bowl was not thick but it was particularly crumbly and soft. The finish on the pipe was also shot. The varnish coat was gone and the stain was streaked and damaged. There were a cut groove next to the left side of the stamping and a smaller one on the right side of the stamping. The shank was filthy and caked with oils and tars. The rim was in great shape with no damage to either the inside or outside rim. The grain under the stain coat looked promising with cross grain on the front and back of the bowl and the top and bottom of the shank and mixed birdseye on the sides of the both.
IMG_4862

I had a stem in my can of stems that fit almost perfectly. It was damaged and would need some work but the fit and bend was perfect for the Zulu shape.
IMG_4863

IMG_4864

I fit the stem in place and wiped down the bowl with acetone on cotton pads to remove the remaining finish on the pipe. I reamed the bowl with a PipNet reamer and took the cake back to bare wood. I cleaned out the shank and the bowl with cotton swabs and Everclear.
IMG_4866

IMG_4867

IMG_4868

IMG_4869

I sanded the stem until the transition between the shank and the stem was smooth. I used both 220 grit sandpaper and medium and fine grit sanding sponges to smooth it out. The end of the stem was badly damaged and the button was ruined. I decided to trim off the damaged end of the stem and rework the button. Once it was cut back I cleaned out the stem with Everclear and pipe cleaners. The stem was badly plugged with tars so I had to use a bent paper clip to push through the airway. I used shank brushes and pipe cleaners to remove the tarry build up and open up the stem once again.
IMG_4870

IMG_4872

The airway was still wide and open so I did not need to reshape it. The top and bottom of the button were thin so I could not remove any further material. I reshaped the externals as best as possible by rounding the ends of the stem and making the button more oval in external shape.
IMG_4873

The slight dents in the stem that remained would not lift with heat so I filled them with superglue until they were level with the surface of the stem.
IMG_4874

IMG_4875

I cut the new button with needle files and shaped the end of the stem to have a better flow and taper to the new button. This involved removing some of the thickness of the stem and making the taper more angled. I used files and sandpaper to reshape the stem.
IMG_4876

IMG_4877

With the new button cut I sanded the stem and the entire pipe with 220 grit sandpaper to remove the remaining finish and make sure the flow of the stem was correct to the angles of the pipe. I also sanded it with a medium and fine grit sanding sponge to remove scratches in the briar and vulcanite.
IMG_4879

IMG_4880

IMG_4881

IMG_4882

IMG_4883

IMG_4884

The stain around the stamping on the left side of the shank was very set and stubborn. I lightly sanded it to break through the top coat and then scrubbed it with acetone on cotton pads to match it as much as possible to the unstained briar. I stained the bowl with an oxblood aniline stain, flamed it and restained and reflamed until I had an even coverage on the bowl. I hand buffed it with a soft cloth. I took the pipe to the buffer and buffed the stem and bowl with red Tripoli and White Diamond. The photos below show the pipe after the buffing.
IMG_4885

IMG_4886

IMG_4888

IMG_4889

I sanded the stem with my usual array of micromesh sanding pads – wet sanding with 1500-2400 grit pads and dry sanding with 3200-12,000 grit pads. I rubbed the stem down with Obsidian Oil and when it dried hand buffed the stem.
IMG_4890

IMG_4891

IMG_4892

I buffed the pipe with White Diamond and then gave it multiple coats of carnauba wax. I finished by buffing it with a clean soft flannel buffing pad. The finished pipe is pictured below. It is ready to go into service again. I like the flow of the lines on this pipe. The shape and matte like finish work well together.
IMG_4893

IMG_4894

IMG_4896

IMG_4897

Restoring an Old Hardcastle Dryconomy Shape 69 Bulldog – Chiz Szymanski


Chiz has followed rebornpipes for quite a while now and shown his refurbishing work on Pipesmokers Unlimited. When I saw his step by step work of reclaiming this old bulldog I wrote and asked if he would mind writing up the process for us on the blog. He was happy to do so. His words and photos follow. I hope this is the first of many refurbs he writes about and posts here on the blog. Thanks Chiz.

This project was first documented on pipesmokerunlimited.com where under the member name of Peter Piper, I am an active contributor. A relative newcomer to the hobby of pipe restoring, my ambition is to encourage others: “If a manually challenged clod like me can do it, so can you!”

I recently bought a job lot of Hardcastle estate pipes on eBay and decided that I should document the experience of restoring one of them. Which one? Why, the grottiest one of course, “Nothing ventured, nothing gained.”

I am delighted at the opportunity to share my experience here. Steve and this blog have been far and away my biggest influences and sources of help when it has come to learning how to restore a pipe, so I feel honoured to be asked for a contribution.

OK, let’s get down to it.
Chiz1

Superficially it doesn’t look too bad, but the rim is badly charred and uneven and I fear I am going to have to risk compromising the shape in order to make the bowl look presentable. The stem/shank fit and alignment has somehow become slightly out of kilter, perhaps it is not the original stem, so that too will need attention.

But more pressing problems first, feast your eyes on this cake.
Chiz2

Sleeves rolled up…

Cleaning the chamber out proved to be quite a job. I had to pick away at it with the nail from a 3 in 1 before I could even get the spoon in there, let alone a reamer. And the smell, ugghh. But at least it looks more like a pipe bowl again now. And happily there was no hidden damage within.
Chiz3

Once the chamber was clear I packed the bowl with salt and saturated it with isopropyl alcohol (99.5%). Additionally, I folded a pipe cleaner in half and twisted that into the shank so that it would soften the gunk in there and wick some of it out. I topped up the alcohol regularly and then left it to do its thing overnight.

Meanwhile, I gave the stem a soak in a bath of oxy solution to help bring out the discolouring. I also find that this helps soften whatever gunk lurks within and I don’t even attempt to do any cleaning on the airway before then.

What I have finally managed to get hold of, after failing to find anything suitable locally, are some long, bristled brushes narrow enough to fit inside the stem. What a boon! Whereas in the past I have struggled with countless regular pipe cleaners, this little beauty made short shrift of cleaning out the innards. It took just a couple of pipe cleaners soaked in isopropyl after that and they were coming out clean. Thank you to our friends in China!
Chiz4

Chiz5

Overnight the salt and alcohol worked their magic, you can see the brown crust as well as the darkened pipe cleaner here:
Chiz6

After chiseling out the crusted salt and a quick rinse under warm running water, I set to with my new super brush in the shank. This soon cleaned the conspicuous debris, but the muck of past smoking clearly ran much deeper. It took many, many pipe cleaners dipped in isopropyl before they started to emerge anything other than black, the previous owner had clearly been a recidivist of the worst order. Even when the pipe cleaners began to emerge light, the niff from within the bowl was still rank. So I have resorted to a further treatment only used in extremis: stuff some cotton wool wadding into the bowl and soak it in lemon juice. I have the germ of an idea forming for what to do with this pipe when I have finished with it and that does not include someone sucking on it and going green around the gills.

After all that effort the pipe is now sweeter than it must have been for quite some time. The next challenge was the misshapen rim, how on earth it got into this state I honestly cannot imagine.
Chiz7

First I roughly flattened the top with a Dremel with sander attachment. I don’t have a workshop with bench grinders and buffers, different kinds of polishing compound etc.just a very basic Dremel – which is of limited use; you really don’t want to go near a pipe with one unless you absolutely have to! – and the rest is all done by hand. So for anybody reading this wondering whether they should have a go at a similar job: if I can do it then anyone can, truly.

After the brief bit of machine work, I set to with the time-honoured and laborious technique of sanding the rim by hand, inverted on a perfectly flat horizontal surface with mostly circular/twisting motions. I also took the opportunity to give the stummel an overall rub with 800 grade sandpaper and then a quick scrub with a tiny dab of oil soap under running water.

Whilst obviously having to sacrifice a bit of height on the bowl, I am relatively pleased with the result of the “haircut.”
Chiz8

The stem cleaning was a matter of routine i.e. oxy solution to lift the grime and loosen the dirt inside and internal cleaning as mentioned earlier. Finally an application of good old elbow grease with MicroMesh 4 way flexi files, going through the colours in sequence: BLACK 180MX; PINK 2400; WHITE 4000; GREY: 12000, used wet.
Chiz9

After all this I was still scratching my head about the stem/shank fit, though. There is a just-about-discernible “H” on the stem, so I know it is aligned the right way. Yet it just didn’t seem quite right. It’s a bit loose to boot, so I will have to deal with that as well. I was grateful at this stage, whilst documenting this in “real” time on the forum, to get some reassurance from others regarding tricky diamond shaped stems. Never underestimate the benefit of soothing words from your peers when things look problematic!

Moving on, here are the first stages of colouring the stummel back up. I use Rustin’s Wood Dyes, which are naphtha based. Whilst you have to exercise some care, the evaporation is almost instant and the drying time is quite short, so two to three coats can be applied in relatively quick succession. I do like it to rest for at least 24 hours until finishing, so that’s it for now.
Chiz10

Chiz11

Oh, nearly forgot, one more tip: I wrap the stem in clingfilm (plastic wrap in the States?) and use that as a handle whilst applying the dye.

I wasn’t able to resolve the stem/shank problem to my complete satisfaction, I could have tried sanding away, but there is always a risk that one ends up removing too much material with no visible improvement. So I settled for heating the tenon in boiling water, inserting the nail from the 3 in 1 and very gently applying outward rotary pressure. I also applied some beeswax to the tenon, these steps together have at least ensured a more snug fit.

To finish off there is just the matter of giving the pipe a good polish to show off your handiwork at its best. As mentioned earlier, I am not fortunate enough to have an array of spinning buffer wheels and various compounds, so as throughout most of the process I rely on a manual approach: Renaissance Wax, applied by dabbing on and rubbing with finger tip and then buffed off with a lint-free cloth.
Chiz12

This will not, of course, produce the glassy shine so beloved of certain eBay sellers. But bear in mind that such a shine starts to disappear the moment you touch the pipe and I kind of like my less exaggerated finish. That’s my argument anyway and I’m sticking to it!

For ease of comparison, I am posting “before” and “after” pictures here next to each other:
Chiz13

Chiz14

A couple more pics of the finished article followed by some final thoughts:
Chiz15

Chiz16

You can see that the rim is out of round at the front edge, this is where the damaged, lowered area was. I was loathe to attempt shaving any more off, but after some input from Steve, I gave the inner edge of the rim a gentle rub with 800 grit paper, it does make it look better.
Chiz17

The shank/stem issue which I have banged on about so much remains clearly visible. At the end of the day, perfection was not in my view possible with this job, certainly with the limited tools at my disposal.

Ultimately one has to ask oneself: what is my aim here? To restore a distinctly banged up specimen to a decent, smokable condition? Well, I hope I have achieved that and, while the pipe still shows signs of age and use, I think that is as it should be. Like an old movie star looking attractive and dignified in a nice set of new threads. But without an OMG facelift.

Refurbishing a Pipe for a New Pipe Smoker – A Straight Grain Apple


This past weekend I was in Lethbridge, Alberta as the speaker at a retreat for a friend of mine. As usual I took along my pipe and some tobacco and planned to sit on his front porch and enjoy a few bowls during the course of the weekend. We were sitting one night in his living room enjoying good conversation and a pint when he commented that he had been thinking of smoking a pipe. He wanted to know if I would teach him the ropes. Of course I agreed and the next afternoon we visited a couple of antique shops in search of a pipe for him. My experience in helping a newbie start is to find a seasoned pipe that is in good shape and use it to introduce the art of pipe smoking. The seasoned or estate pipe is already broken in and if it has been cared for is not too difficult to clean up and restore. We found just the pipe at the third shop we visited. It is a nice apple shaped pipe that was in fairly decent shape. He paid the $9 price on the pipe and we took it home.

I asked him for some isopropyl alcohol, some cotton swabs, cotton makeup pads, and a sharp knife. I had some pipe cleaners with me so that we could field dress the pipe and clean it enough that he could smoke a bowl with me. The pipe had a slight burn on the front right of the bowl toward the bottom from having laid it in an ashtray and having it come in contact with a cigarette. The rim was caked and dirty with buildup but undamaged. The bowl was caked and had some burnt tobacco in it. The stem was lightly oxidized and there was light tooth chatter near the button. There was a stinger apparatus in the tenon of the stem. The stamping on the pipe was on the left side and read Straight Grain over Imported Briar. There was no other stamping on the pipe.

I carefully reamed the bowl with the pocket knife to remove a large portion of the cake. I scrubbed the top of the rim with the cotton pads and saliva until I removed the buildup on the rim. I cleaned out the inside of the shank with the pipe cleaners and the cotton swabs and isopropyl alcohol. I removed the stinger, threw it away and scrubbed the exterior and the interior of the stem to make it ready for him to smoke. Once finished we loaded a bowl of tobacco – a light English blend and headed to his front porch to have a bowl. It took some work to get the hang of lighting and keeping the bowl lit but it worked well after several tries. We enjoyed the visit and the smoke and then headed back inside.

When I headed back to Vancouver I took the pipe with me to give it a more thorough cleaning and polish. The photos below show the pipe when I put it on the work table to give it a thorough work over.
IMG_4615

IMG_4616

IMG_4617

IMG_4618

The next photo shows the cigarette burn mark on the bowl. It was not too deep and did not char the wood but it was deep enough that it could not be sanded out without damaging the shape of the bowl.
IMG_4620

I sanded the burn mark and the rim to clean up the burn on the front inner edge. I used 220 grit sandpaper to start with and followed that with a medium grit sanding sponge.
IMG_4621

IMG_4622

I wiped the bowl down with acetone on cotton pads to remove the finish from the bowl and to prepare it for new staining.
IMG_4623

IMG_4624

IMG_4625

IMG_4627

The slot in the stem was tight and hard to get a pipe cleaner to pass through easily so I decided to open the slot open with needle files. I shaped it and opened it and then sanded it with a folded piece of 220 grit sandpaper.
IMG_4628

IMG_4629

IMG_4631

IMG_4632

I reamed the bowl and cleaned out the shank with isopropyl alcohol and then used pipe cleaners. I used the drill bit in the KleenReem pipe reamer to open up the airway into the bowl from the shank. The tars had clogged the airway so the drill bit opened it and cleaned up the buildup on the sides of the airway.
IMG_4633

IMG_4634

I decided to do a cotton boll and alcohol soak on the bowl. I stuffed the bowl with cotton and used an ear syringe to fill it with Everclear. I set the bowl in an old ice cube tray to let it soak while I was at work. The alcohol leaches out the tars in the bowl into the cotton and leaves the pipe fresh inside.
IMG_4635

IMG_4636

It sat in the tray for about 10 hours soaking. The cotton boll was soaked and brown coloured from the tars that leached out of the bowl.
IMG_4639

I took the cotton out of the bowl and then lit the alcohol remaining in the bowl with a lighter. It quickly burned the alcohol out and left the bowl dry. I used a folded piece of sandpaper to work on the inner edge of the rim to remove the burned spot on the front inner edge. I also used a PipNet reamer to remove the remaining cake that I had missed earlier. I wiped the bowl down a final time with acetone on cotton pads to remove the grit and grime that came out with the cleaning of the bowl.
IMG_4640

IMG_4641

IMG_4642

IMG_4643

I stained the bowl with an oxblood stain as an undercoat. I applied it and then flamed it. I hand buffed the bowl once the stain was dry.
IMG_4644

IMG_4645

IMG_4646

For the second coat of stain I used a dark brown aniline stain thinned 2:1 with isopropyl alcohol. I hand buffed the bowl with a soft cloth and then took the pipe to the buffer and buffed it with White Diamond.
IMG_4649

IMG_4650

IMG_4651

IMG_4648

Once the staining of the pipe was finished I worked on the stem with my usual array of micromesh sanding pads – wet sanding with 1500-2400 grit pads and dry sanding with 3200-12,000 grit pads. I rubbed the stem down with Obsidian Oil and let it dry.
IMG_4652

IMG_4653

IMG_4656

I took the pipe to the buffer and buffed it with White Diamond and then gave it multiple coats of carnauba wax. I finished by buffing it with a clean flannel buffing pad. The pictures below show the finished pipe. It is ready to send back to my buddy in Lethbridge. I think I will put a few samples of tobacco in the package with the “new pipe”. I think he will enjoy the improved version of his pipe.
IMG_4665

IMG_4666

IMG_4667

IMG_4668

Repairing and Restoring a Lumberman Deluxe Canadian by Comoy’s


In a batch of pipes I was gifted by Andrew there was a pipe to repair. It is pictured below. The stamping on it was new to me. It is stamped LUMBERMAN over DELUXE on top of the shank and on the underside it is stamped Made and London arced in a circle with “in” at the center of the circle. It is also stamped 309X. I do not see an L after the X in the stamping of the shape number. The shank was cracked and looked like it had been taped from the sticky substance left around the shank and crack. It also was without a stem. Looking it over it appeared that the shank had also been cut off slightly and the cut was crooked. There was a chipped out portion at the end of the crack. All of that would need to be evened out in the repair. The bowl was caked toward the bottom and dirty with a buildup of carbon on the rim and the inner bevel of the rim. The finish was dirty and there were remnants of sticky tape that had been used to repair the shank on both the bowl and the end of the shank. It needed some TLC and work if it was going to be brought back to life.
IMG_4521

IMG_4522
The close up photo below shows the extent of the caking and the buildup on the rim. Note that the inner bevel was intact and the rim itself was undamaged – no nicks or dings on the outer edge and no burn marks. This one would clean up nicely.
IMG_4528

The Lumberman stamping was new to me. I had not heard of it before but it looked interesting in the photos that Andrew sent along. I asked him about the brand so he included some interesting information on the stamping that he had gleaned from a Mr. Can EBay listing. It certainly sheds some light on the brand. Here is how the listing read:

“This Collectible Briar pipe is unique, extremely rare Comoy’s 309XL – a classic Canadian Shape. It has the arched Comoy’s nomenclature stamped over Deluxe (just as it appeared in the early 1930’s) both of which were stamped over Lumberman. For anyone already familiar with the stamping of Comoy Canadians that is enough to recognize that this is a rare and collectible Comoy.”

It appeared that the pipe was made by Comoy’s and well worth the effort to restore it. Andrew also sent along three pages of background information that he had found on the brand. I believe that Mr. Can was also the source of this information. I have included some of it here as it is interesting to those of us who are curious regarding the history of the pipes we collect:

“During its history, Comoy’s has had three distinct sets of nomenclature, though they became somewhat blended in later years. The earliest Comoy nomenclature either had no Comoy stamping or a scripted, signature like forward leaning Comoy’s beneath which were featured names instead of shape numbers. Few of those names (Like Leman, Naval, Adelaide, and so on) are recognized even by the most ardent collectors. Then after World War I when Comoy began introducing what is sometimes called their Old Nomenclature (featuring the Prima, as the Top of the line with other lines like the Old Bruyere, Grand Slam, Lions Head, Lumberman, Lumberman Special and so forth) and arched Comoy’s stamping was used. In the 1930’s the Prima gave way to the Deluxe as the top of the line Comoy. Then just before World War II newer nomenclature started to appear (like Blue Riband, Specimen Straight Grain, and so on) and the Deluxe was replaced by the Royal Comoy. That New Nomenclature expanded dramatically after the War and blended with the modern nomenclature today.”

“The use of the arched Comoy’s ended with World War II and was replaced after the War with a straight line Comoy’s (along with the now famous country of origin stamping of a circular “Made In London” over a straight line “England”.”

“Prior to World War II with manufacturing facilities in both France and England, Comoy had pipes made in both locations. Most were easily identifiable by their country of origin stamping. There were several versions of Comoy’s Lumberman made in France and/or England. (They might have been the dame pipe but with different nomenclature.) “The Lumberman” and “The Lumberman Special were made in both factories. But none had the arched Comoy’s stamping.”

“After WWII Comoy’s reintroduced the Deluxe, discontinued the arched Comoy’s and continued various versions of the Lumberman. Perhaps Comoy’s best graded Lumberman was stamped Lumberman Deluxe – but it had no Comoy stamping. Lumber was always stamped over Deluxe.”

“Normally Comoy offered to Canadian sizes designated by shape numbers 296 and 309. The difference was in the length of the Canadians. The 309 shape was Comoy’s longest Canadian and the 296 was shorter. However, the extra long Canadians were upgraded with the additional stamping of XL and the very longest were sometimes stamped XXL. Either upgrade was rare.” – the above was taken from correspondence Andrew included when he sent the pipe to me.

Armed with that information I was ready to work on the pipe. I have included a series of photos below to show the cracked shank and the repair I did to it. In the first photo I inserted a dental pick in the shank to open the crack so that I could clean it out. Also included in that photo is the band that I would use to band the cracked shank.
IMG_4523

I wiped down the shank with acetone on a cotton pad to clean off the grime and build up of material left behind by the tape that had been used to repair the shank. Once it was clean I dripped some superglue into the crack of the shank and held it tightly together until the glue had dried. Once it had dried I inserted the end of the tenon of the stem I was going to fit to the shank of the pipe for the photos.
IMG_4532

IMG_4533

IMG_4534

IMG_4535

I sanded the repair and removed the excess glue from the surface of the top of the shank and wiped the area down with Everclear on cotton pads to clean up after sanding.
IMG_4539

I decided to ream the bowl and clean the rim before I went on to band the pipe. I cleaned the inside of the shank as well as I did not want the grime and build up to run when I heated the shank and the band for the pressure fit. I reamed it with a PipNet reamer and scrubbed the rim with saliva on a cotton pad and good old fashioned elbow grease.
IMG_4537

IMG_4538

I turned the tenon down to get a good fit in the mortise and against the end of the shank. I wanted to see what I was working with in terms of the cut off shank. I knew that it was not straight but I wanted to see how far off it was. I also wanted to see the damage to the shank from the crack. The next series of four photos shows the damage to the shank. I was able to smooth out some of the damage but the band would certainly help in making the end of the shank smooth. I did not want to cut off any of the length after reading the information that Andrew provided. From photos I looked at on the net the stem was the right shape, taper and angles to fit this age of pipe. The old stem I chose was one that had the BBB diamond stamped on the top of it. The stamping was faint so it was a good one to sacrifice for this Lumberman.
IMG_4540

IMG_4541

IMG_4542

IMG_4544

I removed the stem once it fit well and pressed the band onto the shank. I then heated it with a heat gun rotating the shank to evenly heat the band and keep the heat from burning the briar.
IMG_4546

IMG_4547

I pressed the band in place while it was still hot. I use a flat board and press down evenly until the band slides into place. This takes repeated heating until the fit is tight and straight against the end of the shank. In the case of this pipe after I pressed it in place I sanded the damaged end of the shank until it was even and then used a knife to cut a slight bevel on the inside edge of the mortise so that the stem would fit properly.
IMG_4548

IMG_4549

IMG_4550

IMG_4551

Once the band was in place I needed to sand down the tenon so that it would fit in the newly constricted airway. I used a folded piece of 220 grit sandpaper to sand down the excess vulcanite on the tenon so that the fit would be snug. The next three photos show the new stem in place with the band. The stem had been sanded with 220 grit sandpaper to match the lines of the shank and give a proper taper to the stem from the band to the button. I also sanded it with a medium grit sanding sponge.
IMG_4553

IMG_4555

IMG_4557

I sanded the area on the top of the shank where the repair extended slightly ahead of the band with 220 grit sandpaper and a medium grit sanding sponge. I followed that by sanding with micromesh sanding pads to smooth out the spot. I wiped down the bowl with acetone on a cotton pad until the surface was clean and free of debris and dust. I stained it with medium brown aniline stain that was thinned 2:1 with Isopropyl alcohol. I wanted the colour to match the tones that were present on the other Comoy’s that I had from this era and the photos I had seen on line. I applied the stain and flamed it. In the photos below the shine is from hand buffing the pipe with a soft cotton cloth.
IMG_4558

IMG_4559

IMG_4562

IMG_4563

I reinserted the stem and worked on the band and the stem with 1500 grit micromesh to begin the process of removing scratches and polishing. I took the pipe to the buffer and gave it a quick buff with red Tripoli and White Diamond.
IMG_4566

IMG_4567

IMG_4568

I worked on the stem with my usual array of micromesh sanding pads – wet sanding with 1500-2400 grit pads and dry sanding with 3200-12,000 grit pads.
IMG_4571

IMG_4570

IMG_4569

I rubbed the stem down with Obsidian Oil to protect it and when it had dried took the pipe to the buffer. I buffed the stem with White Diamond and gave the bowl and shank a light buff as well. I gave it multiple coats of carnauba wax and finished by buffing it with a clean flannel buff. The finished pipe is picture below.
IMG_4572

IMG_4573

IMG_4574

IMG_4575