Tag Archives: Oxidation

A Tired Little Bewlay Billiard Reborn


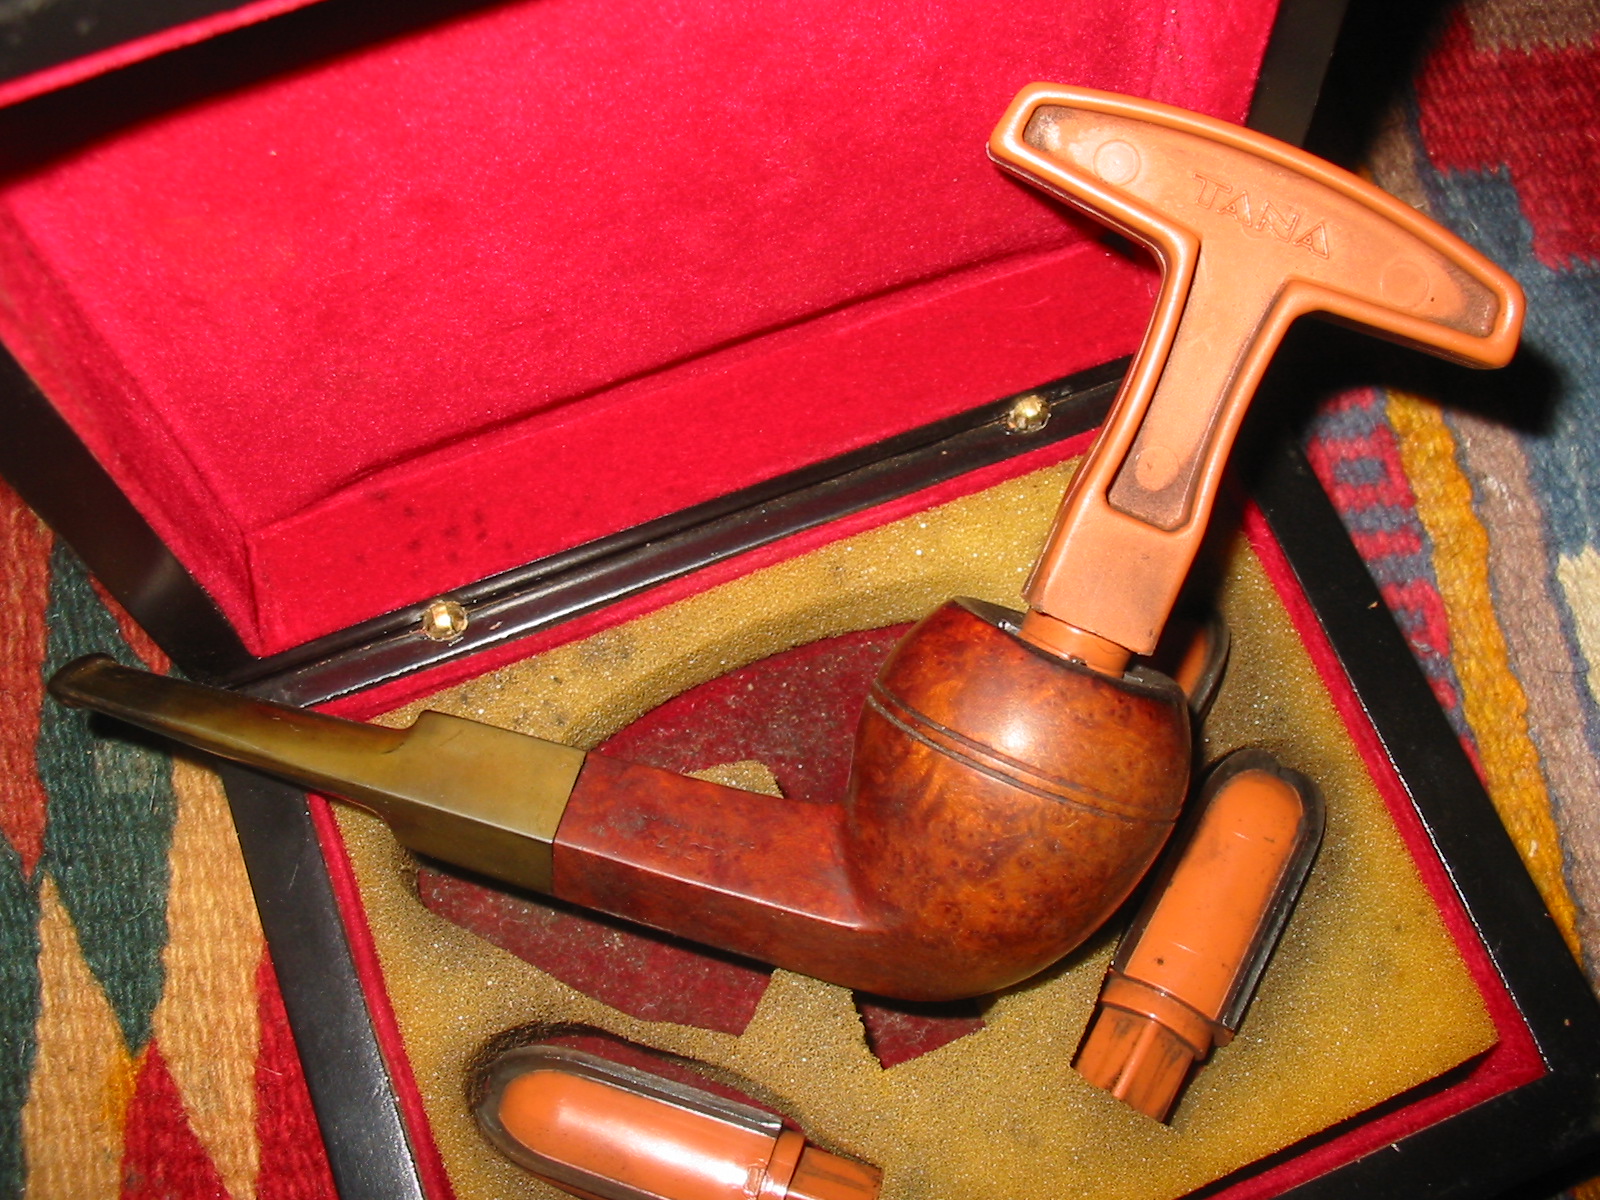
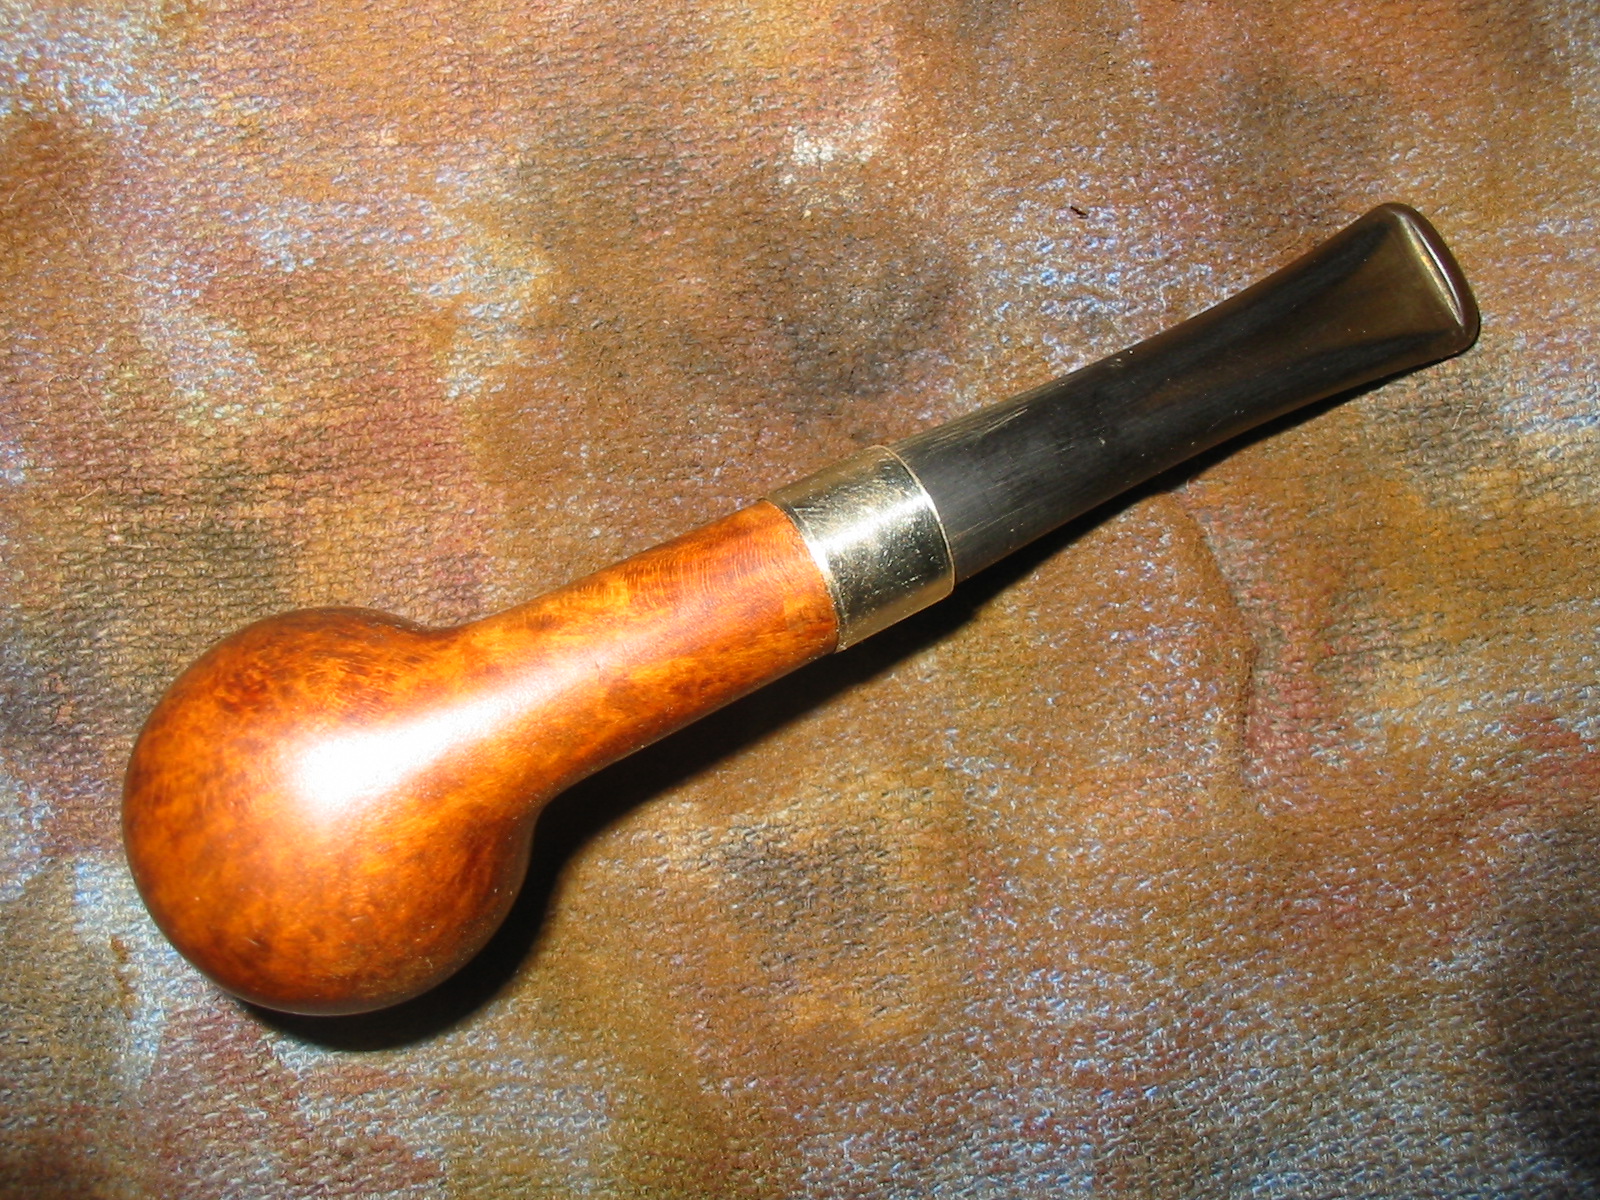
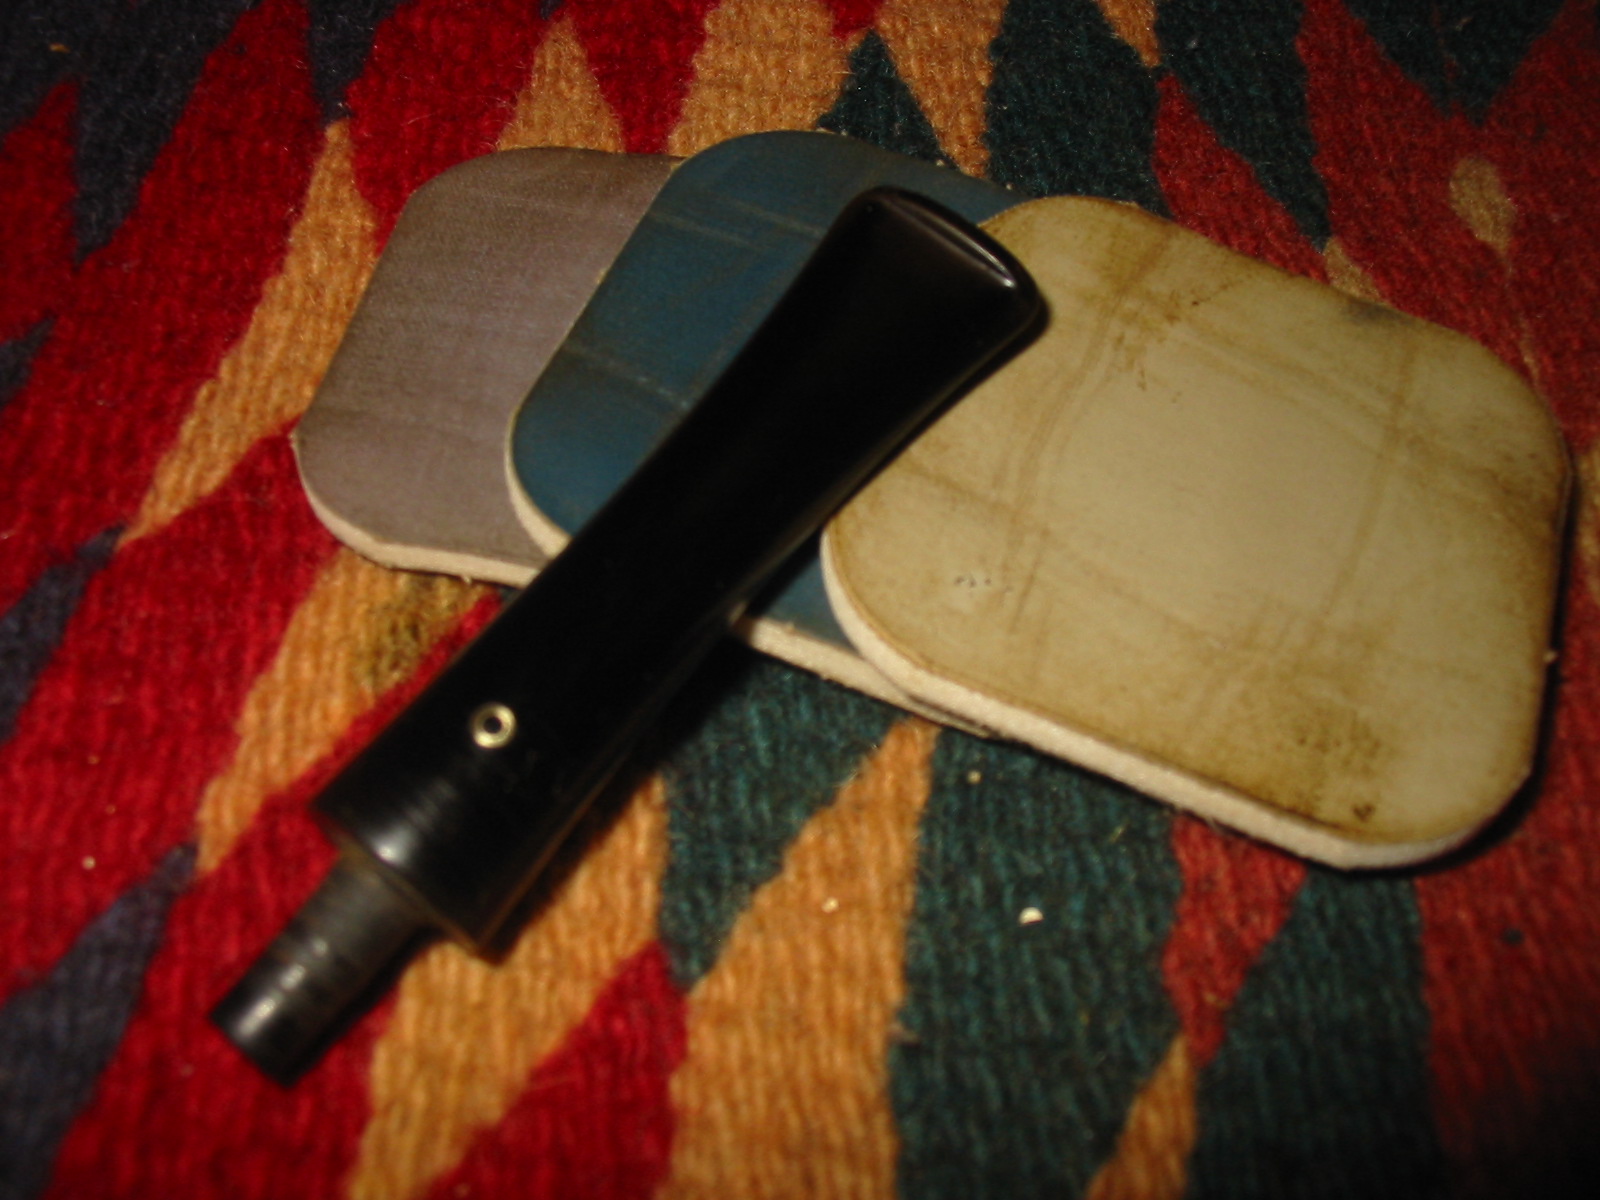
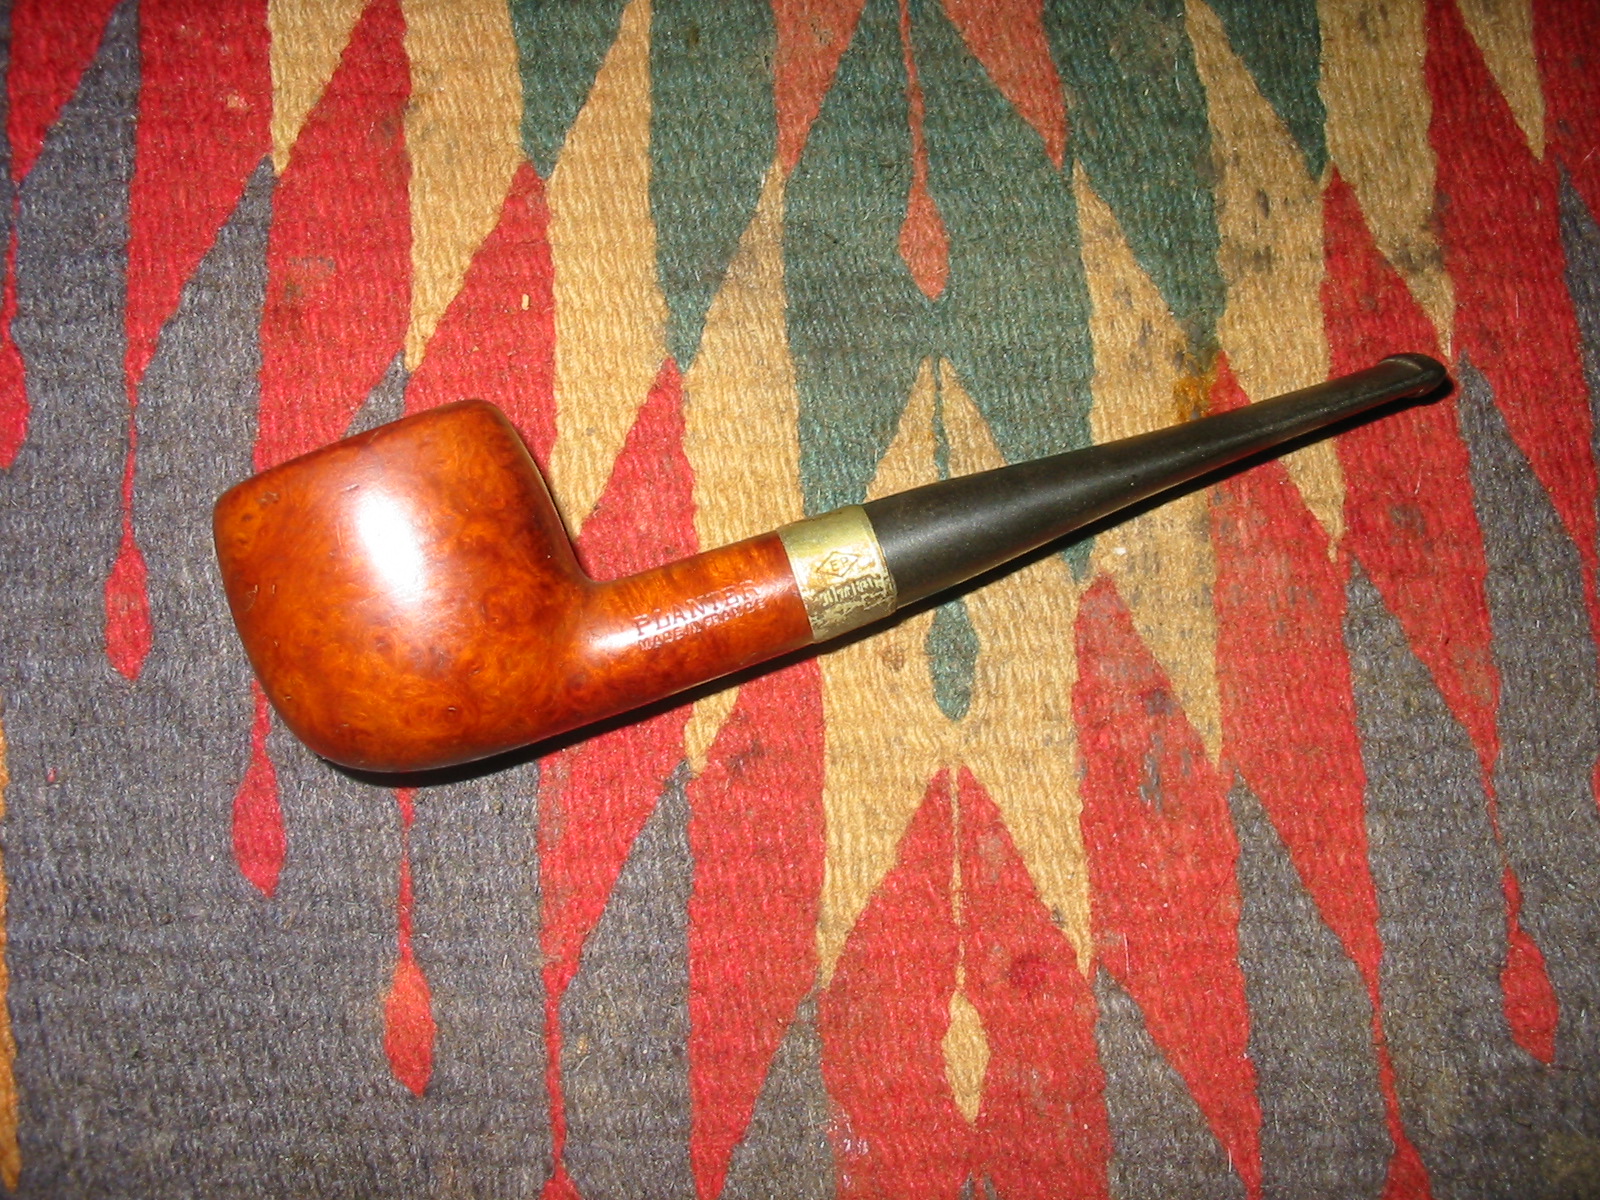
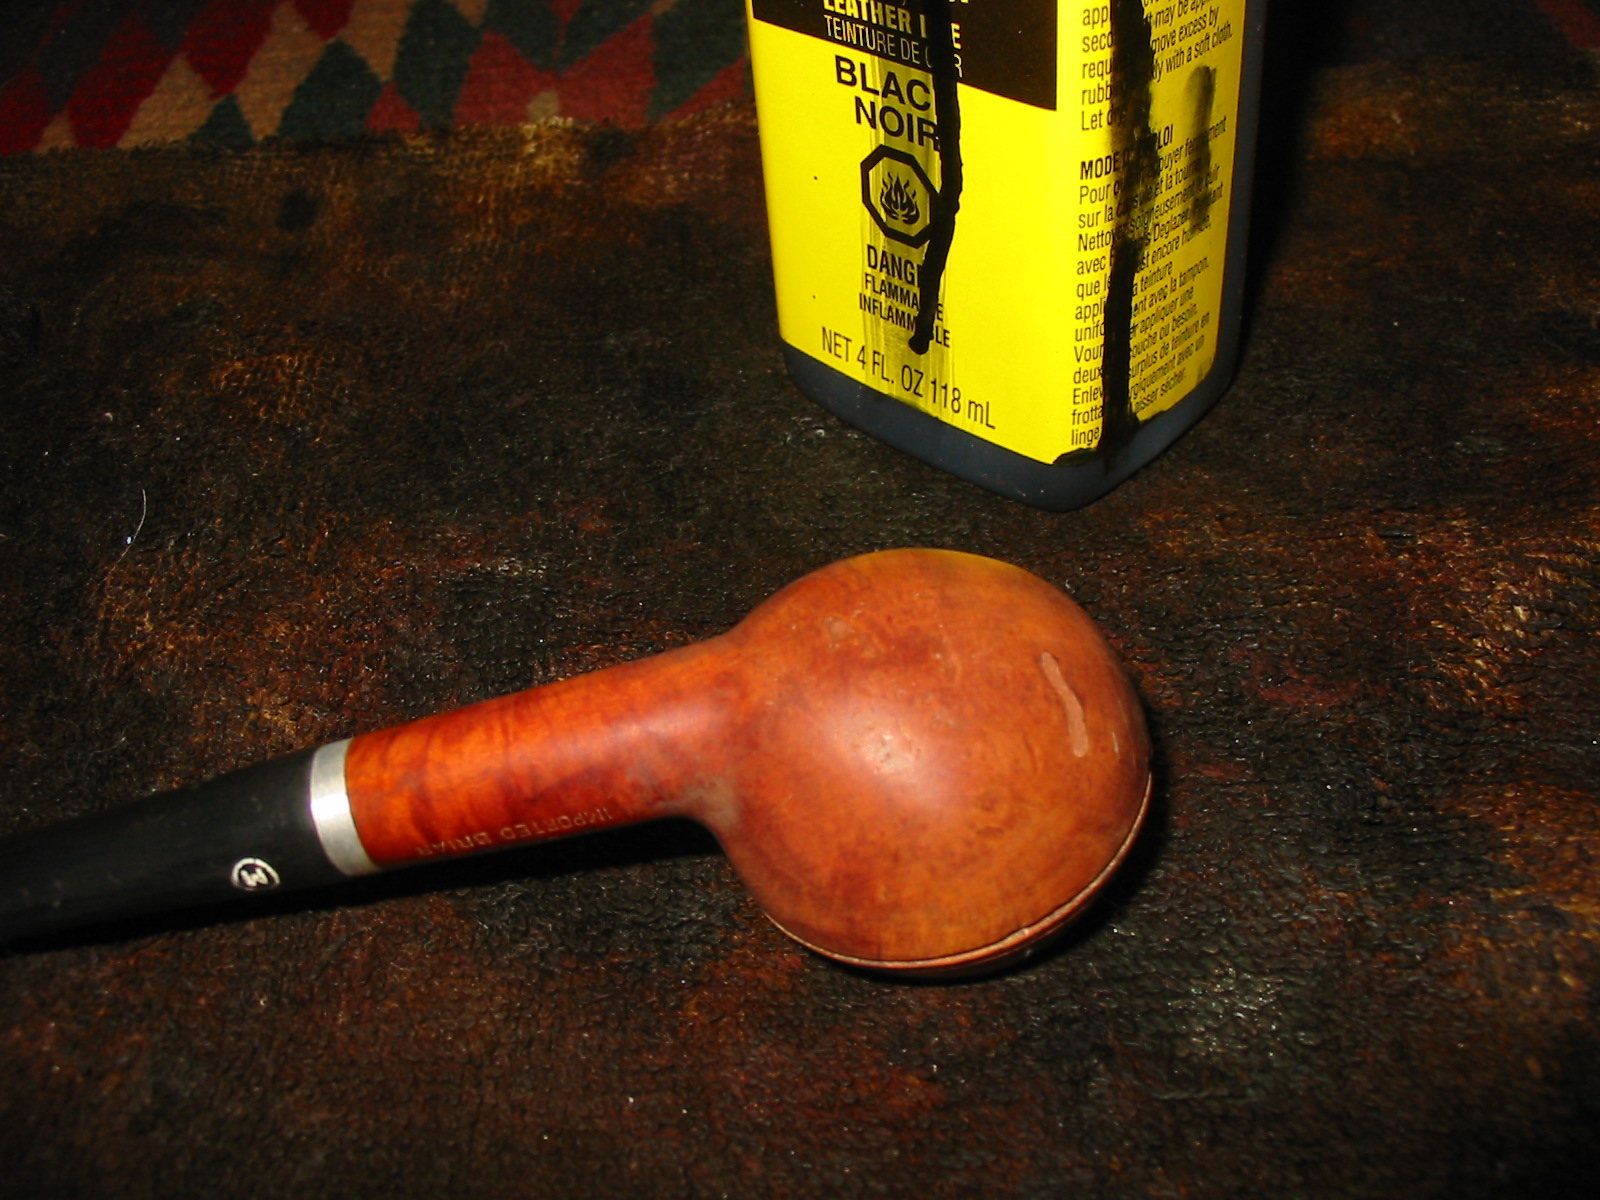
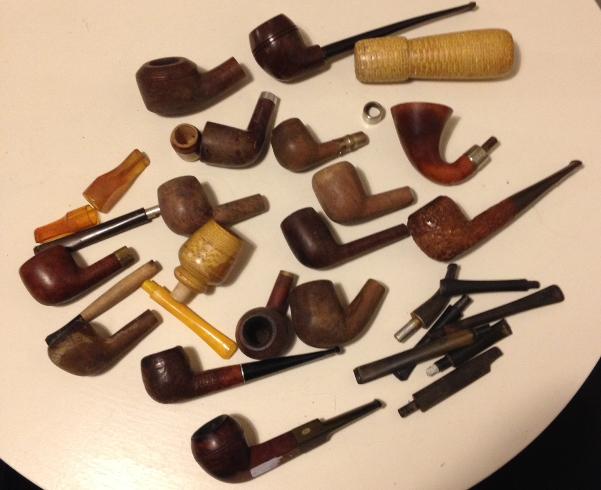
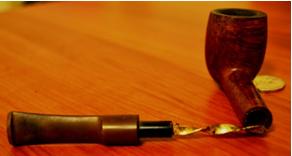
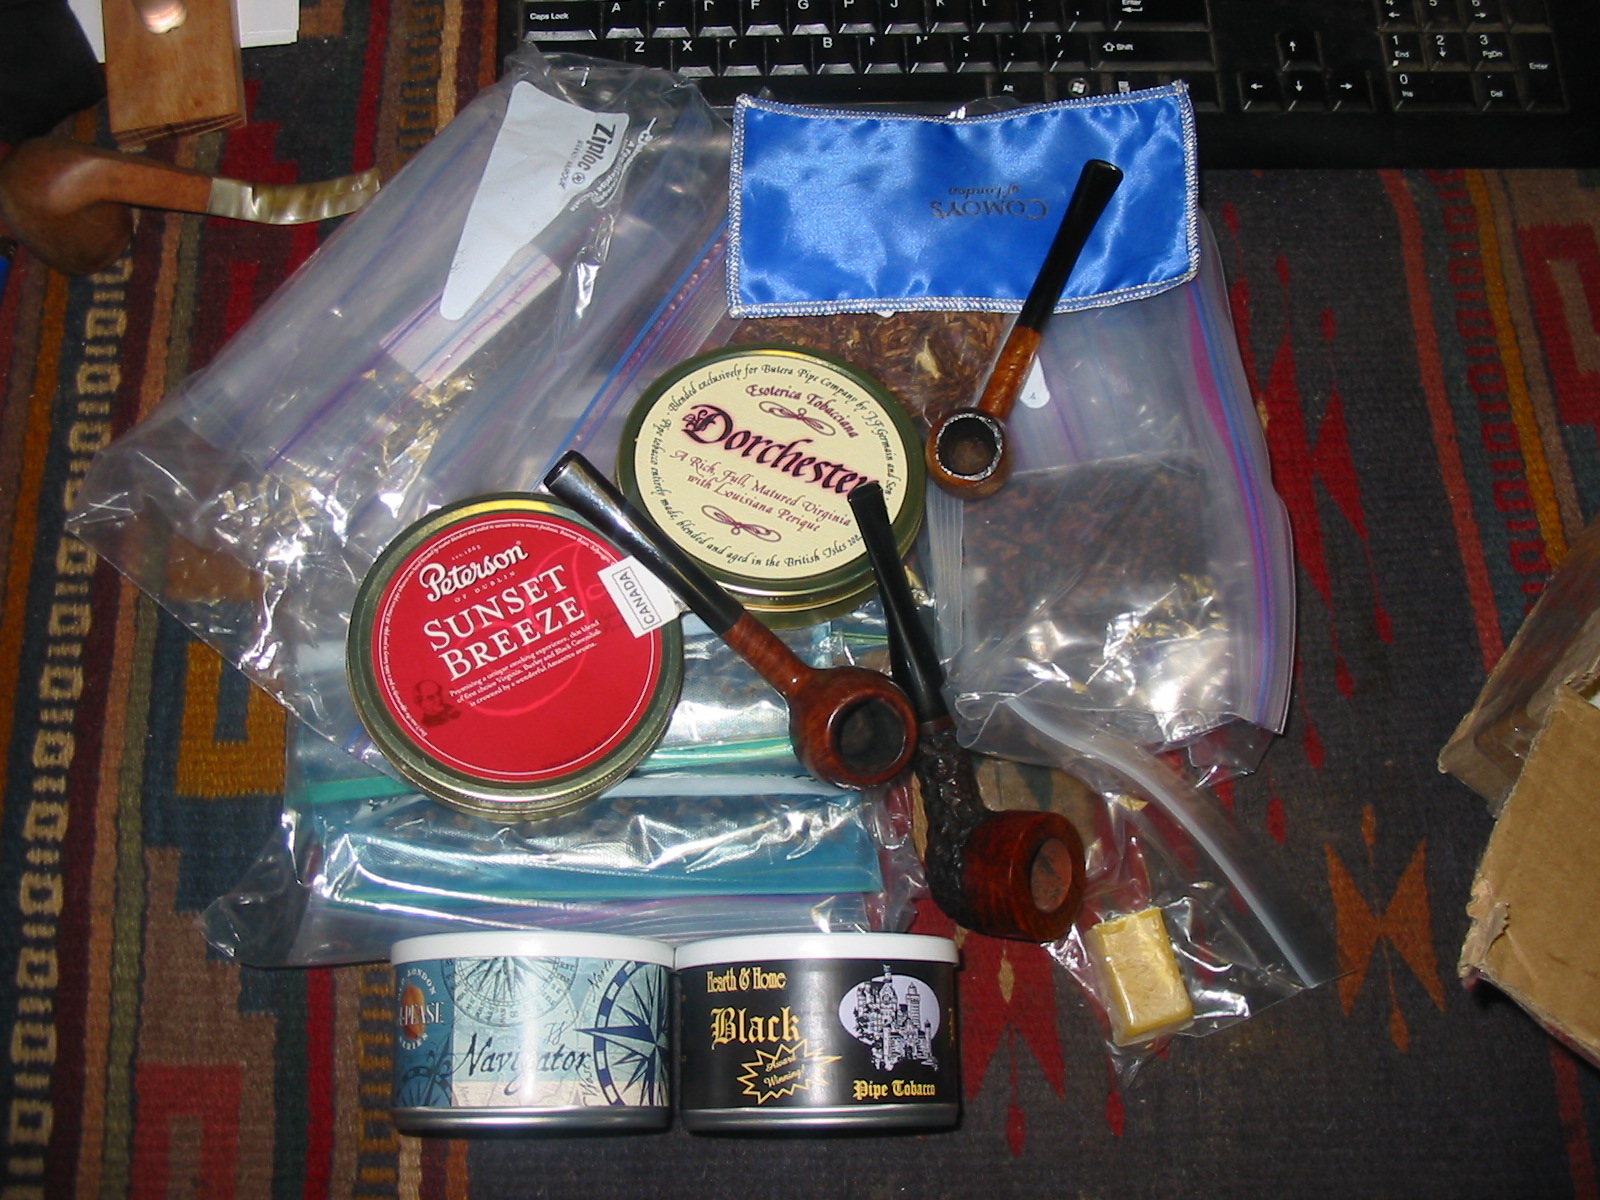
I participated in a Canadian Box Pass where tobaccos and pipes are mailed across Canada between pipemen and women from sea to sea. It is a fun experience in which you are given a chance to try tobaccos that you might never otherwise try to also trade for pipes that catch your eye. This particular box pass was very well-organized and I received a compact box of tobaccos and a variety of tobaccos. They had been divided in to three broad categories – Latakias, Virginias/Virginia Perique/Burley and Aromatics. There were also several tins of tobacco to try or to trade. The idea was you could take one if you put something of equal value back in the box. There were three pipes as well – a Comoy’s Apple (Cadogan era), a Trypsis partially rusticated pot and a Bewlay billiard that had been restemmed to give it the look of a cutty. There was also some carnauba wax that was there for the taking.
IMG_6208
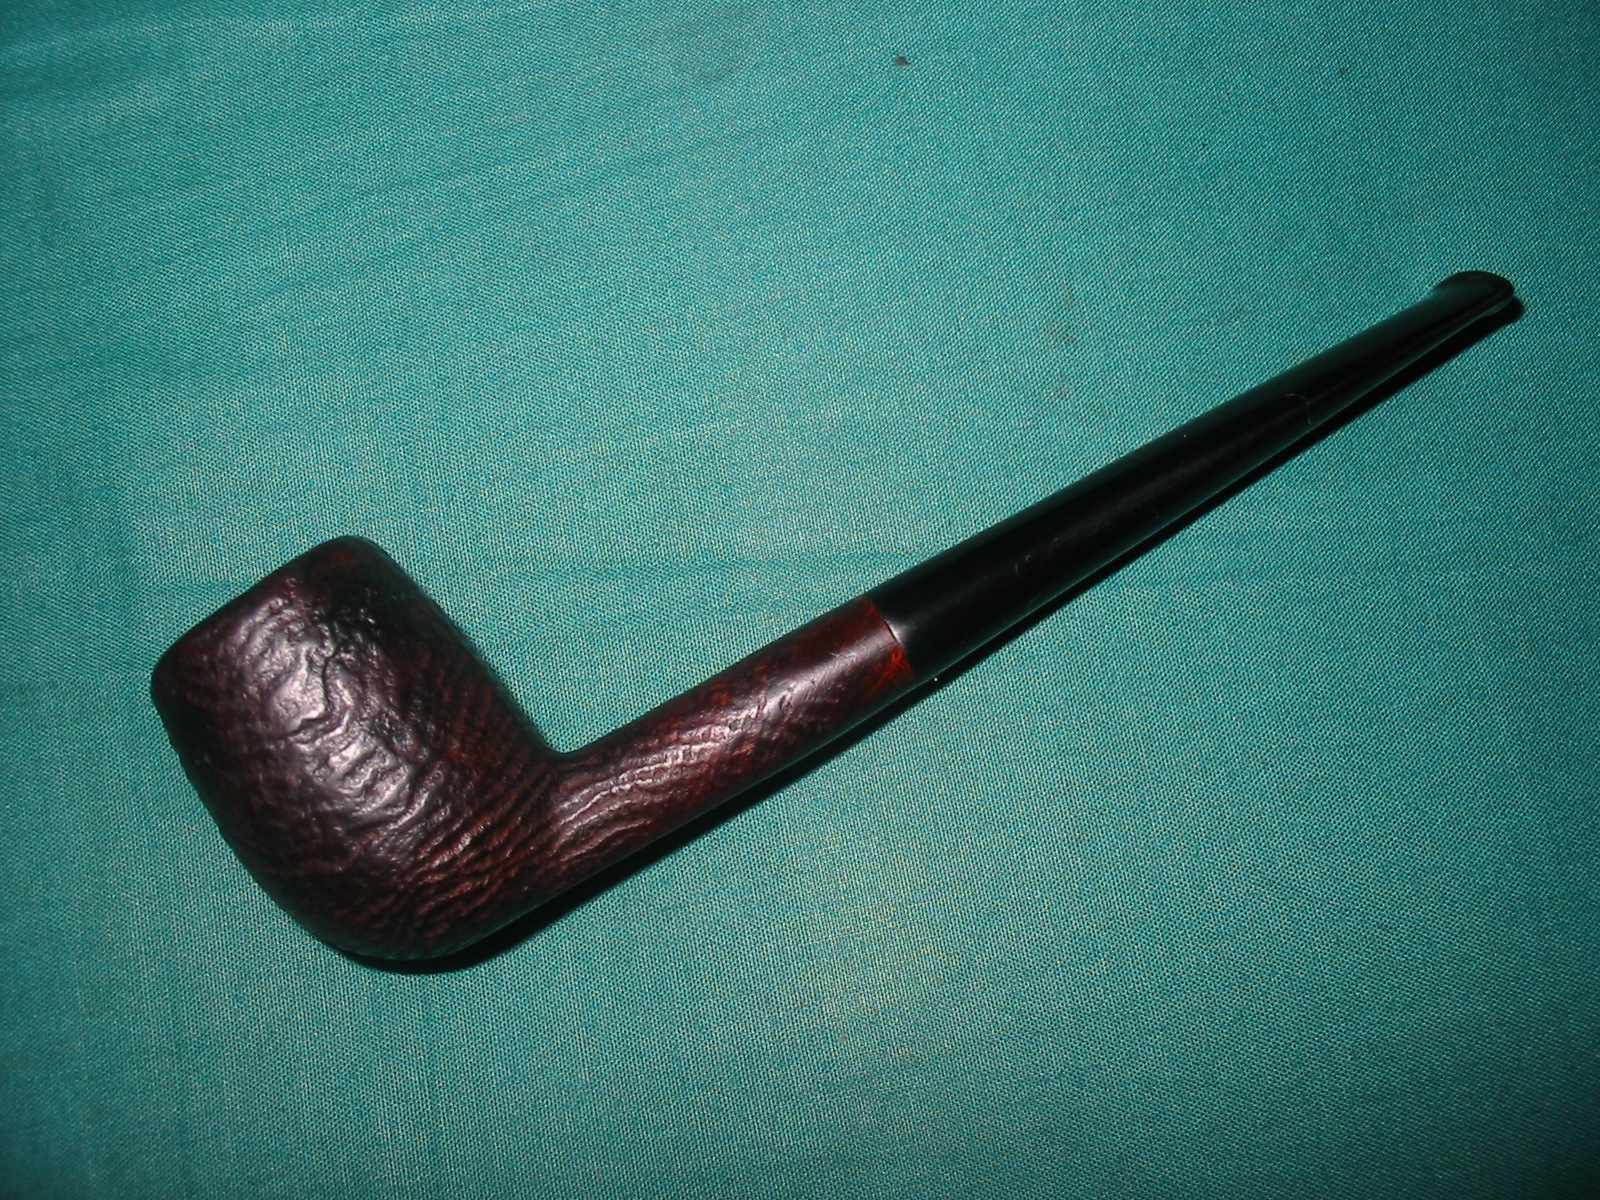
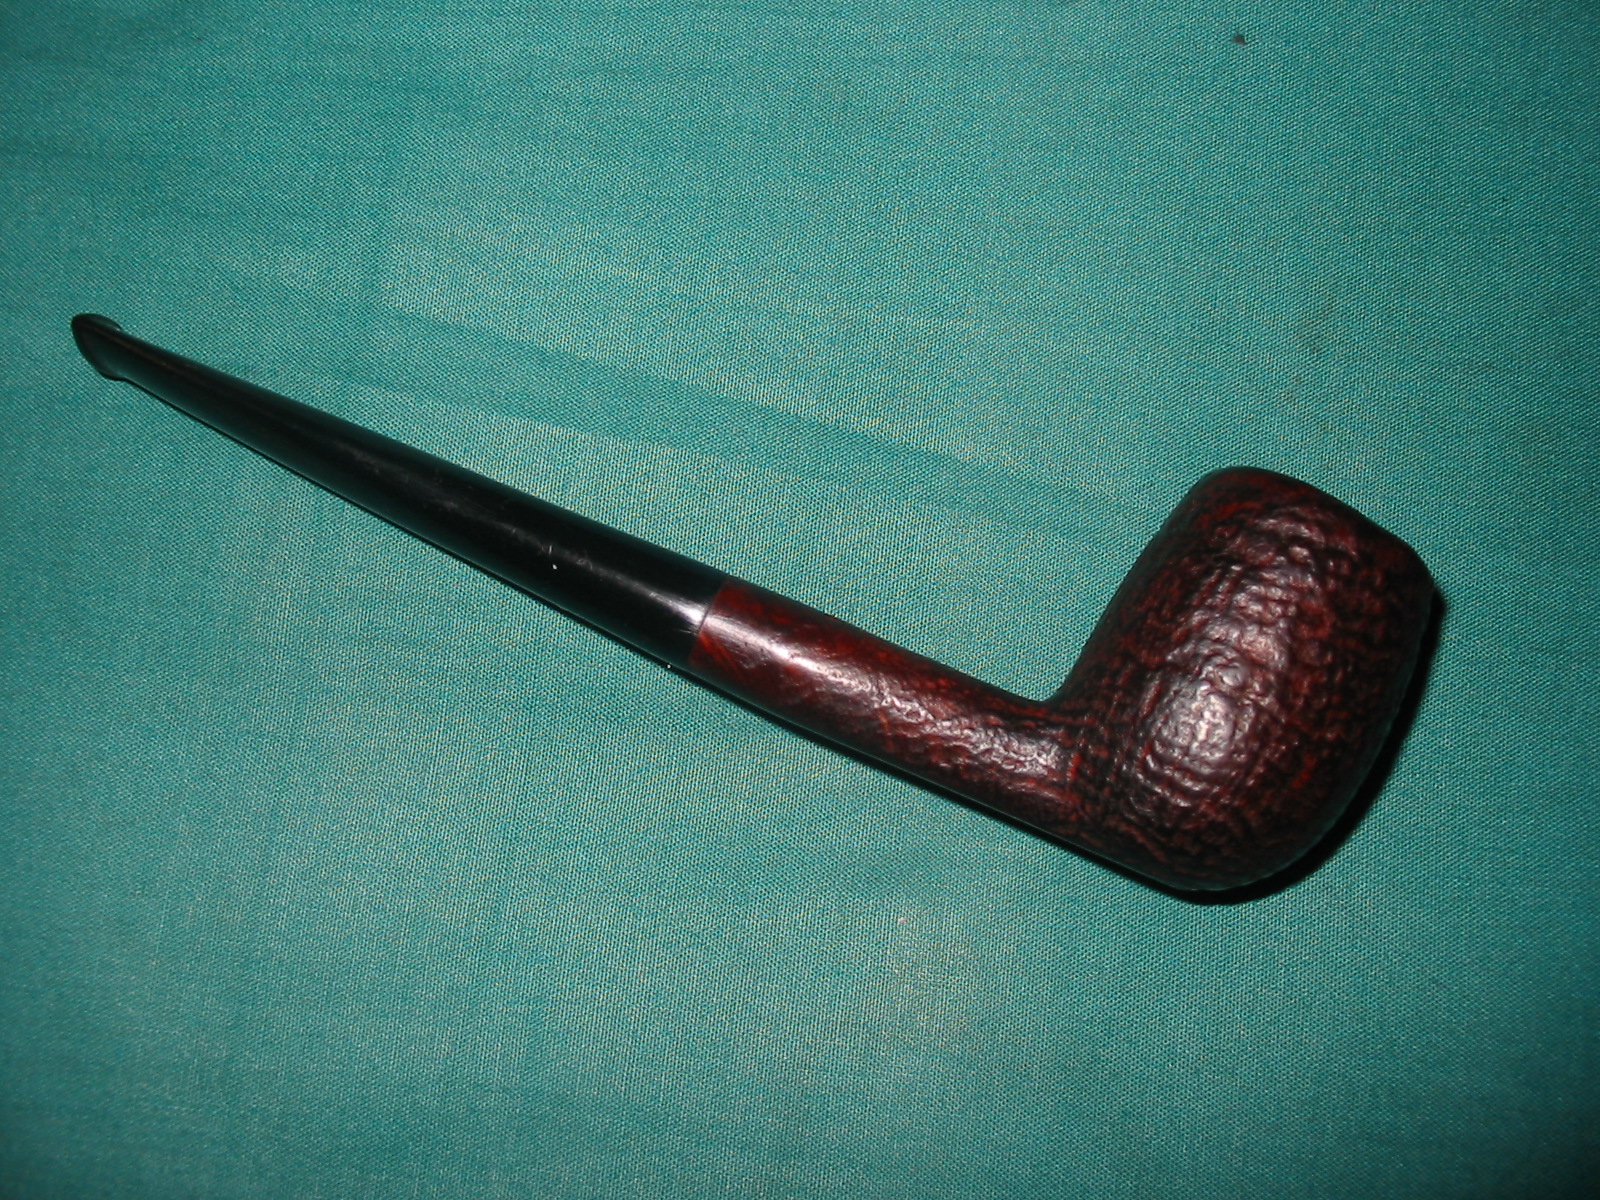
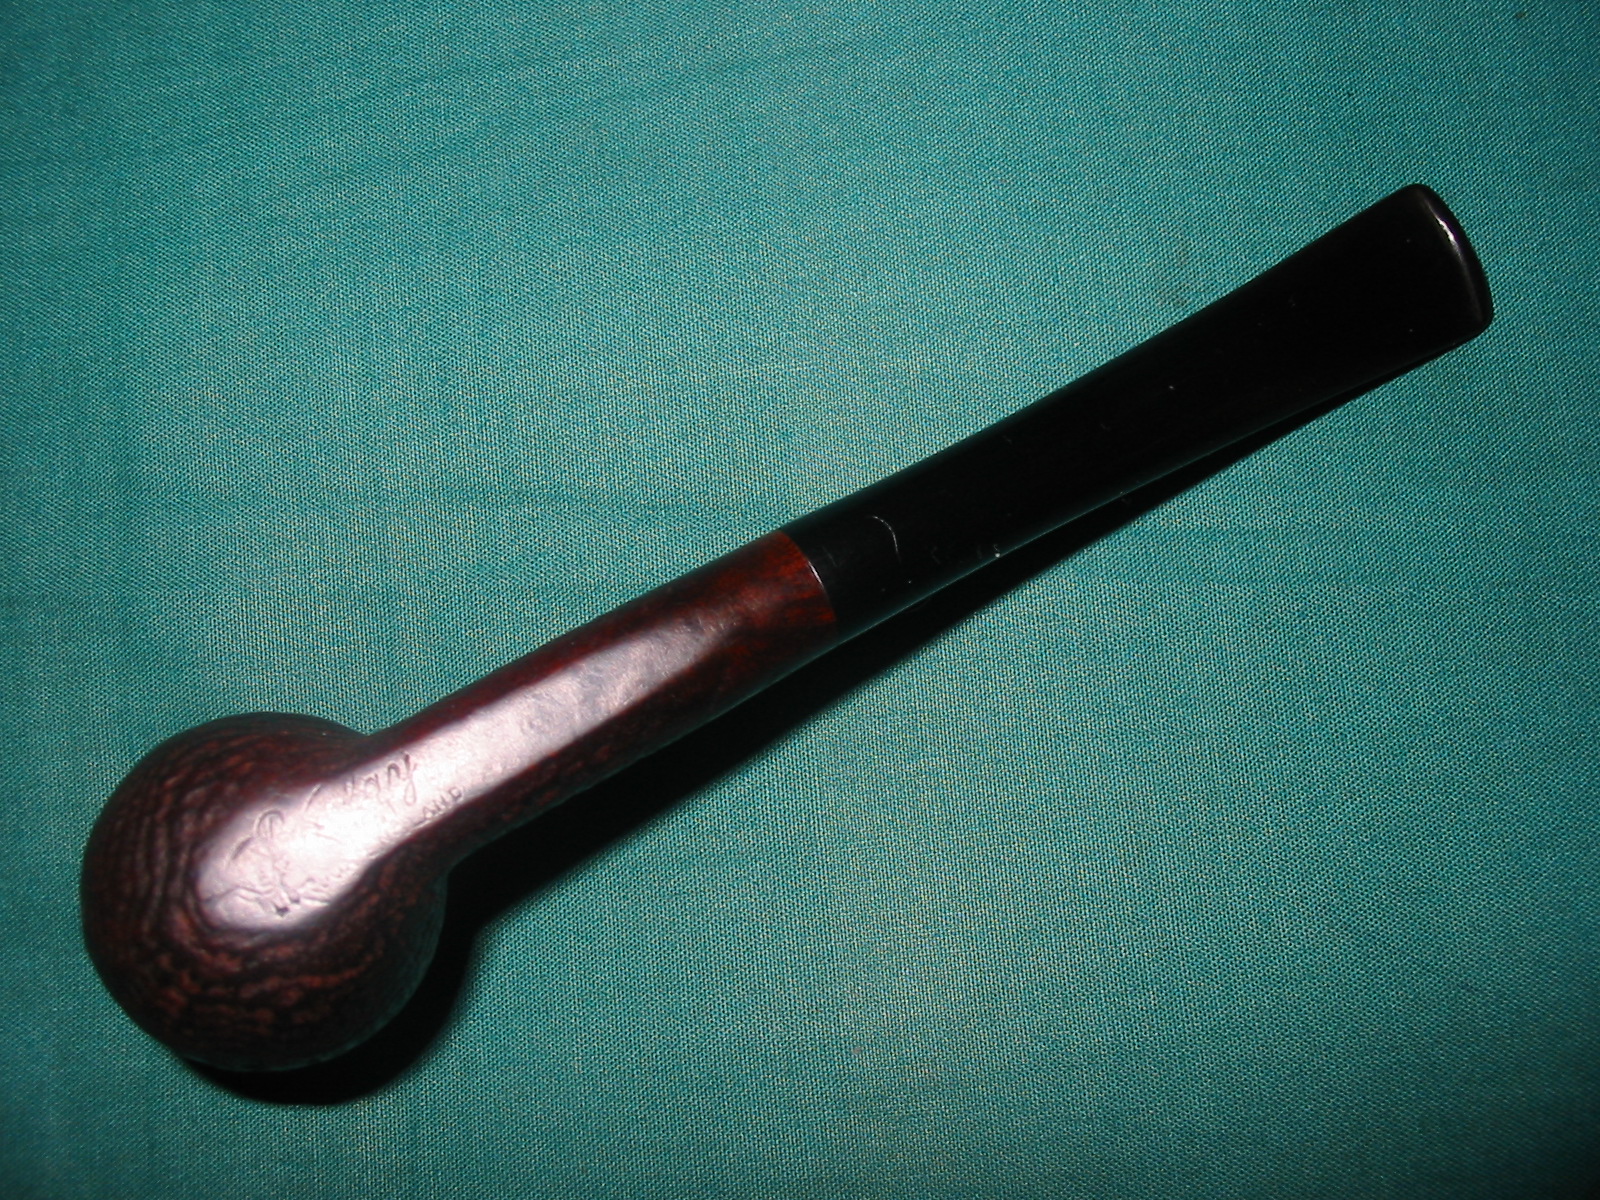
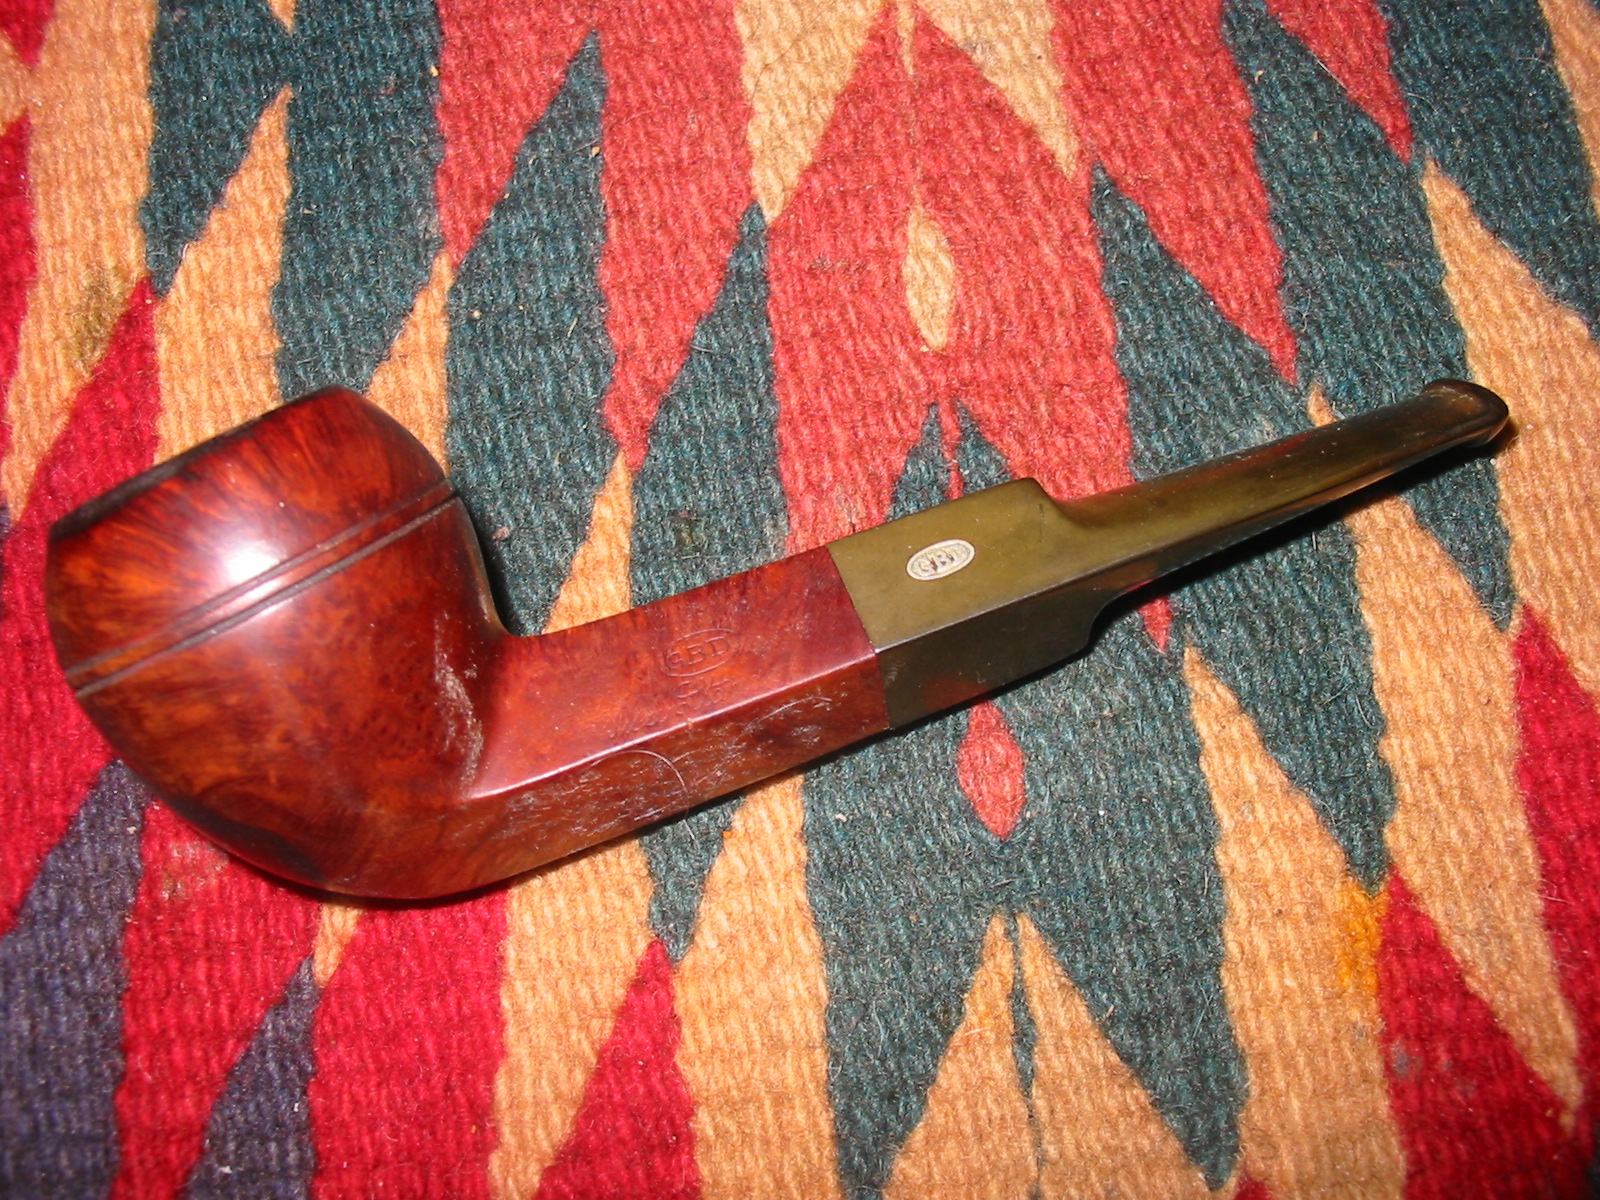
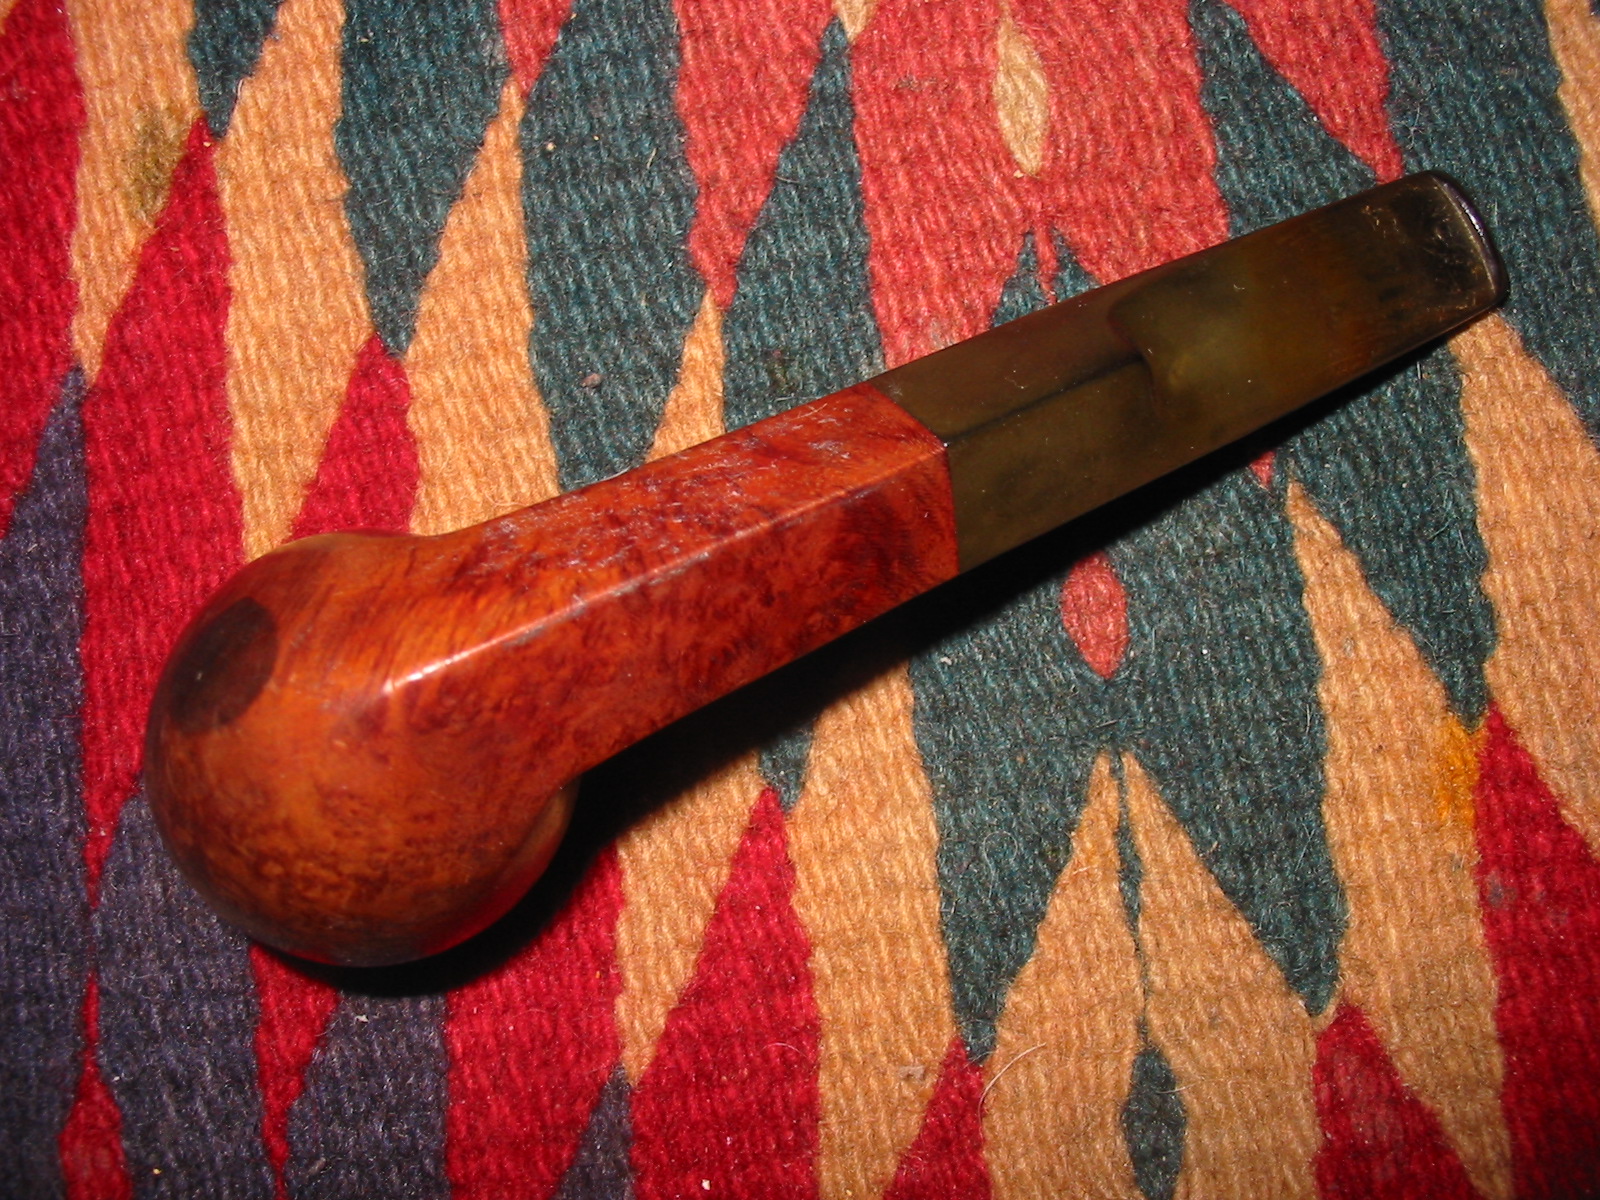
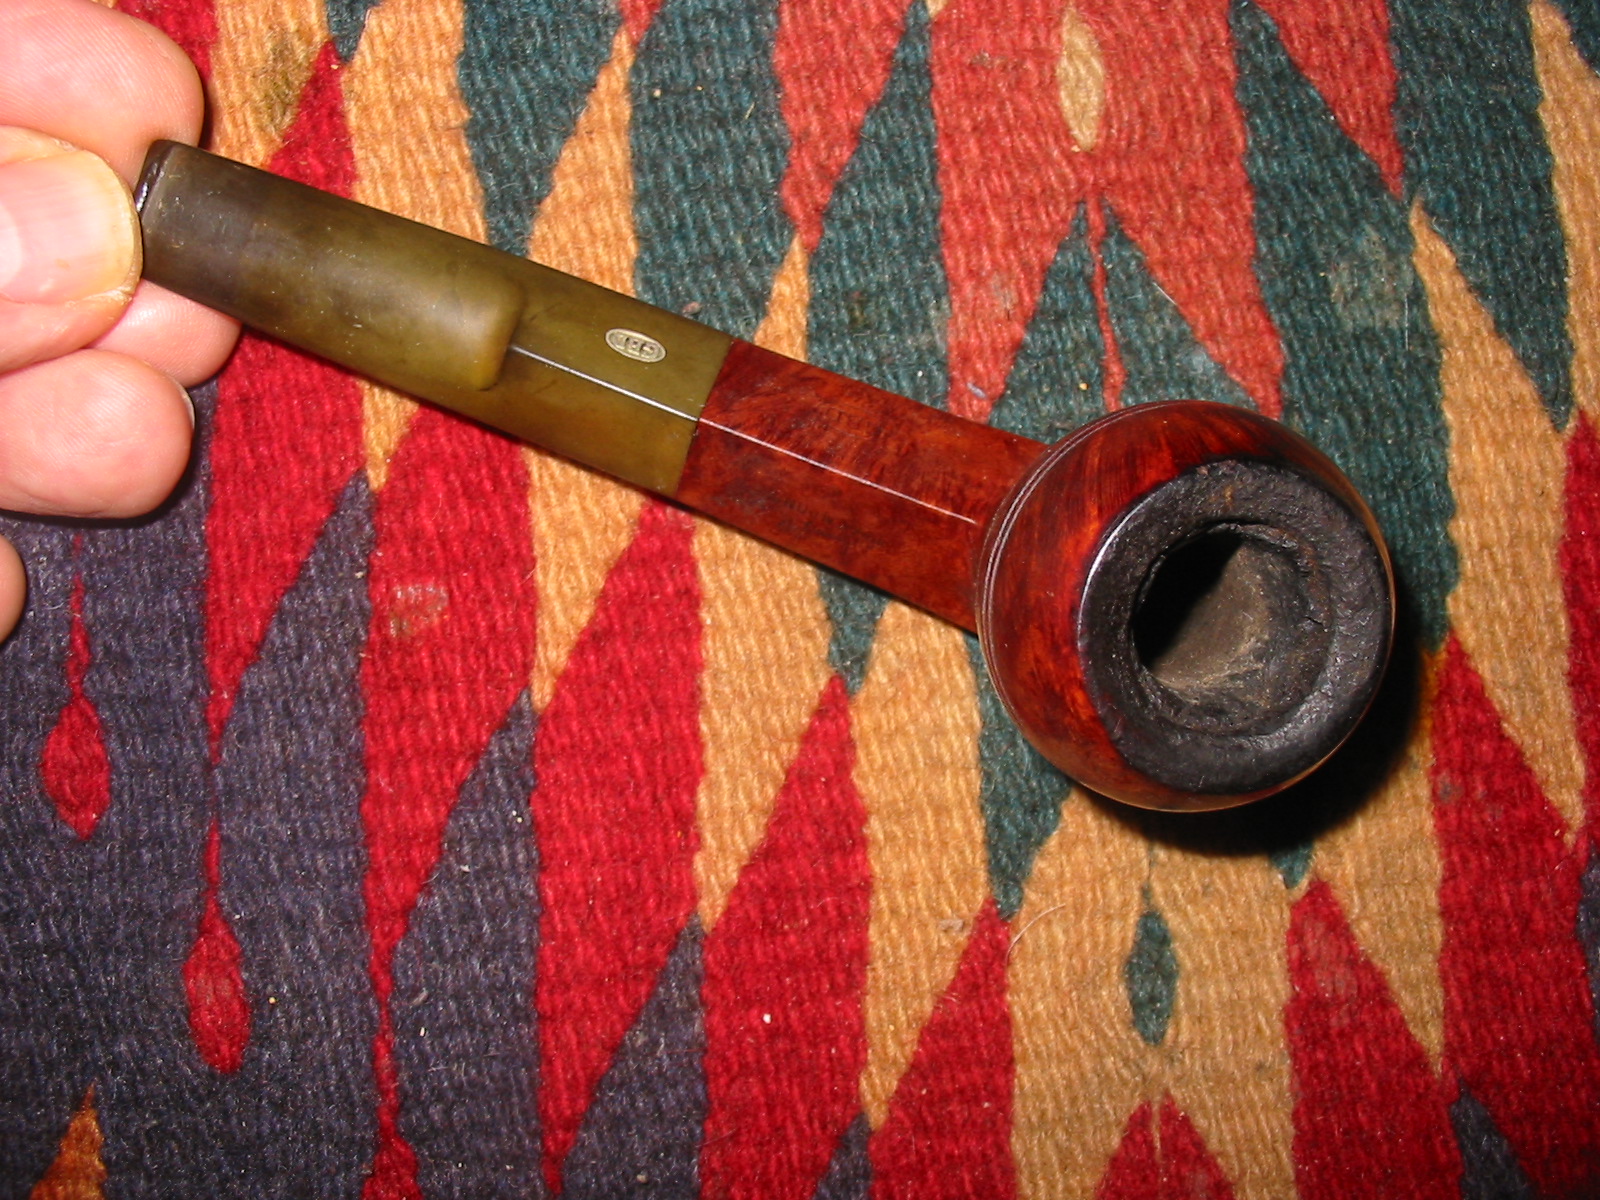
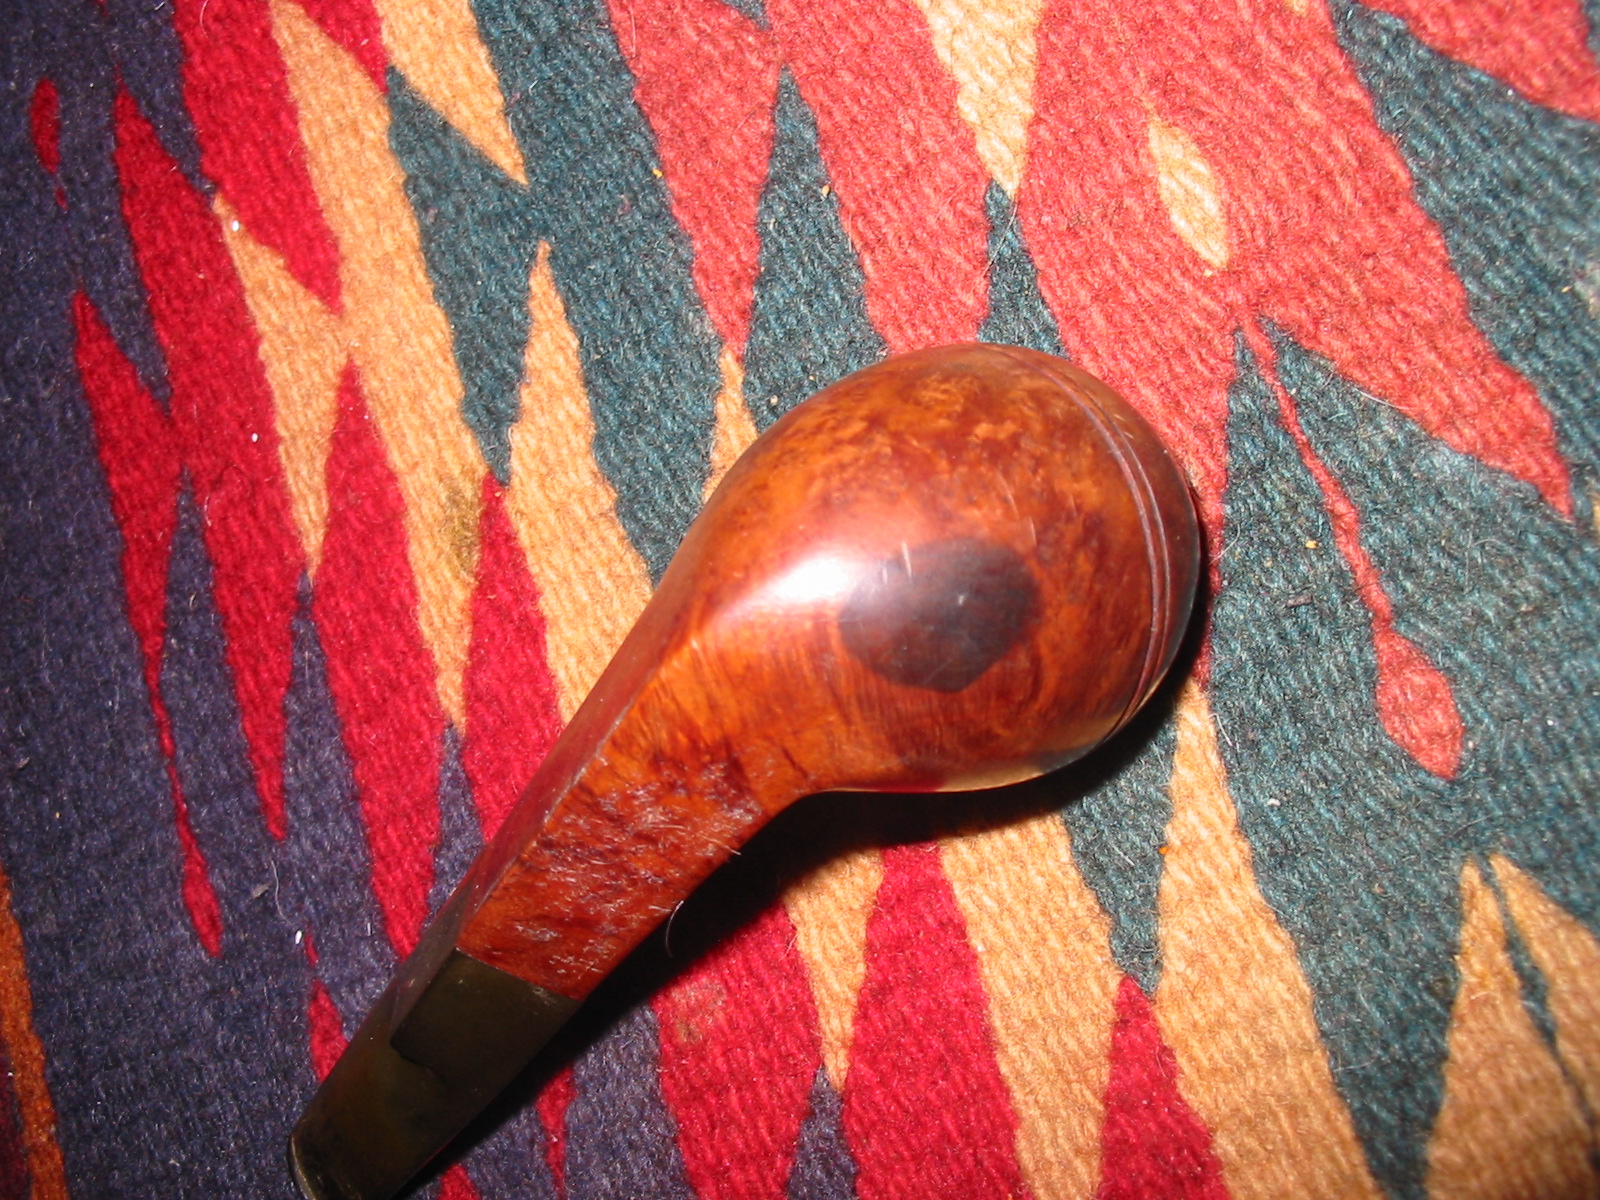
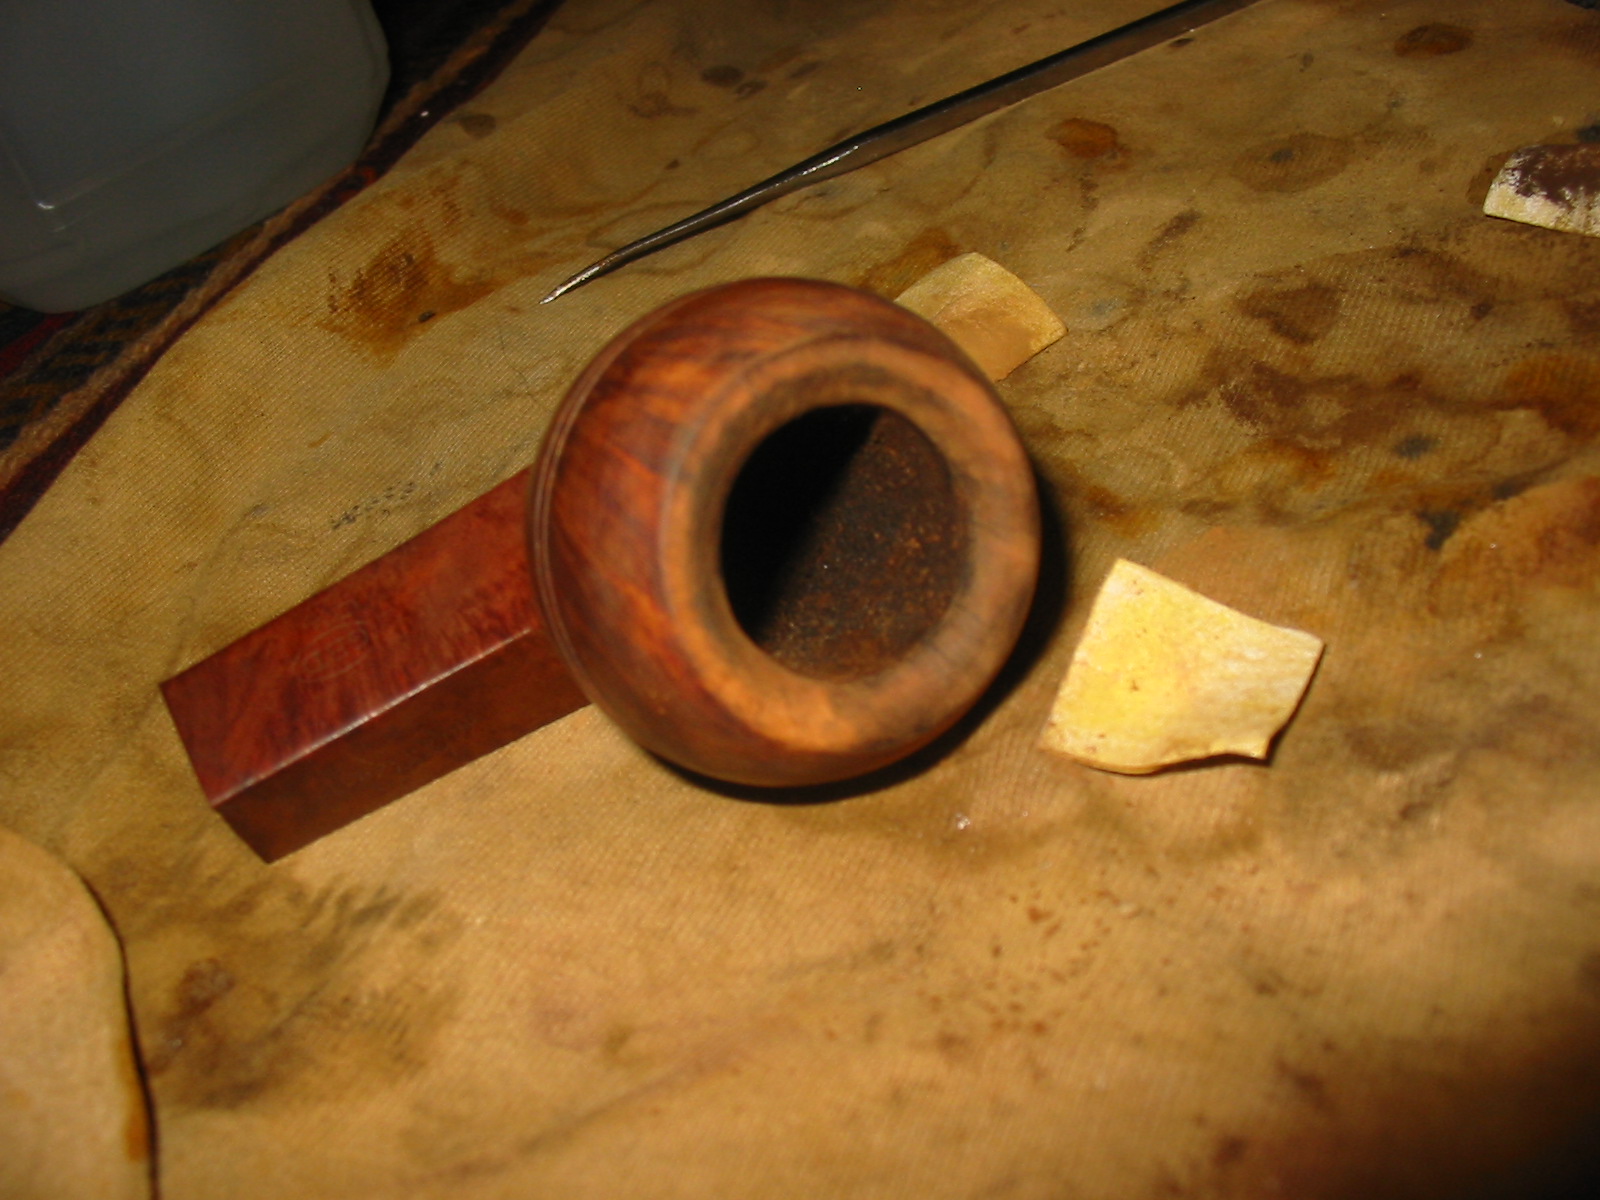
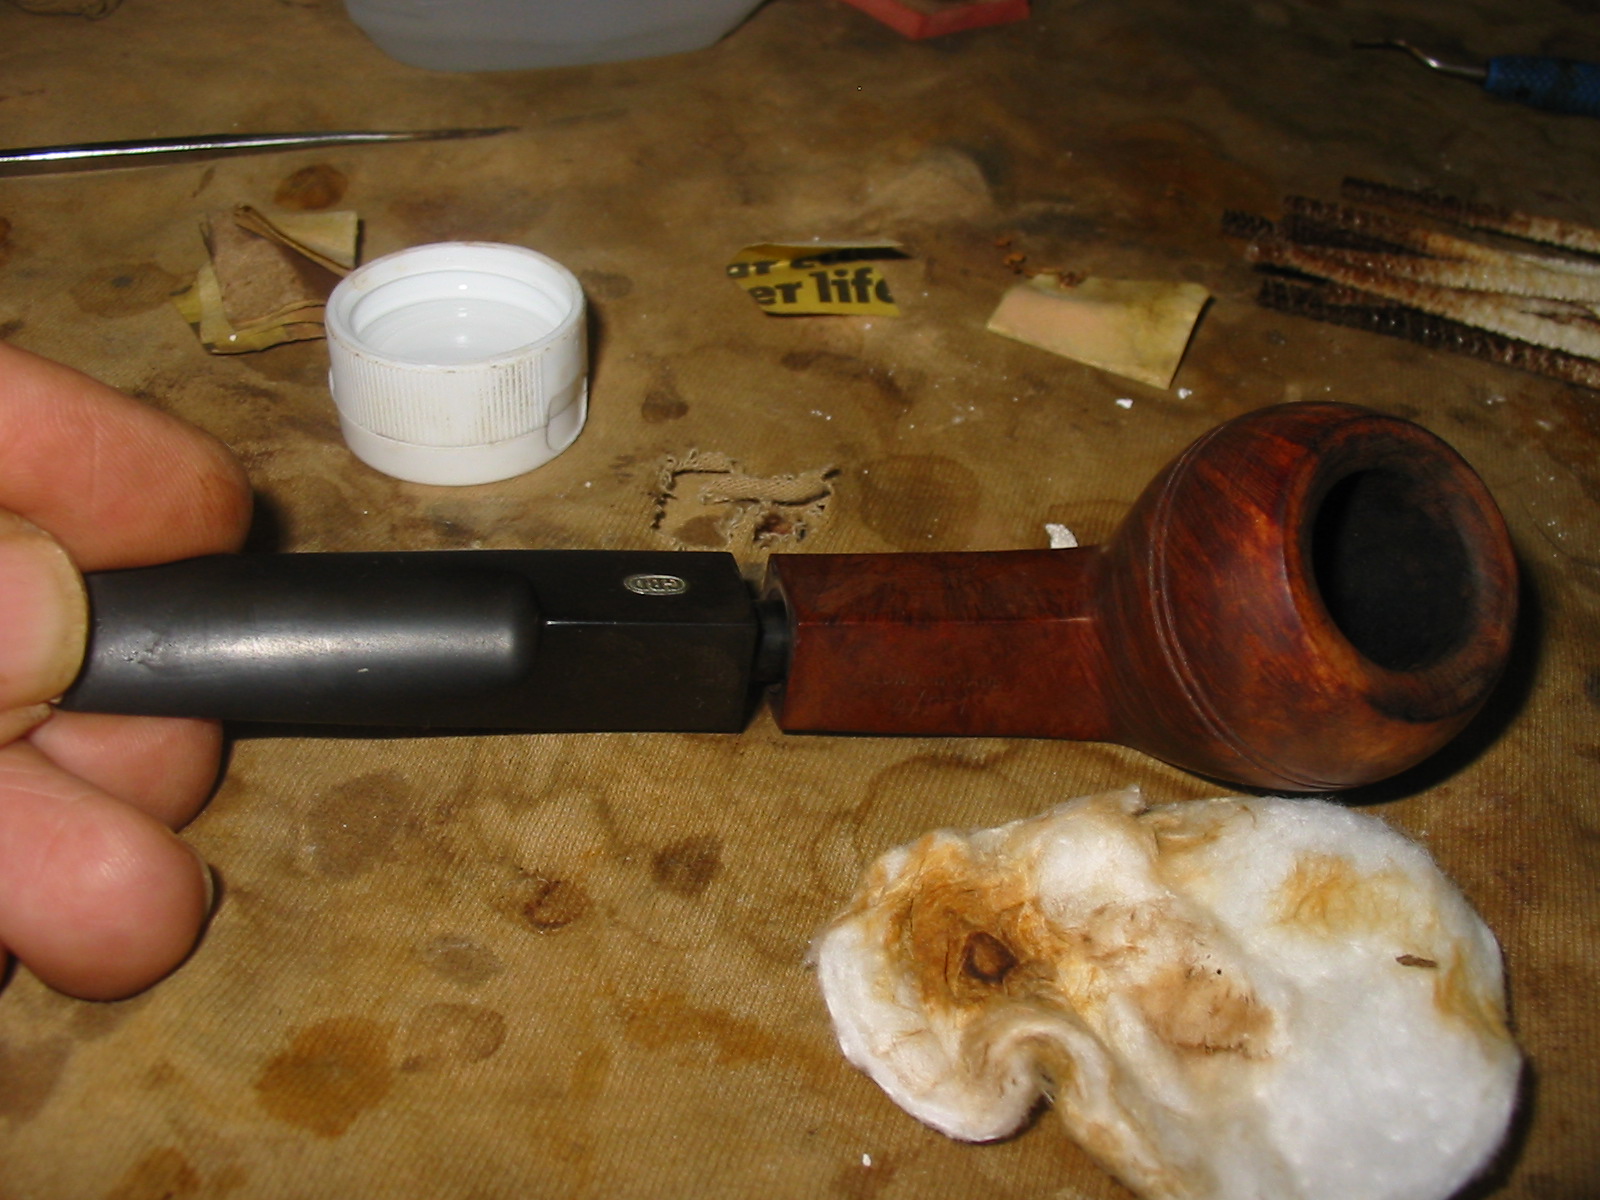
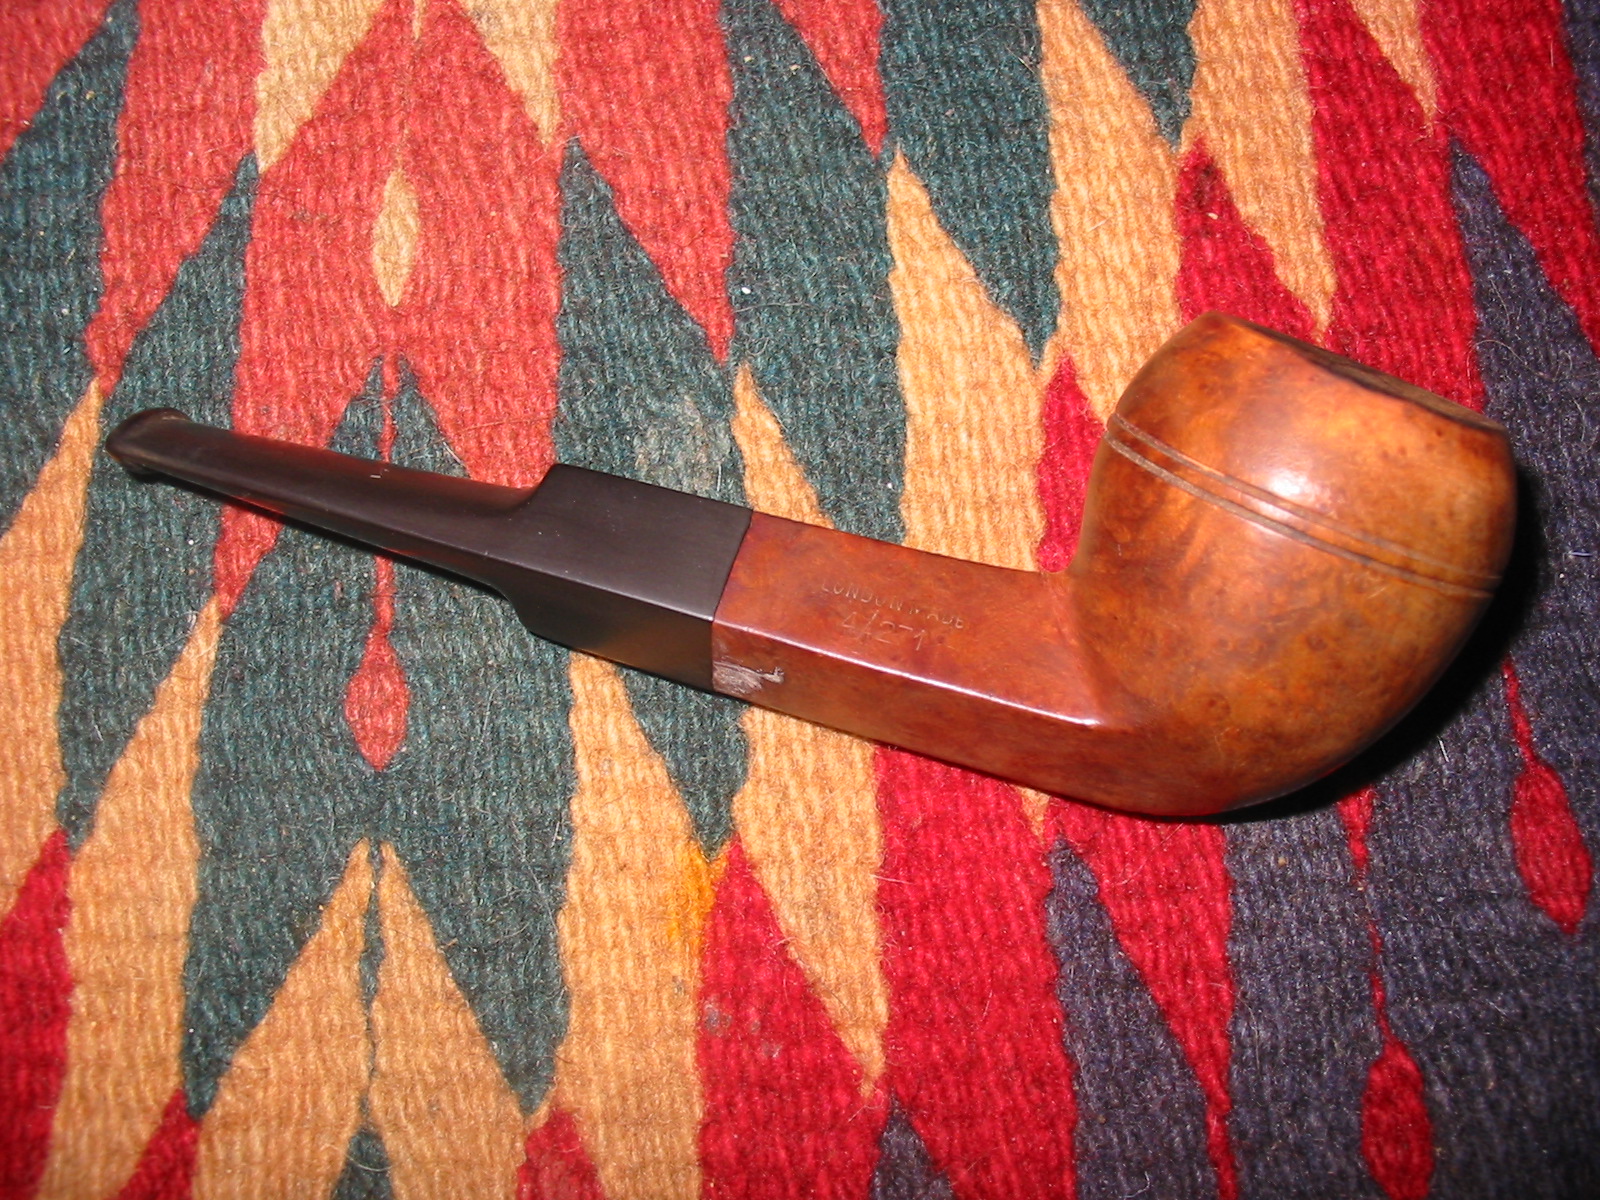
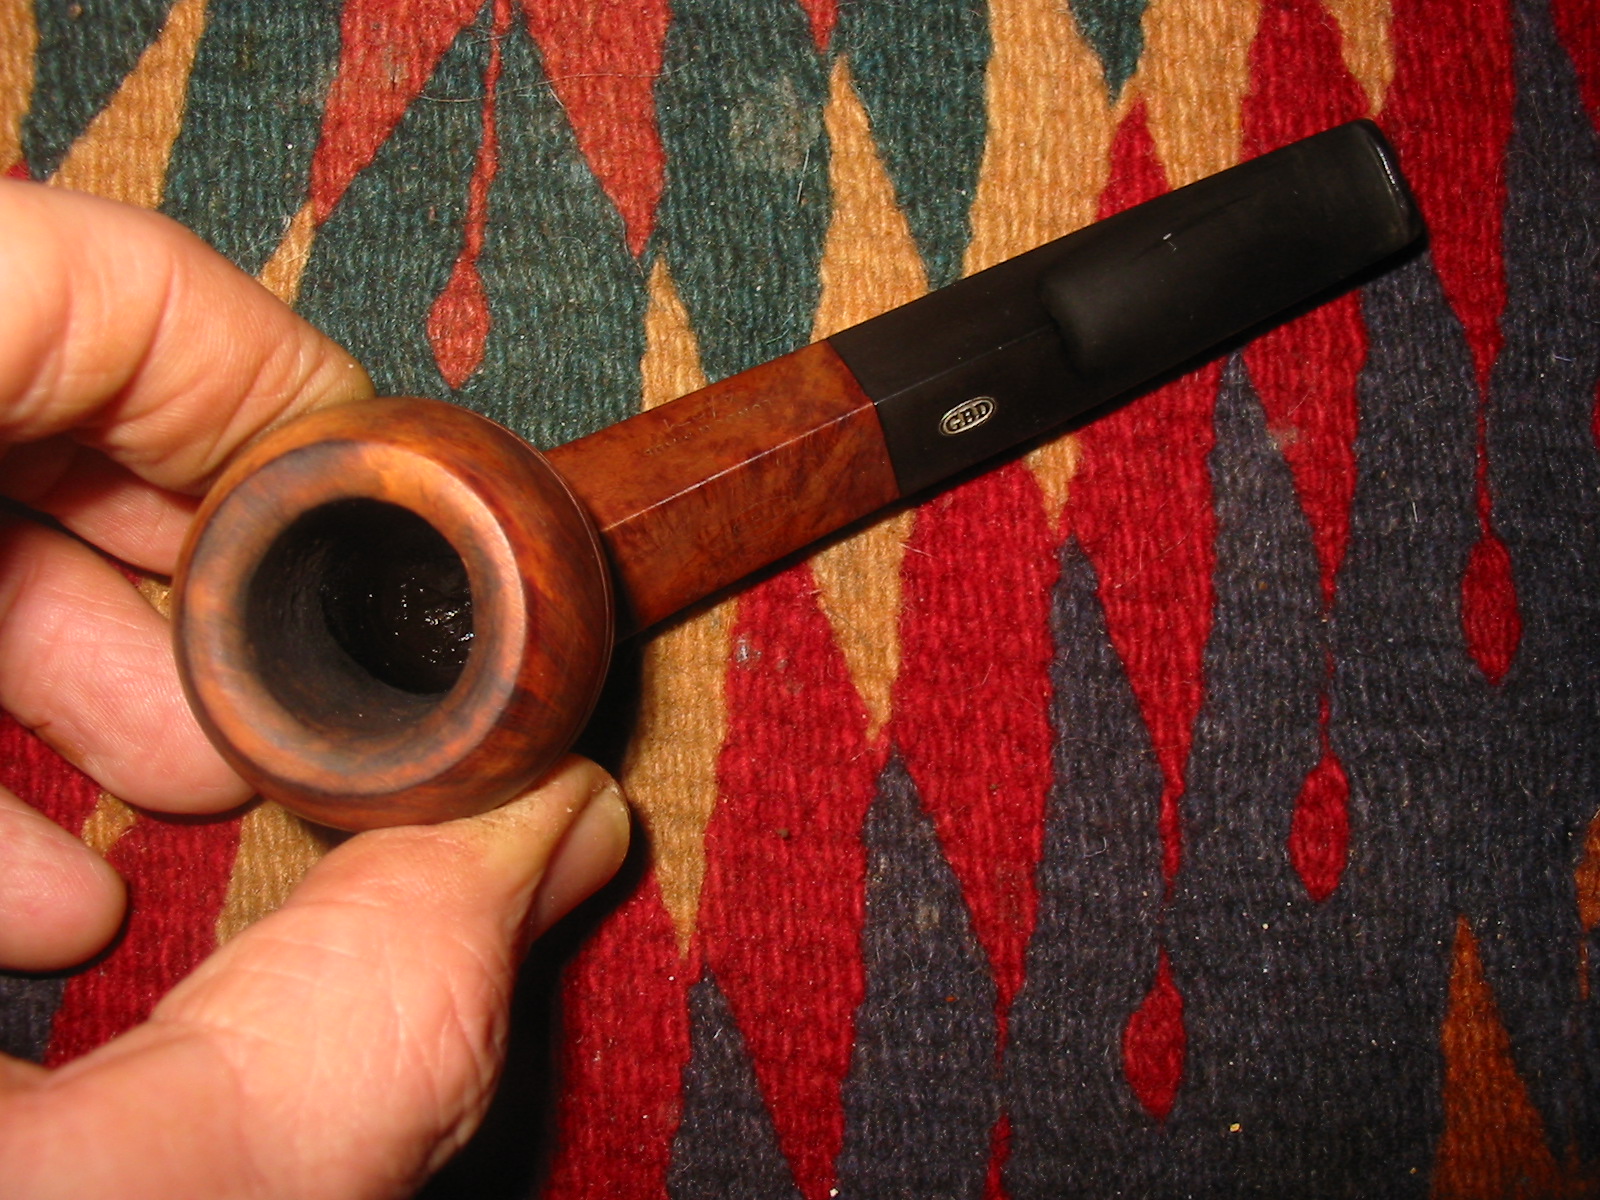
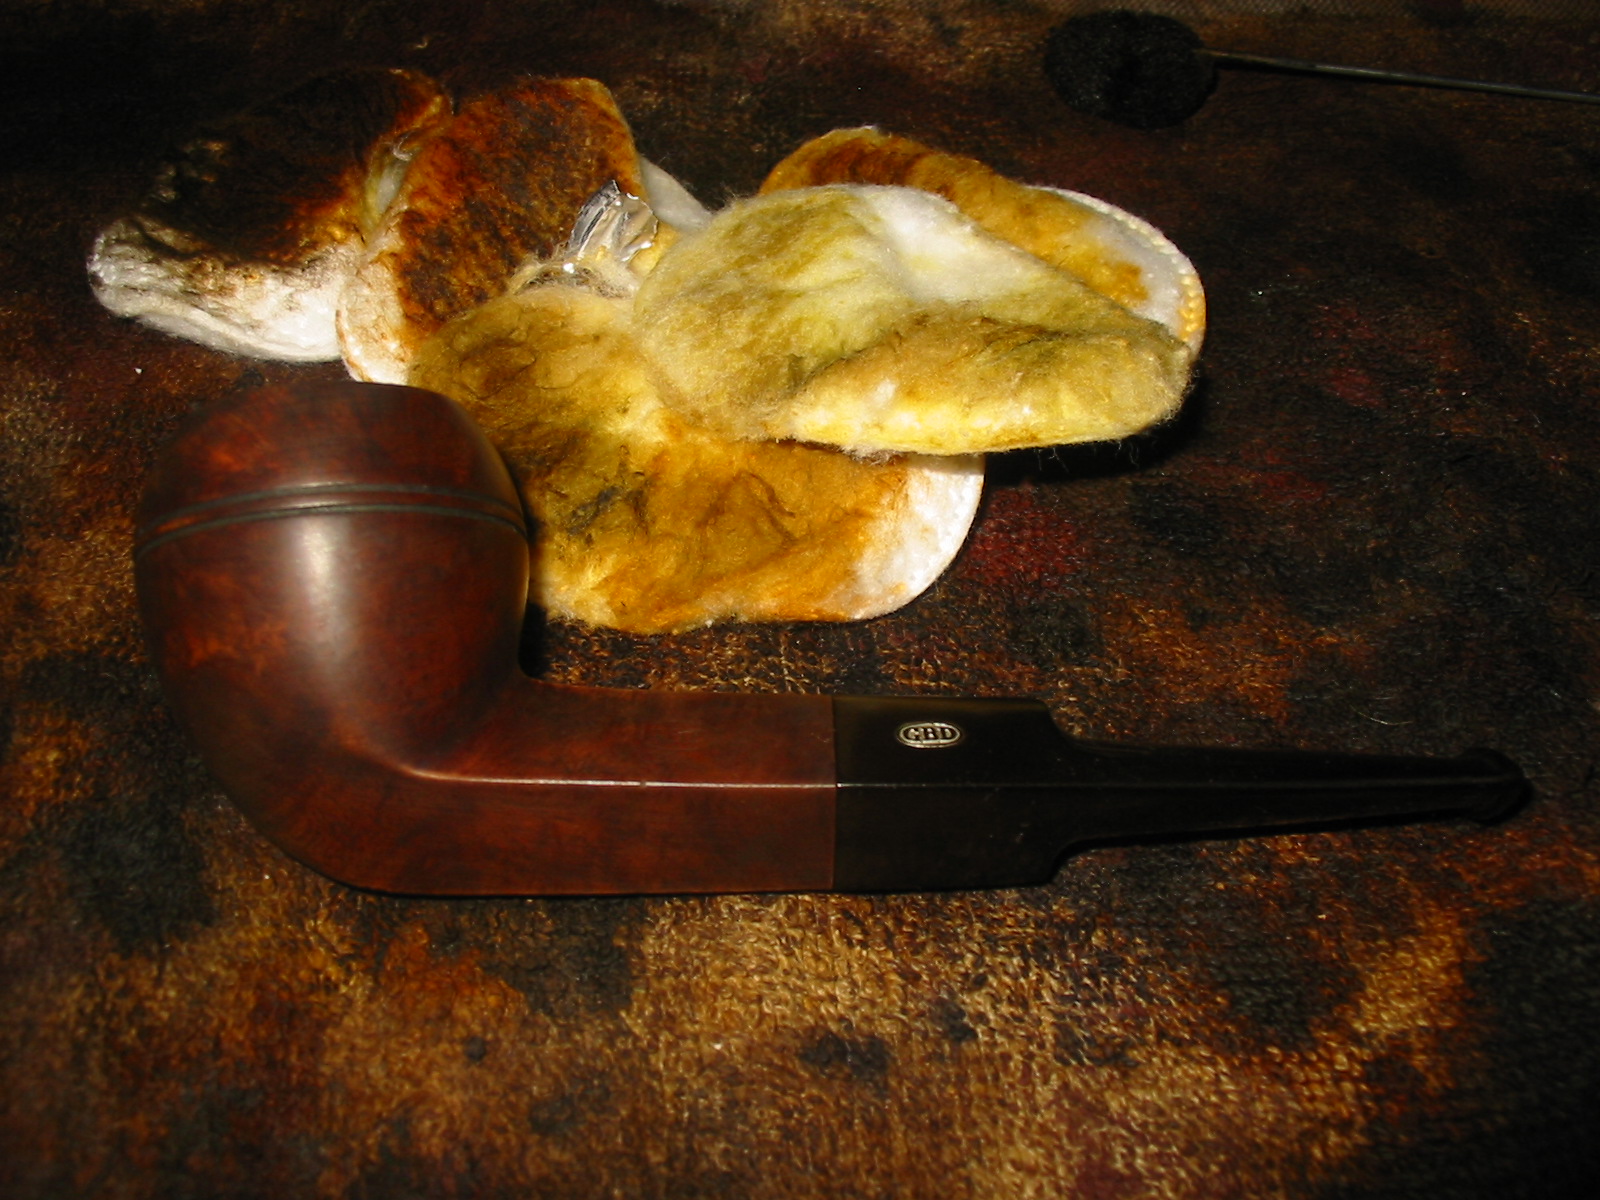
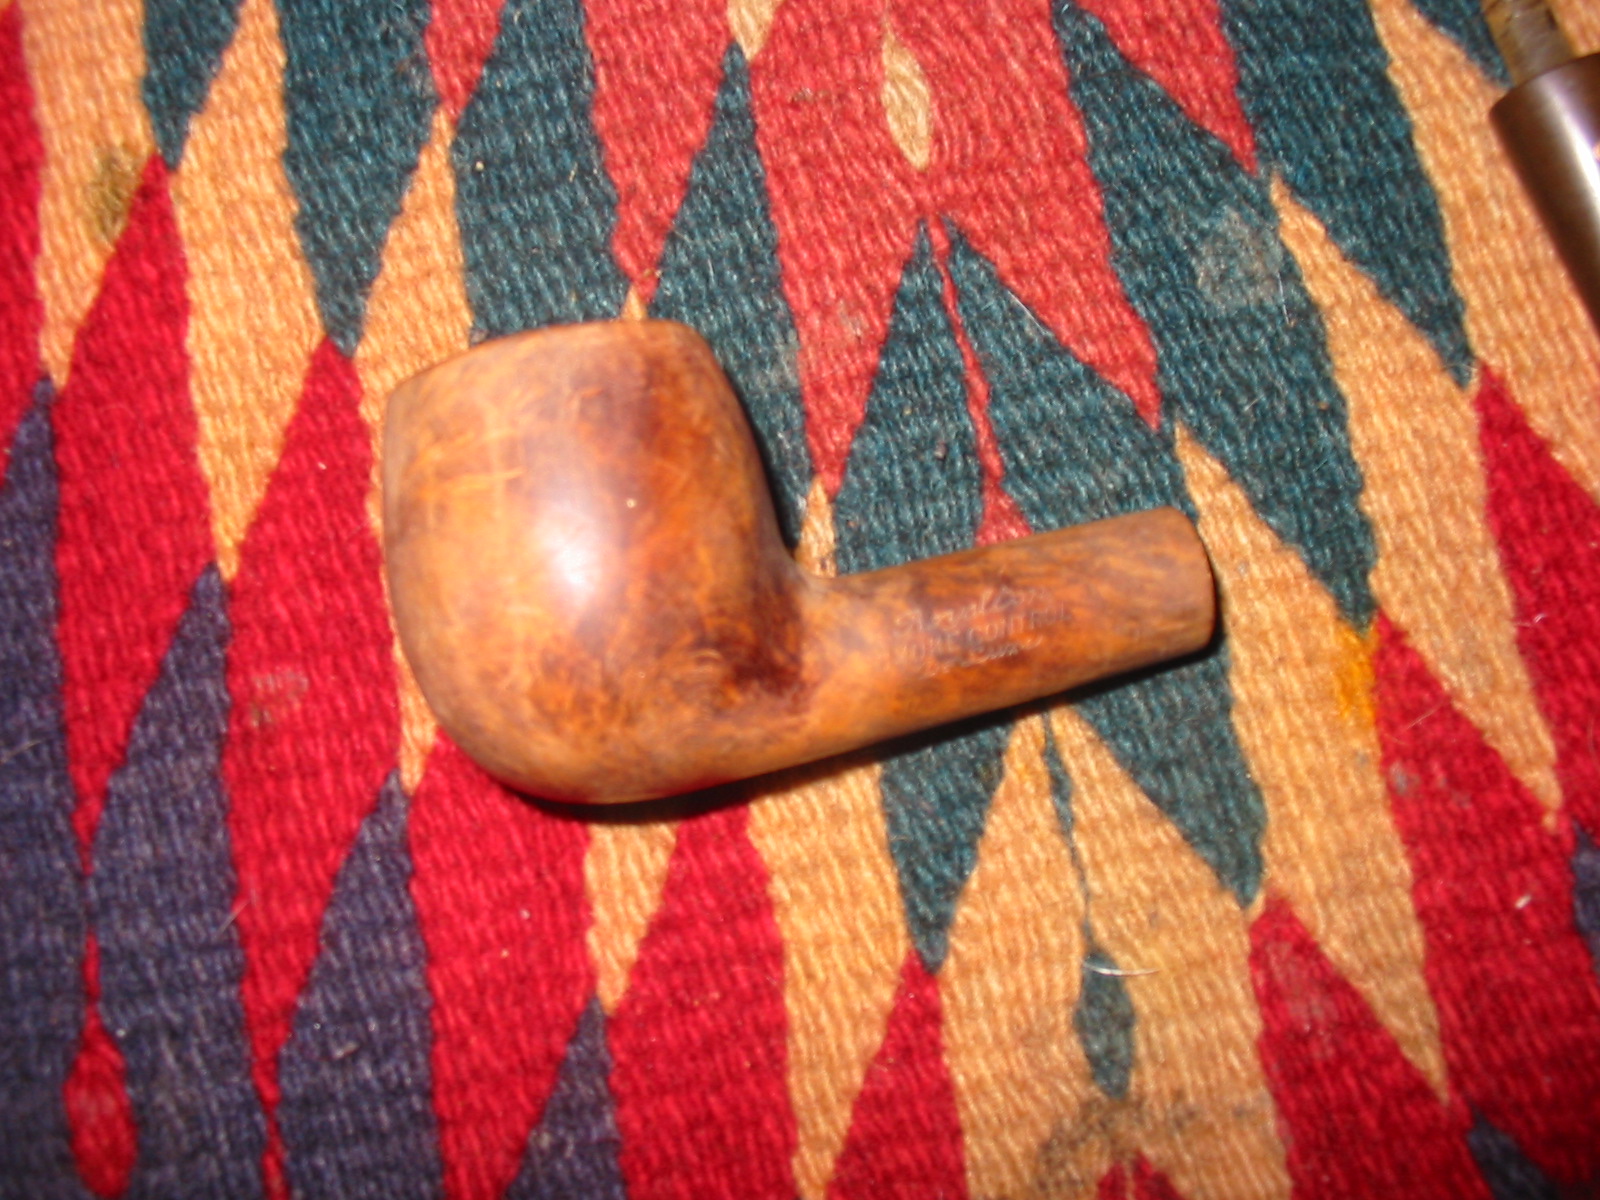
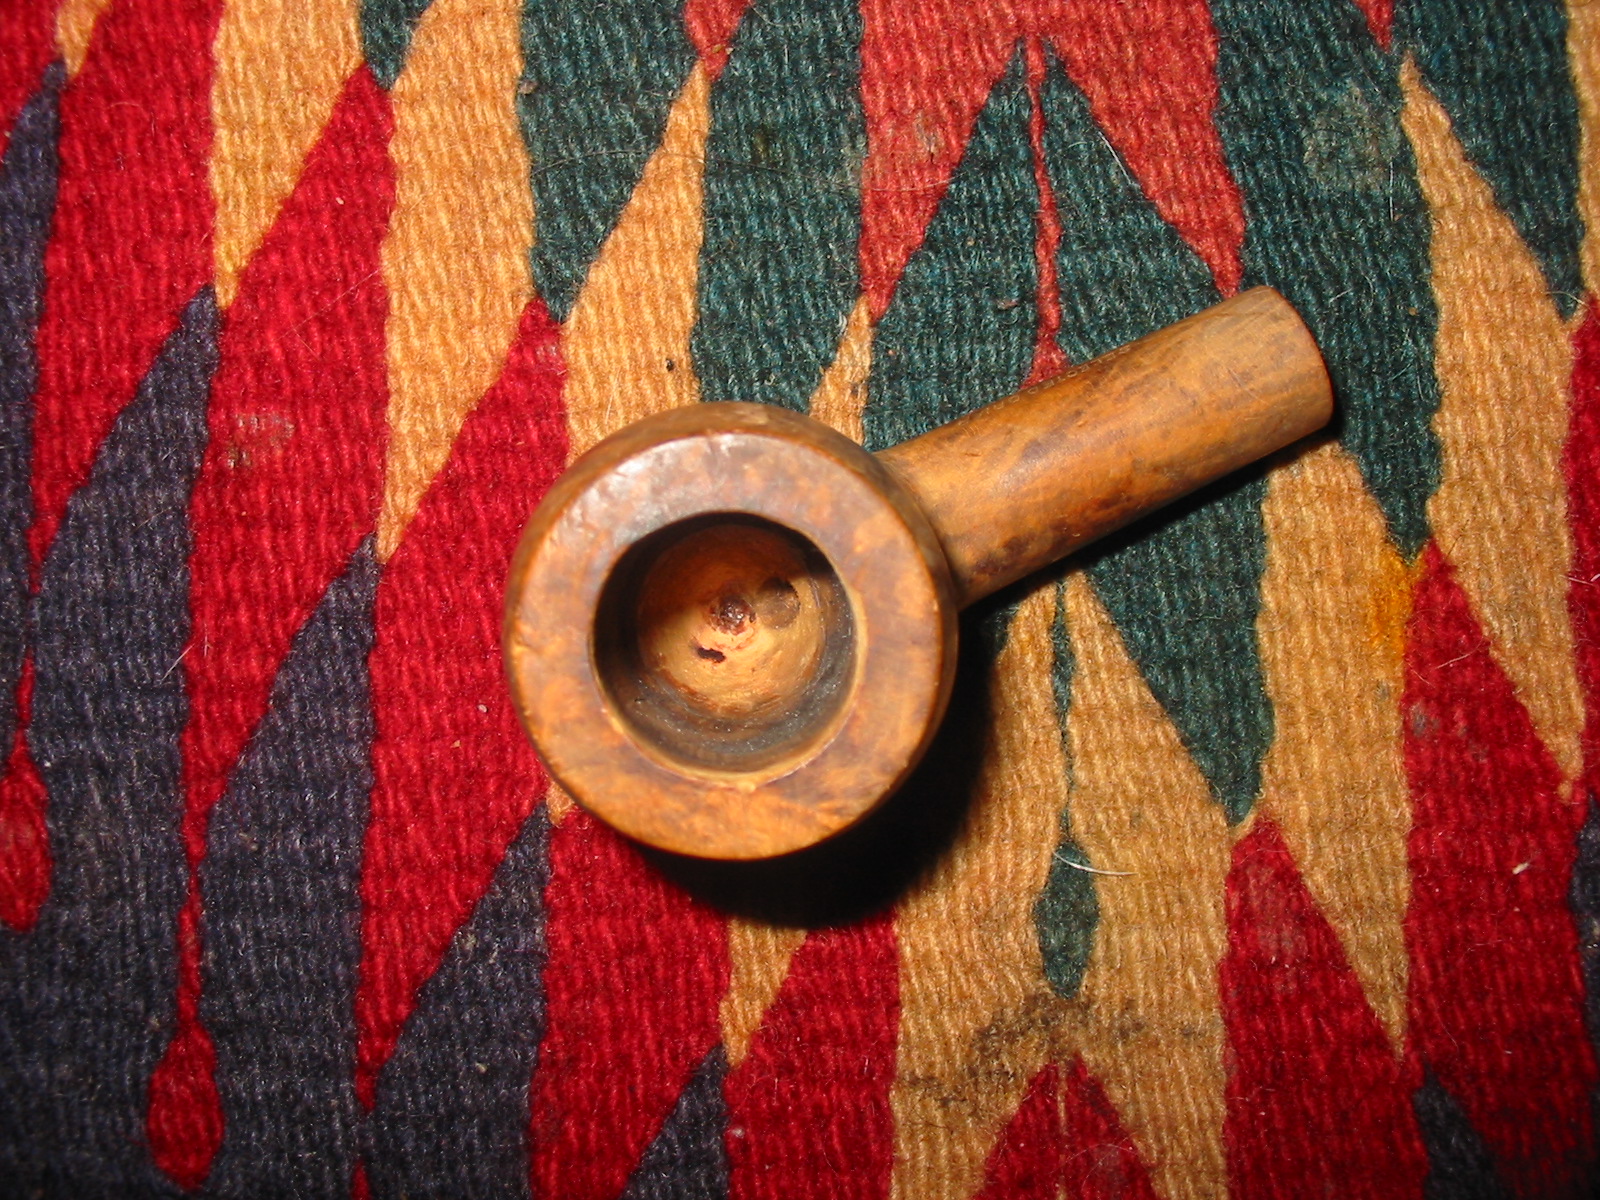
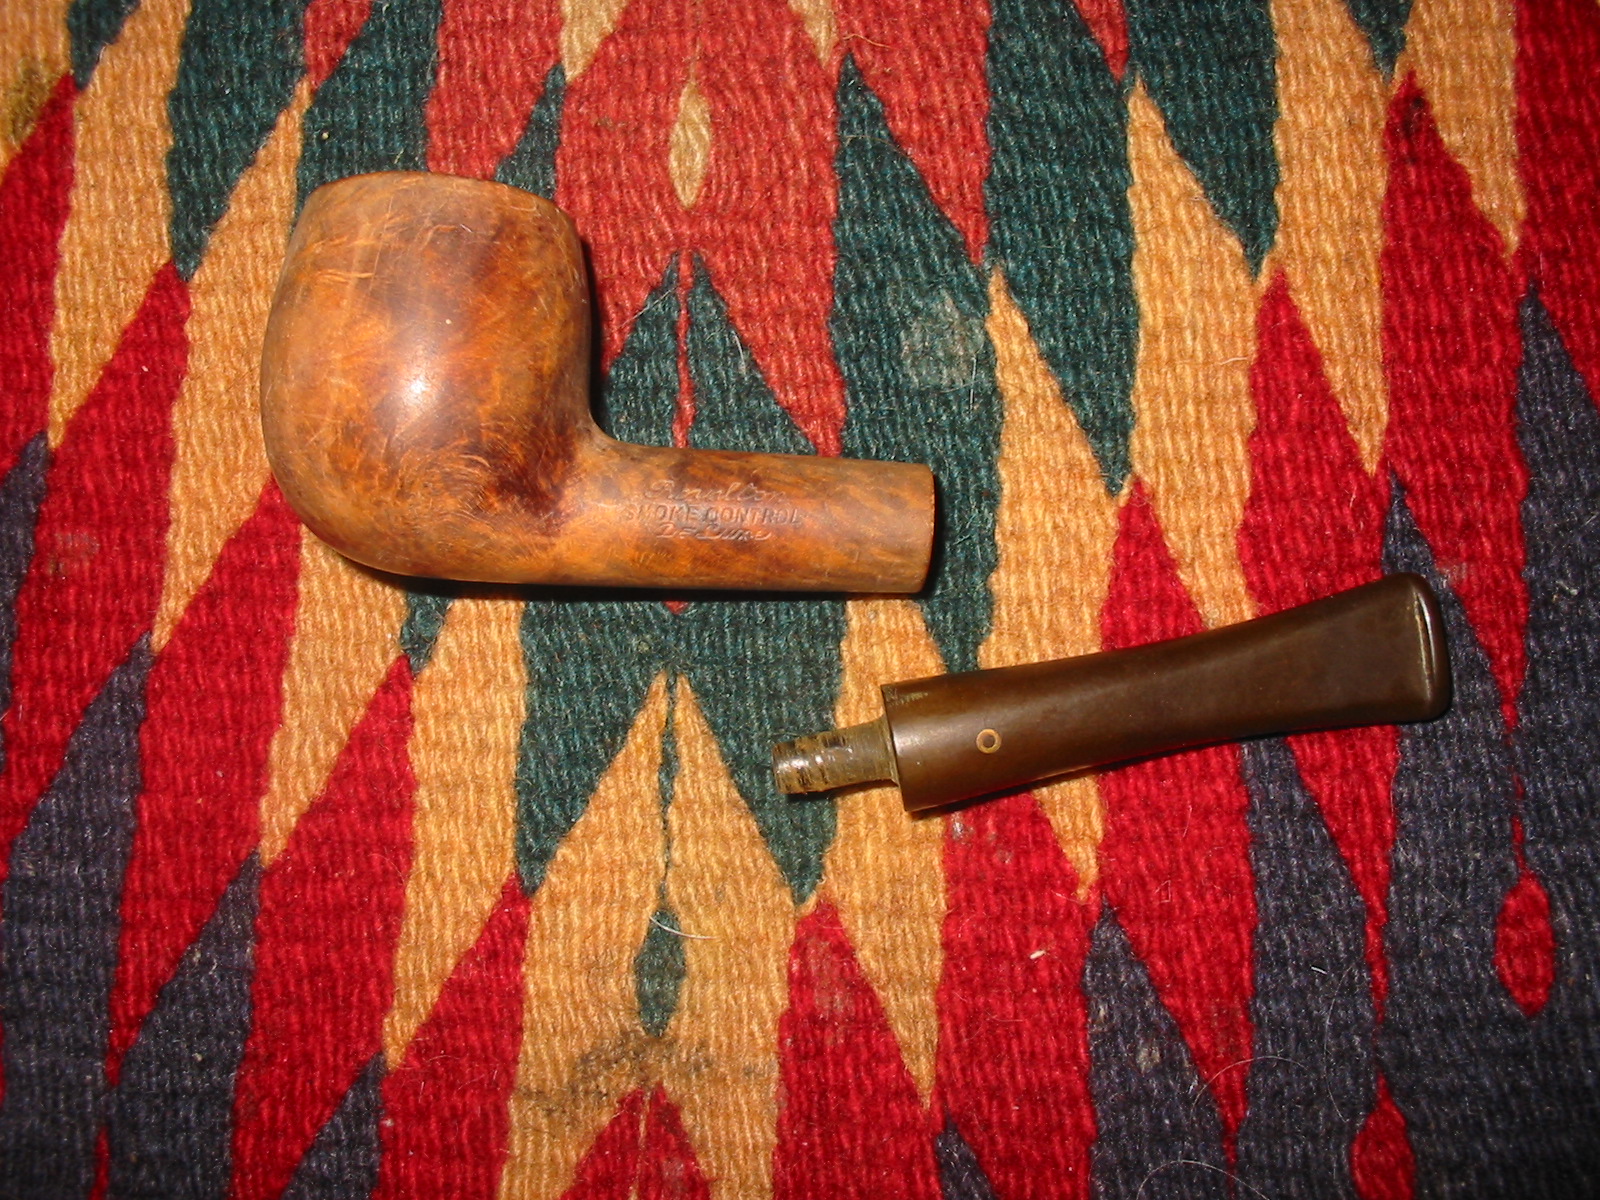
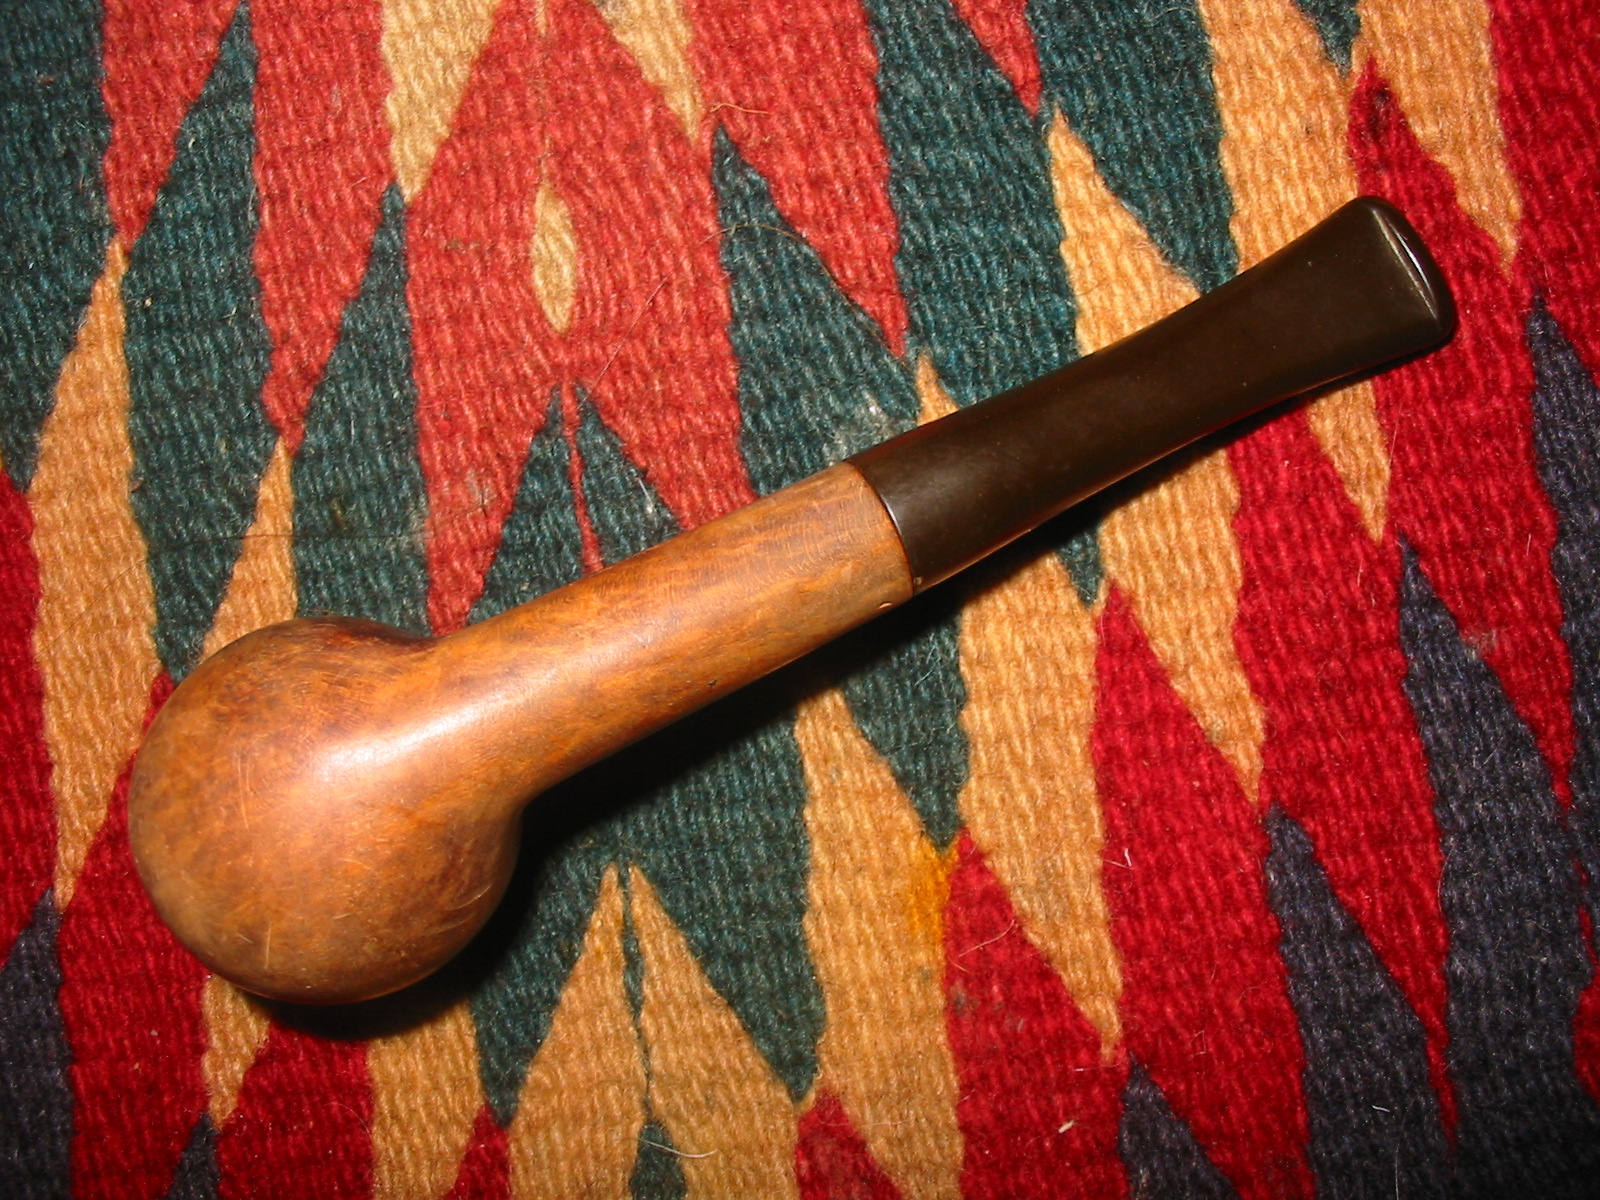
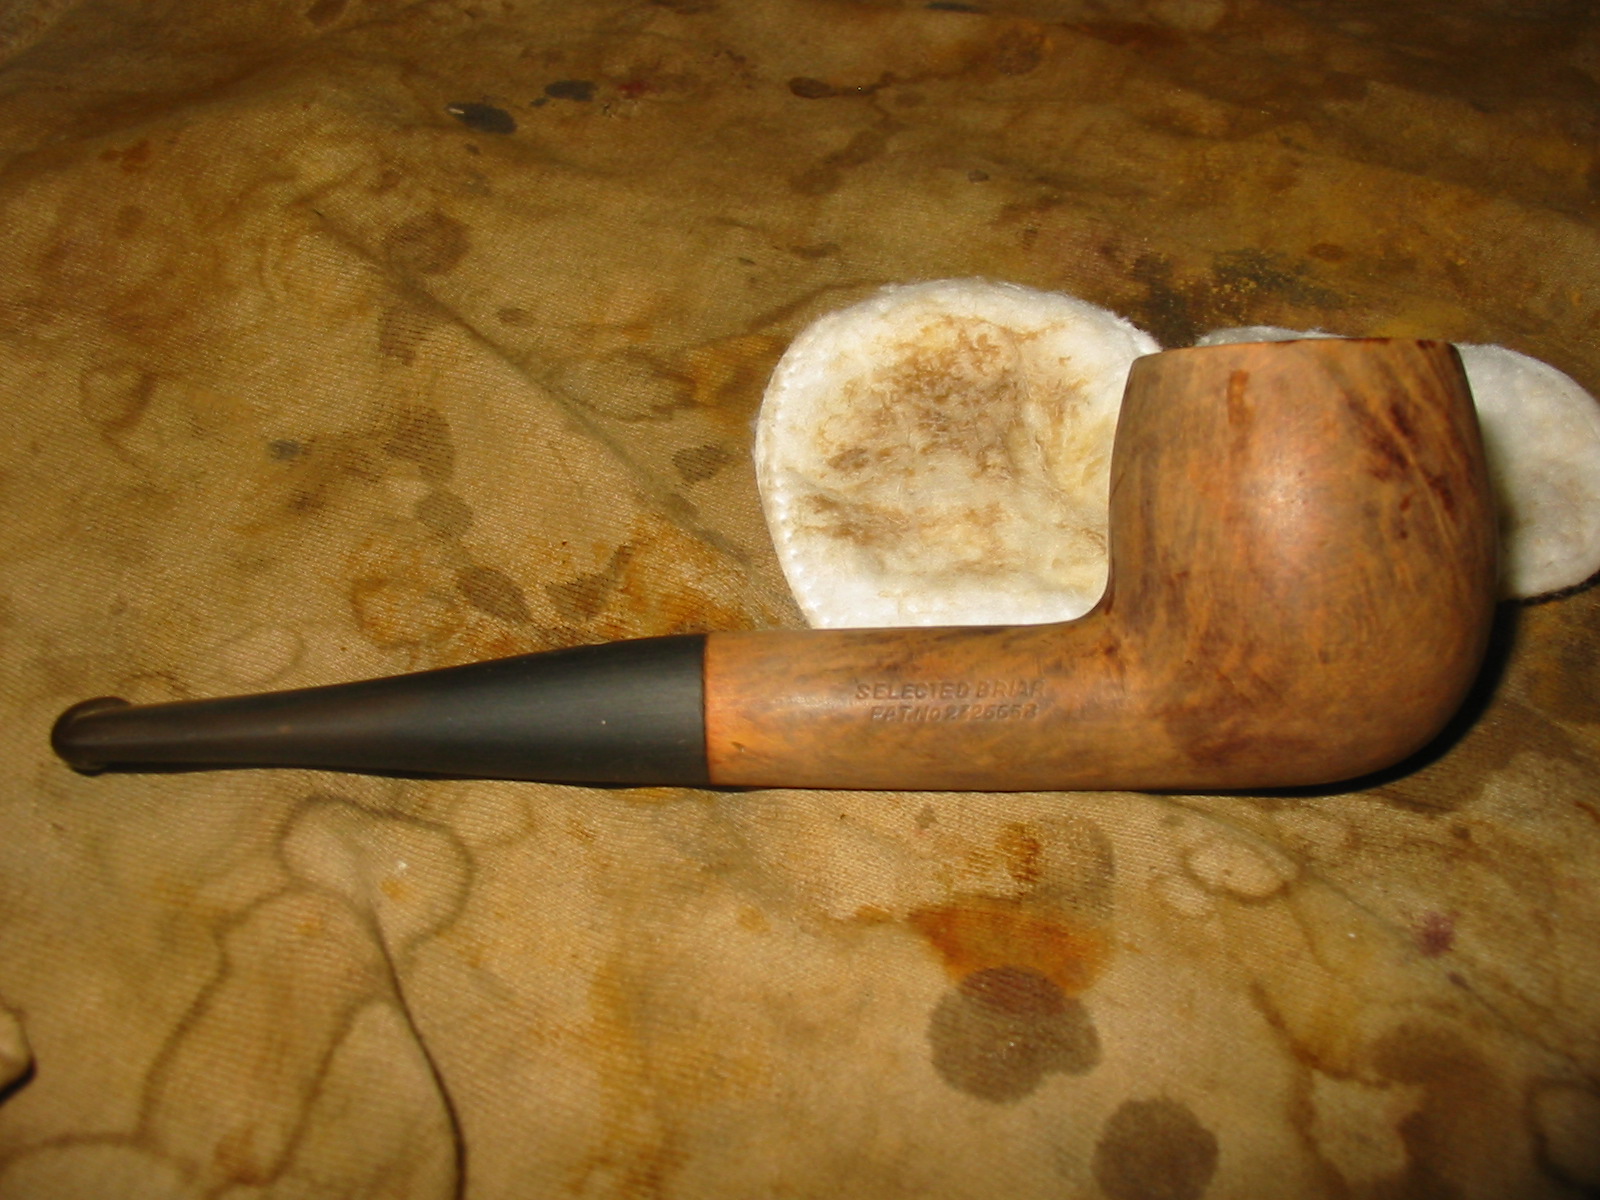
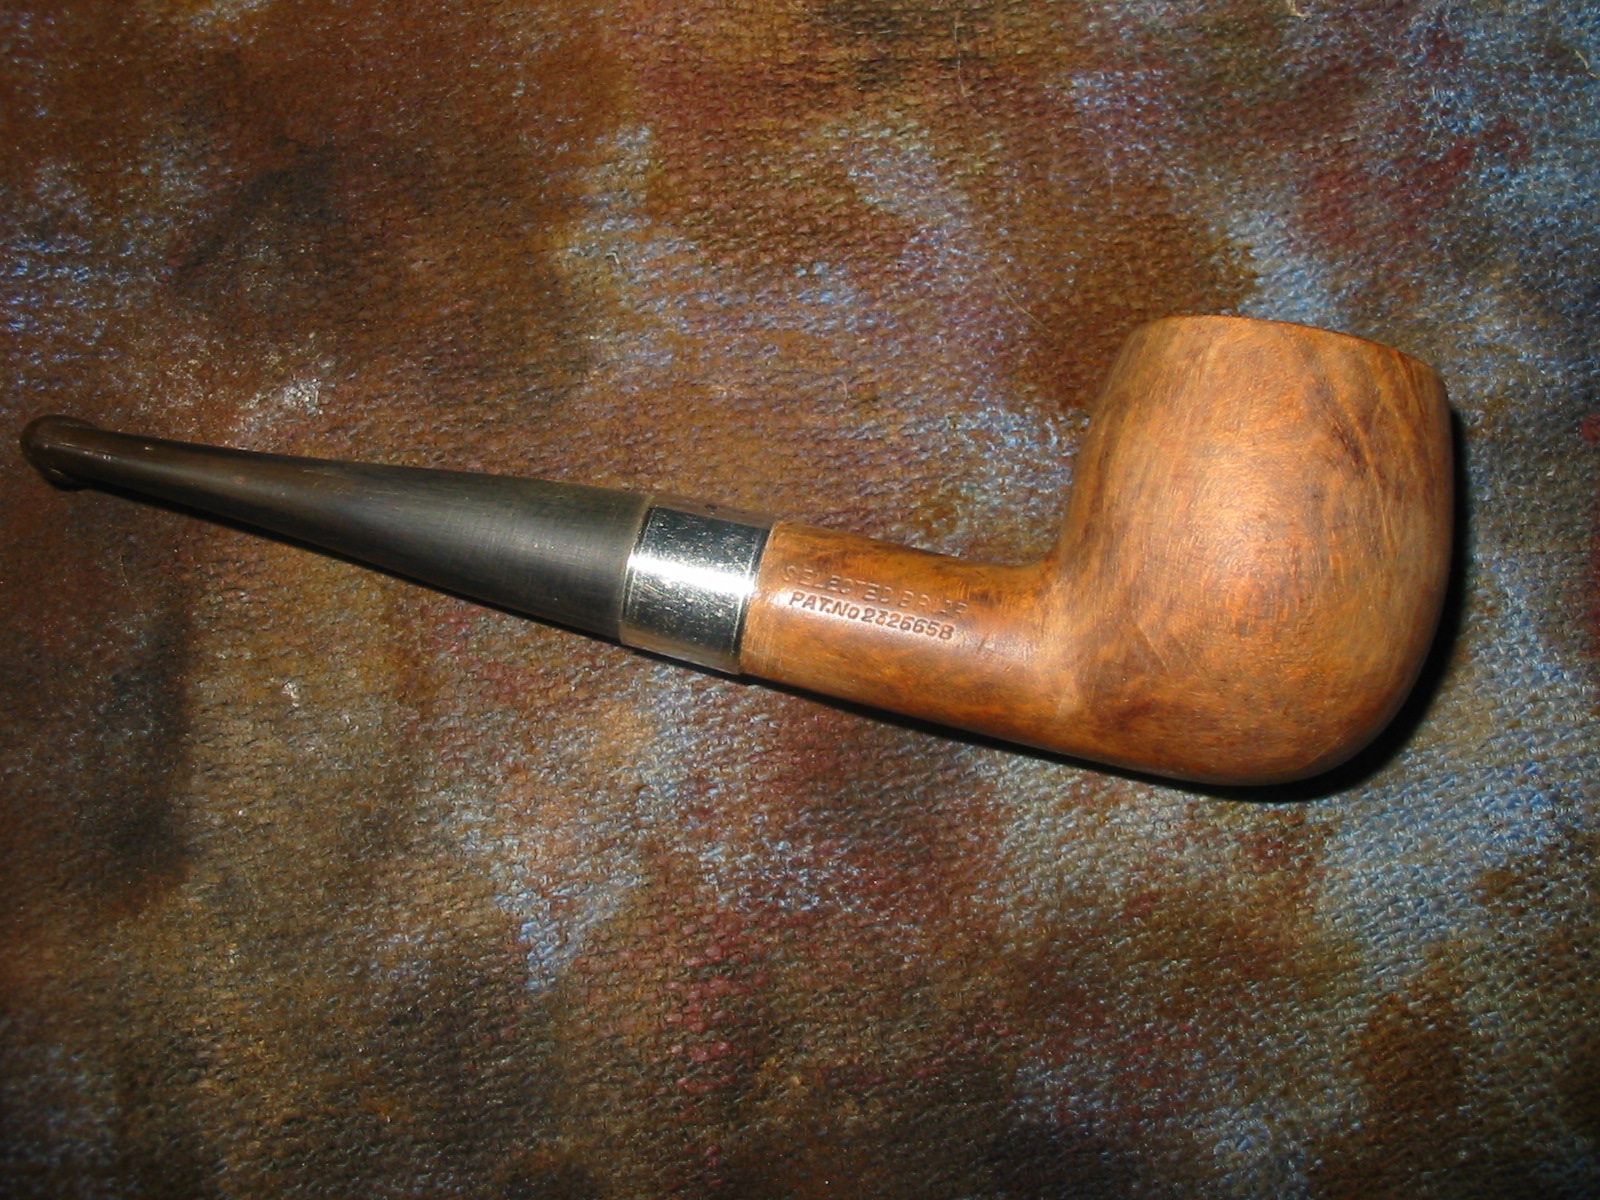
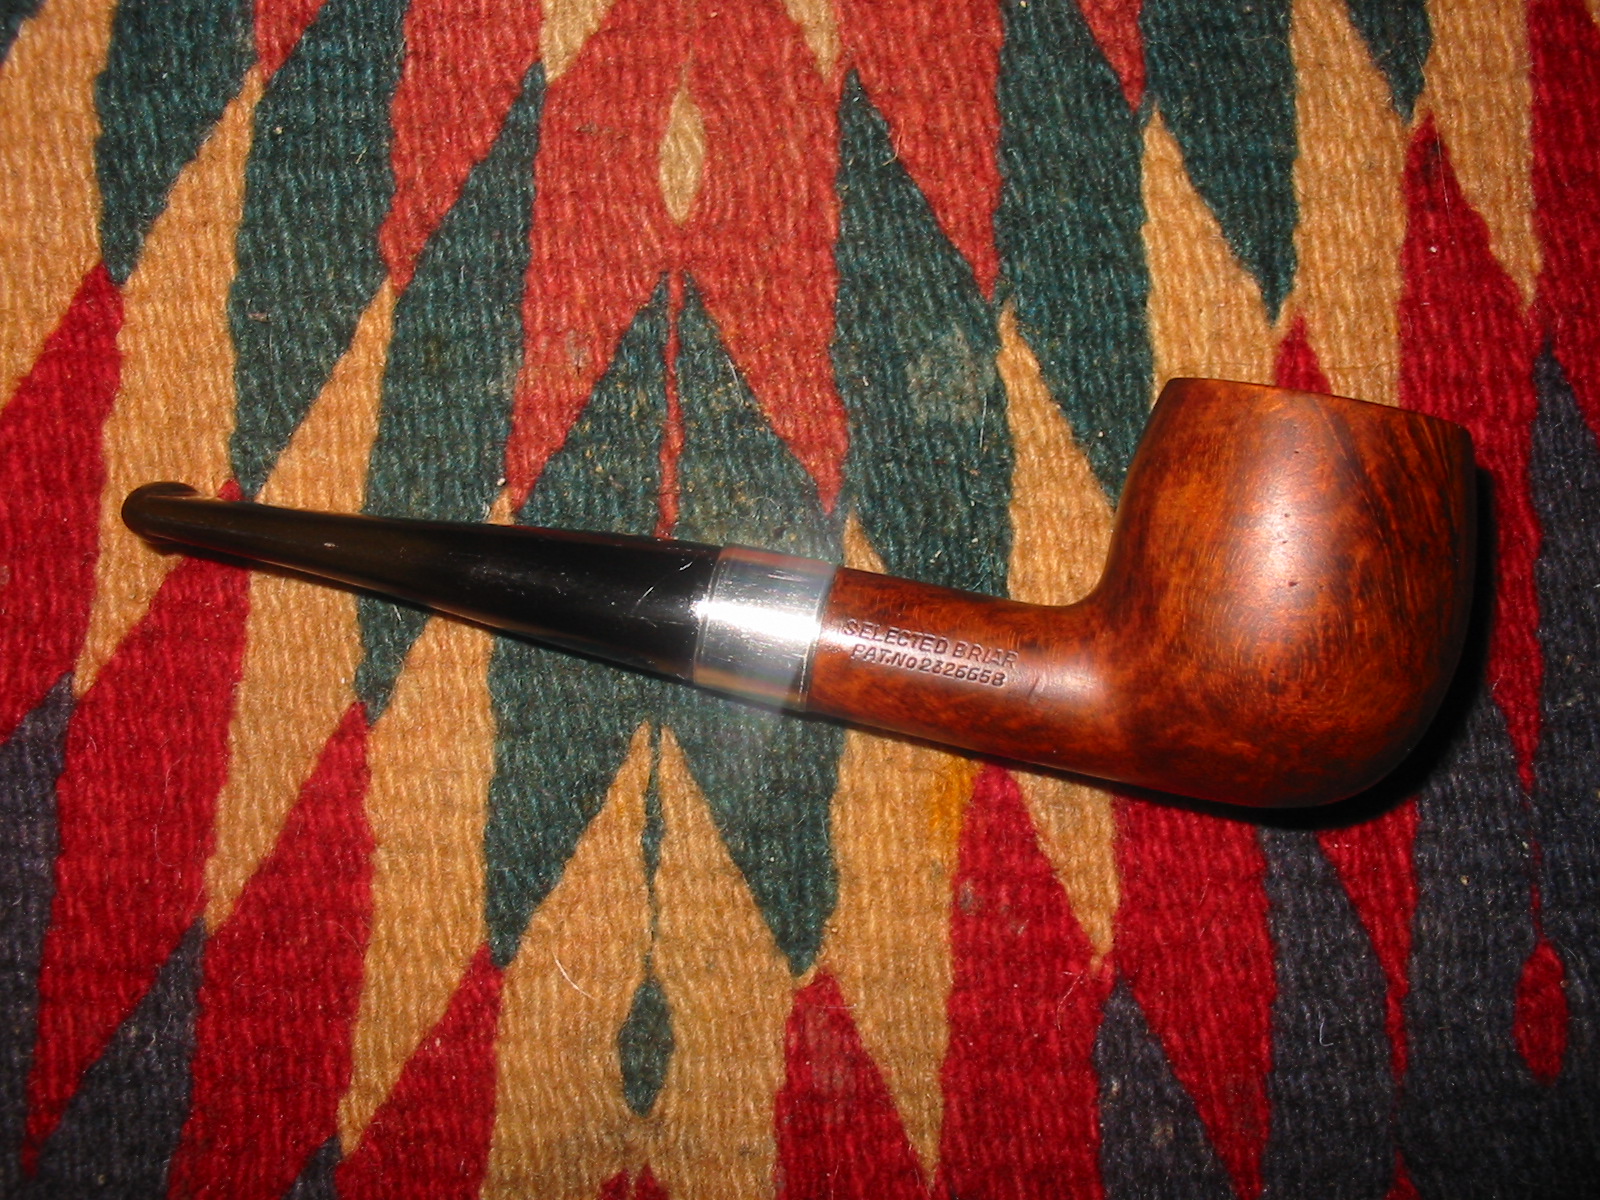
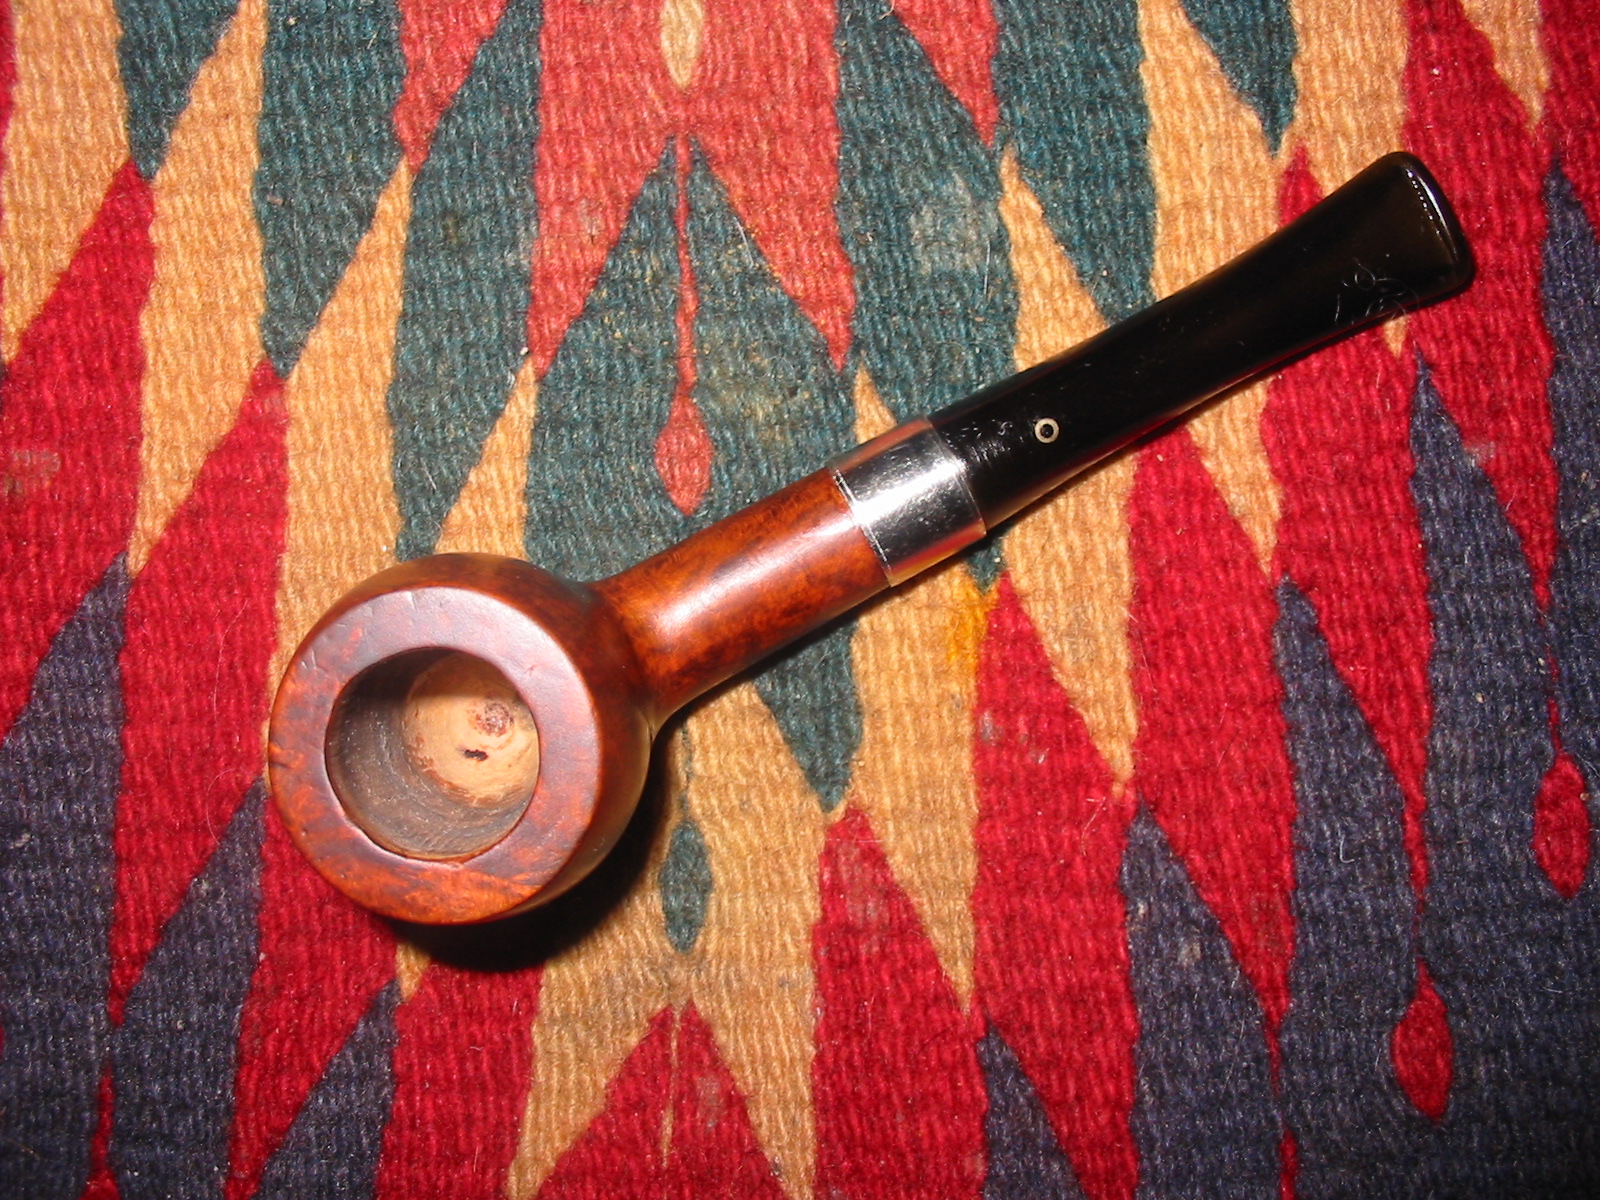
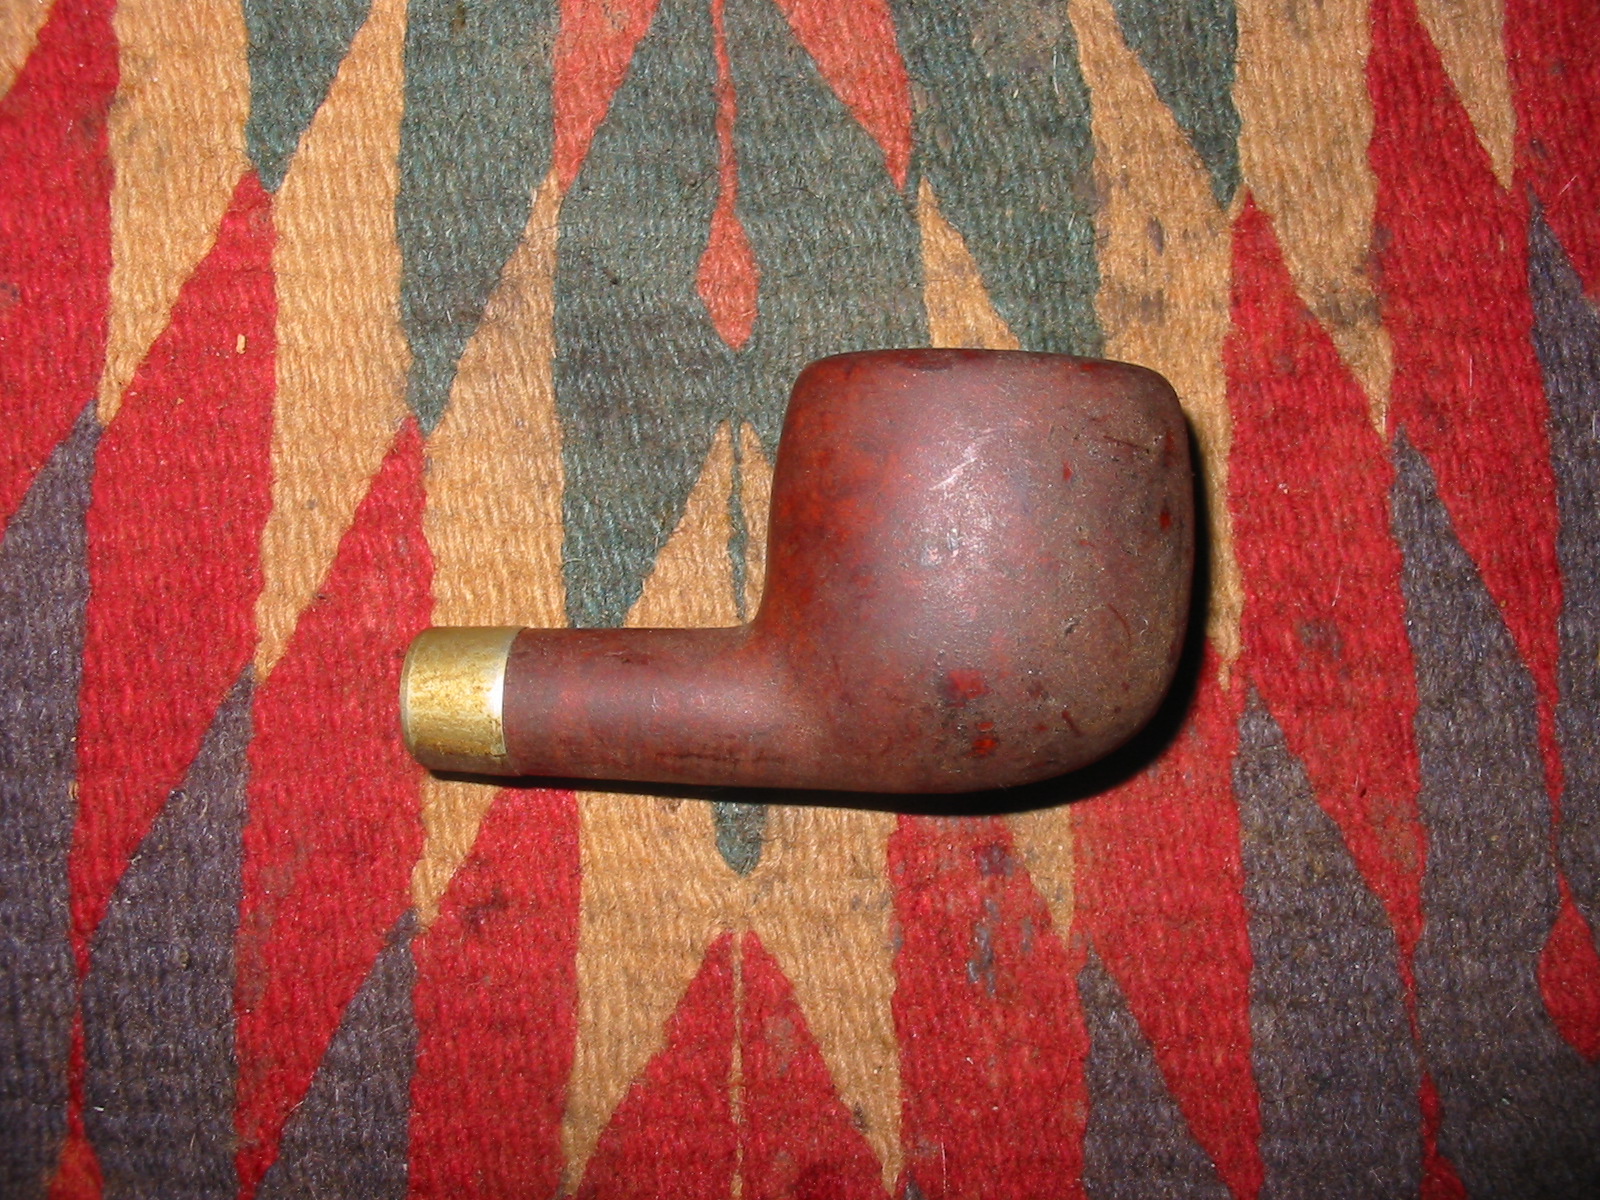
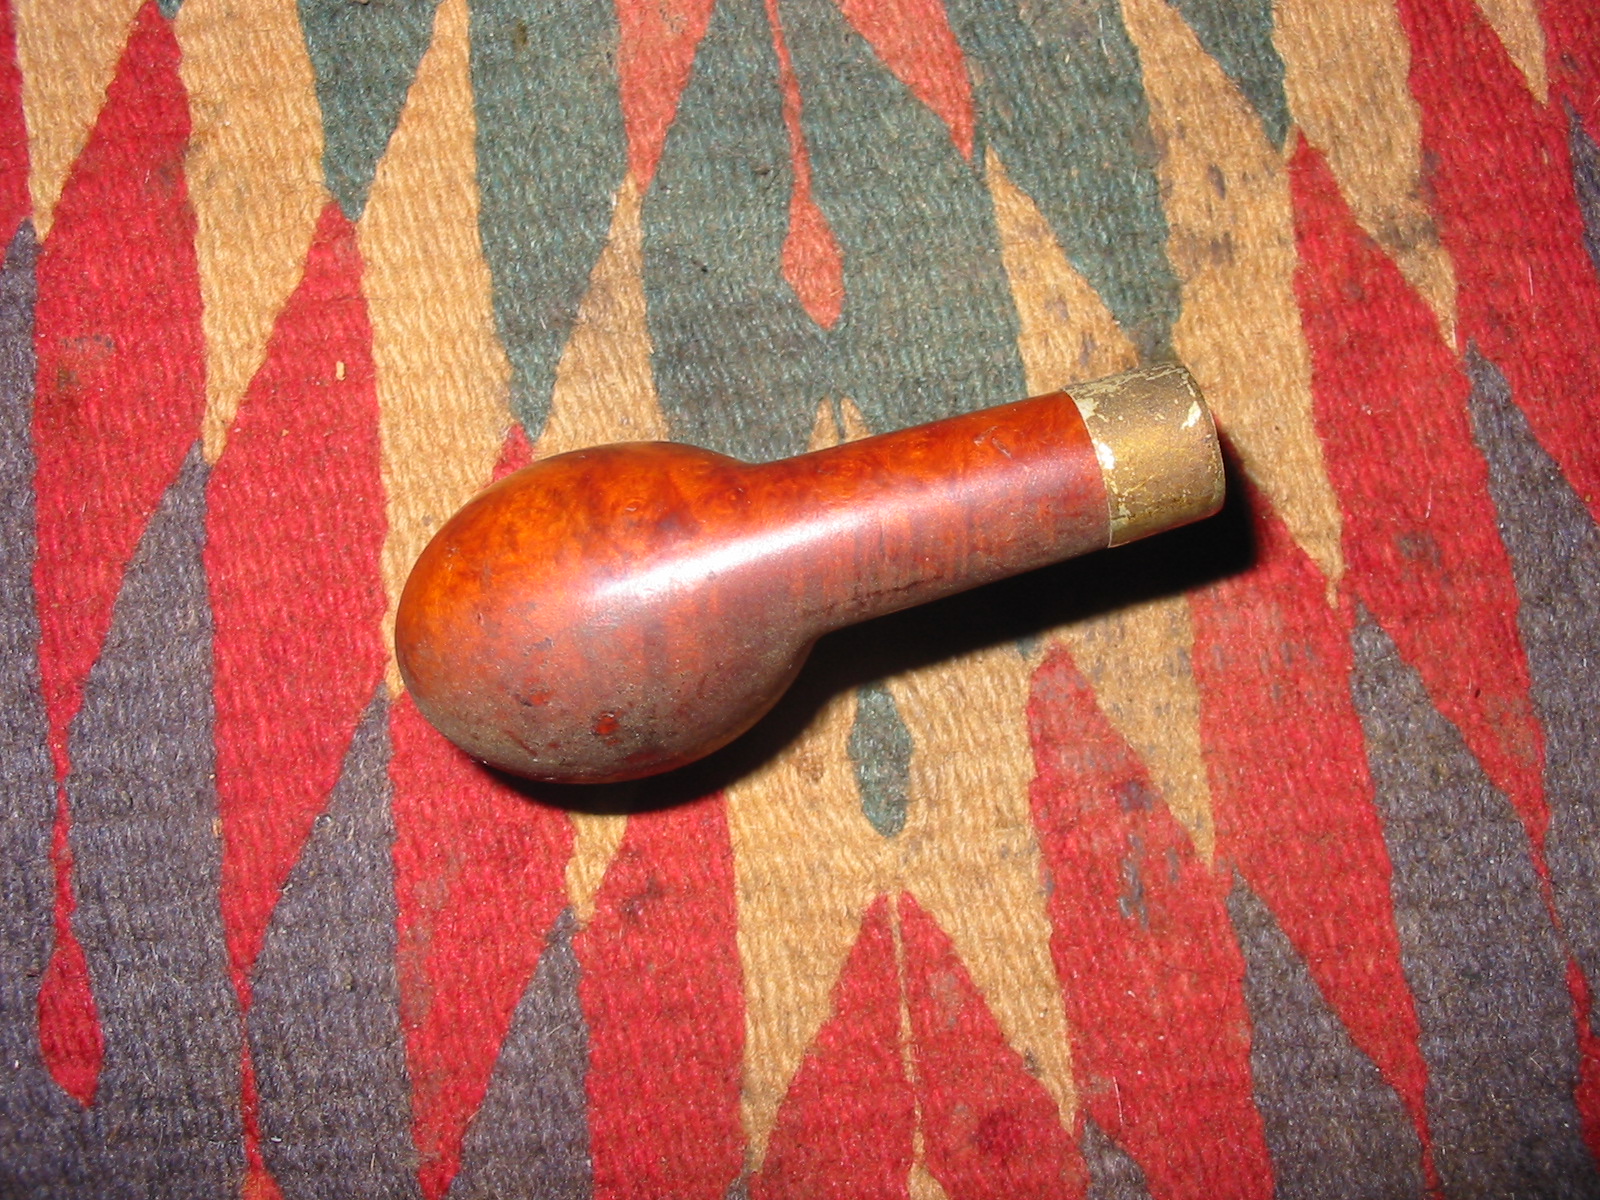
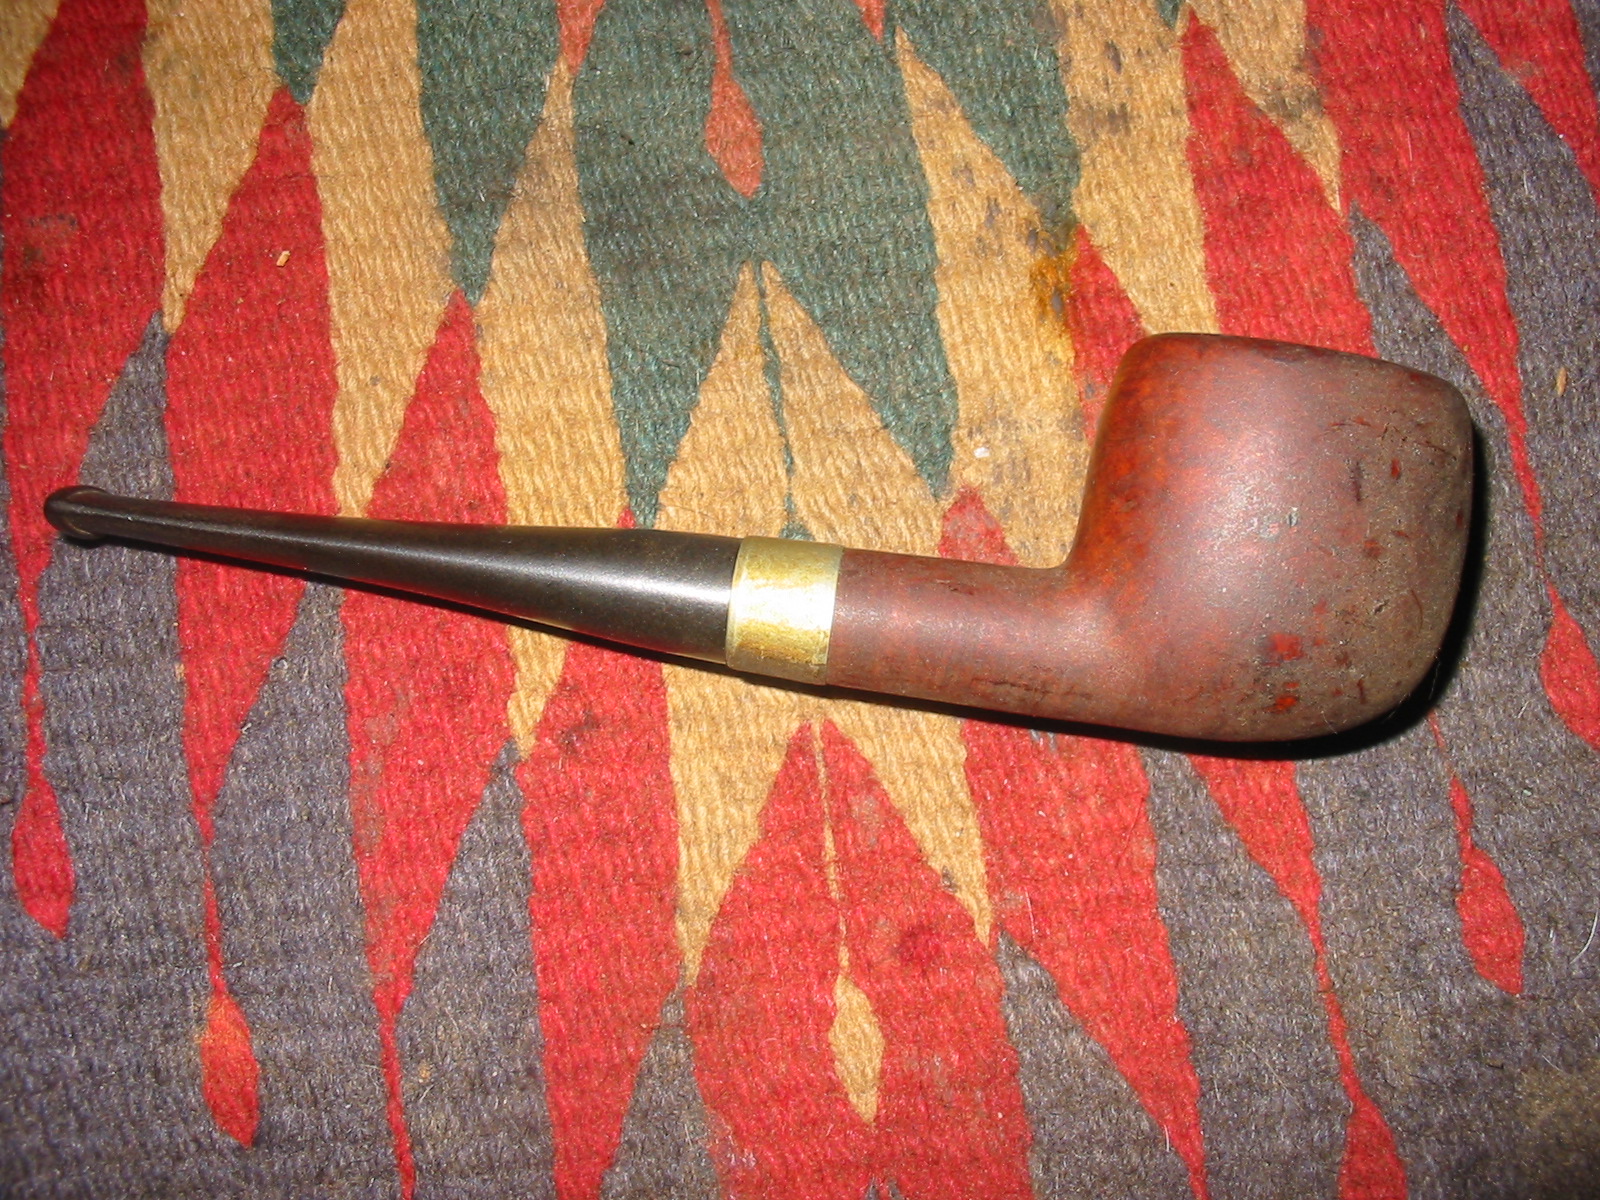
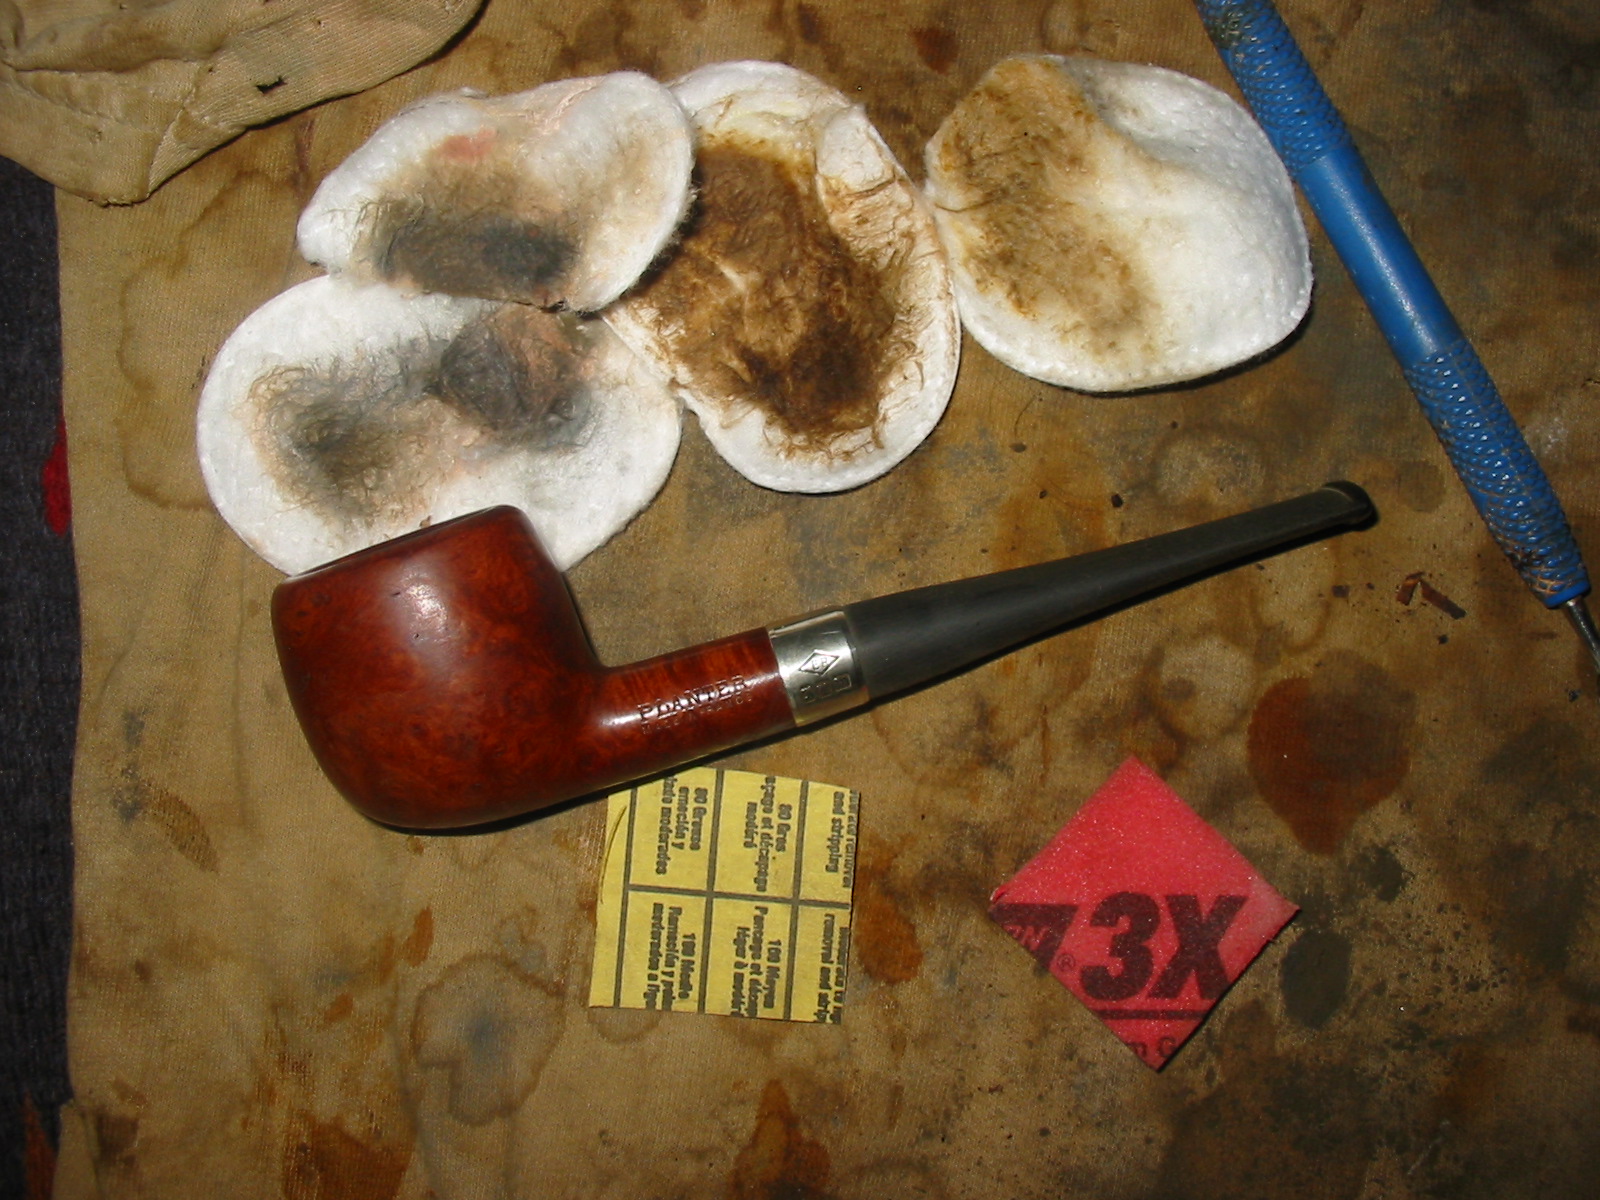
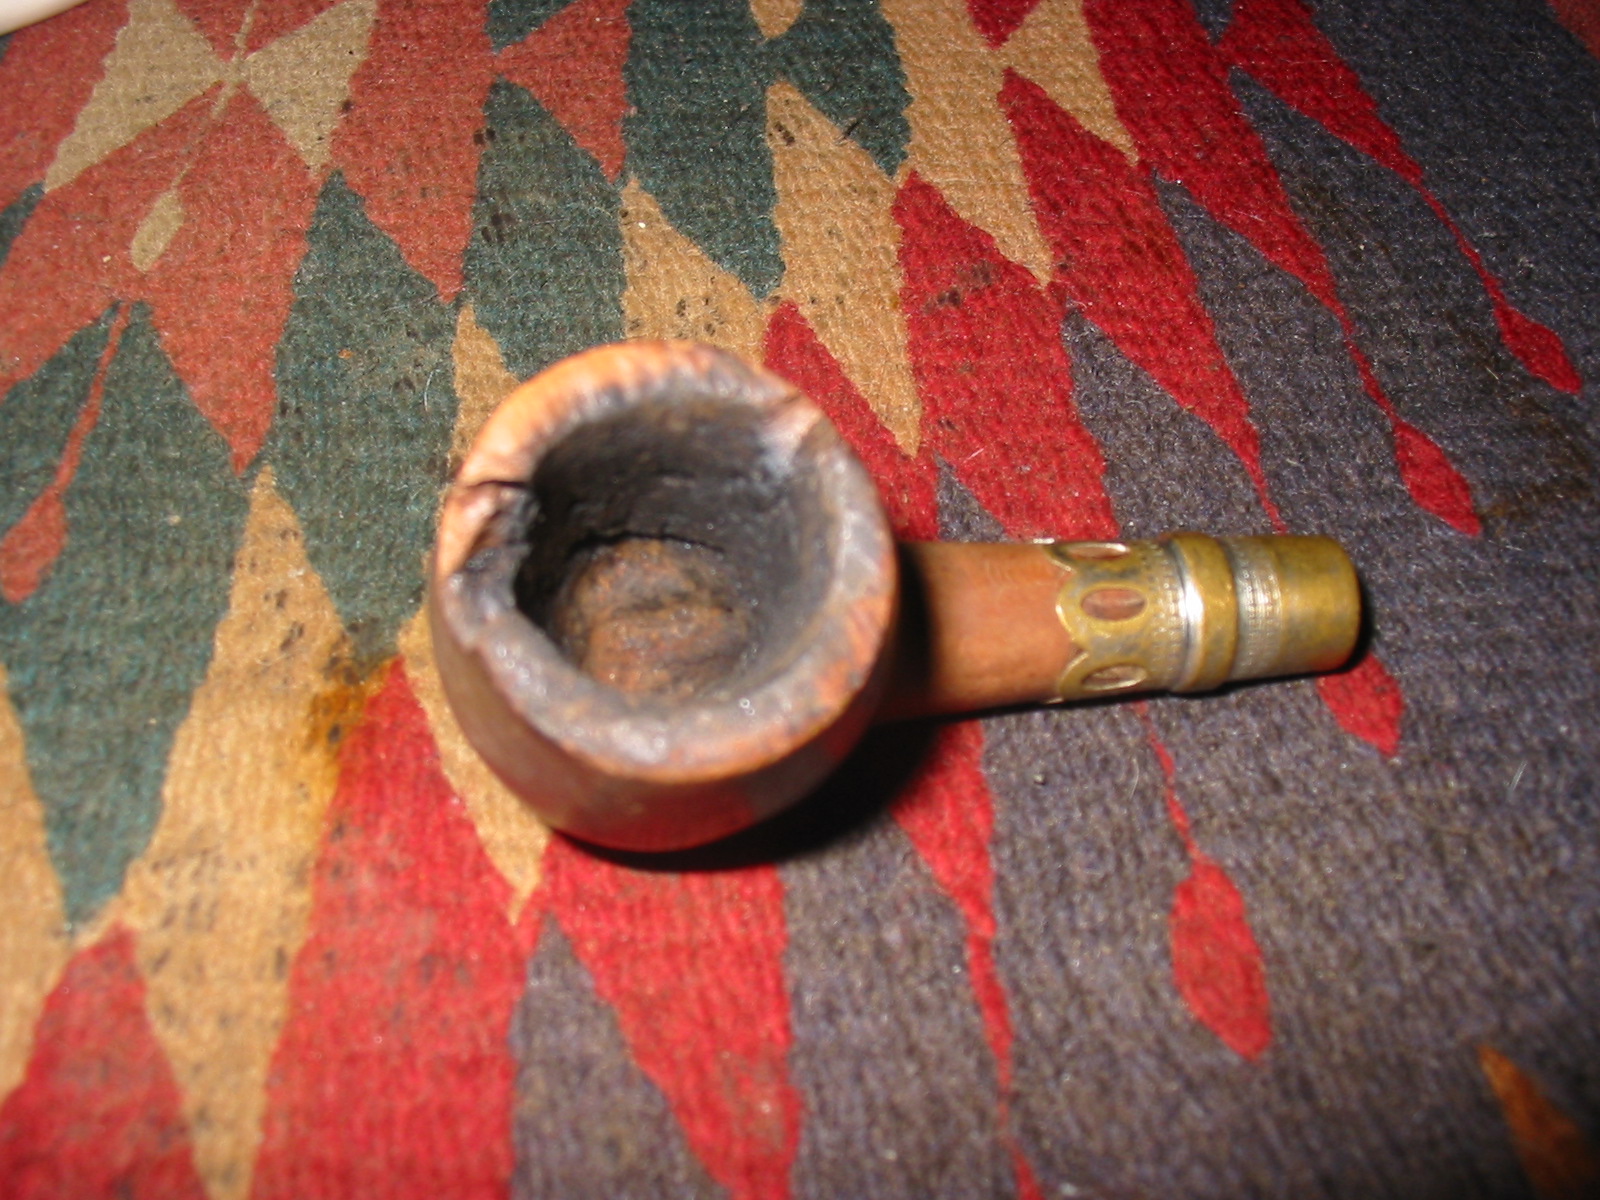
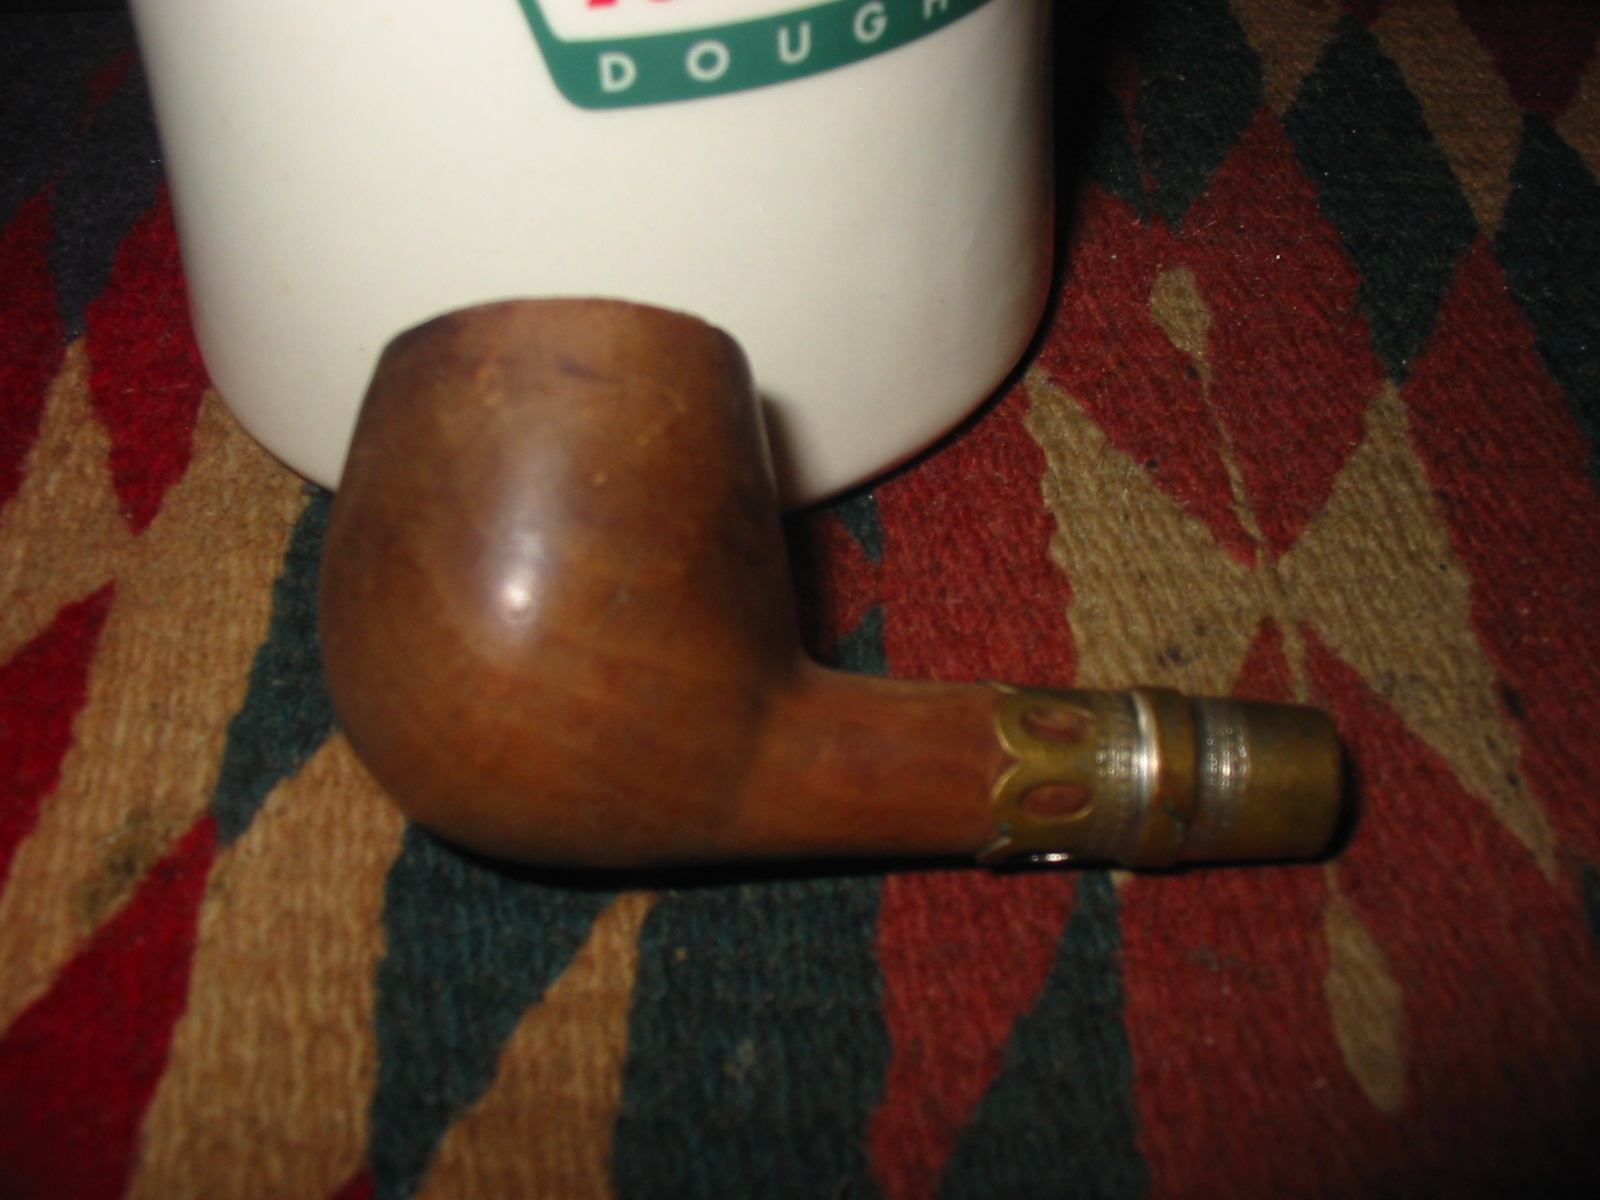
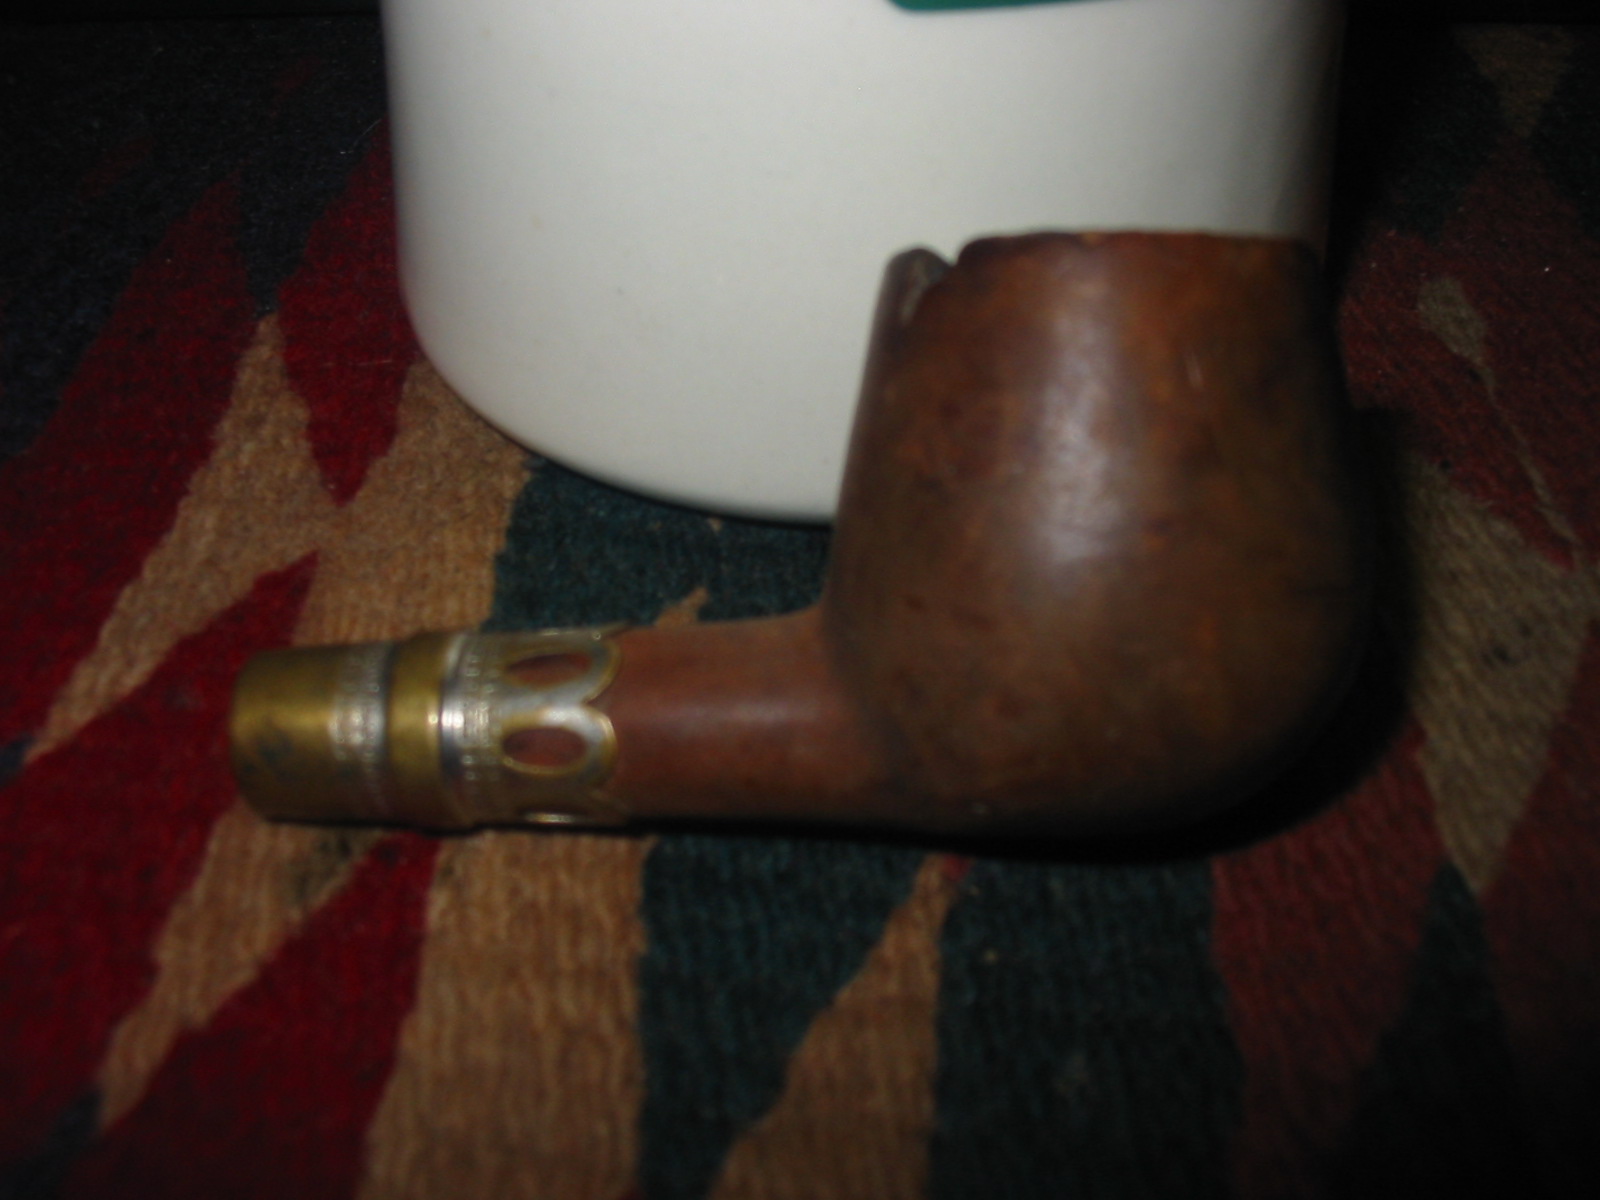
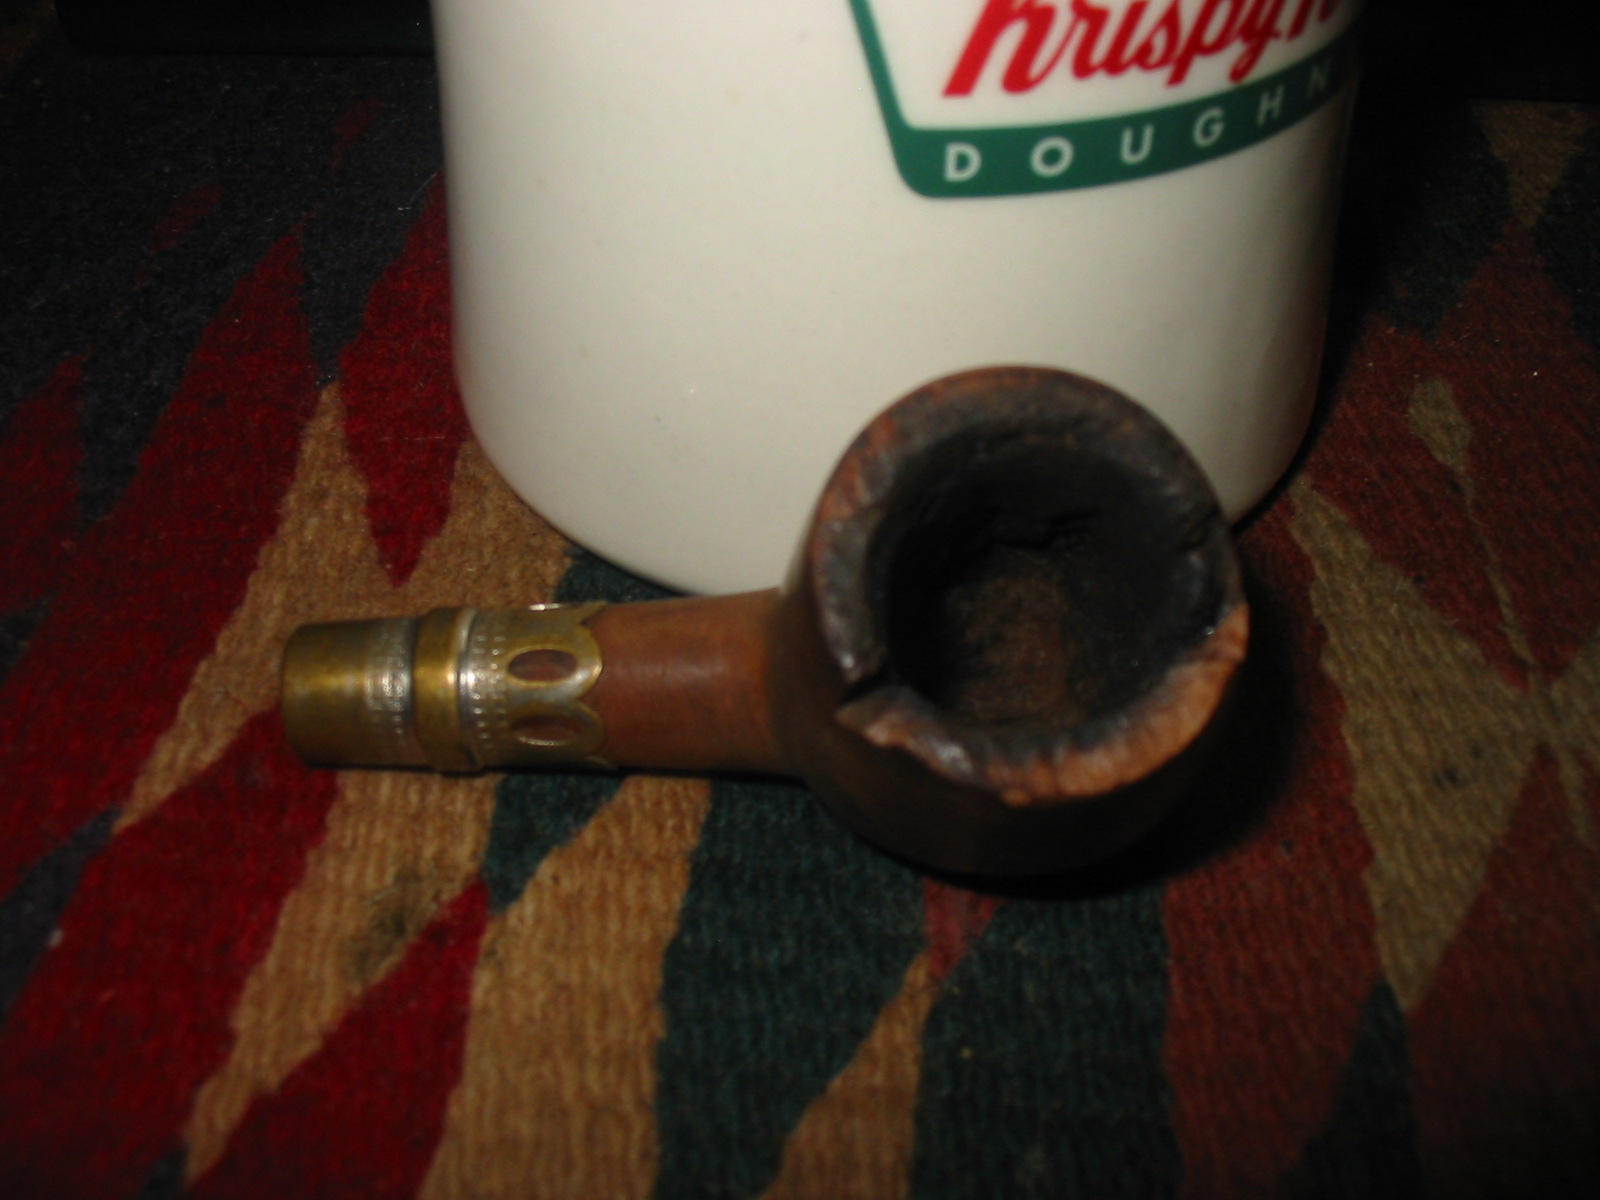
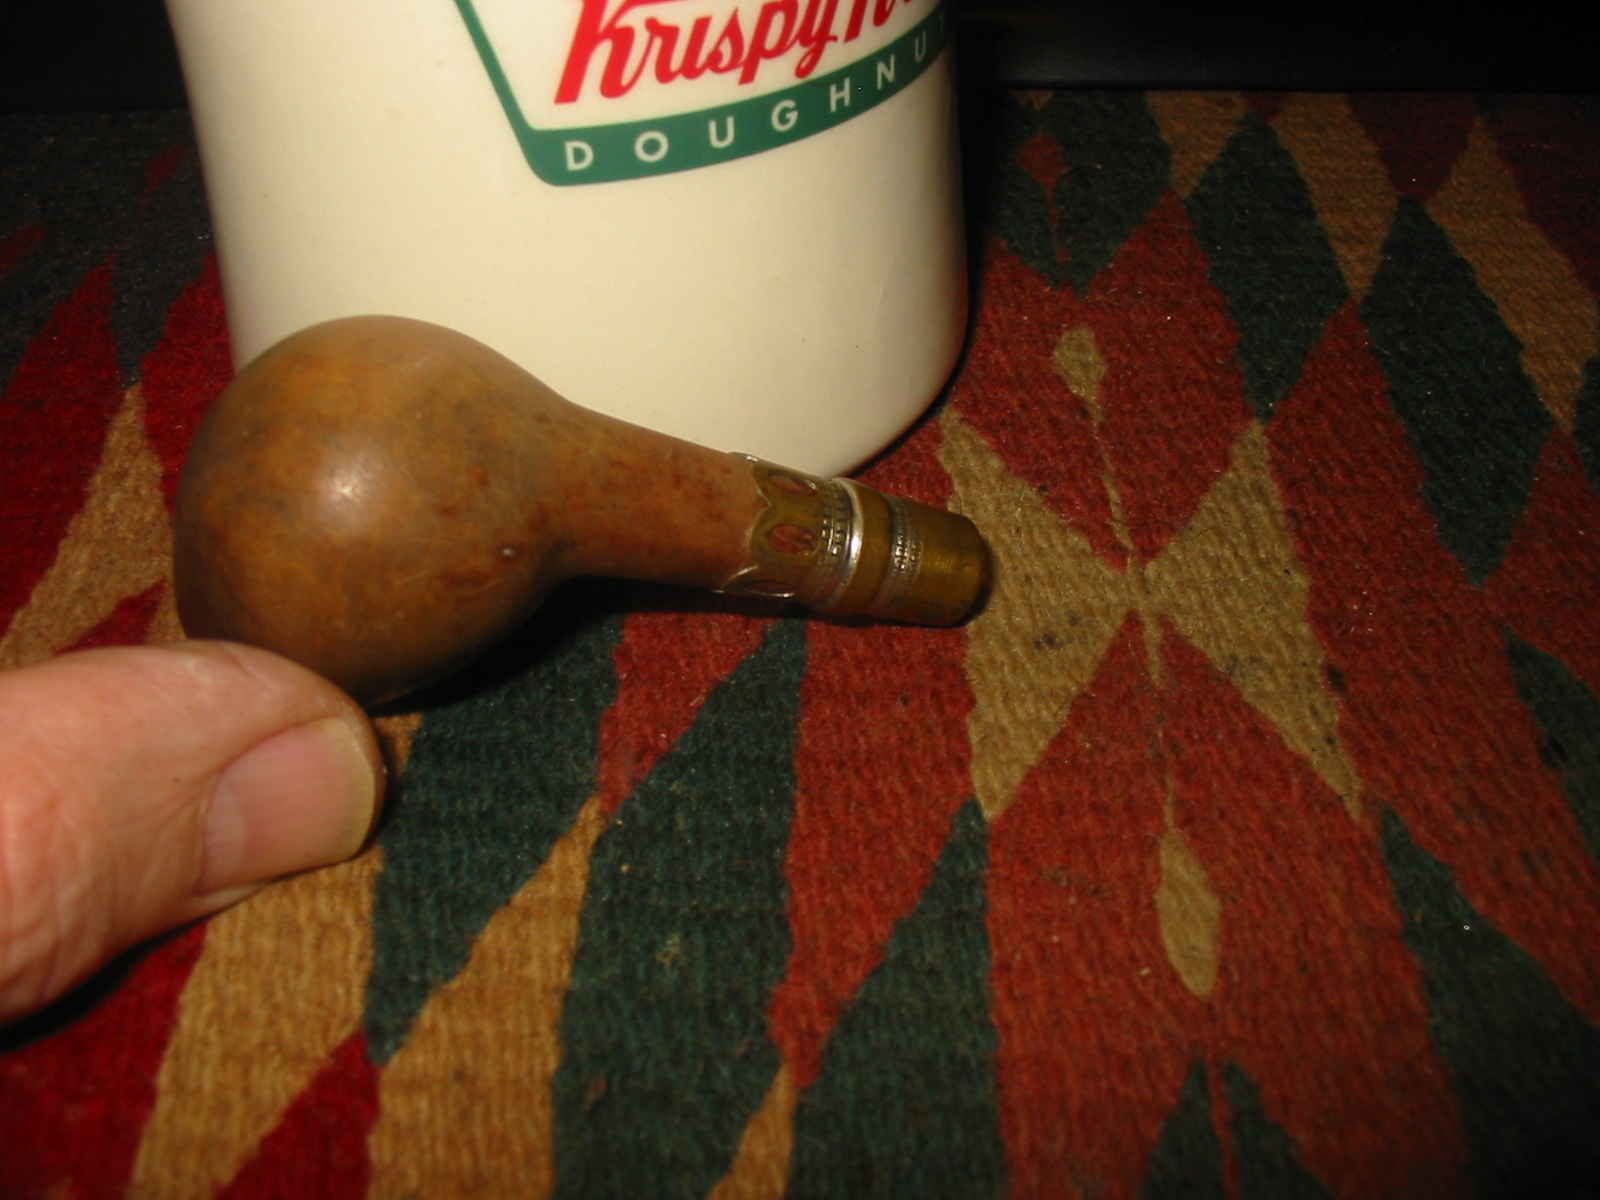
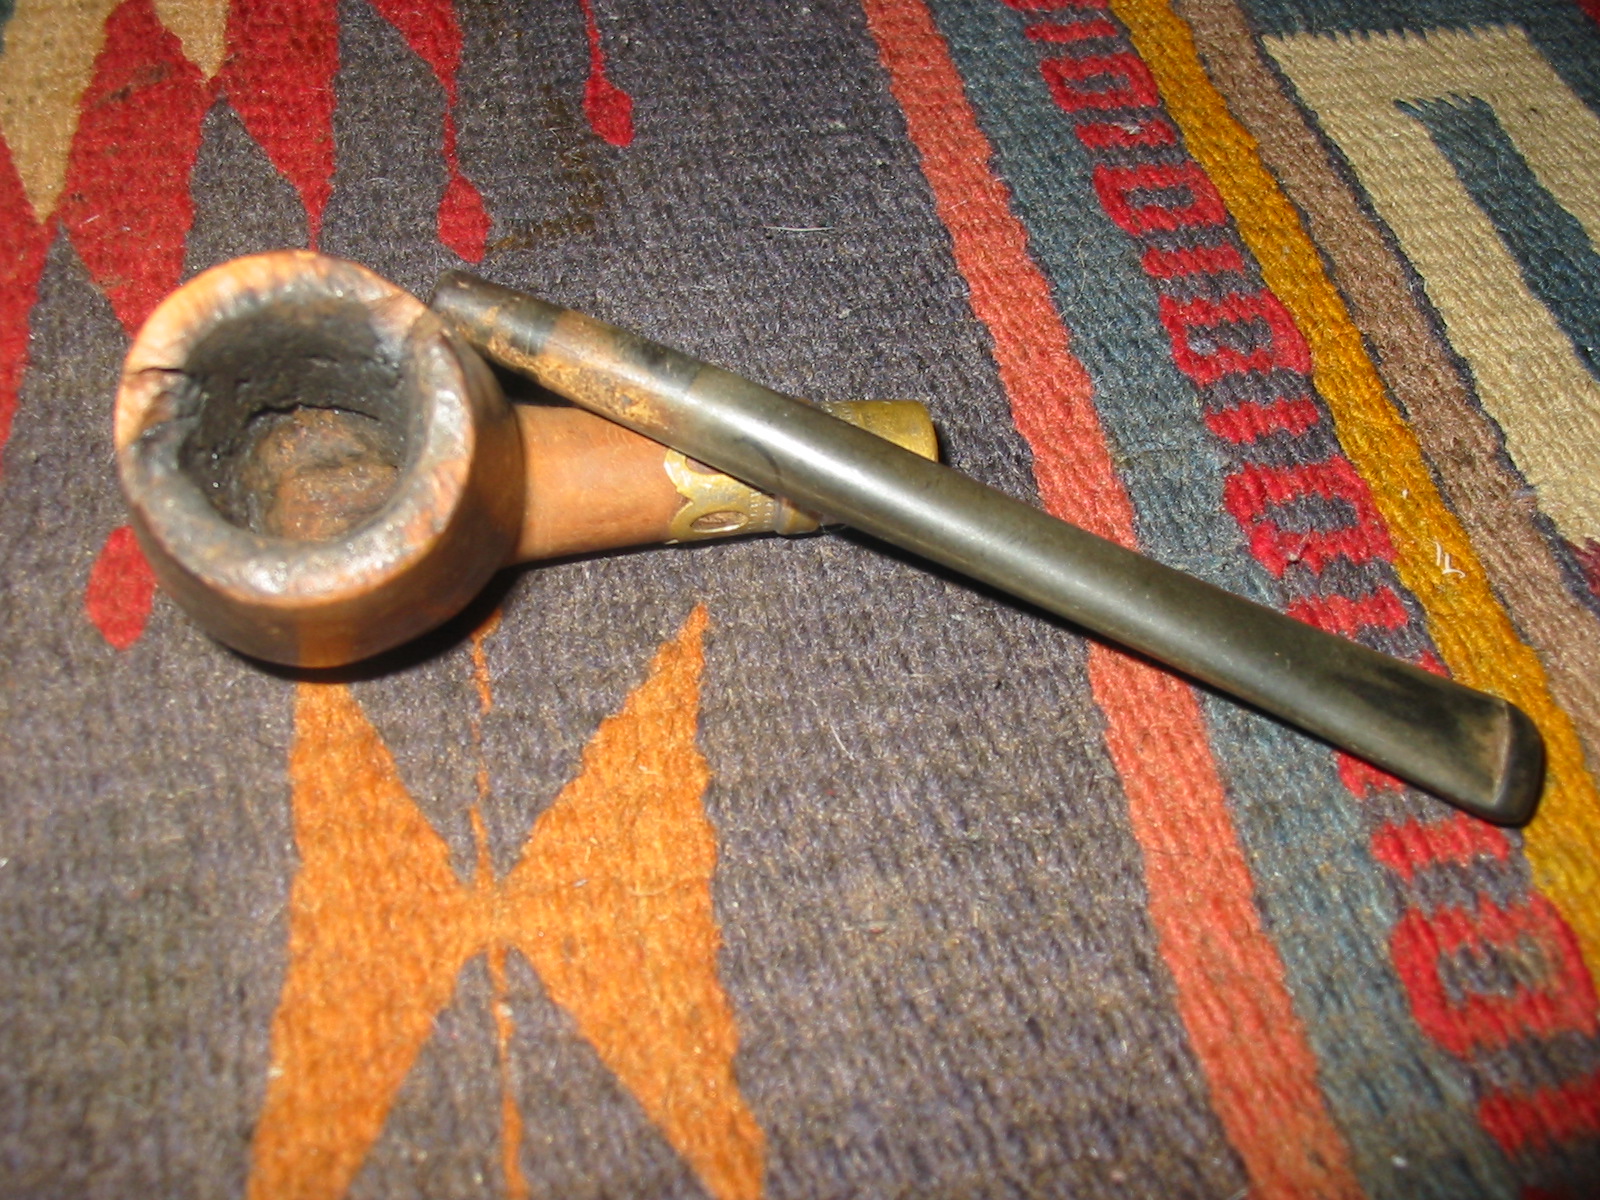
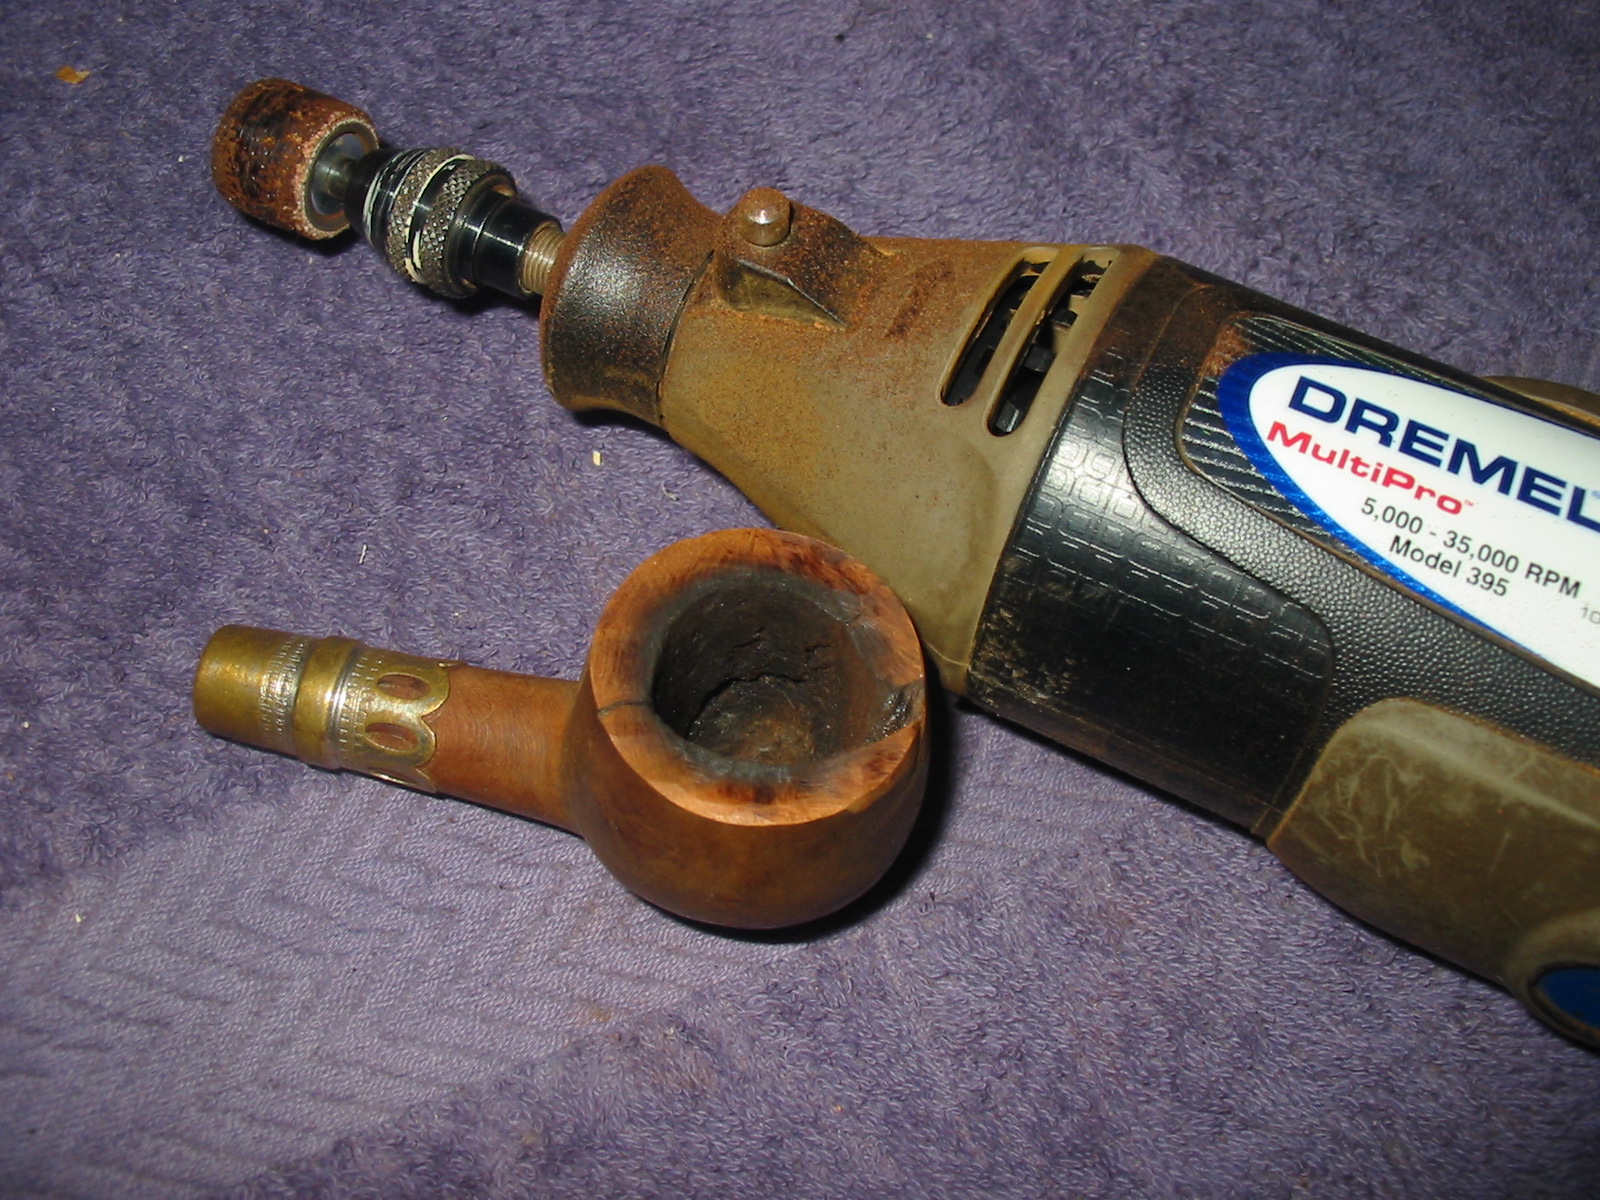
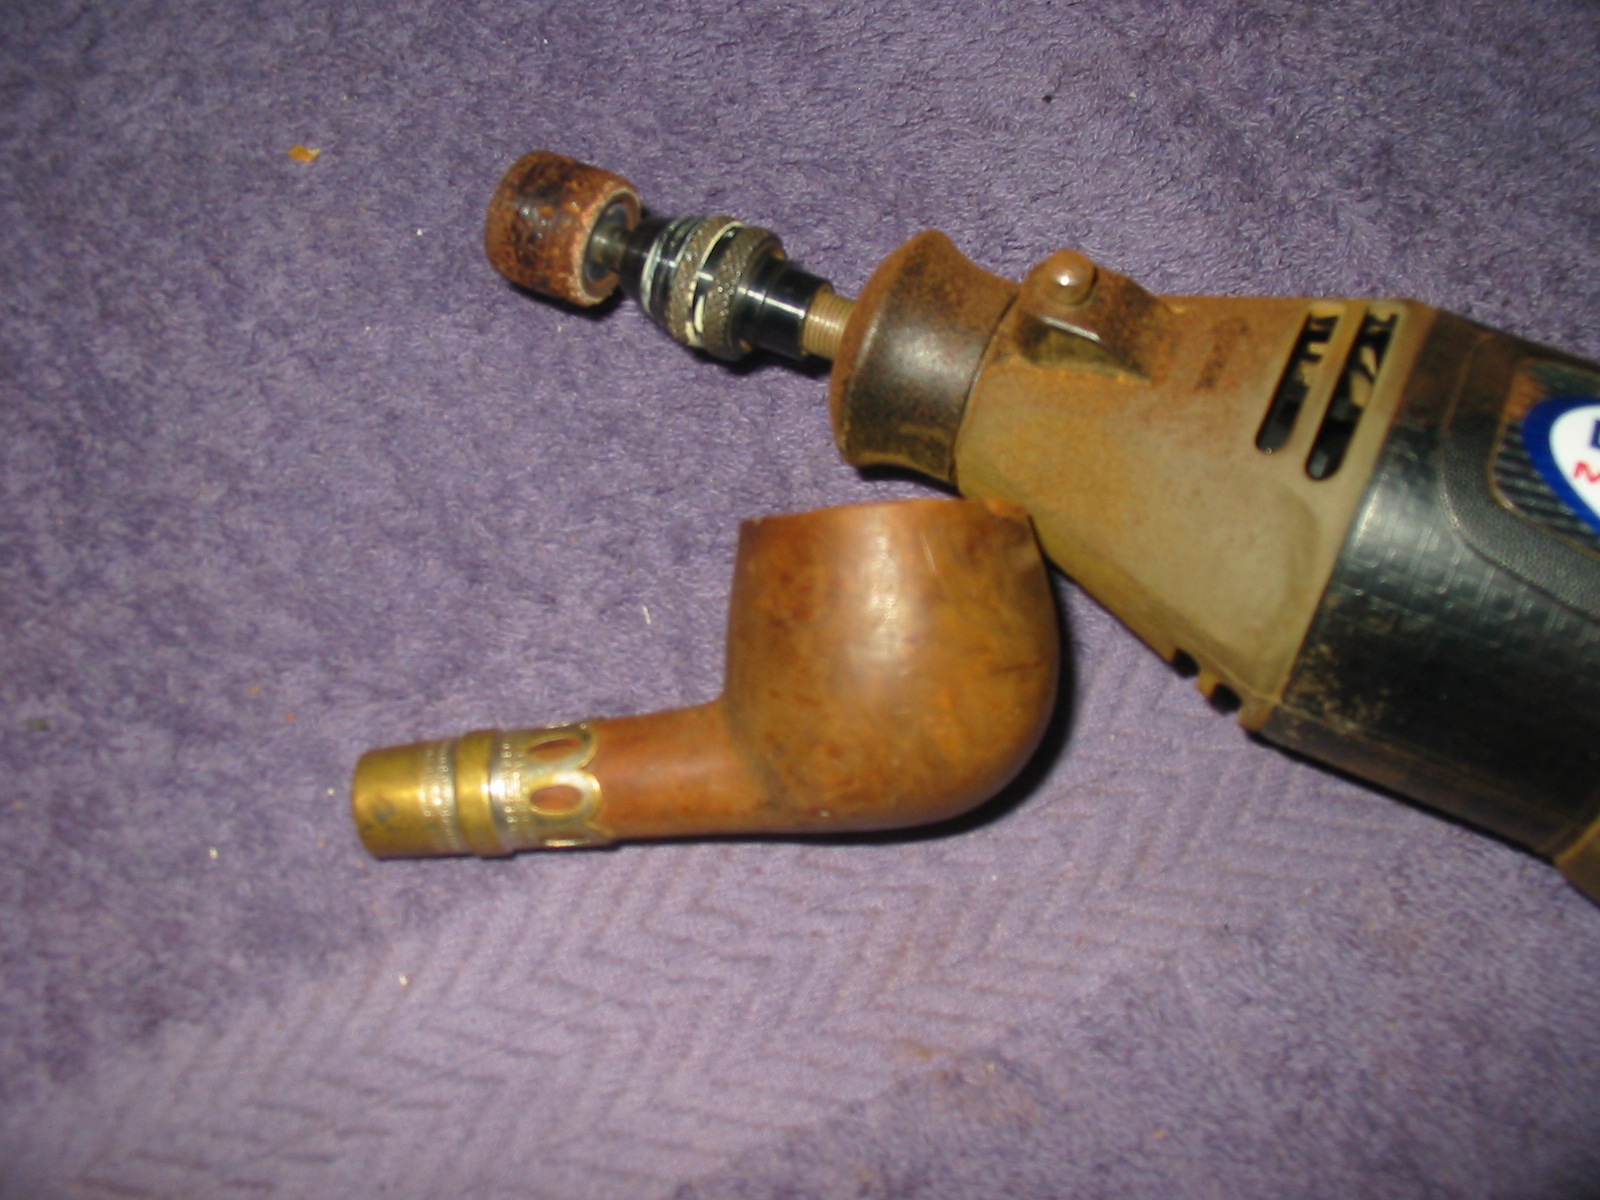
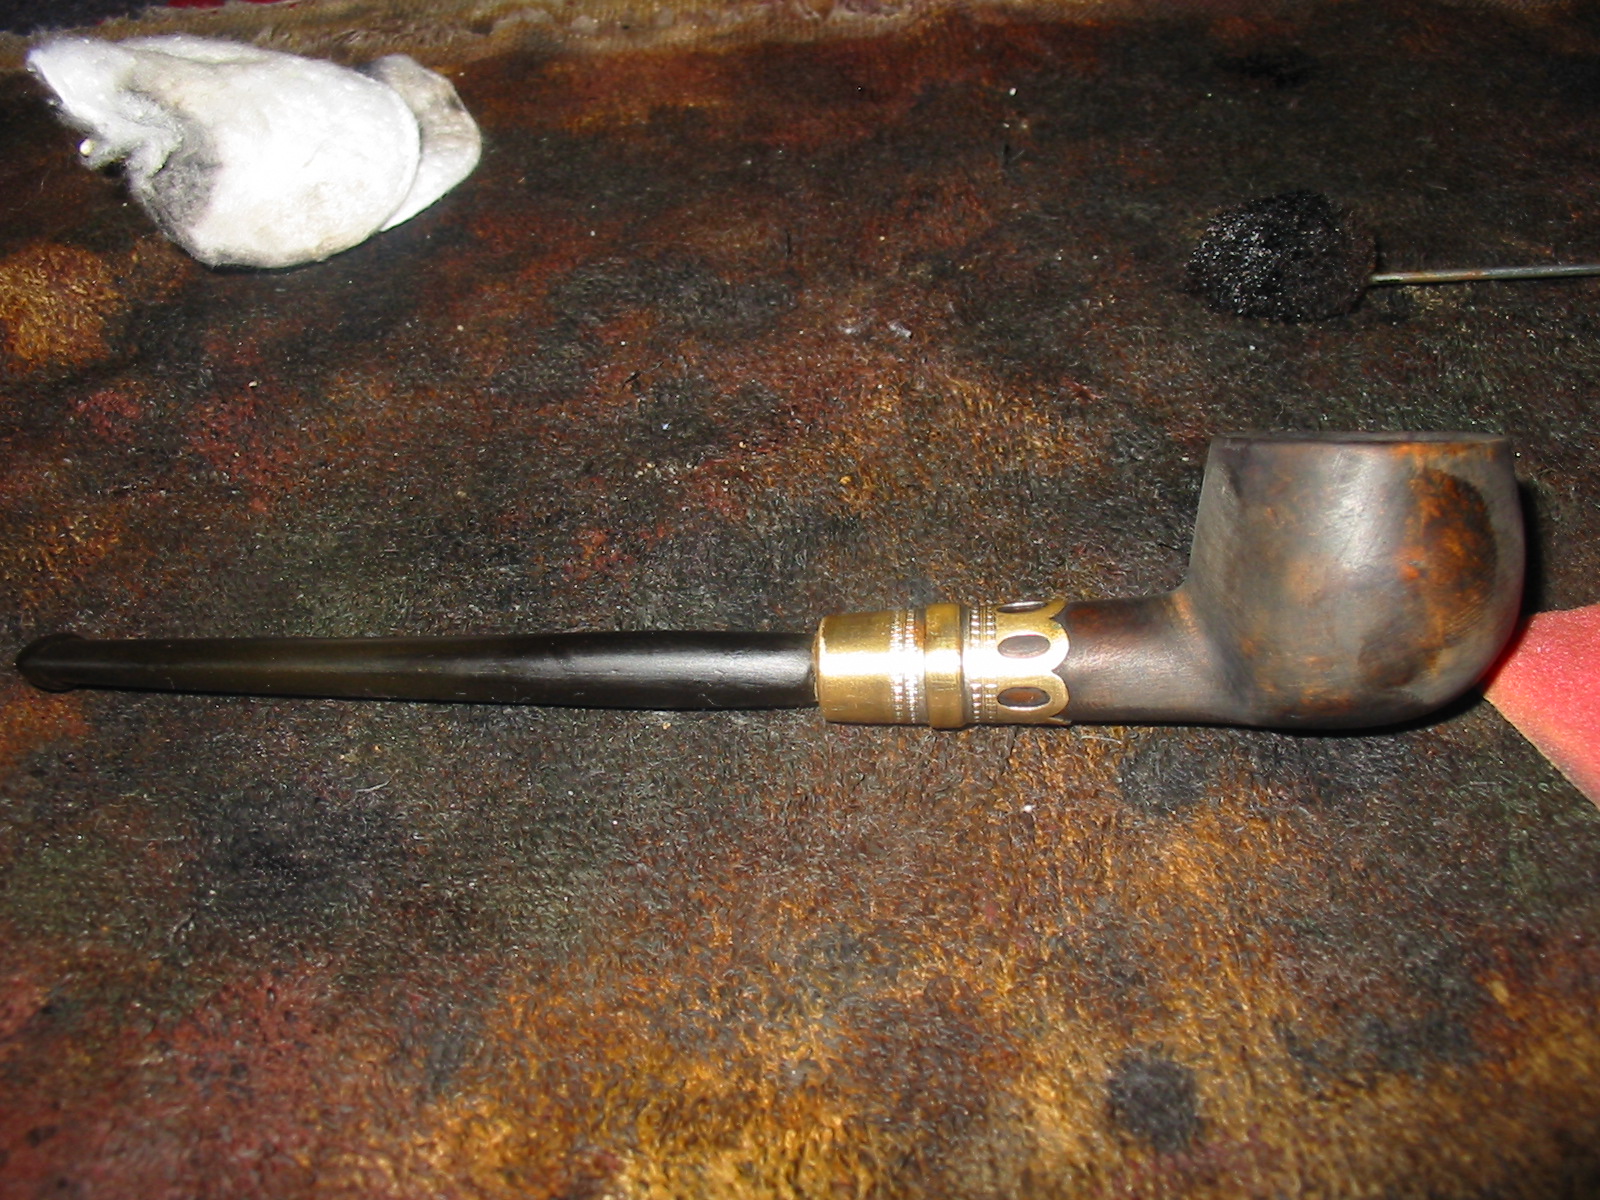
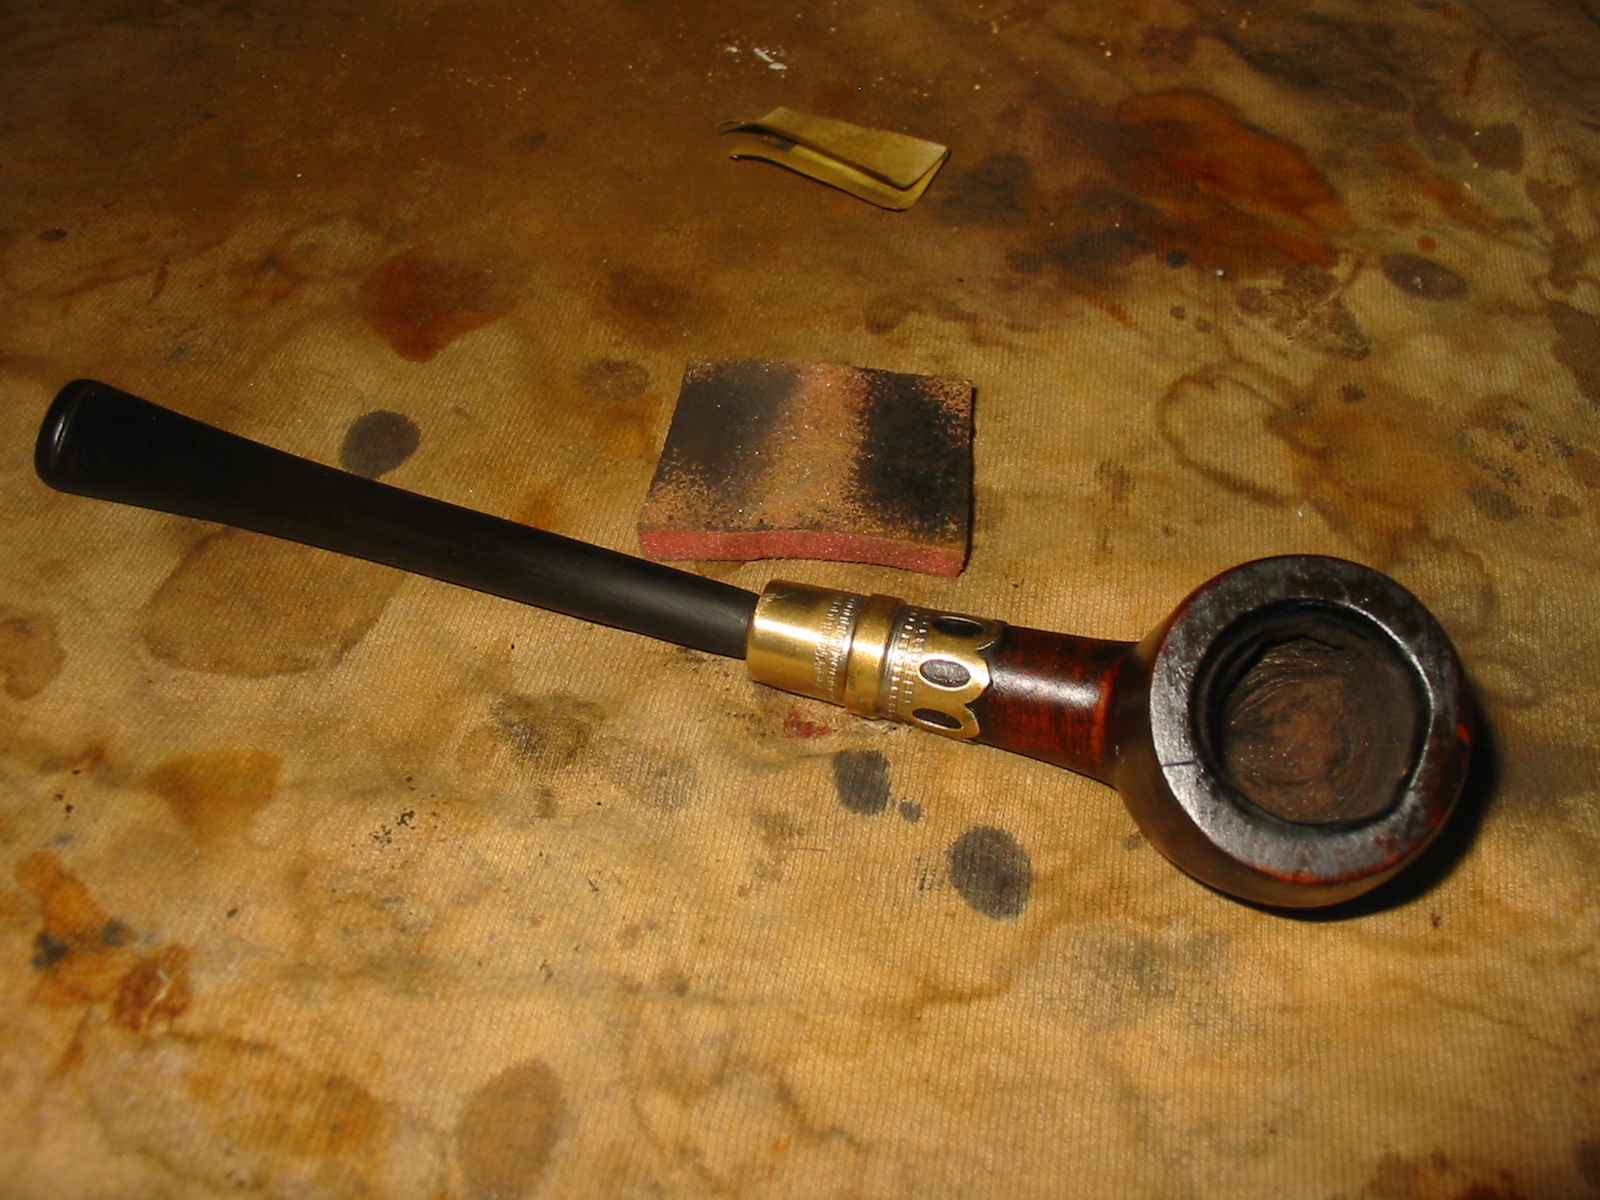
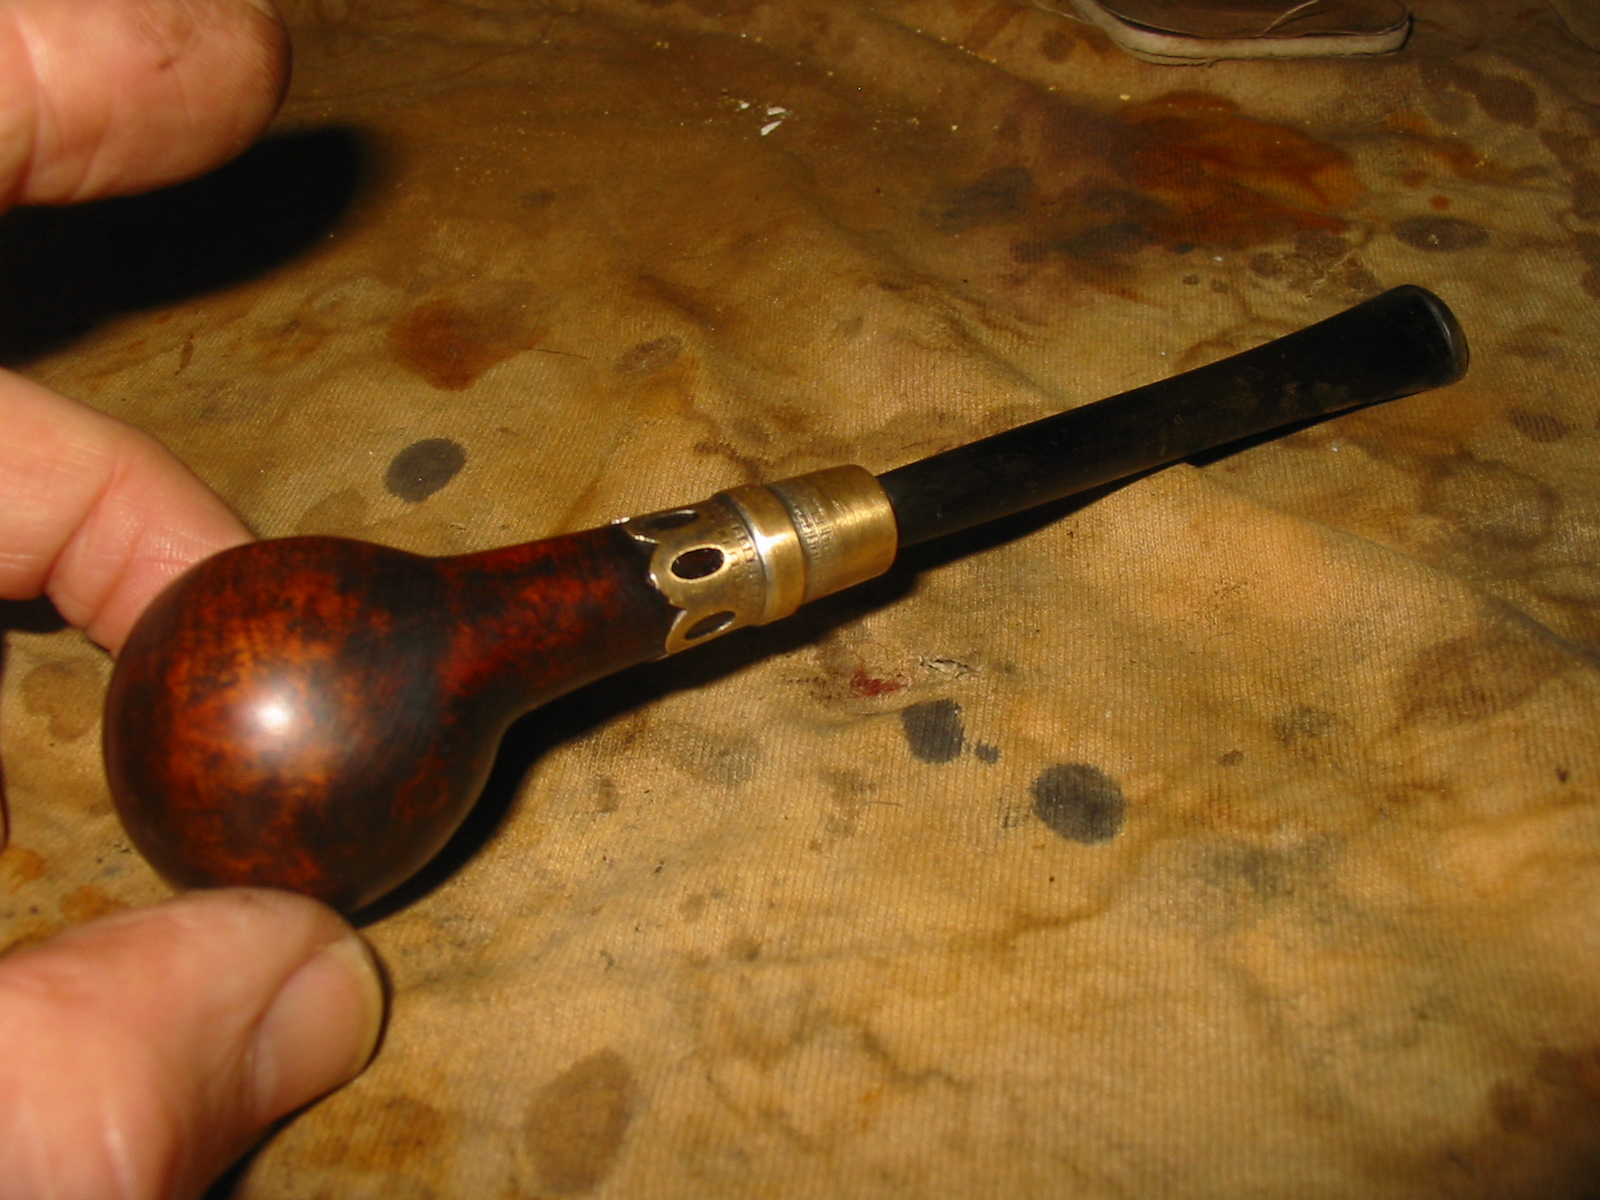
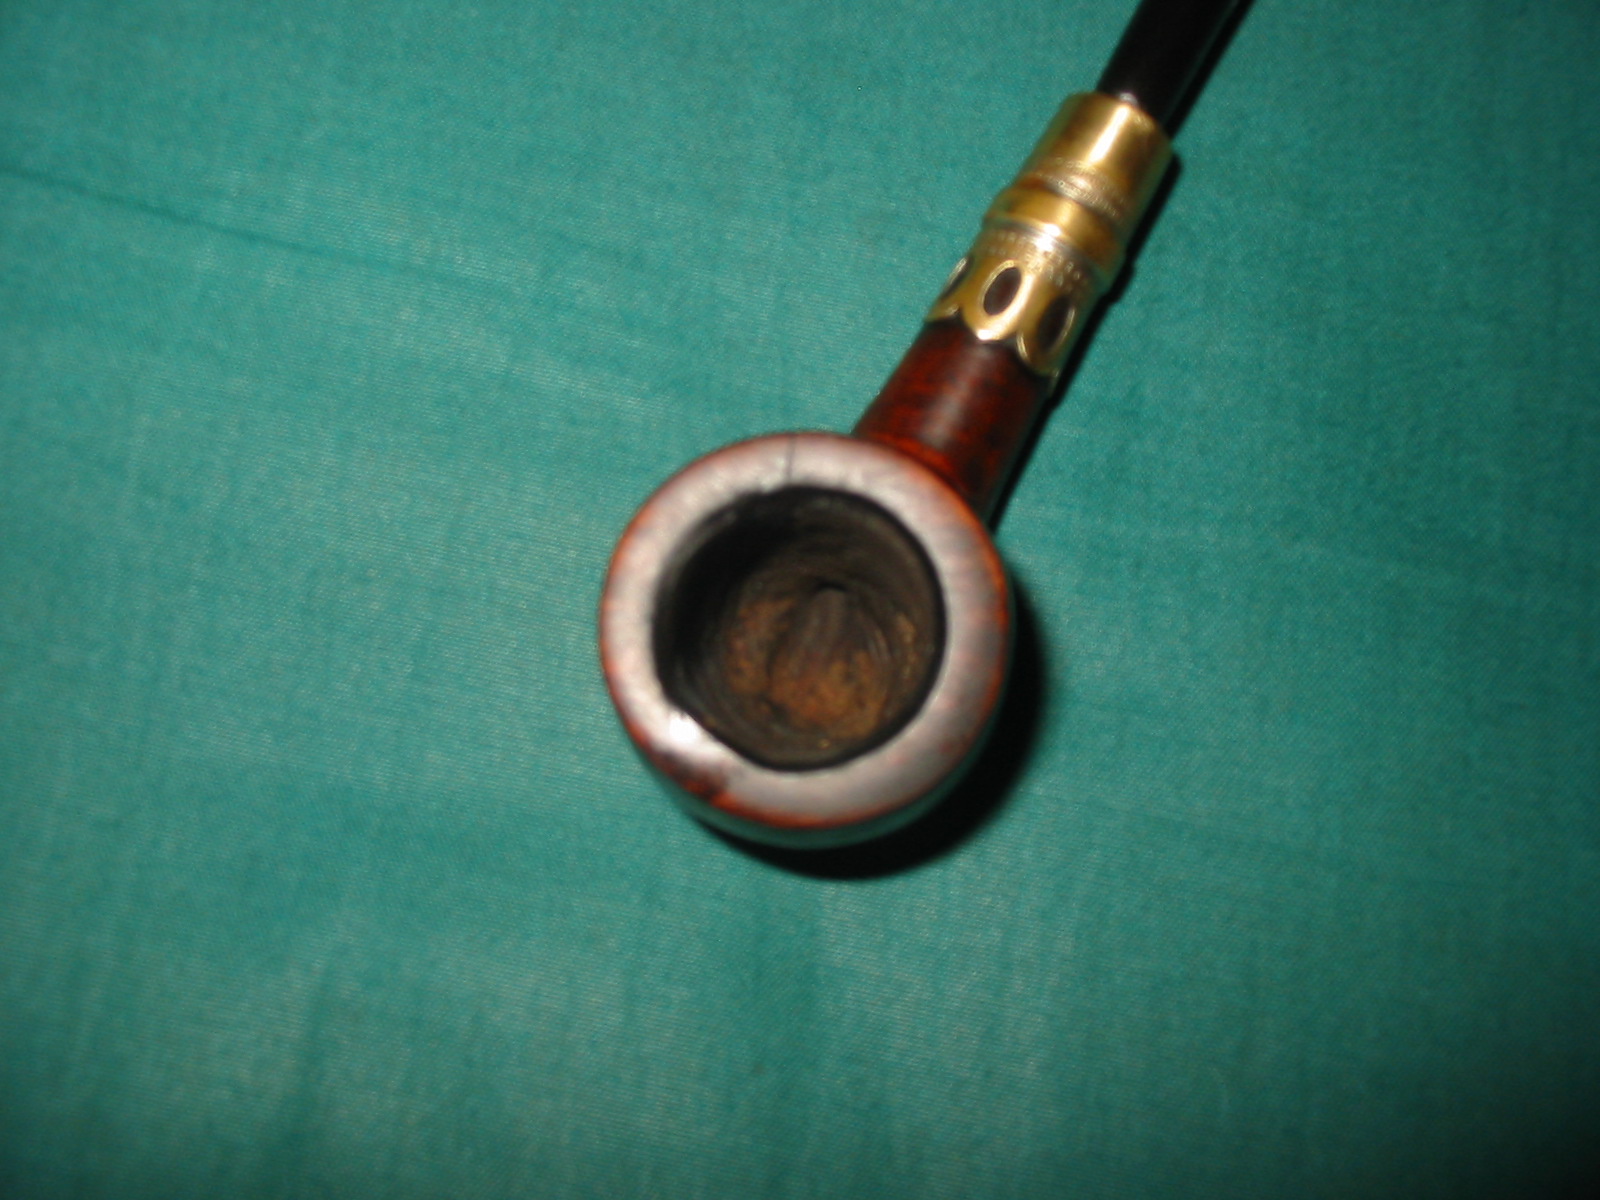
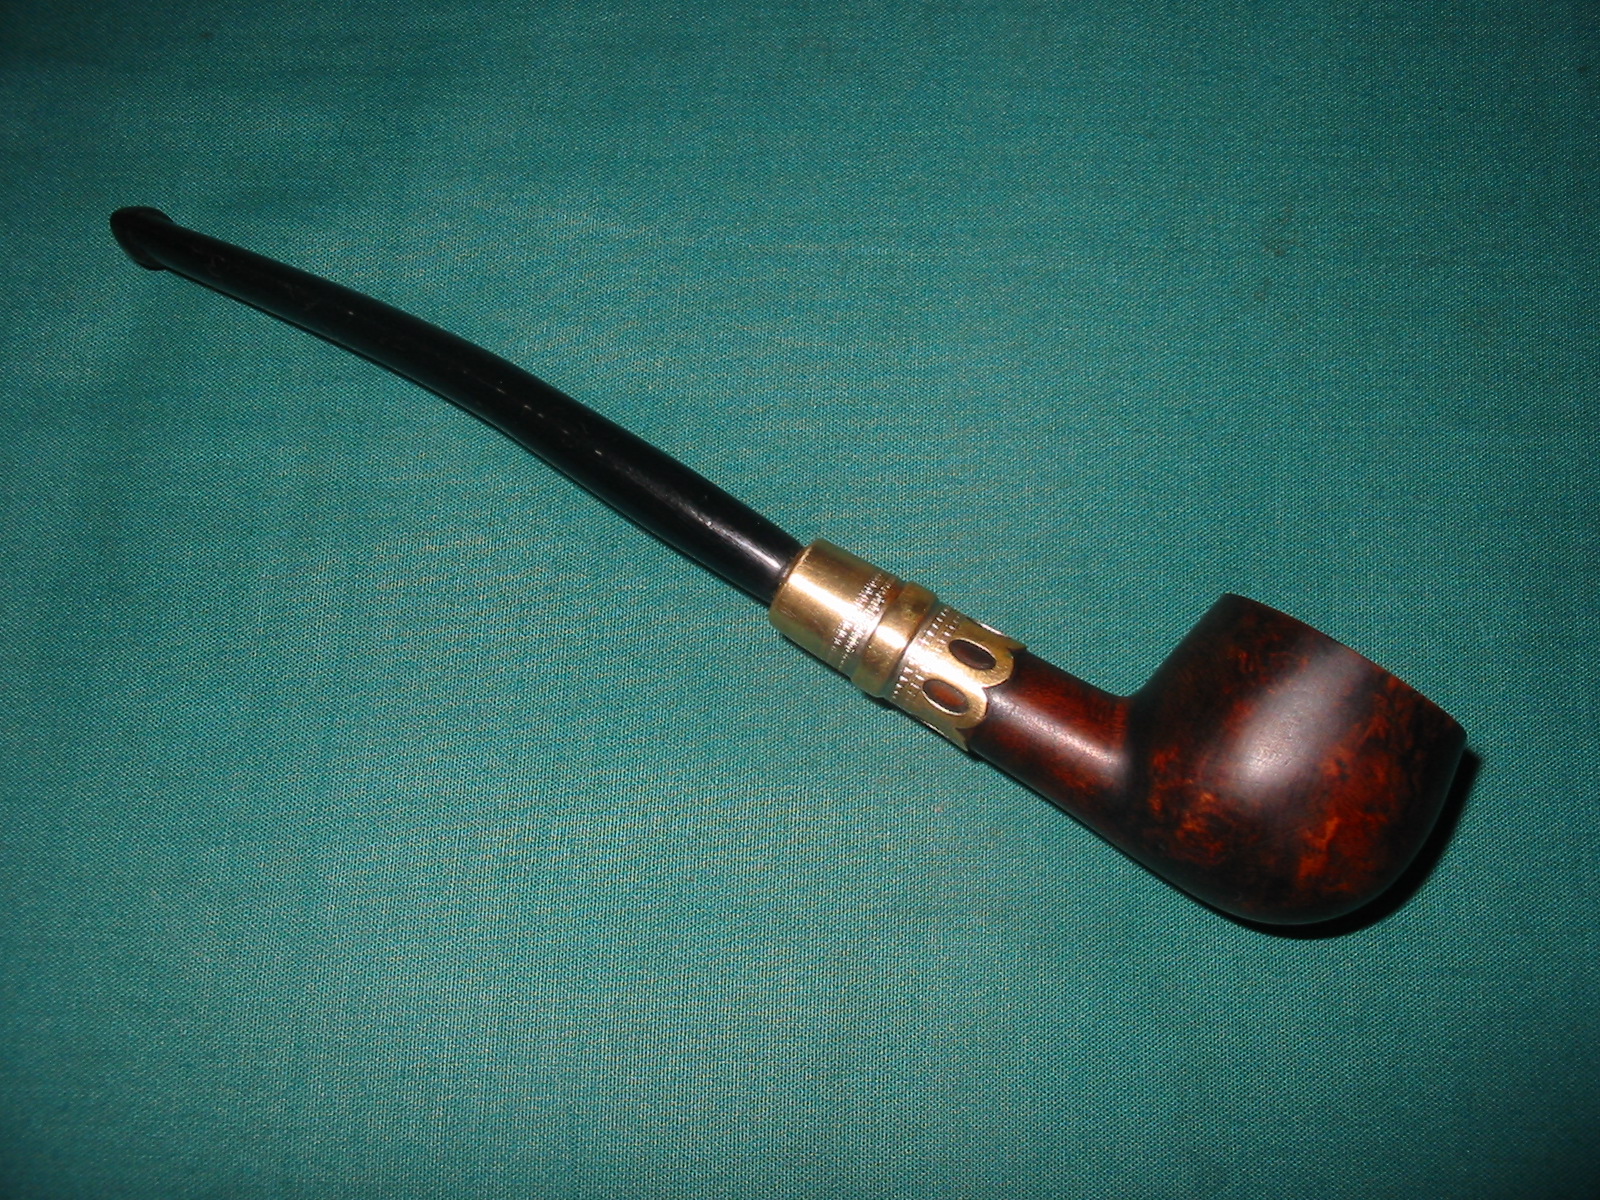
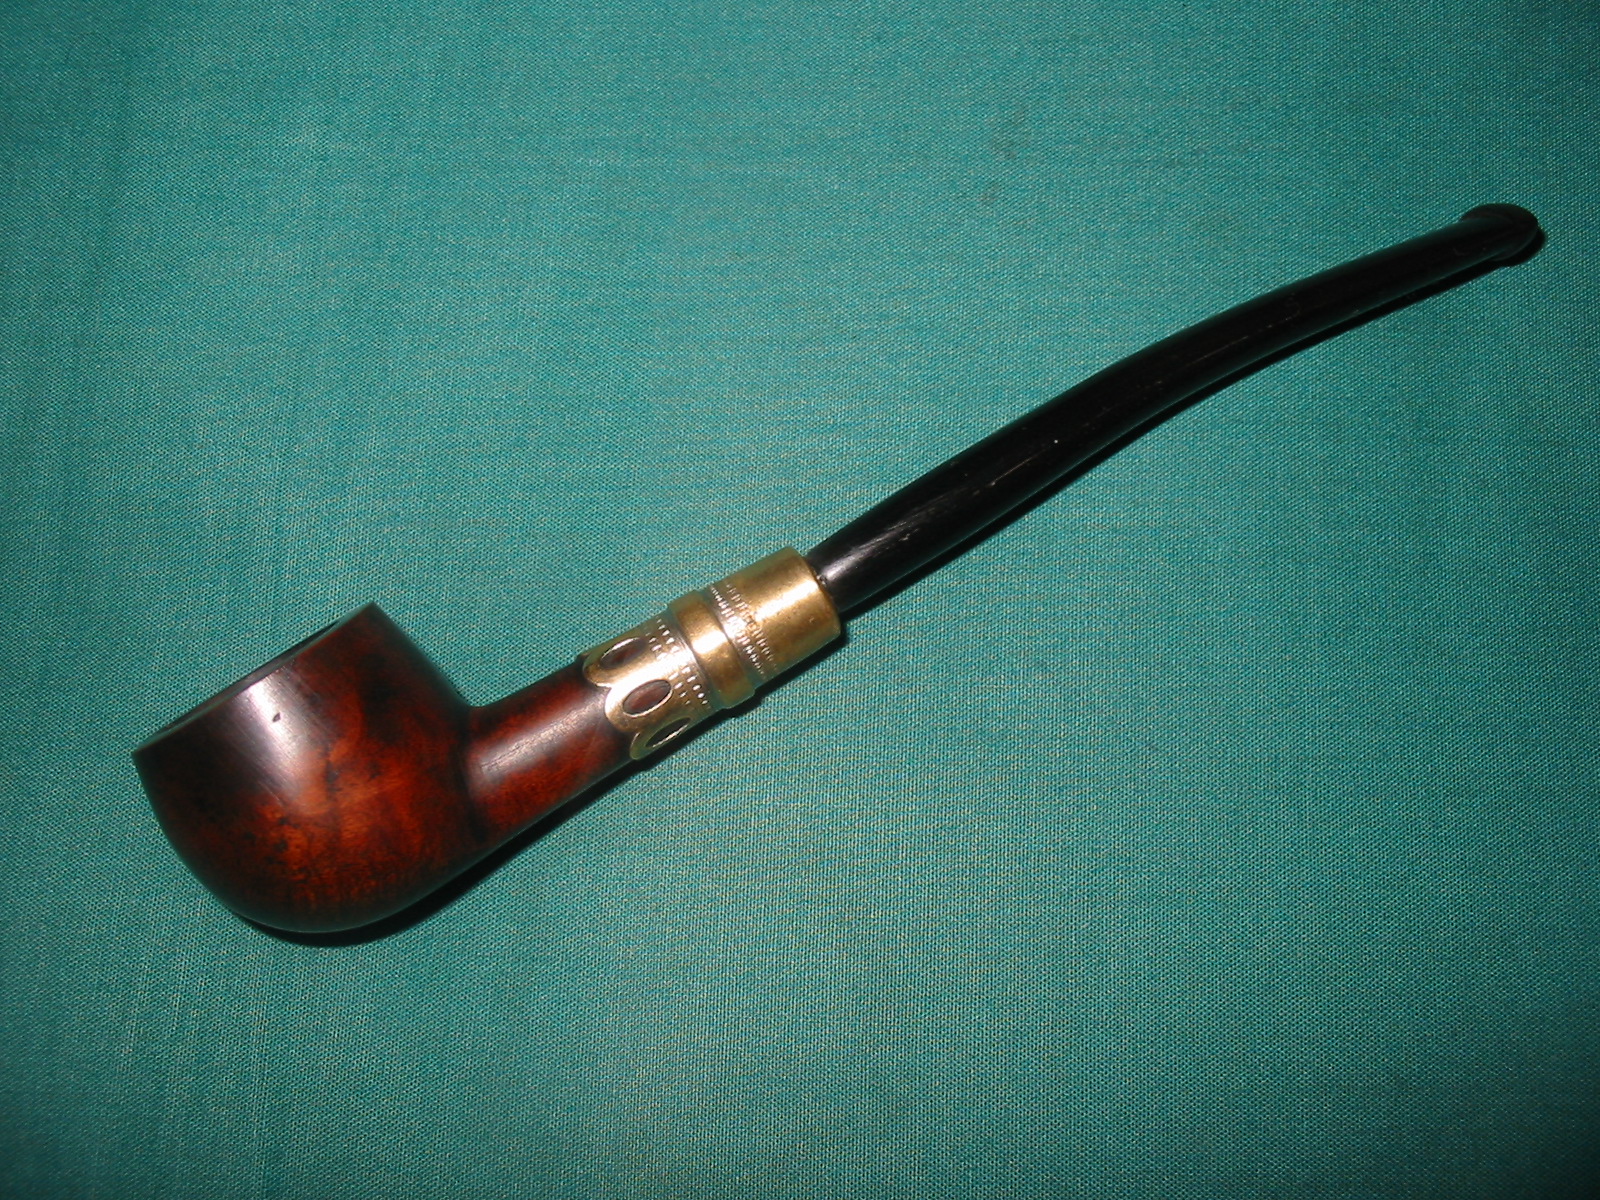
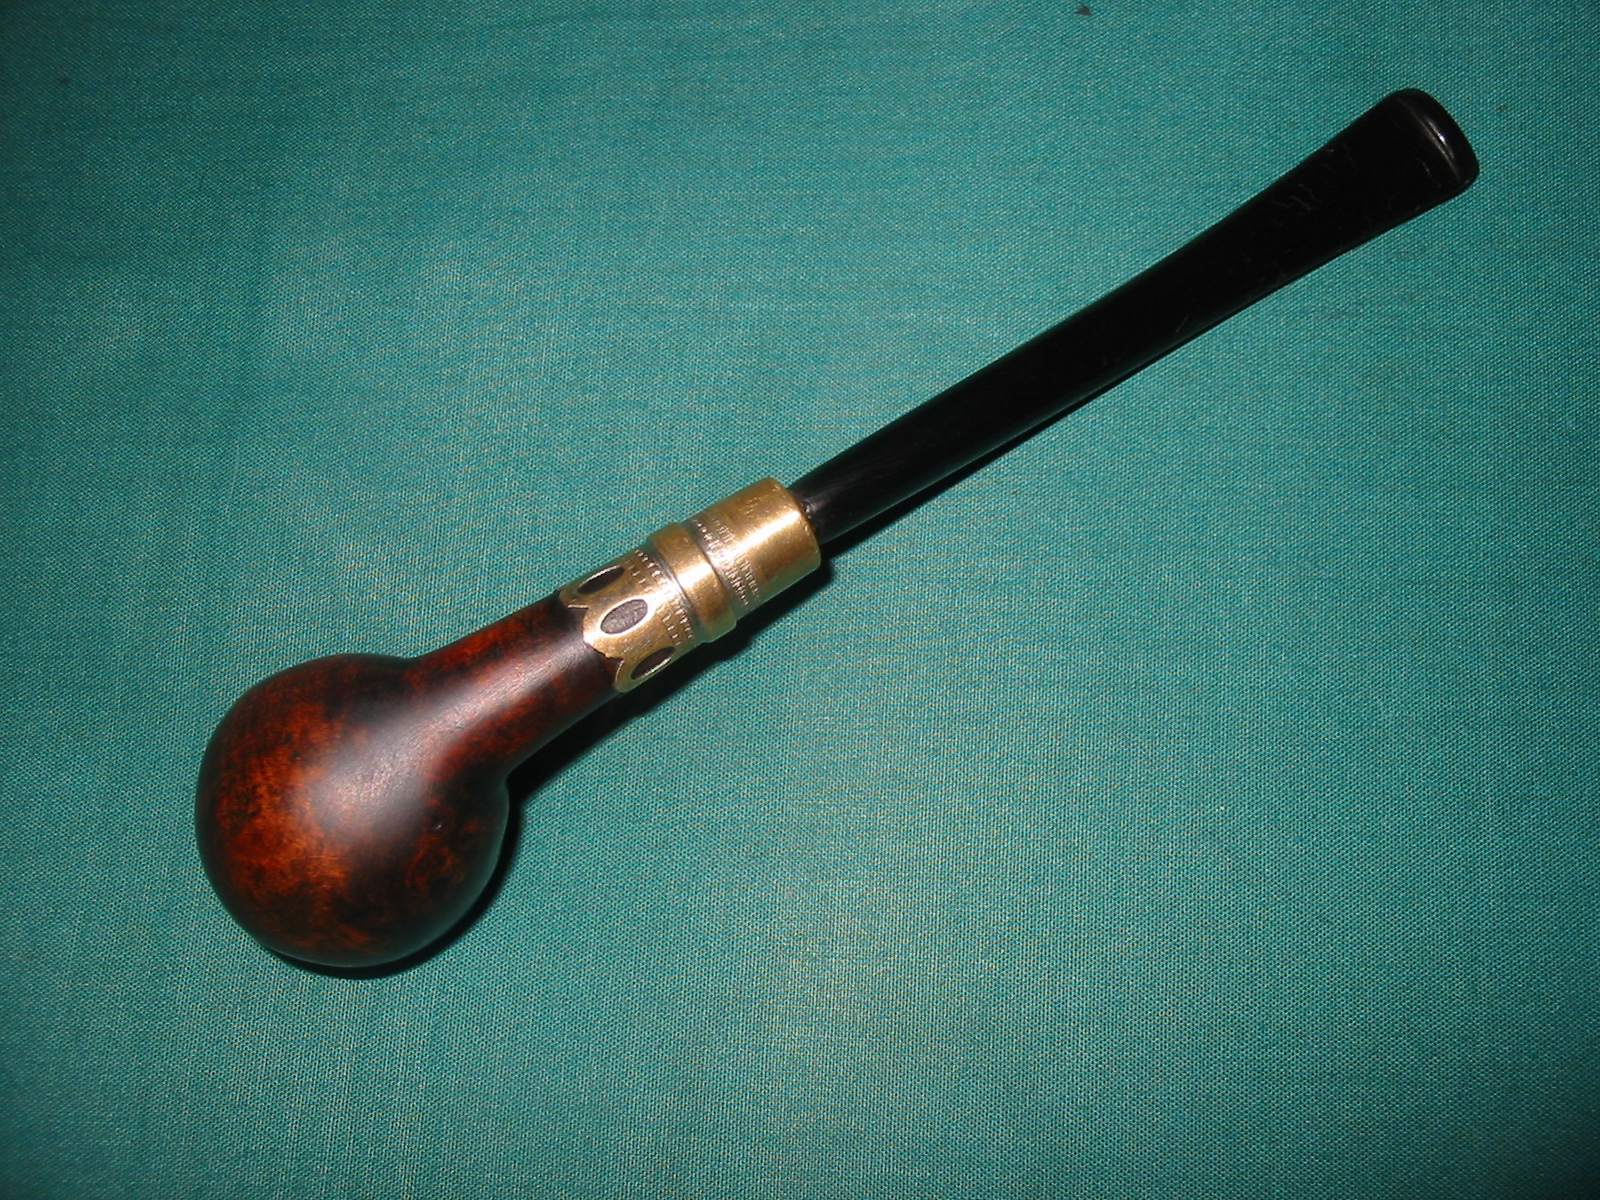
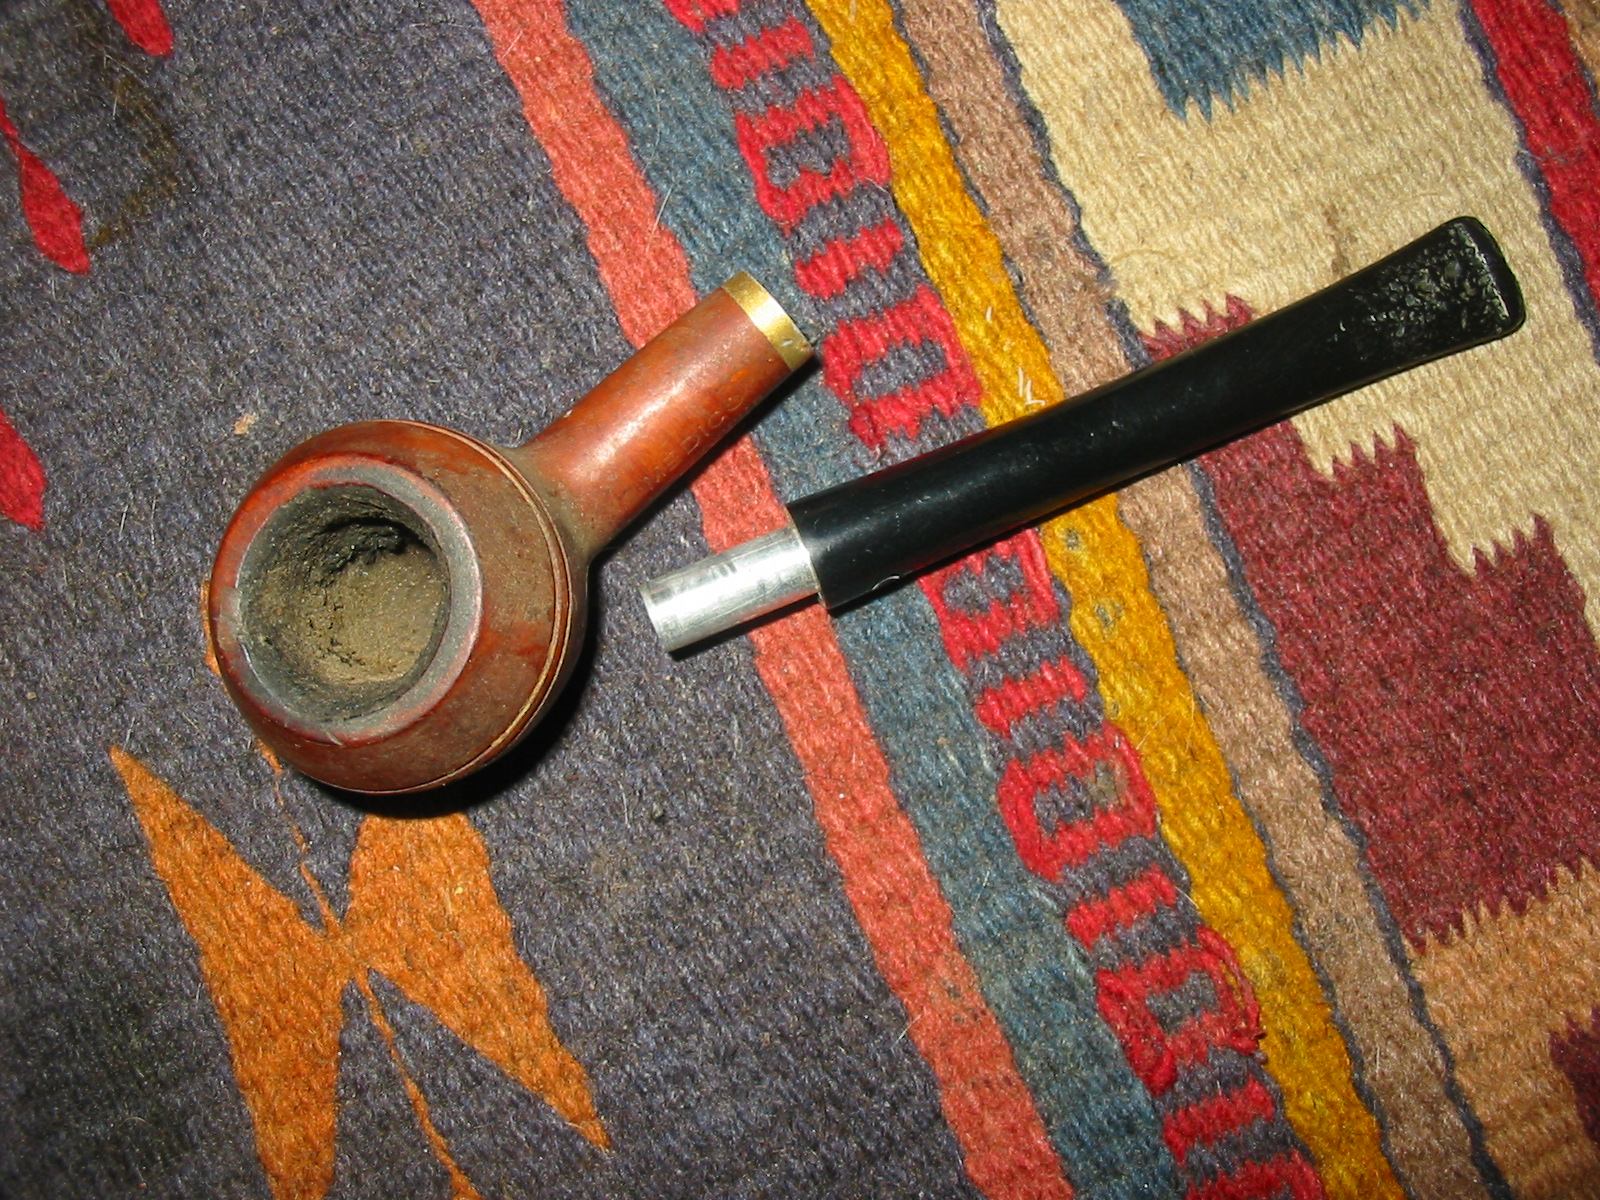
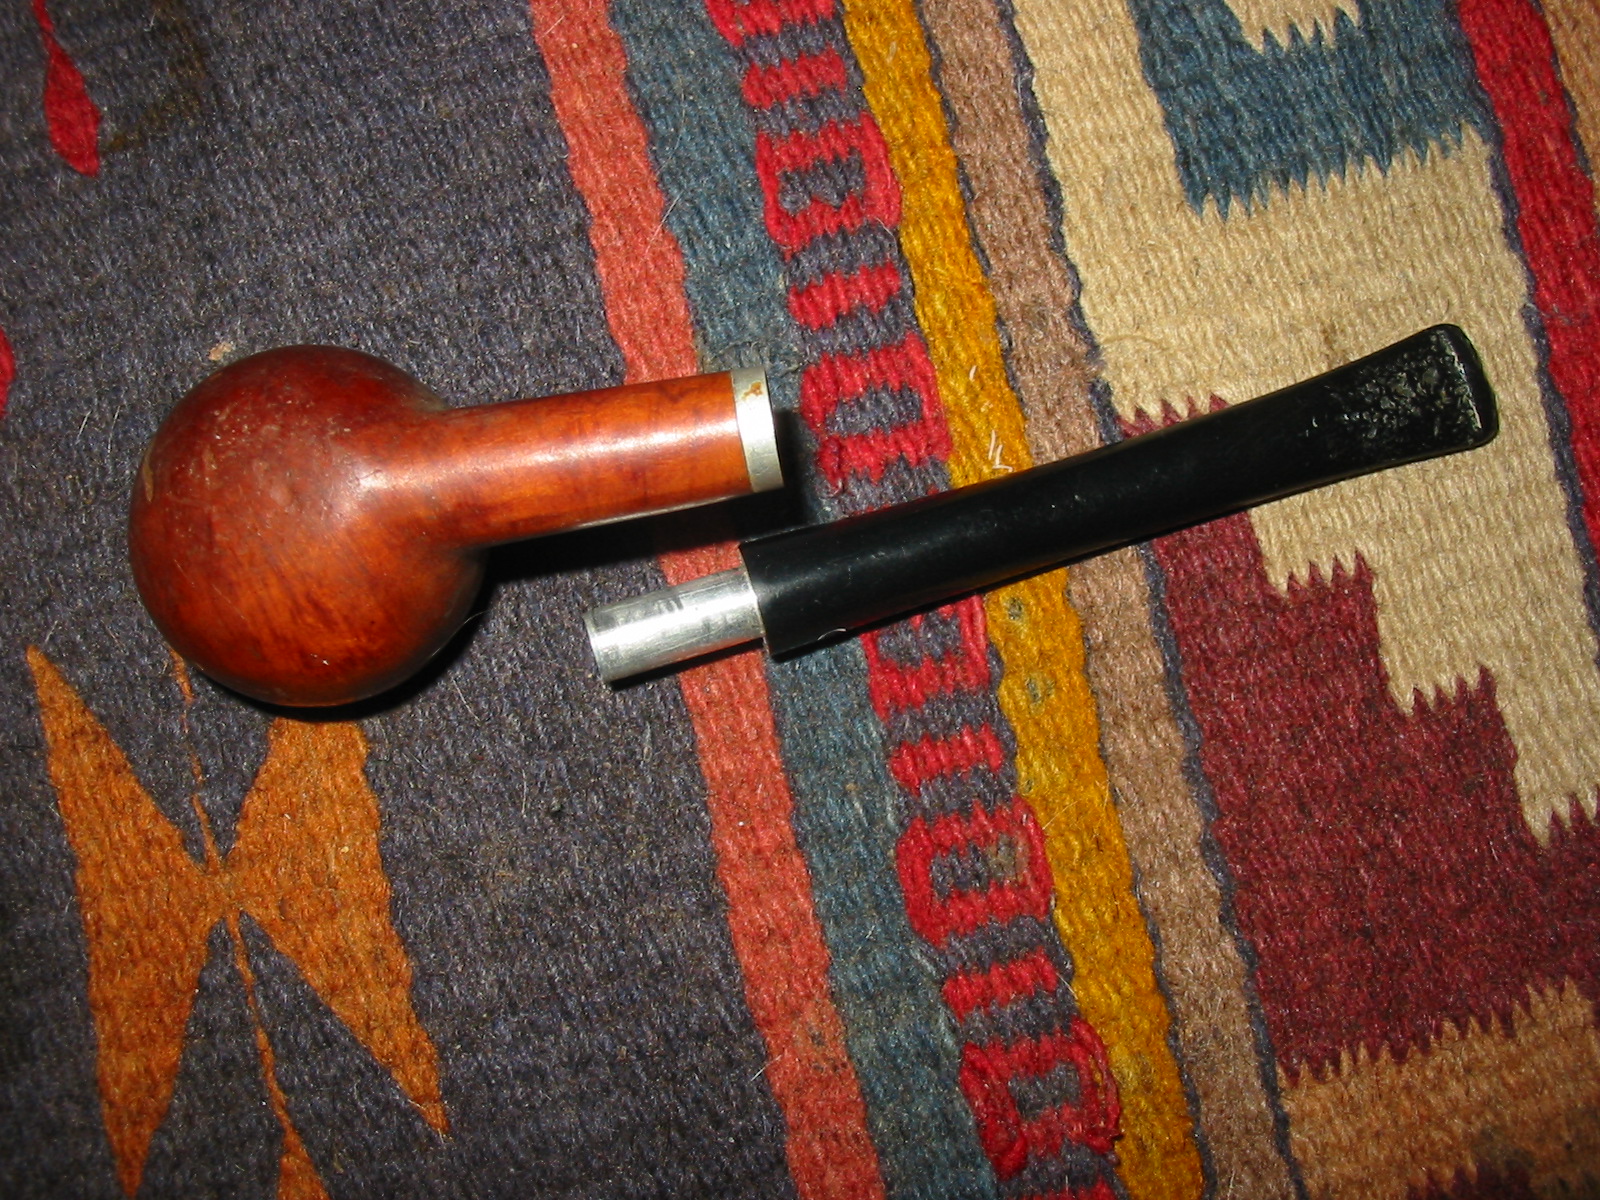
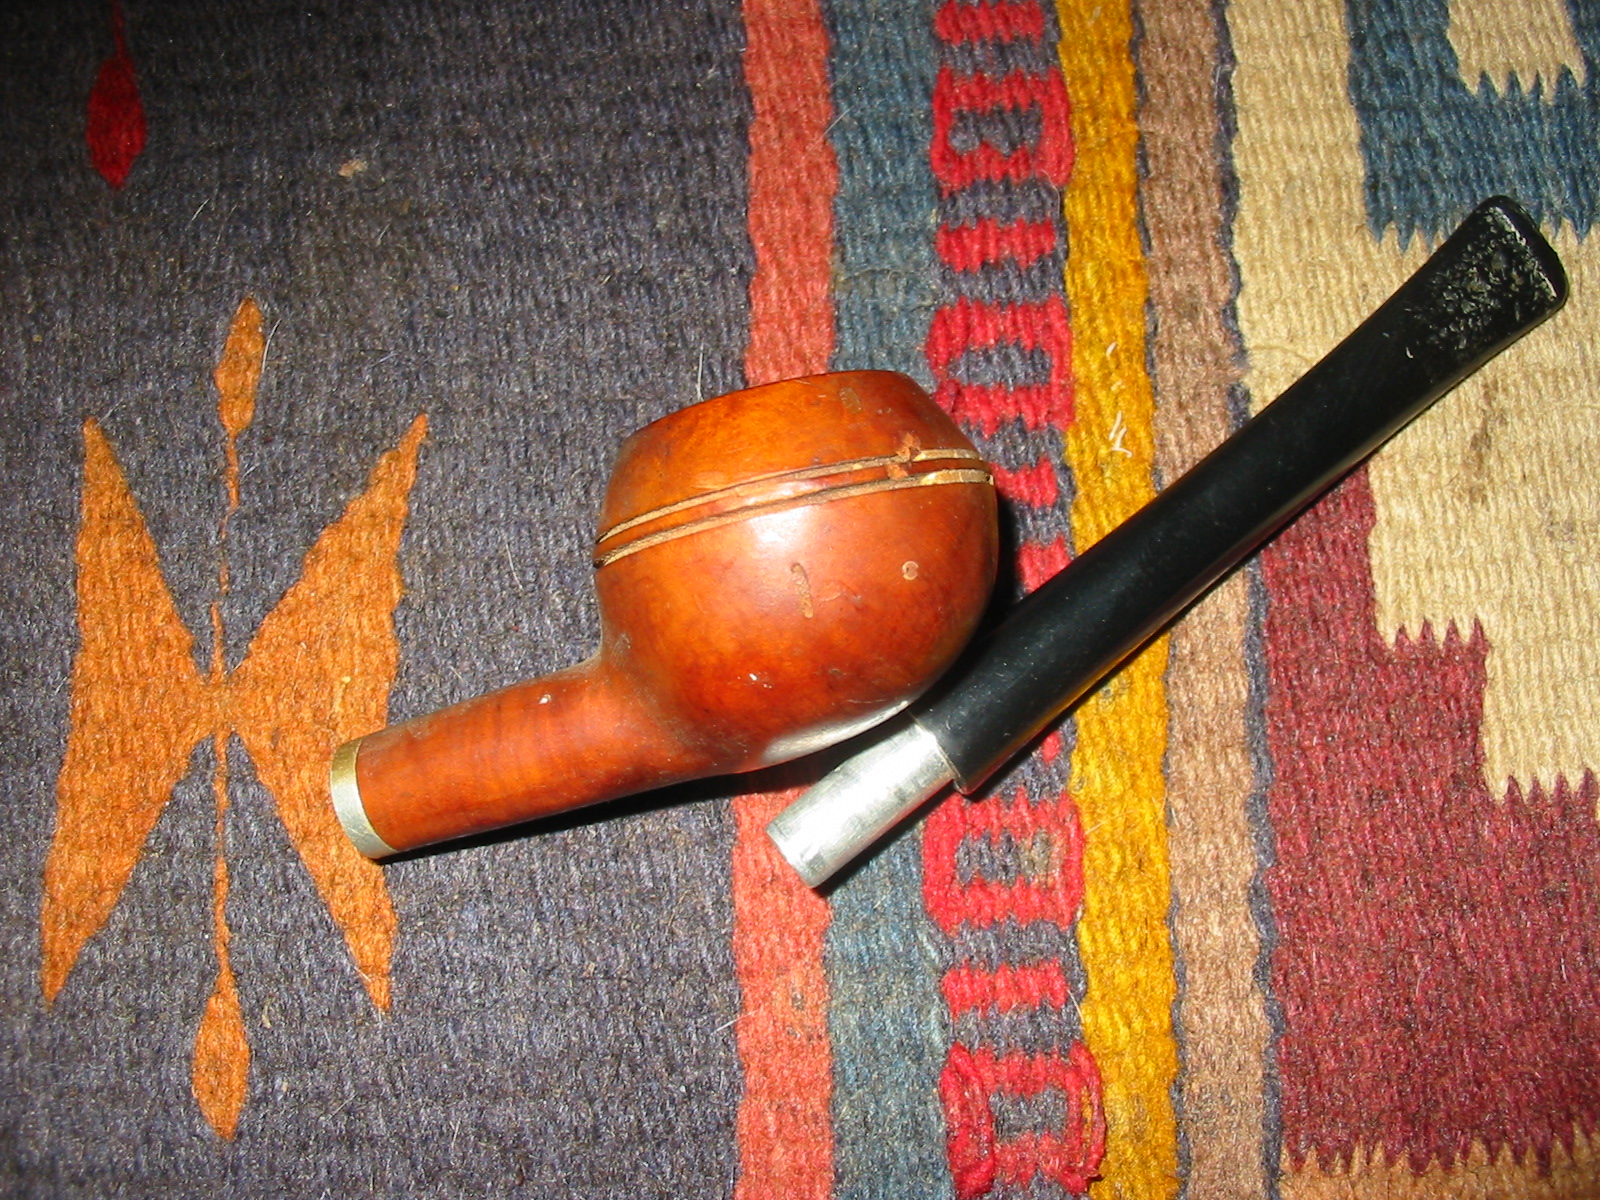
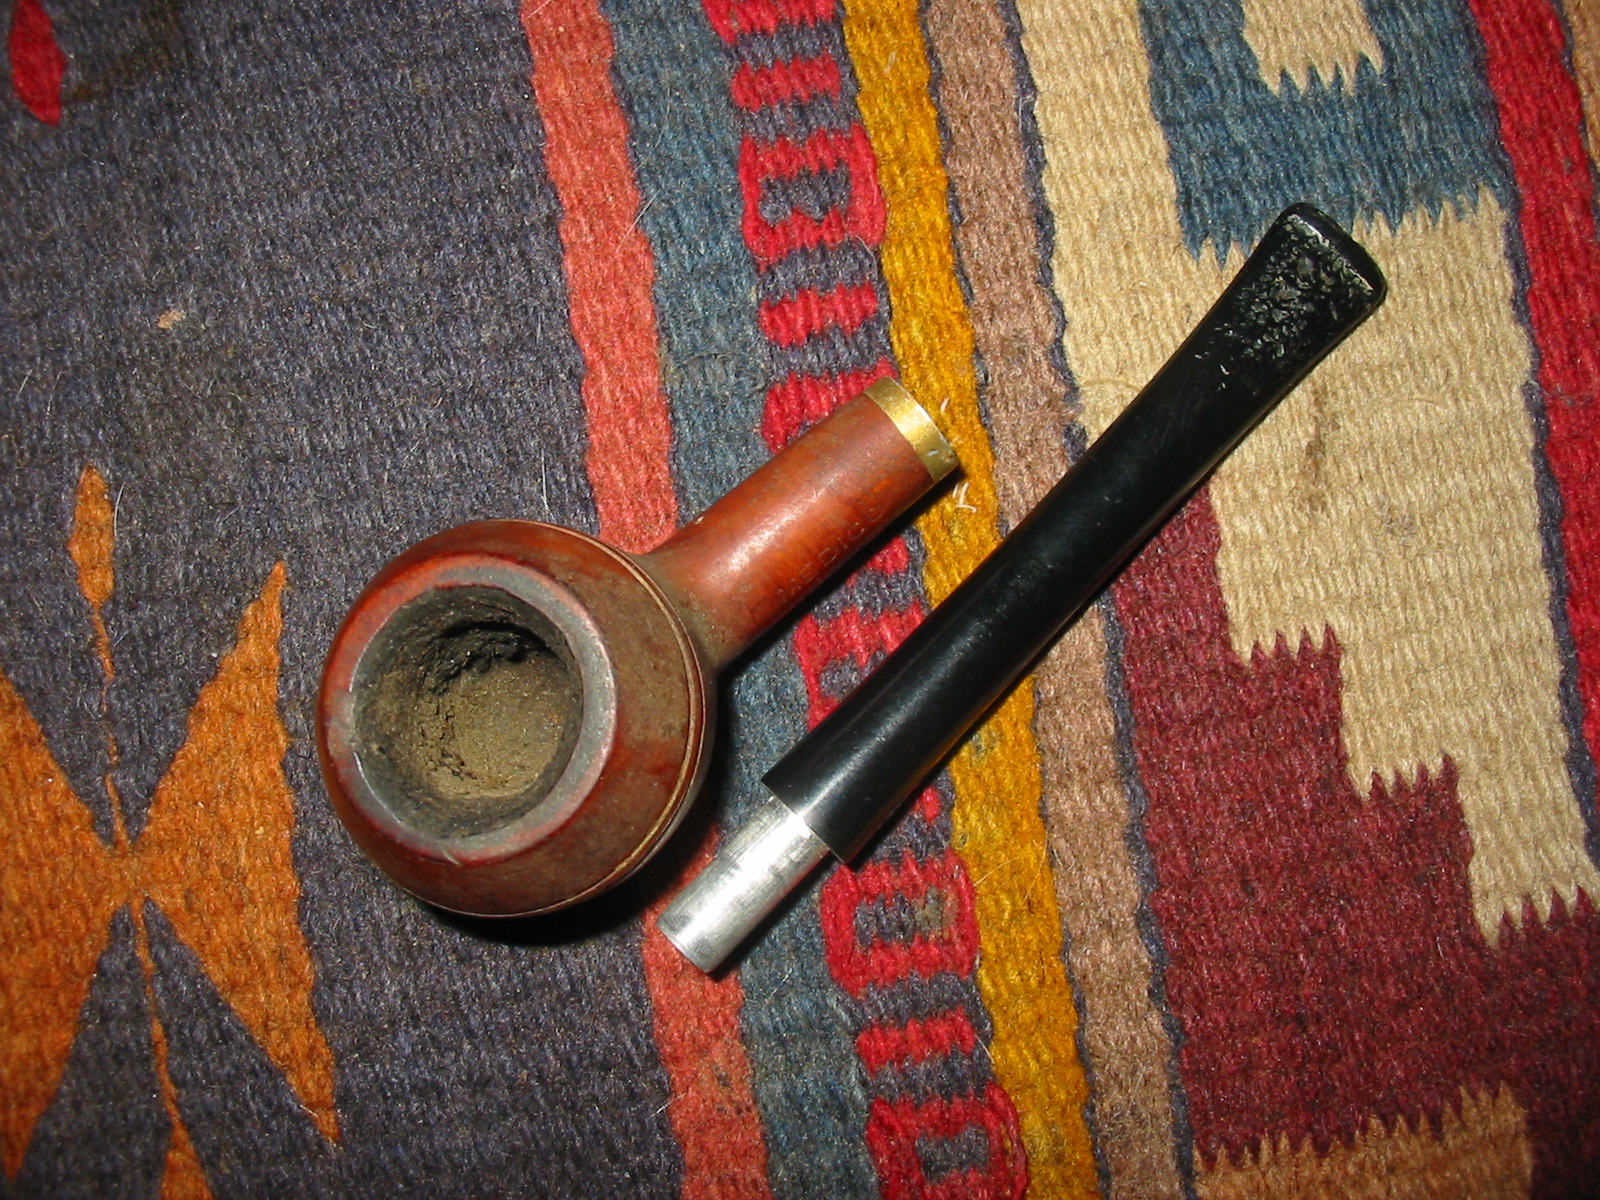
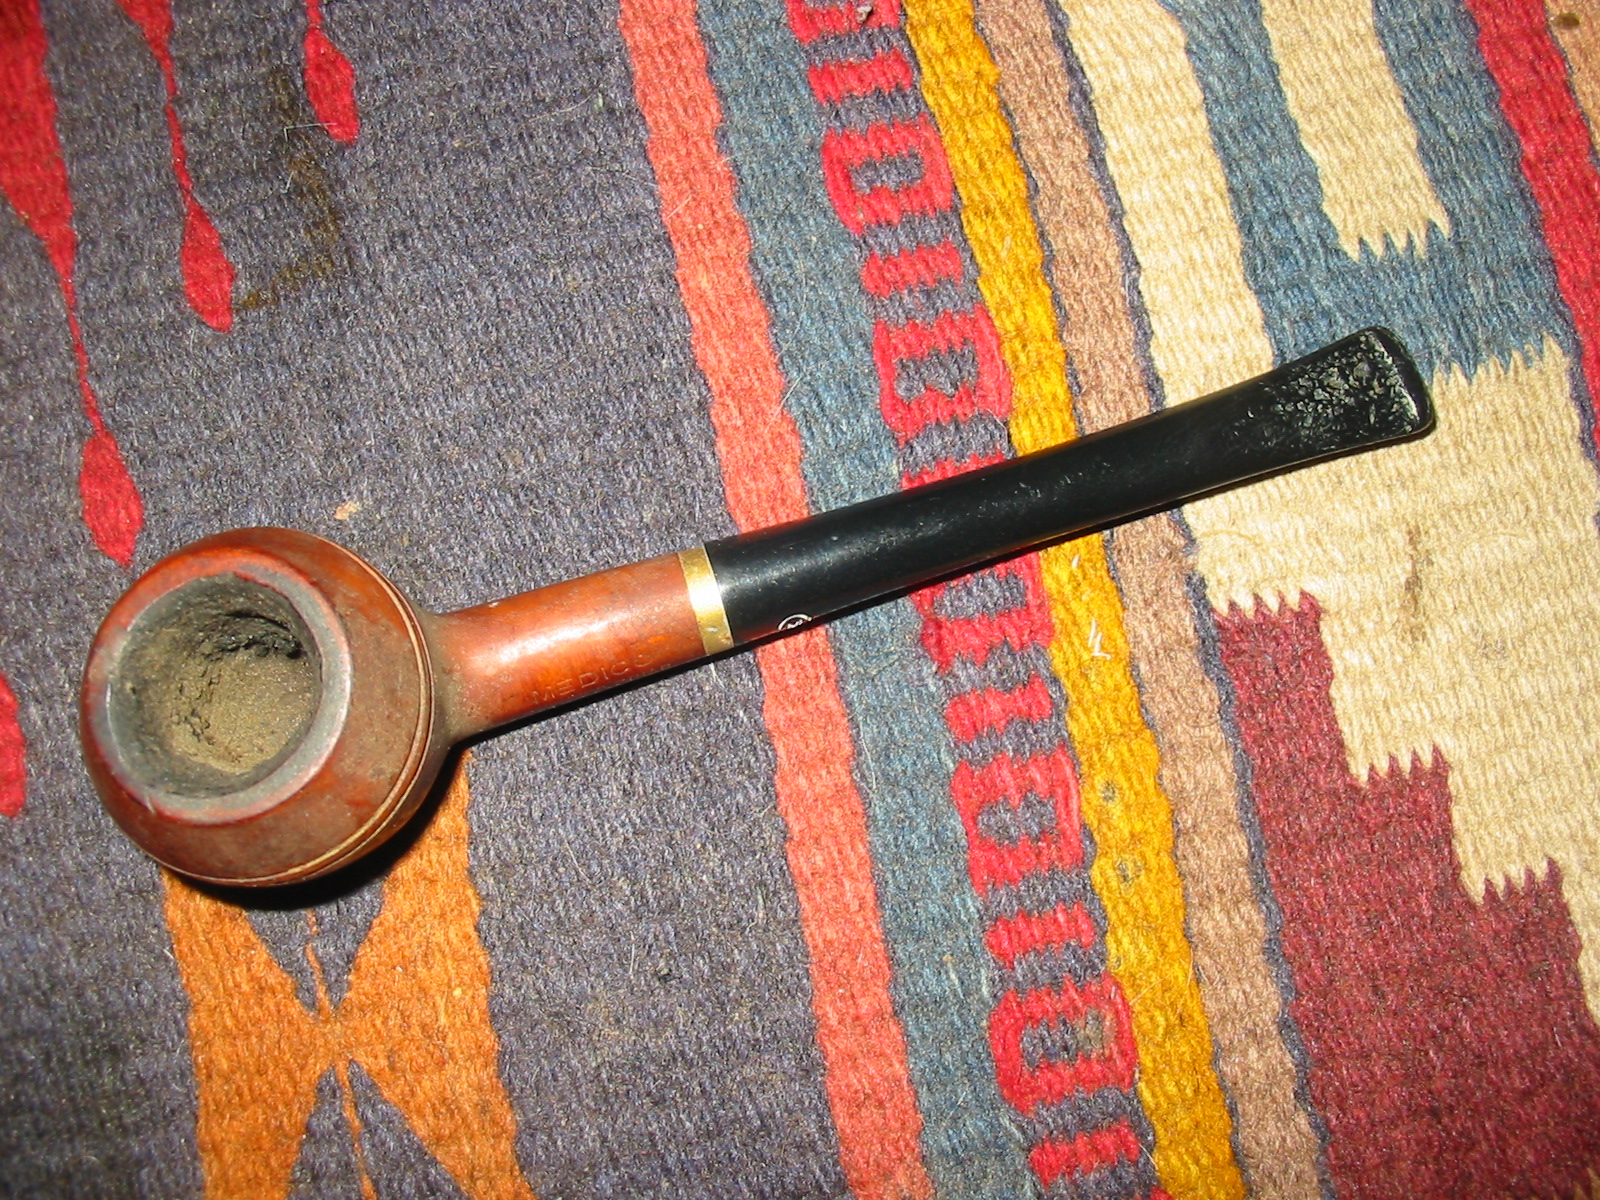
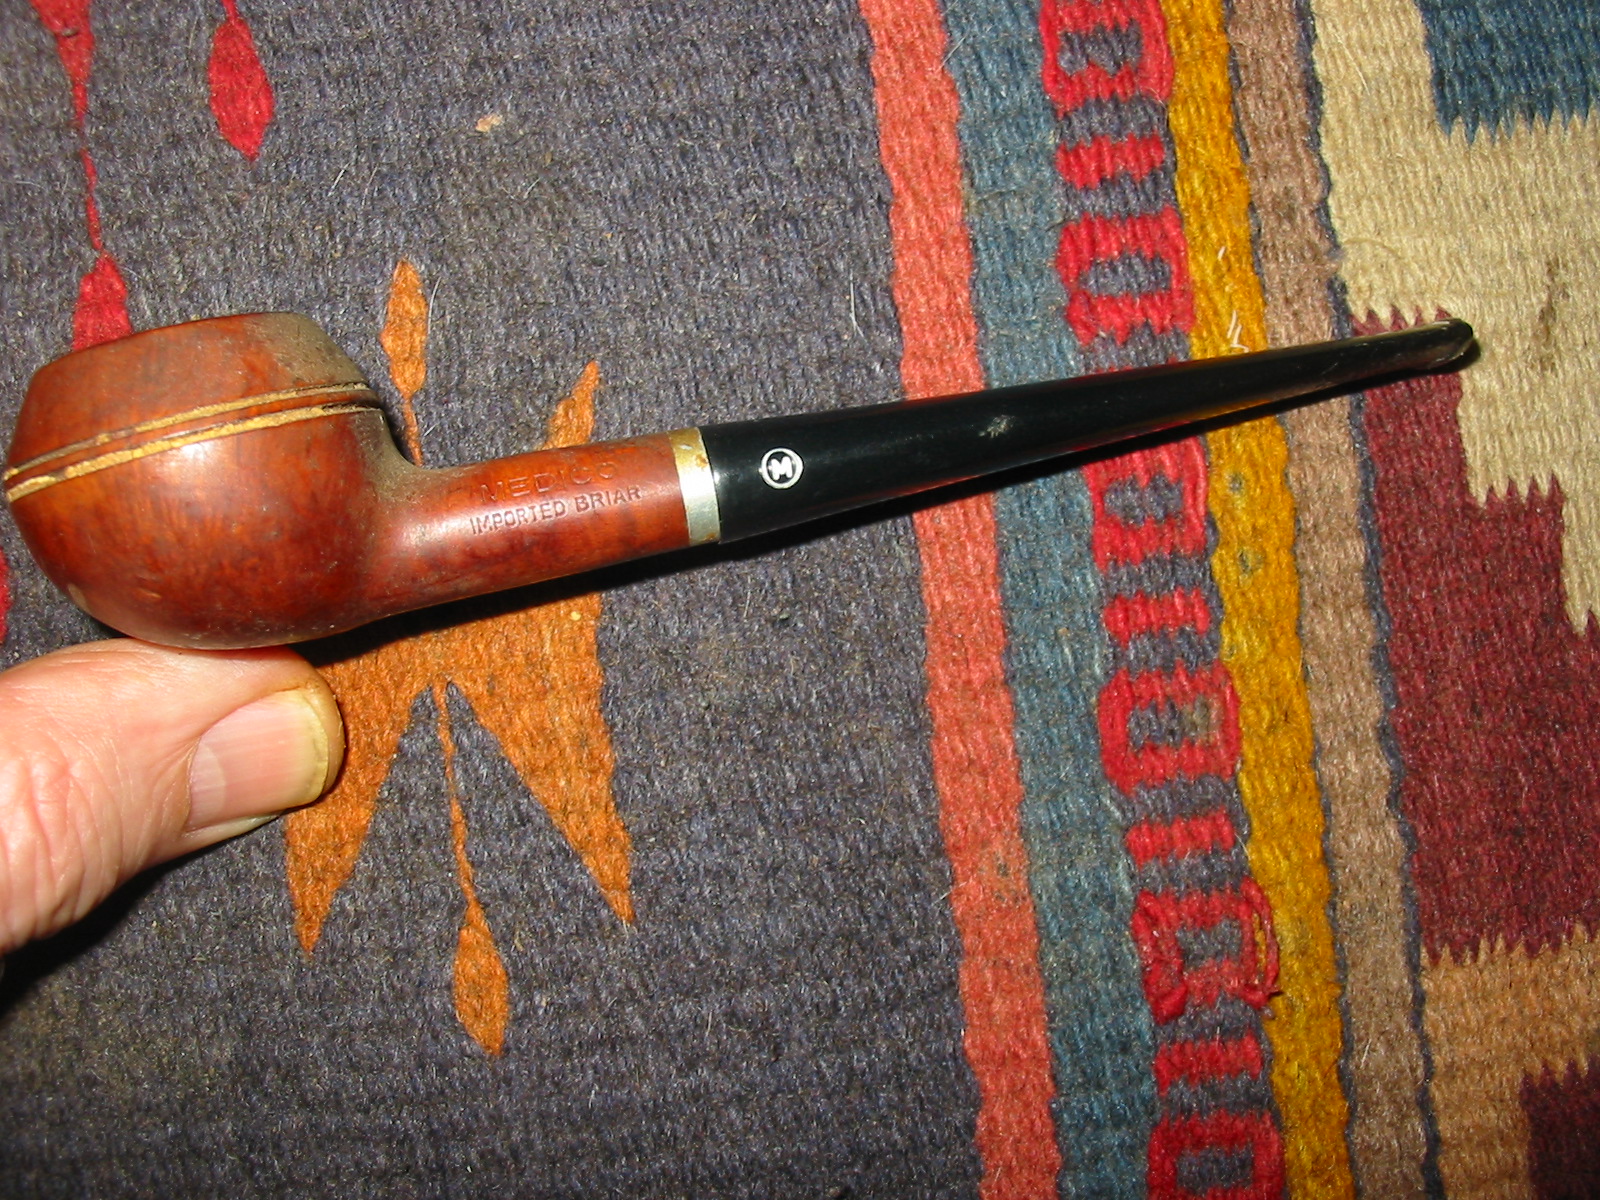
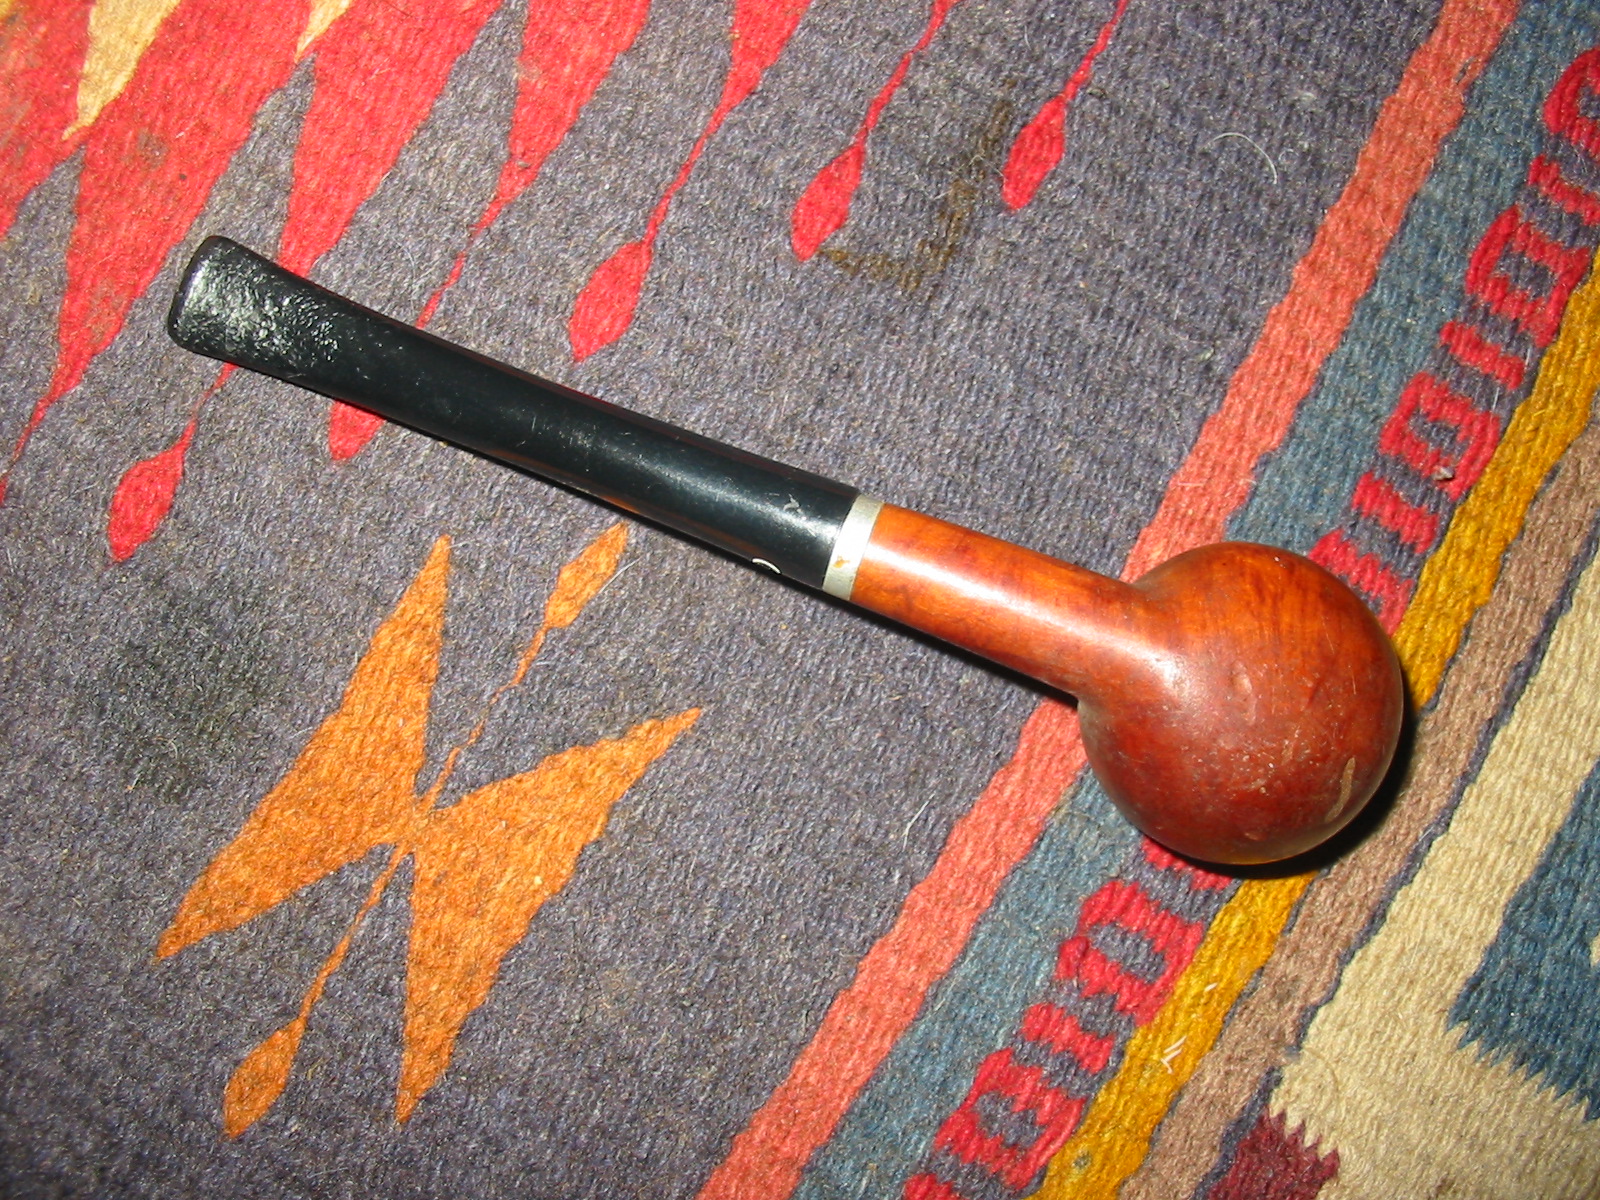
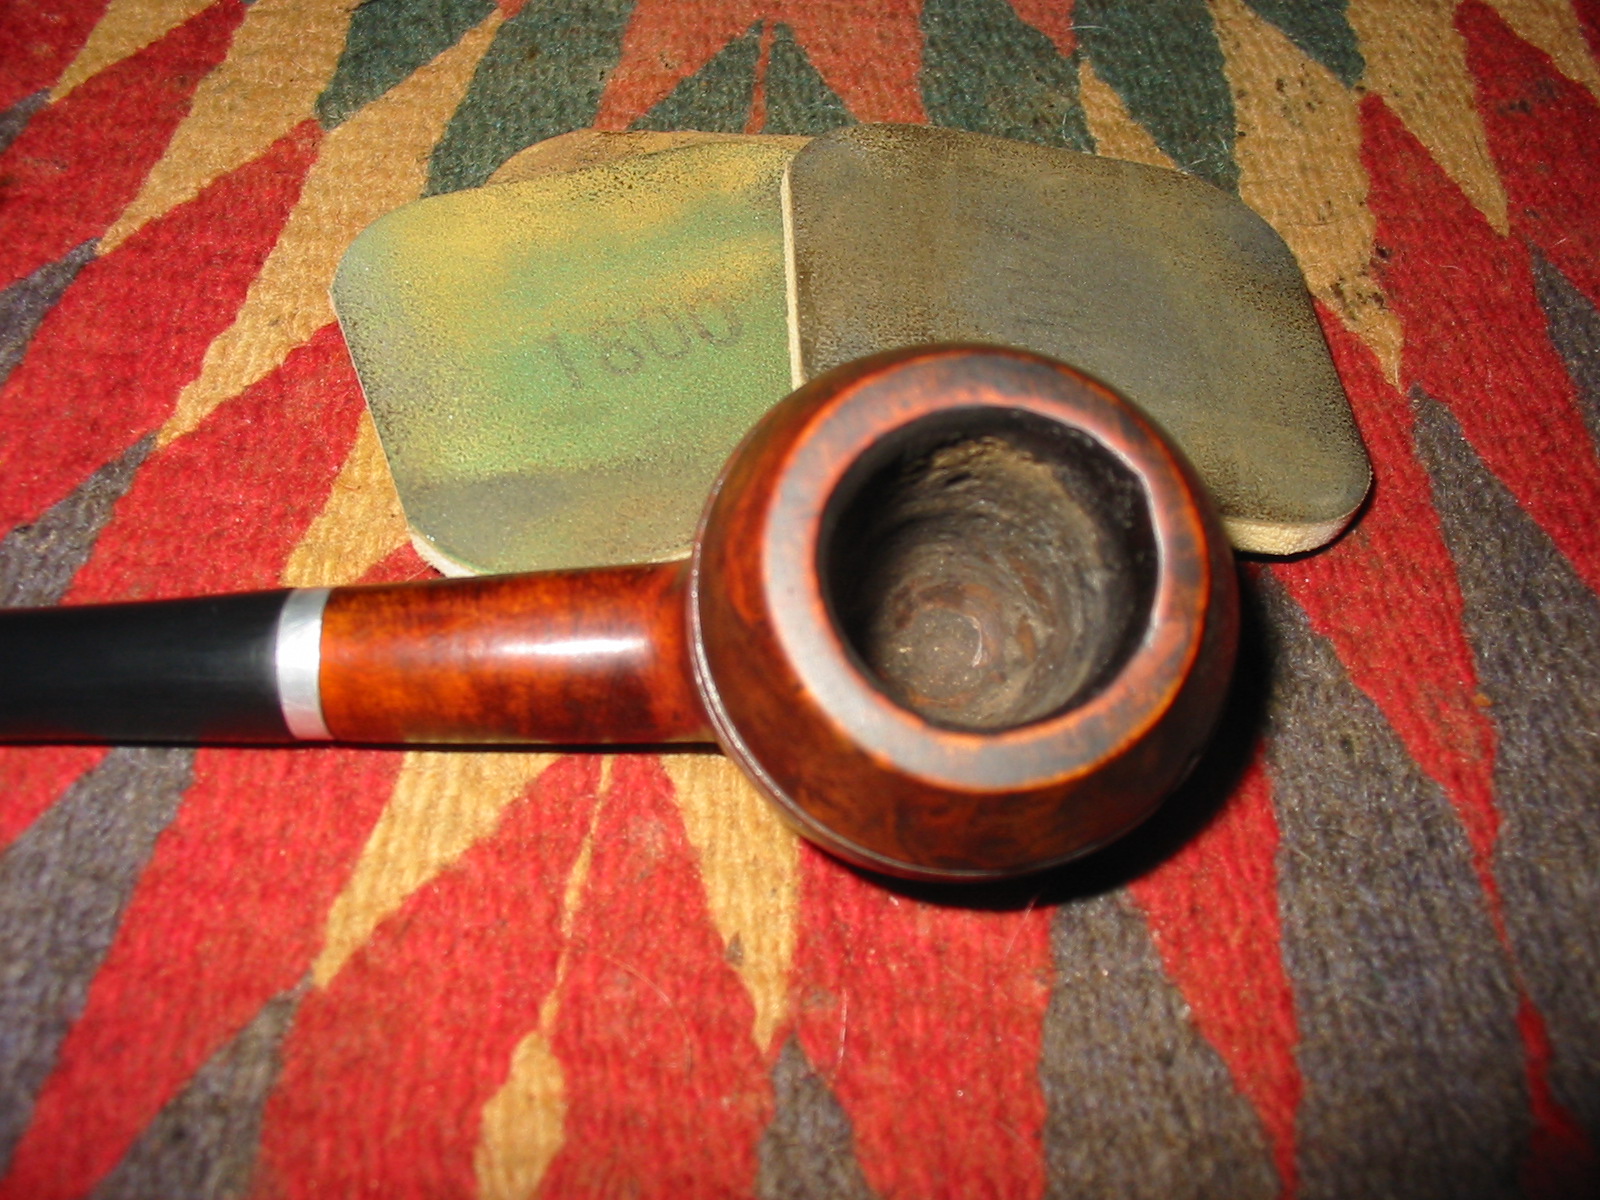
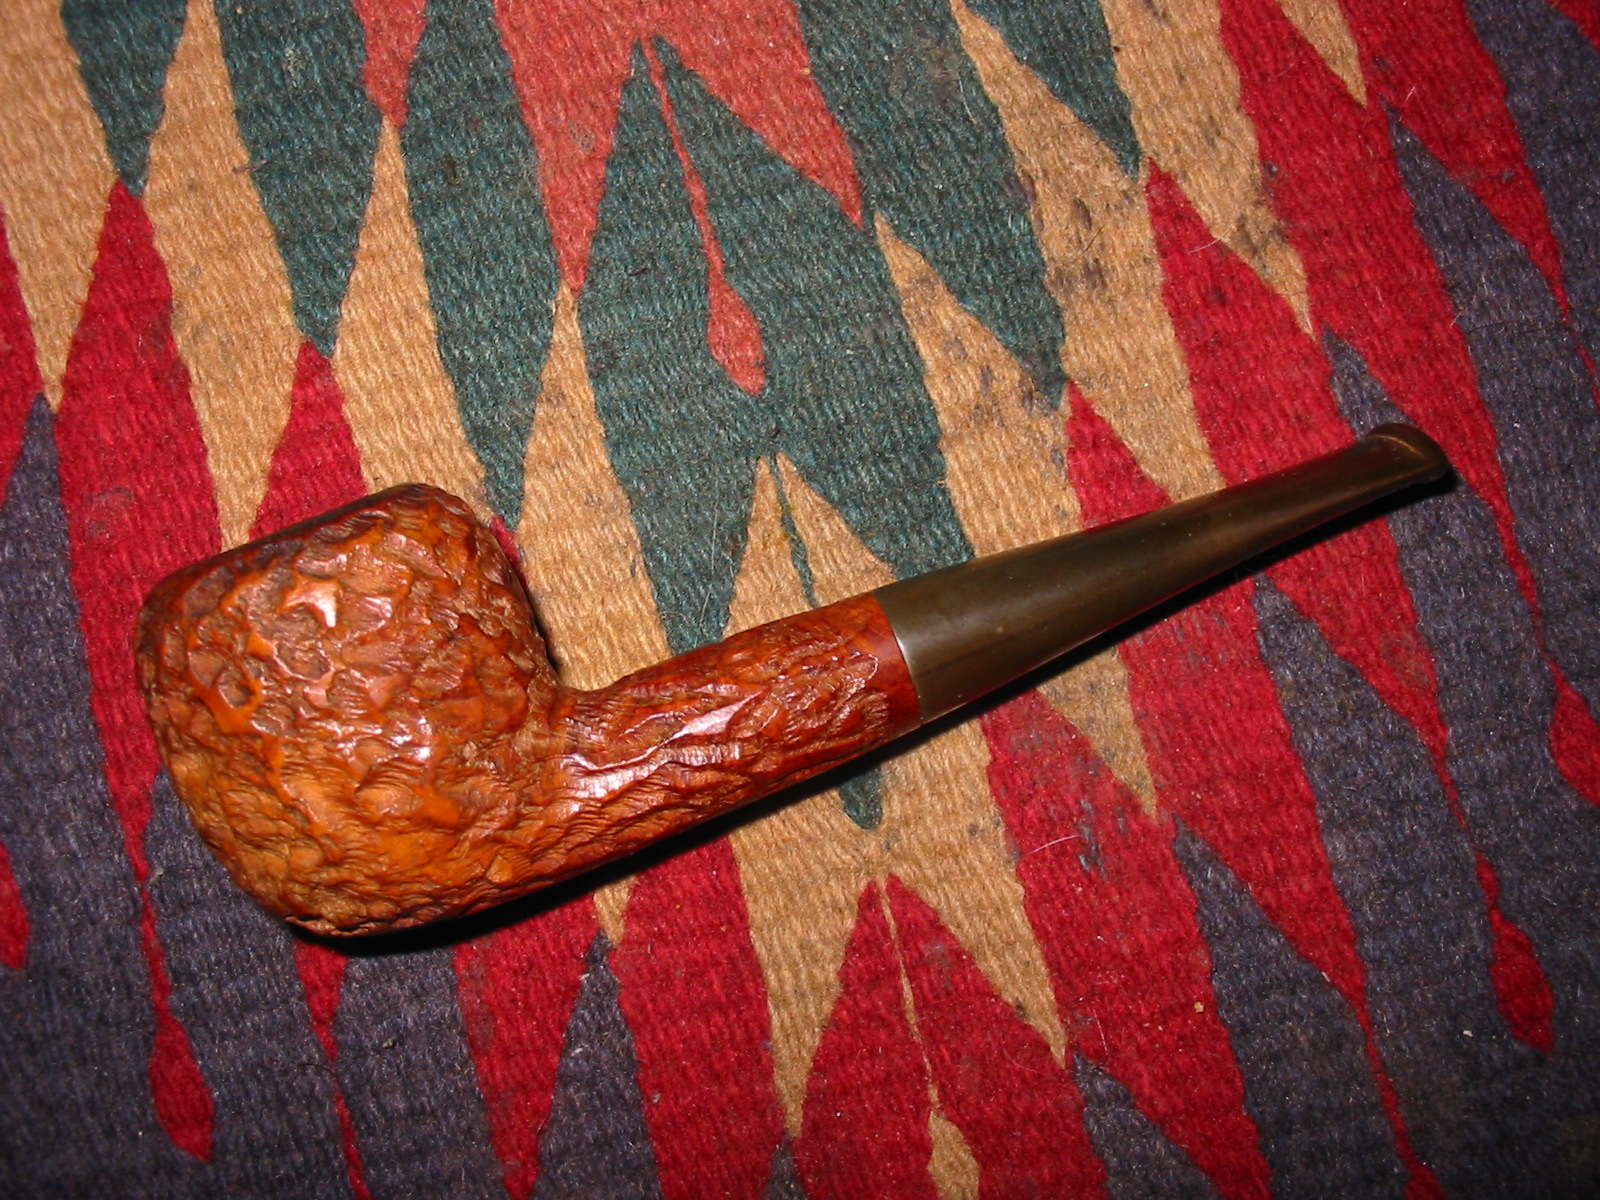
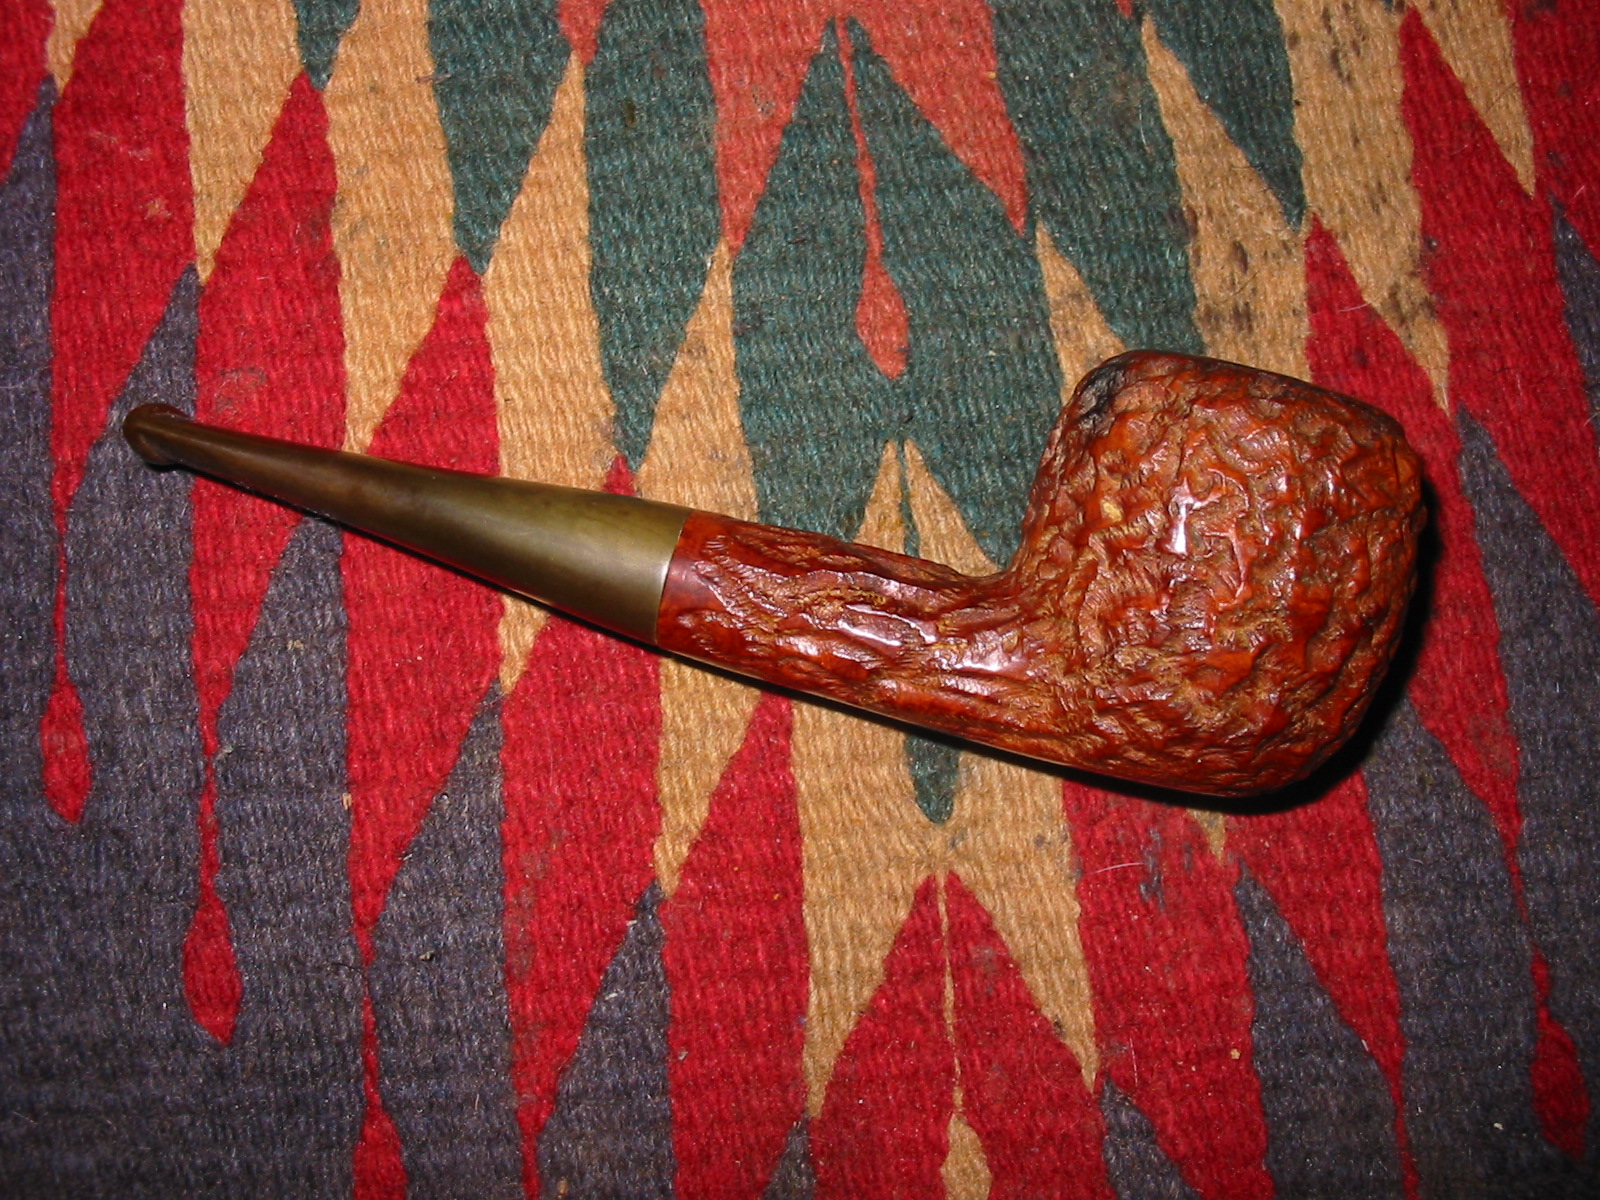
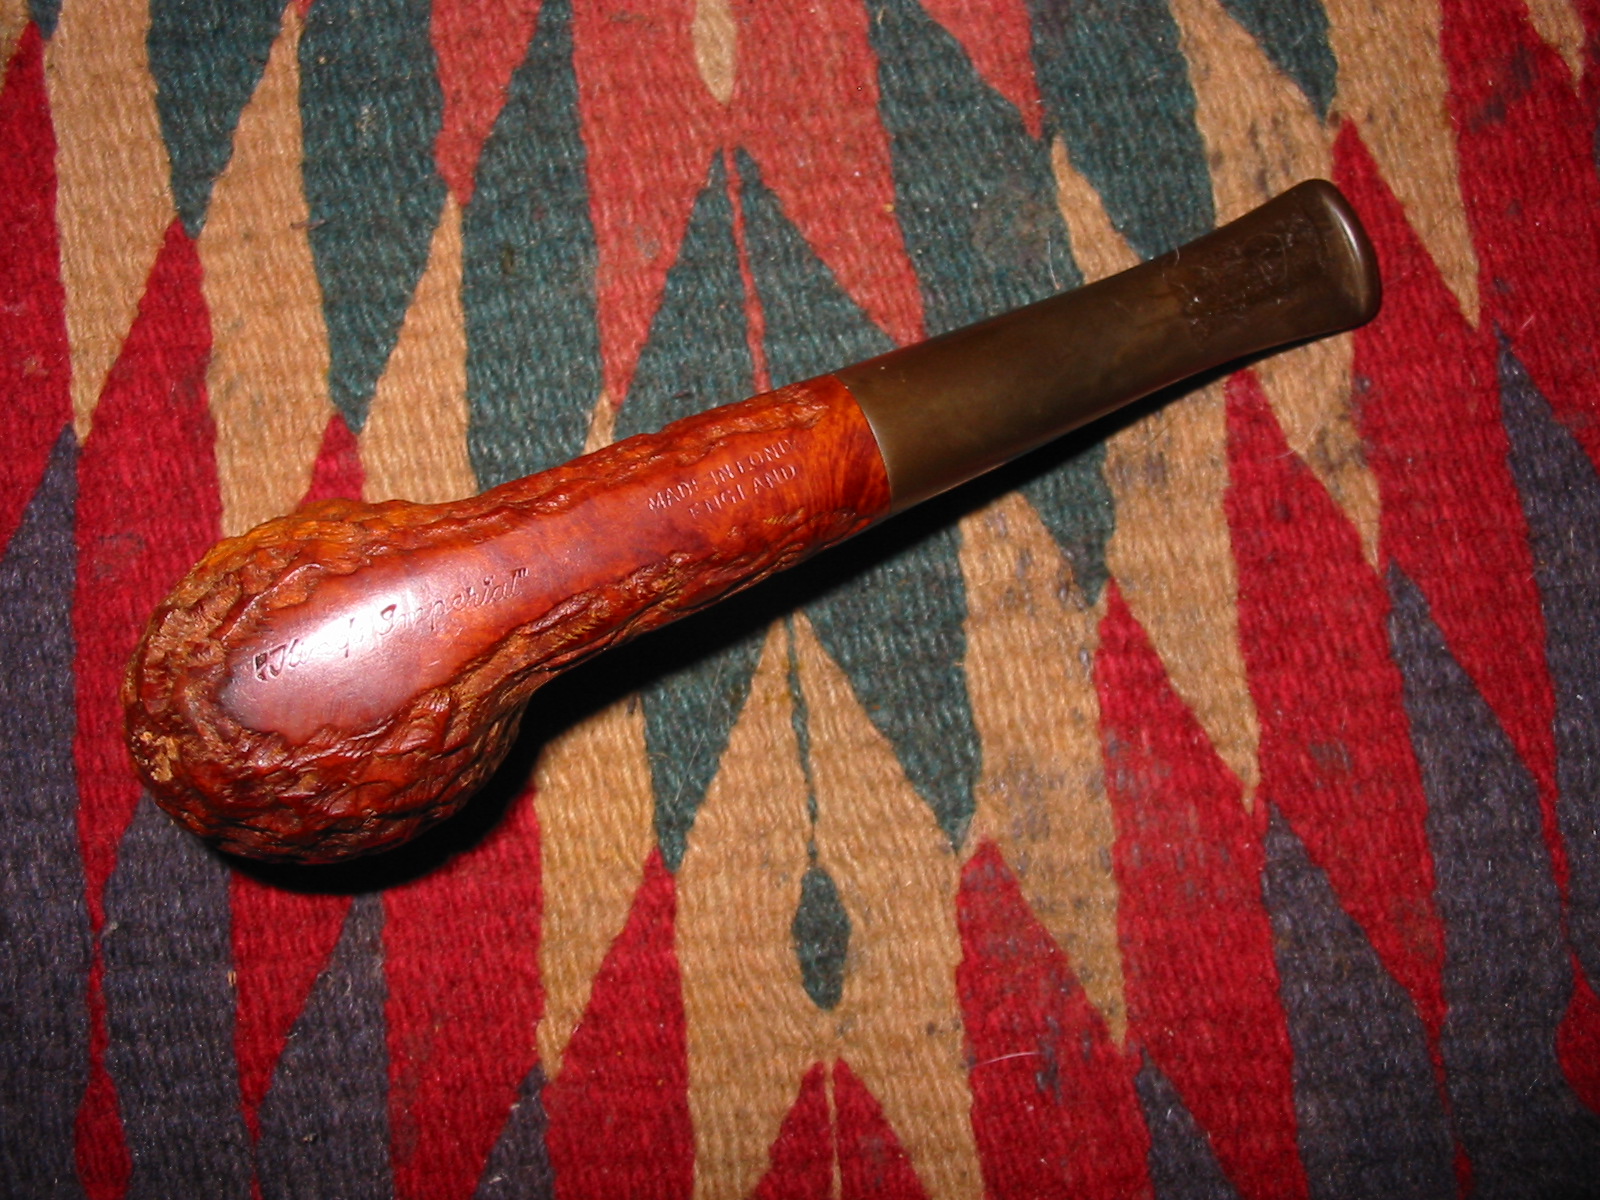
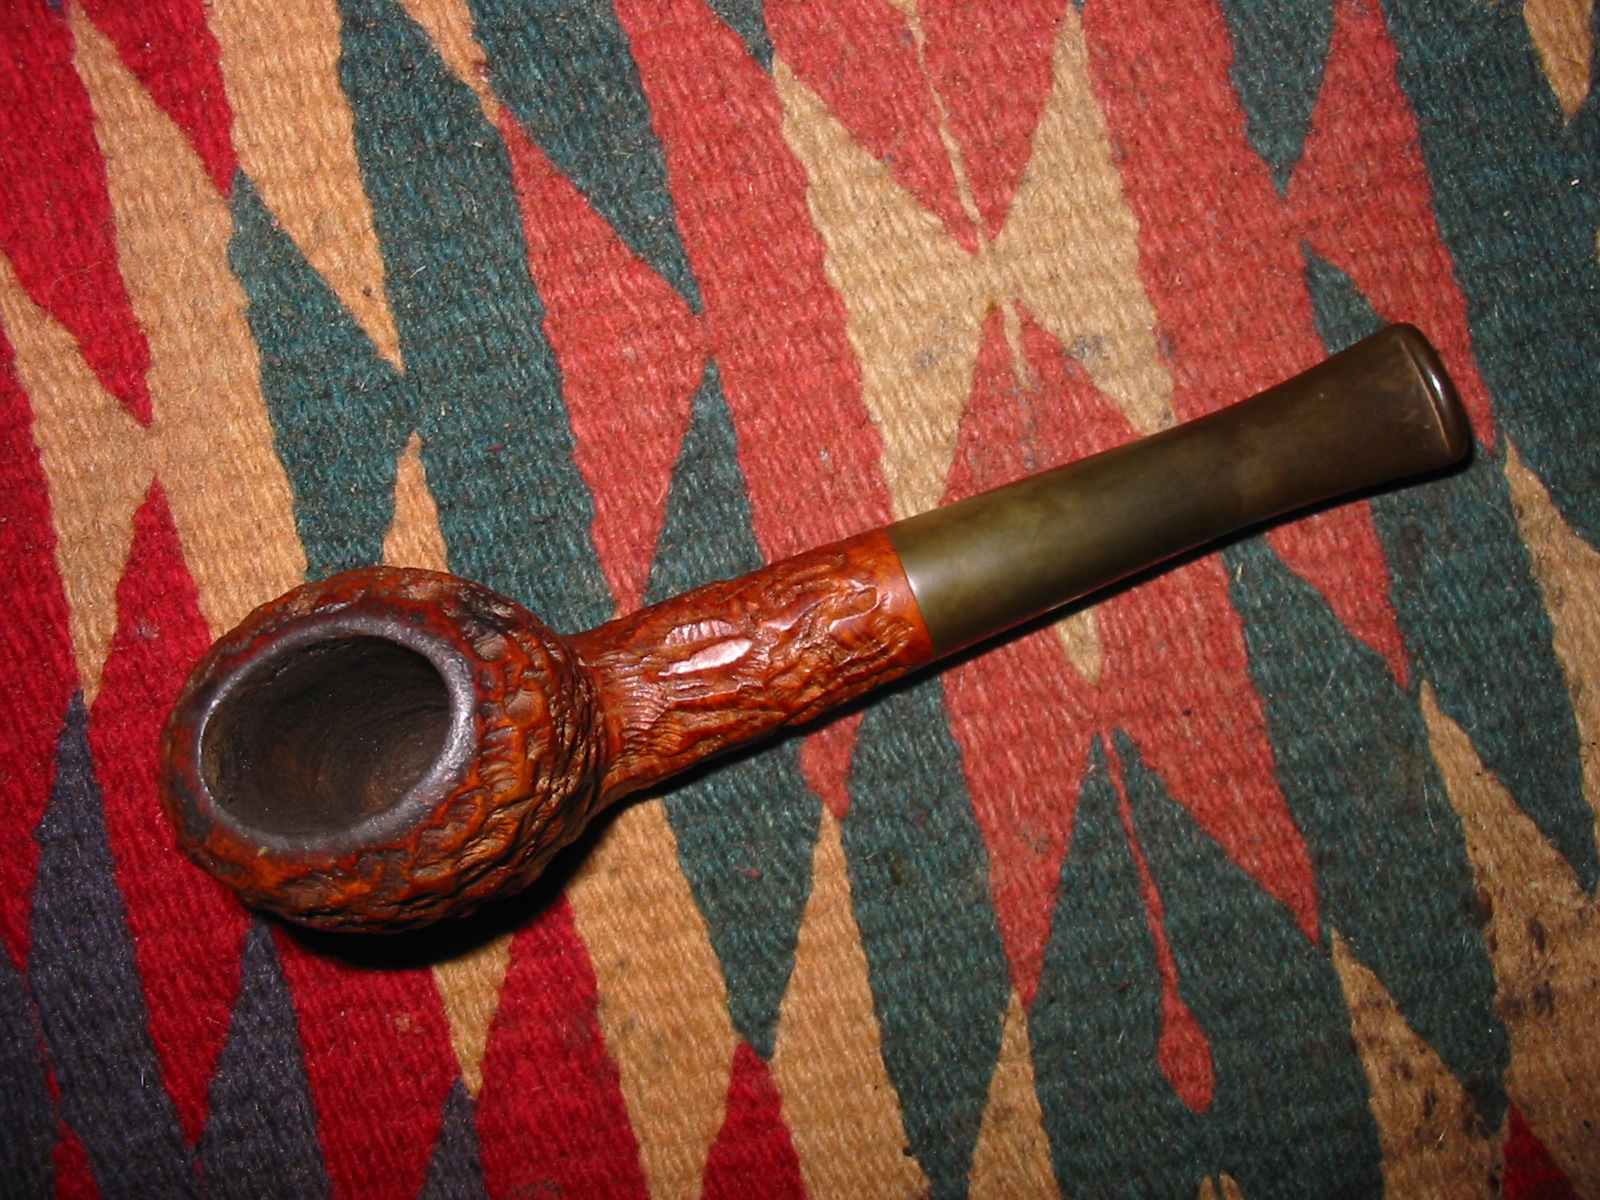
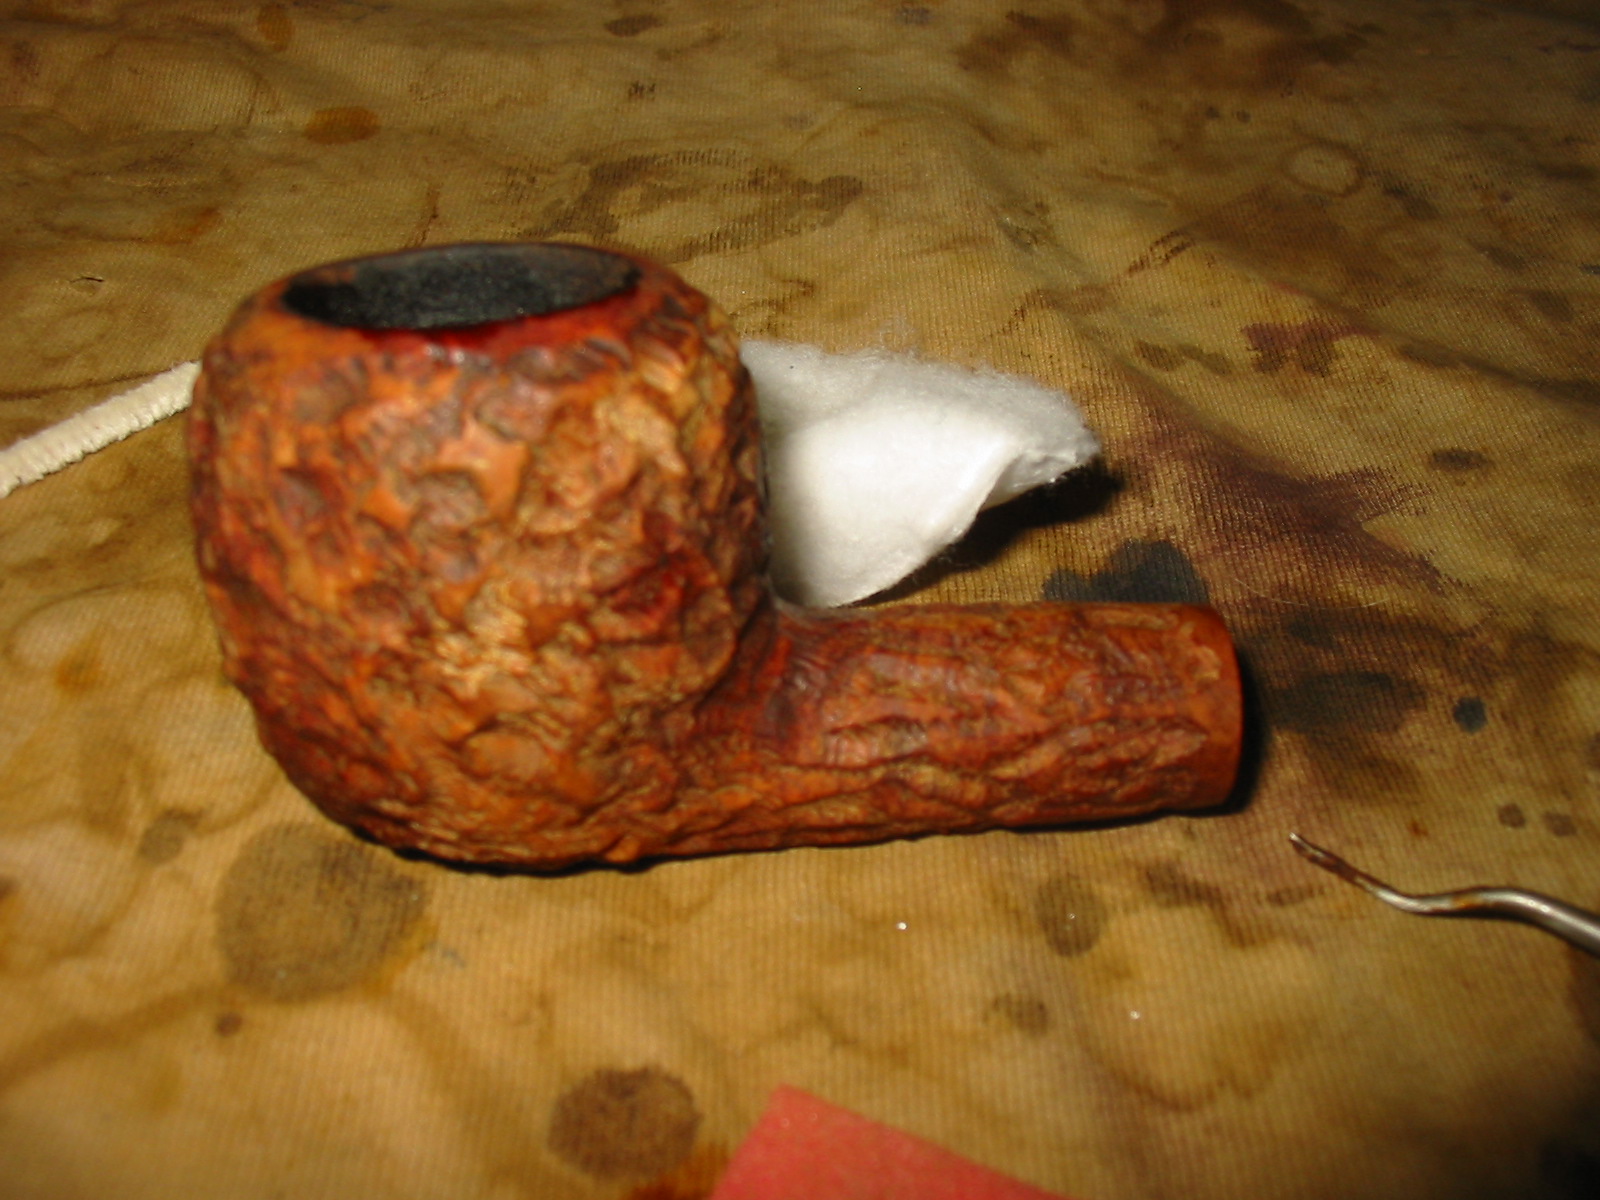
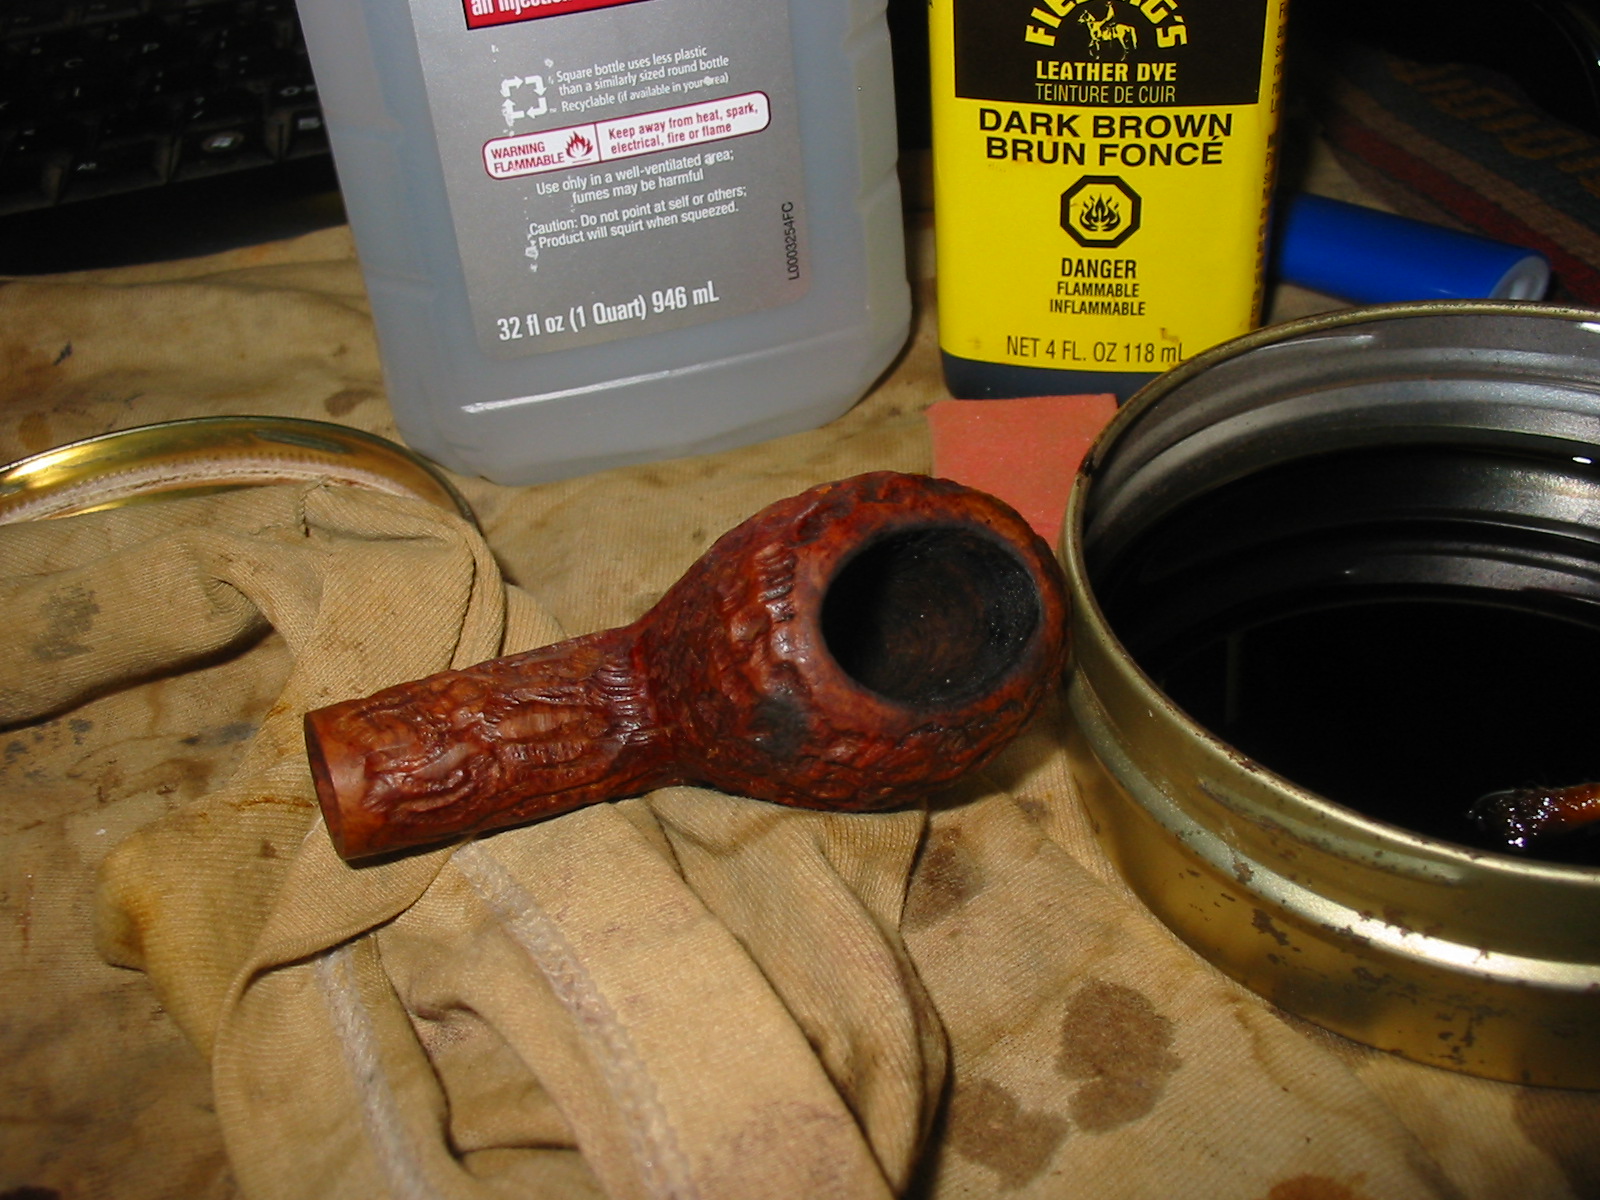
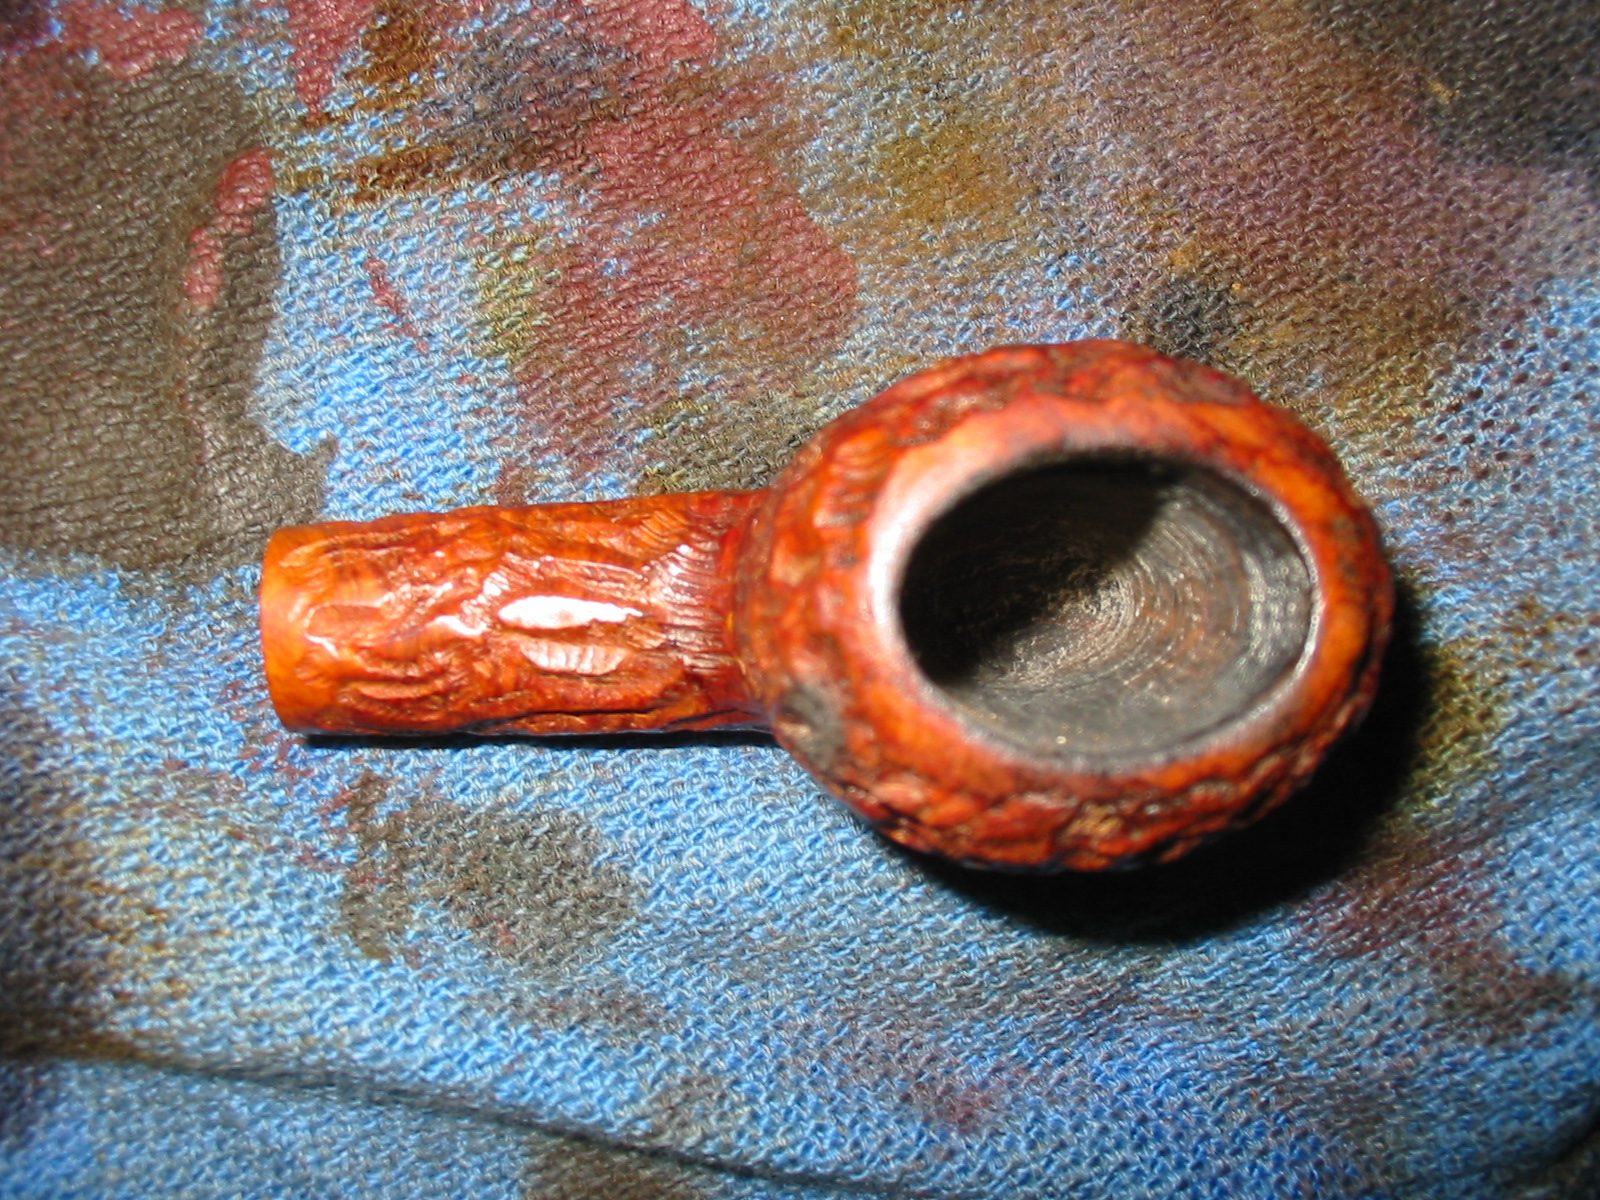
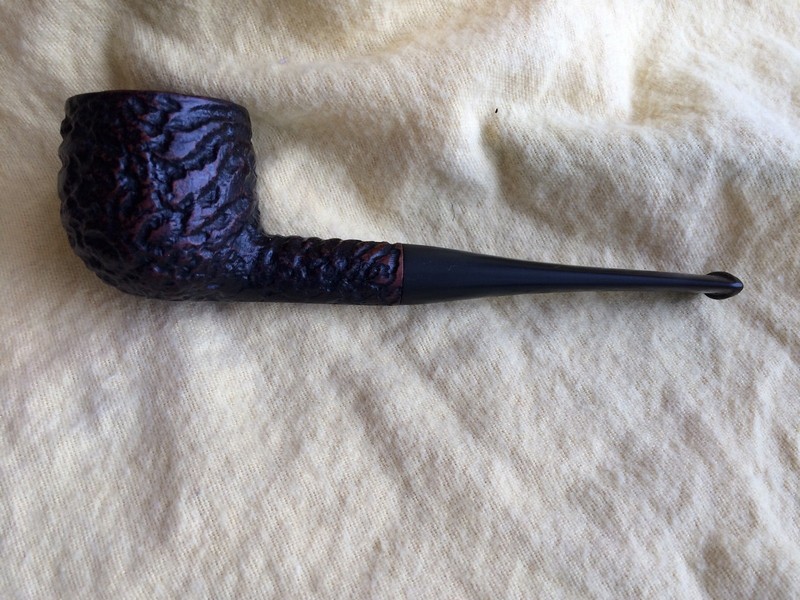
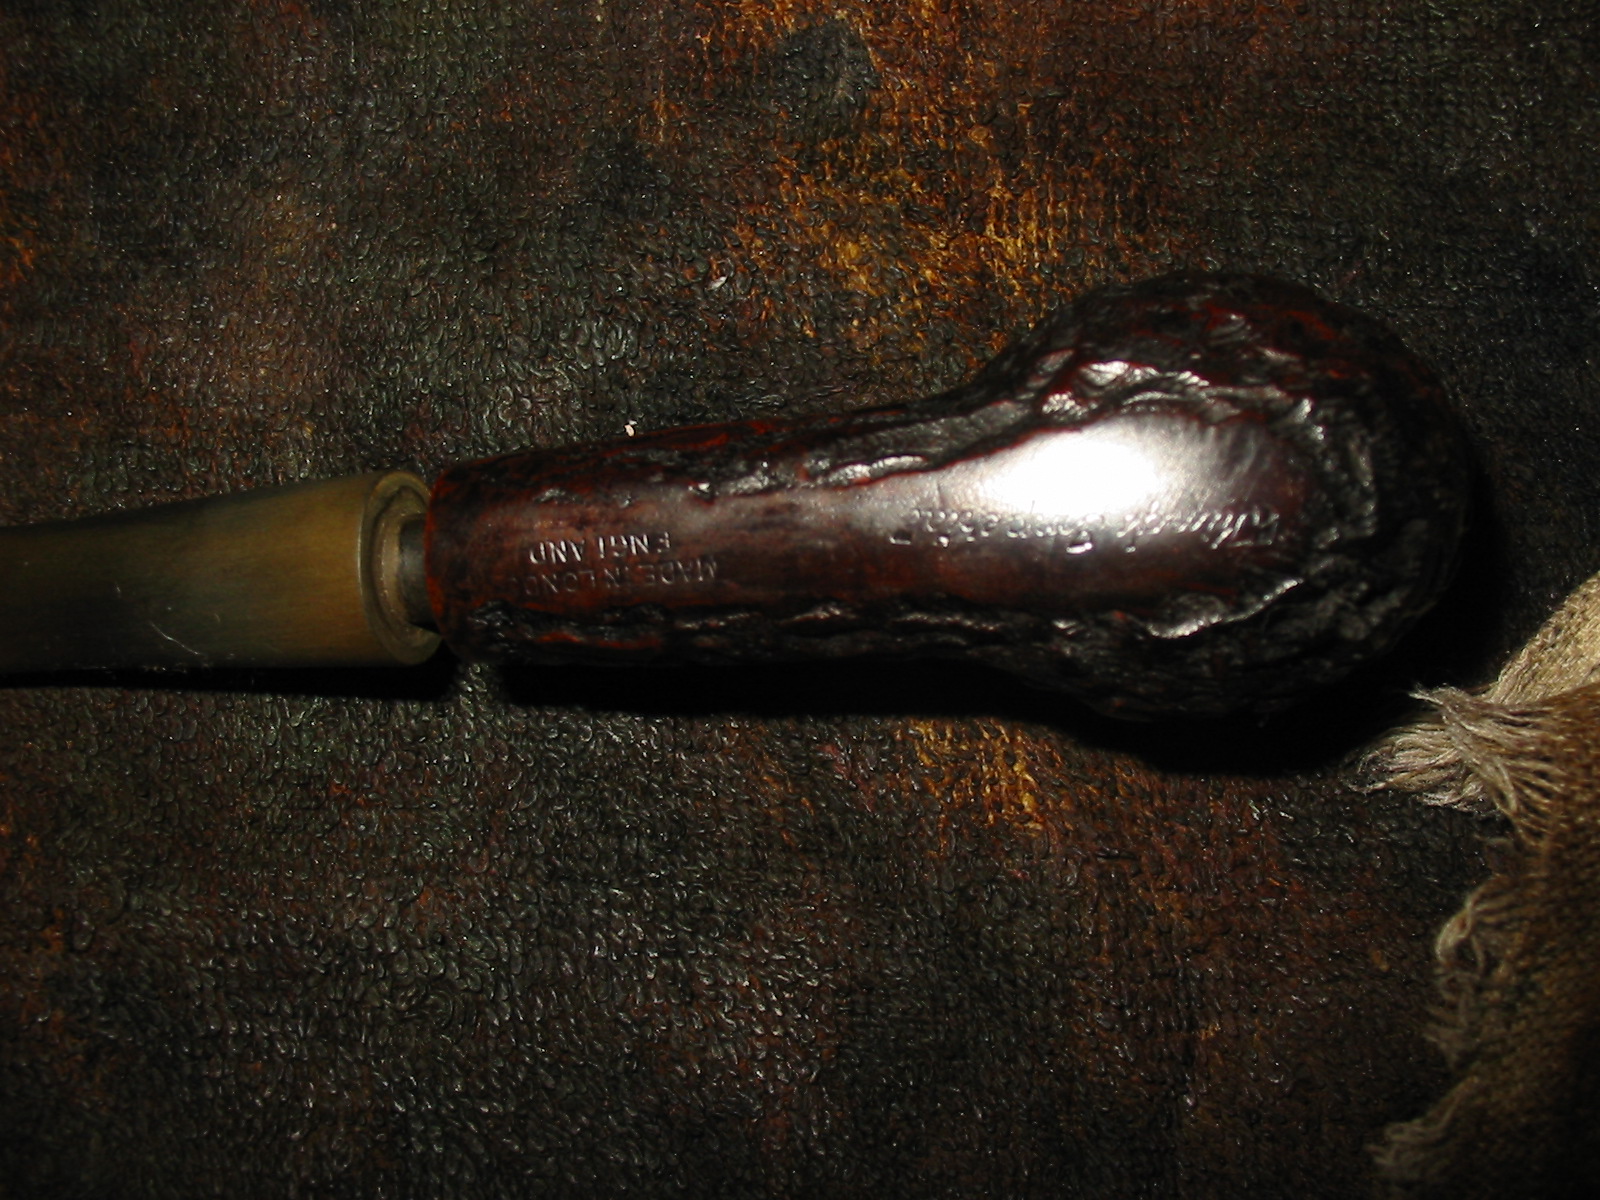
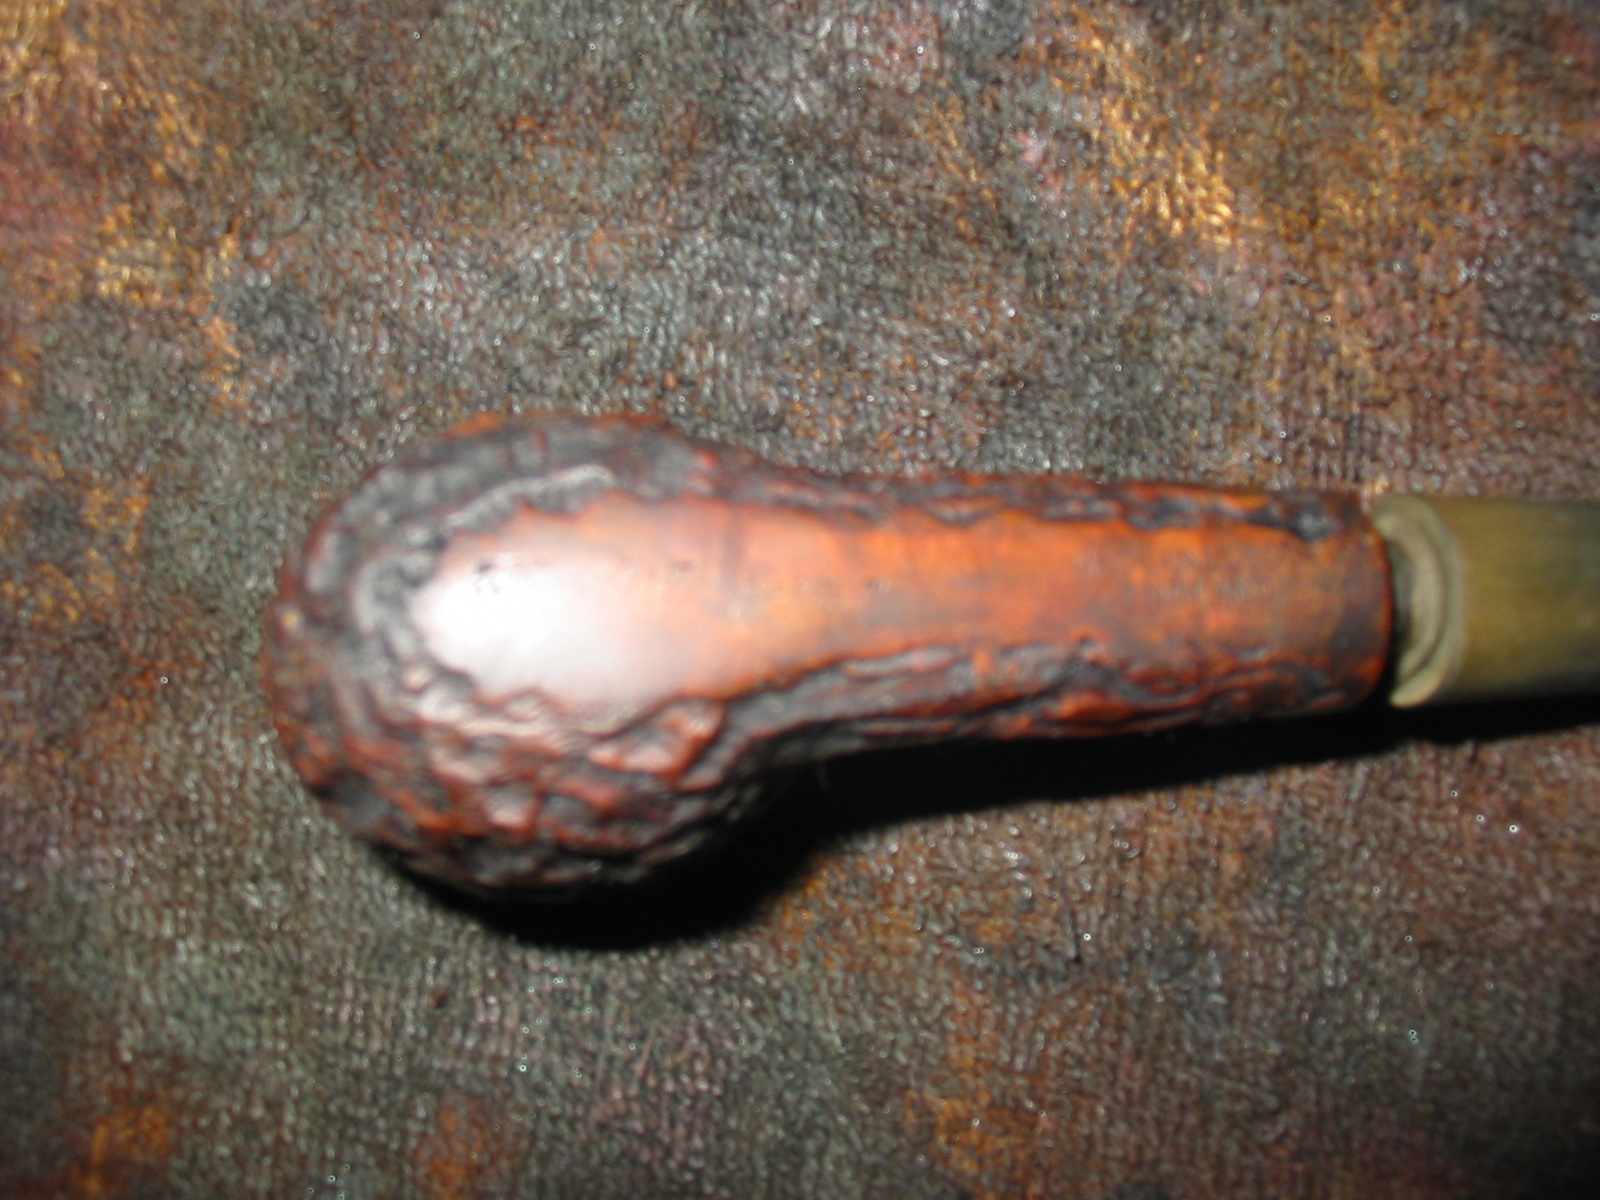
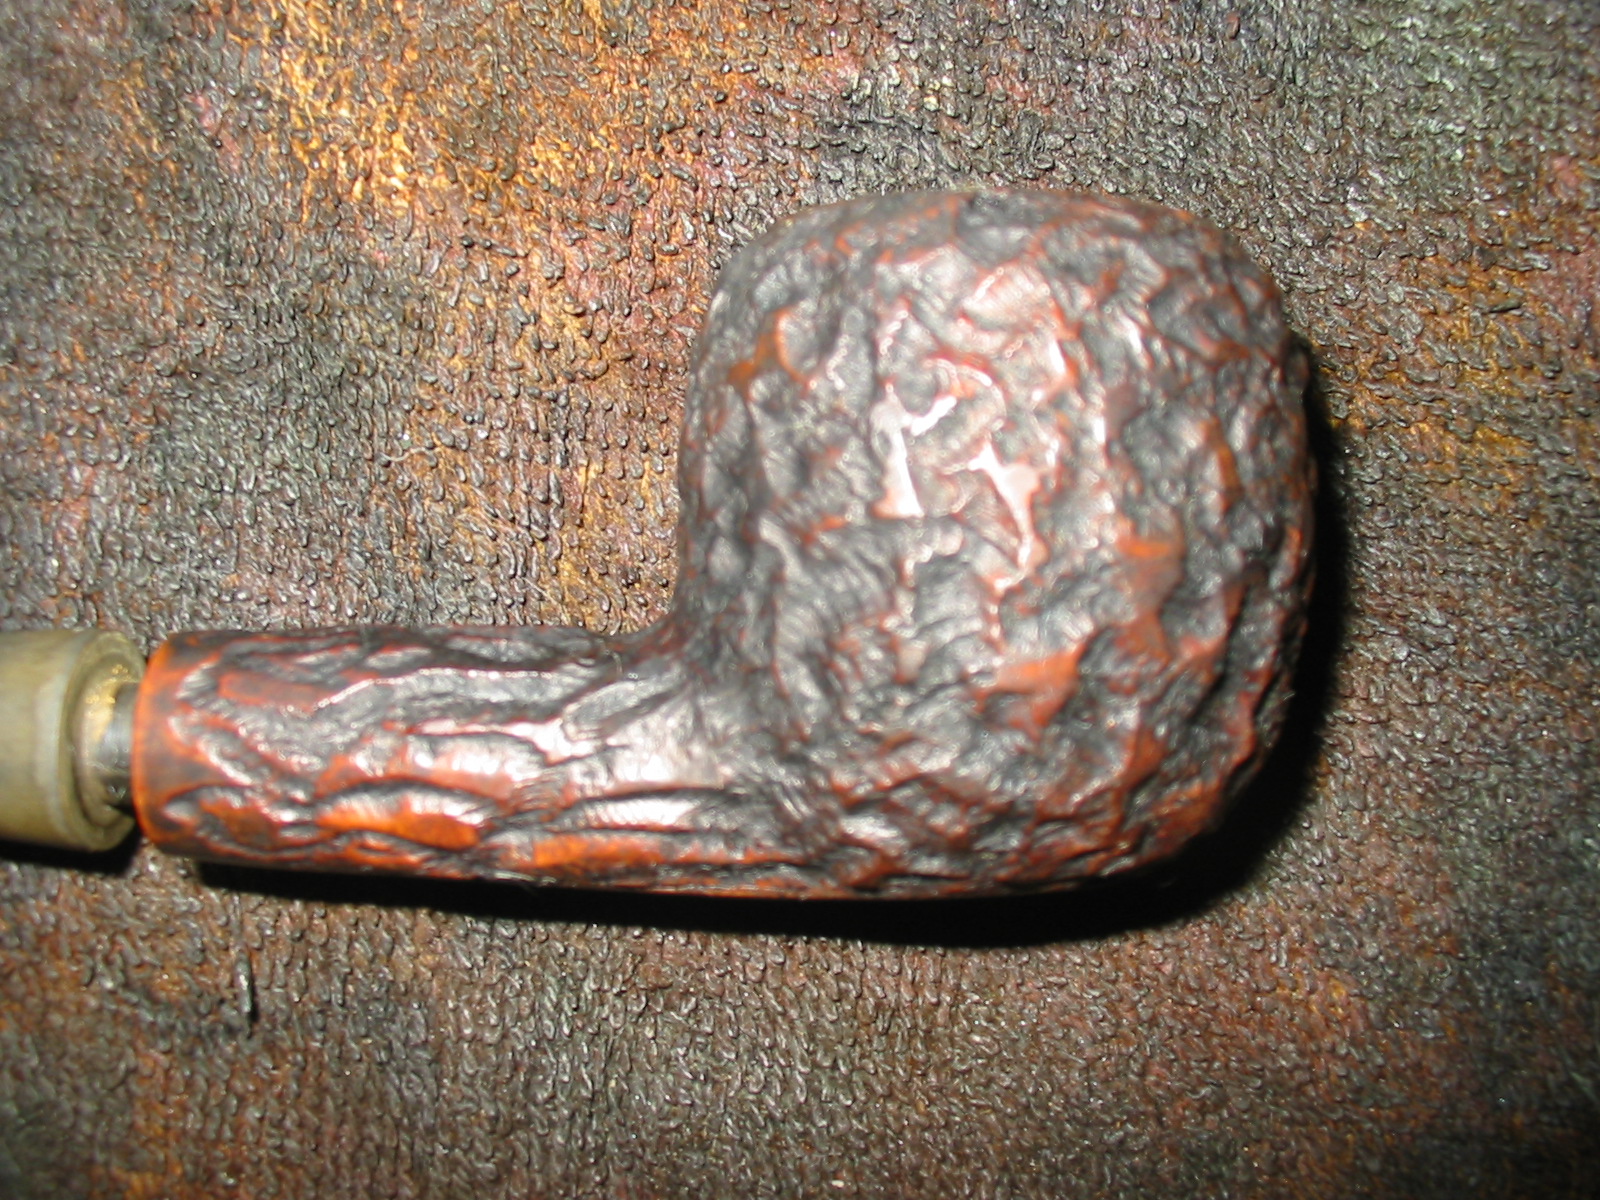
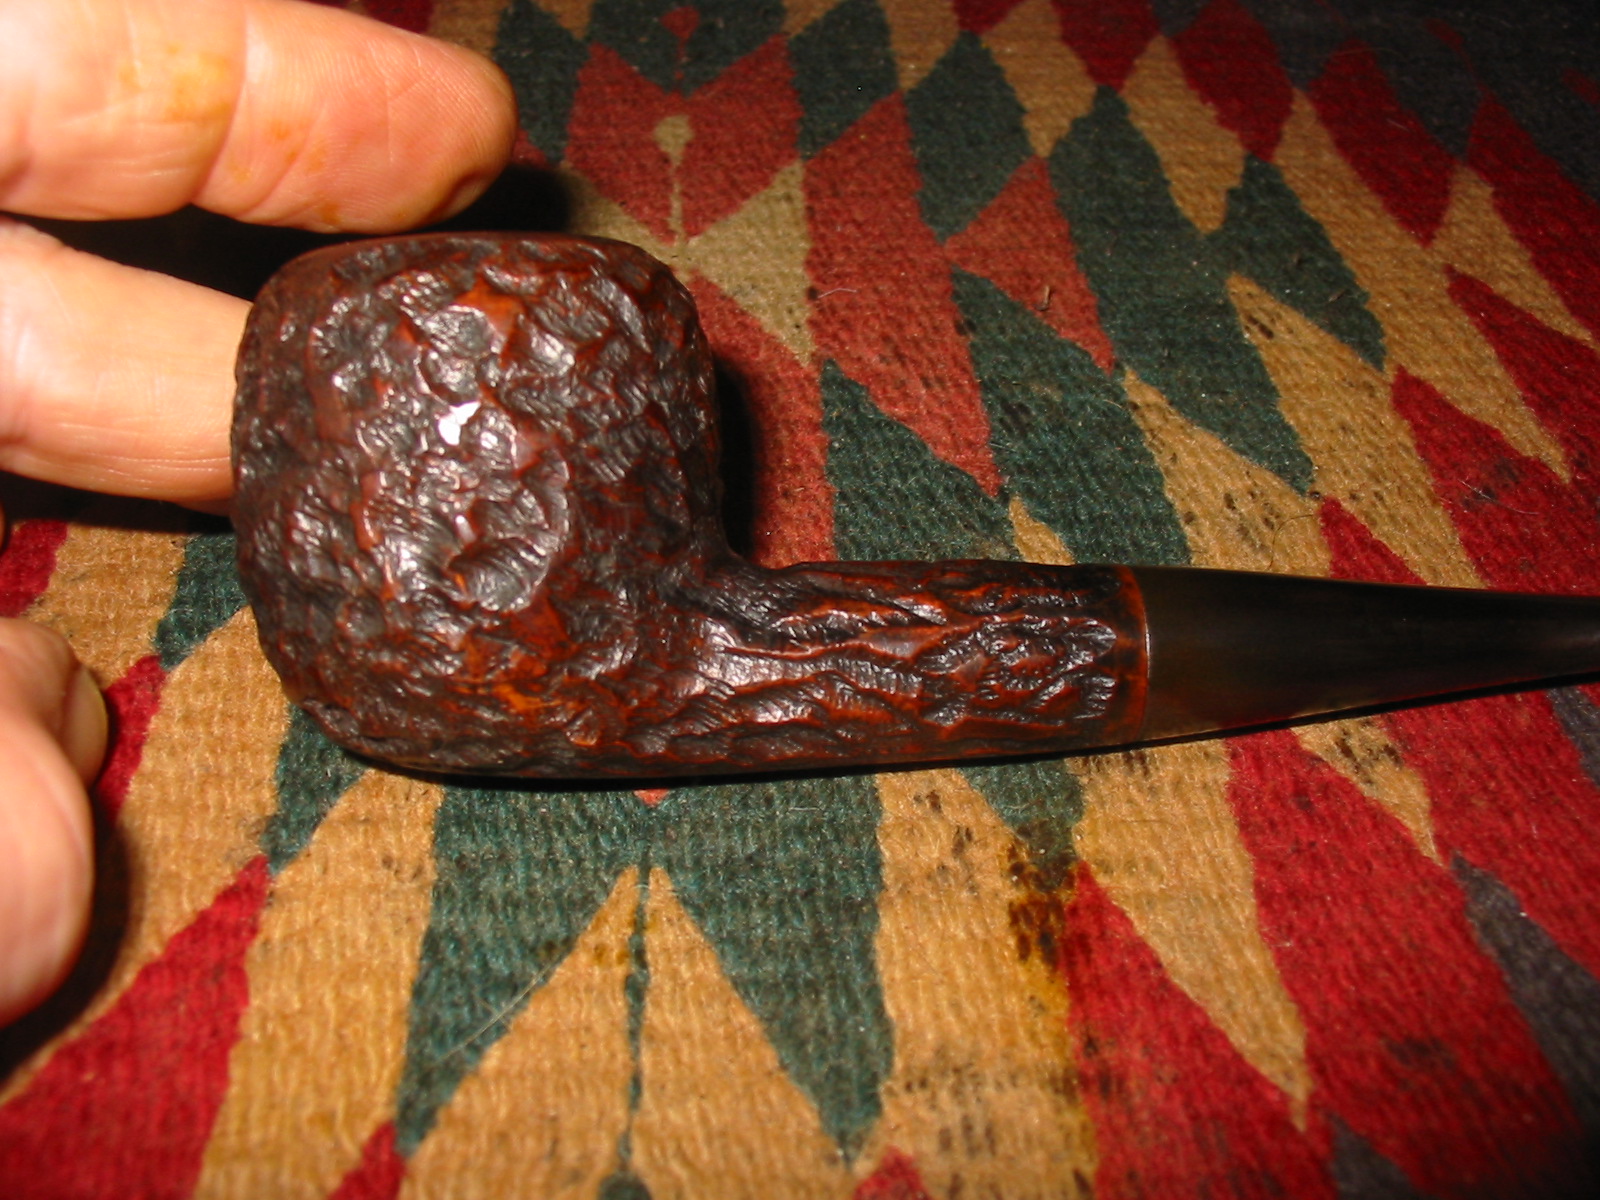
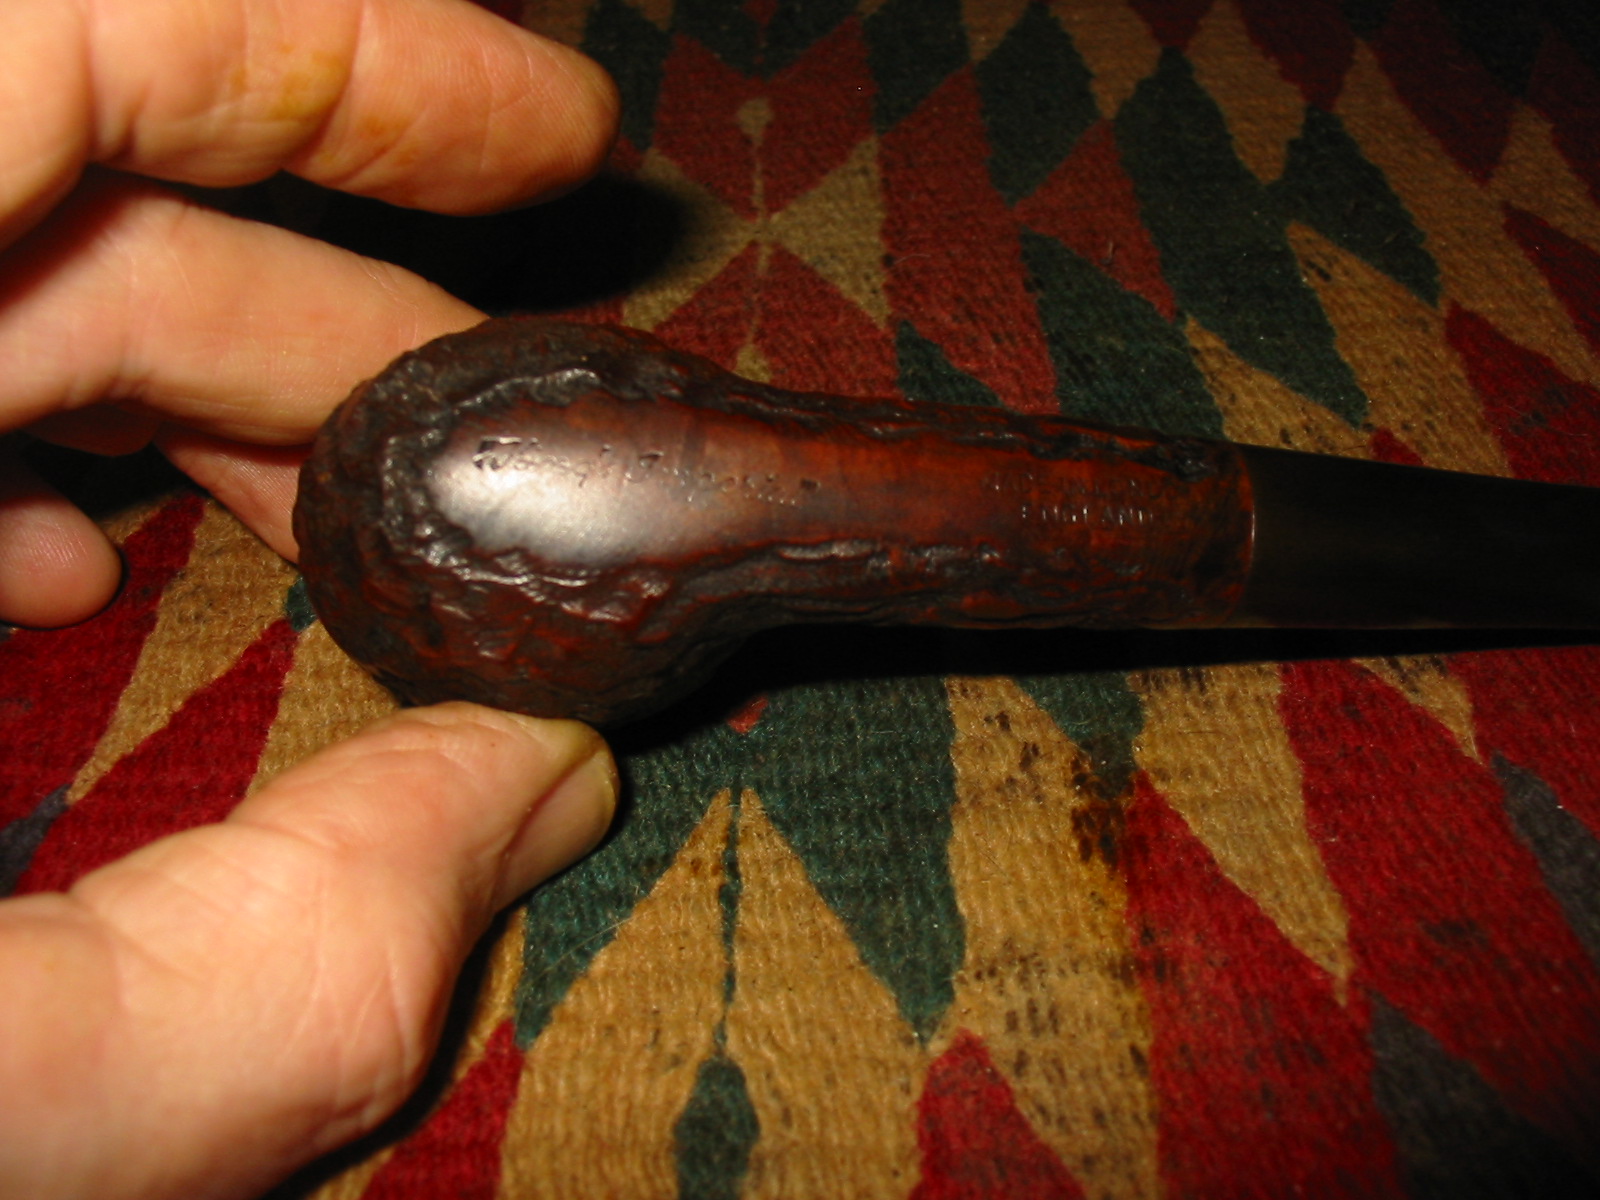
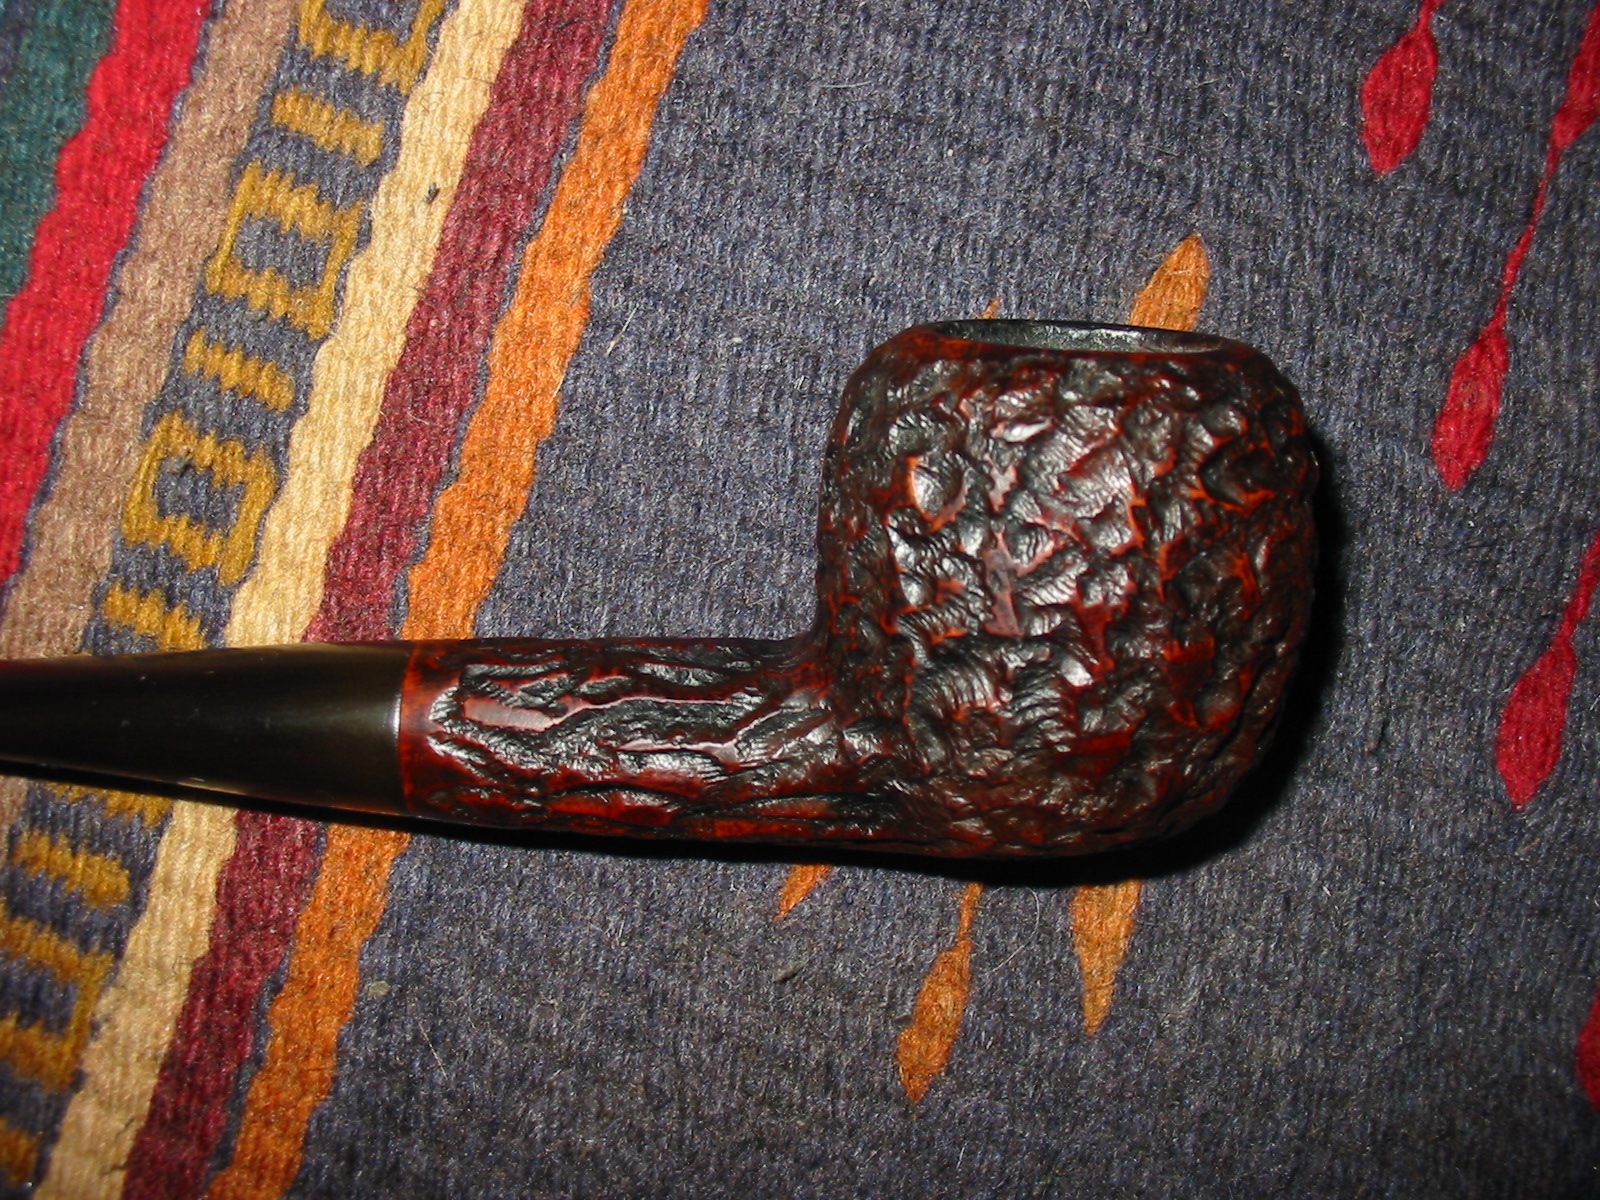
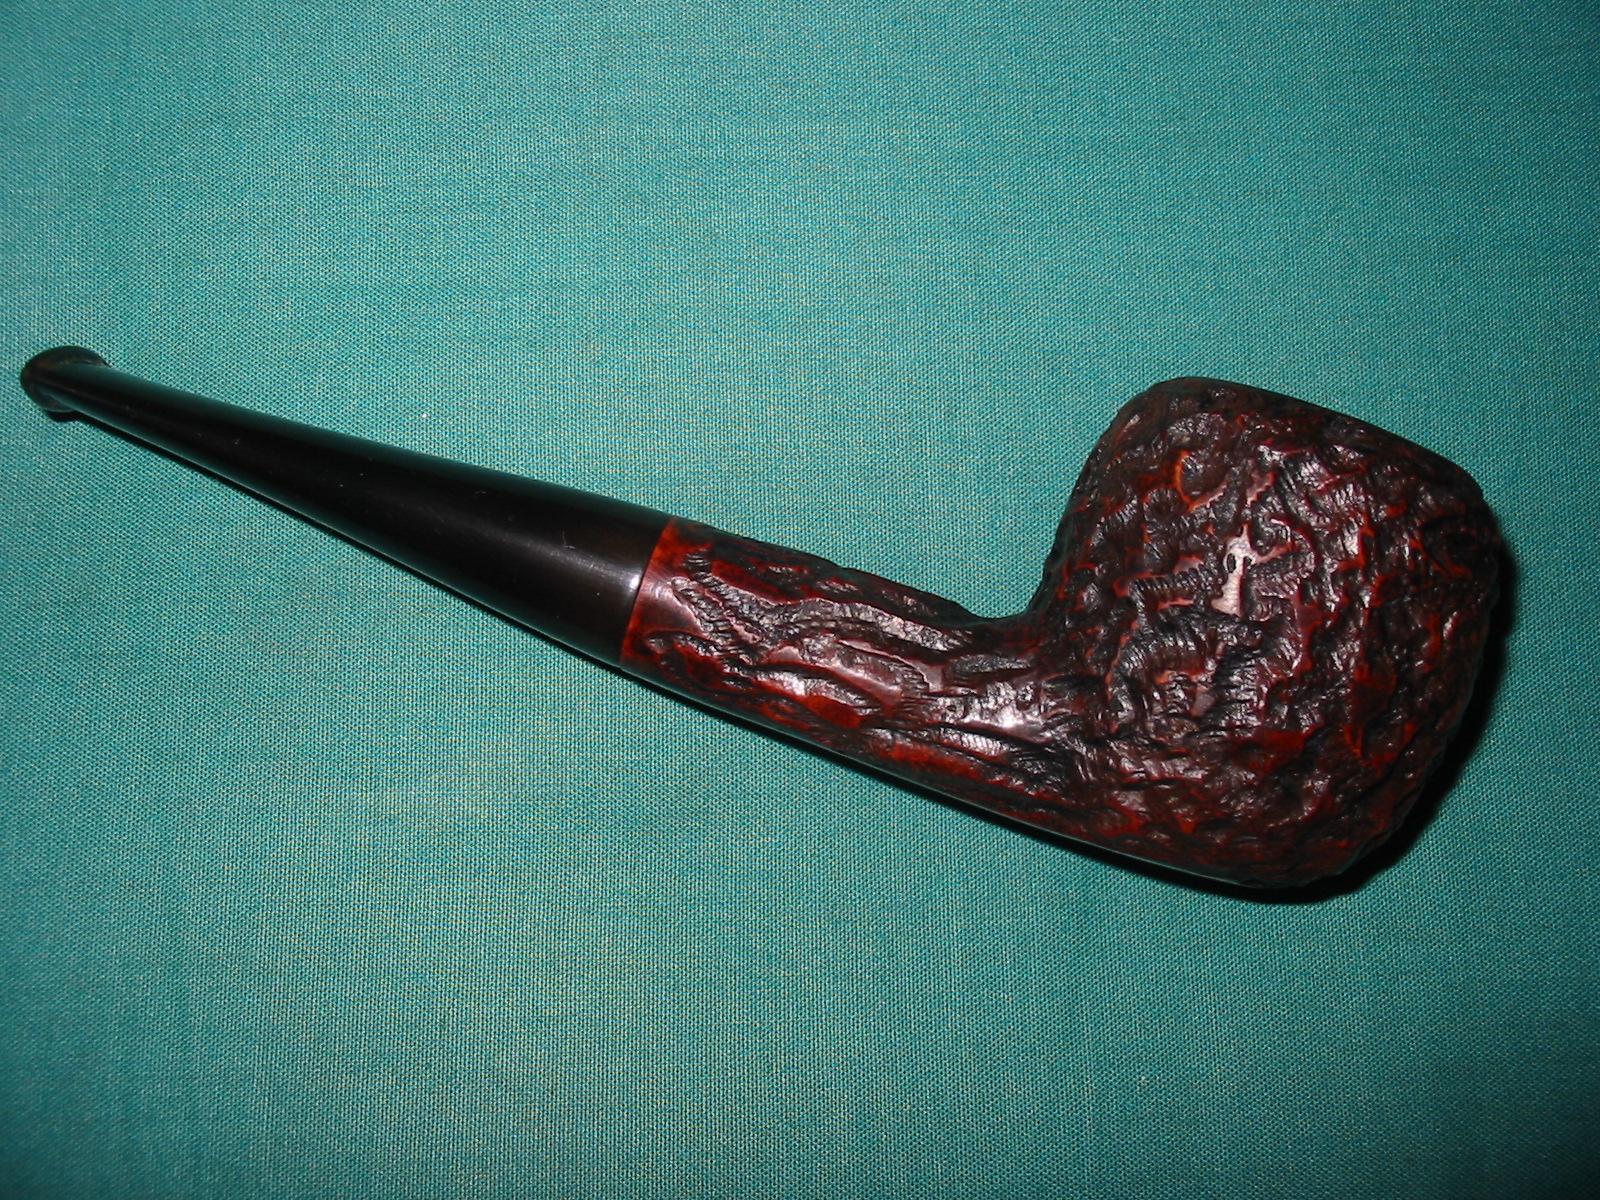
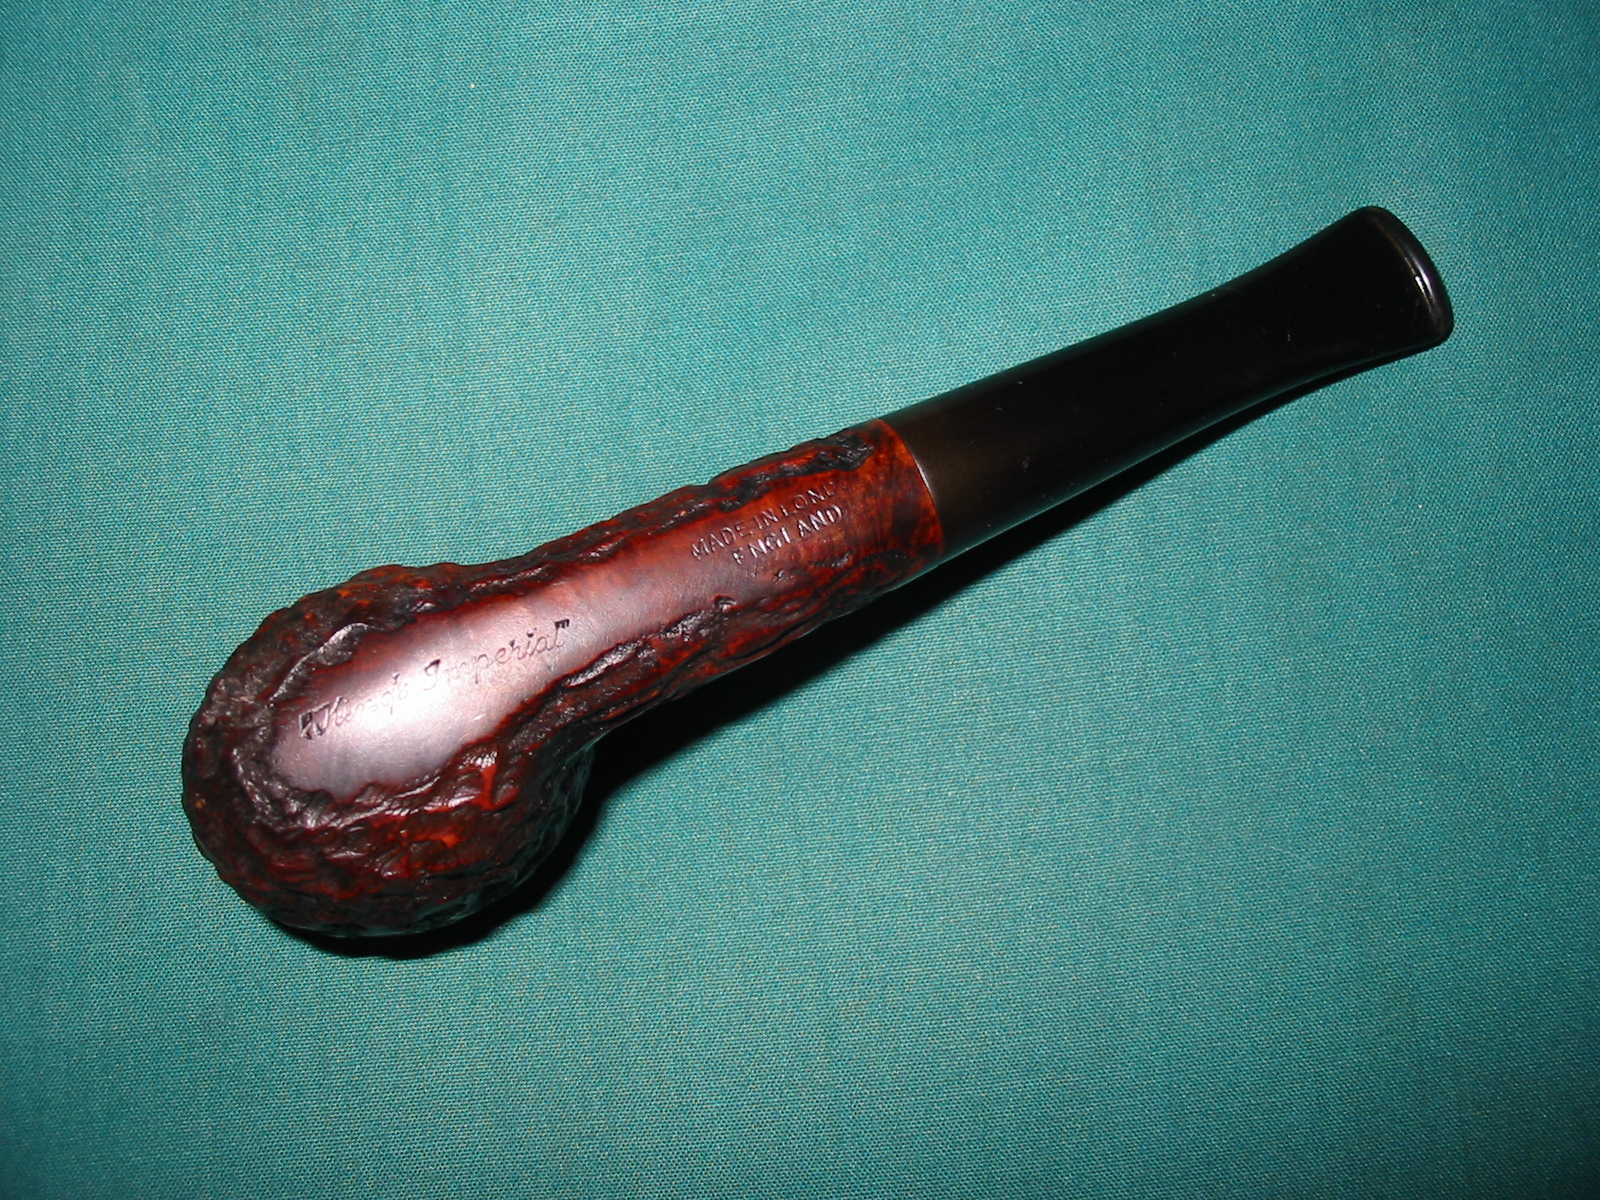
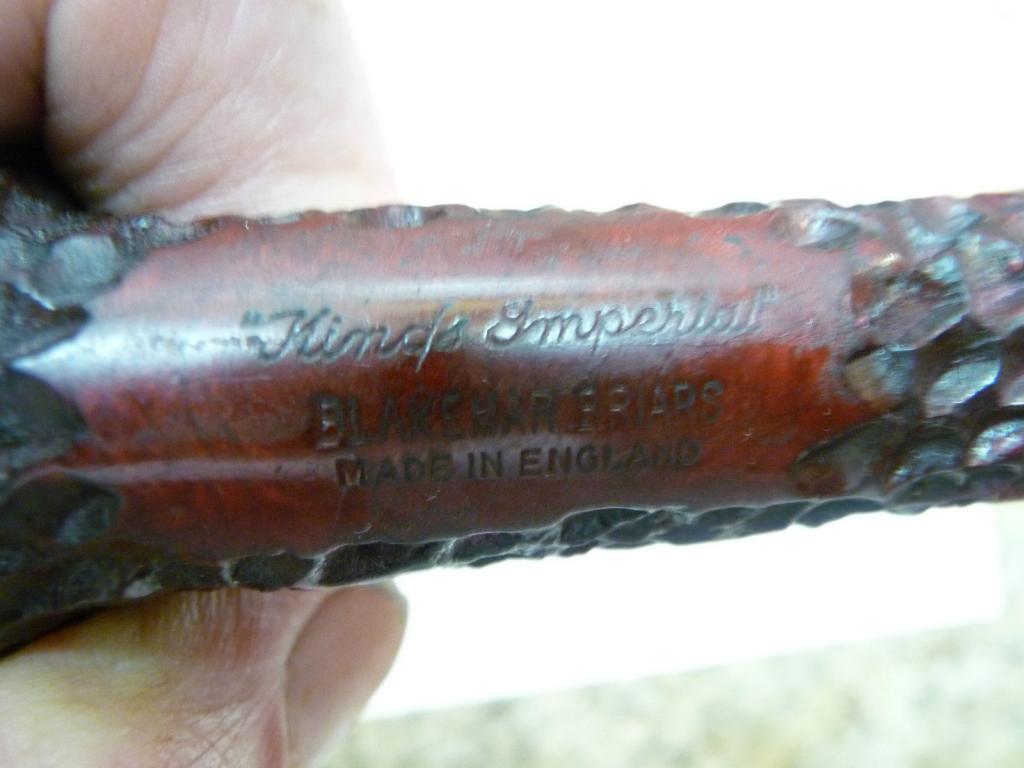
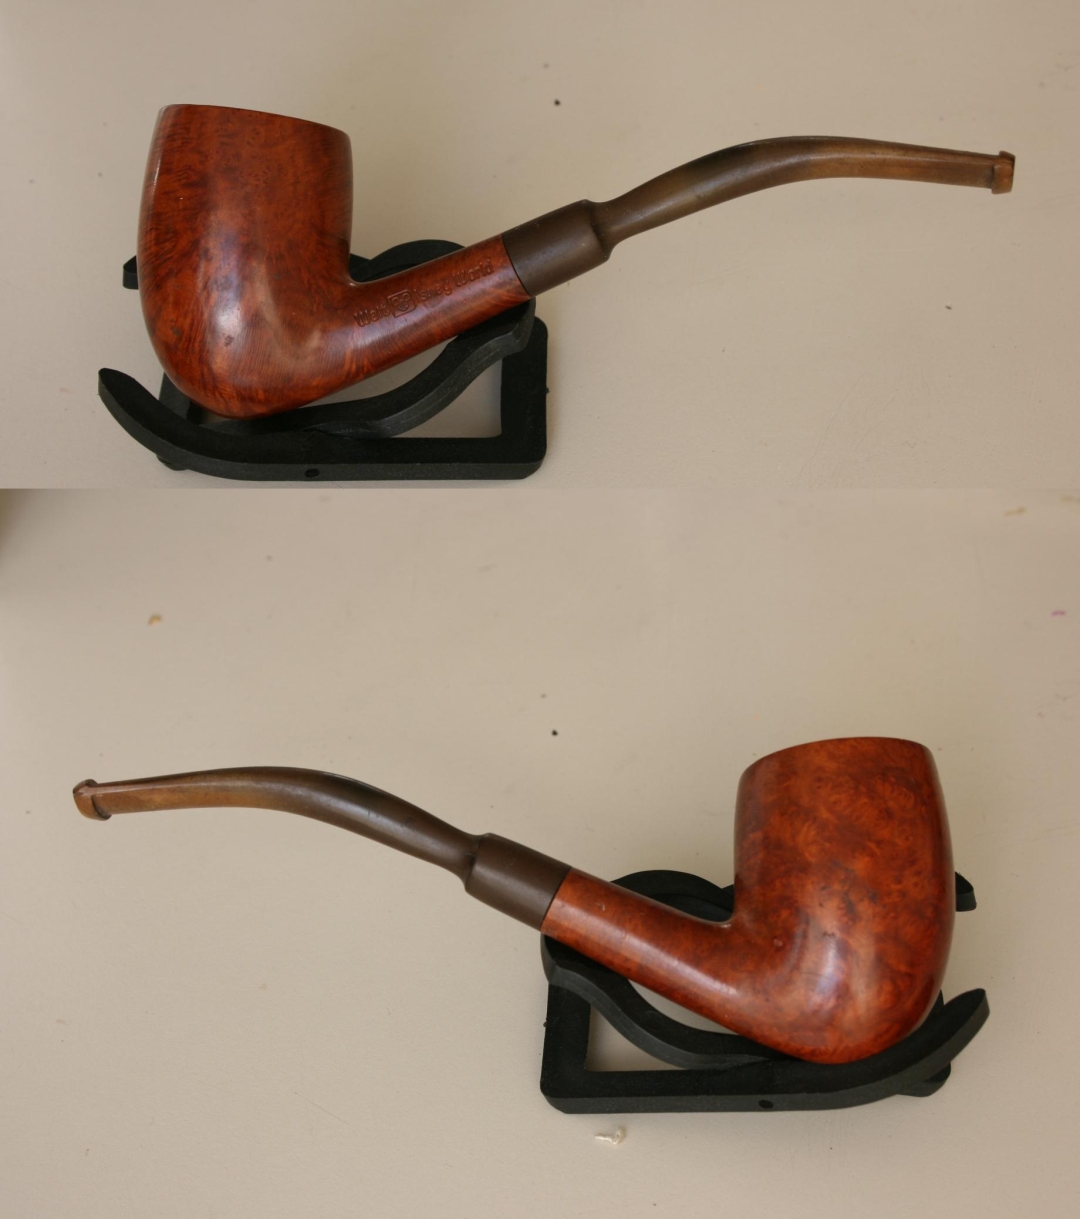
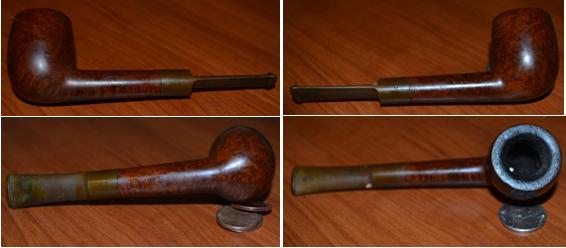
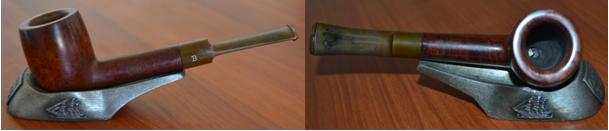
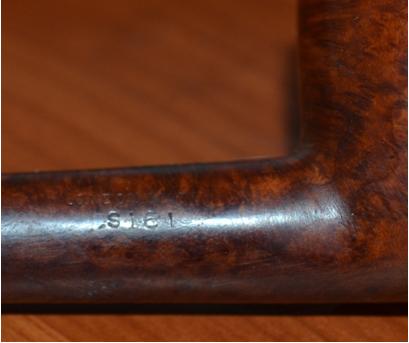
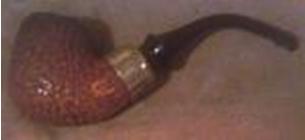
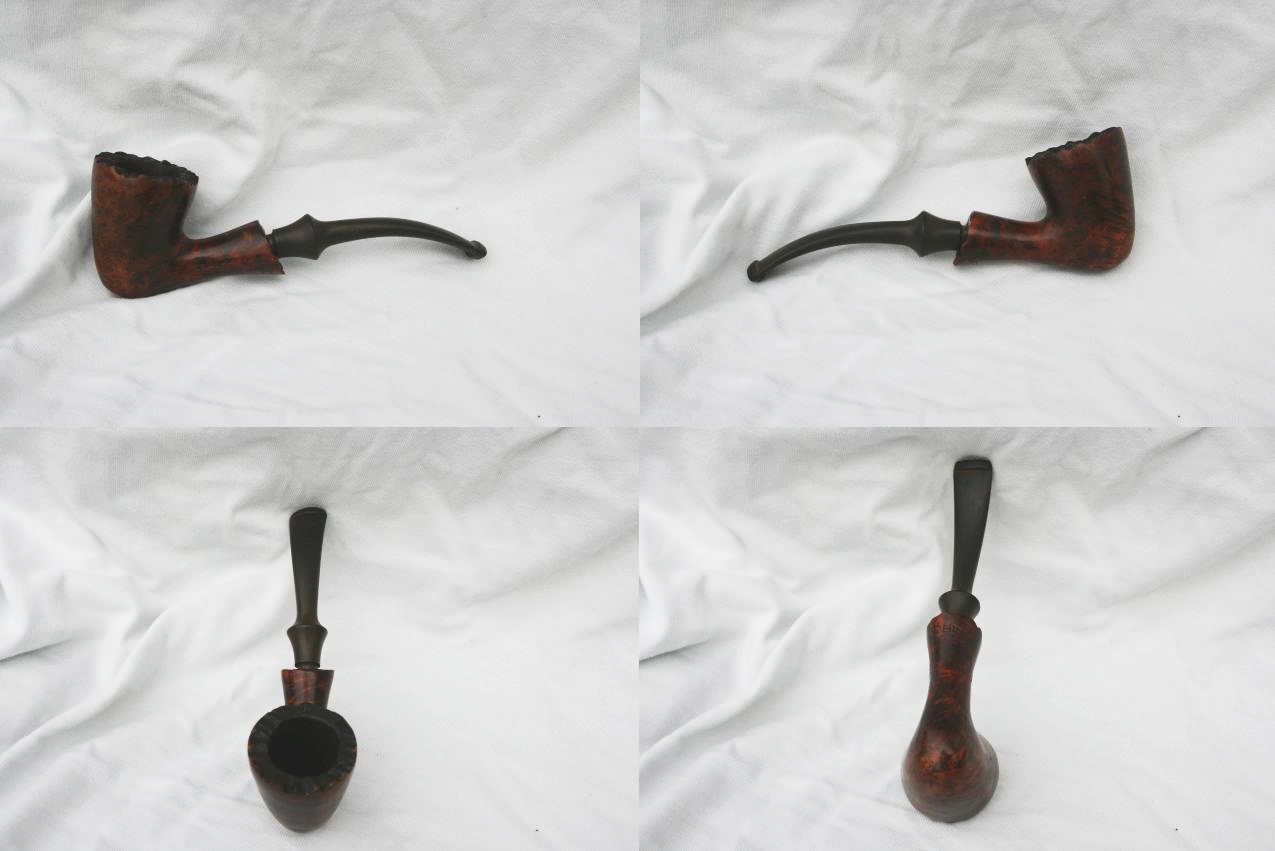
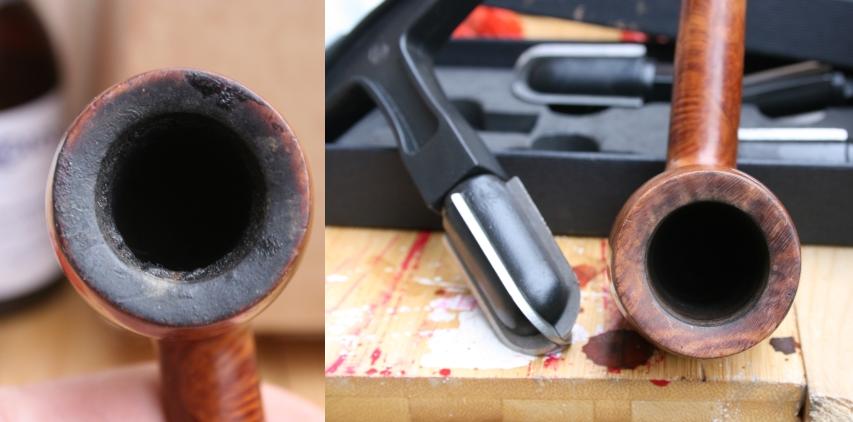
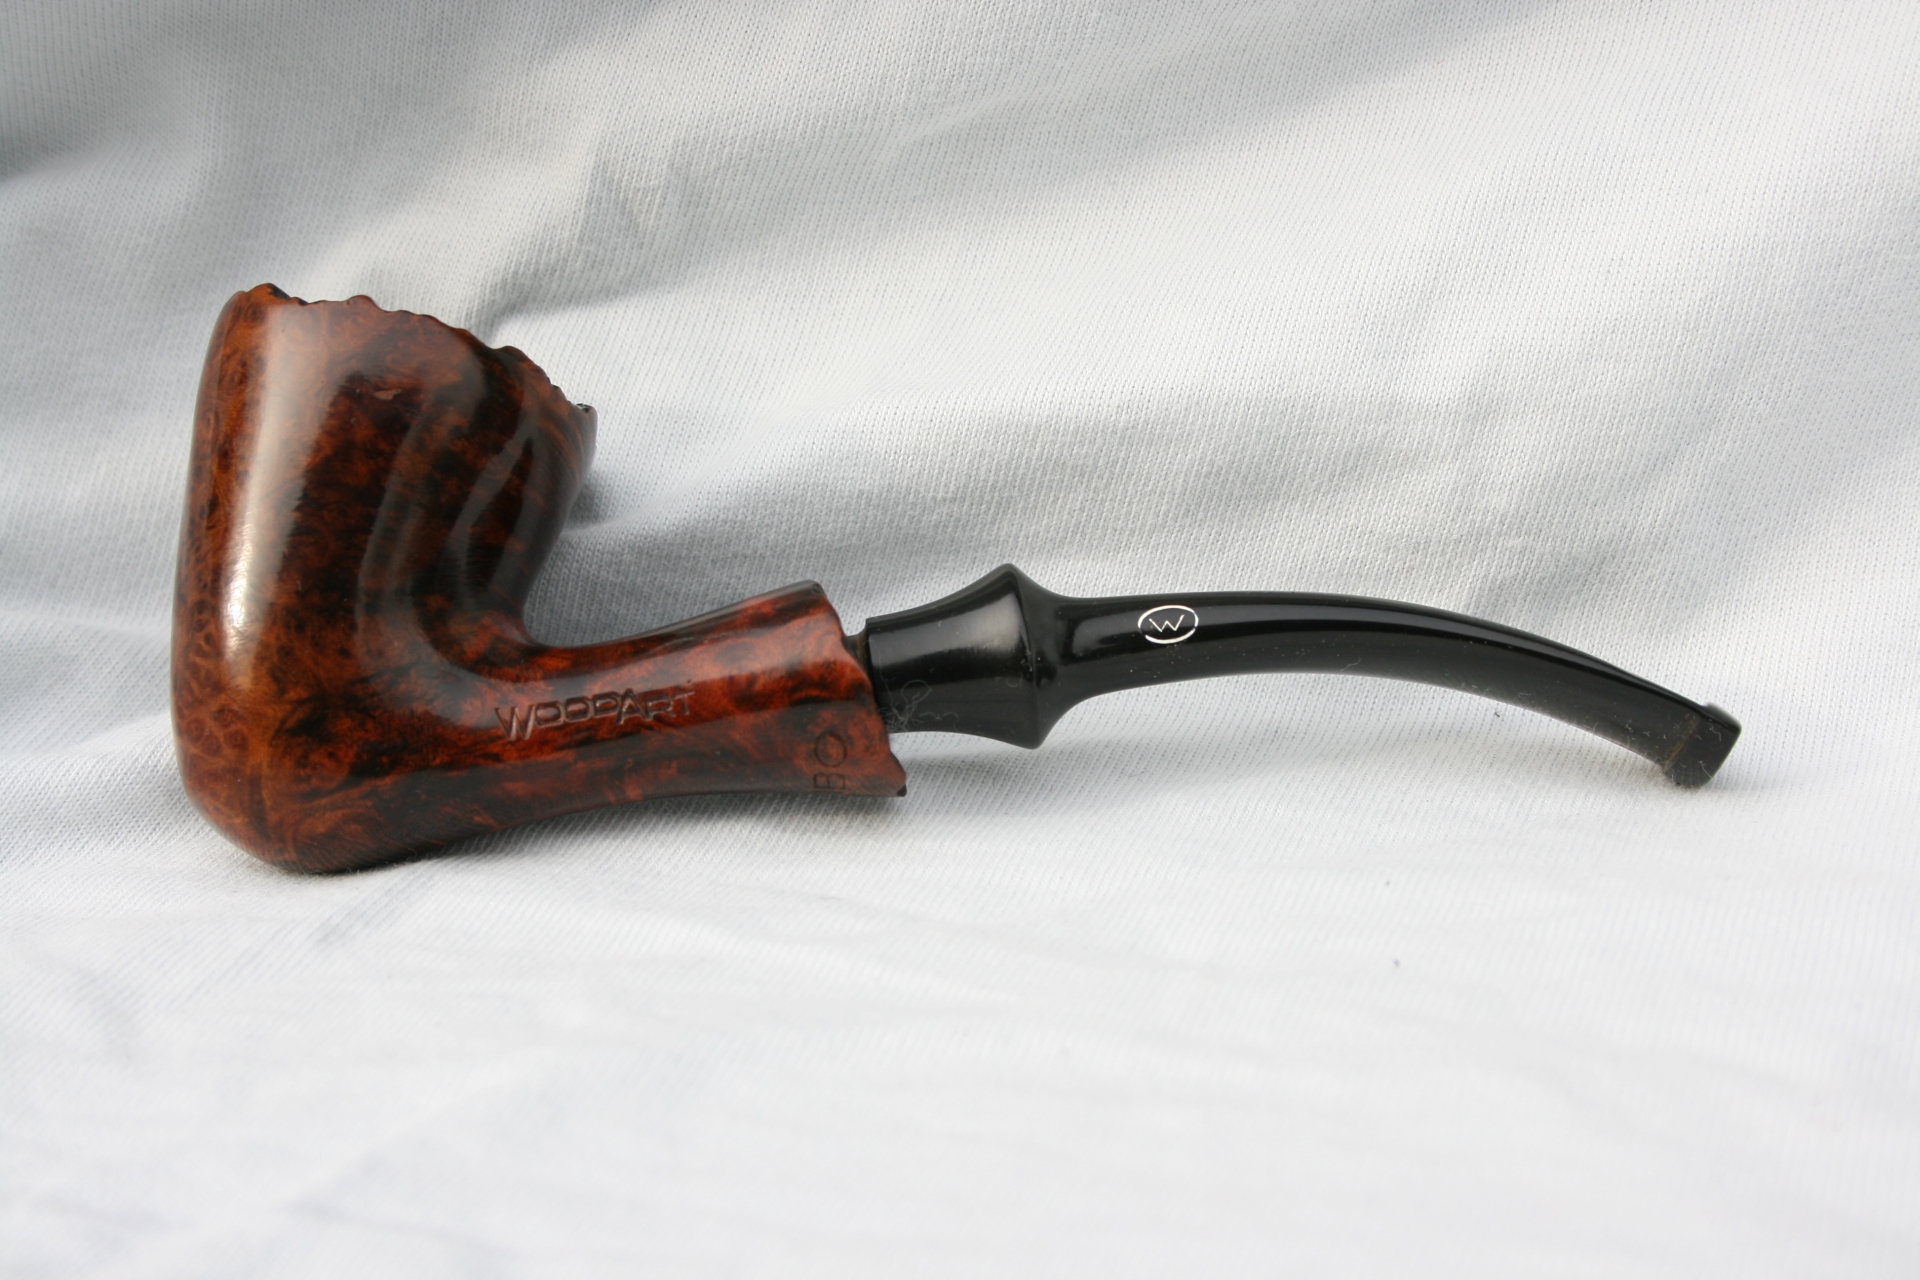
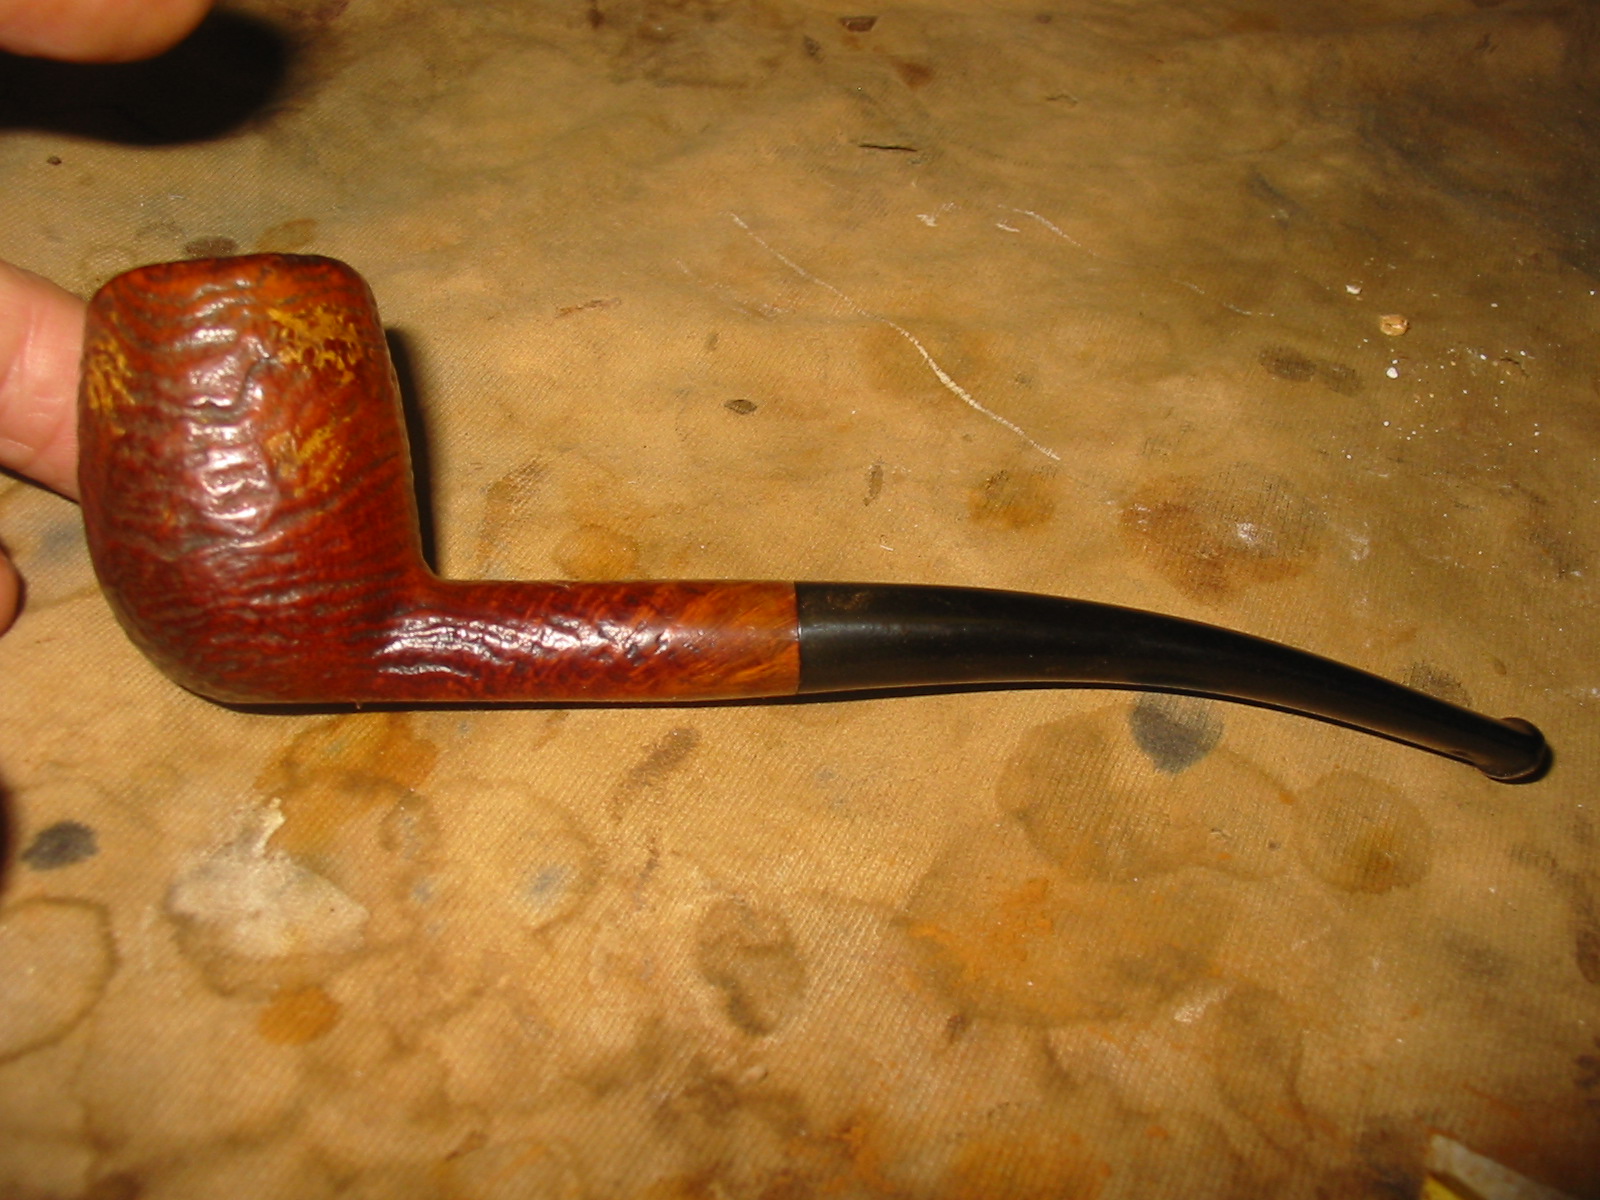
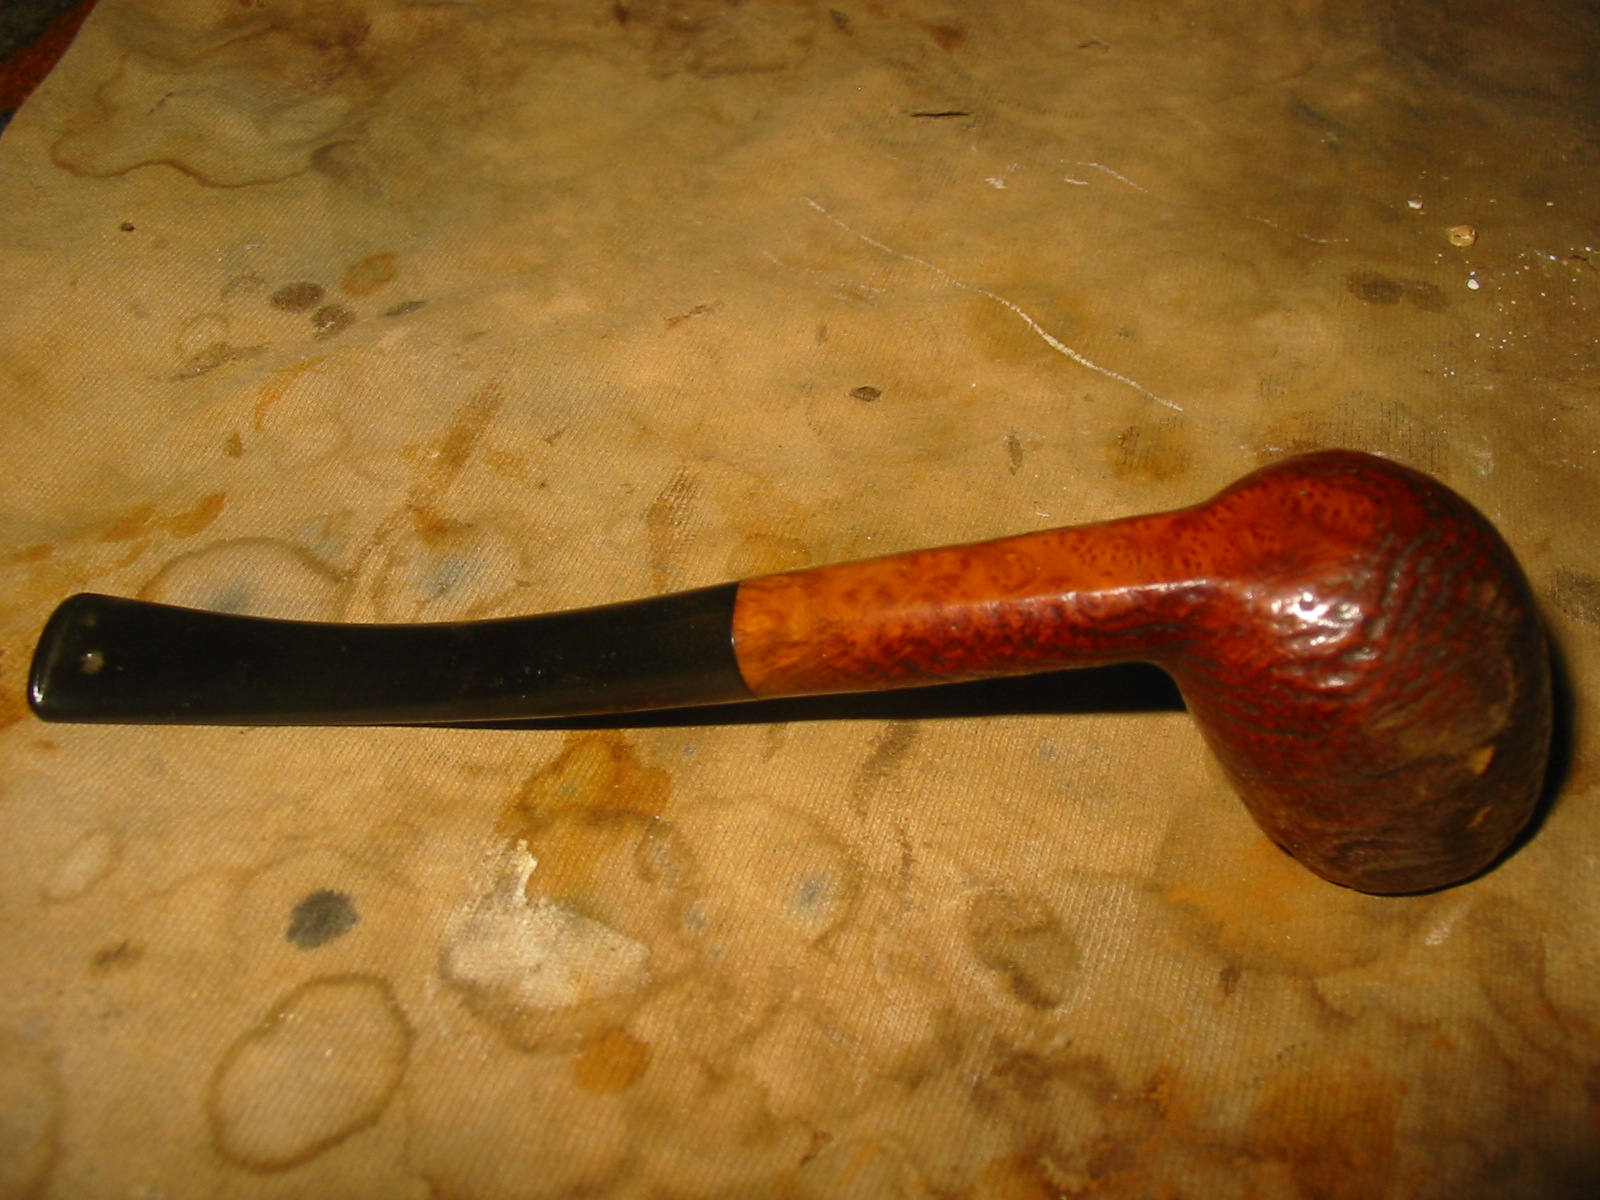
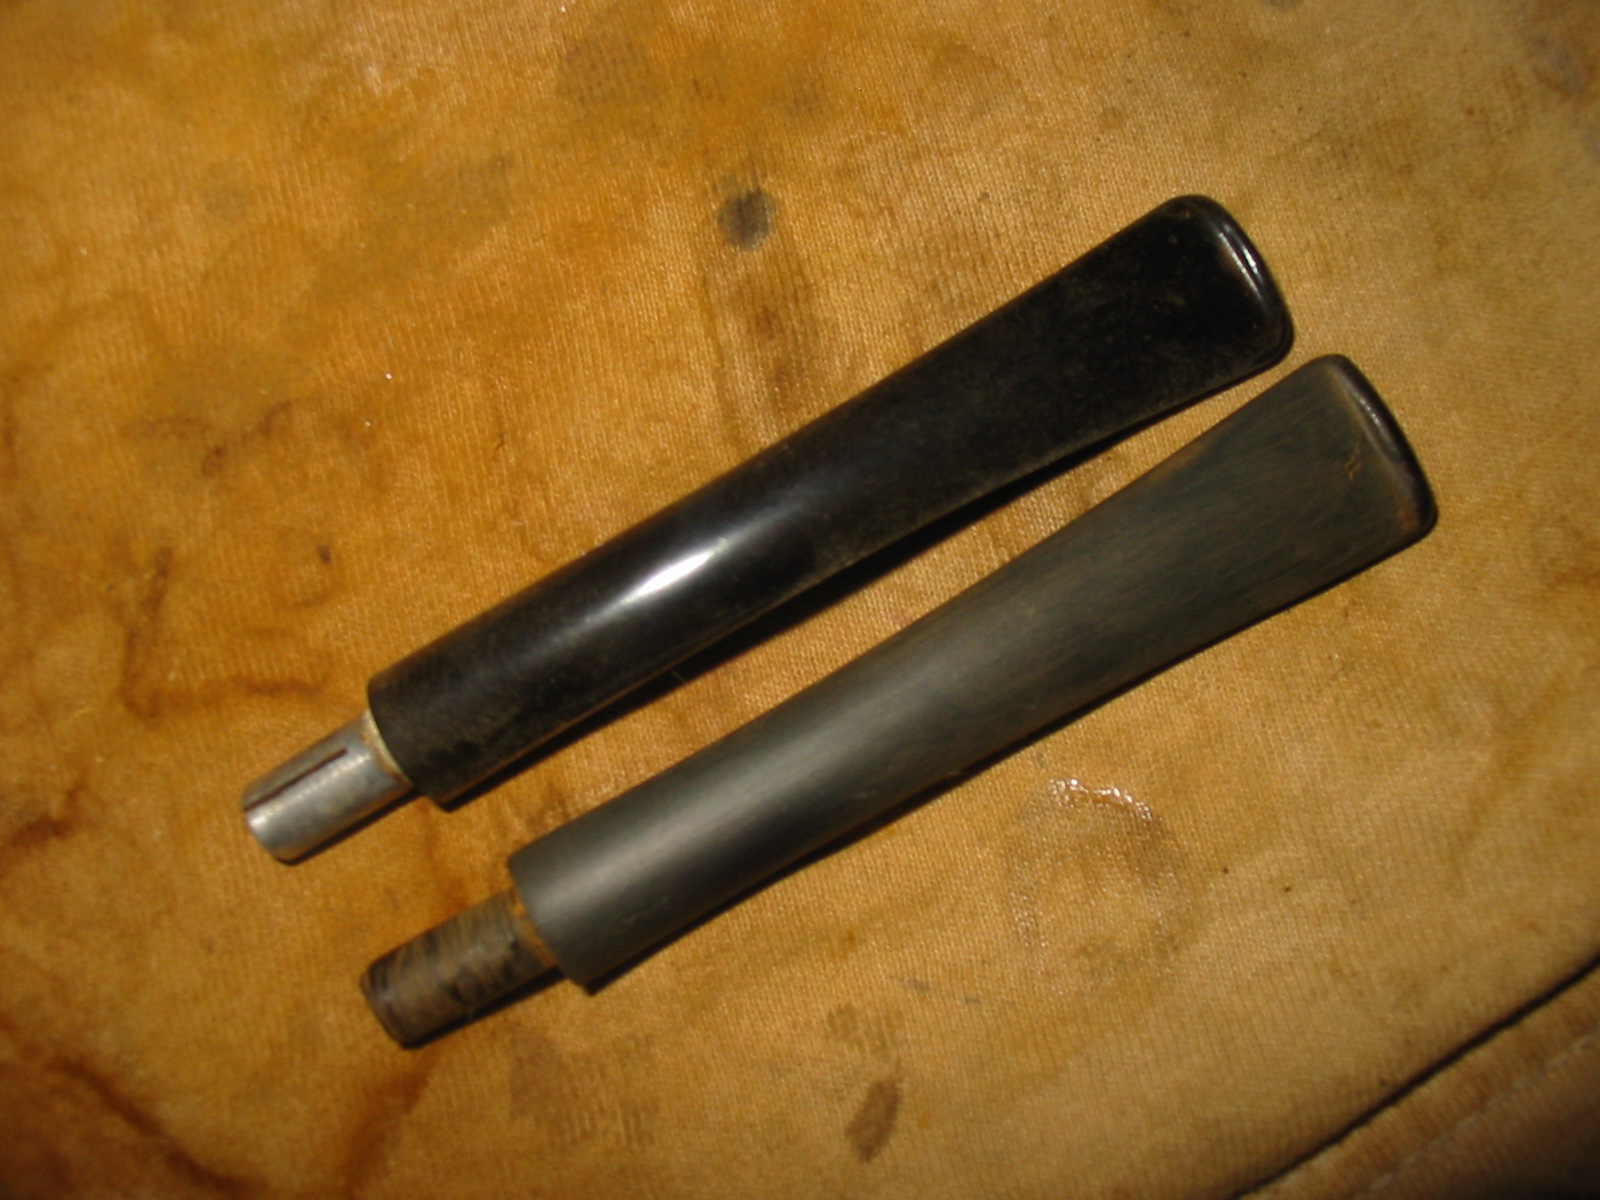
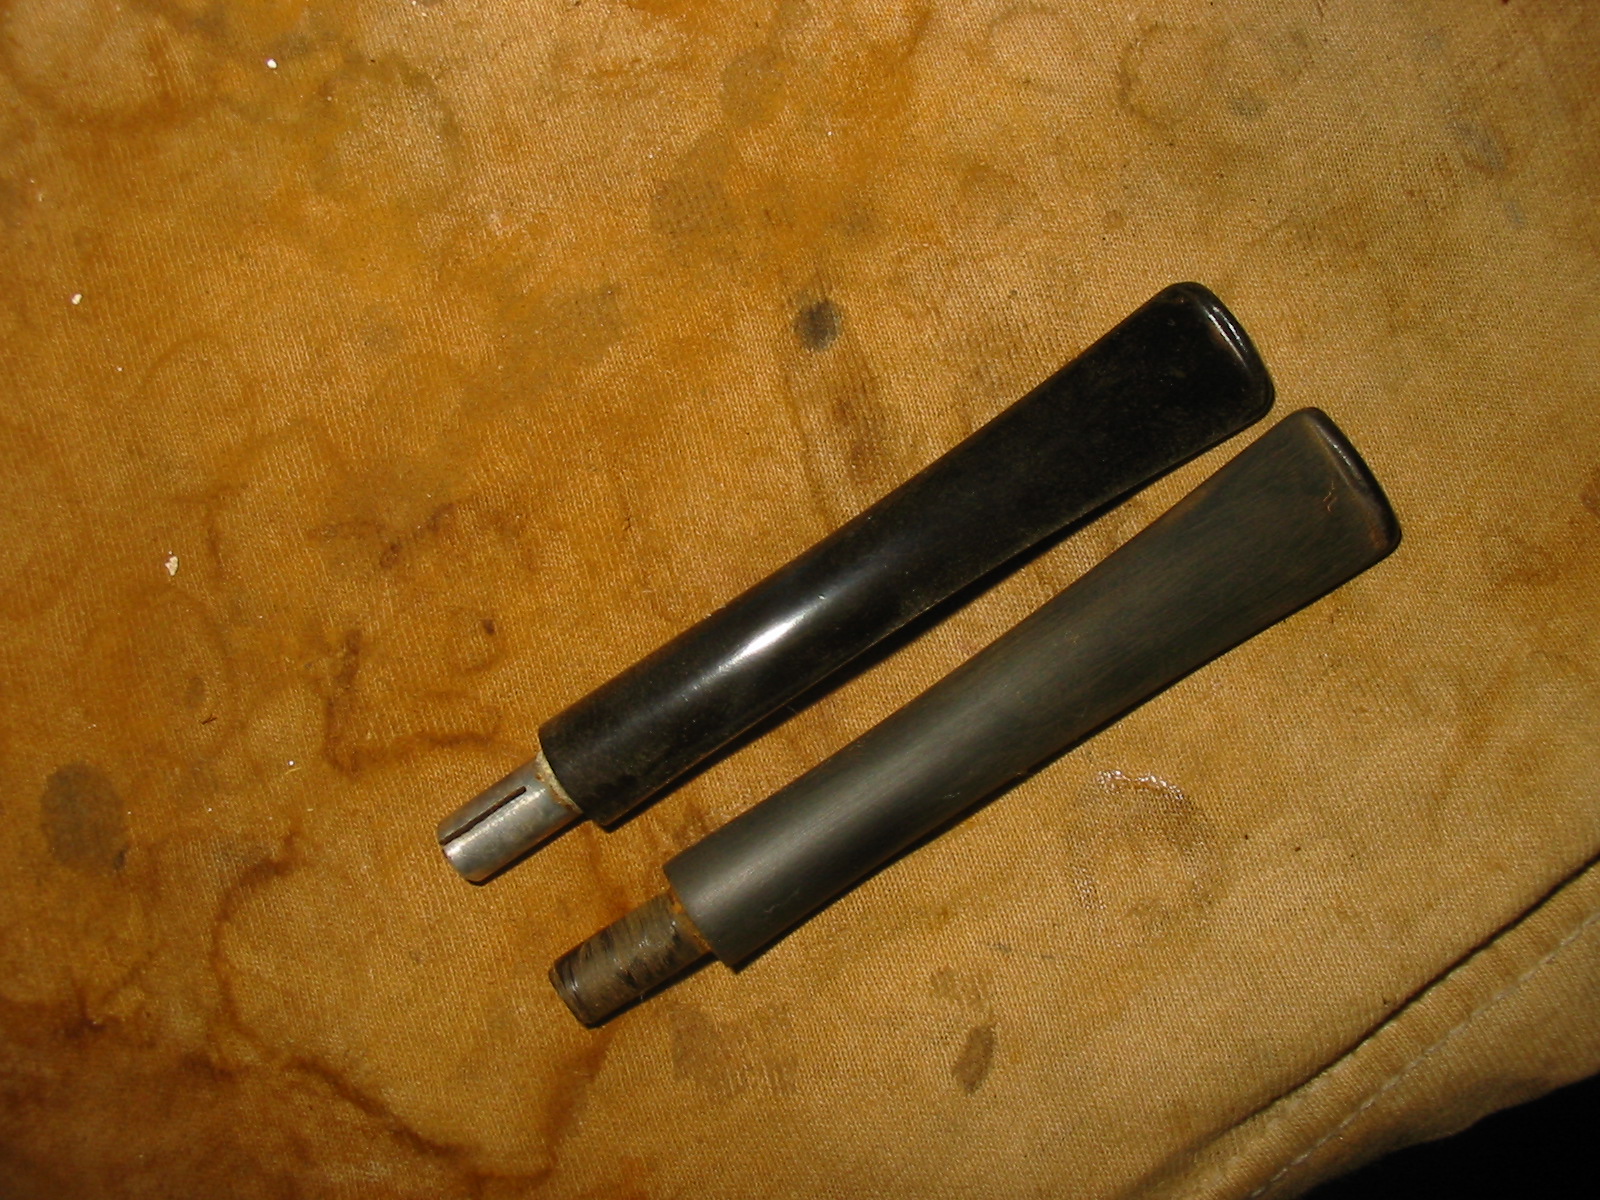
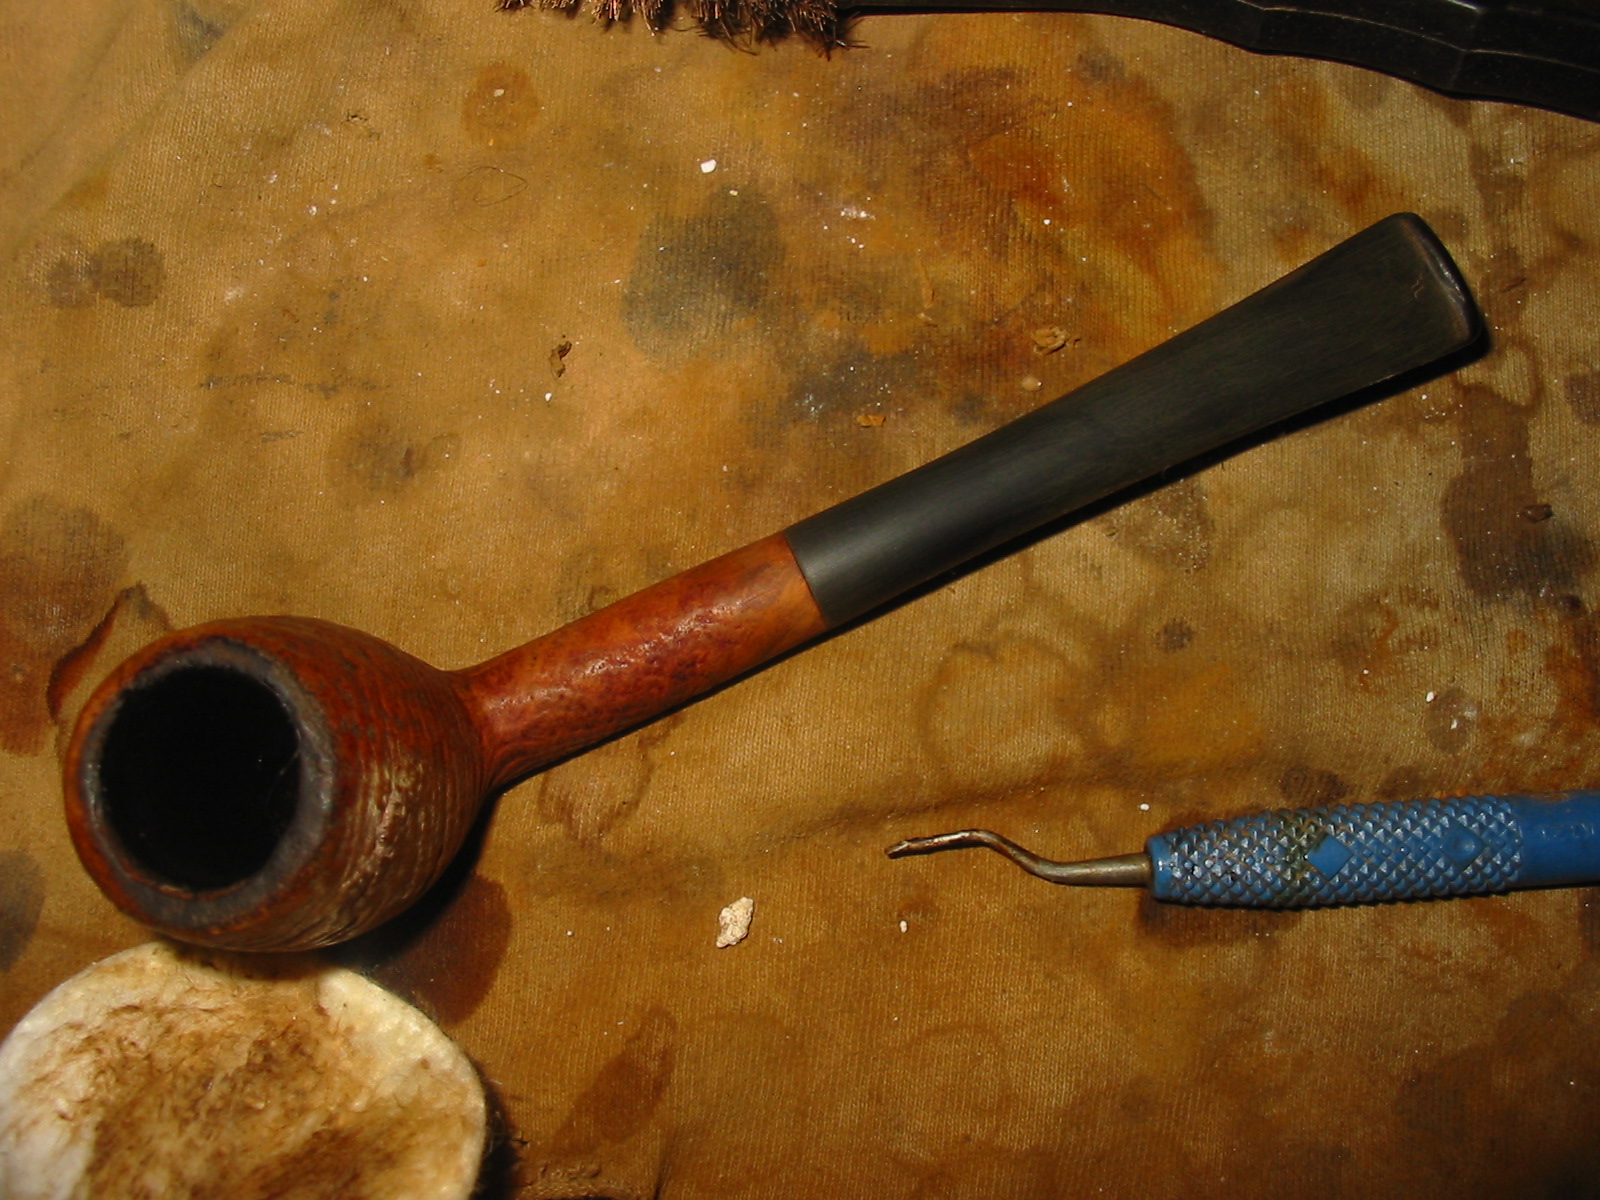
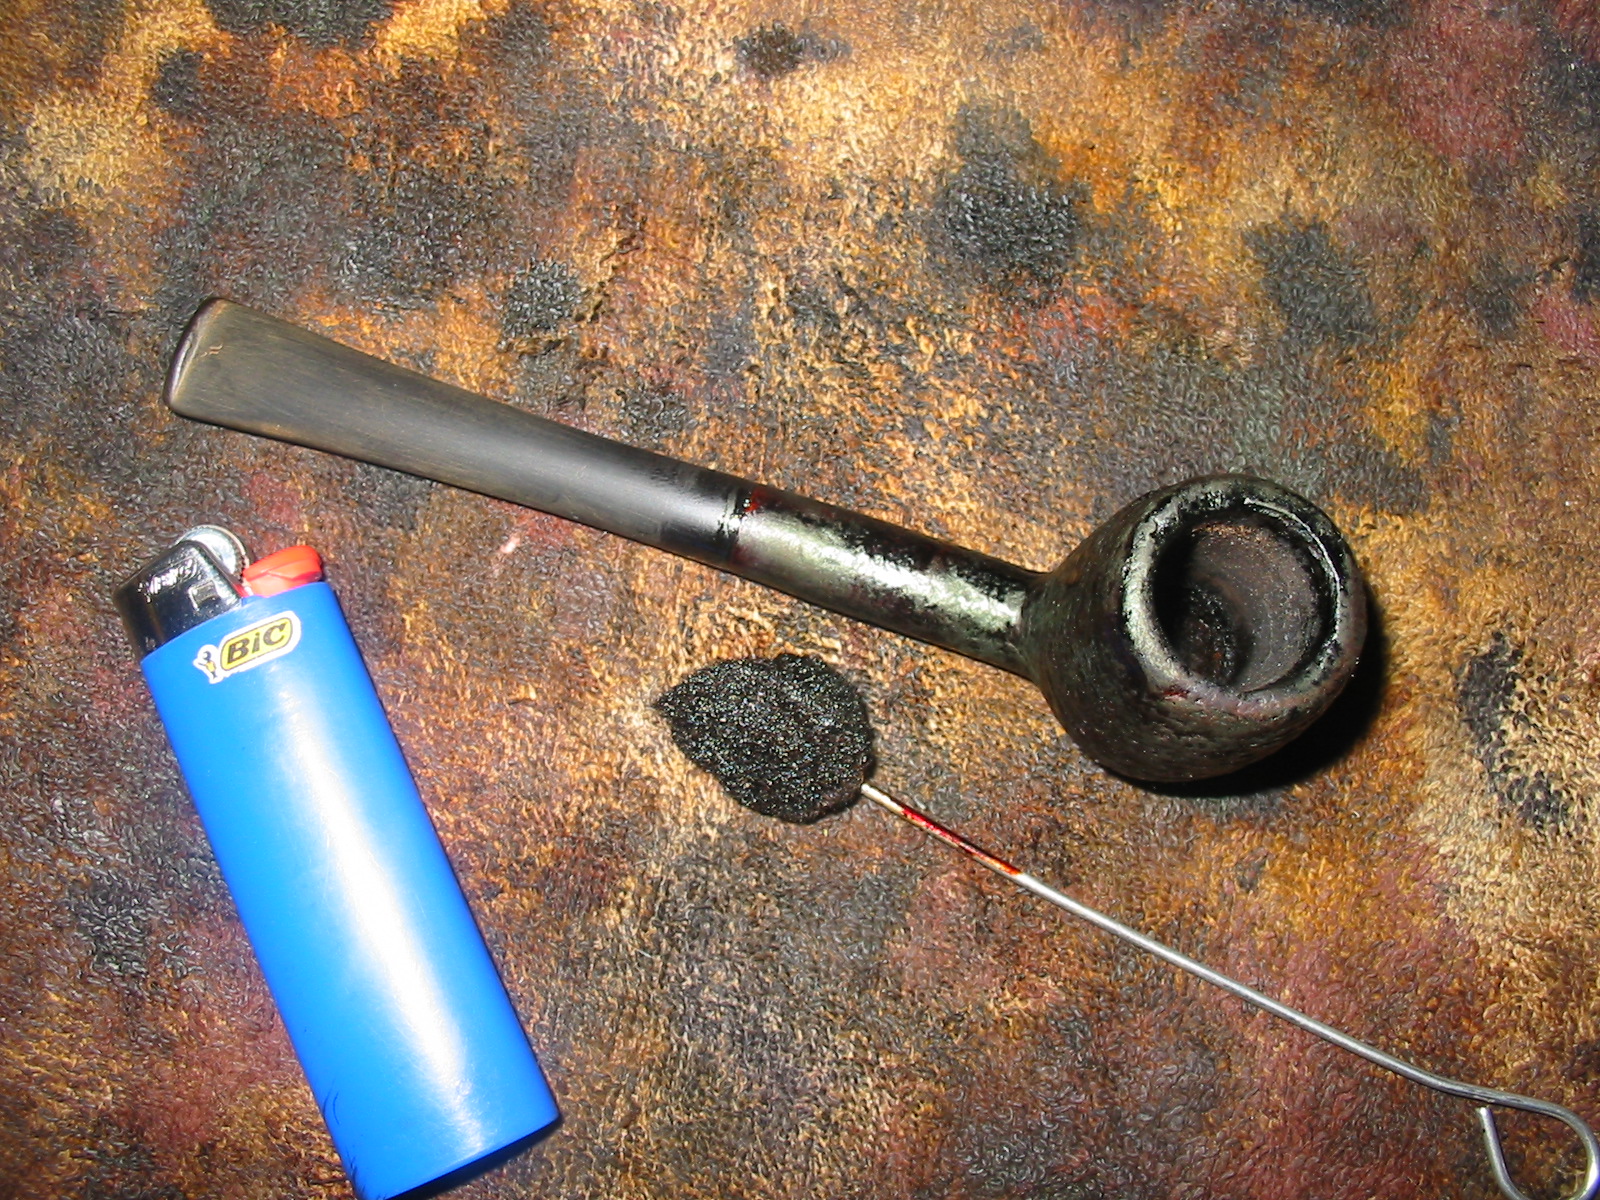
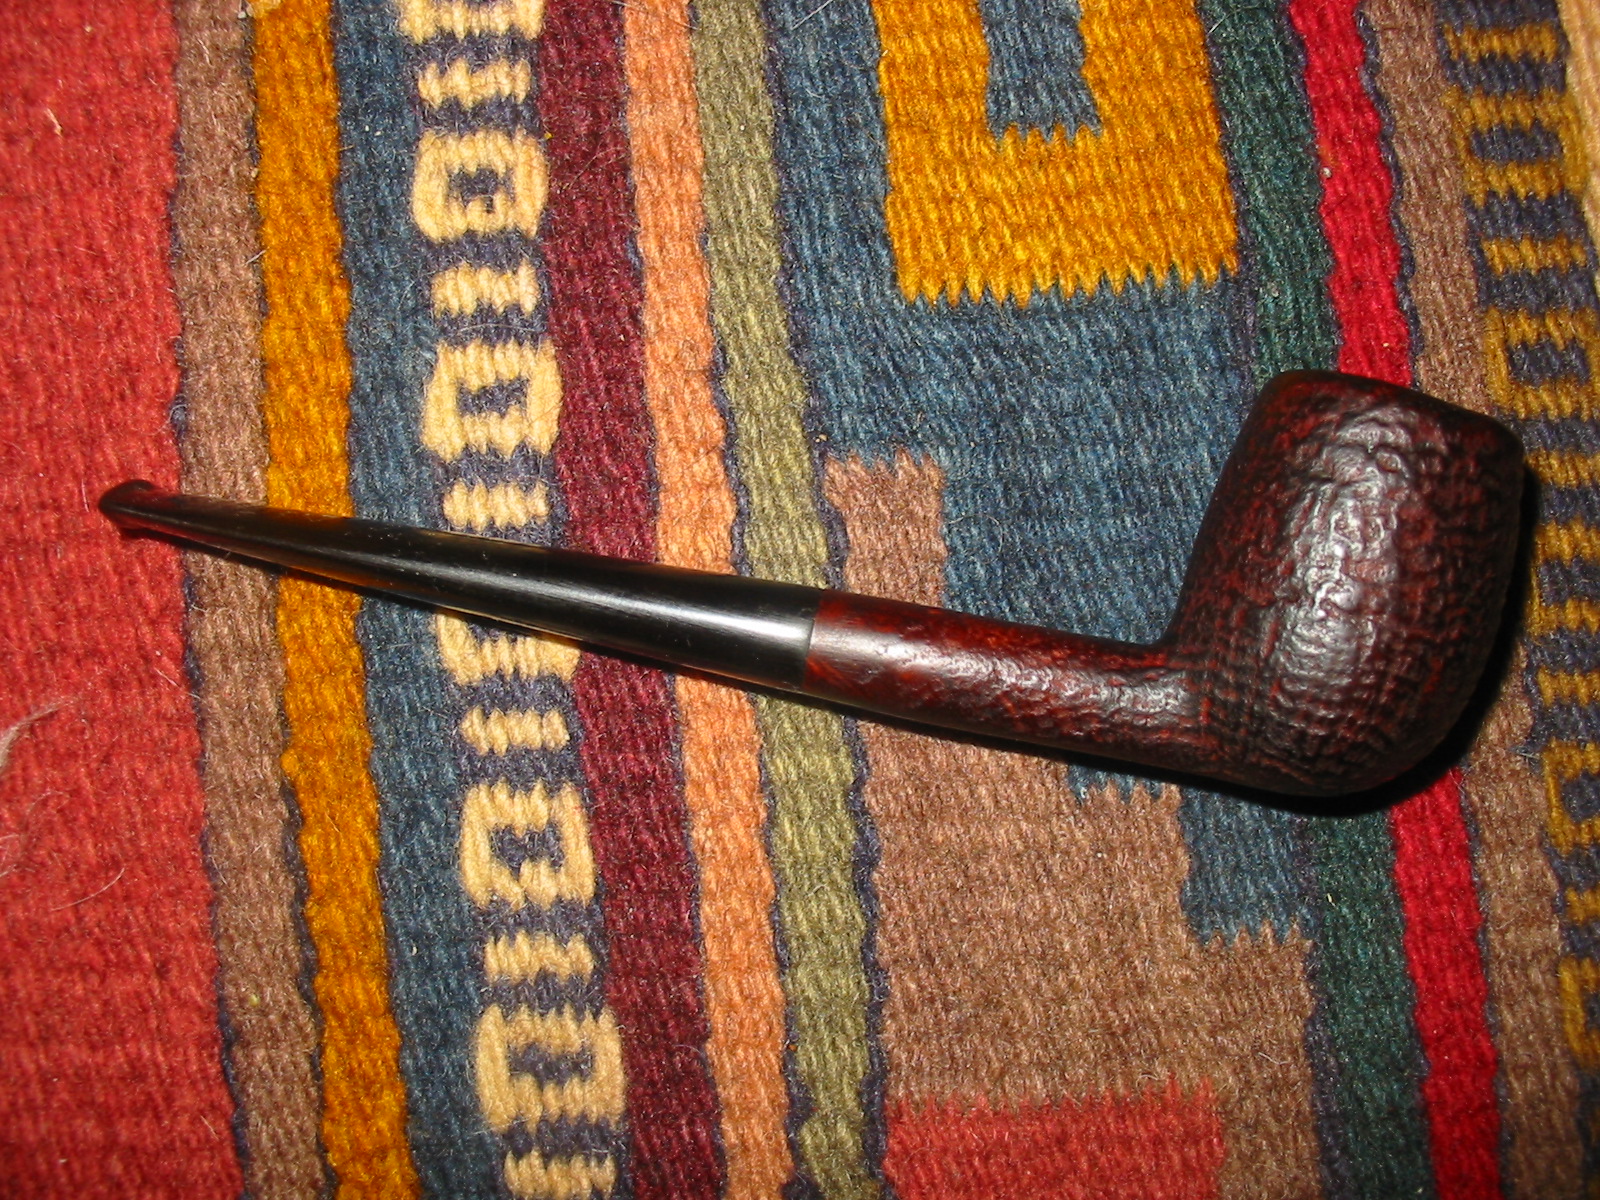
I sampled many of the Latakia blends and many of the Virginia and Virginia/Perique blends. It was an enjoyable experience over the past weekend. There was one of the pipes that I also kept coming back to over and over again during the weekend – the small Bewlay billiard/cutty. There was something about it that drew my attention. It was clean but the finish was shot and the stem was definitely a replacement. The bend in it seems to have been added with the new stem. The finish was a sandblast that was well-worn from either handling or over buffing. The stamping on the bottom of the shank reads Bewlay in script over Sandblast over London England. It is worn and growing faint. There was probably a shape number at the end of the shank but it had been sanded away with the sandblast when it was restemmed previously.

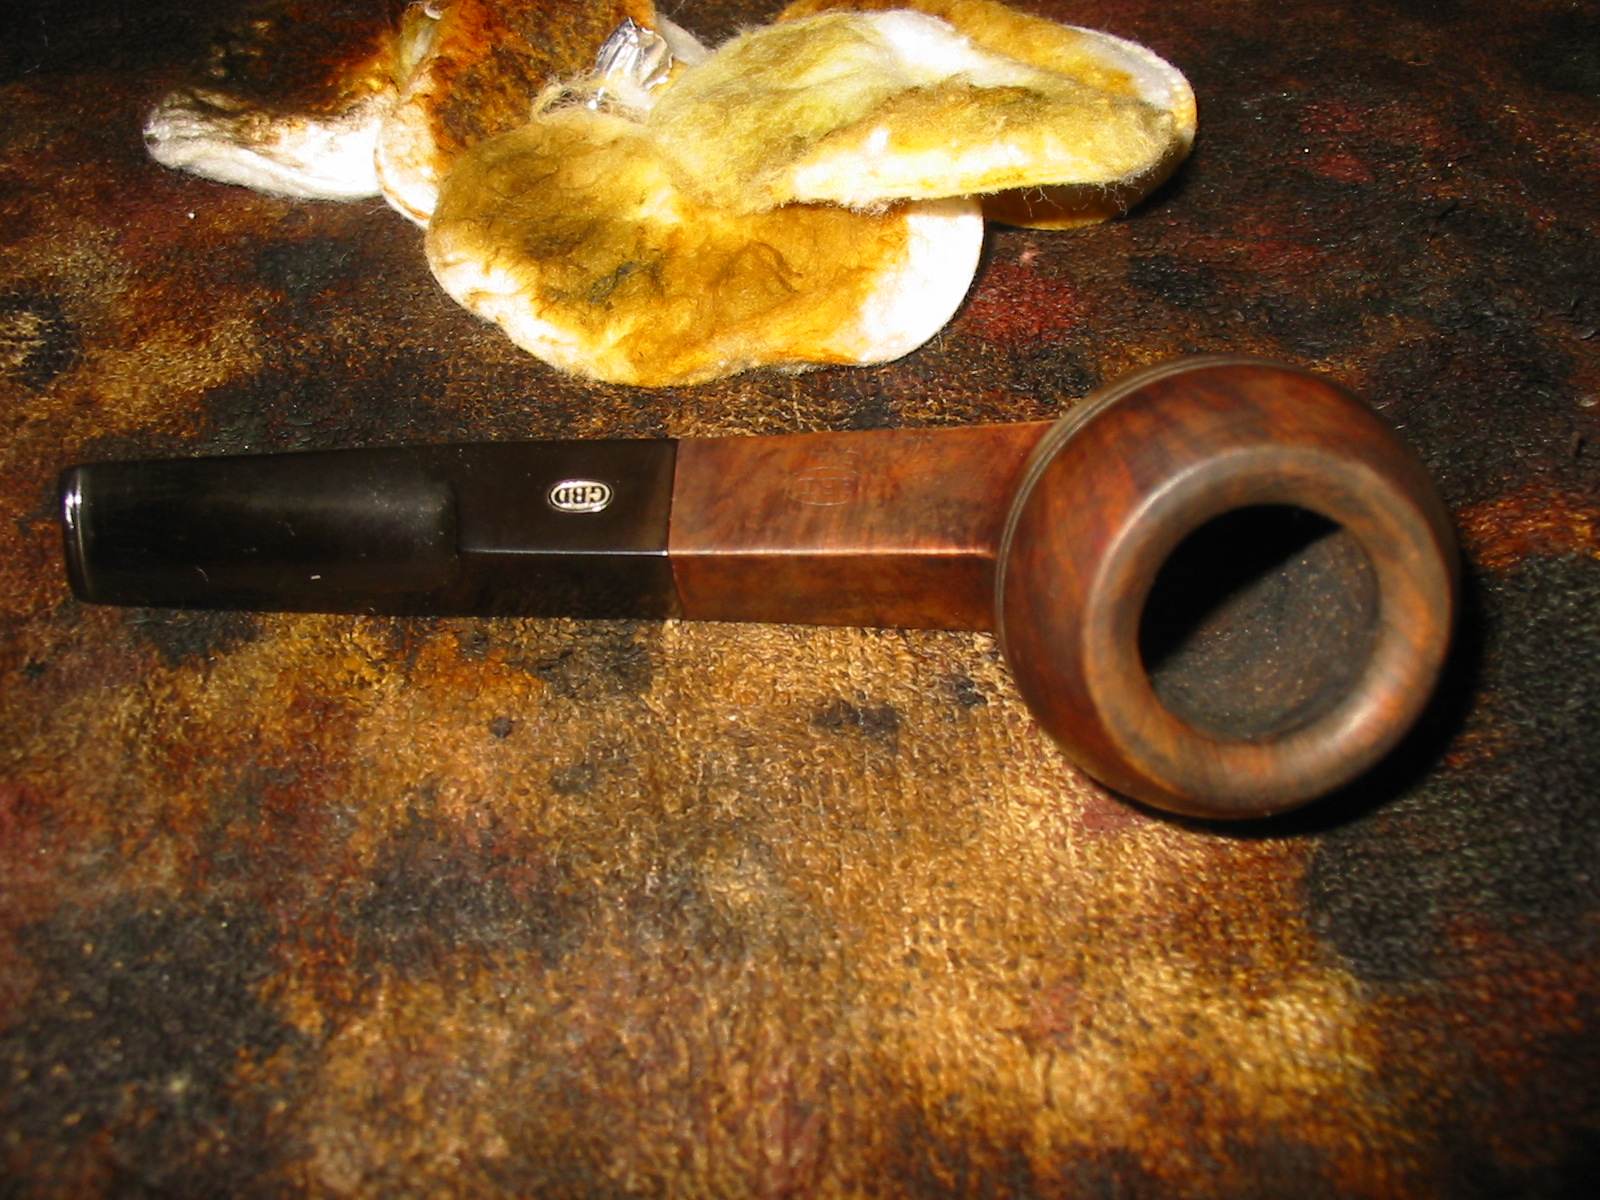
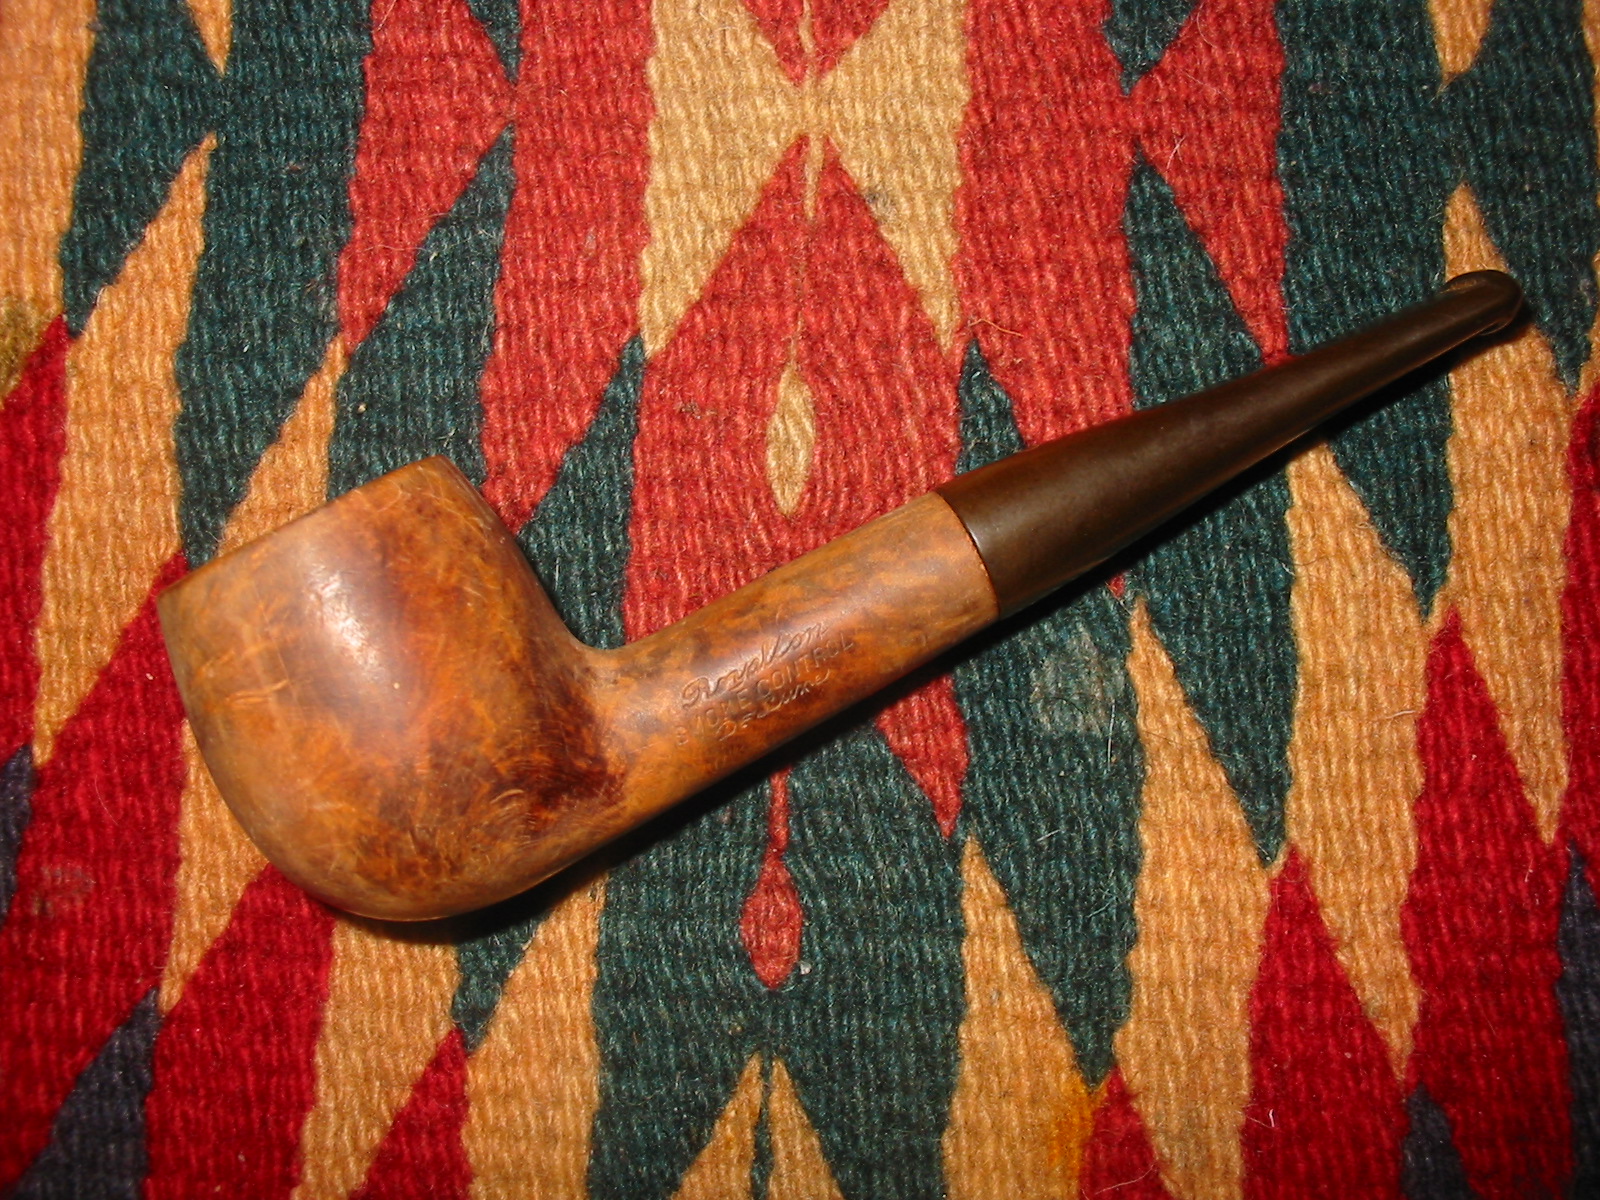
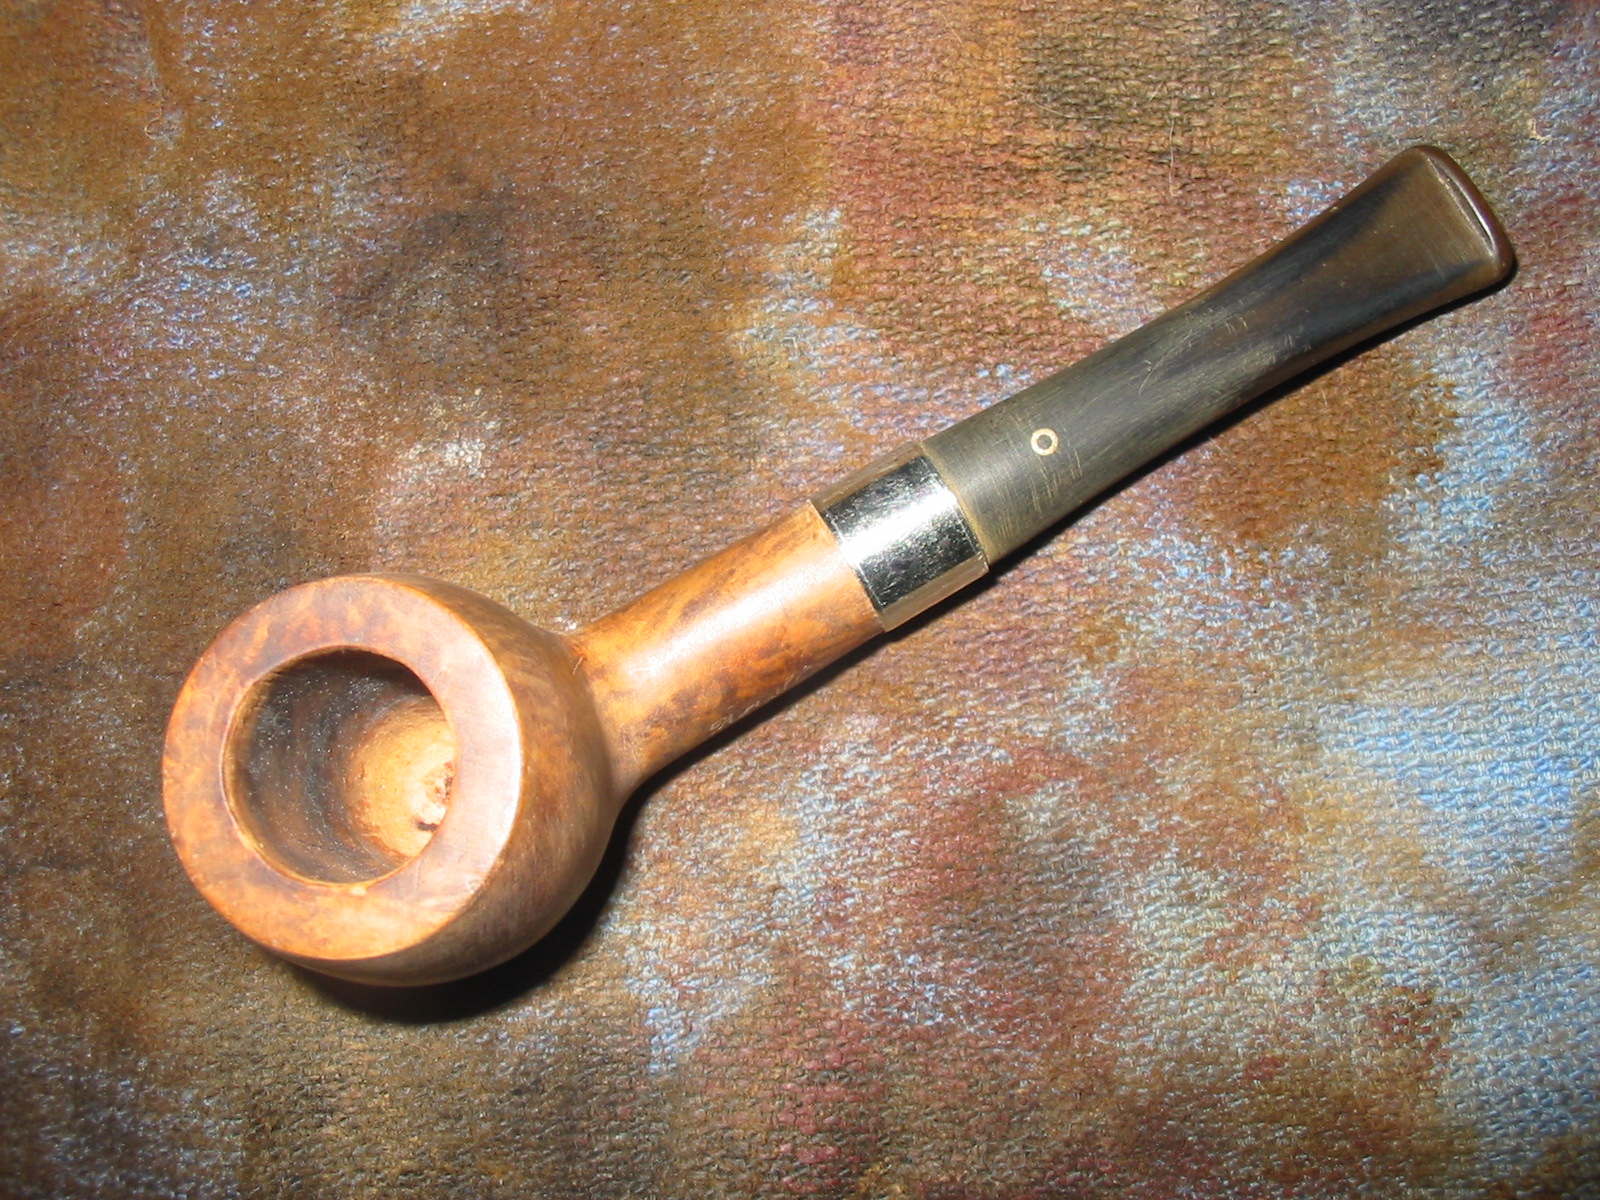
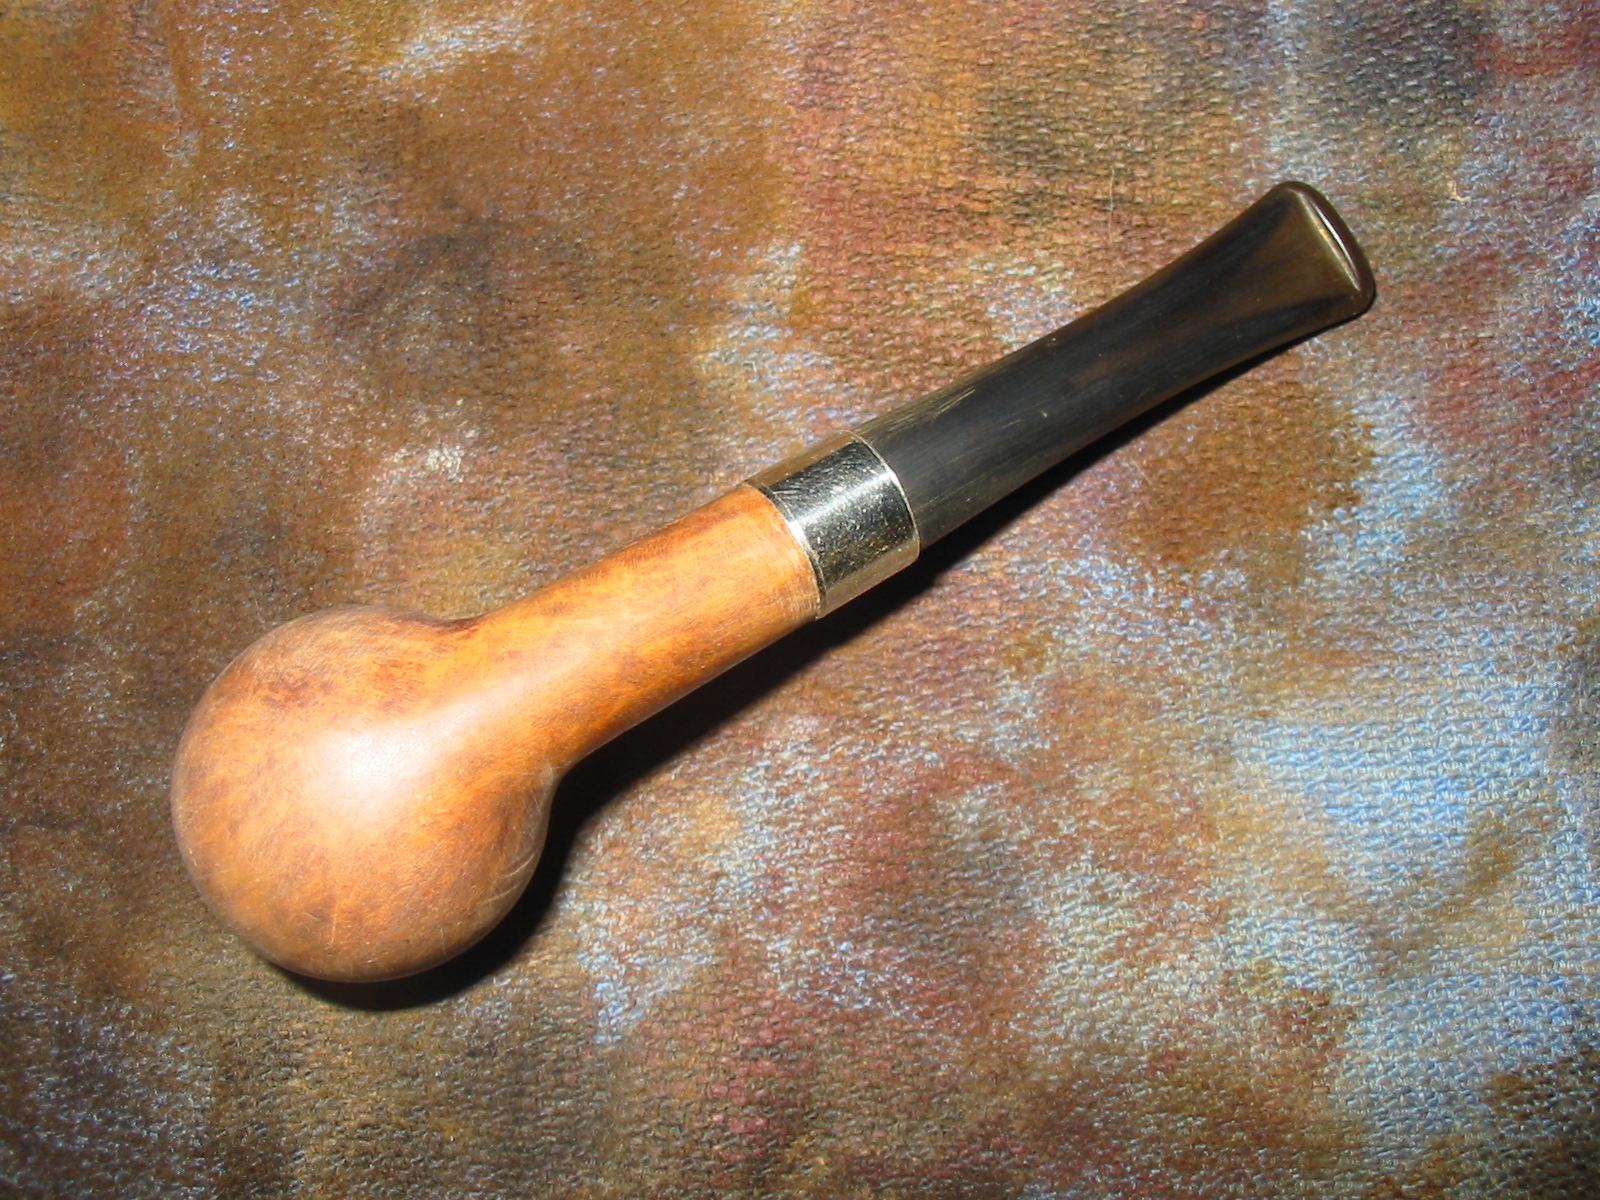
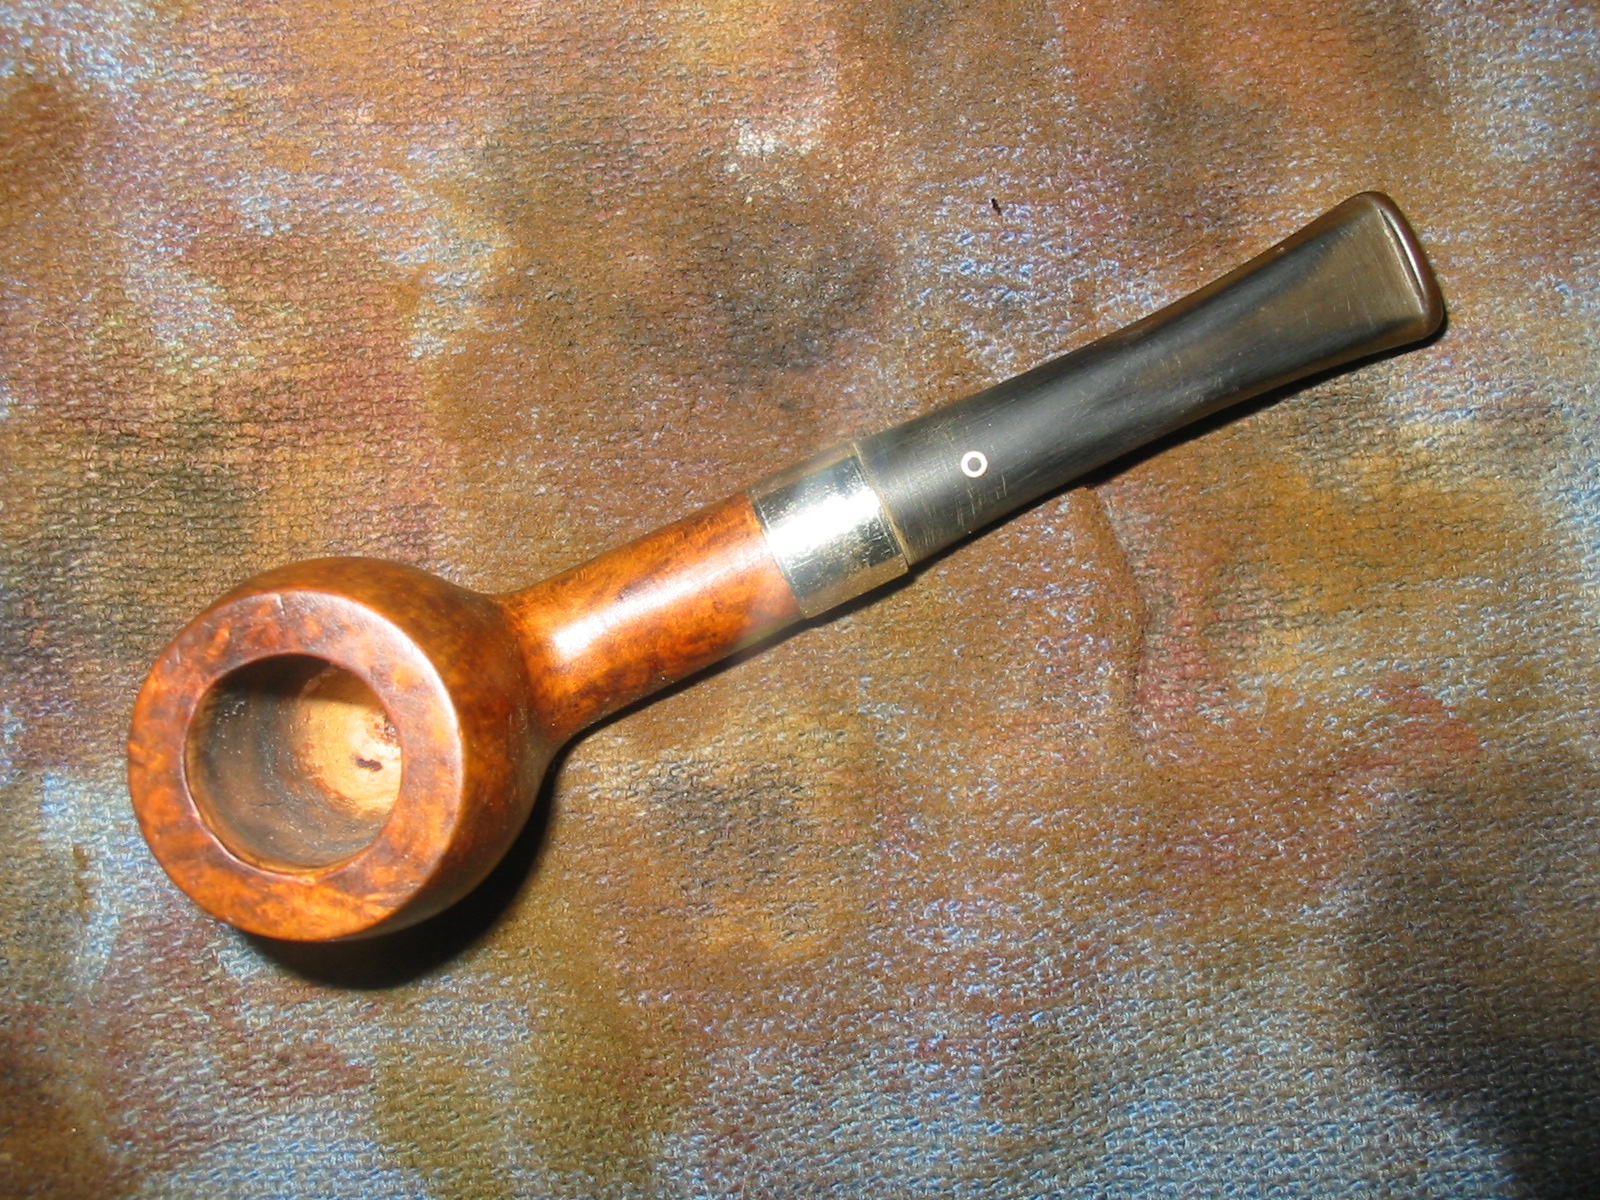
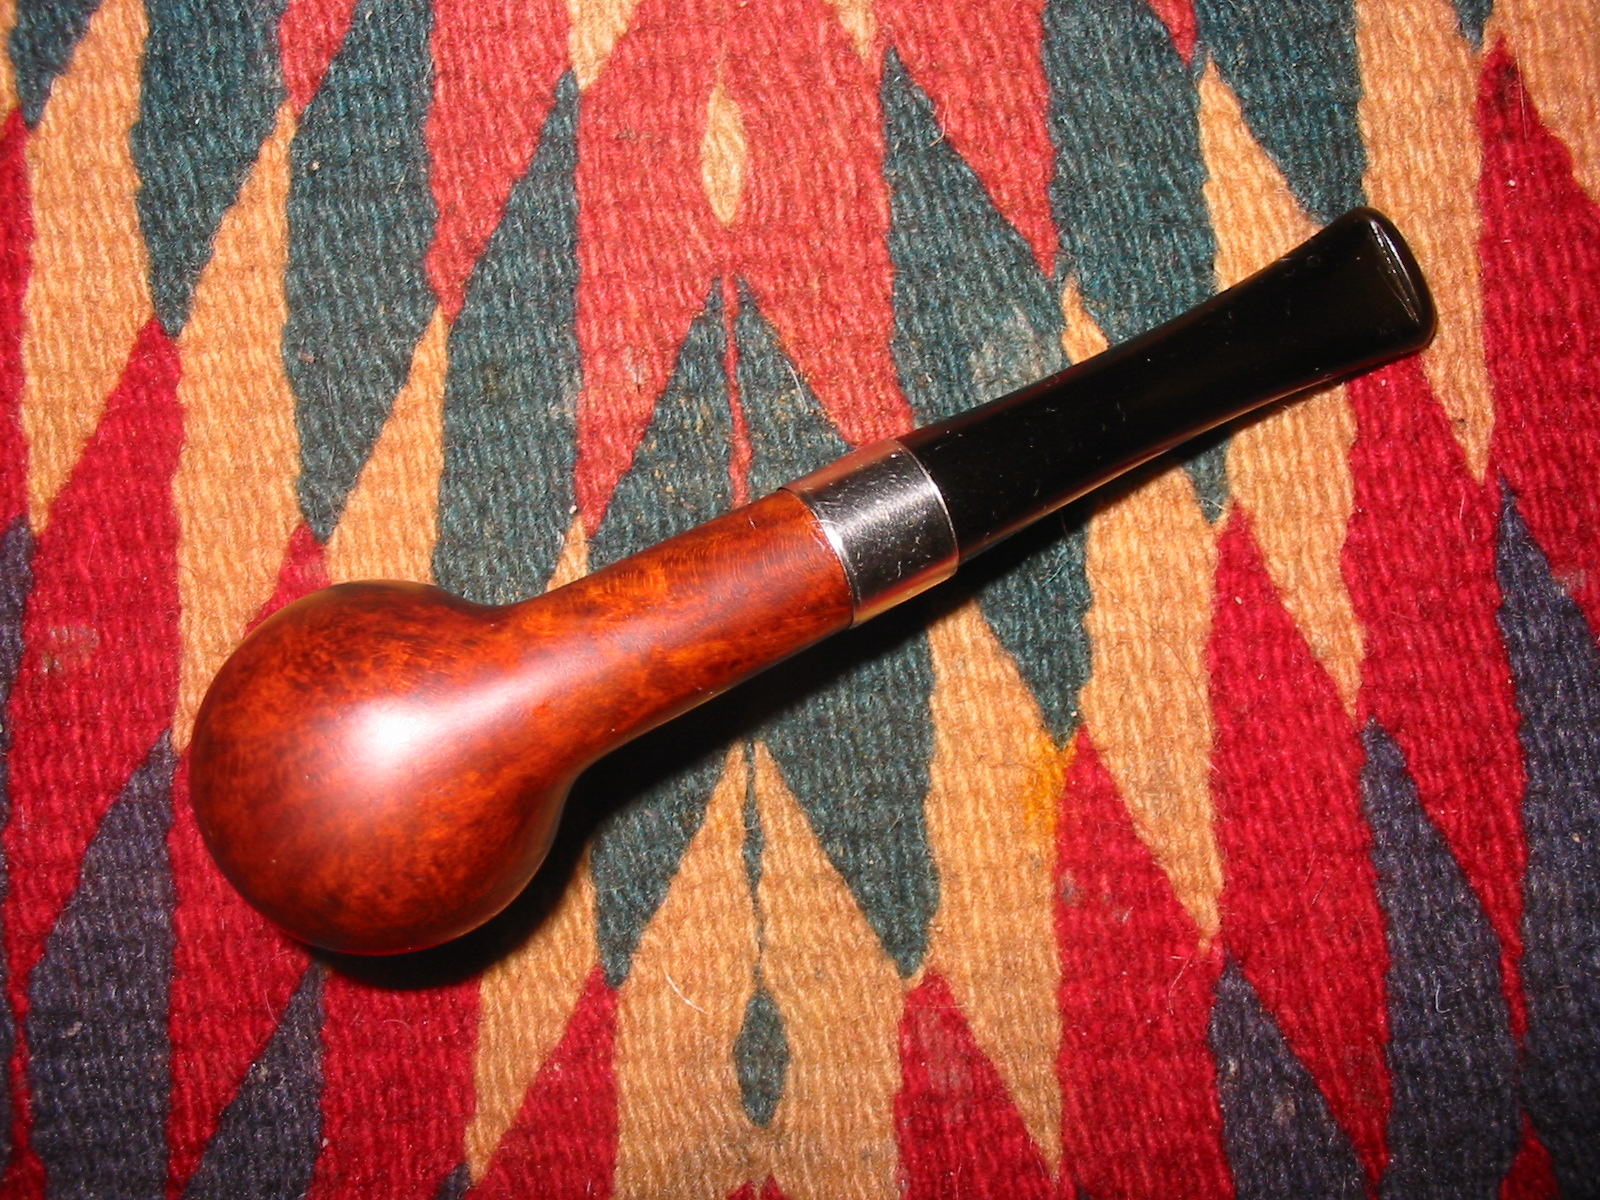
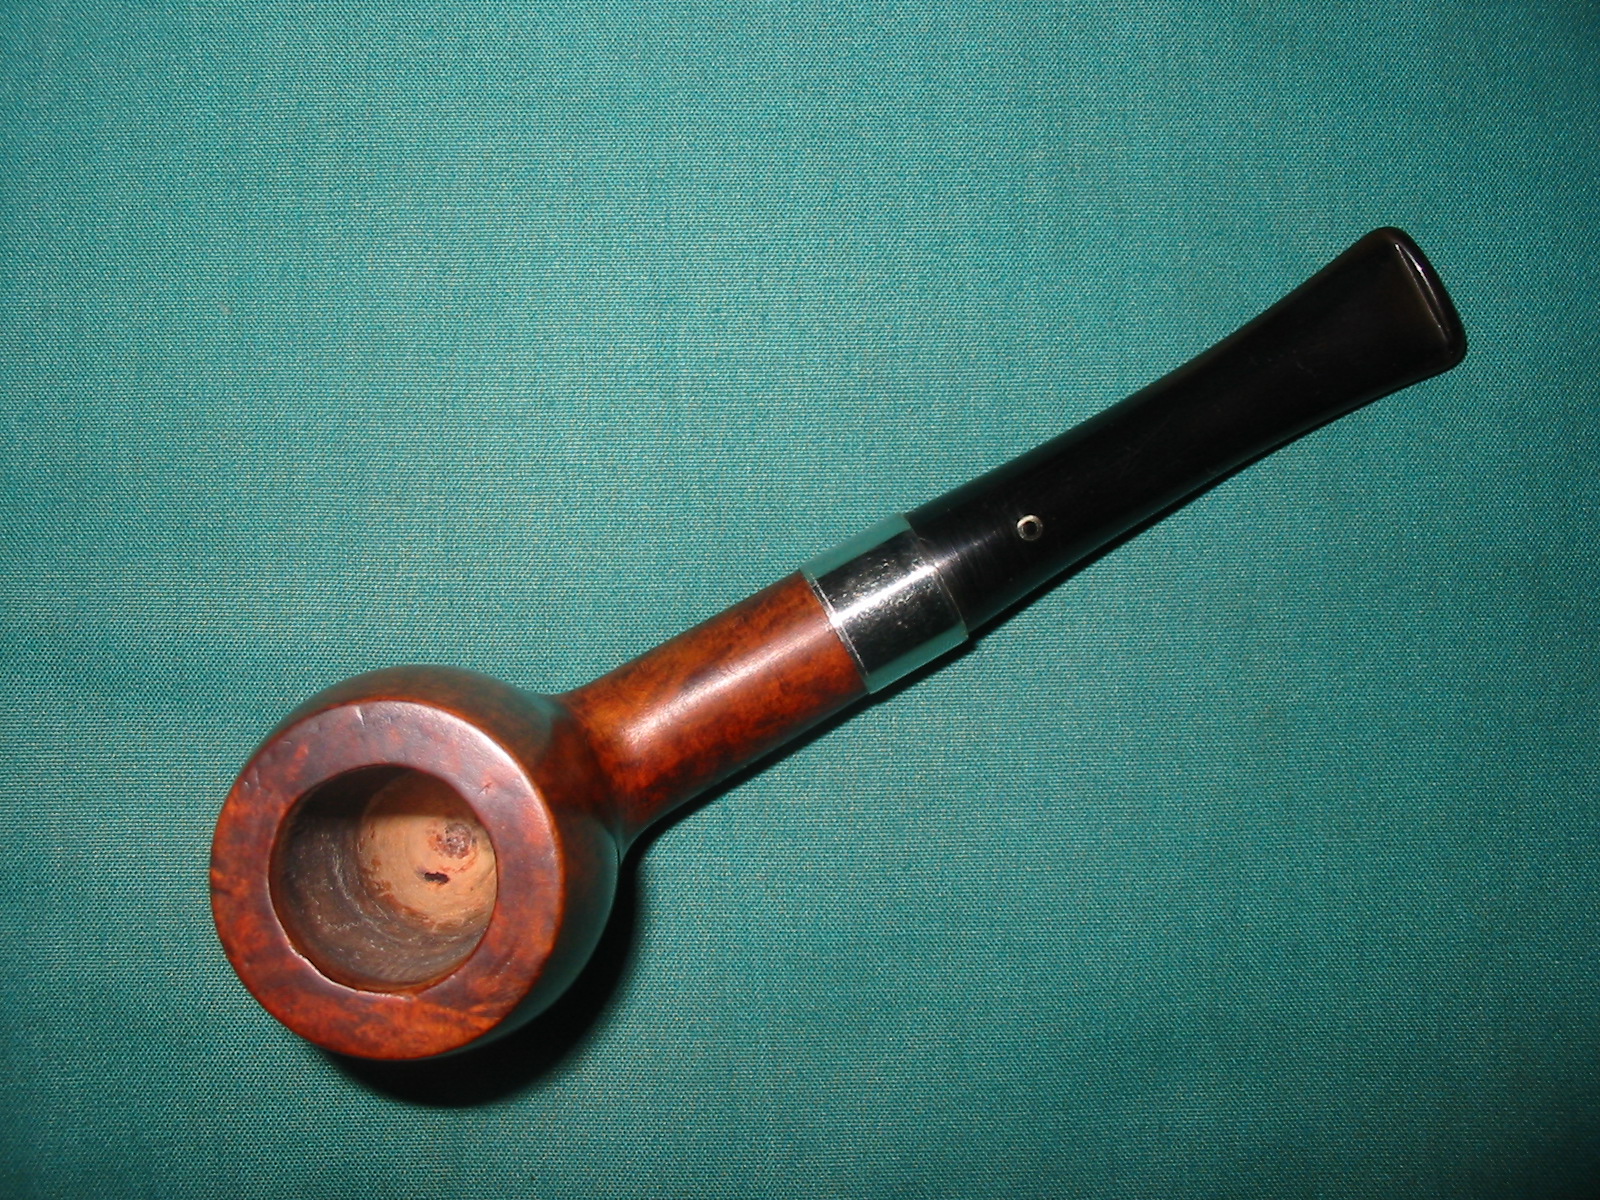
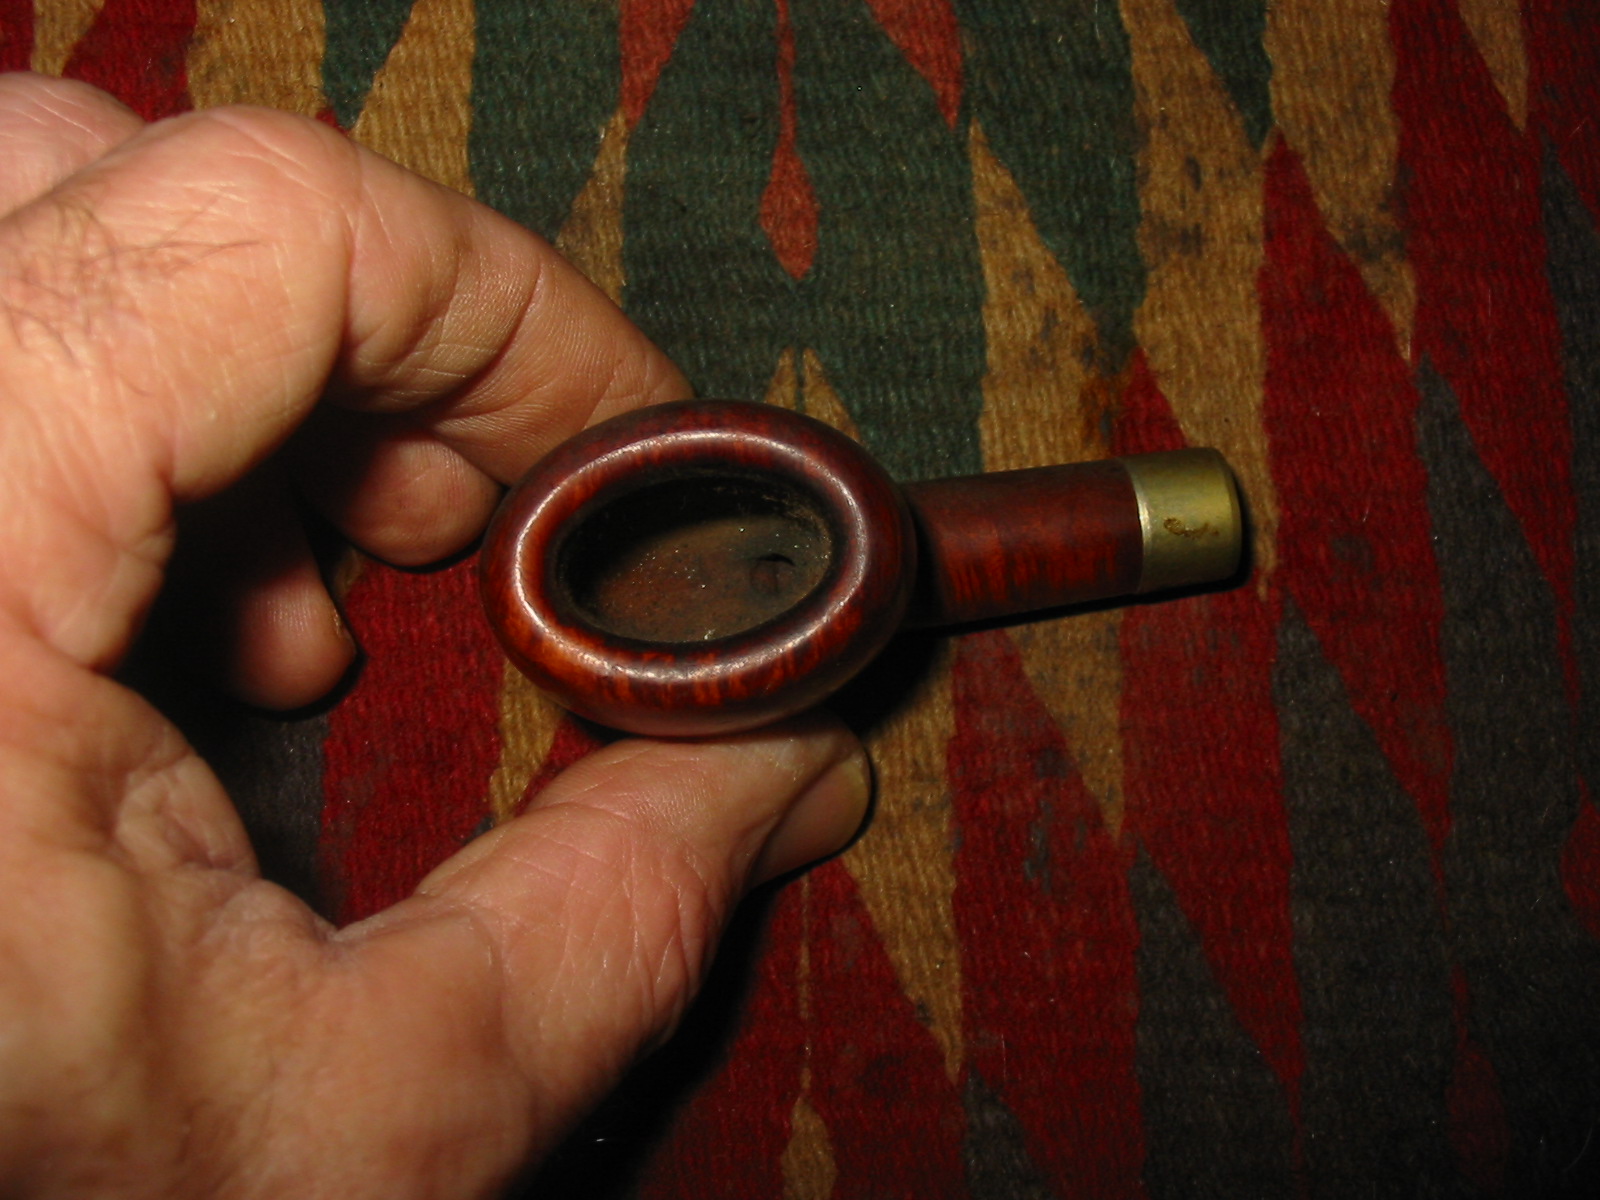
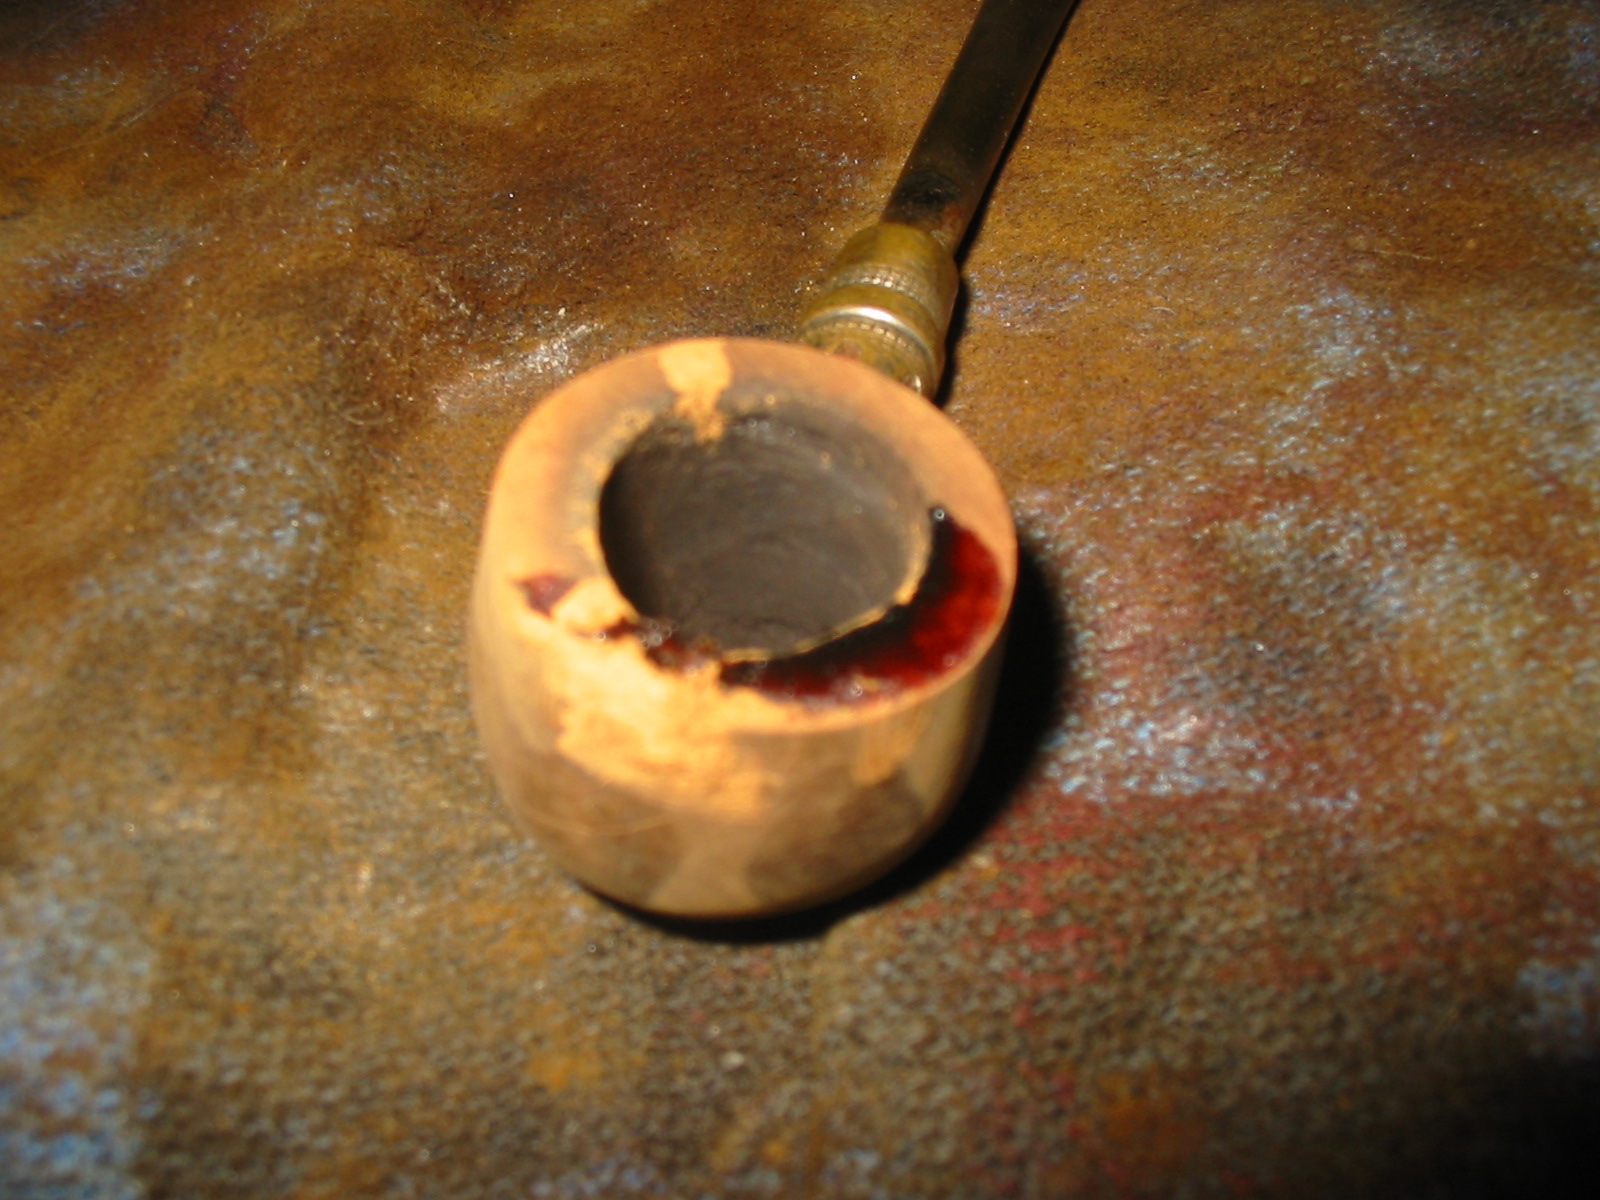
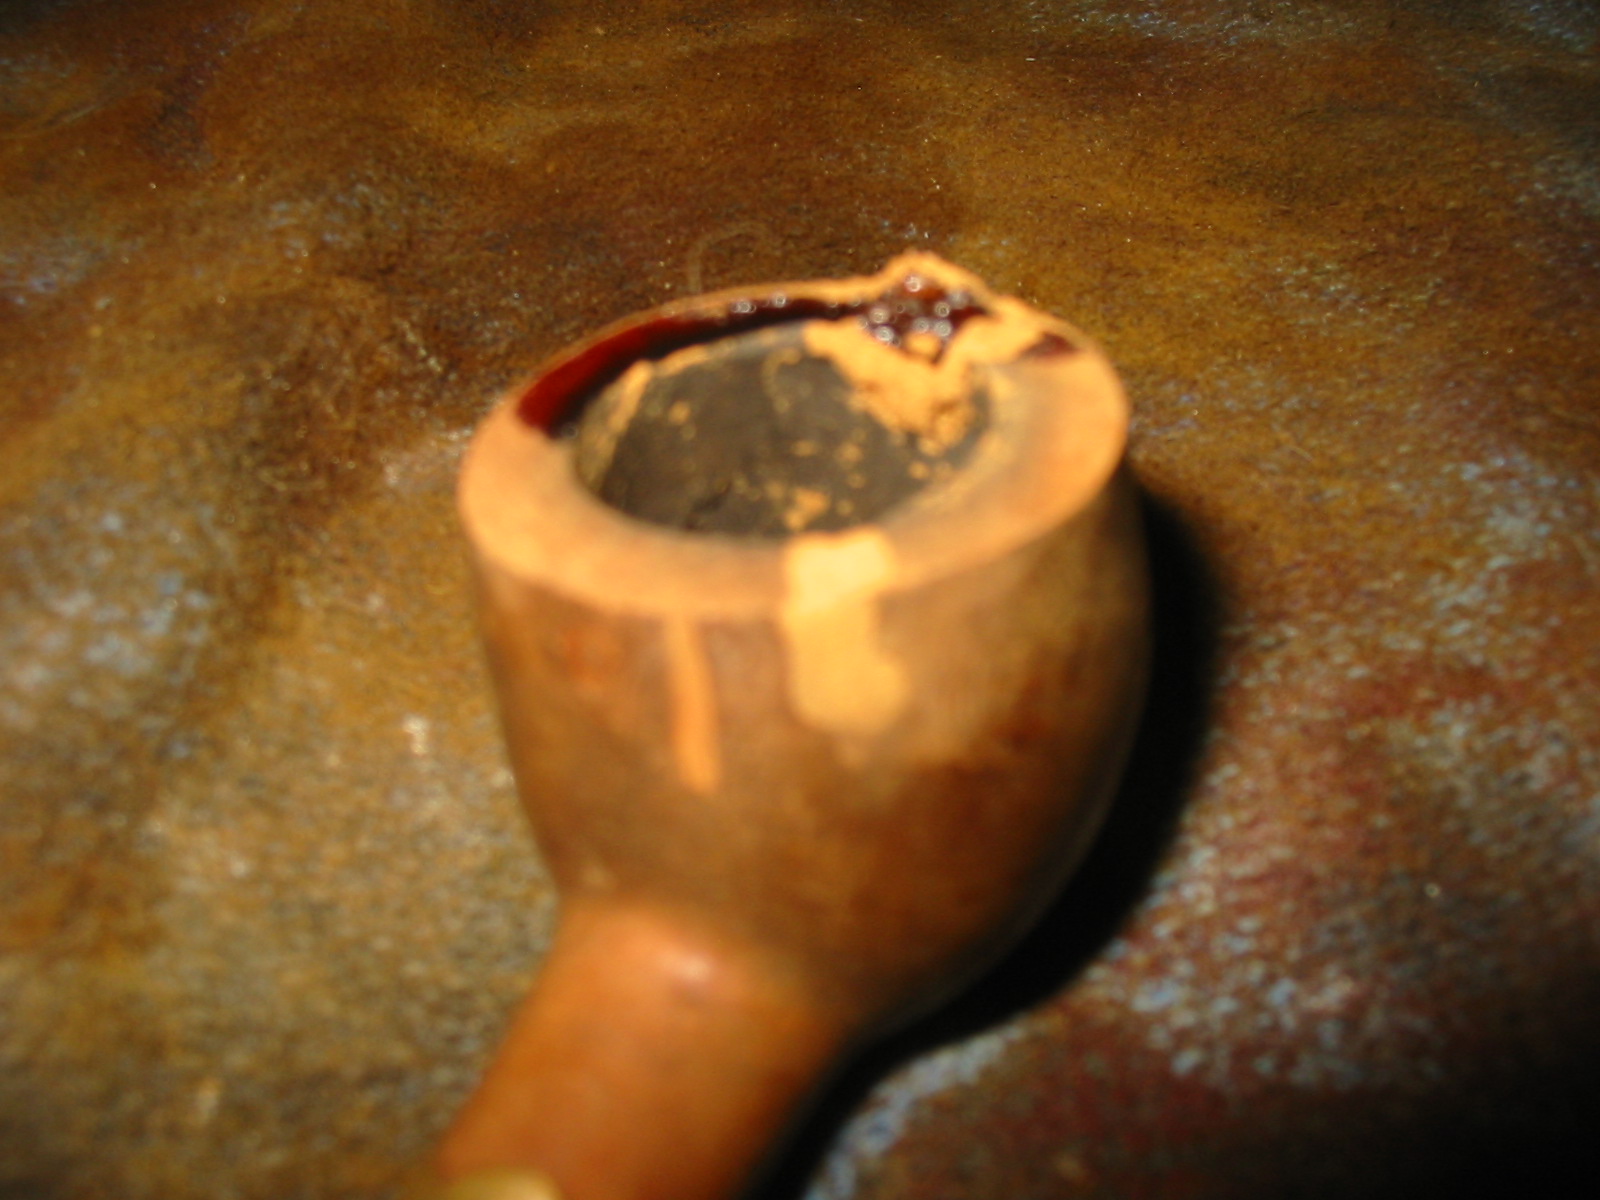
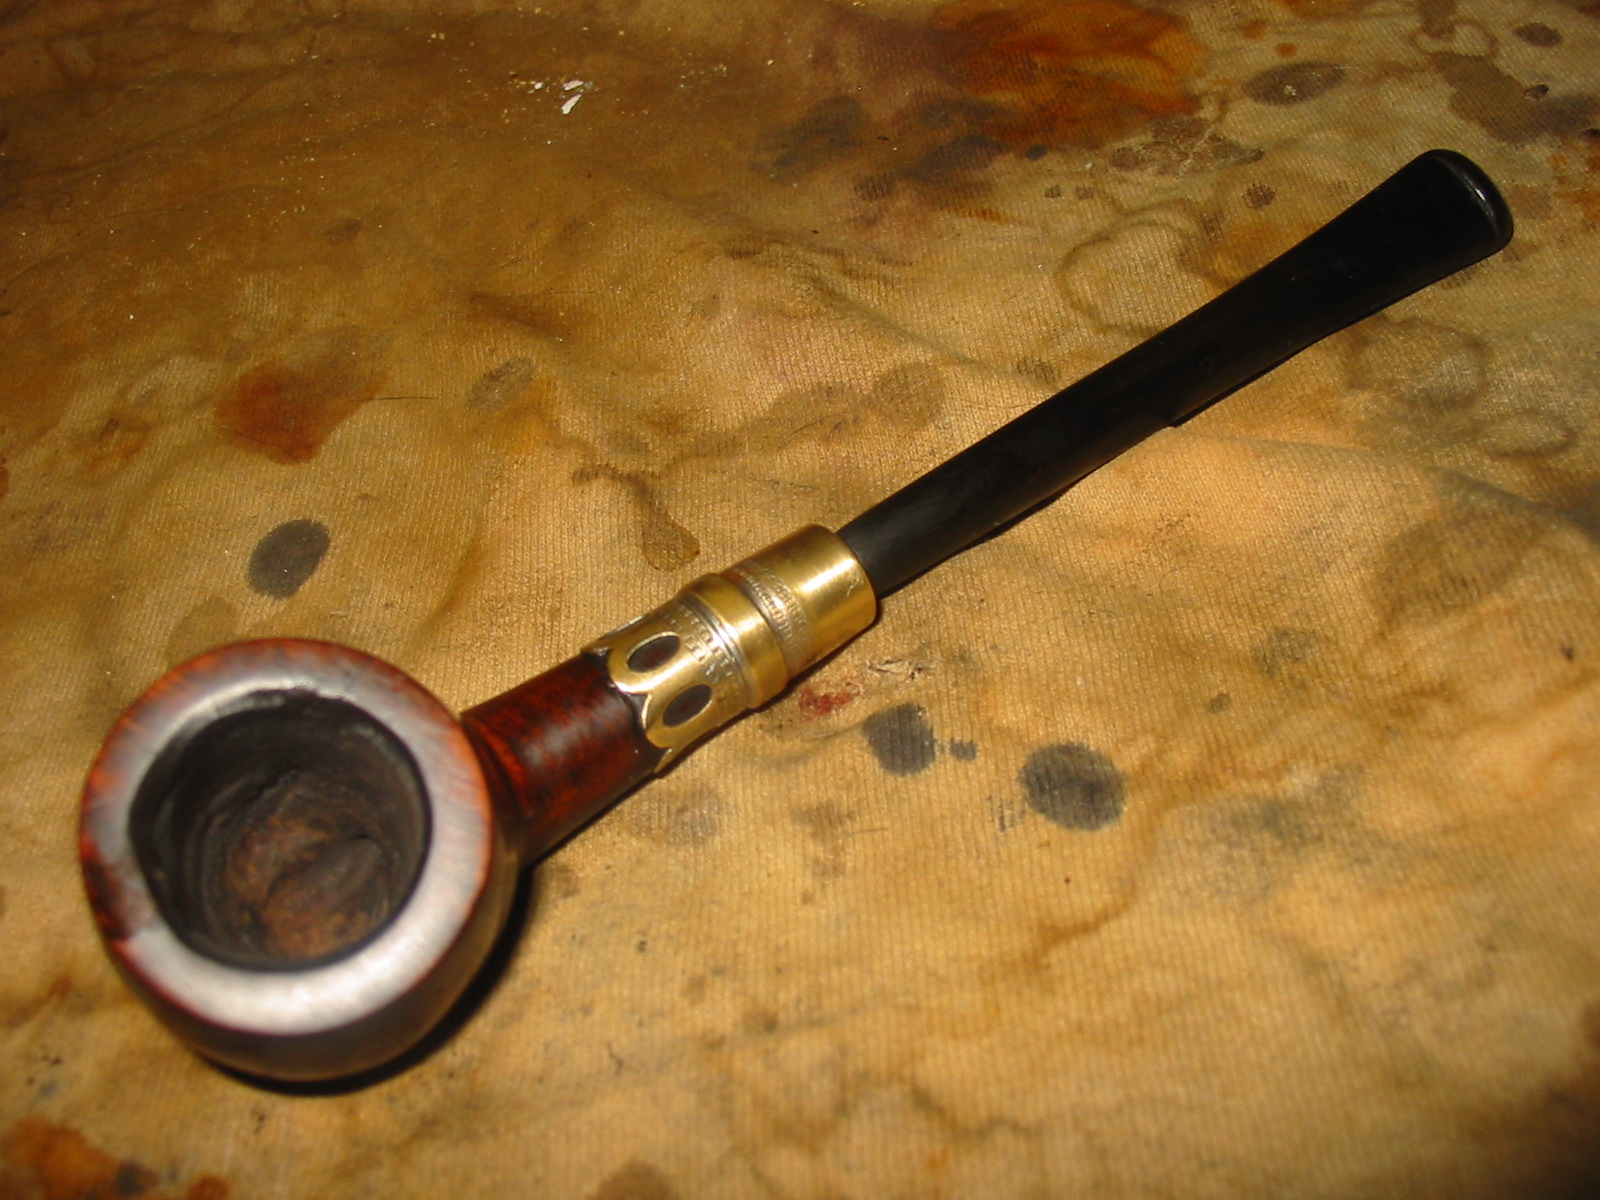
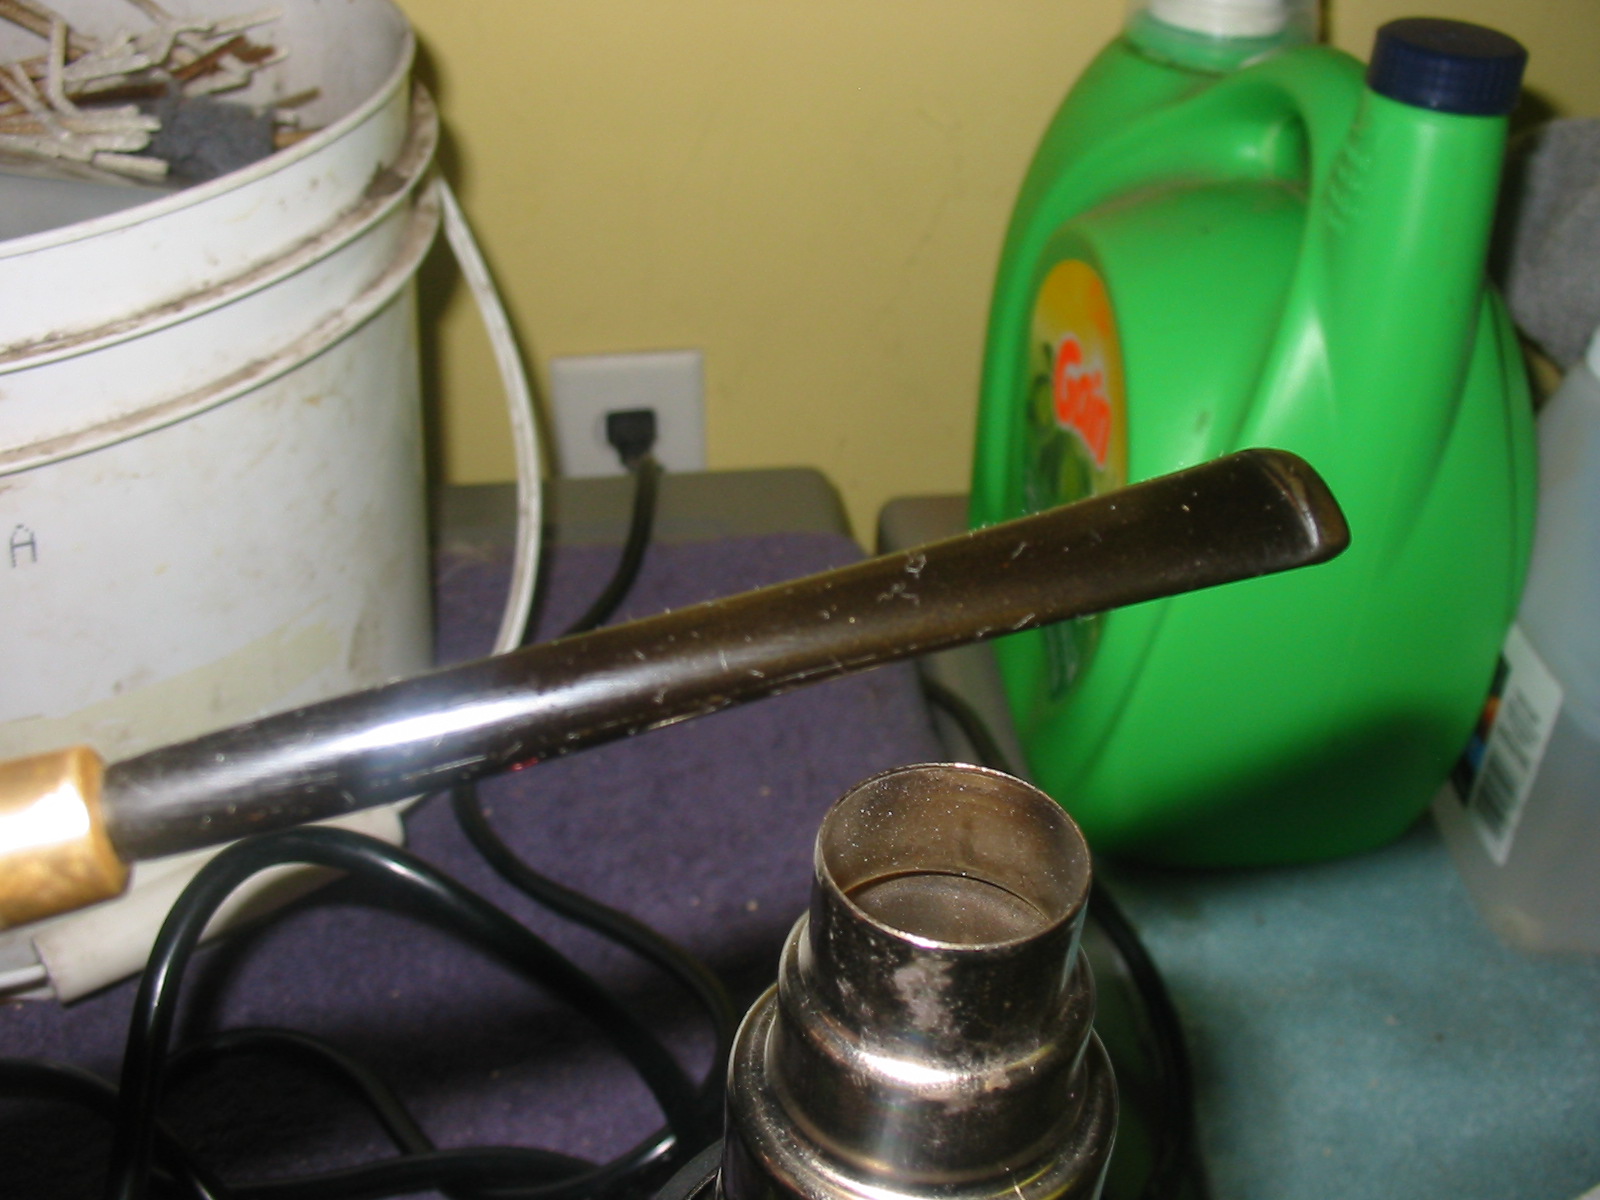
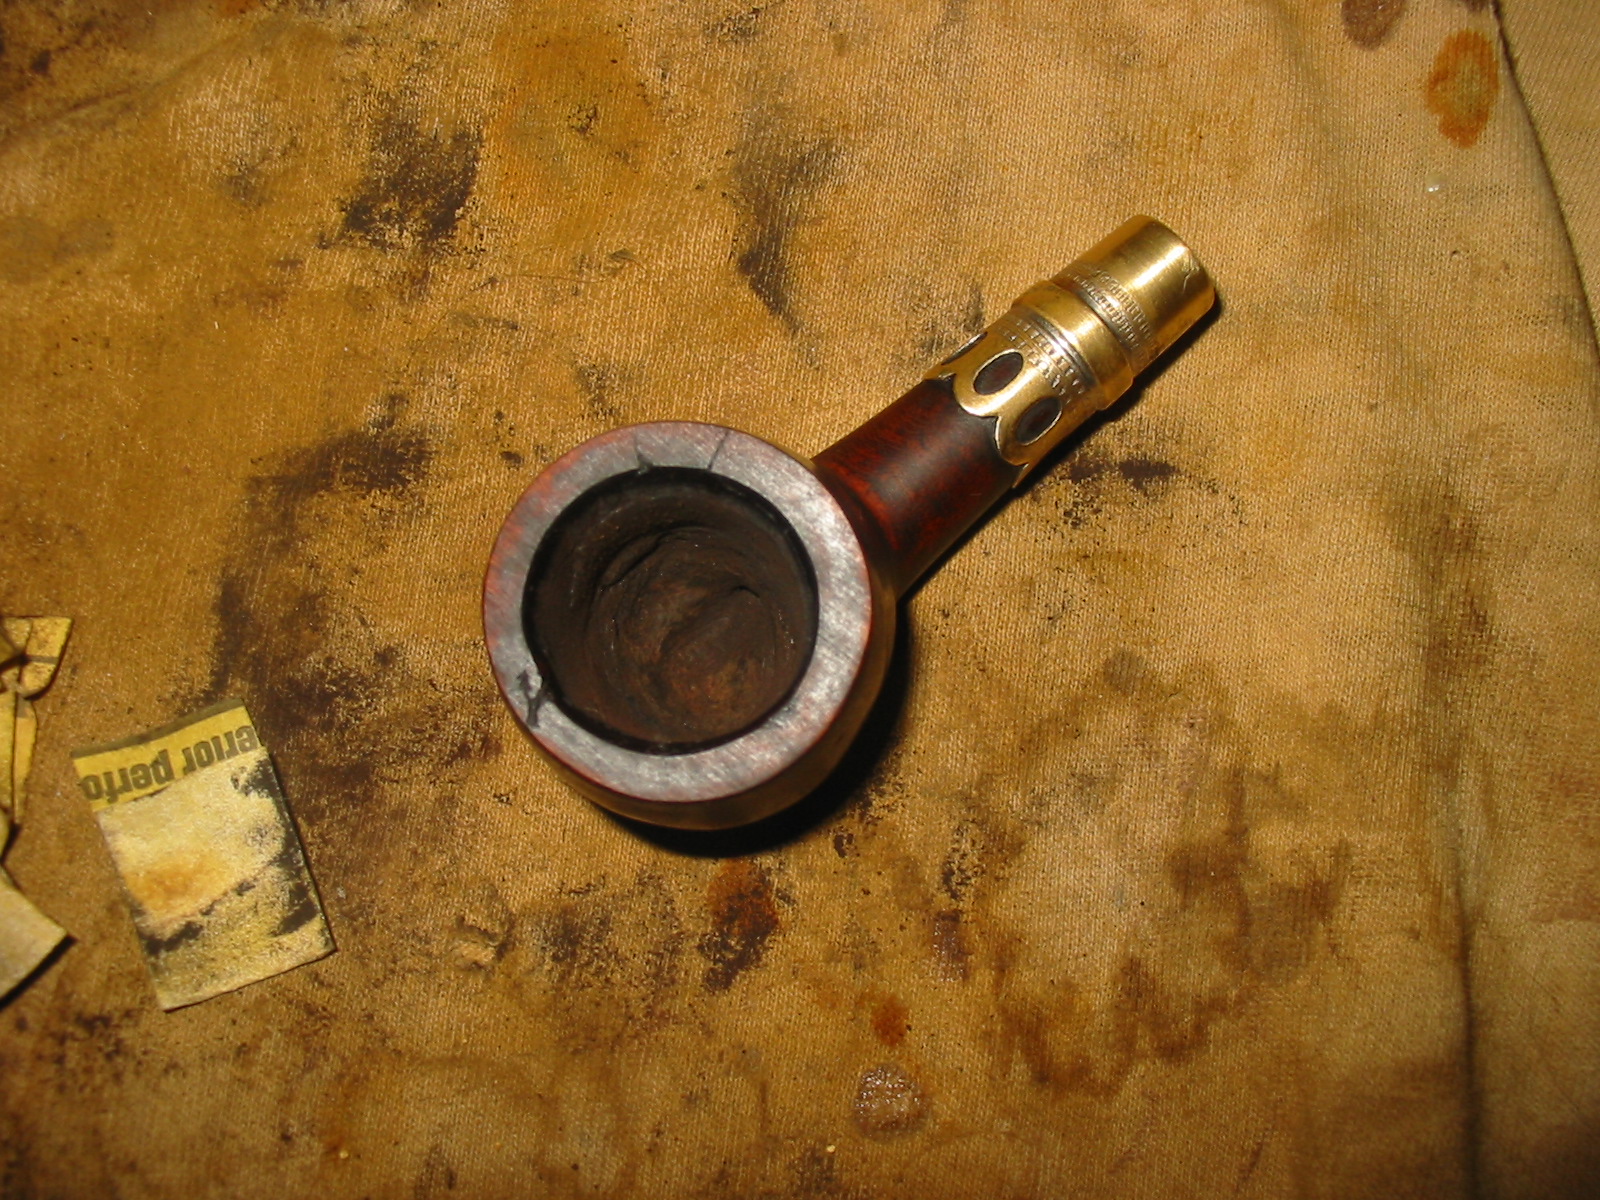
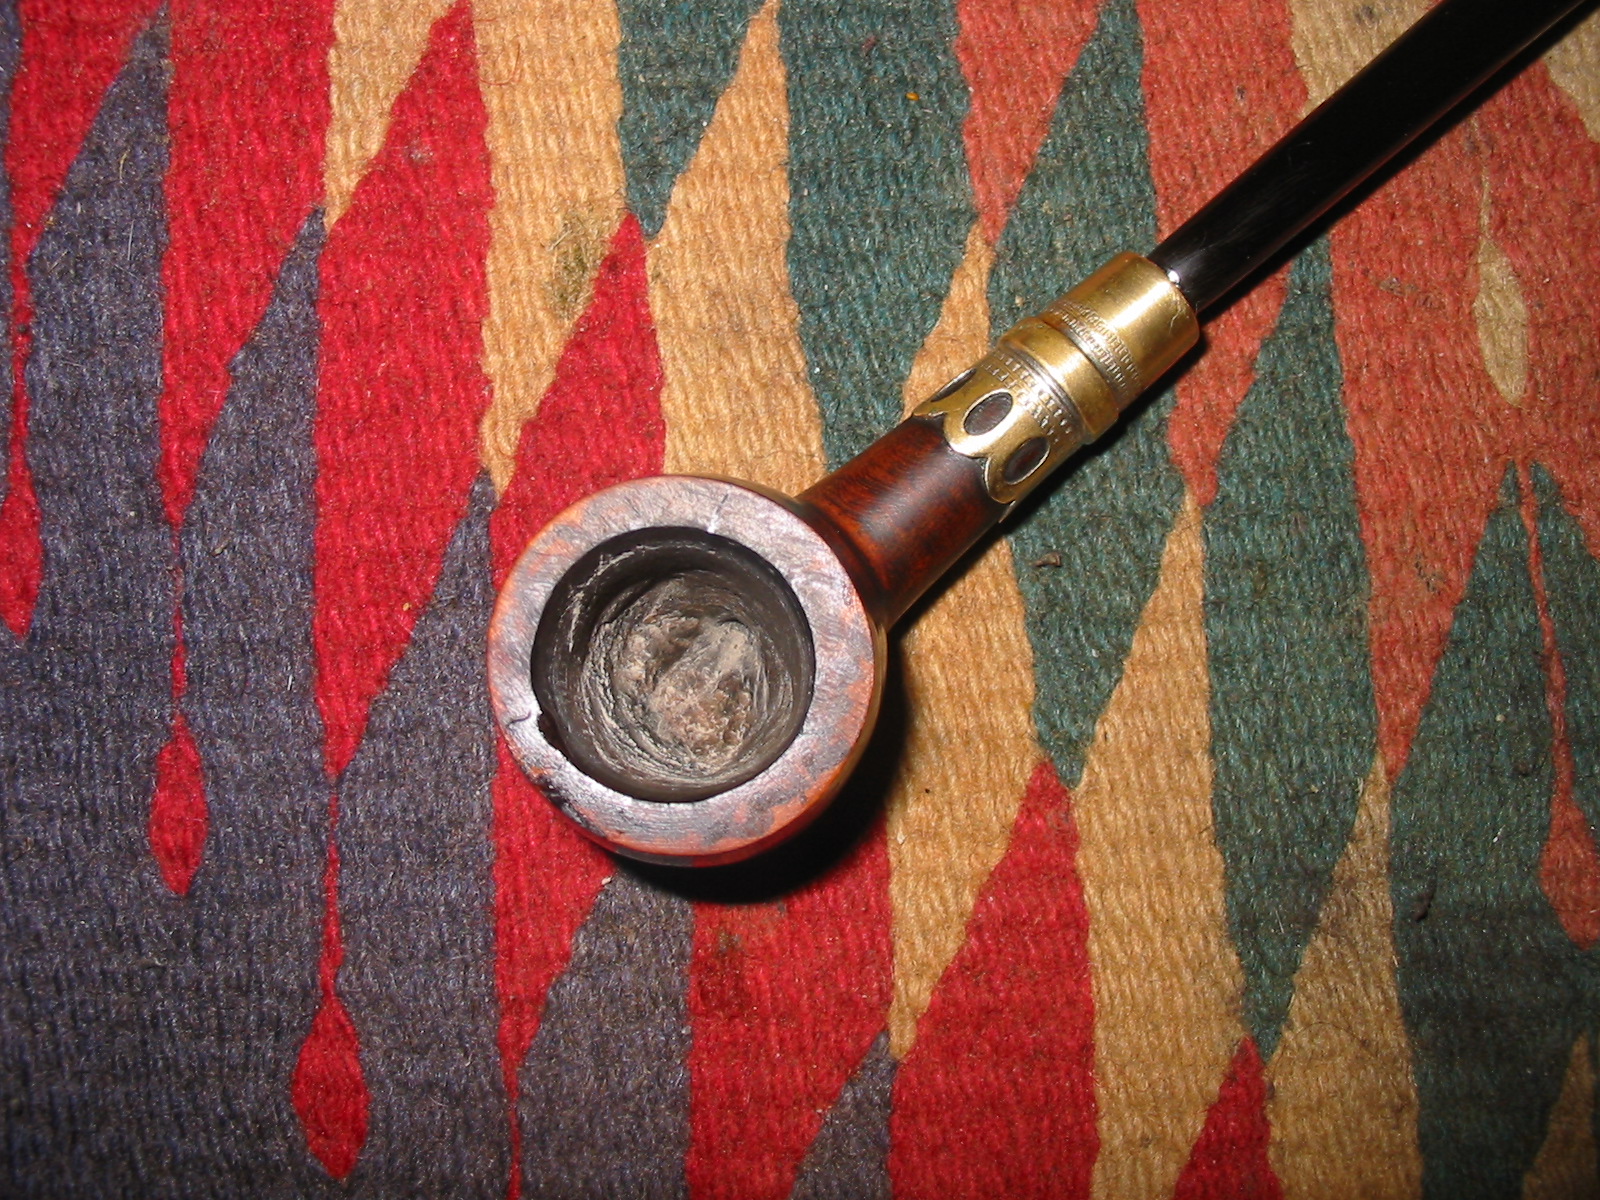
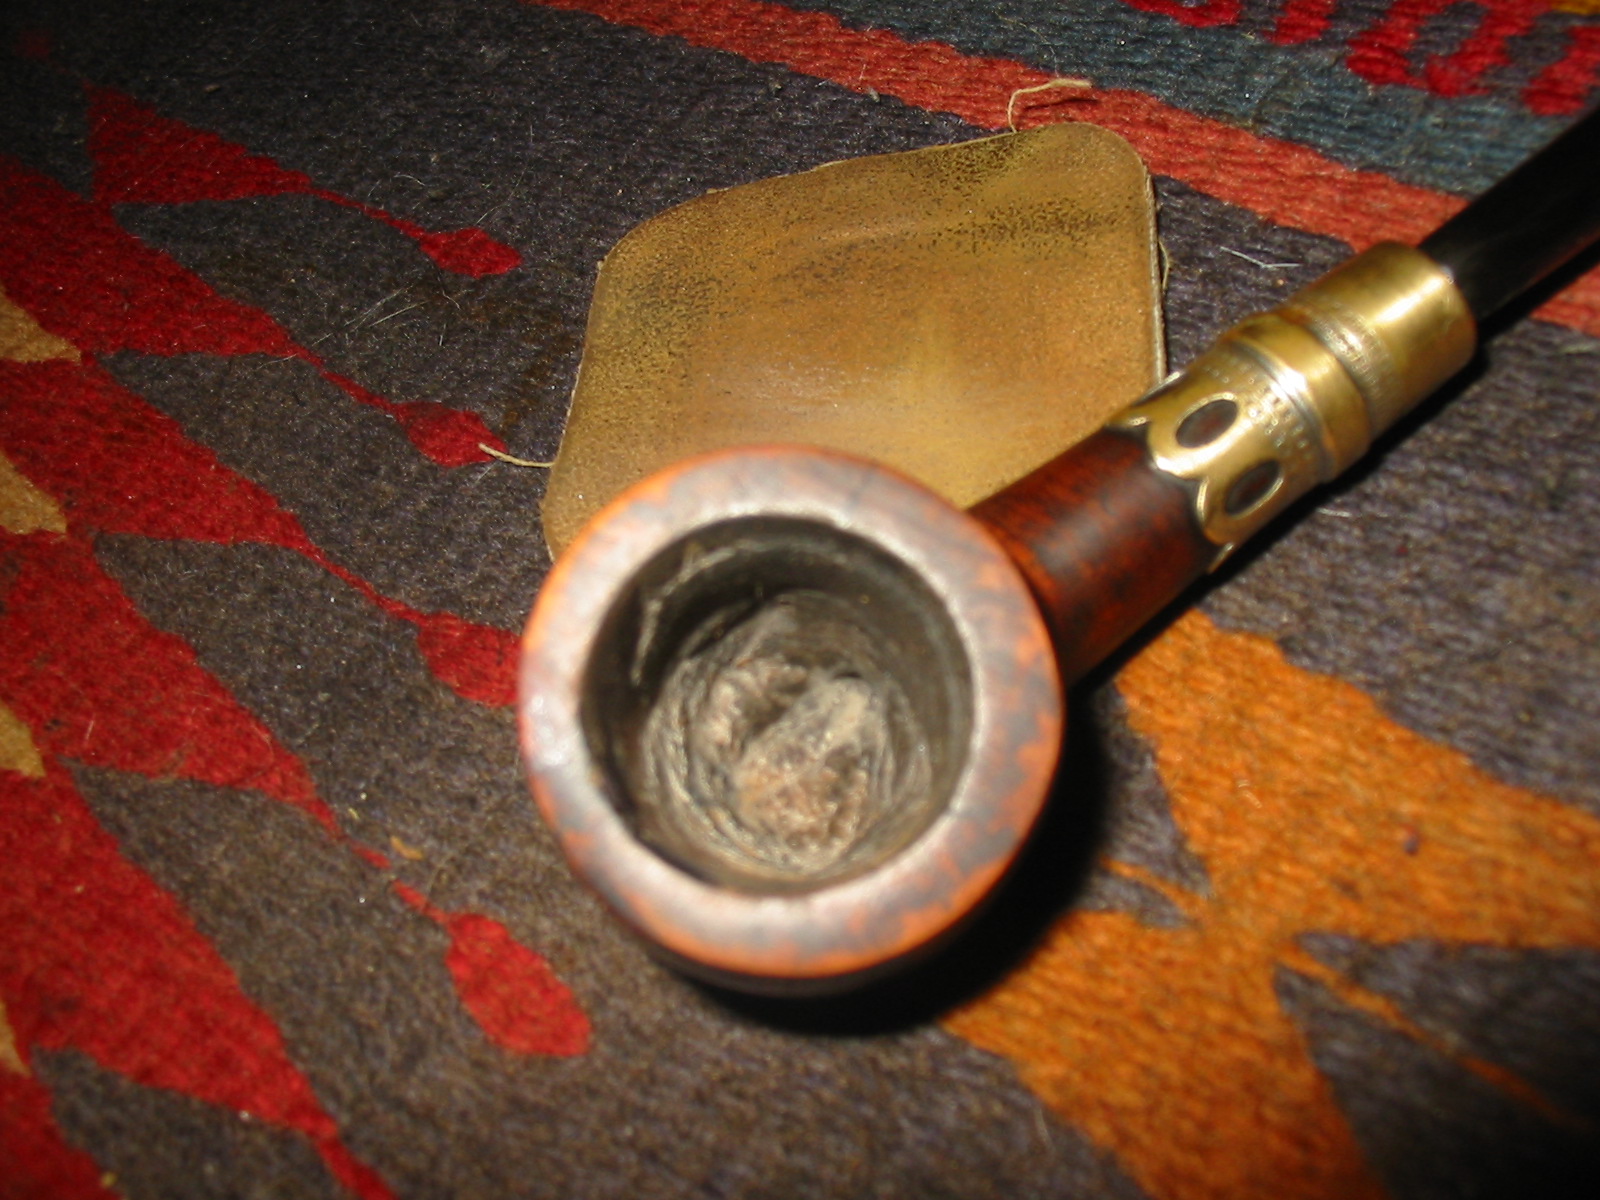
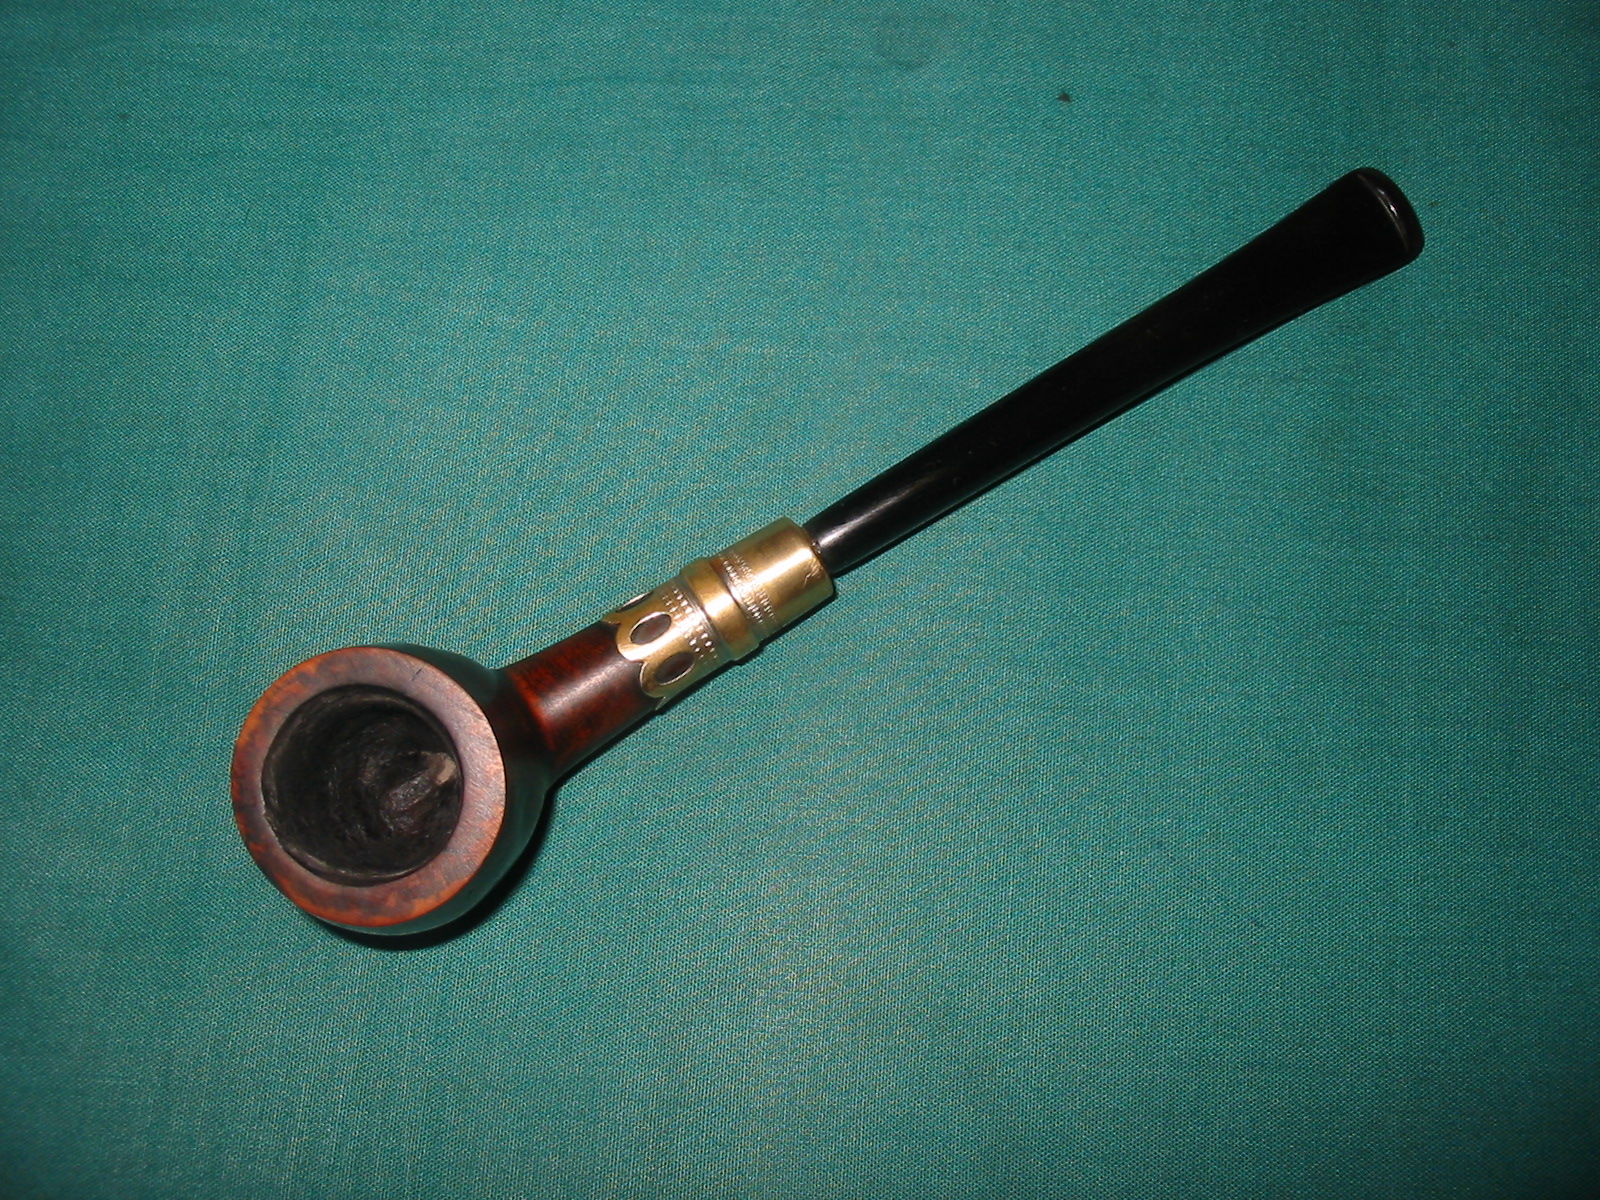
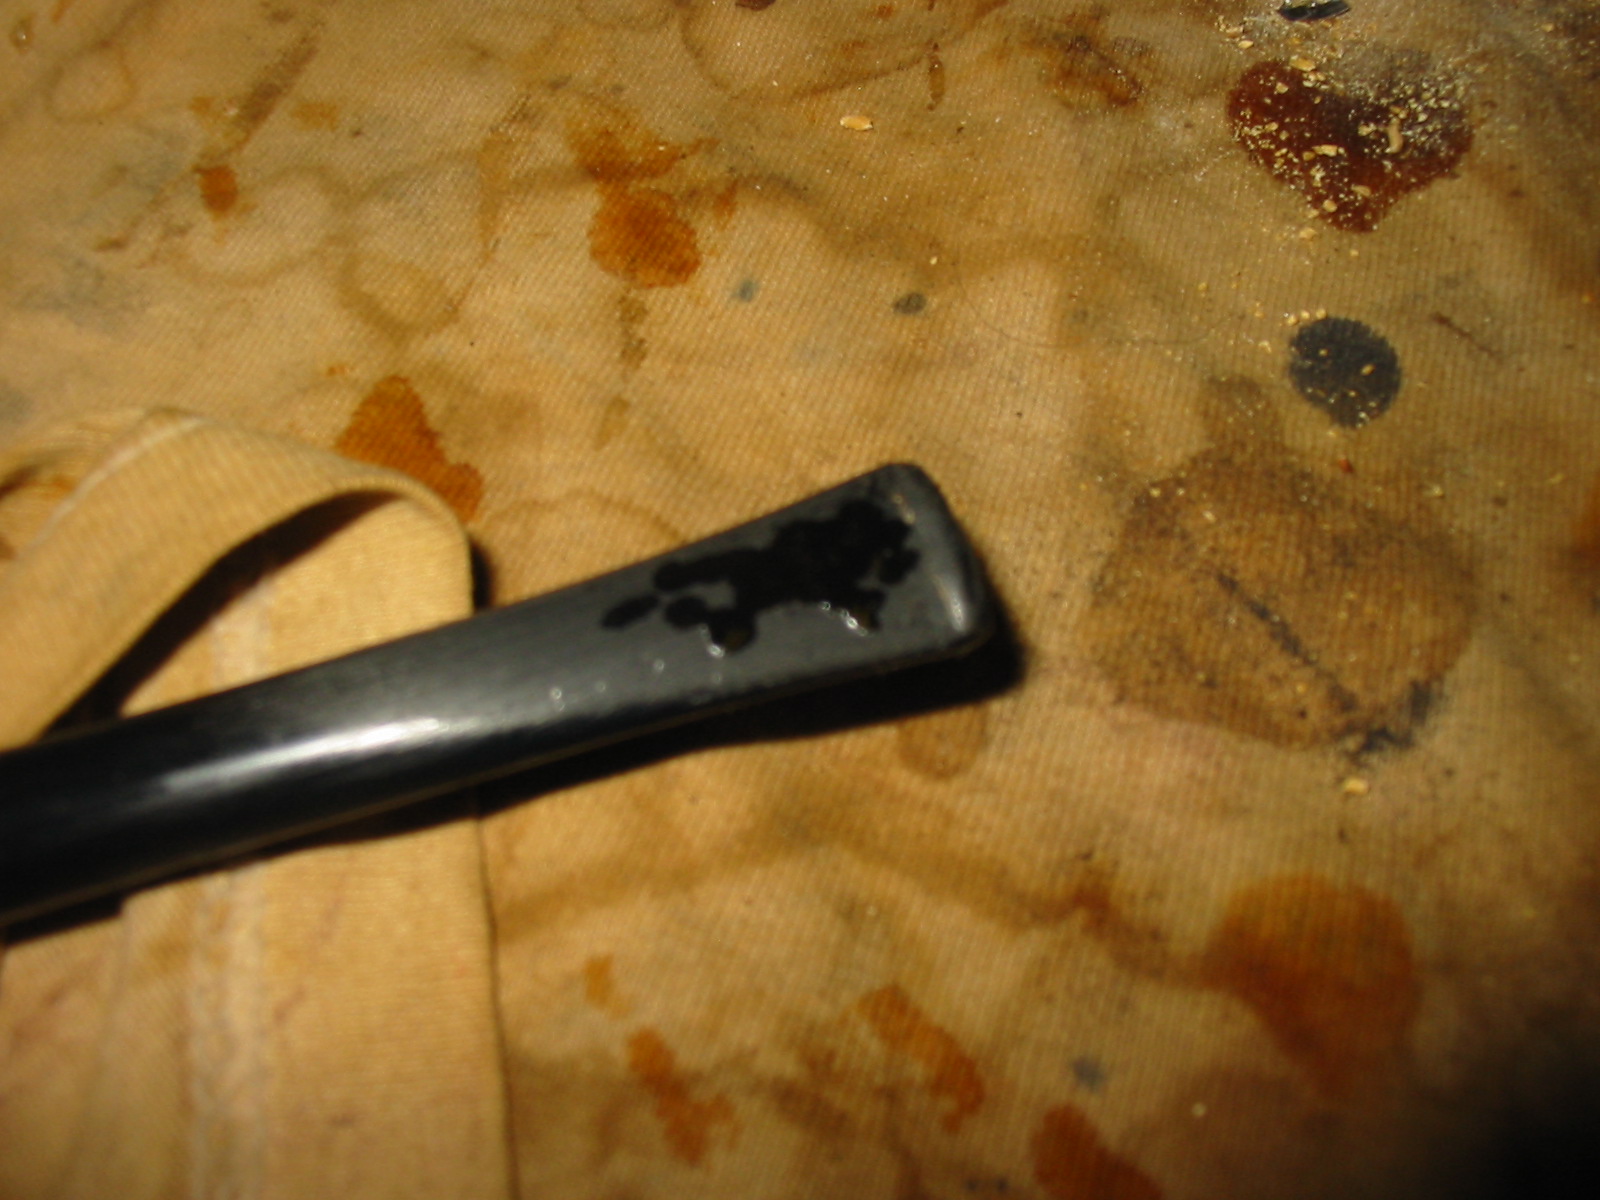
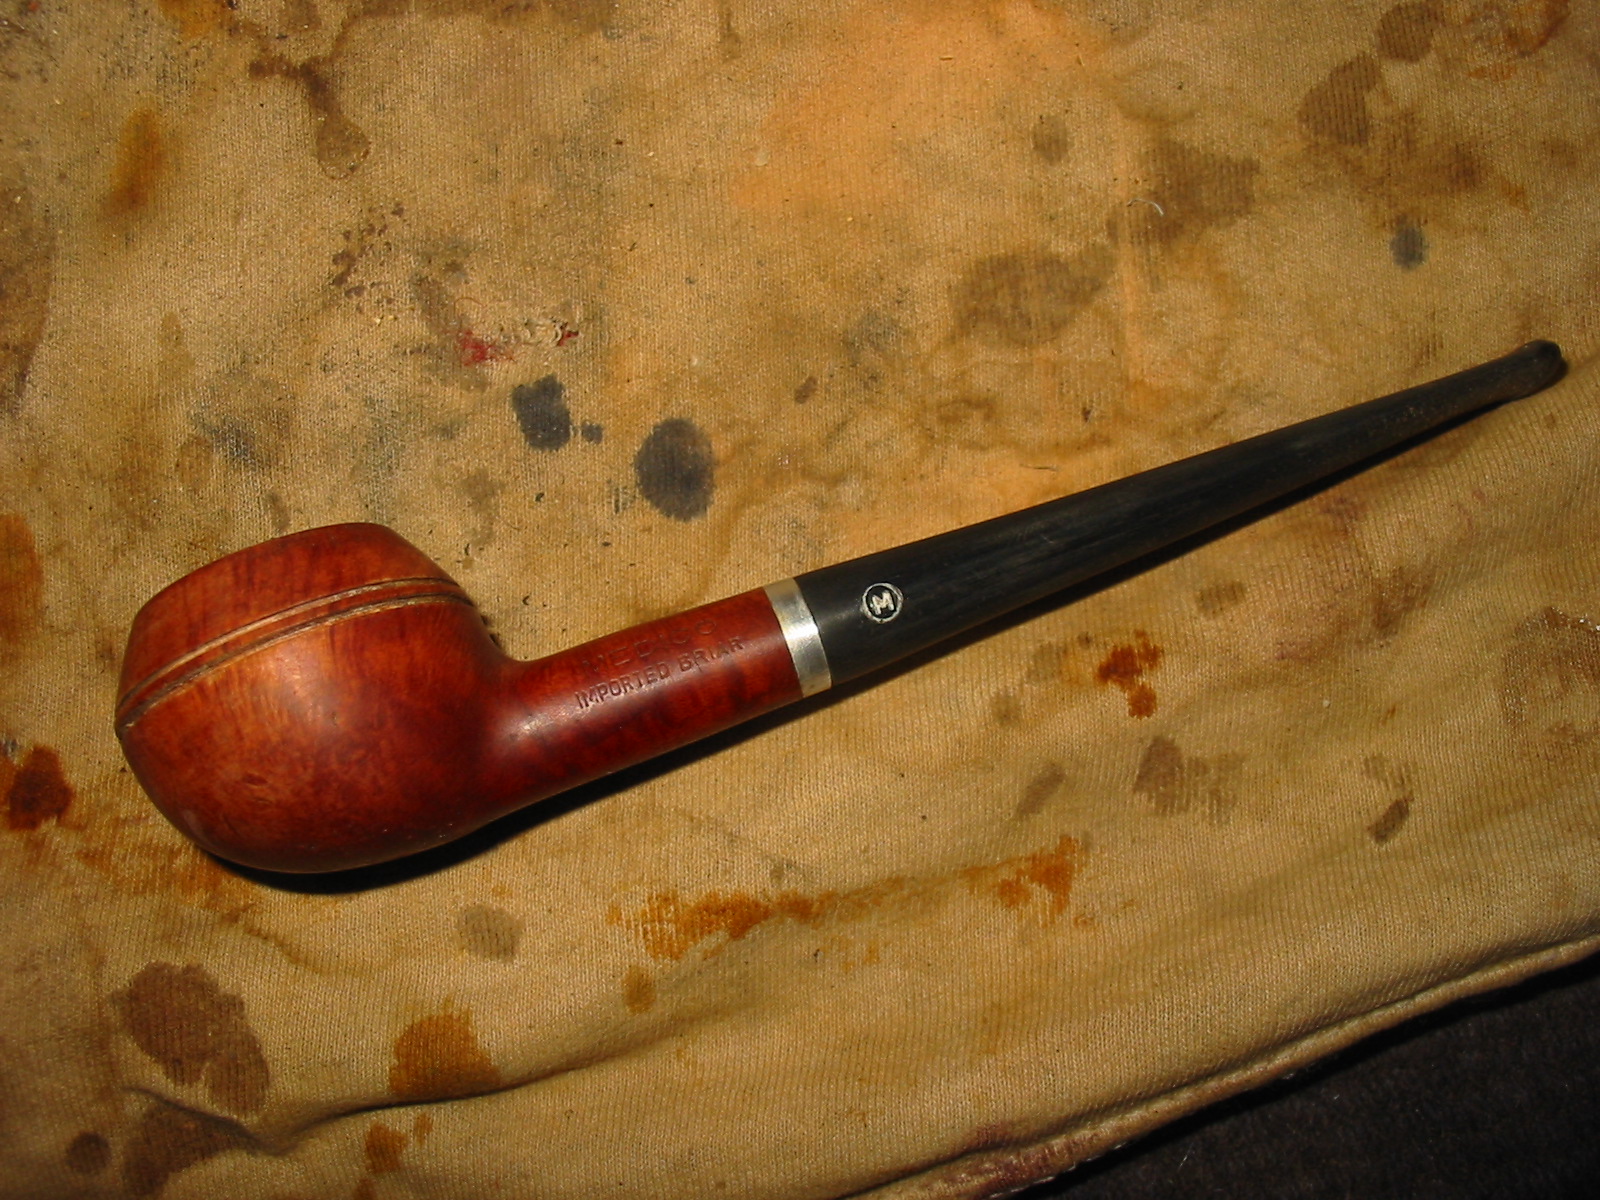
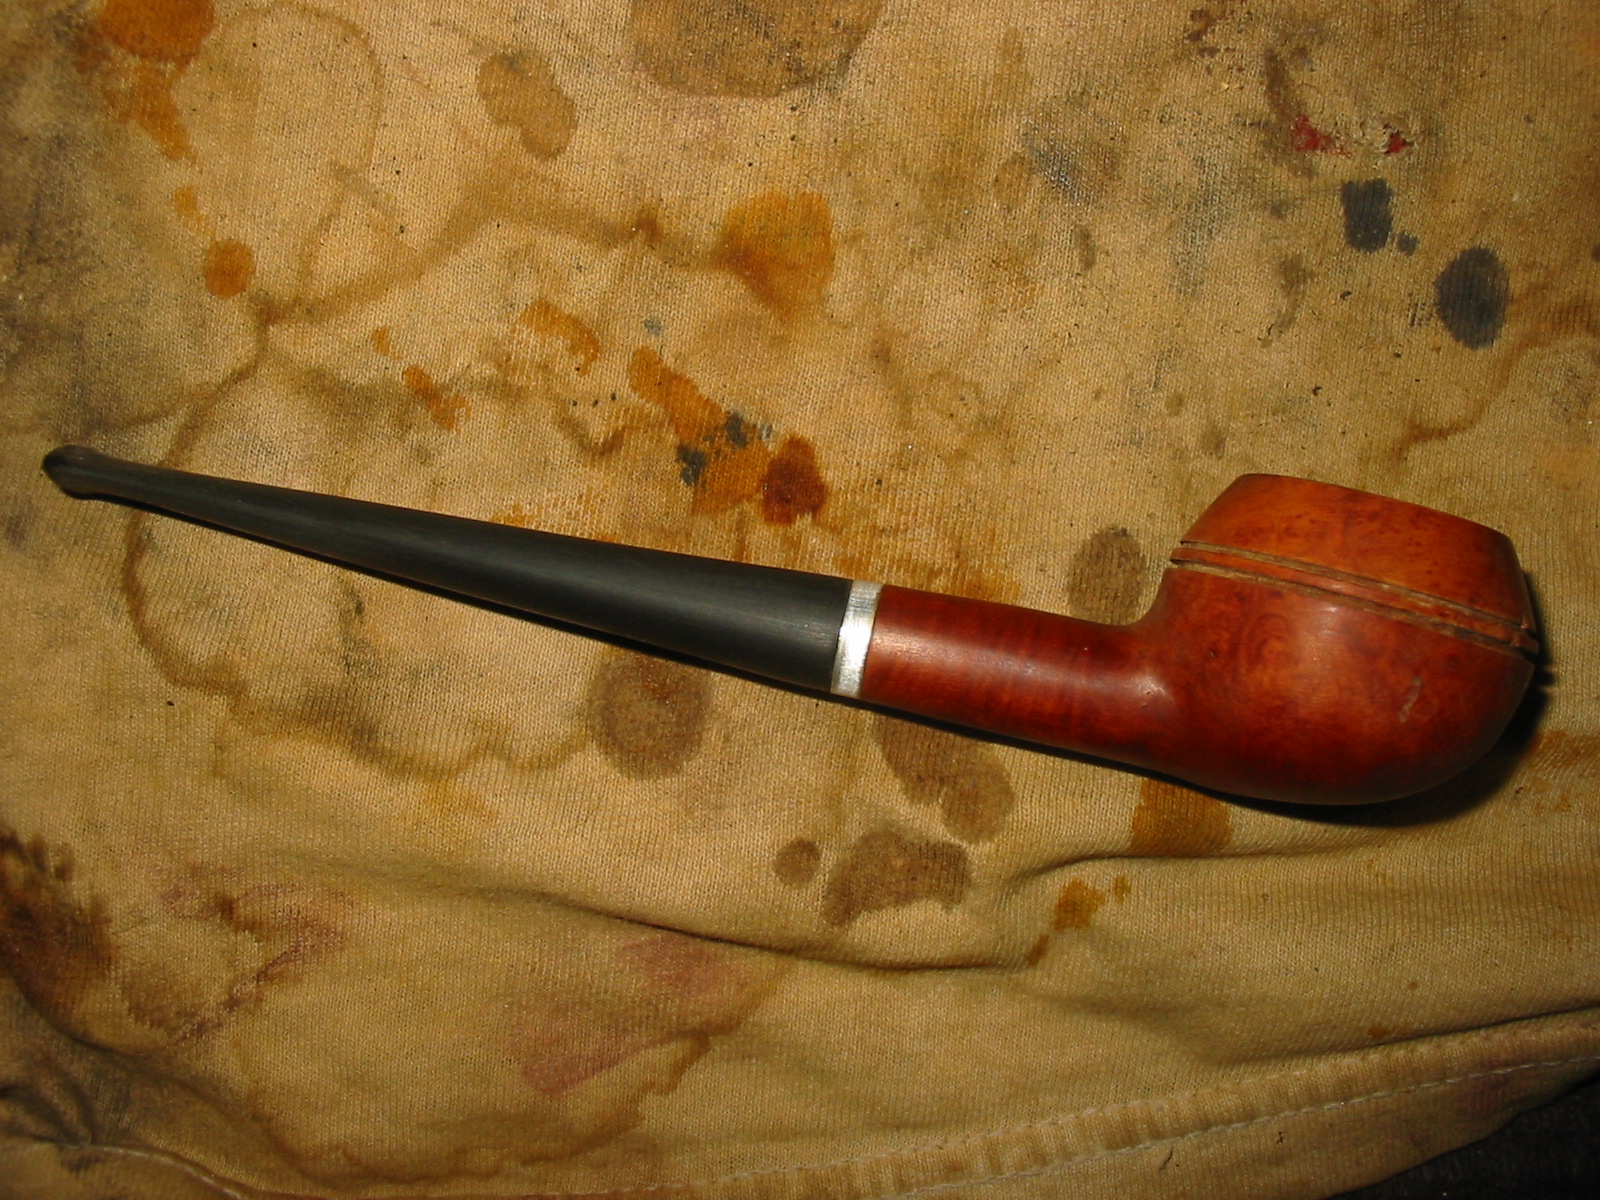
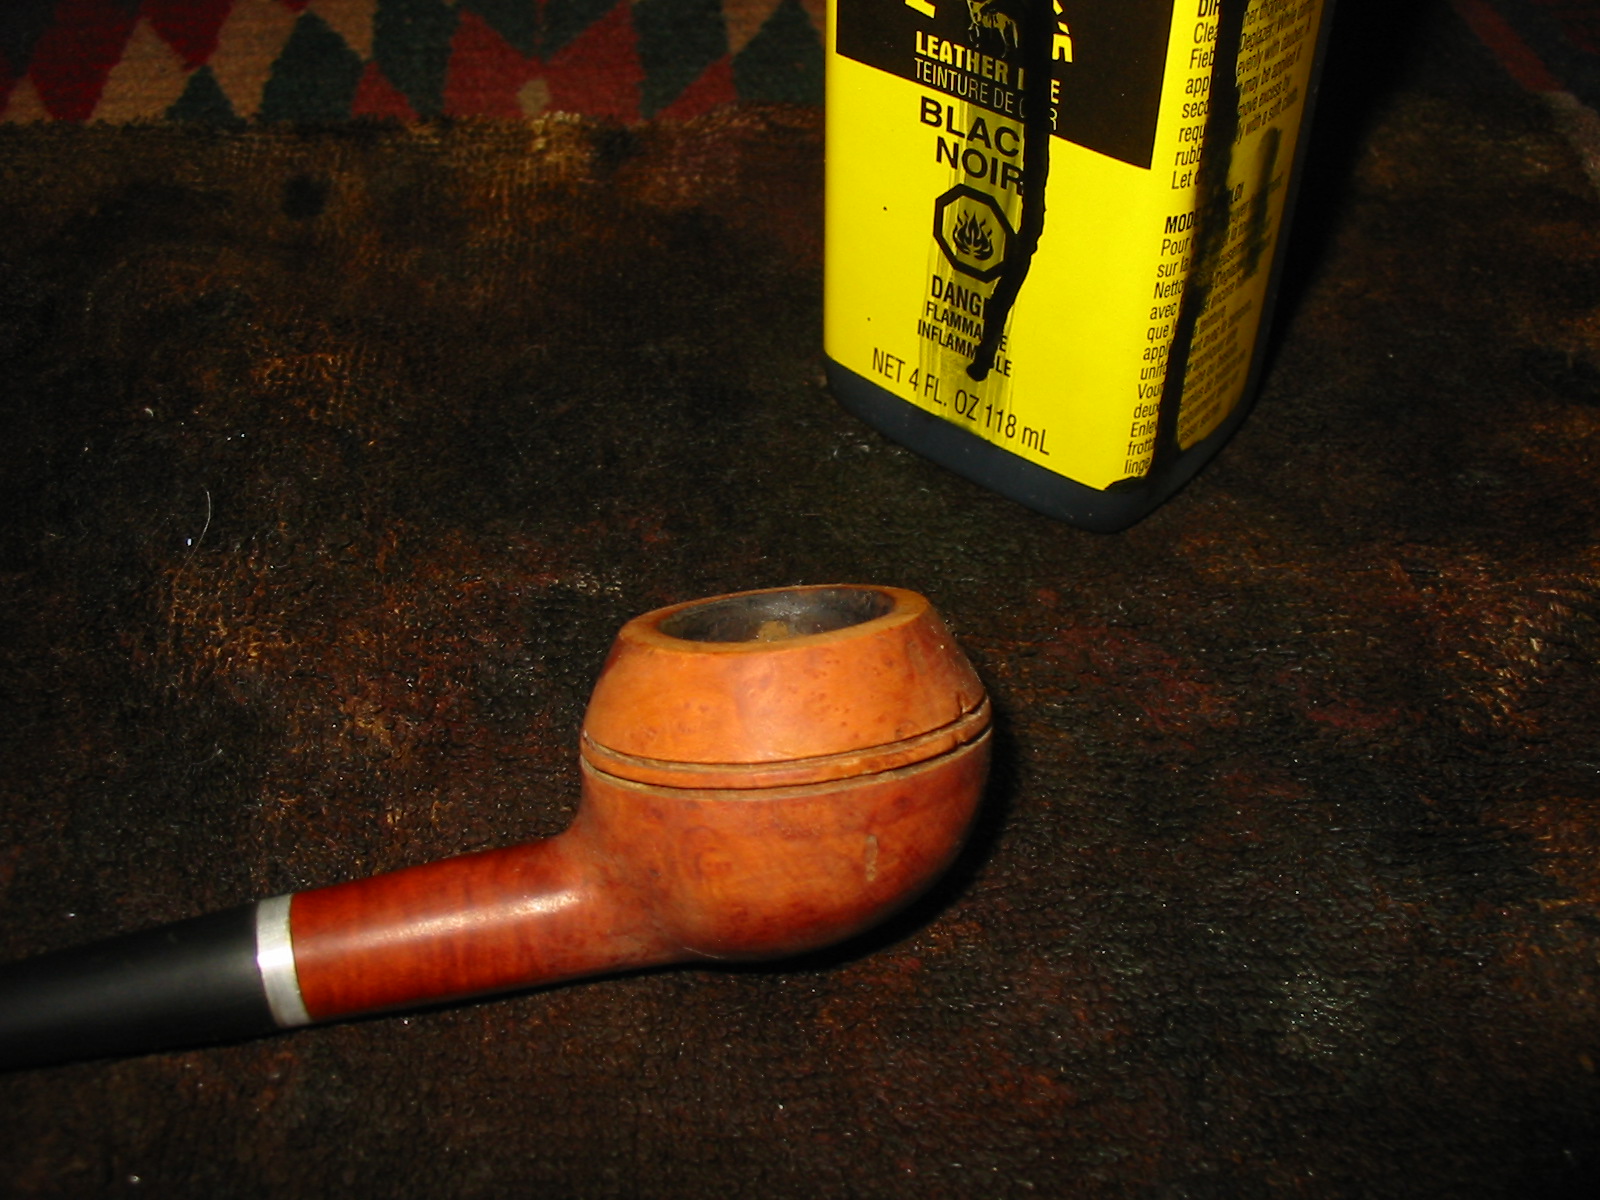
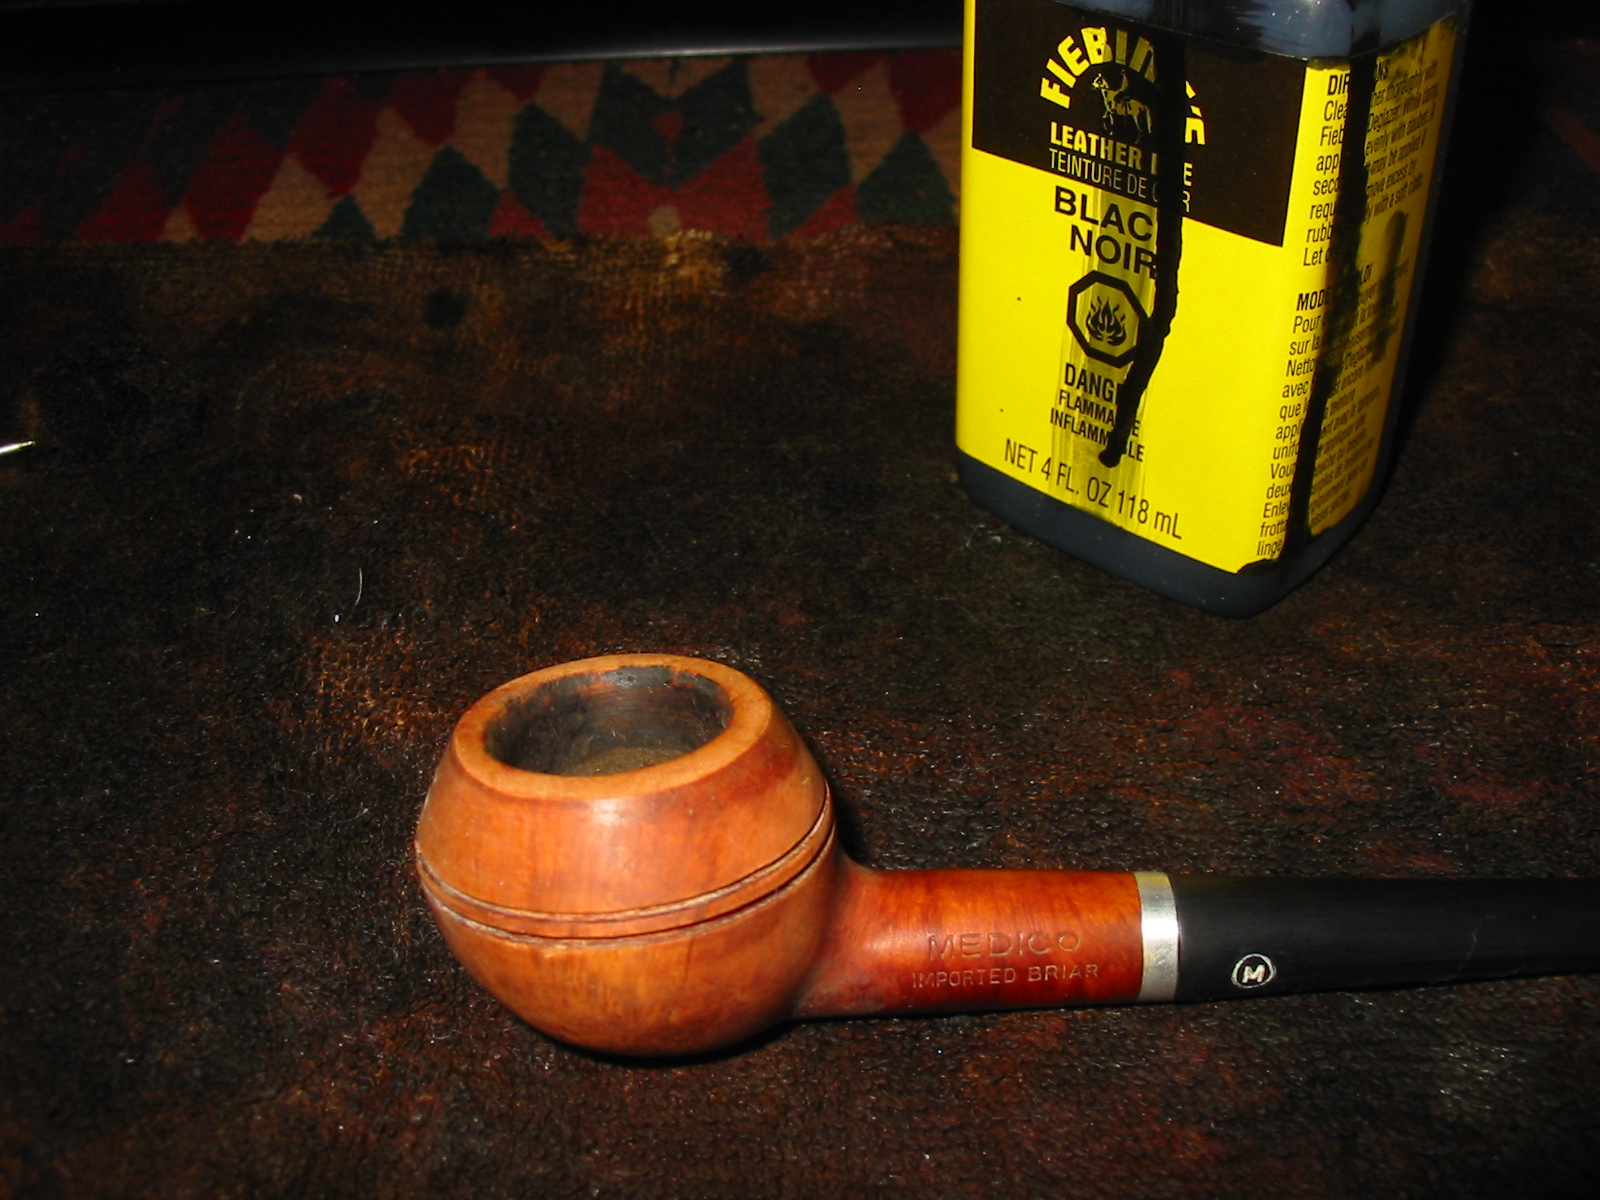
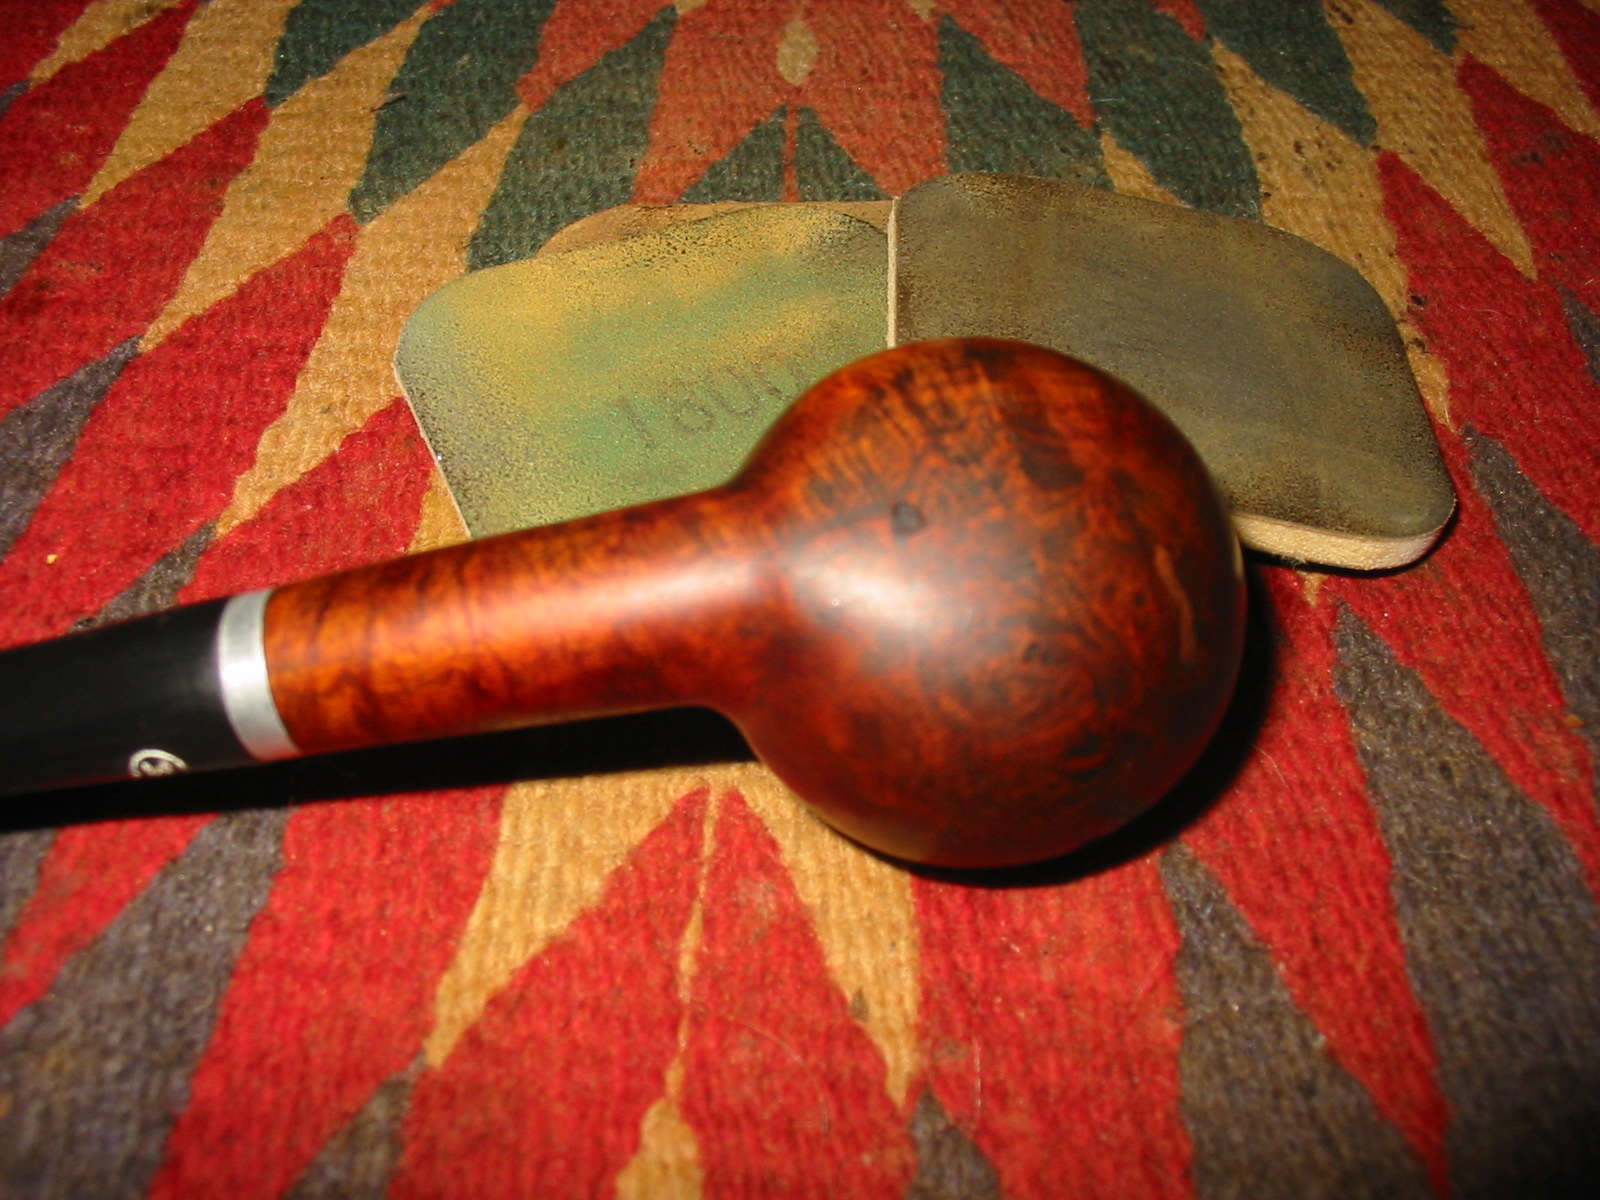
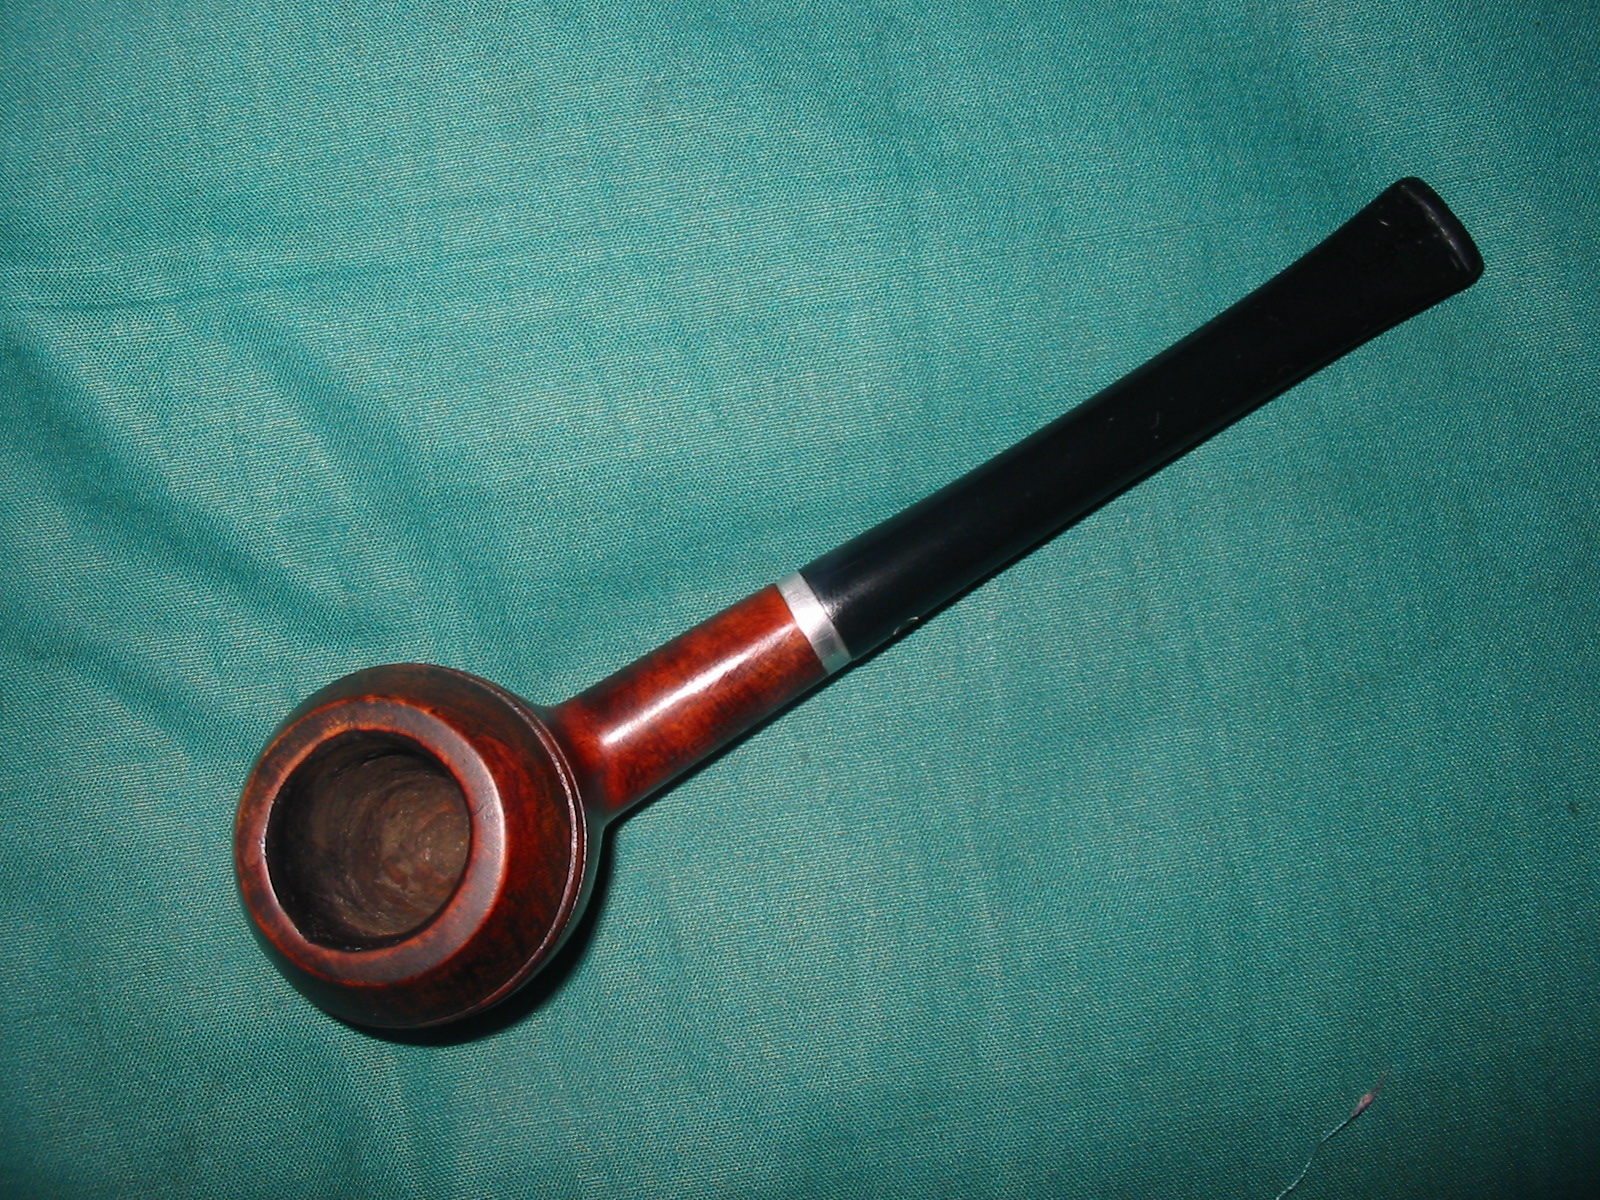
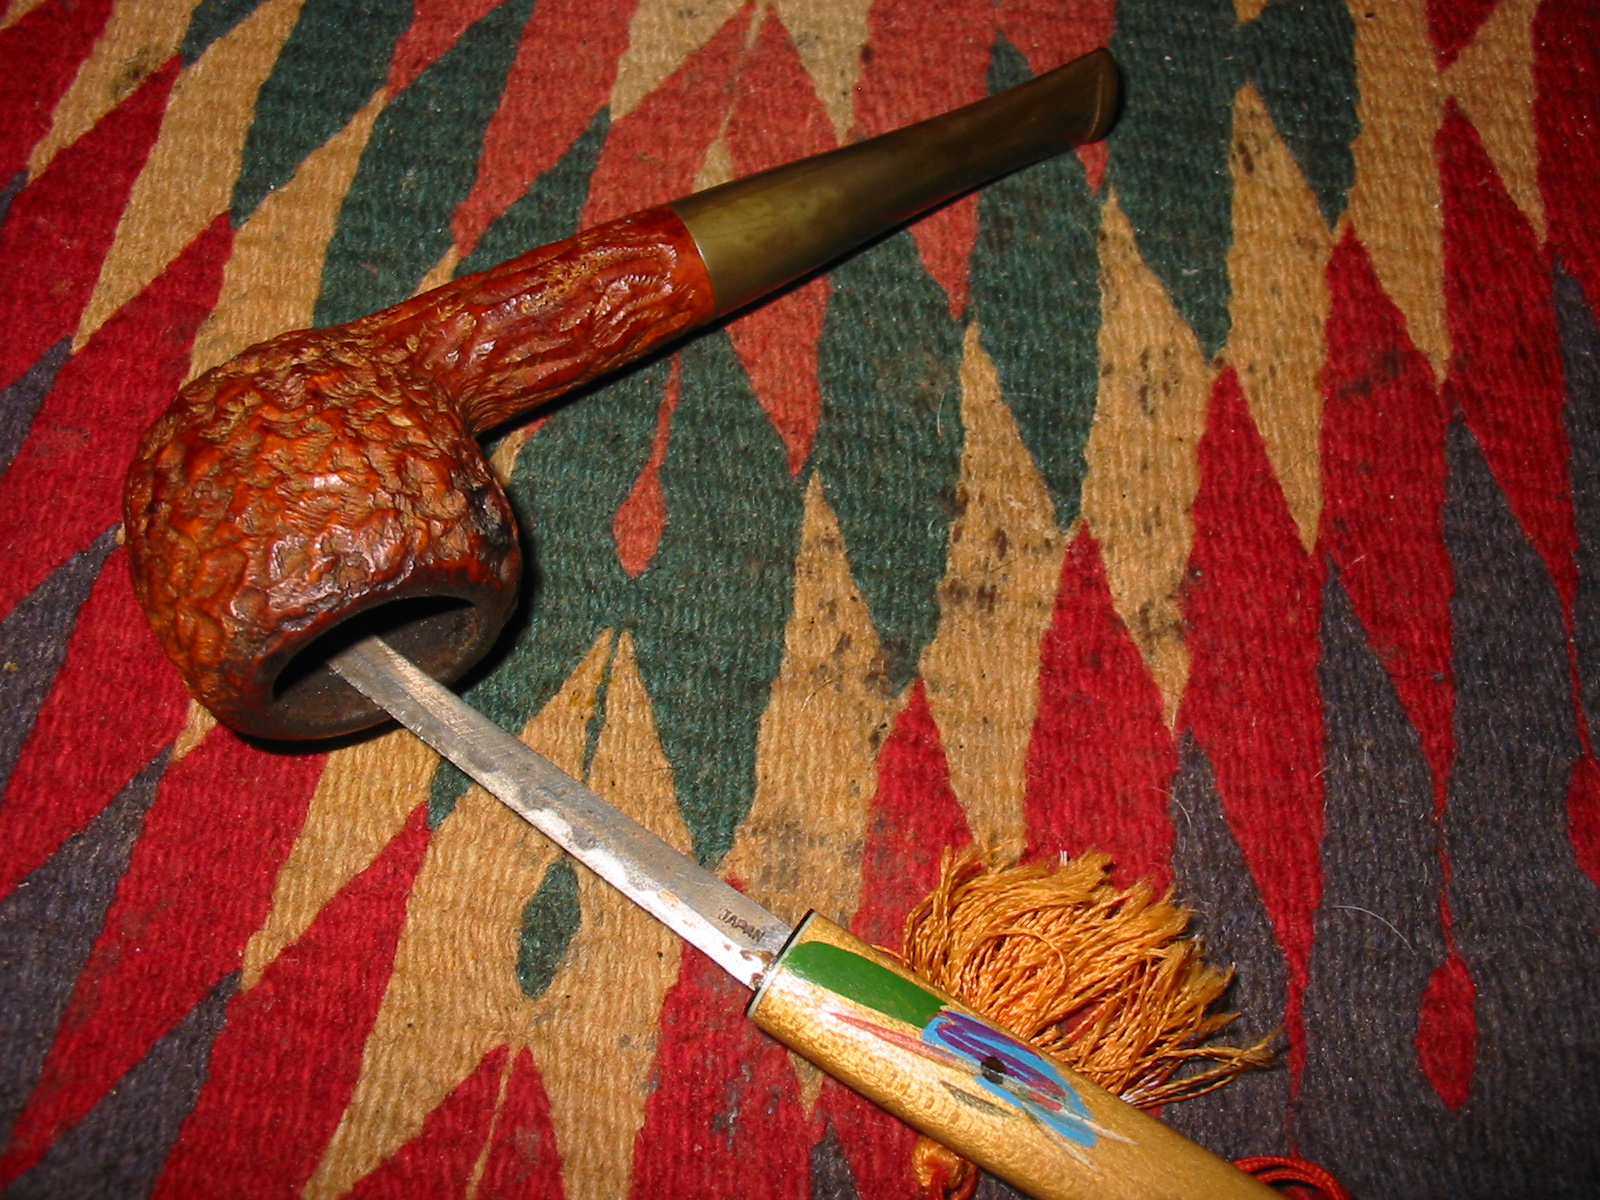
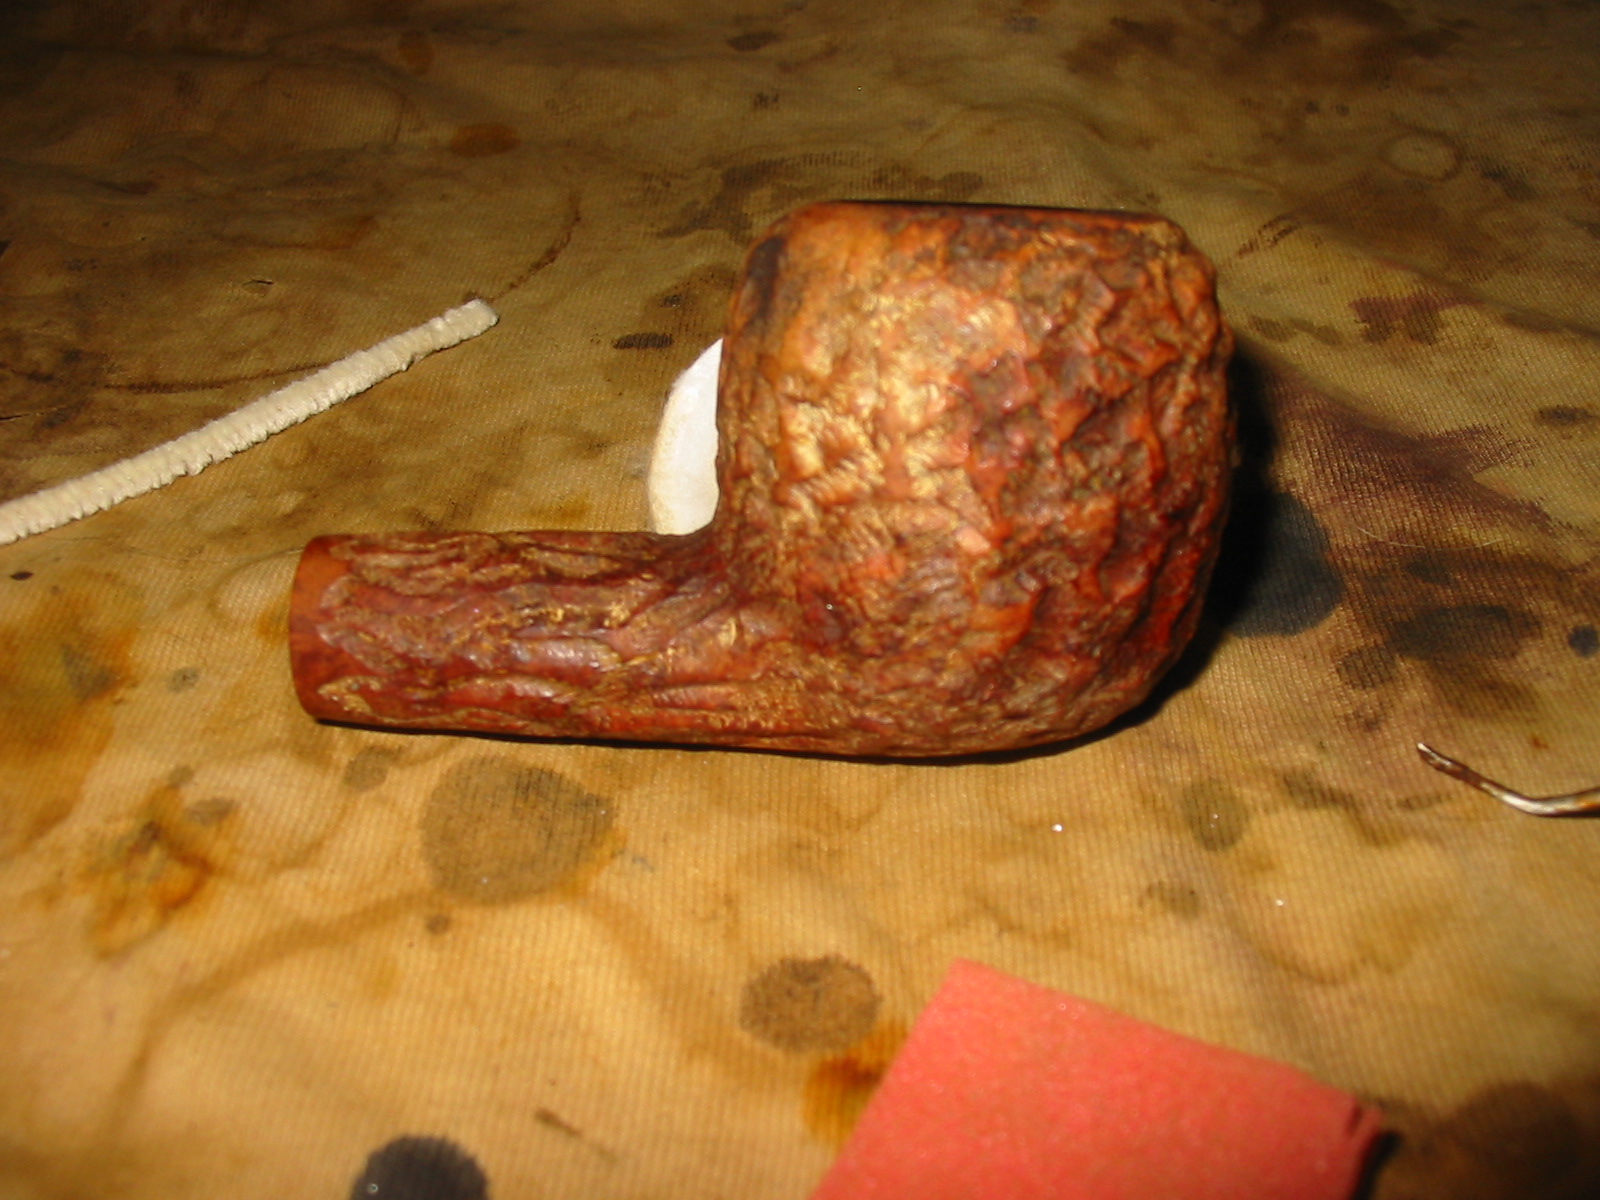
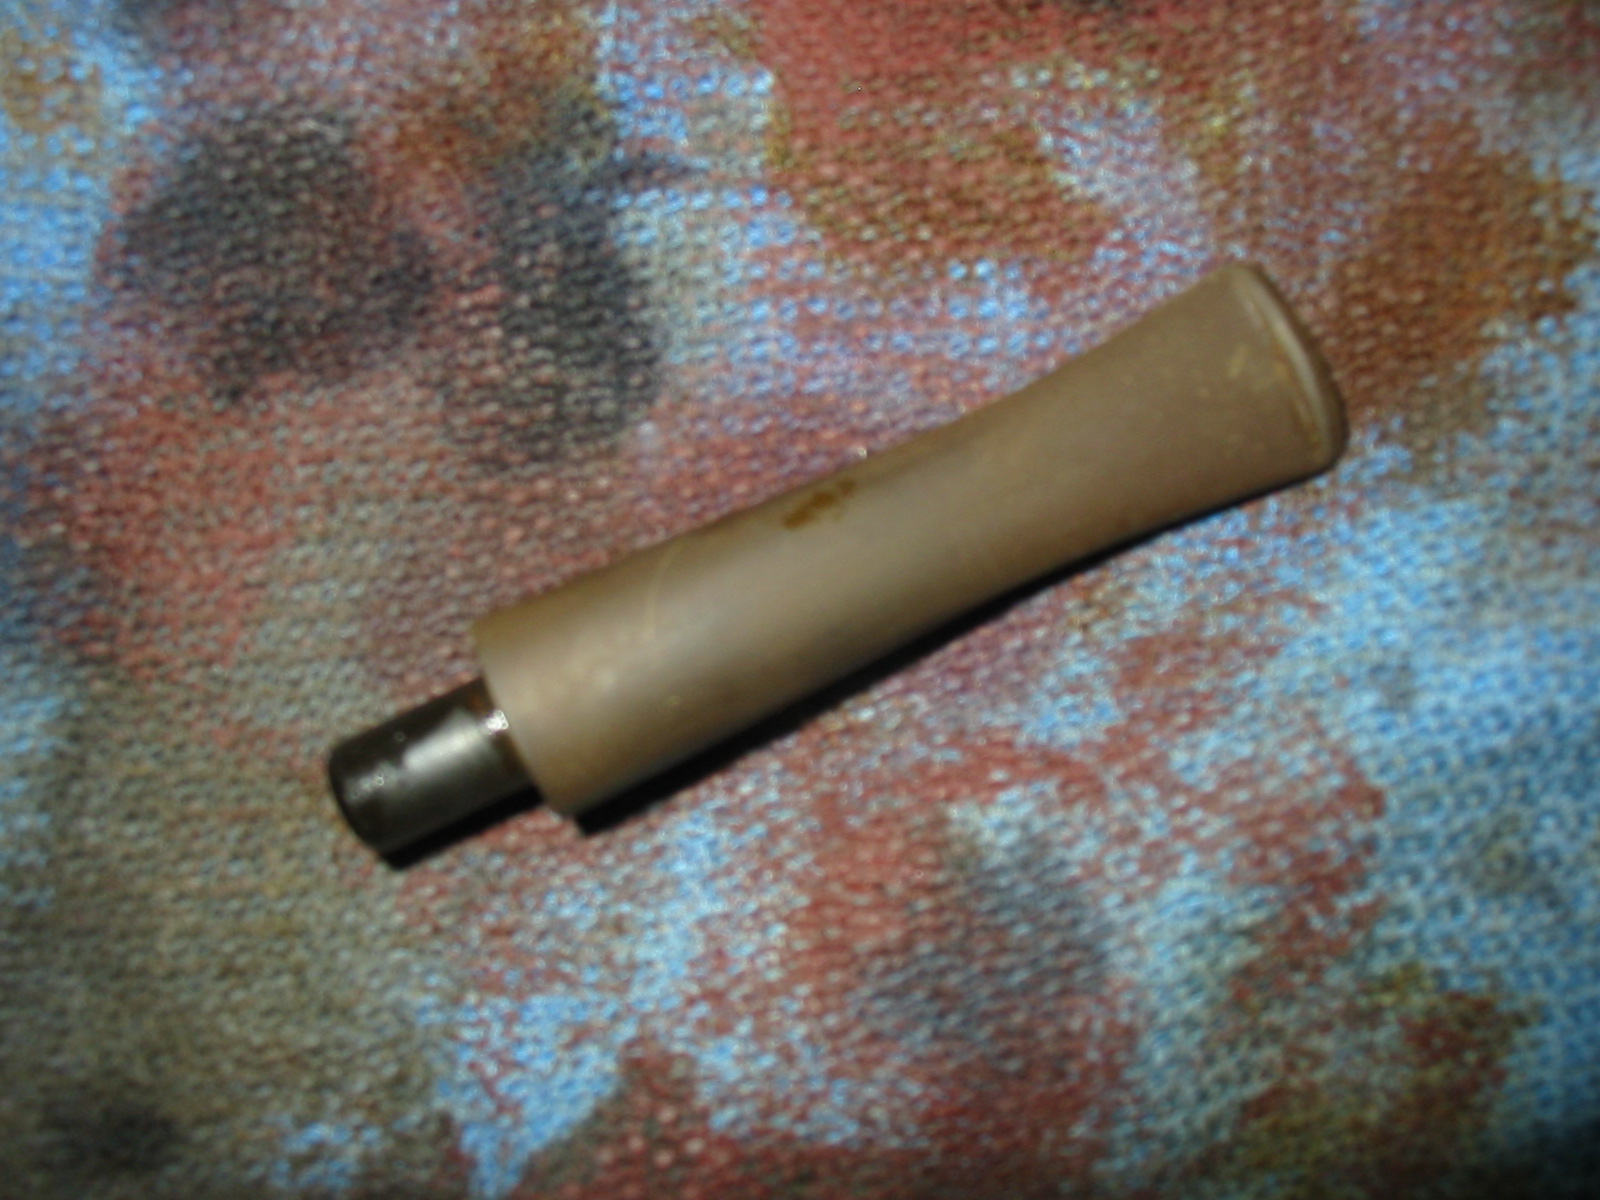
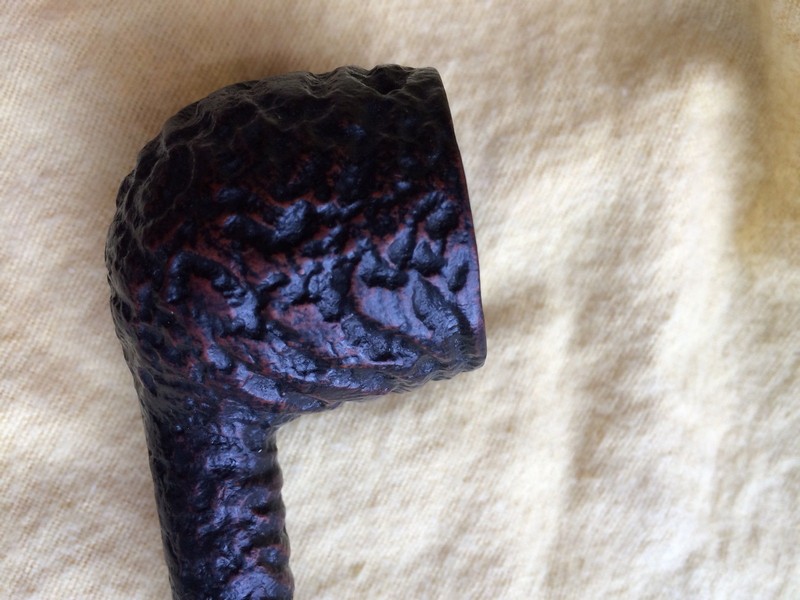
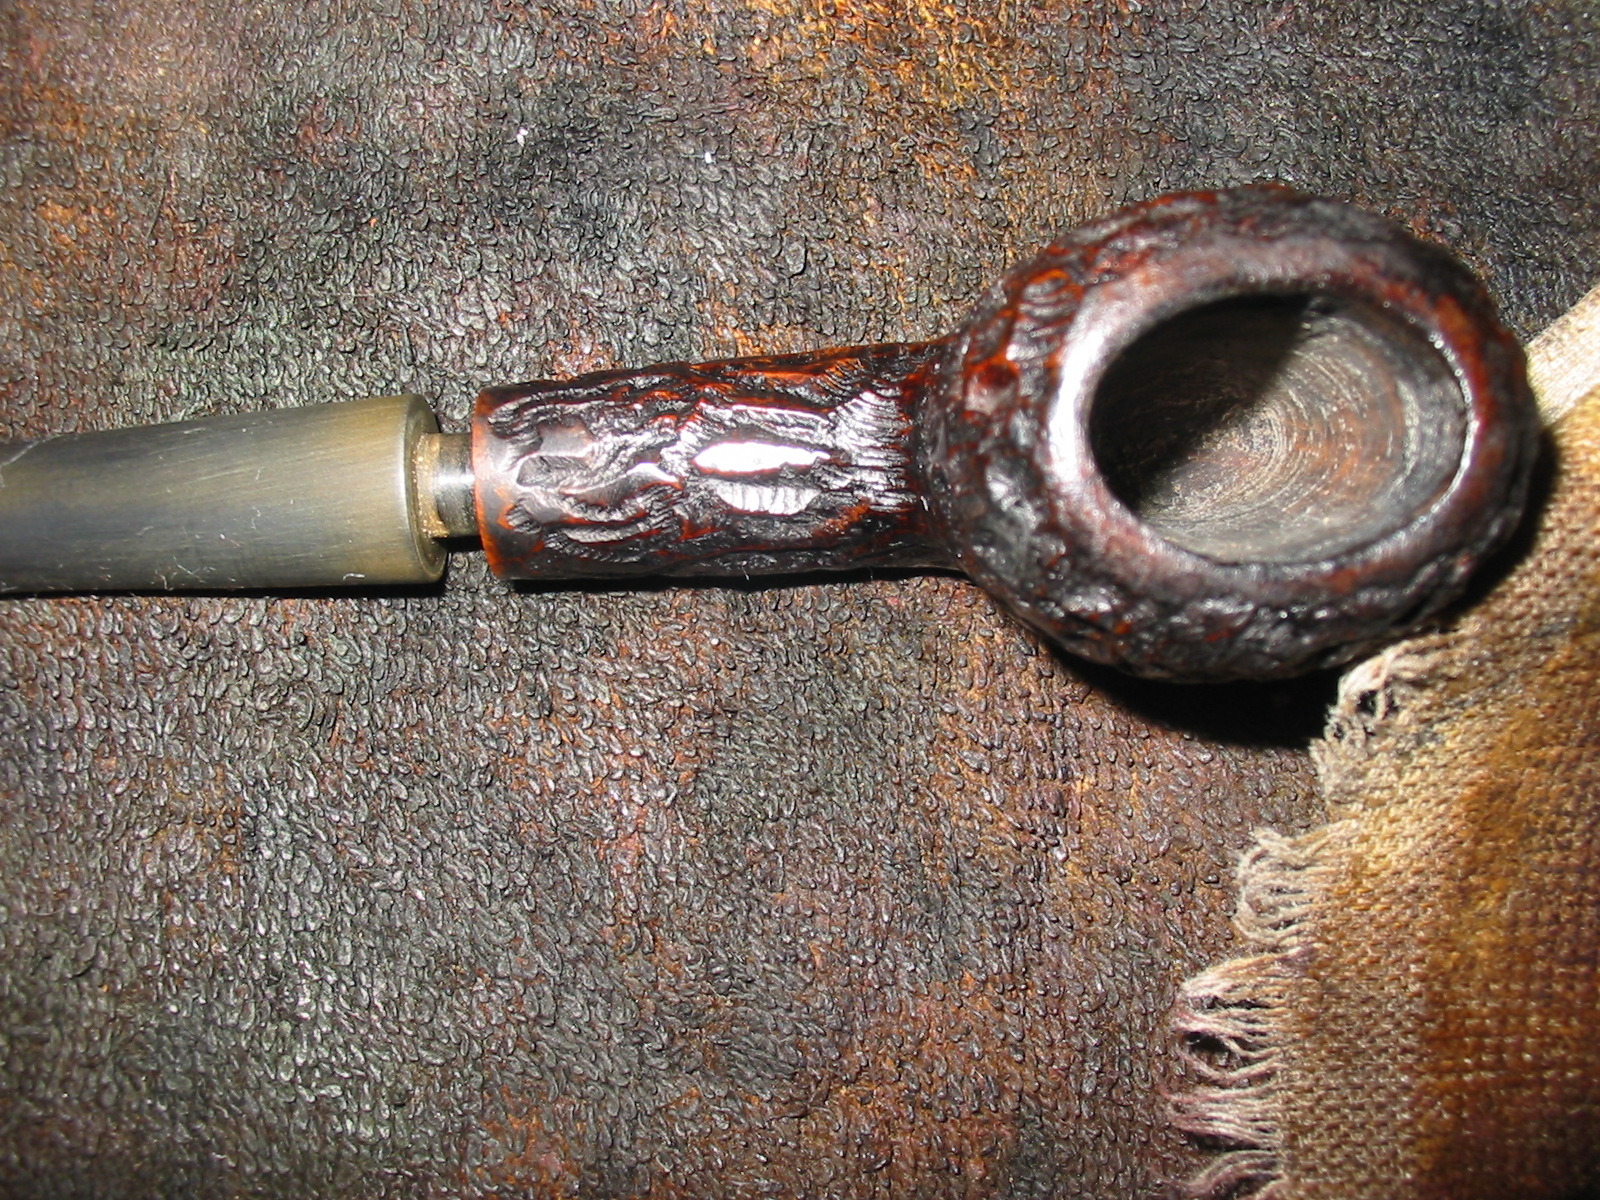
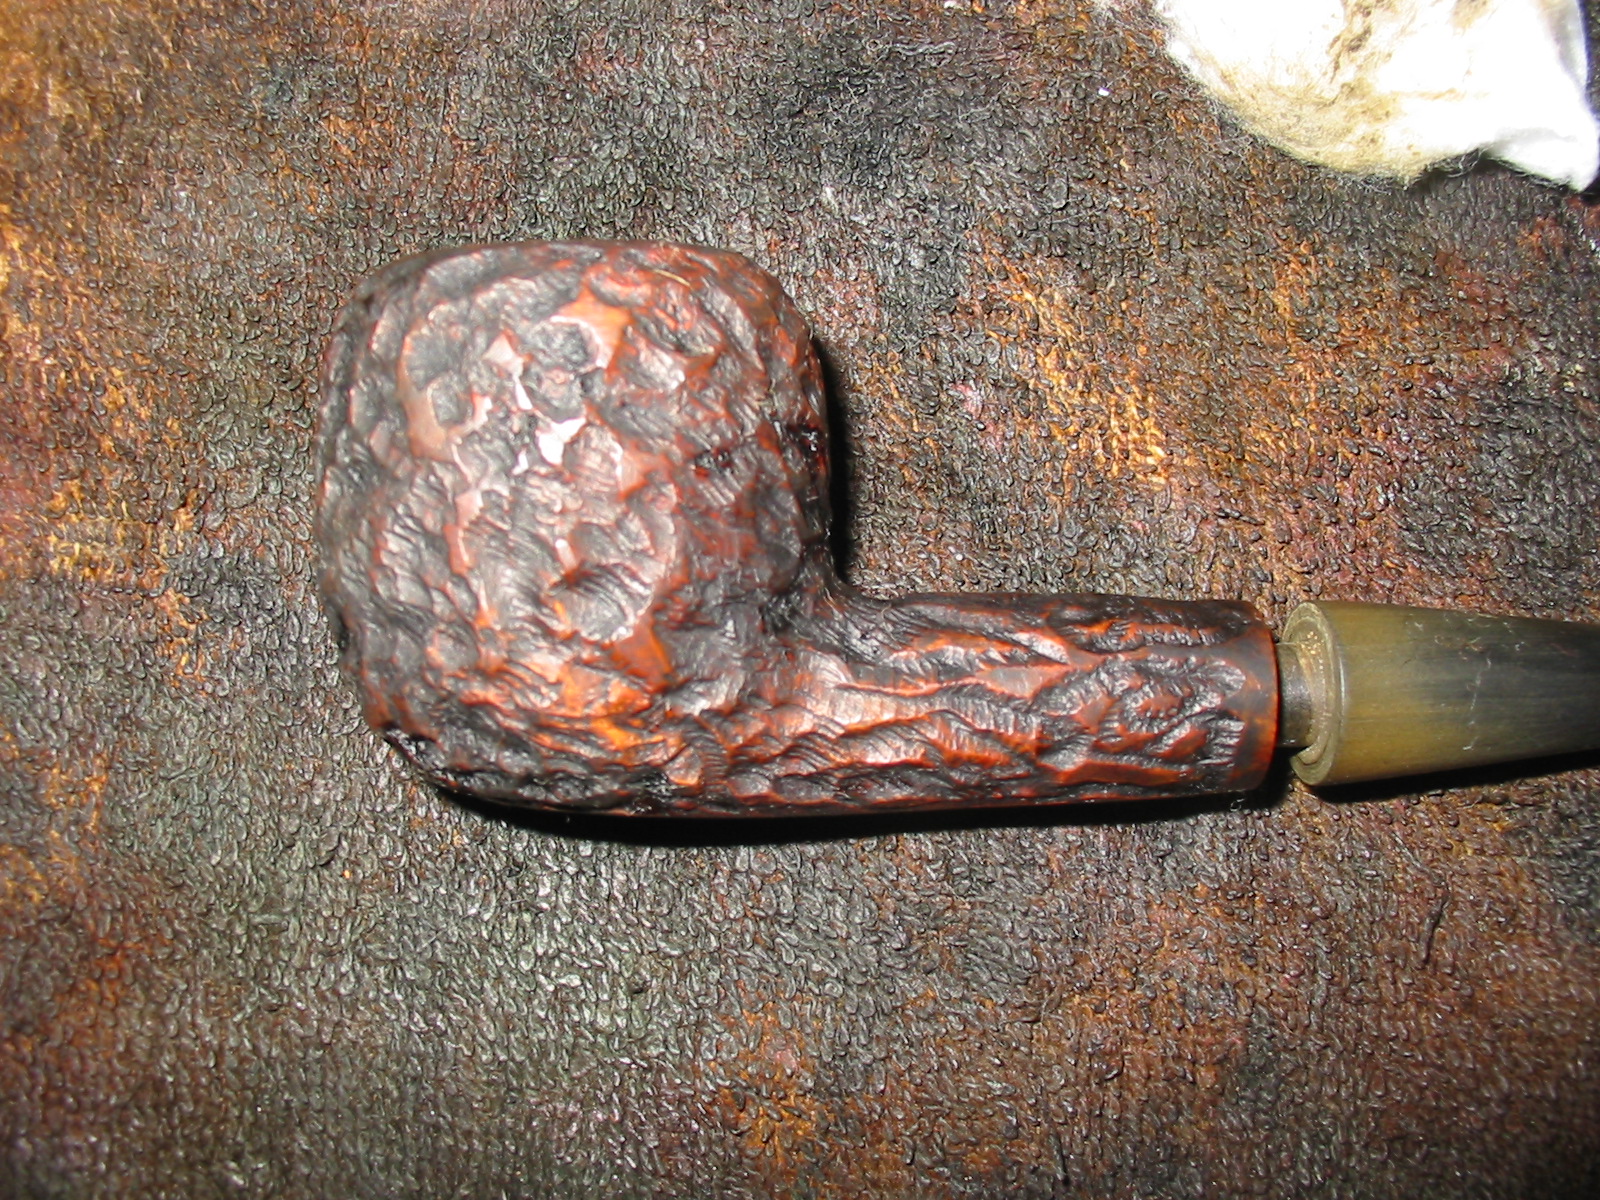
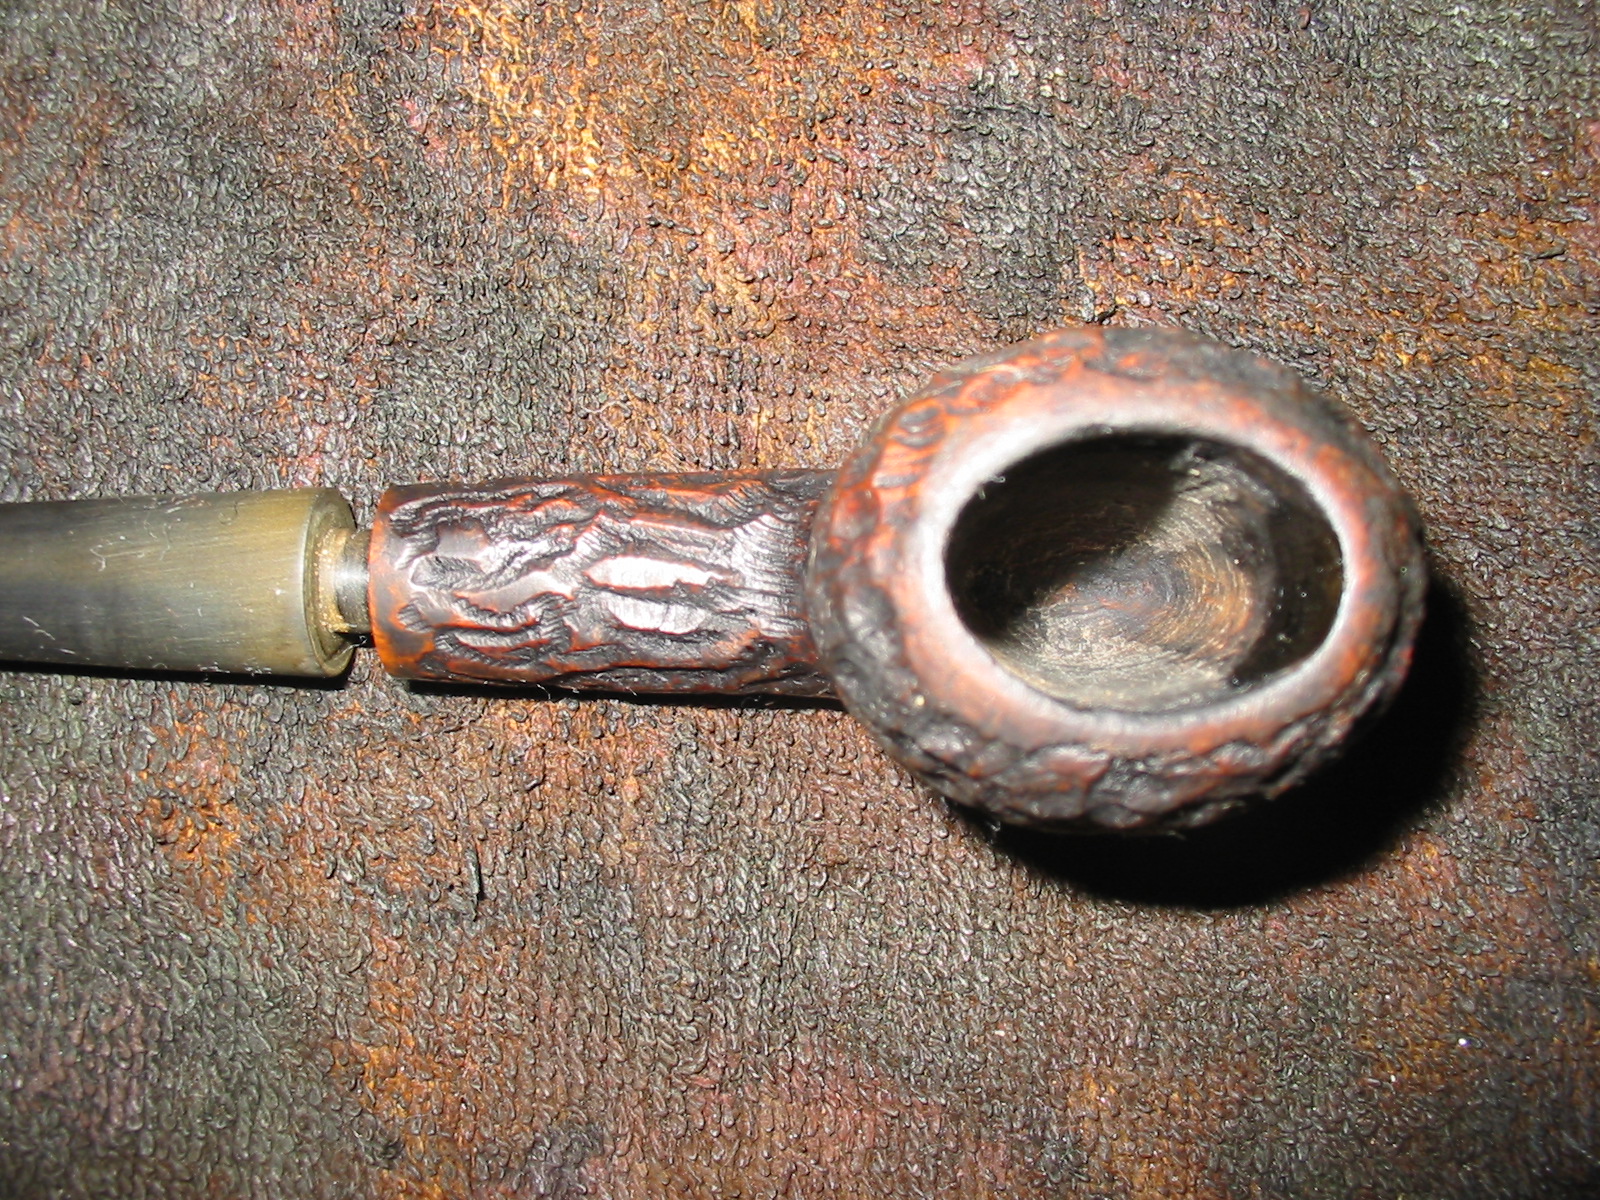
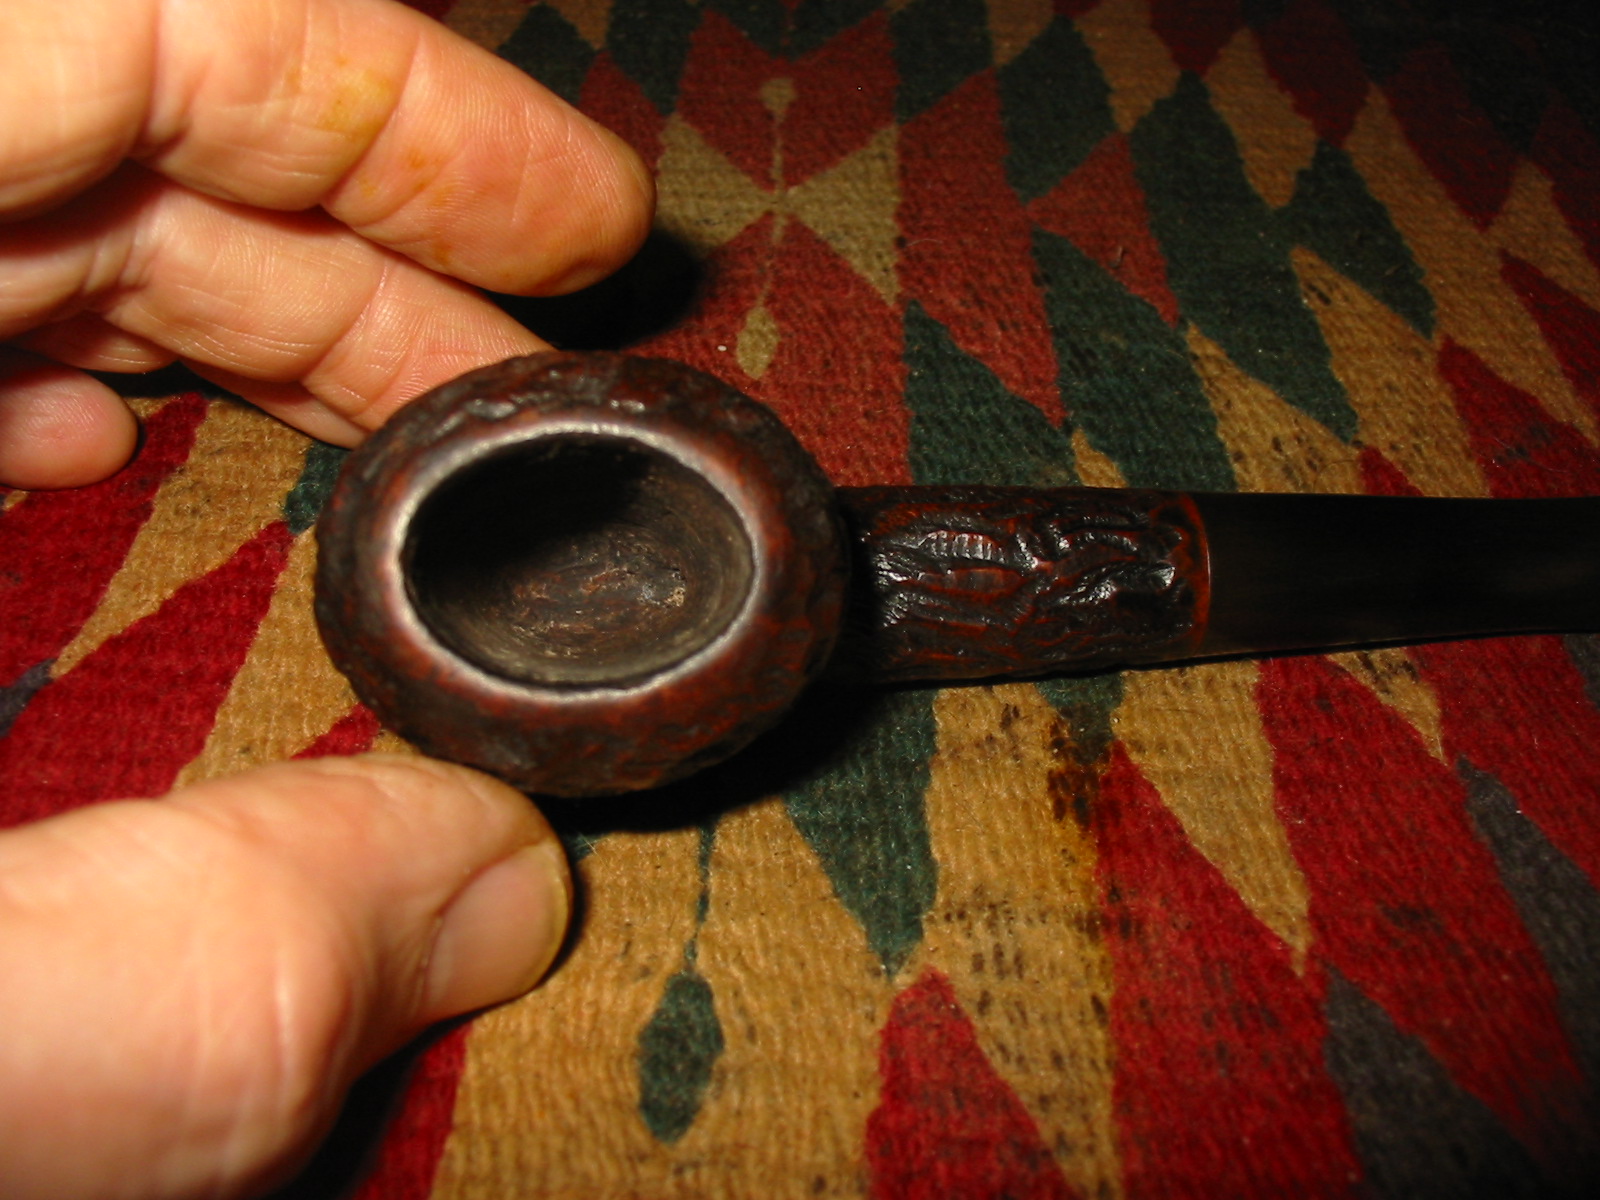
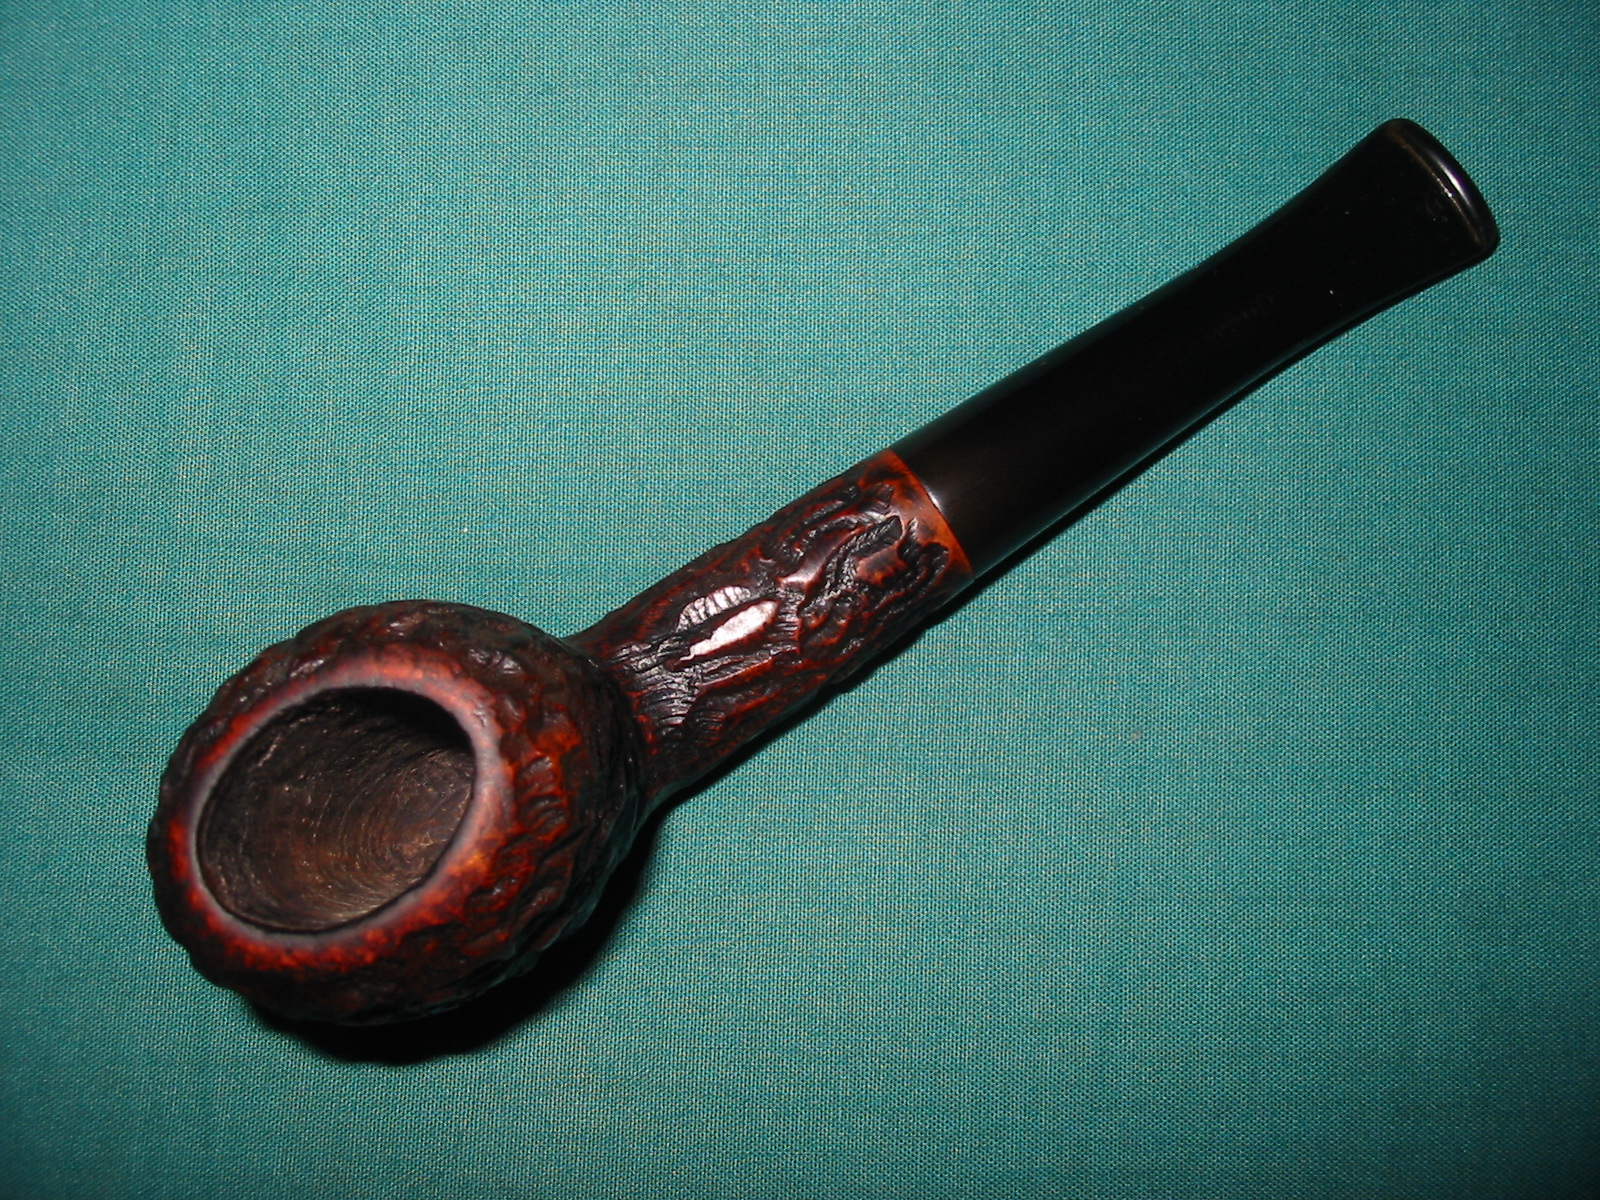
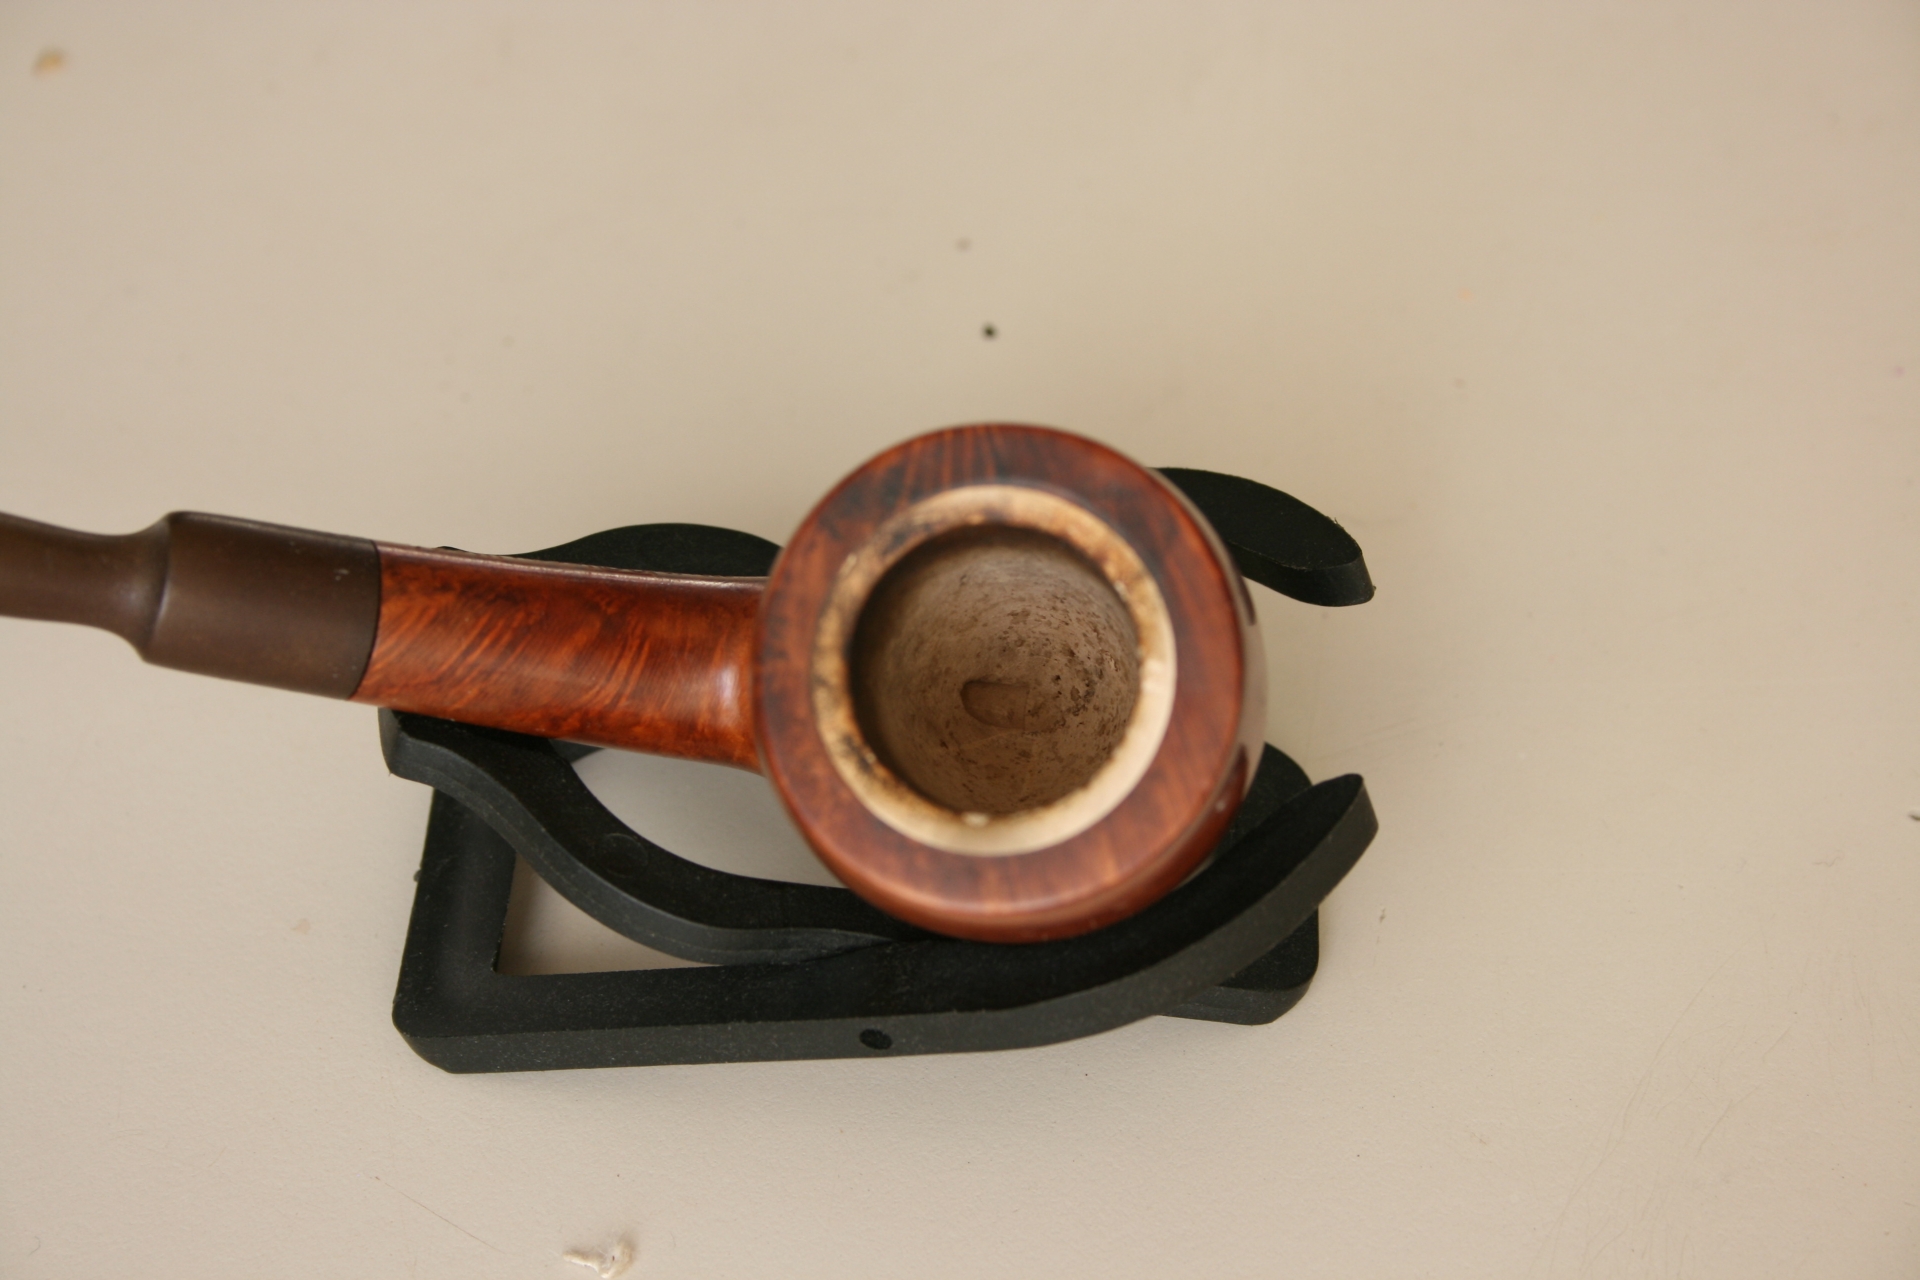
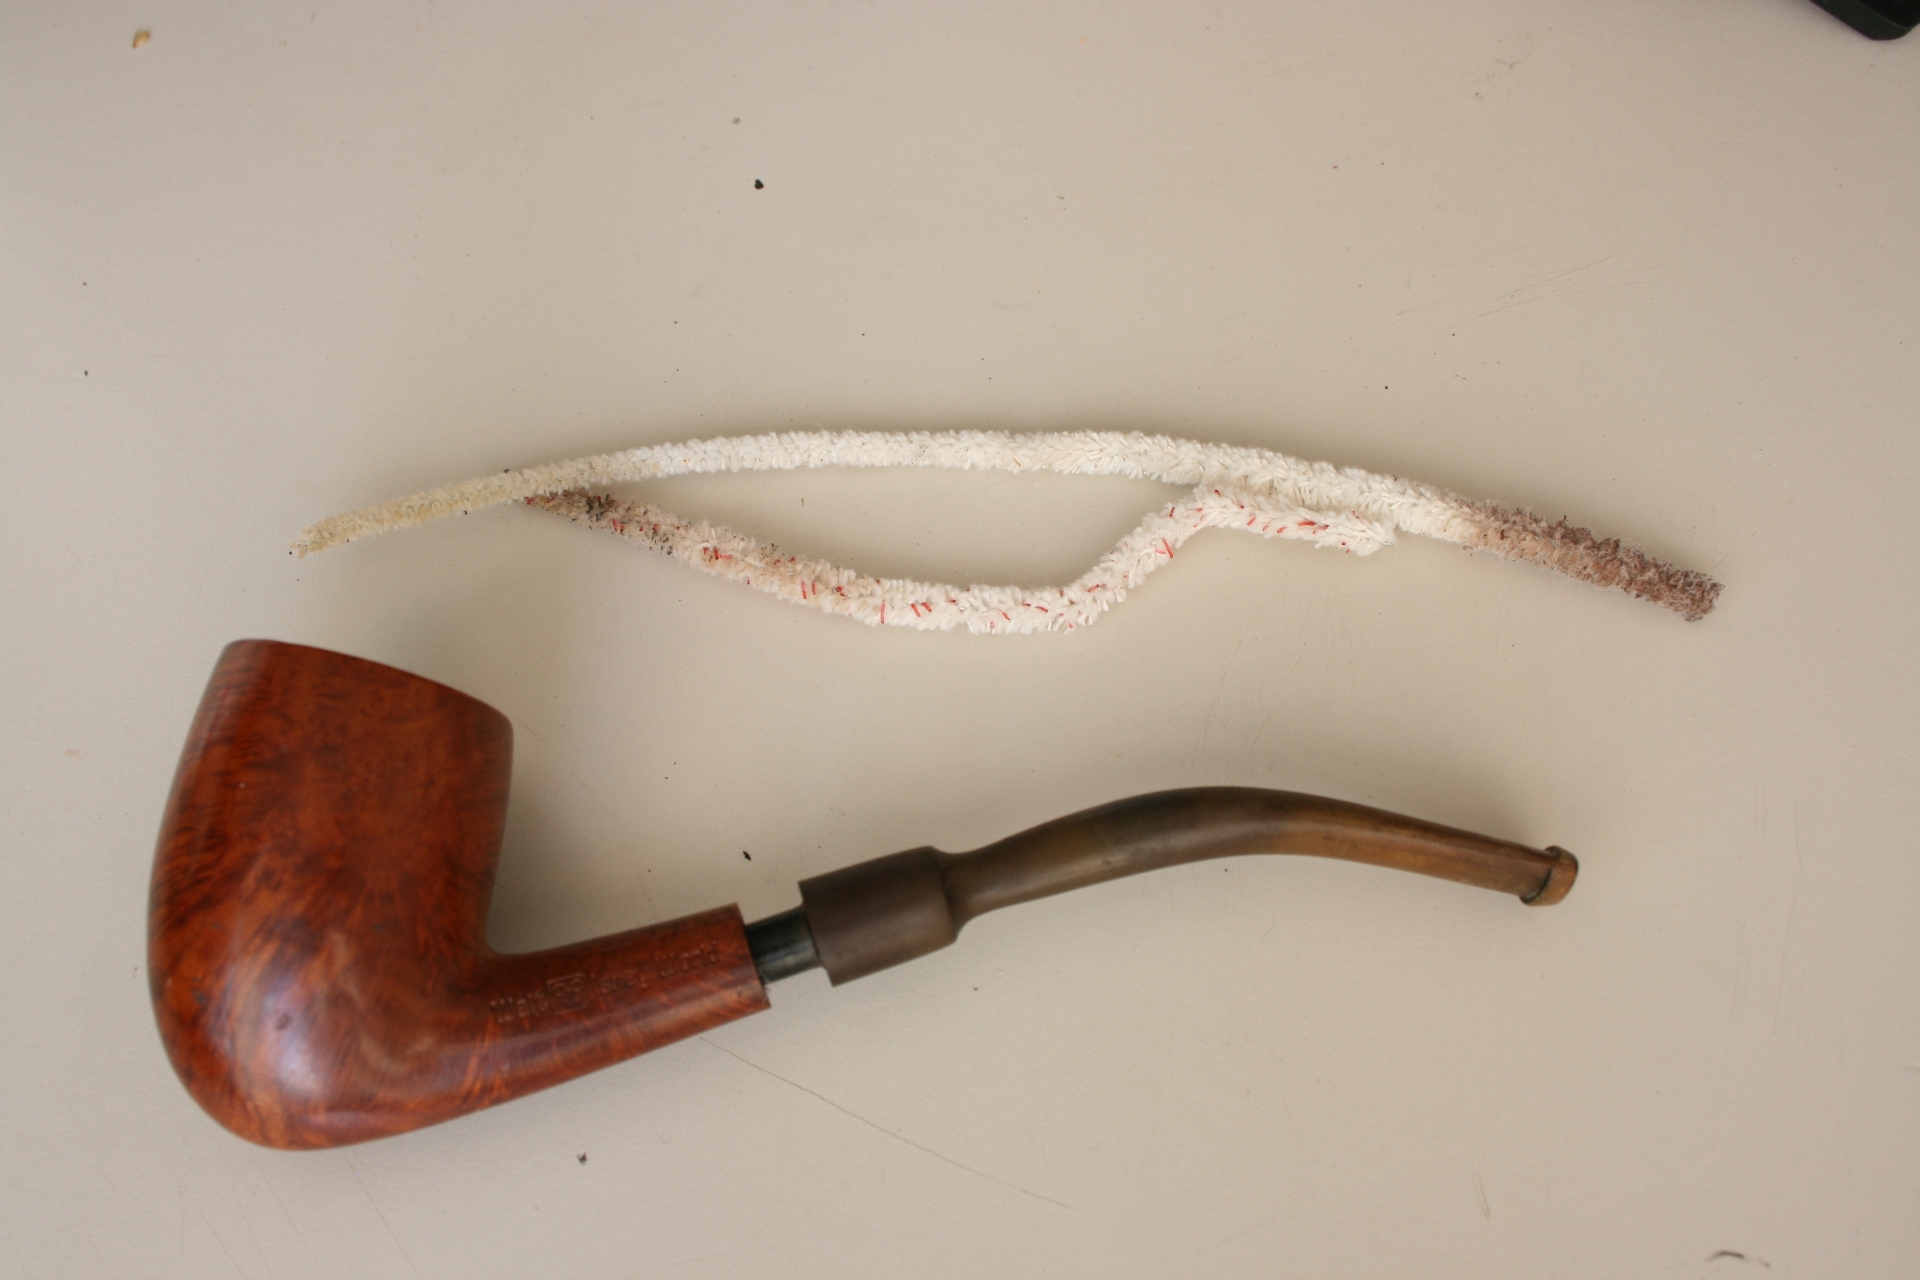
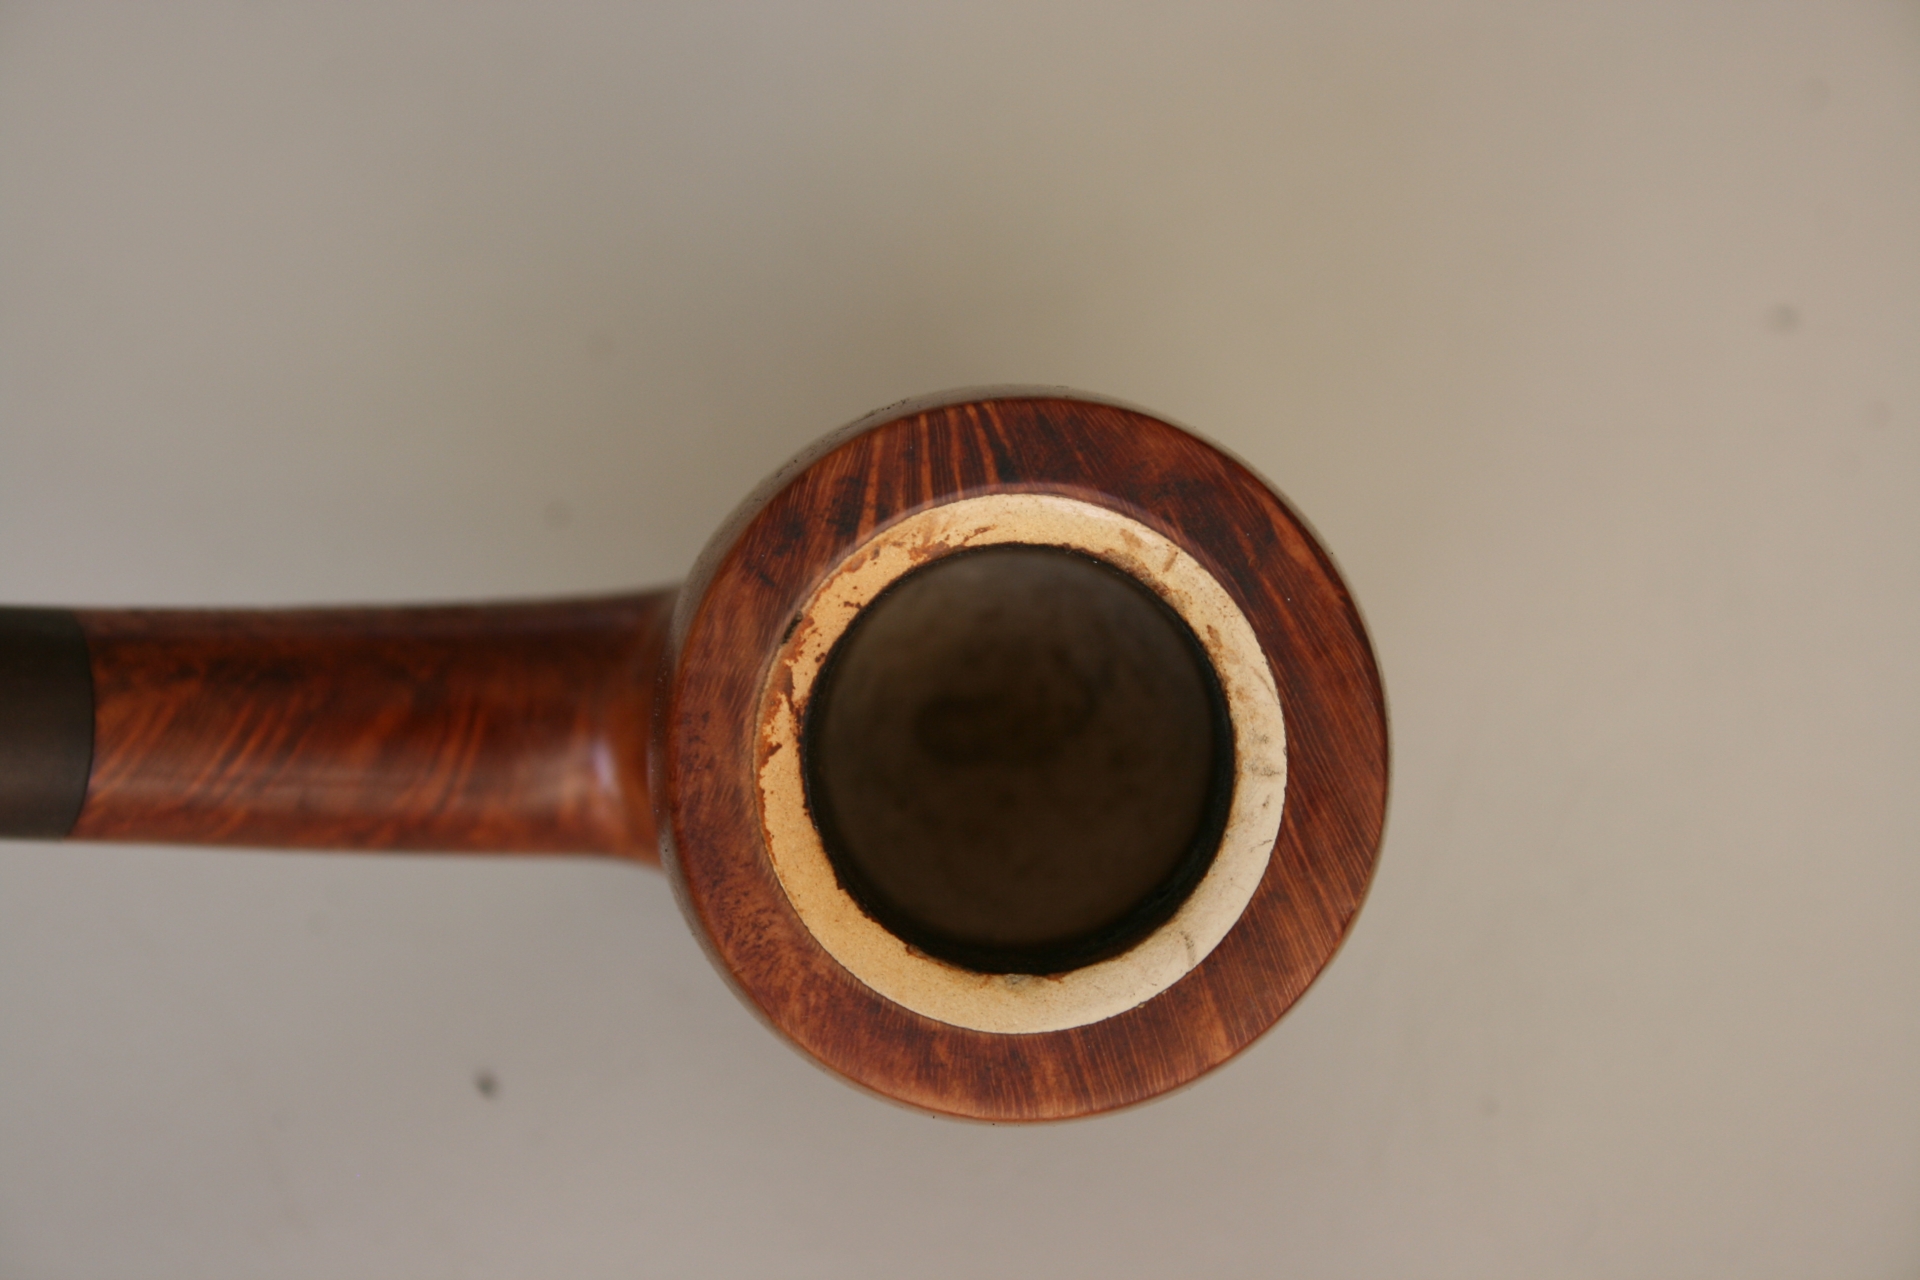
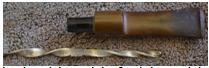
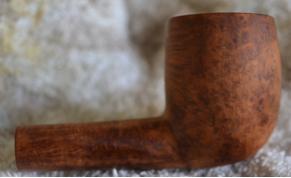
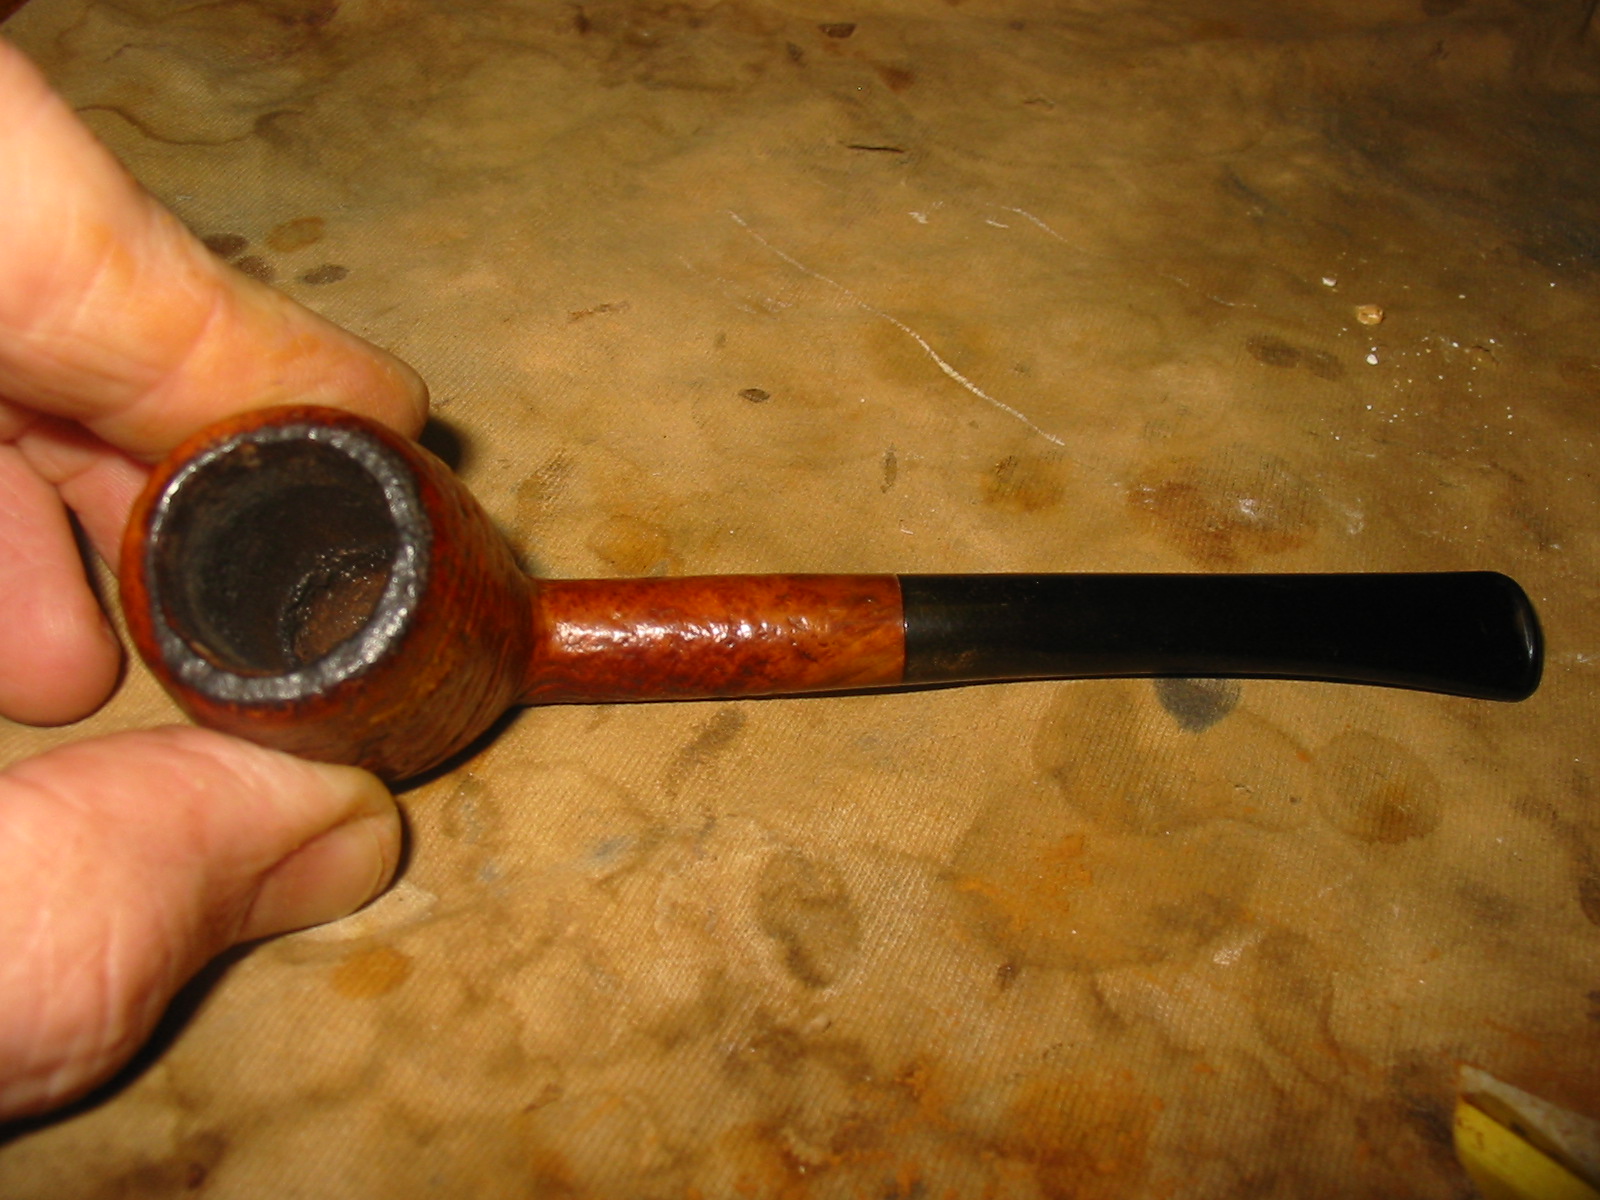
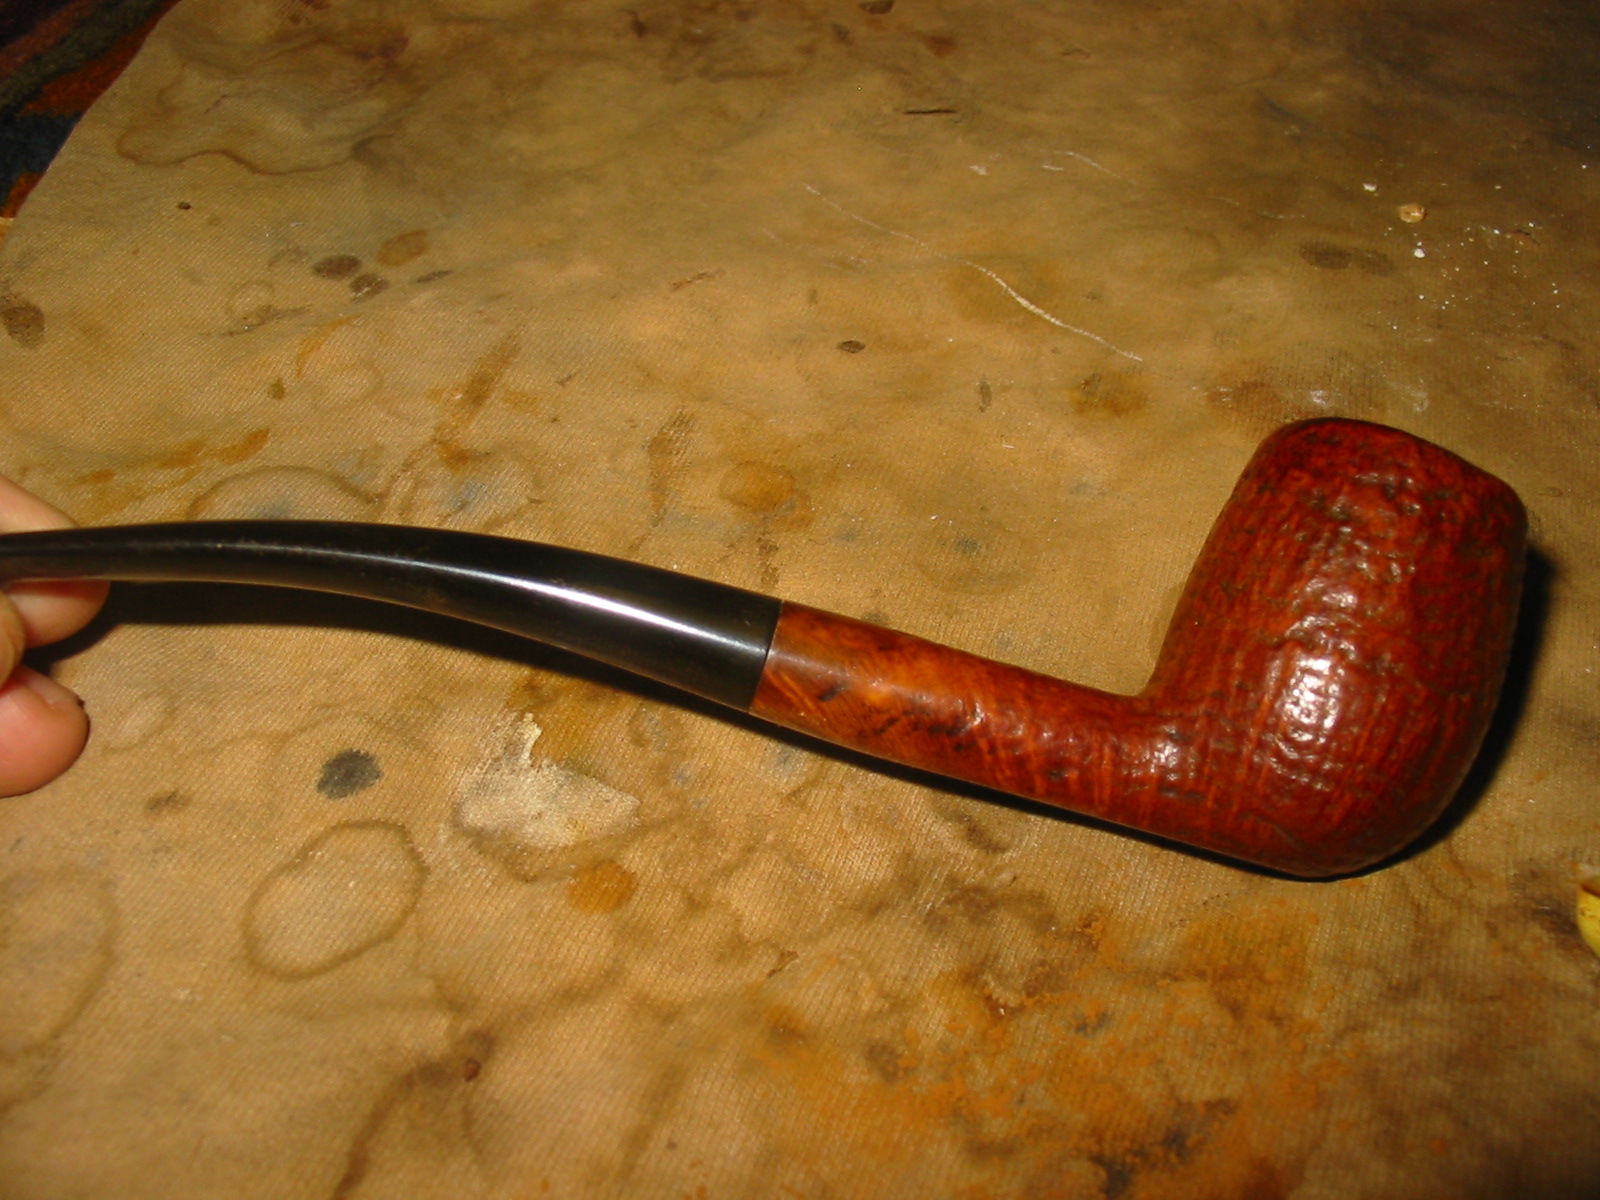
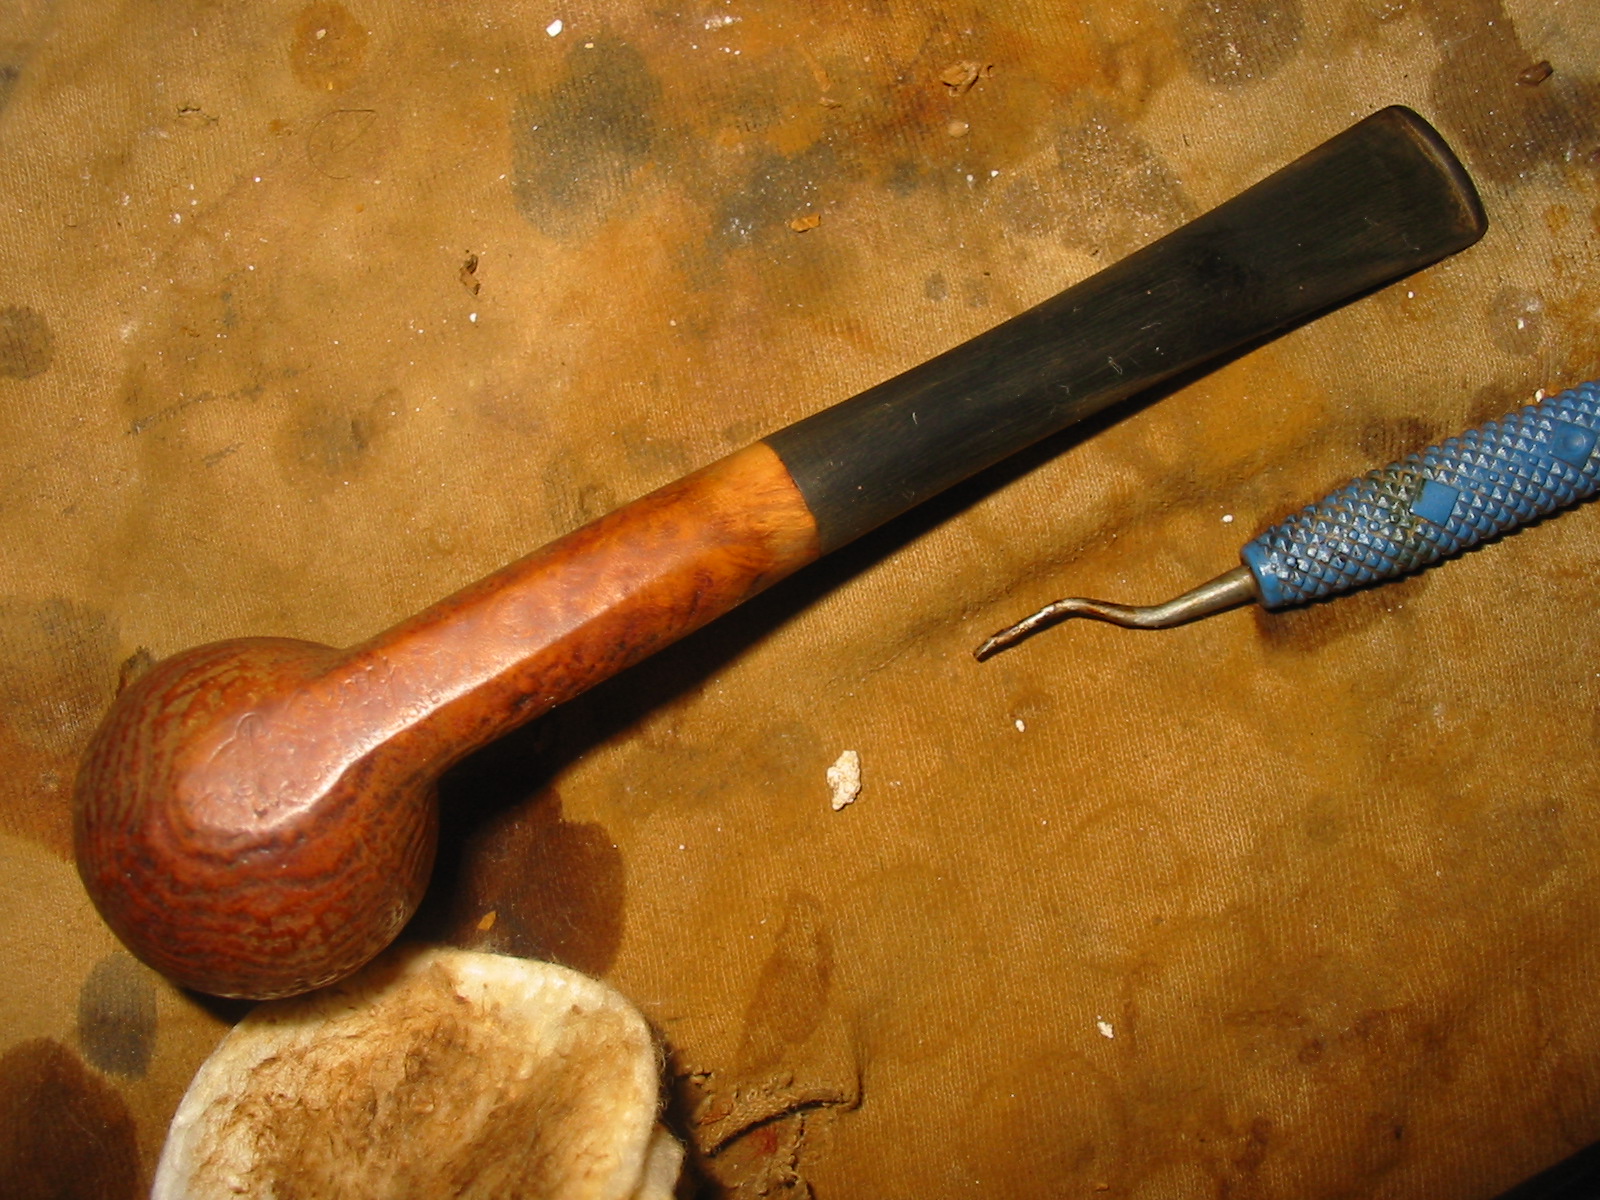
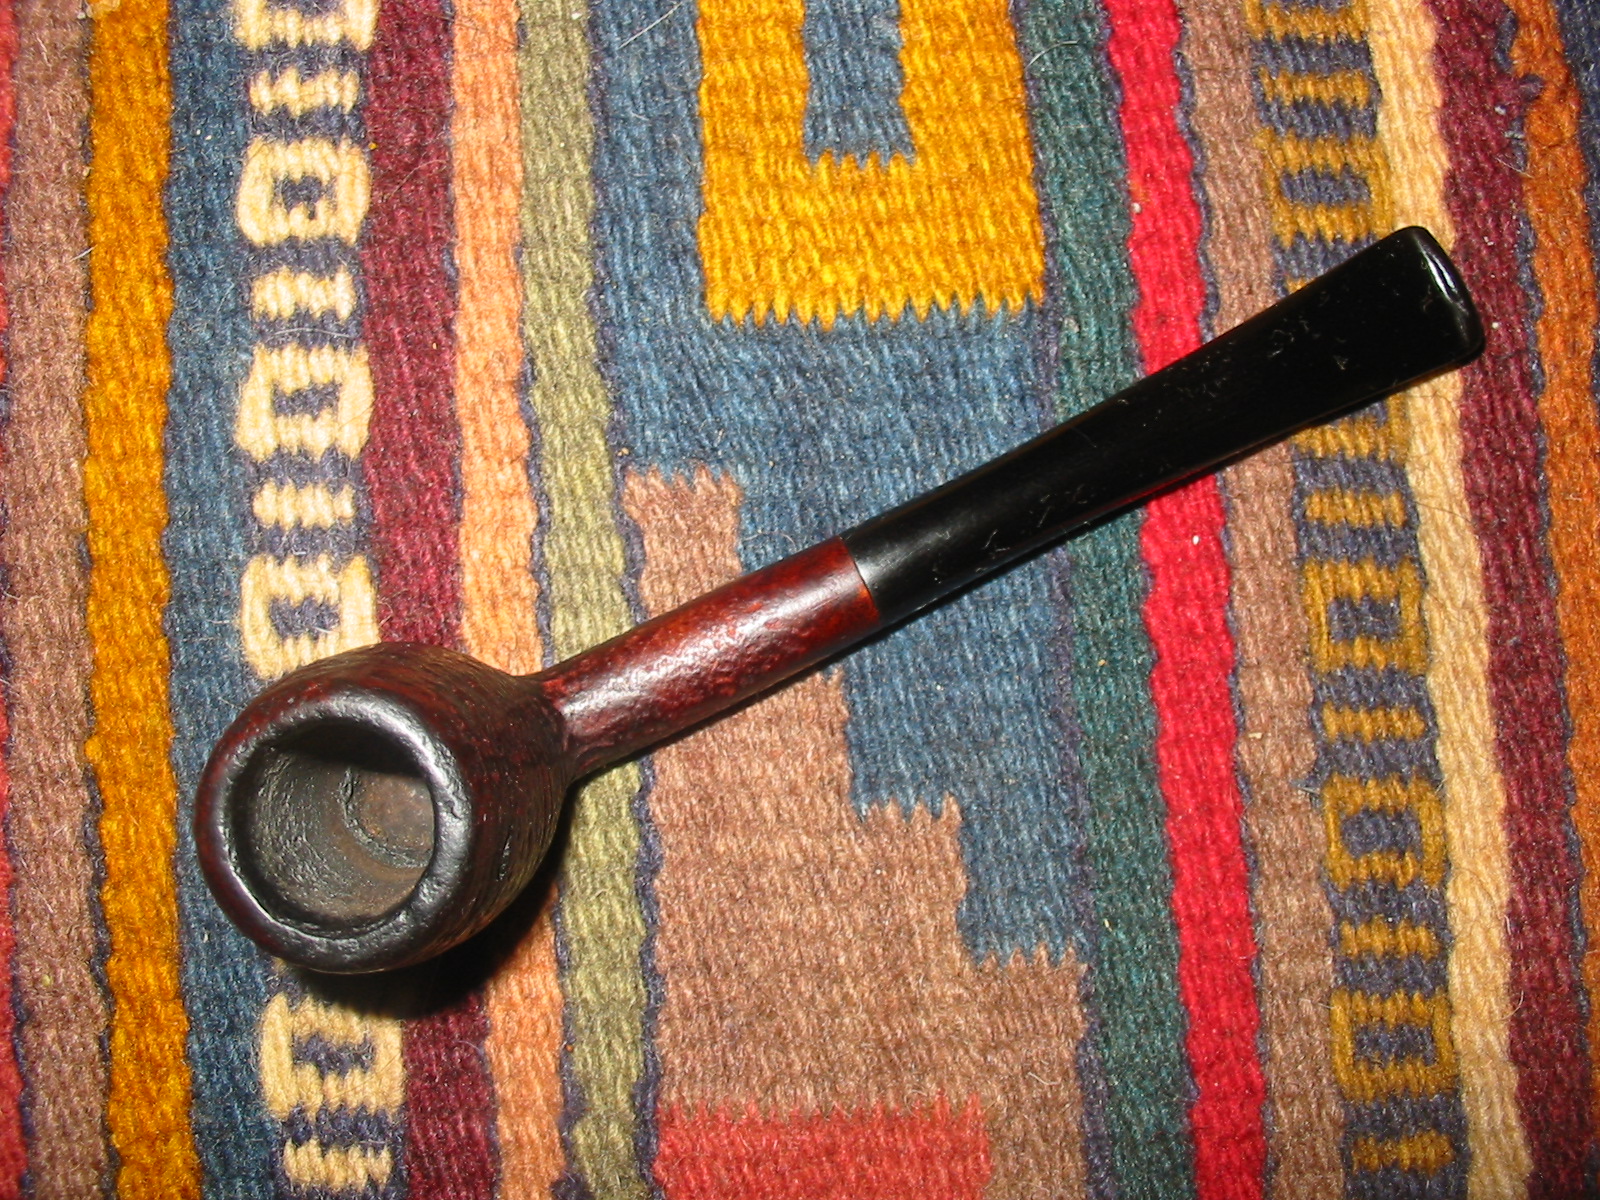
The first photo below show some light splotches on the side of the bowl. These seem to have been fills that were put in before the blasting and finish were done. They were definitely putty. The shank had been sanded down and the first half-inch next to the stem was sanded smooth. There was also a slight taper to the shank were the sanding had taken down the diameter of the shank at the end. The rim was darkened and had some carbon build up on it. The stem was in rough shape in that it had some deep tooth dents on the underside. When I took it out of the shank I was even more convinced that it was a replacement in that it had a thick-walled aluminum tenon. It was similar to the tenons on Medico pipes with horizontal split in the tenon so that it can be adjusted. The difference was in the thickness of the material.
IMG_6433

IMG_6435

IMG_6436

IMG_6437

IMG_6438

IMG_6439
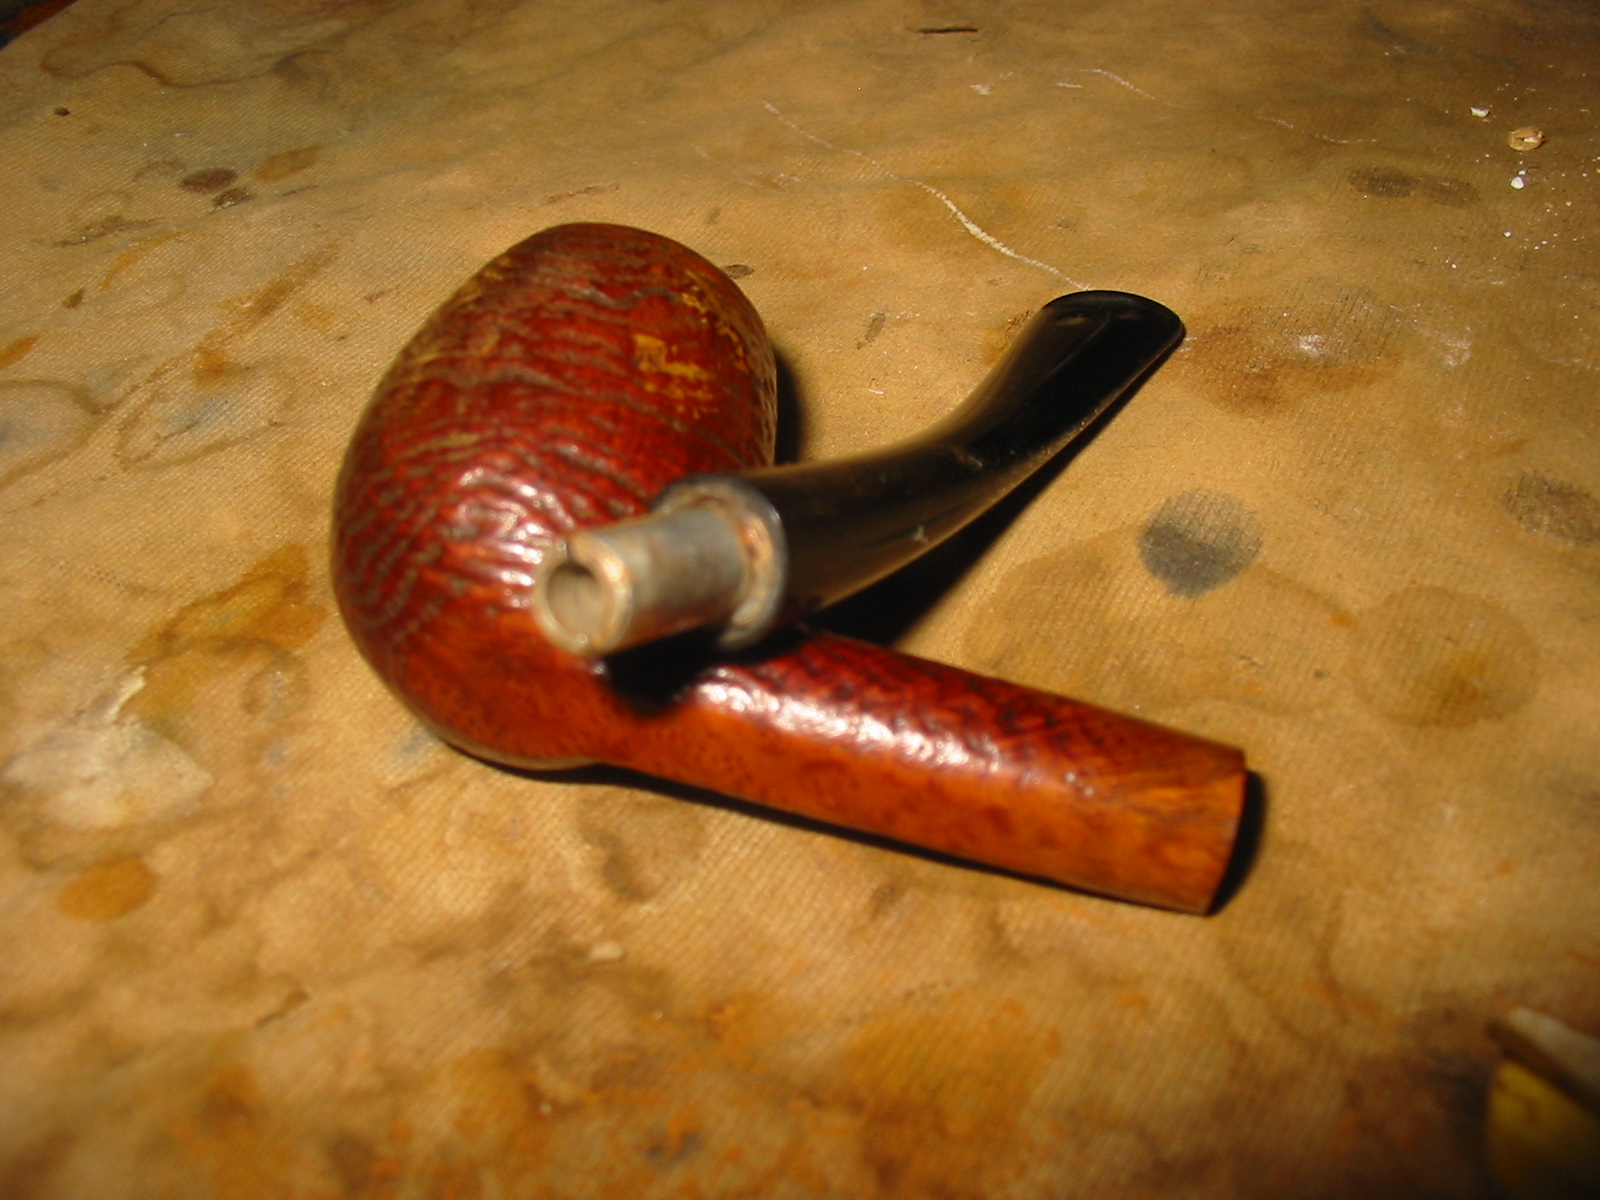
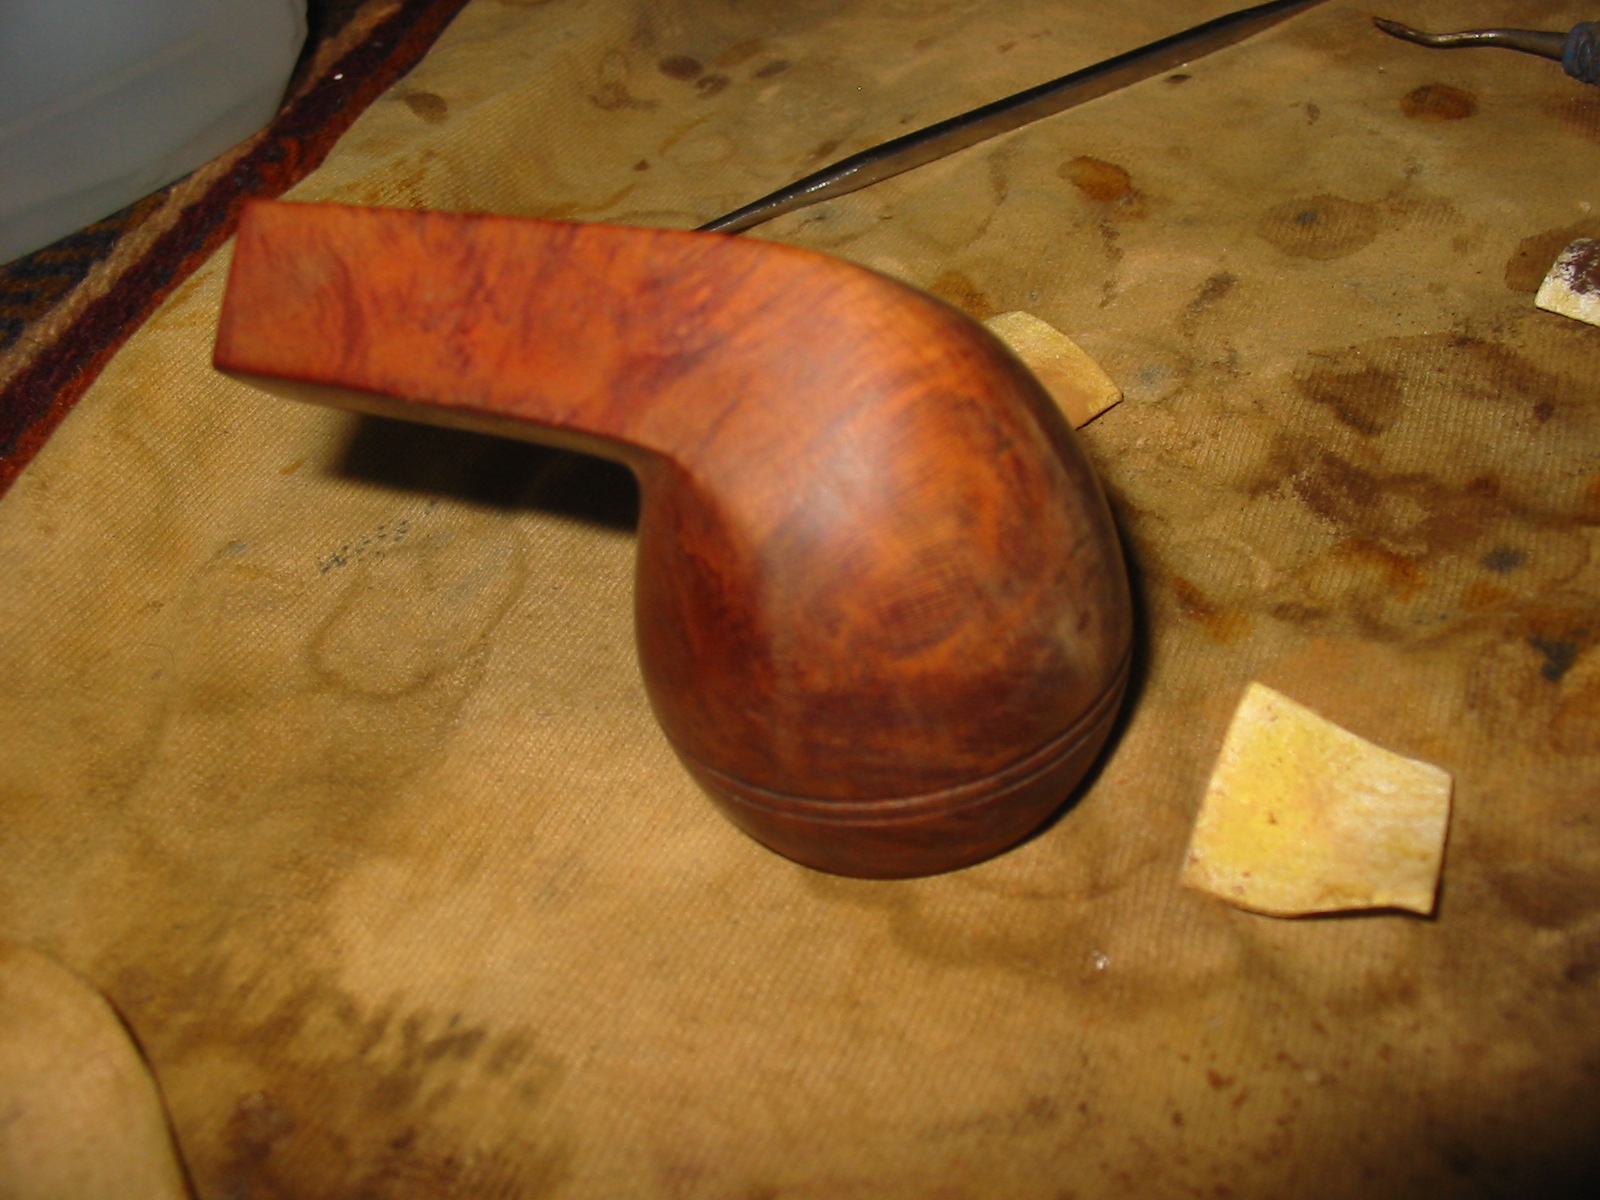
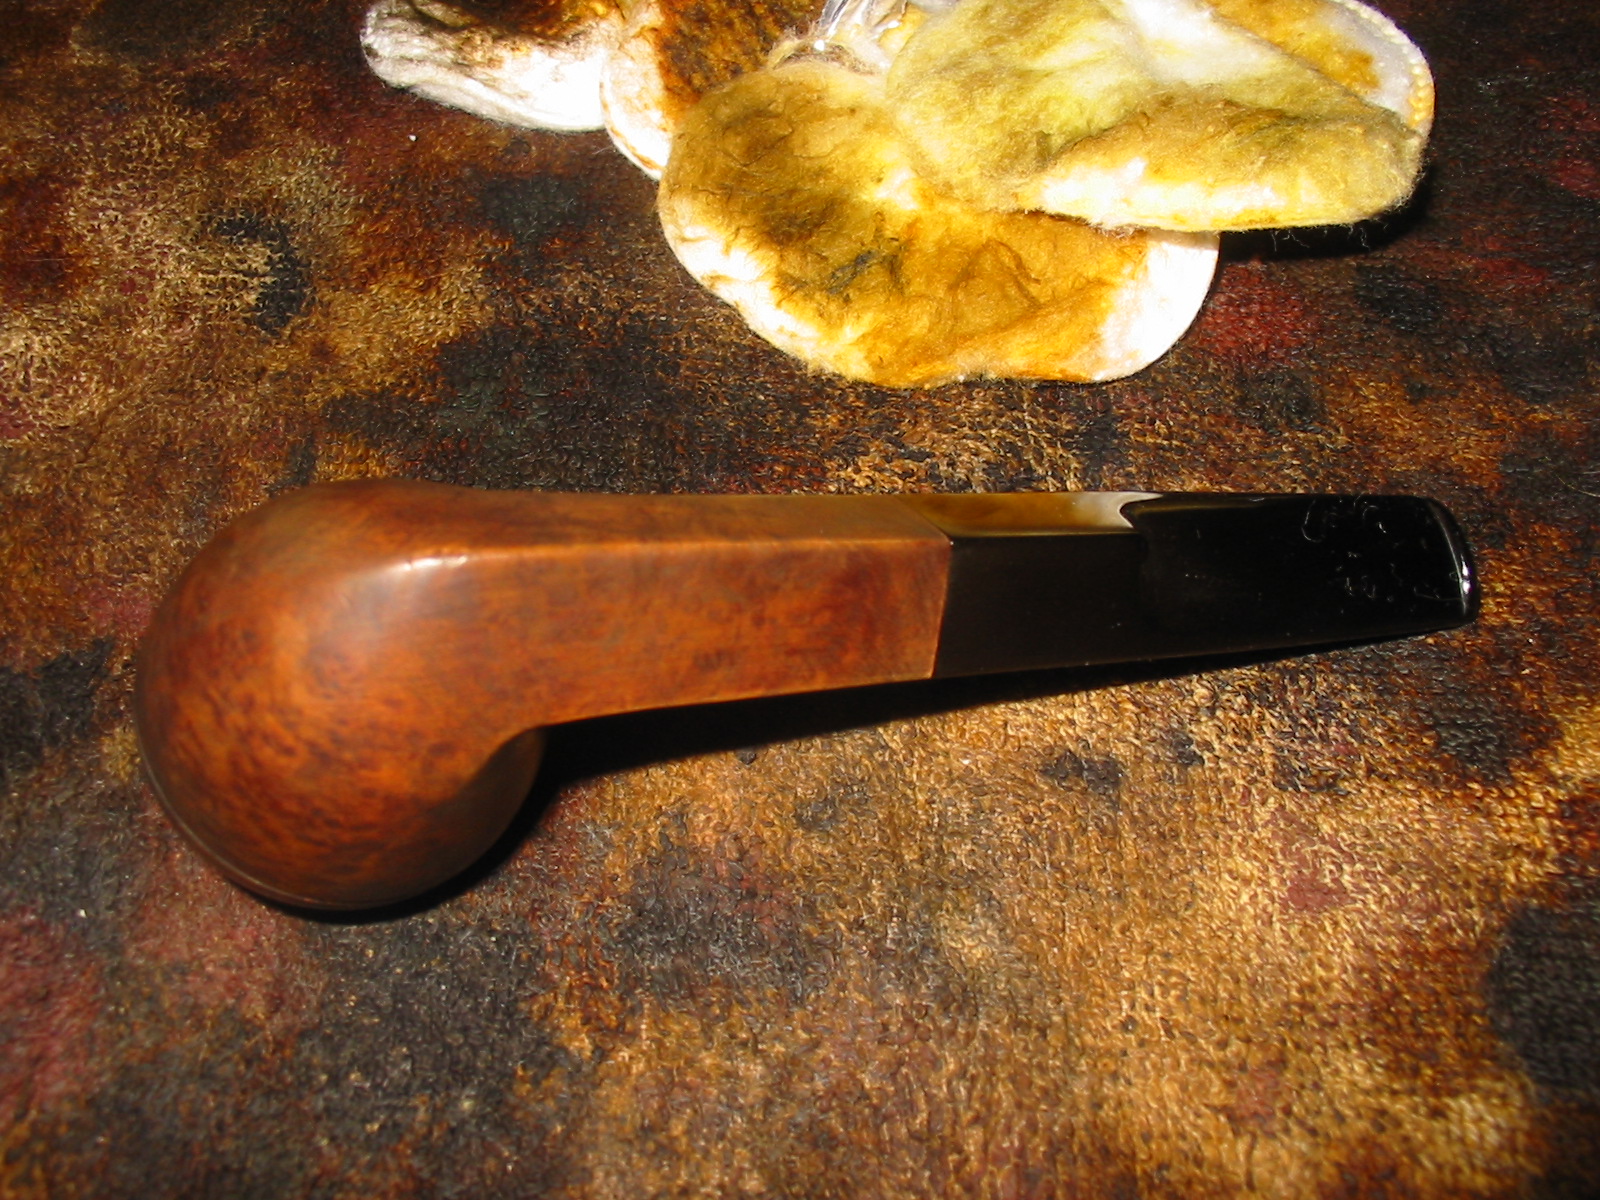
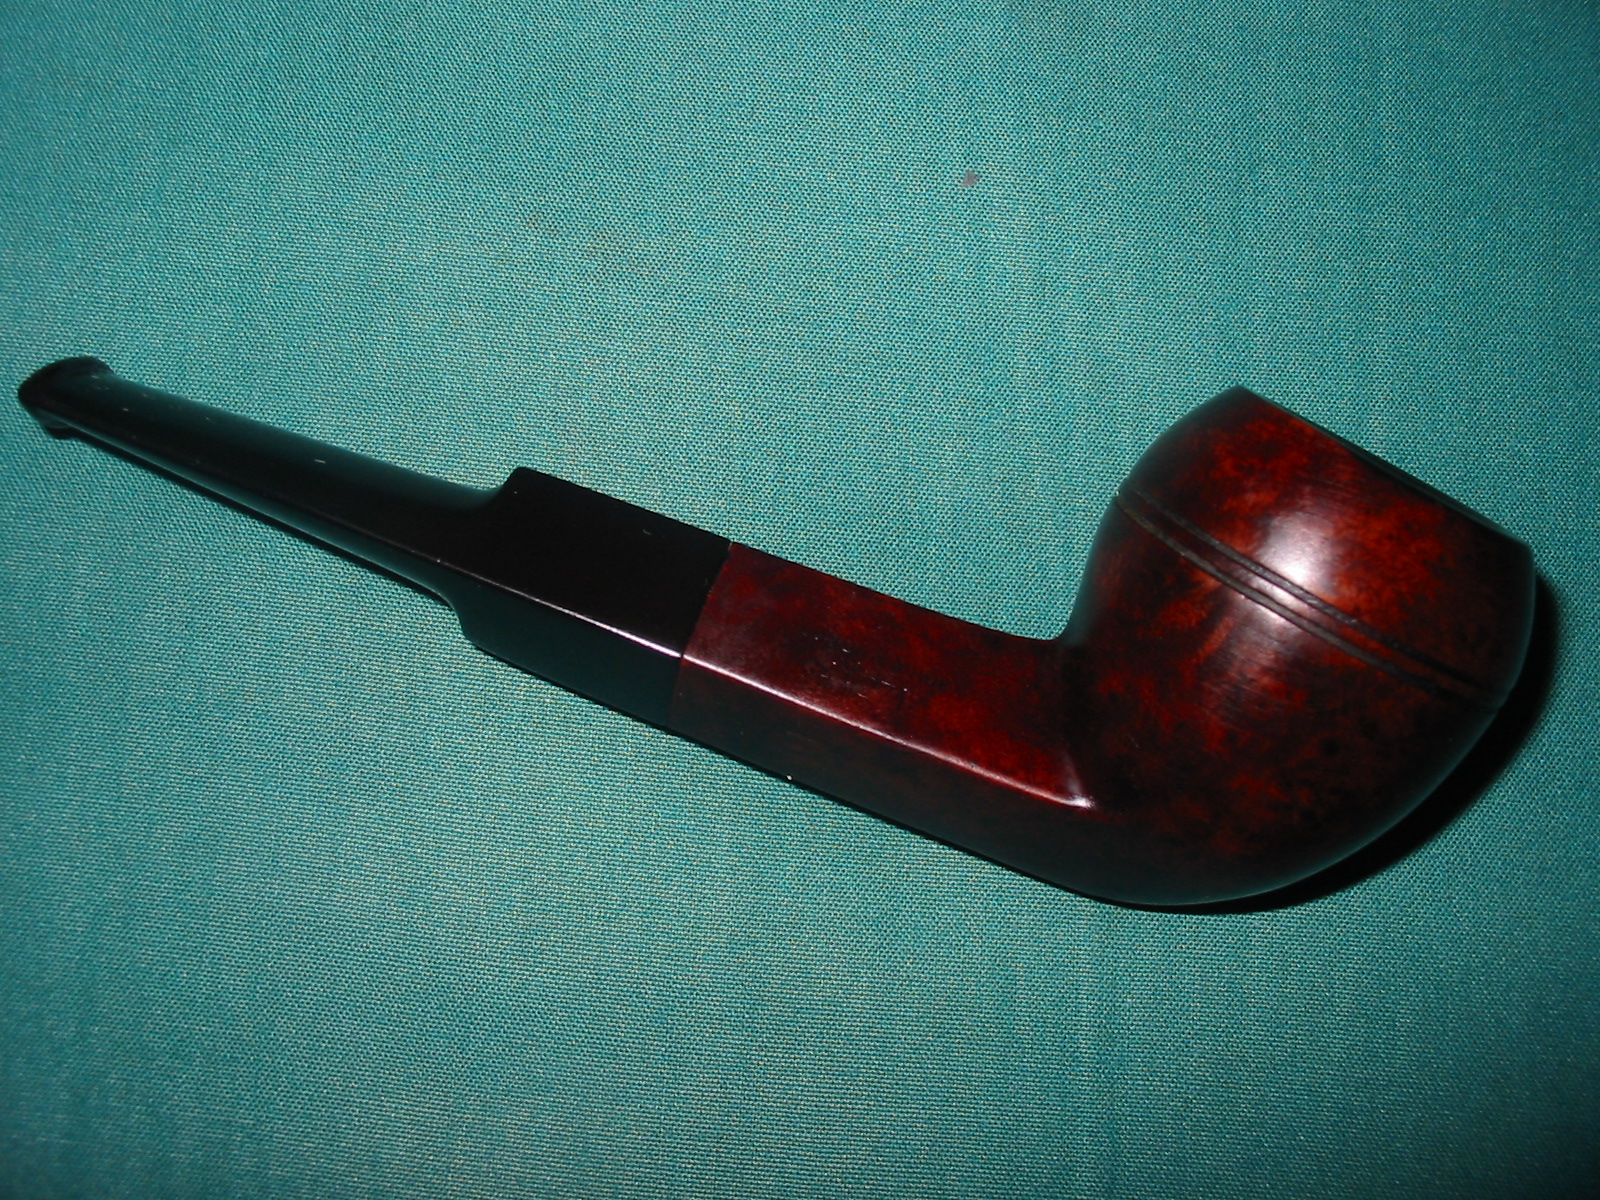
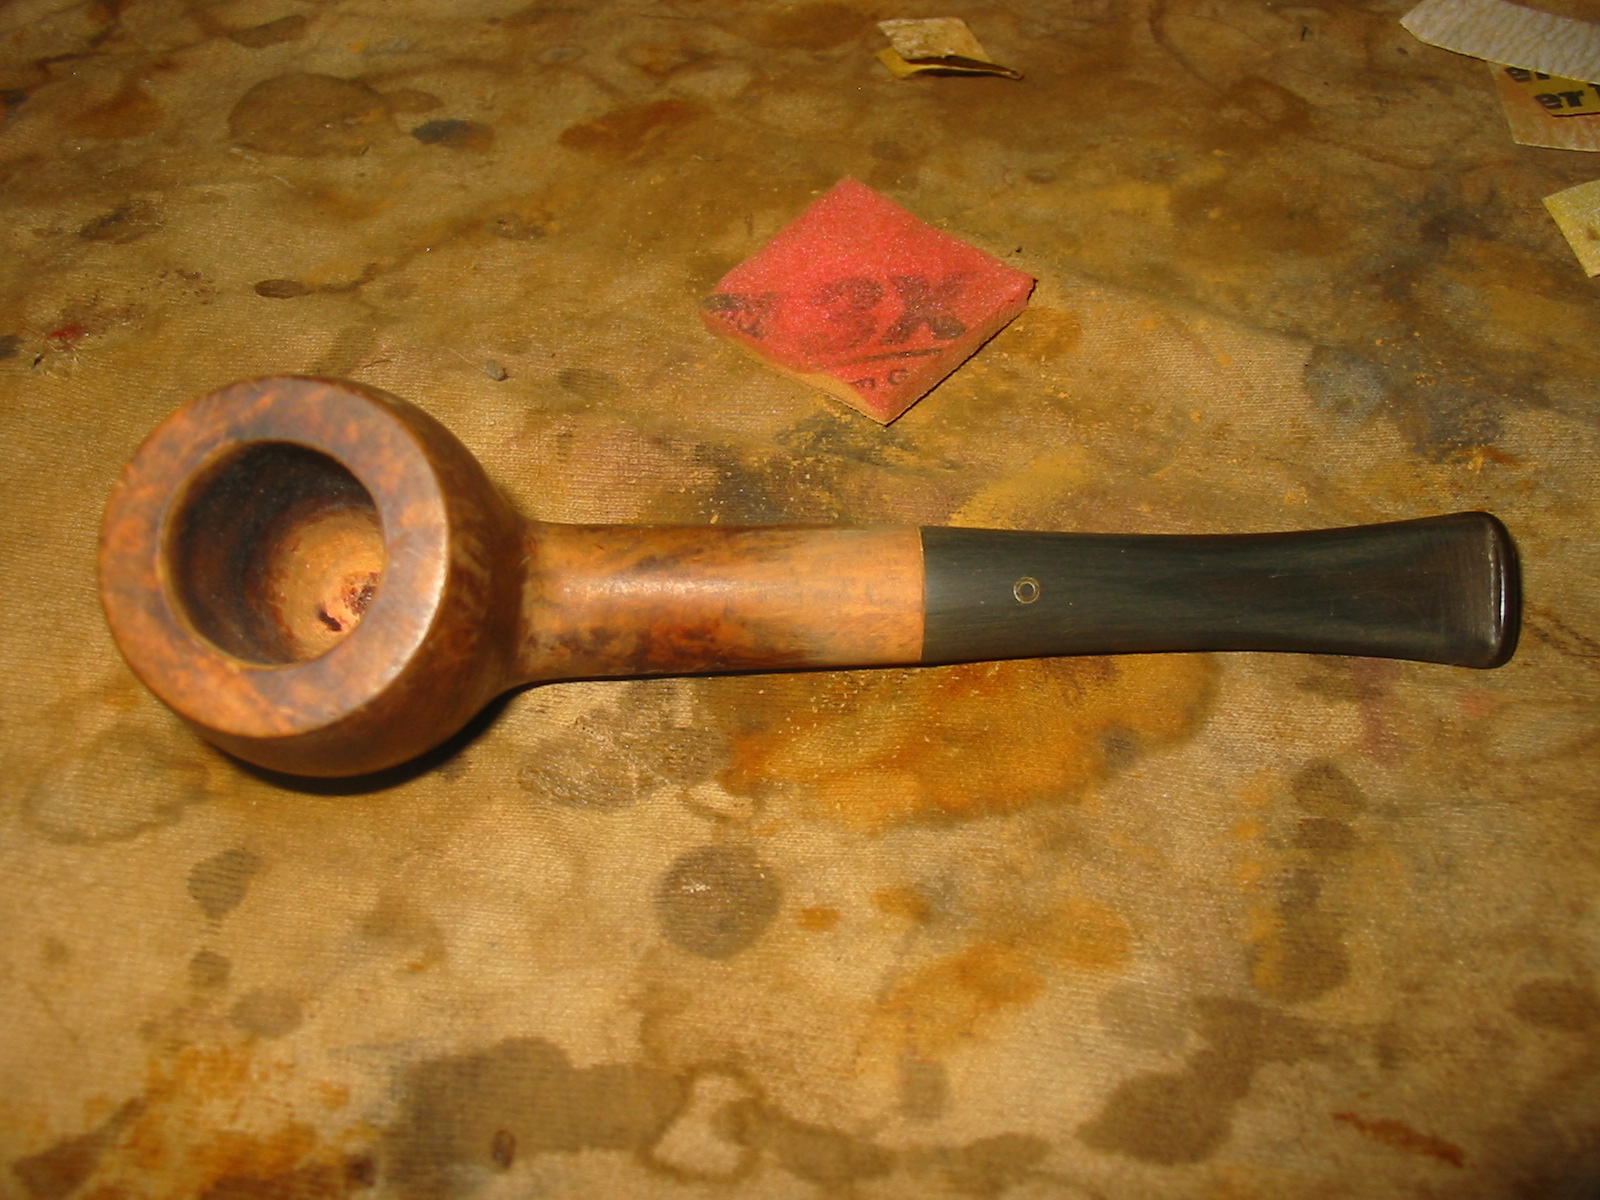
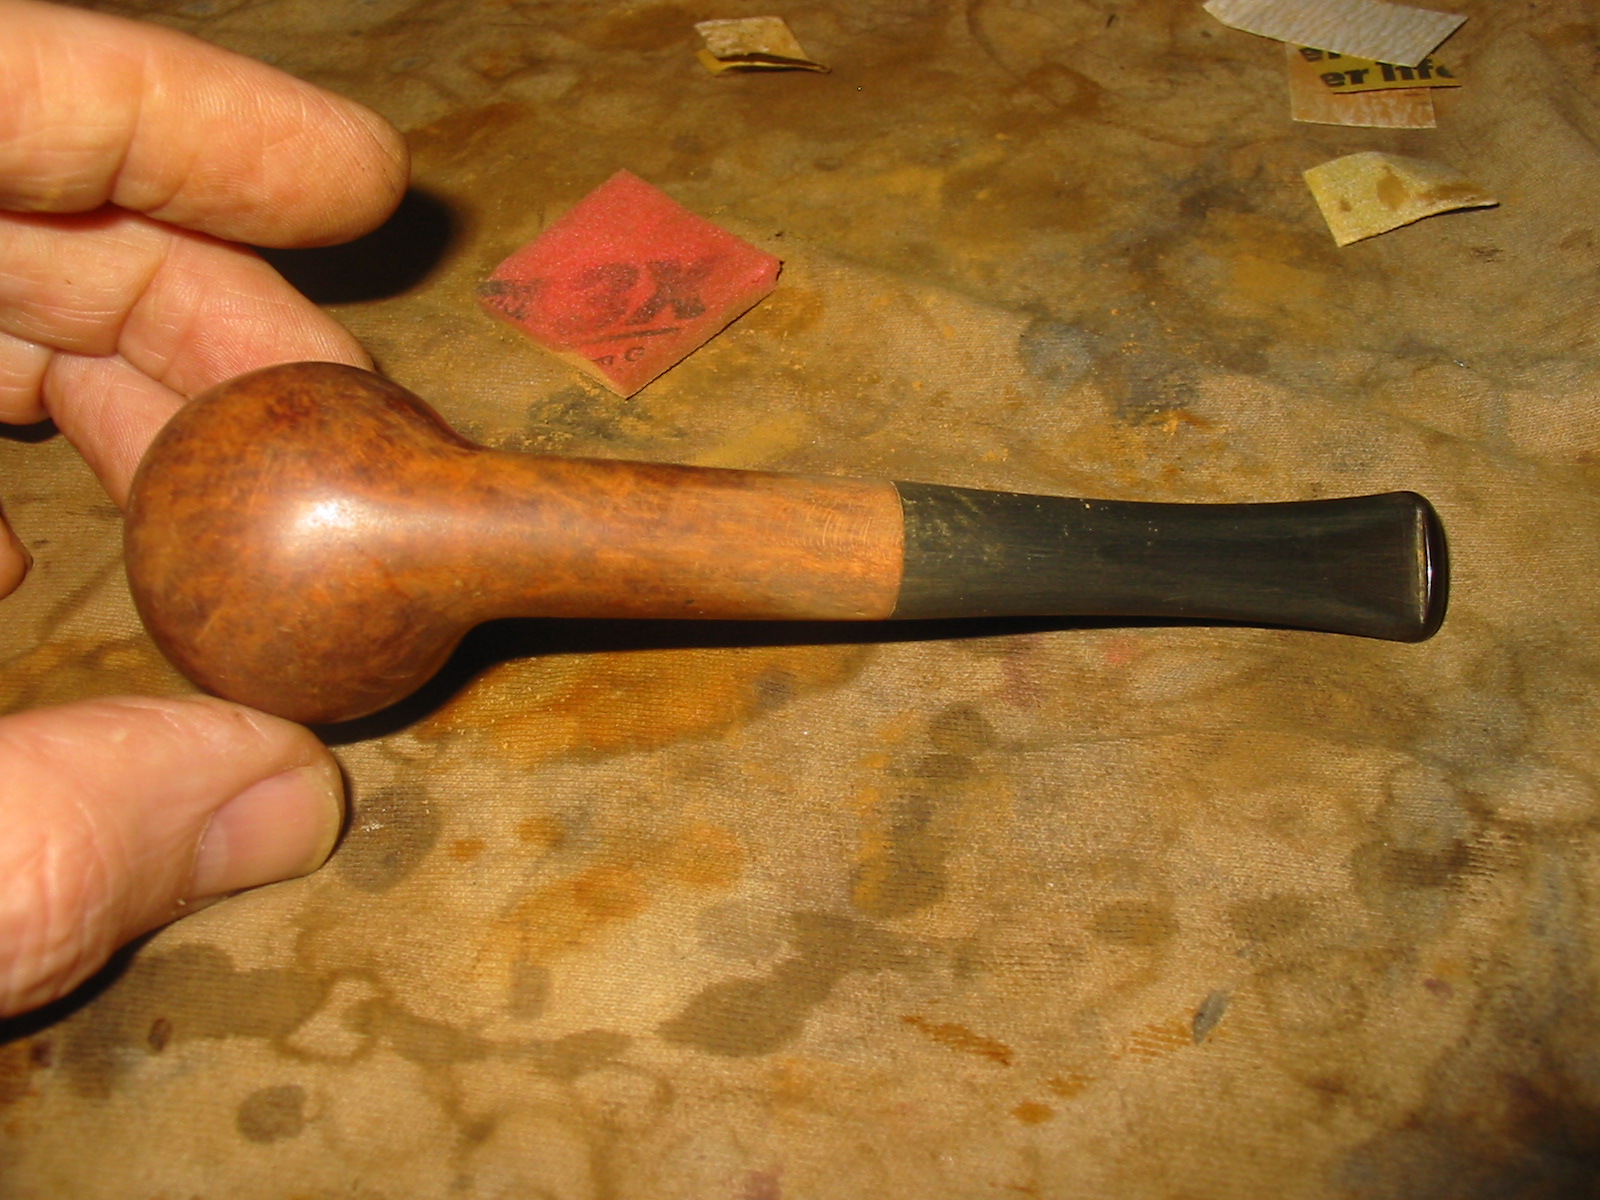
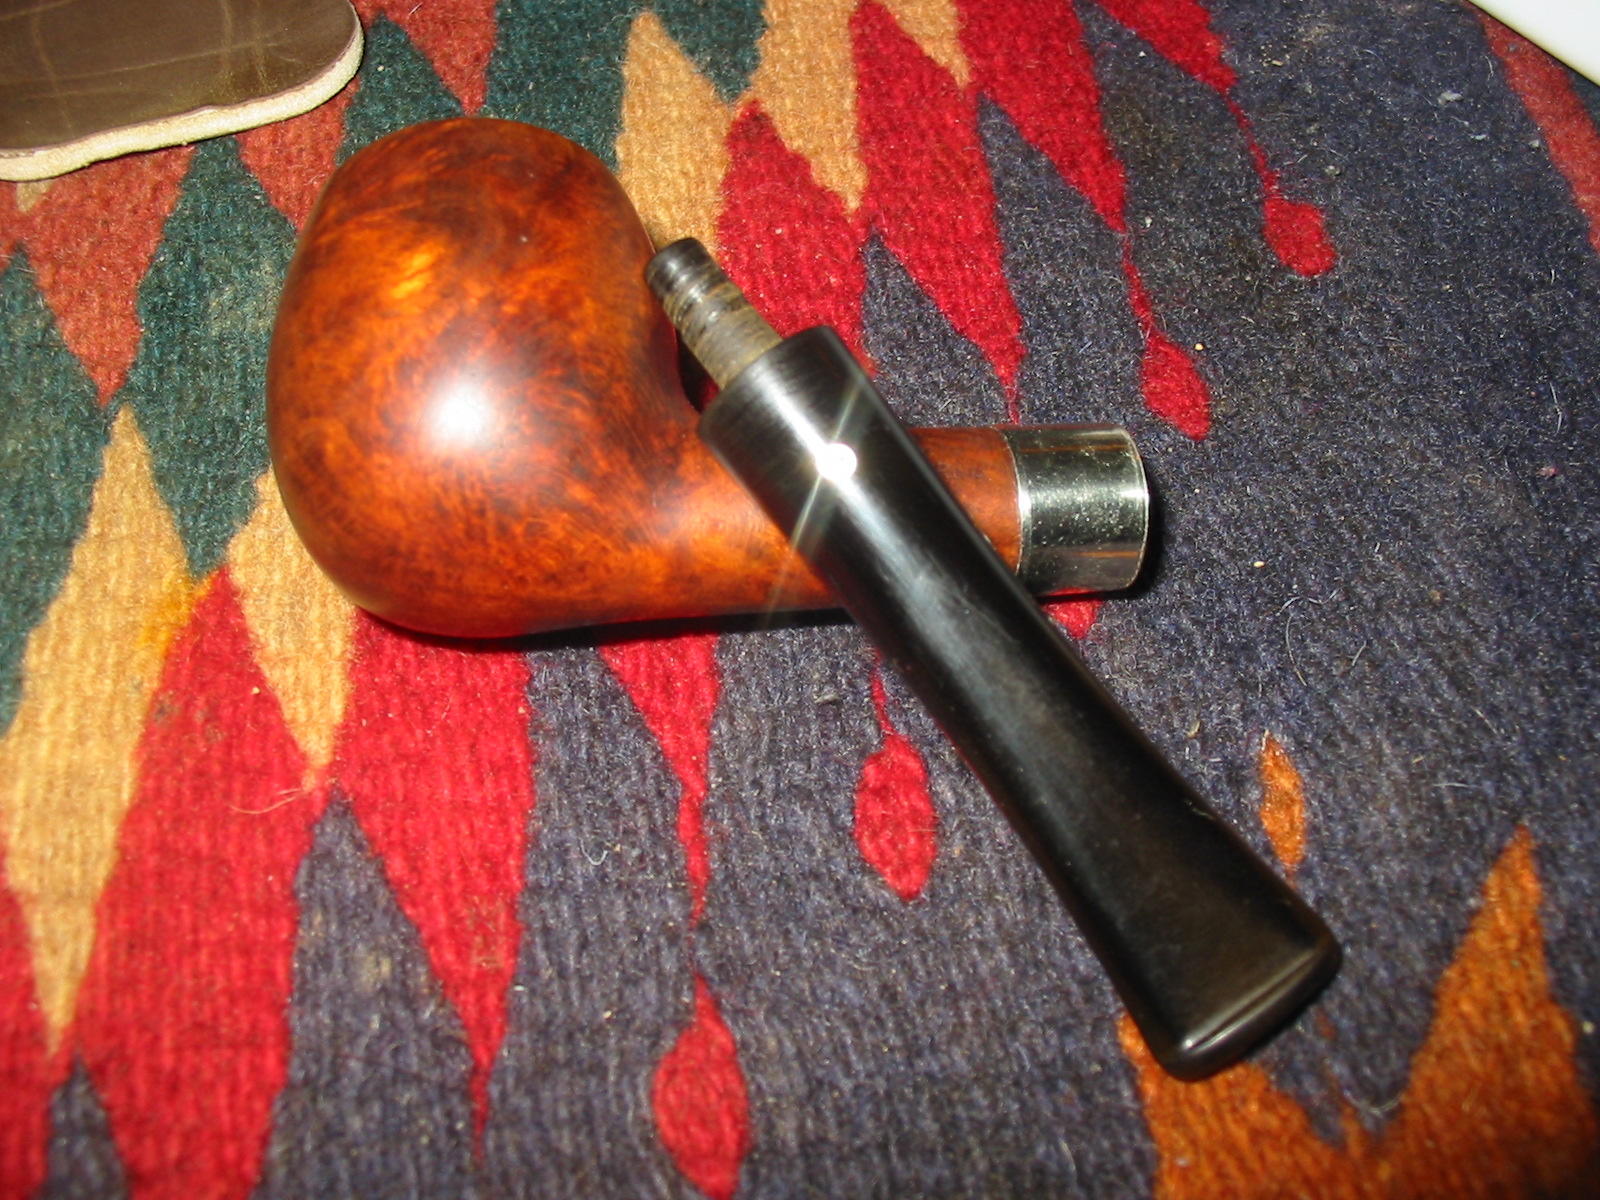
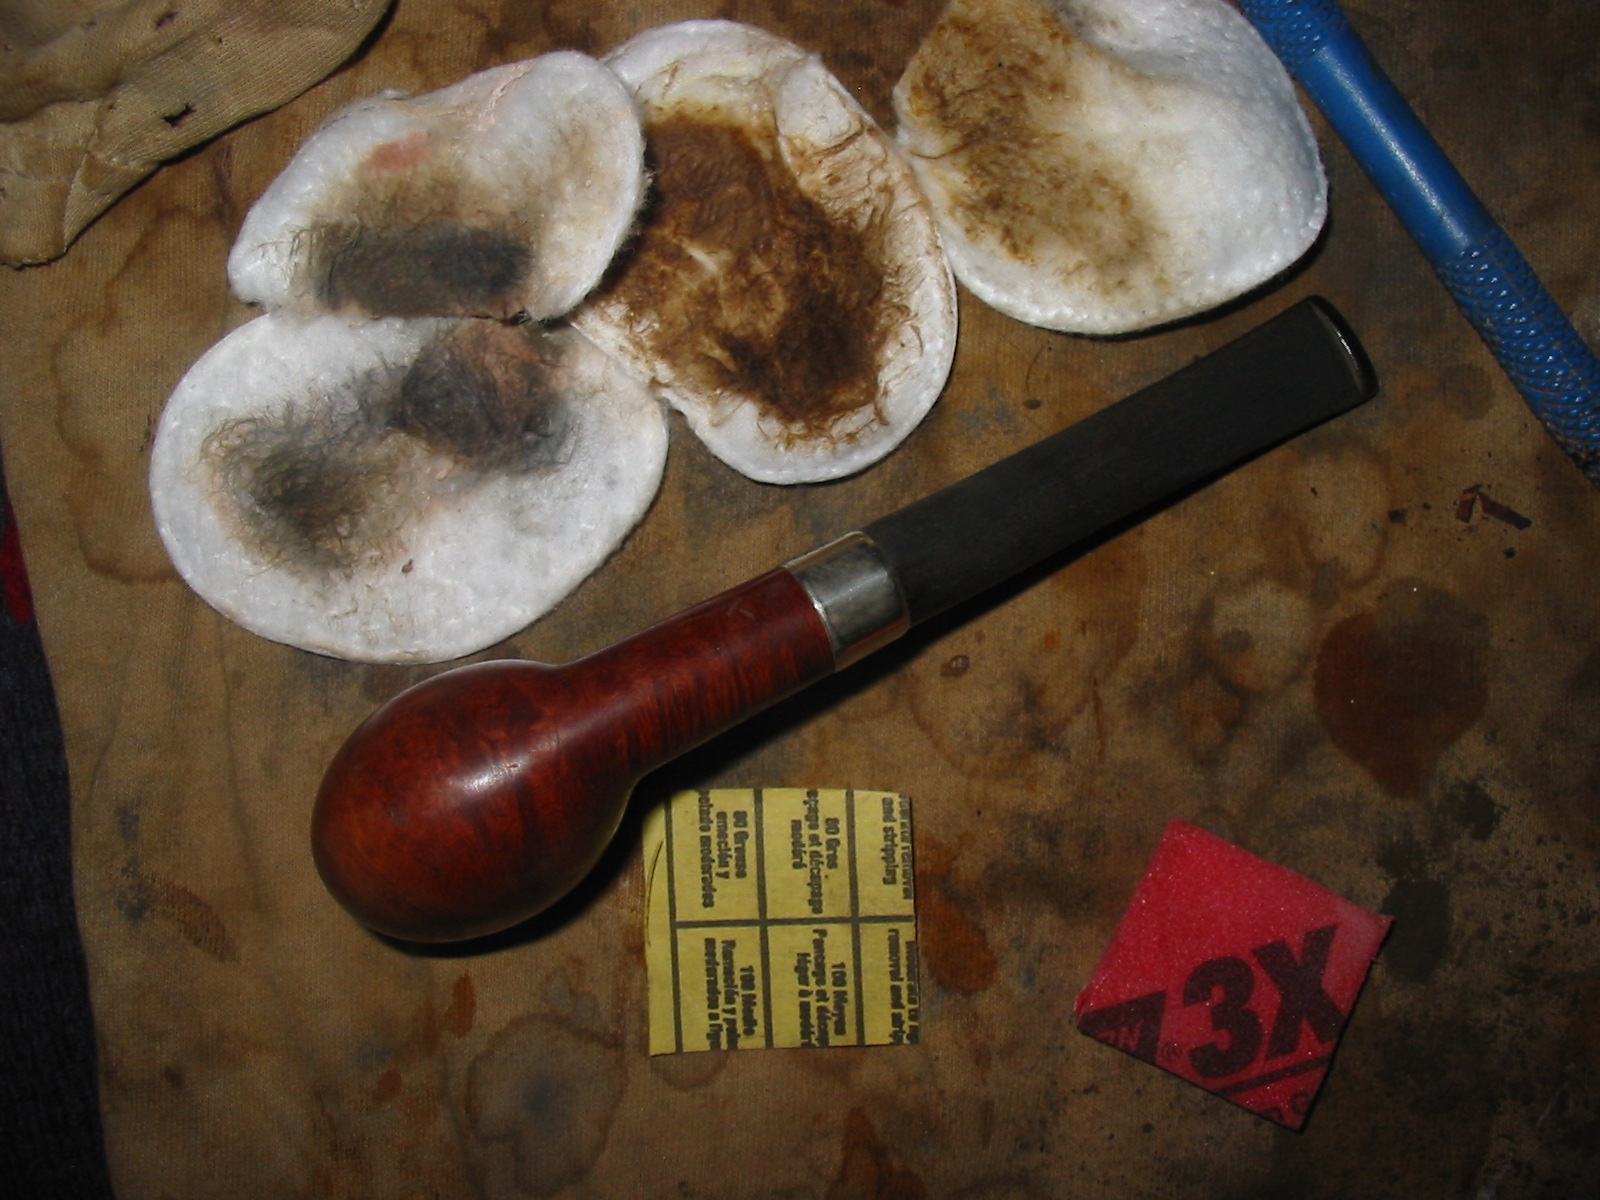
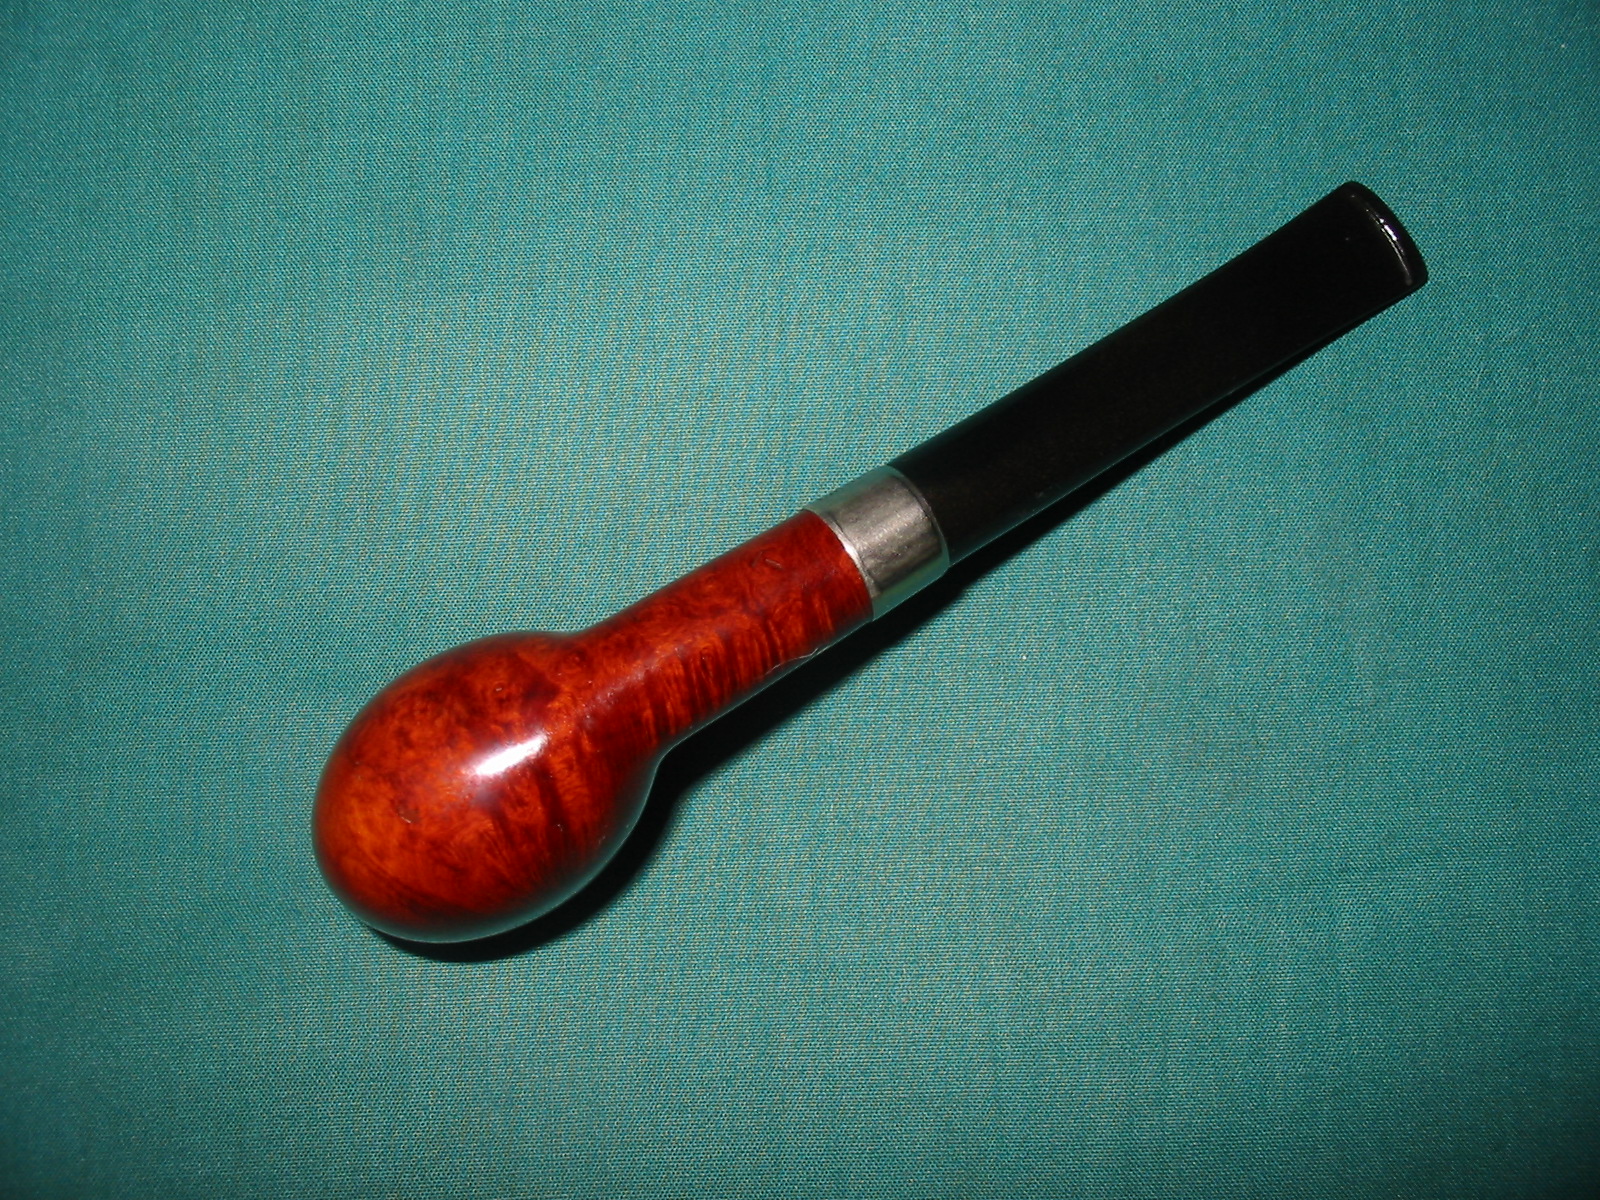
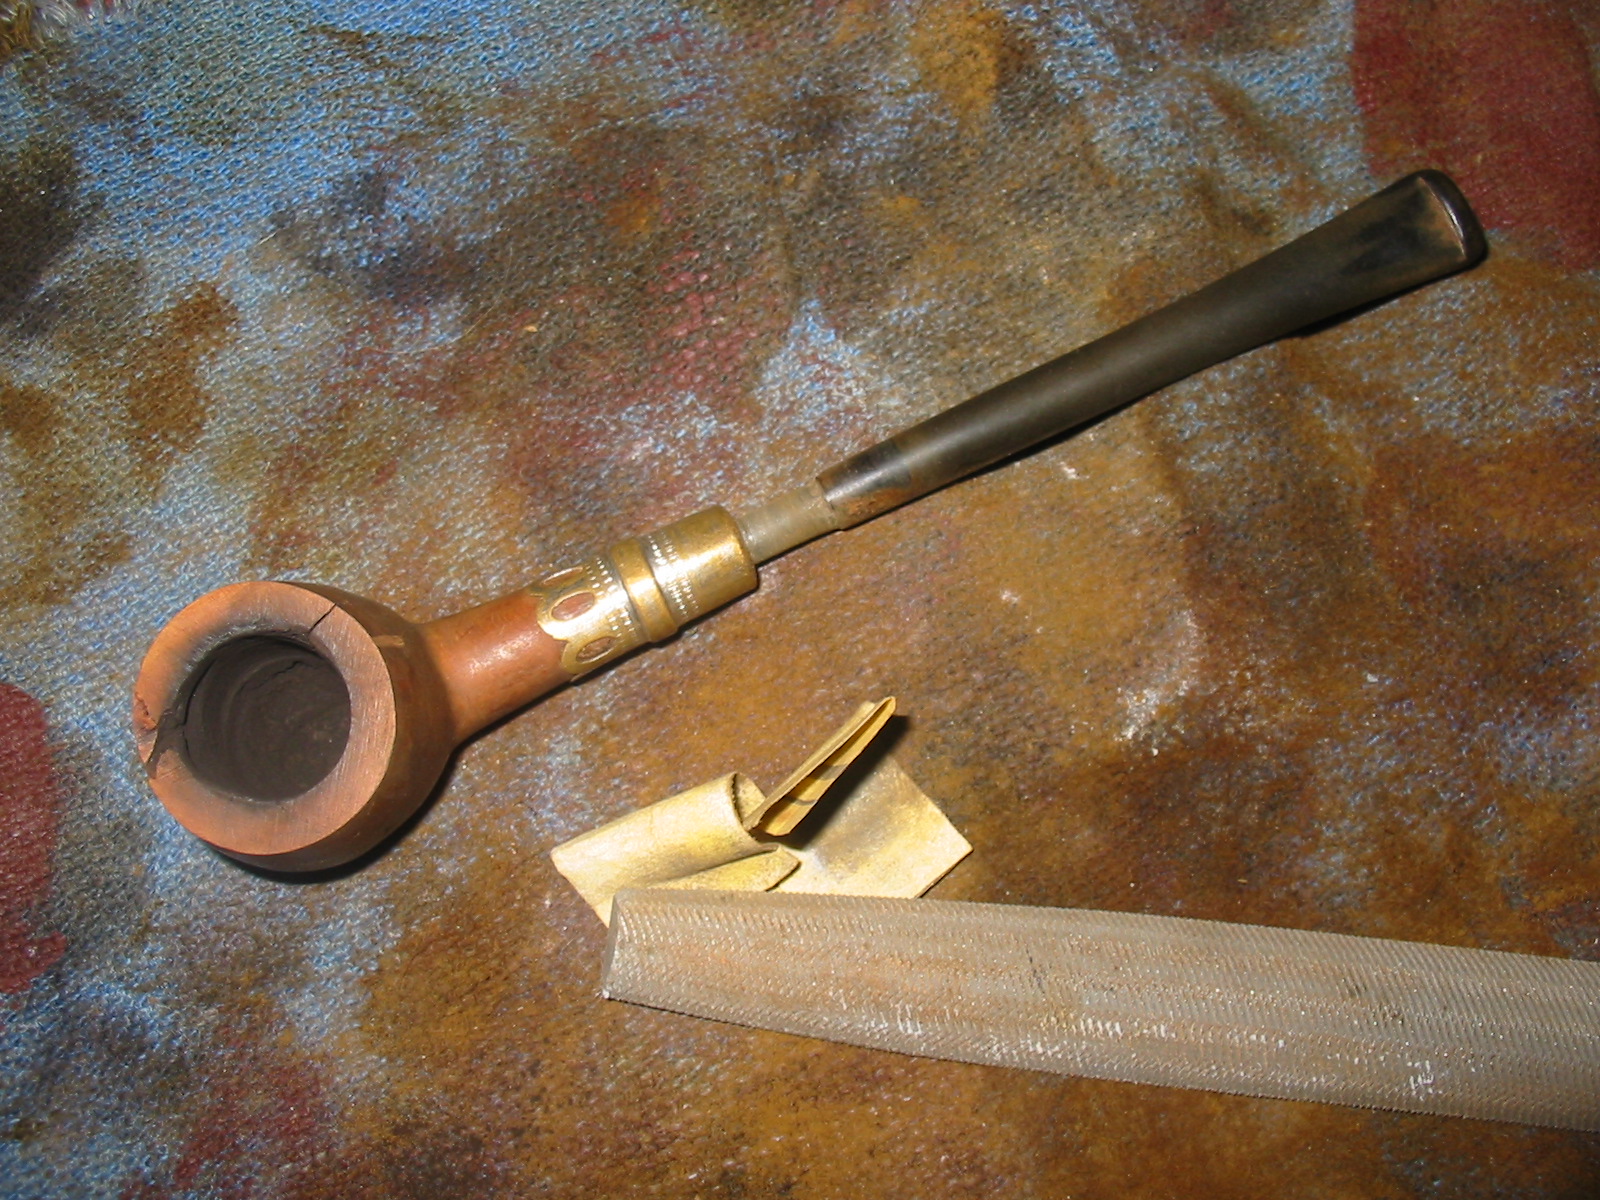
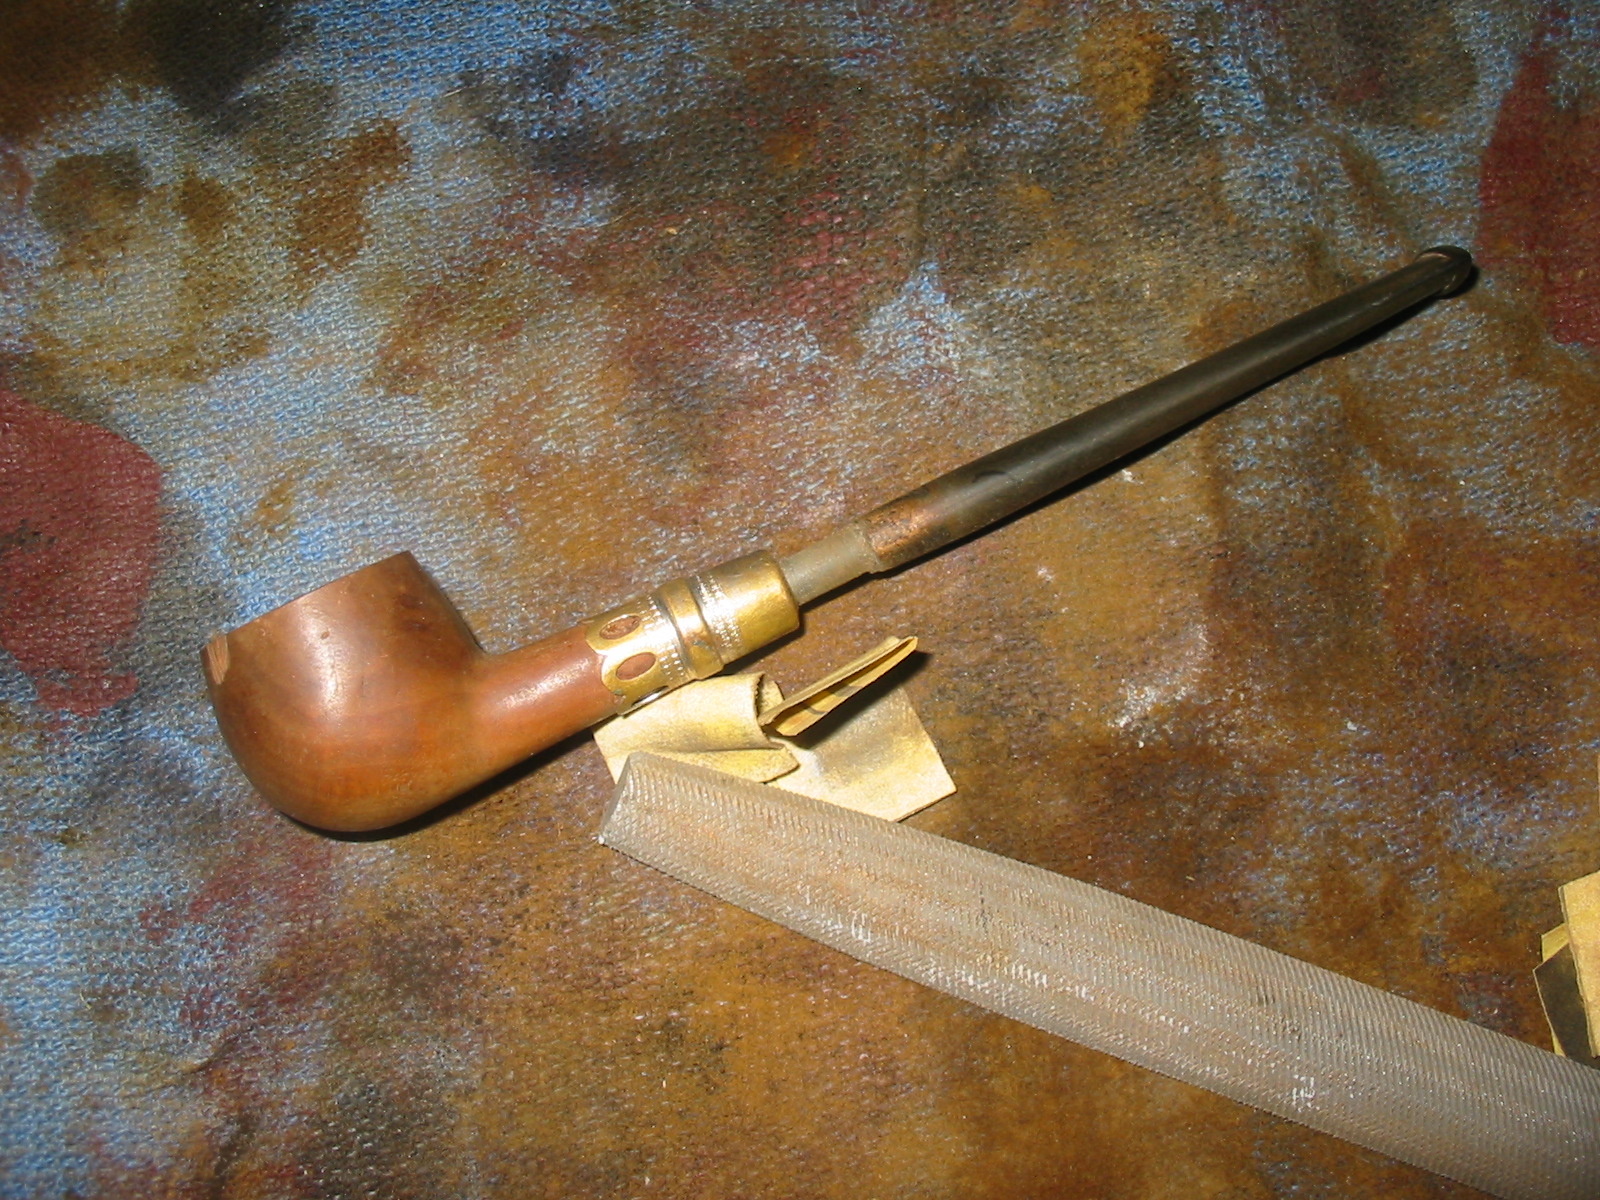
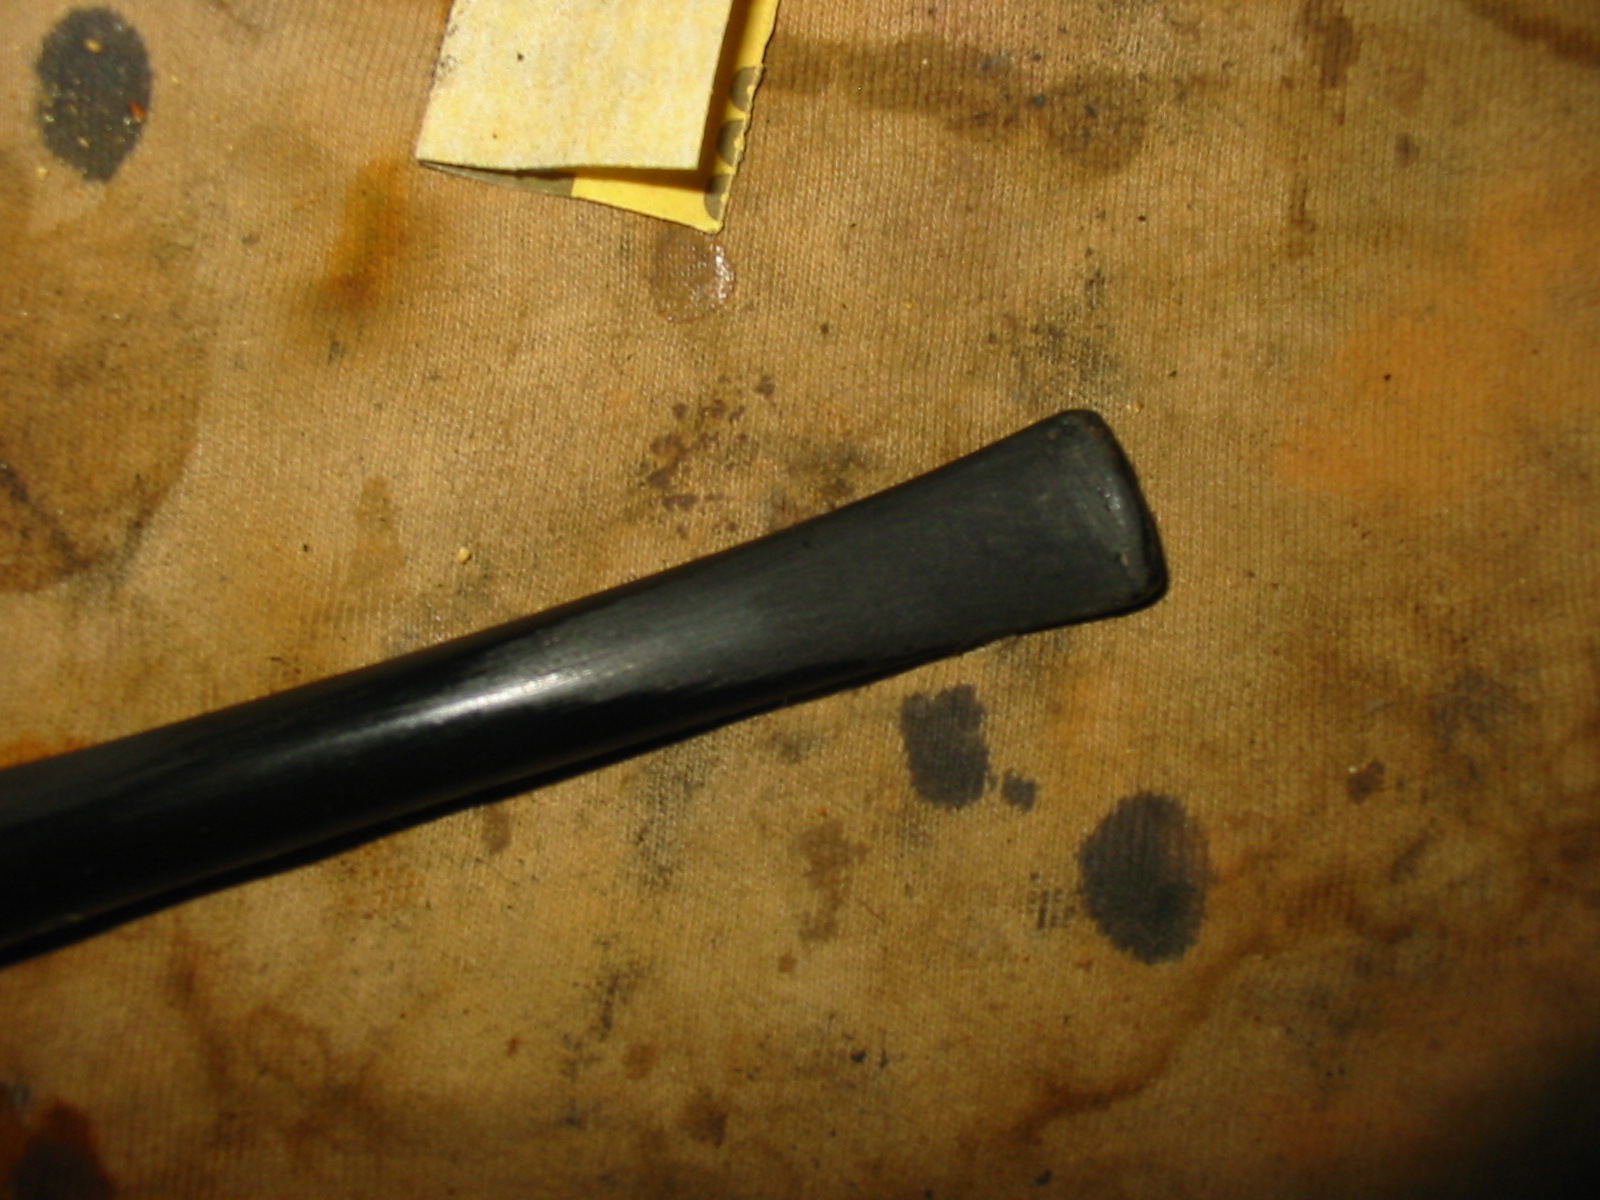
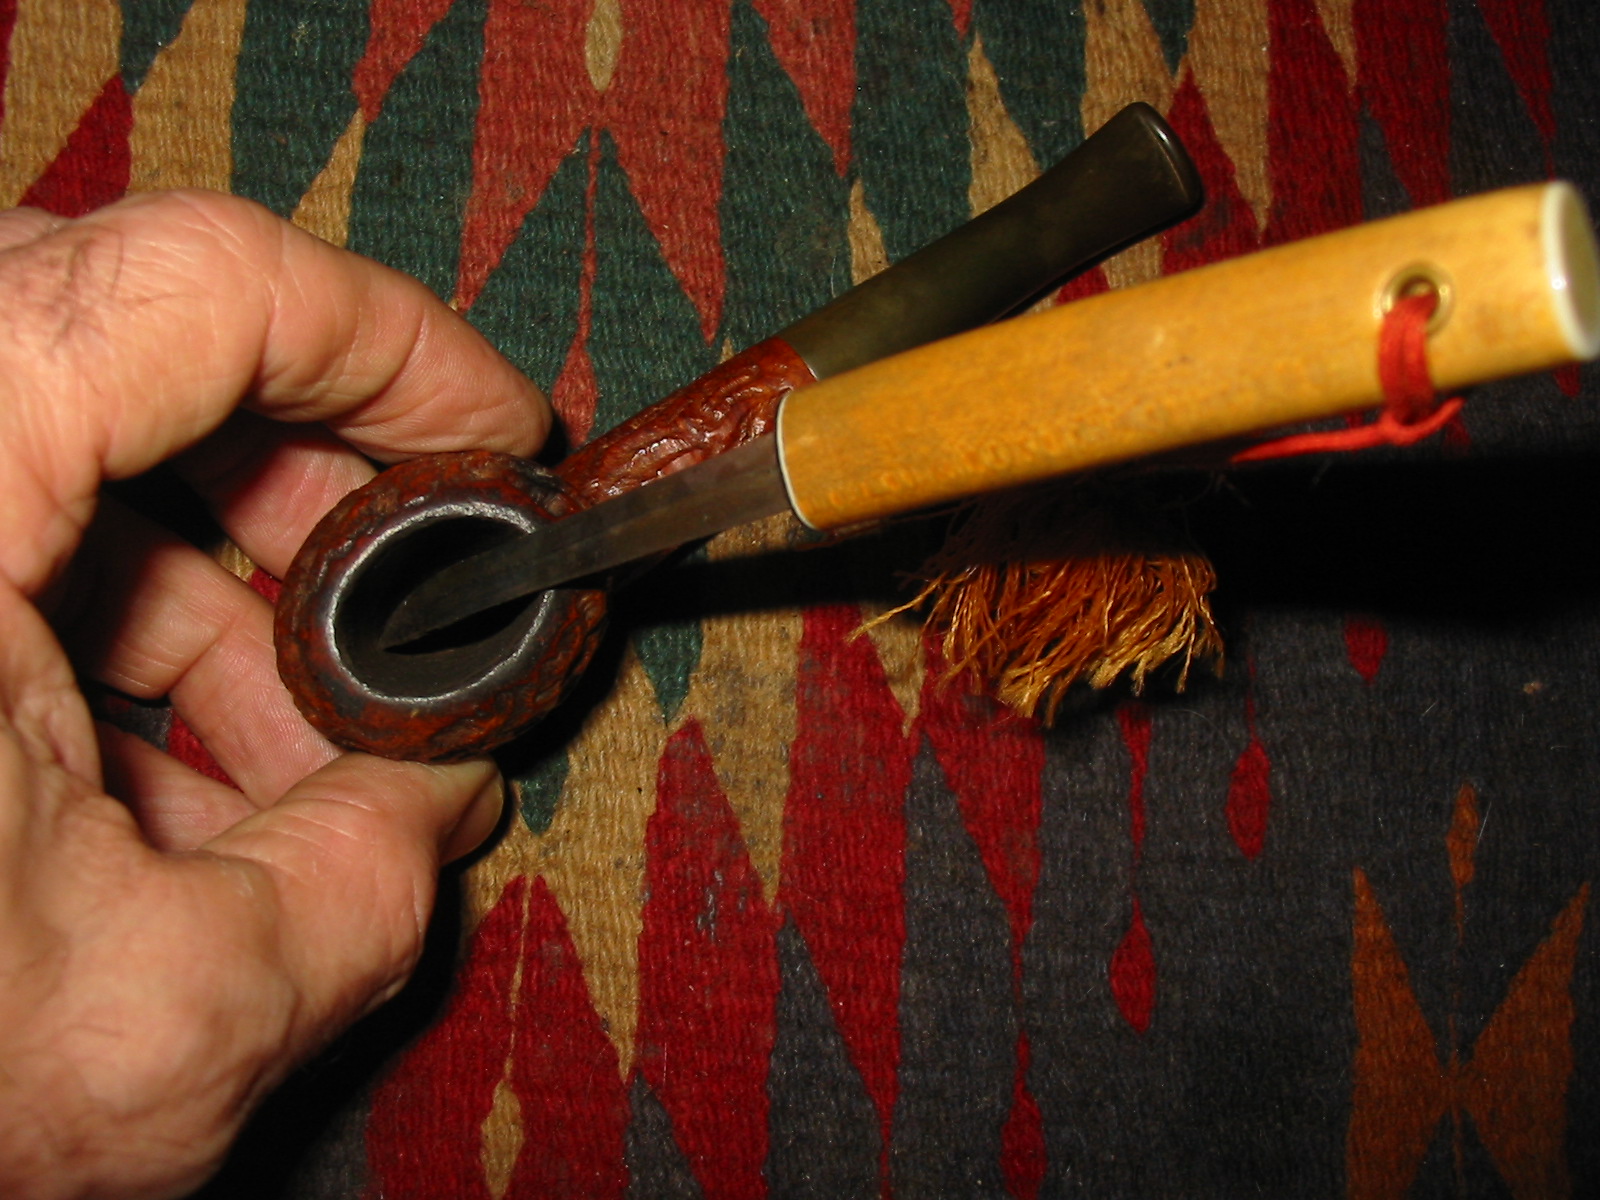
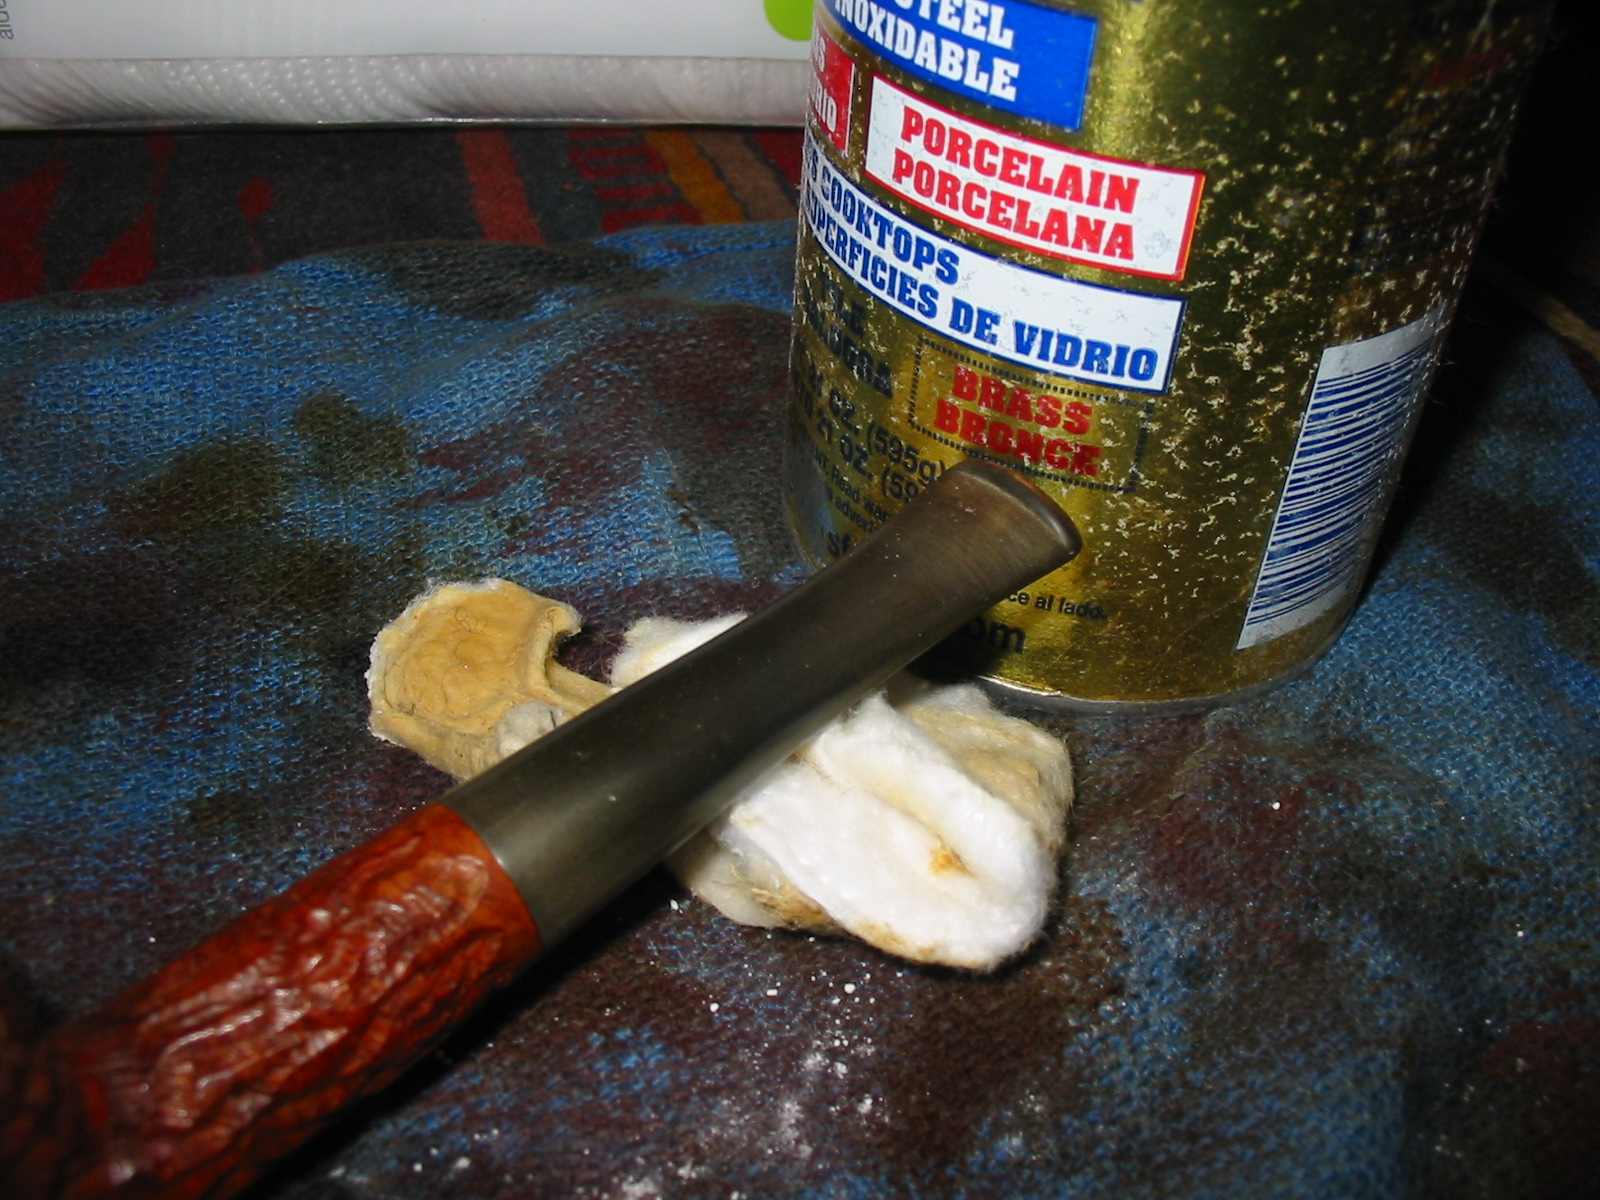
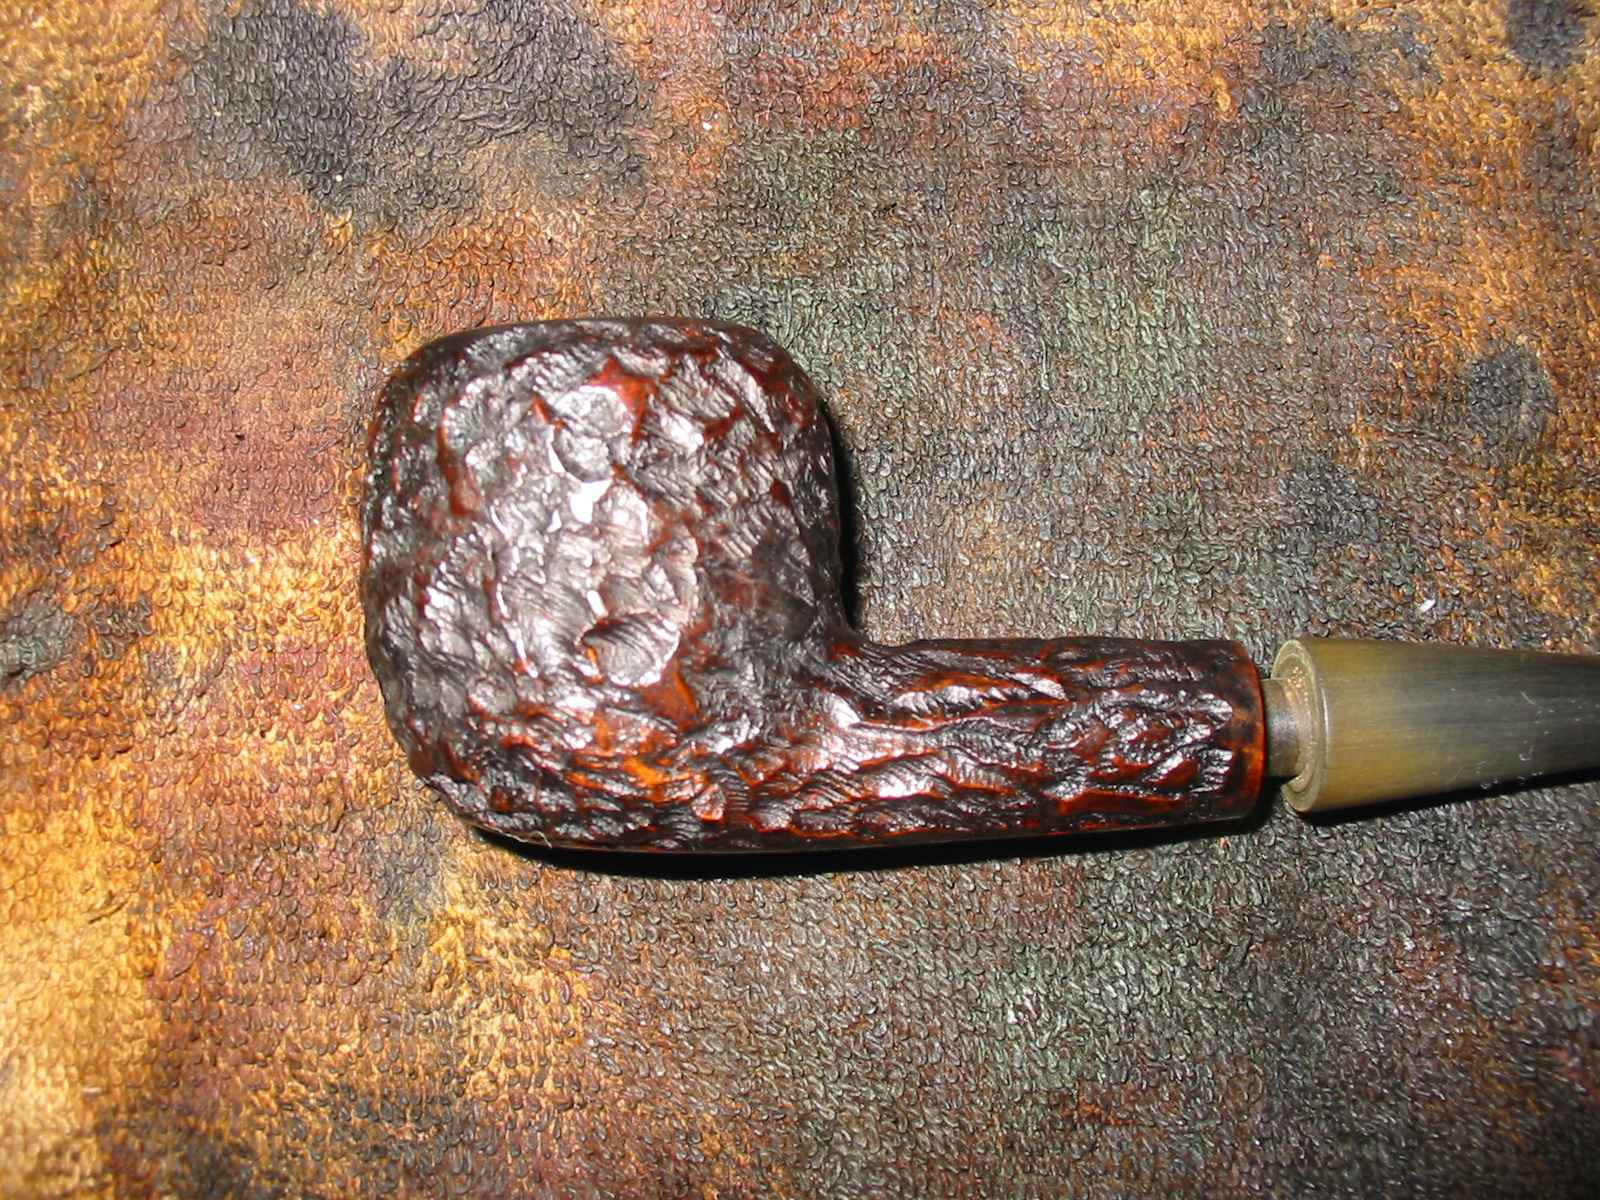
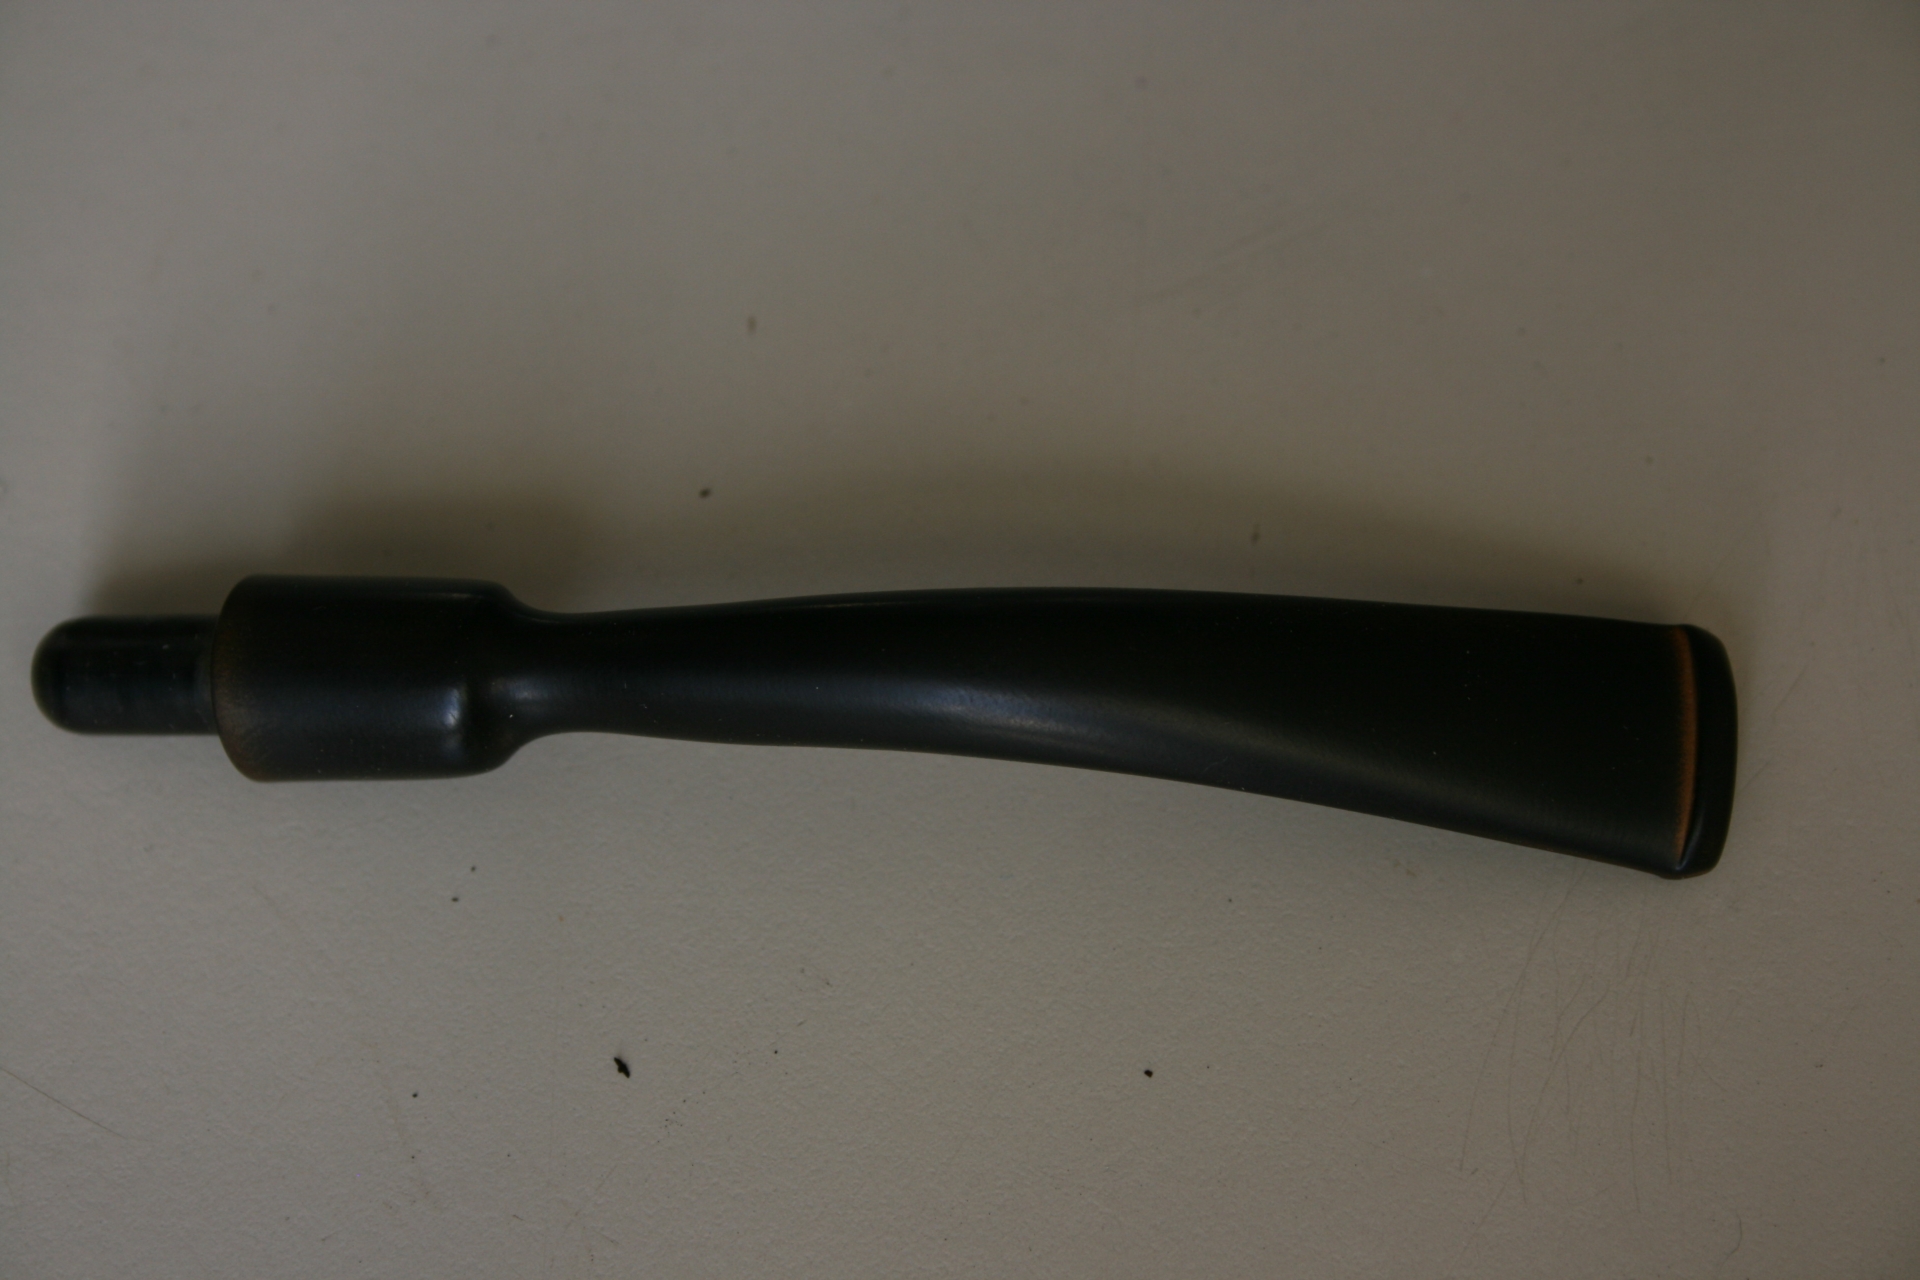
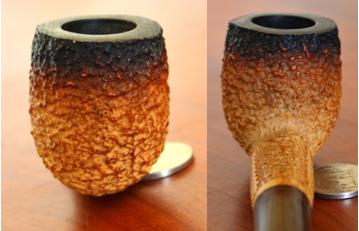
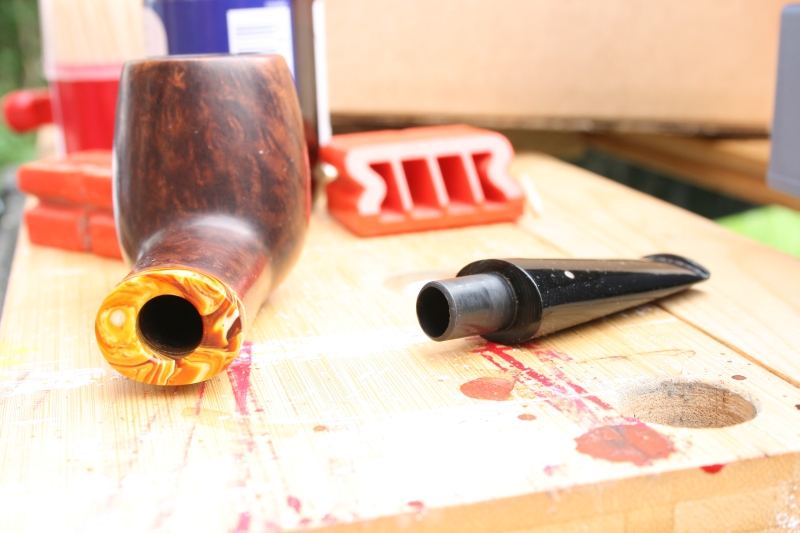
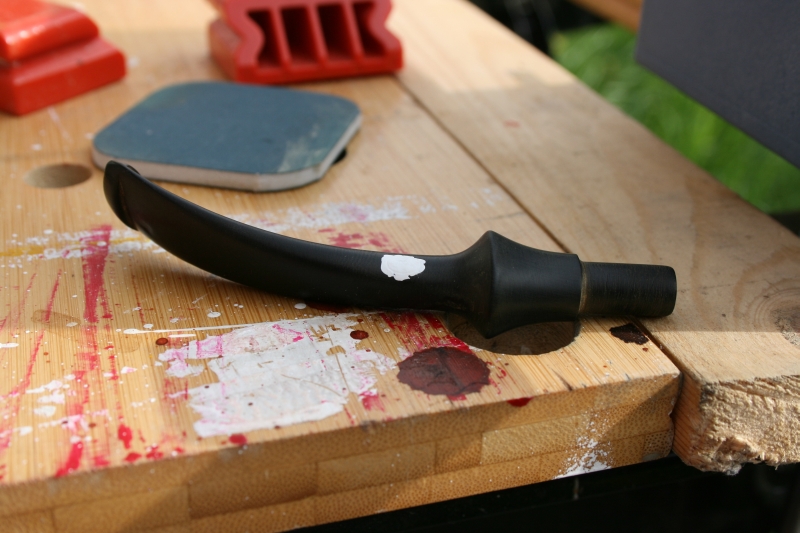
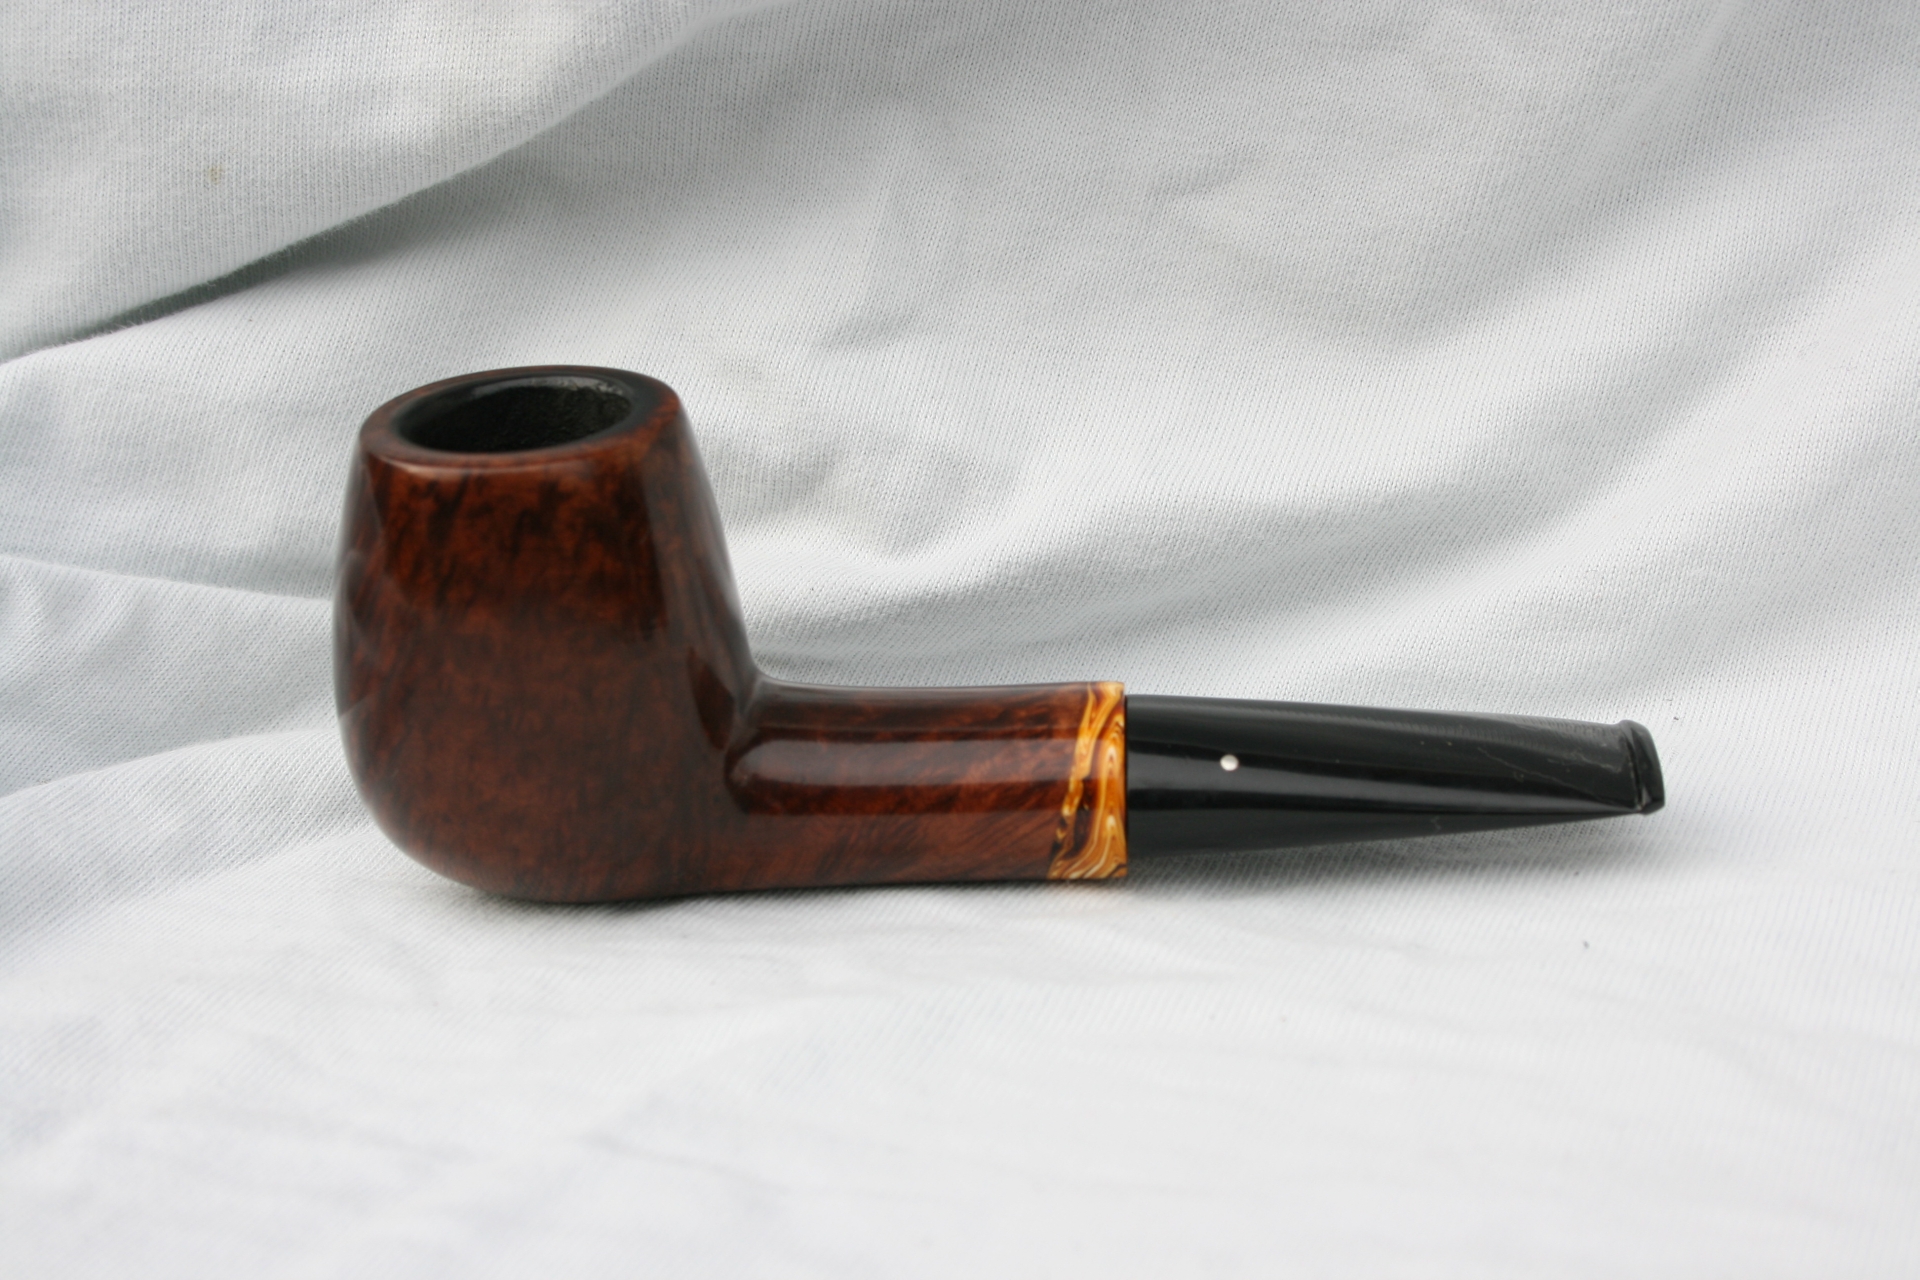
Before I packed up the box yesterday I decided to take the little Bewlay and give it a new home. The first thing I did last evening was fit a new stem on the pipe. I wanted to have a vulcanite stem and tenon. I had a stem in my can of stems that took very little to fit the tenon to the shank. The diameter of the stem was wider than the shank so that would take some work but that was not an issue. I was undecided if I would replace the bent stem with another bent one or restore it to its original billiard status.
IMG_6440

IMG_6443
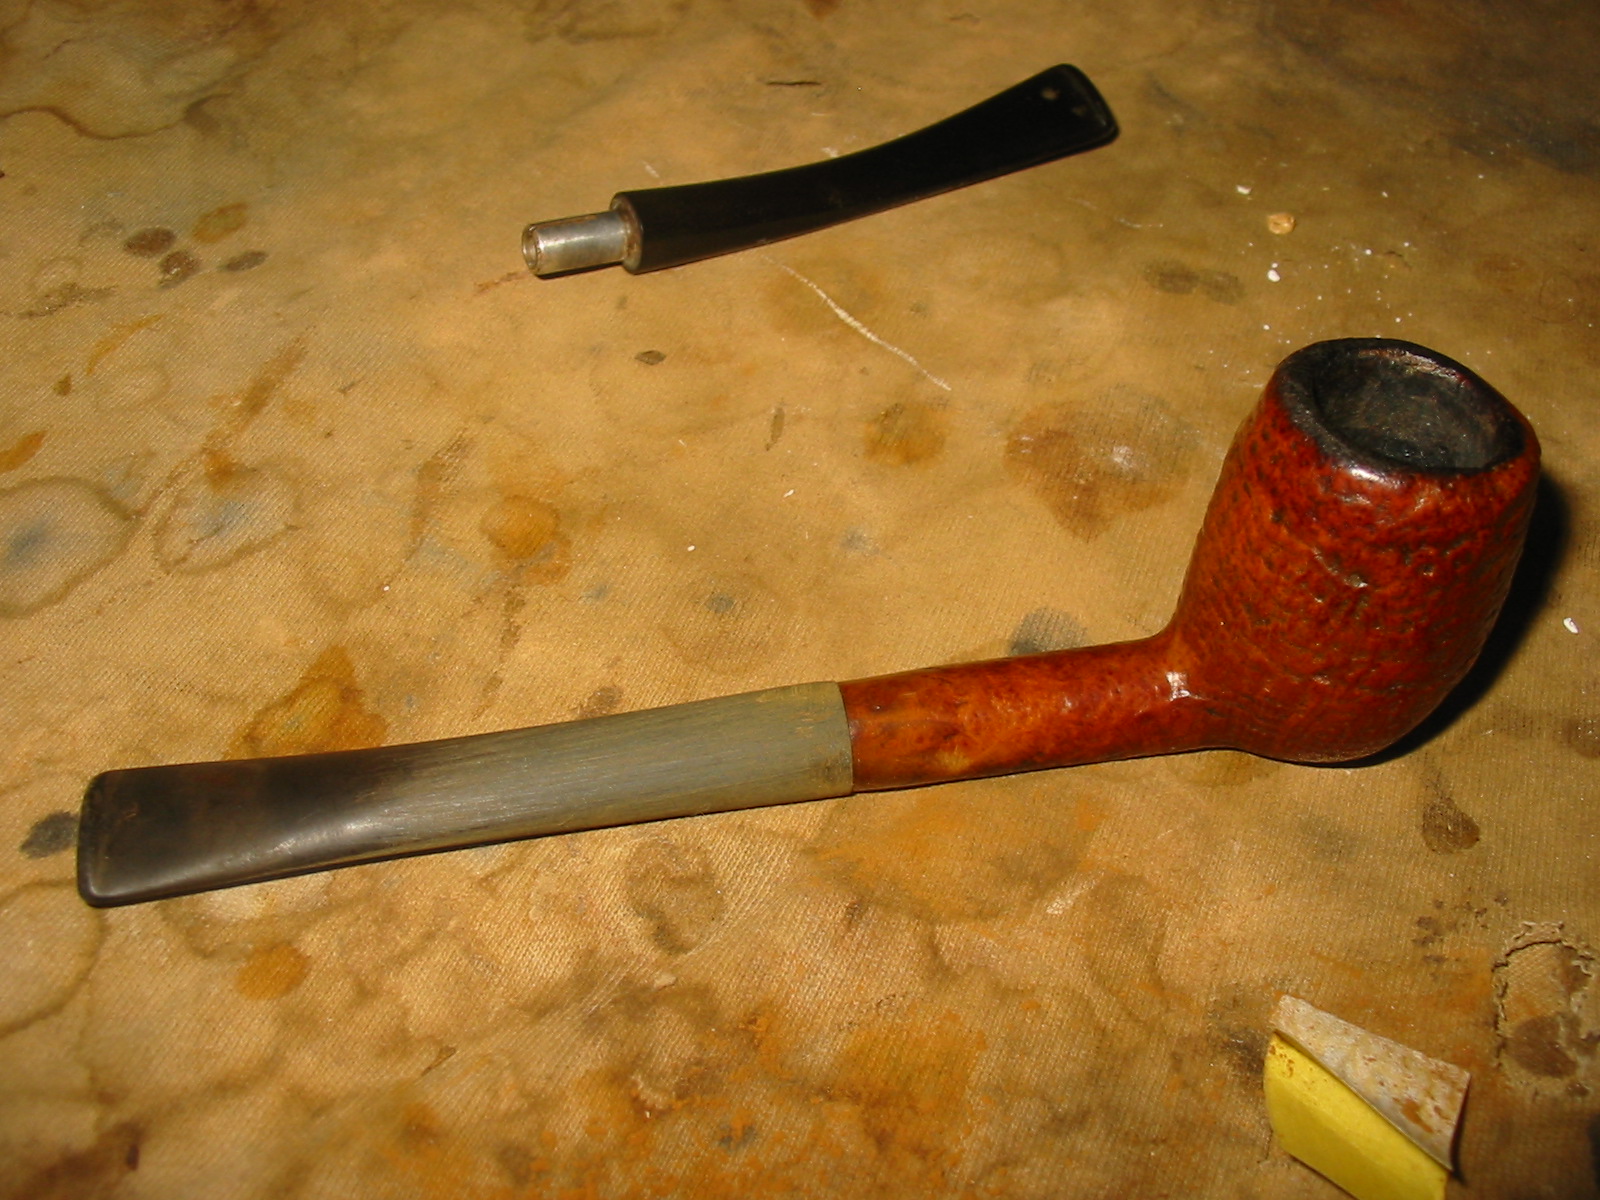
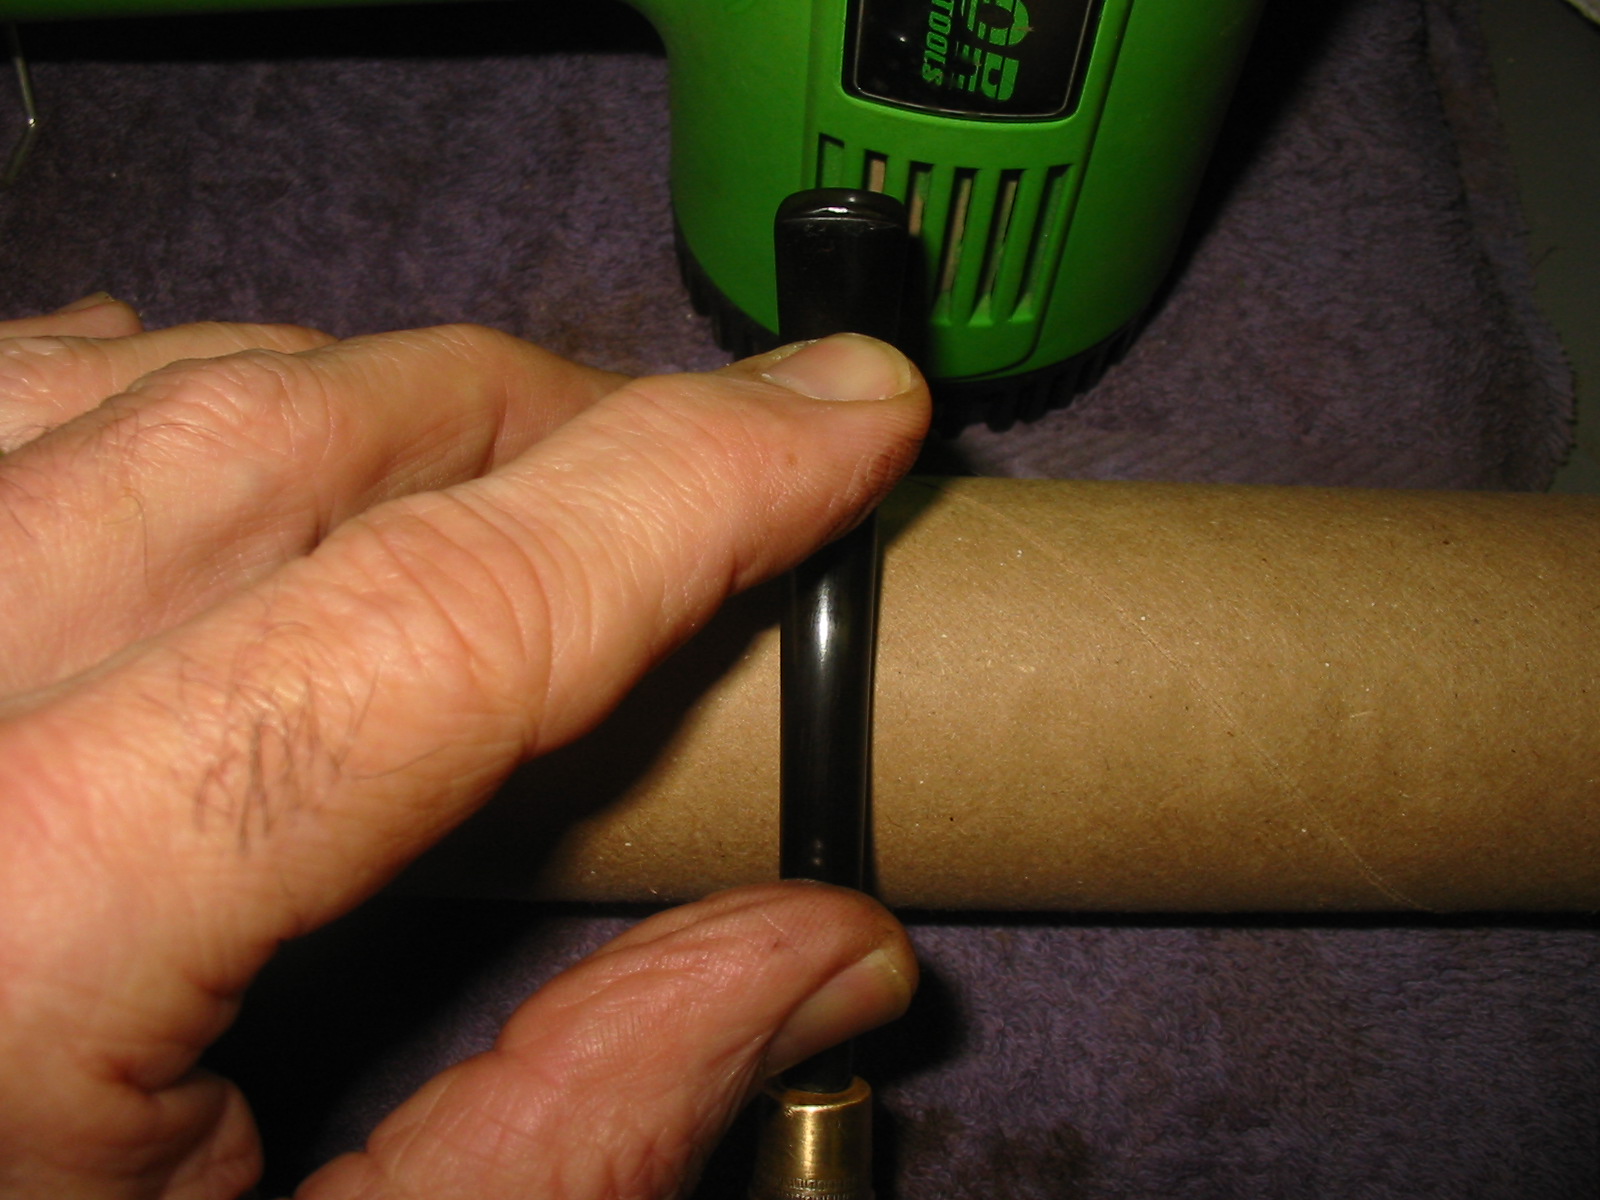
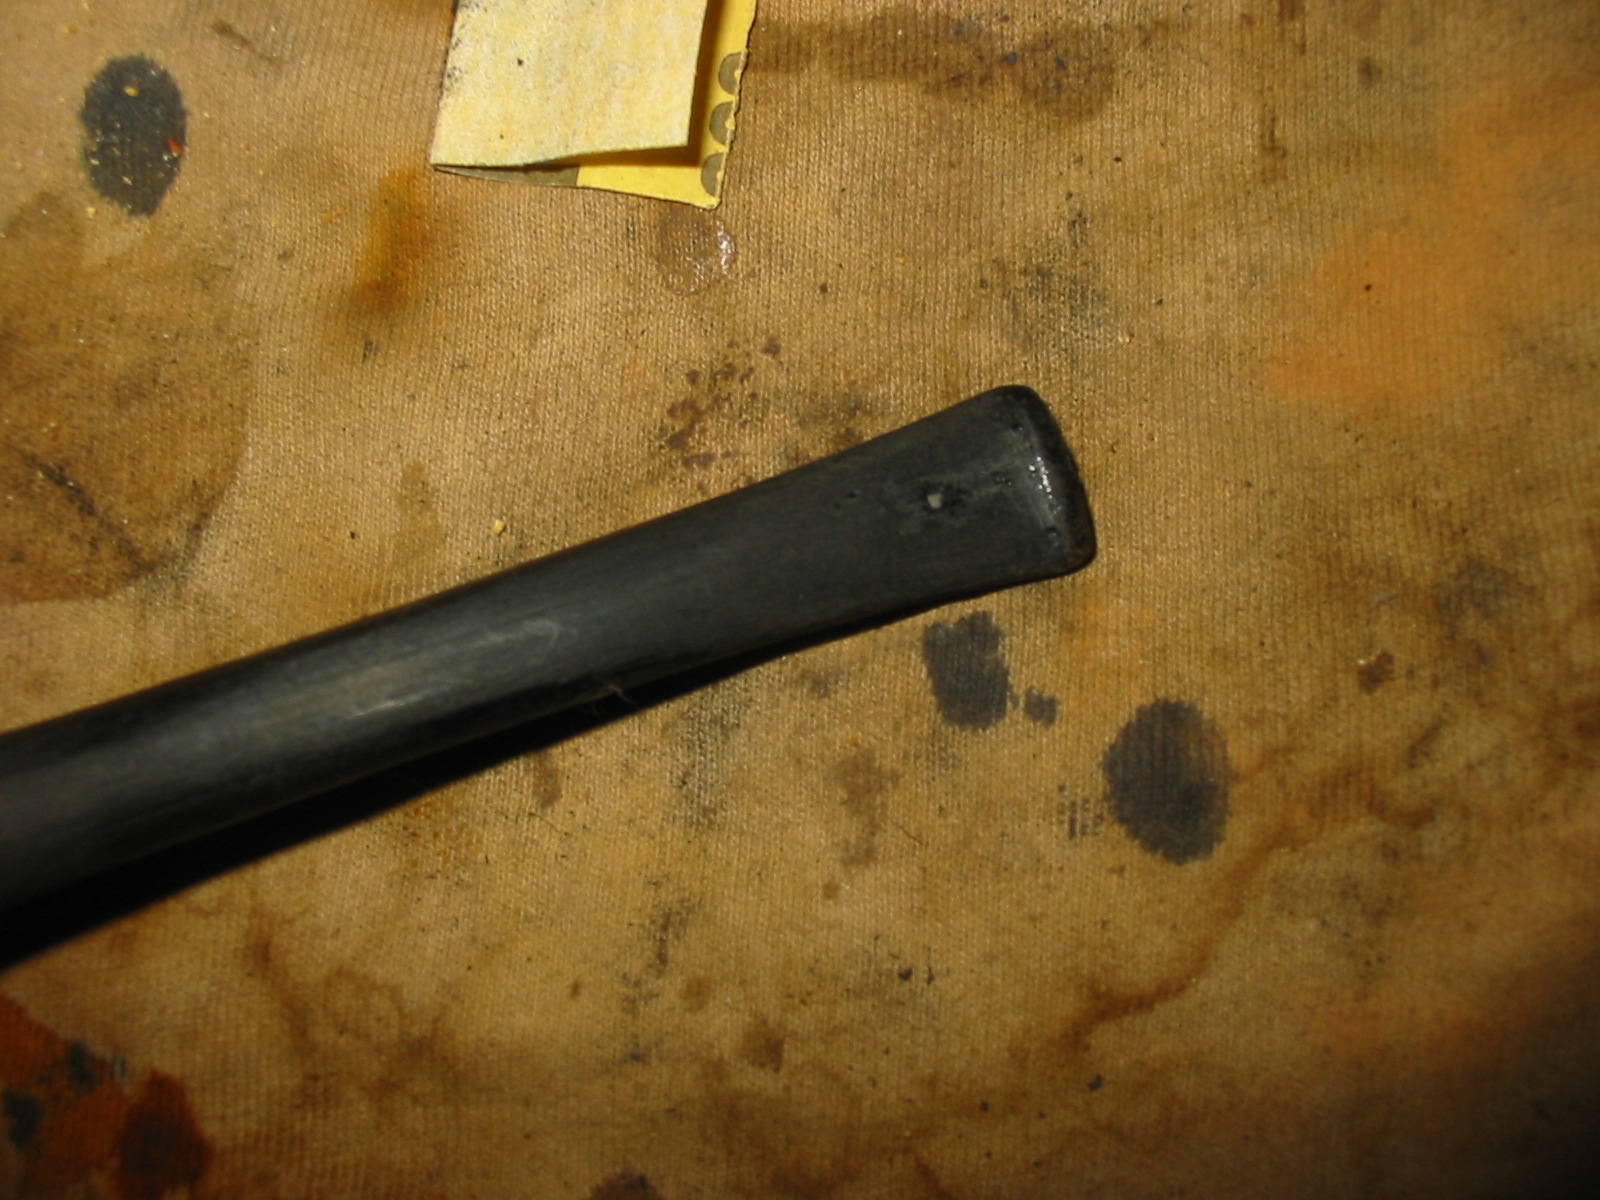
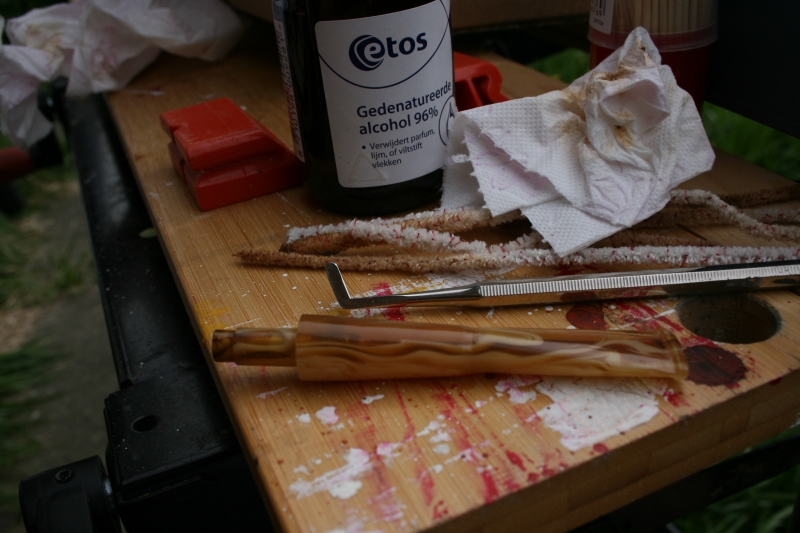
I worked on the stem with 220 grit sandpaper to bring the diameter of the shank and the bowl to a match. I wanted to be careful to not remove any more of the briar from the already slightly tapered shank. Once the sanding was close I dropped the bowl in an alcohol bath for a soak to remove the remaining finish on the bowl and the grime and grit from the sandblast rings.
IMG_6444
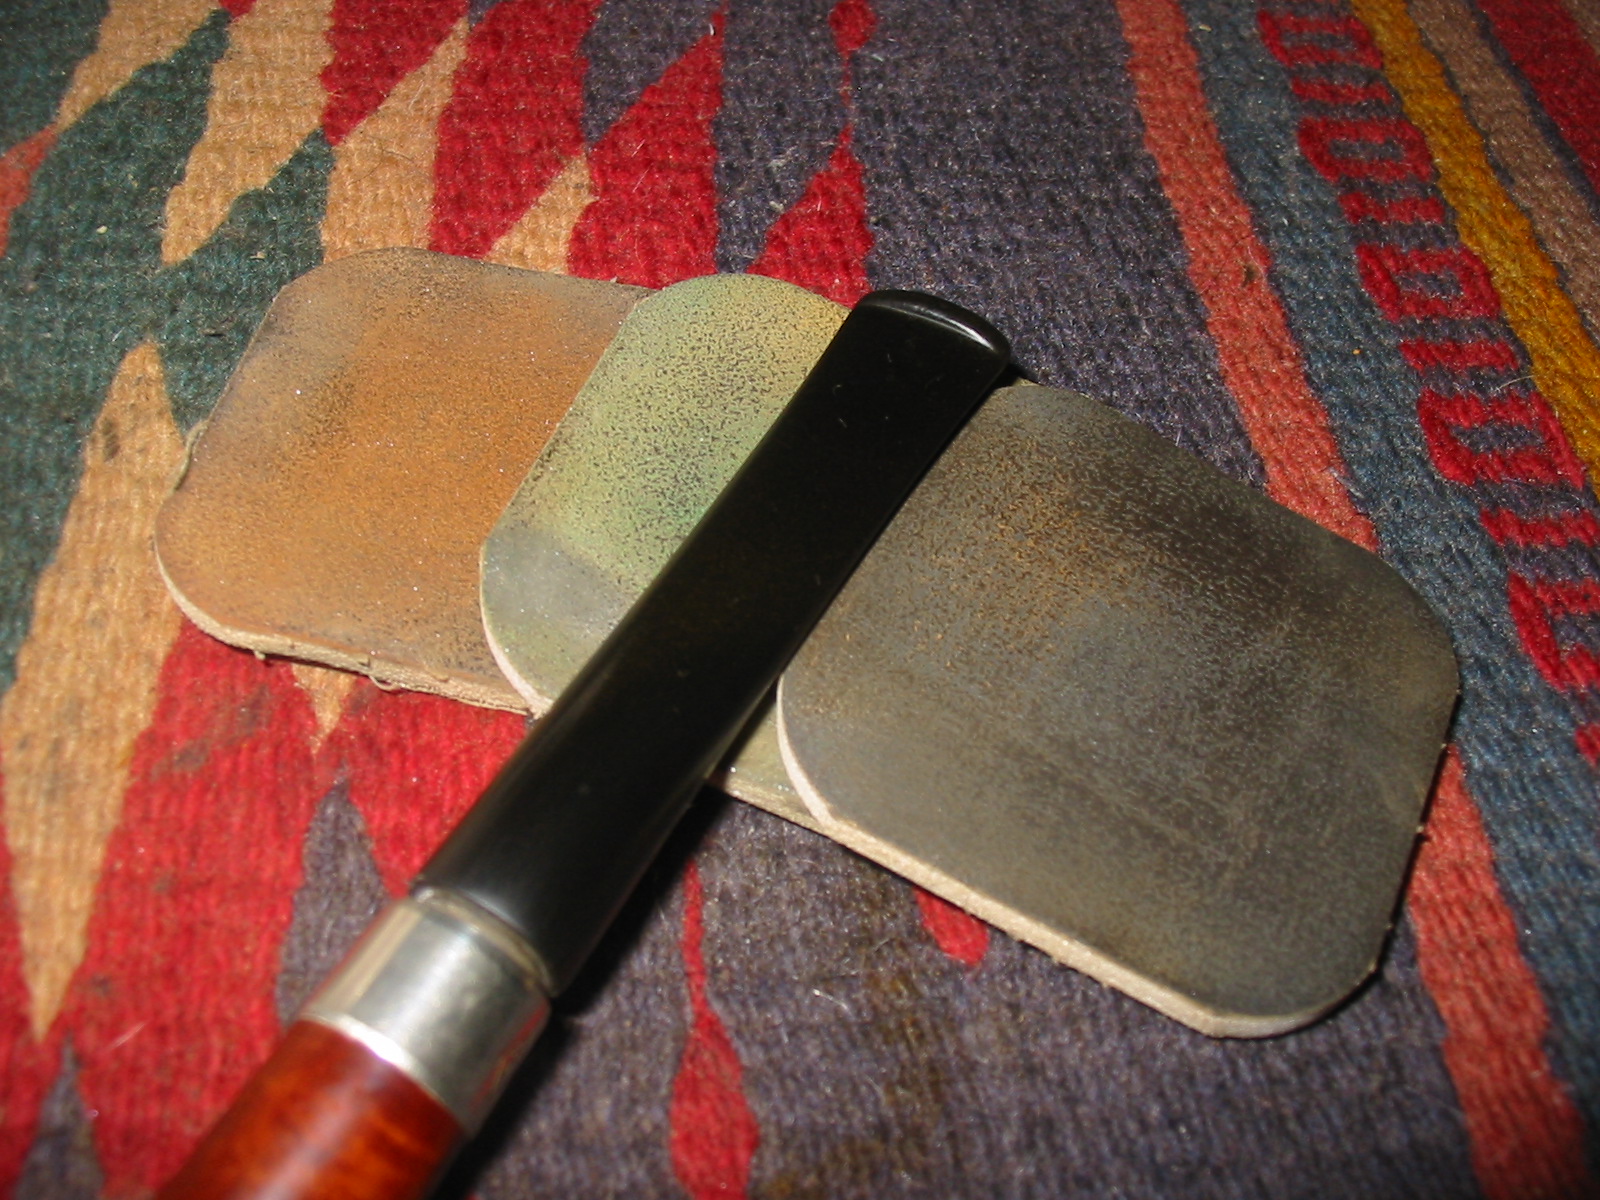
I continued to sand and shape the stem. I liked the wider blade at the button as I thought it looked like it fit better with the pipe. I left the tenon a little longer so it sat against the end of the mortise when it was inserted.
IMG_6445

IMG_6446
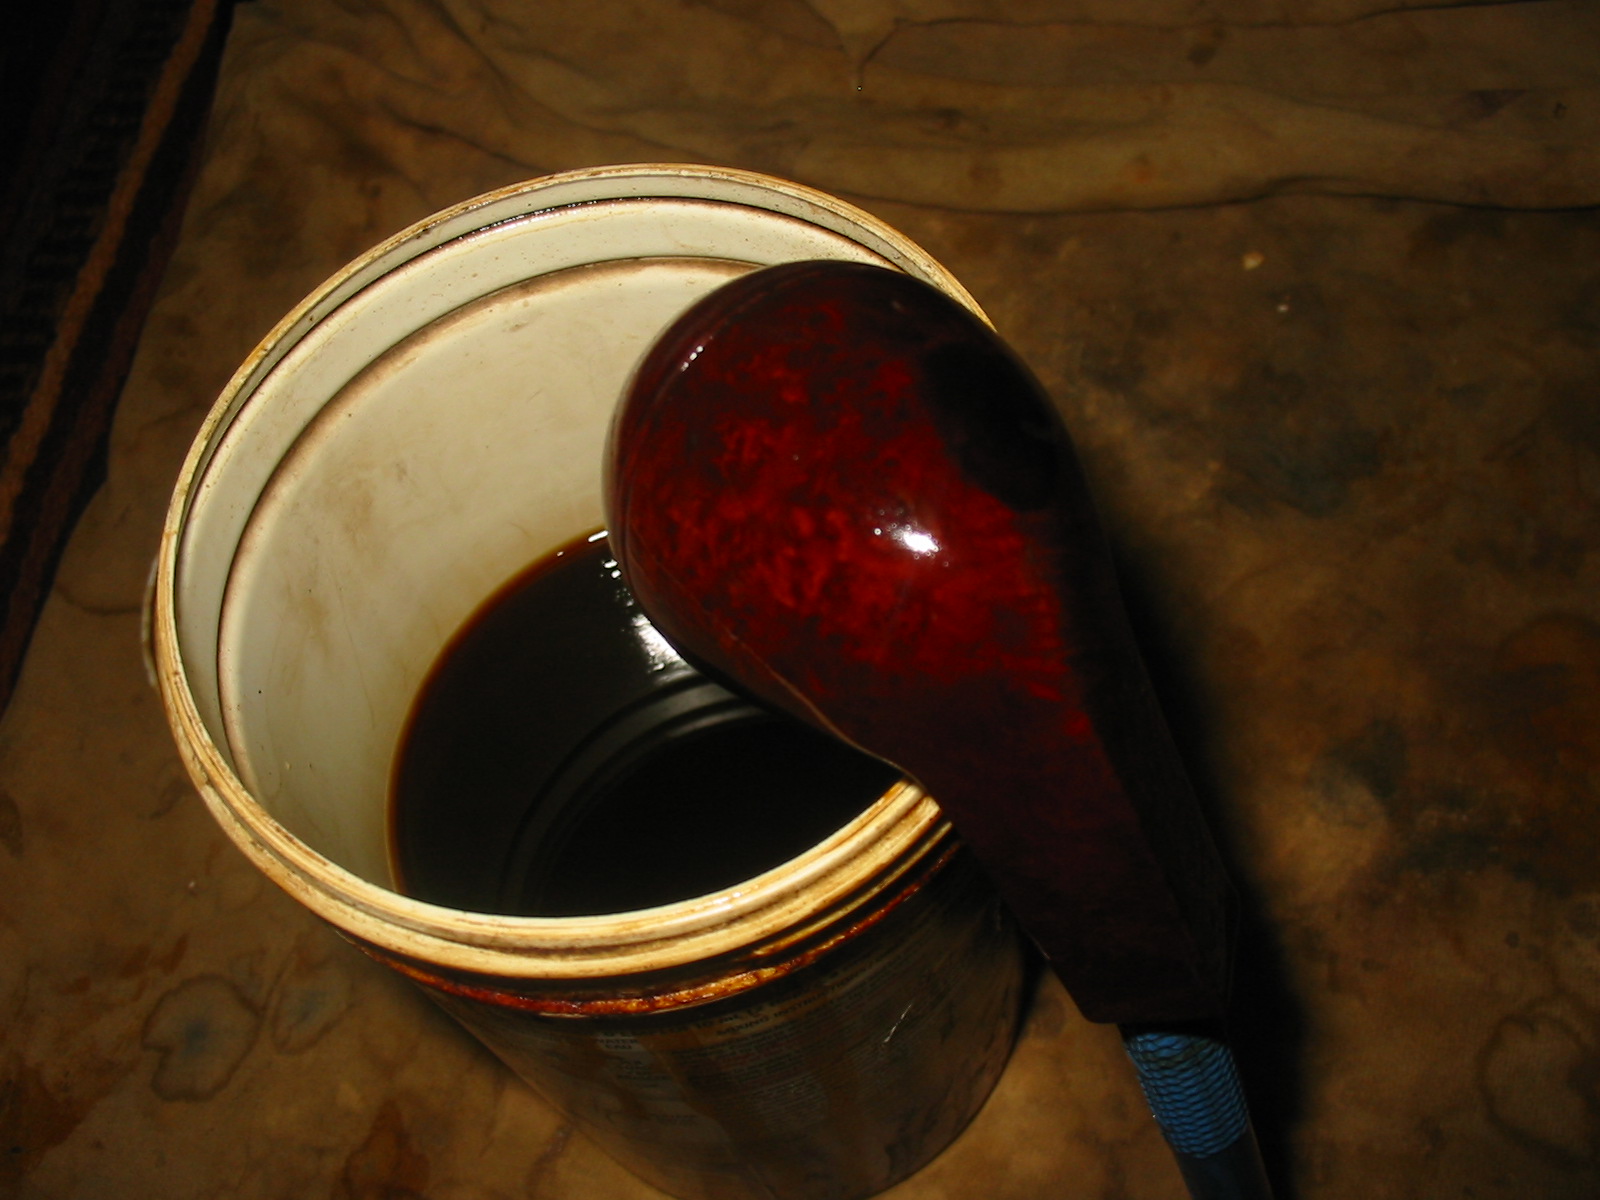
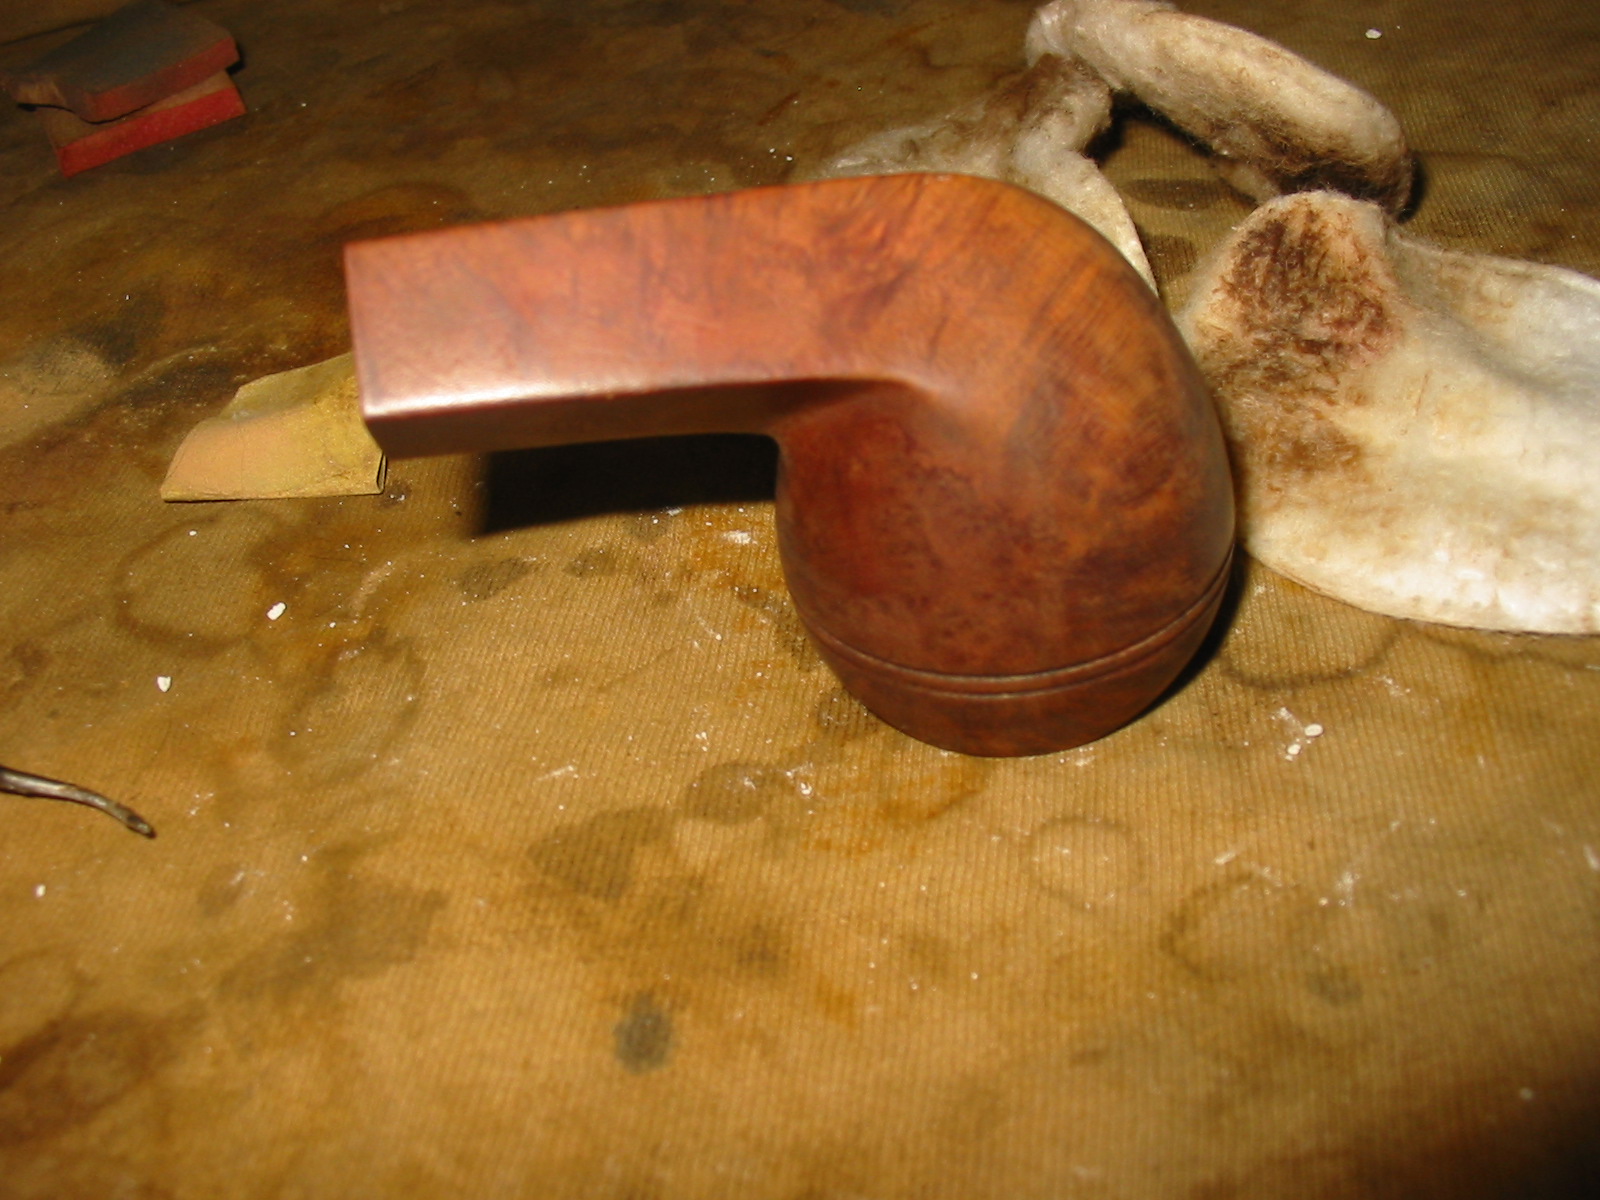
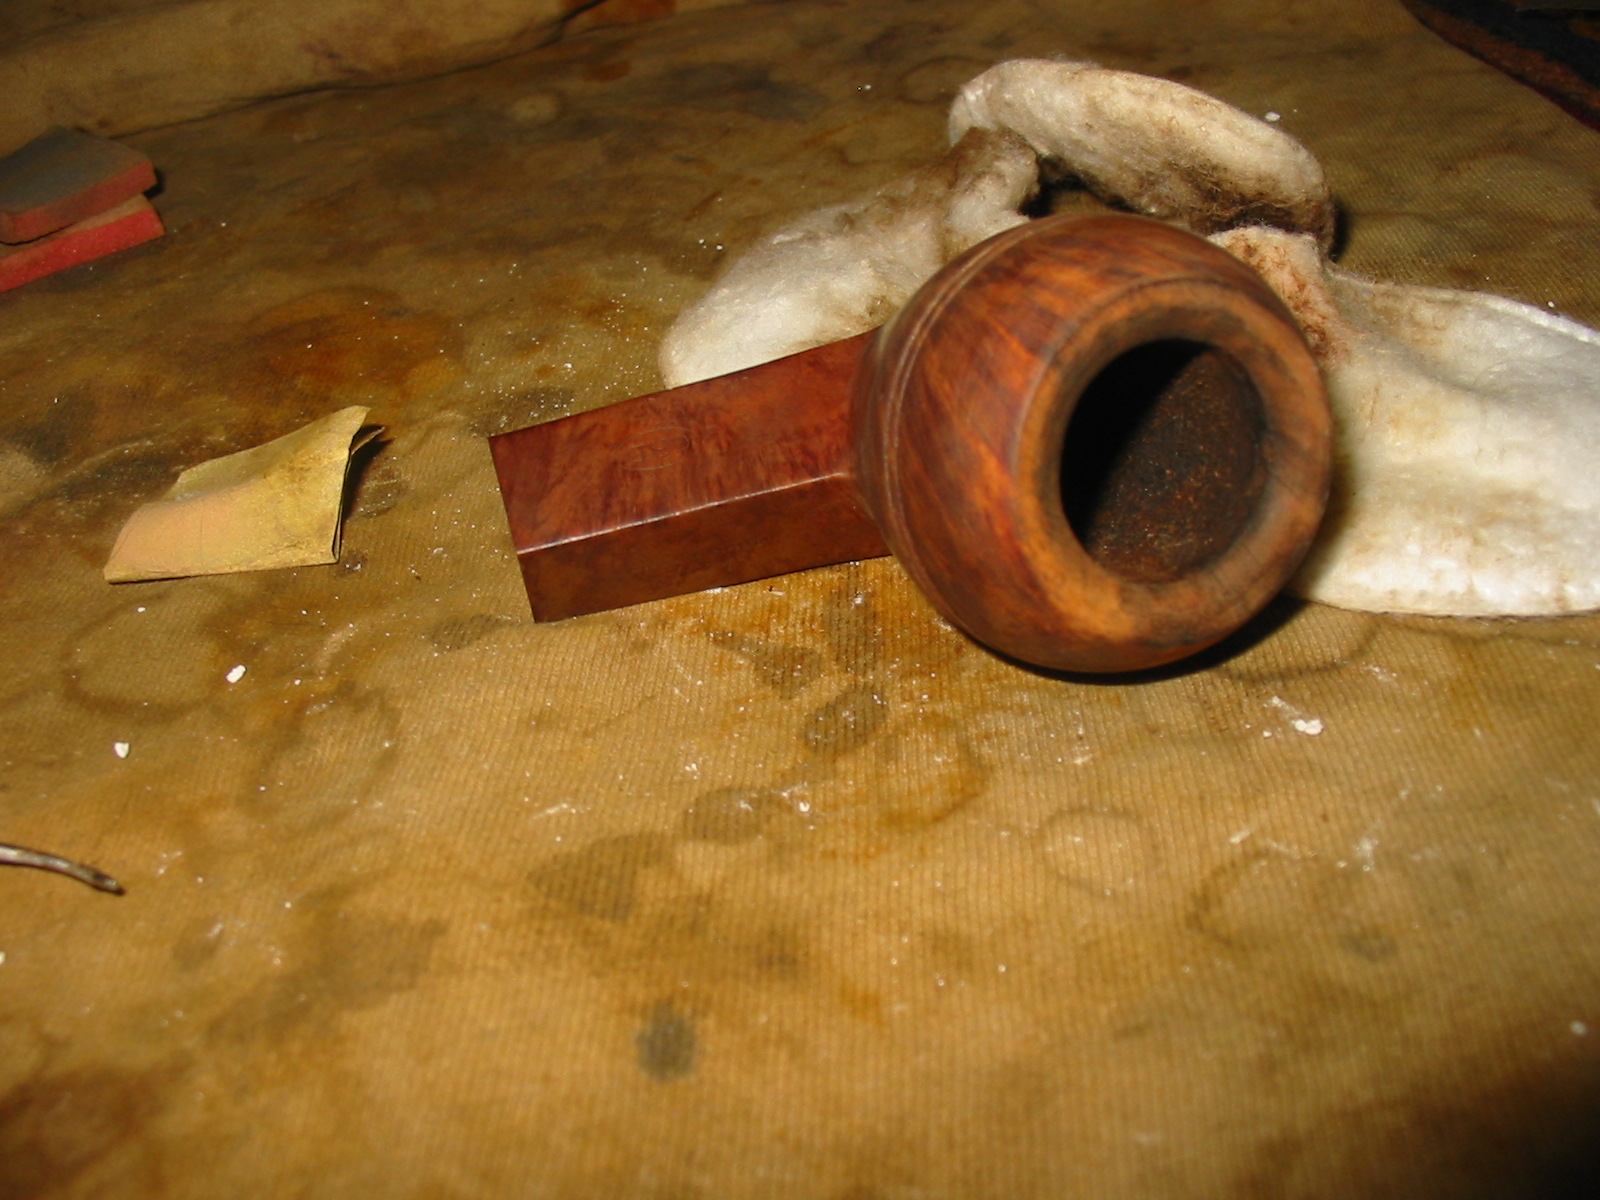
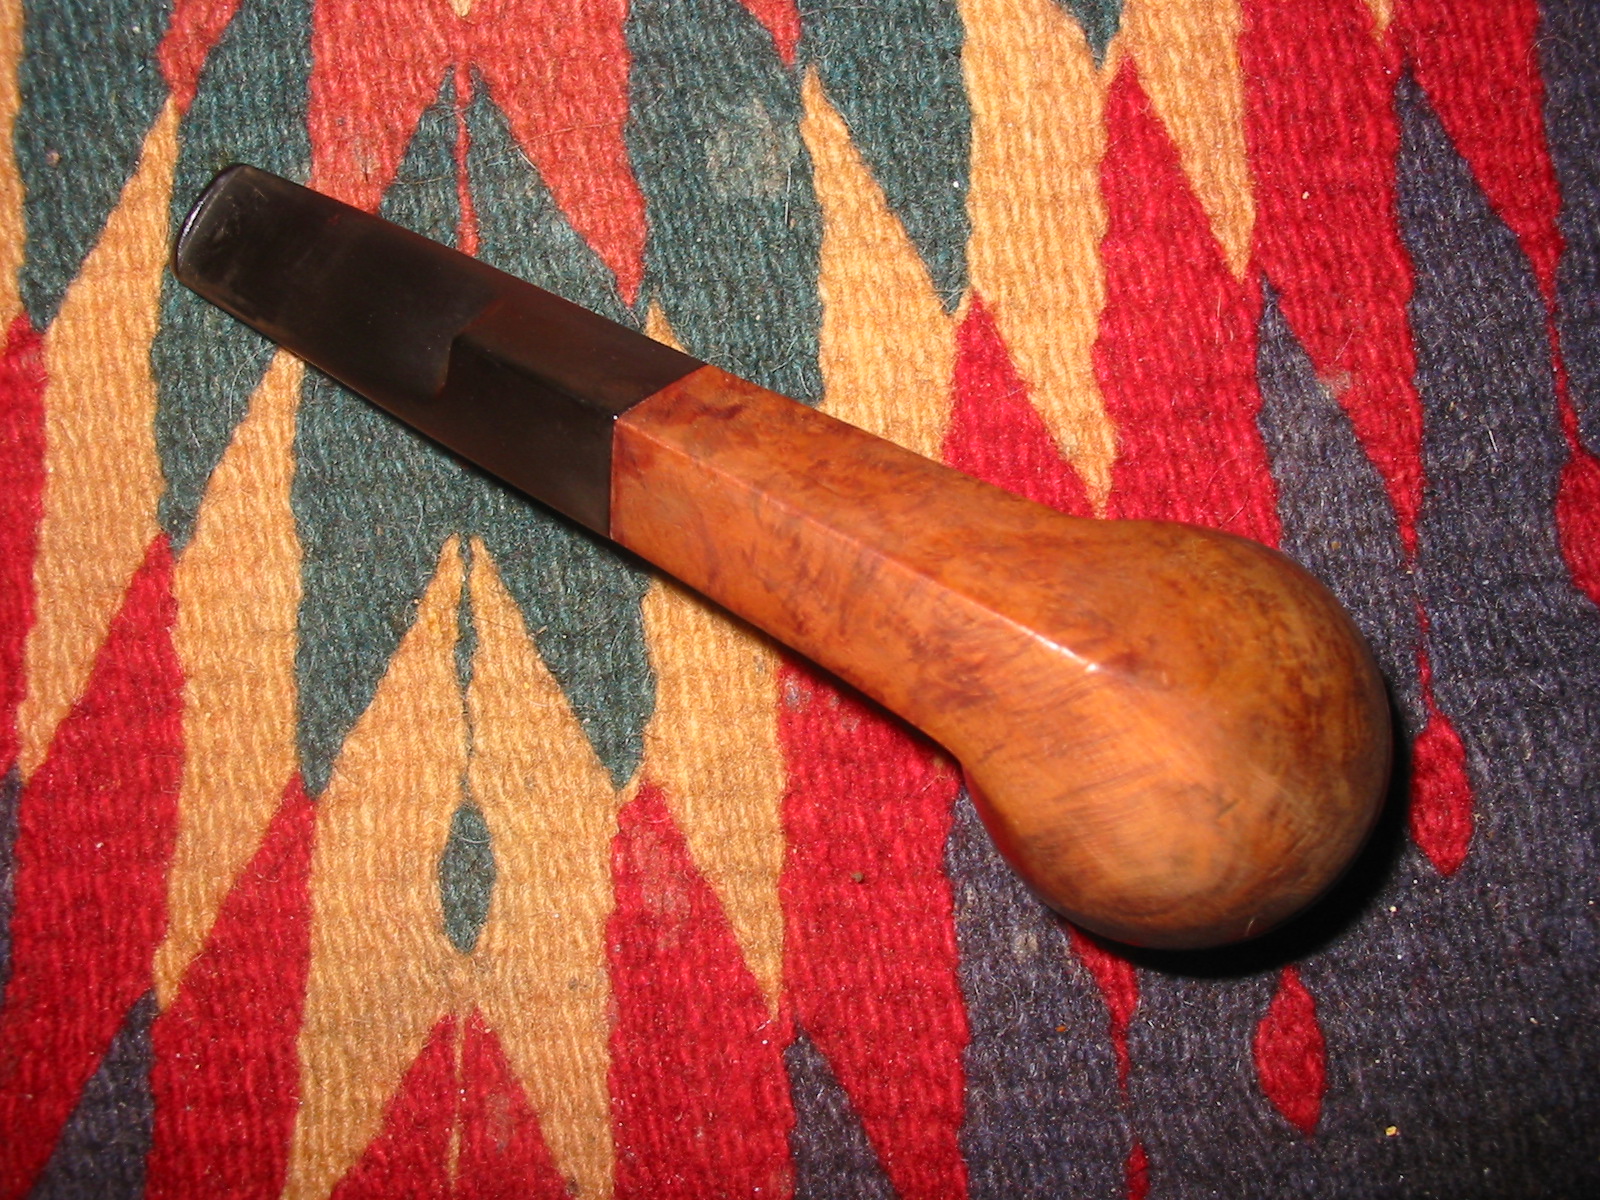
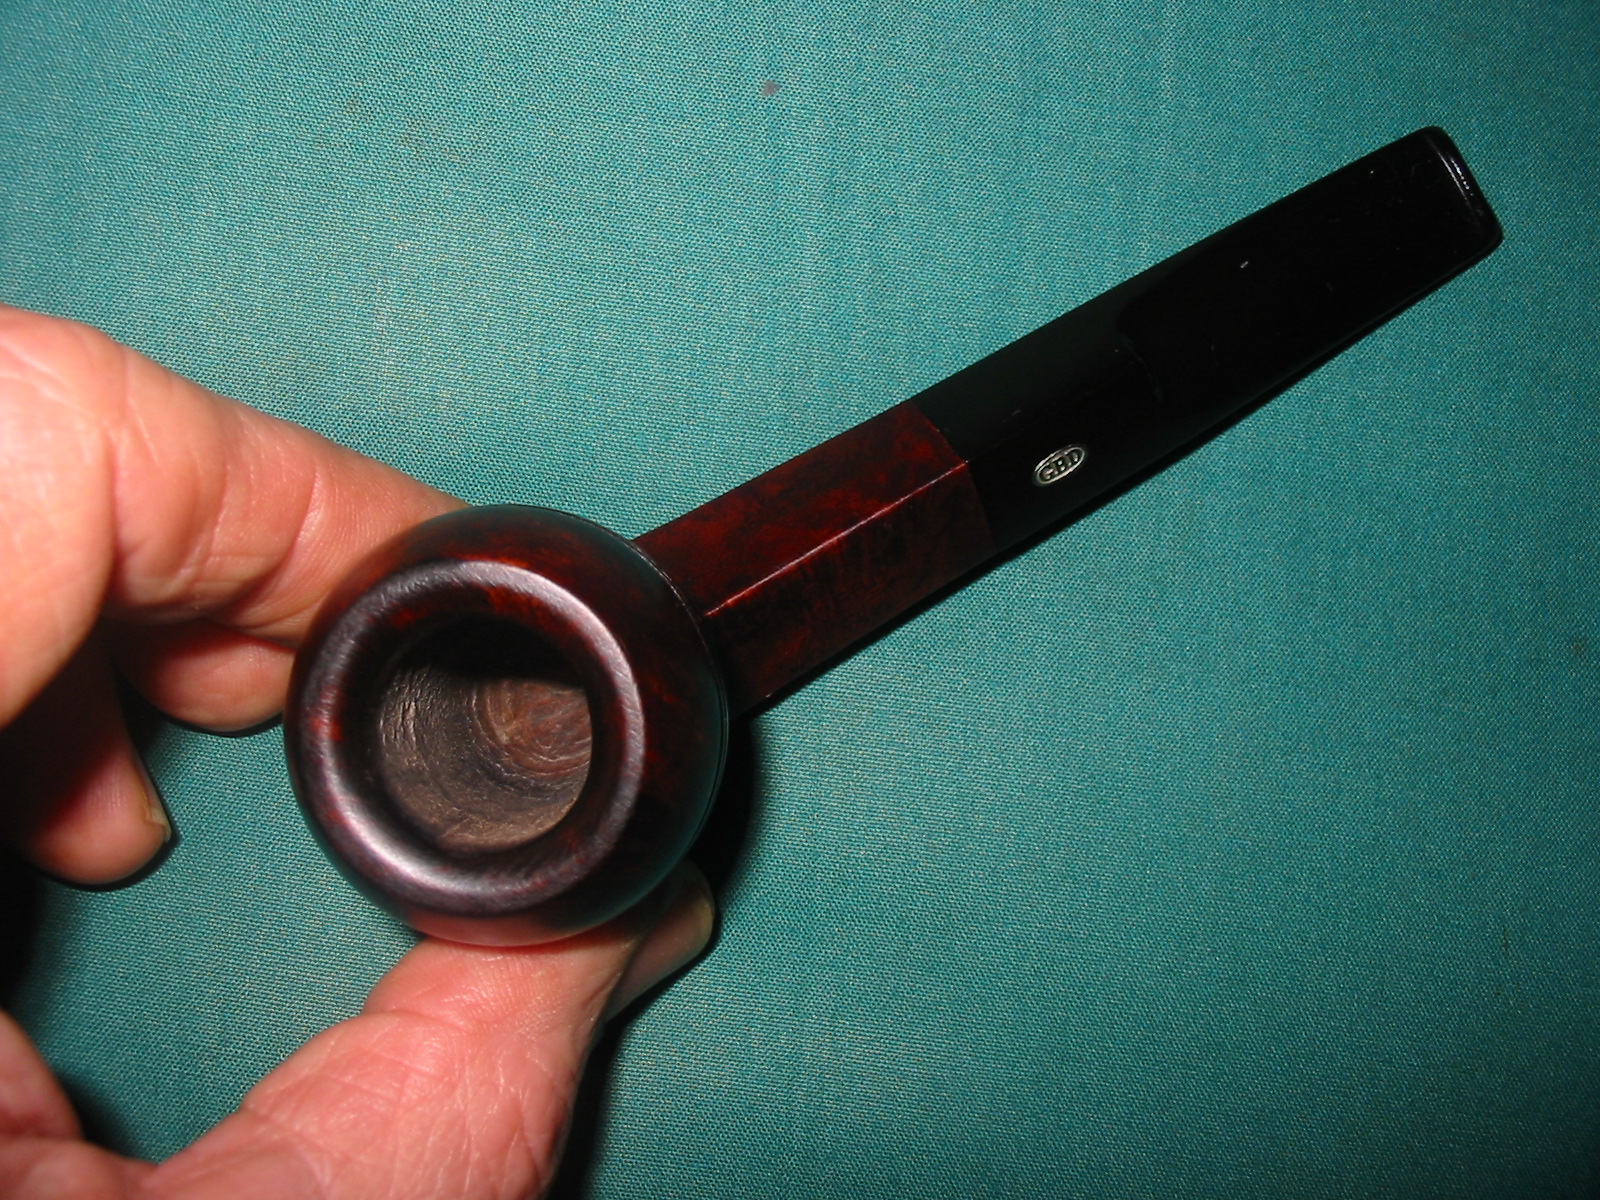
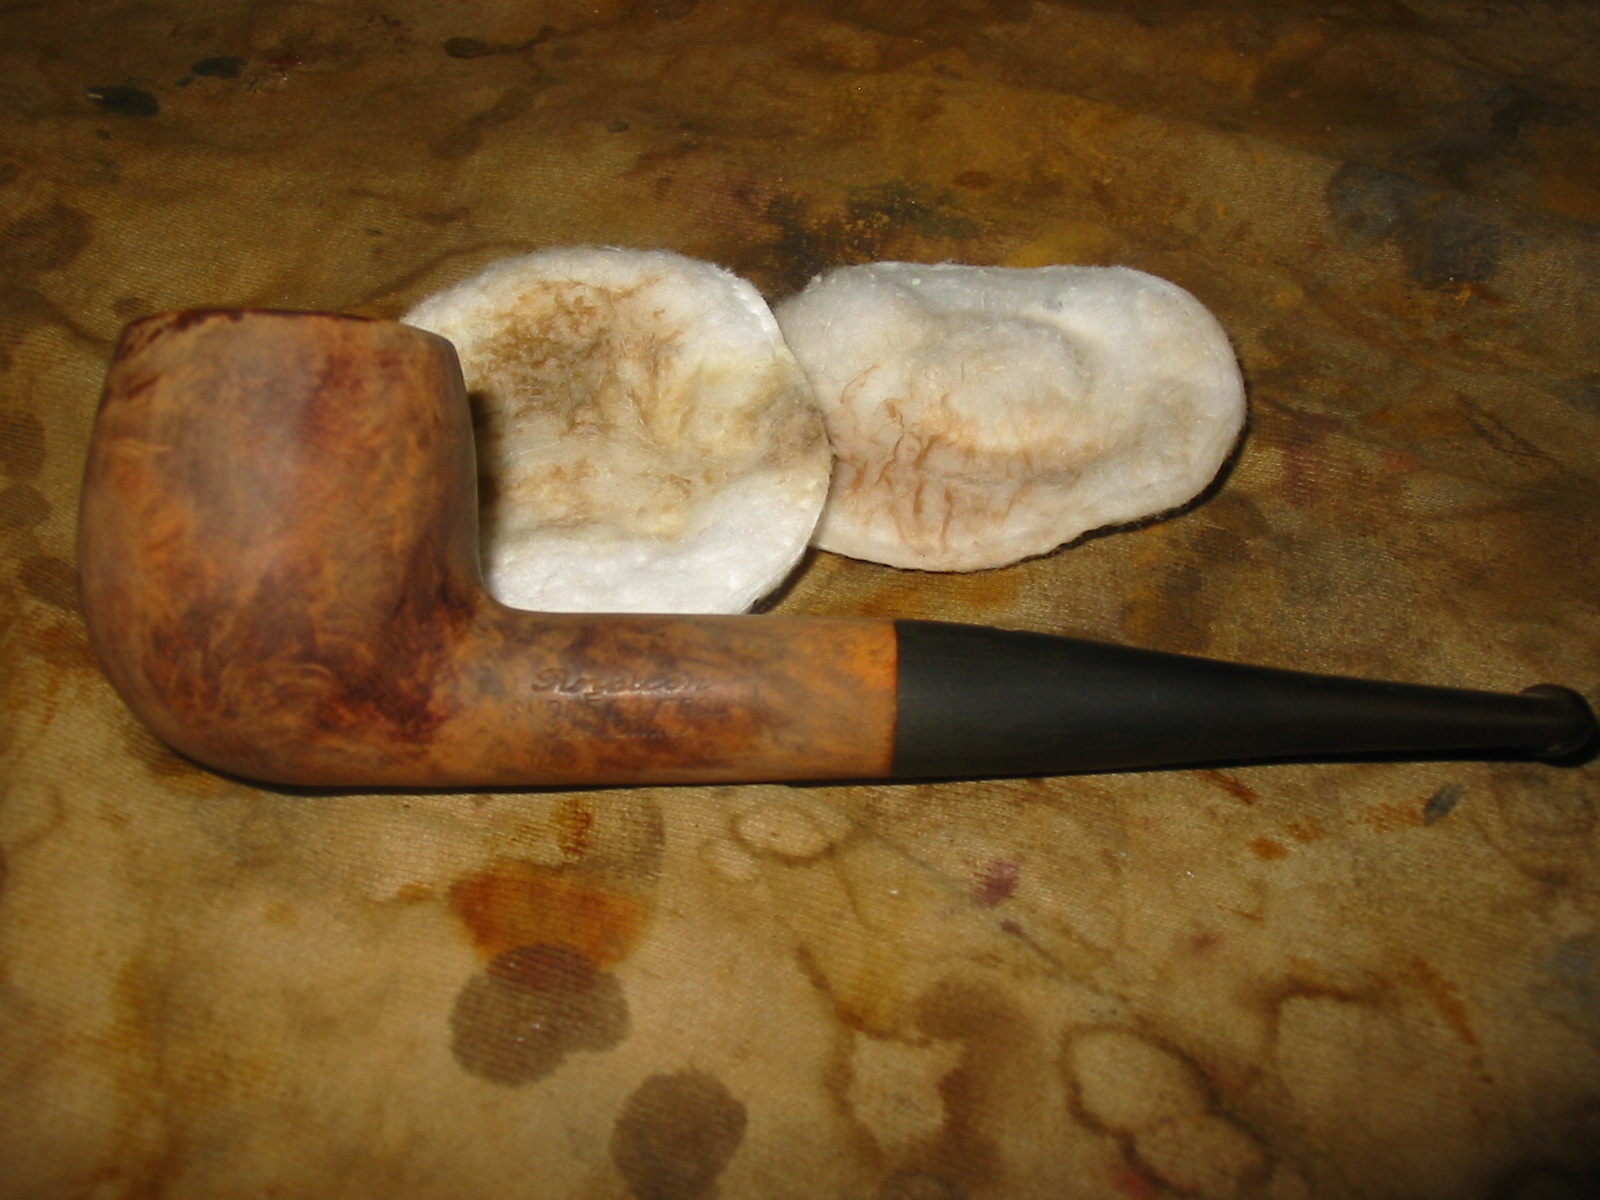
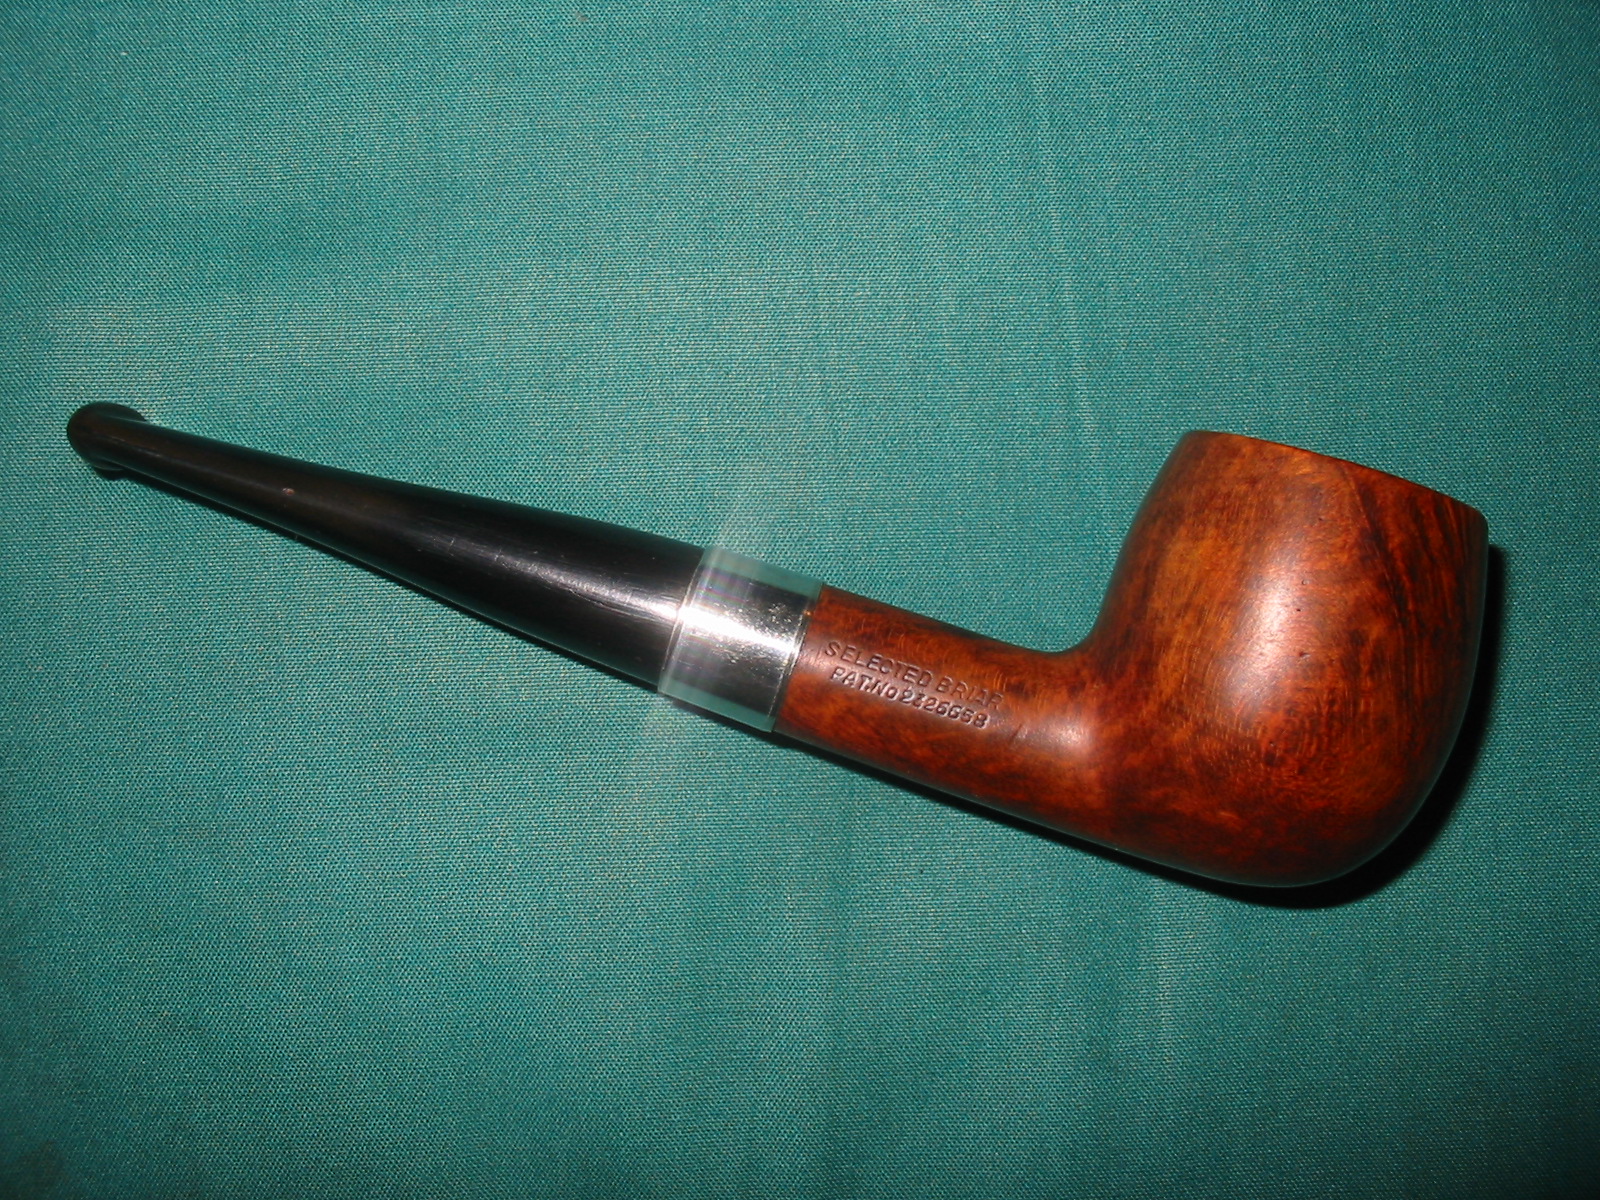
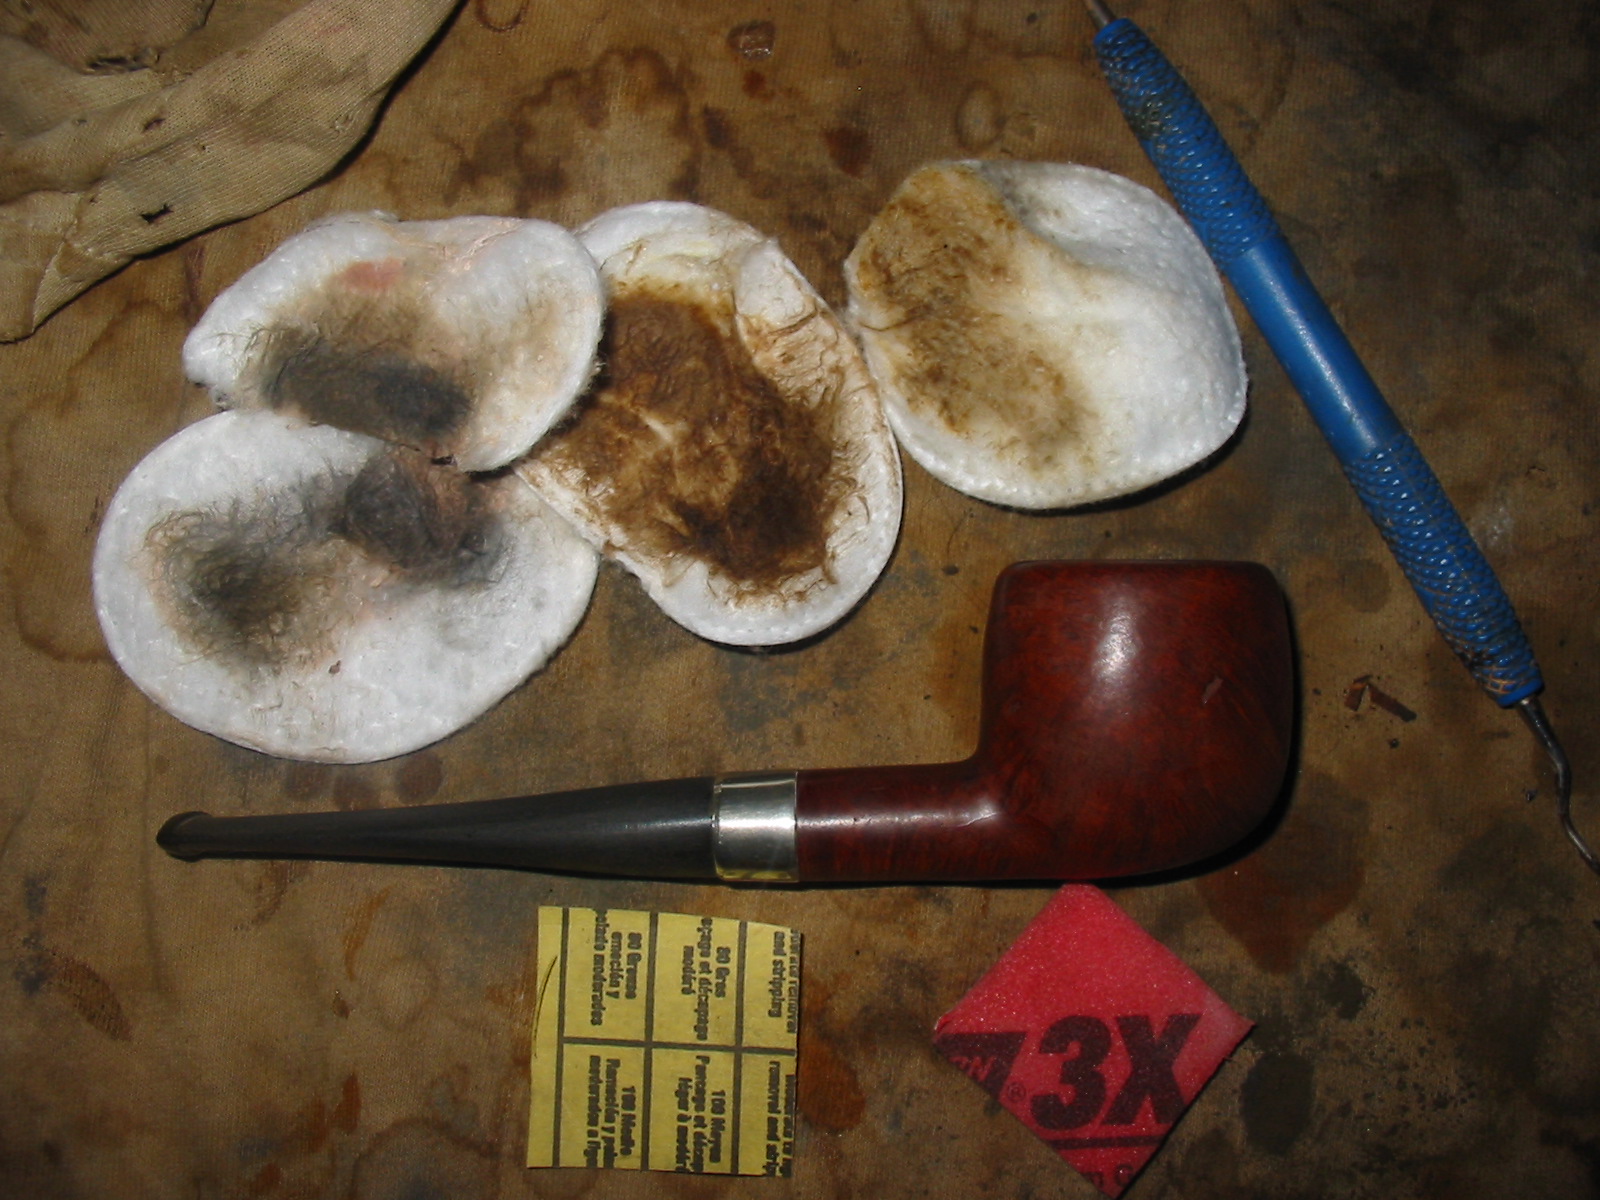
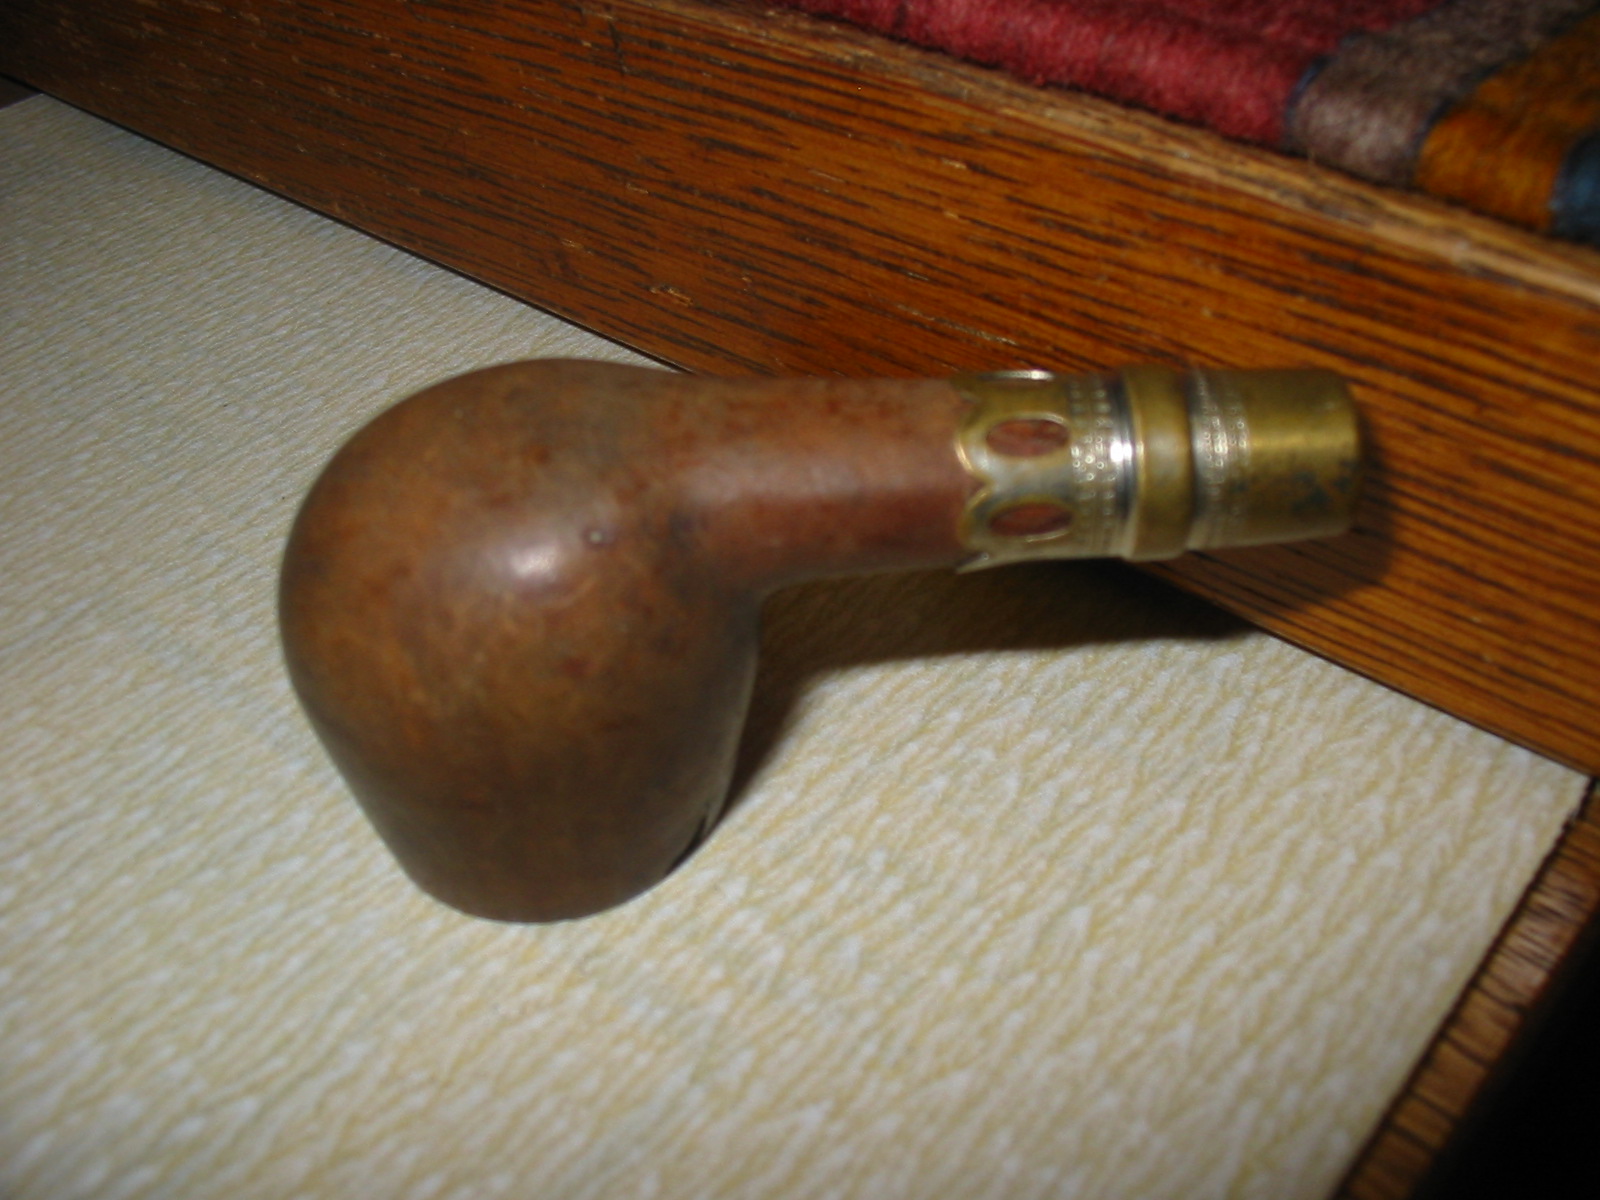
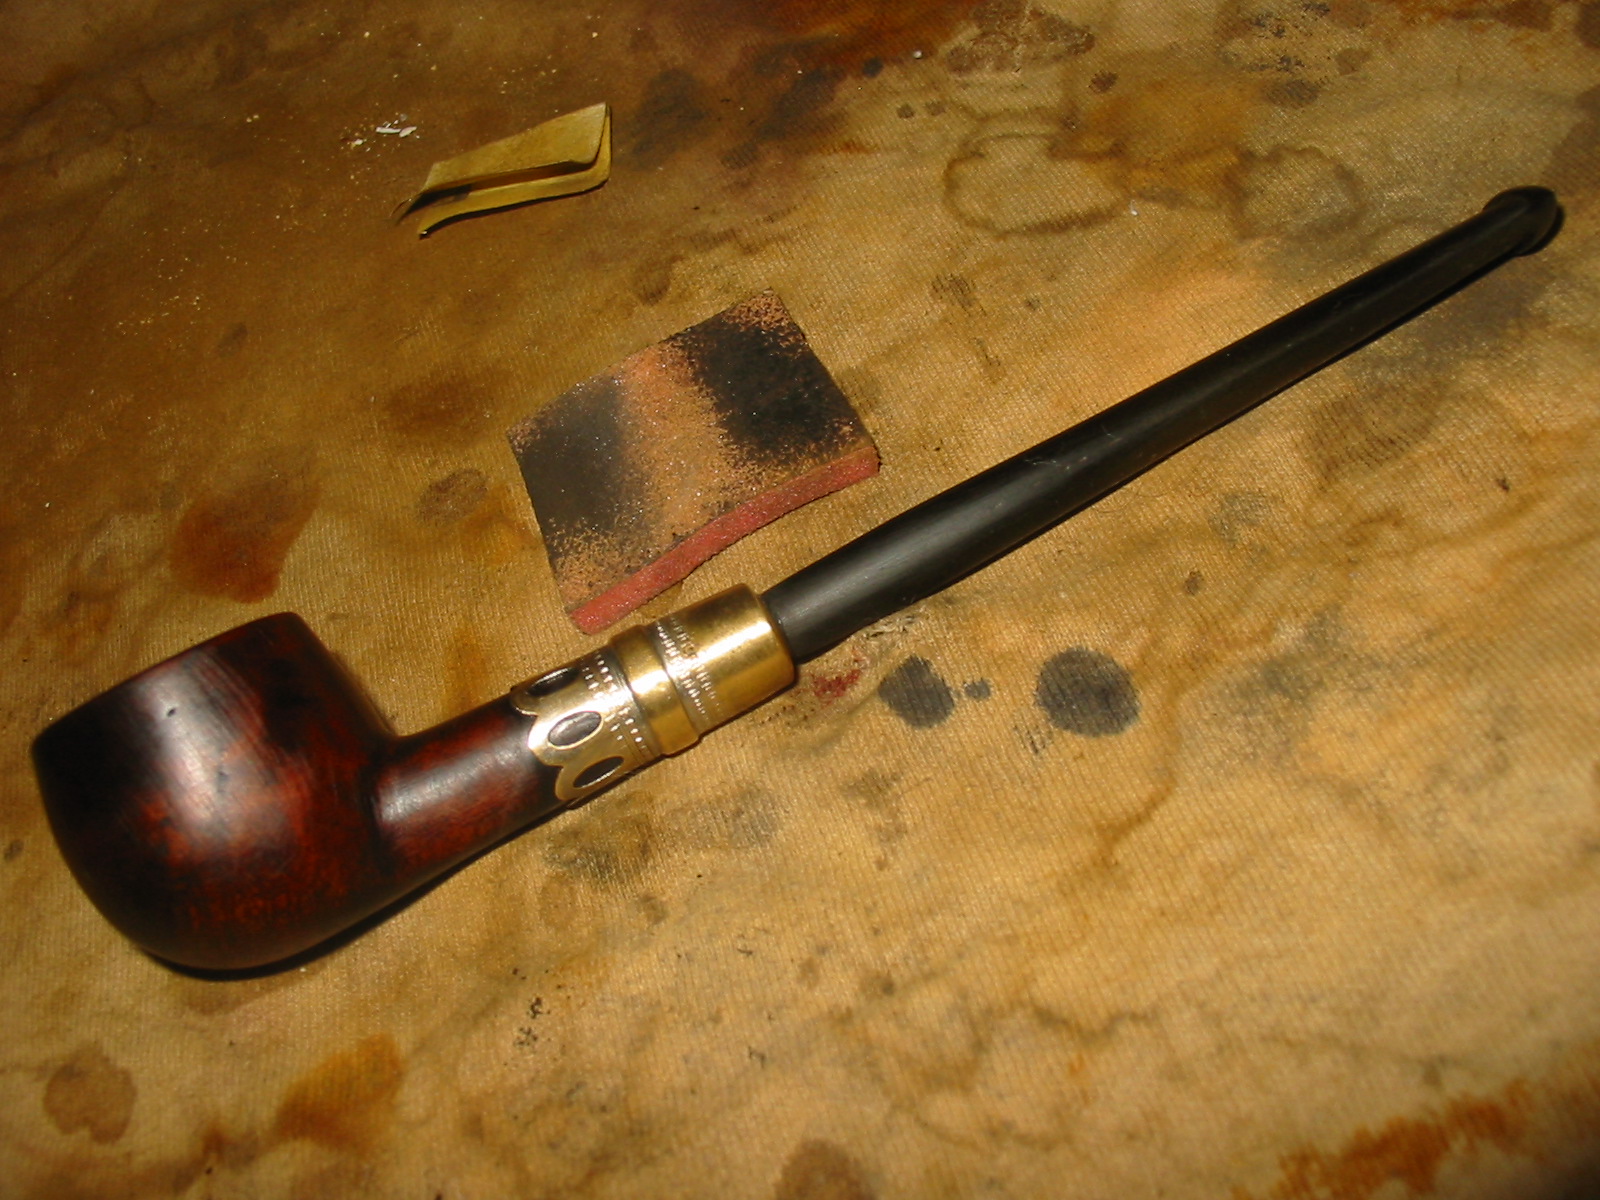
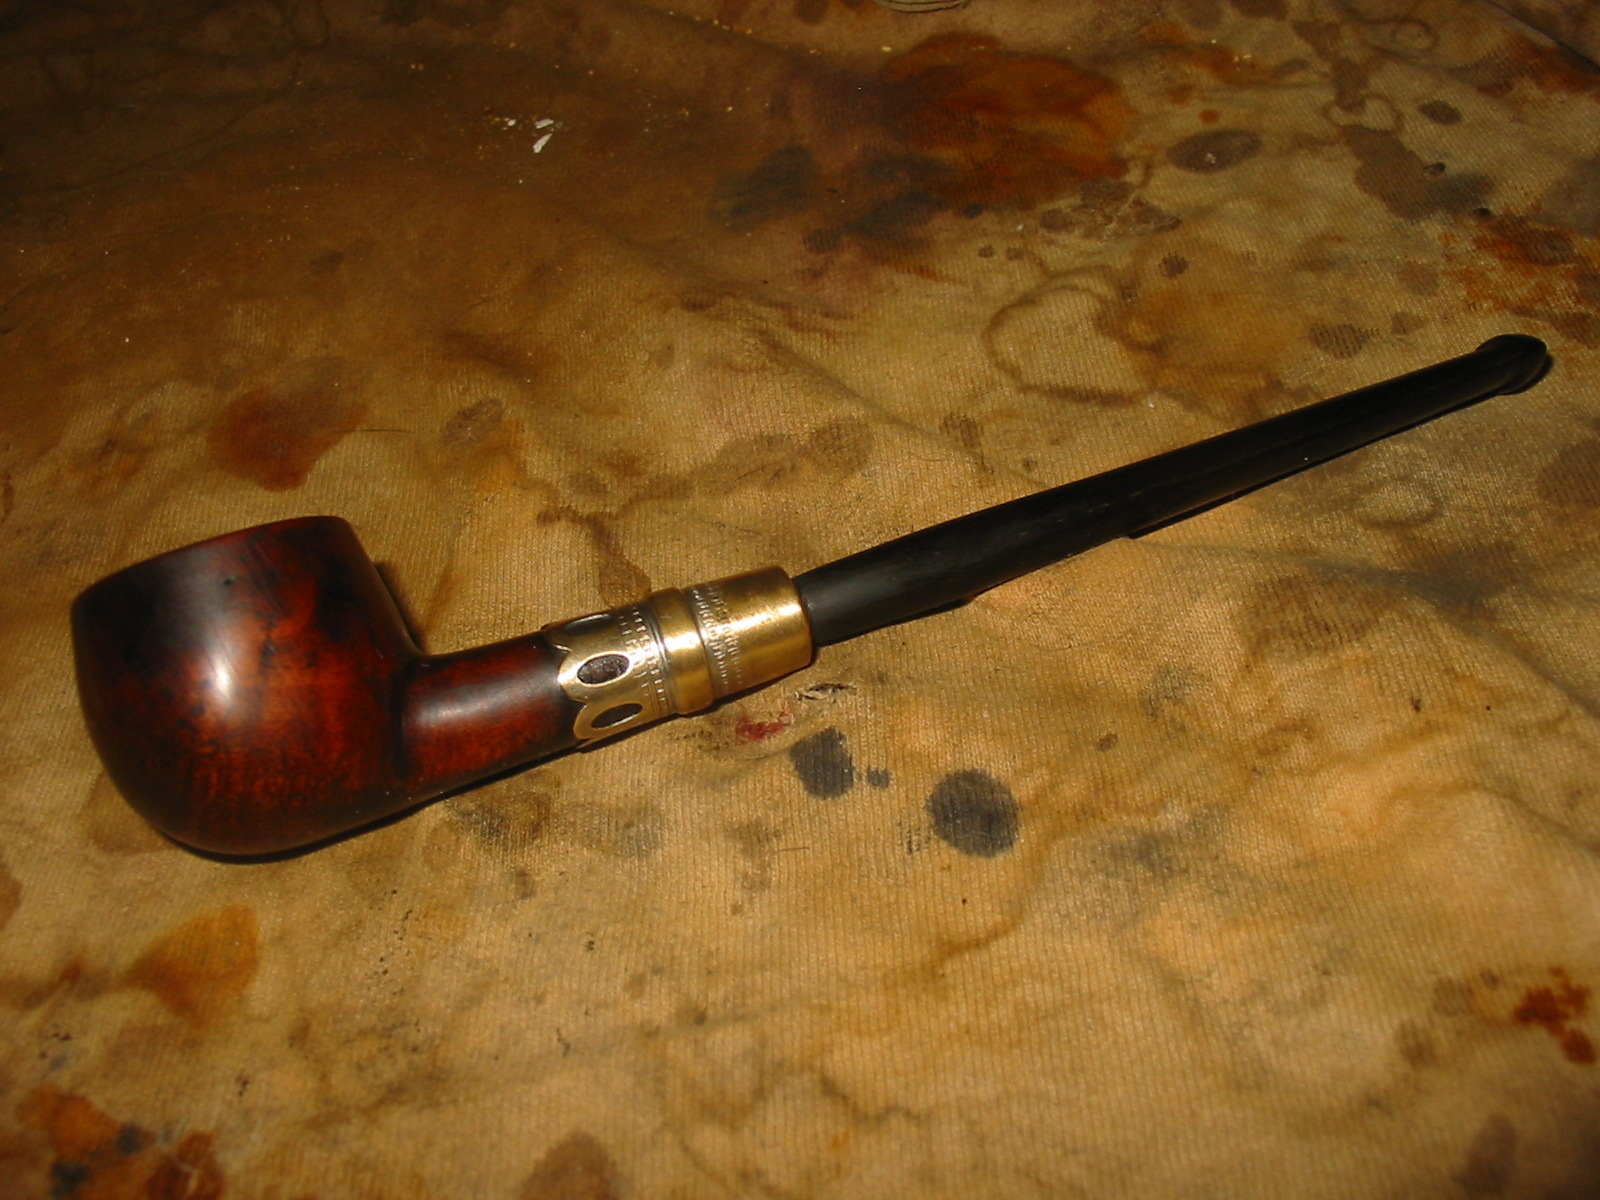
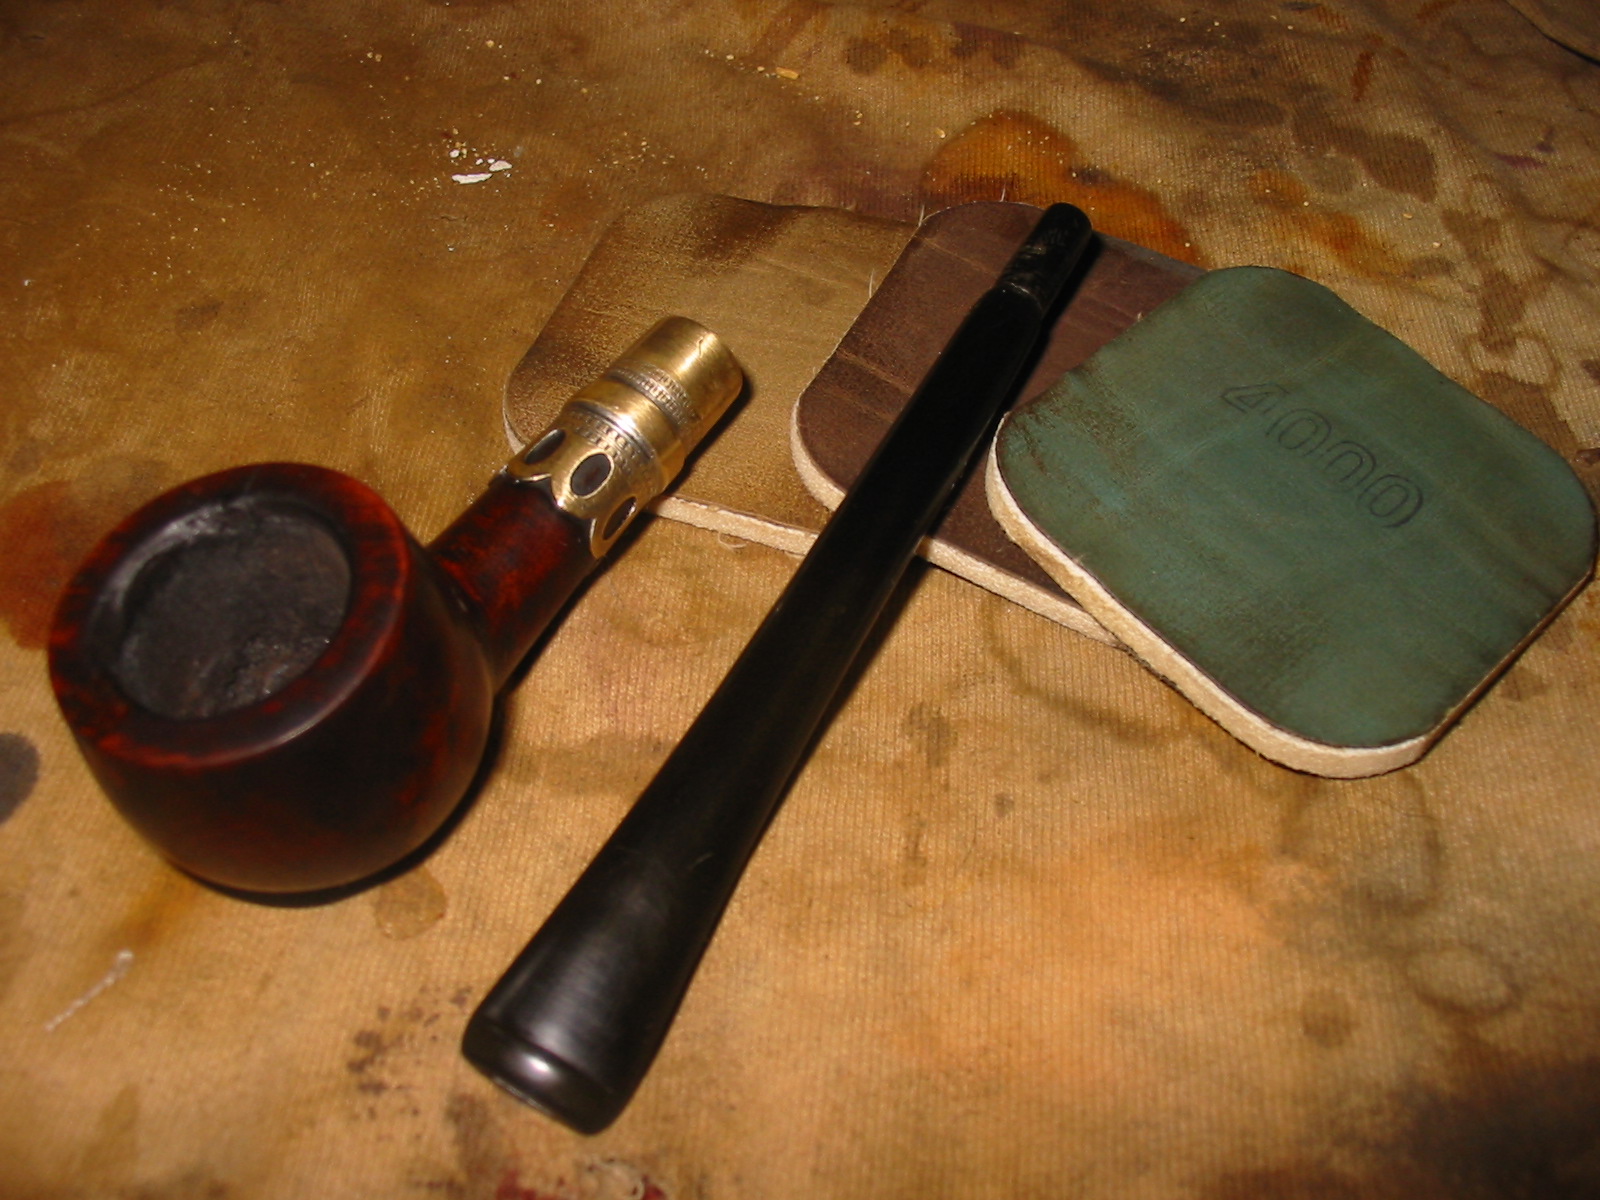
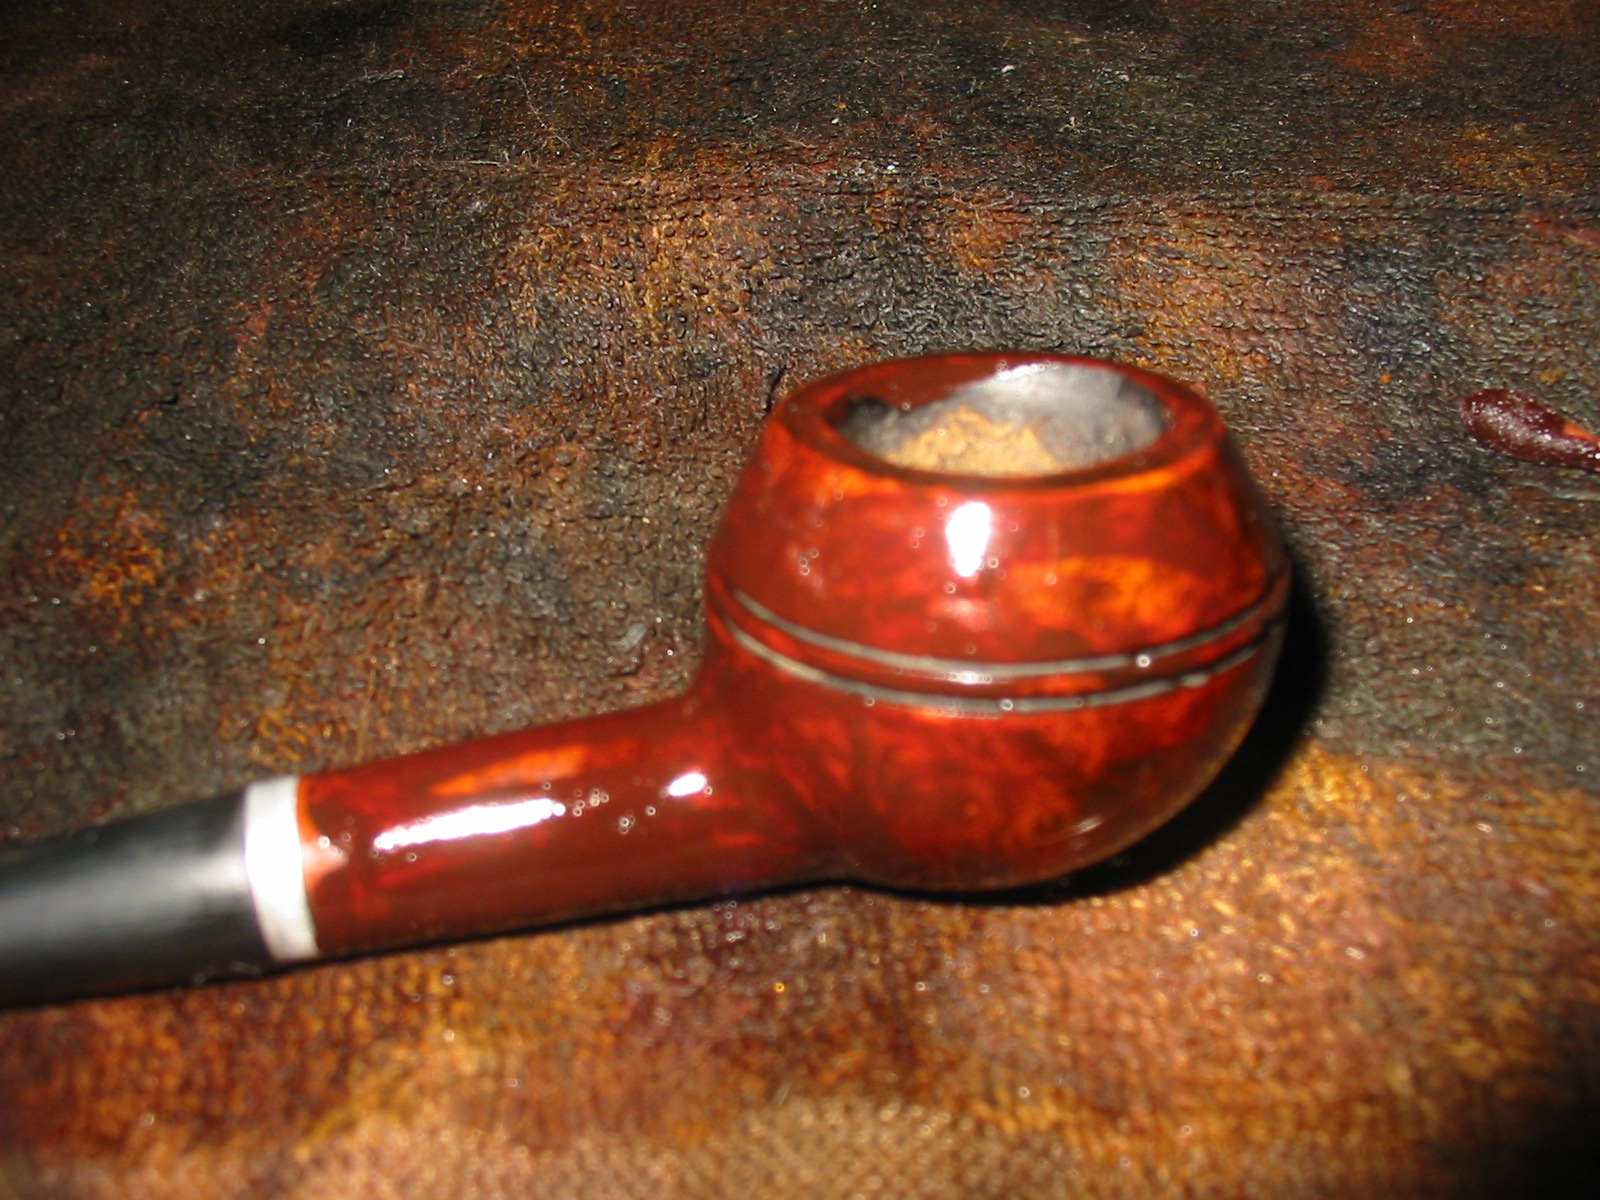
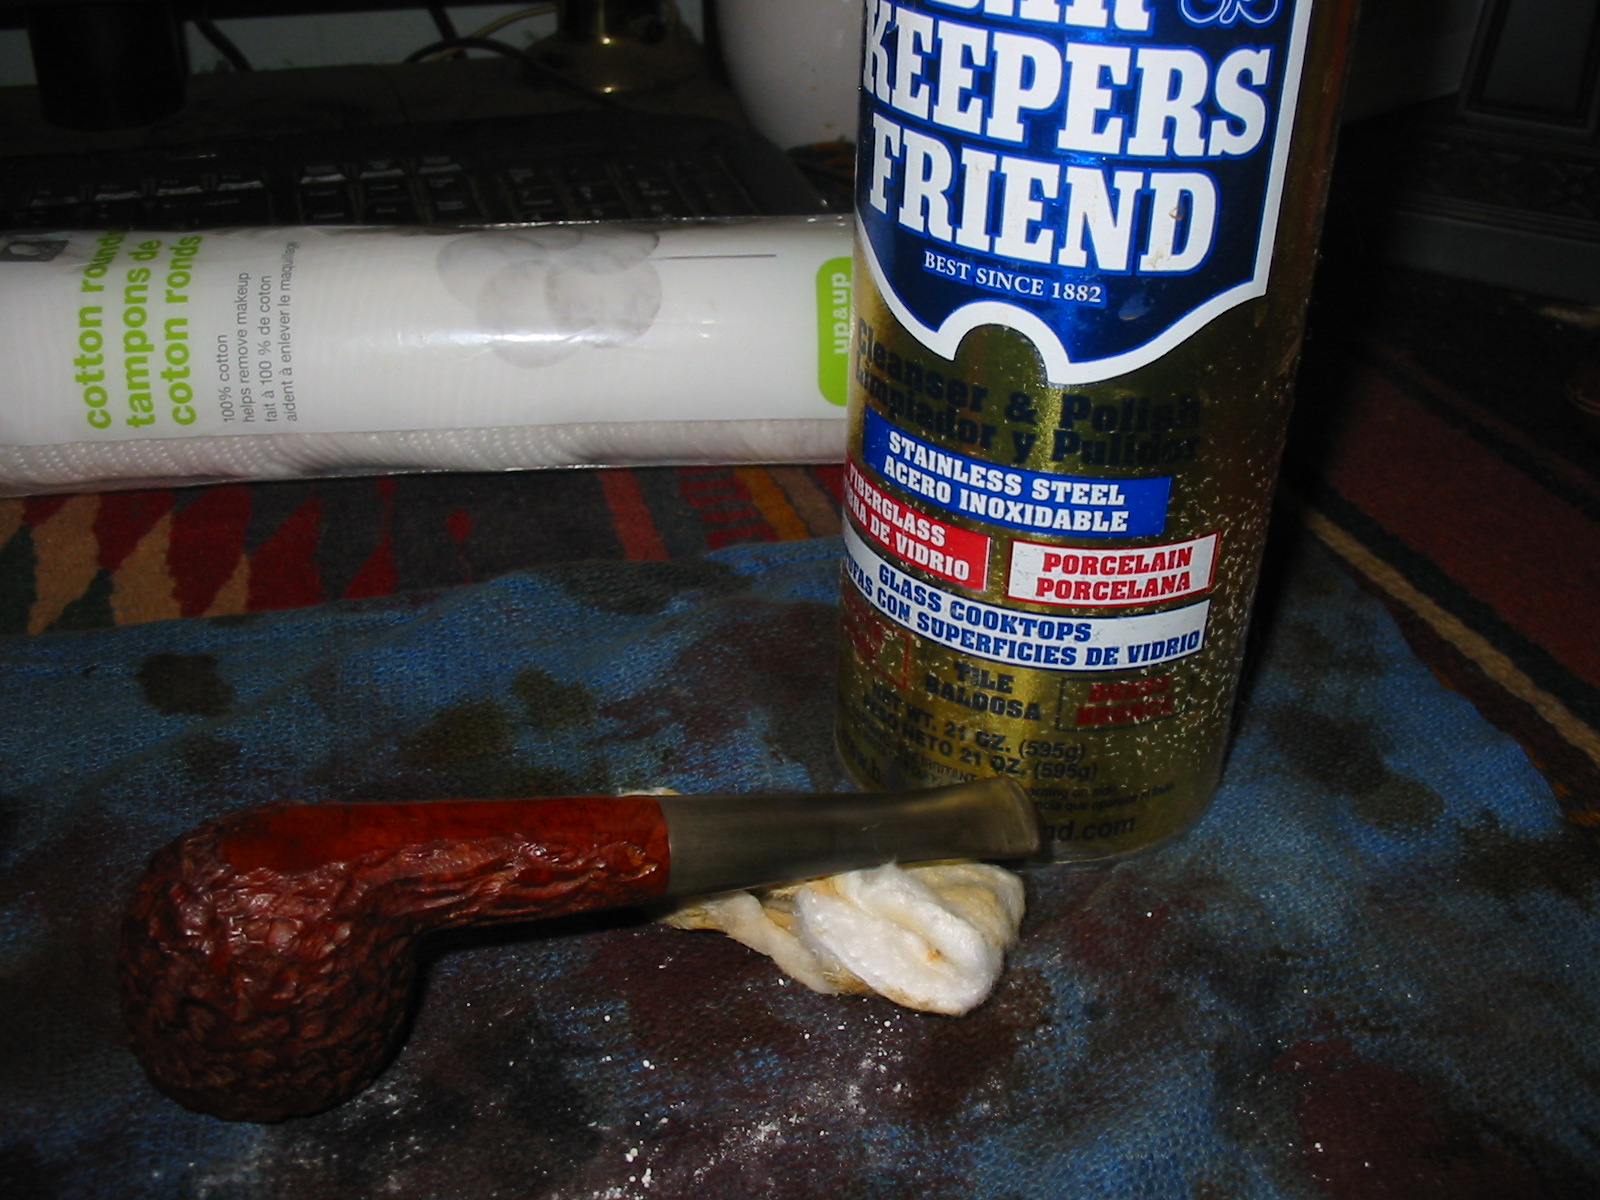
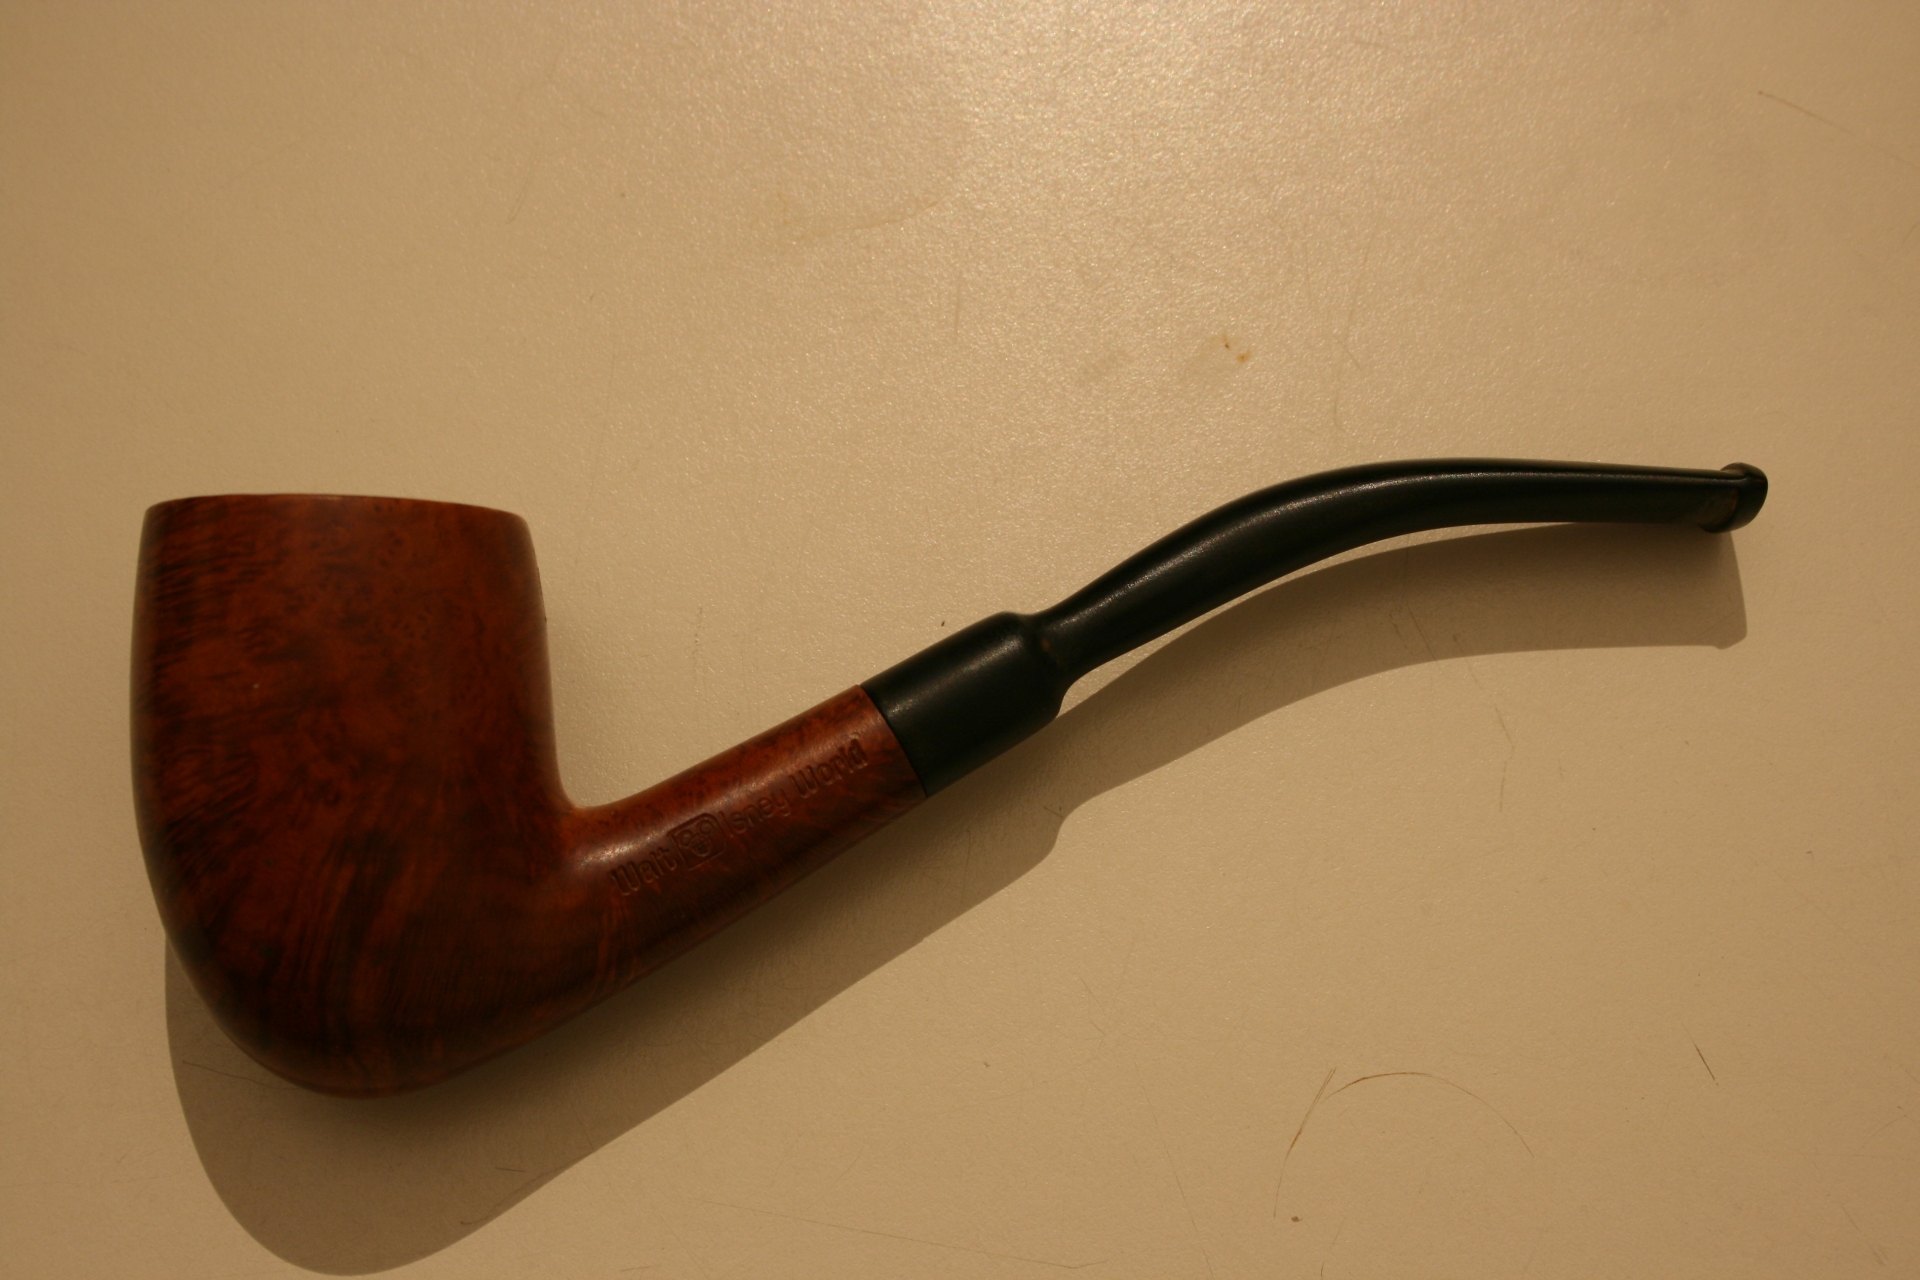
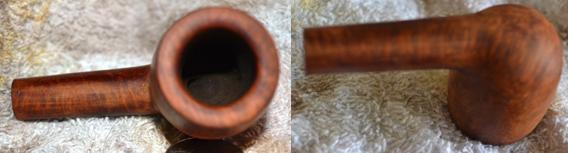
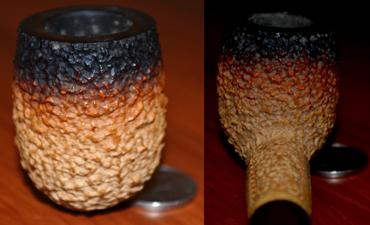
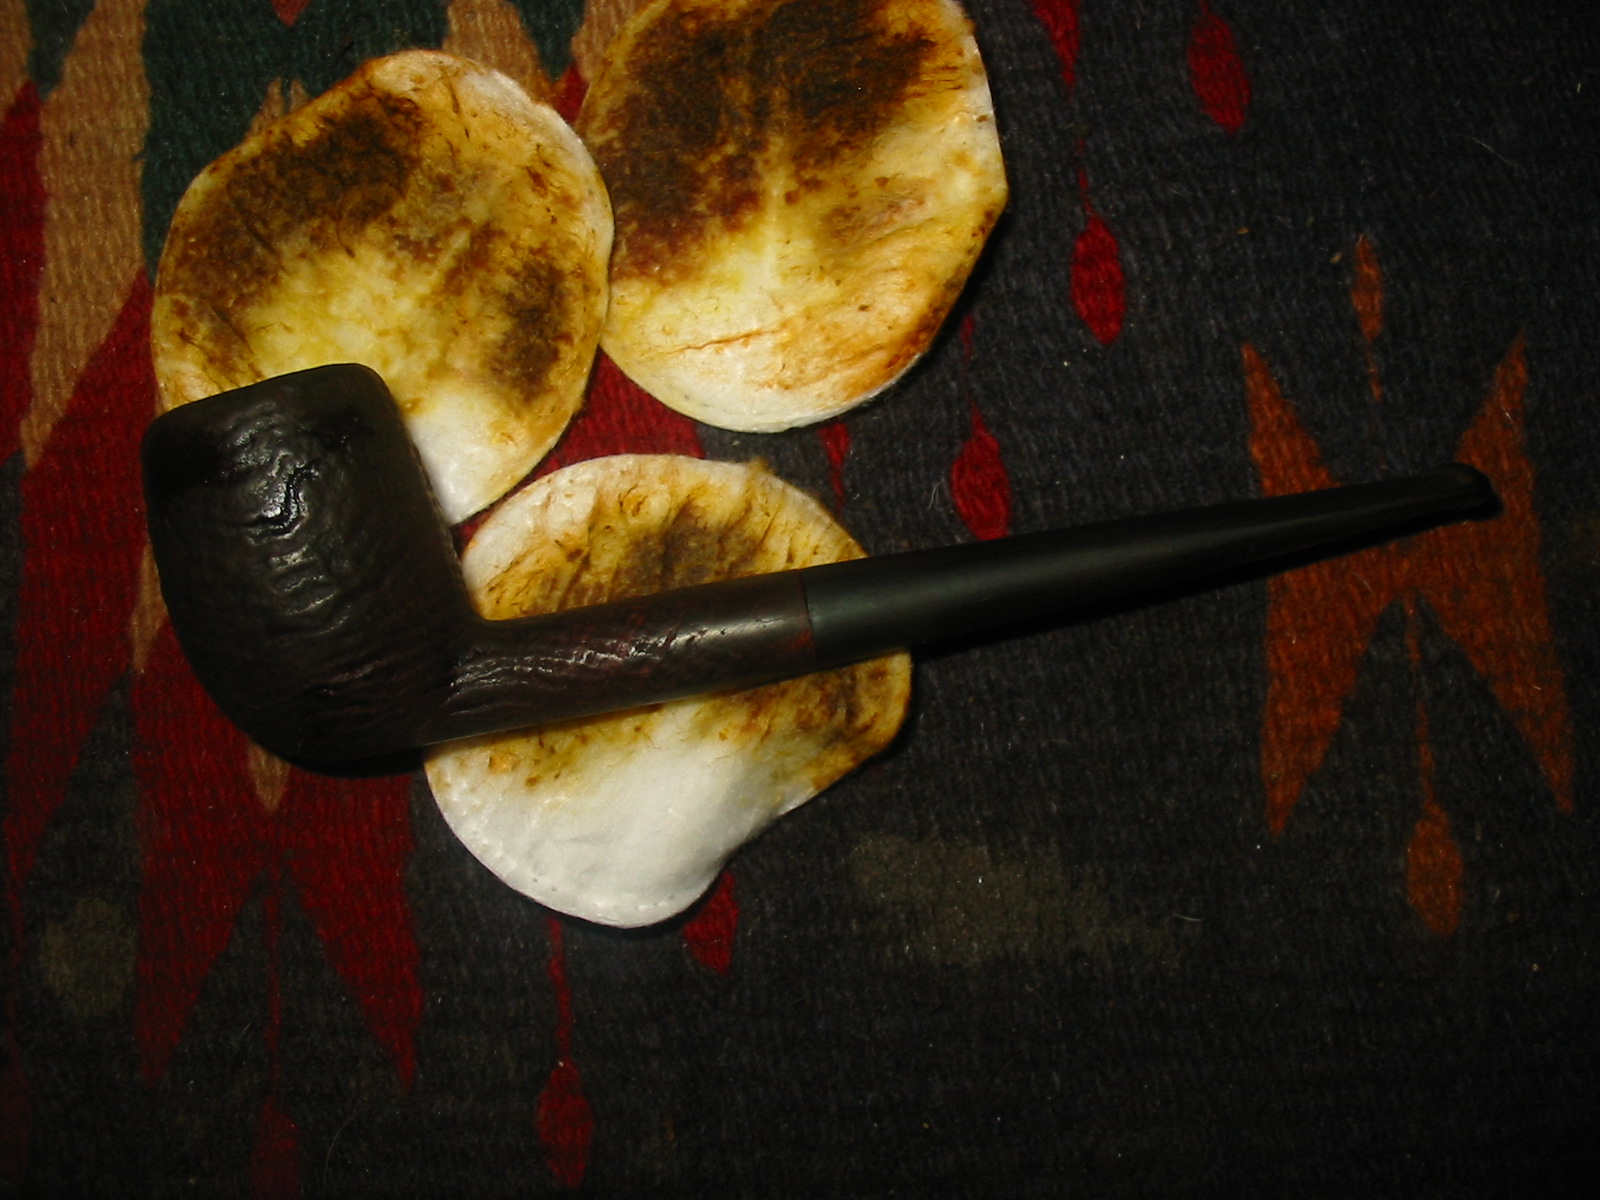
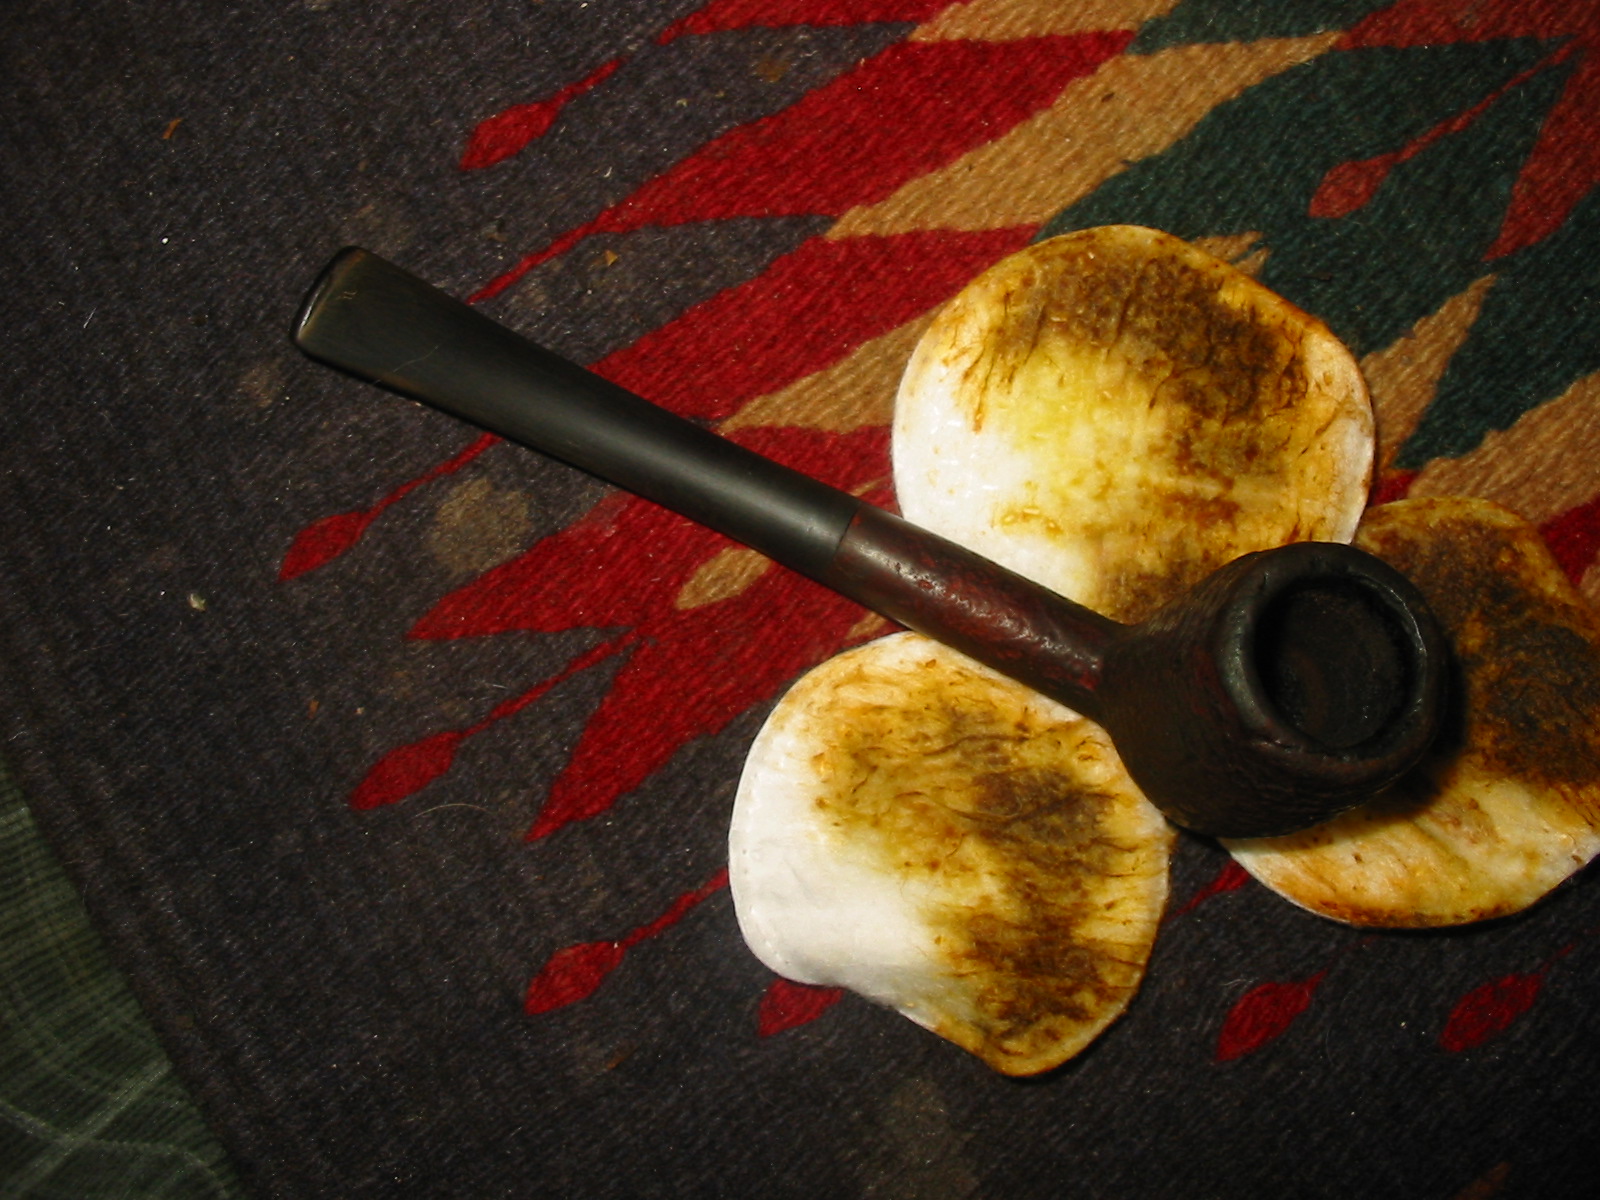
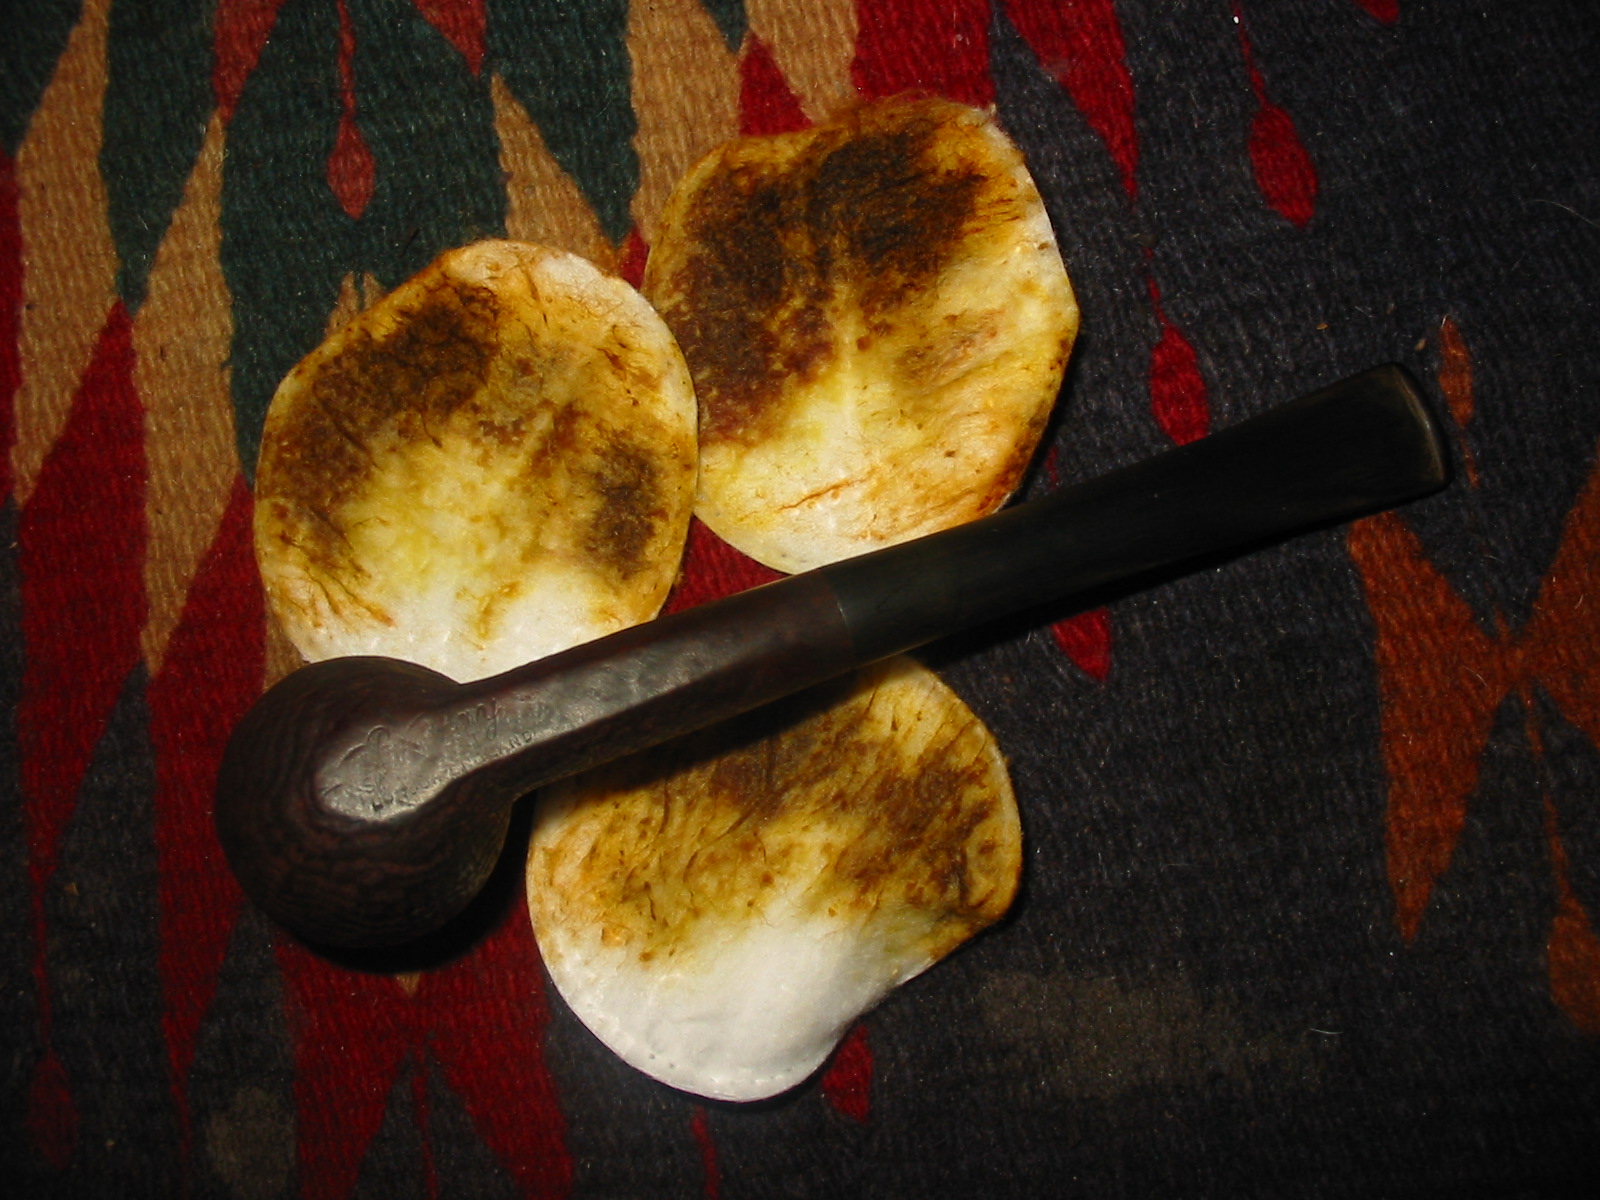
After the bowl had soaked for an hour I took it out and scrubbed the blast with a soft bristle brass tire brush. I find that the bristles do not scratch the briar but that they work well to remove build up in the grooves of the blast. I also wanted to brush the areas of the putty fills to highlight the grain pattern in those areas rather than leave a light looking smooth patch. I used a dental pick to clean out the deeper grooves of the blast in the fill areas. I cleaned out the shank with cotton swabs and alcohol and also the stem internals. I finished sanding the stem to make the transition between stem and shank smooth. I sanded it with a medium and a fine grit sanding sponge after sanding with the 220 grit sandpaper. I sanded the top of the rim very carefully to remove the tarry build up and also smooth the outer edge. At this point I am beginning to really like the straight stem on the pipe. It lends a dignity to the bowl that was lacking with the bent stem in my opinion. It looked to me the way it must have looked when it left the factory. After all the clean up I wiped it down a final time with isopropyl alcohol to prepare the bowl for staining.
IMG_6447

IMG_6448

IMG_6449

IMG_6450
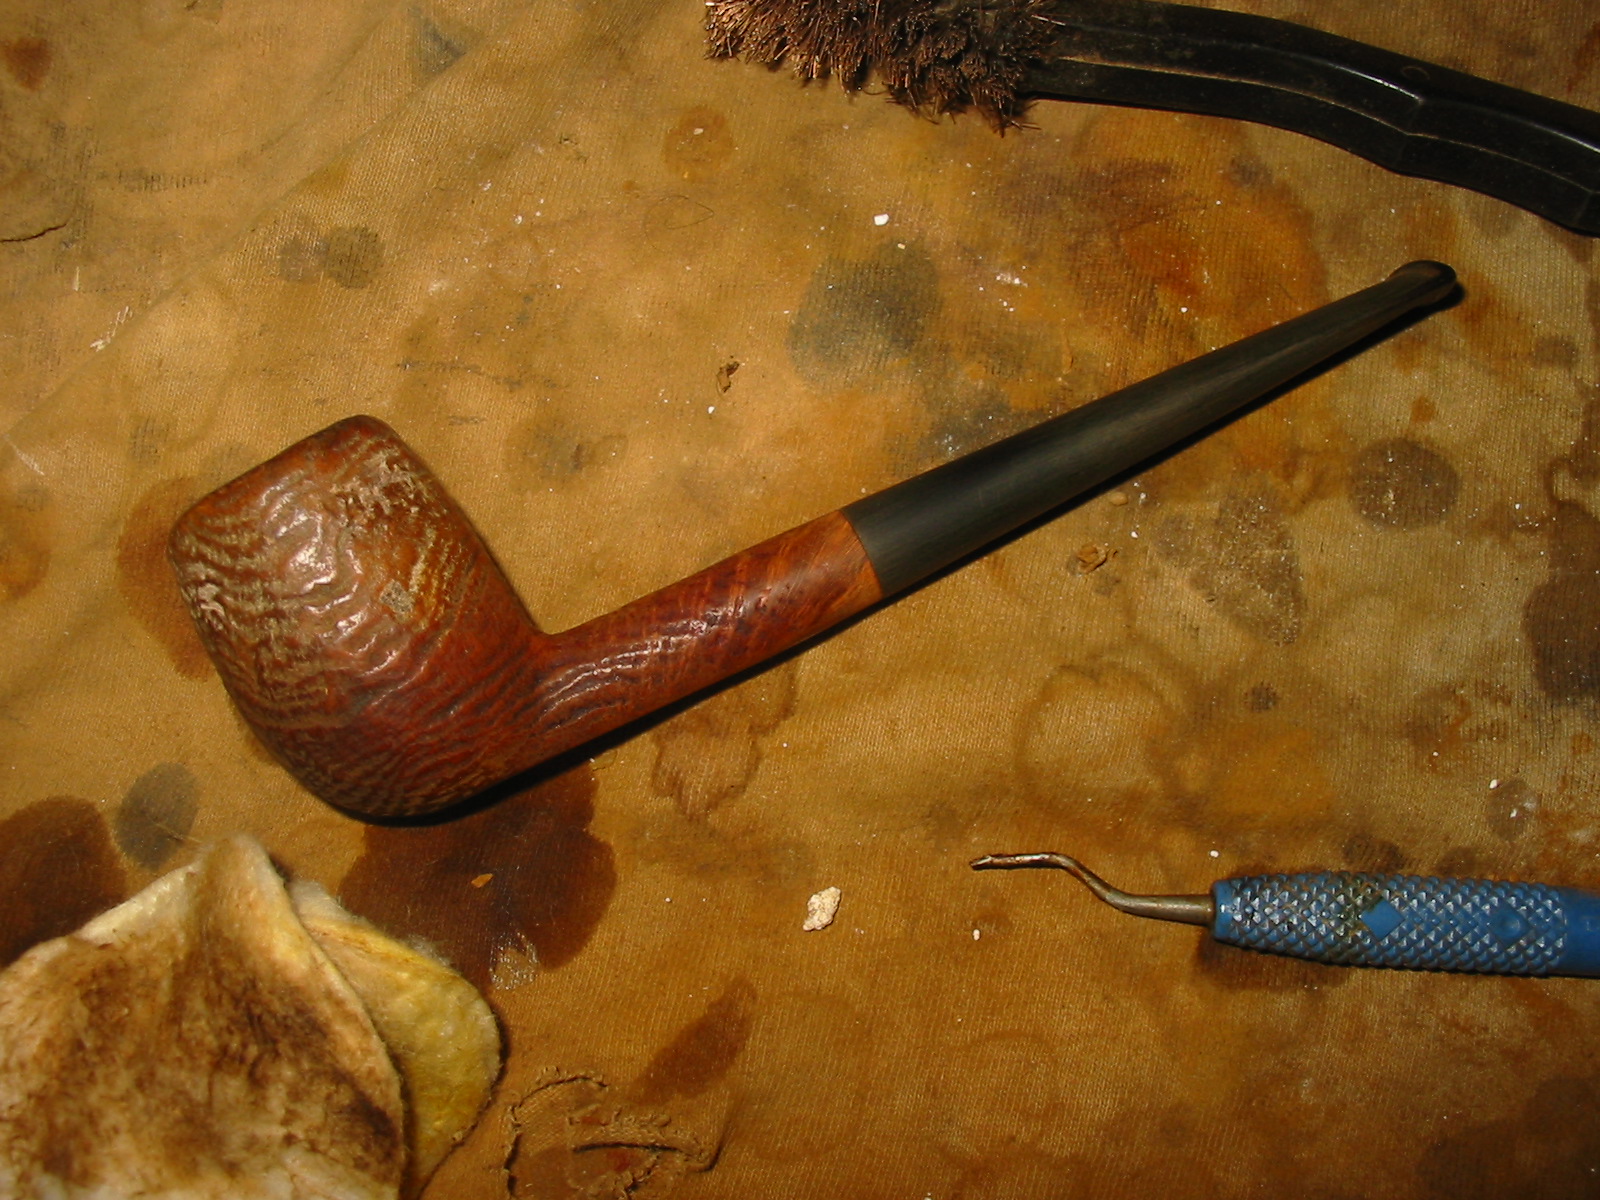
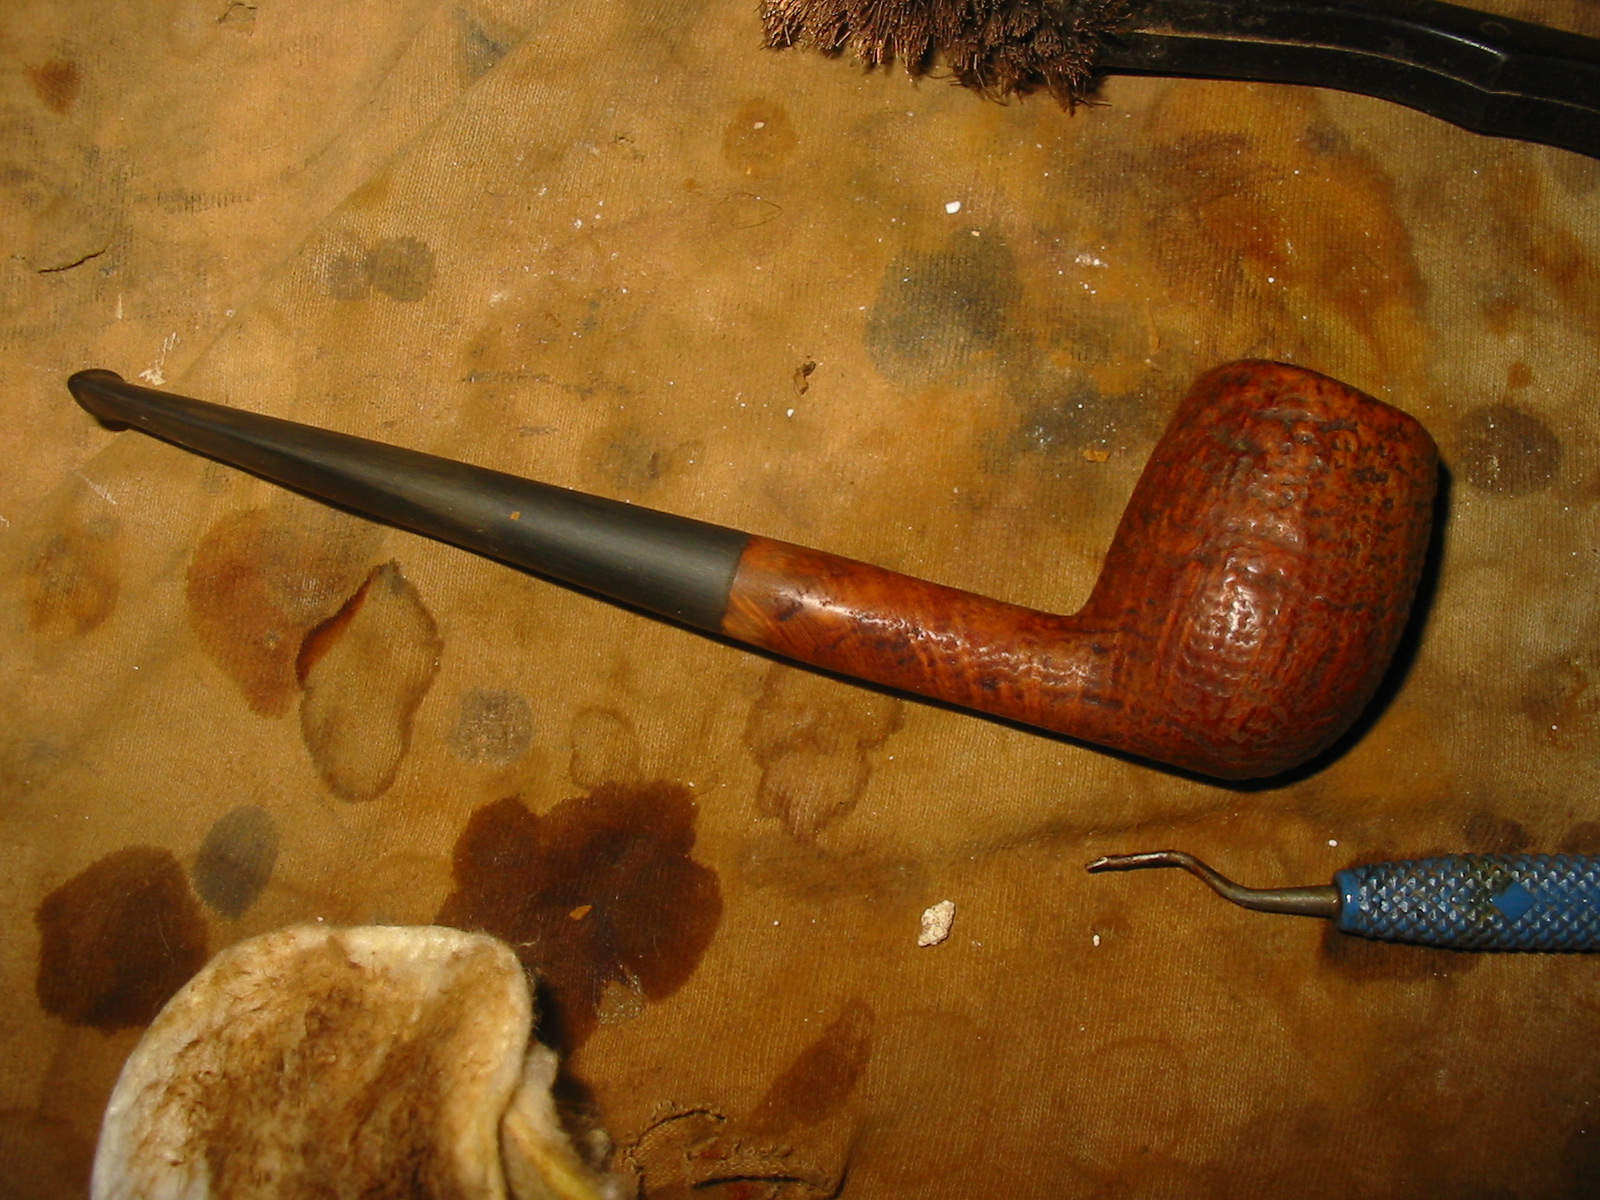
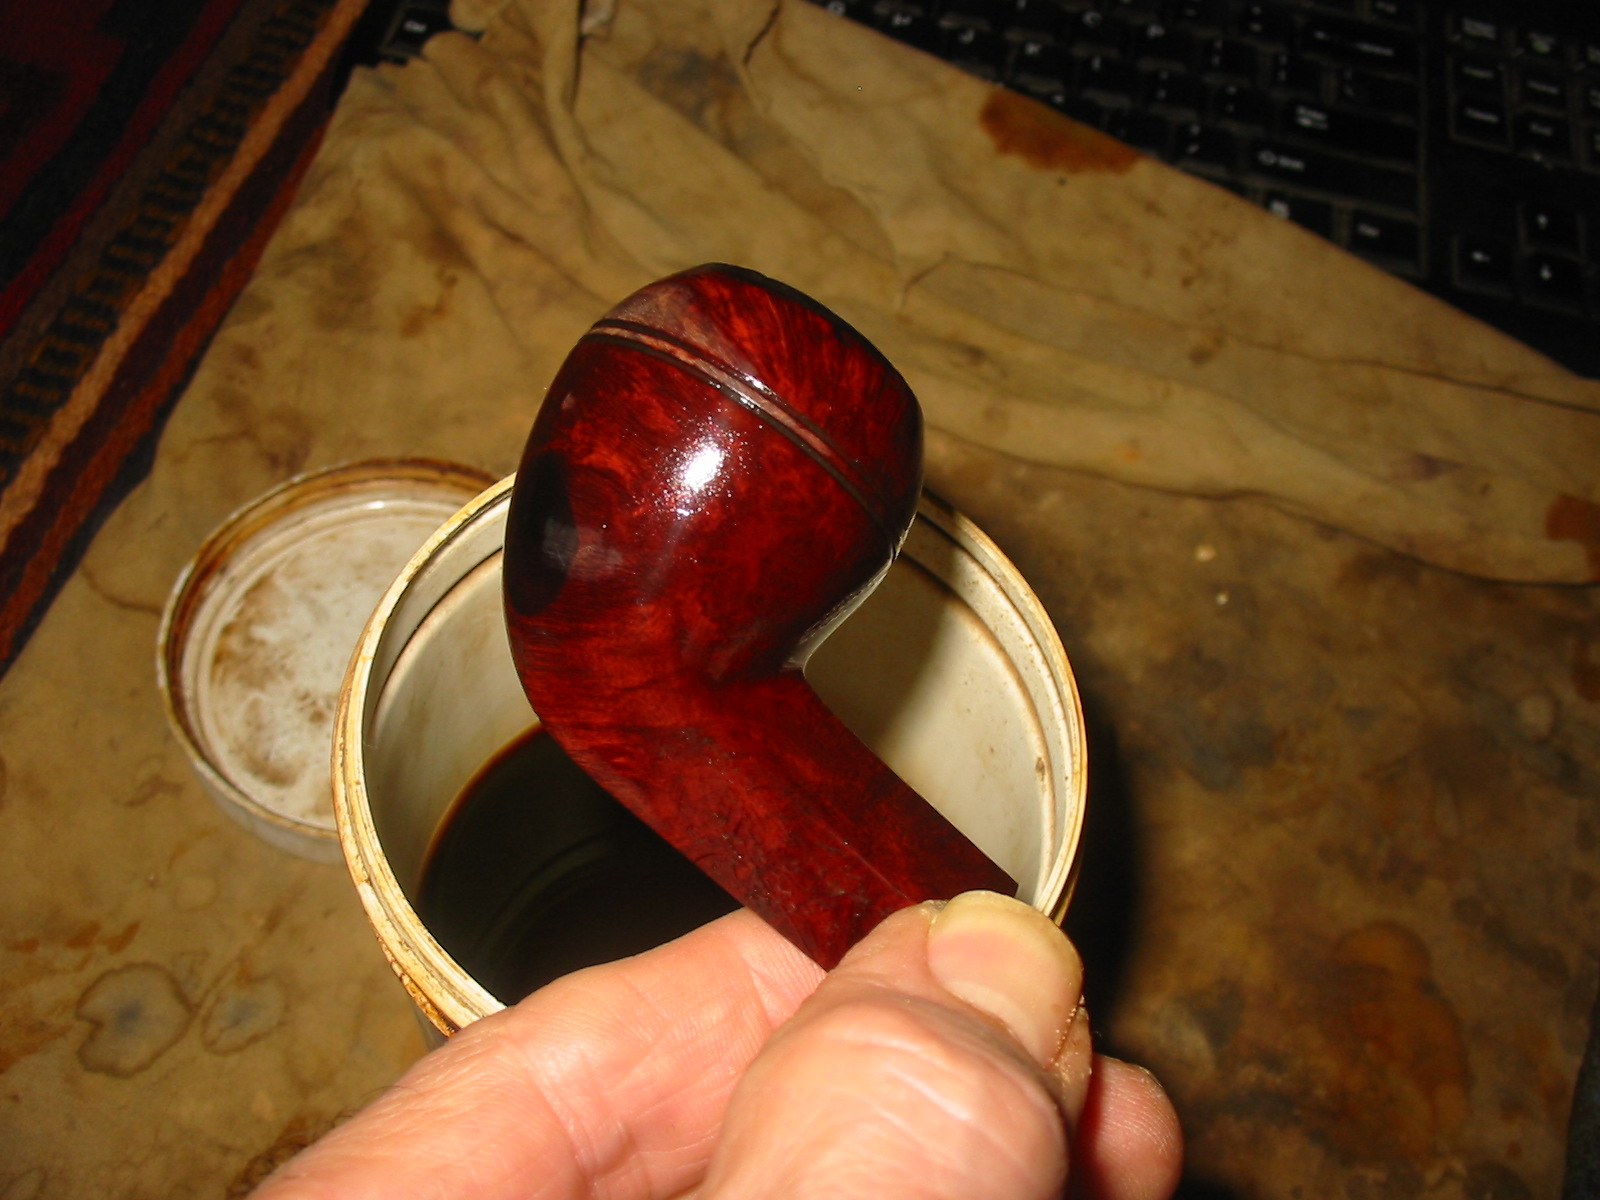
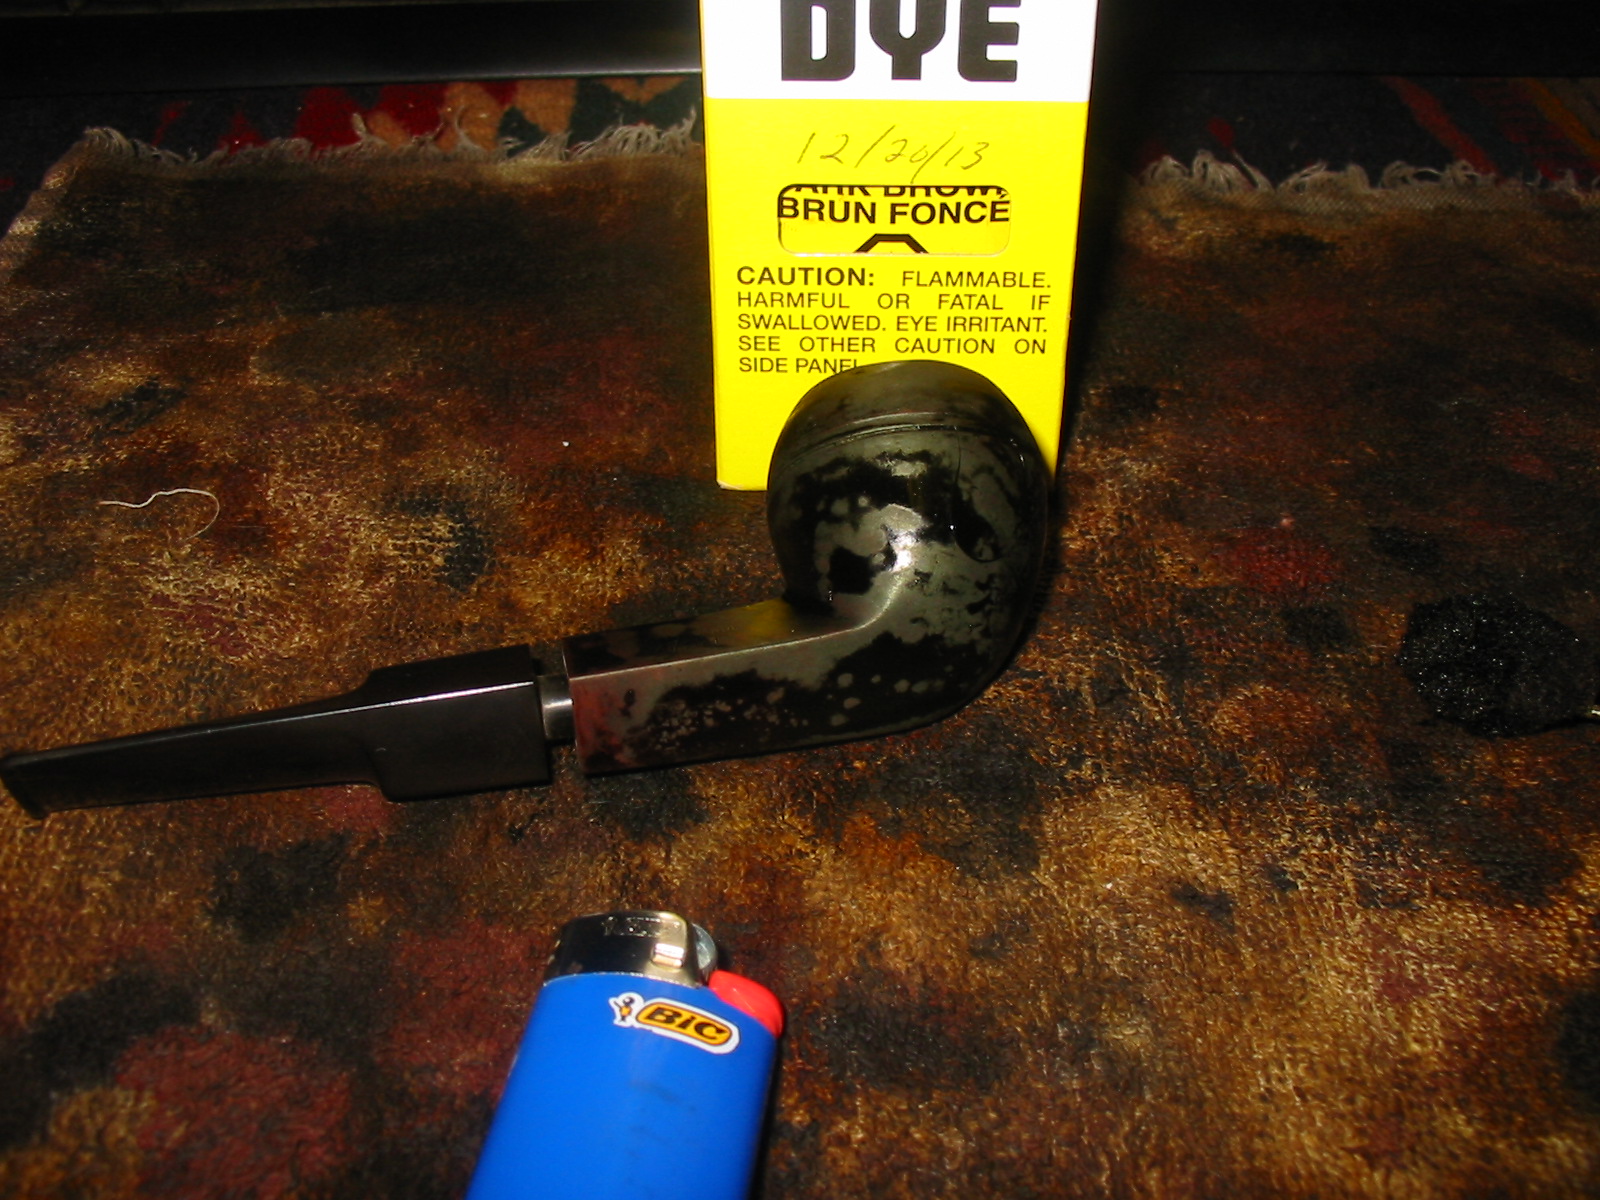
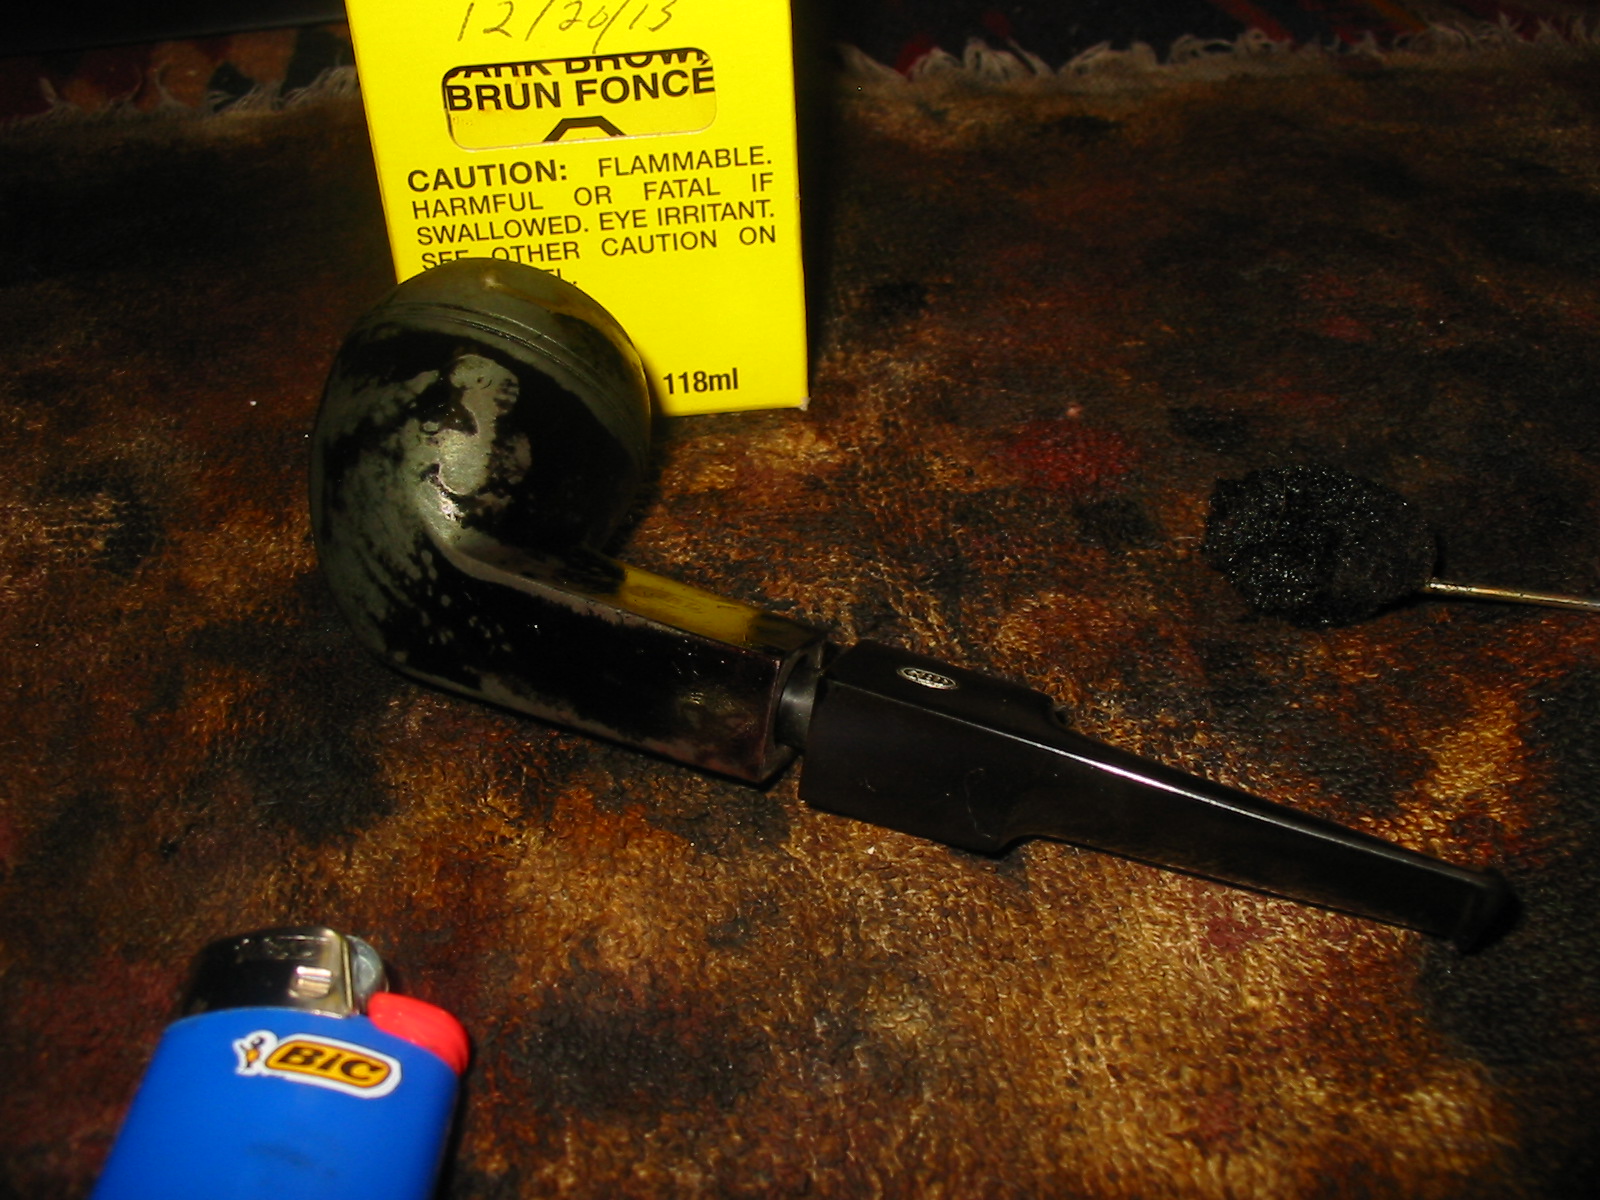
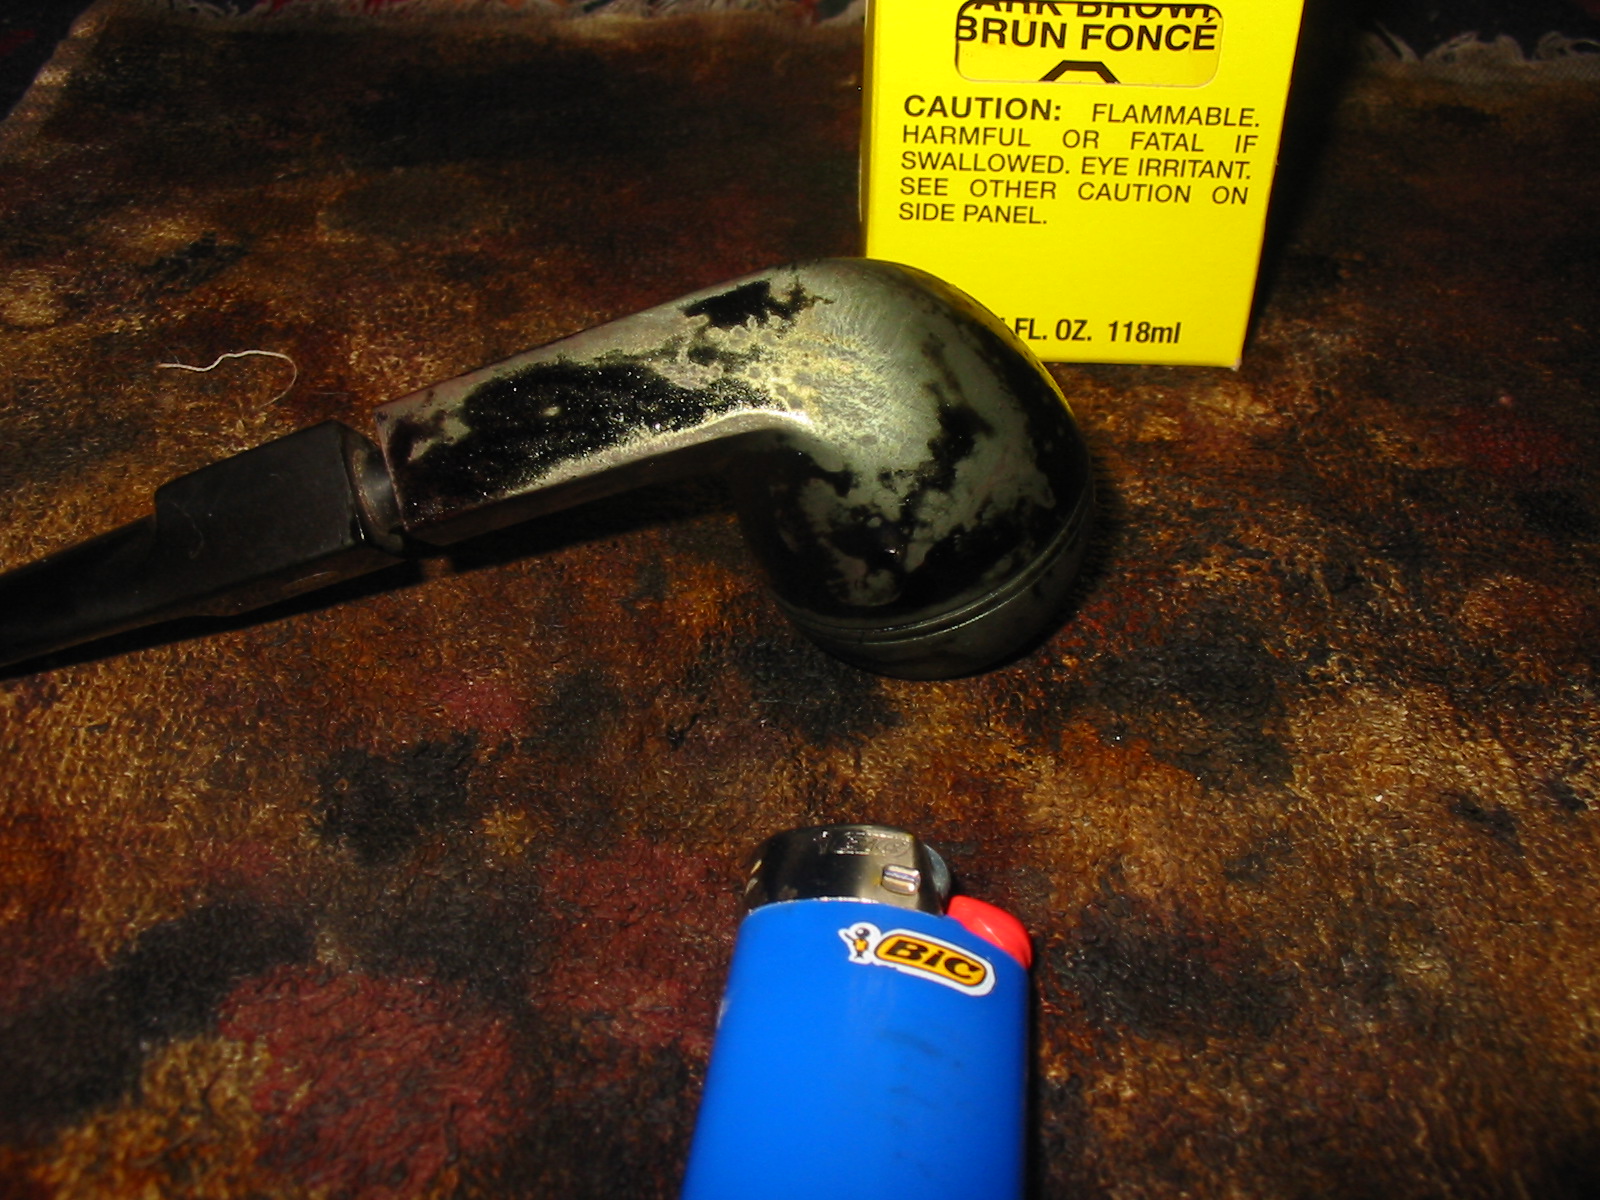
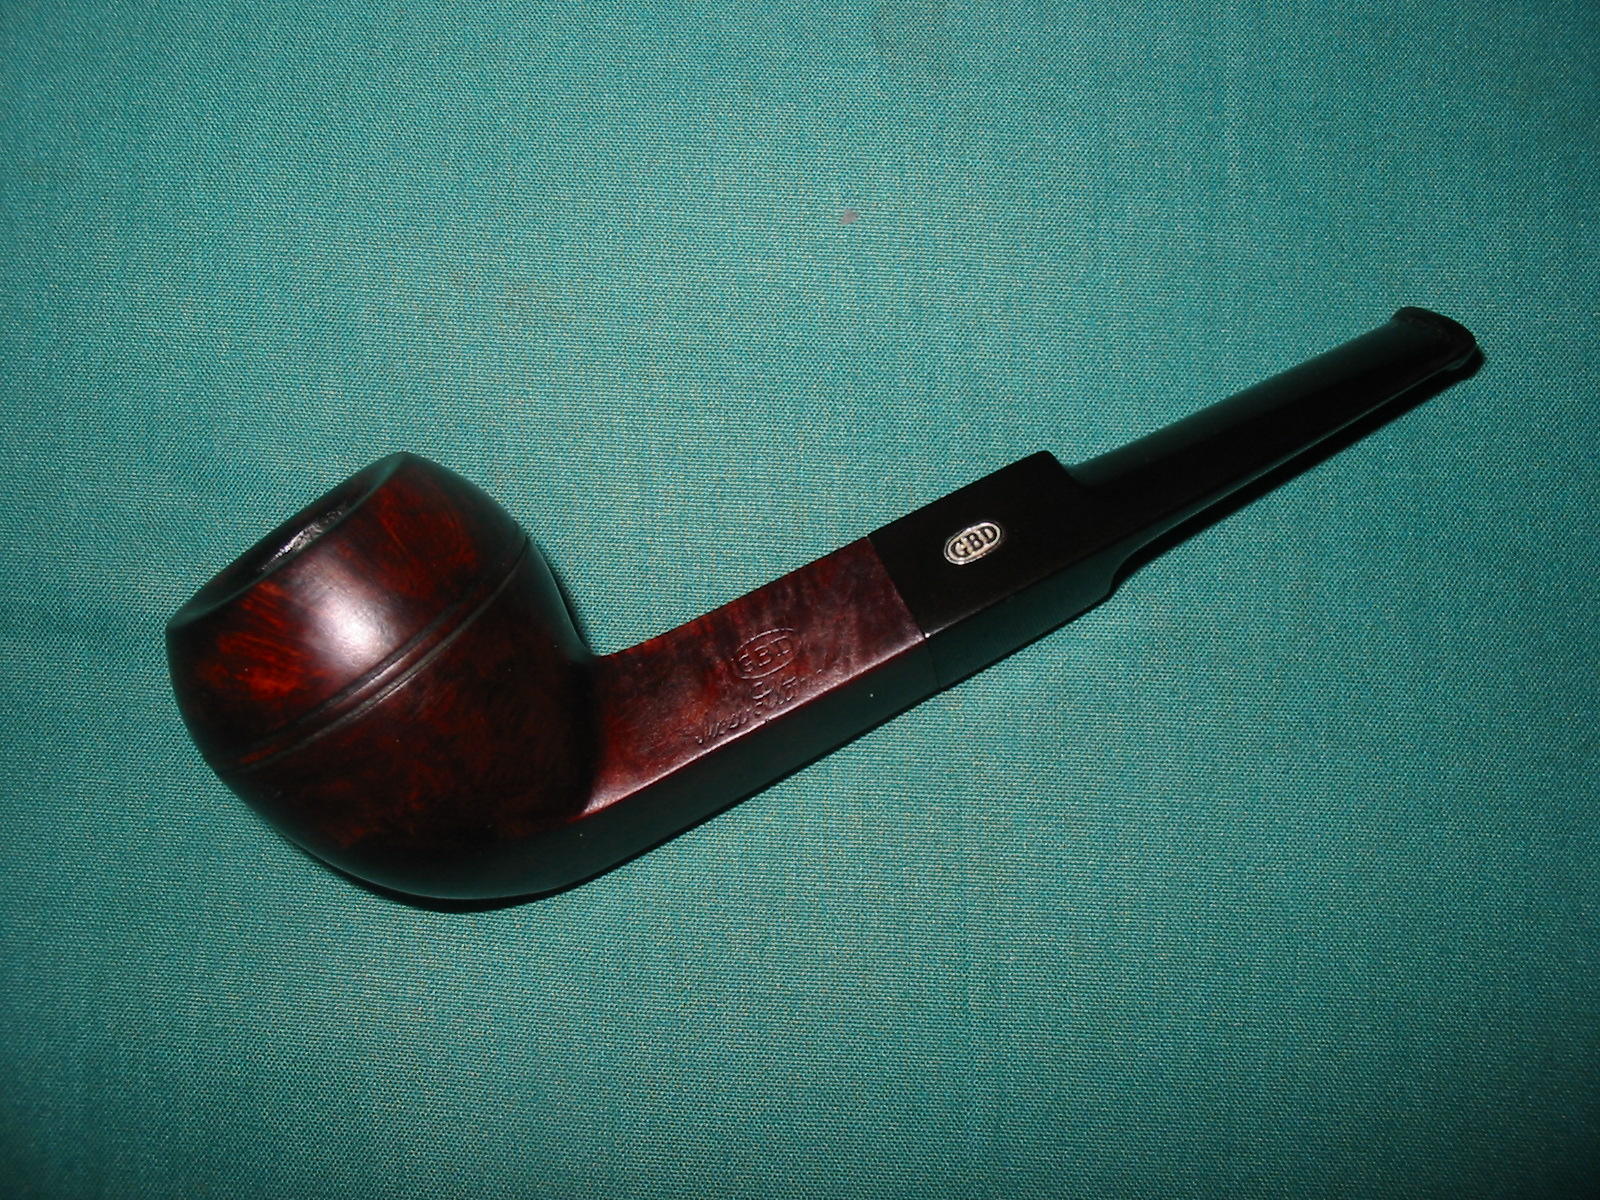
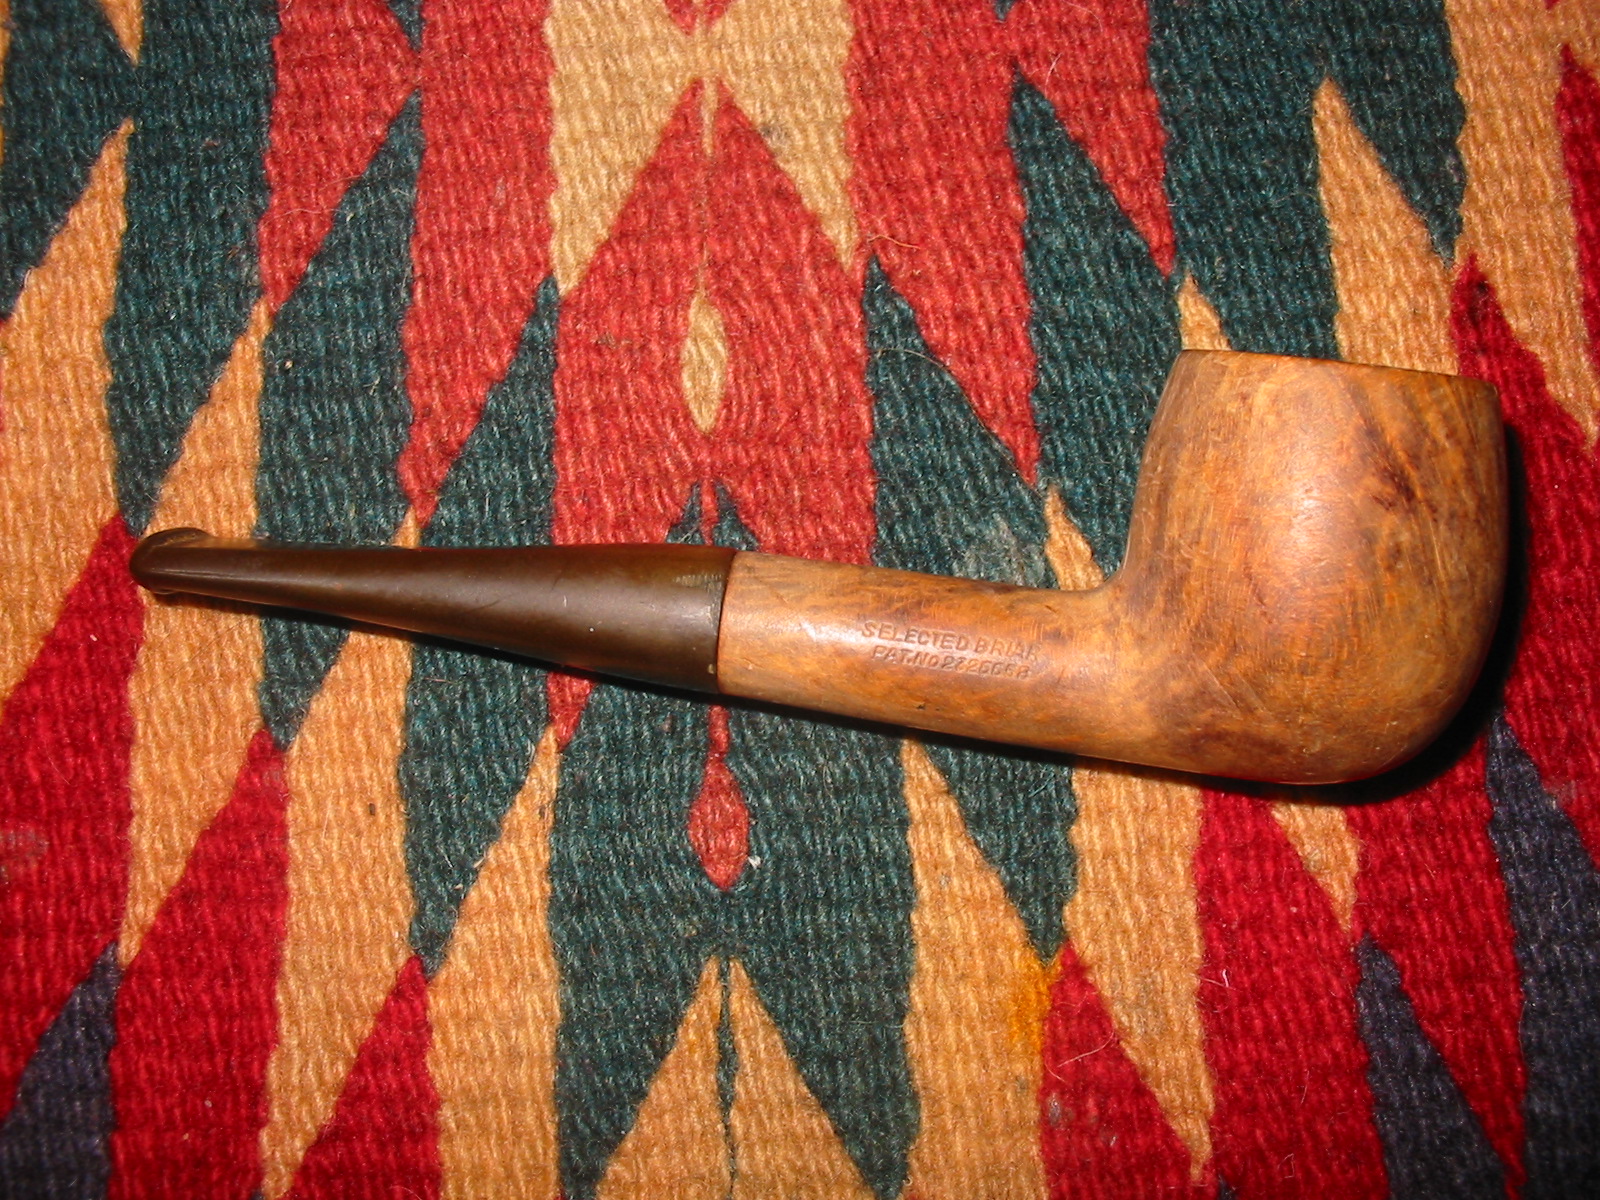
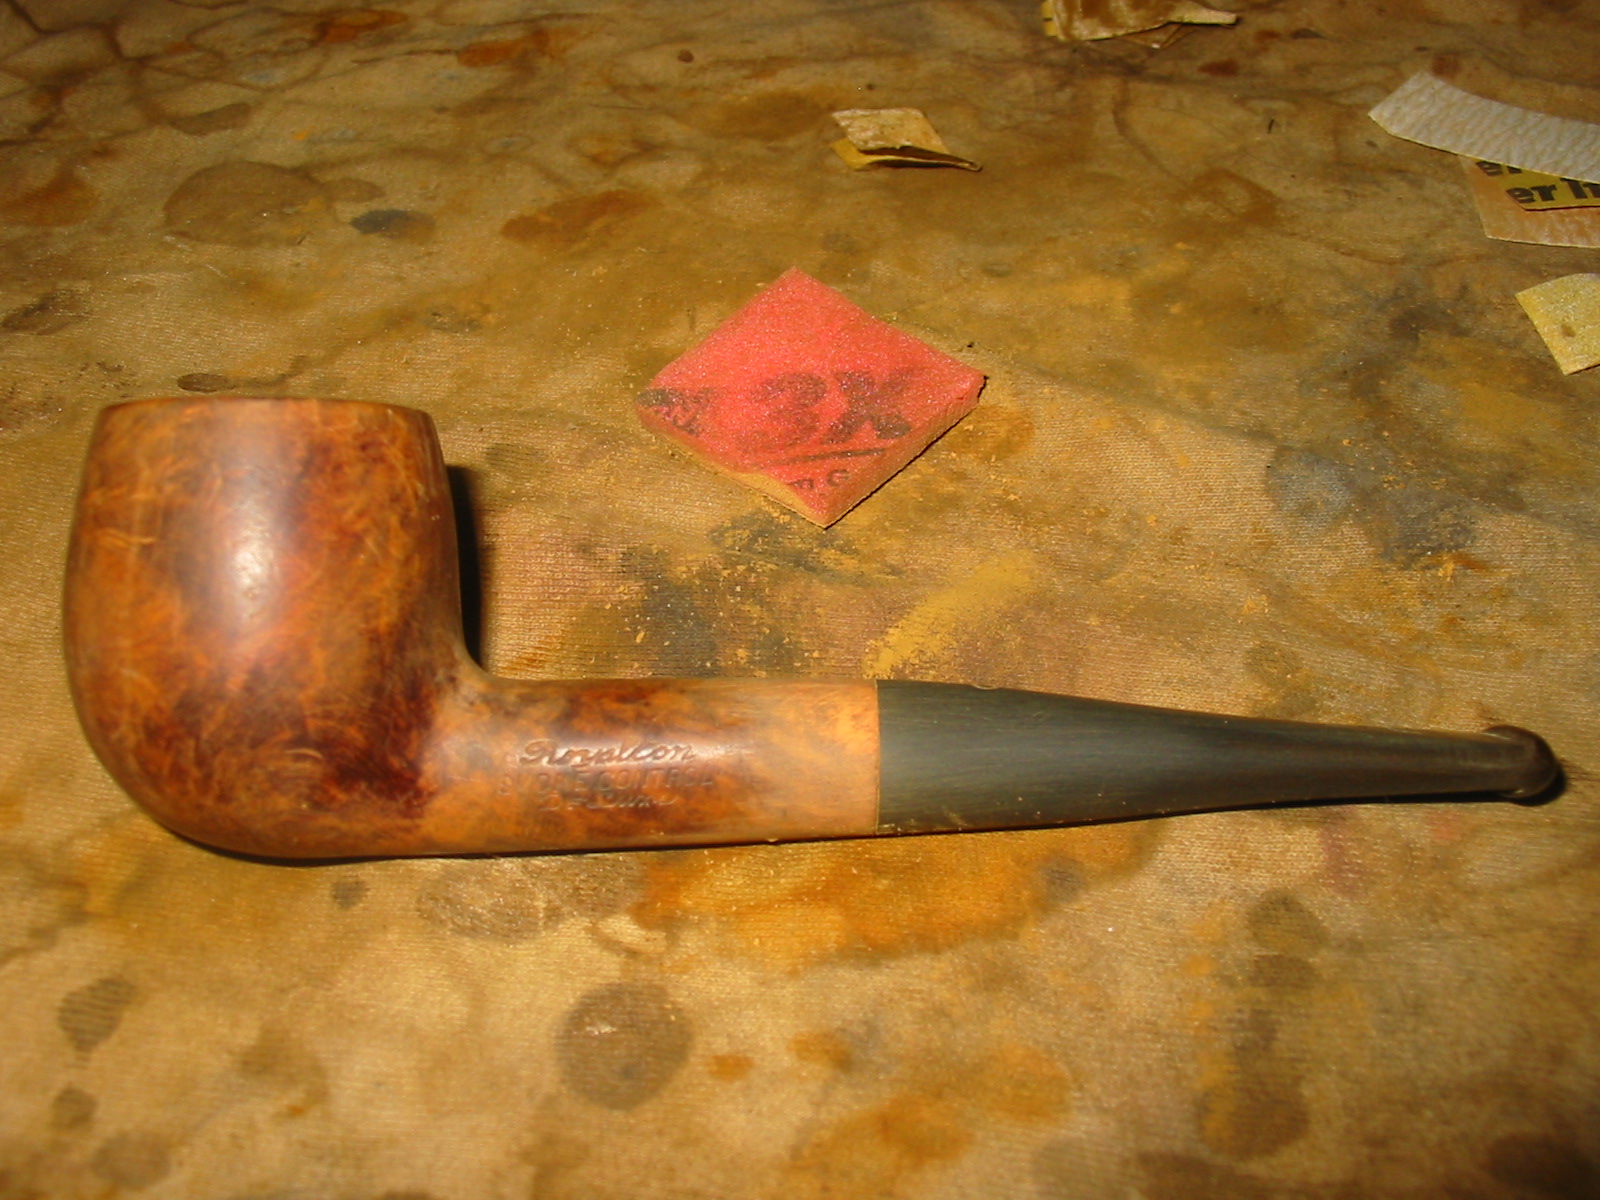
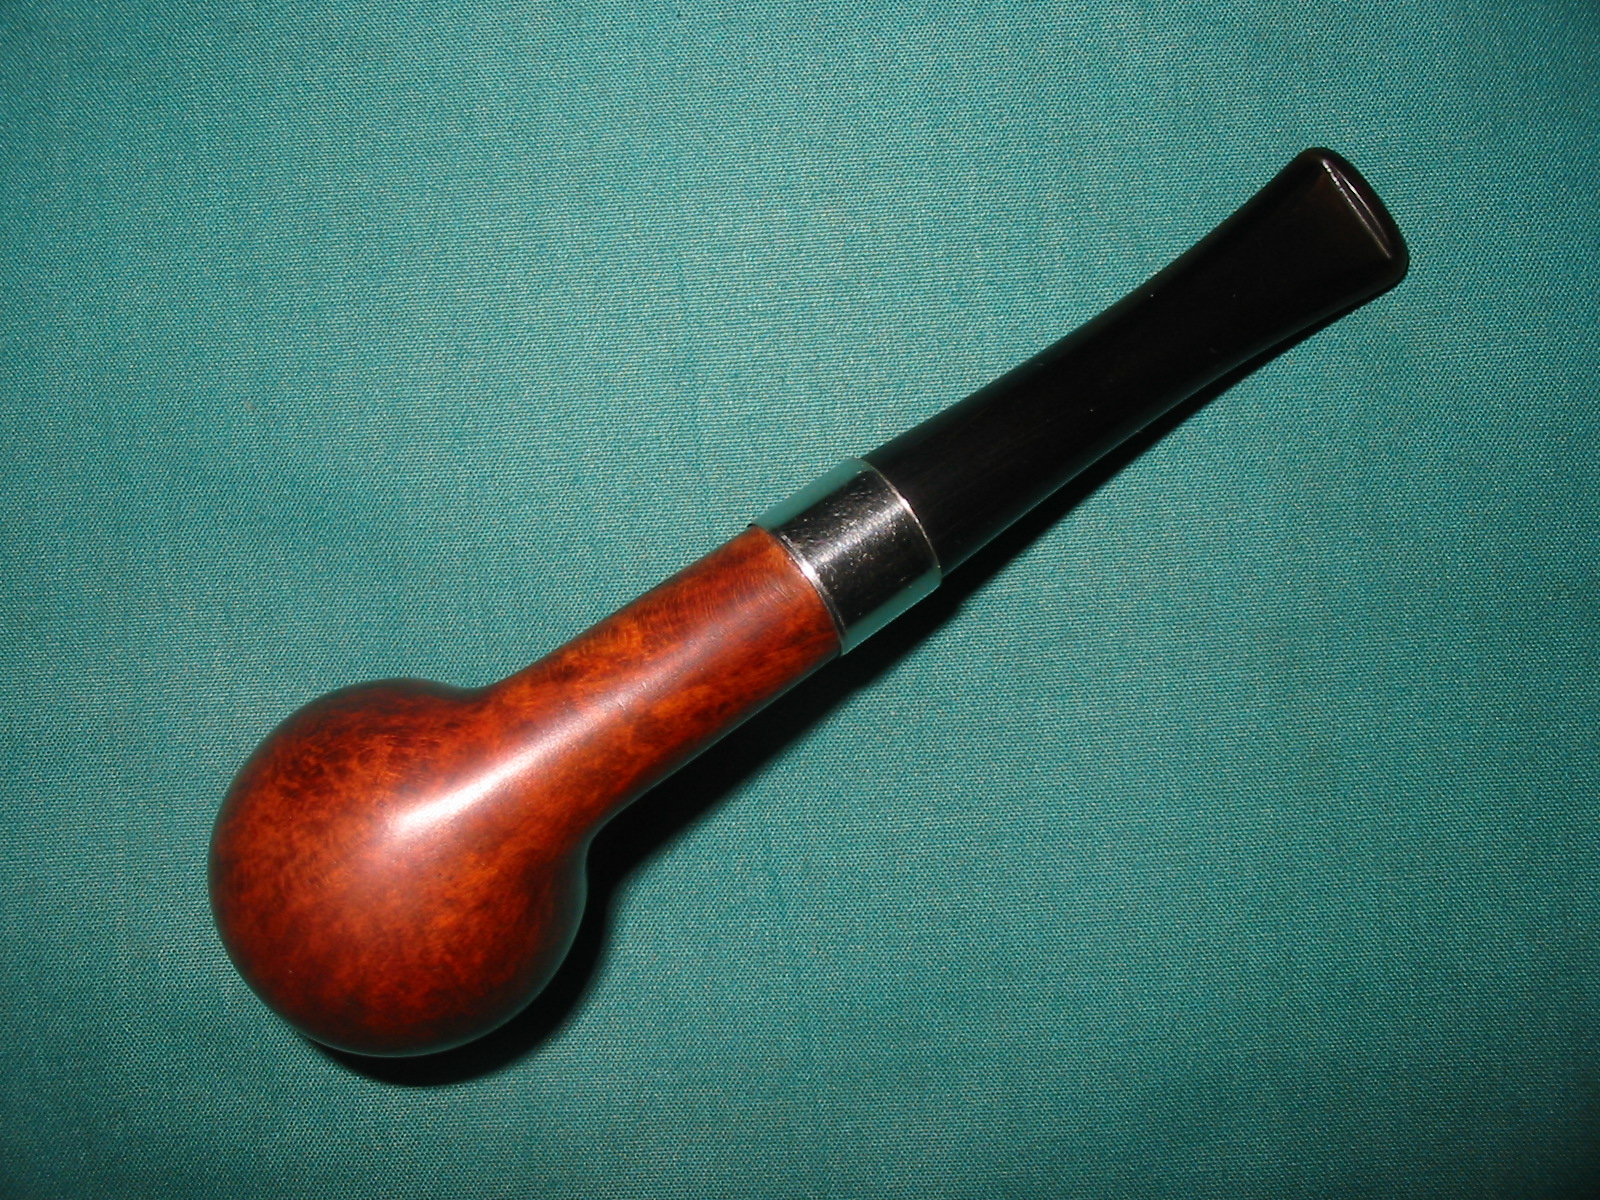
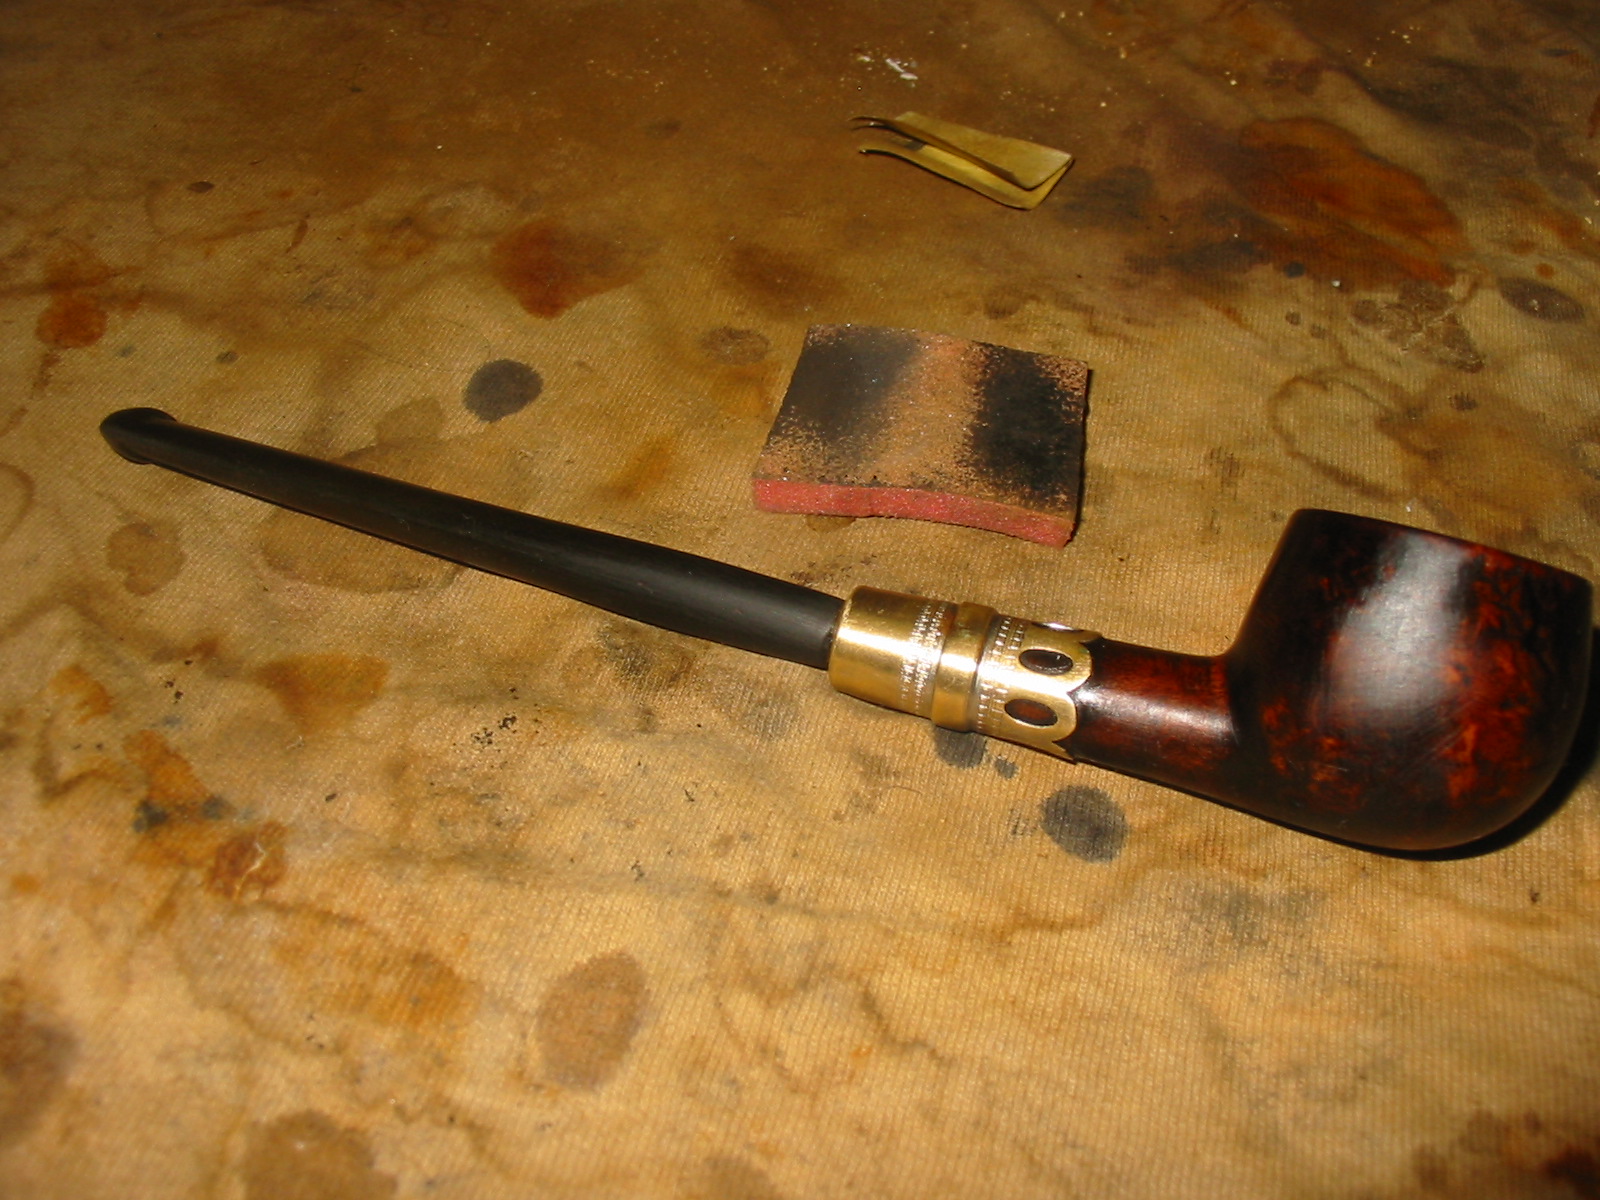
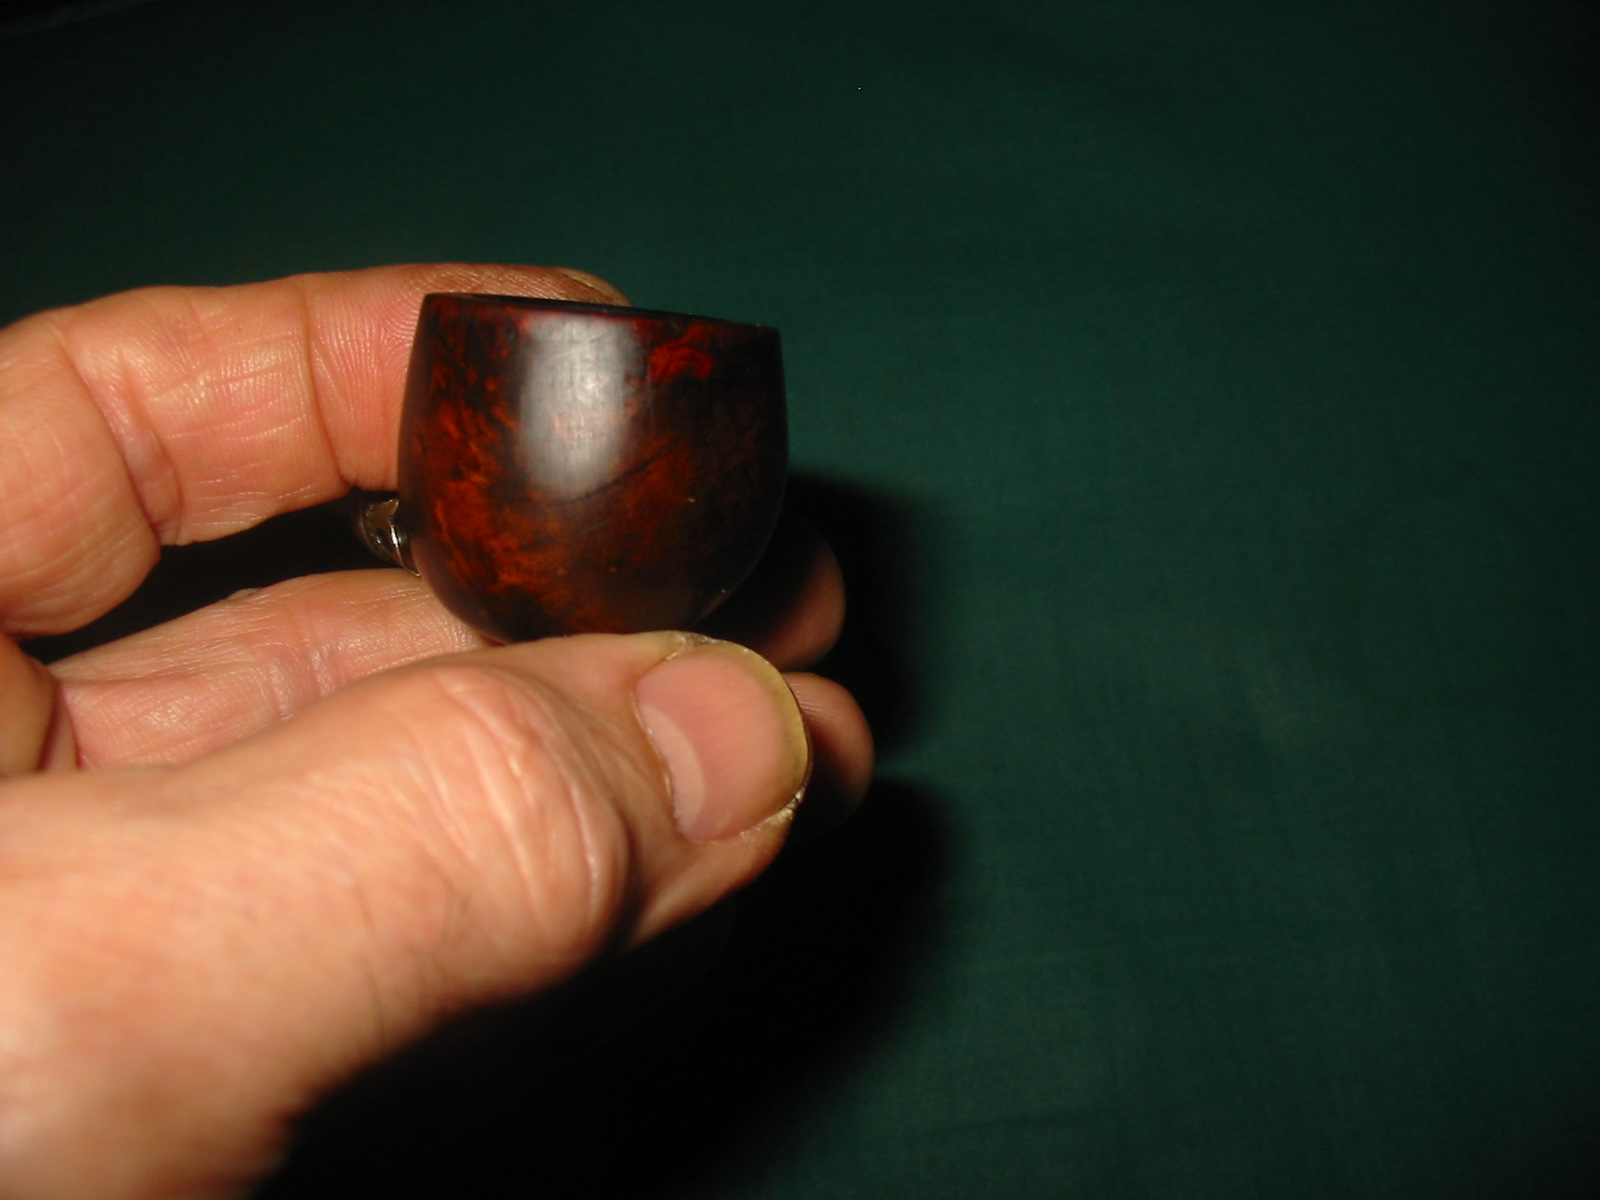
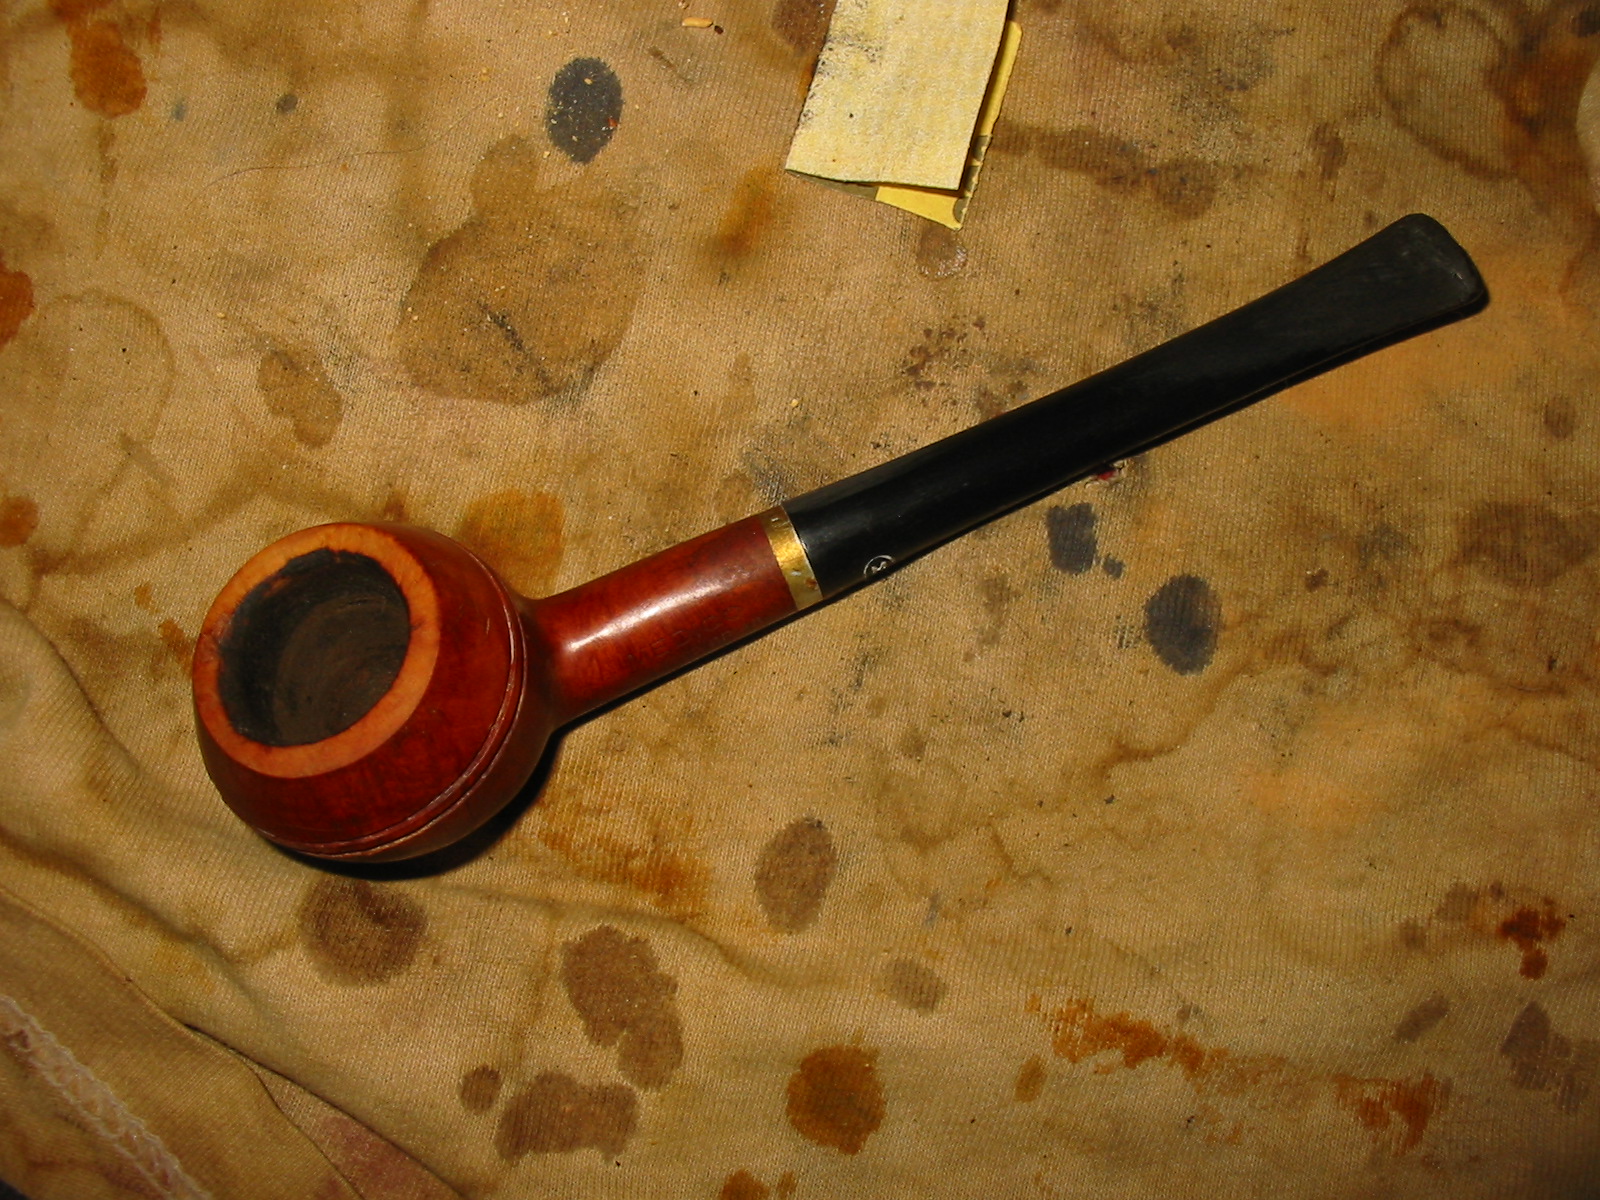
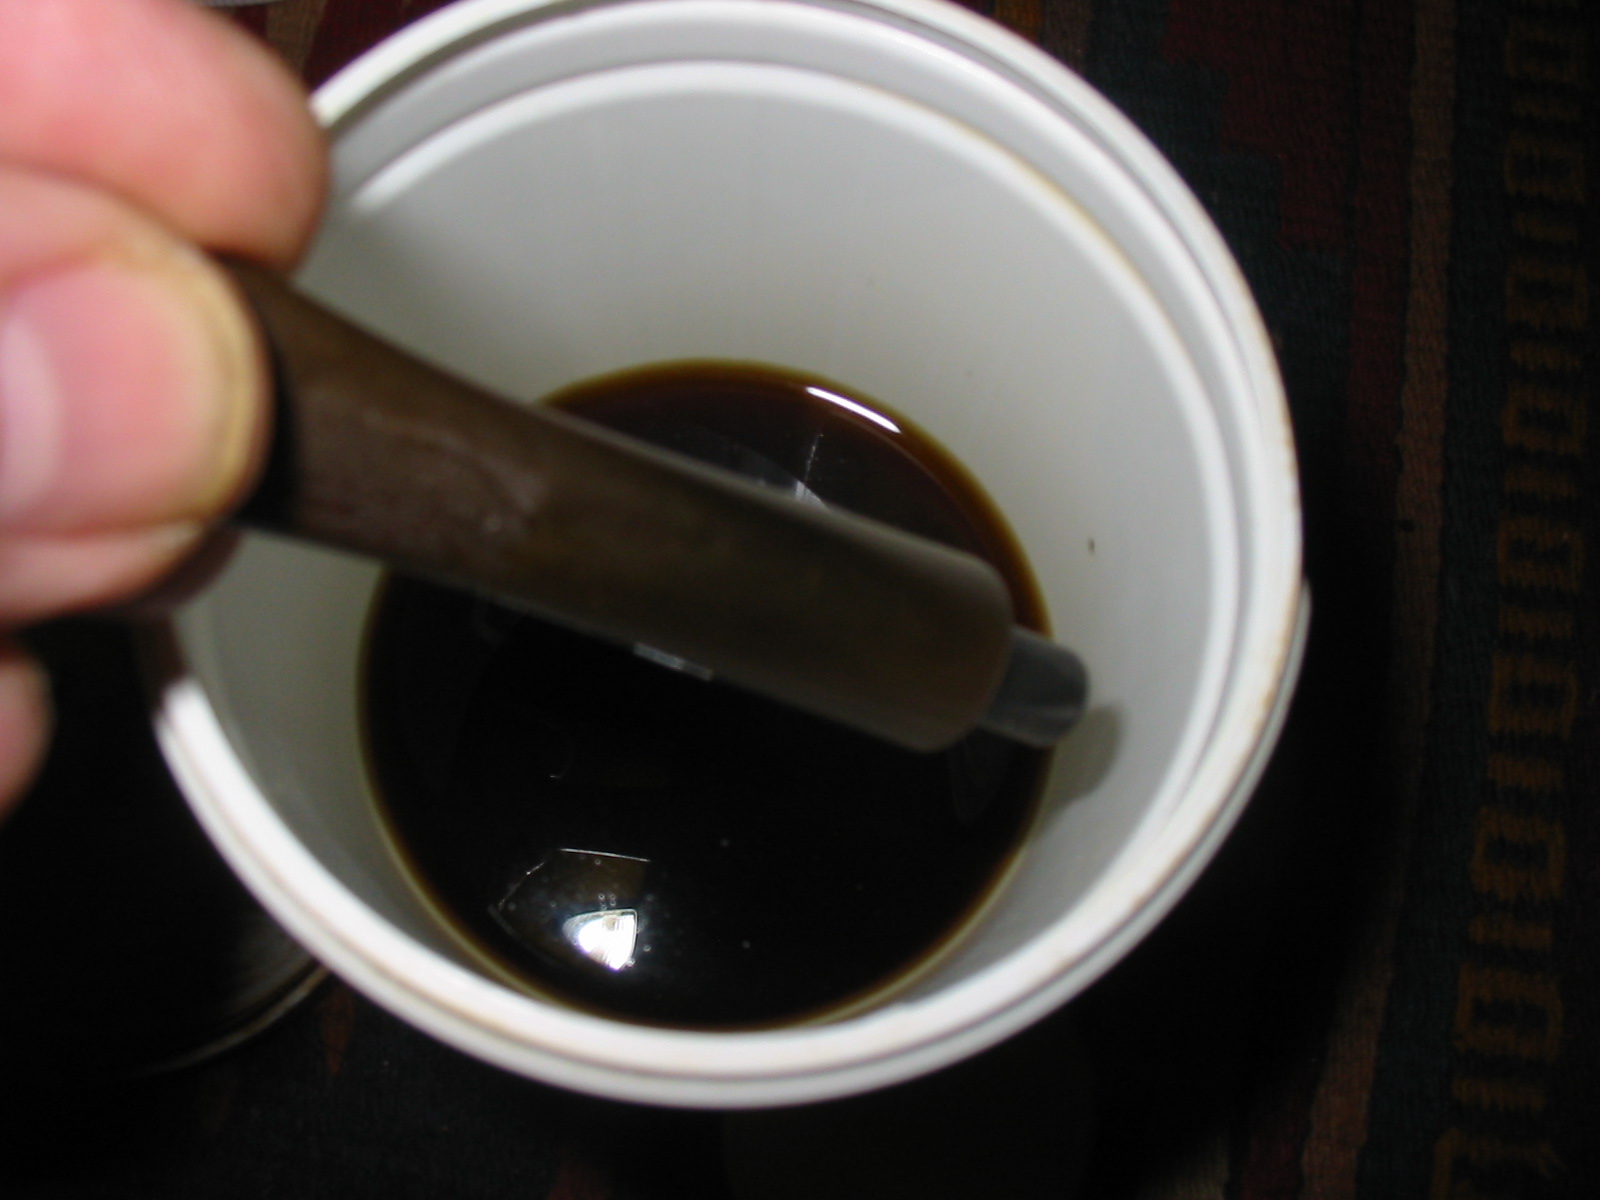
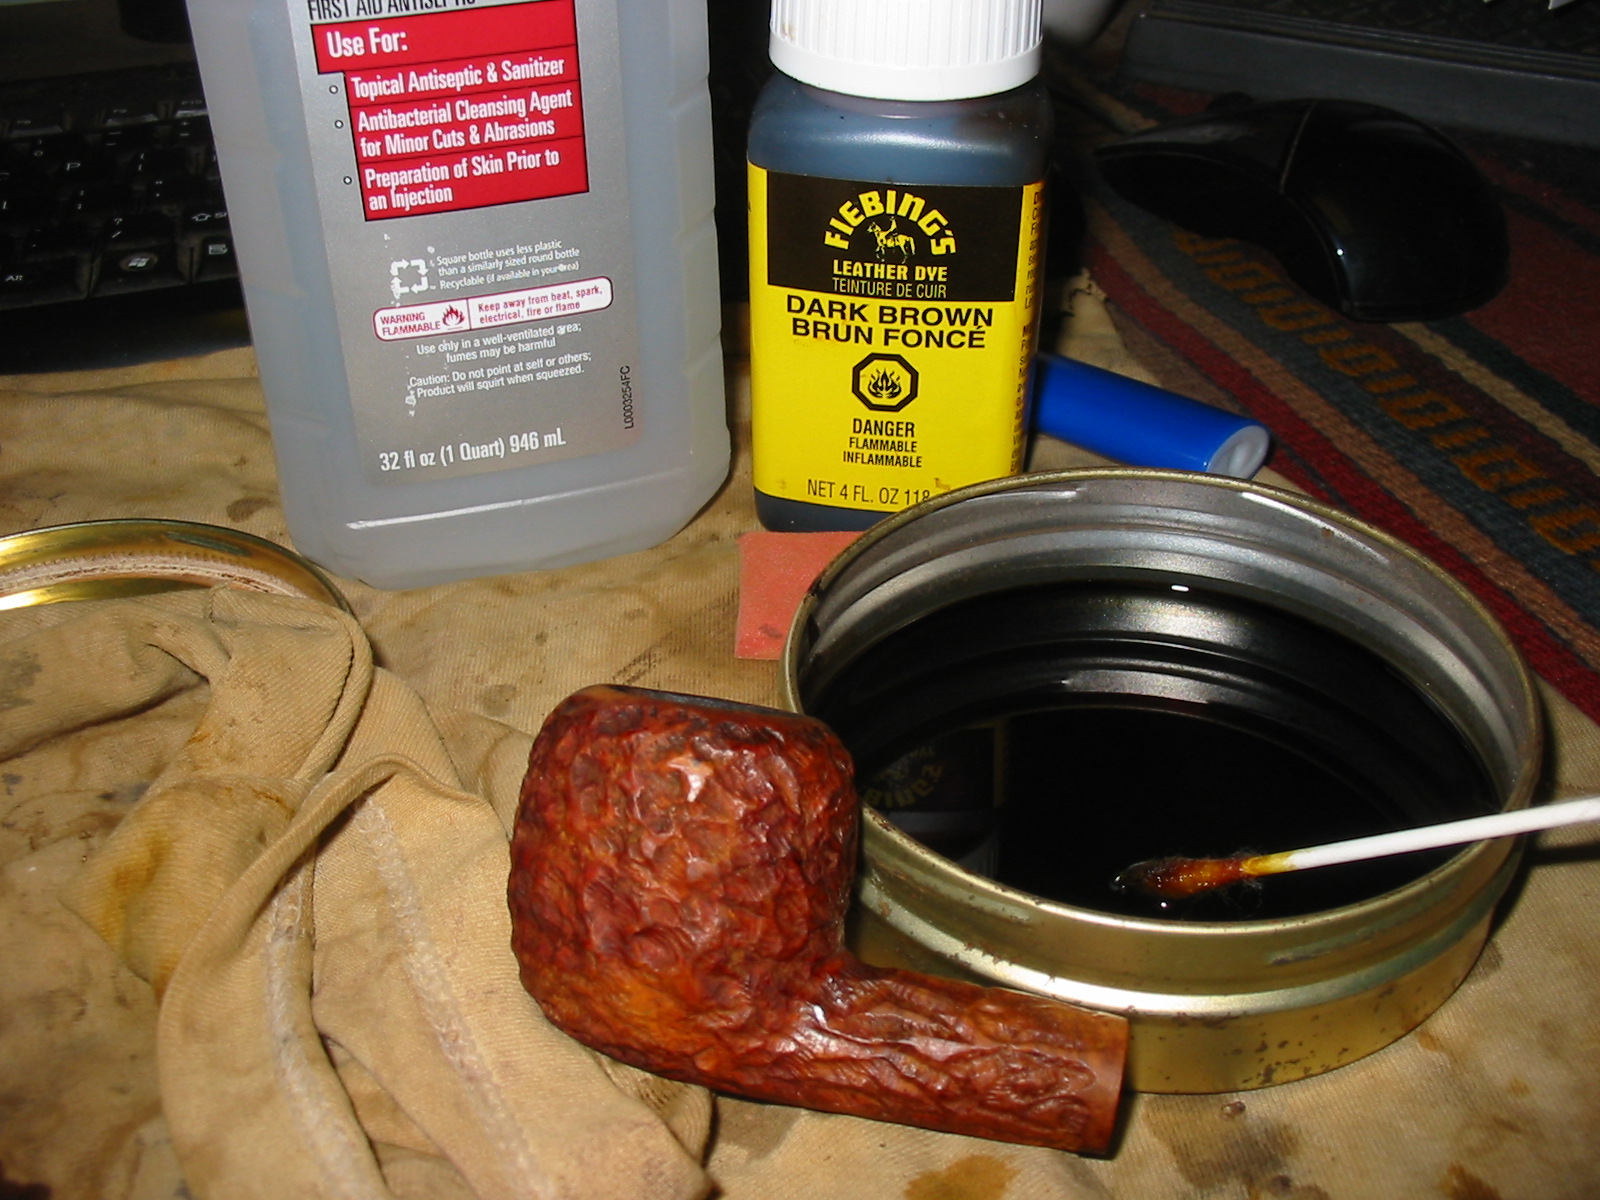
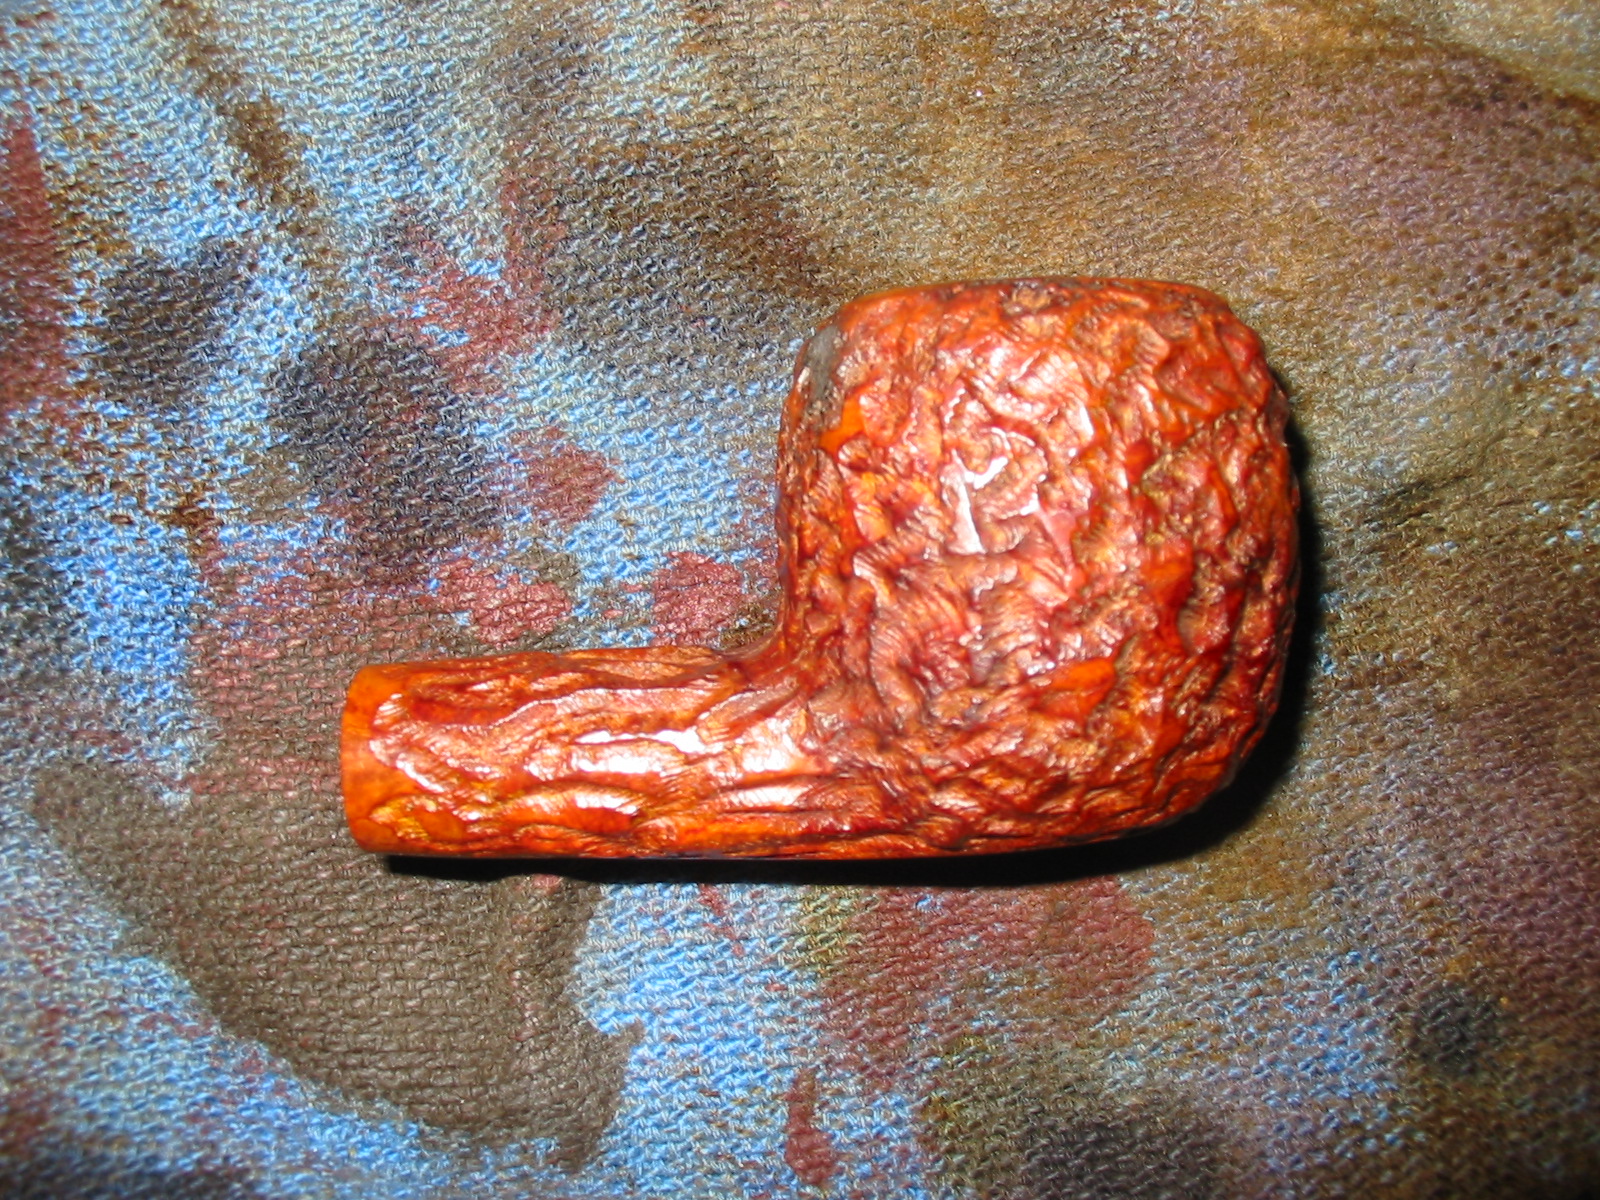
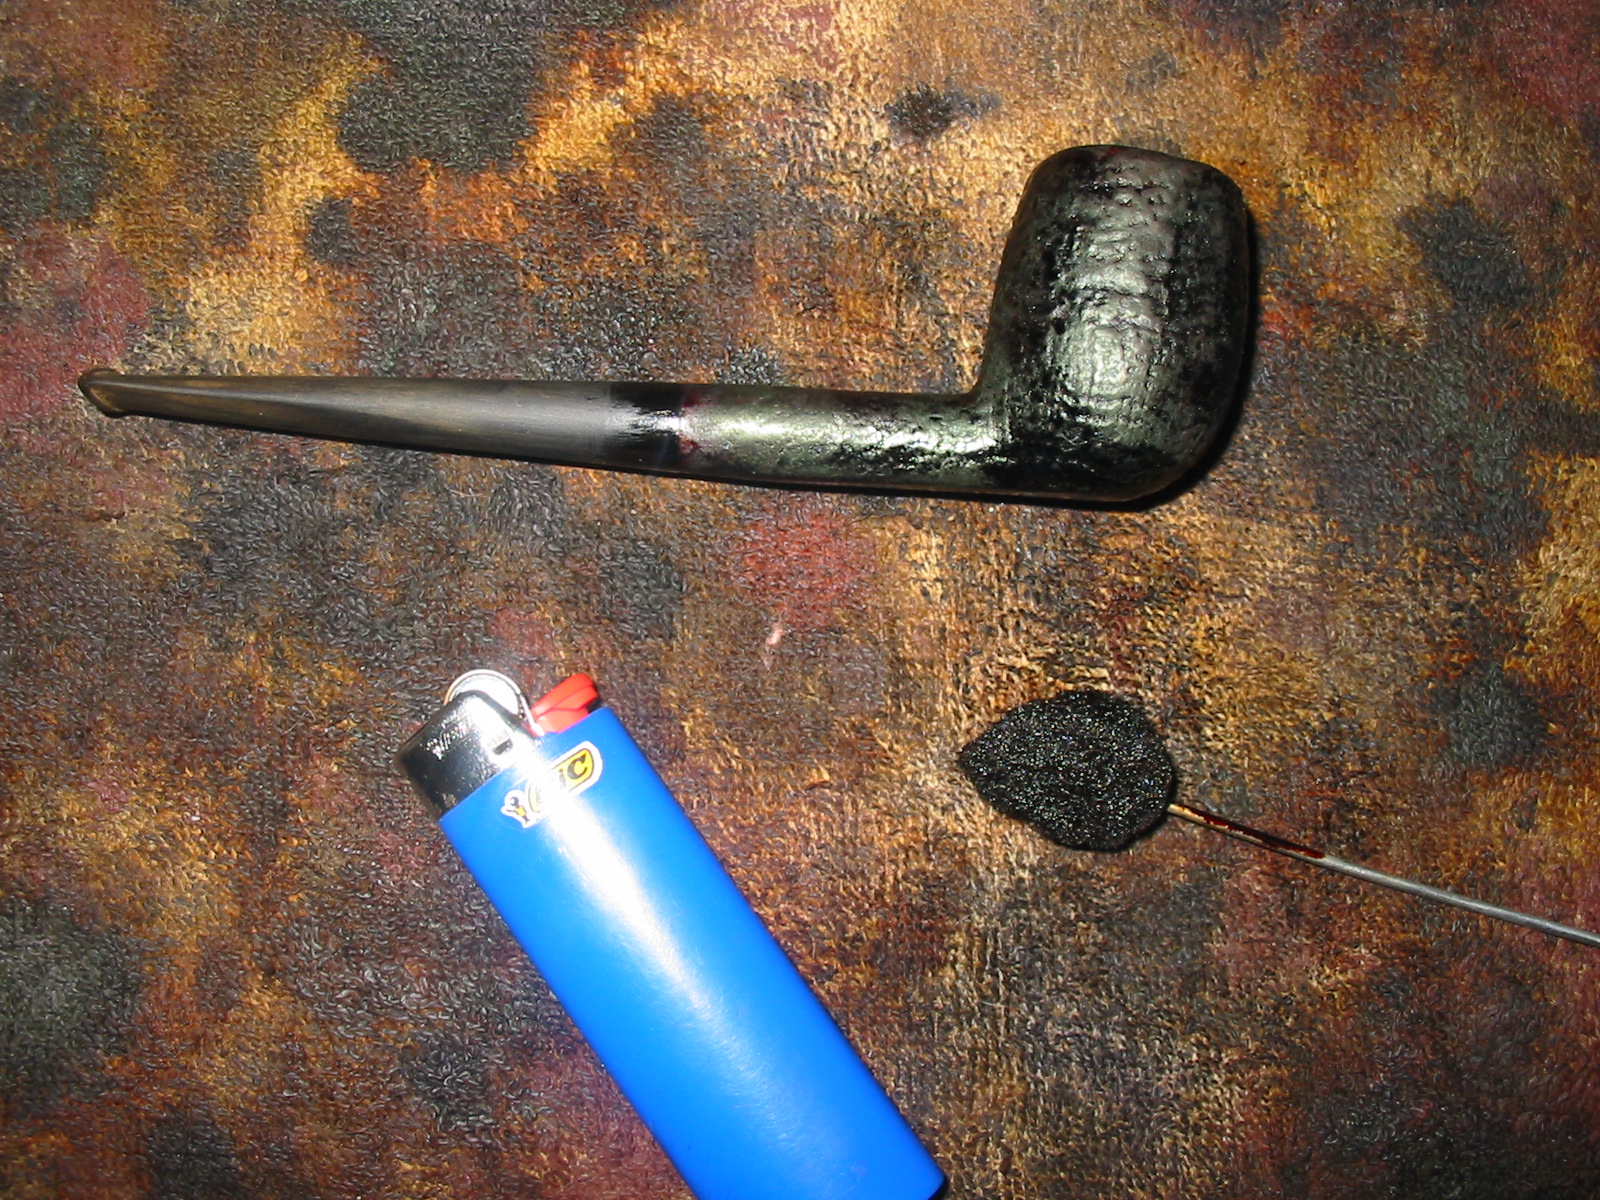
I stained the bowl with a light brown stain to give it a tan blast look but it did not work on the areas of the putty fills. They still showed through the finish as light streaks in the briar. I then decided to restain it with a dark brown aniline stain. I applied the stain, flamed it, stained and flamed it again to make sure that the coverage was even. In the photos below the stain almost looks black but it is not – it is a dark brown.
IMG_6451

IMG_6453

IMG_6454

IMG_6456
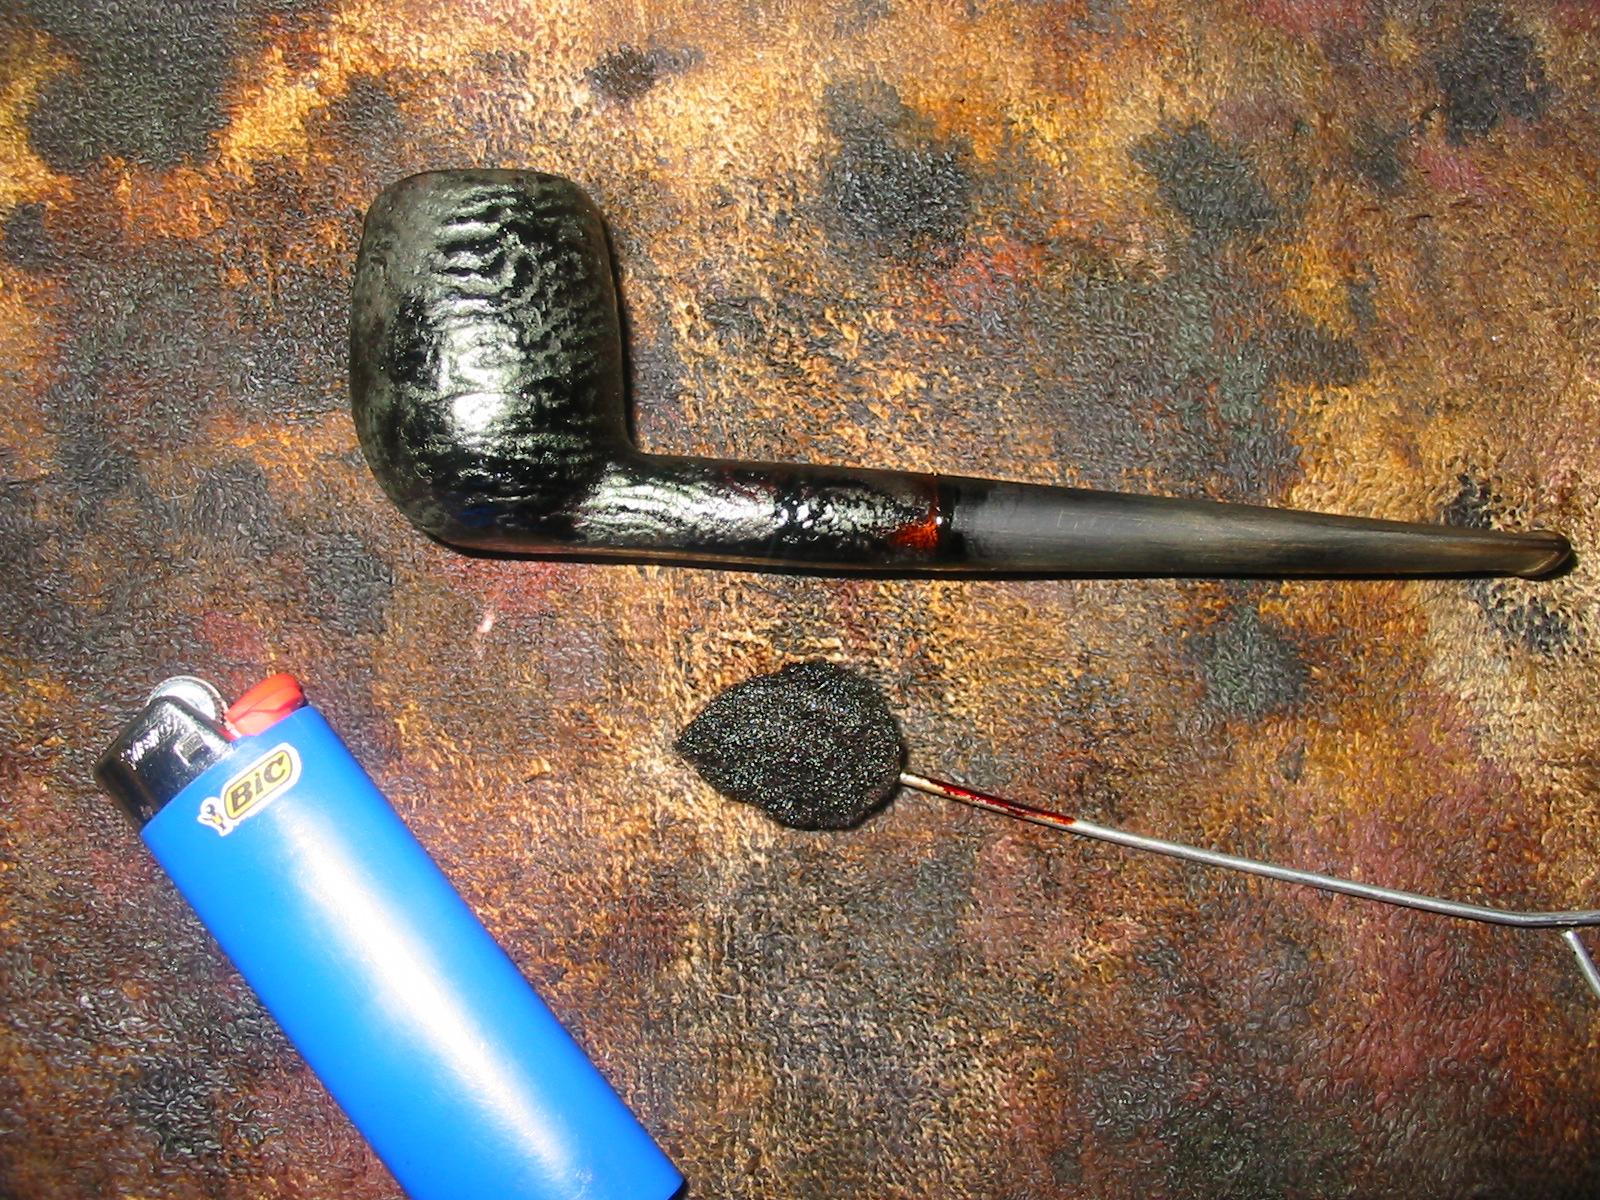
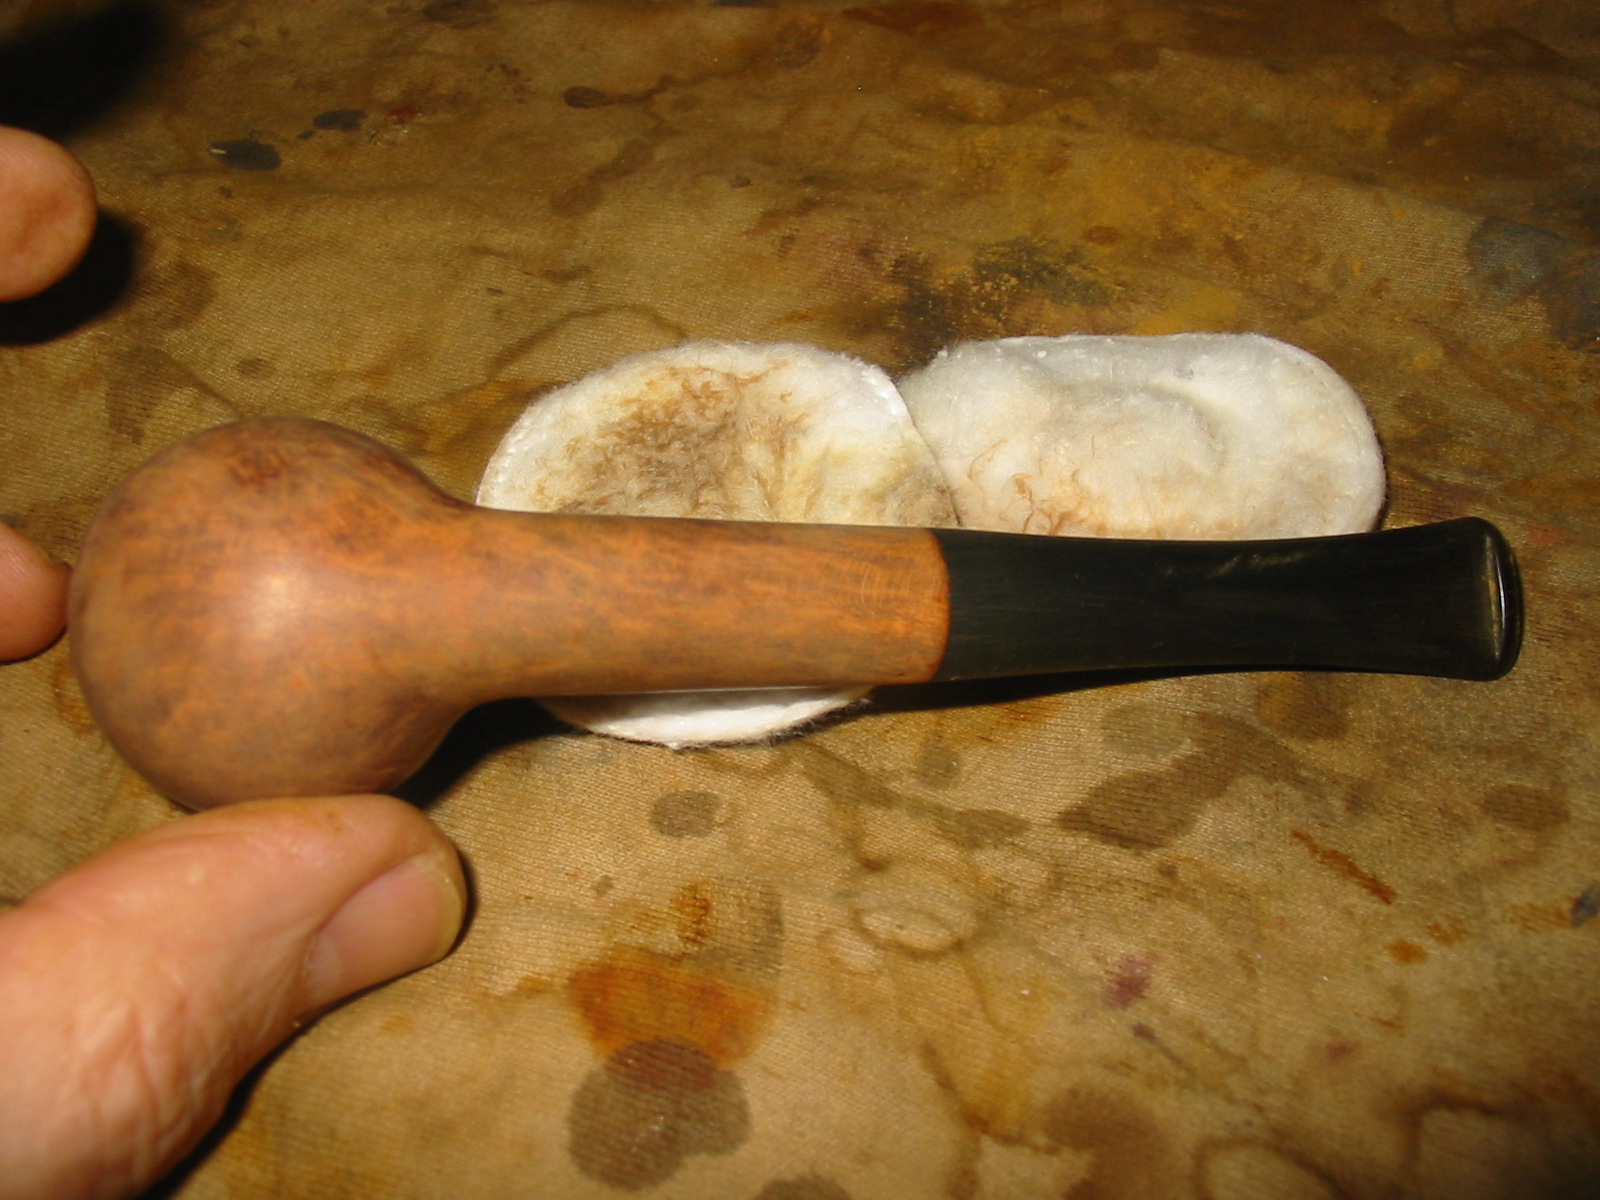
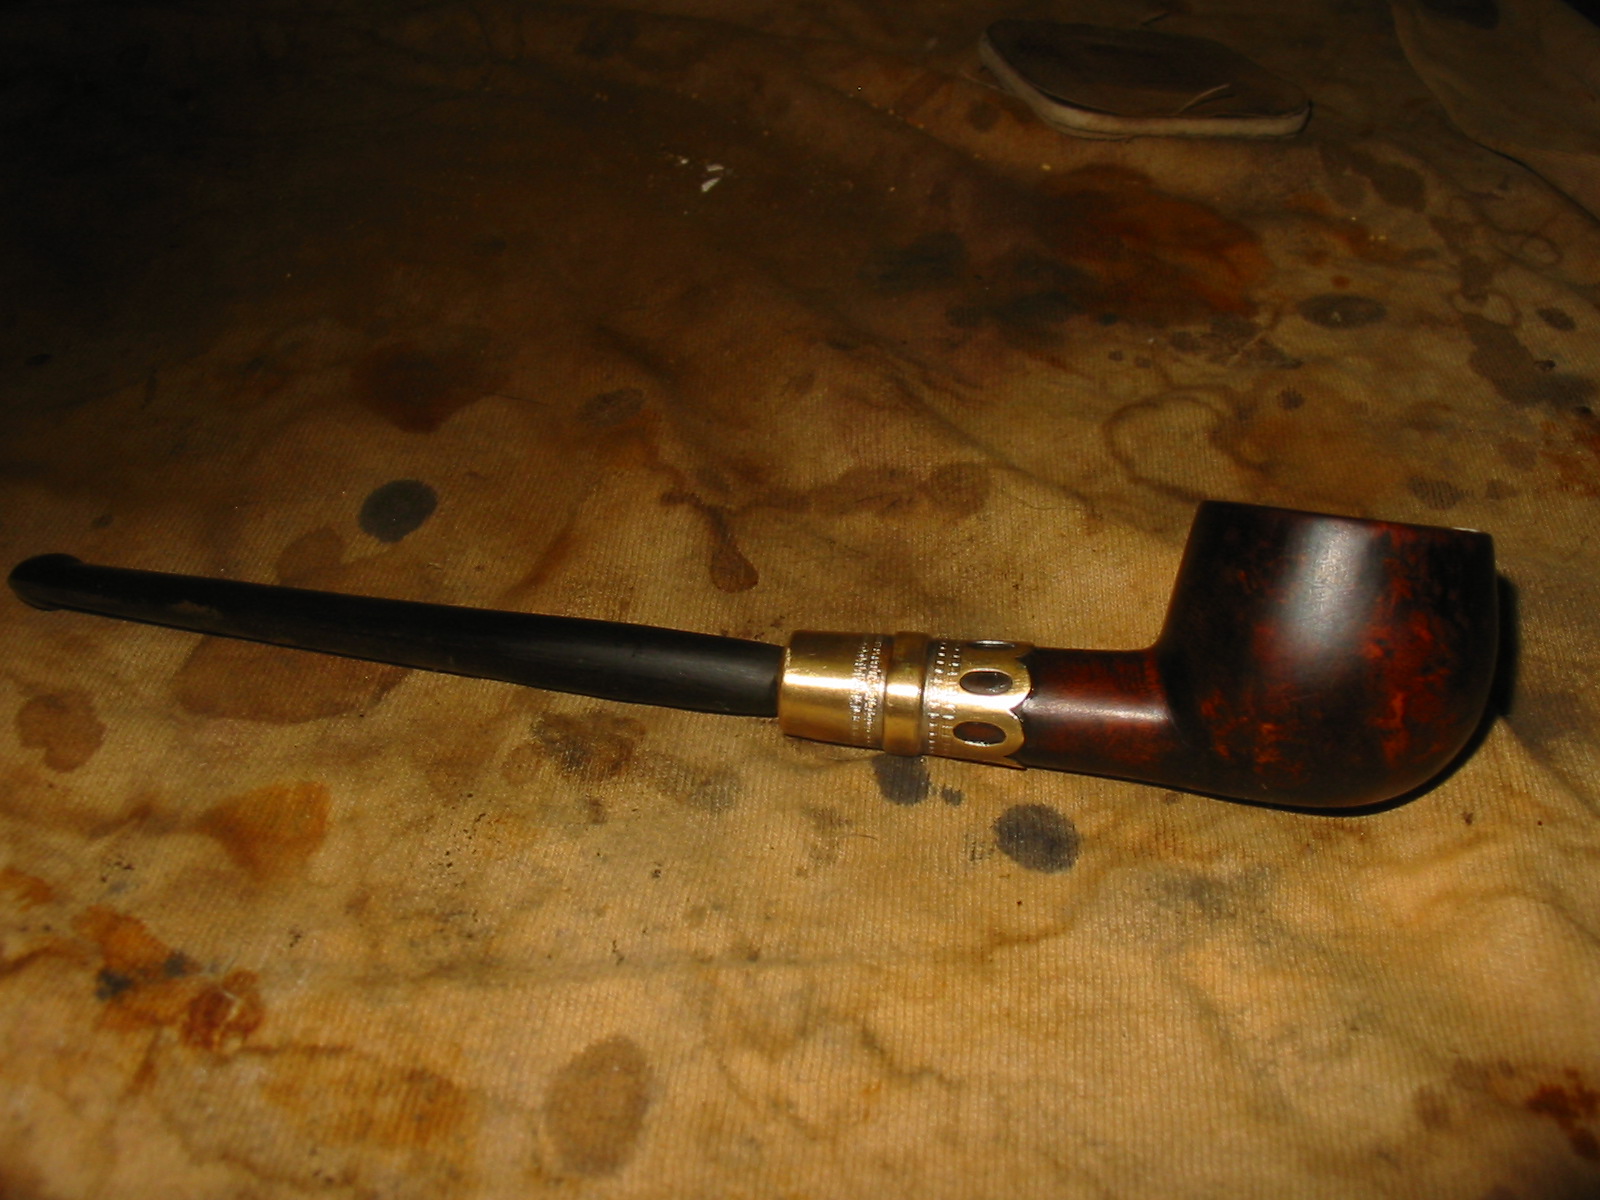
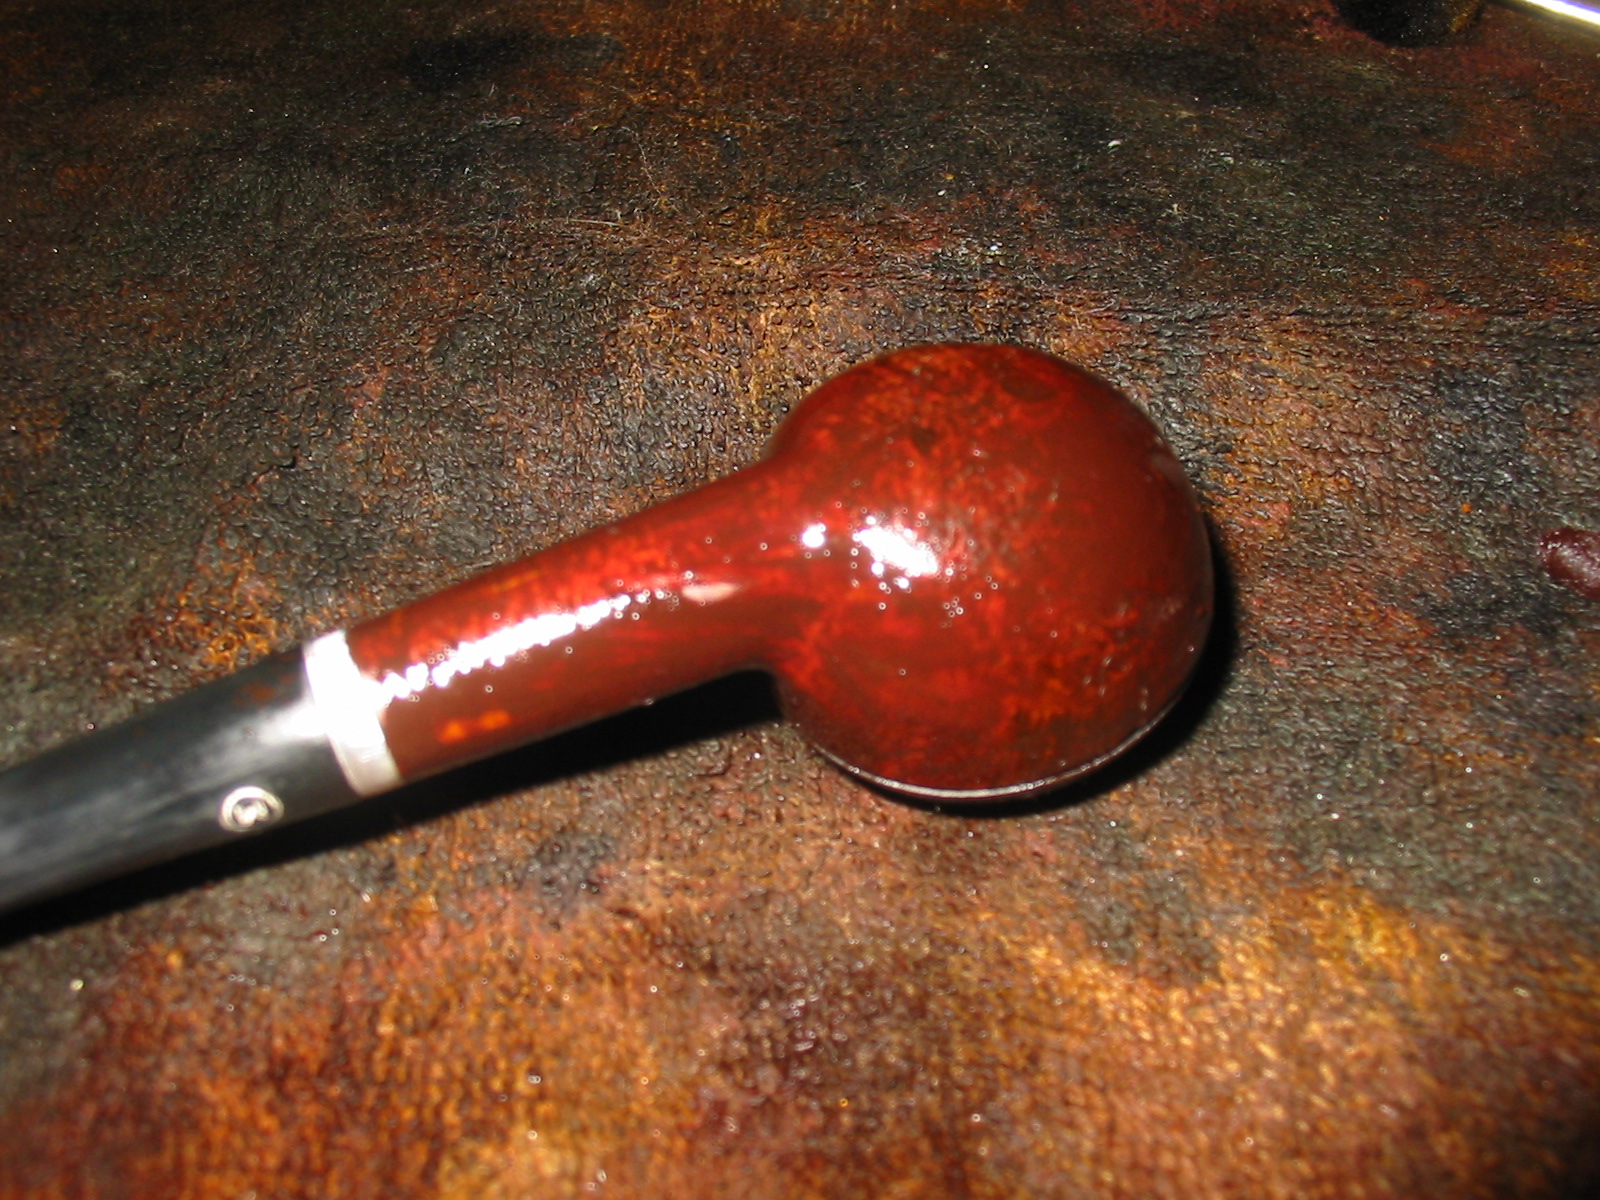
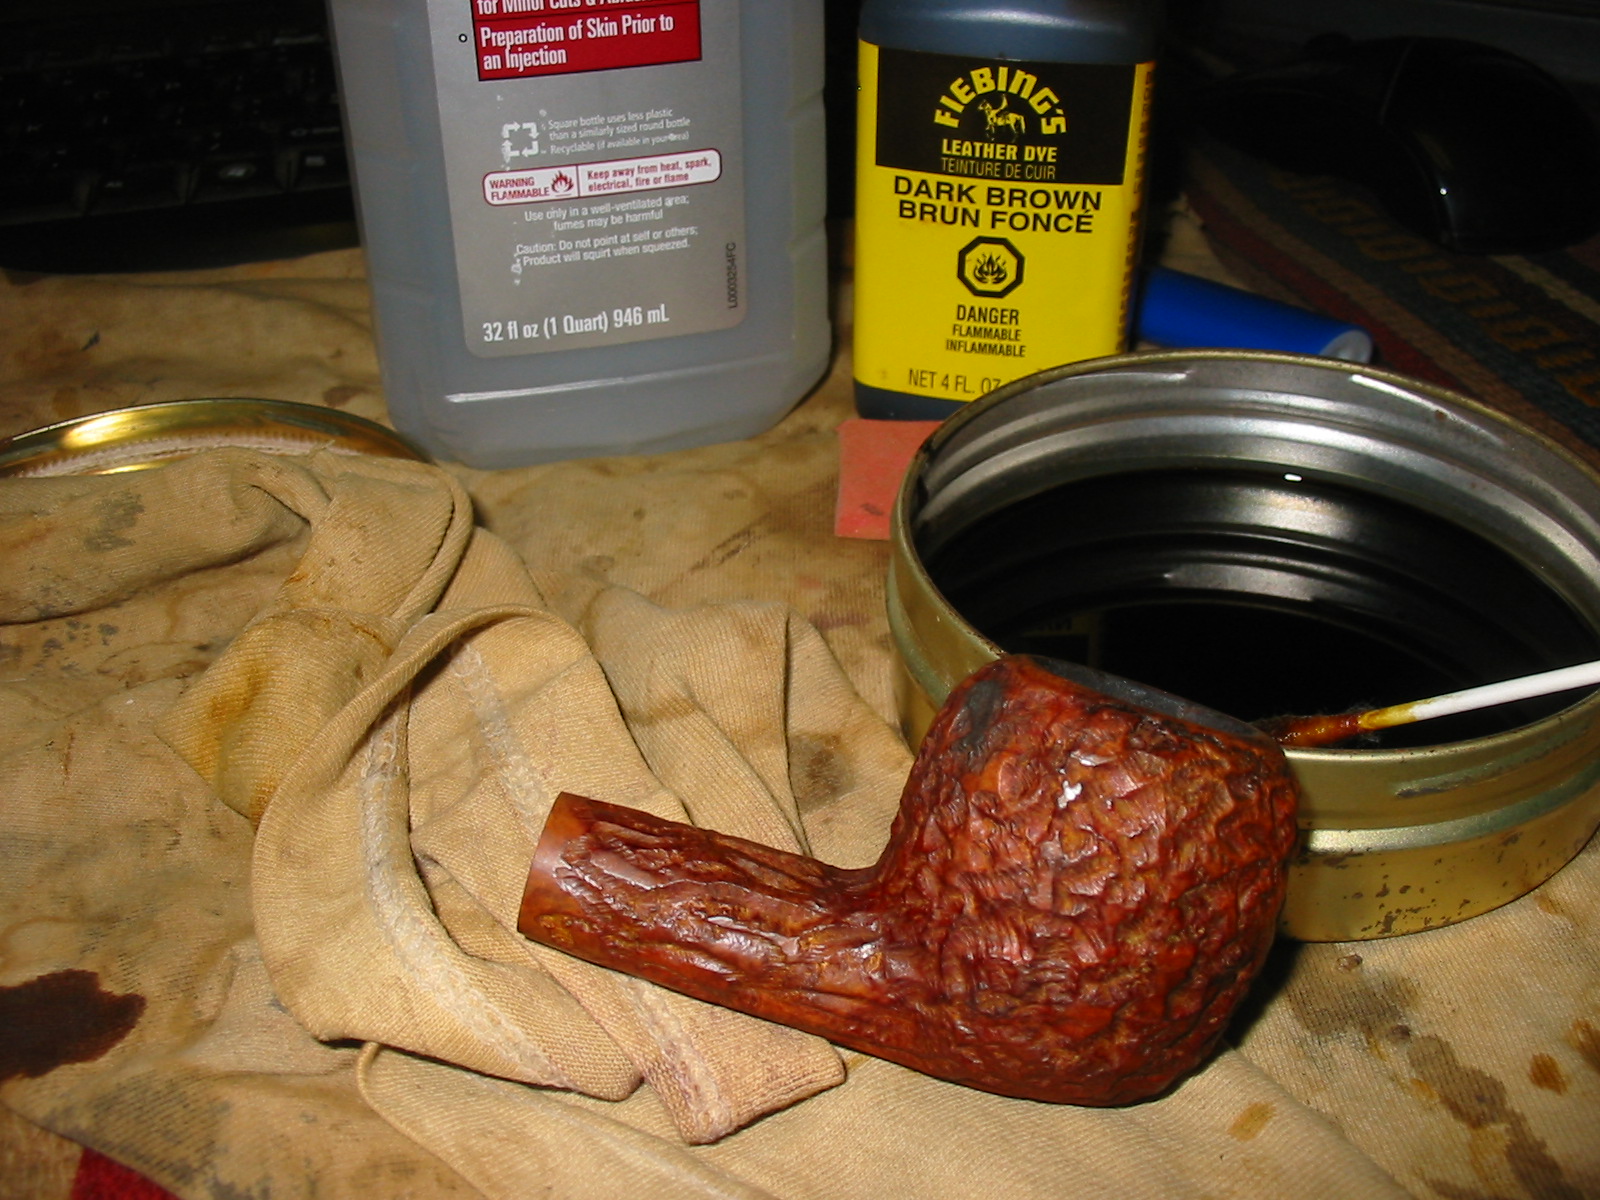
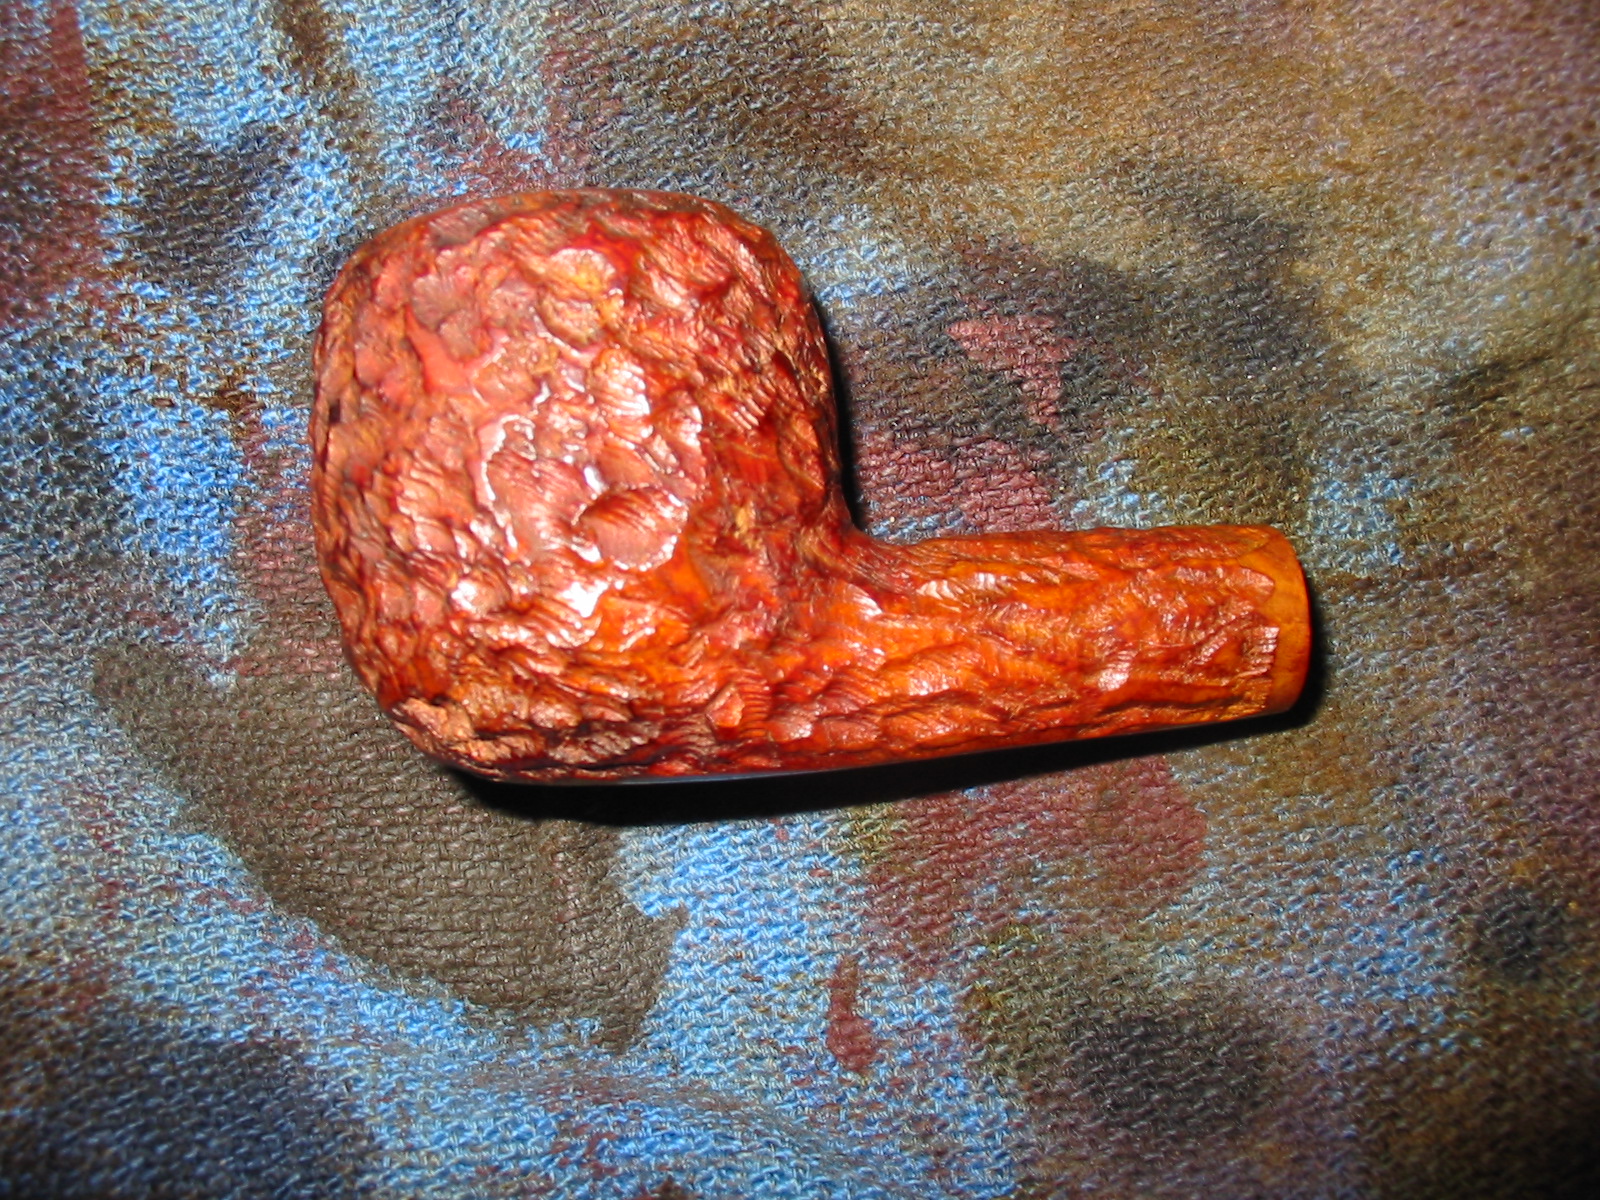
The colour was too dark to my liking so I wiped the bowl down with acetone on cotton pads to remove some of the heavy dark stain and give the bowl more transparency. I wiped it down repeatedly until I got it the colour I wanted with some contrast between the high and low points in the blast.
IMG_6457

IMG_6458

IMG_6461

IMG_6462
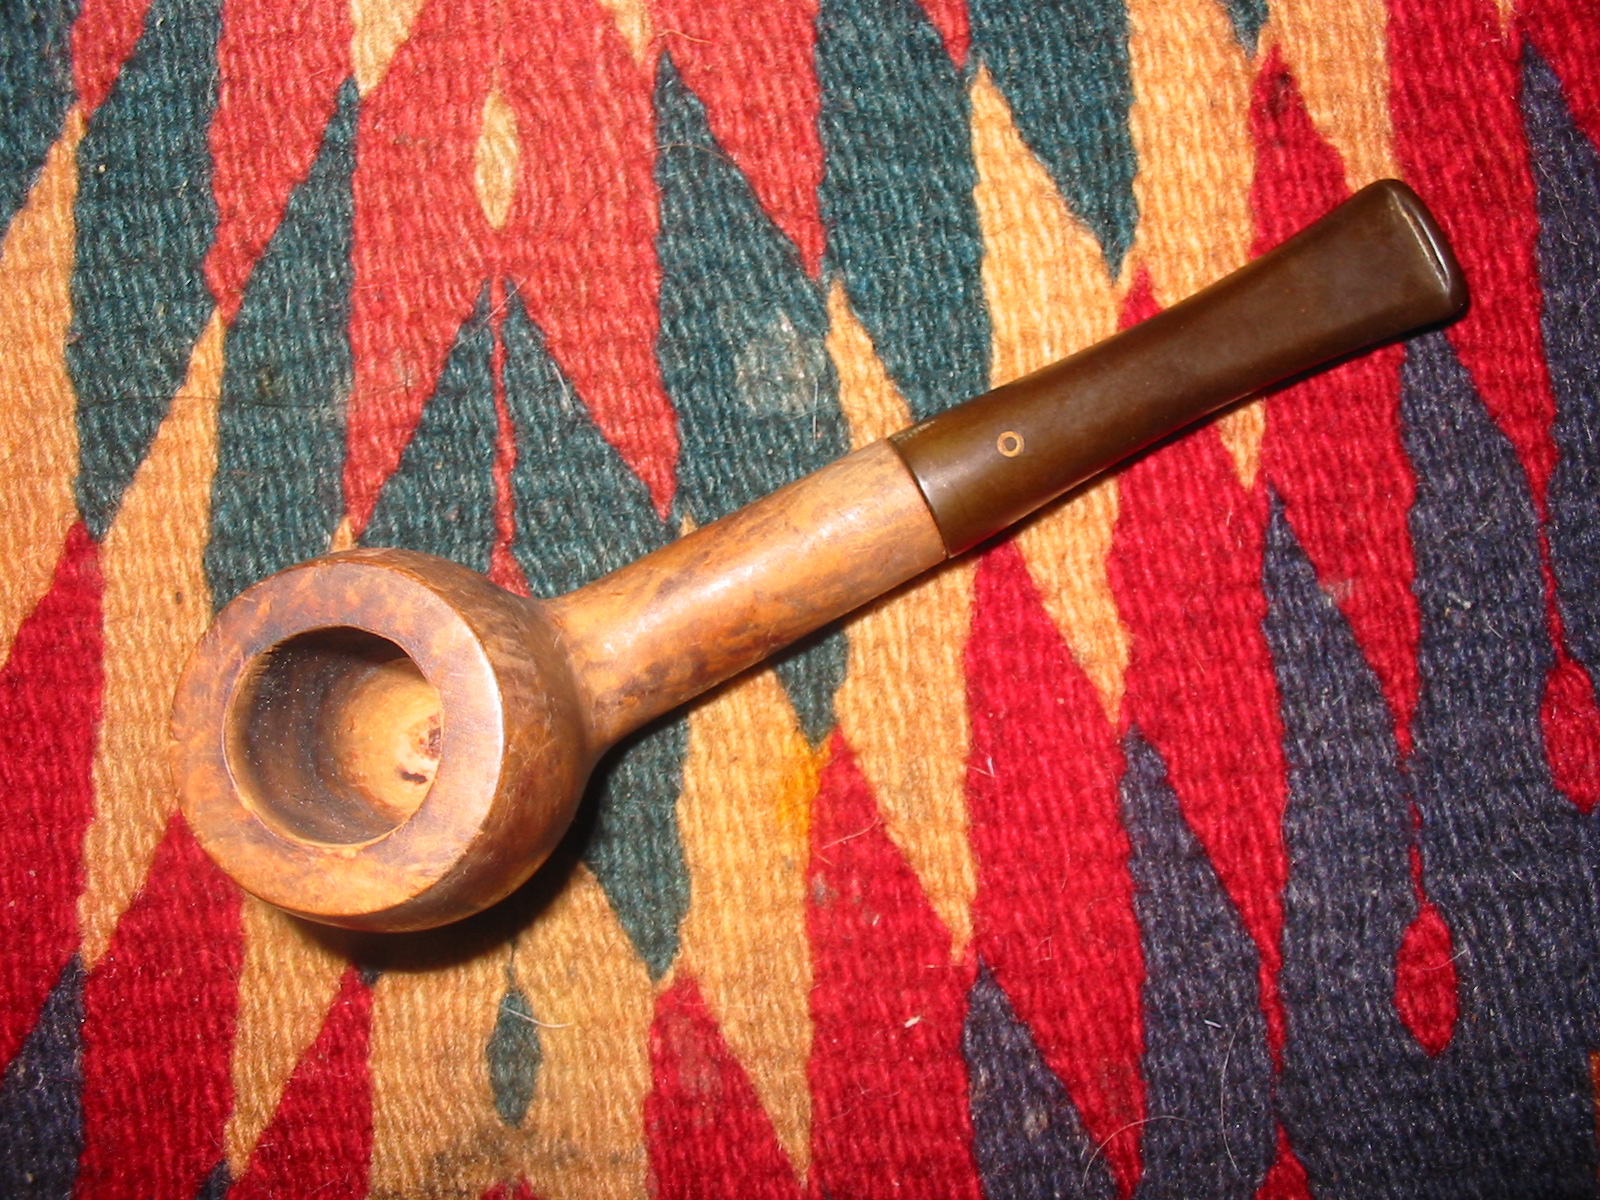
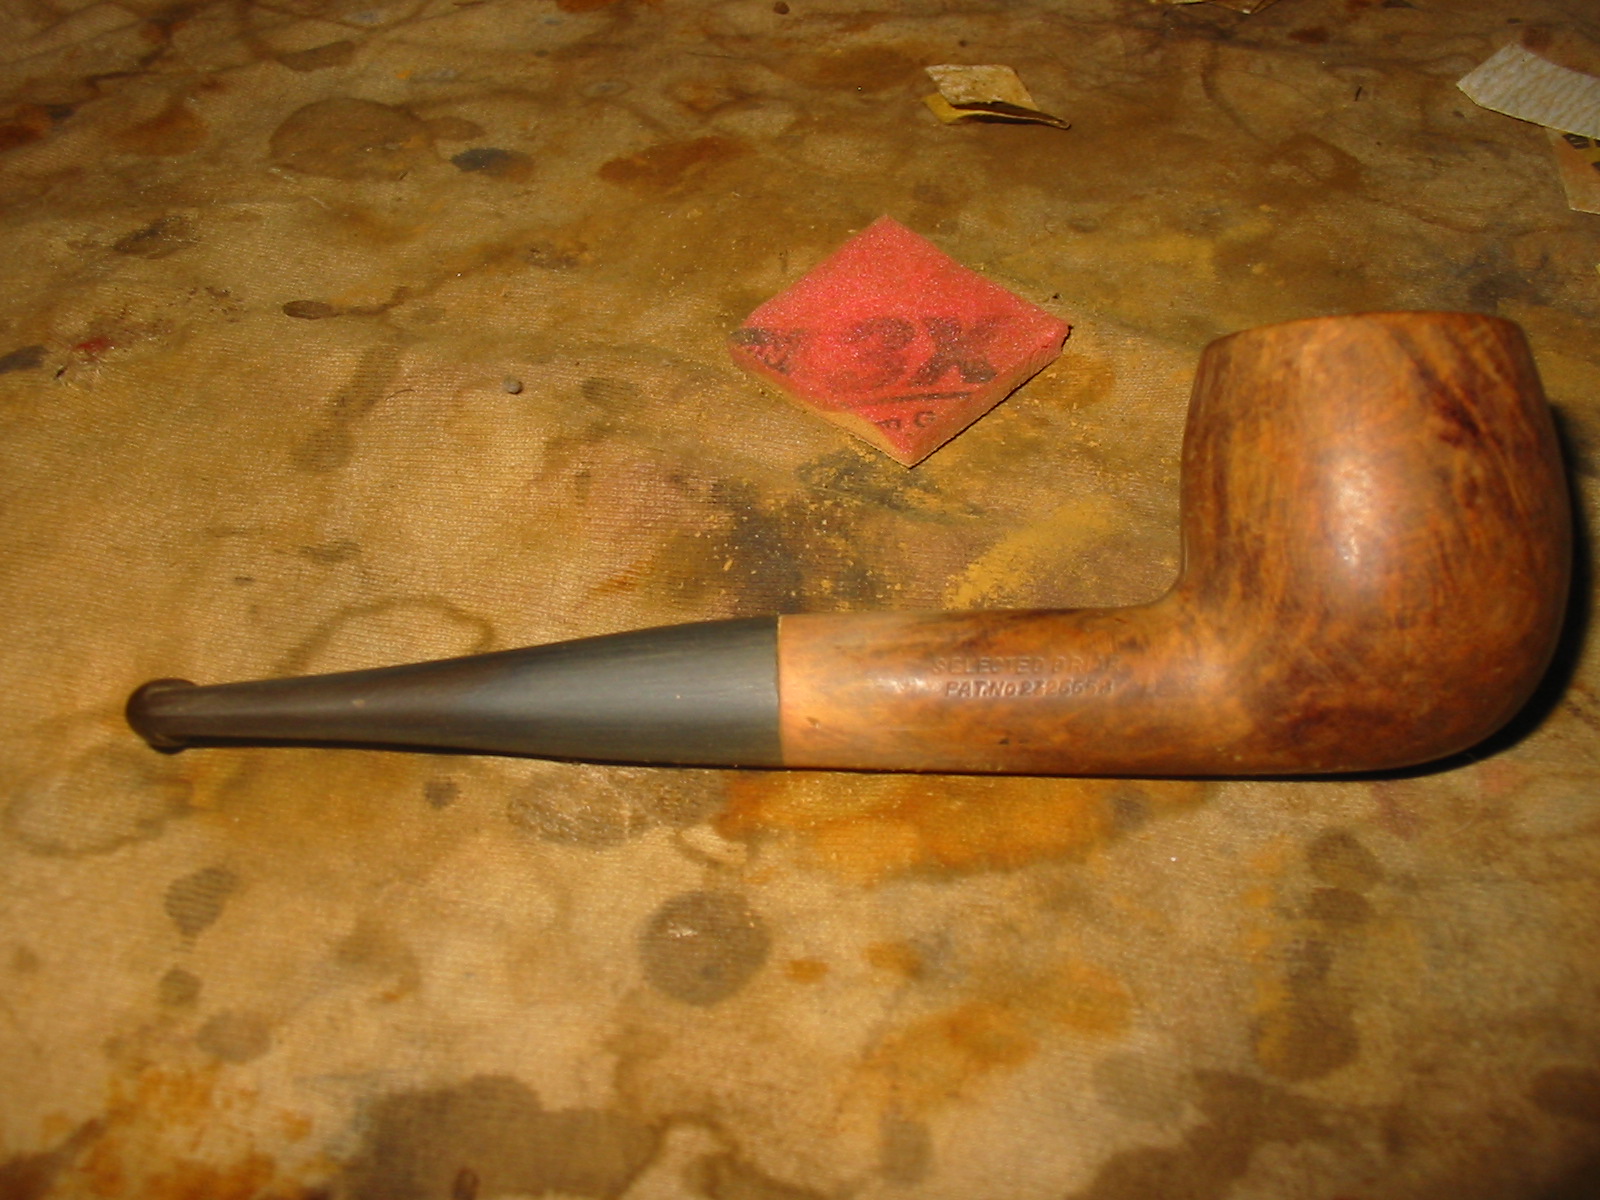
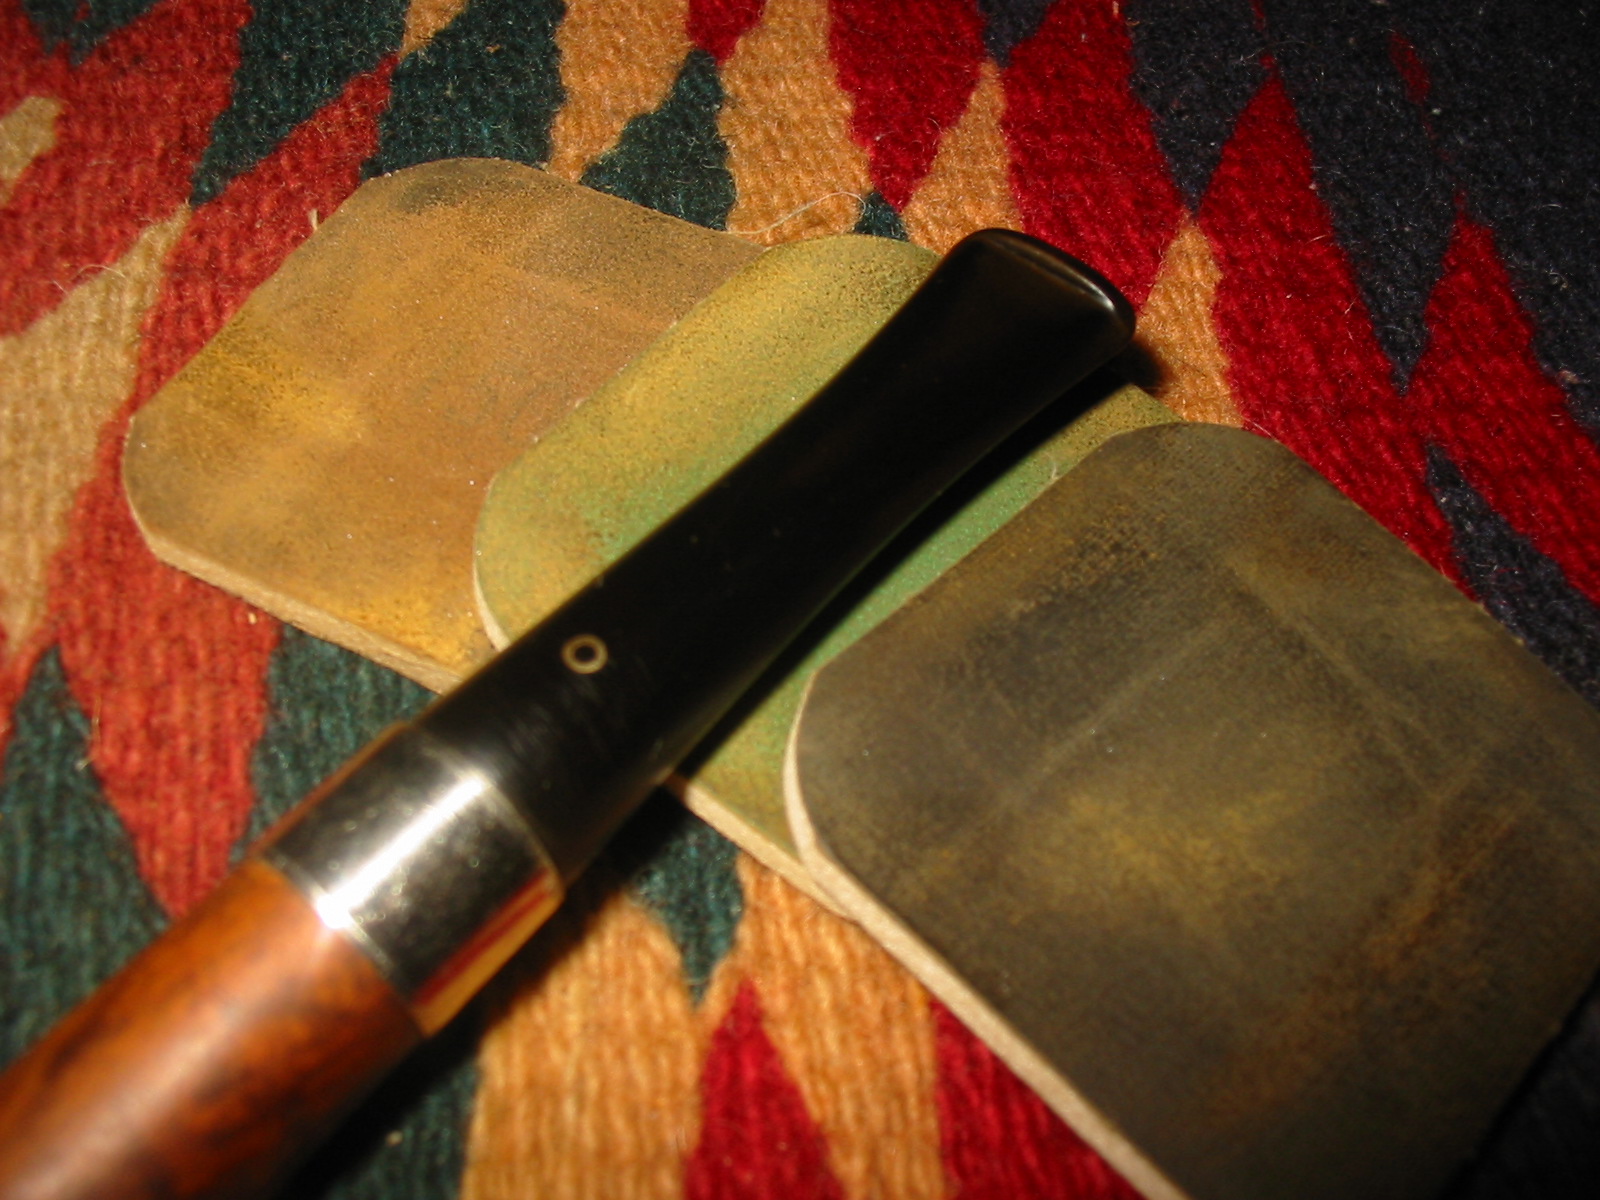
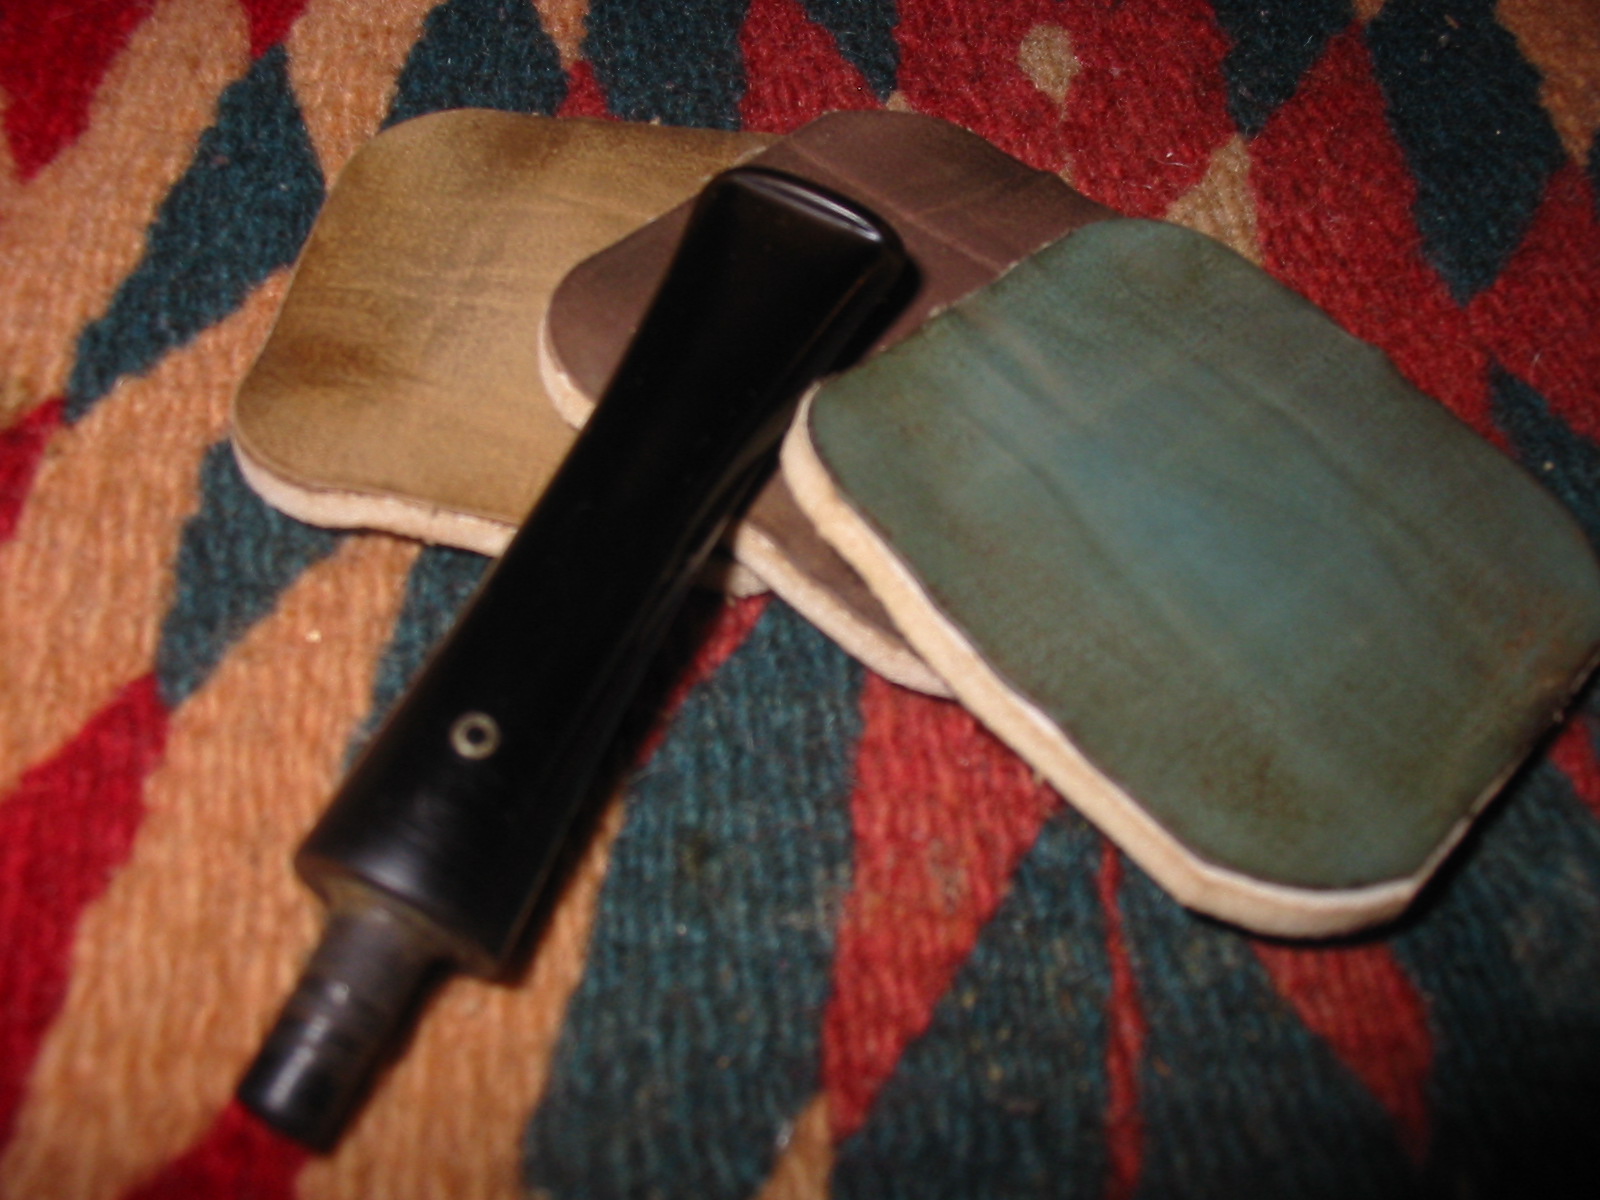
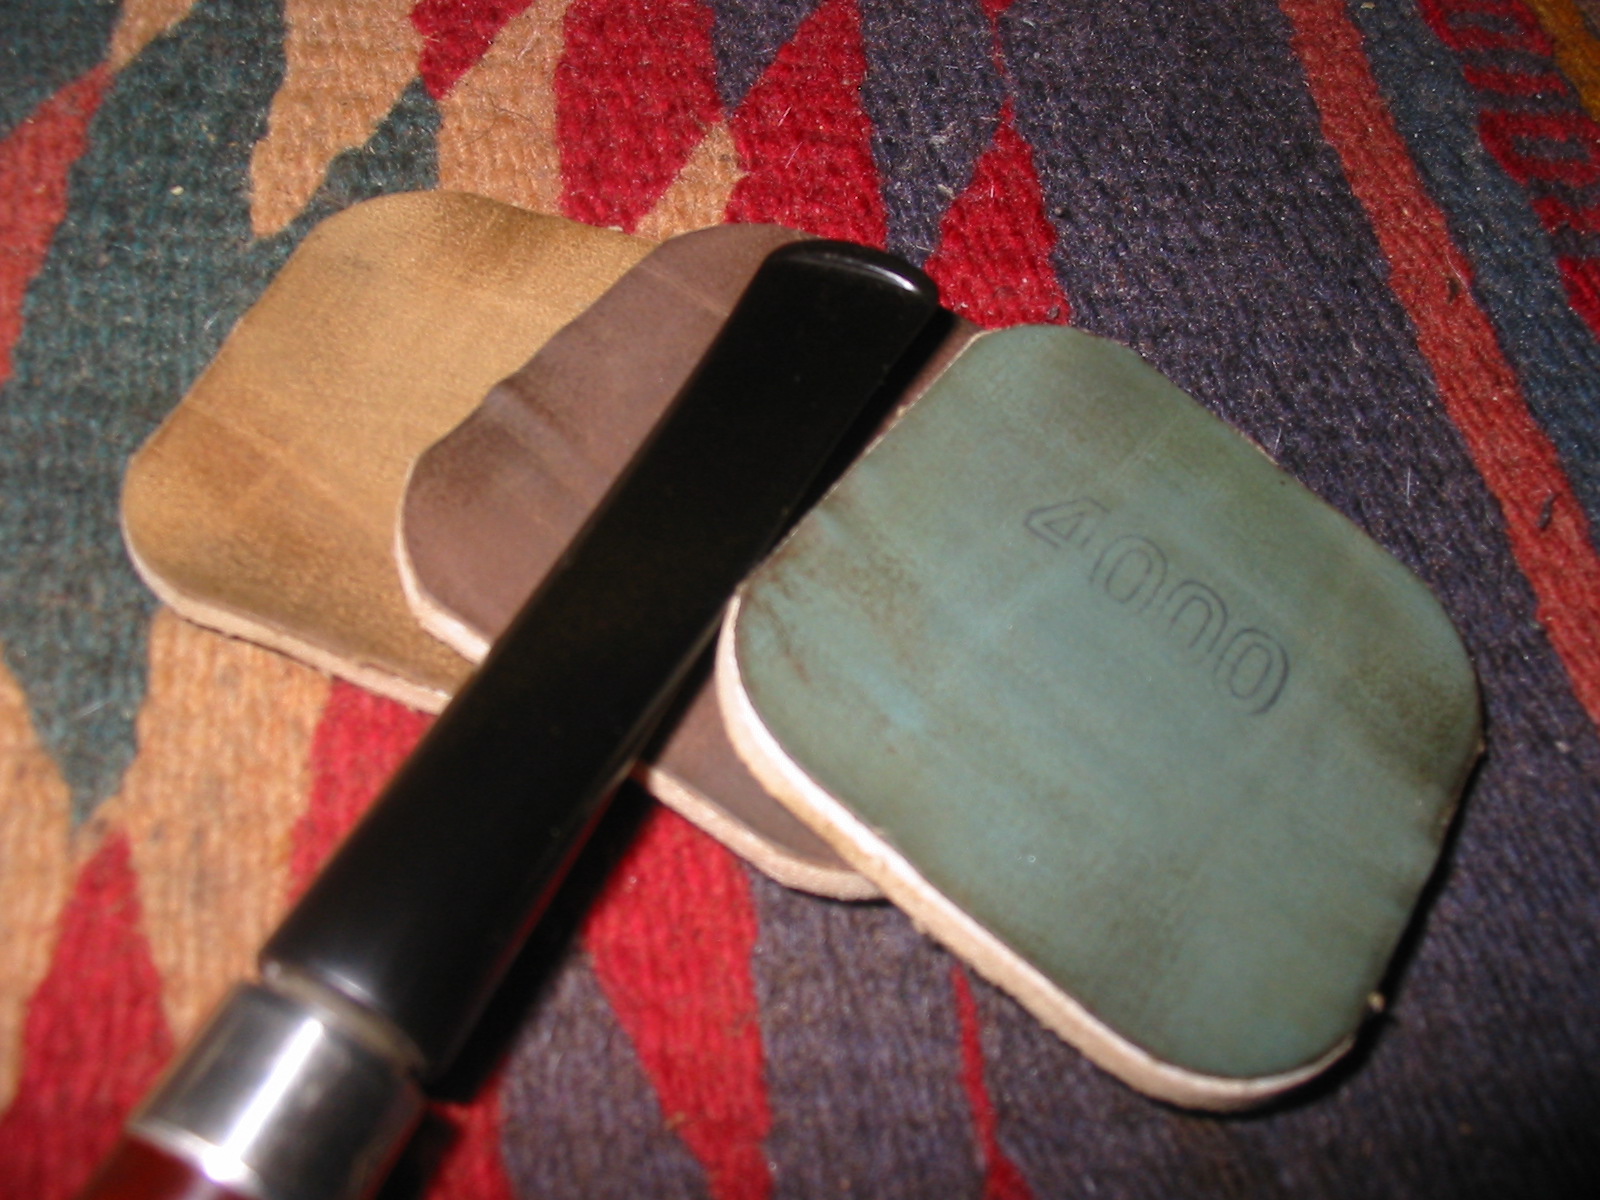
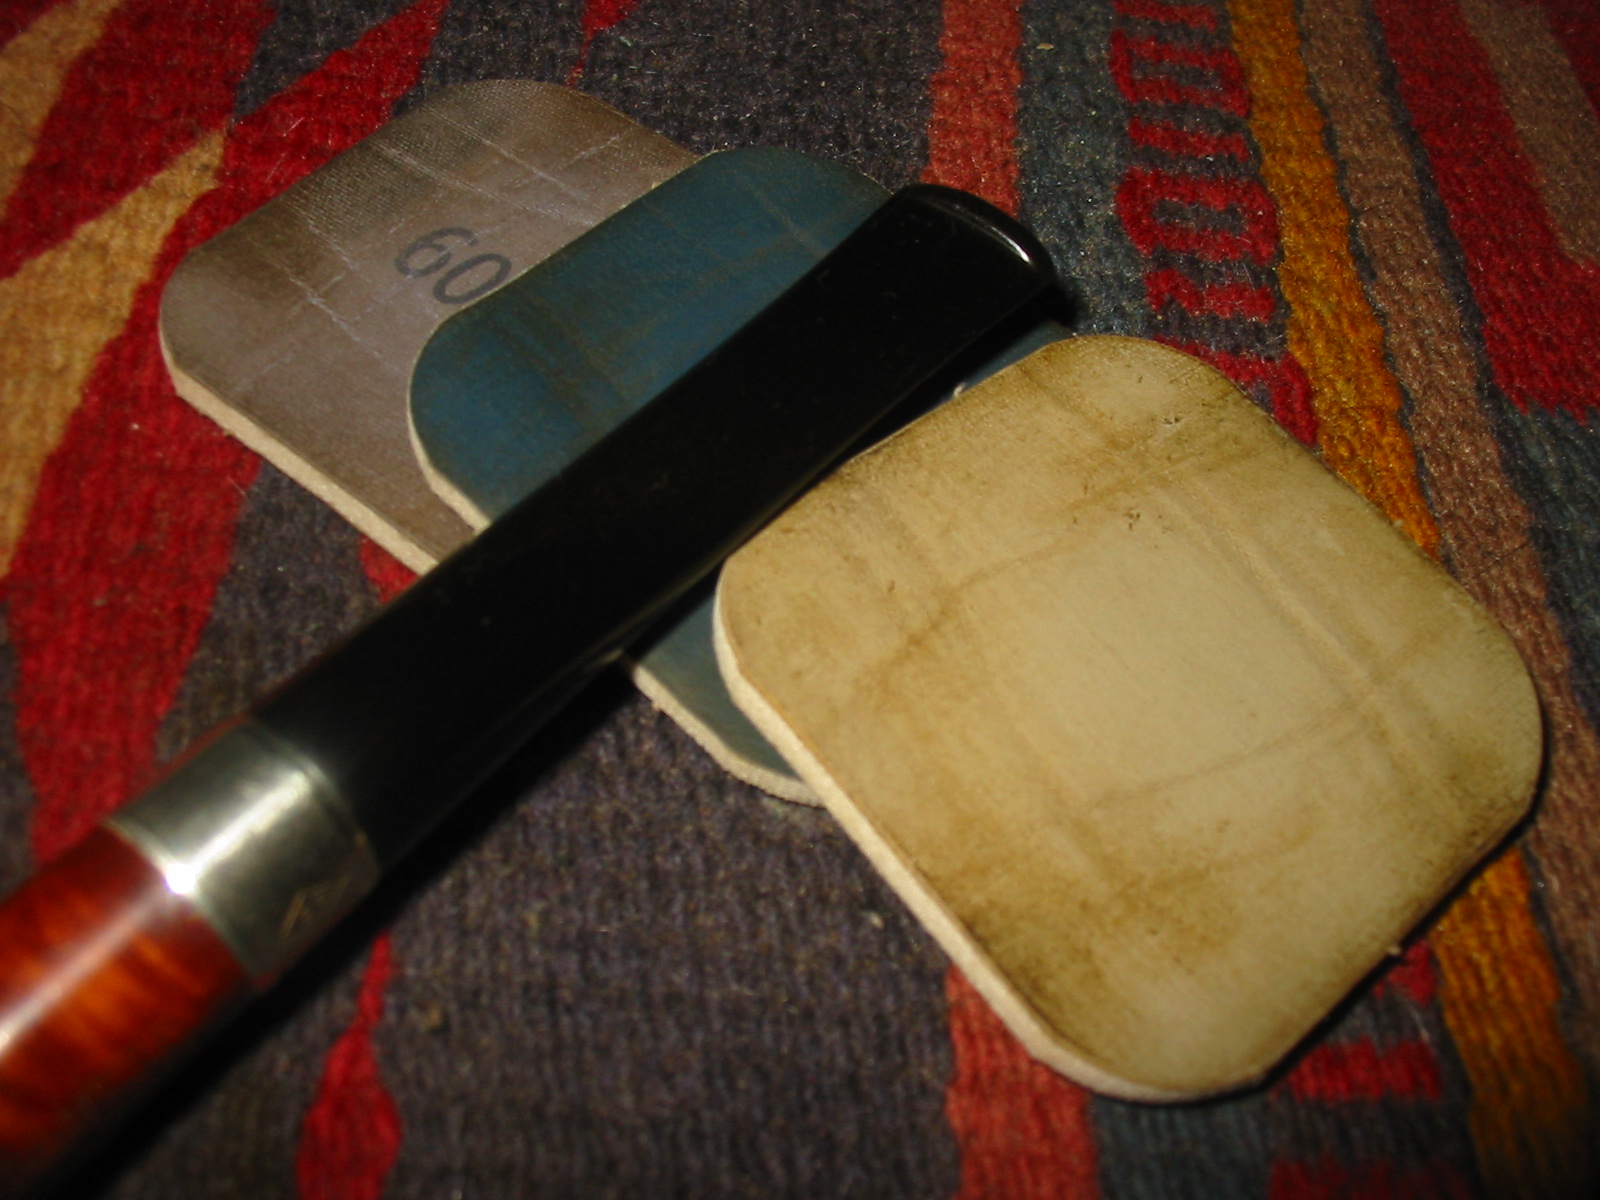
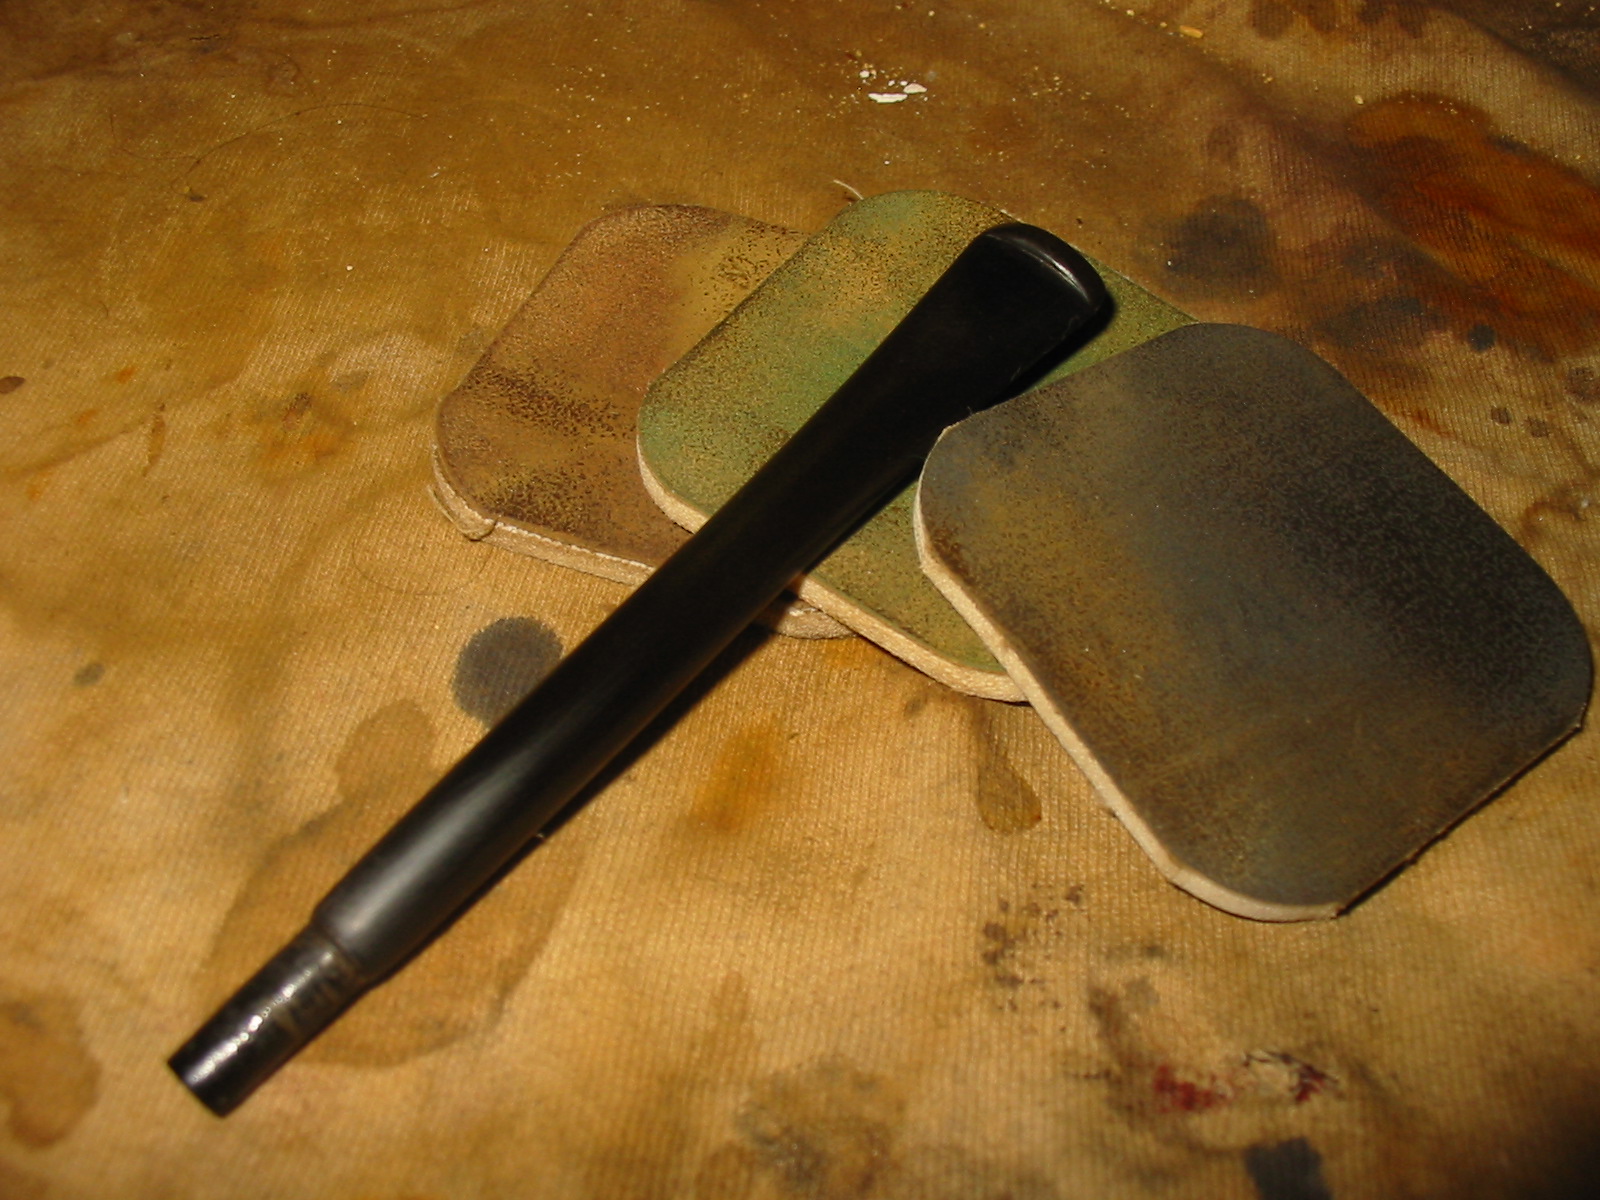
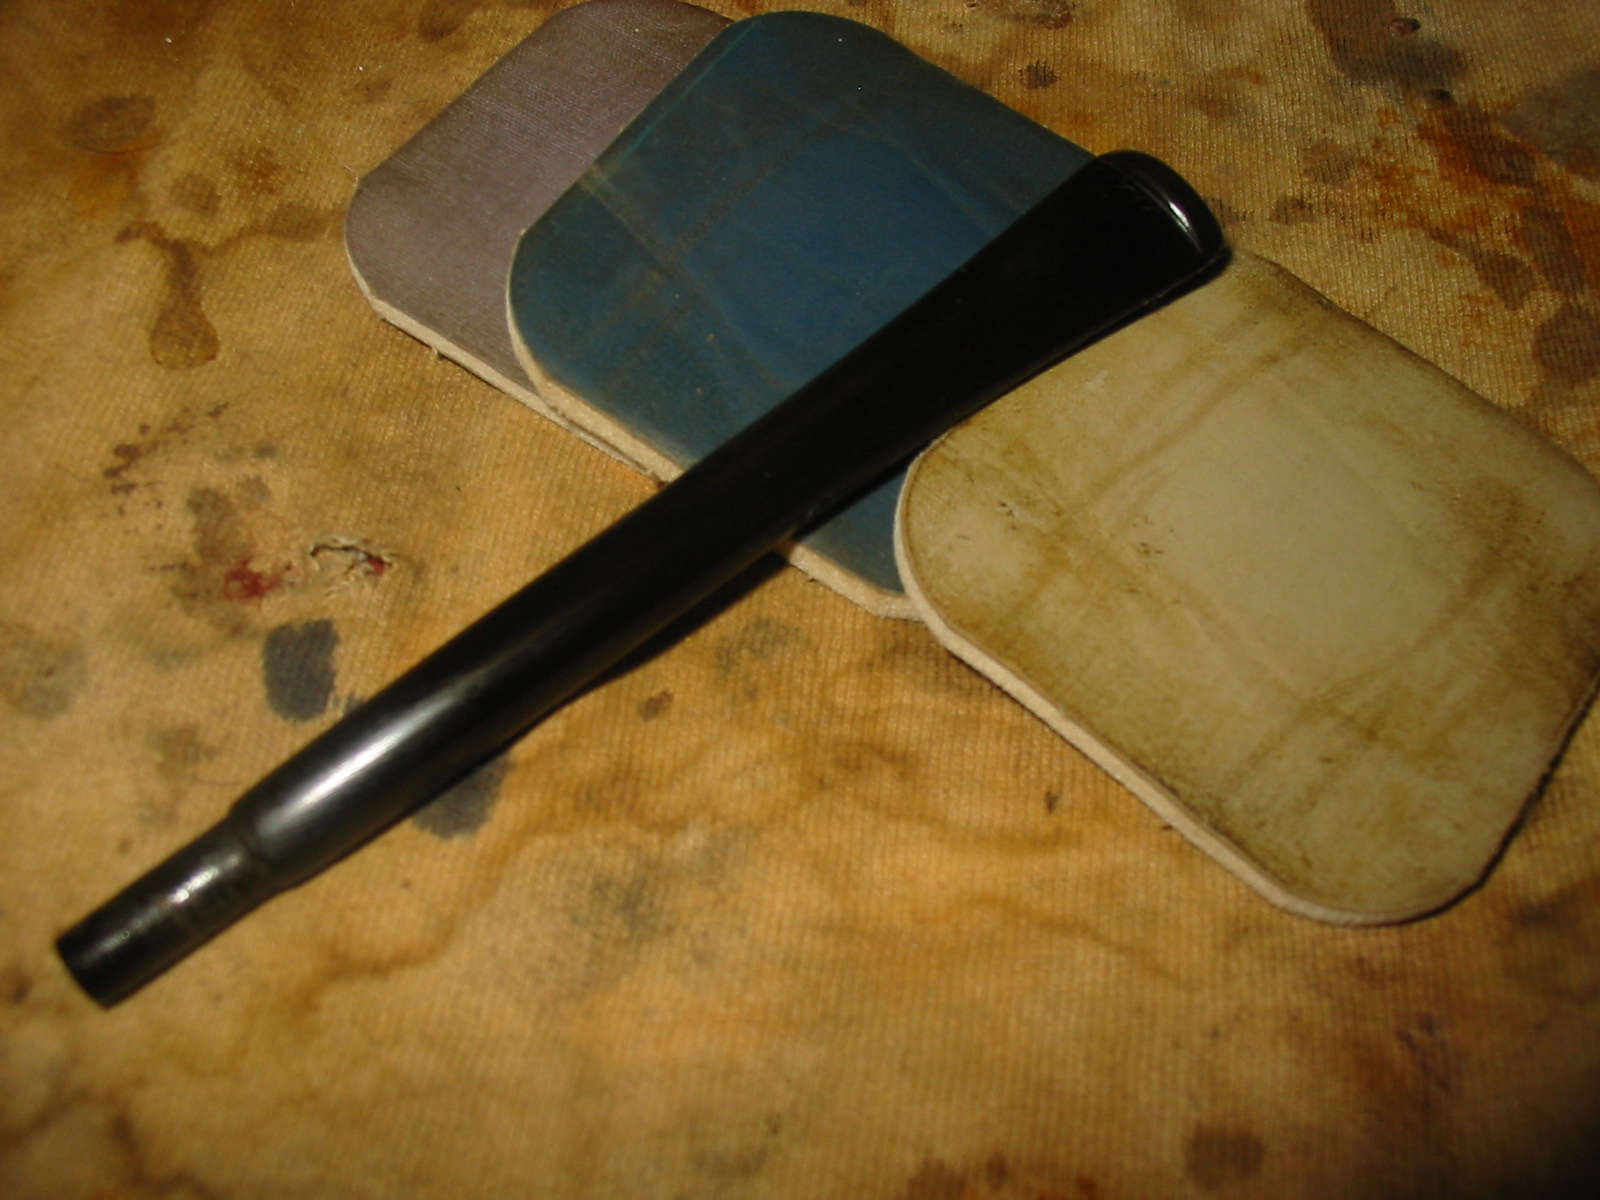
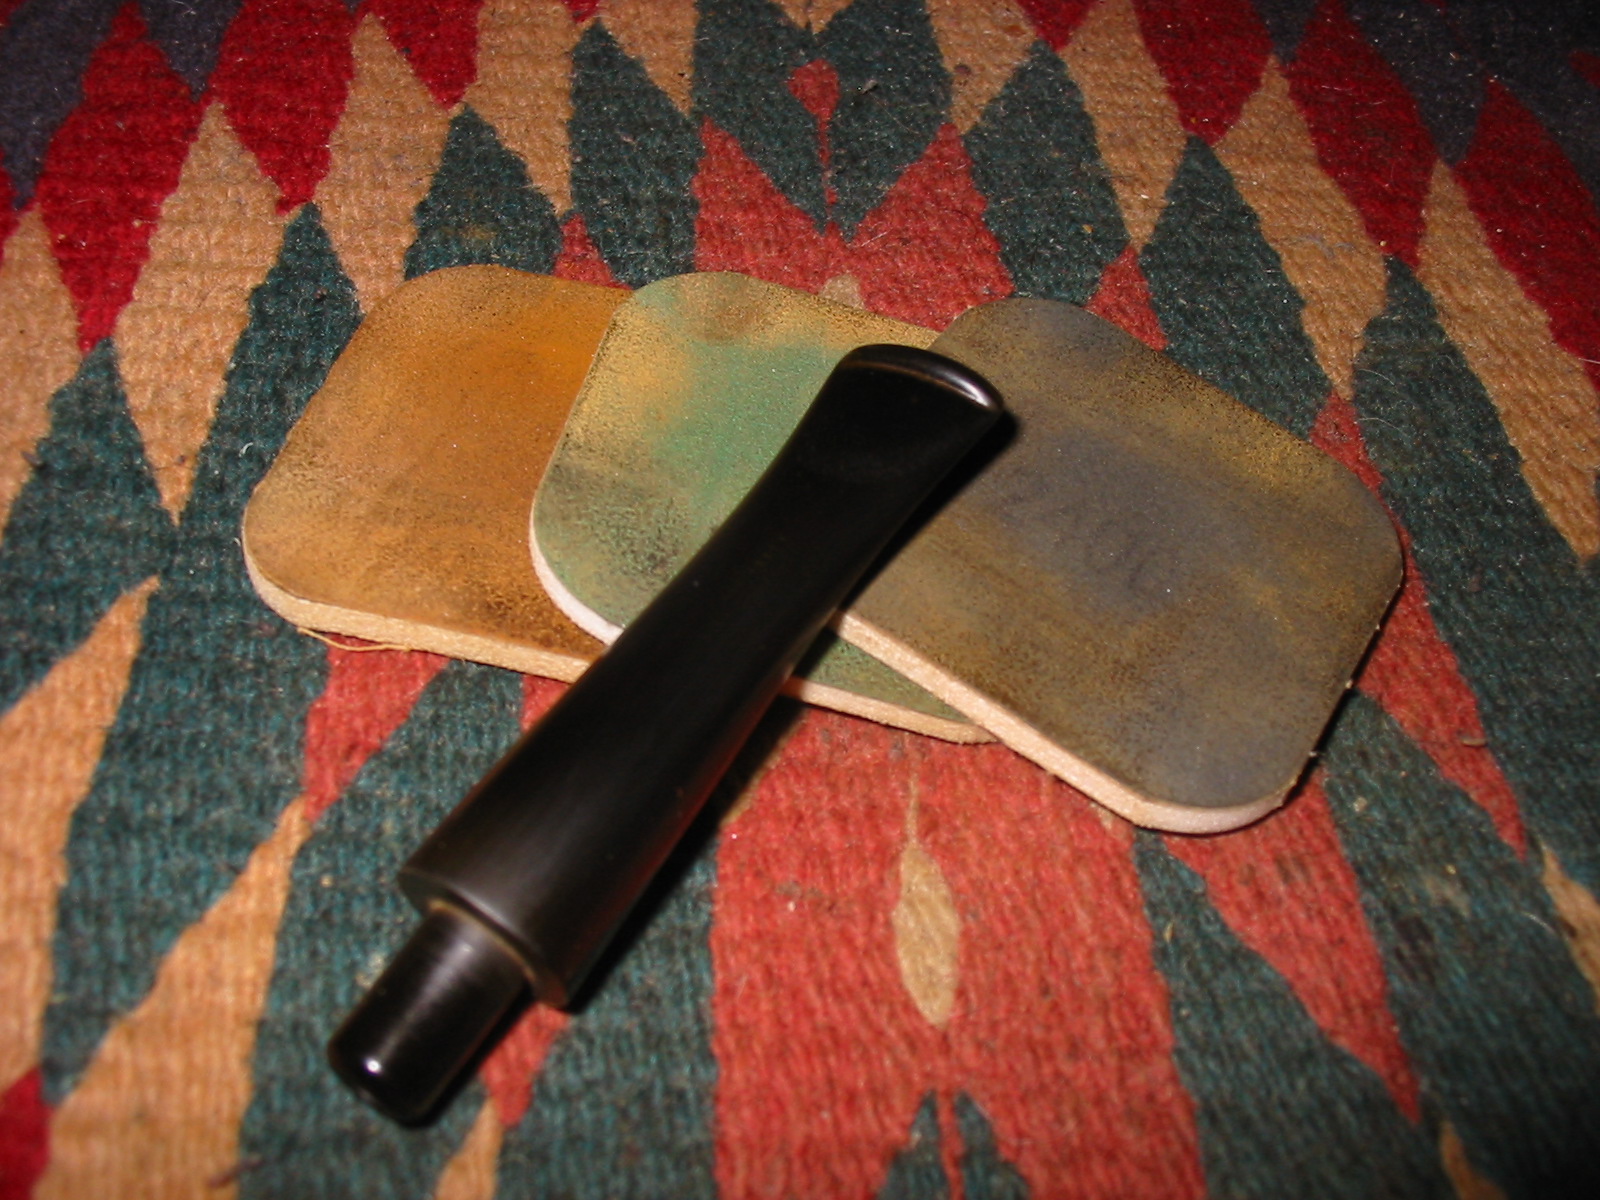
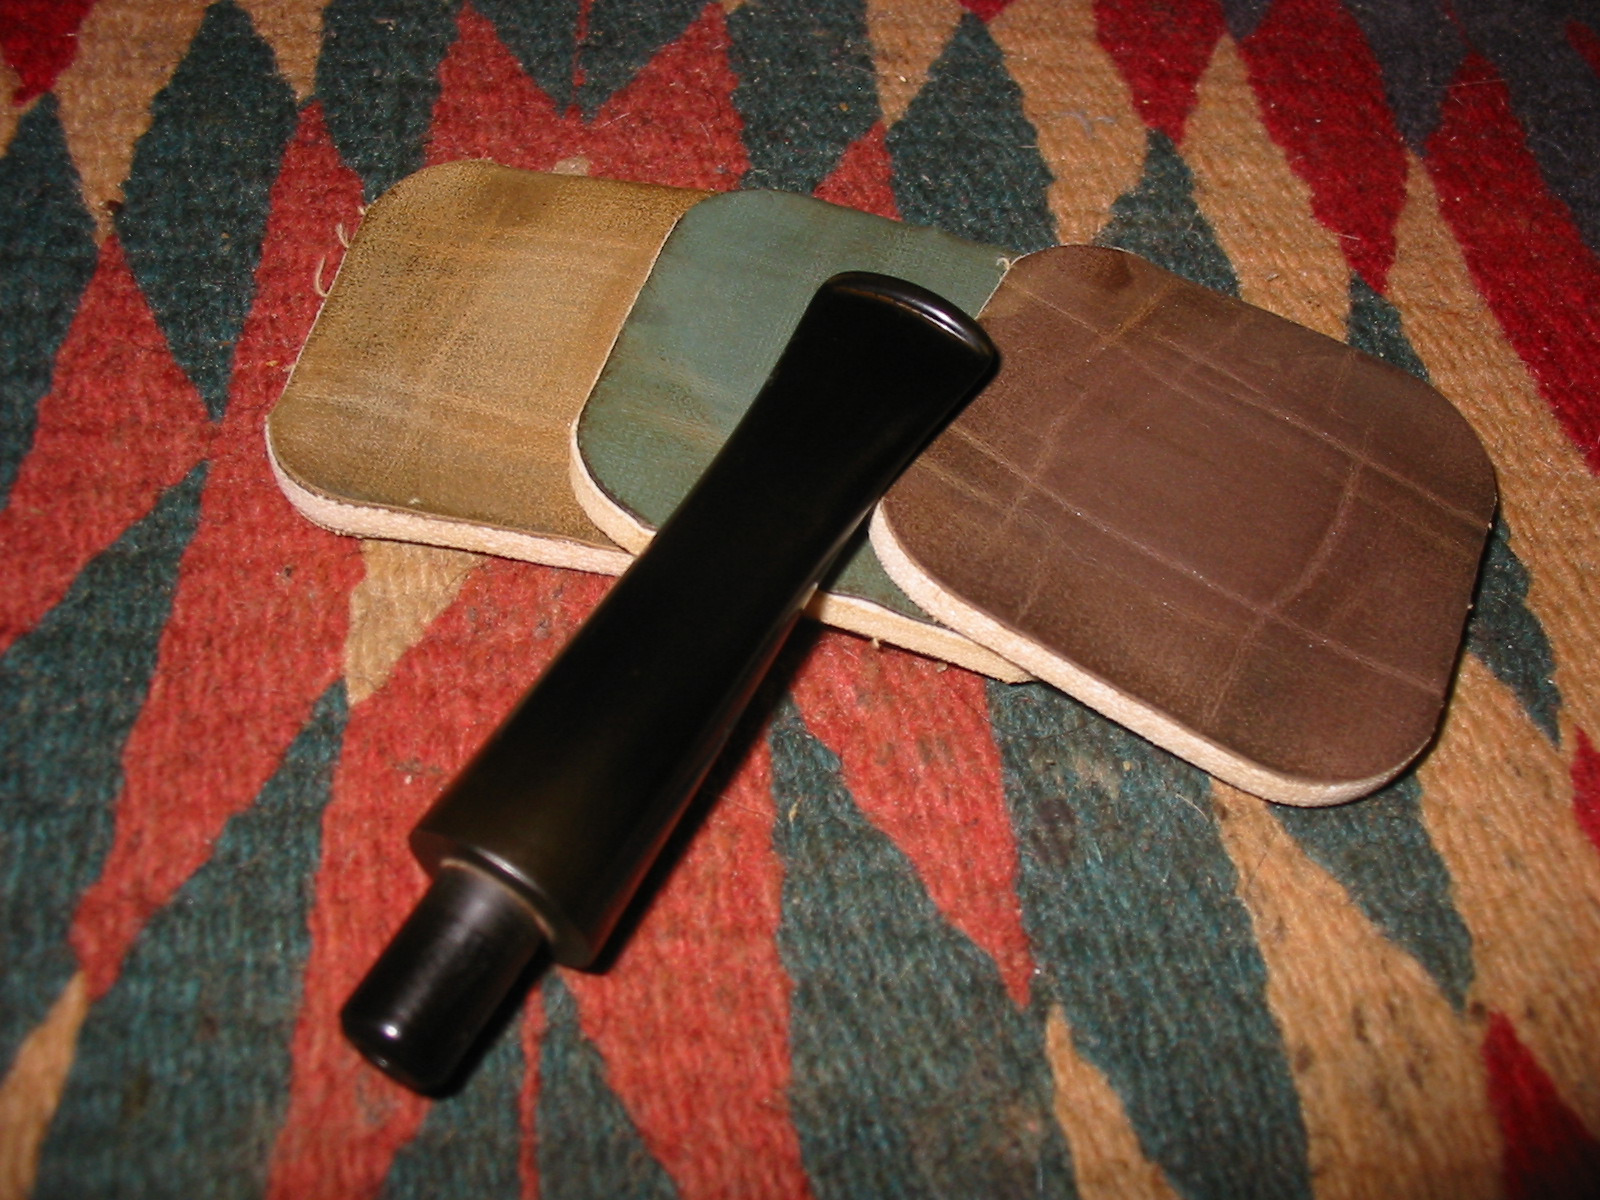
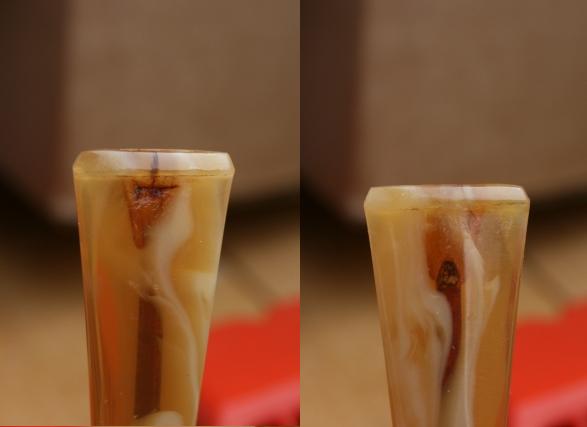
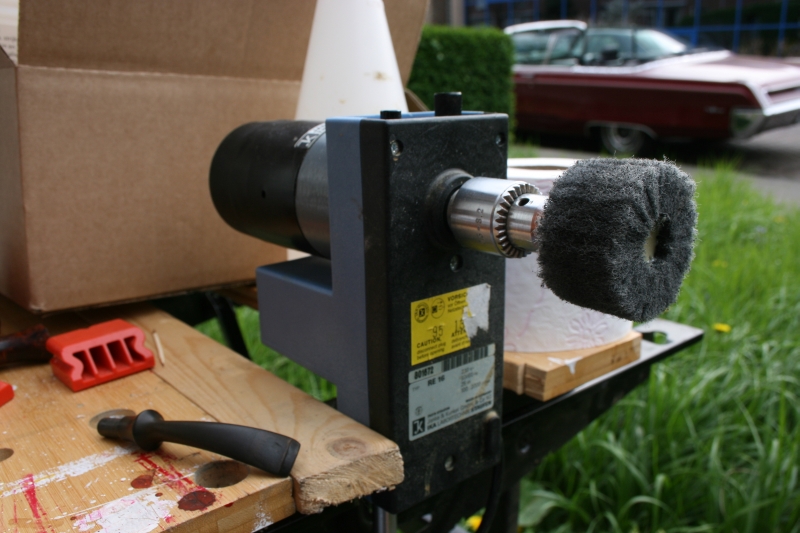
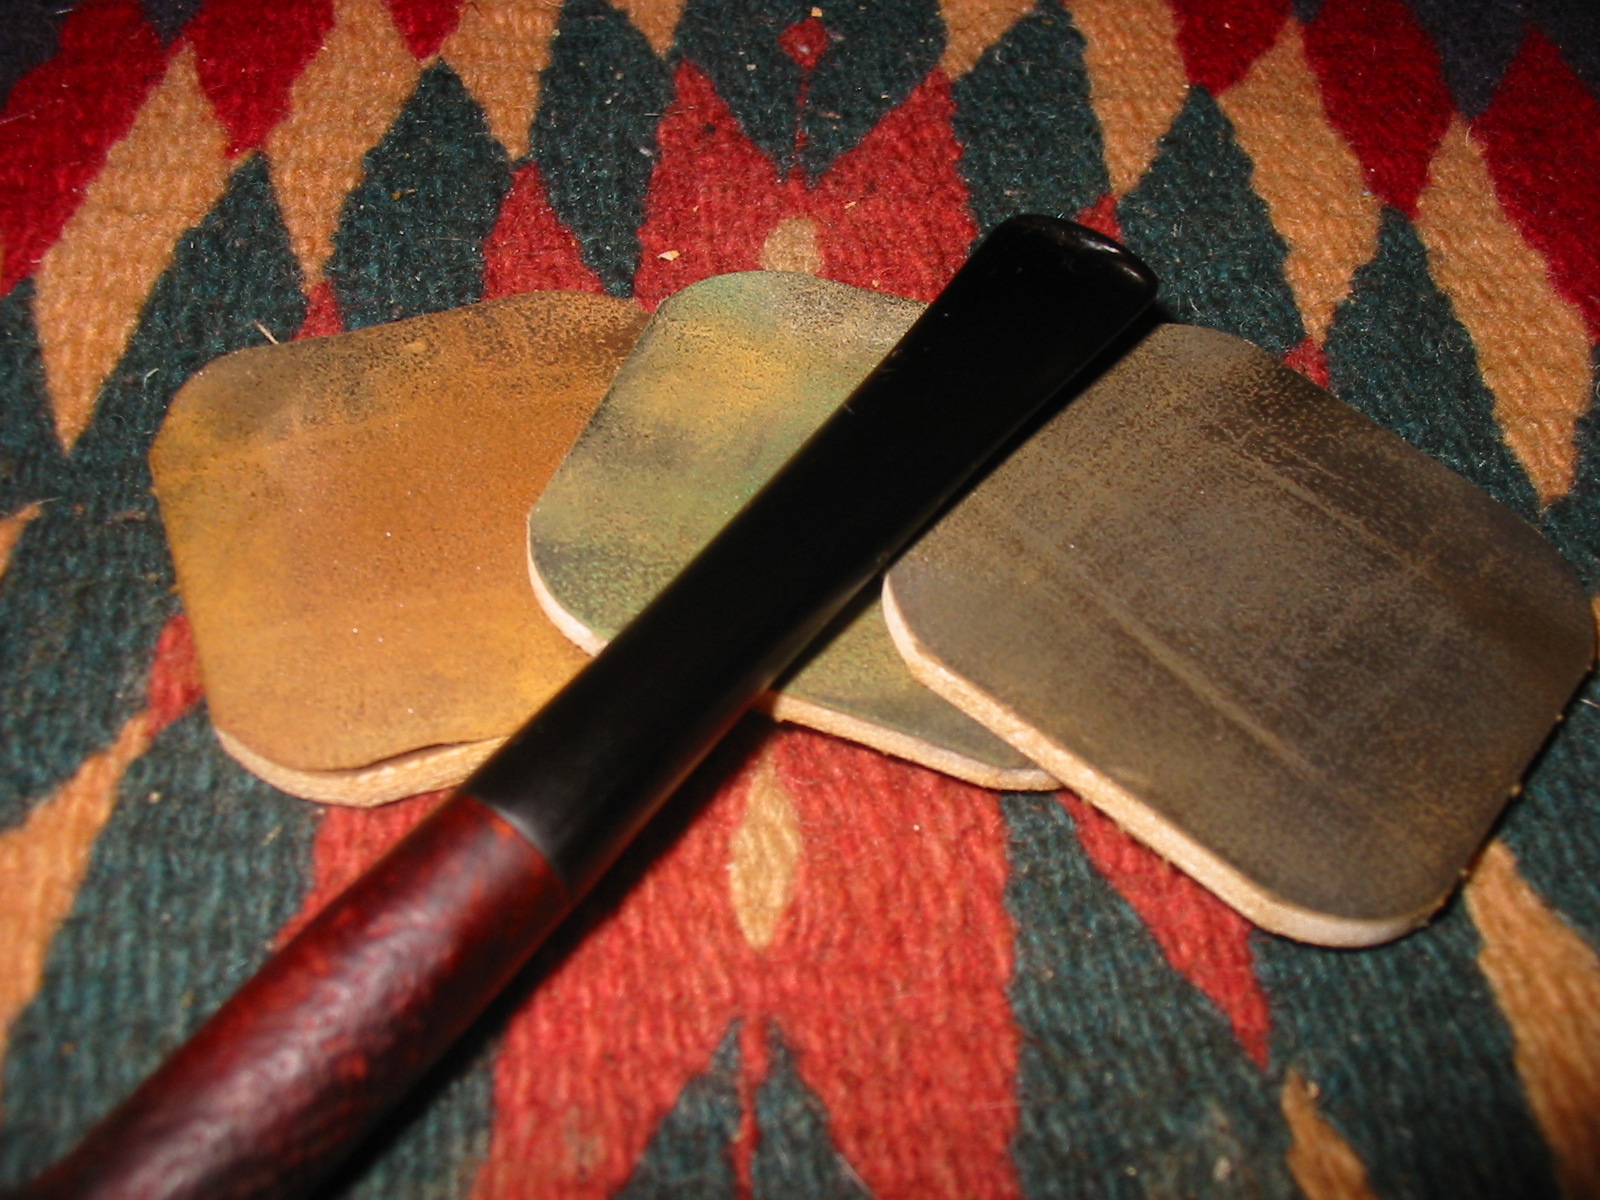
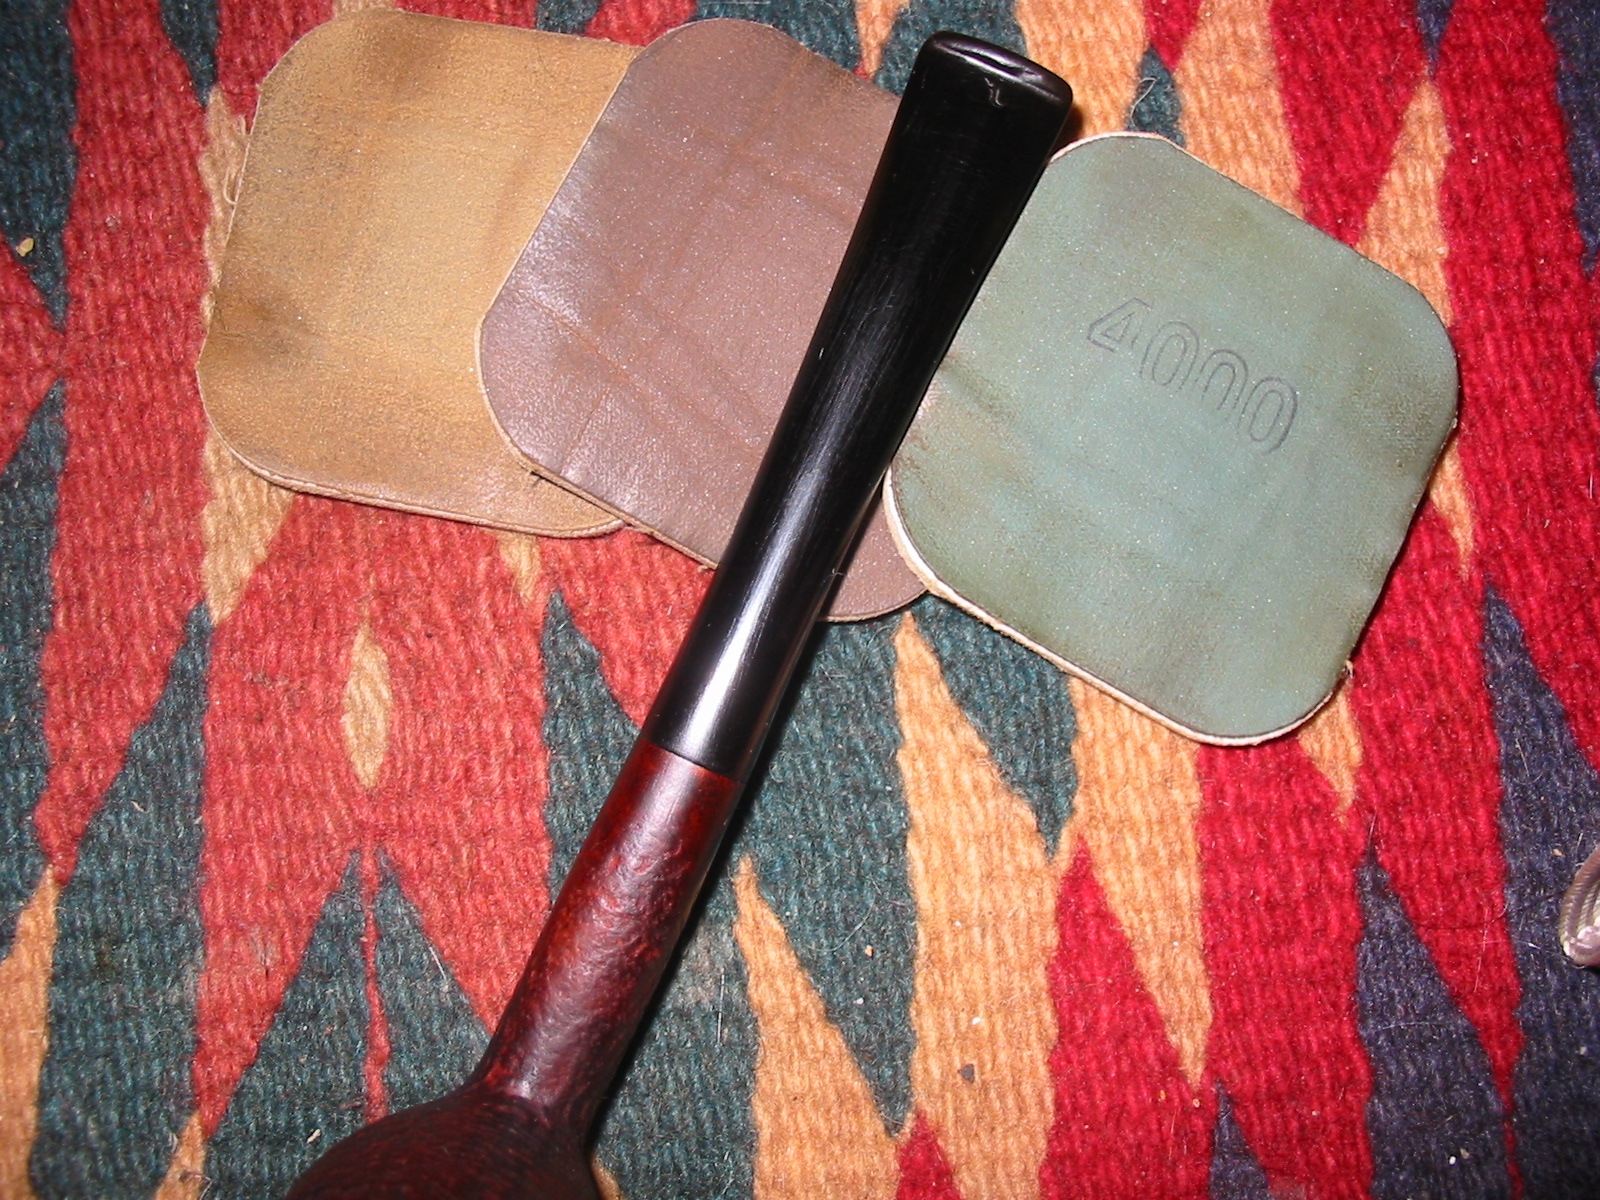
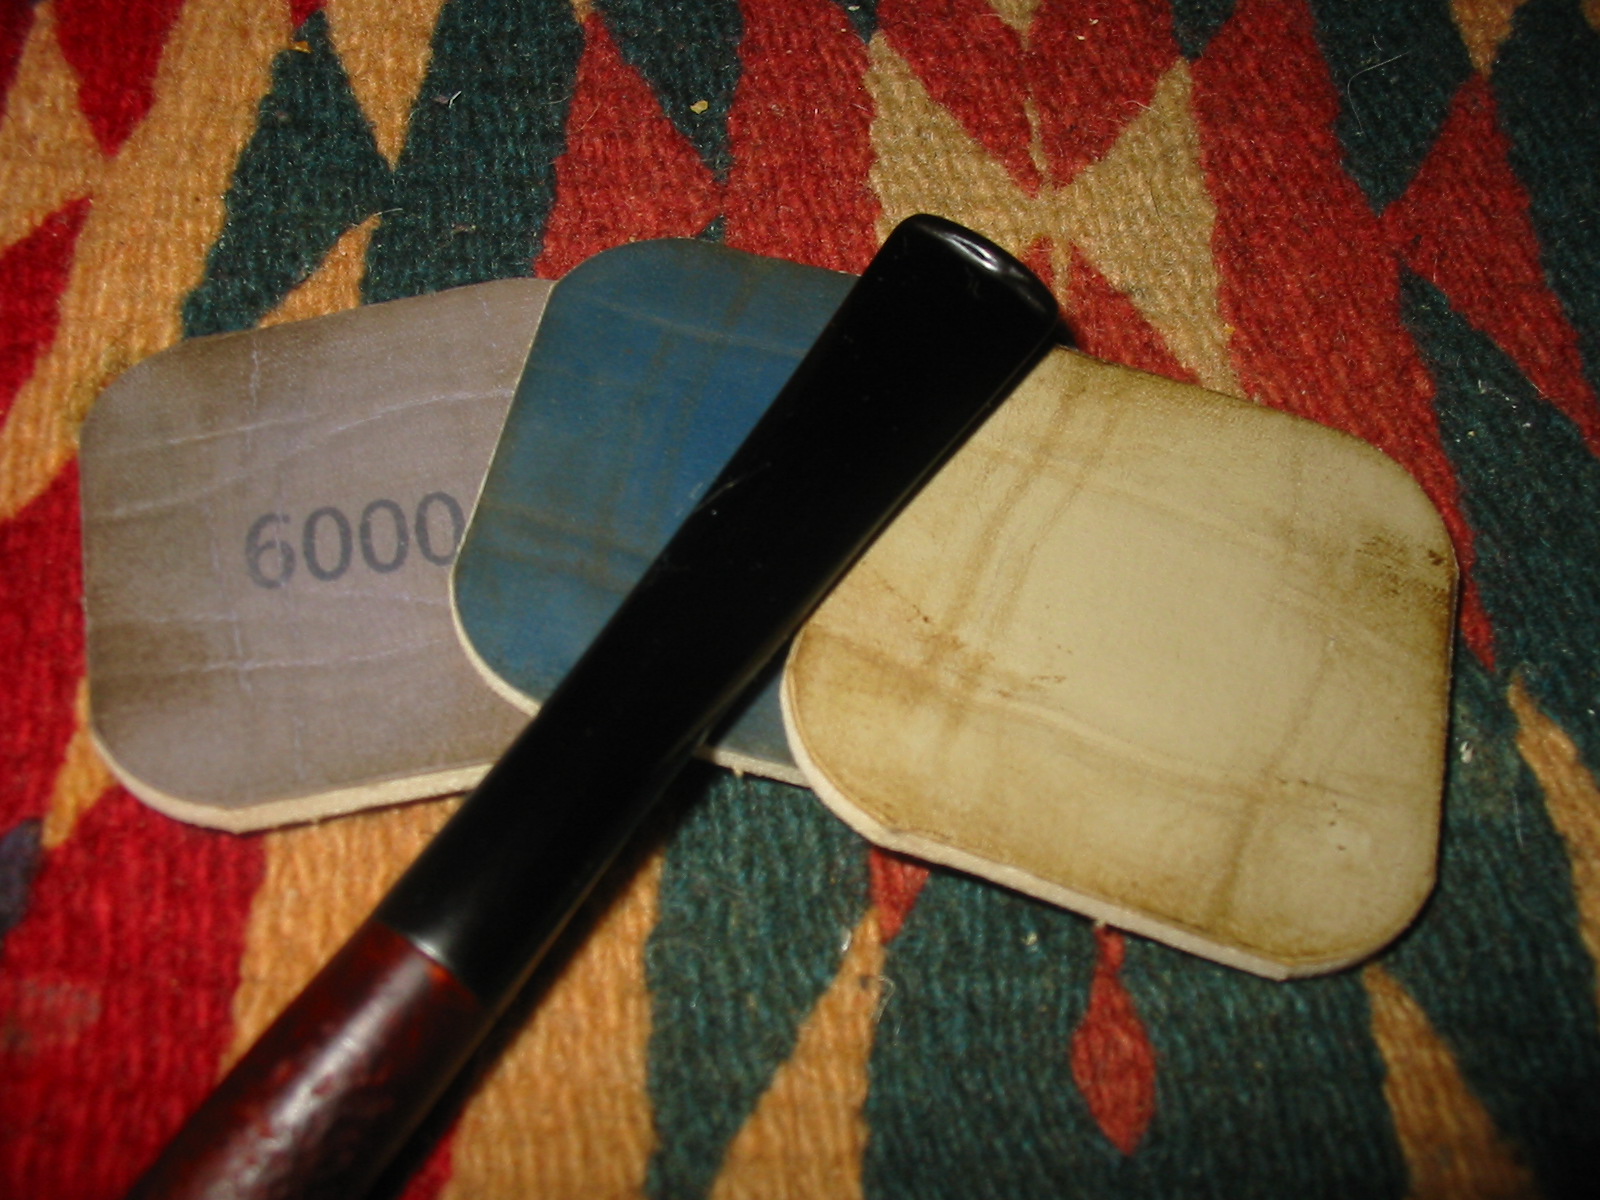
I sanded the stem with the medium and fine grit sanding sponges to remove the scratches from the work on the diameter. Once I had them removed I use micromesh sanding pads – wet sanding with 1500-2400 grit and dry sanding with 3200-12000 grit pads. I rubbed the stem down with Obsidian Oil and let it soak into the stem.
IMG_6463

IMG_6464

IMG_6472
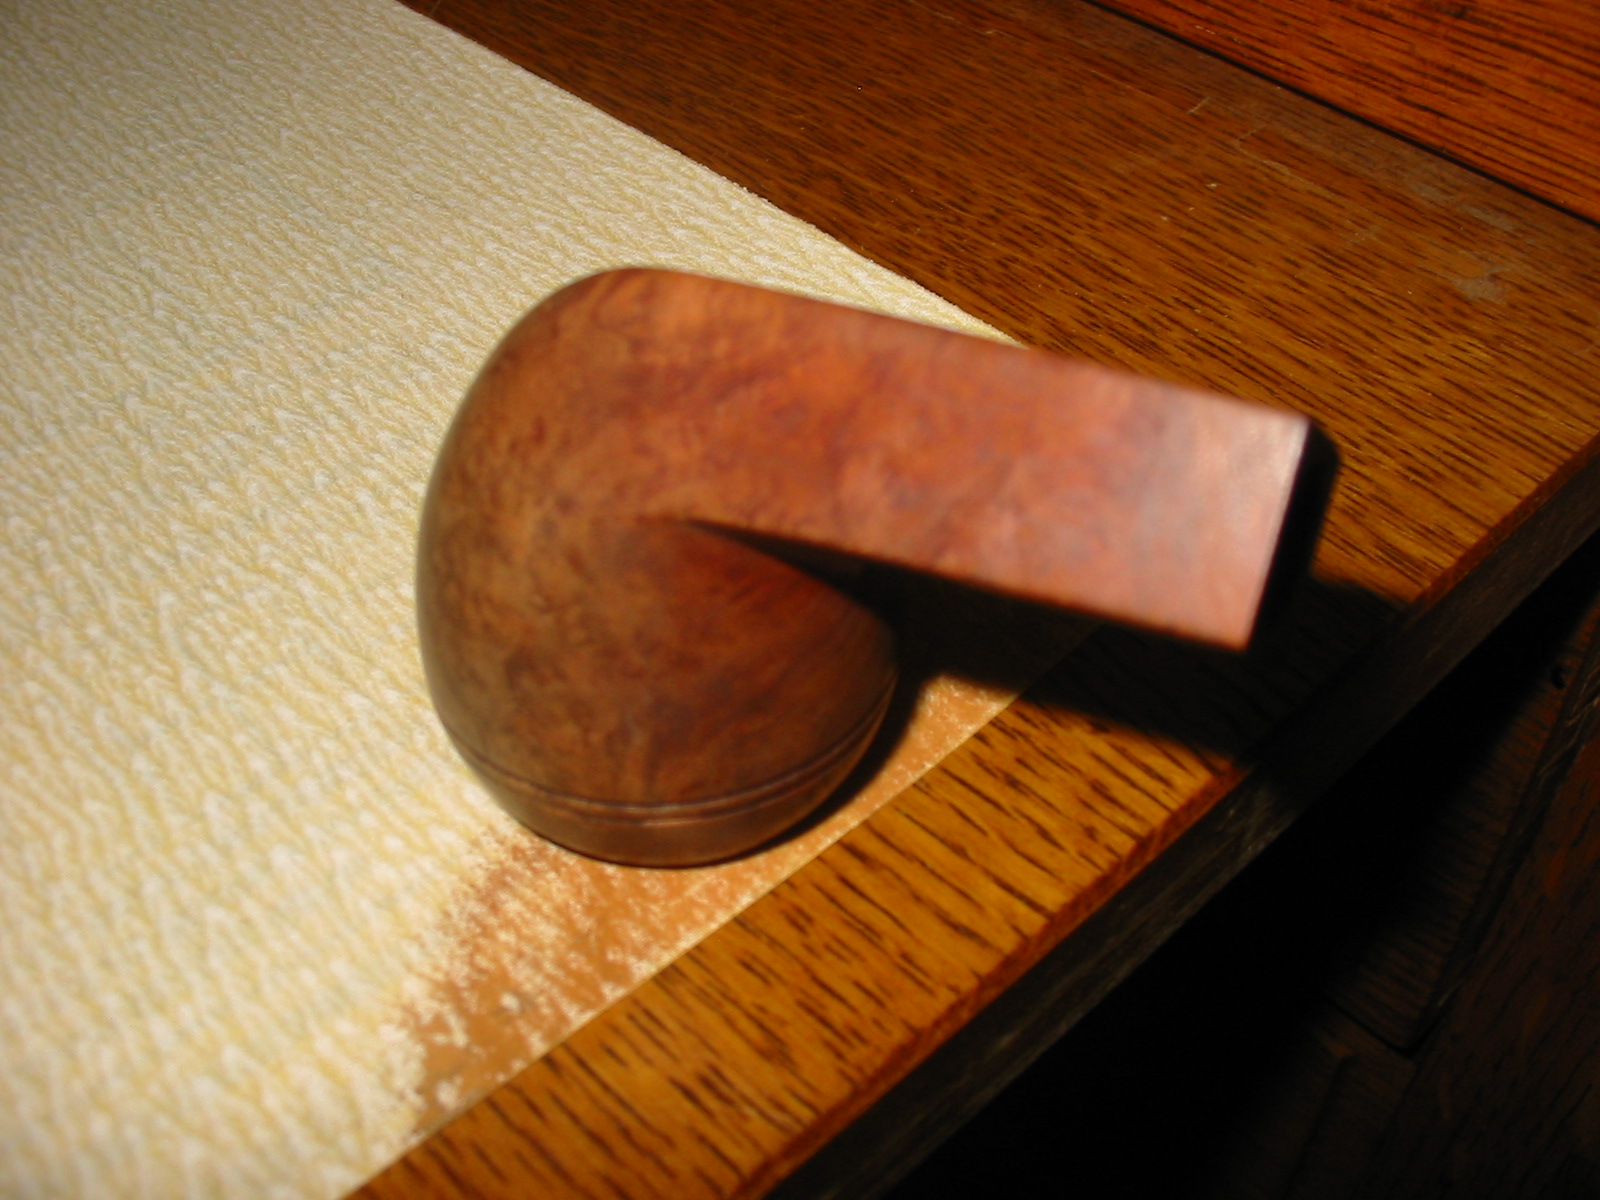
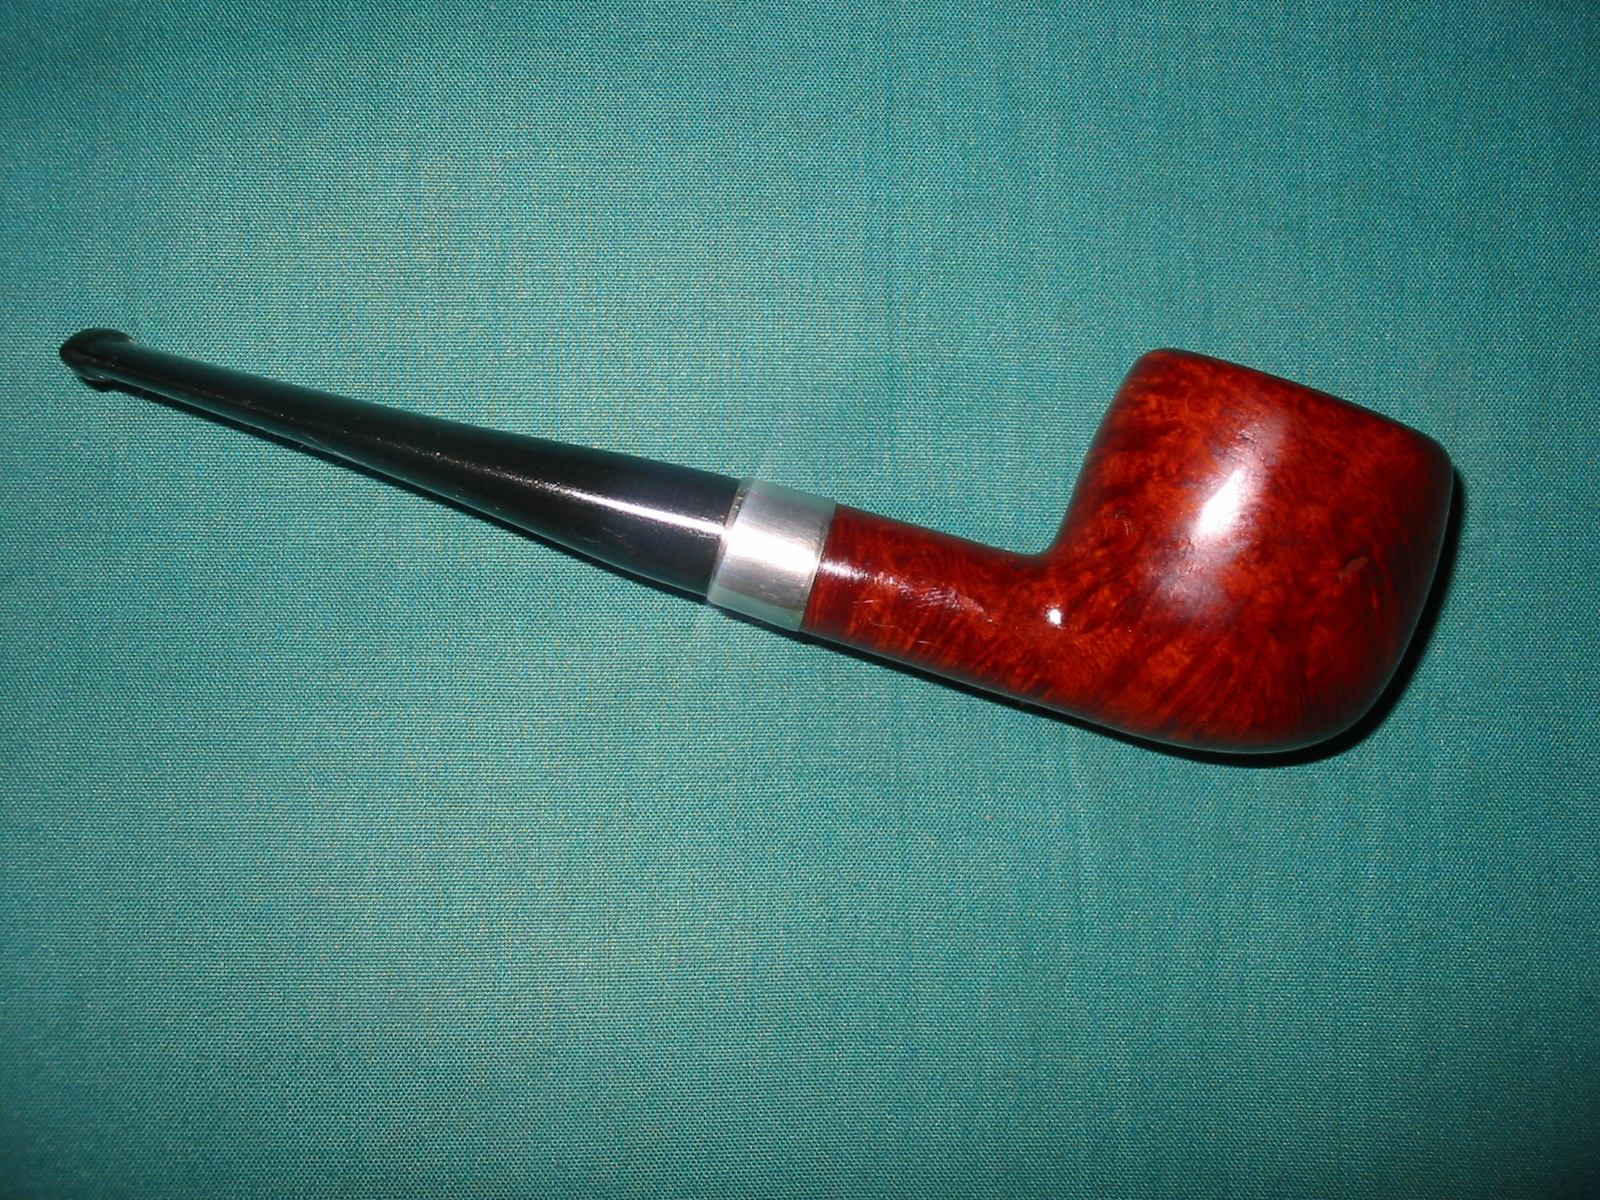
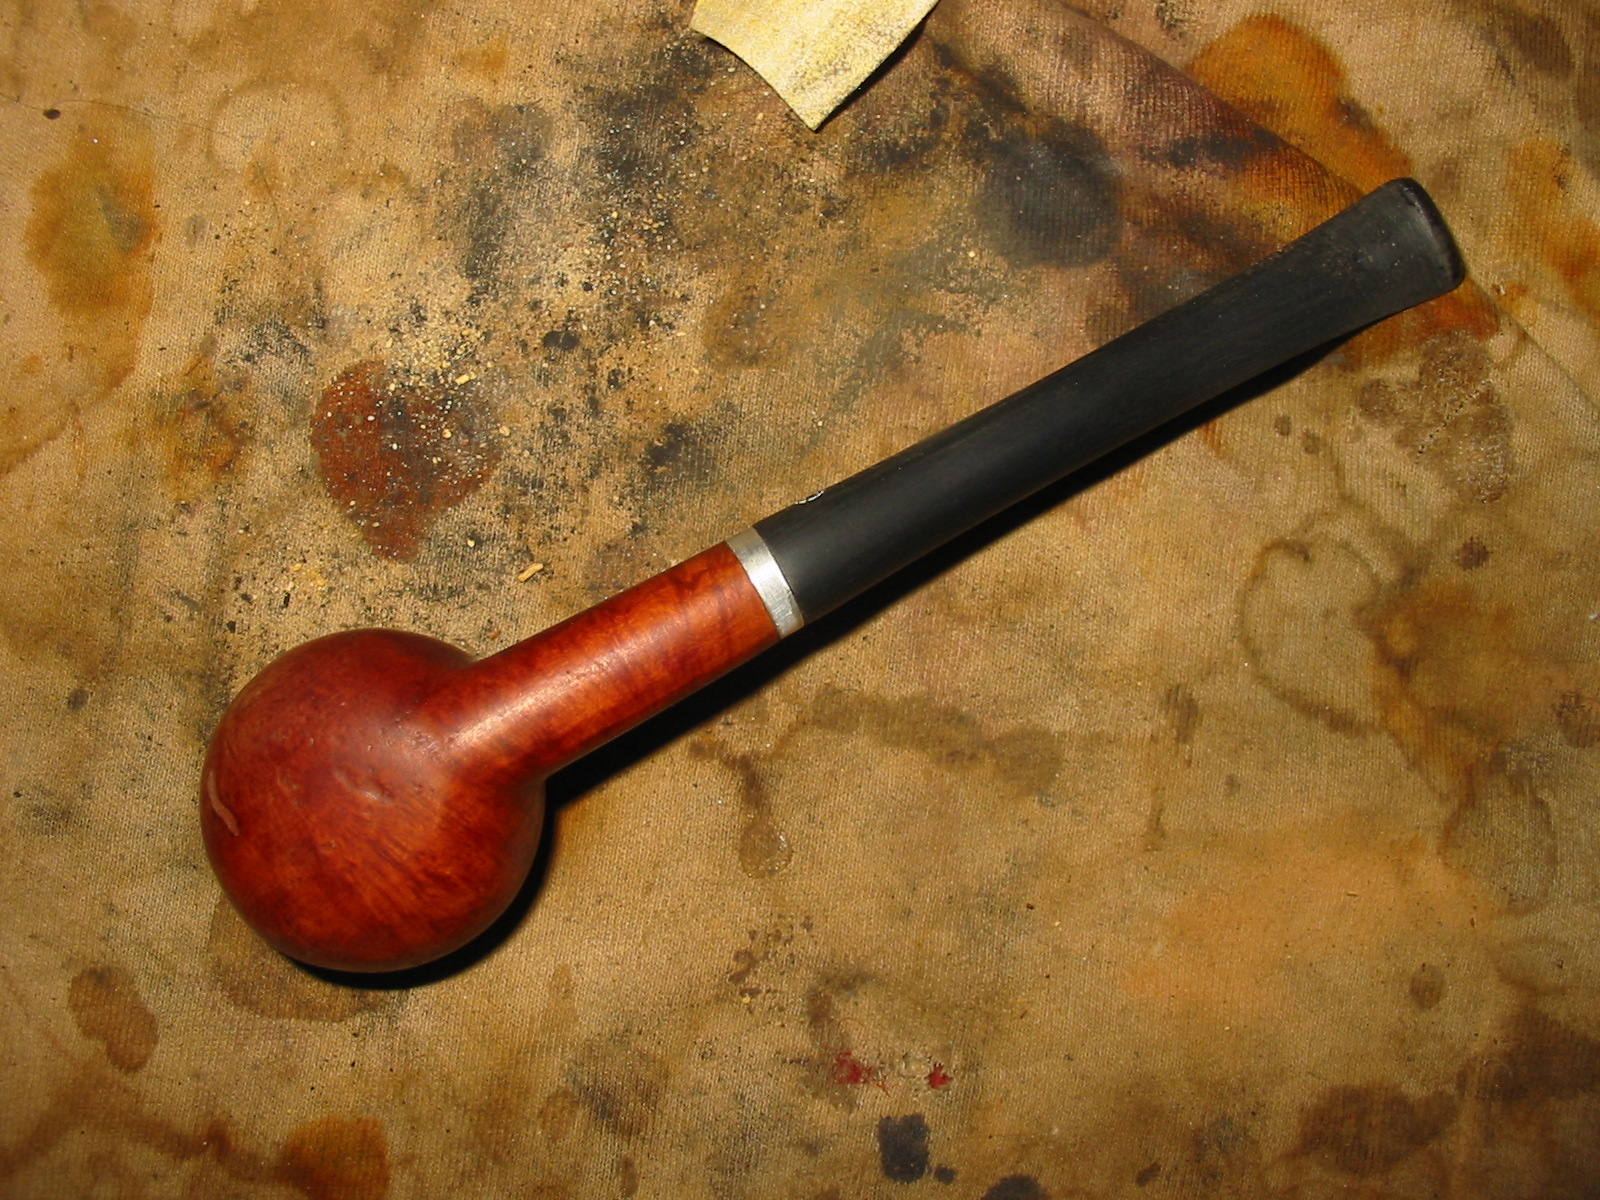
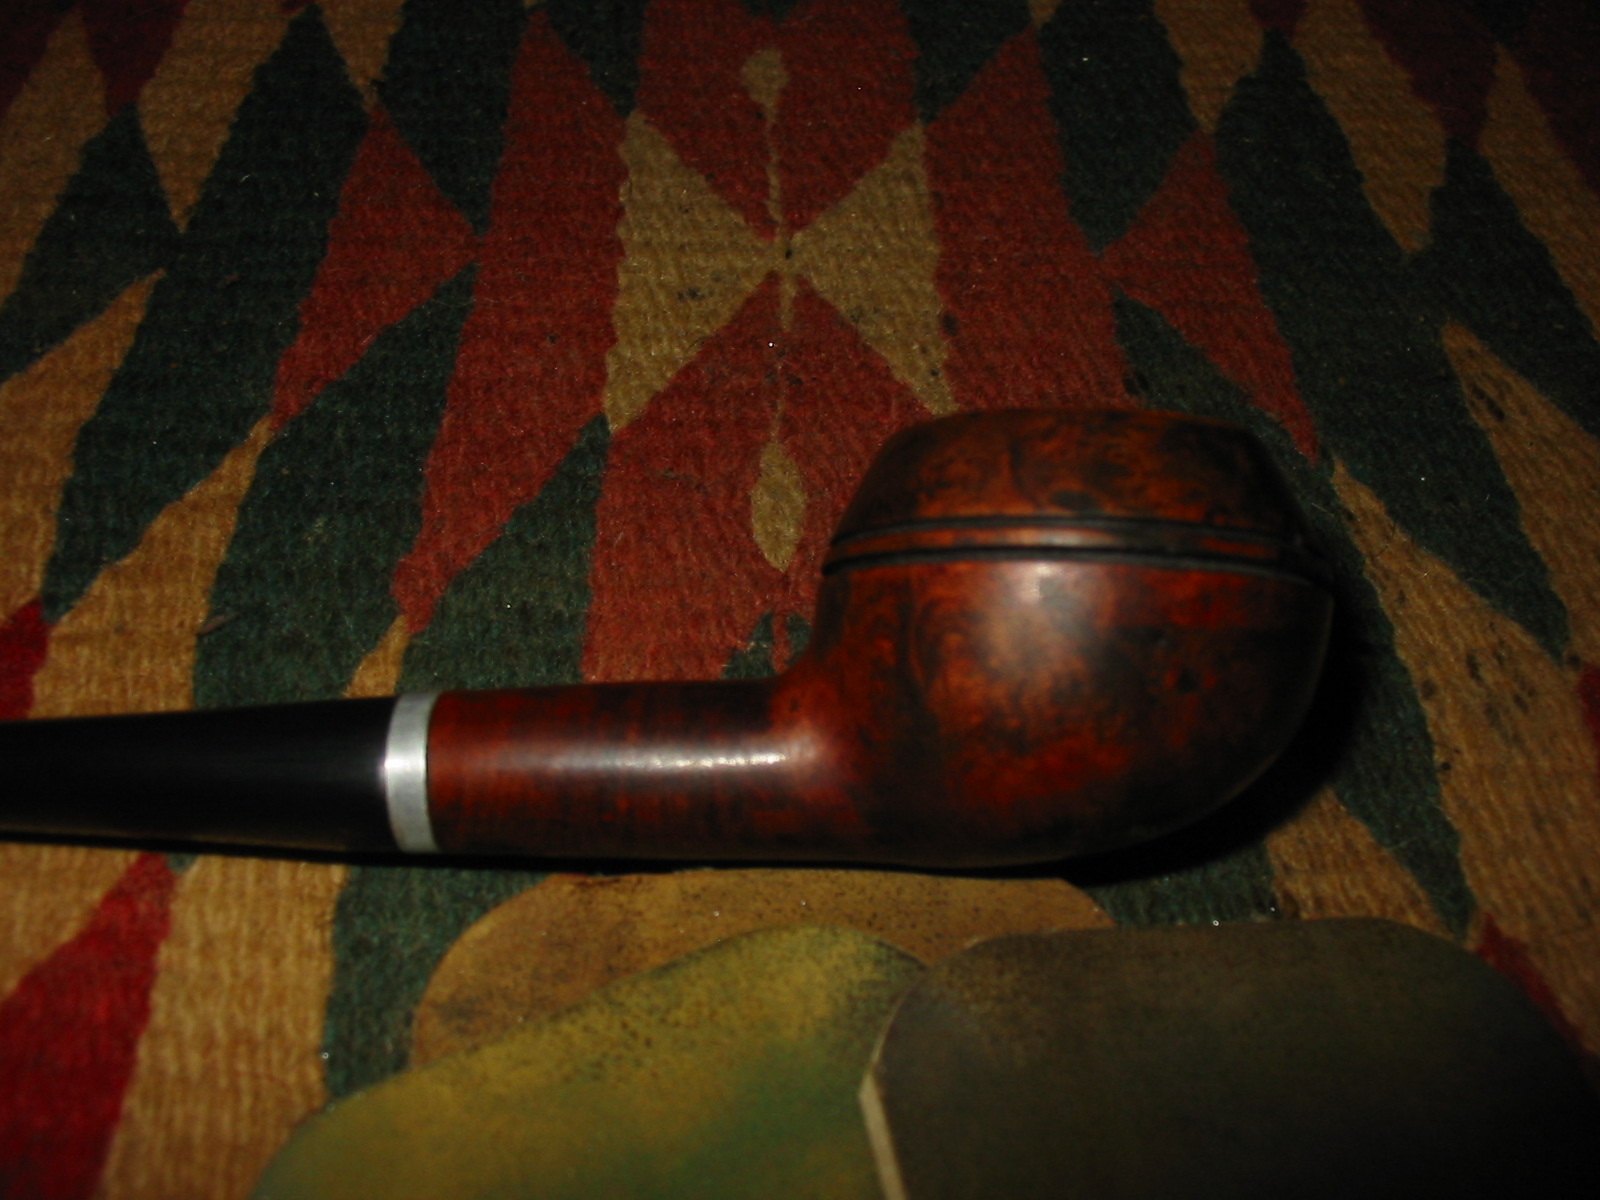
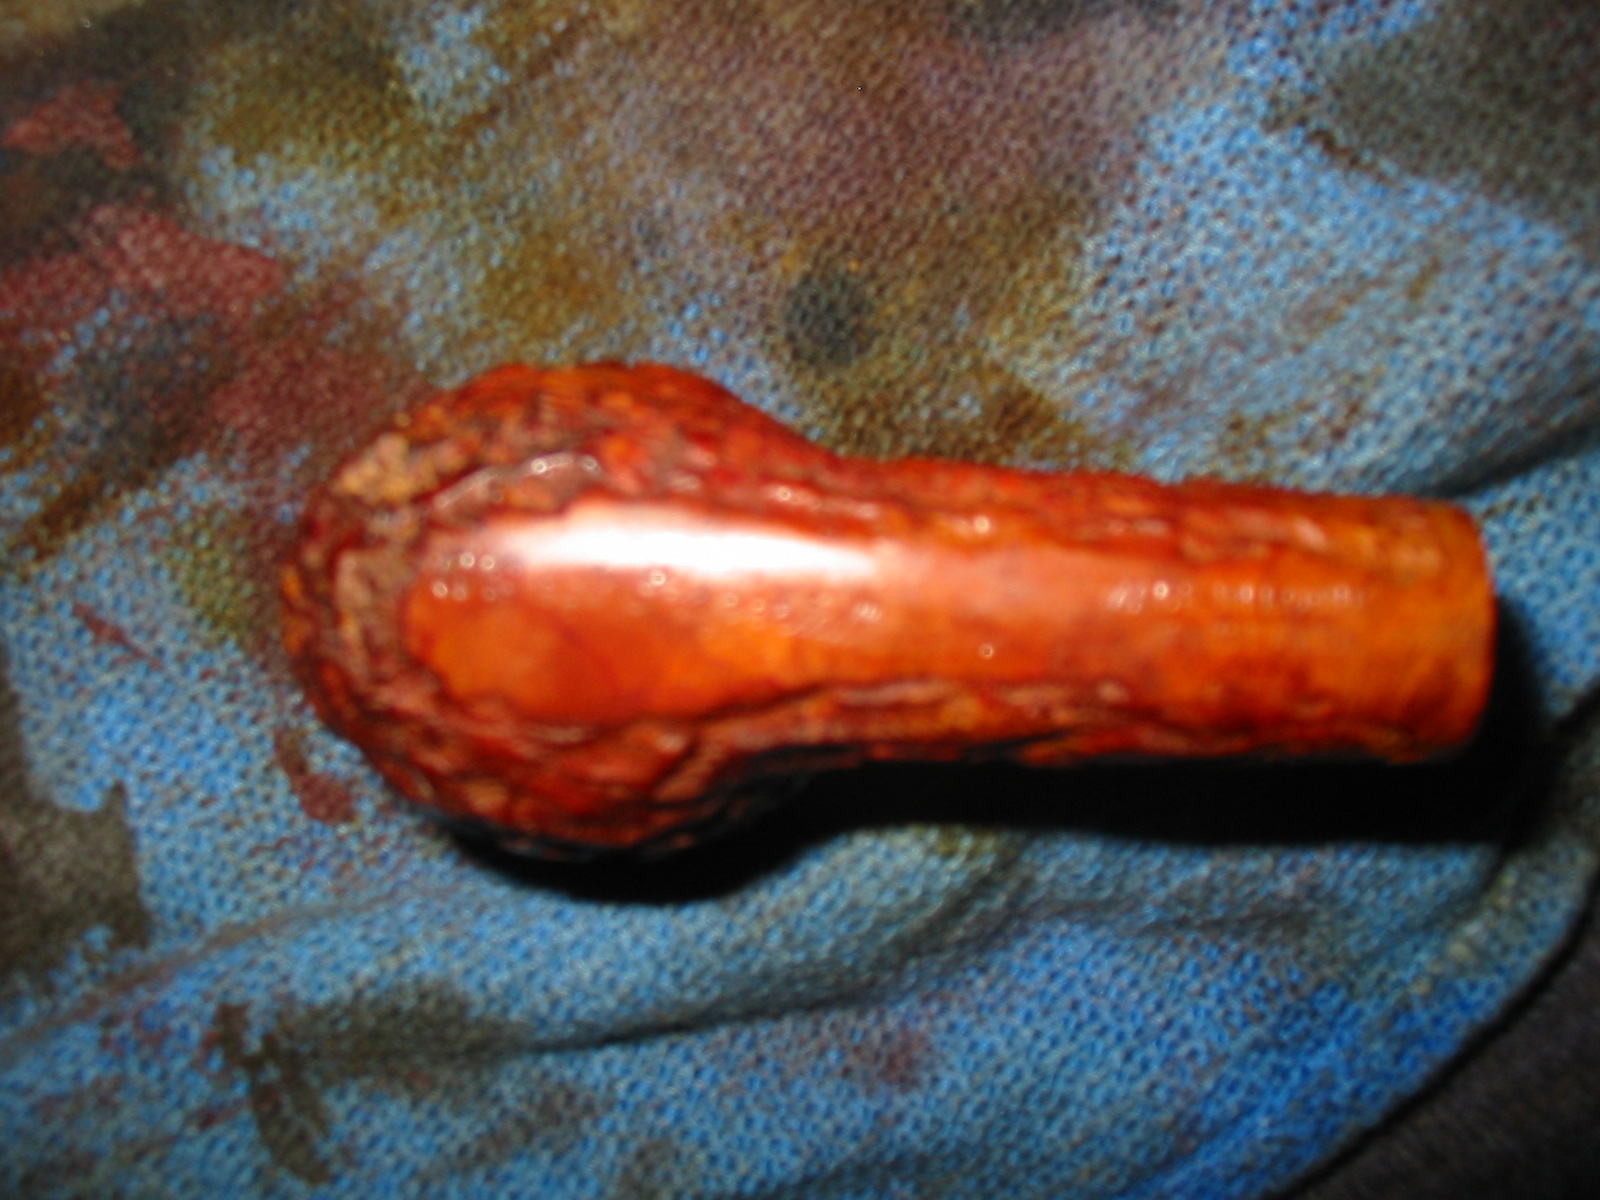
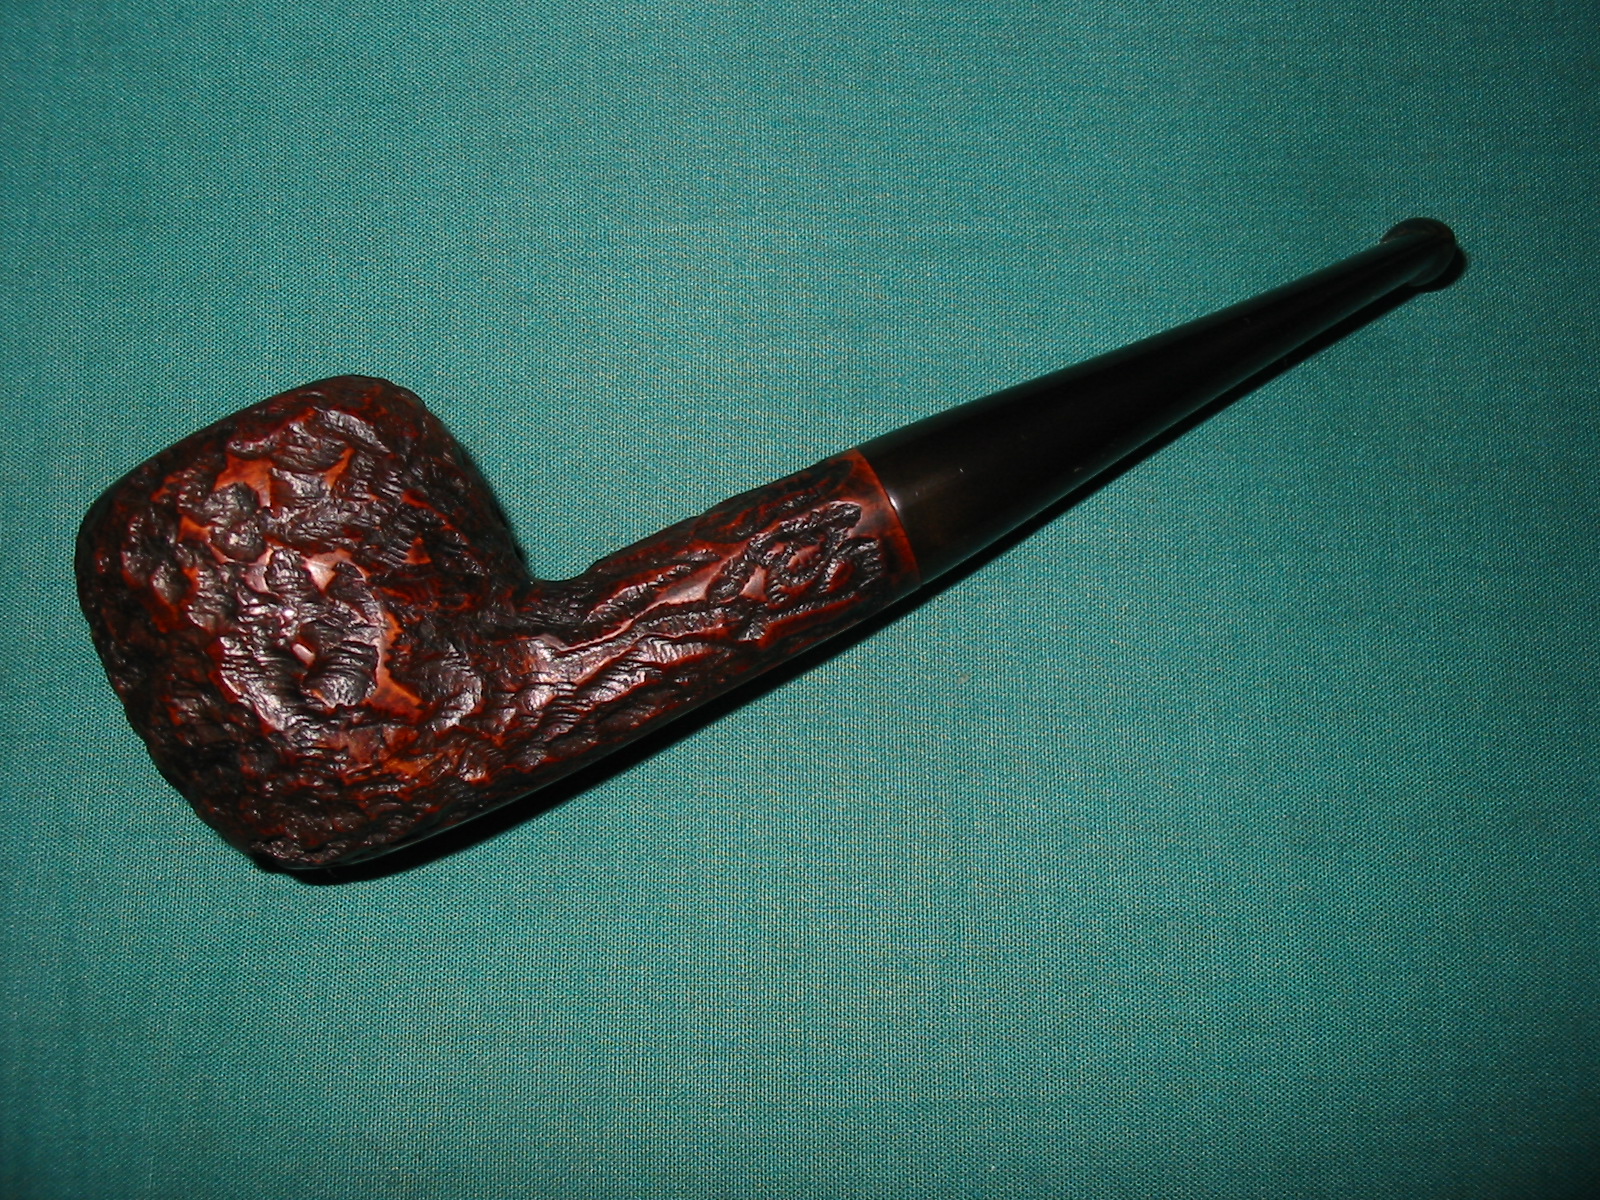
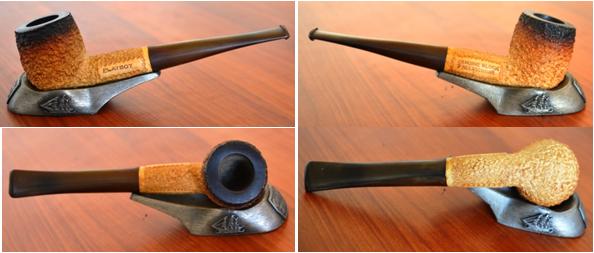
Afterward I took some photos of the pipe at this stage of restoration to get a good look at the straight stem. I find that I can tell more with a photo than I can holding it in hand when I am trying to decide on the finished look. I wanted to decide whether to leave it straight or to bend it like the one I took off the pipe. For me looking at it on the monitor, enlarged gives me a feel for the overal appearance of the pipe. I cannot tell you how many times, after looking at the photos, that I have taken the pipe back to the table for more shaping and work.
IMG_6468

IMG_6469

IMG_6470

IMG_6471
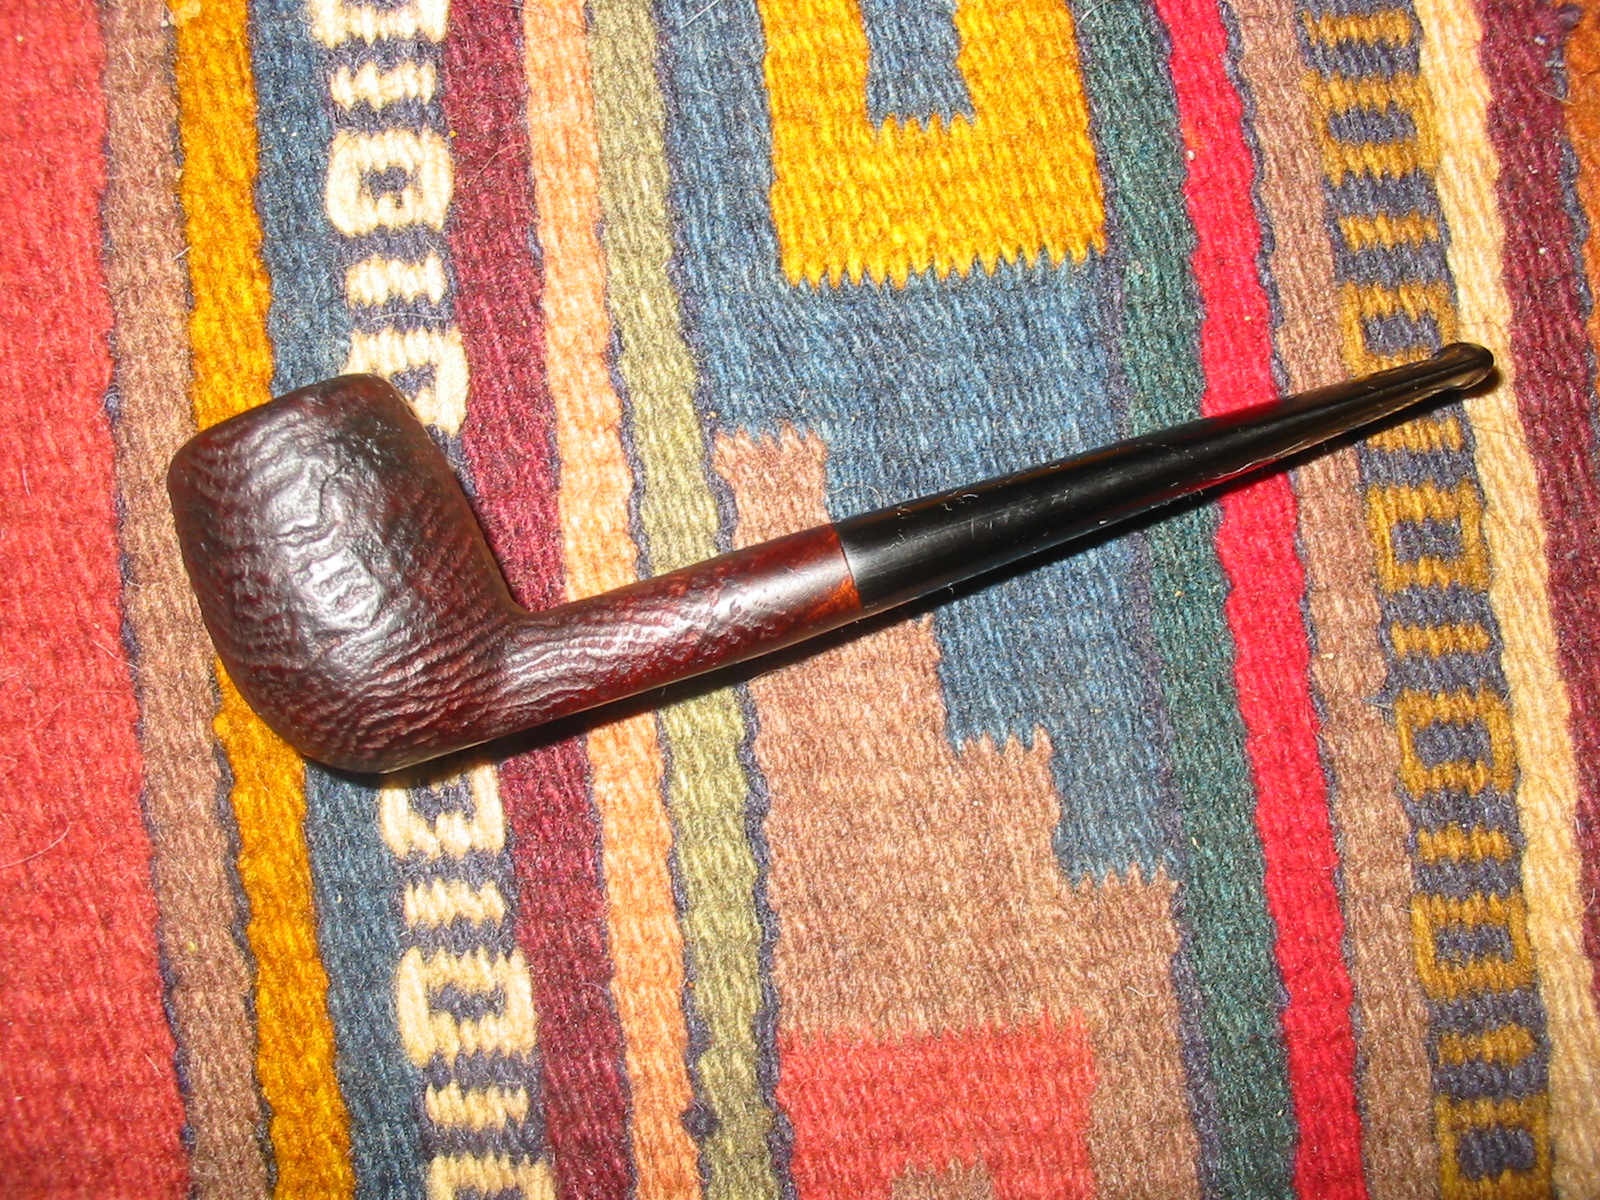
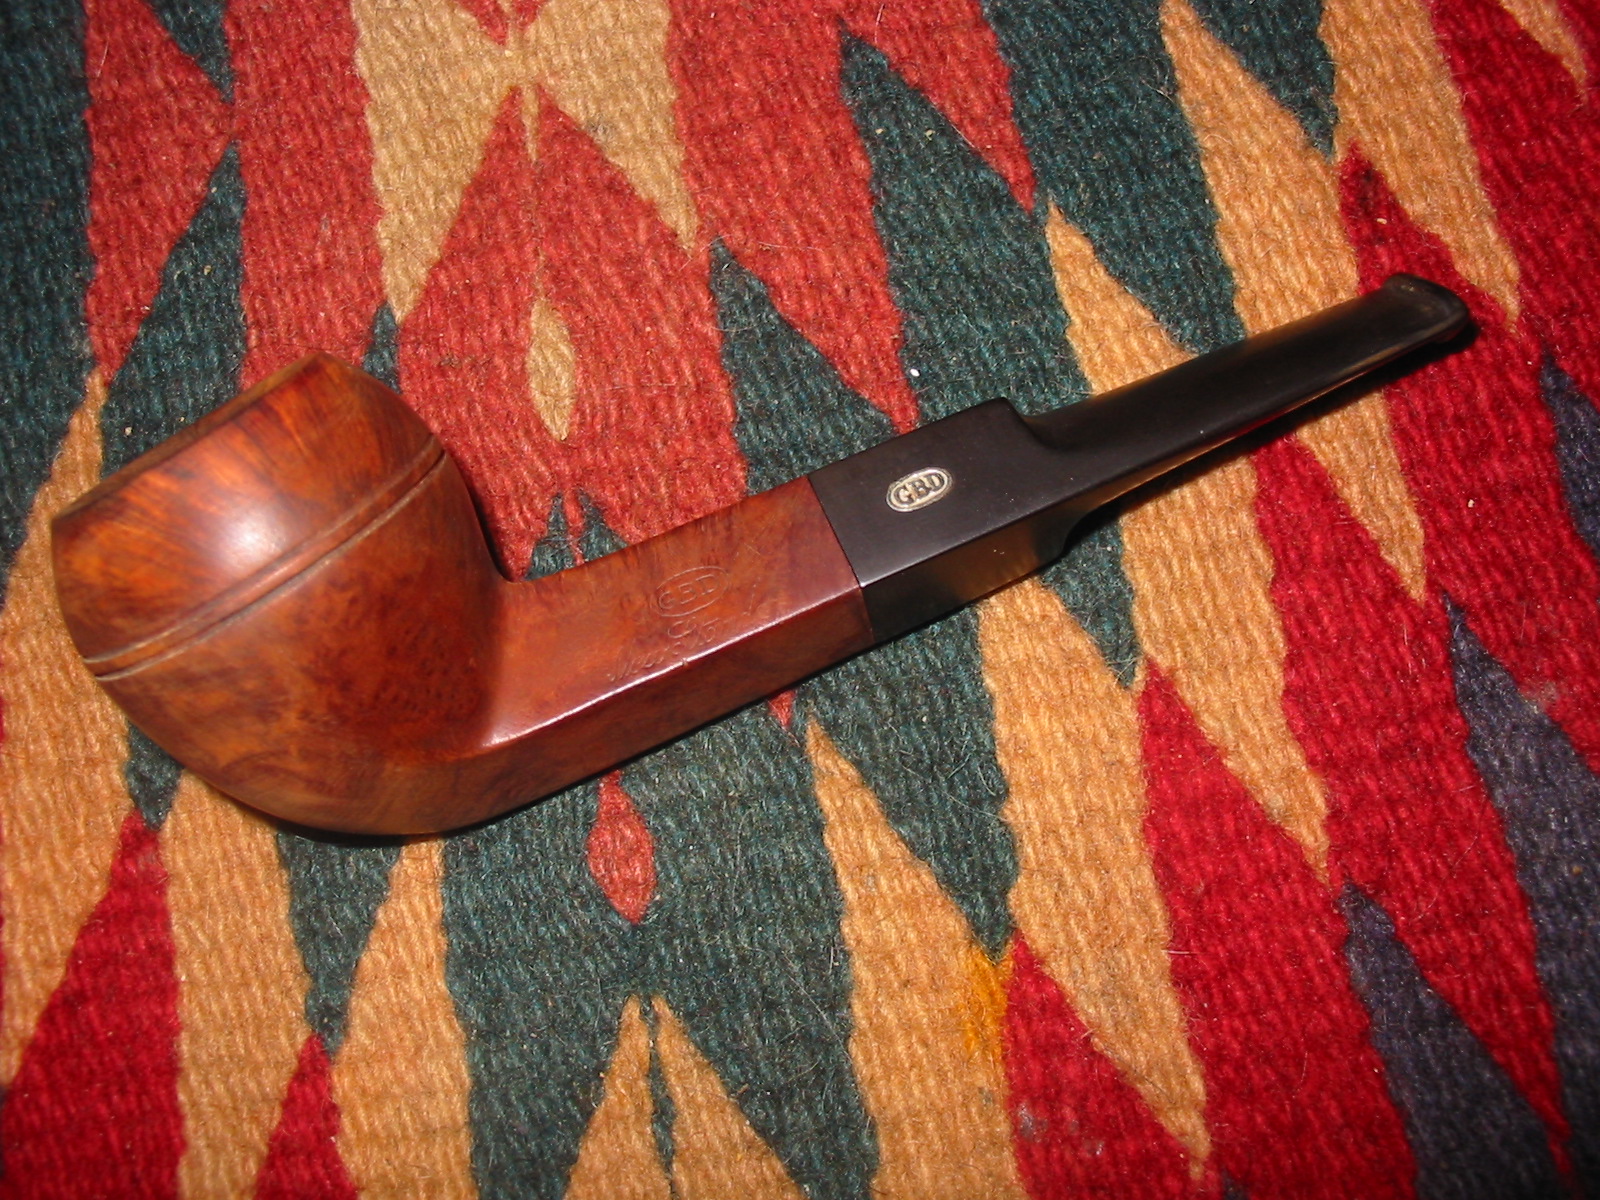
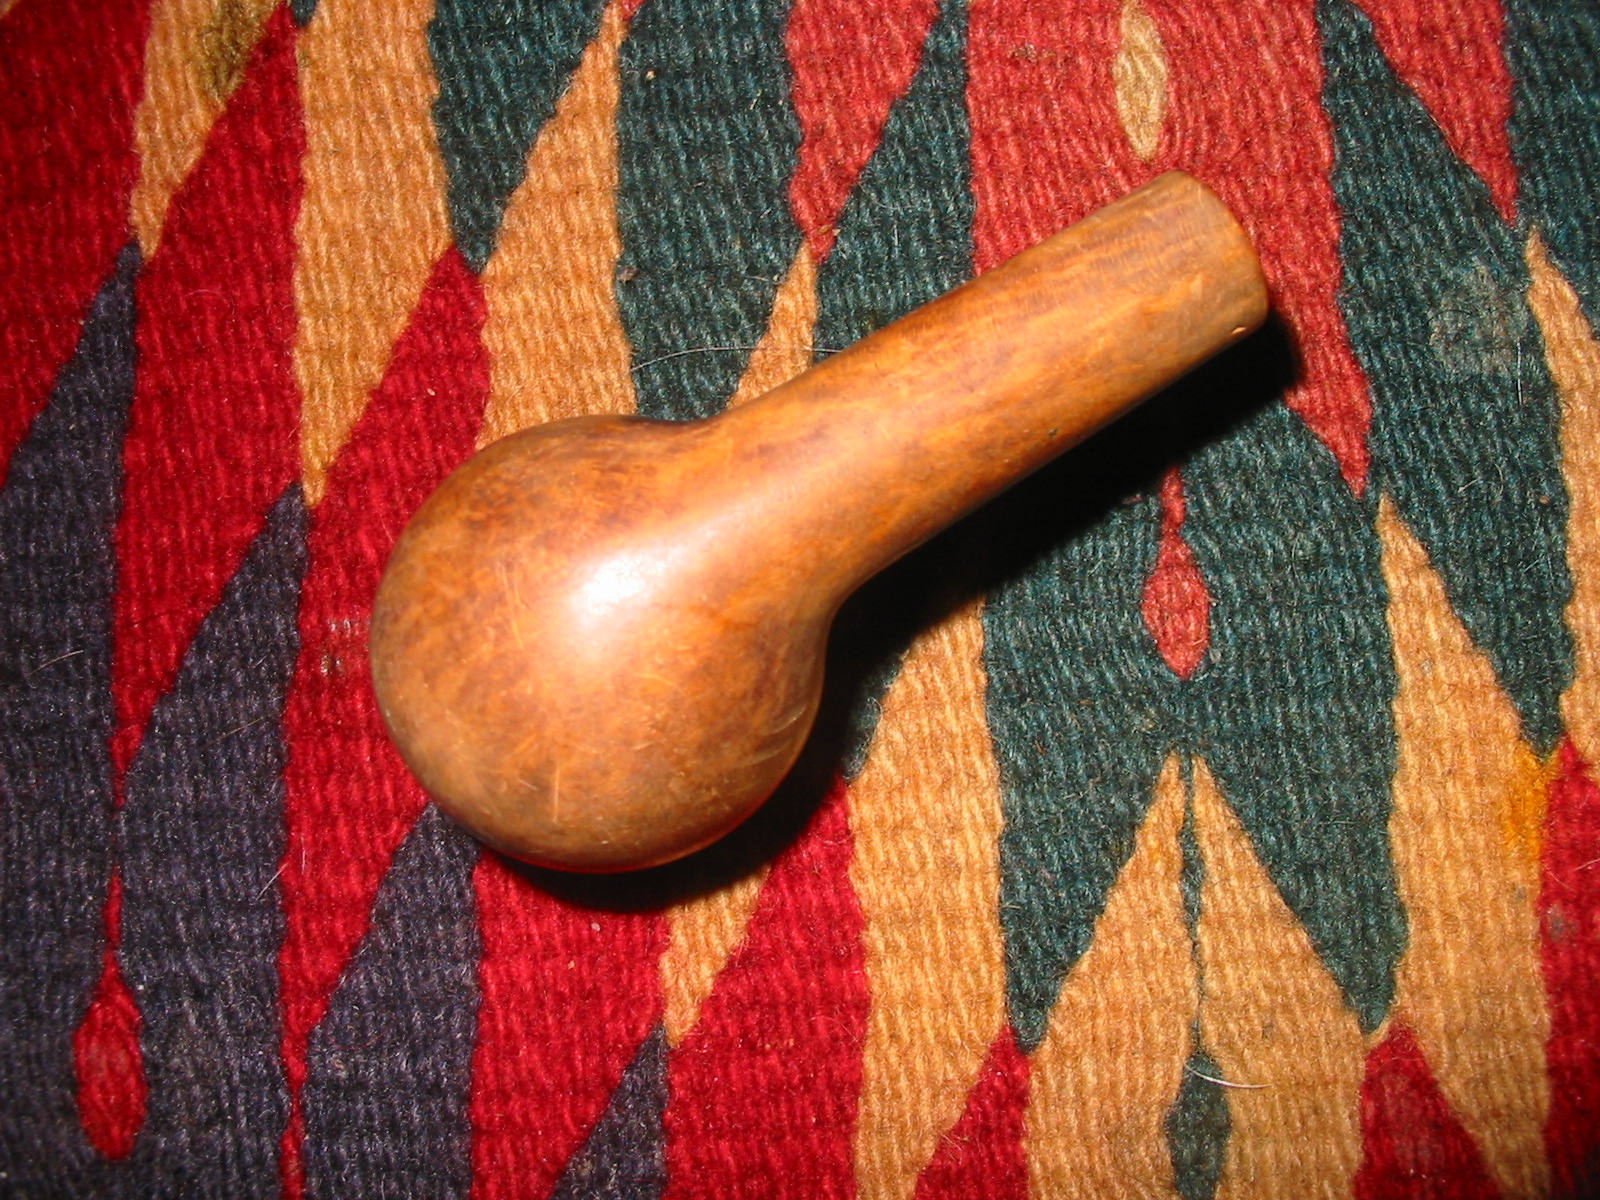
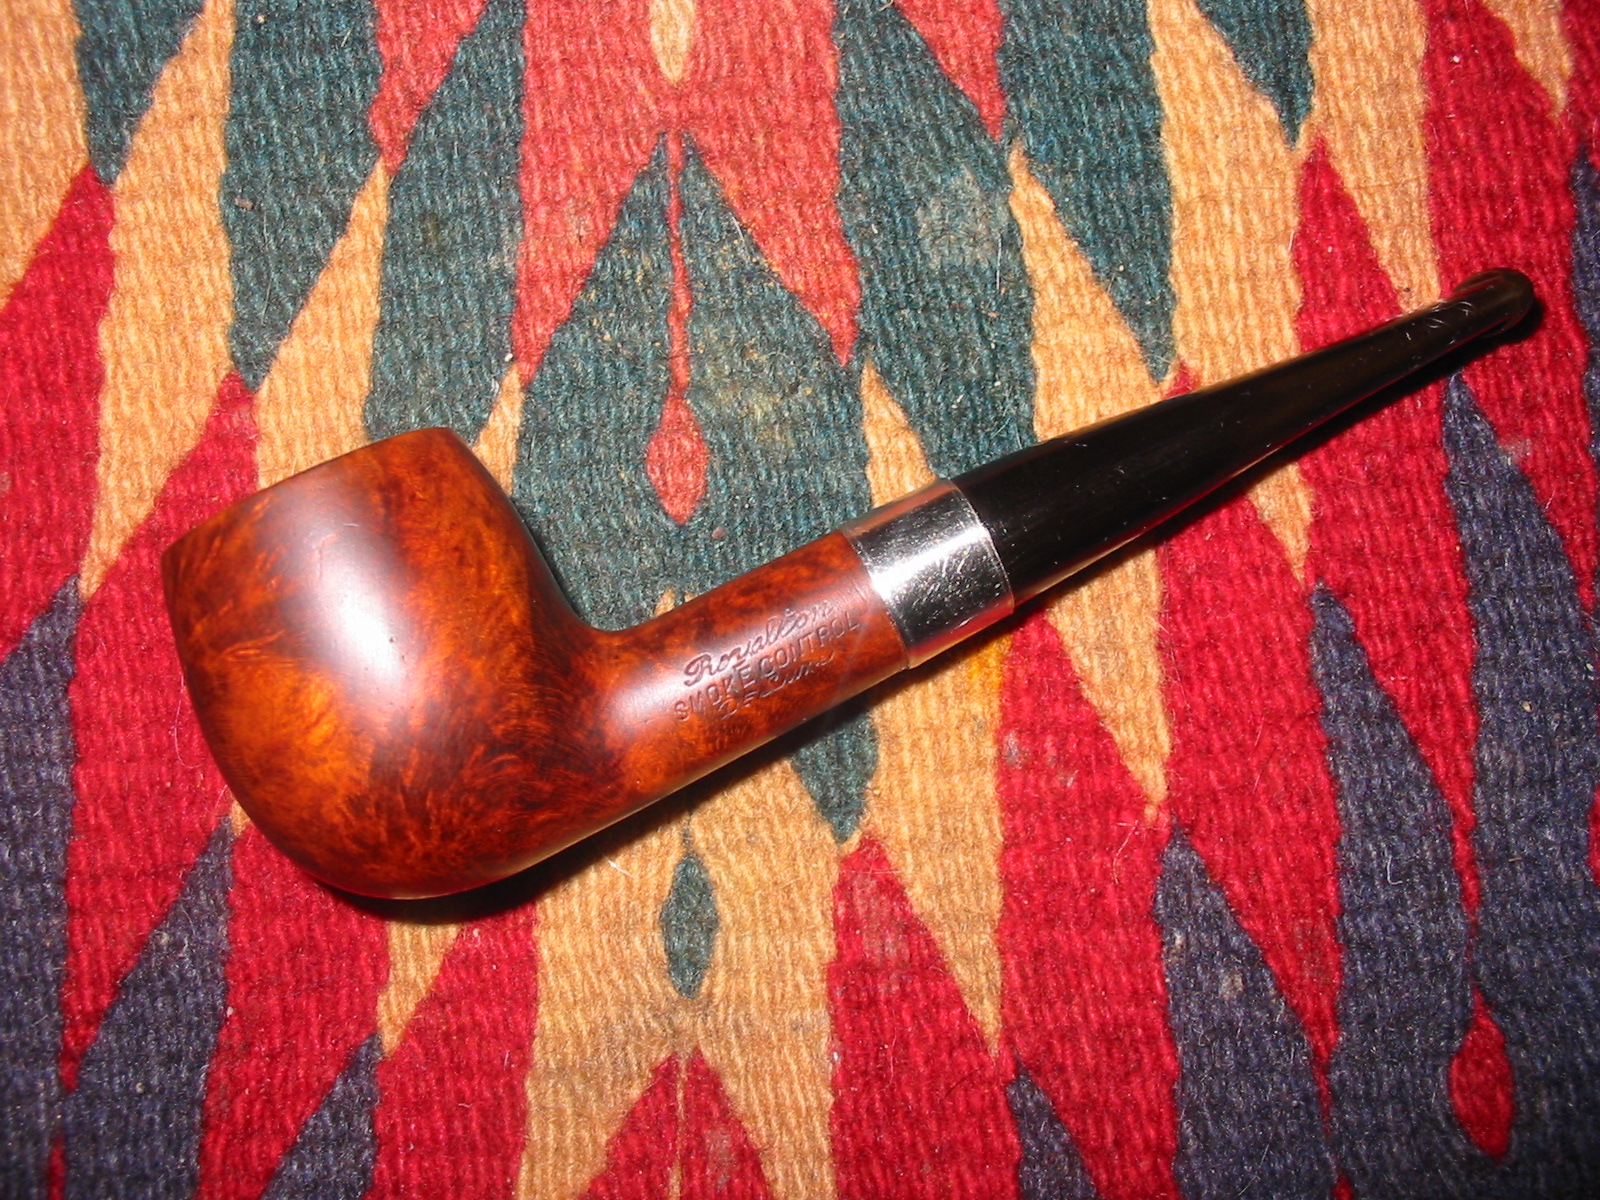
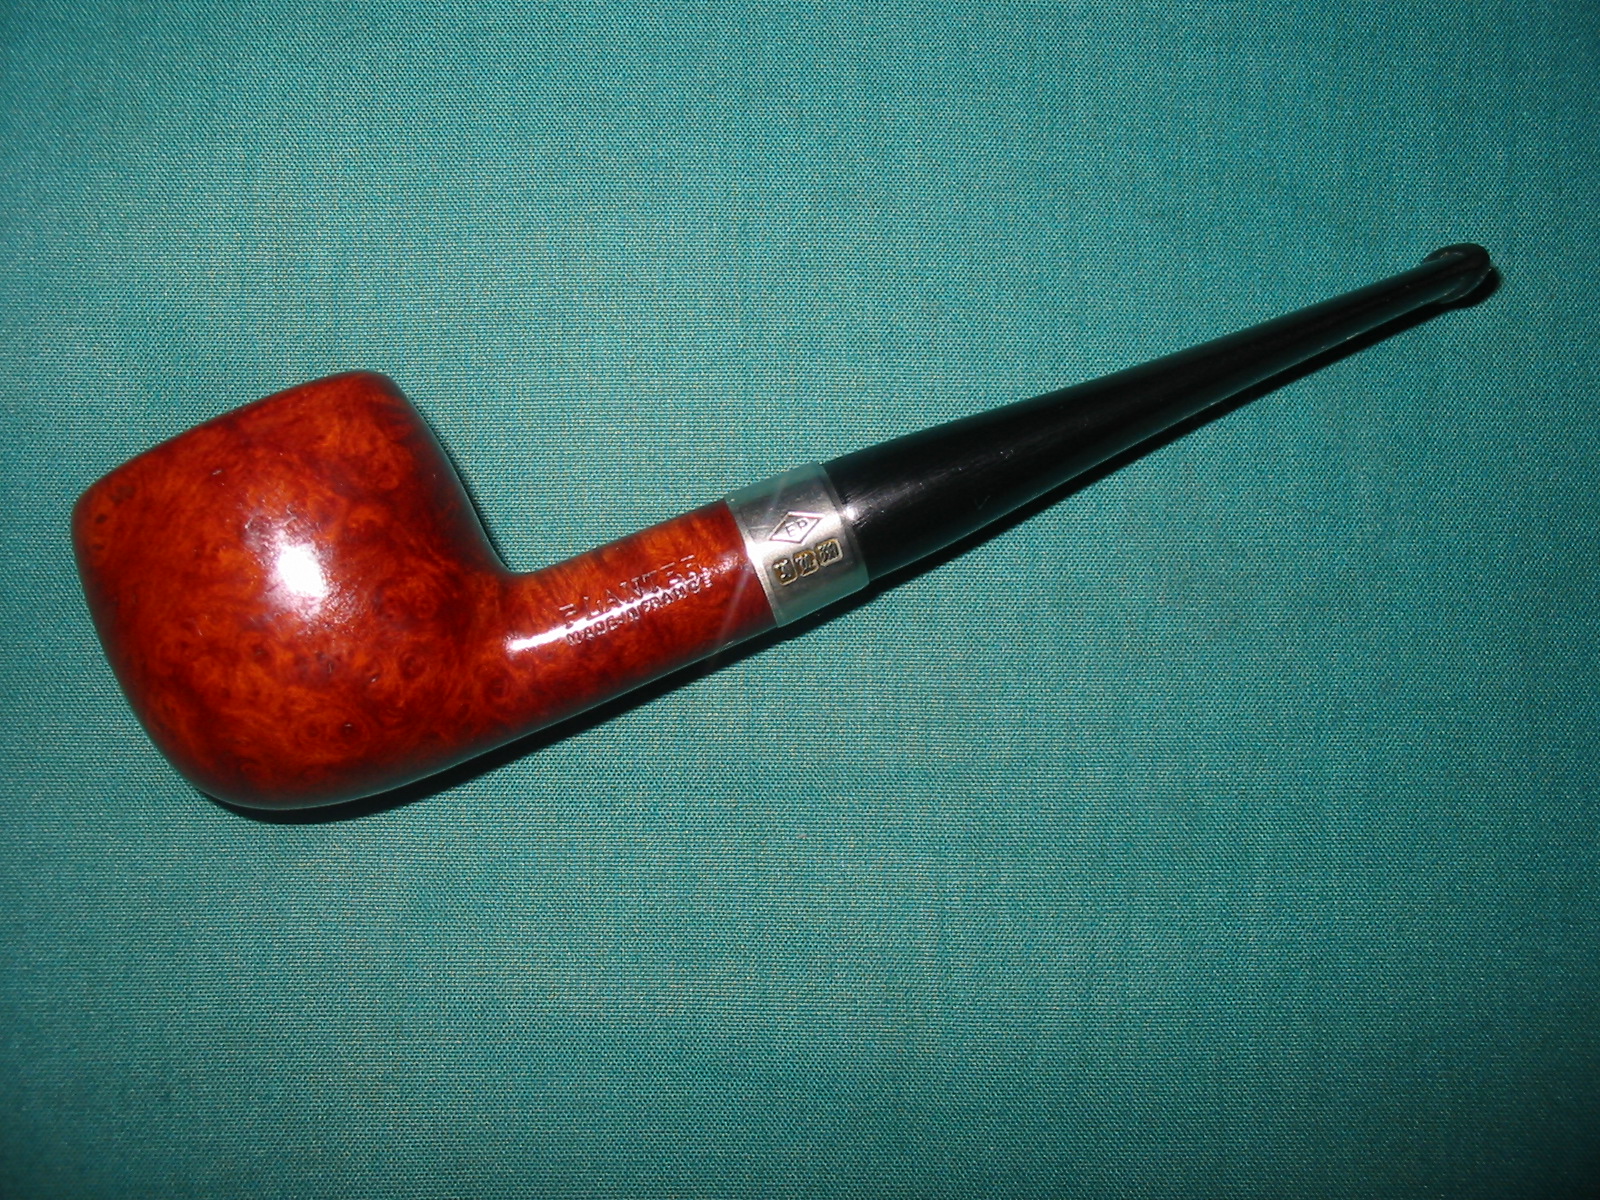
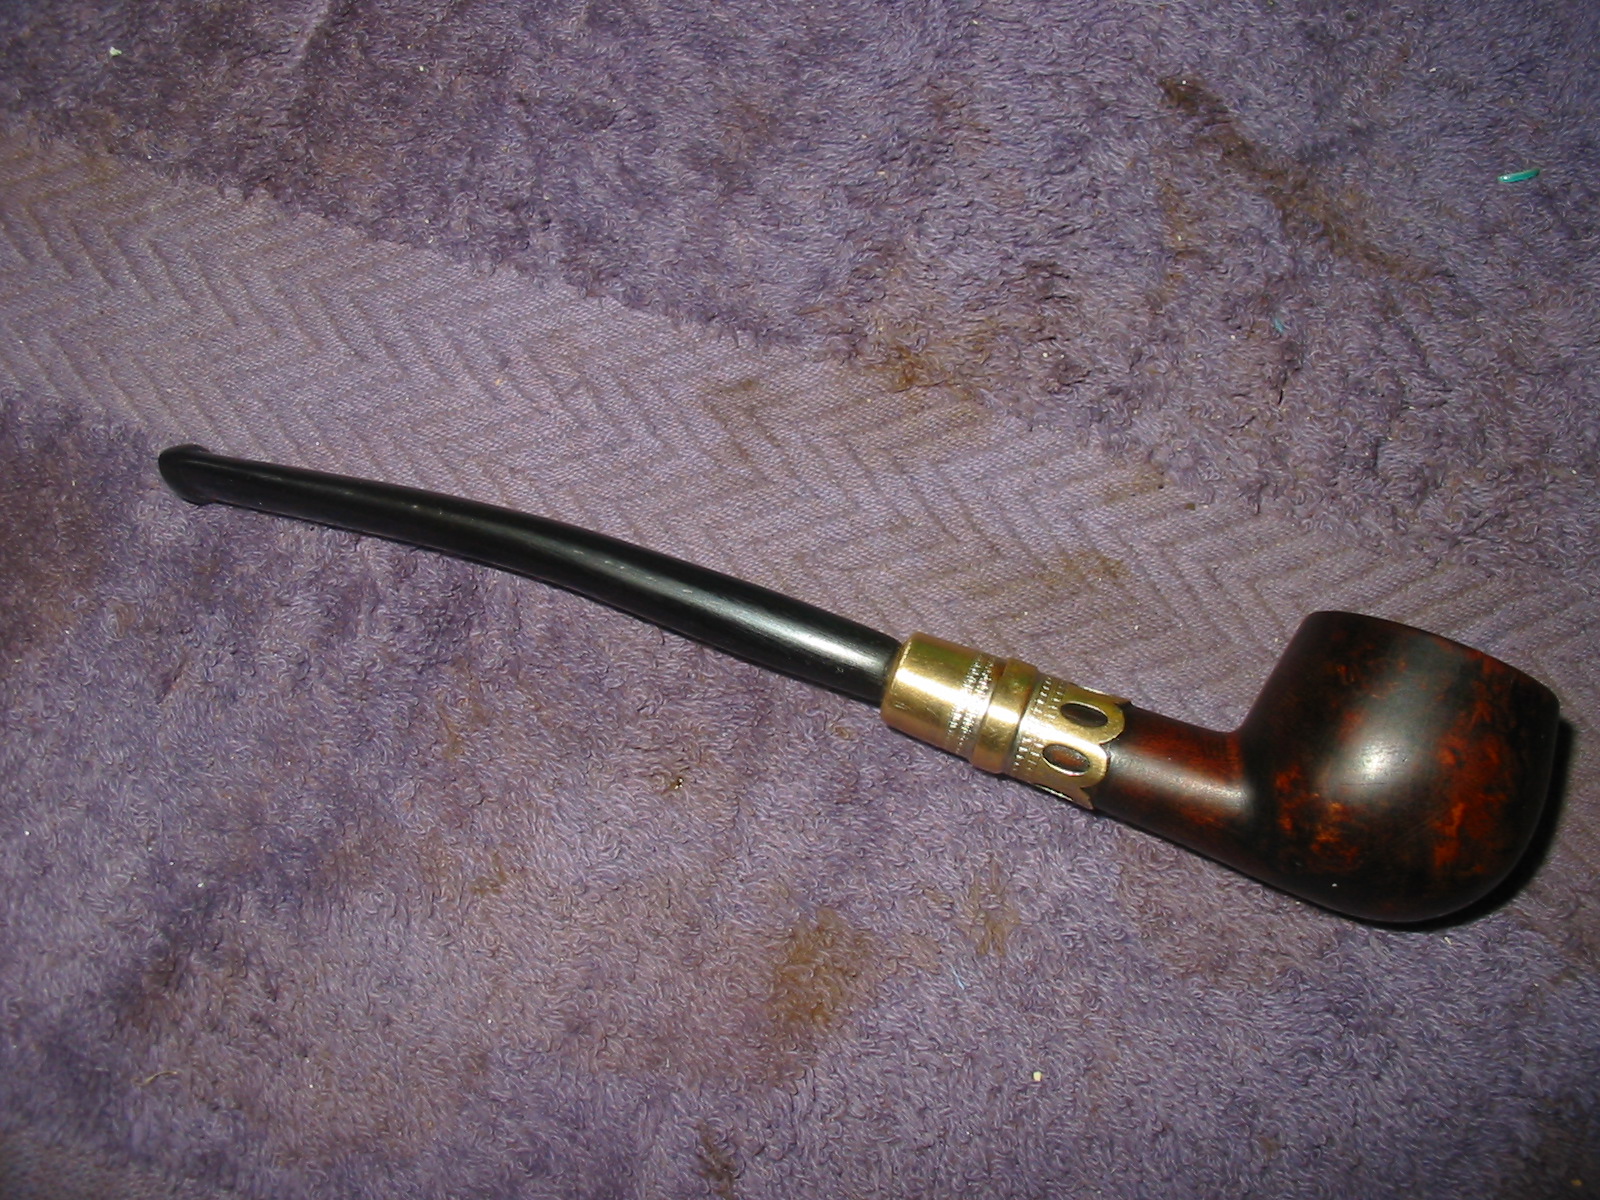
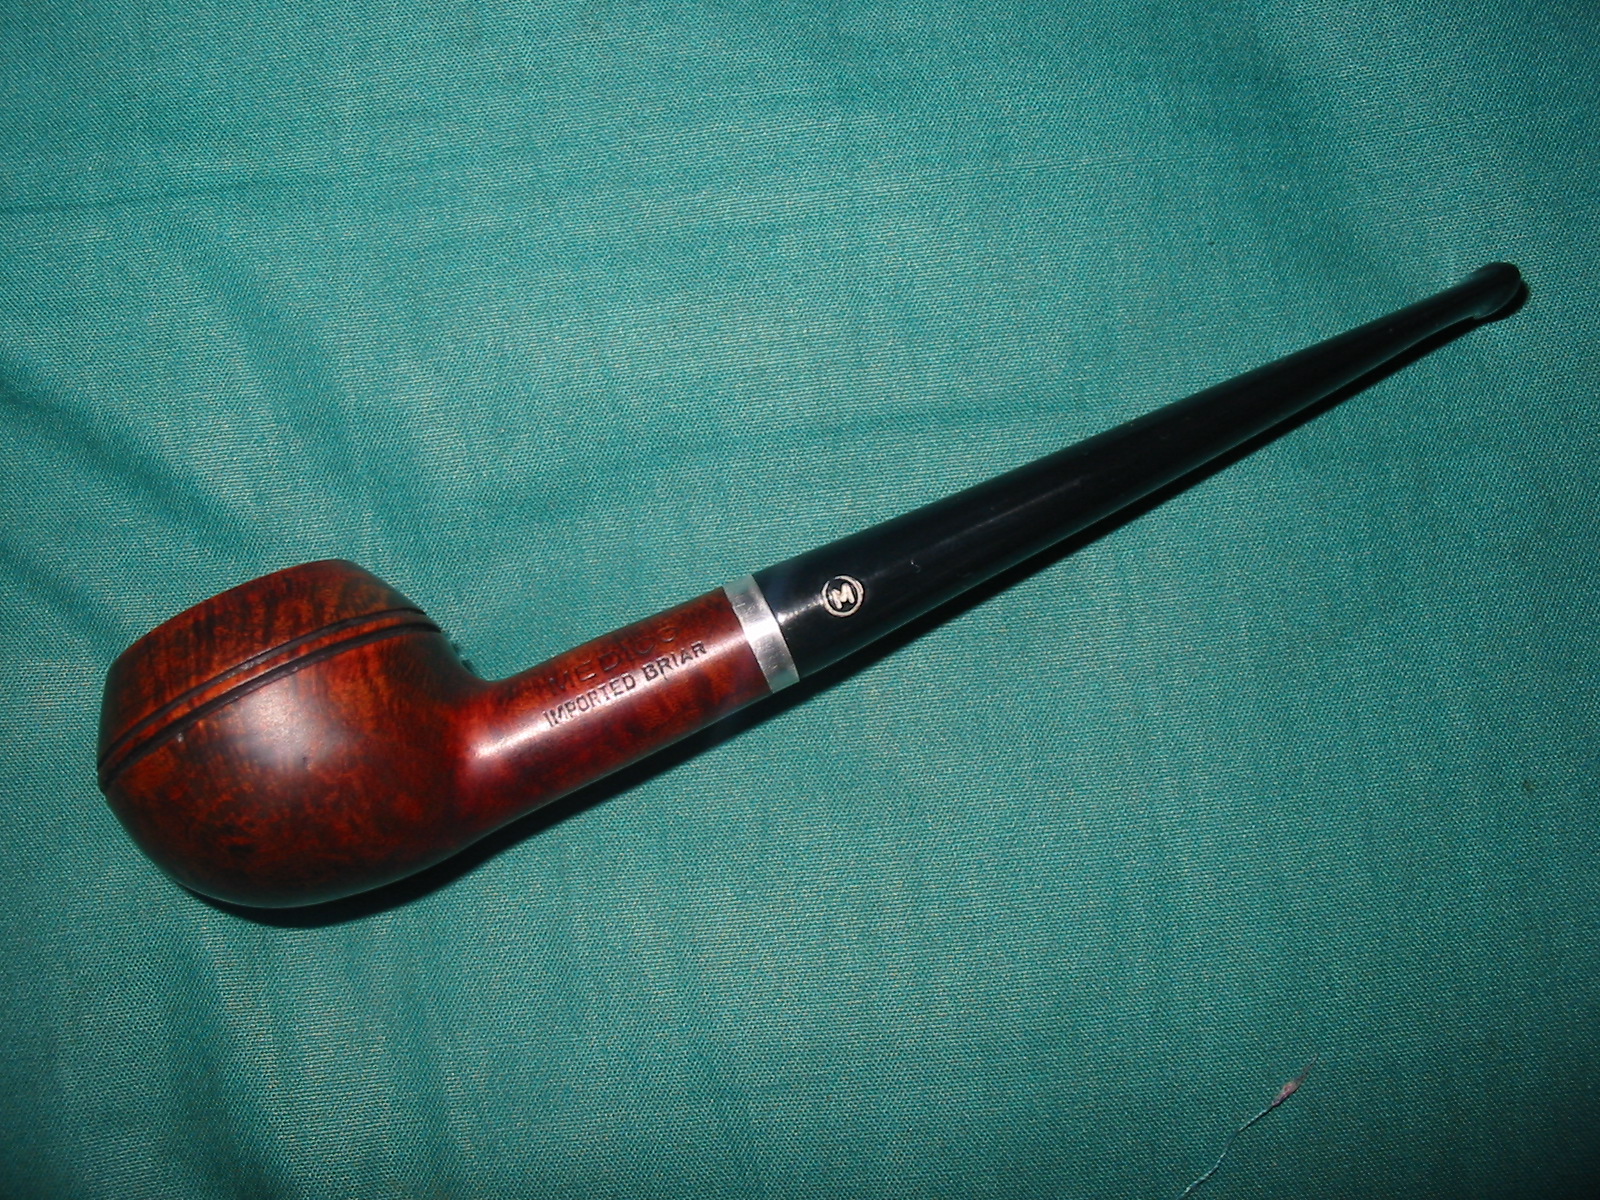
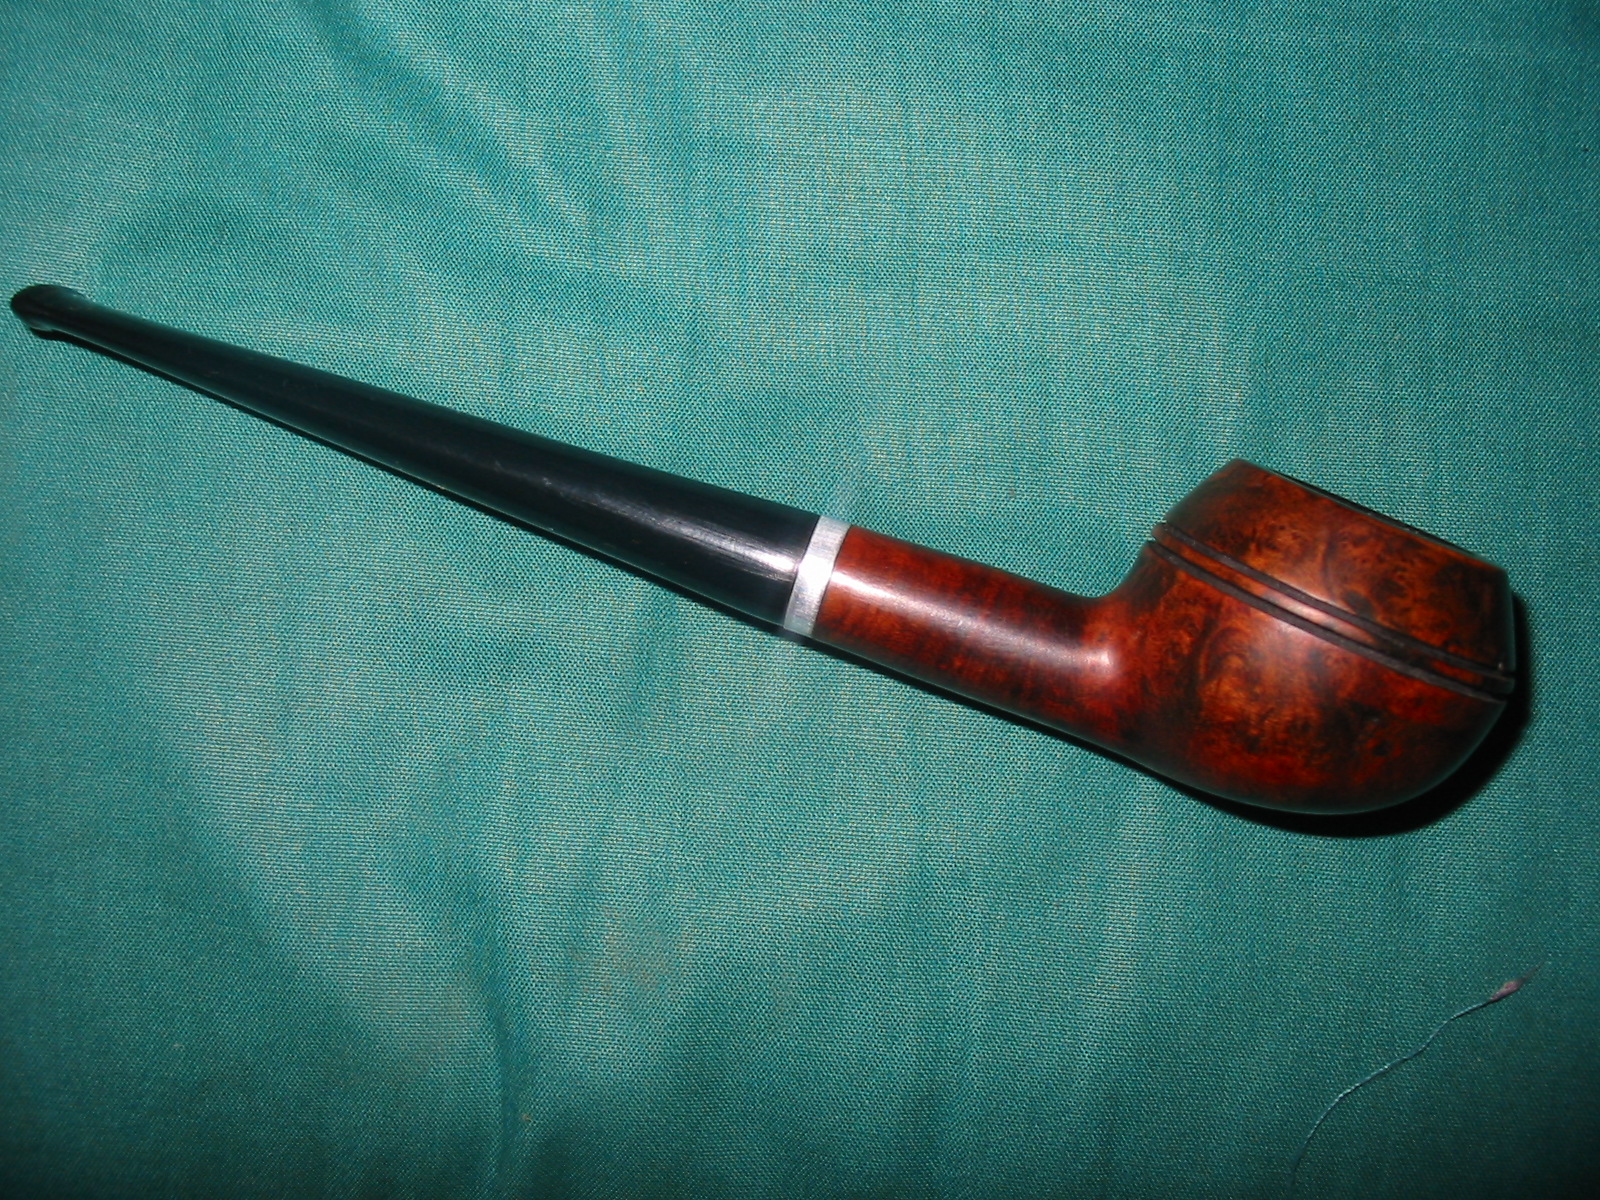
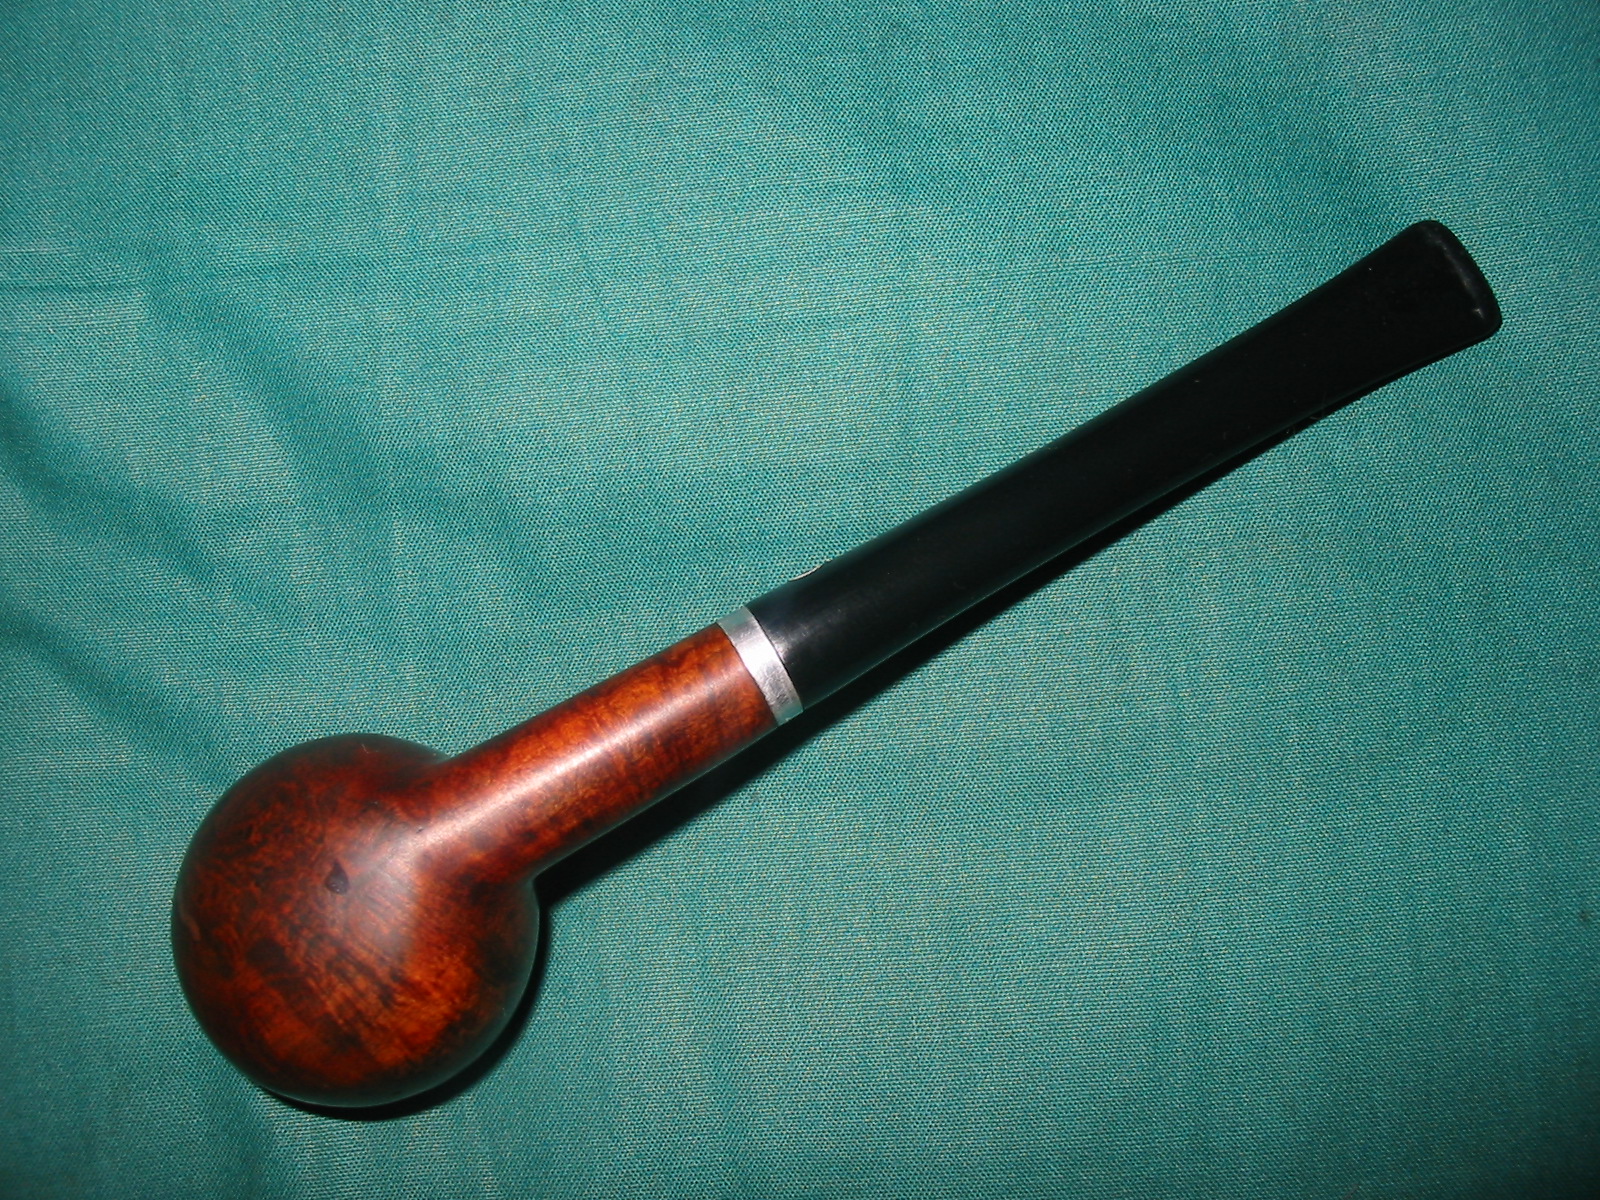
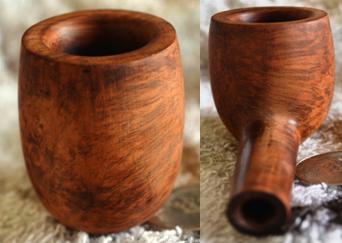
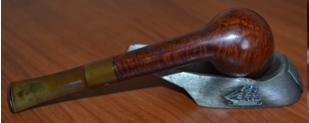
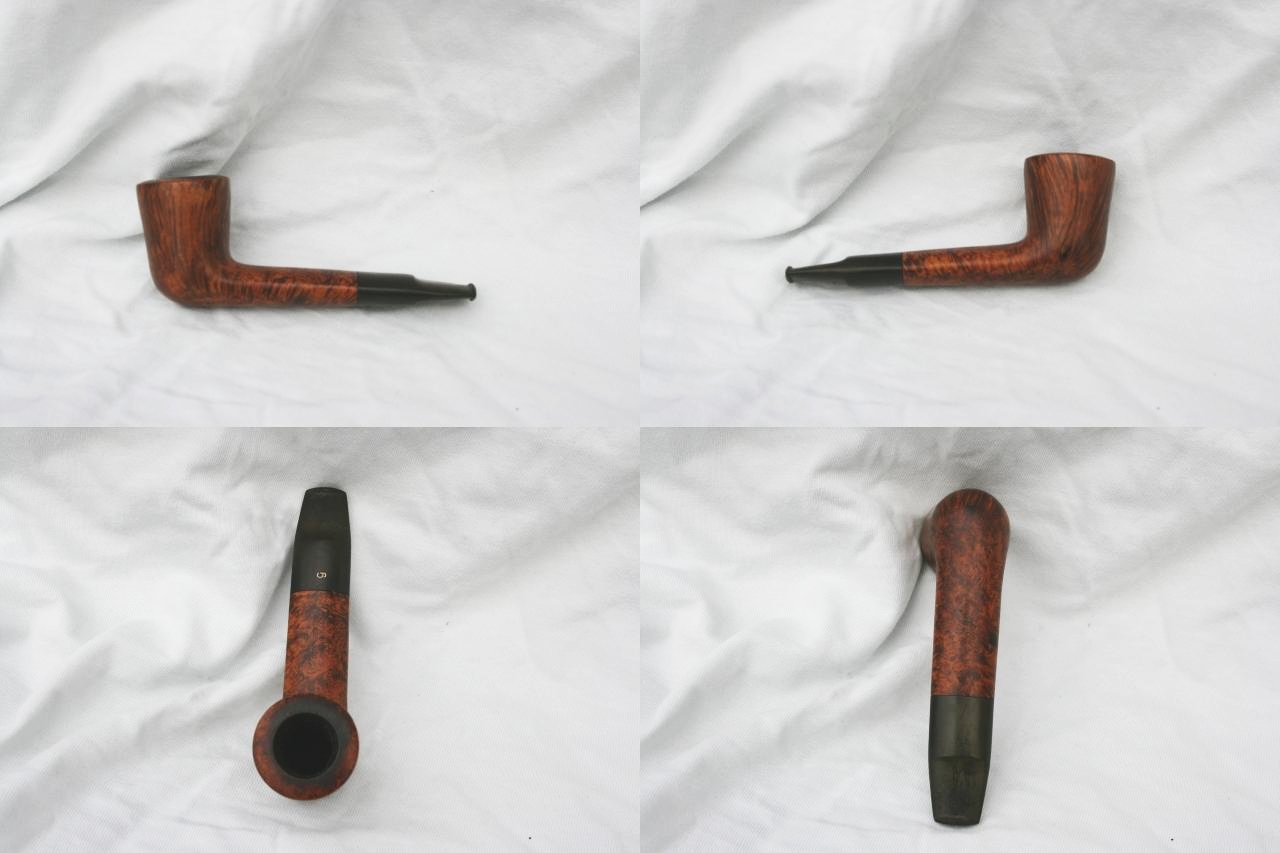
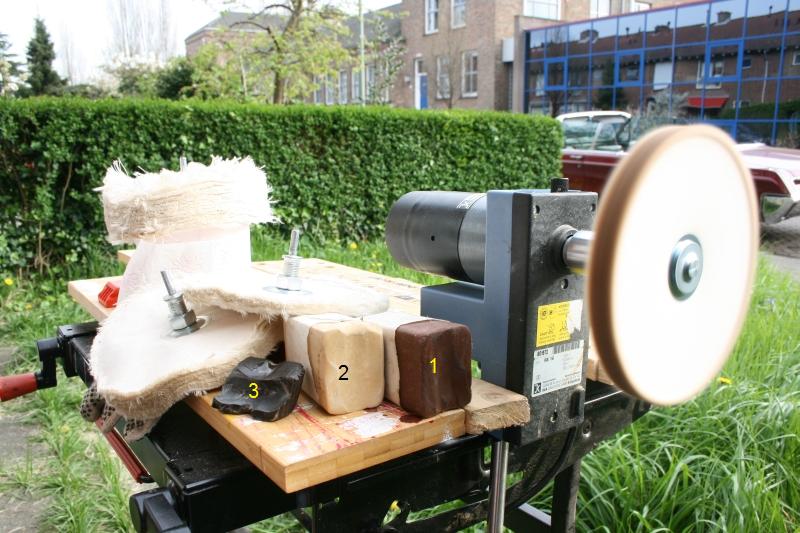
I liked the look of the straight stem so I left it. I buffed the stem with White Diamond and gave it multiple coats of carnauba wax to protect and preserve it. I gave the bowl a coat of Halcyon II wax and then lightly buffed the stem and bowl with a soft flannel buff to bring up the shine. The finished pipe is pictured below. It came out very well in my opinion. As I look at it I wonder who the maker was. Bewlay had others make their pipes – to my mind this one had the look of a nice little Orlik Sandblast, but who knows for sure. What do you think? Who made this pipe?
IMG_6481

IMG_6482

IMG_6483

IMG_6484

Restoring a GBD New Standard 4/271 London Made Straight Bulldog


Blog by Steve Laug

When I was at the antique mall in Edmonton a few weeks ago I found this GBD straight bulldog. It is stamped GBD in an oval over New Standard on the left side of the shank and 4/271 London Made on the right side of the shank. The stem had the brass GBD roundel on the side of the saddle. The pipe was badly cake with a thick carbon build up. The rim had build up and was also damaged. There was darkening, whether burn or tar build up flowing down the crown of the bowl at the top all the way around the rim. The finish was worn and there was a black ink stain on the left side of the bowl down low toward the bottom. It looked like a hot spot when I first saw the pipe so I almost left it in the shop. I examined it under a bright light and could see that it was not a burn but a spot of what looked like India Ink. The stem was oxidized and there was tooth chatter on the top near the button and a tooth mark on the underside along with the chatter there. The button is different from most of my other GBD’s in that it is concave rather than convex. It is shaped like this “(“ looking at it from above.
IMG_6390

IMG_6391

IMG_6392

IMG_6393
The photo below shows the stain on the bowl. I used a flash to highlight the nature of the stain. It was not solid but rather slightly opaque so that the grain could be seen through it. I thought it was worth a try to see if I could remove the ink from the briar.
IMG_6394
I reamed the bowl back to bare briar with a PipNet reamer starting with the smallest head and working up to the next head that fit the bowl.
IMG_6395
I dropped the bowl in an alcohol bath to soak for several hours and dropped the stem in a bath of Oxyclean.
IMG_6397
I left the stem in the Oxyclean while I worked on the bowl. I removed it from the bath and dried it off with a piece of cloth.
IMG_6398
I wiped it down with acetone on cotton pads to remove the finish that remained and scrubbed the ink stain. I sanded the bowl with a medium and a fine grit sanding sponge to finish removing the finish and also the ink stain. I lightly topped the bowl with 220 grit sandpaper to remove the damage to the outer edge of the rim.
IMG_6399
I used a piece of folded 220 grit sandpaper to work on the beveled inner edge of the rim. I wanted to repair the burn damage and take away the ridge left behind by the light topping of the bowl.
IMG_6400
I sanded the bowl where the stain was and with sanding and scrubbing with isopropyl alcohol I was able to remove the ink stain from the briar. The photo below shows the area that had previously been stained.
IMG_6401
I wiped the bowl down with isopropyl alcohol a final time to remove the sanding dust and grit from the twin rings on the bowl.
IMG_6402

IMG_6403

IMG_6404

IMG_6405

IMG_6406
I cleaned out the shank of the pipe with isopropyl and cotton swabs and when it was clean I took out the stem and dried it off. I cleaned out the inside of the stem with pipe cleaners and alcohol. I scrubbed the stem with Mequiar’s Scratch X2.0. I rubbed it onto the stem surface with my finger and scrubbed it off with cotton pads. The photos below show the stem after one application of the polish after about 2 hours of soaking in Oxyclean.
IMG_6407

IMG_6409

IMG_6410

IMG_6411
I continued to scrub down the stem with the Meguair’s until the oxidation was gone. I sanded the areas where there was tooth chatter with 220 grit sandpaper and then with a medium and a fine grit sanding sponge. I put the stem on the pipe and took the photos below. I could not believe how easily the oxidation had come off the stem. There was still more polishing to do but the overall effect of the Oxyclean and the Meguiar’s was amazing to me
IMG_6413

IMG_6414

IMG_6415

IMG_6416
Though there was still oxidation to work on I decided to stain the bowl. I used a dark brown aniline stain. I applied it, flamed it and repeated the process until the coverage was even.
IMG_6417

IMG_6418

IMG_6419
I wiped the bowl down with isopropyl to thin the stain down and make it more transparent. I repeated the wash until the stain was the colour I was aiming for. Then I scrubbed the stem some more with the Meguiar’s and was able to get the rest of the oxidation of the stem.
IMG_6420

IMG_6421

IMG_6423

IMG_6424
I buffed the pipe with White Diamond – both bowl and stem being careful around the stamping so as not to damage it. I rubbed the stem down with Obsidian Oil and then gave the bowl and stem multiple coats of carnauba wax to protect and shine. I buffed it a final time with a soft flannel buffing wheel. The finished pipe is pictured below. The colour on the green background appears redder than the pipe actually is. The wax and buffing did bring out the red highlights in the briar. It is more brown than red but the contrast is quite nice. The grain is visible through the stain. I am pleased with the finished look to the pipe. It is cleaned and restored and ready for the next chapter of the trust with me.
IMG_6425

IMG_6426

IMG_6427

IMG_6428

I Had Heard of Royalton but not of the Smoke-Control Deluxe


In my antique mall grab bag was the bowl that is pictured below. It is stamped on the left side of the shank, Royalton over Smoke-Control over Deluxe and on the right side of the shank, Selected Briar over Pat. No.2326658. I had heard of Royalton pipes and have cleaned up a few of them in the years that have gone by. But I had never heard of the Smoke-Control or the Smoke-Control Deluxe. Obviously it was a system pipe of sorts, one of those creative ideas that lasted about as long as its maker. It never seemed to have caught on because in all the years I have been hunting and refurbishing pipes I have never come across one even to walk by in my prowls of thrift, junk or rummage shops. It was a brand unknown to me.

The bowl was in excellent shape and had not even been smoked to the bottom of the bowl. The bottom half of the bowl was bare briar. The top half was darkened but not carbonized at all. It was for all intents and purposes a new pipe. The shank was clean and contained a strange metal apparatus that filled the mortise and then stepped down to fill the airway all the way to the smoke hole in the bottom of the bowl. It was aluminum, the first ¼ inch was smooth and then it had threads that went to the bottom of the mortise. The airway was smooth. The finish on the bowl was non-existent. Whatever stain or coating had been on the bowl was no long present. The stamping was crisp and readable. There were no fills in the briar but there was a nice swirling mix of grain all around the bowl. The rim was clean and showed no burn or dent marks. The pipe was missing the stem. Judging from the mortise the stinger apparatus on this stem must have been a unique looking piece of hardware.
IMG_6315

IMG_6316

IMG_6318

IMG_6319
Since I had no idea what I was working on I decided to do a bit of digging on the internest and see if I could find out about the brand and kind of stem and stinger apparatus that it had. I wanted to know what the patent on the shank covered so that once I had a clear picture in mind I could hunt down a stem or work on one that would fit the shank in the meantime. I found out that Royalton pipes were manufactured by Henry Leonard & Thomas, Inc. (HLT) of Ozone Park, New York. HLT manufactured other brands as well including Dr.Grabow, Bruce Peters, Broadcaster and Vox Pop. I found on Pipephil’s logos page the two photos below that showed the stamping on the stem and the shank. The stamping on the bowl I had was a Smoke-Control with a hyphen rather than the one picture below and also was a Deluxe rather than a Supreme.
royalton1a

royalton1bMine was also stamped Selected Briar instead of Imported Briar. I could see that the stem had an aluminum faux band that sat between the stem and shank.
So far I had learned the manufacturer and the stamping on the stem and the faux band. I had not seen the stem. I did a bit more digging and found several advertisements that showed more of the stem. The first is from Popular Mechanics and it gave a clear description of the purpose of the pipe as well as the meaning of the Smoke-Control feature. The pipe had an adjustable valve that regulated the daft on the smoke to match personal taste and preference.
Smoke Control Advert
This advertisement spoke of both the Supreme Grade and the Deluxe grade of the pipe. The stinger that is shown in the picture could have been similar to the one in the bowl that I had found but it was not quite the same in terms of the sketched in lines on the shank of the top pipe in the picture. My bowl’s interior was different from the one in the picture so the stinger apparatus too must have been slightly different in the one I found. I went to the US Patent web site and did some more research and found the Patent Number of the pipe that I had. There was a description and a diagram of the pipe. The patent was taken out on August 10. 1943 by Arthur Koenigsamen of Jamaica, New York, assigner to Henry Leonard & Thomas Inc. of Ozone Park, New York. Reading the patent data, I am struck by the familiar hunt to develop a better smoking pipe to deliver a dry and cool smoker to the mouth of the pipe smoker and to make pipe smoking more appealing to those who might not try it otherwise. Have a look at the details of the patent and pay attention to each part of the apparatus in the shank and on the end of the stem. There are some unique features that are not visible in the pipe that is shown in the advertisement from Popular Mechanics.
Smoke Control Patent Page 1

Smoke Control Patent page 2

Smoke Control Patent photo
The stem in the above drawing in Fig. 2 shows the tenon that would fit in the mortise in the bowl I have. It is threaded about mid-tenon with three bands. Before and after the threaded portion the tenon is smooth. The apparatus goes into the stem as well, Fig. 3, in a way that was not shown in the advertisement above. It appears that there is a cooling reservoir in the stem that traps moisture and delivers a cool smoke out the wide slot in the end of the stem. The mortise in the bowl I have looks exactly like the one in Fig. 5 and screwed onto the tenon in Fig. 4. The shank on the bowl that I have is set up precisely like the nipple unit in Fig. 5. It is aluminum and set in the shank. I have included the photo below showing and end view of the shank to show what the insert looks like. You can see the flat area, the step up to the threaded portion and then the step up to the airway just as is shown in Fig. 5 above.
IMG_6322
My problem was that the bowl did not come with the unique stem unit that fit the shank. I tried several older Dr. Grabow stems and a Kaywoodie stem that I had here and the threads did not match those found in the shank. I had a choice to make, save the bowl until I found a stem someday by chance or to try to work on a stem and jerry-rig it to fit the shank system. I figured I had nothing to lose so I chose to work on a stem. I had just the right stem in my can of stems. It was a chubby stem from an Orlik pipe and the tenon was already shaped partially for a shank like this. The end of the tenon was slightly smaller in diameter than the portion of the tenon next to the stem itself.
IMG_6323
I slowly turned the vulcanite stem into the metal mortise, being careful to hold the stem straight as I turned it in place. I figured that by doing so I could score the vulcanite with the metal threads of the mortise and in so doing tap thread the tenon on the vulcanite. Low and behold it worked. The stem fit tightly against the face of the shank. The diameter of the stem would need to be adjusted but otherwise the fit was good.
IMG_6325

IMG_6326

IMG_6327

IMG_6328
I carefully sanded the stem and the shank avoiding the stamping. I did not want to damage the stamping on either side of the shank. I sanded with 220 grit sandpaper and a medium and fine grit sanding sponge. I sanded the rest of the bowl and the rim as well. When I finished the fit of the stem at the shank was smooth.
IMG_6329

IMG_6330

IMG_6331

IMG_6332
I wiped the bowl down with acetone on cotton pads to remove any remnants of the original finish on the bowl and to remove the sanding dust.
IMG_6333

IMG_6334

IMG_6335

IMG_6336
At this point in the process things were going too well! Everything was working without a hitch and the pipe was looking really good. This is when things inevitably take a turn for the worse and they certainly did in this case. I unscrewed the stem from the shank in preparation for staining the bowl. I wanted to clean out any briar dust that was trapped between the stem and the shank. I cleaned out the dust and blew air through the mortise. I then slowly and carefully screwed the stem back in place in the shank. They no longer lined up! The fit of the stem against the face of the shank was not tight. The smooth transition between the shank and stem was no longer there. The fit was not right. I took the stem off and examined the mortise and tenon. I could see that the insert in the shank had definitely been pushed deeper into the mortise. When I started it was even with the face of the end of the shank and now it was sunk in and the mortise bevel showed as it probably should have from the start. Arggghhh. Now the fit was off and the diameter of the stem would have to be corrected again. The big problem was that the way the stem fit against the end of the shank was no longer perfect. There was a gap that I could not correct no matter what I did in adjusting the insert or the stem.

I decided that I would have to band the shank, not as a repair on a bad shank but as a cosmetic measure to clean up the fit of the stem and the shank end. This irritates me to no end in that as you could tell from the above photos it was perfect! Ah well so goes the life of the pipe refurbisher who is restemming old pipes with replacement stems. I adjusted the diameter of the shank to fit the flow of the shank without the band. Once again it was round and smooth. If there had not been a gap at the bottom of the shank/stem union a band would not have been necessary. I looked through my box of bands and found a band that would fit and not go to deeply up the shank as to cover the stamping. I found just the right band. I put all purpose white glue on the shank and pressed the band in place. Once the glue had set I screwed the stem on to the shank and lined everything up. The fit and finish of the stem and shank looked good. I actually liked the band on the shank as it broke the line between the shank and the stem and added a bit of bling to look of the old bowl. I guess I can live with the look of the pipe after all. It is not what I wanted when I started but it would do.
IMG_6337

IMG_6338

IMG_6340

IMG_6341
I wiped down the bowl with isopropyl alcohol on a cotton pad to remove any excess glue that had seeped out around the band and removed grime from my finger prints on the bowl. I gave the bowl a first coat of dark brown aniline stain thinned 1:1 with alcohol. I flamed the stain and then wiped it down with an alcohol pad. I buffed it with White Diamond to see what the finish looked like with the brown stain. While I liked the look, the mottled look of the grain seemed to need some more colour and contrast to make it look right. I was not sure what I would use for a top coat so I set it aside and worked on the stem.
IMG_6343

IMG_6344

IMG_6345
I sanded the stem with 220 grit sandpaper to remove the oxidation that remained after cleaning and then sanded it with a medium and a fine grit sanding sponge. Once I had finished this I wet sanded it with 1500-2400 grit pads. Several times mid stream I went back and sanded with the sanding sponges and started over with the pads to clean up places where the scratching still showed or where the oxidation was stubborn. When I finished with the first three pads I rubbed down the stem with Obsidian Oil and screwed it back on the bowl.
IMG_6346
Now most of you probably would have just finished sanding the stem with the remaining micromesh pads but not me. I got distracted with the stem back on the bowl and decided to give it the second coat of stain. I took it to the buffer and buffed the bowl and the stem with Tripoli and White Diamond before going back to the work table to give it a second coat of stain. For the second coat of stain I decided to use an aniline based oxblood stain. The rich read colour would go well with the mottled grain of the bowl. I applied the stain, flamed it, applied it again and flamed it again as often as necessary to get an even finish. Once it was dry I wiped it down with an alcohol wet pad to remove the excess stain and make it more transparent. I buffed it with White Diamond. This stain coat had the desired effect and I liked the finished look of the bowl.
IMG_6348

IMG_6351

IMG_6354

IMG_6356
I took the photo below to show the threads that were cut into the vulcanite tenon to give an idea of what the finished tenon looked like after all was said and done. The fit in the mortise is snug and the stem screws into the mortise easily.
IMG_6367
I went back to sanding the stem with the remaining grits of micromesh pads. I dry sanded with 3200-12000 grit pads and once again had to go back and sand with the sanding sponges near the button to deal with the stubborn oxidation. This involved having to start over with wet sanding with 1500-2400 grit pads but once I had finished the oxidation was gone. I rubbed the stem down with Obsidian Oil again and when it was absorbed into the vulcanite I buffed the stem and bowl with White Diamond.
IMG_6368

IMG_6369
I polished the nickel band with silver polish and gave the bowl and stem multiple coats of carnauba wax to protect and give it a shine. When finished I buffed it with a soft flannel buffing pad and brought it back to the work table for the final photos. The old Smoke-Control Deluxe is back in action. The bowl looks great; the stem works even though it is not original. The band gives just the pipe an air of elegance that I had not expected. I look forward to breaking it in and enjoying a smoke in what for all intents and purposes is a new old stock bowl.
IMG_6370

IMG_6374

IMG_6375

IMG_6376

Restemming and Refurbishing a Planter Opera Pipe


This is the fourth bowl that I chose to work on from the antique mall lot. It had some great potential to clean up well as it was by far one of the least damaged of the bowls. It is stamped Planter over Made in France on the left side of the shank. There is no other stamping on the bowl or shank. There is no shape size or numbering on the shank. The right side is unmarked. I looked it up online and did not find any maker for the pipe. Pipephil did not have in on his logos and stampings pages nor did any of the other sites I frequent when searching for info online. I turned to my books and found out from “Who Made That Pipe” that the brand was made by Comoy’s in France. I checked Lopes book and it was not listed. The bowl itself was pretty clean on the inside and the interior of the shank was also clean. It barely looked to have been smoked. There were a few remnants of unsmoked tobacco on the walls of the bowl. On the exterior, one side of the bowl was clean and the other was covered with a greasy, dirty buildup. There was some nice looking grain under the grit and grime – both birdseye and cross grain. It looked like it would clean up nicely. There was one small fill on the right side of the bowl. The metal band was tarnished and yellow. The bowl did not come with a stem when I bought it at the antique mall.
IMG_6239

IMG_6241

IMG_6242

IMG_6243
I went through my can of stems and found one that would fit with very minimal adjustments. I sanded the tenon with a folded piece of sandpaper and it fit well against the shank. There were some issues on the diameter of the stem. It appeared that it was slightly out of round on the right side. It would need to be sanded on the right side, top and bottom for a perfect fit.
IMG_6244

IMG_6245

IMG_6246

IMG_6247
The band was not totally in place on the shank. It had slid toward the end of the shank over the years so I needed to heat it and press it into place. The benefit to this was that it heated up the yellow buildup on the band and it came off quite easily with some silver polish/metal cleaner. I scrubbed the band with some Hagerty Tarnish Preventative Silver Polish that I bought years ago at a jewelry shop. It removed the tarnish and oxidation and with repeated scrubbing it cleaned out the tarnish in the hallmarks.

I scrubbed the exterior of the bowl with Murphy’s Oil Soap to remove the greasy buildup on the right side of the bowl and shank. I followed that up with a wipe down of isopropyl alcohol to finish removing the grime. I sanded the stem on the right side to remove the excess vulcanite and make it line up with the band. I always look at the end view of the pipe and see if the diameter of the stem matches the edge of the band that it will sit against. I strive to make it the same all the way around as I think it looks better when done that way. I used 220 grit sandpaper and a medium and fine grit sanding sponge to get the fit right. In the photos below the pipe is shown after all the scrubbing and fitting of the stem.
IMG_6248

IMG_6250

IMG_6251
You can see from the few steps taken with the pipe that it was a very simple clean up. It took more time to fit the stem that it did to clean up the bowl and band. I gave it a quick buff with White Diamond before working on the stem. I took it back to the work table and sanded the stem with a medium and fine grit sanding sponge (the pink square pictured above is one of those sponges). I then sanded the bowl and stem with micromesh sanding pads – wet sanding with 1500-2400 grit pads and dry sanding with 3200-12000 grit pads.
IMG_6252

IMG_6254

IMG_6255
I finished by rubbing down the stem with Obsidian Oil and when it had been absorbed into the stem I buffed the stem and bowl with White Diamond. I gave it multiple coats of carnauba wax to protect and give it a shine. I finish with a soft flannel buffing pad on the buffer. The finished pipe is pictured below. Sometime today I will load a bowl and give it a smoke.
IMG_6256

IMG_6258

IMG_6259

IMG_6260

IMG_6261

A Journey from a Sad Apple to a Handsome Prince


In my antique mall grab bag there was an antique apple shaped pipe with an ornate end cap. It was a mix of brass and silver and had a fascinating look – at least to me. I liked it from the get go. The problem was the damage to the bowl was extensive. It truly was a mess with chunks of briar missing and cracks and crevices on the rim as well as in the upper portion of the bowl. So I looked through some of the bowls I have here to see if I had one that the end cap would fit but none were to be found. Lots of reshaping and changes would have had to be done to make any of the bowls I had work so I revisited the damaged bowl and did a few measurements on it to if I could remove the damage and still have anything left that was worth the work.
IMG_6143

IMG_6144

IMG_6145

IMG_6146

IMG_6147
After measuring the bowl I figured that I could convert it from an apple/brandy shape to a prince shape. If you look at most prince shapes you can easily imagine how it would have looked as an apple or a ball shaped pipe. It is not hard to see the prince as a cut down apple. I also looked through my stems and found an older military push stem that would give it a princely look. The end of the stem would need to be turned down slightly to fit in the metal end cap of the shank.
IMG_6148
I decided to start with a conservative approach to the reduction of the height of the bowl and the removal of the damaged briar first. I have learned that it is easy to remove briar but next to impossible to put it back once it has been removed. I set up the topping board and began to turn the bowl into the 220 grit sandpaper to work back the rim. After about ten minutes of work I could see that it would take me all night to hand sand it back to the height I wanted to work with. There had to be a better way to get it close and then finish the topping with the sandpaper and board.
IMG_6149
I decided to use a Dremel to remove most of the damaged briar, carefully working to keep it as close to flat as possible – a trick with a Dremel and a sanding drum but it worked fairly well. I took back all of the damage on ¾ of the bowl rim and left a slight amount on the front ¼. The rim would be thick and I would be able to rework the inner edge to bring it back to round with folded sandpaper.
IMG_6150

IMG_6151

IMG_6152
I took the bowl back to my worktable and used the topping board to flatten out the rim. The flattened rim is pictured in the photos below. I also used a rasp to trim down the taper of the bit so that it would fit in the metal end cap. The rest of the fine tuning of the stem would be done by hand with sandpaper and small files.
IMG_6153

IMG_6154

IMG_6155
I sanded the stem taper so that the fit was snug in the shank of the metal end cap and shank. The build on this old pipe was interesting. When I first got it I was able to remove the end cap. The shank had been cut quite short and then flattened so that a stem would sit in the end cap and be pressed against the end of the shank. I worked on the stem to achieve that result so that the stem sat flush against the end of the shank. With the stem fit correctly it was time to do some work on the bowl.
I decided to use some briar dust and super glue to repair some of the deep cuts in the briar. I cleaned out the cuts in the surface of the rim as well as the surface cracks that remained with a dental pick. I wiped down the surface with isopropyl alcohol and scored the areas that would be repaired so that the fill would bond well with the briar. I packed in briar dust with the dental pick and then dripped the super glue into place. I always overfill my patches so that when dry they are not sunken.
IMG_6156

IMG_6157
When the patches dried I sanded them with 220 grit sandpaper and a medium and fine grit sanding sponge to bring the surface of the patch to the same height and shape as the surrounding briar. This process is kind of like sculpting and once it was done I reshaped the outer edge of the bowl and did some work on the inner edge as well. The photos below show the look of the pipe at this point in the process. The handsome prince is beginning to emerge from the ashes of the old bowl.
IMG_6158

IMG_6159

IMG_6160
I decided to use a two step staining process to better blend in the fills and repairs to the bowl. They would still be visible but not stand out as the first thing that was noticed when looking at the bowl. I used a black under stain first. I heated the briar with a heat gun to warm it and open out the “pores” in the wood to take the stain well. I applied it heavily, flamed and repeated the process until I had good coverage on the bowl. Once it was dry I sanded the bowl to remove the majority of black stain. It remained in the grain and I left it a bit heavy around the top edge of the bowl and rim. I wanted it to have a shadow like look in those areas.
IMG_6161

IMG_6162

IMG_6163

IMG_6165
I wiped down the bowl with acetone on a cotton pad to remove the final bit of black and the sanding dust that was left behind from my work. I gave it several coats of oxblood stain as a topcoat. My thinking was that the deep red of the oxblood stain would set off the black under stain and provide an interesting contrast look to the finish.
IMG_6166

IMG_6167

IMG_6168

IMG_6169
I buffed the bowl and stem with Red Tripoli and White Diamond to see where things stood in terms of the colour and coverage on the bowl. I took it back to the worktable and sanded it with micromesh pads to smooth out the finish on the bowl. I still needed to do some more work on the rim and the stem at this point but the finish on the bowl was getting to the place where it was looking good.
IMG_6170

IMG_6171

IMG_6172

IMG_6173
I sanded the stem with medium and fine grit sanding sponges to remove the scratches and smooth out the transition from the part of the stem that sat in the end cap and the remainder of the stem. I followed that by sanding with micromesh sanding pads – wet sanding with 1500-2400 grit pads and dry sanding with 3200-12000 grit pads. I rubbed the stem down with Obsidian Oil once I had finished the sanding.
IMG_6175

IMG_6176

IMG_6177
The polish on the stem needed a bit more work to remove some of the scratches that still remained but I left that for the moment and decided to give the stem a slight bend. I set up a heat gun and heated the vulcanite until it was pliable. I bent it over a rolling pin that I use for doing this. I find that I get a more even bend when I use the pin as the base for bending.
IMG_6178

IMG_6179

IMG_6180
I took it back to the worktable to examine the repair on the front of the bowl more closely and to also do more work on the interior edge of the rim. It was significantly out of round, particularly around the area of the patch I had applied.
IMG_6185

IMG_6186
I used a half round wood rasp and folded 220 grit sandpaper to rework the inner edge of the rim. While doing so I also decided to top the bowl some more. I worked on the edge until it was getting more round, restained it to see what it looked like and decided I needed to top the bowl even more to remove more of the damage to the surface of the rim.
IMG_6187
After topping it even more, I sanded it with a fine grit sanding block and then restained the rim yet again. At this point the bowl was looking far better. There was still a slight divot out of the edge of the rim on the front of the bowl. I wanted to rework that area some more before I was finished with the pipe.
IMG_6188
I sanded and shaped the inner edge of the rim some more with folded sandpaper, repaired the fill with a bit of superglue and briar dust, sanded some more to get it to the place shown below. All that remained was to sand the top of the rim and inner edge with micromesh pads to clean up the overall appearance and the bowl was ready to go.
IMG_6190
I sanded the inner edge of the rim with some 400 and 600 grit wet dry sandpaper and then carefully dry sanded the top of the rim with micromesh sanding pads 1500-2400 grit. I gave the inside of the bowl a light coat of pipe mud to protect the bowl. I hand buffed the bowl with a shoe brush to give it a shine and then gave it multiple coats of carnauba wax to finish. The completed pipe is shown below in the last series of photos.
IMG_6191

IMG_6192

IMG_6193

IMG_6194
The old sad apple had disappeared and was replaced with a handsome prince that still had some life in it. The little prince will now grace my pipe rack and will one day be given in trust to the next pipeman who will carry on enjoying this piece of history.

Restoring a Princely Rhodesian Medico – New Stem and New Life


The second pipe I took out of the box of finds from the weekend antique mall score was a little Medico Prince. It is stamped Medico over Imported Briar on the left side of the shank. It had an aluminum band that was coated with a plastic coat that made it appear to be gold. This coating was peeling leaving the band looking unusable. The bowl also did not have a stem. The bowl itself had several fills on the sides and bottom, nicks around the double scored lines on the bowl and the lines themselves were filled in with hard white putty like substance. I am not sure what the purpose of the filling of the lines was but it gave the old pipe a despairing look. The rim was rough and slightly out of round. The cake was built up in the bowl and overflowing onto the rim. I looked through my stem can and found a Medico stem that had originally been on a pipe I made into a Churchwarden. It was from one of my first pipes when I came back to pipes in 1982. The stem was nylon and covered with tooth chatter and deep tooth marks. The metal tenon and the diameter of the stem were a perfect fit. I would only have to make a slight adjustment on the bottom side of the stem and the right side to make the transition smooth.
IMG_6048

IMG_6049

IMG_6050

IMG_6051

IMG_6052
The next series of four photos show the stem in place. The tooth marks are visible on the top and bottom sides of the stem and the shank union on the bottom and right side show the need of adjustment.
IMG_6053

IMG_6054

IMG_6055

IMG_6056
I reamed the bowl with a PipNet reamer to remove the cake so that I could work on the out of round inner edge of the rim.
IMG_6057
I sanded the tooth chatter on the nylon stem to remove as much of the surface chatter as possible and wiped it down with a wet cotton pad to wipe off the dust. Don’t use acetone or alcohol on nylon stems as they potentially can make a mess of the stem material. I used clear superglue to repair the deep tooth marks because heating the nylon does not raise the dents. It is yet another problem to be avoided as heating only makes the material quite soft and it easily collapses. I repaired the topside first and when it dried I repaired the underside of the stem with the super glue.
IMG_6058
When the glue dried I sanded it with 220 grit sandpaper to smooth out the surface of the stem and blend in the repairs. I sanded until the surface was smooth and the patch was flush with the stem material. I followed that by sanding with a medium and a fine grit sanding sponge to remove the scratches left behind by the sandpaper.
IMG_6062

IMG_6063
I lightly topped the rim to remove the surface damage and to remove some of the damage on the inner edge. I sanded the inner edge with a folded piece of 220 grit sandpaper to smooth out the rough edges and give it a more rounded appearance. I wiped down the bowl and rim with acetone on a cotton pad and then isopropyl on a cotton pad to remove the finish. I used a dental pick to remove the white putty like substance that filled the two parallel bands around the bowl and then wiped it down a final time with alcohol. I also removed the stem and wiped down the aluminum band to remove the plastic coating that was on it.
IMG_6061

IMG_6064

IMG_6065

IMG_6066

IMG_6068
I decided to give the bowl a contrast stain. The first coat of stain was a black aniline stain. I heated the bowl and then applied the stain, flamed it, applied it and flamed it again until the stain coat was even across the bowl. My photos of the black stained bowl did not turn out do to camera failure. For some reason the flash did not work and the four photos of the black stained bowl were not visible. I applied the stain with a wool dauber and made sure that the black stain went into the parallel rings around the bowl.
IMG_6069

IMG_6070

IMG_6071
I wiped down the bowl with cotton pads and alcohol to remove the majority of the black stain and to leave it in the deep grain. I buffed the pipe with Tripoli and White Diamond and then wiped it a final time with alcohol. The finish at that point had black deep in the grain of the bowl highlighting the grain variations on the briar. It also served to provide some blending for the fills that were obvious on the bottom of the bowl. I sanded the bowl with a fine grit sanding sponge and 1500-2400 grit micromesh sanding pads to further remove the top finish. Once it was done I gave the bowl a coat of oxblood stain as a topcoat. I wanted the red stain to highlight the red of the briar and to be a contrast to the black grain on the bowl.
IMG_6072

IMG_6073
After the stain was applied I wiped it off with a rag and hand polished the bowl. The contrasting stains went a long way toward giving the pipe a great look and blending the fills into the background of the bowl.
IMG_6077

IMG_6078

IMG_6079

IMG_6080
I sanded the stem with medium and fine grit sanding sponges and then followed up that with my usual stack of micromesh sanding pads – wet sanding with 1500-2400 grit pads and dry sanding with 3200-12000 grit pads. The progressive rich blackness of the nylon is revealed with each successive set of sanding pads.
IMG_6074

IMG_6075

IMG_6081

IMG_6082
When I finished sanding I rubbed the stem down with Obsidian Oil and then gave it multiple coats of Paragon Wax and hand buffed it. I reinserted it in the shank and gave the entire pipe a light buff with White Diamond and then gave the bowl multiple coats of carnauba wax. I am very careful with nylon stems on the buffer after having several of them damaged by the heat of the wheel and having to start over. I have learned to hand buff the stems and if I am using the wheel at all with them to do it lightly and quickly. The finished pipe is pictured below. It is as good as new and ready to provide a good smoke to the next pipeman who carries on the trust.
IMG_6086

IMG_6088

IMG_6089

IMG_6090

A “King’s Imperial” Opera Pipe Reborn


Blog by Steve Laug

Looking over my latest box of pipes that I picked up at an antique mall in Edmonton, I chose to work on one that did not need to be restemmed and had a bit of a mystery attached to it. In the photo below it on the right side just above the batch of stems that were included in the purchase. It was hard to read the stamping while I was in the shop as I had forgotten to bring along a loop to examine it but I could read Made in London England stamped on the underside of the shank near the stem. It was priced at $20 which I figured it was worth in this condition so I added it to the lot.
Pipe finds2
When I got home I looked at it more closely under a magnifier and saw that the stamping read “King’s Imperial” Made in London England. The pipe was rusticated in an identifiable manner that I had seen on several pipes before so it looked promising. The finish was actually far rougher than it appears in the photos below. The stain was gone in many of the high spots and the low spots in the rustication were also pretty raw briar. There were two burn marks on the top back side and front side of the bowl that had darkened, though they were not scorched and rough. There was also a rough place on the left side bottom front of the bowl where it looked as if it had been knocked about. These marks would make it unlikely that I would be able to stain the bowl a natural tan colour. The bowl was oval both inside and outside. The rim had some scorching and darkening. It had been reamed in the centre of the oval but both ends were still caked and needed to be cleaned. The stem was oxidized and had a shallow tooth mark on the topside near the button.
IMG_5992

IMG_5993

IMG_5994

IMG_5999
I have a sharp bladed Japanese letter opener that was a gift from my grandfather that worked very well to ream the oval ends of the bowl. I proceeded to slowly scrape away the buildup of carbon and took the cake back to the bare briar.
IMG_6000

IMG_6001
After reaming the bowl I dropped the bowl into an alcohol bath to soak for an hour and then scrubbed it with a brass bristle tire brush to clean up the surface of the bowl and to scrub the burned areas on the bowl. I also put the stem into an Oxyclean bath to soften the oxidation on the vulcanite so that it would clean up more easily when removed.
IMG_6003
After an hour of soaking the alcohol bath I took the bowl out and dried it off with cotton cloths. I scrubbed it with a soft bristle tooth brush to remove any remaining grit in the grooves of the finish and then dried it off again. I wiped the bowl down with acetone on cotton pads to remove stubborn areas of the old finish. I wanted the bowl clean and free of any remnant of the old finish before I was ready to restain the briar. I sanded the rim with a fine grit sanding sponge to clean off the softened tar buildup and wiped it down with the acetone as well. I used a dental pick to pick out grime that was stubbornly remaining in the grooves of the rustication. I finished by cleaning out the inside of the bowl and shank with clean isopropyl alcohol and cotton swabs until they came out clean.
IMG_6004

IMG_6005

IMG_6006
I decided to try and stain the pipe with a light brown stain – almost tan coloured to mimic the original appearance of the bowl. I mixed one part dark brown stain with 3 parts isopropyl alcohol to make a light brown wash. I applied it to the rusticated surface with cotton swabs and flamed it once it was done. I restained it and reflamed it a second and third time to give it an even coverage.
IMG_6007

IMG_6008

IMG_6009

IMG_6010
Once it was dry I buffed it lightly with White Diamond to see where things stood. When I brought it back to the work table I took the following photos to give me a clearer picture of the look of the pipe. The burn marks were not covered and in fact seem to be highlighted by the light stain. I set the bowl aside for a while to think about what I would do with it.
IMG_6012

IMG_6013

IMG_6014

IMG_6015
With the bowl set aside I turned my attention to the stem. I took it out of the Oxyclean bath and dried it off. The next two photos show the top and bottom of the stem. The oxidation is even and soft over the surface of the stem. The Oxy does not remove oxidation on stems but merely serves to soften it. When I dried it off with the cloth that it is pictured on it took a lot of oxidation off the surface.
IMG_6017

IMG_6018
I decided to use Bar Keepers Friend on this stem. I wet the stem with a wet cotton pad and then sprinkled the surface with the powder. I scrubbed it with the wet pad and a dry pad to scour off the oxidation. The next three photos show how well the Bar Keepers Friend work to remove most of the oxidation. There were some stubborn spots around the shank and the button that would take more work, but it was definitely cleaning up well.
IMG_6019

IMG_6020

IMG_6021
My tendency in cleaning up a pipe is to work on the bowl for a bit, set it aside and work on the stem and cogitate about what I plan to do to address issues on the bowl. In this case while I worked on the stem I was thinking about how to address the darkened marks on the bowl. The light stain was not working and a darker brown would not work either. I set aside the stem and wrote a quick post on two of the forums I am part of and asked about the brand. I had not heard of the “King’s Imperial” brand before and decided to ask about it. A friend on one of them did not have information on the brand but posted a couple of photos of a Hardcastle Sandhewn pipe that he had refurbished to show similarities in the finish of my pipe. When I looked at his pipe I saw the solution to taking care of the burn marks and darkening. Here are a couple of photos of the Sandhewn pipe.
sandhewn1

sandhewn2
Hardcastle had used a contrast stain on this pipe that made the grooves of the rustication black and the high spots on the briar were brown. There was my solution staring me in the face. I set up my staining cloth and put the bowl on the cloth. I applied the black aniline stain and flamed it to set it in the grooves. Once it was dry I buffed it with Red Tripoli to highlight the high points on the rustication and remove the black stain from those areas. The photos below show the pipe after the staining and the buffing. The contrast stain worked well on the burned and darkened areas of the bowl.
IMG_6022

IMG_6023

IMG_6024

IMG_6025
The contrast was still not quite what I wanted as it was too dark for my liking. I wiped the bowl down with isopropyl alcohol on cotton pads to remove more of the black from the high spots on the bowl and shank. I also wiped down the smooth rim area as I wanted it to match the high spots on the bowl.
IMG_6026

IMG_6029

IMG_6030

IMG_6031
I took the pipe to the buffer again and buffed the bowl and stem with Tripoli and then with White Diamond to give it a shine. The contrast now was exactly what I was aiming for with the staining so I was pleased with the results.
IMG_6034

IMG_6035

IMG_6036

IMG_6039
I set the bowl aside and worked some more on the stem. I sanded it with a fine grit sanding sponge to remove the stubborn spots of oxidation at the button and the shank end. I then used my usual array of micromesh sanding pads – wet sanding with 1500-2400 grit pads and dry sanding with 3200-12000 grit pads. Each photo below shows the progressive deepening of the shine and the blackness of the vulcanite.
IMG_6041

IMG_6042

IMG_6043
I rubbed the stem down with Obsidian Oil and when it was dry buffed the pipe and the stem with White Diamond. I was careful in my buffing around the stamping on the bottom of the shank as I did not want to further damage the stamping. I applied multiple coats of carnauba wax to the bowl (lightly touching it against the buffing pad so that it would not cake up in the rustication) and the stem. The finished pipe is pictured below.
IMG_6044

IMG_6045

IMG_6046

IMG_6047
This morning while I worked on the pipe, I checked on the forums to see if there was anyone that had information on the brand. Bill, on Pipe Smokers Unleashed forum, had come across a photo online that had the same stamping but one additional line – Blakemar Briars. The stamping can be seen in the photo below. The “King’s Imperial” stamping was identical. My pipe was stamped Made in London England while this one said Made in England. The Blakemar Briars was the addition that gave the first clue.
T2eC16hy4FIZzOrmvBSc3d8PQ60_57
After reading this I sent an email to Mike Billington at Blakemar Briars to ask about the brand. He replied with the following email.

Hi Steve
It is possible that the “King’s Imperial” pipe was made here, it depends on the age to some extent. My Uncle used to make pipes for John Redman Ltd during the 60’s and 70’s and early 80’s and I continued to do so until the early nineties. The King’s Imperial range was one of John Redmans pipe ranges during that time, but Redmans also had them made by other pipe makers; they also did some pipe making “in house”- so while it is possible that the pipe was made here, it is not definite. From around 1992 until 2005 (I think), Redman’s brands were taken over by Gerald Grudgings of Loughborough in Leicestershire and during that time any Kings Imperial produced were definitely made here.

My memories only go back to the early 70’s but if you send a photo, I can tell you if it seems familiar to me

thanks
Mike

I immediately sent him photos of the pipe as it was when I found it, showing the stamping on the bowl. I am waiting to hear back from him. But I found it interesting to learn that John Redman Ltd had Blakemar Briars make pipes for them during the 60’s, 70’s and 80’s and into the early 90’s. To find out that King’s Imperial was a range of Redman pipes during that time was also invaluable. Some of the other historical notes of interest in Mike’s email were that Redman’s had others making pipes for them and that they also did pipe making in house. I am hoping that Mike can remember and give a bit of certainty to the dating on this old opera pipe. I will update this post as I gather new information.

Walt Disney pipe –AJ Verstraten (aka Bananabox-Ninja)


I am happy to see AJ back at his refurbishing work and writing about what he is working on. This pipe is particularly interesting in that it is a Disney Pipe. I have not seen much about these pipes and have enjoyed AJ’s work and write up. Thanks AJ for doing this and allowing us the pleasure of seeing the Disney pipe.

Greetings. When I first joined the PRF, a little over 18 months ago, there was a subject on the forum in which members could share with the other members what they thought was their dream pipe.

I was still rather green behind the ears when it came to brands, shapes and sizes so I didn’t reply in it at first. However, after a few months I found this article on Pipesmagazine.com:
http://pipesmagazine.com/blog/pipe-smokers-of-the-past/walt-disney-american-icon-inventor-of-pop-culture-pipe-smoker/ It was an interview with Brian Levine who explained about the fact that the Walt Disney Company sold pipes and pipe tobacco in the parks up until 1991/93.
This tickled me; the fact that the ‘wholesome WD Company’ sold tobacco and especially pipes with their logo on it was too good to be true. It was then that I decided a Walt Disney pipe would be my dream pipe.

So I shared this with my fellow Dutch pipe smokers on the PRF and explained that since I live in the Netherlands it would be an interesting challenge to try to acquire on for a reasonable price.

Thus my quest started and ended a mere three weeks later when I was not out bid on this eBay lot:
000

A tobacco pot with two pipes, the one on the left being a Disney pipe. The closing bid was $19.53 for the whole lot though my mood was a bit adjusted when I found out the shipping cost would be $42,-. Still, corrected to Euros it was a nice price for something so rare for a European.

When the pipe came it was very well packed and had survived the transit wonderfully. The other pipe was a Kaywoodie which I will write about in the future.

The first thing that struck me was that the pipe seemed to be only smoked a few times. The mouthpiece was oxidized through time and air but on the whole it was in good condition.
001
The inside of the bowl was lined with meerschaum, wetting a finger with spit and pressing it against the meerschaum I concluded it to be pressed – meerschaum instead of block meerschaum.
002
A rule of thumb (no pun intended :-)) is that when your wet finger sticks to the meerschaum it has a higher absorption rate and is thus most likely to be block-meerschaum. The pipe also confirmed the story from Levine that most of these pipes were basket-pipes stamped with the WD logo, though this one was of better quality than I expected.
003
First I cleaned the inside with 96% alcohol and pipe cleaners. They came out rather clean on the first go.
004
The soot and coal on the rim were rubbed off easily with a little spit and an old sock. And with 1500 grit sandpaper I smoothed the bowl a little, I decided to leave the brown spots on the meerschaum as I didn’t want to ruin the look of the pipe should the spots run deeper than I anticipated.
005
Then using the motor and abrasive wheels I removed the oxidation on the mouthpiece.
And with a needle file the hard to get oxidation near the tip. The picture is made just after the abrasive wheels.
006

The pipe before buffing

The pipe before buffing


The buffing was done with brown paste, followed by white, carnauba wax and a buffing on the fluffy wheel.
008

Bewlay Beauty and the Playboy Meer Beast – Robert M. Boughton


It is once again my pleasure to present an article by Robert Boughton. Robert has written several pieces on his work in refurbishing pipes. He always has a great way of not only describing the process he uses in the work but also does very thorough research into the background of the pipe brands he works on. This article covers his work on two pipes that recently joined his rack – a Bewlay and Playboy meerschaum. Thank you Robert for your willingness to share your work with us.

Bewlay Beauty and the Playboy Meer Beast Guest Blog by Robert M. Boughton
http://about.me/boughtonrobert Photos © the Author
Rob1
“Destiny has two ways of crushing us – by refusing our wishes and by fulfilling them.” – Henri Frederic Amiel, Swiss philosopher, poet and critic

INTRODUCTION
As I admitted in a thread on the Smoker’s Forums, I am the first person to acknowledge that I suffer from a severe case of Pipe Acquisition Disorder (P.A.D.), and so I take both of the above admonitory notes with all due respect, even though I made up one and have no intention of troubling myself with the other. With that in mind, during the past two months my pipe acquisitions have reached epic proportions, at least for me, at 16 additions and one more (a 1980s series Peterson Mark Twain) I am committed to buy on Friday. I really have no choice about that last one, you see, as my word is as good as the metal of the band in my Peterson Gold Spigot Bent System natural grain.And to further my own defense, I should add that I received a nice tax refund and pay raise.Besides, there are far worse things on which to spend ones money, and I have no other serious vices, even having given up alcohol 26 years ago for reasons obvious to everyone who knew me back in the day. Really, when you look at the situation from all sides, it’s more of a quirk than a disorder. Right? I say the habit should be called Pipe Acquisition Quirk, or P.A.Q., to downplay the association of the condition from that of a mental disease.At any rate, that is quite enough of that.

My goal here, as I have already tried to begin making clear, is to have some fun describing the excitement of the hunt for little gems of pipes that can be found in odd locations, such as second-hand stores and antique shops, and the special thrill when it is apparent that the rewards located need some attention and care to restore them to their rightful glory. The latter aspect of the overall adventure is the best part for me, anyway. That is why I was almost disappointed to find that the Knickerbocker and Winston pipes I picked up on Tuesday are in pristine condition and have never even been smoked. If you ask me, I have to say that response to buying pipes is more twisted than being in the habit of acquiring one at every turn.

But as I already suggested, there is nothing like the clandestine hunt for the prized pipe, not online or in the regular haunts but in the wild, so to speak – lurking out there in a dark corner of the jungle where everything from the lowest to the highest example of the art of pipe craft might be found by the crafty hunter, just waiting for the right person to place in his sights and liberate the artifact from its unwitting seller for restoration and lifelong appreciation.

Such was the case this Friday past, while I was driving to my weekly pipe meeting earlier than usual and the notion hit me to veer from my regular course for a stop at an unassuming and poorly situated antique arcade on the east side of town, whence I had heard from a fellow pipe club member of incredible deals on excellent pipes. However, by the time I arrived at the scene, my friend, who seems to have a touch of the old P.A.D. himself, had pretty well cleared out the available stock and was remembered with cloying fondness by all of the vendors. Still, there were five left – the two I bought last Friday, which are the subjects of this blog, the other pair I purchased on Tuesday and one I let someone else have. Note I do not call it the one that got away because had it been a fish I caught I would have thrown it back in the water.

THE RESTORATIONS

I.The Bewlay London Made Hand Cut Spiral
Rob2 Bewlay & Co., Ltd. was an English chain of pipe shops for about the first half of the 20th century until it was sold. [See Steve’s excellent recap of everything I found in my own research and more at https://rebornpipes.wordpress.com/2014/03/07/house-of-bewlay-pipes-tobacco-leaflets/.%5D The general consensus is that Bewlay sold only Barlings, Charatans and Loewes with the Bewlay name and mark on the pipes. Another source included Orlik in the list. But regardless of the total roster of pipe crafters that supplied Bewlay, everything they offered was considered to be of high quality.

Such is the case with my little beauty of a Bewlay small billiard (1-½” x 5”). I have had a difficult time trying to match this pipe with its maker. Even after viewing many samples of all of the above pipe crafters’ works, it is with uncertainty but sufficient confidence that I attribute the pipe’s origin as Barling.rob3Most of my pipe friends to whom I have shown the Bewlay commented right away that it looks like a Barling. My only serious doubt arose from the little billiard’s bizarre, if I may be so bold as to describe it, tenon bit. Here indeed is a bit fashioned by an evil dentist tossed out of the profession and turned stem-maker. My friend and mentor, Chuck Richards, calls it a “funky screw,” but I prefer corkscrew or even drill bit. The thin half of the screwy bit, which bears the same Patent number found on the bottom of the shank – № 167103 – as shown above separate from the bit, fits snugly through a thin horizontal slot in the front of the tenon. The wider half slips into the mortise. Whatever this bit’s real name (and I would very much appreciate a message from anyone who knows the answer), it is removable for cleaning and perhaps replacement if necessary, which is not unimaginable given its frailty. To tell the truth, in fact, I bent mine with almost no force applied when I first discovered its presence and just had to probe to see what I could discover. Well, I soon found that the odd bit is at least like aluminum and can be removed intentionally or not, and bends with alarming ease, but then again bends right back just as handily.

The Bewlay/Barling Spiral billiard was in pretty good shape when I bought it, other than the scorched rim, cake build-up in the bowl, some scratches on the pipe, bite marks and discoloration of the originally brown stem and general dirtiness inside.
rob4

rob7
My first line of attack was to ream the bowl carefully, then sand it with 400-grit paper torn off into a piece that wrapped around my ring finger. Then I soaked it for some time in alcohol, removing most of the old coating which I finished off with some 1000-grit micro-mesh, careful to leave the areas around all of the nomenclature untouched.
Pleased with the results so far, I applied Lincoln light brown alcohol-based boot stain to the entire outside of the pipe bowl and shank, and flamed it all around just enough to see the whoosh of blue light as the alcohol burned off and left a light layer of black soot. The soot I easily removed with the finest micro-mesh
rob8

rob9

rob10

rob11
The only task remaining for the bowl and shank were to buff them with my cheap high-speed dual buffer: once all over with white Tripoli, then again with carnauba. At last I think I’m getting the hang of using a light touch on the single high-speed buffers so as to avoid flying objects that can break easily and to achieve the desired polished effect evenly and without streaks.

I micro-meshed the stem with #600 paper, getting rid of all the discoloration that was not inside the stem itself, and buffed it with white Tripoli. To finish it off, I used a white crayon marker to fill in the Bewlay “B.”
rob12

rob13

rob14

Bewlay Spiral

Bewlay Spiral

London Made S101

London Made S101

Patent № 167103

Patent № 167103

II. THE PLAYBOY MEERSCHAUM BEAST
I already owned one Laxley African Meer…
rob18
…and as soon as I saw the Playboy, I knew it had to be a Laxley also.
rob19

rob20

Rob21
With Chuck’s concurrence, I am satisfied it’s a Laxley Playboy club edition.
This rugged African pebbled Meer was easy to clean up and make it look almost new again, despite the heavy, crystallized burning all around the rim. I began by taking some small cotton gun cleaning cloths and applying a little purified water to each, then lightly cleaning off the outside of the bowl and shank.

I had to sand off the bright black crystallized burn around the rim with patient use of 400-grit paper until I began to see the light brown of the Meerschaum show through. Then I switched to micro-mesh and decided to go all the way past the black stain from the original. Not having any stain of that color, I bought some Lincoln for $6.95 and daubed it around the rim with care not to let it run down the top, which was fine the way it was. Next, of course, I flamed it and micro-meshed the ash away to a very smooth finish.

The screw on brown stem was a mess, so I fixed it up with micro-mesh #600 micro-mesh and buffed it evenly with white Tripoli only.
rob22

rob23

rob24
That, my friends, is how beauty met the beast. And as I intend to keep both of these for my ever growing, P.A.D.-fueled collection, I expect they shall live happily ever after.

Getting back in the saddle – AJ Verstraten


It is a pleasure to post another article by AJ Verstraten aka Bananabox-Ninja. It has been a while since he has been able to do any refurbs do to some health issues he had to deal with. It is great to know he is back and feeling much better. Glad to hear from you AJ and glad to hear you are healing. Thank you for taking the time to record your work for us to read and enjoy.

Greetings, it’s been a while since I was able to get behind my workstation and get some work done on the huge lot of pipes that are patiently waiting for a fix.
Some of you might remember my earlier piece in which I explained that I was home bound due to a motorcycle accident. Turns out I needed an operation to fix my cruciate ligament in my knee, this left me with a long recovery time but last week I was able to sit down and do four pipes that only needed some minor work to ‘flex my muscles’ so to speak.

A note about the pictures, as I did it outside in the nice spring weather there were still a lot of clouds and this makes some of the pictures quite dark.

These are the pipes I chose for cleaning:

Winsløw Grade E bought on ‘Marktplaats’ the Dutch version of Ebay
001 Winslow E group a
Chacom Silhouette a gift from a family friend who quit smoking years ago.
002 Chacom Silhouette a
Vibro Woodart acquired from a fellow forum-goer at the PRF.
003 Vibro Woodart a
Georg Jensen straight grain from the same friend as the Chacom.
004 Georg Jensen a
The procedure for all was the same.
Firstly I used hard bristled pipe cleaners dipped in 96%-proof alcohol. Afterwards the kettle would be inspected and cleared if necessary. After this I would set them aside and buff them one after the other.

The Winsløw is remarkable as it has only one dot on its mouthpiece instead of the two, I reached out to the Winsløw company about this but they didn’t reply. The pipe rather dull to clean as it was very well kept. I only cleaned the inside with the alcohol and that was it, the rest was nice and clean so I set it aside.
005 Winslow
The Chacom Silhouette was heavily used as was evident from the mouthpiece. It is made from swirling acrylic and you can see through it as they used clear acrylic in it. The black tar buildup took a lot of cleaners and the use of a new tool I acquired at a flea market.
006 Cleaning
The brown of the tar build up sits in the small cracks on the inside of the acrylic. These were formed by the precious owner who bit rather hard on his mouthpieces. I tried the ultrasonic cleaner but it wouldn’t budge. So I decided to keep it as is. (If anyone has a tip for me on that one I would be much obliged.)
007 Mouthpiece
Then it was time for the bowl, it had seen better days but there was no damage on the wood itself. So with the help of spit, a sock and the tool as shown earlier the coal layer was removed and the bowl was reamed with the reamer tool.
008 CS bowl
The Vibro Woodart pipe was the first one with an ebonite mouthpiece, so I set up the motor and abrasive wheel and let loose. It came out nice and black in the end.
009 Mouthpiece and motor
I noticed the mark in the mouthpiece was still visible so I used a correction fluid pen to fill it up and used the abrasive pads (8000 grit) to remove it gently.
010 colouring the letter
(The end result will follow)

I don’t have any pictures of the Jensen pipe as the pictures were all too dark. But I did the same as the Vibro pipe. Using the abrasive wheel and the correction fluid pen to get the logo back out again.

Then it was time for the buffing. Buffing with brown (1), white (2) and then with carnauba wax (3).
011 Buffing
Here are the final results, you can see the W on the Vibro pipe quite clearly and on the group shot the result on the Jensen.
012

013

014

015

016
In the end it was good to sit in the sun and once again get my hands into cleaning a nice pipe.
I always feel quite happy when a dull pipe with a heavily caked bowl turns into a nice shiny one that can be once again hopefully be used for many years to come.