Guest Blog by Robert M. Boughton
Member, International Society of Codgers
Member, North American Society of Pipe Collectors
http://www.naspc.org
http://about.me/boughtonrobert
Photos © the Author except as noted
When life was like a summer day,
And I was under twenty,
Three loves were scattered in my way –
And three at once are plenty.
Three hearts, if offered him with grace,
One thinks not of refusing.
The task in this special case
Was only that of choosing.
I knew not which to make my pet –
My pipe, cigar or cigarette!
— Henry S. Leigh (1837-1883), British writer, playwright and lesser poet, “My Three Loves,” 1875
INTRODUCTION
As a writer, I make it a habit to look words up in the dictionary before committing to print, even when I am confident they are the best to convey my true messages. In the process, I have often been surprised to learn how many words come nowhere close to their common usage. I have stopped using fantastic (related to a fantasy or other such literary, delusional or wishful thinking, when I want to suggest excellent; I’ve dropped mesmerizing (named for the Australian physician/showman F.A. Mesmer, which deals with the alleged ability to place someone in a trance so deep the subject cannot feel pain, as opposed to something considered fascinating, and of course I have my pet peeve: unique, or existing as one, sole, solitary, alone. Therefore, there can be no higher degree than unique, such as more, very or, God help us, totally unique, dude. Thomas Jefferson’s unique literary and diplomatic exception to the same rule applied to another word, in penning the “Declaration of Independence” and referring to a more perfect Union, was a brilliant misuse of the language directed to good old King George V, whom the masterful wordsmith, diplomat and statesman knew would not miss the Colonial revolutionary’s attempt to play nice.
Somewhat of a language purist, therefore, I was disappointed upon checking the past participial adjective scintillating in the OED. I hoped to find a meaning with common uses I have heard indicating something more alluring in a sensuous sense. I suffer from chronic migraines and was struck by the sole usage referenced, to scintillating scotoma, the technical name for auras we who live with the often blinding, nauseating, debilitating torture of these attacks call the event that precedes the onset of the pure anguish that can last 12 hours, 24 or for days before running out of air, if you will, burning out (or more descriptive of their quality, terminating with a thermonuclear-like reaction) – and then returning, as they come in cycles of three or so for me. Thanks to my dear Dad, however, who taught me the value of a good double meaning in any title, I moved to the verb scintillate and found more general references to sparks, flecks, twinkles and flashes of light, without the negative but illustrative connection of scintillating scotoma.
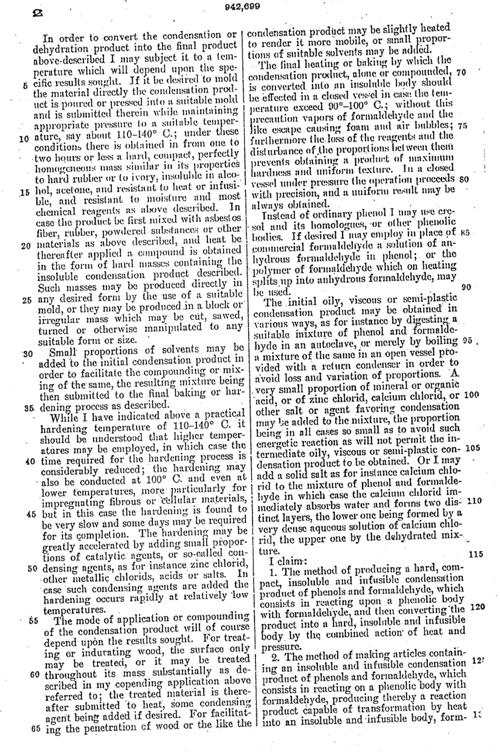
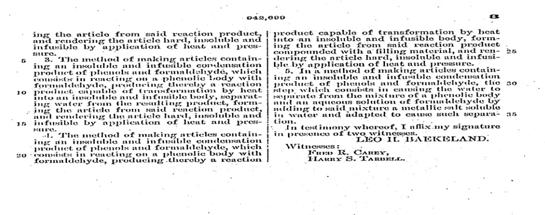
The story behind Bakelite and two of its competitors, and the Machiavellian way the three in time merged into a single Bakelite incarnation, is one for the annals of business law. The basic original resin used to make Bakelite, a phenol formaldehyde based synthesis, was patented as such in 1900 by Leo H. Baekeland, a Belgian-American chemist. Baekeland’s synthetic plastic, the first formulated in the world, was named in honor of its inventor and began production in 1907. See below for the 1900 patent.
The first of many Bakelite satellite companies worldwide, the Bakelite Gessellschaft gmbH, was founded in Berlin in 1910 by Baekeland and two German companies. Late the same year, the General Bakelite Co. was established in the U.S. by Baekeland.
Two independent chemical research and production companies in the same time period, Redmanol Chemical Co. founded by Lawrence V. Redman after whom the harder, more durable and amber-colored synthetic was called, and the Condensite Co. established by A.J. Aylesworth, developed and sold their products which included substantial differences from Bakelite although they employed the same heat process. The hard, durable synthetic plastic redmanol was called thus after its developer and is made from the action of formin on carbolic acid. On the other hand, condensite is formed from the action of chlorine on naphthalene. In other words, all three have fundamental differences that make them viable as separate synthetic plastic products.
Perhaps seeing the only way to maintain ultimate proprietary control over his original Bakelite idea and not miss out on the opportunity to use newer, better variations on his theme, in 1922 Baekeland sued a distributor of Redmanol, which had a controlling interest in Condensite, for patent infringement. Baekeland must have known the other companies could not fight the complaint in court and maintain production. His civil action ending in success, he “arranged” for the two smaller chemical concerns to be consolidated with the formation of the Bakelite Corp. From then on, Redmanol and Condensite products, including pipes, were stamped Bakelite – but all anyone needed to do was look at the quality of the product to know the difference. Bakelite Corp. was consumed by Union Carbide and Carbon Corp. in 1939.
Redmanol so approximated the appearance of amber – which, remember, was prized in meerschaum and other pipes before and after the turn of the 20th century – for which Redmanol Chemical Products in its own name took out ads like one in the June 1919 issue of “The Scientific American.” High-minded and overblown, as was the custom of the day, the ads were headed, “In Search of the Man Made Amber.”
 This amazing combination of all that one could hope to find in a pipe – artistry, elegance, refinement, style, class and functionality, to name a few attributes – alas does not belong to me, and I will neither hesitate nor pretend not to be jealous of the fact. Instead, my fellow piper and friend, Darryl Loomis, is the very lucky new owner. He loves it so much that he was willing to tolerate a somewhat bad taste he detected rather than trust it to someone to restore. I am honored to clean it up for him. Shocked to find I have no photo of Darryl, I suspect he will not be unhappy.
Darryl asked me to clean it up. Well, the fact is, I got one look at it and could almost not keep my voice under control when I said I would love to do it for him if he had no plans for the project. I admit I was jazzed to be able to take it home with me from Friday night’s local pipe get-together at the tobacconist. But there’s one important thing I should now note about any pipe “cleaning” job I undertake, unless the owner makes it clear that’s all he wants done, period. I don’t half-ass anything. Even when my business site was up (and it will be again this week), I included basic refurbishing with cleaning jobs and the full works with refurbs/restores (any necessary replacement parts not included in the base price). So that’s what’s happening here.
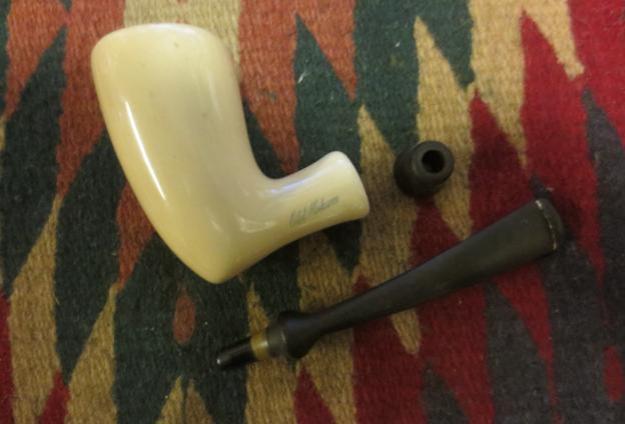
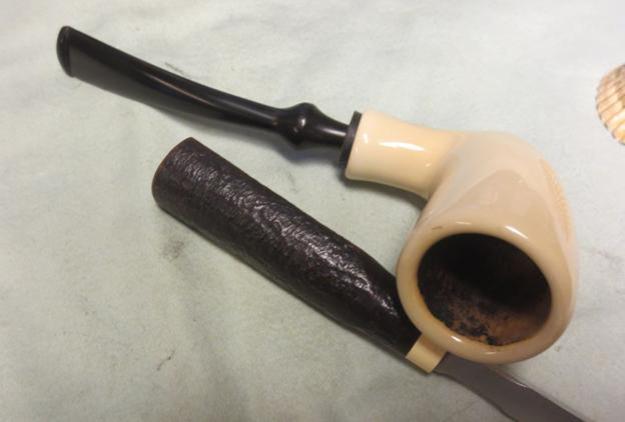
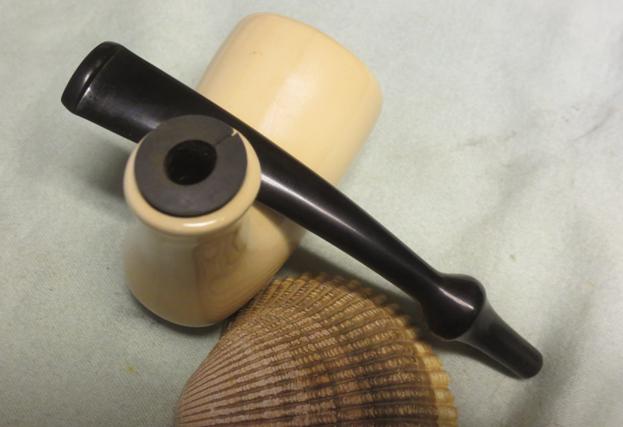
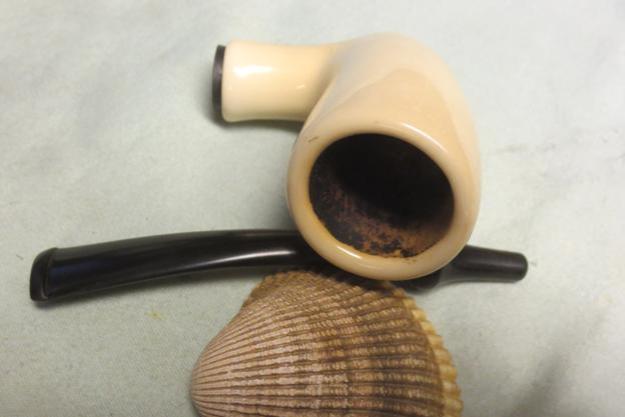
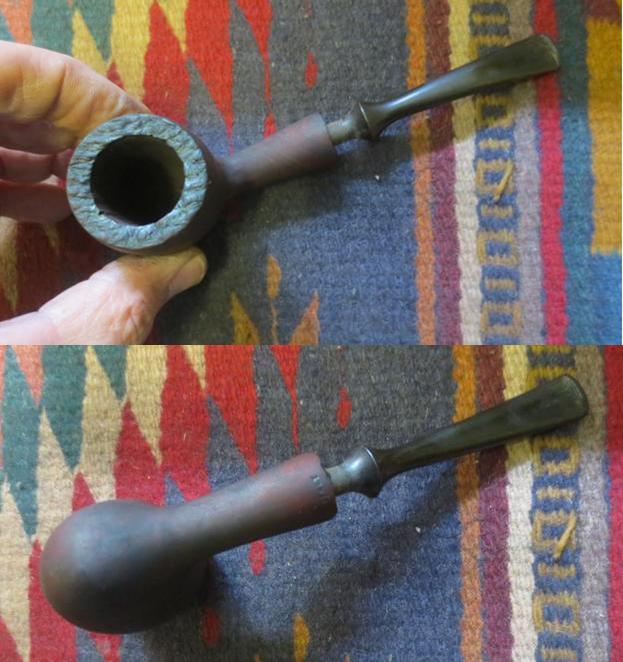
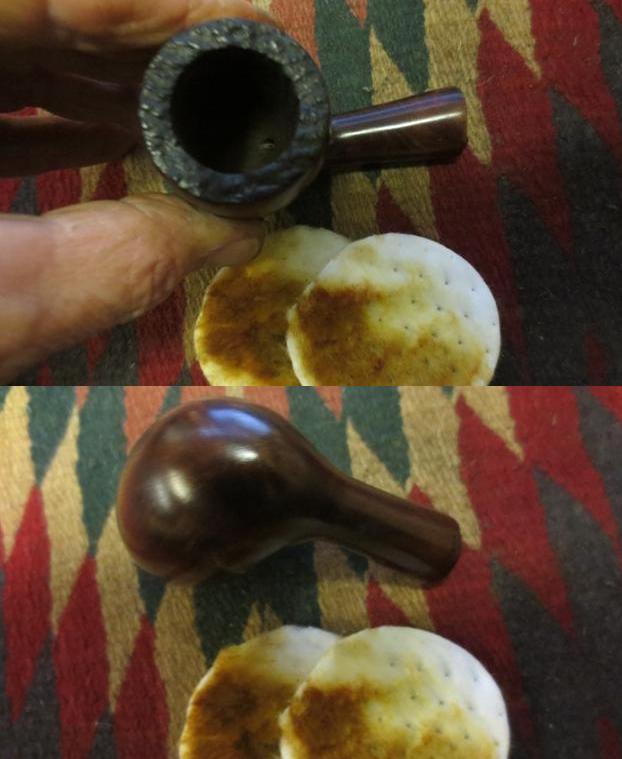
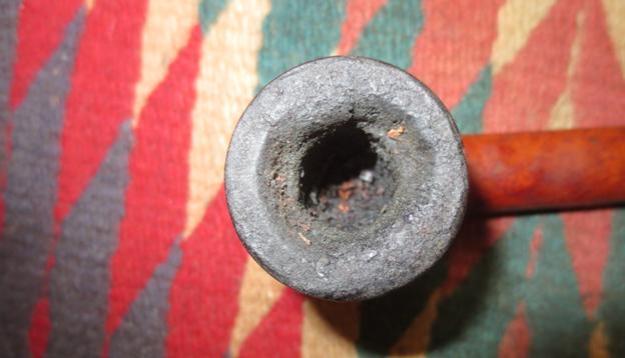
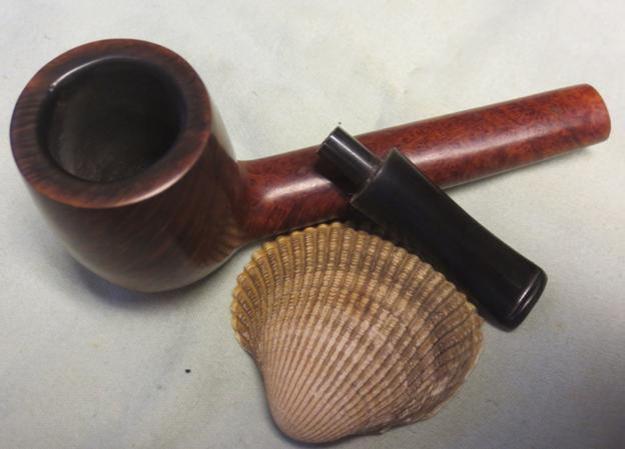
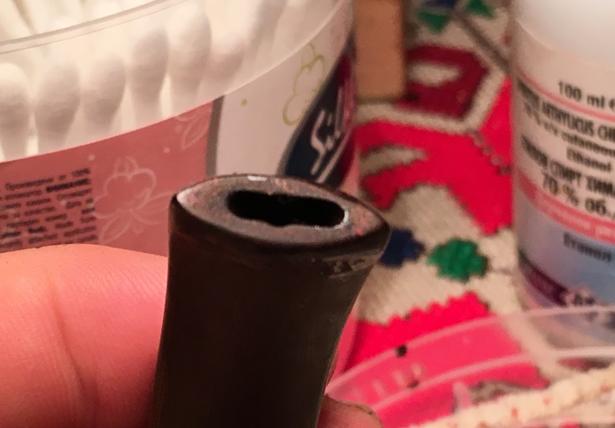
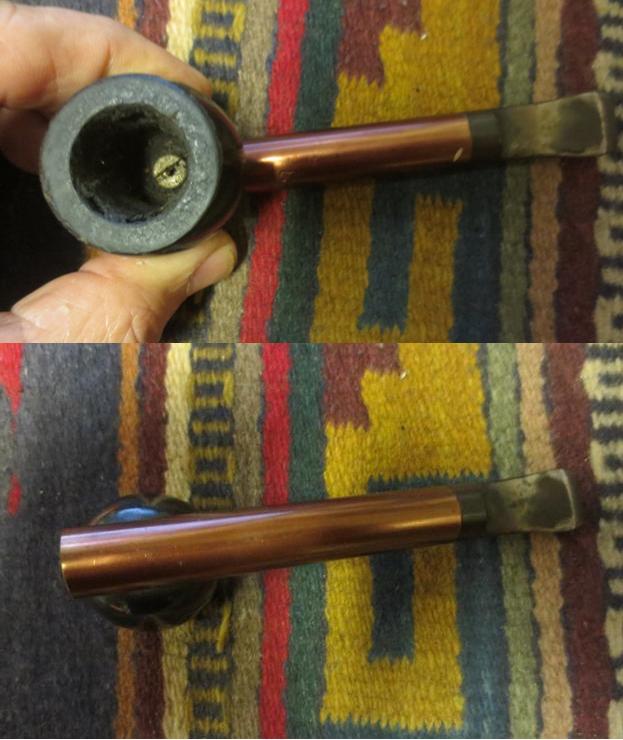
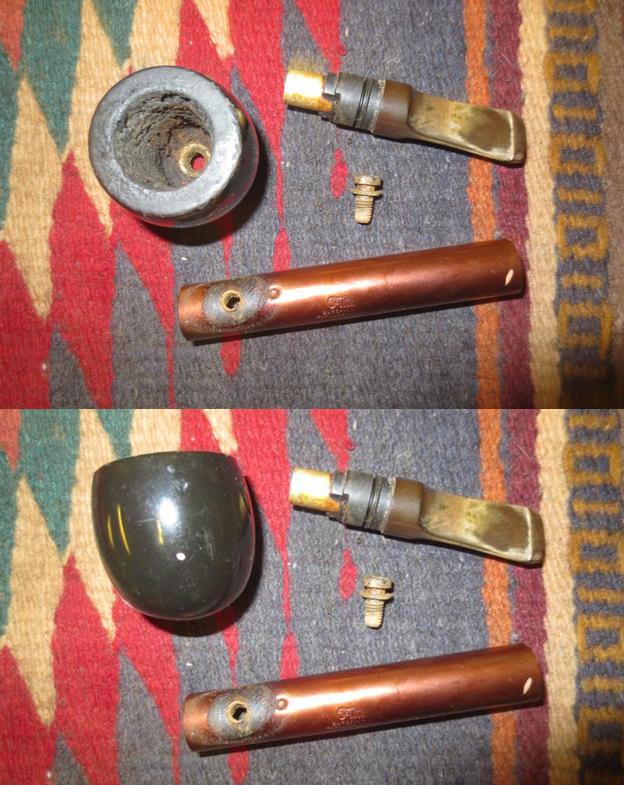
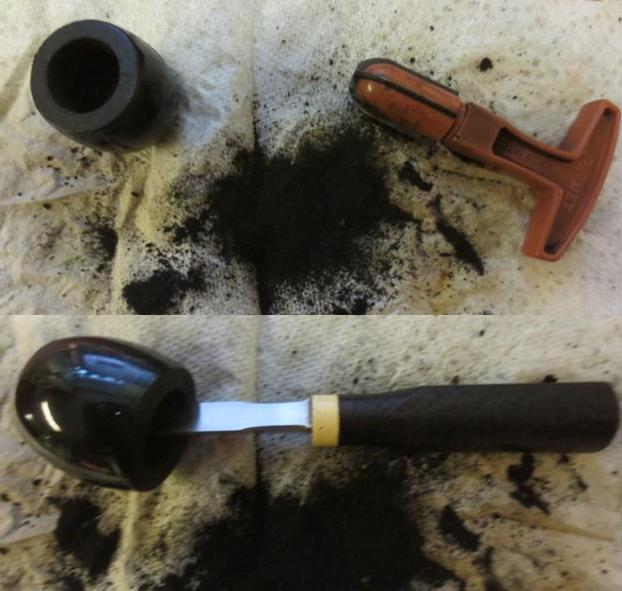
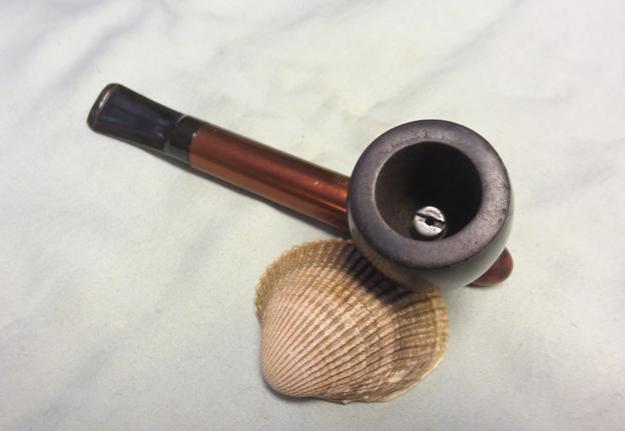
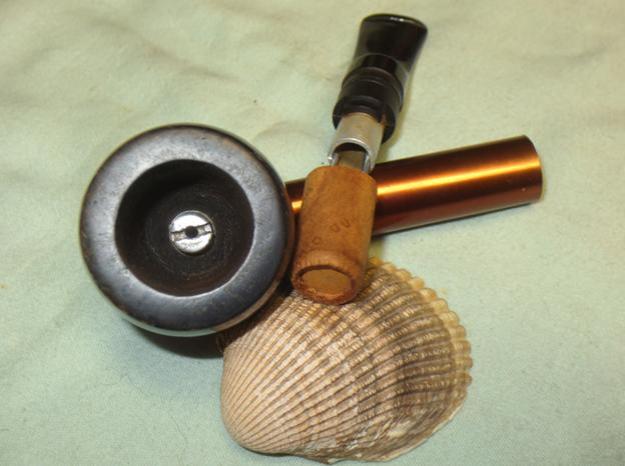
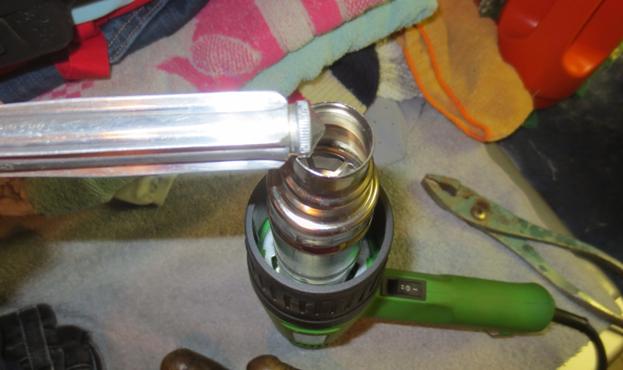
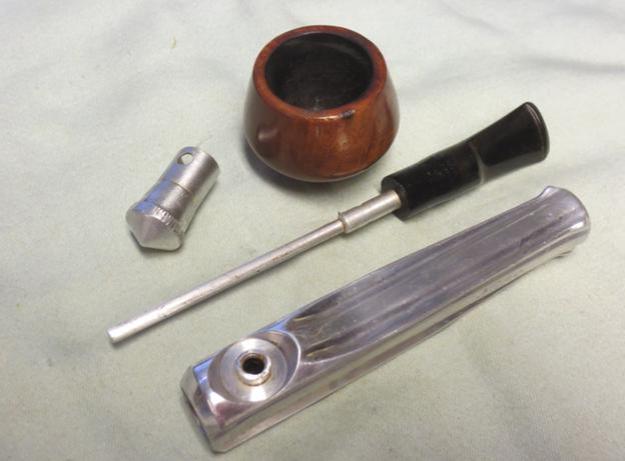
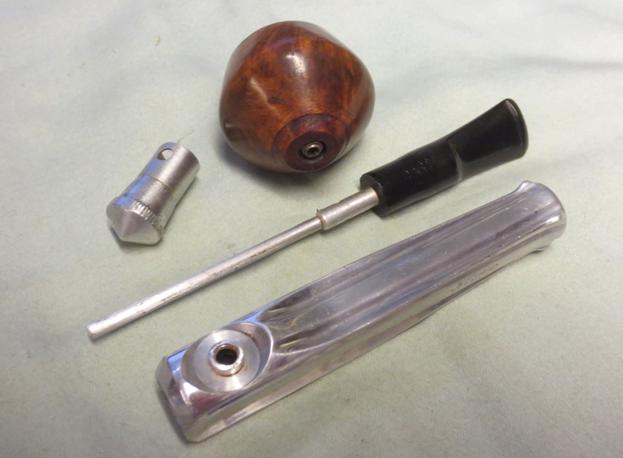
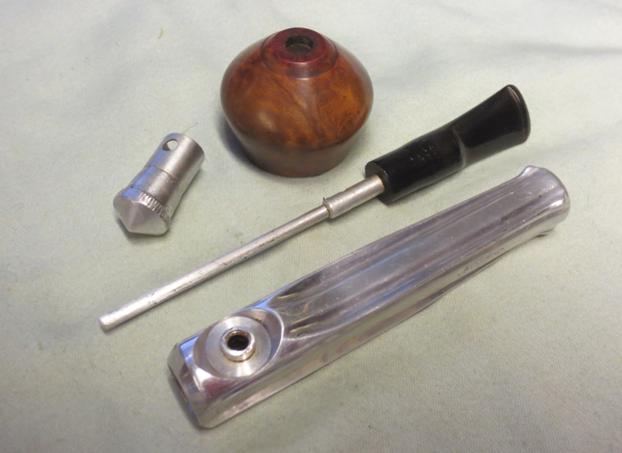
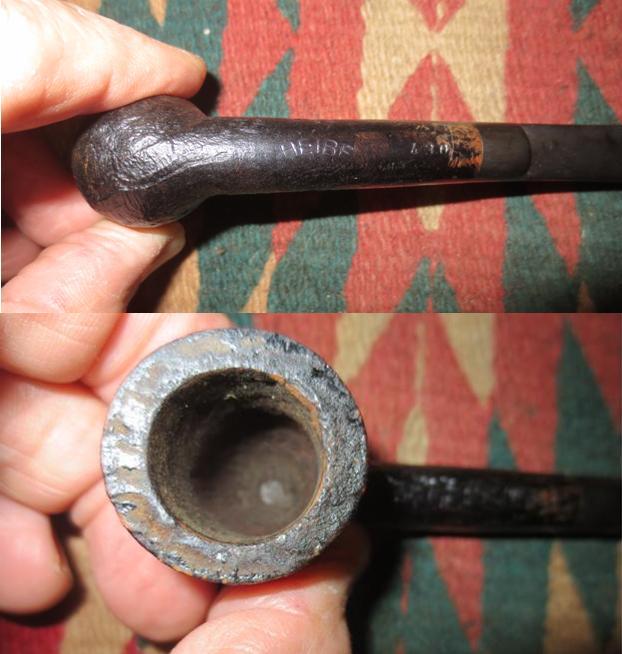
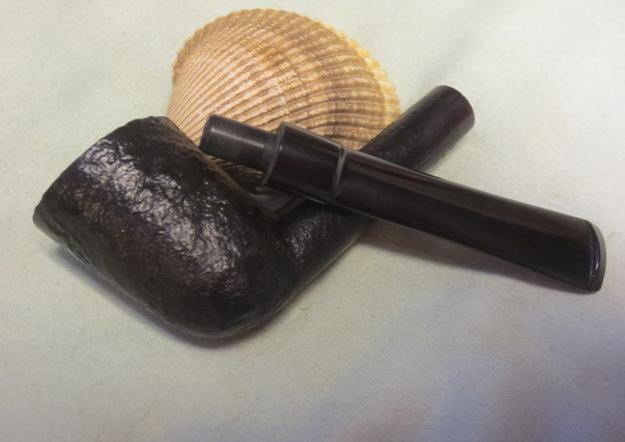
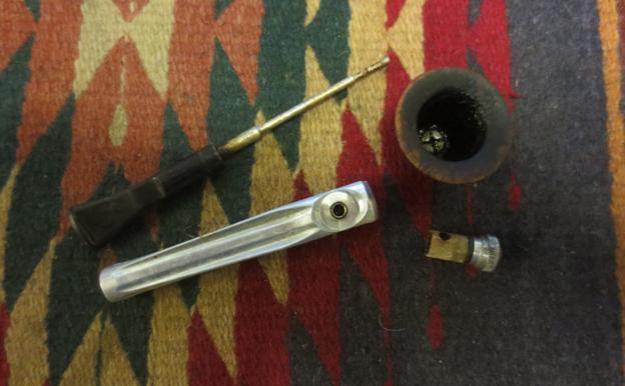
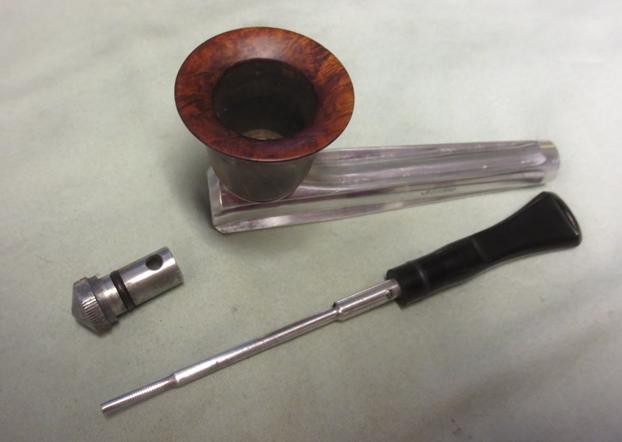
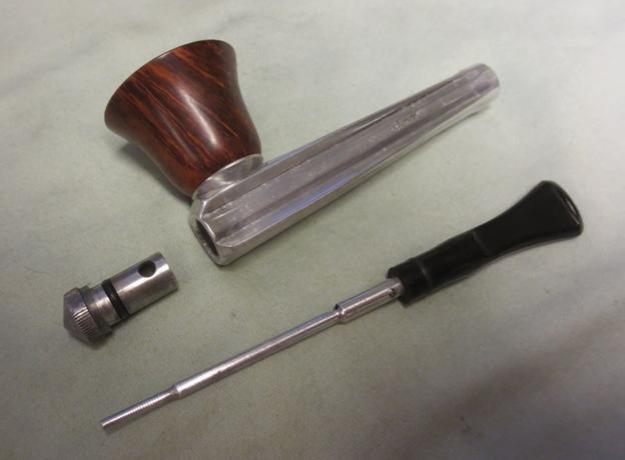
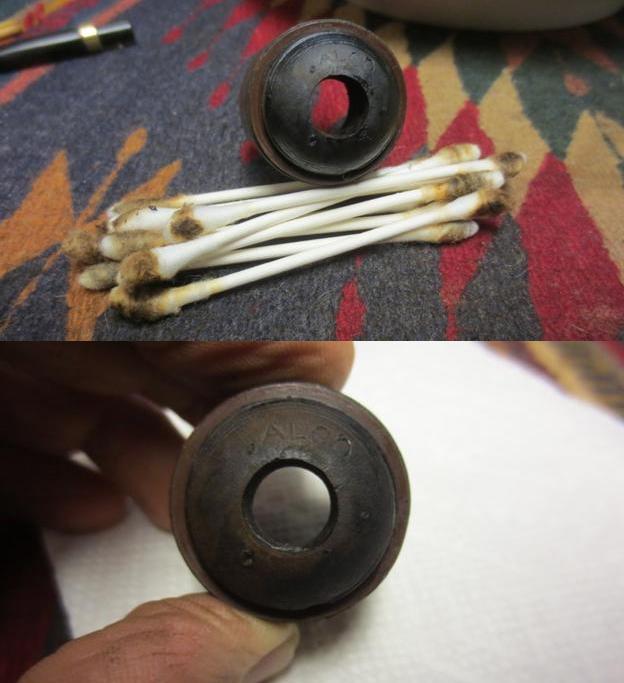
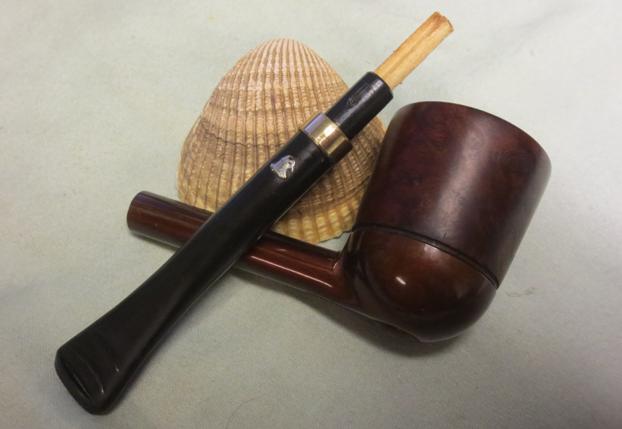
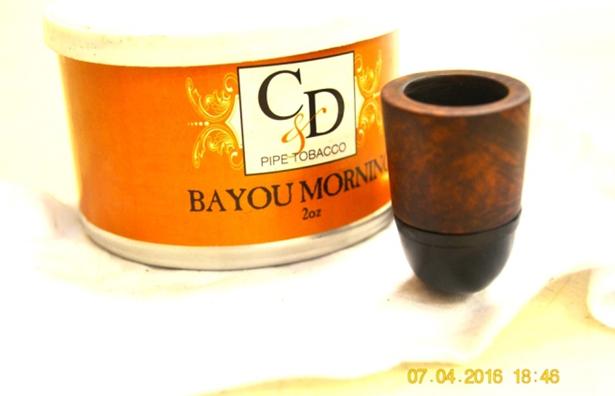
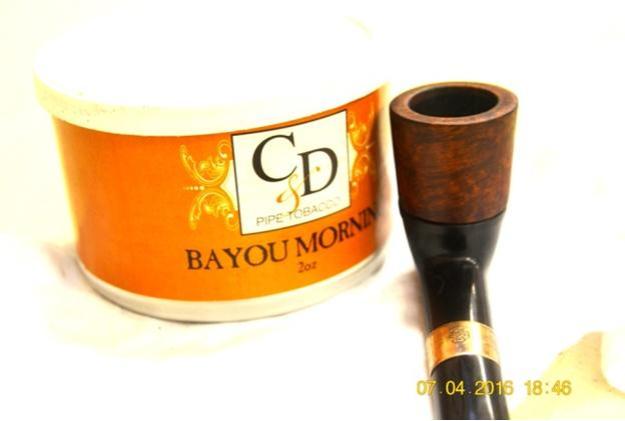
While we talked about the pipe, Darryl mentioned something peculiar. He said he noticed a somewhat bad taste but seemed willing to tolerate it as he did not expect to rotate this pipe very often. I unscrewed the bowl from the shank and saw right away where some of the unpleasant effect may have originated, but mentioning it to him, he was emphatic that he had heard the metal plate inside the shank (just as with any standard system metal, interchangeable bowl pipe such as a Kirsten) was coated with an unknown substance to keep it from overheating.
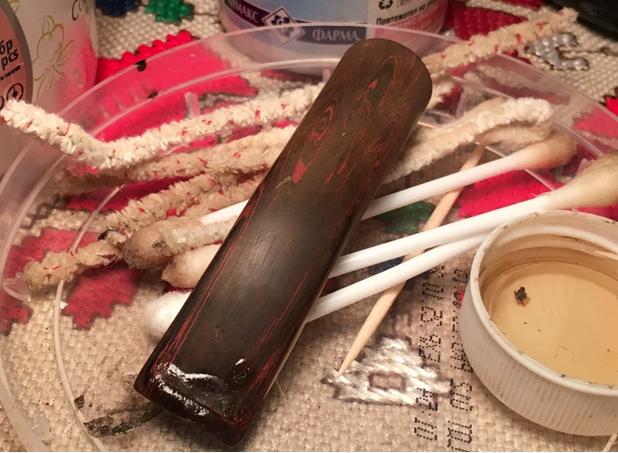
Being somewhat more curious than usual, after I was home with the pipe, I ran a cleaner through it, loaded a half-bowl of MacBaren 7 Seas Red cherry and lit up. Very soon the nastiness Daryl had understated rose in full force, ending with such awful dottle I spat it into a handy cup. My tentative conclusion, until I can query Daryl more, is that he trusted the person who sold it to him and didn’t considered it might never have been cleaned.
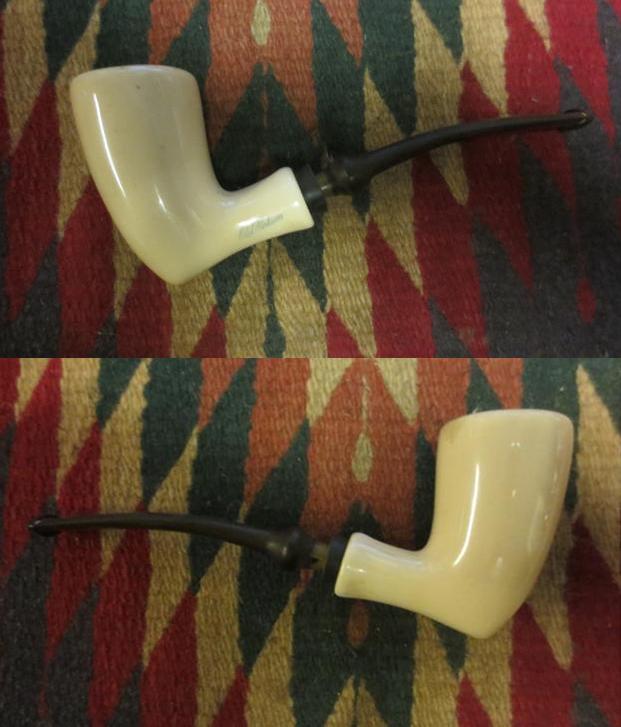
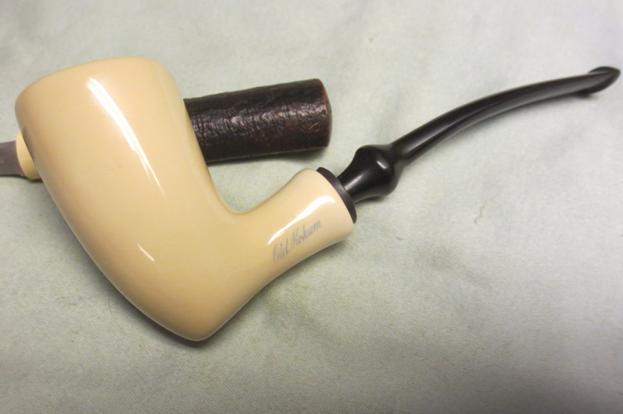
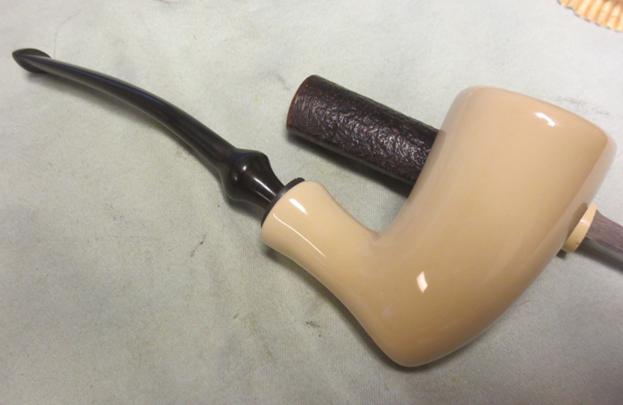
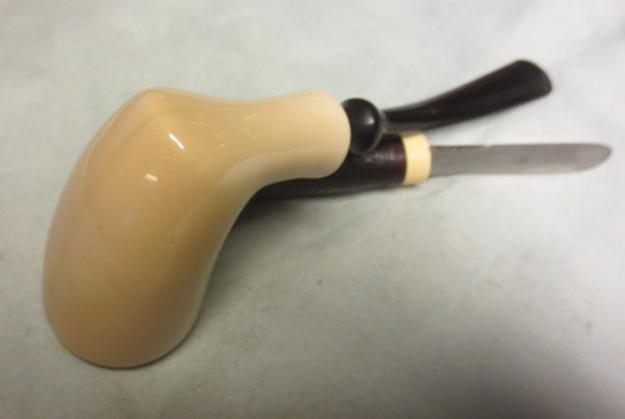
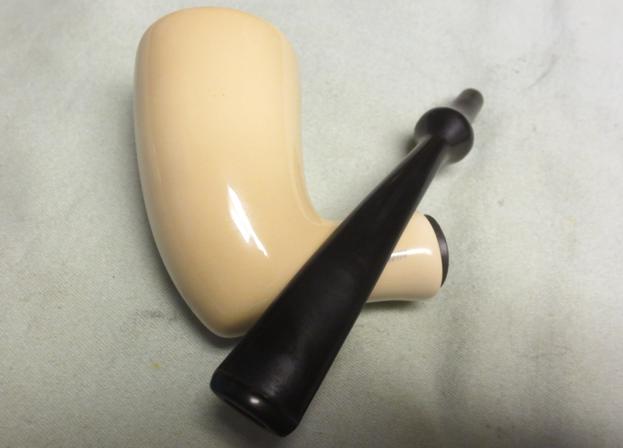
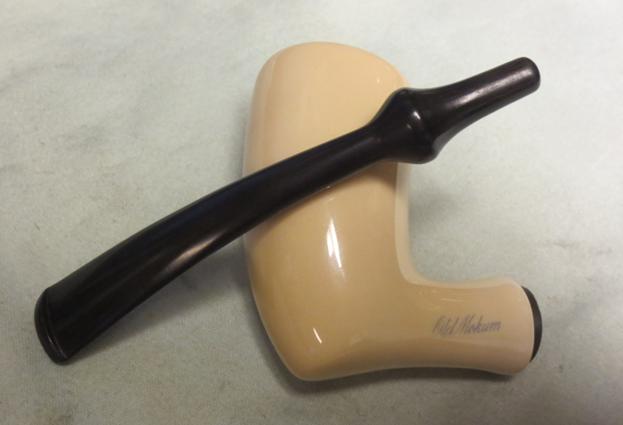
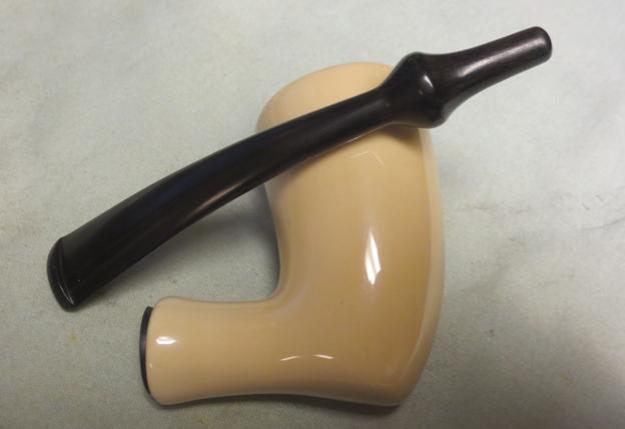
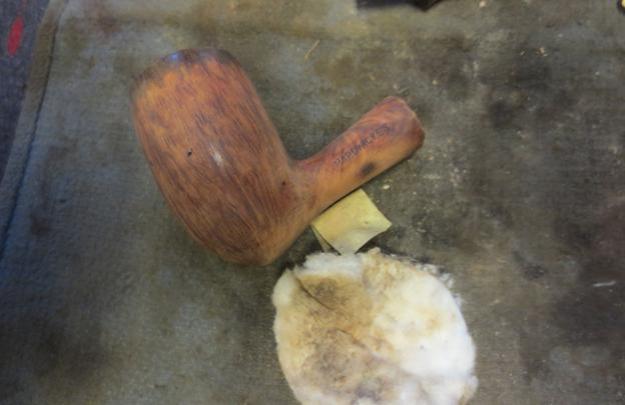
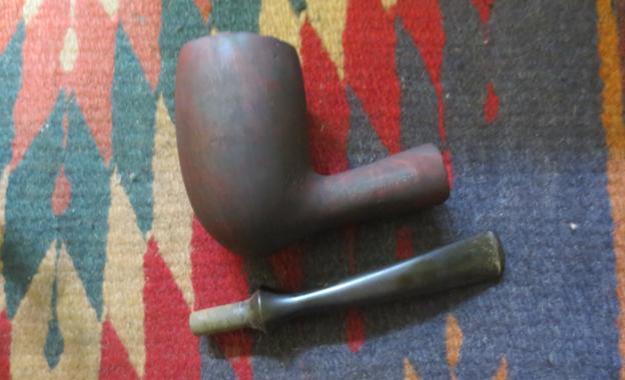
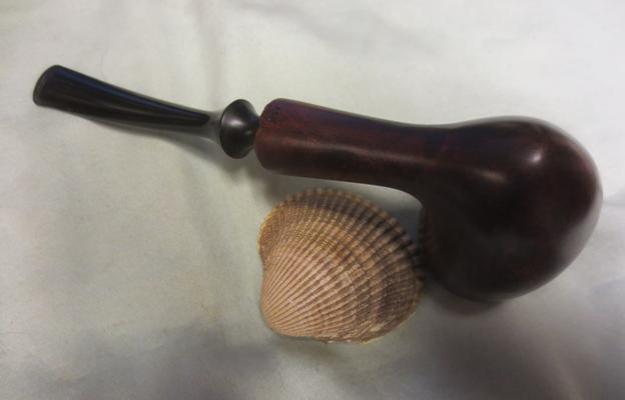
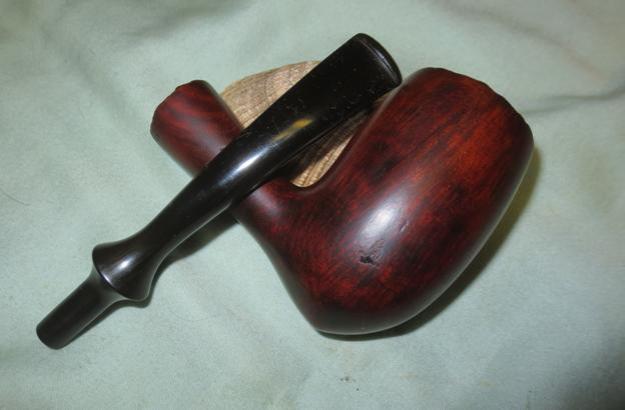
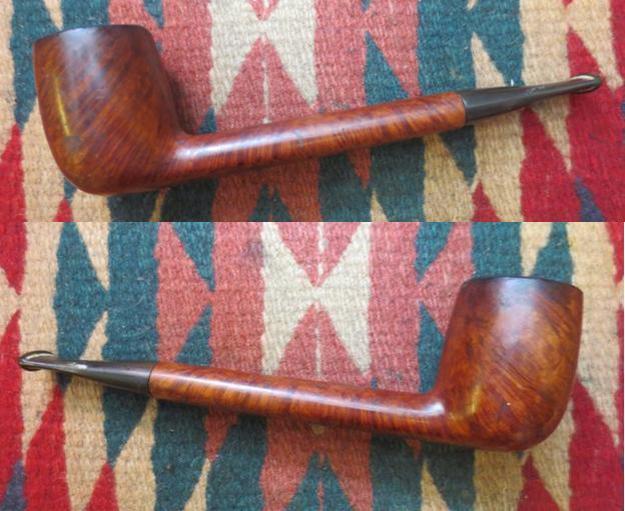
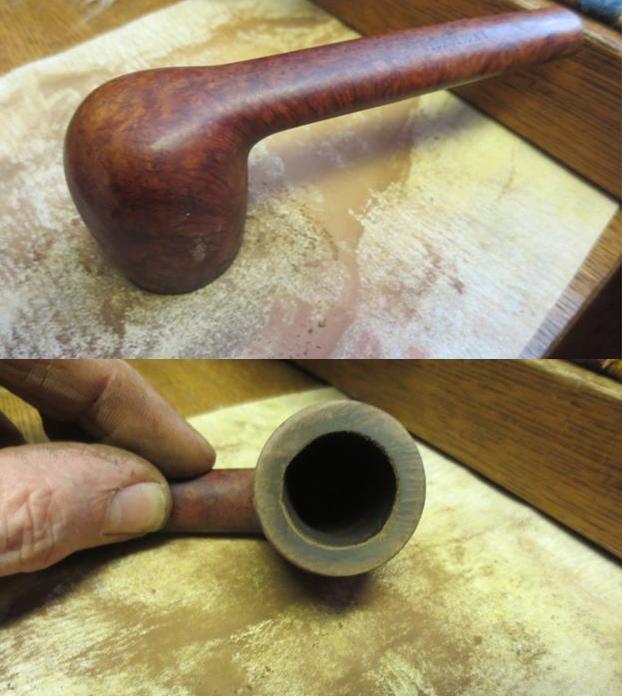
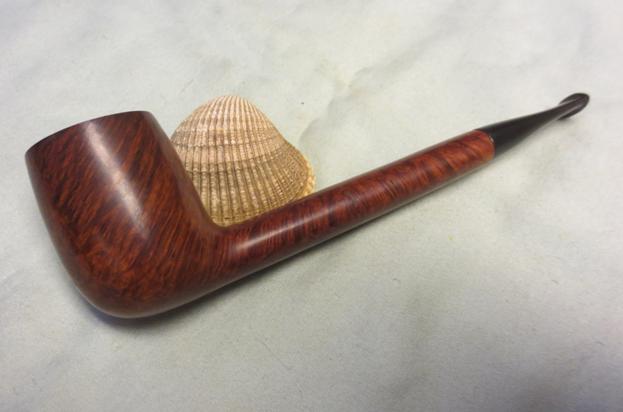
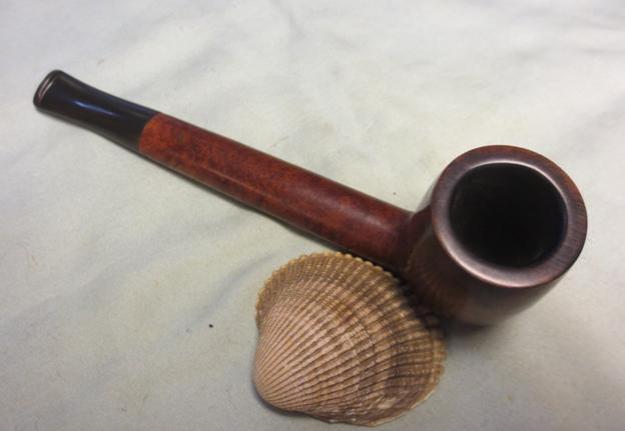
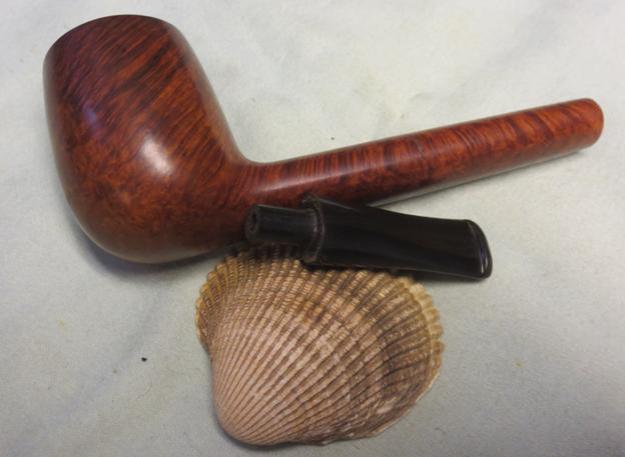
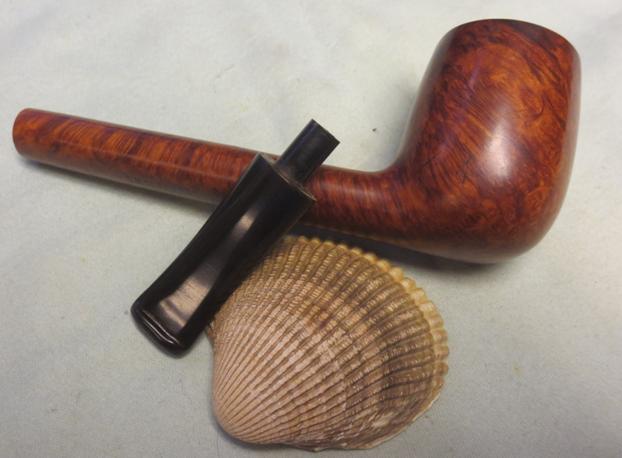
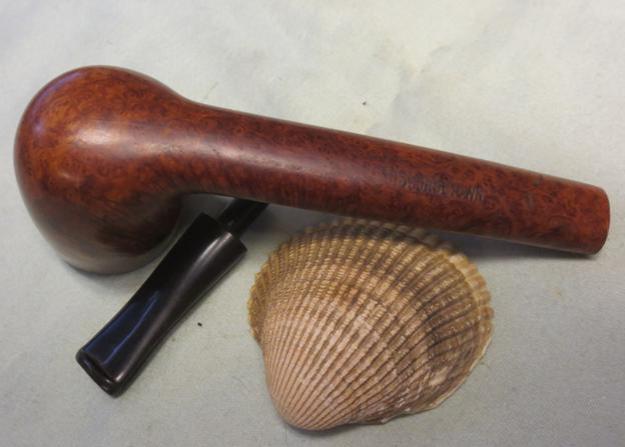
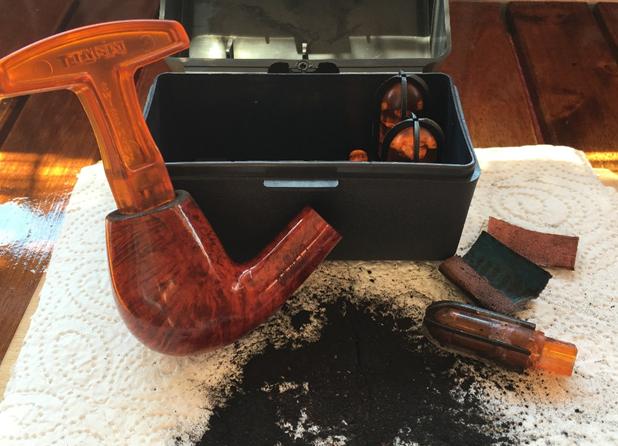
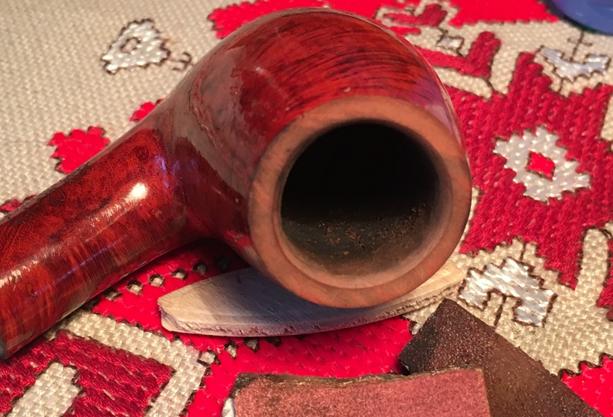
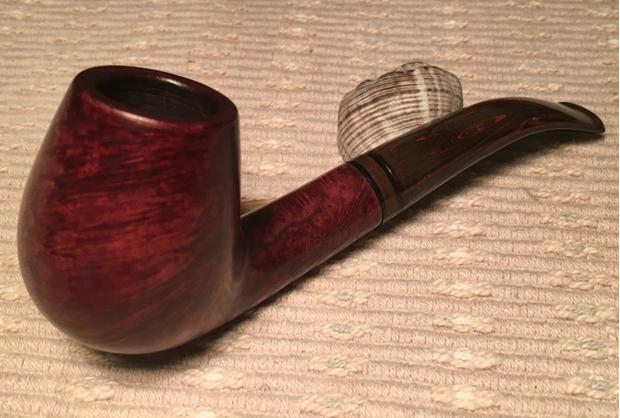
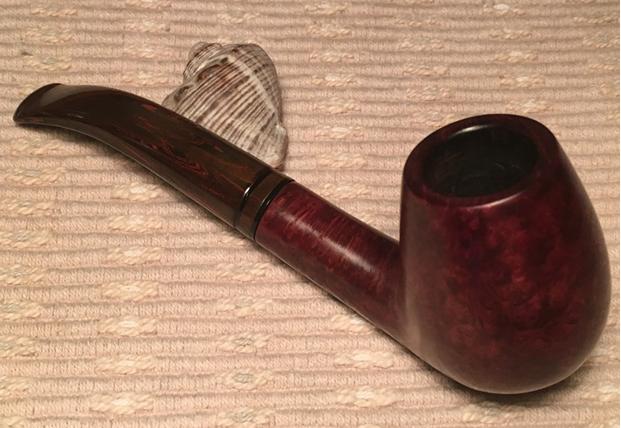
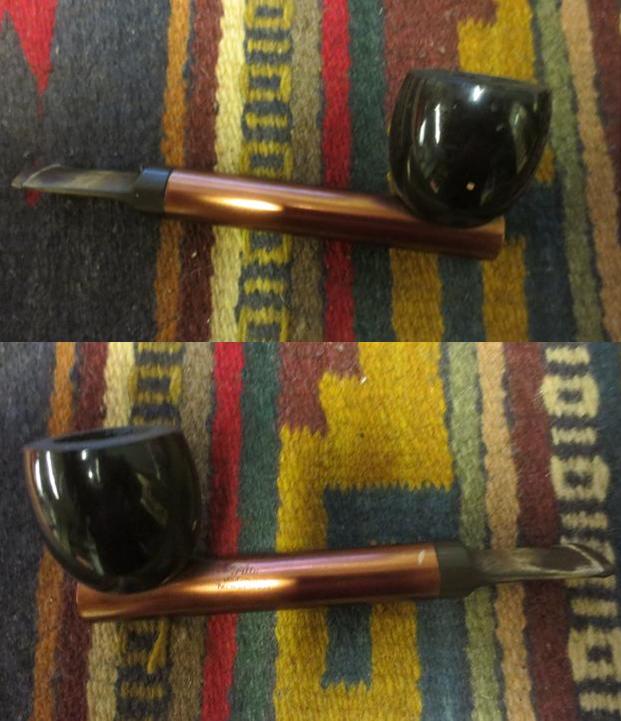
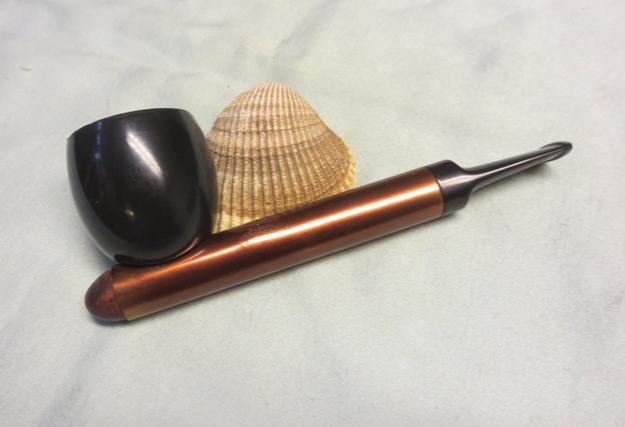
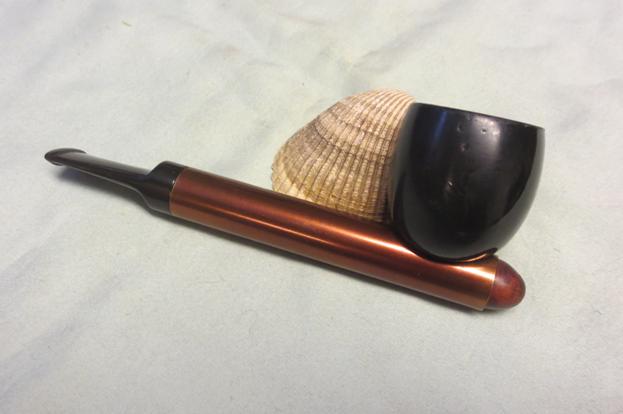
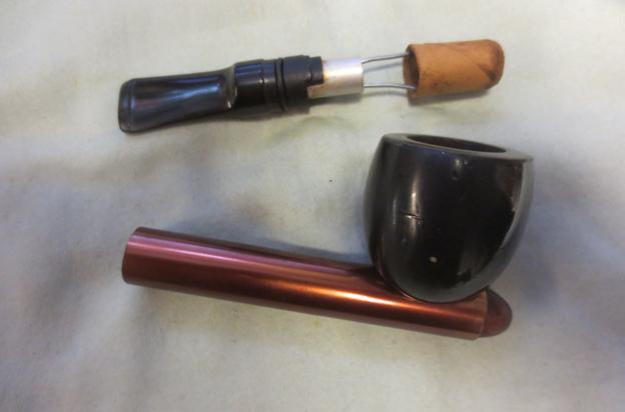
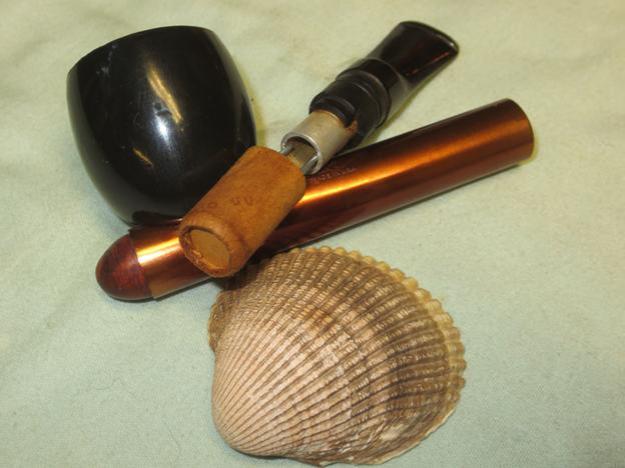
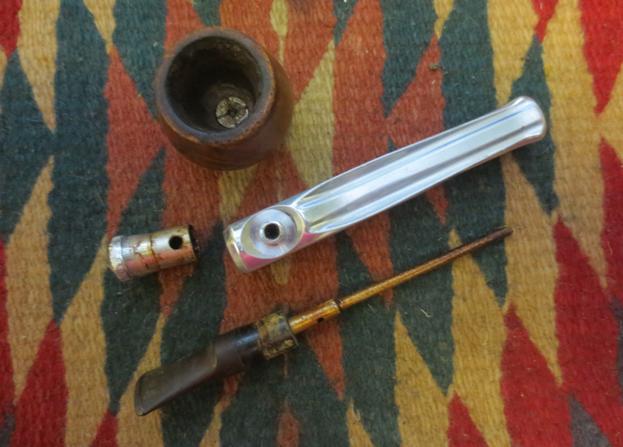
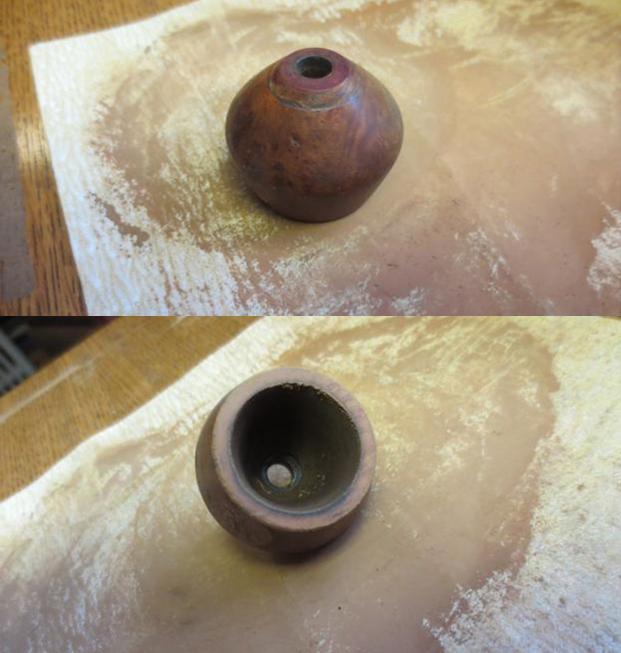
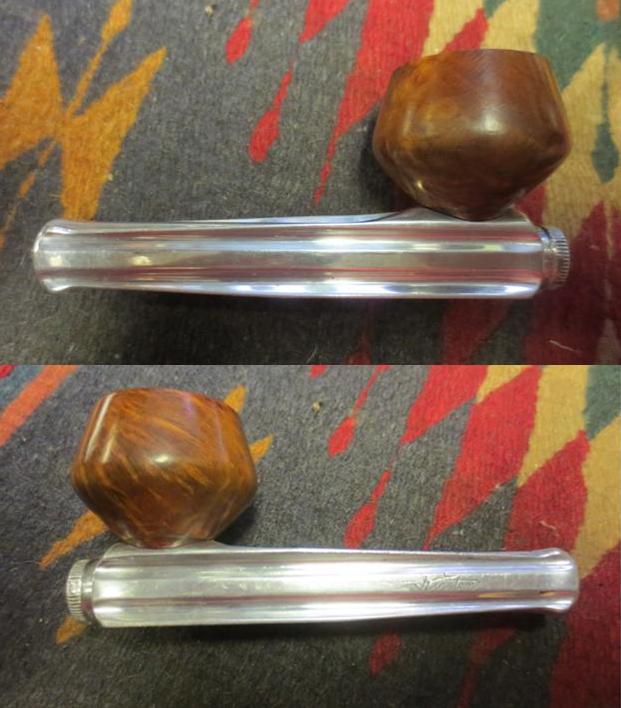
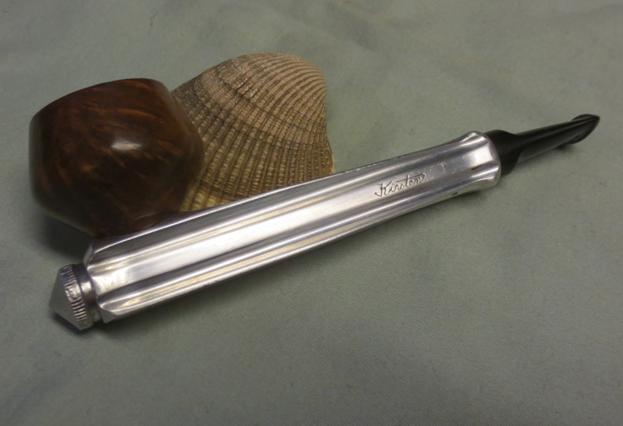
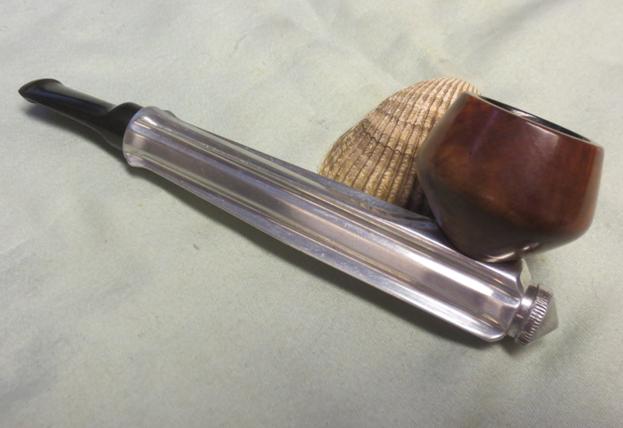
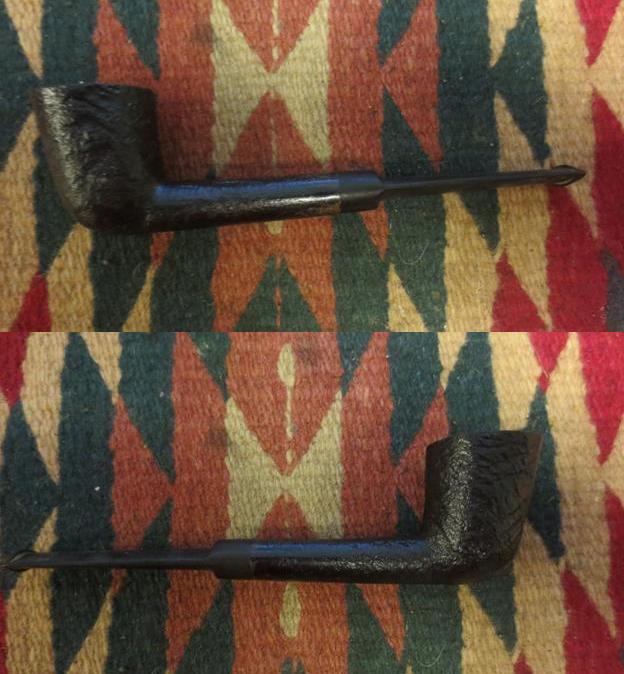
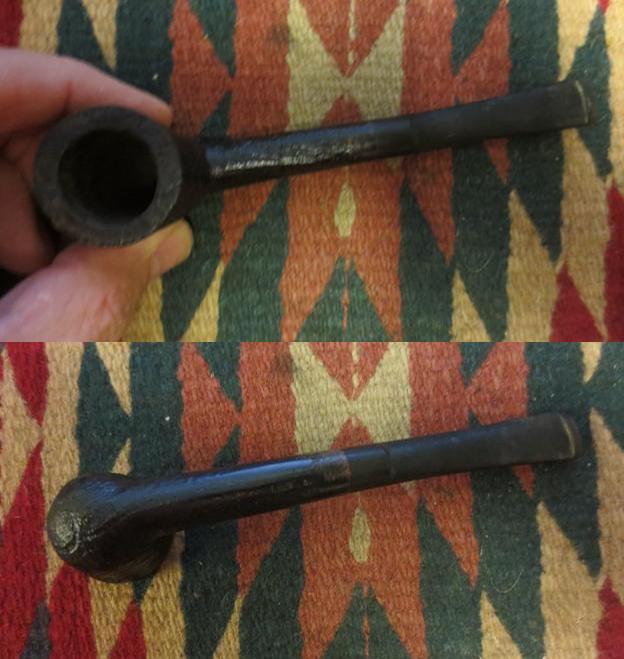
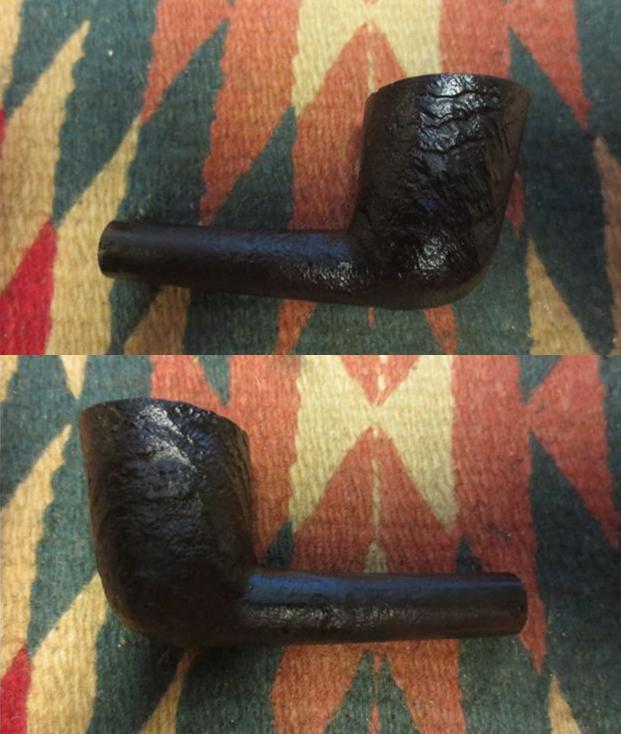
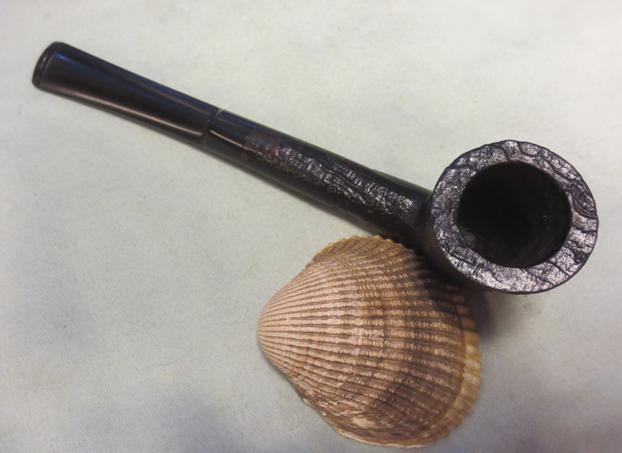
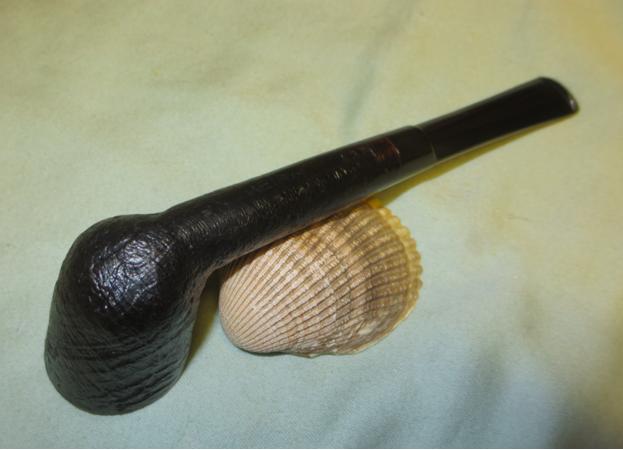
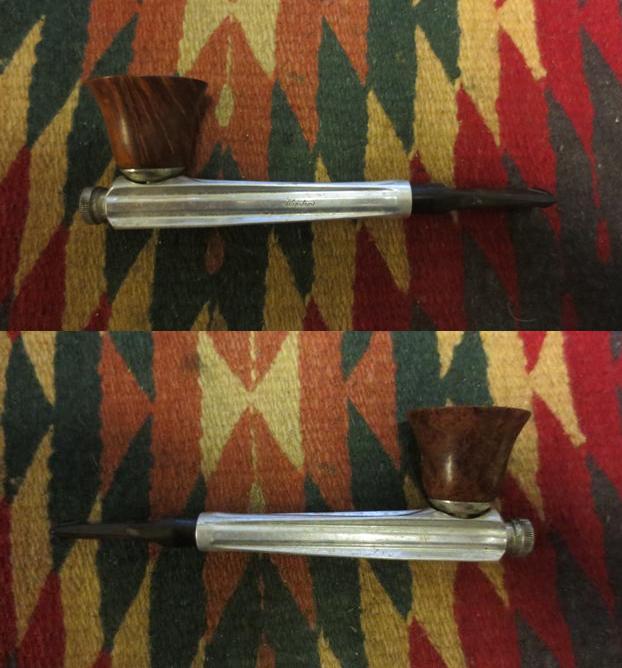
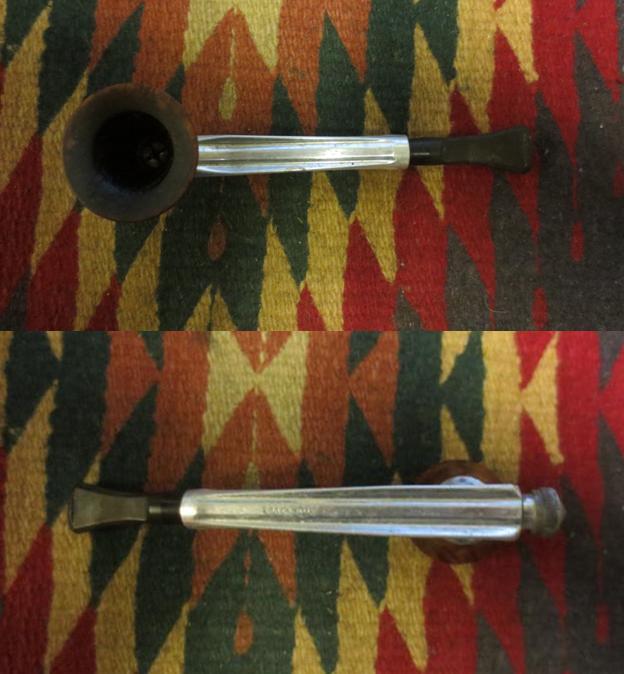
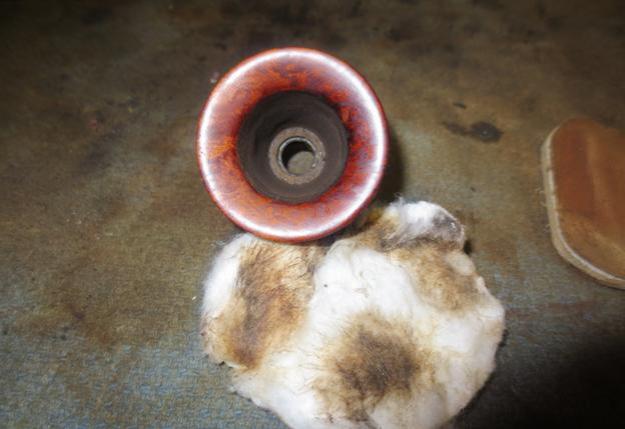
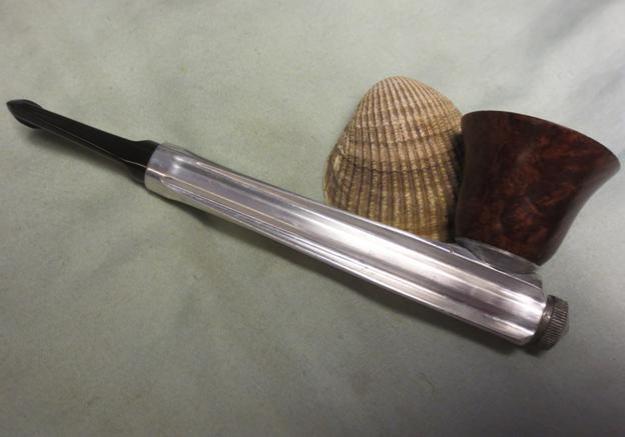
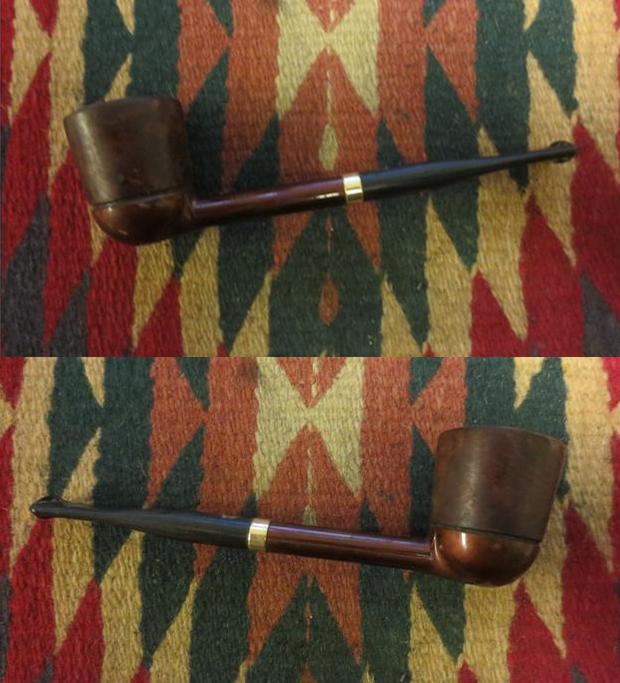
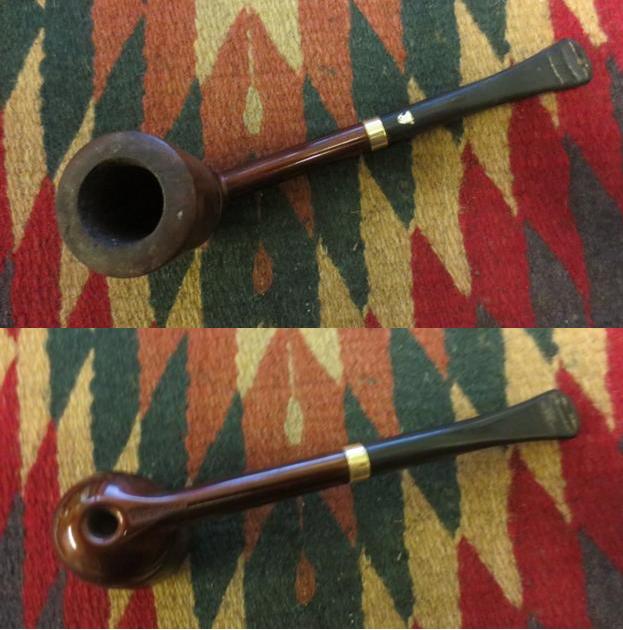
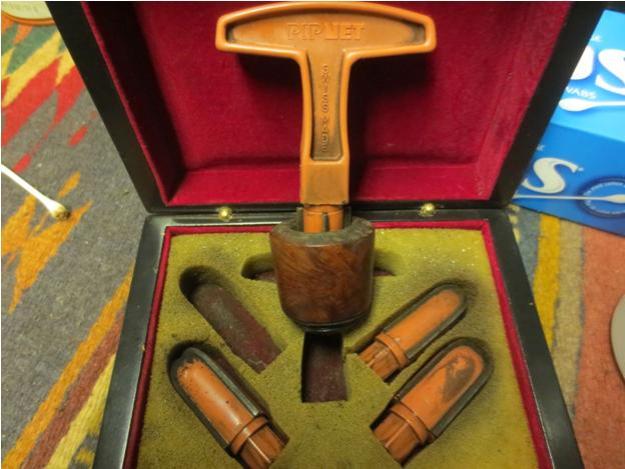
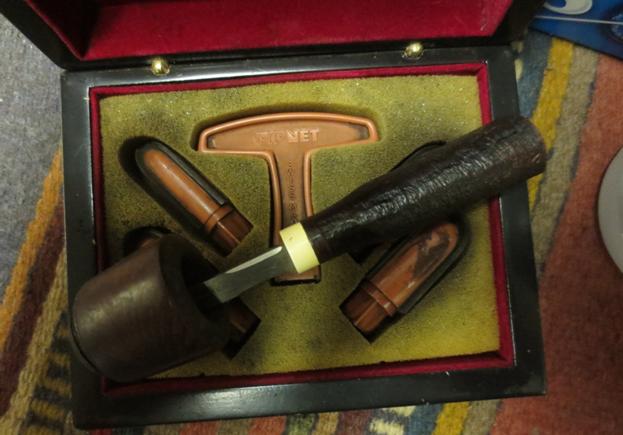
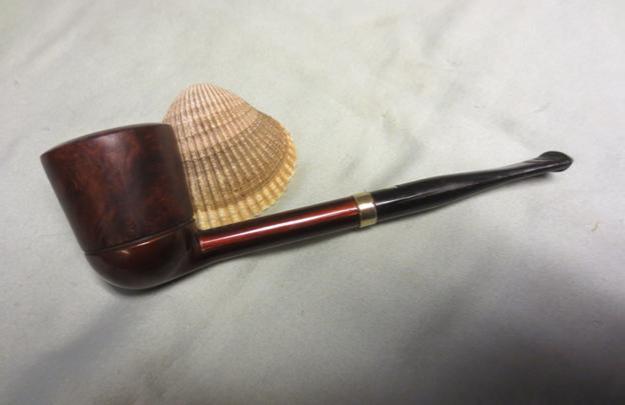
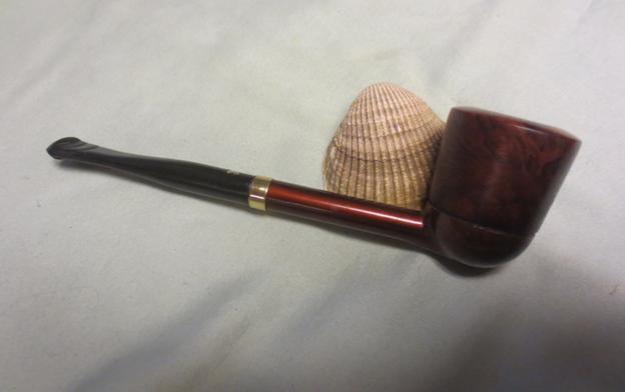
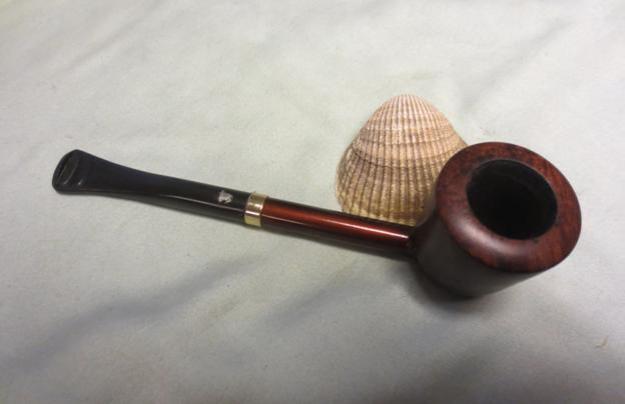
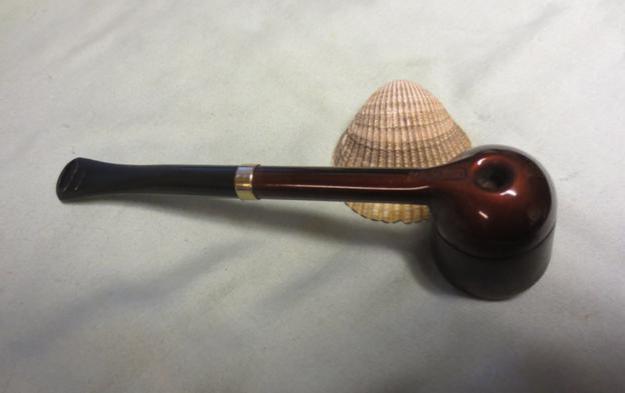
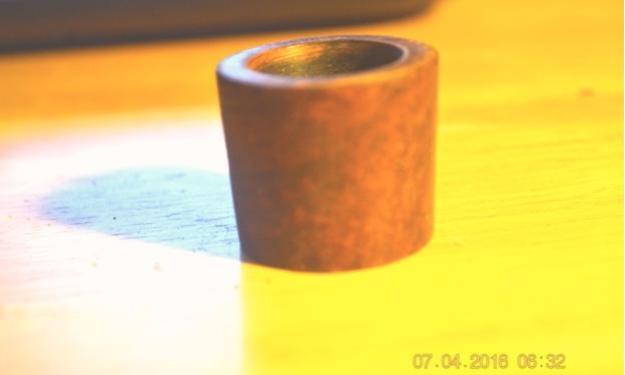
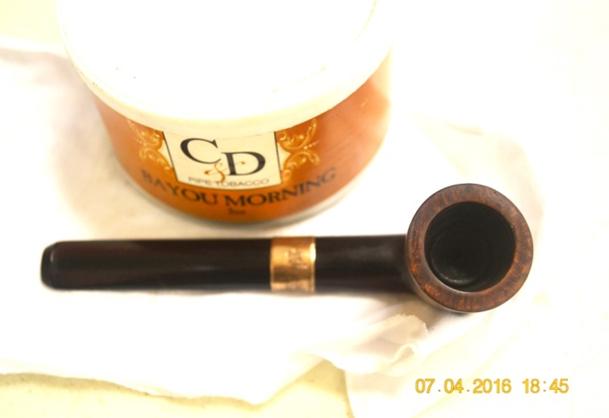
Now, for the before photos of this gorgeous, unique Kaufman Brothers & Bondy work of art – a pipe with a screw-in bowl that predates Kirstens by more than two decades.


 RESTORATION
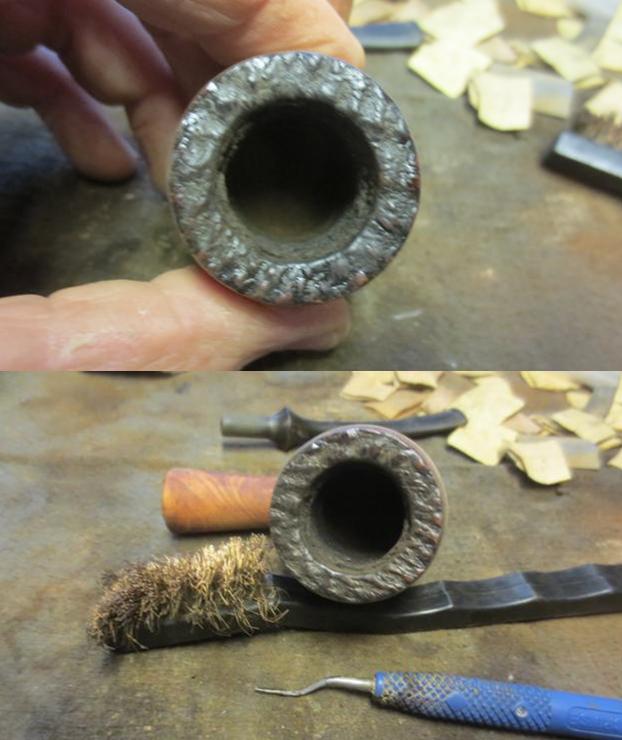
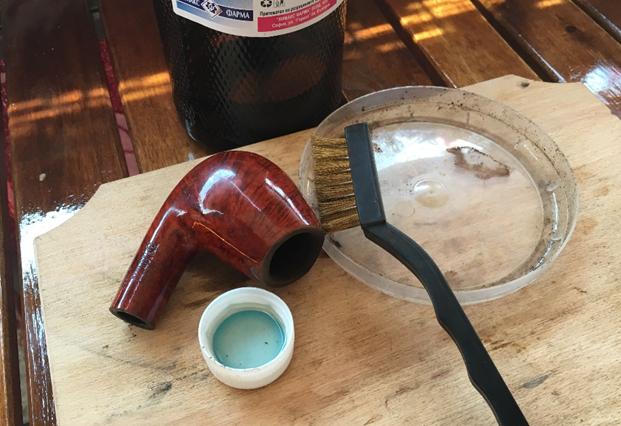
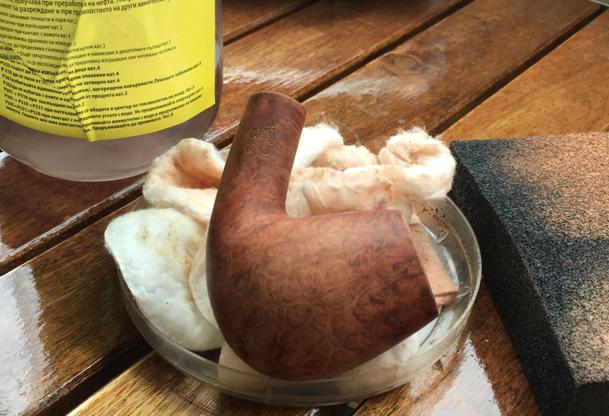
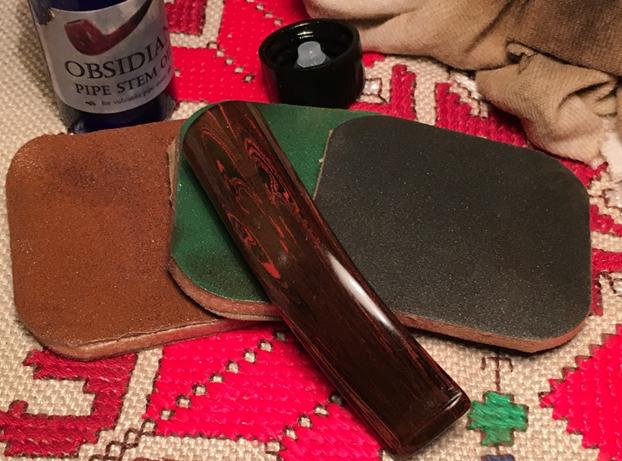
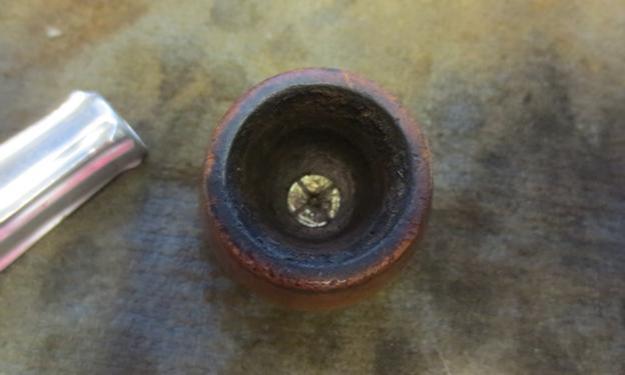
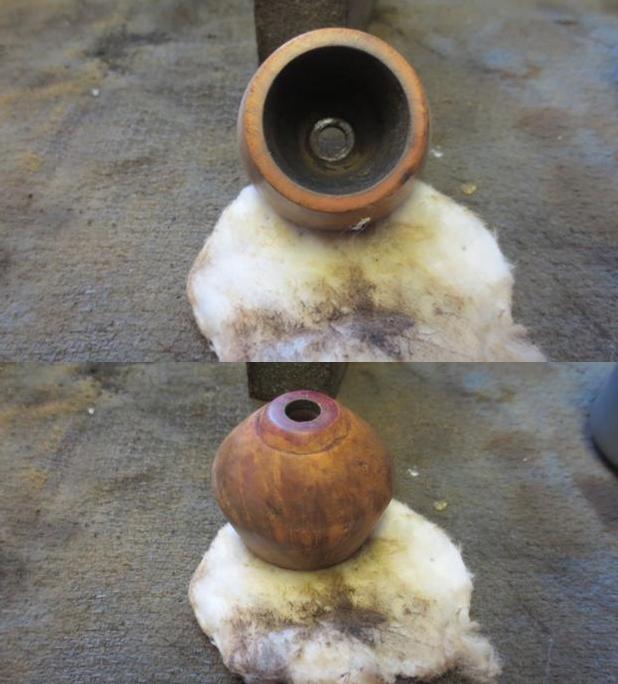
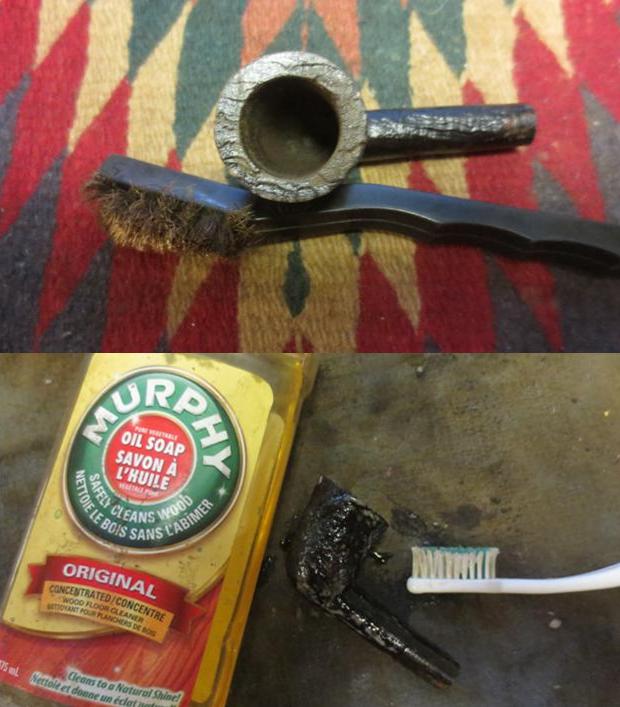
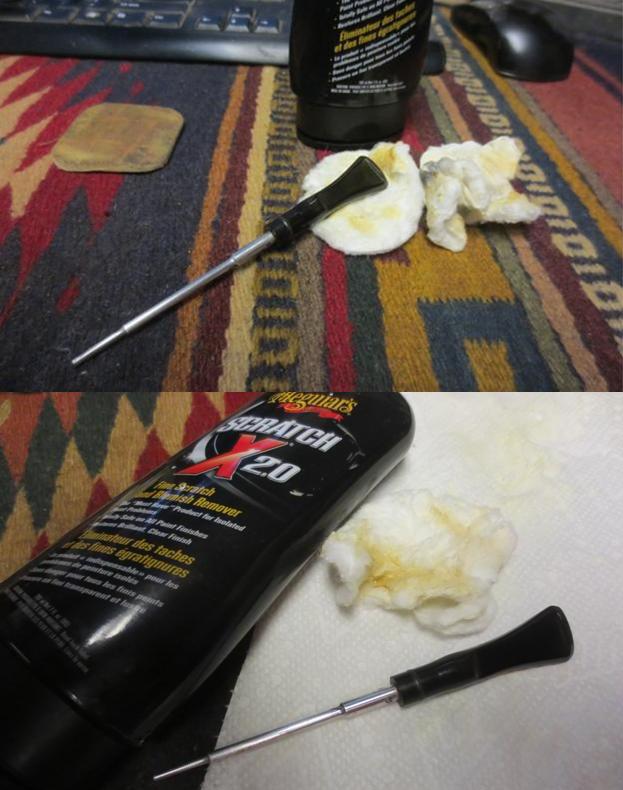
I removed the bowl and began there. Having come across a couple of Reborn Pipes blogs, one by Troy Wilburn a year ago about a KB&B Blue Line Poker c. 1909-1914 and the other by Steve Laug concerning Redmanol bits from almost four years back, I was prepared for how to deal with the briar bowl as well as cleaning the deep red quality synthetic plastic, the cubic zirconia of the phenol formaldehyde resin world.
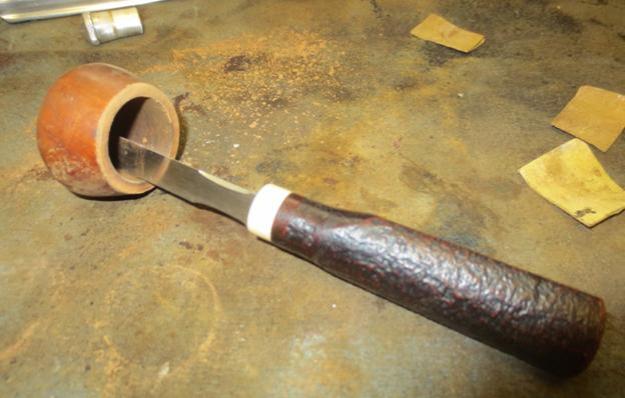
Steve had used nail polish remover (acetone) as a less invasive way of stripping the stain, and it worked quite well of course. Not having any of the stuff on me, however, and being short on cash and time to do this job for gratis, I compromised. Instead of a long, thorough soak in Everclear, I dunked the bowl in a tiny Tupperware container for a minute, removed it and scrubbed it dry inside and out with a soft cotton rifle cleaning cloth. I did have to repeat that process, but still, the combined soak time was minimal.

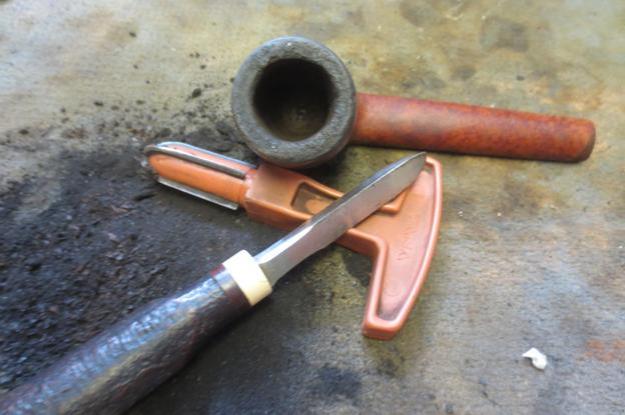
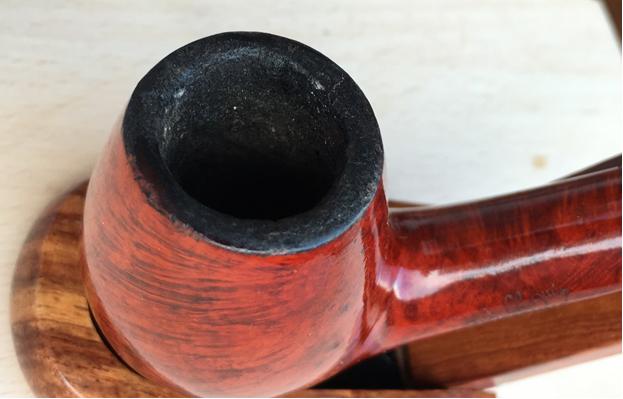
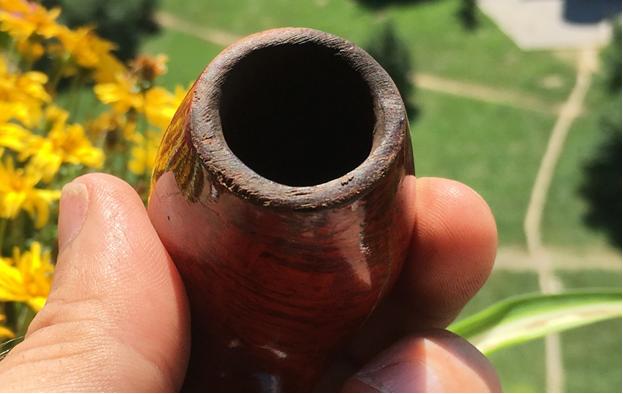
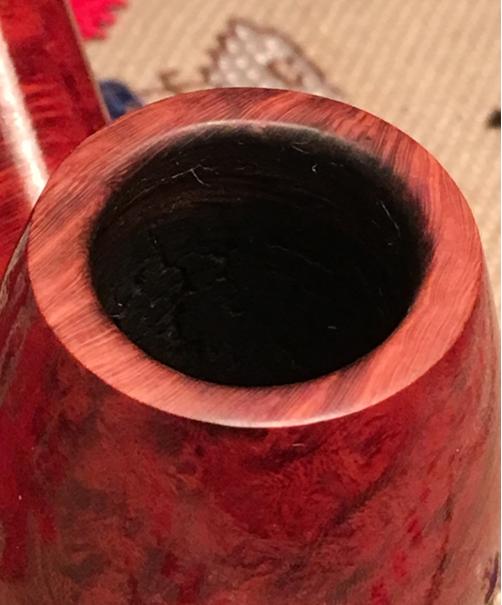
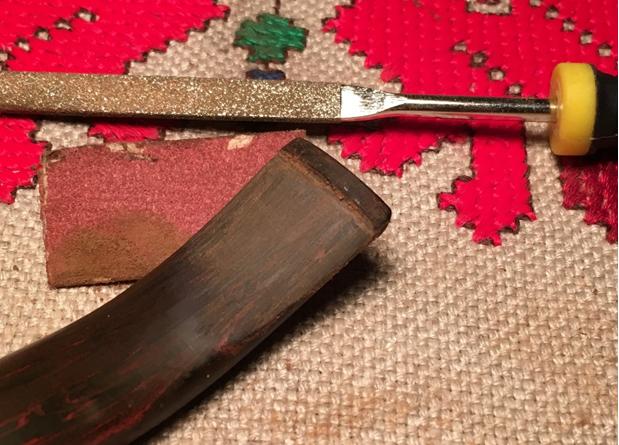
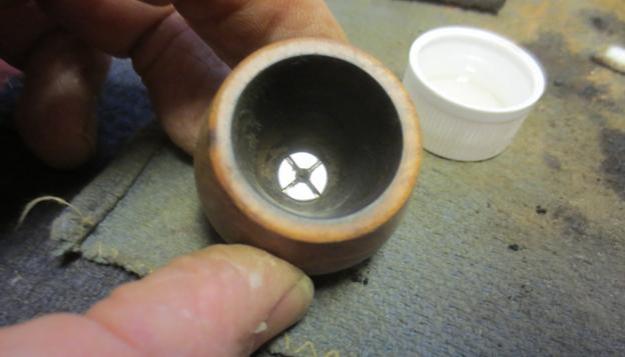
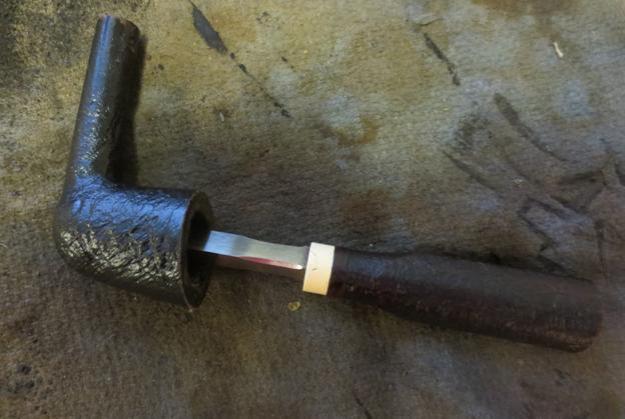
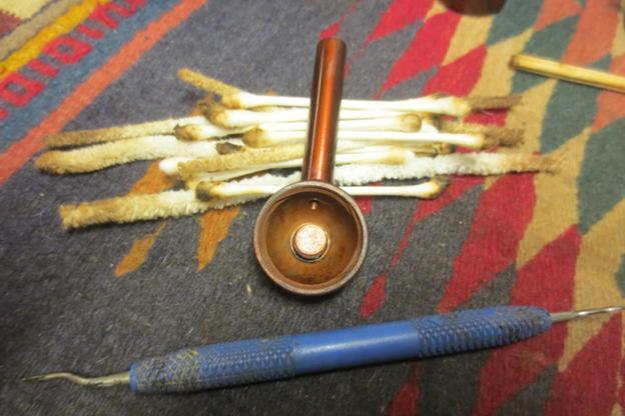
 Again I regretted not being able to follow Steve’s lead using a Pipnet reamer because I saw the good reasoning behind it…BUT, my handle broke some time ago, rendering it useless. You get what you pay for. Next time, I’ll invest a little more for a lot better. But just a couple of turns of the Senior followed by 500-grit and 320 paper made the chamber baby smooth and clear of char. I also used the 320-grit on the rim to remove some scrapes, and both papers on the bottom side which was rougher from after wear from repeated turning into the grooves of the shank.
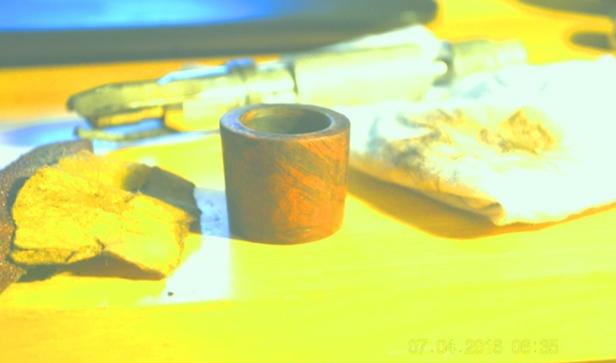

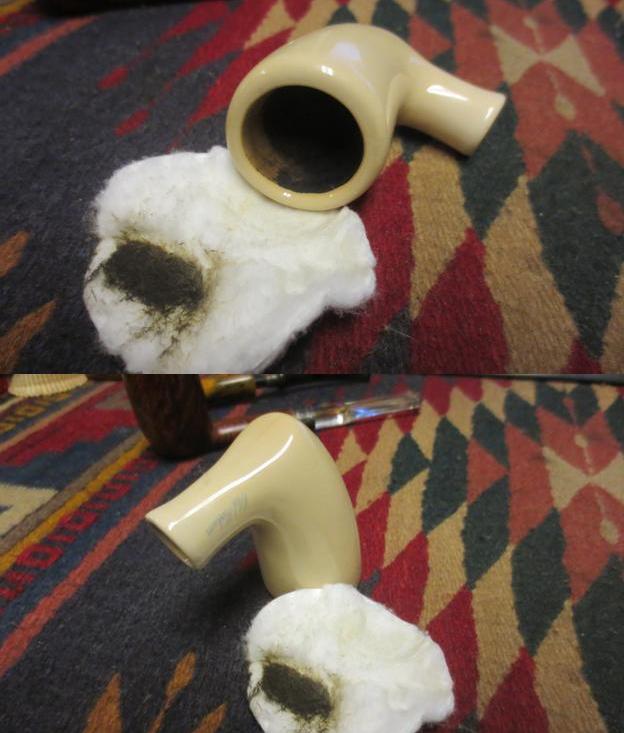
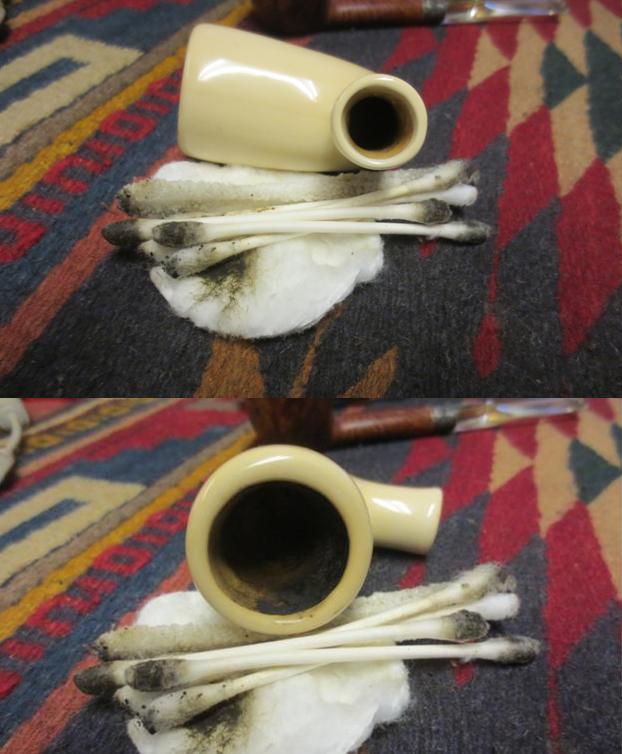
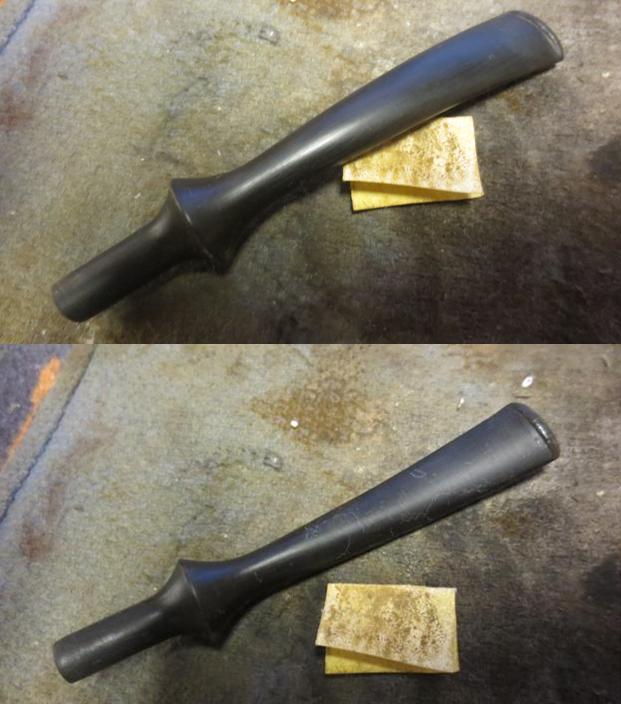
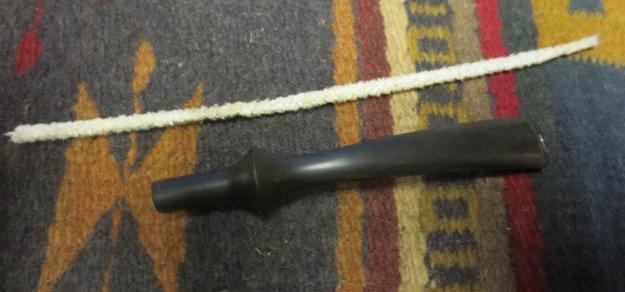
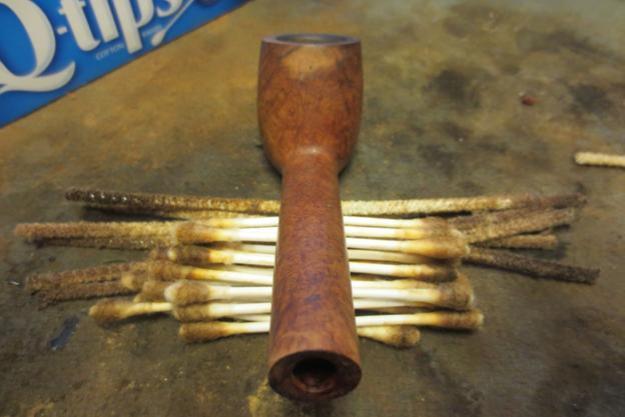
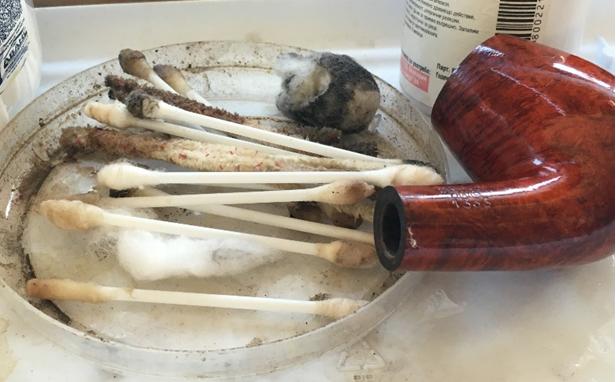
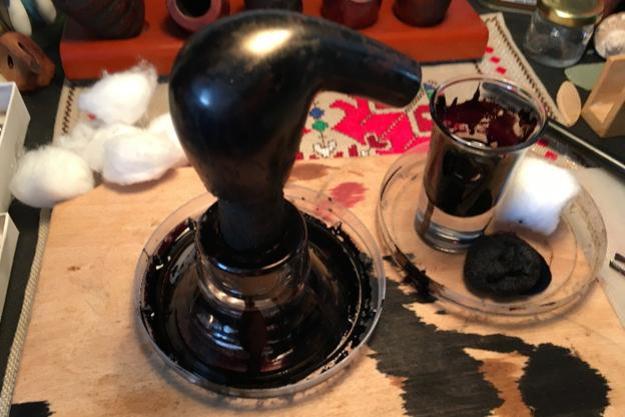
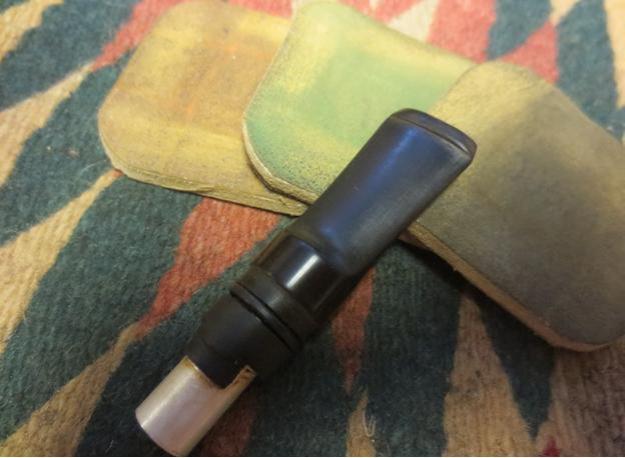
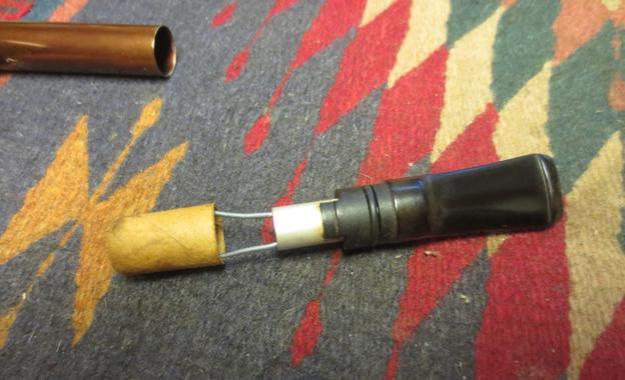
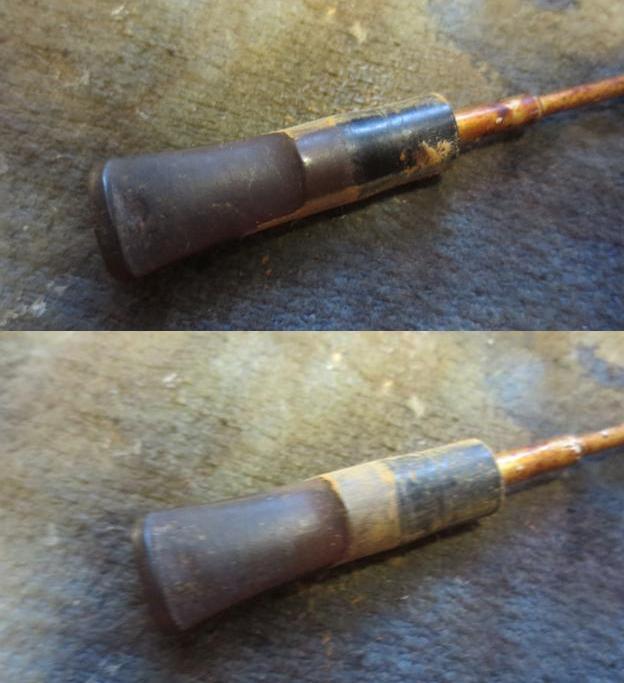
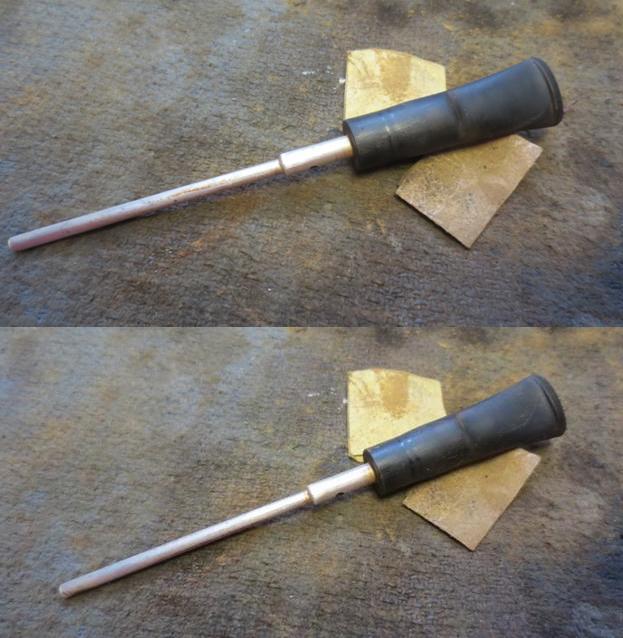
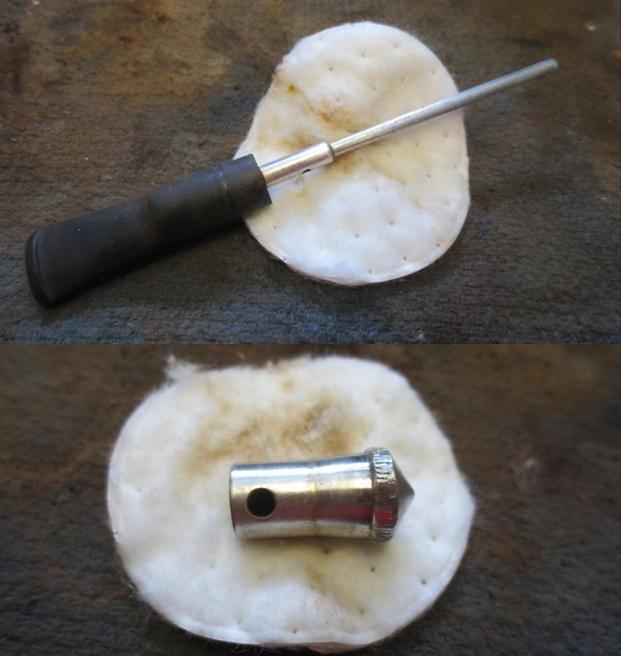
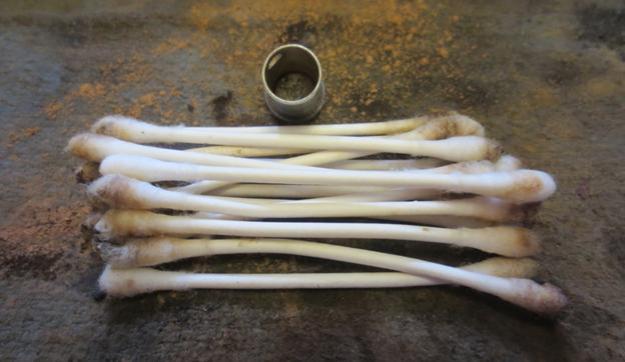
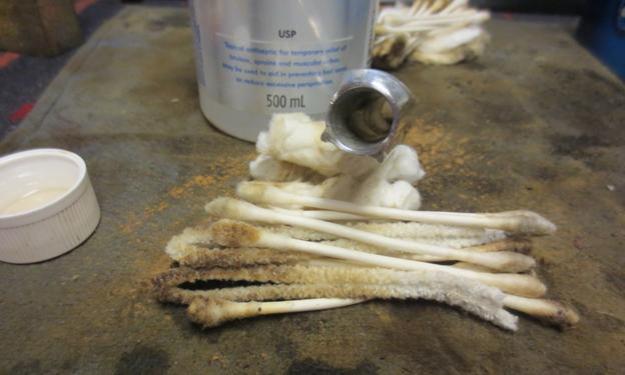
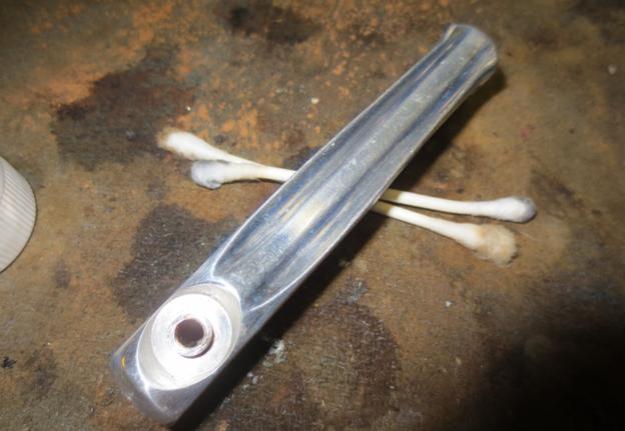
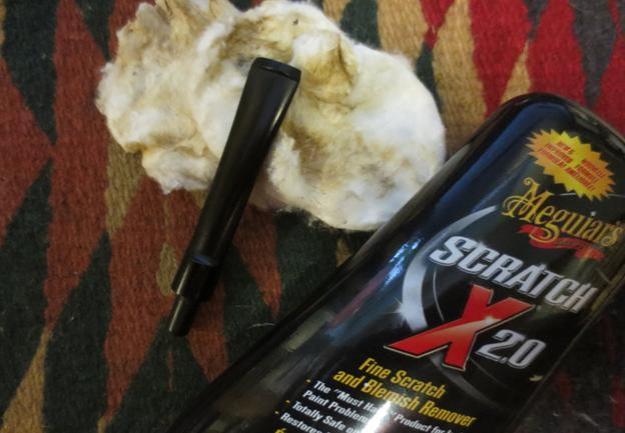
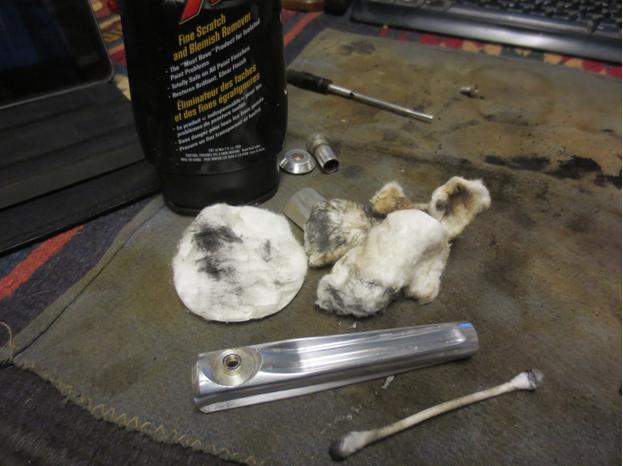
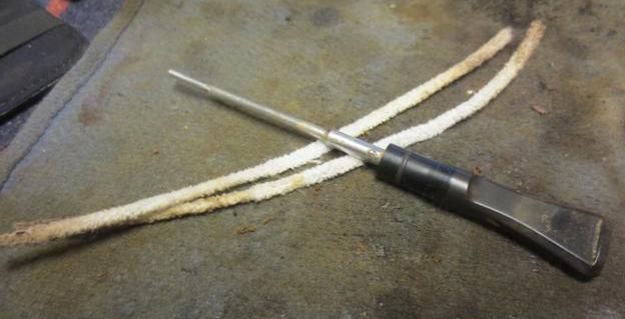
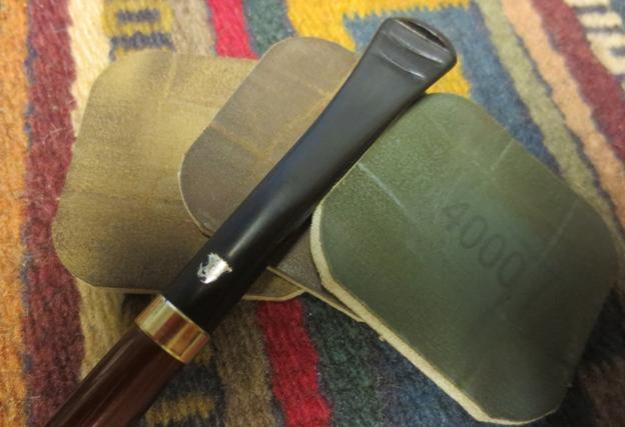
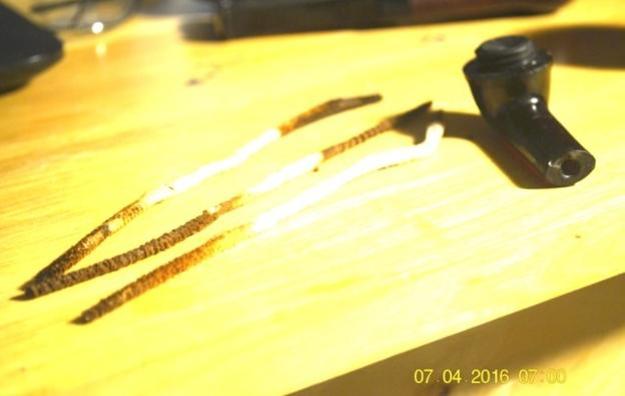
 I ran a few cleaners dipped in freshener through the bit’s air hole, the first of which came out filthy, but the end result was clean.
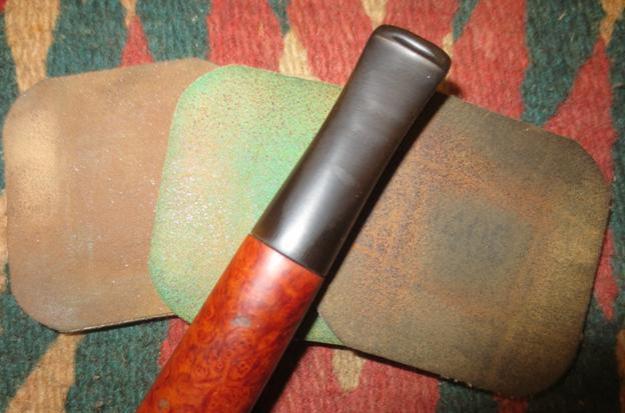
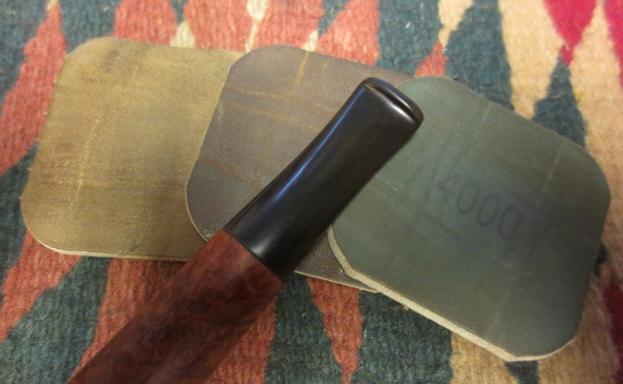
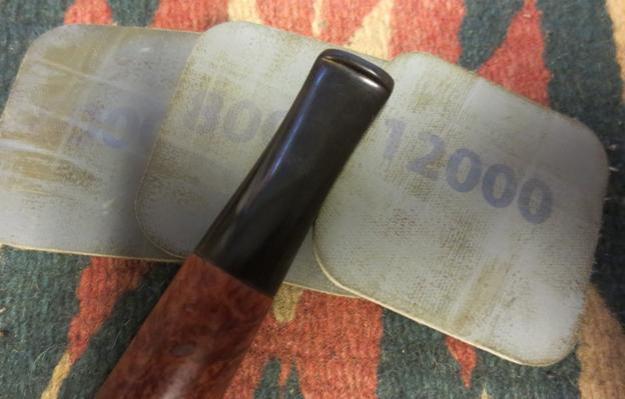
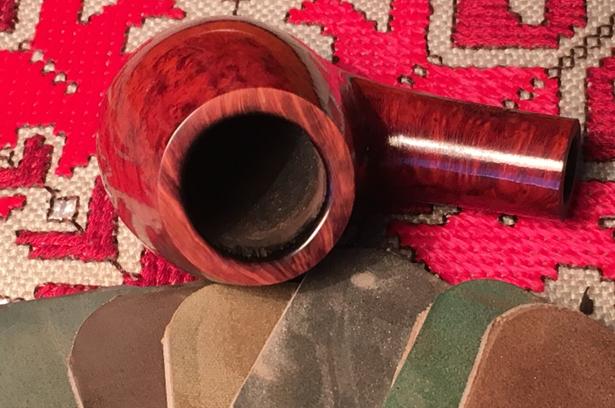
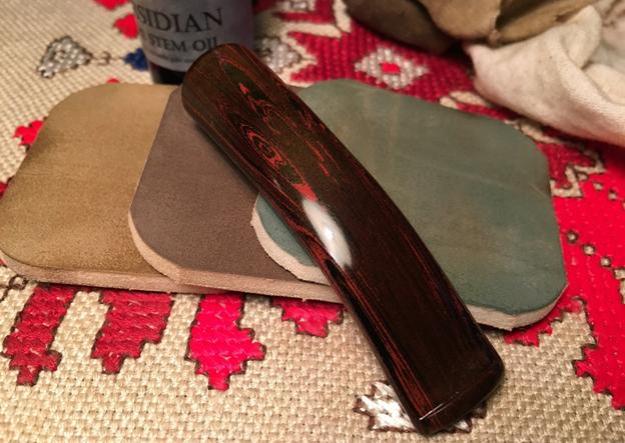
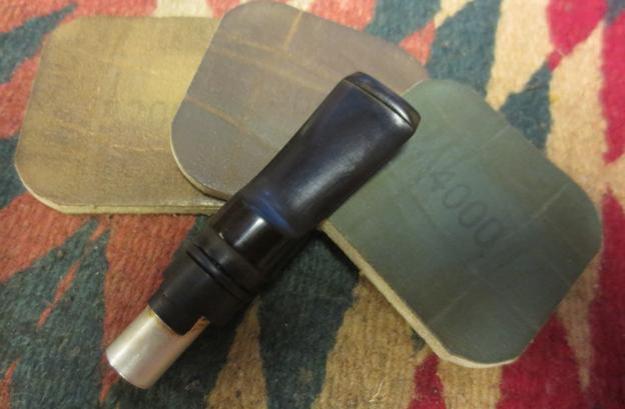
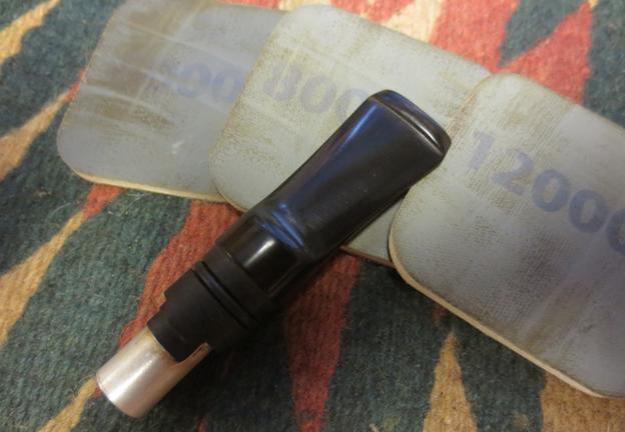
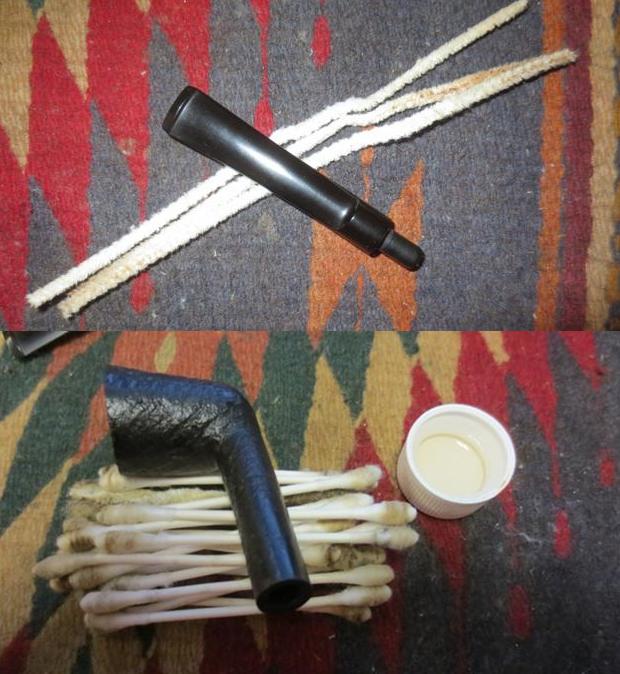
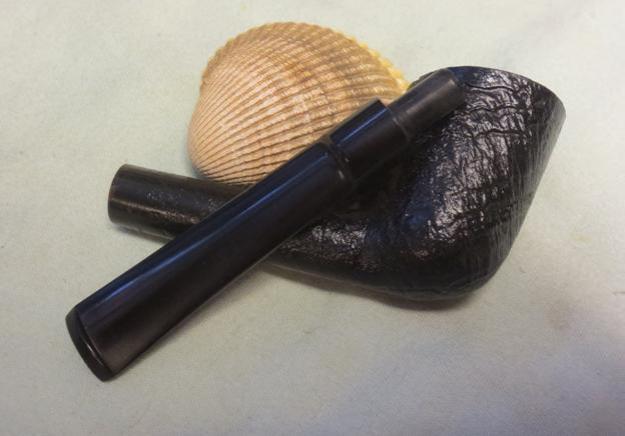
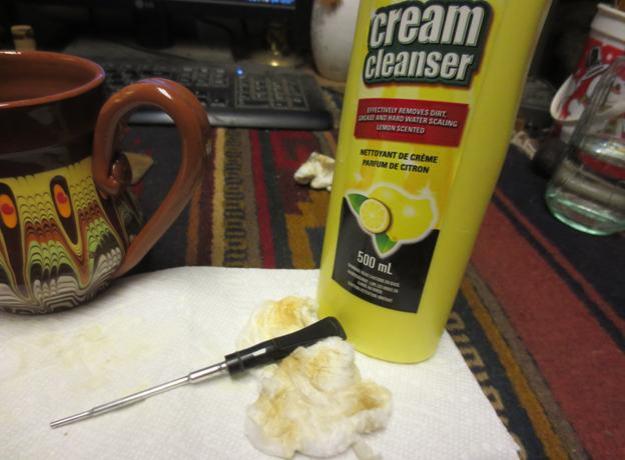
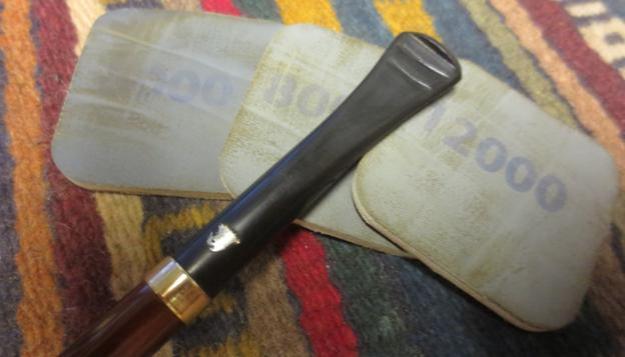
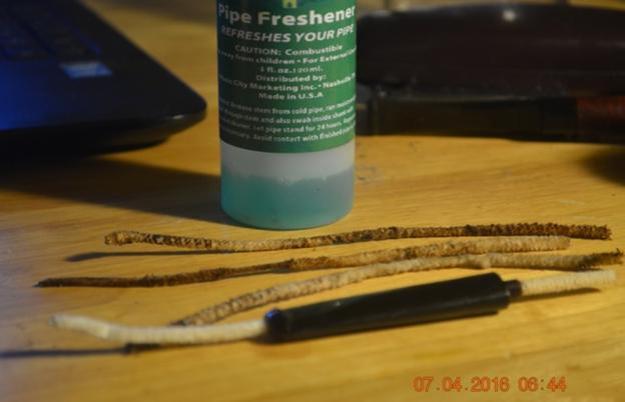 Next, I used wet micro mesh from 1500-12000 on the entire surface of the Redmanol shank and bowl cup. The minimal blemishes there made that fast work. Cleaning out the draught hole was trickier with more cleaners dipped in freshener, but the accreted gunk and juice all came out. I tested it again later to be sure, but it was clean. I really don’t like not being able to retort any pipe.
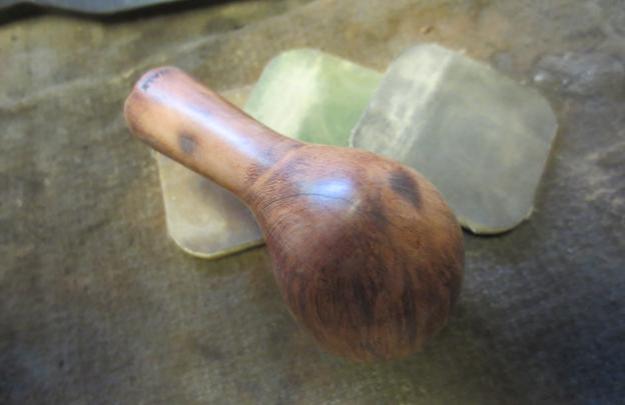
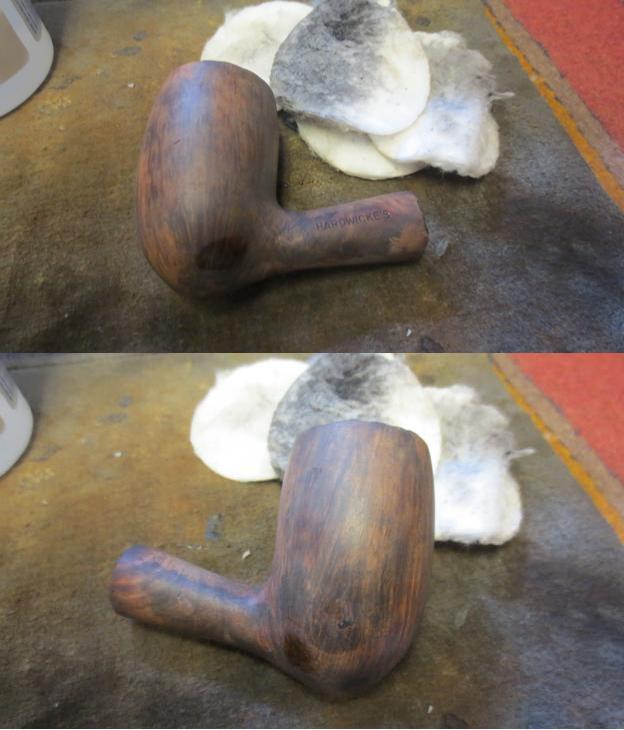
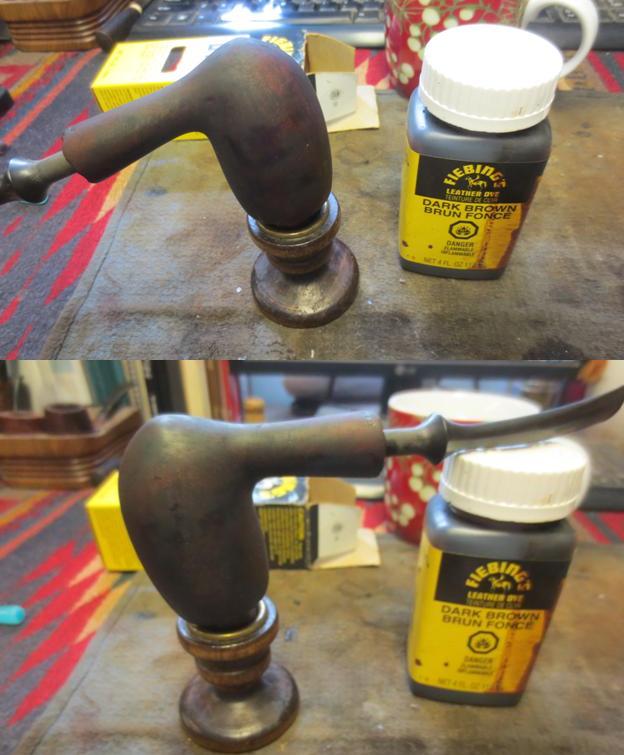
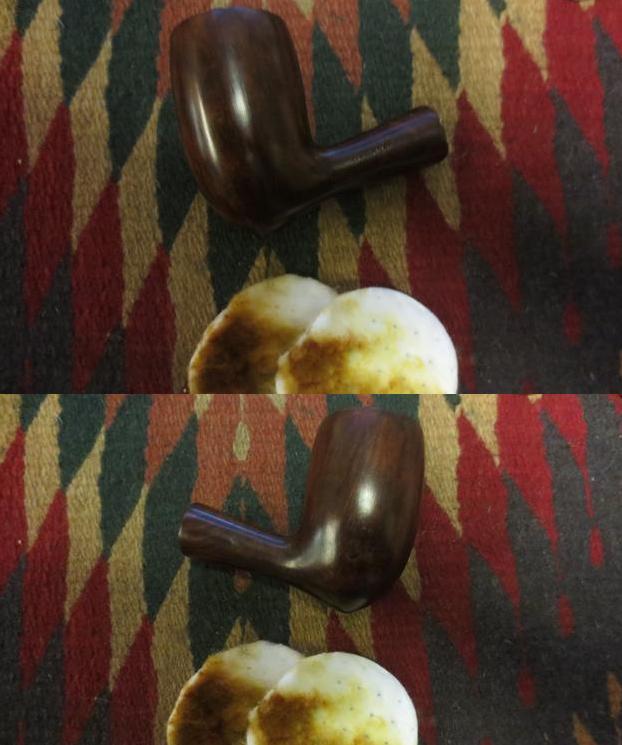
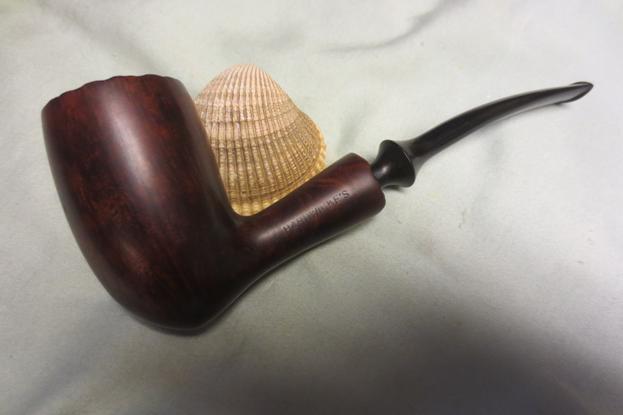
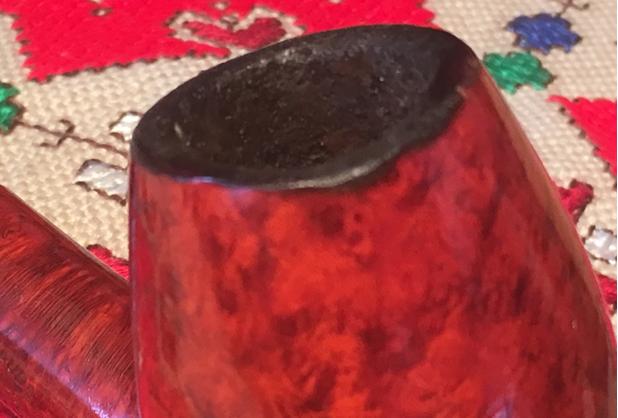
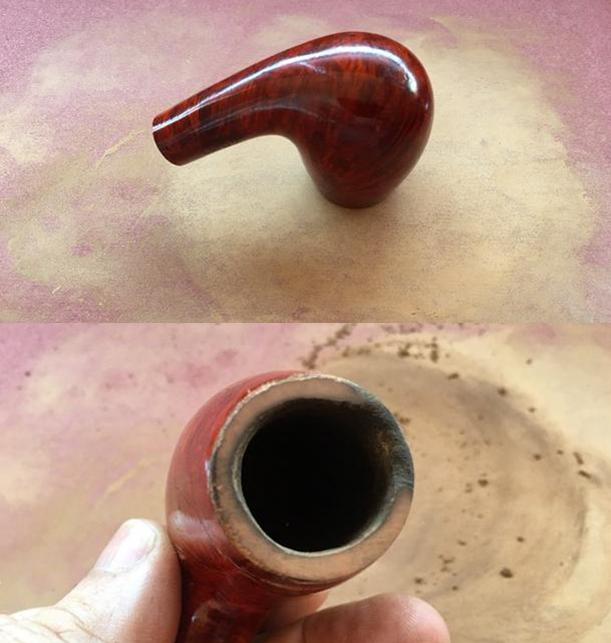
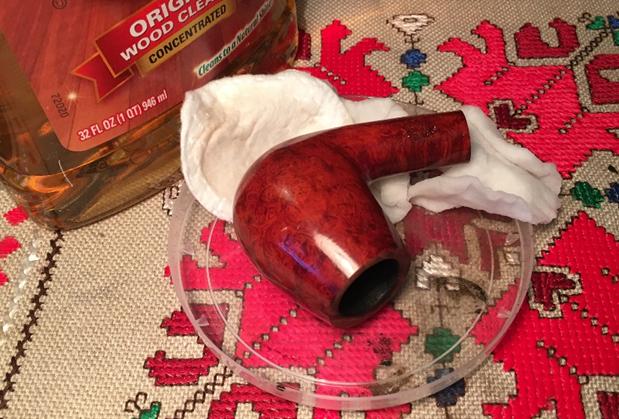
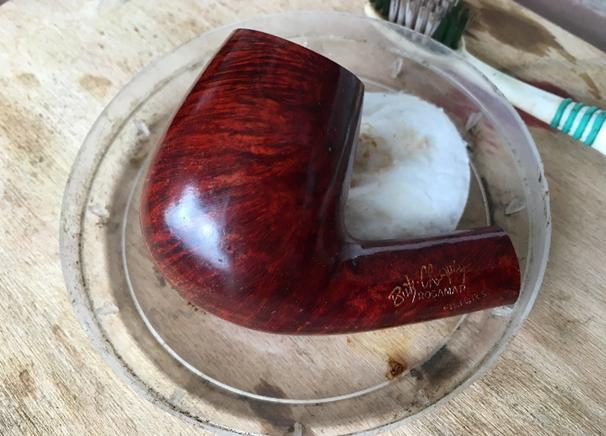
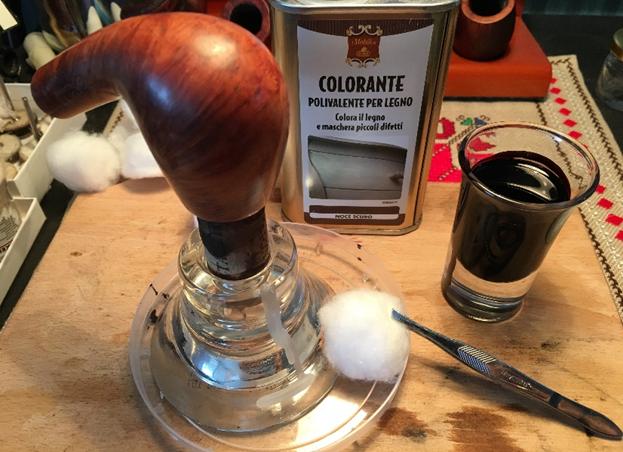
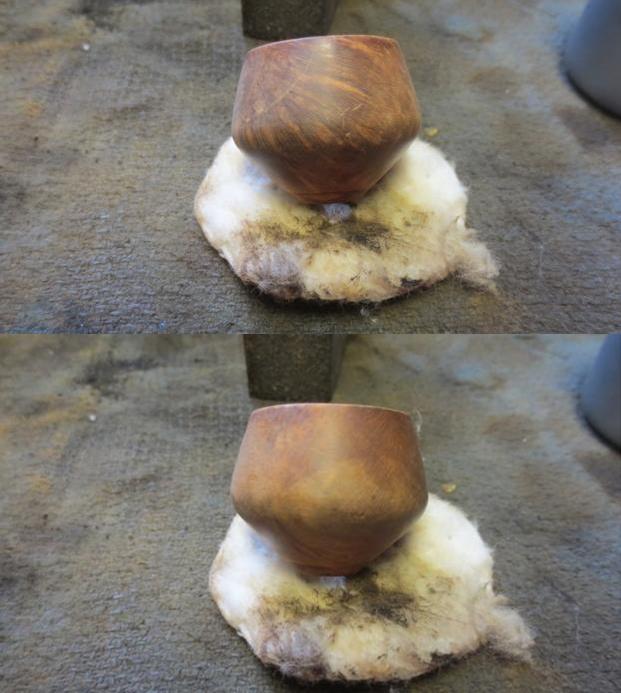
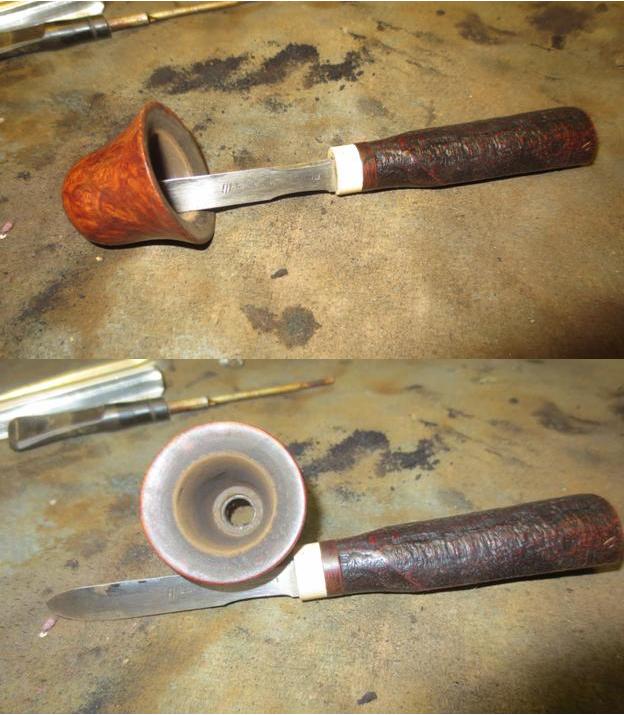
 Near the end, I stained the pipe bowl with Fiebing’s Brown, flamed it and after it cooled gave it a gentle 3200 micro mesh buff. I was very pleased with the color I got from the wood.
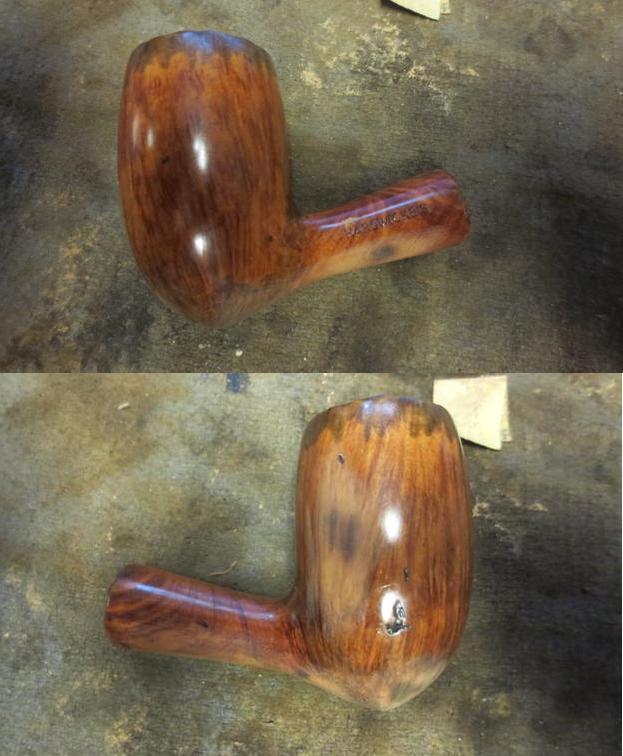
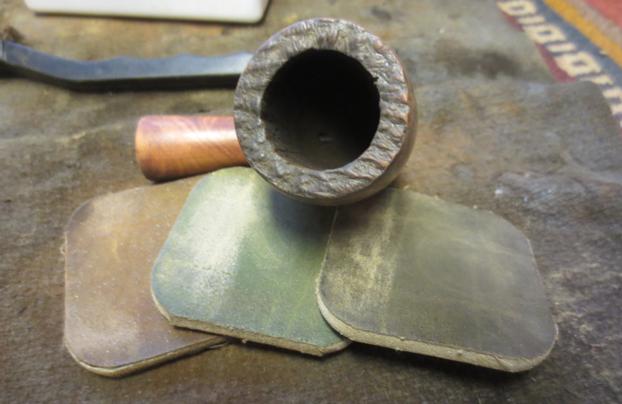
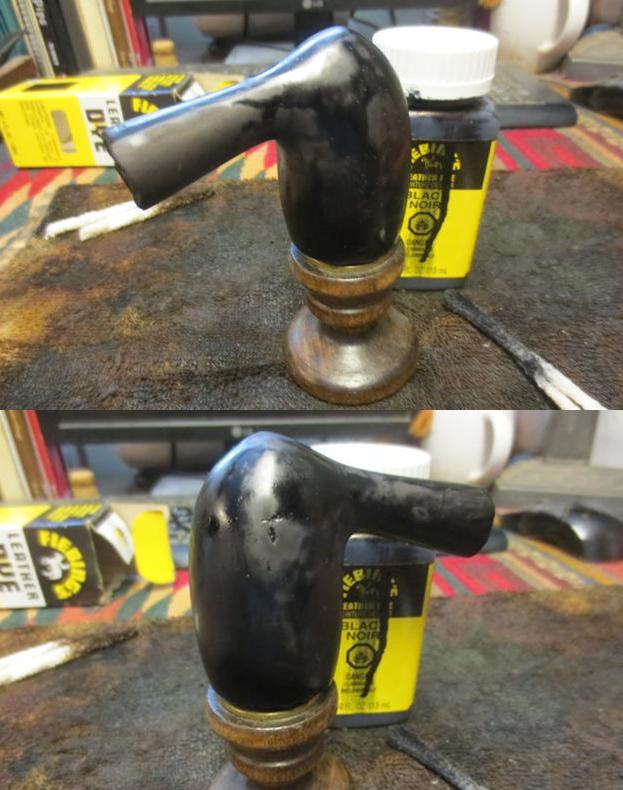
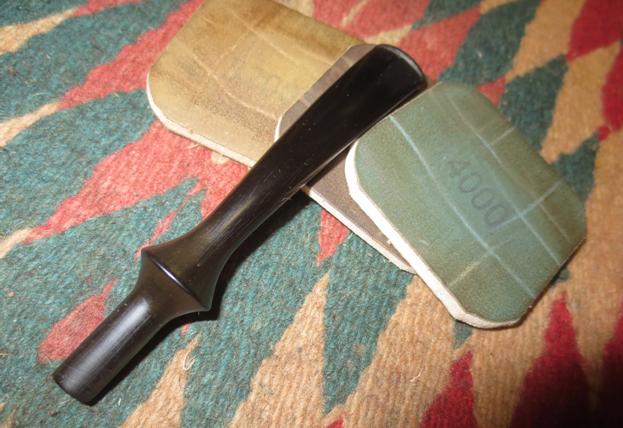
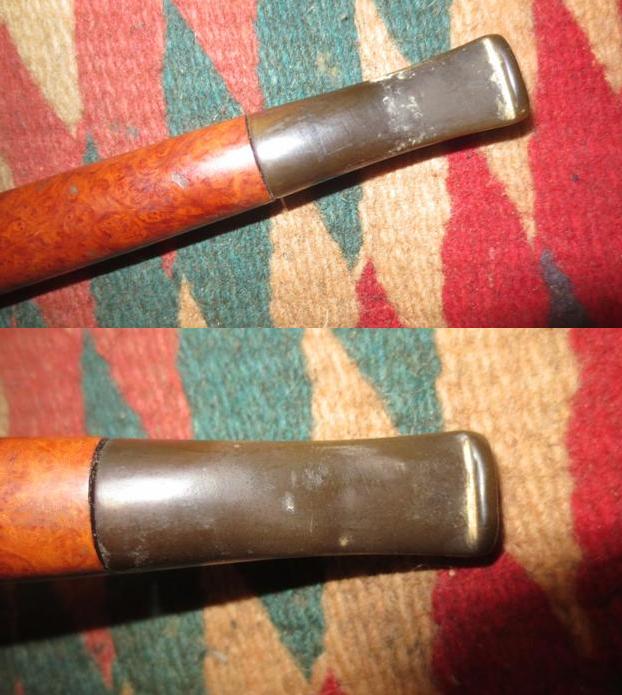
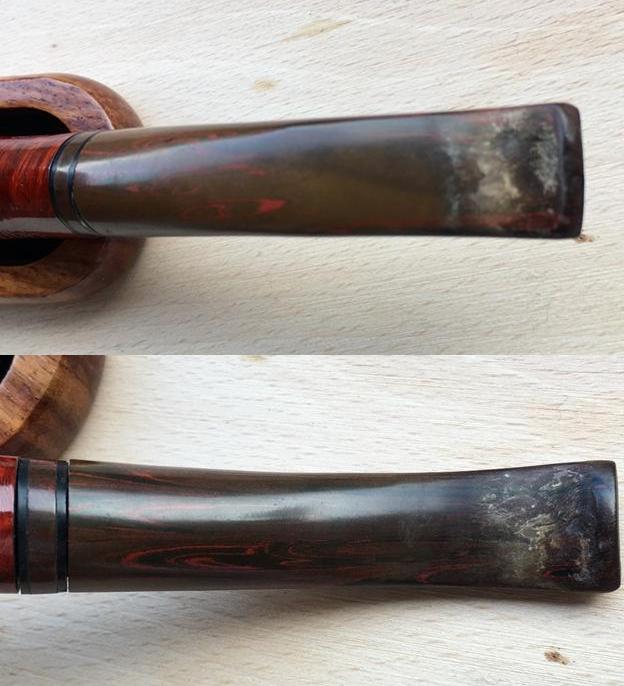
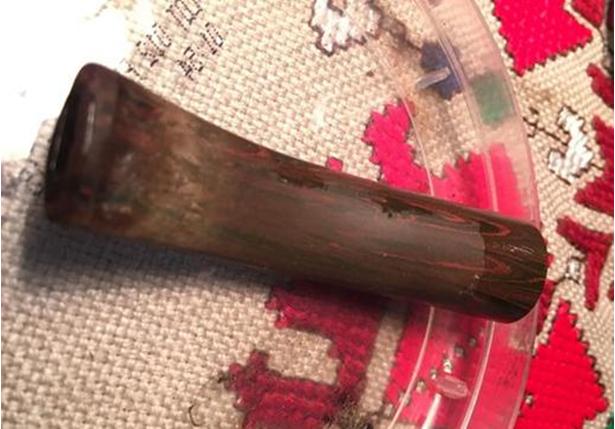
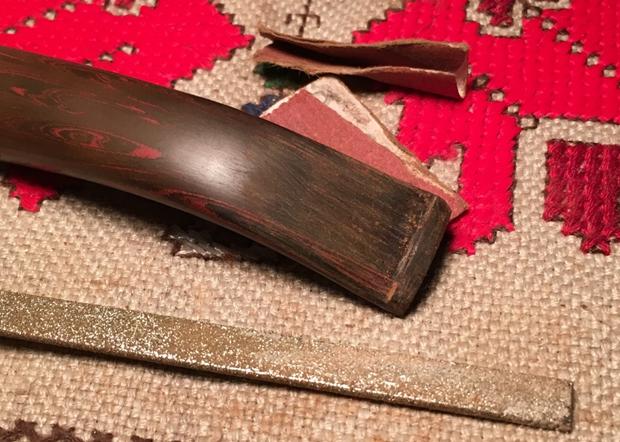
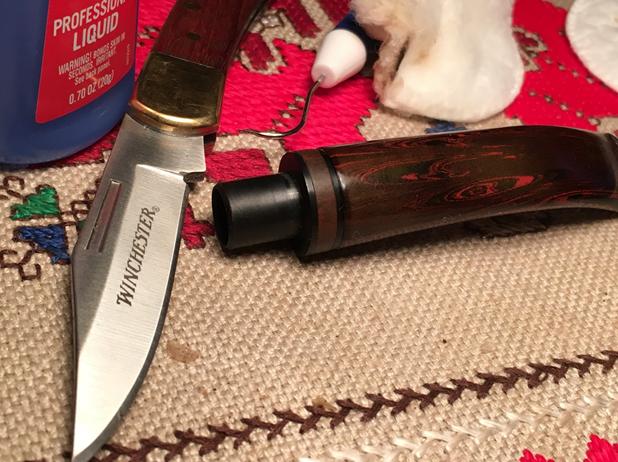
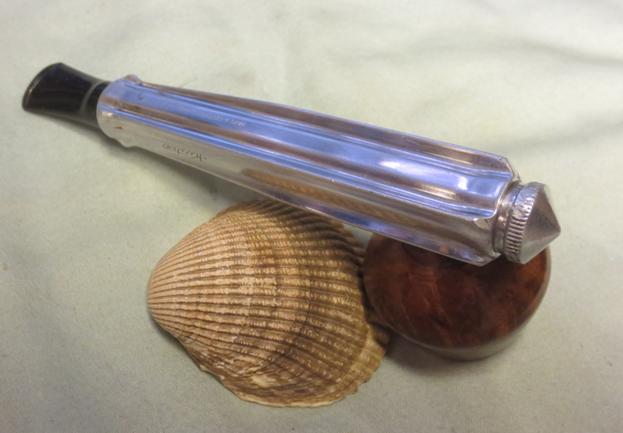
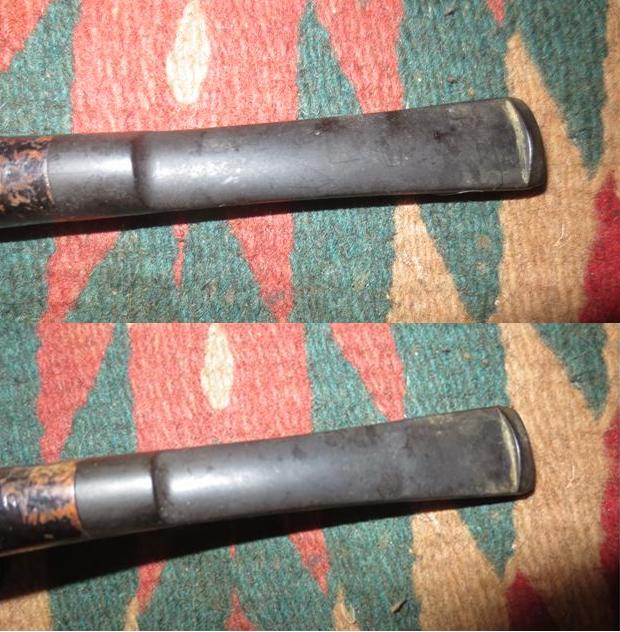
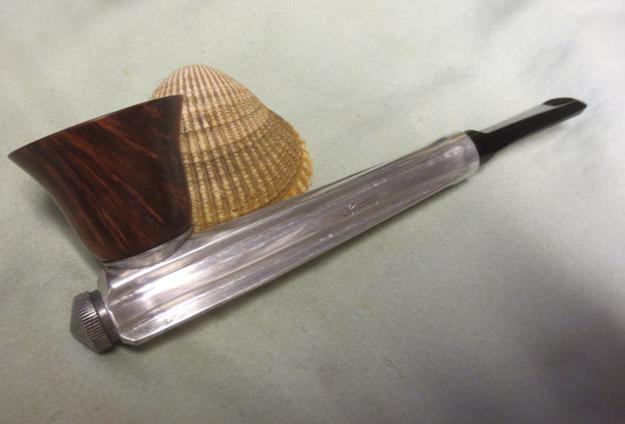
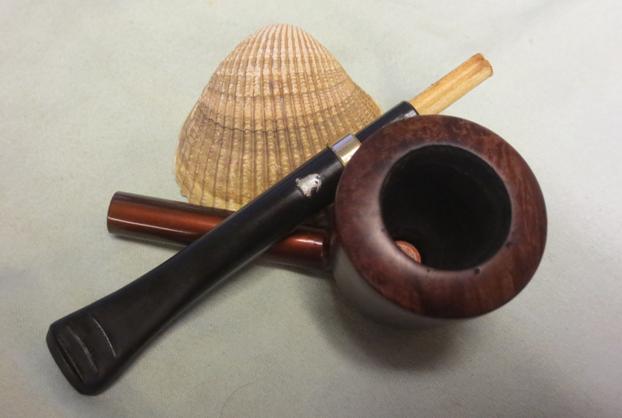
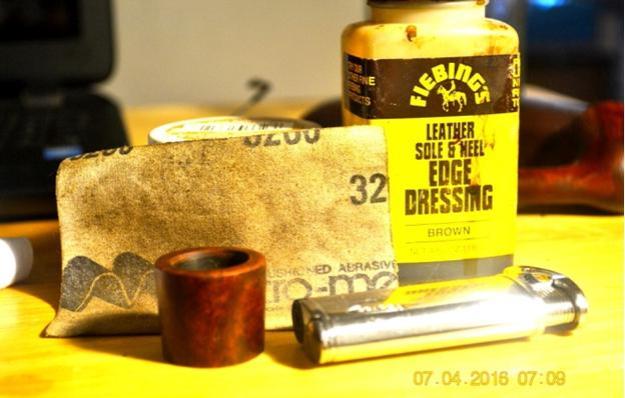 The bell tolled the time to do that which I had put off and Steve graciously reminded me needed doing. He suggested a little Super Glue around the sharp edges of the Redmanol ledge where the bowl was to fit would fill in the cracks. That followed by micro mesh or light sandpaper would do the rest. Here is the best before shot I could get with my failing flash system, but the cuts on the right side of the synthetic plastic show up well enough. There was a matching pair on the left side, suggesting the pipe’s enjoyer was screwy in his habits or the bowl never quite fit right.
 Here’s a shot I admit is horrible with the Super Glue applied, and one after it dried. I opted for super fine “0000” steel wool to even off the ledge.
 I really can’t say what those apparent white flecks are other than that I took it in a hurry outside.
Not touching the bit with any kind of wax, I buffed the briar bowl with white Tripoli, White Diamond and carnauba.


 CONCLUSION
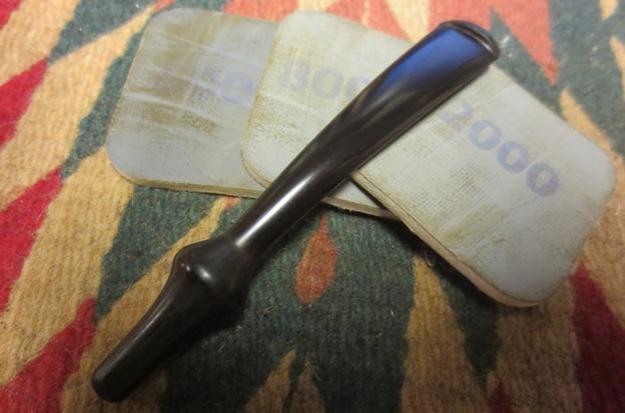
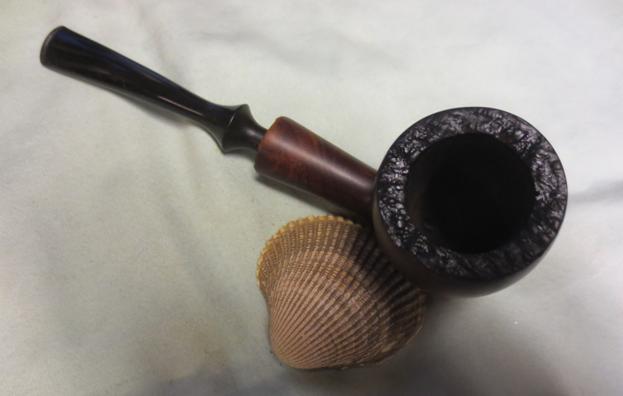
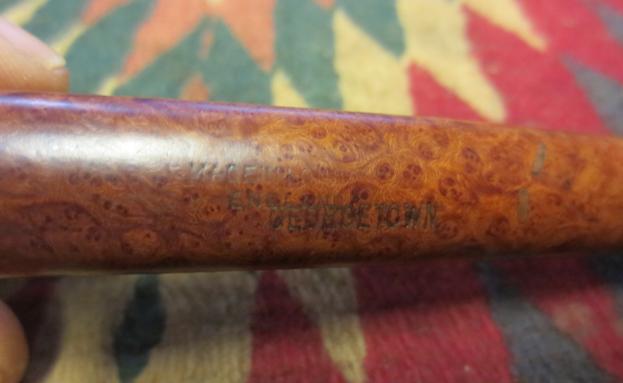
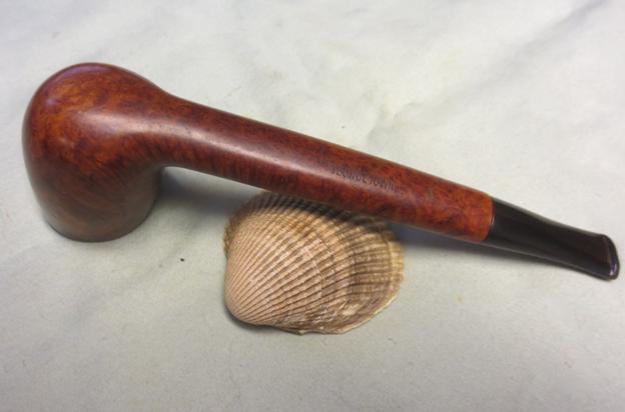
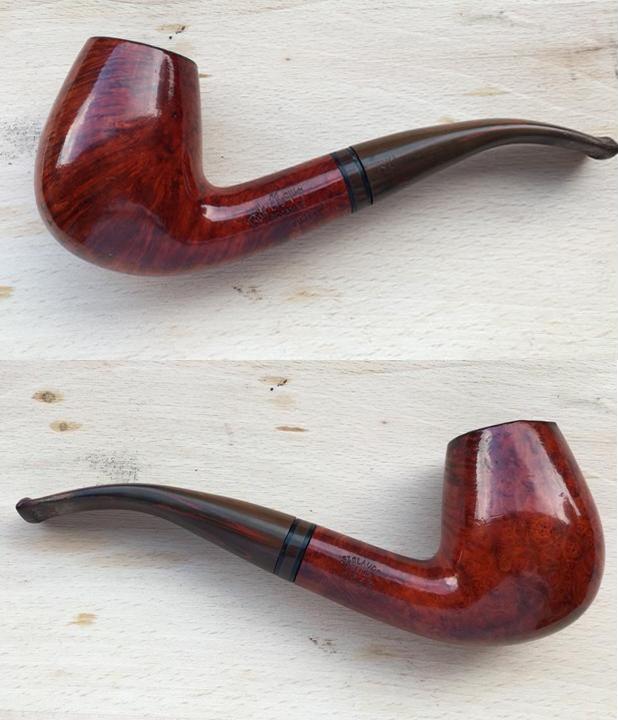
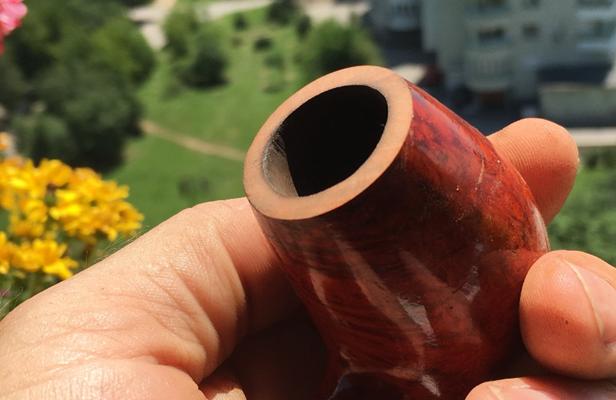
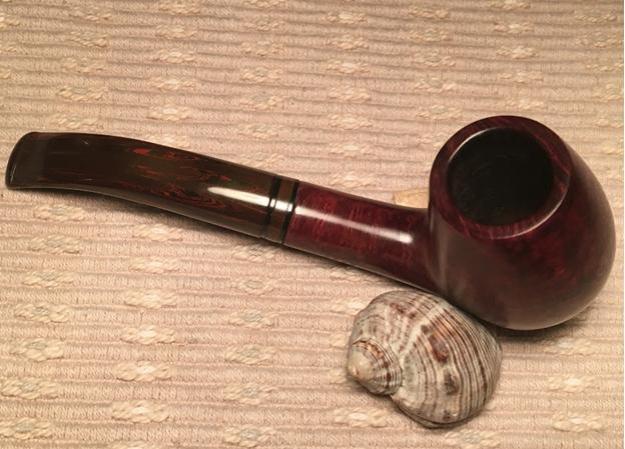
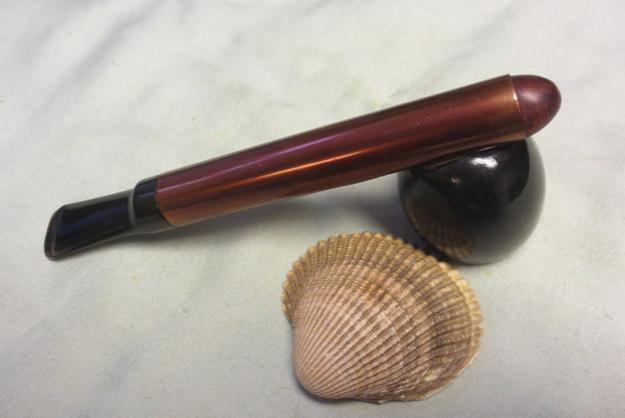
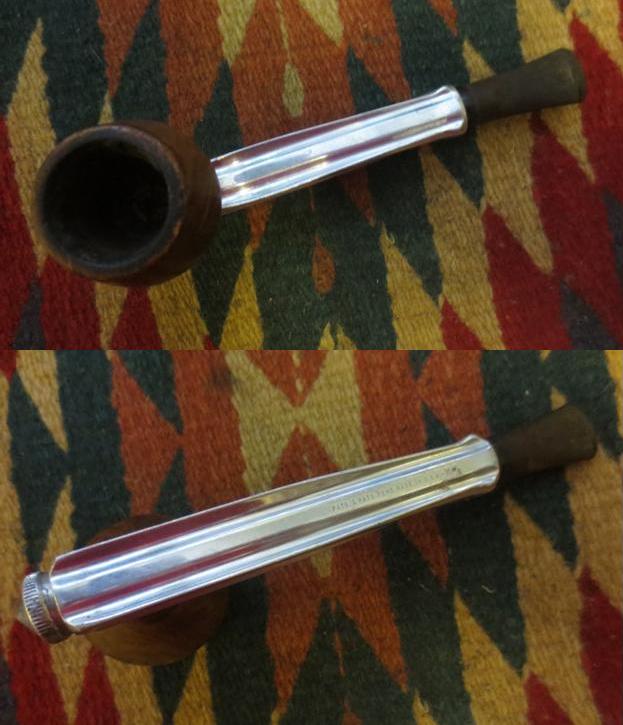
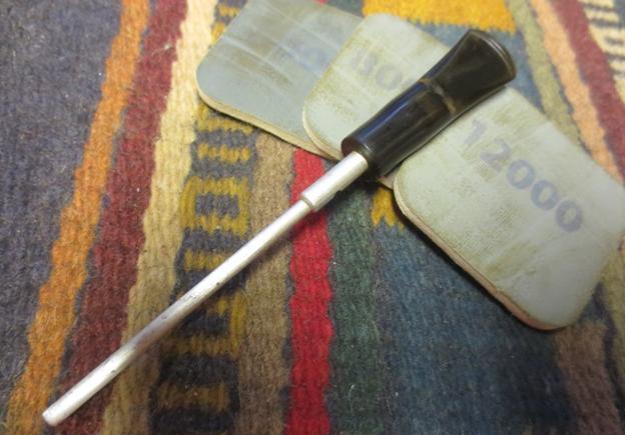
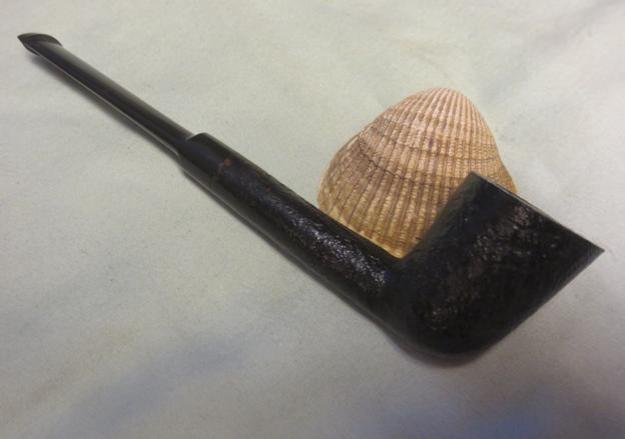
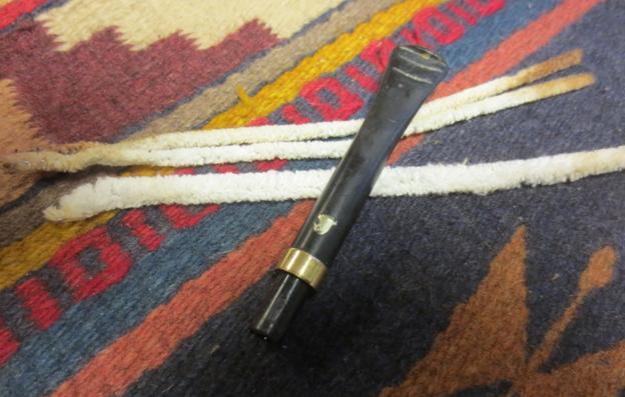
For this special pipe, instead of my usual last photo being the left side full shot, after a detail picture of the band’s KB&B stamp, I chose the close-up of the wonderful red translucence of the bit held up to the light by a friend. The old I would have tried to take it myself despite having to hold down the flash pop-up at the same time, and the probable end would have been, well, unthinkable. But I love those flashes, sparkles and twinkles that make the lovely amber-like bit, which is often called Bakelite because of its more famous owner, so scintillating.
HOLD THE PRESSES! At the exact moment I was about to hit SEND and dispatch the blog to Steve, I made a connection between Redmanol and a meerschaum-lined art-deco style bulldog Chuck sold me some time back with a bottom he described as what I thought was “red menaul,” or something to that effect. Now I understand what it was.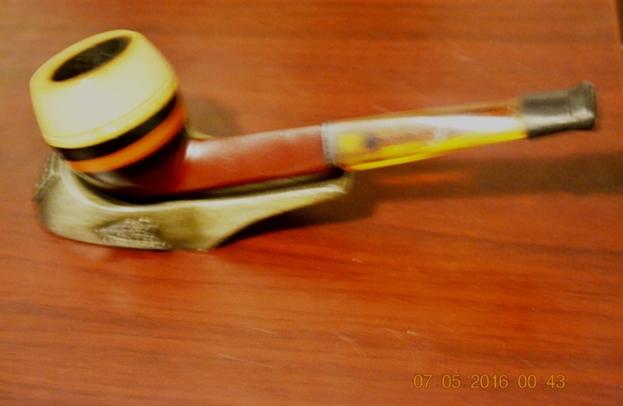

Redmanol Art Deco style socket bulldog
Here I’ve had this great, smooth and cool smoking pipe in my collection for several years and never knew what to call it. All mysteries come to an end in time.
SOURCES
http://www.pipephil.eu/logos/en/logo-r3.html
“Phenolic Resins Technology Handbook,” p. 6, at https://books.google.com/books?id=oYZGAQAAQBAJ&pg=PA6&lpg=PA6&dq=redmanol+chemical+products+founder&source=bl&ots=juthNFh-rW&sig=b9qO8plogjv6fj_u2TBjkdpIfCM&hl=en&sa=X&ved=0ahUKEwj-gNj4h9nNAhUM9YMKHXKjBwMQ6AEINDAE#v=onepage&q=redmanol%20chemical%20products%20founder&f=false
https://rebornpipes.com/tag/redmanol-stems/
https://www.acs.org/content/acs/en/education/whatischemistry/landmarks/bakelite.html
https://en.wikipedia.org/wiki/Bakelite
“Compton’s Pictured Encyclopedia, Vol. 2,” pp. 813-816, at https://books.google.com/books?id=11FHAQAAMAAJ&pg=PA816&dq=in+search+of+the+man+made+amber+redmanol&hl=en&sa=X&ved=0ahUKEwis5OvgmNvNAhVk0oMKHYveA6sQ6AEIIzAB#v=onepage&q=in%20search%20of%20the%20man%20made%20amber%20redmanol&f=false
“Factory and Industrial Management,” Vol. 64, p. 167, at https://books.google.com/books?id=nTs8AQAAMAAJ&pg=PA144&lpg=PA144&dq=redmanol+bakelite+infringement+judgment&source=bl&ots=TCel6fmccJ&sig=ehZijKCRrQSs-RnL6xiDbVA5aKM&hl=en&sa=X&ved=0ahUKEwi39veundvNAhUT32MKHbeiCJwQ6AEIHDAA#v=onepage&q=redmanol%20bakelite%20infringement%20judgment&f=false