Blog by Kenneth Lieblich
This is a pipe belonging to the father of a good friend. He told me there was nothing especially wrong with it, but it did need some spiffing up. The gentleman in question is a fine pipe smoker and has been in the “briar brigade” (I just made that up) for many years. I was happy to help him out. He said that the pipe had been given to him by his then-girlfriend (now wife) when they were courting in the 1960s. It was the first pipe he ever owned.

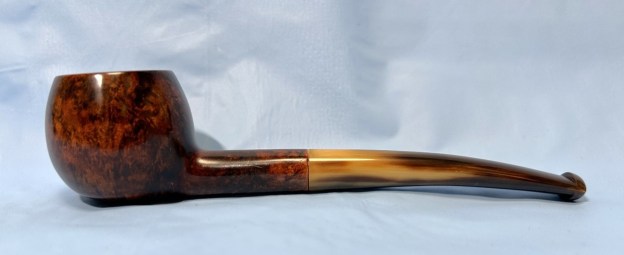
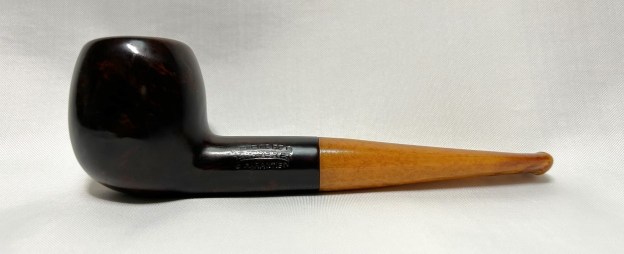
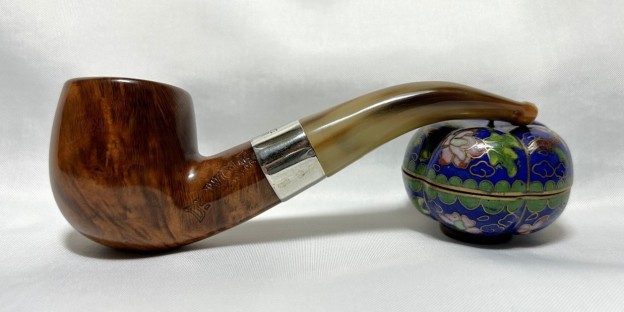
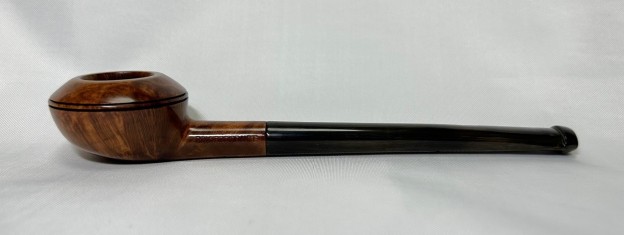
 The pipe is a Peterson Deluxe 595 bulldog. It’s a really handsome pipe — very classic-looking, well-smoked, and well-cared for. The markings on the pipe read Peterson’s [over] DeLuxe on the left of the shank. On the right side is Made in the [over] Republic [over] of Ireland, and next to that, the shape number 595. On the left side of the stem is the beautiful, stylized P of the Peterson company. That P must have had some colouring in it at some point, but it was long gone.
 It was hard to find any information about the 595. I was trying to research it and ended up circling around to a blog post that Steve did in 2020 about a 595 he worked on. That pipe and this pipe are very similar, but there are two crucial differences which I’ll mention in a moment. In Steve’s article of May 2020, he quotes from some email correspondence he had with Peterson expert, Mark Irwin, from Peterson Pipe Notes. I quote Irwin here regarding the 595:
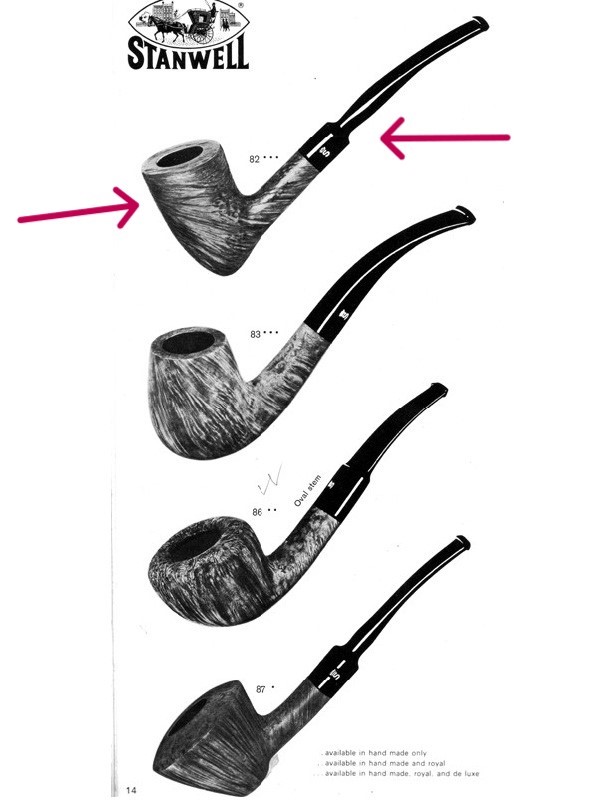
Hey Steve, this is from the 500 shape group, although I’ve not documented the 595 before. It’s an upsized-version of the 80s. Peterson would call this shape a Rhodesian, incidentally, saving bulldog for their round shanks. You can see more 500s at https://petersonpipenotes.org/the-peterson-500-shapes-and-new-old-stock/. The POY 2019 for Peterson was taken from this group as well. I make the argument in that blog post that these shapes were made in the late 1970s and early 1980s when they owned their own US distributor, Allied, and were going after the US market. c. 1980-85, so Late Republic Era, 1969-1990.
If you read Steve blog post (found here), you’ll notice the two differences. First, the pipe I’ve got has the three-line version of “Made in the Republic of Ireland,” whereas Steve’s says “Made in Ireland”. Second, the pipe I’ve got has the P on the stem, whereas Steve’s does not.
However, there’s another wrinkle in this story. As I indicated earlier, the gentleman received this pipe in the 1960s in Hong Kong! I have no doubt that he is telling the truth, but I wasn’t able to square it with the information above. Due to my own ignorance, I also emailed Mark Irwin to clarify what was confusing me. He very kindly responded with the clarifying information. Among other things, he wrote
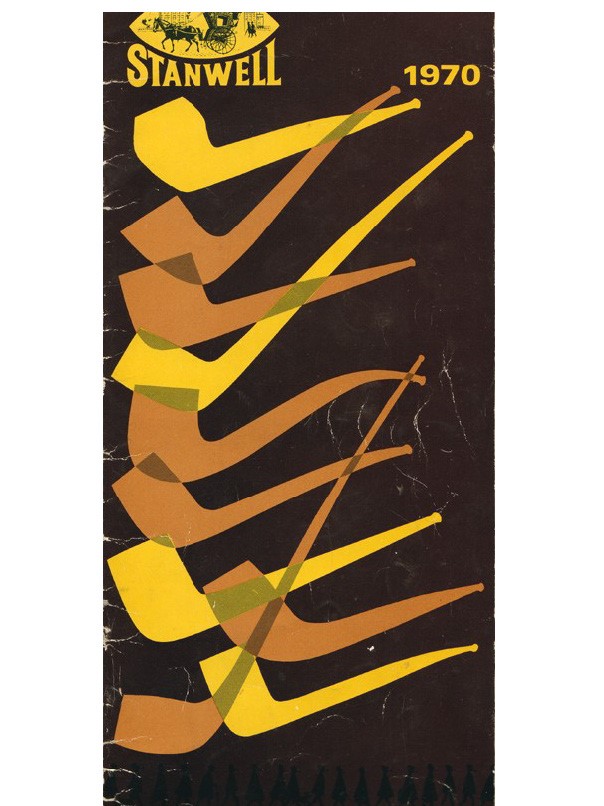
The 595 goes back to at least 1947’s catalog, and perhaps even before. I’ve attached that catalog for you, where you’ll find your pipe on p. 5.
I have included that page below. Thanks to Mark (and the original owner), I can confirm that this pipe dates from the early to mid-1960s. Let’s have a look at the pipe. The stem had several tooth marks, plus some oxidation and calcification. Also, an extra bit of the end of the tenon was broken – I’d have to take a closer look at that. The stummel was in nice condition, no real scratches or damage — except on the rim. That had lots of lava, and what looked like considerable burning, but I’d have to check more closely later. Inside the bowl was a good amount of cake that would need to be cleaned out.


 On to work – I started with a BIC lighter and ‘painted’ the stem with its flame in order to lift the few bite marks and dents. This was not particularly successful in raising the damage, but did help a little.
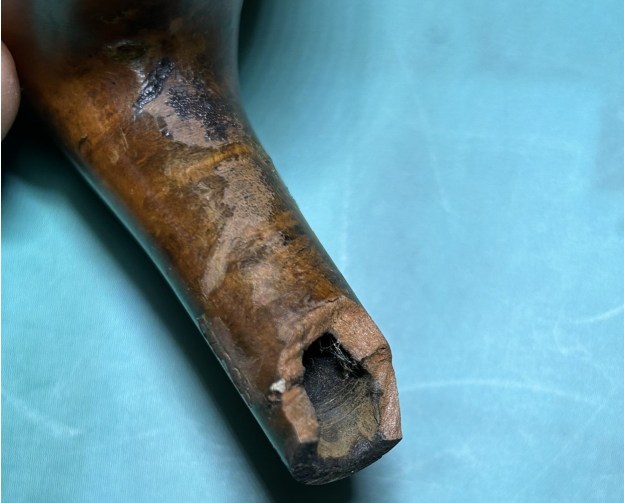
 Next, I took a closer look at the broken tenon end. I’m not sure what happened there, but it was badly damaged and the only reasonable option was to remove it, as it could cause further problems. I then sanded down the end of the tenon to make it smooth and flat.
 Then I wiped the outside down with Murphy’s Oil Soap on some cotton pads and the inside with pipe cleaners and lemon-infused isopropyl alcohol.
 Once this process was done, the stem went for an overnight soak in the Pipe Stem Oxidation Remover. The next day, I wiped down the stem with SoftScrub cleaner and some cotton rounds to remove surface oxidation.
 After that, I used some gold Rub’n’Buff to fill in the P on the stem. This P would have been gold coloured originally.
 I also built up the tooth dents (pun intended) on the stem with cyanoacrylate adhesive and let them fully cure. I then sanded the adhesive down – first with a small file, then with 400-grit sandpaper to meld seamlessly into the stem. I then used all nine Micromesh pads (1,500 through 12,000 grit) to bring out the lovely black lustre on the stem. I also used Obsidian Pipe Stem Oil in between each pad scrubbing.

 Moving on to the stummel, I used the PipNet Reamer to remove the built-up cake and followed that with 220-grit sandpaper taped to a dowel to eliminate as much as I could. I took the chamber down to bare briar, as I wanted to ensure there were no hidden flaws in the wall. Fortunately, there were none.
  Next, I took a dental tool and gently ran it along the grooves of the outside of the bowl to clear out any filth in there.
  In order to save as much of the rim as possible, I used a piece of machine metal to very delicately scrape away as much burnt material as I could. I do this before automatically jumping to my topping board; this gentle scraping revealed far more burn damage than I had anticipated, so it would need more work later.
 For now, I proceeded to clean out the insides of the shank with Q-tips, pipe cleaners, and lemon-infused isopropyl alcohol. There was quite a bit of filth inside this stummel and it took a fair amount of cotton to get it clean.
  That done, I decided to de-ghost the pipe in order to remove any lingering smells of the past. I thrust cotton balls into the bowl and the shank and saturated them with 99% isopropyl alcohol. I let the stummel sit overnight. This caused any remaining oils, tars and smells to leach out into the cotton. The bowl was nice and clean after this.
 I followed that up by cleaning the outside with Murphy’s and the insides with some Castile soap and tube brushes.
  After all this cleaning, I took a closer look at the damage to the rim. As the photo shows, the damage was considerable. At this point, I asked the owner if he wanted me to remove all the burn marks, which would entail significant removal of briar, or simply deal with the surface damage and leave the wood intact. He opted for the latter (correctly, in my view). The burns would remain on this pipe, but they are part of its story – and that is just fine.
 In order to remove some remaining burns on the rim, I did ultimately “top” the pipe – that is to say, I gently and evenly sanded down the rim on a piece of 220-grit sandpaper. This effectively removed the surface damage, without altering the look of the pipe.
 I also took a wooden sphere, wrapped a piece of 220-grit sandpaper around it, and sanded the inner side of the chamber. This achieved two things: first, it removed some of the burn marks on the inner edge of the rim; and second (and more importantly), the circular shape and motion of the sphere gradually returned the edge to a perfect circle.
 With all that done, I polished it up with all nine of my Micromesh pads. After that, a light application of Before & After Restoration Balm brought out the best in the stummel’s grain.


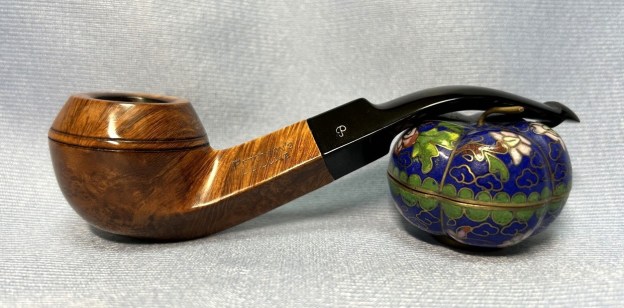
 Of course, the final step is buffing with some White Diamond and a few coats of carnauba wax.
 This is a beautiful pipe with an interesting history. I was delighted and honoured to be a part of it! I hope you enjoyed reading the story of this pipe as much I as I did restoring it. If you are interested in more of my work, please follow me here on Steve’s website or email me directly at kenneth@knightsofthepipe.com. The approximate dimensions of the pipe are as follows: length 5¼ in. (134 mm); height 1½ in. (37 mm); bowl diameter 1½ in. (39 mm); chamber diameter ¾ in. (18 mm). The weight of the pipe is 1⅛ oz. (34 g). Thank you very much for reading and, as always, I welcome and encourage your comments.