Blog by Paresh Deshpande
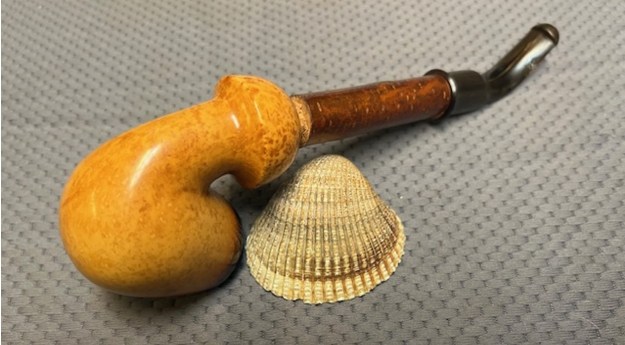
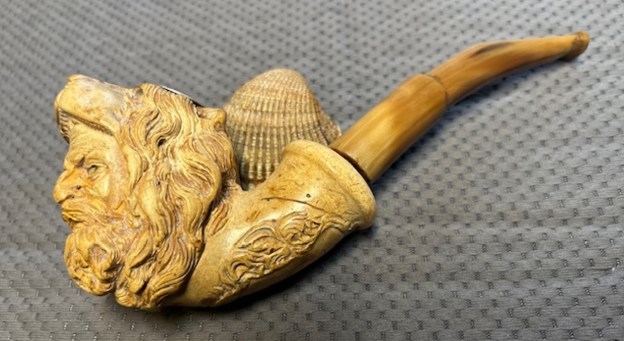
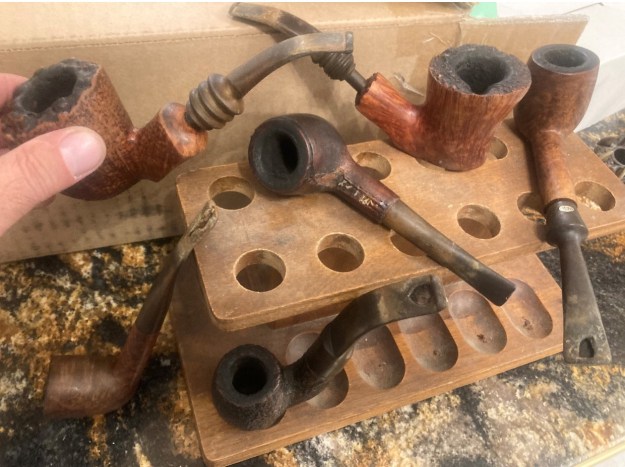
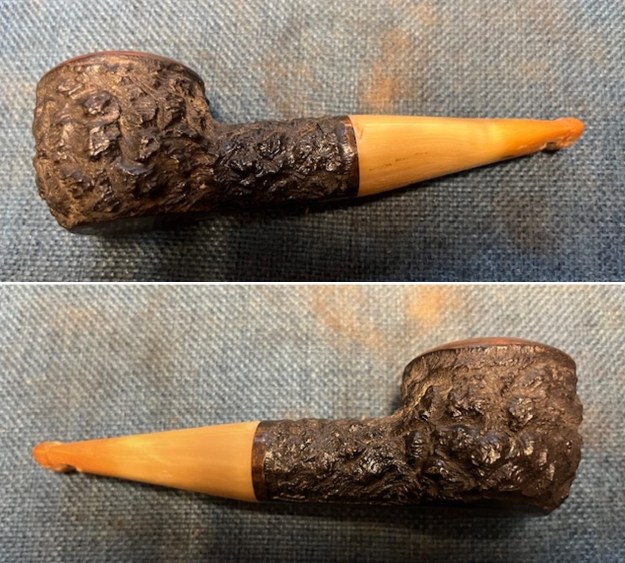
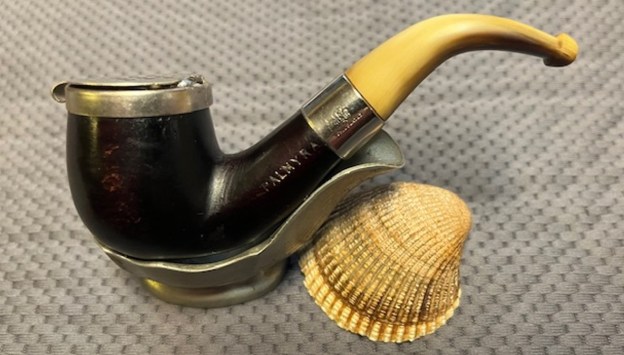
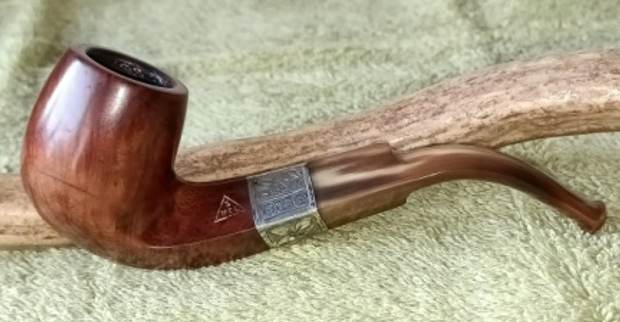
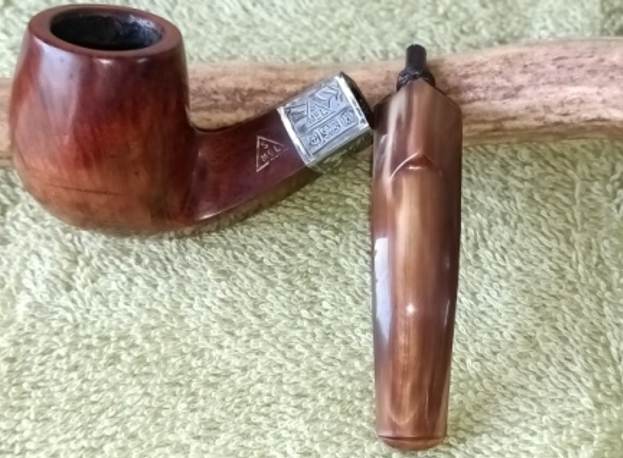
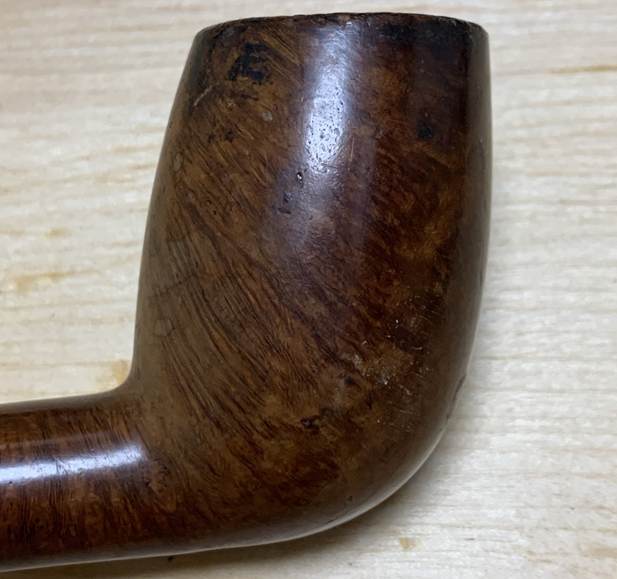
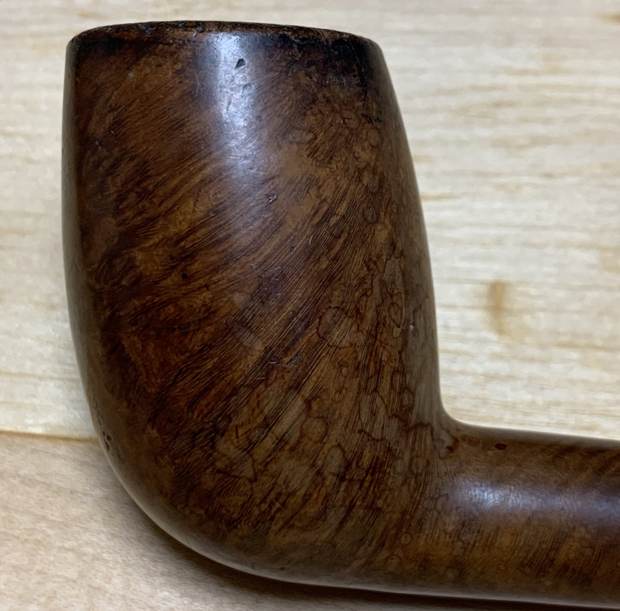
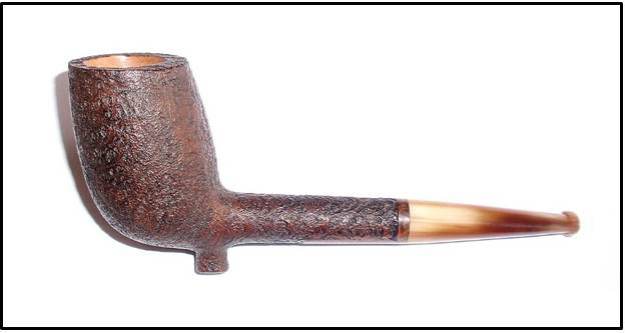
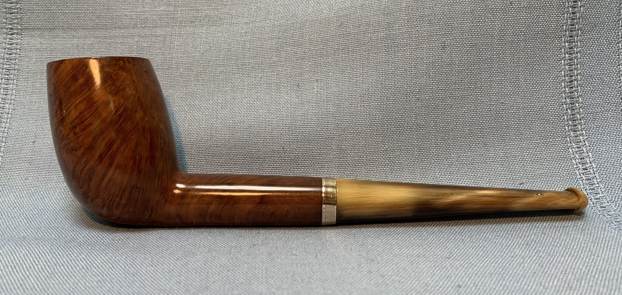
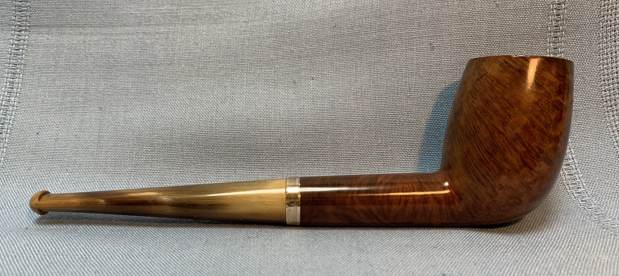
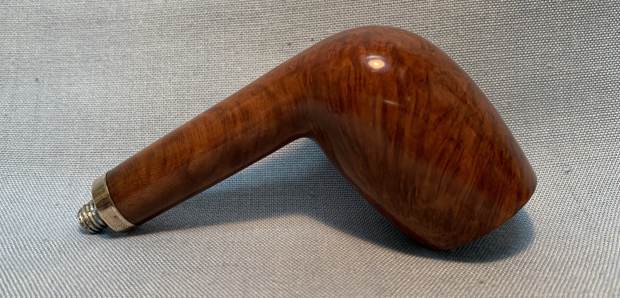
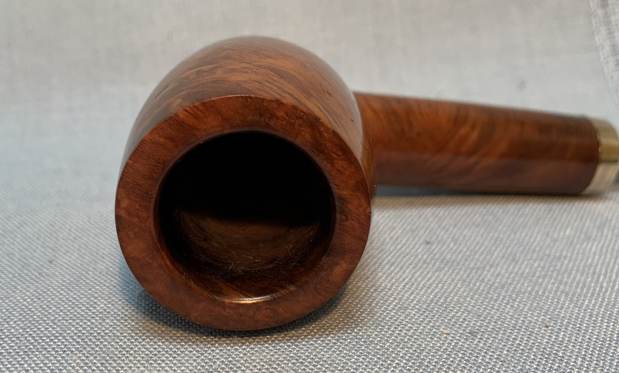
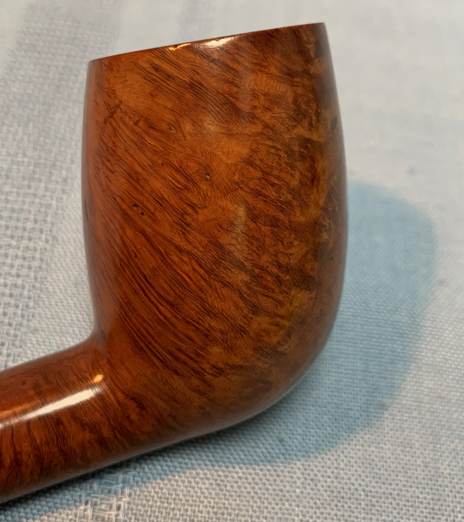
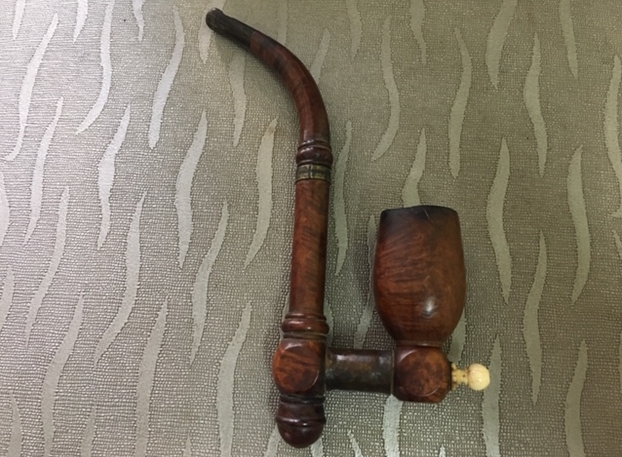
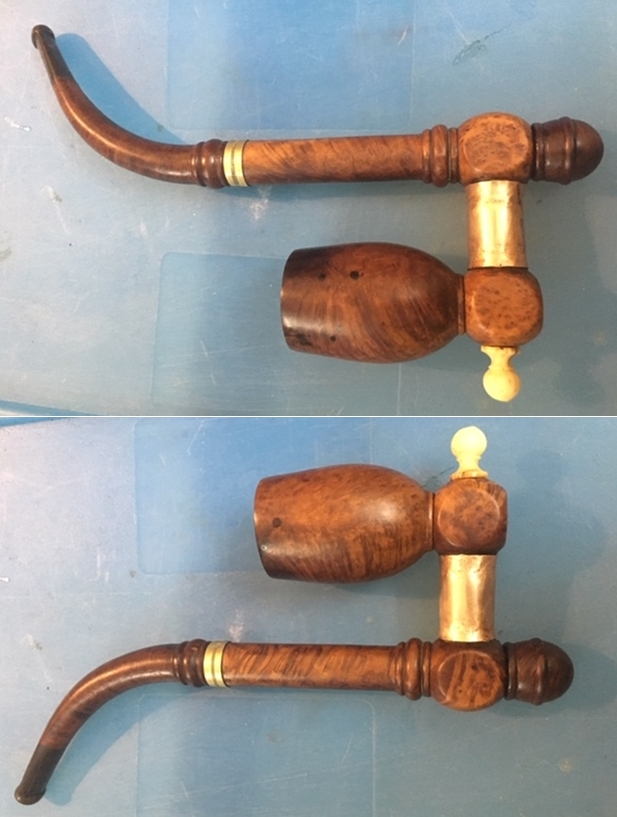
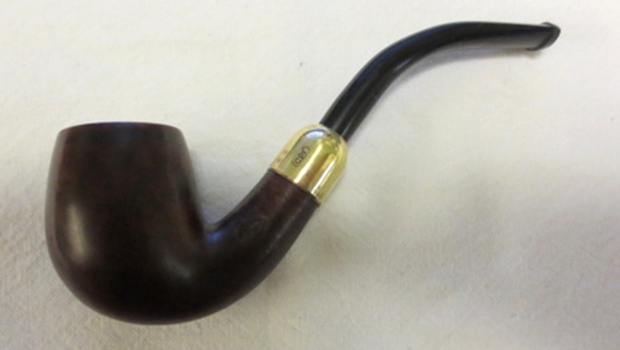
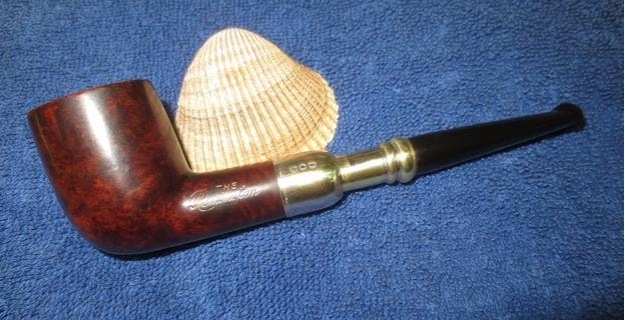
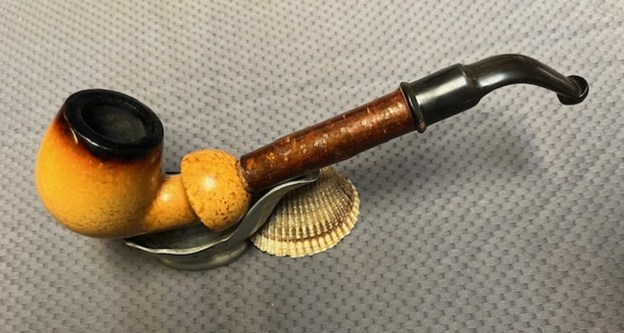
This pipe now on my work table came to me from a lot of 40 pipes that I had purchased from a French seller on etsy.fr just before the outbreak of the pandemic. It’s a beautiful classic billiard shaped pipe with a bone stem and beautiful flame grains along the sides of the stummel and bird’s eye grain over the rim top and the foot of the stummel.
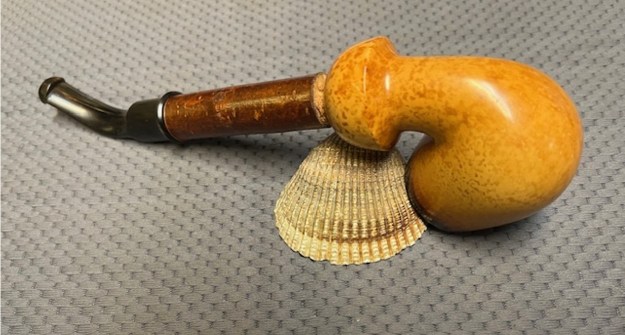
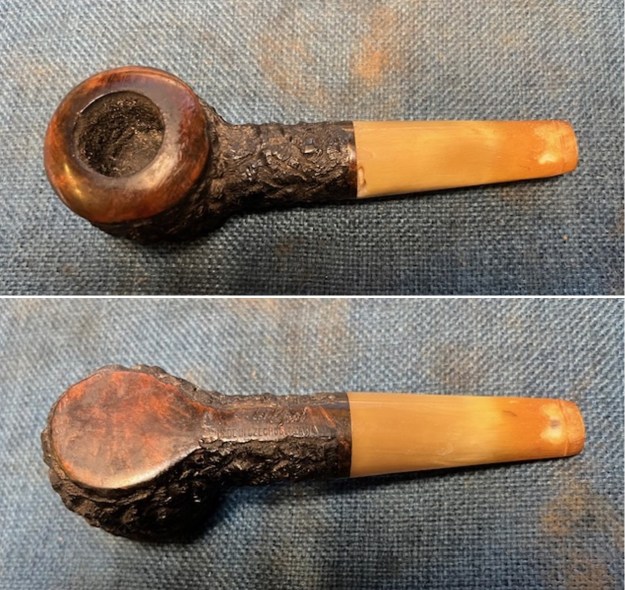
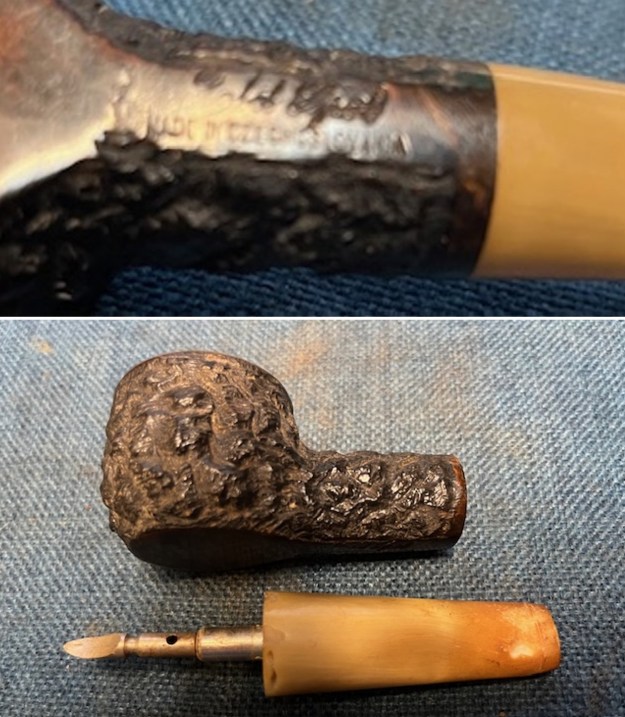
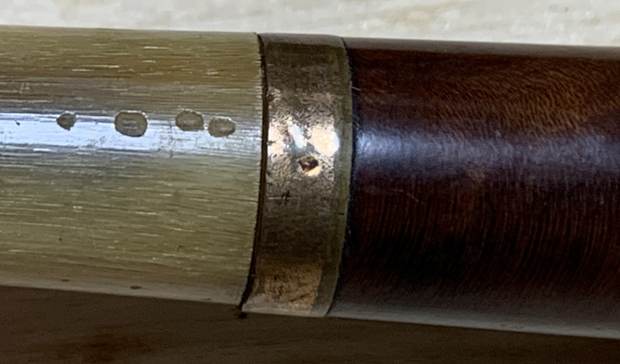
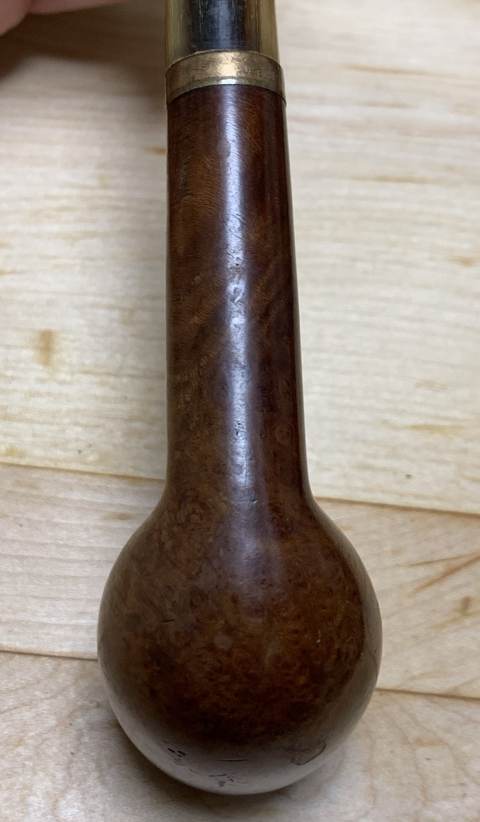
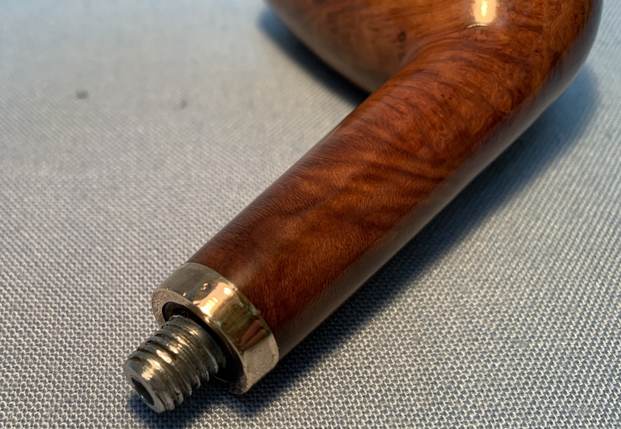
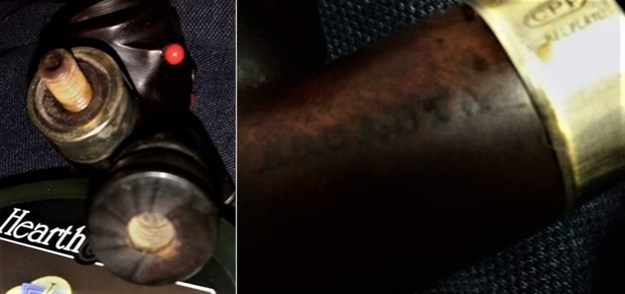
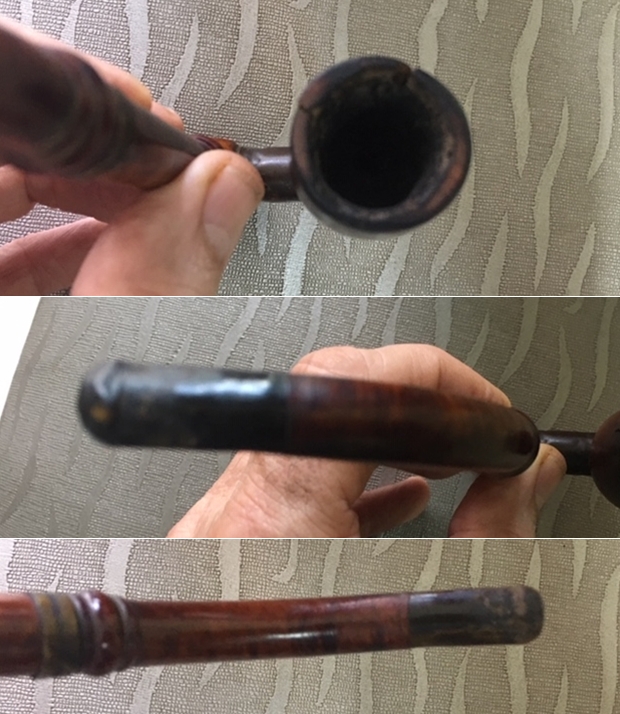
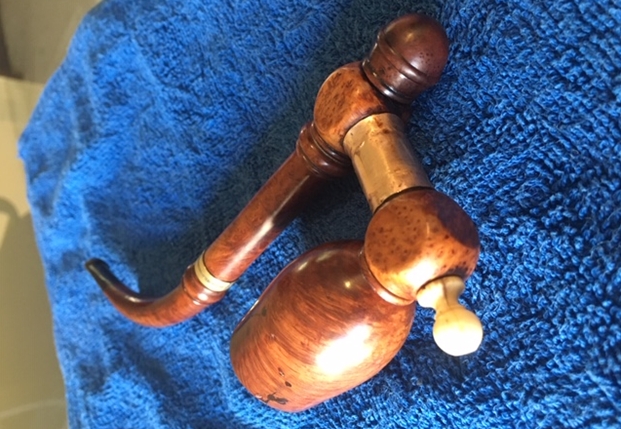
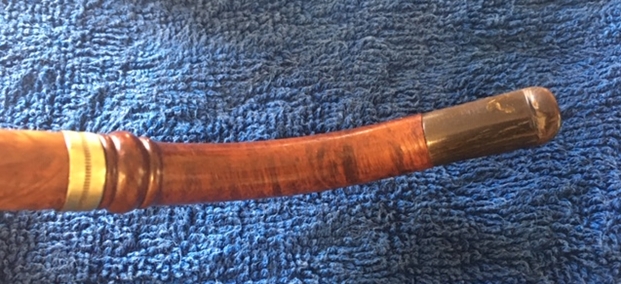
This perfectly proportioned light weight pipe has a medium sized bowl, equivalent to a size 4 Dunhill. The piece of briar is without a single fill and oozes very high quality. The copper band at the shank face adds a classy bling to the appearance of the pipe. The stampings on this pipe is one of the most elaborate that I have come across with “PNEUMATIC” over “BREVETE S.G.D.G” stamped across the left side of the shank at an upward angle. This is followed by “ROPP” in an oval towards the shank end. The right side of the shank is stamped as “RACINE” over “DE VIEILLE SOUCHE” in a downward incline. The shape code “9105” is stamped at its end on the right surface of the shank.
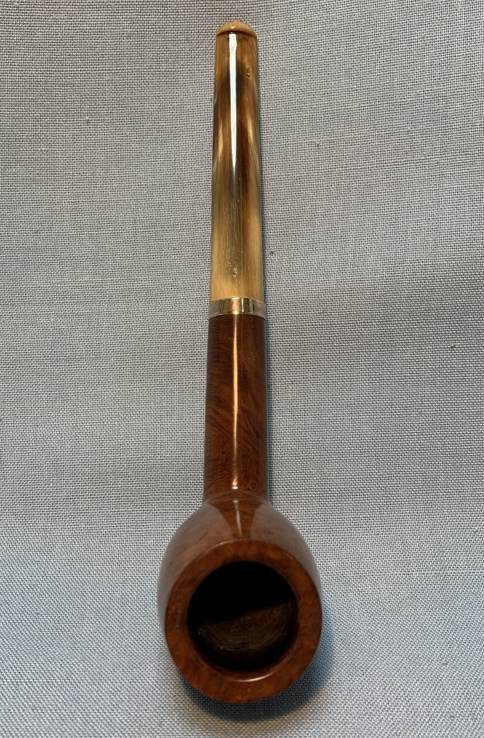
 The shank opening is lined by a metal ring that extends inside the mortise and is stamped on the metal face as “ROPP” over the upper portion and the lower surface bears the stamp “BREVETE S.G.D.G.”.
 I had worked on ROPP pipes before and had a fair idea of this French marquee. But it was the stampings which intrigued me and I also knew that I was working on a very early era ROPP and had to know more specific details of this line from ROPP.
I searched the internet and came across this site that had the exact same pipe for sale. The information I got from the description with a link to the website is reproduced below:
https://www.delcampe.net/en_US/collectibles/tobacco-related/pipes-accessories/heather-pipes/tres-rare-pipe-ropp-pneumatic-brevete-s-g-d-g-virole-en-argent-date-1897-ou-1898-a-loccasion-de-linstallation-a-baume-1103869216.html
VERY RARE PIPE ROPP PNEUMATIC patented S.G.D.G silver ferrule dates 1897 or 1898, on the occasion of the installation in Baume
This “Pneumatic” model dates from the very last years of the 19th century: 1897 or 1898, on the occasion of the installation in Baume.
I decided to break down my search parameters to get a better understanding of the stampings as seen on the pipe. I searched for BREVETE S.G.D.G and this is what Wikipedia revealed:-
https://en.wikipedia.org/wiki/Brevet%C3%A9_SGDG
Breveté SGDG was a French type of patent that ceased to exist in 1968. The name was a common abbreviation for “Breveté Sans Garantie Du Gouvernement“ (patent without government guarantees).
In France, the law of 1844 states that patents are issued “without prior examination, at the risk of the applicant and with no guarantee of function, novelty and merit of the invention also in terms of precision or accuracy of the description”.
I also visited various forums to know more about this line of pipes from ROPP. Here is an interesting conversation that I chanced upon on placedelours.superforum.fr and contained a thread discussing a ROPP pipe with similar stampings that were stamped in the exact same way as seen on the pipe currently on my worktable. I have reproduced an English translation of the thread below:-
http://placedelours.superforum.fr/t33004-pipe-ropp-pneumatic
vidu52
Hello to all of you,
For a long time I have been looking for this ROPP brand pipe, marked : PNEUMATIC patented S.G.D.G and with a diamond-shaped punch.
The ROPP brand I find many, but not a single marked “PNEUMATIC” ??
Long : 14 cm approx High 4.5 cm approx, Weight: 42 Grams
I turn to you to try to help me identify this pipe and if possible its degree of rarity.
In advance Thank you….
Nucingen
Very nice pipe, with silver ferrule
this “Pneumatic” model dates from the very last years of the XIXe century: 1897 or 1898, on the occasion of the installation in Baume.
You will know everything about the “Pneumatic” by reading pages 21, 29 and 34 of this very beautiful and interesting book :
https://issuu.com/romainbassenne/docs/ropp_livre_maquette_issuu
However, the link is either no longer active or may not be accessible from my location. In any event, if anyone is able to access it, it is requested to share the information therein on Pneumatic line of pipe from ROPP for info of readers.
https://pipedia.org/wiki/Ropp
Eugène-Léon Ropp (1830 – 1907) had acquired a patent for a cherrywood pipe (wild cherry, lat.: Prunus avium) in 1869. In 1870 he established a workshop to manufacture such pipes in Büssingen (Bussang, Vosges mountains). Around 1893 the business moved into the former mill of Sicard (part of the community of Baume-les-Dames – Département Doubs, Upper Burgundy – from 1895 on).
The pipes were a big success in the export as well. Shortly before 1914 Ropp designated A. Frankau & Co. (BBB) in to be the exclusive distributor in the UK and it’s colonies.
Probably in 1917 a workshop in Saint-Claude in the Rue du Plan du Moulin 8 was acquired to start the fabrication of briar pipes. In 1923 a small building in the environment of Saint-Claude, serving as a workshop for polishing, was added.
Even though cherrywood pipes were the mainstay of Ropp until the company finally closed down in September 1991. The company was taken over by Cuty-Fort Entreprises (Chacom, Jeantet, Vuillard, Jean Lacroix…) in 1994.
I was still not satisfied with the research of this pipe. This pipe has some of the most detailed stampings that I have seen on any pipe. I have deciphered the stampings of ROPP, PNEUMATIC and BREVETE S.G.D.G. The stampings of RACINE, DE VIEILLE SOUCHE yet remains to be understood. Now, my French is what my mother tongue Marathi is to you. I searched the internet for translation and this is what I found.
(a) RACINE: – Root.
(b) DE VIEILLE: – Old stock.
(c) SOUCHE: – Stump.
These stampings together do make sense implying that the briar used to carve this pipe is an old stock briar root stump.
Though the discussion thread and description of the similarly stamped pipe stated above places this pipe to be from the period 1897/ 98, the lack of pictures of the tenon on that pipe and being unable to access the link leading to the book on the PNEUMATIC line of ROPP, I cannot conclusively place the pipe on my work table to be from the period 1897/ 98.
The aluminum tenon in a bone stem with an elliptical slot makes me inclined to place this pipe from during the WW II era, which is from 1940 to 1945/ 6.
That said this pipe is definitely an old timer and is being added to my personal collection.
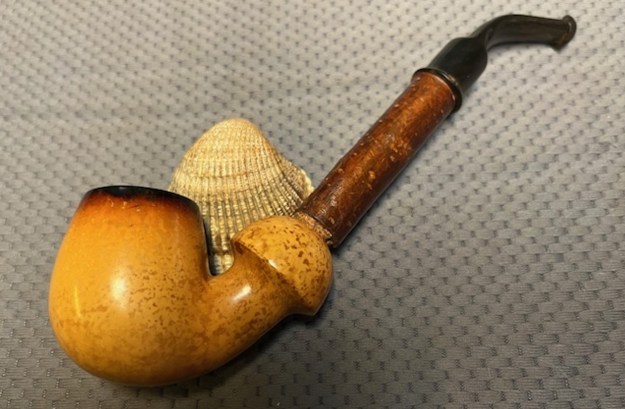
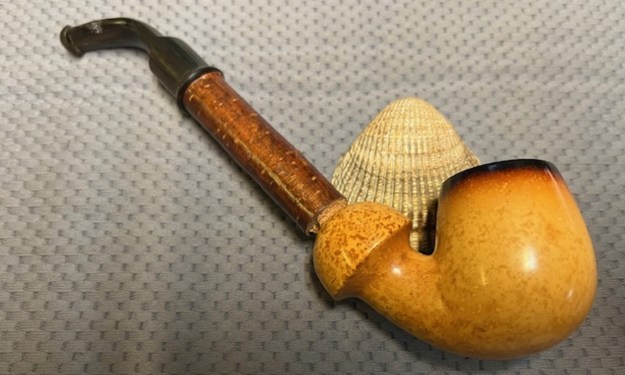
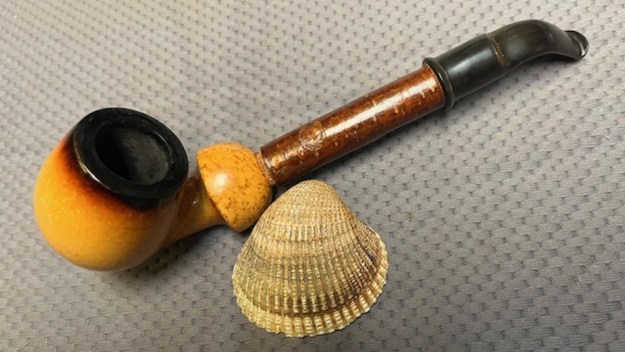
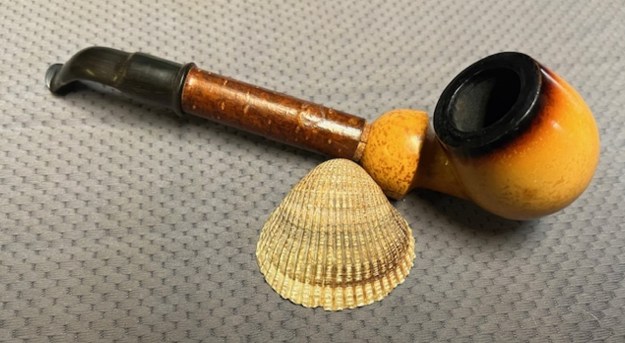
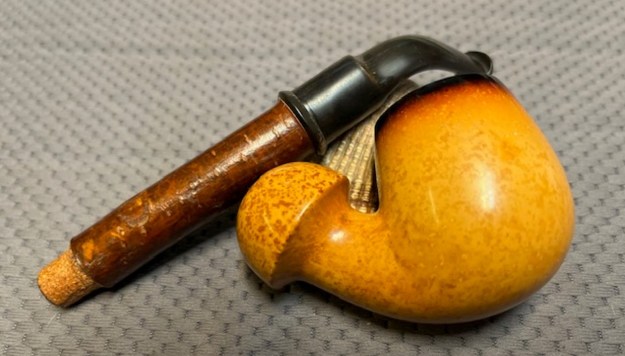
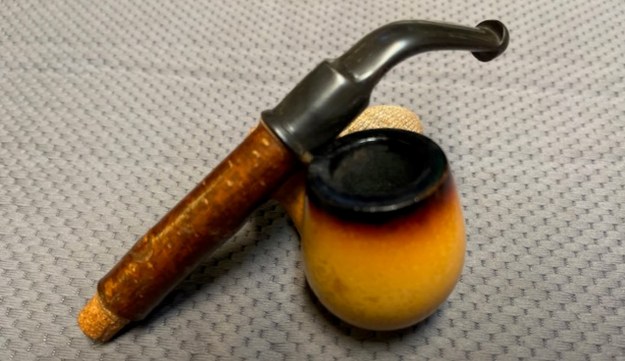
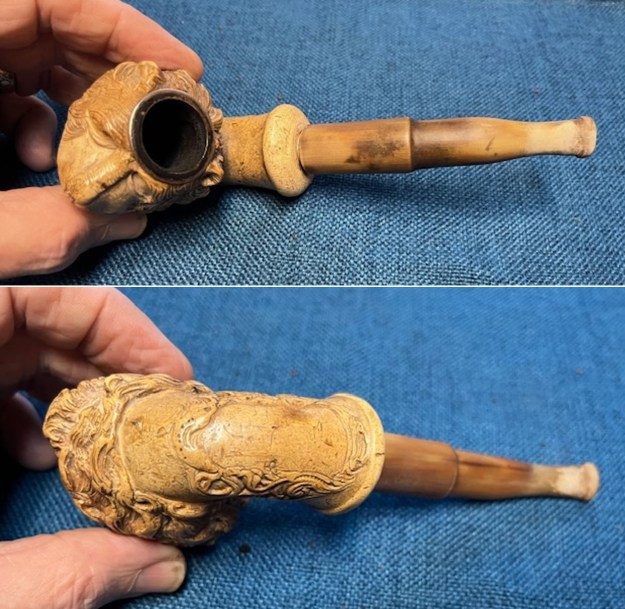
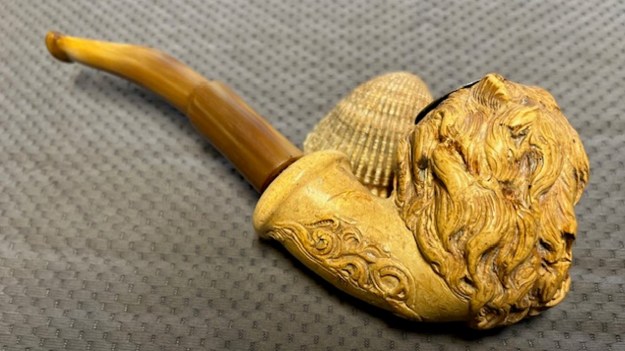
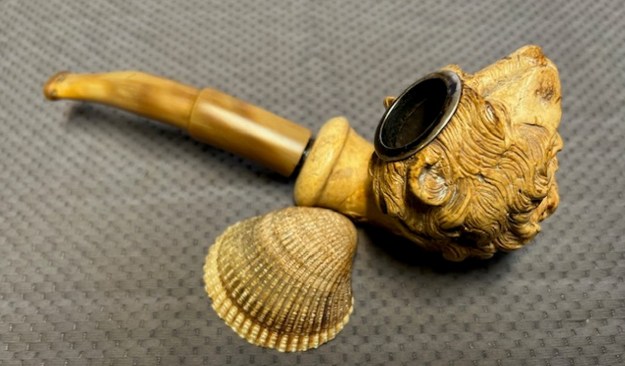
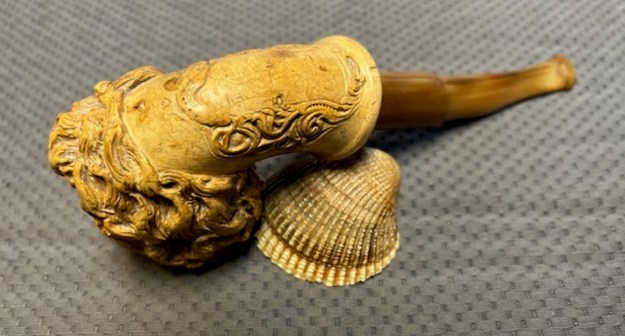
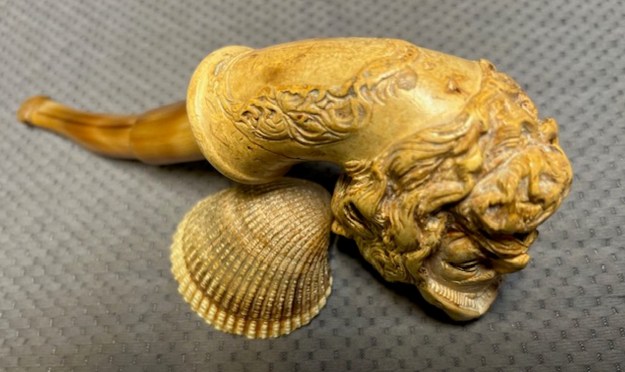
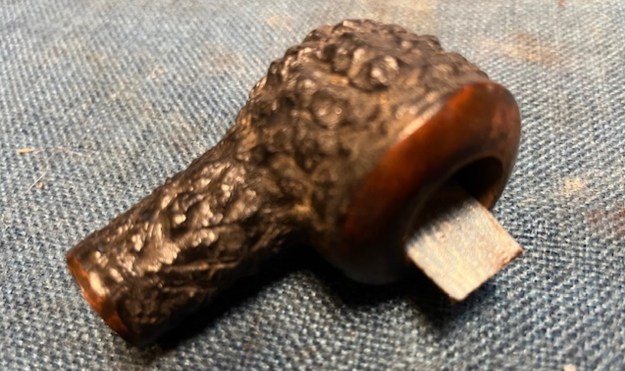
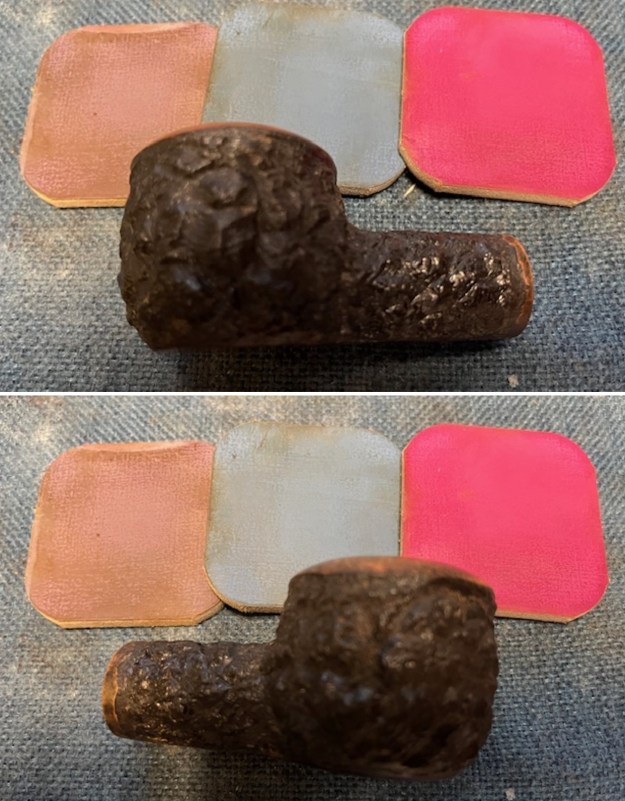
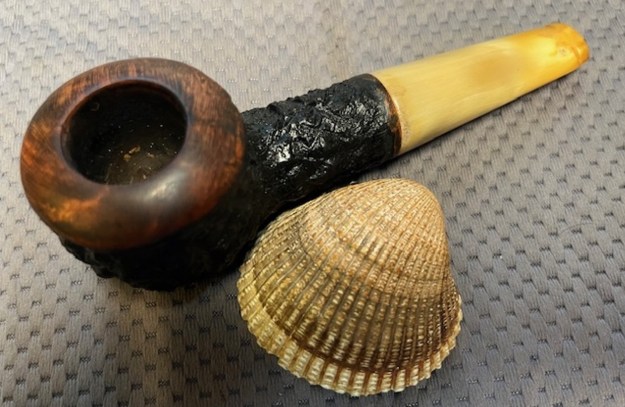
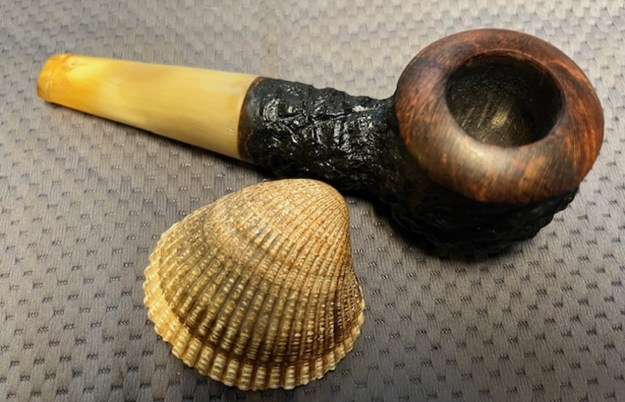
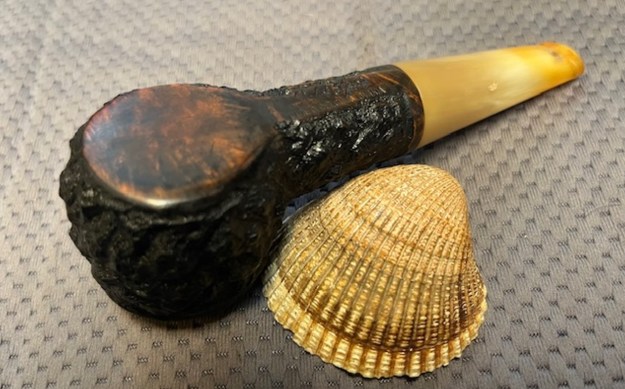
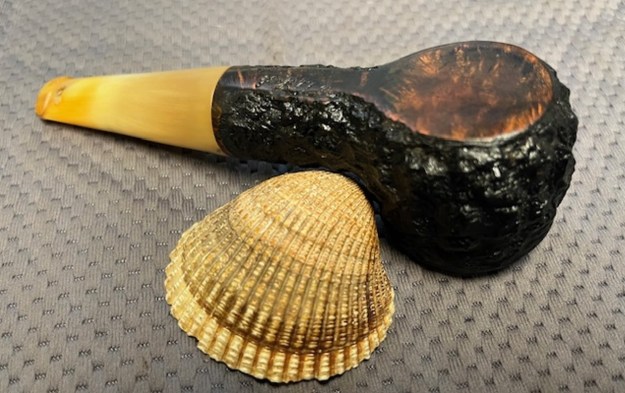
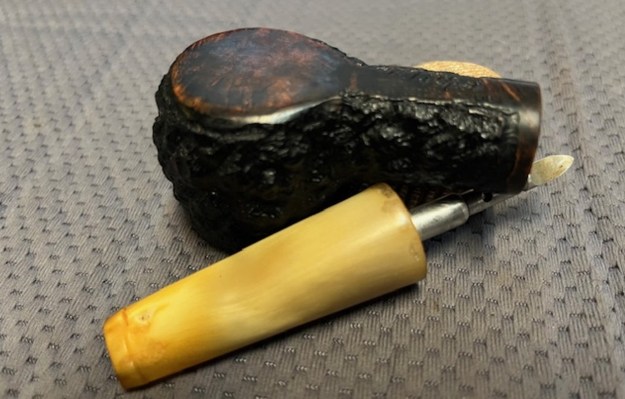
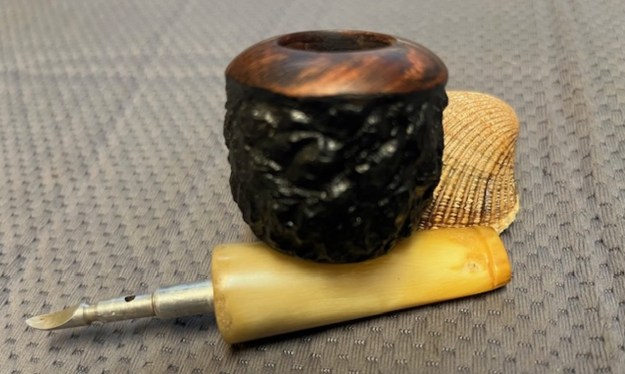
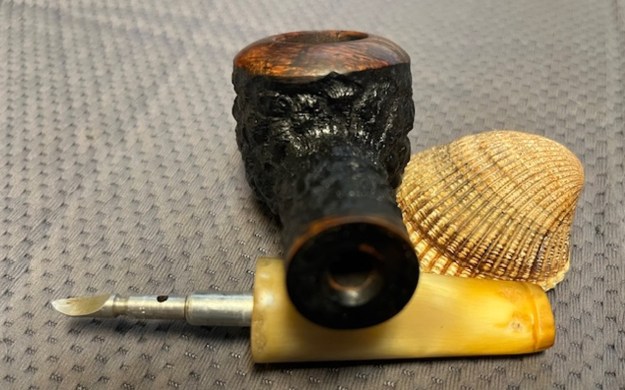
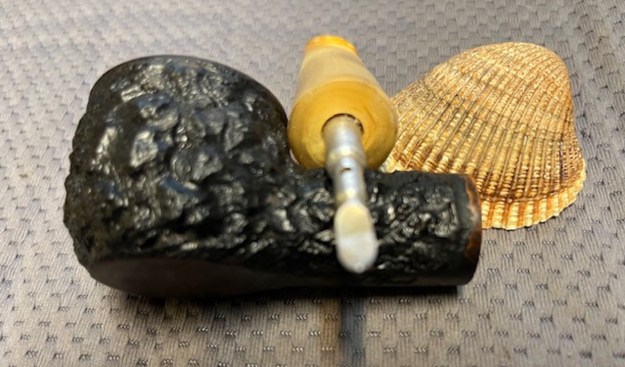
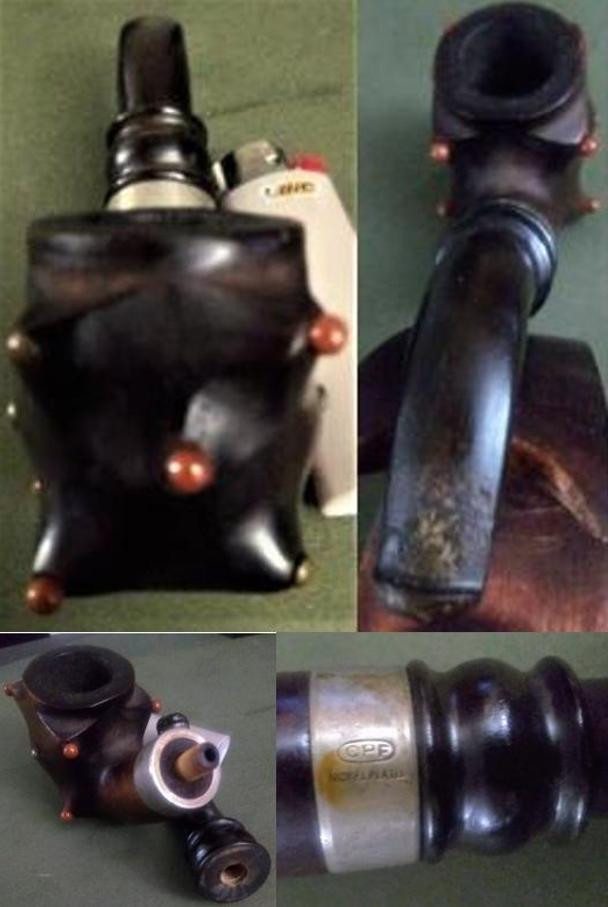
Initial Visual Inspection
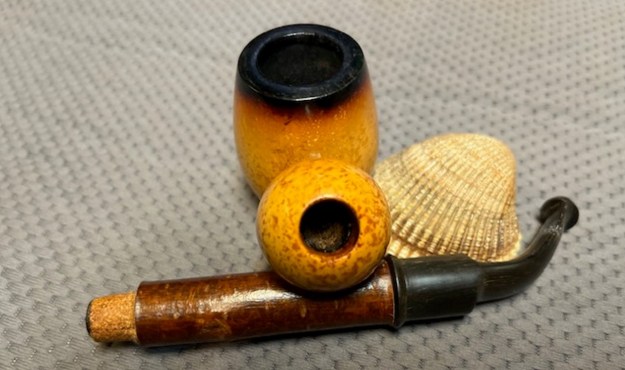
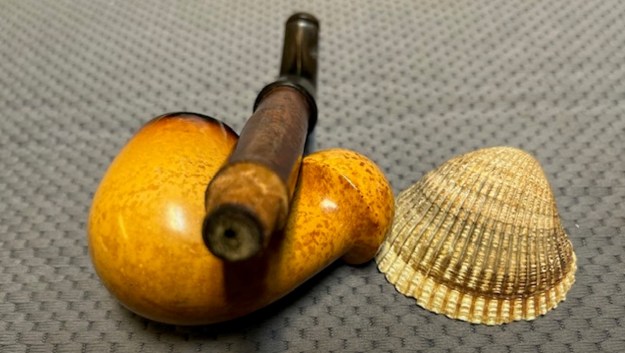
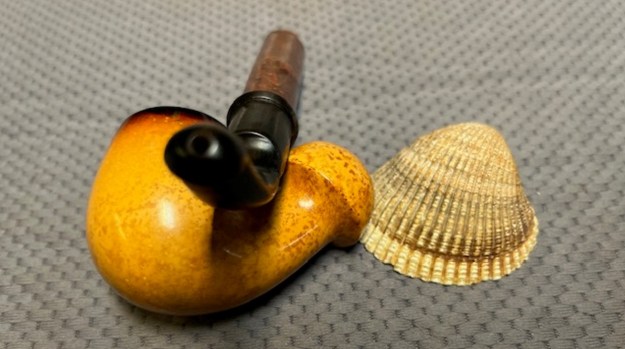
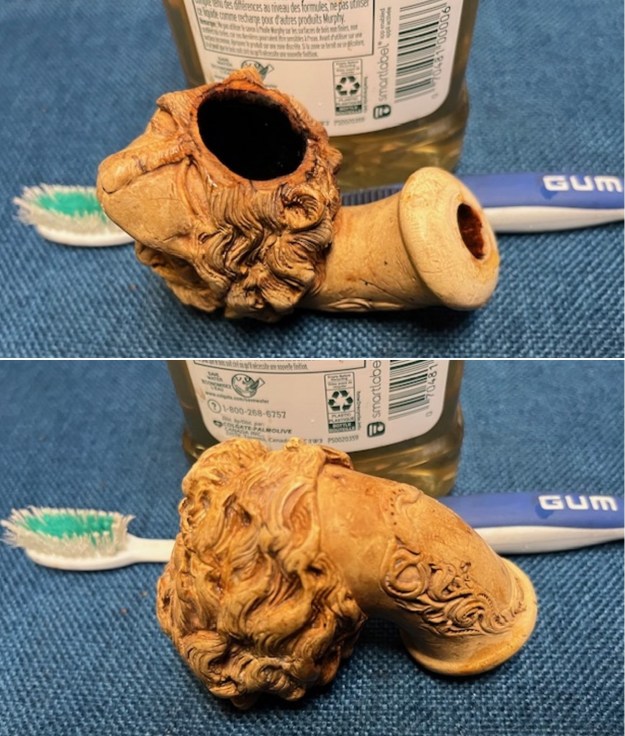
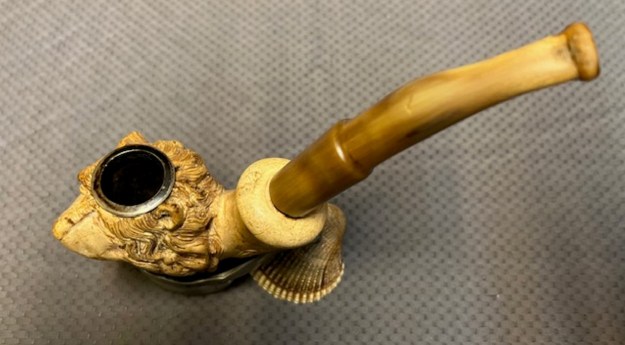
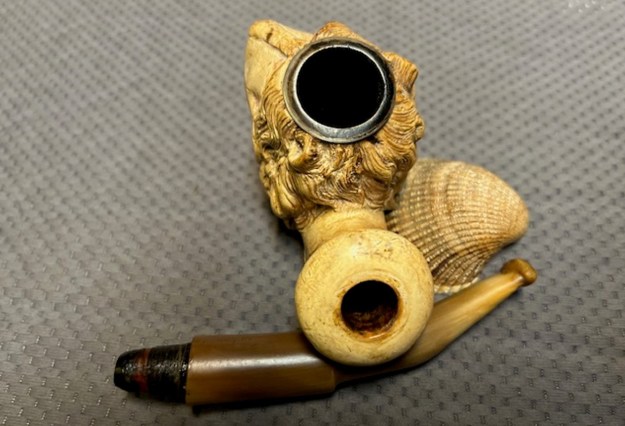
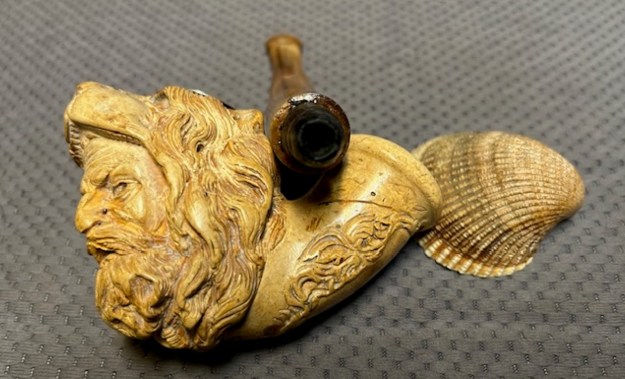
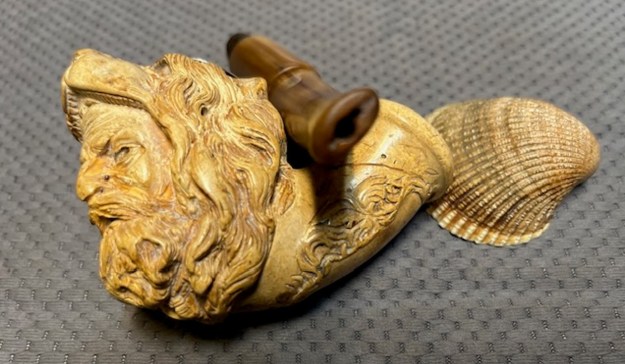
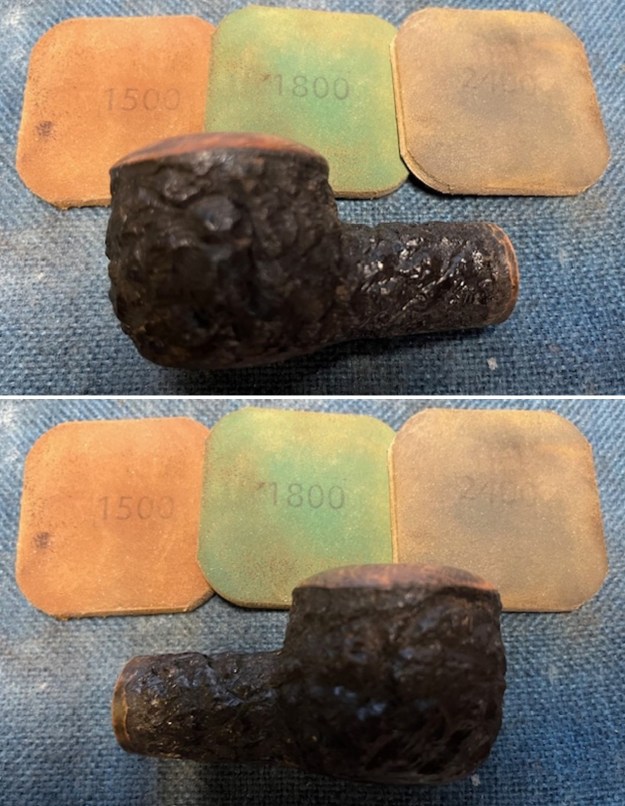
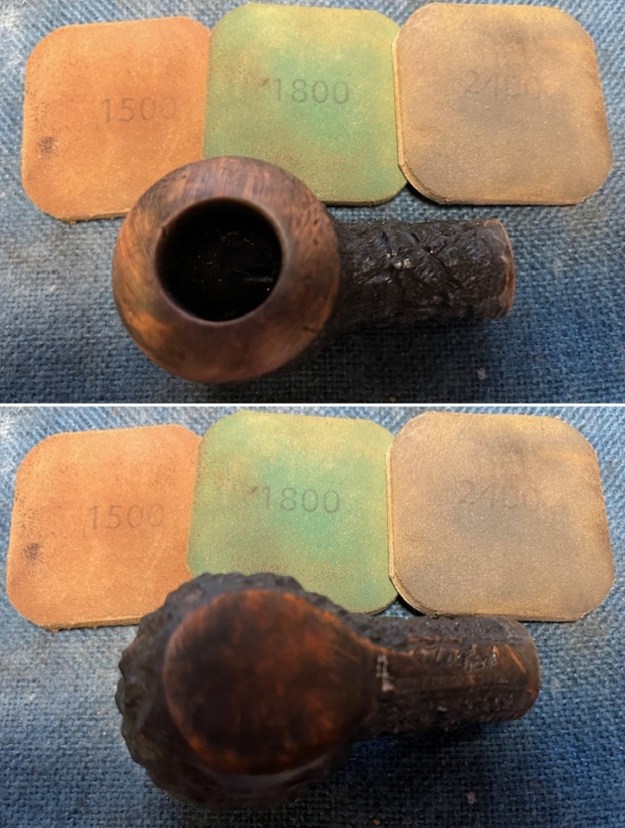
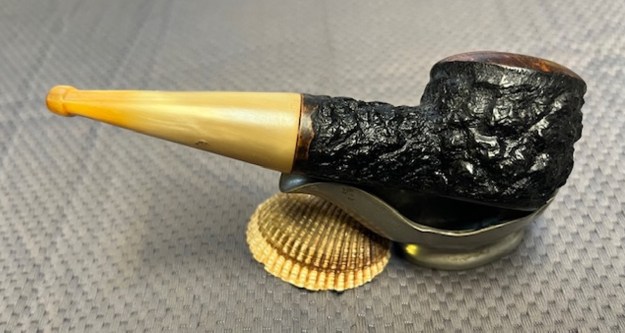
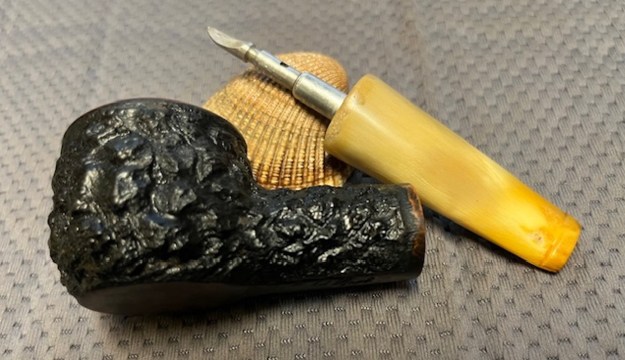
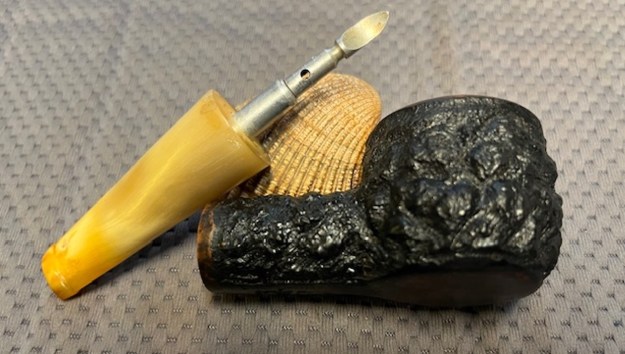
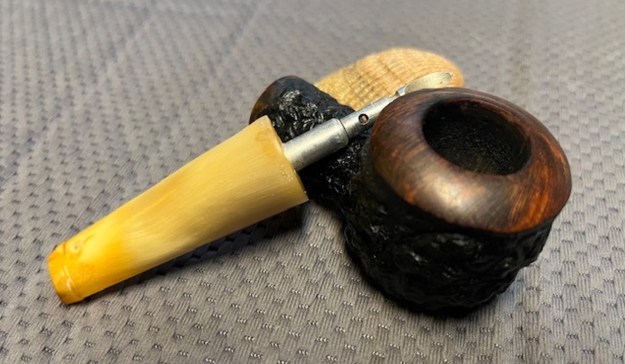
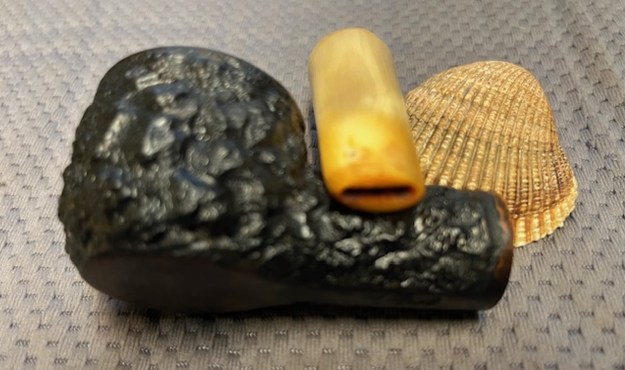
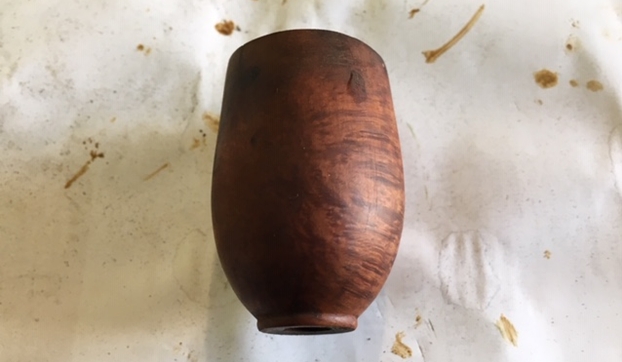
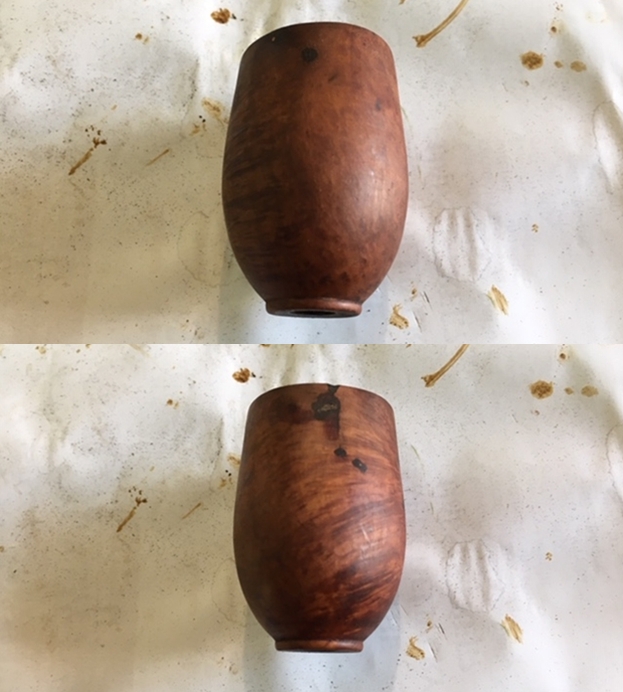
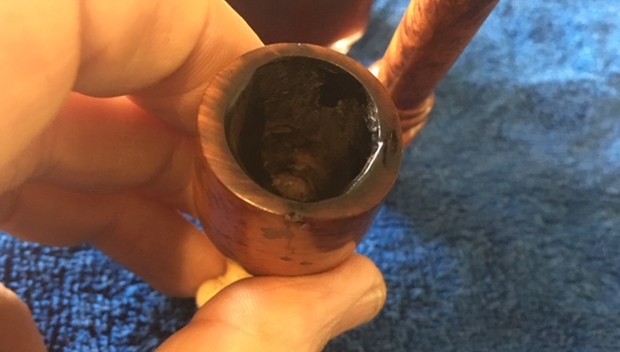
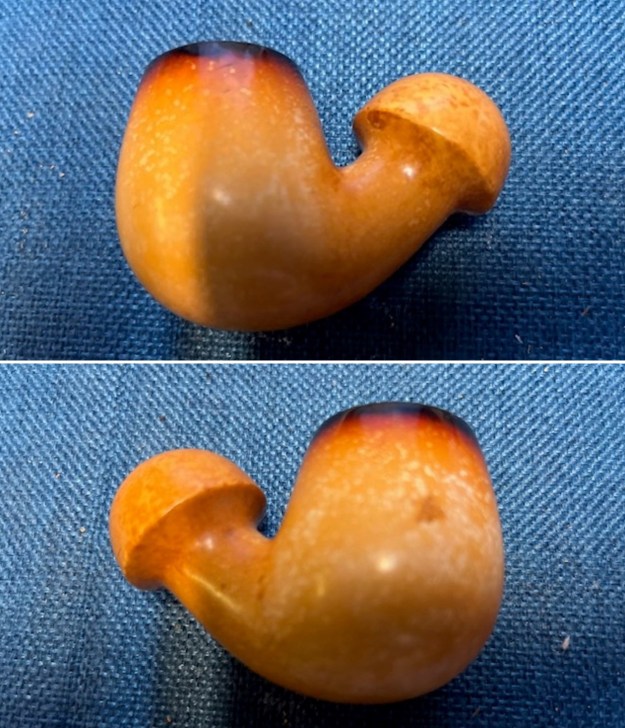
The pipe, as it sits on my work table, is dirty with a thin layer of cake in the chamber, a stummel that is covered in dust and grime and a tapered bone stem that has tooth indentations on either surface in the bite zone. Here are a few pictures of the pipe before I proceed with a detailed visual inspection of each part of the pipe.

 Detailed Visual Inspection
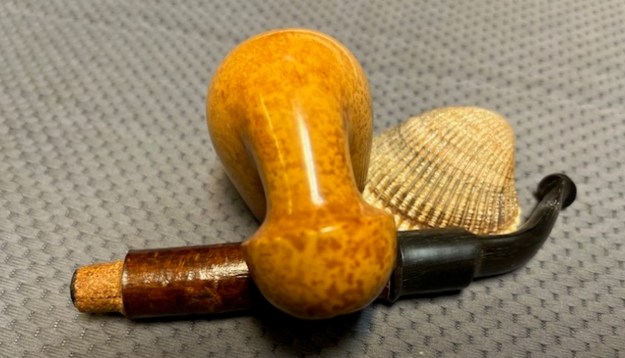
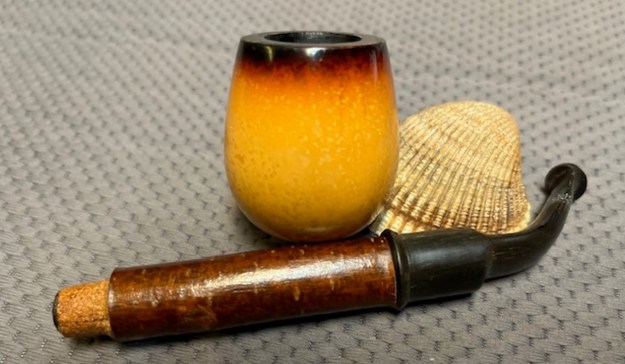
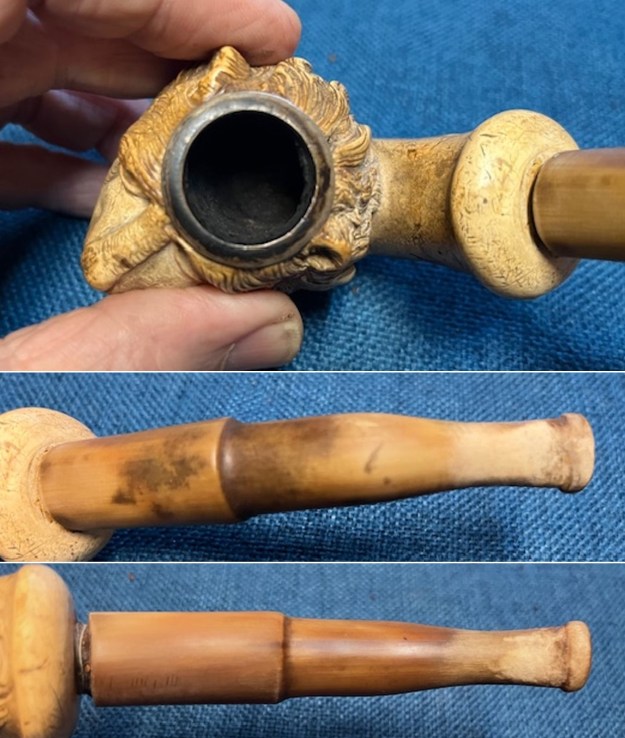
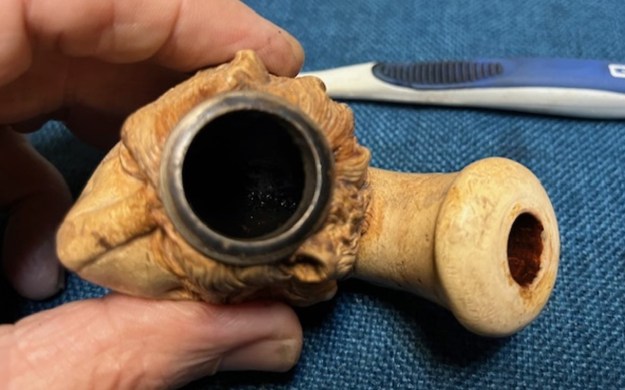
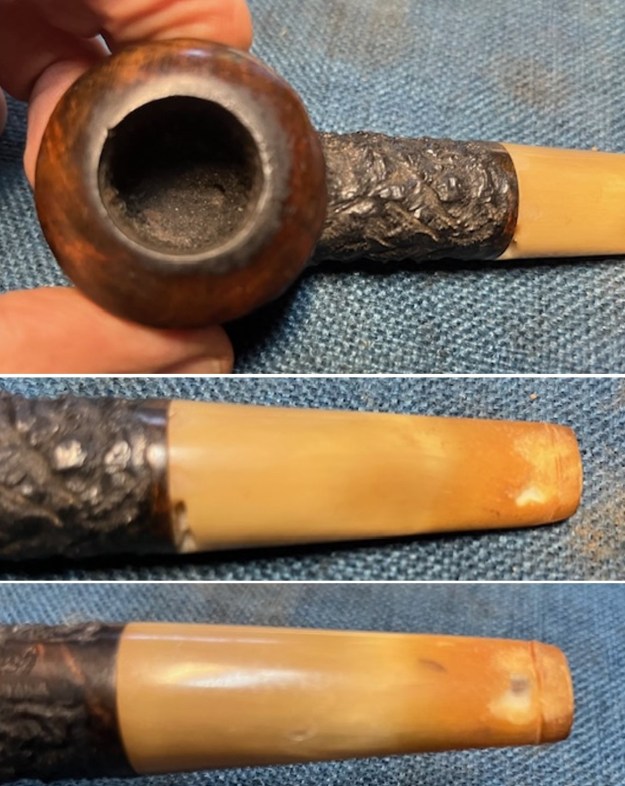
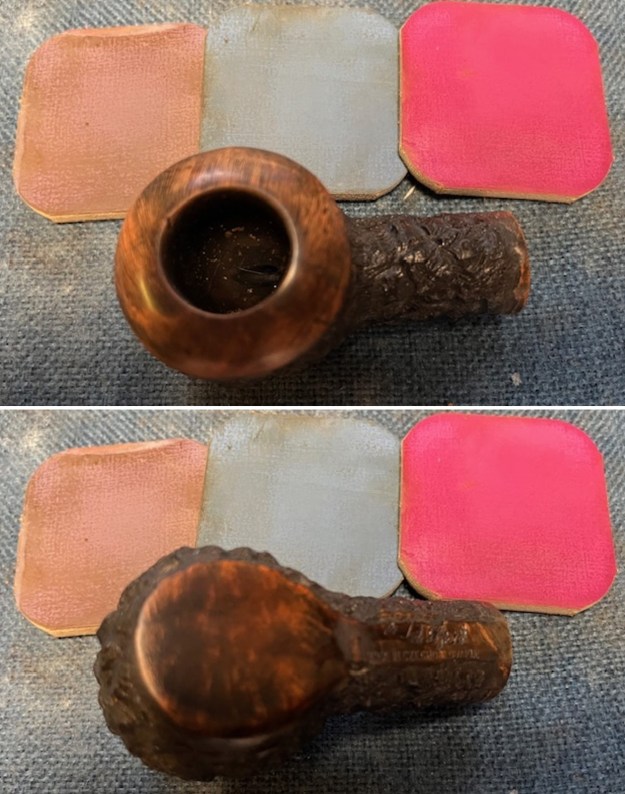
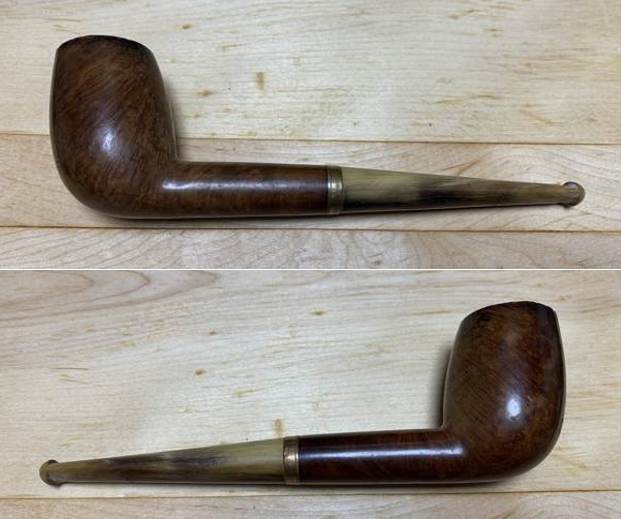
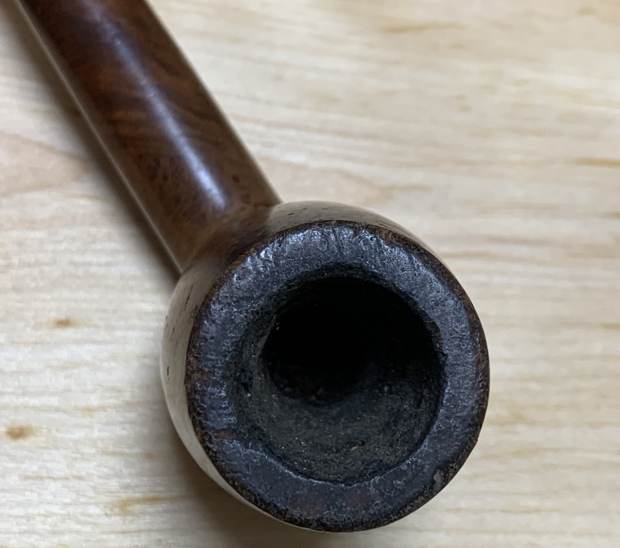
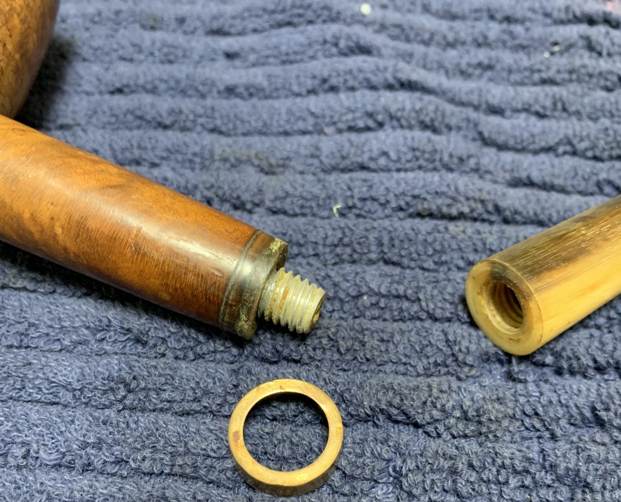
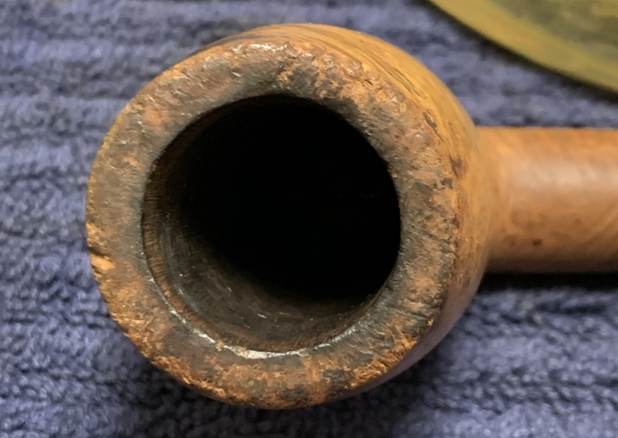
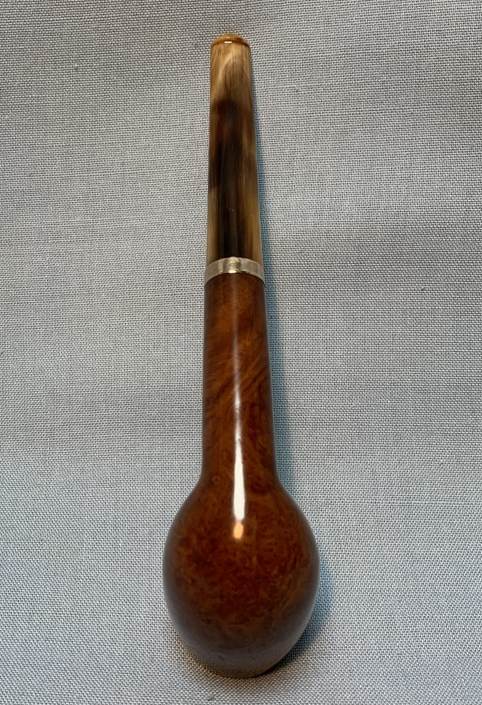
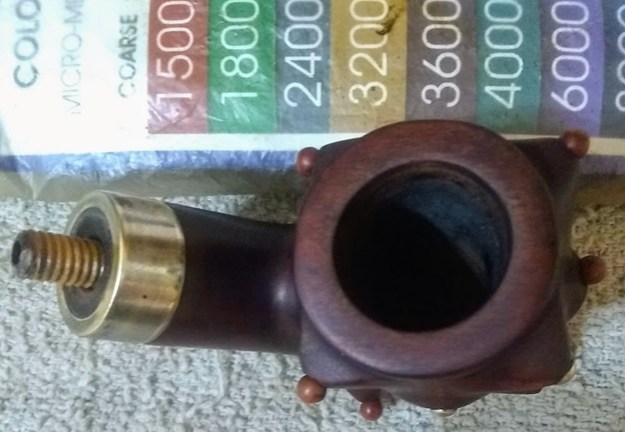
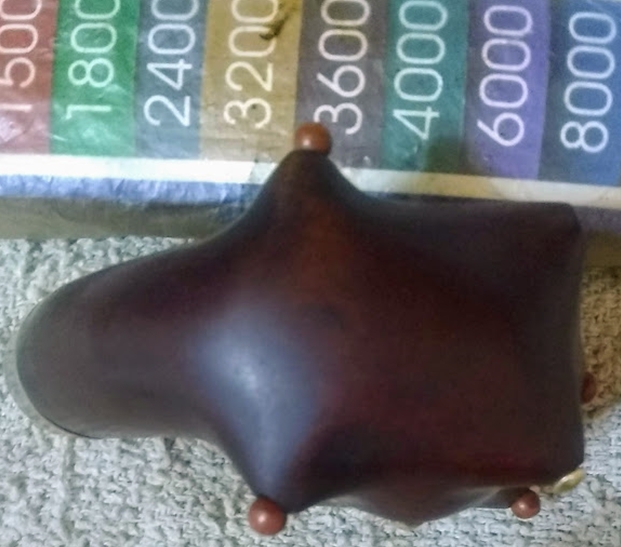
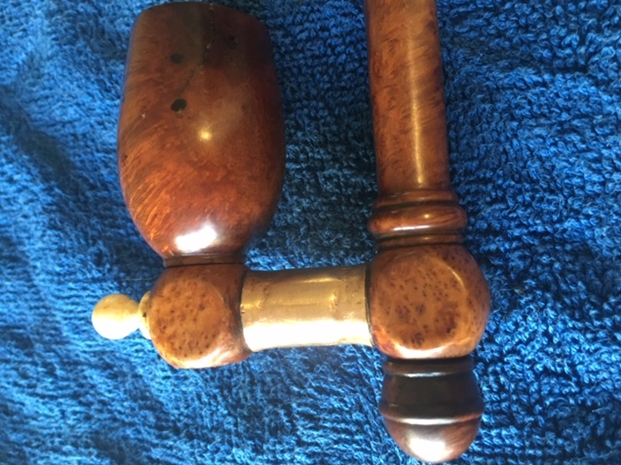
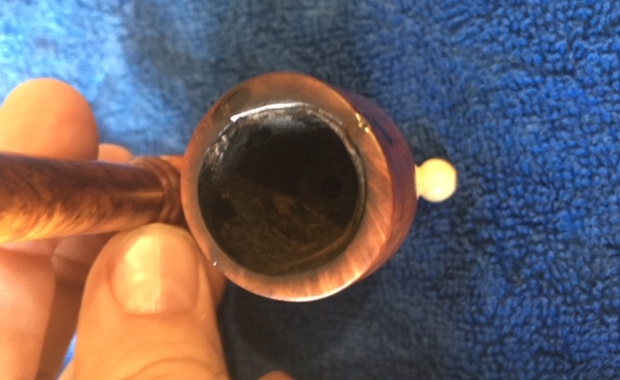
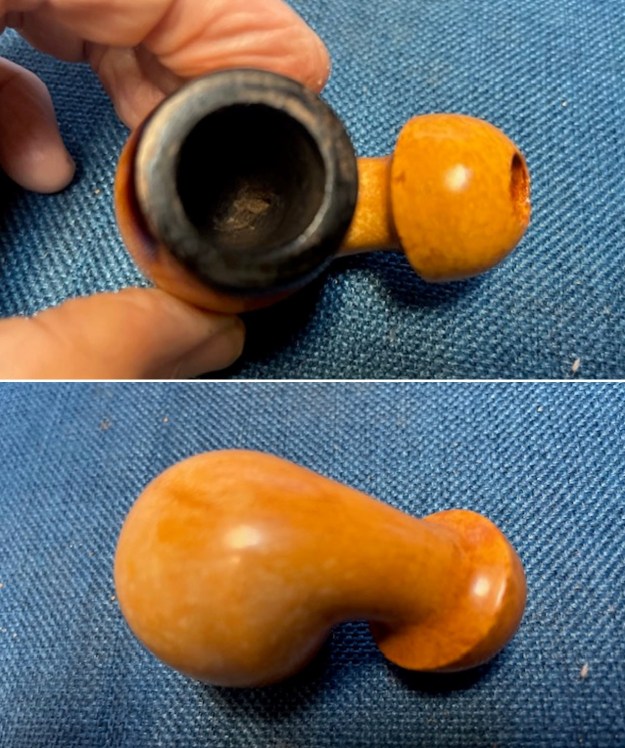
A thin layer of cake lines the walls of the chamber. There is no accumulation of overflowing crud over the rim surface but slight darkening is seen to the aft of the rim surface. The rim edges, both outer and inner, are sans any dents and dings. The rim top surface, however, shows a number of dents and dings likely caused due to either strikes against a hard edge or due to uncared for storage of the pipe. The stummel surface has attracted dust and dirt giving it a dull lackluster and lifeless appearance. There are a few scrub marks over the surface but these should be easily addressed during the polishing process. The briar wood has taken on a nice dark patina from the years of handling and smoking. It will be my endeavor to preserve and highlight this aspect. The stampings on the shank surface are all crisp and clearly discernible. The shank end of the stummel is adorned with a copper band. The unique feature of this pipe is a metal spacer that is stamped on the face as BREVETE and S.G.D.G as mentioned above. This spacer extends in to the mortise and is lined with cork extending up to an inch or so. The mortise is relatively clean with minor traces of residual ash and oils/ tars.

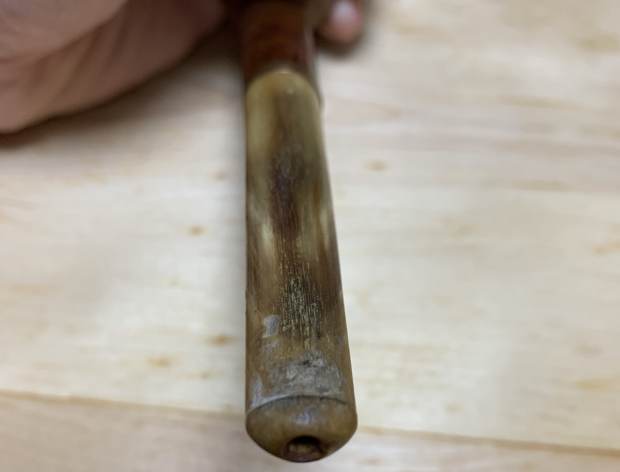
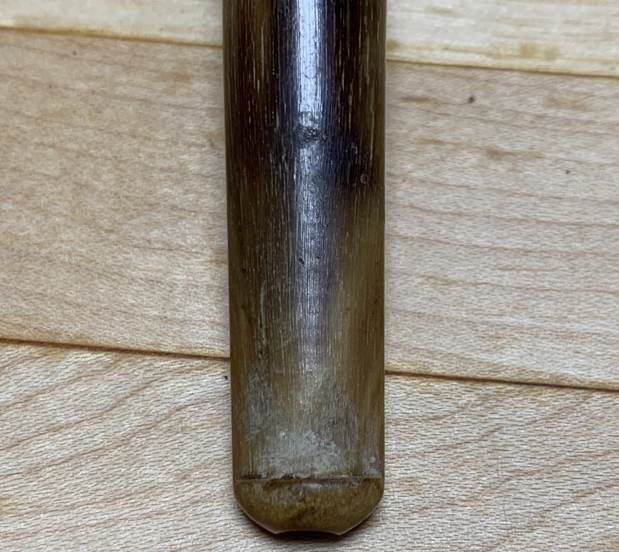
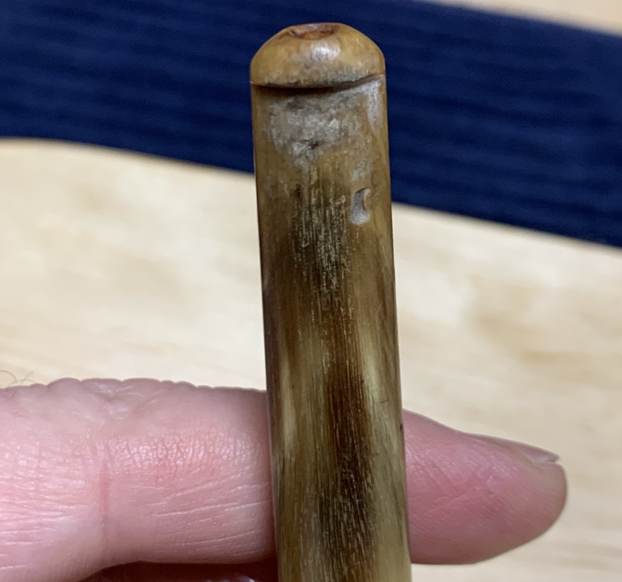
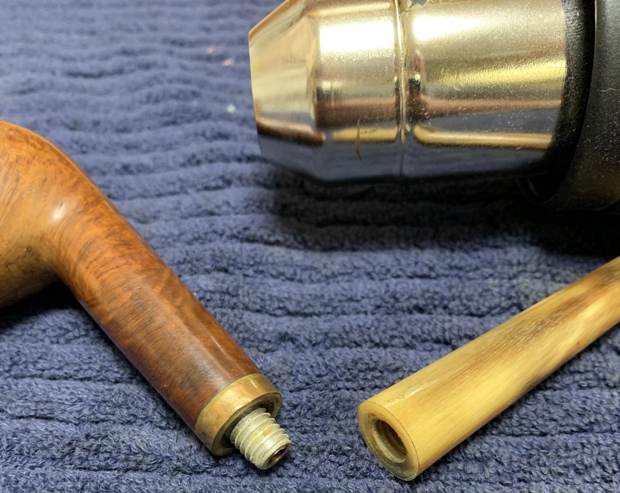
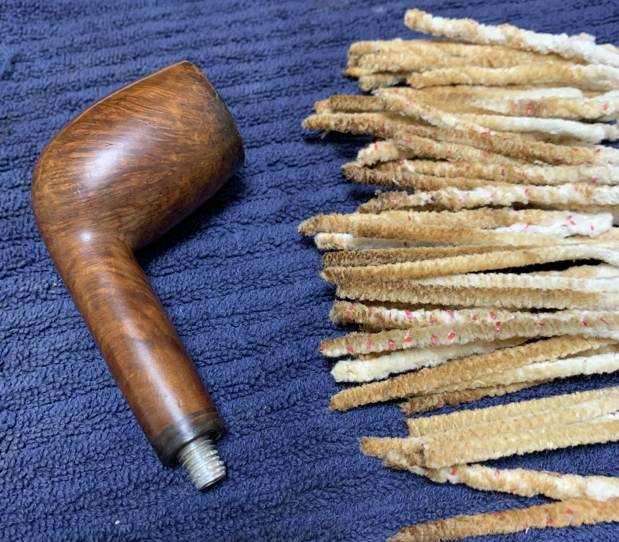
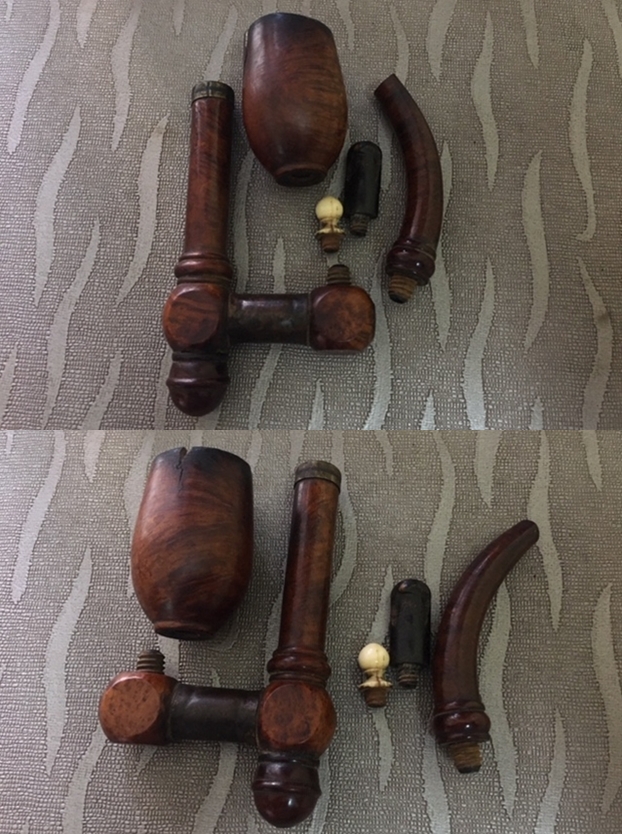
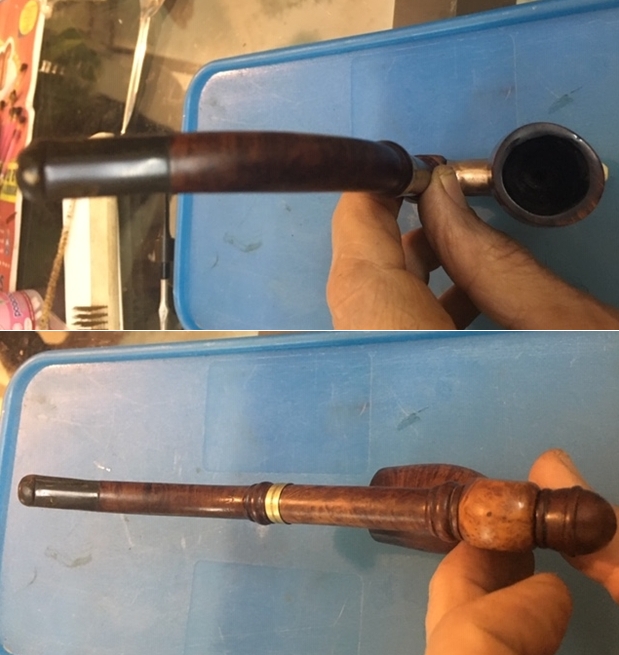
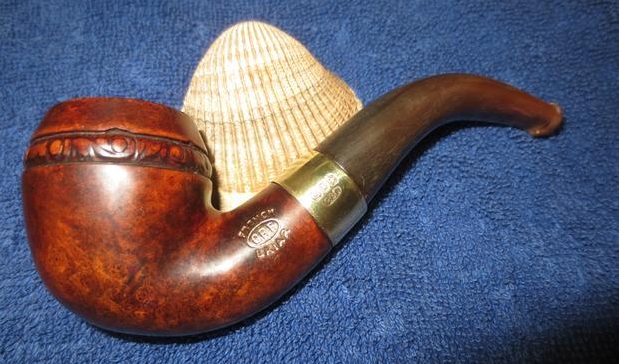
 The horn stem has a nice light and bright appearance with bite marks and tooth indentations on either surface in the bite zone. There are a couple of superficial cracks over the stem surface and should be addressed once the stem is sanded and polished. I think these superficial cracks are primarily the result of drying of the bone material. The long aluminum tenon is tapered and cinched at the tenon end to match the mortise opening. The tenon surface is clean but would benefit from some cleaning and polishing. The elliptical slot and tenon end shows traces of old residual oils and gunk. The button edges show a couple of minor teeth marks and would need to be sharpened.
  The Restoration Process
Whether to start with stem or the stummel refurbishing has always being a source of conflict for me as stem repairs and refurbishing almost always takes the longest time and efforts and hence prudent to be worked on first while the allure of unrevealing the beautiful grains of the briar weighs in favor for its refurbishing first. Well in ibid case, the lovely patina and straight grains won and I decided to start working on the stummel.
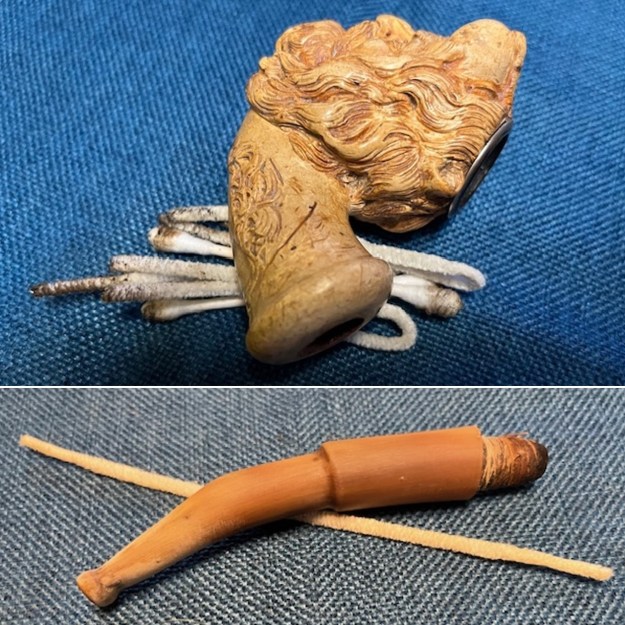
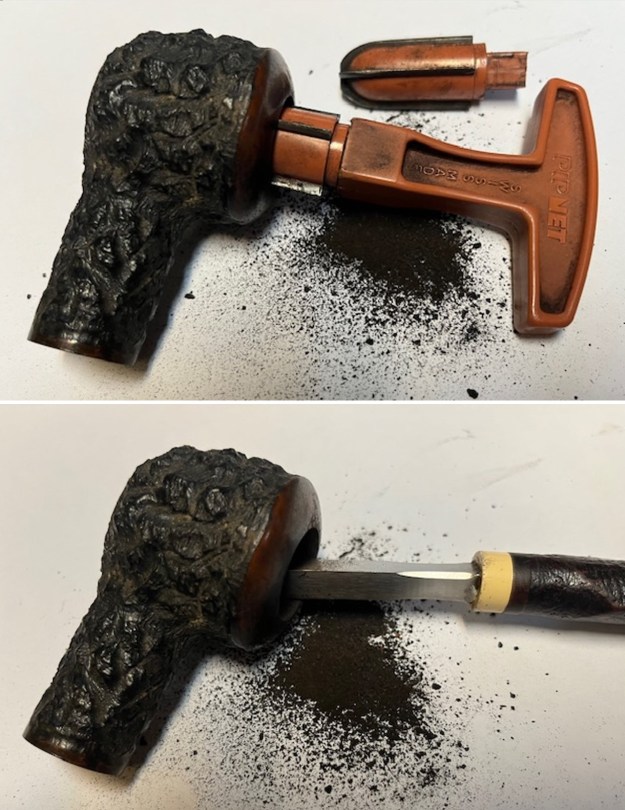
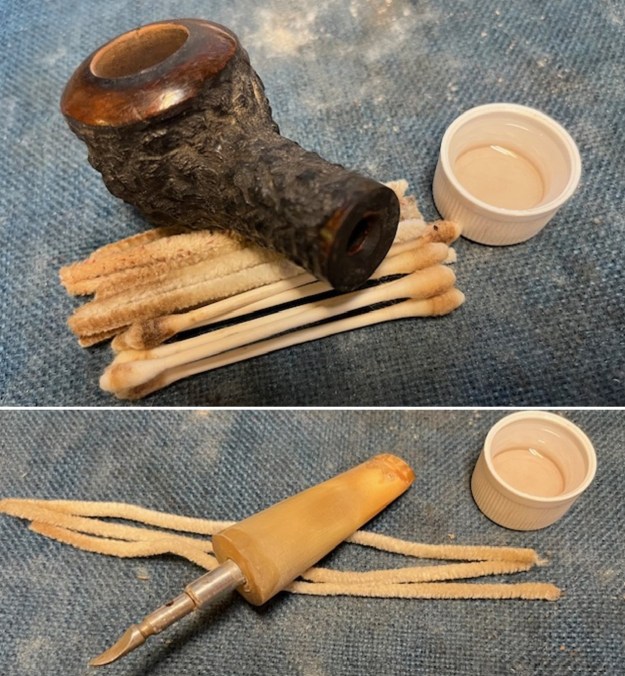
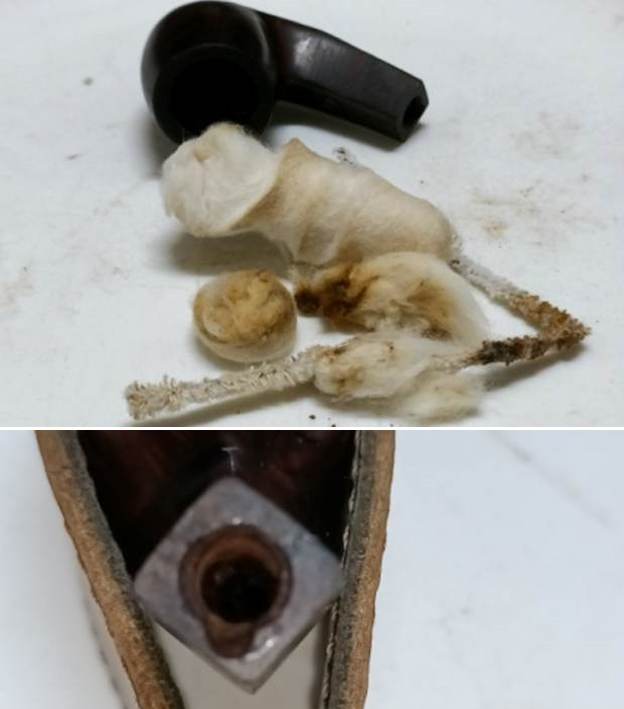
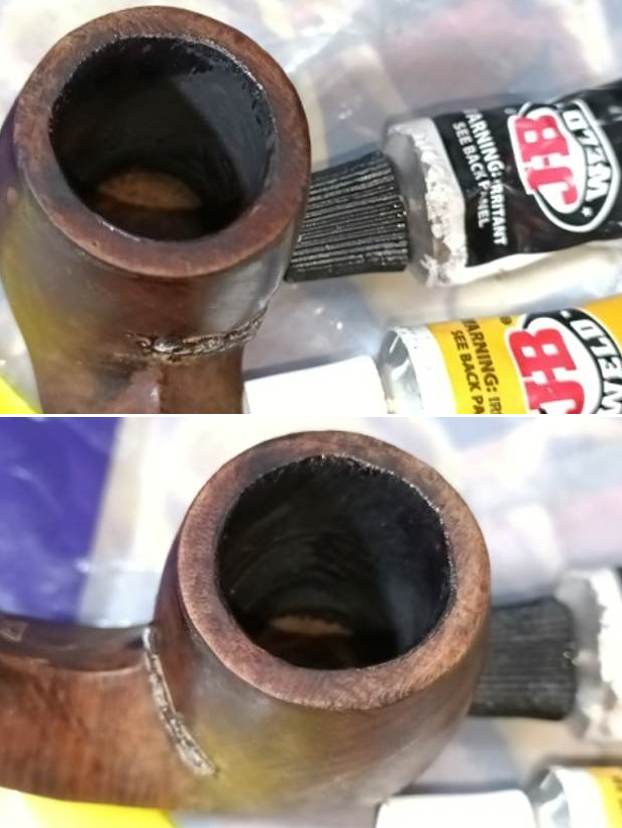
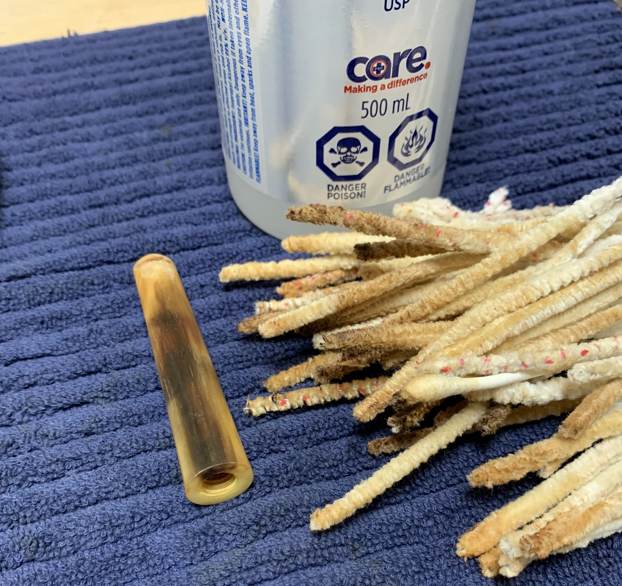
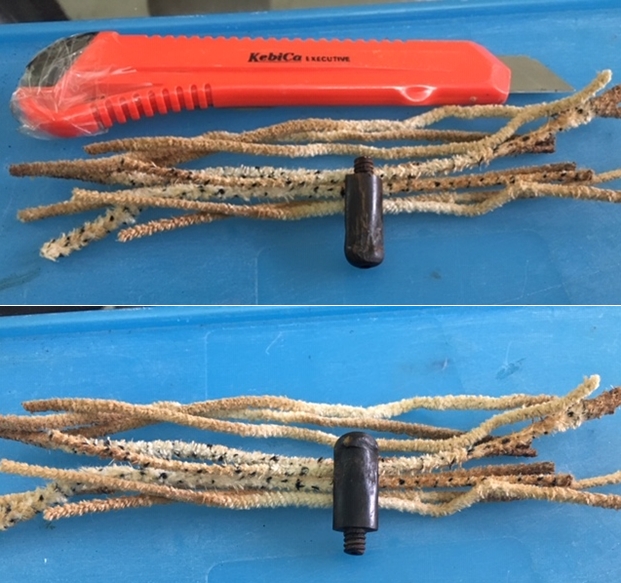
I started the process of refurbishing by reaming the chamber first. Using reamer head sizes 1 and 2 of the PipeNet pipe reamer, I took the cake down to the bare briar. The amount of carbon that was dislodged from the chamber was really surprising as I had appreciated a thin layer of carbon and the quantity of carbon that was removed was anything but a thin layer. With my fabricated knife, I removed all the cake and took it down to the bare briar. I further sand the chamber wall with a folded piece of 180 grit sandpaper to smooth out the wall and remove the last bit of stubborn carbon that remained stuck to the chamber. To finish the reaming process, I wiped the chamber walls with a cotton swab dipped in alcohol to clean the last traces of residual carbon dust. I was happy to note a clean and well seasoned solid chamber. Next, I cleaned out the shank internals. Early on, I realized that I could not pass a pipe cleaner trough the draught hole due to blockages in the shank airway. I used a modified poker tool to push through and dislodge this block of dried oils and gunk. I further scraped out all the dried and crumbly oils and tars from the walls of the mortise with my dental tool. I cleaned out the mortise and shank walls with pipe cleaners dipped in alcohol. I shall continue further cleaning of the shank and mortise while going through the other processes.
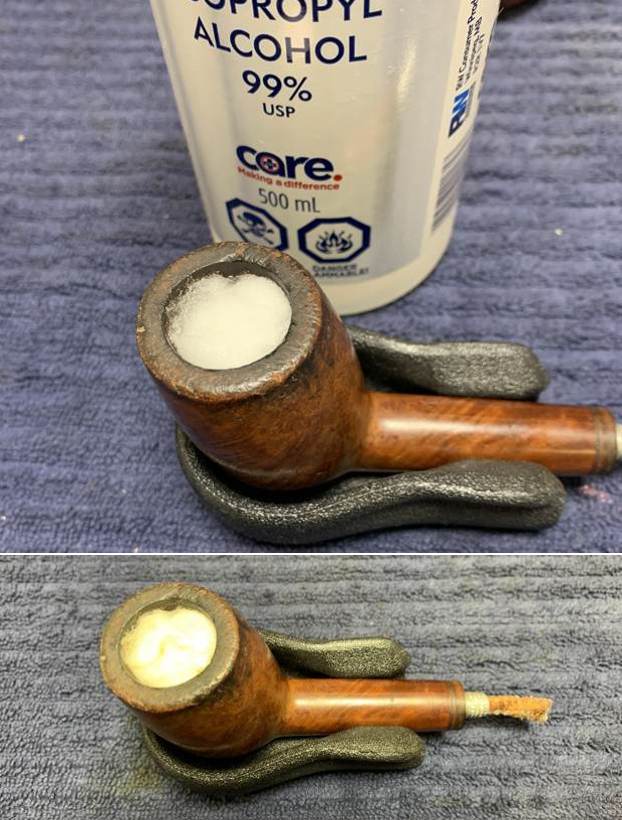
 Now on to de-ghosting the pipe…. I packed the chamber with cotton balls and drew out a wick from the cotton and along with a folded regular pipe cleaner, inserted it into the mortise and through the draught hole into the chamber. I tightly packed cotton balls in to the remaining portion of the mortise. Thereafter, I soaked the cotton balls with isopropyl alcohol up to the brim. About half an hour later, the level of alcohol had gone down, having being absorbed by the cotton. I topped it up once again and set it aside overnight. By next afternoon, the cotton and alcohol had drawn out all the remaining oils and tars from the chamber and mortise. I removed the cotton balls and ran pipe cleaners through the mortise and draught hole to clean out all the loosened tars and gunk that was lodged in the draught hole and mortise. The chamber and mortise now smelled clean, fresh and looked it too. I set the stummel to dry out naturally.
 With the night still being young and not wanting to break the momentum of work as the stummel soaked in cotton and alcohol bath, I decided to use the time to address the stem issues. I first ran a few pipe cleaners dipped in alcohol through the stem airway and they came out very dirty. To conserve pipe cleaners, I put off further cleaning of the airway and would continue the internal cleaning using shank brushes and oil soap under warm water. With a sharp dental tool, I scraped out the dried oils and gunk from the slot end and tenon face. I also cleaned the aluminum tenon surface with a cotton swab wetted with isopropyl alcohol.
 Continuing with the stem cleaning, I followed the internal cleaning of the stem with cleaning the airway using thin shank brushes and anti oil dish cleaning soap. I ran a couple of pipe cleaners to clean and dry out the airway. Using Scotch Brite pad and oil soap; I cleaned out the entire gunk from the aluminum tenon, elliptical slot end and the stem surface.
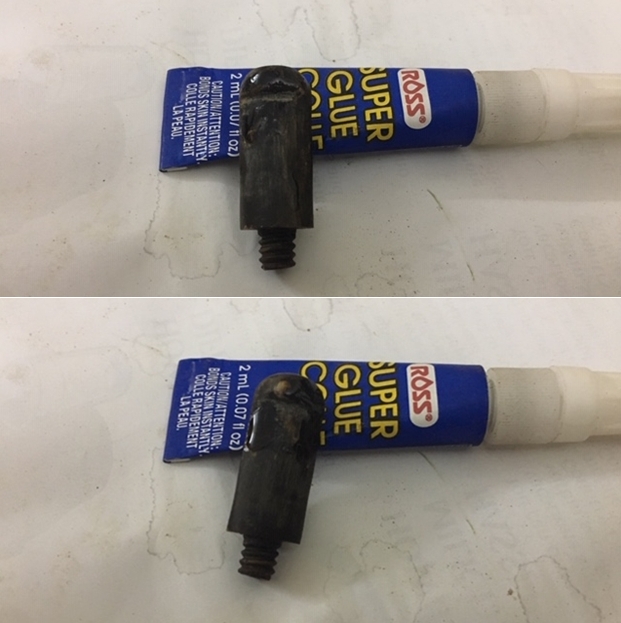
 The last agenda for the day before I turned in for the night was to address the bite marks on either surface in the bite zone. I cleaned the surface with alcohol on a cotton swab in preparation of the surface for a fill. I filled the deep tooth indentation in the bite zone on the upper stem surface with clear medium CA superglue. Once the fill had hardened sufficiently, I similarly filled the tooth indentation in the lower stem surface. I set the stem aside for the fills to cure.
 By the time I again sat at my work table the next evening, the alcohol and cotton had leached out all the old oils from the chamber walls and the stem fills had cured too.
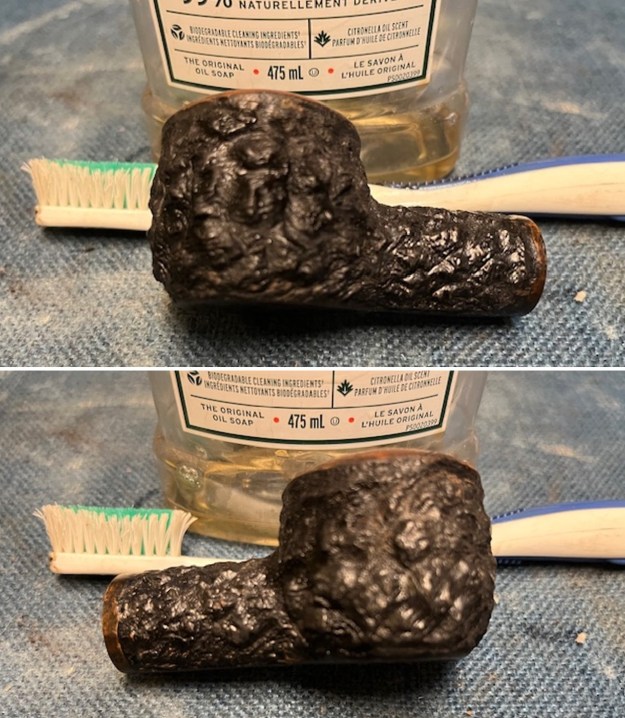
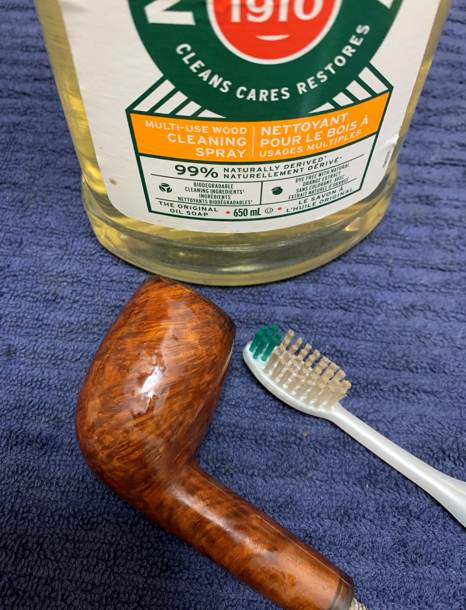
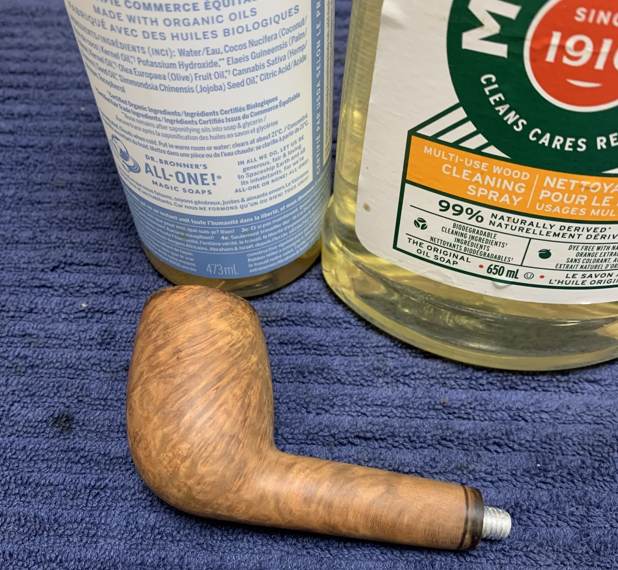
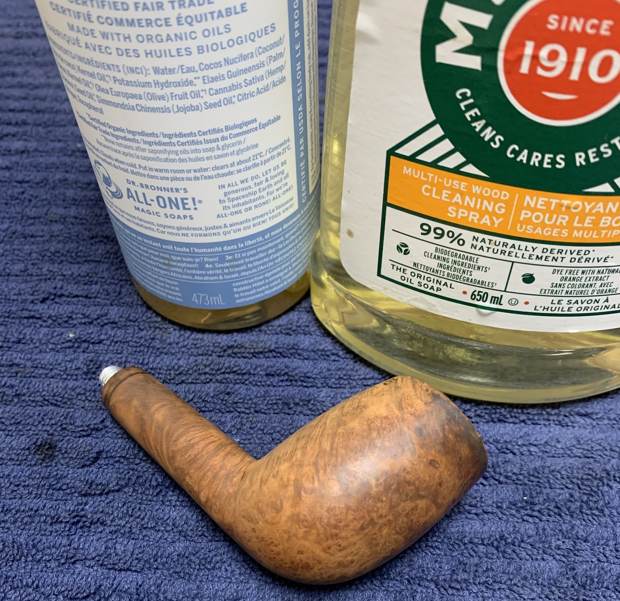
Next, I proceeded to clean the exterior of the stummel. I used a hard bristled tooth brush, Scotch Brite pad and Murphy’s Oil soap to scrub the stummel and rim top. For this stummel cleaning, I used Murphy’s Oil soap as I wanted to preserve the old patina that had developed on the stummel and this product really helps in cleaning the briar surface. After the scrub with oil soap, I washed the stummel under running warm water with anti oil dish washing detergent till the stummel surface was clean and dried it using paper towels and soft cotton cloth.

 I simultaneously cleaned the shank internals with the detergent and hard bristled shank brush and set the stummel aside to dry out. That the shank end is internally lined with cork is now apparent after the cleaning and this further restricts the cleaning process, adding caution to the equation while further cleaning the shank internals. I was fortunate that the alcohol bath has not loosened and removed this cork lining. To aid in the drying process, I heat the stummel under a 100 watt filament bulb as it is very important that the briar is completely dry as presence of slight moisture leads to growth of fungus over the surface subsequently.
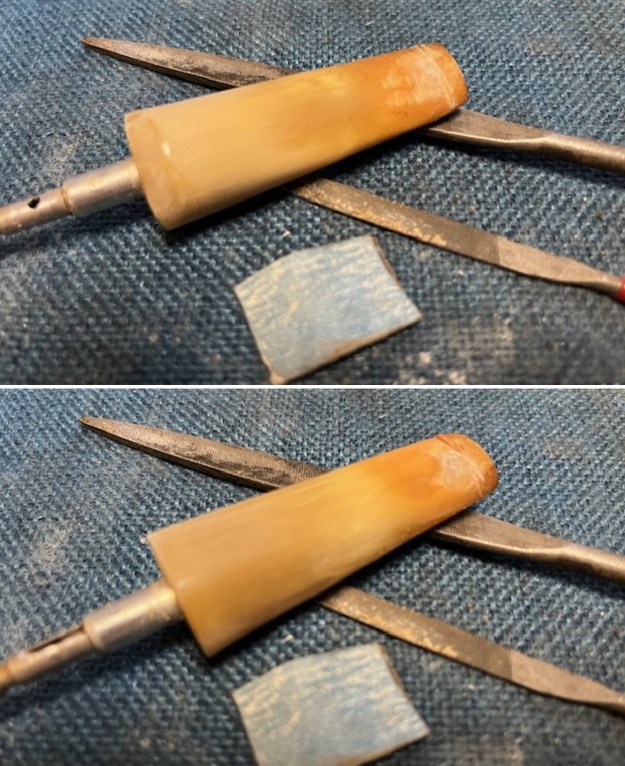
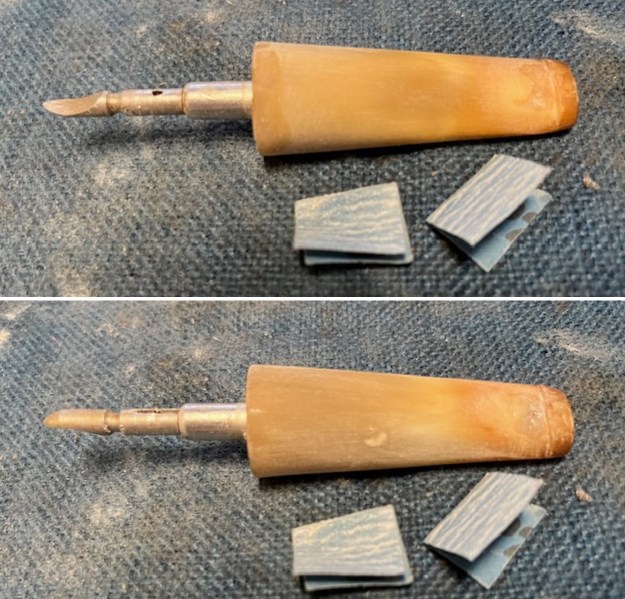
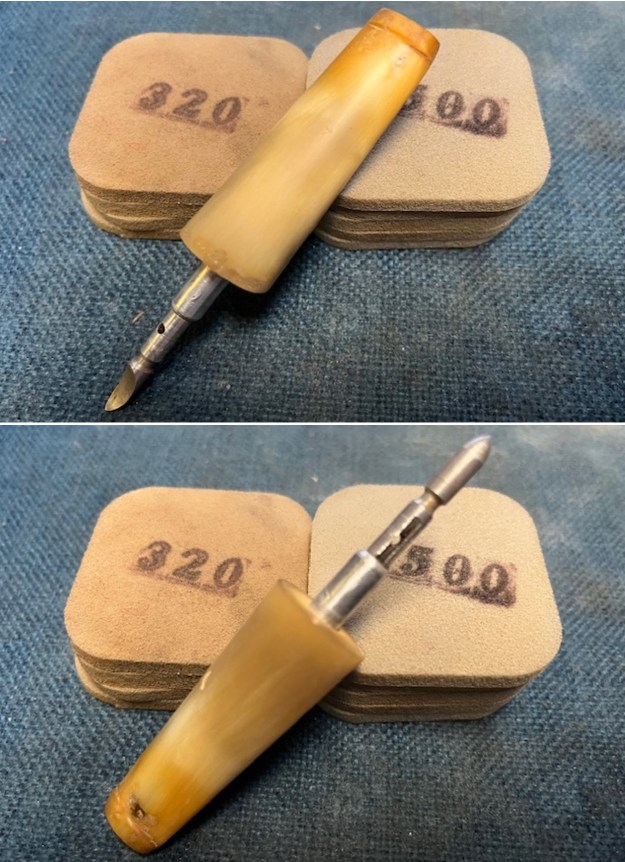
 With the stummel set aside for drying, I used a needle file to sand the stem fill to achieve a rough match of the filling with the rest of the stem surface. To achieve a better blend, I sand the fill with a folded piece of 180 grit sandpaper. I also worked the button edges to a crisp edge with the file. By no means is the blending complete and shall be continued with during the sanding and polishing process.
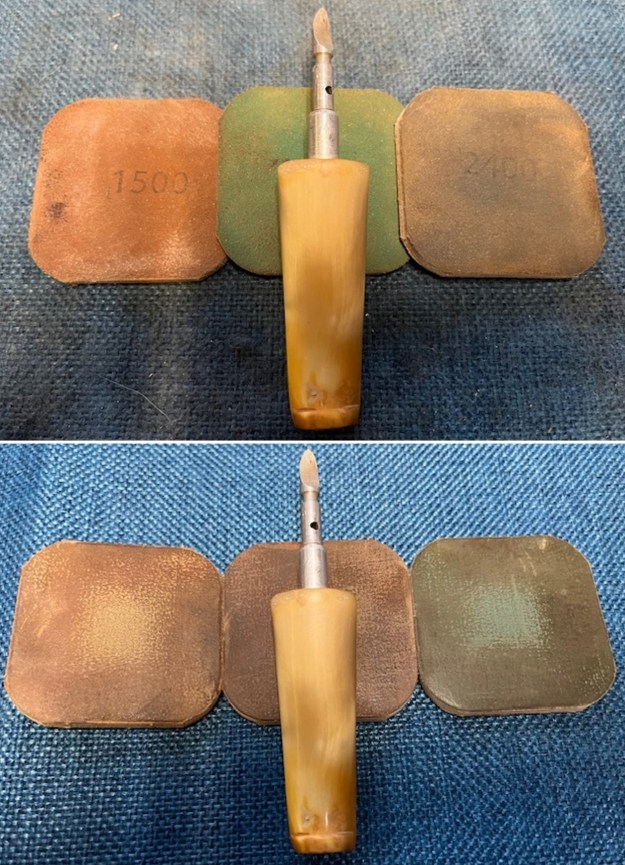
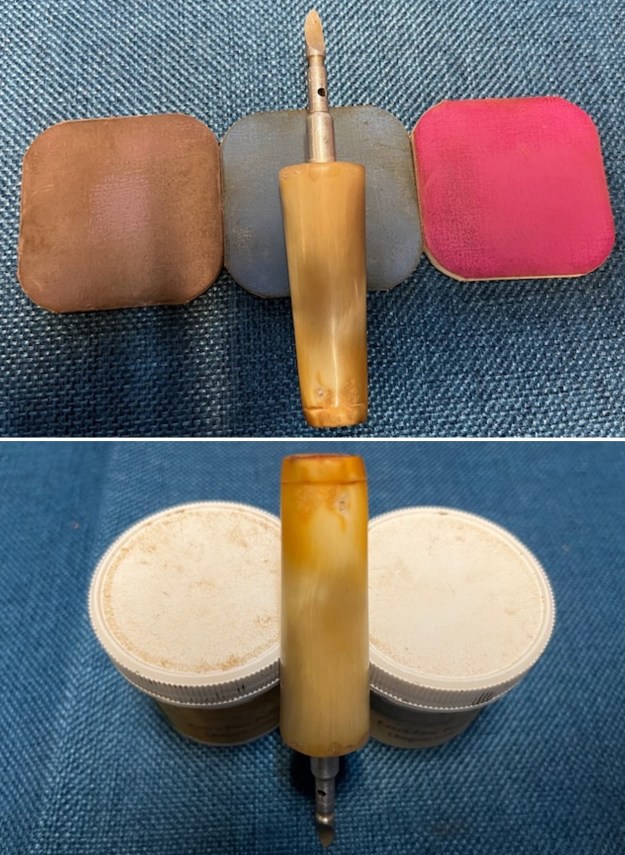
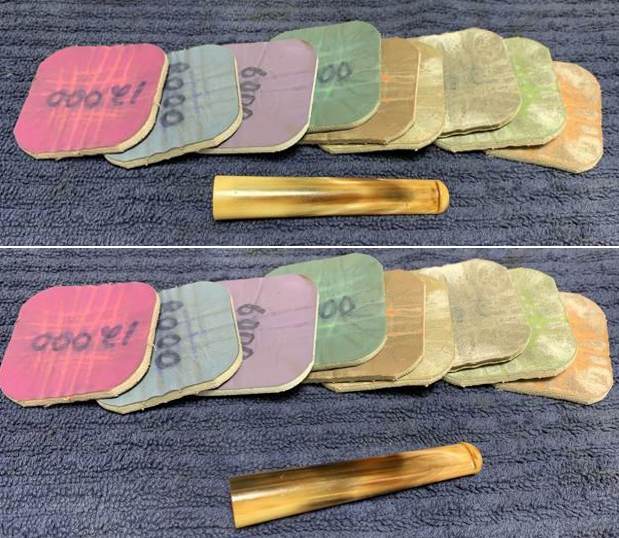
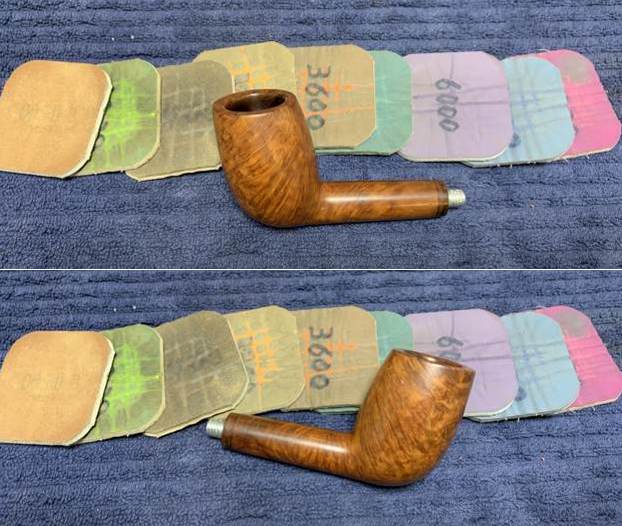
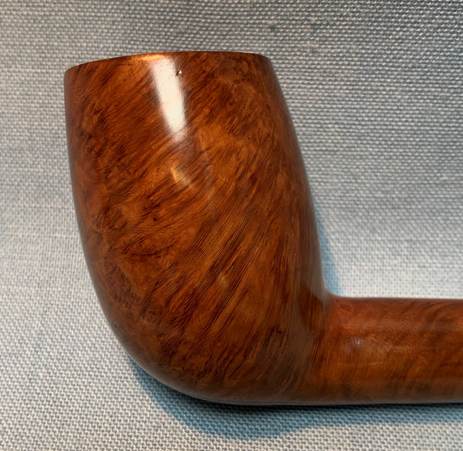
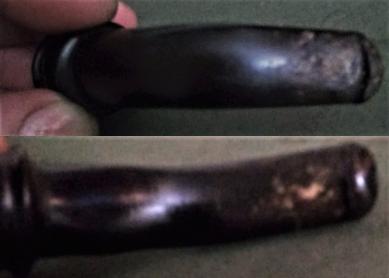
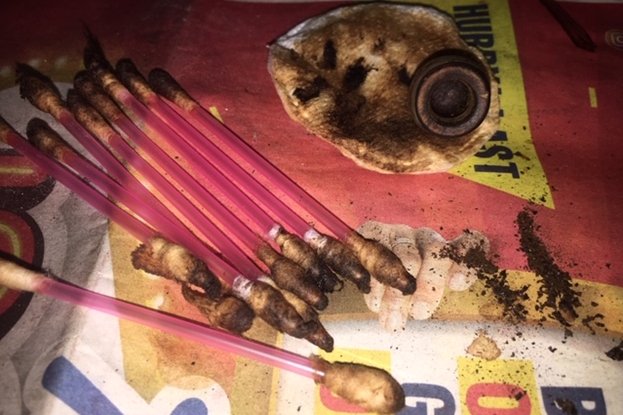
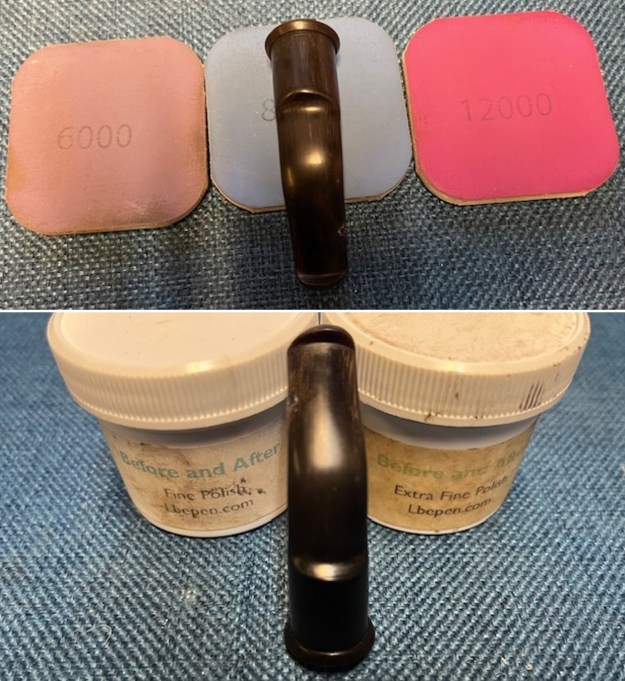
 To bring a deep shine to the horn stem, I went through the complete set of micromesh pads, wet sanding with 1500 to 12000 grit pads. I wiped the stem with moist cloth after each pad and rubbed it down with Extra Virgin Olive oil to rejuvenate the horn which is very prone to drying and developing cracks over the surface. The finished stem is shown below.
 Remember the stummel that had been set aside to dry out under the bulb? Well, in the while that I completed the repairs and initial polishing of the stem, the briar had completely dried out and was ready to be worked on further.
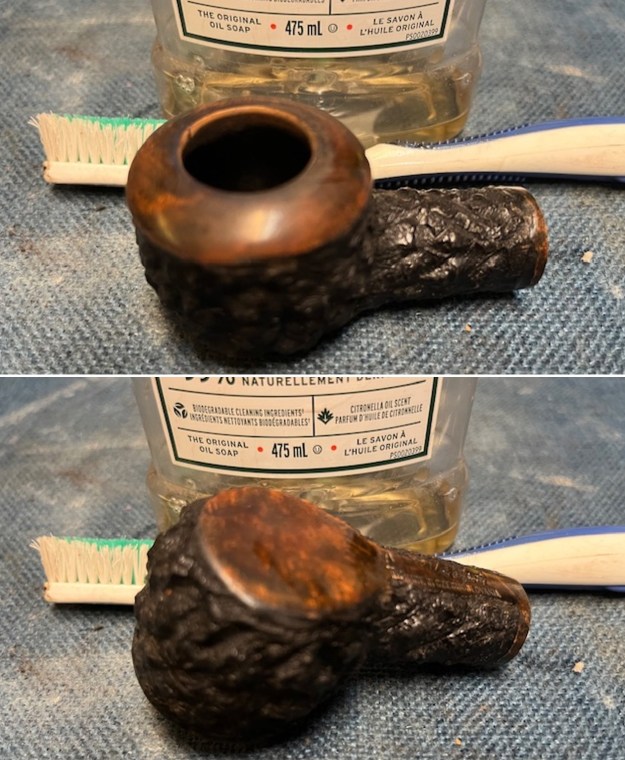
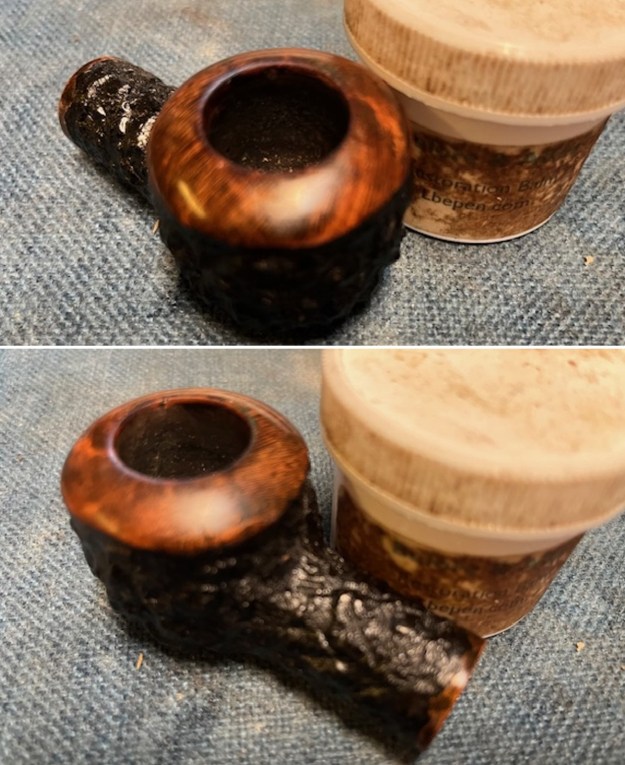
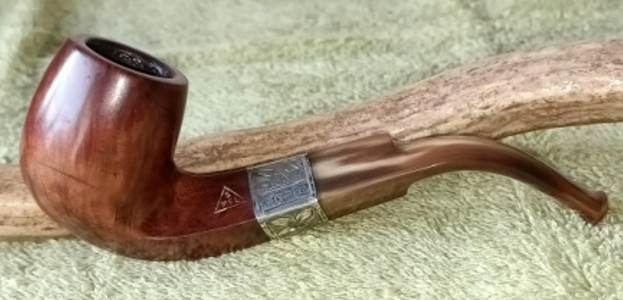
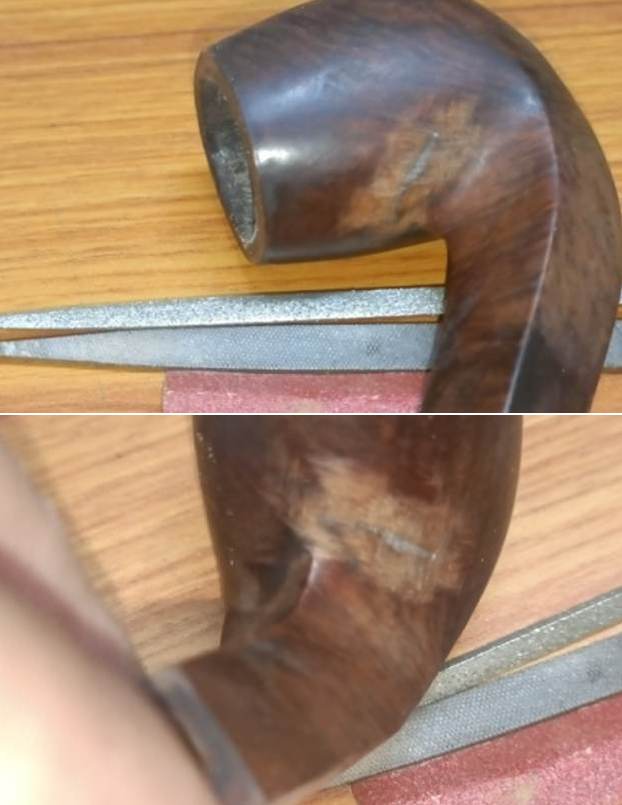
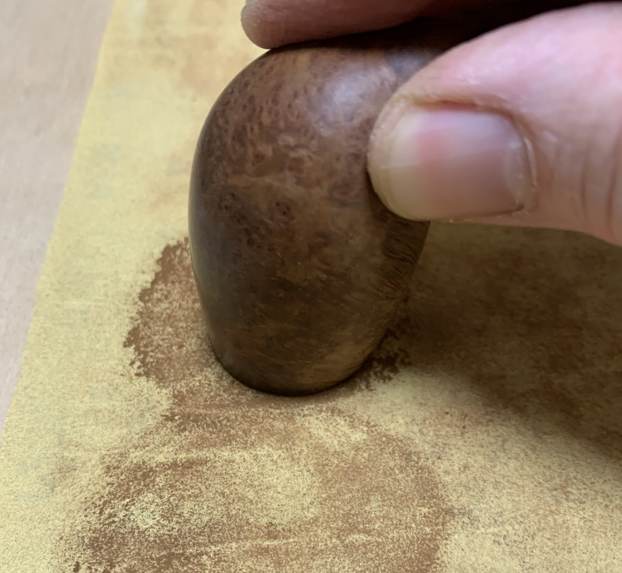
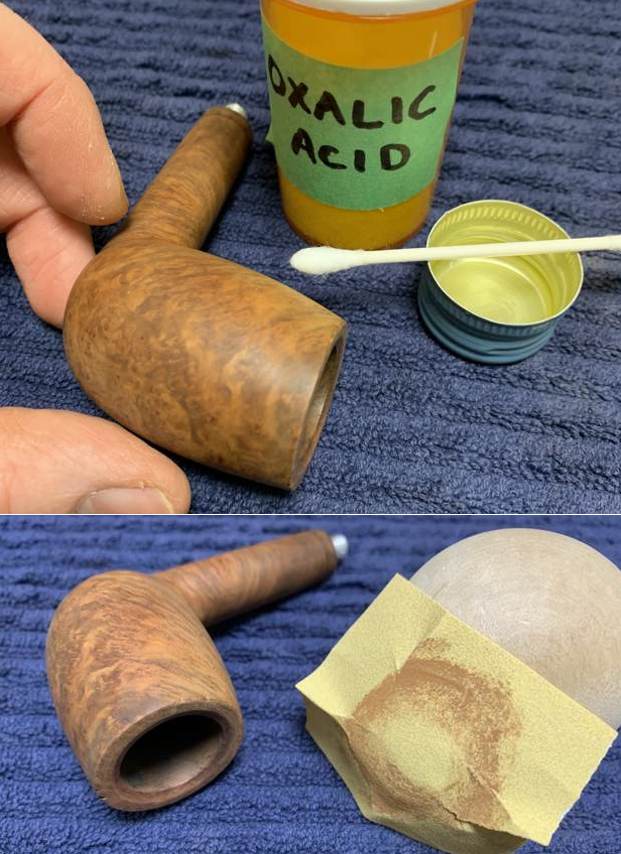
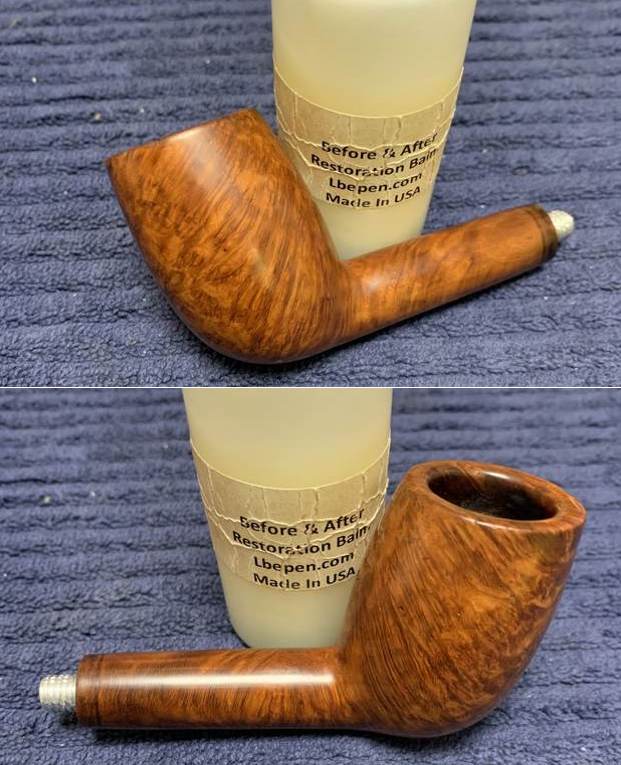
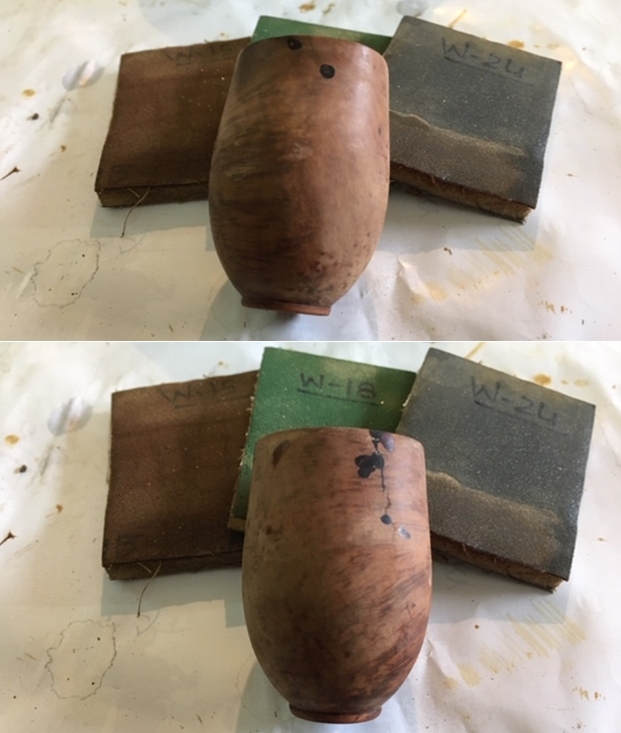
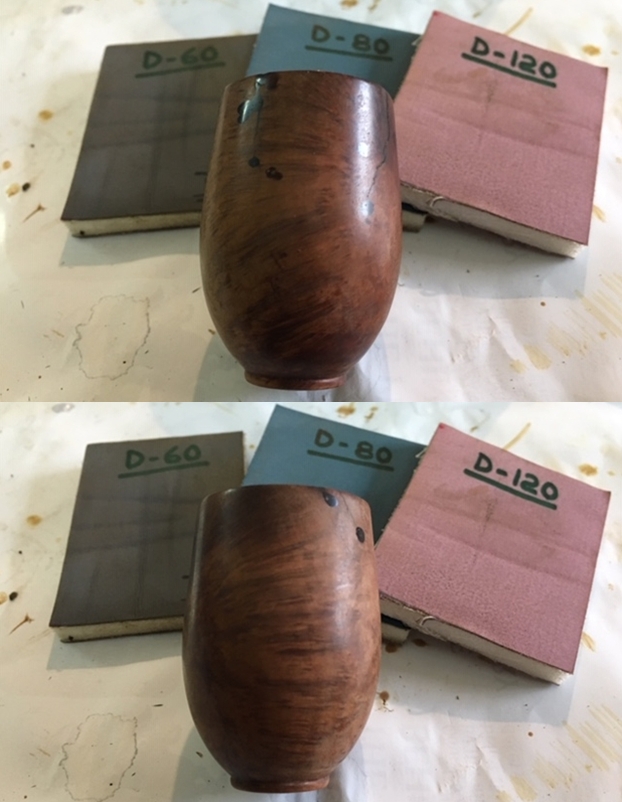
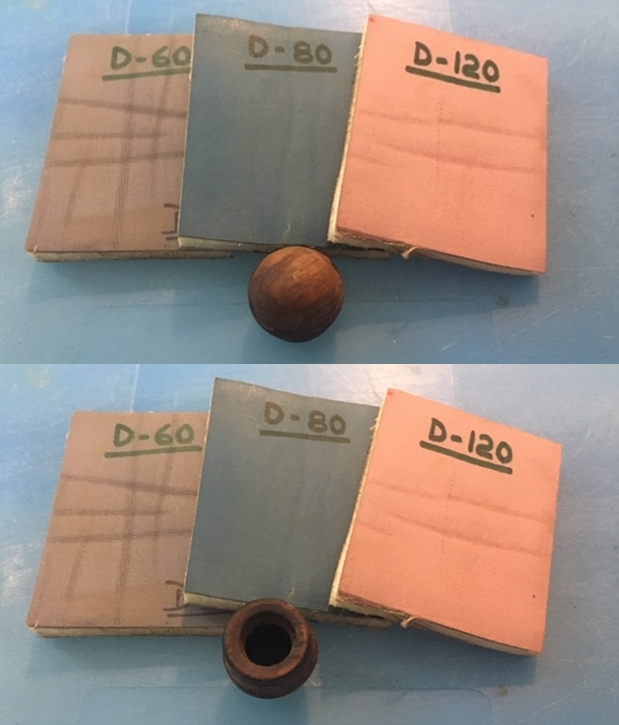
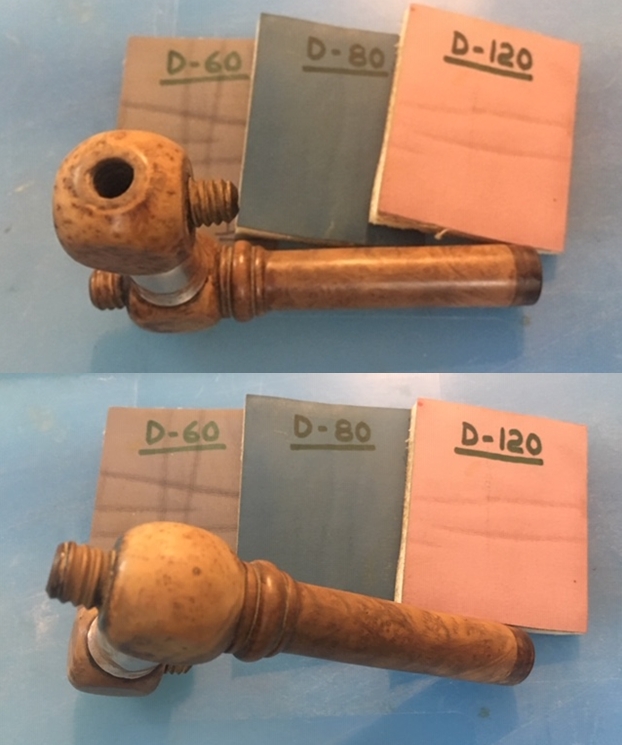
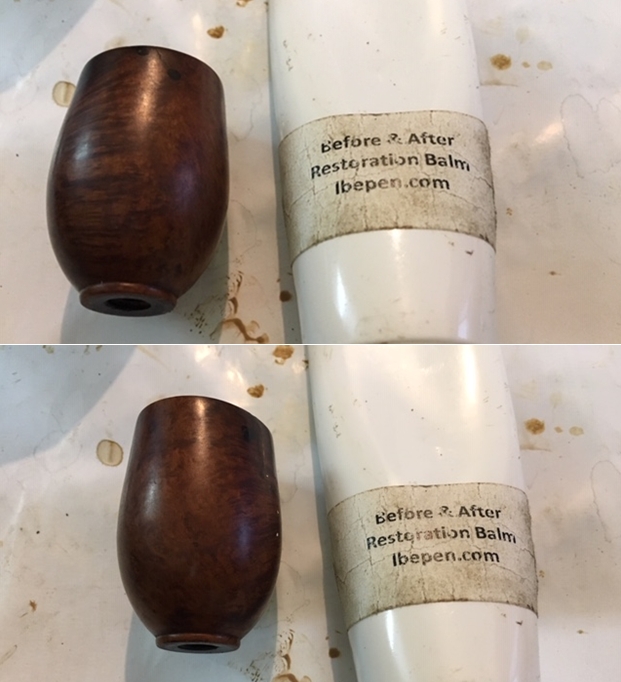
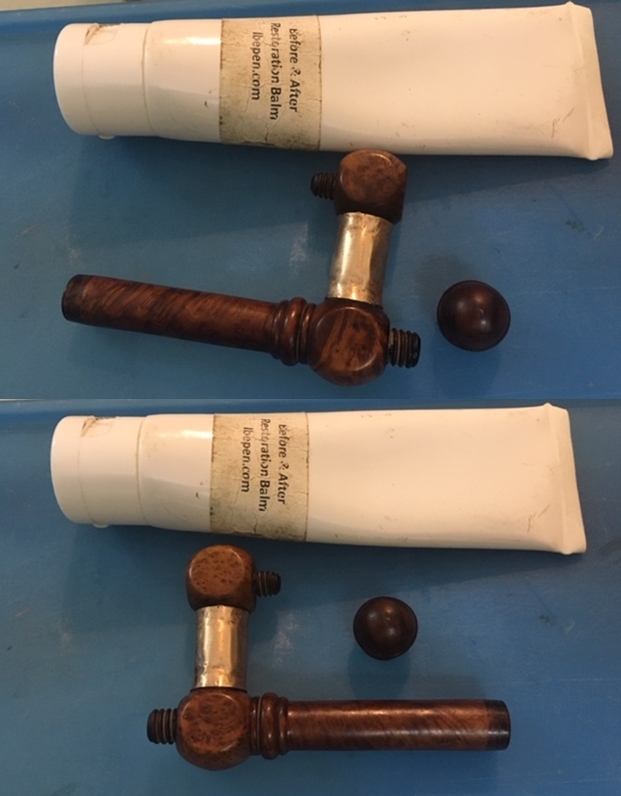
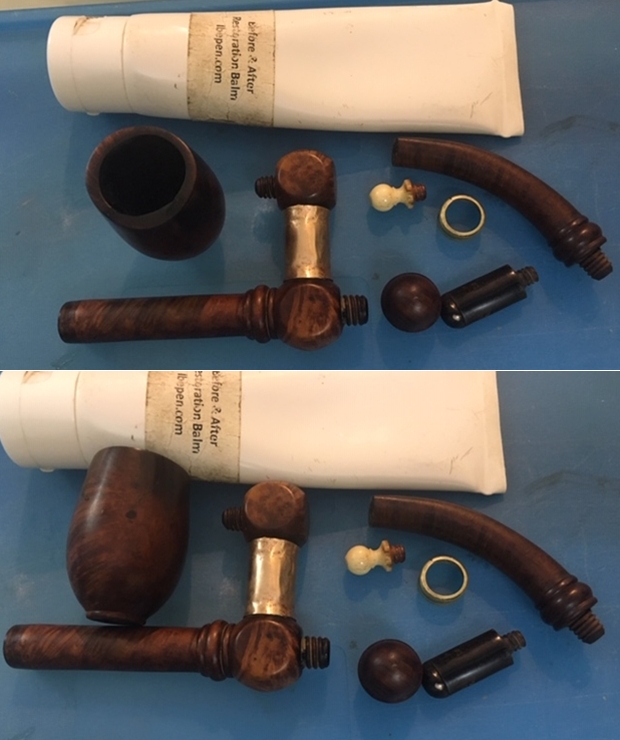
The issue that needed immediate attention was the number of dents and dings over the rim top surface. To address it, I topped the surface over a piece of 220 grit sandpaper till these damages all but disappeared. I am quite pleased with the appearance of the rim top at this stage. I followed it by wet sanding the entire stummel with 1500 to 12000 grit micromesh pads, wiping frequently with a moist cloth to check the progress. I really like the looks of the stummel at this point in restoration. The grains and the clean lines of this piece of briar is really appreciable. Next, I rubbed a small quantity of “Before and After Restoration Balm” deep in to the briar with my finger tips and let it rest for a few minutes. The balm almost immediately works its magic and the briar now has a nice vibrant appearance with the beautiful grain patterns displayed in their complete splendor. I further buffed it with a horse hair brush. The contrast of the dark browns of the Bird’s eye and straight grains with the dark natural patina of the rest of the stummel adds an interesting dimension to the appearance of the stummel that cannot be insufficiently described in words and be rather seen in person.

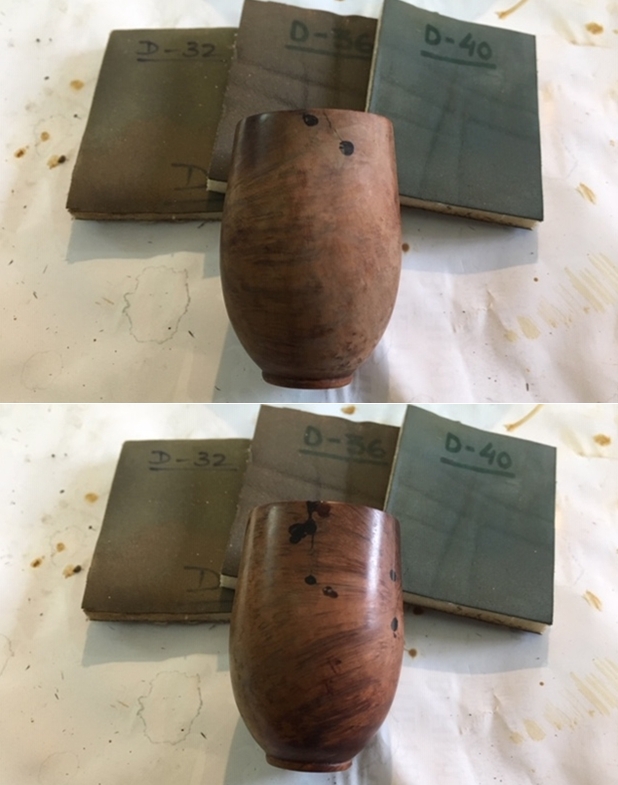
 I have now reached the homestretch in this restoration project. To complete the restoration, I mounted a cotton cloth buffing wheel on to my hand held rotary tool and polished the stummel and stem with Blue Diamond compound. This compound helps in polishing and also in removing the minor scratch marks that remained from the sanding process.
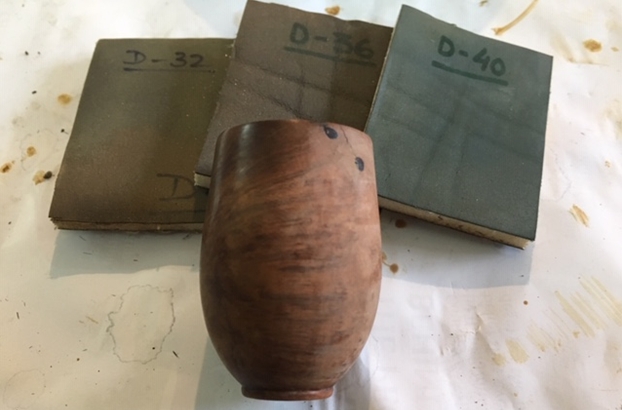
 I mounted another cotton buffing wheel that I have earmarked for carnauba wax and applied several coats of the wax. I finished the restoration by giving the entire pipe a rigorous hand buffing using a microfiber cloth to raise the shine further. The finished pipe looks amazingly beautiful and is ready to join my collection. I only wish it could share with me its life story of the past years while I enjoy smoking my favorite Virginia blend in it or maybe an English blend or maybe just keep admiring it!!!! Big thank you to all the readers who have joined me on this path by reading this write up as I restored and completed this project.


 P.S.: I came across an interesting flyer/ advertisement bearing the stamp “RACINE, DE VIEILLE SOUCHE” in French language. I have included the same here and would be happy to receive any information on the pipe in English for the sake of enhancing my knowledge on this pipe.
 Thank you once again for your time and assistance.
ADDENDUM – Pages 21,29 and 34 of the French Ropp Book (Ropp, ça ne fume plus). Kenneth Lieblich scanned the pages and translated them for Paresh.
 Translation of the highlighted parts of page 21
Trademarks were registered for each of his creations: La Cosaque, La Pneumatic and La Norvégienne appeared at the beginning of the century, between 1904 and 1908. According to the INPI records, these brands were intended to be affixed to the pipes, smoking accessories and other handmade items as well as cases, boxes, packaging of pipes… The reasons for choosing most of these names are unknown.
Regarding La Pneumatic, we can see a link with current events. In fact, the tire was invented in 1888 by Irishman John Boyd Dunlop and the removable tire by Michelin in 1891. Its use became widespread at the beginning of the 20th century. Another pipe was named Pipe des aviateurs (1909) when, on July 25, 1909, Louis Blériot succeeded in crossing the Channel by plane for the first time.
Each pipe had several varieties of shapes, sizes and ornaments. La Pneumatic could be fitted with a fancy band: gold, silver or other metal; in straight or bent models; of medium to very large size; and with oval or round bowls. Then, the types of briar evolved with the appearance in 1910 of Cum-mer root, Cum-mer briar, blood briar and blood root, recalling both the raw material used and its particular red grain. Translation of the highlighted parts of page 29
To explain the changes, Ropp cited three main reasons: moving towards thinner pipes, the choice of raw materials and the improvements made to the different systems. These developments had made the pipe a “clean, practical and elegant” accessory. The fact that the brand sought to constantly modernize itself, while paying attention to consumer demand, was also an important selling point. The ads spoke of “the important technical research” which allowed the factory to frequently employ new manufacturing processes or new models. La Pneumatic system, developed when the company set up in Baume-les-Dames, was one of the manufacturing processes most appreciated by smokers. Translation of the highlighted parts of page 34
At the start of the 20th century, system pipes and other inventions aimed at better health were very popular with French smokers. Concerns about the harmful effects of tobacco and nicotine were in vogue, as were concerns about hygiene: pipes were sometimes difficult to clean and maintain. These were different from filter pipes since the piece inserted into the stem did not absorb the condensation but only stopped it. These system pipes, with different variations, appeared healthier and more hygienic. La Pneumatic is one of the system pipes that Ropp put on the market and patented. A separate ferrule was housed inside the stem while a piece of cork, providing friction, made it easier to separate the stem from the stummel and also made cleaning easier.
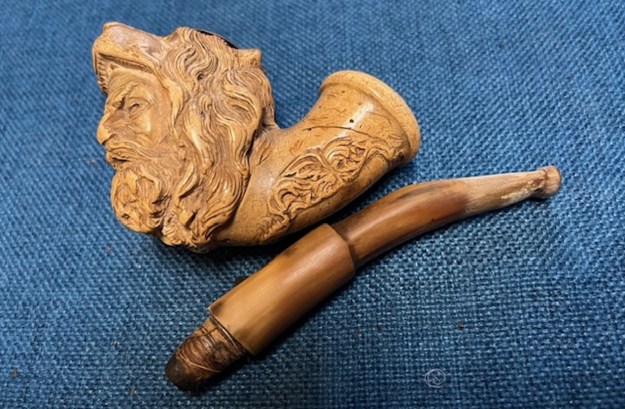
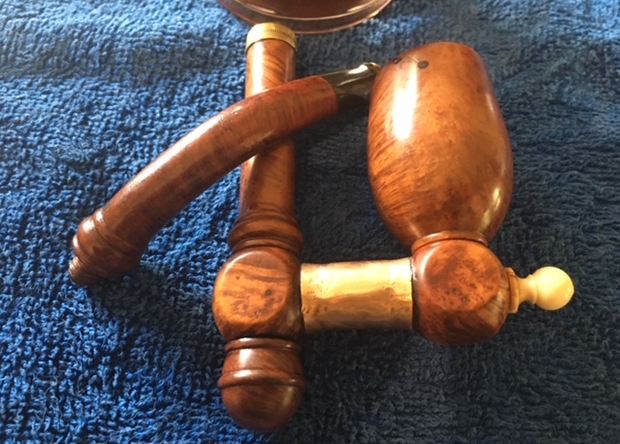
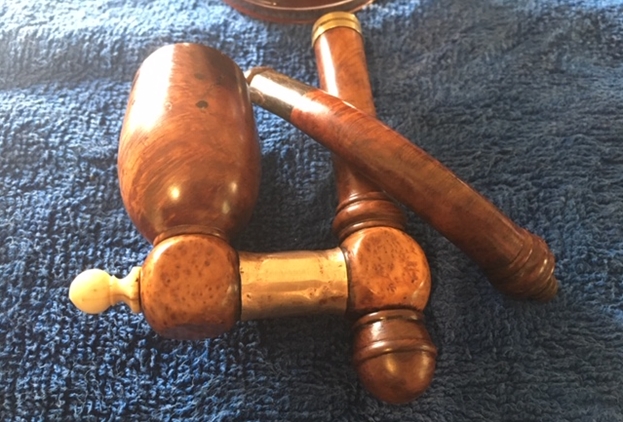
 I went through my stems and found a cherrywood shank and horn stem that would work well with the pipe. I would need to glue some cork on the tenon of the stem (normal for this style of shank). The cherrywood was in excellent condition but the stem had some worm damage on the sides and a small split in the underside that would need to be repaired.
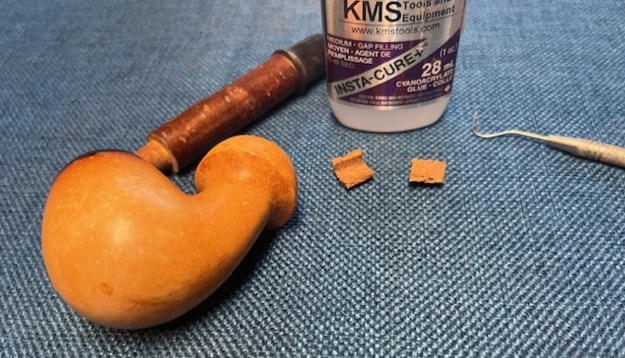 I gave the cork a coat of clear CA glue and pressed it in place on the shank end. I love working with this glue as it cures quickly and holds very well.
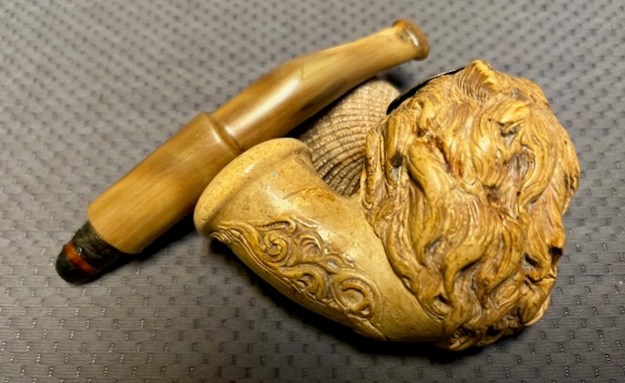
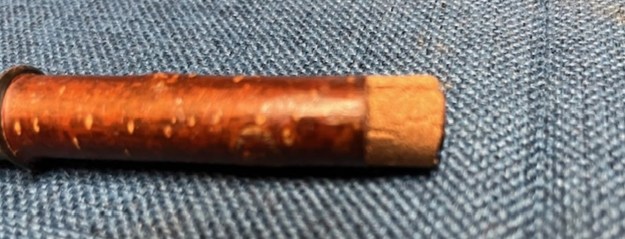 I took some photos of the parts of the pipe to show the general proportion of the pipe. You can also see the seams in the cork gasket. But no worries. I still need to sand down the gasket for a fit in the shank and grease it which will bring the seams together. You can also see the worm damage on the horn stem in the second and third photos below.
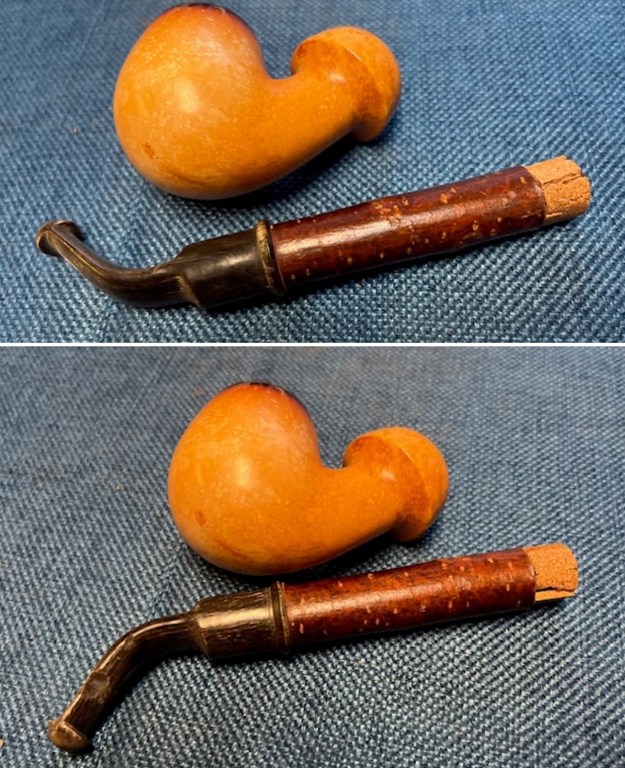
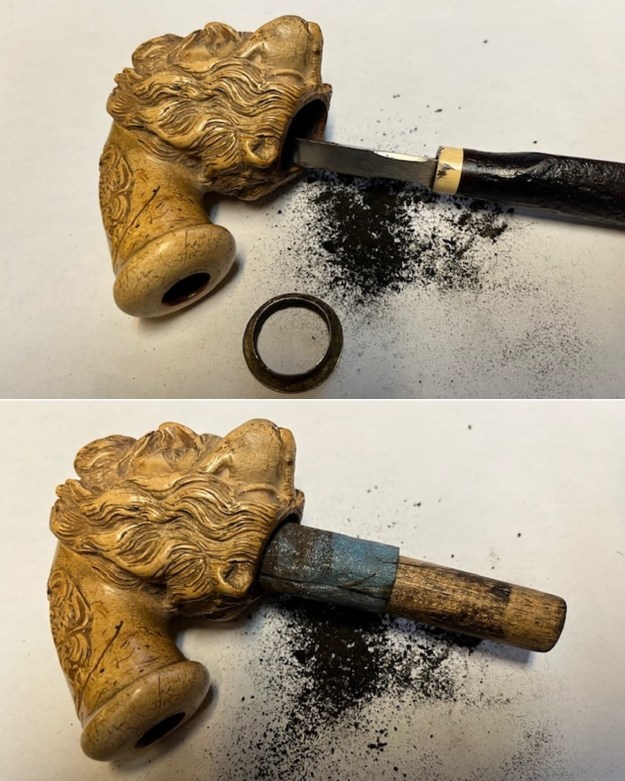
 I used my Dremel and sanding drum to reduce the diameter of the cork gasket until it fit well in the shank ed of the bowl.
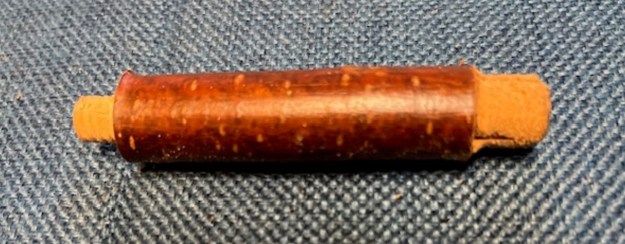 I used some Vaseline petroleum Jelly to soften and preserve the cork gasket. I worked it into the cork with my finger tips and let it sit. I repeated the process and once finished the cork was soft and pliable. It fit well in the shank and was snug and solid.
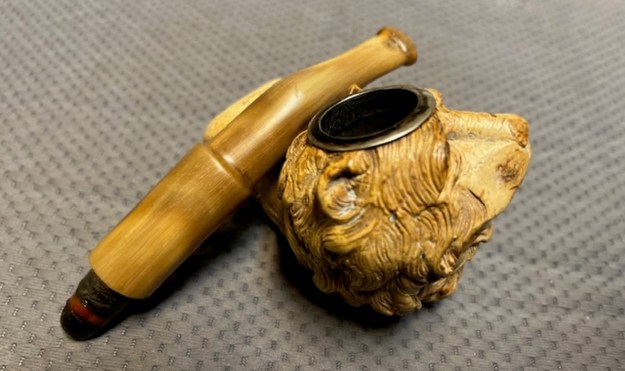
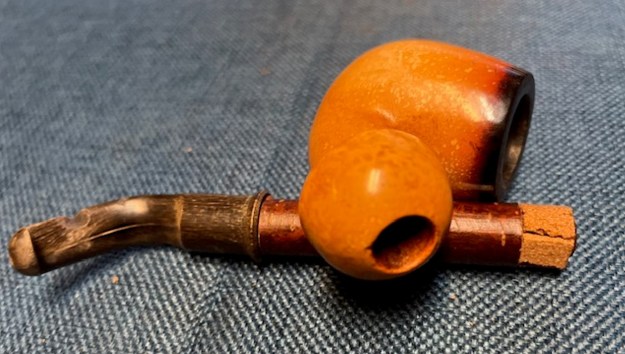
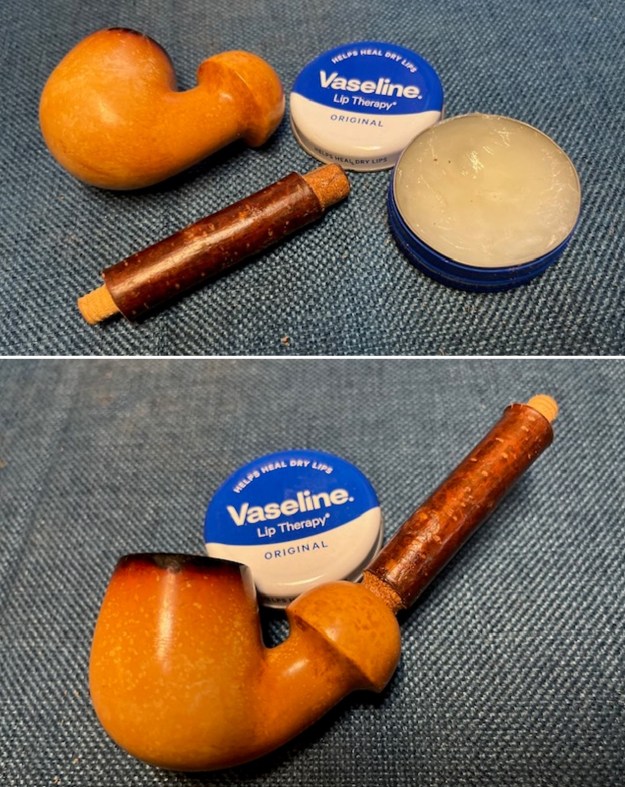 I screwed the stem on the shank to give a sense of what the pipe would look like once finished. I like the look and feel of this one.
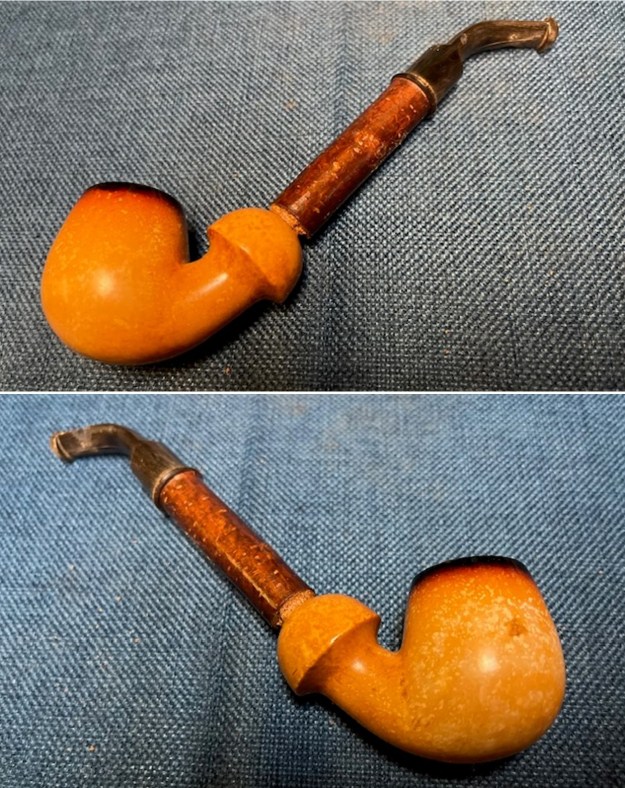
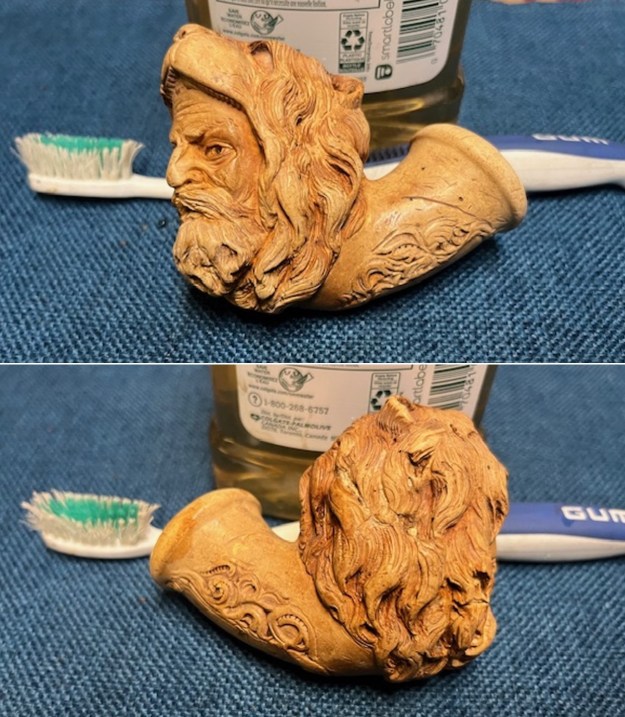
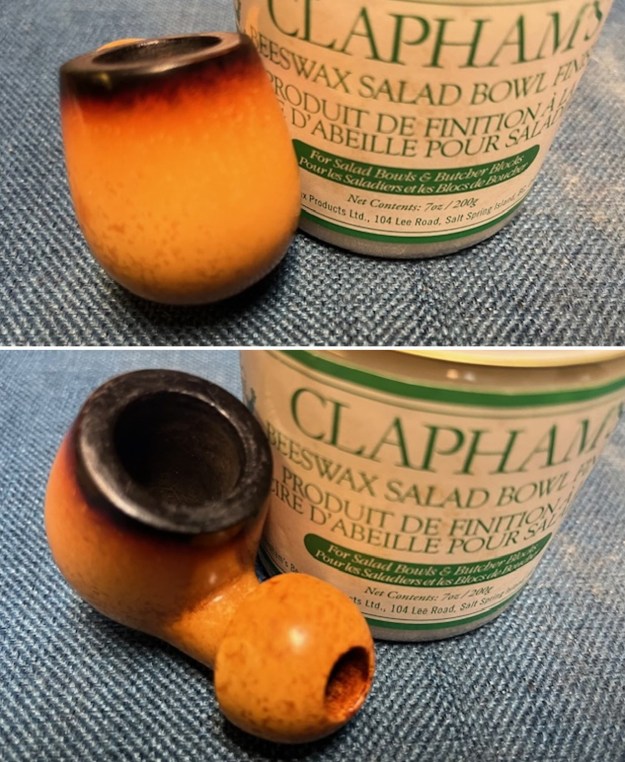
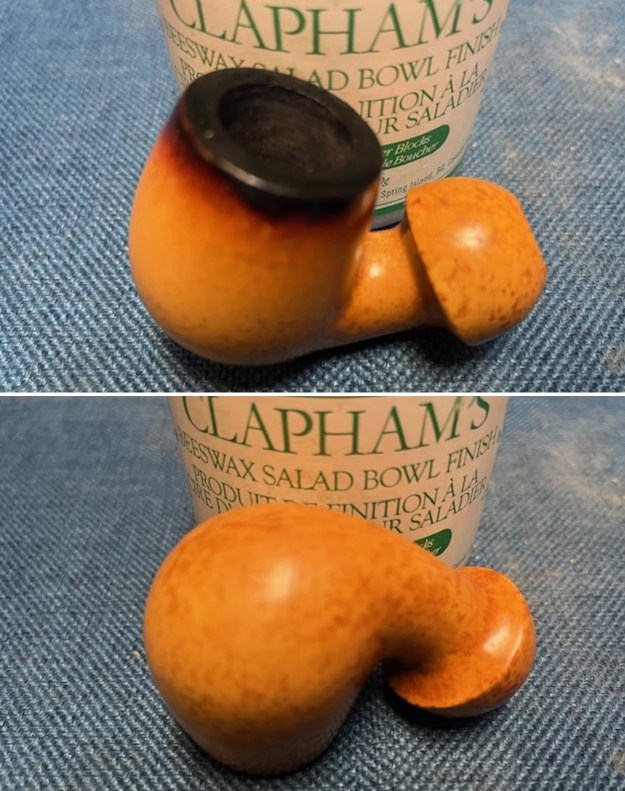
 I touched up the black flume to the rim top with a black Sharpie Pen. I coloured in the edge and the spots on the rim top and inner edge until it was blended in.
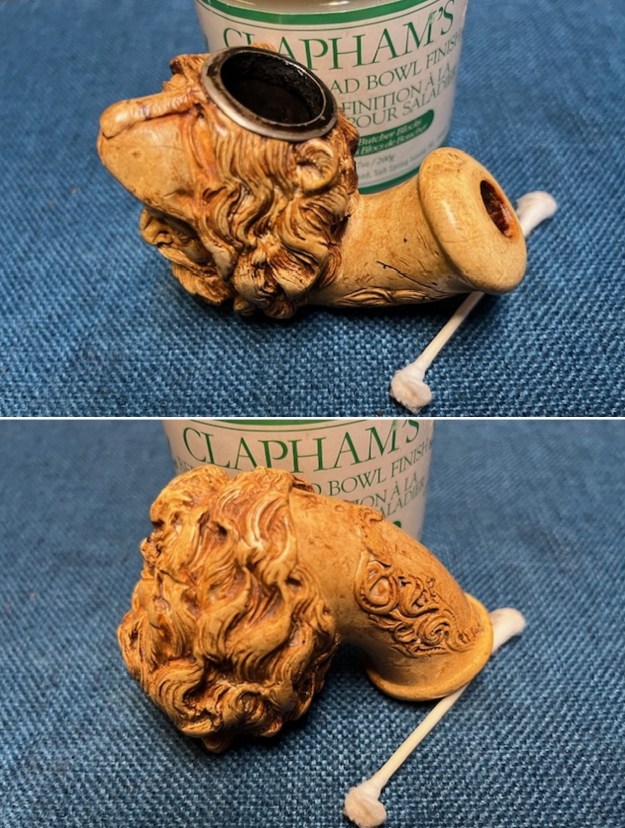
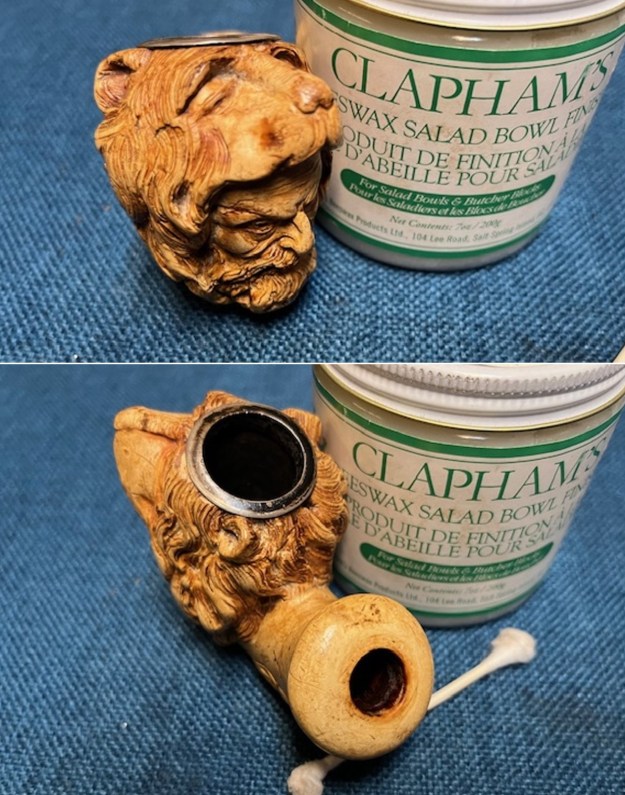
 I gave the bowl multiple coats of Clapham’s Beeswax/Carnauba wax. I applied it by hand and let it cure then buffed it off with a soft cloth to raise a shine.
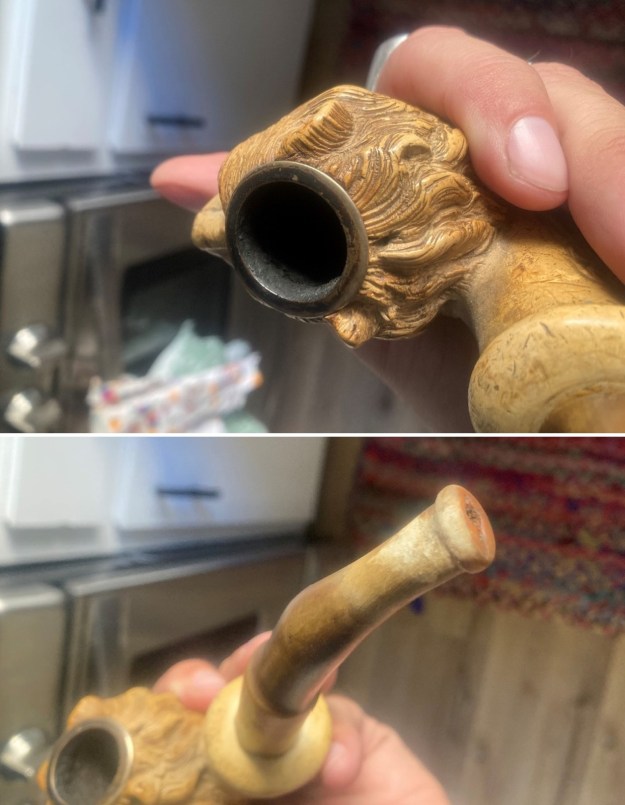
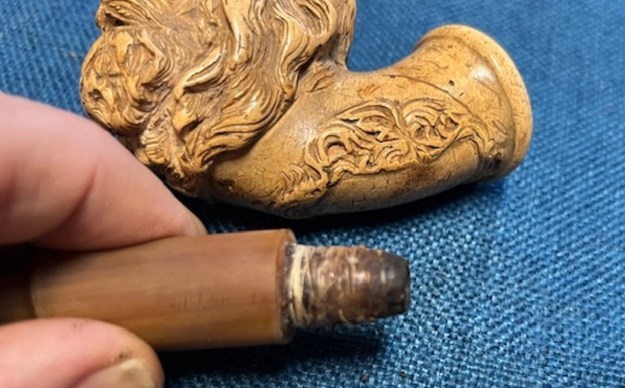
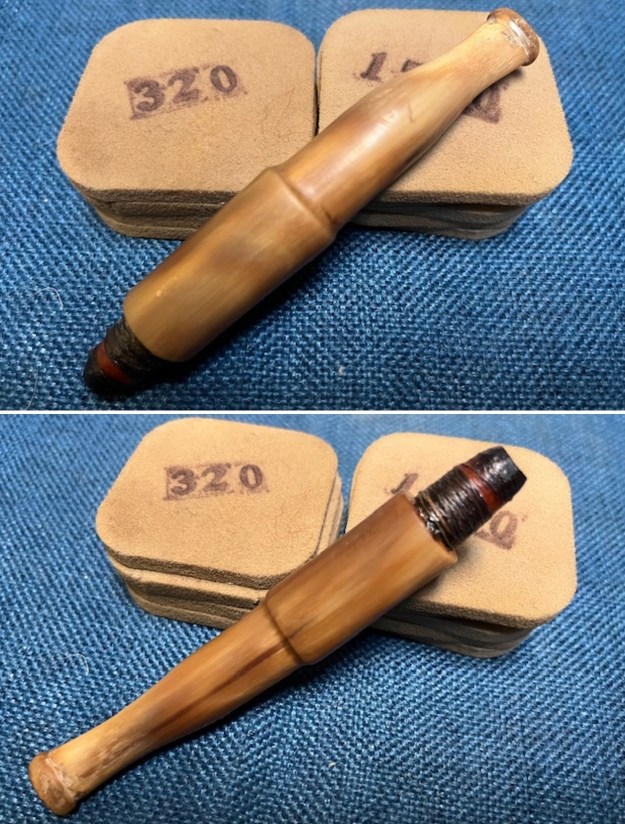
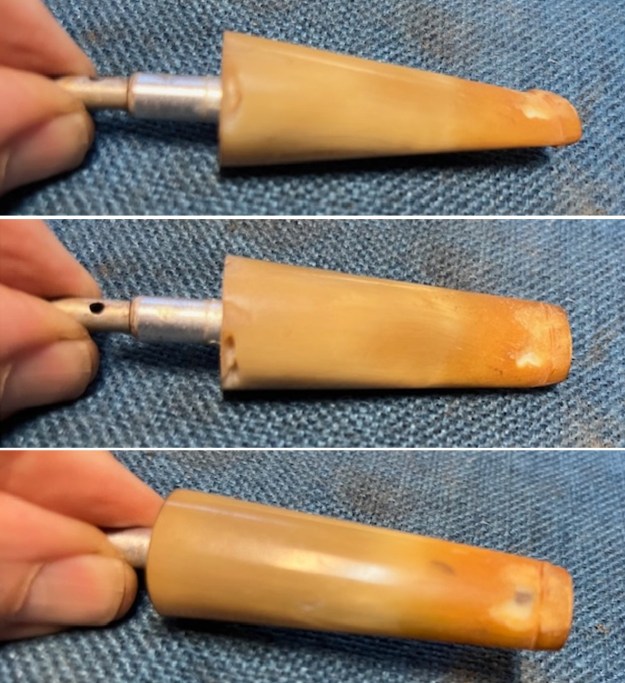
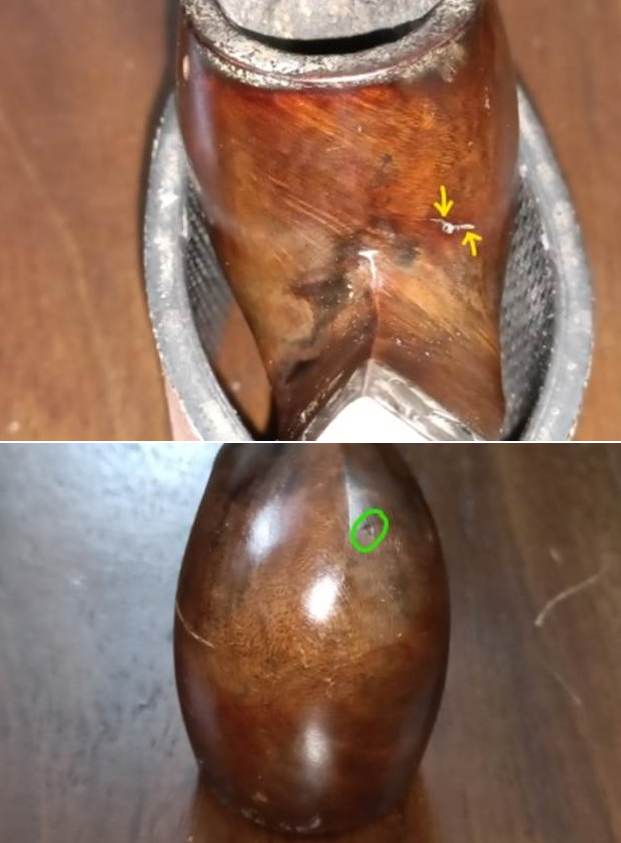
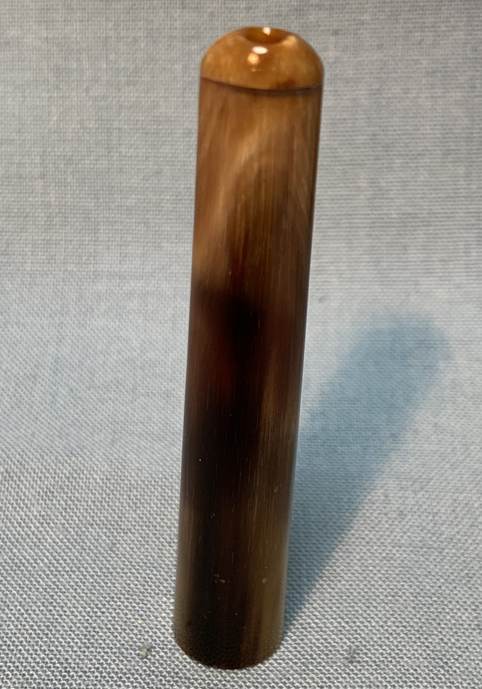
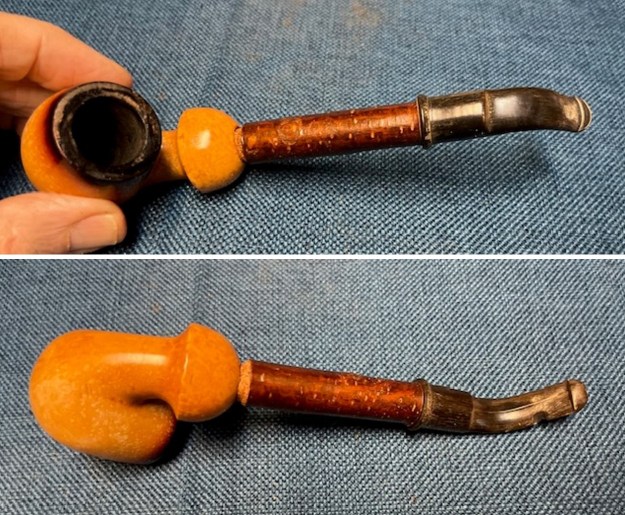
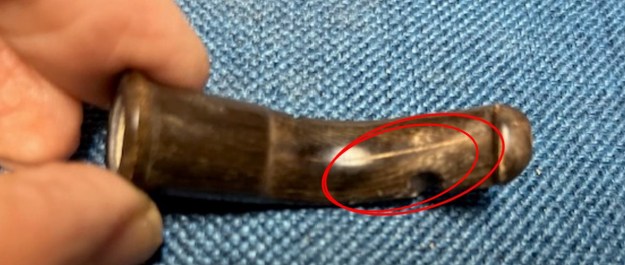
 I removed the stem from the cherrywood shank and set the bowl and shank aside. It was time to address the worm damage in the horn stem. I have circled the damaged areas in red in the photos below.
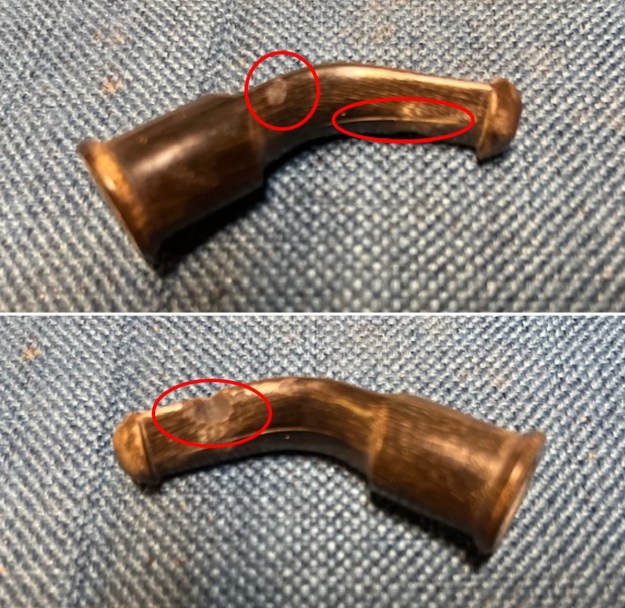
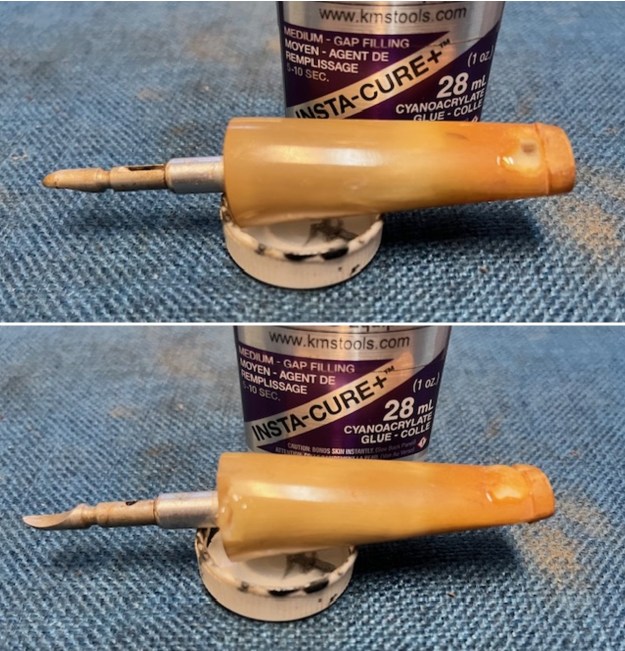
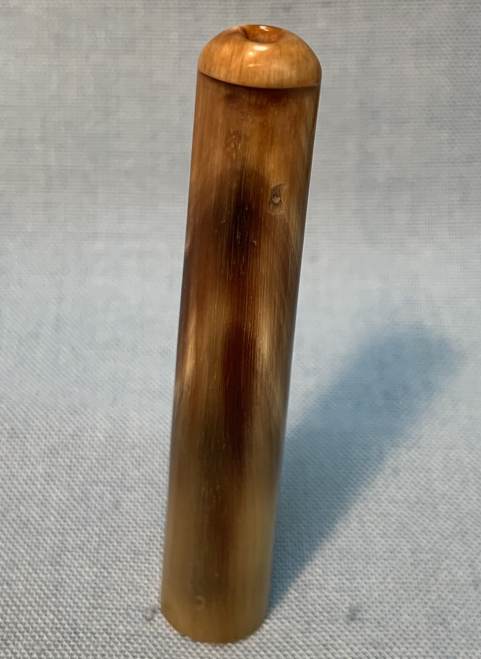
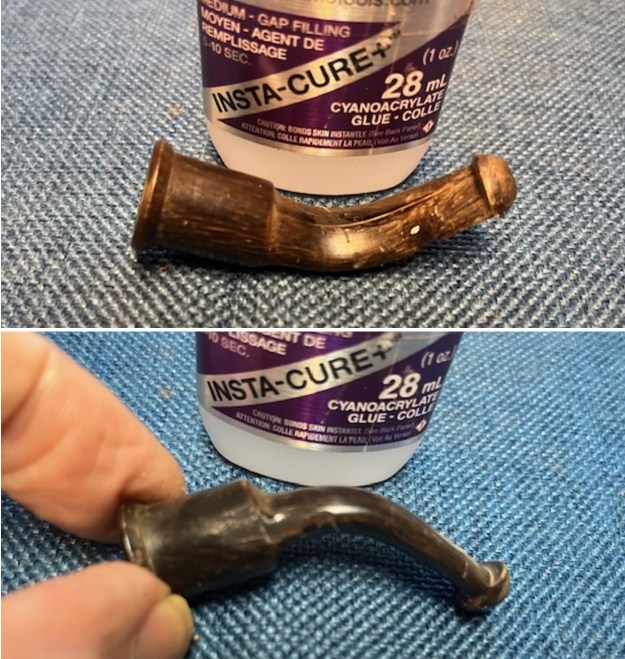
 I filled in the split on the underside of the stem and the worm damage spots on each side with clear CA glue. I layered it into he damaged areas until it was smooth.
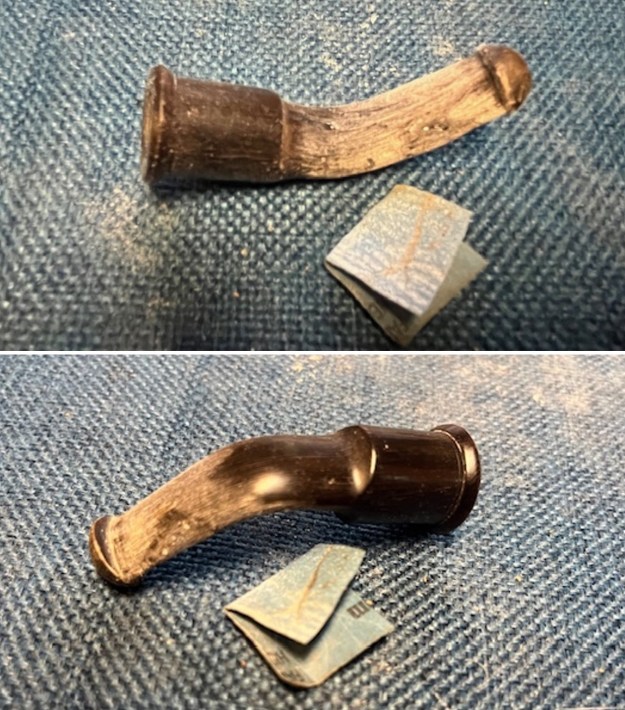
 Once the repair cured I shaped and flattened the repairs with a small file. I worked over the shape with a folded piece of 220 grit sandpaper. I wanted the edges and surfaces to be smooth.
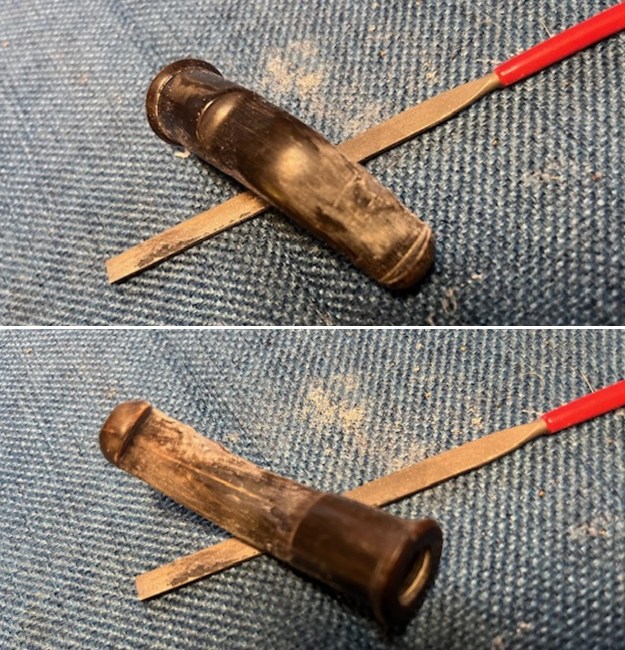

 I sanded the stem with 320-3500 grit sanding pads. I wiped the stem down after each sanding pad to remove the sanding debris and dust. The stem looked very good.
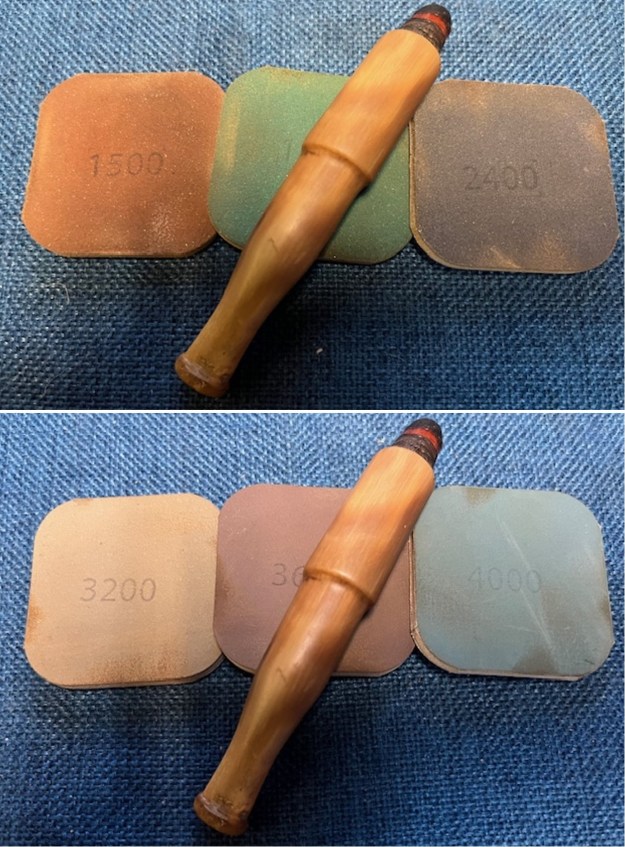
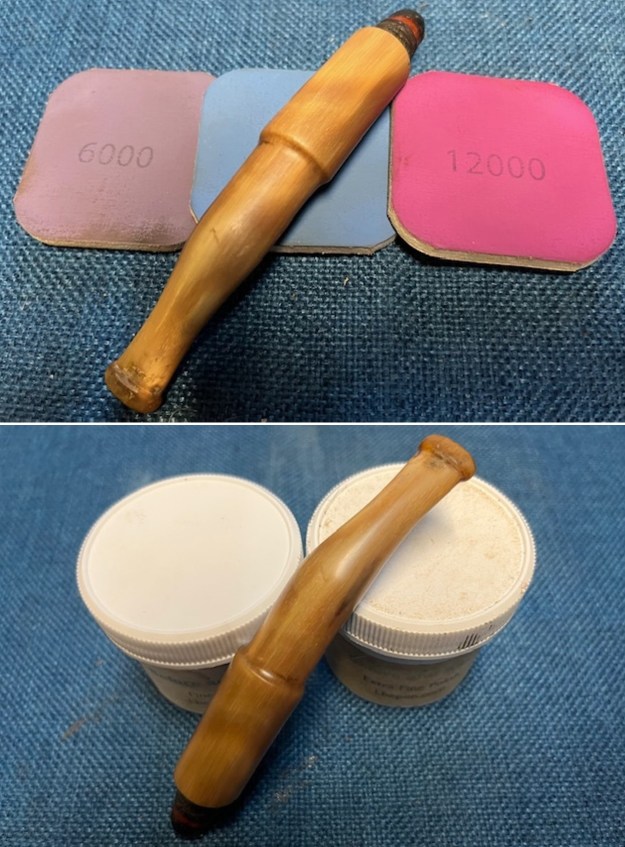
 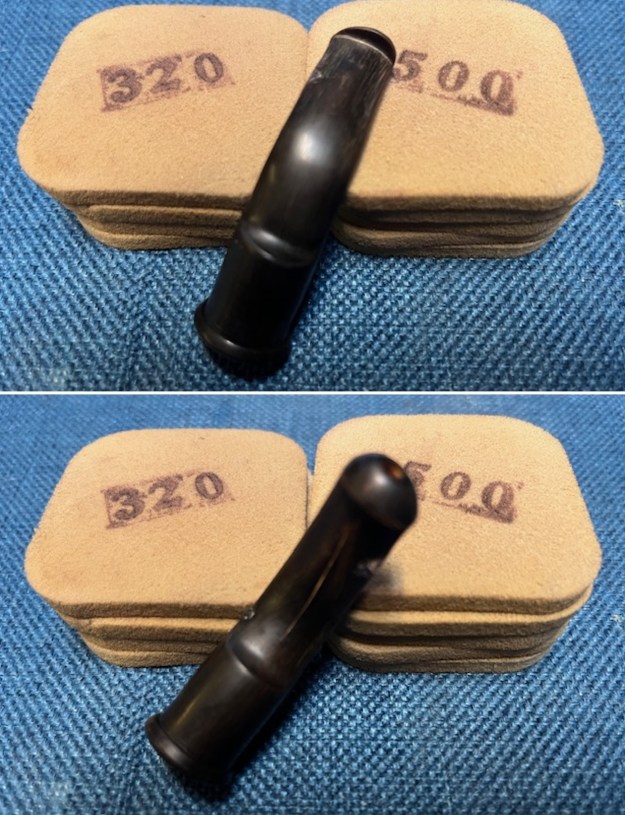 I polished the stem with micromesh sanding pads – 1500-12000 grit pads. I wiped it down with an Obsidian Oil cloth after each sanding pad. I finished polishing it with Before & After Pipe Stem Polish – both Fine and Extra Fine and buffed it off with a cotton cloth. I gave it a coat of Obsidian Oil to preserve and protect the stem.
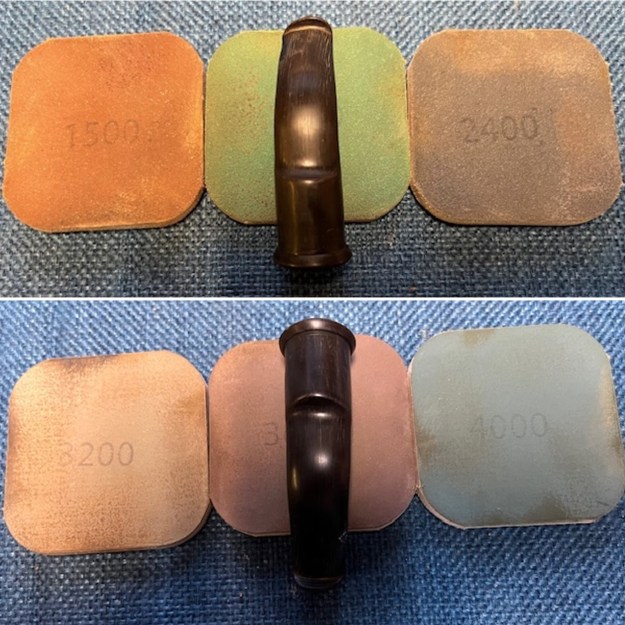
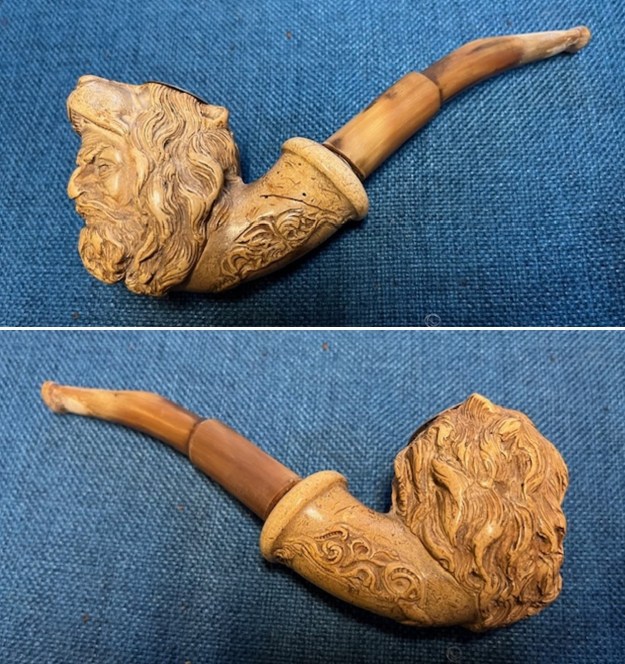
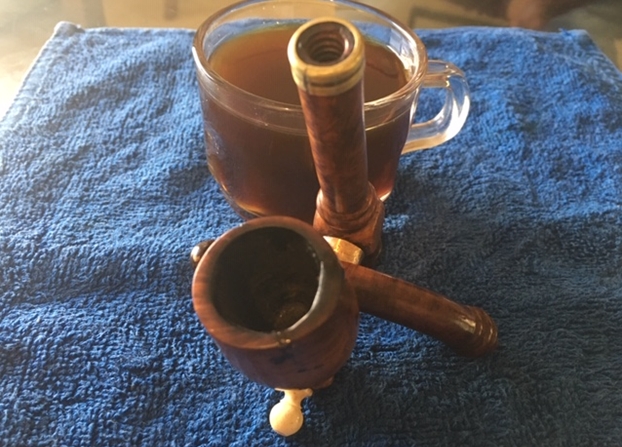
 This Old Apple Meerschaum with its new Cherrywood and Horn Stem is a great looking pipe now that it has been restored. The patina on the waxed meerschaum gives a sense of depth to the pipe. The flume on the rim and down the outer edge of the bowl is a nice touch. The Cherrywood shank and the rebuilt horn stem go well with this older classic bowl. I carefully buffed the parts of the pipe with Blue Diamond on the buffing wheel. I gave the bowl and the stem multiple coats of Clapham’s Beeswax carefully buffed the entire pipe with a clean buffing pad. I hand buffed the pipe with a microfiber cloth to deepen the shine. The finished Old Apple Meerschaum with its new Cherrywood and Horn Stem fits nicely in the hand and feels great. Give the finished pipe a look in the photos below. The dimensions of the pipe are Length: 7 inches, Height: 1 ¾ inches, Outside diameter of the bowl: 1 ¼ inches, Chamber diameter: ¾ of an inch. The weight of the pipe is 57 grams /1.98 ounces. I will be adding it to the rebornpipes online store in the Meerschaum Pipe Section shortly. Send me an email or a message if you wish to add it to your collection.