
Blog by Steve Laug
If you have been reading rebornpipes for long, you will have figured out that I really like older C.P.F. pipes (Colossal Pipe Factory). I have quite a few of them in my collection and really like them. The history is an intriguing and enjoyable part of the brand for me. The artisanship and design of these pipes captures my appreciation and admiration. The shapes are always unique; even in the same line the shapes vary from pipe to pipe. The creativity and inventiveness of the smoking delivery systems of their pipes are always a pleasure to study. The variations of Bakelite bases and stems with briar bowls, briar bowls with Bakelite stems, briar bowls with horn and with vulcanite stems. The names the company gave their pipes always has me wondering where they came from. Sometimes they seem to be humorous like the Siamese conjoined stem pipe I just finished and sometimes descriptive like this one – the square shank, horn stem Setter. 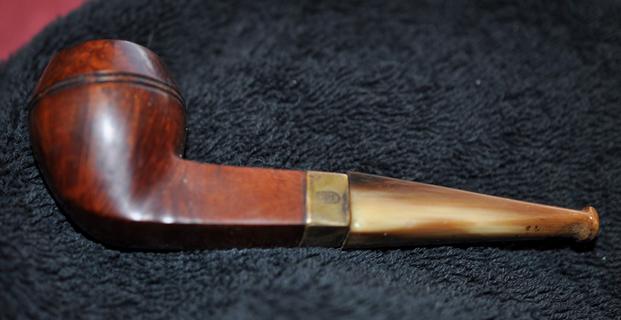 The pipe came from Jeff in a box he shipped to me just before he left for his European adventure. The box arrived last evening. I was like a kid on Christmas morning. No matter how many boxes he sends my reaction is always the same. There were two C.P.F. pipes that immediately caught my attention. Jeff had shown me these two on FaceTime before he left so I was awaiting their arrival. When he was cleaning them both he somehow switched the stems in a hurry and in the process broke the tenon off the wrong stem in the shank of this pipe. Both pipes had a bone tenon so it is easy to understand what happened. He had put both pipes in individual bags in the box. When I saw this one, I decided it was the next one I wanted to work on.
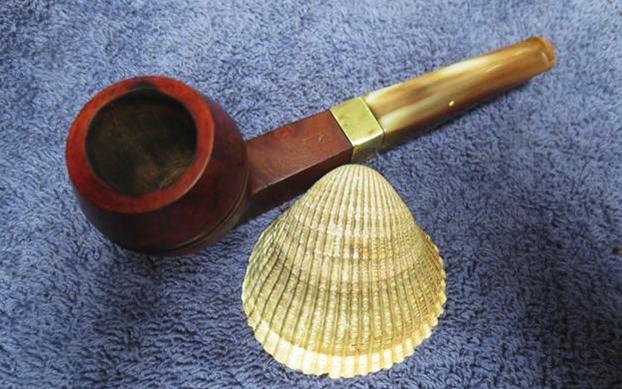
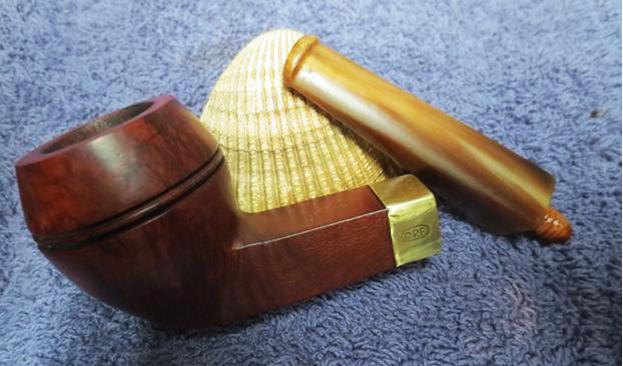
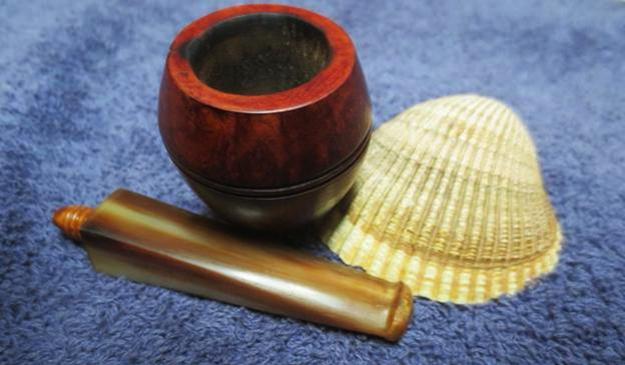
 The pipe is a bulldog with a square shank and square tapered horn stem. It has twin rings around the top of the bowl. The shank had a gold coloured ferrule on it with the end turned over to cover the exposed end of the shank. On the left side of the ferrule, it was stamped with the C.P.F. oval logo. There was no other stamping on the metal ferrule. The bowl had a thick cake that lightly overflowed like lava over the top of the rim. The inner edge of the rim shows a lot of damage from what looks like reaming with a knife. The outer edge showed some nicks on the right side and a few on the left front.
 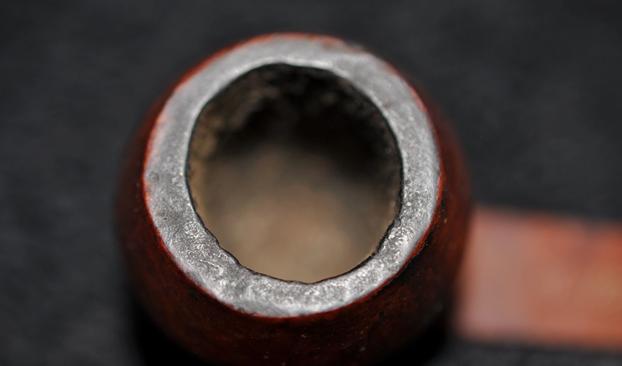 Jeff took some photos from different angles showing the condition of the bowl. It was a beauty. The grain was quite nice and the twin rings around the rim were in excellent condition with no chips.
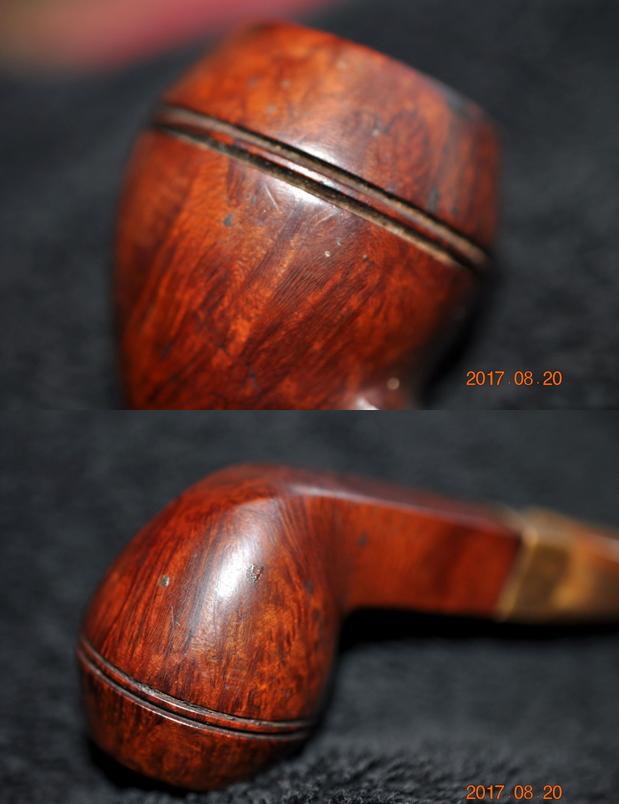
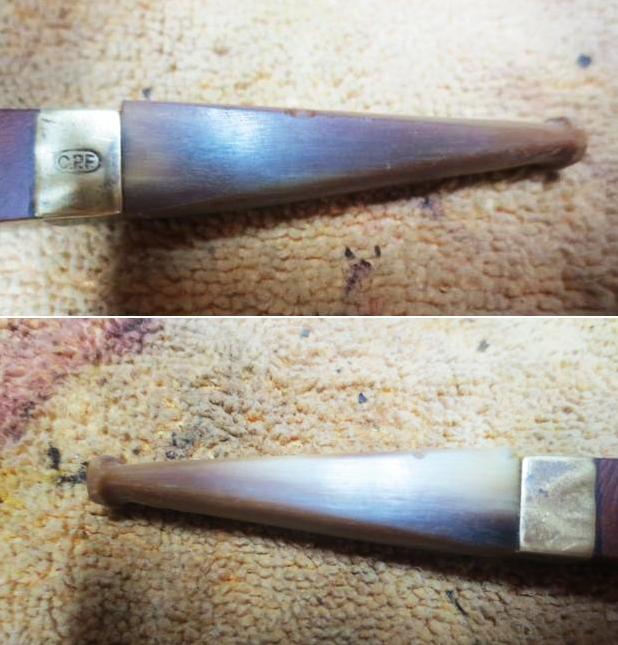
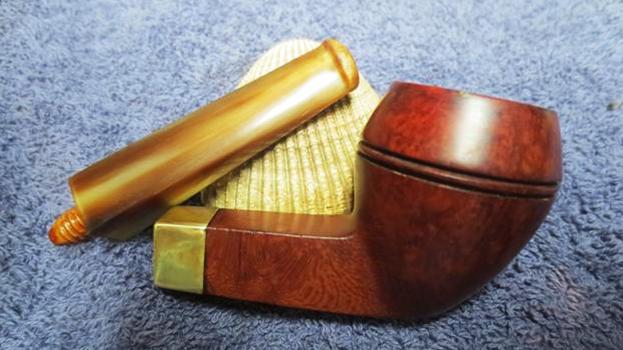
 On the top of the shank there was faint gold lettering reading Setter in a Germanic script that I have come to expect on C.P.F. pipes from this era of the late 1890s to early 1900s. The finish was worn and dirty as expected on a pipe of this age. The two photos that follow that are different views of the shank and the ferrule. The ferrule appeared to have slipped off during its life and there was a dark space just in front of it showing its original position on the shank.
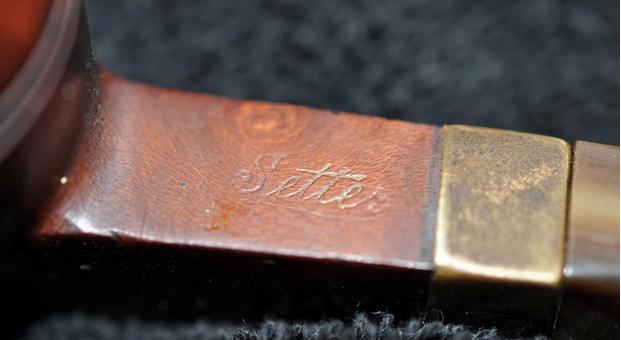
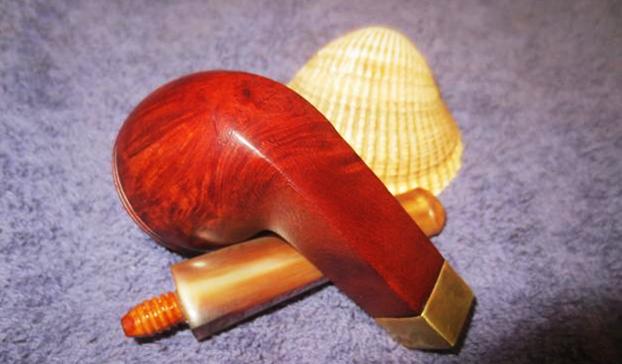
 The diameter of the stem was larger than the diameter of the shank so it looked a little awkward making me wonder if it was not a replacement horn stem. If not it was poorly fitted and would need to be properly fitted to the shank. There were issues with the stem that might lessen with reshaping but they were present and can be seen in the photos below. These included deep nicks on the edges of the square stem – a chip at the right corner near the shank, a nick on the right side about a ½ inch from the shank end, and another on the left side that looked like a wormhole.
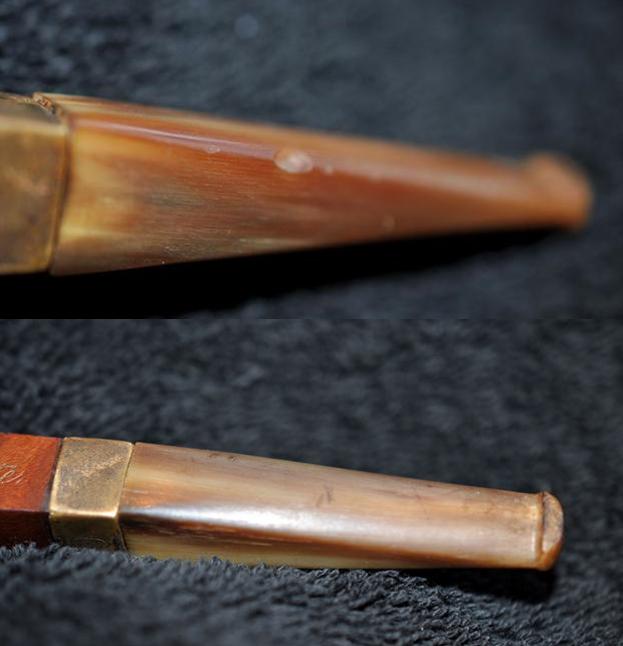 The threads in the shank were evidently worn and someone had wrapped the bone tenon in scotch tape to facilitate a tight fit. I have seen this done often so it is not a surprise but it also makes me wonder if the stem is not a replacement. I won’t know until I check out the threads in the mortise when it arrives.
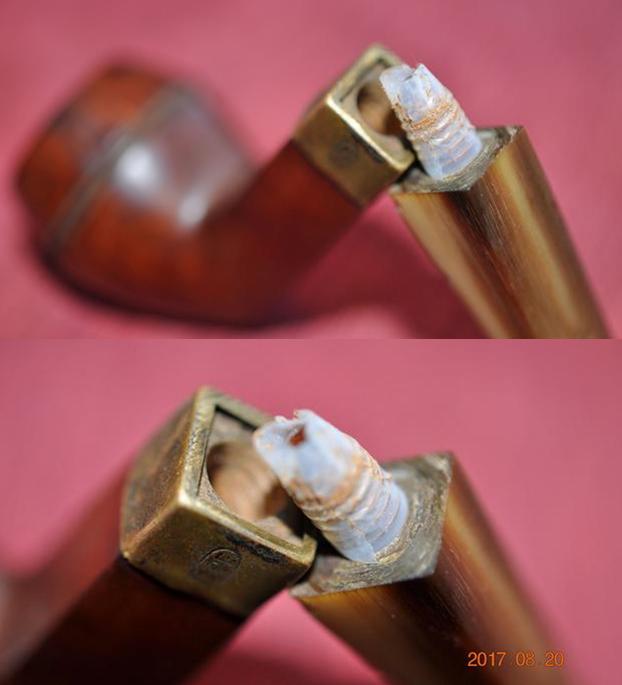 The button showed some wear and tear and there was light tooth chatter on both sides of the stem. Fortunately it appeared that there were no deep tooth marks present.
 Jeff did a lot of cleaning and scrubbing on the pipe before he sent it to me. He reamed the bowl with a PipNet pipe reamer and a Savinelli Fitsall Pipe Knife. He cleaned up the rim and the exterior of the bowl with Murphy’s Oil Soap and removed the grime and debris of the years. He had cleaned out the mortise and the airway in the shank and the stem with alcohol, cotton swabs and pipe cleaners. The bone tenon on the stem was in good condition. The stem damage was clearly visible and the nicks and marks stood out in clarity. I drilled out the broken tenon in the shank of the pipe so that I could put it back together and check out the fit of the stem to the shank. Over the years I have developed my own method of drilling out a broken, threaded tenon. It may be different from the one that you use but it works for me. I followed that procedure on this pipe. I set up a cordless drill on my worktable and put a drill bit a little larger than the airway in the broken tenon. I slowly twisted the stummel onto the drill bit. I wanted it to grab onto the tenon and allow me to either twist it free or break it enough that I can remove it without damaging the threads in the mortis. I repeated this several times until the broken tenon came out on the bit. I blew the dust out of the shank. The pipe was now ready for me to work on.
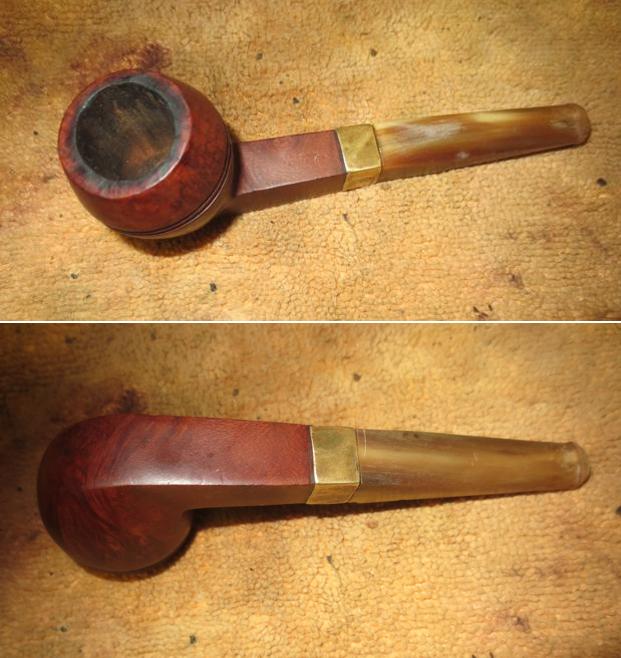
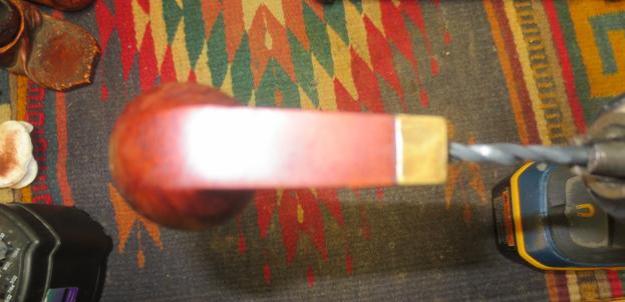 I checked out the threads in the mortise and they were slightly worn but not too severely damaged. They would easily be renewed for a better fit. I screwed the stem on the shank and took the following photos of the pipe before I started my work. These photos are kind of a benchmark for me to compare the finished pipe with the original shown in the photos. Note the fact that the stem is larger in diameter than the shank as noted above. It is the right shape but it sits above and below the top of the ferrule on the shank. The fit on the sides of the shank is perfect. That kind of fit makes me think that perhaps this was a replacement stem. The shape was correct but the fit was off. I have worked on enough C.P.F. pipes to know that they do not send them out of the factory with this kind of sloppy fit.
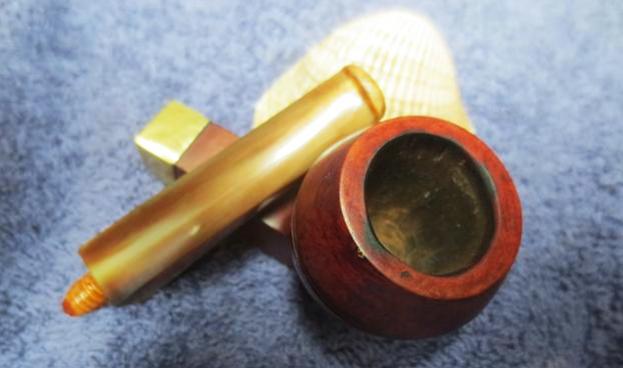
 Jeff had managed to clean up the rim quite well. The bowl was clean and the inner edge damage was clear.
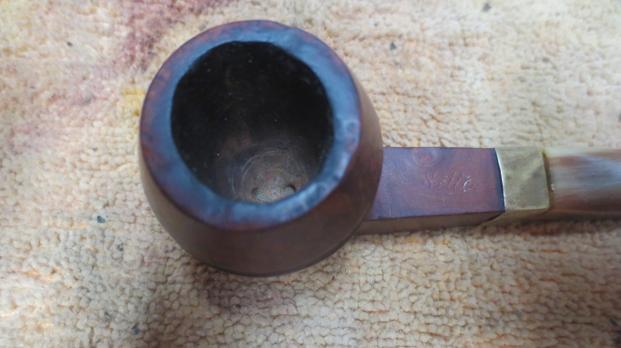 The next photos show the nicks and worm hole in the stem. These would need to be repaired. The side view photos show the fit of the stem against the shank. You can see from the photo that the top of the stem is significantly higher than the top of the ferrule and shank.
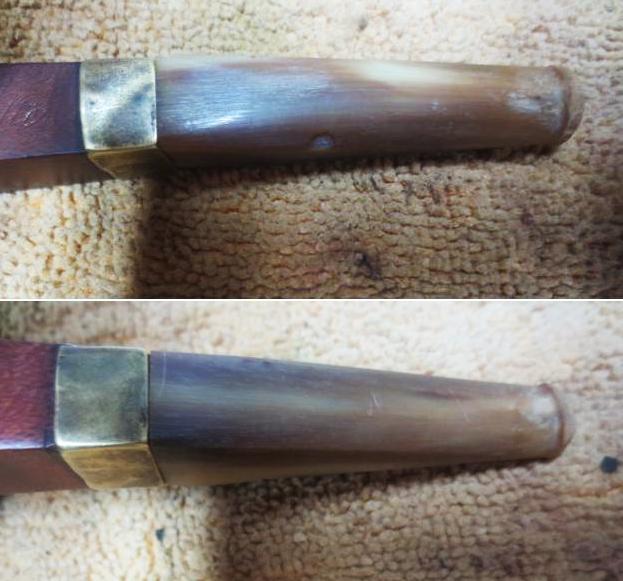
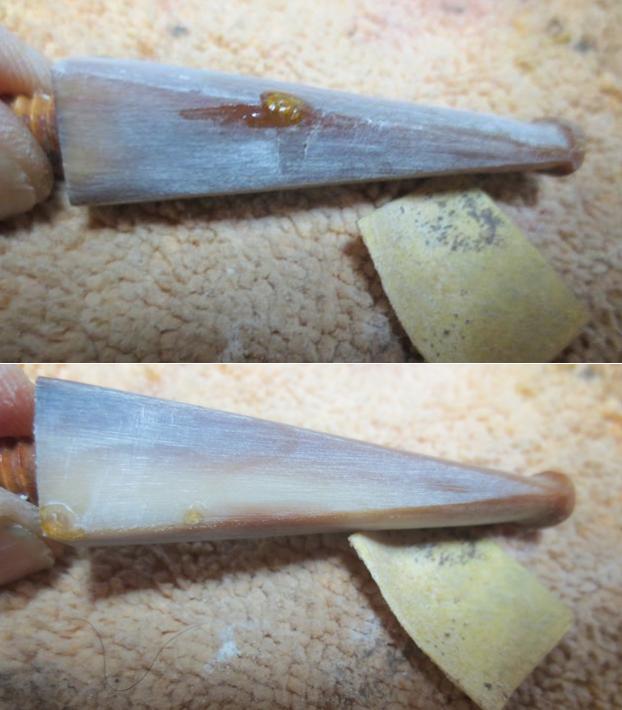
 I decided to address the nicks and worm hole first. I was not sure how much of the repair would be left once I reshaped the stem but I figured I might as well start with smoothing those out before I started shaping. I sanded the stem to smooth out the tooth chatter and the edges of the damaged areas first. I wanted to see if I had any filling to do around the button before I repaired the damaged areas. Fortunately there were no deep marks at the button. I filled the nicks and hole in with amber super glue. The photos below show the stem repairs from different angles. Note that the damage was on the top and side mid stem on the left and toward the front on the right.
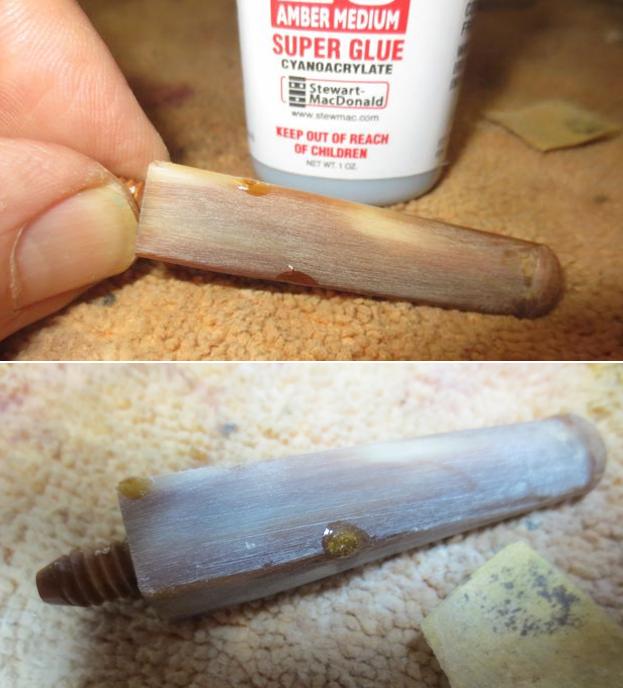
 Once the glue dried I used a needle file to smooth out the repairs and blend them into the surface of the stem. I sanded the stem with 220 grit sandpaper to further blend them in. I used the Dremel and sanding drum to reduce the height of the stem on the top and bottom at the shank as well as adjust the width on both sides. Once I had it close I sanded it more with the 220 grit sandpaper.
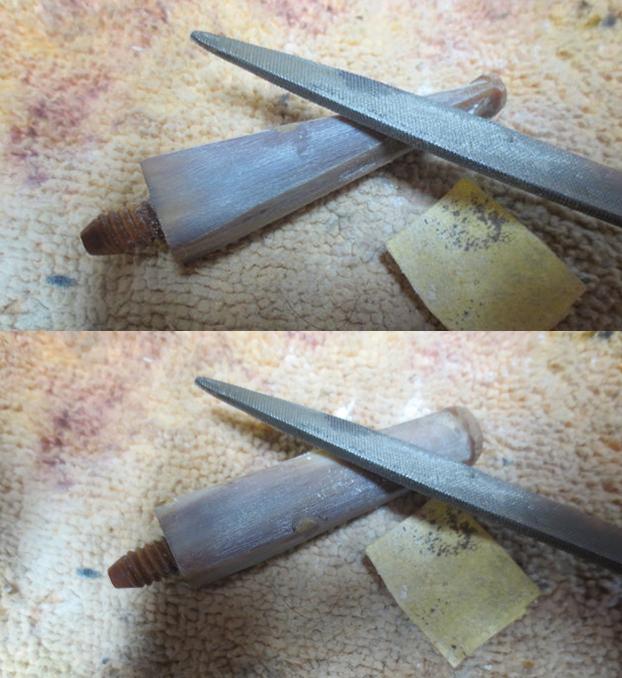
 I painted the thread on the bone tenon with clear fingernail polish and let it dry. Once it was dry I screwed it into the shank and it was a snug fit. You can see in the photos below that the fit to the shank in terms of height and width is getting much closer.
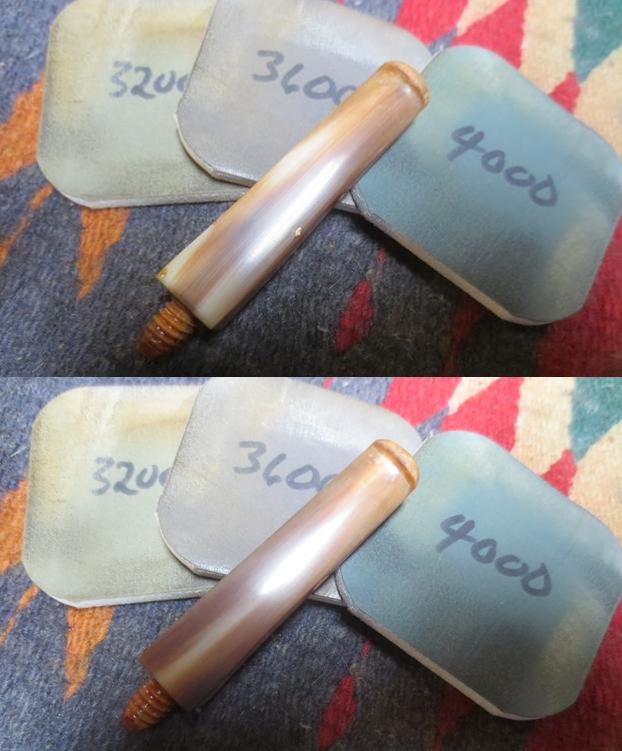
 I sanded the stem until I was happy with the transition between the stem sides and the ferrule. I wanted it to be smooth. It took a lot of sanding to get it to the place where I was happy with the flow. I was happy to see that the sanding removed much of the repaired areas from the stem. The right side repairs are virtually invisible and on the left side it was quite small. Once it was there I polished the stem with micromesh sanding pads. I wet sanded with 1500-2400 grit pads and dry sanded with 3200-12000 grit pads. I wiped the stem down with Obsidian Oil after each pad. I polished the stem with Fine and Extra Fine Before & After Pipe Polish to further remove the scratches. I buffed the stem with Blue Diamond on the buffing wheel.
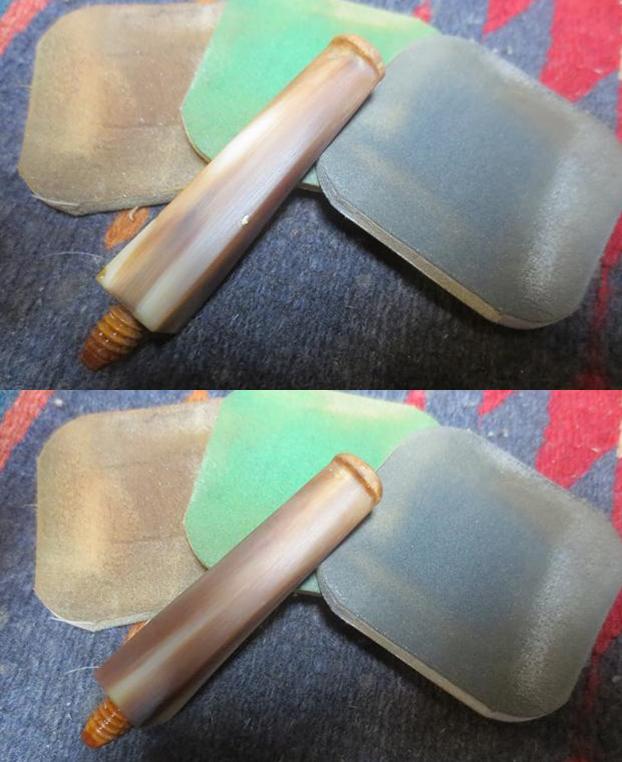
 I set the stem aside and turned my attention to the damaged rim and edges of the bowl. I lightly topped the bowl to remove the damage on the surface and the outer edges of the rim. I used a folded piece of 220 grit sandpaper to reshape the inner edge of the rim and bring it back close to round. I wiped down the surface of the bowl with alcohol on cotton pads and then put a drop of clear super glue in the damaged spot on the right side edge of the rim and bowl. When the glue dried I sanded it smooth with 220 grit sandpaper and polished it with 1500-4000 grit micromesh sanding pads.
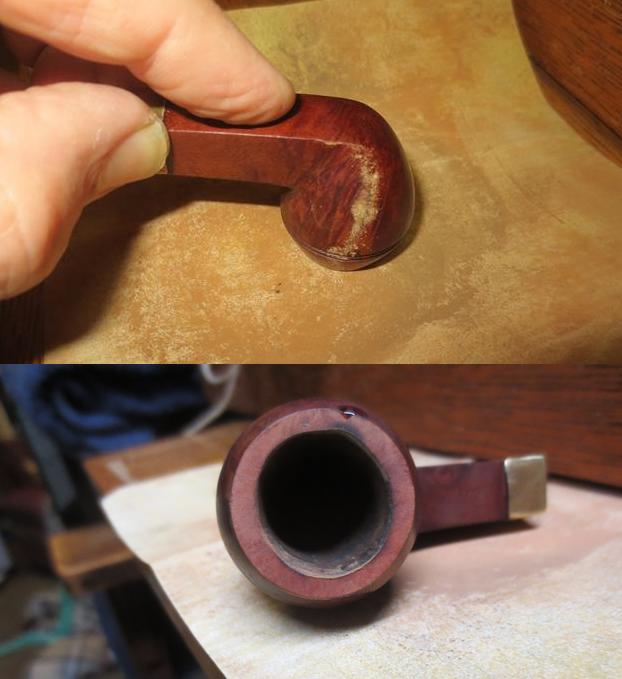
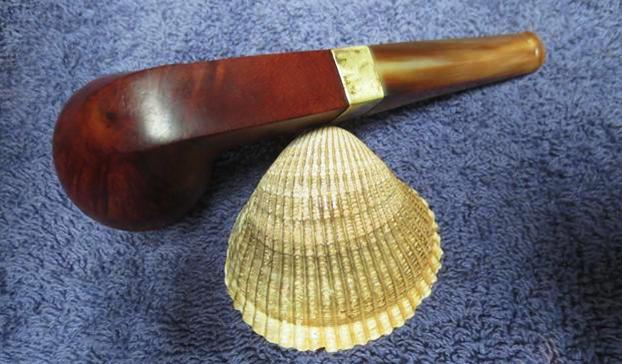
 I used a dark brown stain pen to blend the repaired area on the side of the rim cap and the top of the rim into the existing colour of the pipe. It did not take much work to get a good match. I tried to add Rub’n Buff European Gold to the stamping on the shank top but the stamping was not deep enough to hold the repairs. I buffed the pipe with Blue Diamond on the buffing wheel to polish the briar and the stem. I gave the entire pipe multiple coats of carnauba wax and buffed it with a clean buffing pad to raise the shine. I hand buffed it with a microfibre cloth to deepen the shine. I am quite happy with the finished pipe. It looks far better than it did when I started the restoration. The fit of the stem to the shank and the overall look of the bowl is better. The small burn mark on the right side of the rim top is a beauty mark of the past life of the pipe. The rim and bowl look very good. The finished pipe is shown in the photos that follow. Thanks for looking and enduring my obsession with these older C.P.F. pipes.
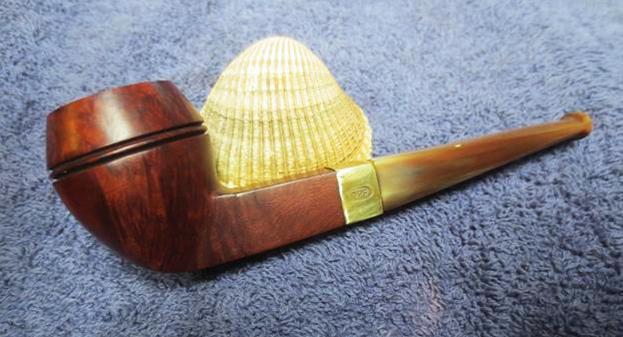


I have a dragon claw small C.P.F
I’d like to know more about it.
LikeLike
There are quite a few blogs on CPF pipes and at least one on the history of the brand. https://rebornpipes.com/2013/04/14/some-reflection-on-the-historical-background-on-cpf-pipes/
LikeLike
Pingback: Reflecting on a Few of my CPF pipes – Colossus Pipe Factory Pipes | rebornpipes