Blog by Steve Laug
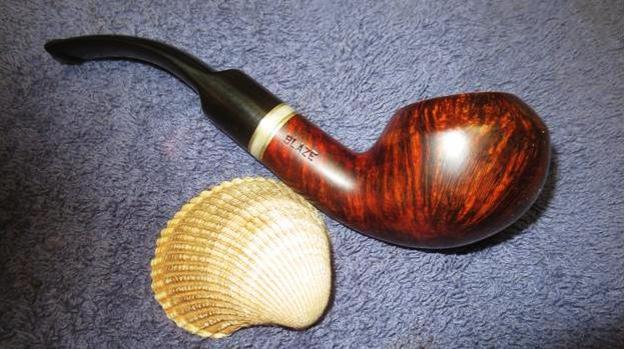
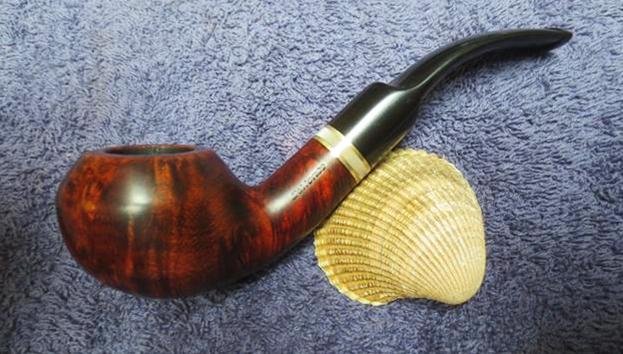
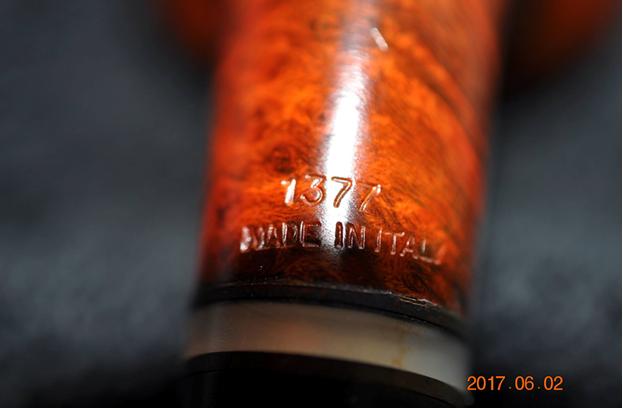
Before I restored DiMonte Classica earlier this year I knew nothing about the DiMonte brand. I wrote about the restoration on a previous blog if you are interested in reading about this previous pipe (https://rebornpipes.com/2017/05/11/a-beautiful-italian-hand-made-dimonte-classica-991/). When I saw that pipe my first thought was that it was an Italian Hand Made pipe somewhere between Savinelli and Castello. The quality of the craftsmanship and the hand made stem and briar work made me think that it was more toward the Castello side of the scale. It was a beautiful pipe. If I had found this one first I would have thought differently. It came to me with a heavy coat of Varathane on the bowl and shank. The craftsmanship was average to medium but it was not high end. This pipe had the looks of a machine made pipe which was certainly different from the previous DiMonte. The pipe was stamped DiMonte on the left side of the shank and Blaze on the right side. On the underside at the shank stem junction it was stamped with the shape number 1377 over Made in Italy.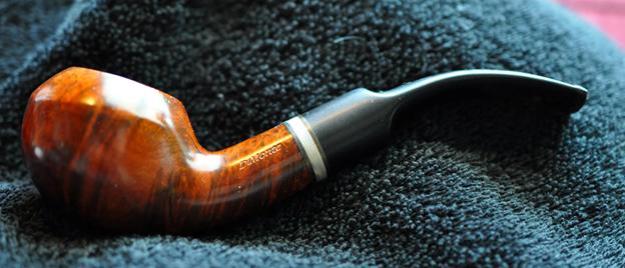 The pipe had some charm, don’t get me wrong but it was nothing like the previous DiMonte. The slick topcoat of “plastic” did nothing for me. It was bubbled on spots on the rim top and the cap or the Rhodesian. The bottom of the bowl looked like it had been used for a hammer. The inner edge of the rim showed damage from poor reaming and rim top both showed darkening. The outer edge looked relatively good other than the bubbly plastic top coat. The stem was lightly oxidized and there were light tooth marks and chatter on both sides of the stem near the button. The mother of pearl and brass band on the shank added some charm to the pipe.
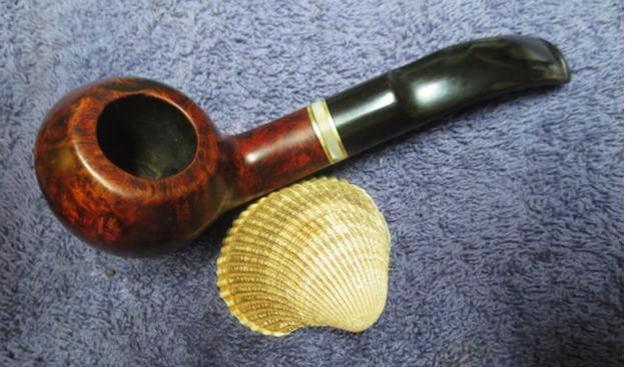
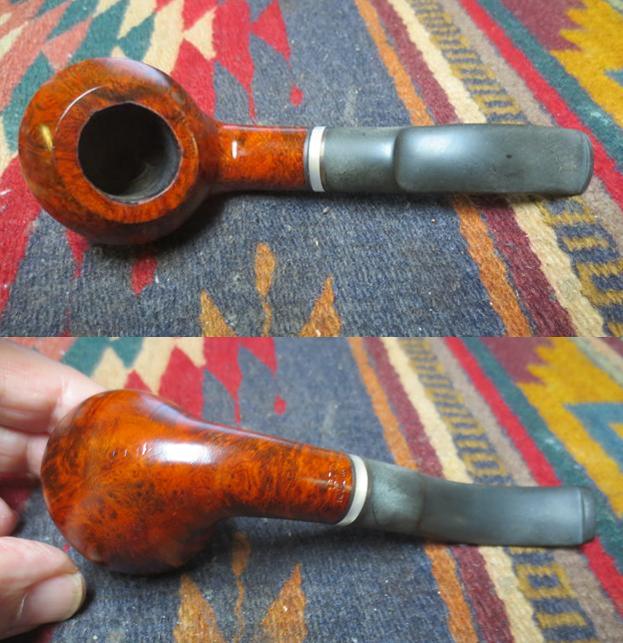
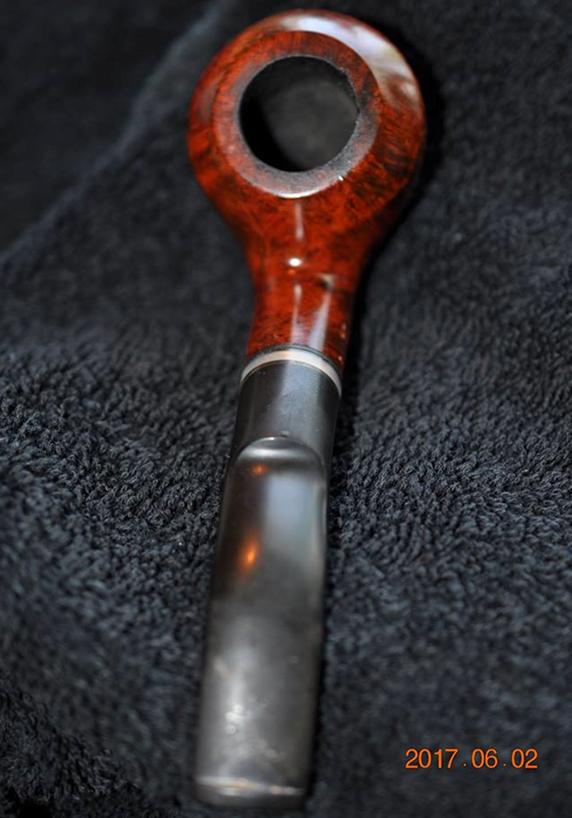 Along with the above two photos, Jeff took photos of the rim top and edges. The bowl was lightly caked as can be seen in the photo. The top of the rim did not have the common lava buildup but it had a blistered looking finish. Around the edge of the cap there were a lot of nicks.
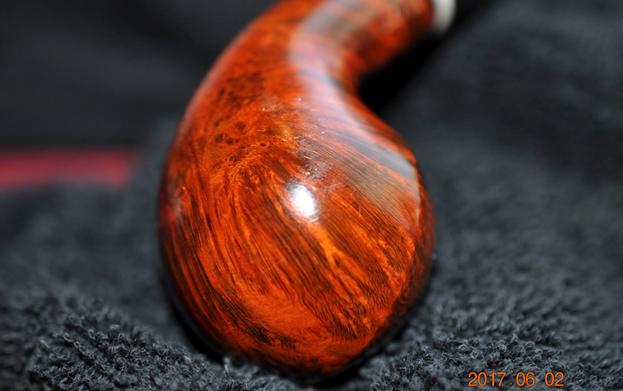
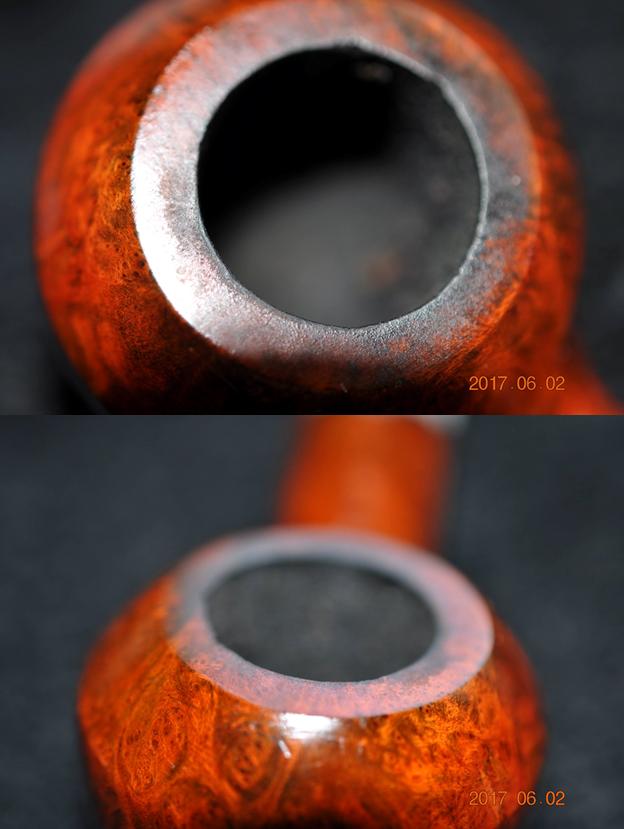 The next three photos show the beat up bottom of the bowl. It is what I mentioned above about the pipe being used as a hammer. There were deep gouges and scratches in the finish. The scratches and nicks went up the front and both sides of the bowl. Those combined with the blistering top of the rim and the bubbles along the sides of the cap meant that I was going to need to strip down the finish on this bowl and rework the damaged areas.
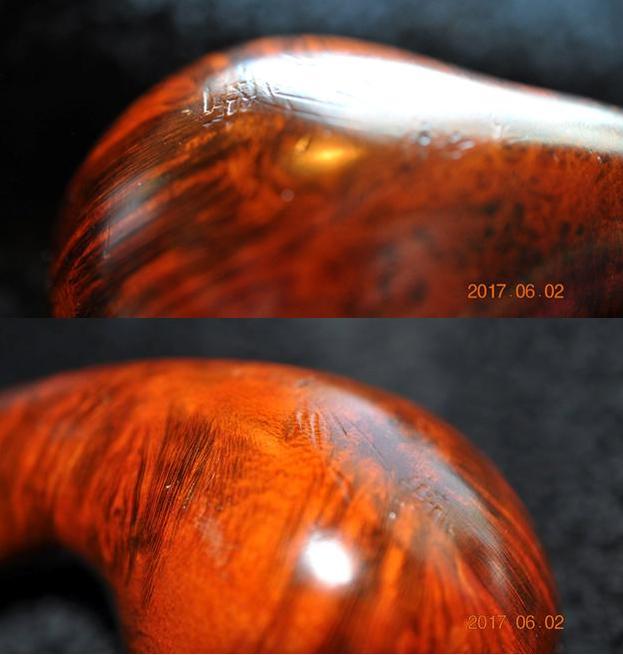
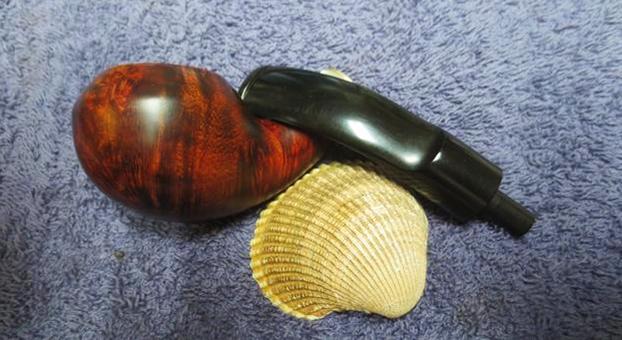
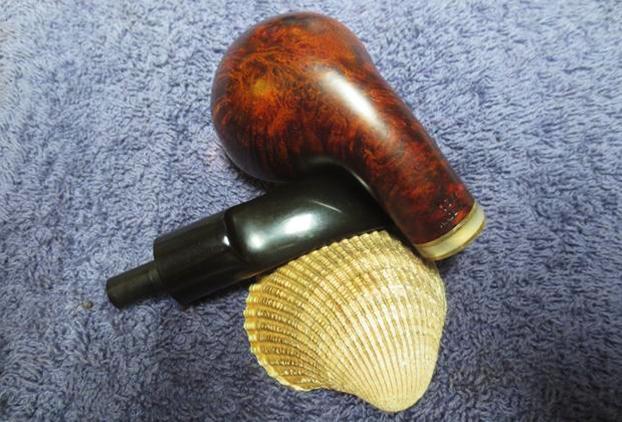
 The next photos show the condition of the shank – actually the best part of the pipe at this point. The stamping is very clear and readable. It will need to be protected when I strip the finish of the pipe.
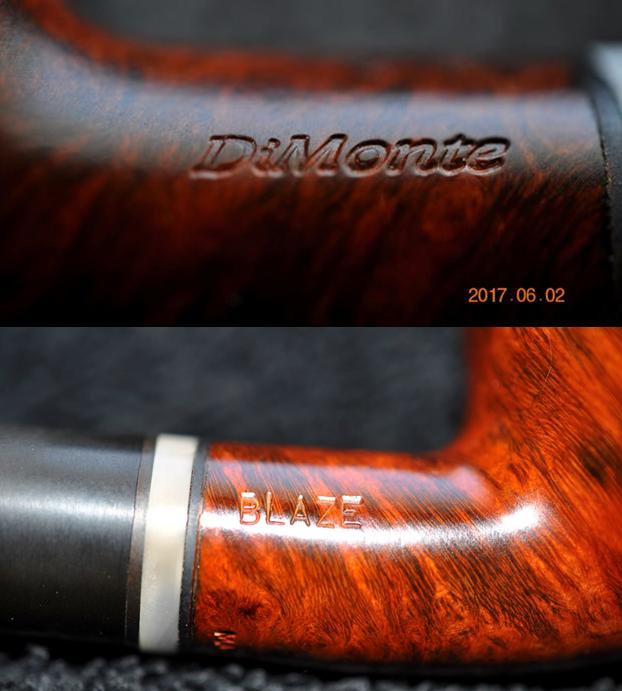
 The next photos show the condition of the stem with all of the light tooth marks and chatter on both sides. Fortunately, none of marks were deep and should easily sand out when I polish the stem.
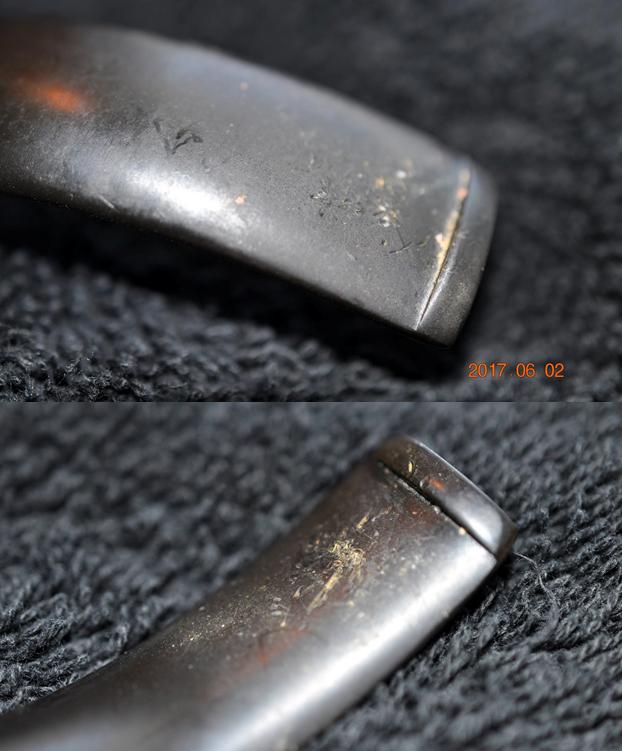 I decided to include some my findings regarding the brand that were on the previous blog for ease of reference. I had found a link to a post on alt.smokers.pipes that was a response to a fellow who posted a question about the brand. I have included the link to the thread as well as the informative response regarding the history of the brand and its place of origin. Here is the link: https://pipesmokersforum.com/community/threads/info-on-this-pipe-brand.20964/
Hello Pappy, here’s a bit of information that I found from an alt.smokers.pipes post in 02/10/2003 that reads:
DiMonte was originally Arlington Briar Works, a pipe factory in New York. It went out of the pipe-making business, and sold off its machinery, I think in the 1970s. Maybe later. Mark Tinsky could probably give you an accurate date on when, if that is of concern.
Recently (2003), the family has decided to get back into pipes, and has been having them made under contract in Italy and importing them. The few I have seen so far seem to be good value for the money, but nothing to rave about. I have one. Wood is good, combustion chamber and shank both properly drilled, good quality mouthpiece. Some of the digits in the nomenclature look as if stamped by a dyslexic (and perhaps were — upside down 8, other minor things), and the finishing touch in fine details was not apparent in all instances.
If you find one and like it, I would expect it to be a good smoker. But if you worry about nit-picks, examine the pipe carefully before buying. You might find some…
One more comment: The old pipes from Arlington Briar Works that I have picked up at estate sales have been of lesser quality wood and a touch on the small side, but craftsmanship and attention to detail was great. The new pipes from Italy have better wood, size is generally larger (better, for me), but attention to detail is not always what it might be. As smokers, I rate the newer ones higher, because wood is so important, but in fit and finish things ain’t what they used to be…”
It appears when Arlington attempted to re-enter the pipe market, they contracted with an unknown Italian outfit, who manufactured these pipes under the DiMonte label. However, Arlington once again soon went out of business.
However, I’m sure there must be some knowledgeable pipers here that may have more information for you. Hope this helps you a smidge more…
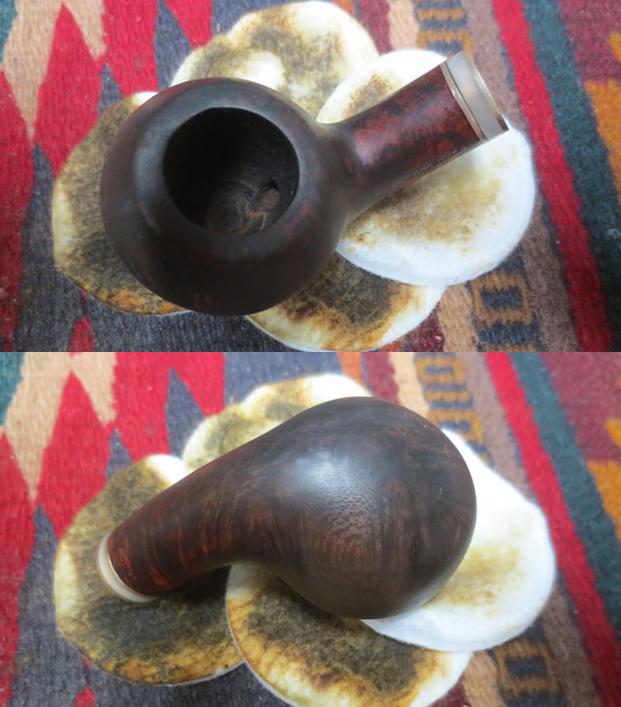
This DiMonte Blaze Rhodesian came to me clean and ready to restore. Jeff had reamed the bowl and scrubbed out the mortise and the airways in the shank and stem with alcohol, cotton swabs and pipe cleaners. He scrubbed and scraped the rim top with the edge of the Savinelli Fitsall Pipe Knife. He scrubbed the exterior of the pipe with Murphy’s Oil Soap and a tooth brush. He rinsed it with running water to remove the grime and the soap. He soaked the stem in an OxyClean bath to remove the oxidation. It raised the oxidation to the surface of the stem. I took photos of the pipe before I started restoring it. One of the most frustrating things for me in pipe restoration is bowls that have been coated with a thick coat of Varathane and that is what was covering the briar. The brass and white acrylic band on the shank added a nice touch but I could hardly see if for the shiny plastic coat over the surface of the briar.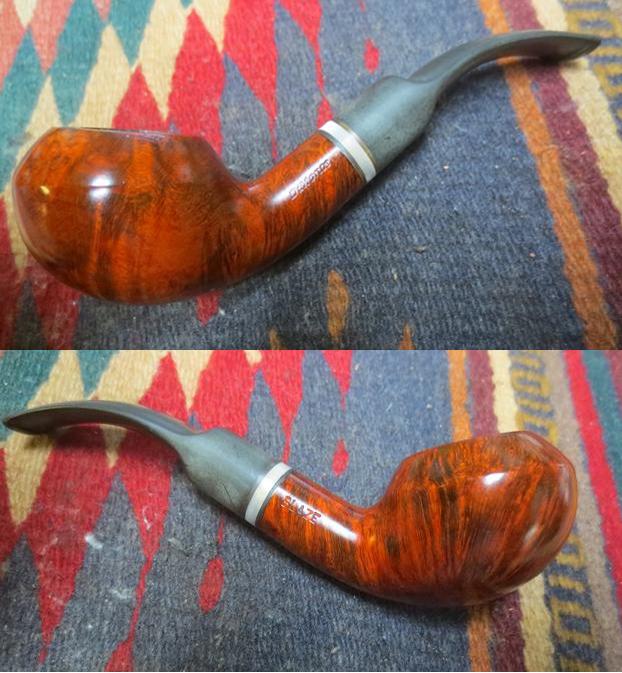
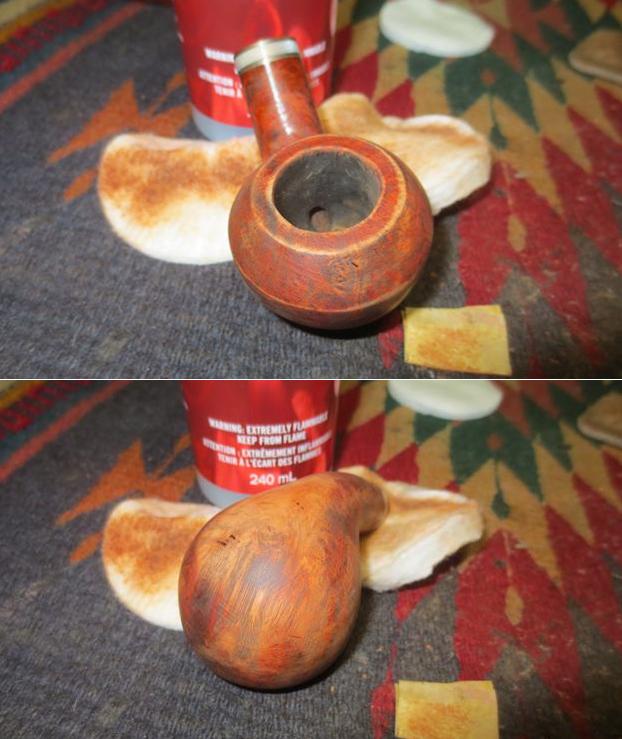
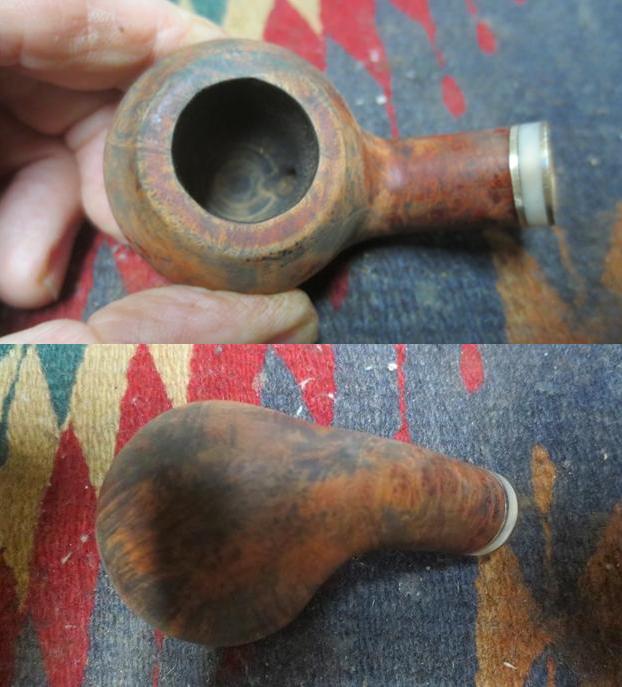
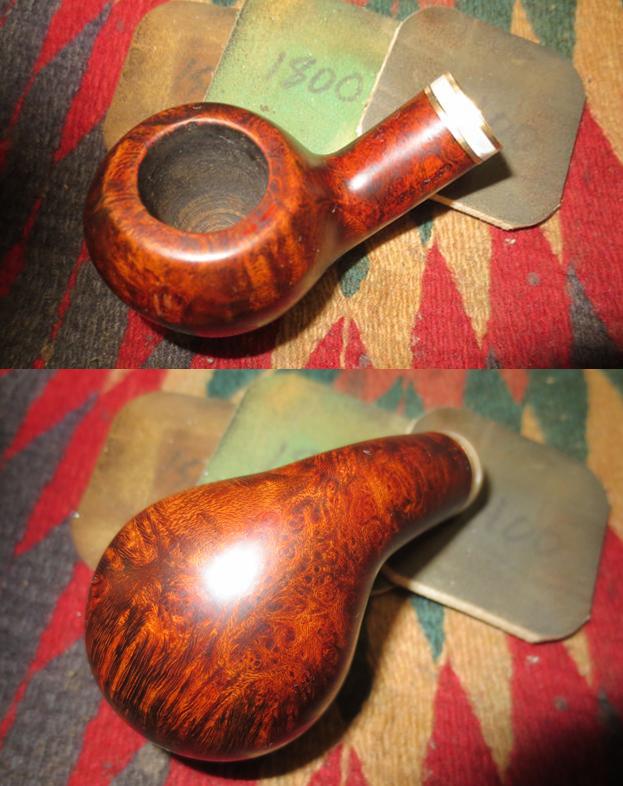
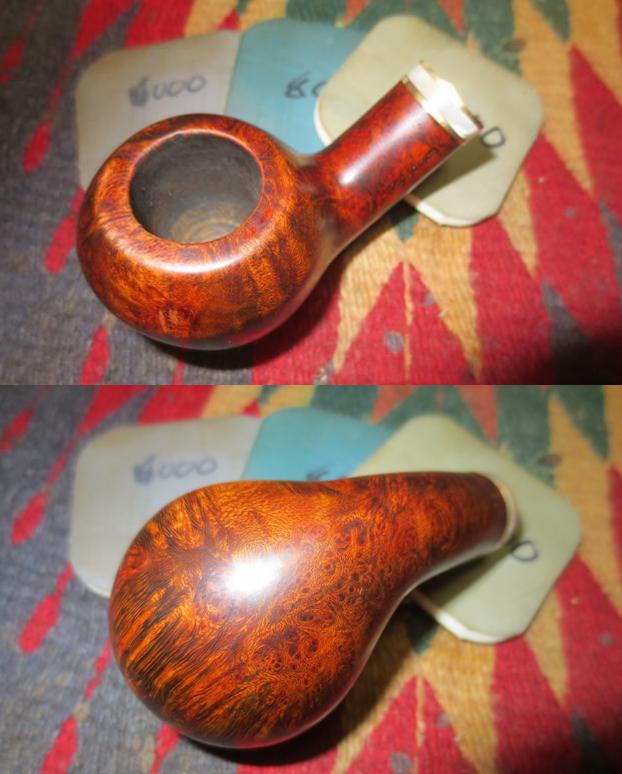
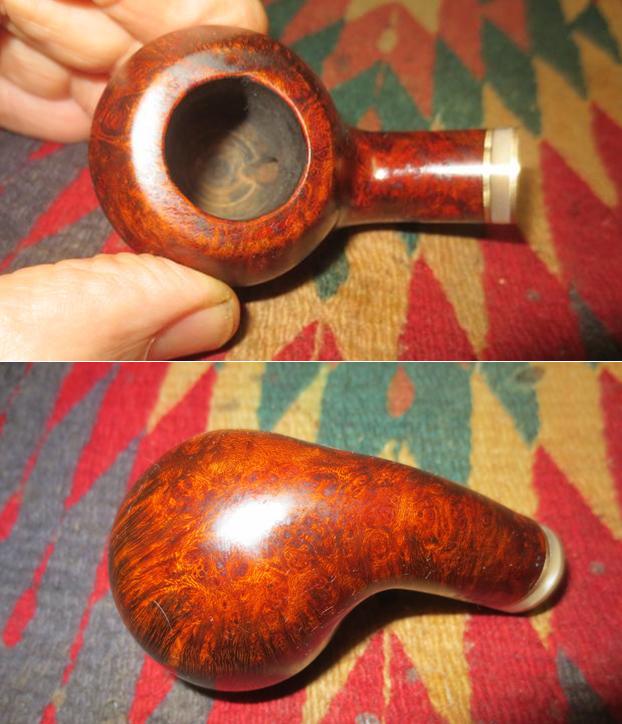
 I took a photo of the bowl and the rim top to show the condition of the pipe. The bowl was very clean. The rim surface was clean of the darkening though the blistering of the finish was still very present.
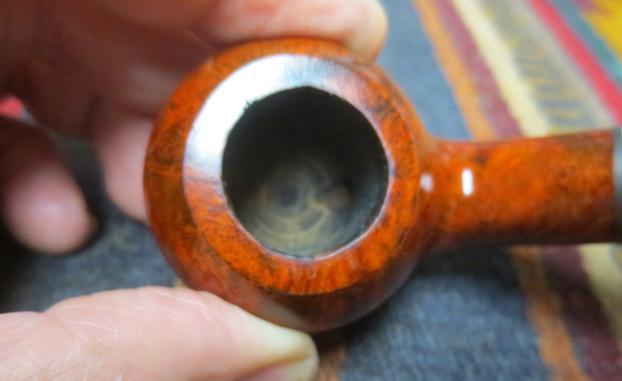 I took photos of both sides of the stem to show the condition of the stem. There was tooth chatter on both sides of the stem and some pits in the vulcanite surface. The oxidation was on the surface of the stem. I took the stem off the pipe and put it in the Before & After Pipe Stem Deoxidizer to soak for 24 hours.
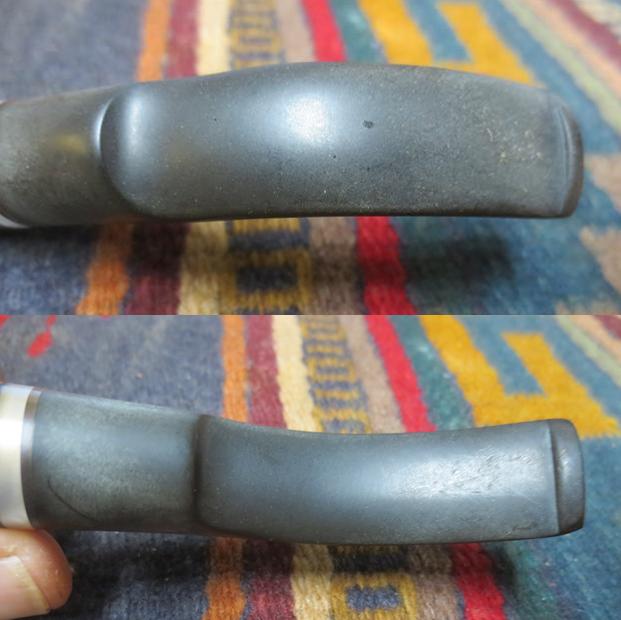 I tried wiping the briar down with acetone and it did not even dent the plastic finish. I sanded the surface of the briar with 220 grit sandpaper to break the plastic finish. Once it was broken I wiped the bowl down with the acetone and it began to break through the Varathane/plastic coat on the bowl.
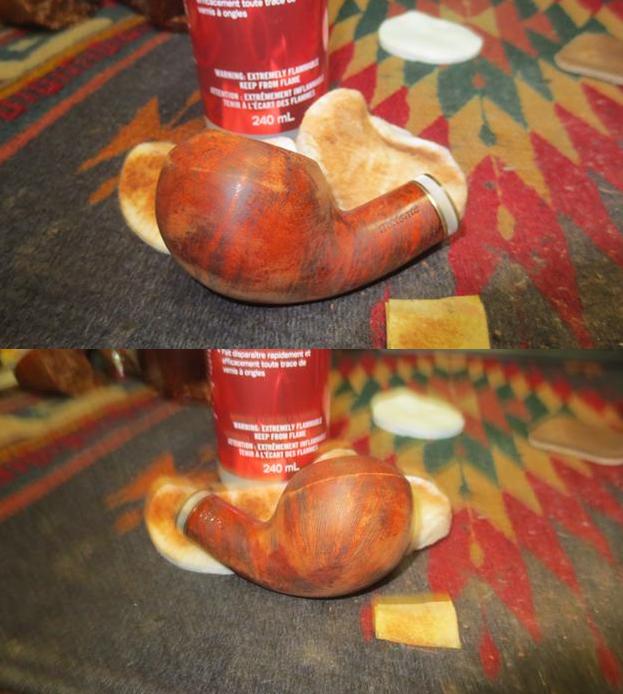
 I continued to sand the bowl with 220 grit sandpaper and wipe the bowl down to try to remove the finish from the bowl. It was a very thick coat of finish that covered the bowl. It was taking a lot of time to remove the thick top coat but I was intent on making it happen. The next photos show the bowl after the top coat is finally gone. I sanded out the scratches and marks on the sides and bottom of the bowl. I filled in the deepest gouges with clear super glue and when it dried sanded the repairs to blend them into the surface of the briar.
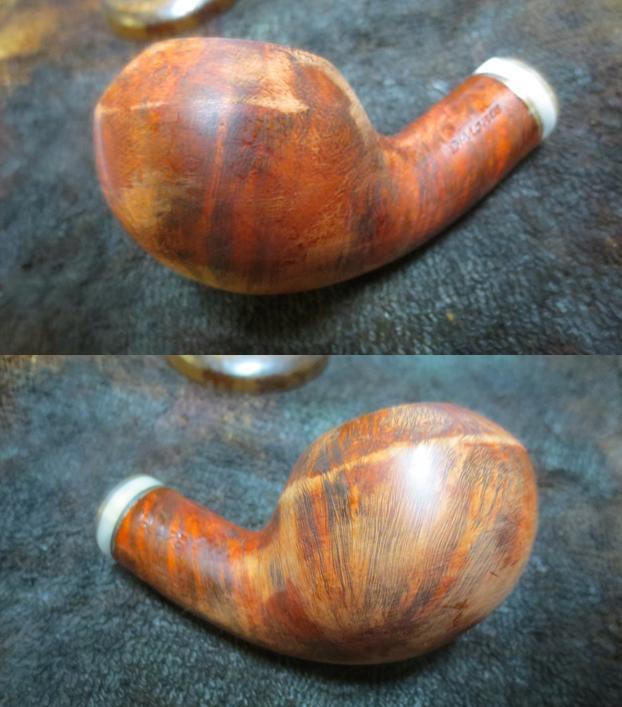
 I sanded the bowl with 1500-2400 grit micromesh sanding pads to remove some of the scratching. I would work more with that after staining. I wiped the bowl down a final time with the acetone on cotton pads to remove any remnants of the remaining finish. I stained the bowl with a black aniline stain and flamed it to set it in the briar. I repeated the process until the coverage was well set.
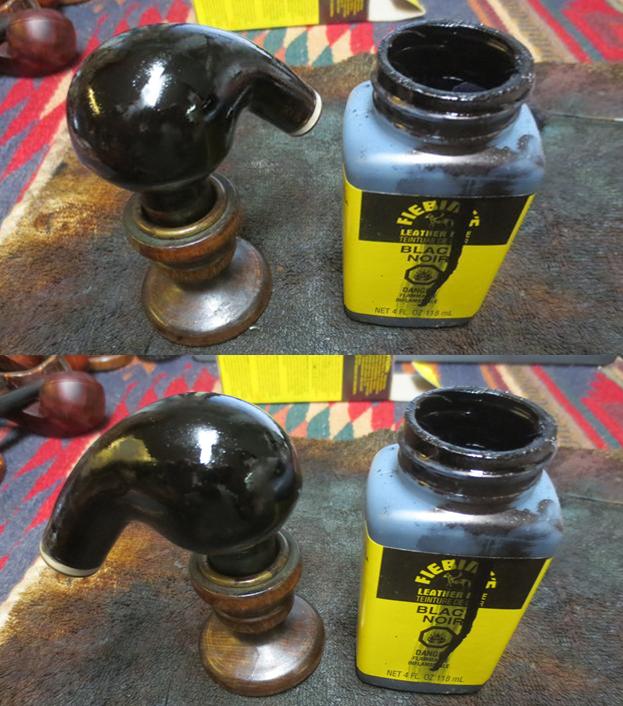 I wiped the briar down with alcohol on cotton pads to remove the excess stain on the briar. I was able to remove the top coat of stain leaving behind the black in the grain of the briar. I sanded the bowl with a medium grit sanding pad. I used a folded piece of 220 grit sandpaper to clean up the inner edge of the bowl and minimize the damage. The photos that follow show the bowl after the sanding and washing with alcohol.
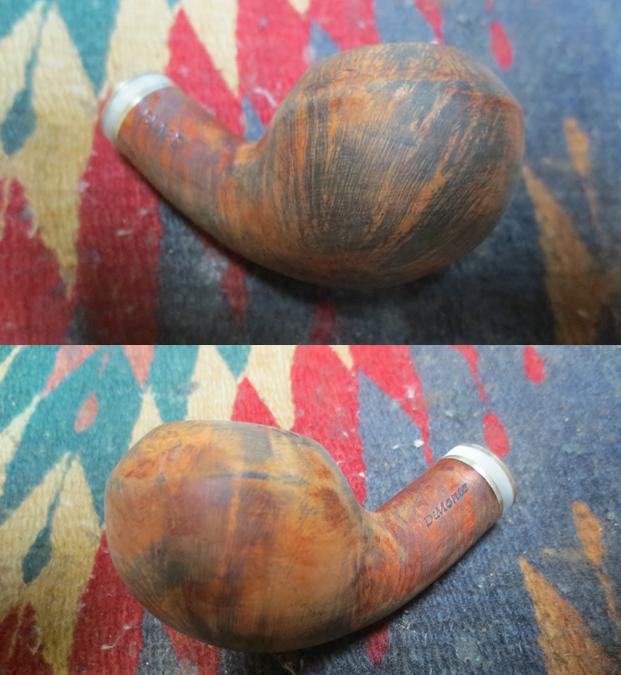
 With the black stain removed I wiped the bowl down one more time with alcohol and gave it the next coat of contrast stain. I used a dark brown aniline based stain and flamed it with a lighter to set it in the surface of the briar. I repeated the process until the coverage around the bowl was even and I was satisfied with how it looked. I let the stain set for 30 minutes before moving on with the process.
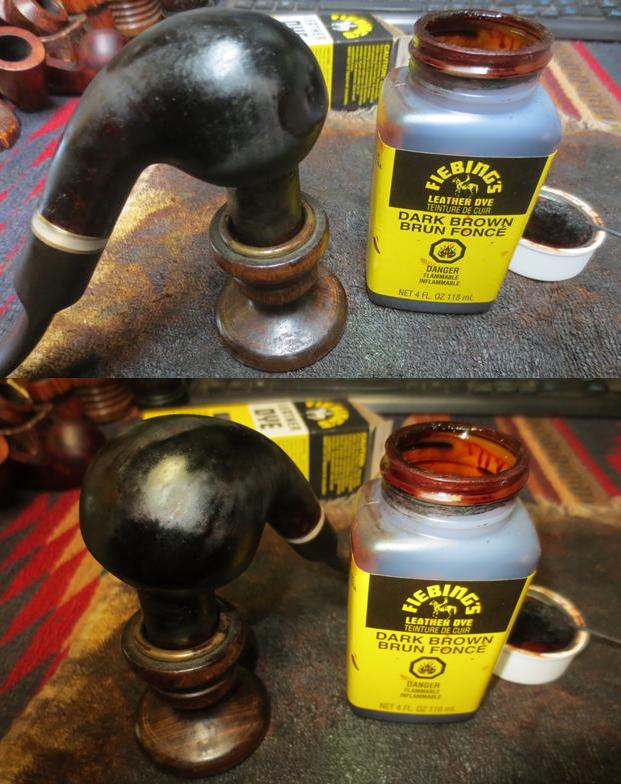 I wiped the bowl down with alcohol on cotton pads to remove the excess brown stain and make it more transparent. I wanted the grain to pop through the finish. The black undercoat would come through in dark contrast to the rest of the browns on the bowl.
 With the grain showing through it was time to polish the briar with micromesh sanding pads. I wet sanded the bowl with 1500-2400 grit pads and dry sanded with 3200-12000 grit pads. After each pad I wiped the bowl down with a damp cloth to remove the sanding dust and stain powder.
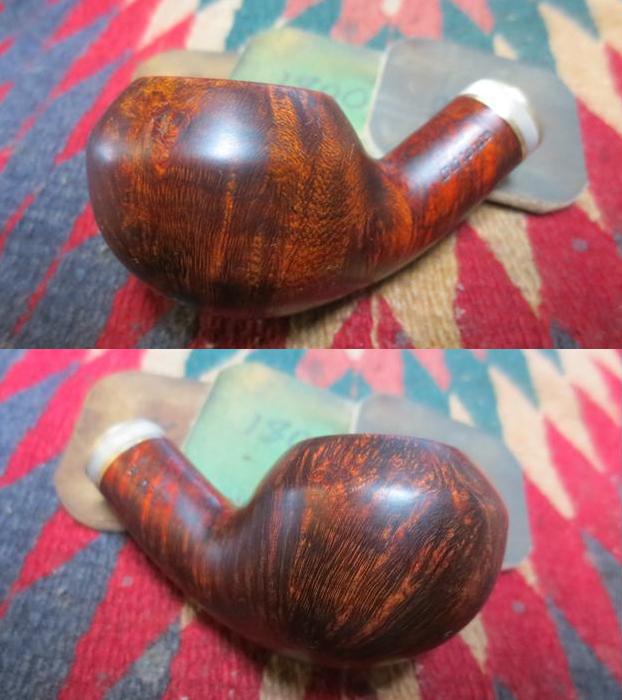

 Once I finished polishing it with the 12000 grit micromesh pad and wiped it down with a damp cloth I dried it off in preparation for the finish coat of stain. I gave the bowl several coats of Danish Oil with a Cherry stain. I applied the stain with cotton pads and rubbed it into the finish of the briar. I buffed it with a soft flannel pad to smooth out the finish. It added the touch of red that I wanted to the briar and bring out some of the colour in the grain.
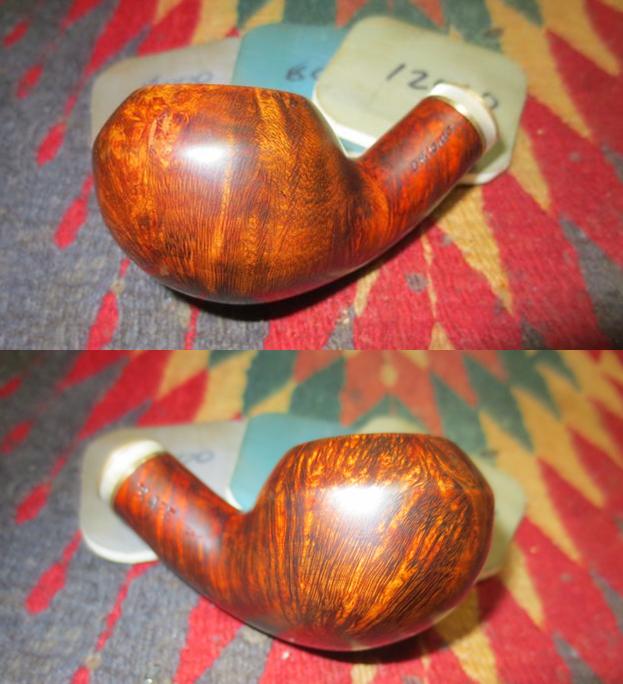
  I hand buffed the bowl with a microfiber cloth to polish the newly applied Danish Oil finish. I took the following photos of the pipe at this point in the process. It is looking the way I was hoping it would when I stripped off the plastic coat. It is a nice piece of briar with a mix of grains around the bowl and shank. All that remained was to give it a final buff with Blue Diamond on the buffing wheel and then wax it with multiple coats of carnauba wax. The finish would really shine when the wax was buffed with a clean buffing pad.
 I set the bowl aside to dry overnight and took the stem out of the Before & After Pipe Stem Deoxidizer Bath. I wiped it down with a dry cloth to remove the Deoxidizer and rubbed it down with some Obsidian Oil to see where things stood. The stem looked good with most of the oxidation removed. The photos below show the stem after it was removed from the bath. I sanded the stem with 220 grit sandpaper to remove the tooth chatter and pitting on both sides near the button and sanded the rest of the stem to remove the residual oxidation.
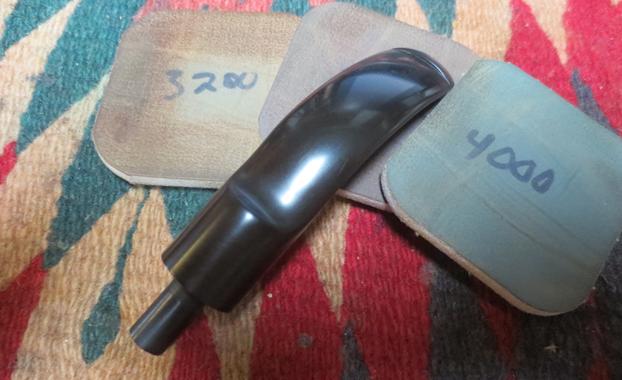
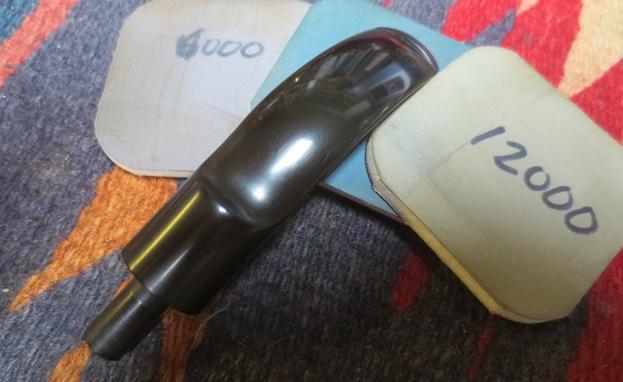
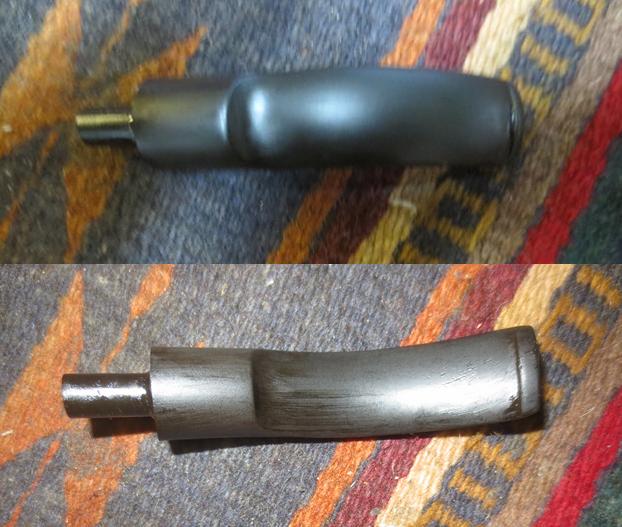 I polished the stem with micromesh sanding pads – wet sanding it with 1500-2400 grit pads and dry sanding with 3200-12000 grit pads. I rubbed the stem down with Obsidian Oil after each pad and when I finished sanding with the 12000 grit pad I gave it a final coat of oil and set it aside. I figured that while the bowl and the stem dried I would call it a night and pick it up in the morning.
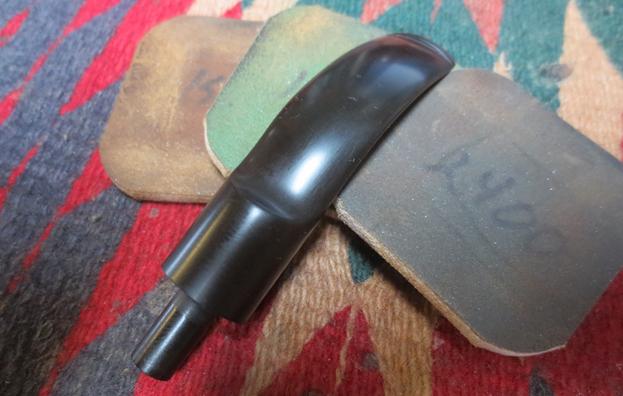
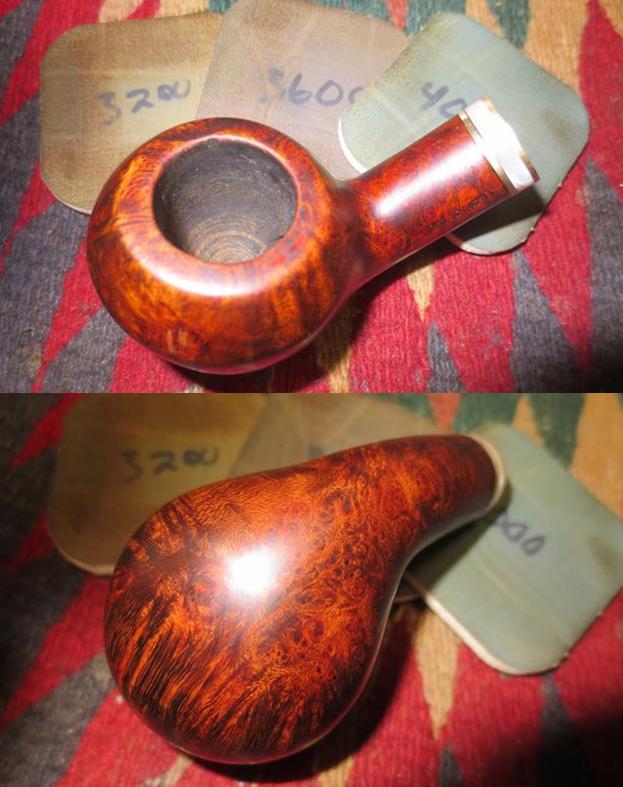
 In the morning I picked up where I had left off the night before. I buffed the bowl and stem with Blue Diamond on the buffing wheel and then gave the entire pipe several coats of carnauba wax. I buffed it with a clean buffing pad to raise the shine. I hand buffed it with a microfiber cloth. The finished pipe looks far better than it did when I began. It no longer has that thick plastic coat and the blistering is gone from the bowl surface. The stem shines and the briar looks amazing to me with the contrast stains of black, dark brown and cherry. It really works well with the grain. The dimensions of the pipe are; Length: 6 inches, Height: 1 ½ inches, Bowl diameter: 1 ¾ inches, Chamber diameter: ¾ inches. This one is going on the rebornpipes store soon. It will make a nice addition to someone’s collection. If you are interested in adding it to your rack contact me at slaug@uniserve.com or send me a message. Thanks for looking.