Blog by Paresh Deshpande
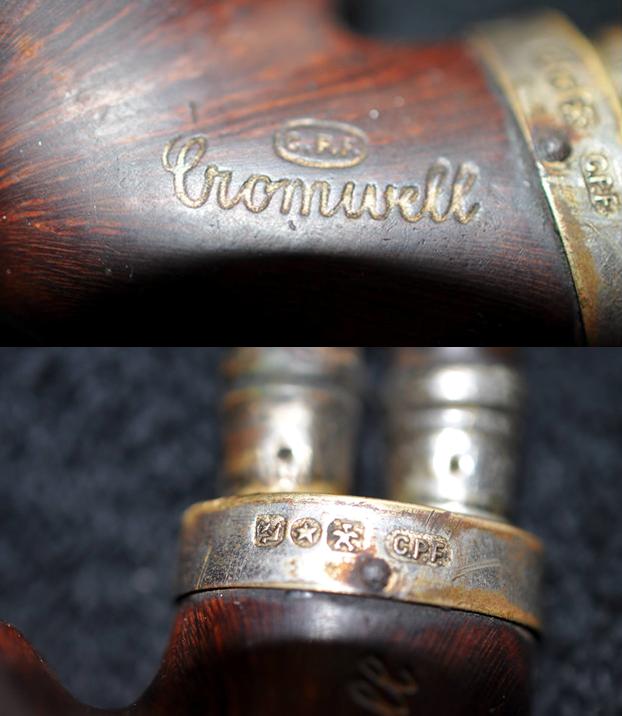
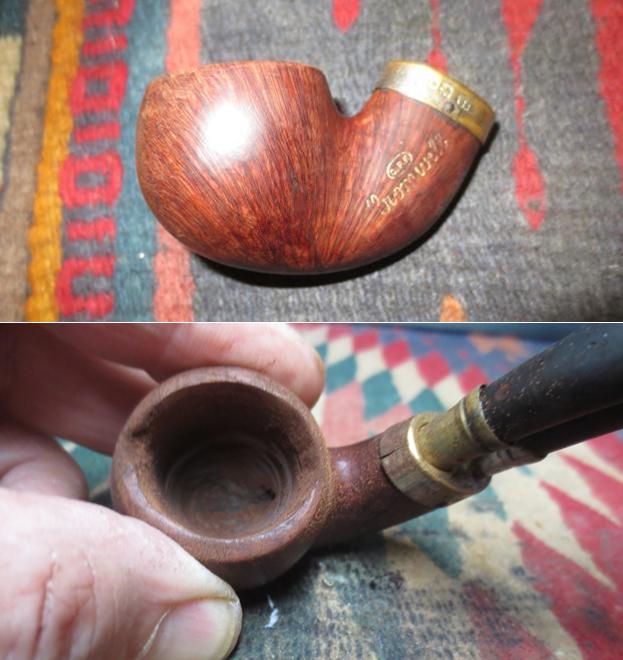
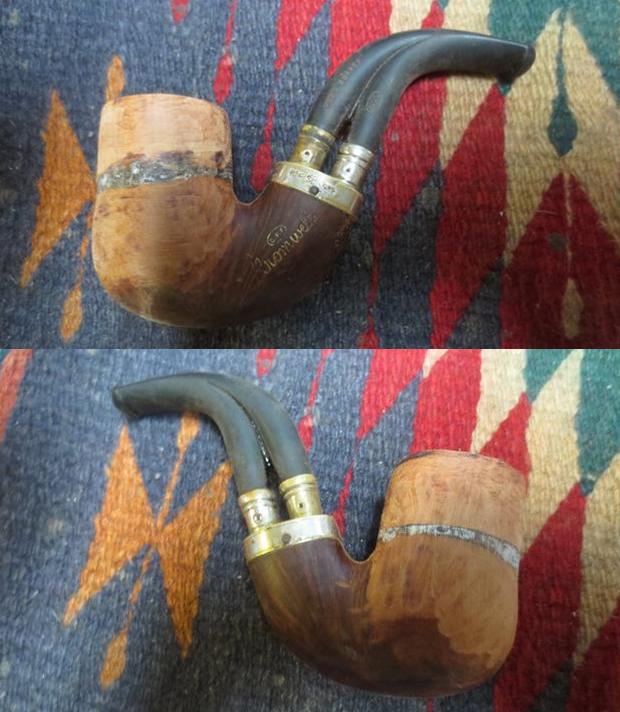
The next pipe is stamped as “PEMBROKE” over KB & B” on the left shank surface and came to me as part of inherited pipes that predominantly constituted pipes from various English brands, most notably LOEWE, BBB, COMOY’S, PETERSON’S, BARLING’S etcetera. However, this lot did also contain many pipes from American pipe makers like WDC, KB & B/ KAYWOODIE and others. I have researched and worked on a few of the KAYWOODIE pipes from this collection and recollect that KB & B changed their name to KAYWOODIE in 1920s to promote their Kaywoodie line of pipes or was it for some other reason? For clarification and recollection of history of this renowned brand from USA, I re-read the history from https://pipedia.org/wiki/Kaufmann_Bros._%26_Bondy#Brands and have only reproduced that information that helps to date the pipe:-
Early History
Kaufmann Bros. & Bondy (KB&B), Kaywoodie has been making pipes since well before the Civil War – around 1851. They peaked in the late 1950’s along with most American Briar works. In the early 20th century, their pipes were the standard others were measured by, along with Sasieni, Charatan and Comoy’s. There were few other world-class American pipe-crafters (William Demuth Company, early L & H Stern). Their pipes were as good as any of the renowned British firms. Kaywoodie just did not merely produce quantity, they provided quality: in the 1920’s they bought the exclusive rights to some of the choicest briar fields in history, hauling out 250 year-old roots the size of 27″ TVs and fashioning masterpieces out of this spectacular-grained ancient briar.
Early KB&B (non Kaywoodie)
Kaywoodie was the name a pipe offered by Kaufmann Bros. & Bondy Company (KB&B), first appearing in February of 1919.
The origin of the name Kaywoodie is a combination of the K from Kaufmann and wood, as in briar. Not much is known of the original KB&B company other than it was started in 1851 by the German born Kaufmann brothers when they opened a small pipe shop in the Bowery section of New York City.
When one of the men from the New York office got “gold fever” he carried a large supply of pipes with him to California that he sold along the way. This early “national distribution” did much to build the reputation of KB&B. By the late 1800’s, branches of KB&B were opened in Chicago, Atlanta, San Francisco and St. Louis with family and friends acting as agents. The trademarks, for the inlaid cloverleaf and the cloverleaf with the KB&B initials inside, were issued in 1881.
Pre-Kaywoodie KB&B
According to Hackert, the firm of Kaufmann Bros. & Bondy (KB&B) began producing the Kaywoodie Pipe in 1915.
Business thrived and in 1854 the Kaufmanns took in a partner named Bondy. … The three partners retired in 1898, but their relatives continued on with the firm, which had begun to manufacture their own briar pipes under the KB&B trademark. In 1915 the Kaywoodie brand was created as a marketing umbrella for a new briar pipe which the KB&B Company introduced. …”
Hacker concludes his history of Kaywoodie Pipes by noting that: “The KB&B briar pipe brand existed from 1900 until just after World War I (with some overlapping with the Kaywoodie from 1915 — 1917), and collectors refer to the KB&B as a Kaywoodie transition pipe.
The pre-Kaywoodie KB&B pipes were marked on the shank with a cloverleaf around KB&B.
In March of 1955, when S.M. Frank & Co. Inc. bought Kaufmann Bros. & Bondy, The Kaywoodie Company, Reiss-Premier Corp., The New England Briar Pipe Co. and – of course – Yello-Bole.
Thus, comparing literature notes with the stampings as seen on the pipe that I am working on, I am certain that it dates as to being pre- 1920. Another pointer is the orific slot which was gradually replaced by more elliptical slot from 1920 and progressed further to the horizontal slot that we see on pipes today.
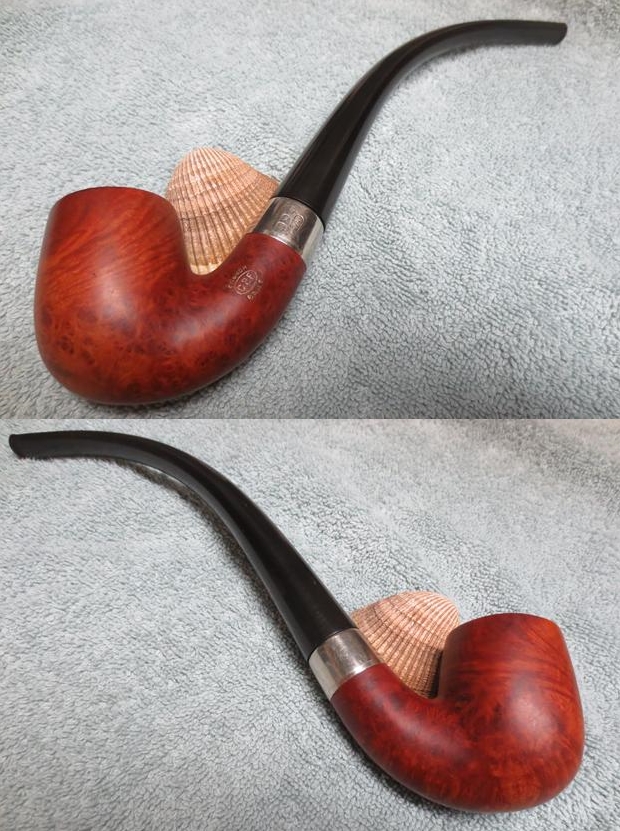
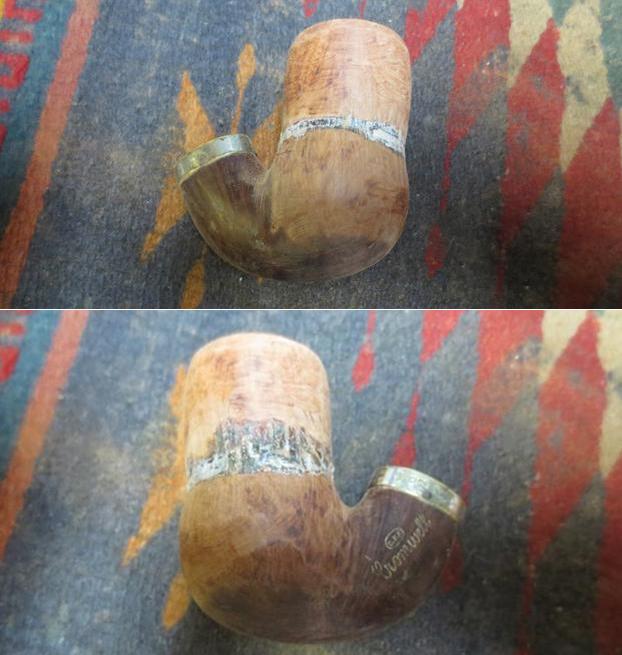
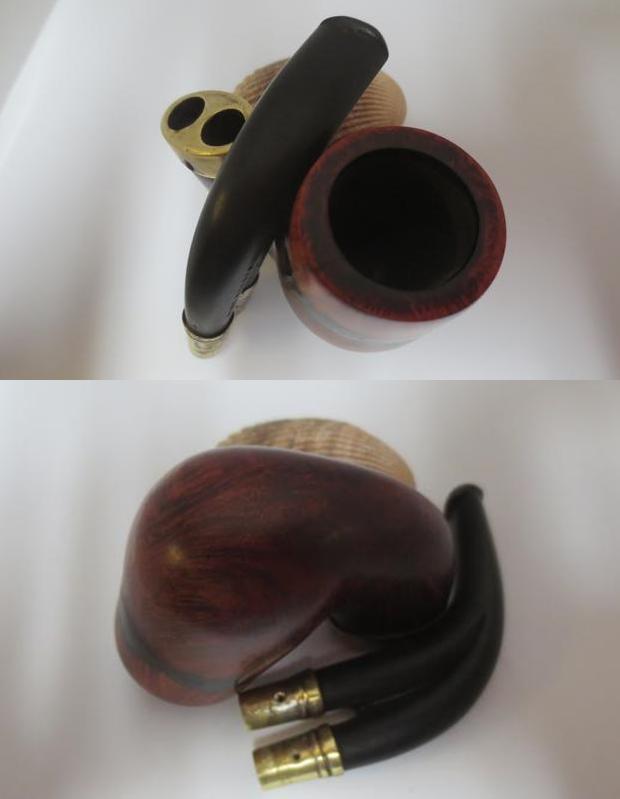
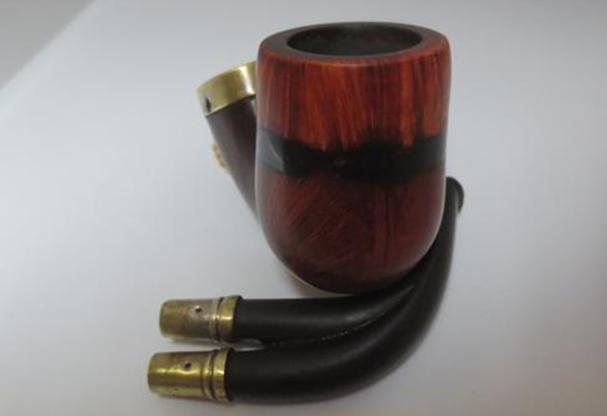
Here are the pictures of the stampings as seen on the PEMBROKE:  Initial Visual Inspection
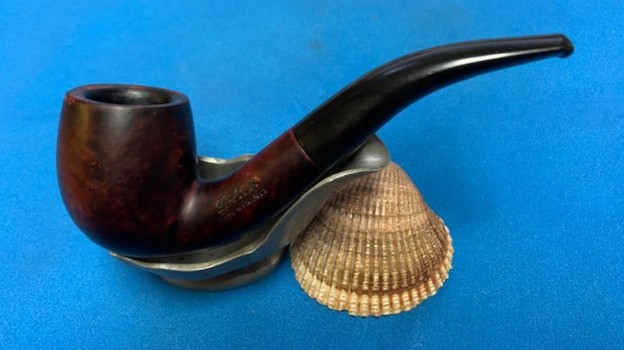
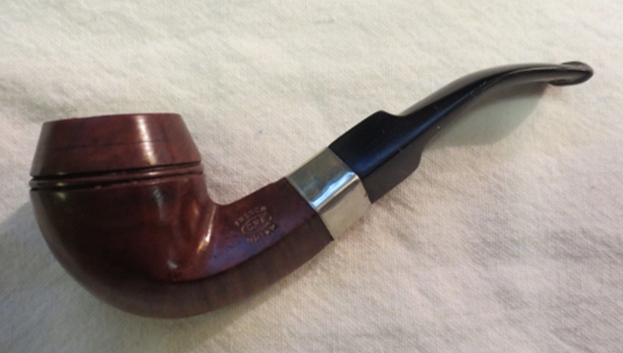
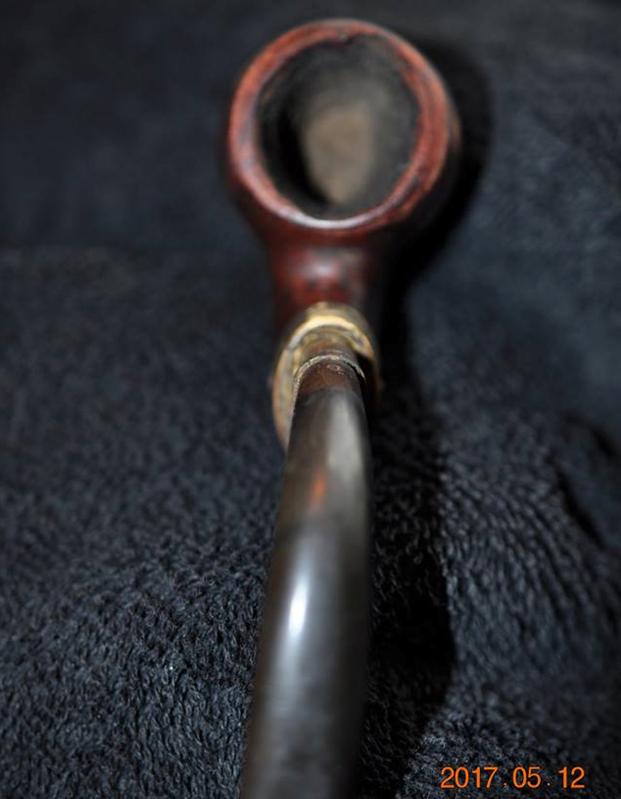
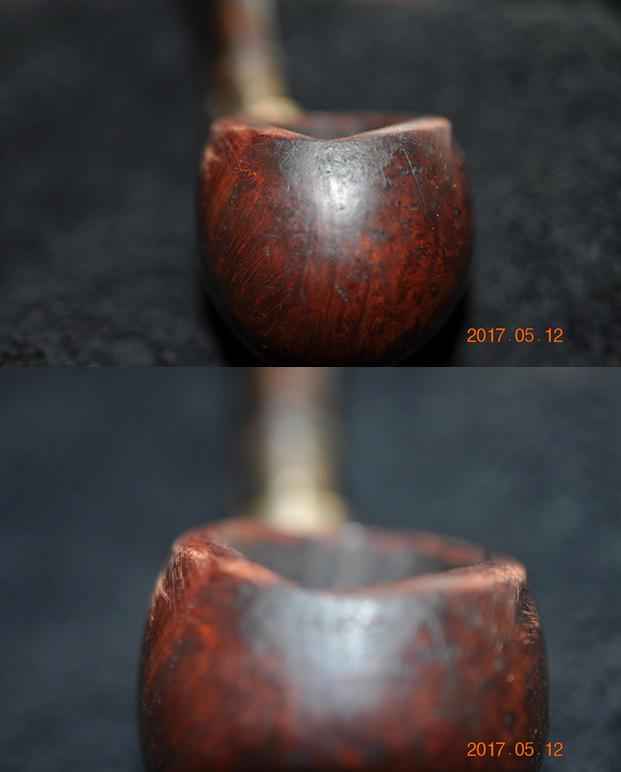
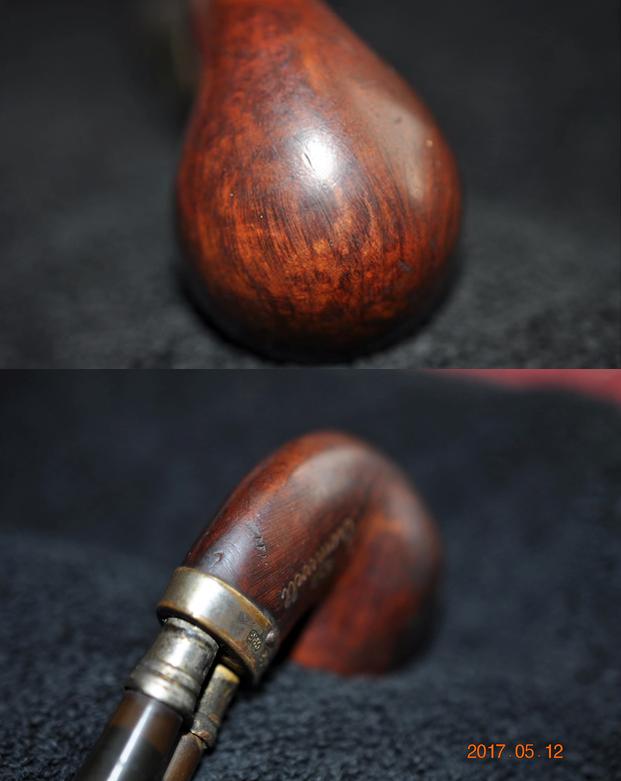
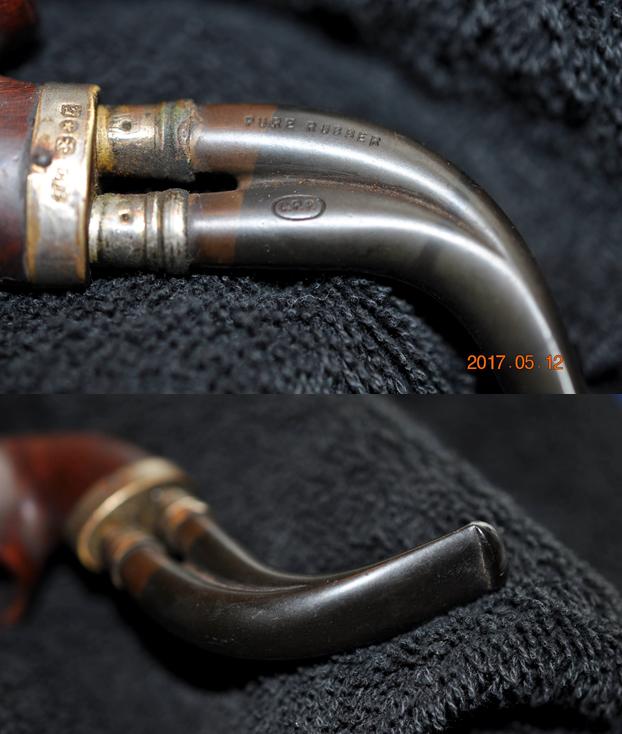
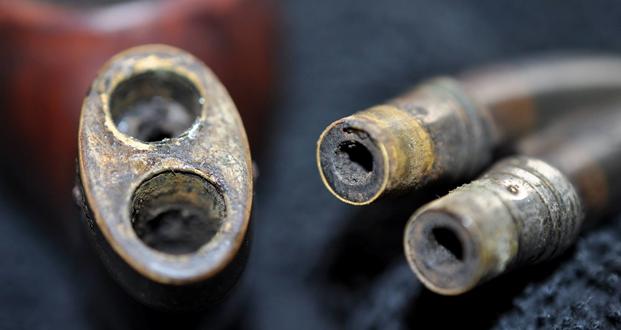
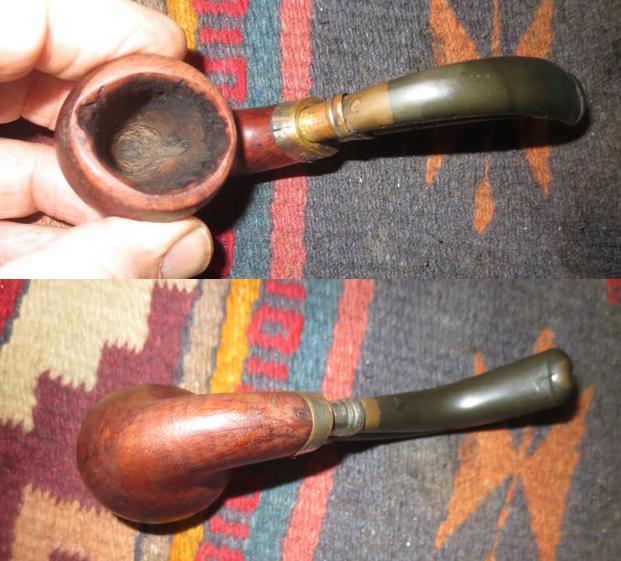
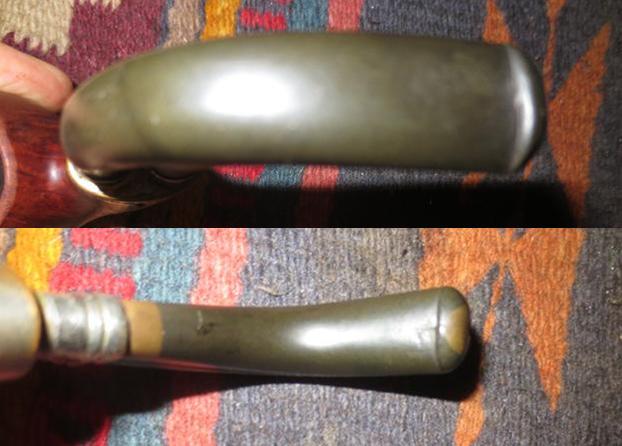
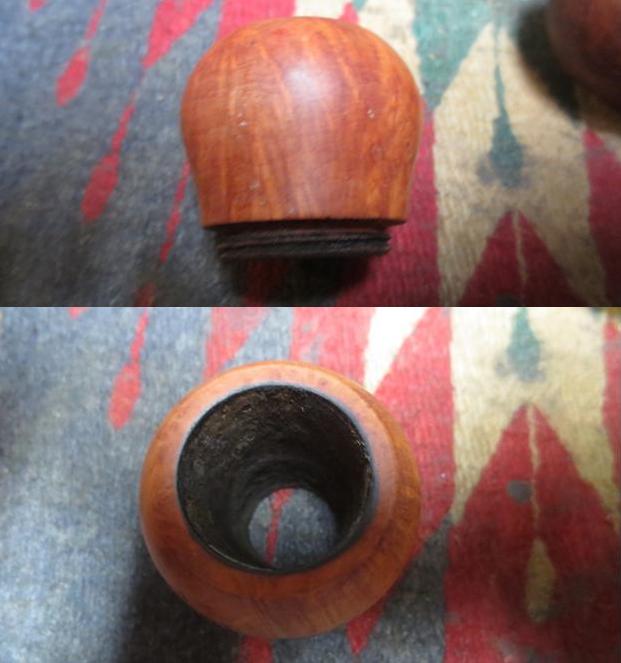
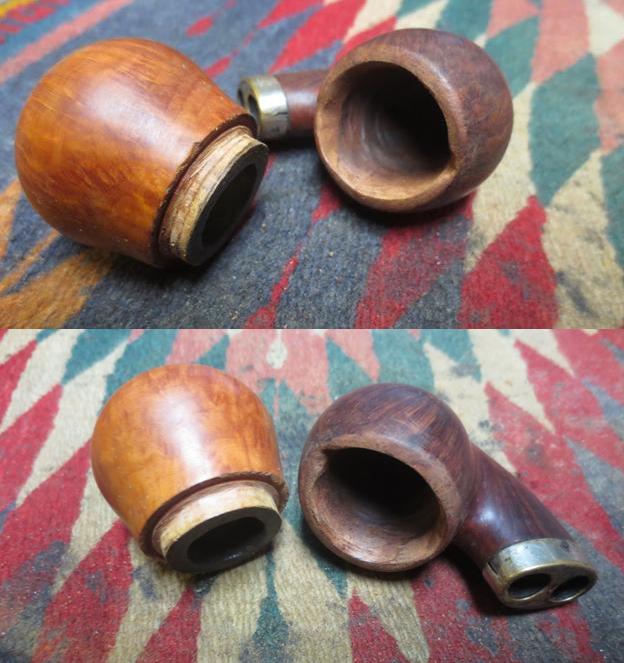
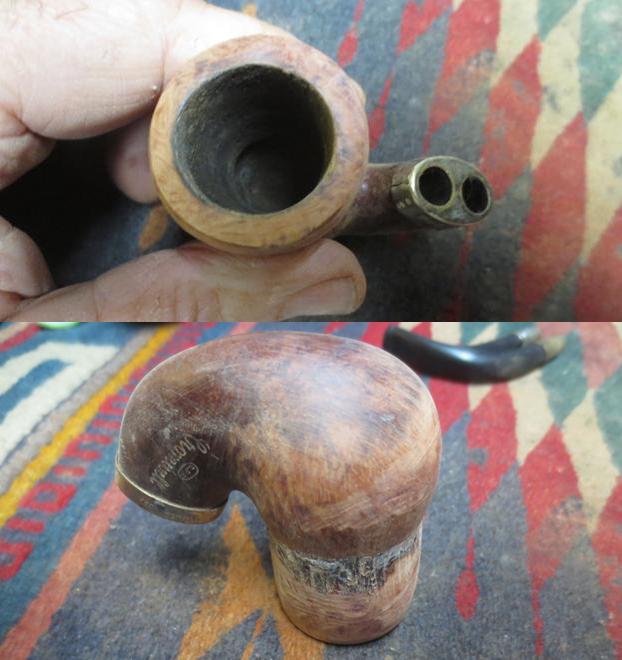
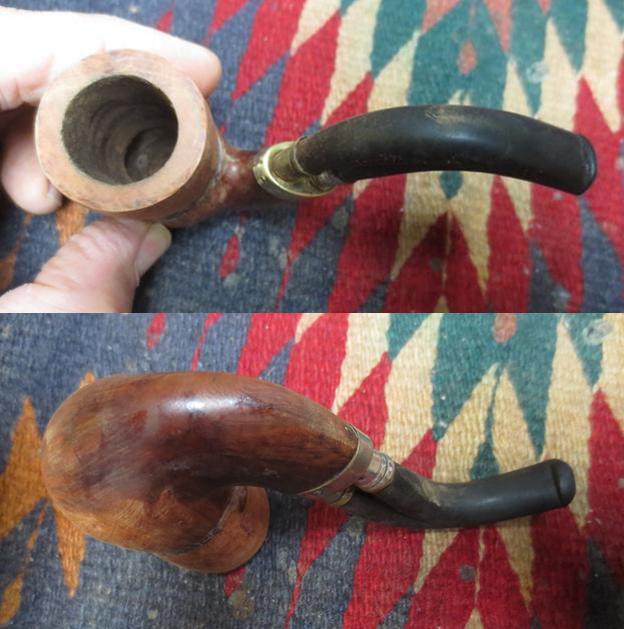
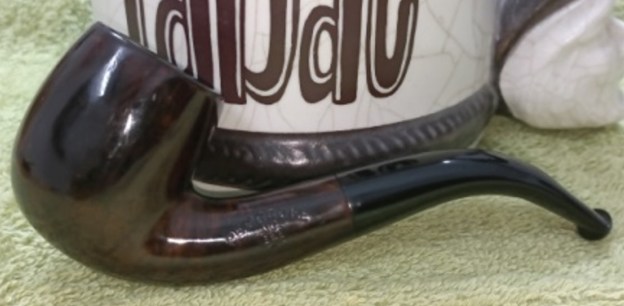
The PEMBROKE, currently on my worktable, is a medium sized classic bent billiards with a decent sized bowl in dark reddish brown color. The well seasoned briar is covered in dirt, dust and grime from decades of use. There are a couple of deep scratches on the stummel surface. There is a thick cake in the chamber with heavy overflow of cake, oils and tars over the rim top surface. The inner rim edge is uneven and charred. The outer rim edge, likewise, is peppered with dents and dings. The high quality hard rubber stem is oxidized with flattened bite zone on either surfaces of the stem. The tenon has a narrow extension at the end and is covered in dried oils and tars. The round orifice slot is similarly clogged with dried gunk. The stem does sit flush with the shank face and the seating is too damn tight within the mortise. Following pictures will give the readers a general idea of the condition of the pipe before I start to work on the pipe.

 Detailed Inspection
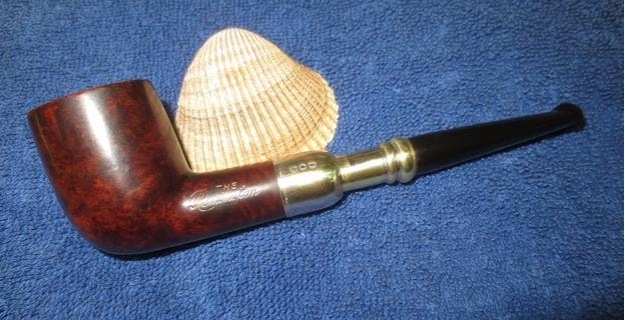
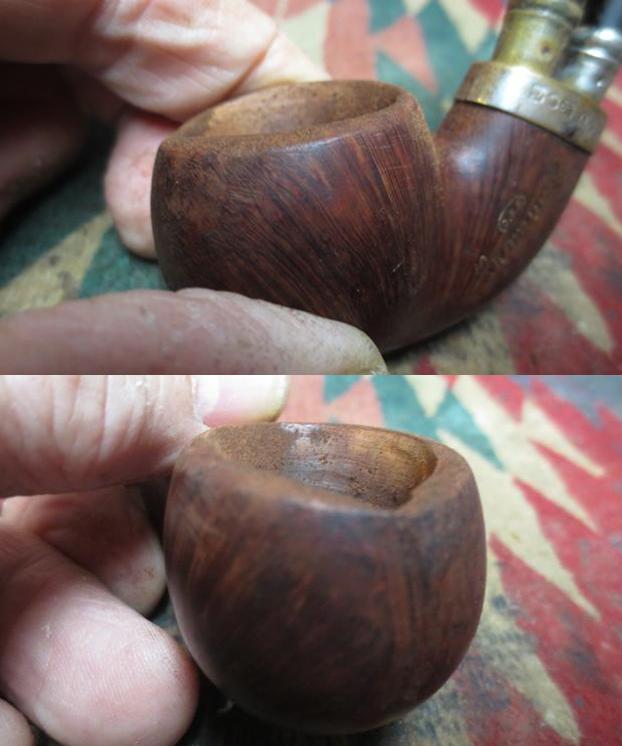
The chamber has a thick hard cake that has spilled over the rim top surface. The cake is thicker around the upper half of the chamber. The outer rim edge has dents and dings all around but is most severely damaged along the front half portion (encircled in yellow), a damage that can result only due to repeated strikes against a hard edged surface. The inner rim edge, prime facie, is sans any damage. The condition of the inner walls of the chamber can be commented upon after the cake has been taken down to the bare briar. There is a strong ghost smell in the chamber which is all pervading. There are remnants of un-burnt tobacco at the bottom of the chamber. The stummel surface is covered in dust, dirt and grime giving a dull, lifeless and lackluster appearance to the pipe. However, the briar has taken on a nice dark patina which has been a result of more than 100 years of usage and would be worth preserving. However, eliminating/ addressing the deep scratches (encircled in green) on both side of the stummel and the few dents and dings would entail sacrificing the patina. This is a call that I would need to take at some stage in the restoration process. The mortise is chock-a-block with old oils, tars, ashes and grime making for a laboured draw. The thick cake and blocked mortise hides the draught hole from the view. These issues need to be addressed.

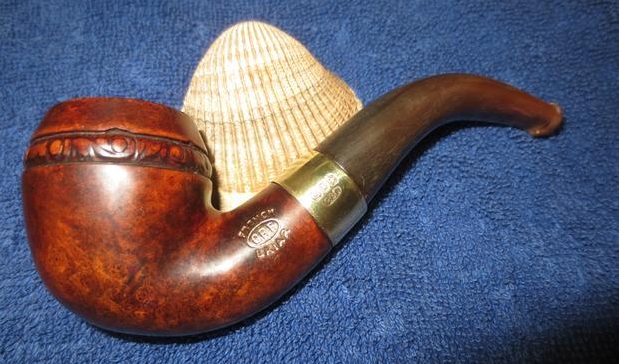
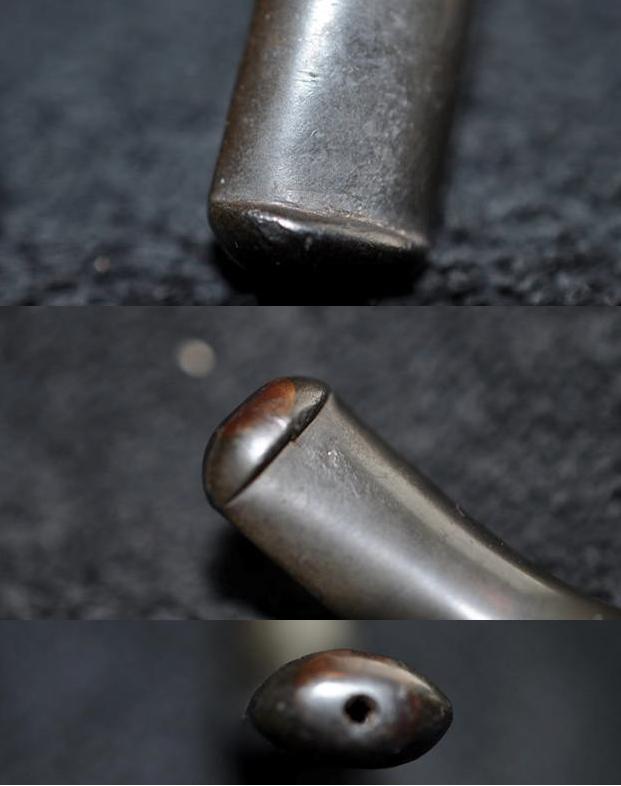
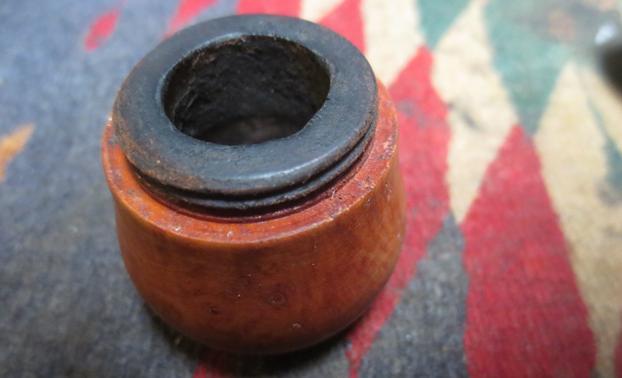
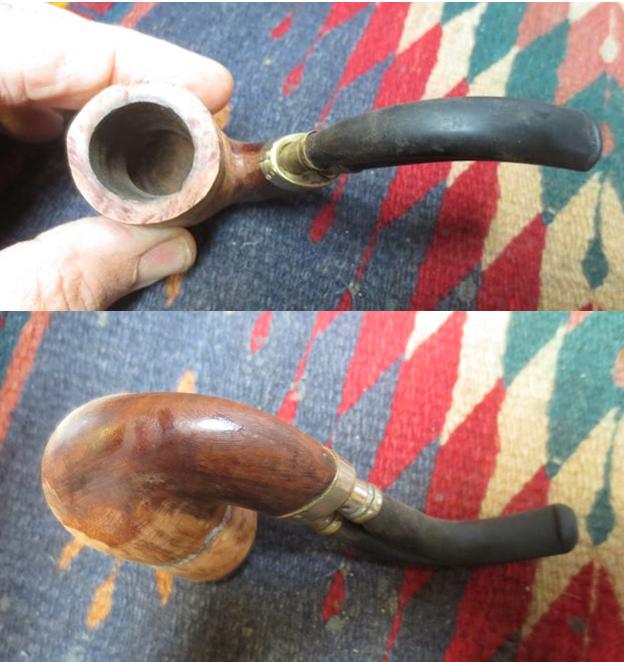
 The high quality hard rubber stem is deeply oxidized. The unique feature of the stem is that the stem surface is flattened in the bite zone on either surface with defined cut edges. Now, the question that came to my mind was if these flattened surfaces were original to the stem or carved out by the piper who owned it, probably for ease of clenching? Well, to me it appears that this unique carving of the bite zone is machined and not handmade since the edges are too well defined and sharp to be handmade using home tools. But that the flattening of the bite zone makes it comfortable for clenching is unquestionable. There are no significant bite marks or chatter in the bite zone or over the button edges. The orifice slot shows dried accumulated oils and tars that would need to be cleaned. The tenon has a stepped hard rubber (?) extension similar in shape to the ones seen on Peterson’s Deluxe line of pipes. The tenon and extension too is covered in a thick layer of dried crud. The stem does not seat flush in the mortise and is fit is very tight. I think the seating issues would address itself once the tenon and mortise is cleaned.
 The Process
I began the repair and refurbishing process with reaming of the chamber. I reamed the chamber with head sizes 1 and 2 of the PipNet pipe reamer. I removed the carbon from the areas where the reamer head could not reach with my fabricated knife. To completely remove the residual carbon from the walls of the chamber and smooth out the walls, I sanded the chamber walls with a folded piece of 220 grit sandpaper followed by cleaning the chamber with a cotton swab wetted with isopropyl alcohol. The chamber walls are in pristine condition. I gently scrapped off the lava build up over the rim top using a sharp knife to avoid damage to the surface.
 I cleaned the mortise and shank walls of the pipe using dental tool. I scraped out the dried oils and tars from the walls of mortise and shank walls. The pile of crud that was scraped out is indicative to the amount of gunk that was lodged in the mortise and shank internal. At the end of this step, I still was not able to pass a pipe cleaner through the mortise. Out came one of the many modified tools in my arsenal and after some deft use of this poker, I was able to dislodge the blockage from within the mortise. I ran a bristled pipe cleaner and q-tip dipped in alcohol through the mortise and out through the draught hole further clearing the passage. I will continue this further cleaning during the course of refurbishing of this pipe.
 Next, I decided to subject the chamber and mortise to cotton and alcohol bath. I packed the chamber with cotton and drew out a wick from the cotton and along with a folded regular pipe cleaner, inserted it into the mortise and through the draught hole into the chamber. I tightly packed cotton balls into the remaining portion of the mortise. Thereafter, I soaked the cotton balls with isopropyl alcohol up to the brim. About half an hour later, the level of alcohol had gone down, having being absorbed by the cotton. I topped it up once again and set it aside overnight. By next afternoon, the cotton and alcohol had drawn out all the remaining oils and tars from the chamber and mortise. I removed the cotton balls and the dirt can be gauged by the appearance and coloration of the cotton balls and the pipe cleaner. I ran pipe cleaners through the mortise and draught hole to clean out all the loosened tars and gunk that was lodged in the draught hole and mortise. The chamber and mortise now smelled clean, fresh and looked it too. I set the stummel to dry out naturally.
 Once the internals of the chamber and shank were cleaned, I cleaned the external surface of the stummel with Murphy’s Oil soap and cotton swabs followed by scrubbing the surface with a toothbrush and dish washing soap. This rid the stummel surface of all the accumulated dust, dirt and grime. Using a piece of Scotch Brite scrub, I deliberately cleaned the rim top and removed the crud from the surface. The damage to the rim edges is now amply evident.
 Simultaneously, I also cleaned the shank internals with dish washing soap and a shank brush. I set the stummel aside to dry out naturally while I worked the stem.
 I began the process of refurbishing the stem by first scraping off the dried gunk from the tenon and tenon end extension using a sharp thin knife. I was careful not to damage or break the extension or the stem face. I cleaned the tenon extension with a cotton swab moistened with alcohol and ran a pipe cleaner through the airway to check if the airway was clear of any blockage. Fortunately, it was.
 Using thin shank brushes and anti-oil dish washing soap, I cleaned the stem airway. I have modified this process of cleaning the stem airway by doing away with pipe cleaners and alcohol as it saves me a ton of pipe cleaners, which is a precious commodity for me here in India. I continued this cleaning till only white clean foam came out of the stem airway, indicating that the airway was nice and clean. I ran a couple of pipe cleaners dipped in alcohol through the airway to dry it out and make sure that there are no traces of soap and gunk hidden in the airway. I also scrubbed the stem surface to remove surface oxidation and rubbed a small quantity of EVO in to the stem surface. Since there were no damages to the stem, I set it aside and shall return to polishing the stem after I am done with the stummel repairs.
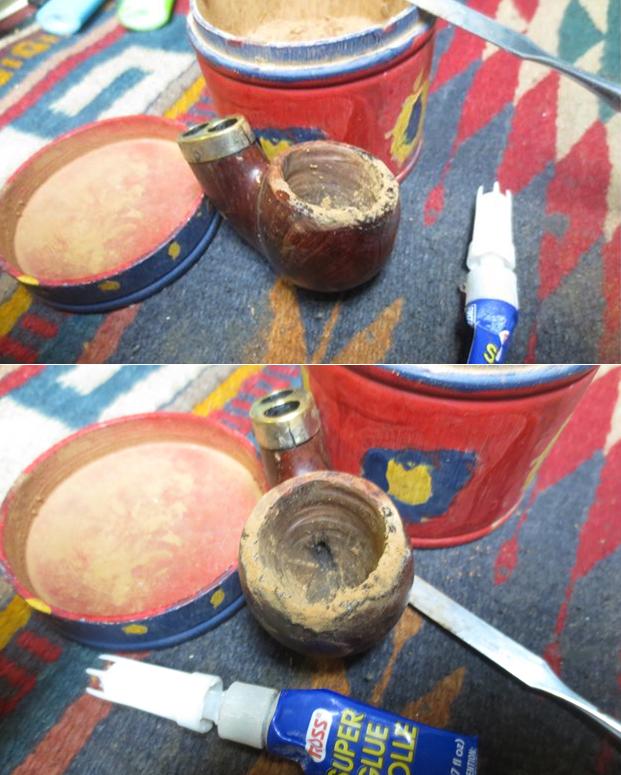
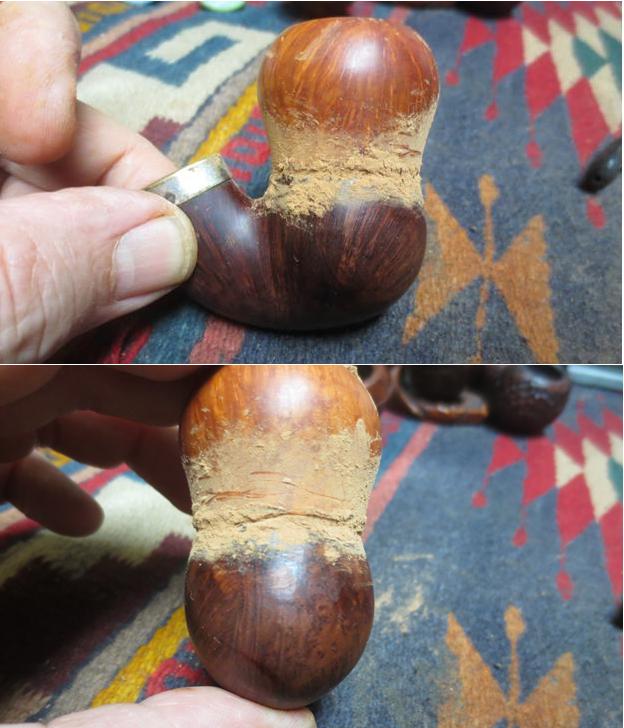
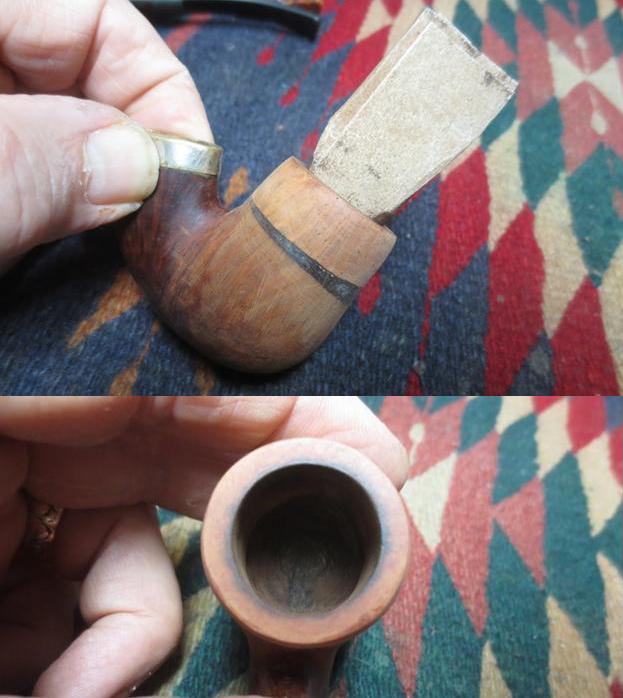
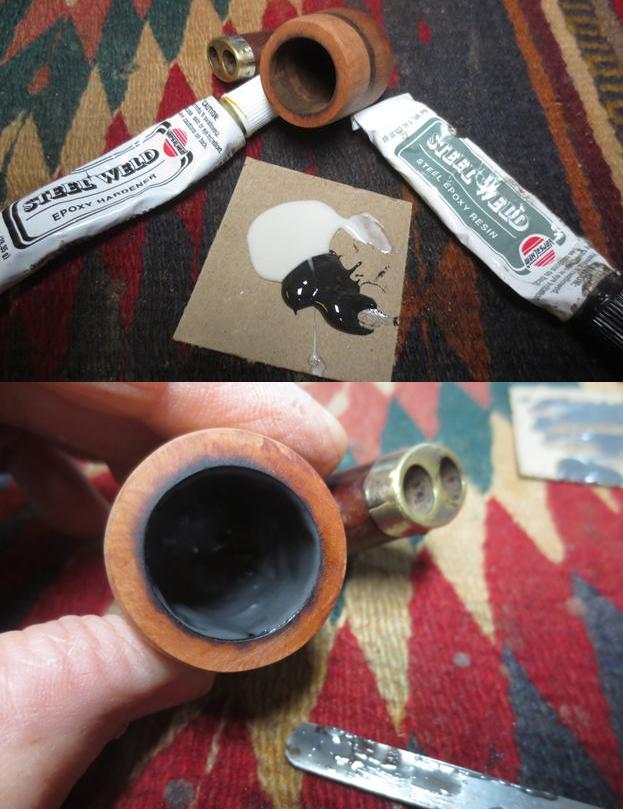
 Next, I got around to addressing the rim top damage. The extent of the damage to the outer edge, caused due to banging against a hard surface, would necessitate heavy topping off of the rim surface, and I for one, absolutely wish to avoid any loss of briar. Also topping to the extent that was required to eliminate the dents/ dings and chipped areas would completely alter the original shape and symmetry of this pipe. So, I planned on first filling up these dents and dings on the rim edge using briar dust and superglue to roughly match the surrounding intact rim surface and some more and then topping it to achieve a smooth even surface. Theoretically, this sounds logical.
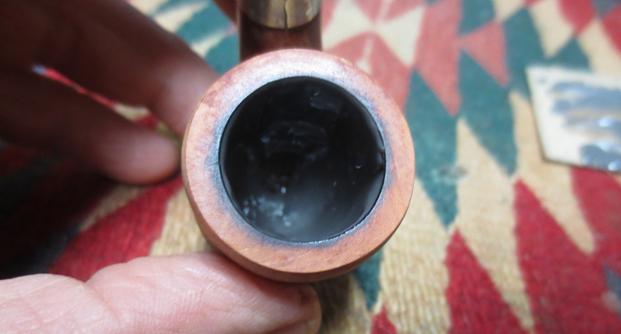
I resorted to the layering method again; first I layered superglue along the damaged surfaces of the rim followed by sprinkling of briar dust, another layer of superglue followed by a final layer of briar dust. This final layer of briar dust reduces the probability of air pockets (or so I thought). In the second picture, you can see that the layering has not been done to the level of the rim surface but above the surrounding intact rim surface as I would be sanding the rim subsequently. I set the stummel aside to cure.  I revisit the stummel the next evening after the repairs are completely cured and hard. Using flat needle files, I sand the repairs to achieve a rough match with the surrounding briar surface. Once I had achieved a rough match, I top the rim surface over a 220 grit sandpaper to even out the surface and achieve a perfectly even rim top surface. The inner and outer rim edges are still slightly uneven and shall be addressed next.
 To get the inner and out rim edges back to round, I created a bevel over the edges with a folded piece of 220 grit sand paper. I am pretty pleased with the progress being made thus far.
 It was now that I decided to address the numerous scratches over the stummel surface and the process of steaming these out is the best way forward. I assembled the items that are essential to this process; a wet Turkish towel, a knife and a candle. I heated my fabricated knife over the flame of the candle till it was really hot. I covered the scratched surface with the wet towel and placed the hot knife over it. The steam that is generated expands the briar raising the scratches to the surface. I repeated the process over the areas till the issue of scratches was addressed over the entire stummel surface. Though these scratches were pulled to the surface, I would still need to sand the stummel to eliminate them.
 Using a folded piece of 220 grit sandpaper, I sand the scratched surfaces till these were completely eliminated. I followed the 220 grit sandpaper by sanding the surface with a piece of 800 grit sandpaper. However, here I also realized that this also resulted in losing the patina that I so dearly wanted to preserve. You win some and lose some, that’s how it always is!
 To further clean and highlight the grains, I sand the stummel with micromesh pads, wet sanding with 1500 to 12000 grit pads. I wiped the stummel after each wet pad with a moist cloth to remove the resulting dust and note the progress being made. I rub a small quantity of “Before and After Restoration Balm” in to briar and let it rest for a few minutes. The balm almost immediately works its magic and the briar now has a nice vibrant appearance. I further buff it with a horse hair shoe brush.

 I set the bowl aside and took to working on the stem. I once again cleaned the stem surface using the Scotch Brite sponge and followed it up by a scrub with 0000 grade steel wool. This helps in further removing the oxidation from the surface. I also ran a thin shank brush through the stem airway to ensure that it was clean and clear of all the soap deposits. I rubbed the stem with some EVO to hydrate the surface.
 To impart a deep black shine to the stem while getting rid of the oxidation from the stem surface, I wet sand the stem surface with 400, 600, 800, 1000, 1500 and 2000 grit sand papers. I again rub the surface with some EVO to hydrate the stem and prevent oxidation from again creeping over the surface due to exposure to natural elements and set the stem aside.
 To bring a deep shine to the hard rubber stem, I polished the stem, wet sanding with 1500 to 12000 grit micromesh pads. I rubbed it down with Extra Virgin Olive oil to rejuvenate the hard rubber. The finished stem is shown below.
 With the stem refurbishing nearly completed, I took a long hard look at the stummel now bereft of the patina and the original dark reddish brown stain. I discussed with Abha about the difference in the appearance of the stummel at this stage in restoration from the way it appeared at the start. The unanimous decision was to stain the stummel to its original color or as close to it as possible and with the decision made; I decided to stain wash the stummel using Feibing’s Cordovan leather dye.
Using a heat gun, I warm the stummel to open the pores in the surface to accept the stain. I mix a small amount of alcohol with the dye to dilute it and apply it over the heated surface with a folded pipe cleaner. I set the stain by flaming it with the flame of a lighter as I went ahead to different self designated zones of the surface. This helps in the setting of the stain into the grain of the briar and set the stummel aside.
 The next evening, approximately 18 hours later, as Dal describes, I began to unwrap the stain in the hope to see beautiful grains. I mount a felt cloth buffing wheel on my hand held rotary tool and setting the tool at its slowest speed, I began to peel off the stain from the stummel surface first using Red compound. The stain was peeled out gradually revealing a nice shining surface and grains underneath the stain.
 Next, I mount a fresh felt cloth buffing wheel and polish the stummel with White Diamond compound. This further lightens the stain, highlighting the grains while imparting a nice shine to the stummel surface. The similar coloration achieved at this stage to the original color, uplifted my spirits sky high. I shall continue the polishing regime further using Blue diamond and finish off with carnauba wax polish.
 I have now reached the homestretch in this restoration project. To complete the restoration, I mount a cotton cloth buffing wheel on to my hand held rotary tool and polished the stummel and stem with Blue Diamond compound. This compound helps to remove the minor scratch marks that remain from the sanding while further highlighting the grain and lightening the stain.
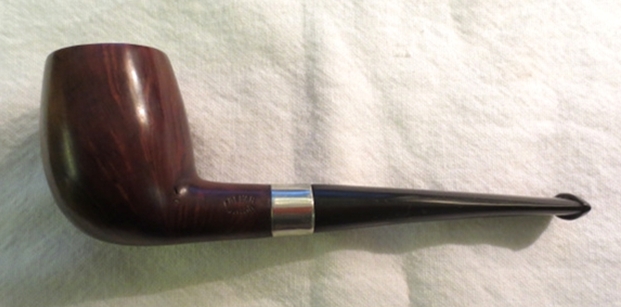
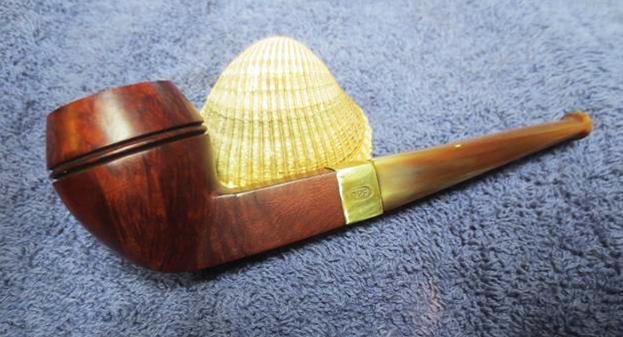
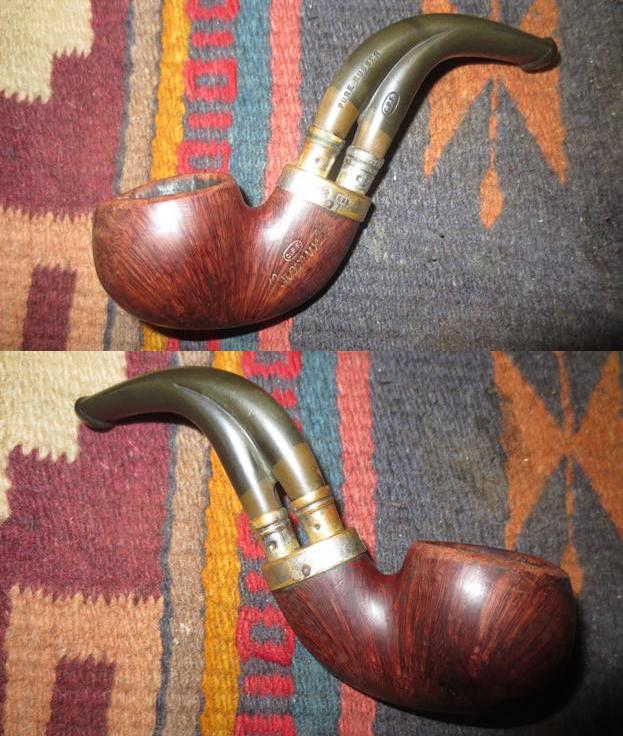
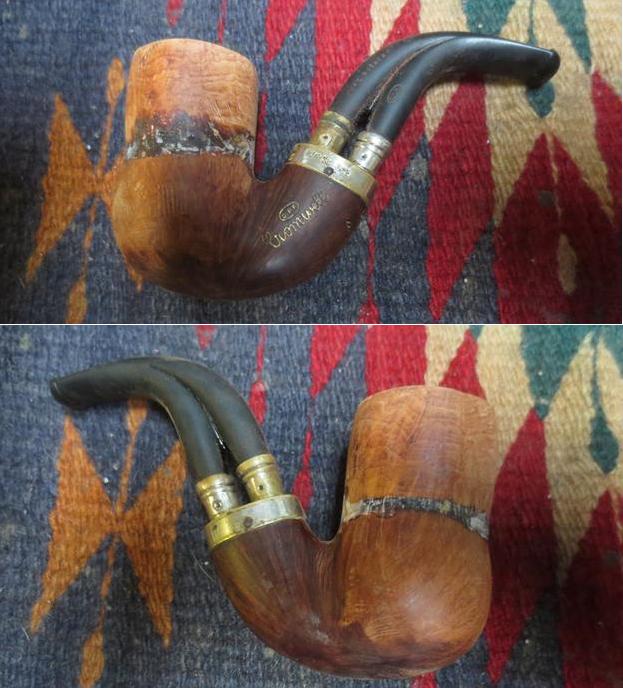
 I mount another cotton buffing wheel that I have earmarked for carnauba wax and applied several coats of the wax. I finished the restoration by giving the entire pipe a rigorous hand buffing using a microfiber cloth to raise the shine further. The finished pipe looks amazingly beautiful and with the Cordovan stain, as good as original. In fact, the pipe looks much more endearing and beautiful in person than it does in the pictures below. It shall find a place of pride in my “American pipe makers” section of my personal collection.


 P.S. – This then is one project which has given me greatest of satisfaction that I have experienced after it’s completion.
I am not too concerned with successes or failures of any project. What matters to me is the journey.