Blog by Dal Stanton
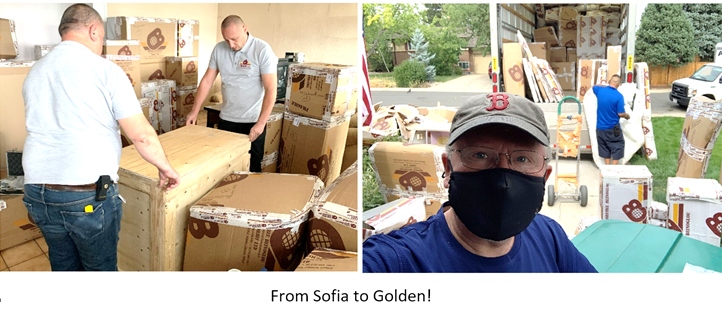
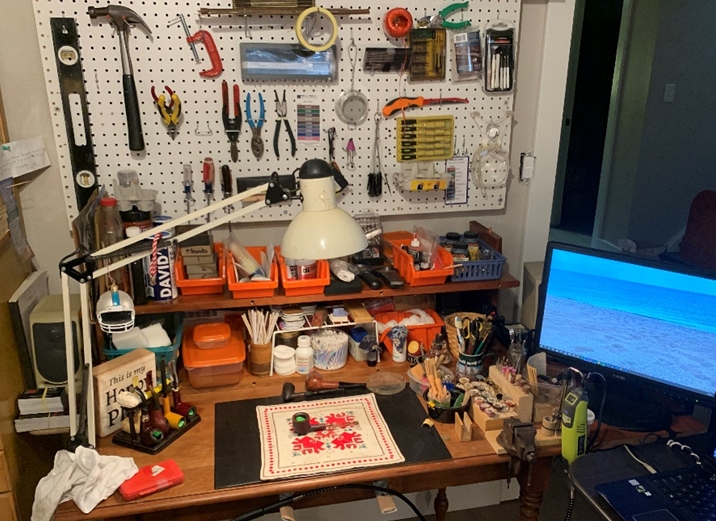
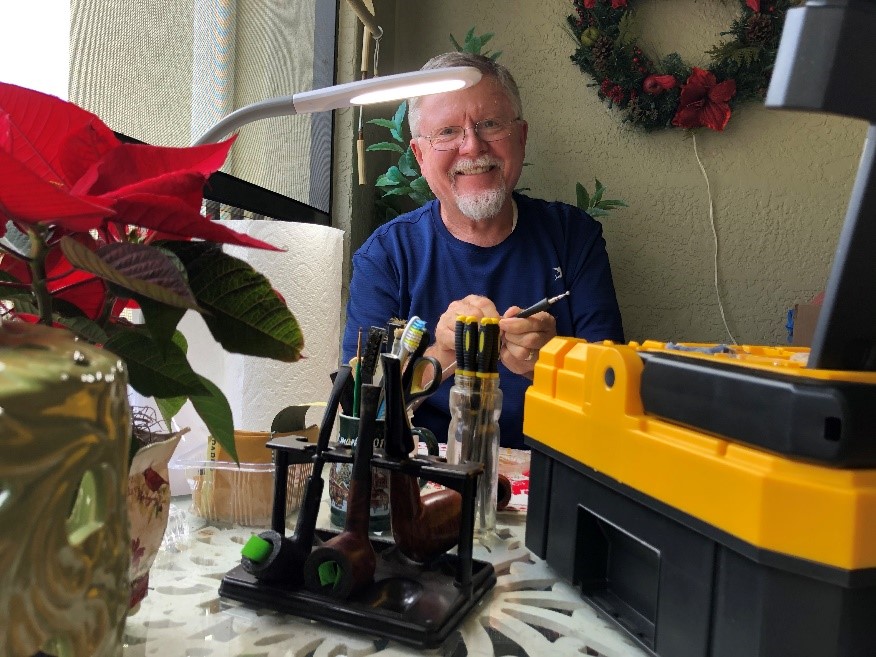 With Christmas behind us and with New Years before us, I’m thankful to be with family during these holidays. This was the first Christmas with my mother in Florida in many years – it has been great! It has also been great on her second floor screened-in balcony which has served as The Pipe Steward worktable. My wife caught me in action!
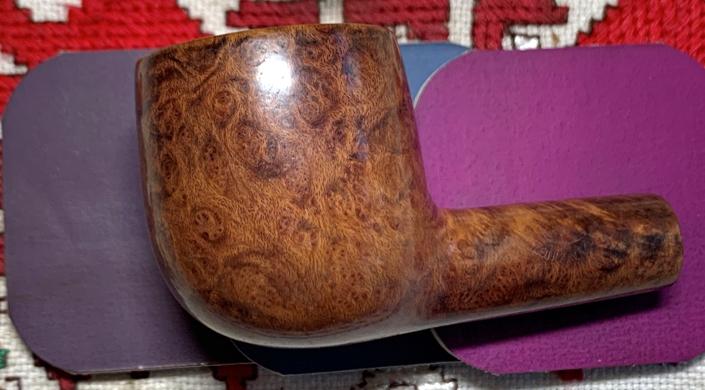
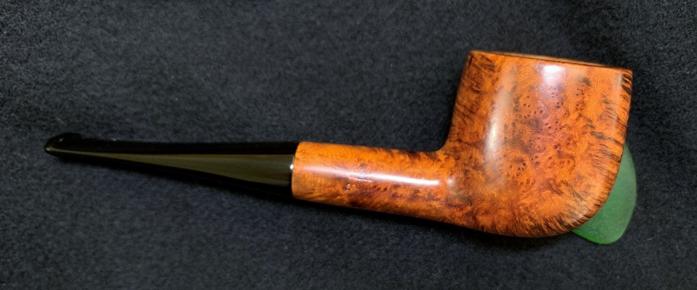
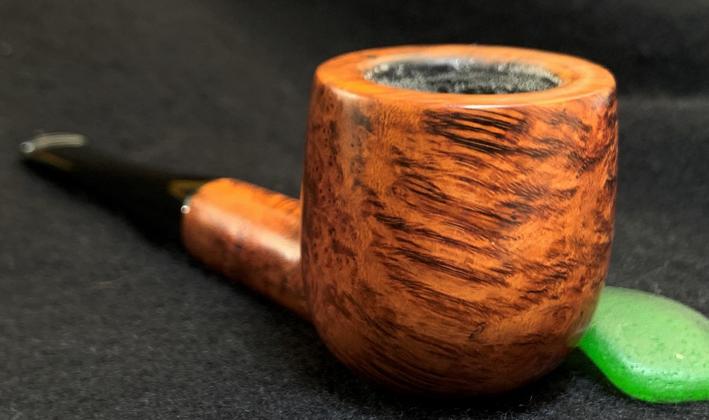
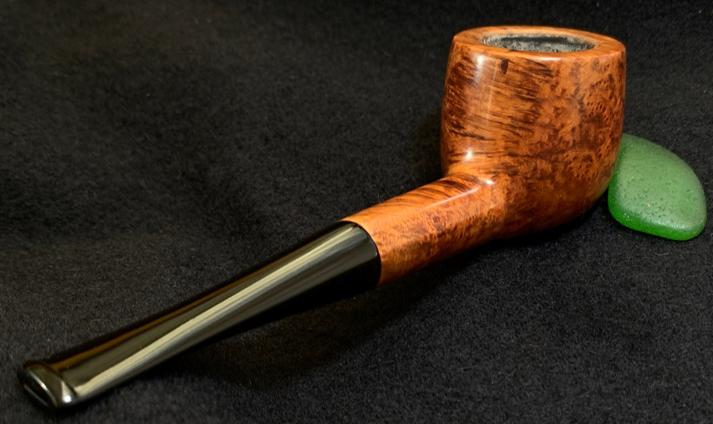
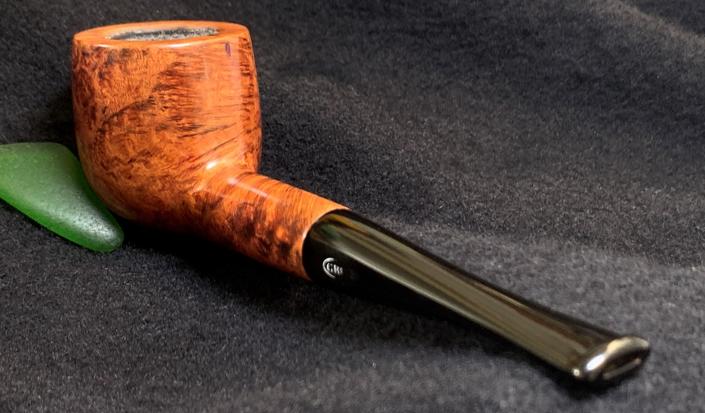
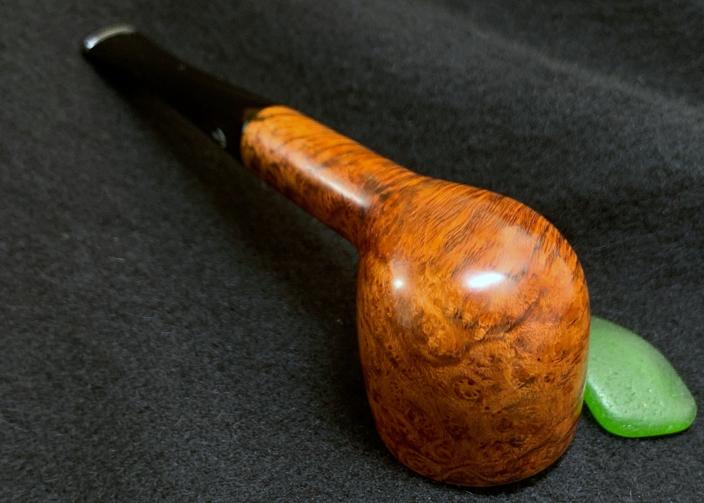
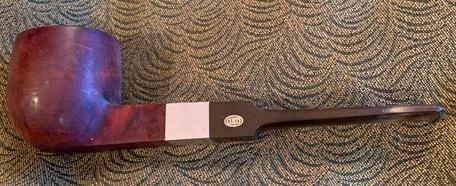
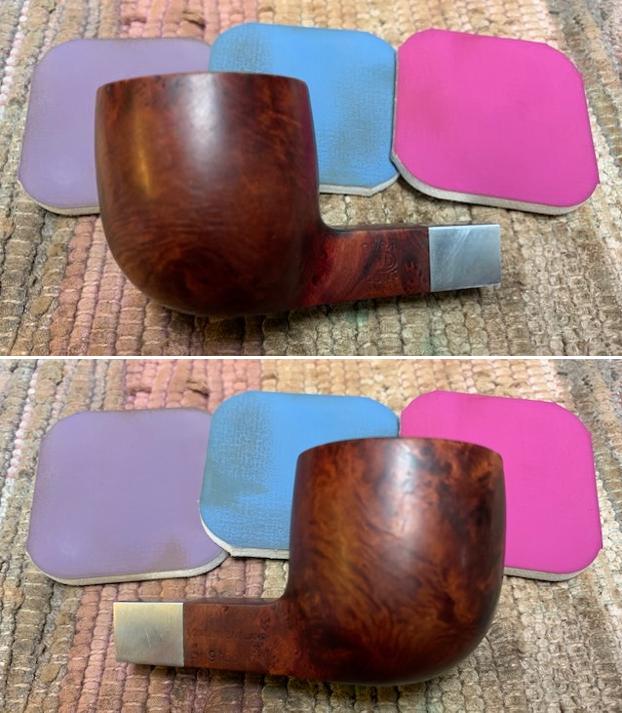
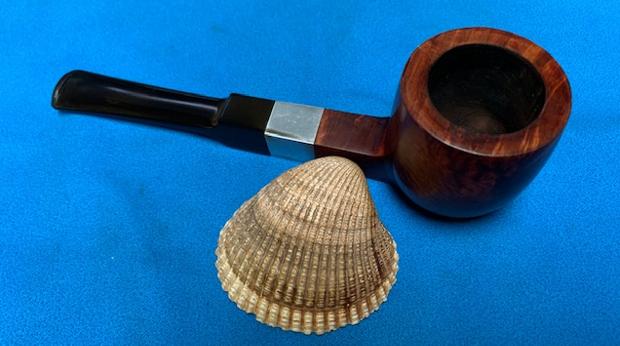
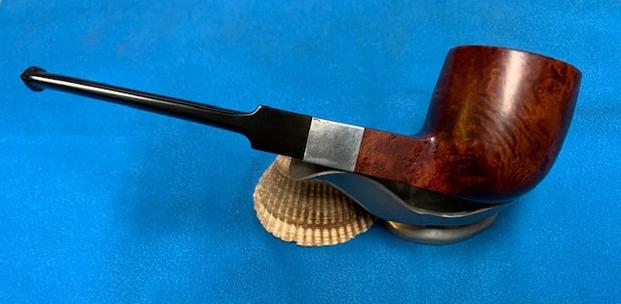
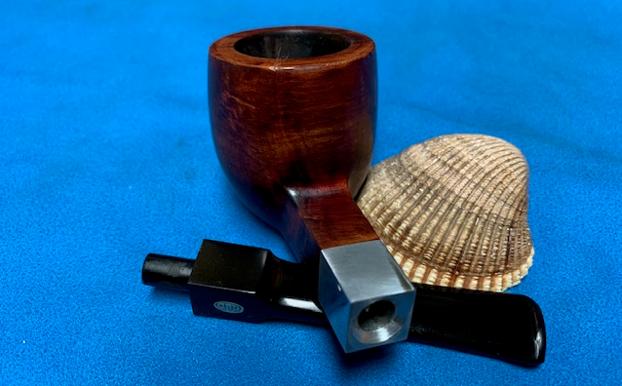
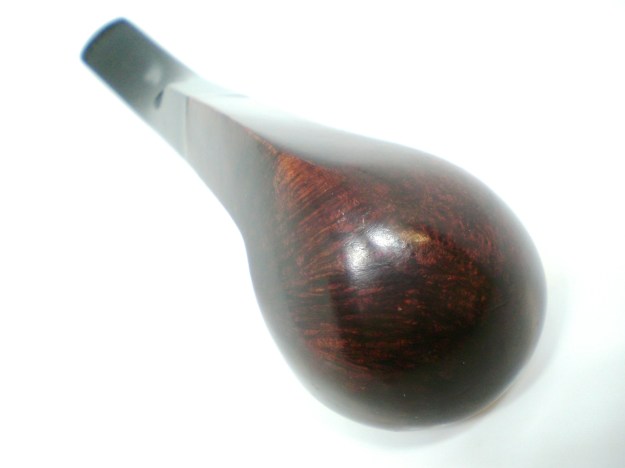
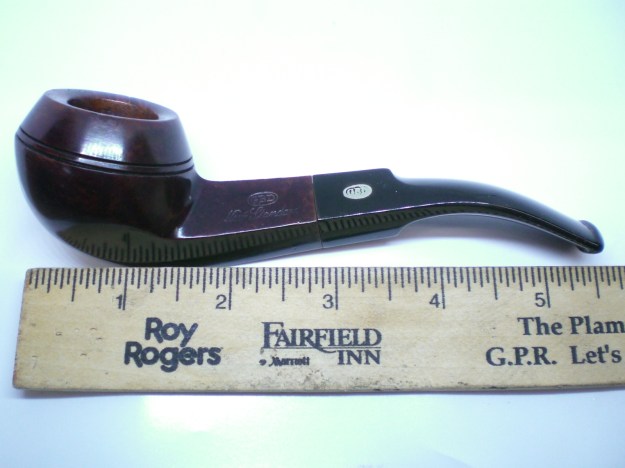
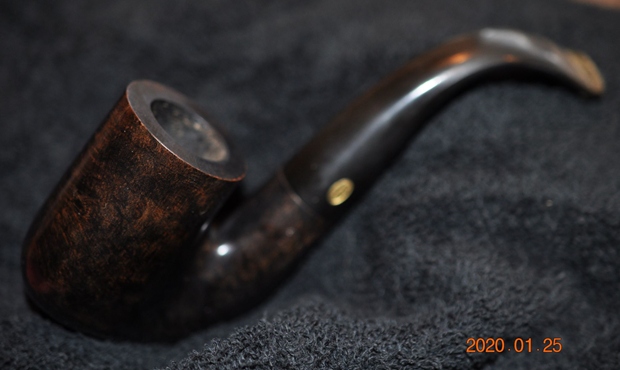
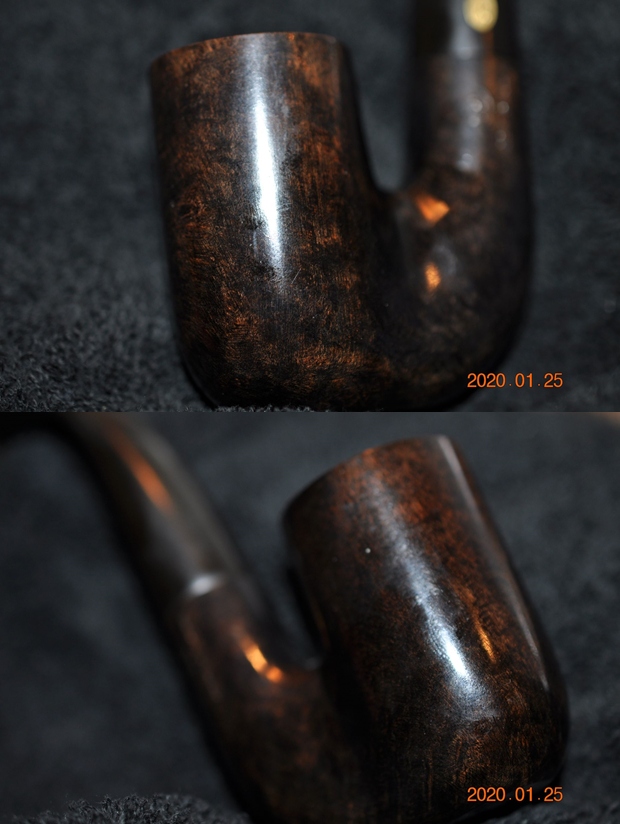
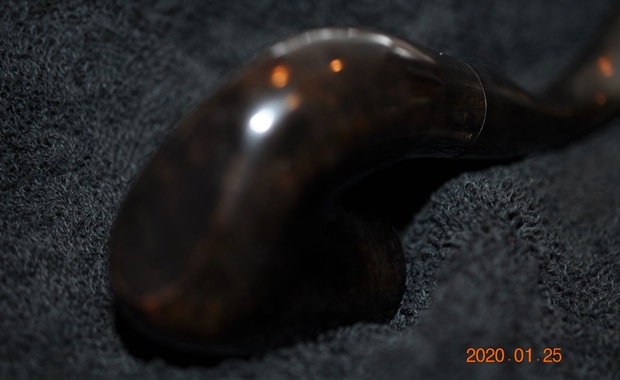
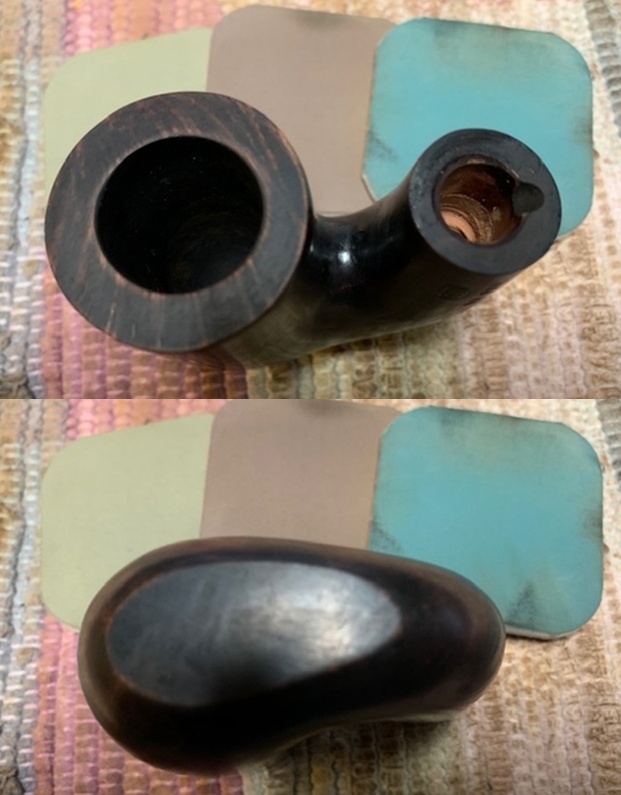
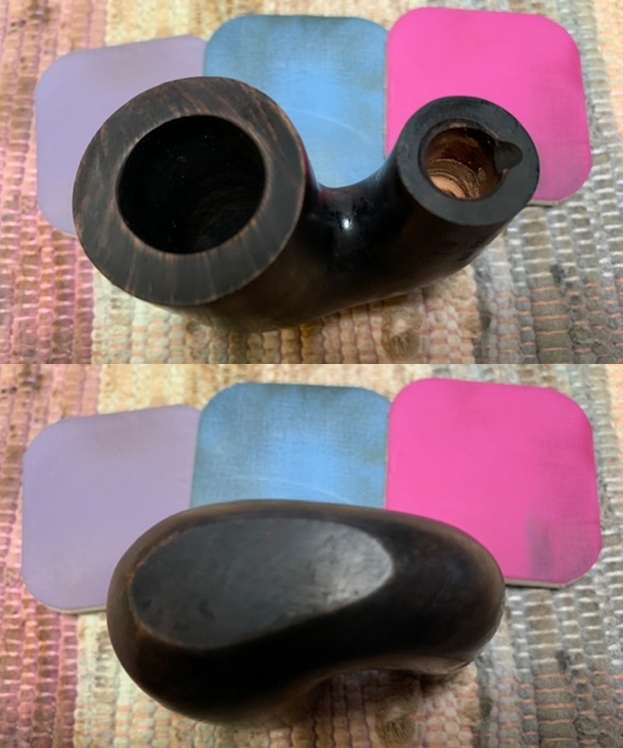
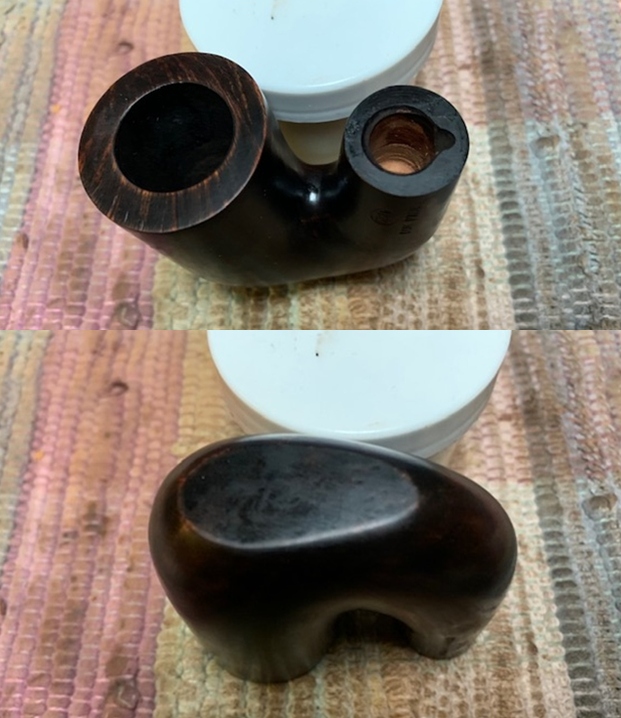
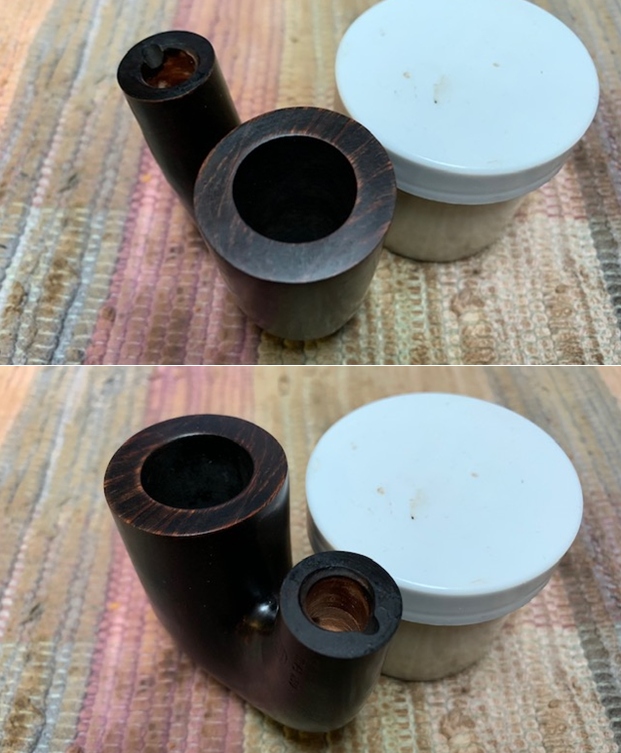
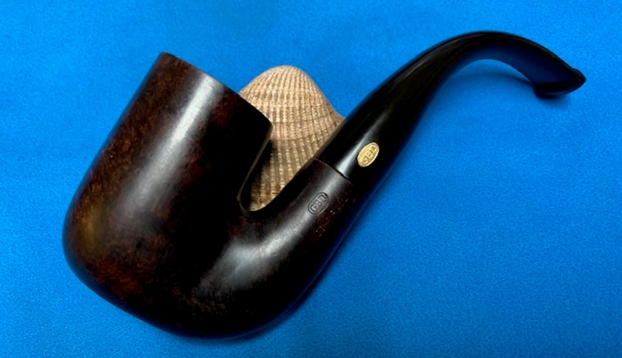
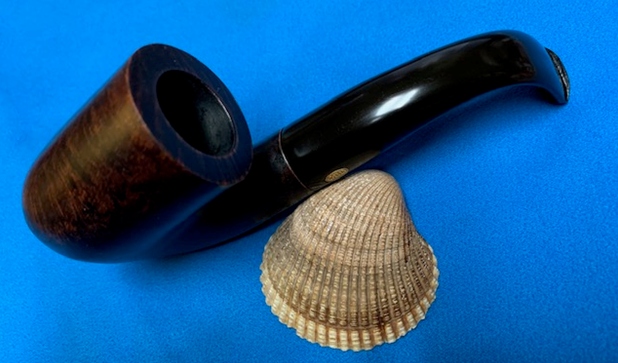
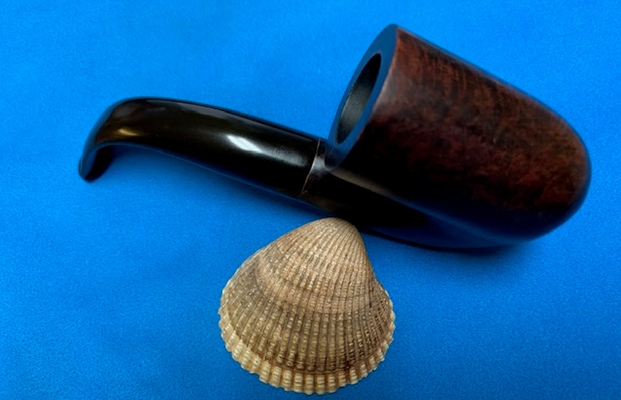
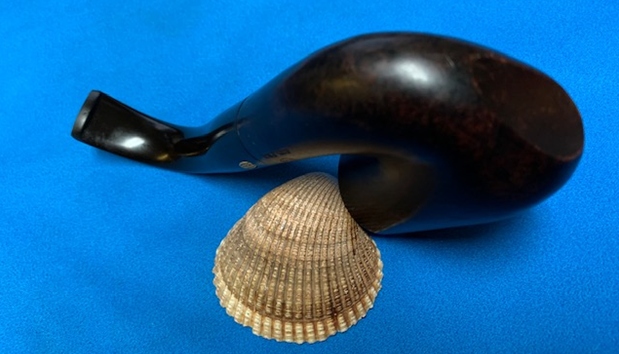
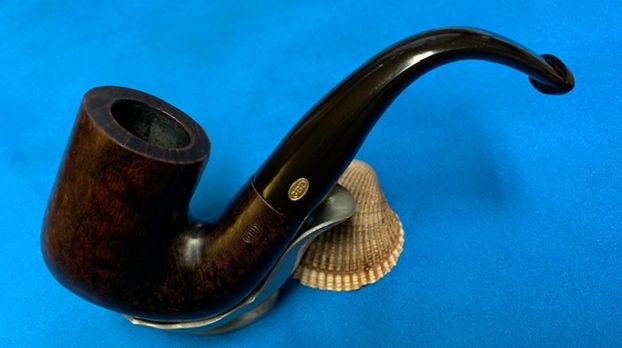
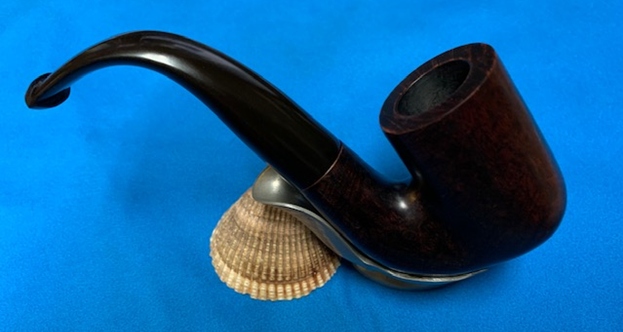
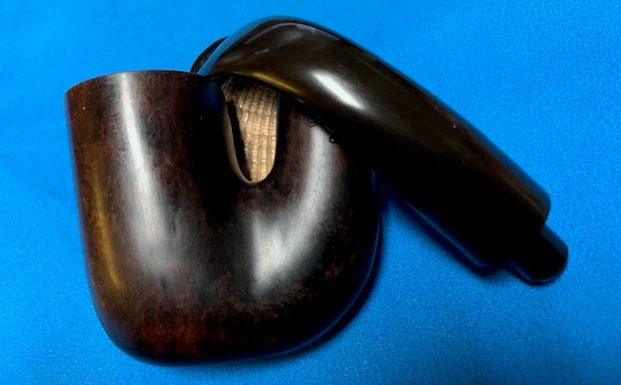
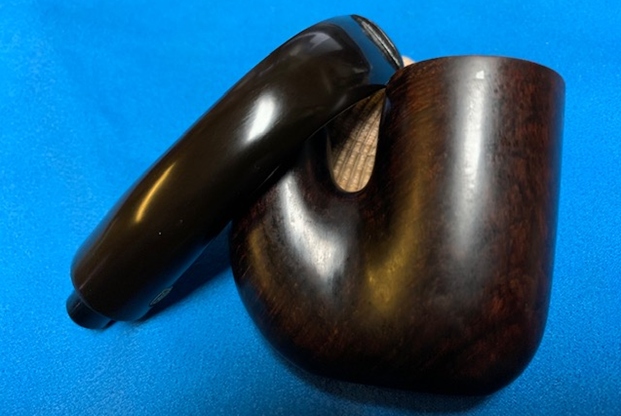
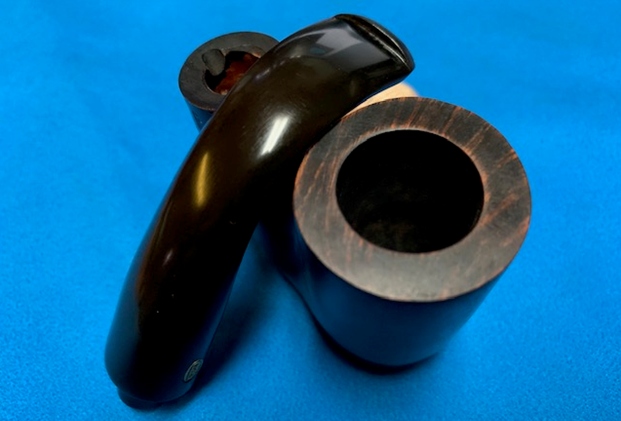
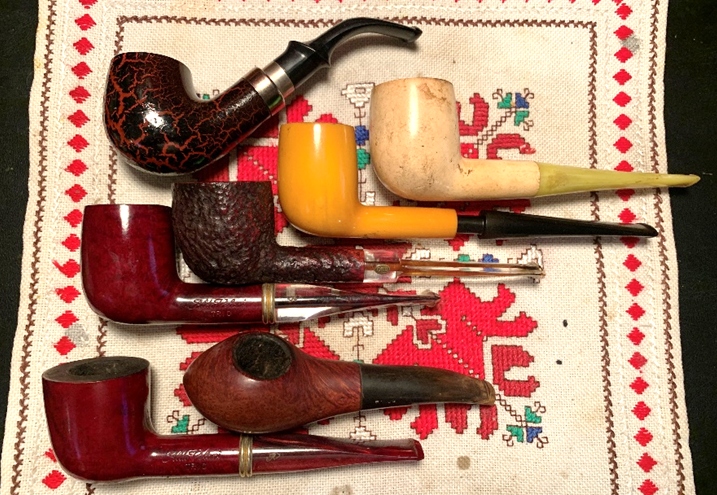
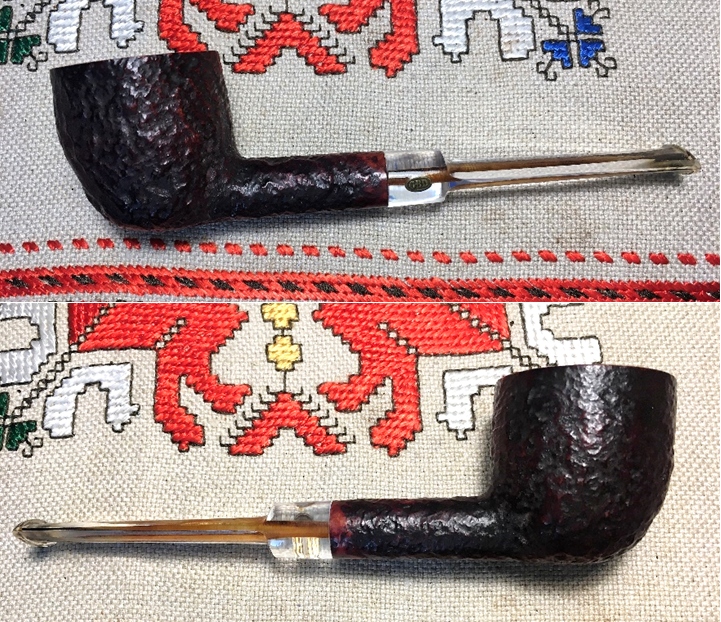
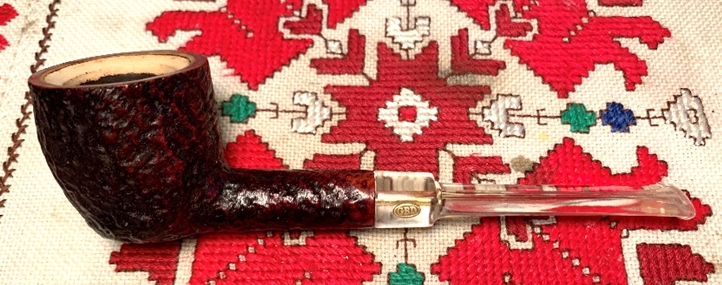
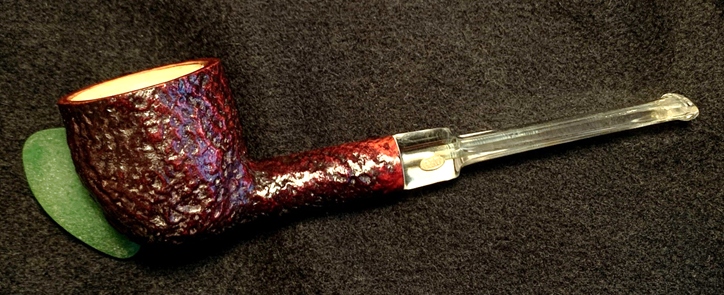
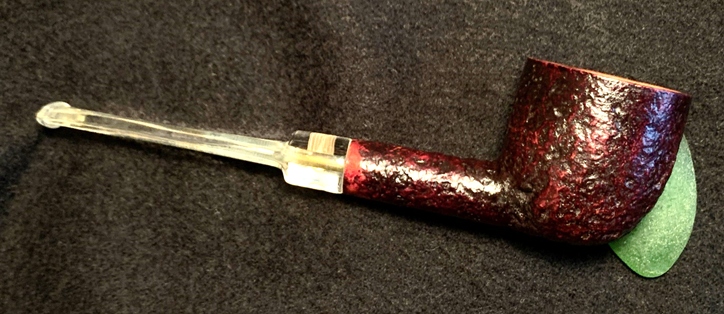
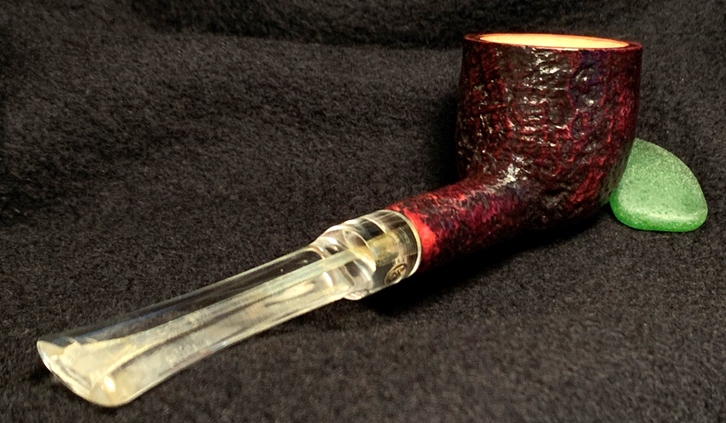
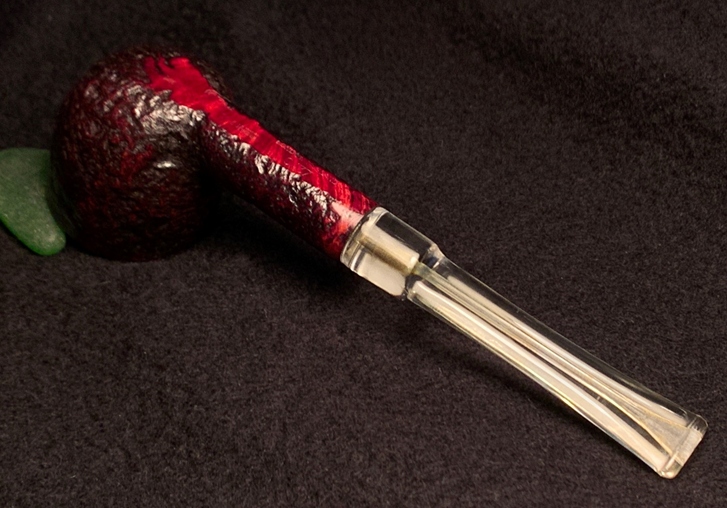
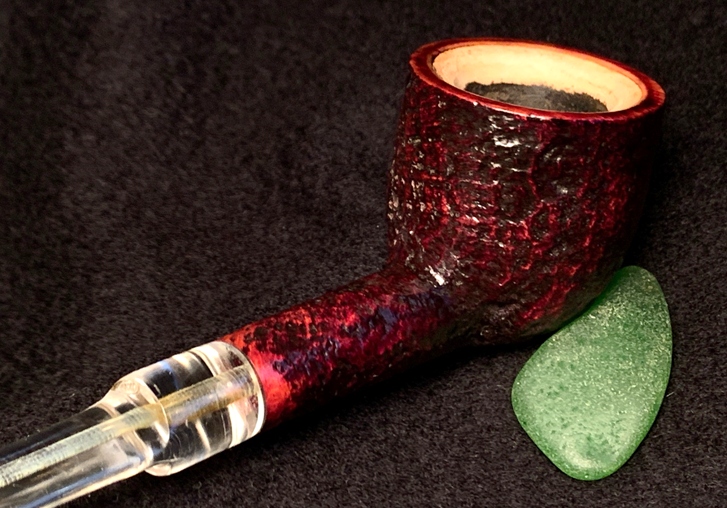
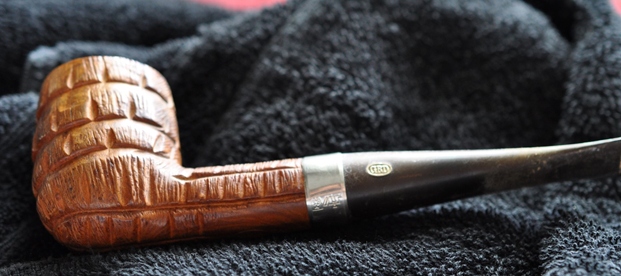
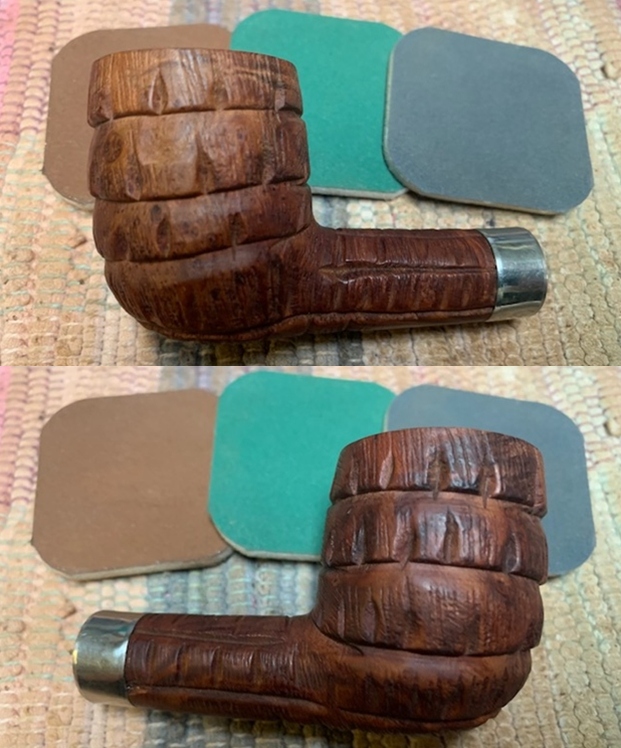
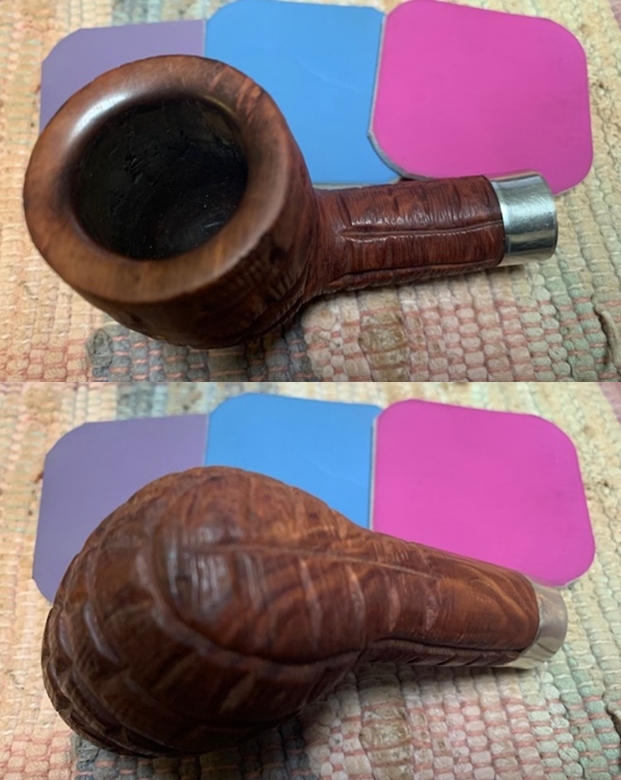
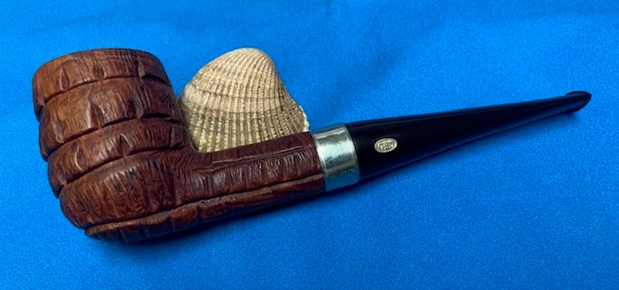
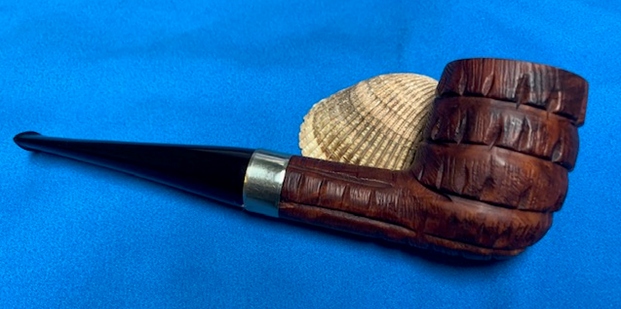
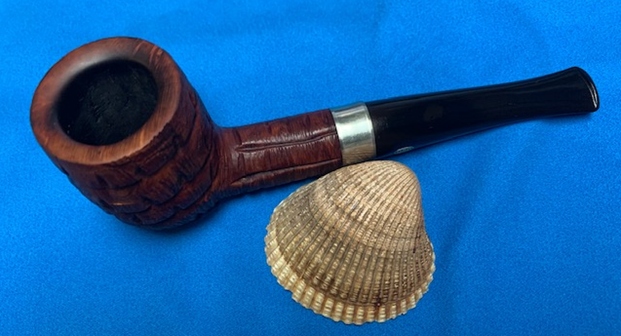
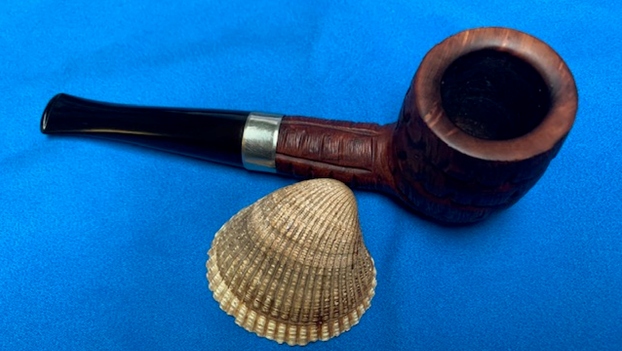
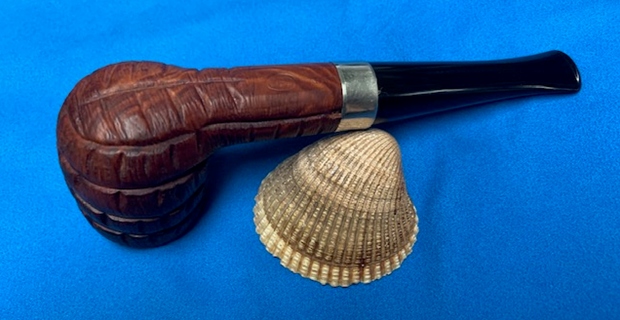
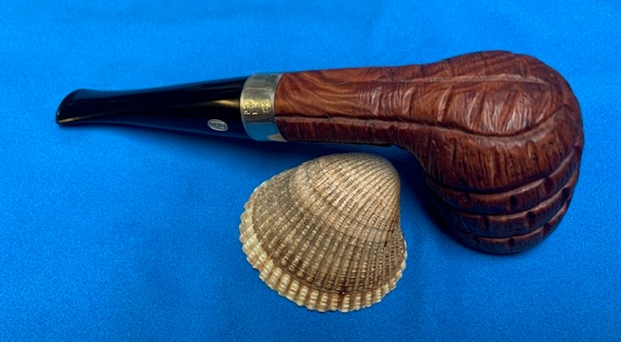
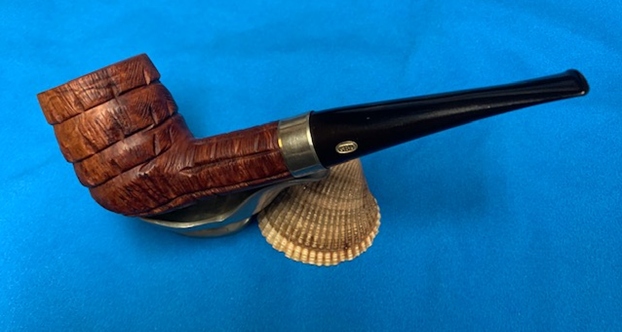
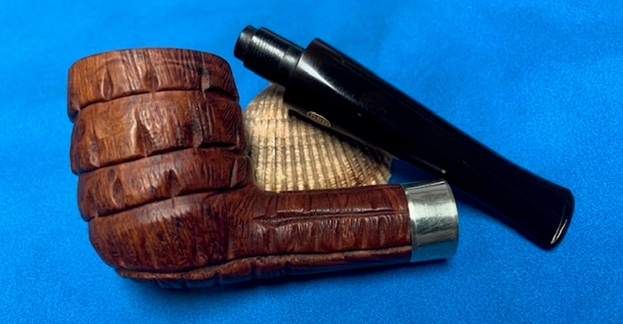
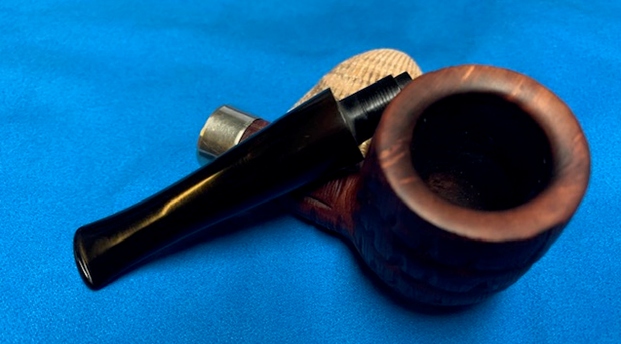
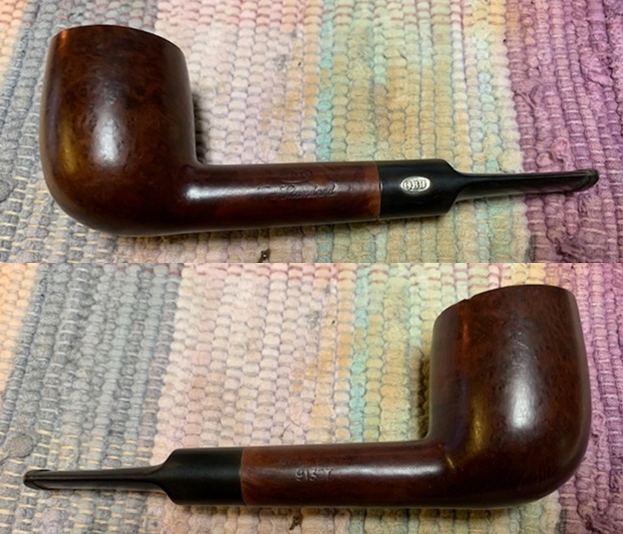
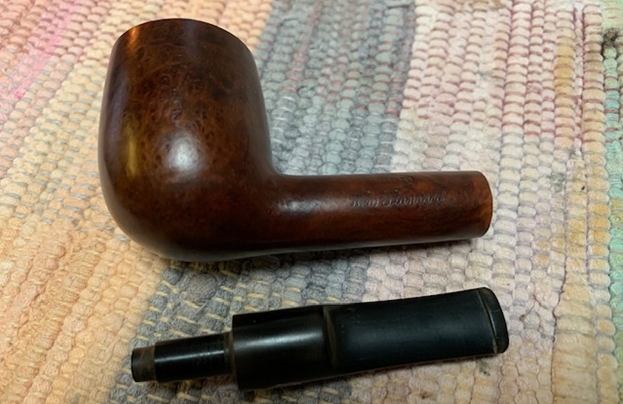
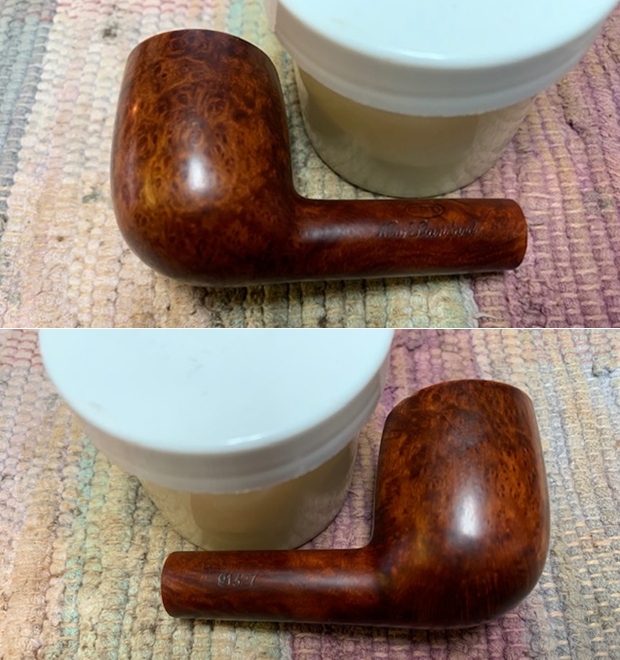
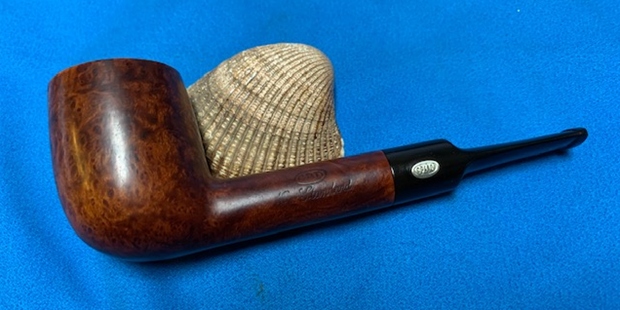
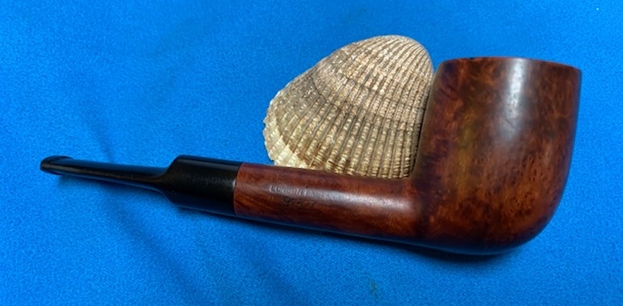
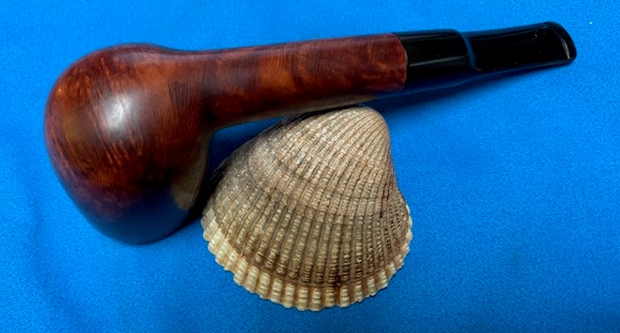
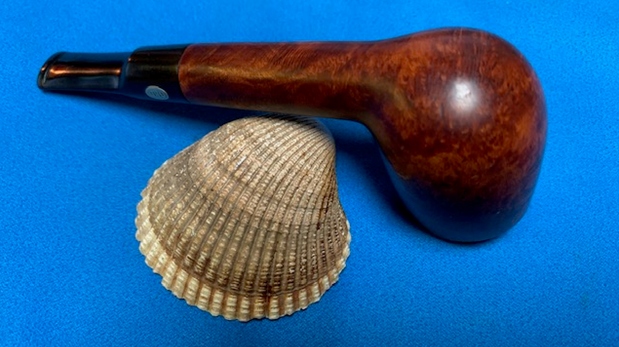
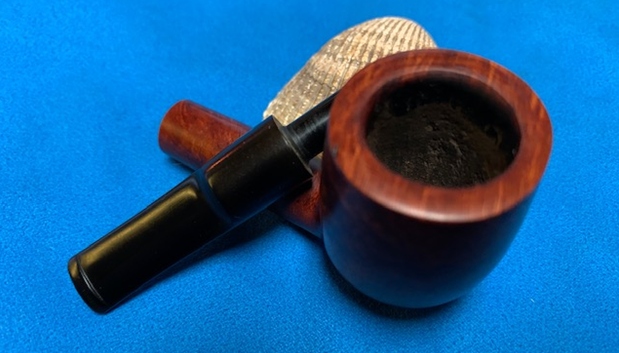
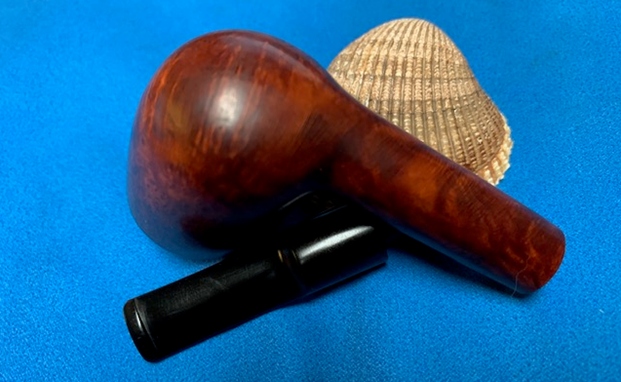
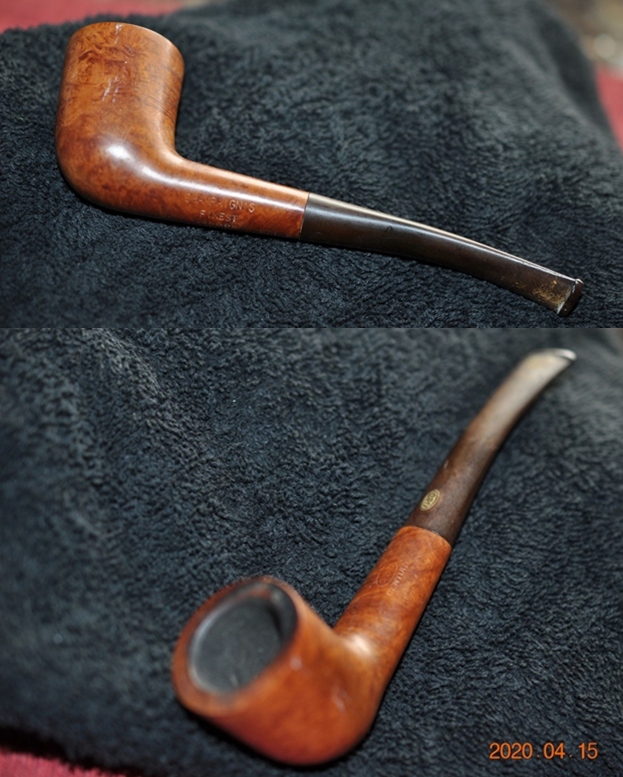
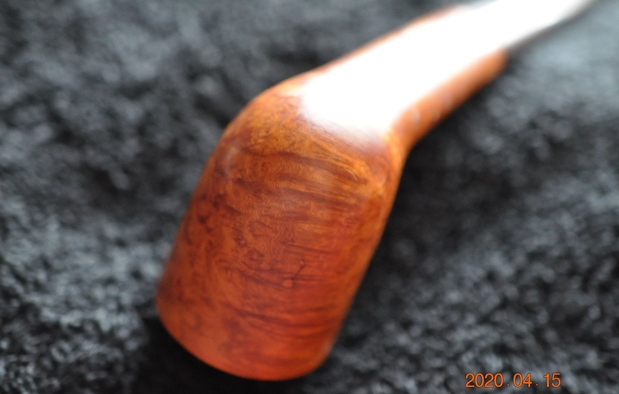
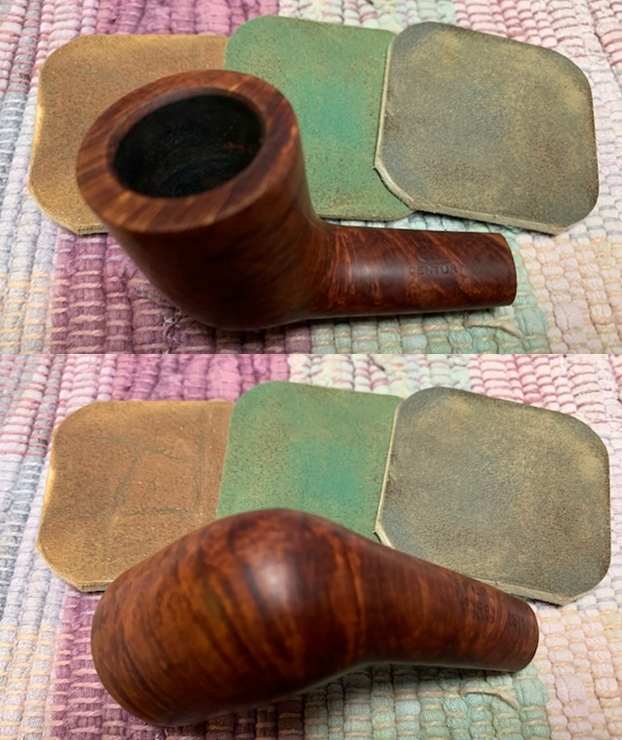
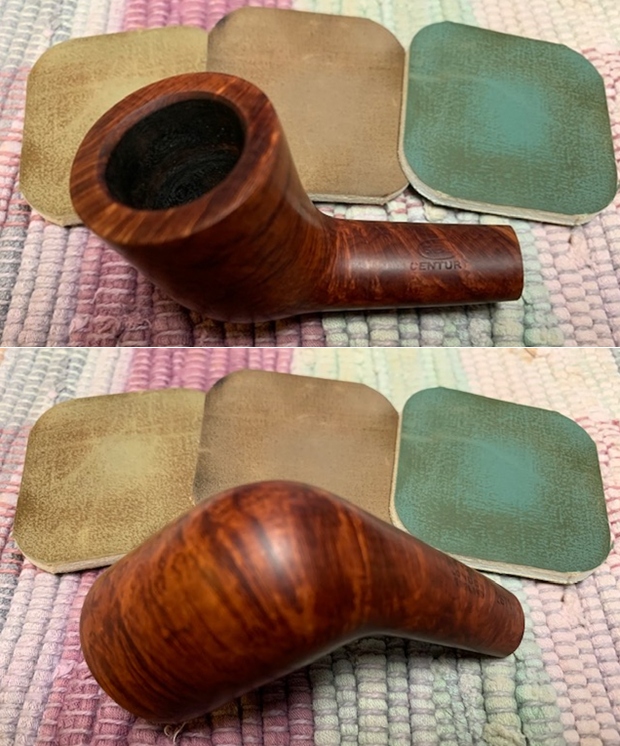
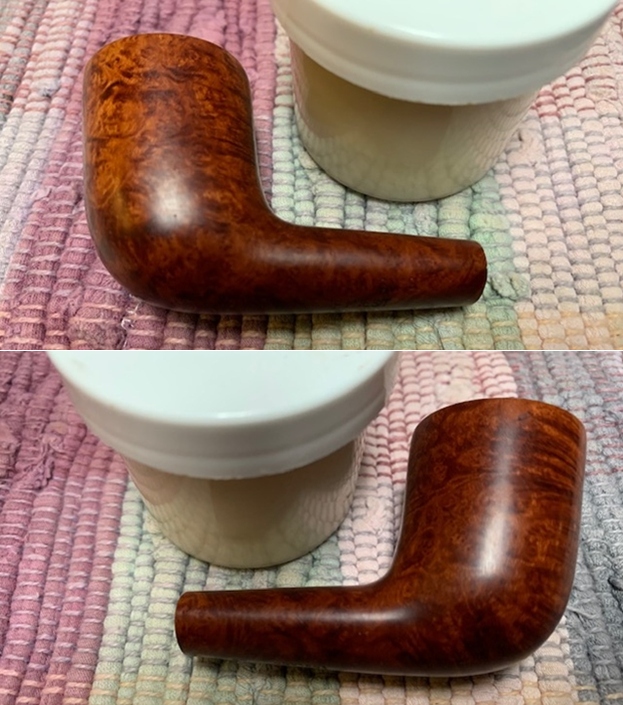
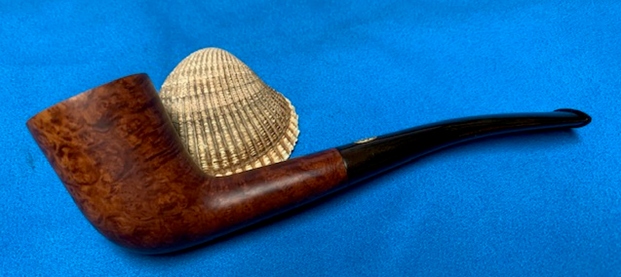
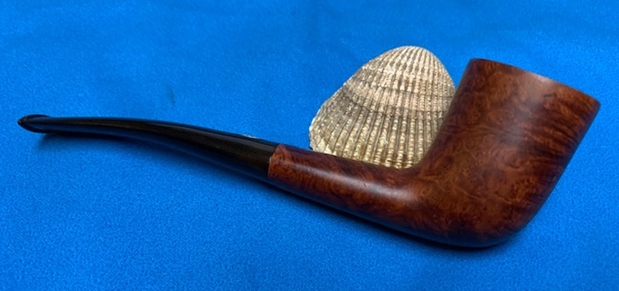
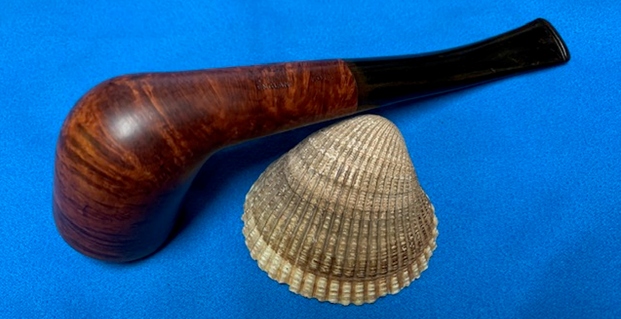
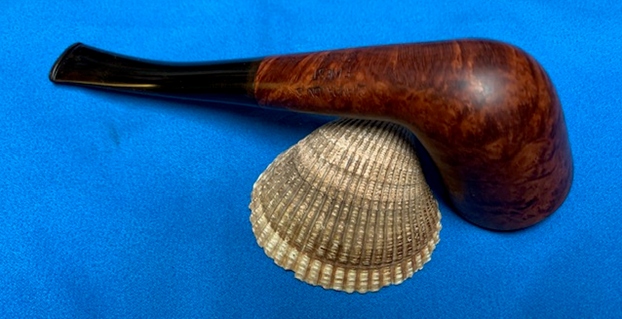
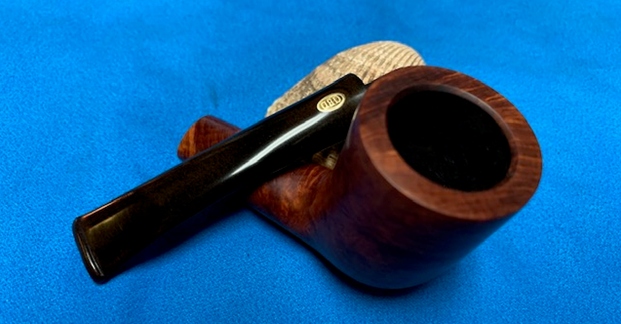
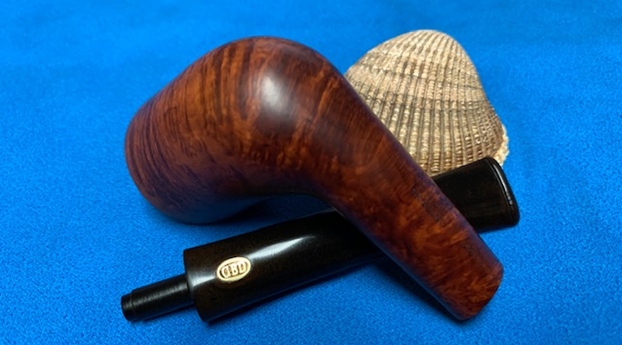
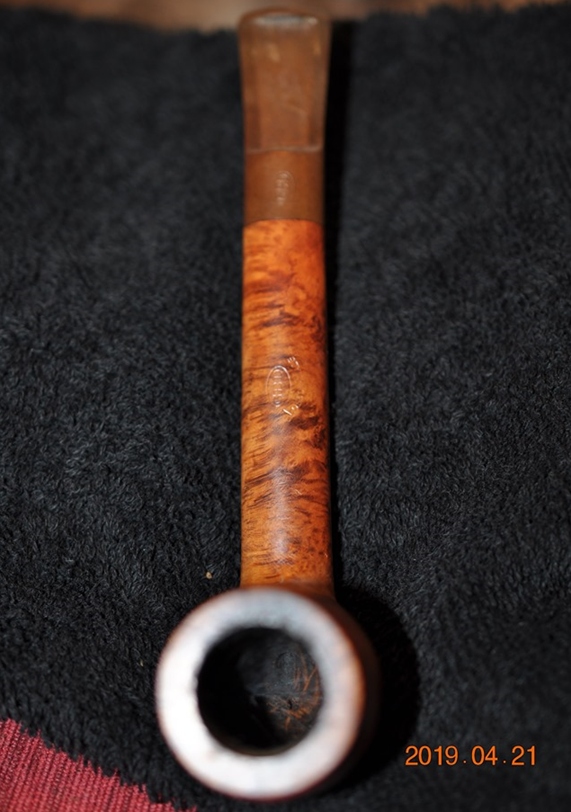
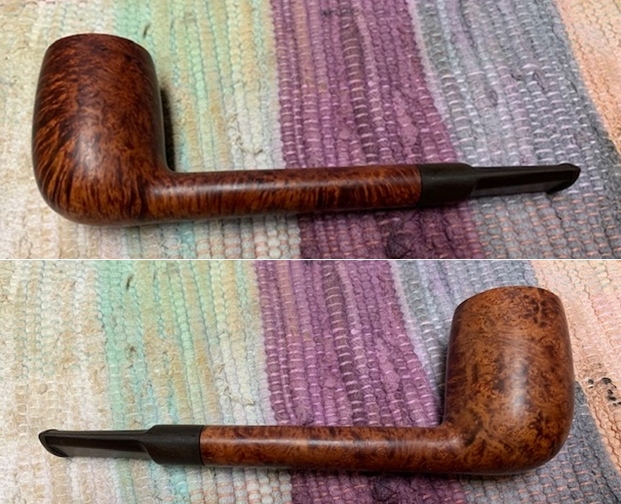
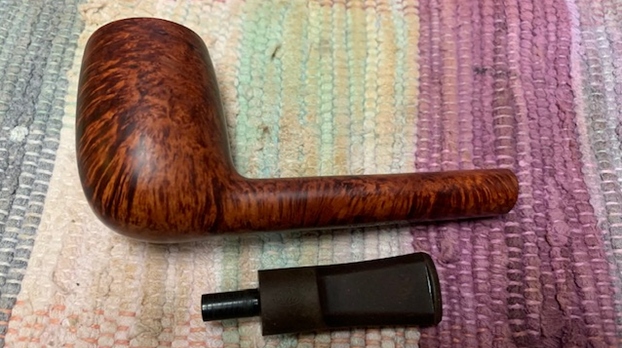
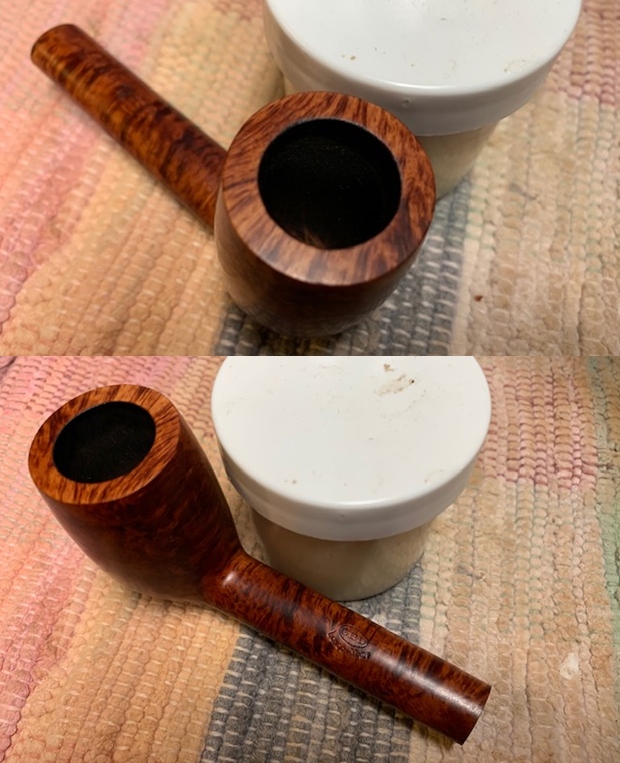
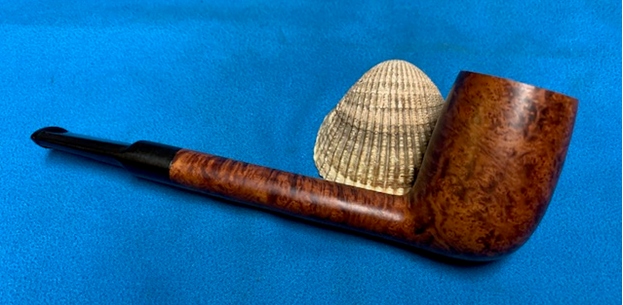
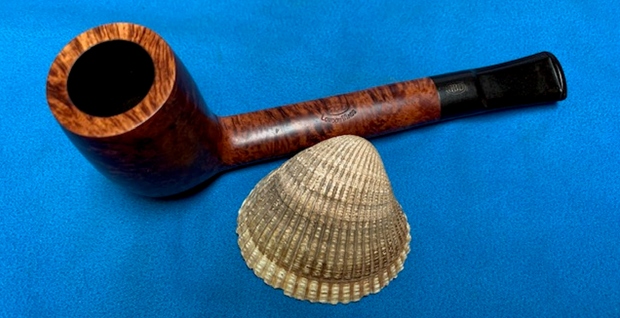
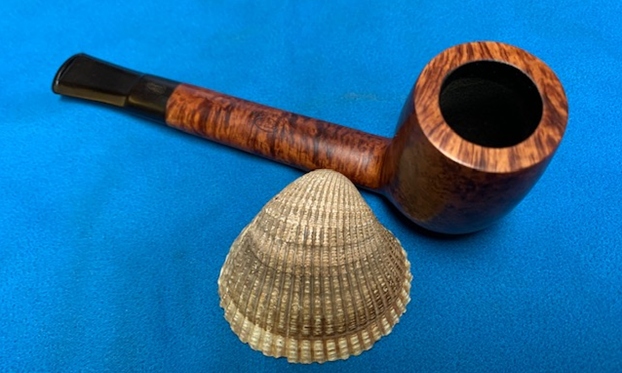
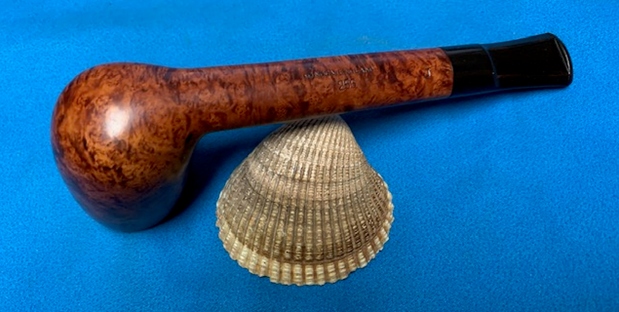
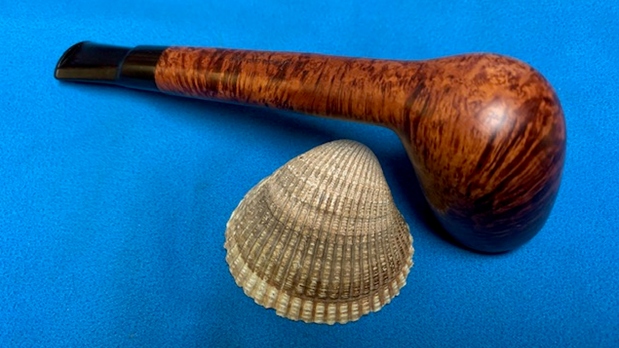
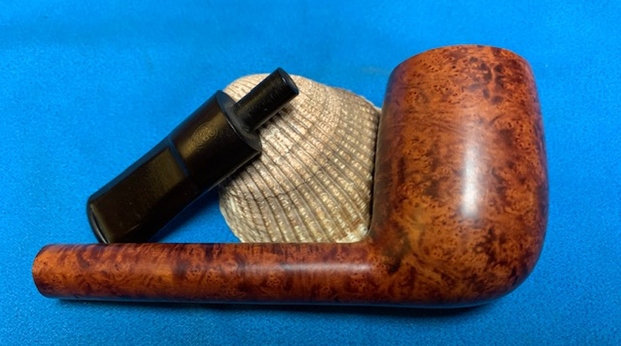
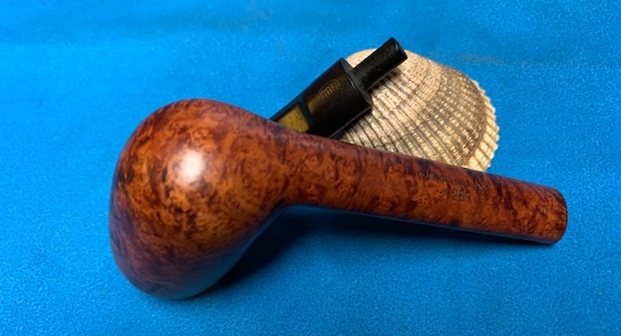
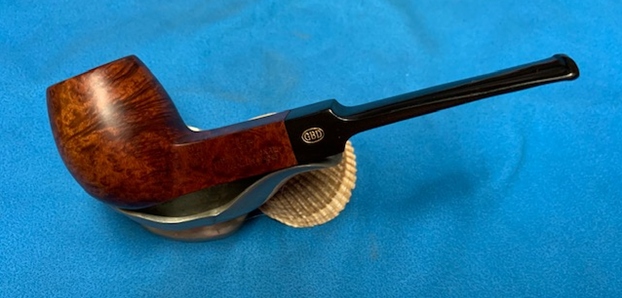
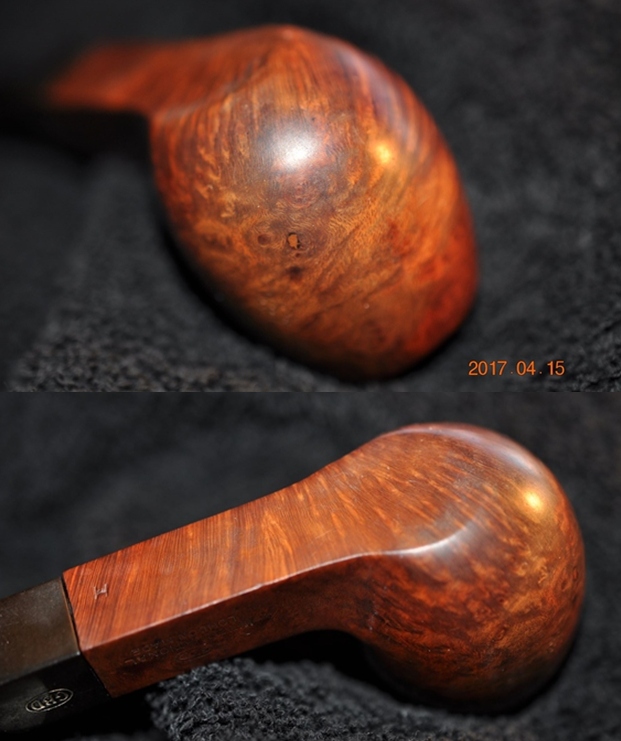
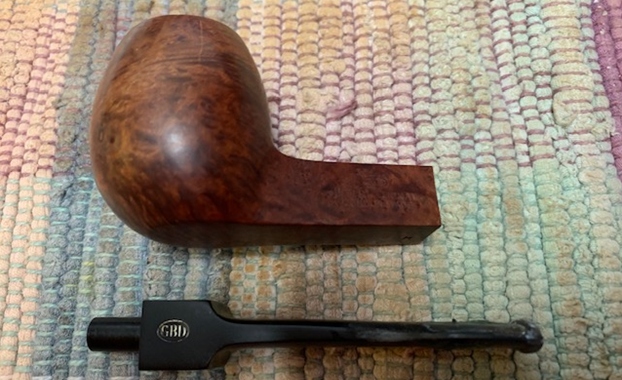
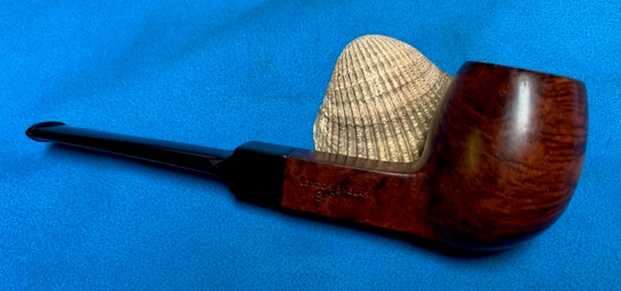
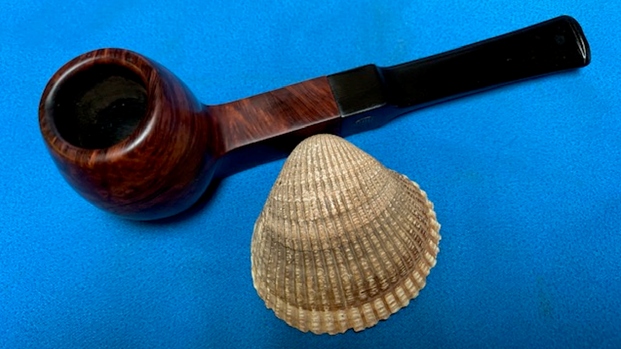
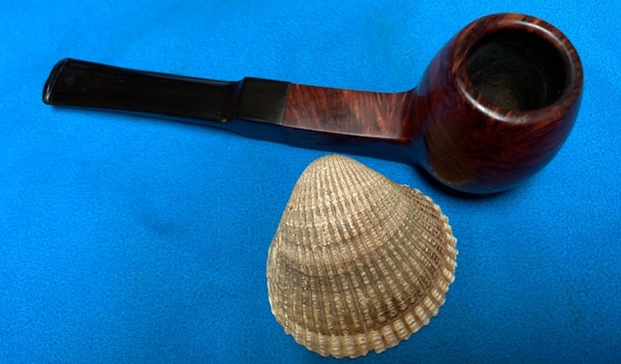
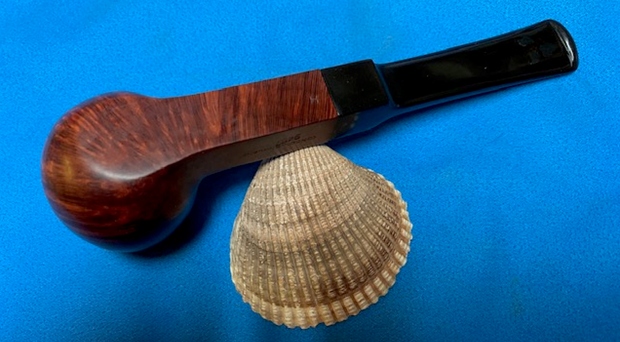
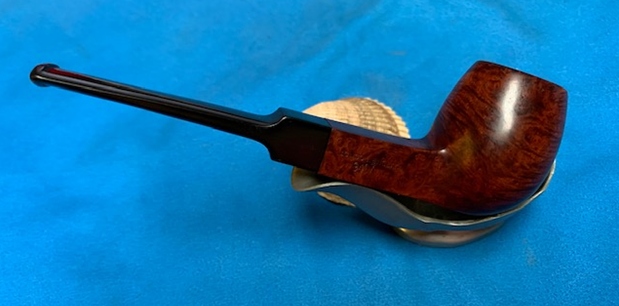
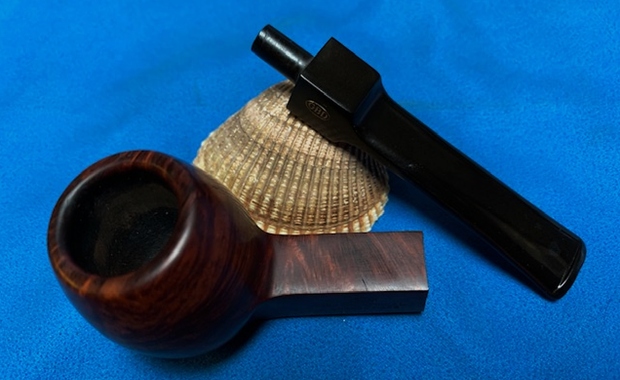
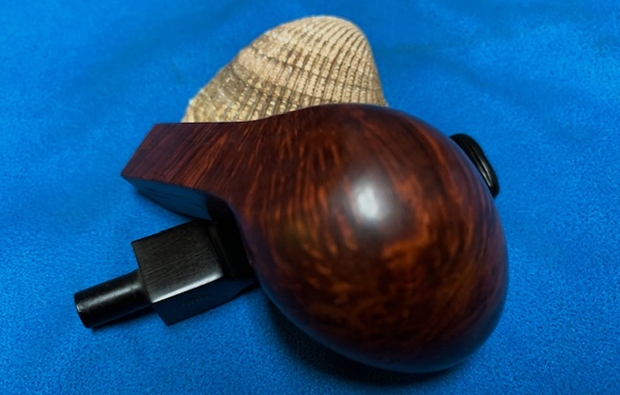
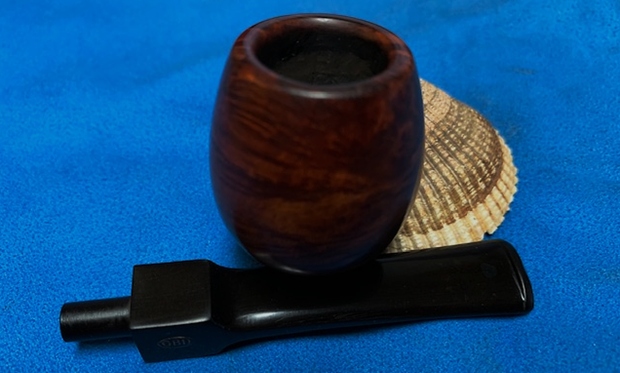
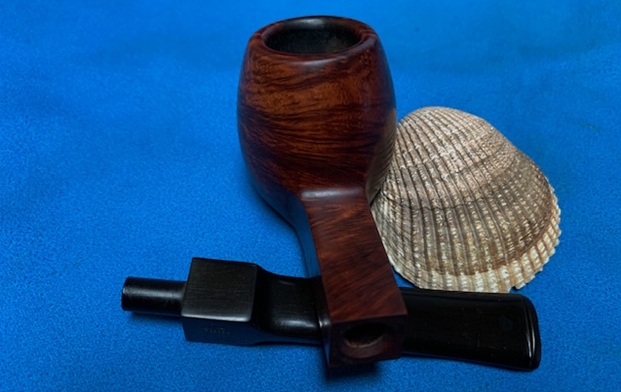
I remember acquiring this GBD Pot a few years back from an eBay seller from Cave City, Arkansas. She had a few different pipes on the auction block and in the end, we were able to work out a bundled agreement which was mutually beneficial. The bundle included GBD London Made, Selection Italy, GBD Americana, Dr. Grabow Omega and No Name Algerian Briar. I was attracted to the GBD Americana included in the bundle which joined my personal collection. The unique grain is amazing (See: The Striking Grain of a GBD Americana – Made in London England Bent Billiard). 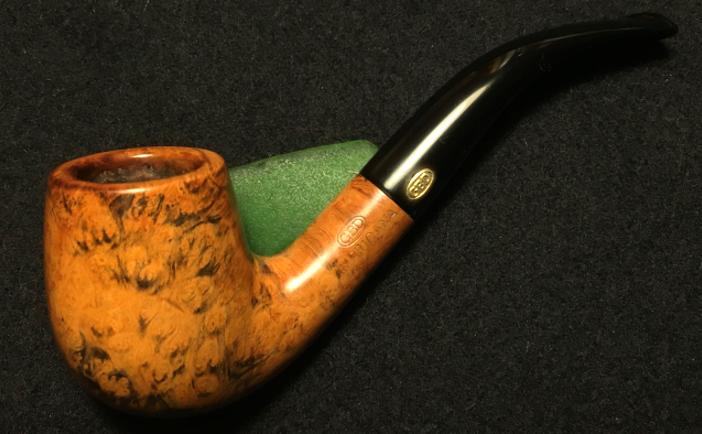 The other GBD in the bundled deal caught Chris’ attention in the online For “Pipe Dreamers” Only! collection where he also found the Fratelli Rossi ‘Century Old Briar’ (See: A Mobile Christmas Vacation Restoration of an Exquisite Fratelli Rossi Century Old Briar Billiard) which was last on the work table and soon to join Chris in Alabama. The GBD London Made Pot now on the table also shows great potential. Here are a few of the pictures of this GBD.
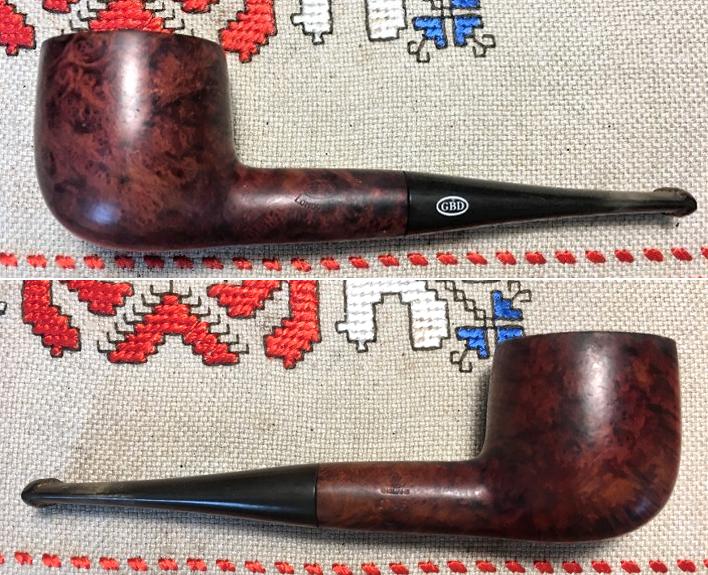

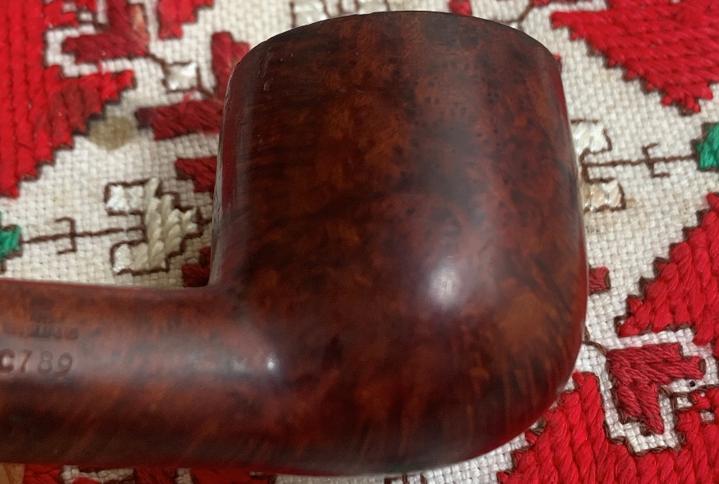
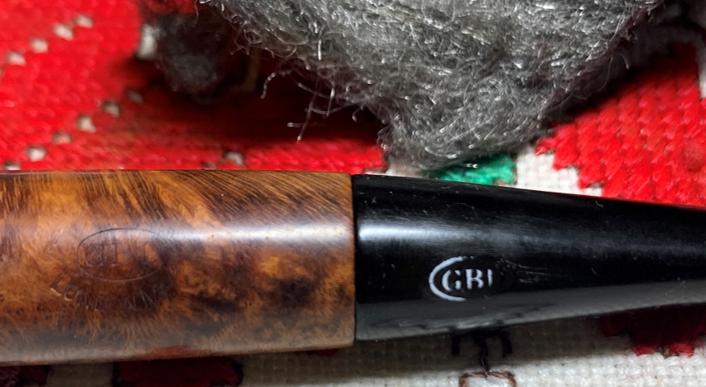
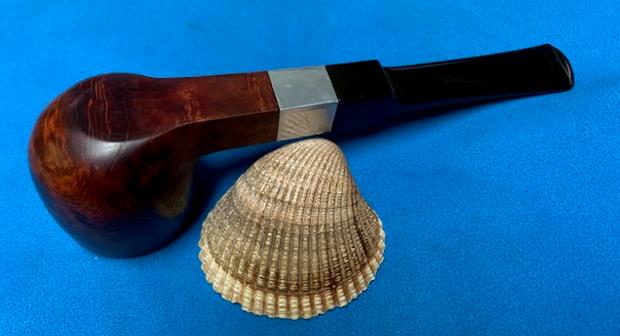
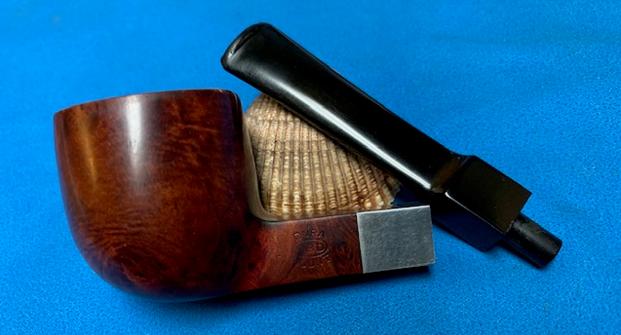
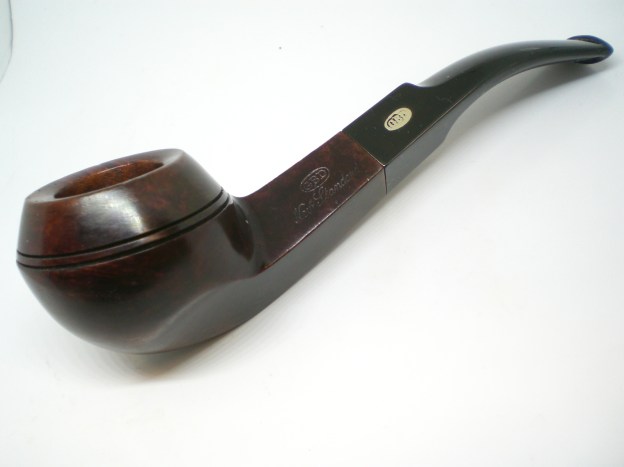
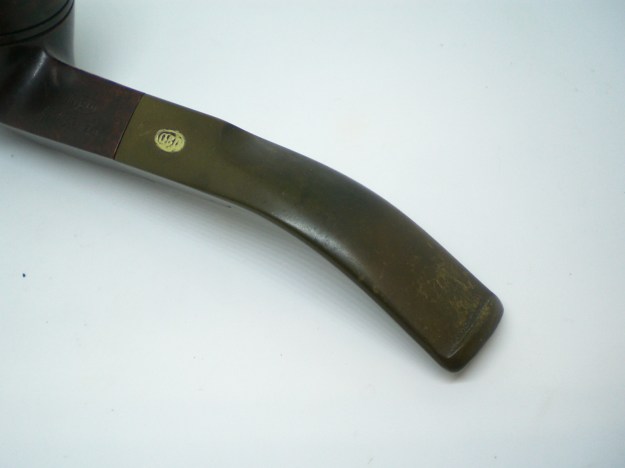
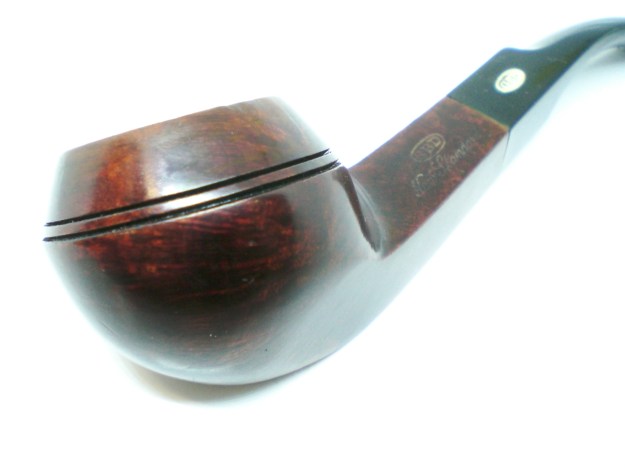
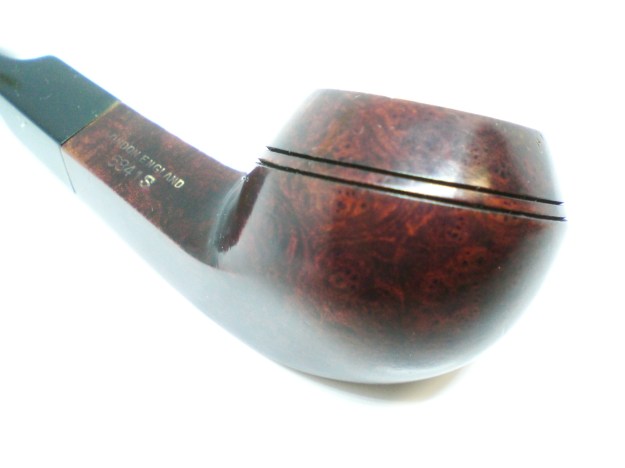
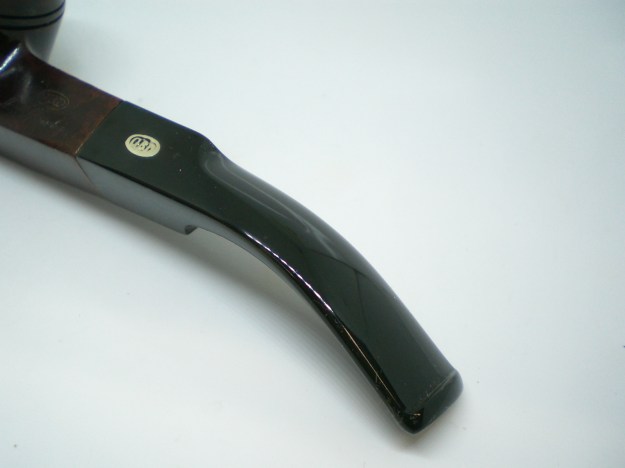
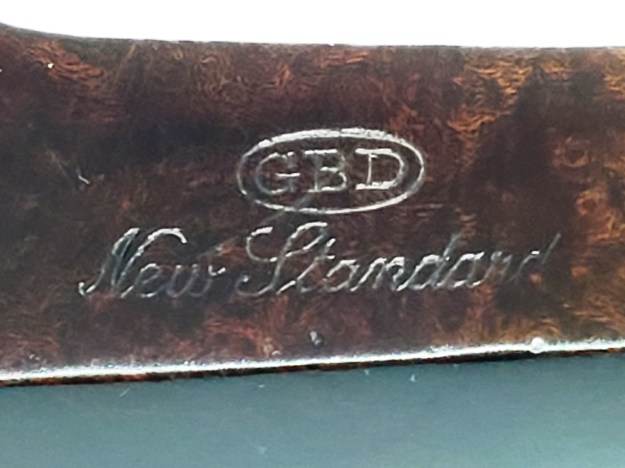
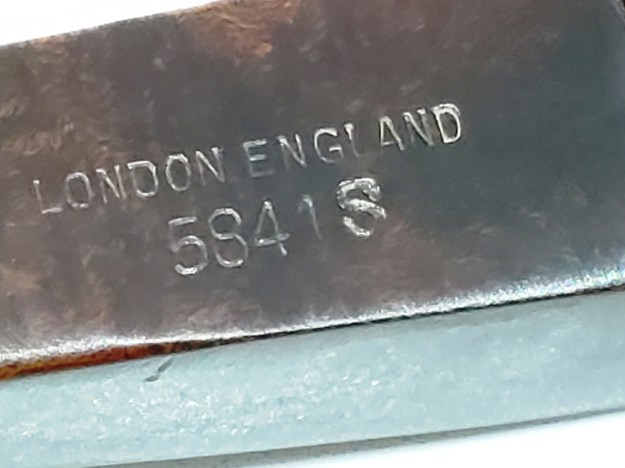
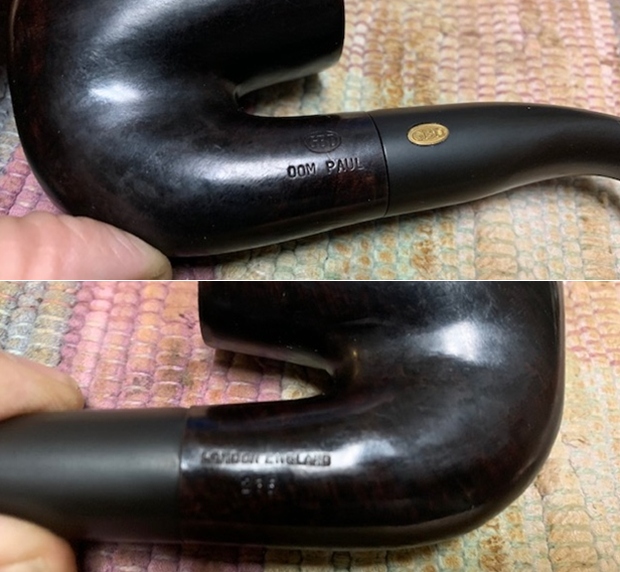
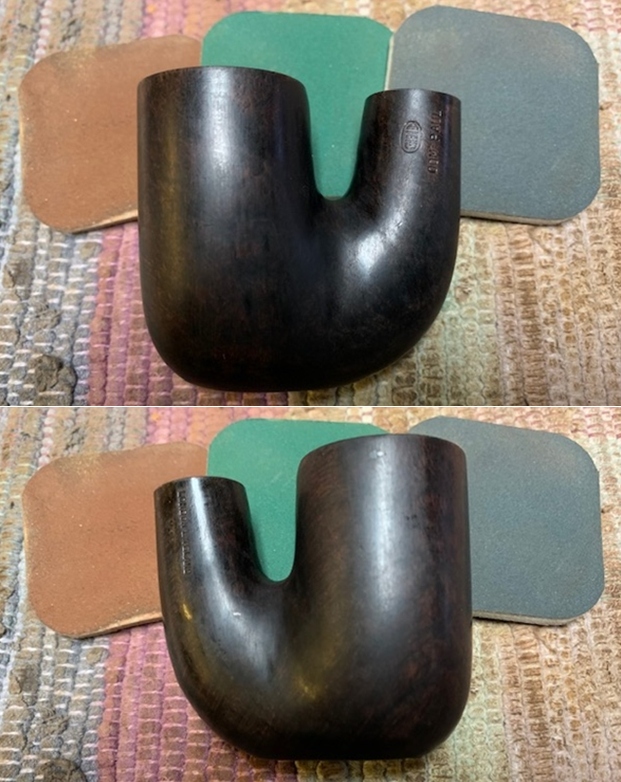
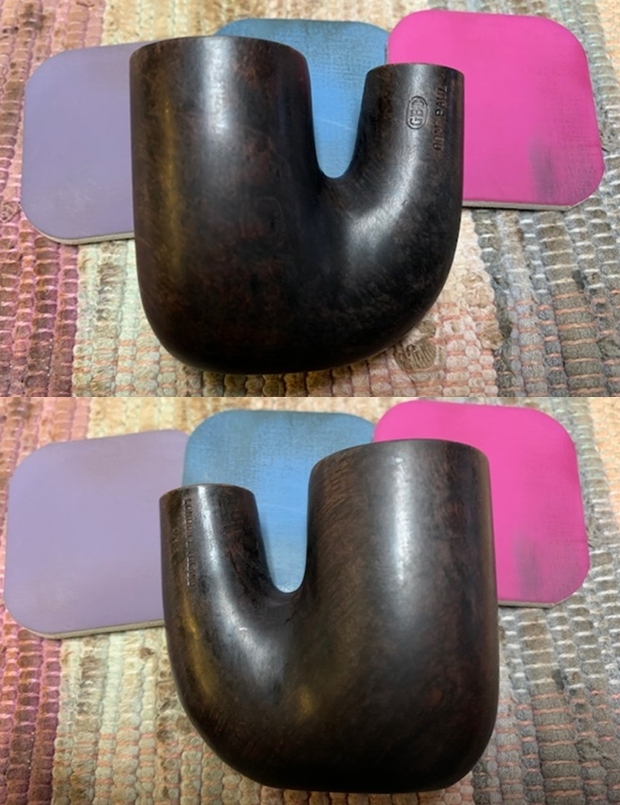
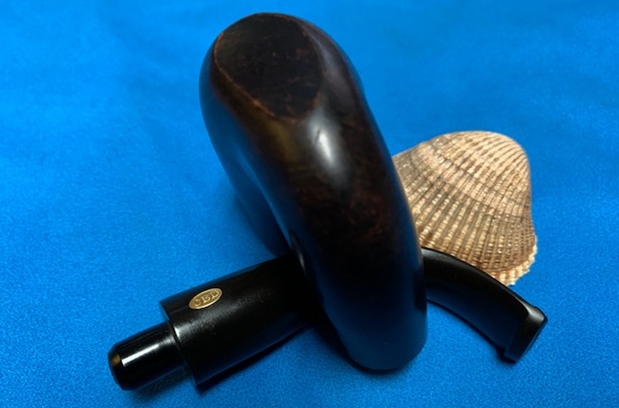
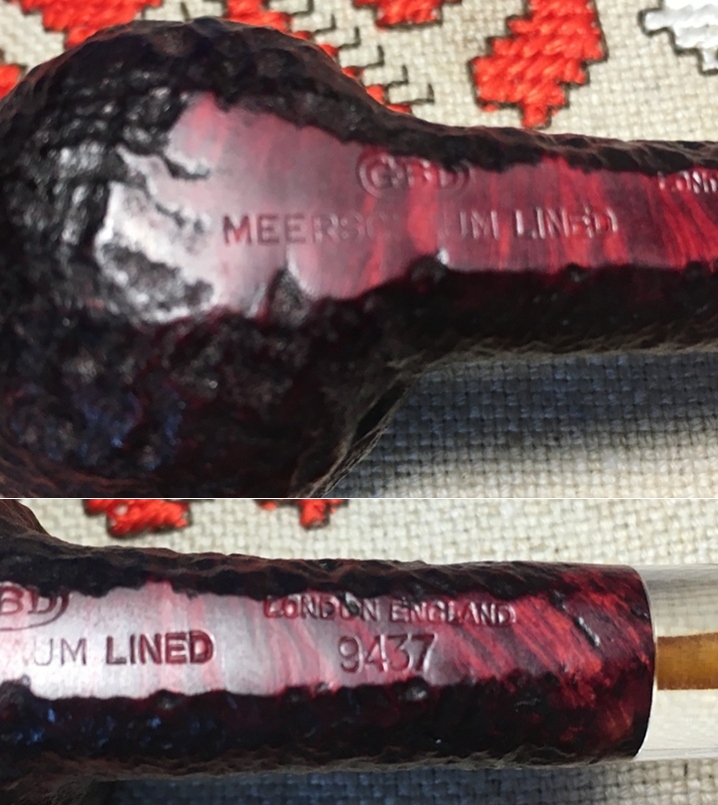
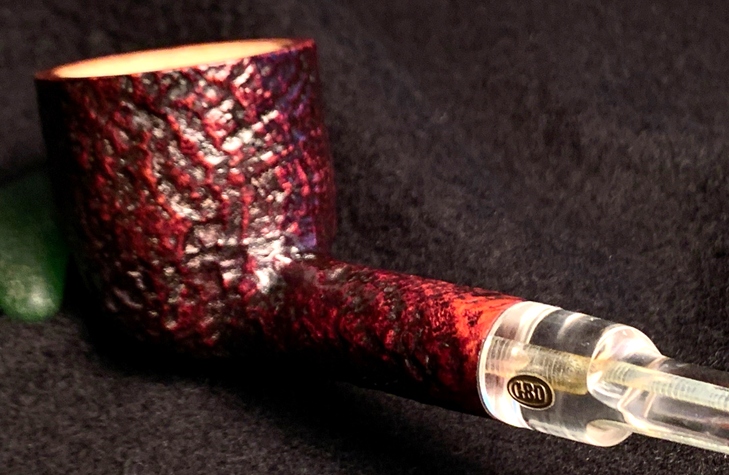
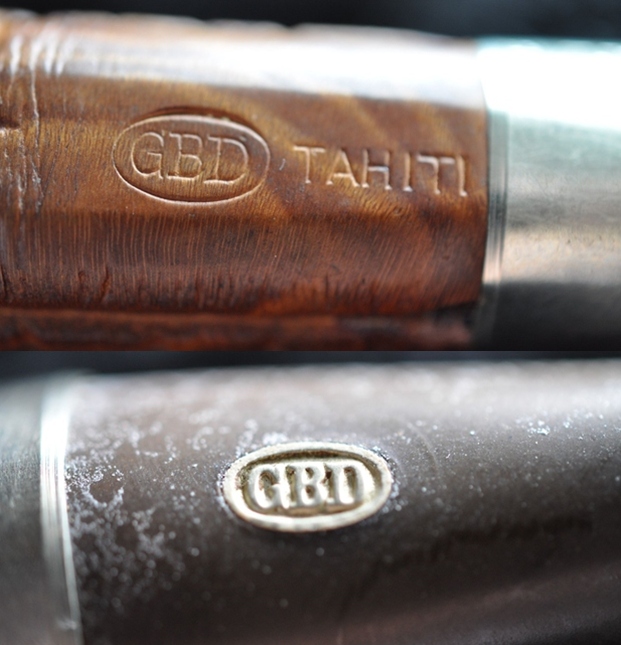
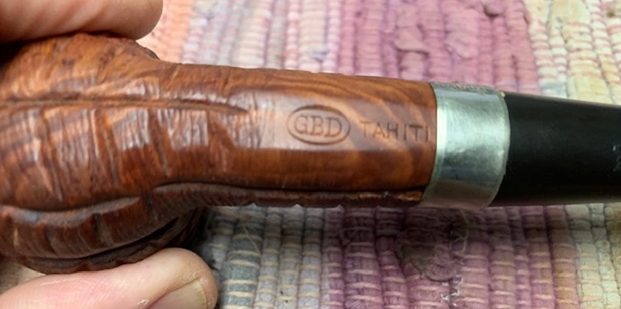
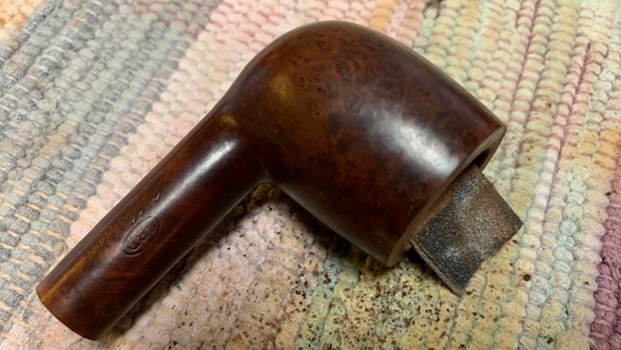
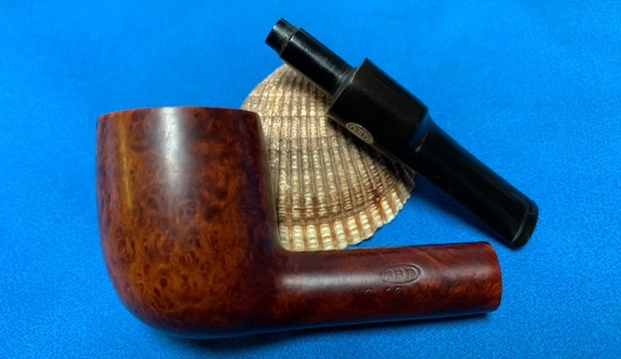
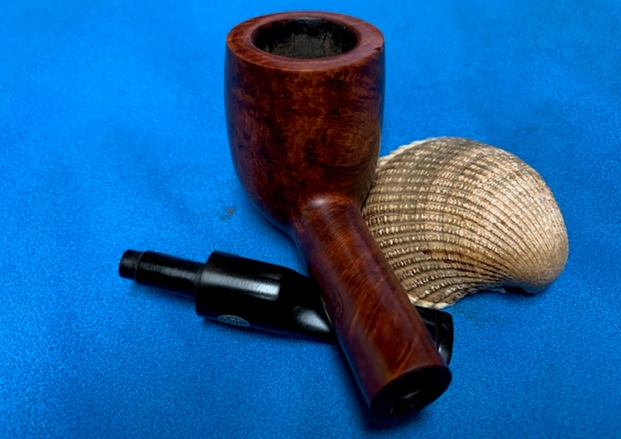
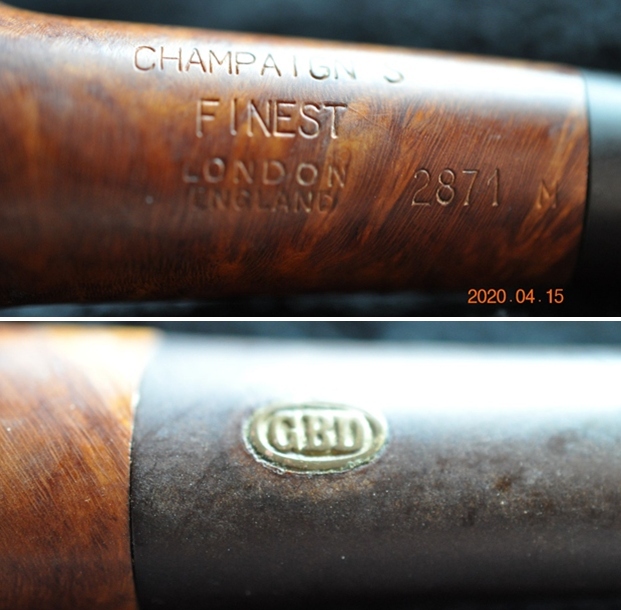
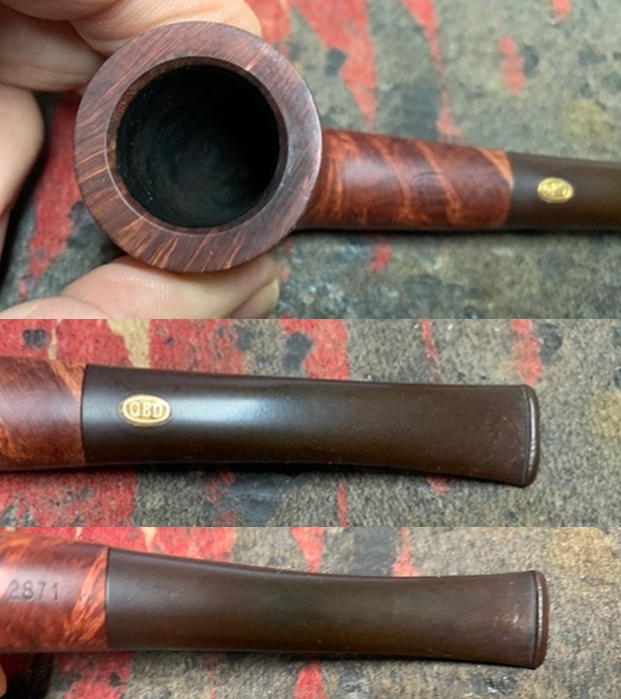
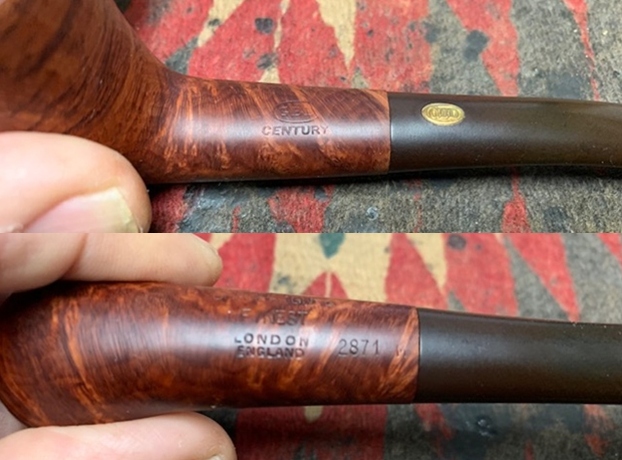
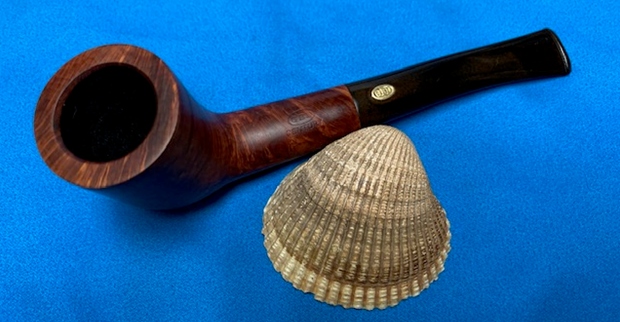
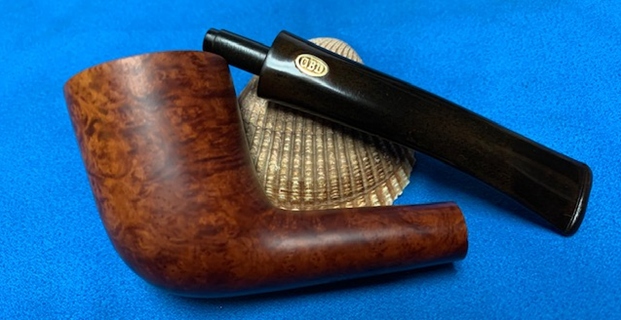
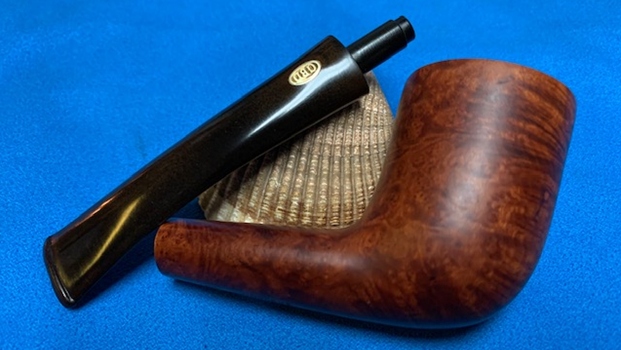
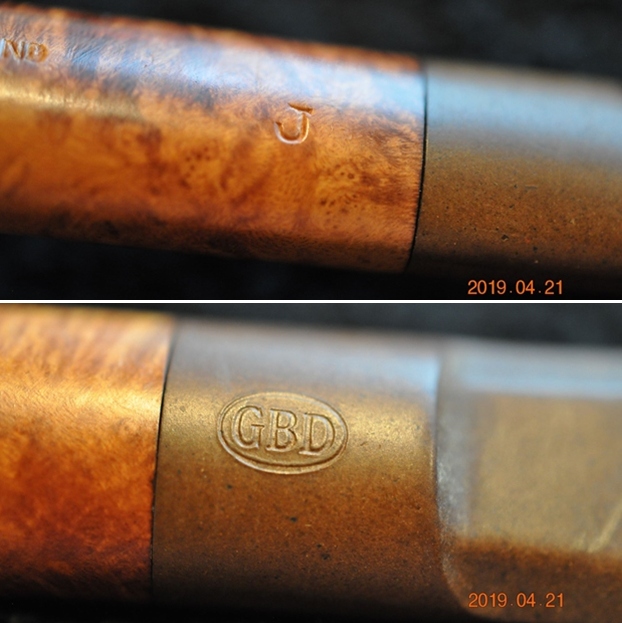
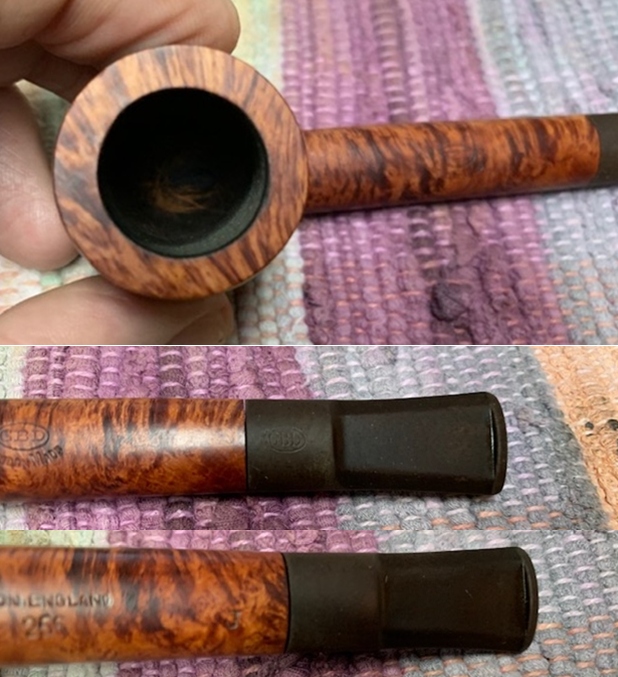
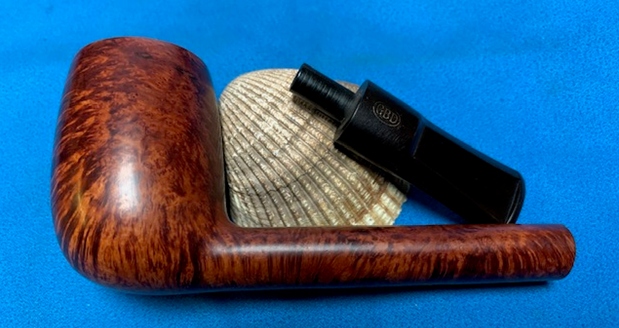
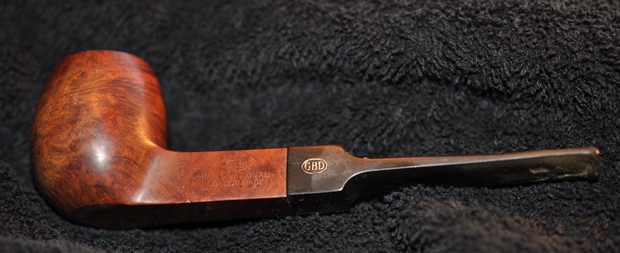
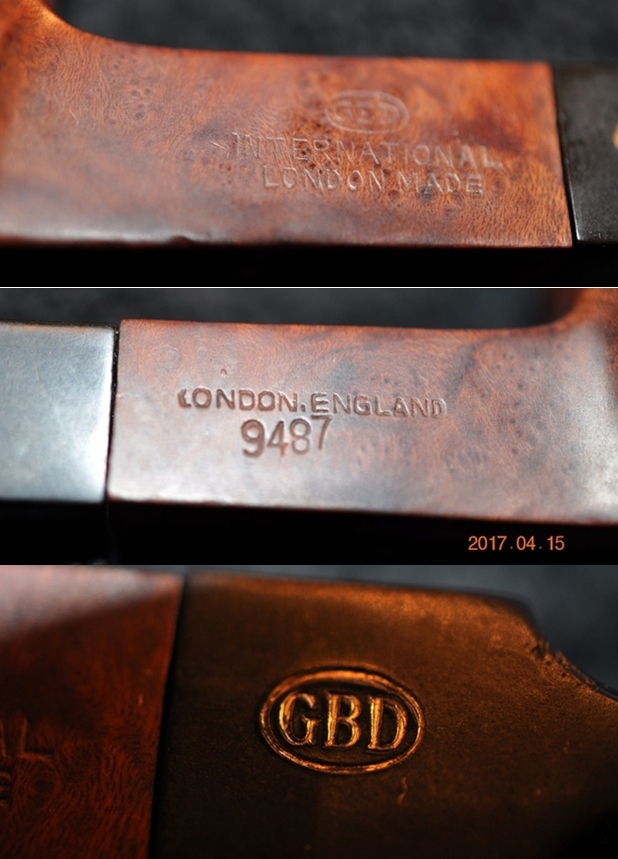
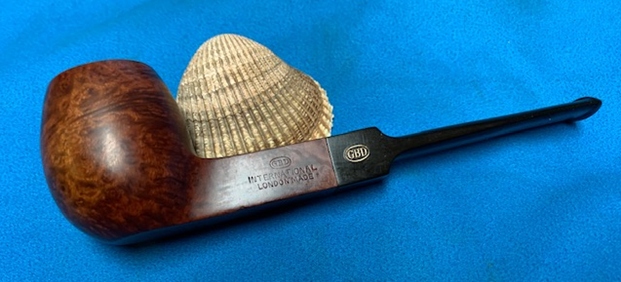
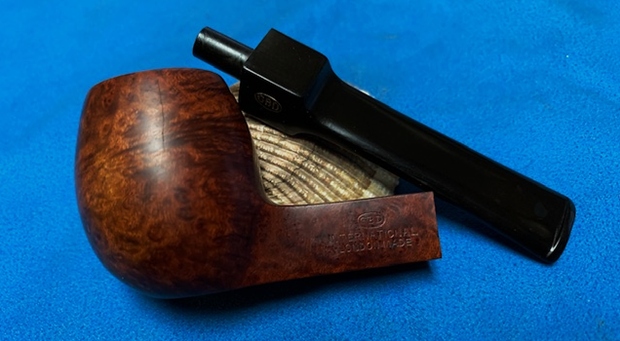
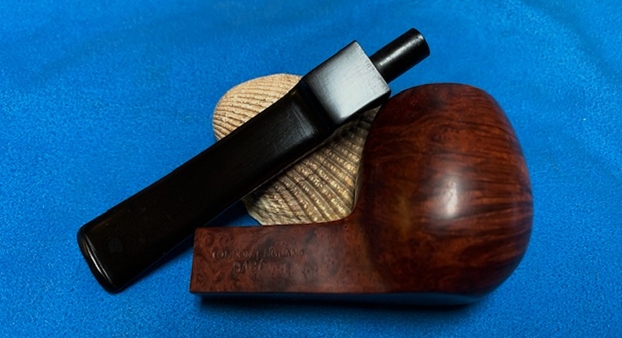
 The nomenclature is Cadogan era markings. On the left shank flank is stamped the GBD set in an oval. Beneath the oval, the arched text LONDON MADE is stamped. The Cadogan era stem stamp is the GBD in and an oval repeated. The right side of the stem is stamped in circular fashion, MADE IN LONDON – with the ‘IN’ occupying the center of the oval. Beneath the circular text is stamped the COM, ENGLAND. Beneath the COM is the shape number, C789, the designation for a Pot shape. However, after some searching and finding nothing to explain it, I was flummoxed by the ‘C’ affixed to the shape number. I decided to send a quick note to rebornpipes contributor, Al Jones, to see if he can shed some light. Al’s response confirmed the ‘C’ as being a ‘rogue’ letter. After the merger in the early 80s, differing letters would appear on GBD pipes with no clear understanding what they referenced.
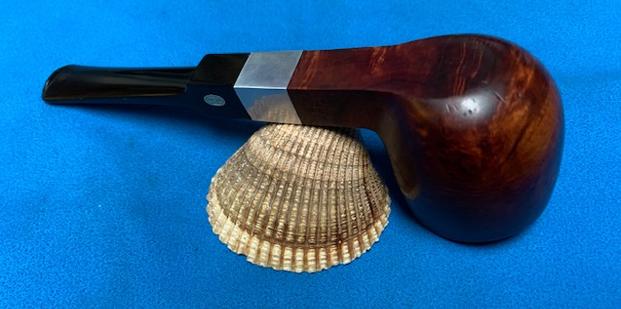
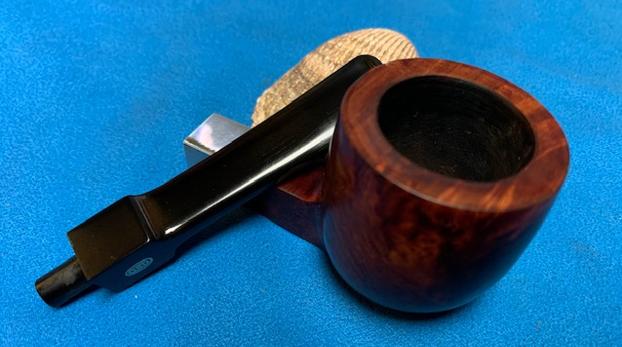
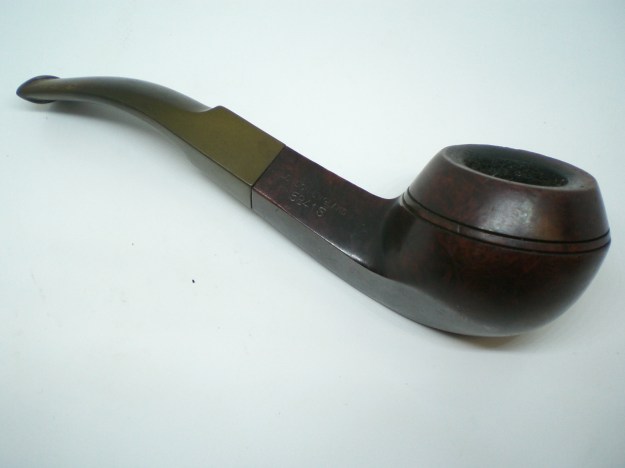
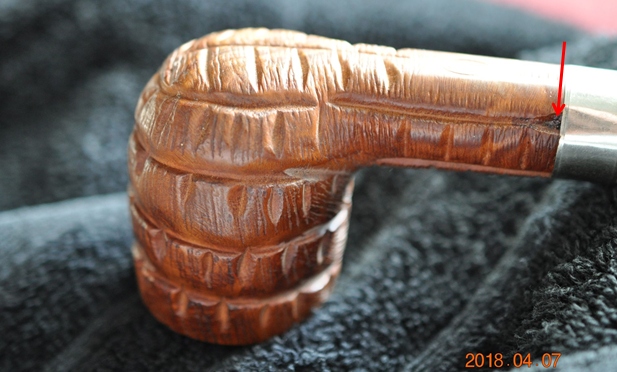
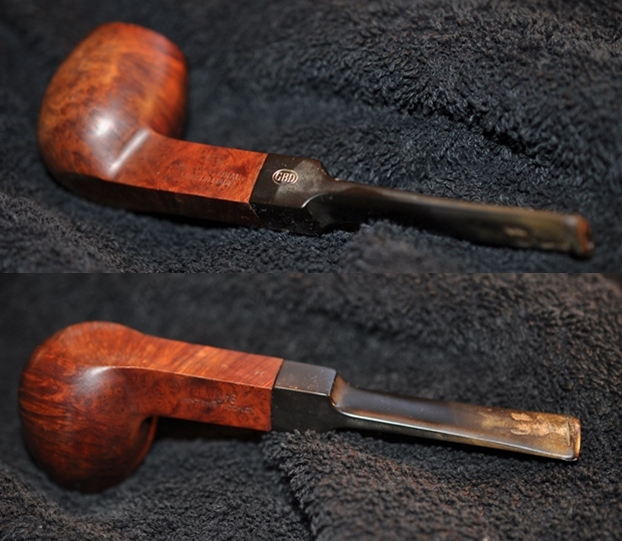
The dating of the GBD on my table I’ve described as a ‘Cadogan Era’ pipe. Pipephil records that GBD’s metal stem rondels were discontinued after 1981 when GBD merged with Comoys. The absence of this brass rondel on the stem places this pipe post ’81 and later. The rounded COM designation rather than a straight lettering (London England), also points to a post-merger GBD. 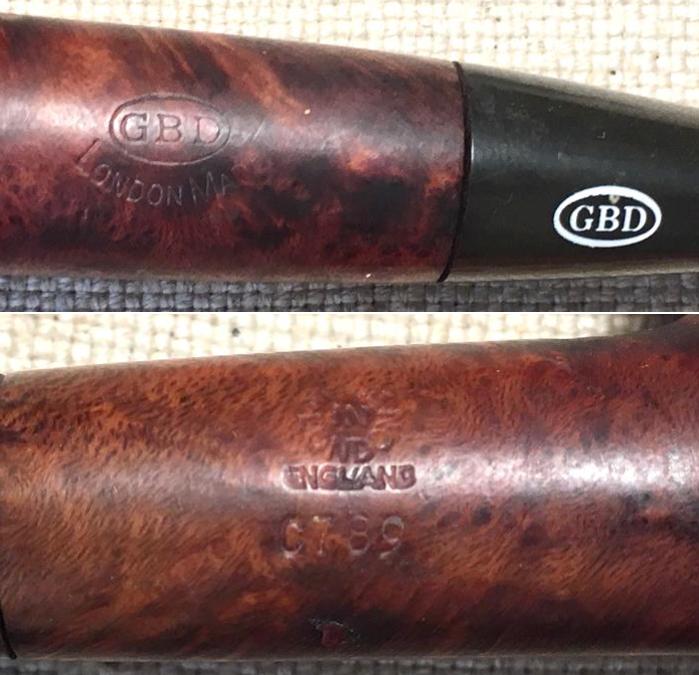 The GBD also has a random letter, ‘J’ on the underside of the shank. I’ve seen these letters before on Cadogan era pipes and it seems that Comoy’s used several letters for what are perhaps part numbers, but this isn’t confirmed.
 I have researched other GBD pipes that have been on my worktable and I always enjoy a refresher from the fruit of that research. The story of GBD pipes is an interesting one starting in France in 1850 with an unexpected partnership, not coming from businessmen, but fellow pipe makers who felt they could make a go of it. This excellent article, Finding Out Who Created GBD – Story of a Pipe Brand – Jaques Cole was reposted on rebornpipes and is an excellent read for framing a historical appreciation for a pipe name and its development – GBD.
Who were these creators? Ganneval, Bondier and Donninger were three ‘Master Pipemakers’ who got together in Paris in 1850 to manufacture meerschaum pipes. It was a bold decision as these were troubled times in France. Charles Louis-Napoleon Bonaparte has returned after the 1848 revolution and become President of the Republic. Following a coup d’etat in 1851, he made himself Emperor Napoleon III in 1852. He was incidentally a keen pipesmoker and may well have owned one or more early GBDs.
The focus of the ‘GBD’ enterprise in the late 1800s was primarily the production of meerschaum pipes but in the 1850s, with Saint-Claude’s discovery of briar and its special qualities for making lasting, heat-resistant pipes, GBD adapted and added briar to its list of materials. GBD boasted in the end of the 19th Century as having 1500 models that customers could choose from – though Pipedia’s article on GBD clarifies this unbelievable number as counting each shape three times due to three different stem materials used. GBD straddled its French identity and its adopted English identity through various acquisitions and changes in ownership, yet, keeping the initials of the founders firmly in place. Pipedia’s history is helpful to understand these historical iterations:
There is a very simple explanation for GBD’s program to turn more “British”: GBD became a British company soon after the turn of the century! In 1902 Marechal and Ruchon sold GBD to A. Oppenheimer & Co. in London. Charles Oppenheimer had founded this successful trade business in 1860 as an import-/export house. His brothers David and Adolphe and brother-in-law Louis Adler soon joined him. Adolphe took over when Charles went to Germany as British ambassador. Briar pipes were among the first products traded. The business relation to GBD in Paris began as early as 1870. Being the most important customer in the English-speaking world, Oppenheimer & Co. were designated as sole distributor for Great Britain, the USA and Canada in 1897.
Though English owned, pipe production continued in Paris and soon Oppenheimer acquired two factories in Saint-Claude in 1906, increasing its production. Also, during this period, Oppenheimer continuing to expand, built a pipe factory in London, but this operation failed to live up to expectations until the genesis of WW I when demand for pipes increased for the front line and production fell in the French factories as men were called to the front lines. The shift of GBD being identified more distinctly as a British pipe emerged after the close of the war even though production continued in London and France through the 1920s. I find the next Pipedia excerpt interesting because it marks well how GBD had fully transitioned from its origins, the handshake of 3 French pipe makers, to a macro-business continuing through the 1900s.
In 1920 Oppenheimer had purchased BBB (Blumfeld’s Best Briar, formerly A. Frankau) and little later Loewe & Co. and large shares of Comoy’s of London. The economic crisis in the early 1920s induced the foundation of Cadogan Investments Ltd., named for its seat at Cadogan Square in London. The Cadogan group was a superordinated holding company, in order to tune all activities of Oppenheimer’s brands in the pipe industry. Whereby an extensive independence of the single brands was preserved. Remember, the Oppenheimers and Adlers weren’t pipe specialists, but rather sales people who depended on their experts in the British and French plants.
In 1952 the Paris factory moved to Saint-Claude and since the 1980s most GBD pipes come from London. The higher-end GBD pipe lines are of good quality and many feel they stack up well against the array of Dunhill offerings yet more affordable. The Pipephil.eu history of GBD says that the Saint-Claude pipe factory closed in 1981 leaving only London as the producer of GBD pipes.
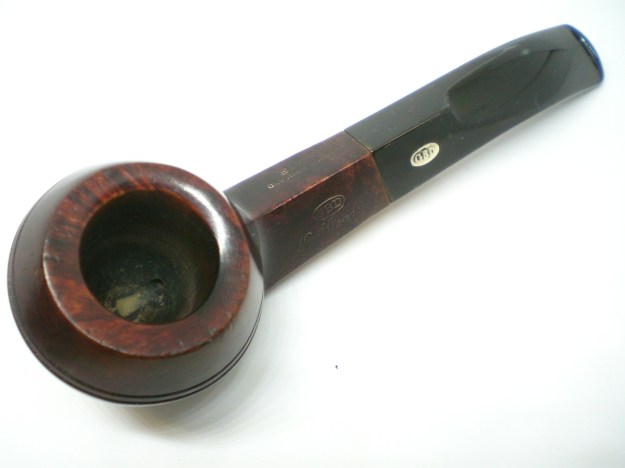
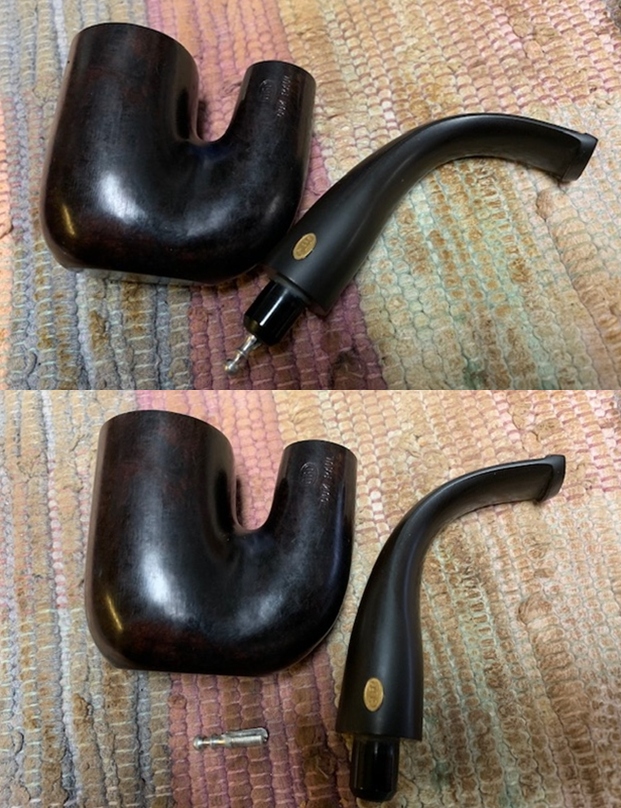
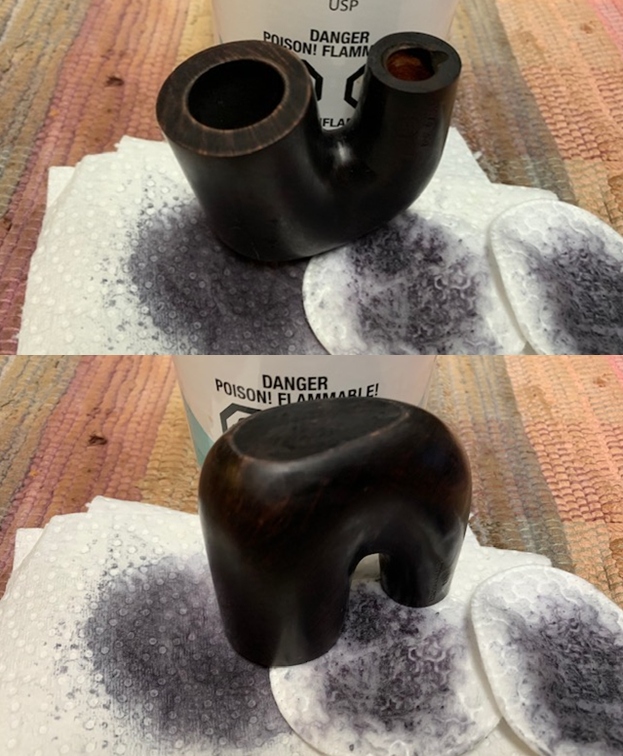
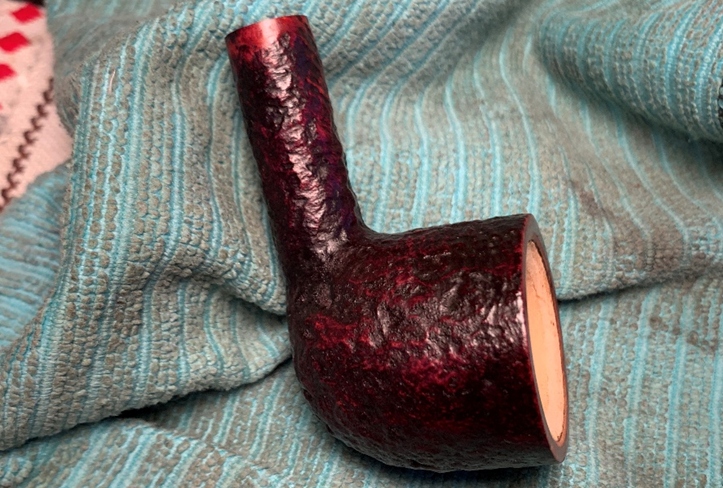
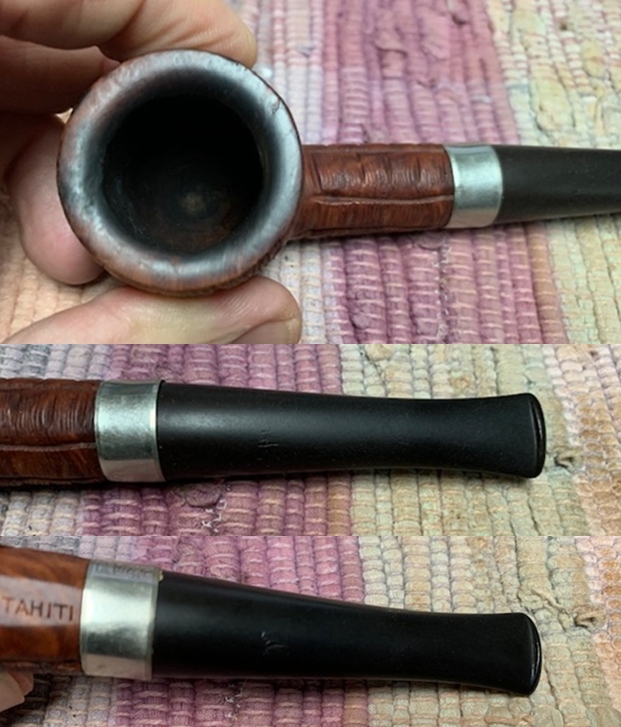
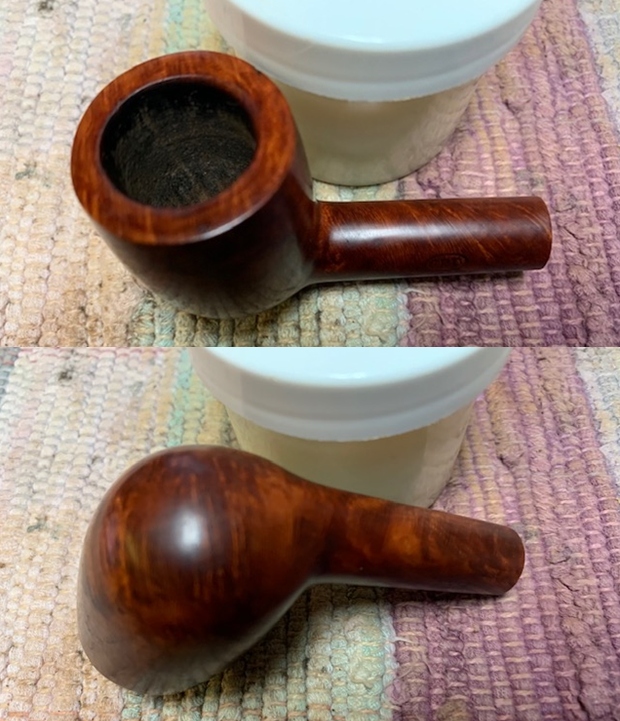
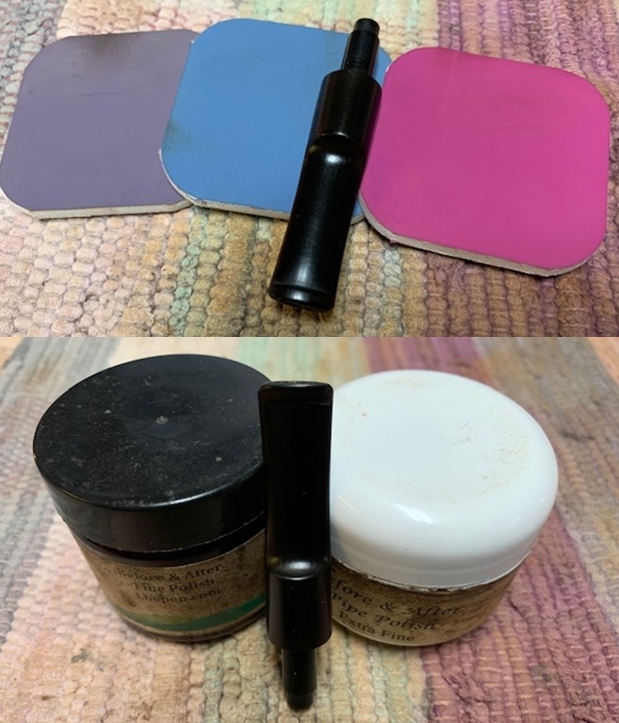
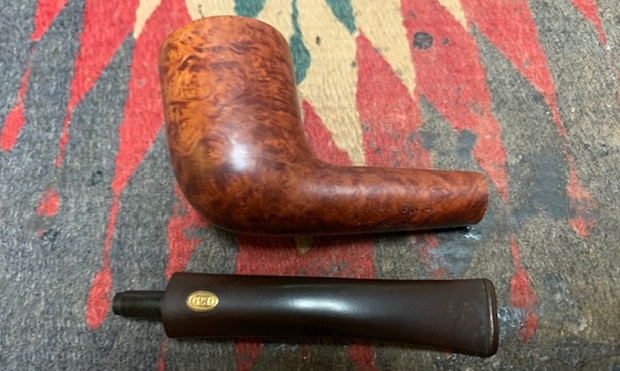
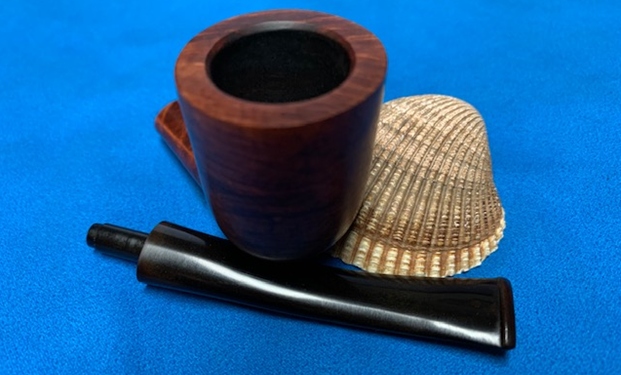
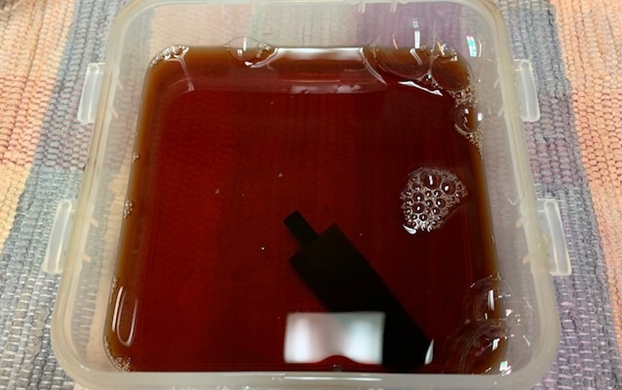
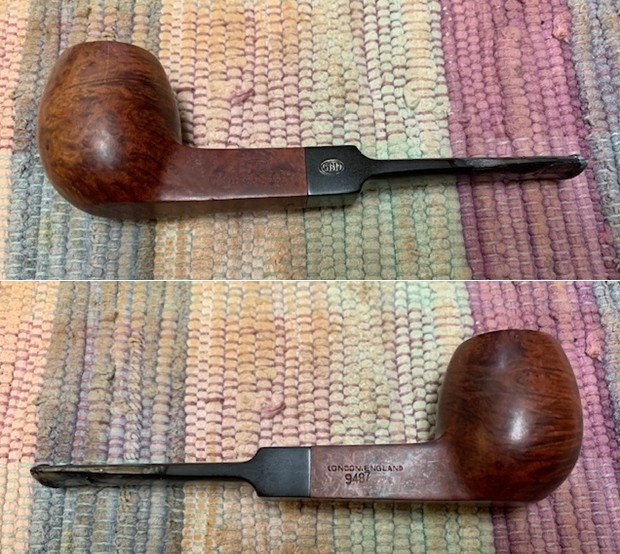
Now looking more closely at the GBD Pot on my worktable, the bowl has thick cake buildup in the chamber. This will need removing to inspect the chamber walls for heating problems. The stummel finish is dark and bears the grime of years of service. The stem has heavy oxidation and a good amount of tooth chatter. To begin, I clean the airway of the stem with pipe cleaners wetted with isopropyl 99%.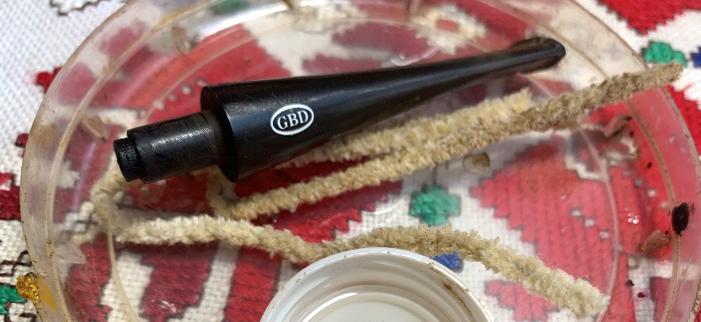 This is followed by then adding the GBD stem to a soak of Before & After Deoxidizer to address the oxidation issues.
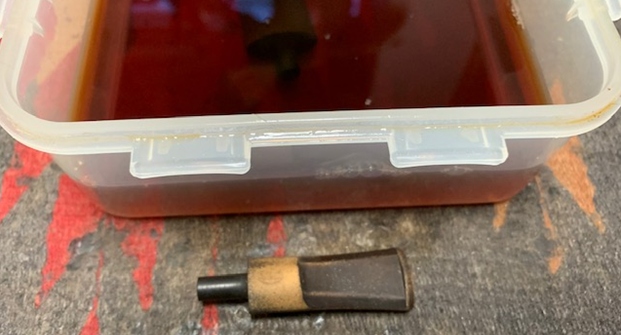
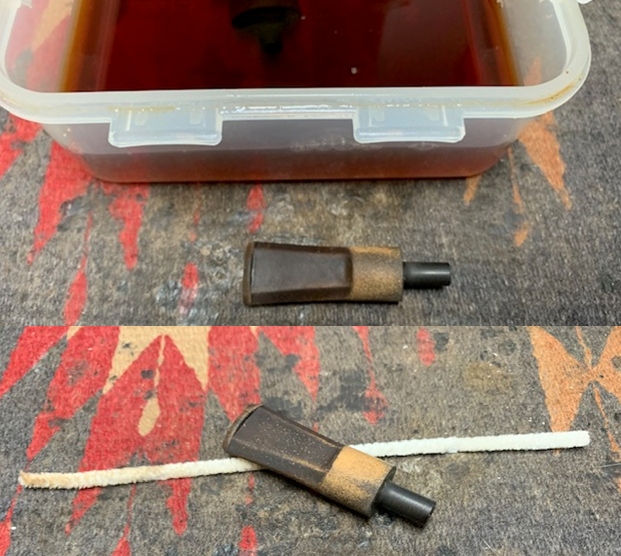
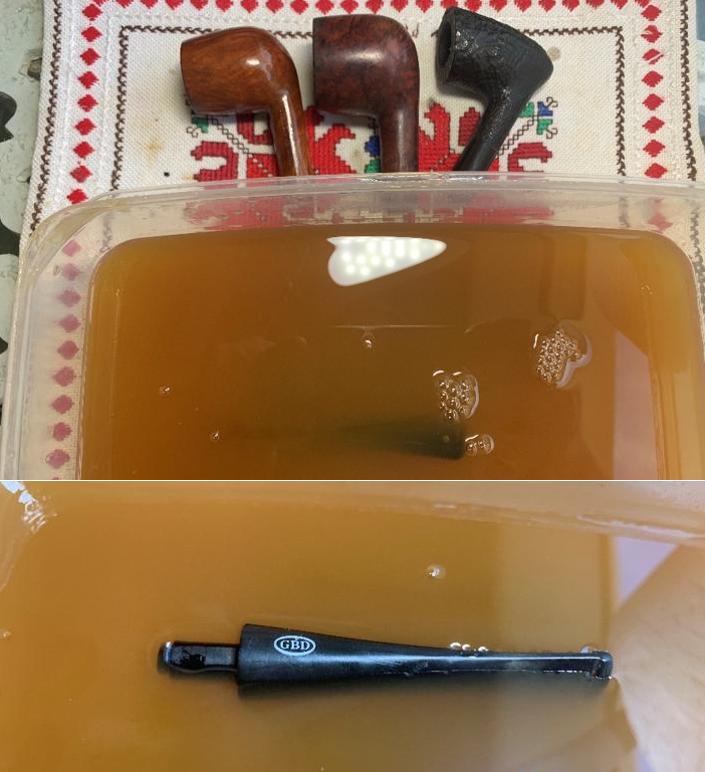 After several hours soaking in the solution, I fish the stem out and squeegee the excess liquid from the stem with my fingers and run pipe cleaners wetted with alcohol through the airway to clear away the Deoxidizer. Cotton pads are also used to wipe off the raised oxidation.
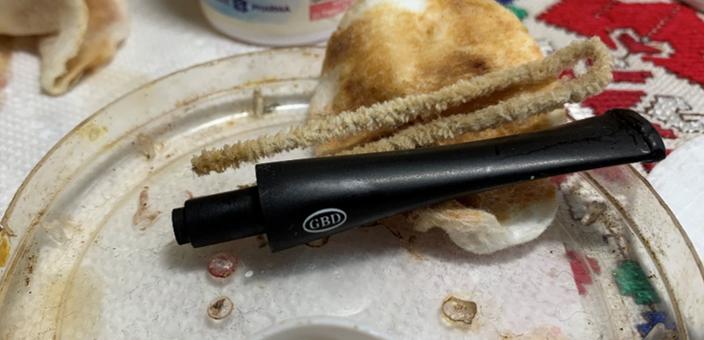 The stem is then treated with paraffin oil to help condition and rejuvenate the vulcanite.
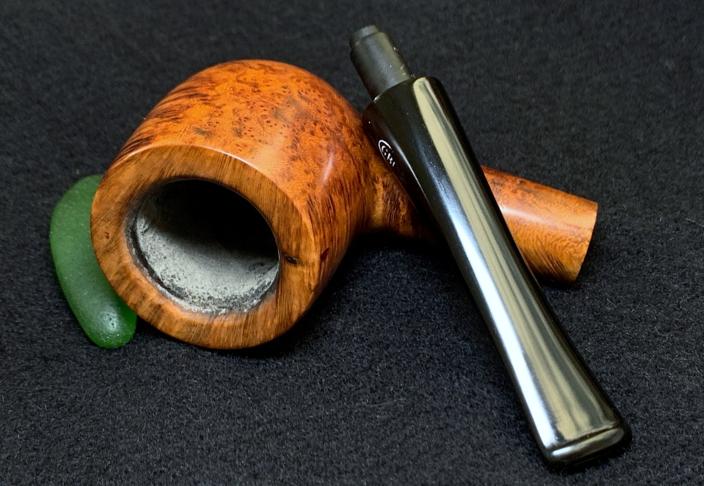
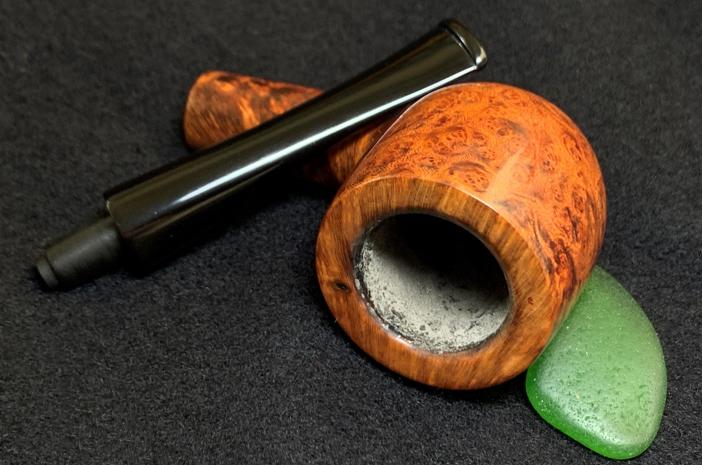
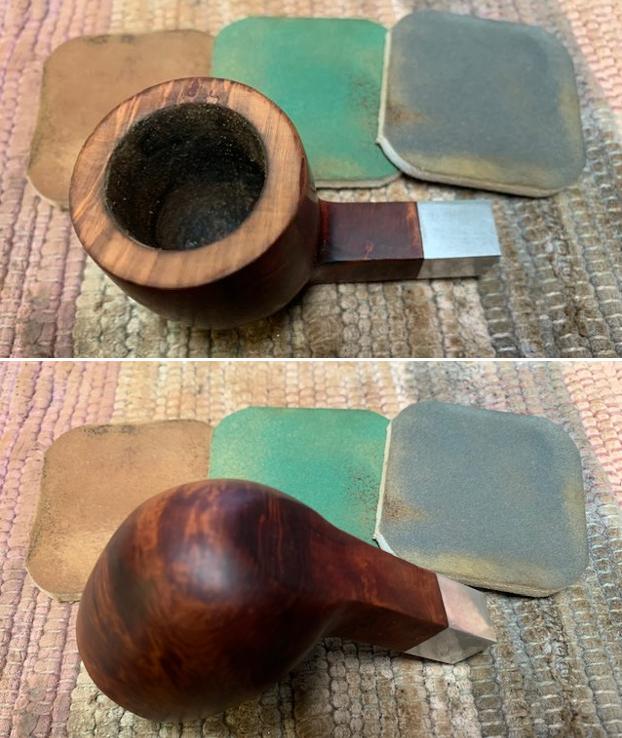
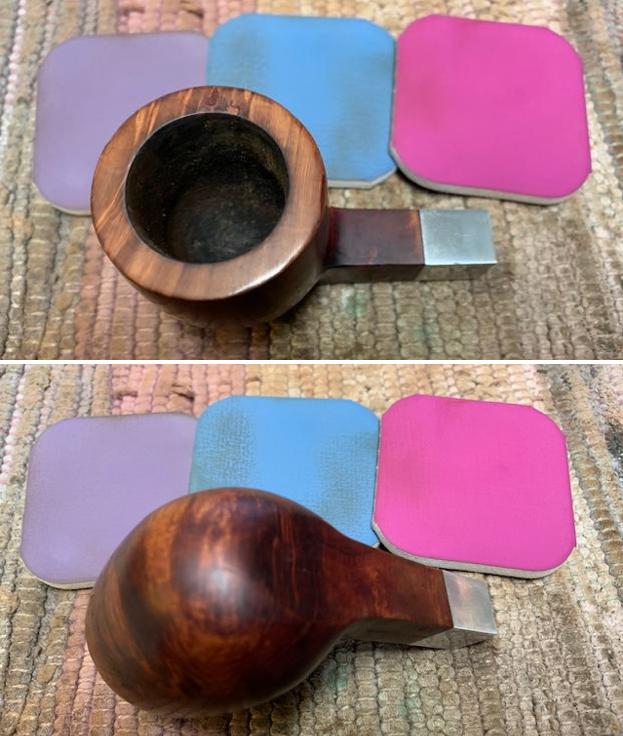
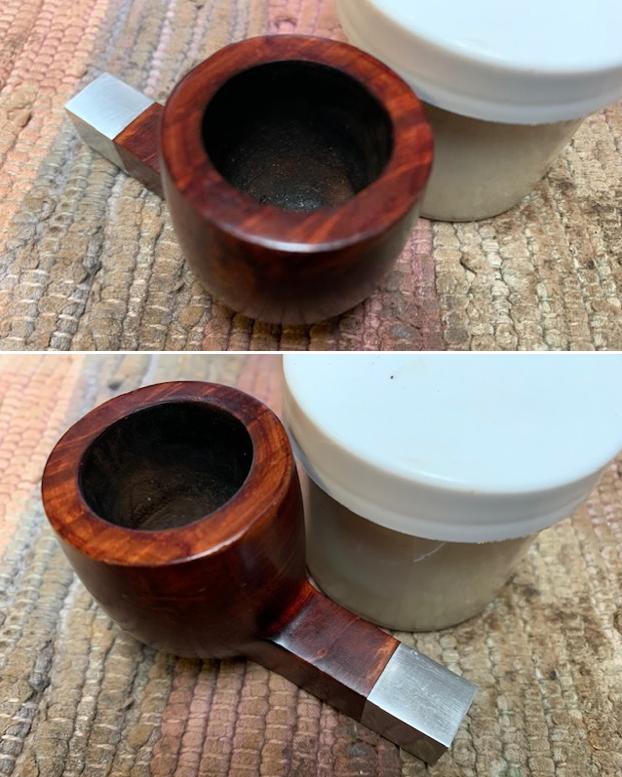
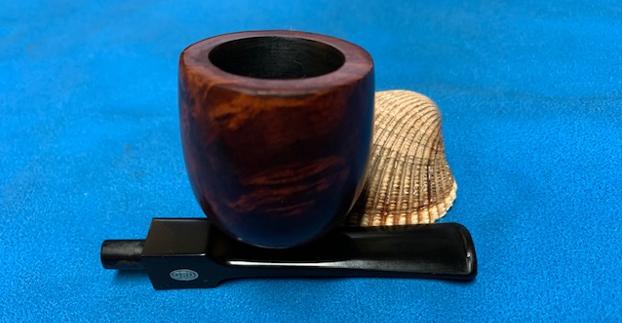
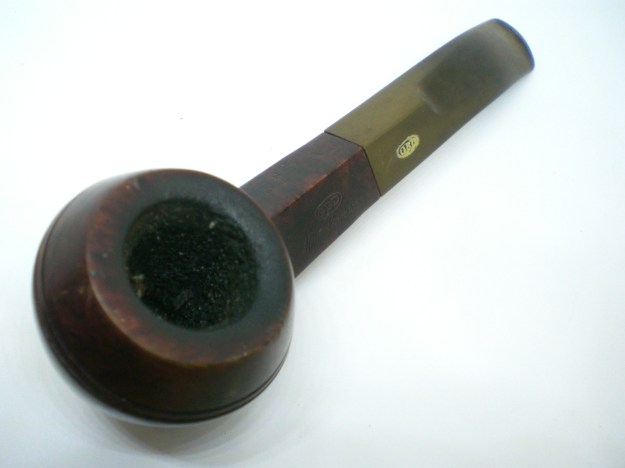
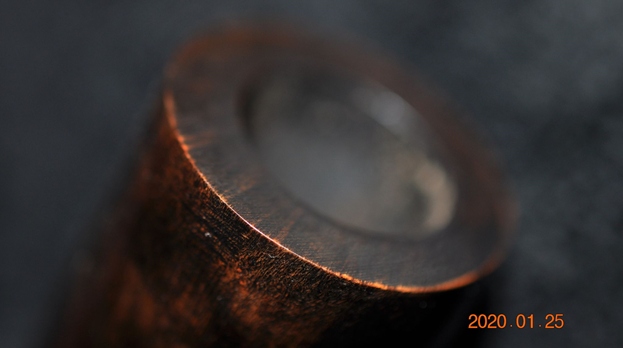
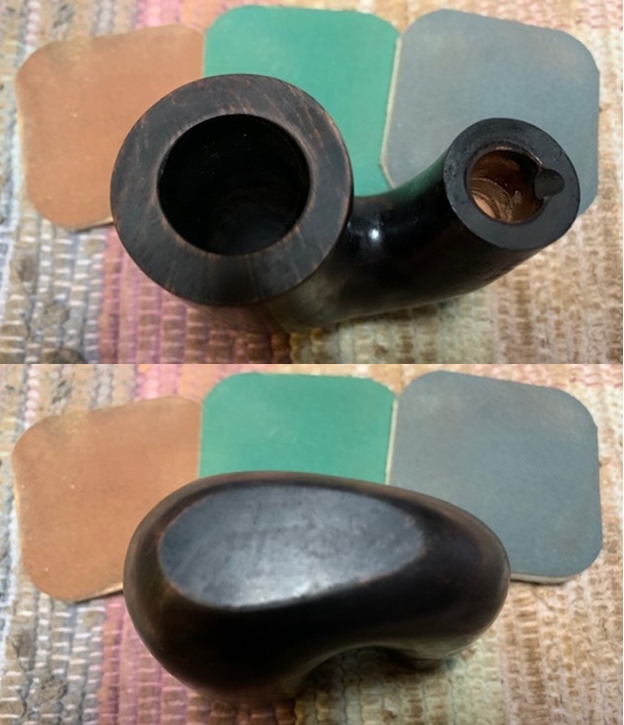
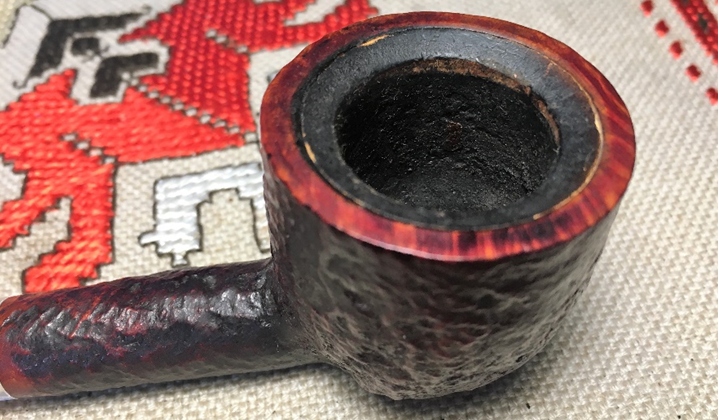
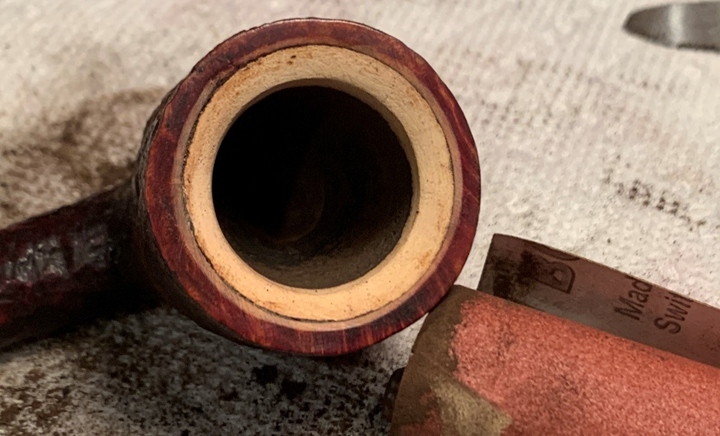
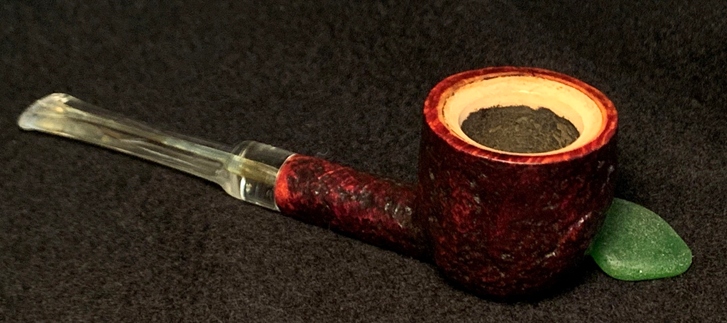
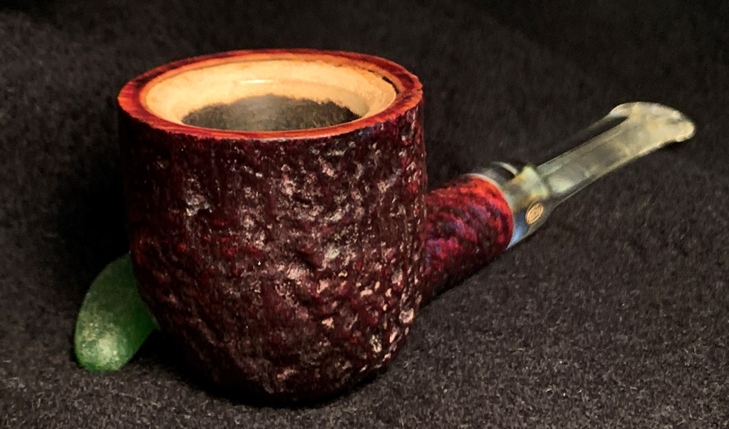
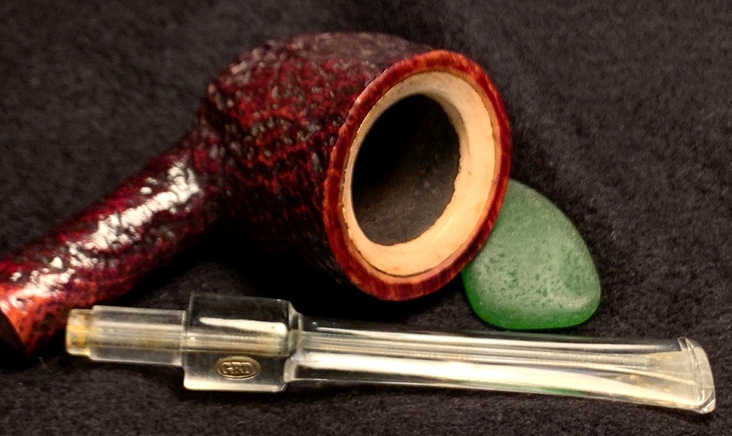
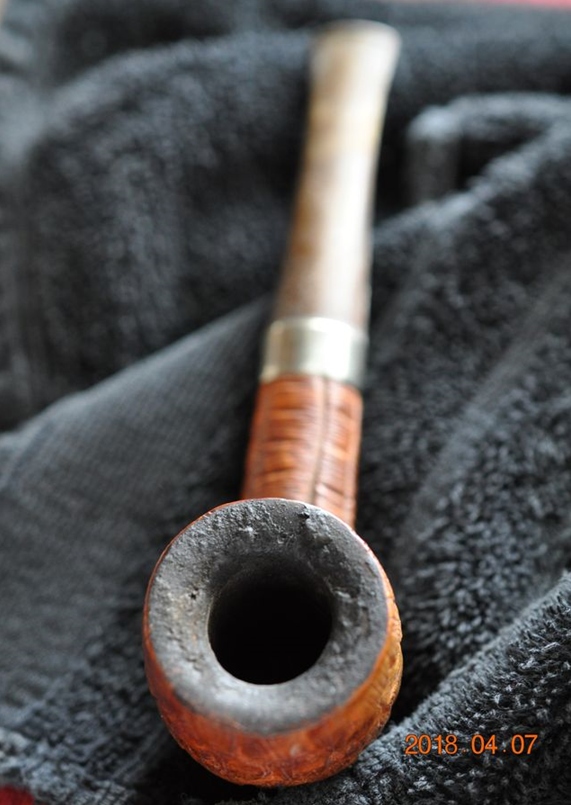
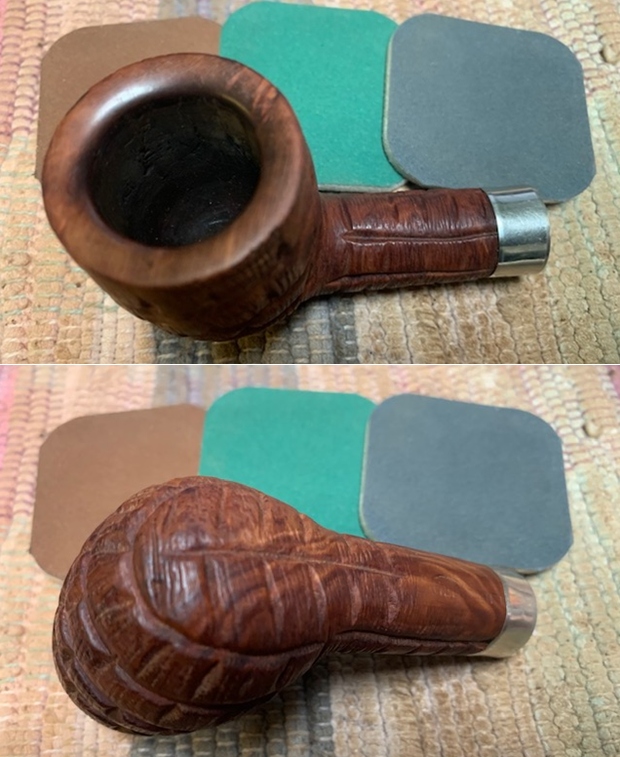
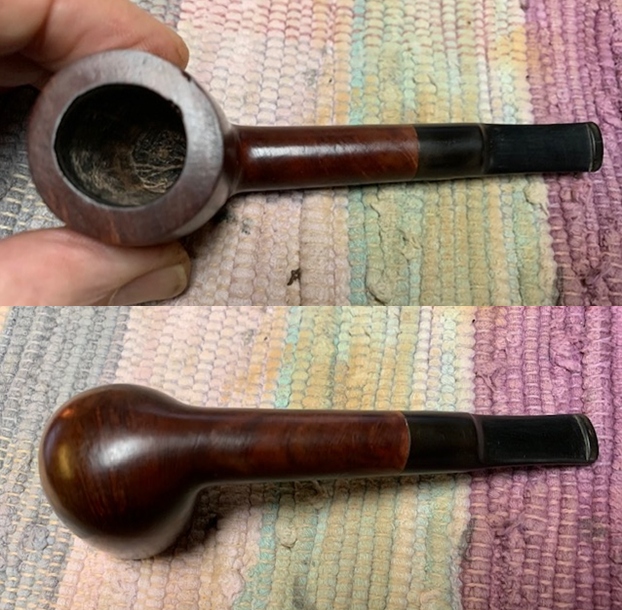
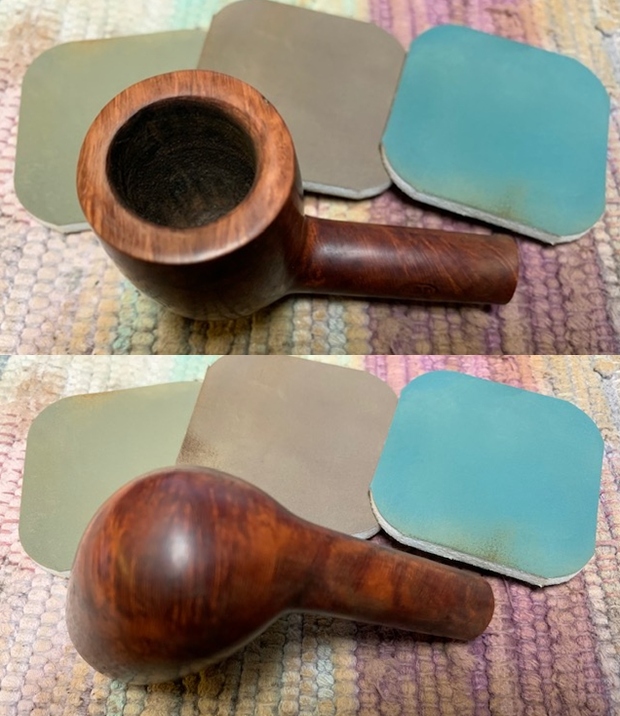
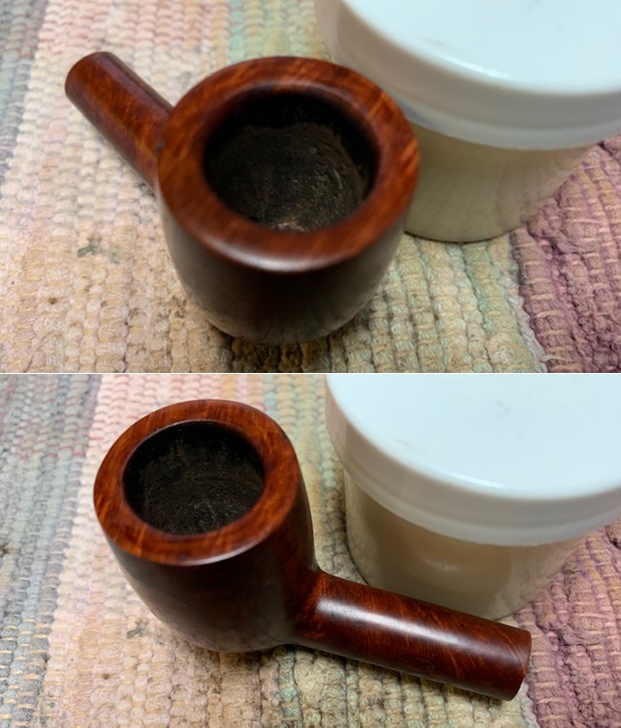
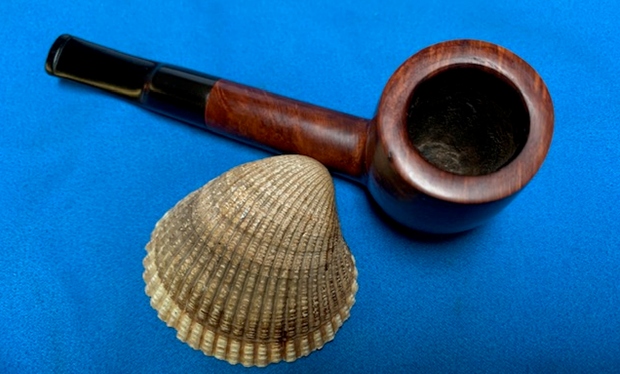
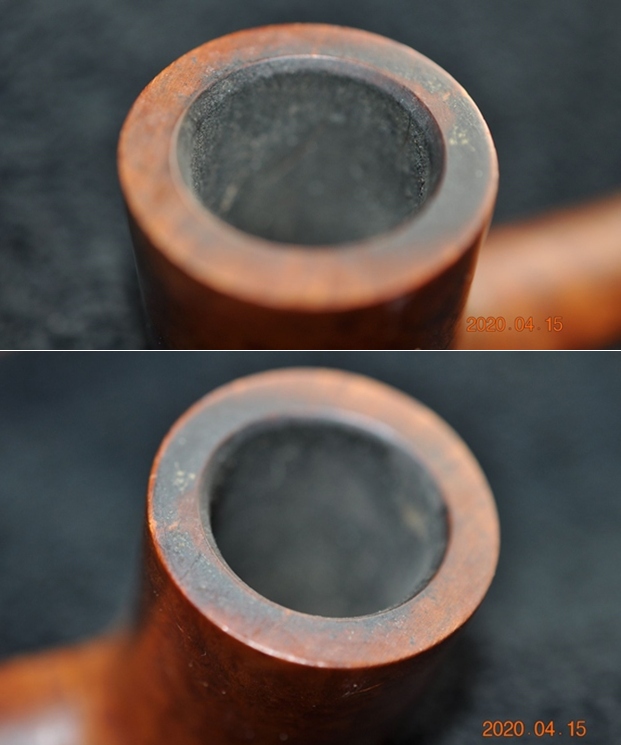
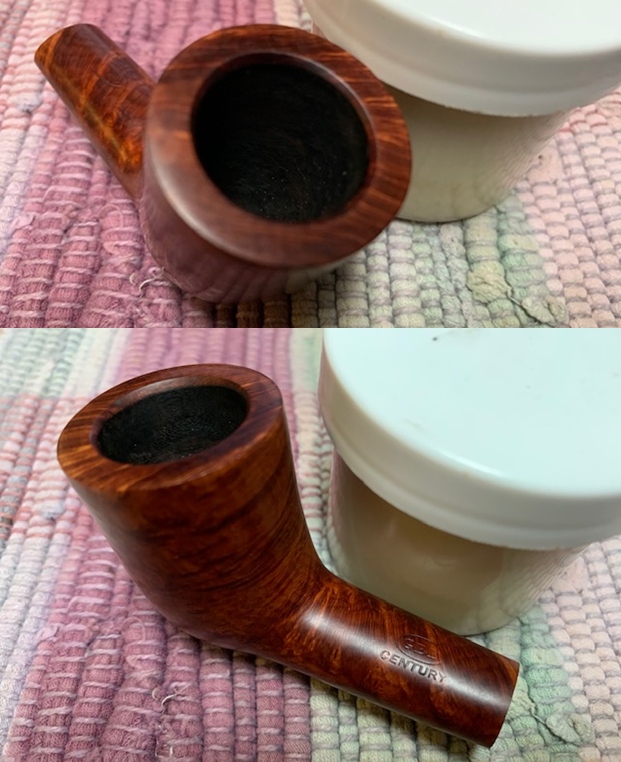
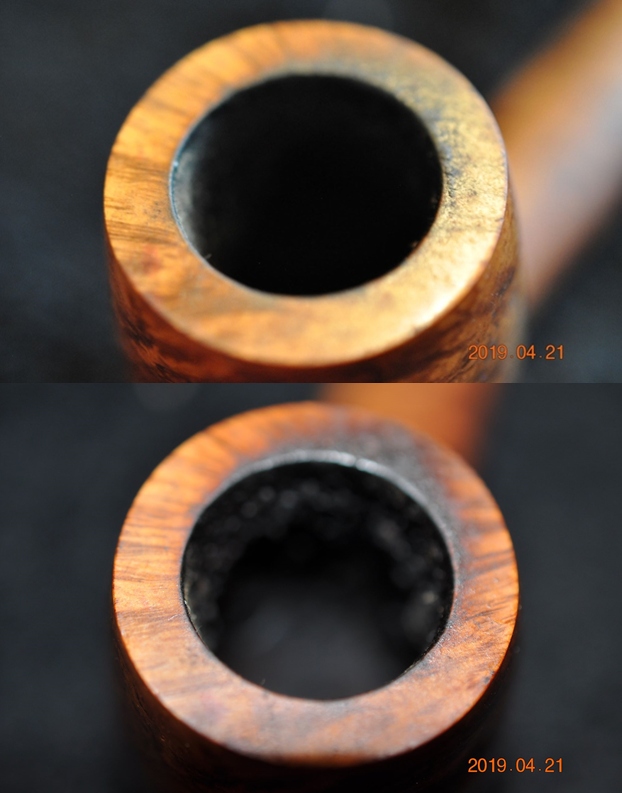
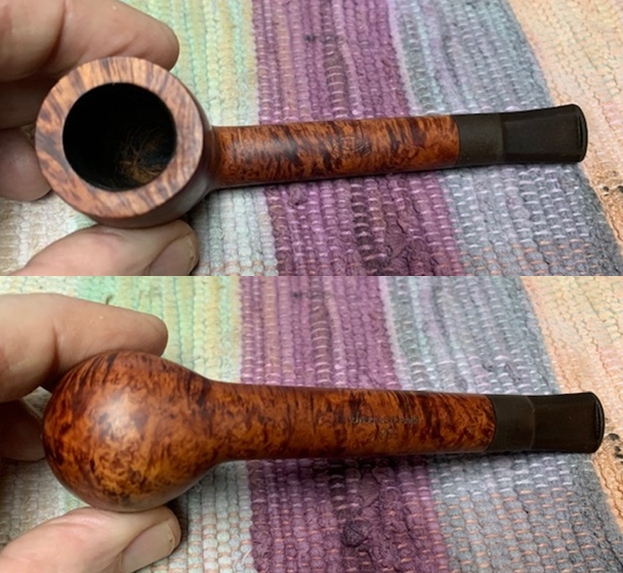
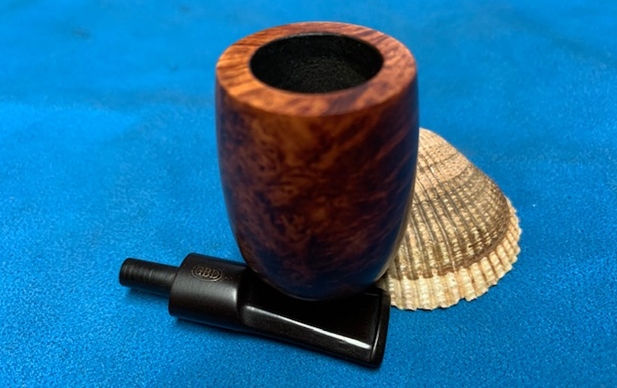
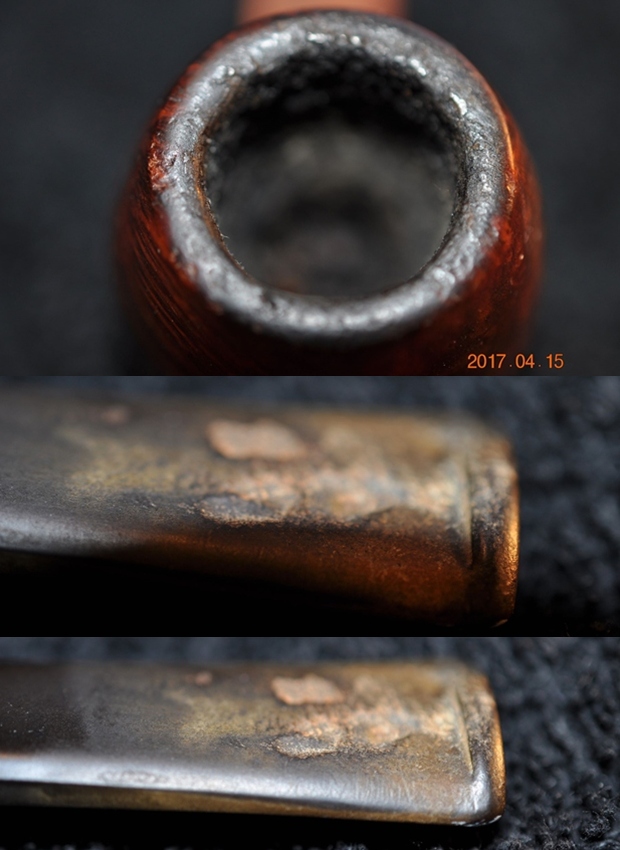
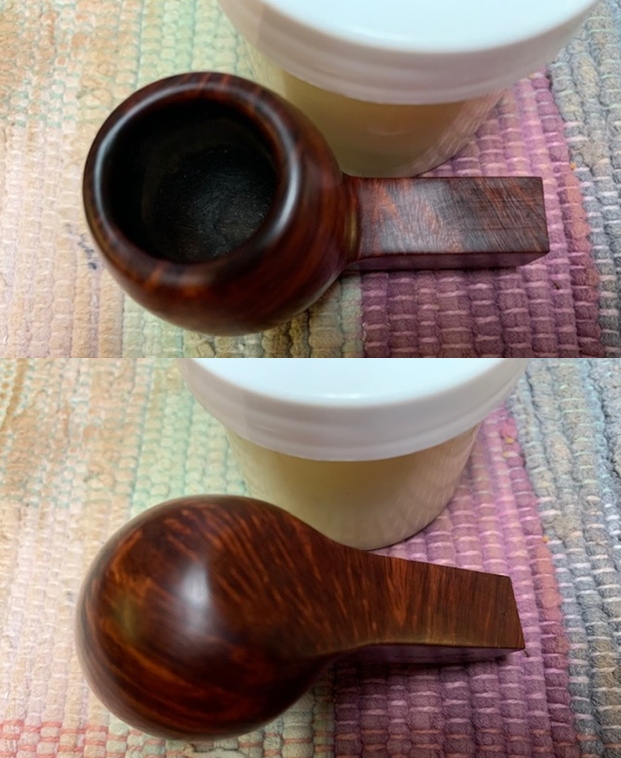
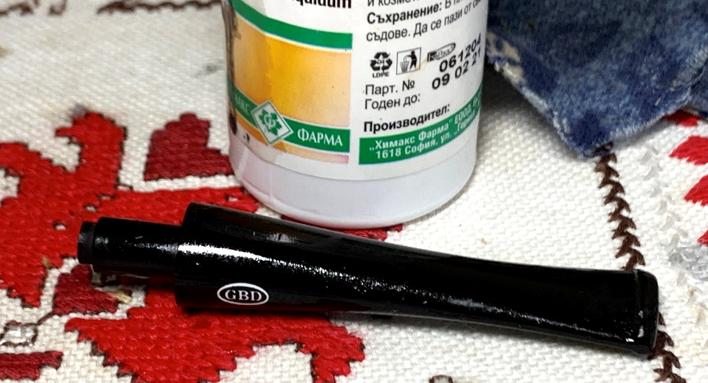 Turning now to the stummel, I take another look at the chamber. The cake is thick, and the lava flow is substantive over the rim. There is little doubt that the former steward enjoyed his GBD and that this indicates a good smoker on the table.
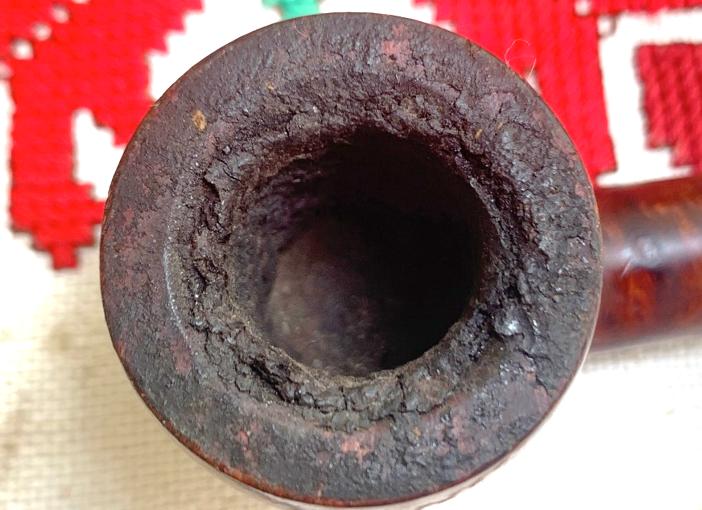
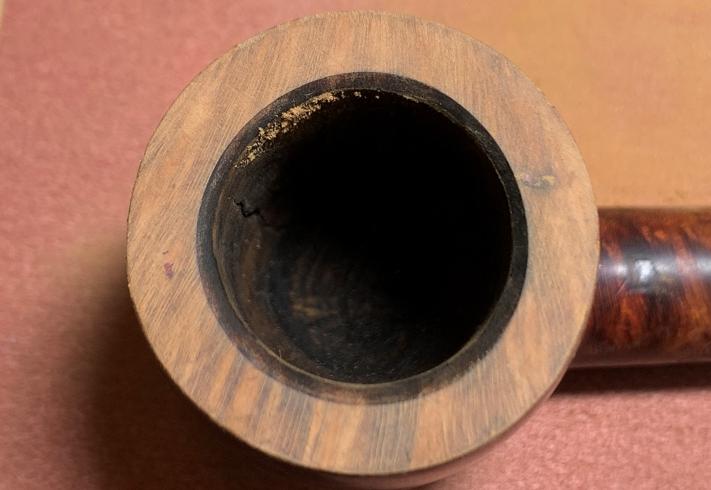
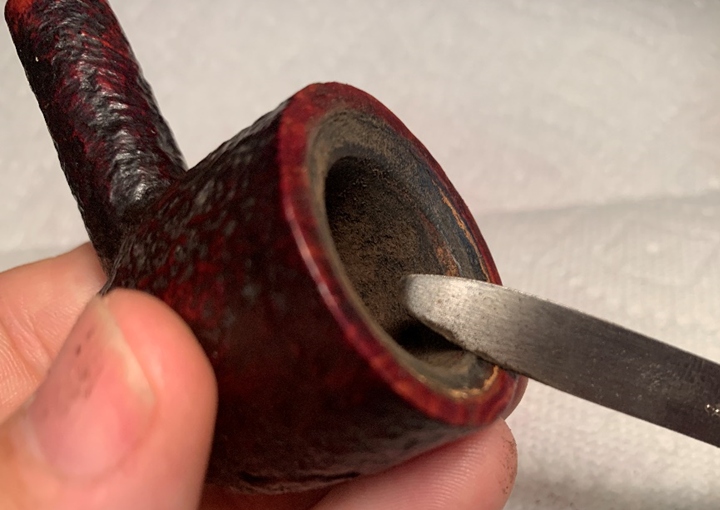
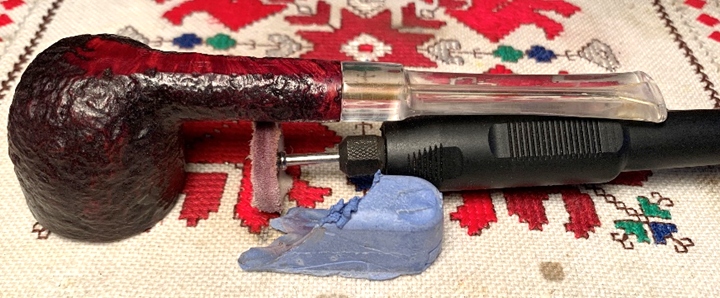
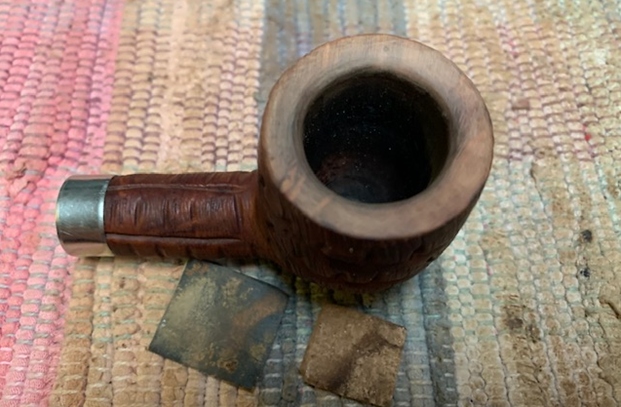
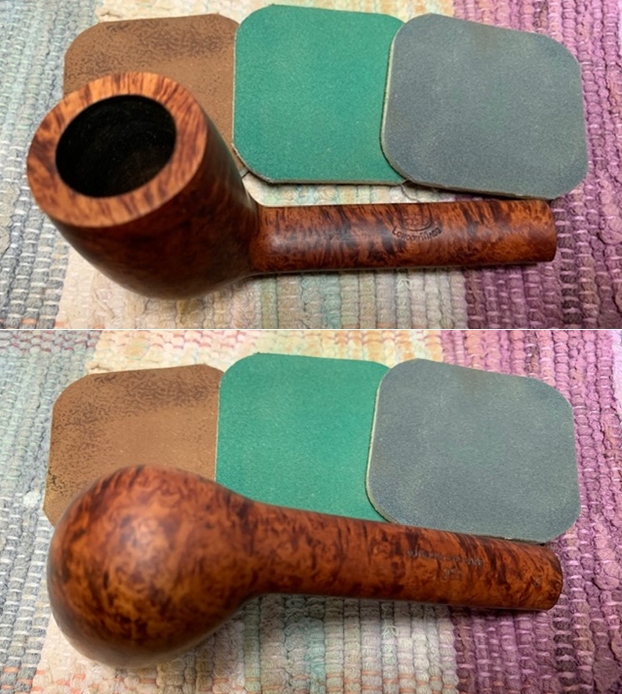
 After putting down paper towel to minimize cleanup, I go to work on removing the carbon buildup to allow the briar beneath to have a new start and to inspect for problems. I use all 4 of the Pipnet Reaming Kit blades heads and this is indicative of the large chamber of this GBD Pot. I follow the reaming with the Savinelli Fitsall tool to further scrape the walls and finish by sanding with 240 paper wrapped around a Sharpie Pen. A pocketknife is also employed to scrap the lava crust off the rim. This reveals a smart internal rim bevel which is nice.
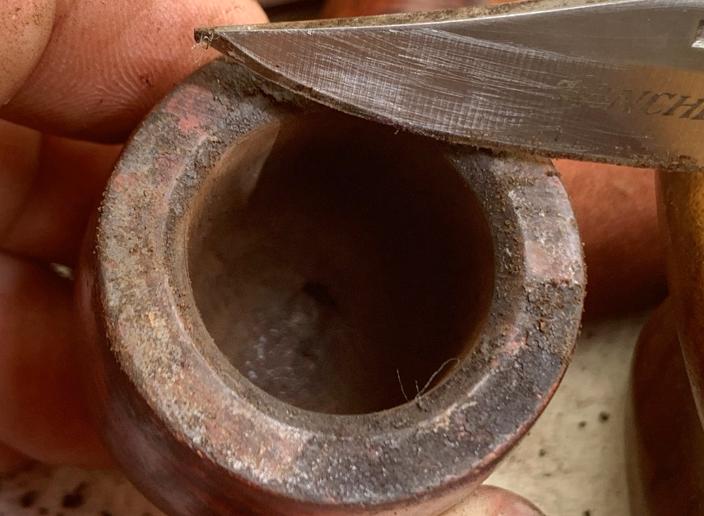
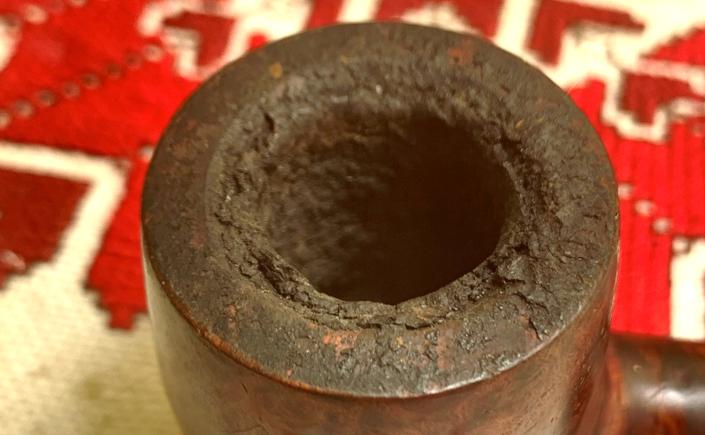
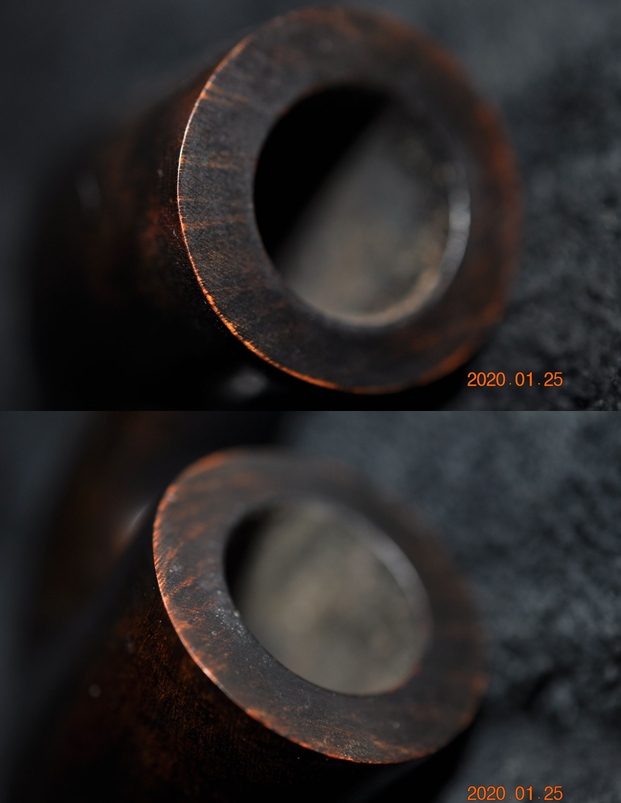
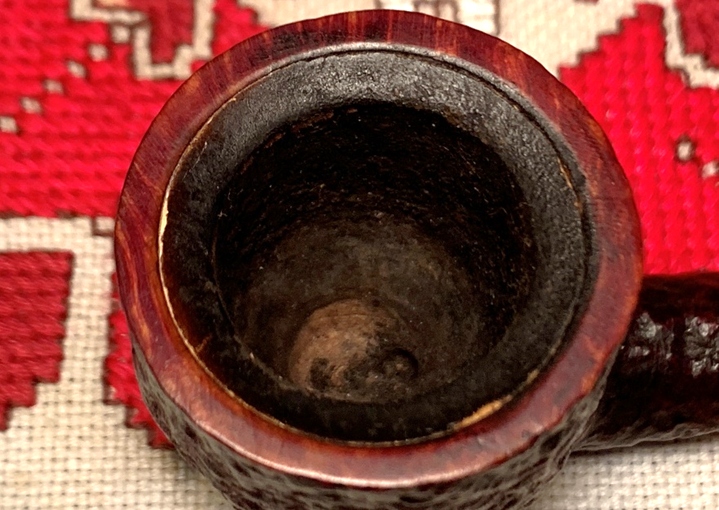
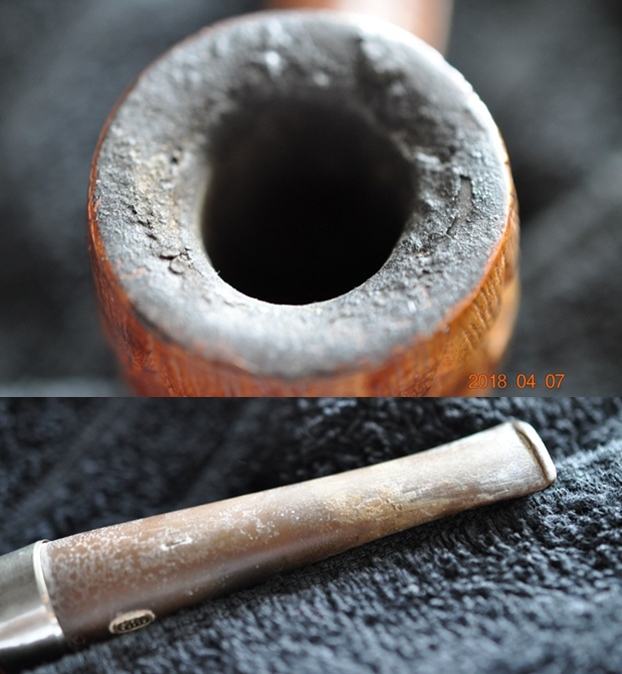
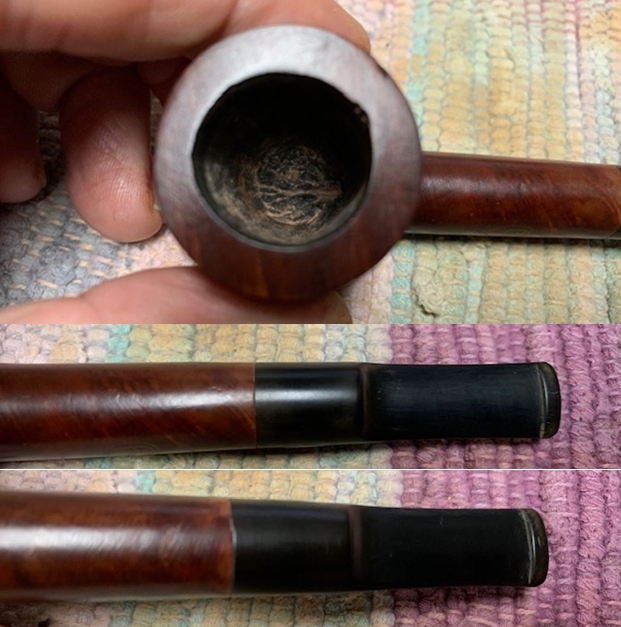
 With the cake cleared out, working on the balcony of my mother’s condominium where my Christmas Vacation mobile work desk is located, I use the natural sunlight to inspect the chamber. Not surprising, I can see some heating veins on the chamber wall. The thick cake on the GBD contributed to this heating problem. A carbon cake needs only to be the width of a US dime. When the cake is too thick, its expansion and contraction during the service of the pipe causes undo stress and heating on the briar. The worst-case scenario is an eventual burn-through or a severely cracked bowl. These veins are minor, thankfully, and will be addressed by applying pipe mud later. Pipe mud helps the formation of a protective cake.
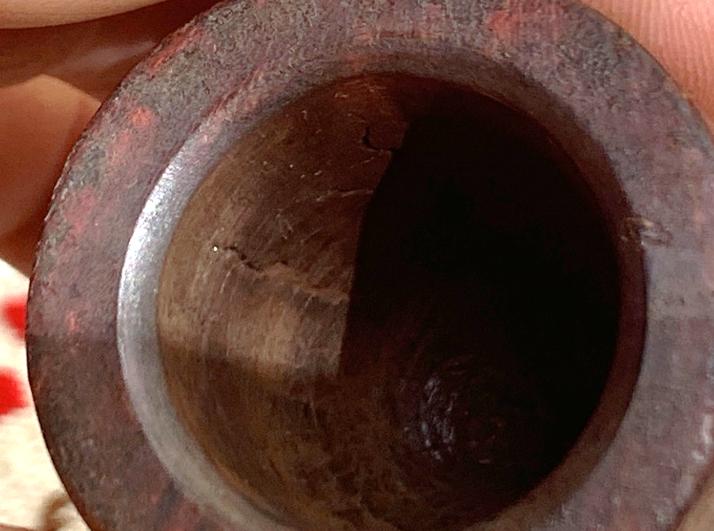
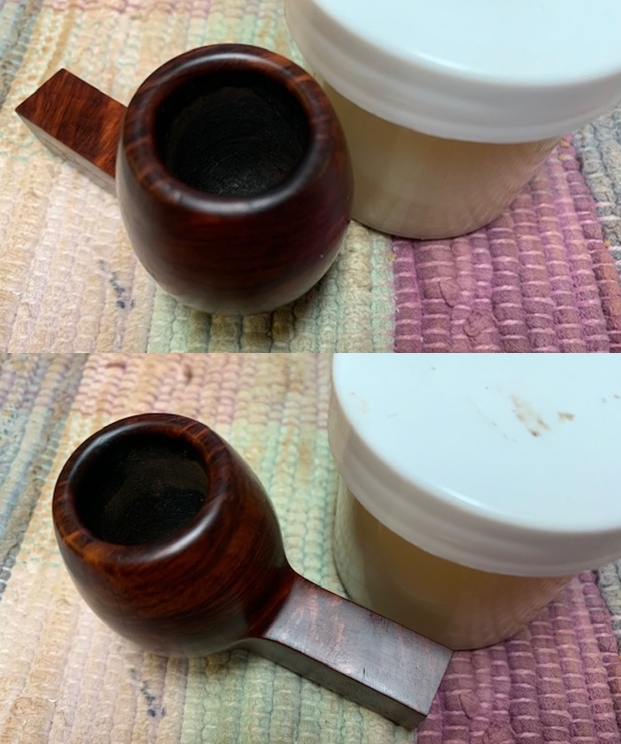
 The scraping of the rim reveals some dings on the edge from normal wear.
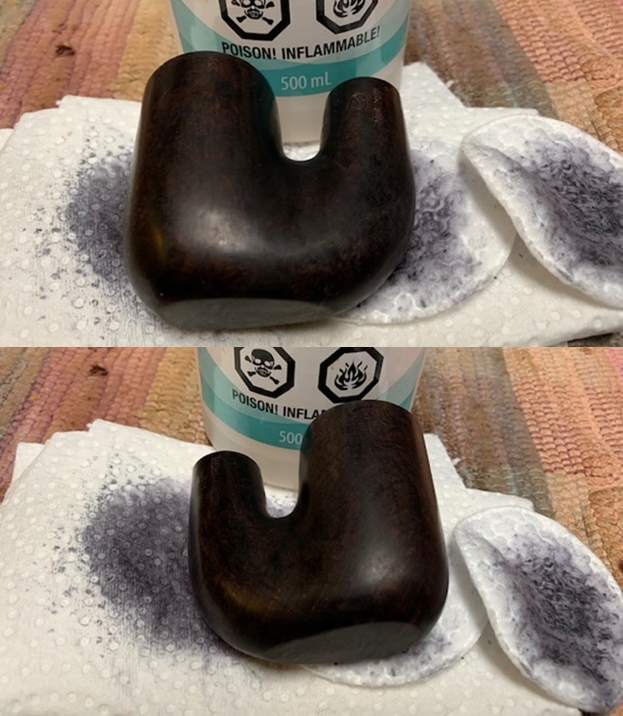
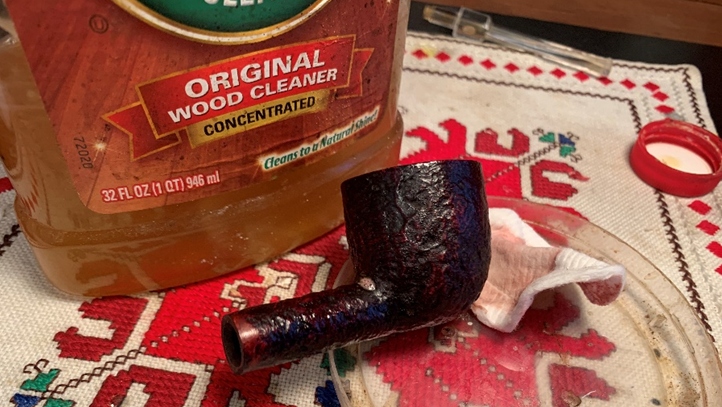
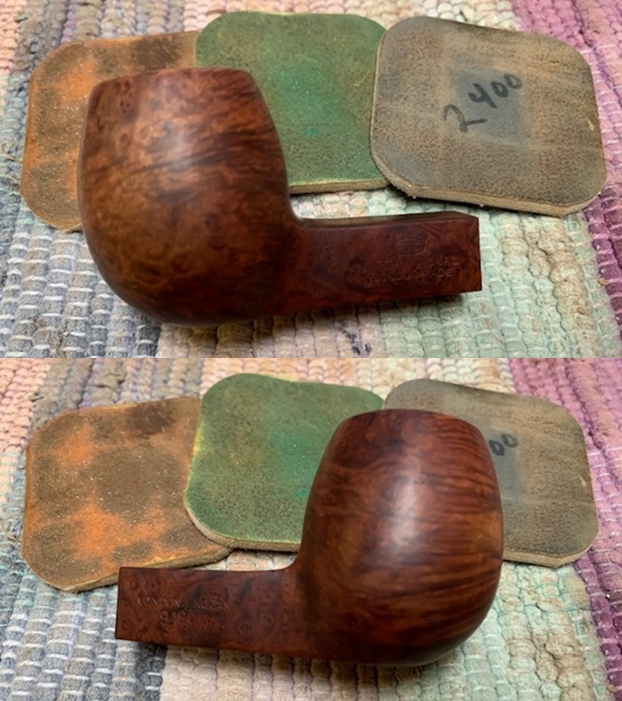
 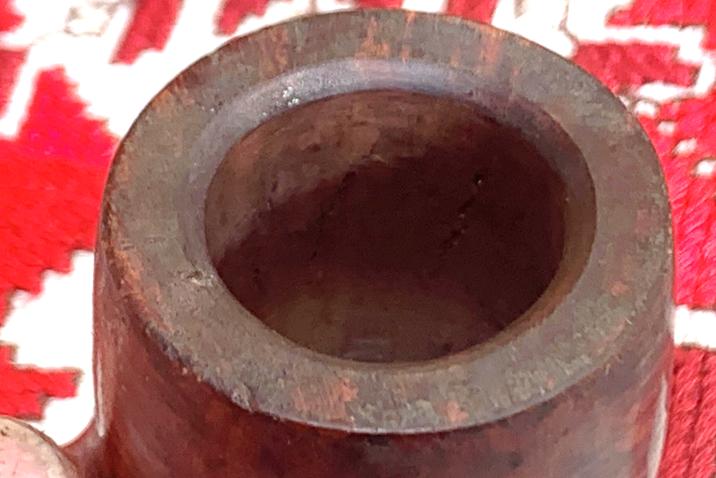 Continuing the cleaning process, I use undiluted Murphy’s Oil Soap to clean the darkened, grimy briar surface. I take a few pictures to mark the start.
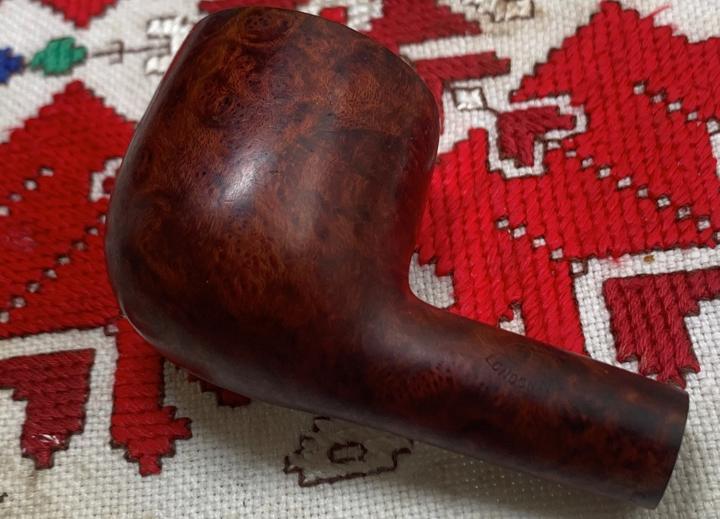
 A cotton pad did the scrubbing with Murphy’s and a brass bristled brush helps with the rim. Using brass brushes is less intrusive and a softer approach to cleaning.
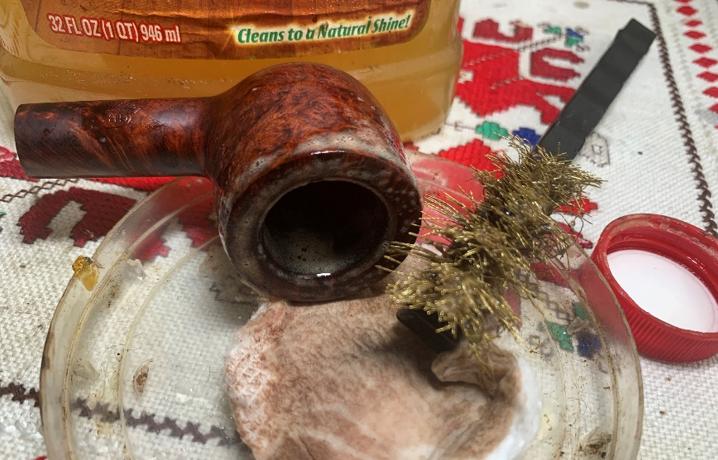 After this, the stummel is taken to the sink and using anti-oil liquid dishwashing soap and warm water, the mortise is scrubbed with shank brushes. After the stummel is rinsed thoroughly, I bring it back to the table.
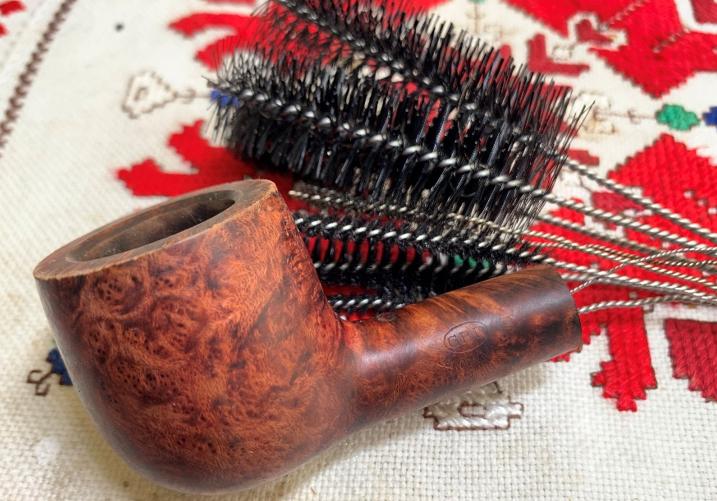 Doing a quick survey of the stummel, the chips on the rim are evident along with scratching on the briar surface on the aft quadrant of the bowl.
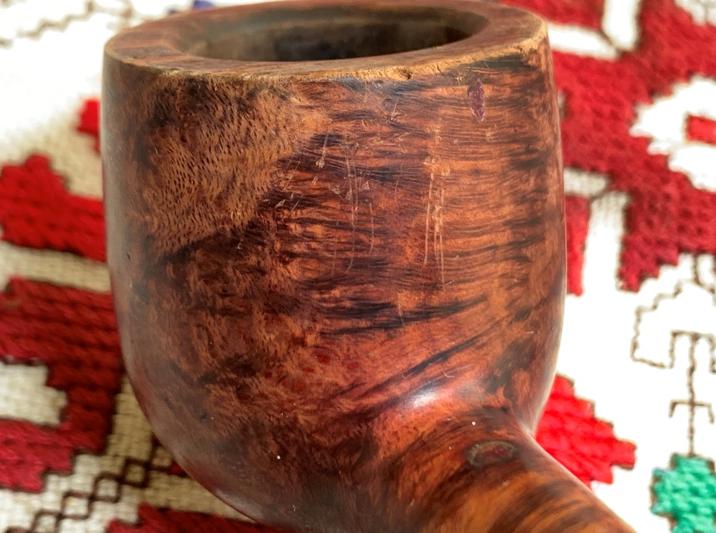
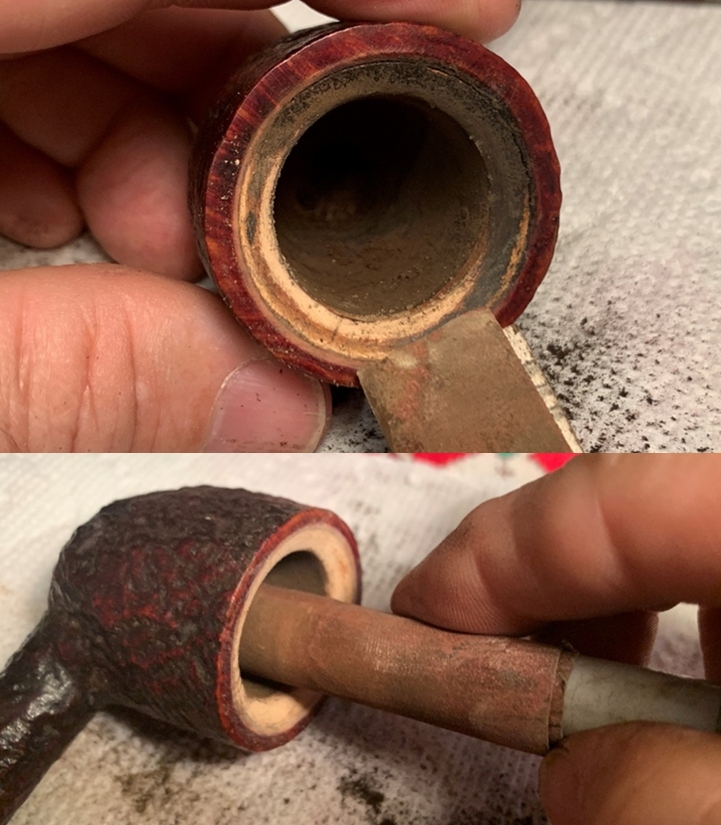
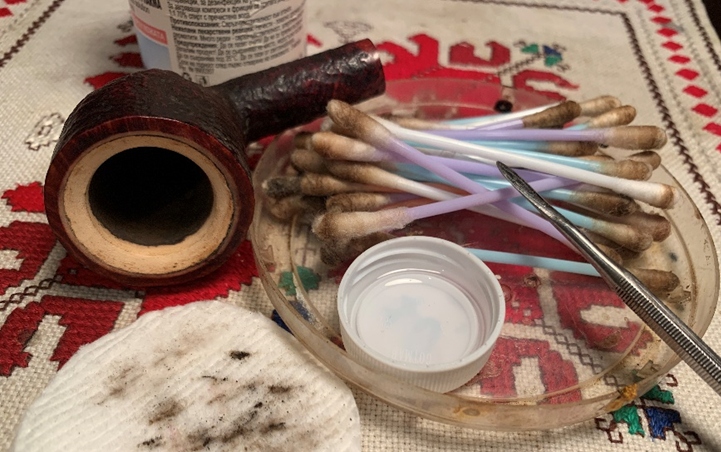
 Next, focusing more on the internals, cotton buds and pipe cleaners wetted with isopropyl 99% are used to do the job. I also use the small dental spoon to scrape the mortise walls. The previous cleaning in the sink did a good job. It doesn’t take a lot of effort and the buds and cleaners are coming out lighter. I’ll continue the internal refreshing later using a kosher salt and alcohol soak.
 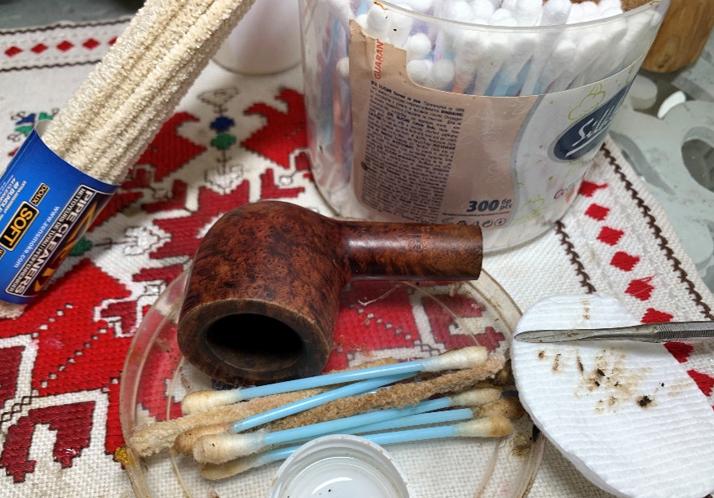 Continuing with the stummel, the rim is not in good condition and coupled with the scratching and fill on the stummel surface, sanding will be necessary. I start from the top and work my way down.
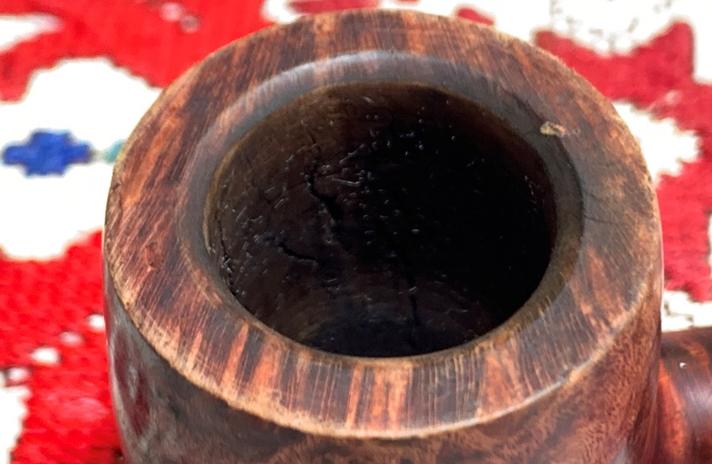
 I begin by topping the stummel to refresh the rim. I use 240 grade paper to begin on a chopping board. After inverting the stummel, I give it several rotations.
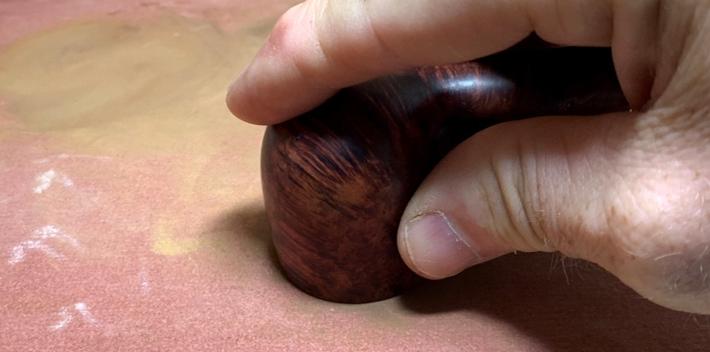 I stop to check the progress not wanting to remove more rim briar real estate than is necessary.
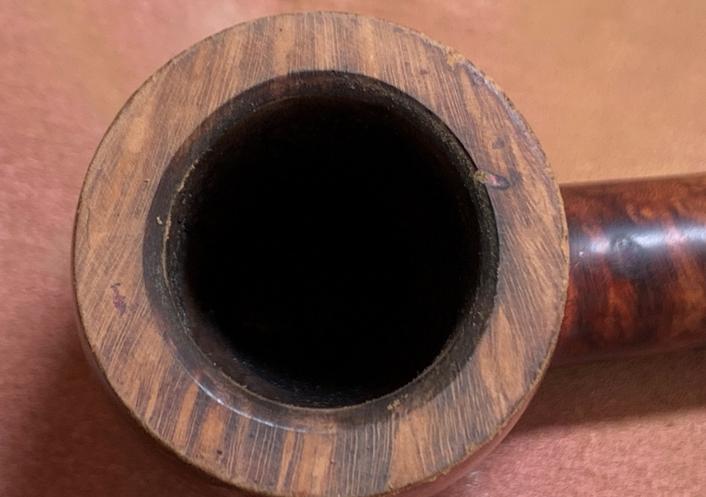
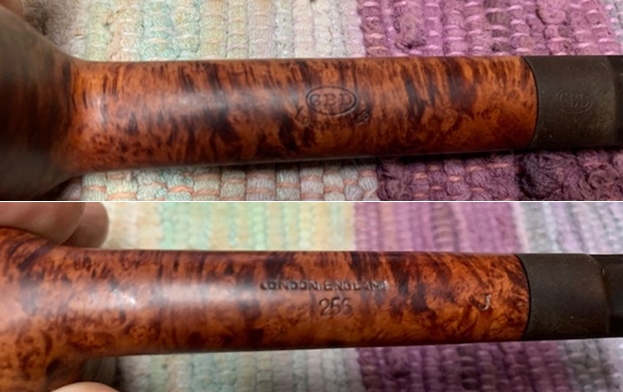
 While I’m at it, I also refresh the rim with 240 paper using a hard surface to press the paper. I do the same with 600 grade paper and after changing the topping paper to 600, I give the rim several more rotations to further smooth the rim and remove the imperfections. The picture below shows a much-improved rim. A knot can be seen on the shank-side of the rim. It doesn’t appear to be a fill.
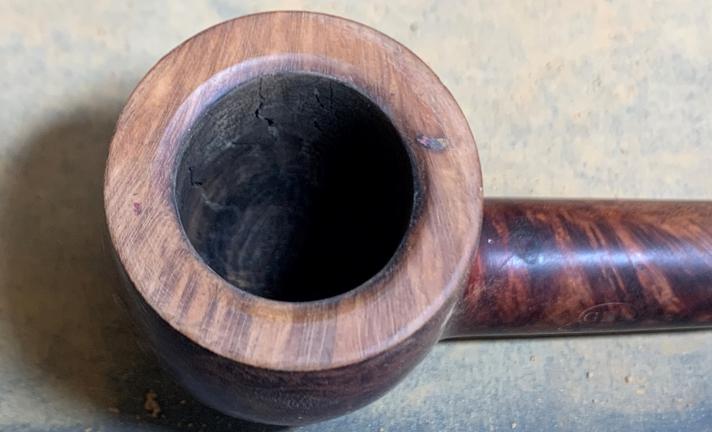 The spot on the rim has an indentation and is not smooth to the touch. I decide to fill it so that the rim surface is smooth.
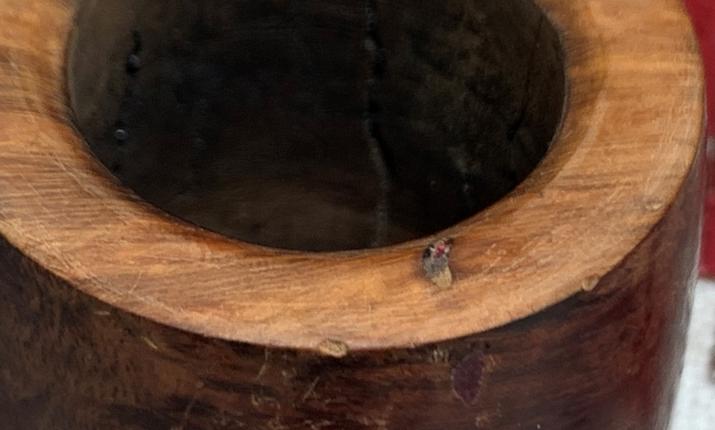 Using a sharp dental probe, I dig out any loose material.
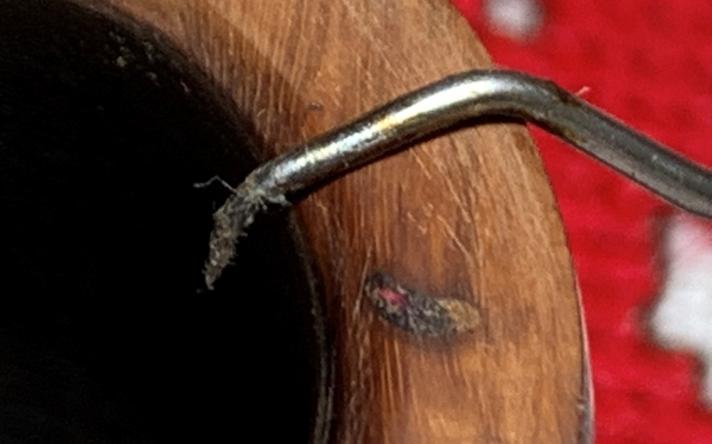 After cleaning off the area with alcohol, I then apply a drop of clear CA glue to the pit and put the stummel aside for the patch to cure.
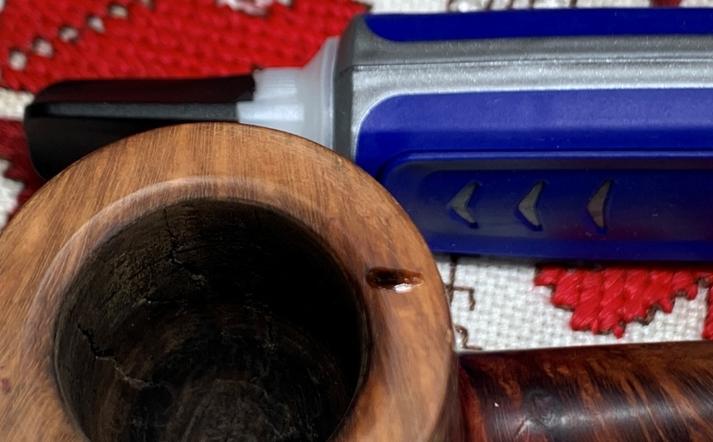 It doesn’t take long for the patch to cure. I use a flat needle file and a tightly rolled piece of 240 paper to do some precision filing and sanding to remove the excess patch mound.
 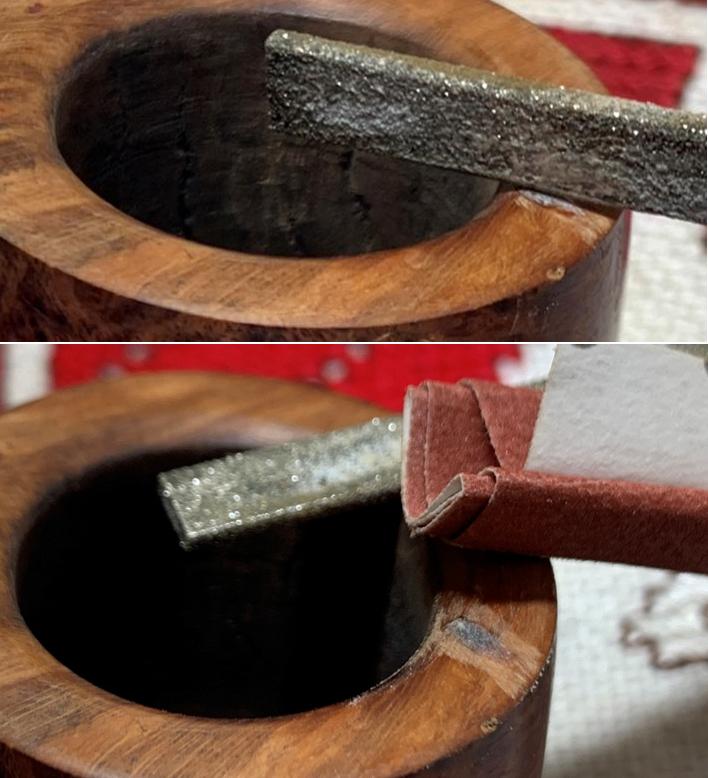 The rim patch is completed after again returning the stummel to the topping board with 600 grade paper. After a few more revolutions to blend the patch, the patch looks good and is smooth to the touch.
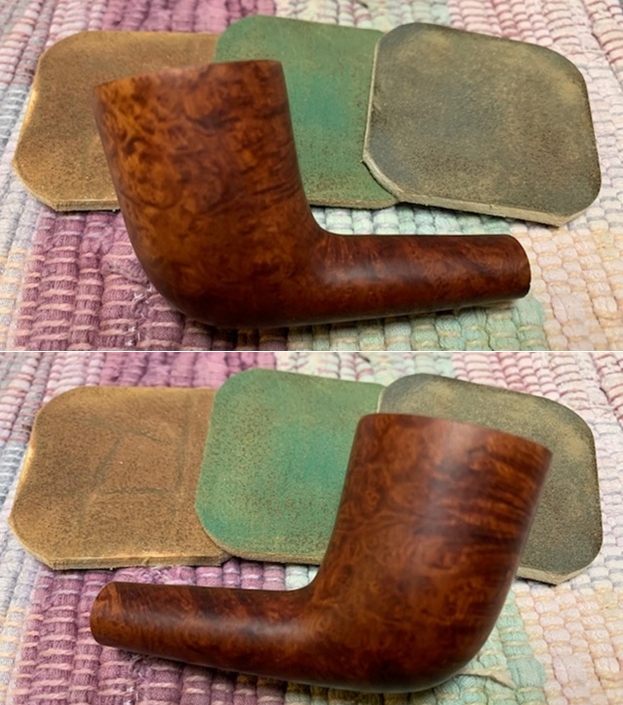
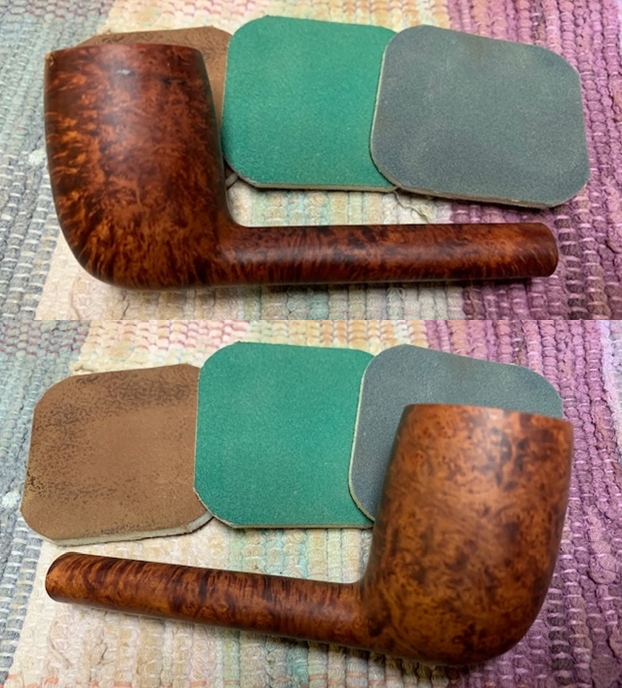
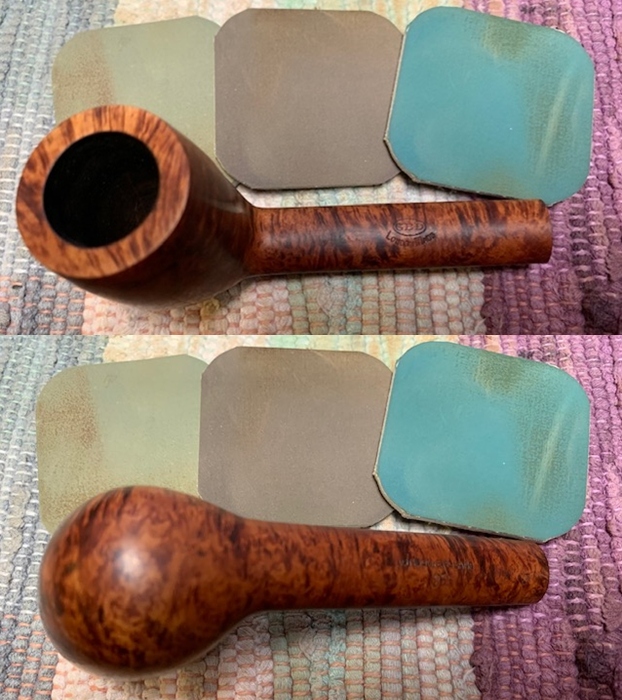
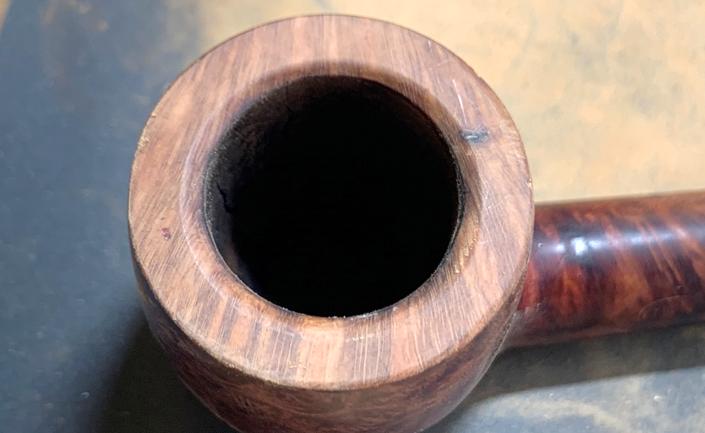 To address the dents on the shank-side of the rim lip and the multitude of scratches over the stummel, I use sanding sponges. Starting with the rough grade, I sand over the entire stummel, carefully maneuvering around the nomenclature on both sides of the shank. I follow the roughest grade with a medium grade then a fine grade. The results are good. Sanding sponges help to cleanup the blemishes on the briar surface less invasive than sanding paper.
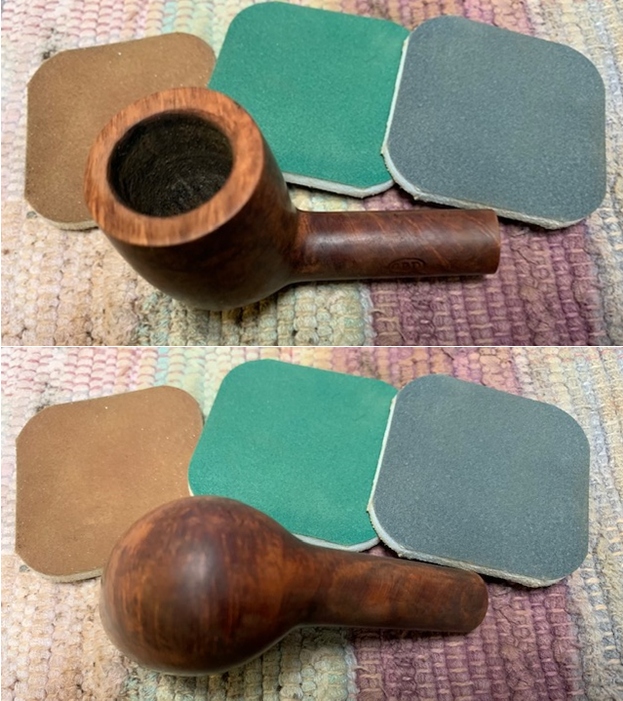
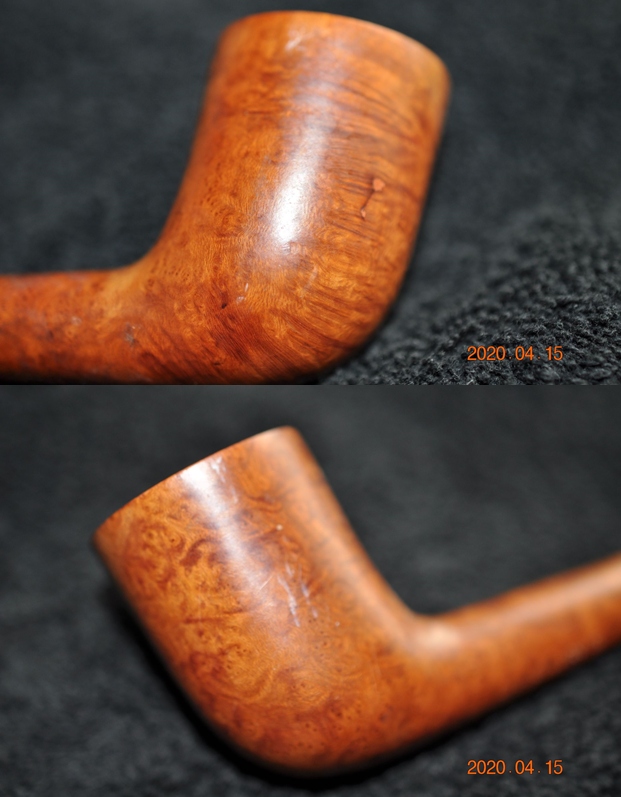
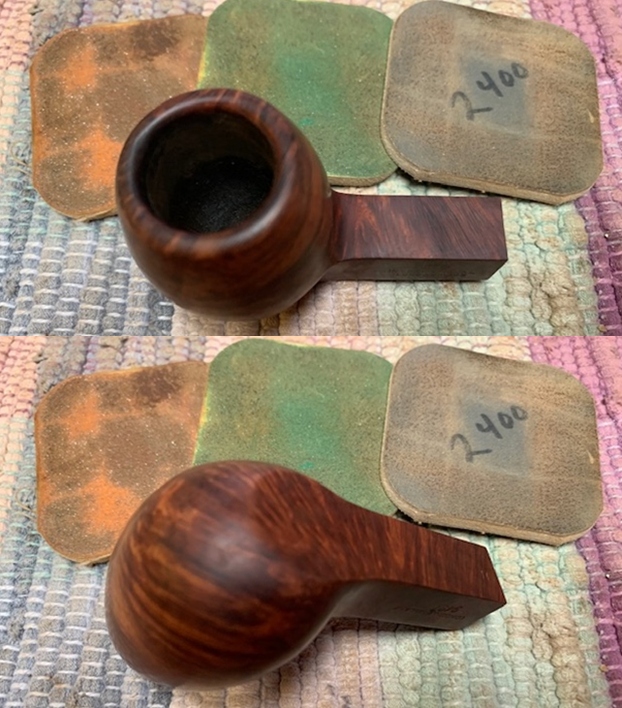
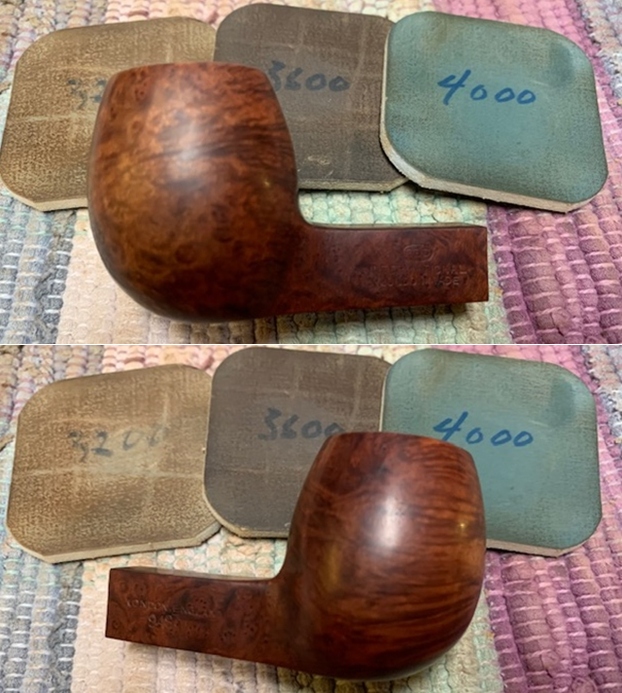
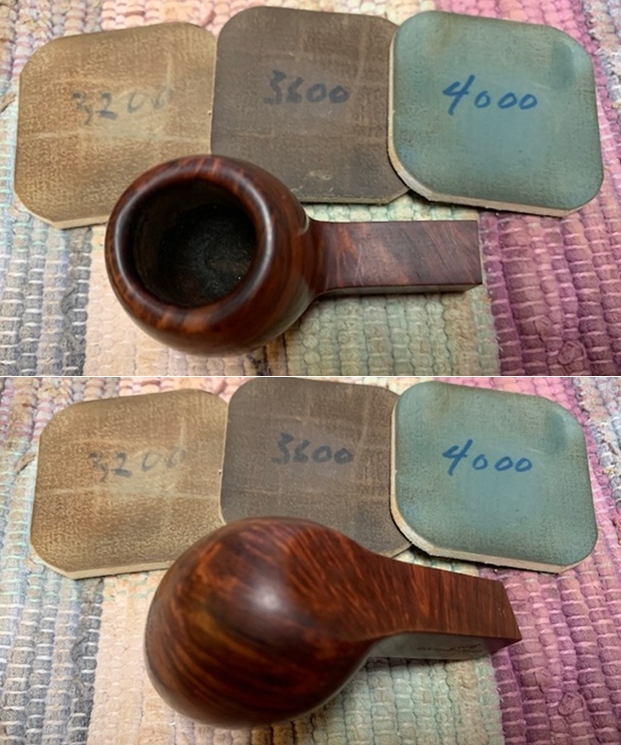
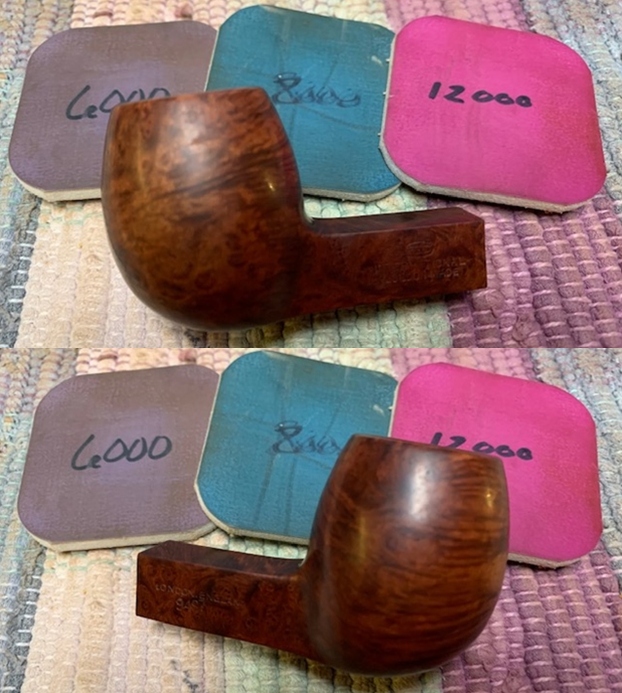
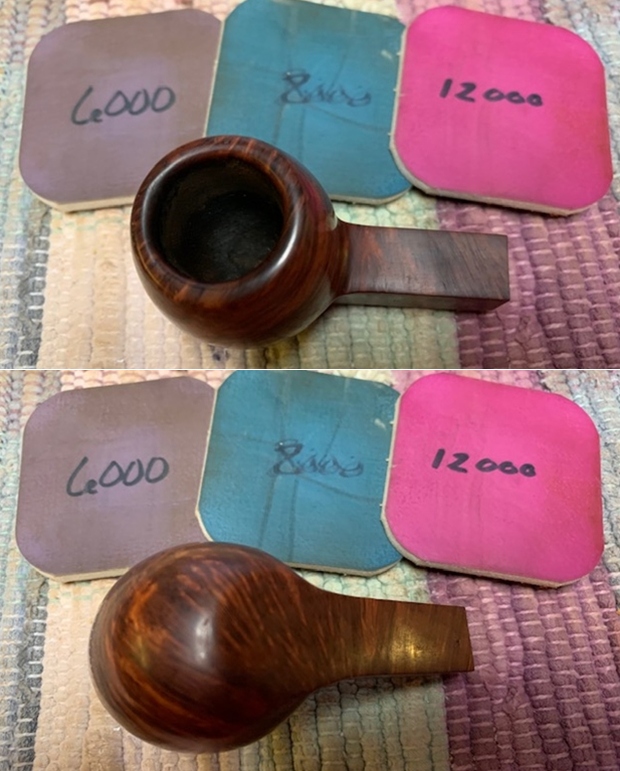
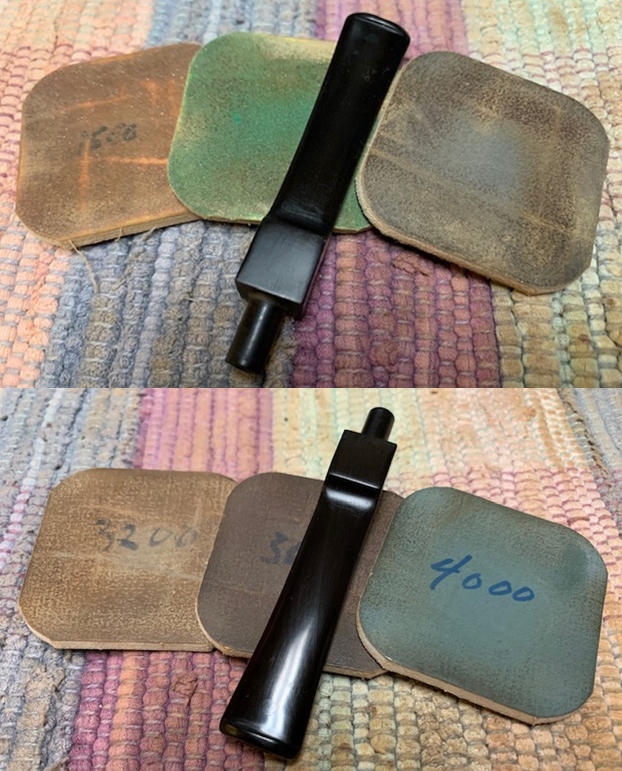
 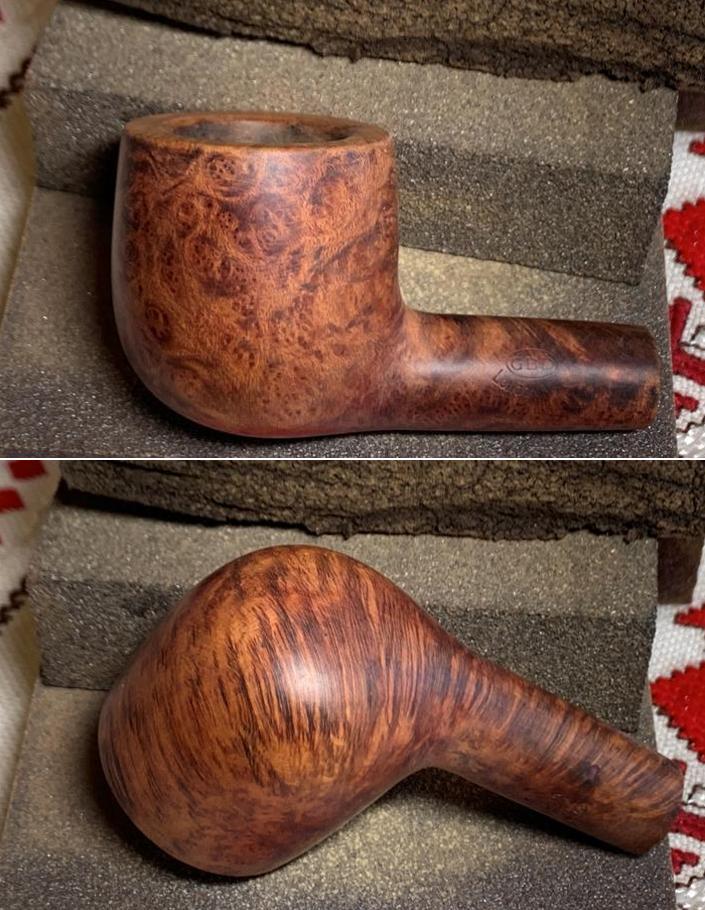 On a roll, I continue the stummel sanding with the full set of micromesh pads. Using pads 1500 to 2400 grade, the stummel is wet sanded. Following this, dry sanding with pads 3200 to 4000 and 6000 to 12000 complete the job. Wow! The grain on this GBD is active and expressive. This is looking good.
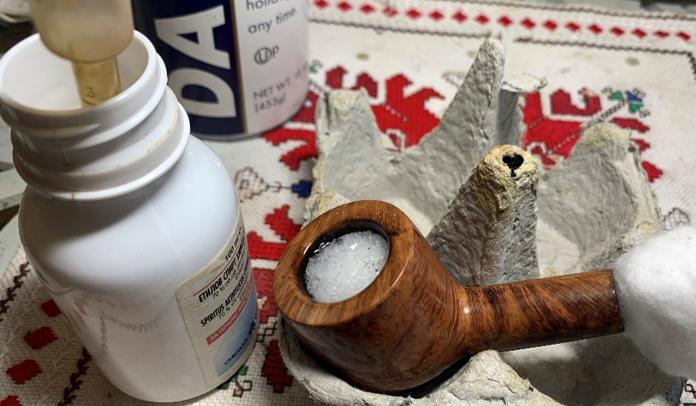
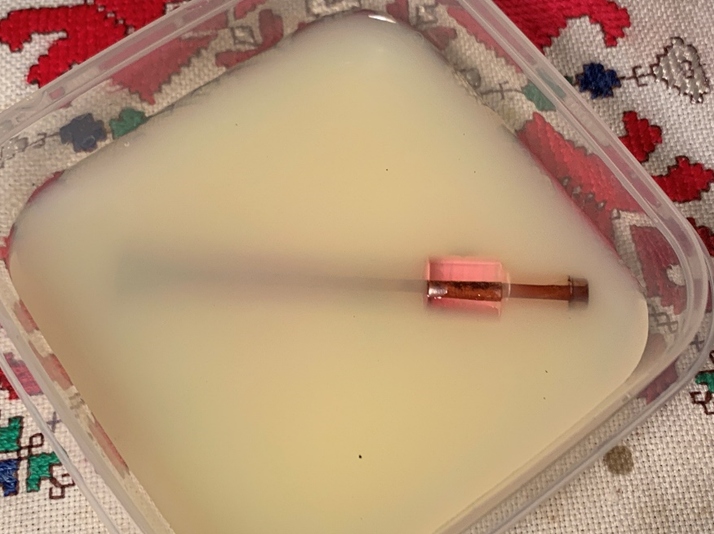
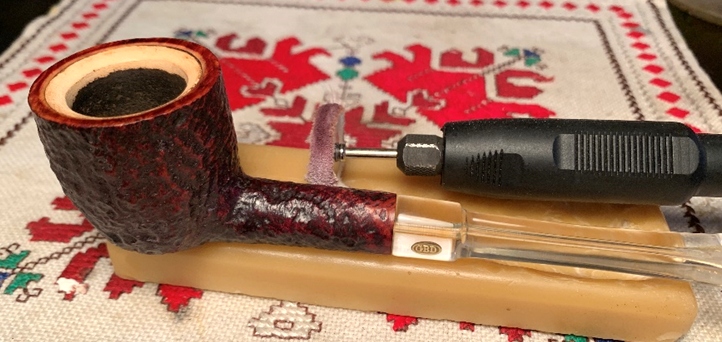
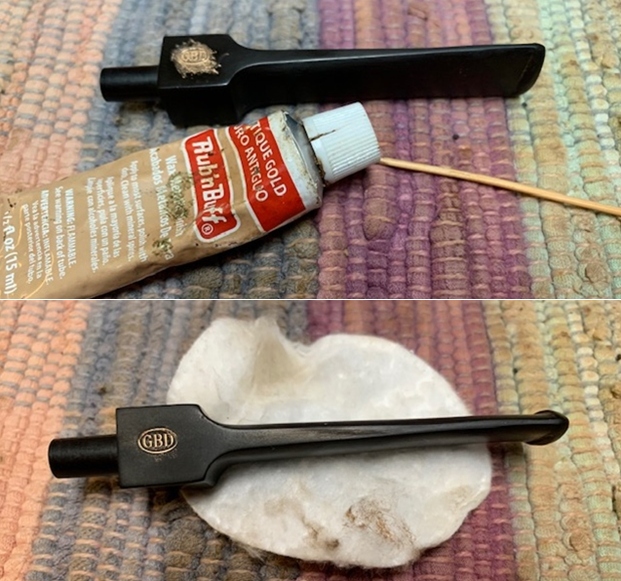
 Before continuing with the stummel, I decide to continue the internal cleaning using a kosher salt and alcohol soak. This process continues the cleaning of the internal briar as the salt and alcohol draw out the tars and oils. I start by stretching and twisting a cotton ball to form a ‘wick’ that helps draw out the oils.
 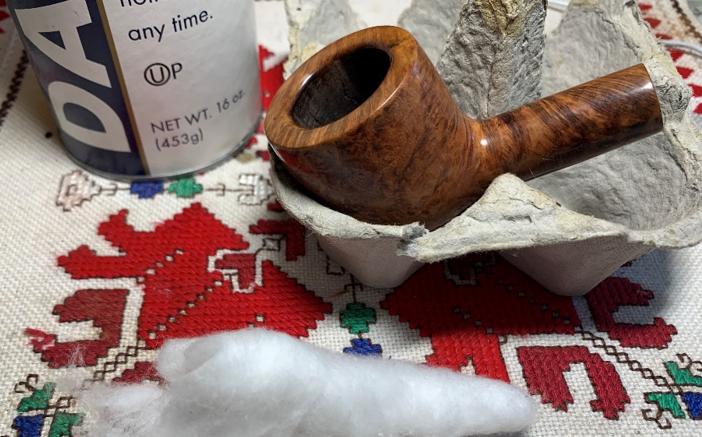 Using a stiff hanger wire, I guide the wick down the mortise and through the airway to the draft hole. I then fill the bowl with kosher salt and place the stummel in an egg carton to provide the stability and necessary angle for the stummel. Kosher salt is used rather than regular iodized salt because unlike the latter, kosher salt leaves no undesirable aftertaste.
 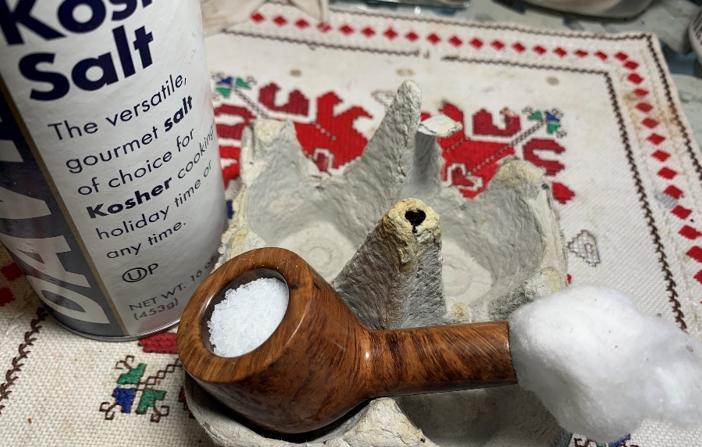 Then, using a large eye dropper, isopropyl 99% is put in the chamber slowly until the alcohol surfaces over the salt. After waiting a few minutes, the alcohol is absorbed into the salt and cotton and is then topped off with a little more alcohol. I put the stummel aside for several hours to allow the soak to do its thing.
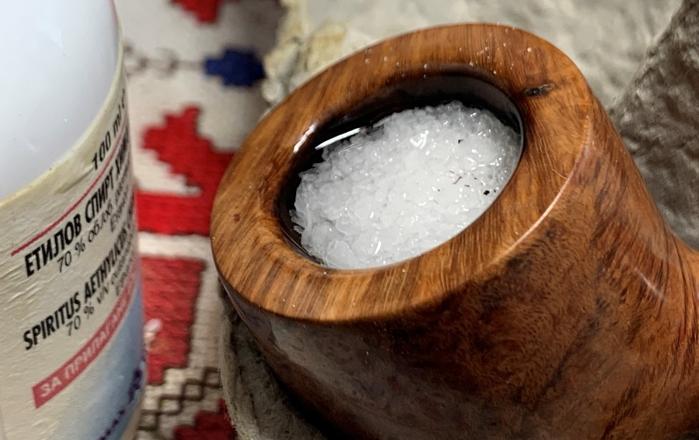
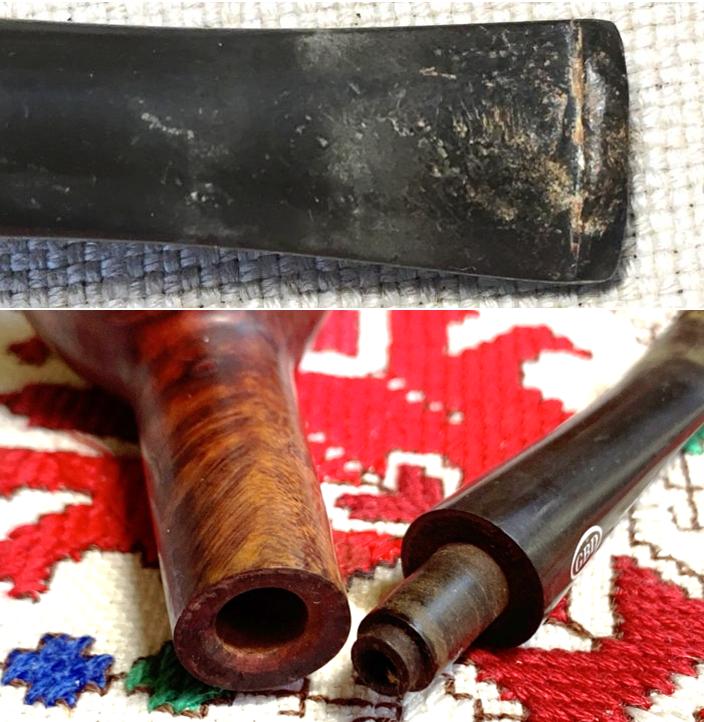
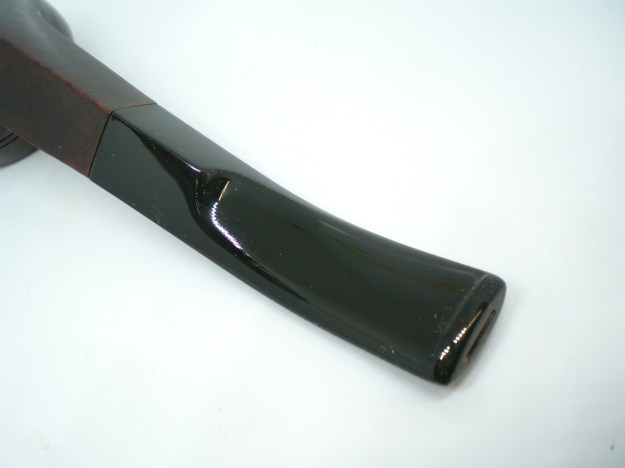
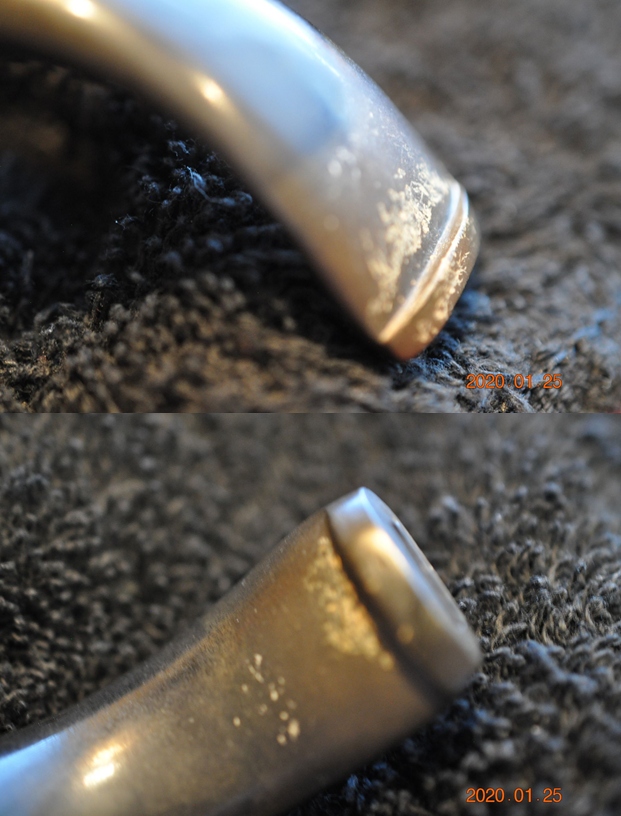
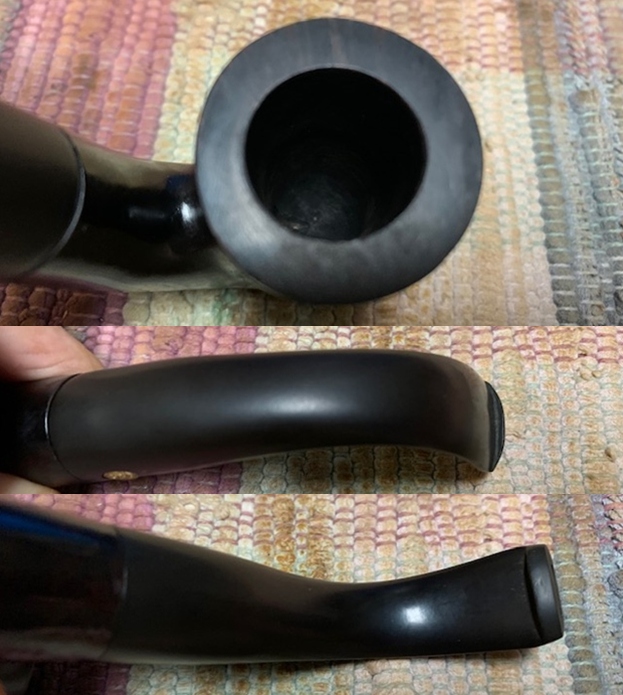
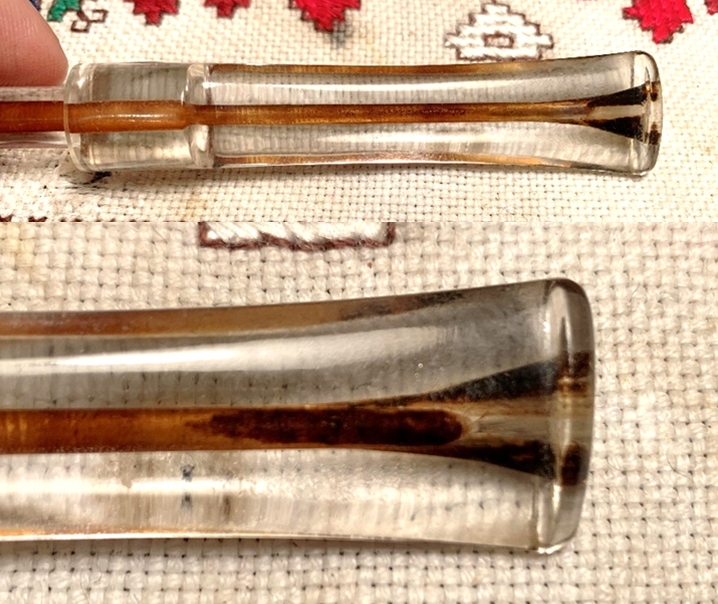
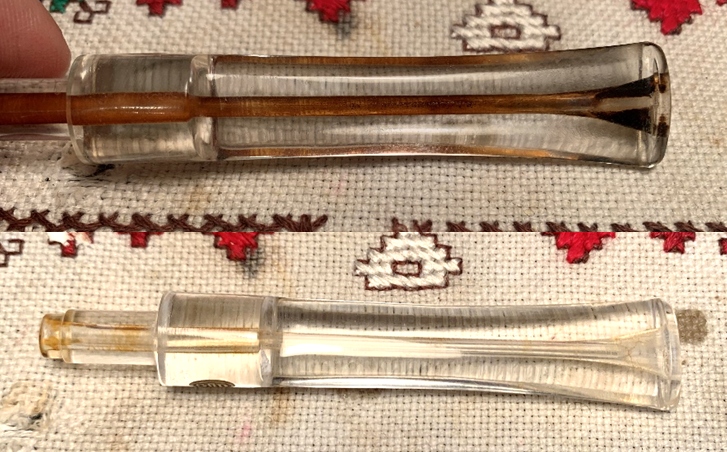
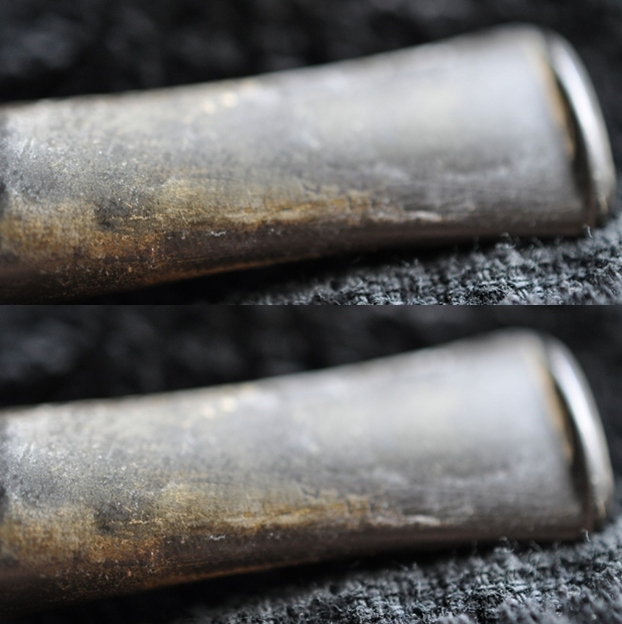
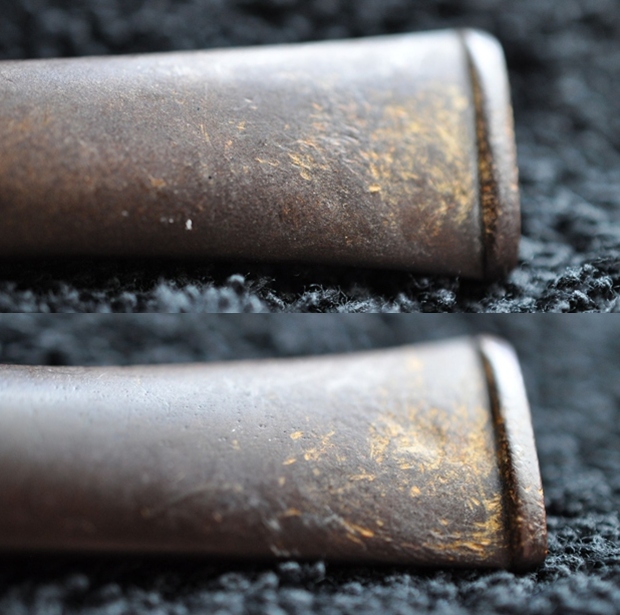
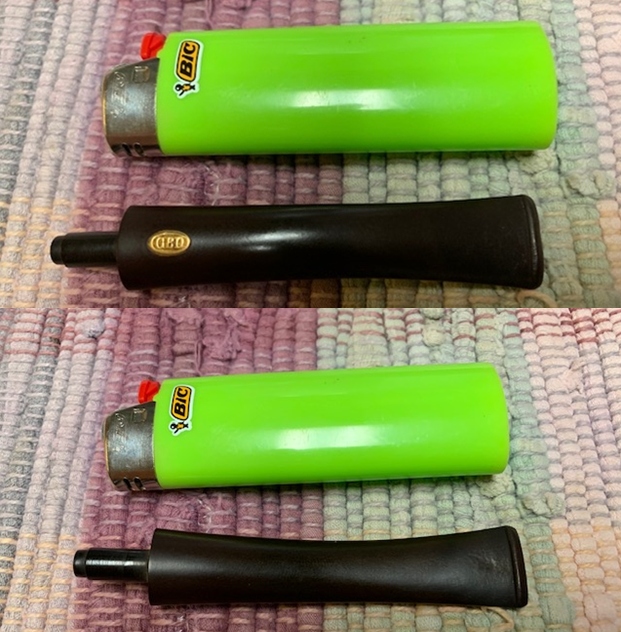
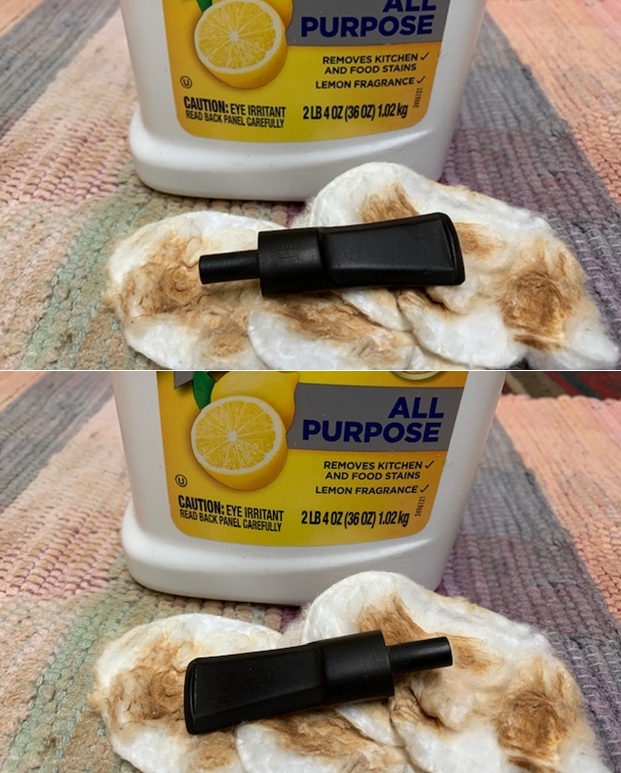
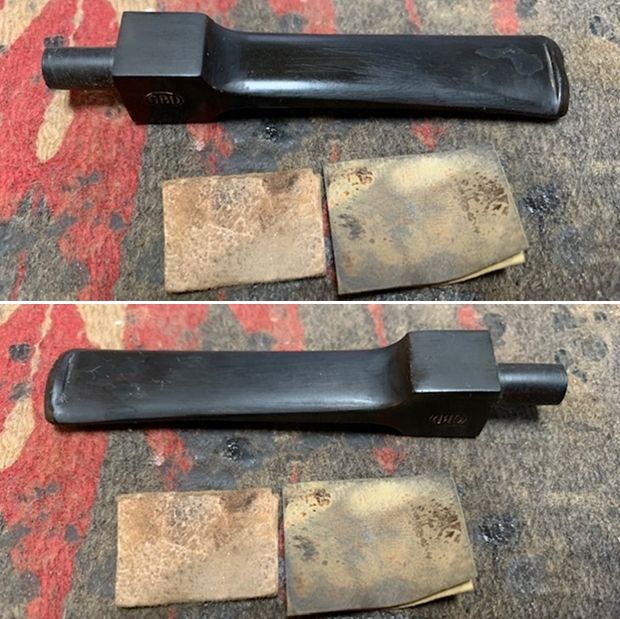
 With the stummel soaking, I return to the stem. The earlier Before & After Deoxidizer soak did a good job. A few pictures are taken of the upper and lower bit to look at the damage. The bit has been chewed and mauled. The button, upper and lower, shows bite compressions. The process of heating the vulcanite, a rubber compound, causes expansion of the material helping it to regain its original condition. After several Bic lighter painting sessions, I take two more pictures to compare. The heating method does not seem to have helped too much this time around. Perhaps, but only marginally.
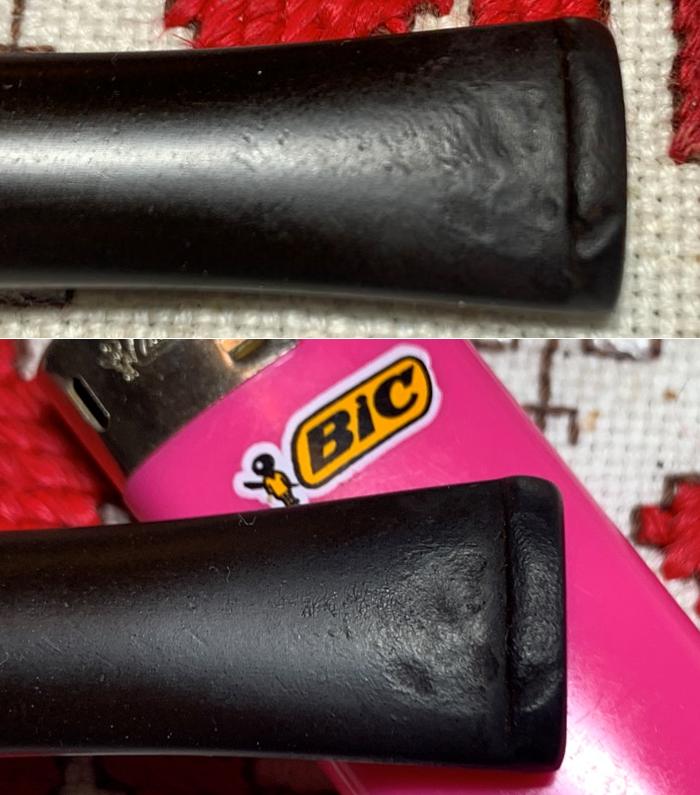
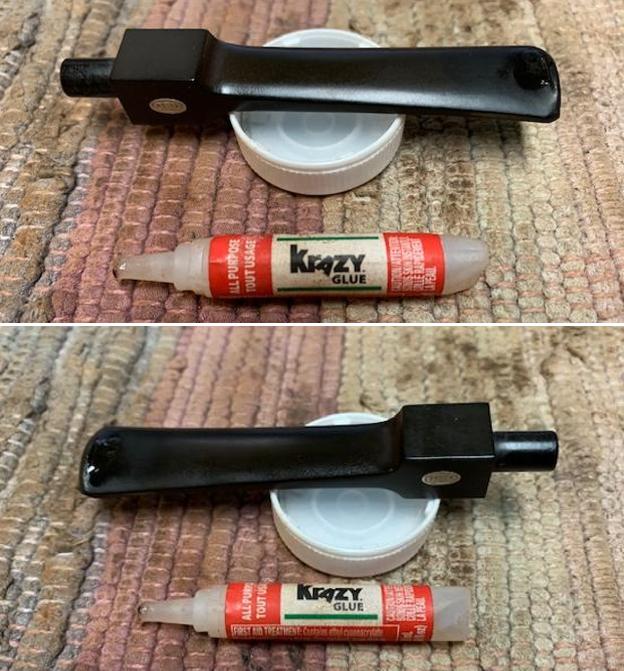
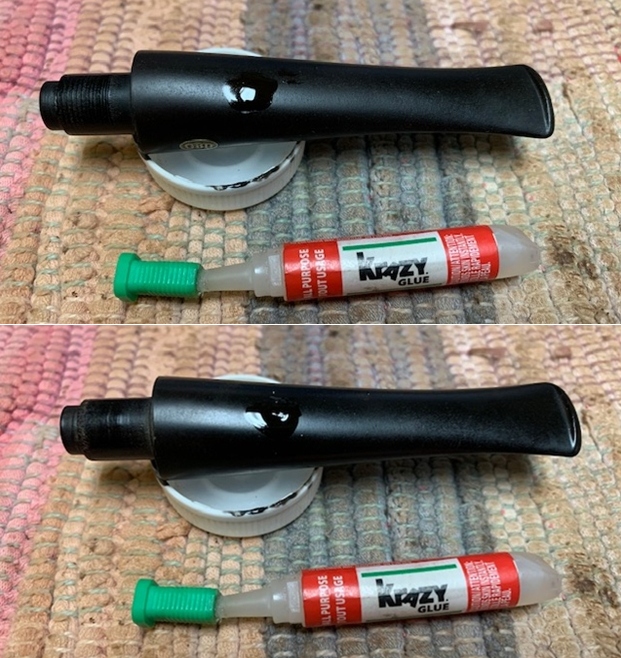
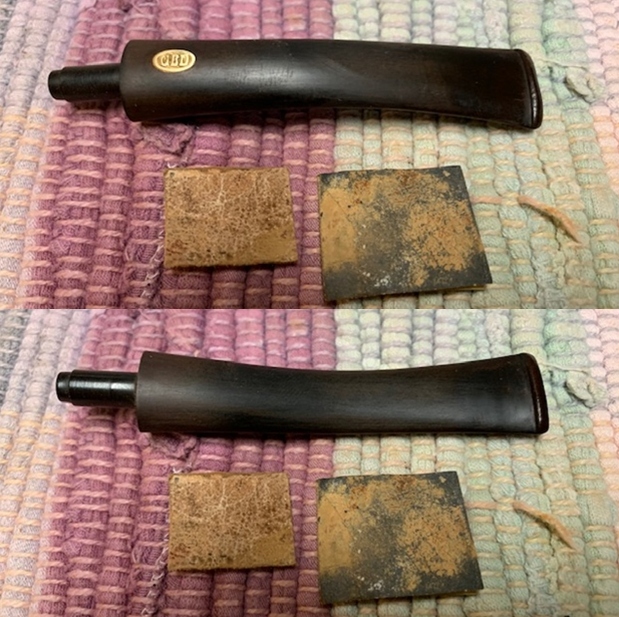
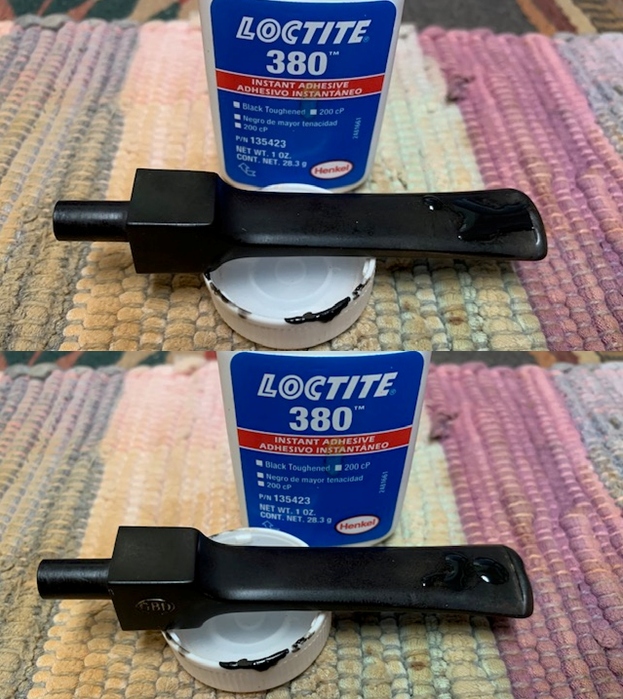
 To address the residual tooth chatter and compression, I apply black CA glue to both sides of the bit filling the compressions and building the button. To hold the CA glue in place, I use an accelerator that cures the glue more rapidly holding the glue in place.
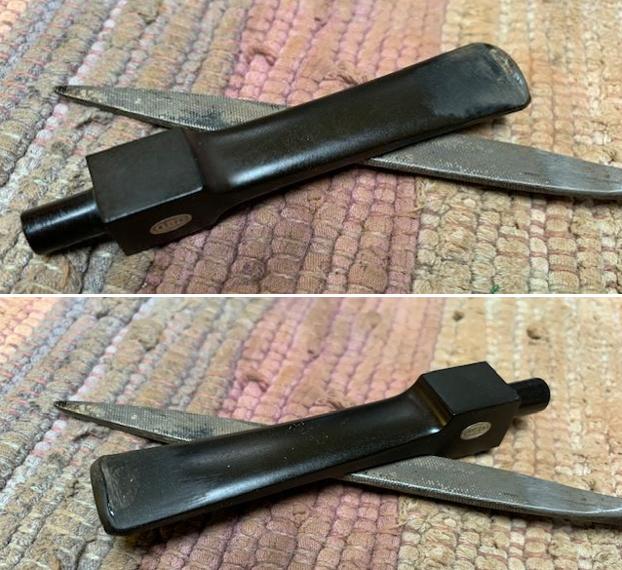
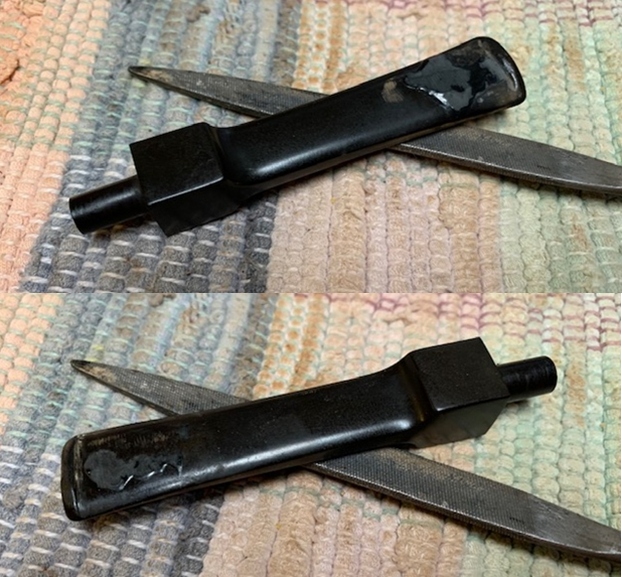
 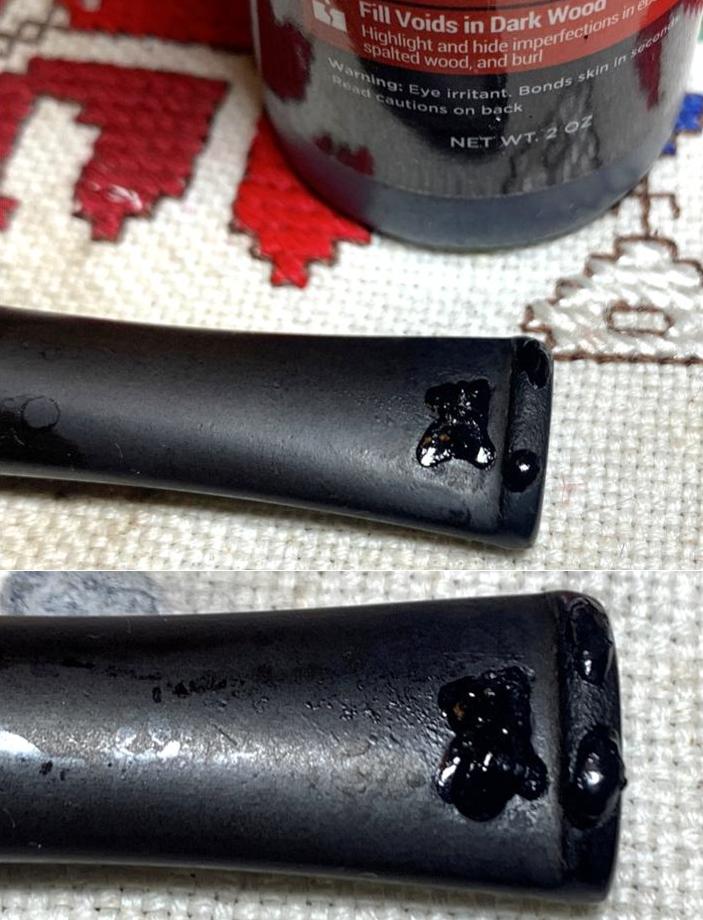 After the CA patch thoroughly cures, I go to work with a flat needle file bringing the patch mound down to the stem surface level – upper and lower. The button lip is also refreshed during the filing process.
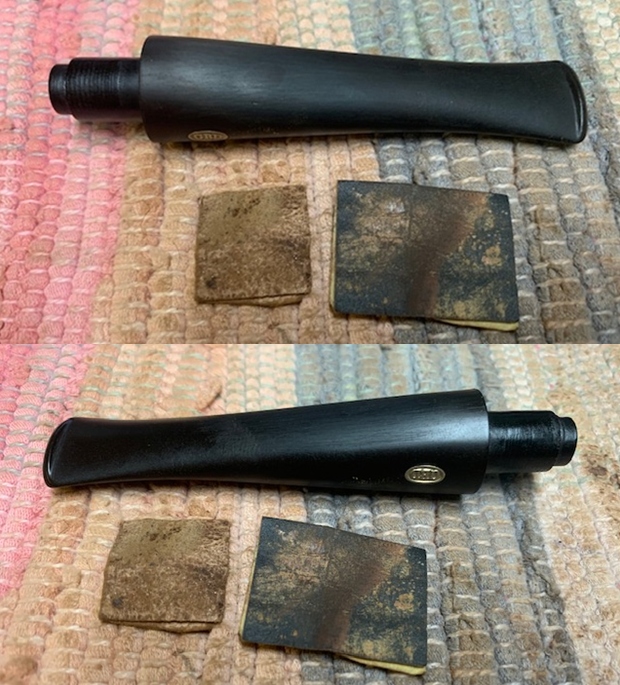
 Following the filing, 240 sanding paper erases of the rough scratches of the filing and further shapes the button. To remove the roughness, the sanding is expanded to the entire stem – upper and lower.
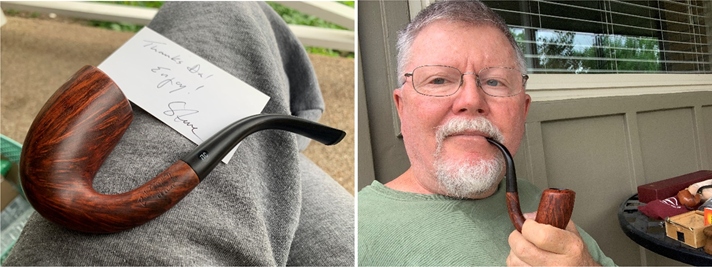
 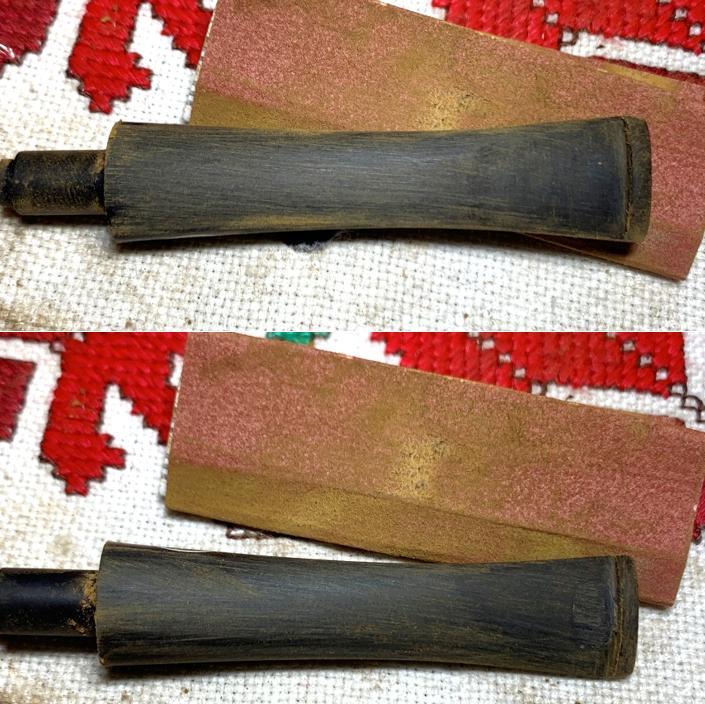 Following the 240 sanding, I transition to wet sanding with 600 grade steel wool. It was going so well until it wasn’t. Oh my. Restoration of pipes has as a goal returning a pipe to its new, and often, better than new state. Yet, with all the efforts to do this, mistakes happen that diminish this goal. While wet sanding with 600 grade paper, the paper inadvertently swept over part of the GBD stem stamping and it disintegrated. One of the sad realities of the merger was the loss of the brass stem rondel. Replacing it was more of a press of paint on the stem surface which has little compression or indentation into the vulcanite. It is this indentation that protects the paint and gives it purchase or hold power. After I did the carnage, the sick feeling in my gut continued as I vainly tried to repair the damage with the application of white acrylic paint. I launched an email with the picture to Steve to see if he had any ideas how to salvage the situation. His reply came quickly:
Hey Dal
I have that happen as well… it is not reparable. I just left mine half missing to give an idea of what it looked like originally. It happens and nothing can change that
Steve
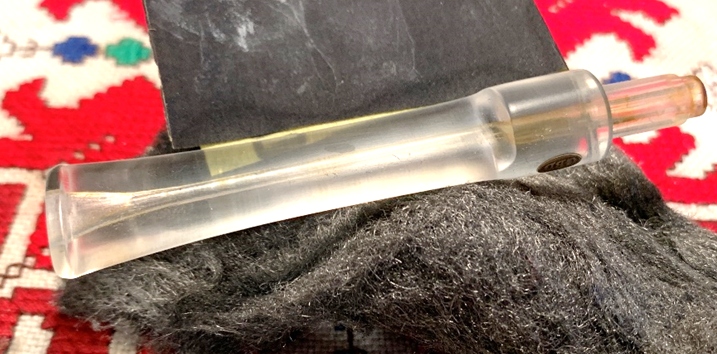
Such is life…. I move on.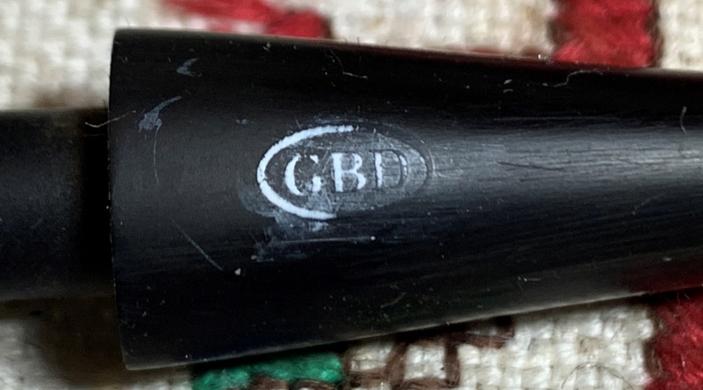 I complete the wet sanding with 600 grade paper and finish this phase by applying 0000 grade steel wool. Other than the stamping carnage, the stem looks great – repairs to the bit turned out very well – upper and lower.
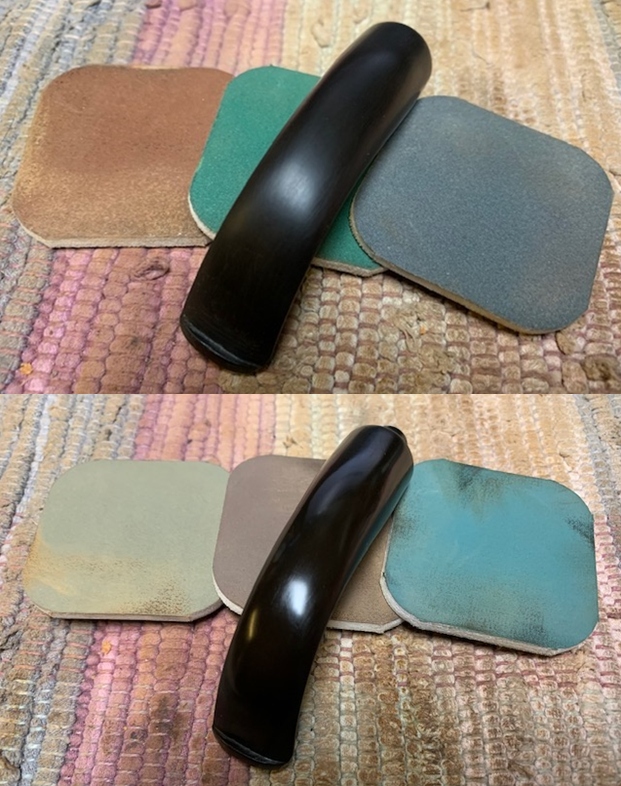
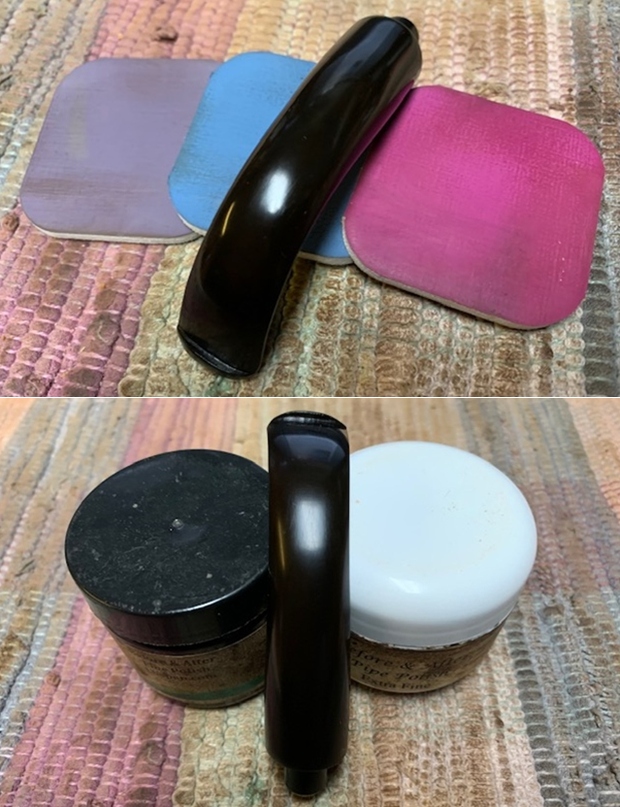
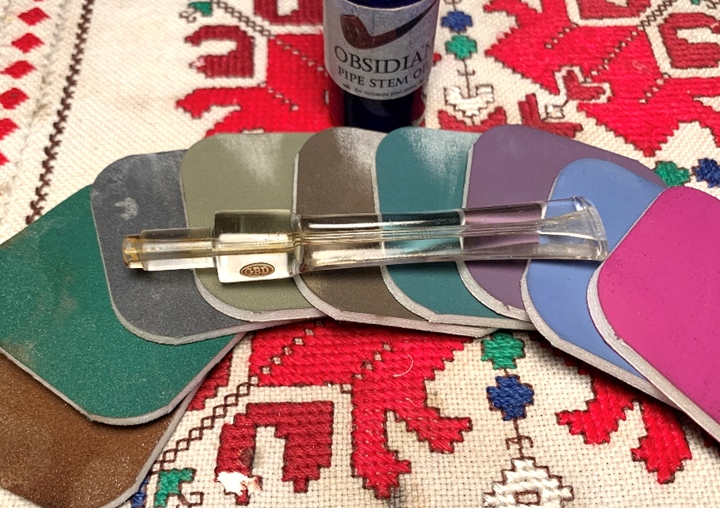
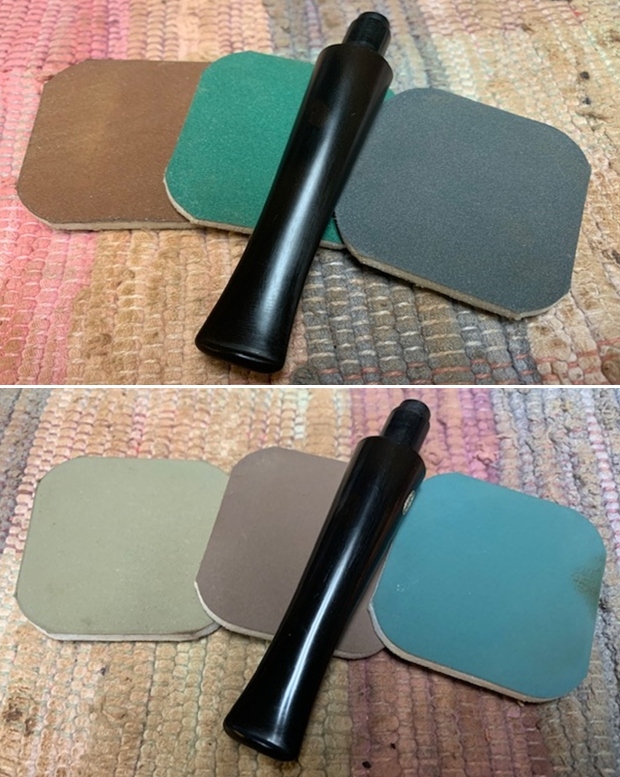
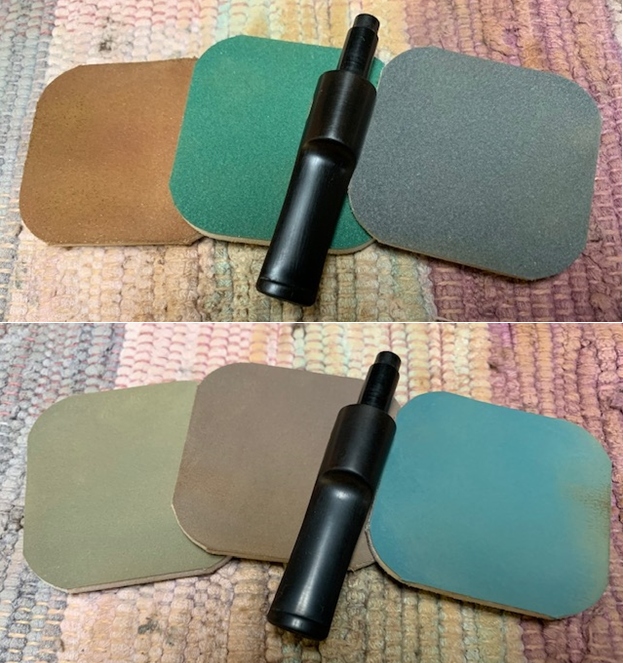
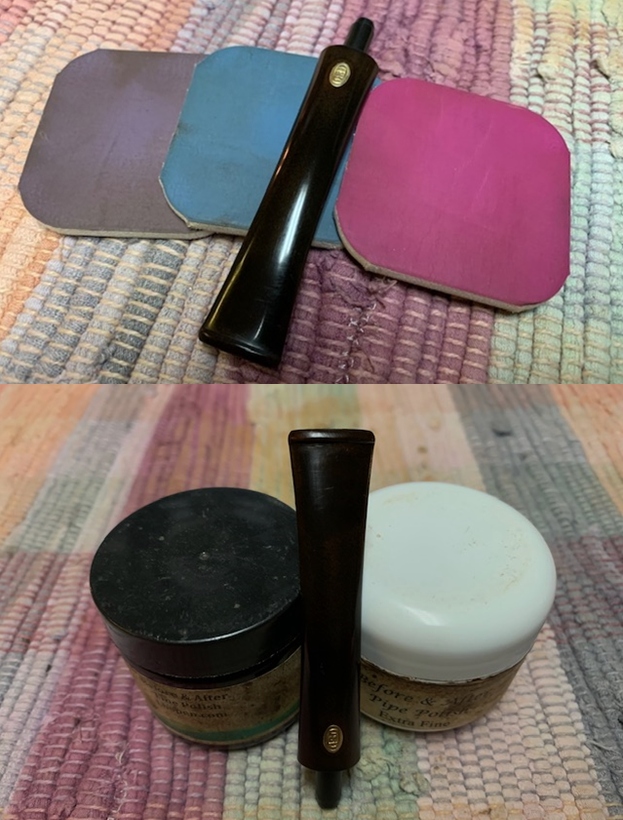
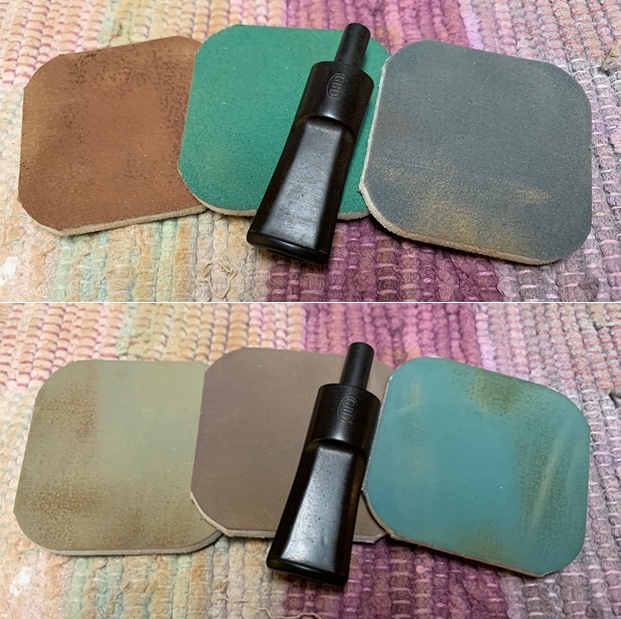
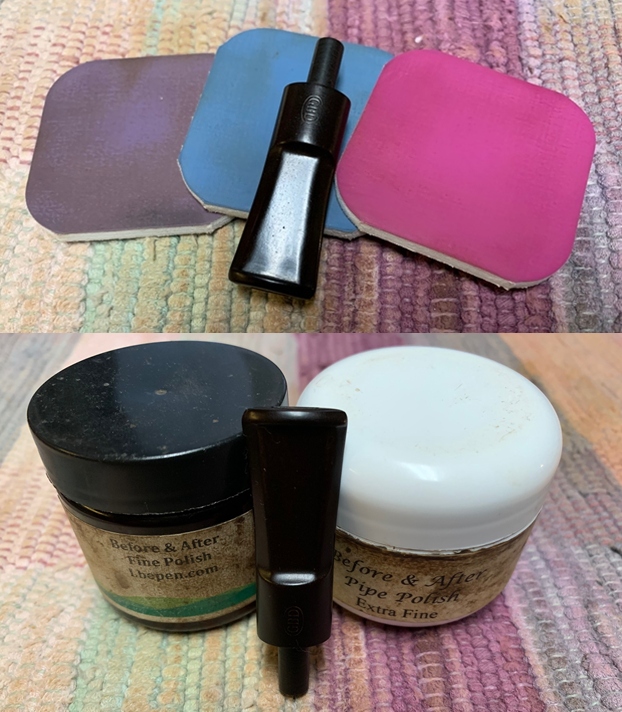
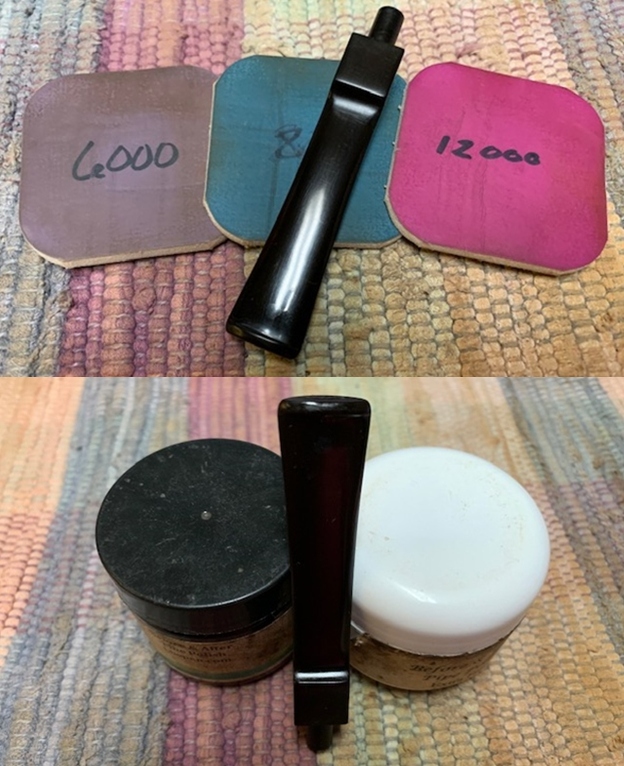
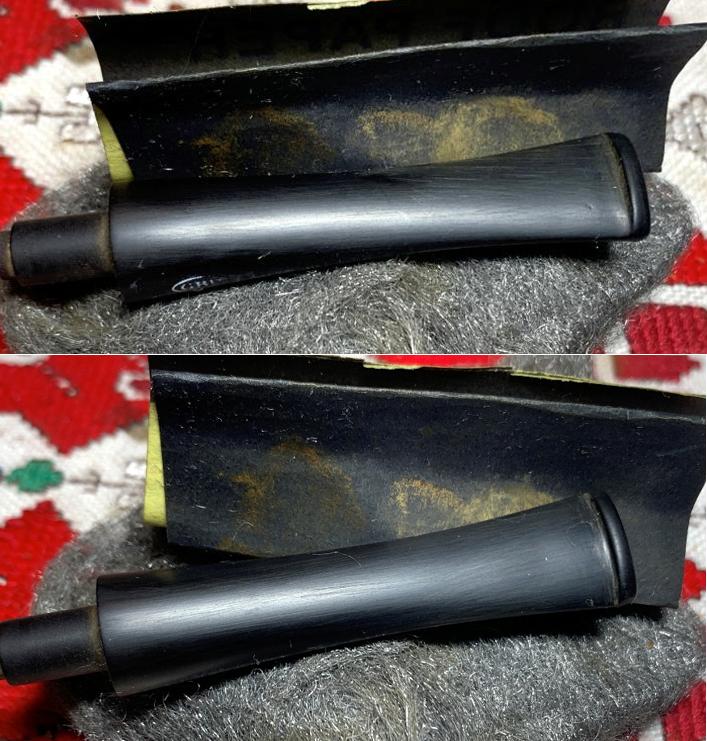 Next, the stem receives sanding from the full regimen of micromesh pads starting with wet sanding with pads 1500 to 2400. Following the wet sanding, dry sanding is used with pads 3200 to 4000 and 6000 to 12000. Between each set of 3 pads, Obsidian Oil is applied to protect the stem from oxidation and to rejuvenate it.
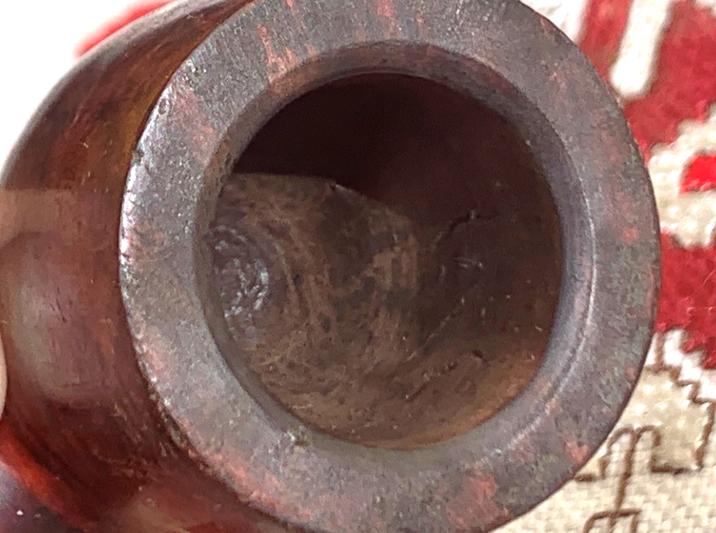
 The kosher salt and alcohol soak worked through the night. It continued the cleaning and refreshes the stummel. The salt is soiled as well as the wick indicating that oils were drawn out during the process. After removing the expended salt and wiping the chamber with paper towel, I also blow through the mortise to make sure salt crystals are dislodged.
  To make sure that all is clean, one cotton bud and one pipe cleaner dipped in isopropyl 99% were the proof of a clean and fresh pipe.
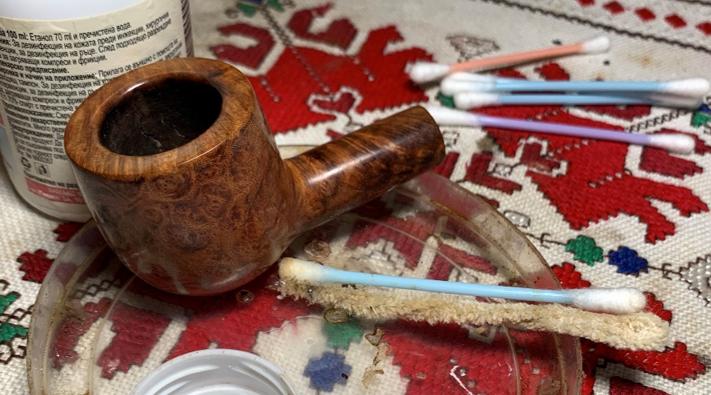 Next, I attempted to reunite the stem and stummel to apply Blue Diamond compound, but discovered that through the cleaning process, the fit of the tenon into the mortise had tightened and was a bit too tight for comfort.
 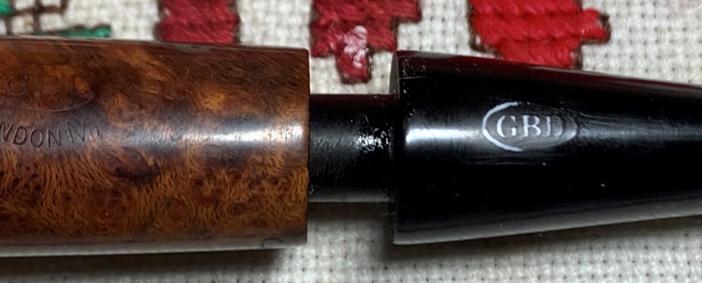 To remedy this, I use 470 grade paper to sand the tenon down. To do this I wrap a piece of the sanding paper around the tenon and while pinching the paper tightly around the tenon, the stem is rotated to create the abrasion. I did this a few times and tested after each. When the fit was good, I finish by applying 0000 steel wool to the tenon to smooth it after the sanding paper.
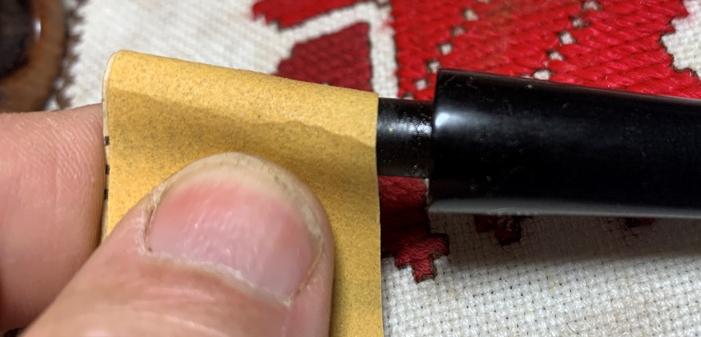
 Next, after mounting a cotton cloth buffing wheel to the rotary tool, with the speed set about 40% full power, Blue Diamond compound is applied to the stem and stummel. It takes some time for the process to methodically apply the compound around the pipe. After completion, a felt towel is used to wipe/buff the pipe to remove excess compound dust.
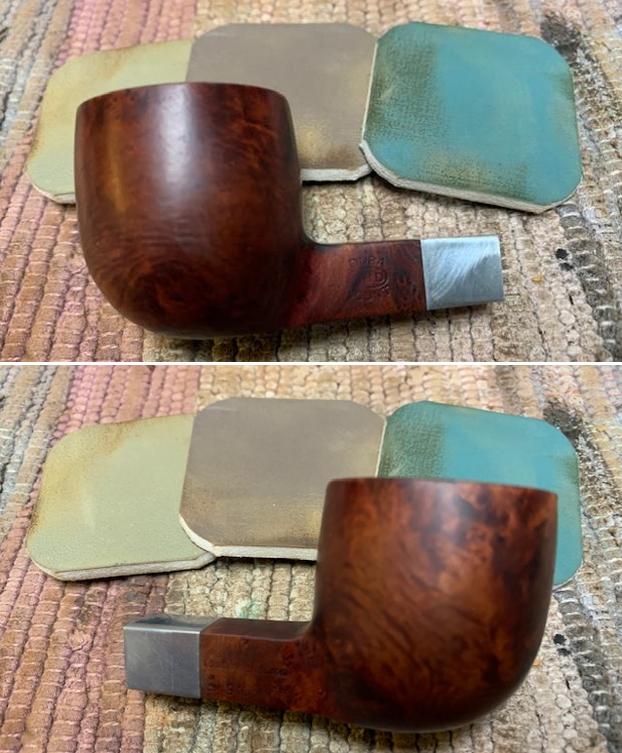
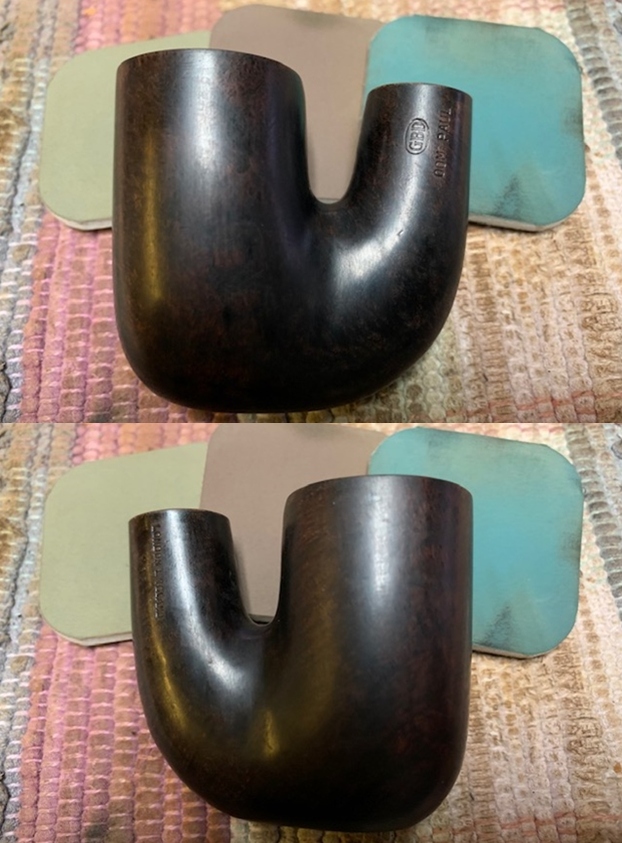
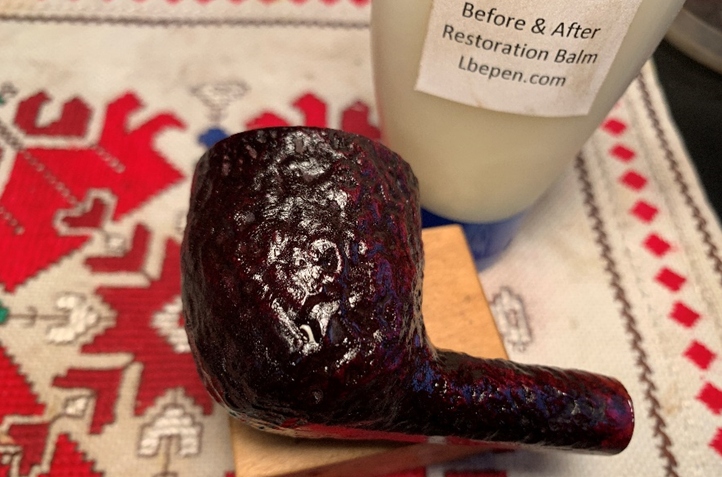
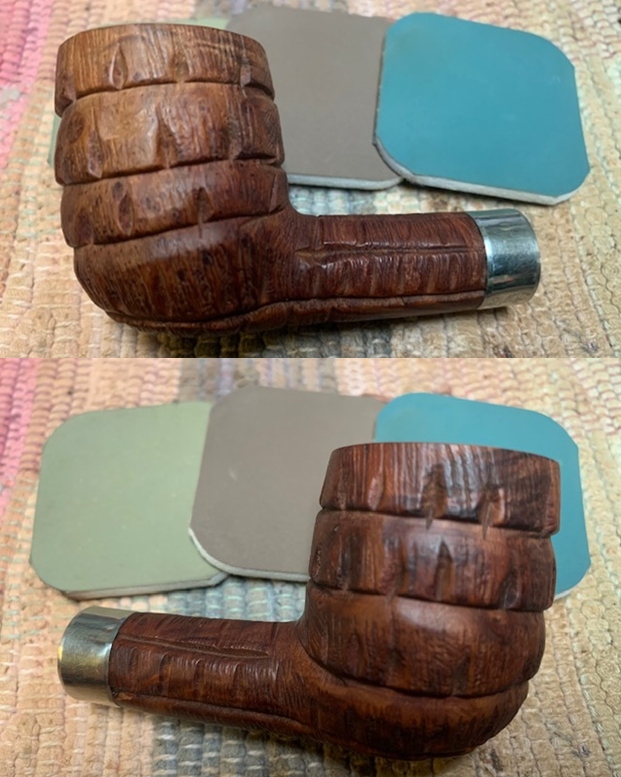
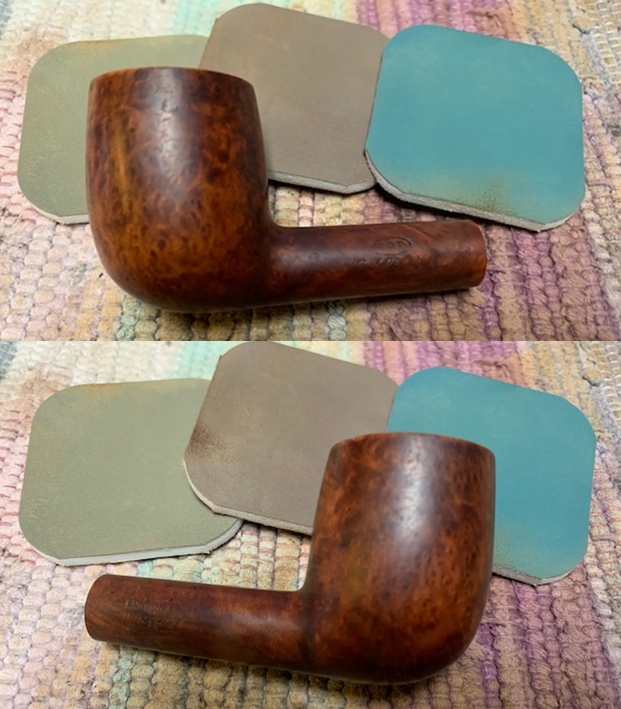
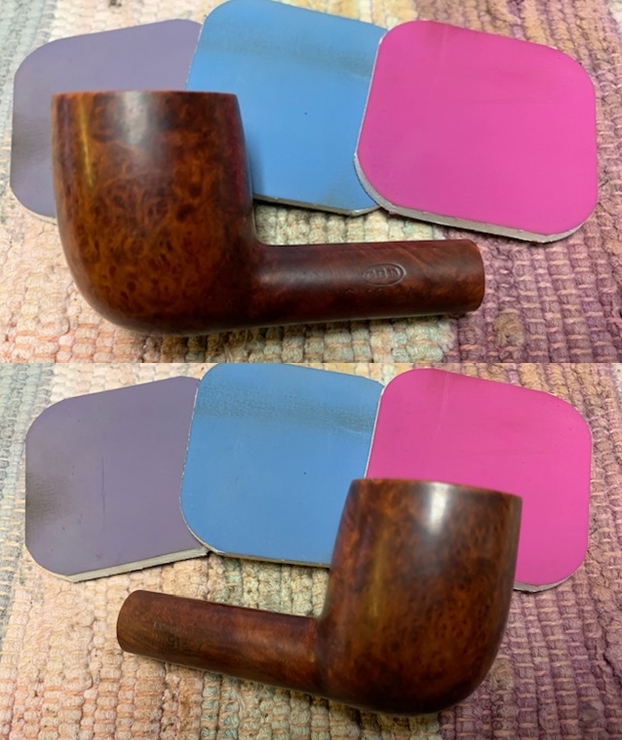
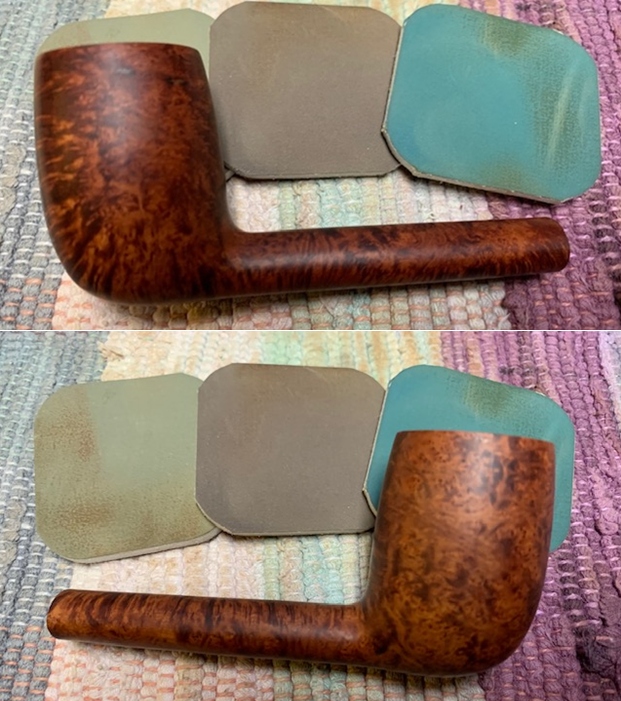
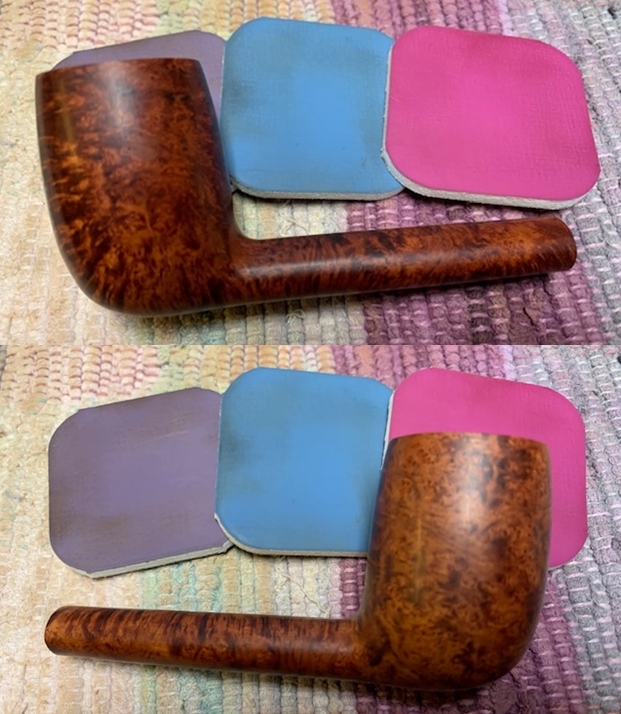
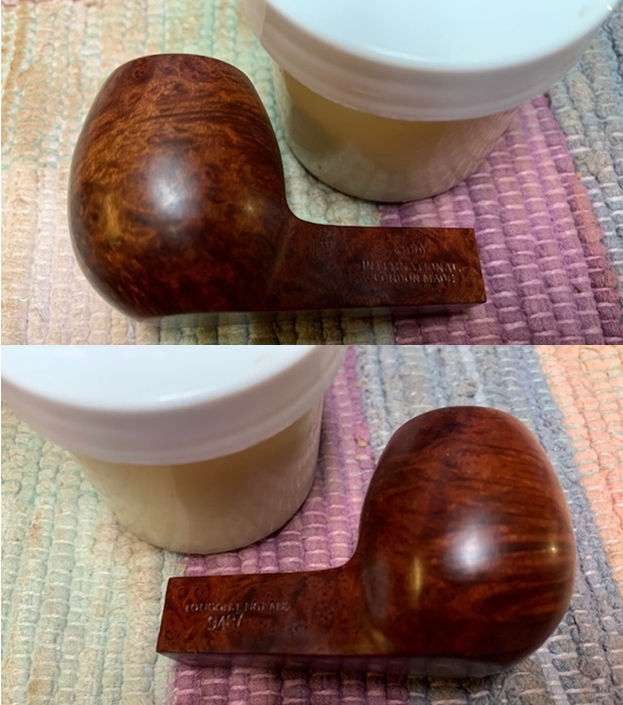
 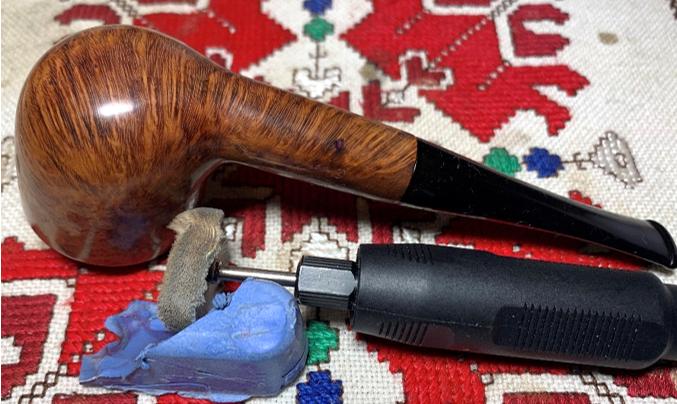 Before applying wax, I apply Before & After Restoration Balm to the stummel. I like how this product enhances and brings out the subtle natural hues of the briar. After applying some to my finger, I work the Balm into the surface of the briar. It thickens and it’s applied and once all is covered, the stummel is put aside for 20 minutes or so for the Balm to do what it does.
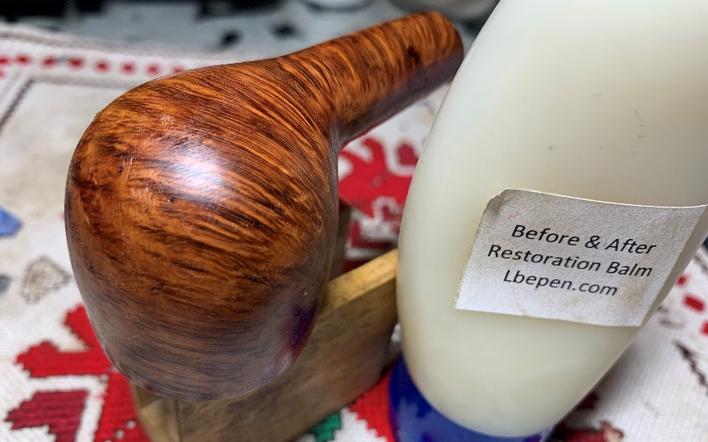 After the time is complete, the stummel is wiped with a microfiber cloth to remove the excess Balm and then it buffs up with the cloth. Nice.
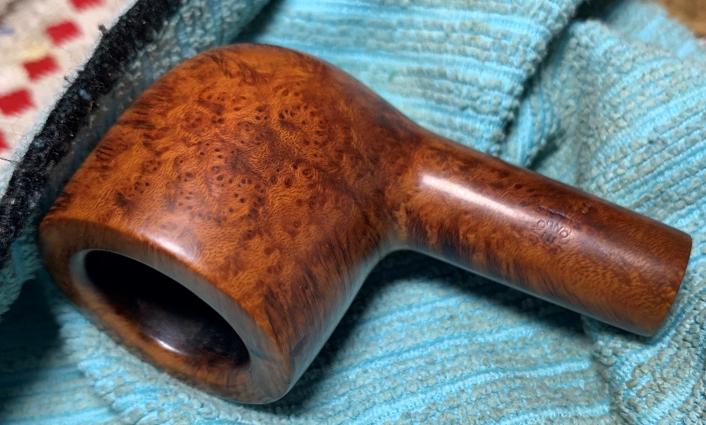 I have two steps left. First, to apply the wax and then to apply pipe mud to the chamber. Another cotton buffing wheel is mounted on the rotary tool with the speed remaining at about 40%, and carnauba wax is applied to the pipe – stem and stummel. After several rotations over the briar with the buffing wheel, I then give the pipe a rigorous hand buffing to raise the shine and to remove excess wax.
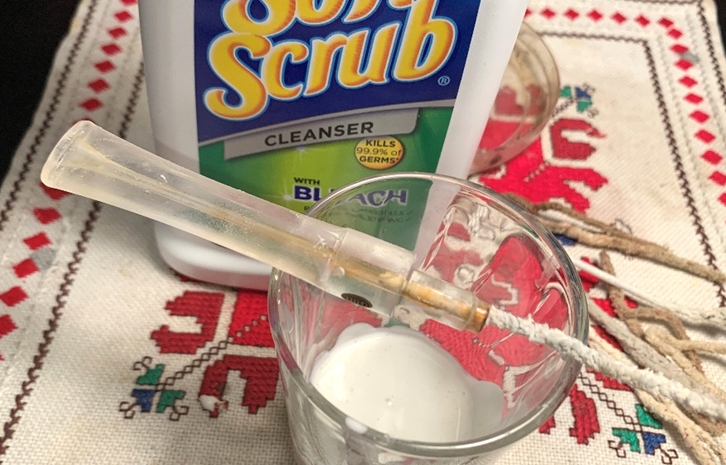
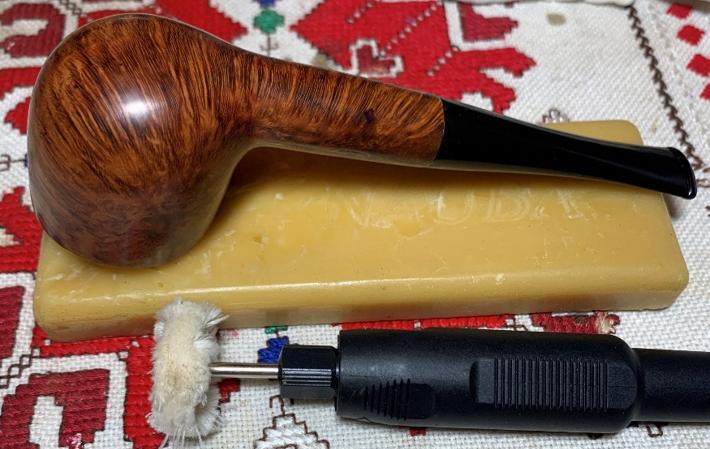 As noted, because of some heating veins in the chamber, I decided to apply a layer of pipe mud over the chamber wall to help start a protective layer of carbon. Pipe mud consists of cigar ash and water. I have already filtered and sifted the ash to clean out chunks of stuff not wanted. Using a pipe nail tool, I scoop some ash into a shot glass where I will do the mixing.
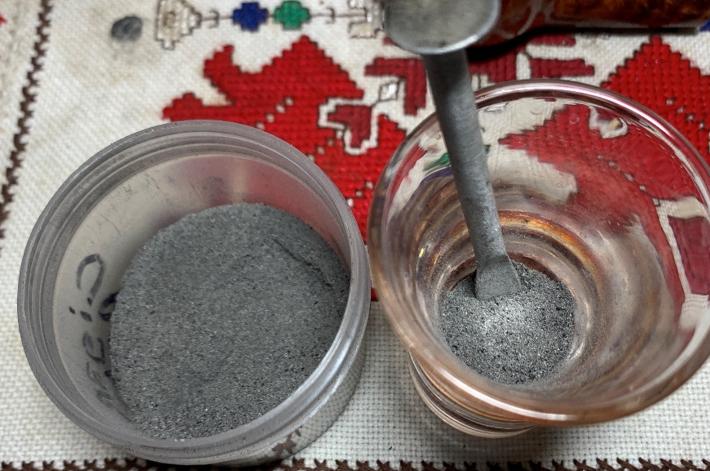 A pipe cleaner is inserted through the draft hole to guard it from being blocked during the process.
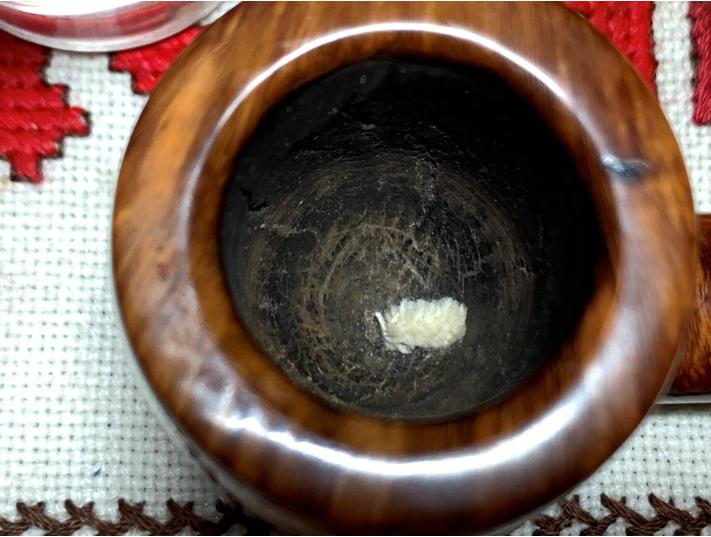 I use a large eye dropper to introduce small amounts of water and then mix with pipe nail. It’s easy to get too much water in the mix and it becomes too runny. If this happens, more ash is added to dry and firm up the mixture. This I had to do a few times until the mud was the consistency of mud – yep. Firm enough to hold shape and not drip off the nail.
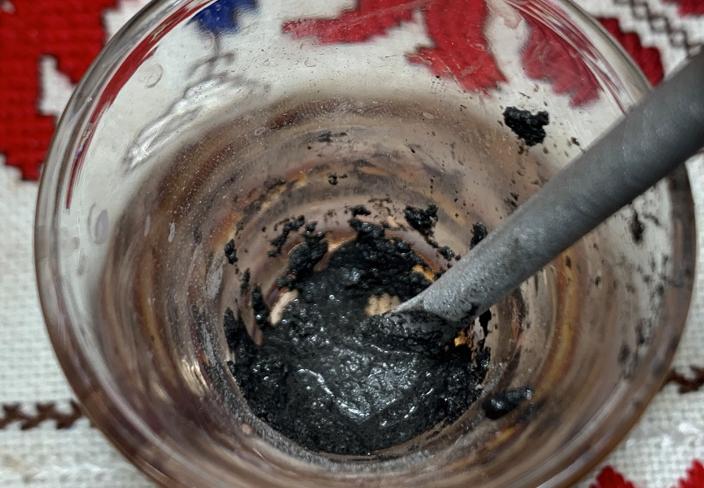 With the consistency good, I scoop some mud with the pipe nail and deposit it at the floor of the chamber and then spread it out like putting peanut butter on bread. Starting from the floor and working up to the rim, adding mud as I go. I use my thumb fingernail to run along the inner lip of the rim to create a straight edge of mud around the circumference.
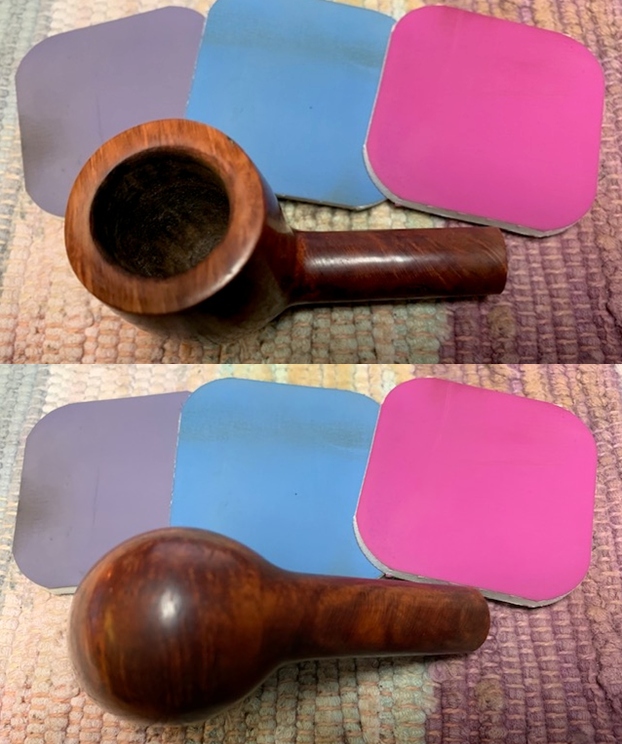
 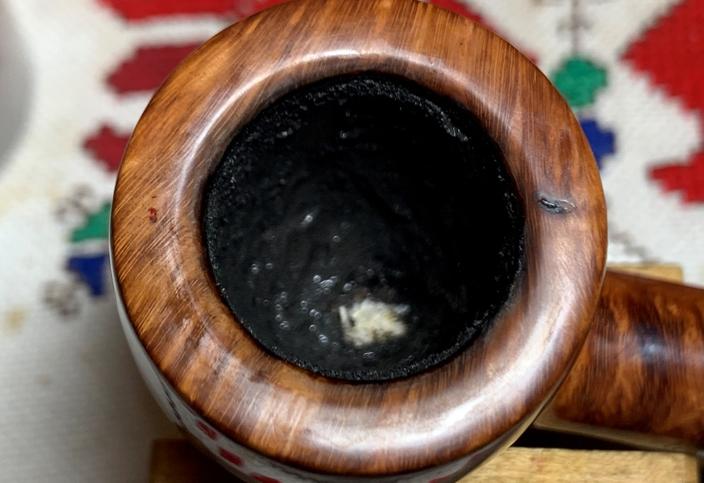 I let the mud cure through the night. When it cures, it will lighten a good bit. The next morning, the pipe mud was cured and the pipe was given another hearty hand buffing to raise the shine.
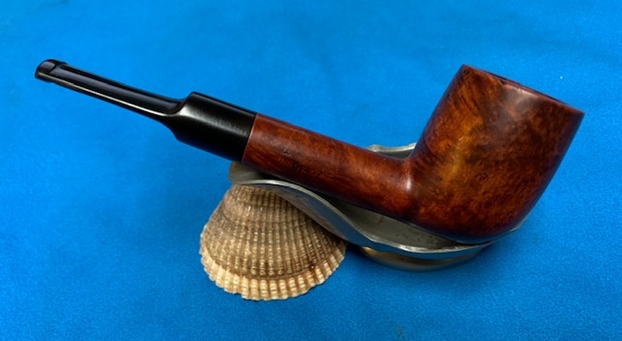
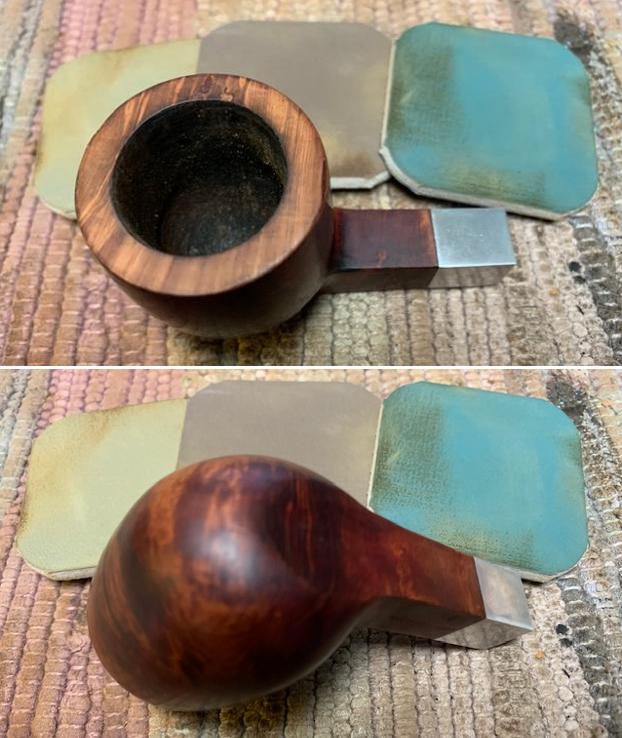
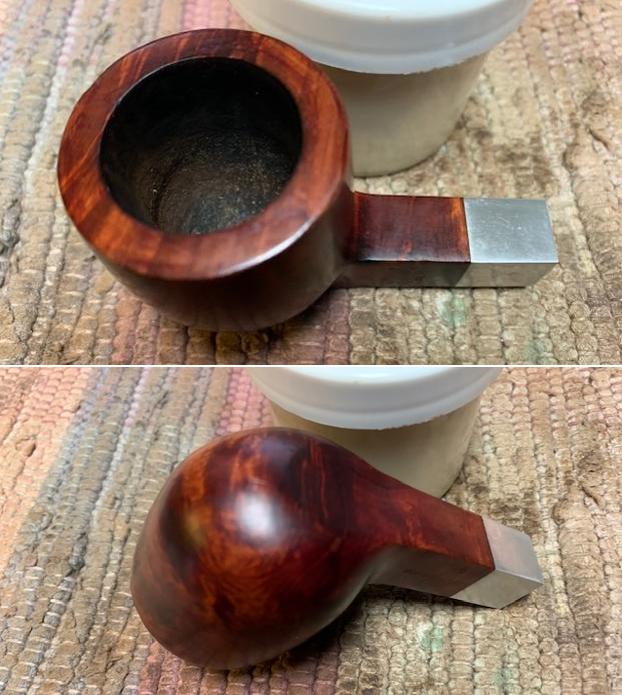
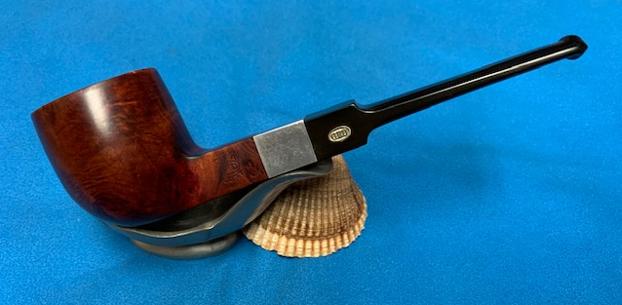
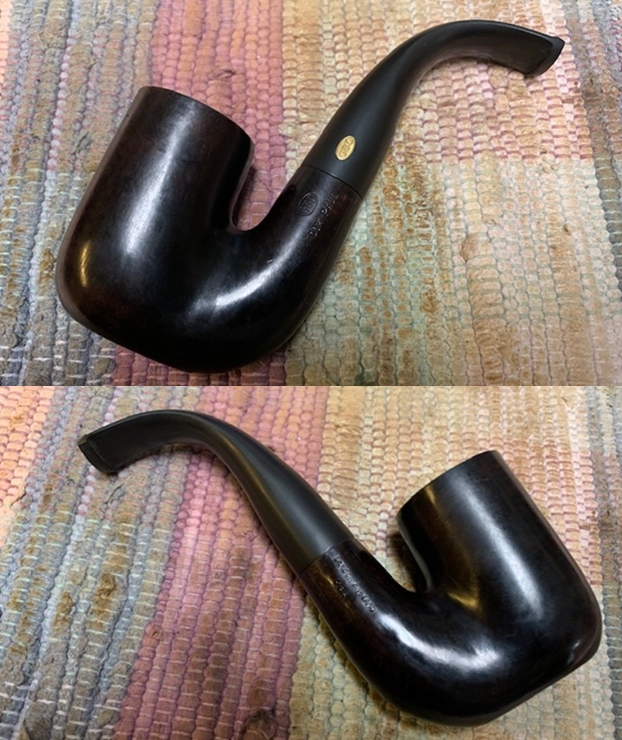
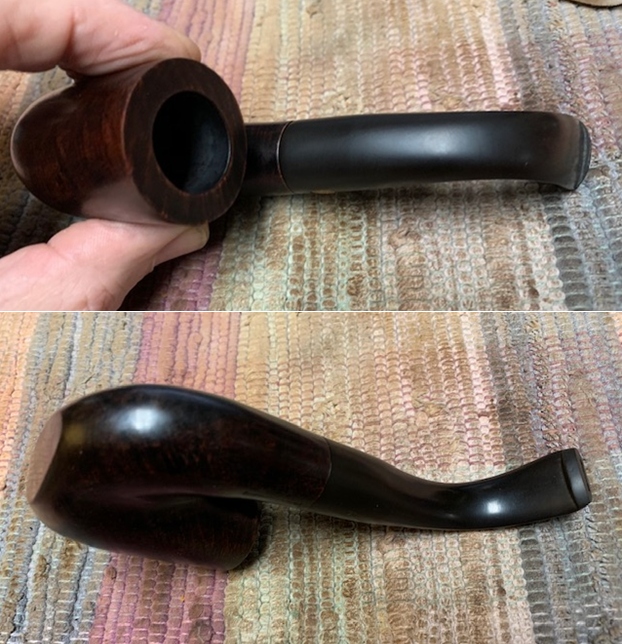
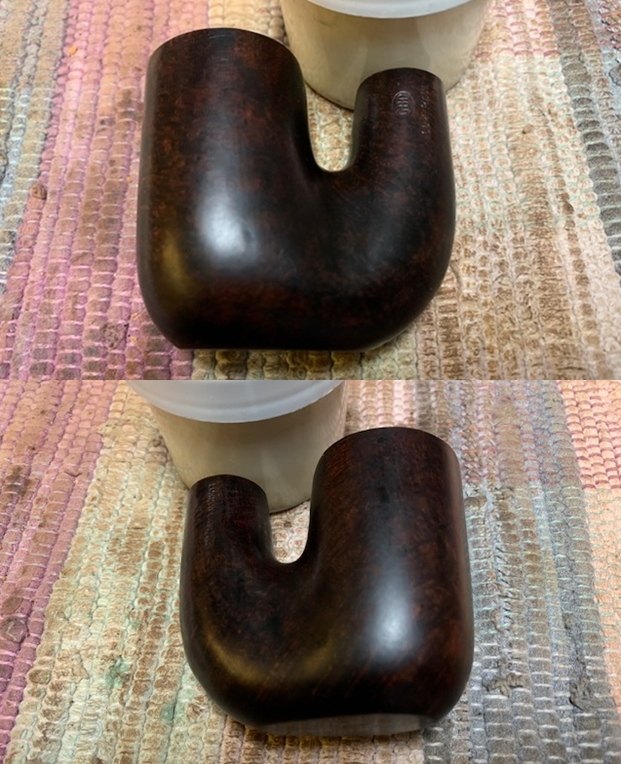
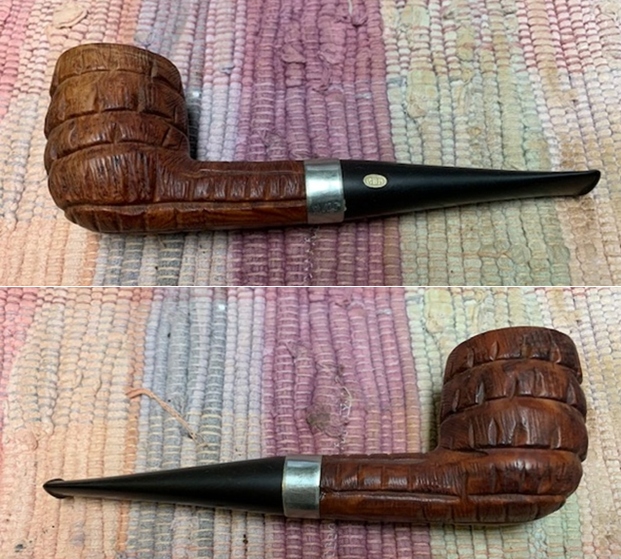
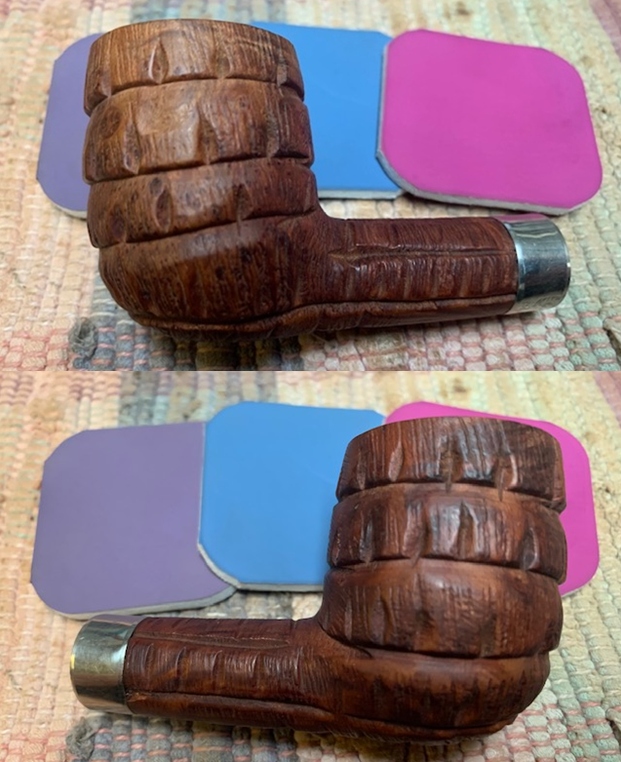
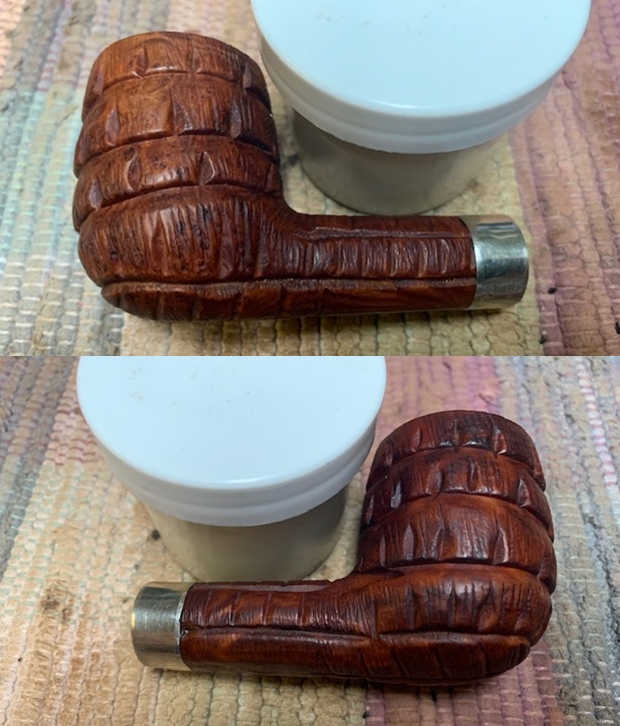
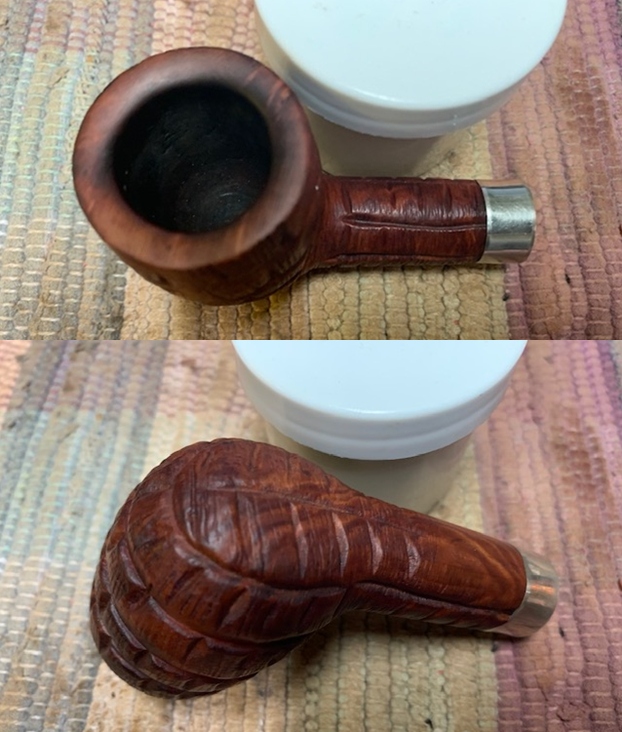
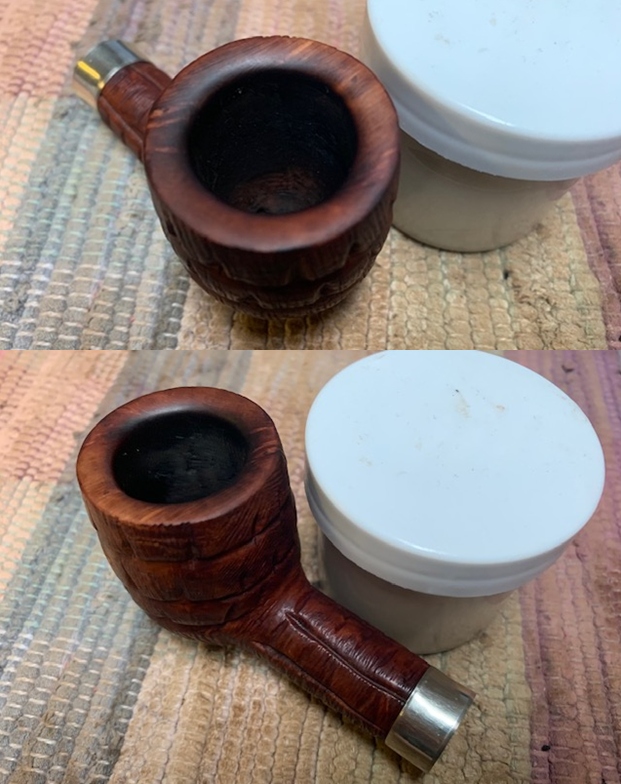
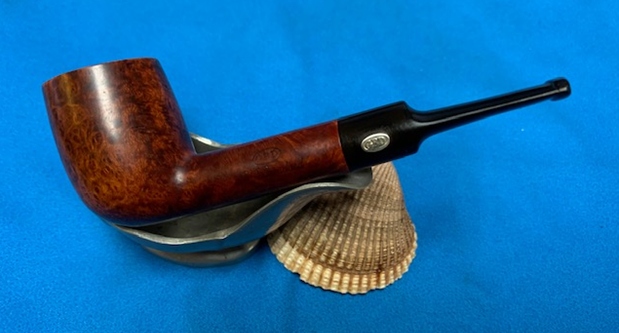
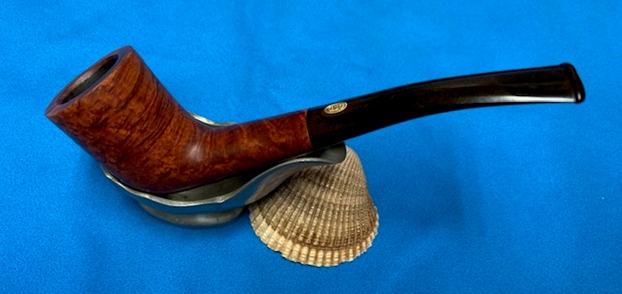
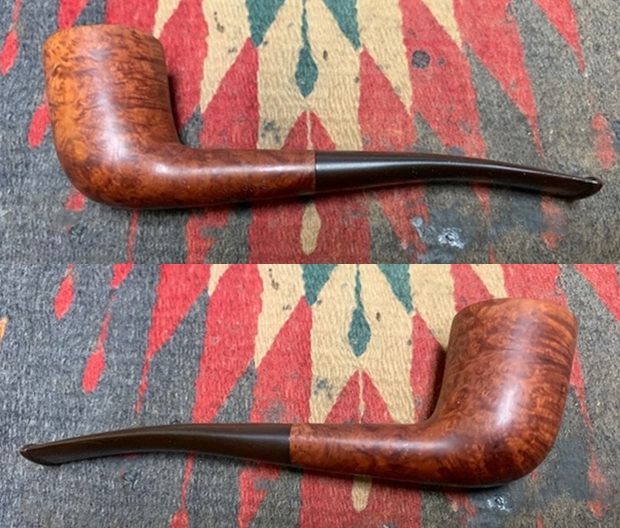
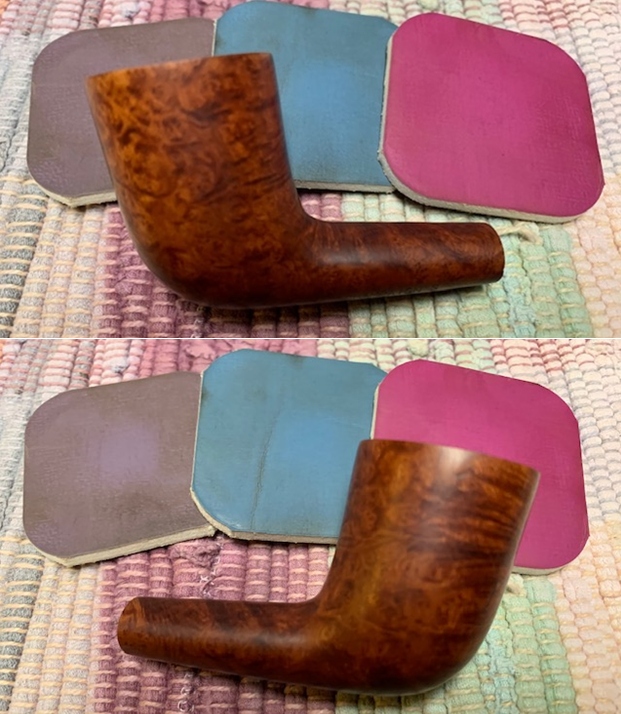
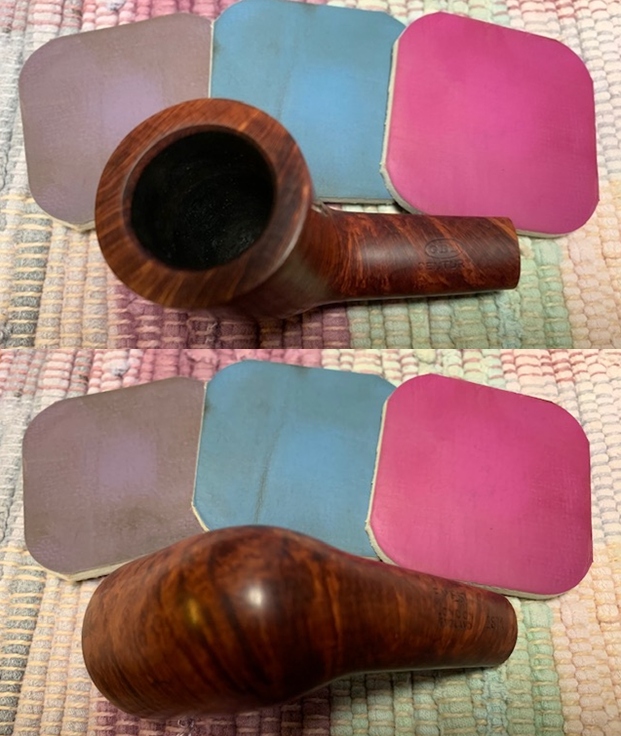
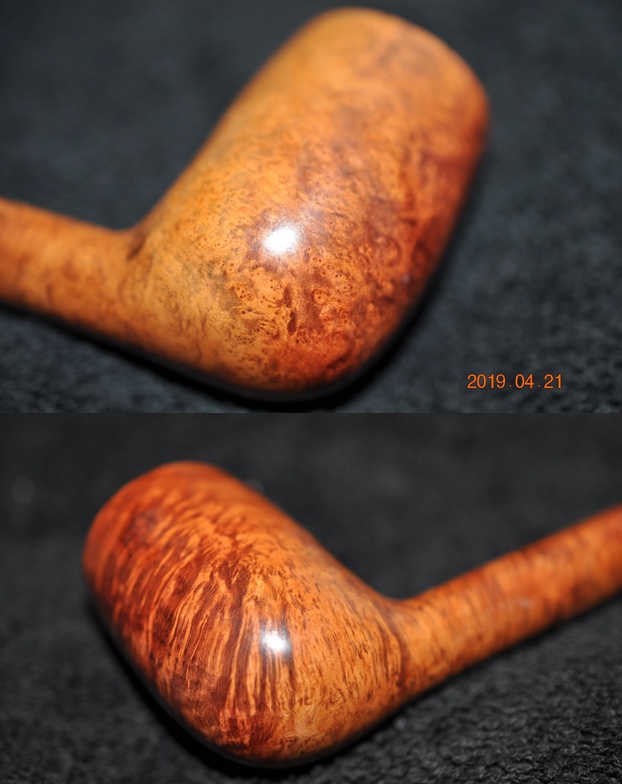
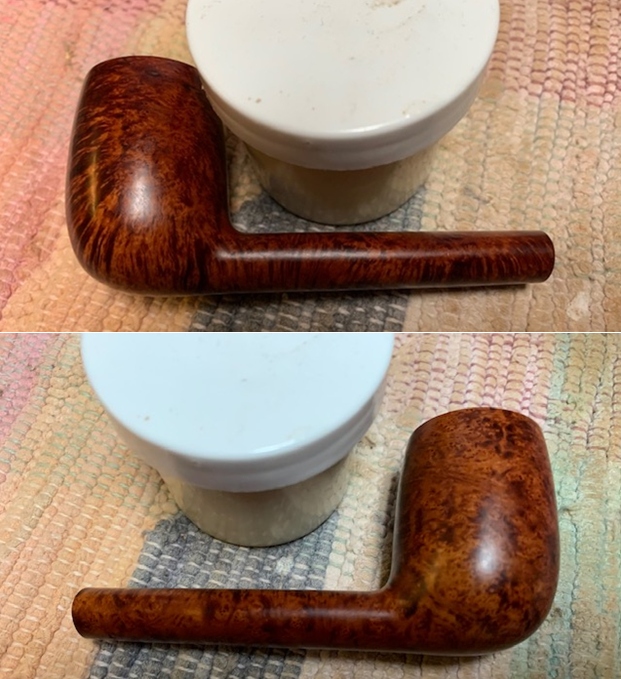
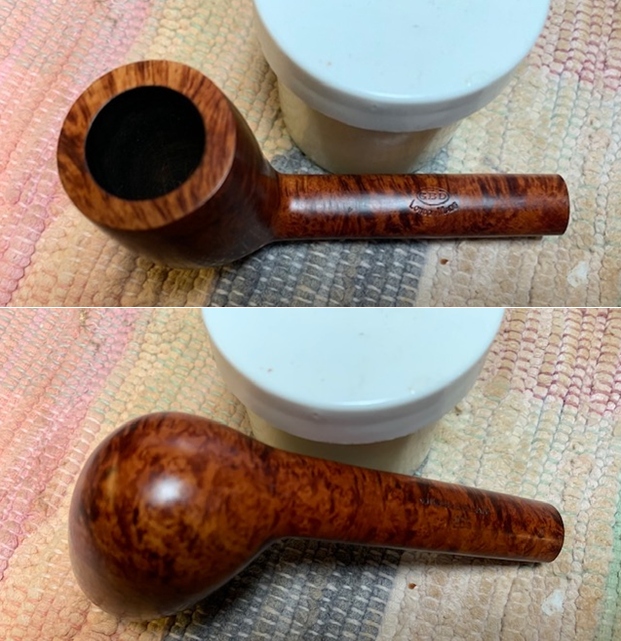
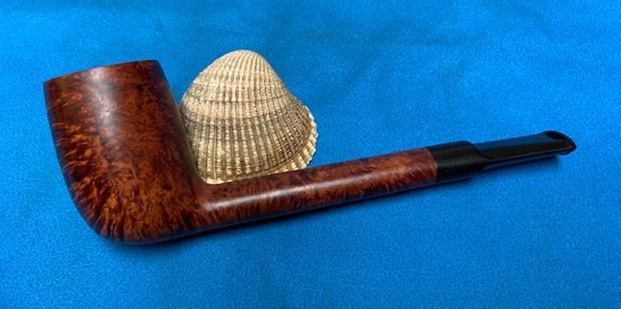
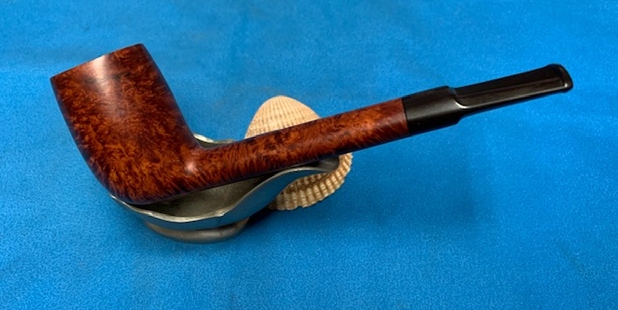
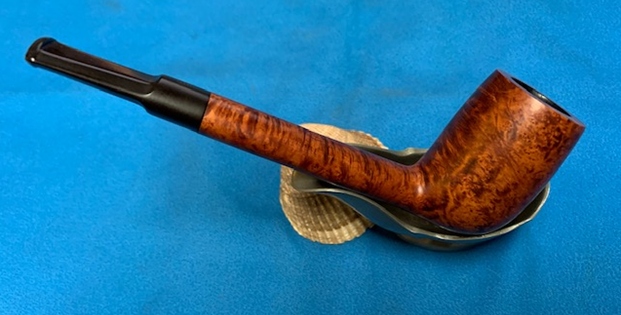
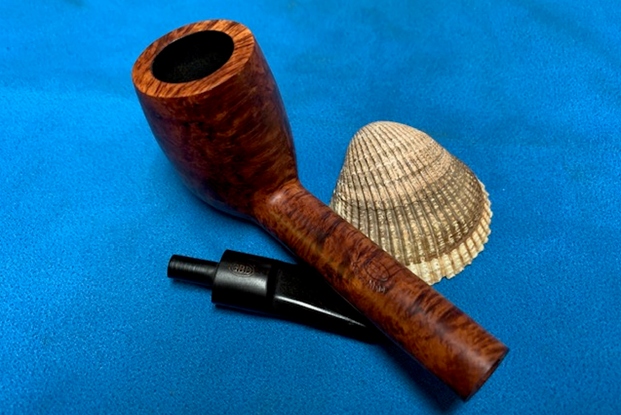
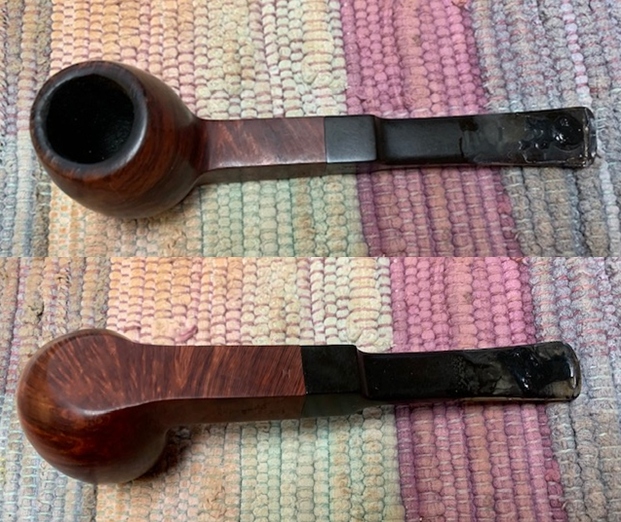
Other than the stem marking carnage I inflicted, this GBD came out exceptionally well. The grain is lively and expressive with large swirls of bird’s eye on both sides of the bowl and horizontal straight grain on both the fore and aft sections of the bowl. The grain also sweeps across the heel laterally. Without doubt, the grain of this GBD Pot will hold one’s attention. The bowl is ample for a good, long time of reflection packed with one’s favorite blend. This is the second of 2 pipes that Chris commissioned, and he will have the first opportunity to claim this GBD in The Pipe Store benefiting the Daughters of Bulgaria. Thanks for joining me from my Christmas Vacation in sunny Florida! Have a great New Year!


 I have quite a few of the pipes in this collection that we purchased from the older gentleman. He sent me the photos and I was amazed at what I saw. You have seen many of the pipes that he had. These included Dunhill, BBB, Orlik, Barclay Rex, a cased Ben Wade, an H. Simmons all briar, Hardcastles and some Meerschaums. There were also some assorted others that I will get to in the days ahead. It was a great collection.
 Jeff took photos of the bowl, rim top to show the thickness of the cake in the bowl and the thick lava on the rim top. The rim top and both inner and outer edges are so thickly covered that it is hard to know their condition. It appears that there is a large chip on the outer edge at the back of the bowl that will require a bit of attention. All of the issues will become clearer after the clean up. He took photos of the top and underside of the vulcanite stem showing the oxidation, calcification, tooth marks, chatter and wear on the stem and button.
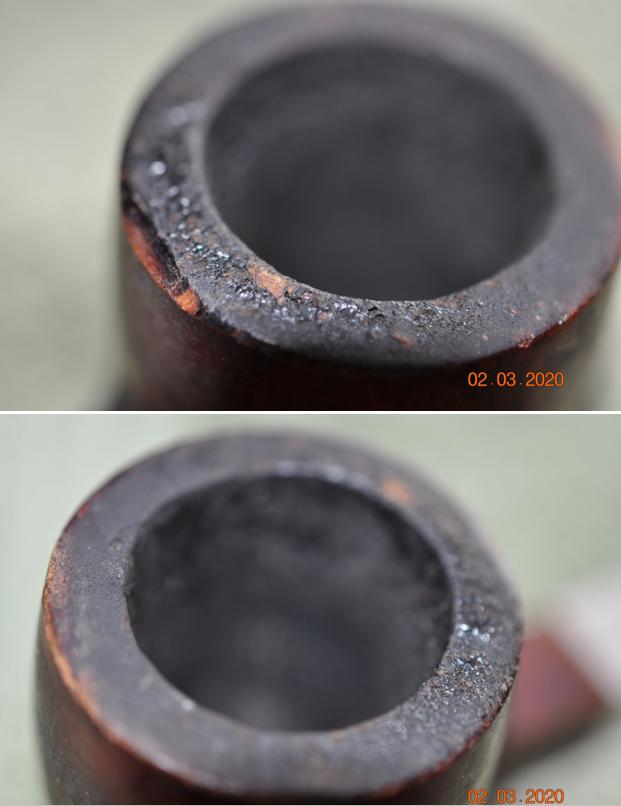

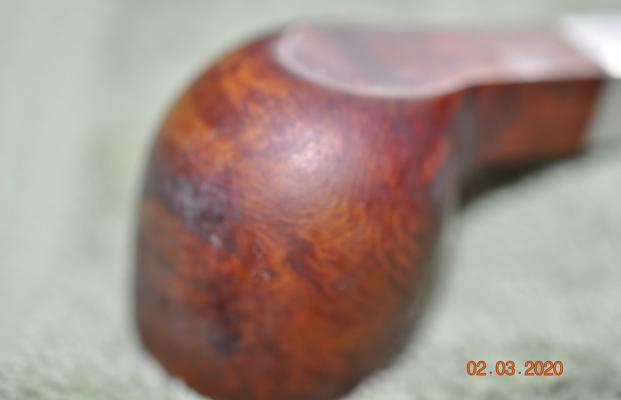
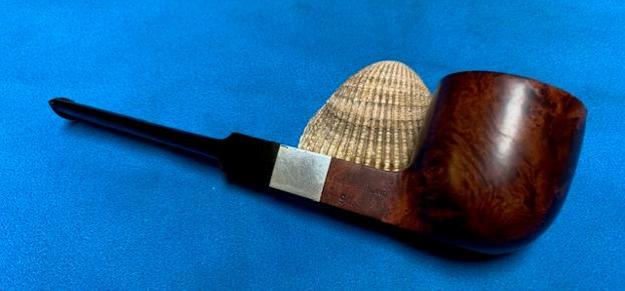
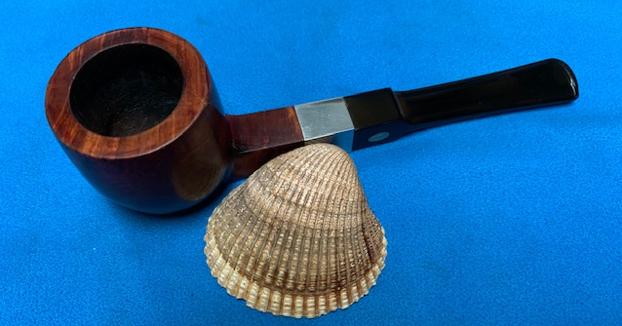
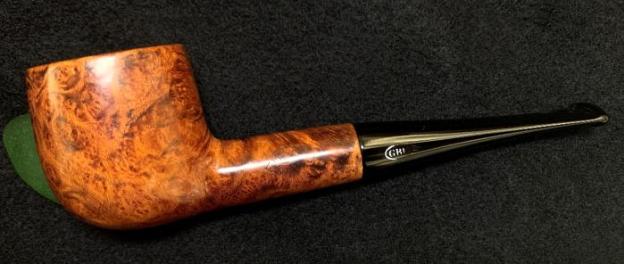
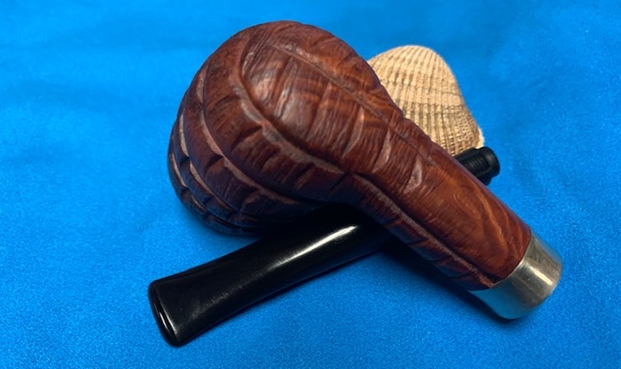
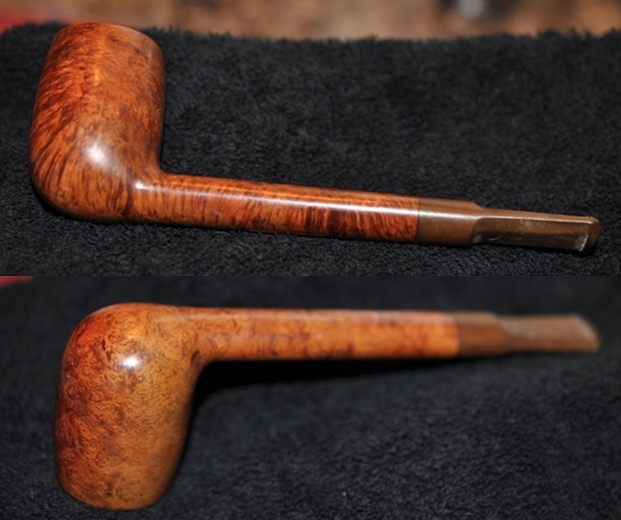
 Jeff took photos of the sides and heel of the bowl to show the condition of the briar. You can see the beautiful shape of the bowl and some interesting grain even through the dirt and debris of many years.
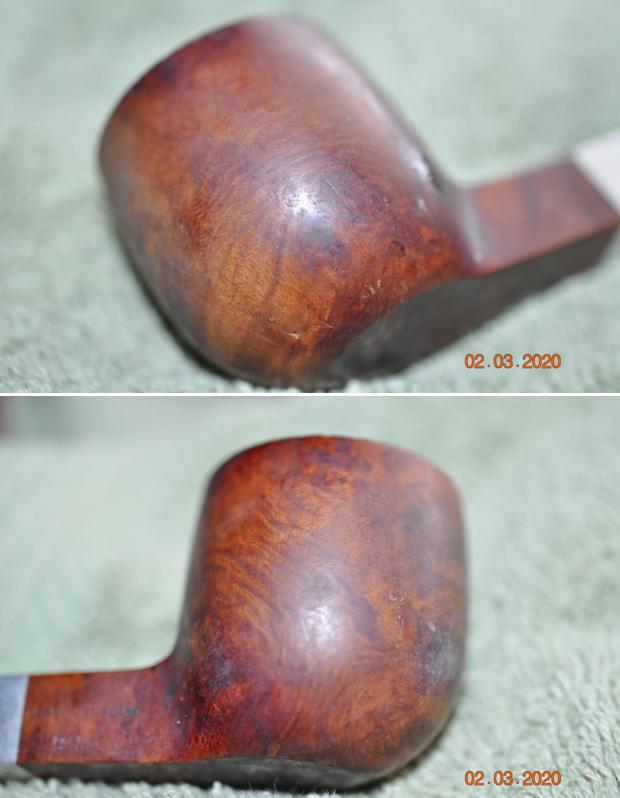
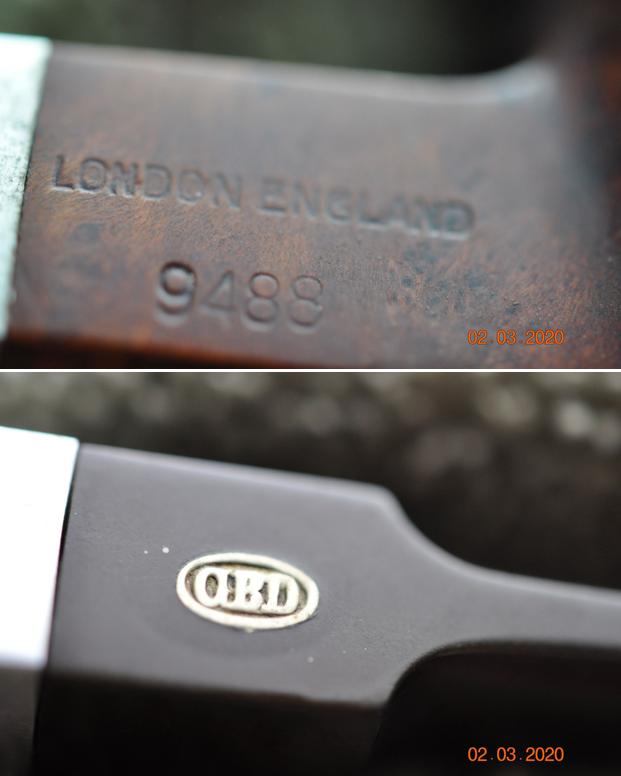
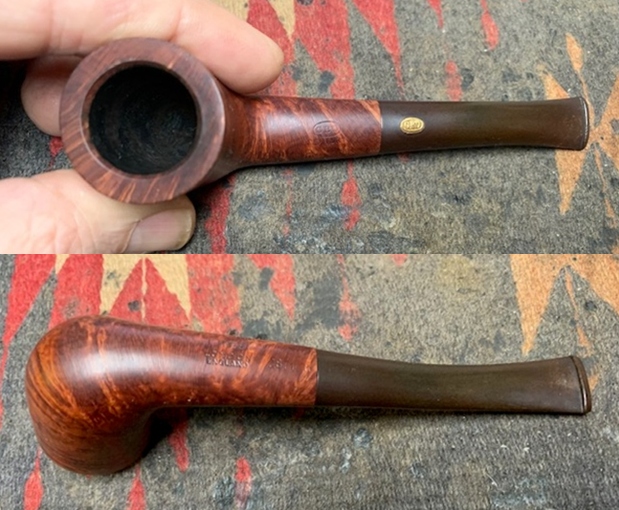
 Jeff took photos of the stamping on the sides of the shank to show the clarity and readability of the stamp. It reads as mentioned above. He also took a photo of the brass GBD logo on the stem.
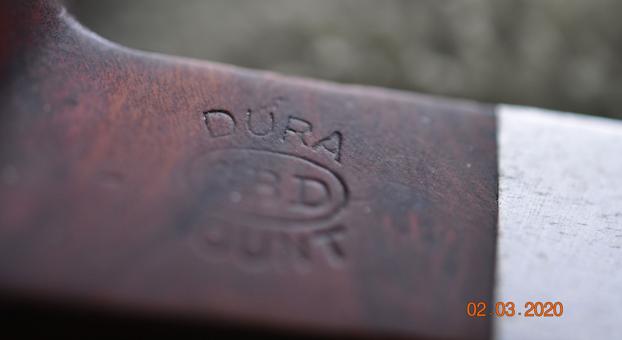
 I turned to Pipephil’s site and to the general GBD listing for the GBD Dura Mount pipe and other than a picture of the pipe and the stamping on Pipedia there was not any significant information on the line. I turned to the section on Pipedia on GBD Model Information to see what I could find (https://pipedia.org/wiki/GBD_Model_Information). There was one short line that I quote below.
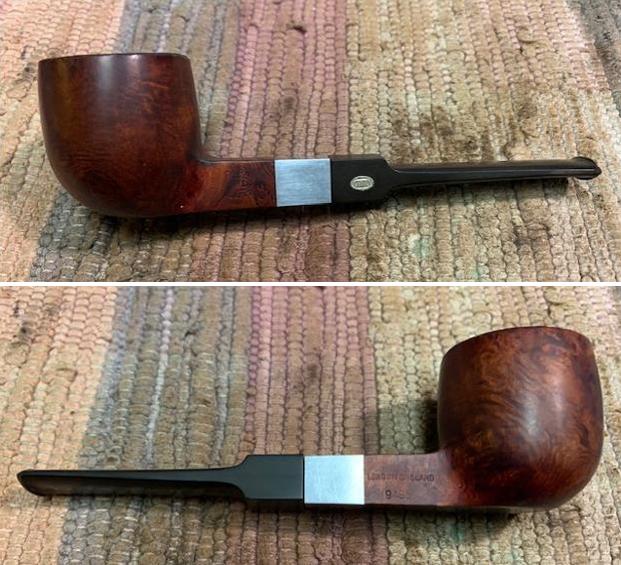
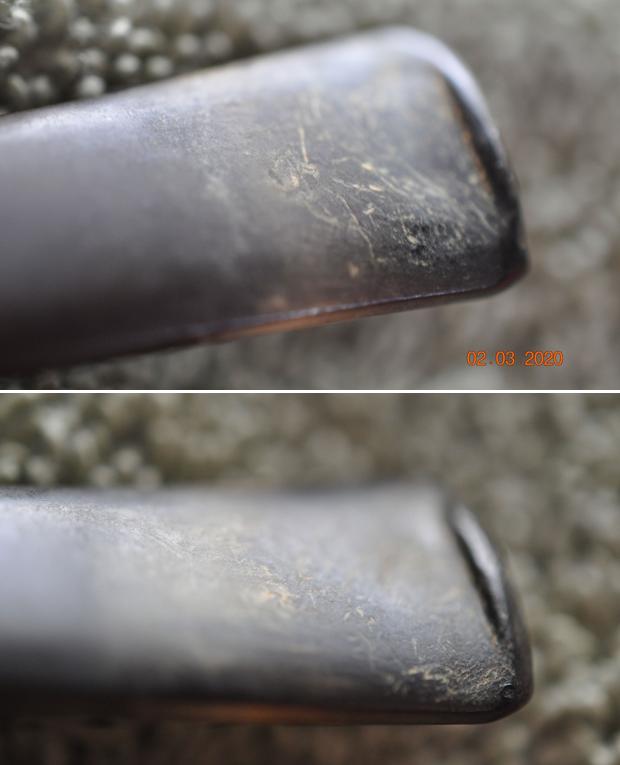
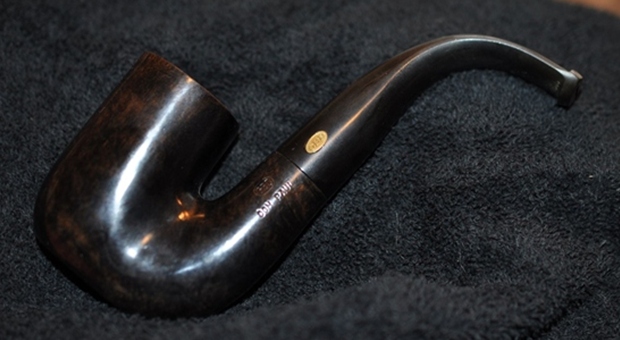
 I took some close up photos of the rim top and the stem surface. The top and inner and outer edge of the rim showed damage. There was serious damage back outer edge of the bowl. The stem had tooth marks just ahead of the button and on the button surface.
 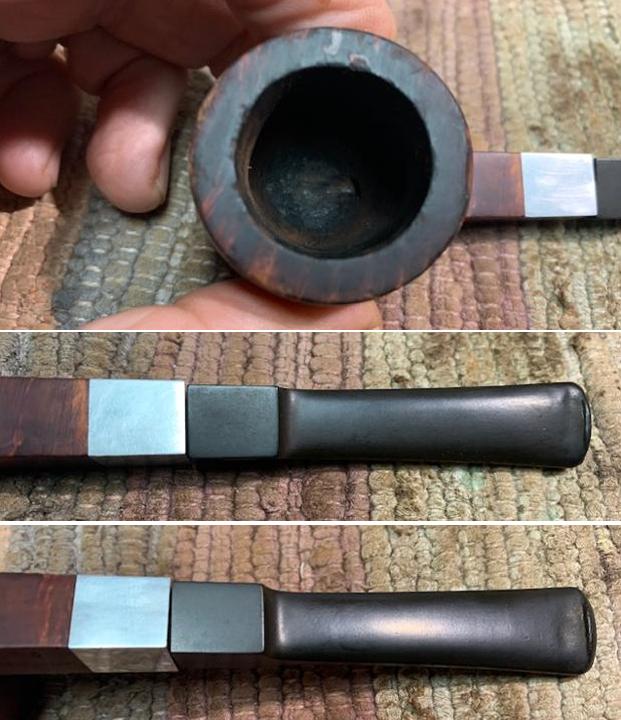 I took photos of the stamping on the sides of the shank. It is readable and clear.
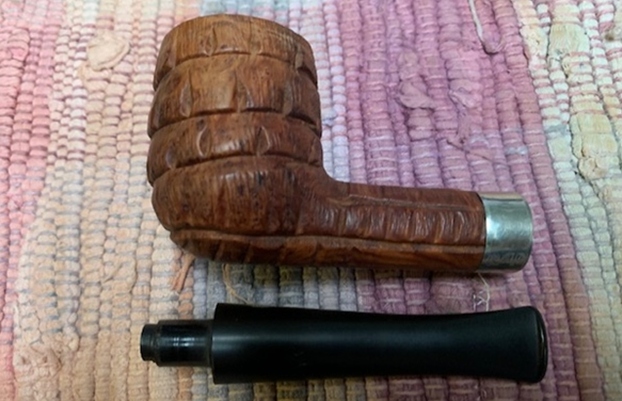
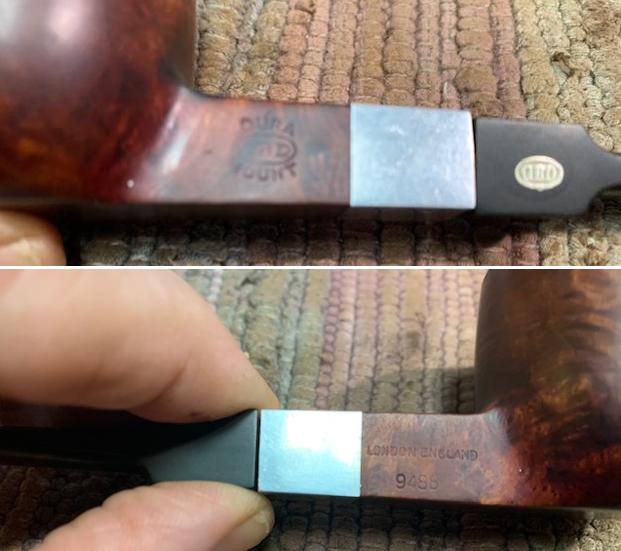 I removed the stem from the shank and took a photo of the parts of the pipe.
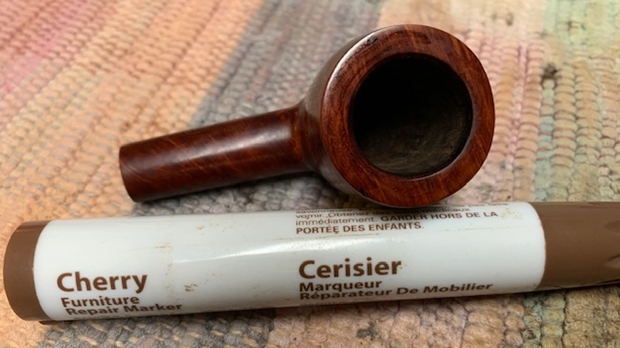
 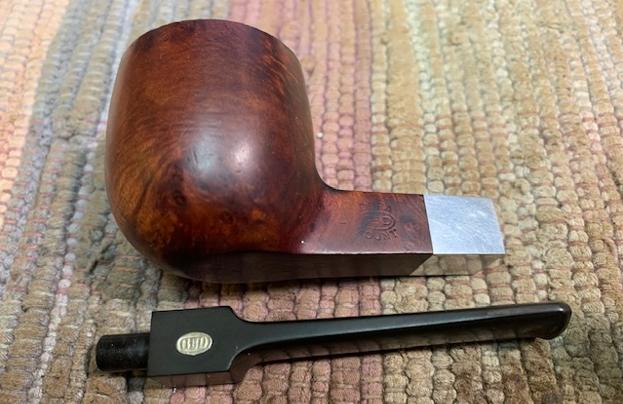 I started my work on the pipe by dealing with the damaged rim top and edges. I used a folded piece of 180 grit sandpaper to smooth out the nicks the inner edge of the bowl. I lightly sanded the rim top in preparation for the repair to the back outer edge. I stained the chipped area with a Maple stain pen to match the bowl and then built it up with clear CA glue. Once the glue cured I topped the bowl on a topping board with 220 grit sandpaper and sanded the outer edge with 220 at the same time. I took a photo of the rim top at this point in the process.
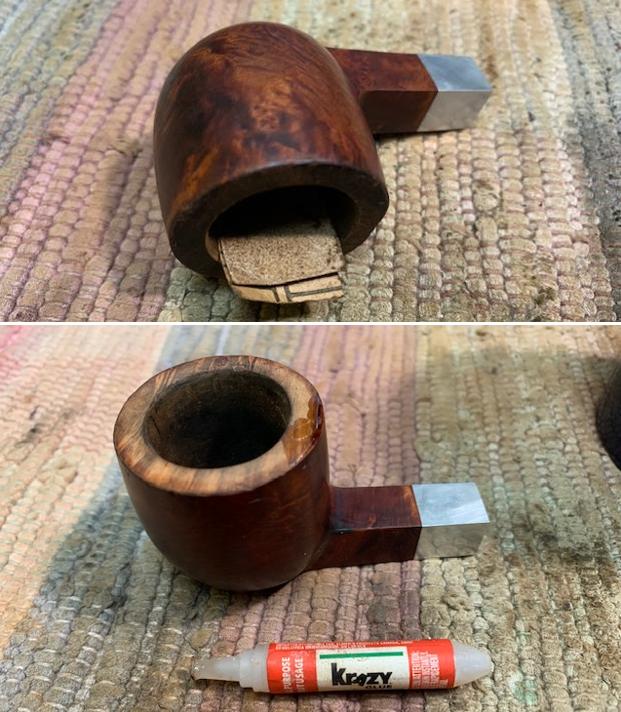
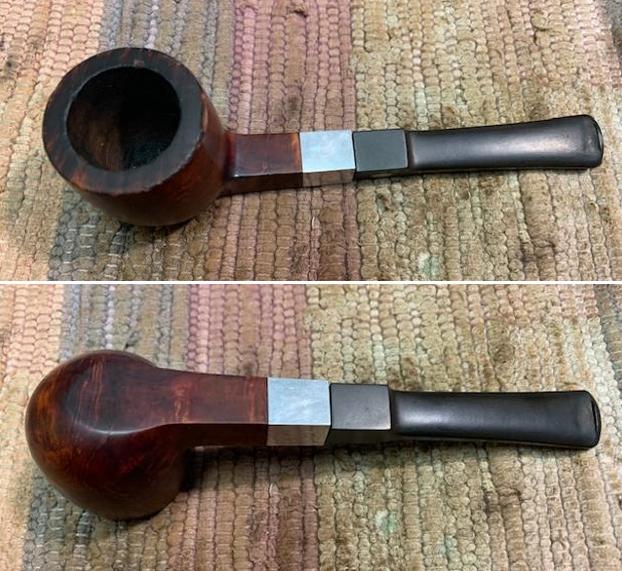
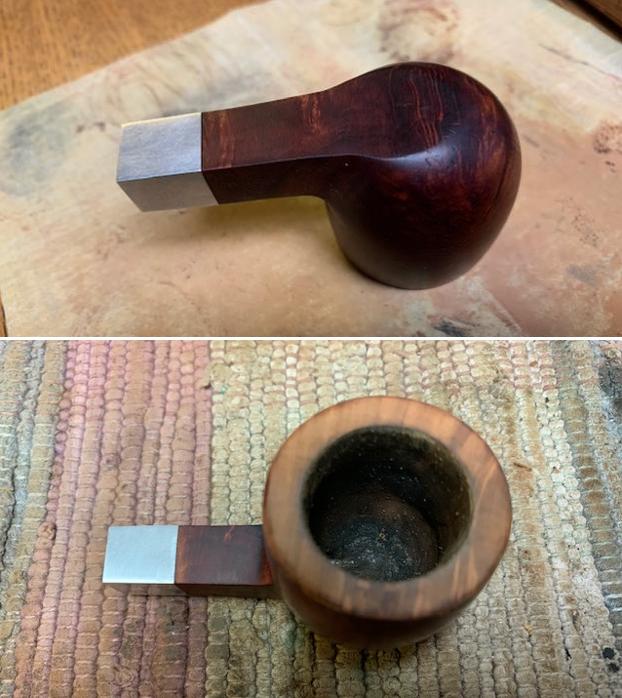 I polished the briar and aluminum shank extension with micromesh sanding pads – dry sanding with 1500-12000 grit sanding pads. I wiped the bowl down after each pad with a damp cloth to remove the sanding debris.
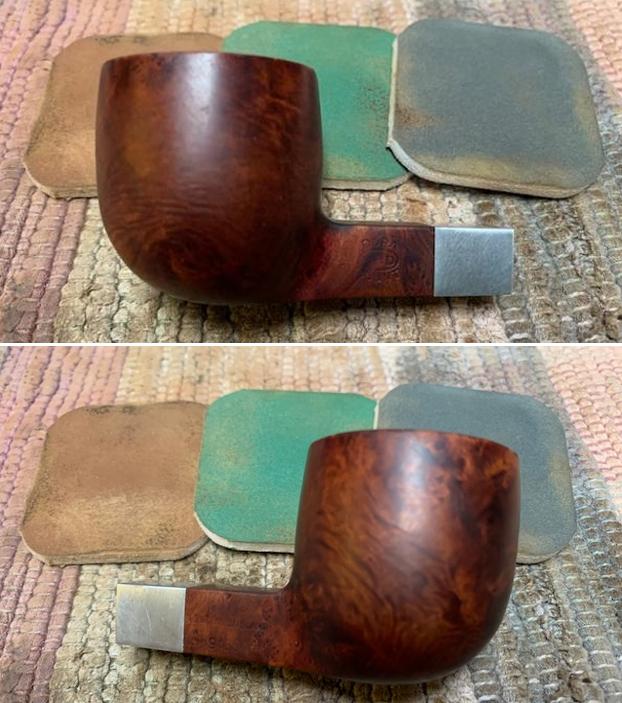
 I stained the rim top with a Maple and a Cherry Stain pen to match the surrounding briar. Once it is buffed the match should be perfect.
 I worked some Before & After Restoration Balm into the surface of the bowl and shank with my fingertips to clean, enliven and protect the briar. I let the balm sit for 15 minutes and then buffed with a cotton cloth to raise the shine. The photos show the bowl at this point in the restoration process.
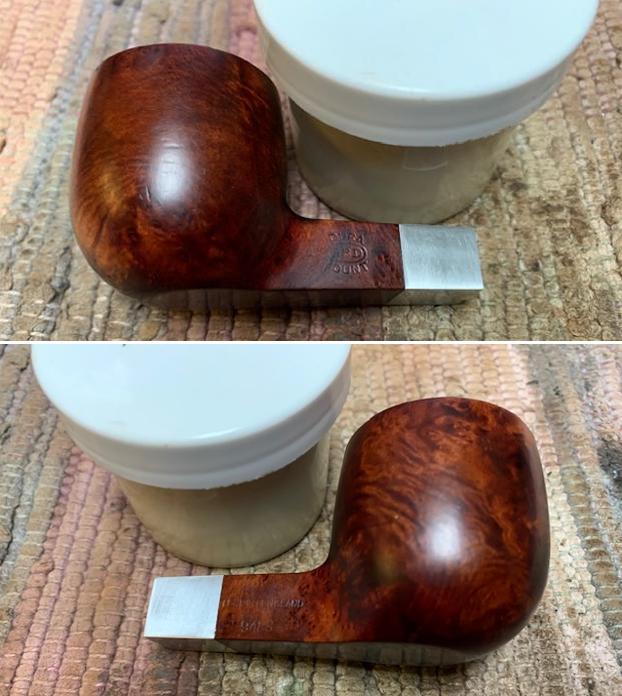
 I set the bowl aside and turned my attention to the stem. I “painted” the surface of the stem on both sides to lift the tooth marks. I was able to lift most of them. I filled in what remained next to the button with clear CA glue. Once the repairs cured, I sanded them with a folded piece of 220 grit sandpaper to smooth out the surface of the stem and reshape the button. I started polishing the stem with 400 grit wet dry sandpaper.
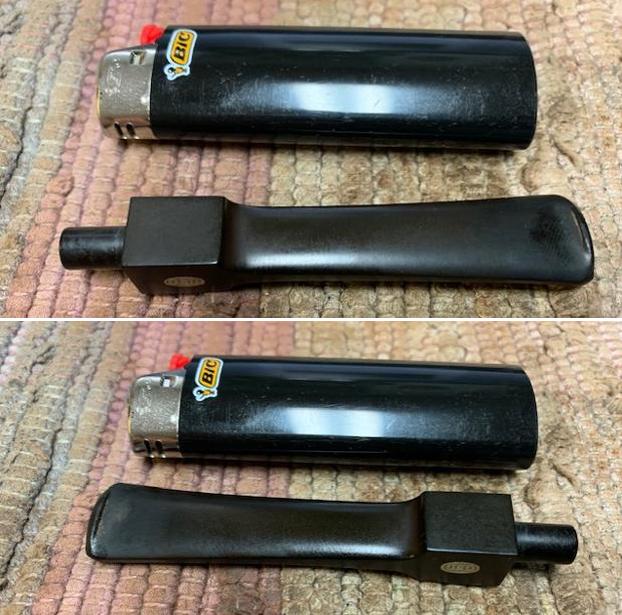
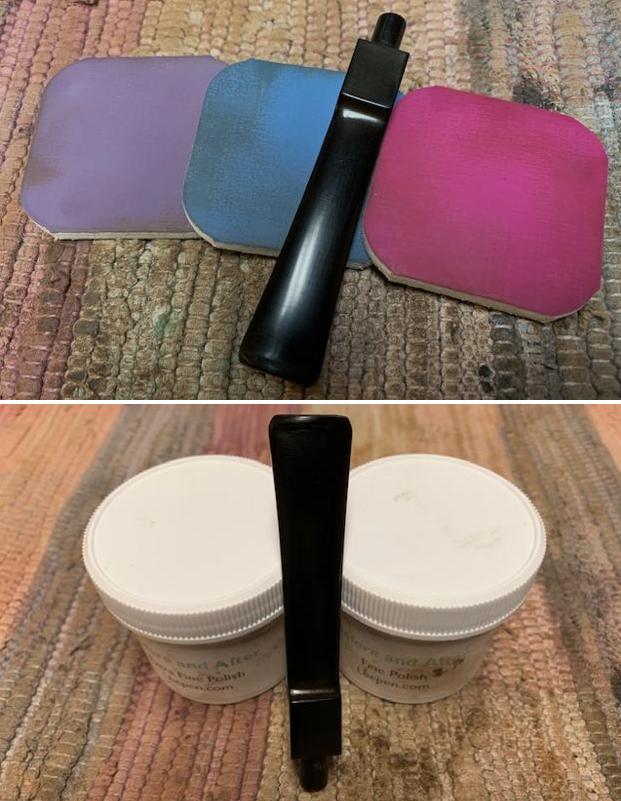
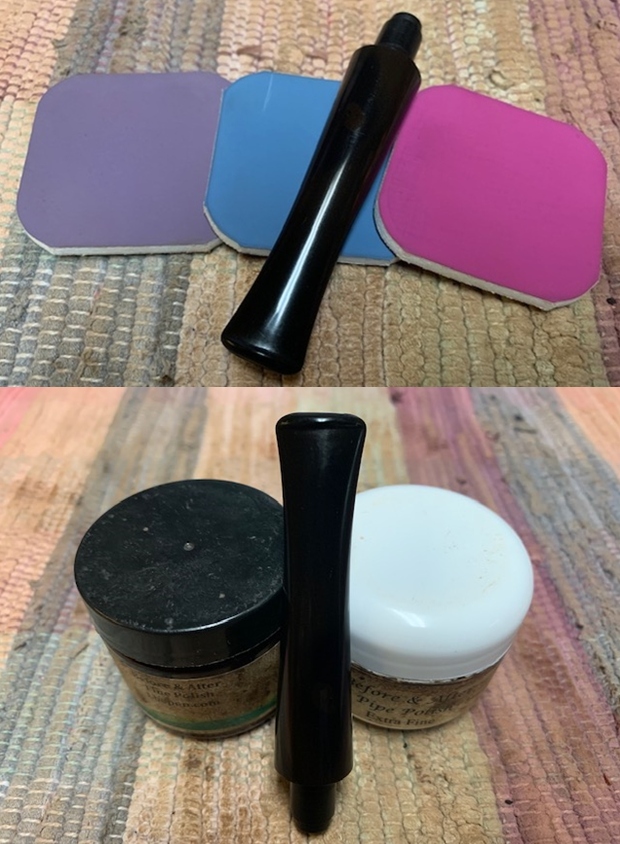
 I polished the stem with micromesh sanding pads – dry sanding with 1500-12000 grit sanding pads. I wiped it down after each sanding pad with Obsidian Oil. I polished it with Before & After Pipe Stem Polish – both Fine and Extra Fine. I gave it a final coat of Obsidian Oil.
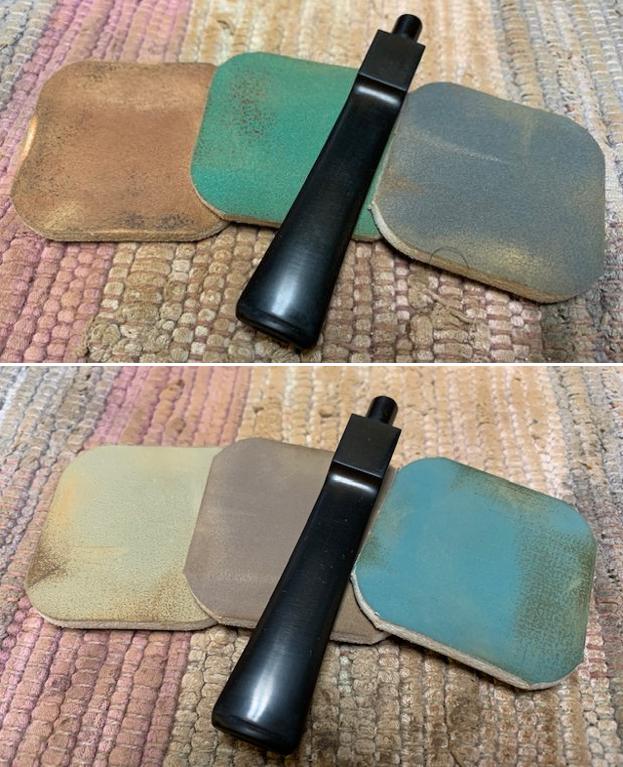
 With the bowl and the stem finished I put the beautiful GBD Dura Mount 9488 Pot back together and buffed it on the wheel using Blue Diamond to give it a shine. I gave the bowl and the stem multiple coats of carnauba wax on the wheel. I buffed it with a clean buffing pad to raise the shine. I hand buffed it with a microfiber cloth to deepen the shine. The grain on this pipe really is a great looking. The dimensions of the pipe are – Length: 5 ¾ inches, Height: 1 ¾ inch, Outside diameter of the bowl: 1 ½ inches, Chamber diameter: 1 of an inch. The weight of this large pipe is 1.34 ounces /39 grams. This GBD Dura Mount is another great find from this collection. It is much more beautiful in person than these photos can capture. I will be putting it on the rebornpipes store soon. If you would like to add it to your collection let me know. This is another pipe that has the possibility of transporting the pipe man or woman back to a slower paced time in history where you can enjoy a respite. Thanks for walking through the restoration with me.


