Tag Archives: fitting a stem

Midterm Exam #3: Restemming a Thermofilter Billiard


Blog by Anthony Cook

I’m turning in my third midterm exam today. This one is based on an old Thermofilter pipe. I’ve made plenty of mistakes while fumbling my way through the learning process of pipe restoration, but one of my biggest and earliest blunders was inflicted on this poor pipe.

Thermofilter seems to be one of those nearly forgotten brands that nevertheless still pops up on eBay on a fairly frequent basis. The best information that I can dig up on it comes from a comment that “emo” posted on the Dr. Grabow Collector’s Forum:

Thermofilter was made in Italy by Fratelli Rossi in Varese. Started about 1964 and continued till about 73/74. It was imported and sold by Mastercraft…. to, best I recall, Whitehall Products Co. in Wheeling WV… Division of CULBRO.

We had several “left over” and closed them out for $3.98 over a year or two… not as Thermofilter, but simply as a filter pipe, even though they were stamped Thermofilter. Pretty cheap stuff…

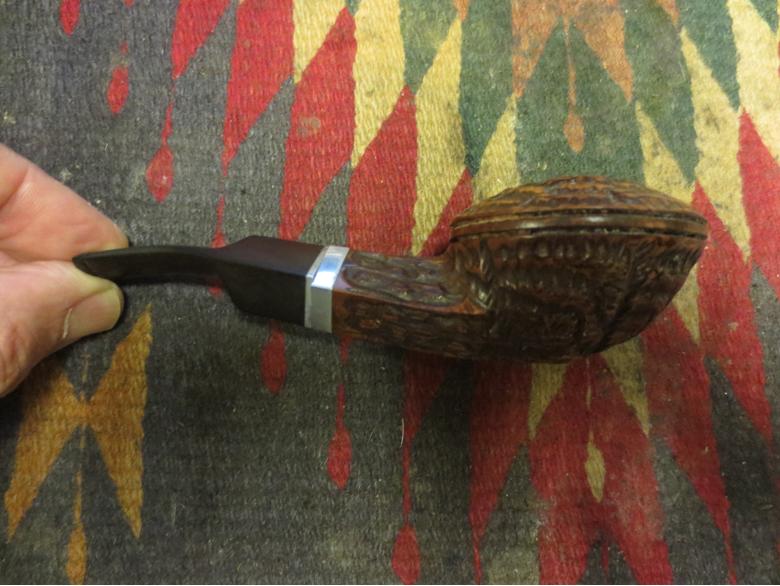
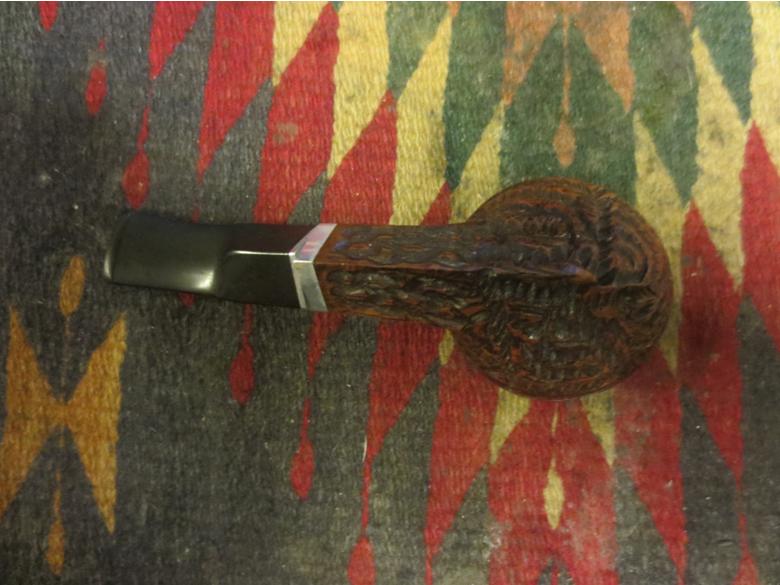
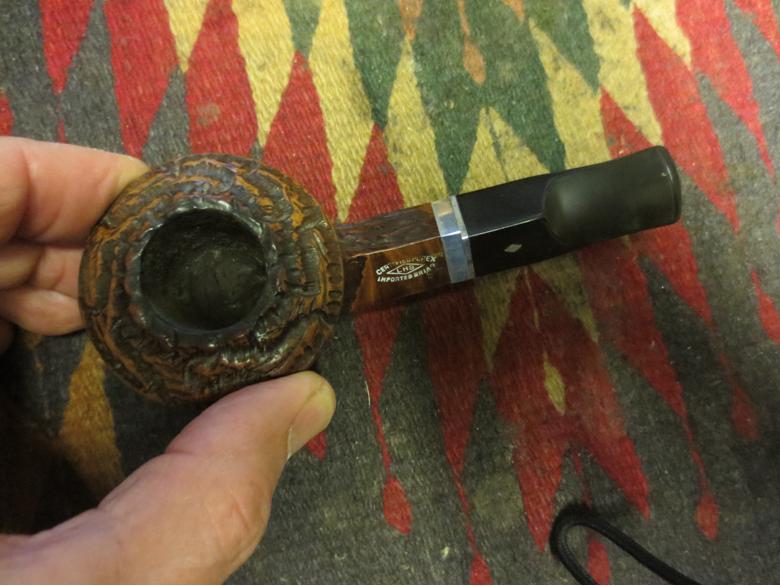
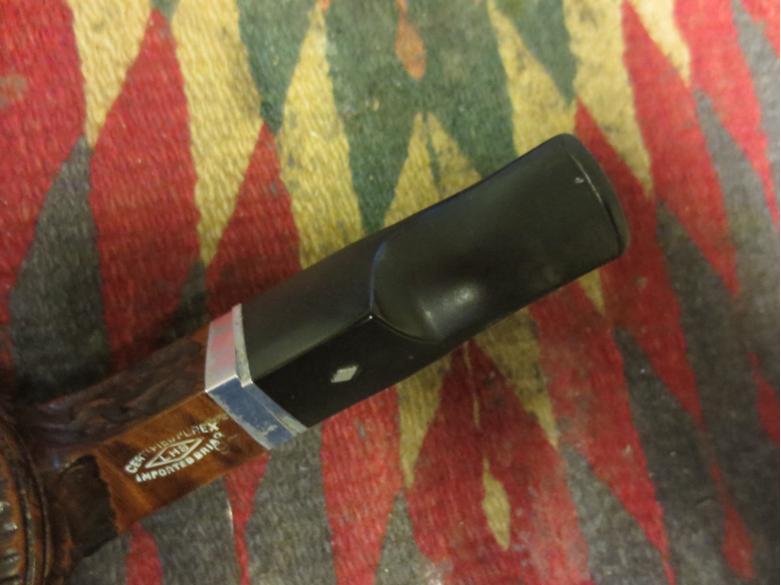
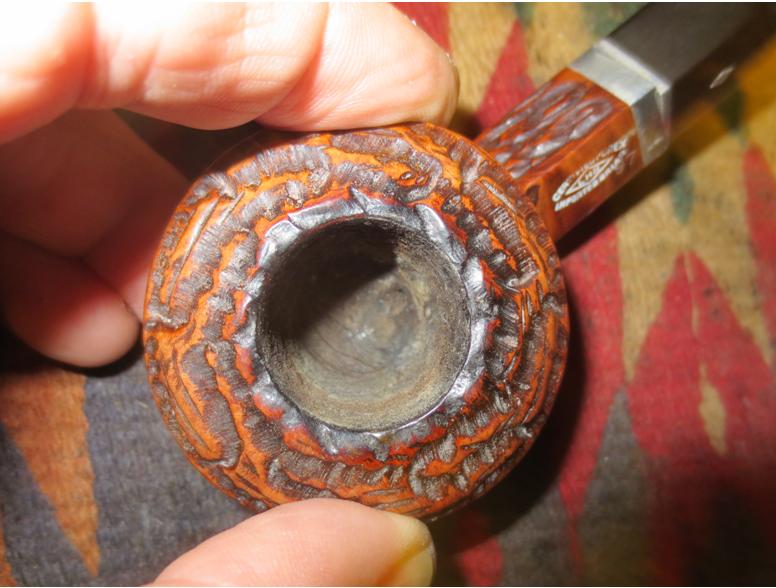
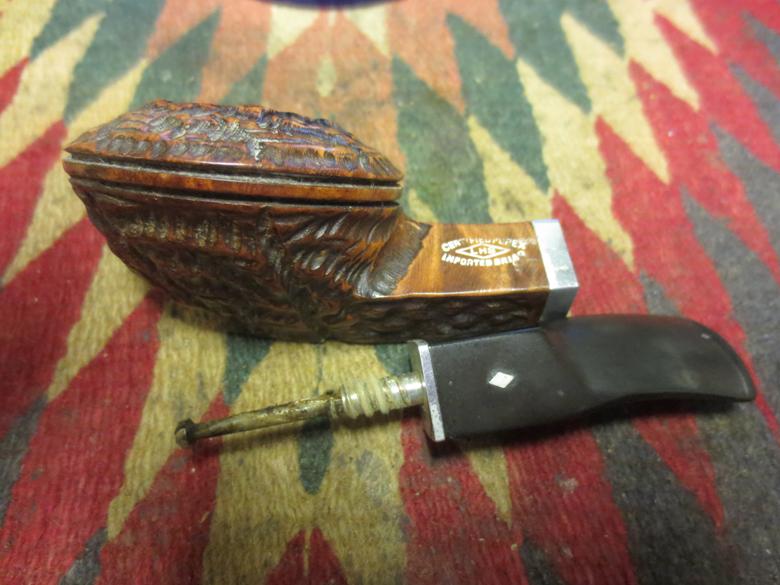
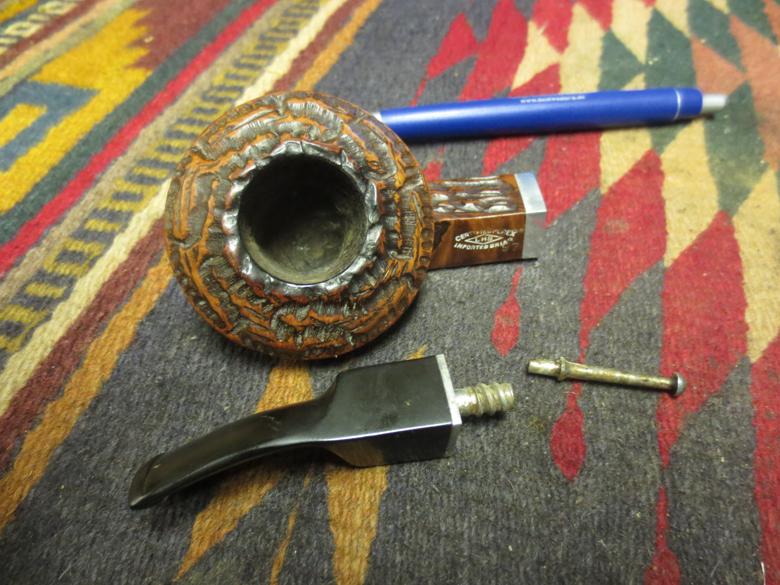
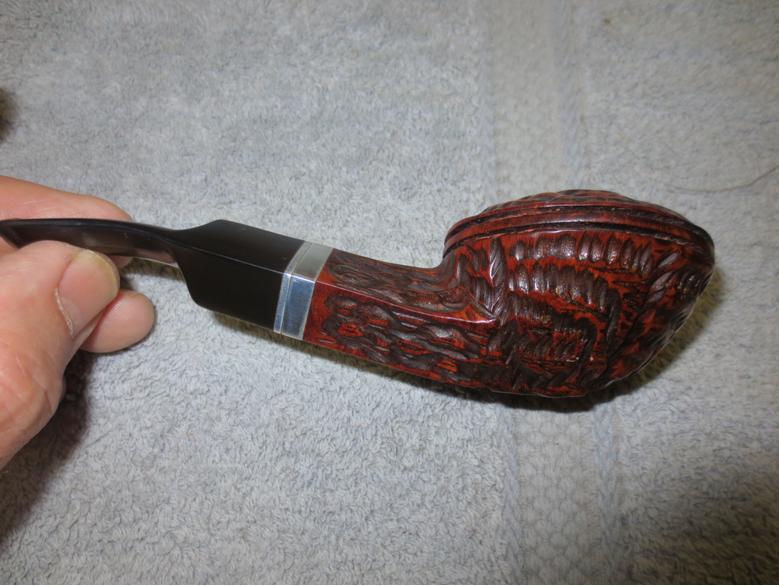
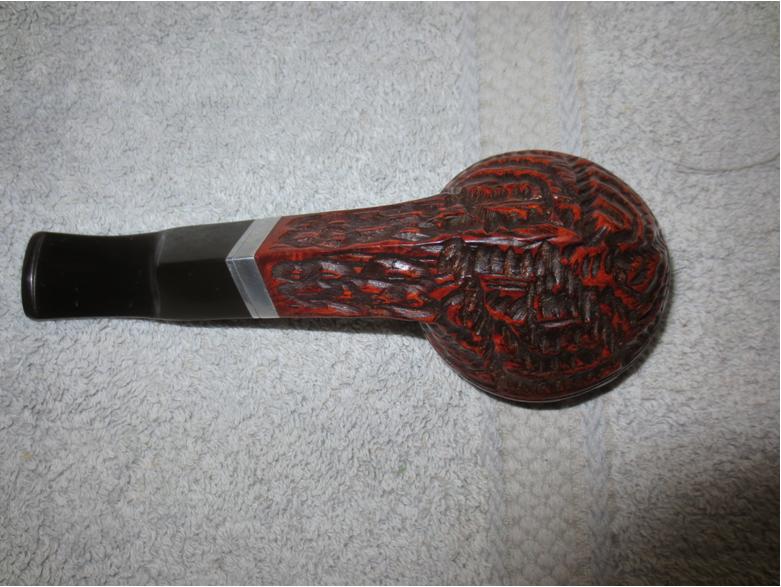
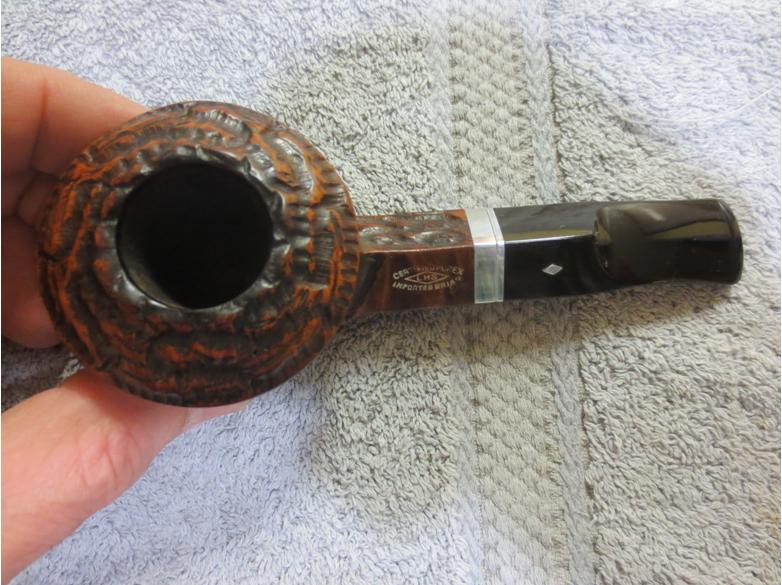
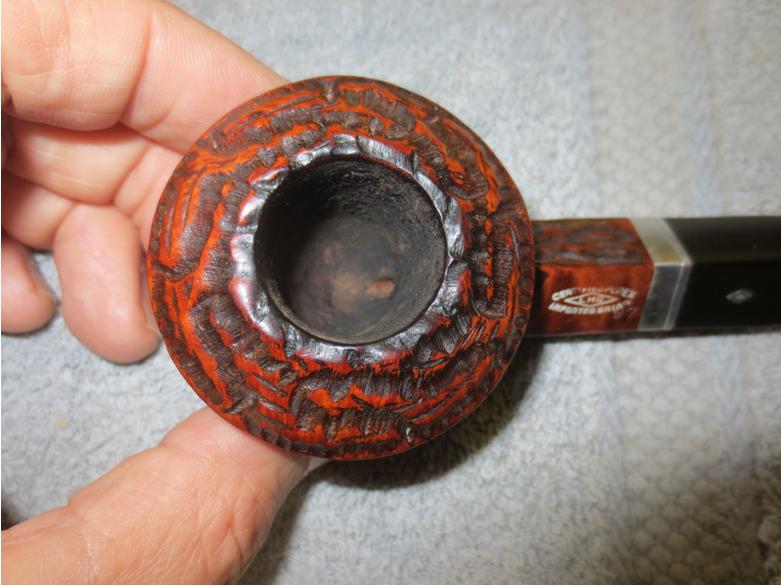
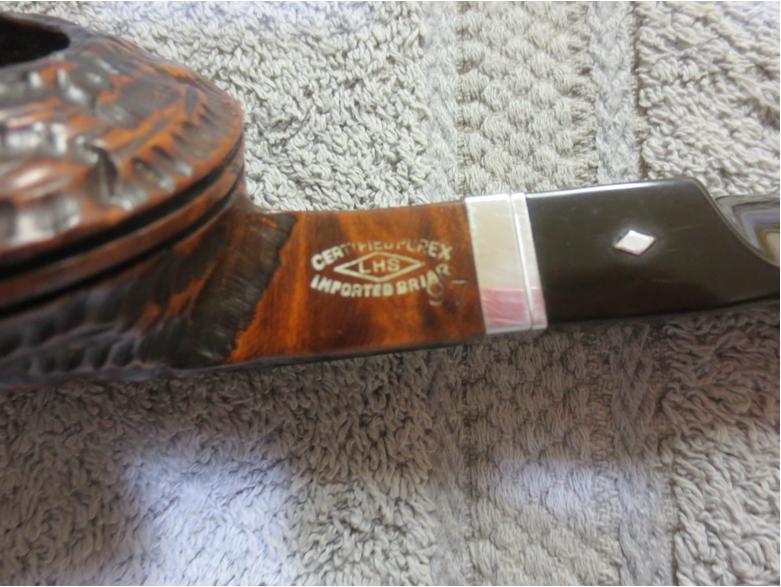
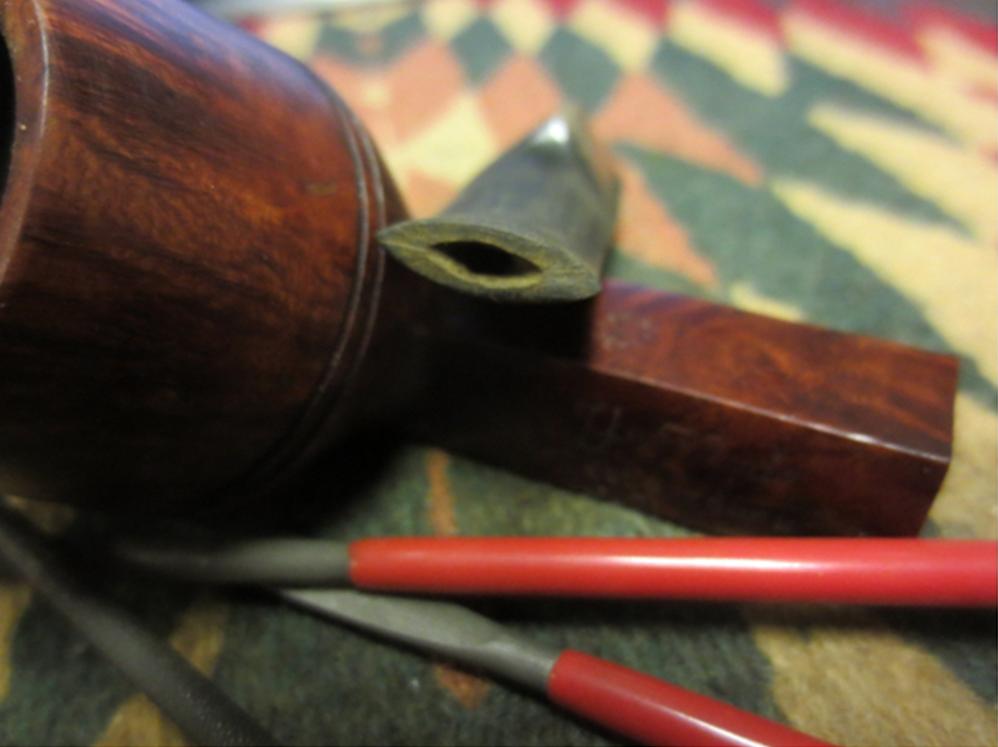
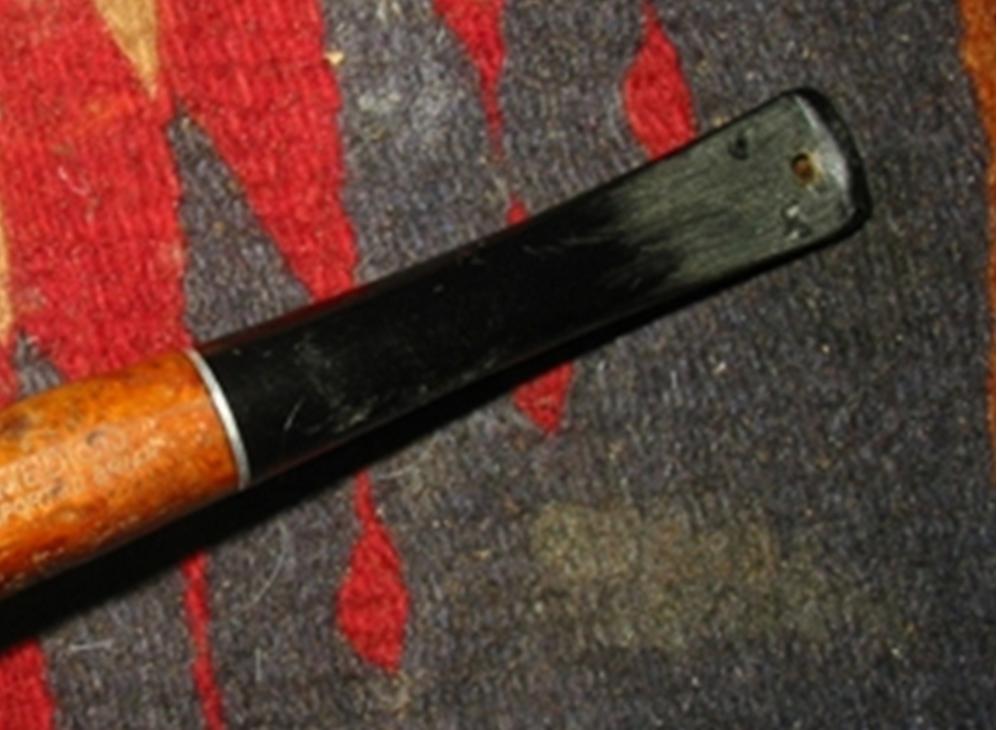
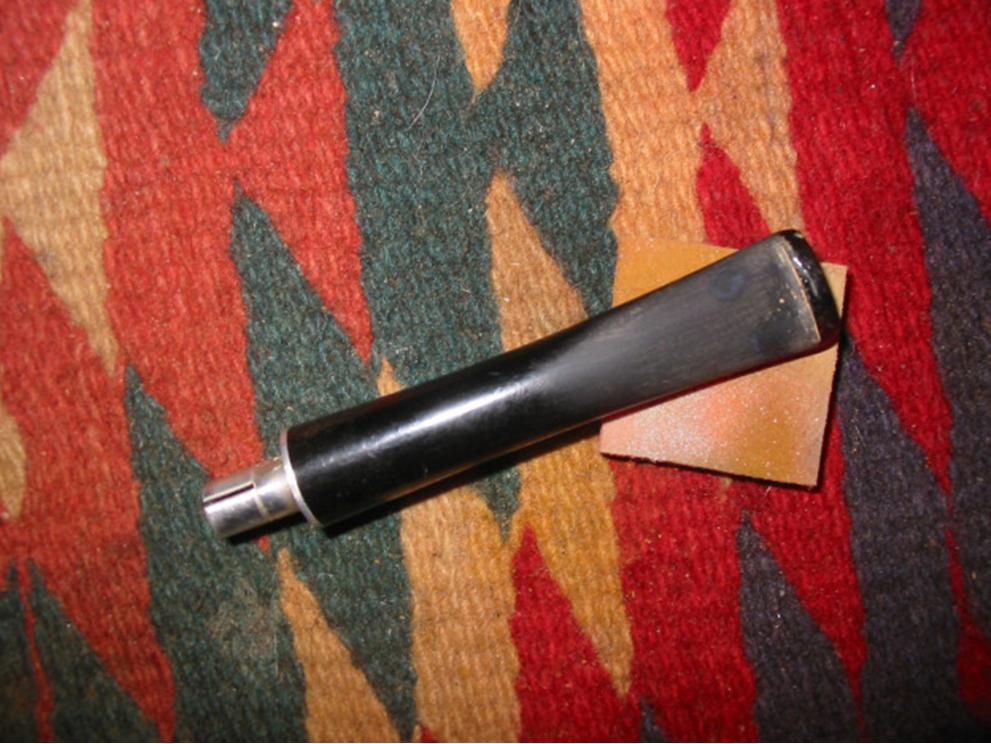
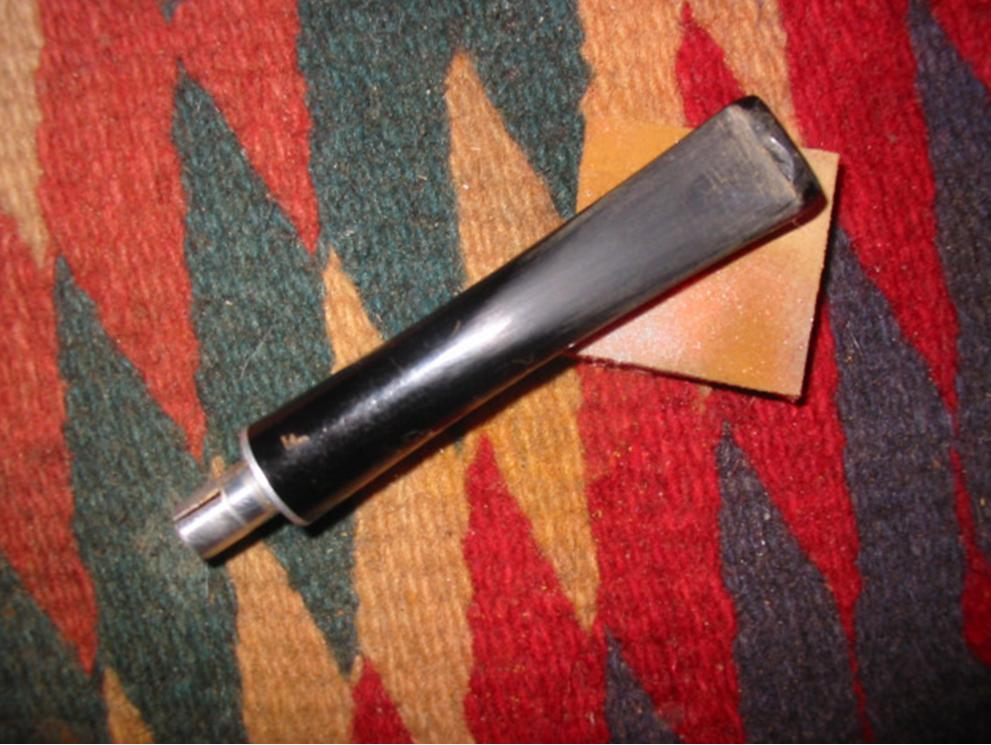
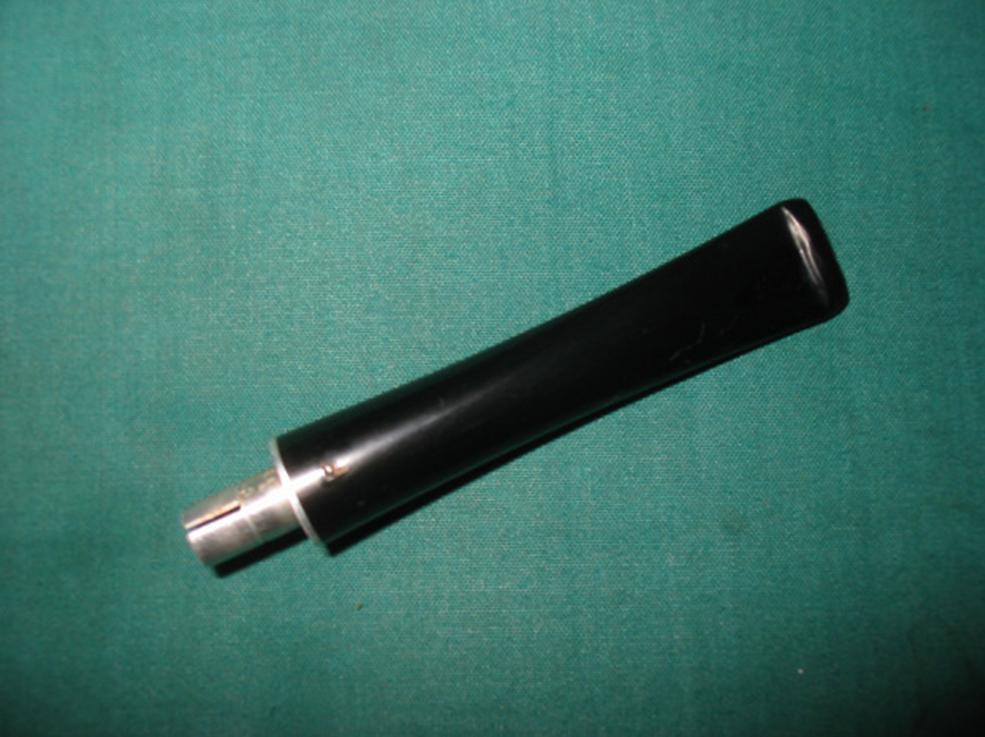
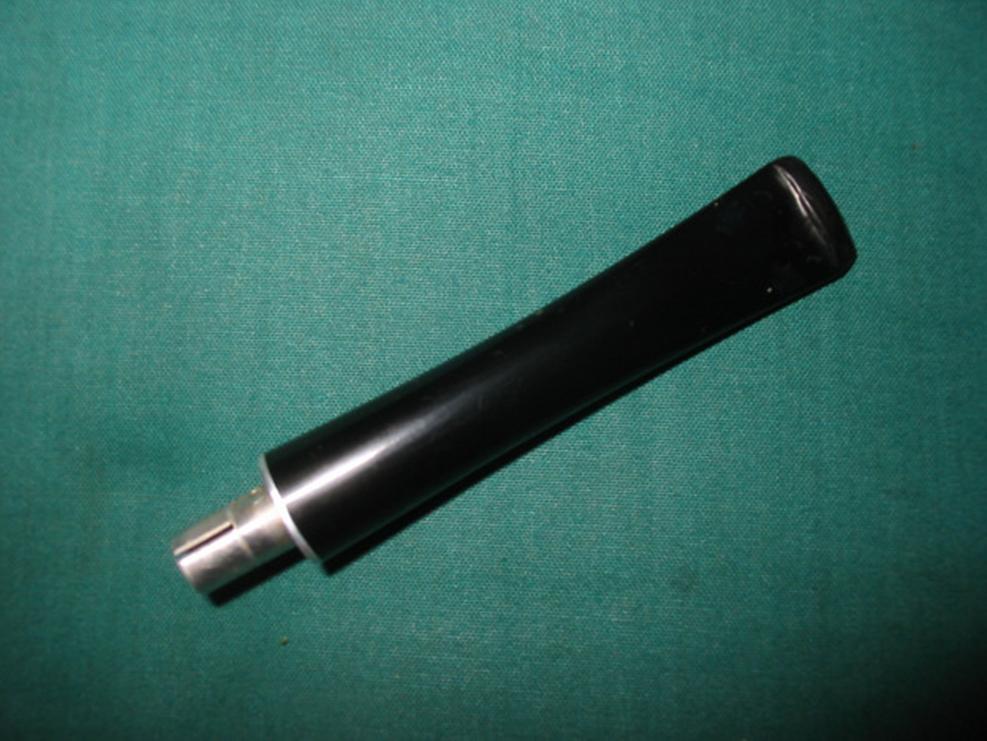
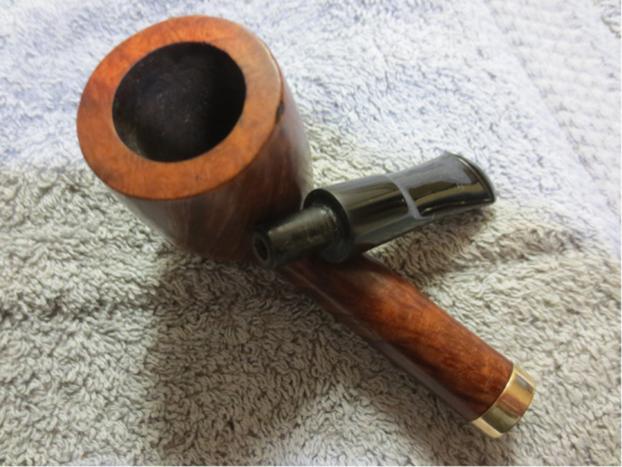
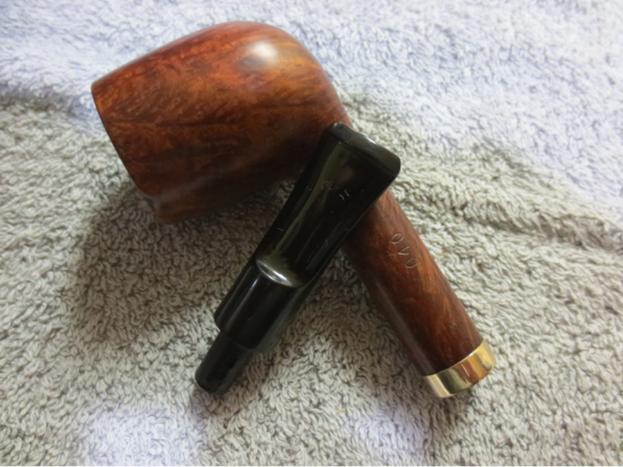
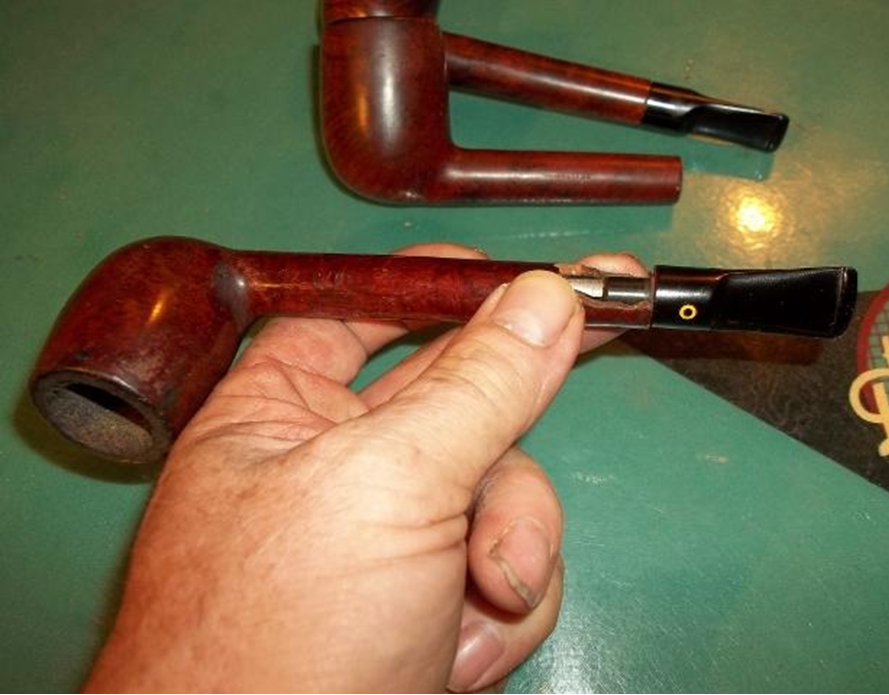
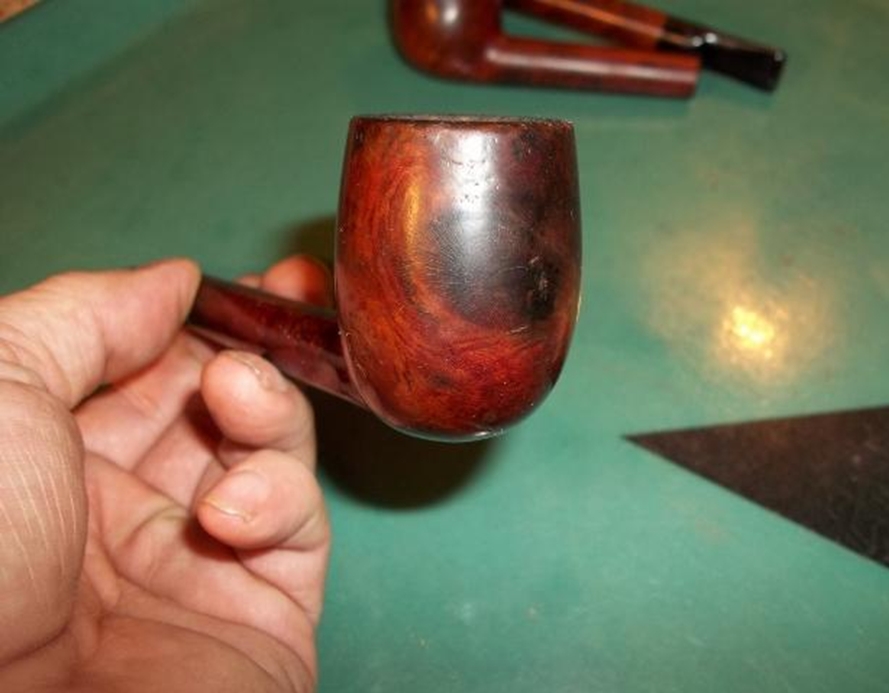
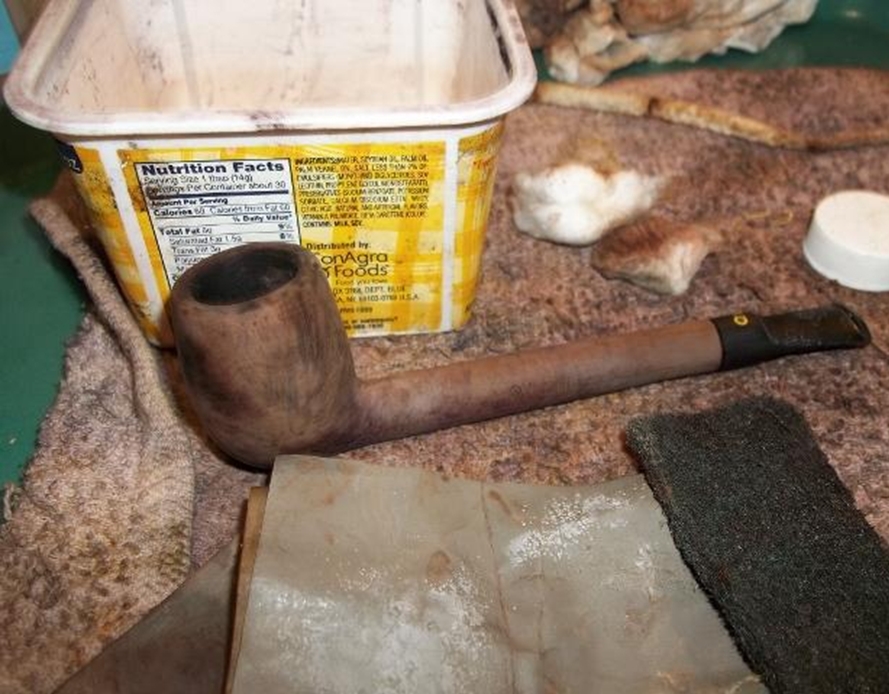
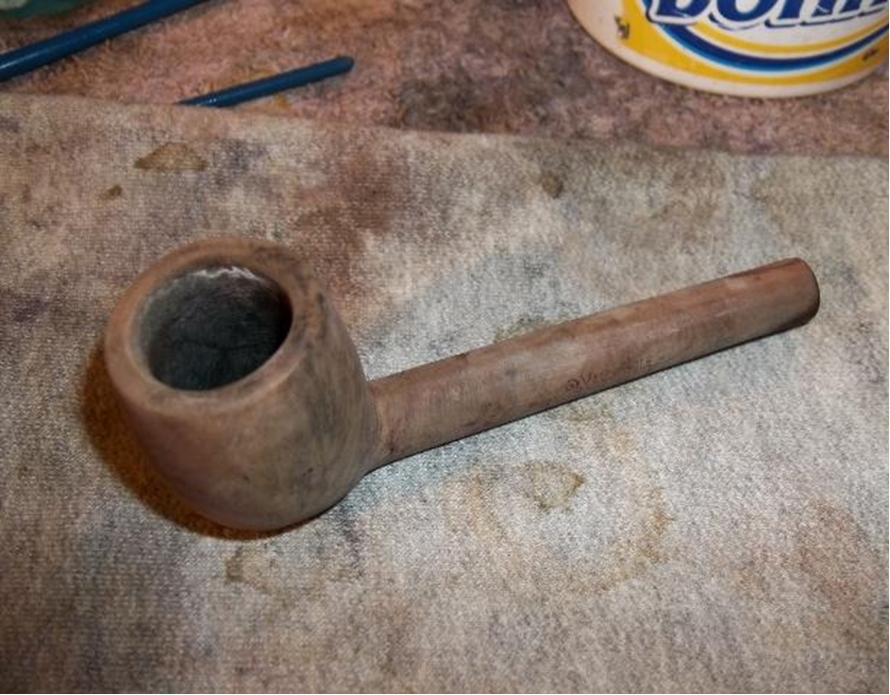
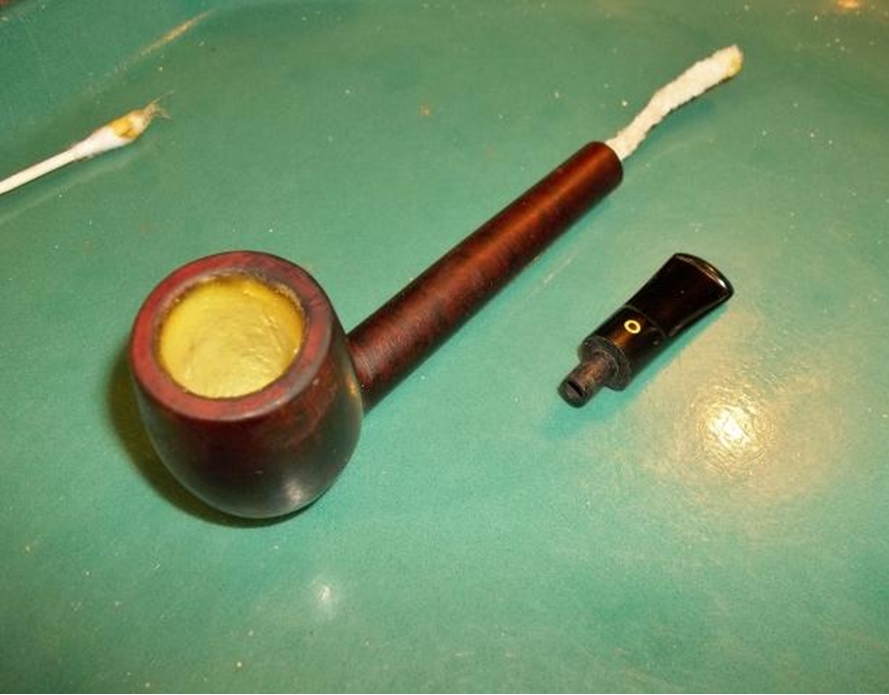
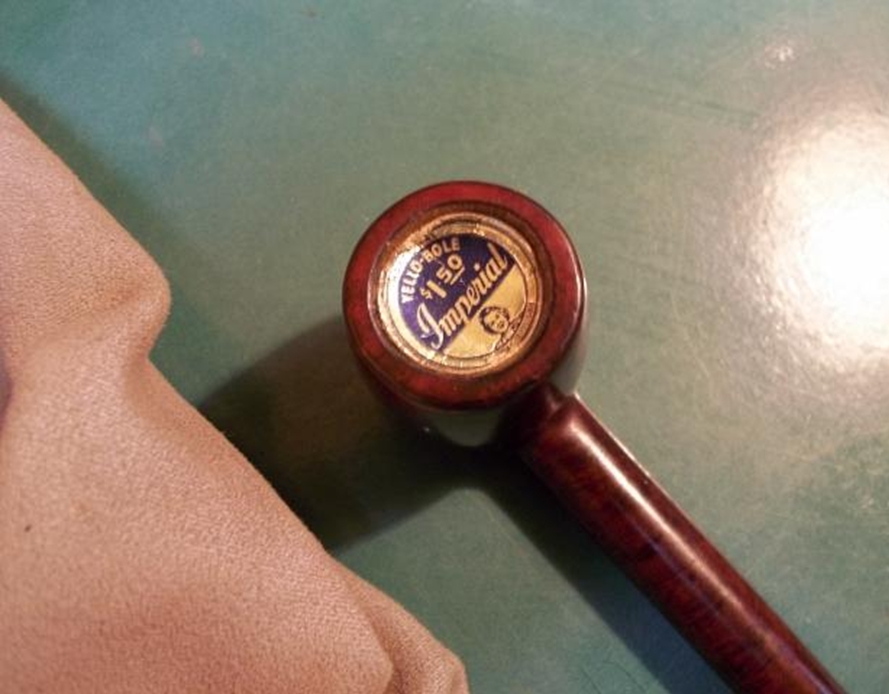
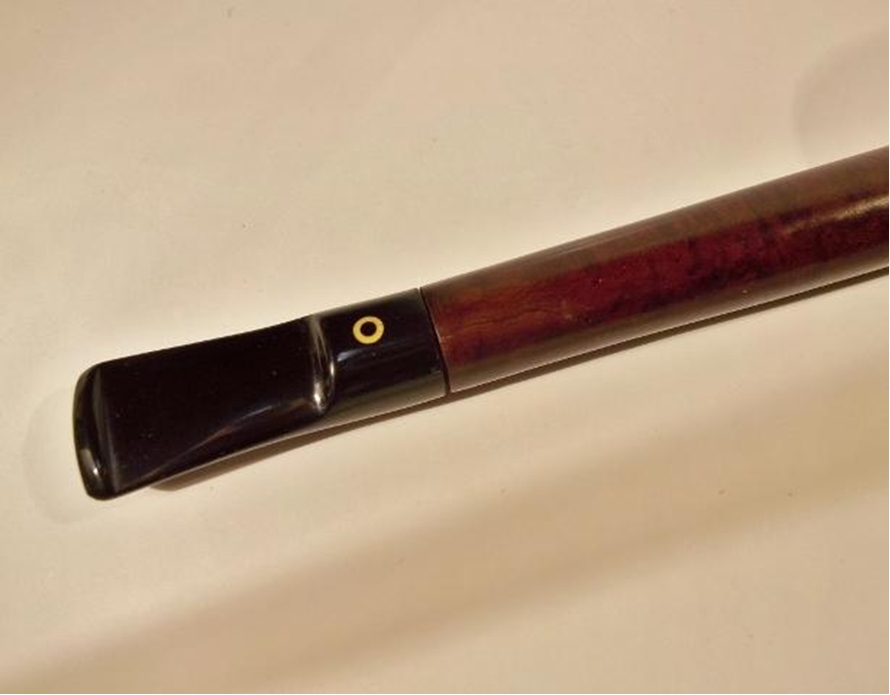
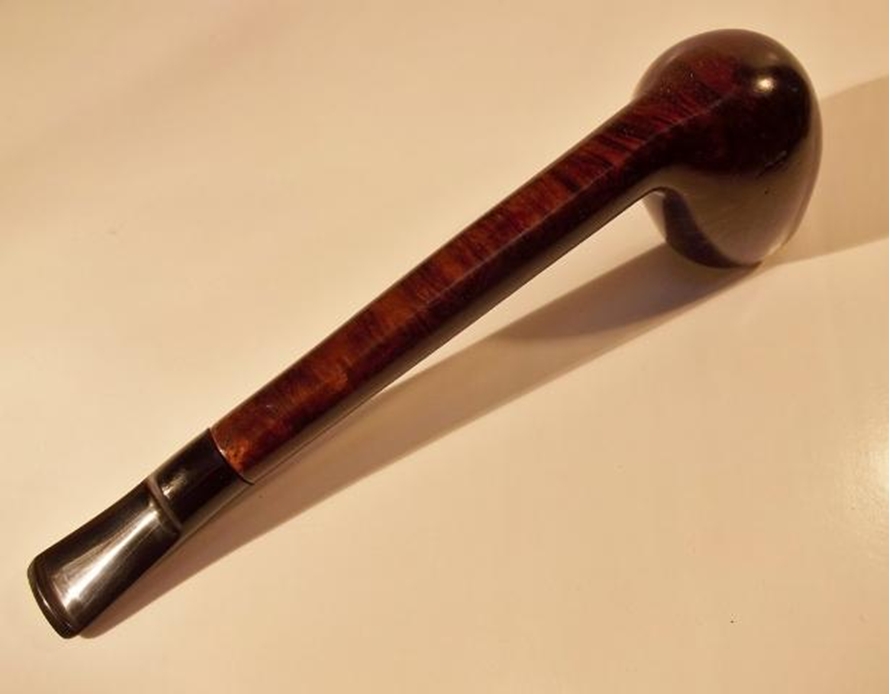
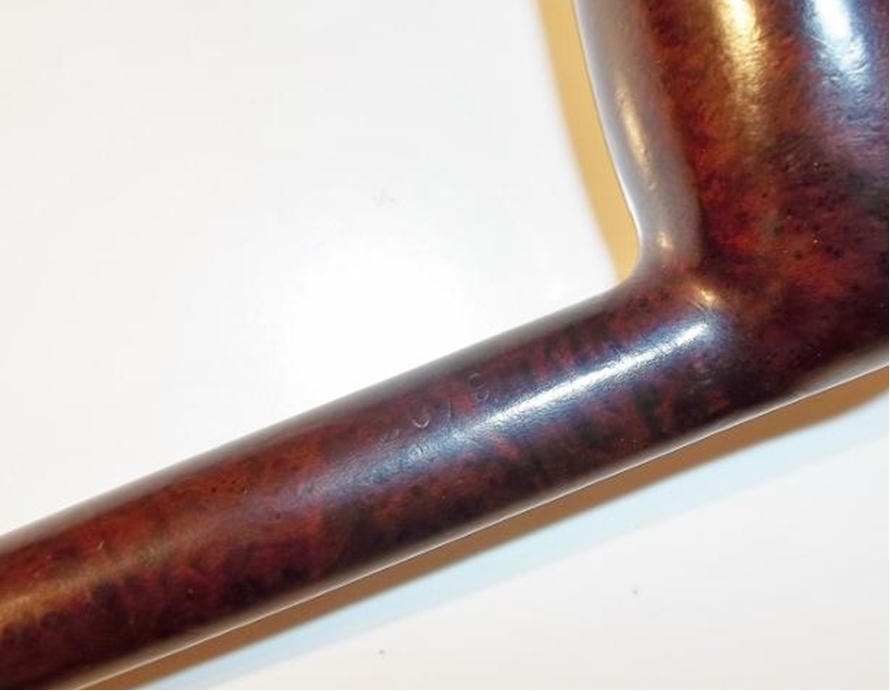
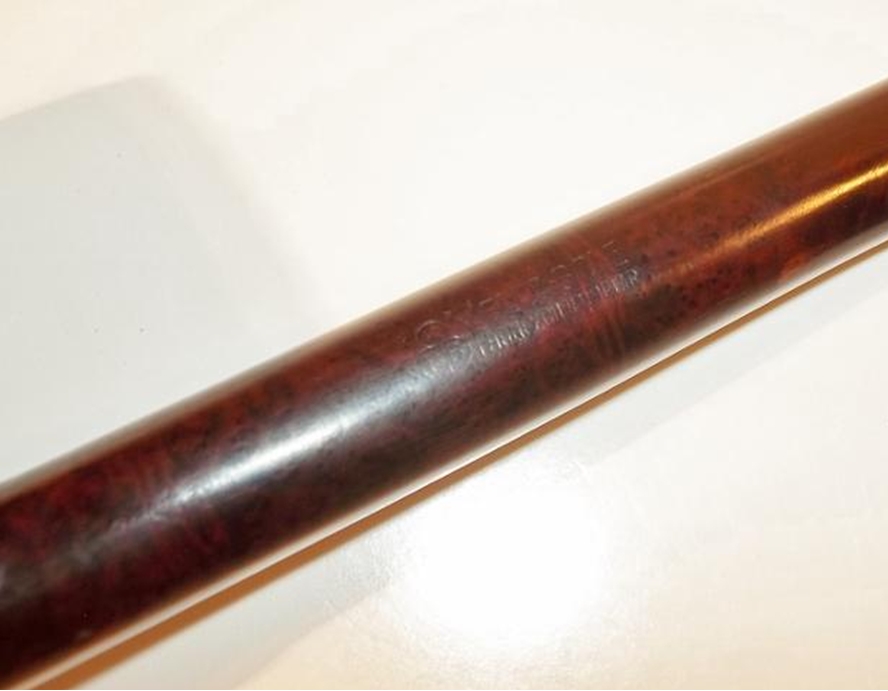
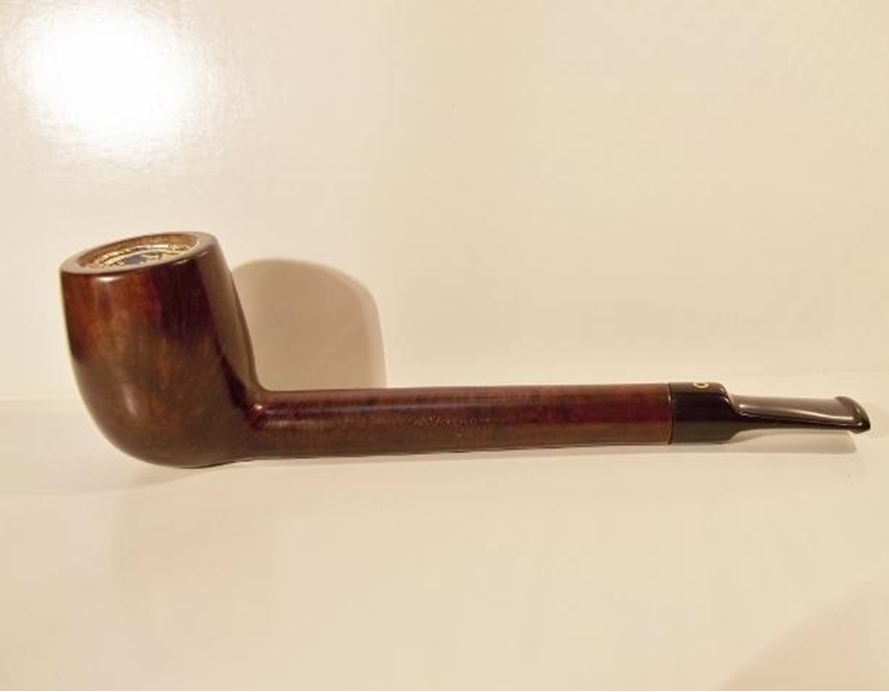
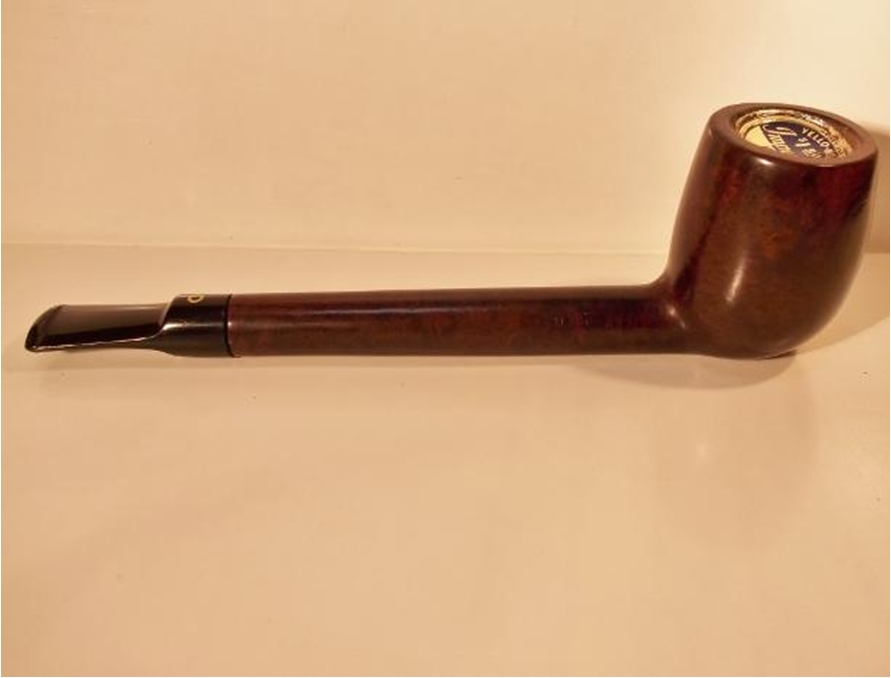
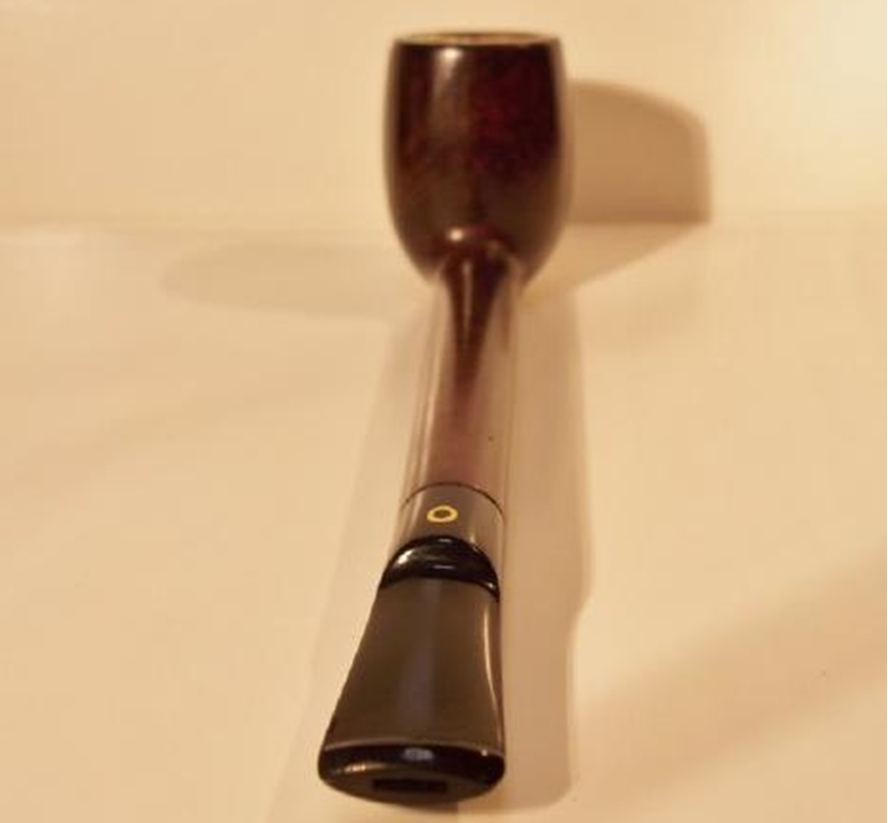
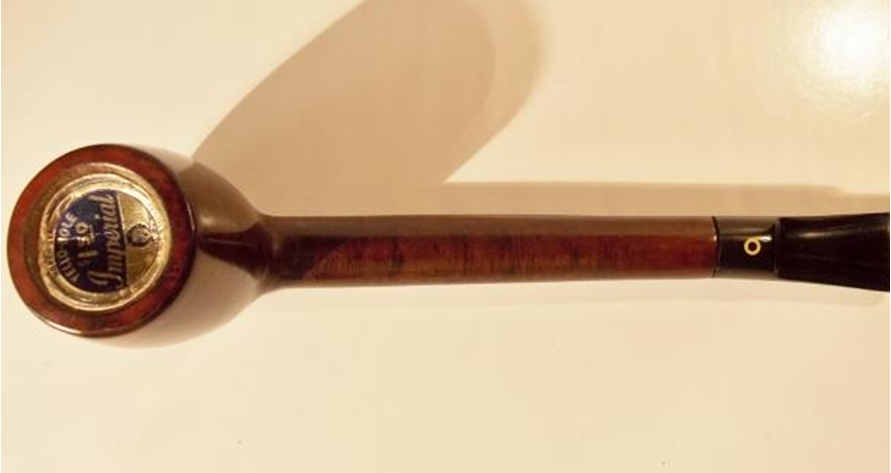
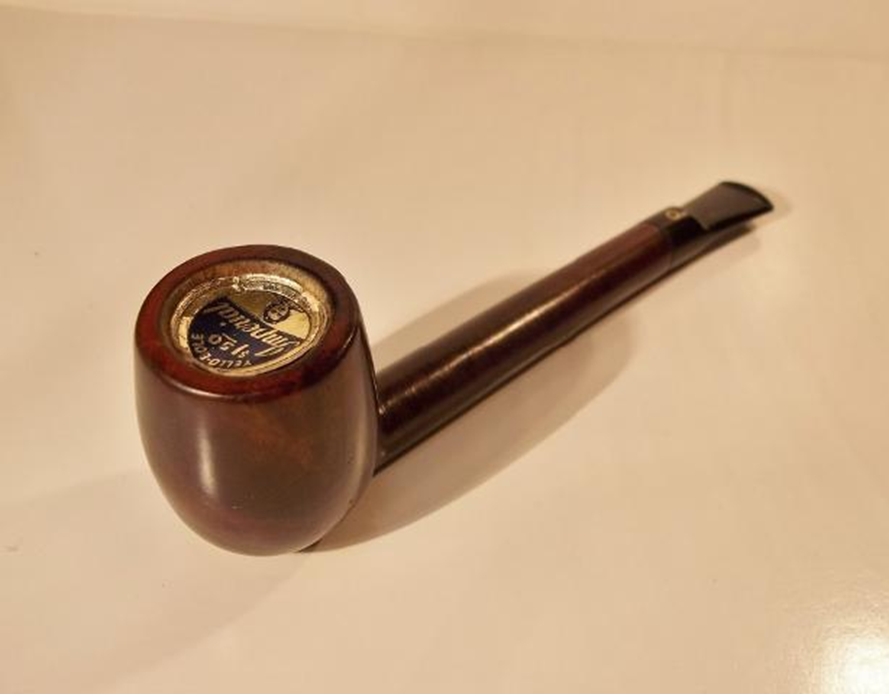
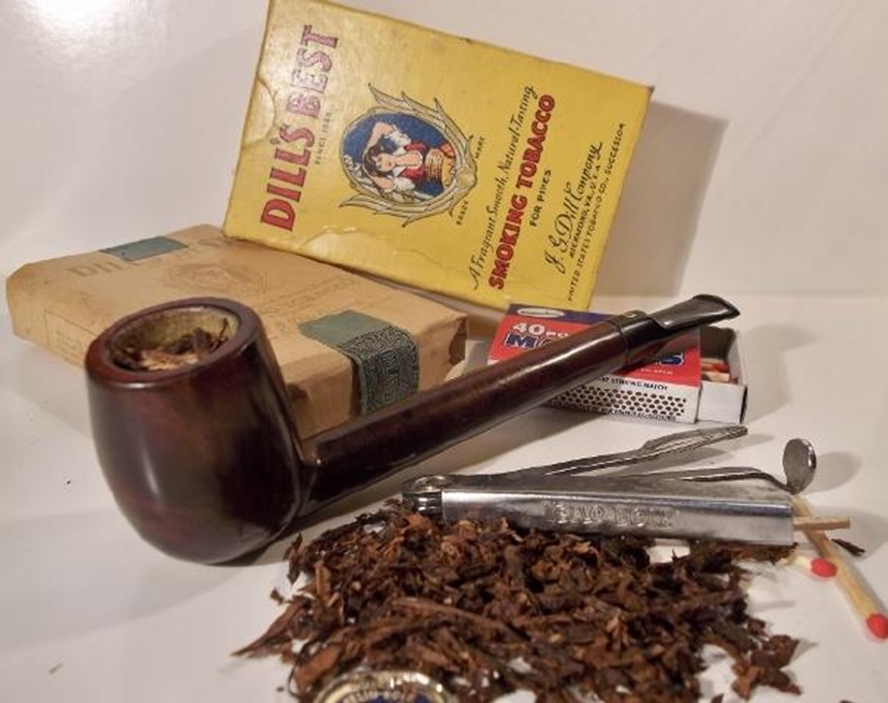
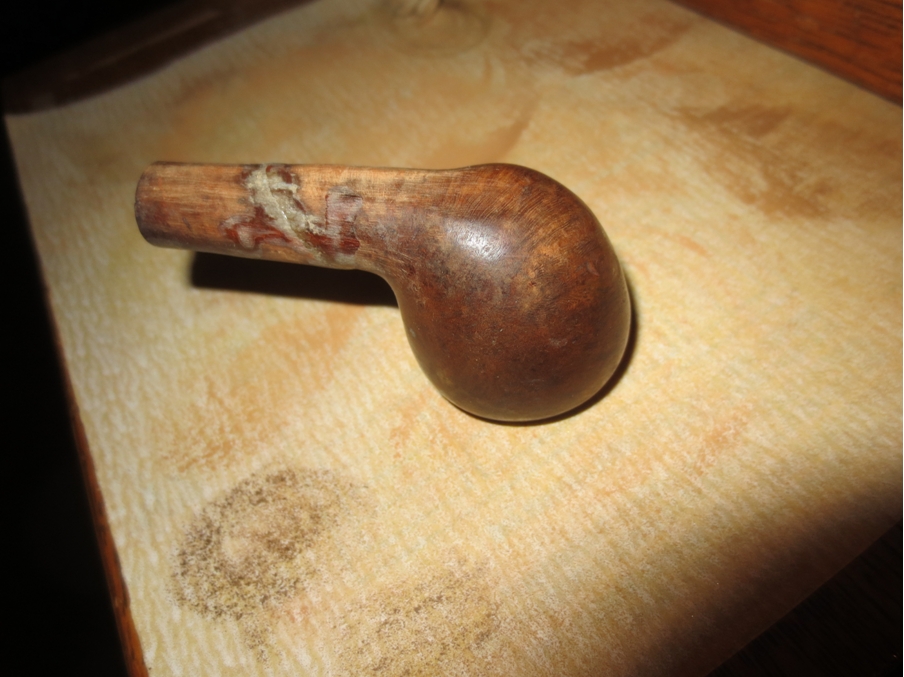
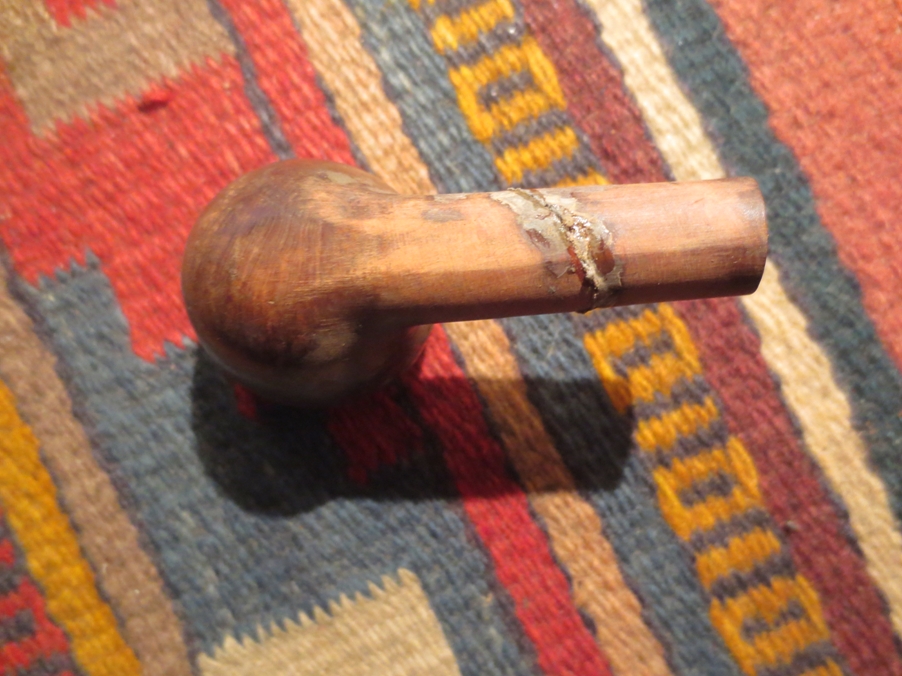
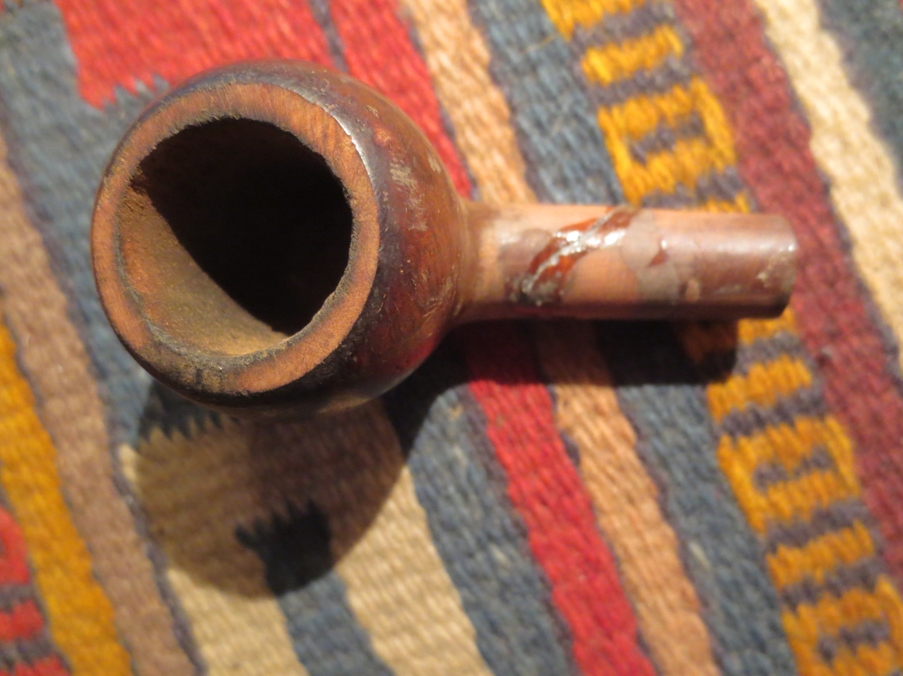
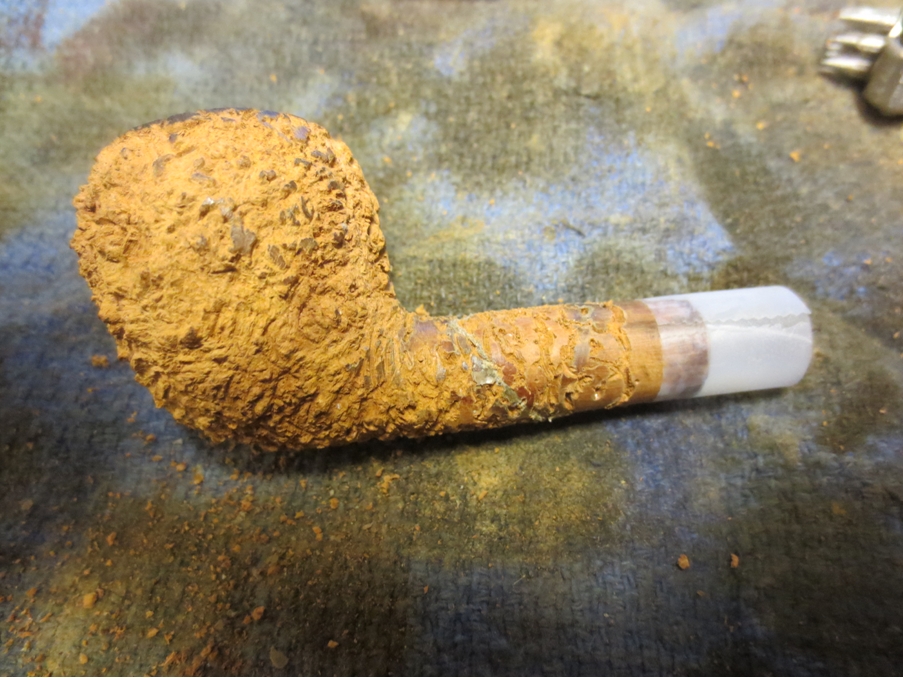
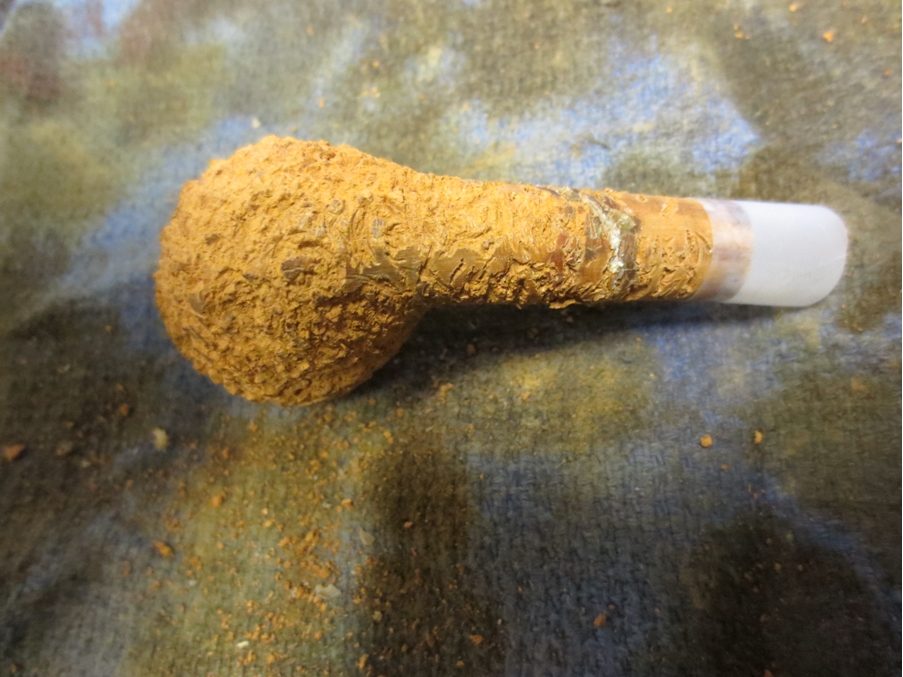
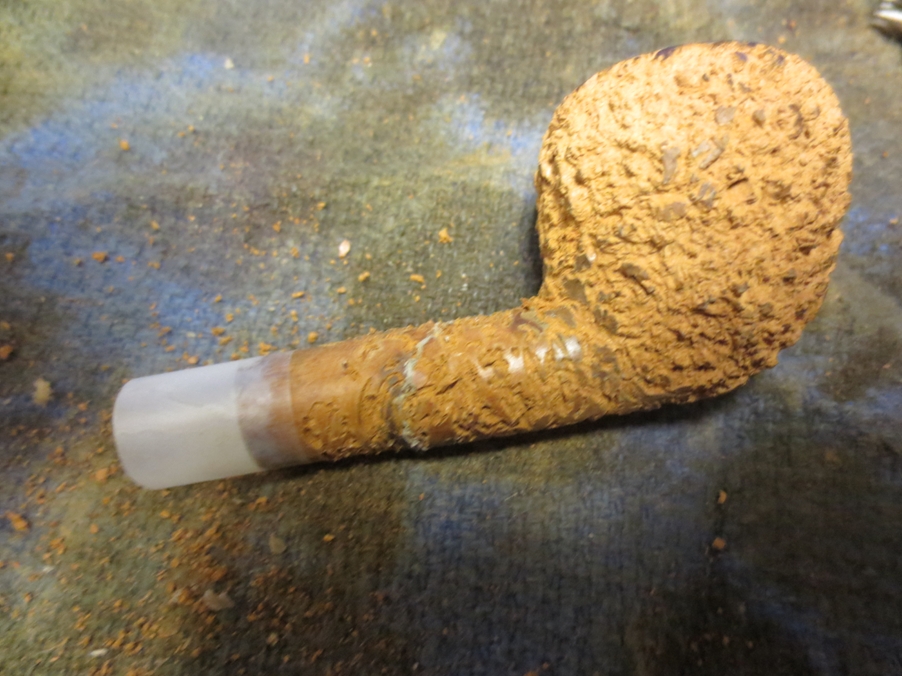
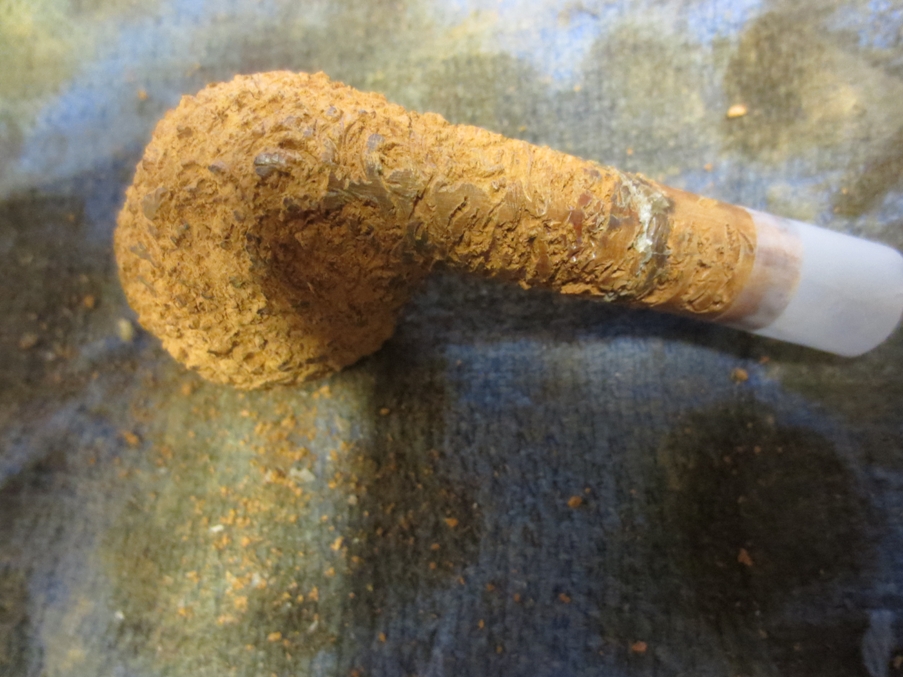
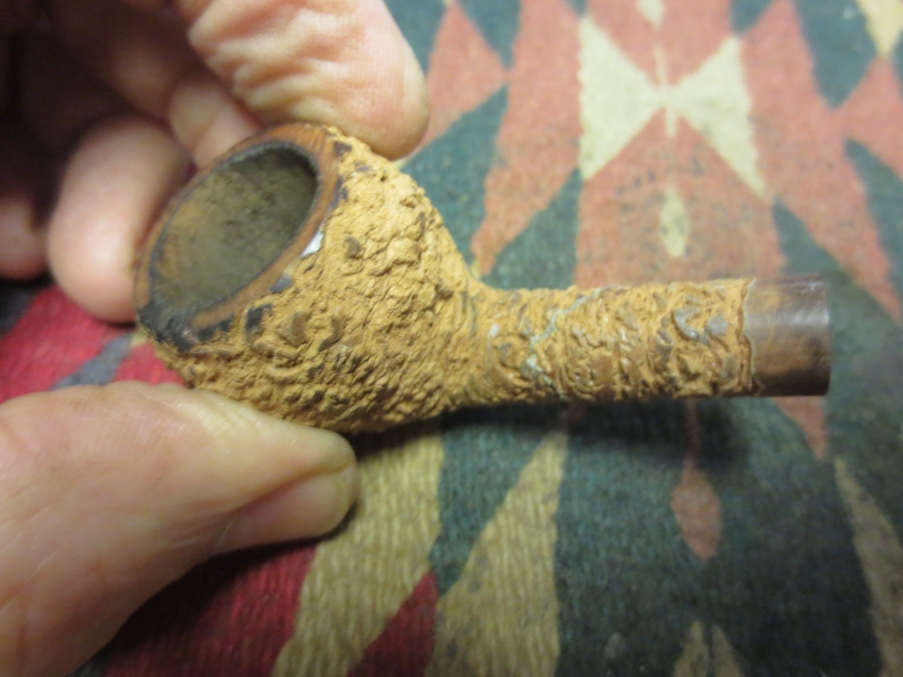
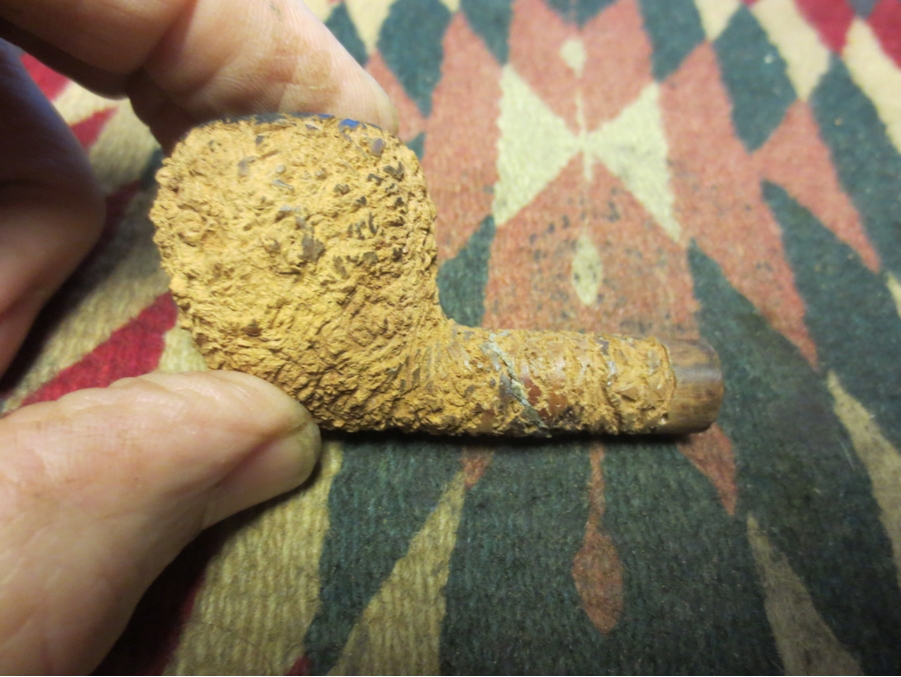
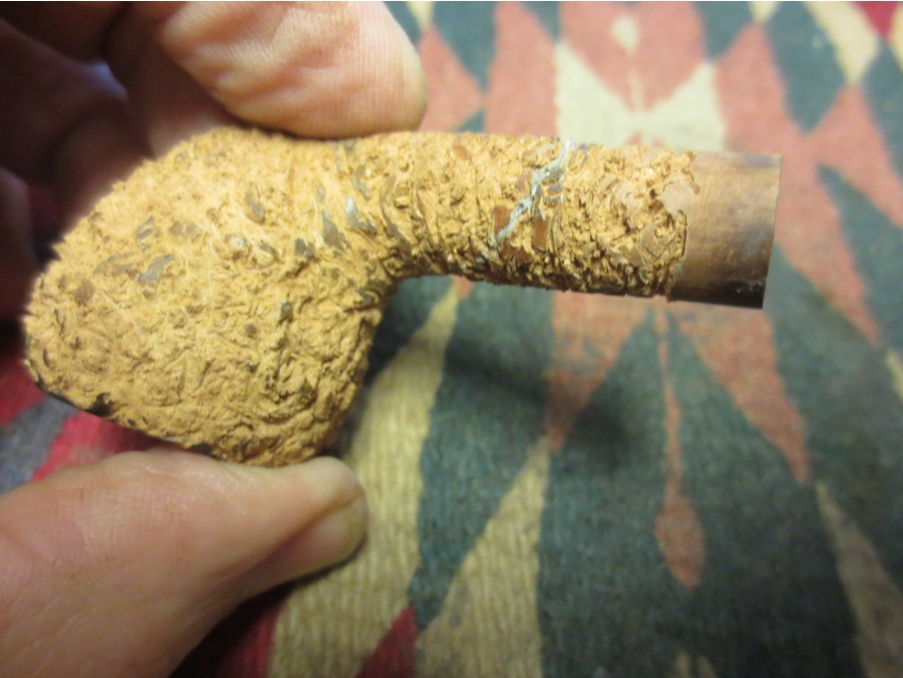
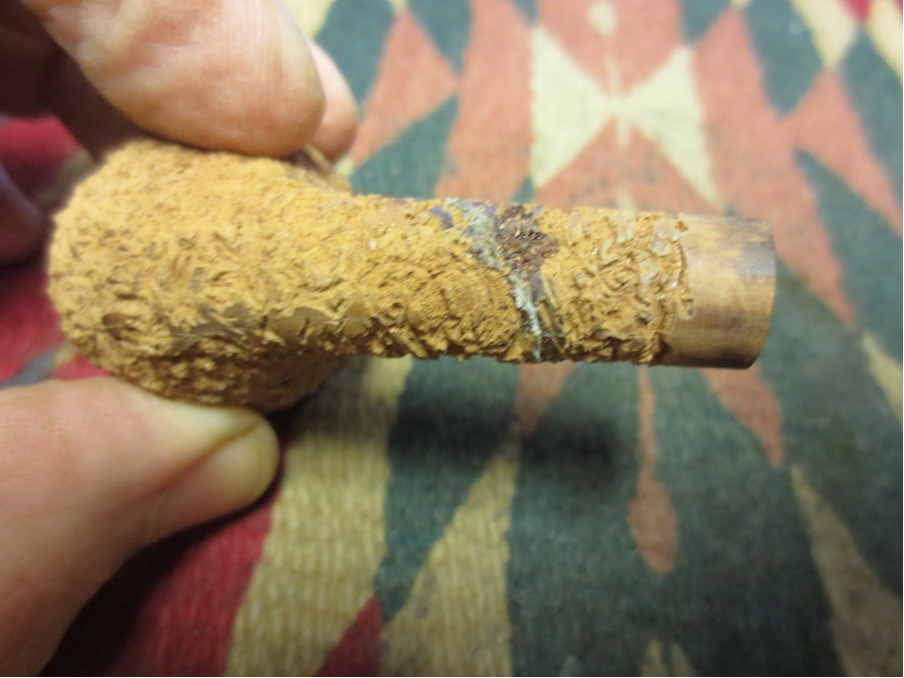
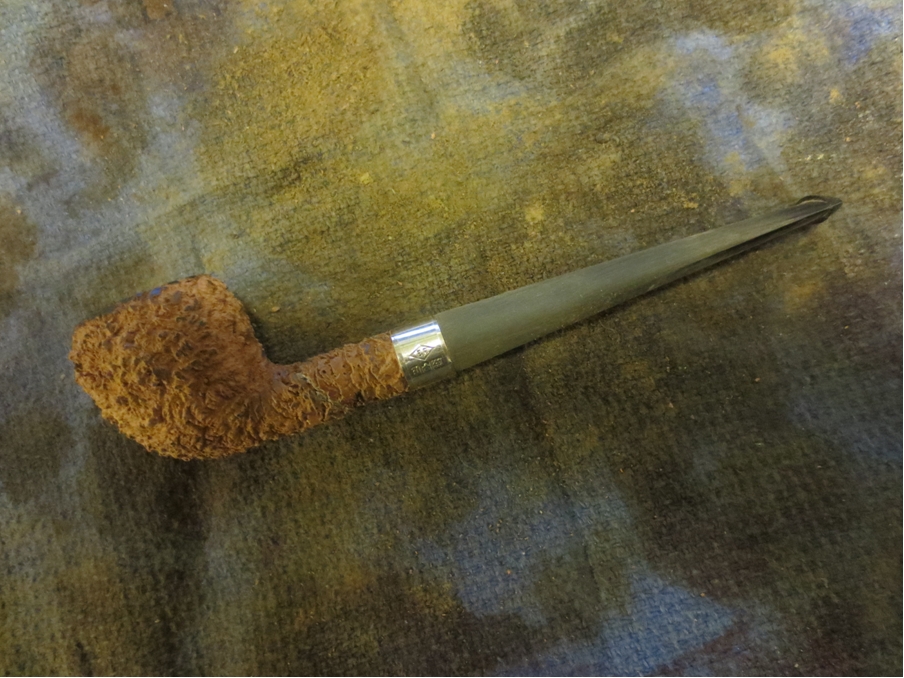
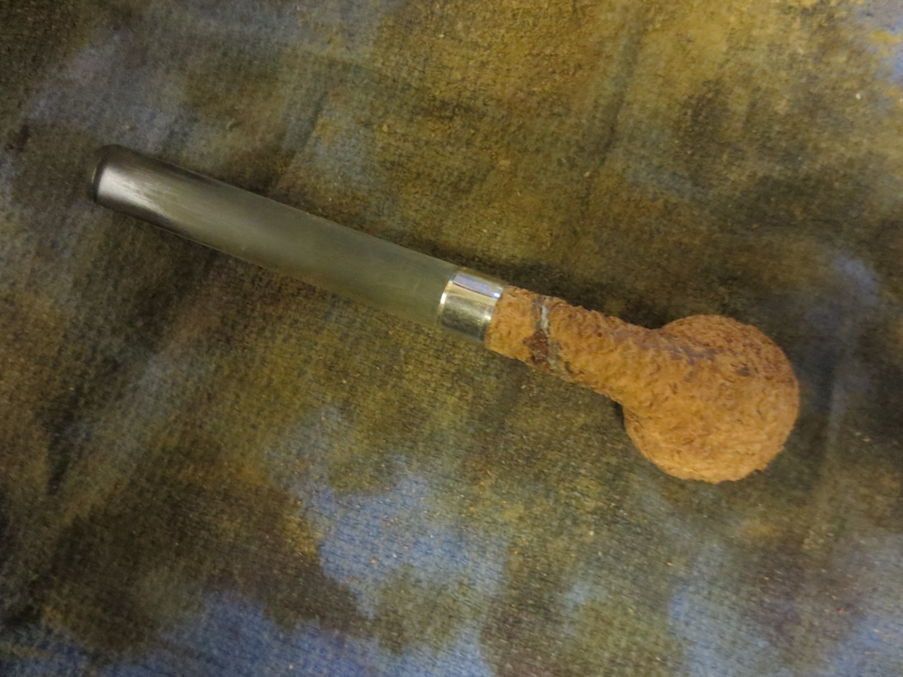
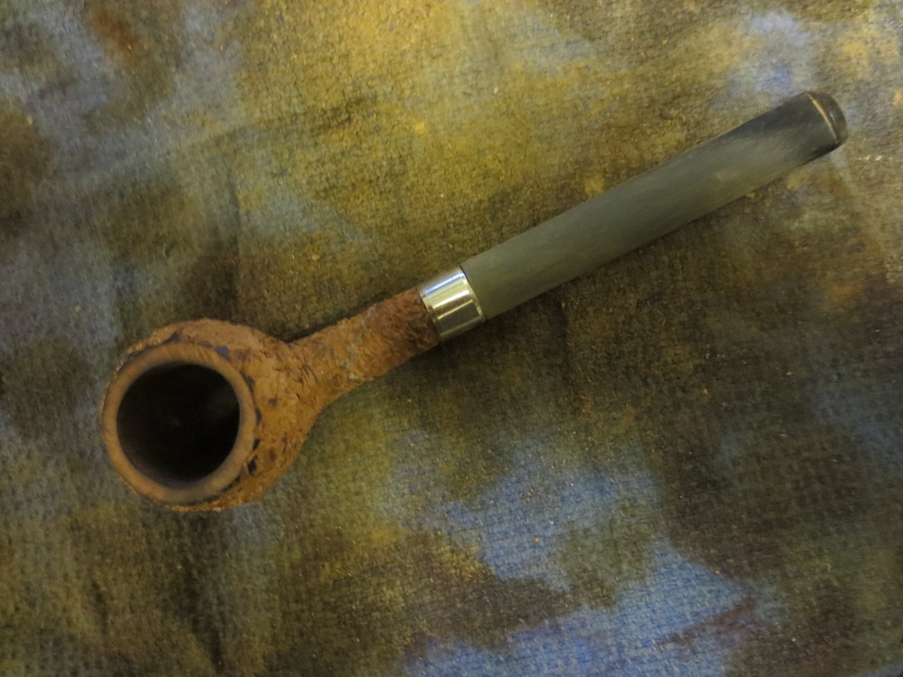
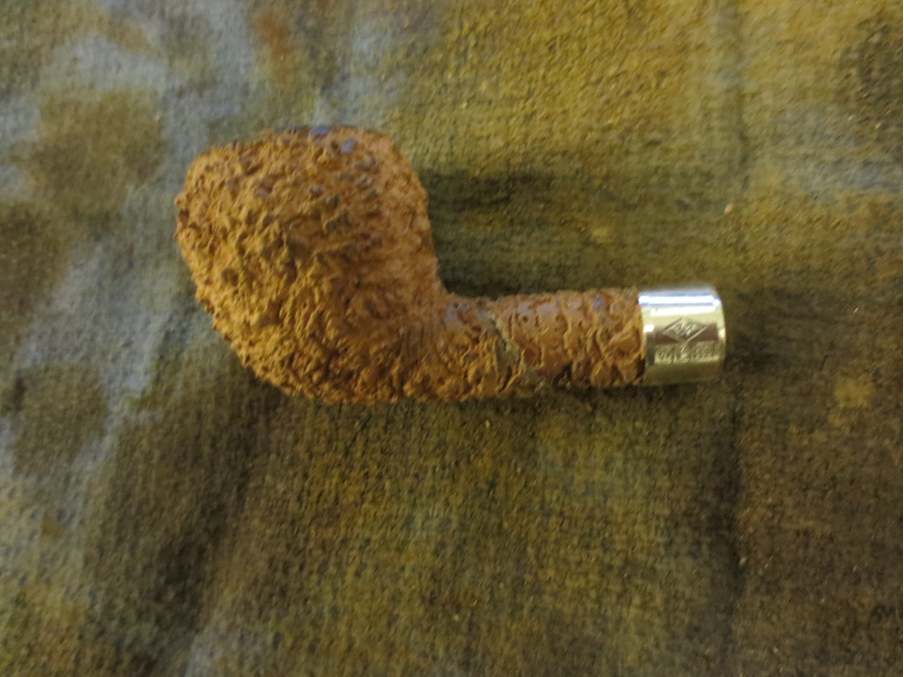
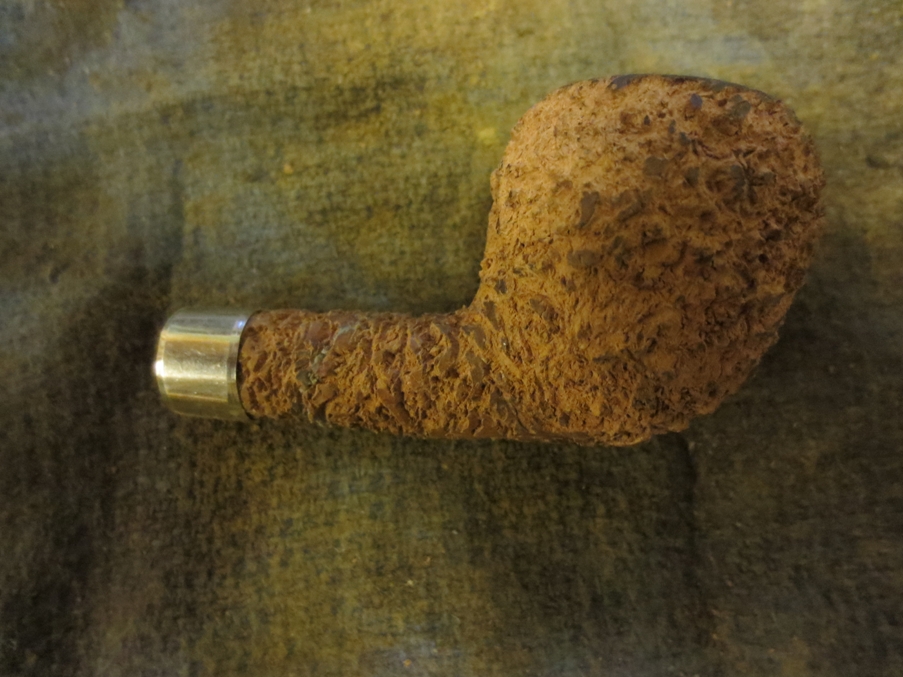
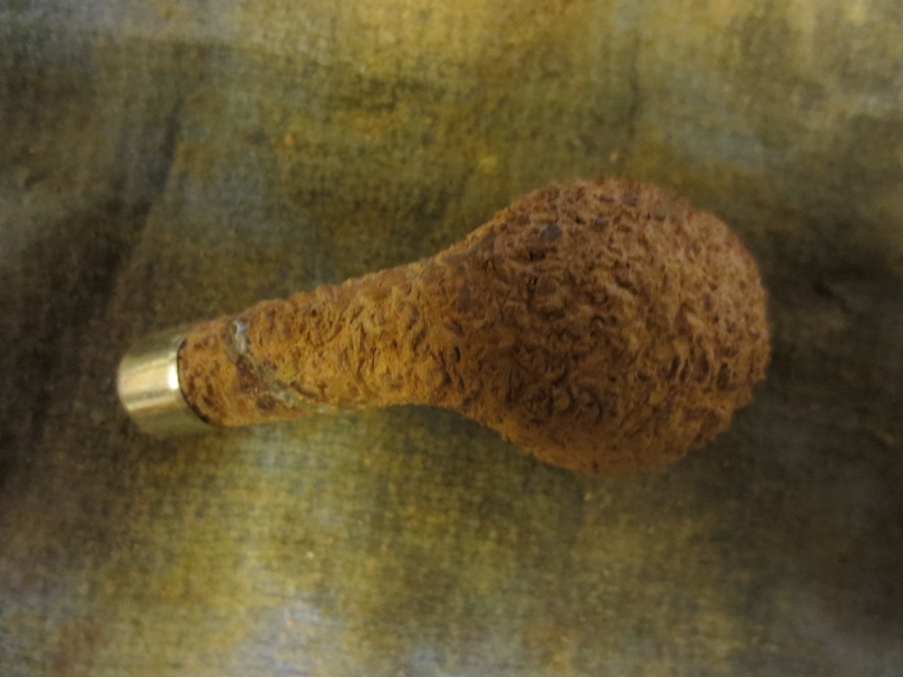
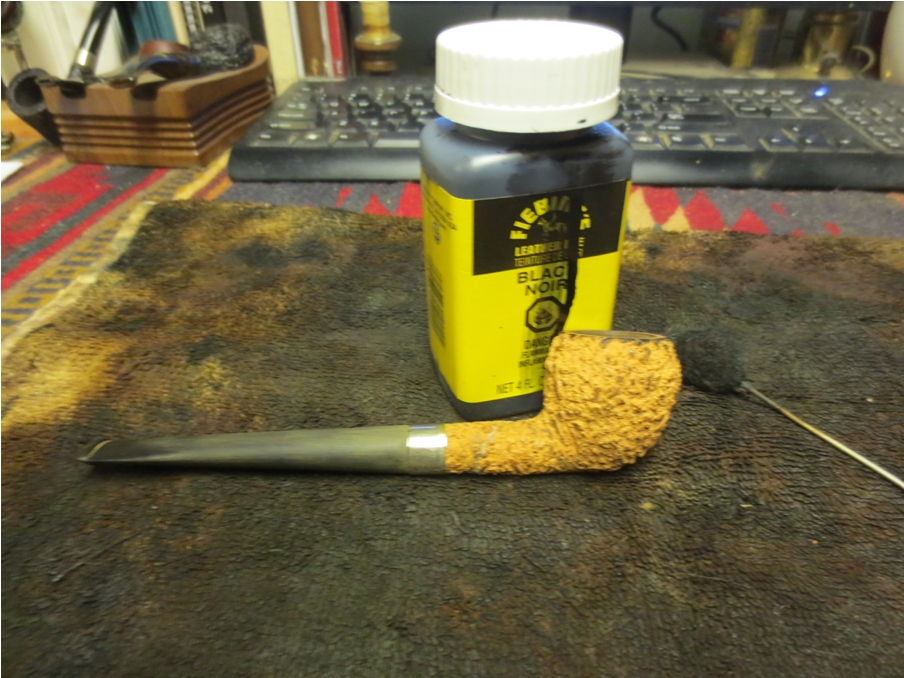
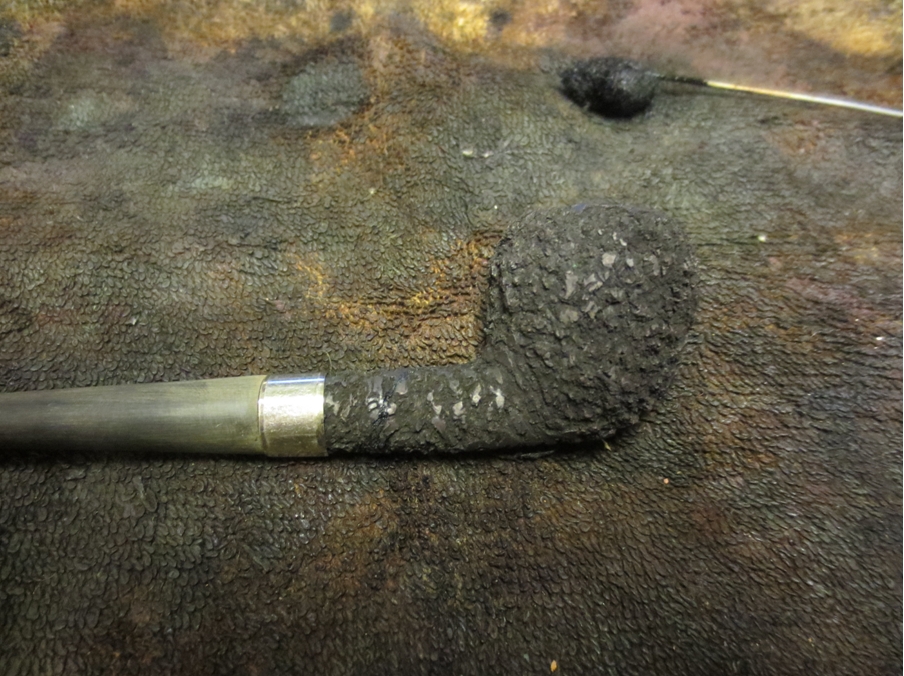
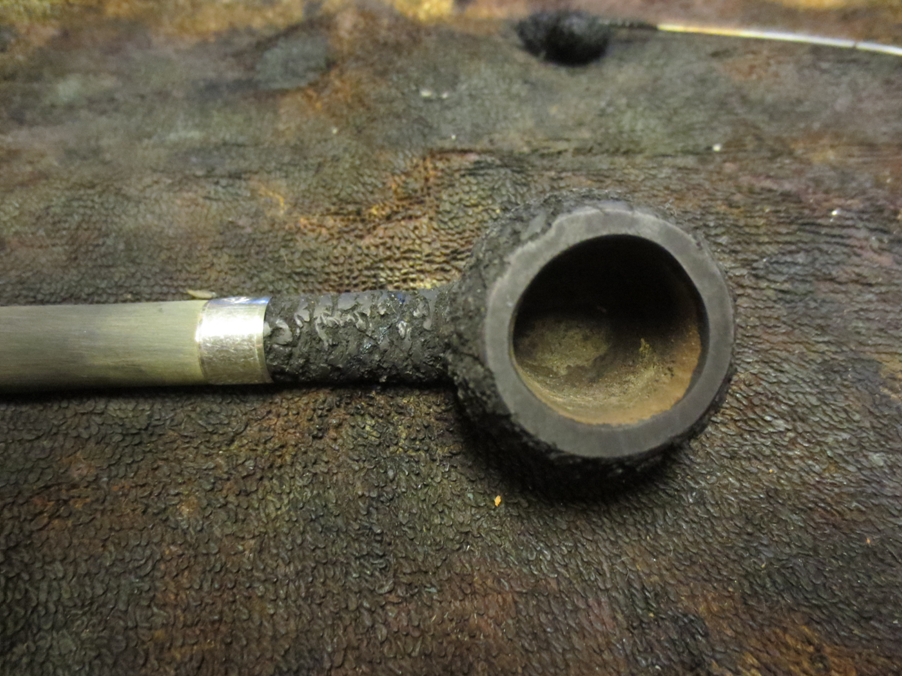
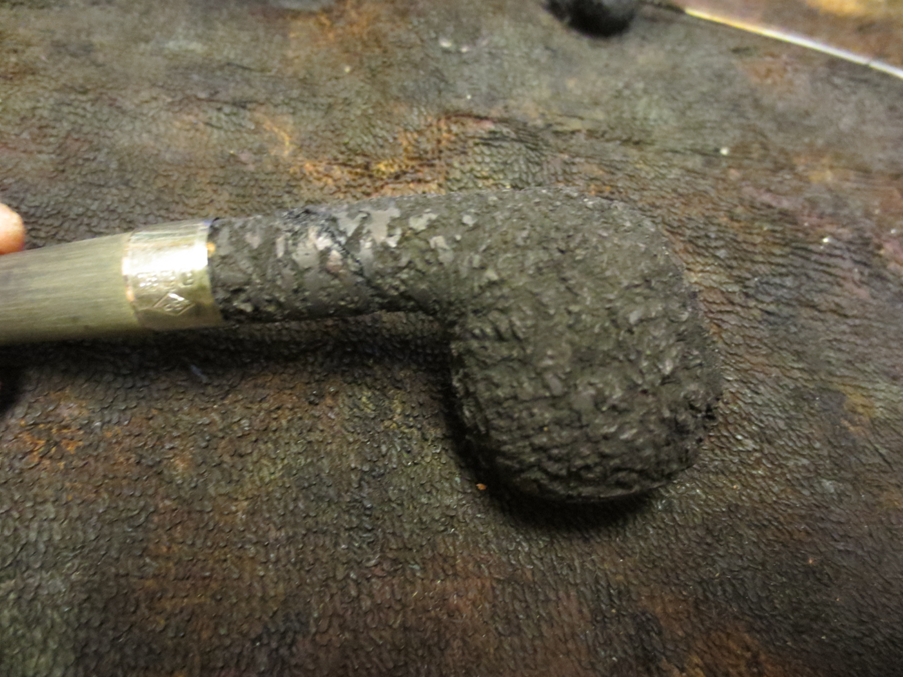
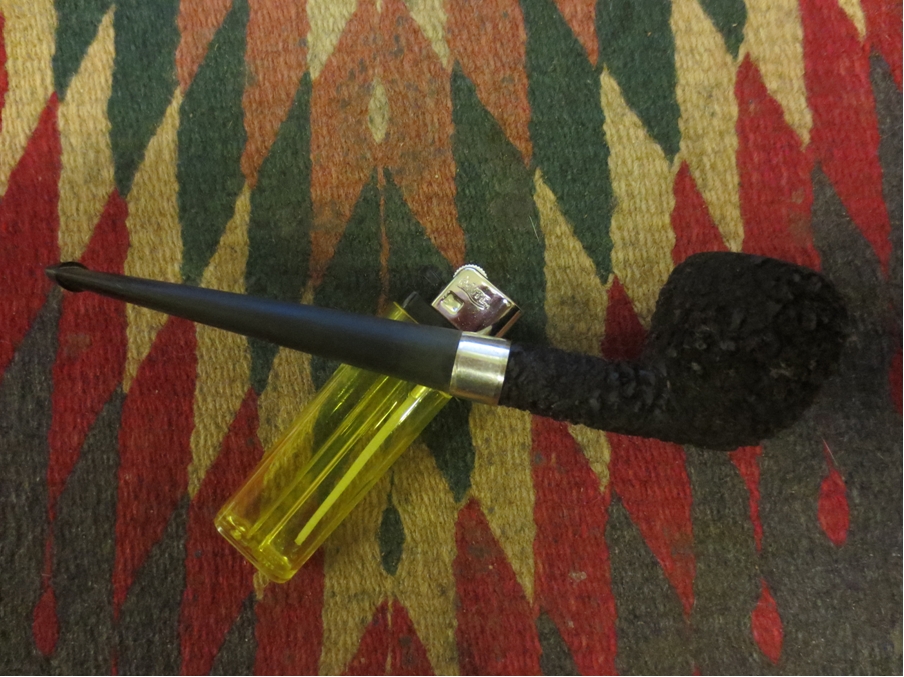
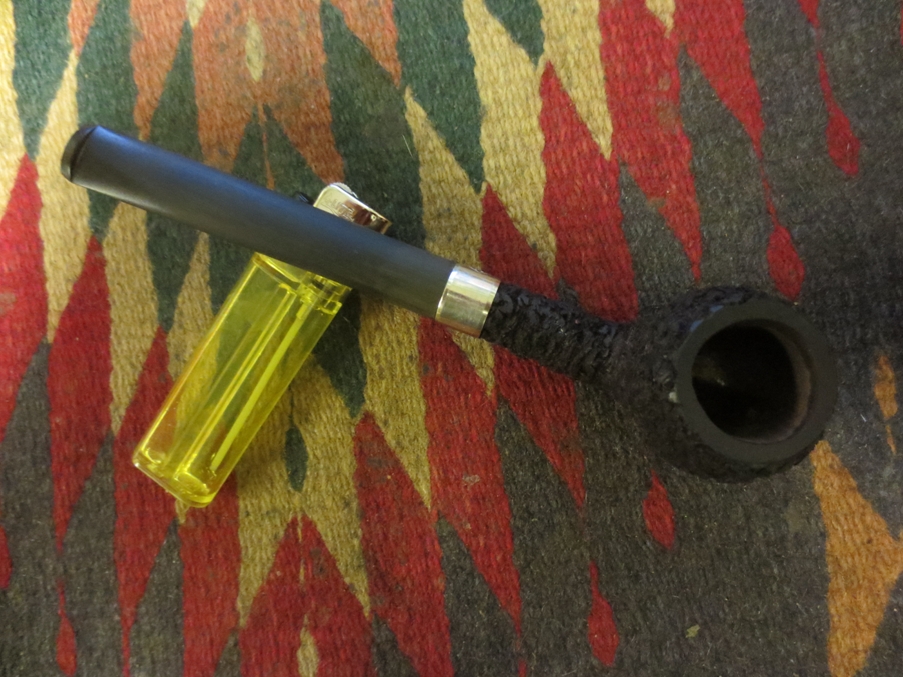
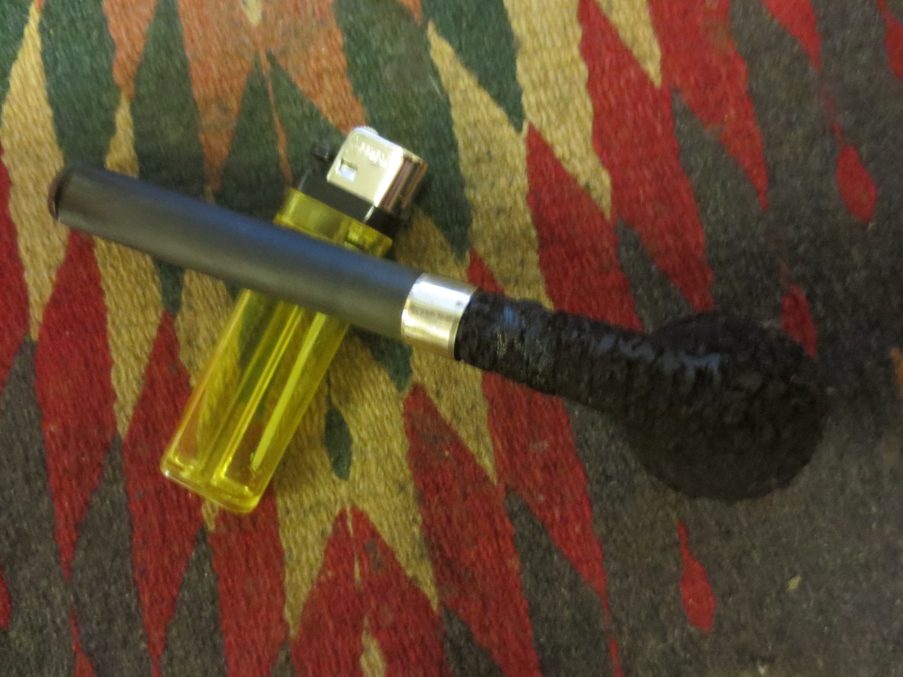
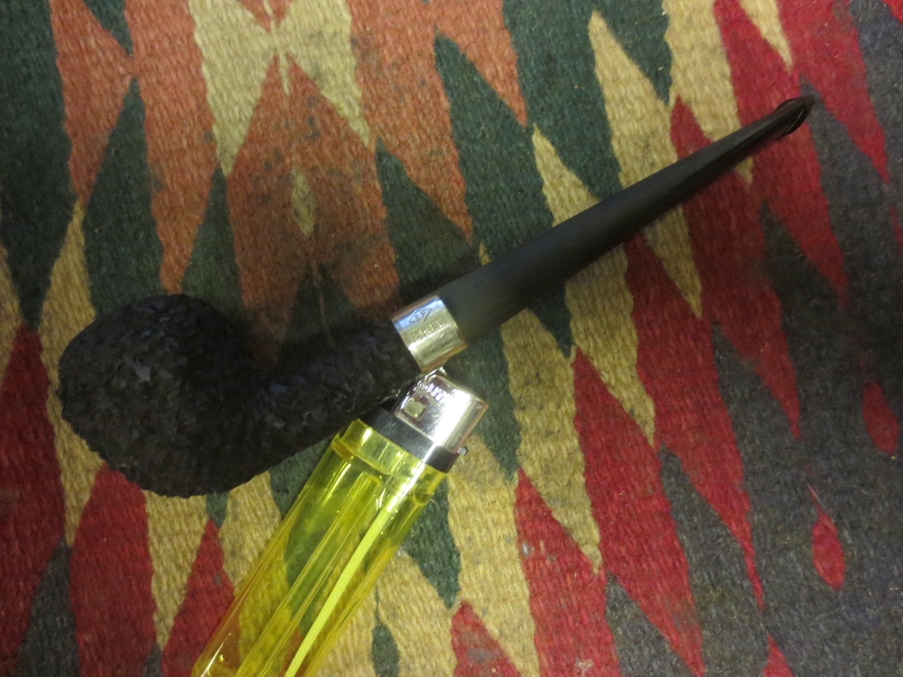
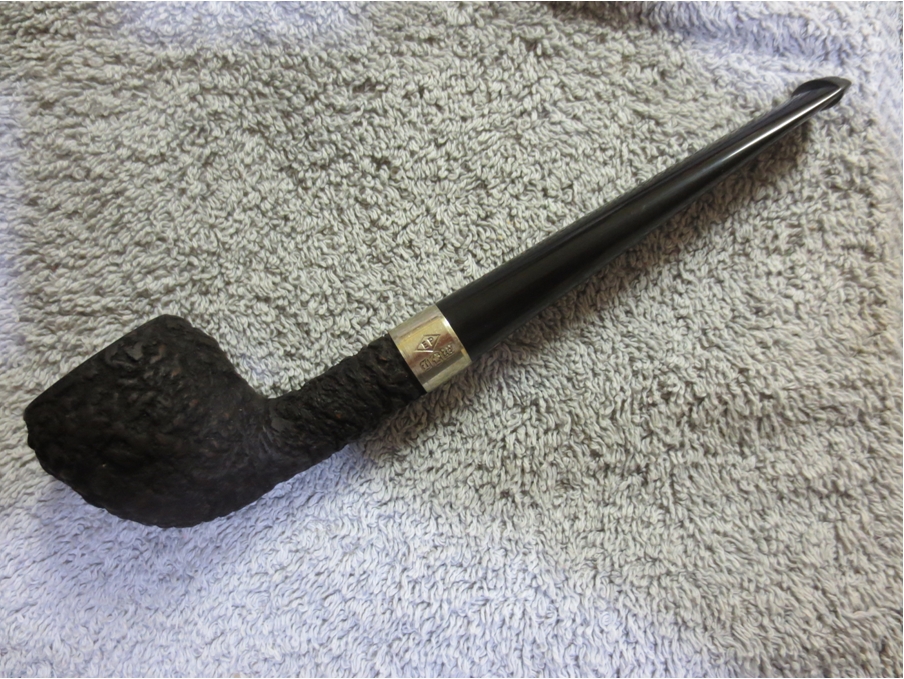
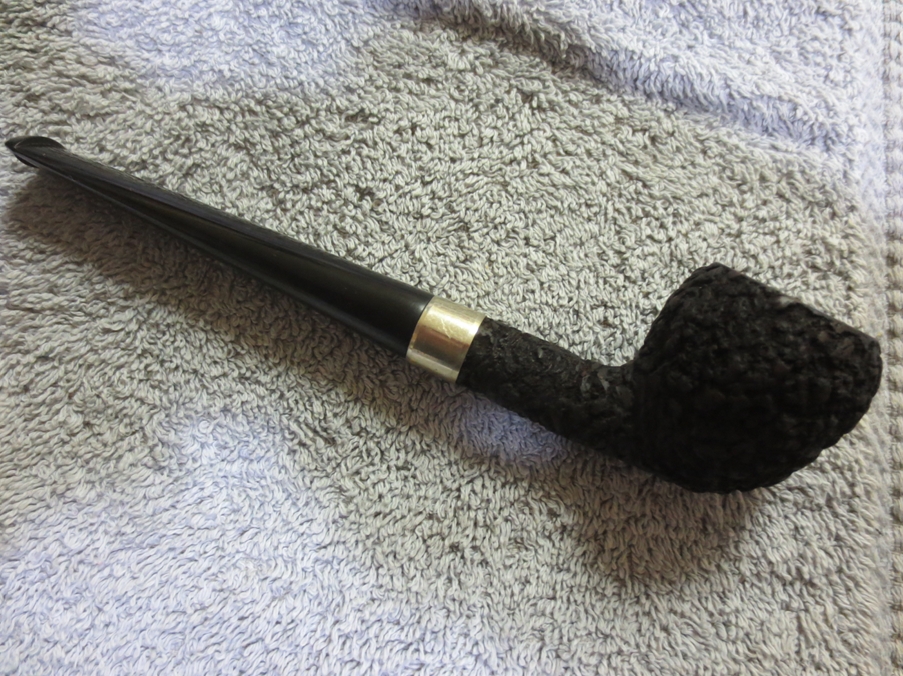
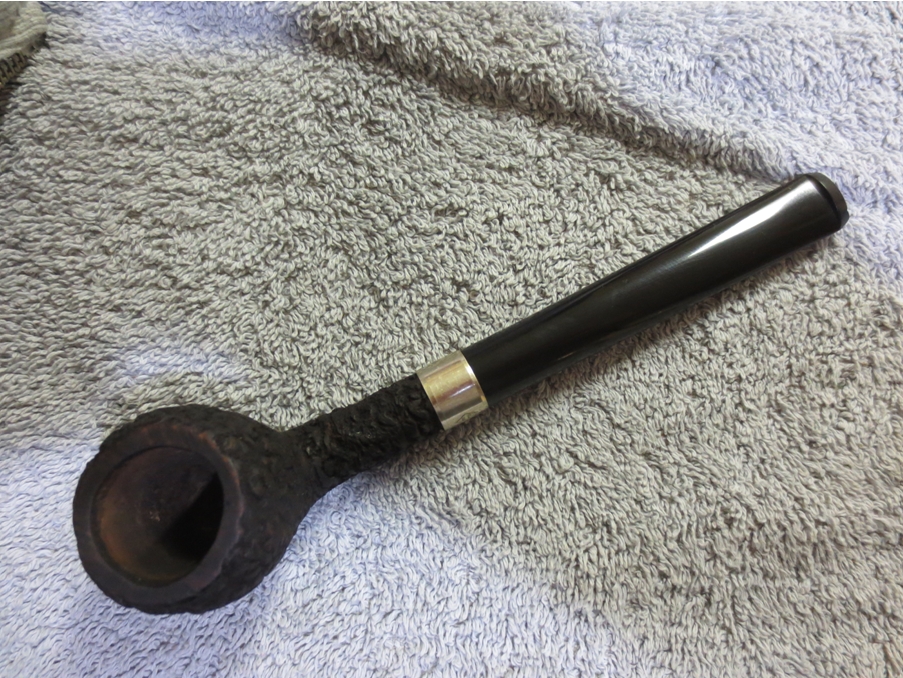
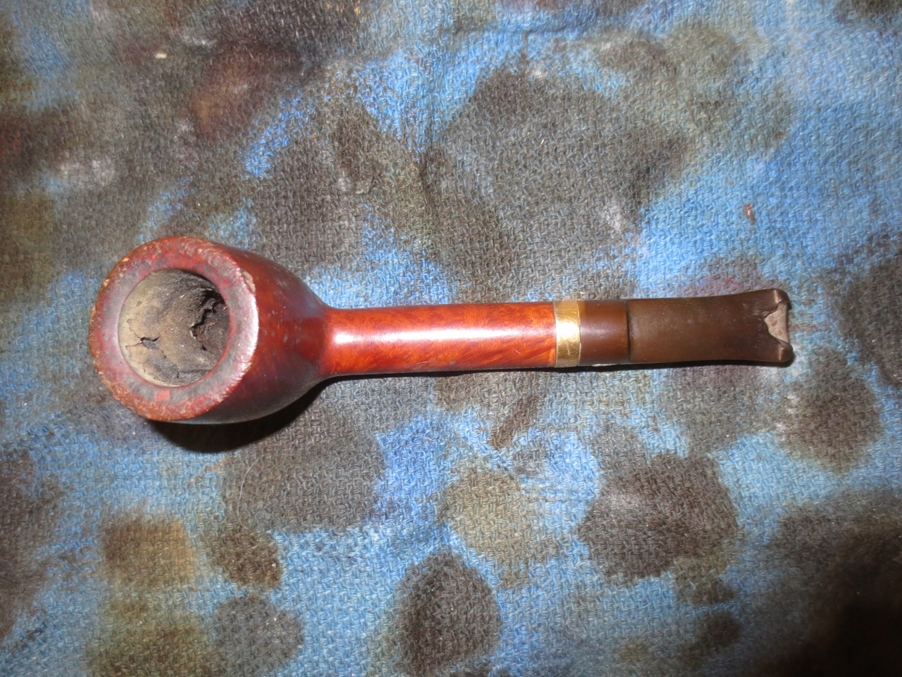
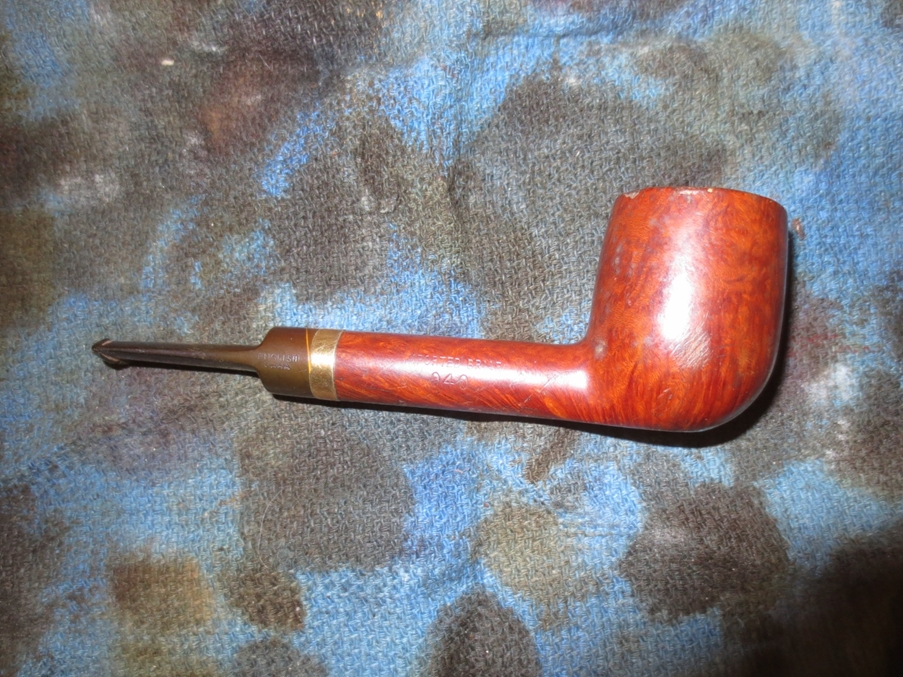
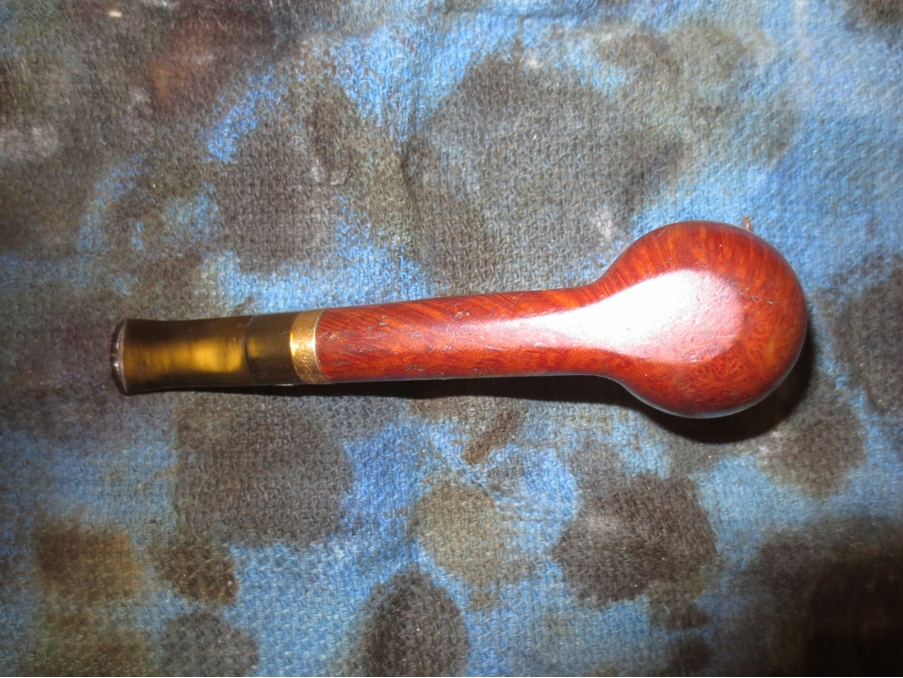
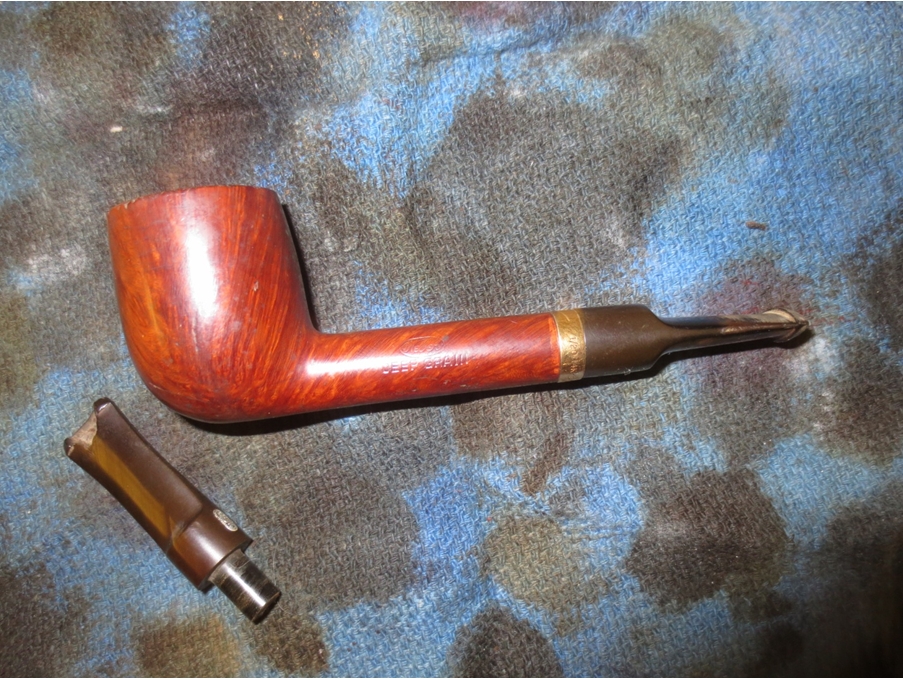
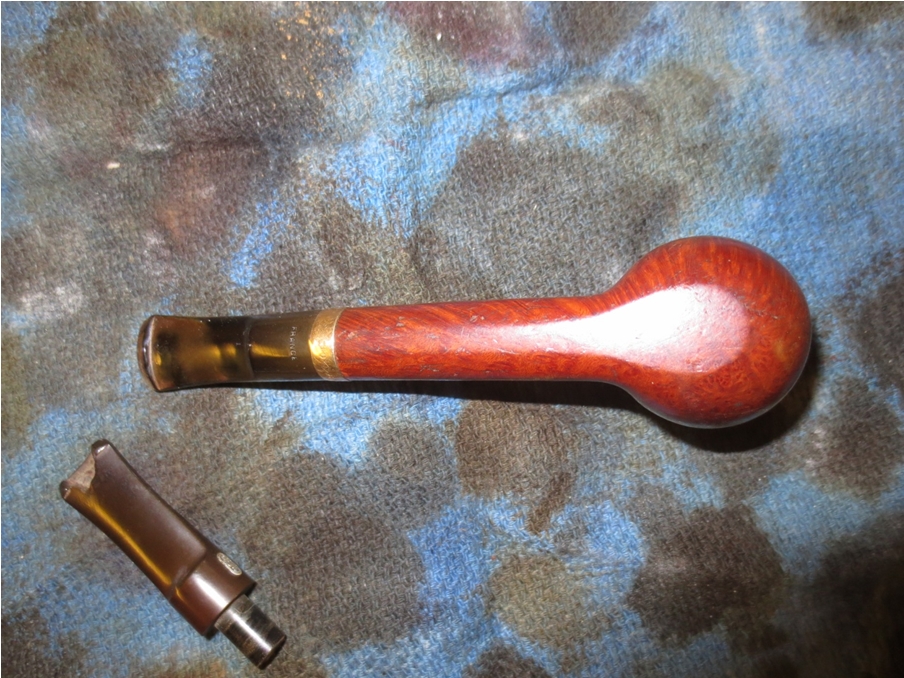
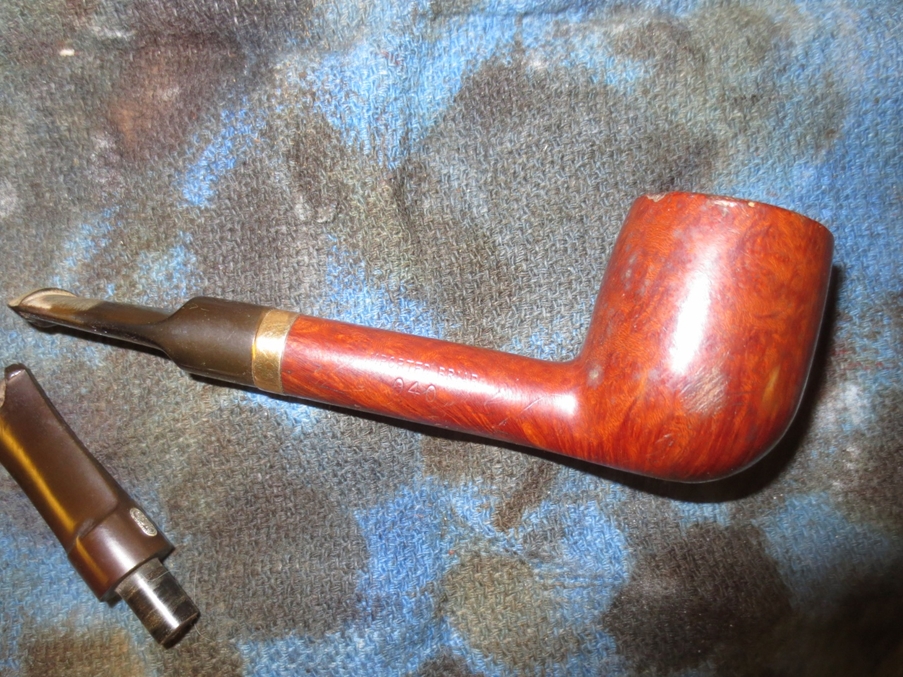
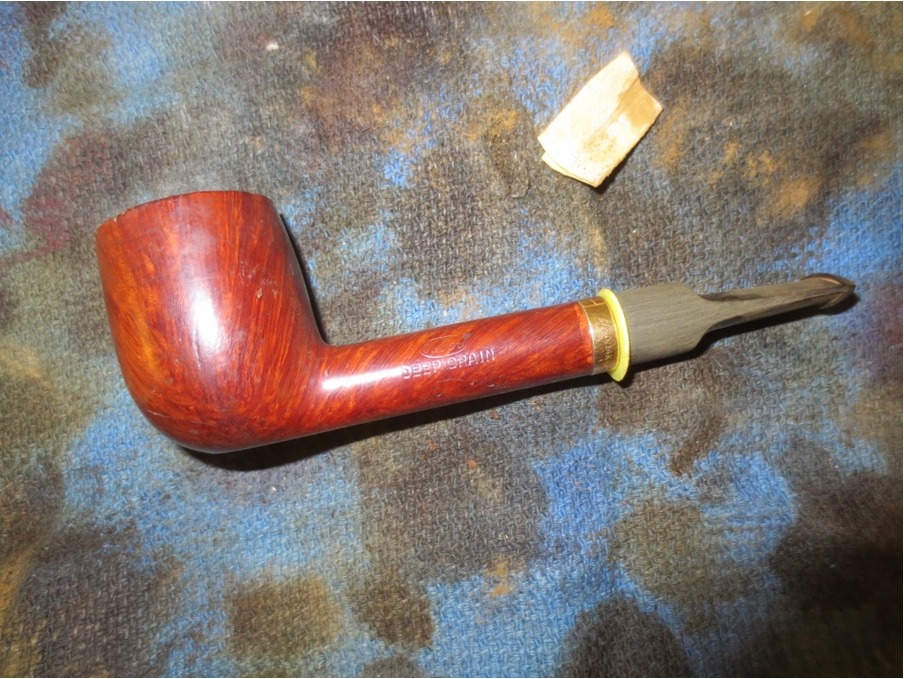
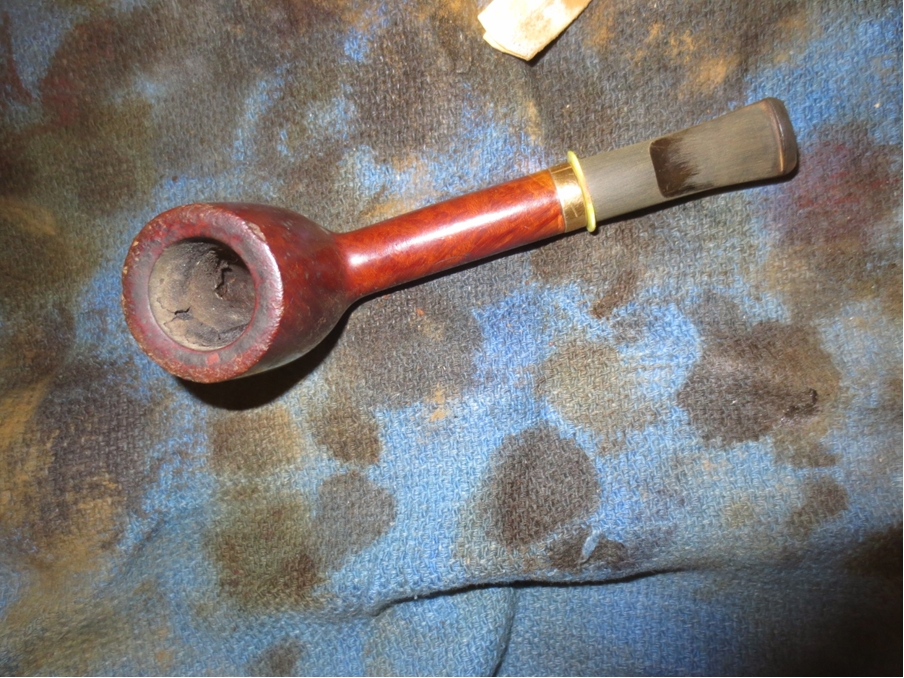
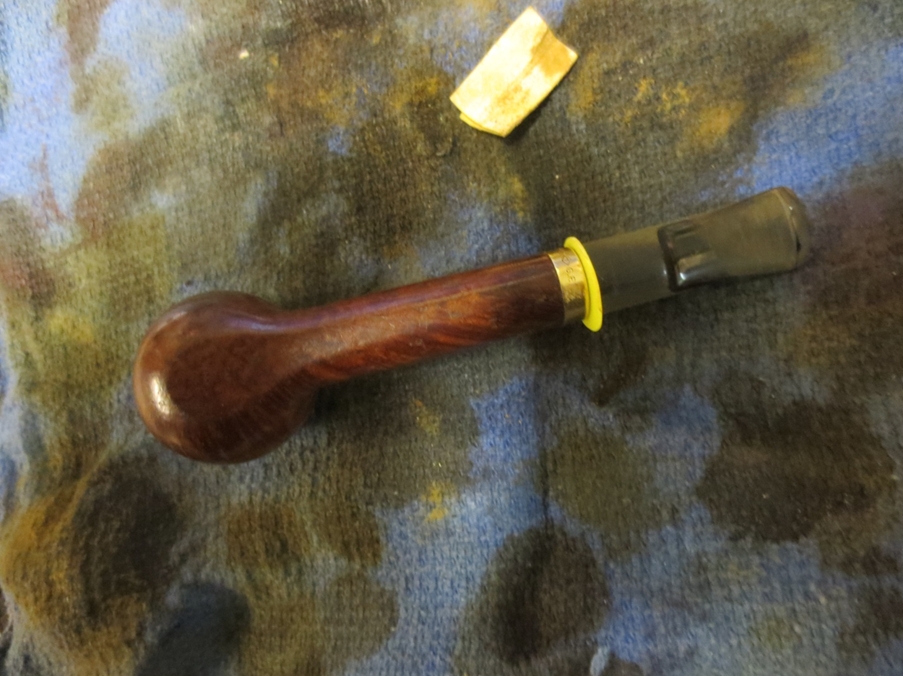
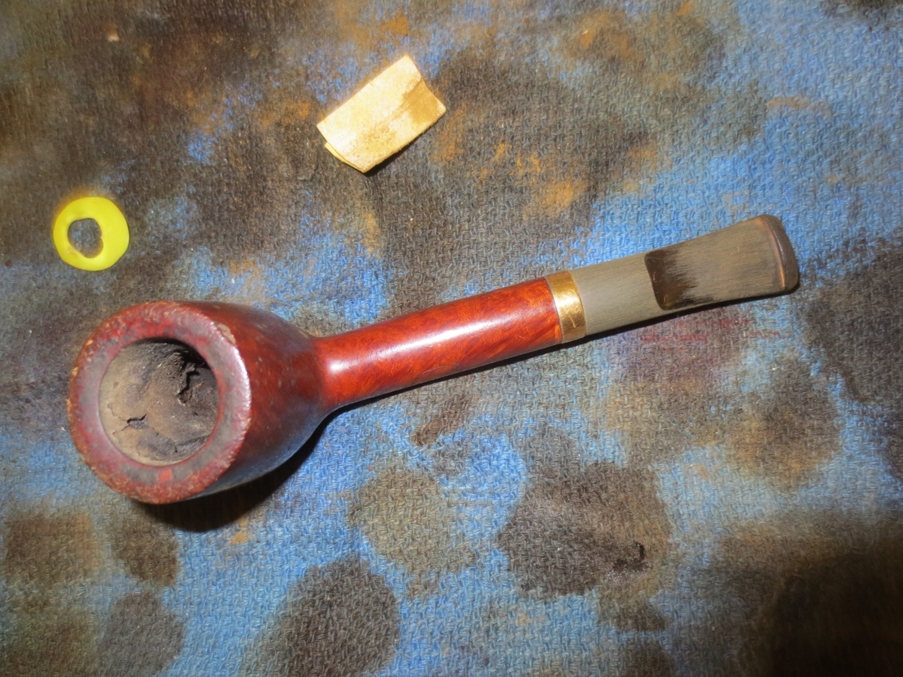
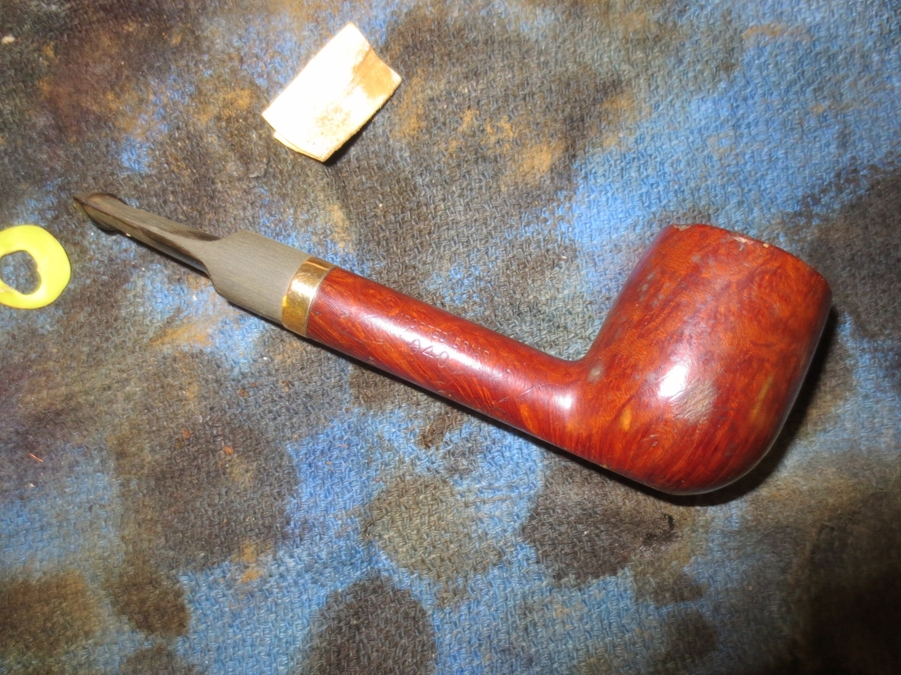
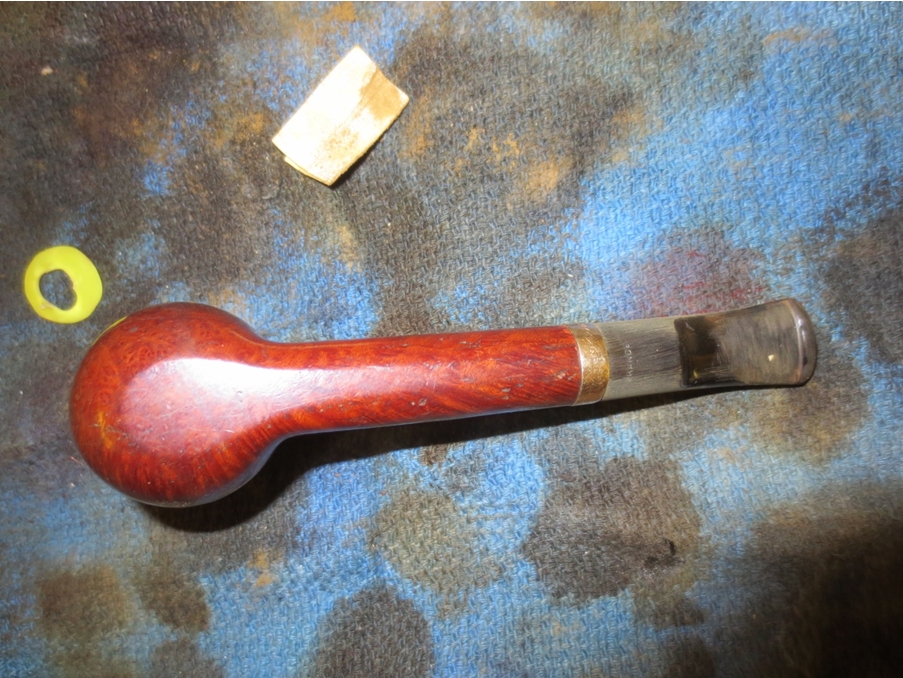
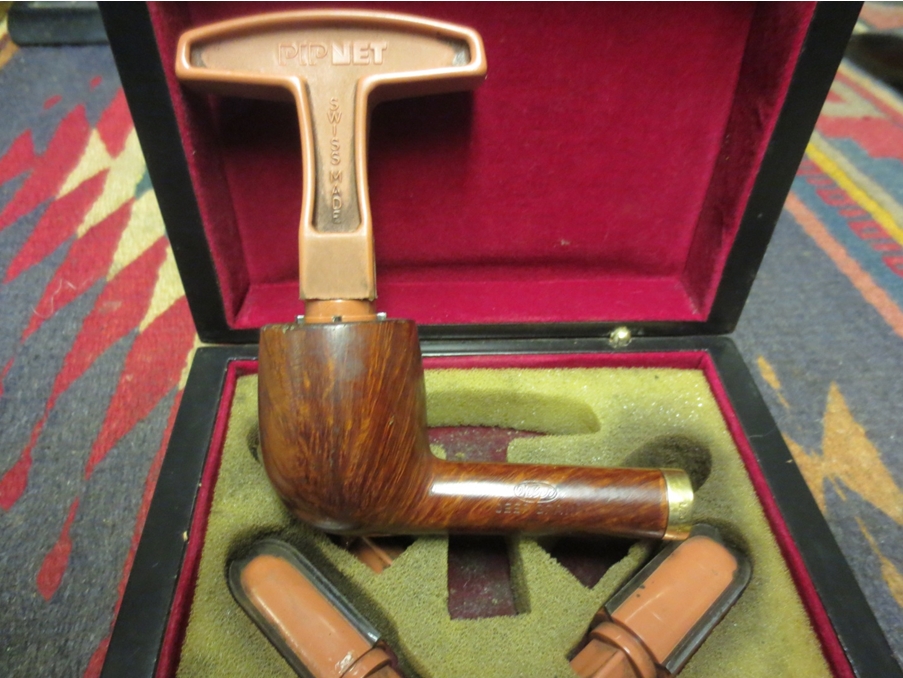
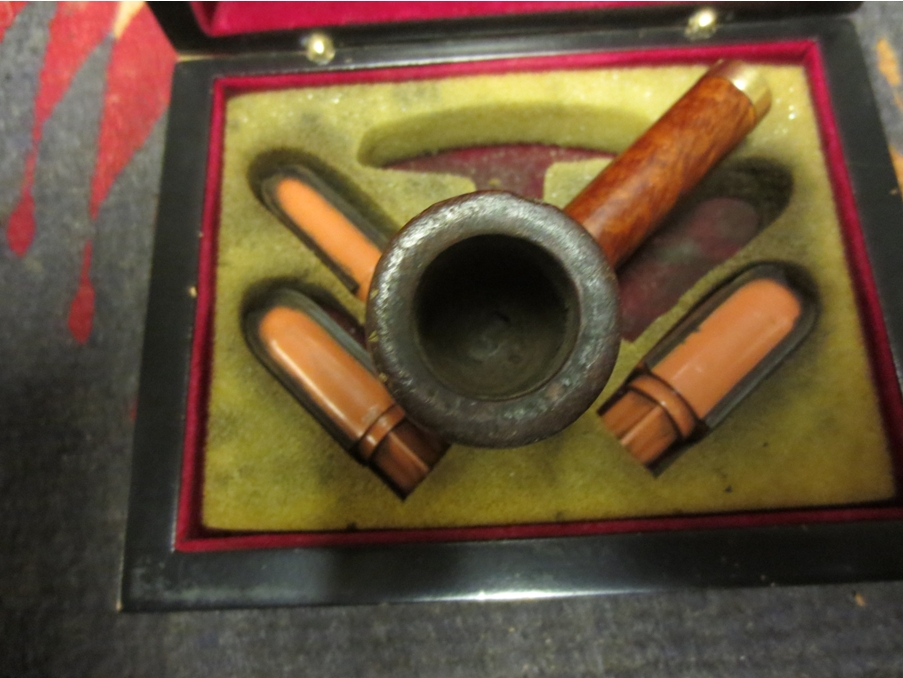
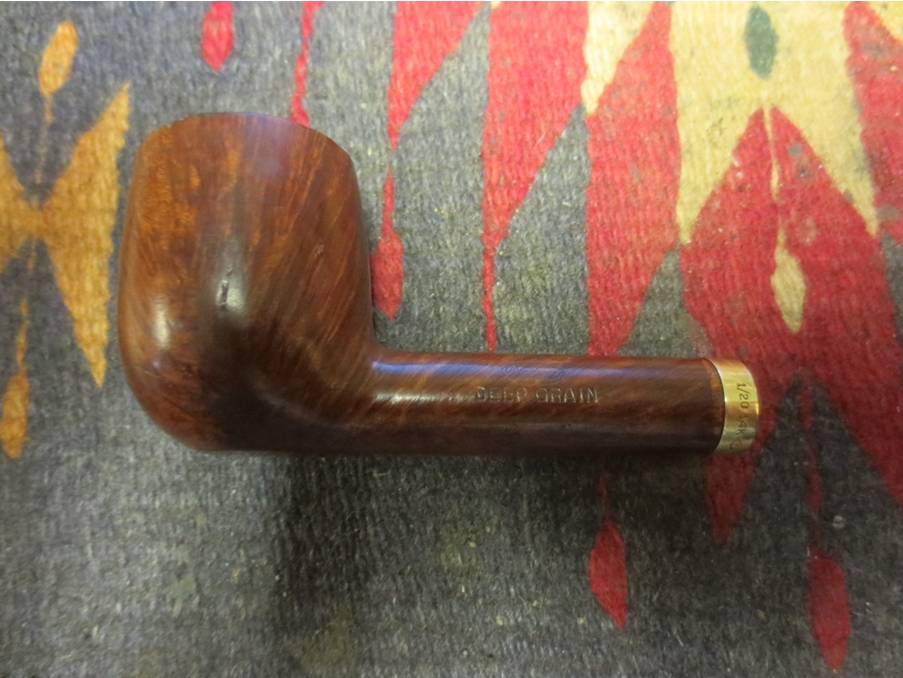
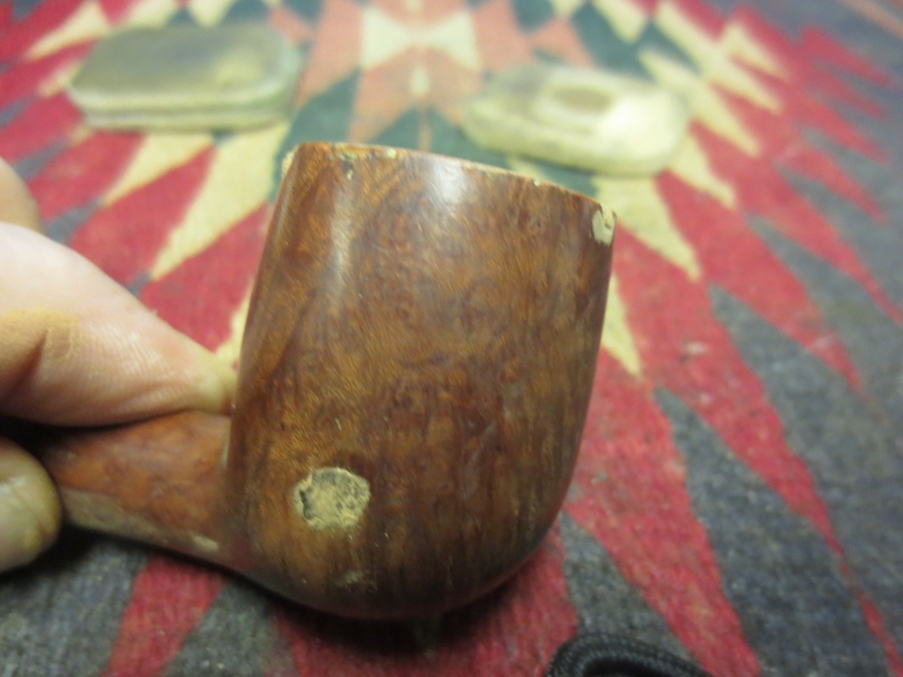
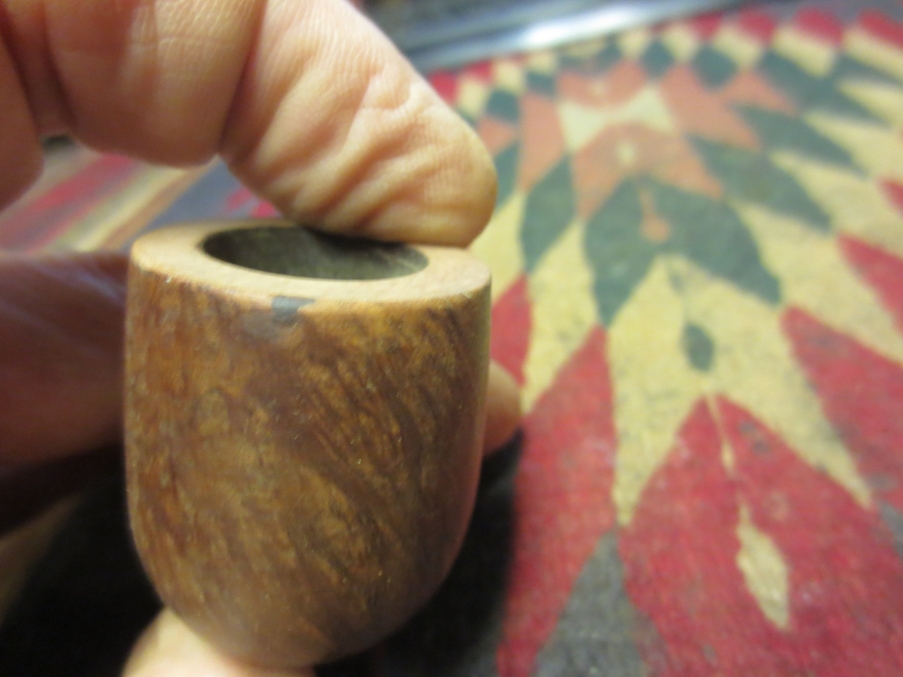
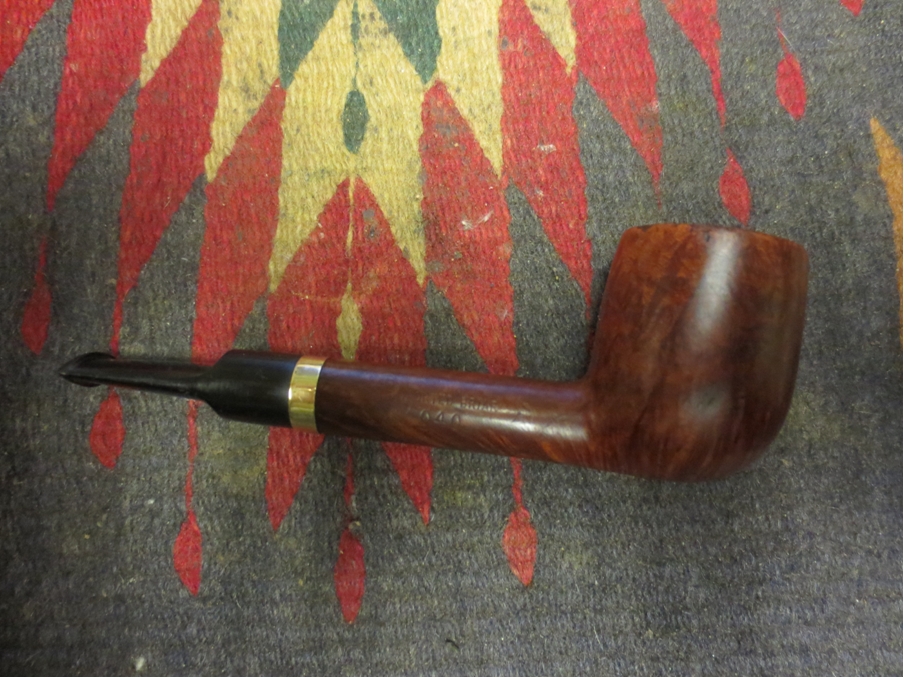
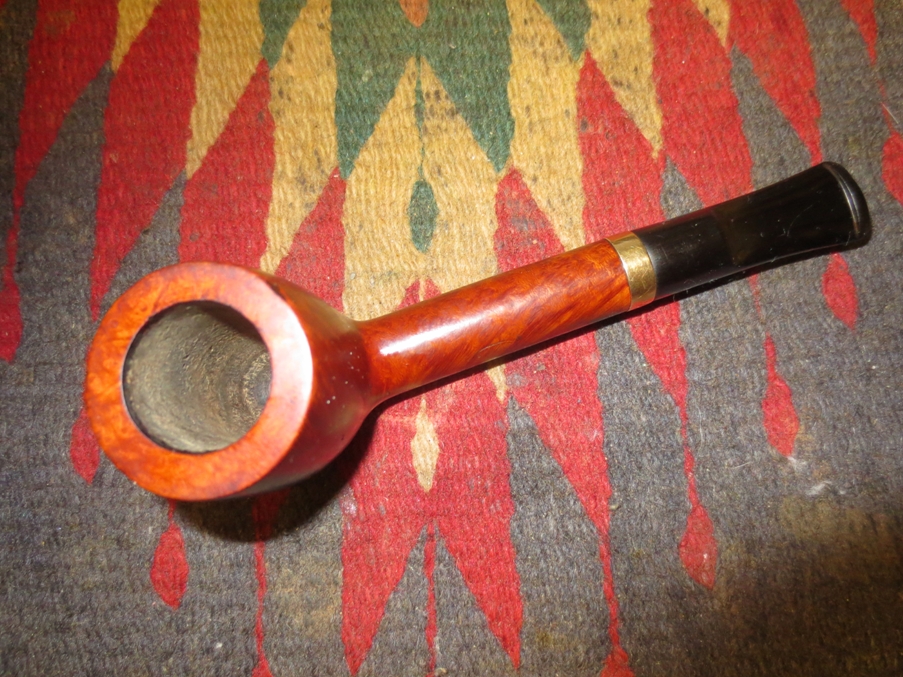
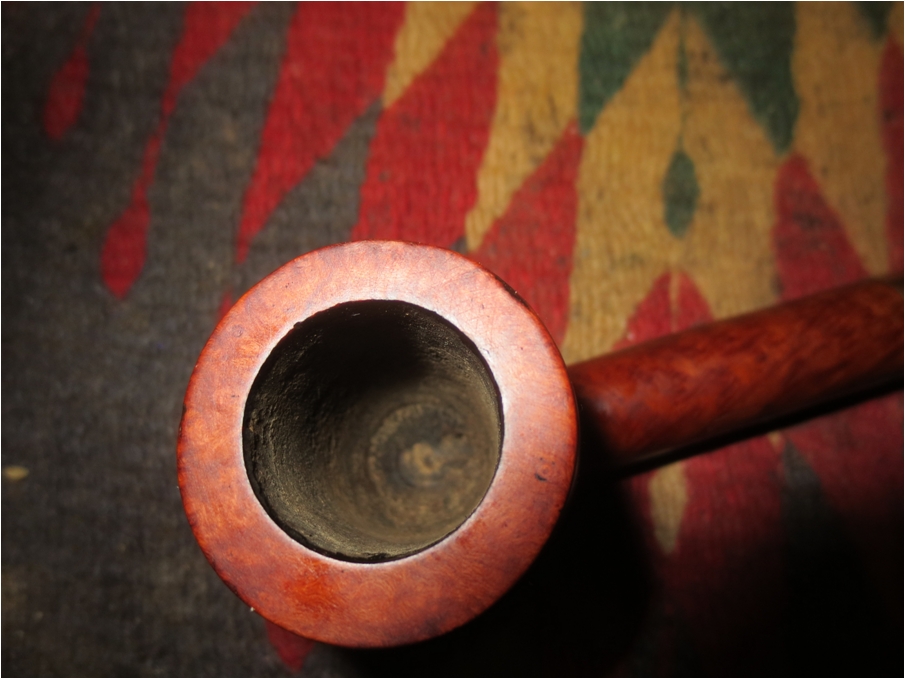
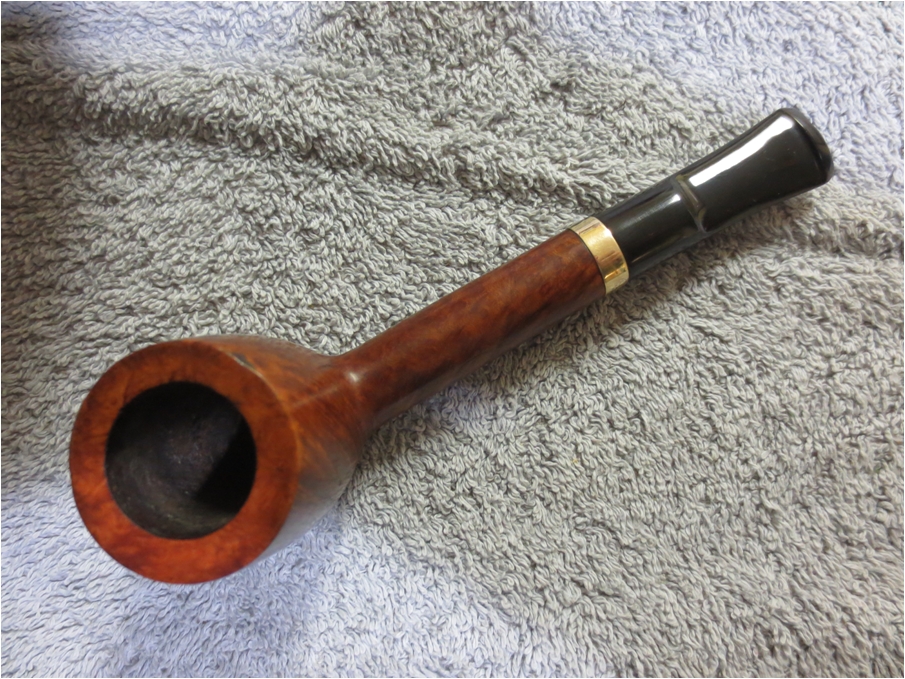
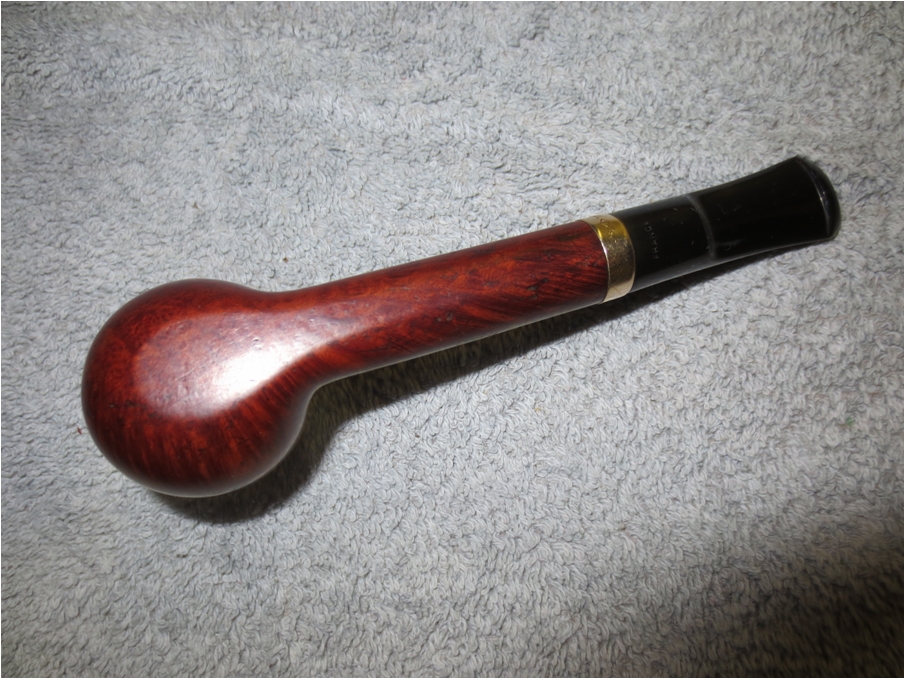
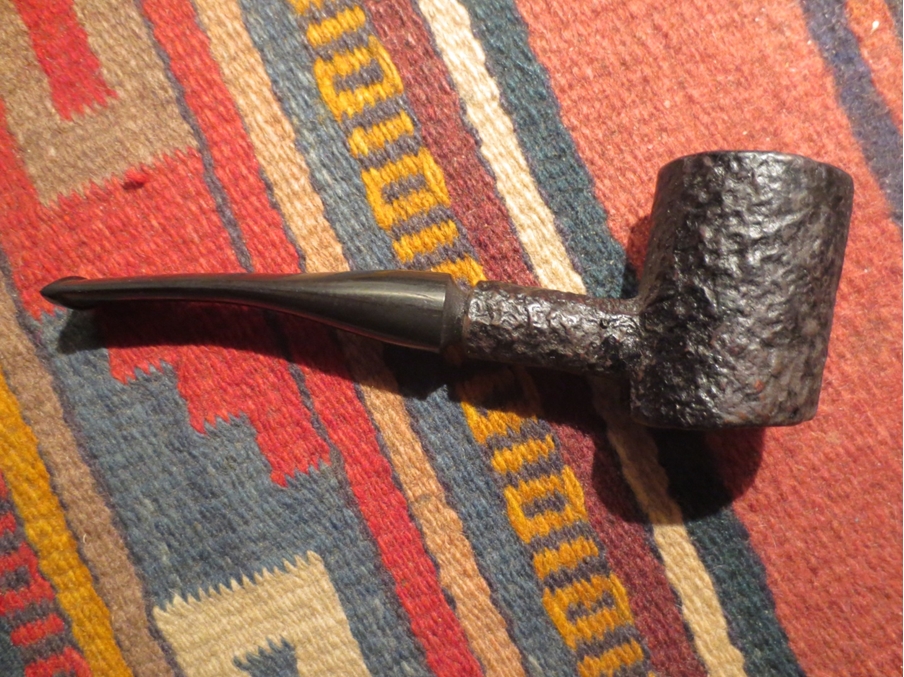
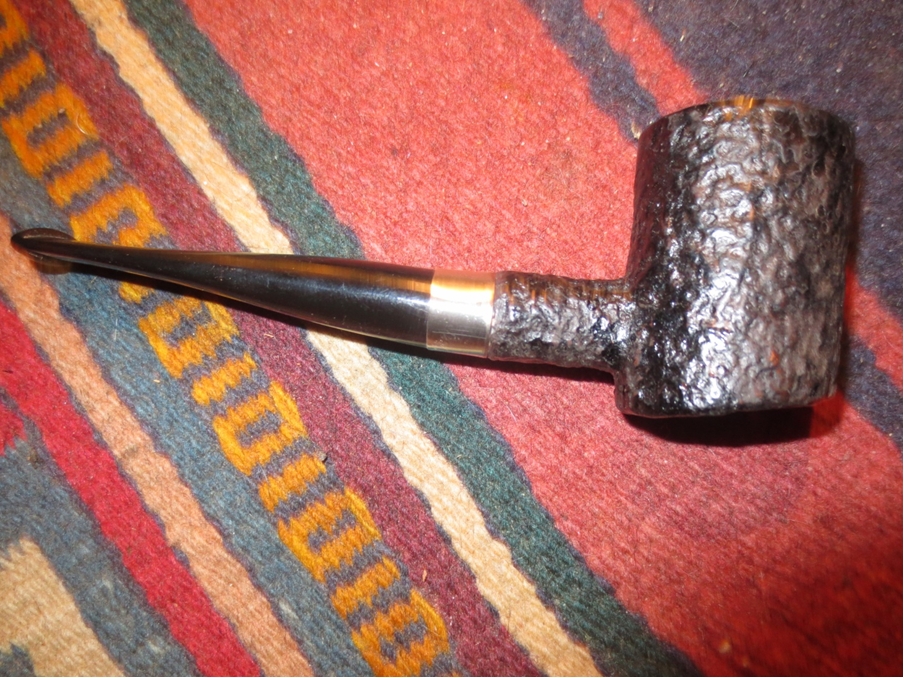
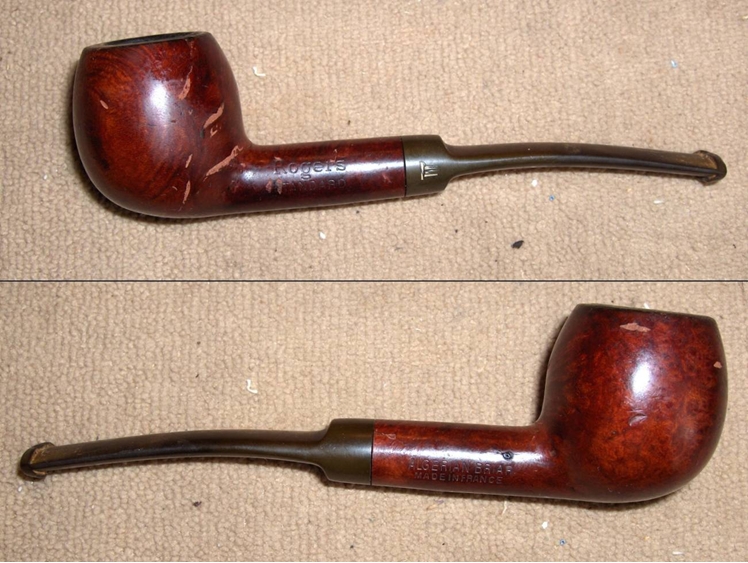
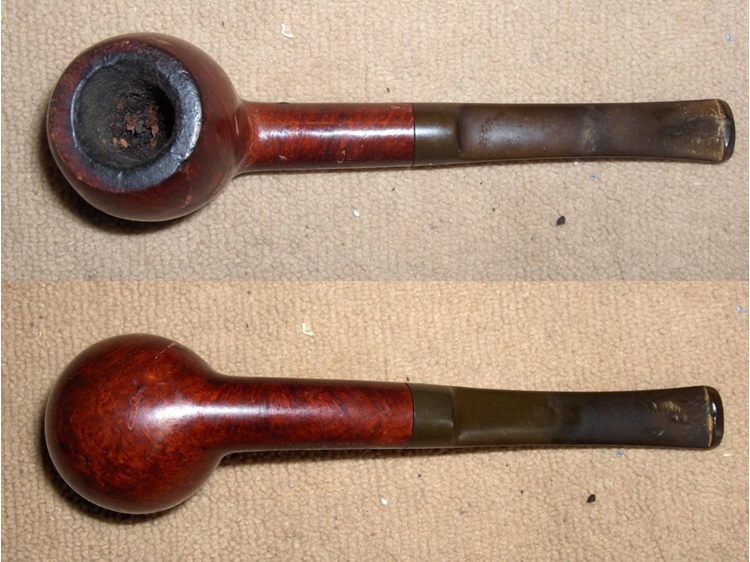
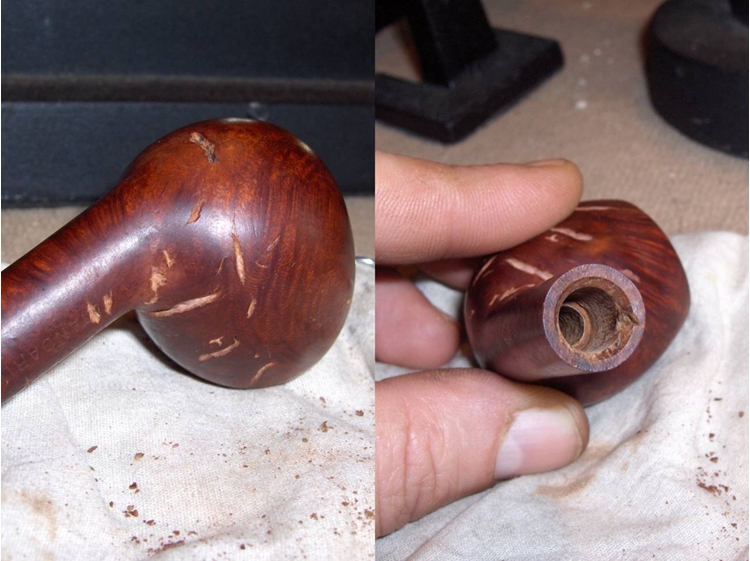
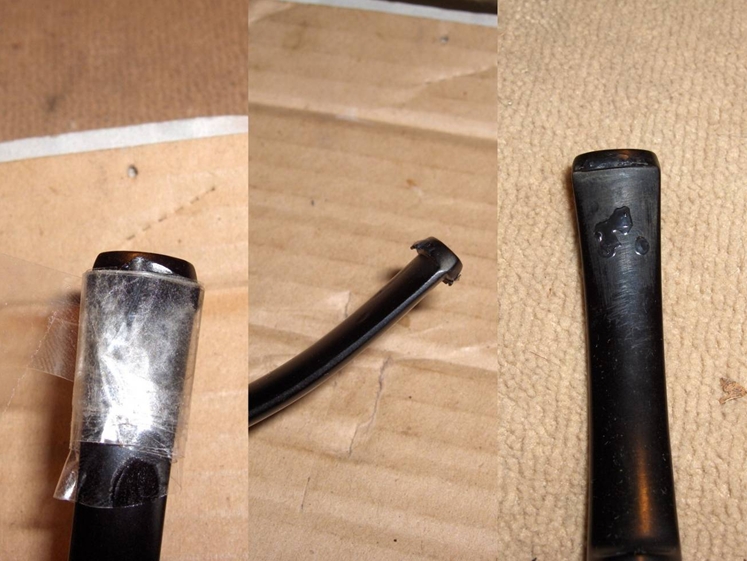
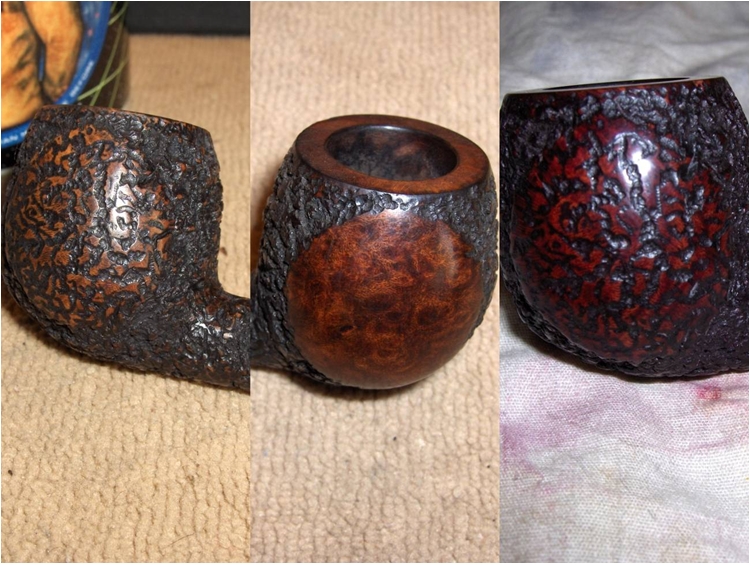
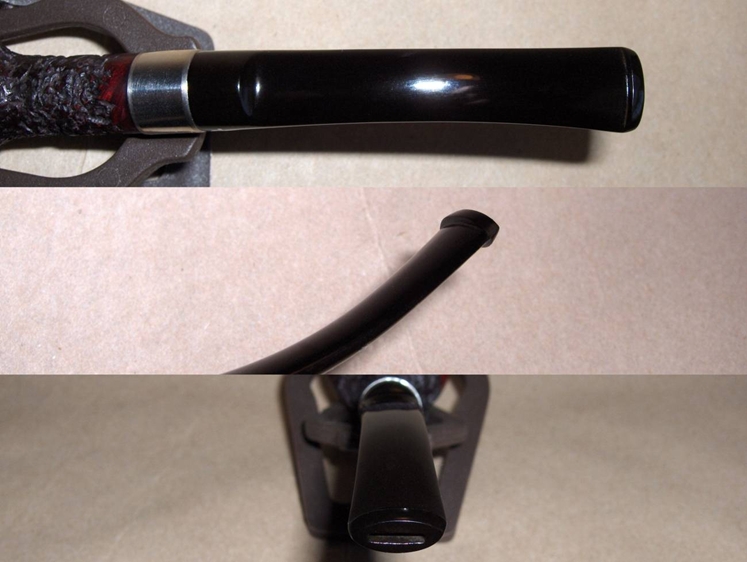
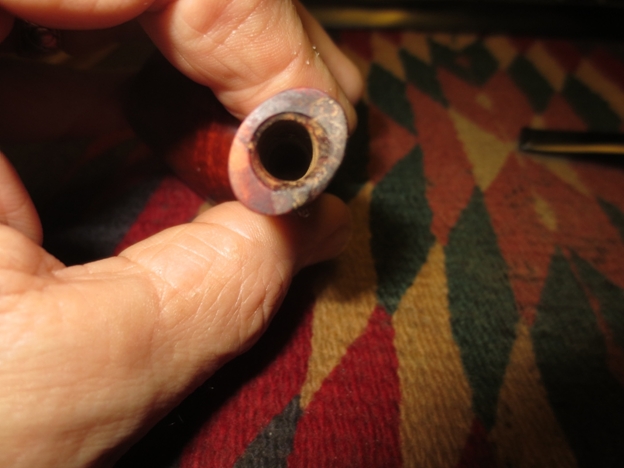
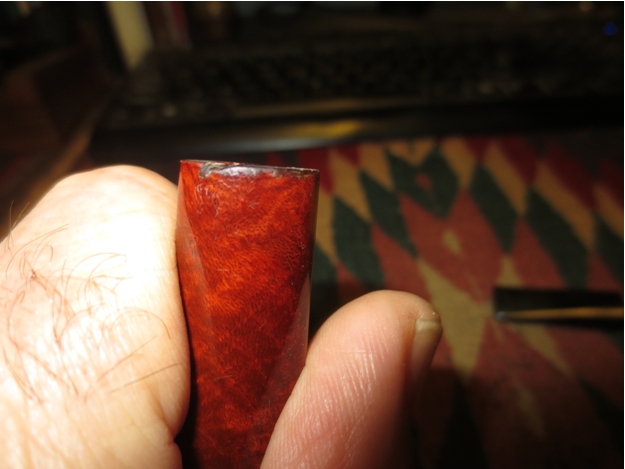
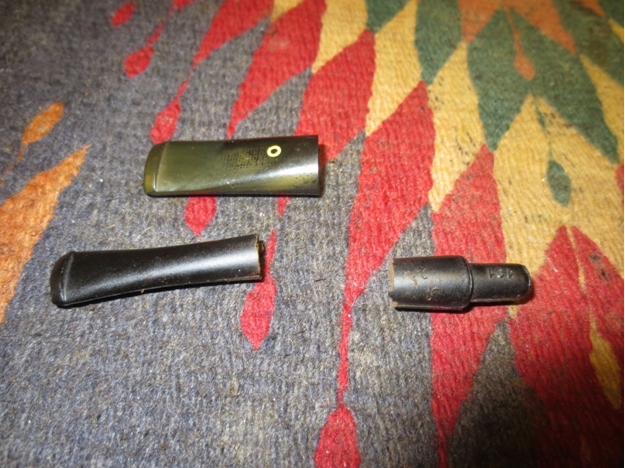
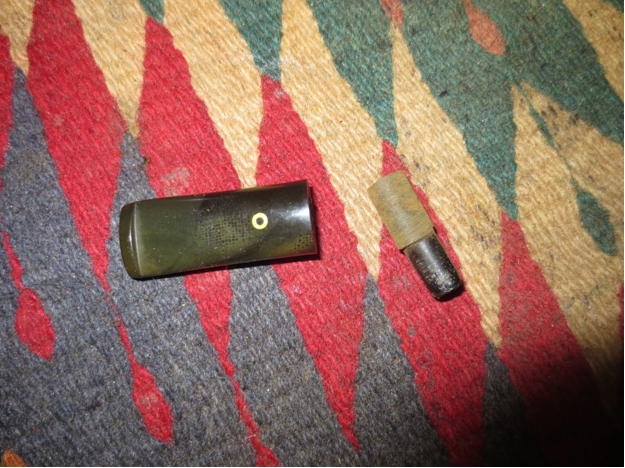
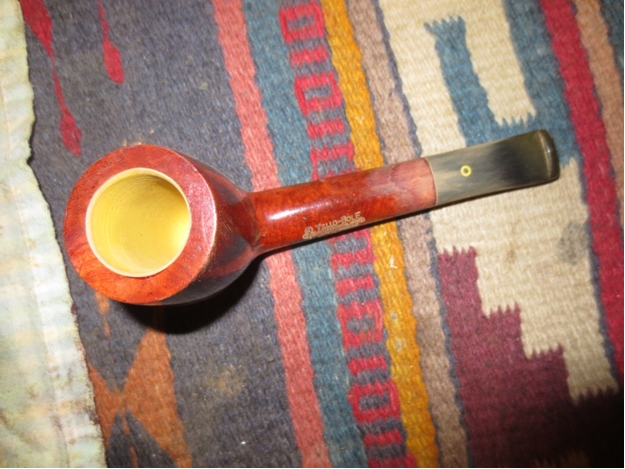
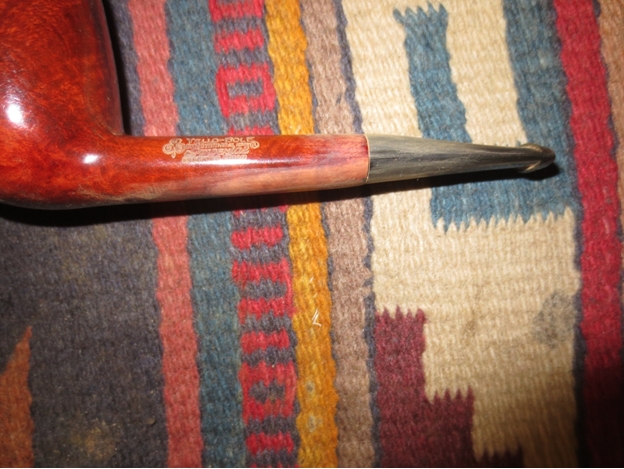
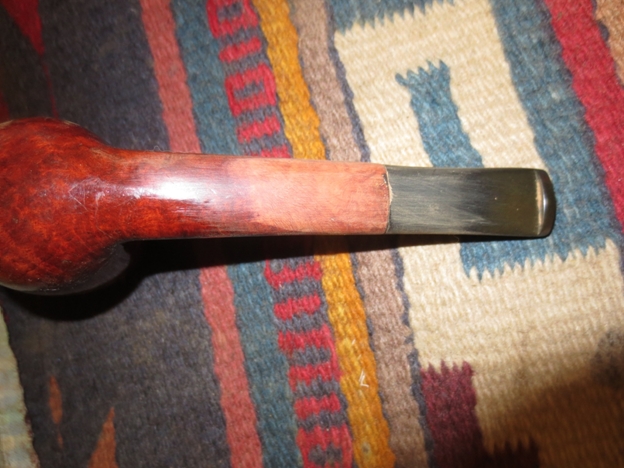
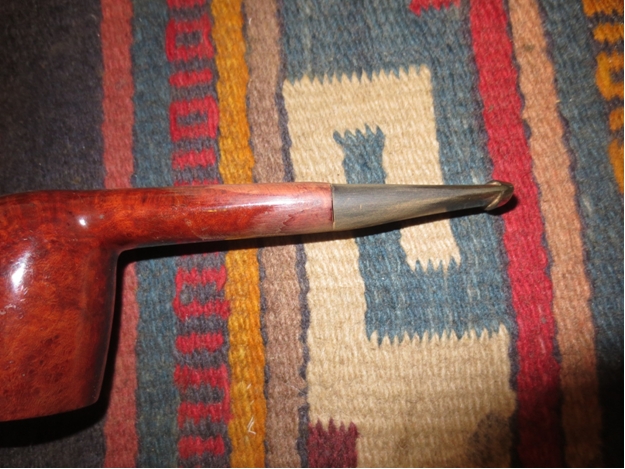
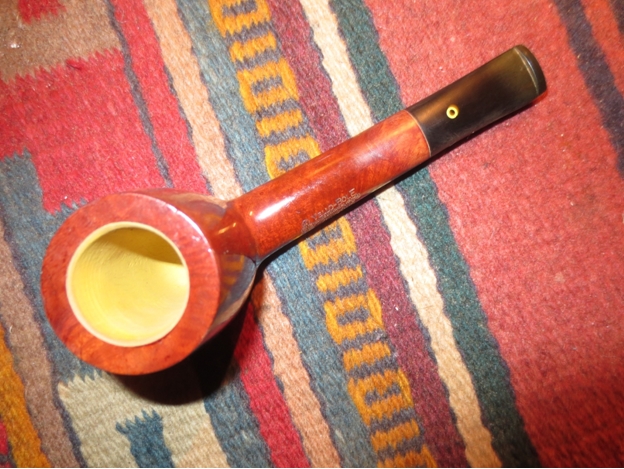
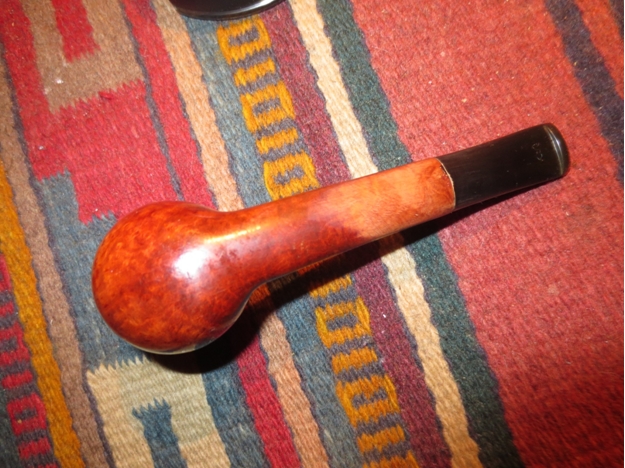
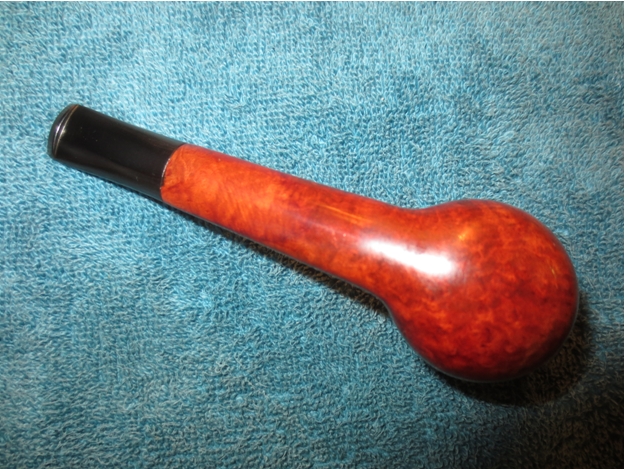
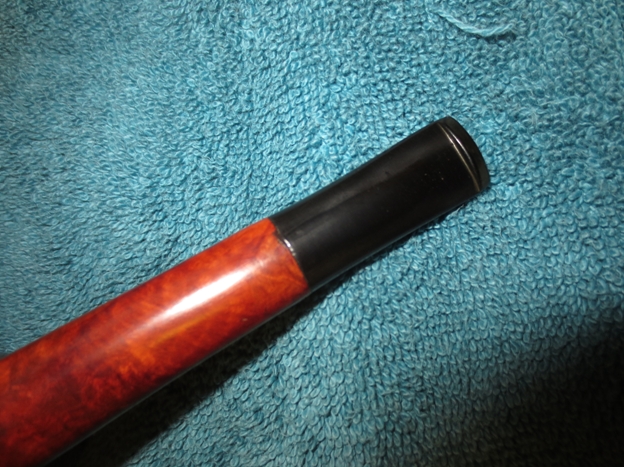
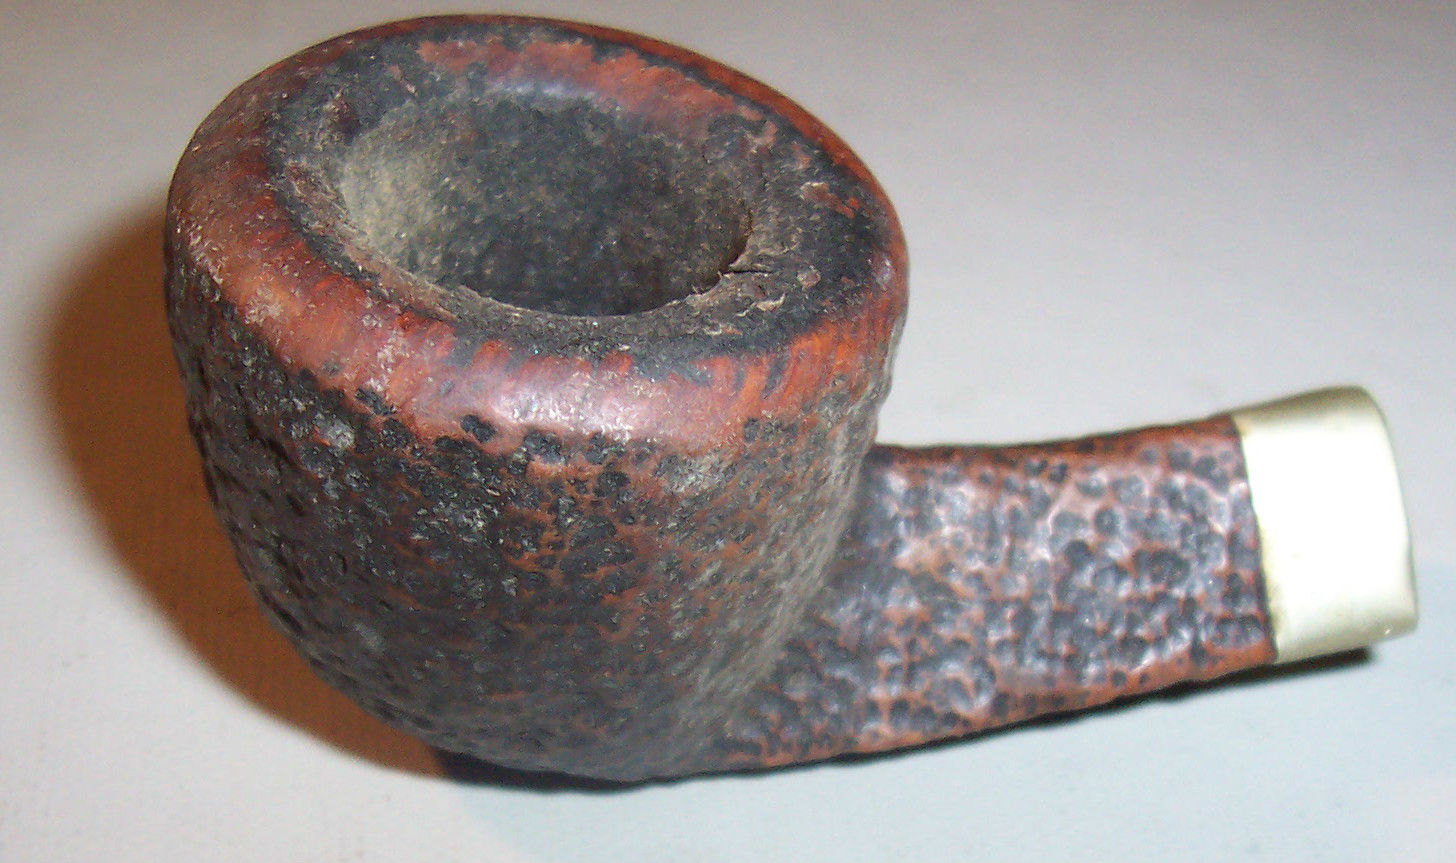
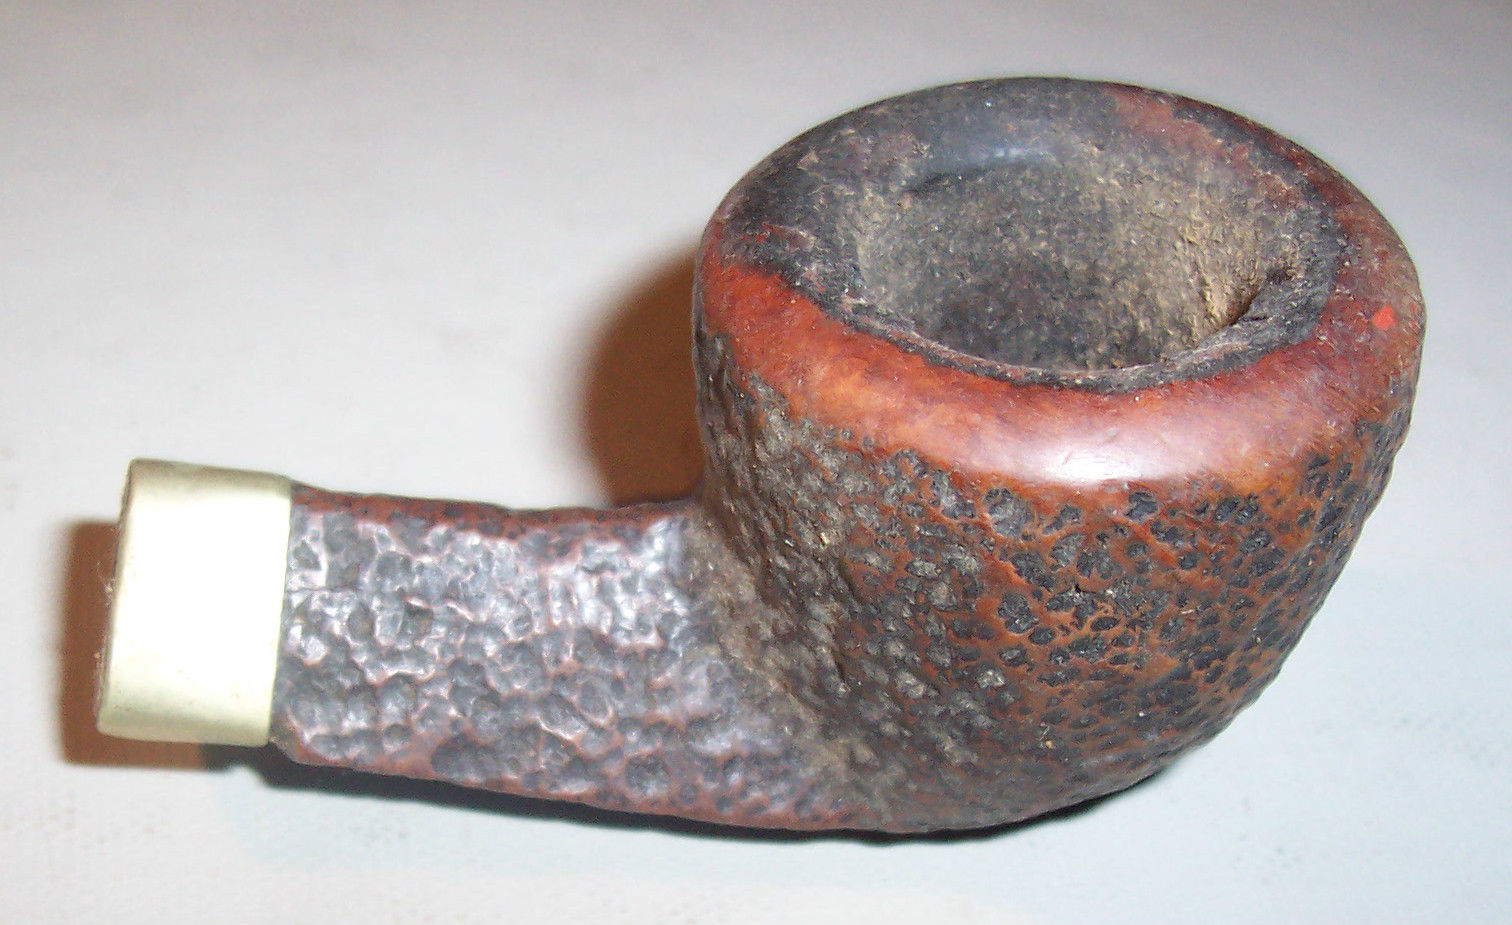
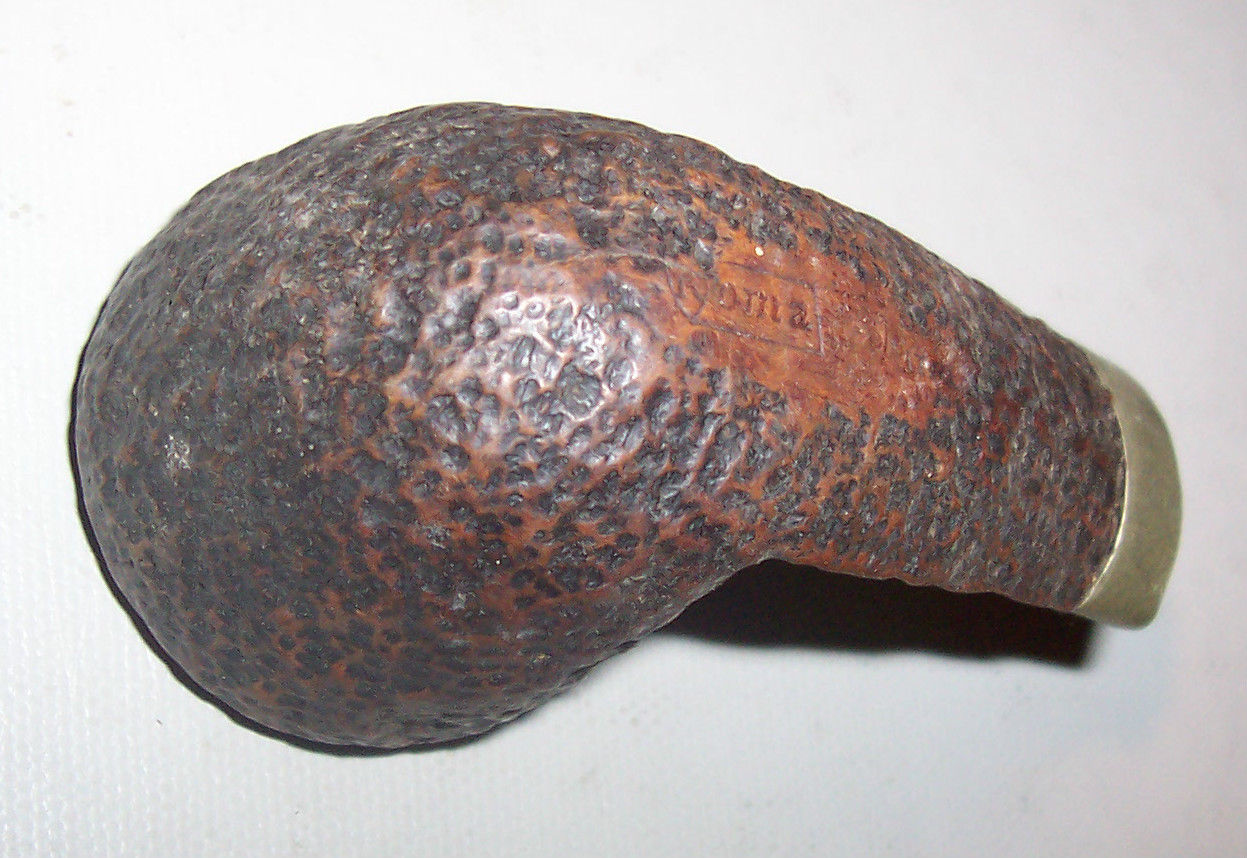
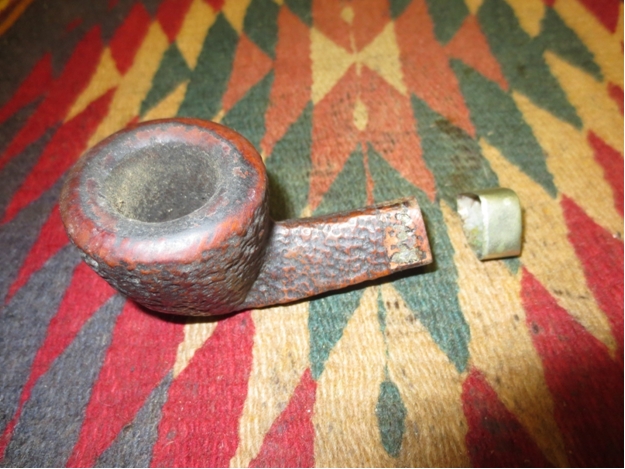
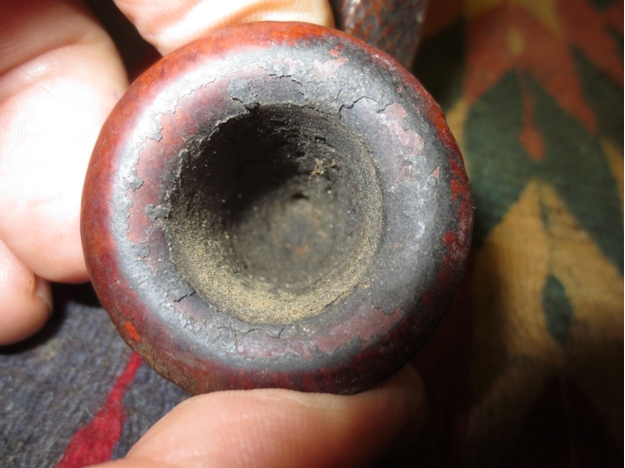
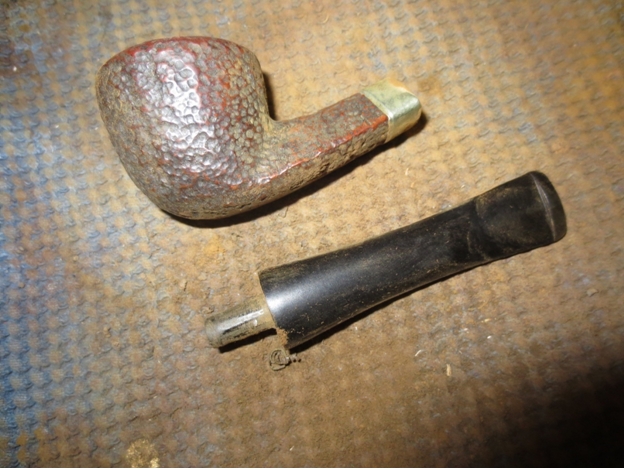
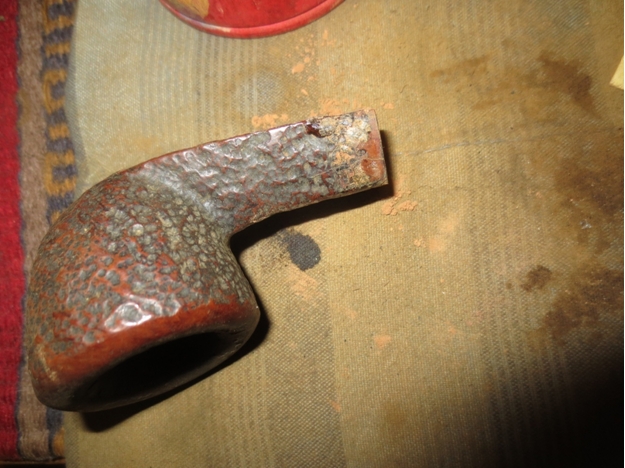
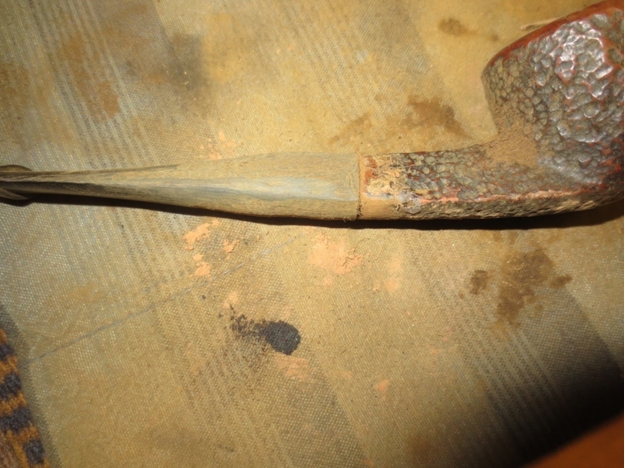
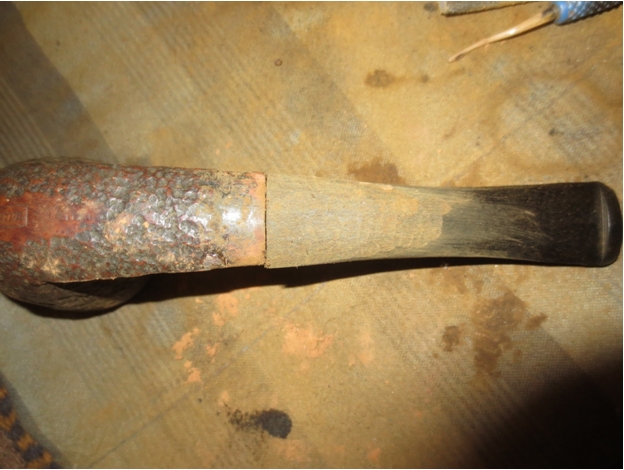
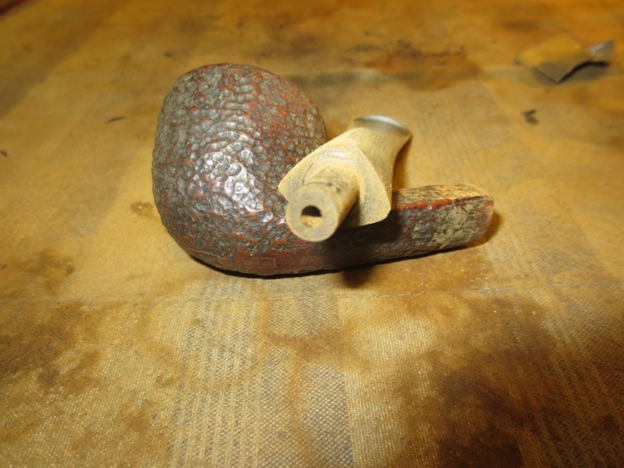
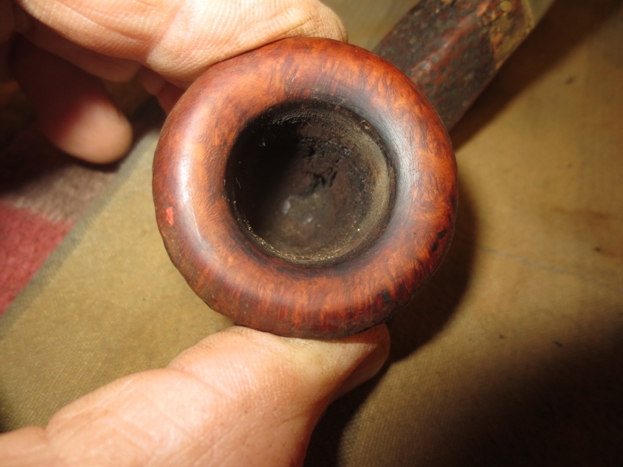
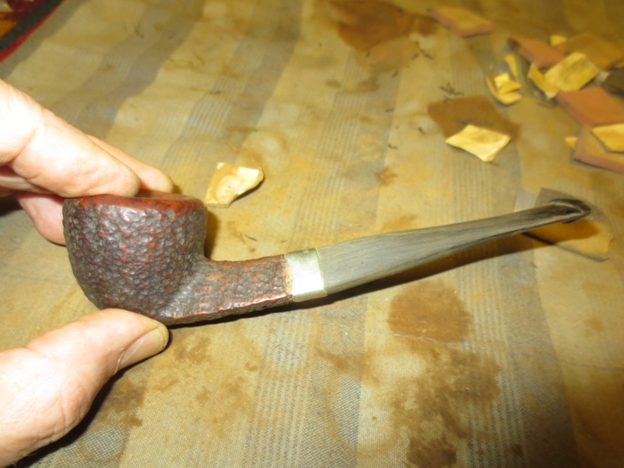
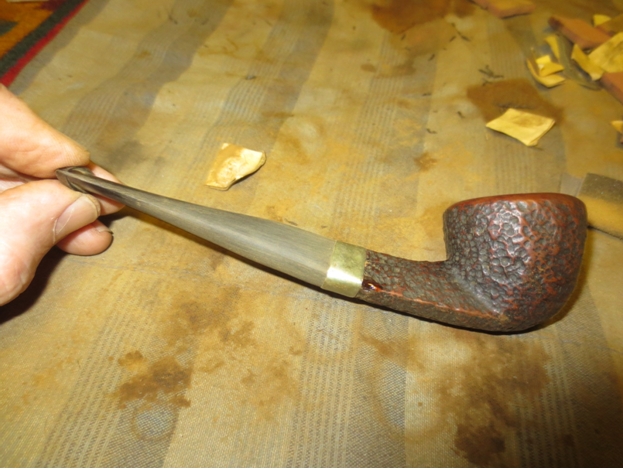
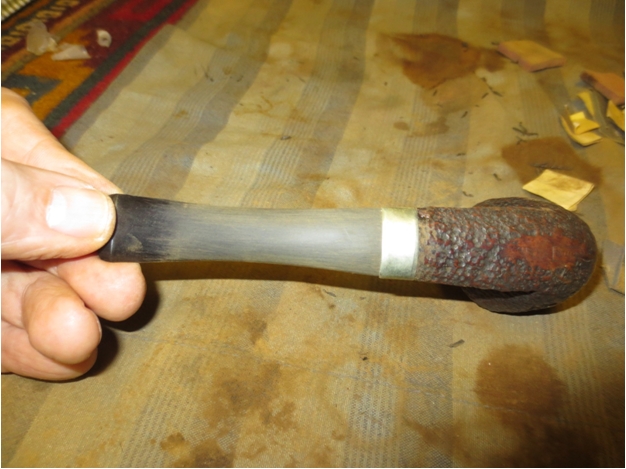
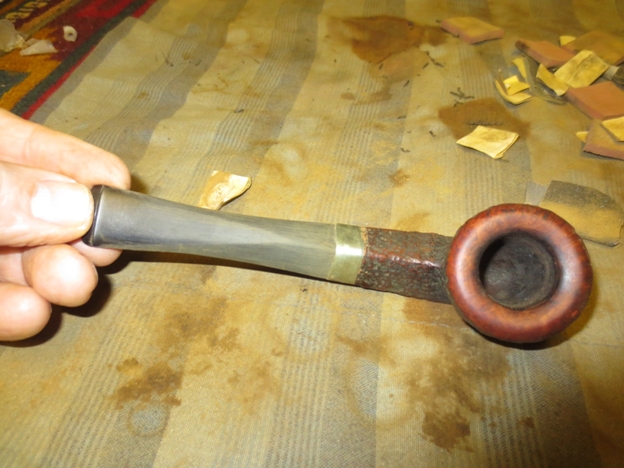
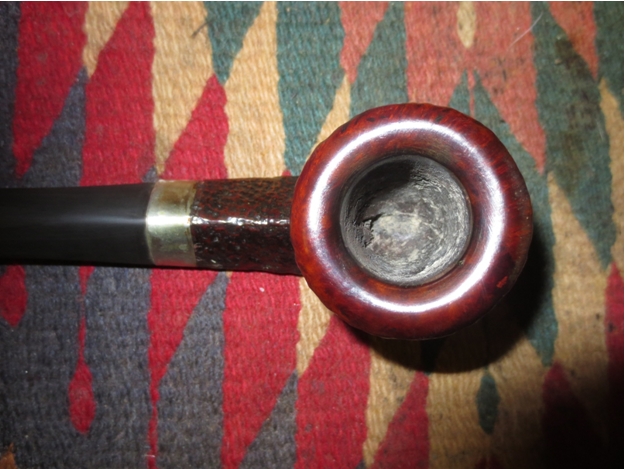
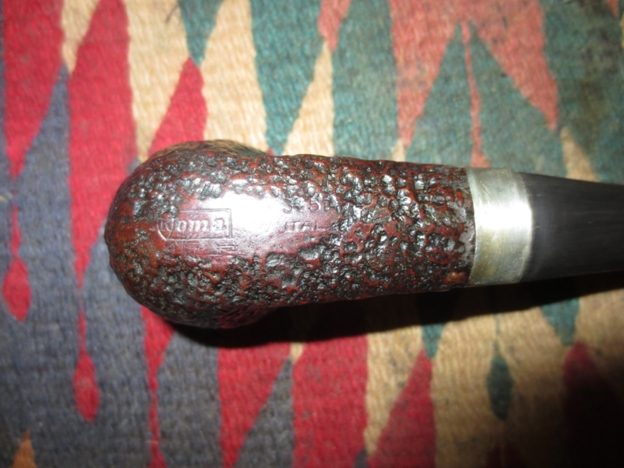
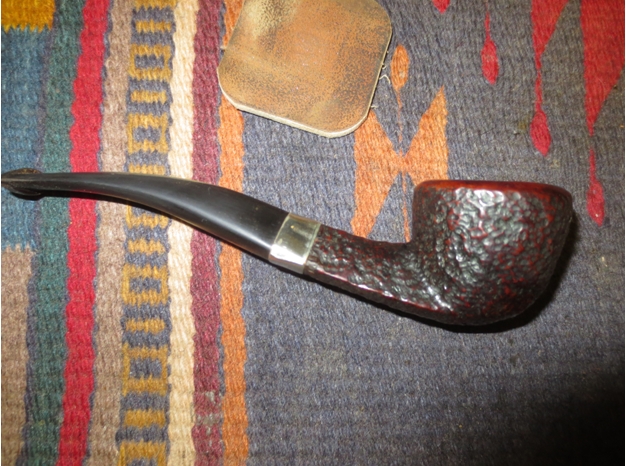
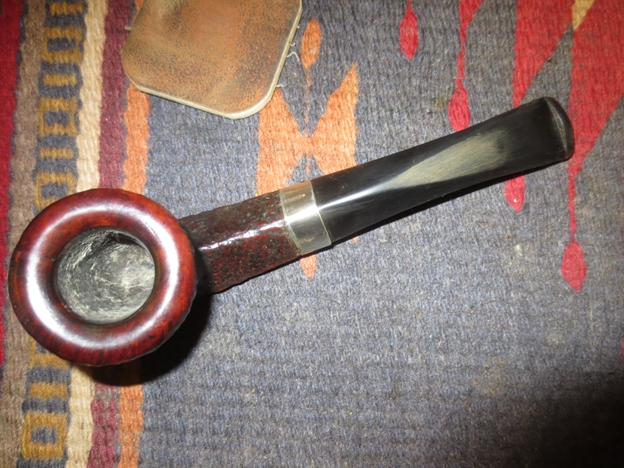
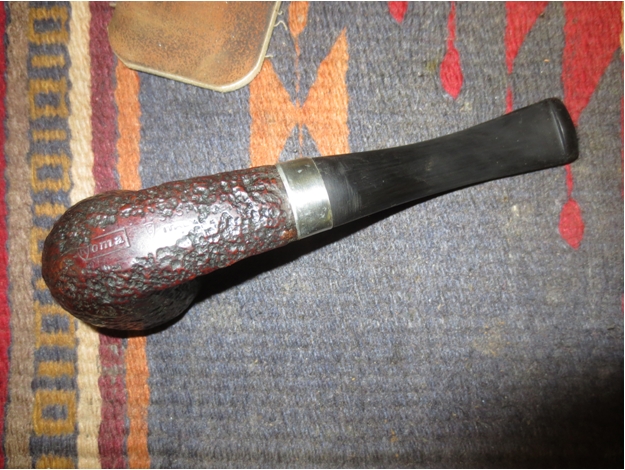
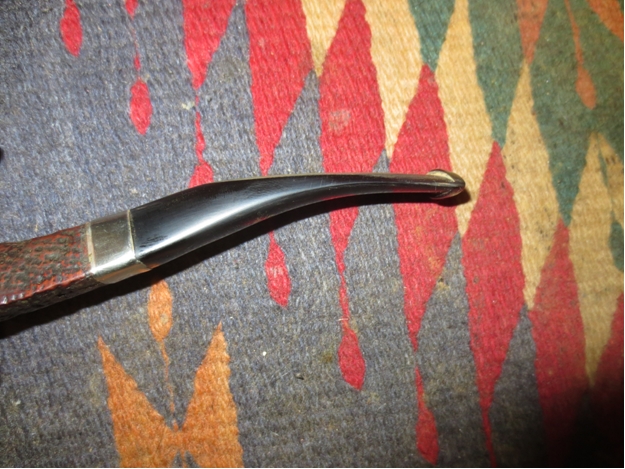
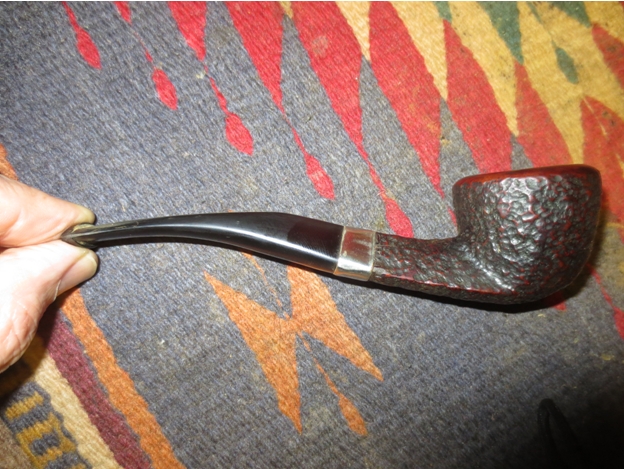
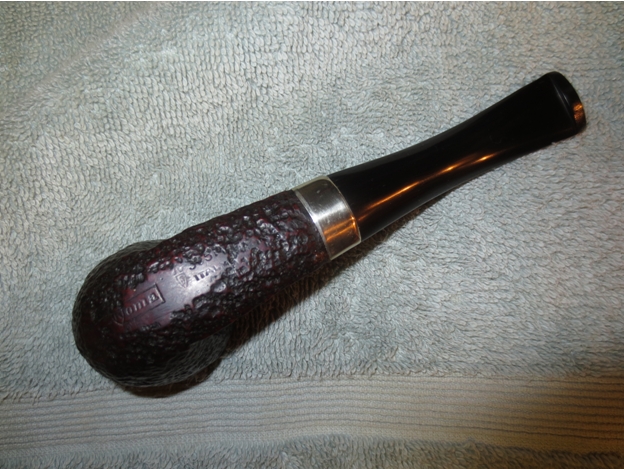
The pipe in my possession is a small billiard with carved rustication. The center letters of the stamping are very worn and faint, but there’s enough there to make out “THERMOFILTER” over “IMPORTED BRIAR” on the left side of the shank. The stem did not have any markings and the bit end had been hacked off. Below are some photos of the pipe that I took shortly after its arrival.Anthony1

Anthony2 
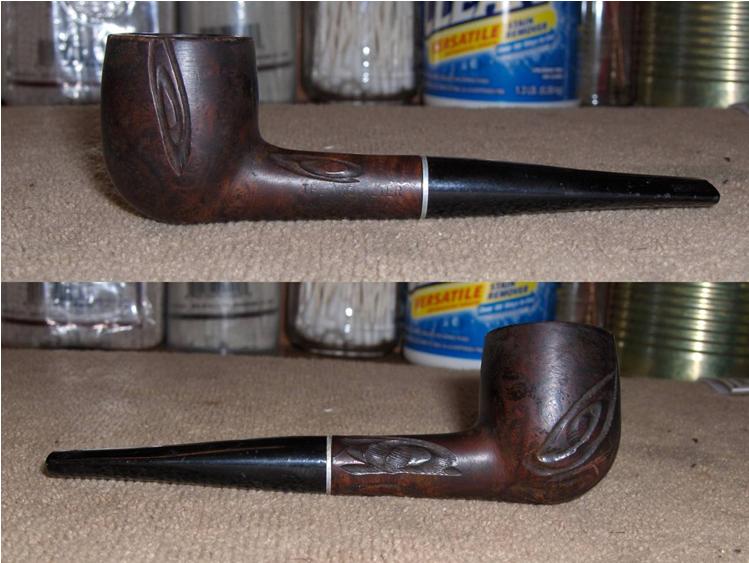
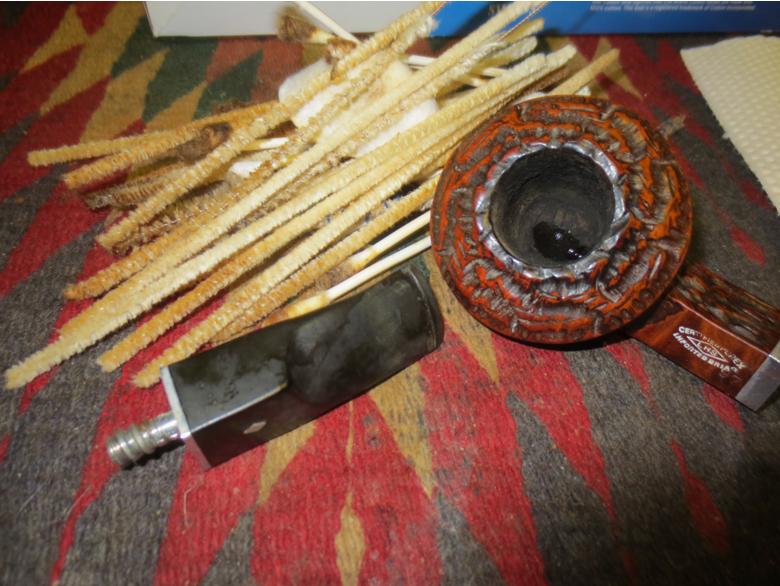
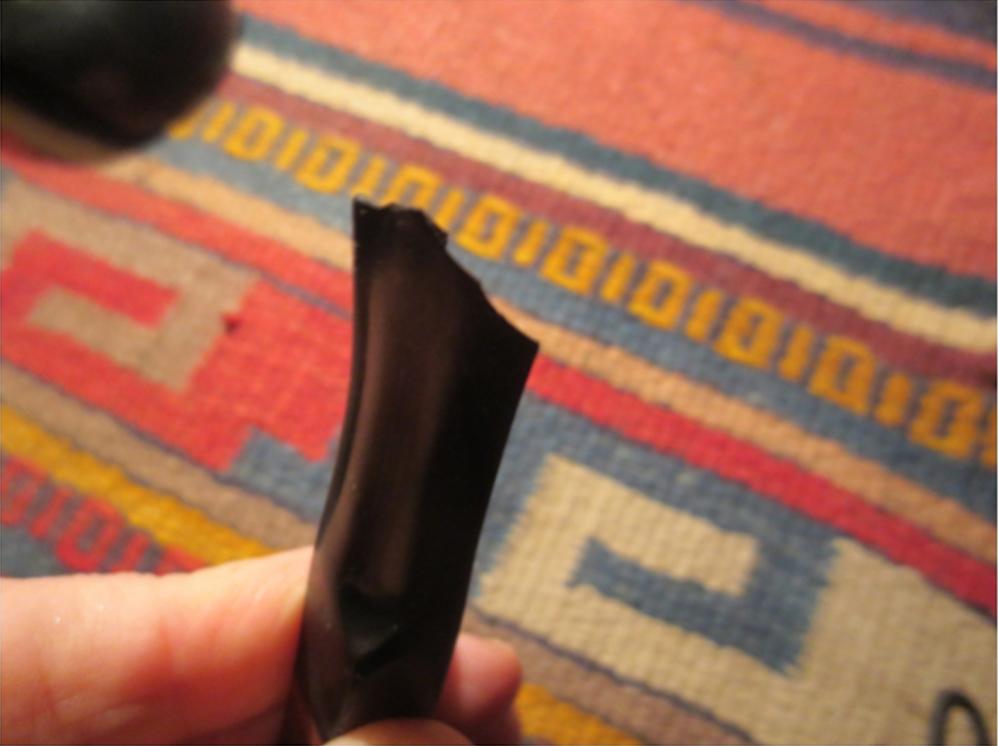
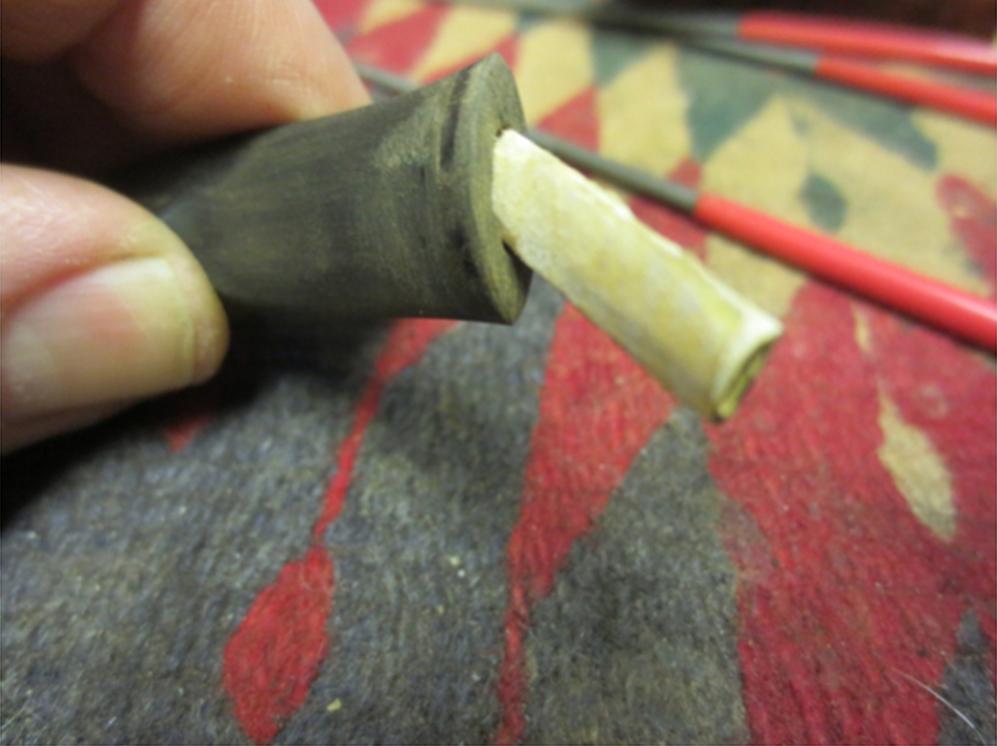
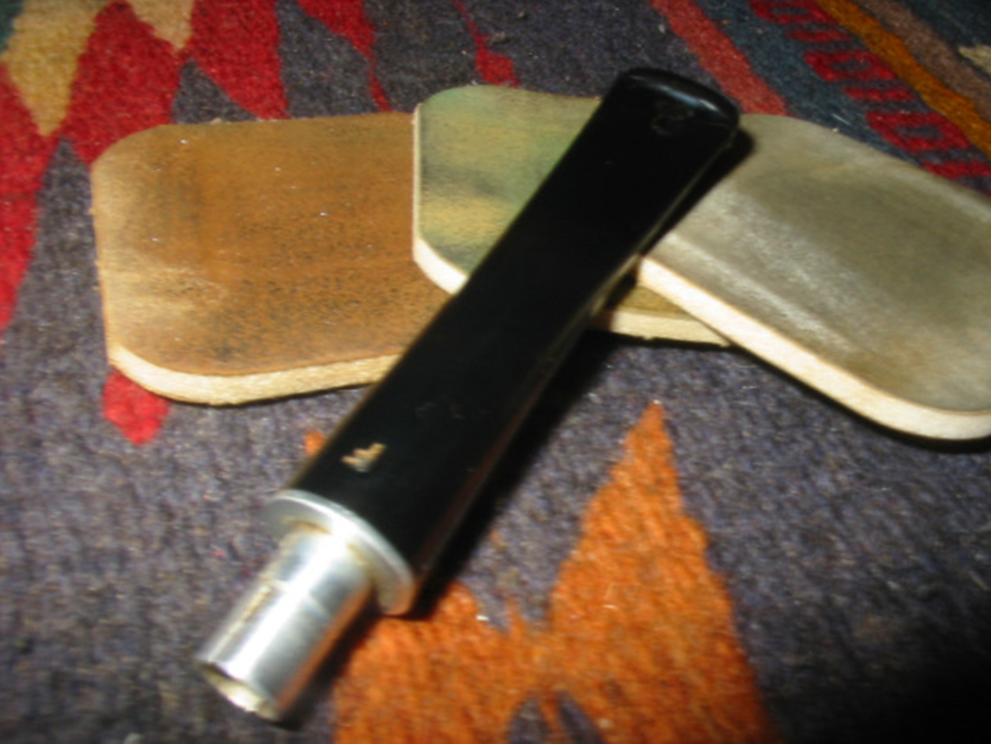
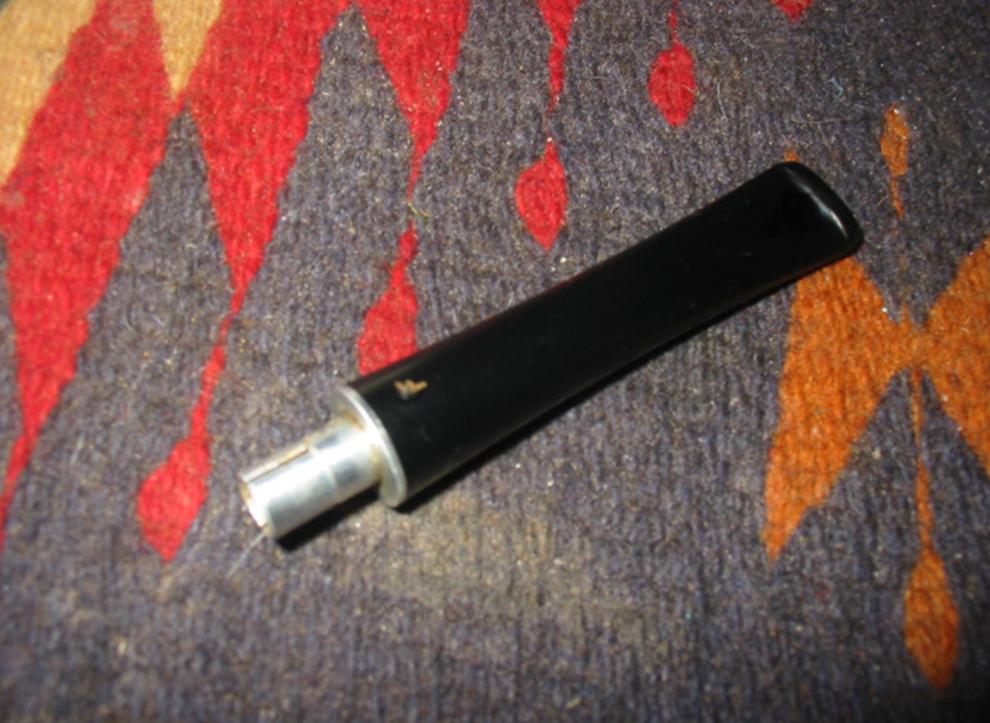
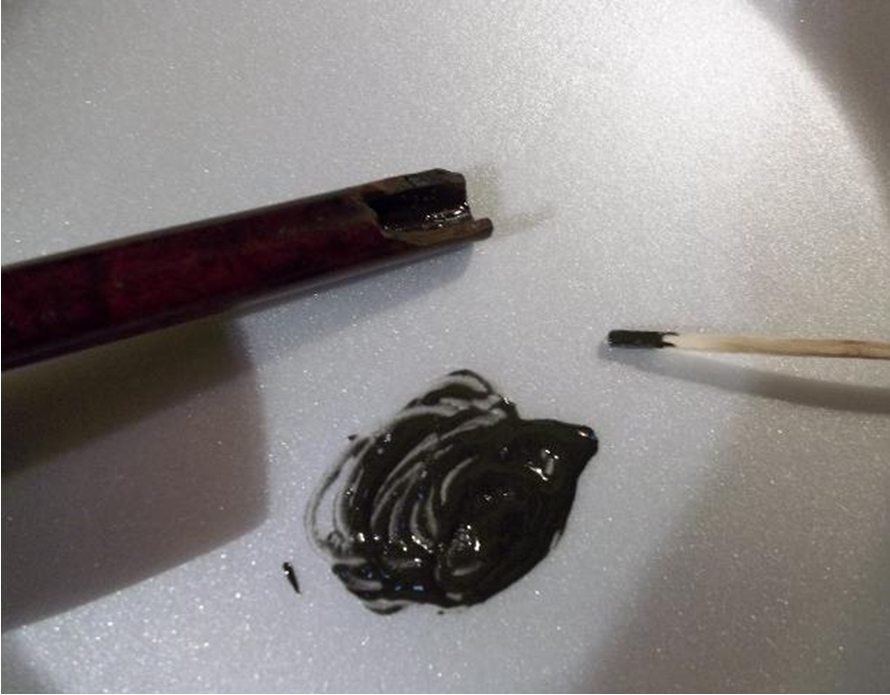
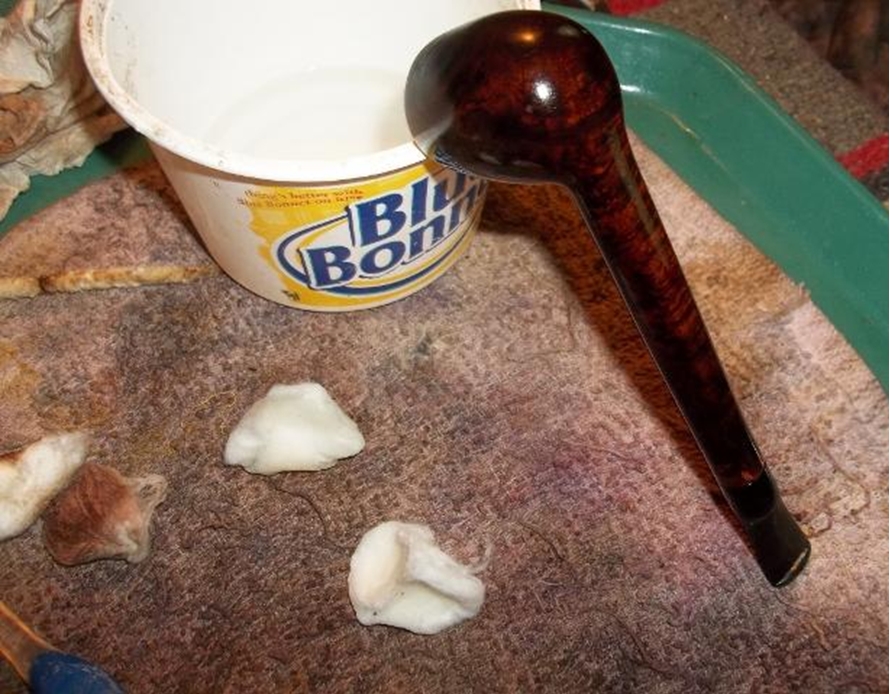
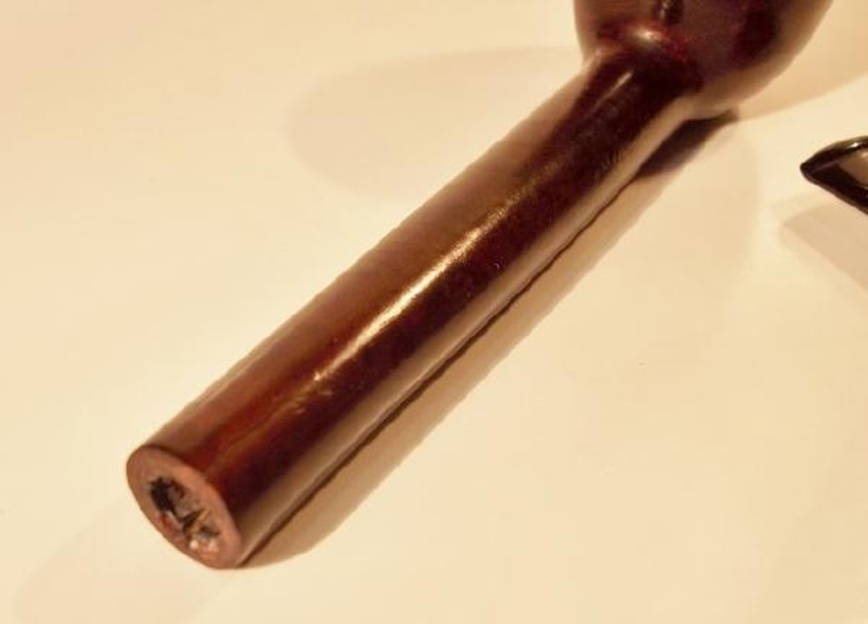
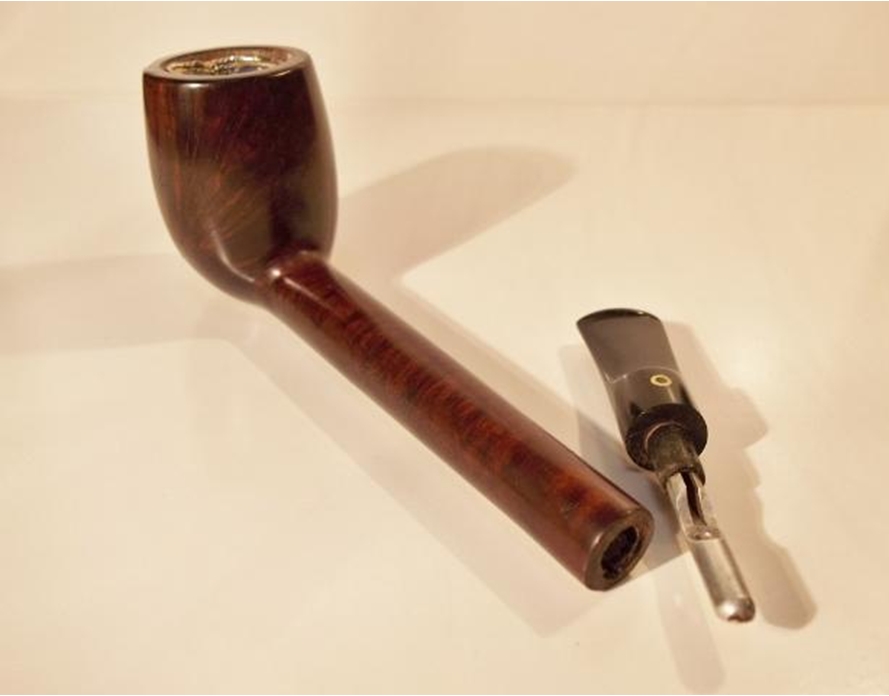
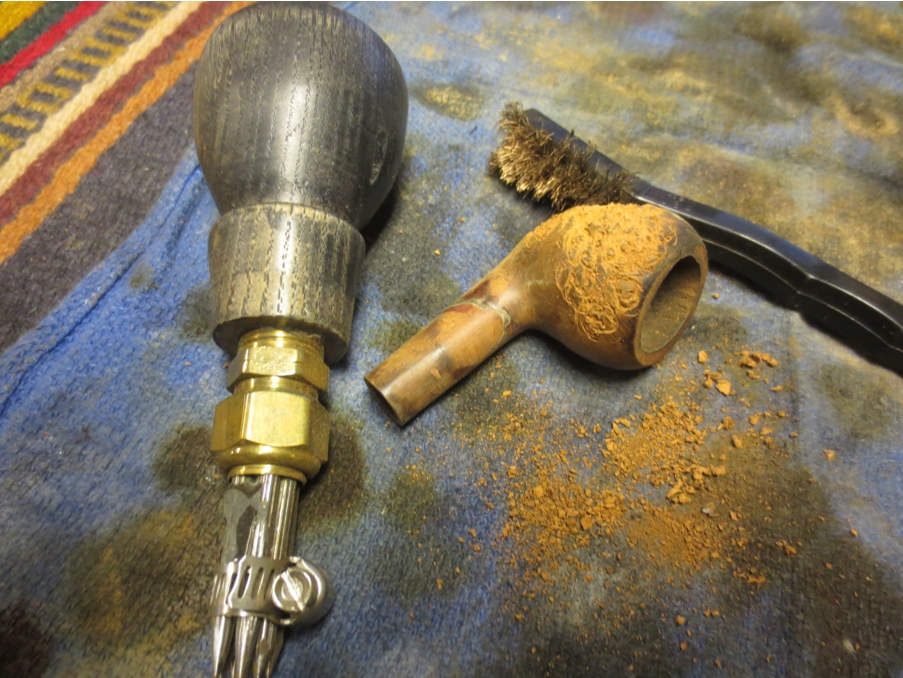
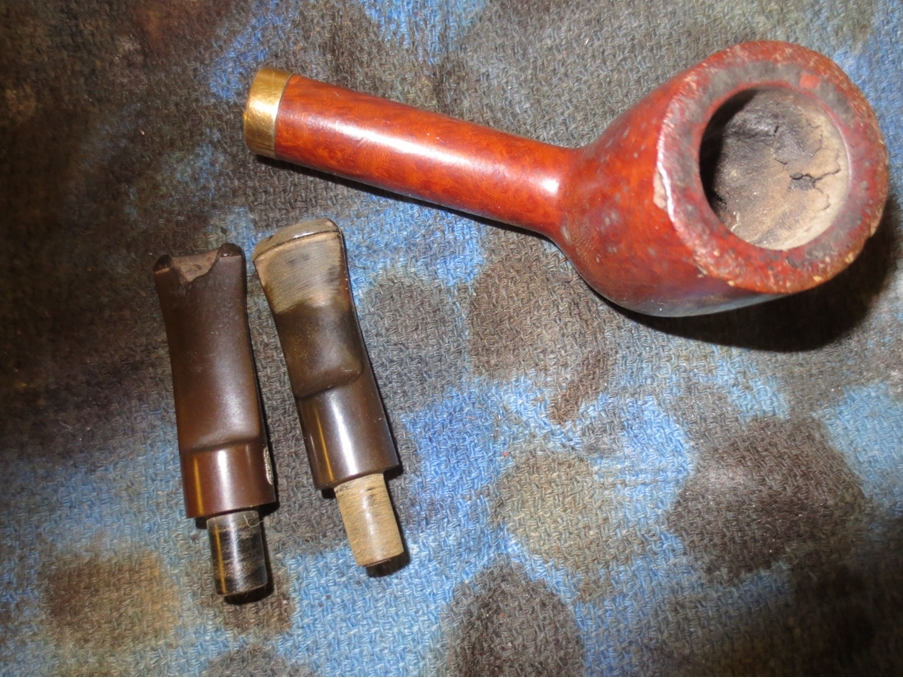
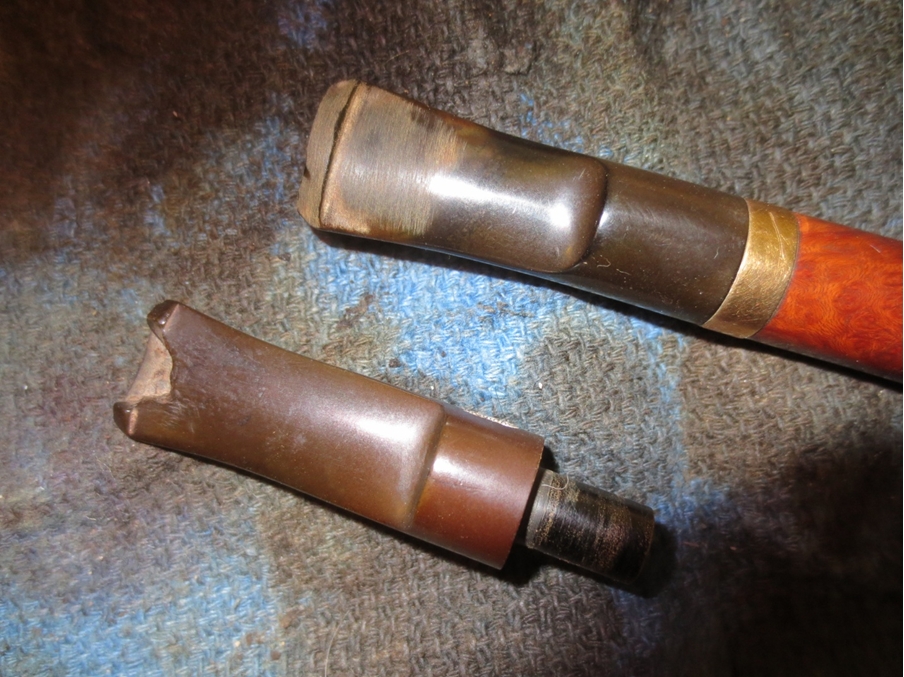
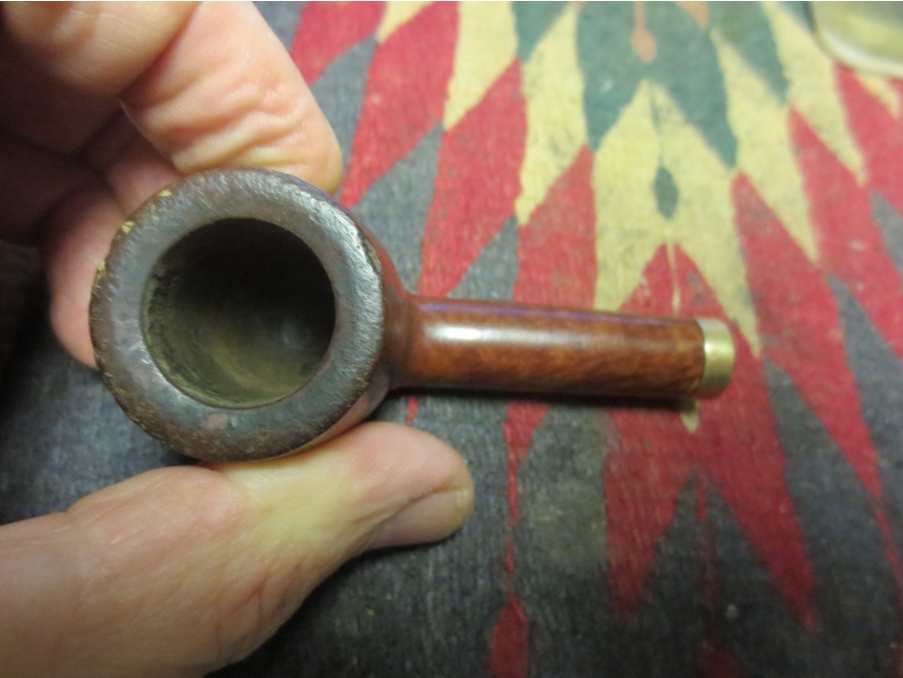
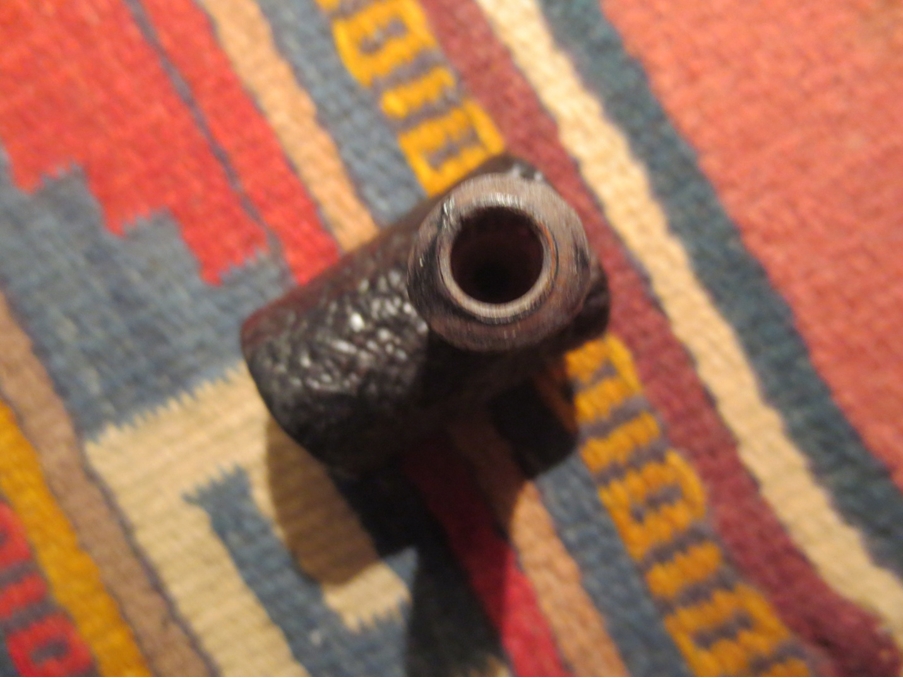
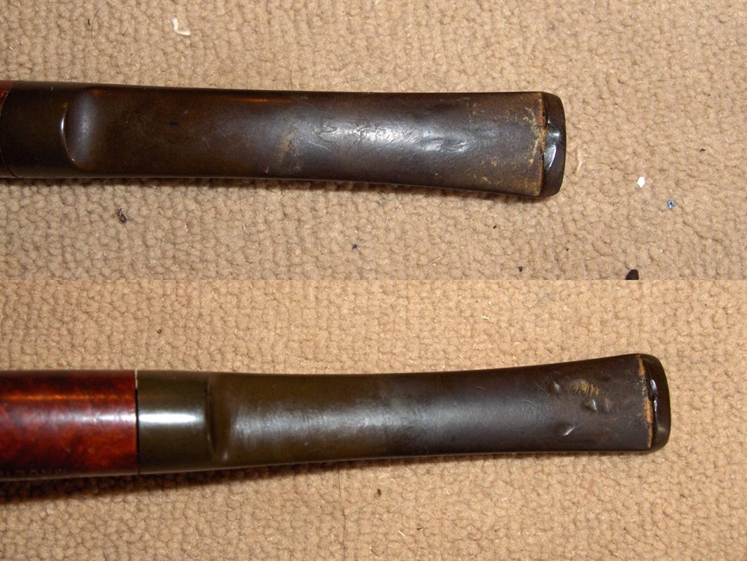
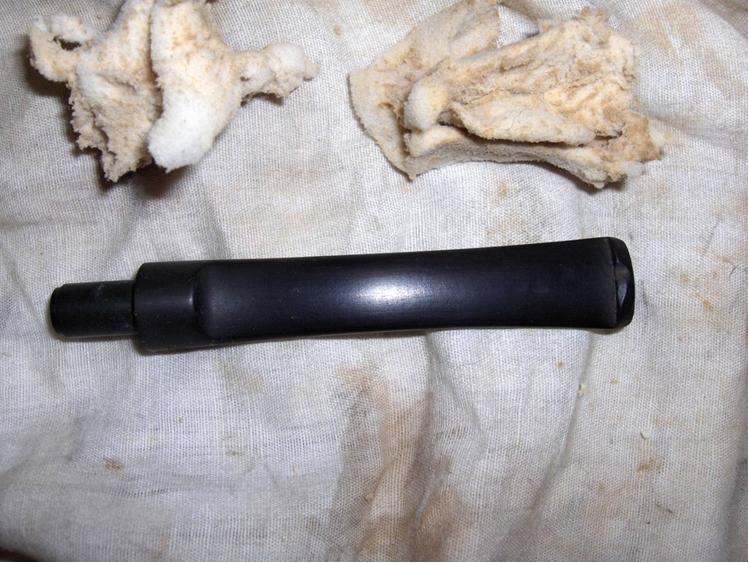
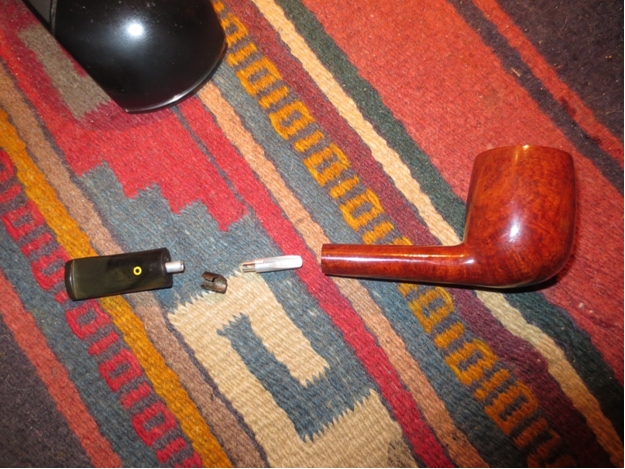
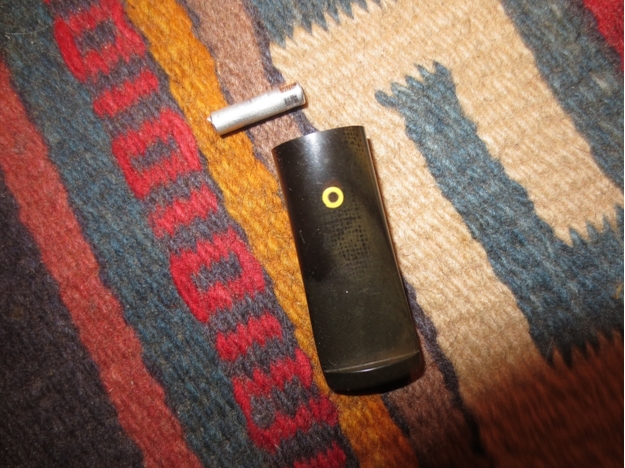
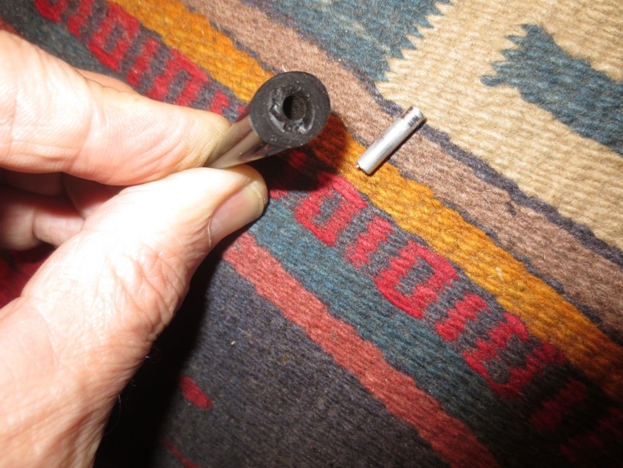
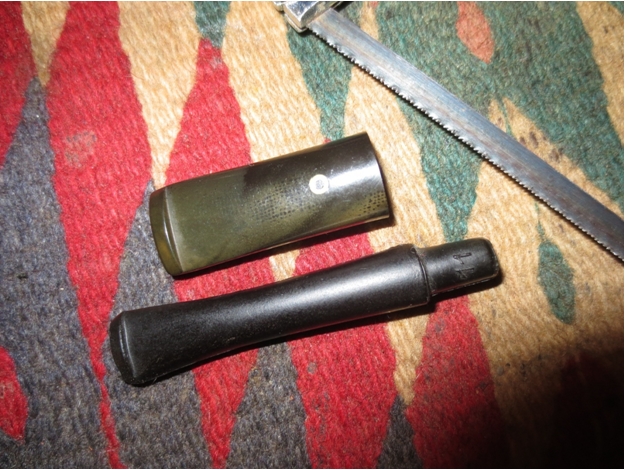
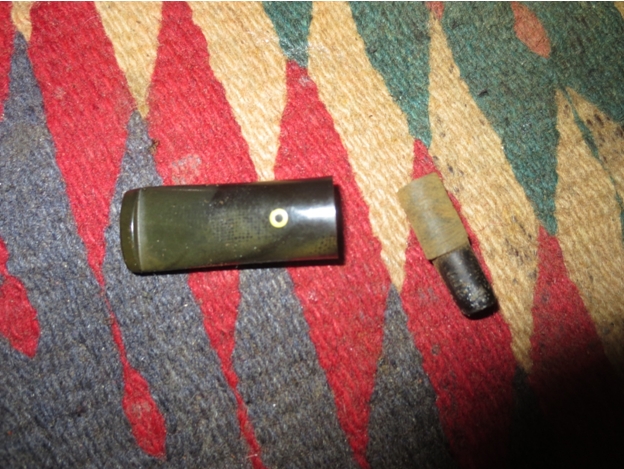
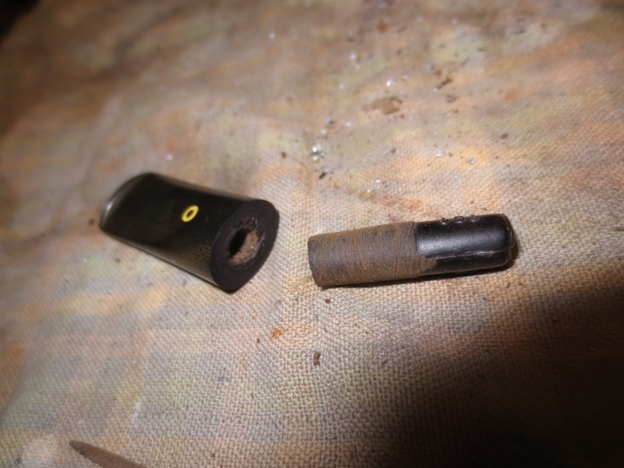
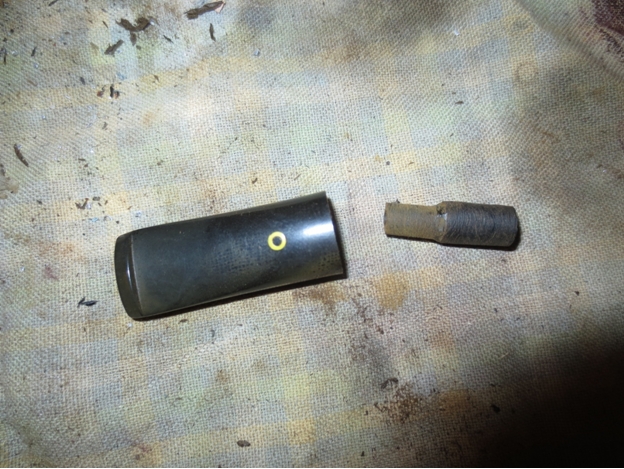
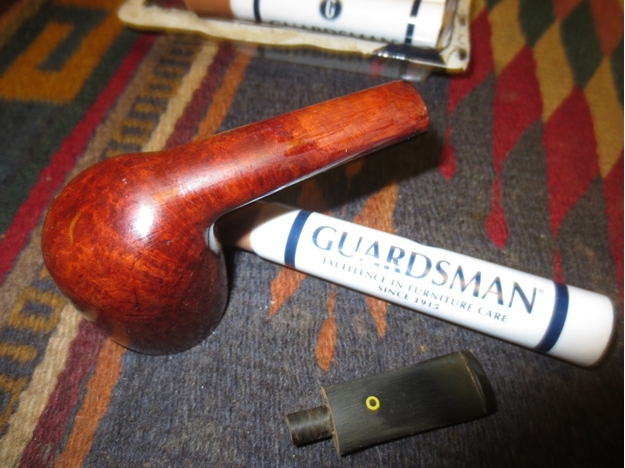
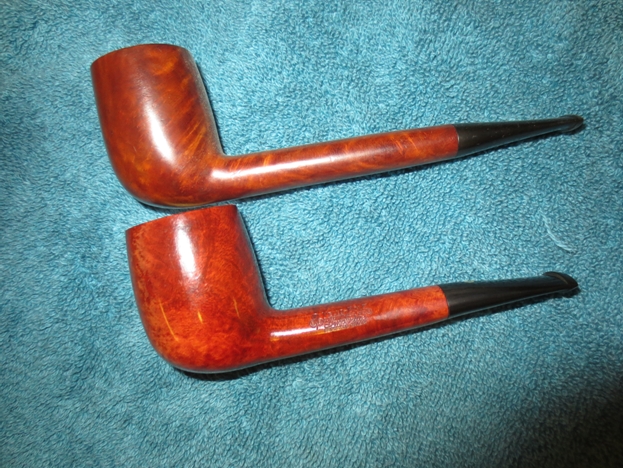
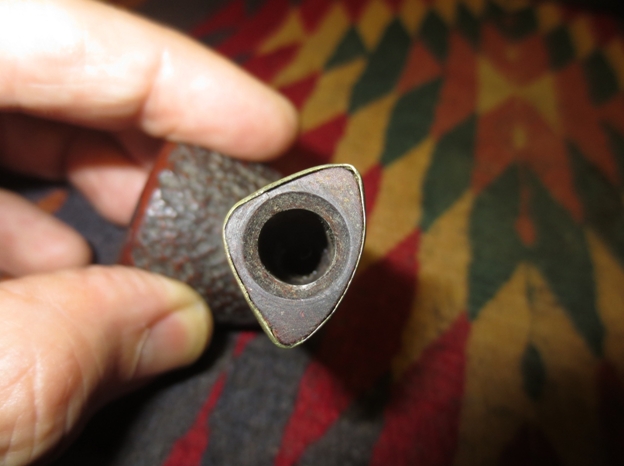
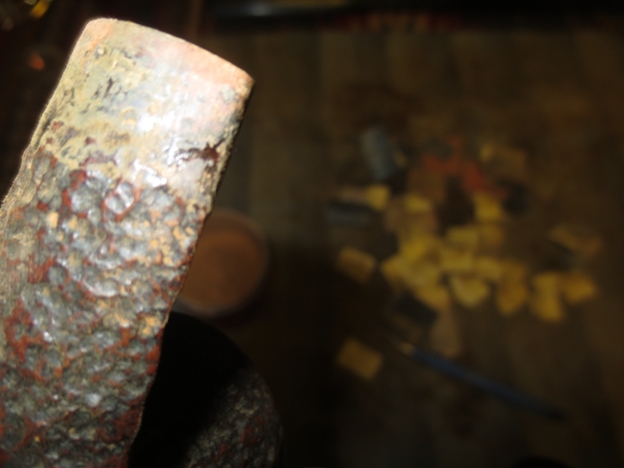
You may have noticed that I used past tense when mentioning the stem above. That’s because I dissolved the original, plastic stem from the inside out. Yes, you read that right. When I was running alcohol dampened pipe cleaners through the stem to clean it out, the first couple came out covered with the thickest, blackest, and stickiest goo that I had ever encountered and I surmised that I was working on some serious tar build-up. I was surprised to find that the amount goo wasn’t diminishing as I worked, but actually appeared to be increasing. Eventually, I noticed that the bore of the airway seemed larger than I had originally thought it was. That’s when I realized the horrible truth. The alcohol on the cleaners was causing the cheap, plastic material of the stem to break down and it was disintegrating from the inside out. You can see for yourself in the comparison photos below.Anthony3 You’d think that I would have noticed it earlier, but I honestly wasn’t paying attention to the diameter of the airway. I mean, who thinks that their stem is just going to dissolve, right?

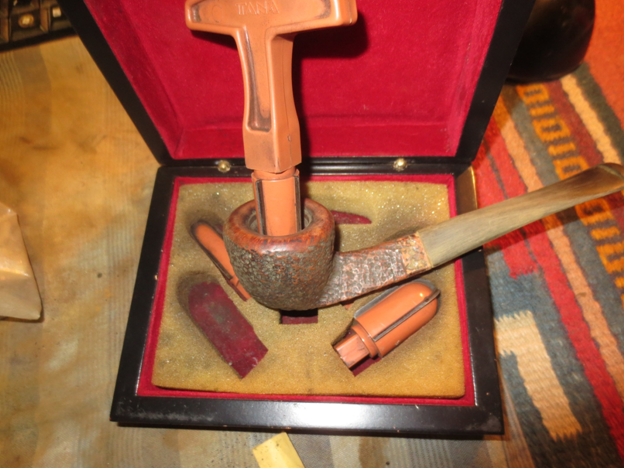
In any case, I didn’t have any extra stems to replace the original with. So, I tossed the poor, mutilated stem into the trash and dropped the stummel back into the box. It’s been wasting away in there for the past several months. For my third midterm exam, I decided to pull it out to see if I could do right by this old pipe, try some new things, and correct my past mistakes.

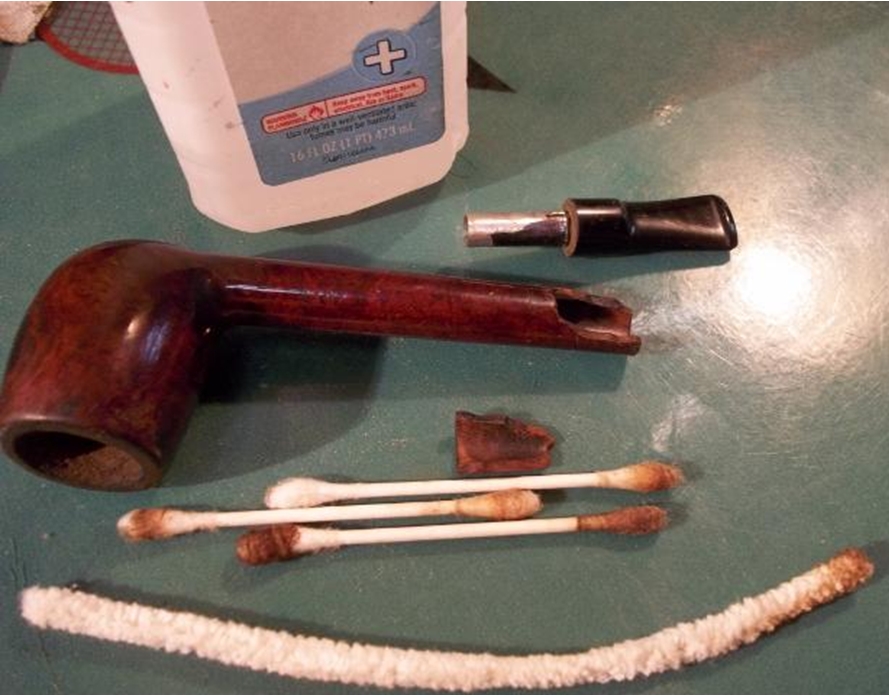
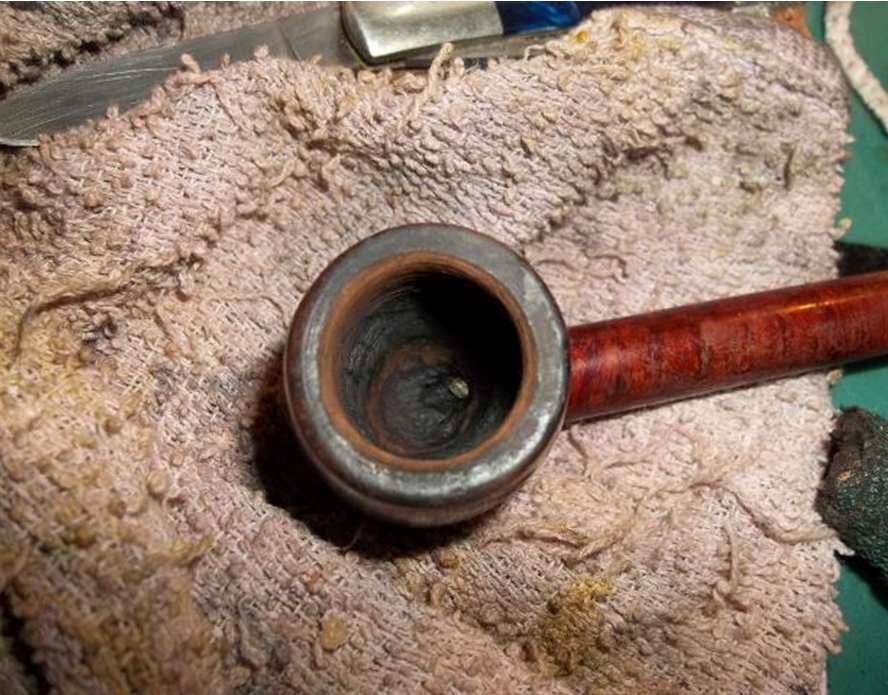
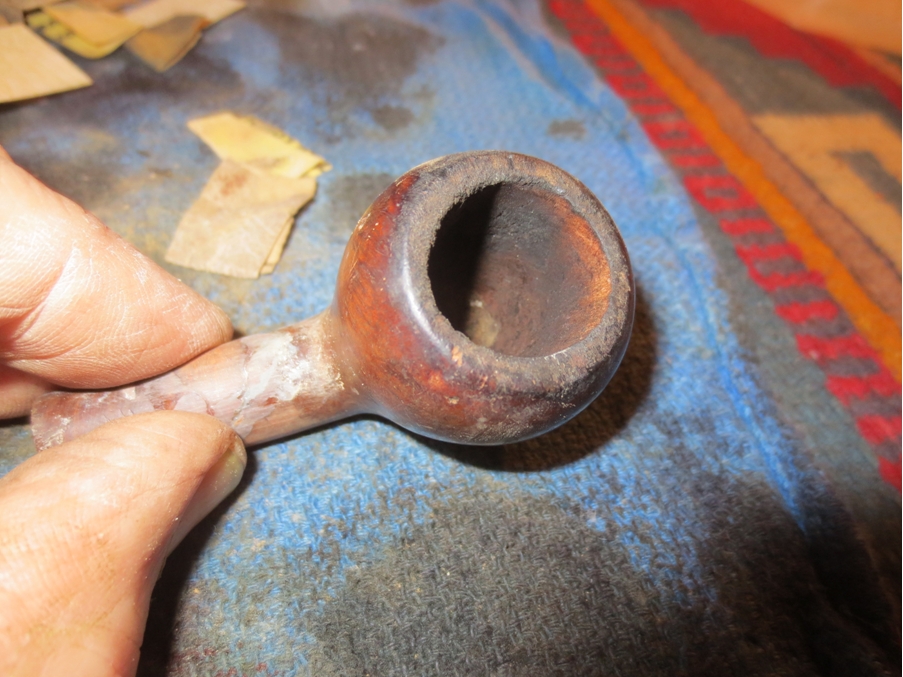
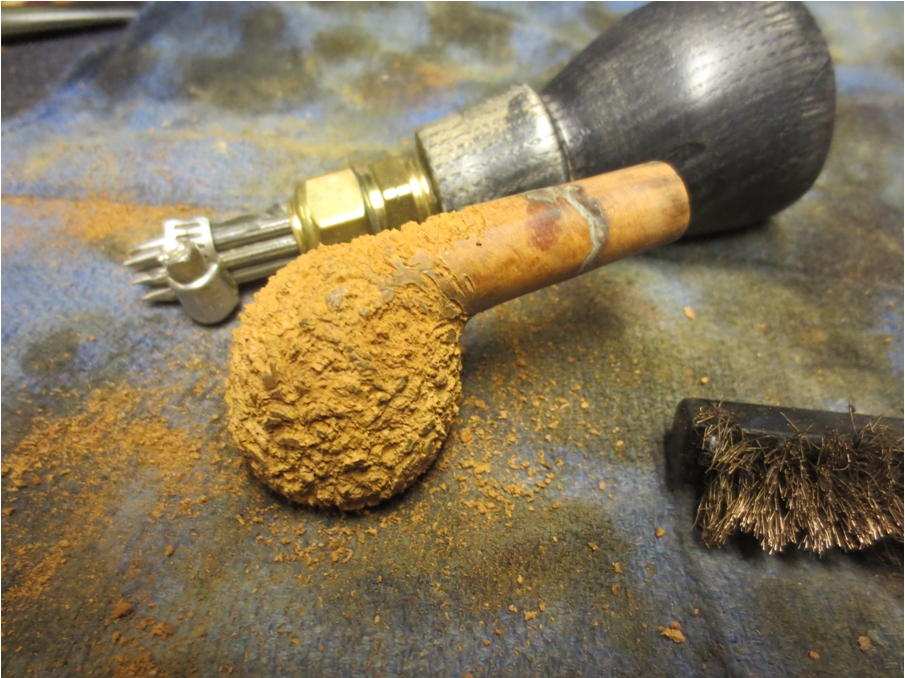
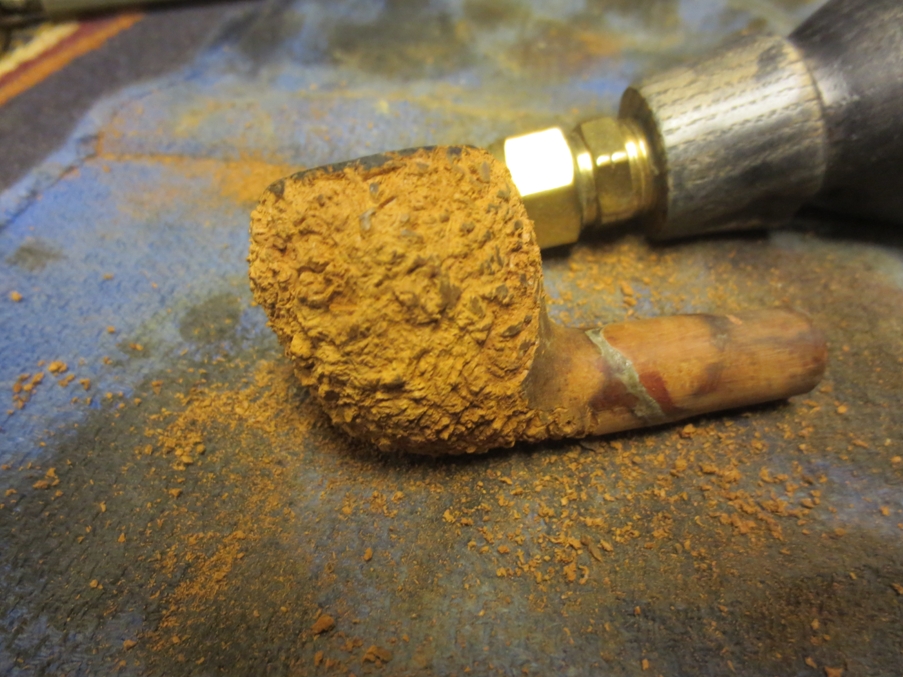
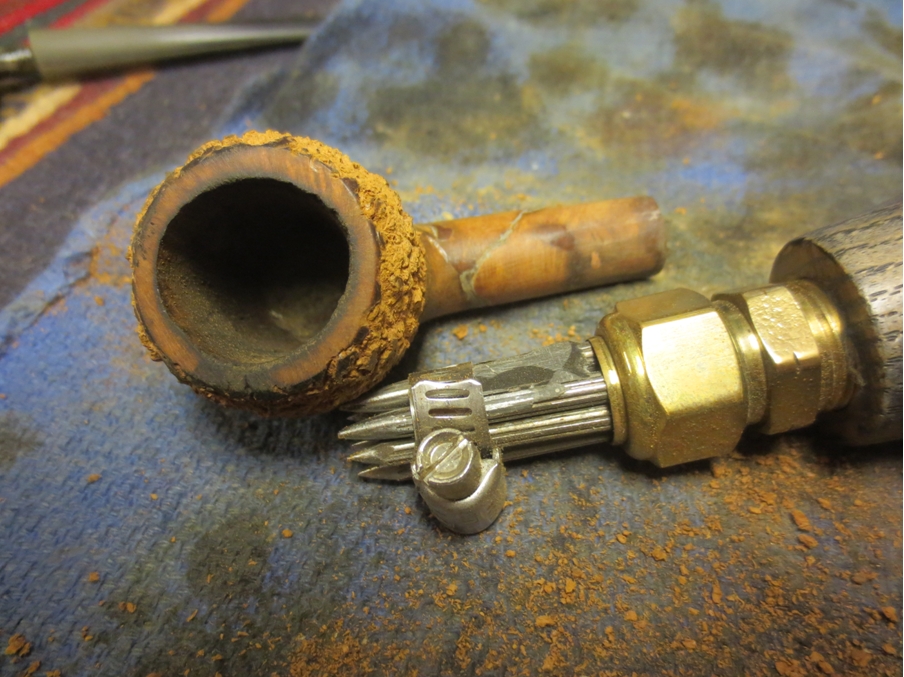
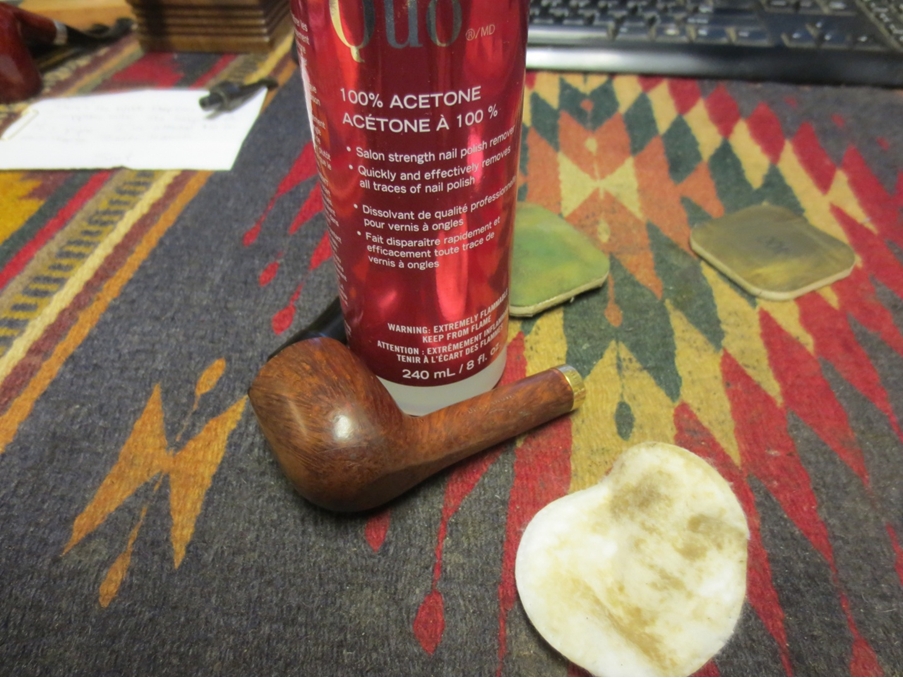
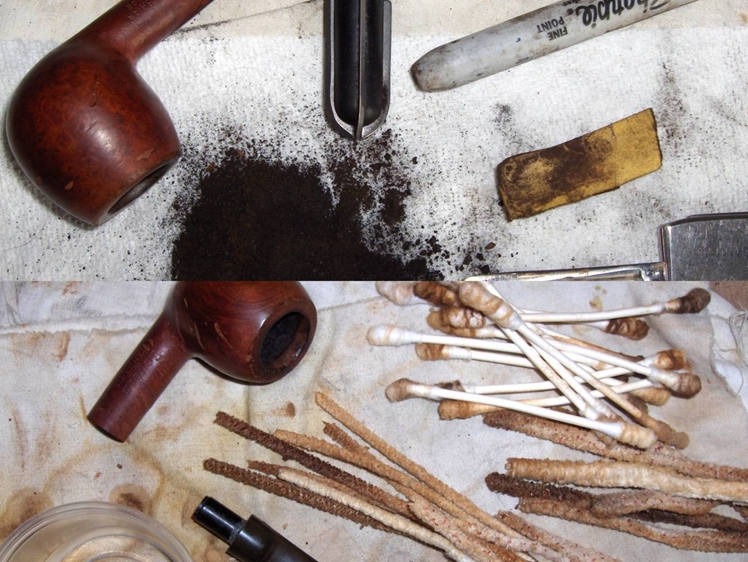
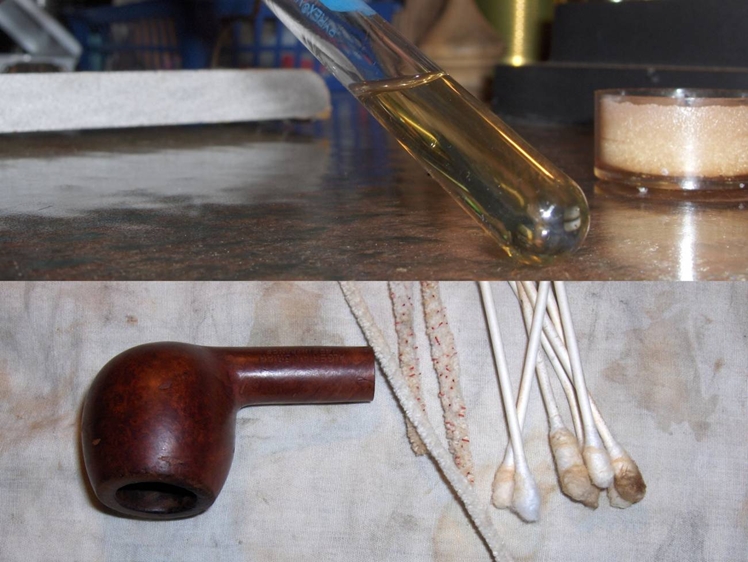
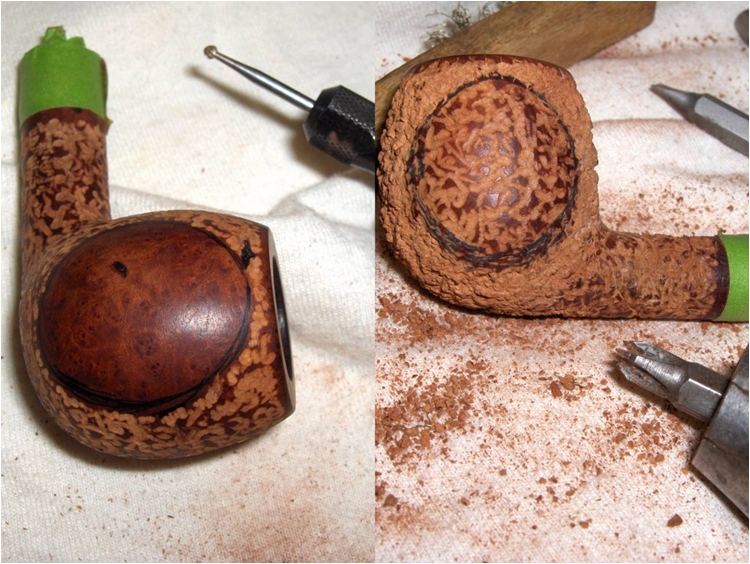
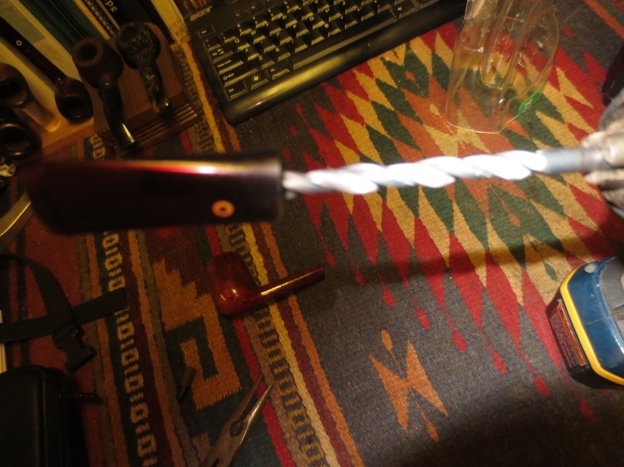
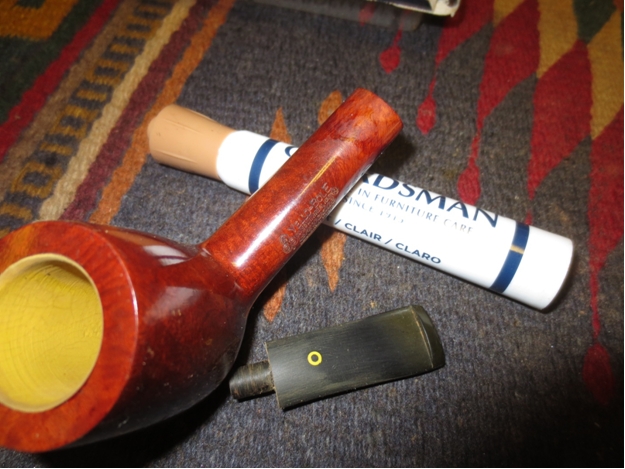
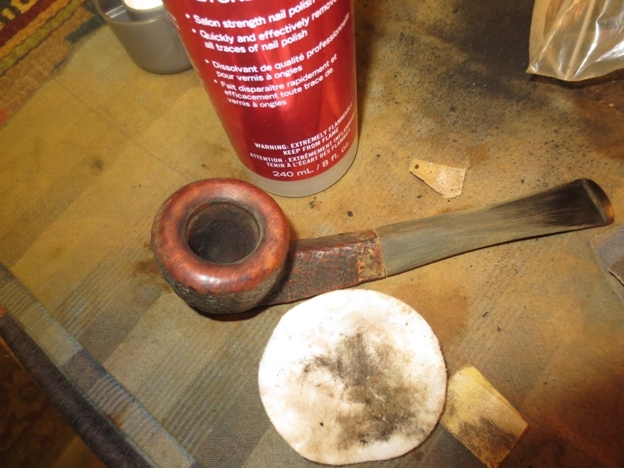
I started by giving the stummel an alcohol bath and wiping it down with acetone. This removed the lacquer coat and much of the old stain. It also revealed some really nice grain between the areas of carved rustication. Then, I topped the bowl with 220-grit and 320-grit papers. I used the same grits to rough out a chamfer around the rim to remove the gouges along the edge.Anthony4 Even though the pipe had been hand cleaned before being boxed up, I wanted to do a retort since I didn’t have one at the time. So, I placed the original, aluminum tenon into the mortise and attached the retort tube directly to that. I flushed the boiling alcohol through the shank 8-10 times before setting the pipe aside to cool, and then I dumped the amber-colored alcohol and repeated the process. After the second flush, the alcohol remained nearly clear and I was satisfied that the retort had done all that it could do. I gave the shank a final scrub using a few pipe cleaners, cotton swabs, and a shank brush and considered the pipe to be clean as it was going to get.Anthony5 
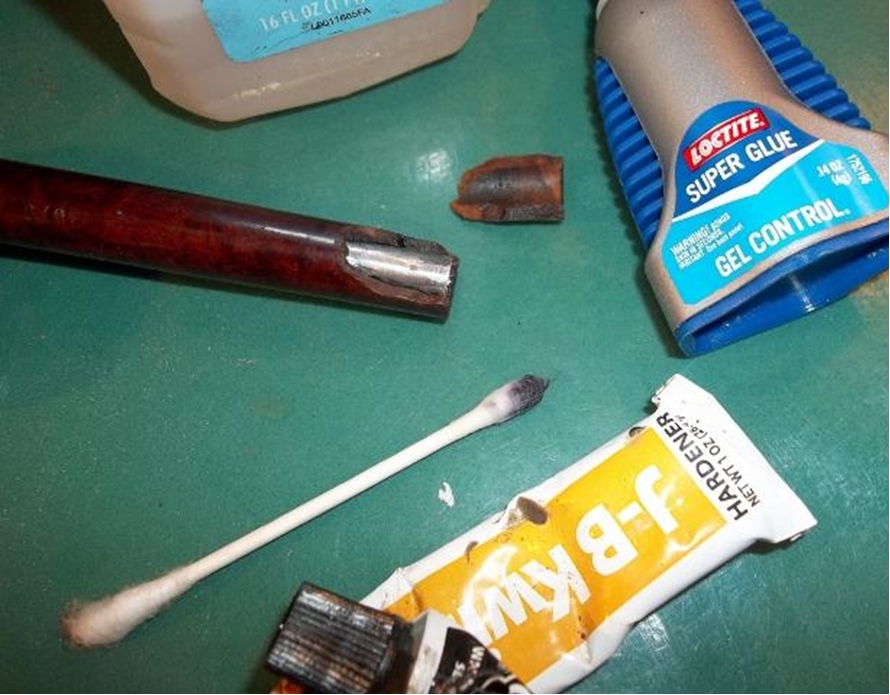
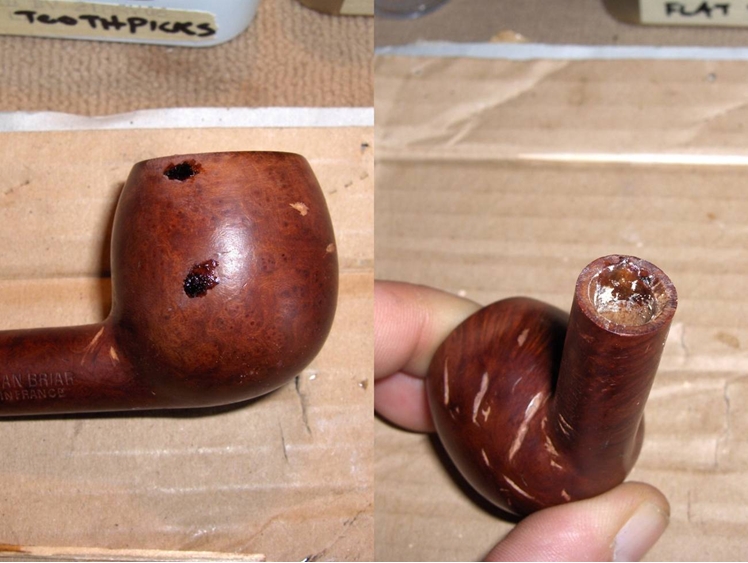
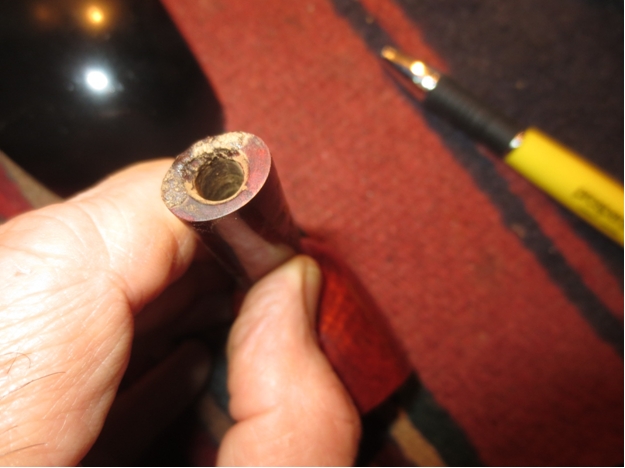
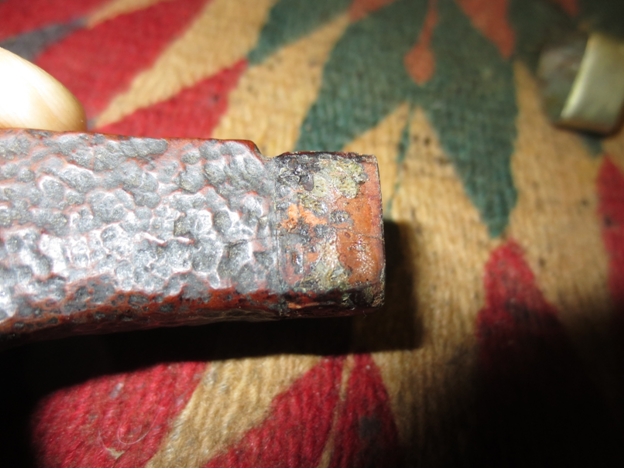
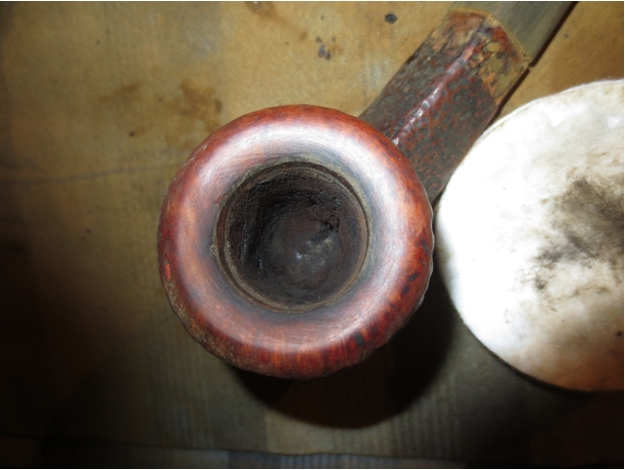
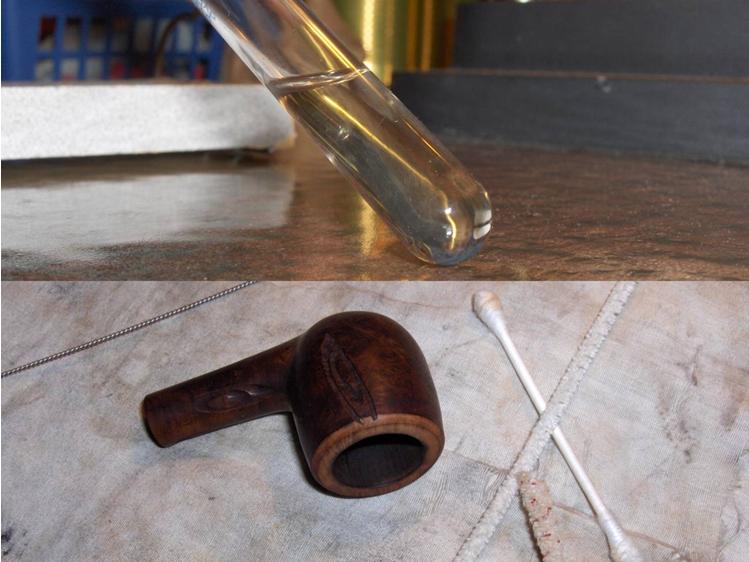
The stummel had a few fills that needed to be dealt with. It also had a small, surface crack at the end of the shank that did not penetrate into the mortise. I had wondered about using black CA glue for fills for a while. When I saw Al’s work on the Chelsea pipe I knew that I had to give it a try. After picking the fill material out, I applied a bit of glue into the pits and crack with a round toothpick, and then packed in a little pre-stained briar dust that I had left over the Rogers pipe that I posted earlier. I repeated this until I had a good patch built up above the surface. When the glue was dry, I sanded it down with 220 and 320-grit paper. I also used a round, tapered needle file and 240/320-grit sanding needles to smooth and shape a patch inside the carved rustication.Anthony6 
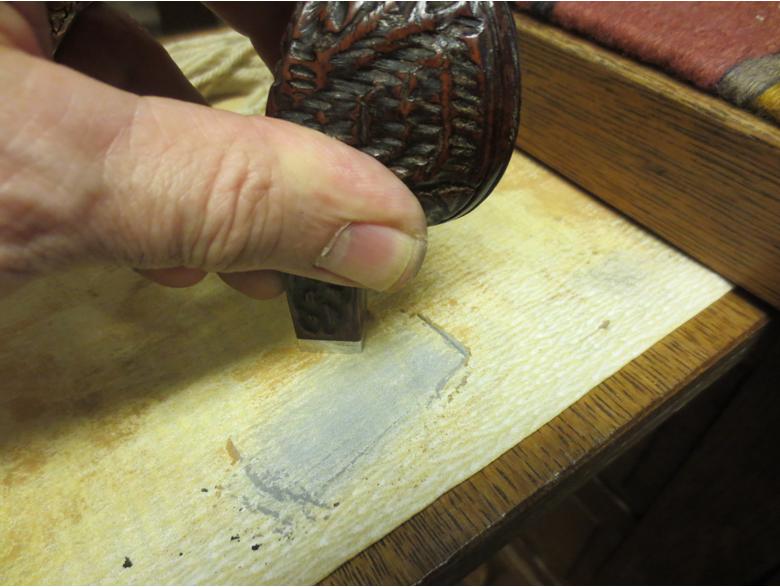
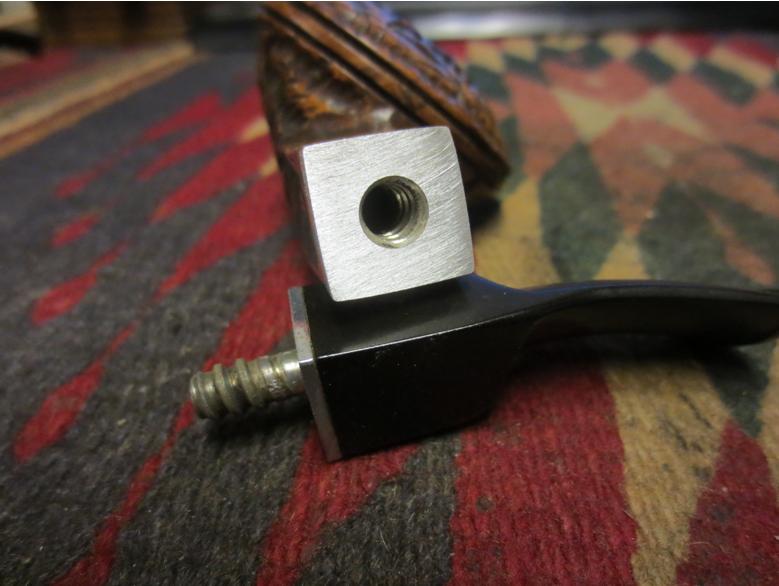
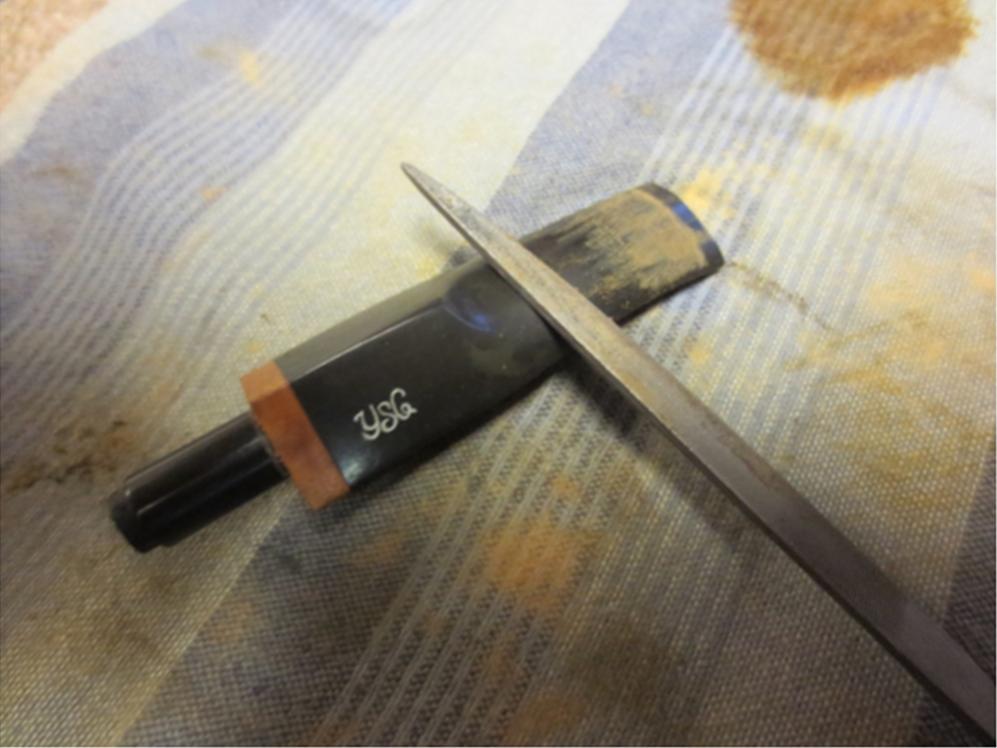
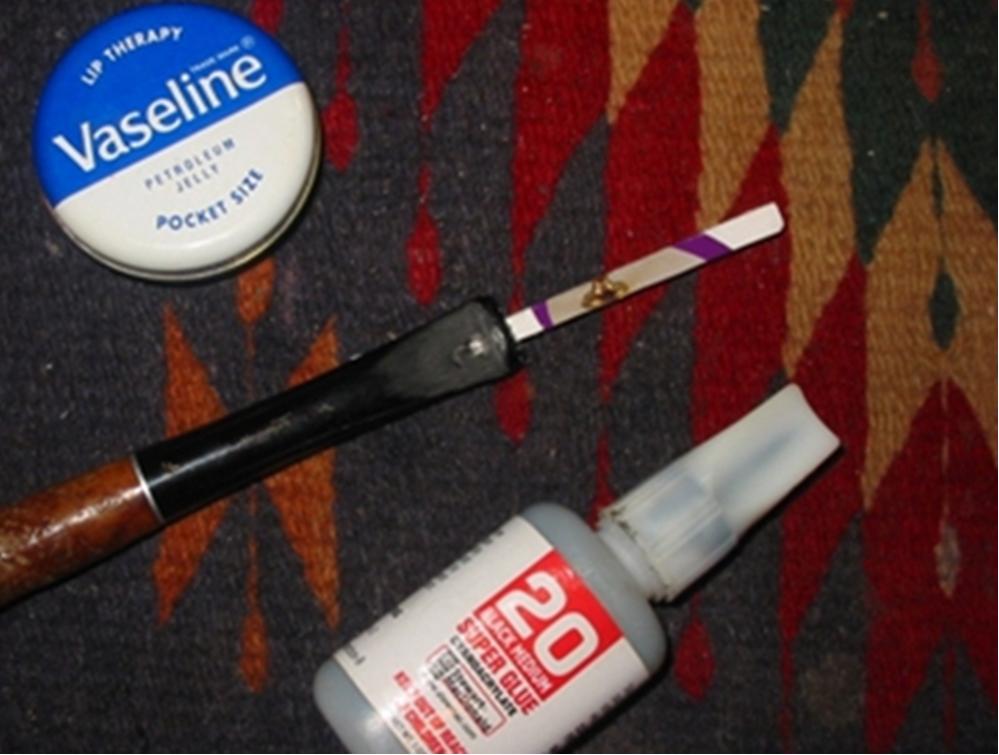
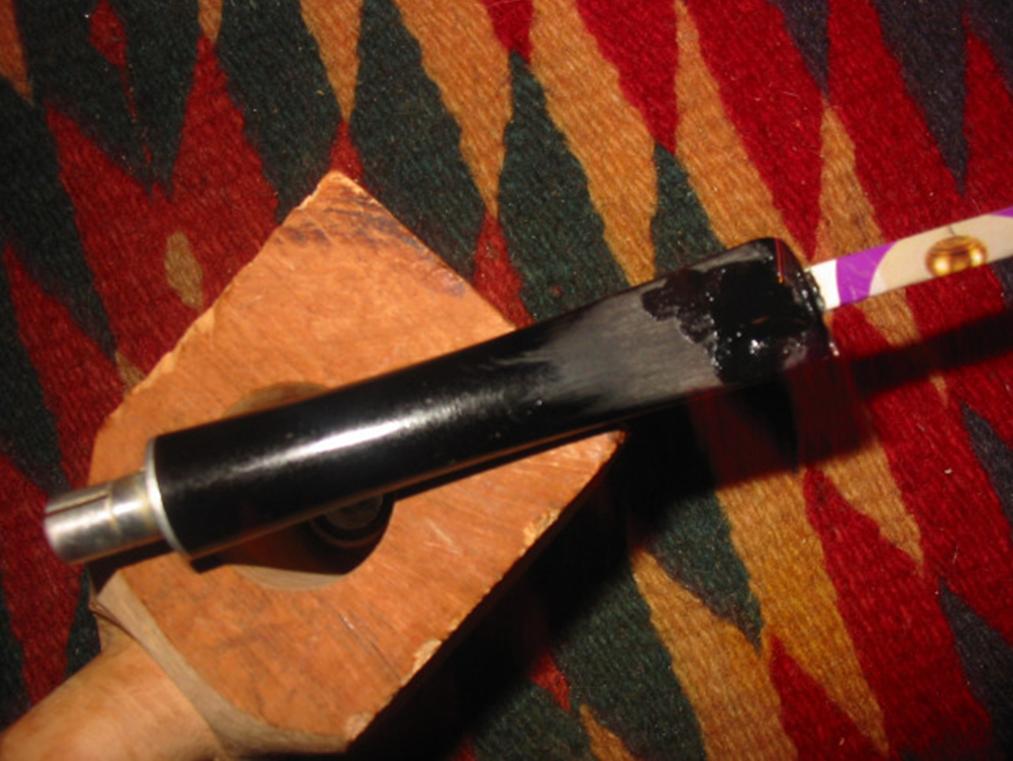
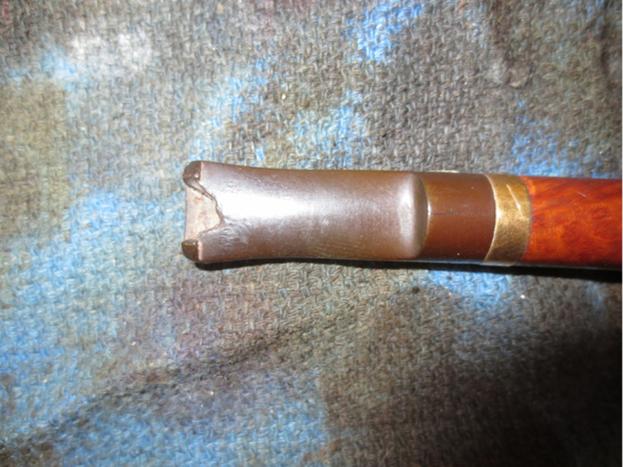
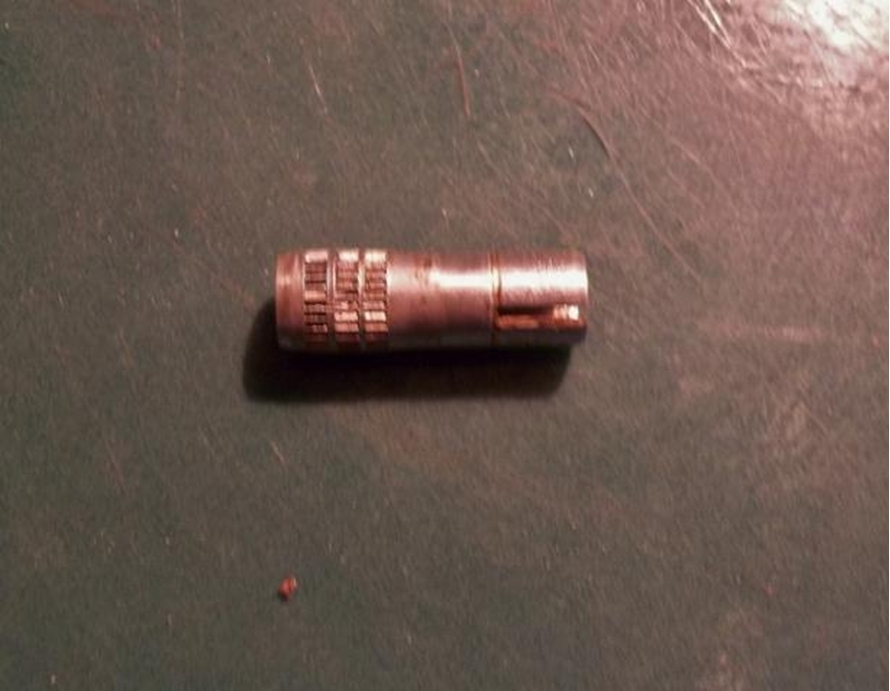
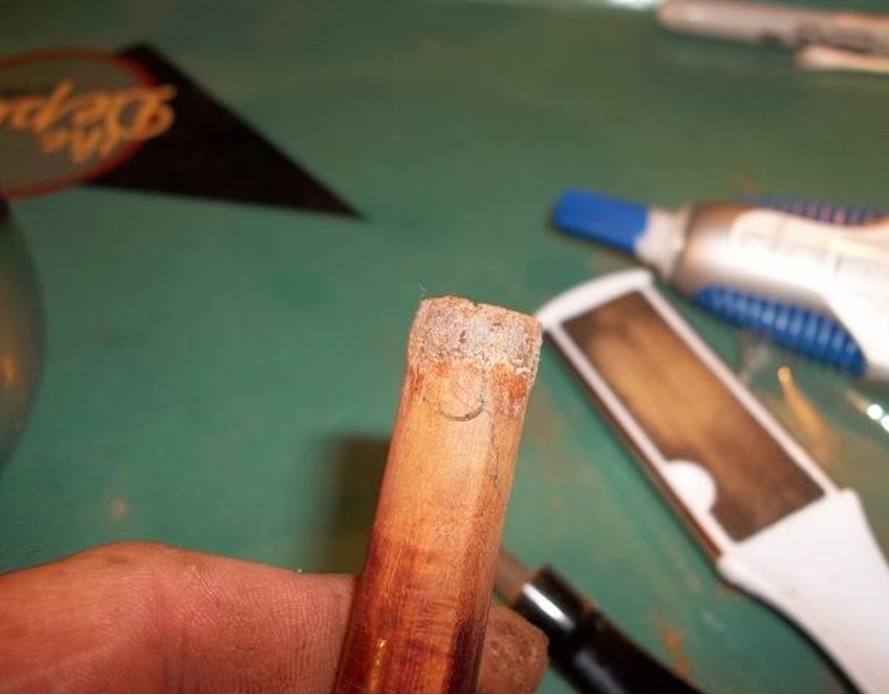
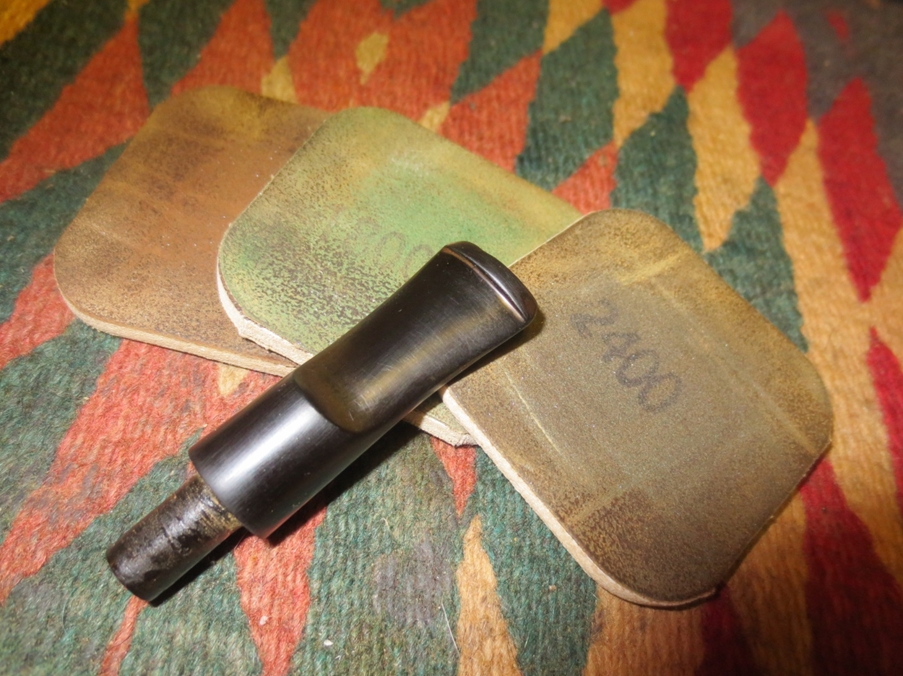
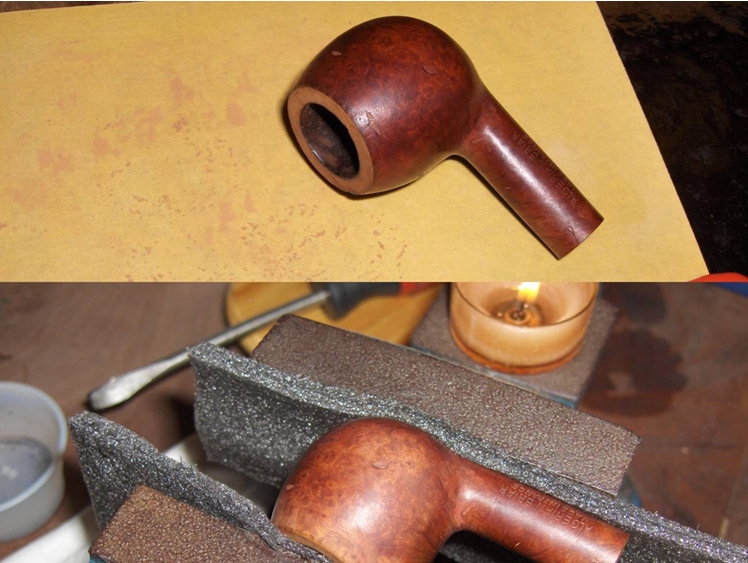
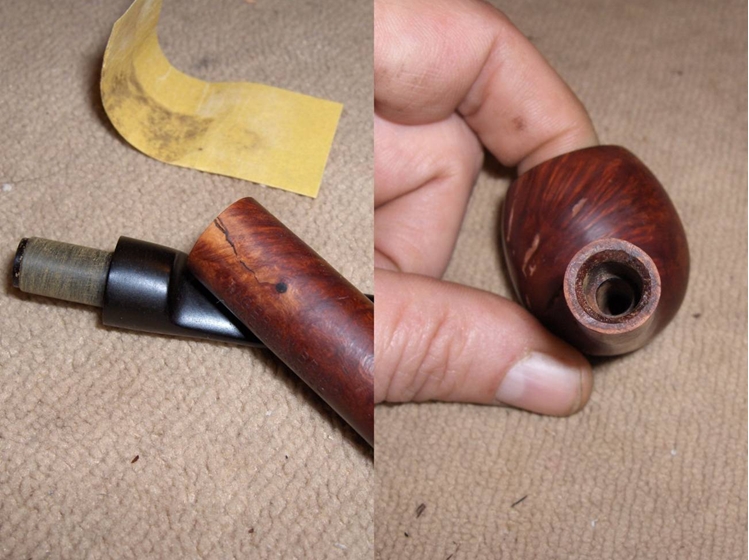
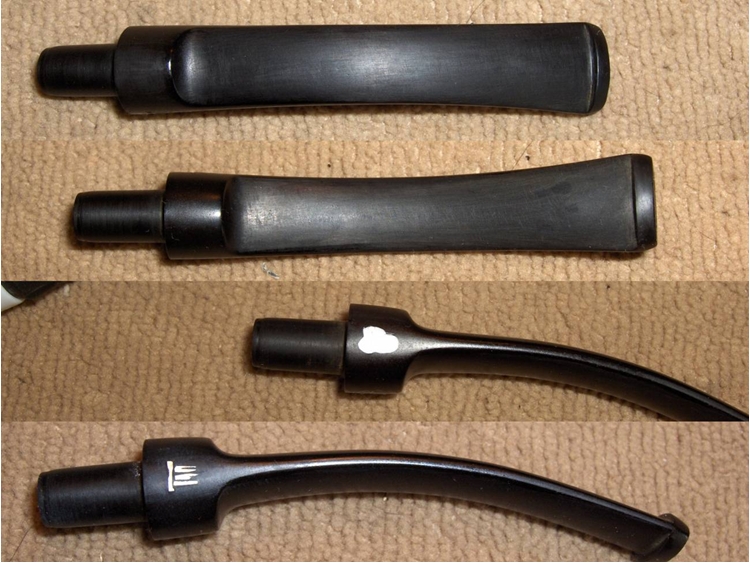
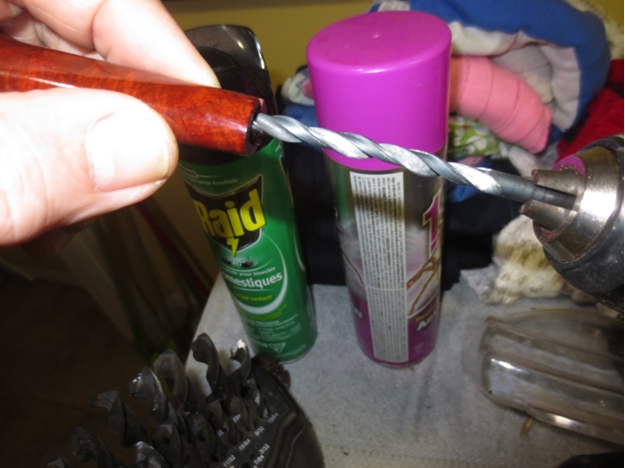
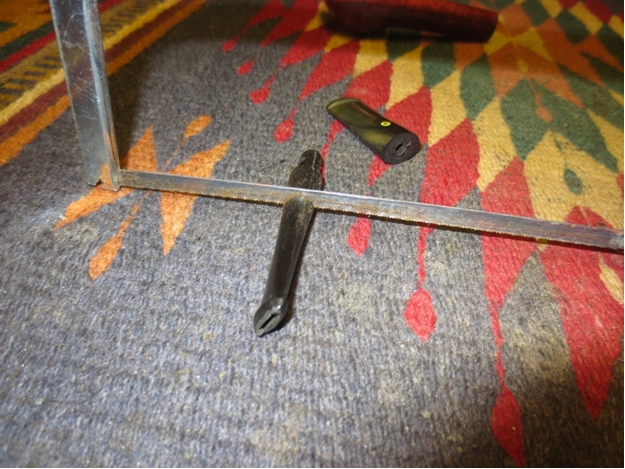
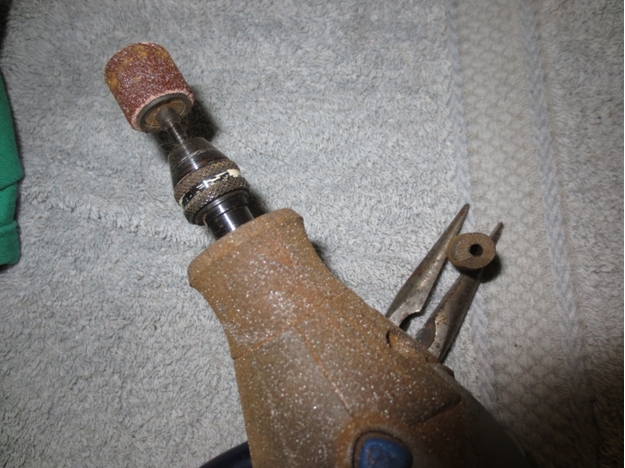
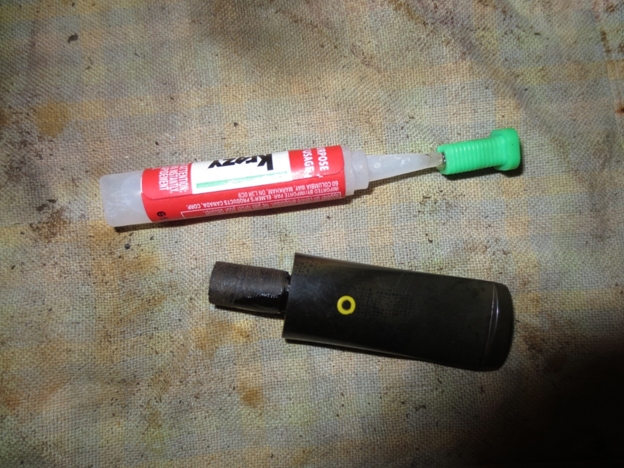
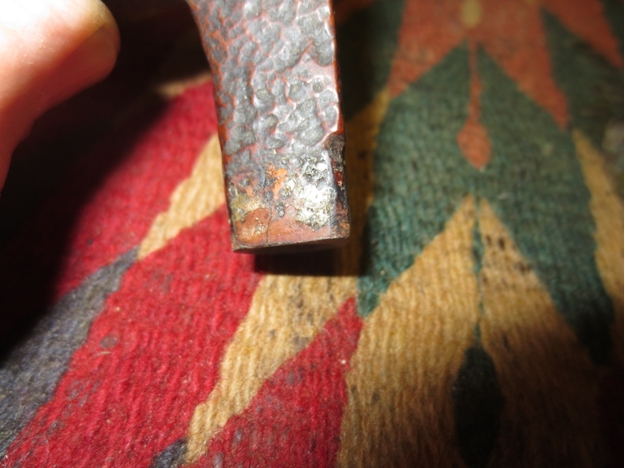
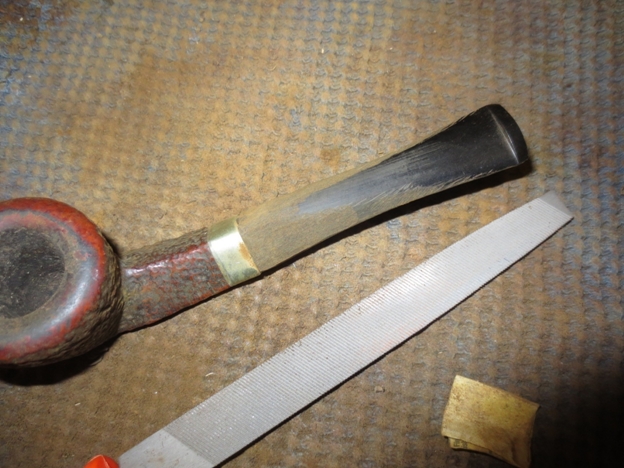
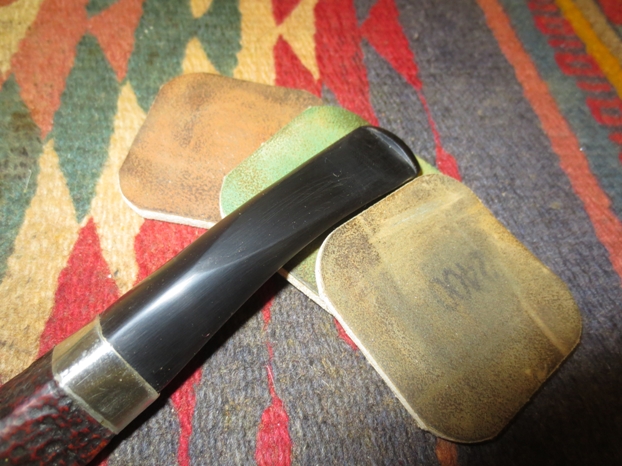
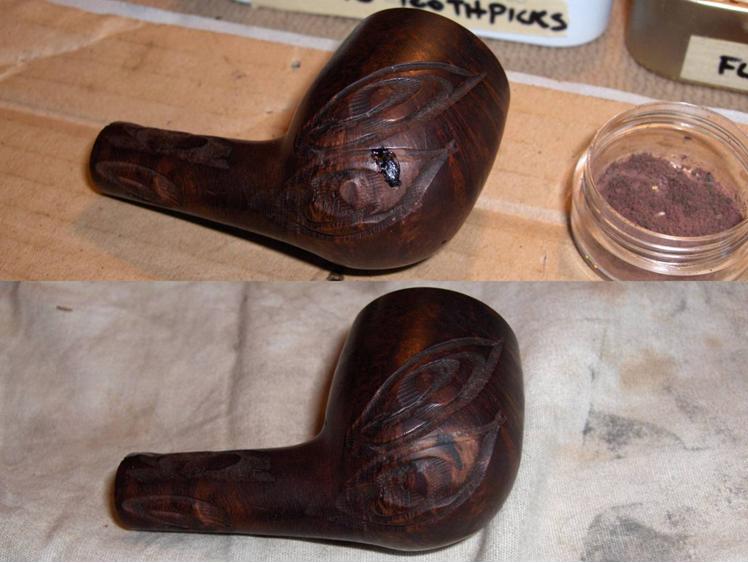
Once the fills and crack were repaired, it was time to do something about the stem. I had picked up a grab-bag batch of pre-made stems a short while earlier. I sifted through them until I found a decent match. I decided to trim the tenon rather refitting the old, aluminum one. So, I cut off the stepped end of the tenon with a Dremel, and then trimmed the tenon with the tenon turning tool chucked into the drill press. The tool was new to me and the first image in the picture below shows the result of my first cut. My speed was off and I didn’t take it up far enough to face it properly. No worries though, because it was still too large and the subsequent trims went much better.Anthony7 
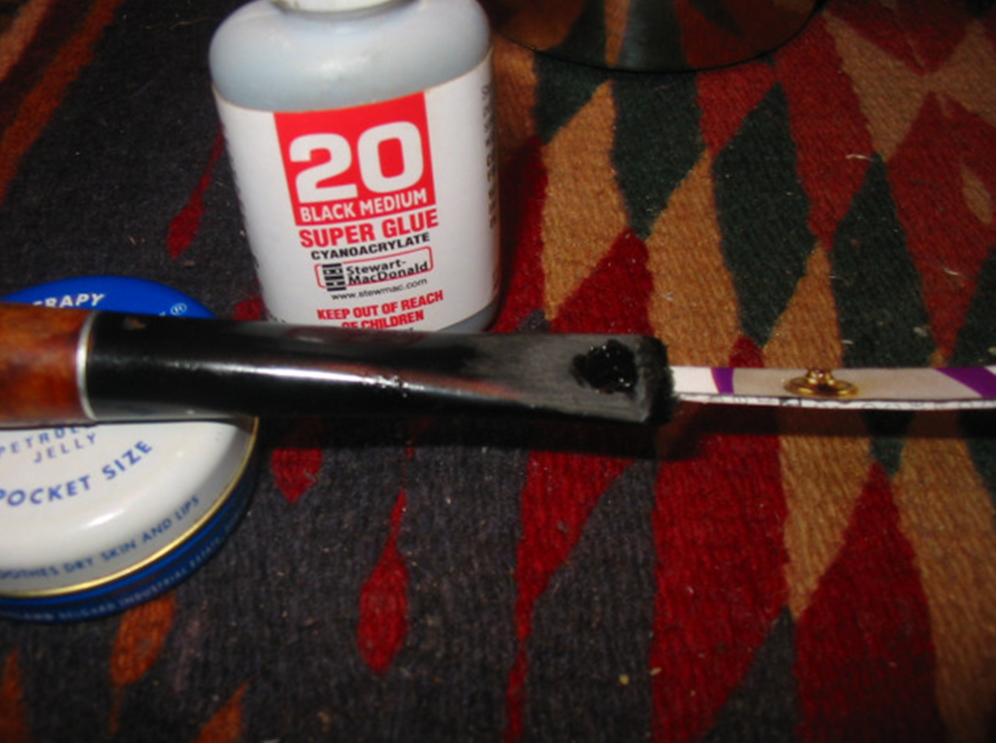
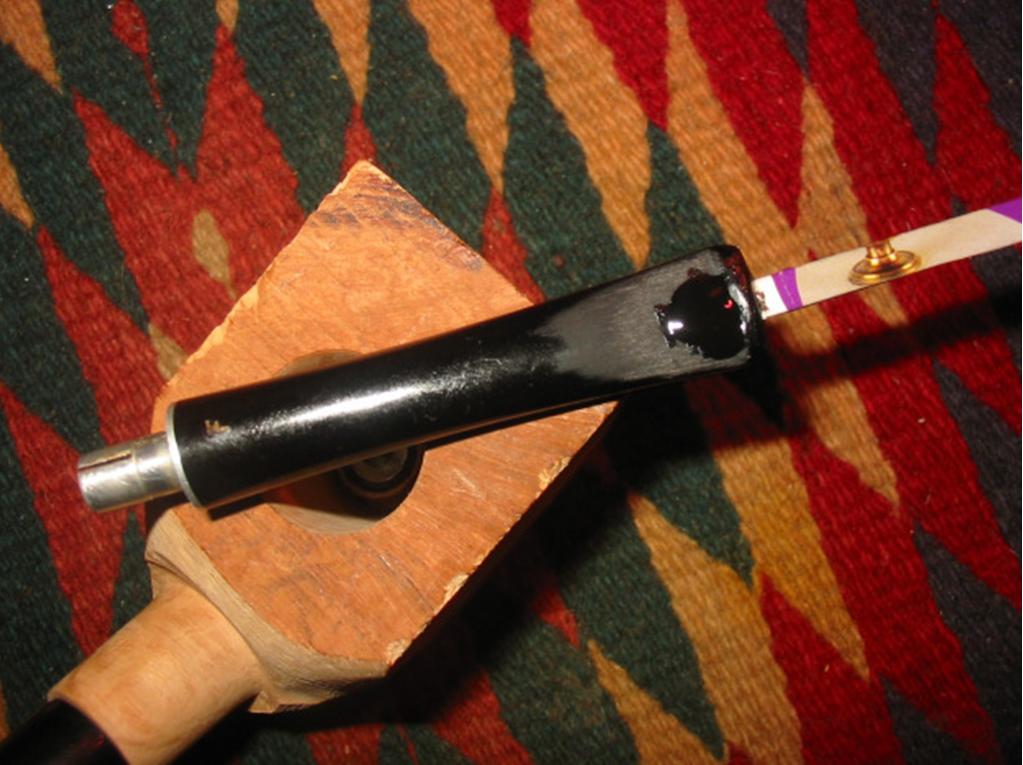
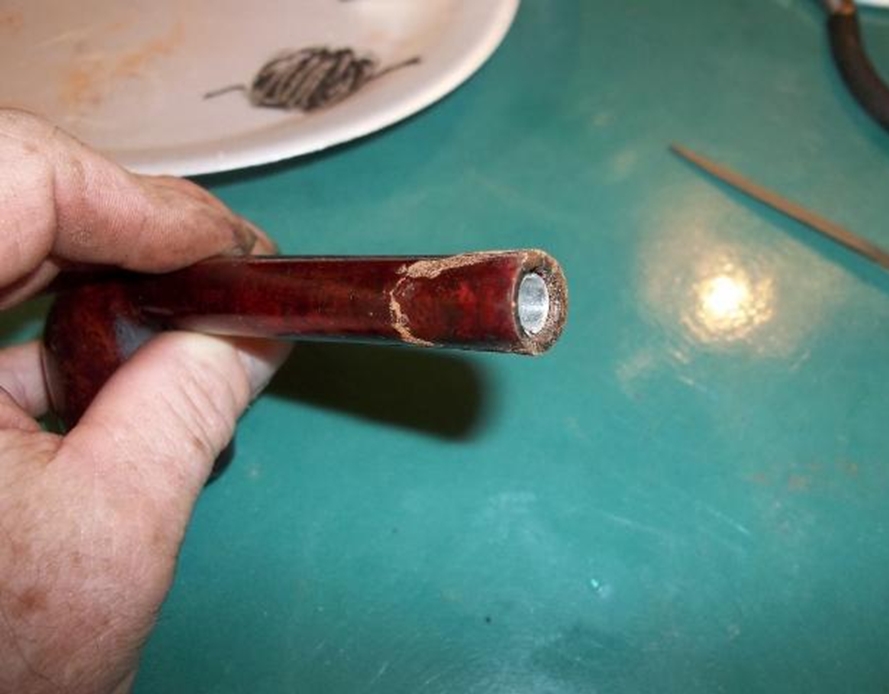
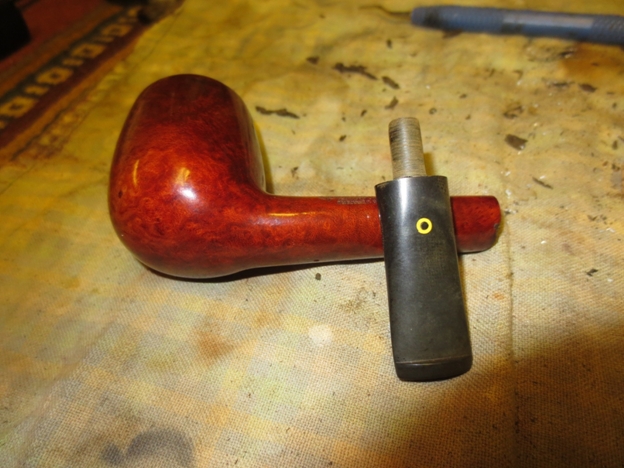
After each turn of the tenon, I tested the fit by inserting it partially into the shank. When I thought I was getting very close, I attempted to insert the stem a bit farther and heard a sharp “snap”. It was the unmistakable sound of the shank cracking. It seems that the surface crack that I had thought was insignificant had suddenly become significant.

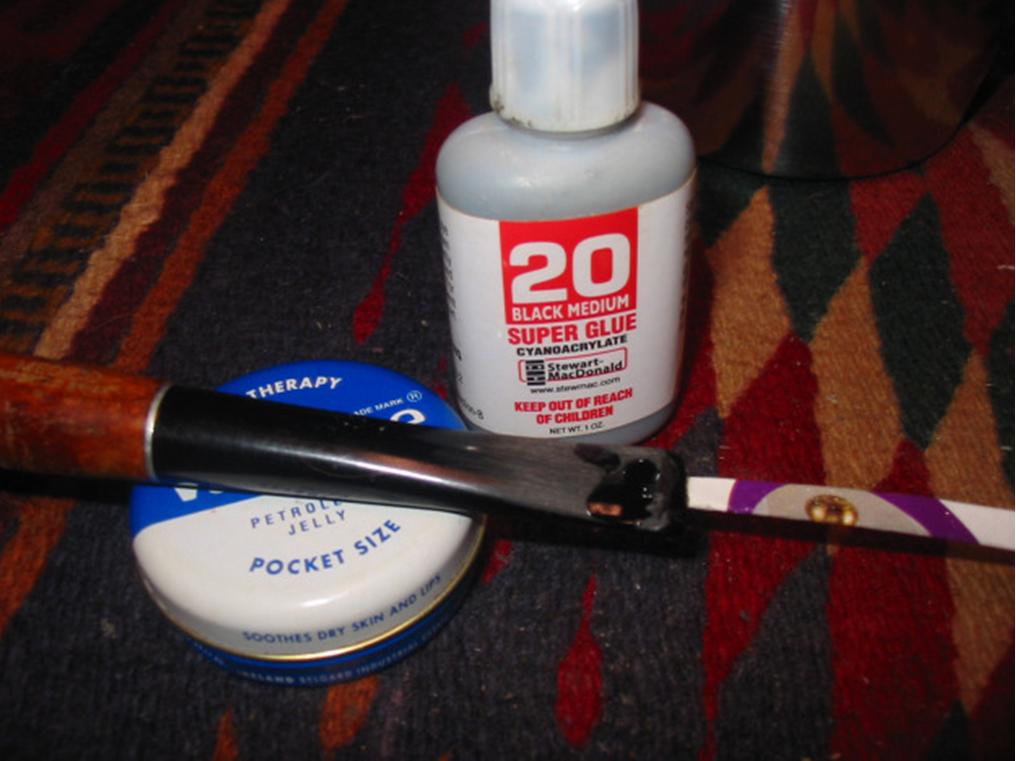
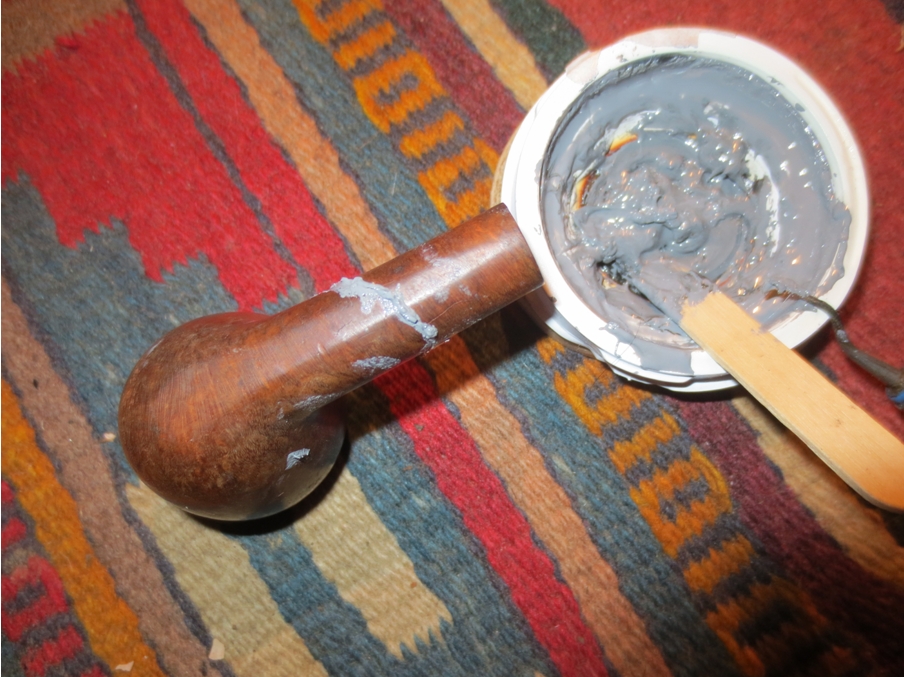
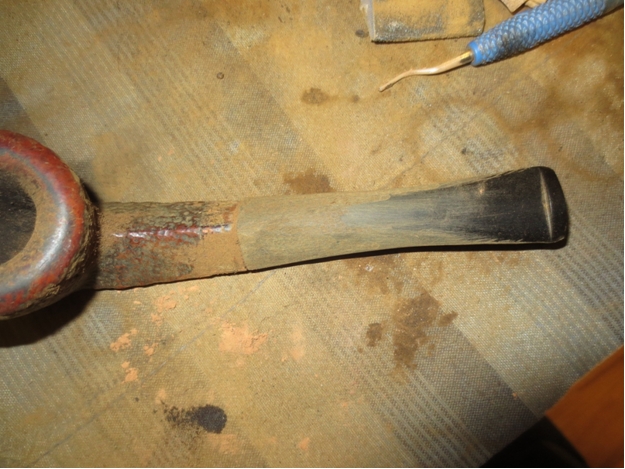
To repair the crack, I smeared petroleum jelly over the tenon and inserted it into the mortise to spread the crack open. Then, I applied CA glue (clear, not black this time) into the crack and removed the stem to allow the crack to close. I squeezed the shank tightly together with my fingers for a couple of minutes until the glue had set.Anthony8 I wasn’t going to do anything more with the stem until I added some support to the shank. I considered trimming down the original, aluminum tenon to use an internal splint, but decided against it. Since the new crack had run longer than the length of the tenon. So, I decided to band the shank.

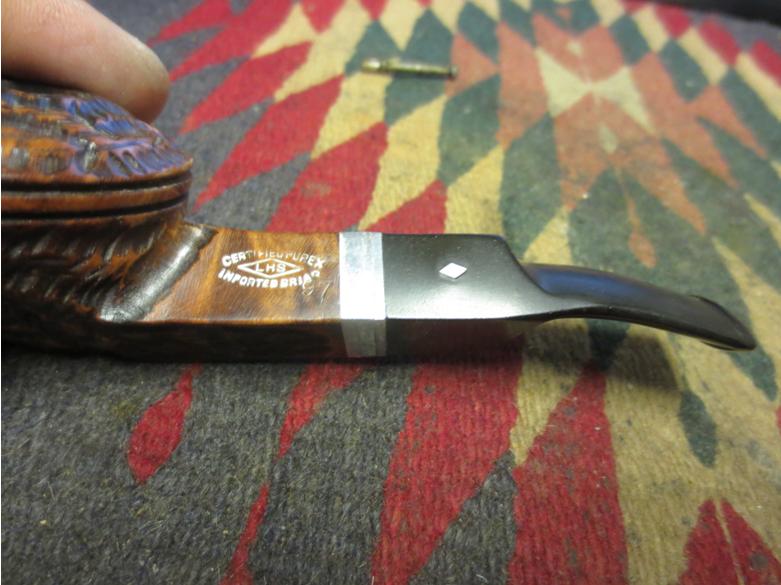
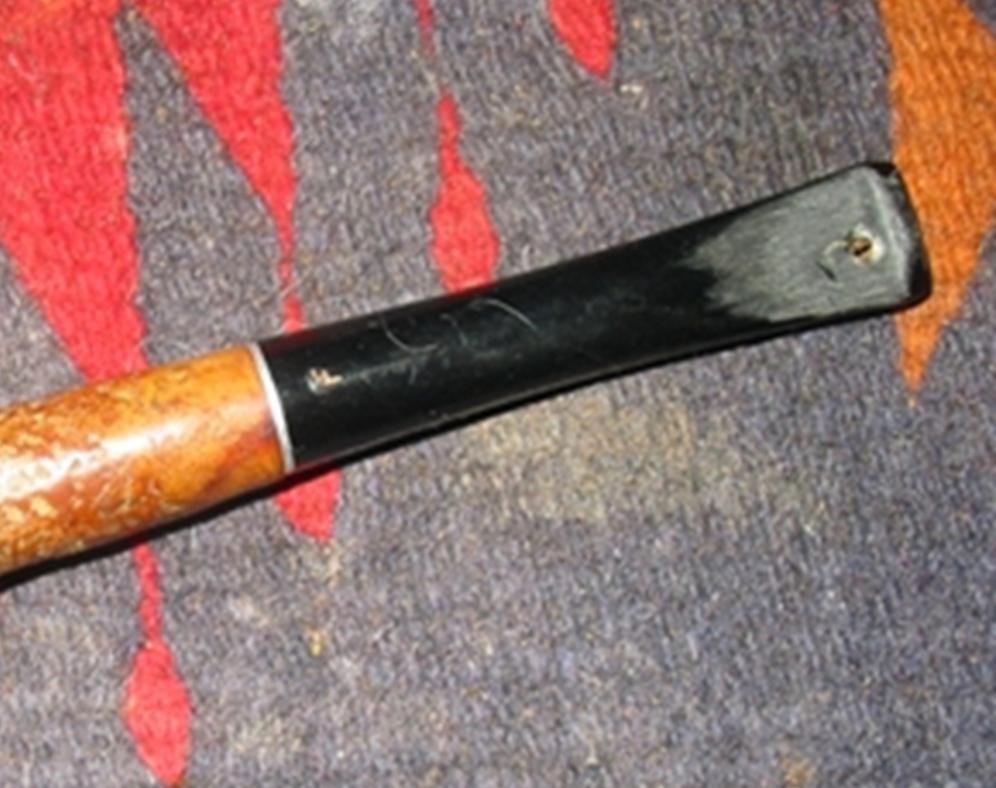
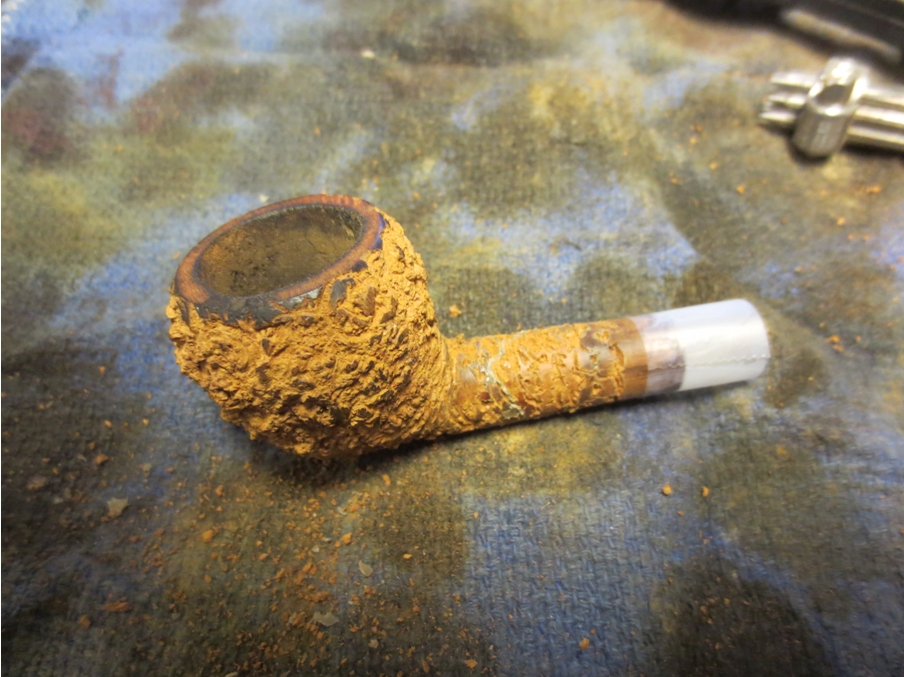
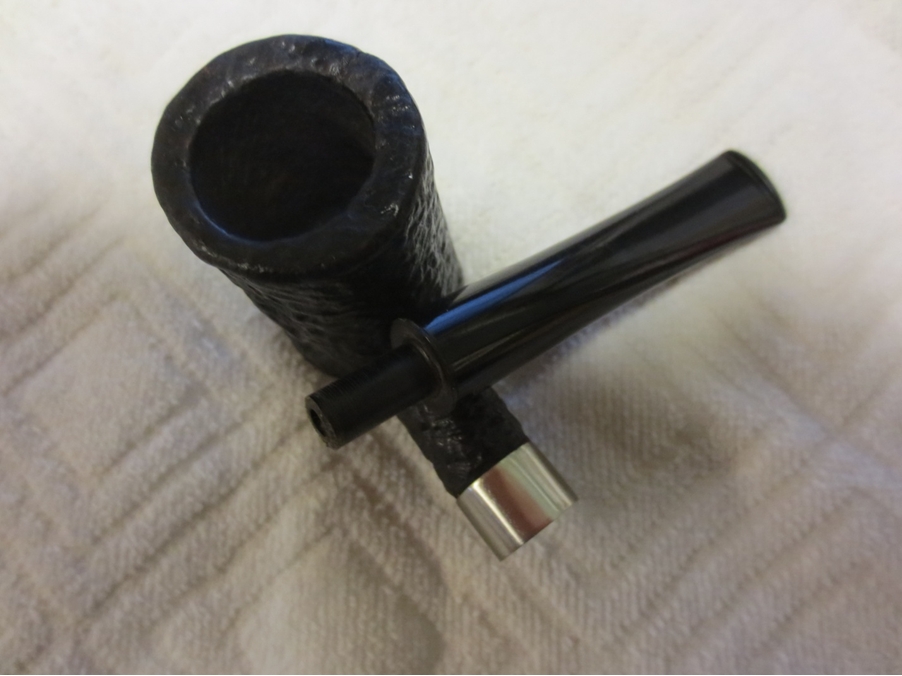
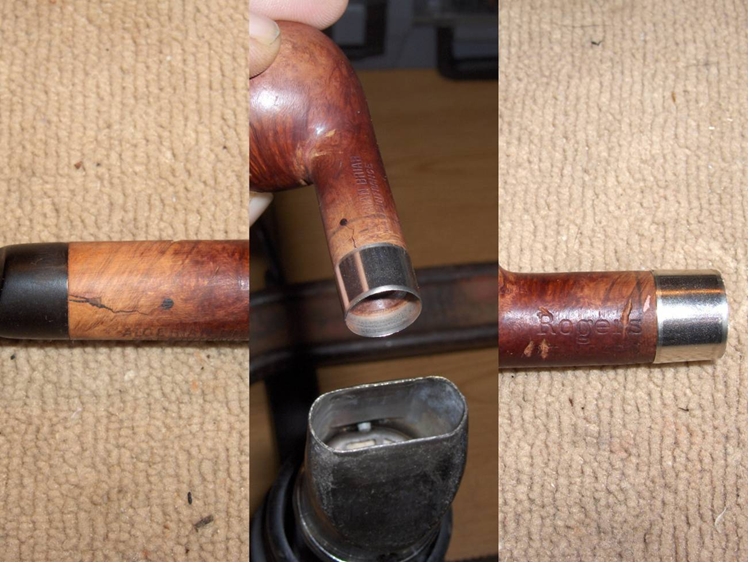
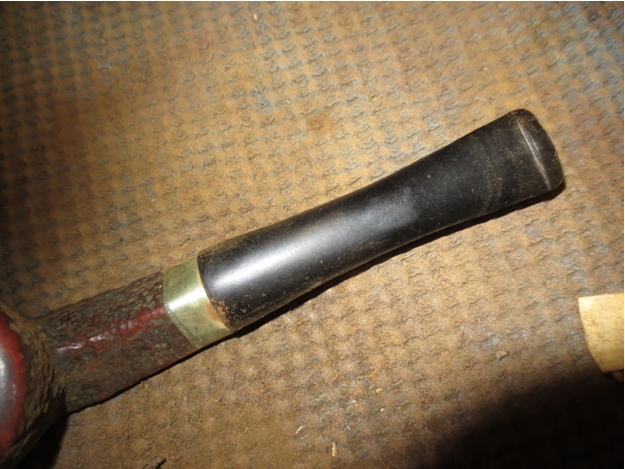
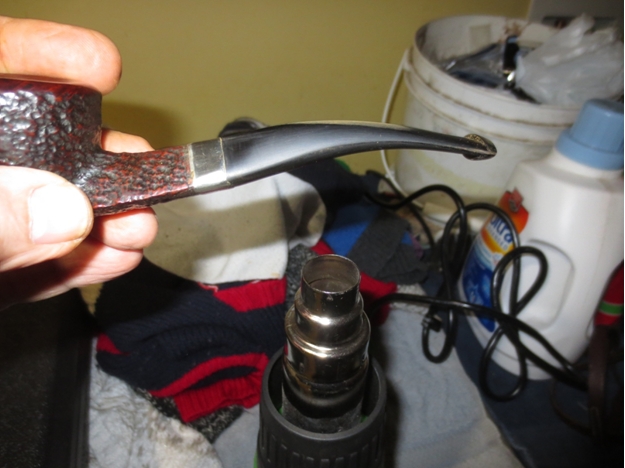
I had some trouble finding a band that would fit properly. A 13mm would slide most of the way up the shank easily, but a 12.5mm band wouldn’t even start over the end. So, using the 13mm as a guide, I marked off an area that was the width of the band and sanded it down until the 12.5mm band would just barely slide onto the shank. Then I held the band attached to the stummel over a heat gun to expand it. In less than a minute it had expanded enough that I could push the band the remaining distance up the shank by pressing the end into a soft cloth on a hard surface.Anthony9 
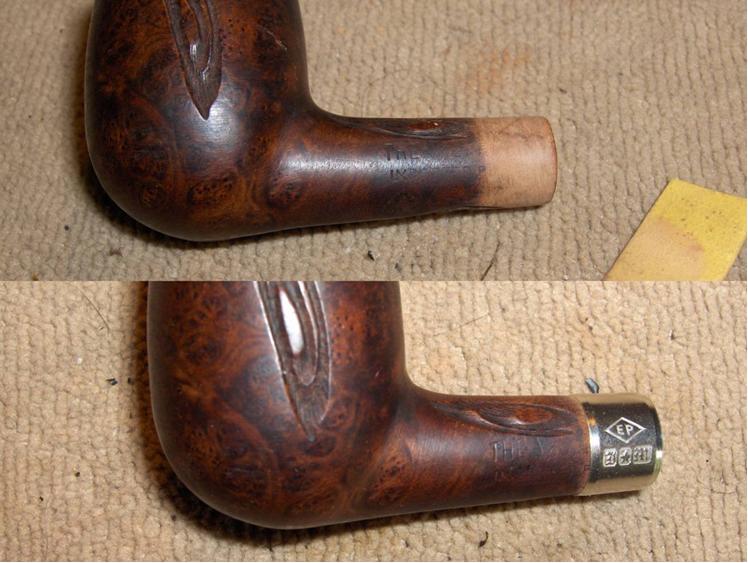
With the band in place, I could continue working on the tenon. I continued to slightly reduce the diameter of the tenon with 220-grit, 320-grit, and 400-grit paper until the stem was held tightly in place but easily removed.

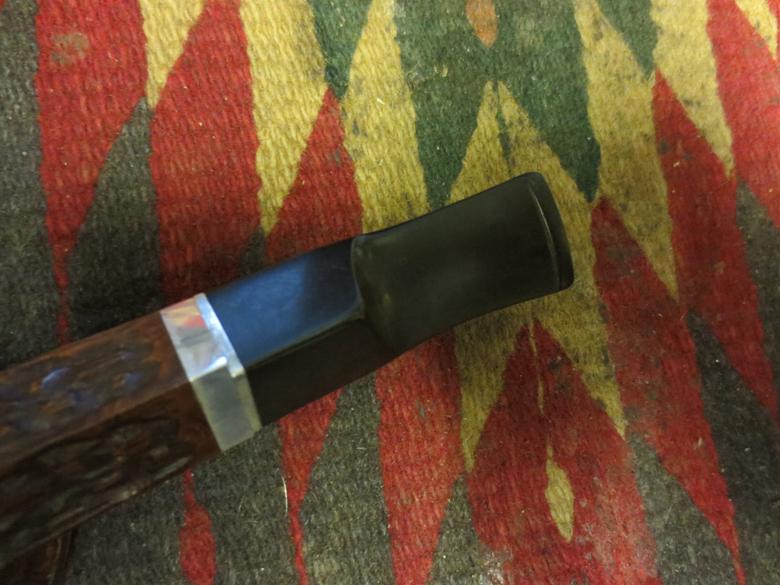
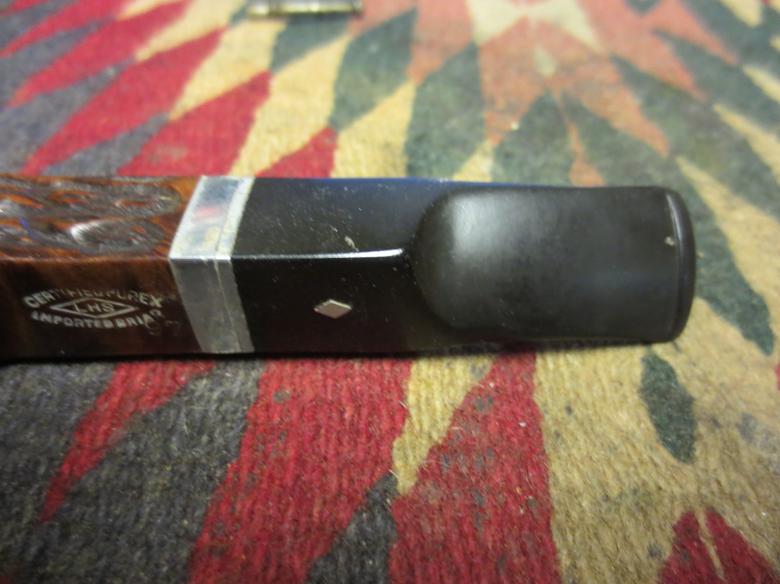
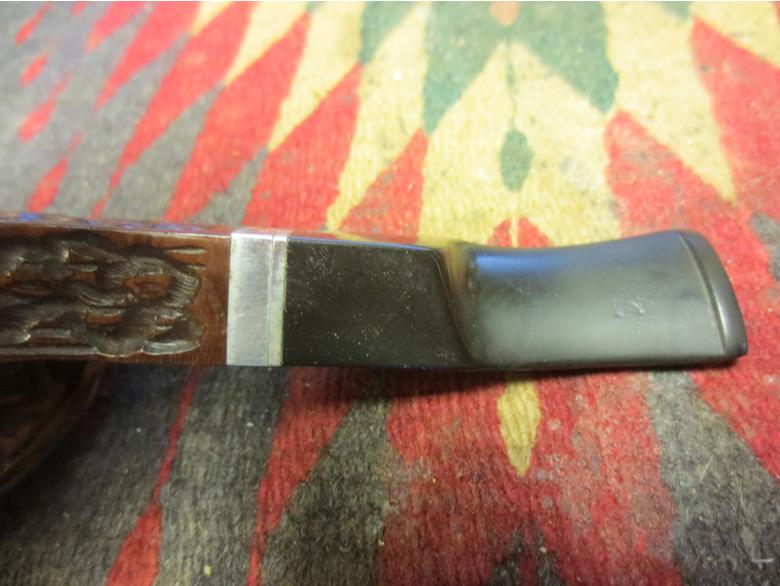
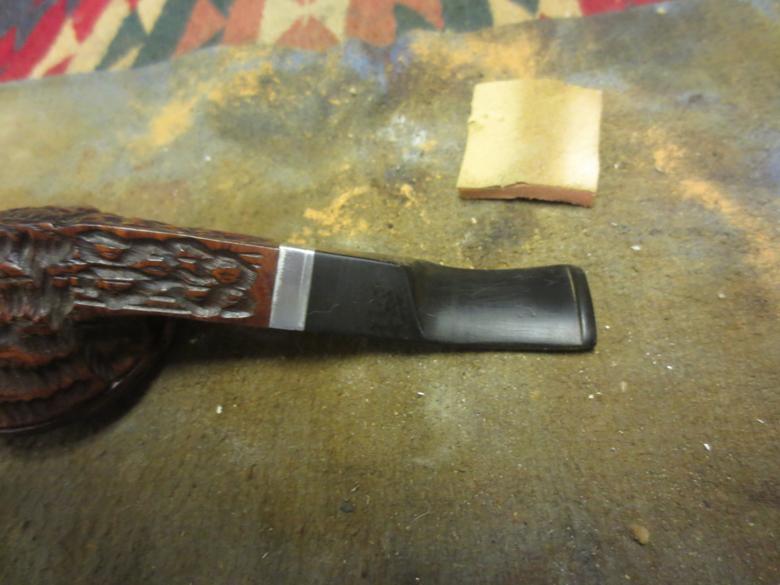
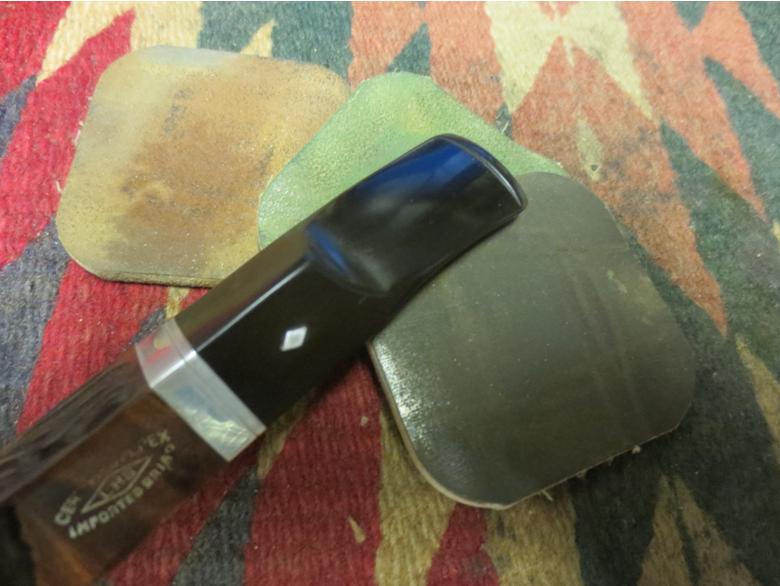
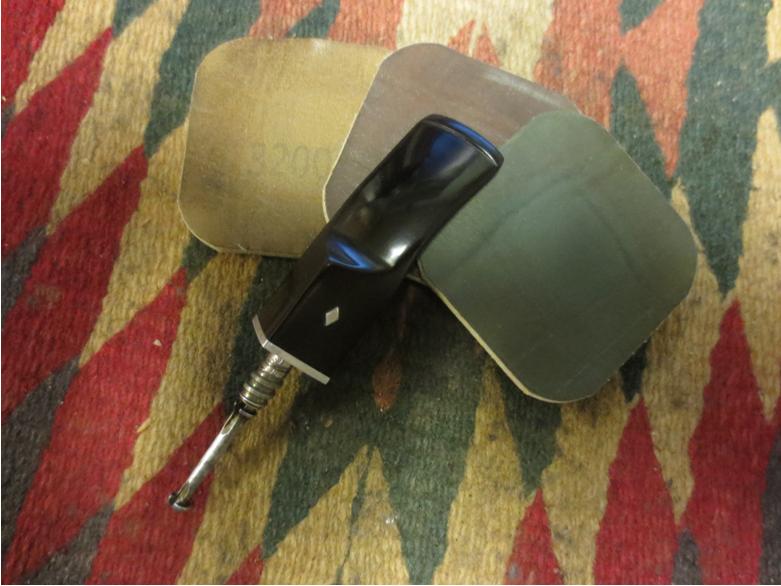
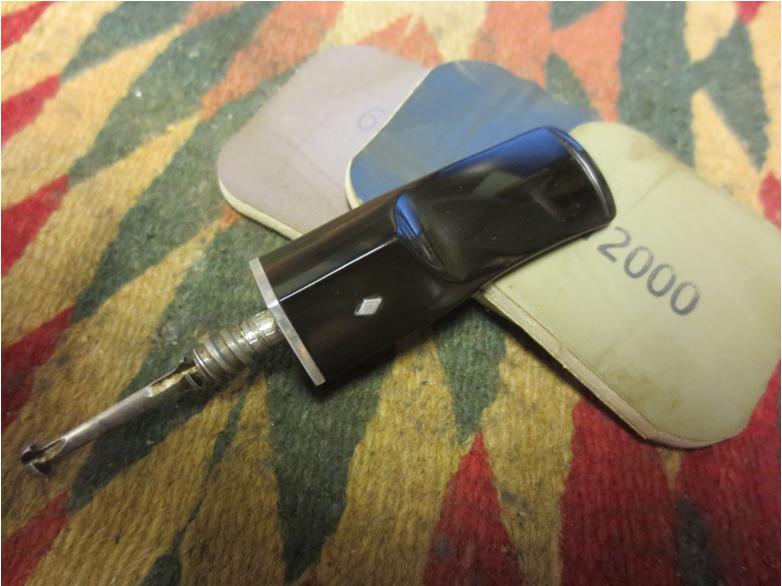
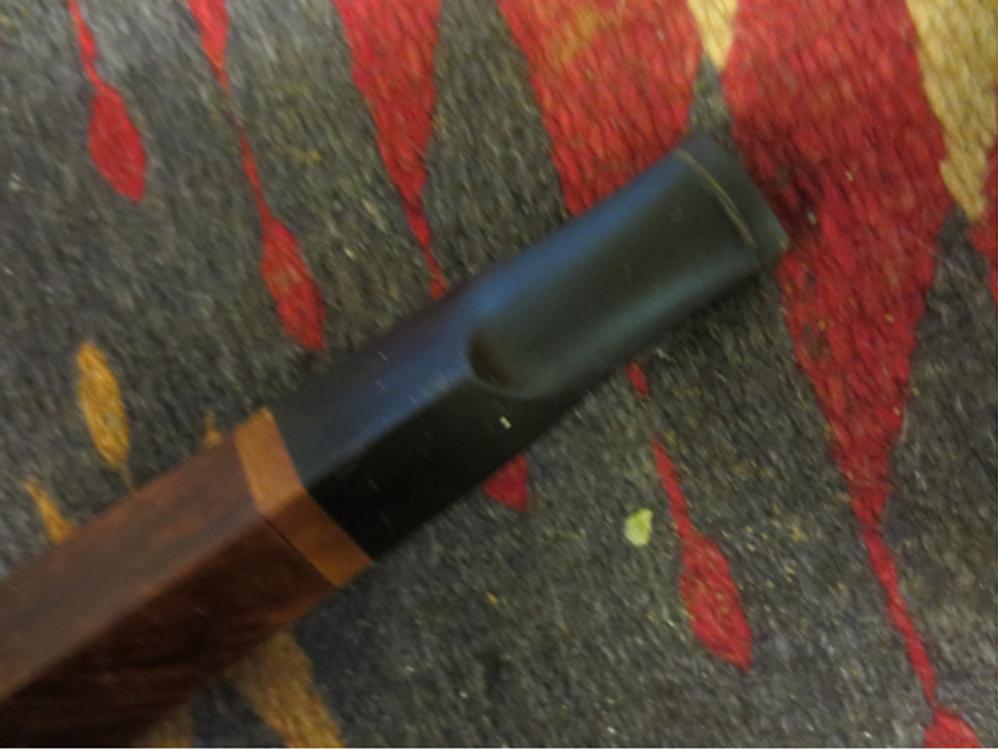
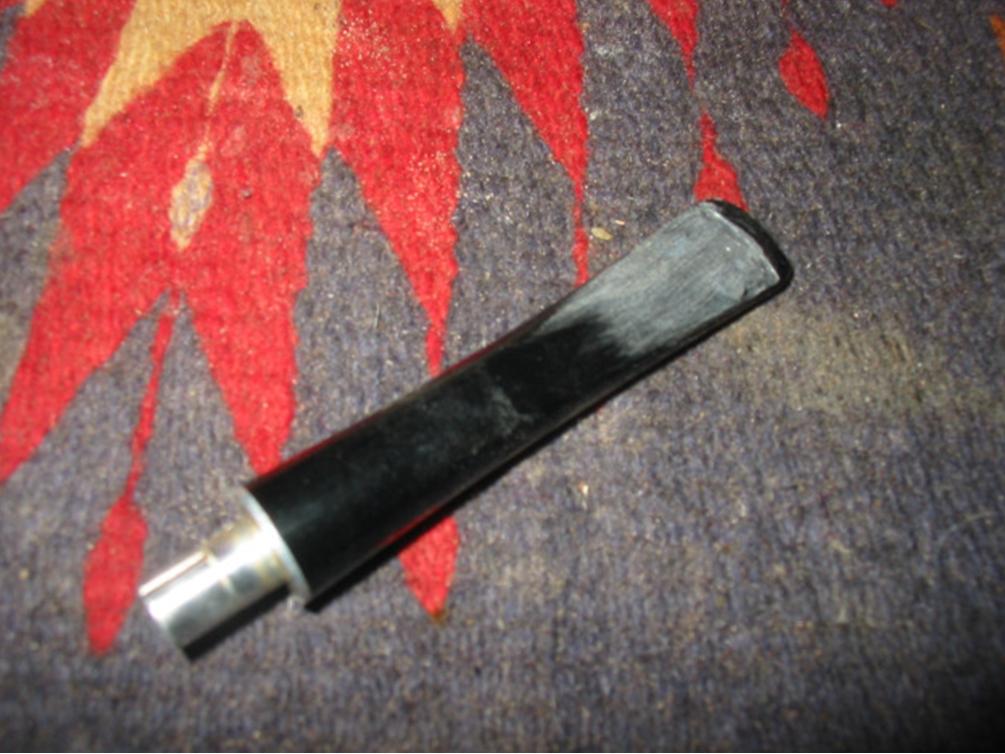
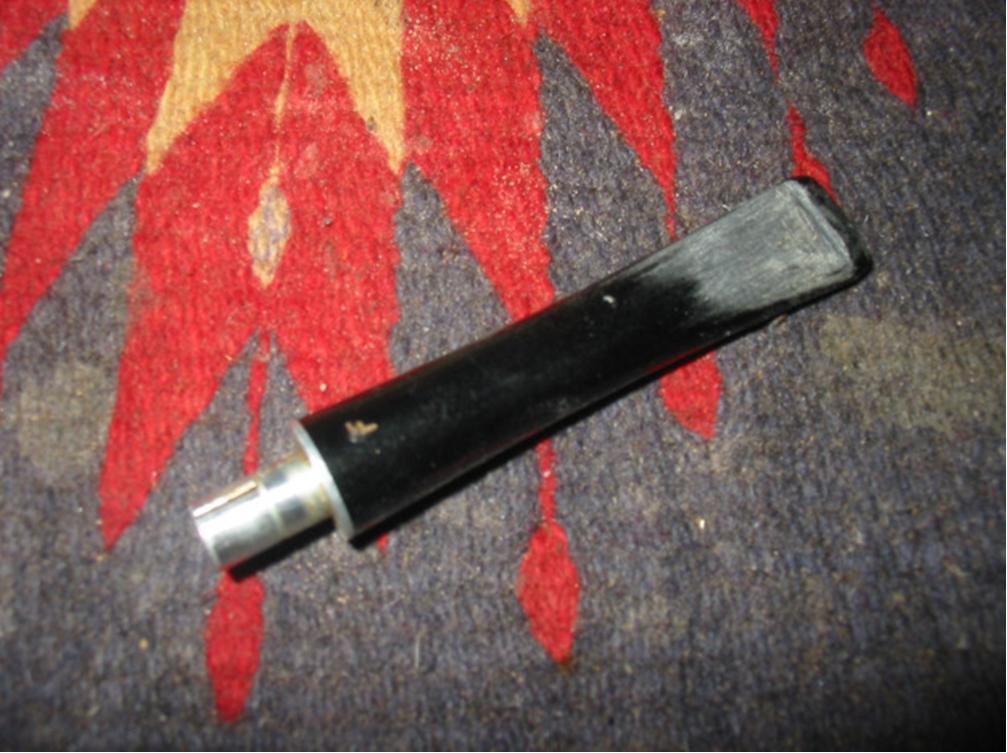
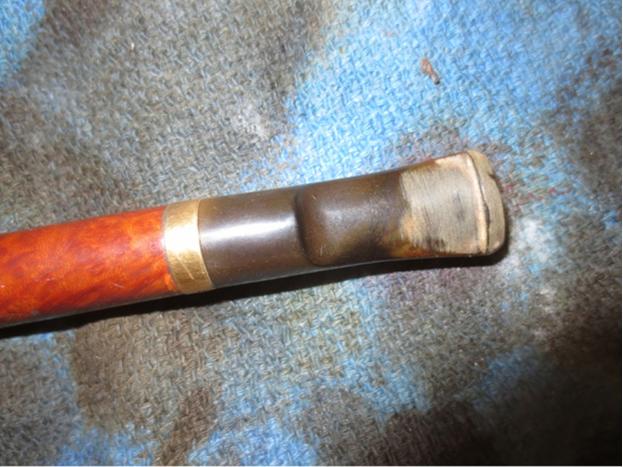
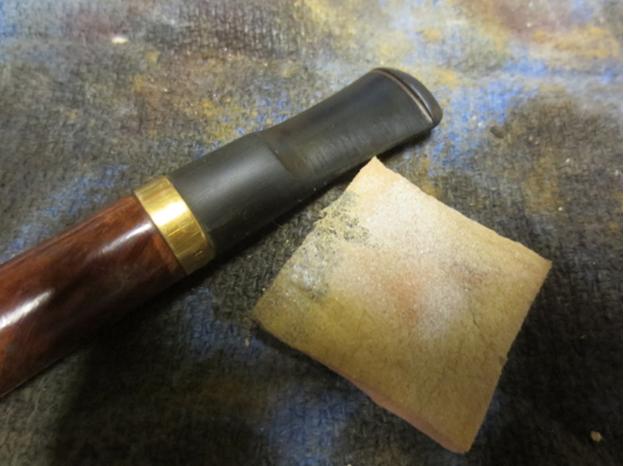
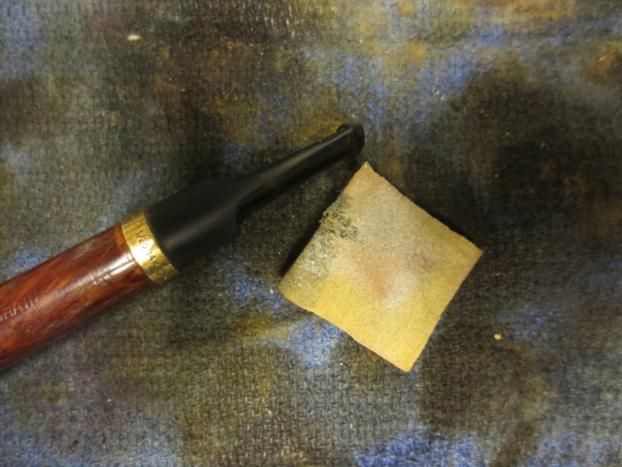
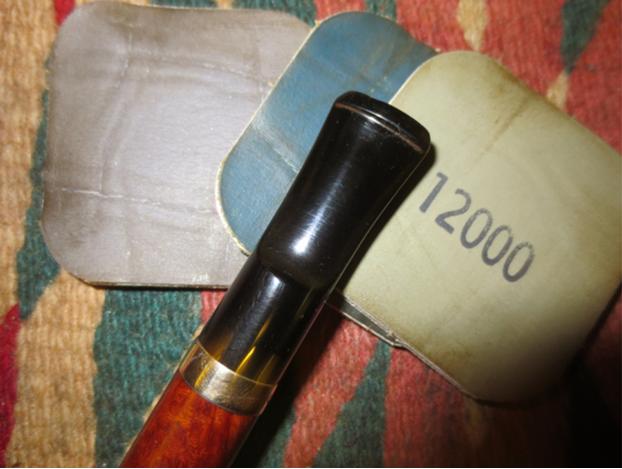
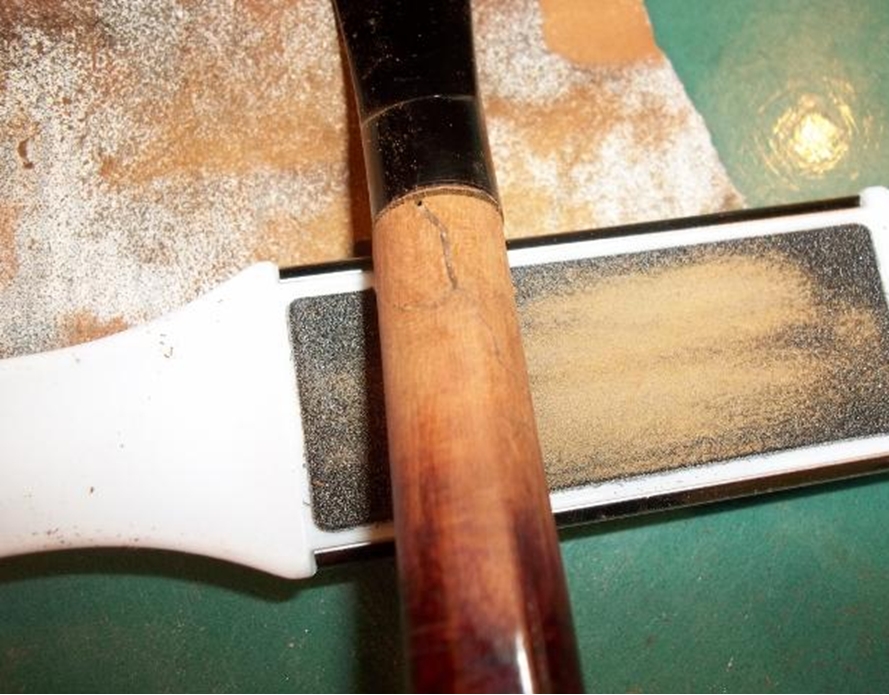
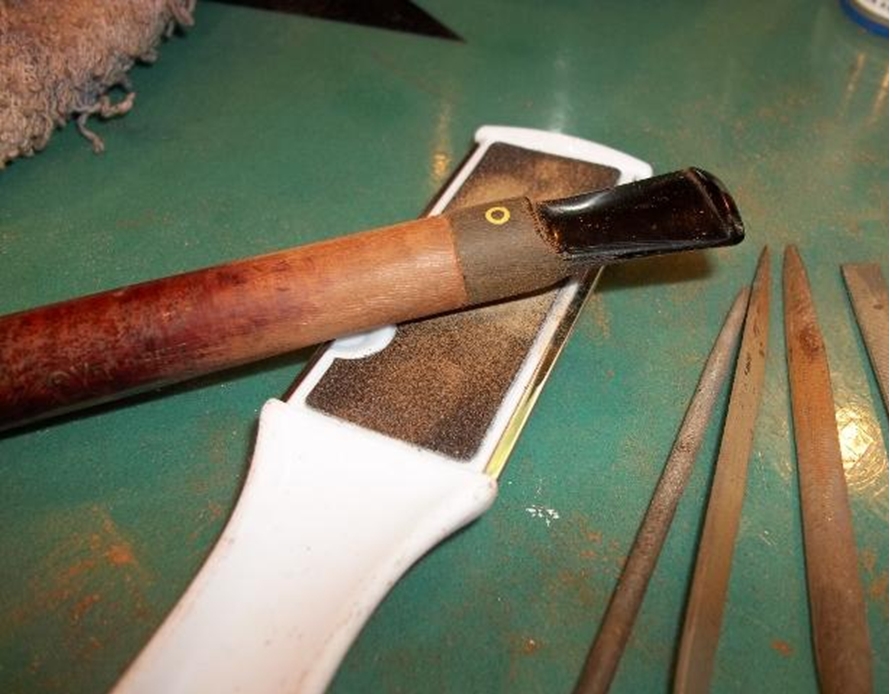
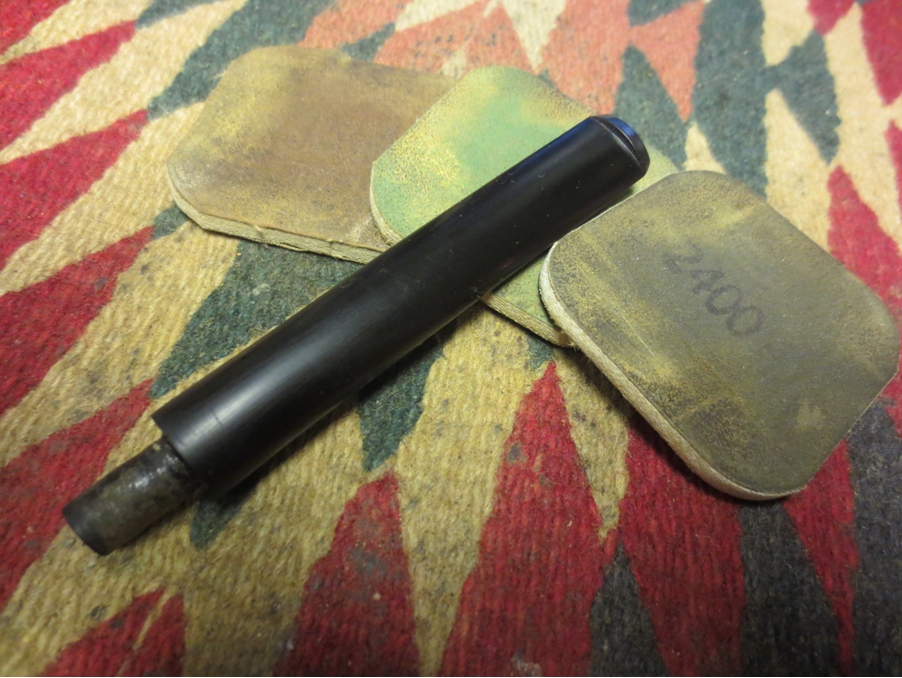
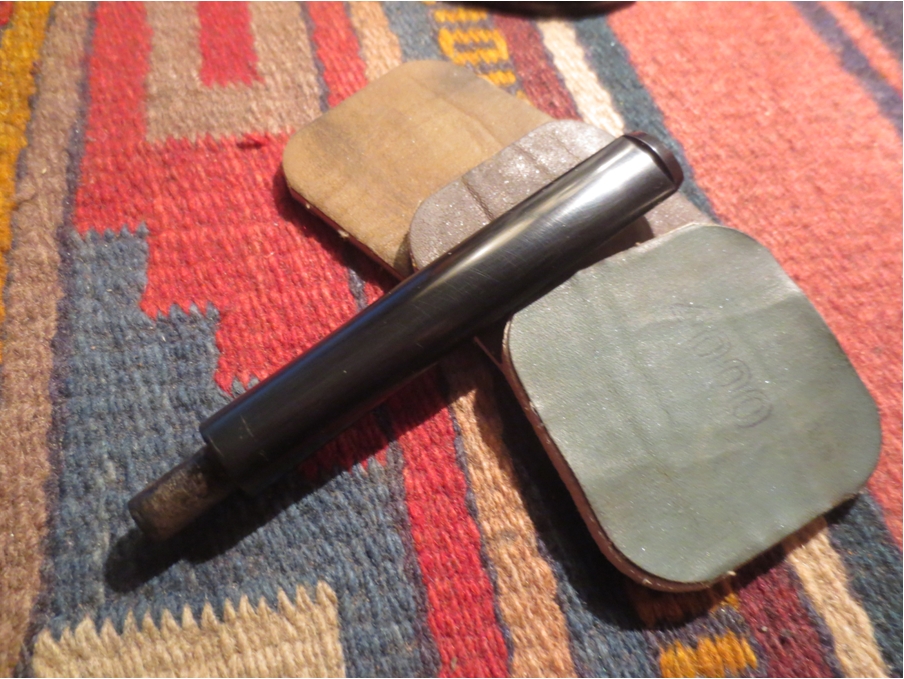
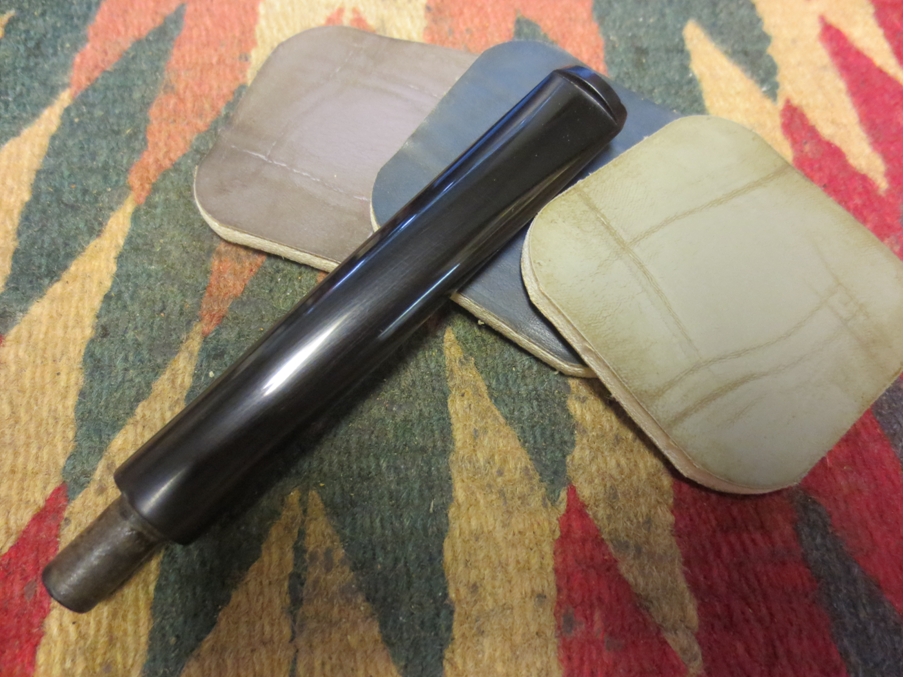
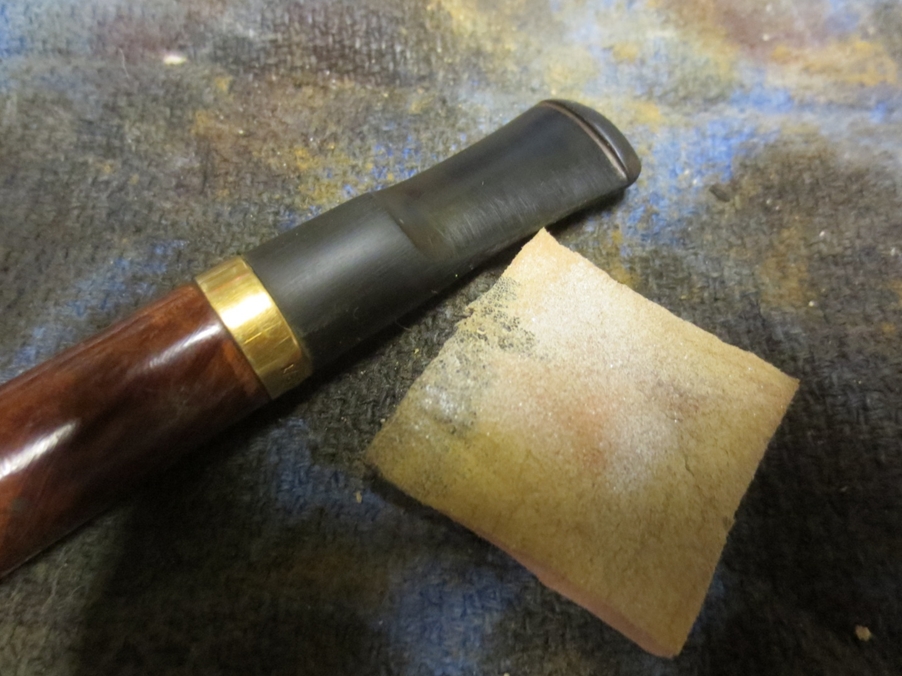
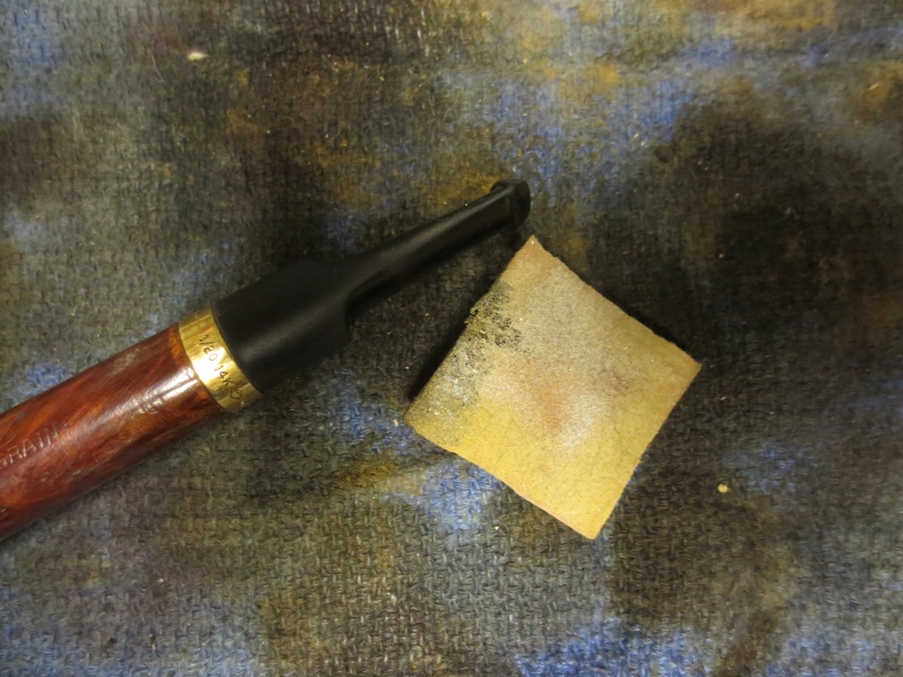
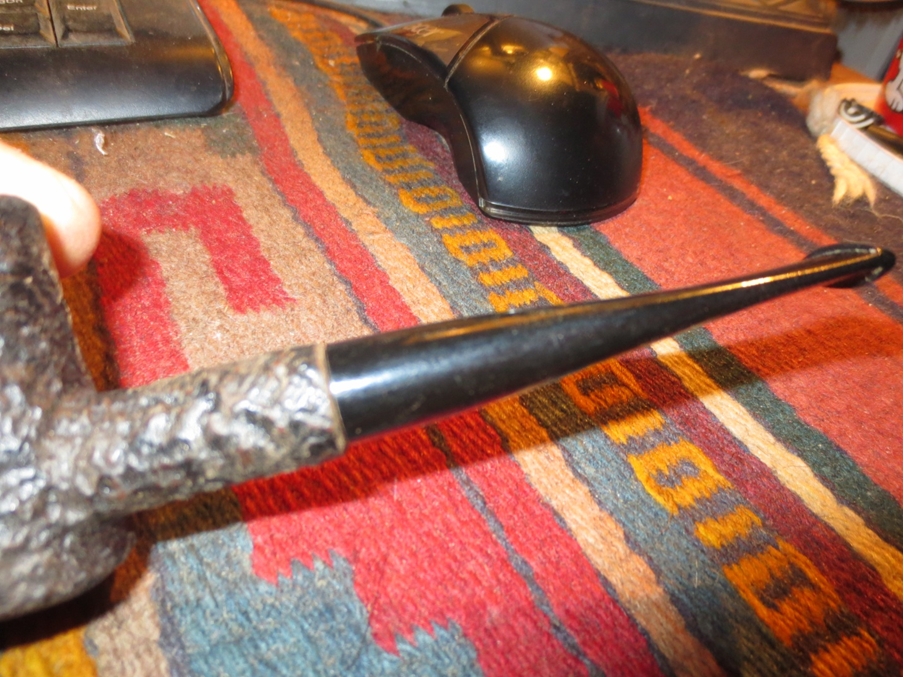
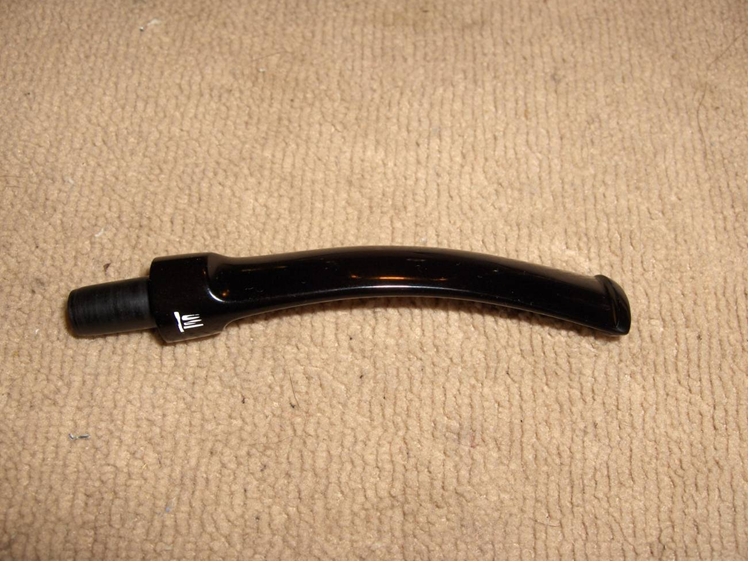
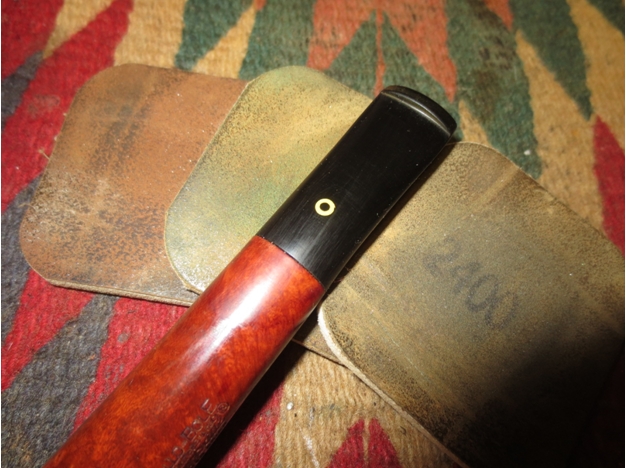
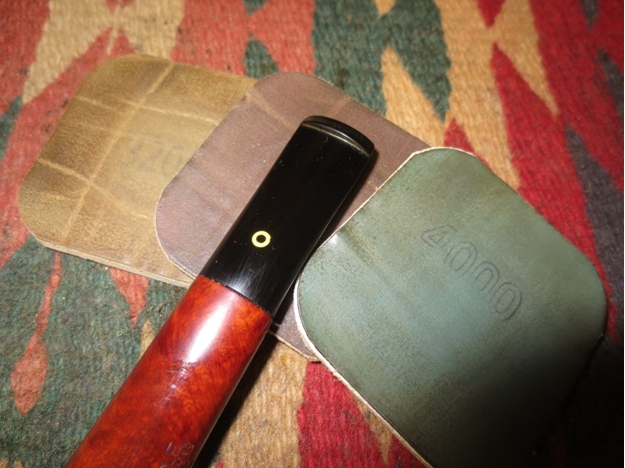
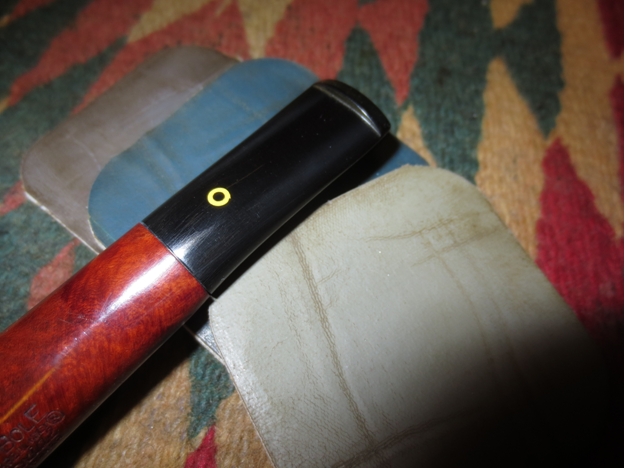
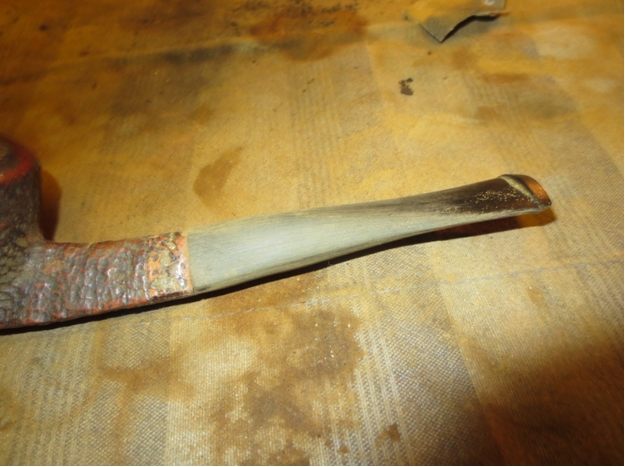
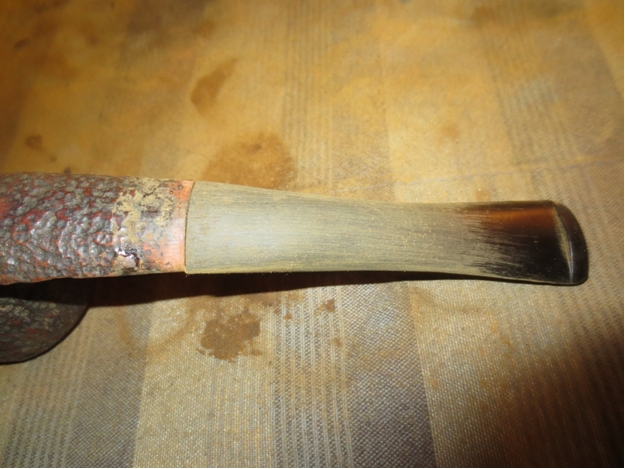
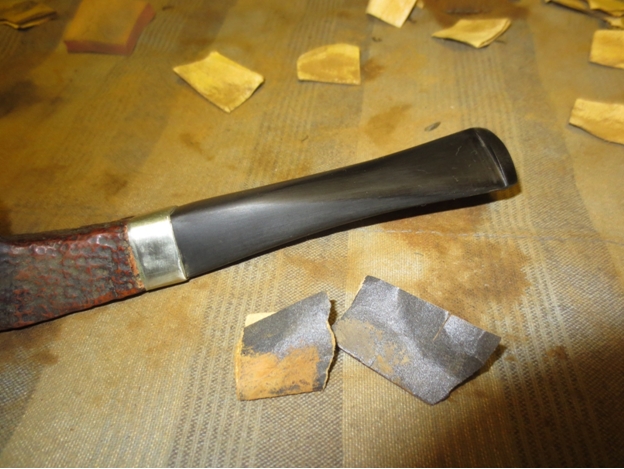
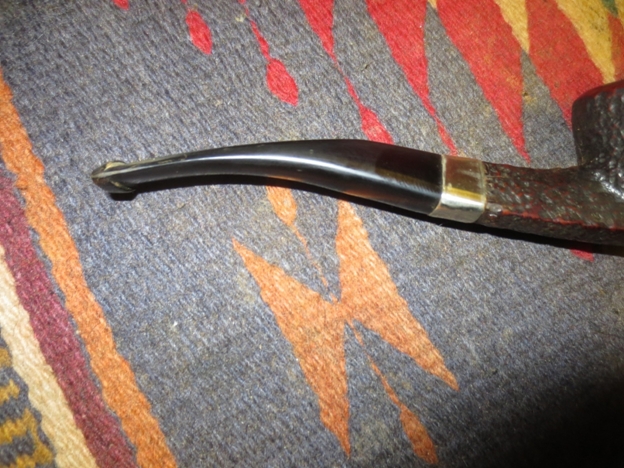
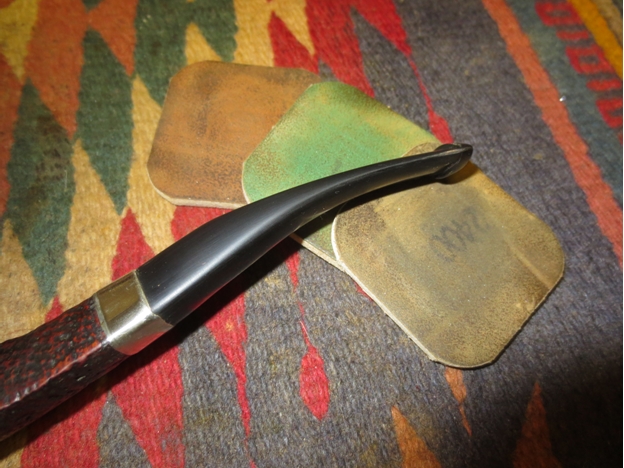
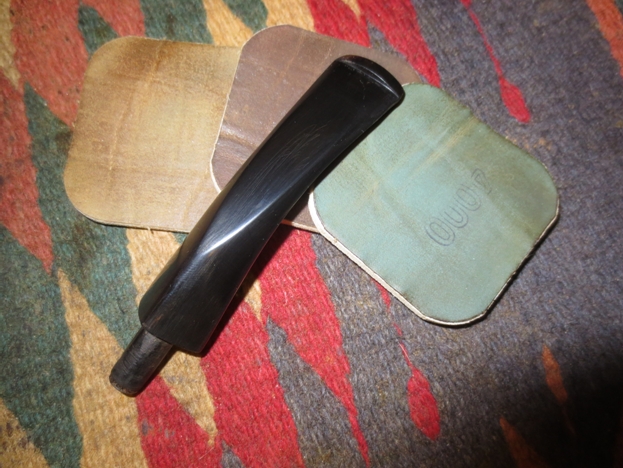
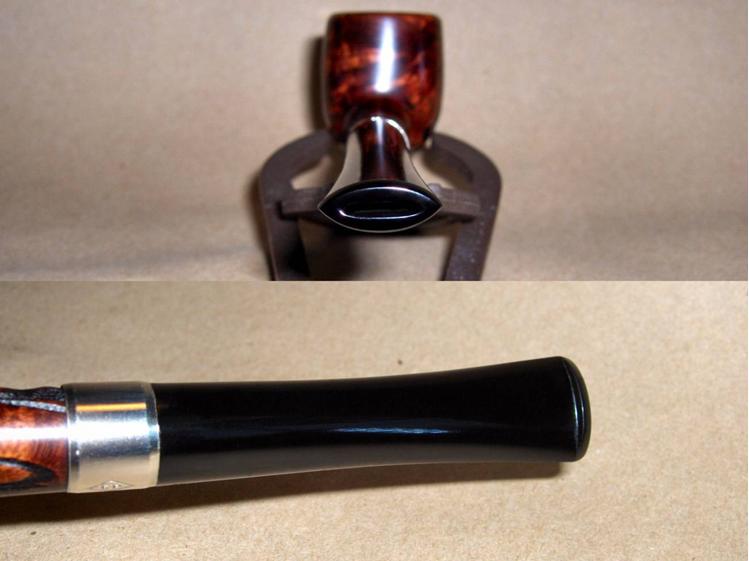
The stem was already a pretty close match to the width of the stummel but it needed some refinement and the artifacts from the mold needed to be removed. I kept the stem attached to the stummel and wrapped a strip of painters tape around the band to keep from dragging fine metal shavings into the vulcanite (which dulls it). Then, I began shaping the stem and removing the extra material with sandpaper and sanding sticks. I began roughing it with 220-grit and 320-grit (results in first picture below) and refined it with 400-grit and 600-grit (results in second picture below).Anthony10 
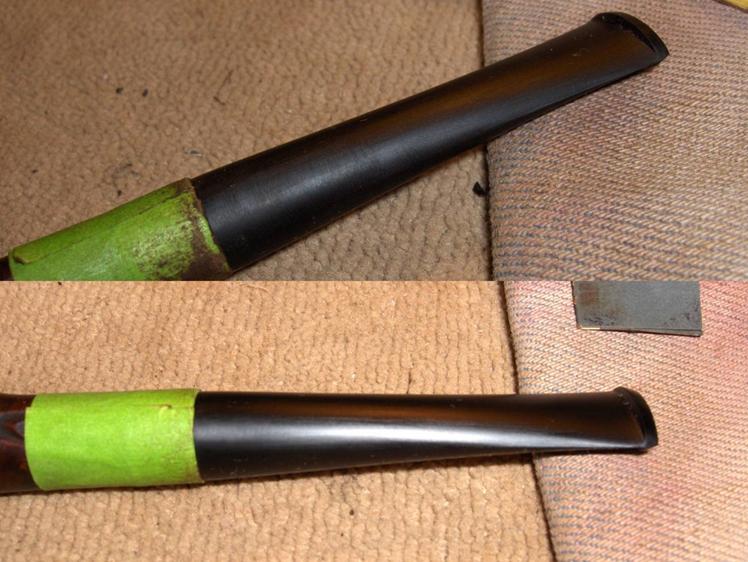
I used a set of needle files and sanding needles to open the slot and funnel it. This was my first time trying my hand at this and I’m going to need some more practice because the results were rough. I also funneled the tenon to remove the whistle when the stem was drawn on. Finally, I lightly sanded the entire stem with 1200-grit paper before polishing with micro-mesh pads 1500-12000. The final stem, along with a whole lot of lint, can be seen in the bottom image below.Anthony11 
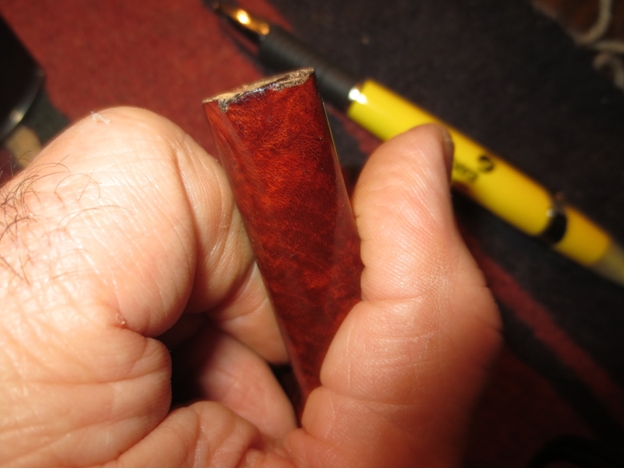
Between the large areas of carved rustication (blech!) on the stummel there was some really nice grain. I can appreciate straight grain for its rarity, but I love a good bird’s eye. When it’s stained well, it has a depth that’s almost like looking at an x-ray of the briar. So, I wanted to do everything that I could to accent that grain and take your eyes away from the ugly, carved, tobacco leaf swirls.

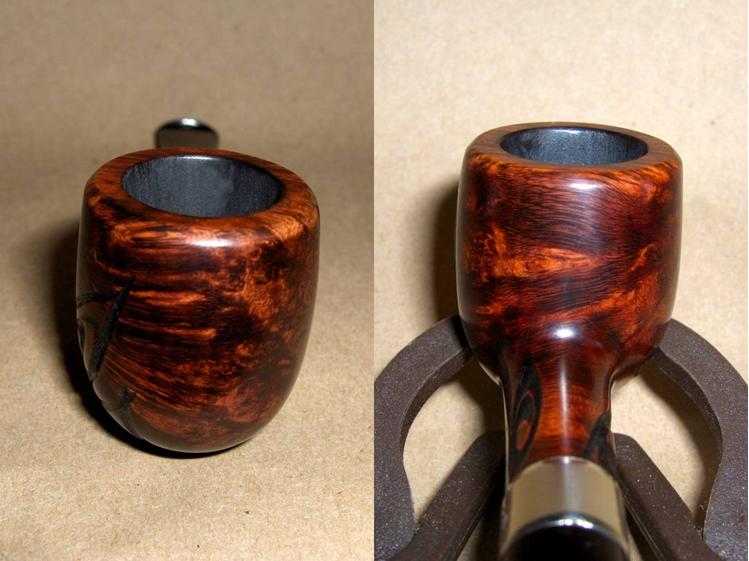
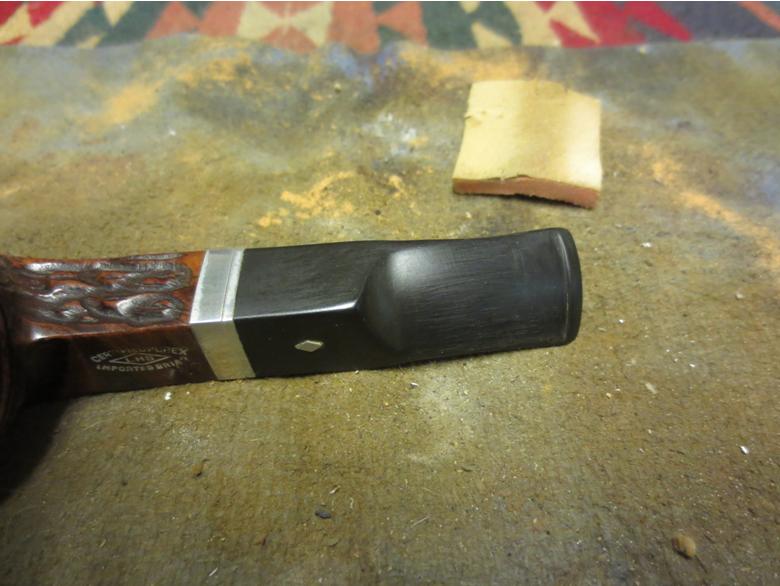
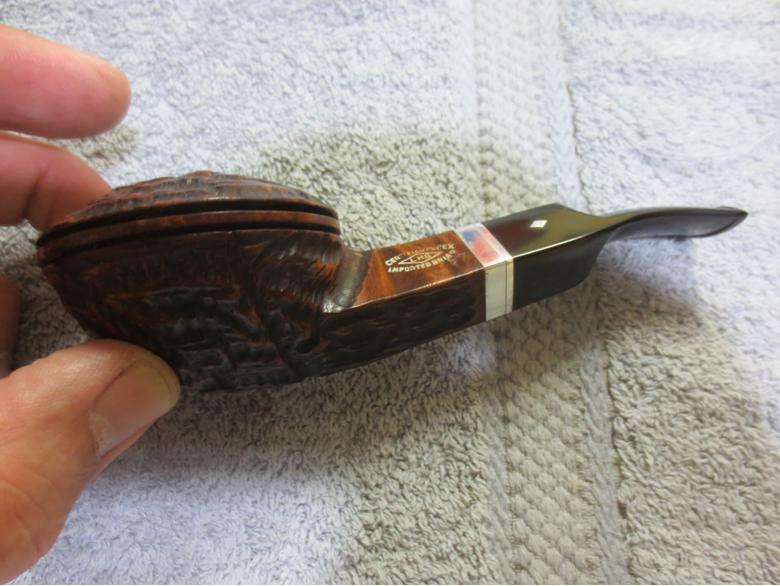
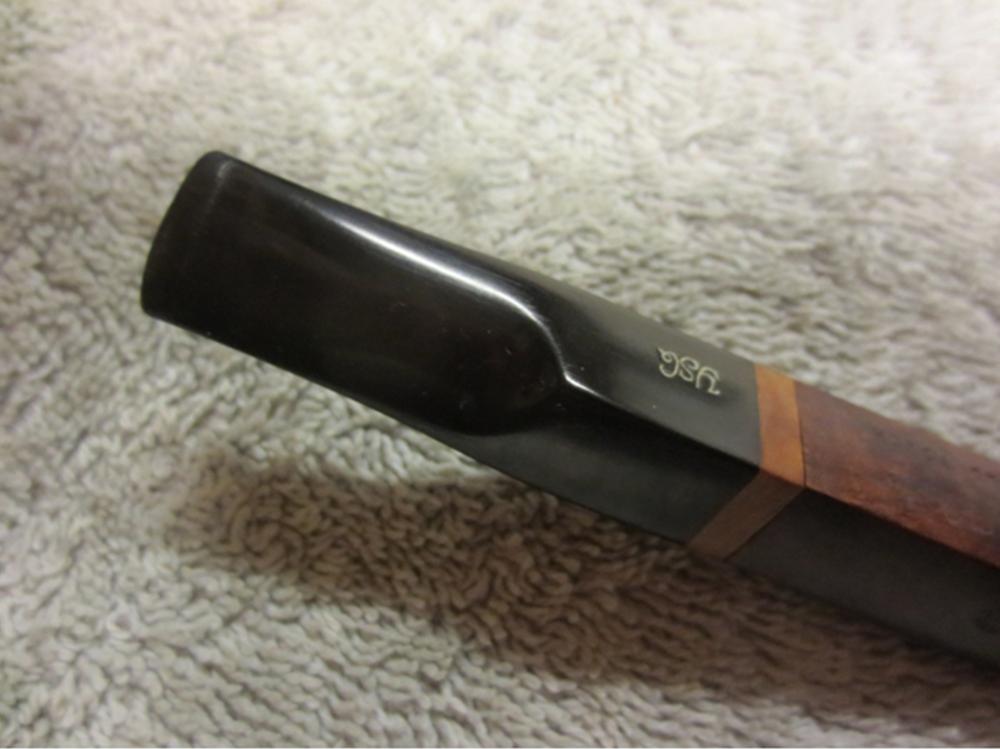
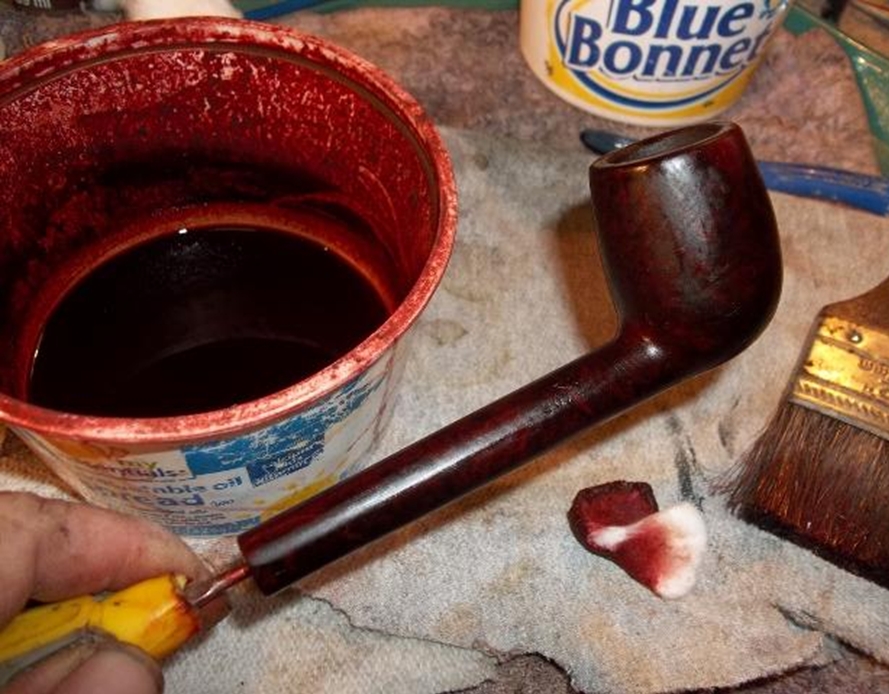
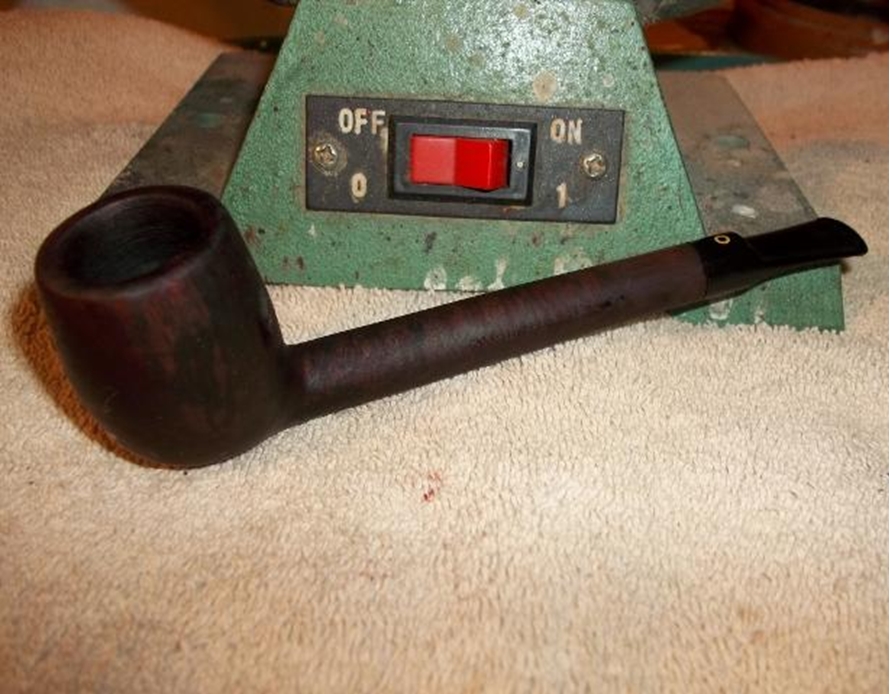
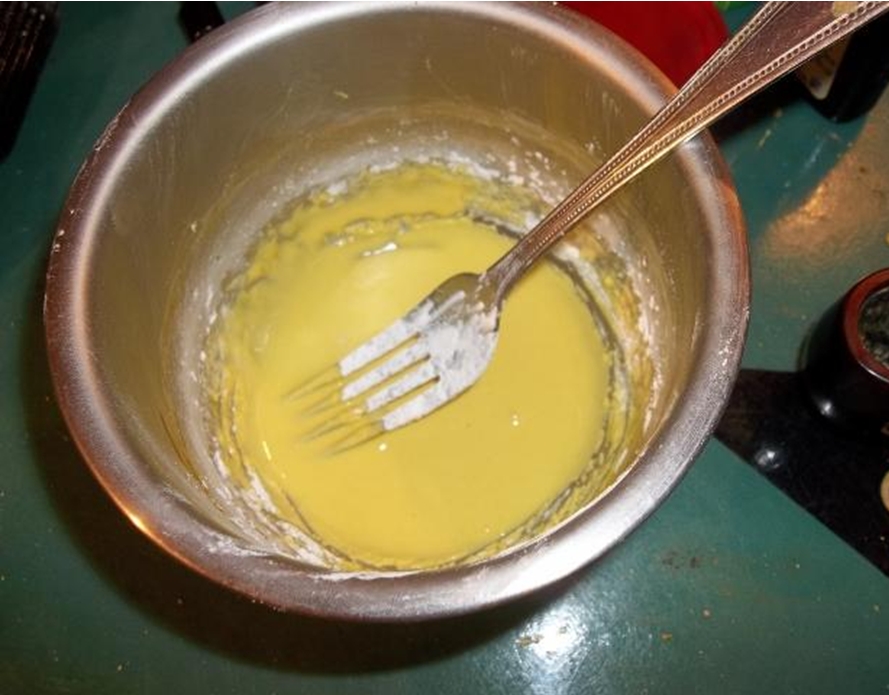
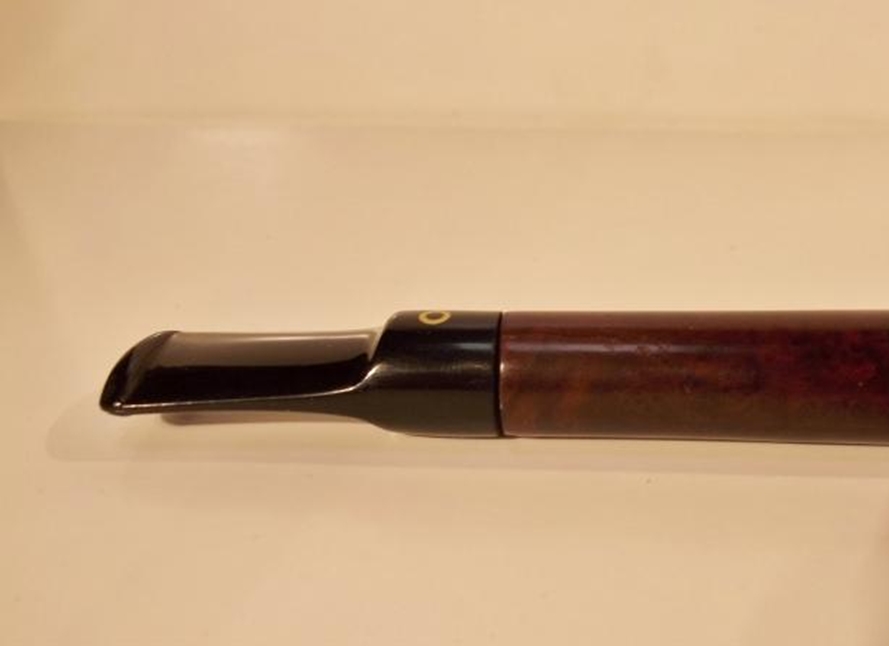
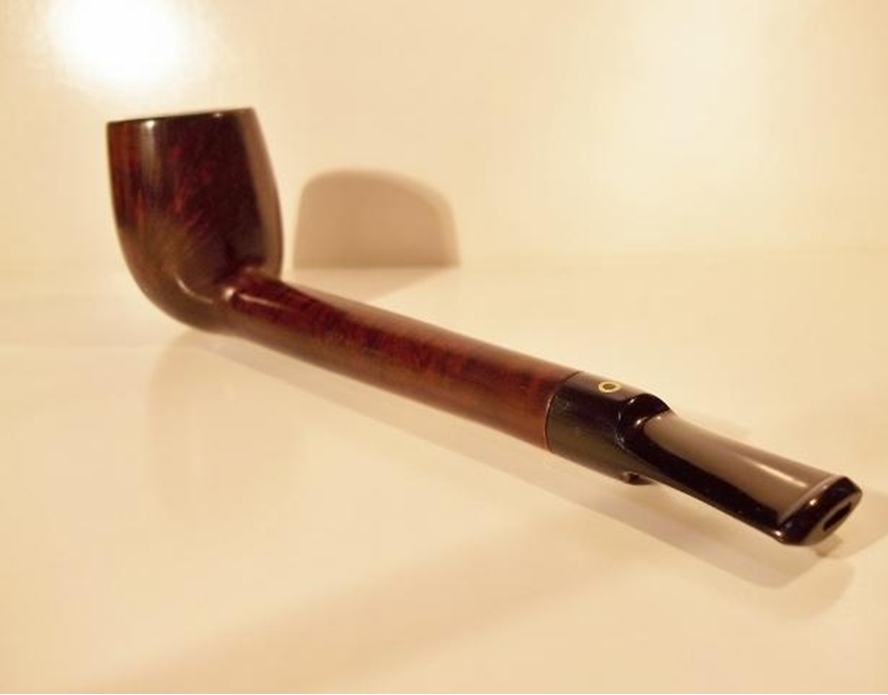
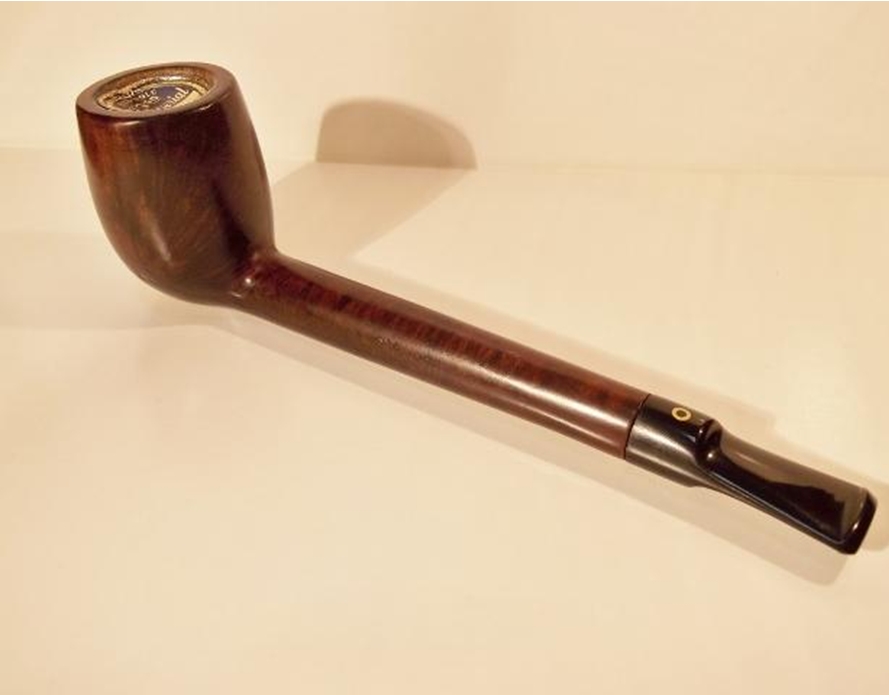
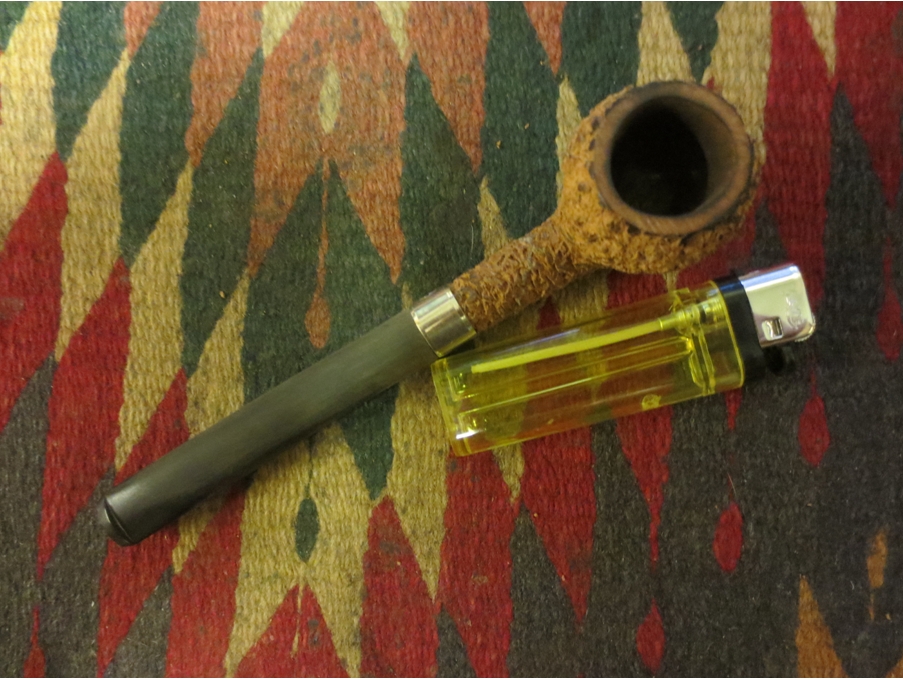
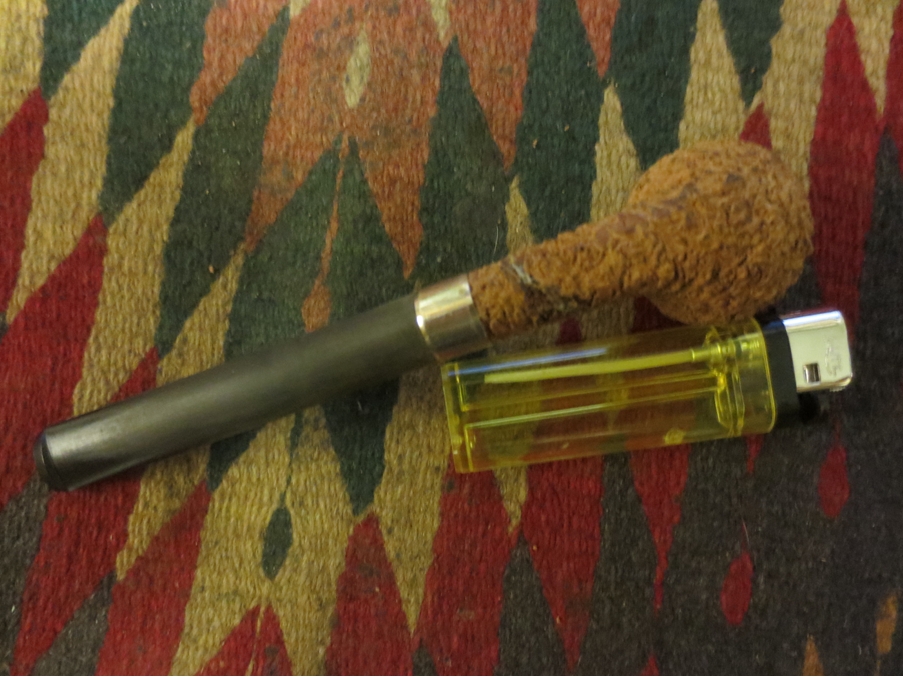
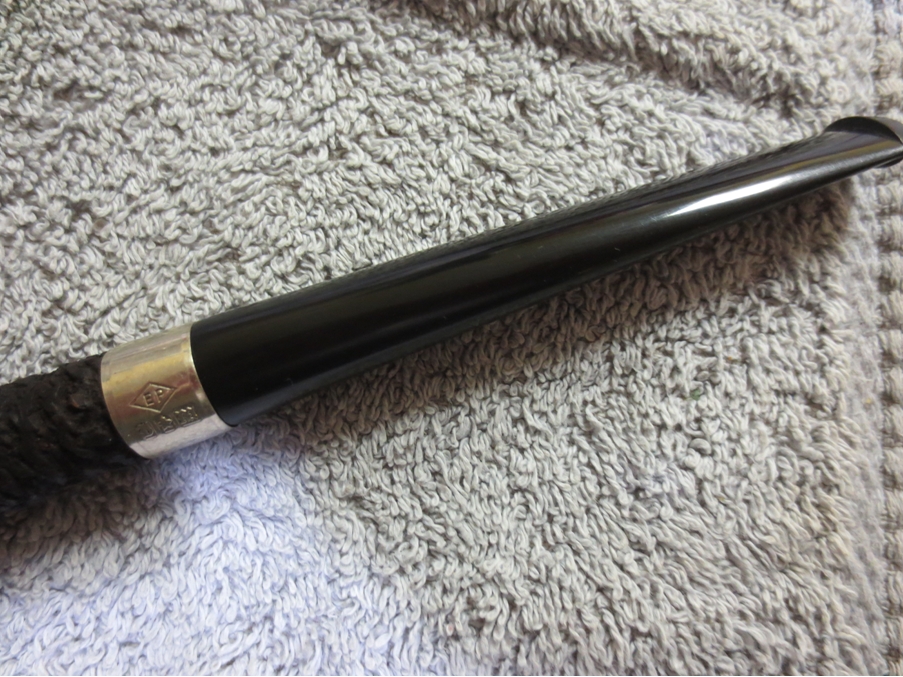
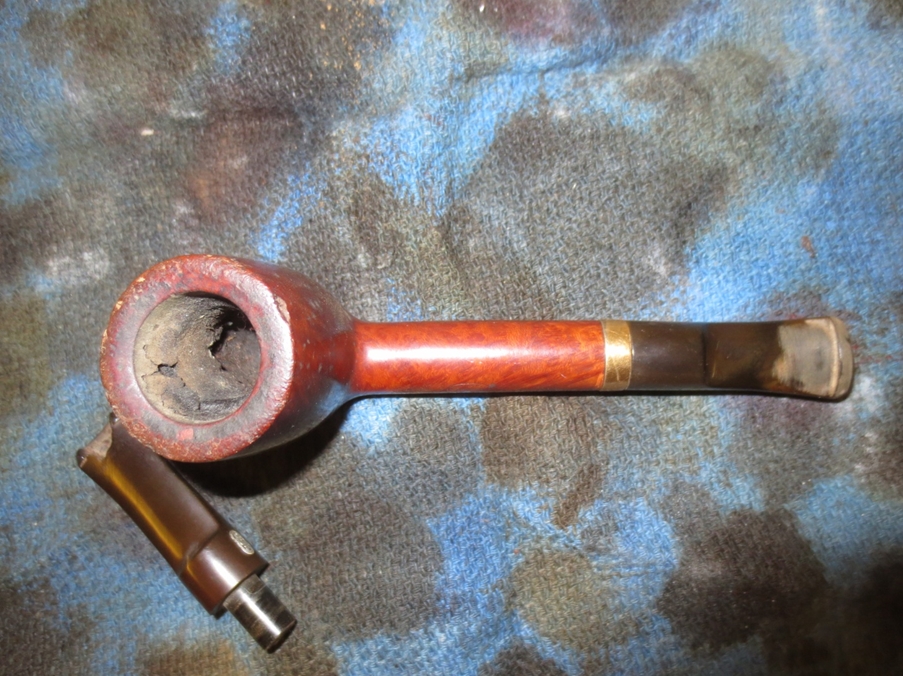
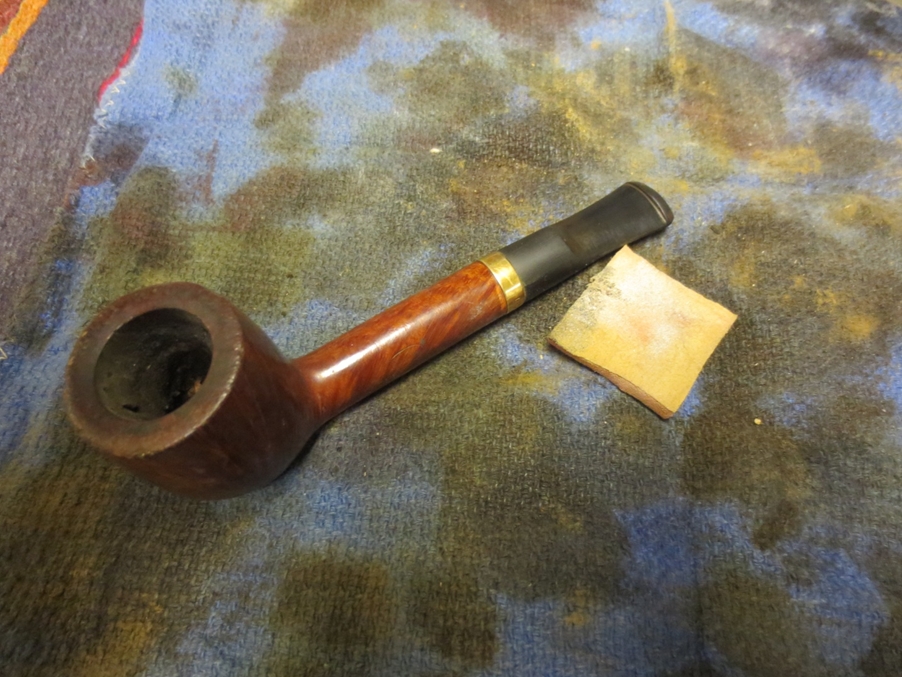
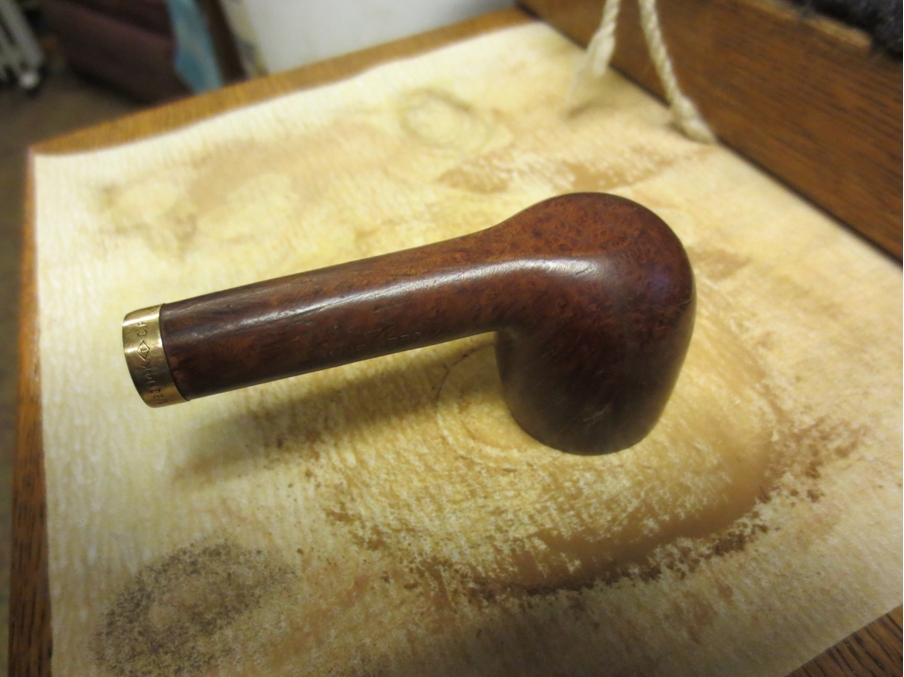
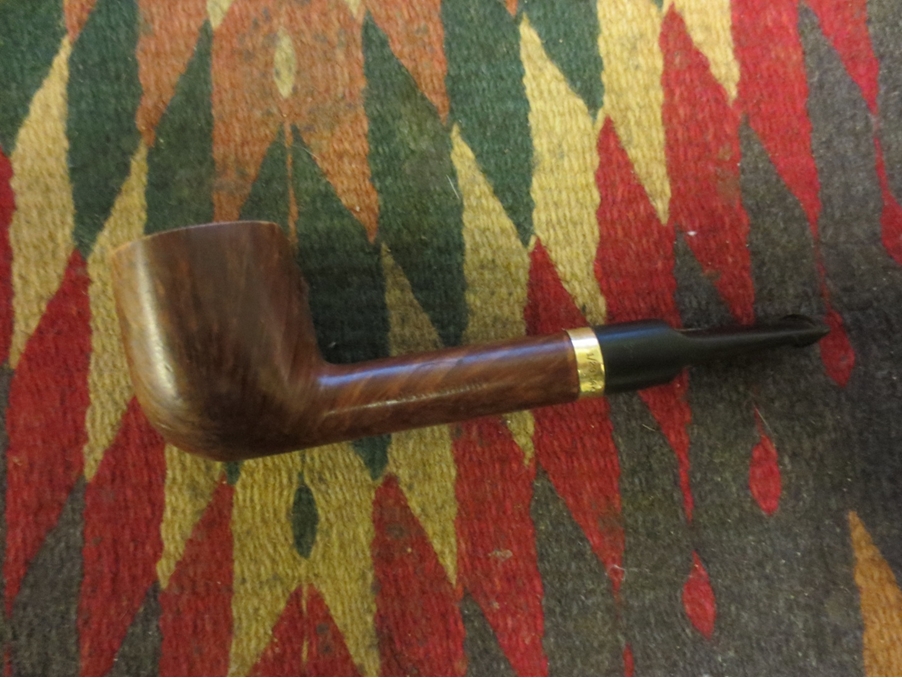
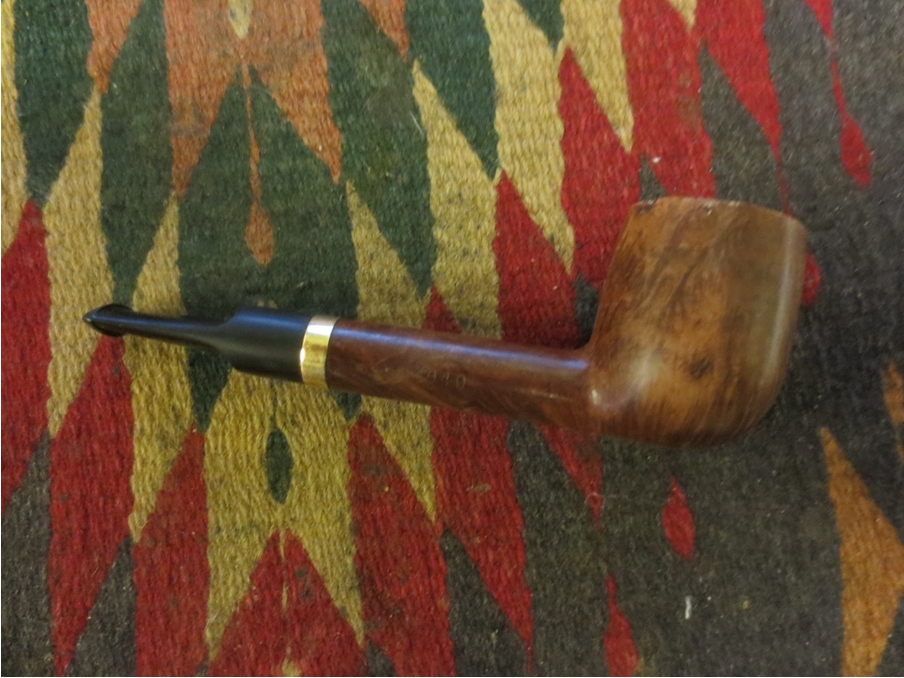
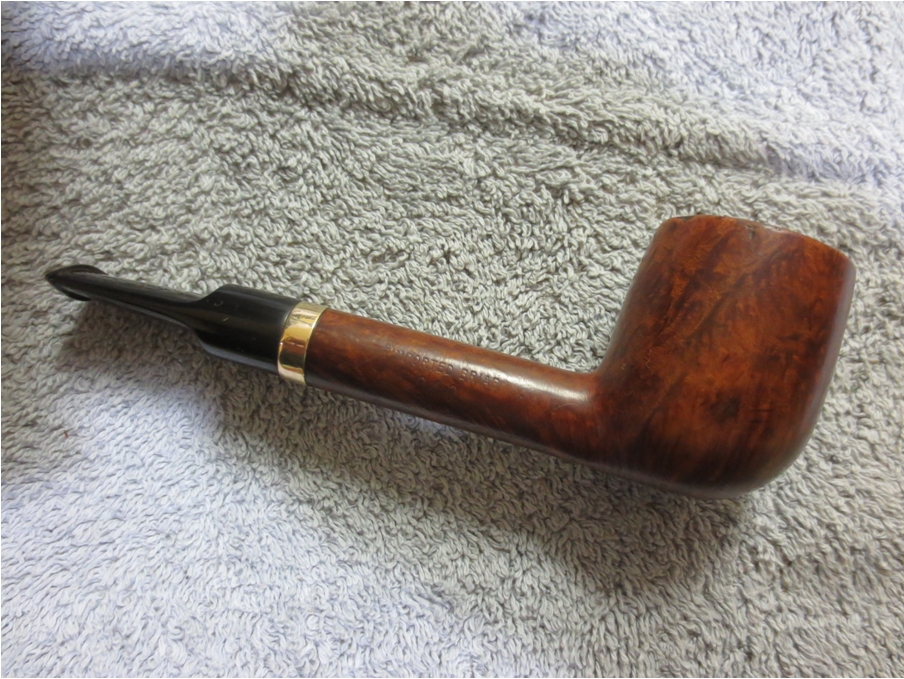
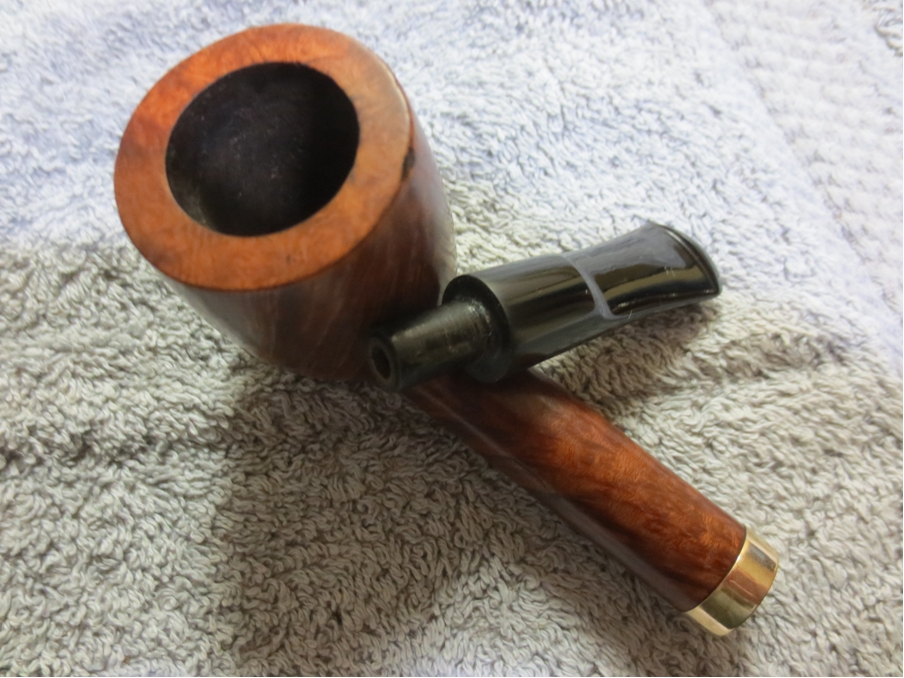
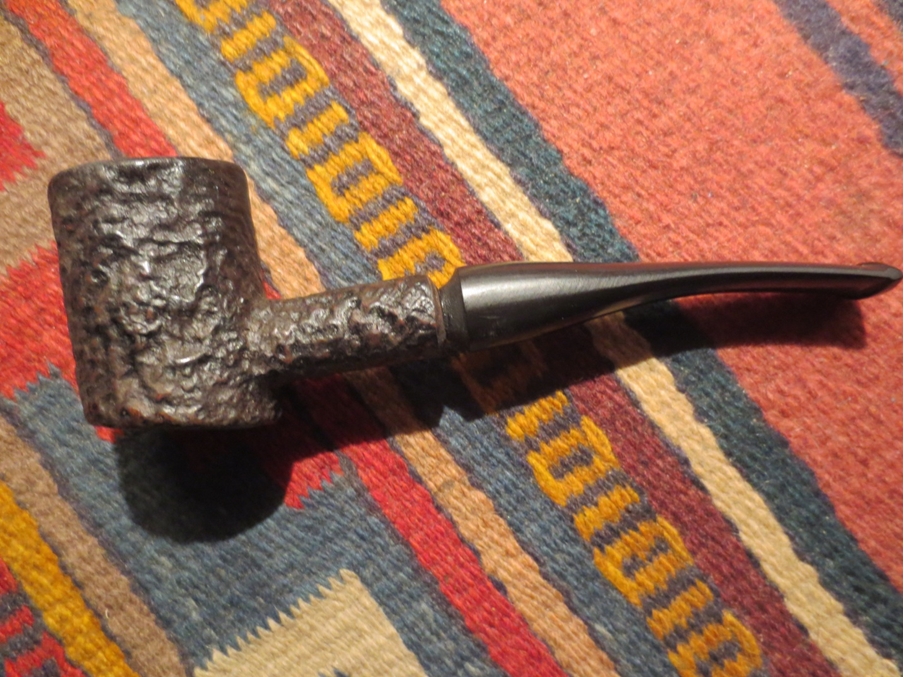
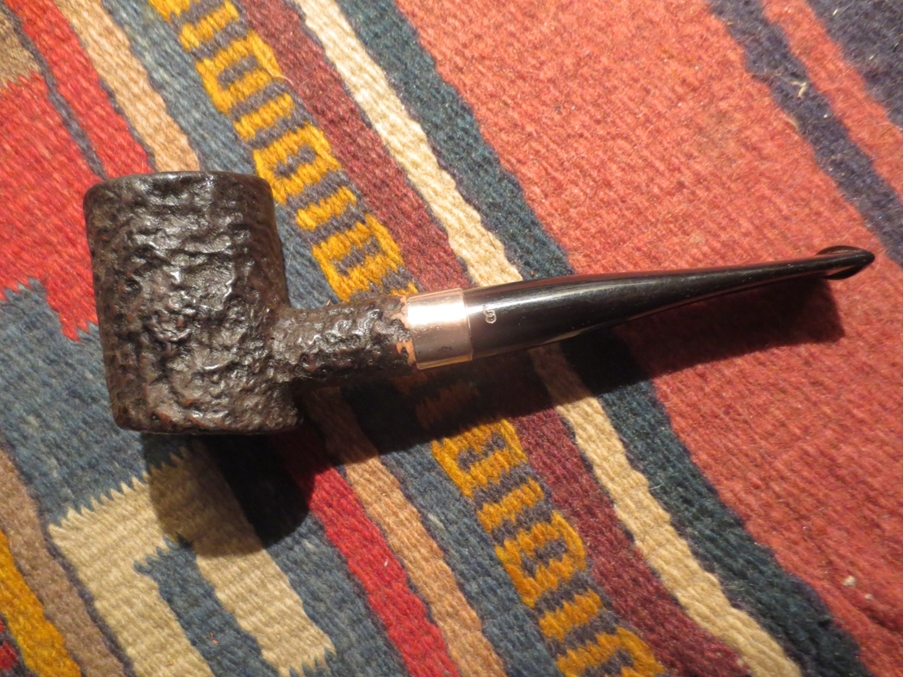
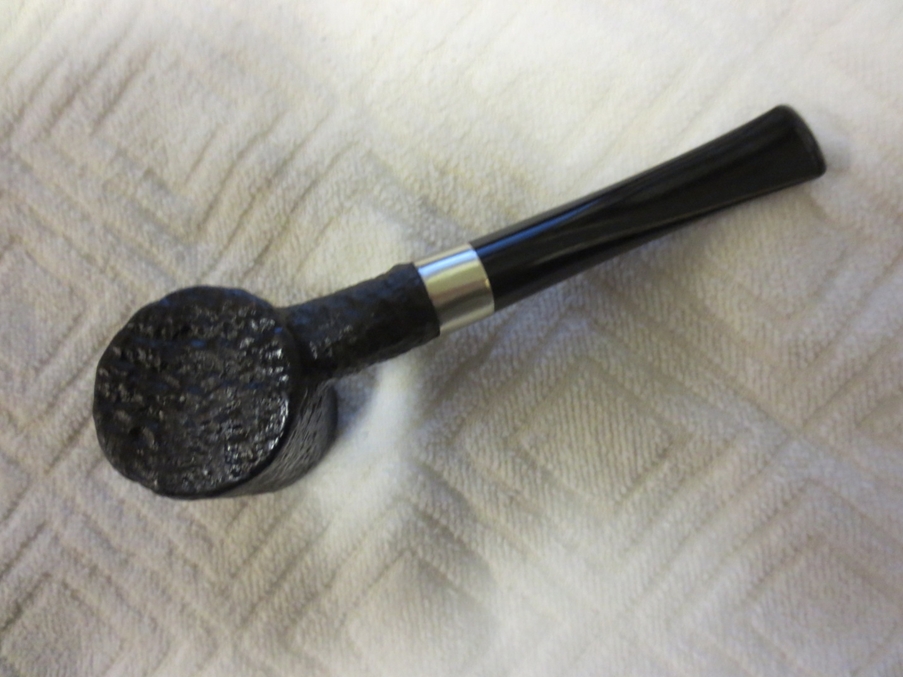
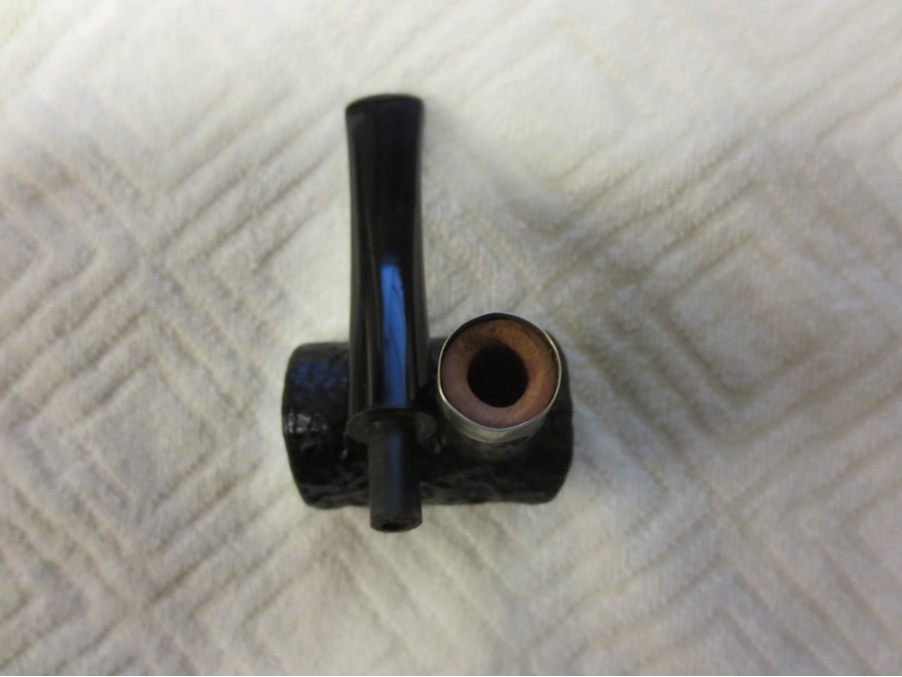
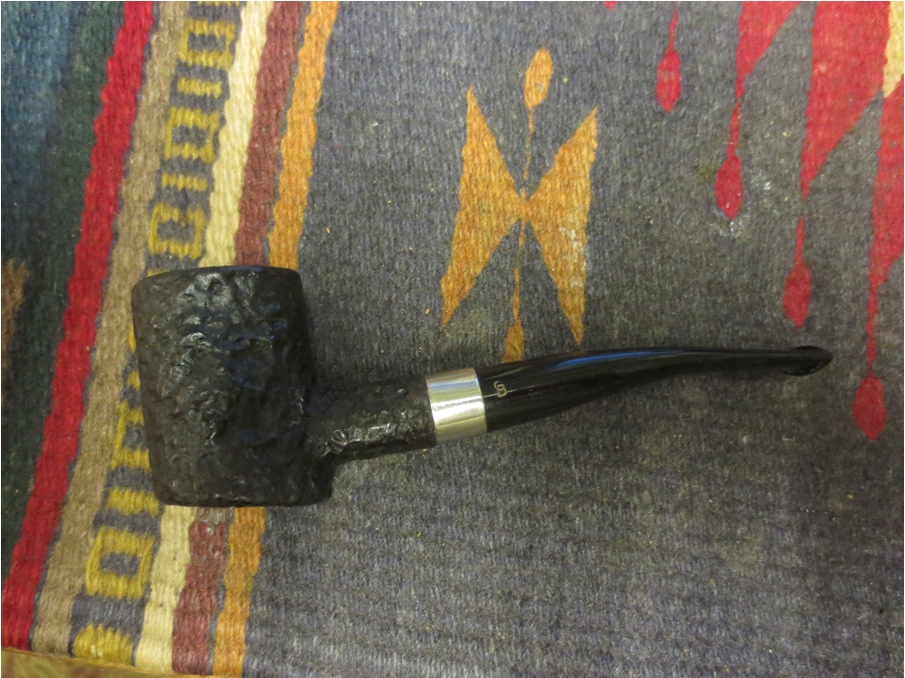
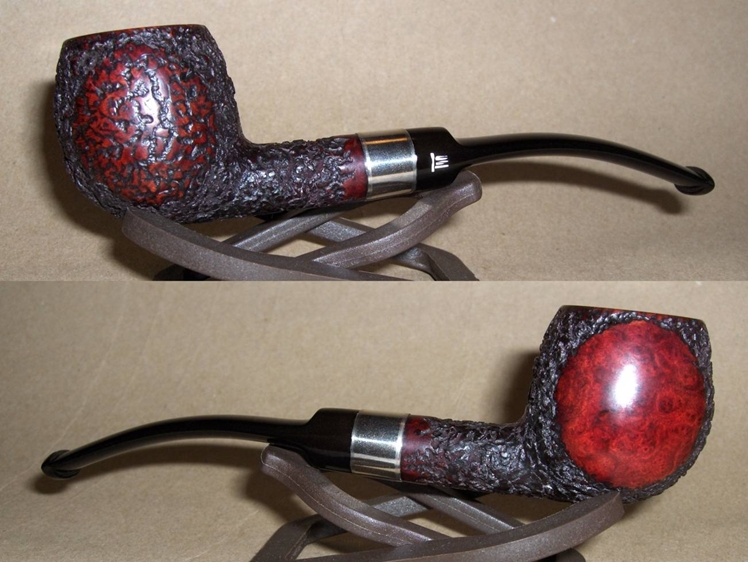
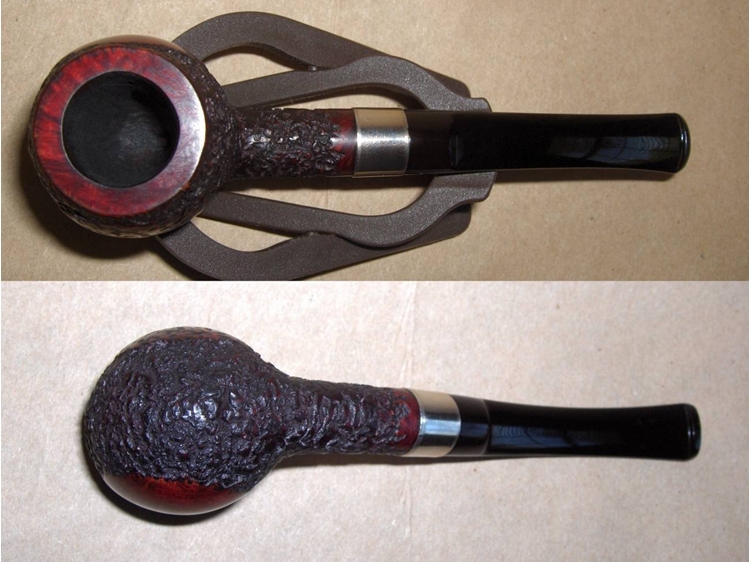
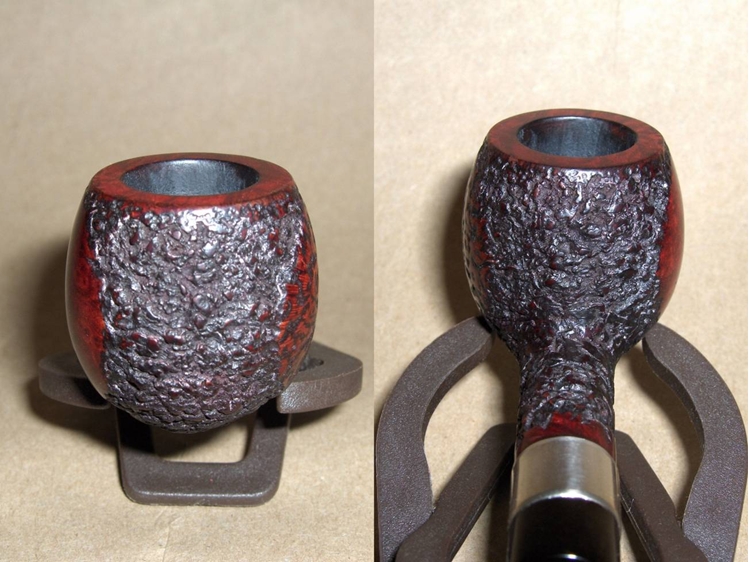
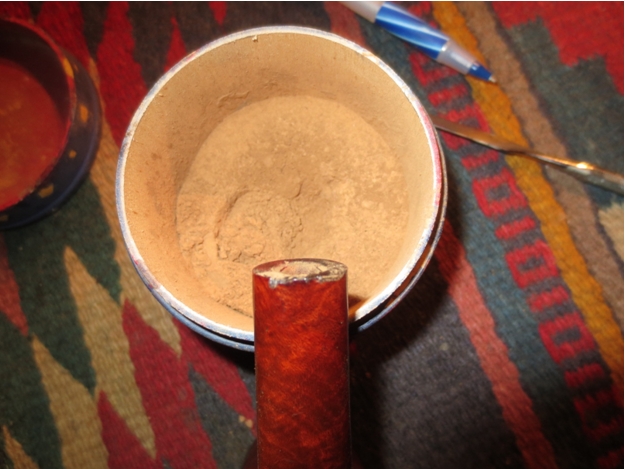
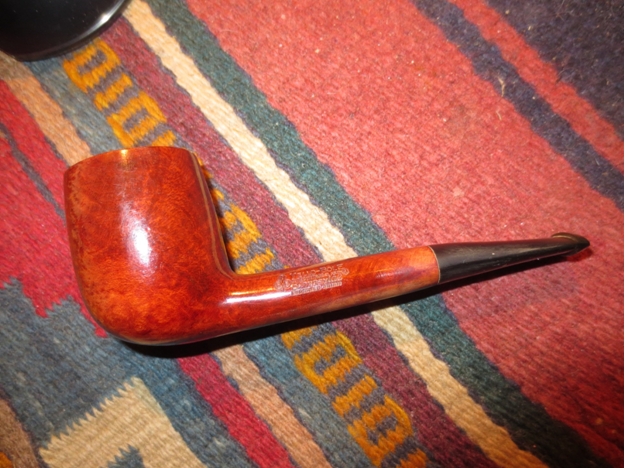
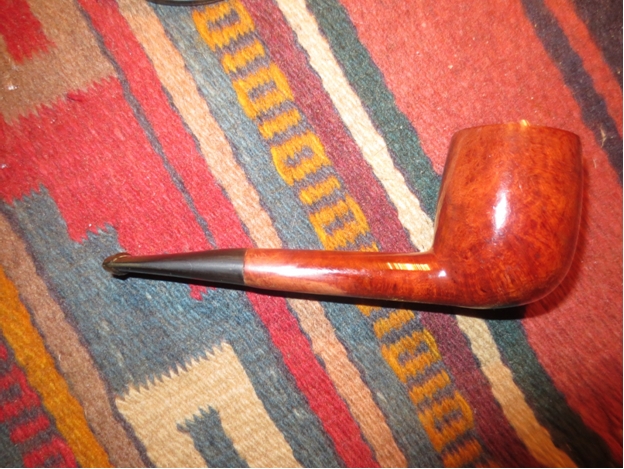
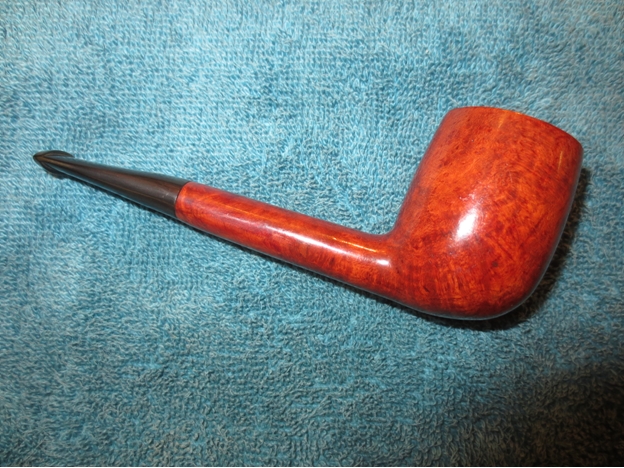
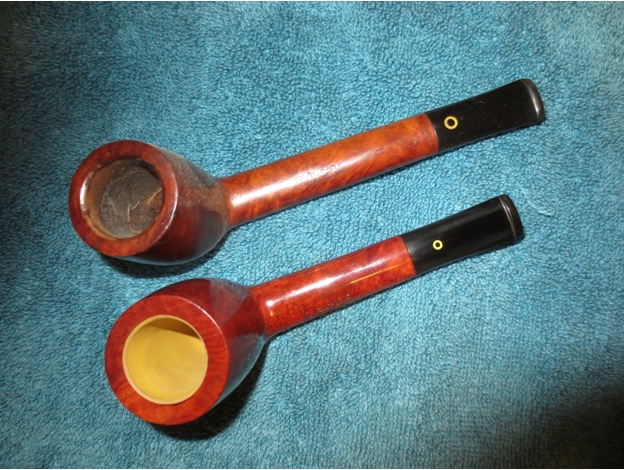
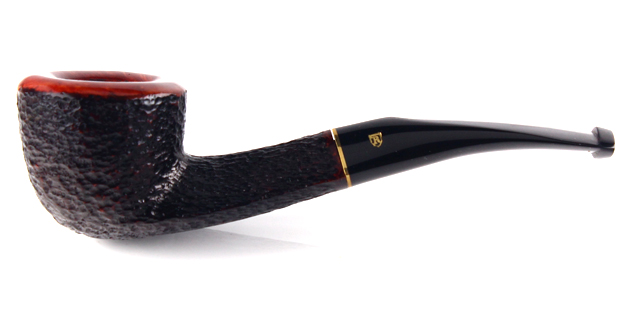
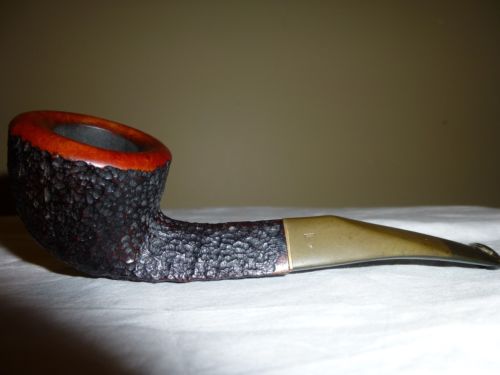
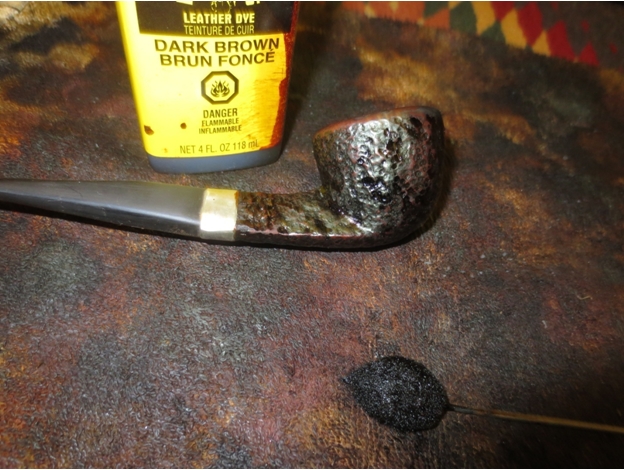
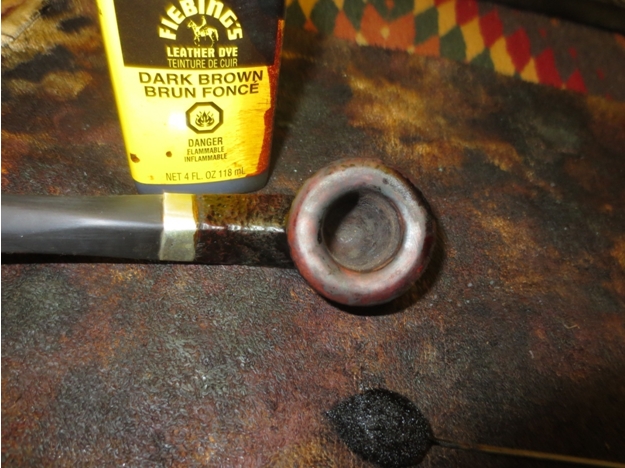
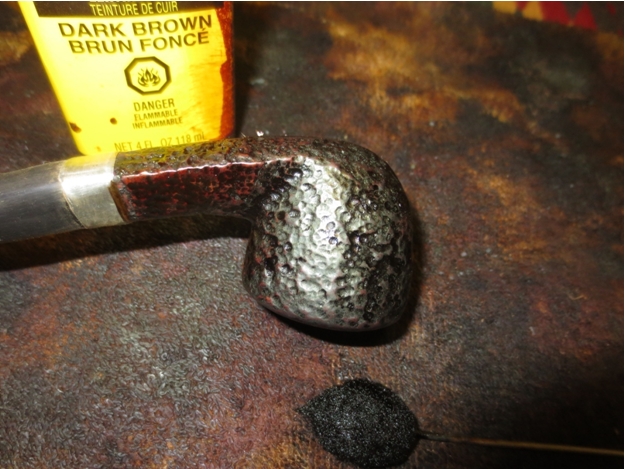
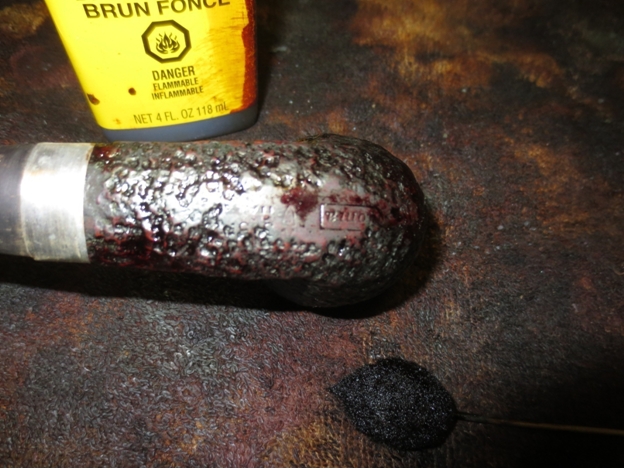
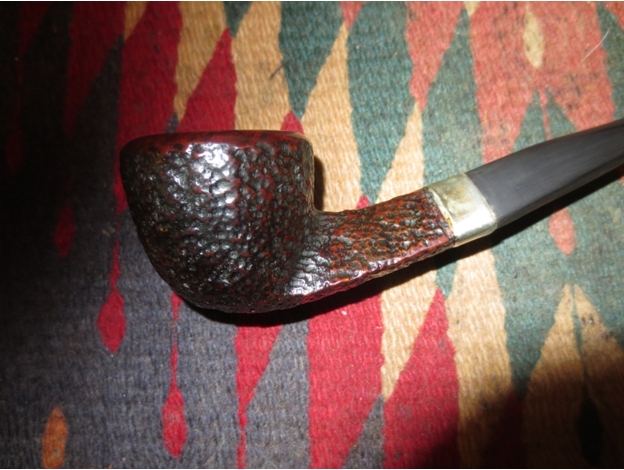
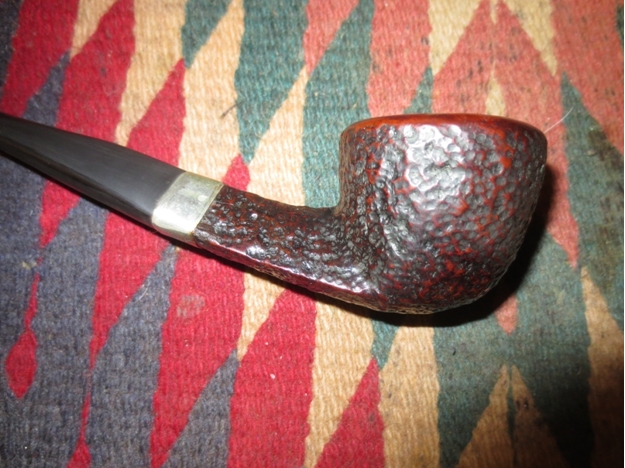
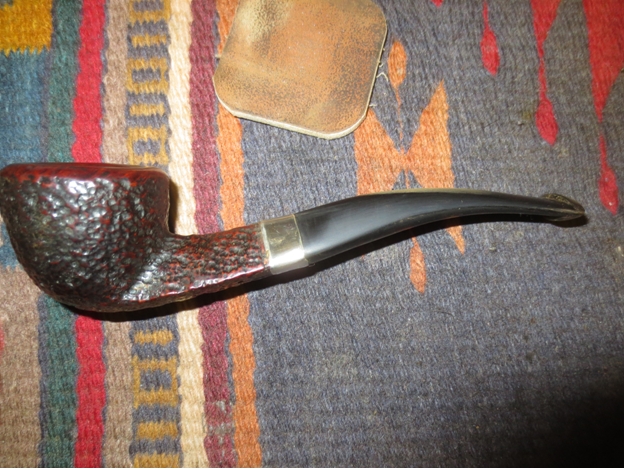
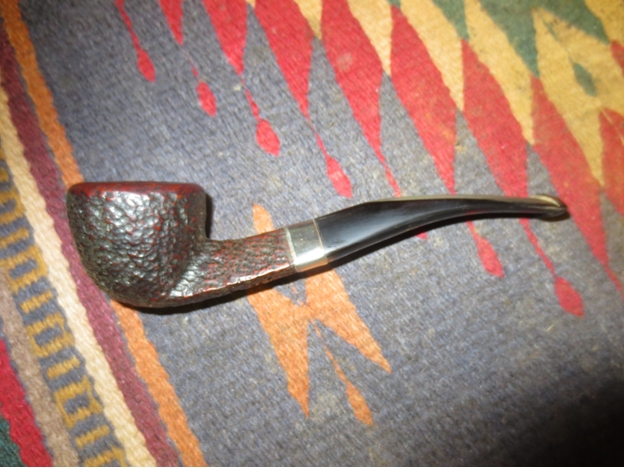
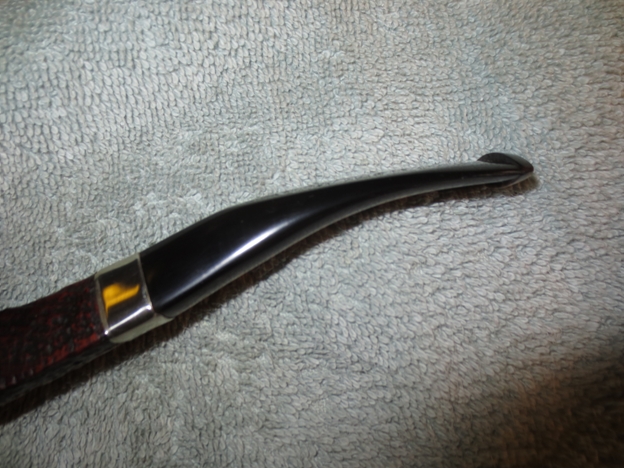
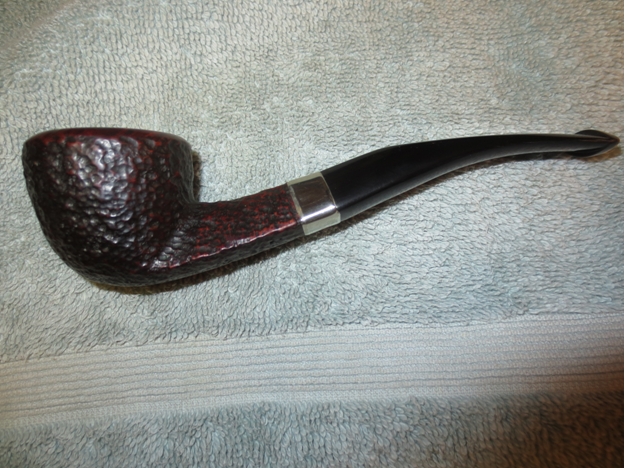
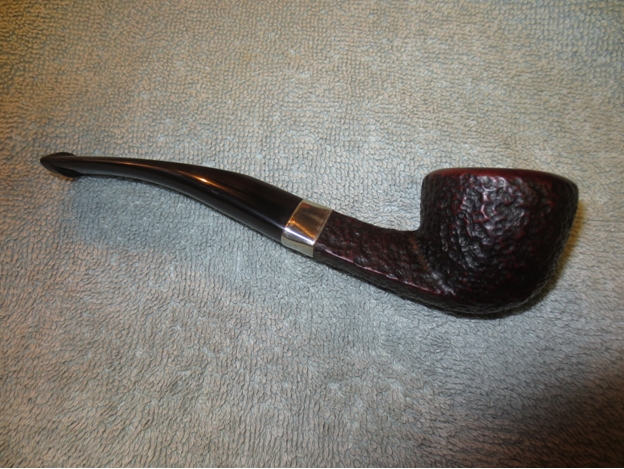
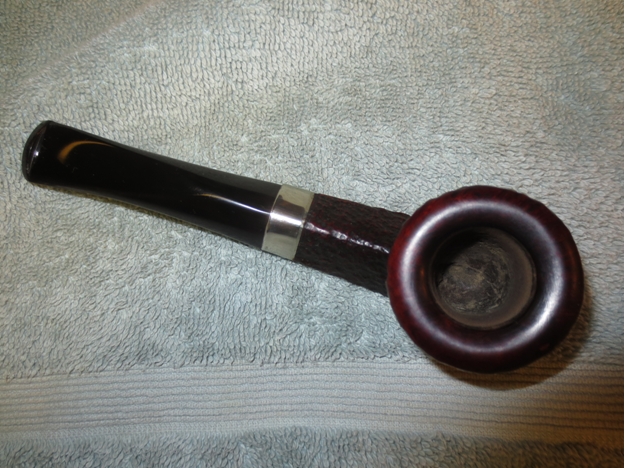
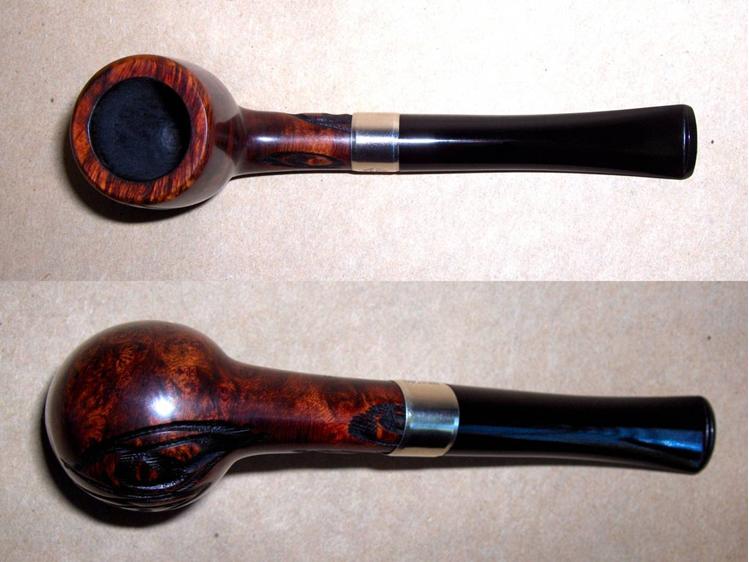
Three main stains were used to achieve the final look of the pipe; black to accent the grain, mahogany to give the overall tone, and ox blood at the end to add a bit of vibrancy. The first two colors were mixed at a 3:1 ratio of isopropyl alcohol to stain. The final color was mixed as a thin wash that I just eyeballed. The stummel was sanded between each staining; starting with 400-grit after black, 600-grit after mahogany, and 1200-grit after the ox blood wash, and then a micro-mesh polish 1500-12000. I also did a lot of grain massaging between each stain using a variety of tools including liner brushes and markers and inks and dyes of a few different colors. You can see how the staining progressed from start to finish in the pictures below.Anthony12 
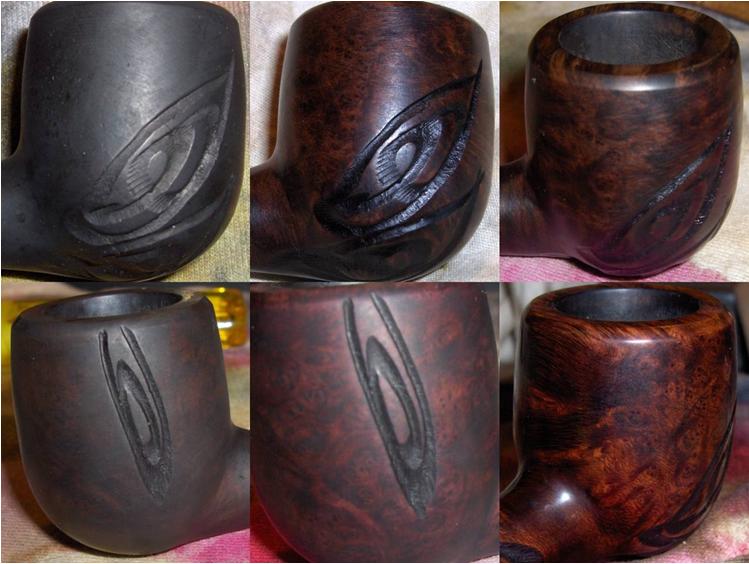
When the staining was complete, I reattached the stem and buffed the entire pipe with White Diamond, gave it several layers of carnauba wax, and added a bowl coating to the well worn chamber. Here’s the pipe that I’m turning in for my third exam.
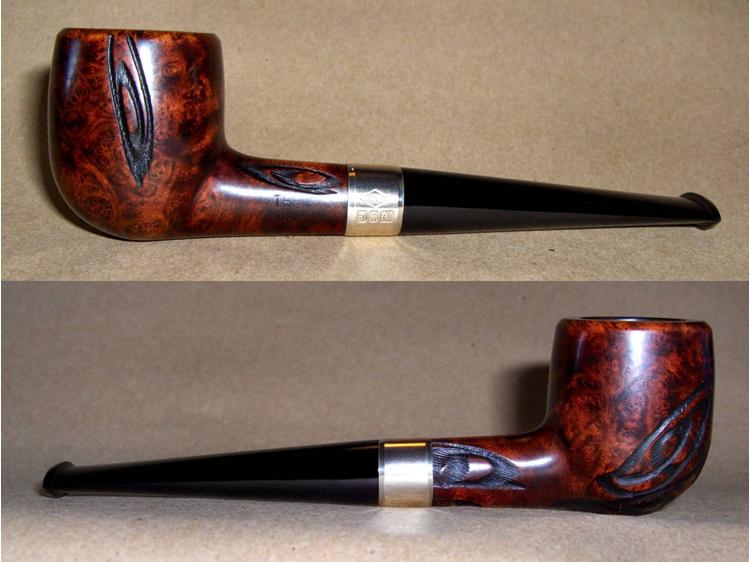
Anthony13

Anthony14

Anthony15

Anthony16 Thanks for looking!

NEPAL PROJECT PIPE SALE 11 – Restoring a LHS Certified Purex 97 Squashed Bulldog


Blog by Steve Laug

I decided to add this LHS Bulldog to the sale. It is thus the eleventh pipe from the box of pipes that I was gifted by a good friend of mine with the instructed purpose of cleaning them up and selling them with all of the proceeds going to the aid of earthquake victims in Nepal. Once again all funds raised will all go to the SA Foundation, and organization that has worked in Nepal for over 15 years helping provide recovery, housing and job training for women who are victims of sexual exploitation and trafficking. The ongoing earthquakes (over 300) that continue to shake Nepal have left much in ruins. The SA Foundation Project there was able to find new housing for the women and help with staff as well. Every dollar raised from the sale of these pipes will go to the work in Nepal.

It is an old LHS (LH Stern) Bulldog. It is stamped on the left side of the shank with the shape number 97 and almost over the top of that stamp is the application of a white imprinted logo. The logo reads LHS in a flattened diamond. On the top of the diamond it reads Certified Purex and on the bottom of the diamond it read Imported Briar.Bulldog1 I have had quite a few LHS pipes on my work table over the years but this is the first time I have seen this shape bulldog. It is squat and short but has a large bowl – the size of my thumb and the bowl is quite deep. There are two rings around the bowl and a bulldog cap. The rustication pattern is also quite unique – looking like a thatched pattern. There is an aluminum fitment in the shank of the pipe and an aluminum tenon with a separated stinger that screws into the fitment in the shank. The stem was slightly oxidized and underturned. There were no major tooth marks or chatter on the stem. The finish was in decent shape, just dirty and dusty. The rings around the cap were plugged with debris that would need to be cleaned out. The airway in the bottom of the bowl was very small looking. The bowl had been reamed recently and was clean that way.Bulldog2

Bulldog3

Bulldog4 If you look closely at the alignment of the metal band on the shank with the band on the stem you will see how it is underturned and how the band on the shank is slightly corroded next to the shank.Bulldog5

Bulldog6 The close up of the bowl shows the constricted airway at the bottom of the bowl on the back side. Too me it looked to be almost plugged with tars and would not be too difficult to open.Bulldog7 I unscrewed the stem from the shank to look at the internals. I have found that pipes with the metal fitment in the shank are generally quite dirty on the other side of the metal mortise and take some work to clean. This pipe was no exception. I tapped the metal end against my desk top and a lot of chunks of tar fell out on the desk top. The stinger was inserted into the threaded tenon and also was quite dirty and the slots in it were also restricted with buildup.Bulldog8 I heated the tenon and stinger with the flame of the lighter hoping to loosen the tenon in the shank and straighten the fit in the shank. I heated it until the stem itself was warm and the metal tenon did not budge. I was able to remove the stinger for cleaning.Bulldog9

Bulldog10 I examined the tenon insert in the stem (probably should have done this first). I found that the metal plate that acted as a stem adornment and the tenon were integrated into one piece and no amount of heating would ever loosen the tenon from the shank. I had to come up with another solution. I screwed the stem back on the pipe and set it aside to contemplate my course of action. I thought of adding a thin plate of Lucite or briar between the stem adornment and the shank adornment but decided against that. I let it sit for a while and worked on the stem.

Suddenly I figured out a potential fix. If I were to sand down the shank end enough to allow the stem to sit correctly I could possibly get the alignment correct. I measured the depth of the threads in the shank and then those on the tenon and found that the thread went deeper than the length of the tenon by about 1/8 of an inch. If I could remove some of the aluminum shank end plate I could get it to seat correctly. I used my topping board and pressed the end of the aluminum end plate flat against the board. I carefully worked it in a circular motion on the sandpaper. I checked frequently to make sure I did not take of too much or too little of the aluminum plate.Bulldog11 The next photo shows the end plate after it had been topped sufficiently. The scratches from the sandpaper would easily be polished off with micromesh. I have also included four photos of the different angles on the stem to show how the underturn had been corrected. The fit was perfect.Bulldog12

Bulldog13

Bulldog14

Bulldog15

Bulldog16 With the stem fit corrected I then turned to cleaning out the inside of the stem and the shank. It took many pipe cleaners, cotton swabs and alcohol. I also used the drill bit from the KleenReem reamer to open the airway into the bowl. Bulldog17 I scrubbed the exterior of the bowl down with oil soap and a tooth brush. I picked out the debris in the twin rings around the cap. I sanded the stem down with 220 grit sandpaper and then followed that by sanding with a medium and a fine grit sanding sponge.Bulldog18

Bulldog19 There were two small tooth marks in the vulcanite on the underside of the stem. I repaired those with a drop of clear super glue. I sanded the glue patch with 220 grit sandpaper and then repeated sanding it with the two sanding sponges. When finished I sanded it with micromesh sanding pads – wet sanding with 1500-2400 grit pads and dry sanding with 3200-12,000 grit pads. Between each set of three pads I rubbed the stem down with an Obsidian Oil saturated sock that I use for this purpose. I let it sit for just a few moments before continuing with the next grit of pads. The oil gives traction for polishing the stem.Bulldog20

Bulldog21

Bulldog22 I used the micromesh pads to also polish the aluminum on the shank and the stem. I worked through all of the grits to polish it to a shine. I also used 0000 steel wool to polish the stinger and the tenon. Then I buffed the stem with Blue Diamond Plastic polish to further raise the shine. I put it back on the bowl and buffed the bowl and shank lightly with Blue Diamond. A light touch keeps the buffing compound from collecting in the grooves. I also carefully worked around the white stamping on the shank. I gave the stem several coats of carnauba wax and then rubbed the bowl down with Halcyon II Wax and hand buffed the bowl and shank with a shoe brush. The finished pipe is shown in the photos below. I really like the shape and the rustication on this one. I am looking forward to loading a bowl and enjoying it on the weekend ahead. Thanks John.Bulldog23

Bulldog24

Bulldog25

Bulldog26

Bulldog27

Bulldog28 This LHS Bulldog is a beautiful pipe and the rustication and stain gives it almost a multidimensional look. It should make someone a great addition. The entirety of the sale price will go to the Nepal project. I will pay the postage so that does not get taken off the proceeds. If you are interested in reading about the SA Foundation you can look at their website at http://www.safoundation.com.

Thanks for looking.

What are the options for repairing a damaged stem?


Blog by Steve Laug

Over the years that I have been working on pipe restoration I have found that when working on badly damaged stems I have 4 basic choices on how to deal with the damage. They are stated in the form of a simple list below but each one will have to be detailed out to understand the implications of the choice.
1. Cut it off
2. Build it up
3. Splice it
4. Replace it

Choice #1 – Cut it off

This sounds pretty brutal but it really is a pretty easy repair to work on the chewed stem. I generally see how far back I have to go to get enough stem material on the top and bottom of the stem to shape a new button. Once I have a pretty clear idea of that I put a piece of cellophane tape on the stem to get an idea of how it will look with that bit of stem removed. Sometimes the new stem length just does not work. If it is too short it is awkward. If not then it can be reworked and still look acceptable. I have even cut back badly broken billiard stems and crafted a Lovat shaped pipe that looked really good. The decision is yours and cannot be reversed without making a new stem for the pipe.

The process is quite simple. Once I have marked the part of the stem I plan to remove I use a Dremel with a sanding drum to remove the damaged portion. It works quite quickly. The only caution is to keep the line straight as you are removing the broken part of the stem. This line is not only the horizontal one across the surface of the stem but also the vertical one looking at the pipe from the end. Others use a coping saw or hacksaw to remove the broken area. I prefer a Dremel. With the end removed the stem is ready for reshaping. I use needle files to cut a new button on the stem. I do that by filing a straight line across the top and bottom of the stem making sure that they align.Broken1

Broken2

Broken3 Once the new button line is in place I use a flat needle file to file back the slope of the stem to the button line. I am careful not to go to deep but judge depth by the amount of material above the opening in the stem end. Once I have the slope set and the button more defined I use the flat needle file to clean up and define the edge of the button. I want a good sharp edge on the inside of the button to catch behind the teeth. I use 220 grit sandpaper to clean up the slope and smooth out the file marks.Broken4

Broken5 When I get the stem shaped the way I want it I then move on to the shaping of the button. I like a button that is shaped like an oval that tapers outward to the edges on both sides. I sand and file and file and sand to shape it. When I have the shape correct I also slope the button backward toward the airway on the stem end. I generally am working the button to look as much as possible like the one that was originally on the stem. I use pictures of the stem from the internet or from the camera that I took to get the look just right.Broken6 After the button is shaped I work on the airway in the end of the button. I want it to be a slot. I use the needle files to open the airway. I flair it from the opening like a Y. The idea is to create an opening that is funnel shaped. I start with a flat file and work toward a round and an oval needle file I shape the ends of the slot to match the shape of the button as much as possible. When I finally have the slot open I fold a piece of sandpaper and work on the inside of the slot to smooth out the file marks.Broken7

Broken8

Broken9 I finish by sanding the stem with micromesh sanding pads and polishing it to give it a shine. Here are some photos of the finished stem.Broken10

Broken11
Choice #2 – Build it up

I have used this method quite a bit with variations. I have used it repair bite marks and bite throughs on stem. The basic procedure is to clean up the affected area on the stem with alcohol and sandpaper to prepare it for the buildup. I leave the area slightly roughened to give the repair something to grab on to. Once all loose debris, sanding dust and oxidation is removed you are ready to begin the patch. The stem I am using to illustrate the process had holes on both sides of the stem and both were large. Alongside both sides there were also many tooth dents that needed to be addressed as well. In this case those dents would provide a strong base for what would be a large patch.Broken12

Broken13 I grease a piece of folded paper or a nail file with Vaseline and insert it into the slot on the stem. I want to have a slick base for the glue to sit against but not fasten to. I also do not want to close off the airway and this method has worked well for me for many years.Broken14

Broken15 With the folded paper inserted it is time to begin to build up the repair. I use medium viscosity black super glue that I get from Stewart MacDonald online. I build up the edges of the repair first. Some folks will use an accelerator at this point to speed up the process. I have also done so but find that the glue is more brittle and I have had patches fail after using it. So I have learned to “patiently” wait for the glue to harden. Others mix in fine charcoal powder or grit with the superglue and feel that it gives a stronger patch. I have done that as well but did not choose to use that on this stem repair.Broken16

Broken17 As the first layer of glue dried I continued to build the patch inward to the middle and thicken it as well. The process took several days and included at least four layers of glue.Broken18

Broken19 Once the last layer of the patch was finished I set the pipe aside to cure for several days. When it was dry I sanded it with 180 grit sandpaper and then 220 grit sandpaper to level out the patch and the surrounding stem.Broken20

Broken21 I used needle files to sharpen and define the edge of the button. I sanded it with a medium and a fine grit sanding sponge. The patches show up still in the surface of the stem as a slightly different colour but once the stem is sanded with micromesh they begin to disappear.Broken22

Broken23

Broken24

Broken25 The finished stem looks like new.Broken26

Broken27
Choice #3 – Splice it

On the blog, Jacek Rochacki has written of splicing a repair and reshaping the stem. I am inserting his procedure at this point to explain the choice he uses.
Instead of cutting/removing the damaged part and carving the lip/button of what is left, I would proceed in different way. Keeping in mind my wish of keeping original dimension, proportions, form, I would try to reconstruct damaged stem/mouthpiece as following:

By using sharp cutting tools – engravers/burins, scrapers or in case of better equipped “workshop corner” – cutters, like those used by jewelers for stone settings, or even a sharp pocket knife, a frame saw and needle files I would work on the damaged area making it a proper shape a piece of the same material carved that I will later shape/carve to fit what is missing. The words “making it of proper shape”, may be a subject for another longer text. But as sort of inspiration may be the different ways dentists use to “elaborate” holes in teeth so that the filling will be kept securely in place. In a stem the situation is easier as we have good binding glues and are binding together the same kind of materials – vulcanite/ebonite to vulcanite/ebonite.

When the newly carved material is fixed into the missing area with glue, I work with files and drill bits to achieve desired missing shape. Then I proceed with finishing techniques. Let us look at the pictures:Broken28

Broken29

Broken30 Others have actually cut off the broken portion of the stem after matching it to a similar style and shaped stem. The also cut off the replacement stem so that the undamaged areas match perfectly. A small stainless steel tube can be used to join the two pieces of stem together and black superglue can be used to hold it together and to fill in the joint of the two stems. Once the glue has cured then the repair can be sanded and blended together so that it does not show at all.

Choice #4 – Replace it

The fourth option is to fit a replacement stem on the pipe or make one from vulcanite or Lucite rod stock. I do not have a lathe so I usually use precast stems and do a lot of shaping and fitting and improvements on the blank. The photos below show a new stem that I fit to a Lovat pipe for a friend. I used an old saddle stem that I had here so I did not need to use a precast one. This one just needed adjustment and fiddling to make it work well.
The original stem had a large bite out of the end of it the underside next to the button.Broken31 I choose a stem that is similar in shape and style that was the same length. It had a slightly larger saddle portion on the stem but I liked the look of it and figured it would work. I turned the tenon down slightly to make for a snug fit in the mortise.Broken32 In this case I sanded the stem down to remove the oxidation from the surface and also to remove the slight tooth marks and tooth chatter that was there.Broken33

Broken34 After sanding with the 220 grit sandpaper I used a medium and a fine grit sanding sponge to clean up the stem further and remove scratches.Broken35

Broken36 I sand the finished stem with micromesh sanding pads to polish it.Broken37 After sanding with the 12000 grit pads I buffed it with Blue Diamond Plastic Polish and then with carnauba wax and a soft flannel buffing pad. The finished stem is shown below.Broken38

Broken39

Doing an interior shank repair and restemming a KBB Yello Bole Lovat


Blog by Troy Wilburn

I got this pipe from a member of Dr. Grabows Collector Forum, John McP. He hails from across the pond in Scotland. He had contacted me about a old KBB Yello Bole pipe that he had picked up that did not have a stem and wanted to know a little about it and what kind of stem it originally had. He also informed me it had an old repair of a cracked shank.

It is stamped 2079 and had the “Honey Cured Briar” under the KBB Yello Bole, which made it a pre 1936 model. I then checked my Kaywoodie charts. It’s a large bowl, long shank Lovat saddle bit. Even though the KW shape charts call it a Canadian I don’t think so because of its round shank. I’ll never consider a round shank as a Canadian.K1 I informed him that it was a nice pipe and should be a good smoker once cleaned up and a replacement stem found. Unfortunately for John the old repair was not a good one and it had made the shank weak. When John tried to fit some stems to it, a piece broke out of the shank. He asked me if I wanted it free of charge as he did not want to tackle repairing the pipe.

The pipe as John showed me before he sent it.K2 I agreed that I would see what I could do with it. Well after over a month in the mail it finally arrived and I got a good look at it and found a donor saddle bit from another Yello Bole.K3

K4 The bowl had some black scorch marks from smoking hot.K5 I was going to get this pipe blasted after repairs to help hide them and cover some dark burn marks on the bowl. After much thought I decided to restore it close as factory as I could. The possible history of this pipe was just too good to alter it. In the short time of my possession of this pipe it had already been half way around the globe. That’s just a fraction of the long life that this pipe has had over it’s at least 80-year-old life. Maybe it was taken over by an allied soldier and left behind as a gift of friendship? Maybe it was carried by an OSS agent behind German lines during the war? Maybe not but its fun to think of the possibilities.

So all the sand pits and small fills were left as is and not covered or filled. After all it’s a Yello Bole if it did not have these imperfections it would have been a Kaywoodie. The old war horse has some scars from repairs and wear. The stamping’s are quite worn but it’s a pipe someone had thought enough of to repair it once before. Hopefully it has many more years left in it.

I decided to do an inner band like Steve did on a YB I sent him for repair. I found an old metal tenon from a Grabow filter stem I had.K6 I filed out the inner shank and broken shank piece to clean up and to give the glue something to grab too.K7 After grinding the metal tenon to fit inside the shank. I cleaned up the shank and broken piece with some 91% alcohol and marked the best way it fit with a black sharpie so I know where to place it when glued.K8 I mixed up some two part epoxy and then set the inner band in the shank.K9 After it set up I got ready for the broken piece and cleaned off the Sharpie from the metal band to ensure a good bond. I put two part epoxy on the metal band then super glue on the briar edges and set the broken piece. Then I applied briar dust before the glue set. I had to work fast so no pics during this process, only before and after.K10

K11

K12 I then sanded the repairs; the old repair had a bad high spot and took some filing.K13 I had to build up the bottom from making the old repair flush again. It was a bit lower than the stem.K14 I then filed the stem to match the shank.K15 After cleaning out the shank and bowl I noticed that all the old YB coating was gone from wear or scraped out over time. I decided to remove all the cake and address this later.K16 I then stripped off the old finish with warm water and Oxy Clean bath. I did some light scrubbing with a toothbrush and a Scotch Brite pad used on the stubborn spots. I then wet sanded repairs and bowl with various grits of wet dry paper from 600 – 2500.K17 After this I wiped the pipe several times with household bleach to lighten the dark spots and repairs so it would be harder to spot with the dye.K18 After bleach bath the pipe is ready for dye.K19 I then mixed up some dye close to original stain but slightly darker to help cover the repairs and black marks. I applied three coats.K20 Pipe dry and ready for some base wax.K21 After applying three coats of wax to lock in the dye I mixed up some homemade Yello Bole bowl coating.K22 I applied the bowl coating and found a Yello Bole paper cover from a NOS pipe I have. The cover is from an Imperial but I thought it would look nice for the pictures.K23

K24 After several more coats of wax the pipe is done. First off the repairs are not perfect and I wish I could have gotten a tighter fit with the stem. This was my first inner banding so I didn’t get the band quite as square as I should have making the stem fitting a bit difficult .The more I tried to get a tight fit the more gap I would get on one side, so I settled for a uniform gap. I’ll know better next time and should get a better fit. Here are some pics of the finished repairs.

As Steve pointed out to me on the Dr. Grabow Collectors Forum, if you flare the tube it will make it fit more squarely. I think showing your mistakes is as important as showing your successes for the next person trying to do a similar repair. So if you are doing an inner band repair soon I suggest you flare the end before you set it with epoxy.K25

K26

K27

K28 I did manage to save what little of the stamping’s were left.K29

K30 Pictures of whole completed pipe K31

K32

K33

K34

K35

K36

K37

K38

K39

K40

K41 Even though this was a tough and time consuming refurbish it was quite fun and wish to thank John for sending me this old soldier to be used and enjoyed again.

Repairing a Broken Shank Acorn Shaped Pipe and giving it a New Look


Blog by Steve Laug

I have had this broken Acorn shaped bowl in my box of parts for a long time now. I remember breaking it. There were several fills around the shank at that point. The stem was absolutely stuck in the shank and no matter what I did I could not get it out. Heat, cold, alcohol bath or any other means would not work. Finally after I had dunked it in boiling water hoping to loosen things I twisted on the stem and the shank snapped. Then I could see the problem. The stem had an aluminum tenon that had basically begun to disintegrated and had bonded to the shank. It had a long aluminum stinger that extended virtually to the air hole. It was a mess. I clean up the shank and the bowl to remove all of the corroded aluminum and scraped it clean. I was undecided whether to fix it or just part it out so I put it in the box and left it there.

Yesterday I decided to take it out and have a look at it. I put the two parts back together and saw that the fit was actually quite clean. There were just two small places where the briar actually had chipped. I had a polished aluminum tenon that I had extracted from a broken stem and saved for just such a repair. I sanded it and used a file to score the surface of the metal tube so that the glue would have something to grab hold on in the shank. I mixed a batch of two part epoxy and a painted it on the tube with the mixing stick. I liberally coated the tube with epoxy and let it sit until it got a little tacky and then inserted it in the shank end of the break. I inserted the stem in the mortise end so that I did not set the tube too deeply in the shank. Once I had it positioned I let it cure for 30 minutes until the epoxy set and the tube was solidly in place in the shank.Broke1 I put epoxy on both sides of the exposed briar and then on the other end of the extended tube. I carefully pressed the two parts together and worked to make sure that I had them aligned correctly. The excess epoxy squeezed out and bulged around the enter repair. I used a dental pick and scraped away the excess leaving a smooth top coat of epoxy in the cracked area.Broke2

Broke3

Broke4 The top surface of the rim was quite damaged and the bowl was out of round. I topped the bowl on a topping board to remove the damage and burn marks that were present on the surface. I sanded it with a sanding block to remove the scratches and smooth out the finish.Broke5

Broke6 I sanded the epoxy on the shank back until it was smooth with 220 grit sandpaper. In the photo below you can still see the slight bulge of epoxy that needed to be removed but since I was planning on rusticating the bowl and shank I did not spend a lot of time sanding that out.Broke7

Broke8

Broke9 I sanded it a little bit smoother and then used the rustication tool that Chris Chopin made for me to do a deep rustication on the bowl and shank. As I rusticated it I then used the brass bristle wire brush to knock off the loose briar chips. (I collected the briar chips as I plan on using them as Joe suggested in fill repairs to see if I can get them to stay light). I left the rim smooth and would later top it lightly to smooth it out.Broke10

Broke11

Broke12

Broke13

Broke14

Broke15

Broke16 When I finished the bowl I wrapped a piece of cello-tape around the end of the shank to make a smooth area that I would later install a band on. The shank end was not straight so I would need to clean it up a bit and then band it to get a clean fit of the stem in the shank.Broke17

Broke18

Broke19

Broke20

Broke21 Once I finished rusticating the shank I removed the tape to show the smooth shank end.Broke22

Broke23

Broke24

Broke25 I slid the band on the shank slightly and then heated it with a lighter until the metal expanded enough to press the band into place. I left about 1/8 of an inch extended to allow for the stem to fit properly in the shank and sit inside the band. I sanded the stem with 220 grit sandpaper until the diameter was a close fit in the band. I slid it in place and took the pictures below to show the look of the pipe at this point. I knew that there was a lot more sanding to do to get a snug fit in the band but I wanted to see a picture to look at the fit a bit removed from the pipe I held in my hands. I purposely chose a longer stem to give it a subtle elegance and length bordering on a mini-churchwarden pipe.Broke26

Broke27

Broke28

Broke29 I lightly topped the bowl some more to take care of the burn marks on the right side of the rim top. Then I took a set of close-up photos of the bowl with the band to look at the rustication and figure out where I needed to do some touch up work on it. The shank was where I was the most concerned. I wanted it to match as much as possible with the bowl rustication. I could see that overall it looked good but that the left side of the shank would need some adjusting before it was finished.Broke30

Broke31

Broke32

Broke33 I touched up the rustication on the left side of the shank and then wire brushed the entire bowl and shank with the brass bristle brush to knock of loose particles.Broke34

Broke35

Broke36

Broke37 I brushed of the dust with a shoe brush and then took out some black aniline stain to give the rustication and undercoat of black. I applied the stain with the dauber and then flamed it with the lighter to set the stain in the bottom of the rustication.Broke38

Broke39

Broke40

Broke41 I sanded the stem with a medium and a fine grit sanding pad and put it back in the shank to get a feel for the appearance of the pipe after staining.Broke42

Broke43

Broke44

Broke45 I took the stem back out and worked on it with the micromesh sanding pads. I wet sanded with 1500-2400 grit pads and dry sanded with 3200-12,000 grit pads. I rubbed the stem down with Obsidian Oil between each of the three grits.Broke46

Broke47 Between the 4000 and the 6000 grit pads I buffed it with White Diamond on the wheel and then finished with the higher grit micromesh pads.Broke48 I buffed the stem with Blue Diamond and gave it a coat of carnauba wax. The next two photos show the polished stem in place on the pipe.Broke49

Broke50 I sanded the surface of the rustication to knock off some of the high points and smooth it out slightly using a sanding block. The sanding made the rustication a bit more pebble like in appearance and once I had finished the sanding I gave the bowl a coat of oxblood aniline stain as a top coat. It added some red highlights to the rustication – particularly on the high spots. I then buffed the stem with Blue Diamond on the wheel and gave the stem multiple coats of carnauba wax. I polished the band with silver polish and hand buffed it with a soft jeweler’s cloth. The finished pipe is shown below. It has a delicate look that gives it an air of elegance and class. I am looking forward to firing it up and enjoying a bowl soon.Broke51

Broke52

Broke53

Broke54 Thanks for looking.

Restemming and Restoring a Weber Deep Grain Lovat


Blog by Steve Laug

I have been doing a bit of reading on the Dr. Grabow Collectors Forum and have been learning a lot from the folks there. On one of the threads on refurbishing Scot wrote and asked about restemming an older Weber Deep Grain Lovat. He had it sitting and did not feel confident about doing the stem work on it. I offered to restem it for him for the postage. When the pipe arrived I took it to the work table and took the following photos. The bowl had some really nice grain on it. The finish was rough with a lot of scratches, dents and nicks. Next to the band the finish was work off on the right side. There were some deep gouges and a scratch across the surface on the right side of the bowl. The rim was in rough shape. The outer edges were beat up pretty badly with gouges and chunks missing from the edge. The inner edge was clean and undamaged. The top of the rim was very rough. There were nicks and dents and it was almost crowned looking – though uneven. The bowl was badly caked forming a thick ring about mid bowl. Below that the cake was almost non-existent and above that it was flaking off in sheets. The stem was worn out with a large bite taken out of the top side near the button and the underside it was cracked. It was ruined.Weber1

Weber2

Weber3

Weber4 I took the next two close-up photos to show the rim damage and the odd cake in the bowl and also the damage to the stem.Weber5

Weber6 When Scott first sent it I was under the impression that he merely wanted me to make a new stem for it. After I saw it I wrote him and asked if he wanted me to clean it up and restore it for him. While I waited for his response I worked on the new stem. I had a stem that was the same length and had a tenon that was not only the right length but also almost the right diameter. I sanded the tenon down lightly and fit the stem to the shank. It was perfect in diameter on the bottom side of the band but was a little large on the top and left side of the saddle.Weber7

Weber8

Weber9

Weber10

Weber11

Weber12

Weber13 I put a plastic washer between the shank and the stem so that I could sand it to the edge without rounding the shoulders of the stem. I sanded it with 220 grit sandpaper to shape it and fit it to the band diameter. I also sanded off the oxidation that was on the surface of the stem and some of the wavy lines that were present on the flat surface of the blade.Weber14

Weber15

Weber16

Weber17 removed the washer and carefully sanded around the shank/band junction to clean up that edge.Weber18

Weber19

Weber20

Weber21 I sanded the stem with a medium and a fine grit sanding sponge to remove the scratches that were present on the stem from the sandpaper.Weber22

Weber23

Weber24 Once I had removed the majority of them I sanded the stem with micromesh sanding pads – wet sanding with 1500-2400 grit pads and dry sanding with 3200-12,000 grit pads. I rubbed the stem down with Obsidian Oil between each set of three pads.Weber25

Weber26

Weber27 There were still some scratches present on the stem that would go once I had buffed it with Blue Diamond but just before I took it to the buffer I heard back from Scott. He said he would be glad to have me give the pipe a work over. Given that go ahead I set aside the stem and turned to work on the bowl. Once I had the bowl finished I would buff the entire pipe.

I reamed it with a PipNet reamer starting with the smallest cutting head and then finishing with the second smallest head. With that I took the crumbling, flaking uneven cake back to bare wood. I figured that Scott could start over and build an even hard cake of his own choosing.Weber28

Weber29 I took a few photos of the bowl to record the damage and scratches to the finish. I wanted to not only get a good look at them but I also wanted to document them. The right side of the bowl had a large series of scratches and grooves from what looked like dropping the pipe on concrete. There were also scratches on the shank and outer edge of the rim. In fact the rim edge was very rough. The left side of the bowl also had some scratches that were pretty deep. The top view of the rim shows the missing chunks of briar around the edge of the bowl and the uneven crown that came from tapping the bowl out against a hard surface. The underside of the shank had a rough spot next to the band and quite a bit of scratching.Weber30

Weber31

Weber32

Weber33I washed down the bowl with acetone on cotton pads to remove the remnants of the finish before I worked on the scratches and dents in the bowl and shank.Weber34 topped the bowl on a topping board to remove the damaged surface and outer edge of the rim.Weber35 Once I had the bowl topped and the rim smooth and flat again I decided to repair the missing chunks of briar on the outer edge and the deep cuts on the right side of the bowl. I sanded the edge and scratches with a sanding sponge to clean up the jagged edges. I wiped the areas down with alcohol. I then filled the cuts and the missing chunks with superglue and packed in briar dust to fill them. I generally overfill them and then sand them back until they are smooth and blend into the surface area around them.Weber36

Weber37 I sanded the fills with a folded piece of 220 grit sandpaper and then with sanding sponges until I had blended the area in with the surrounding surface of the bowl.Weber38 I took the next two profile photos of the pipe to show the clean look of the bowl rim. Notice on the second photo the repair to the cuts on the right side of the bowl toward the lower ¼.Weber39

Weber40 The next photo shows the newly topped and repaired rim from the top.Weber41 I sanded the bowl surface with a medium and a fine grit sanding sponge being careful around the stamping so as not to damage it. Once it was smooth and the scratches minimized I rubbed down the bowl with a light coat of olive oil. The olive oil gives some life to the grain and highlights the areas that I still needed to sand. The next four photos show the pipe after it had been rubbed down with a soft cloth after the olive oil.Weber42

Weber43

Weber44

Weber45 I took another close up of the rim to show the repairs and how the olive oil brought out the colour of the rim so that it matched the rest of the pipe.Weber46 I then took the pipe to the buffing wheel and buffed it with Blue Diamond Plastic Polish. I worked the stem over with the polish and then buffed the briar as well. Afterwards I gave the bowl and stem several coats of carnauba wax and buffed it with a clean, flannel pad to raise the shine of the wax. The finished pipe is shown below. Tomorrow I will get it packed up and sent back to Scott. It should serve him well for a good many years to come. Thanks for letting me work on this old pipe. It was a pleasure.Weber47

Weber48

Weber49

Weber50

Weber51

Weber52

Giving a no name Poker a new stem and a new look


Blog by Steve Laug

Over the past six or seven months I have picked this pipe up and looked it over at the small antique shop I visit regularly. Every time I put it back down and leave it there. There was really nothing redeeming about the shape with its one thin side and the odd shank that was not quite round. The stem was just plain ugly and unfinished. It was as if the maker or owner just turned a blank to fit the mortise and flared it backwards to avoid having to deal with a smooth fit to the shank as it was everything but flat and round. The sides of the stem still showed file marks and the diameter was markedly different than that of the shank. All in all it was one that I could do without that is for sure.

Then this past weekend I was in the shop again. I picked it up and looked at it once more. I don’t know if my mood was different or I was on the adrenaline high of finding the old Zeus at the shop before or what but this time I saw some possibilities in the pipe. I paid the $8 cash and the pipe was mine. Now what would I do with it?

When I got home I took some photos and weighed my options over Saturday evening and Sunday. I thought about making a freehand style stem for the pipe and ditching the old one. I thought about cleaning up and reshaping the old stem. I thought about facing off the shank end and giving it a more classic look. I took the stem off and looked at the shape of the shank, the shape of the shank end and tried to visualize it with a classic look. As you can guess by this point if you know my likes I went for the classic look.Poker1

Poker2

Poker3

Poker4 I took a couple of close-up photos of the rim and the shank end to give an idea of how the bowl and shank were not round or close to it. The first photo of the dirty rim of the bowl shows the odd shape it was in. The right side of the bowl wrapping about half way around both the back and the front had a nice thick, even width while the left side tapered in from the thickness and roundness of the right, back and front to a thinner width. Besides that it also seemed to be a bit oval on the back and front but after measuring it I could see that it was an illusion. The second photo shows the shank end. It is a bit hard to see but the shank end was crowned and rounded over but inconsistently. The shank itself had the same problem as the bowl – it too was not round but was thicker on the left side than on the right; just the opposite of the bowl. This little pipe was going to be a challenge to make look correct.Poker5

Poker6 I decided to face the end of the shank and remove the uneven crown and to flatten it to fit a flush stem. I used the topping board and carefully pressed the end of the shank into the sandpaper. I had to make sure that I held it straight vertically while sanding so that I did not slant the end of the shank and make things worse.Poker7 I worked it against the 220 grit sandpaper until it was smooth and the crown was gone. I then used a medium grit sanding block to make sure the shank end was flat and even.Poker8 I had an old Georg Jensen stem that fit on the right side of the shank perfectly. The left side and the bottom and top on that same side were off. I tried a saddle stem I had as well. No matter which stem I use the shape of the shank made a perfect fit impossible. The good news was that the flush stem fit snugly in the mortise and flat against the end of the shank. Now I would need to make adjustments to the shank diameter without losing the nice sandblast finish.Poker9 I went through my bands and found one that would fit both the shank and the stem once it was in place. I used my Dremel and sanding drum to take down and round out the shank end so that the band would sit properly. I wanted to make the adjustments to the shank before the band so that once it was in place the stem would fit without adjusting the roundness of the stem to match the out of round shank. It took some work to round out the shank but the Dremel made short work of the process.Poker10 I was able to put the band loosely on the shank to get an idea of the overall look of the pipe with the band. It appeared to me that it would work well.Poker11

Poker12 I decided to heat the band with a lighter rather than set my heat gun to do the simple heat up of the band. Once I heated it I pressed it into place on the shank. The metal expanded slightly with the heat and by pressing the shank end against a flat surface I was able to push the band into place.Poker13

Poker14

Poker15

Poker16One problem was solved. The shank was now round at the end and the stem would fit tightly against the shank and the band made the match perfect.Poker17

Poker18

Poker19

Poker20 I used a dark brown stain pen and a black permanent marker to touch up the raw briar in front of the band and blend it into the colour of the bowl and shank.Poker21

Poker22

Poker23

Poker24 Once I had the stained matched, it was time to clean the sandblast finish. I used Murphy’s Oil Soap and a tooth brush to scrub the bowl and shank. I did it after the stain touch up as I figured that the scrub would help blend the stains together.Poker25 I rinsed the bowl with fresh water avoiding getting it into the shank and the bowl. I dried it off and brought it back to the work table. I cleaned out the shank and the used stem with a few pipe cleaners and alcohol. The pictures below show the pipe at this point in the process.Poker26 The stem needed some work to clean up the scratches and wear around the button. I wet sanded it with 1500-2400 grit micromesh sanding pads and dry sanded it with 3200-12,000 grit pads. I rubbed it down with Obsidian Oil and then buffed it with Blue Diamond Plastic Polish on the buffing wheel. I gave it a quick coat of carnauba and took it back to the work table.Poker27

Poker28

Poker29 I gave the bowl and stem a light buff and rubbed the bowl down with a light coat of olive oil. When it dried, I hand buffed the bowl with a shoe brush to raise the shine. The finished pipe is shown in the pictures below. I think I achieved what I set out to do when I started this project. I took a pretty ugly poker with a misfit stem and with work transformed it into a more classic poker look. What do you think? Thanks for looking and giving your opinion on the new look.Poker30

Poker31

Poker32

Poker33

Poker34

Poker35

Taking the idea that several readers gave regarding the straight stem I bent it this morning. I heated it with the heat gun and then gave it a gentle 1/8 bend. Here are the photos.Bent1

Bent2

Bent3

Bent4

A Dodgy Rogers: Restoring and Modifying a Rogers Standard


Blog by Anthony Cook

I was recently engaged in a conversation with another member of an online pipe tobacco forum and I learned that he had been smoking a pipe for six months and had only one pipe. I’ve been there, man. From what I’ve seen, six months seems to be the sweet spot for new pipe smokers. They’re likely to stick with it if they’ve made it that far, but everything is still new enough that even simple things can be a challenge. I’m sure that most of you will agree that smoking a pipe isn’t rocket science, but the initial learning curve can be fairly steep all the same. So, I offered to send him a pipe to give his faithful companion a break, reward his perseverance, and encourage him to hang in there.

I sent him a photo of a few pipes that I had on hand. I told him to pick one and I’d send it along. I half expected him to balk after seeing the photos. None of the pipes had been restored at all. If you’re not used to dealing with estate pipes, it can be difficult to see one as anything other than what it is; grime, tar, fills, and all. So, to ease any concerns that he may have I sent him a few before/after photos of some of my work and promised that I would make sure that his pipe was clean and pretty. He responded quickly with his choice, and to my surprise, it was probably the grungiest in appearance of the lot. Here it is…An1 The pipe is a Rogers Standard. I think the unique shaping is what attracted him and I can understand why. The slightly longer shank paired with the short saddle on the stem give it a quirky look that’s still classy. Here are a few more photos to give you an idea of what I was working with.An2

An3

An4 The stem was stuck tight on this one, but a couple of hours in the freezer took care of that. Once the stem was removed, I found a grimy, spiral stinger in the tenon. It too was stuck. So, I dripped alcohol into and around the tenon to soften the tar that was gluing it in. After a few minutes, I wrapped it in several layers of soft cloth to protect it and pulled it out with a pair of pliers. I dropped it into a container of alcohol for about an hour, and then scrubbed it with a pipe cleaner until it was as good as new.An5 I gave the stummel an alcohol bath to remove the old, lacquer finish. Several hours later, I removed it and wiped it down. Only about the top two-thirds of the bowl was caked to any degree, but what was there was thick, uneven, and harder than chicken lips. In the end, it took a group effort to ream the bowl back to bare wood the way I like it, but a T-handle reamer, a pipe knife, 400-grit paper wrapped around a Sharpie pen, and a little elbow grease got the job done.

I’ve added a retort to my tool chest since I last posted here, but I still like to scrub out the solid debris and lumpy build-ups by hand before using it. The Rogers took a whole handful of pipe cleaners, cotton swabs, and a couple of shank brushes before I was satisfied enough to move on.An6 I set up the retort and flushed the stem and shank several times before setting it aside to cool for about 15 minutes. Then, I refilled with clean alcohol and flushed several more times. After the second retort, the alcohol was nearly clear. So, I considered the retort to have done its job and gave the stummel and stem one last quick scrub to remove any remaining tar.An7 While I had been retorting the stummel, the stem had been soaking in an Oxyclean bath. I removed it and scrubbed it down with a couple of 1” cubes cut from a Magic Eraser pad to remove the oxidation. There is one thing to note though. I noticed that the paint had come out of the stem stamping during the bath despite my attempt to protect it with a dab of petroleum jelly. I’ve never really trusted this method of protection and I think I’m going to explore some others ideas in the future.An8You may have noticed from the photos that this pipe had a few fills. Okay… It had a lot of fills and the ones that concerned me the most were a few that were right inside the stamping on the shank. I was considering what to do about them when the thought occurred to me that it might be best to leave it up to the guy that was going to smoke the pipe. I contacted the future owner and presented him with a few option: (1) I could patch the fills with briar dust and CA that would blend well into the final finish, but some of the stamping would be sacrificed, (2) I could leave the stamping intact, but there would be some obvious fills on the shank of the finished pipe, or (3) I could rusticate the pipe, which would completely obliterate the stamping but the pipe would be unique. He chose to go with rustication.

So, once I knew the direction in which I was heading, I set up my topping surface to remove the scratches and charring on the rim. I sanded with a progression of 220-grit, then 320-grit, then 400-grit paper until I was satisfied that all of the scratches were gone. I also softened the inside and outside edge of the rim by light sanding with 400 grit paper (not pictured).

My rustication plan called for a round, smooth button on the right side of the bowl where there were few fills and some fairly decent bird’s eye. There were also a few dents in the area. So, I clamped the stummel in a vice and tried to steam them out by pressing a heated screwdriver into a wet cloth placed over the dents. Most of them were removed successfully, but one large dent with sharp edges still remained. You win some. You lose some.An9 Nobody wants a pipe that looks like it has the measles and those pink putty fills will show through and ruin even a rusticated finish. So, I picked them all out. I also discovered that the wood inside the mortise directly beneath the shank crack was weak and spongy. I scraped it out easily with a pick, but left behind a disconcertingly large gouge in the mortise.An10 I had been experimenting with pre-staining briar dust for patches and fills, but I hadn’t had the opportunity to put it into practice until this pipe. I dripped a couple of drops each of Fiebing’s black and oxblood into a bit of briar dust, and then added a few drops of isopropyl alcohol to spread it evenly. After mixing it up and sitting it under a warm lamp for about 30 minutes, I had a batch of stained briar dust.An11 The stained dust and a bit of CA glue were used to patch the dent and a large fill on the right side of the bowl. I also used unstained dust and CA to fill in the area of missing wood in the mortise.An12 The bowl patches were sanded out with 220-grit, then 320-grit, sandpaper. In the mortise, I used 240 and 320-grit sanding needles. When I inserted the stem to test the fit, I heard a sharp “snap”. Uh-oh.
When I flipped the pipe over I saw that the shank had cracked again. This one began about 1mm below the patched crack and was also longer than that one. I used a 1/32” drill bit to make a small hole at the end of the crack to stop the run. I didn’t drill all the way through, only a hair’s width below the crack. Then, I inserted the stem (after smearing petroleum jelly on the tenon) to widen the crack and filled the crack and drill hole with stained dust and CA. Once the patch had set up, I removed the stem, wiped the petroleum jelly from the mortise, and added more briar dust and CA there to add the strength that it obviously needed.An13 The new patches were sanded out once dry and I used a strip of 400-grit paper to reduce the diameter of the tenon before trying to insert is again. The fit was snug but not overly tight, and best of all, there were no new cracks.An14 Since the shank crack had been opened up and then filled, the overall diameter of the shank had increased slightly. So, I used 220-grit, then 320-grit, sandpaper to bring it back into register with the stem.

Then it was time to strike up the band. I selected a band from my box that was large enough to fit over the end of the shank, but not so large that I could slide it all of the way up by hand. With the band partially in place over the shank, I heated it with a heat gun to expand the metal, and then pressed it into place on a hard, cushioned surface.An15 The mortise had been constricted by the placement of the band. So, again, I had to do a bit of sanding with 220-grit, 320-grit, and 400-grit paper to turn the tenon down enough to make a good, snug fit.

The heat gun was already set up. So, I used it to heat the stem to see if I could raise some of the tooth dents. It did a fair job, but a few still remained after the heat treatment. I also took the opportunity to add a few more degrees of bend in the stem to give it a more elegant flow (at least to my eyes).An16 The stem button had a couple of chunks bitten out of it that needed to be repaired. I borrowed Andrew Selking’s idea of wrapping the area below the button with tape to keep a crisp edge before applying black CA glue to the gouges. The middle picture in the image below shows the button just after removing the tape. There was a bit of overhang at the lip that would have to be taken off, but the area where the button meets the stem is crisp and clean. That would save a lot of work. Thanks, Andrew!

I sanded out the lighter dents on the stem with 220-grit paper. For the deeper dents, I patched them with a bit of black CA glue applied with a toothpick.An17 When the stem patches where dry I sanded them down with 220-grit paper, and used 320-grit and 400-grit to blend them into the rest of the surface and to shape the button. Then, I lightly sanded the entire stem with 600-grit paper to remove any scratches and pits in the vulcanite. I also used a grout pen to paint in the stamped logo. Some of the logo area had been worn smooth over time. So, the resulting logo didn’t look as good as the example over at PipePhil.eu, but I think it looks better than it did originally.An18 For comparison, here’s the logo example from PipePhil.eu (first image), the original logo (second image), and the repainted logo (third image):An19 The stem was polished with micro-mesh pads 1500-grit to 12000-grit. I applied a drop of Obsidian Oil to the stem, let it sit for a couple of minutes, and then wiped off the excess to finish up the work on the stem.An20 I decided to go for three levels of texture in the partial rustication and hoped that would give the pipe a unique appearance. I used a felt pen to mark an oval-shaped guideline on each side of the bowl. I started carving with a Dremel and a 3/32” engraving burr. Basically, I just scribbled around the stummel avoided the areas that I wanted to leave smooth to create the base for the medium texture. Then, I used a variety of hand-cut bits and tools to really get in there and remove some wood to create the craggy texture around the ovals that I had marked. To finish up the rustication, I used a 1/32” engraving burr to touch up a few of the places where the rustication met the smooth areas.An21 It turned out to be a rather lengthy process to get the final color and finish the way that I wanted it. So, I won’t go into a lot of detail, but here’s the gist of it:
1) Applied black stain, sanded smooth areas and rustication high spots with 400-grit, and buffed with Tripoli
2) Applied mahogany stain, lightly sanded smooth areas and brushed the rustication high spots with 600-grit, and buffed with a clean wheel.
3) Applied ox blood stain to the rusticated areas only, hand buffed, sanded smooth areas with 1200-grit (Not pictured below. Oops).
4) Polished with micro-mesh 1500-grit to 2400-grit, applied red stain to smooth areas only, buffed with a clean wheel, continued polishing smooth areas with micro-mesh 3200-12000.An22 After the final micro-mesh polish, I reattached the stem and buffed the entire pipe with White Diamond. I then applied Halcyon II wax to the stummel and carnauba wax to the stem and buffed the pipe with a clean wheel. Lastly, I painted the walls of the chamber with a sour cream and activated charcoal bowl coating to add some temporary insulation until a good cake could form.

The finished pipe is very different from what it was when I started. It has lost its pedigree, but it has gained a unique, one-of-a-kind appearance. I’m quite pleased with the way that it turned out and I’m hoping that the new owner will be too. It’s in the mail, Dustin. Smoke it well, brother!An23

An24

An25

An26

An Odd Yello Bole Imperial Nosewarmer Canadian worth saving


Blog by Steve Laug

The second pipe that Troy Wilburn sent me to restem was a short Canadian with a large bowl. It was a bit of an odd pipe – no shape number and no catalogue shape that matched it. It was almost like a Canadian that had been cut off somewhere along the way. However it was sent out from the factory like this. It is stamped on the top rolling down the left side of the shank with the older KBB in a cloverleaf. Next to that it reads Yello Bole. Underneath it reads cured with real honey and an R in a circle. Underneath that is stamped Imperial in Script with small block letters reading IMPORTED BRIAR.

It came to Troy as New Old Stock or NOS – unsmoked pipe. It had a strange tenon repair that someone had made some time in its history. The tenon had broken off in the shank and rather than remove it, the decision had been made to leave it in the shank. In the first photo below you can see the broken tenon and at the end of it is the YB stinger apparatus still sitting in the shank. There was a notch taken out of the shank on the left underside near the end of the mortise and in the mortise end. The repair that had been made was to smooth out the end of the stem and insert a stainless steel rod in the stem. The rod was the same diameter as the inside of the tenon. Effectively it was like the repair I did on Troy’s other pipe. The problem with this one was the very constricted draw due to the narrow airway constricted by the tenon. With the notch in the end of the mortise the fit of the stem against the shank was also compromised. This pipe was going to be a bear to get all of the alignments straight. The airway drilled in the stem for the metal tenon was slightly off centre and a little angular. The notch in the shank would need to be corrected or removed. The fit in the shank would need to be adjusted. You can see that this NOS pipe would take a bit of creativity to reconstruct.YB1 I began the reconstruction of a new tenon by addressing the constricted airway and broken tenon in the shank of the pipe. I used a drill bit that fit well against the end of the tenon that was stuck in the shank and slowly drilled into the broken tenon. My hope was that the drill bit would catch on the material of the tenon and I would be able to back it out of the shank. It worked on the first try. The bit stuck in the bit and I reversed the direction of the drill and the broken tenon came out on the drill bit. Once it was free I was able to shake out the stinger from the airway and the shank was clear. This unsmoked pipe now had an unconstricted airway. The first part of the repair had gone off without a hitch.YB2 The next photo shows the parts that were in the shank. The broken tenon piece and the spoon shaped stinger are to the left of the end of the shank. You can also see the short metal tenon that had been inserted in the stem end.YB3 I gripped the end of the metal tenon with needle nosed pliers and wiggled it free of the stem. It had not been glued but rather heated and inserted deep in the airway of the stem. With very little effort I was able to remove the tube from the stem. The next two photos give two different views of the tenon and the end of the stem. You can see in the second photo that the airway had been drilled open to take the metal tube tenon. It would not take much to open it slightly larger to put a repair tenon in place.YB4

YB5 With the airway opened I decided to address the notch out of the end of the shank. I did this by using super glue and briar dust to build up the shank end. The trick was to keep the glue isolated to the shank end and not let it run on the finish of the shank bottom.YB6 I carefully put a few drops of glue in the notch and then packed in briar dust with a dental pick. I repeated this process until I had built up the notch slightly higher than the flat end of the shank. I then used the topping board and carefully stood the pipe against the sandpaper and slowly worked the filled area smooth with the paper. I repeated the process until the area was evenly built up and the notch was gone. There remained a little darkening at the edge of the repair on the bottom edge of the shank end but the notch was gone. Once the stem is repaired and is in place the notch will be virtually invisible. I cleaned up any of the glue bits and briar dust in the shank with the dental pick and a sharp knife.YB7

YB8

YB9 The next three photos show the shank end from different angles to show the state of the repair at this point in the process. It still needs to be cleaned up and touched up once the stem is fit in the shank, however the notch itself is virtually gone and the stem (sans tenon) sits smoothly against the shank end.YB10

YB11

YB12I decided that rather than wait for a new tenon to arrive I would make my own. I had a very small stem that I knew would work well to fashion a tenon. I used a hacksaw to cut off a portion of the stem to use for the tenon. I purposely cut it long to give me material to work with.YB13

YB14

YB15 The cut off portion is shown in the photo below. I held the smaller portion in the tip of a pair of needle nose pliers and used the Dremel with a sanding drum to bring down the larger portion to match the smaller one. I would sand until I had a vulcanite tenon that I could insert into the stem.YB16

YB17 Here is a photo of the shop “foreman” sitting in my chair while I worked on the tenon. Spencer loves to hang out with me while I work.YB18 The thinner part of the tenon in the photo below will be the part I insert in the stem once it is drilled out. The larger part will need to be turned down to fit in the mortise.YB19

YB20 I started by using a drill bit that was slightly larger than the airway that had been opened in the stem for the metal tenon. I worked my way up to a drill bit that would open the airway and deep enough to take the new tenon and provide stability.YB21 When I had drilled the opening in the stem as large as I could, given the taper of the stem I needed to take down the diameter of the replacement tenon I had made. I used a Dremel to take off the excess material to reduce it to the same size as the stem opening. Once I got close in diameter with the Dremel I hand sanded it to fit.YB22

YB23 When the tenon end fit snugly in the stem, I squared off the end of the tenon and then superglued it in place in the stem. I coated the tenon with the glue and pressed it into place. The tenon itself would also need to be turned to fit the shank of the pipe.YB24 I used the Dremel and sanding drum to sand down the tenon and then used sand paper to get a snug fit.YB25 Once it fit well I polished it with fine grit sanding sponges and micromesh.YB26 The fit in shank was good and snug. It was at this point that the alignment issues became clear. I would need to do some work on the shank to clean up the repair and also get a good transition from the shank to the stem. The fit on the topside was slightly high and the fit on the underside was a little low. I needed to sand the shank anyway to clean up the repaired notch on the underside so to sand it a bit more was not an issue.YB28 I sanded the shank and stem with 220 grit sandpaper to smooth out the transition between the two and to give a better flow to the taper on the stem.YB28

YB29

YB30

YB31 I sanded the stem and shank with a medium and a fine grit sanding block to make the transition smooth and remove the scratches left behind by the sandpaper.YB32

YB33

YB34

YB35 Once the transition was smooth I sanded the briar with micromesh sanding pads from 2400-4000 grit and then used the Guardsman brand stain pens to stain the shank. I used the lightest stain pen first and finished with the medium stain pen. Once it dried I buffed the pipe with Blue Diamond to raise the shine on the shank and to even out the stain.YB36

YB37 I sanded the stem with micromesh sanding pads – wet sanding with 1500-2400 grit pads and dry sanding with 3200-12,000 grit pads. I buffed the stem with White Diamond and Blue Diamond and then buff the shank with the same once again.YB38

YB39

YB40 I buffed the stem and the shank with Blue Diamond on the wheel and then gave the pipe several coats of carnauba wax. I finished by buffing it with a soft flannel buffing pad. The finished pipe is shown below.YB41

YB42

YB43

YB44 The next two photos show a close up of the fit of the stem to the shank. I am pleased with the way it turned out.YB45

YB46 The last two photos are of a regular sized Yello Bole Canadian (top pipe) and the little nose warmer (bottom pipe). I put these together to give a bit of perspective. The bowl on the nose warmer is larger and the shank is definitely shorter.YB47

YB48 Thanks Troy for the challenge on this little Canadian. It was a pleasure to work on it. Each time I work on putting a new tenon on a pipe I learn something new. This time around, between the new tenon on the billiard, the insert in the cracked shank and the new tenon on this little one I had a good week in pipe school. They will soon be on their way back to you Troy. I hope they smoke well and you enjoy them.

Restoring and Shaping a New Stem for a Savinelli Roma 305


Blog by Steve Laug

When I saw this old Savinelli Roma on eBay I decided to bid on it and see what I could do with it. It had a triangular shank without a stem. The bowl had a cake build-up and the rim was covered with tars that were flaking off. The finish was dirty and worn as these pipes usually have a contrast dark stain on the bowl and a lighter stain on the rim. The rim is chamfered or bevelled inward toward the bowl. The edges of the rim – both inner and outer – were in great shape. The bowl was still in round.Roma1 The band was an aftermarket addition and from the looks of it covered a cracked shank. In the photo below you can see the band has been pressed into place and damaged the shape of the shank on the bottom right side. Notice the step down from the band to the bottom edge of the shank and you will see what I mean.Roma2

Roma3 I have included the next photo of the Savinelli Roma 305 to show what the pipe originally looked like. The triangular shank and matching stem are attractive. This should be interesting to duplicate on a replacement stem! The round rim and the contrast colour of the bowl and rim look very good. The thin metal spacer between the stem and shank would have been connected to the stem and with the cracked shank on the one I picked up will not be possible to duplicate.Roma5 I have also included a picture I found on the web of a badly oxidized stem. I saved this because it gives a good close up of the angles on the stem that I will need to duplicate.Roma4 When the pipe arrived I took it out of the package and gave it a thorough inspection. As I suspected the band was an added feature. It was pressed loosely in place to deal with a crack in the right side of the shank and also on the bottom edge. It was poorly fit and would need shaping before I put it permanently in place. I would also need to address the cracks in the shank and the missing notch on the right side of the shank.Roma6 The next group of three photos shows the damaged areas on the bowl and shank. The crack is visible in the first photo and the missing notch is visible in the second photo. The third photo gives a close up of the bowl and rim.Roma7

Roma8

Roma9 I slipped the band in place and took a photo of the end of the shank to give an idea of what the shape of the stem will need to be when I worked on it. You can see the poor fit of the band at this point as well.Roma10 I went through my can of stems to find one that fit. I tried diamond shaped stems and none had a wide enough diameter to match the width of the shank without being too long to look right. I finally settled on a round stem blank that had the correct diameter. I turned the tenon down with a PIMO Tenon turning tool until it fit the shank. In the photo below you can see the stem and the stem before I corrected the tenon.Roma11 With the tenon turned to fit I pushed it into the shank of the pipe.Roma12

Roma13 Using a rasp and files I roughed in the shape of the new stem. I used a Dremel and sanding drum to take it down as close as possible to the finished shape and then brought it back to the work table to use the files again. The photo below shows the roughly shaped stem. Much more sanding will be necessary before this stem is finished.Roma14 I slipped off the band from the shank and worked on the area on the right side of the shank where there was a large divot in the shank. I also cleaned the cracks on that side of the shank and the underside of the shank with alcohol. I picked out the loose briar with a dental pick and then filled in the divot with briar dust and superglue. I built it up to match the current level of the shank and carved it with the dental pick and needle files to match the finish around the repair. I put super glue in the cracked areas on the shank as well and pressed them until the glue set.Roma15

Roma16 The next photo shows the repaired edge of the shank. The shiny area on the right side of the photo is the glue and briar dust repair.Roma17 With the band off and the repairs made I inserted the stem and used the files to further shape the angles on the stem. I sanded it with 100 grit emery cloth to smooth out the file marks and further shape it.Roma18

Roma19

Roma20

Roma21 After more sanding with 180 grit sandpaper the stem is finally beginning to take shape. You can see the shape in the photos below.Roma22

Roma23

Roma24

Roma25 I decided to clean up the bowl before continuing further on the stem. I reamed it with a PipNet reamer and took it back to a thin cake. I would sand it smooth later in the process.Roma26 With hard sanding work done on the stem I worked on the bowl. I scrubbed down the bowl and shank with acetone to remove the remaining finish and scrubbed and scraped the buildup of tars on the rim. I used a small piece of folded 220 grit sandpaper to clean up the rim further.Roma27

Roma28 I scrubbed the rim with acetone and elbow grease and was able to remove all of the tars on the rim.Roma29 I put some wood glue on the shank and pressed the band into place. I wiped off the excess glue with a little alcohol on a cotton pad. I sanded the stem with 220 grit sandpaper to continue shaping and fitting it against the shank. I would need to clean up the straight edges on the sides of the stem and the flattened top portion before I was finished but I wanted to get the shank fit done first.Roma30

Roma31

Roma32

Roma33 I sanded the stem (particularly working on the shank stem junction) with 600 grit wet dry sandpaper. I also sanded the bottom and the sides of the stems at the same time.Roma34 I stained the bowl with a dark brown aniline stain, flamed it and repeated the process.Roma35

Roma36

Roma37

Roma38 I buffed the pipe with White Diamond to even out the stain and bring some shine to it.Roma39

Roma40

Roma41

Roma42 Then it was time to bend the stem to match the original in the photo that I had. I heated it with a heat gun until it was flexible and then bent it over a rolling pin that I use to get an even and straight bend.Roma43 I took the pipe back to the worktable and took the following photos so I could compare the stem with the original photo. The bend looked correct.Roma44

Roma45 However, the top of the stem needed to be flattened more and lose the arched look. I used a flat file that I have and worked on the top of the stem to flatten it.Roma46

Roma47

Roma48

Roma49 The next three photos show the stem after I had filed and flattened the top of the stem to get the angles correct.Roma50

Roma51

Roma52 I sanded the stem with 220 grit sandpaper, medium and fine grit sanding sponges and with 600 grit wet dry sandpaper. I moved on to polishing it with the micromesh sanding pads – wet sanding with 1500-2400 grit pads and dry sanding with 3600-12,000 grit pads.Roma53

Roma54

Roma55

Roma56 I buffed the stem with White Diamond and Blue Diamond plastic polish to further shine the stem.Roma57

Roma58 I polished the band with micromesh sanding pads and then buffed the pipe with Blue Diamond to bring out a shine. I then gave it multiple coats of carnauba wax and buffed it with a soft flannel buff to lift the shine even higher. The finished pipe is shown in the photos below.Roma59

Roma60

Roma61

Roma62