Blog by Dal Stanton
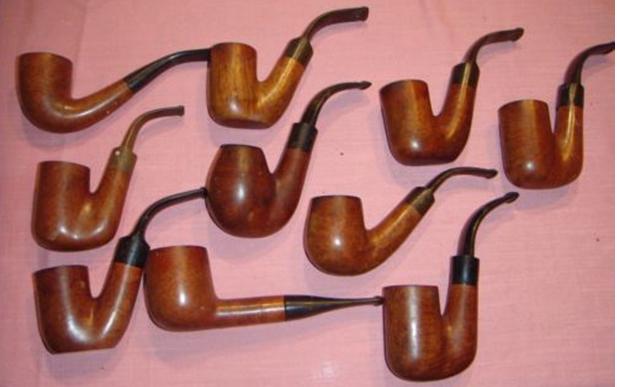
Is there a psychology in the choosing one makes when befriending a pipe? A young Bulgarian lady, who also is a budding pipe lady, chose a pipe out of my ‘Help Me!’ baskets and boxes. After looking at scores of hopeful candidates, there was only one – only one – that she held in her hands, looking at it and smiling. A beautiful, graceful, WDC Milano Swan Neck Billiard caught her attention, and it would seem, her affections. Is there a psychology unfolding in the process, the evaluation, and the weighing of one pipe against another? Or, is the process more like the lore of Harry Potter’s choice of one’s wand? The young wizard does not choose the wand – the wand chooses his wizard. Does the pipe do the choosing?
And is there any credence to the oft unspoken observation – do pipe stewards resemble their pipes like canine lovers sometimes uncannily resemble their 4-legged friends? These observations come to my mind because intriguingly, the young lady who was claimed by the WDC Milano Swan Neck, shares, in some very remarkable ways, pleasing characteristics of this graceful pipe.
And then there is the ‘question’ of the ‘Pipe Lady’ more so than the ‘Pipe Man’. A Pipe Lady lives closer to the social and cultural ‘edge’ when she takes her pipe in hand and enjoys a bowl of her favorite blend. This picture I found somewhere on the internet (sorry, can’t cite!), I suspect would never be ascribed to Pipe Men. Yet, a Pipe Lady looks at the three with a smile of agreement and a wink, while she is thinking, ‘You’ve got that one right!’ This graceful, Milano Swan Neck stem comes from the William Demuth Company, established in 1862 – one of the oldest pipe manufacturing houses in the United States (Pipedia article). The WDC Milano patent goes back to the 1920s with an example of the familiar WDC rhombus from the same WDC article in Pipedia (courtesy of Doug Valitchka).
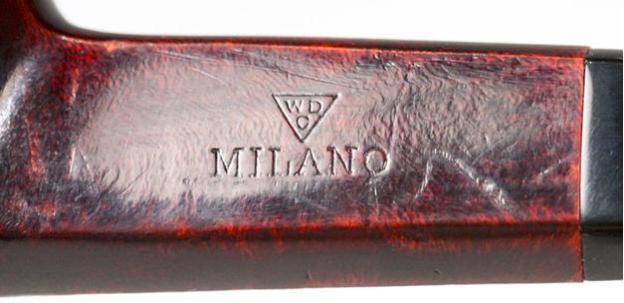 The eBay seller from Akron, Ohio, described the long dimensions of the Lady’s Choice WDC Milano: Very graceful bent billiard! About 6″ long, bowl is 2″ tall, 1 3/8″ wide. ID 3/4″, depth 1 13/16″. From Pipedia’s WDC article, courtesy Doug Valitchka, a very nice example of what appears to be the same Swan Neck Billiard of the Milano line.
 From my worktable on the 10th floor of our flat here in Sofia, Bulgaria, I take these pictures to fill in the gaps.
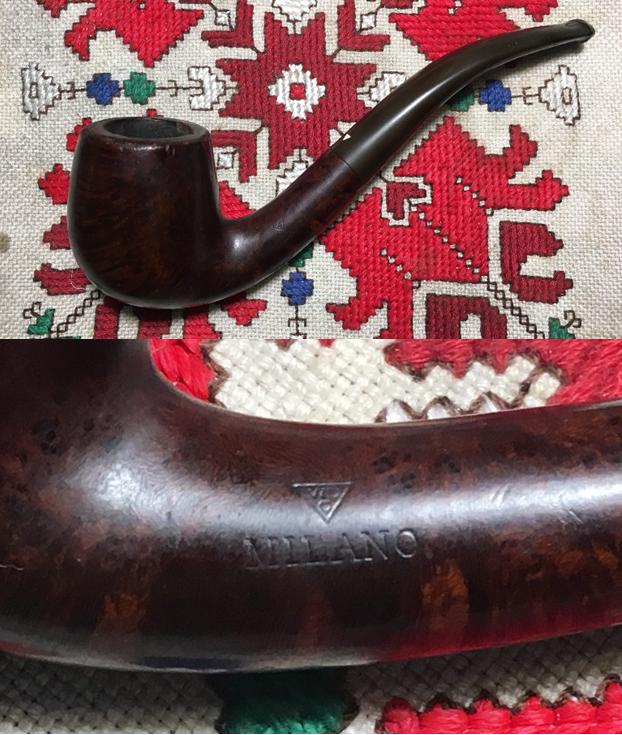
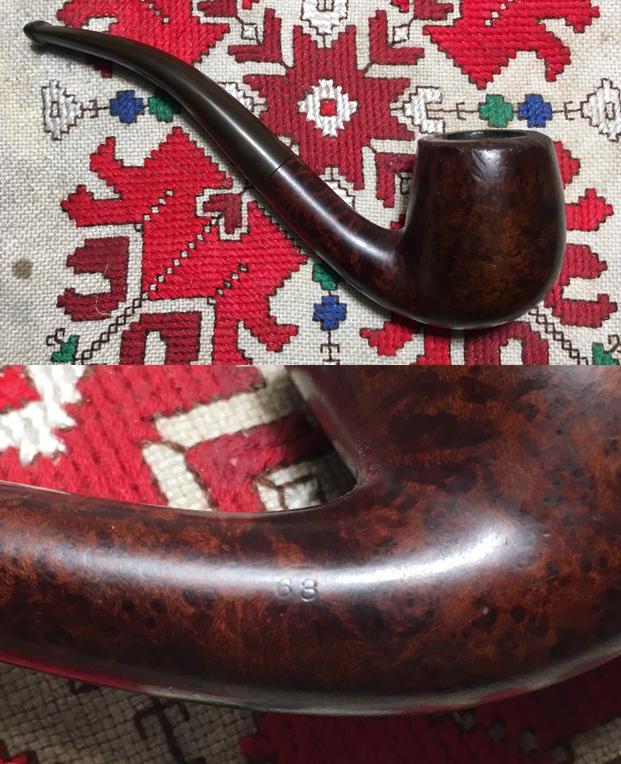
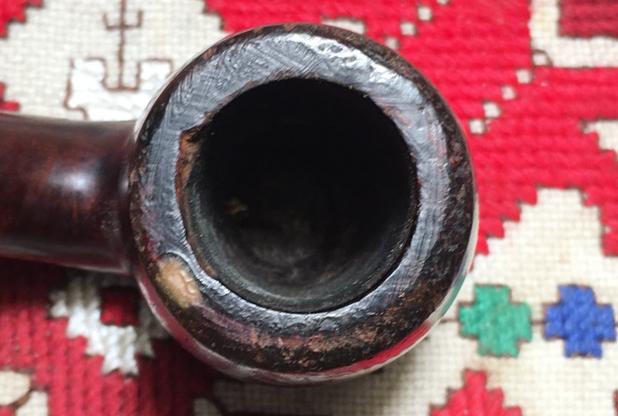
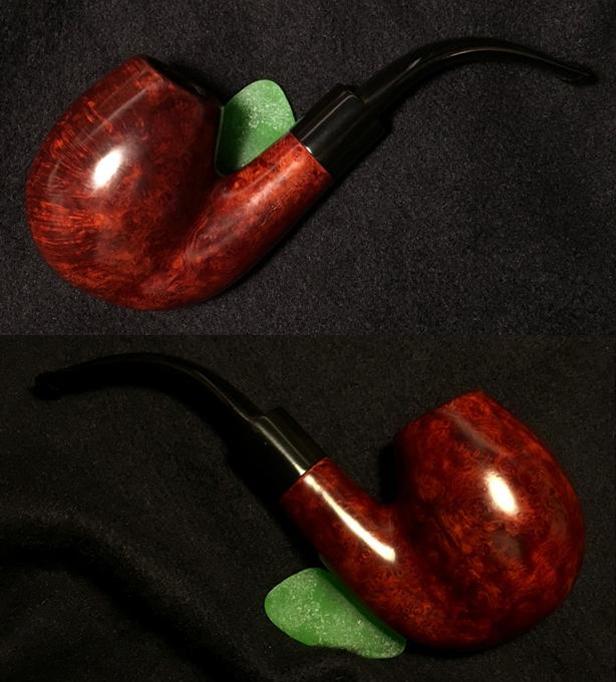
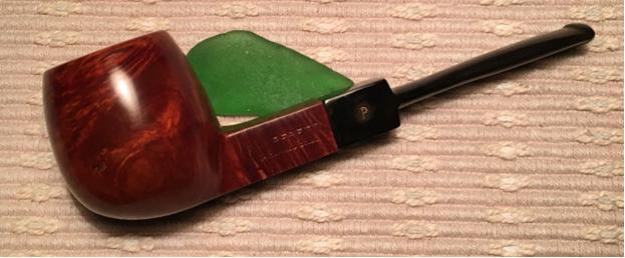
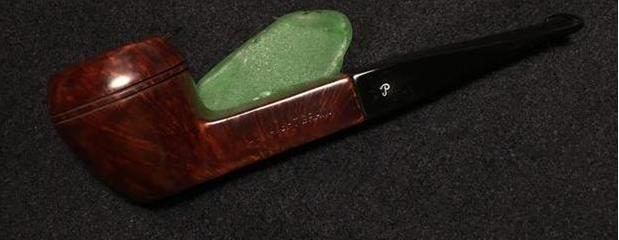
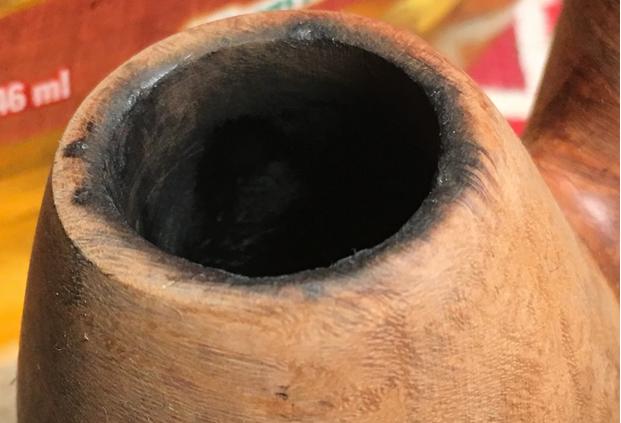
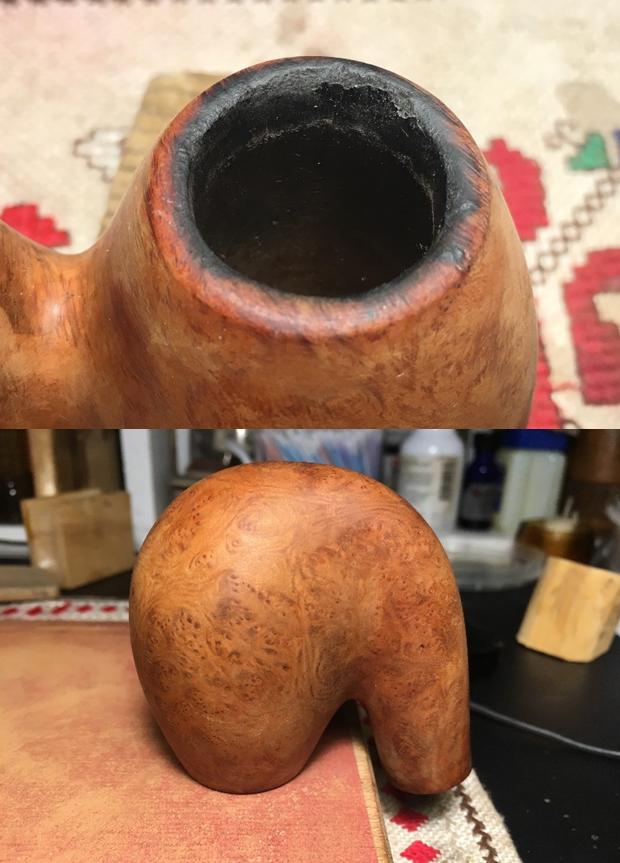
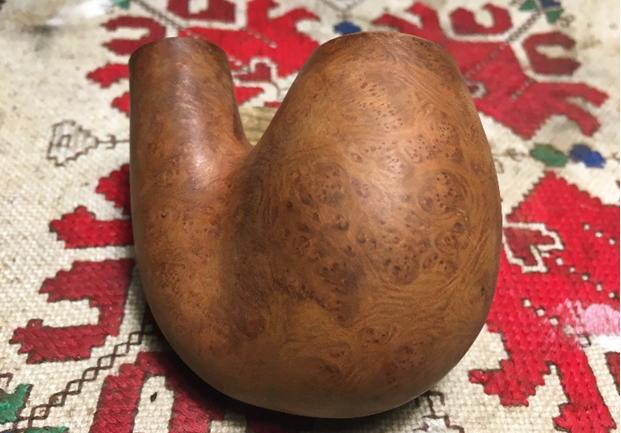
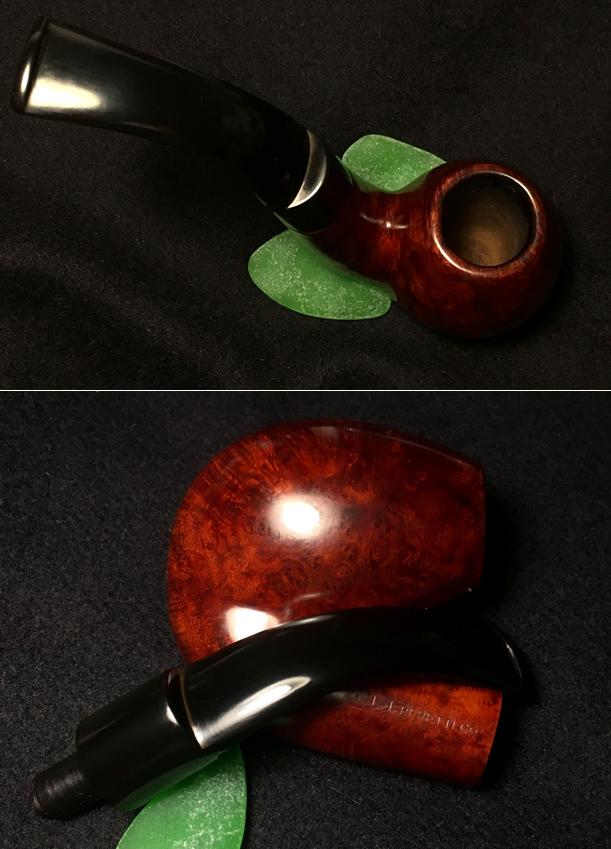
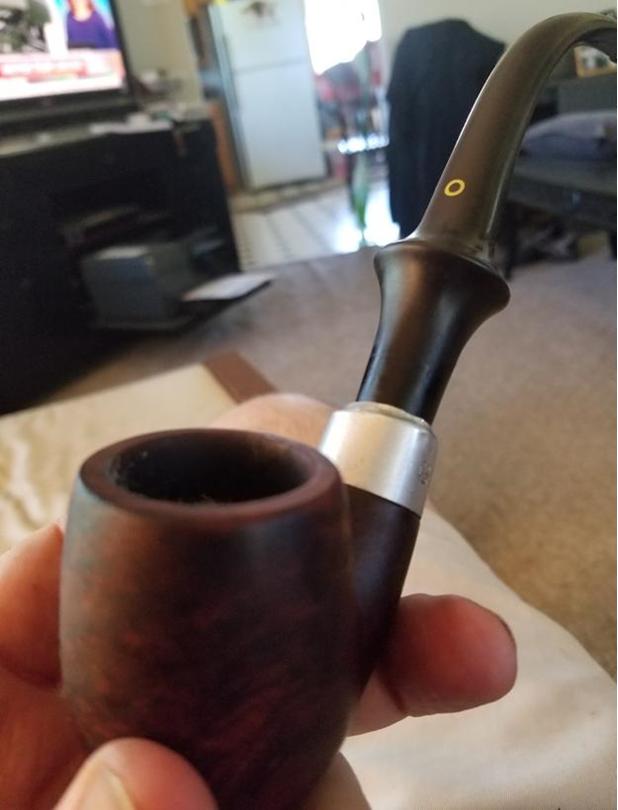
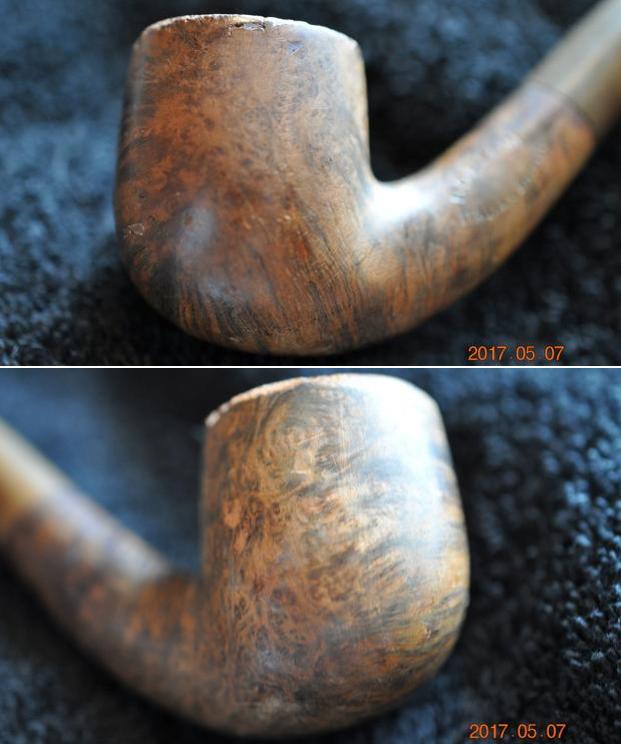
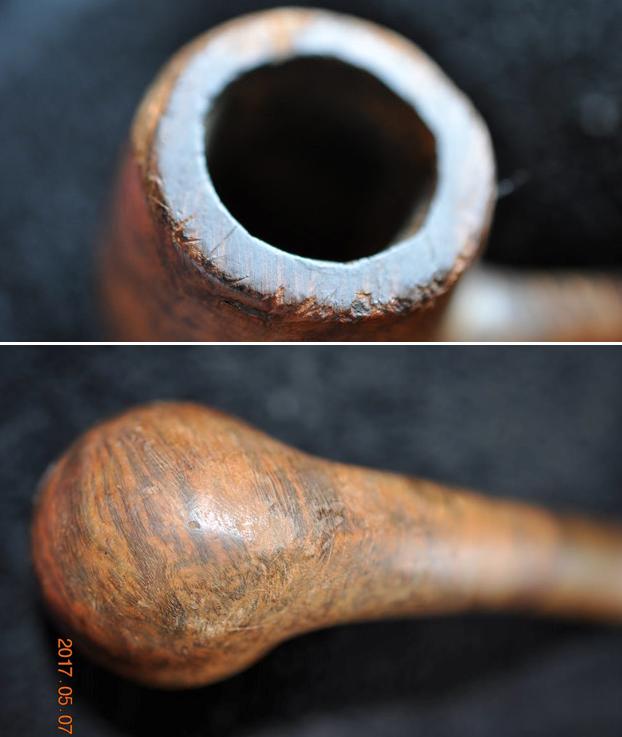
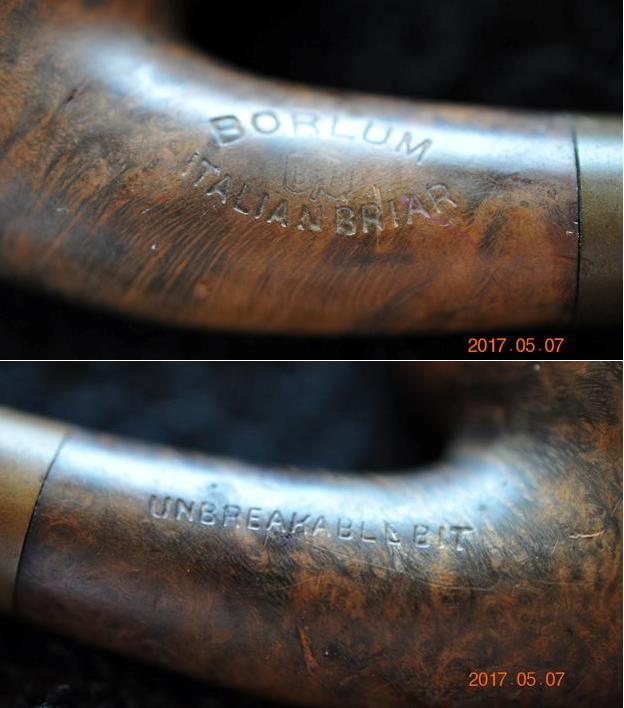
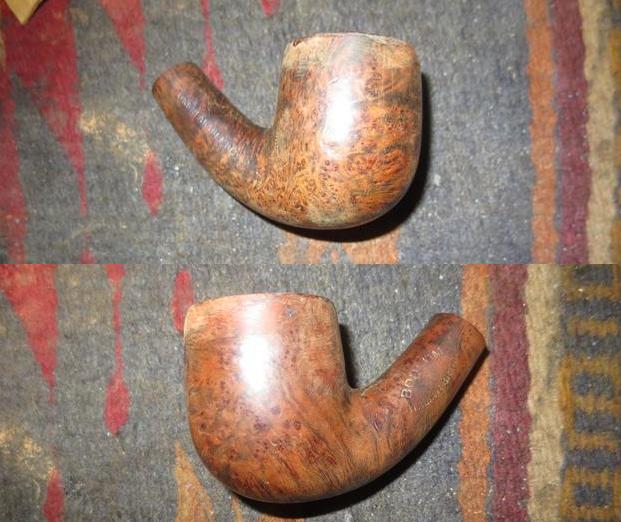
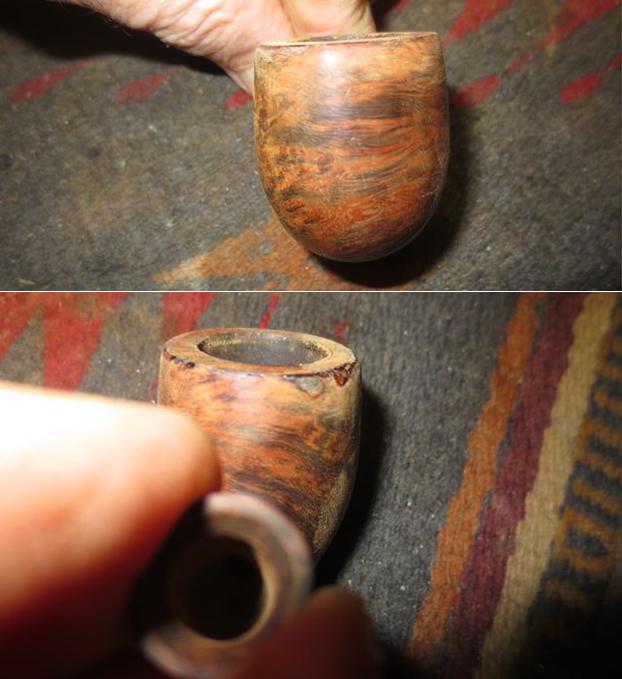
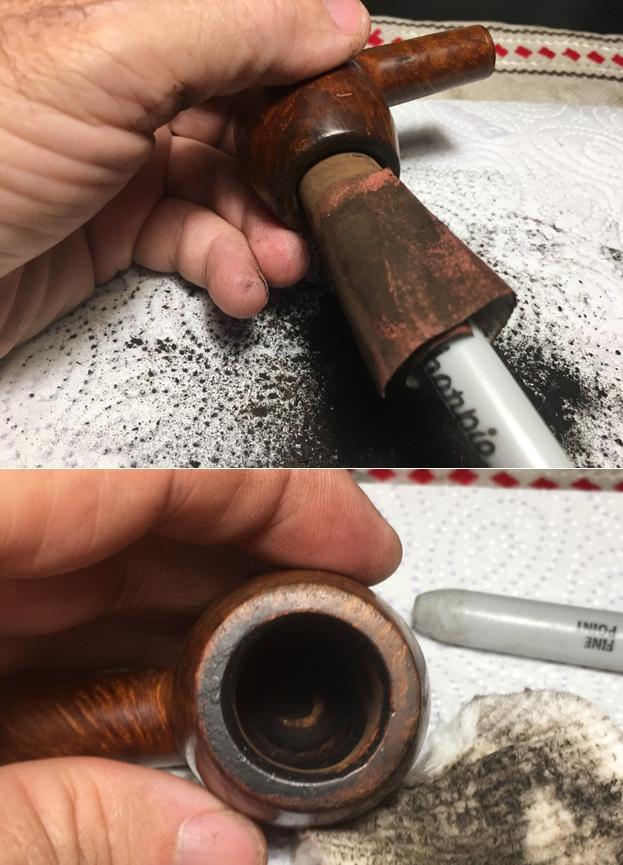
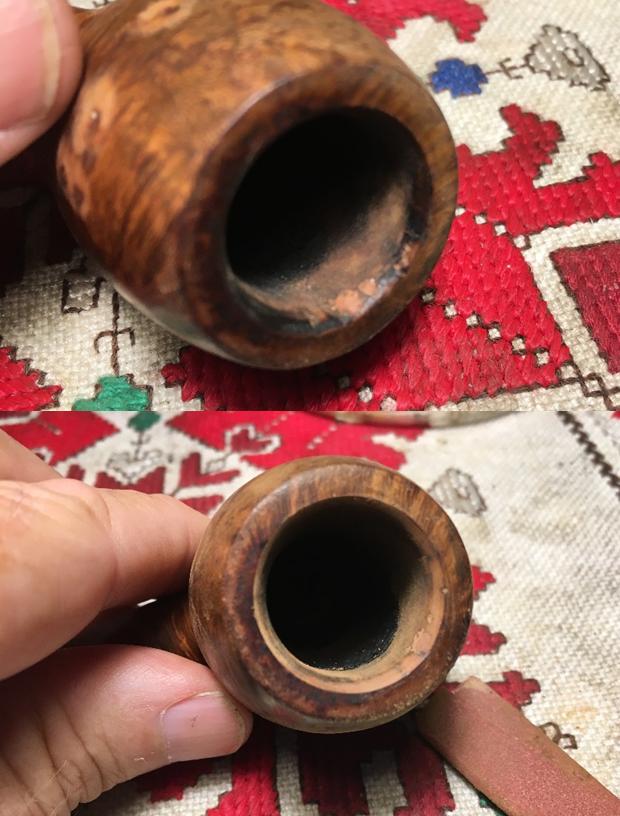
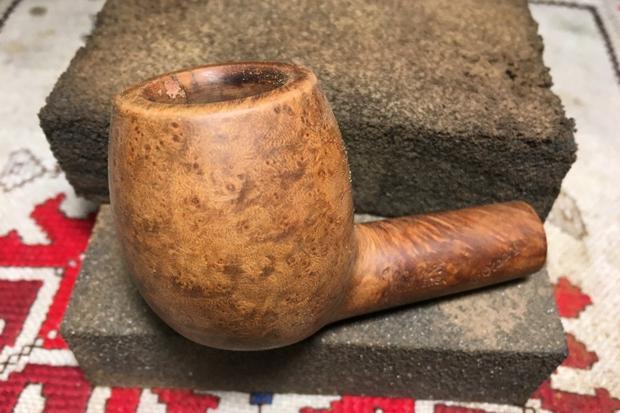
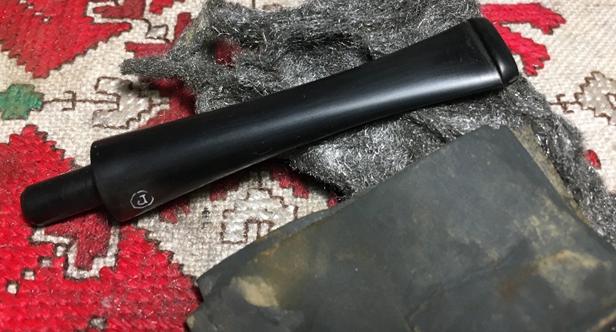
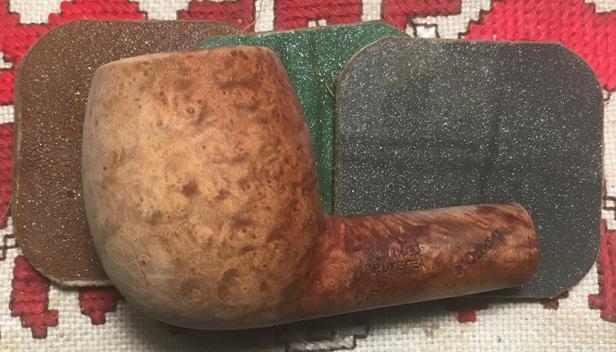
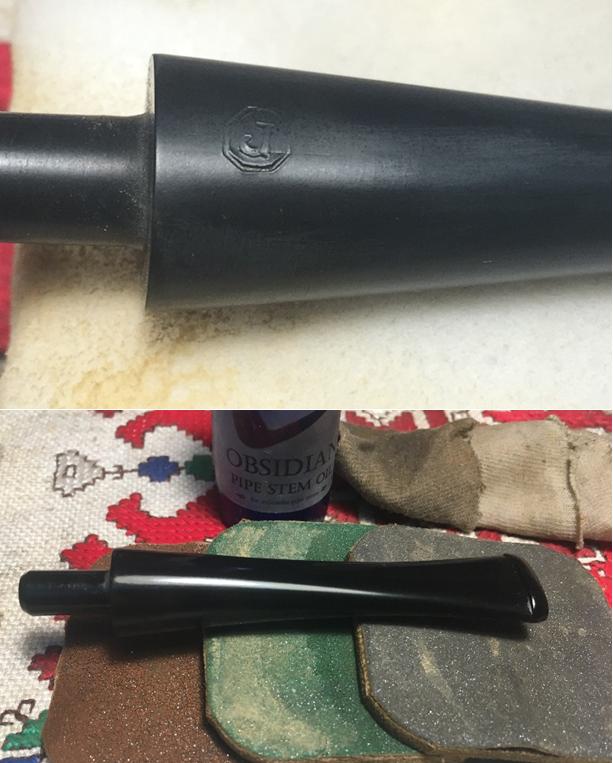
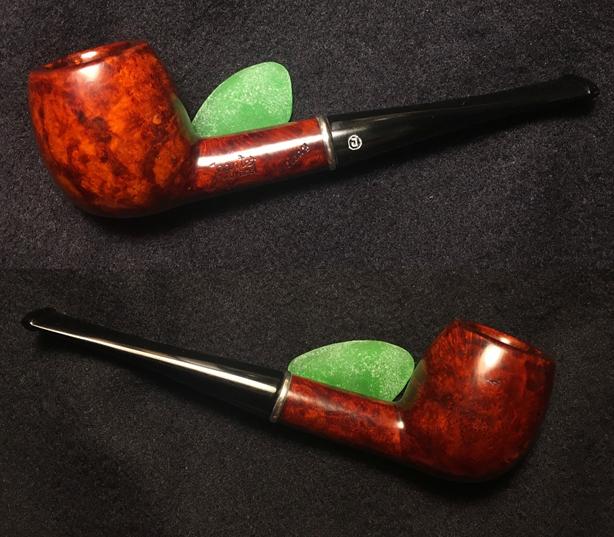
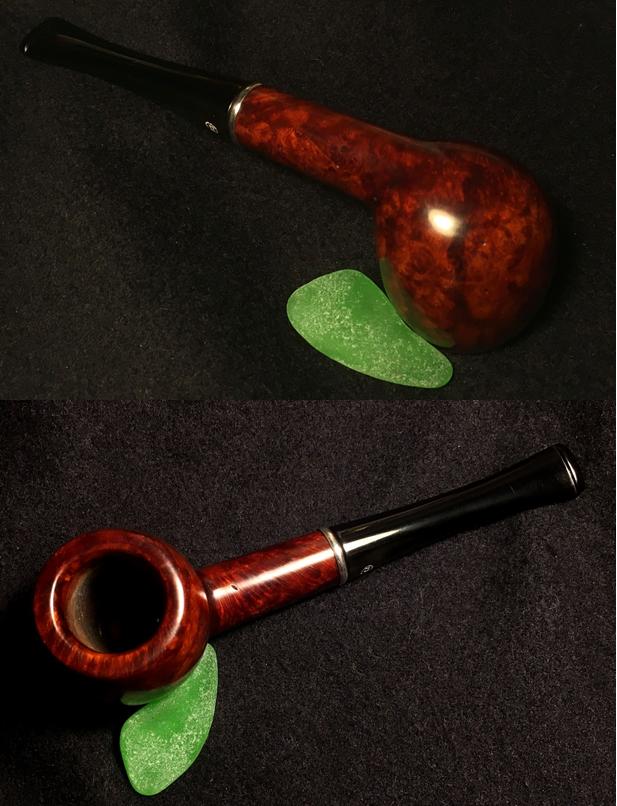
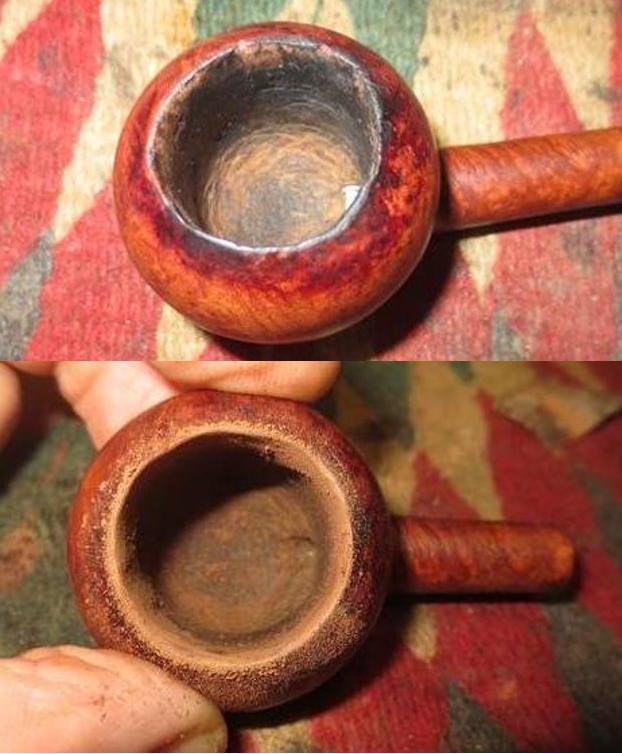
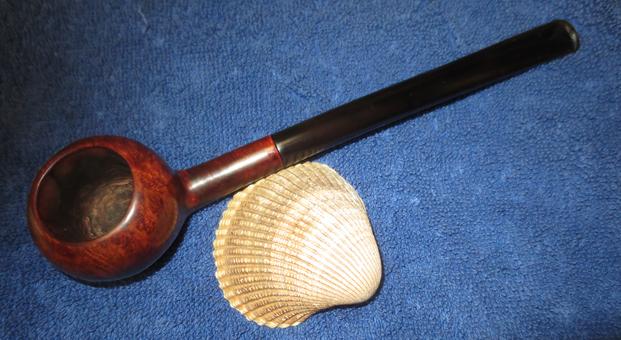
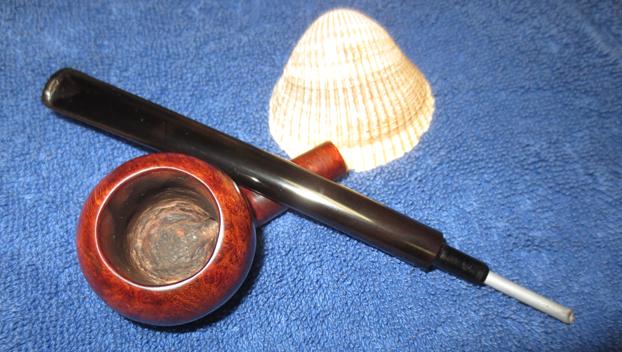
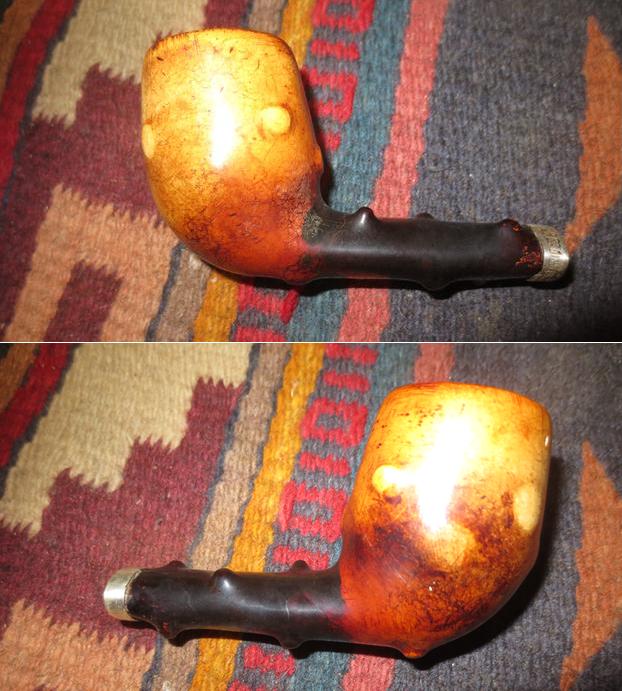
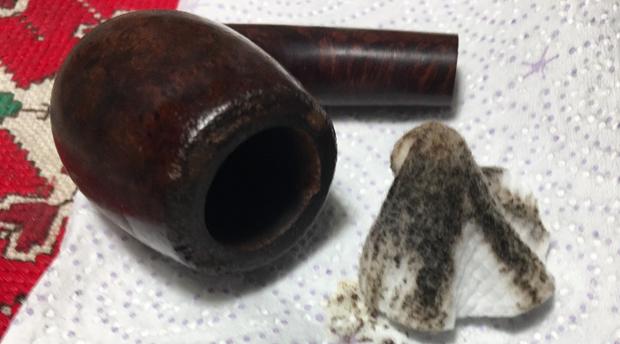
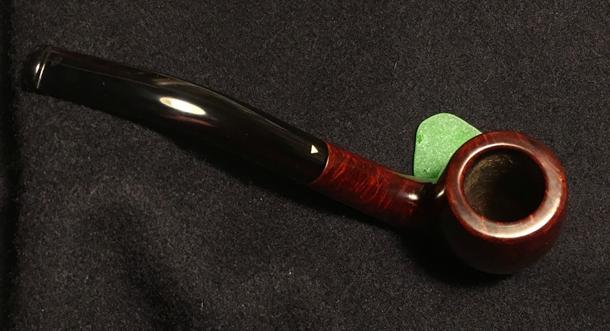
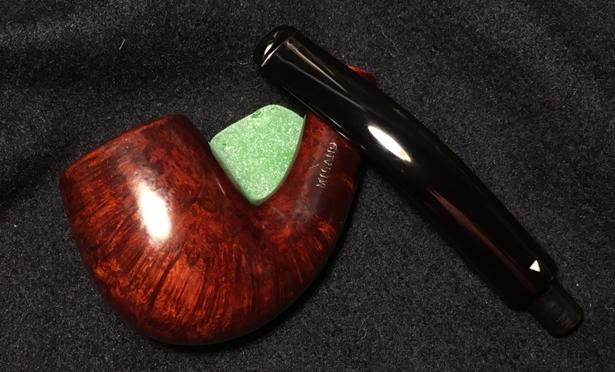
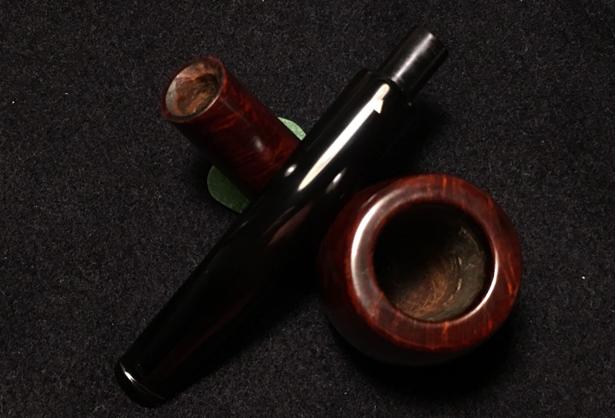
 On the left side of the shank is stamped the traditional WDC rhombus [over] MILANO. The right side is stamped the single shape number, ‘63’. The chamber appears to have been cleaned to some degree and the carbon cake is very light. The rim is sad. It appears someone took a divot out of the internal lip trying to clean it or something. The rim’s outer edge is beat up and I can see the vestiges of a bevel. There is lava crusting as well on the rim surface and some hardened light stuff – the rim needs cleaning. The stummel has few if any fills that I see – the grain of the tall bowl is impressive. The stem has the WDC inlaid white triangle on the top. Oxidation is present and the former steward was a clencher and chewer. Both top and bottom of the bit shows deep bite dents. The top button lip is dented.
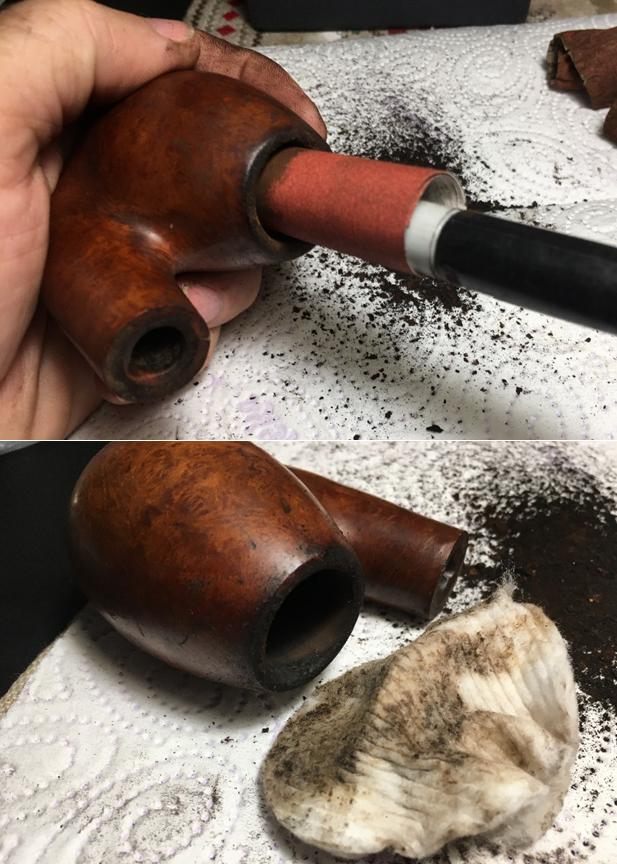
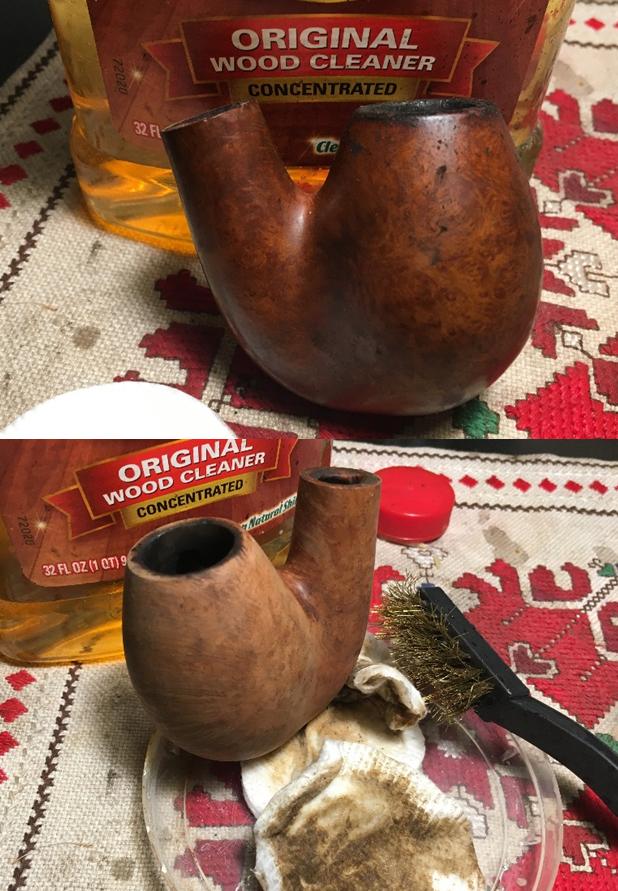
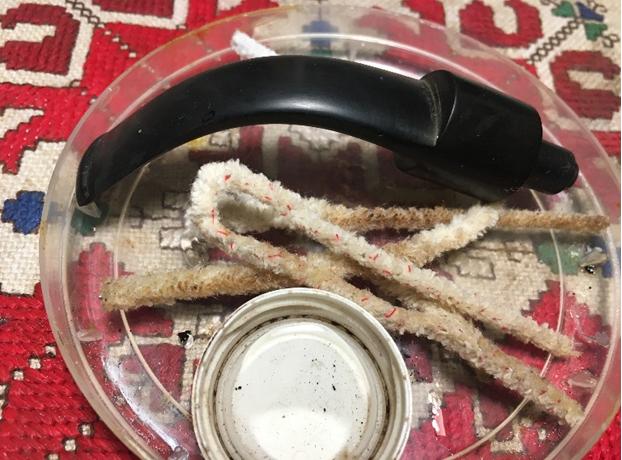
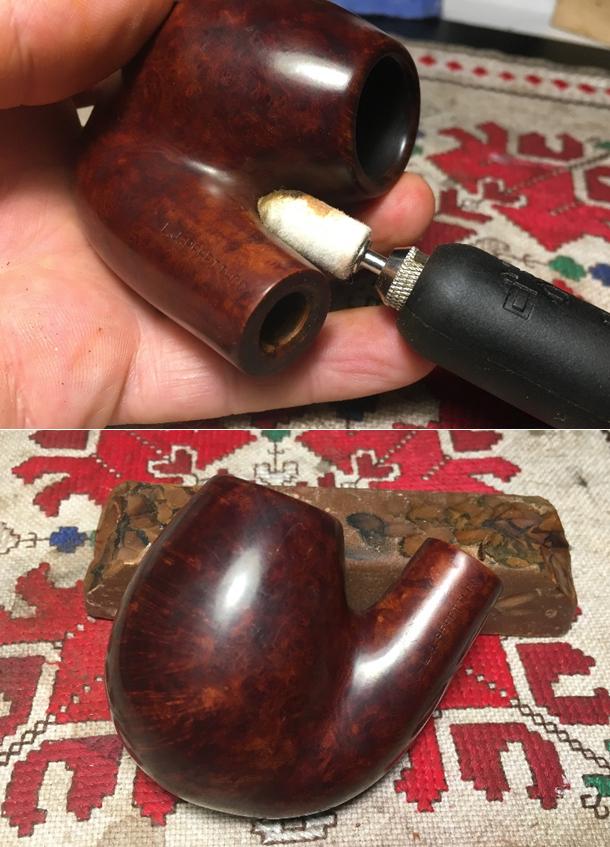
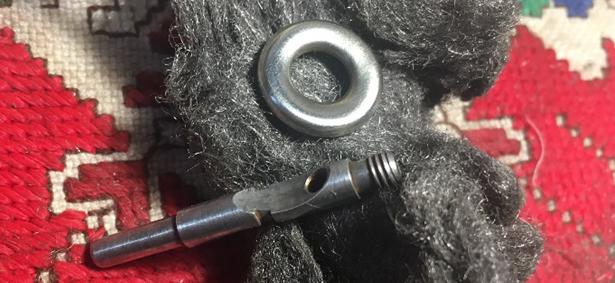
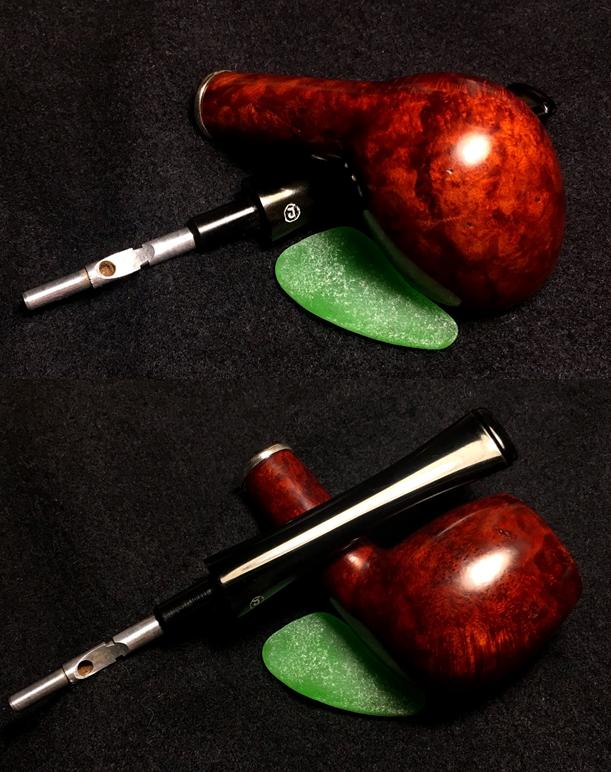
The recommissioning of this Lady’s Choice WDC Milano Swan Neck Billiard, begins by putting the stem into the OxiClean bath to work on the oxidation. The second thing I do is toss the tubing that was hanging in the tenon. If it belonged to this pipe originally, something is missing as the airway diameter of the tenon is much larger than the tubing. On an interesting note, there is a patent number stamped on the tubular stinger. I looked it up in Google patent search but found nothing that had bearing on pipes (PAT. NO. 5861 / IX – I think). Next, after spreading paper towel to catch the carbon dust, I use the Savinelli Pipe Knife to remove the little carbon left. I follow with sanding the chamber walls with a 240 piece of sanding paper wrapped around a Sharpie Pen.
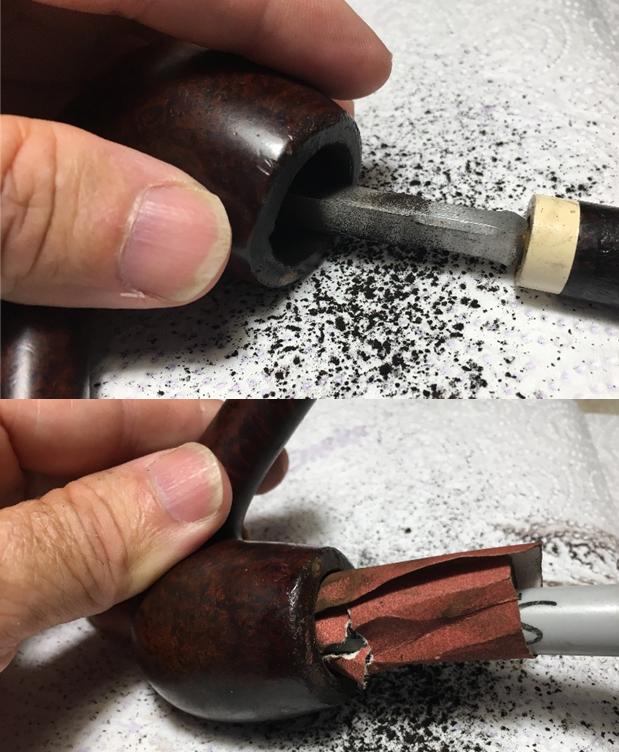
 I then turn to cleaning the internals of the stummel using cotton swabs and pipe cleaners wetted with isopropyl 95%. There’s a good bit of tar and oils in the mortise. After some time, I decide to switch to a Kosher Salt and alcohol soak to finish off the internal cleaning and to freshen the stummel.
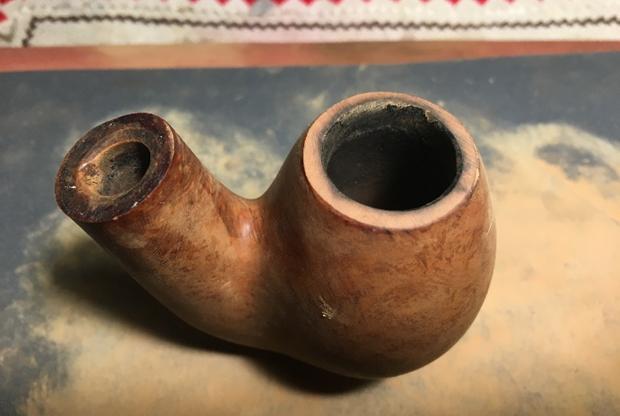
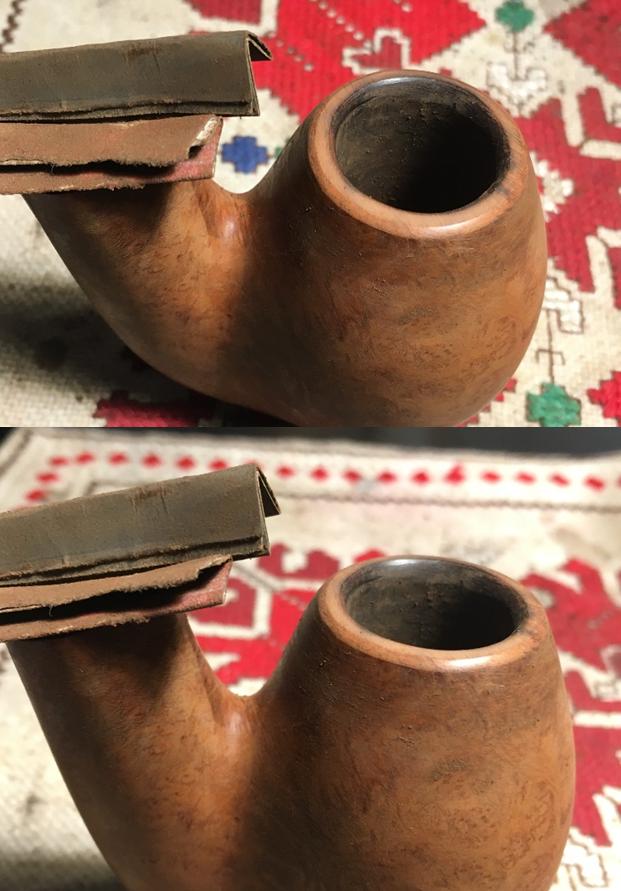
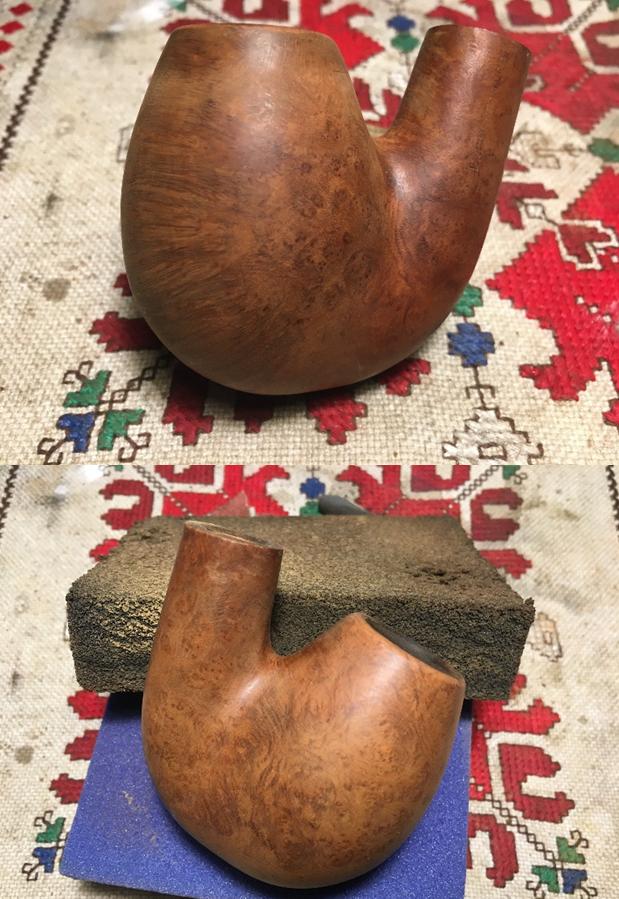
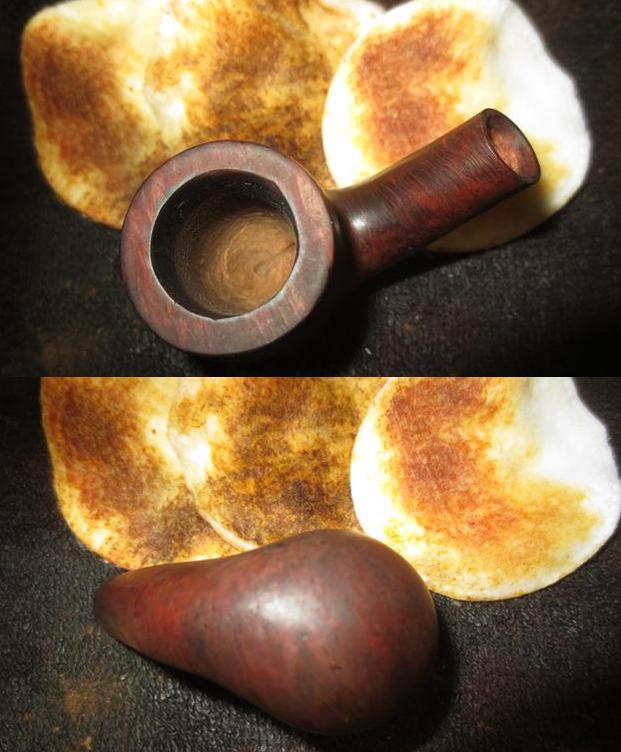
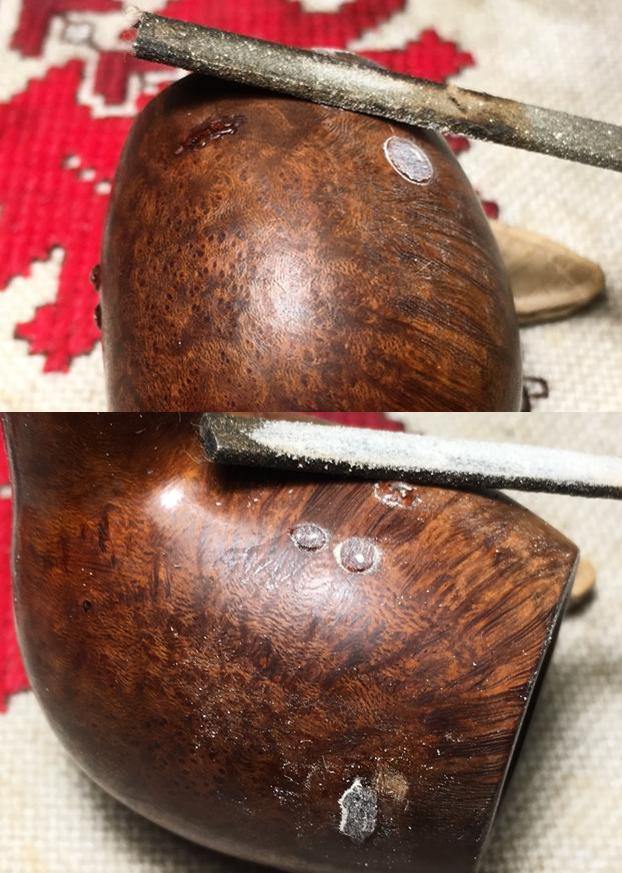
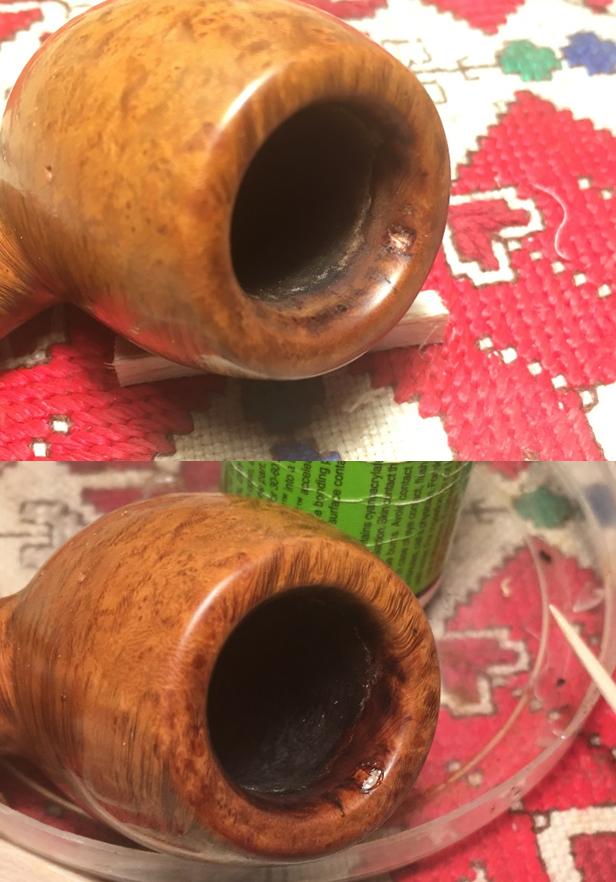
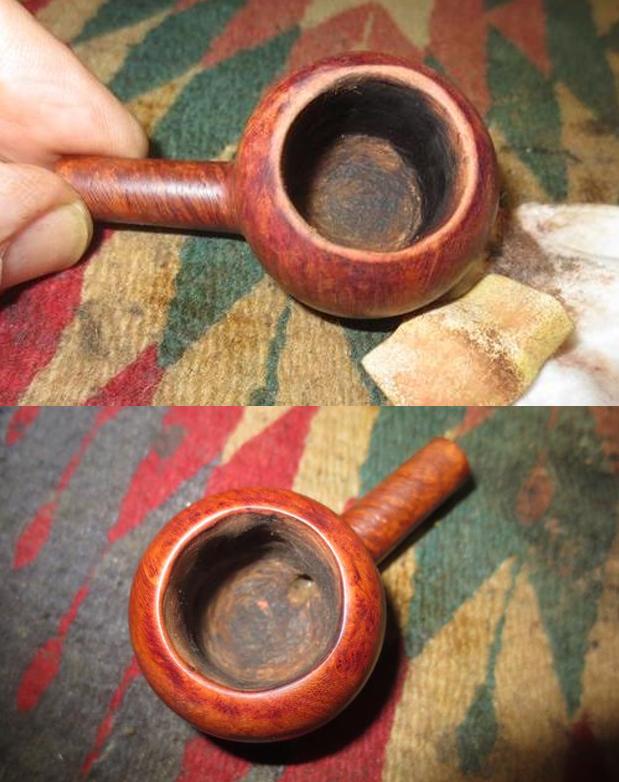
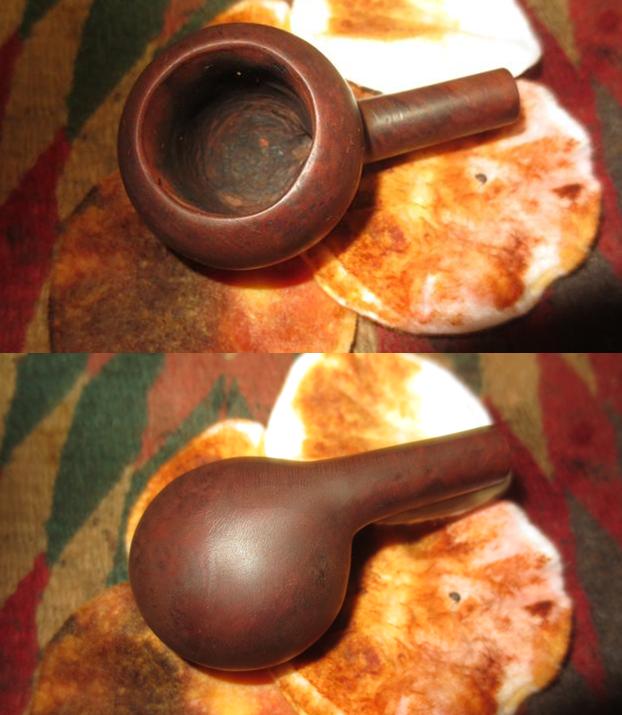
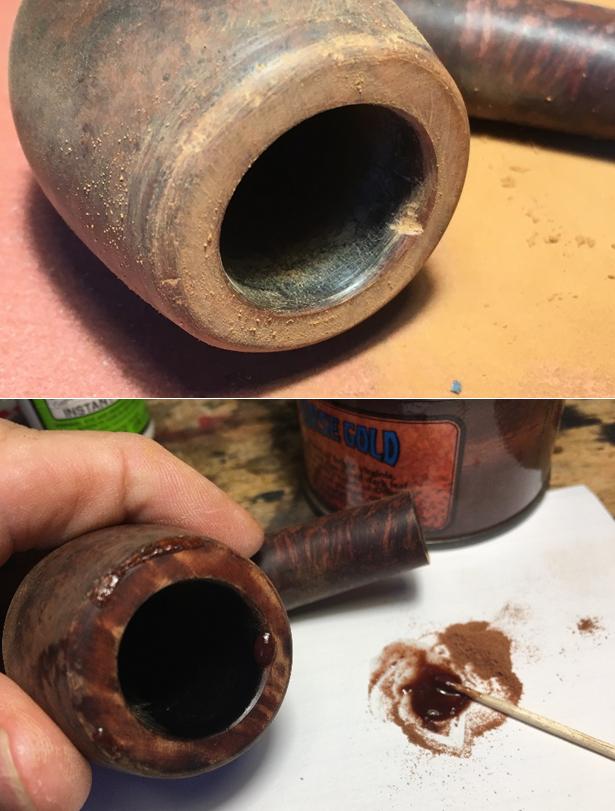
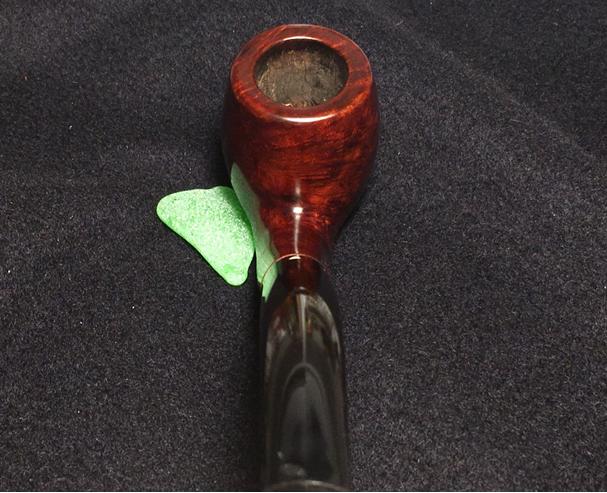
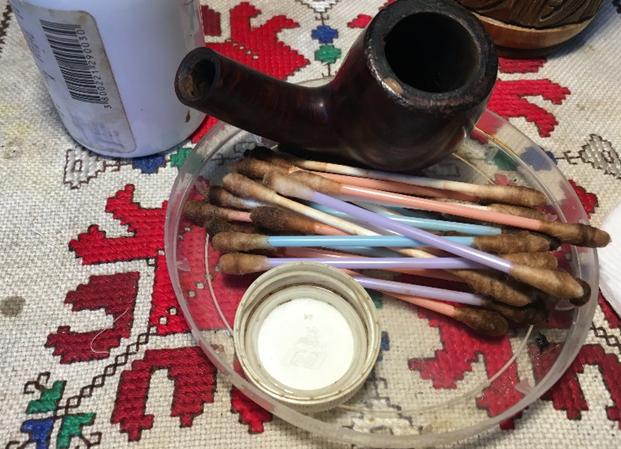 Next, using undiluted Murphy’s Oil Soap I work on the external surface of the stummel and the rim with cotton pads. I also use a brass bristled brush on the rim. After the scrub, I rinse the stummel in cool tap water. The condition of the rim becomes more evident. I think I will be able to remove the large divot at 4 o’clock in the second picture below by creating an internal bevel on the rim after I lightly top it.
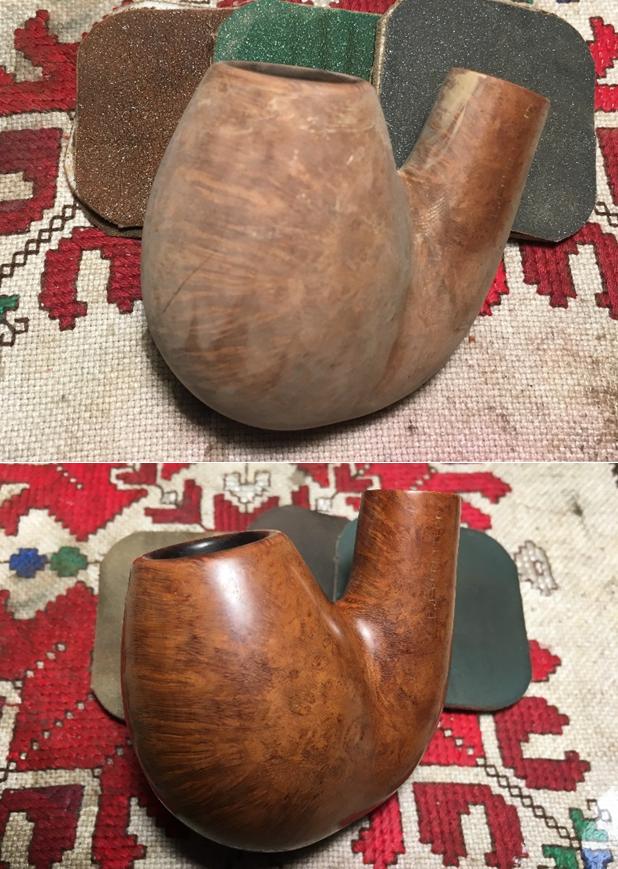
 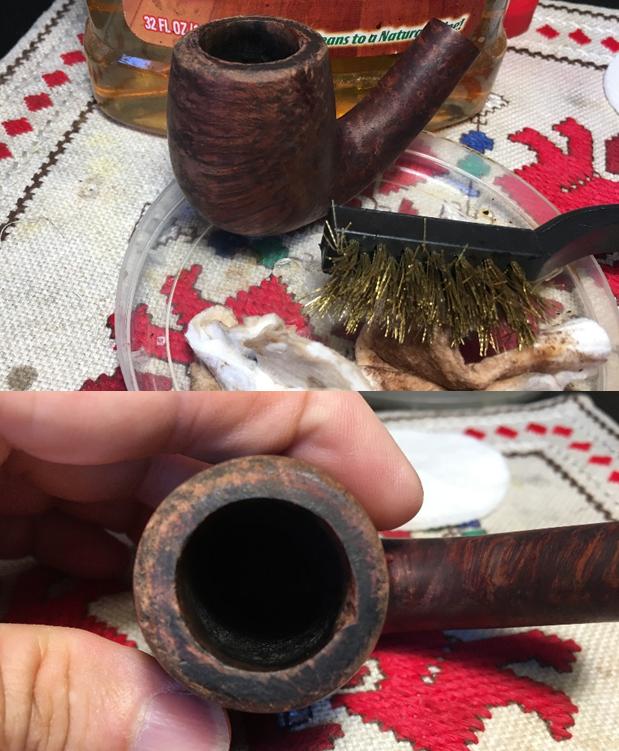 I start with by topping the stummel using 240 grit paper.
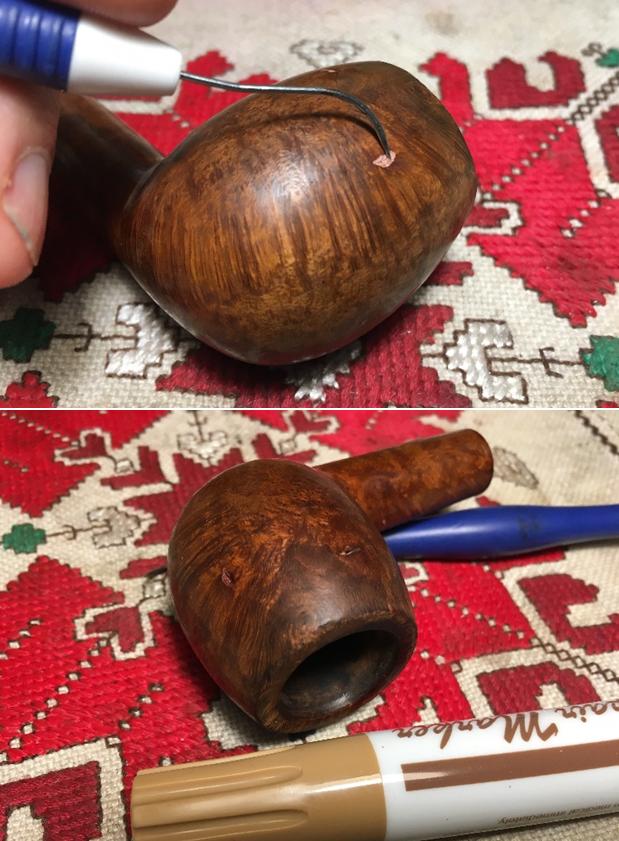
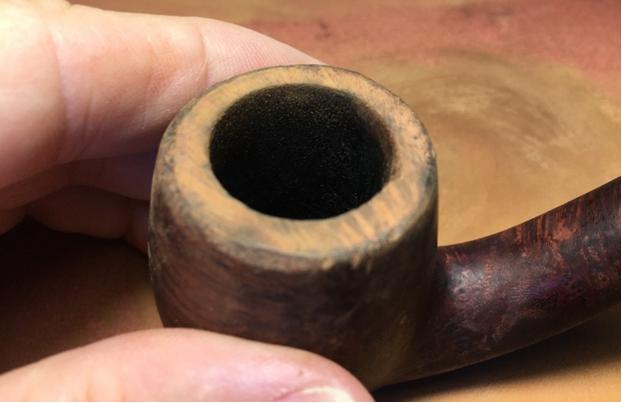 I follow by creating an internal and external bevel around the rim. After a few rounds of working on the bevels, I realize that the internal rim divot is too much for the bevel to erase. I switch gears and mix some briar dust with thick CA glue and create a putty and fill the divot on the rim. I spray it with an accelerator to shorten the curing time.
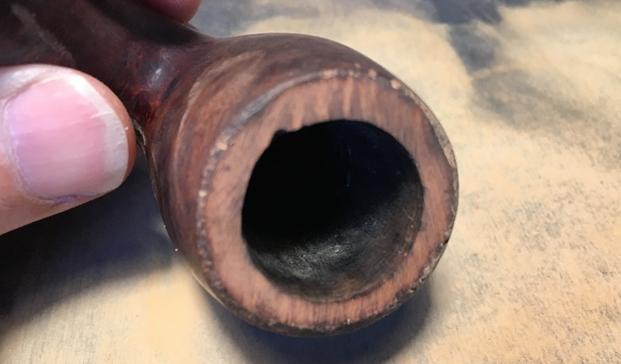
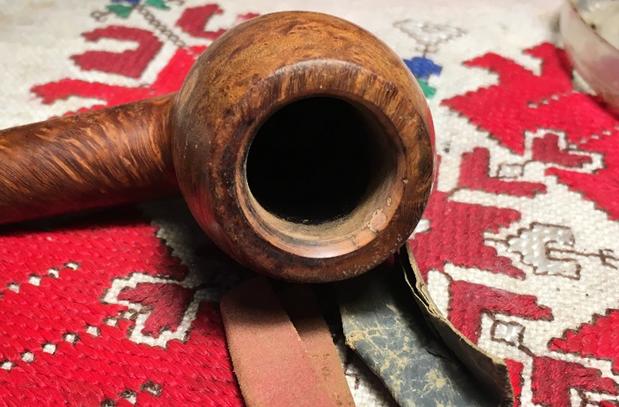
 With a needle file, I file down the briar dust patch material until it’s almost flush with the briar. I then use 240 and 600 grit sanding paper to blend the patch and finish the bevel on the internal and external edges of the rim.
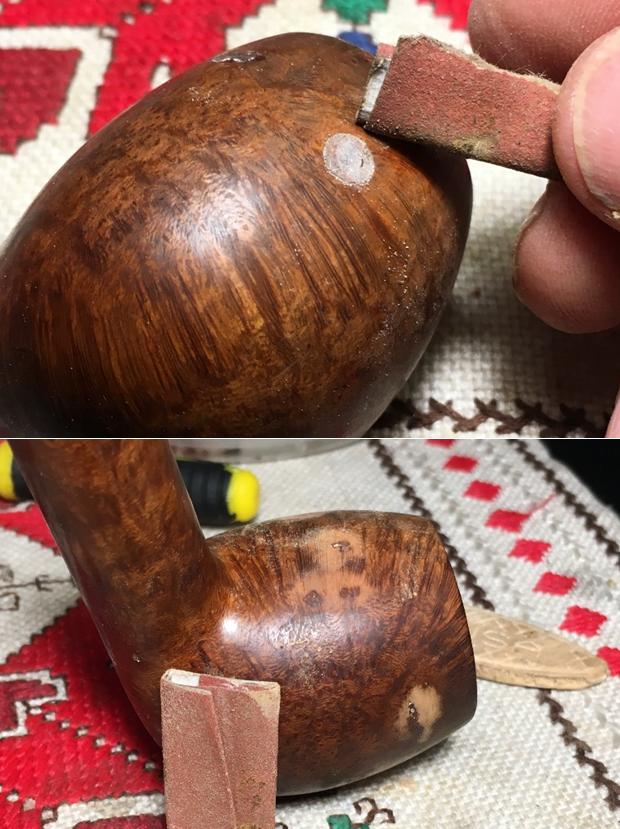
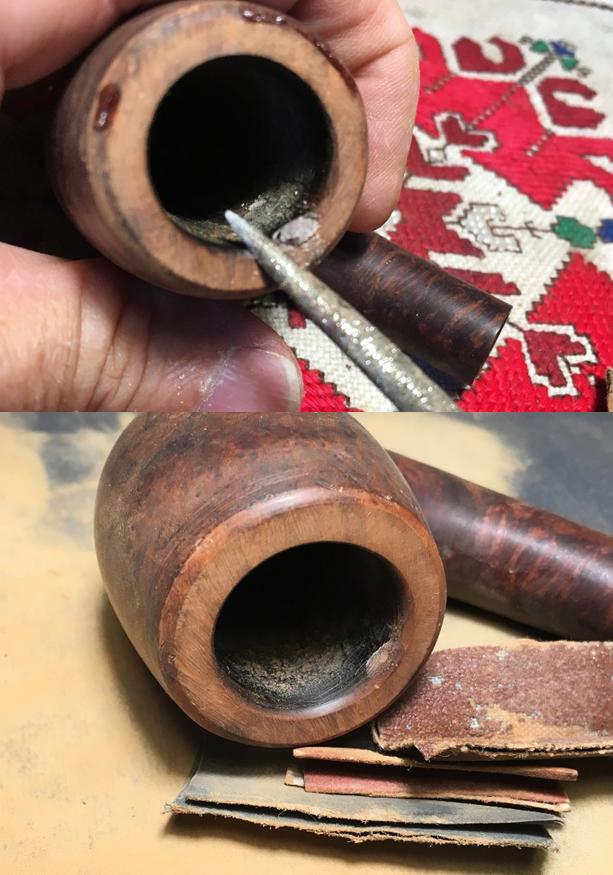 I then sand the stummel using a medium grade sanding sponge followed by a light grade sanding sponge. I remove the minor nicks and scratches on the bowl surface.
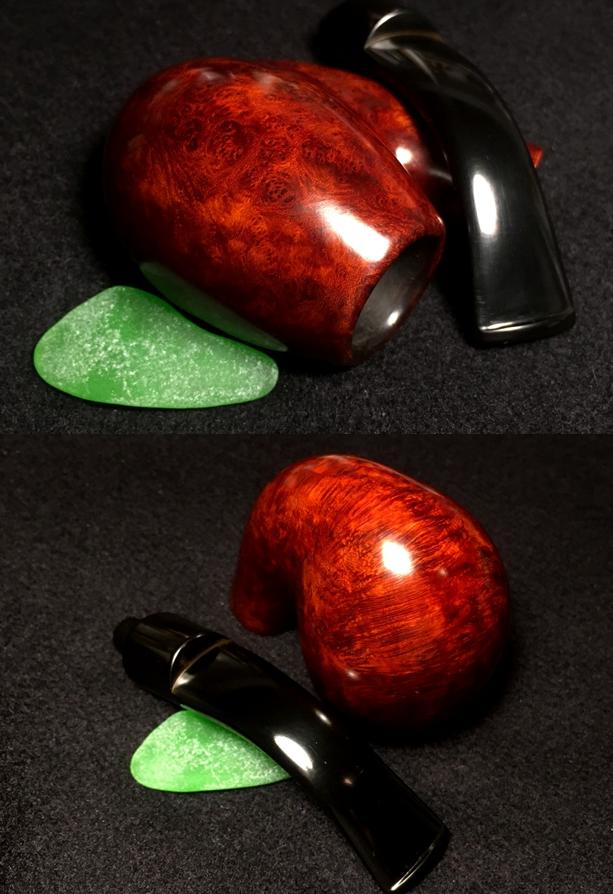
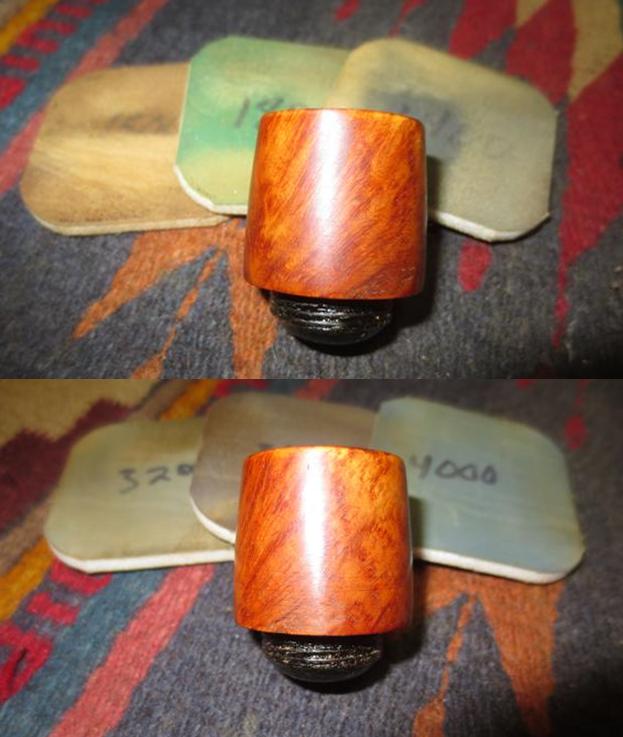
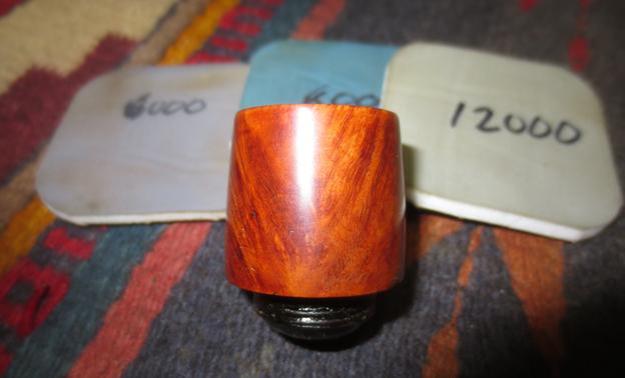
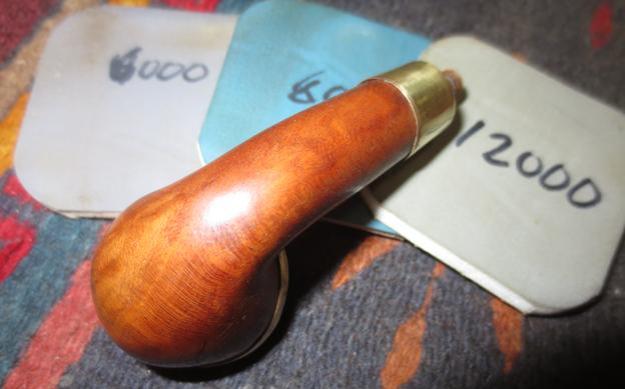
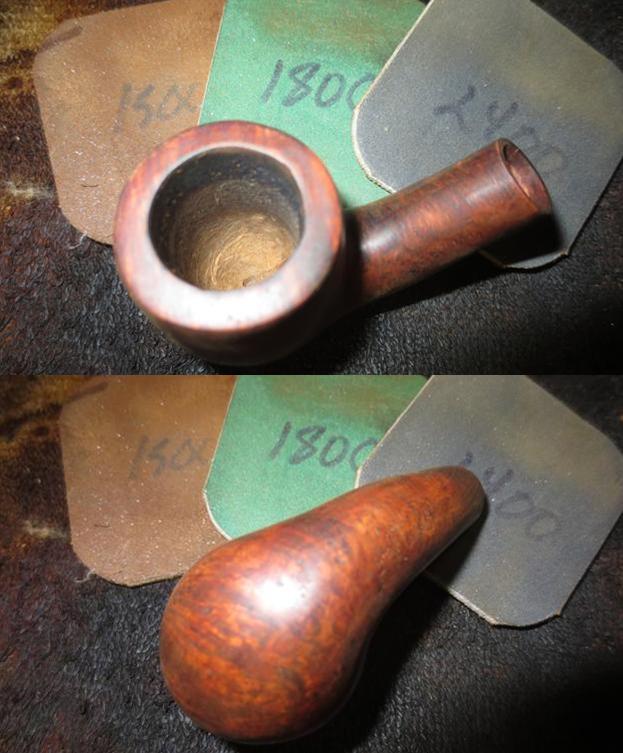
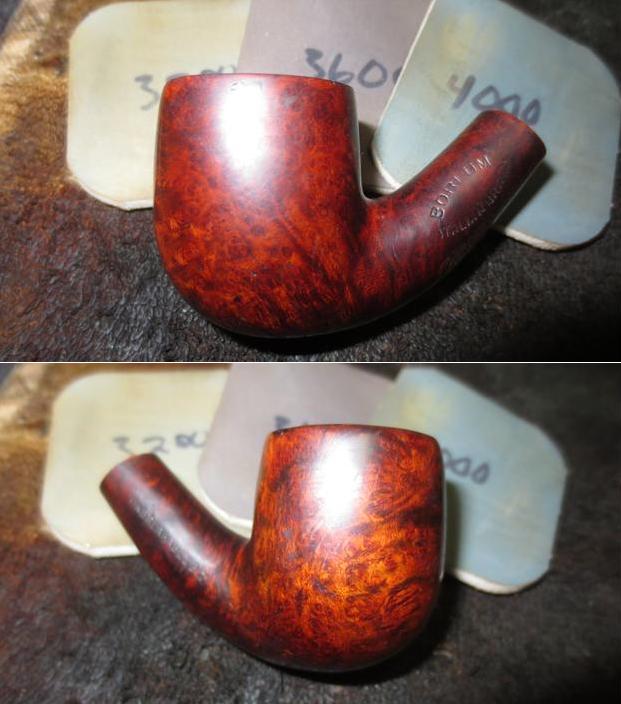
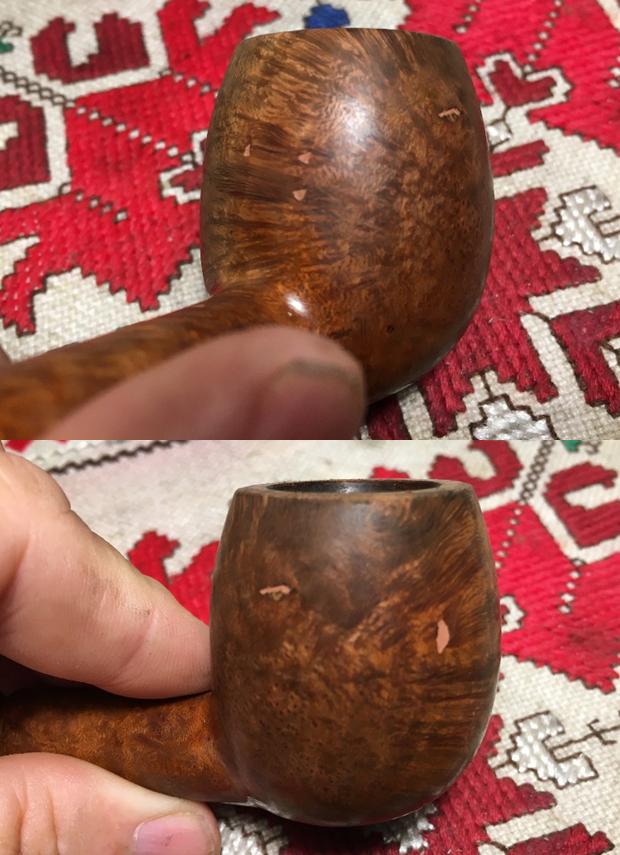
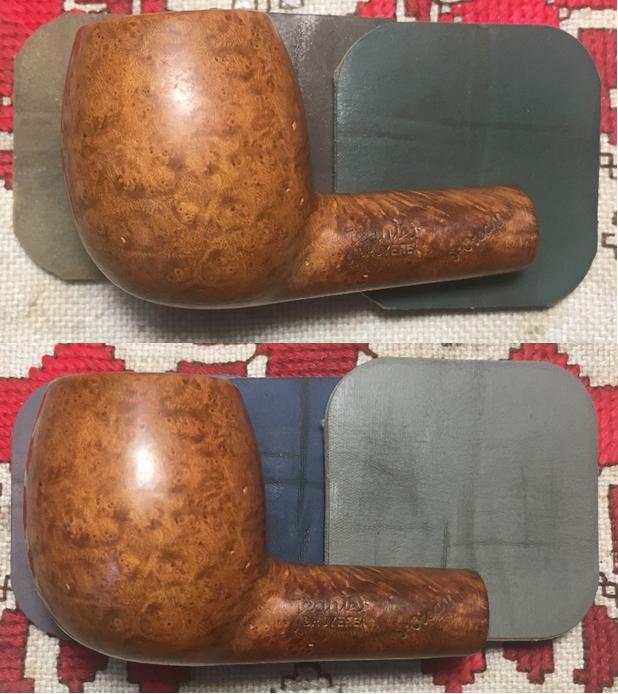
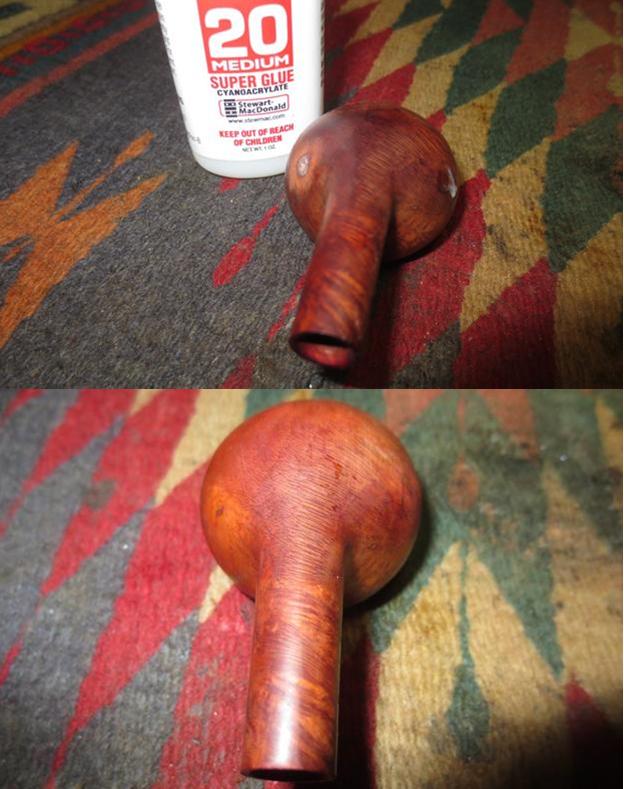
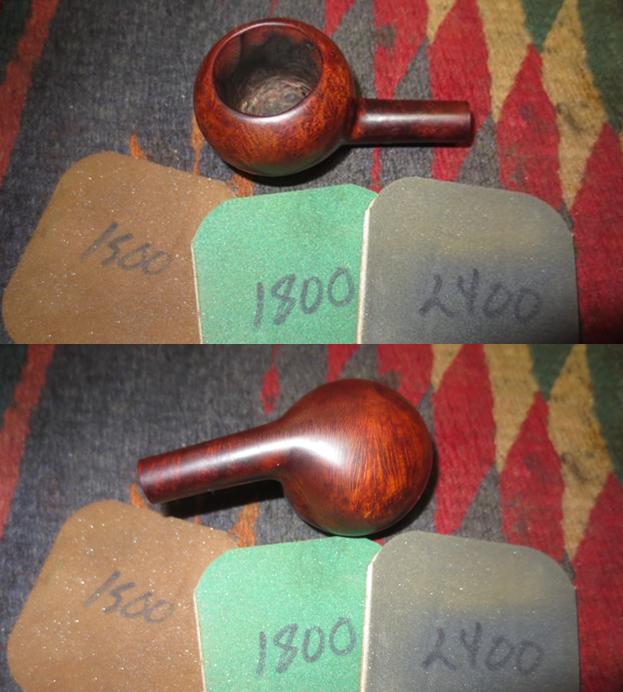
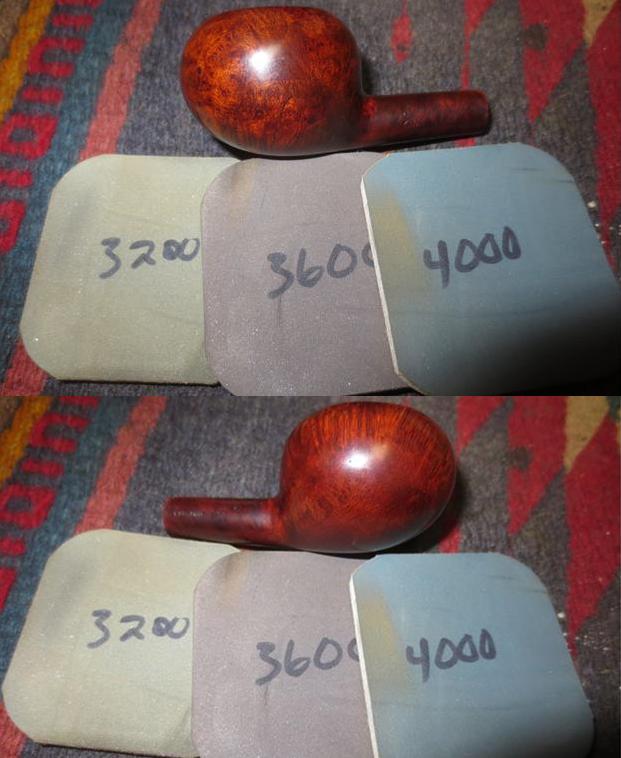
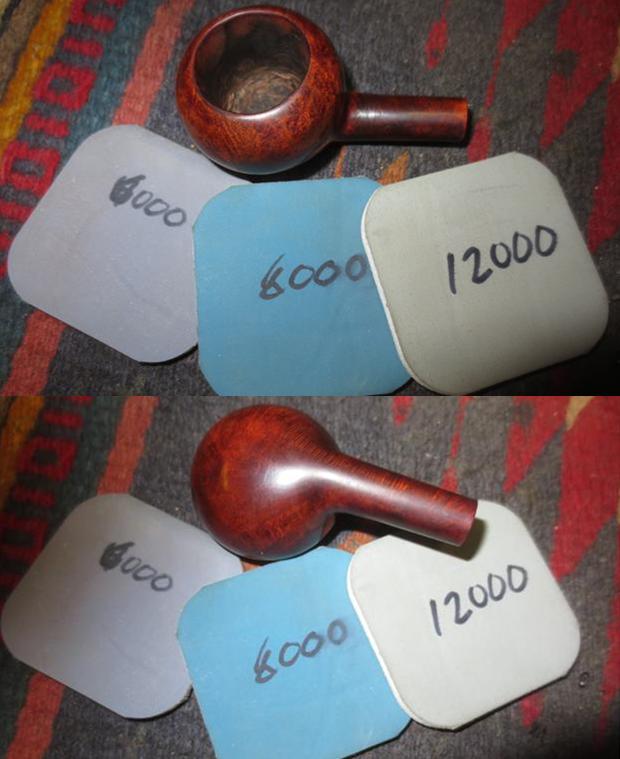
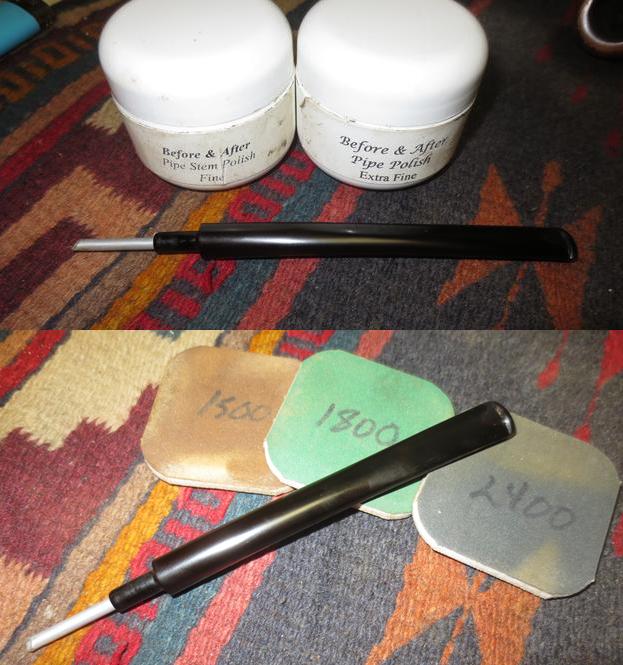
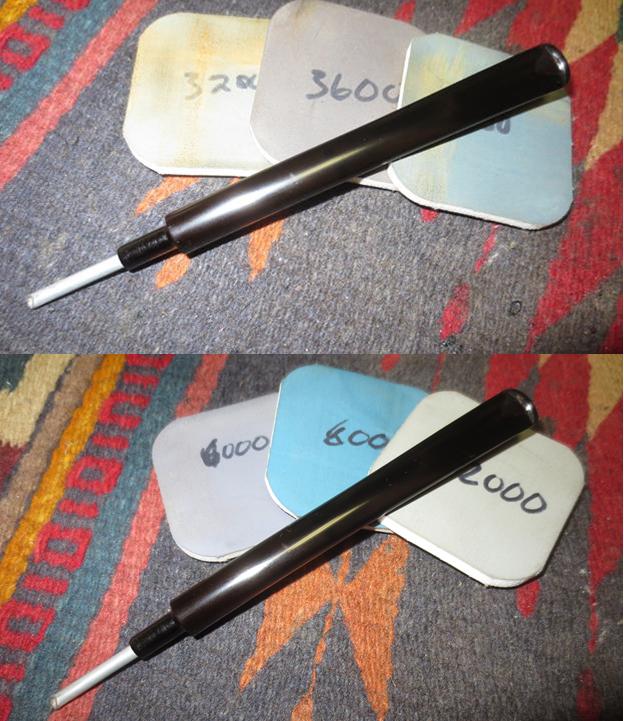
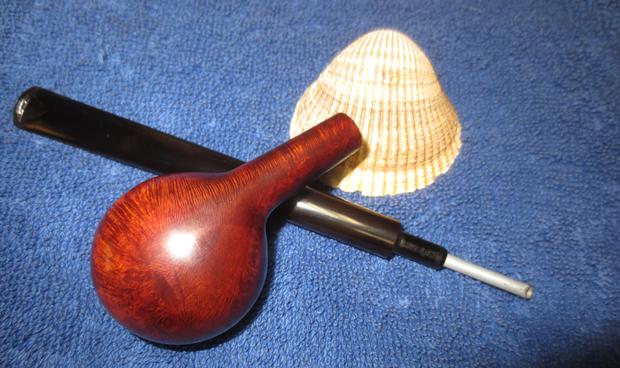
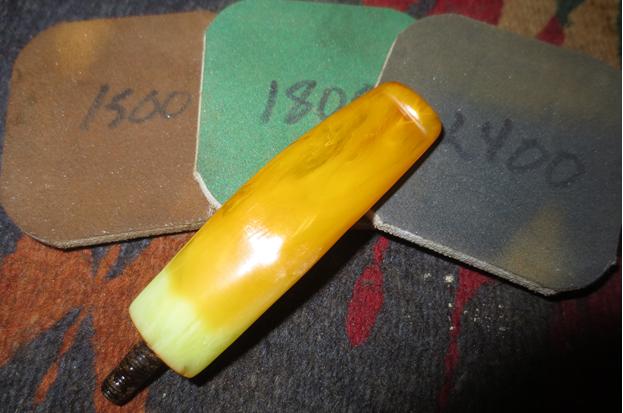
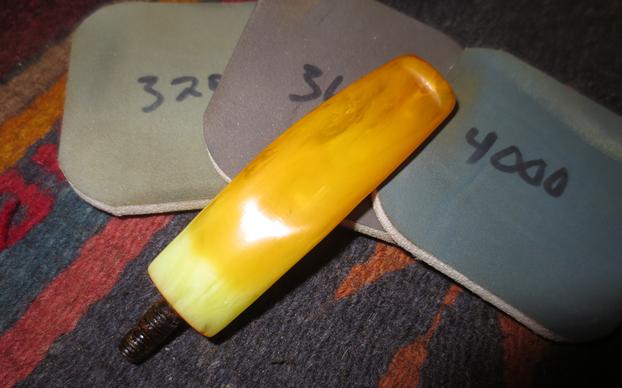
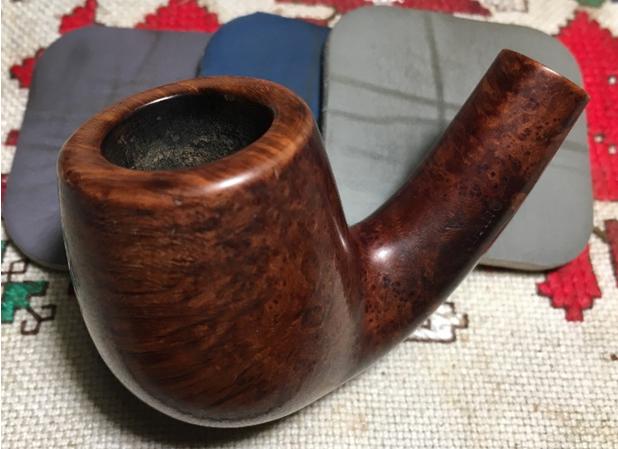
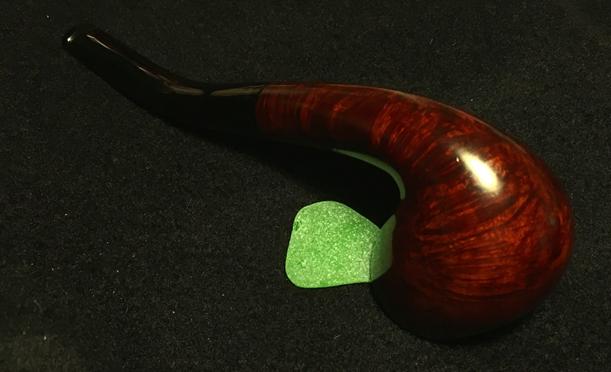
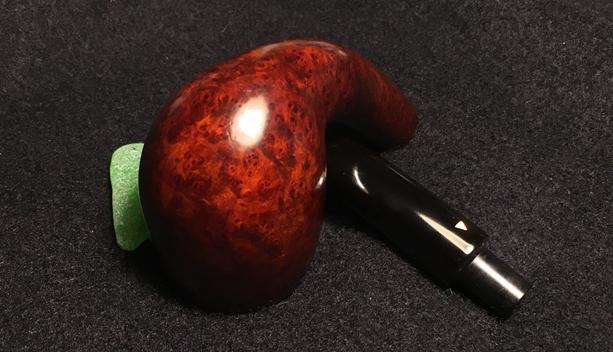
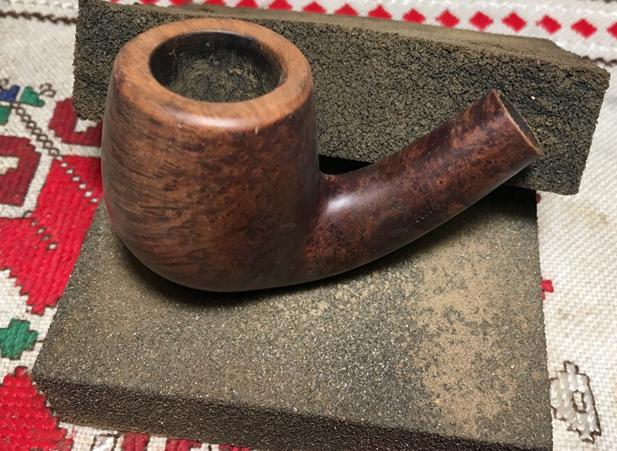 I then proceed to sand the bowl using micromesh pads 1500 to 2400, then 3200 to 4000, then finally, 6000 to 12000. The process brings out the beautiful horizontal grain flows from the front of the bowl downward to encompass the heel. Bird’s eye grain is sprinkled nicely on the stummel sides.
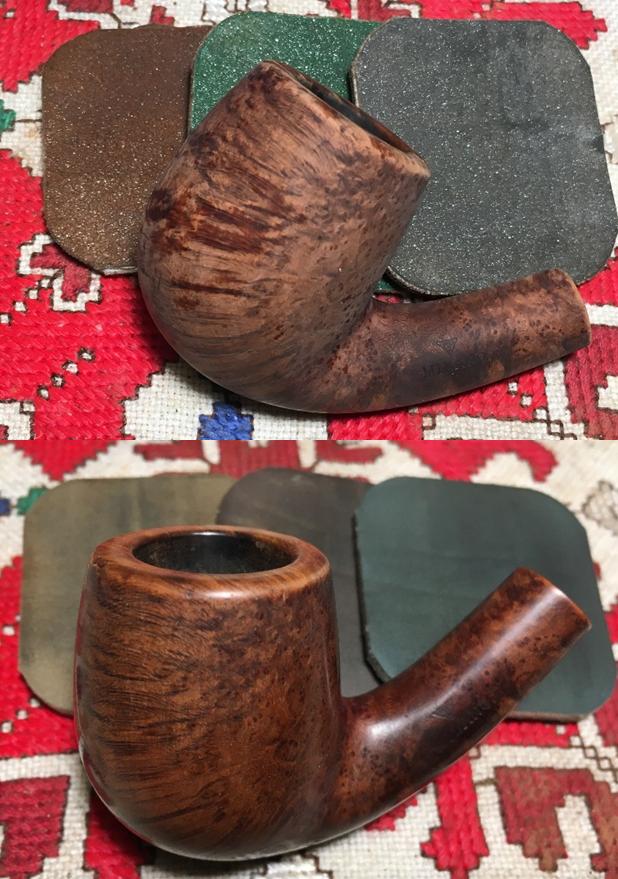
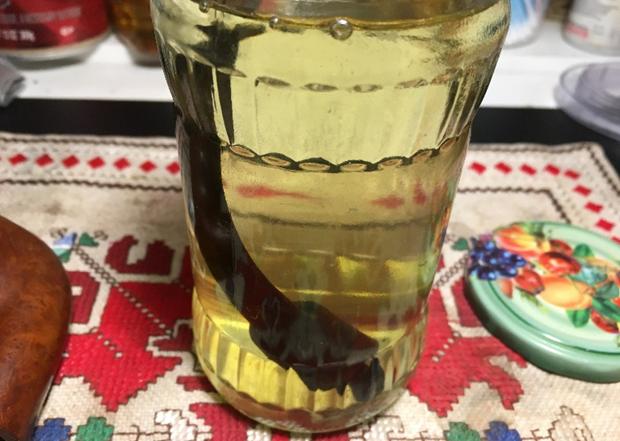
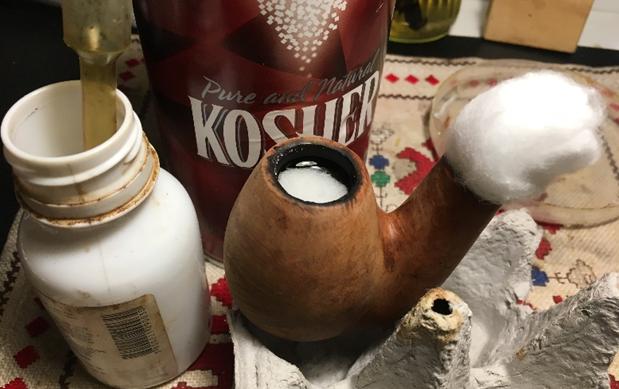
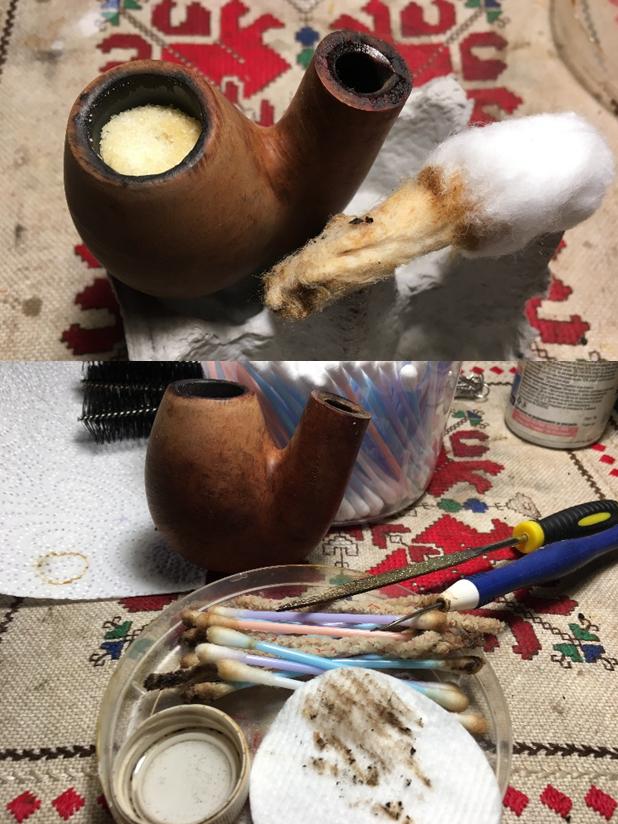
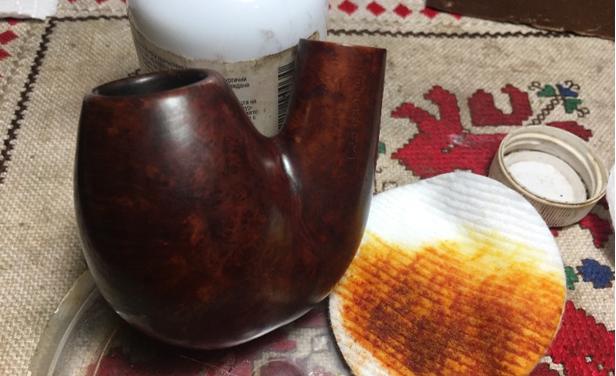
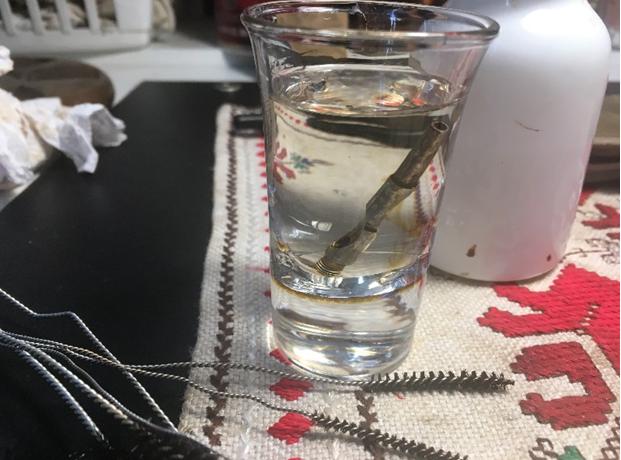
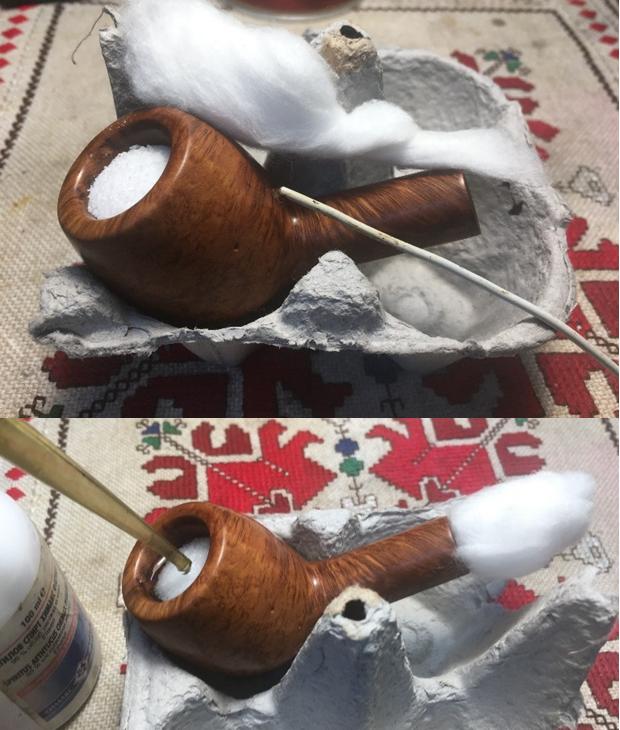
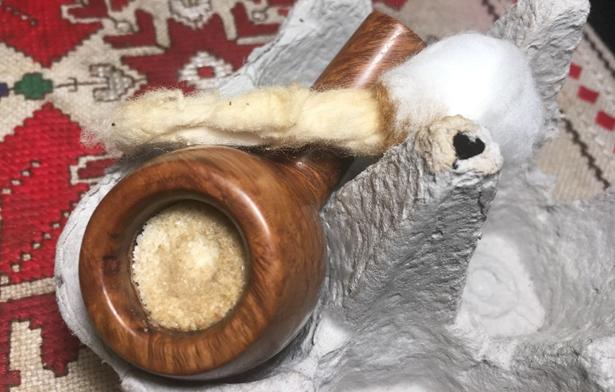
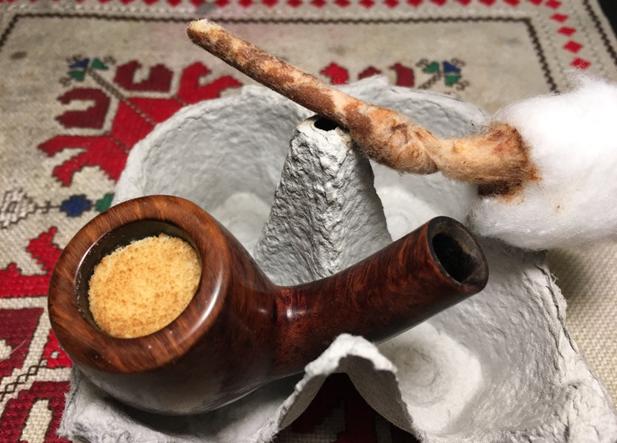
 With the day ending, I continue the cleaning and refreshing of the stummel internals using a Kosher Salt and alcohol soak. I create a wick to insert into the shank/mortise by twisting and stretching a cotton ball. I take a straight stiff wire to help stuff it deeply into the mortise. With the stummel secured in the egg carton I fill the bowl with Kosher Salt (which leaves no iodine after taste) and give it a shank to displace the salt. I then, using a large eye-dropper, put isopropyl 95% into the bowl until it surfaces over the salt. I put it aside for the night. The next morning, the salt and alcohol soak did the job well. The salt had turned dark and pulling the wick out – the same was true of it. I toss the expended salt and wick in the waste and wipe the bowl out removing leftover salt. Then returning to the use of cotton swabs and alcohol, in only a few plunges down the mortise, the internals are clean. Pictures show the cleaning process.
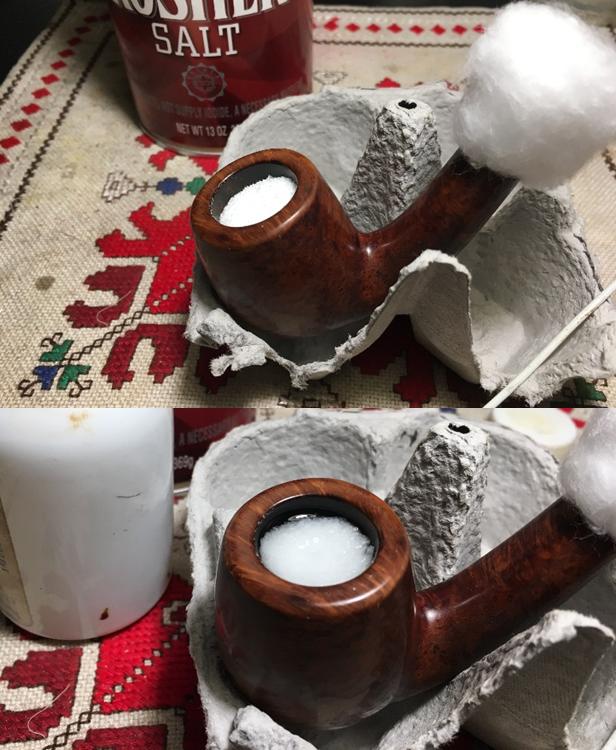
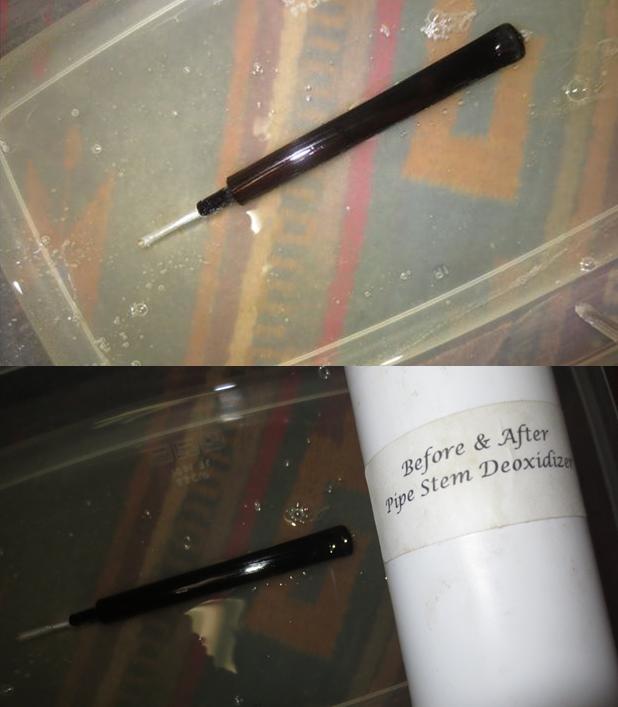
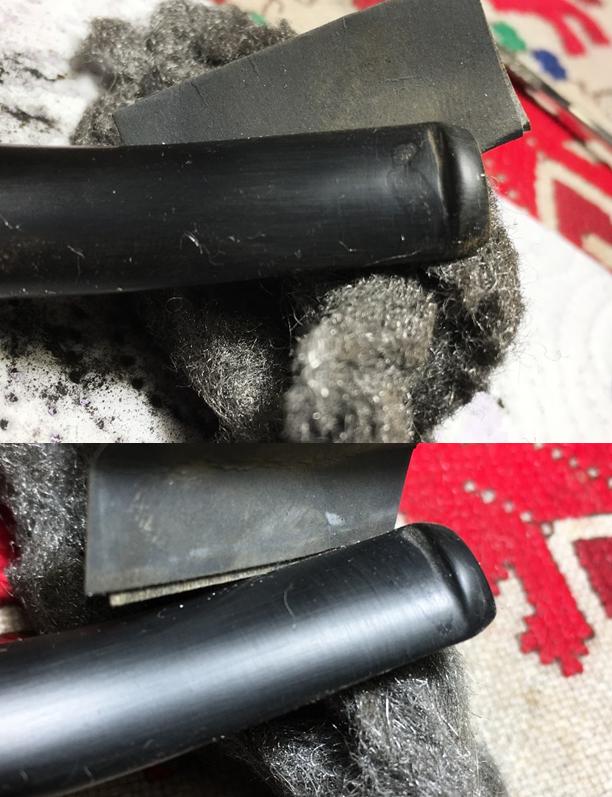
 The stem was soaking in an OxiClean bath to raise the oxidation from the vulcanite. I take stem out of the bath and the oxidation was raised showing the normal olive-green color. I then take 600 grit sanding paper and wet sand the stem to remove the oxidation and to work on the serious teeth clenching damage. After the 600 grit sanding, I give the stem a stiff buffing from 0000 grade steel wool. Interestingly, I noticed it earlier but thought that it would go away with the OxiClean and sanding. I see a small lighter (reddish?) dot on the underside of the stem (second picture below), almost below the WDC triangle mark but just off center. I’m not expecting a ‘manmade’ mark there so I assume it’s a discoloration in the vulcanite. I take a little 240 grit paper and go after it, but it remains for now. Pictures show oxidation and post-oxidation sanding.
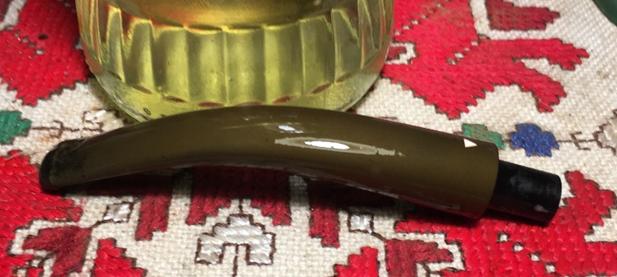
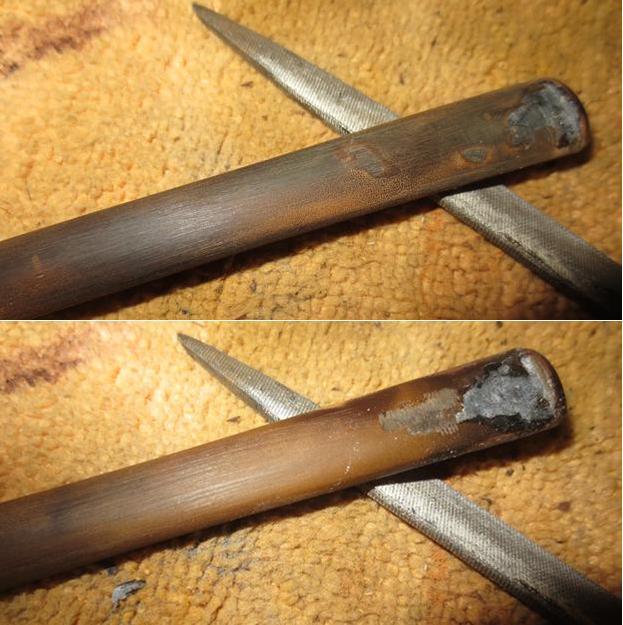
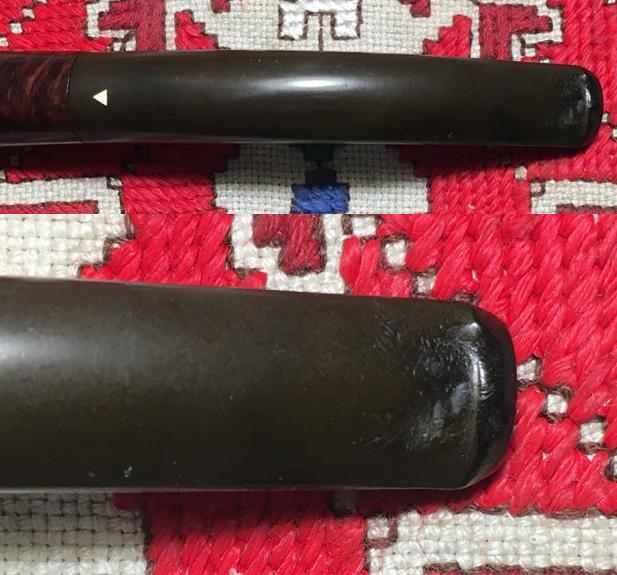
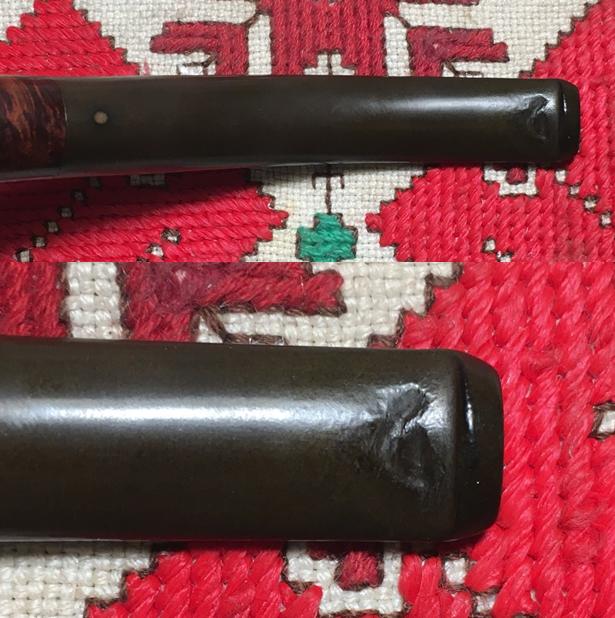
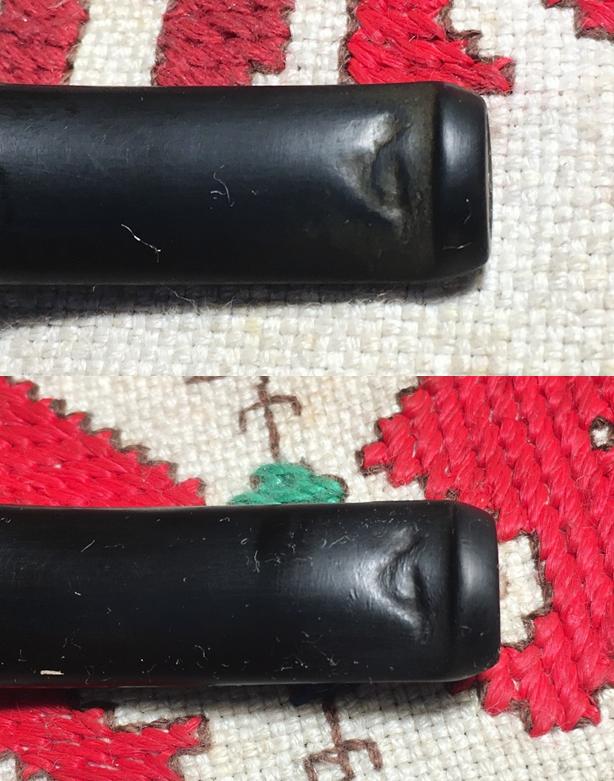
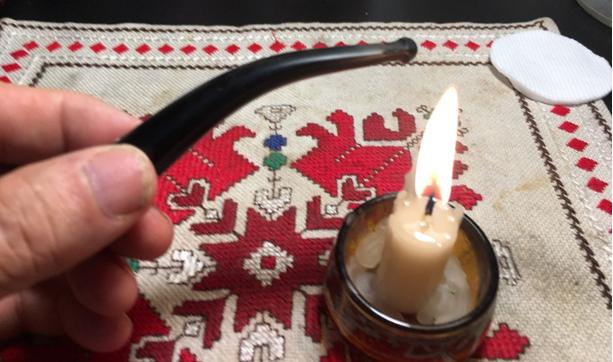
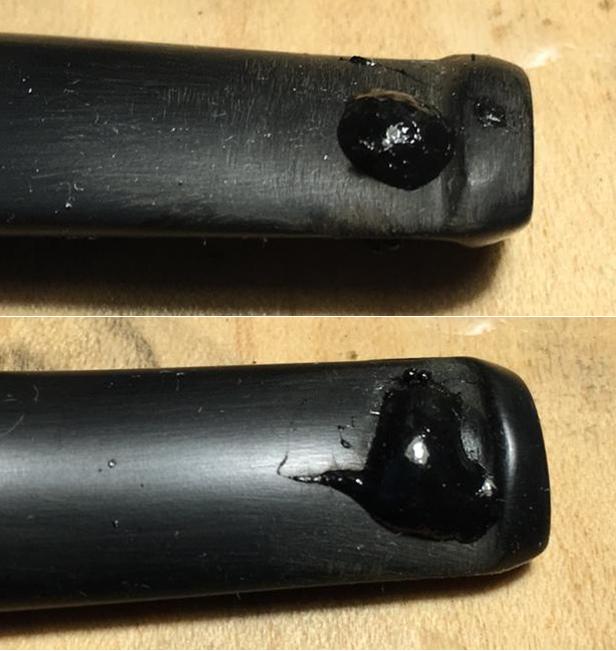
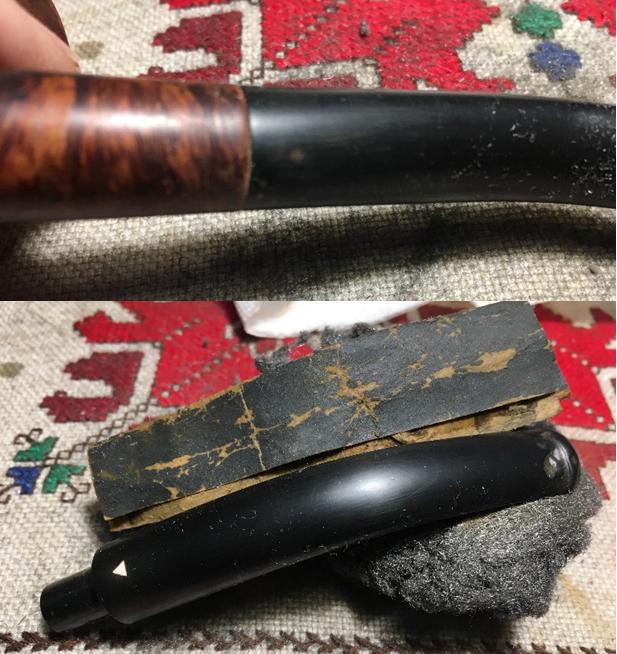 The button area is in bad shape. The former steward was a clencher par excellence. Neither upper nor lower bit areas were spared. The upper has deep bites and a ‘wedgy’ dent on the button lip. The lower button lip is spared, but there is a ‘go to’ clench handle which is distinct. I take pictures to mark the start. Focusing first on the topside, I use the heating method to see if I might hopefully tease out the concave dents. Then the bottom-side. Vulcanite, a form of rubber, amazingly will seek out its original disposition when heated as the rubber expands with the heat. I light a candle and pass the bit-end of the stem over the flame in back and forth style. I try not to cook the vulcanite, but simply heat it strategically. After some time, using heat on upper and then lower, I take pictures to compare. You can see the closing of the dents in the picture comparisons below. I think there is a beneficial change, but there are still dents to repair. Pictures 1 and 2 are before heating and after for the upper side. Pictures 3 and 4 of the lower side – before heating and after.
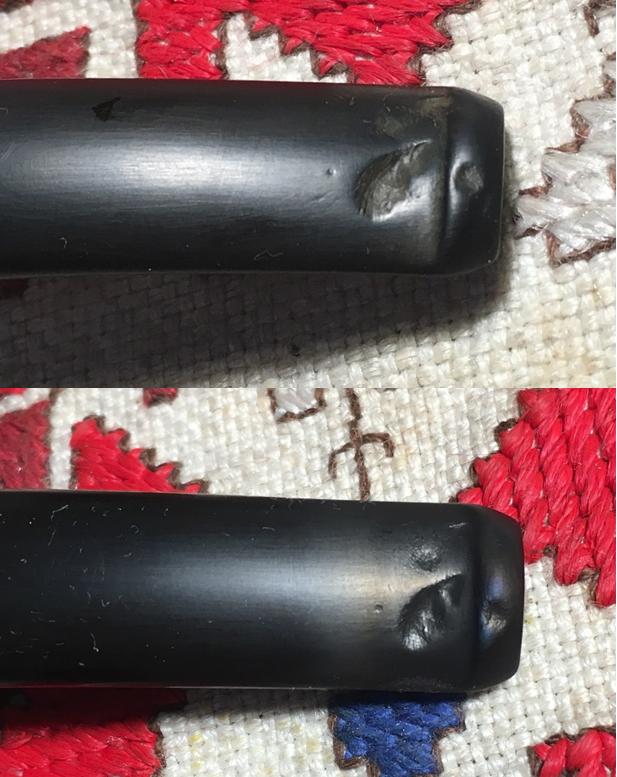
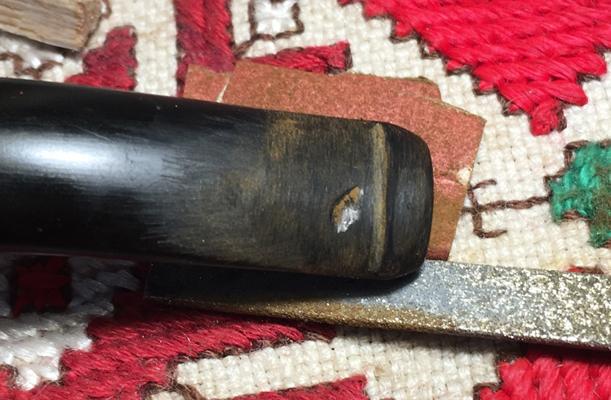
 I first use 240 grit paper on the upper bit. I sand out as much as possible all the smaller dents. Through the years of clenching, the button lip has lost its distinction so using a flat needle file, I reintroduce the lip edge and then follow by sanding with 240 to erase file tracks and shape more. I’m wondering if I can avoid having to rebuild the button lip. I gently sand the upper button lip as well. The tooth grip has turned into only a small dimple – good movement. I sand gently to remove the dimple because I don’t want to lose too much button real estate. The top looks great. The only patch needed is the remaining large dent. The topside filing, sanding and shaping progression is pictured below.
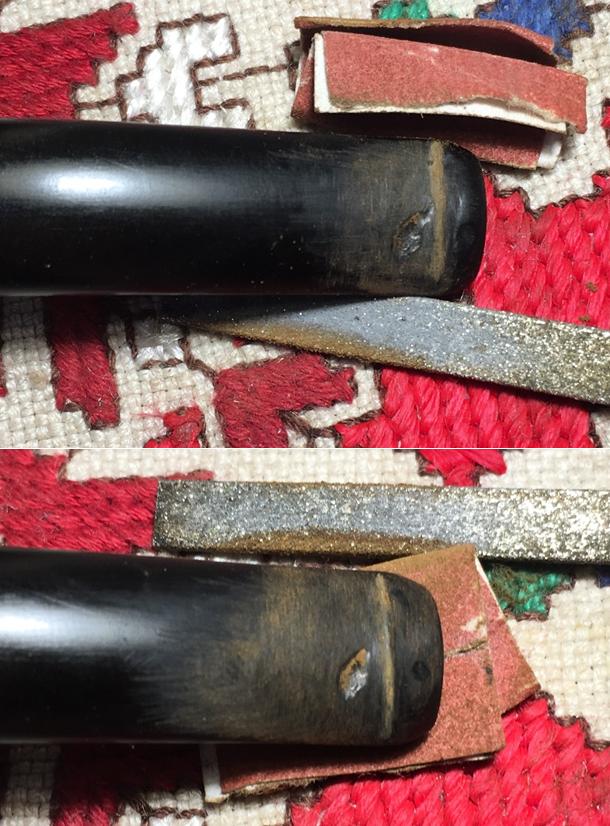
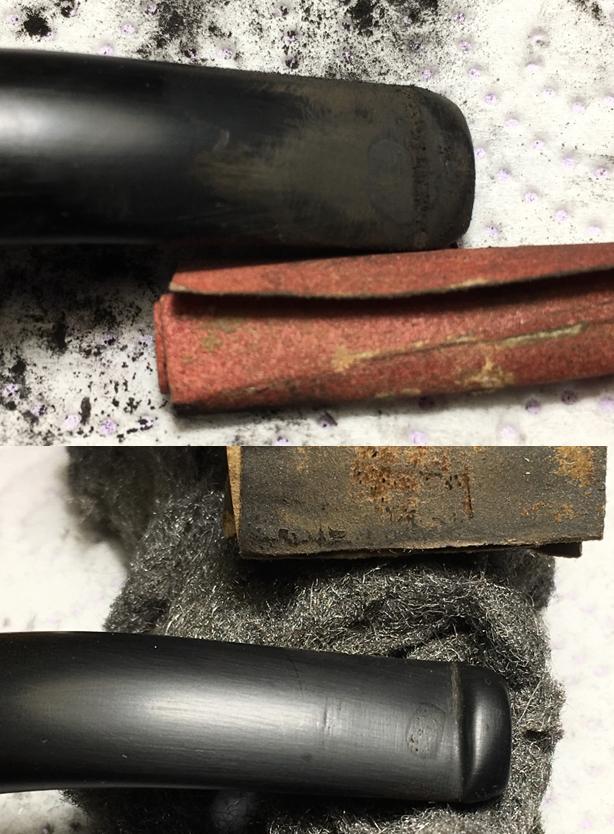
 Turning to the lower bit, again I use 240 grit sanding paper to sand out what can be removed and blended by sanding. The dent/clench configuration was minimized by sanding but I need to patch what remains of the surface damage.
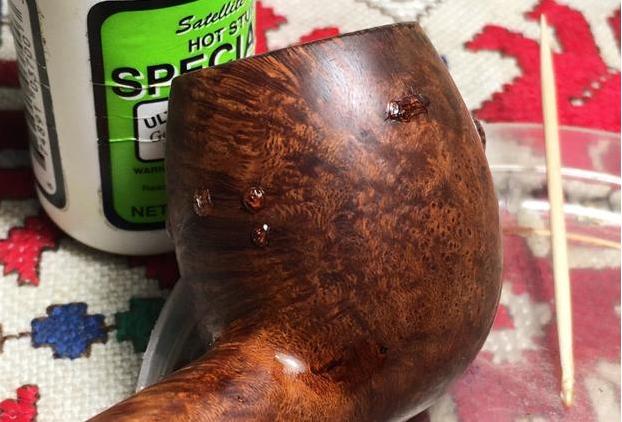
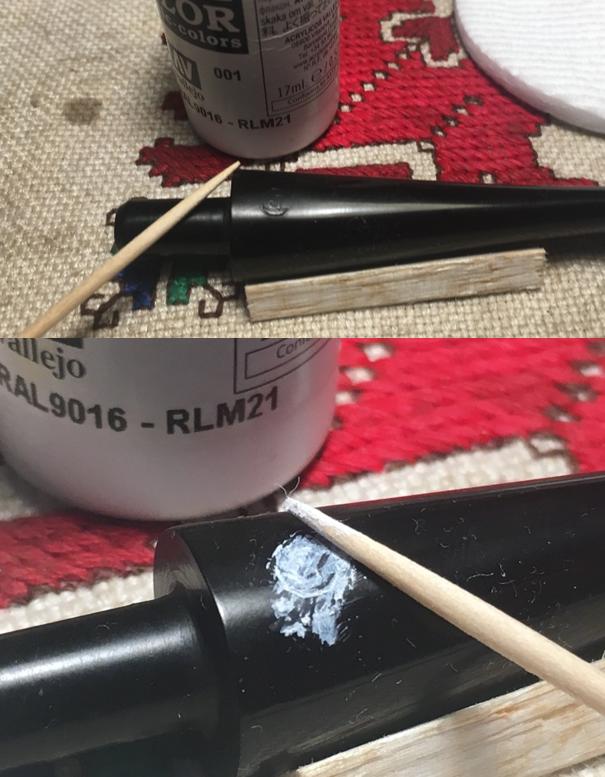
 To prep the vulcanite for the patch work, I wipe down the upper and lower bit with a cotton pad wetted with alcohol. I mix activated charcoal powder with Hot Stuff Special ‘T’ CA Instant Glue (extra thick) to form a putty which is like molasses in viscosity to apply to the damaged areas. I use a tooth pick as my trowel and tamper and I apply more putty than needed – the patch mound allows me to file down gently to the surface of the stem to achieve a better blended patch. I apply putty to the upper bit, and a dab on the small, remaining dimple on the button lip. I spray it with accelerator to cure the putty. I then do the same for the needed area on the lower bit. The pictures show the patch progress.
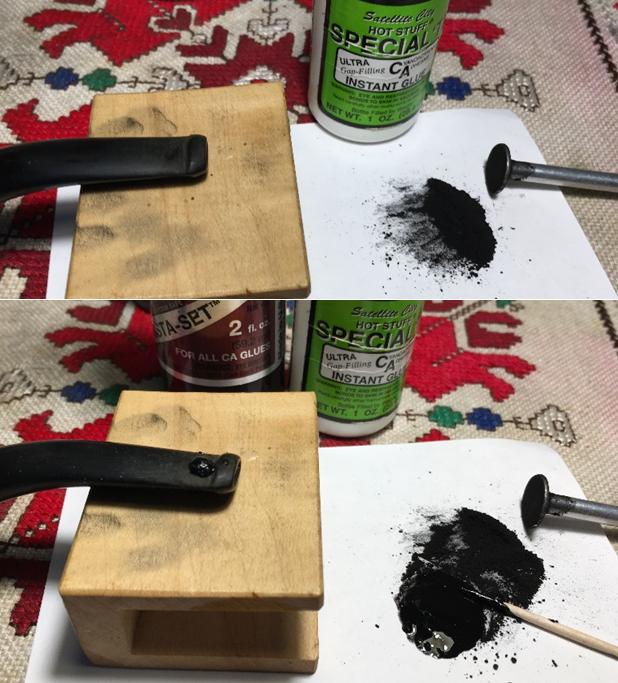
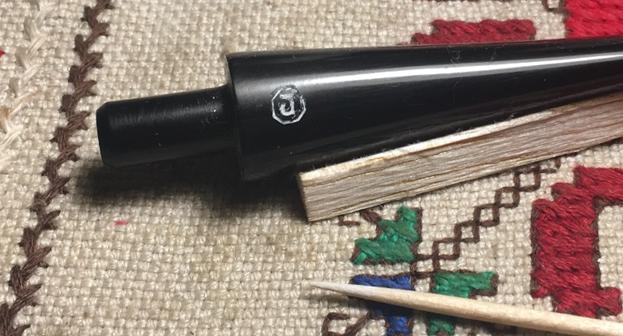
 Using a flat needle file, I begin filing the patch mound on the upper bit until I’m very close to the vulcanite surface. With the patch expanding closely to the button lip, I also utilize the flat needle file to separate and define the button lip. When close to the surface, I switch to 240 grit paper to bring the patch flush with the vulcanite surface. After I’ve blended as far as 240 paper will take me, I switch to 600 grit paper and then finally, 0000 steel wool which fine tunes the blending and each in turn erases the former’s scratch marks. I take pictures along the way to document progress.
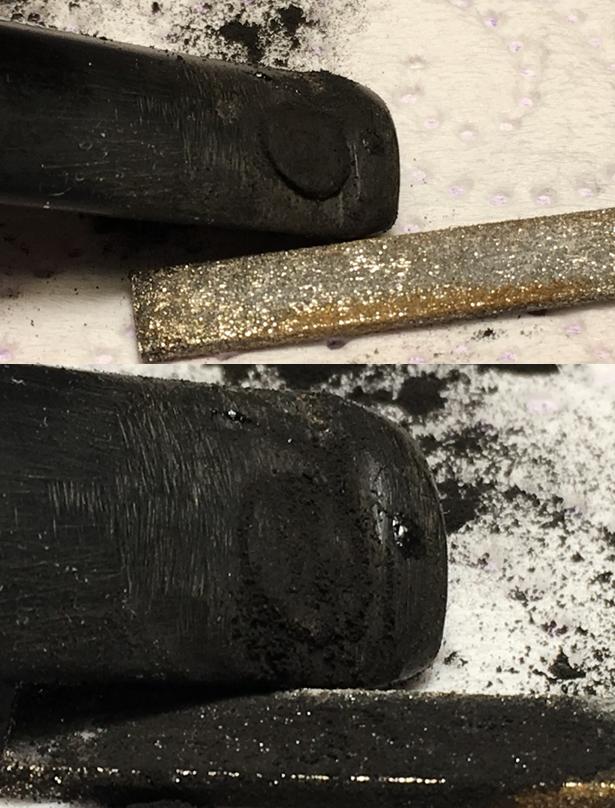
 At this point, not surprised, I see very small air pockets exposed on the patch area (see picture above). Taking Hot Stuff CA Glue, thinner than the ‘T’ I used for the patch, I dip a toothpick into the glue opening to give a coat of CA glue on the toothpick. With this wet glue, I paint the patch with a thin glaze of glue which fills the air pockets. I give the glaze of glue a quick spray of accelerator to cure it. I then take 600 grit paper followed by 0000 steel wool to blend and complete the upper bit patch work. The micromesh sanding later will further blend the patches.
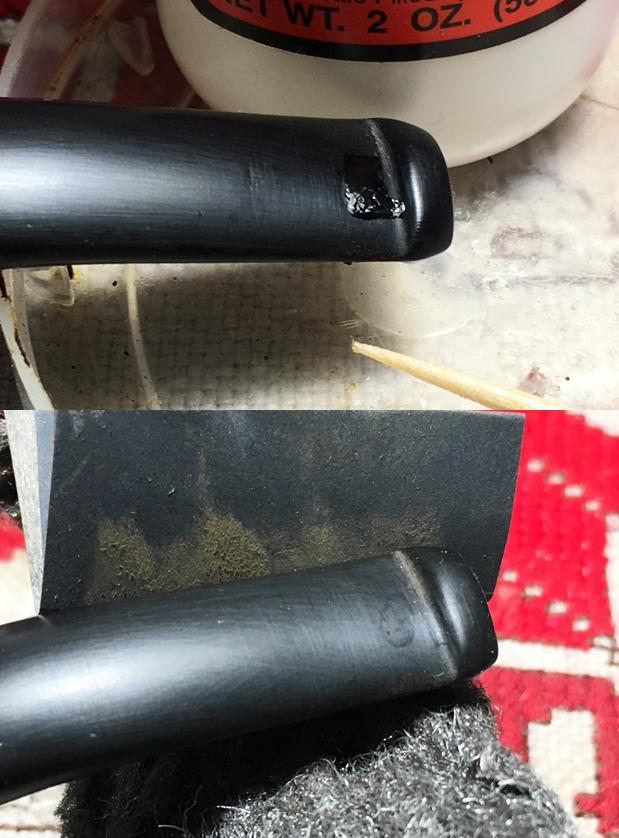 Now, to the lower bit patch. As before, I use the flat needle file initially, then 240, 600 and then 0000 grade steel wool working toward the vulcanite surface then blending. Again, a few miniscule air pockets are revealed in the patch, and I repeat the same procedure as on the upper patch.
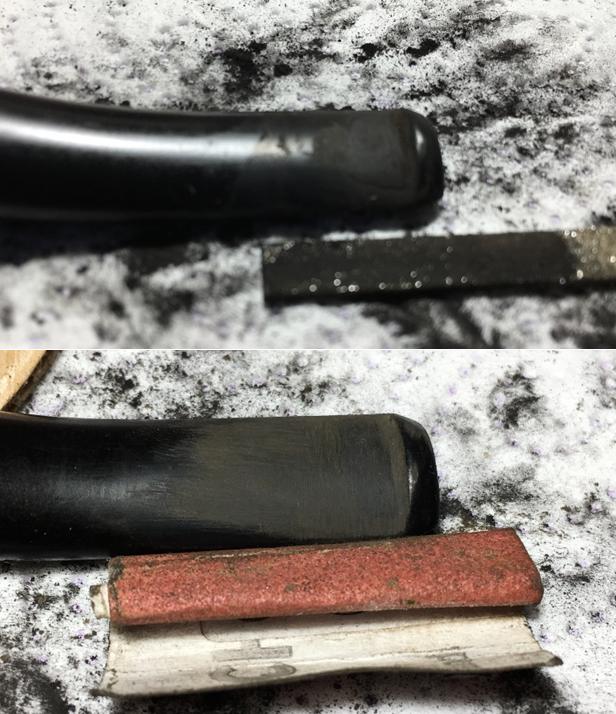
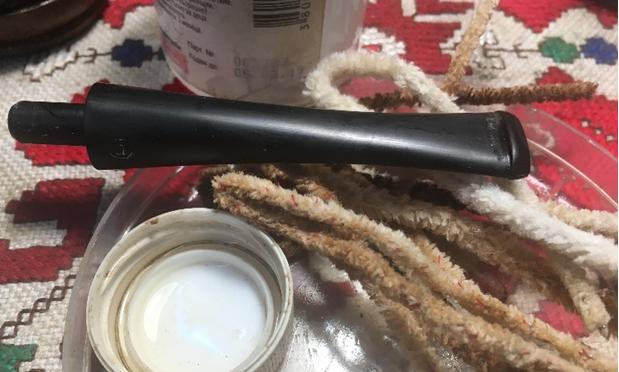
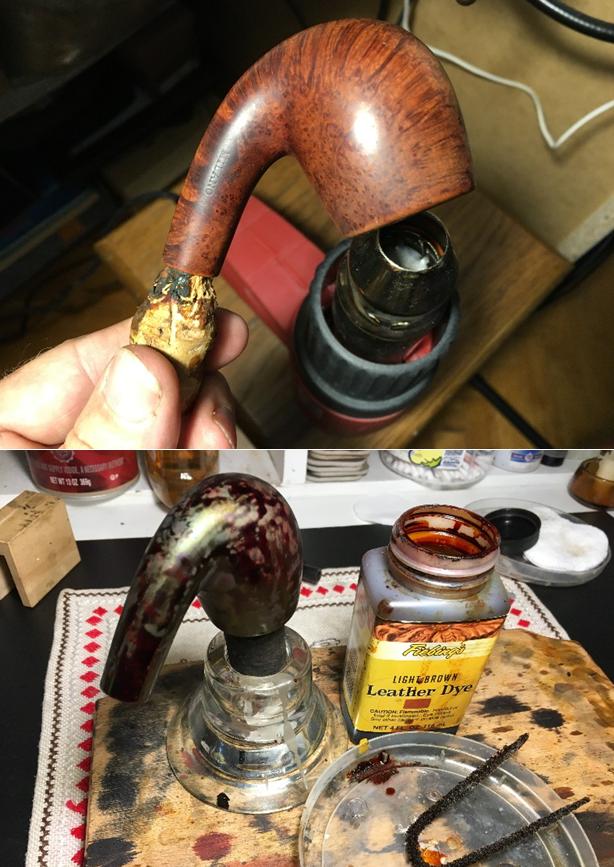
 Having been so focused on the button repairs, I almost forget (again) to clean the stem internal airway. With pipe cleaners dipped in alcohol, I do that and it does not take long to clean.
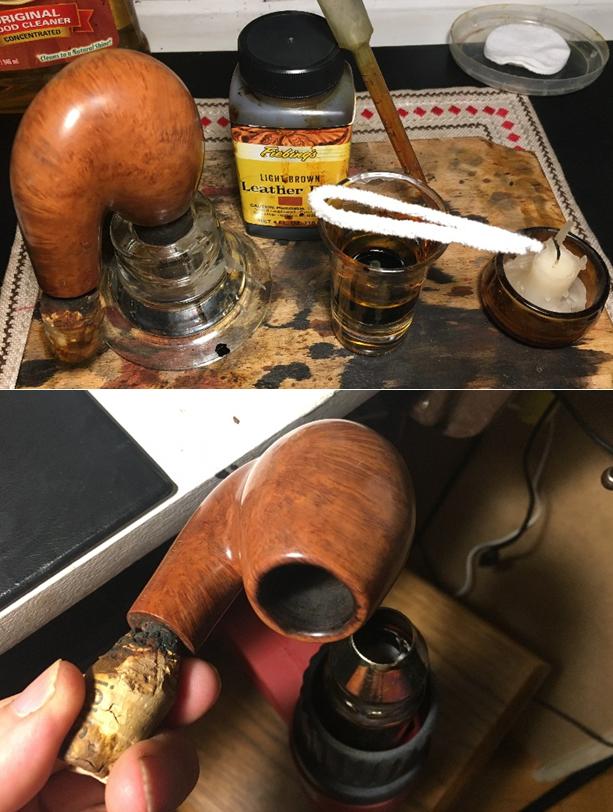
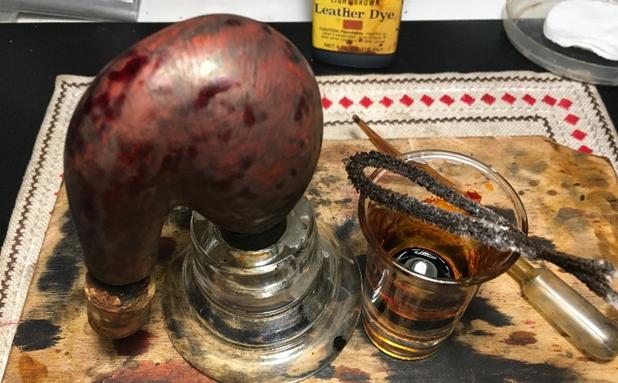
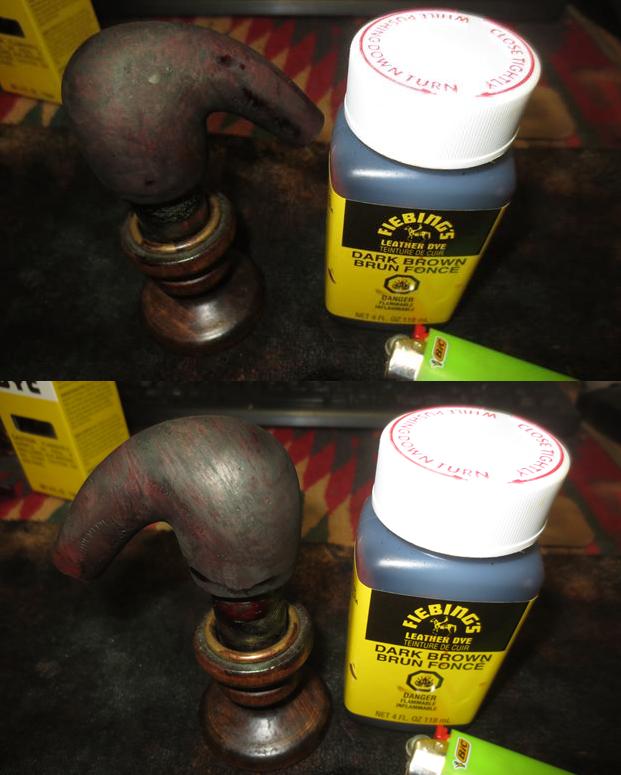
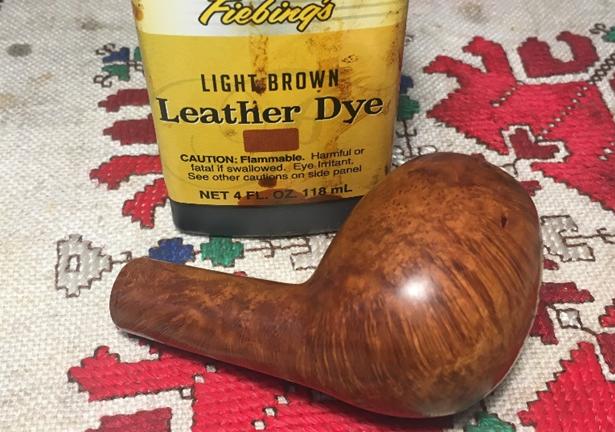
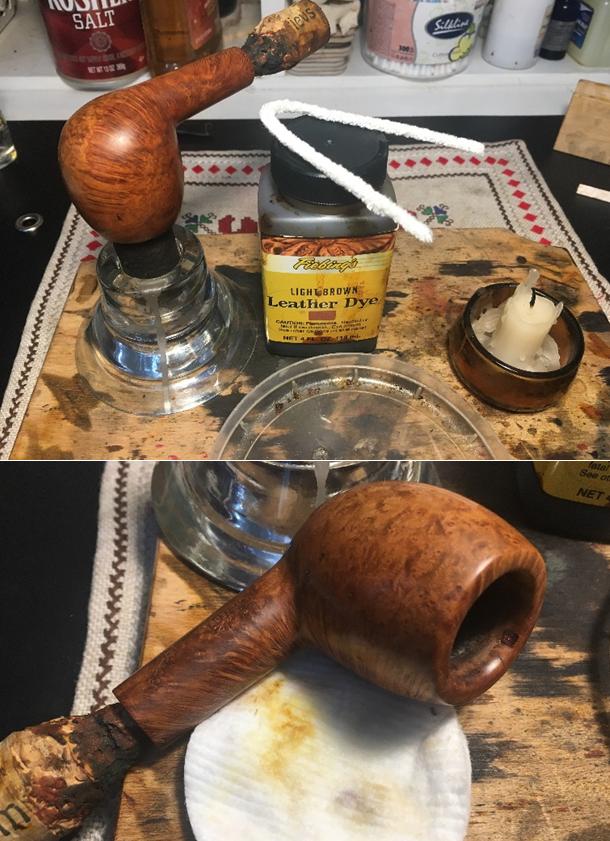
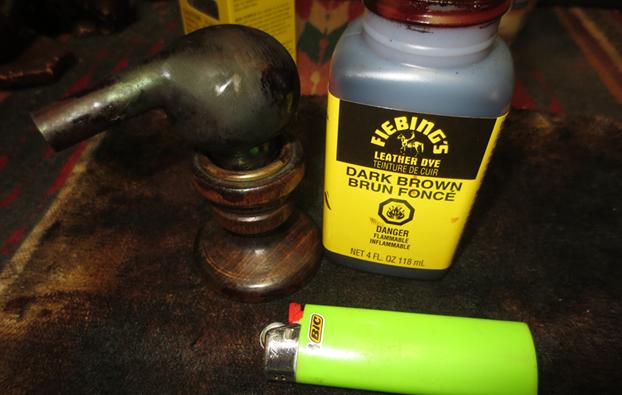
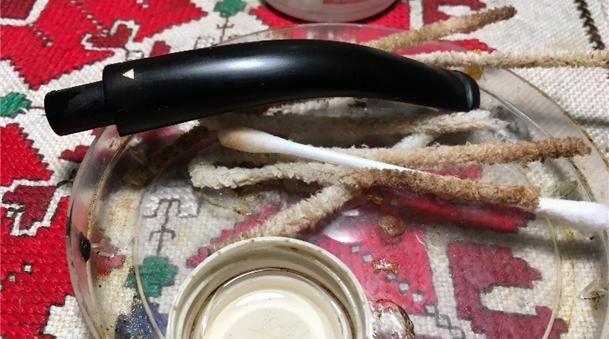 Putting the stem aside, I pick up the stummel. I will use Fiebing’s Light Brown Leather Dye to add some unifying hues on this very attractive WDC Milano’s grain. I like the lighter motif which is what the Milano’s picture included above courtesy of Doug Valitchka. I wipe the stummel with a cotton pad wetted with isopropyl 95% to make sure it’s clean. I then warm the stummel with the heat gun after inserting a whittled cork into the shank to serve as a handle. After the bowl is warmed, helping the briar more effectively to absorb the dye, I apply the dye liberally using a folded over pipe cleaner. After the stummel is covered, I fire the dye with a lit candle which ignites the alcohol in the dye and sets the pigment in the grain. After a few minutes, I repeat the procedure concluding with firing. I then put the stummel aside to rest.
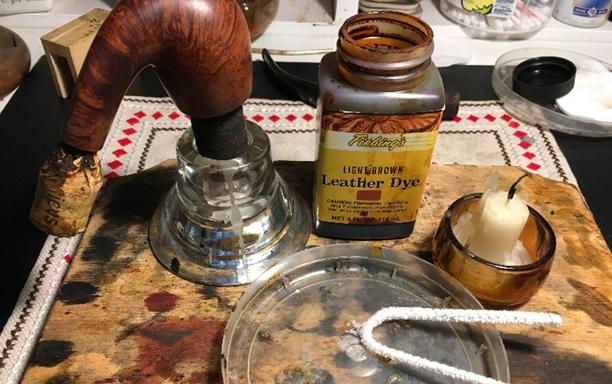
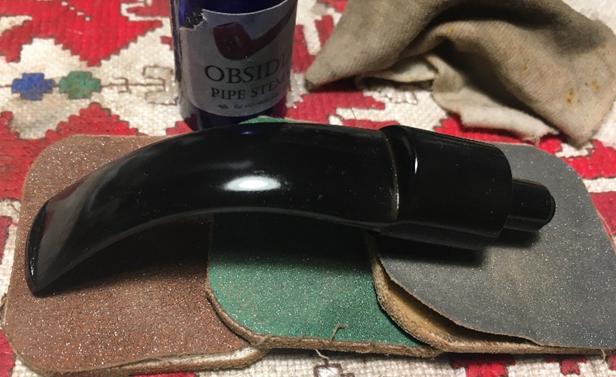
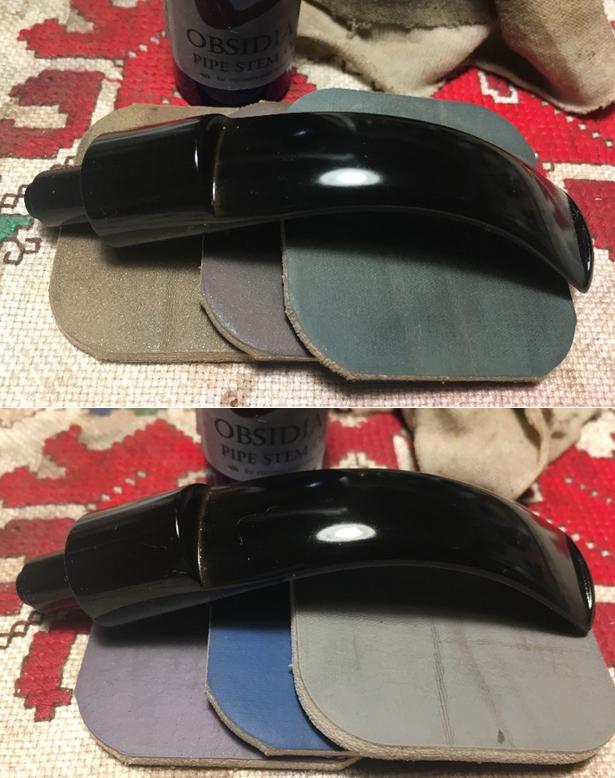
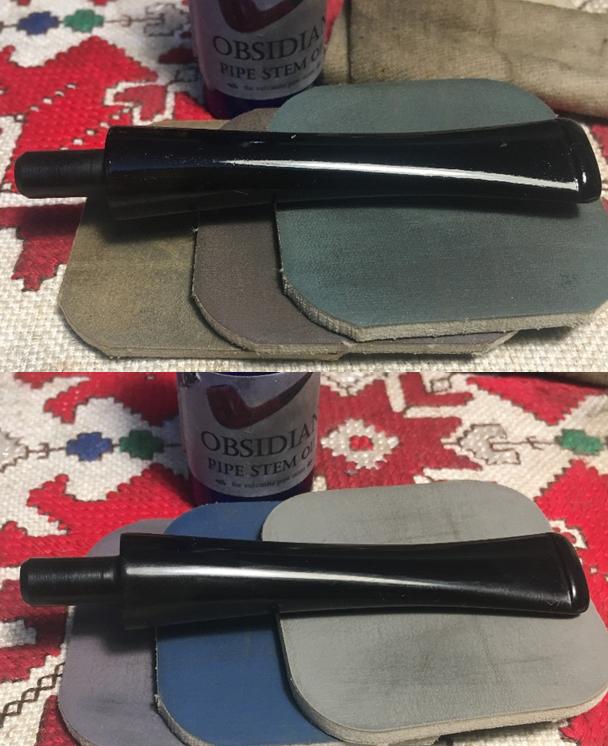
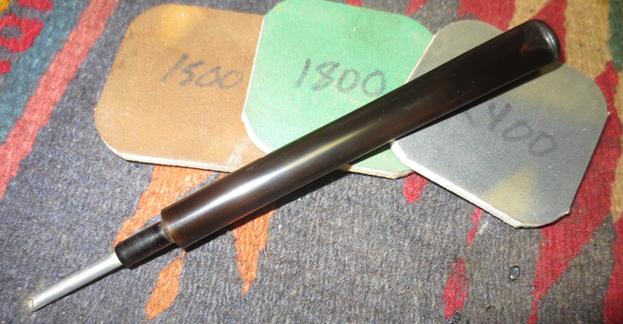
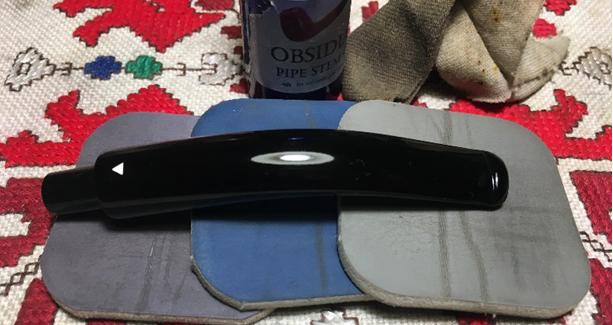
 While the stummel rests, the stem is ready for the micromesh pad cycle. I wet sand with pads 1500 to 2400, then dry sand with pads 3200 to 4000 then 6000 to 12000. After each cycle, I apply Obsidian Oil to rejuvenate the vulcanite, and my how it likes it! The pop of a newly restored stem is wonderful to behold!
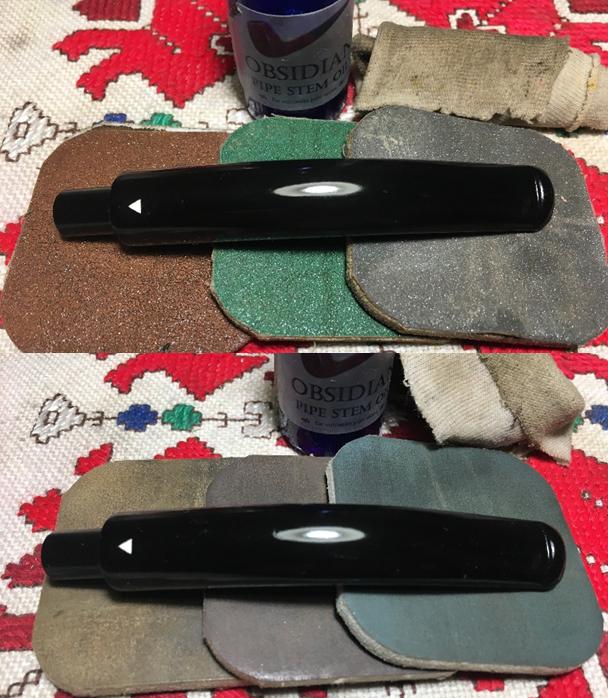
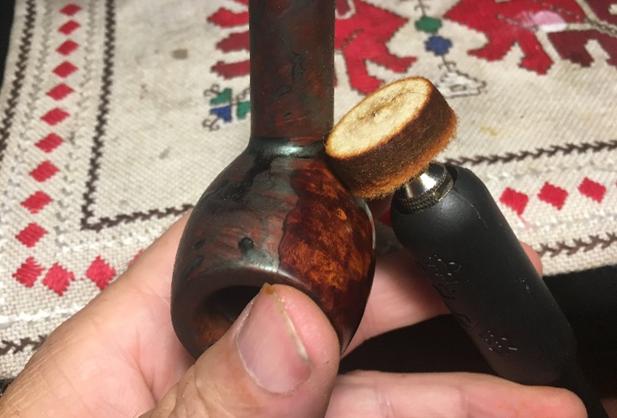
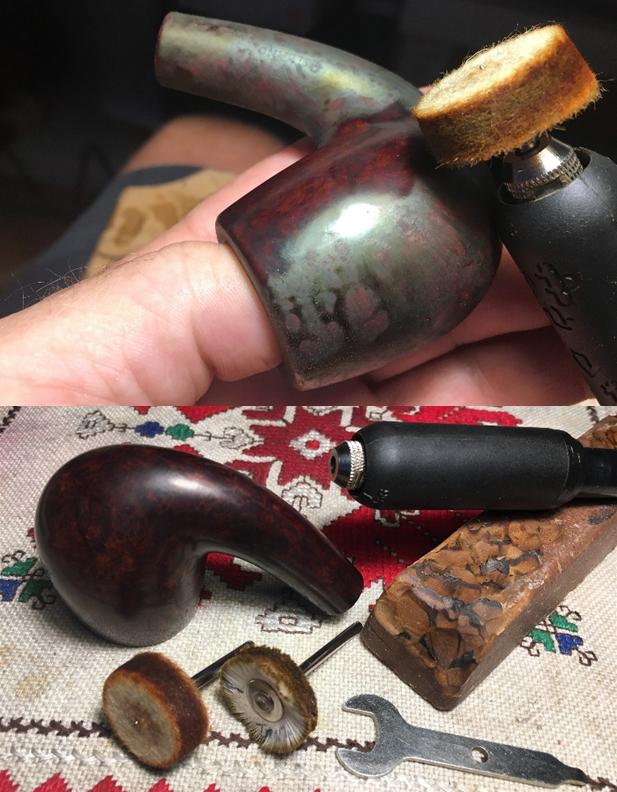
 The next day, I’m home from work, and it’s time to ‘unwrap’ the stained and fired bowl. I mount the felt buffing wheel on the Dremel, which provides more abrasion to the surface, helping to remove the crust. I used Tripoli compound with the Dremel set at 20% speed – slow because I don’t want to generate too much friction. Using the Dremel’s adjustment wrench, I purge the old compound off the felt wheel to clean and soften it. I work the felt buffing wheel applying the abrasive Tripoli compound over the stummel. I am not able to reach the bend curve between the shank and the bowl with the felt wheel. I change to a cotton cloth buffing wheel again, only dedicated to Tripoli compound. Each compound has its own dedicated Dremel buffing wheels. With the cotton cloth wheel, I’m able to reach into the harder to get places. I run the wheel over the entire surface. I take a picture showing the completion of the ‘unwrapping’.
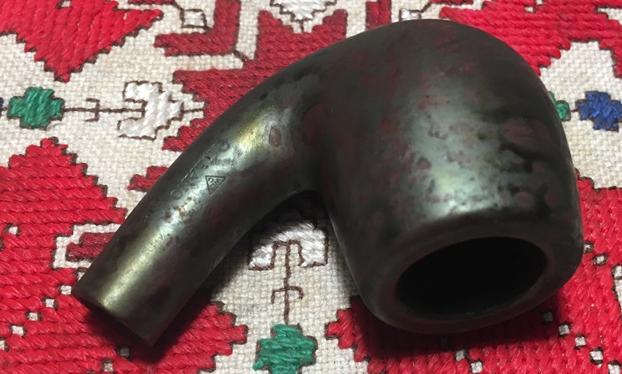
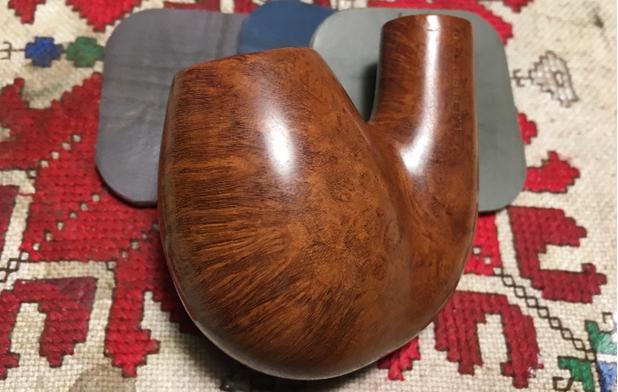
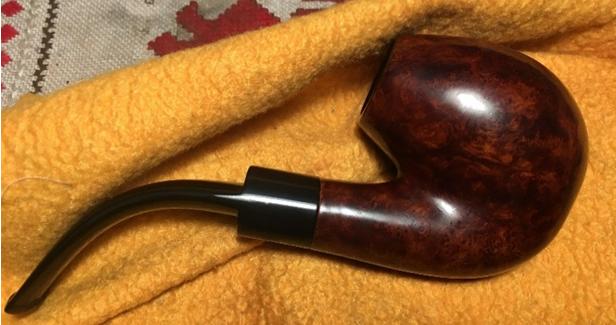
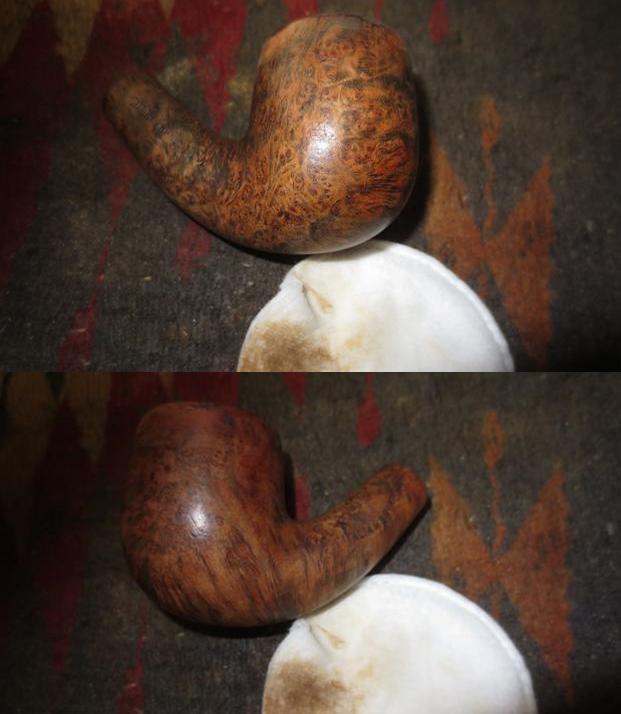
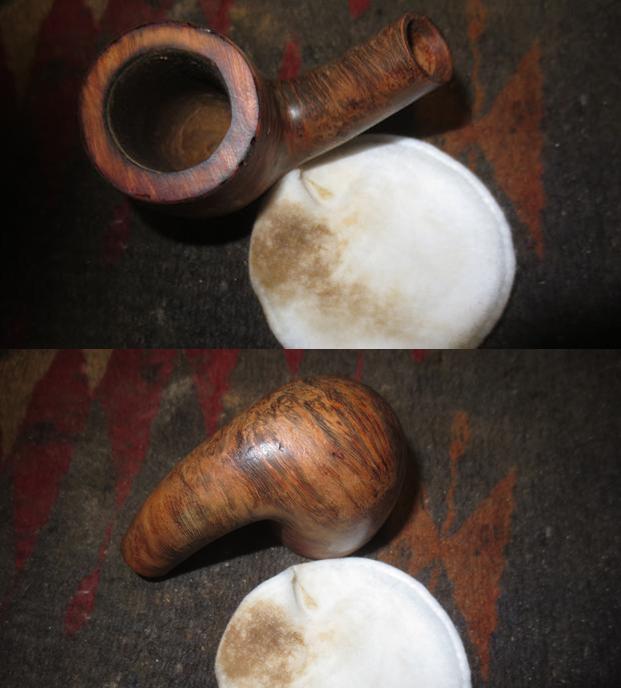
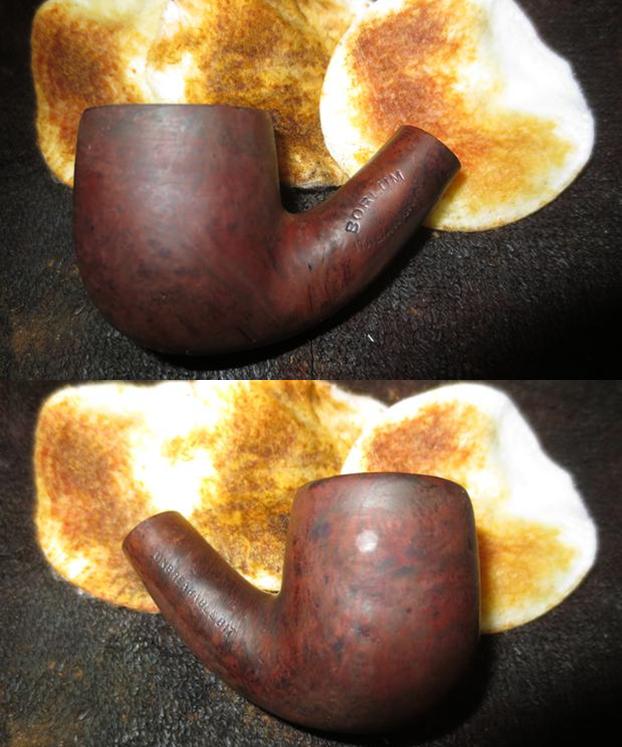
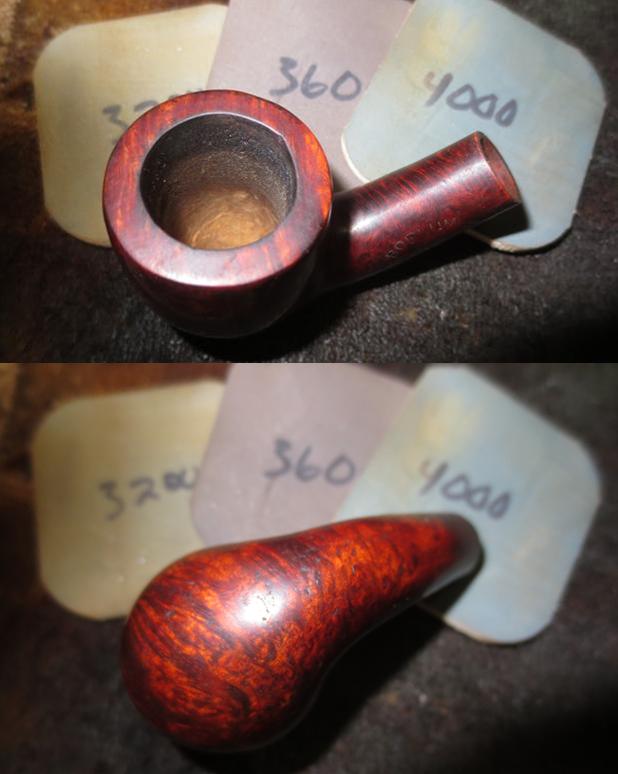
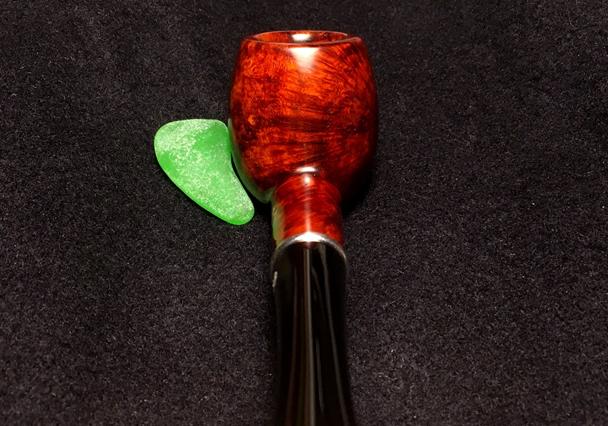
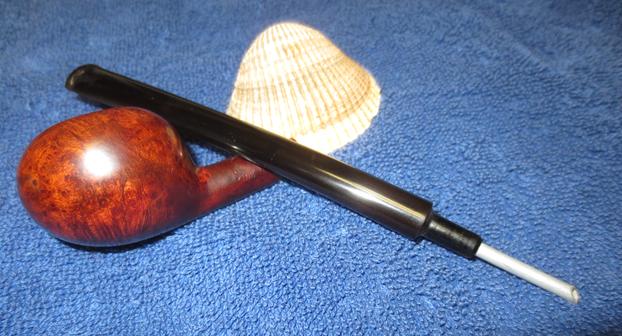
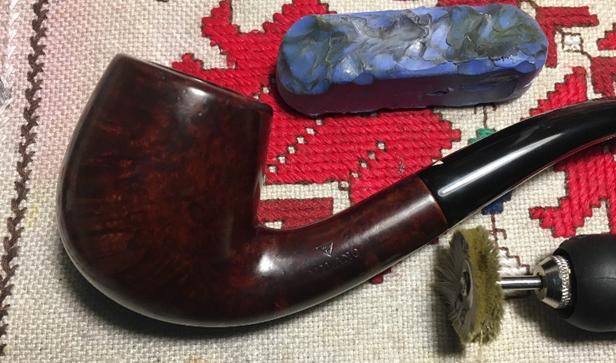
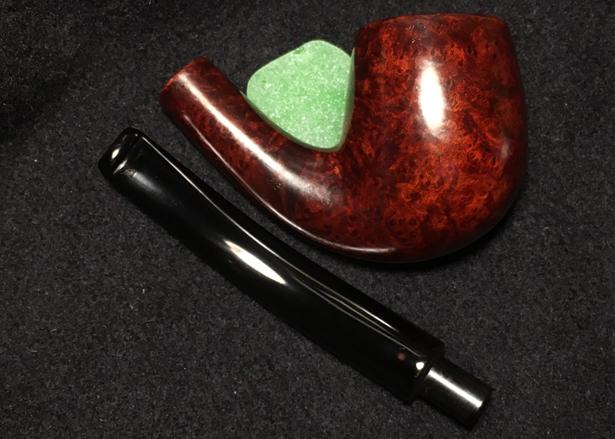
 One of the helpful aspects of aniline, or alcohol-based dyes, is the ability to wipe it with alcohol to lighten the application as well as blend the dye. I want to lighten this WDC Milano so I wipe it down with cotton pad wetted with alcohol. I take a picture before and after. Immediately after wiping down the surface, the surface clouds with the alcohol. Then I remove the alcohol wipe clouding effect with Blue Diamond compound, with a cotton cloth wheel mounted on the Dremel at 40% speed. Following the Blue Diamond application, the true ‘after’ picture is taken. I also reunite the stem with the stummel for the Blue Diamond buffing. Well, the third picture below represents the lighter ‘after’ picture, but I don’t believe the picture does justice to what my eyes are seeing. The lightening and blending of the surface hue is showing off the grains quite nicely. I’m liking it! I think this, “Lady’s Choice” is going to like her choice too!
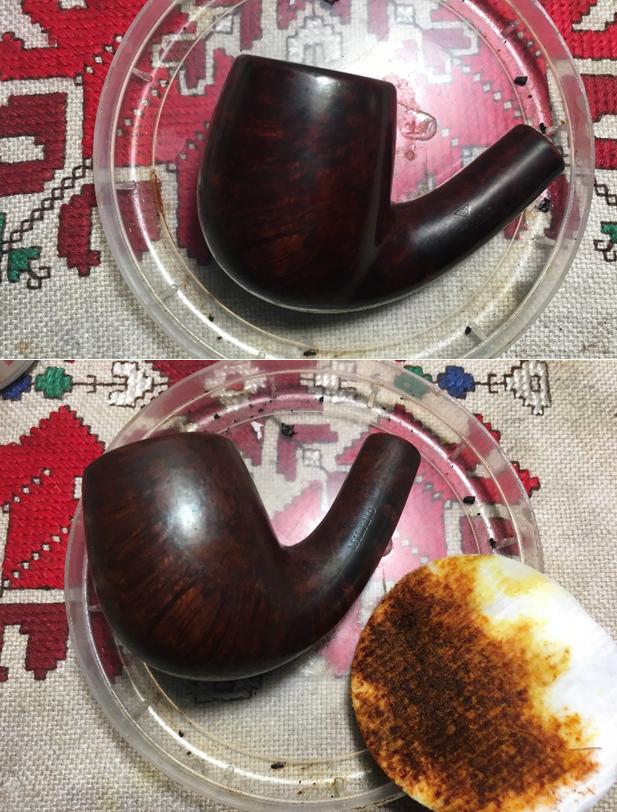
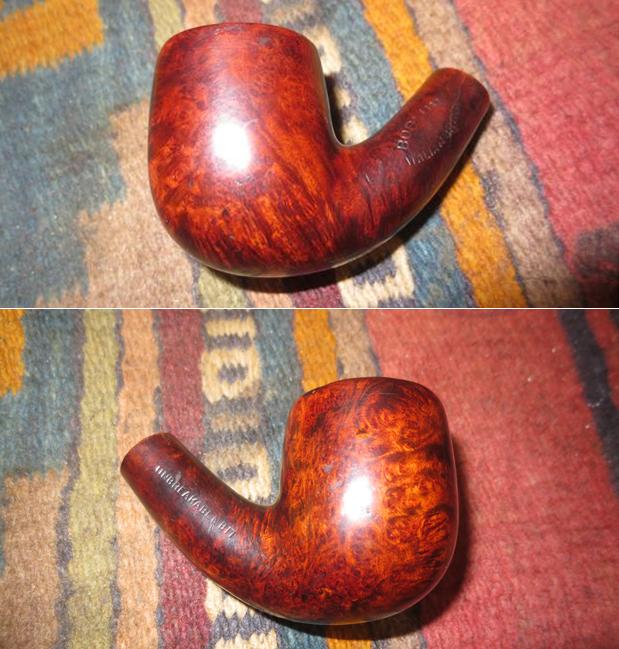
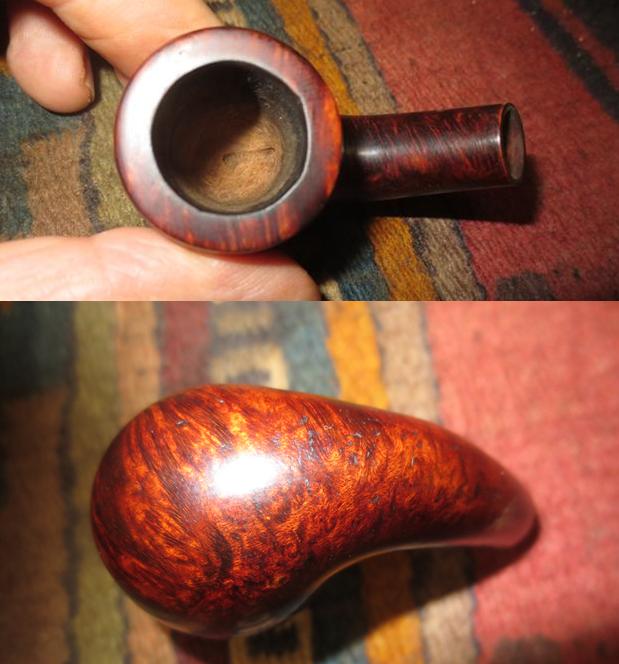
 I give the pipe a hand buffing with a felt cloth, not so much to buff up the shine at this point but to remove the compound dust from the surface. The compounds are abrasives and the dust is the residue left over. After this, I mount the Dremel with a dedicated cotton cloth buffing wheel, leaving the speed at 40%, I apply the carnauba wax evenly over the stummel and stem. I finish with a hefty hand buffing of the pipe with a microfiber cloth to raise the shine more.
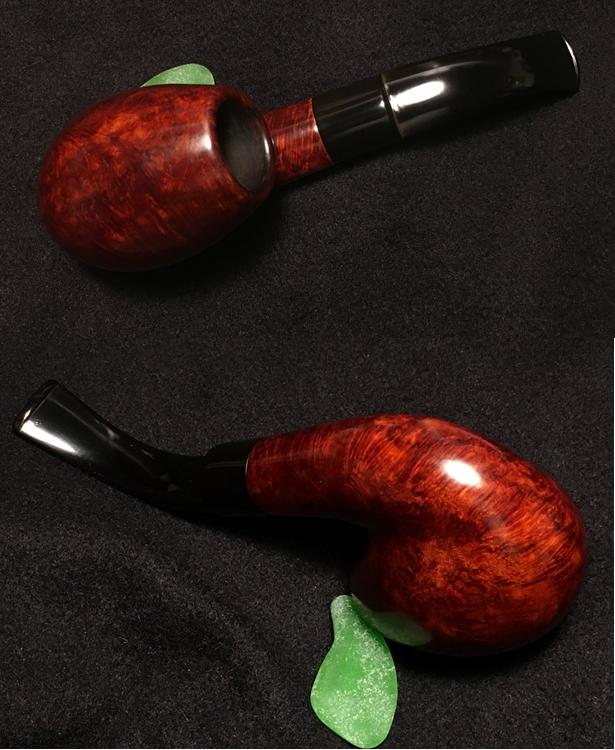
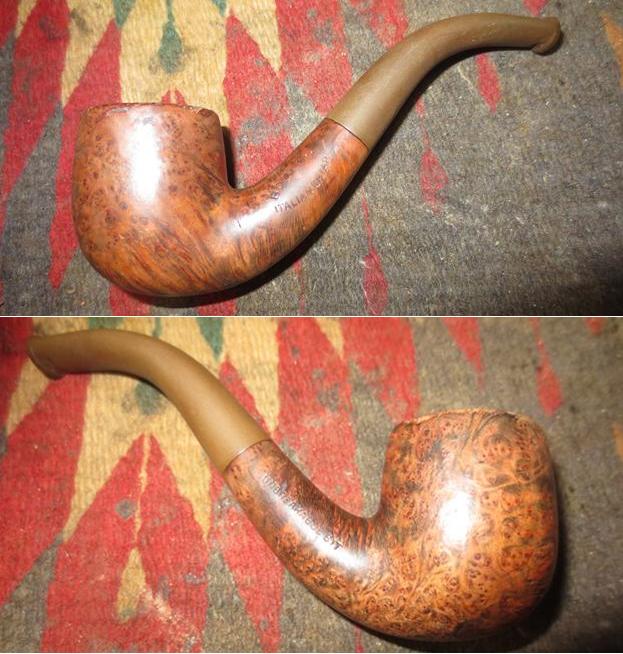
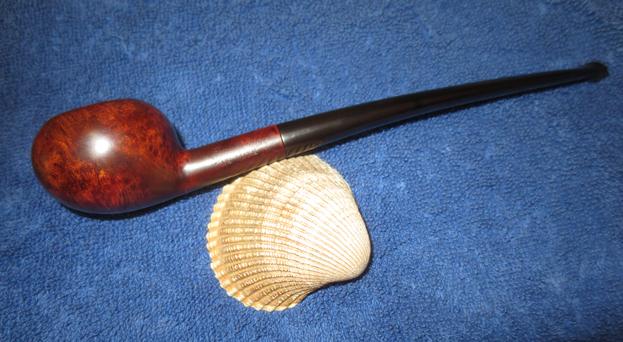
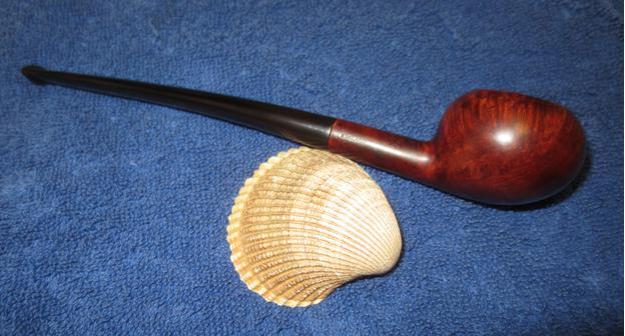
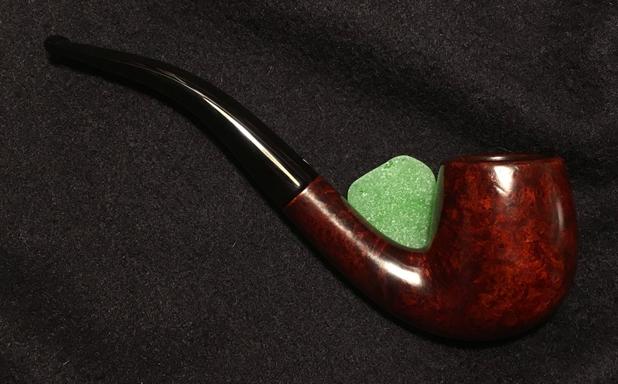
This WDC Milano Swan Neck Billiard is a lady’s choice. I hope she likes it. It is an elegant pipe and showcases beautiful flowing grain. I’m pleased with the button repair that blended very well – without knowing it’s there, most people would not see it. The repaired rim also looks good – forming the beginning of the long elegant lines carried through to the swan neck stem. Nice. Each pipe I restore benefits the work we do with the Daughters of Bulgaria – helping women and girls who have been sexually exploited and trafficked. For more information about this and pipes I have available, check out the store at The Pipe Steward. Thanks for joining me! 

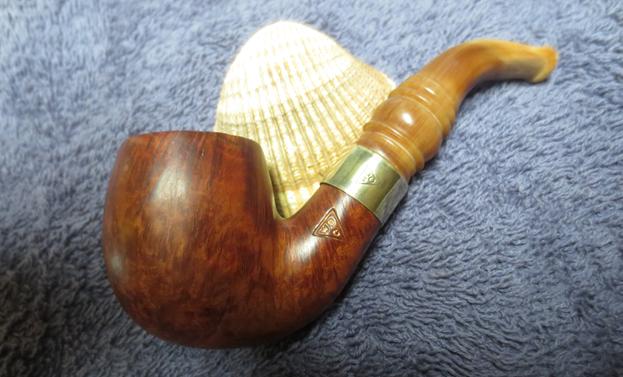
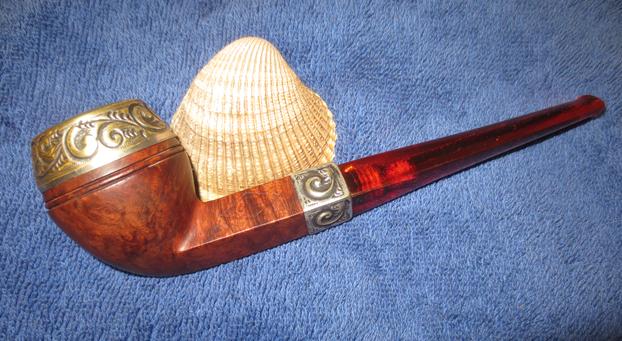
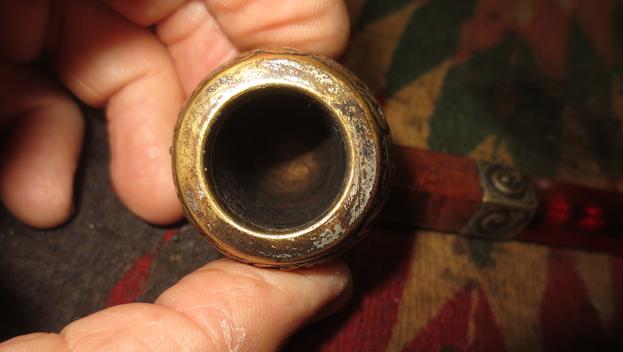
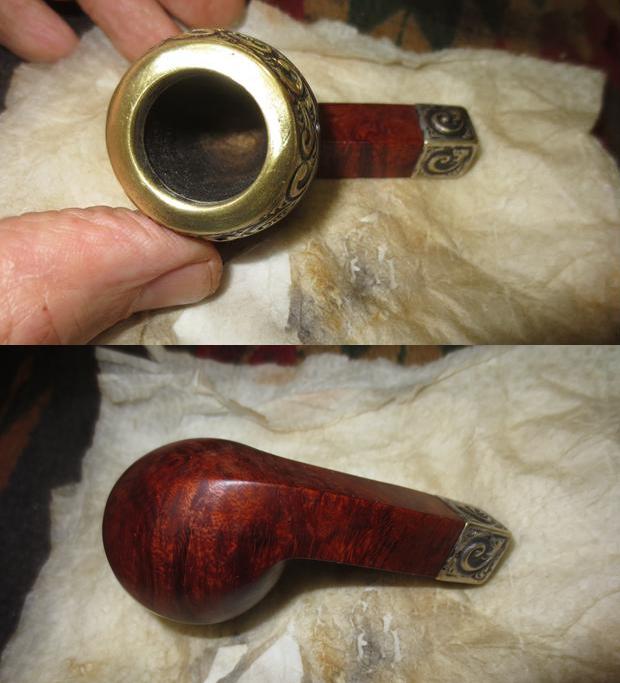
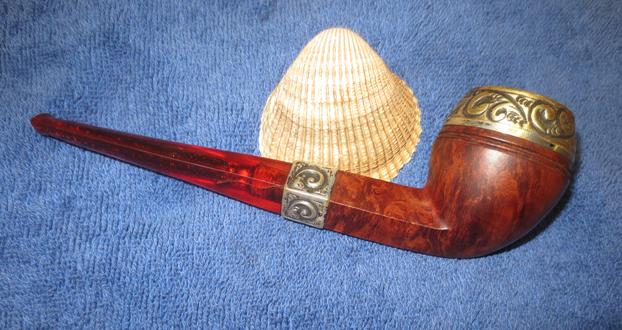
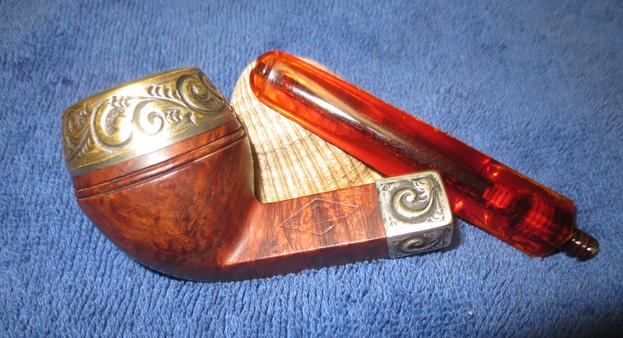
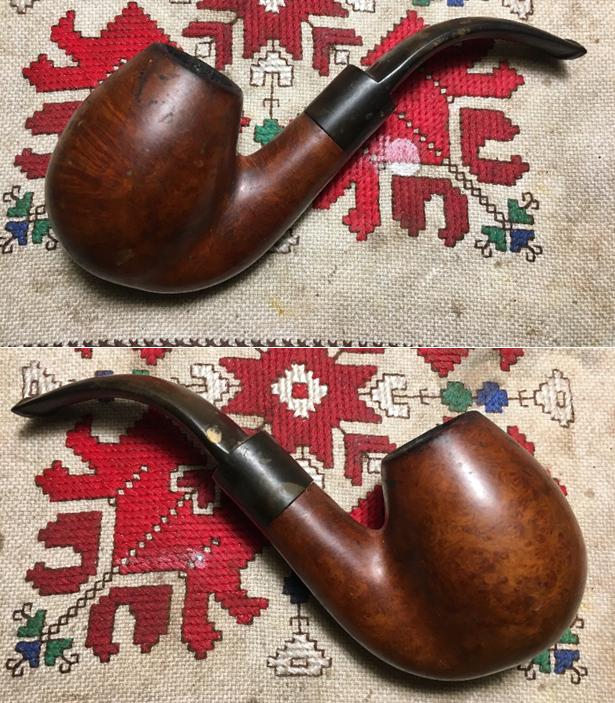
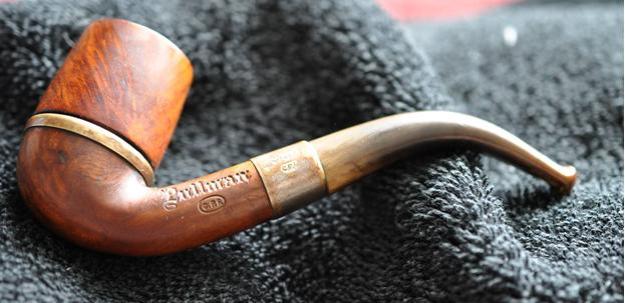
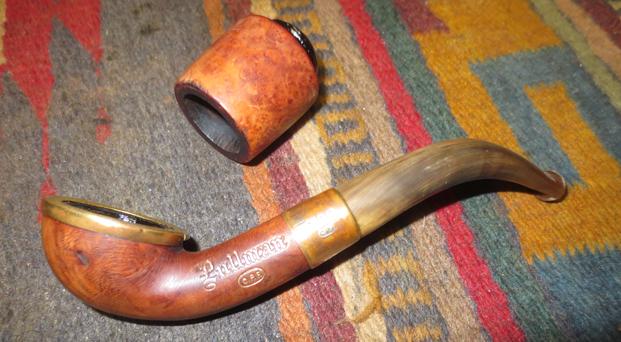
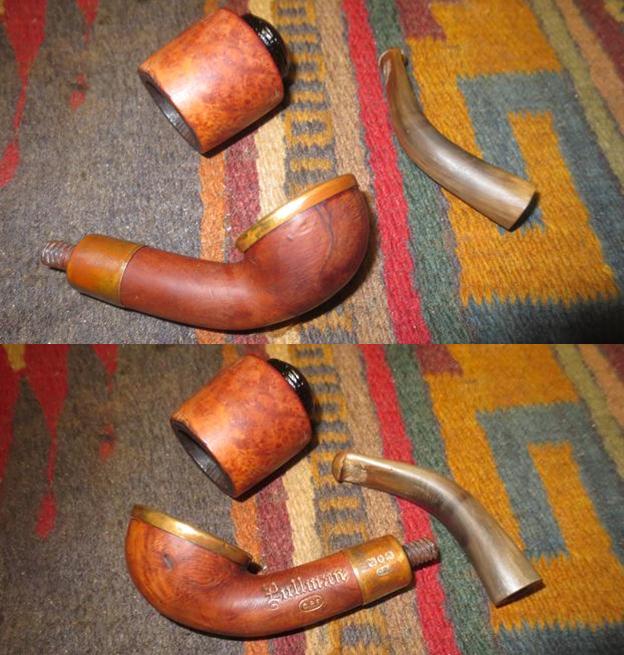
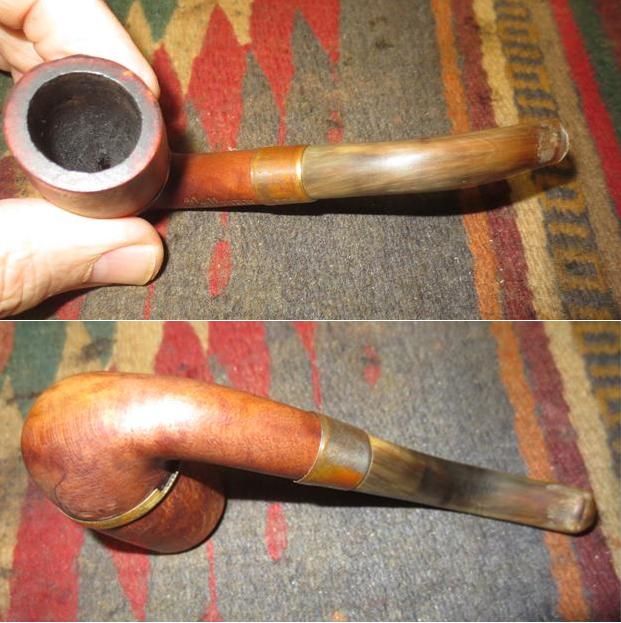
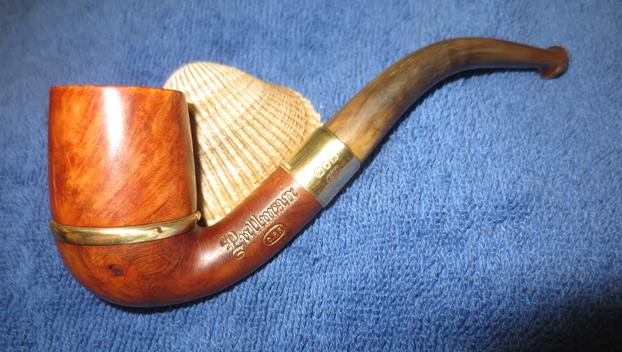
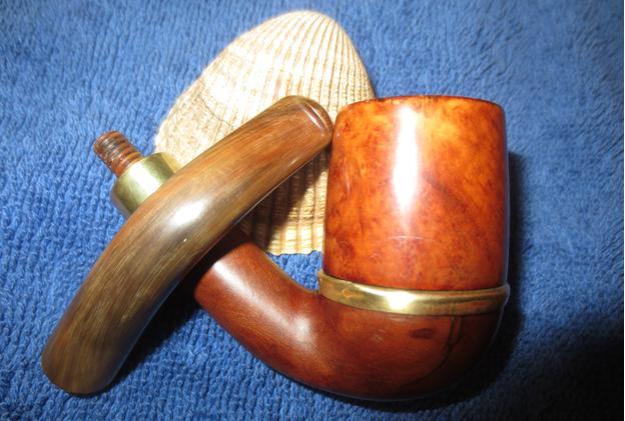
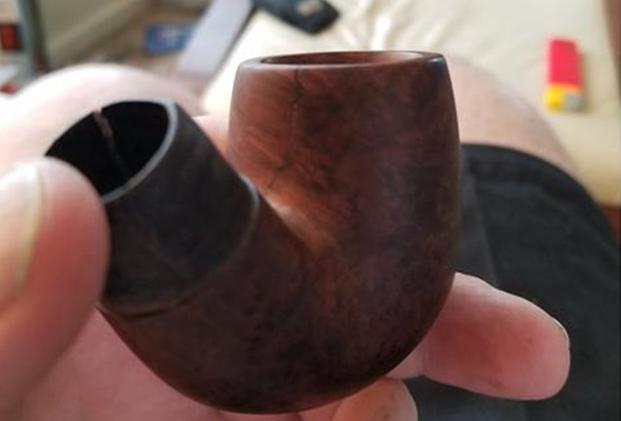
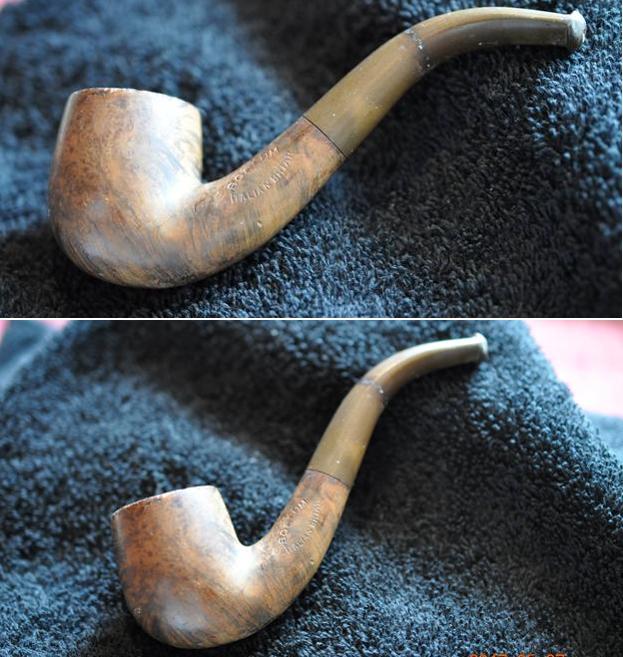
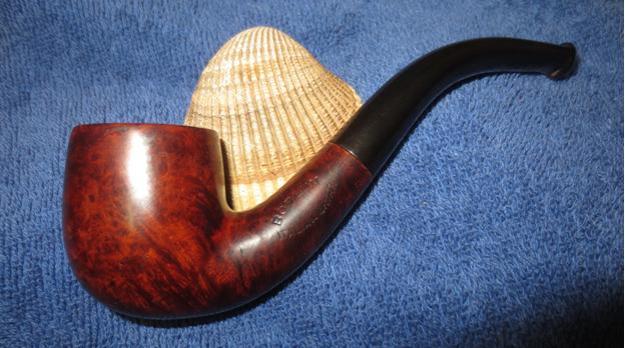
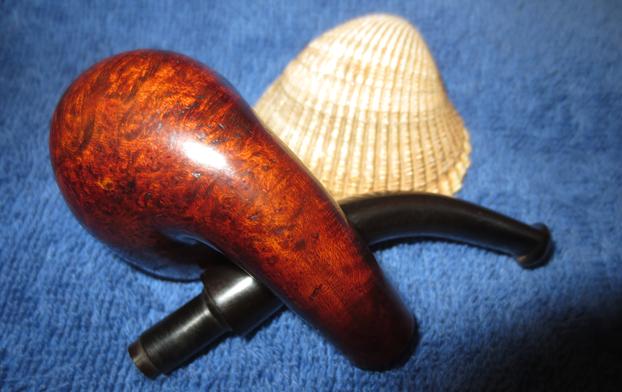
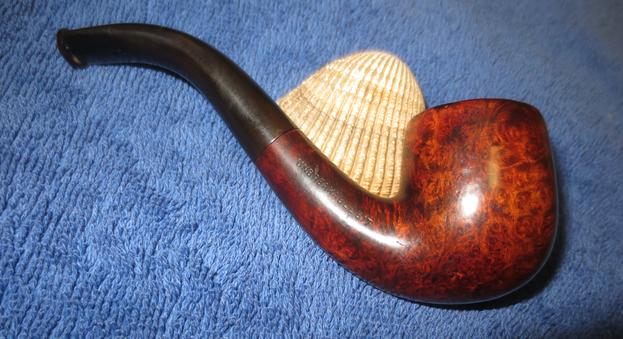
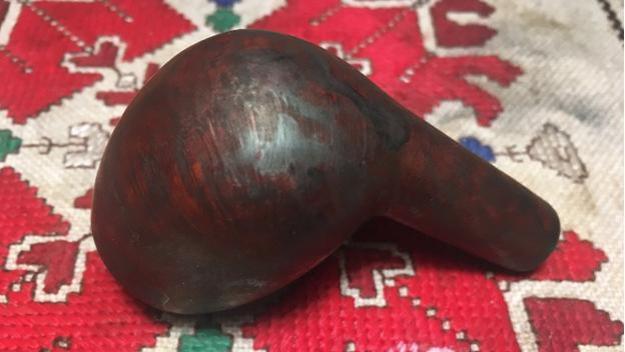
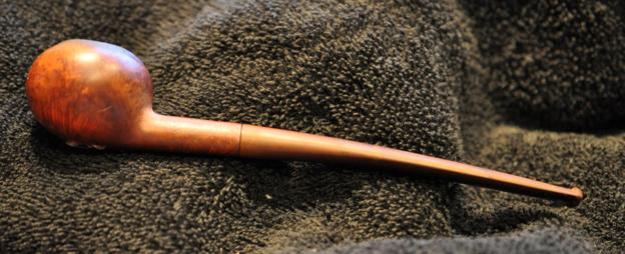
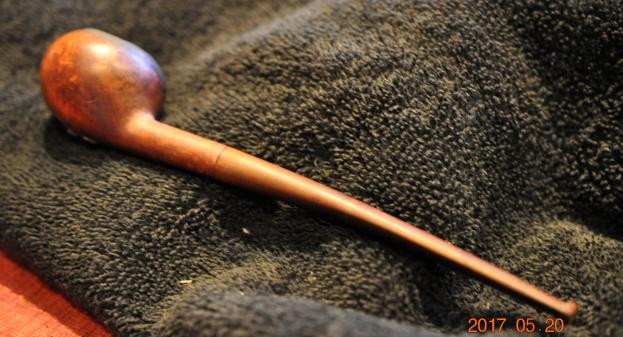
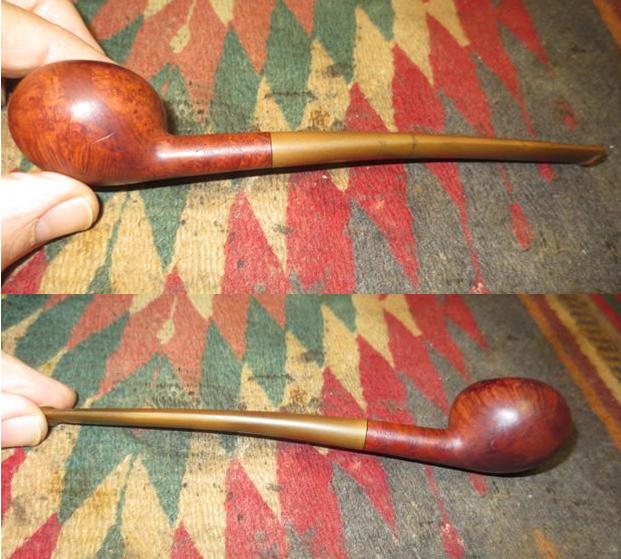
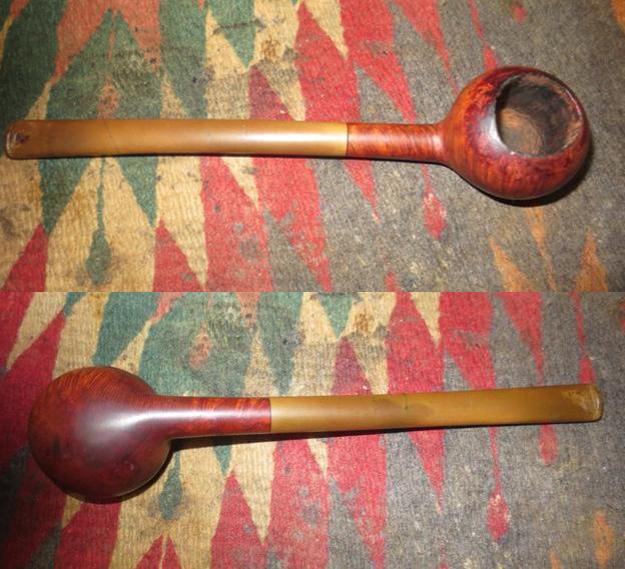
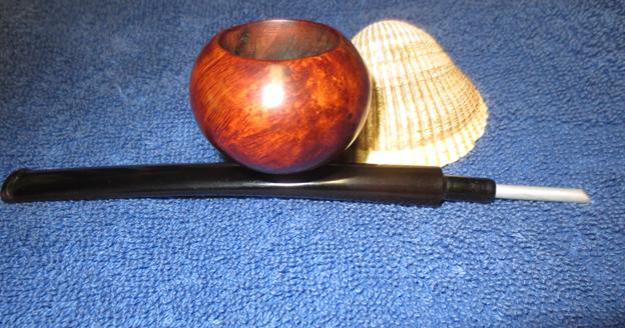
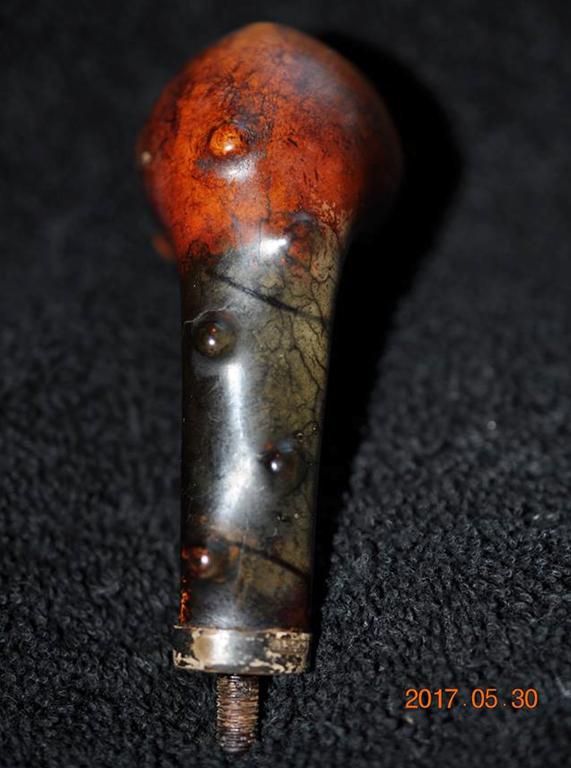
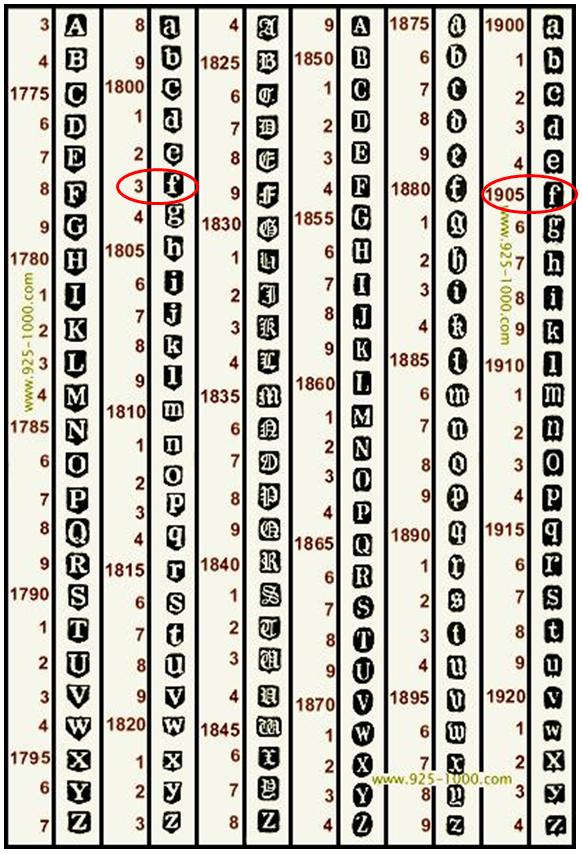
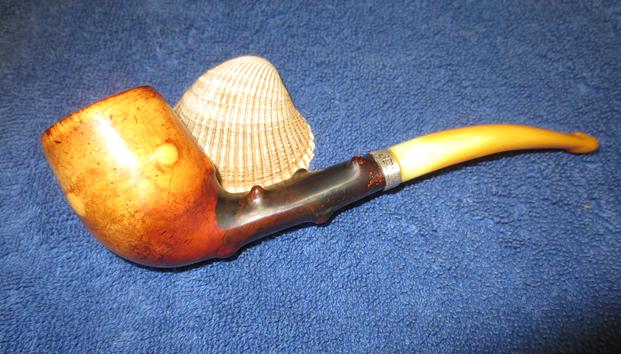
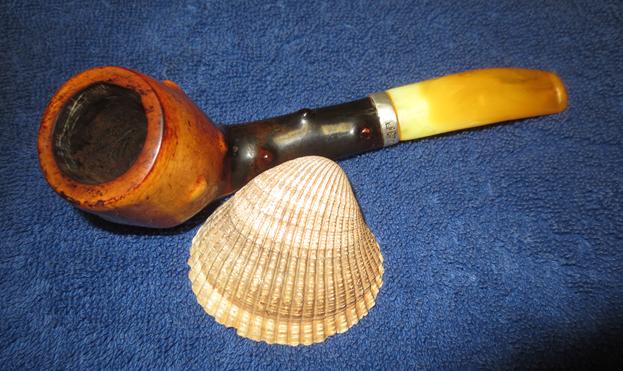
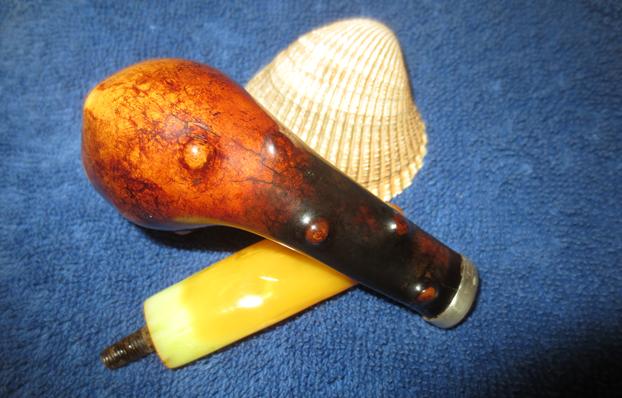
 What makes this pipe remarkable to me is that it is unsmoked. There has never been a bowl of tobacco lit and smoked in this old timer. I believe it is an early 1900’s era pipe or possibly earlier. It has a horn stem that is turned which is also unusual. I typically see straight or bent tapered horn stems. I don’t remember the last fancy turned horn stem I have seen. The pipe bears the WCD triangle logo on the left shank and a matching logo on the ferrule. There are a few small fills in the bowl and some issues on the inside that I will speak about when I get to the photos of the bowl and rim. Nonetheless this is a rare find – a pipe that is probably at least 100 years old that has not been smoked. It is new old stock with an emphasis on the old. Jeff took the above photo and the ones that follow when he brought it home from the trip.
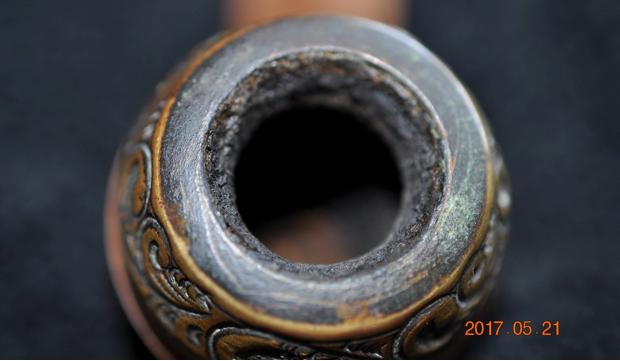
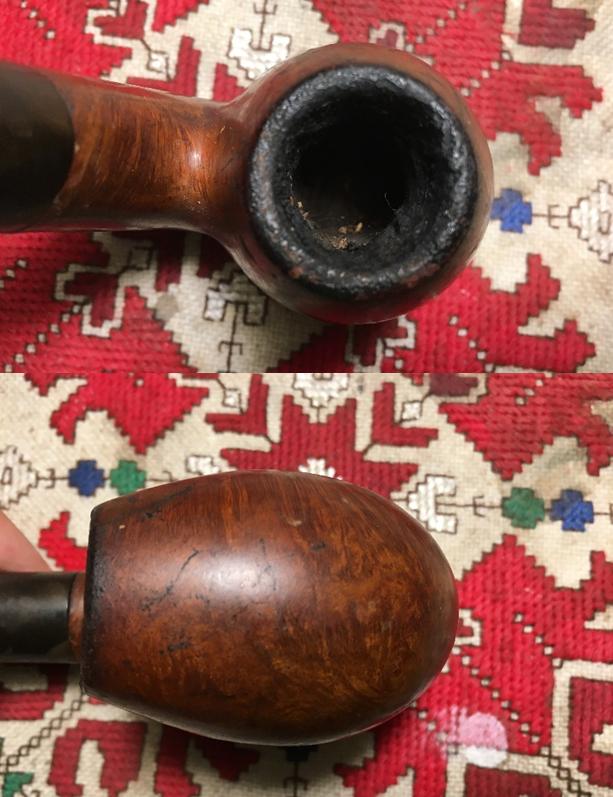
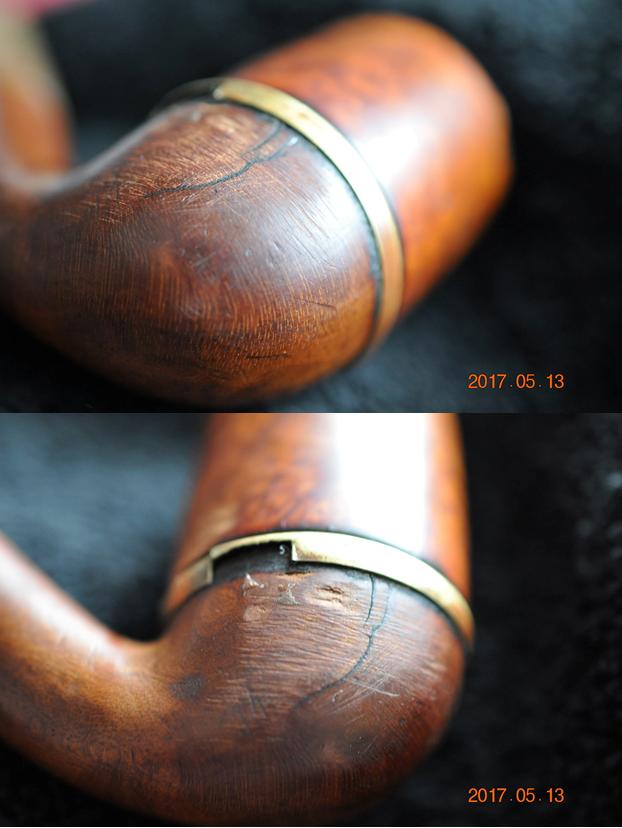
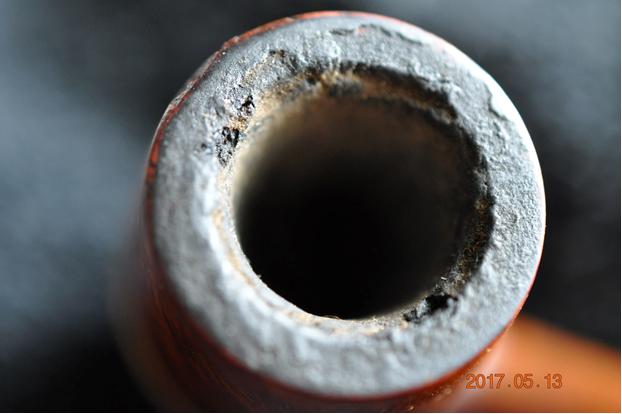
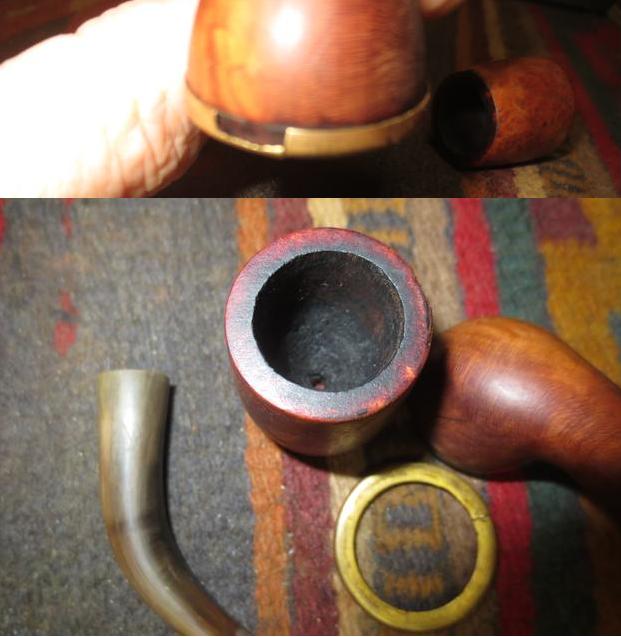
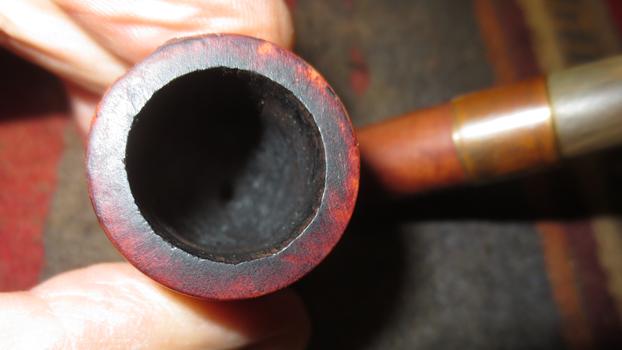
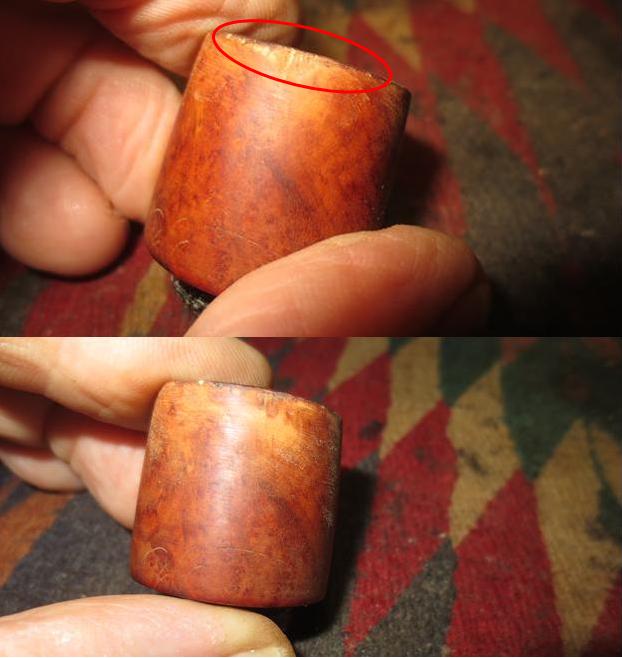
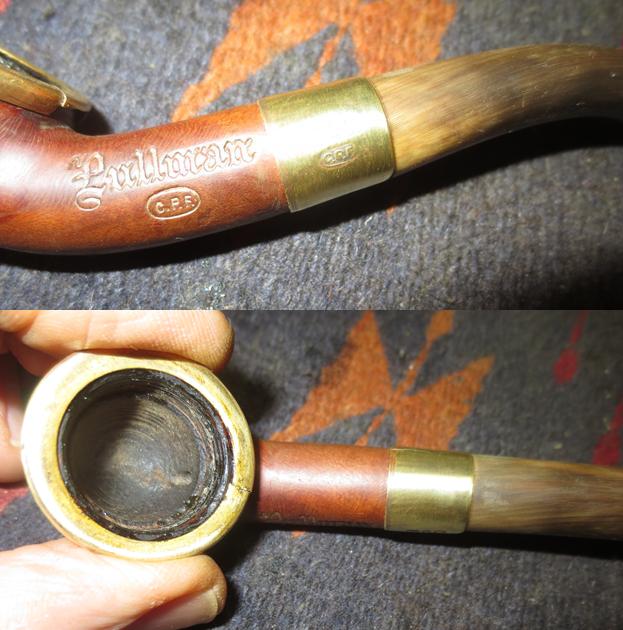
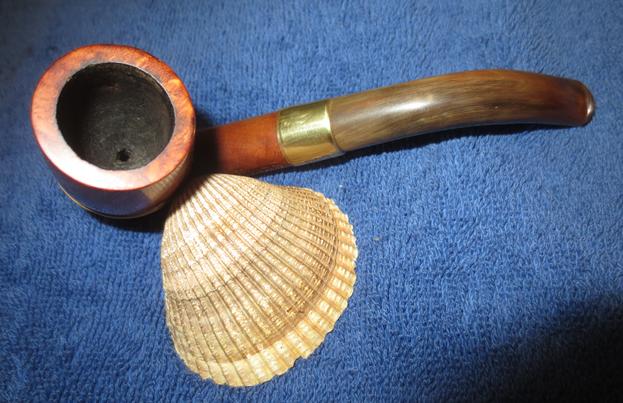
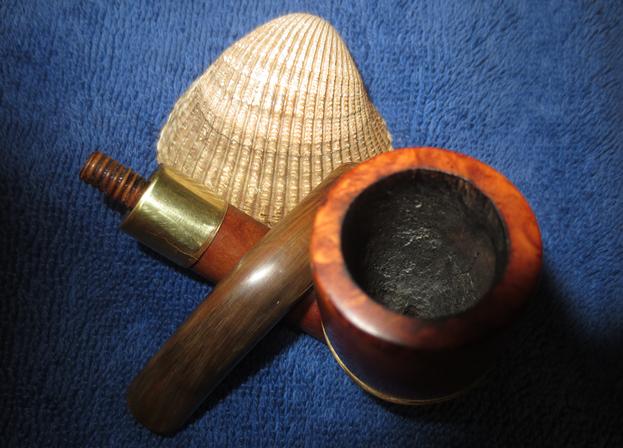
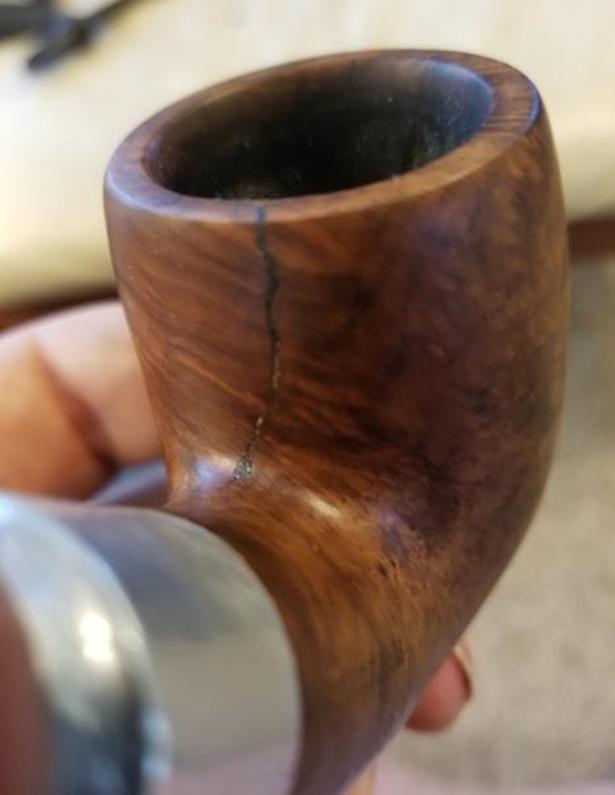
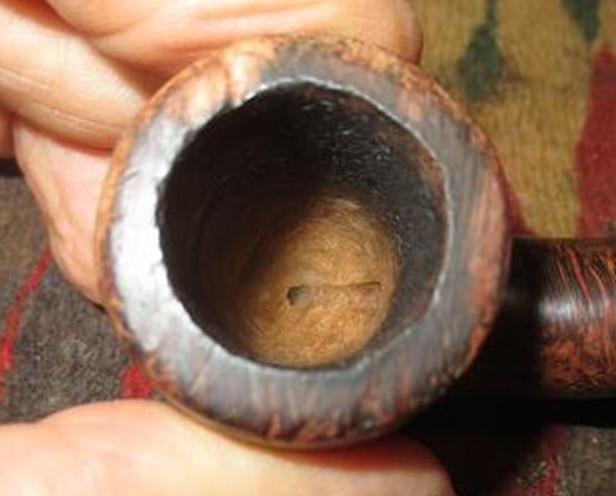
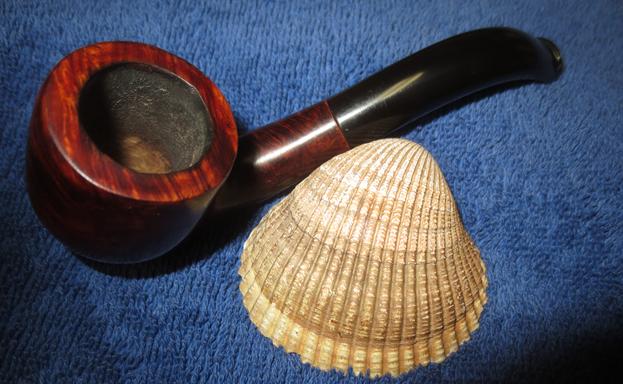
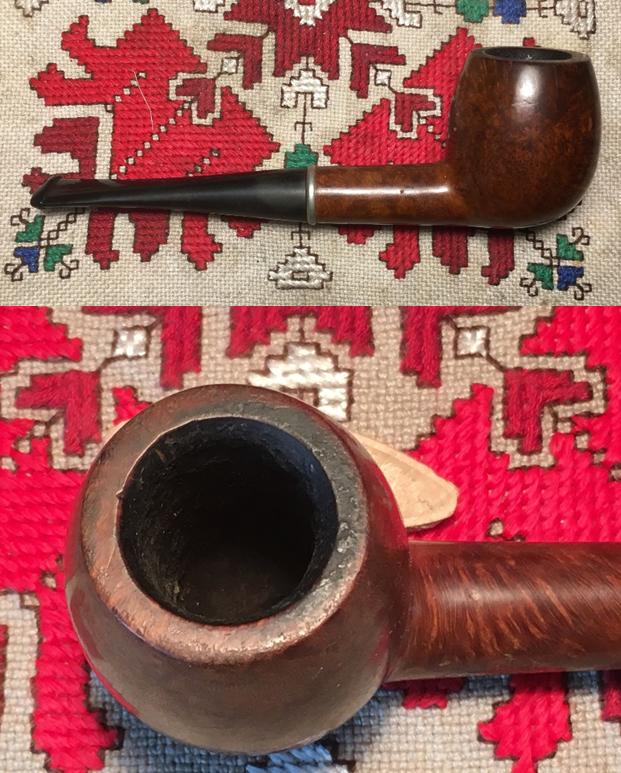
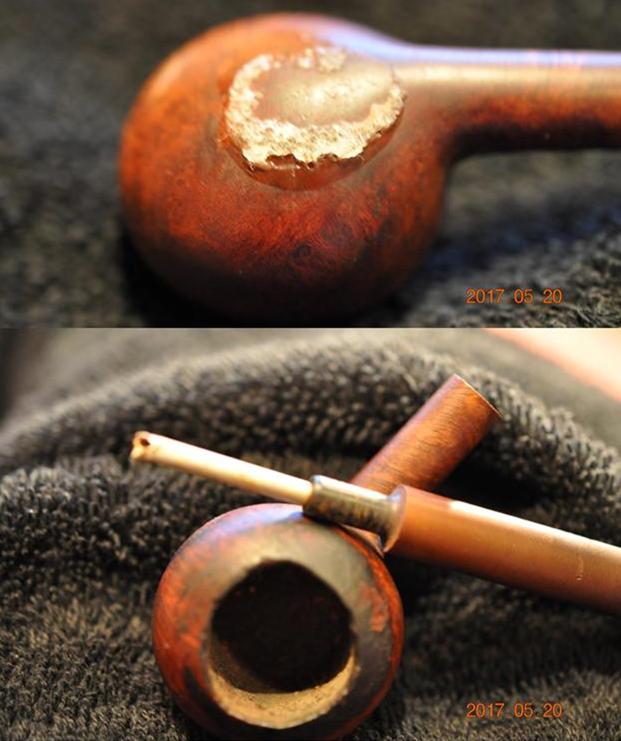
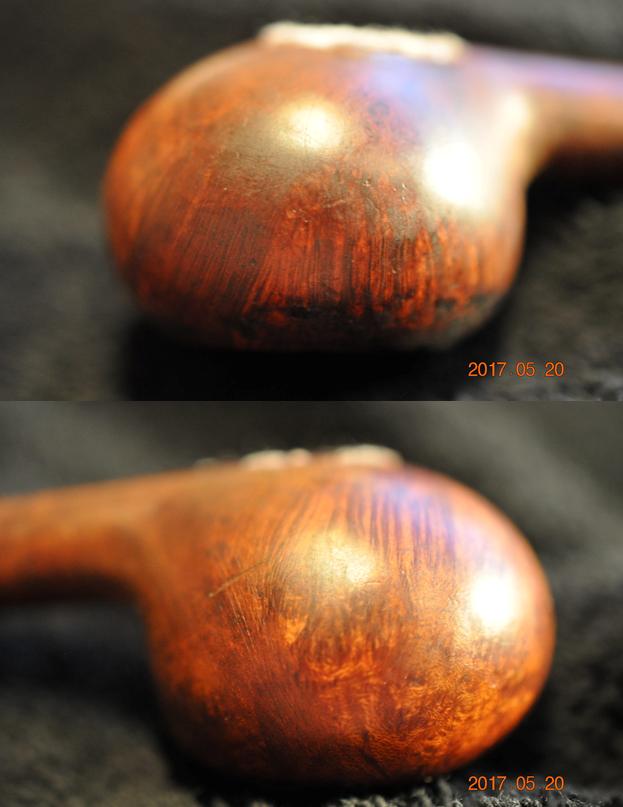
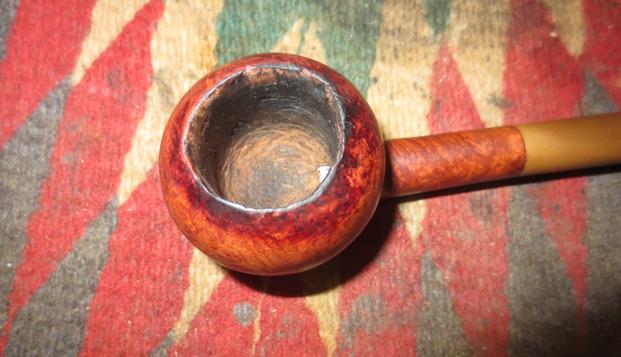
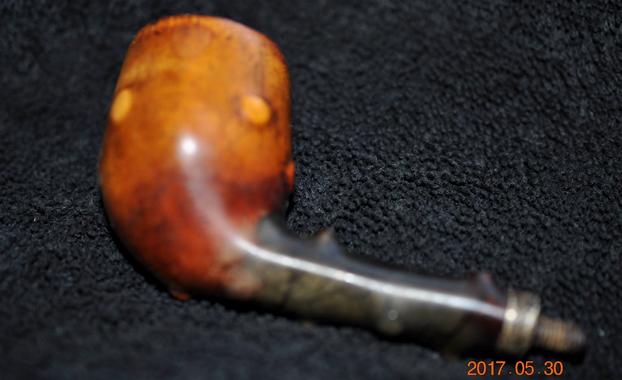
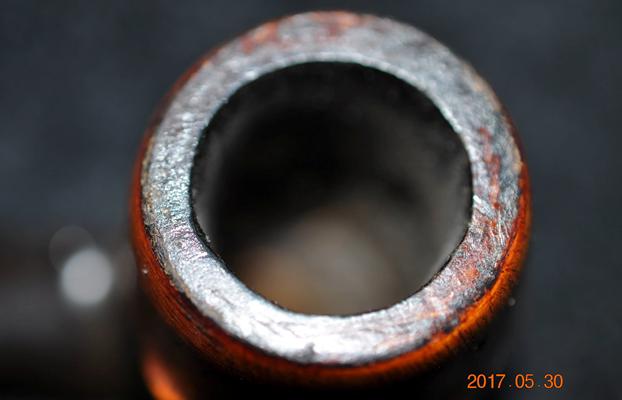
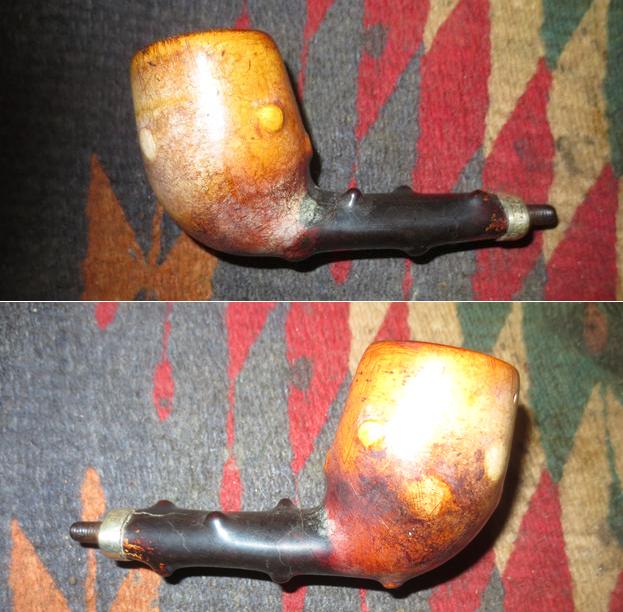
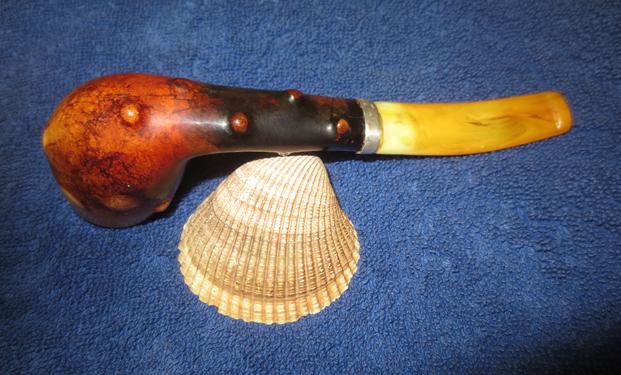
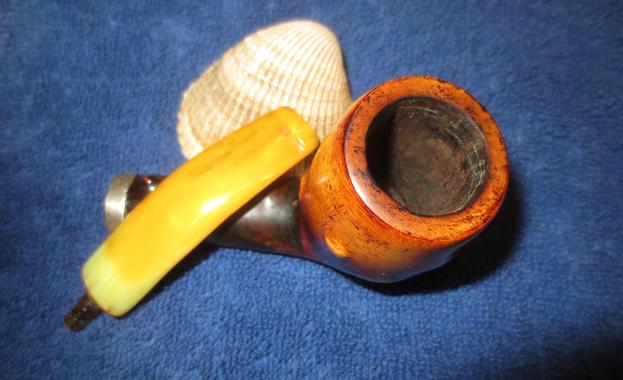
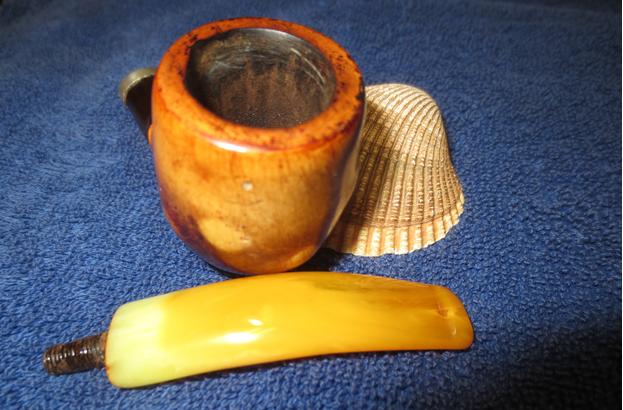
 The finish was a little shop dirty from years of sitting on display. The rim was clean but had some grime in the finish. The issue I referred to above can be seen in the first photo below. There was a large fissure in the right side of the bowl from the rim downward into the bowl for about ¼ inch. It was clean and there was no burn thanks to the unsmoked condition. If the pipe is going to be used for its intended purpose then this will need to be repaired. The inner edge of the bowl is also nicked around the area above the flaw. It makes the inner edge out of round.
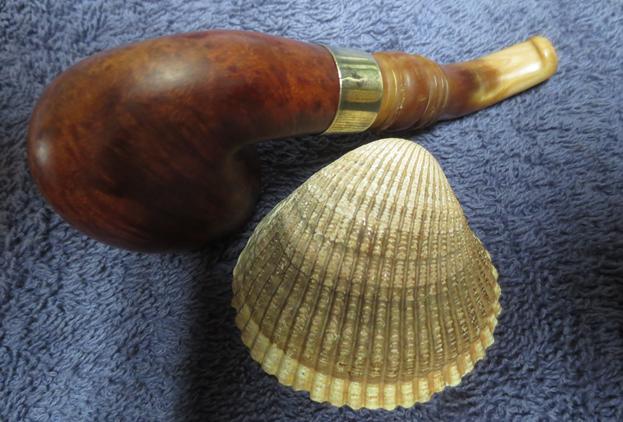
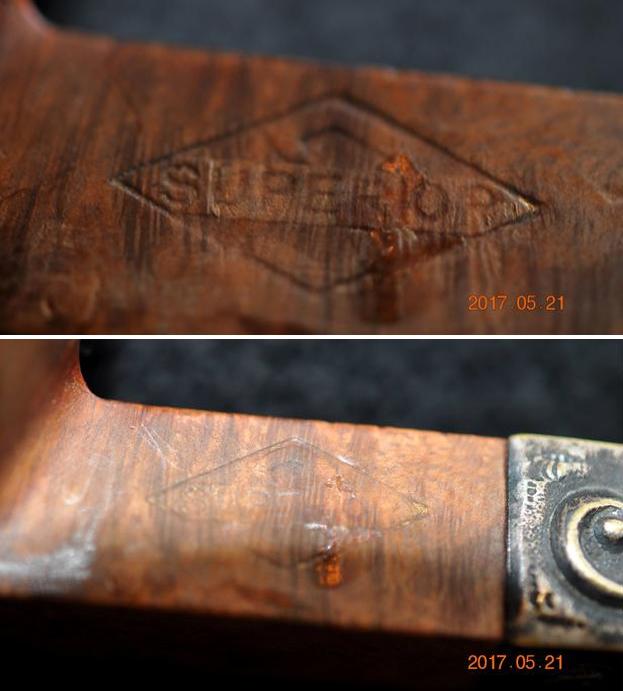
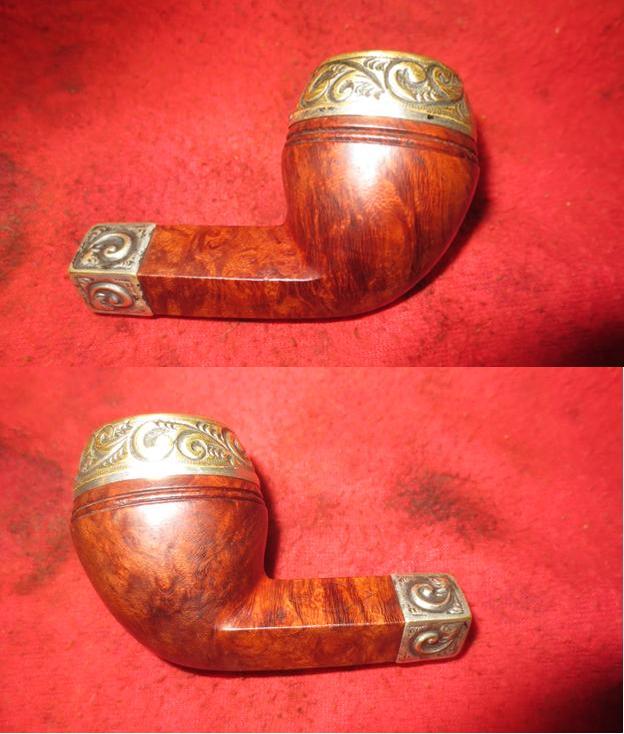
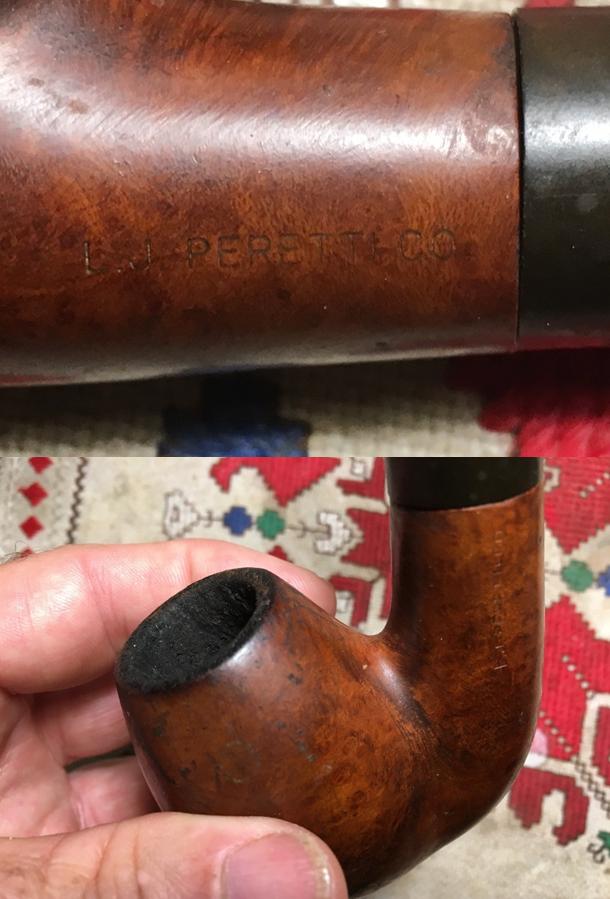
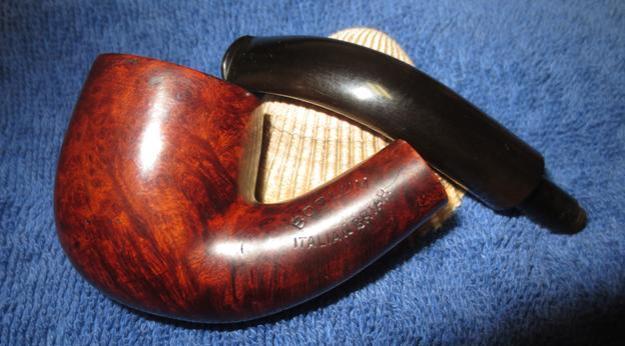
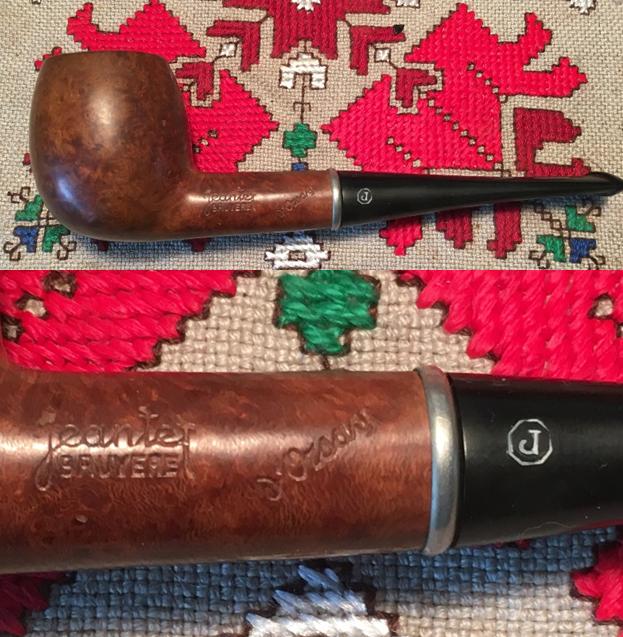
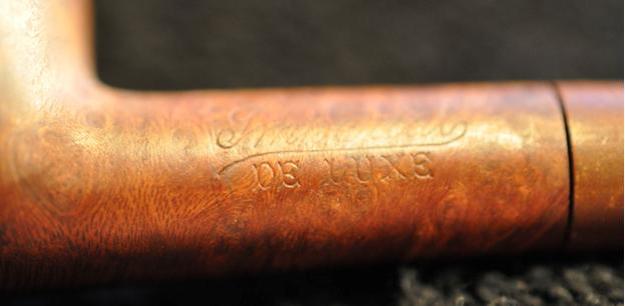
  Though the pipe is new and unsmoked it is dirty with the kind of dust and grime that comes from sitting for a long time on display. The next photos show the grain with the grime and also show the tarnished ferrule and the clear stamping on the shank. The ferrule has been turned as there is a WDC triangle logo on it as well.
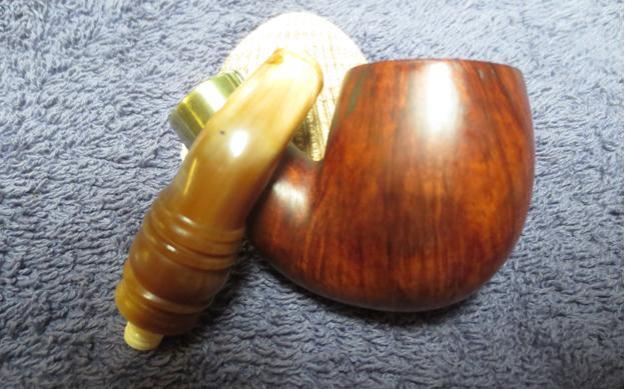
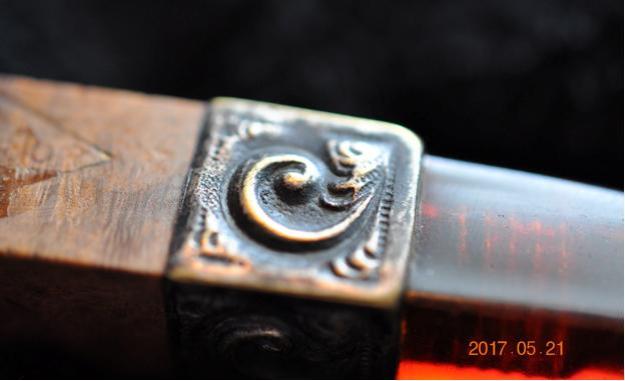
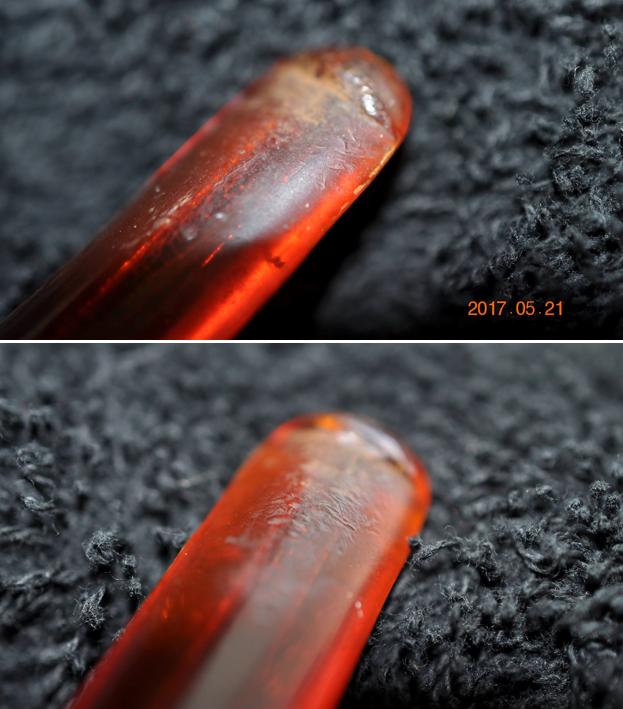
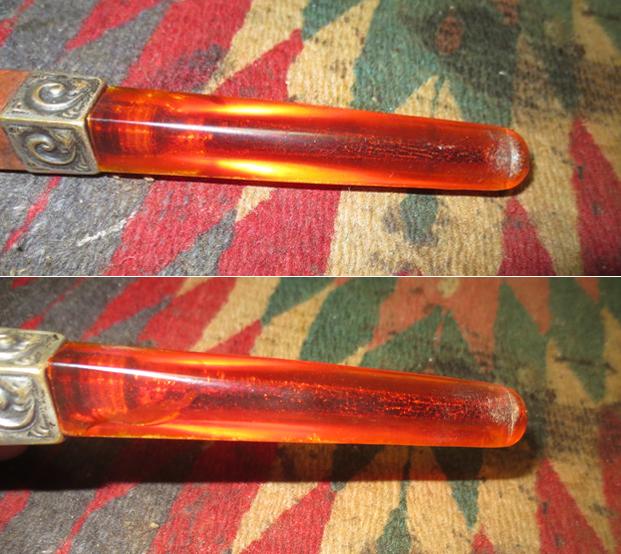
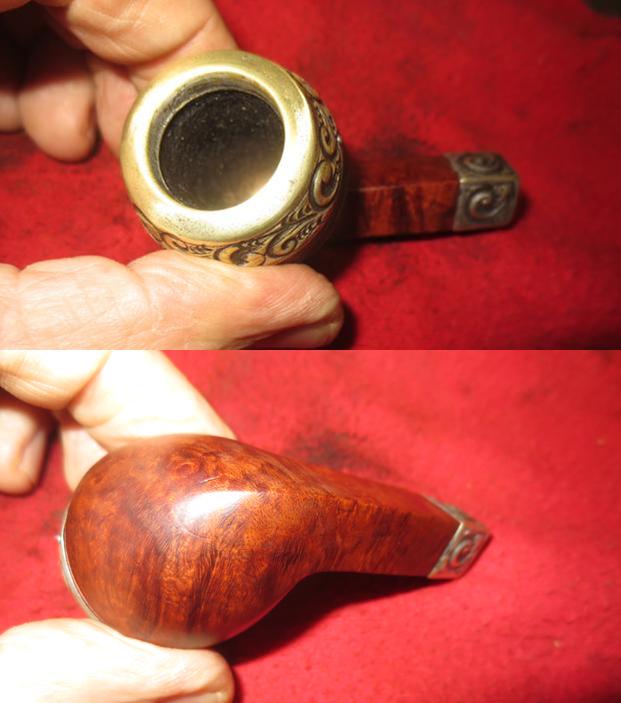
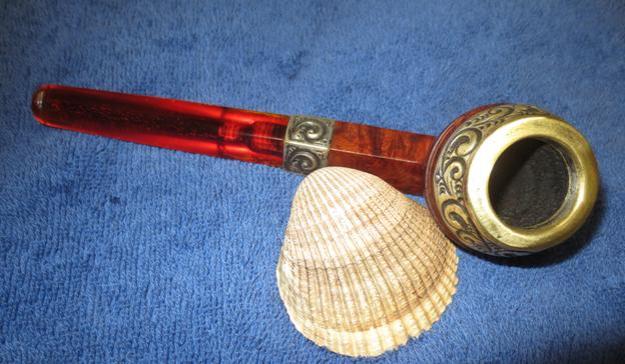
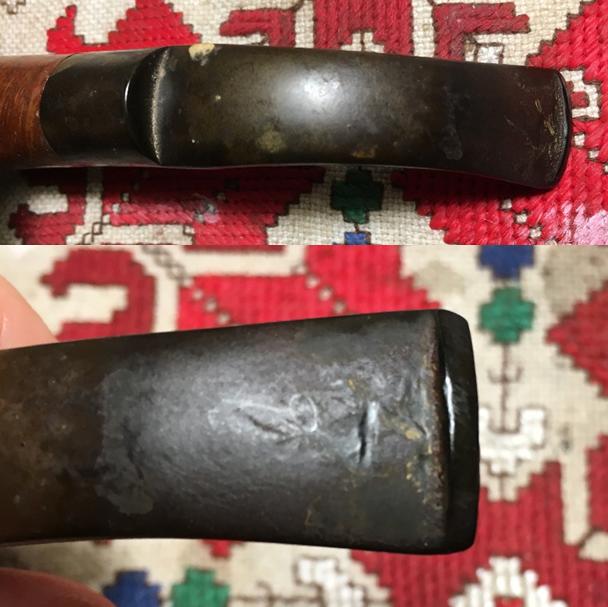
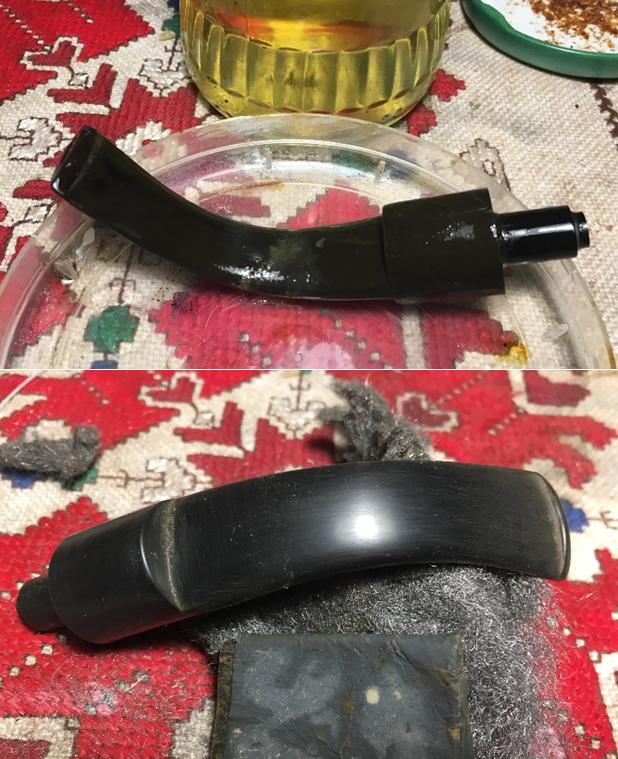
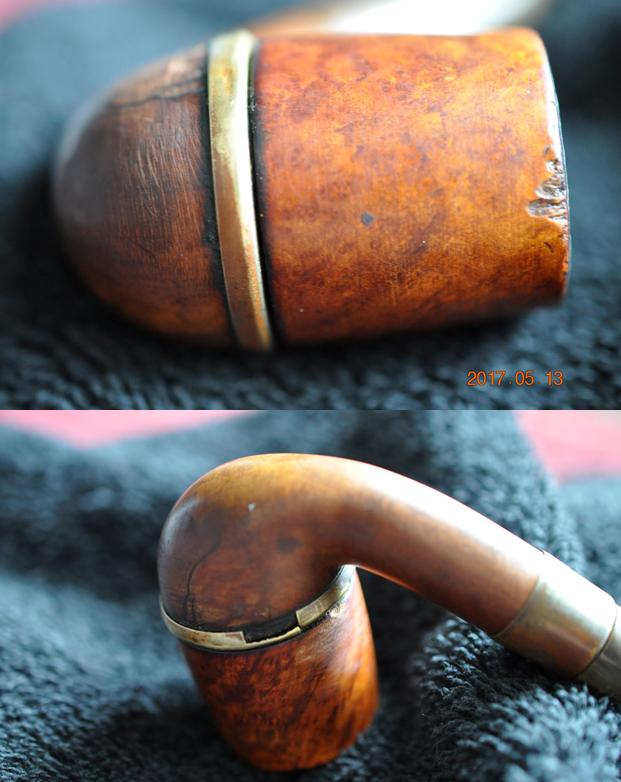
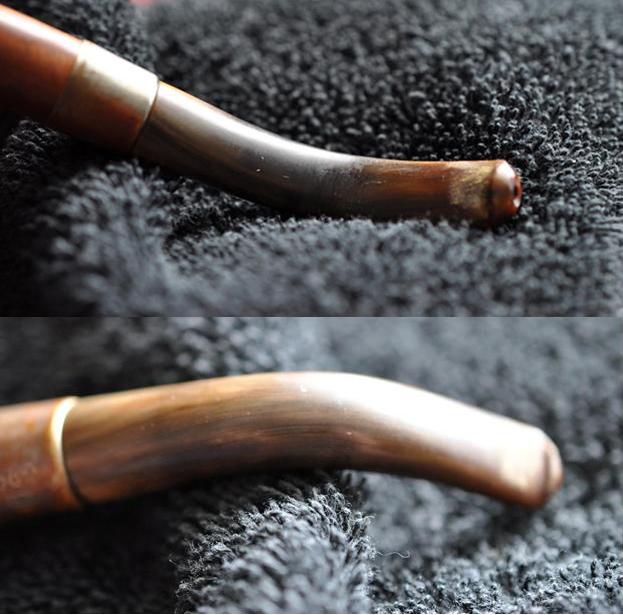
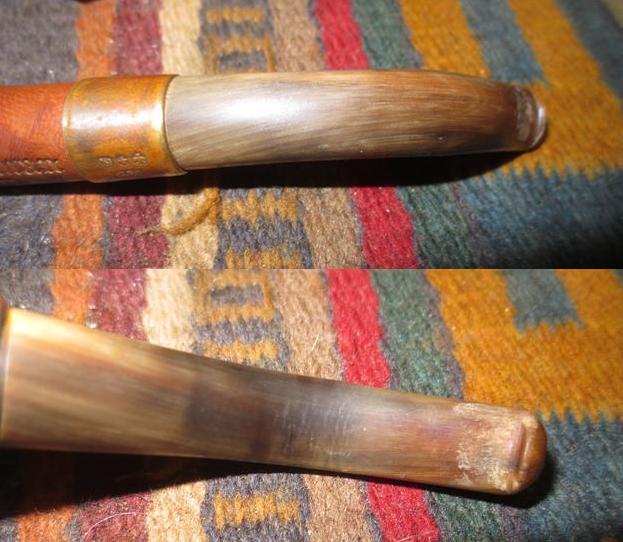
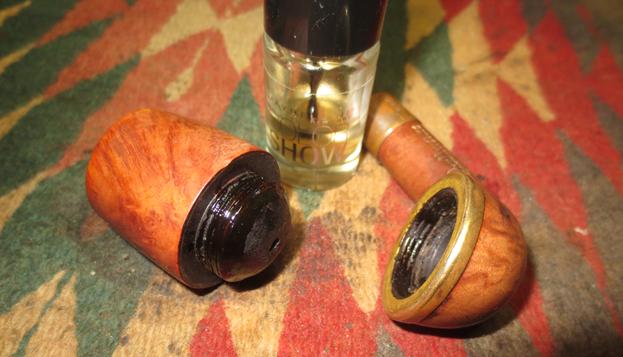
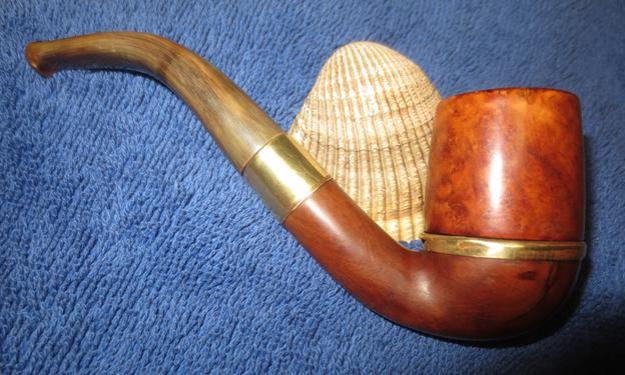
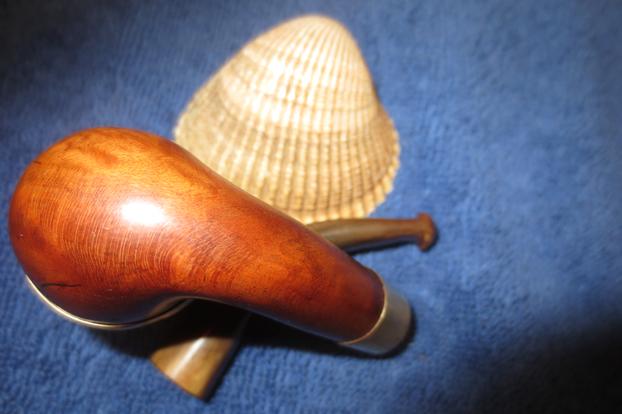
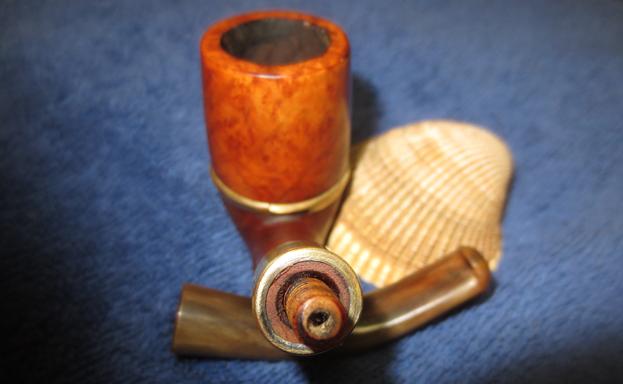
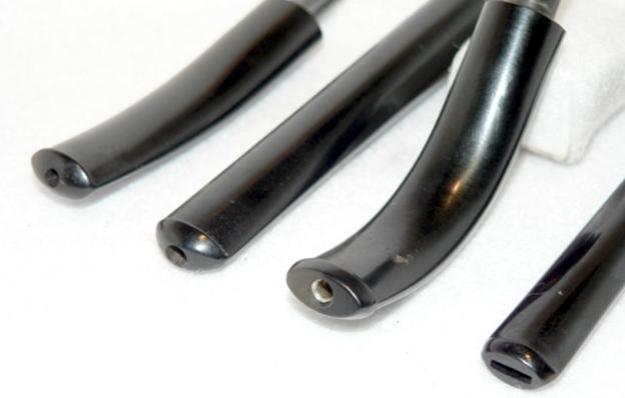
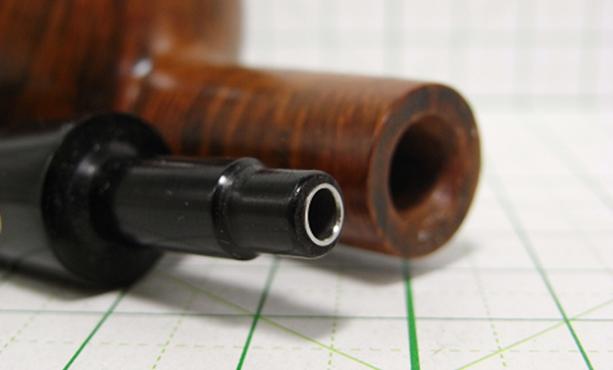
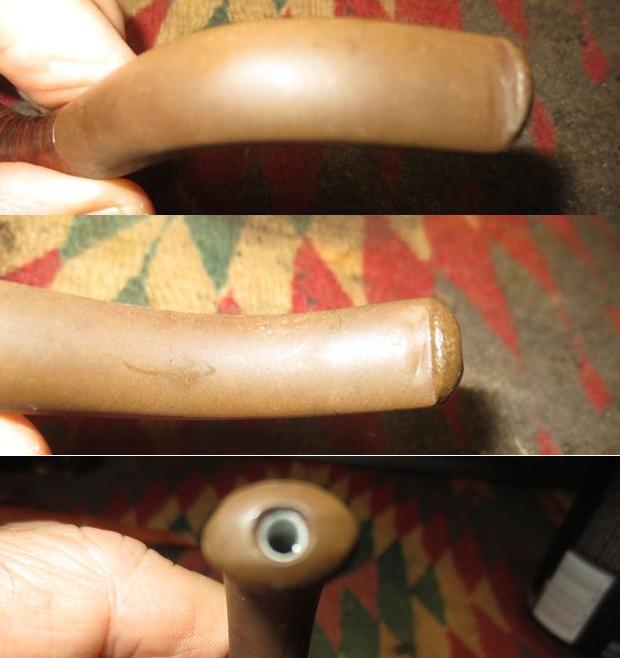
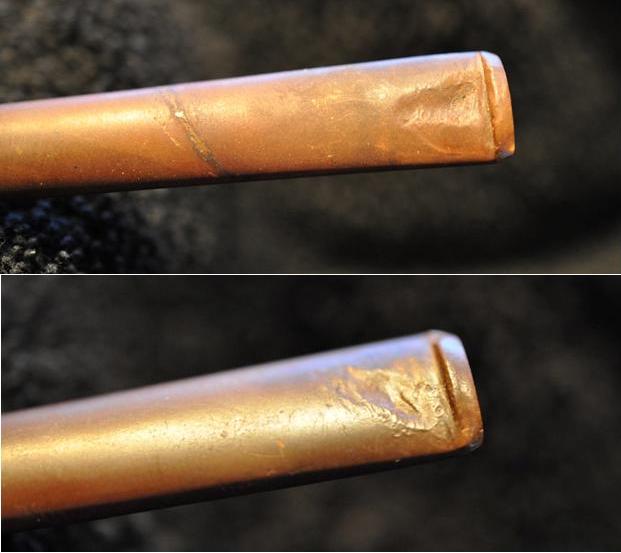
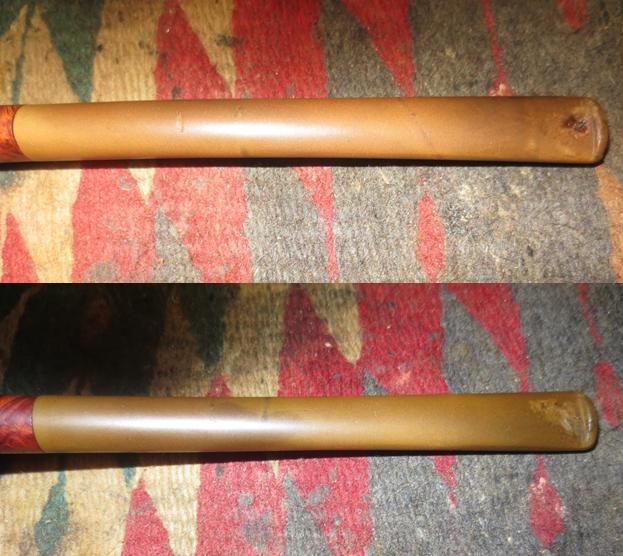
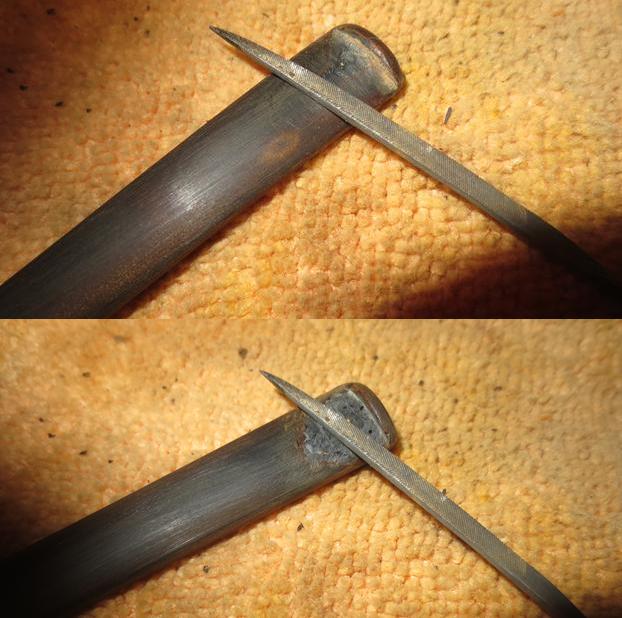
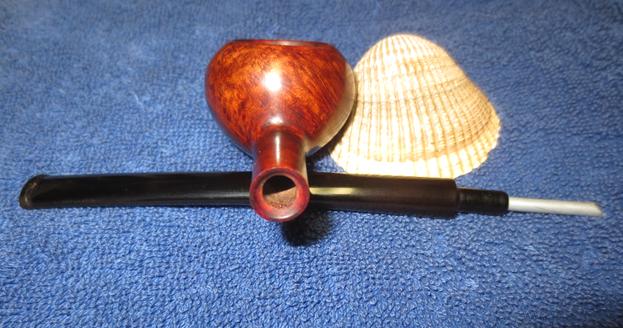
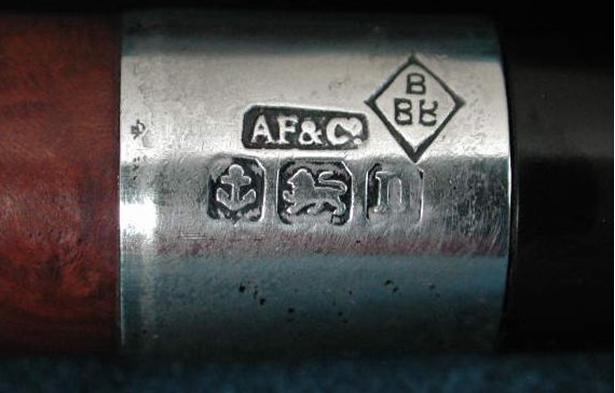
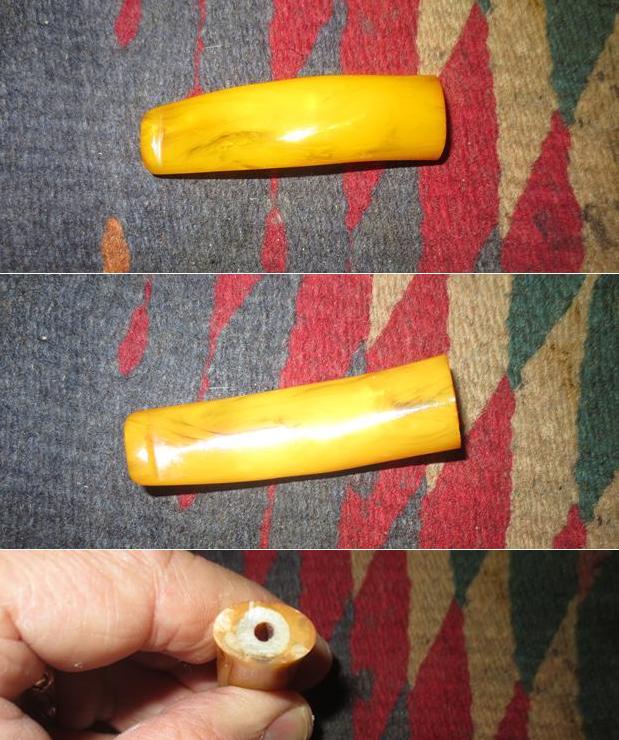
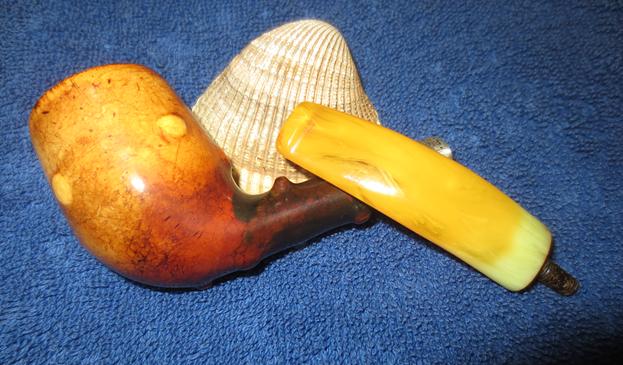
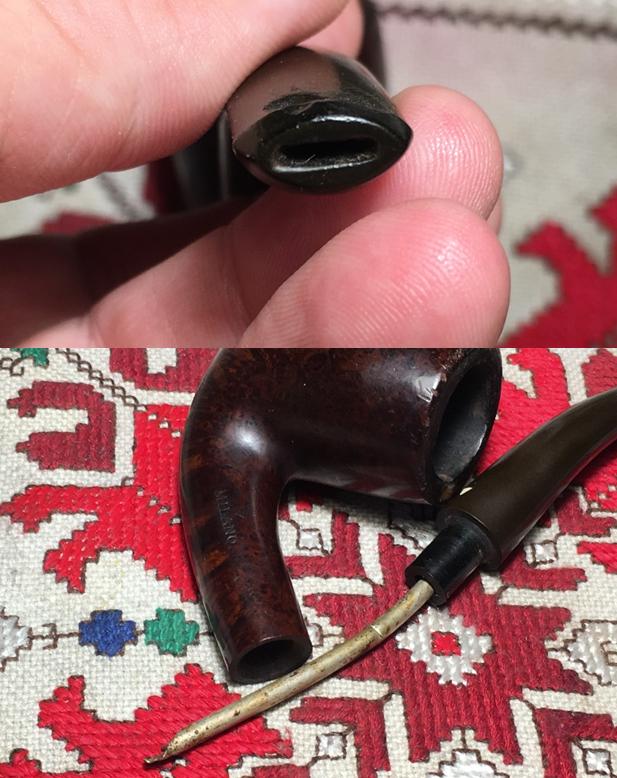
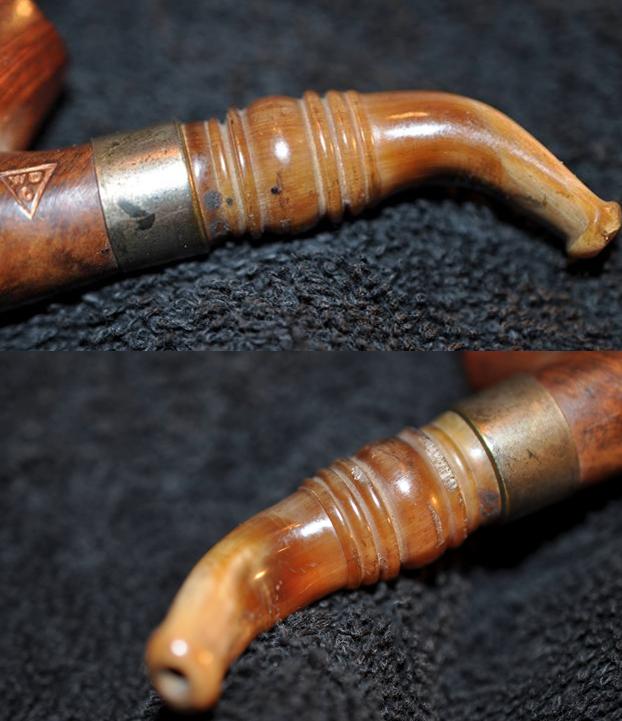
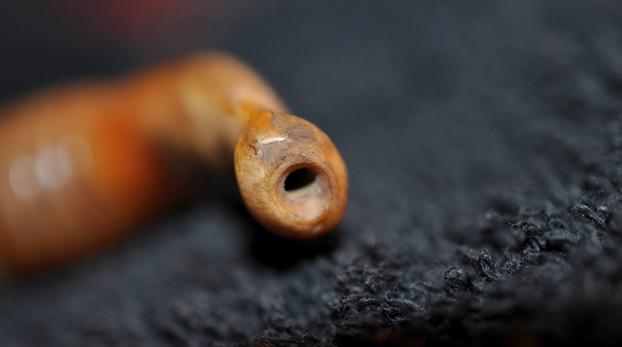
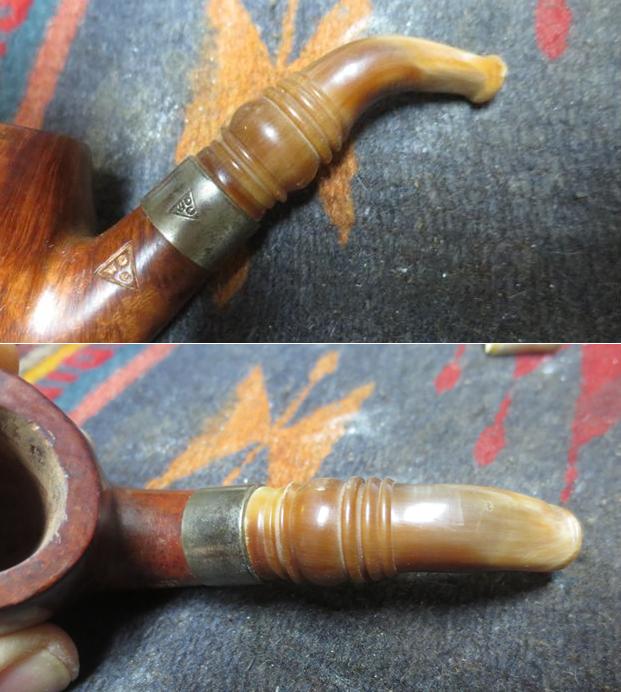
 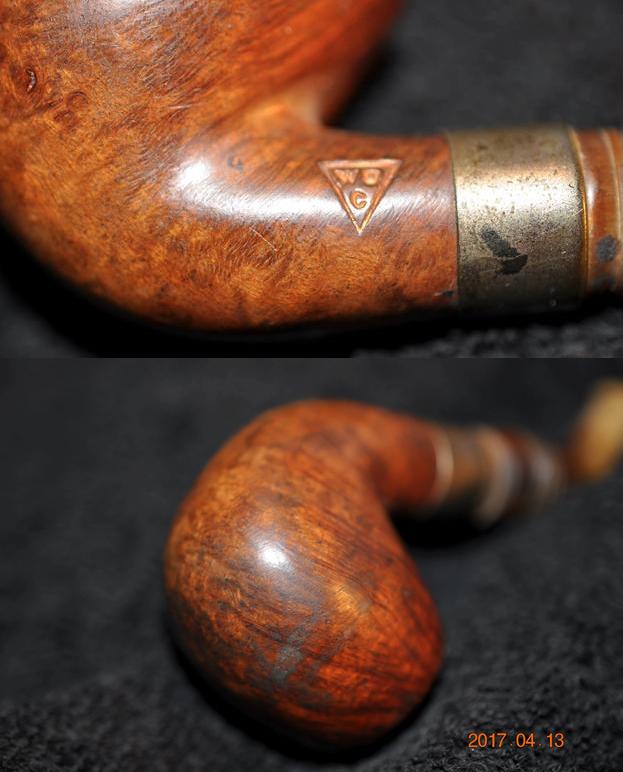 The next four photos give a closeup picture of the shank/stem fit and the WDC triangle on the ferrule. The turned horn stem really is beautiful under the dust and debris of time. The stem has the old style button with the orific opening on the end. The button is more rounded that new buttons and the round opening at the end is very different from the newer slot opening.
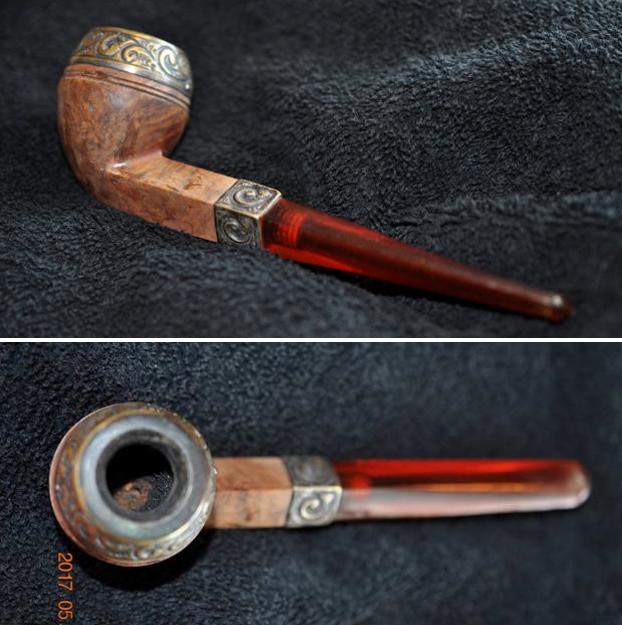
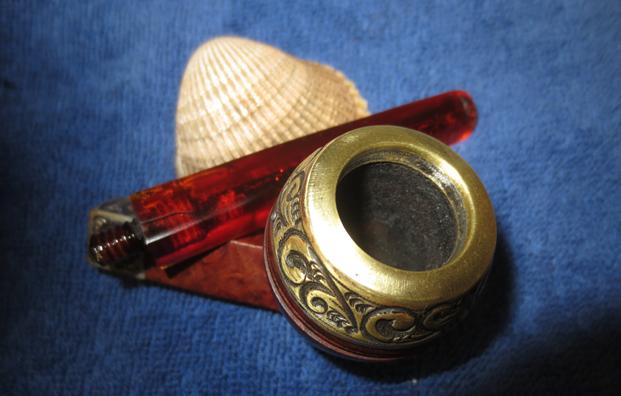
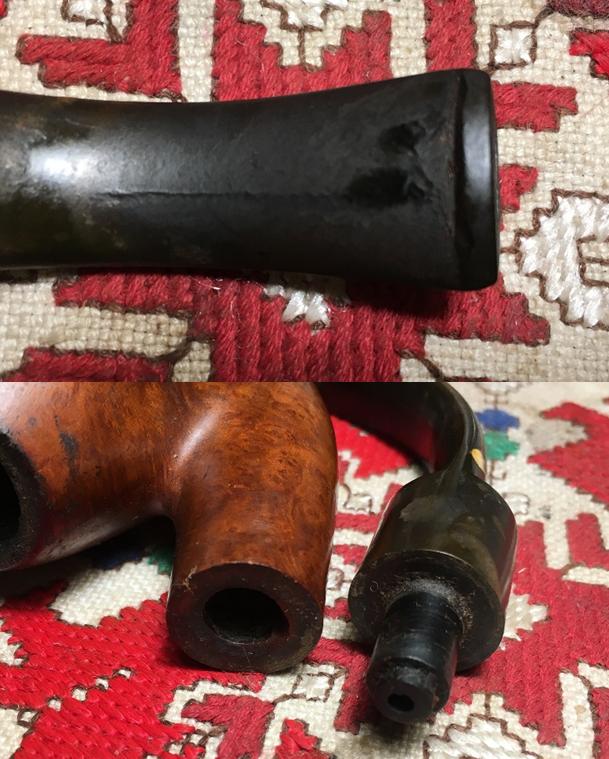
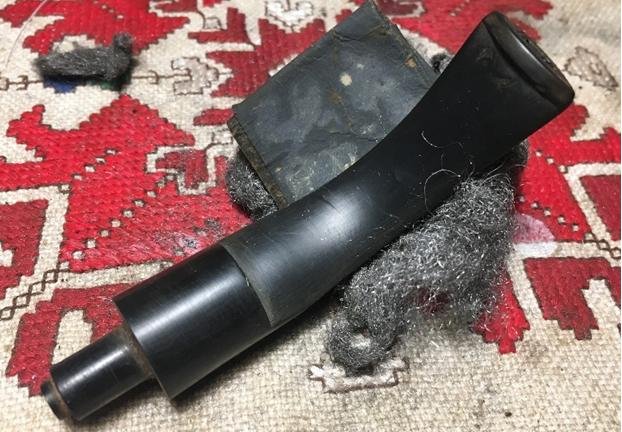
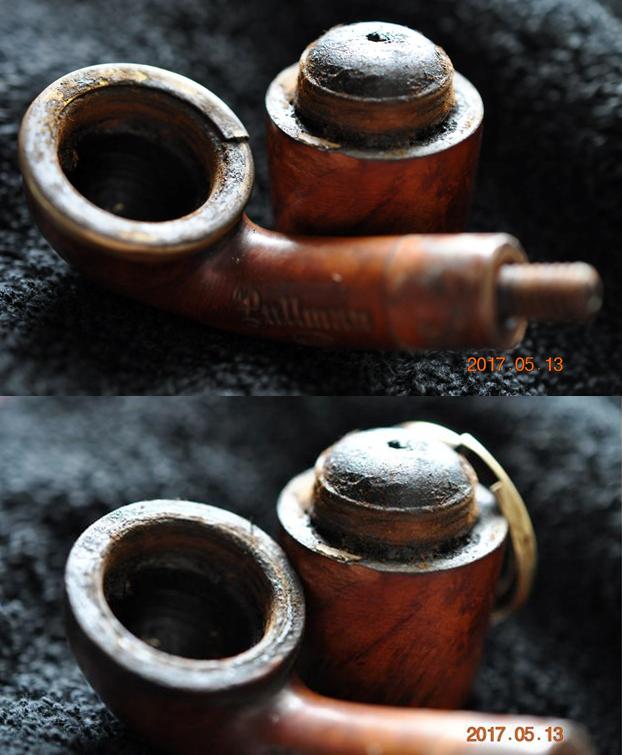
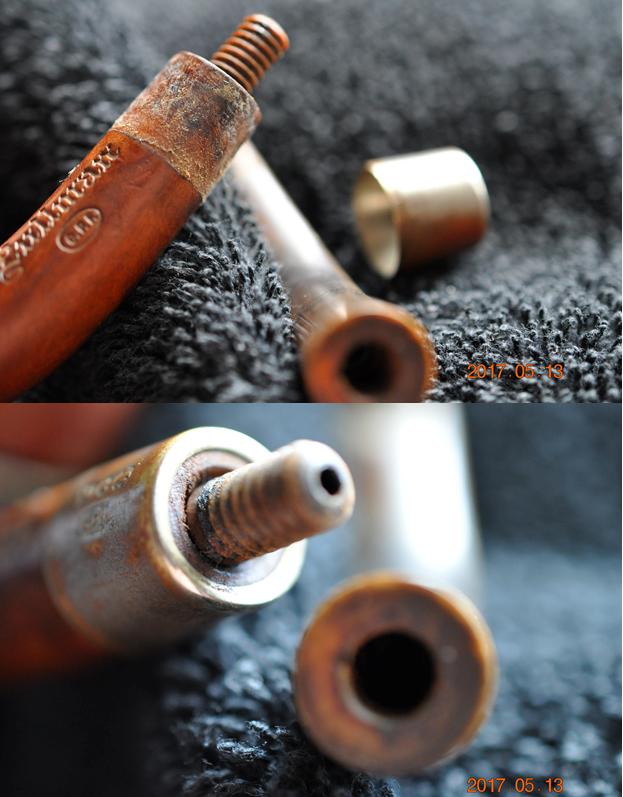
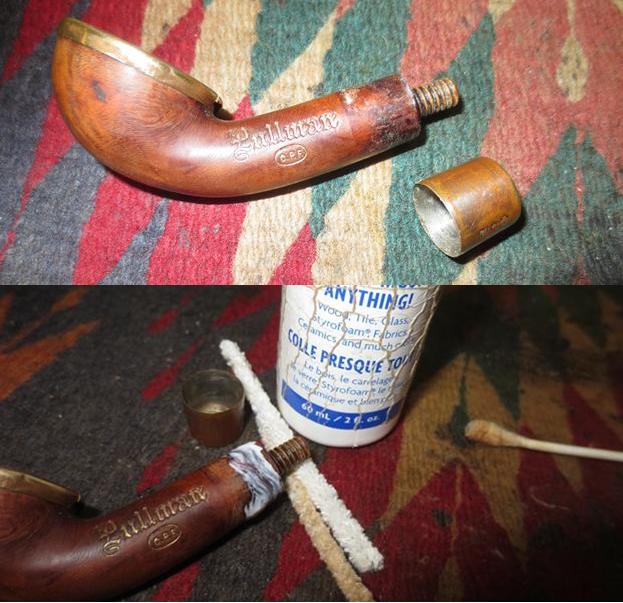
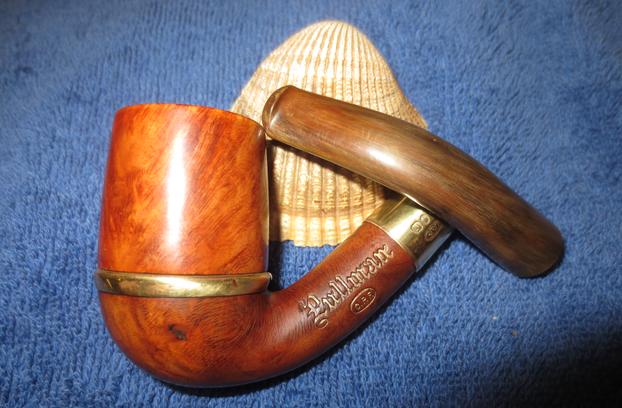
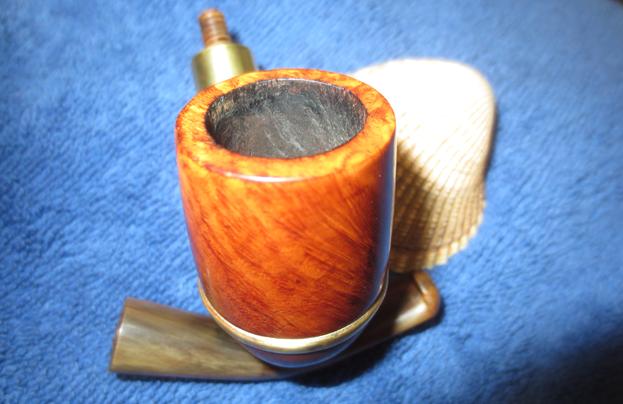
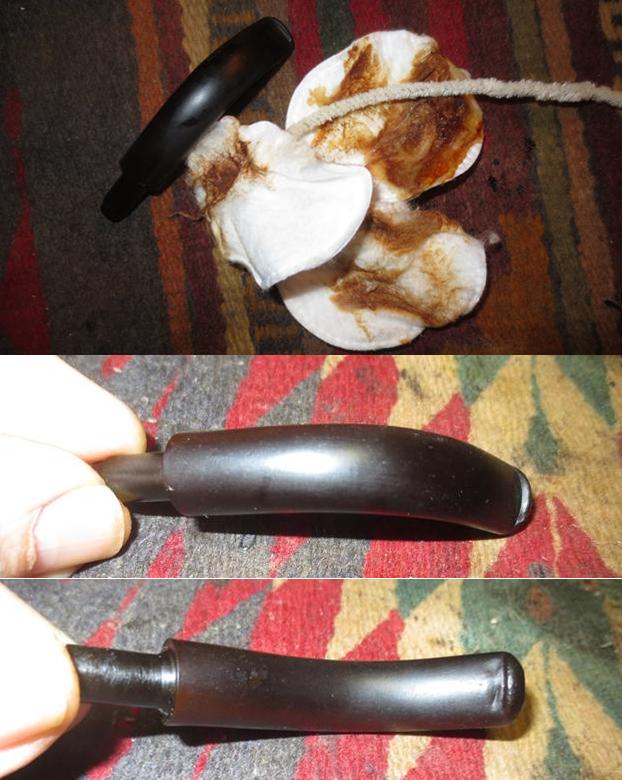
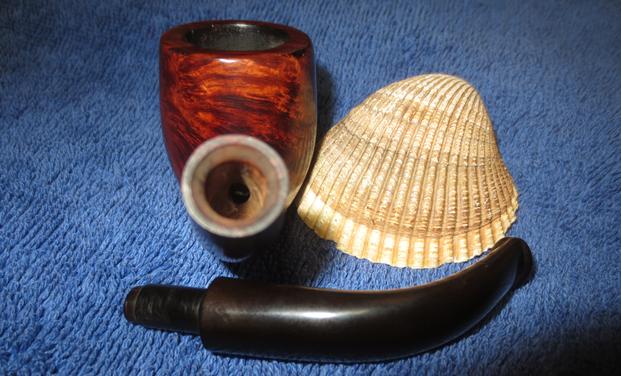
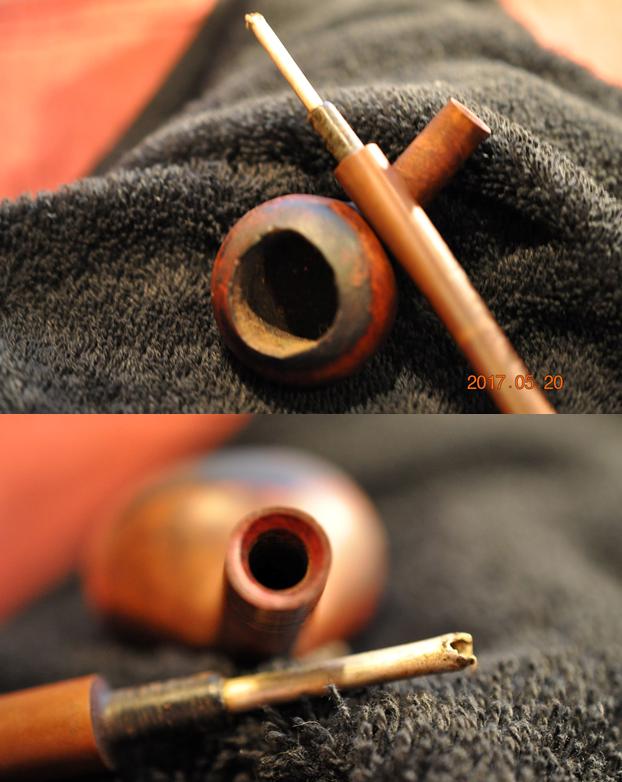
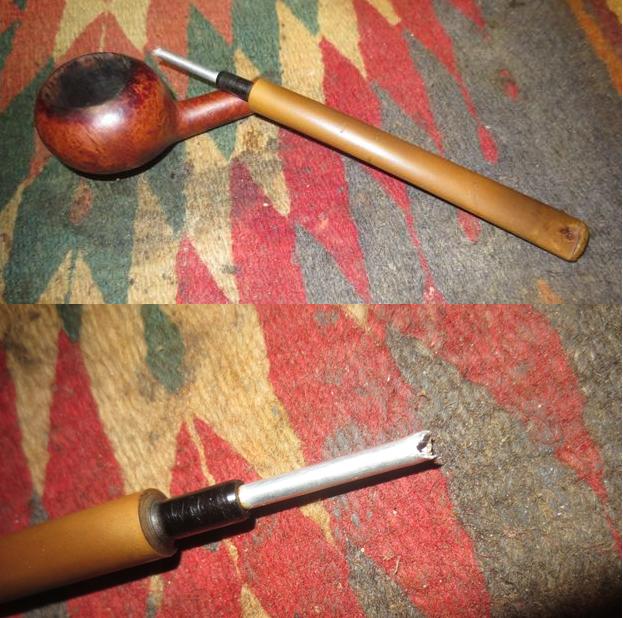
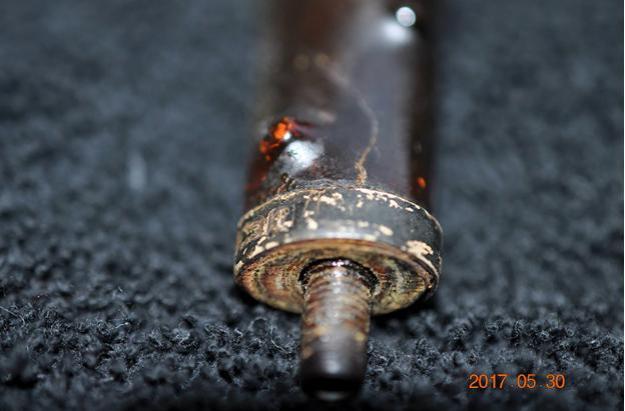
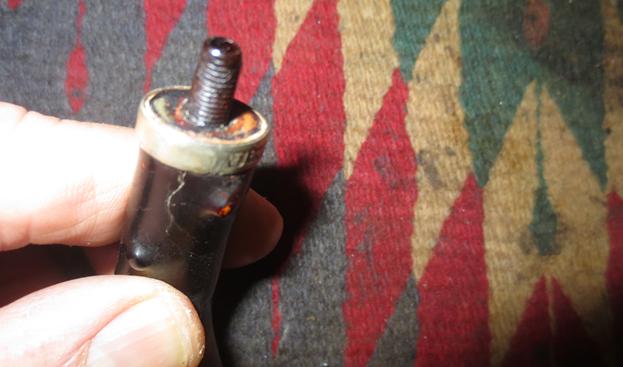
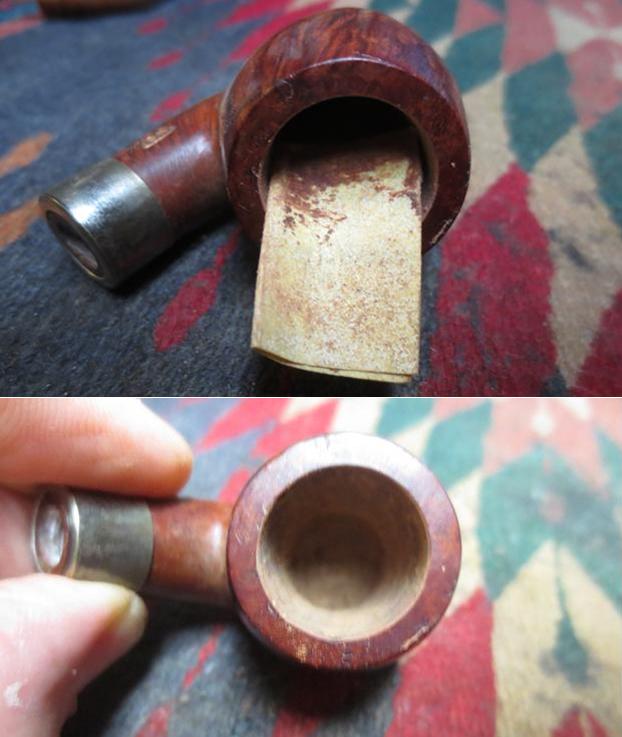
 Jeff took a photo of the pipe with the stem removed. The threaded bone tenon looks clean and new. This is yet more proof of an unsmoked pipe.
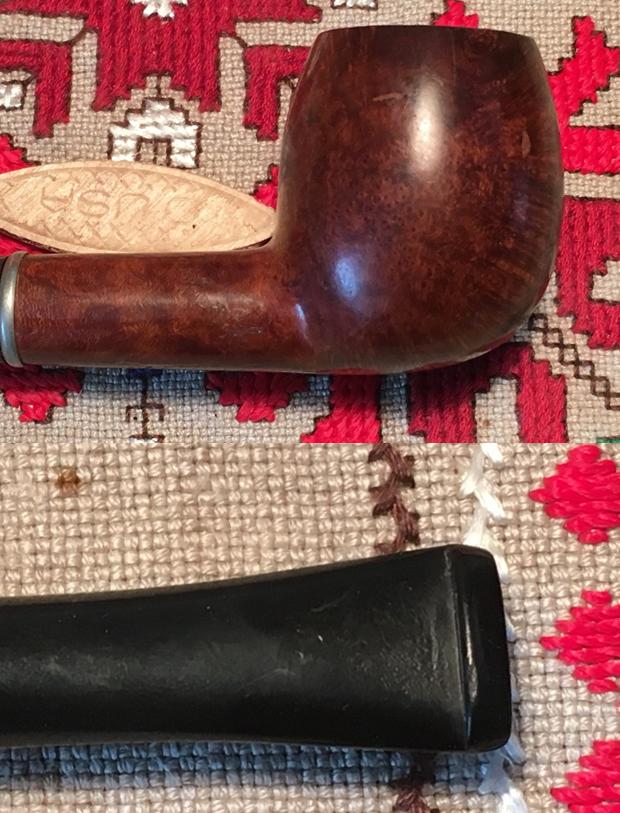
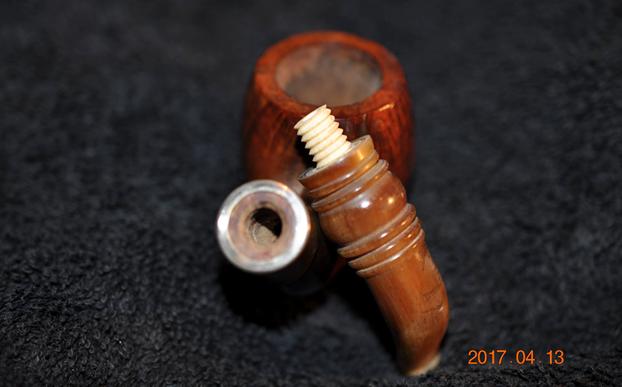 The horn stem showed damage from the shuffling around. There were small scratches and nicks in the top side and underside on the flat portion of the stem. There were also small nicks on the some of the edges of the turned area of the stem. These were normal marks of wear and tear and really nothing too big to deal with.
  Jeff cleaned the exterior of the pipe with some Murphy’s Oil Soap and a tooth brush and rinsed it off under running water. He dried it off with a soft cloth and the grime on the finish was gone. He ran pipe cleaners and alcohol through the mortise and the airway in the shank and stem to remove dust and debris that had collected there and he packed it up and sent it my way for the touch up work. I took photos of the pipe when I unwrapped on my worktable. It is an intriguing little pipe that draws attention, that is for certain. He also turned the loose band so that it lined up properly with the stamping on the shank side. You can see from the photos that the stem is slightly underclocked and will need to be aligned.
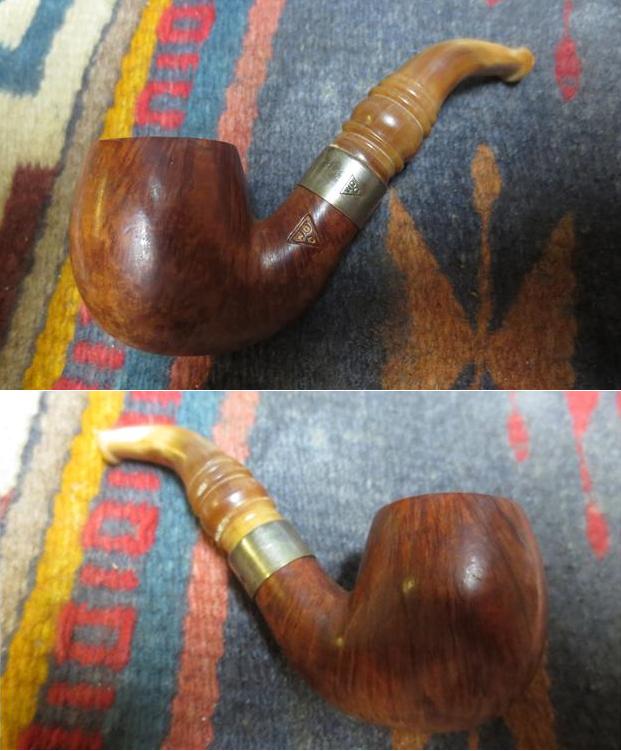
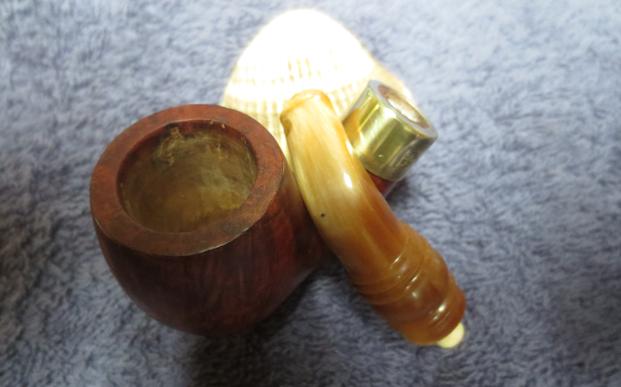
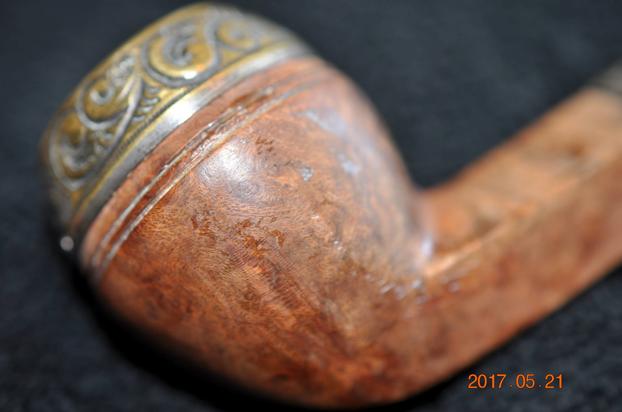
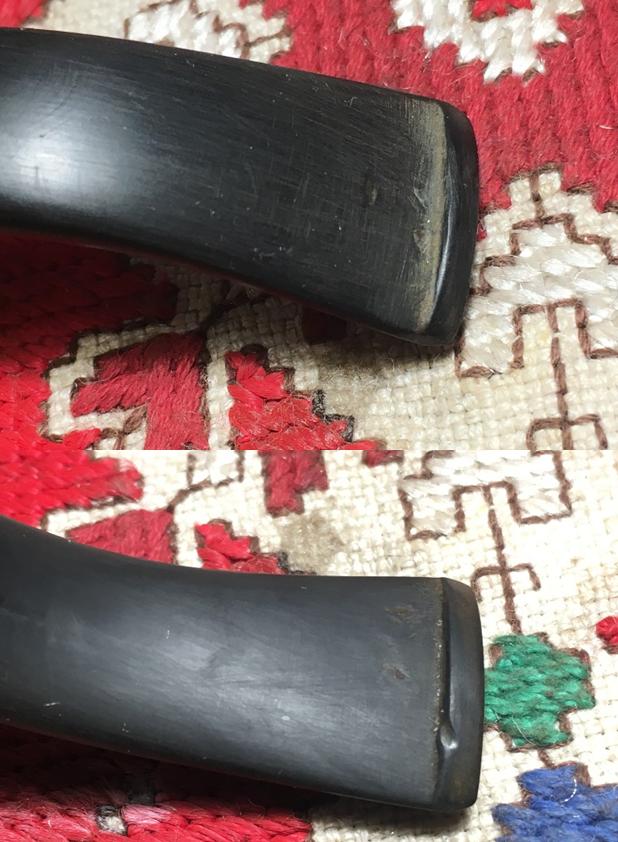
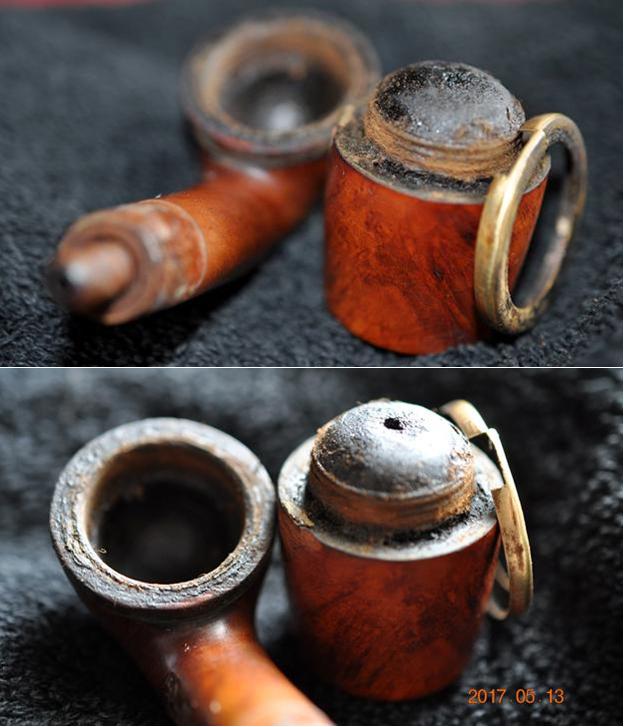
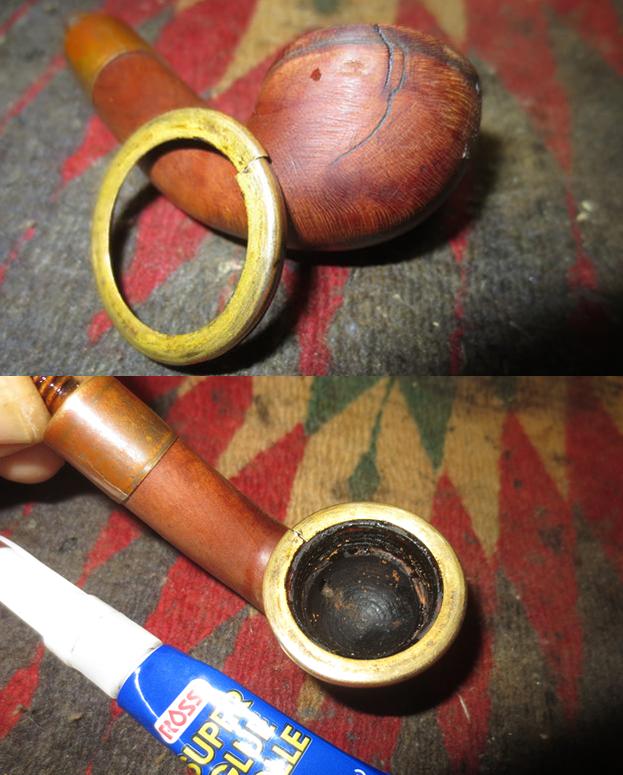
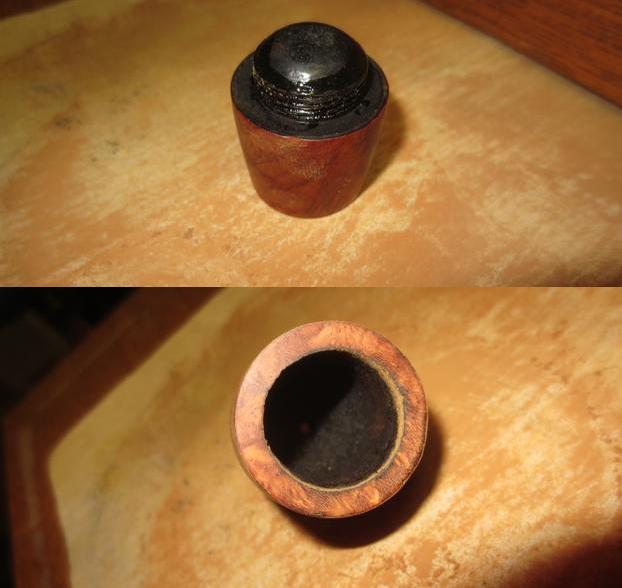
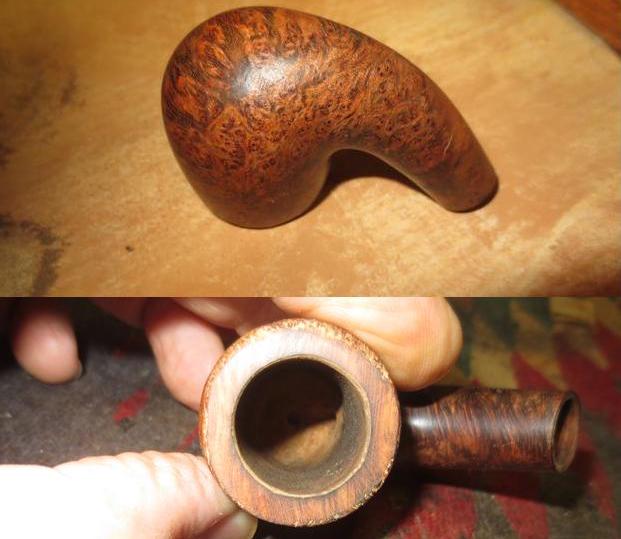
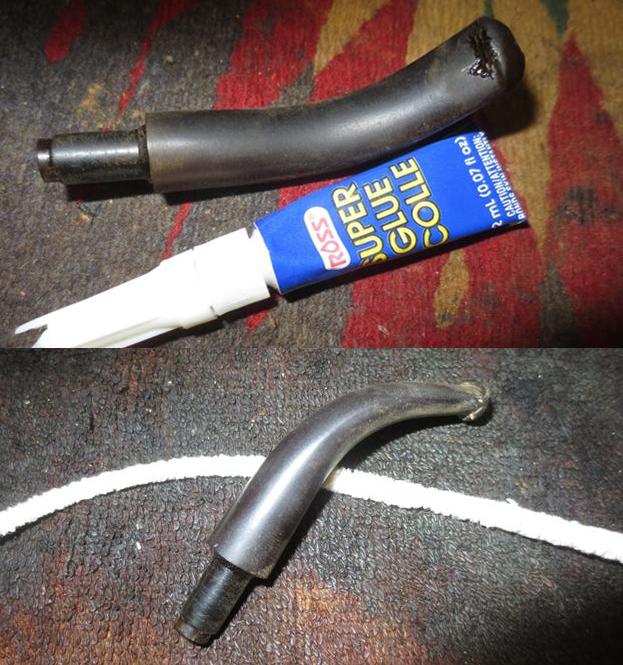
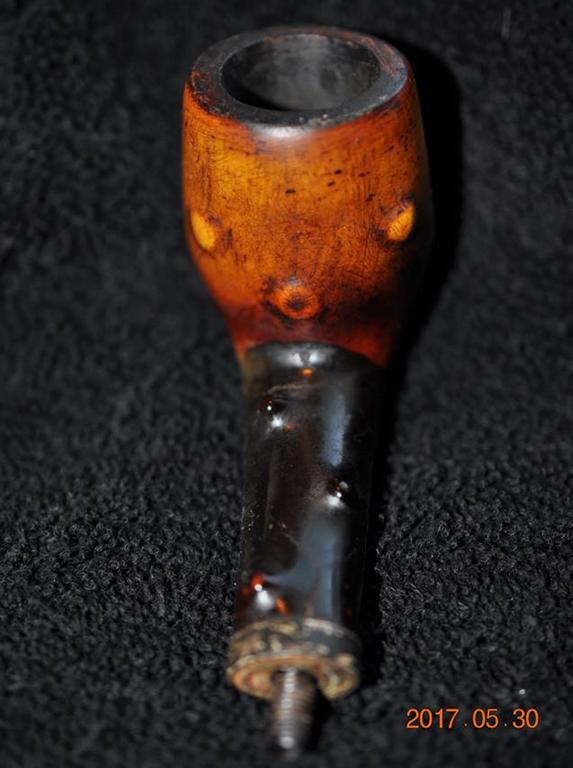
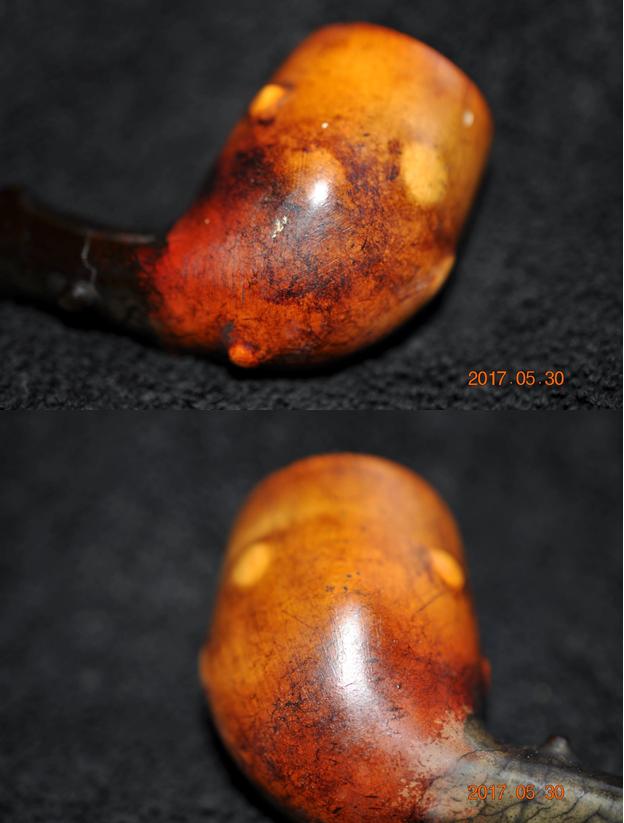
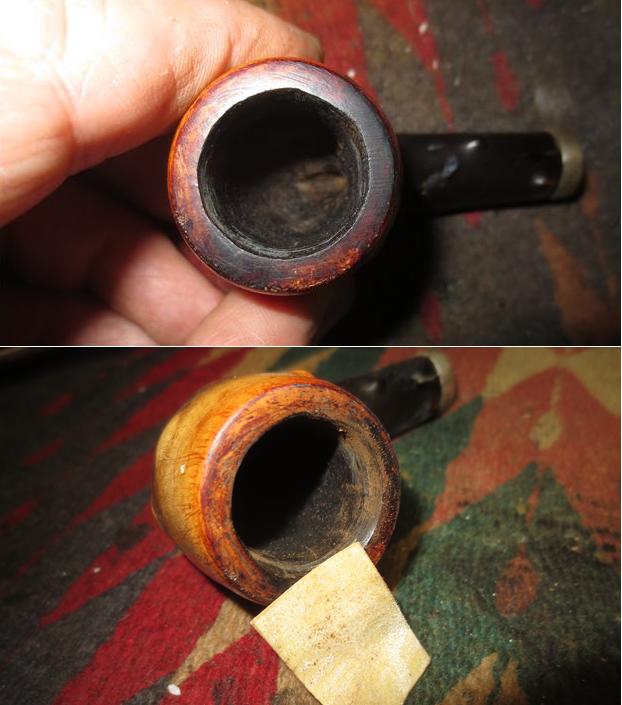
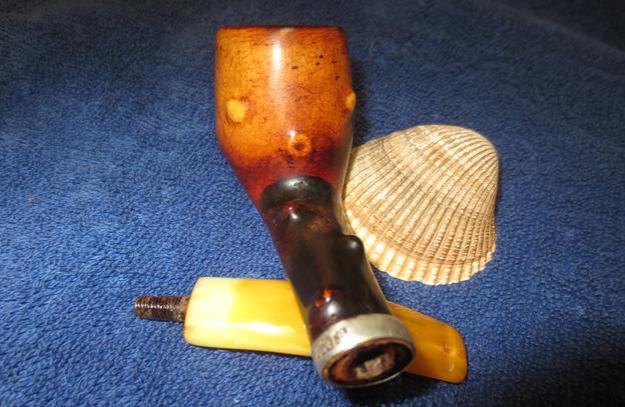
 The next two photos show the damage to the bowl wall and rim edge.
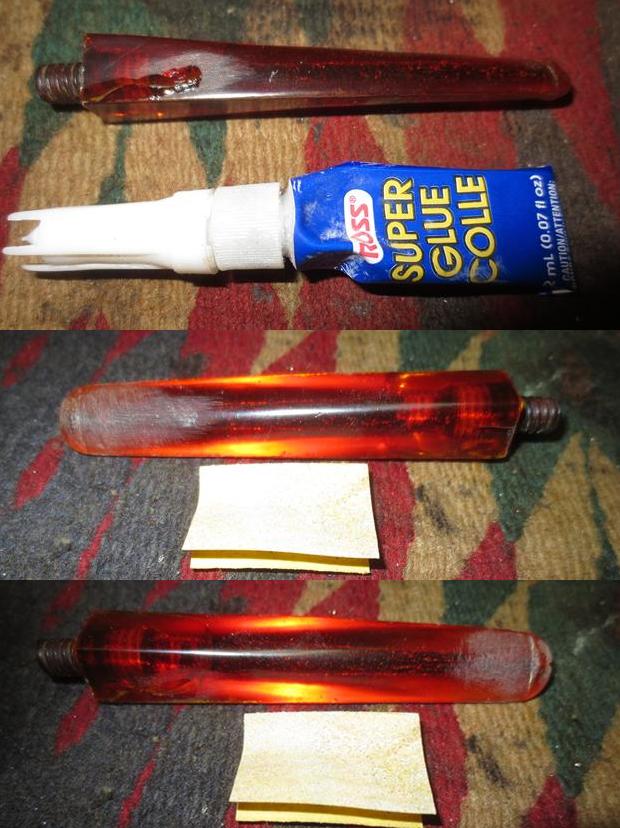
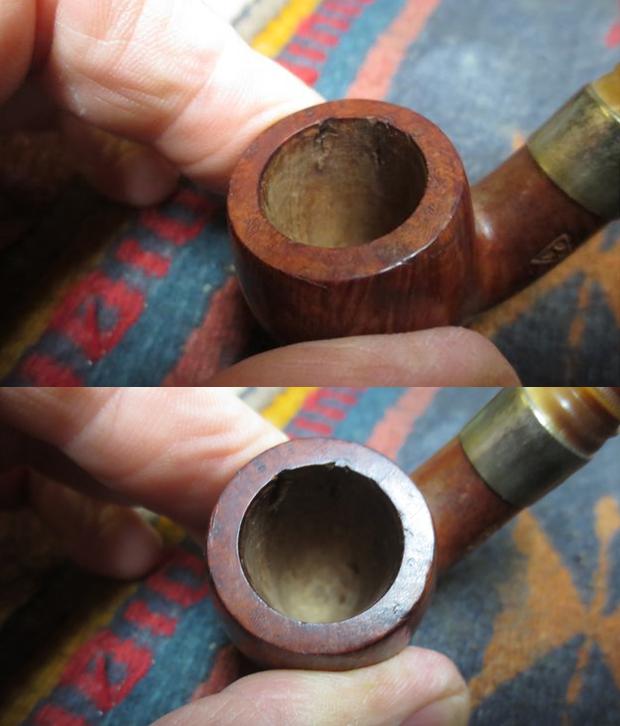 The stem had some small nicks that a bit of amber super glue would easily take care of.
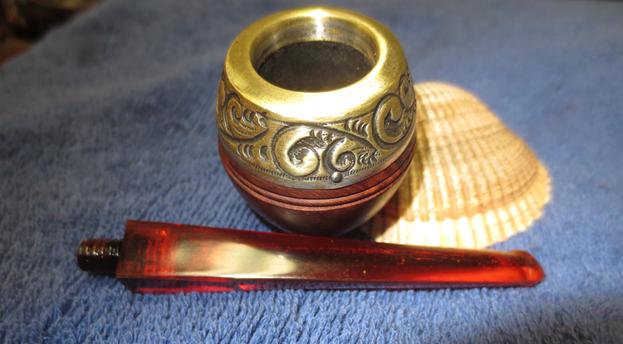
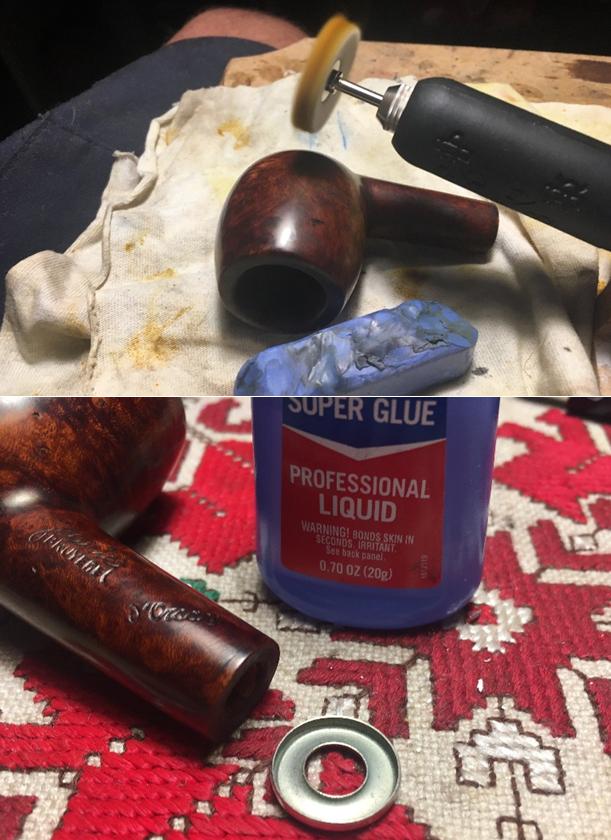
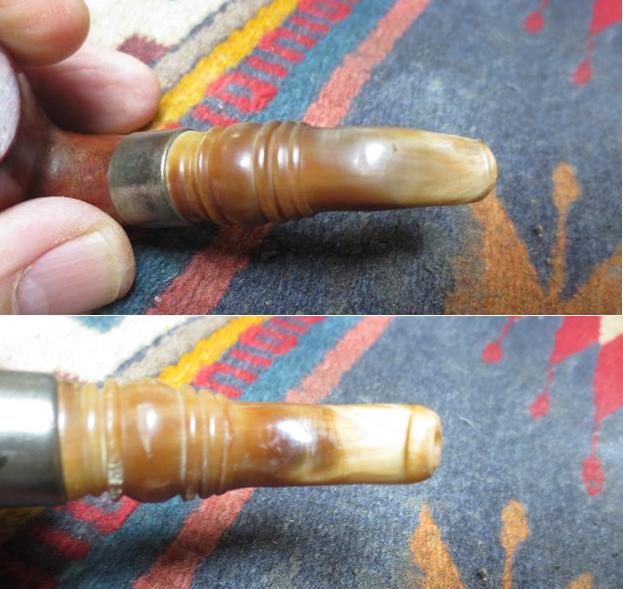 The ferrule was loose and it took nothing to have it drop off in my hands when I turned the stem out of the shank. The briar underneath looked as if it had never had glue on it. It made me wonder if the band had just been held in place originally by pressure fit and over time the wood shrunk as it dried and the band came free of the shank.
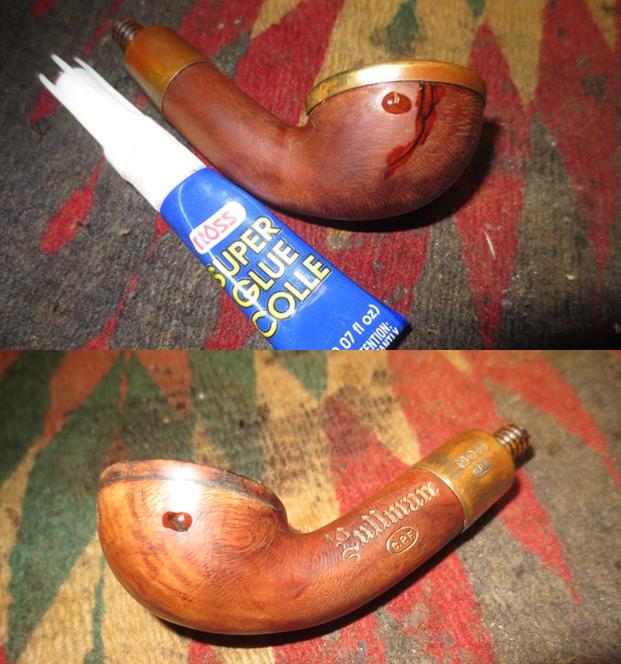
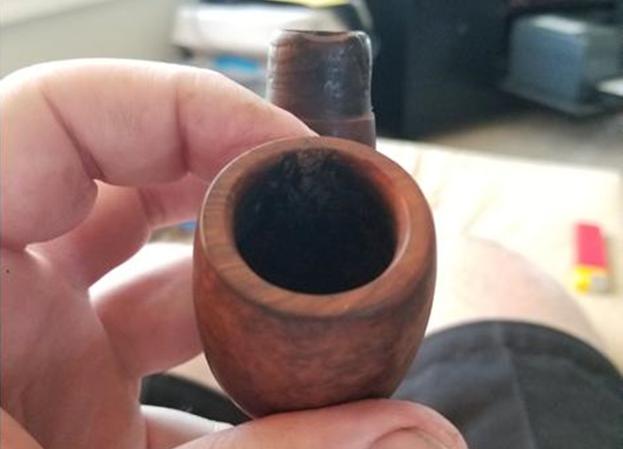
 To address the flaw in the briar on the right inside of the bowl I mixed some briar dust and clear super glue and filled in the flaw. As the patch dried it shrunk and I refilled it until it was even with the rest of the surround bowl walls. While the glue dried on the repair I put some white glue around the shank, aligned the ferrule and put it in place. Thus while the repair dried the band could also dry. Once the repair in the bowl dried I sanded it smooth with 220 grit sandpaper. I reshaped the inner edge of the bowl with the sandpaper as well and cleaned up the nicks in the edge. I chose not to bevel the rim as it had not been beveled previously.
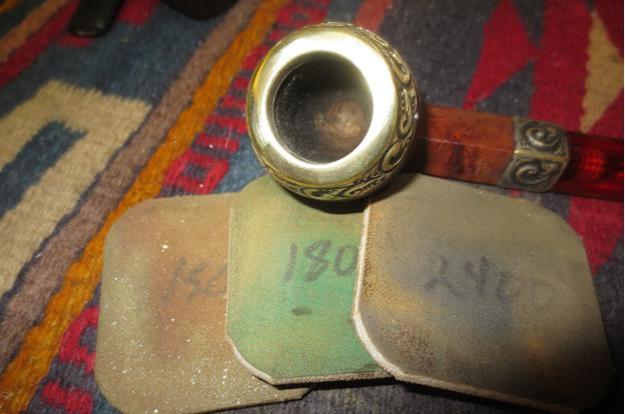
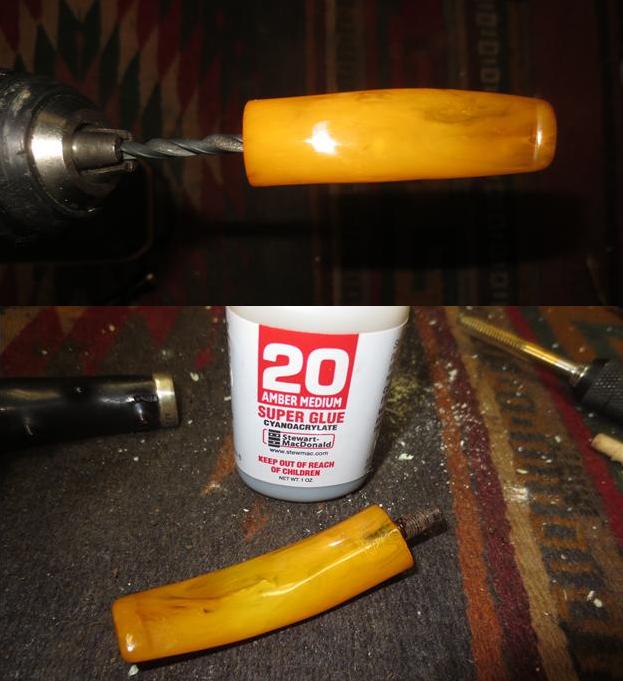
 The bone tenons can swell over the years making the fit and alignment less than perfect. I have learned a few tricks over time with over and under turned stems with bone tenons. If the stem is over turned I generally build up the threads on the bone tenon with super glue until thing align properly. If it is under turned like this stem I remove material from the tenon. I carefully sanded the threaded area to reduce the diameter slightly. I checked the fit often and once I had it finish I cleaned up the tenon and put the stem aside.
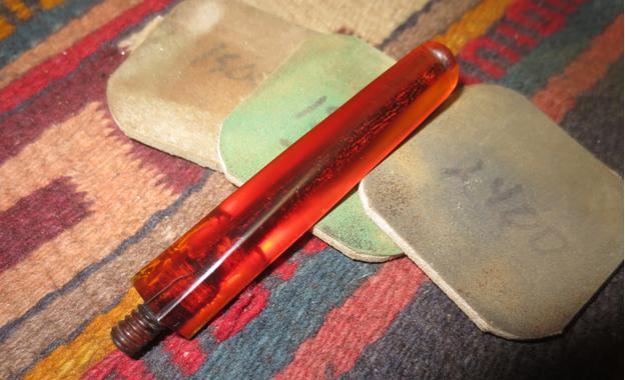
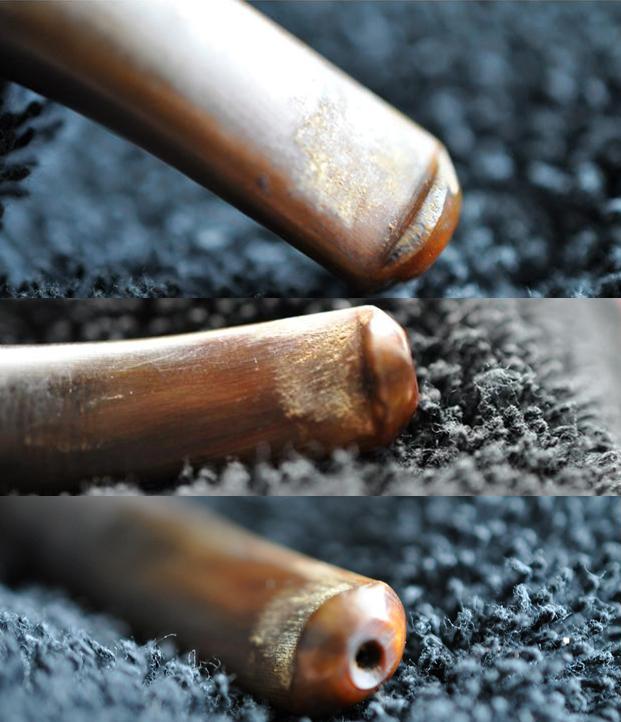
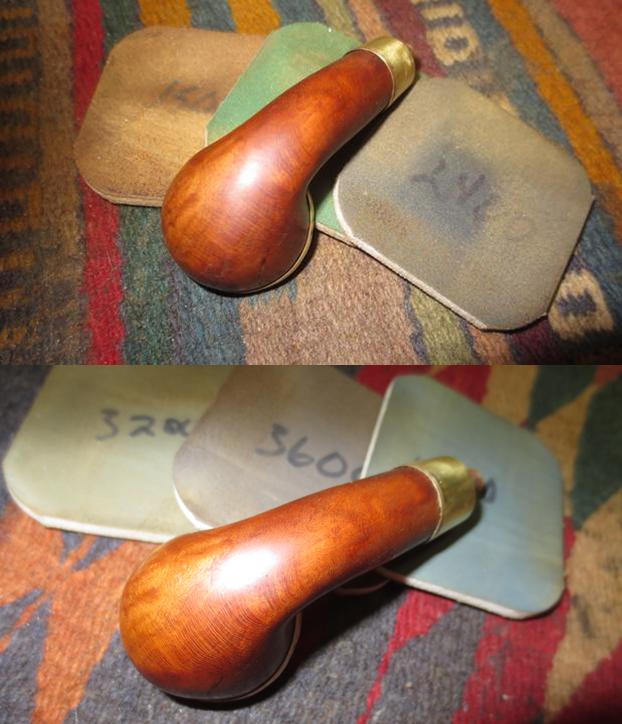
 I filled in the nicks on the surface of the stem and near the button with clear super glue. The amber would have dried dark on this light horn. When the repair dried I sanded it smooth with 220 grit sandpaper. I sanded the nicks on the turned areas with 220 grit sandpaper to smooth them out and make them less obvious.
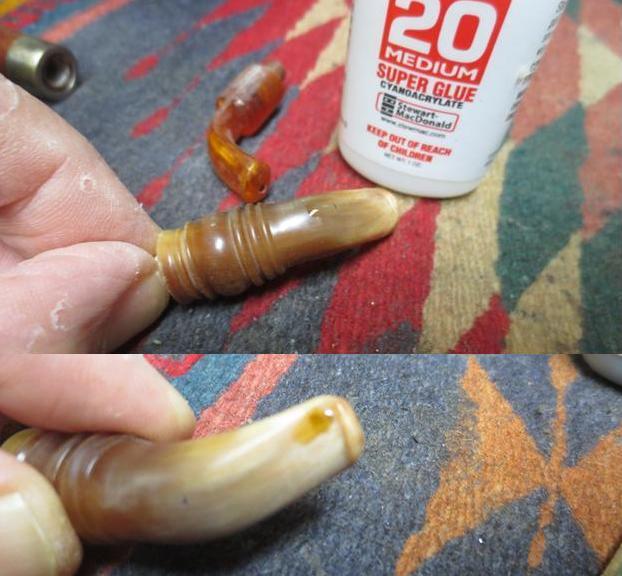
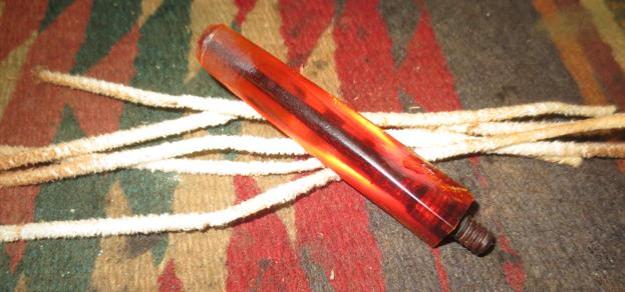
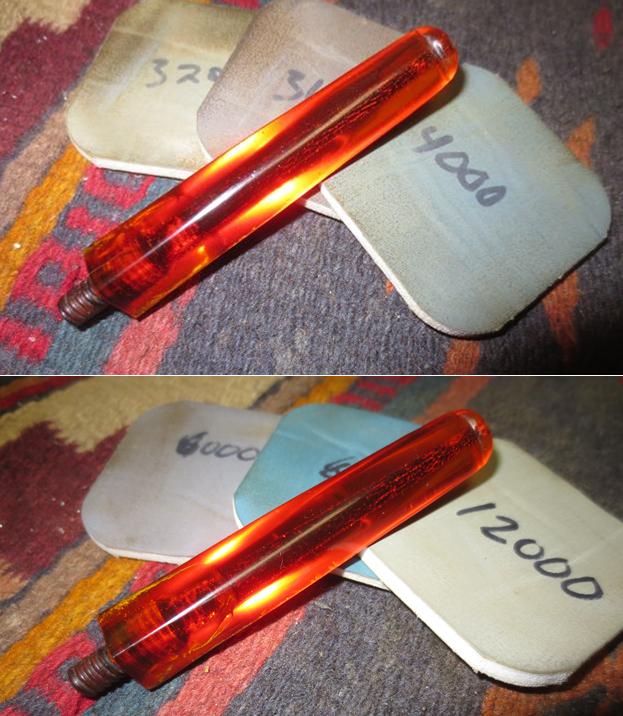
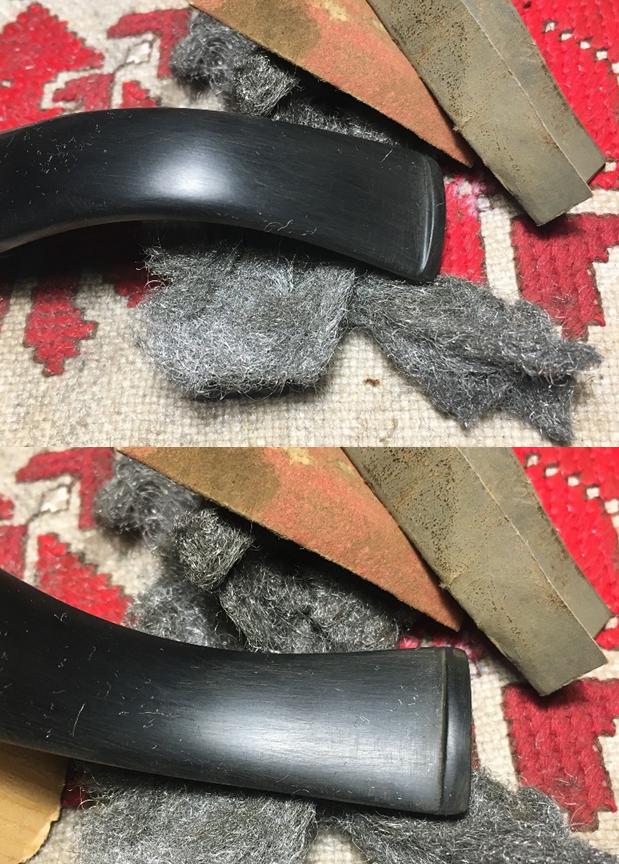
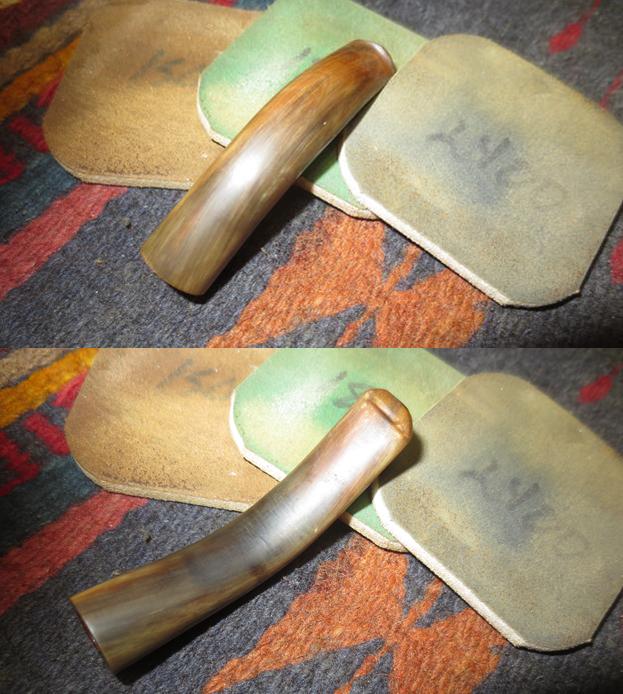
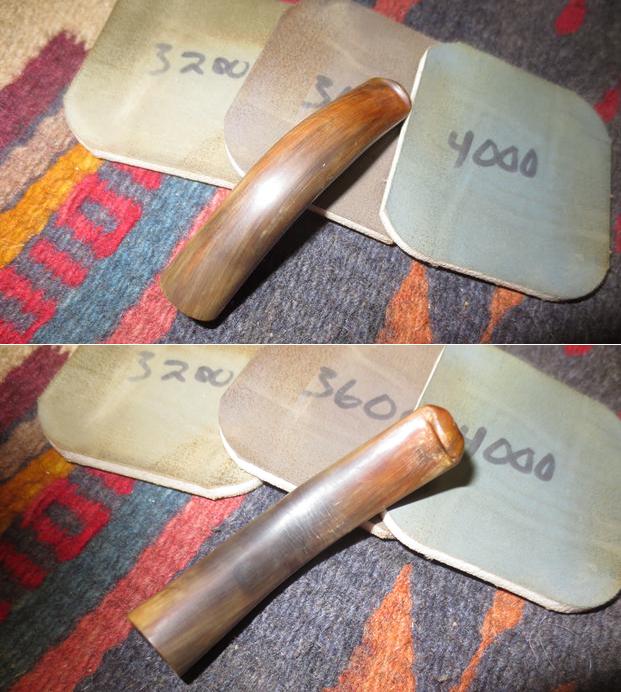
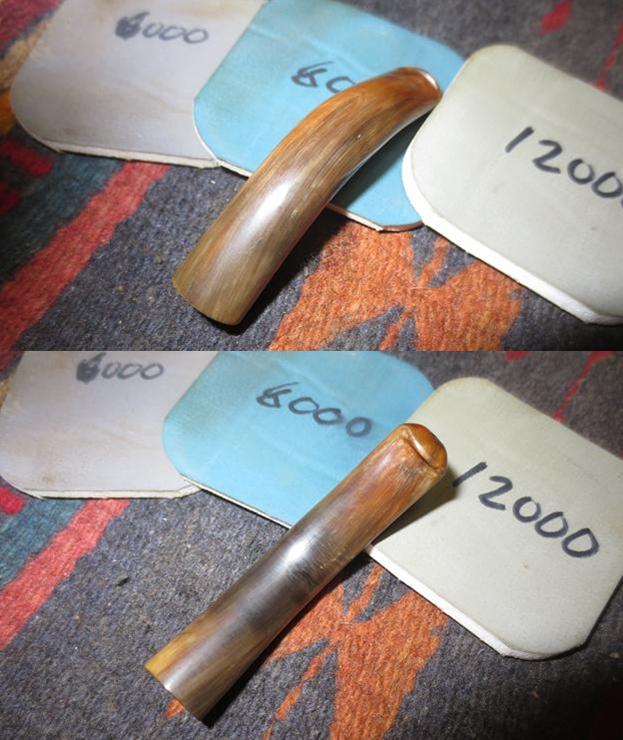
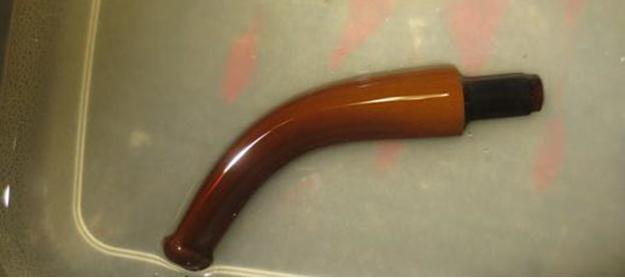
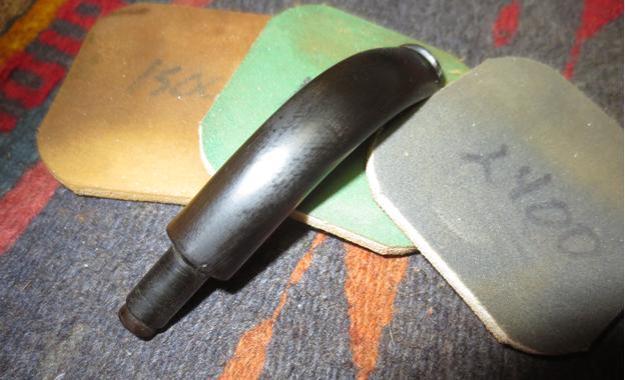
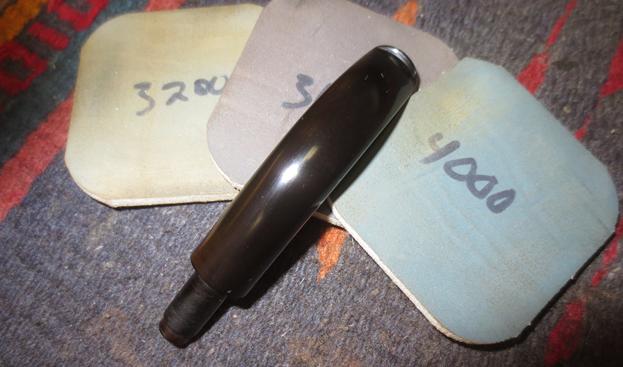
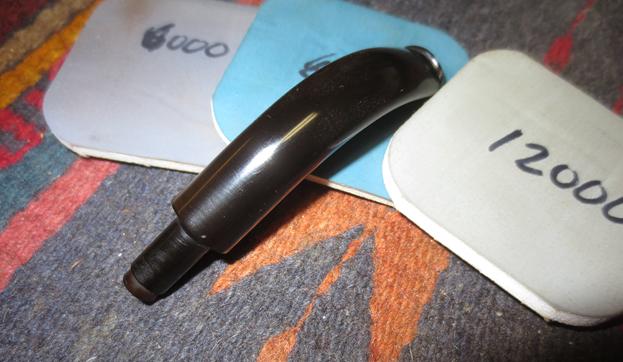
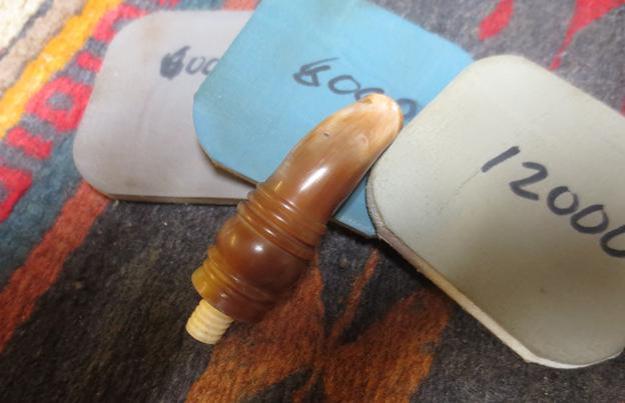
 I polished the horn stem with micromesh sanding pads – wet sanding it with 1500-2400 grit pads and dry sanding it with 3200-12000 grit pads. I rubbed the stem down with Obsidian Oil after sanding with each micromesh pad. After the final pad I set the stem aside to let it dry.
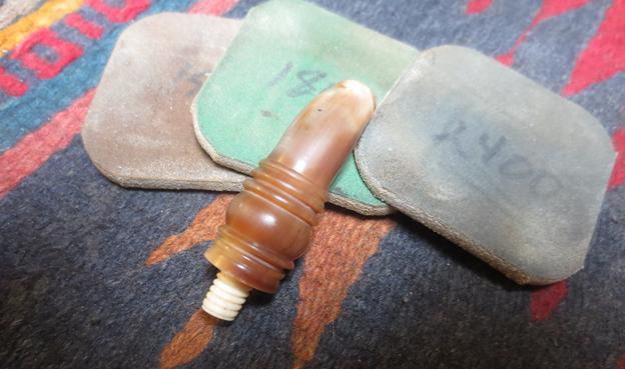

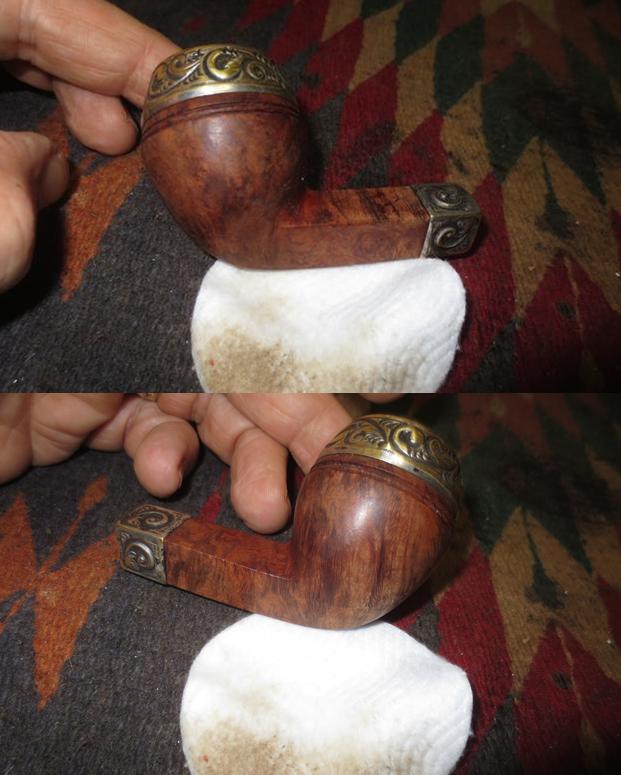
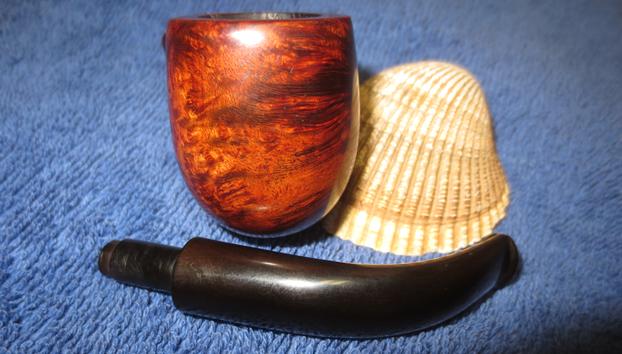
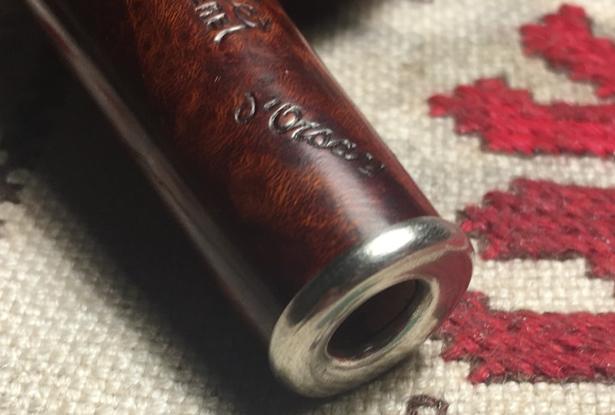
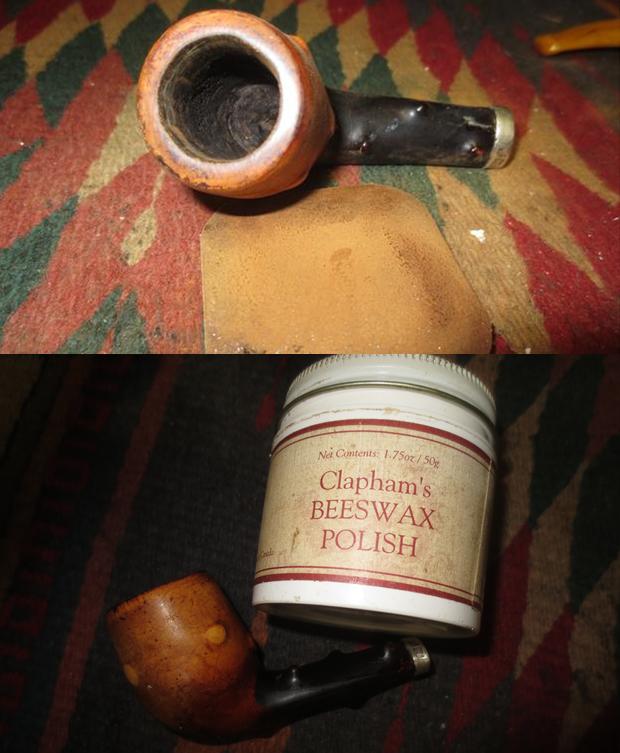
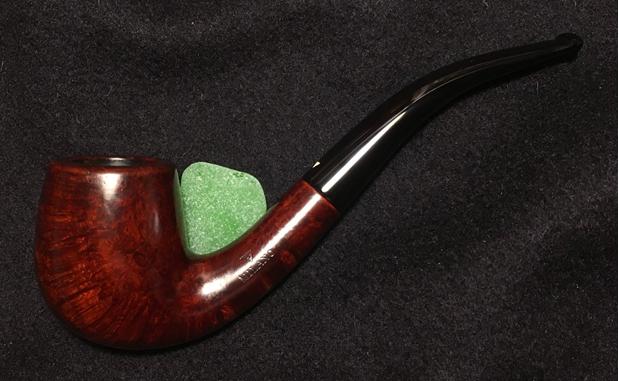
 I polished the metal ferrule with micromesh sanding pads to remove the tarnish on the metal. There was a small crack in the underside of the ferrule that I repaired when I glued it onto the shank. I finished with the 12000 grit pad and then rubbed the stem down with a jeweler’s cloth to polish the metal. The silver is a nice contrast between the brown of the bowl and the translucence of the horn.
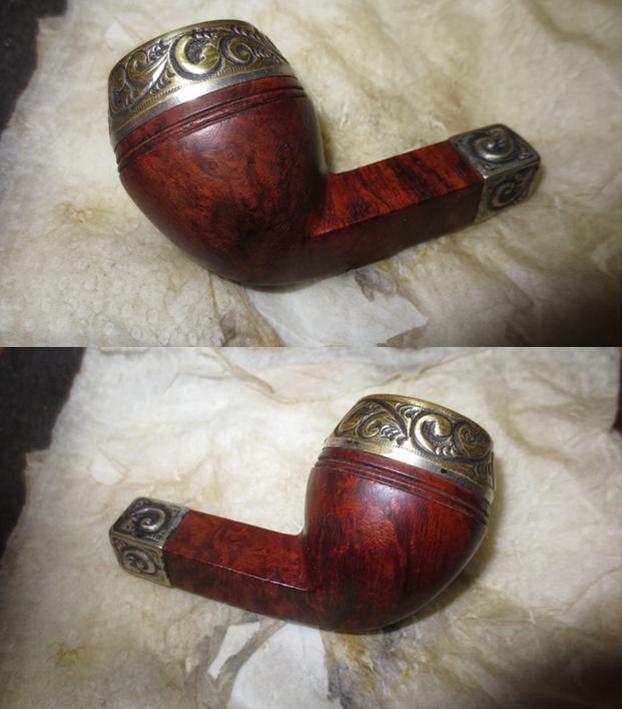
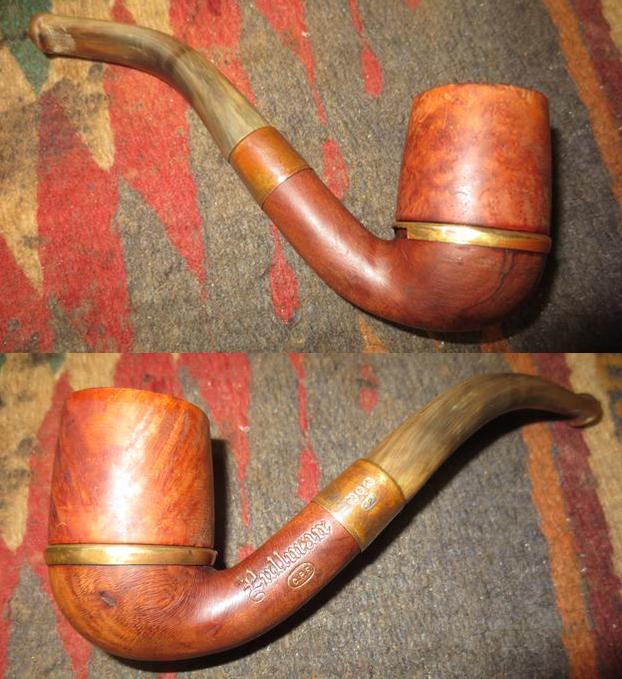
 I buffed the pipe and stem with Blue Diamond on the buffing wheel and worked carefully around the band. I gave the bowl and stem multiple coats of carnauba wax. I buffed it with a clean buffing pad to polish the wax and give the pipe a shine. I hand buffed it with a microfiber cloth to deepen the shine. The wax made the grain stand out clearly and the two fills along the front and the back right edge of the bowl running with the grain. They are visible but they do not detract from the beauty of this old unsmoked William Demuth & Company pipe. It is an interesting piece of pipe history and I can only wish it could tell the story of its journey across the United States and now into Canada. Thanks for looking.