Blog by Dal Stanton
I have been looking forward to this project ever since I landed three Stanwell Henley Special pipes on the eBay block from a seller in Maryland. The seller provided helpful information that only helped urged me to place a bid:
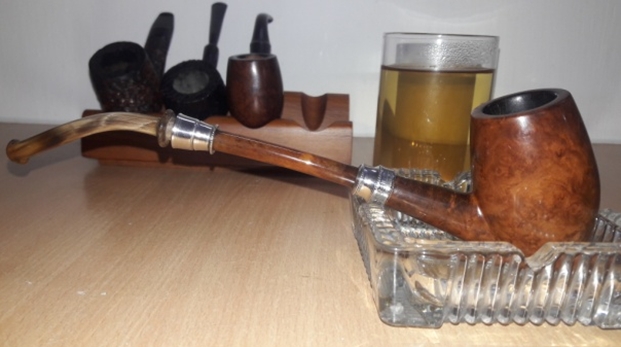
This auction is for three vintage Stanwell, Henley Line estate pipes from the 1950’s-60’s era. All are in good pre-owned condition. The stems are primarily free from teeth marks. The stems do have some fading. All of the stems fit snug and the wooden bowls are free from outstanding blemishes. As seen from top to bottom, the first pipe reads Henley Special #57, the second and third read Henley Special without any numbers seen. All of the pipes read Made in Denmark.
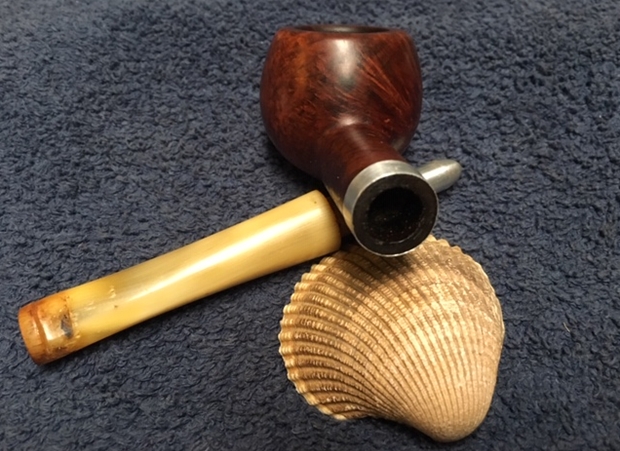
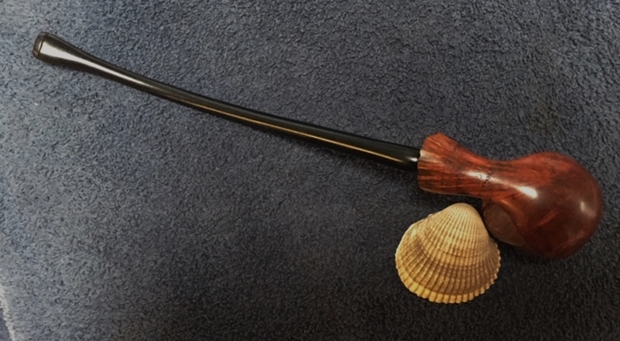
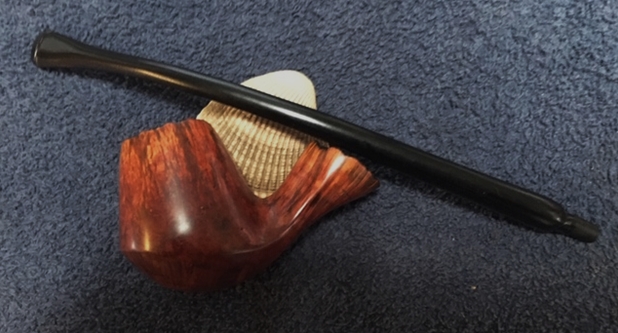
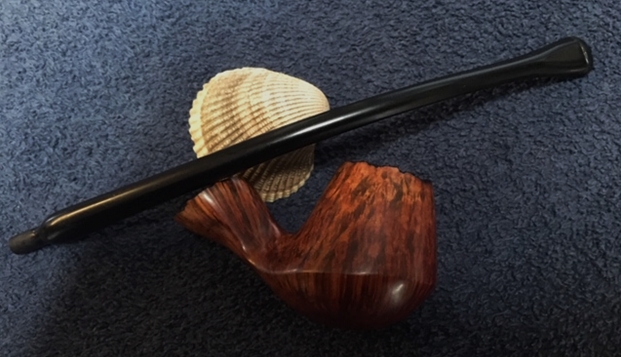
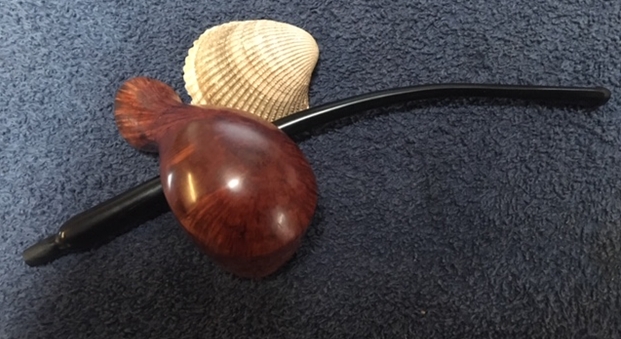
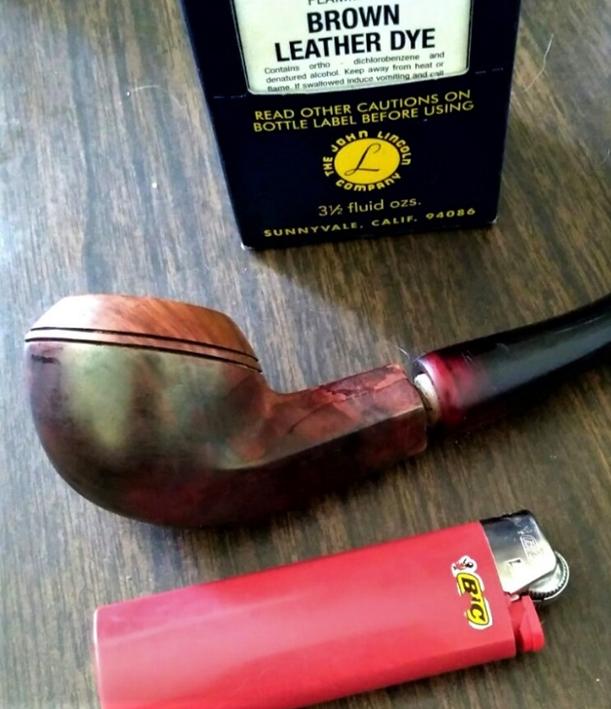
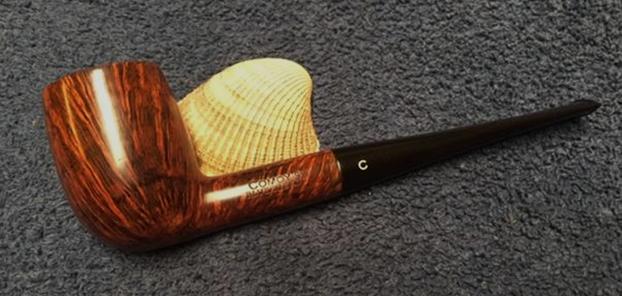
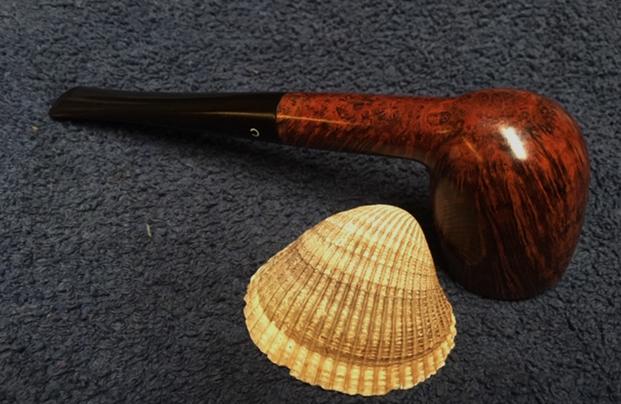
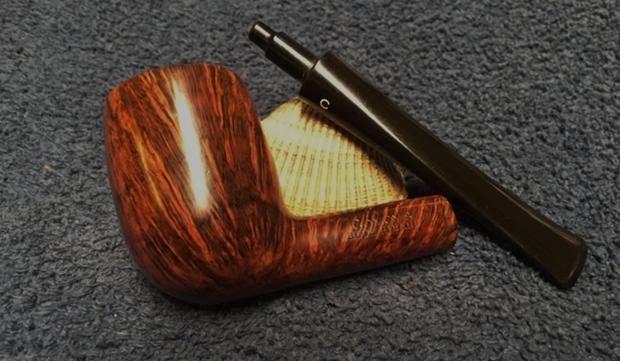
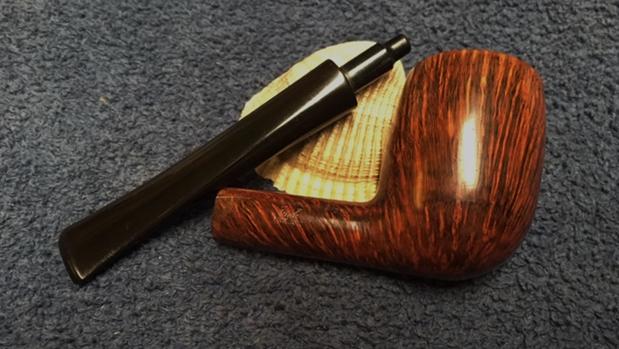
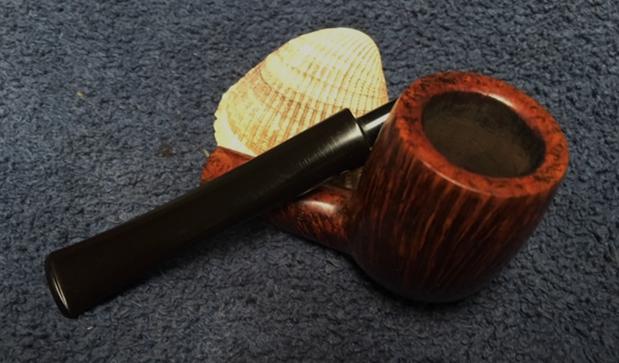
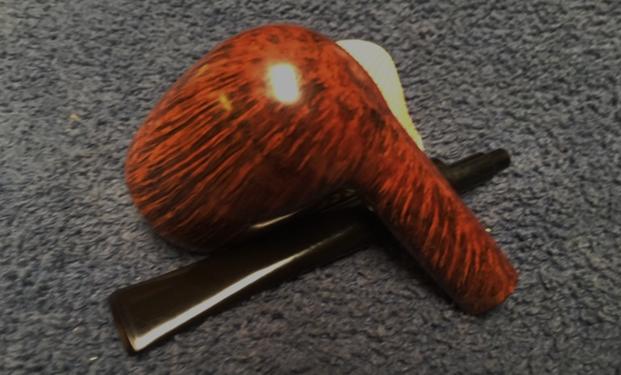
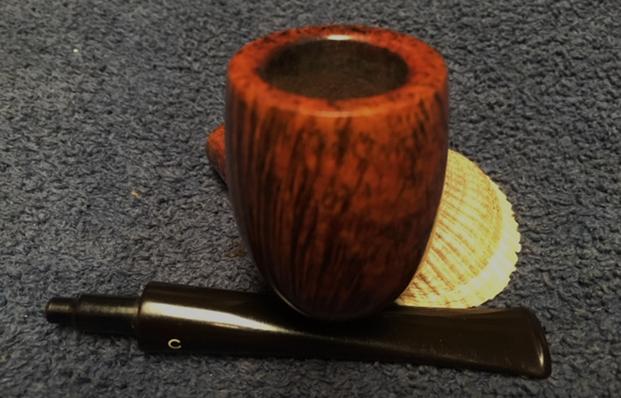
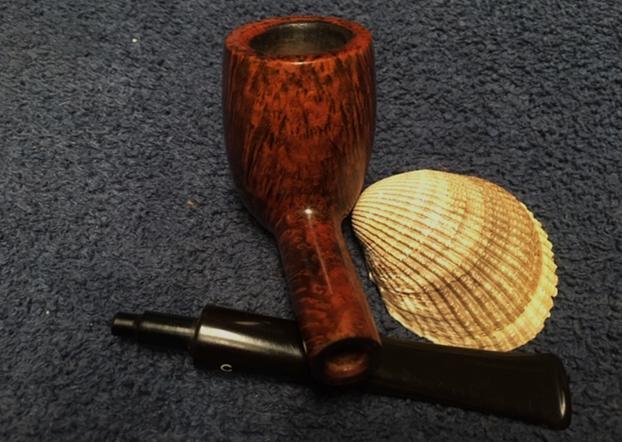
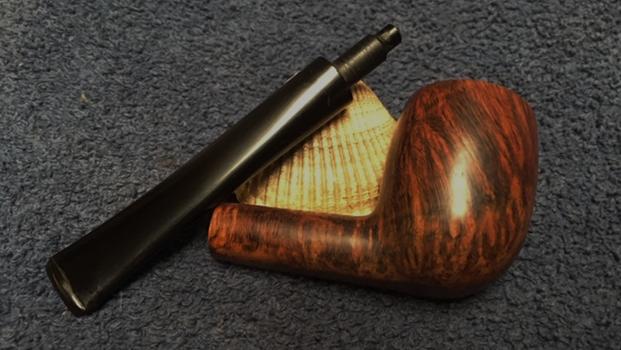
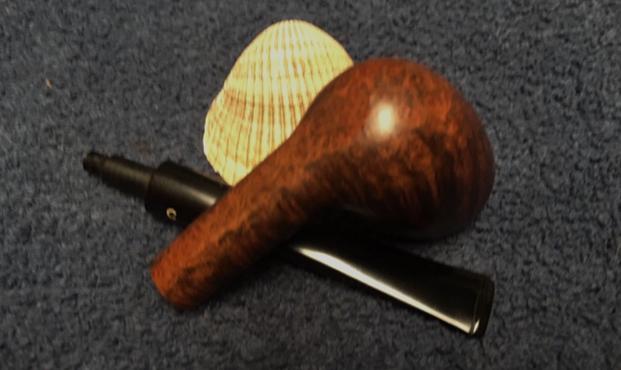
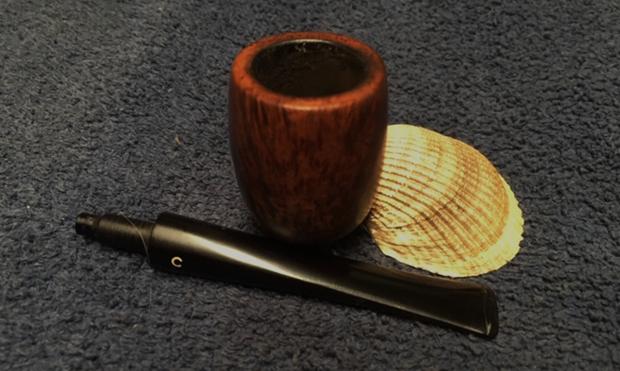
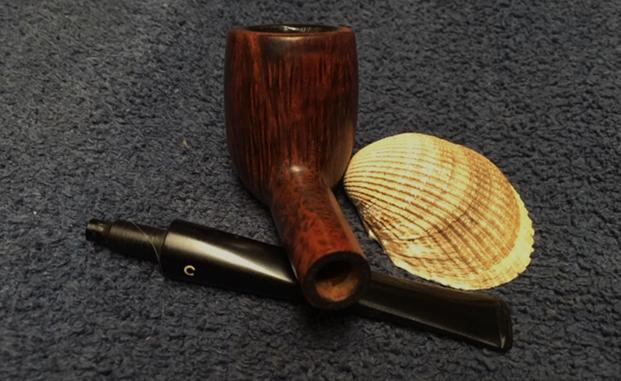
Since I started collecting and restoring pipes, I’ve grown in my appreciation for Danish made pipes. They tend to be stout, well made pipes. The stems are also interesting – the ‘pinched saddle’ fish tail is unique. When I saw the 3 Henley Specials, I was attracted to the line-up but had never heard of ‘Henley’. When I read the sellers description I was sold – I was especially drawn to the ‘Chimney’ on the top of the group below, sporting a pinched saddle fishtail stem. The Stanwell Henley on my workbench now is the classic Oval Shank Billiard in the center. Along with a Comoy’s Moorgate, Jim saw the Henley Special in the For ‘Pipe Dreamers’ Only! collection and commissioned him. He saw what I also see in these classic Danish pipes. As with frosting on the cake, this pipe benefits the Daughters of Bulgaria, our work here in Bulgaria helping women and girls who have been trafficked and sexually exploited. The pictures show what I saw on eBay.
 Unfortunately, I cannot find much online regarding the Henley line. Pipedia’s article on Stanwell pipes simply places the Henley Special line in the list of Stanwell second brands. Pipephil.eu provided more information with a Henley much like the slightly bent, Chimney above with the characteristic bulging midsection, but with a blasted finish. It also show a ‘H’ stem stamp. If the Henley on my worktable had one, it is now long gone.
 The only information I found that gave any reference to dating is spurious at best. I found the following picture on Google images but the link to pipesmokersforum.com is now a dead end. “Who made this pipe?” I would have loved to read the thread that discussed the dating of the discontinued Stanwell second, Henley Special. The picture puts a question mark in the late 50s. Looking at all the 3 Henley Specials I acquired, the look and feel of them lends toward this dating, but…. This picture and the eBay seller’s description placing the pipes in the 50s or 60s are anecdotal, but seem to me to be accurate. Oh, for the return of the now defunct, Chris’ Pages website, to look through the old catalogs!
  One very interesting find was a Stanwell Henley Special for sale in the listings of SmokingPipes.com in restored state – very nice. It gives me an idea of what might be under the older, tired finish of all three Henleys in my collection.
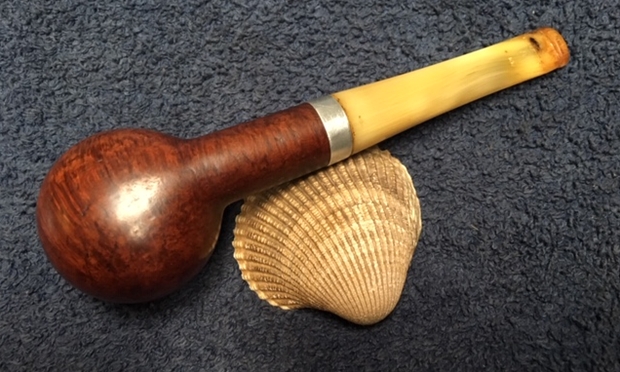
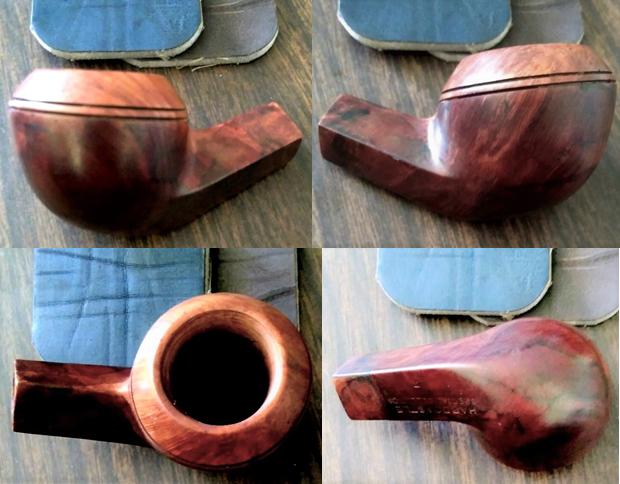
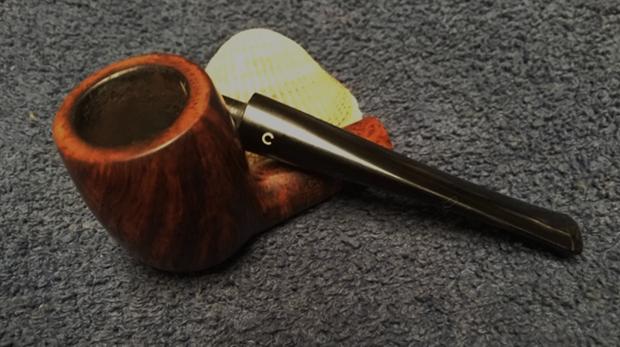
 Taking a closer look at the Henley Special Oval Shank Billiard on my worktable, I take these pictures for a closer look.

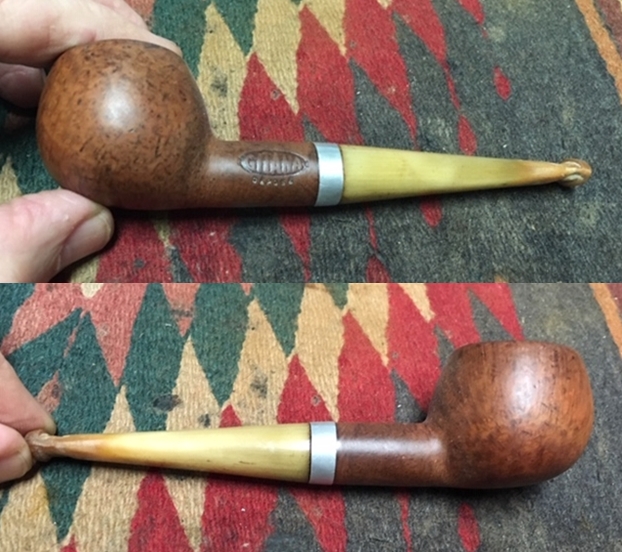
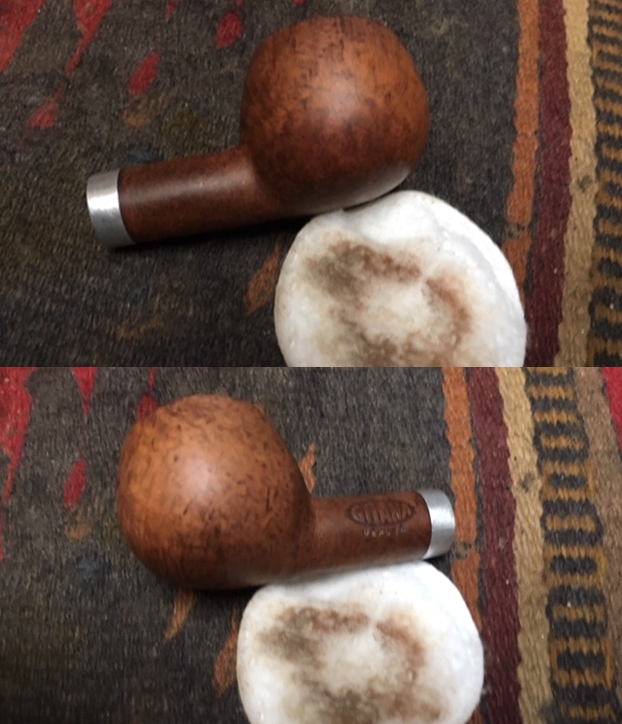
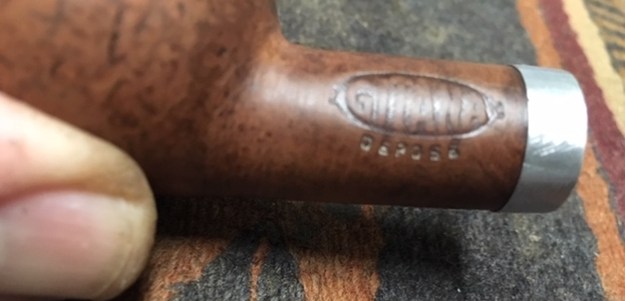
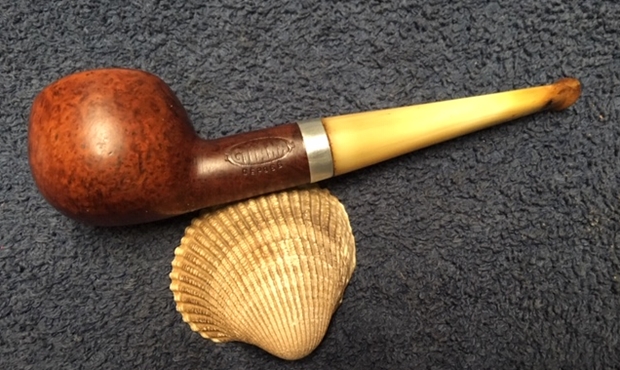
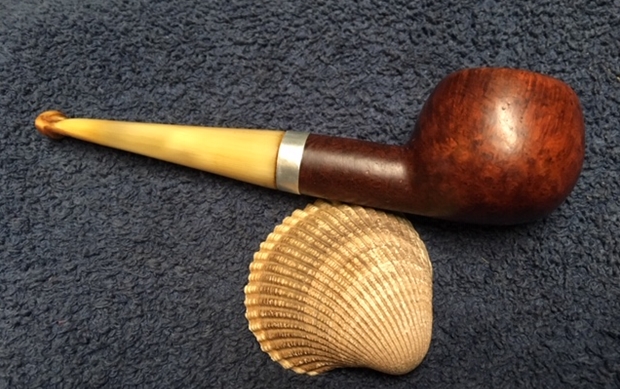
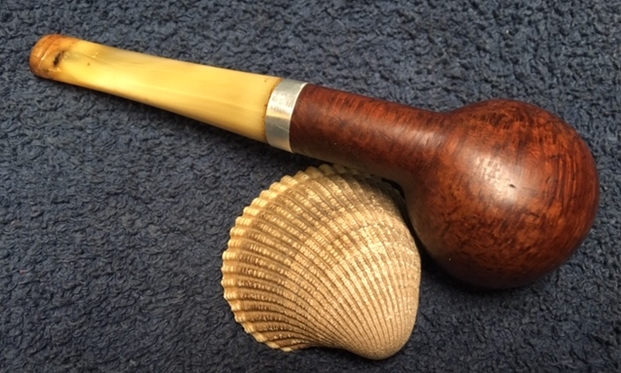
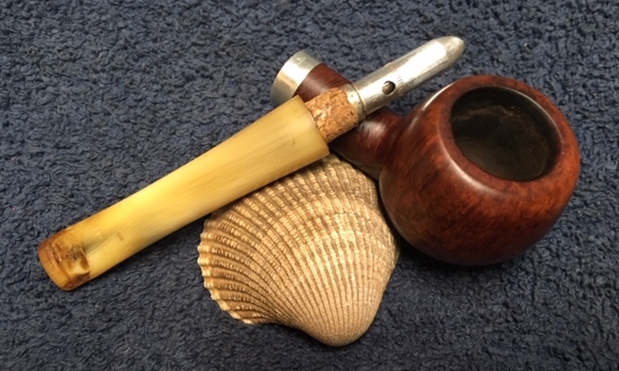
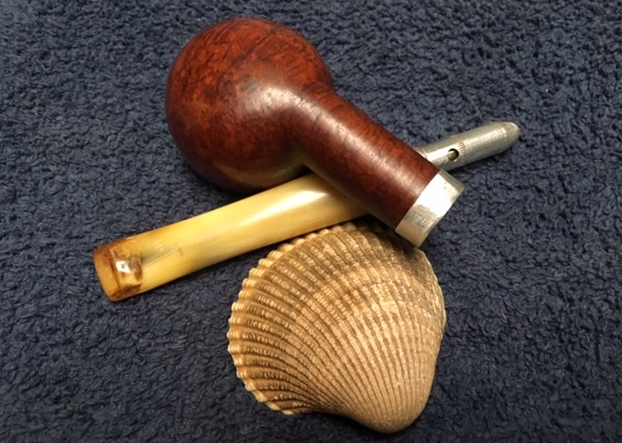
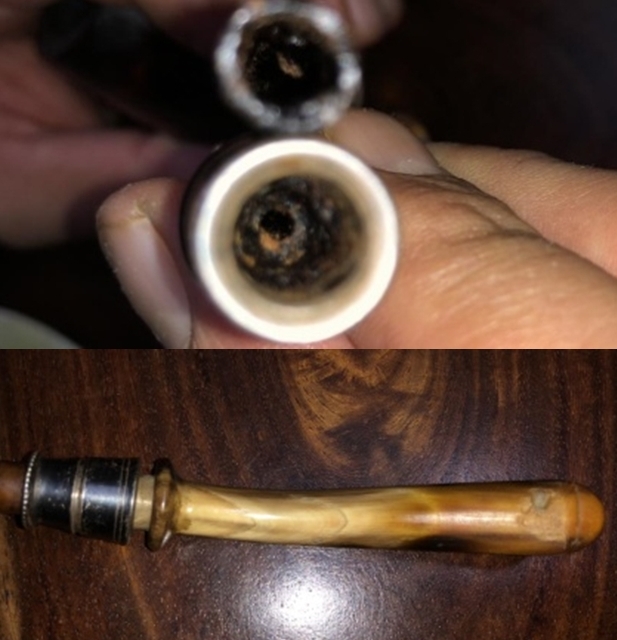
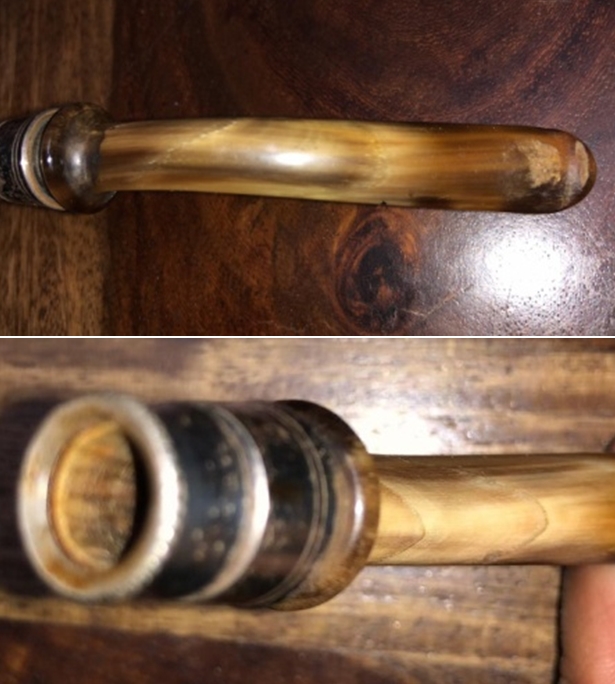
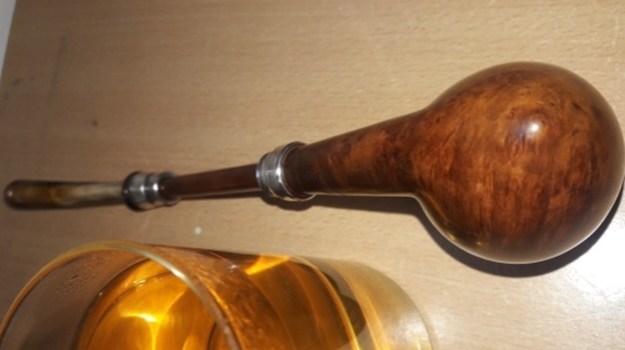
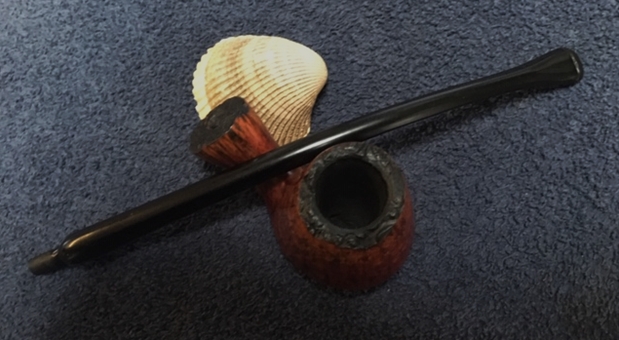
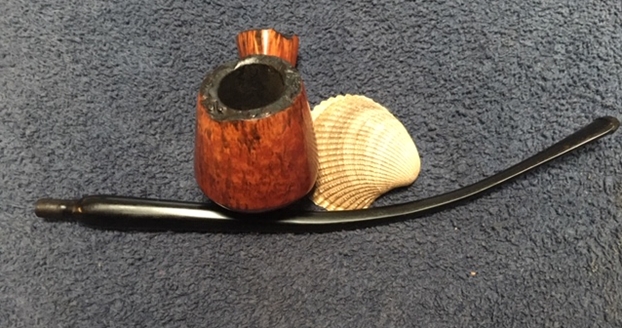
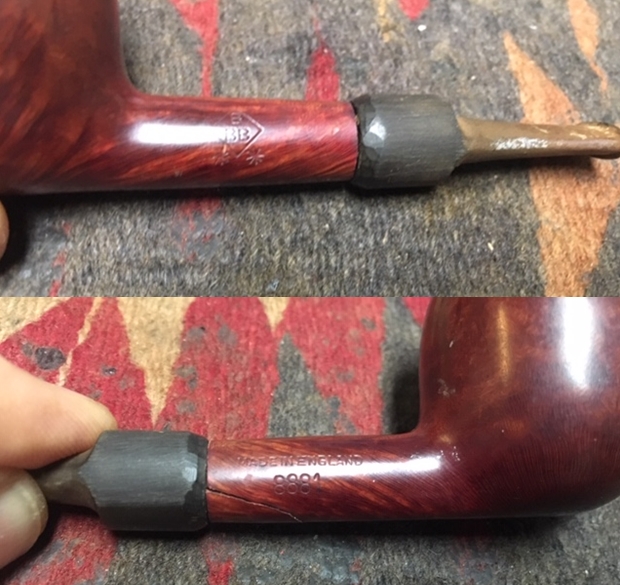
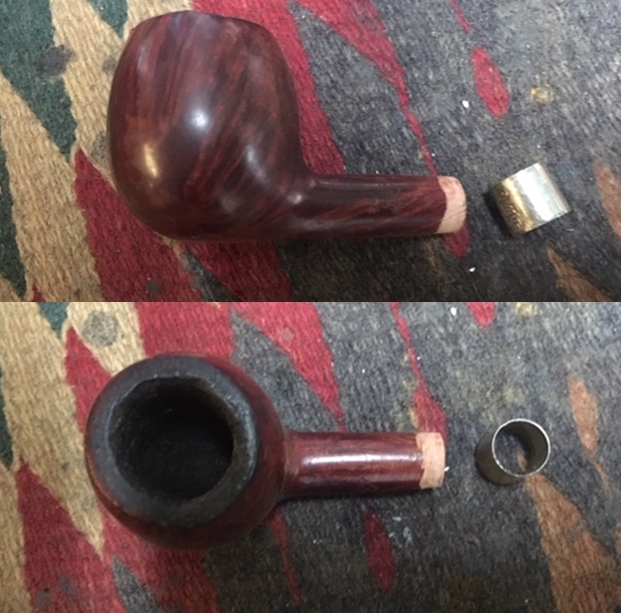
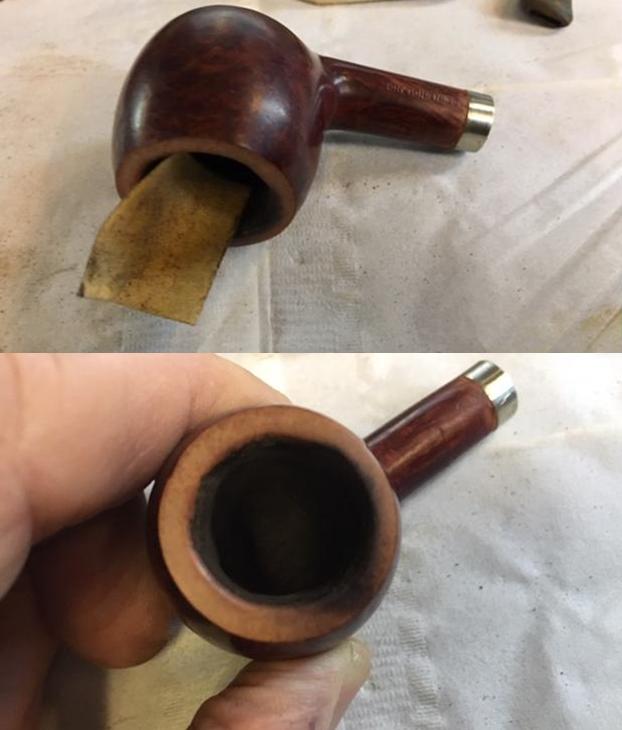
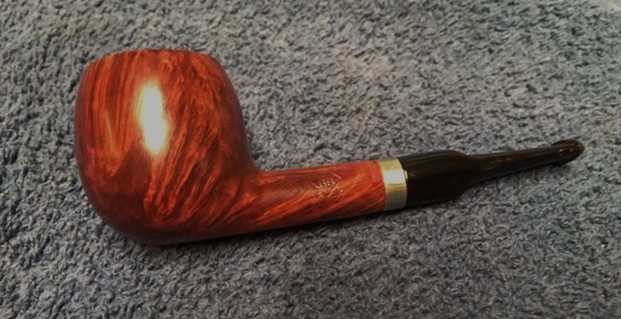
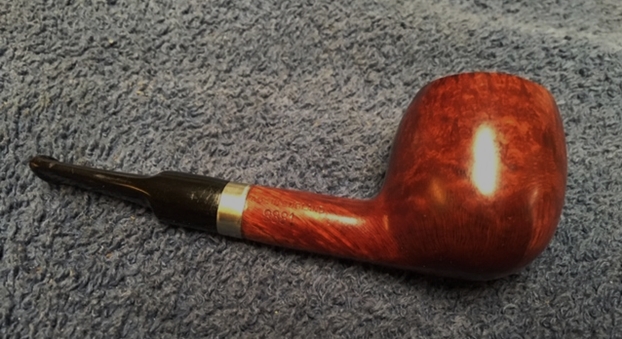
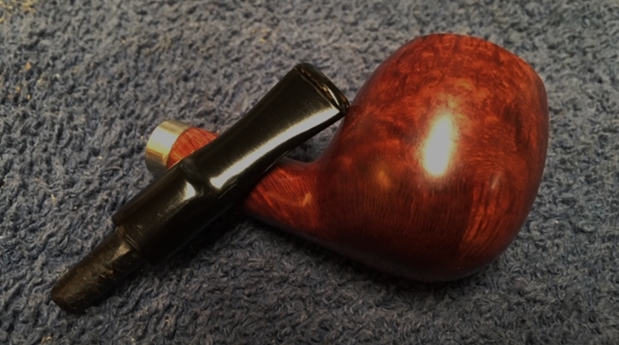
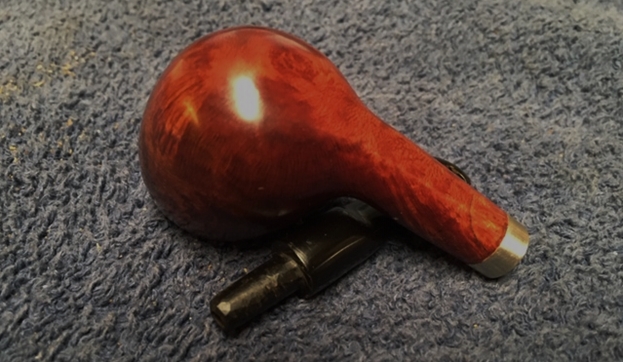
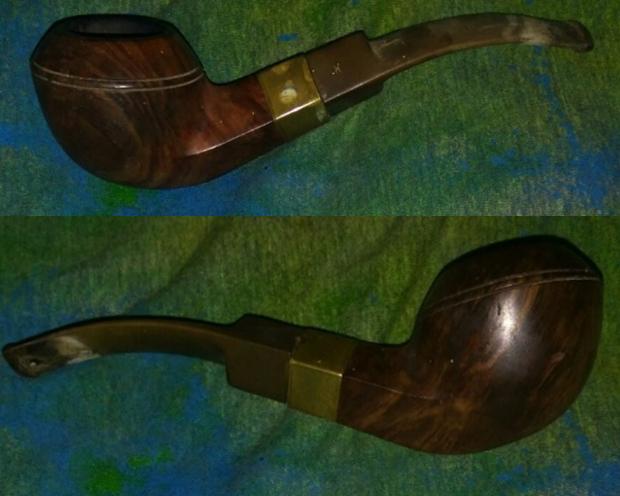
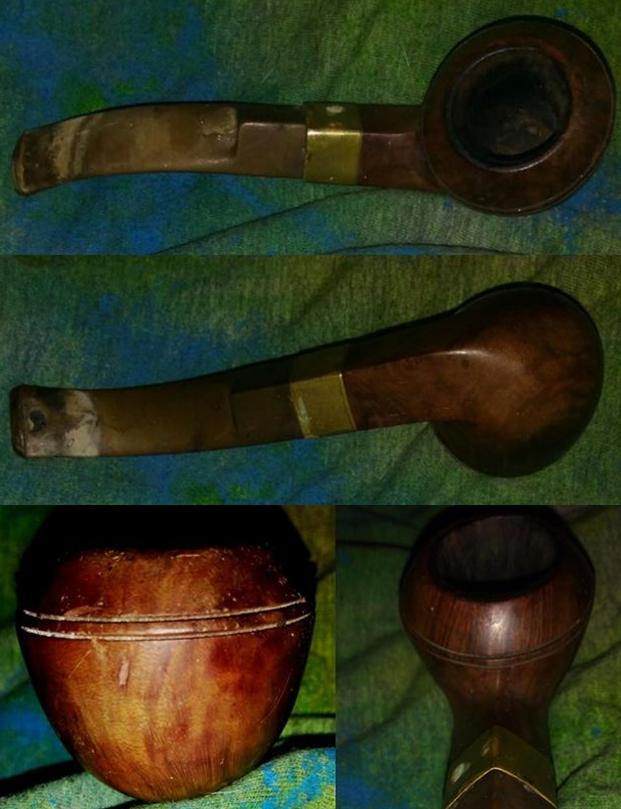
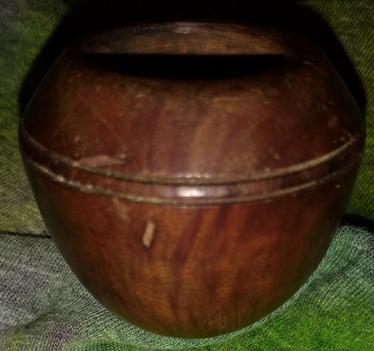
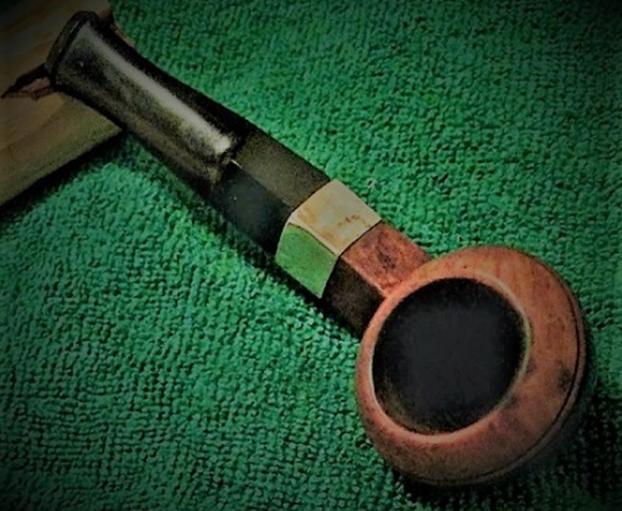
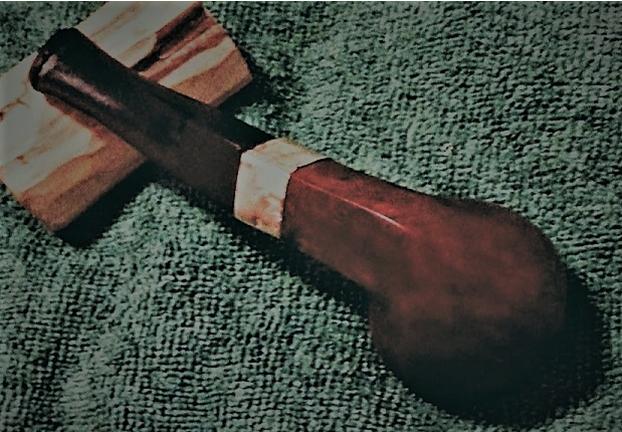
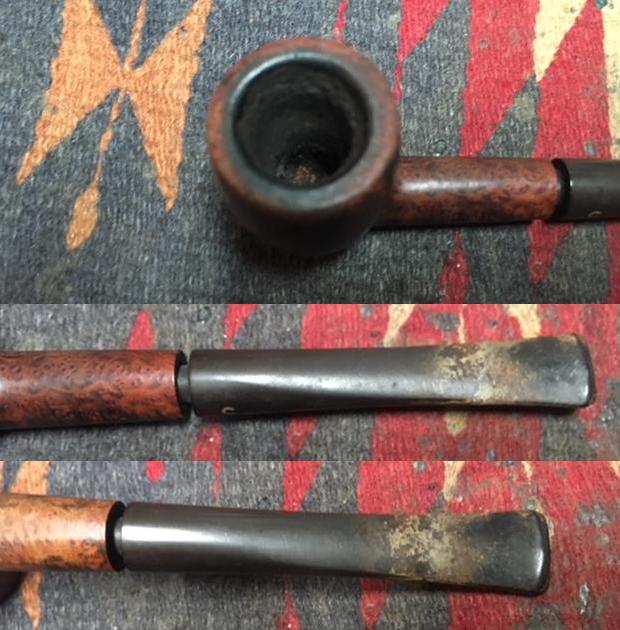
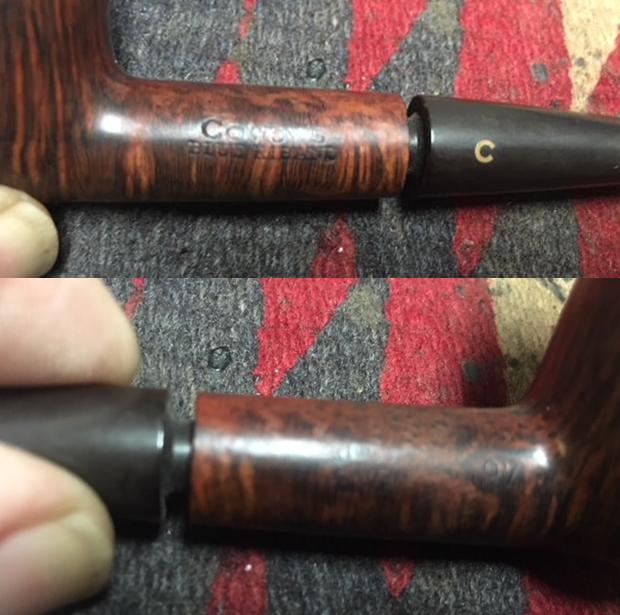
 The nomenclature is found on the upper side of the oval shank. A very thin, worn ‘Henley’ (in cursive script) [over] offset ‘SPECIAL’. On the underside is the COM, ‘MADE IN DENMARK’.
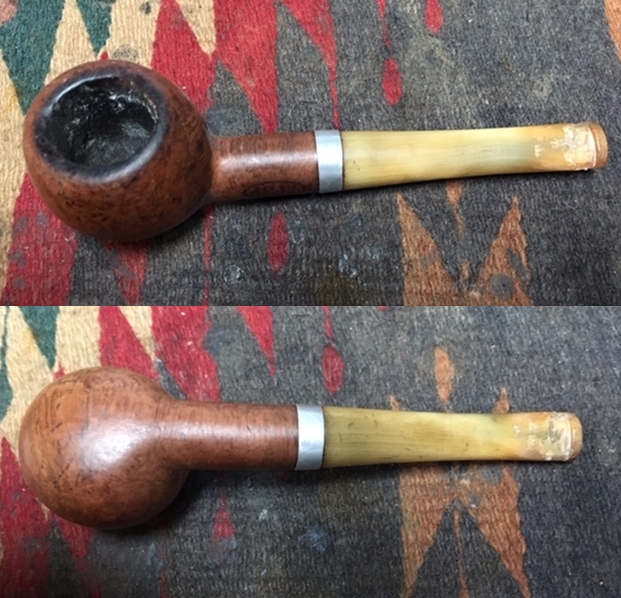
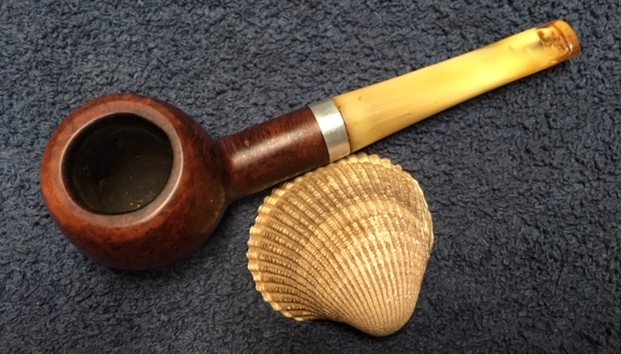
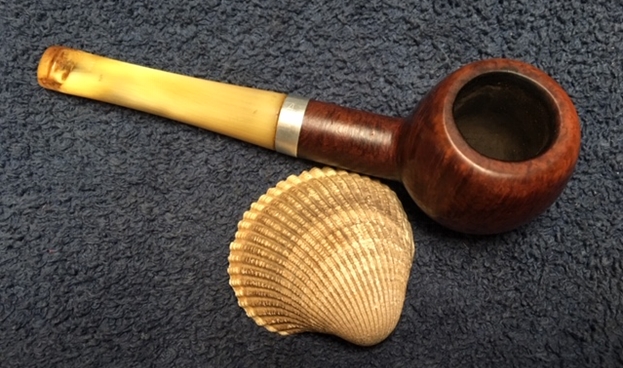
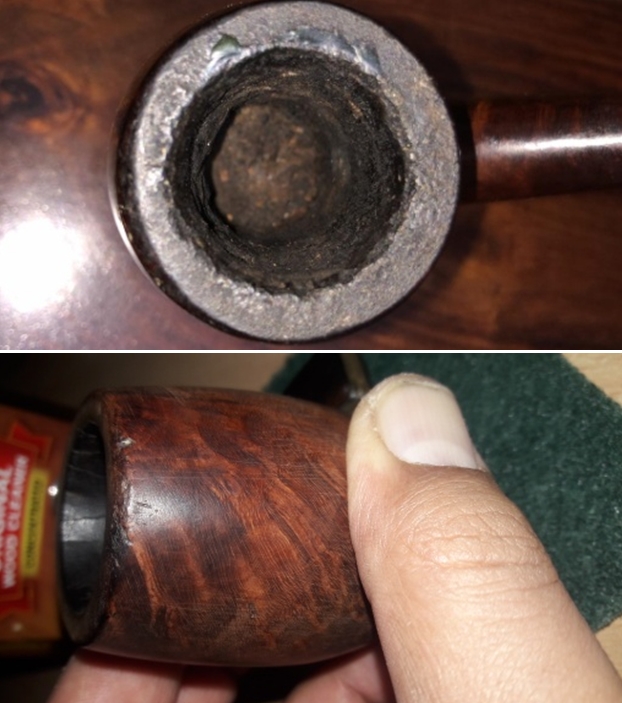
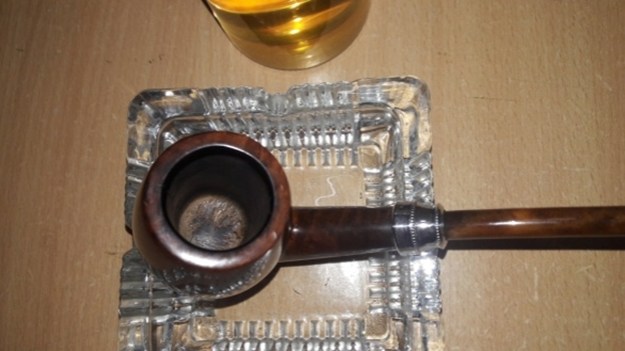
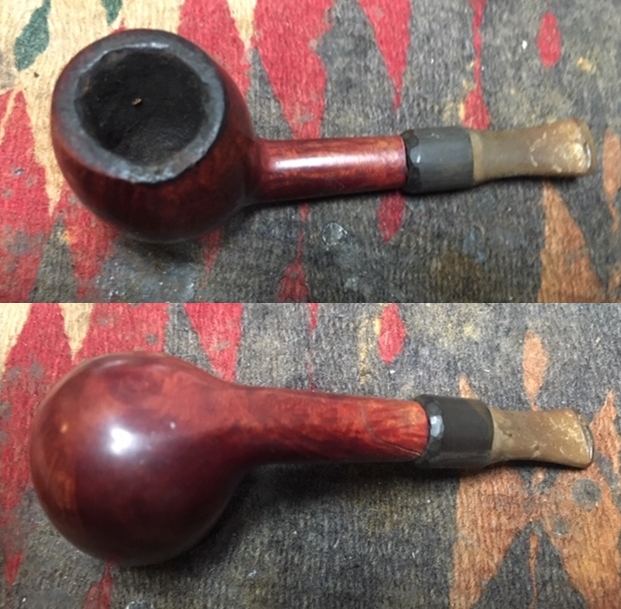
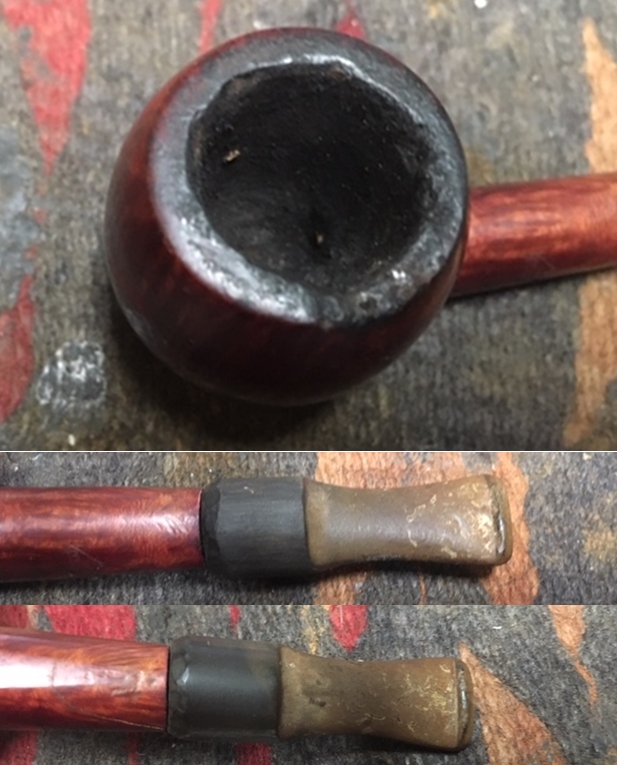
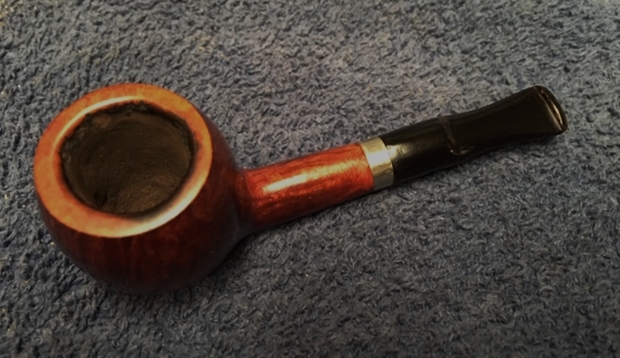
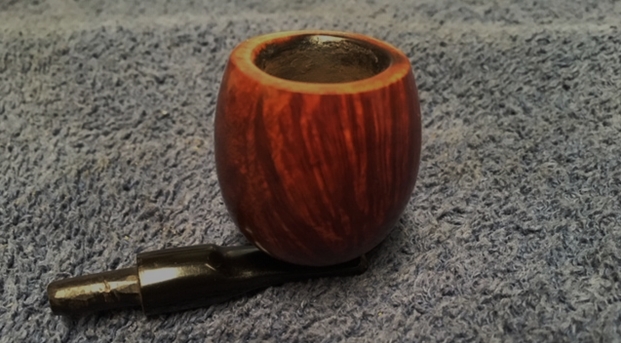
  As with the other two Stanwell Henley pipes I acquired at the same time, the finish is extremely dark from years of grime and oil build up. The uniformity of the darkened state of the pipes lends to a common period of manufacturing, which I’m guessing to be in the 1950s or 60s. Even though I know it’s not an exact science, the feel of the pipes seems older. I need first to clean the briar surface before I can see what is going on with the briar – the condition or even the look of the grain. The oval saddle stem has oxidation, tooth chatter and dents which need attention. The cake in the chamber is thick and will be removed to give the briar a fresh start. The rim has significant lava flow and I detect a divot on the internal lip of the rim which needs attention.
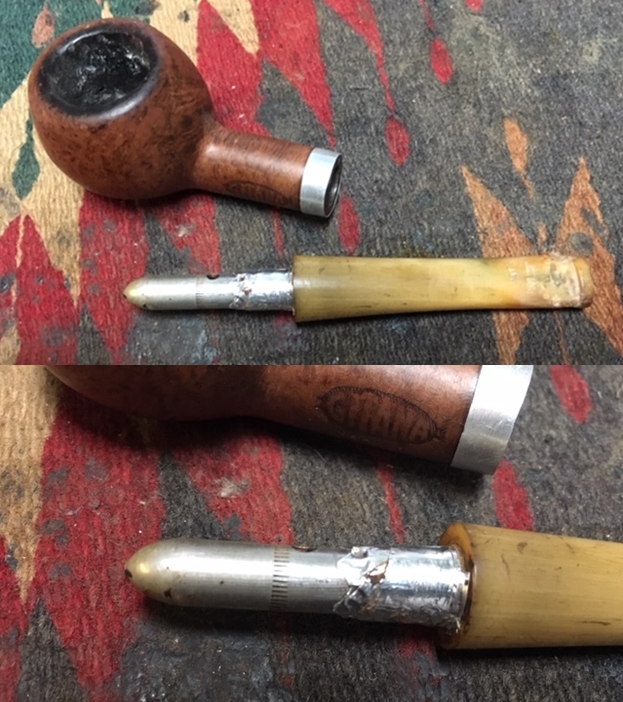
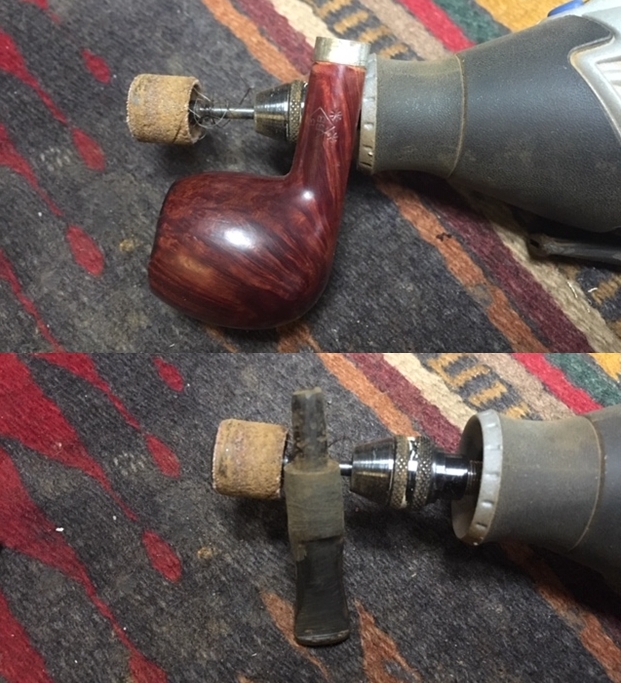
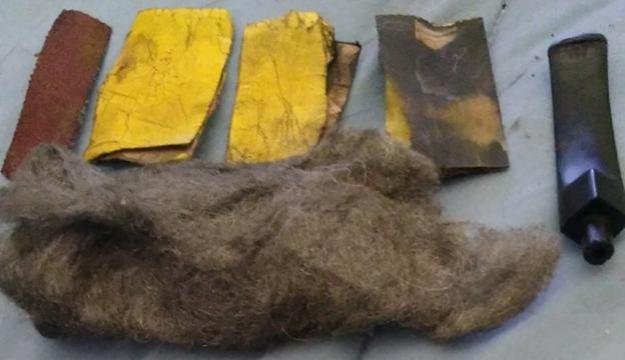
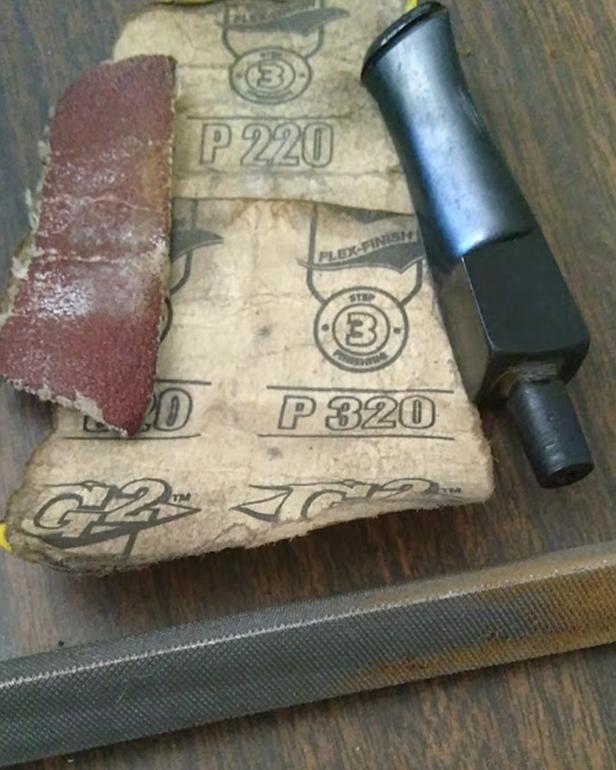
To begin the restoration of this vintage Stanwell Henley Special Oval Shank Billiard, I run a pipe cleaner dipped in isopropyl 95% through the airway to clean it up. I then add the oval saddle stem to a soak of Before & After Deoxidizer with other pipes and stems in the queue. I leave it in the soak for several hours and fish it out, letting the Deoxidizer drain off the stem. I then wipe the raised oxidation with cotton pads wetted with alcohol. I follow the alcohol by wiping the stem with a pad wetted with light paraffin oil.

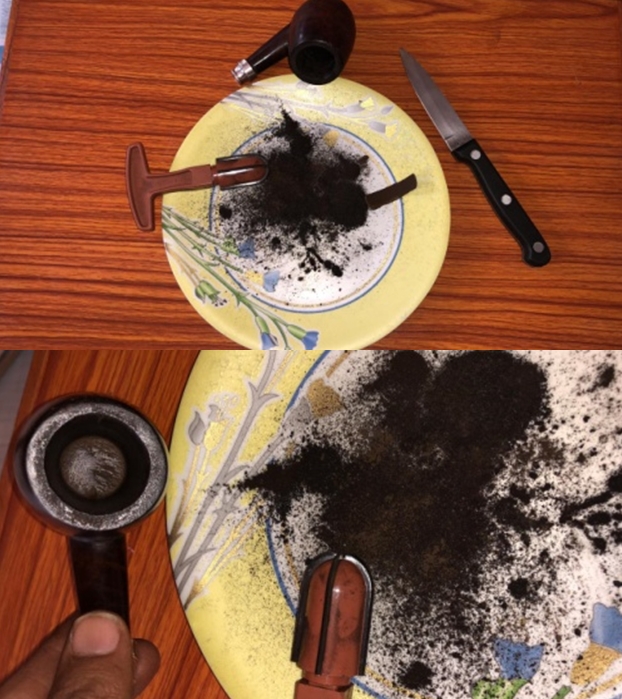
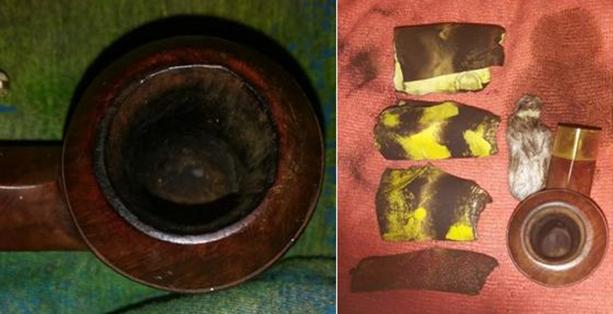
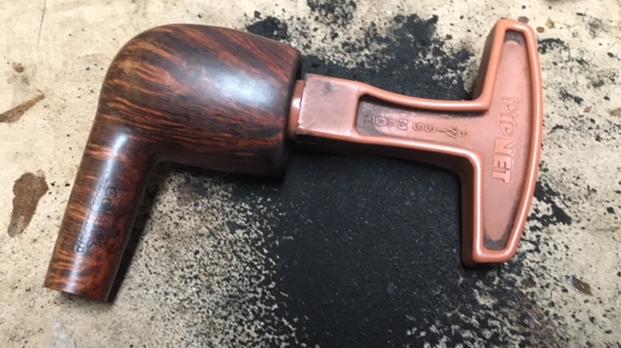
 Turning now to the bowl, I begin by reaming the chamber. There is heavy cake in the chamber tightens as it descends in the chamber. Using the Pipnet Reaming Kit, I start with the smallest of the 4 available blade heads. After putting some paper towel on the table, I go to work. I use 3 blade heads of the 4 and then transition to the Savinelli Fitsall Pipe Tool. With the Fitsall tool I continue scraping the chamber wall and fine-tuning the reaming and reaching to the difficult angles. Then, wrapping 240 grade paper around a Sharpie Pen, I sand the chamber removing more carbon and revealing fresh briar. To complete the chamber cleanup, I wipe it with a cotton pad and alcohol to clear the carbon dust. With the carbon cake cleared, an inspection of the chamber reveals no problems with cracks or heat fissures. The pictures show the progress.

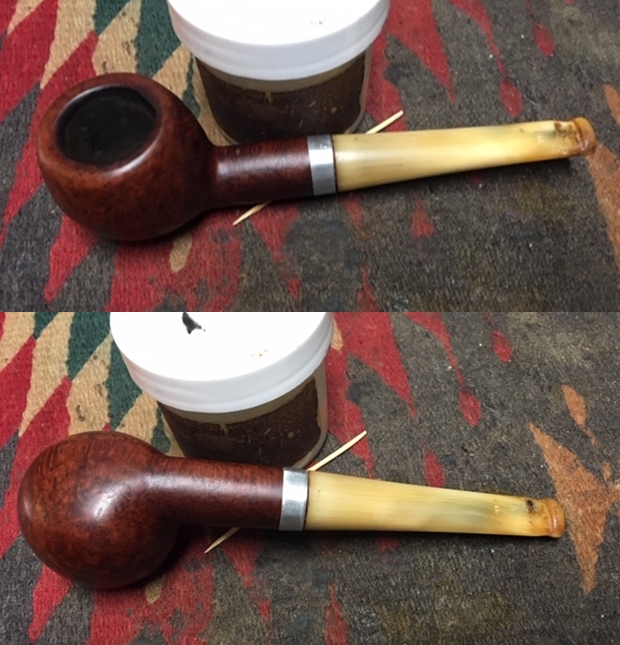
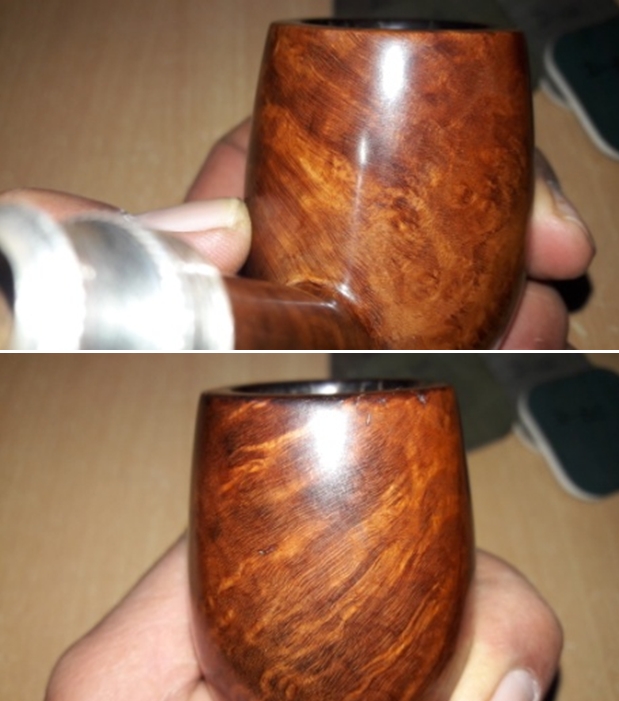
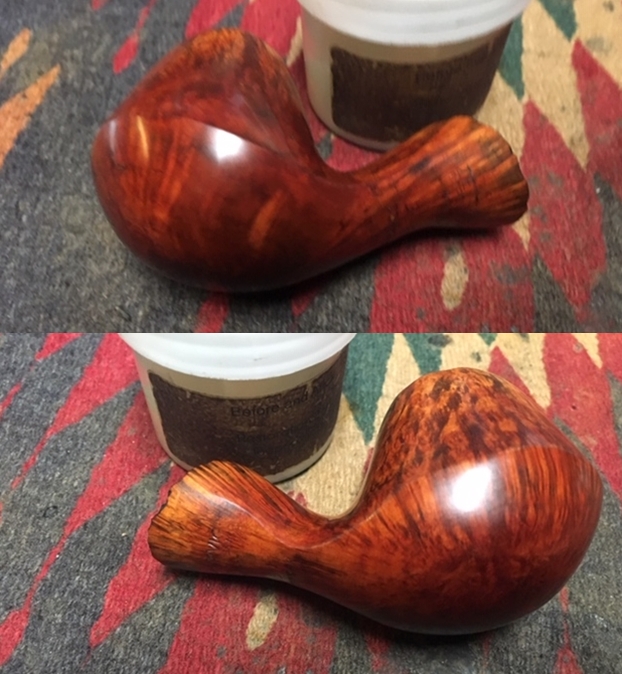
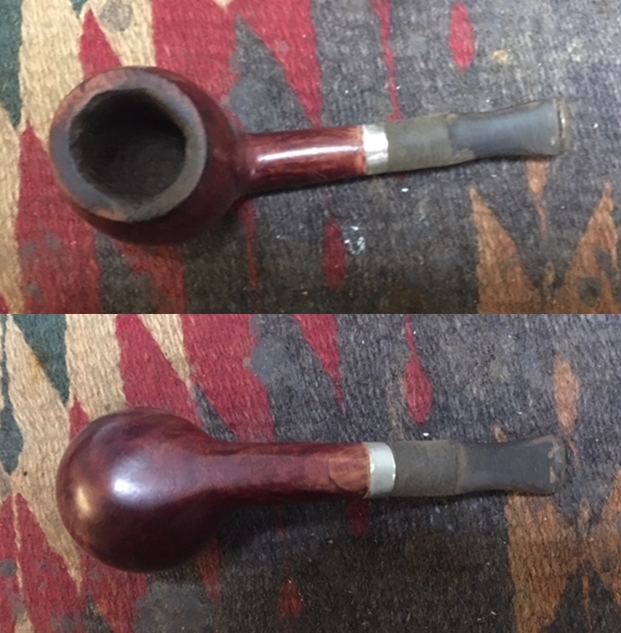
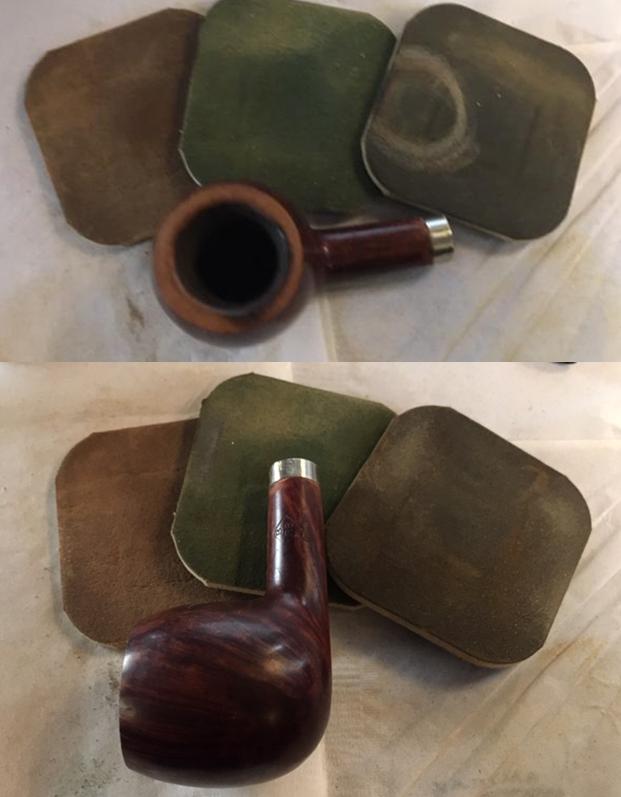
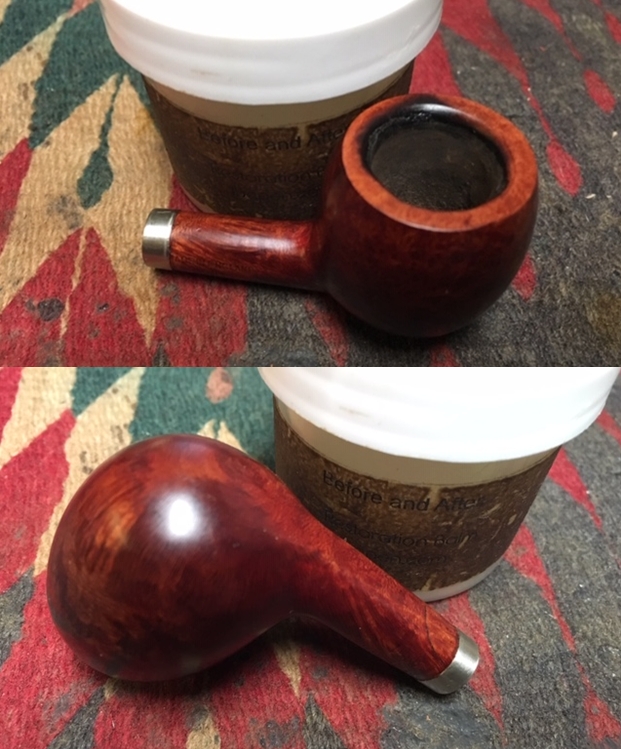
 Turning now to the external surface, I use undiluted Murphy’s Soap on cotton pads. I’m anxious to see what the Murphy’s Soap does on this very dark, aged briar surface. As I use the cotton pad, I very quickly begin to see what beauty was waiting underneath. I called my wife to take some pictures as I scrubbed the ancient layer of oils and tars that have cocooned the briar underneath. I also use a bristled tooth brush and a brass wire brush on the rim. My, oh my! I’ve never seen a pipe clean up to such a pristine condition. I rinse the bowl with tap water and literally marvel at what is in my hand. The rim is still darkened a bit from lava flow, but the flame grain that dominates the bowl’s external surface is striking. I take two pictures after the cleaning to mark the progress. As I look at the stummel, I decide to hydrate the briar using light paraffin oil (mineral oil) which also gives me a sneak peek at a finished stummel. The before and after pictures tell the story.


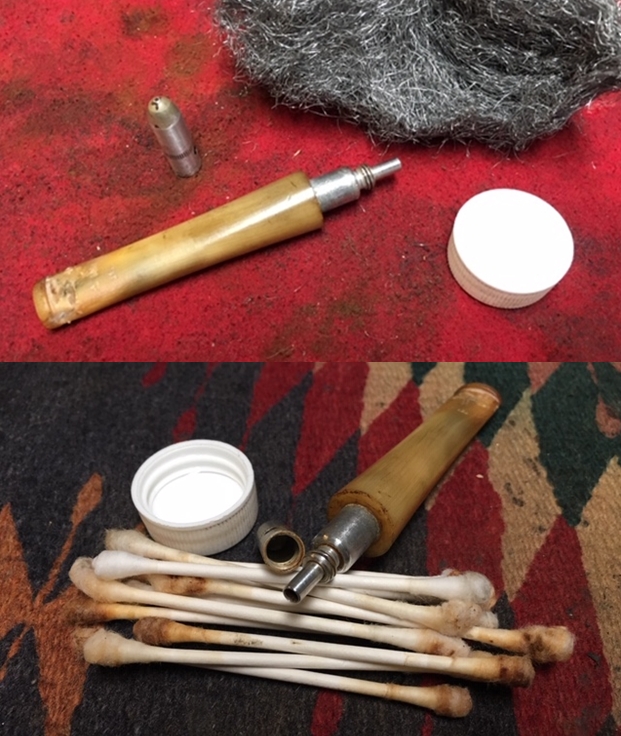
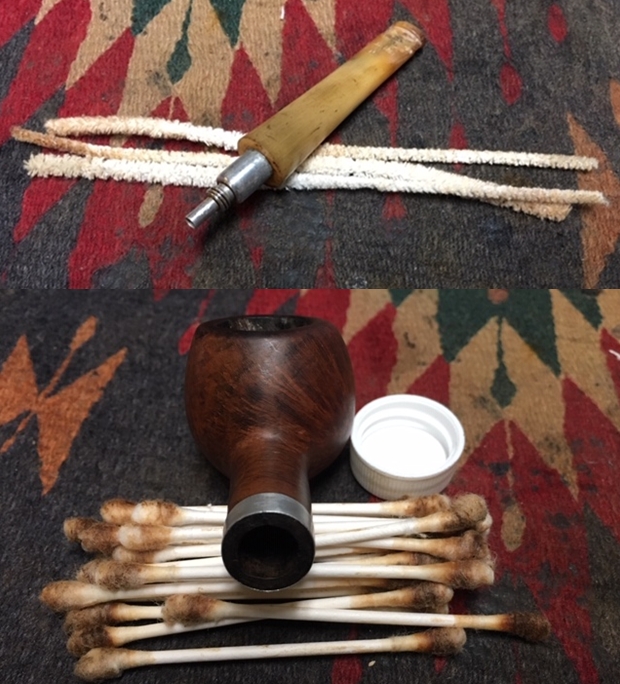
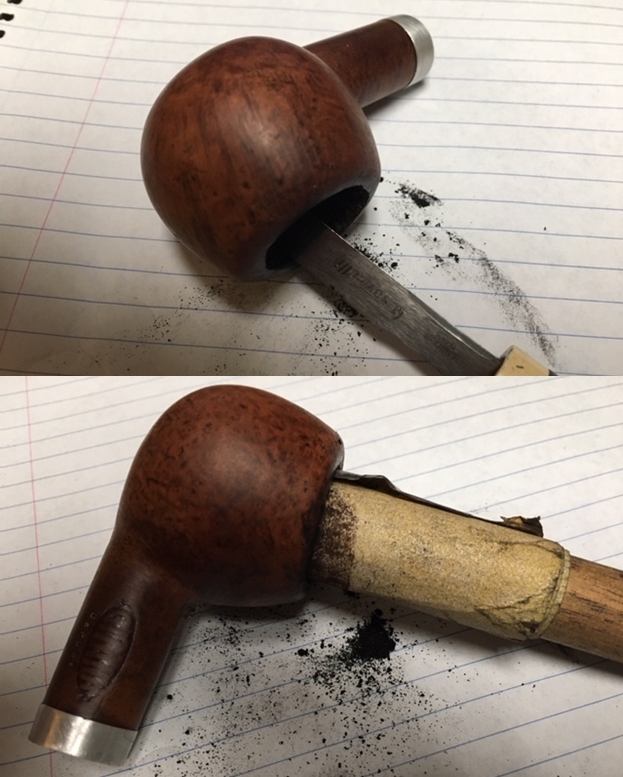
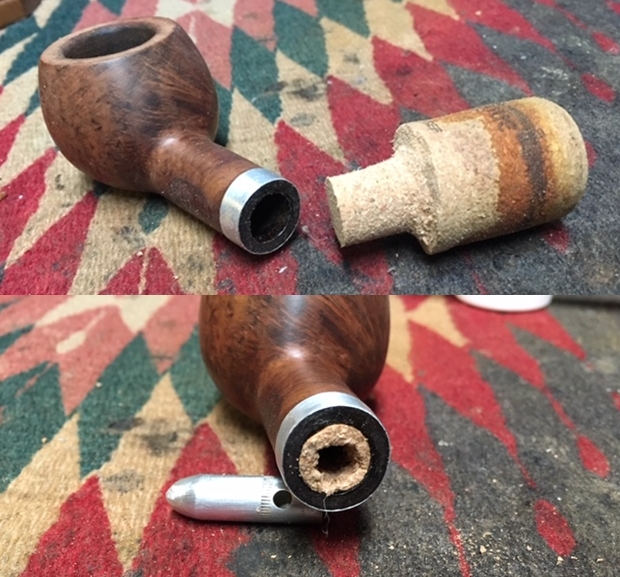
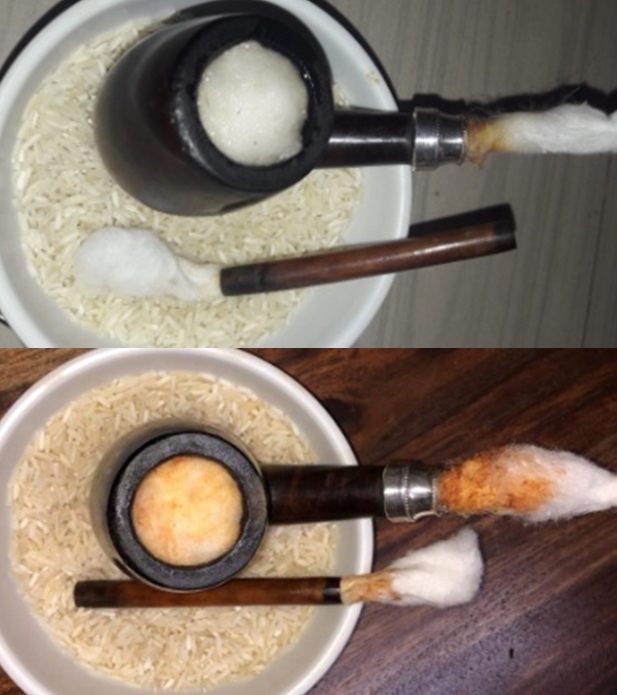
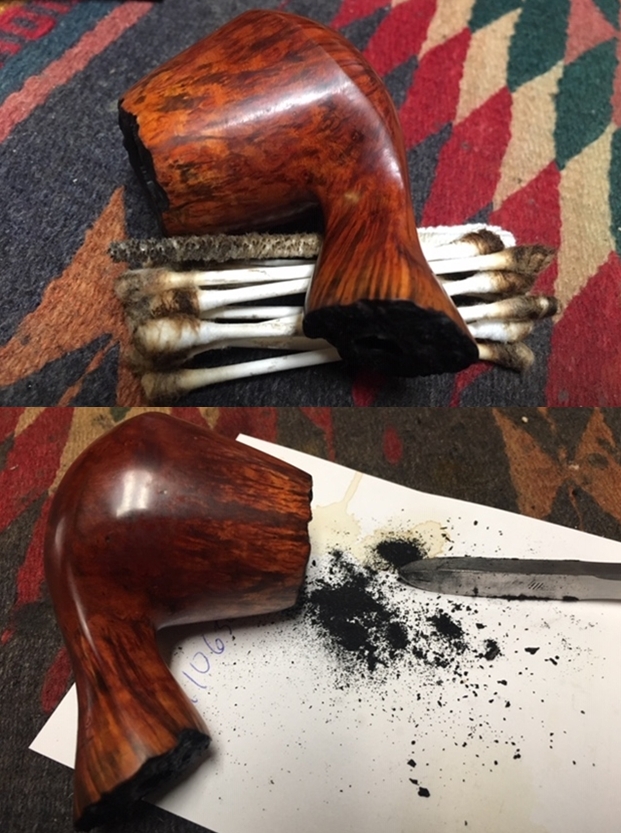
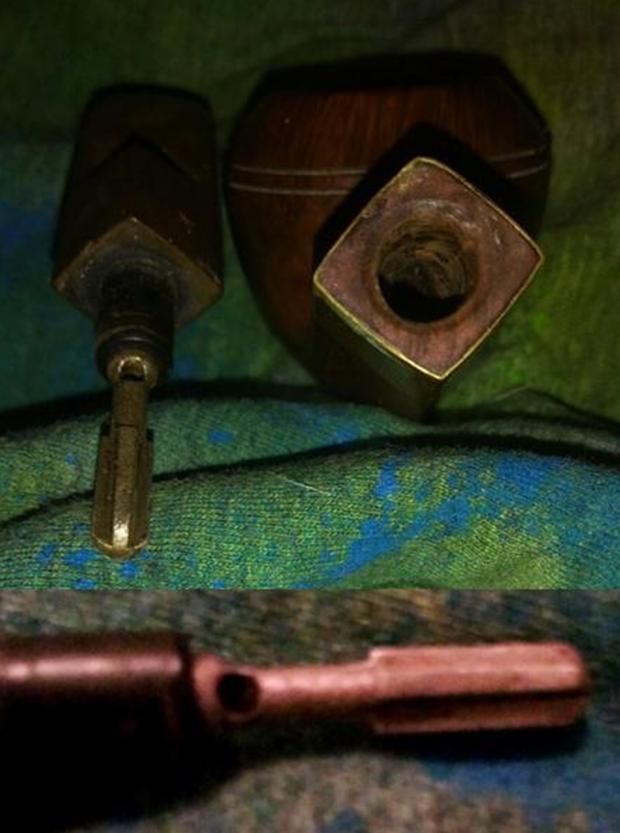
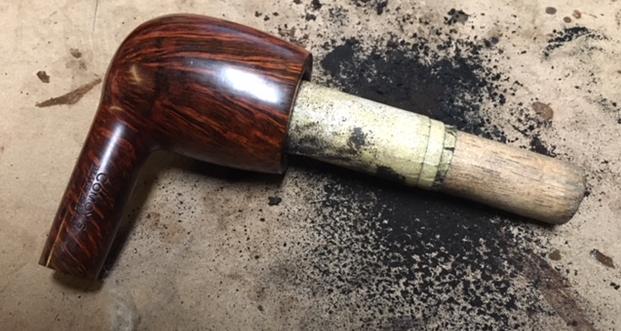
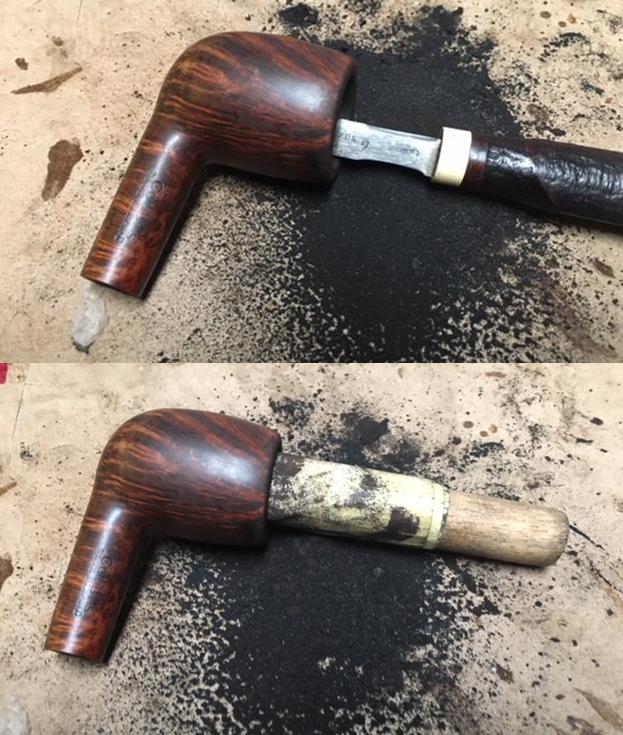
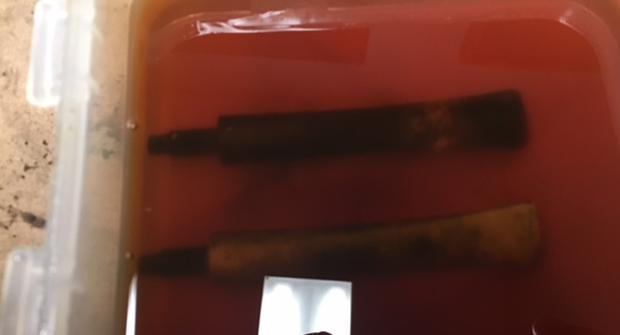
 Turning now to the internals of the stummel, I use cotton buds and pipe cleaners dipped in isopropyl 95% to clean the mortise and airway. I also utilize long shank brushes to save on pipe cleaners. To loosen up the tars and oils, I employ a dental spatula to scrape the mortise wall and reach into the airway. A drill bit effectively excavates crud out of the airway. To do this, I use a bit the size of the airway and hand turn the bit so that it proceeds down the airway. The bit grabs the buildup and removes it. After some time excavating and scraping, pipe cleaners and cotton buds start coming out clean. The pictures show the tools and the progress.
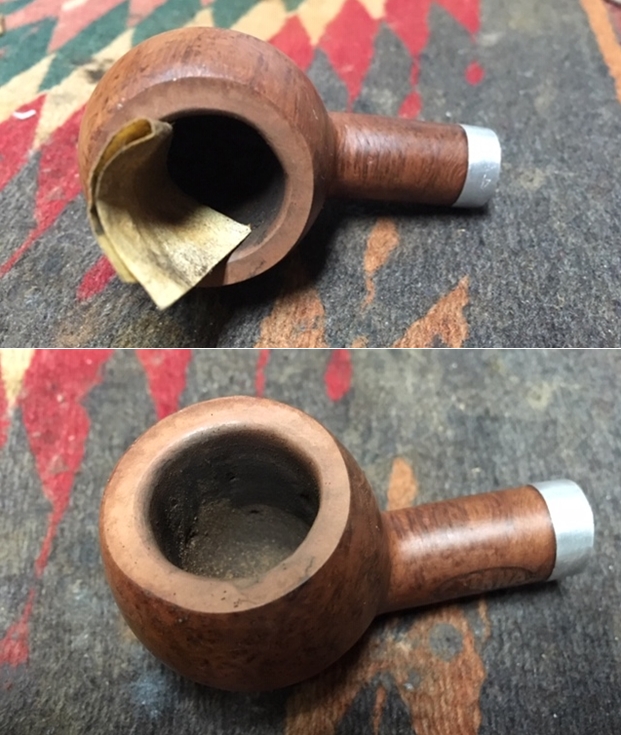
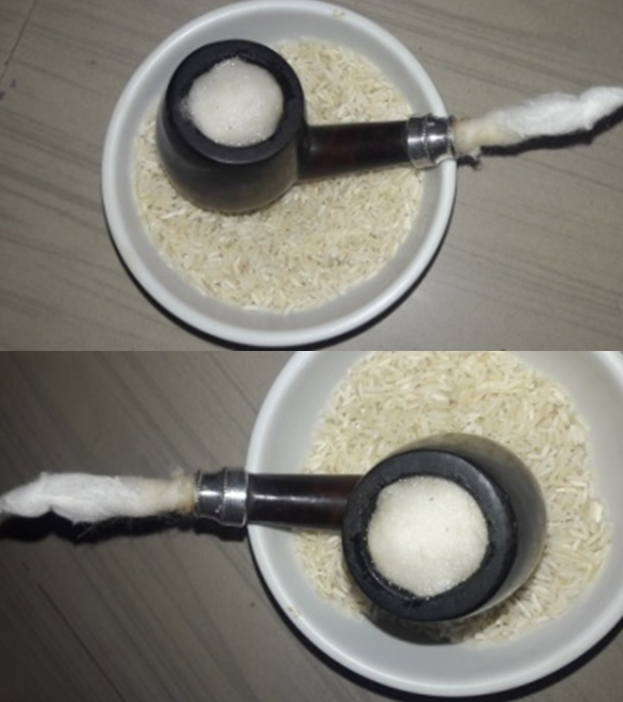
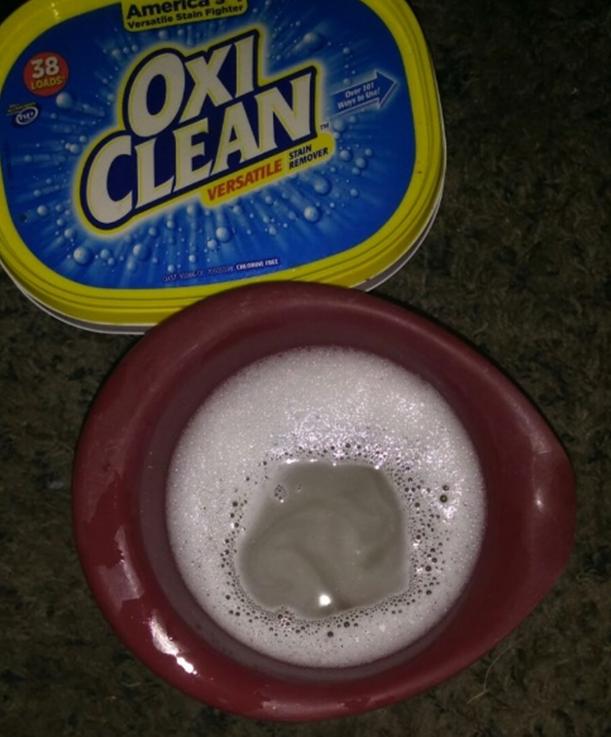
 I continue the internal cleaning with a kosher salt and alcohol soak. After twisting and stretching a cotton ball to form a wick, I stuff it down the mortise/airway to draw the oils and tars. Following this, I fill the bowl with kosher salt (kosher salt has no residual after-taste as does iodized salt) and set it in an egg crate. Using a large eye dropper, the bowl fills with isopropyl 95% until the alcohol surfaces over the salt. After a few minutes the alcohol is absorbed, and I top off the alcohol and set the stummel aside for the night.
 The next morning, the soak did the work. I toss the expended salt in the waste and wipe the bowl with paper towel to remove the salt. I also use a shank brush in the chamber and down the mortise to remove any remaining salt. Finally, I blow through the mortise. To make sure all is clean, I finish by wetting a pipe cleaner and cotton bud with isopropyl 95% and running them through the mortise. I declare the stummel to be cleaned.
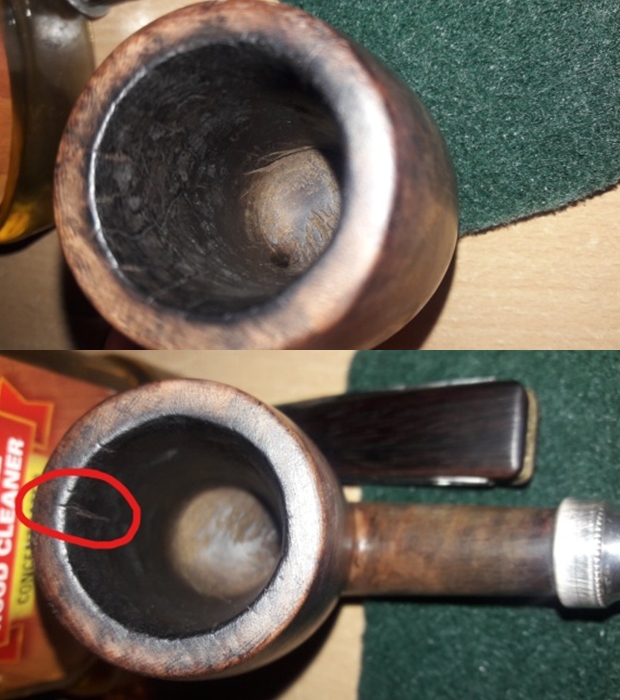
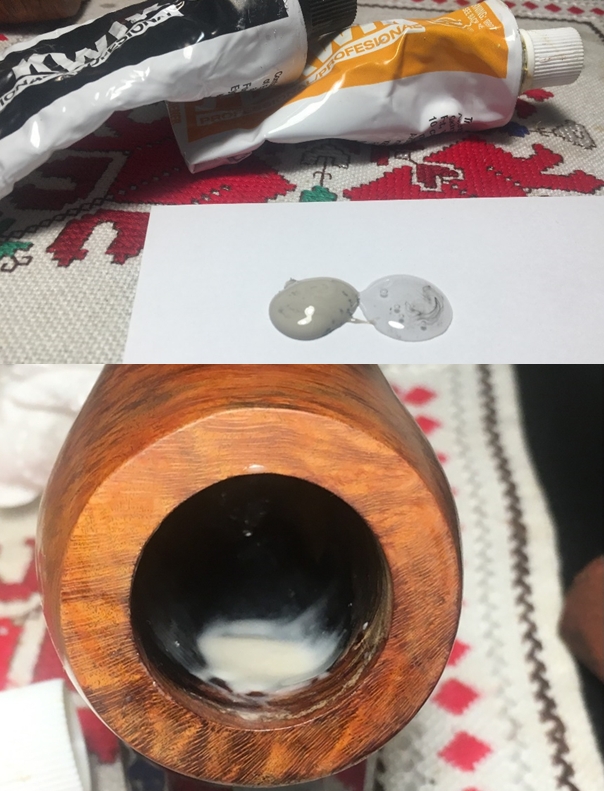
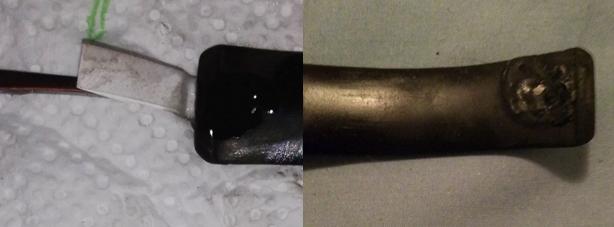
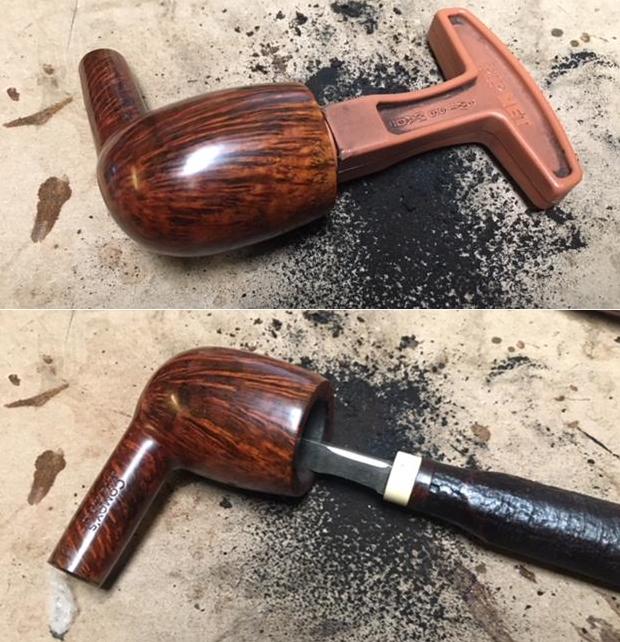
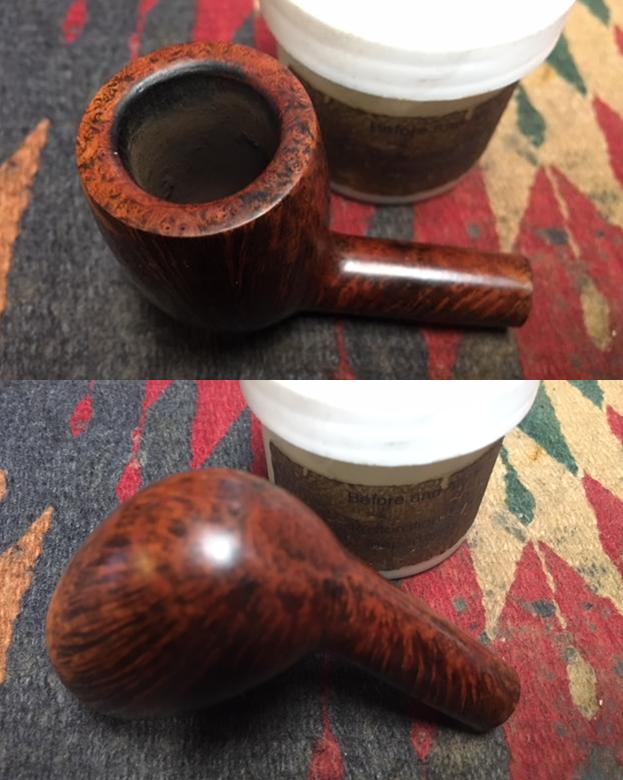
 With the pipe cleaned, I look again at the stummel surface which almost appears to have been protected by the layer cocooning it. My task will be to preserve the patina of the briar’s finish by not introducing sanding that will be too invasive and remove the aged surface. I sent a note off to Steve of rebornpipes, just to make sure my plan received his concurrence before moving further with the Henley. My plan is to first repair the divot on the inside of the rim lip, shown at the 2 o’clock position on the first picture below. I could introduce an internal bevel to mask the divot, but I would rather salvage the rim real estate with this vintage pipe. I make a patch of briar dust and thick CA glue and mix a small amount of putty with it. After wiping the area with alcohol to clean it, I mix the CA glue and briar dust until it reaches the viscosity of molasses and apply the putty to the divot using a toothpick. It takes very little. I put the stummel aside to allow the patch to cure.
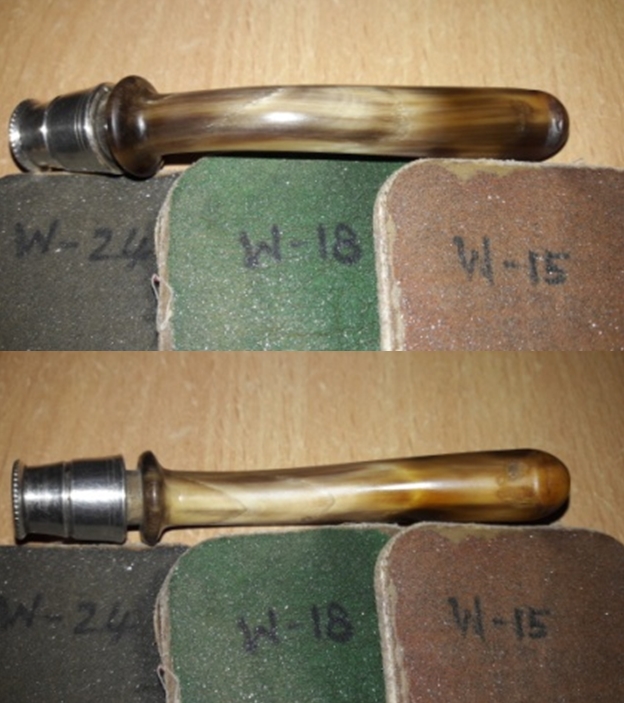
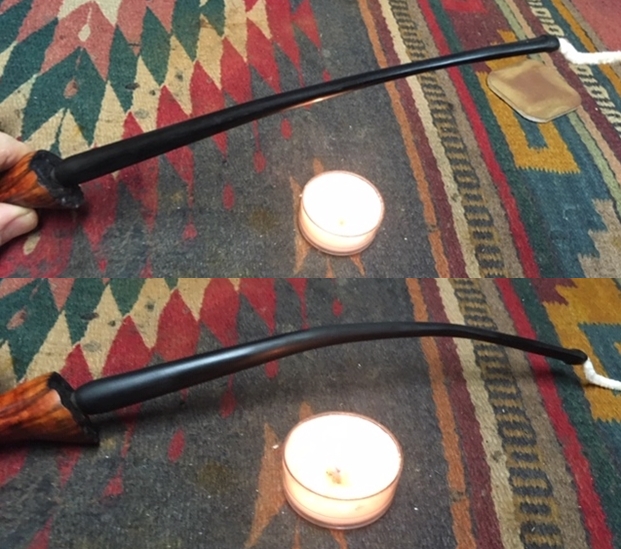
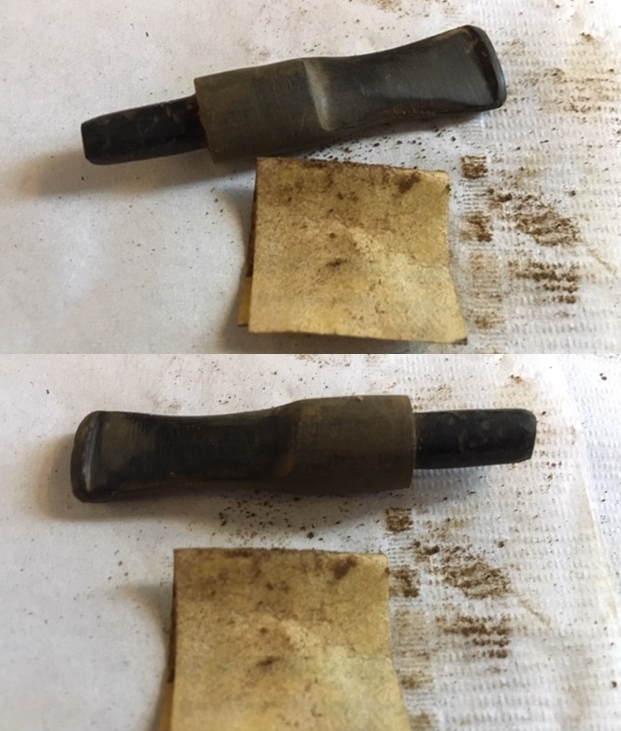
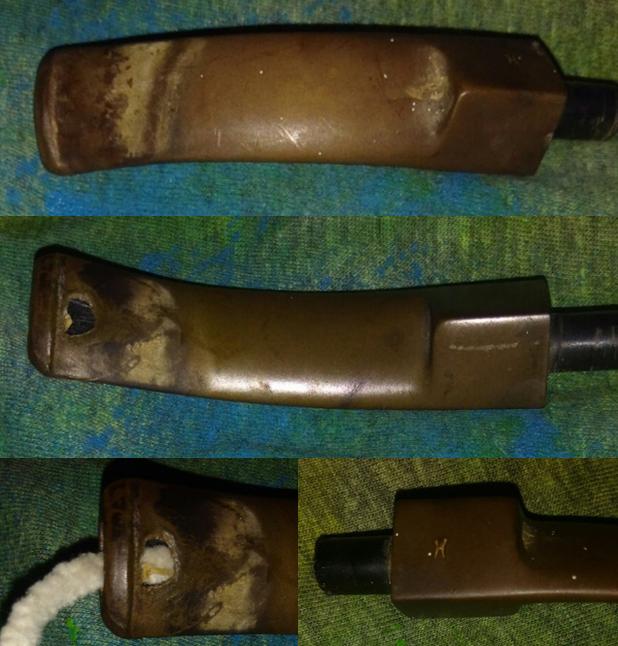
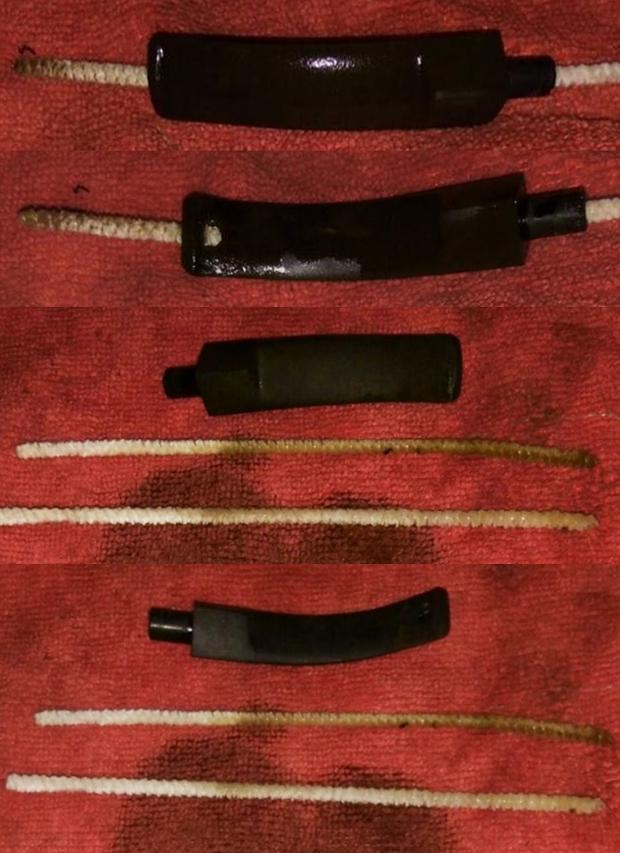
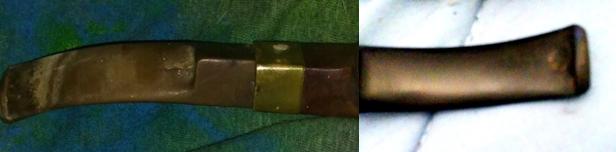
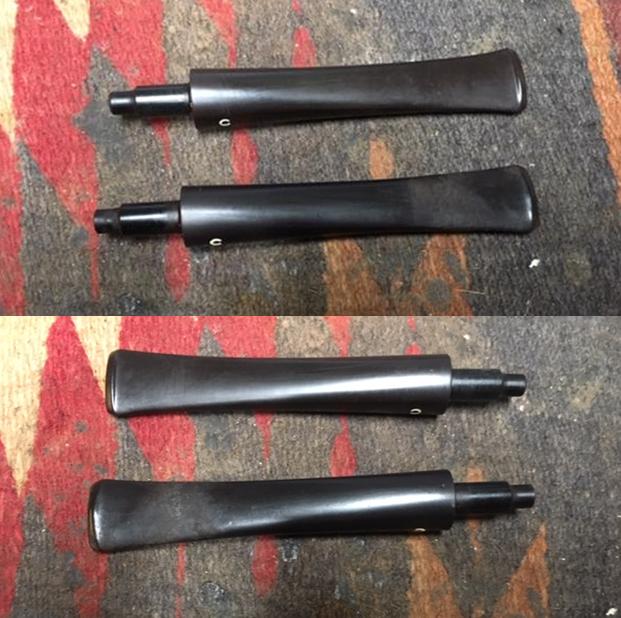
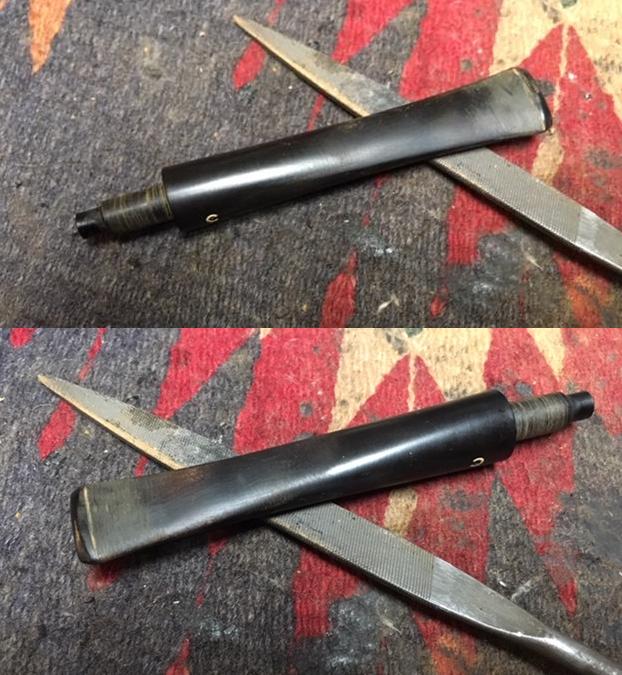
 With the patch curing, I look at the stem and take some close ups of the bit area. The chatter is light with some bites. I begin by using the flame method to raise the indentations in the vulcanite. With a Bic lighter, I paint the button area. The physics of vulcanite – a compound rubber, expands when heated. The heating causes the bites and chatter to lessen in the intensity. As I heat, it does lessen but is not fully removed. I next use 240 grit paper and sand out the chatter and dents remaining. I also use the flat needle file to redefine the button lips – upper and lower. The pictures show the progress.
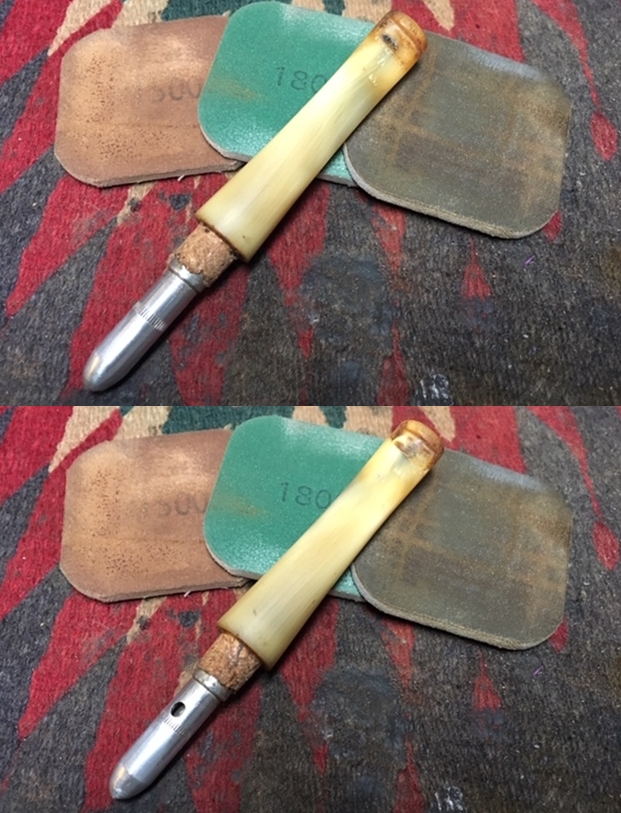
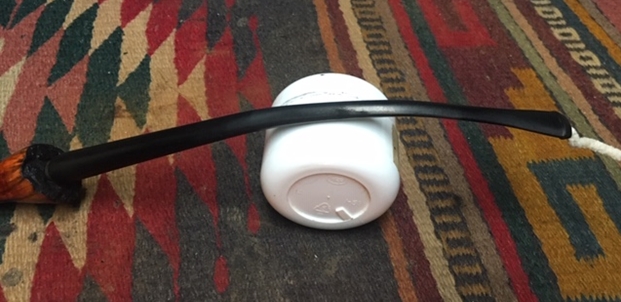
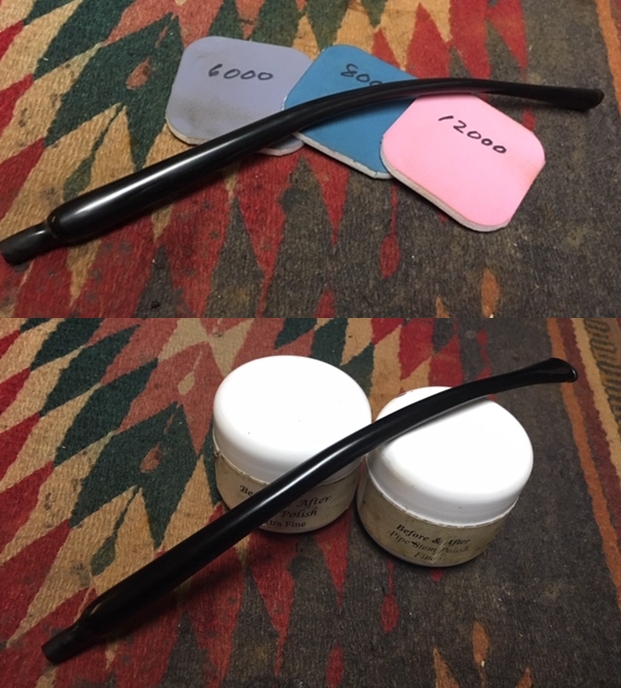
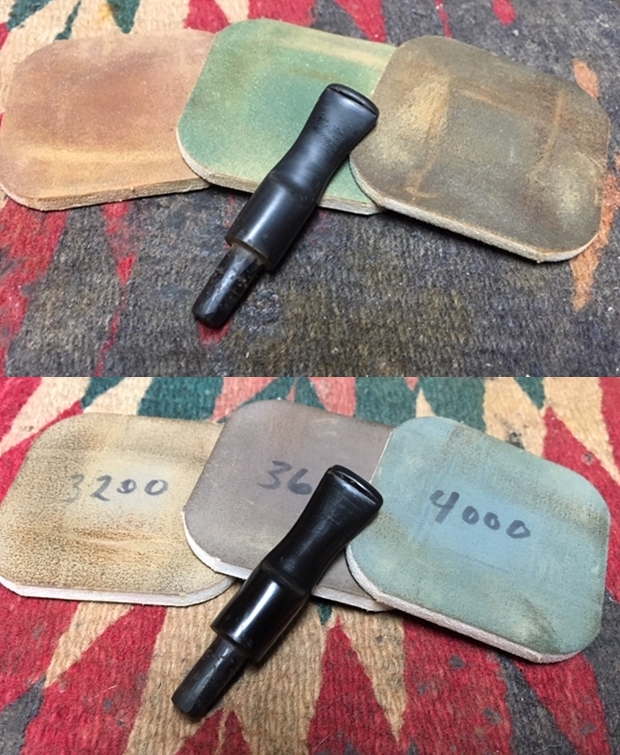
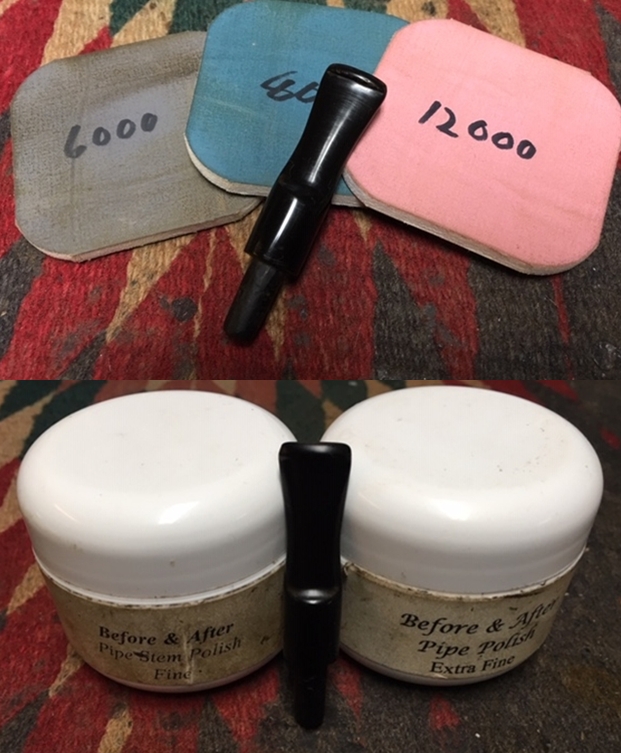
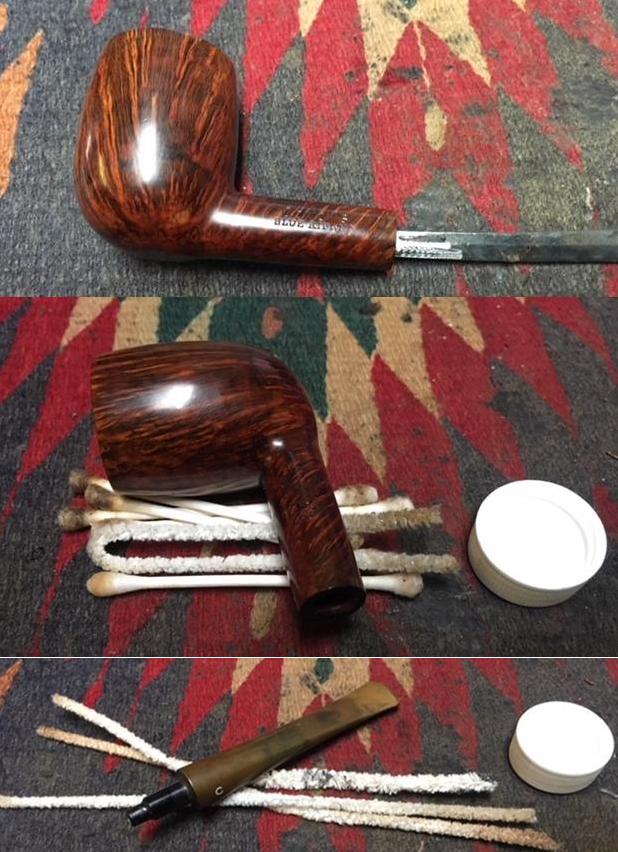
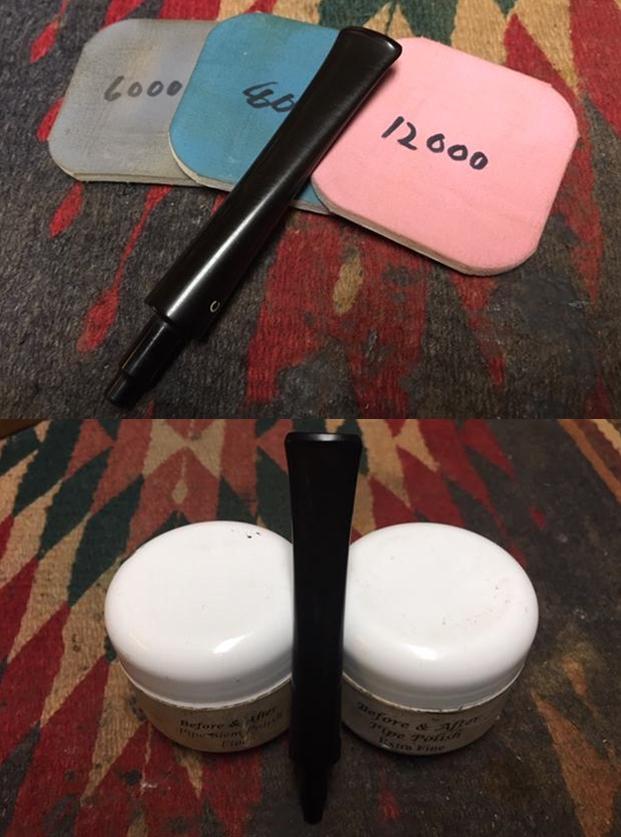
 Following the 240 paper and filing, I use 600 grade paper and wet sand the entire stem. I follow this using 0000 steel wool to sand/buff the stem. The pictures show the progress.
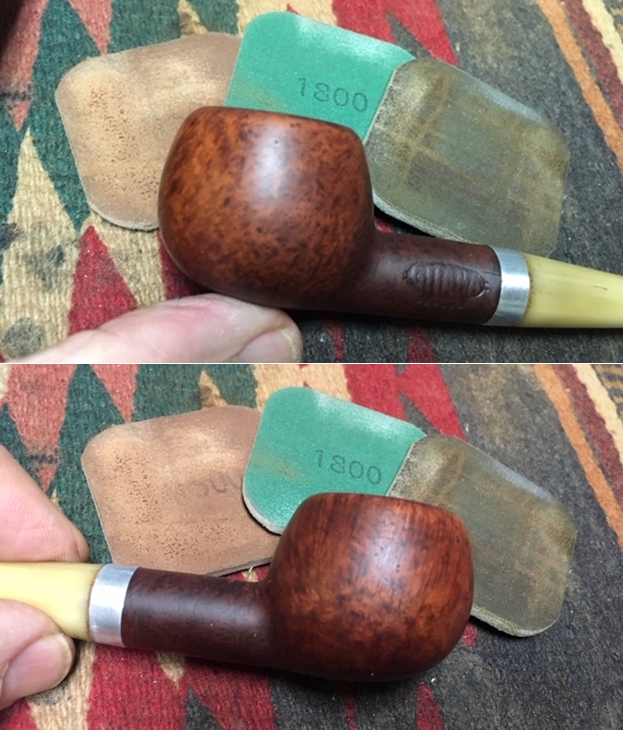
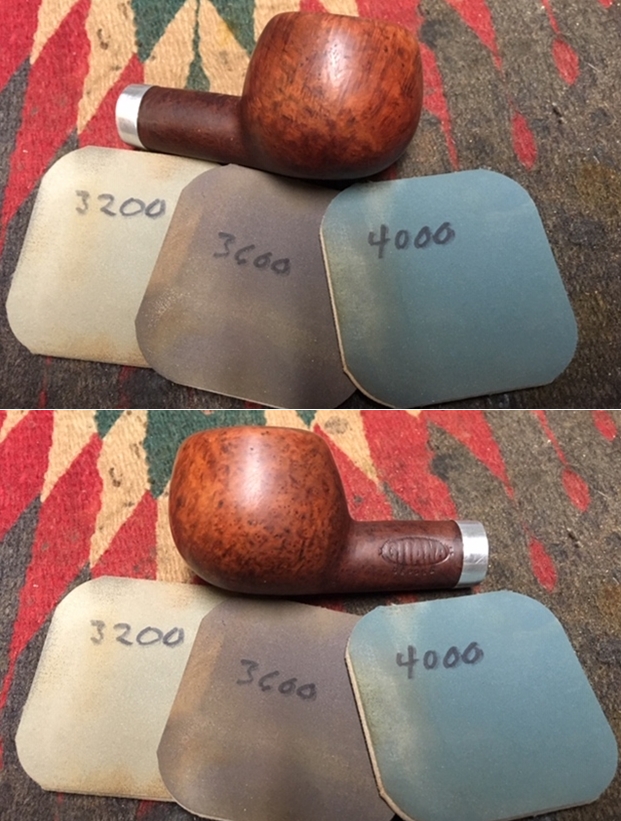
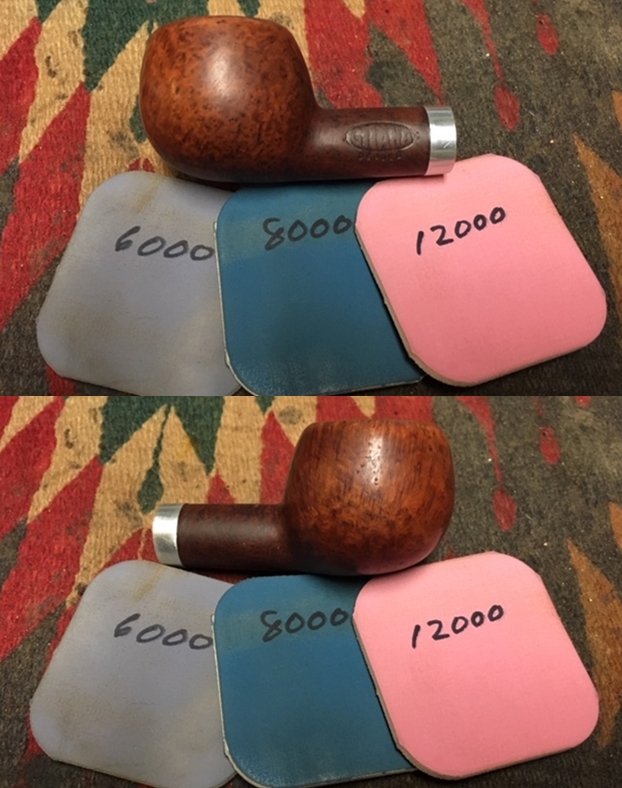
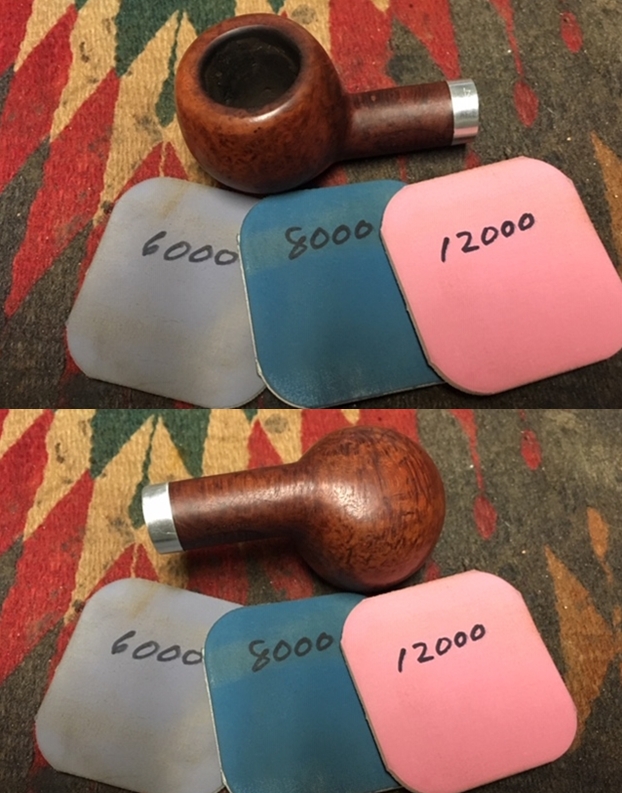
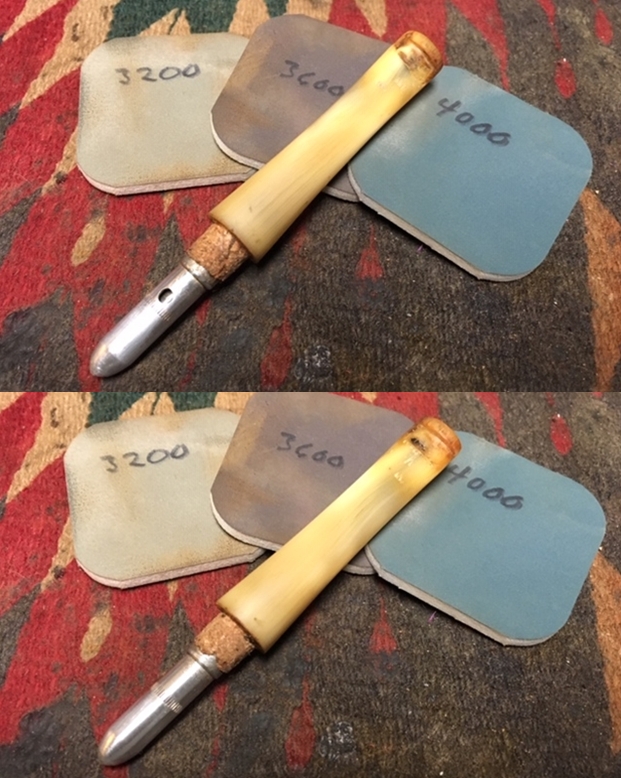
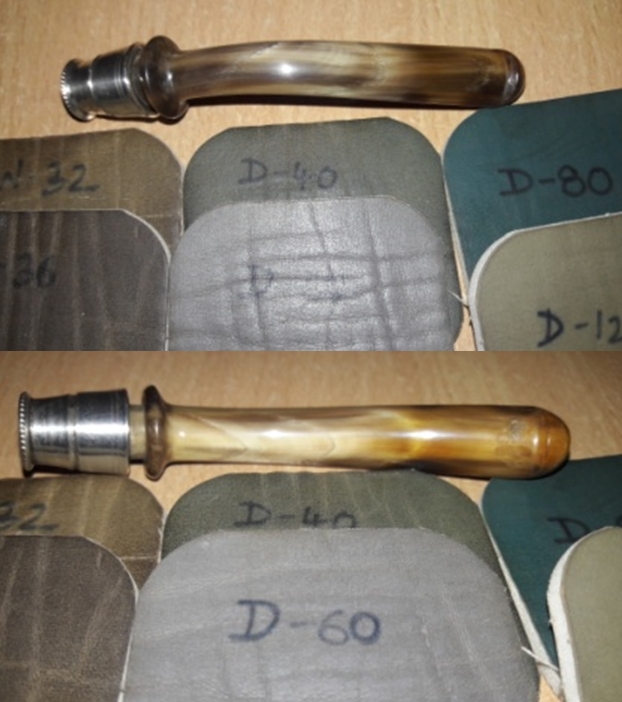
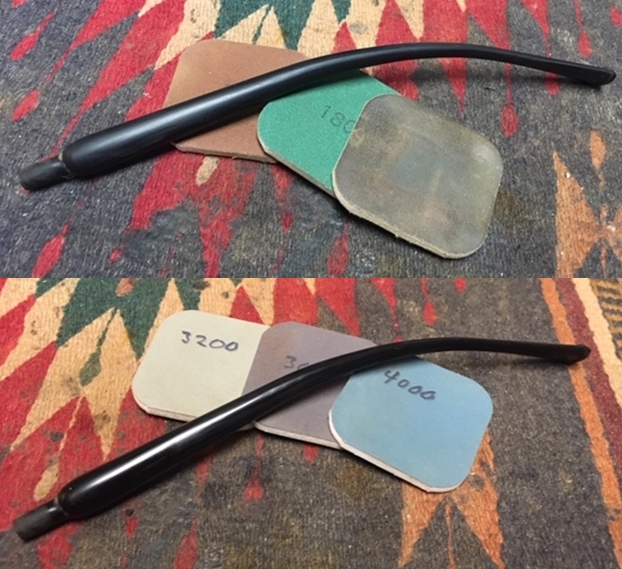
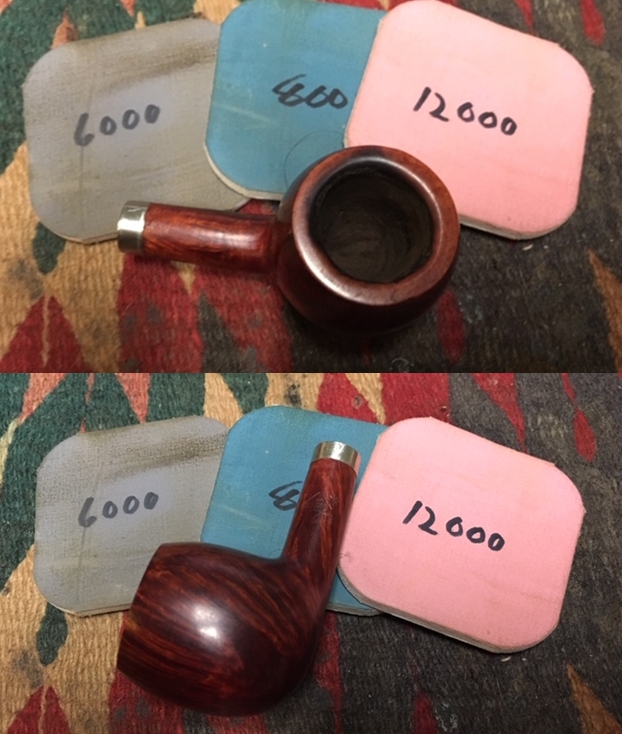
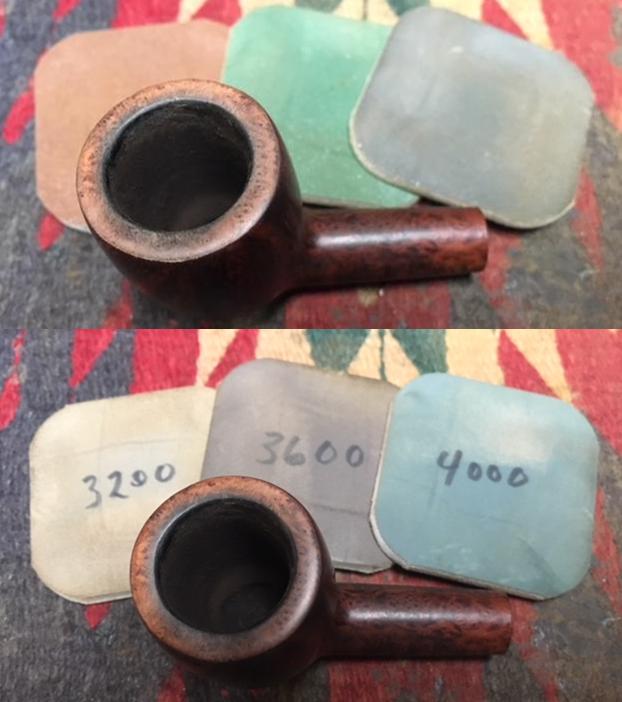
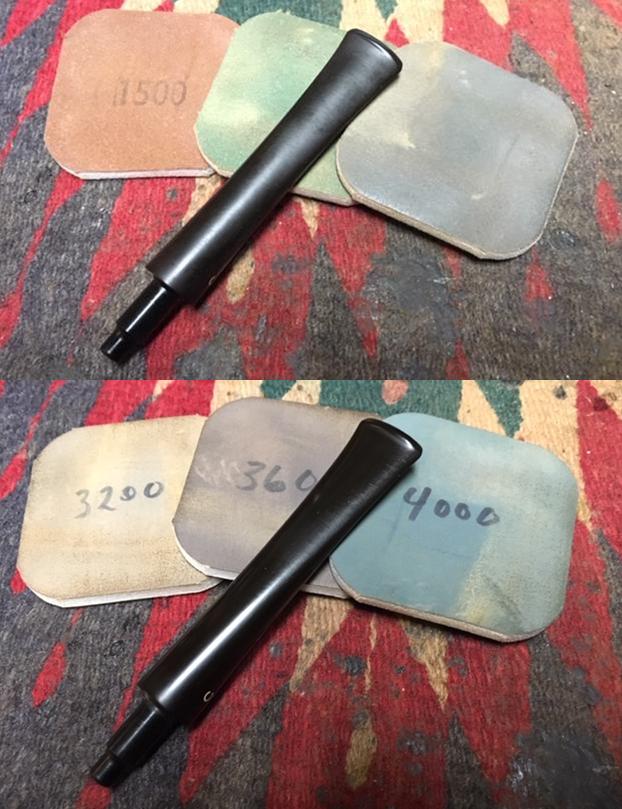
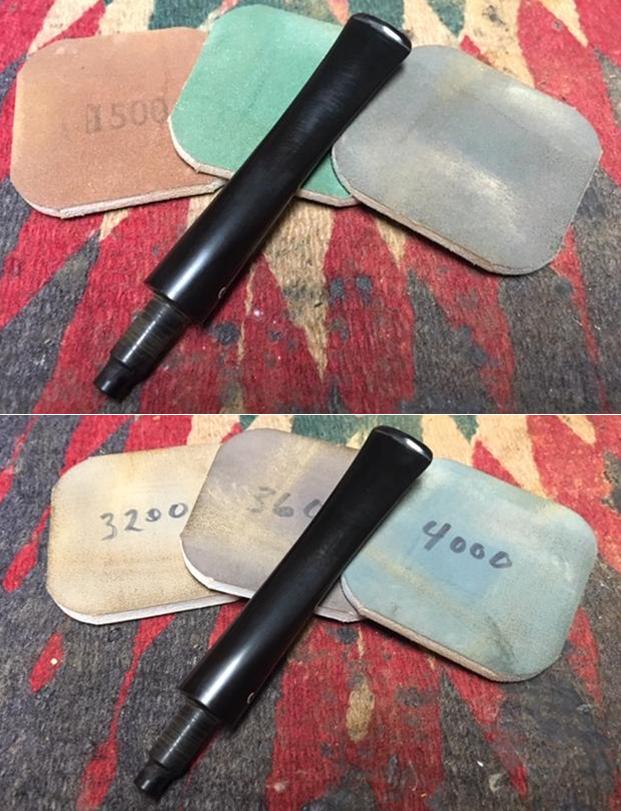
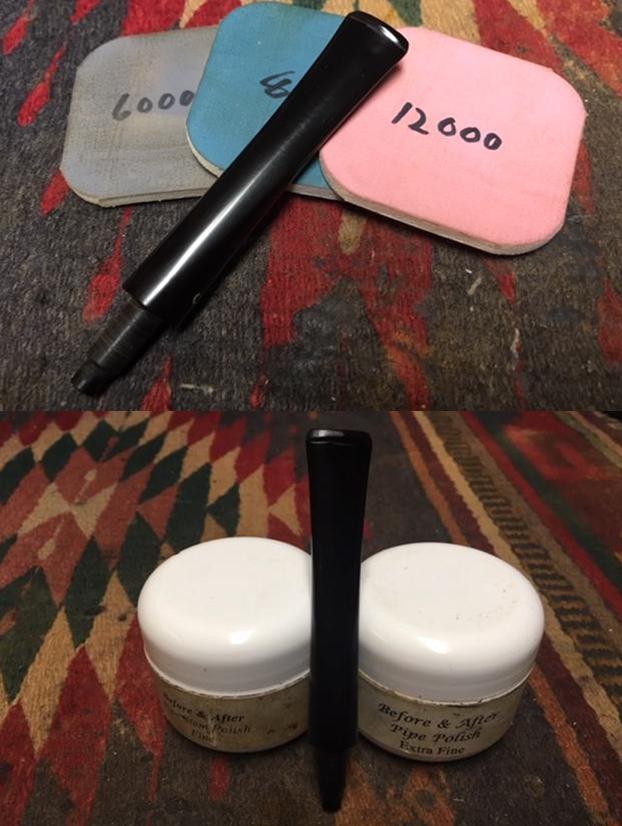
 Next, using micromesh pads 1500 to 2400, I wet sand the stem. I follow by dry sanding using pads 3200 to 4000 and 6000 to 12000. Between each set of 3 pads, I apply a coat of Obsidian Oil to the stem to revitalize the vulcanite. The pictures show the progress of restoring that glossy pop. I like it!

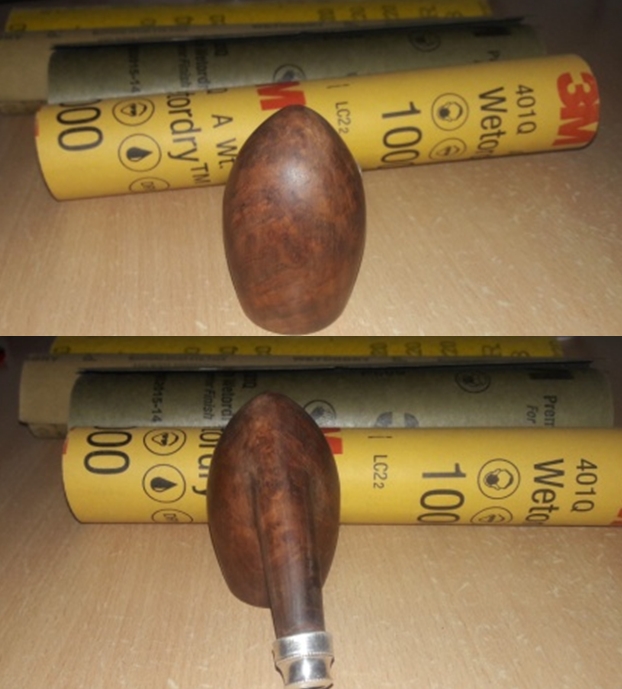
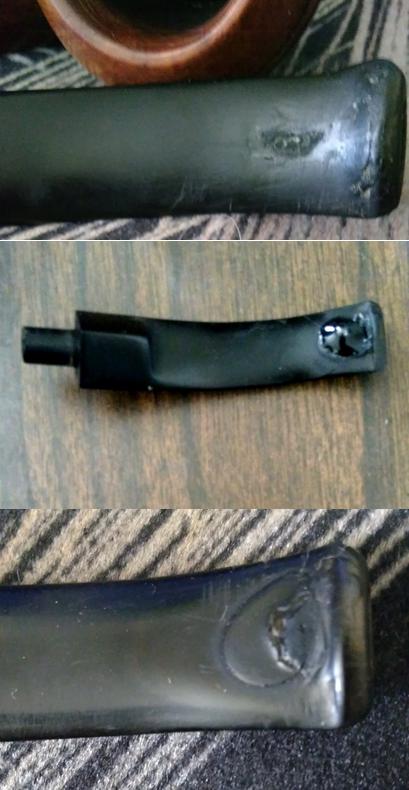
 With the stem drying, I look again to the stummel. The briar dust patch is cured, and time to be file and sand the patch mound. I use both a flat and a half-rounded needle file to gently and patiently file the patch mound on the top of the rim and on the inside lip. I’m careful not to impact the surrounding rim briar. After some time filing, I use a piece of 240 tightly rolled to finish the sanding, bringing the patch flush with the briar on the top and inside. I chronicle the progress.


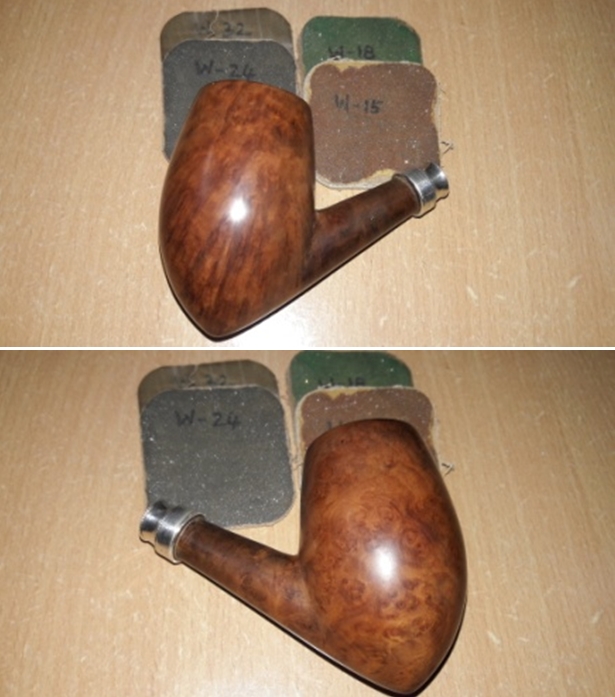
 Next, I gently clean the whole rim surface by lightly sanding it starting with micromesh pad 1500 and completing with pad 3600. The rim looks good.
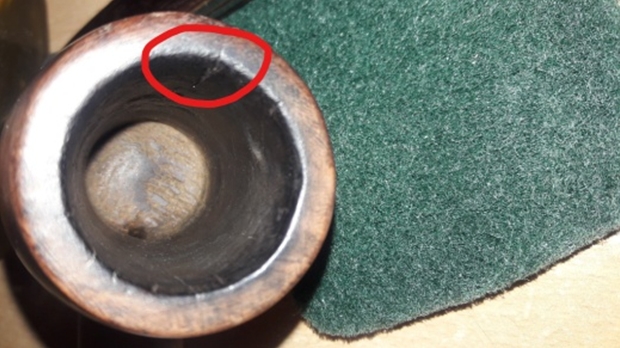
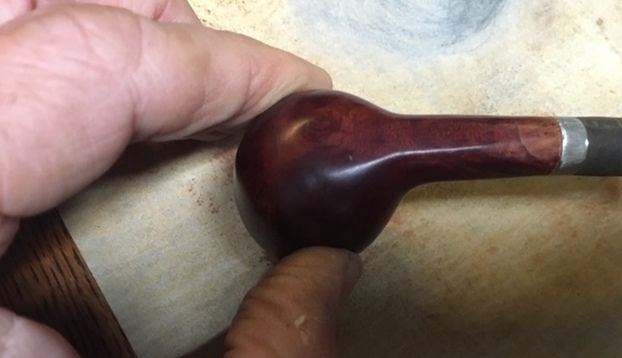
 To preserve the patina in the old finish, I’m willing to allow some scratches and dents to pass as badges of this Stanwell Henley’s past walk in life. I did want to try raising some in an area where I identified a concentration of these. I take a picture to show a closeup of the area. I then take my wife’s iron (she always raises her eyebrows when I ask for permission and my response to her question regarding what use HER iron will be to the art of pipe restoration! 😊) and wet a rag with tap water and place the rag over the briar area to be addressed. After the iron is heated, I place the iron over the rag which heats both water and wood creating a steaming effect on the dents and scratches. The effect of the heating and moisture causes the briar to absorb the moisture and expand, helping to close the wounds. This technique helped, but there remain some badges of the past for the Henley Special!
 Following this heating technique, I apply Before & After Restoration Balm to the entire briar surface working it in well. I apply some to my fingers and massage the Balm into the briar. The Balm begins with the texture of a light oil but thickens into a heavy wax as it is worked into the briar. After the Balm absorbs for a few minutes I wipe it off the stummel surface with a microfiber cloth. As I wipe, the Balm-treated surface loosens, and it becomes more of a buffing. I like what the Before & After Restoration Balm does to bring out and enrich the briar. The water spot (above) disappeared as the Balm did its job.
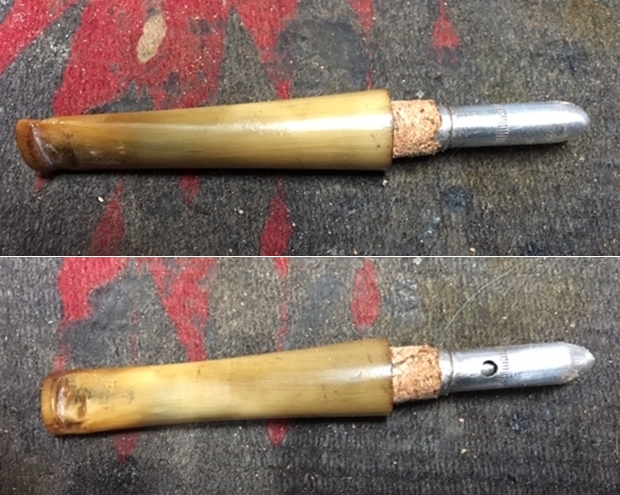
 At this point, I rejoin the stummel and stem and often I find that the cleaning process has loosened the connection. To remedy this, I choose a drill bit that is the next size larger than the bit easily fitting down the airway of the mortise. I heat the vulcanite of the tenon by painting it with a lit Bic lighter. As the vulcanite heats, it becomes supple allowing me to work the drill bit into the tenon thus expanding the tenon’s diameter microscopically and securing a tighter fit for the tenon in the mortise. The expansion worked so well, that I needed to loosen the tenon a bit using 470 and 600 grade papers and then 0000 steel wool. The fit now is good.

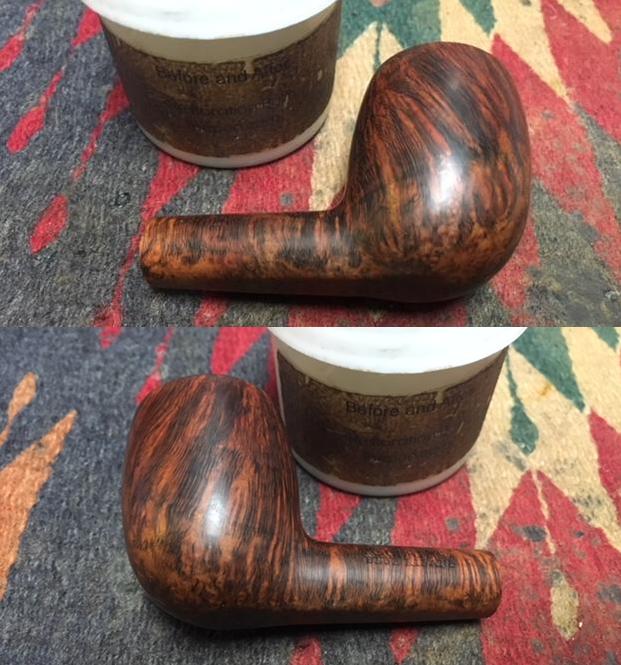
 With the tenon now fitting the mortise snugly, I mount the Dremel with a cotton cloth buffing wheel, set the speed at about 40% full power and apply Blue Diamond to the entire pipe. With this compound being the only abrasive, I’m applying to the bowl, I spend extra time working the compound over the briar. The compound doesn’t remove the ‘badges’ I’ve left behind, but it buffs out the very fine lines in the briar surface creating that natural briar shine. When I add wax to this natural shine, it’s like frosting on a cake! After applying the Blue Diamond is complete, I hand buff the entire pipe with a felt cloth to remove the excess compound dust left behind before applying carnauba.
 I now mount another cotton cloth buffing wheel to the Dremel, maintaining the same speed, and apply a few coats of carnauba wax to the stem and stummel. I finish the restoration by giving the pipe a rigorous hand buffing with a micromesh cloth which raises the gloss even more.
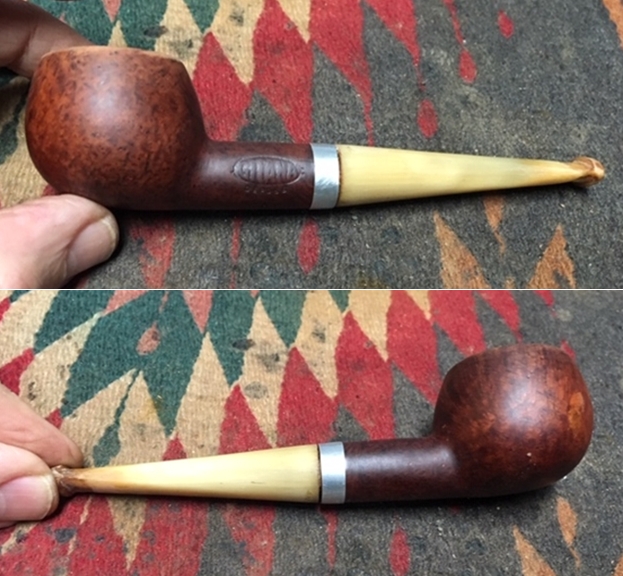
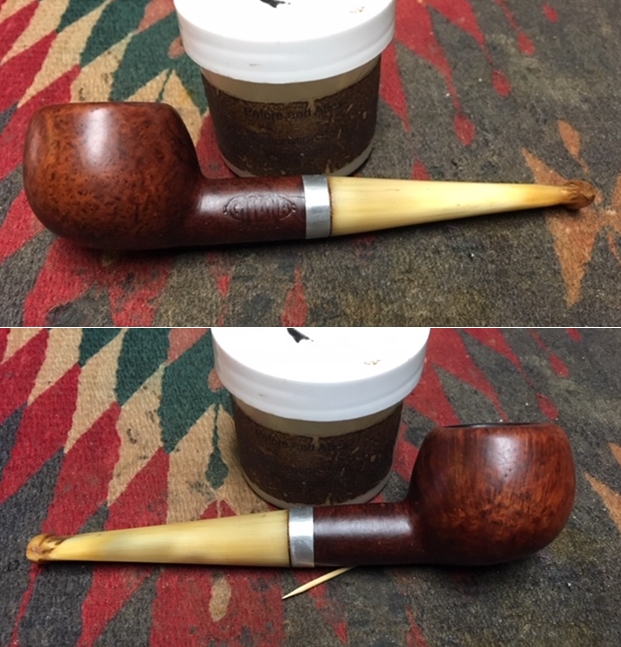
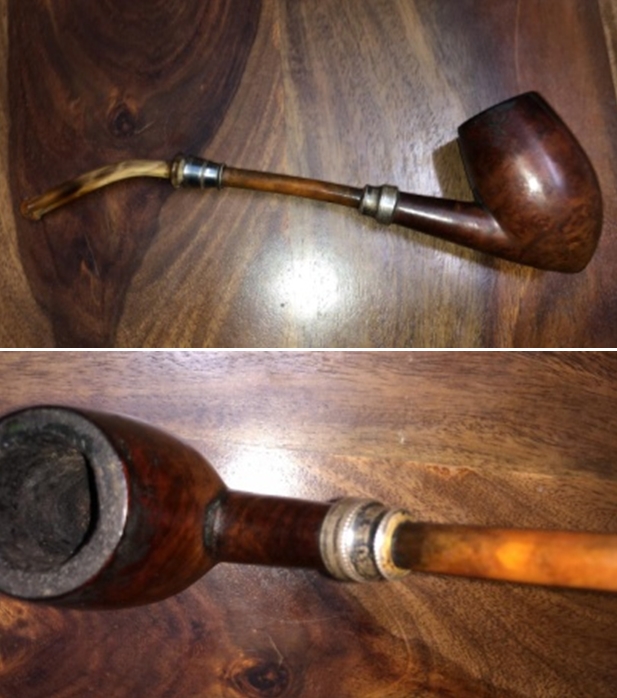
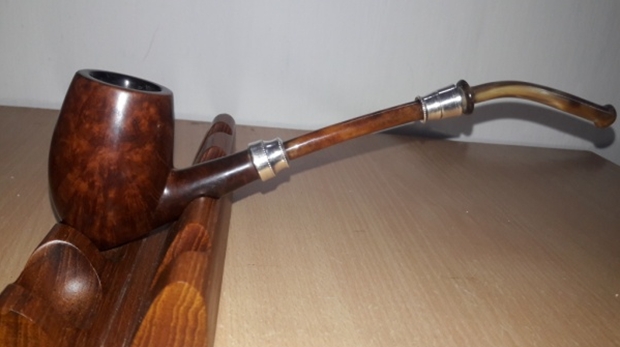
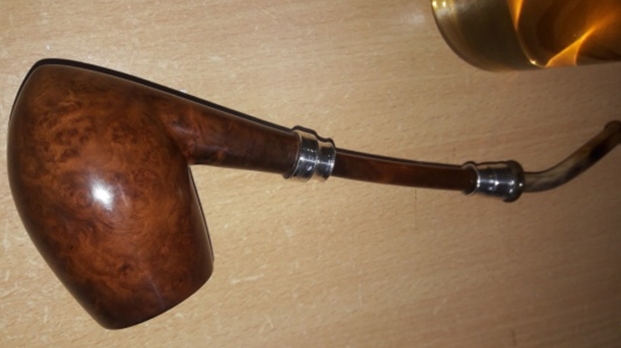
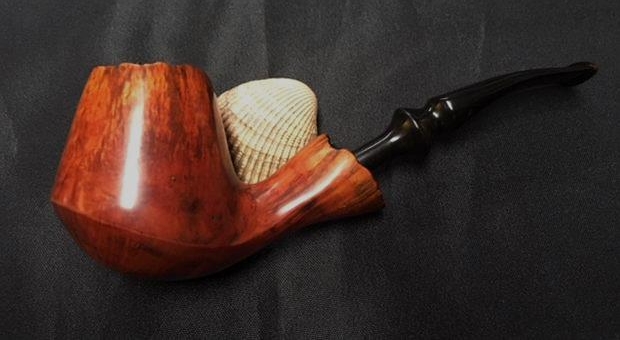
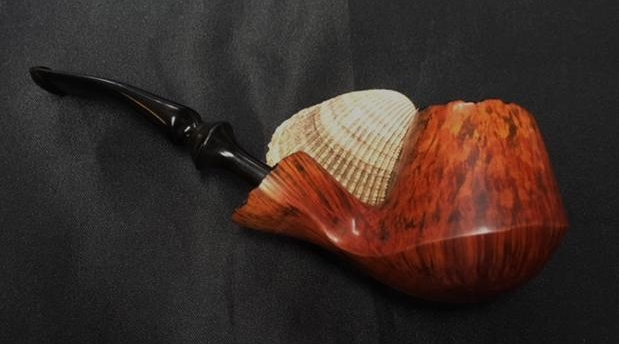
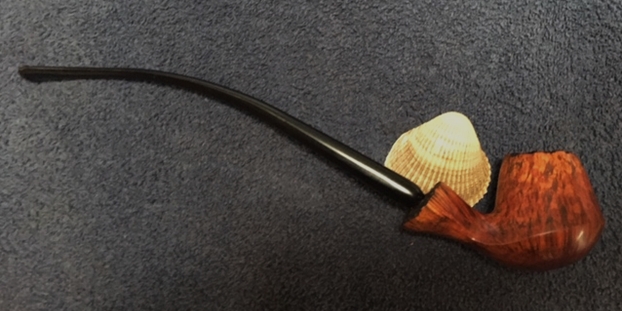
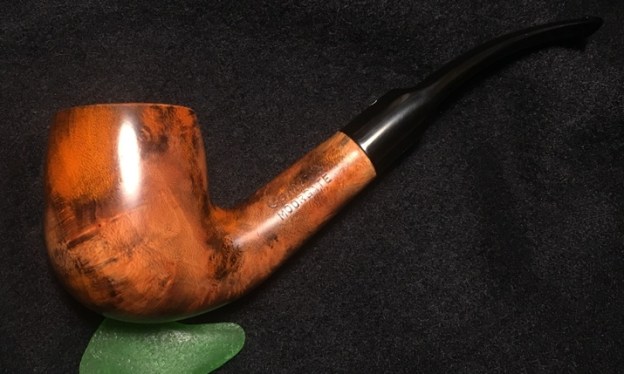
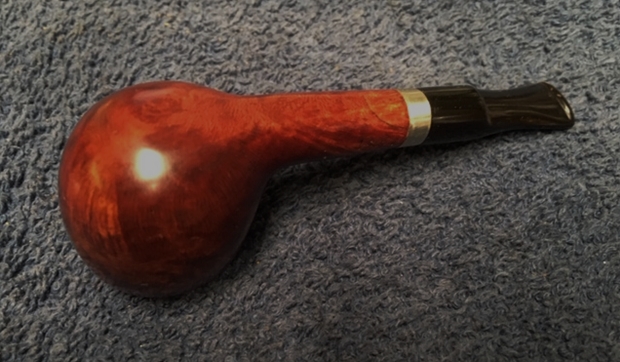
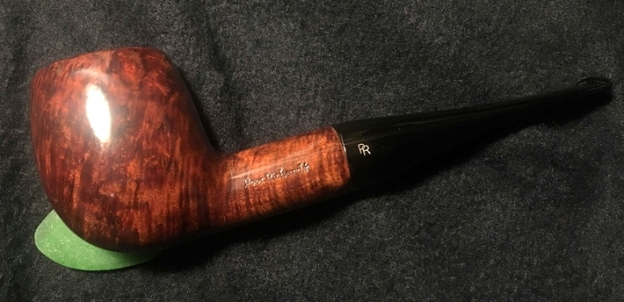
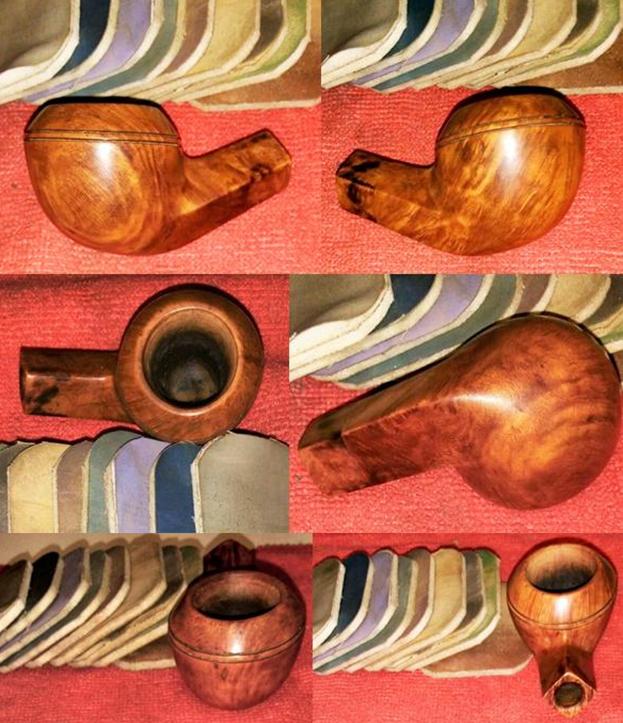
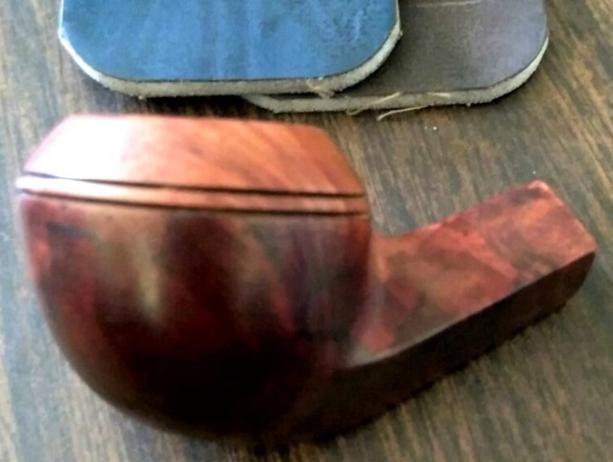
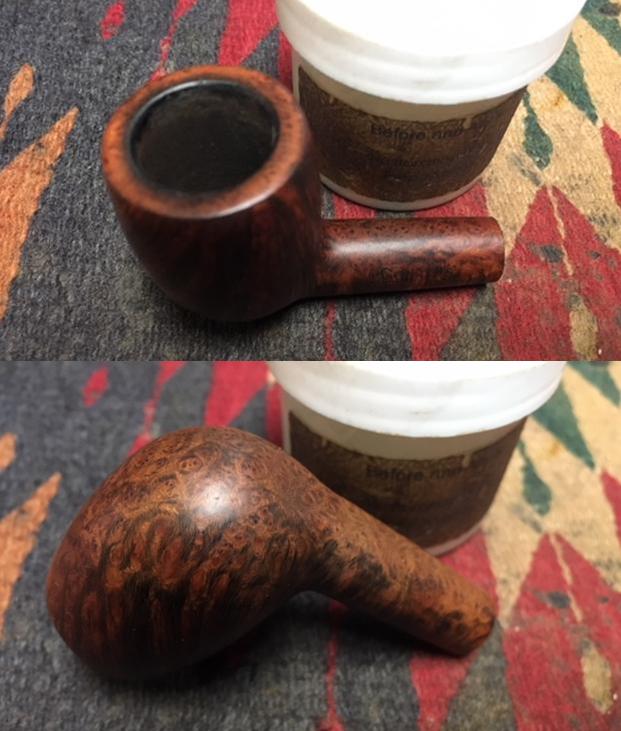
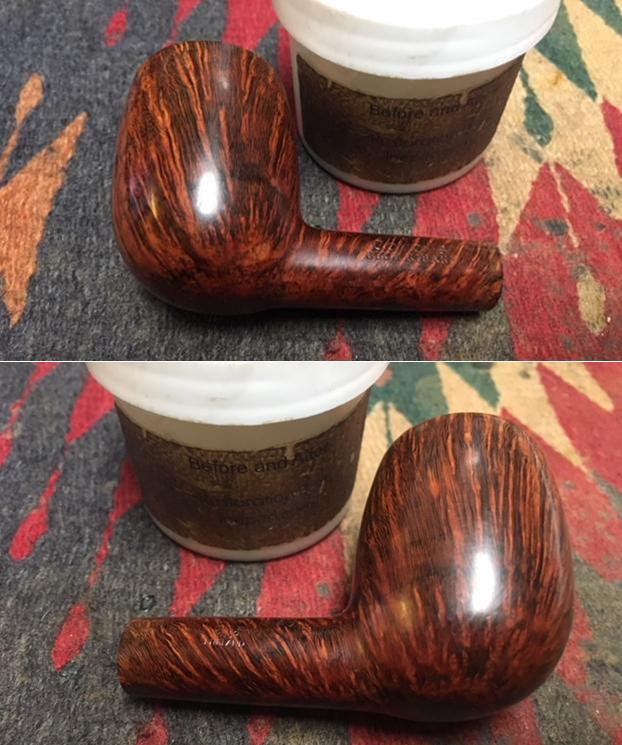
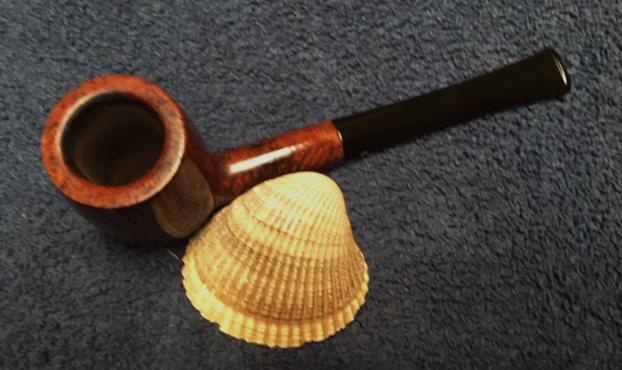
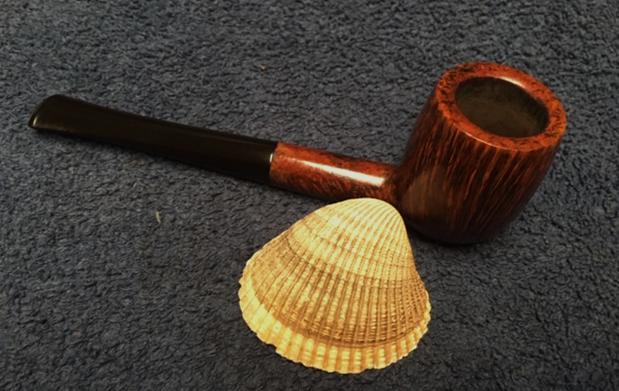
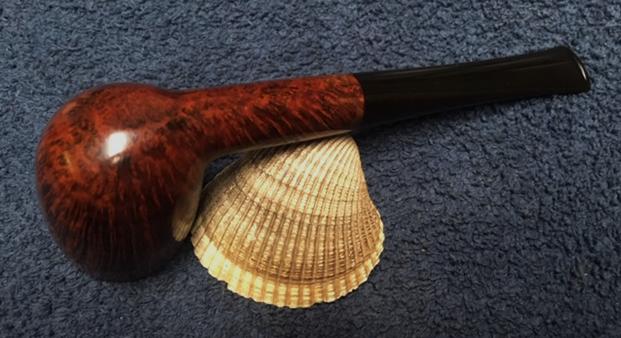
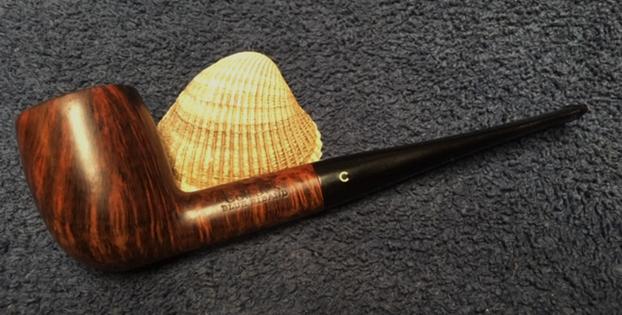
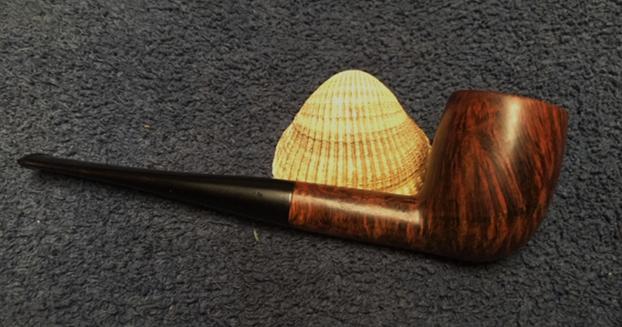
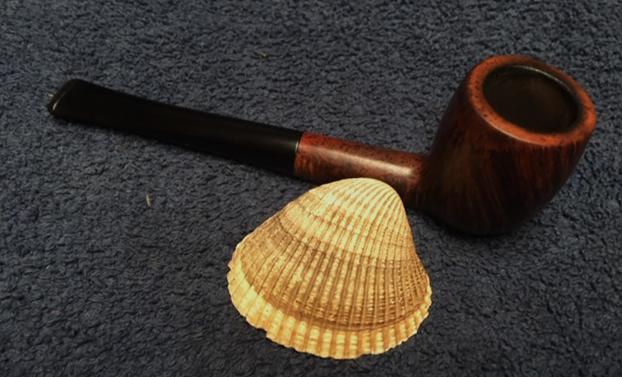
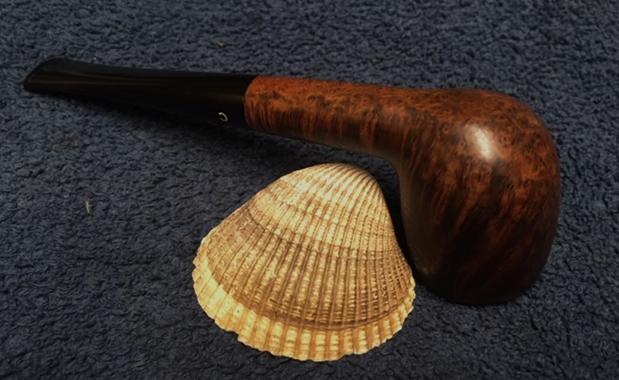
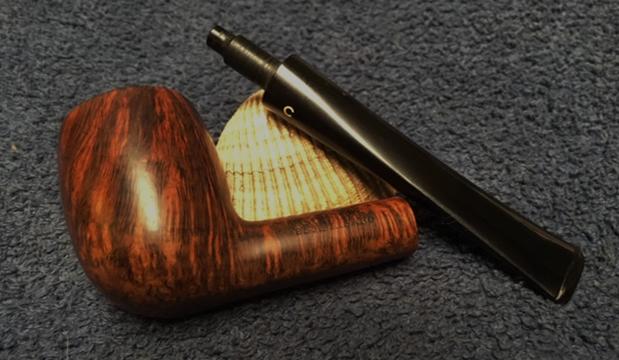
Oh my! When Jim commissioned this Stanwell Henley from the For ‘Pipe Dreamers’ Only! collection, could he have possibly seen what was hidden in this stately Oval Shank Billiard, Made in Denmark? The grain and patina are beautiful. I called the pipe, ‘stately’. It’s remarkable, how so much beauty is hidden underneath the surface appearance and neglect of years. Yet, as the vertical, flame grain cascades upwardly to the rim, if one looks closely at the rim, revealed there are the small bird’s eye grains formed by the cut cross-sections of the vertical grain. I’m pleased with the small, seemingly insignificant internal lip patch to the rim – it blends well and joins the ensemble without notice. With the bowl’s striking grain revealed, the oval shank now compliments well as it flows to the saddle stem. I fear I’m waxing too much at this point! Jim has the first opportunity to acquire this 1950s or 60’s Stanwell Henley Special from The Pipe Steward Store and this benefits the work we do here in Bulgaria with the Daughters of Bulgaria – women and girls who have been trafficked and sexually exploited. Lest we forget, I begin with a ‘before’ picture for the striking contrast. Thanks for joining me!