Blog by Paresh Deshpande
The first ever Preben Holm in my collection was from eBay about two years back. It came to me with a broken stem and the tenon stuck in to the mortise. This pipe received a new lease on life in the month of May last year when Steve, Jeff and Dal Stanton visited me here in India. I learned the process of tenon replacement along with many other tips and processes in pipe restoration. Here is the link to the informative write up by Steve on this pipe; (https://rebornpipes.com/2019/05/14/restoring-a-preben-holm-hand-cut-sandblast-freehand-in-pune-india/).
The second Preben Holm in my collection came from my Mumbai Bonanza, which I really enjoyed working on; (https://rebornpipes.com/2019/08/12/refurbishing-a-tired-preben-holm-1-from-the-mumbai-bonanza-lot/).
The next two Preben Holm pipes came to me from a seller on eBay. Both these pipes had some serious stem issues which really kept other buyers away from placing their bids and lucky me, I got both these pipes for a really good price. Even though both pipes came to me together, I shall be working on them separately since they each have a different set of issues involved.
The first of these two PH pipes was restored a couple of weeks ago and it really turned out to be a gorgeous pipe. Here is the link to the write up that has been posted on rebornpipes.com (https://rebornpipes.com/2020/03/10/refurbishing-a-preben-holm-3-freehand-pipe/).
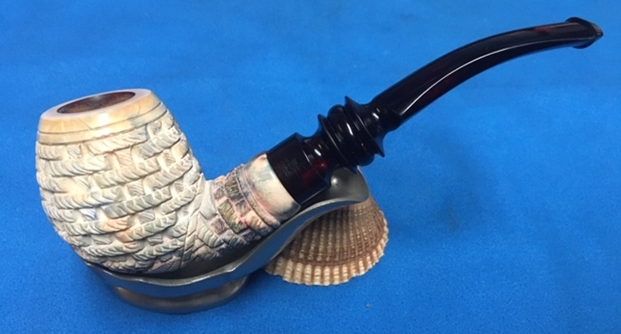
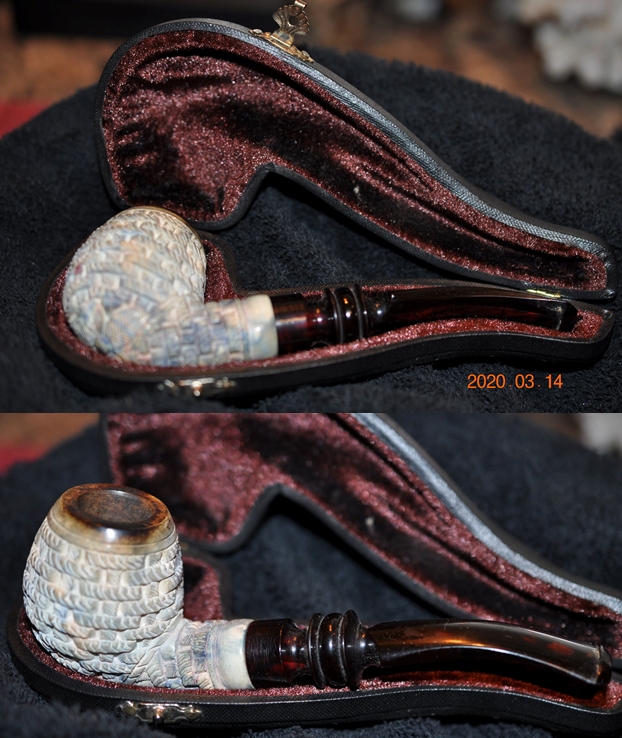
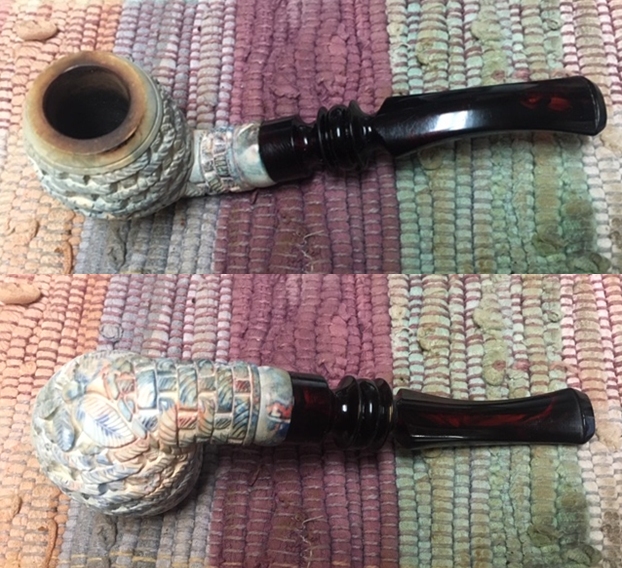
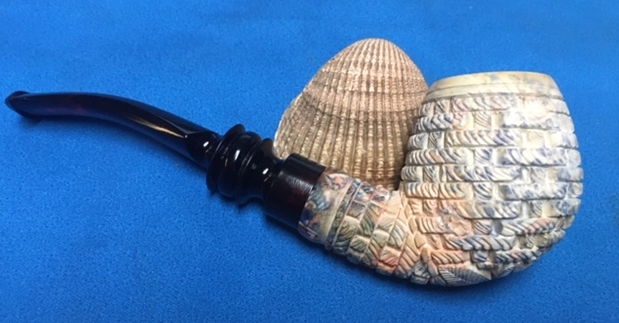
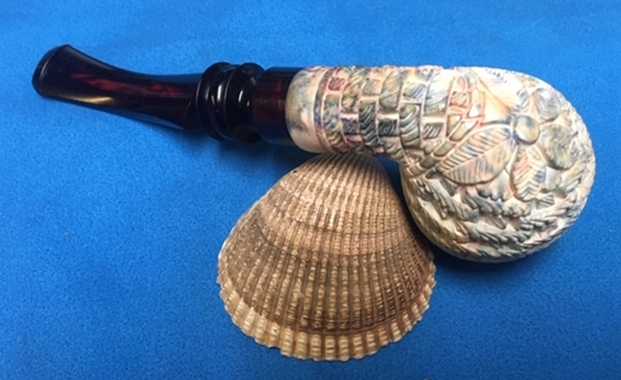
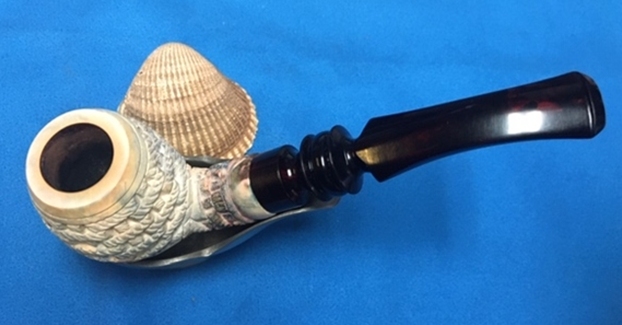
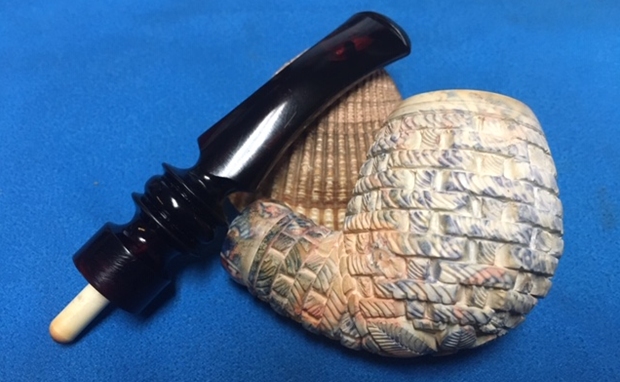
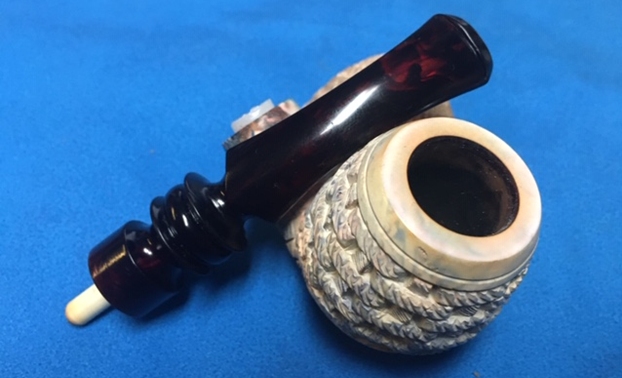
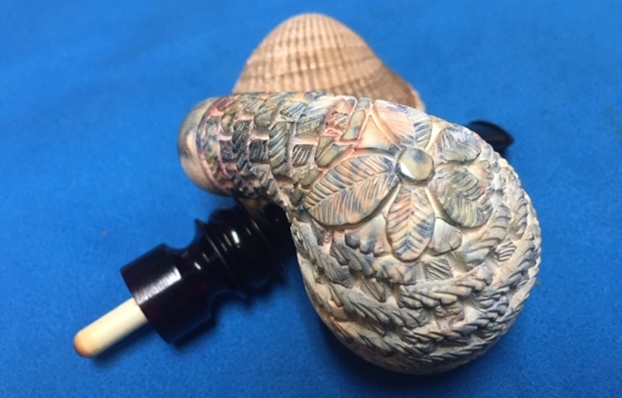
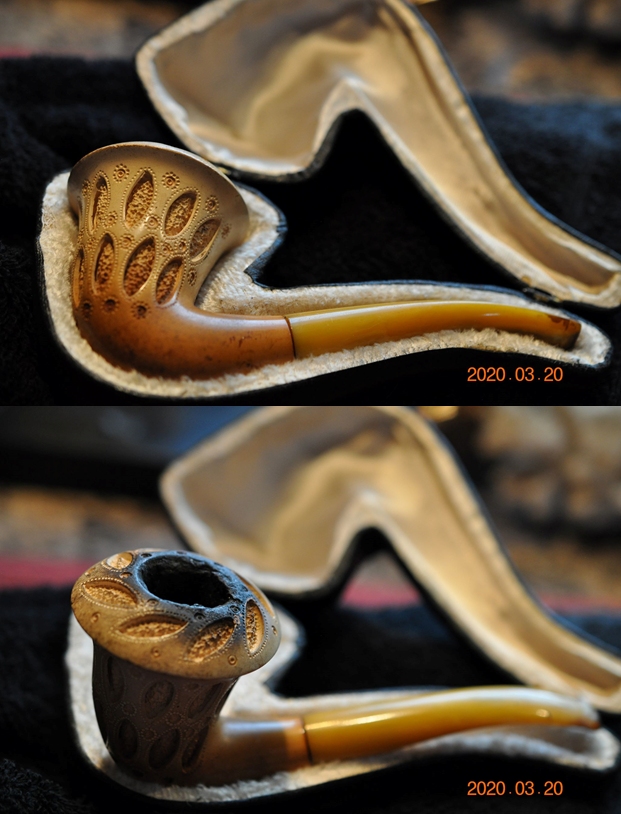
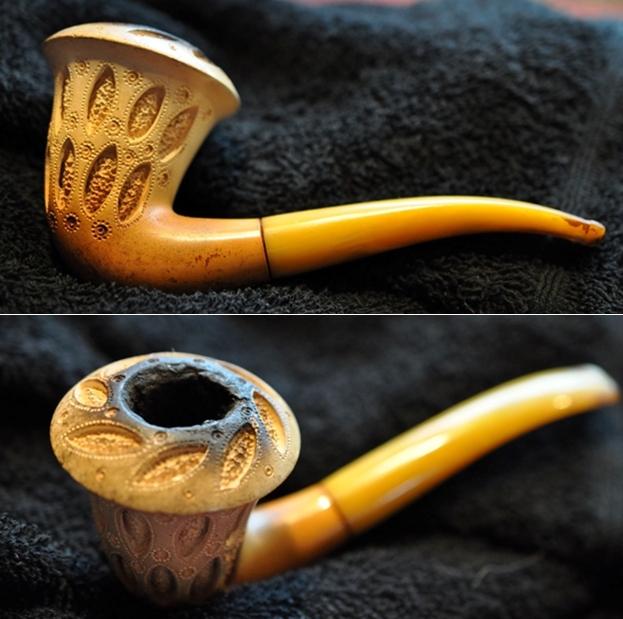
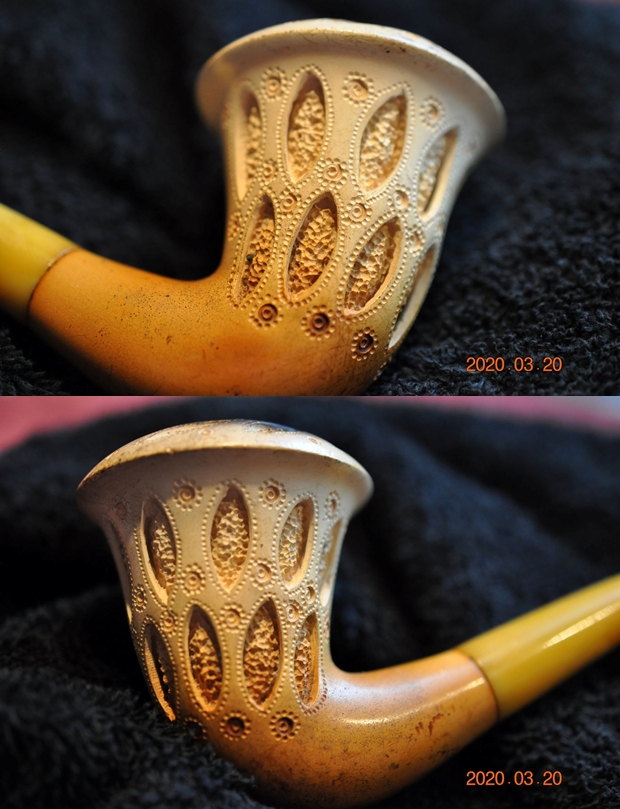
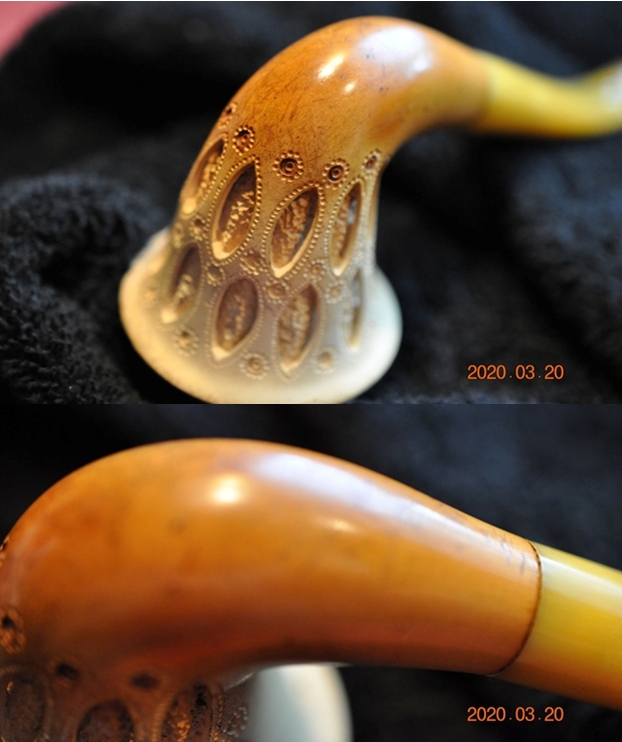
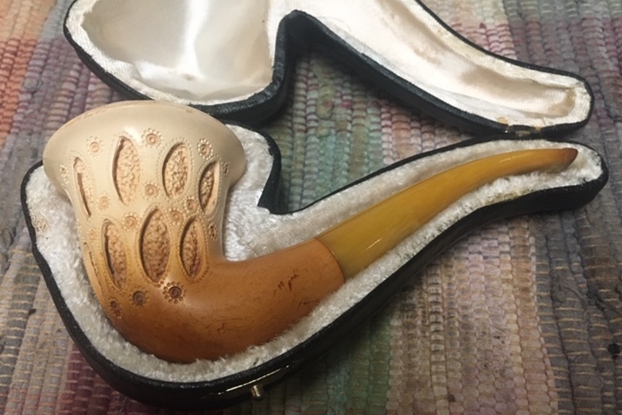
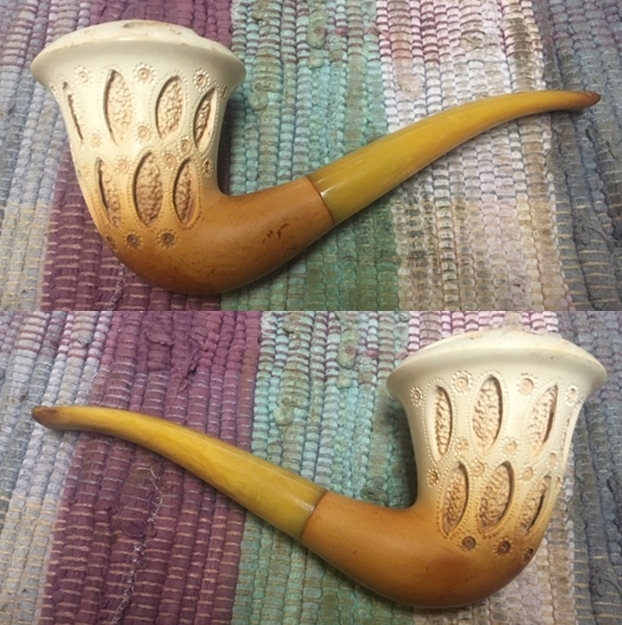
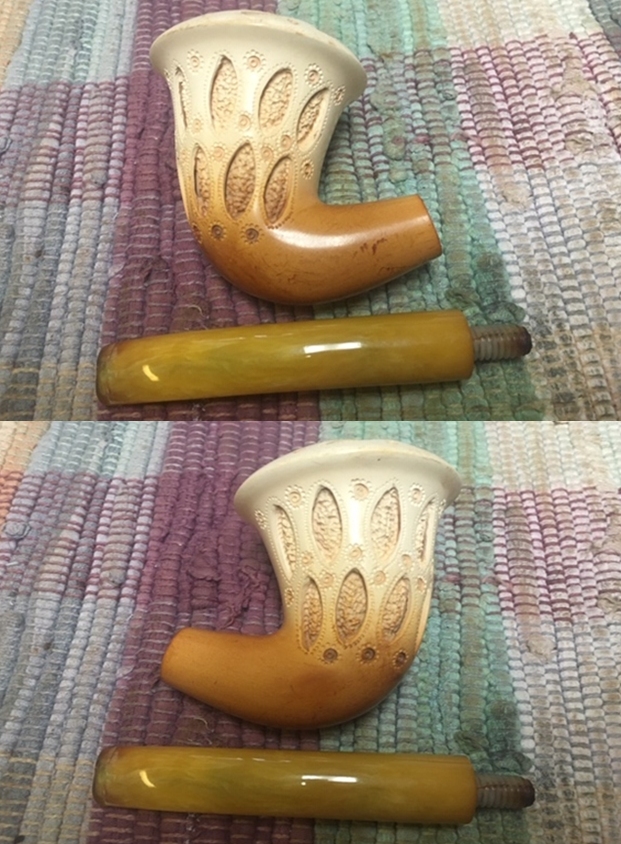
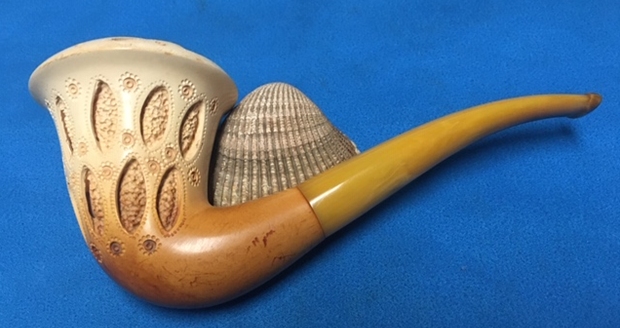
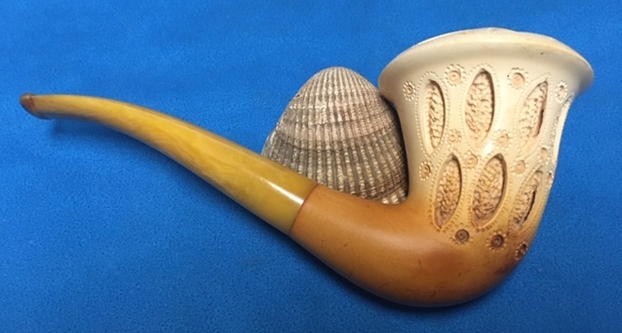
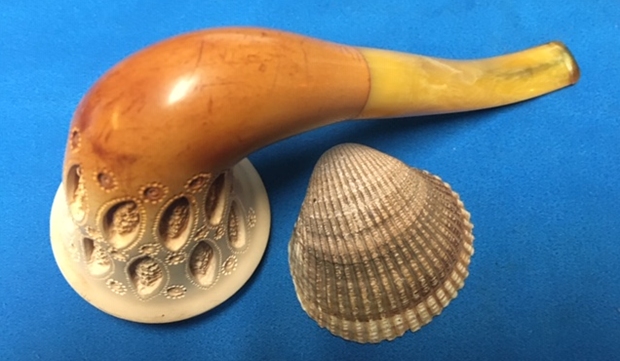
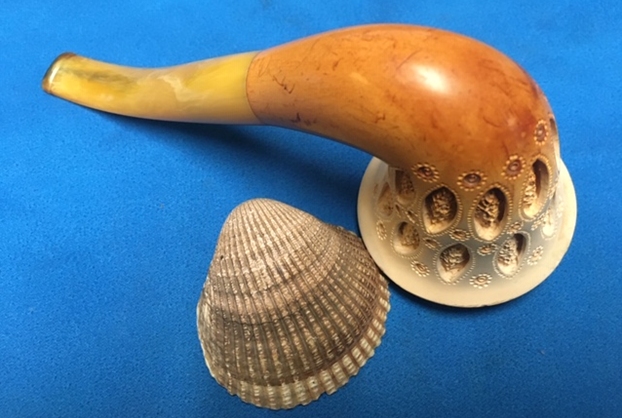
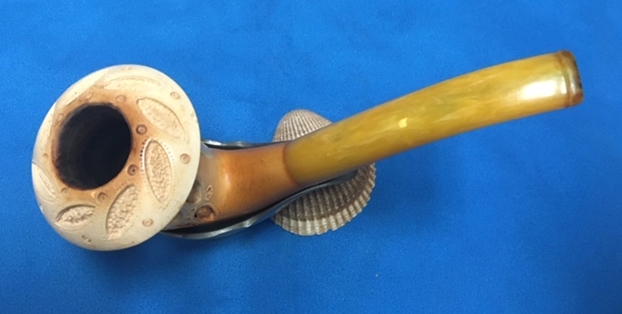
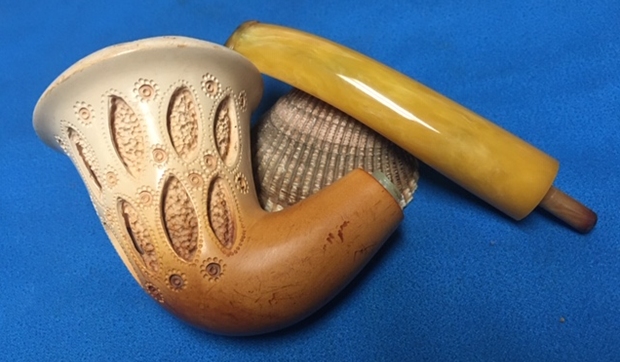
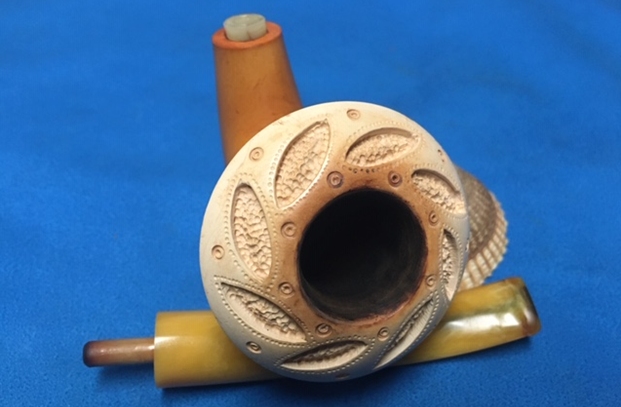
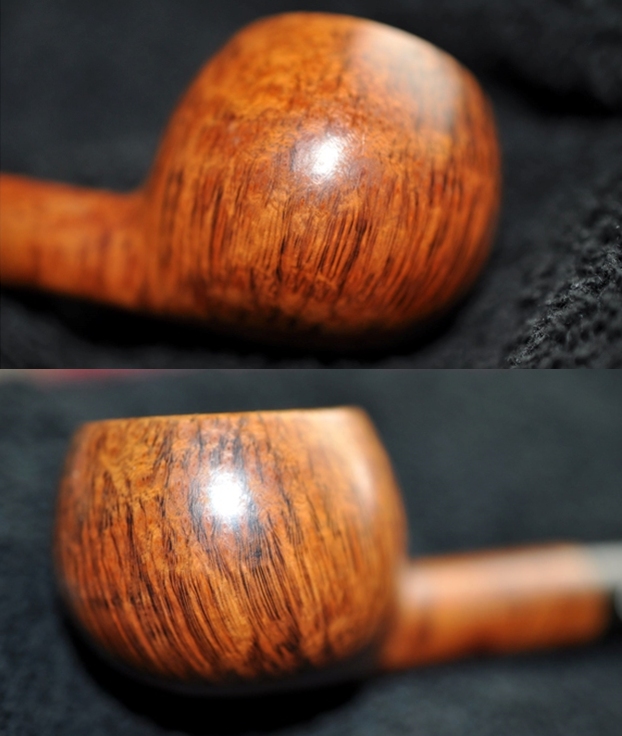
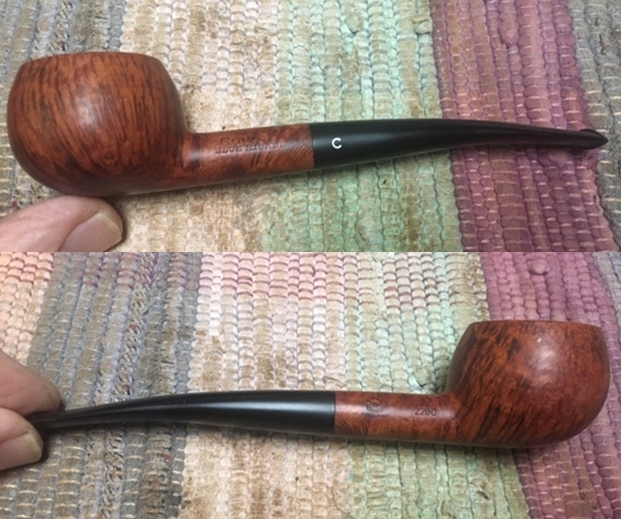
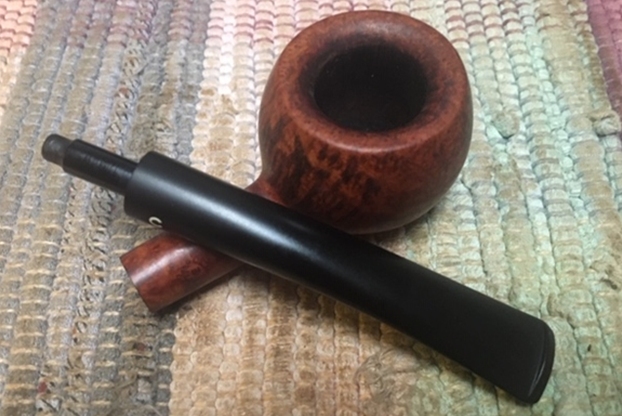
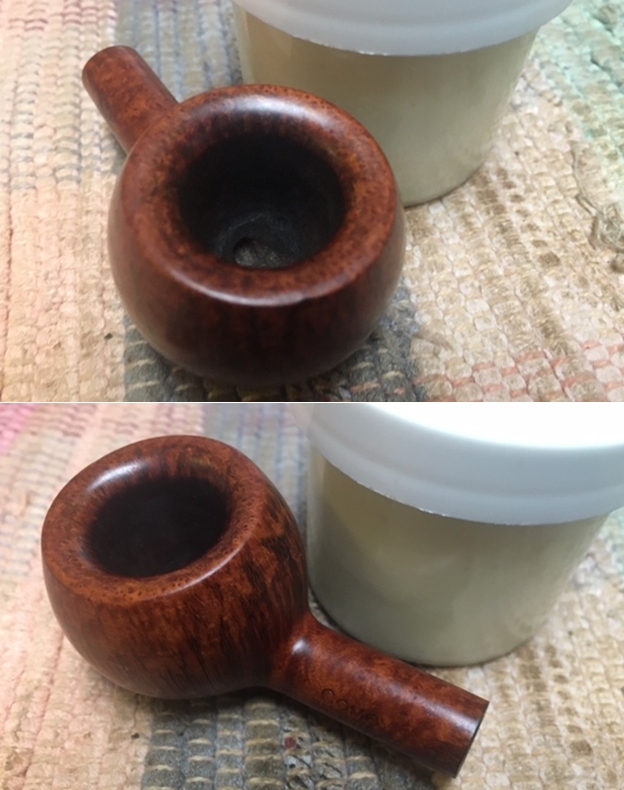
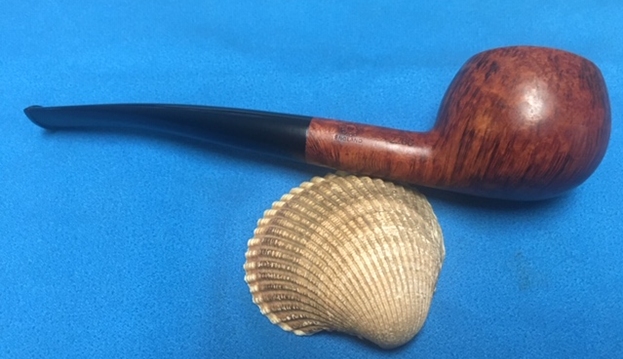
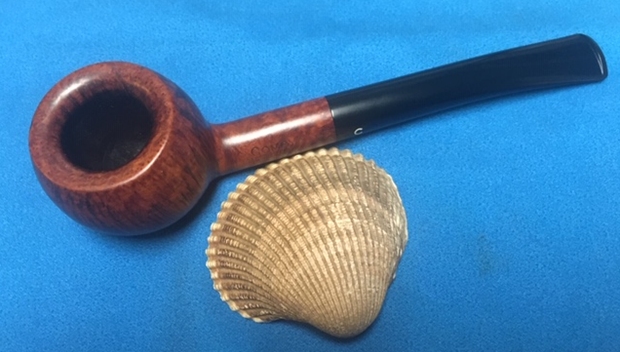
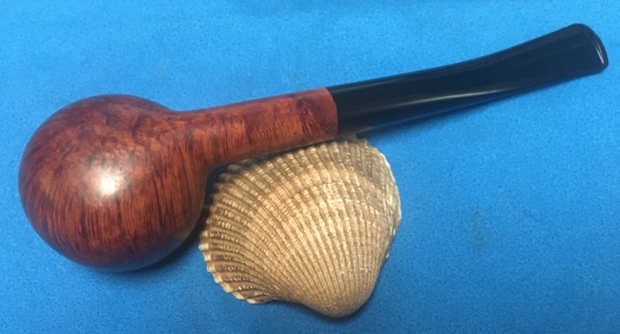
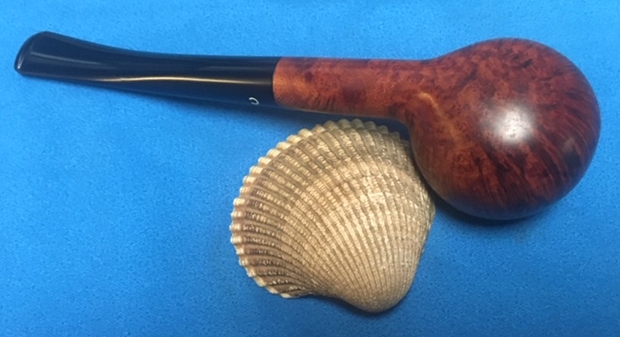
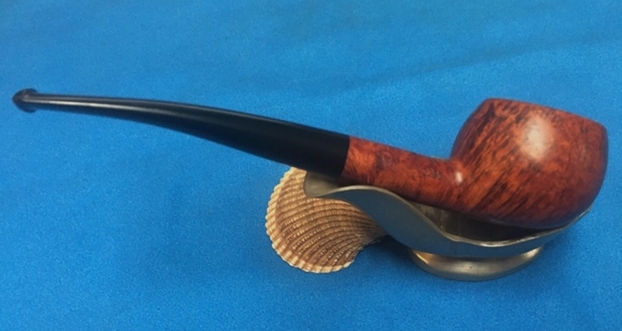
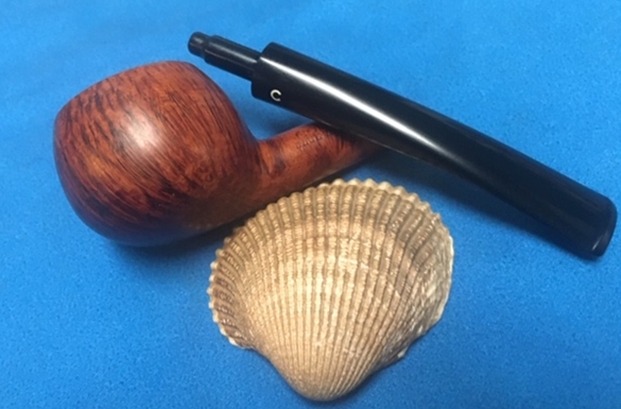
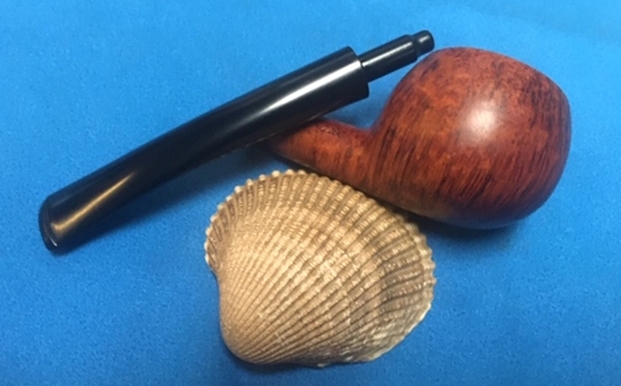
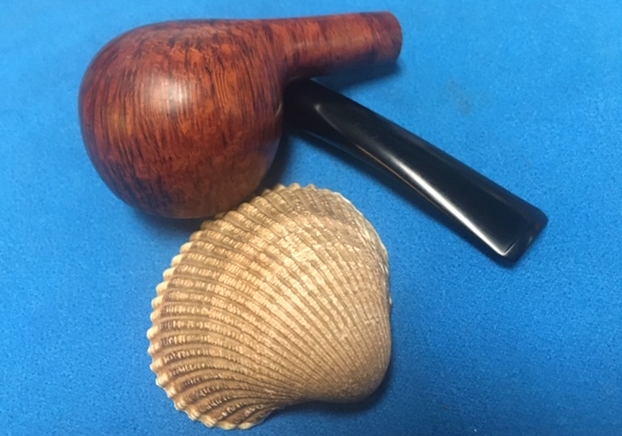
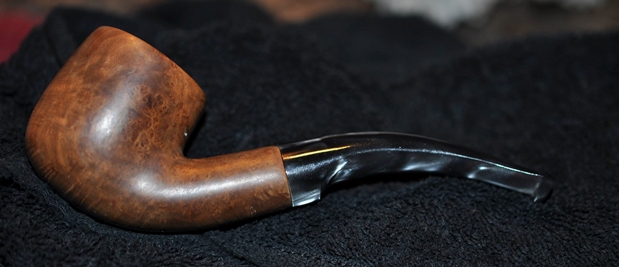
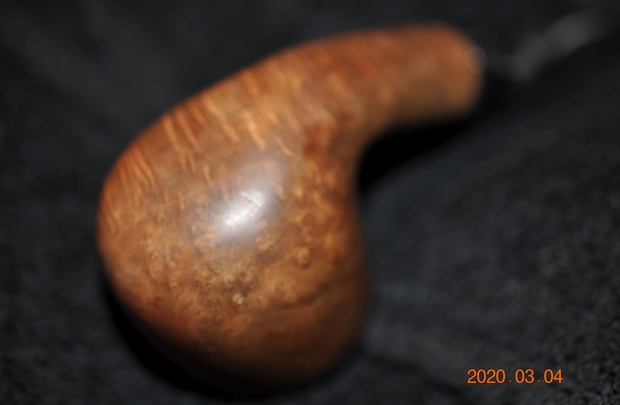
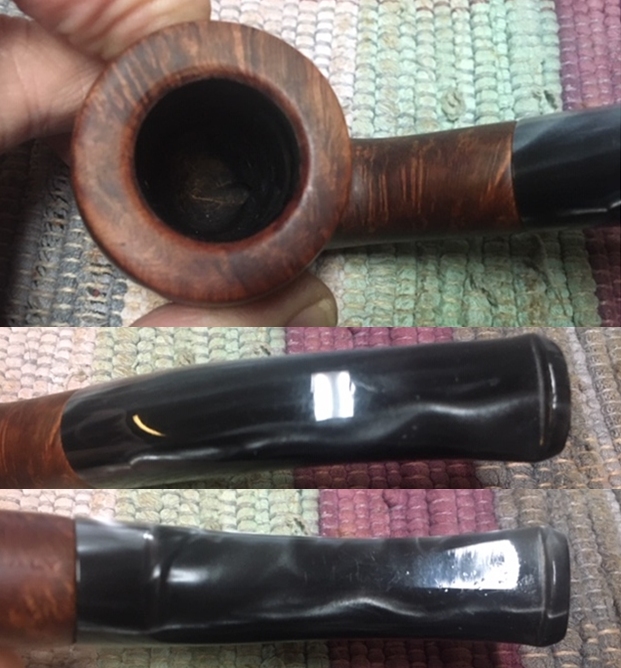
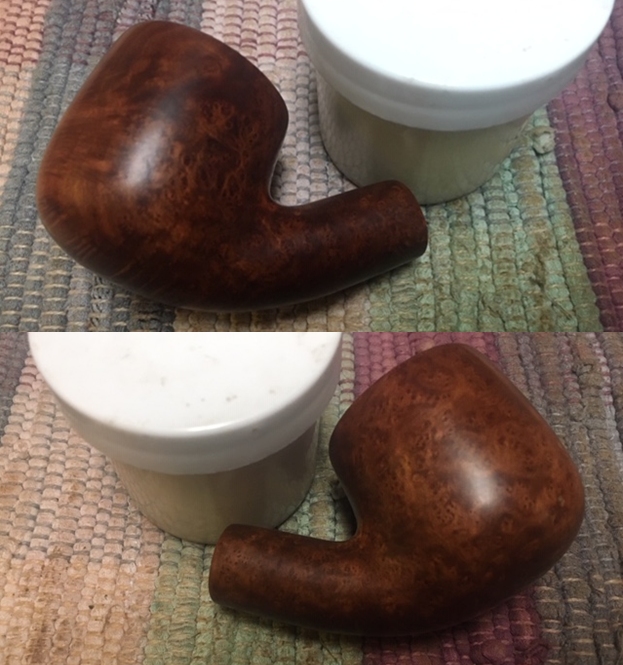
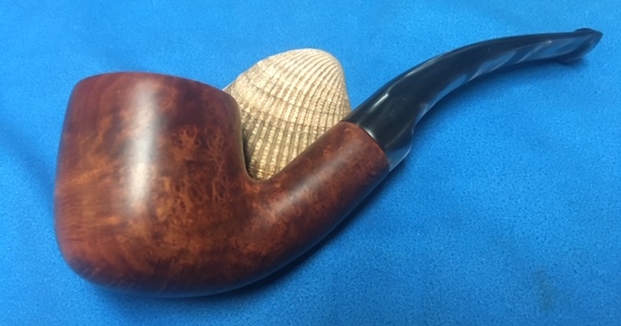
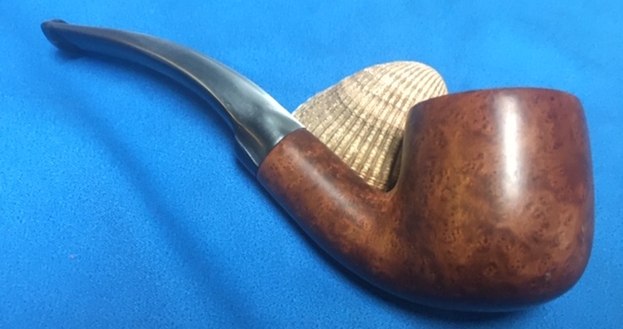
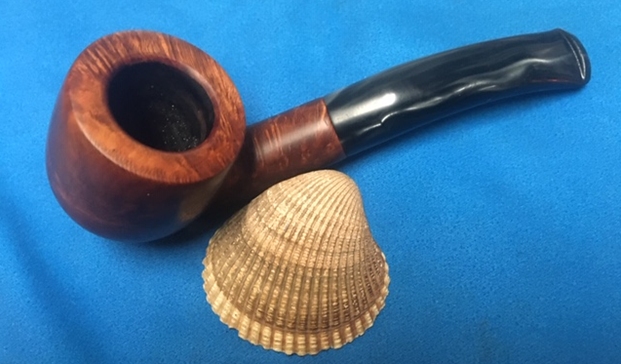
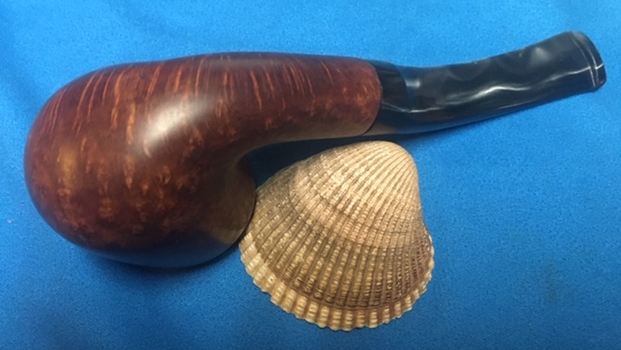
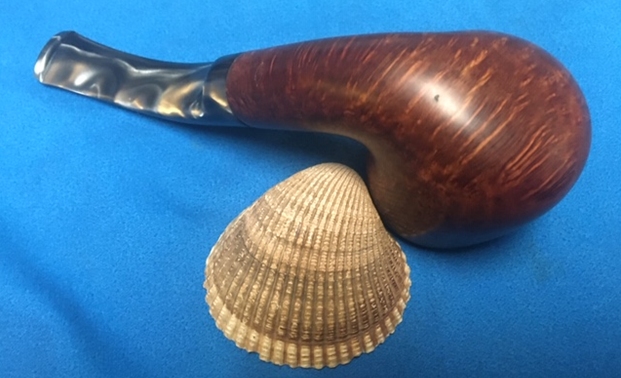
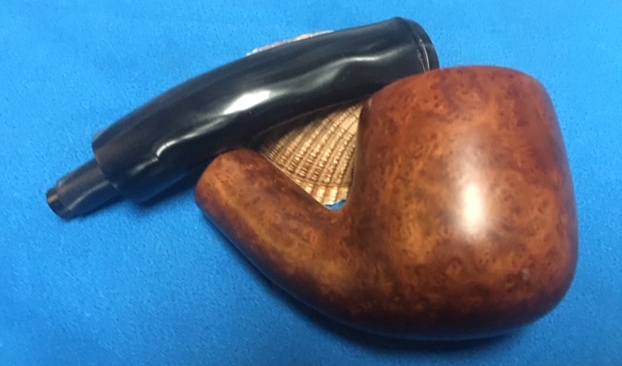
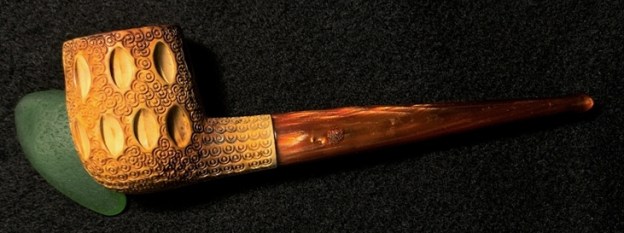
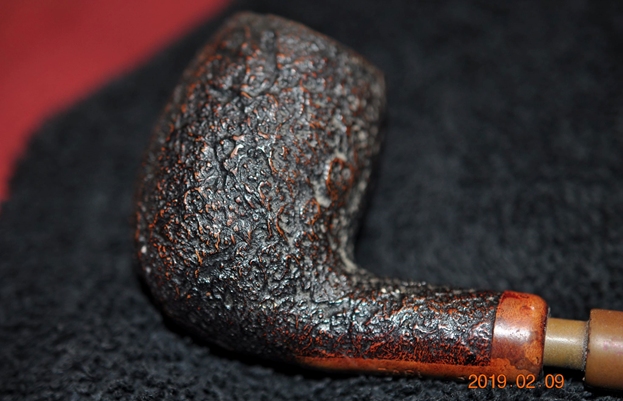
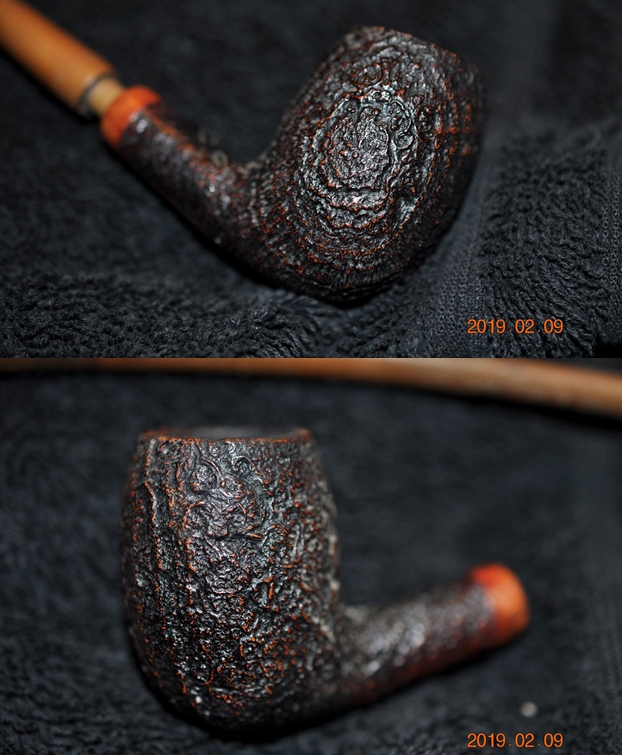
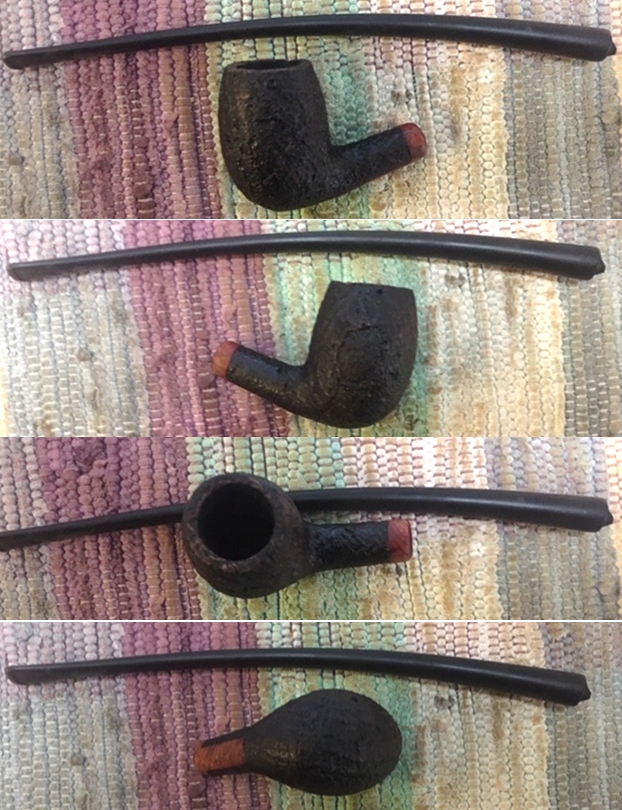
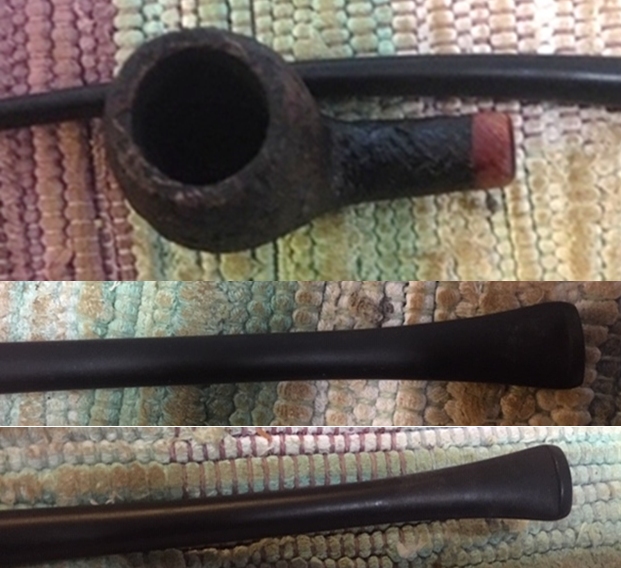
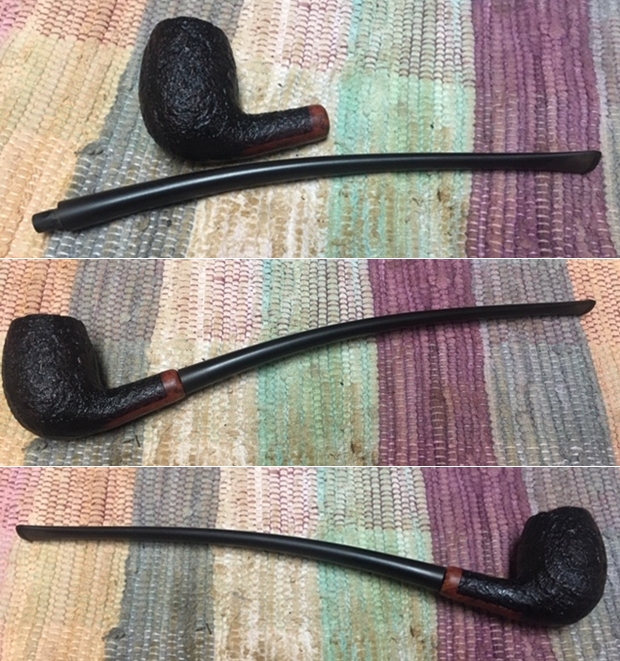
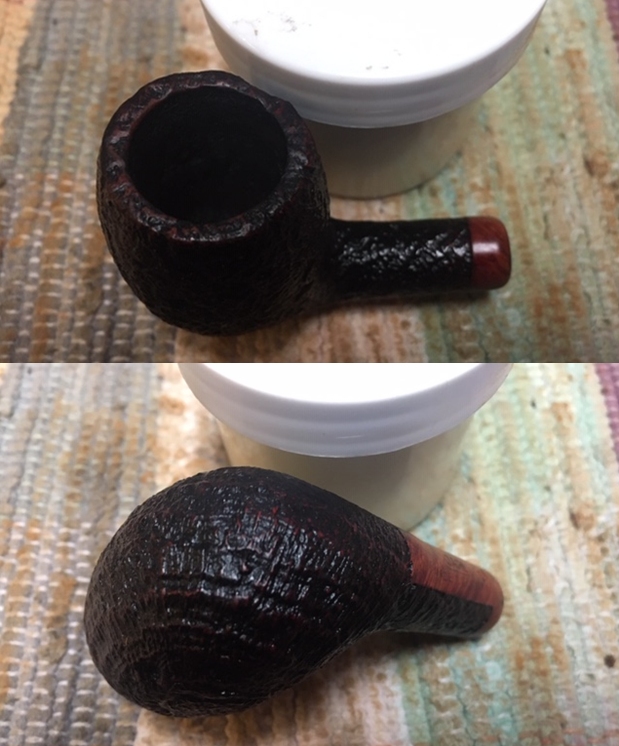
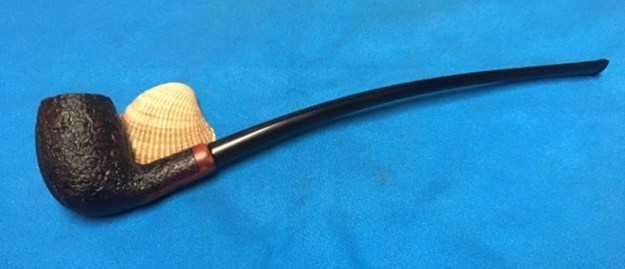
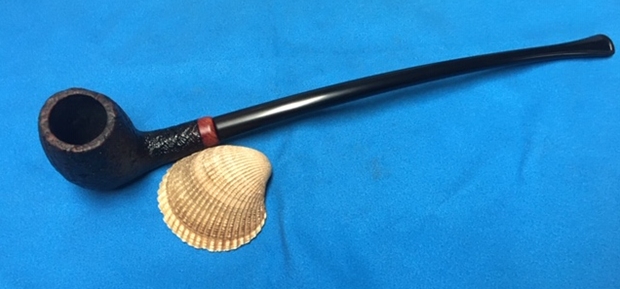
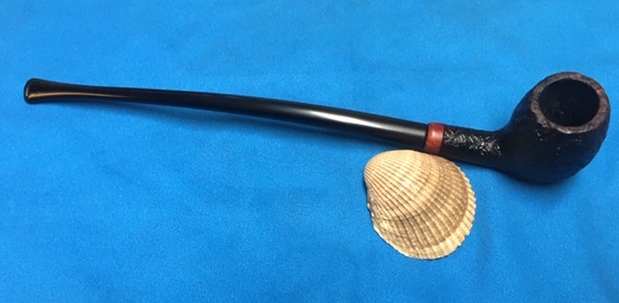
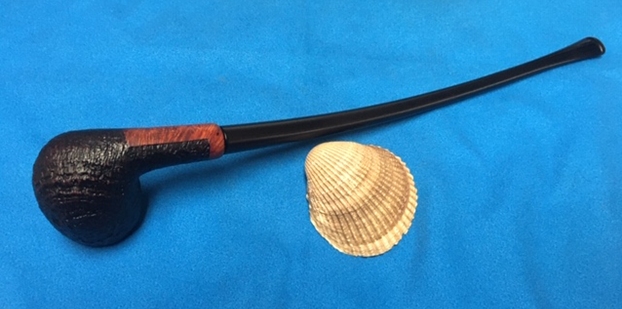
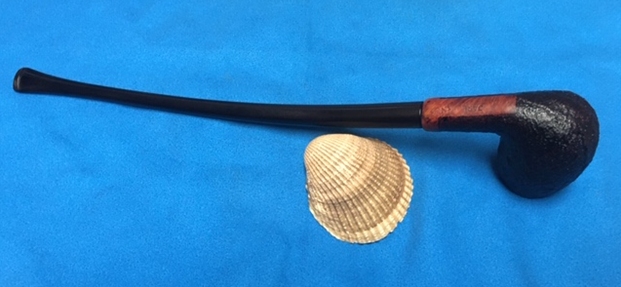
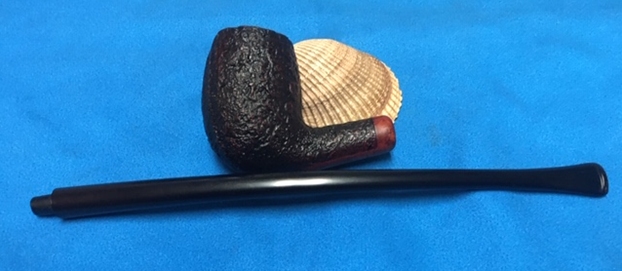
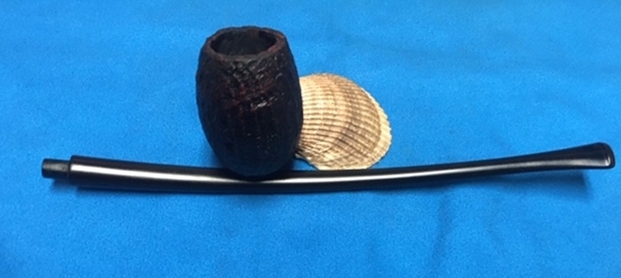
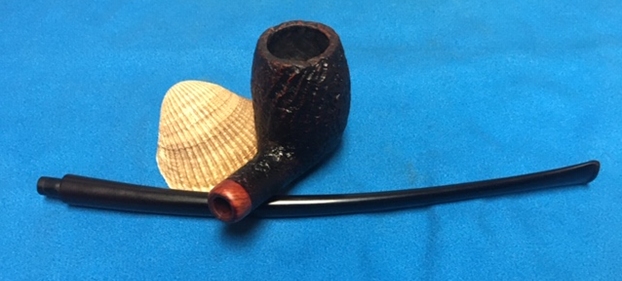
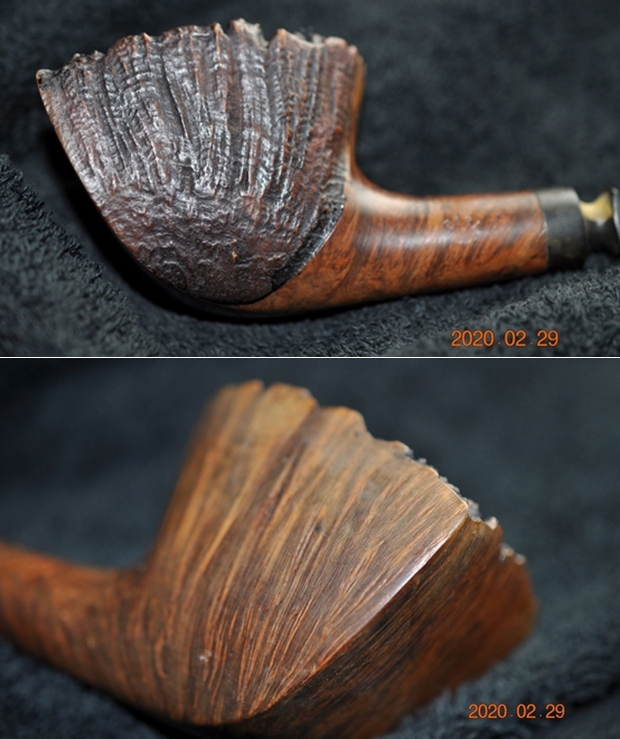
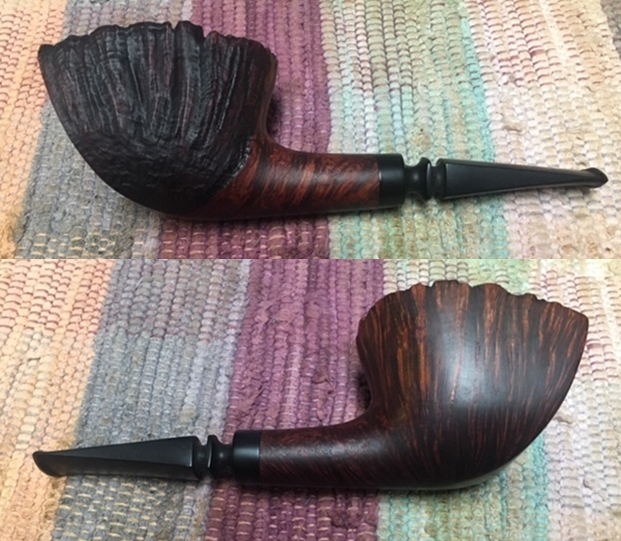
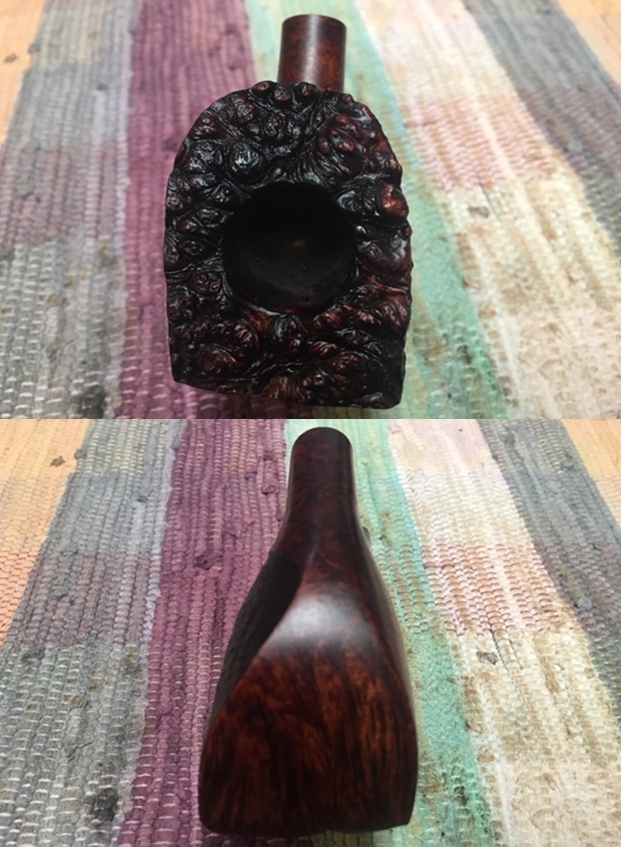
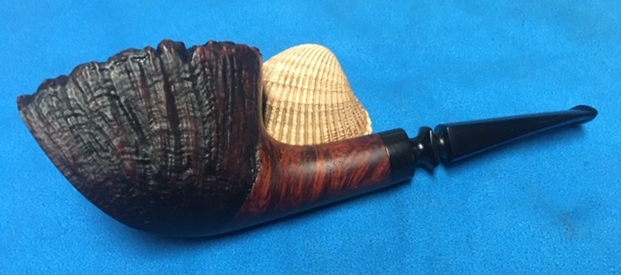
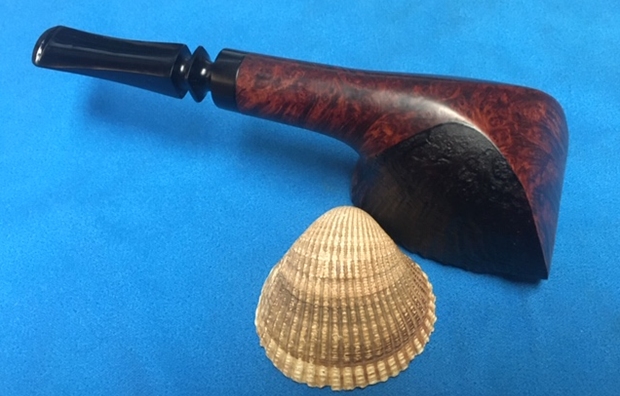
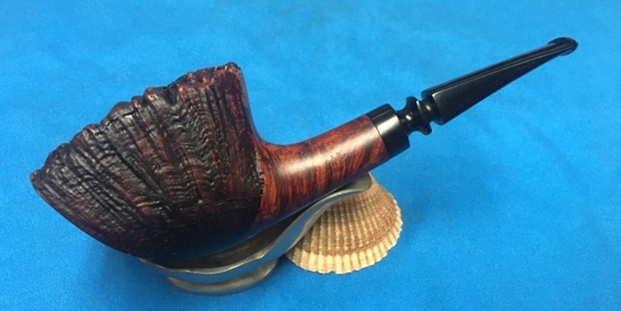
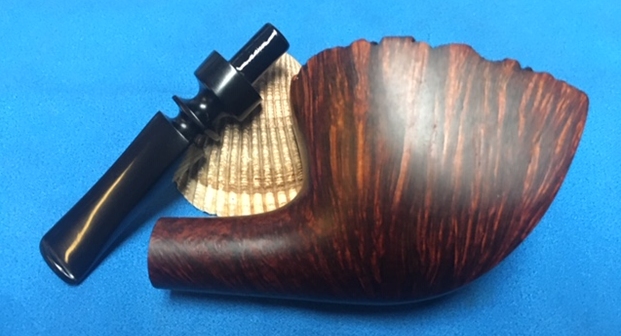
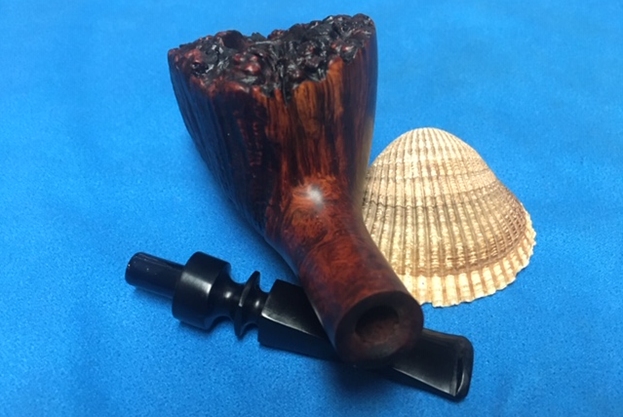
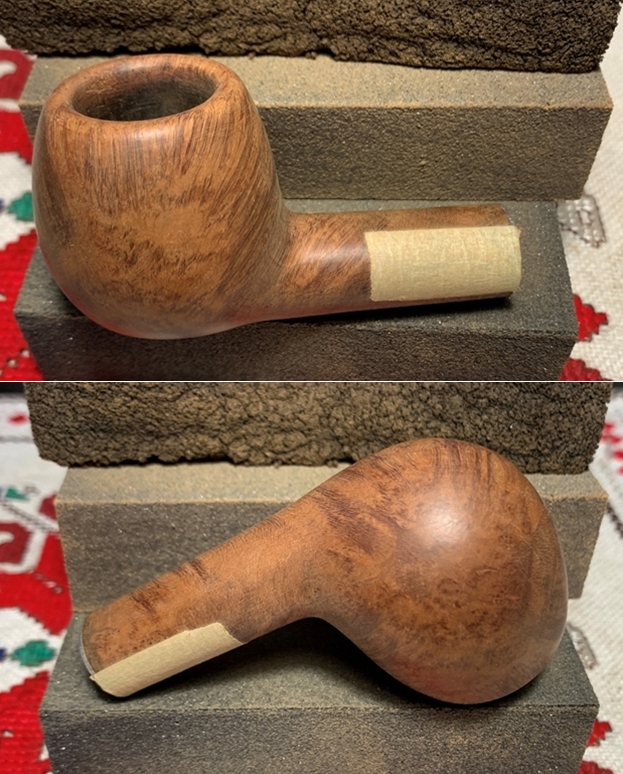
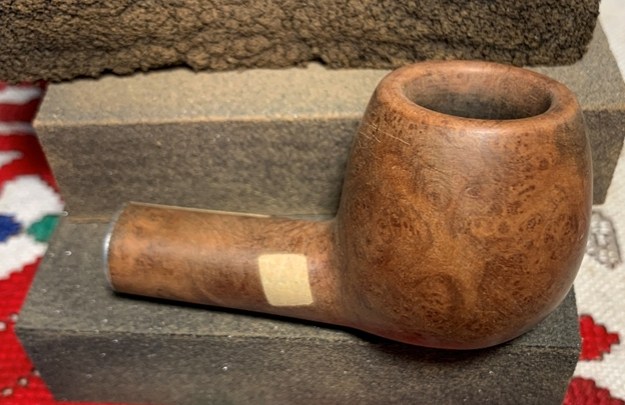
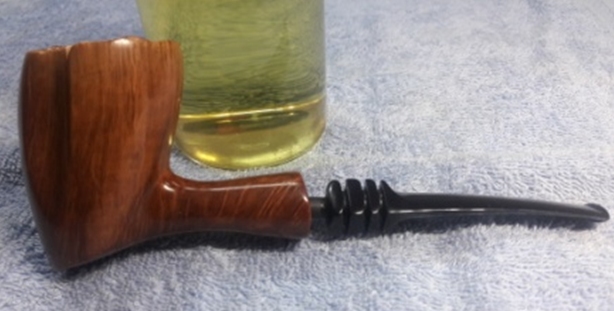
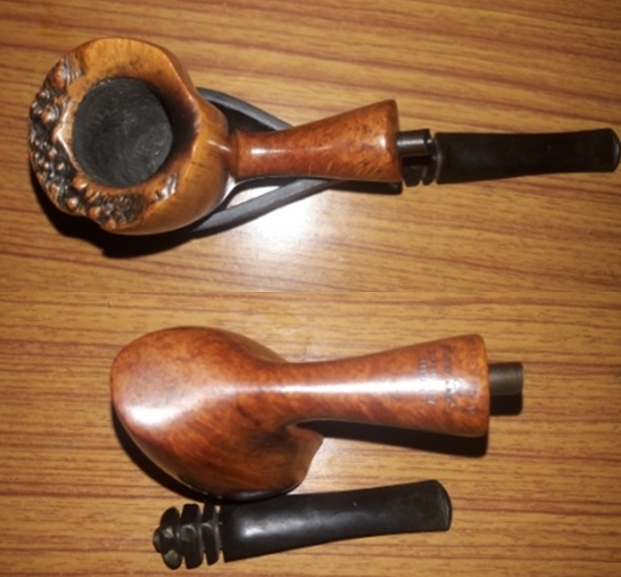
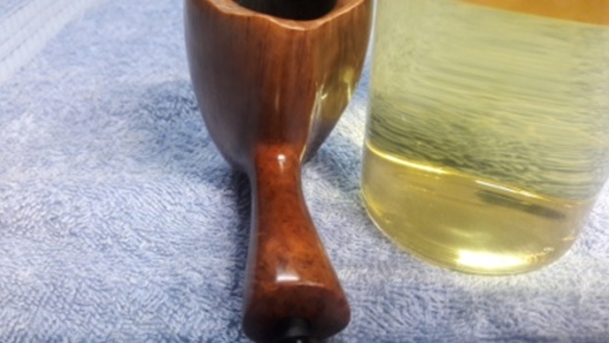
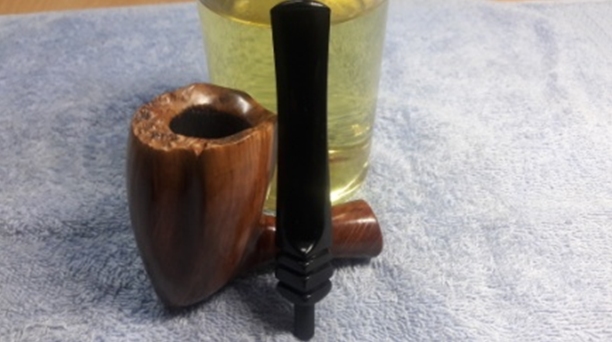
The second PH currently on my work table, is a beautiful pickaxe freehand with beautiful flame grain all around the stummel and shank and birdseye at the foot of the stummel. The rim top has remnants of plateau along the front left side and extending to the right up to half the length of the rim top. The shank end is sleek and smooth with a slight flare at the shank end, a complete contrast to the earlier PH I had worked on that had a large flare at the shank end. Here are the pictures of the pipe as it sits on my work table.

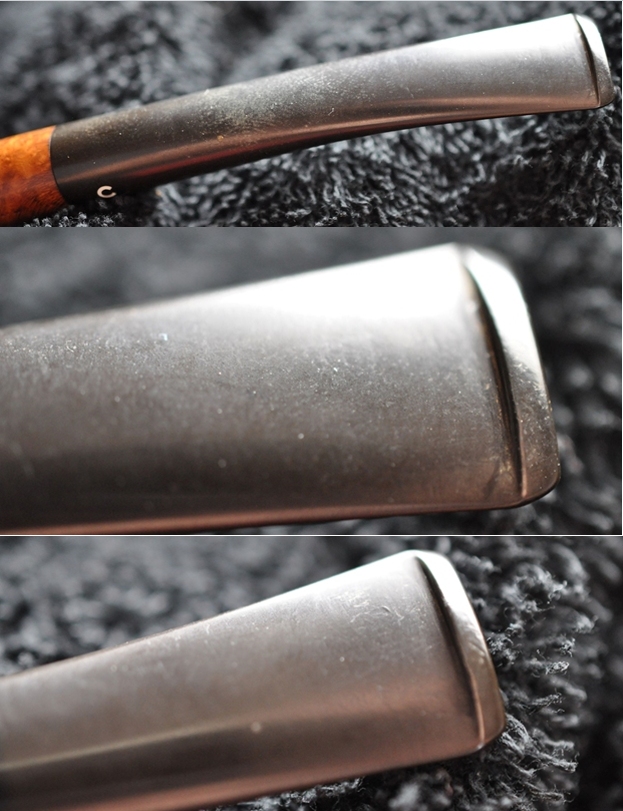
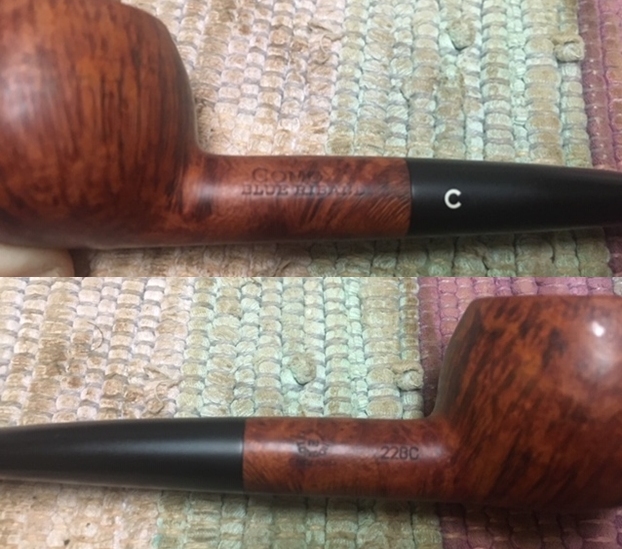
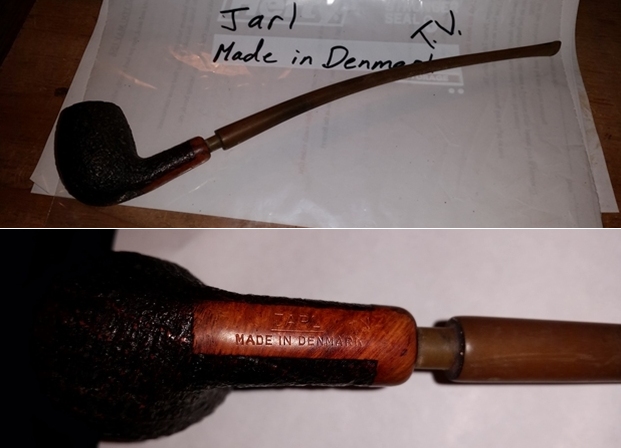
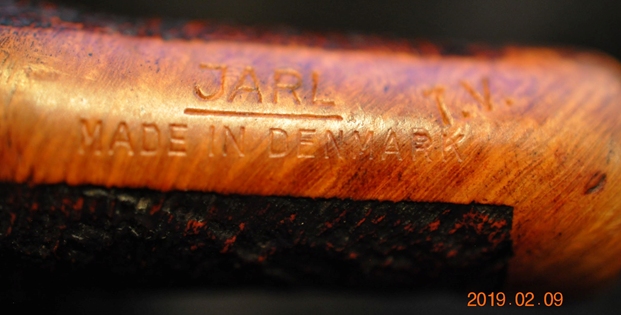
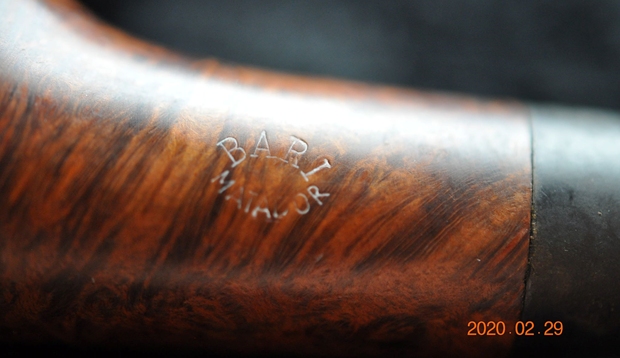
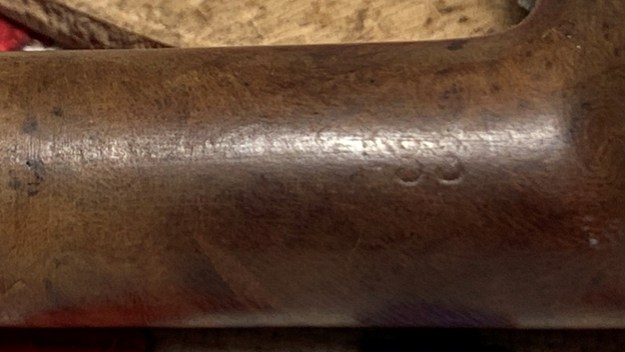
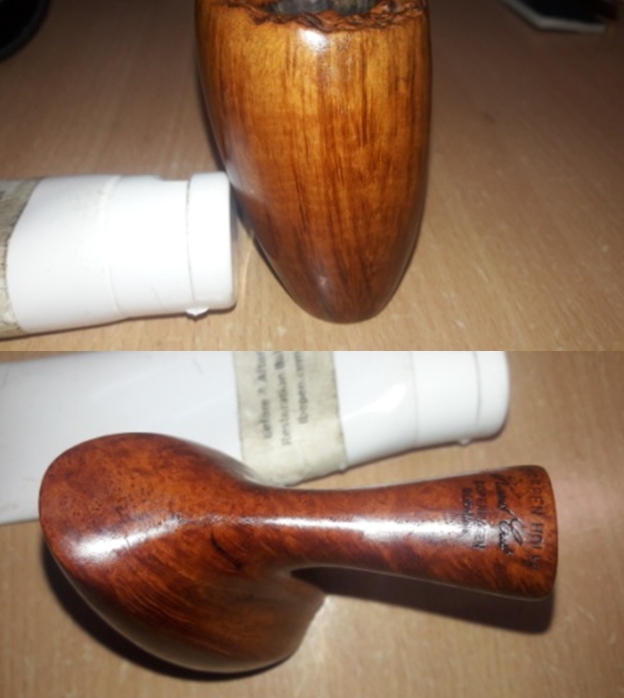
 The pipe is stamped on the bottom of the flared shank end as “PREBEN HOLM” in block capital letters over “Hand Cut” in a cursive artistic hand over “COPENHAGEN” over “DENMARK”, all in block capitals. The left side of the shank bears the encircled numeral “7”. All the stampings are crisp and easily readable. The fancy vulcanite stem is devoid of any stampings.
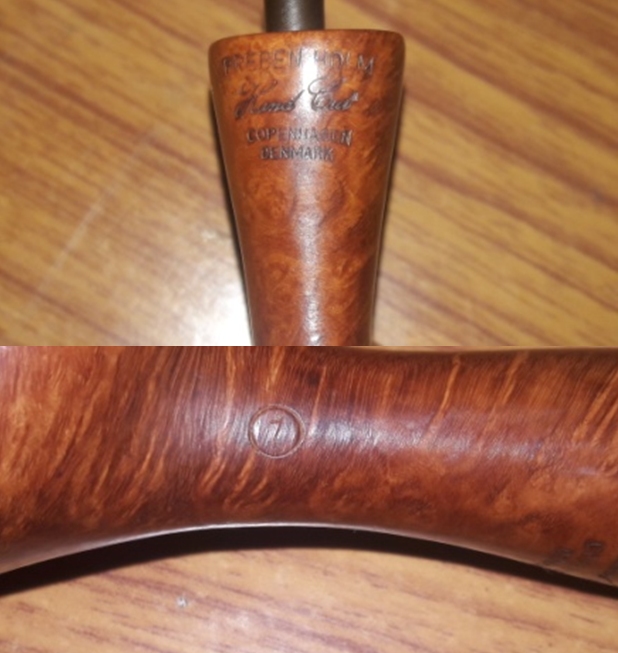 There is a lot of interesting information on the carver, Preben Holm, on pipedia.org (https://pipedia.org/wiki/Holm,_Preben) which makes for an interesting read. However, there was no information or guidelines to help understand the grading and dating of these pipes from the carver. In my previous write ups on Preben Holm pipes, I had sought input on these specific aspects and was honored by studied information from esteemed readers of rebornpipes. Here is some of the information that was shared by the readers;
Roland Borchers March 10, 2020 at 8:21 am
Hi Paresh,
What a wonderful pipe and a great job (again) on the restoration. The PH pipes were 1968-1970 graded from 1 (lowest) to 8 (unicorn) .
This page from smokingpipes.com might be of interest, but there is more to be found on the www.
https://www.smokingpipes.com/pipes/estate/denmark/moreinfo.cfm?product_id=136933
So a 3 is not bad at all…
Best wishes,
Roland
I followed the link forwarded by Mr. Roland Borchers and reproduce the information gleaned;
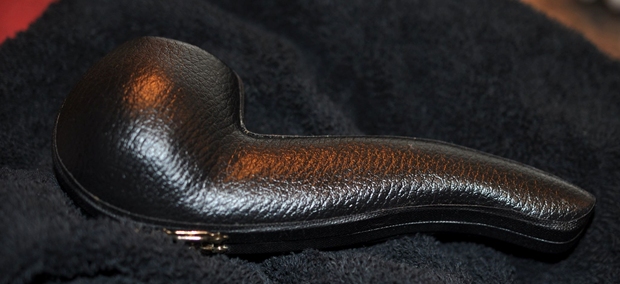
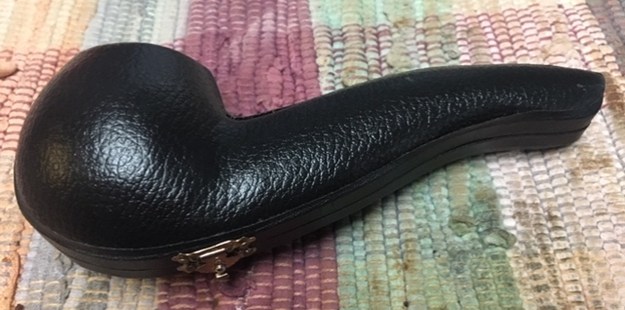
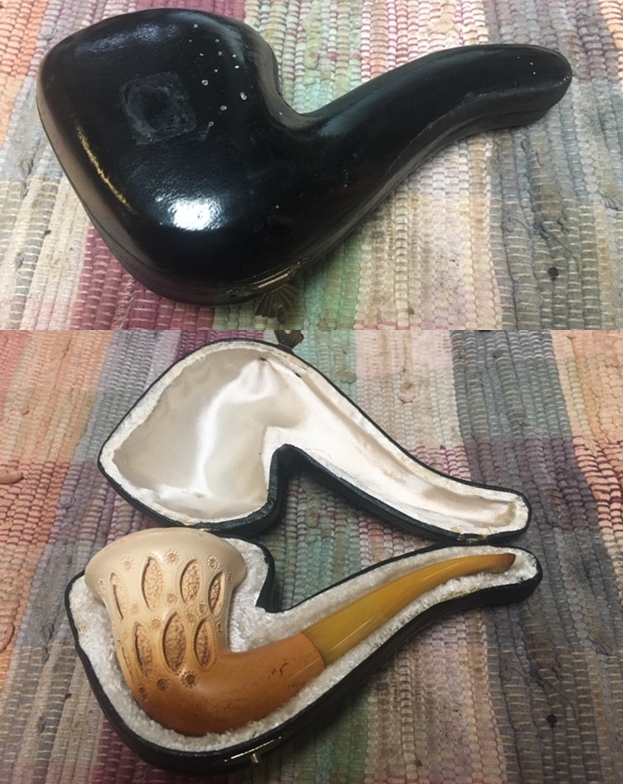
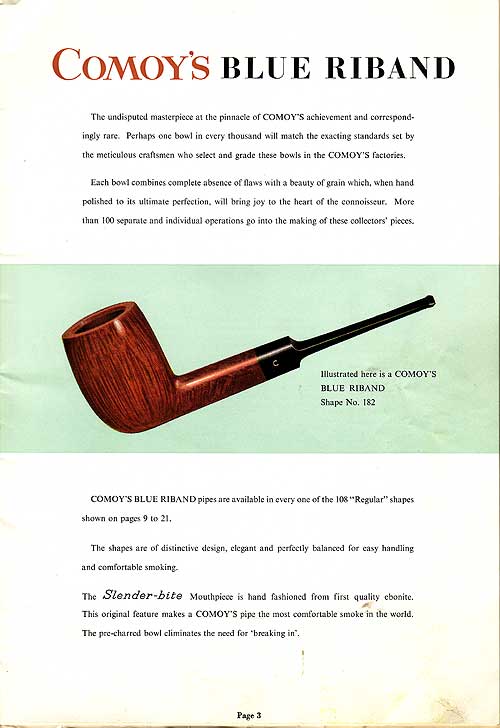
“Now that my pulse has returned to (vaguely) normal. Preben Holm pipes which bear a single grading number in a circle, represent Holm’s earliest ‘Hand Cuts’, a period that most estimate between 1968 and 1970. Prior to handling this amazing jewel, the highest grade that I had encountered was a ‘5’. Once (just once) I saw a smoked ‘7’ offered across the pond for a price that could feed a decent sized village for a month (mild exaggeration, but you get the idea). Here we have a ‘6’, featuring both the conservancy of shape that one would expect from the earliest days, as well as a grain worthy of such a lofty grade designation. Forty (plus) years young, utterly unsmoked and it comes with both the original presentation box and sleeve. For Pete’s sake, don’t let this one get away”.
–R. ‘Bear’ Graves
borman August 15, 2019 at 5:44 pm
Not sure how correct I am but… pipes 1-4 as such are lower to higher quality rating as A-E is low to high. The bone extensions that I have had and others I have seen appear to be from the 60’s. Hope I am not far off and also I hope it helps you.
Thus from the above information, it’s evident that this beautiful Preben Holm pipe in my hand is a very rare # 7, top grade and very expensive pipe from 1960s…
INITIAL VISUAL INSPECTION
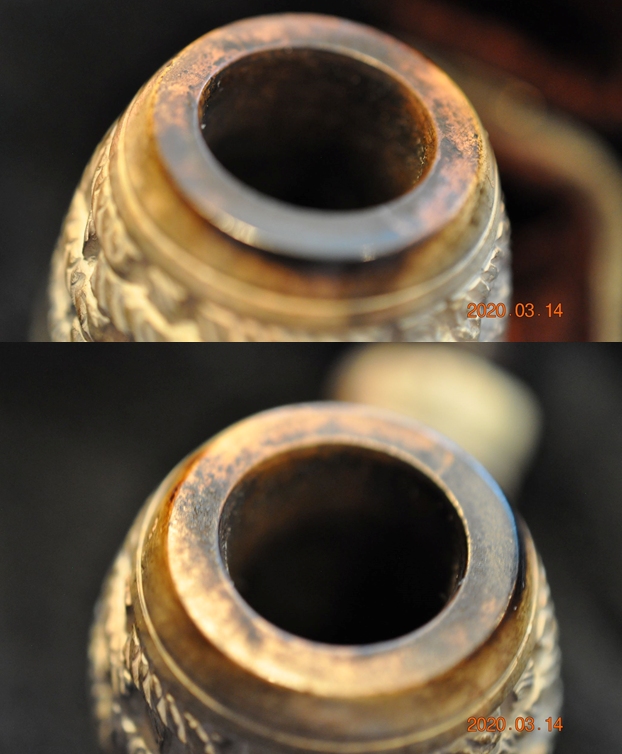
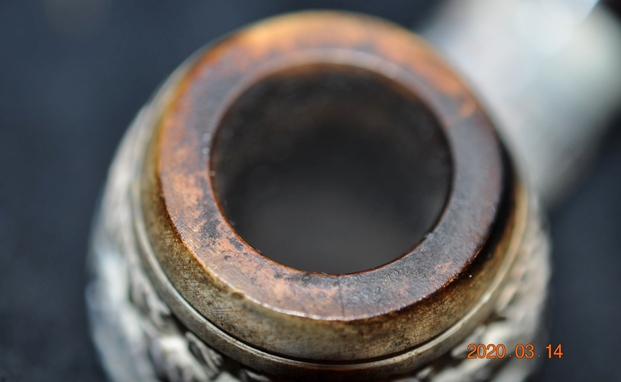
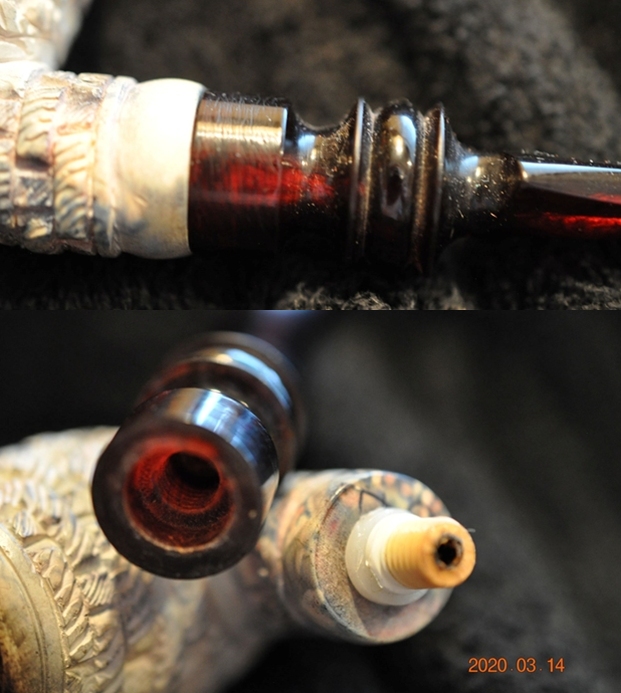
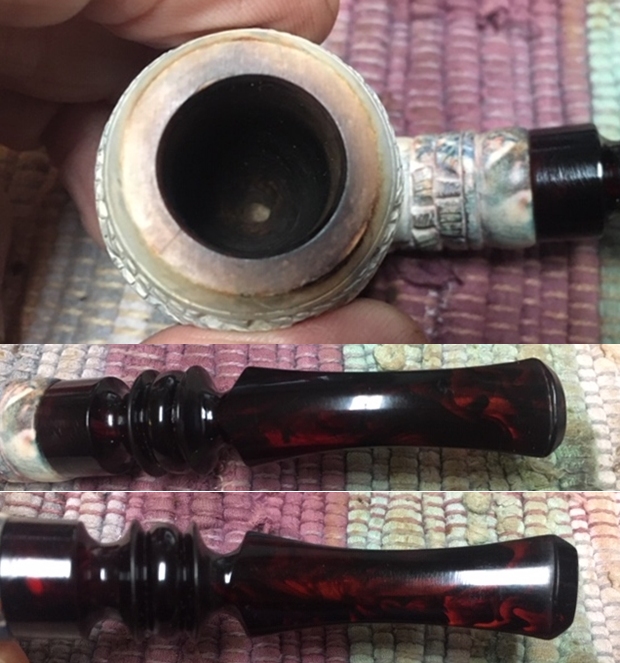
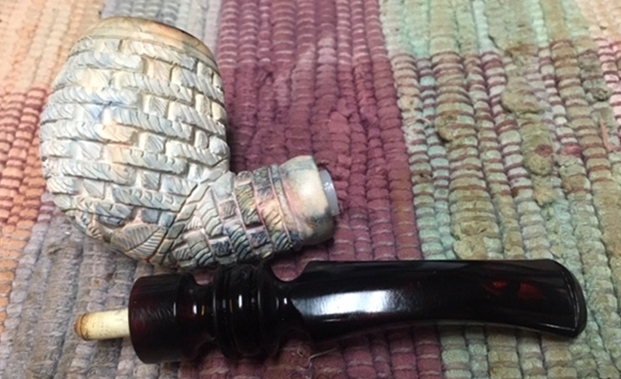
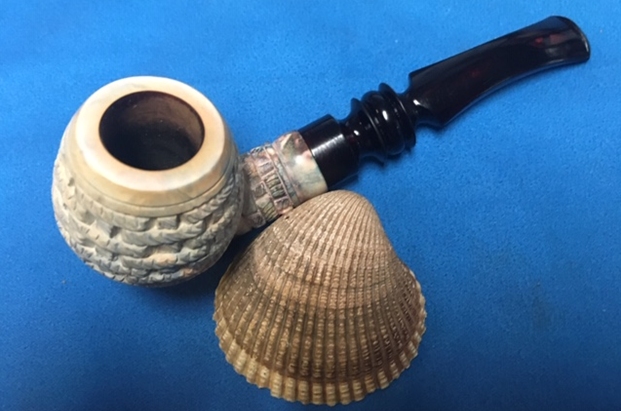
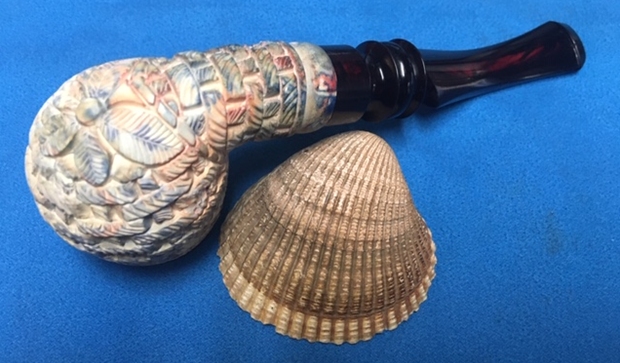
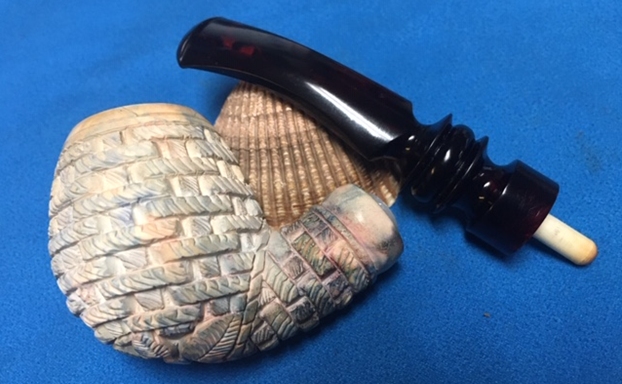
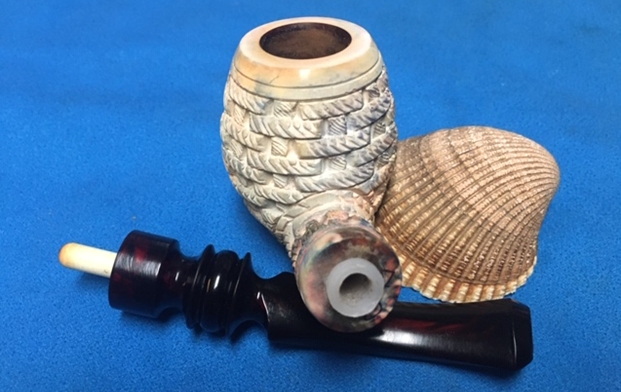
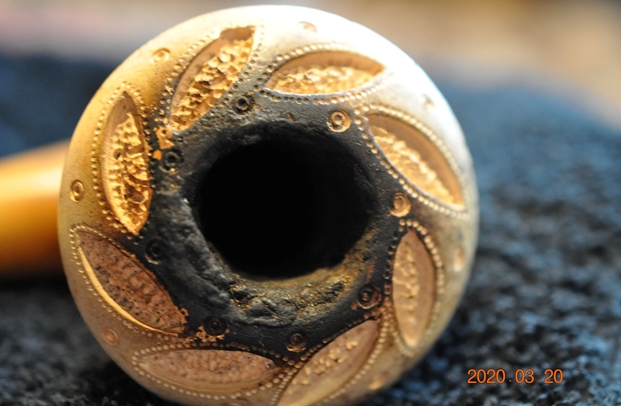
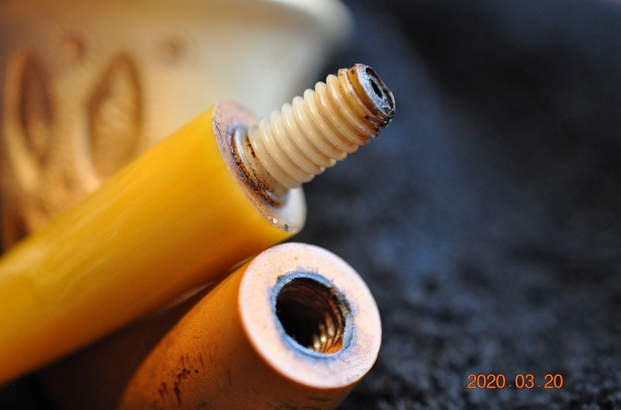
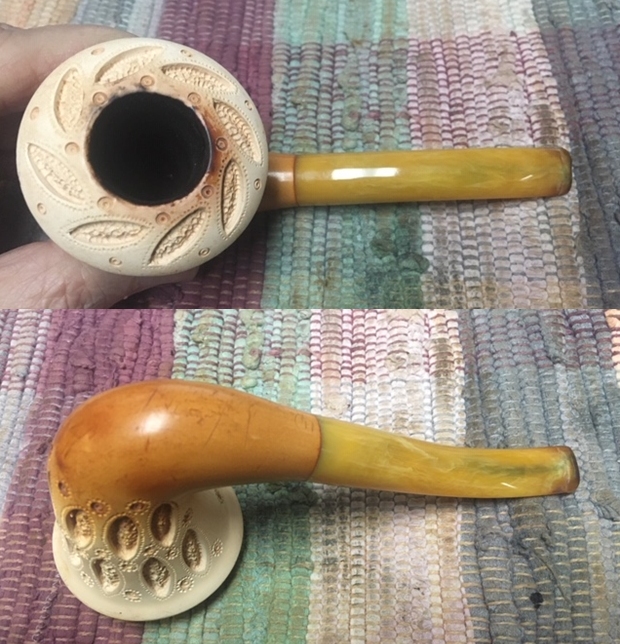
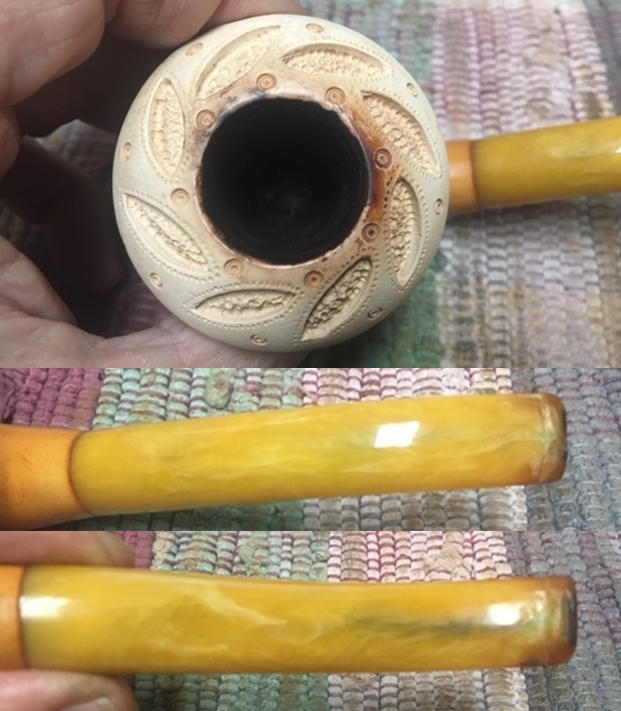
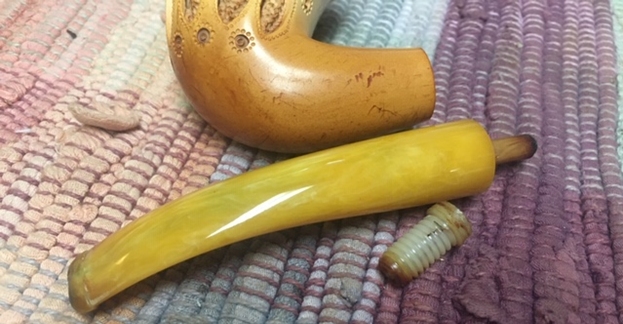
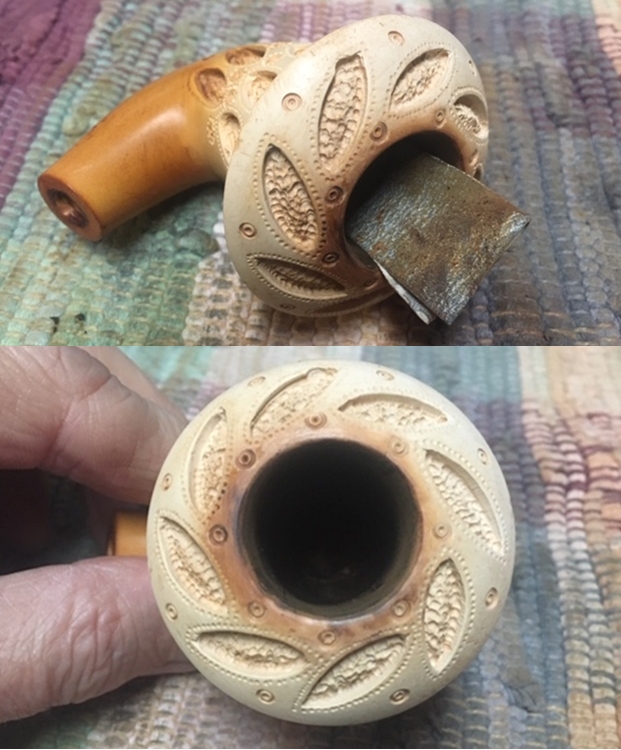
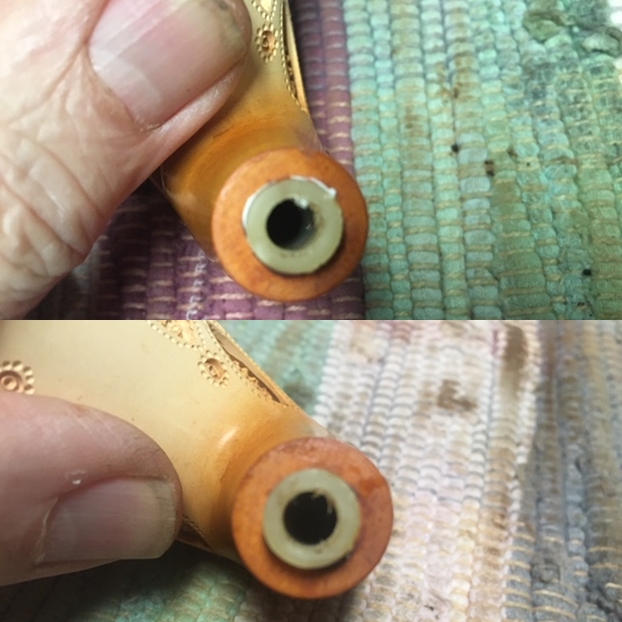
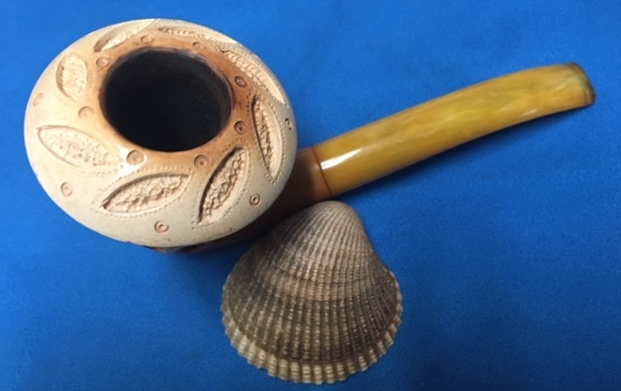
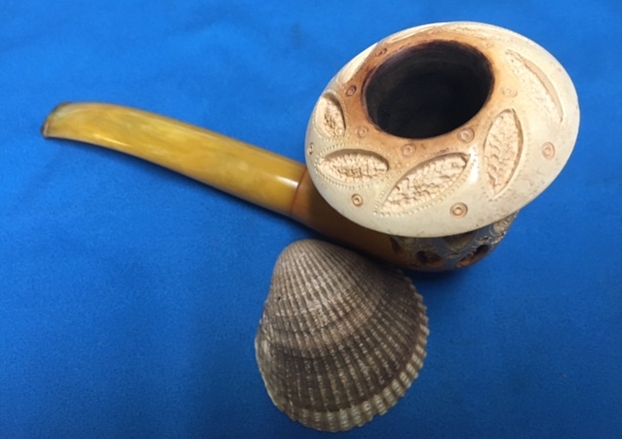
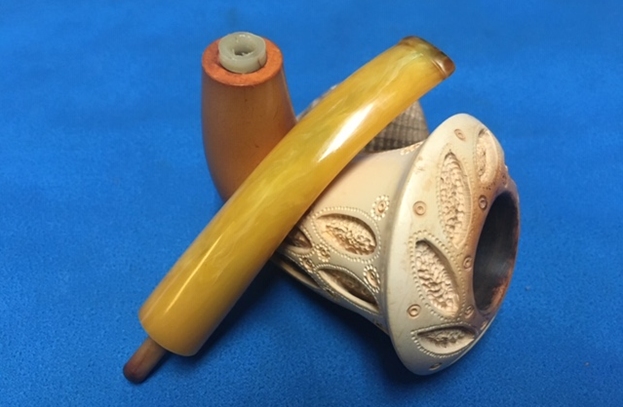
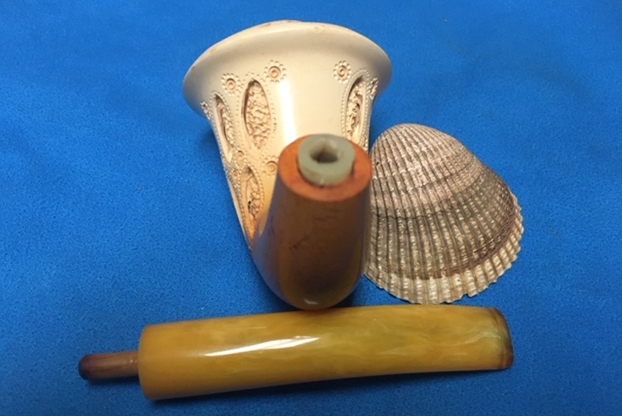
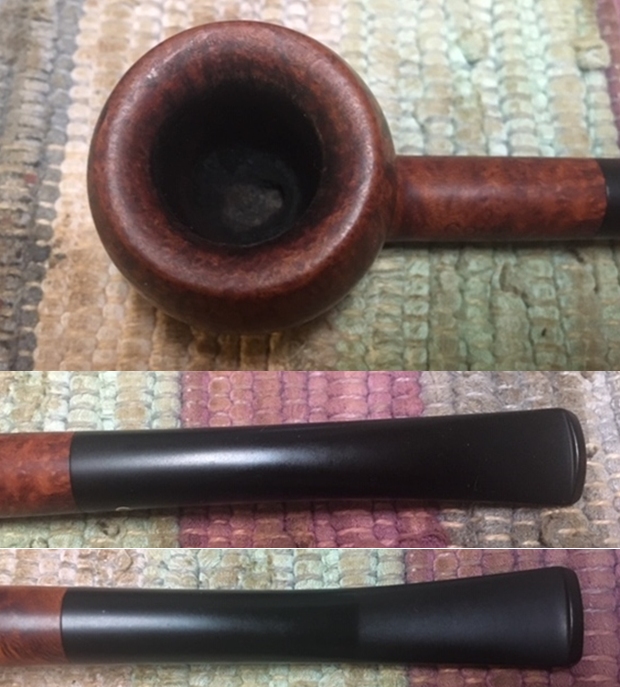
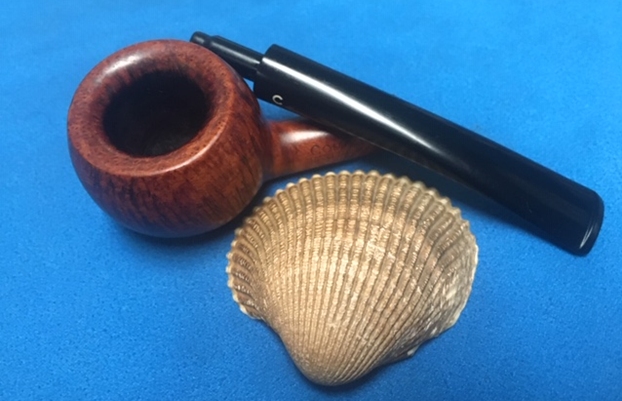
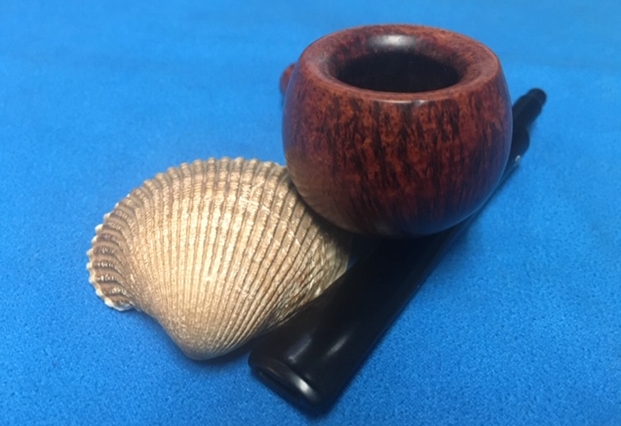
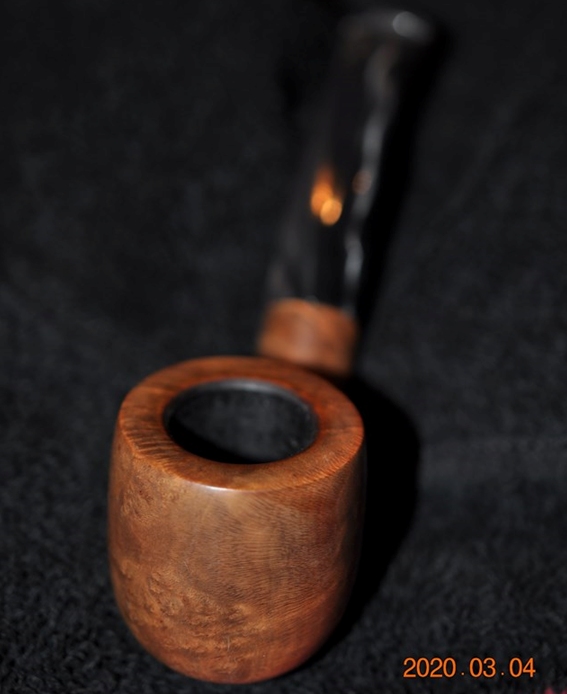
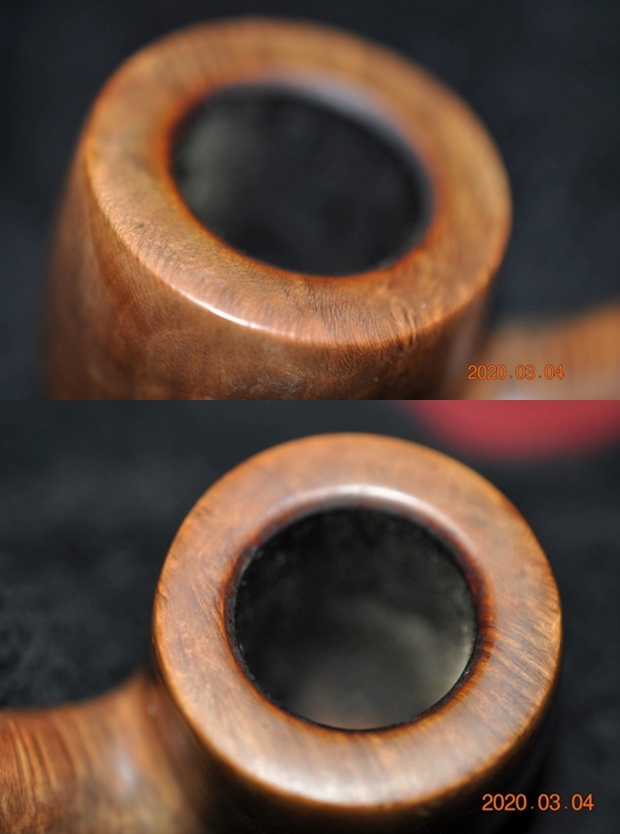
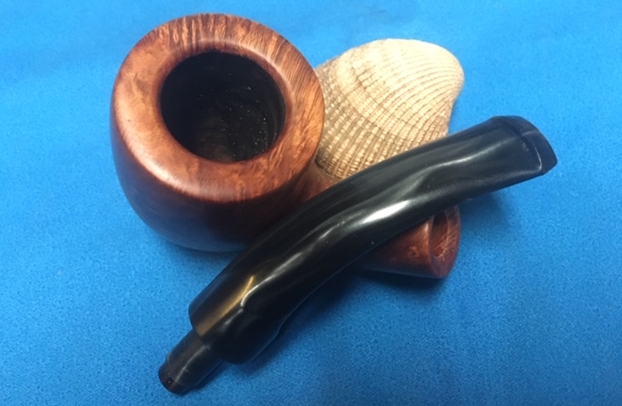
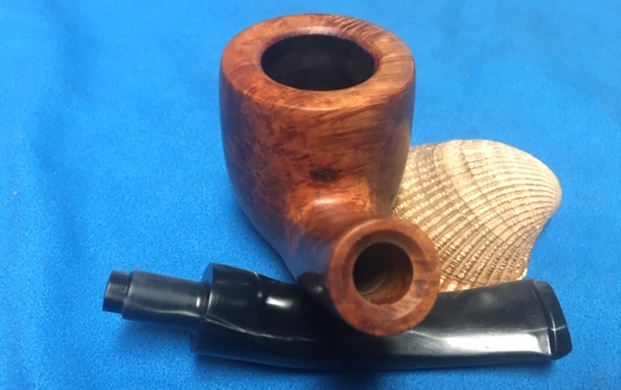
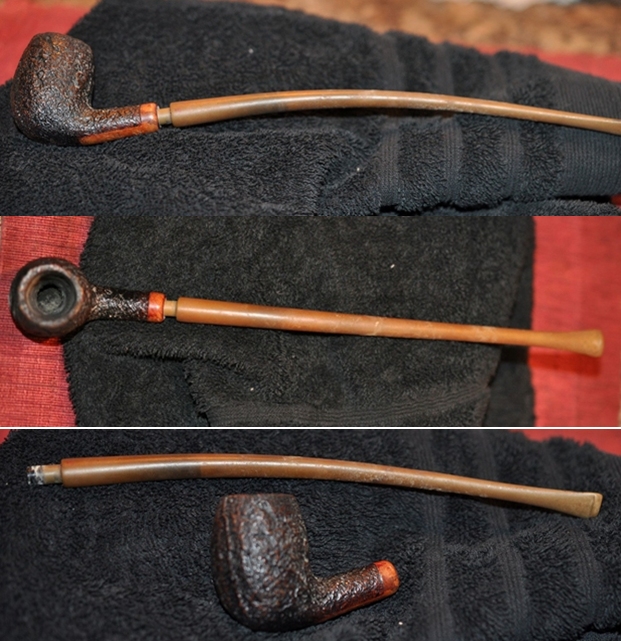
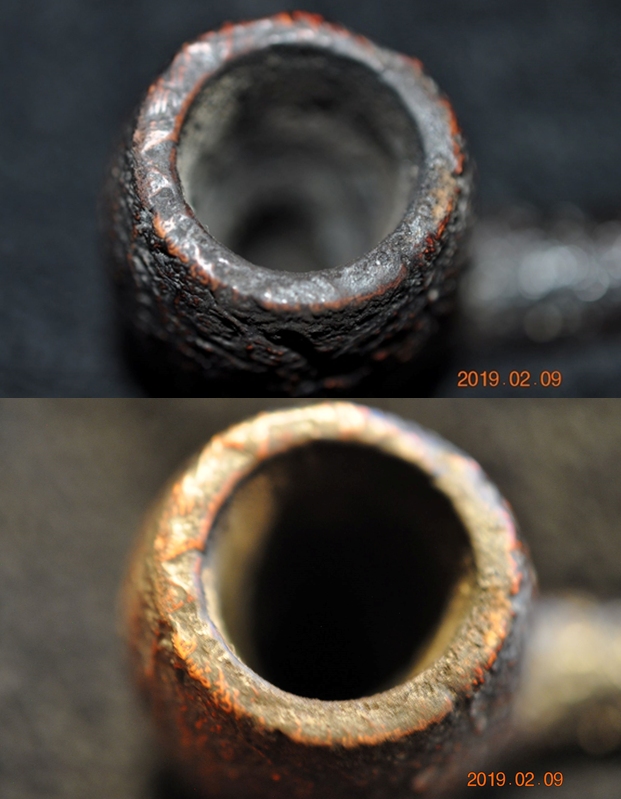
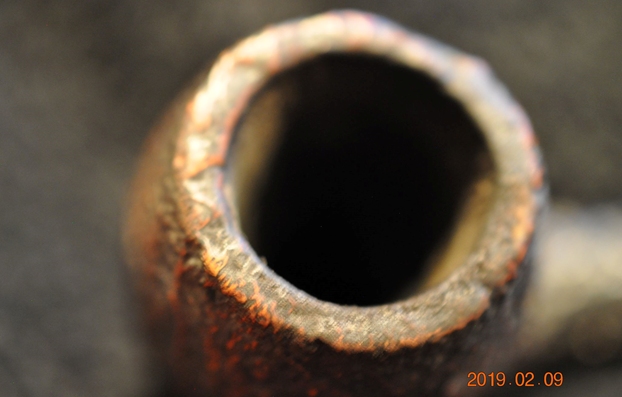
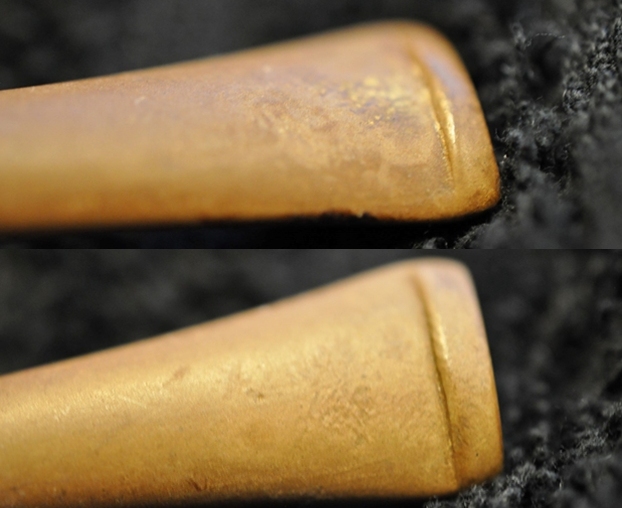
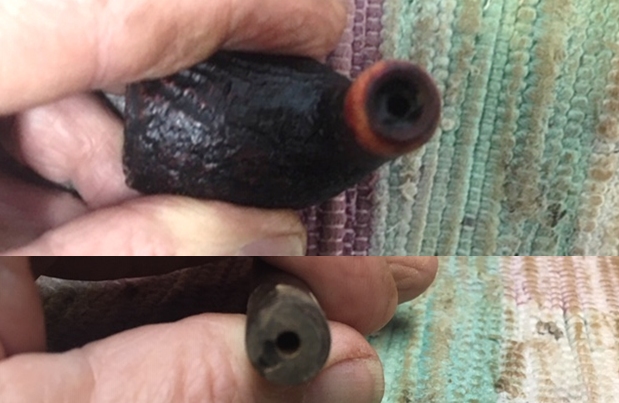
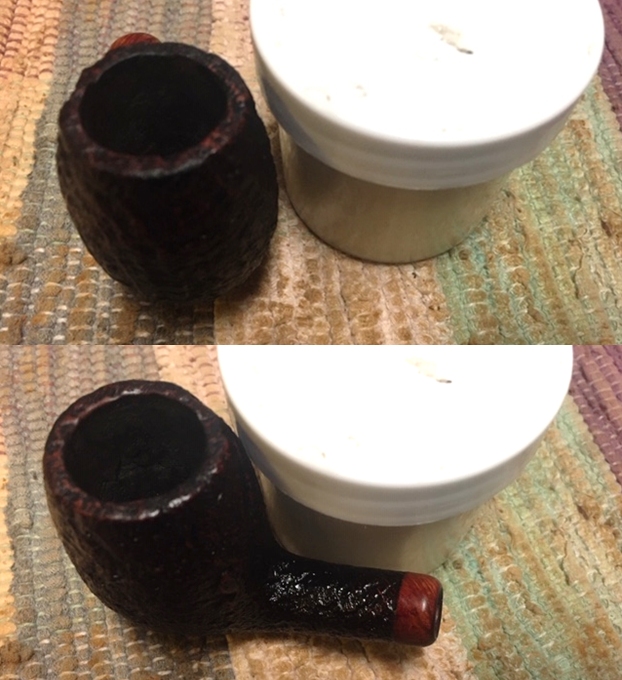
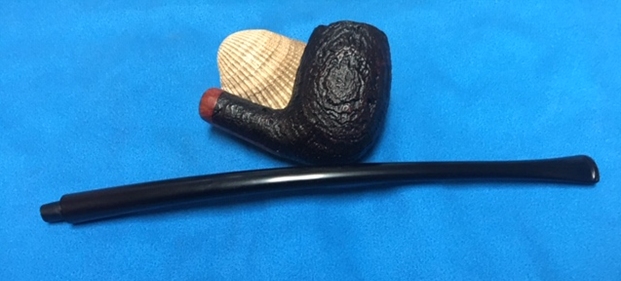
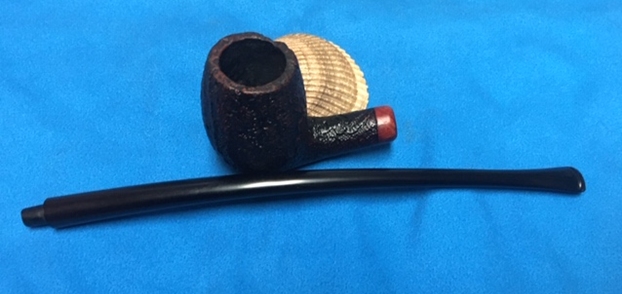
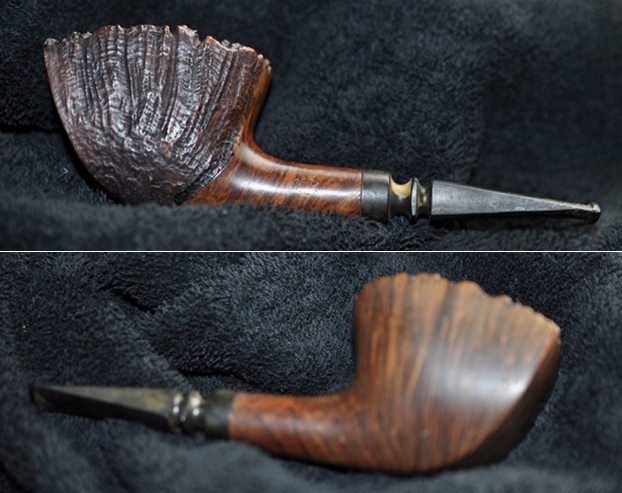
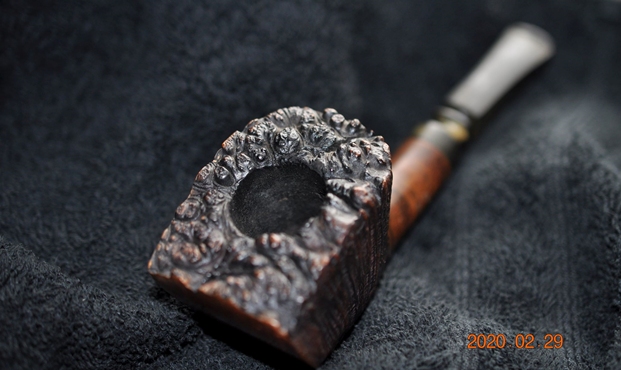
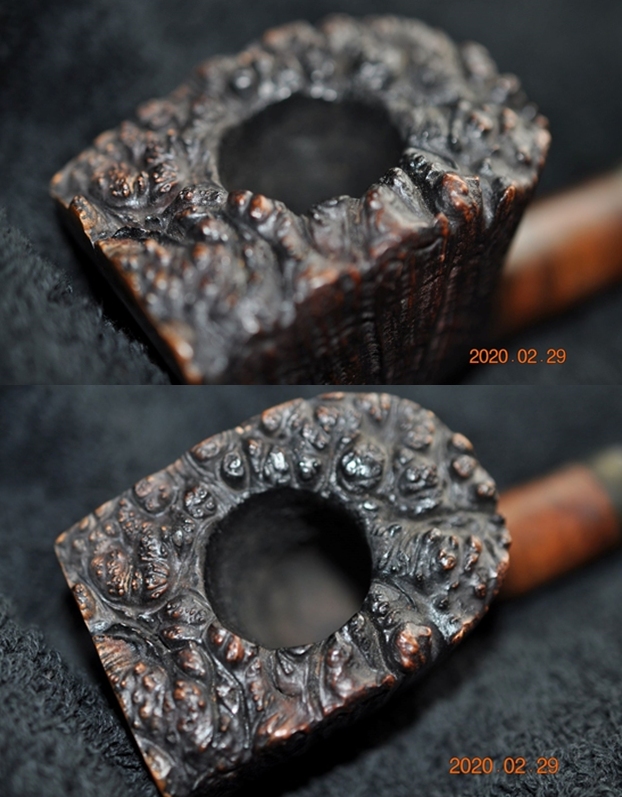
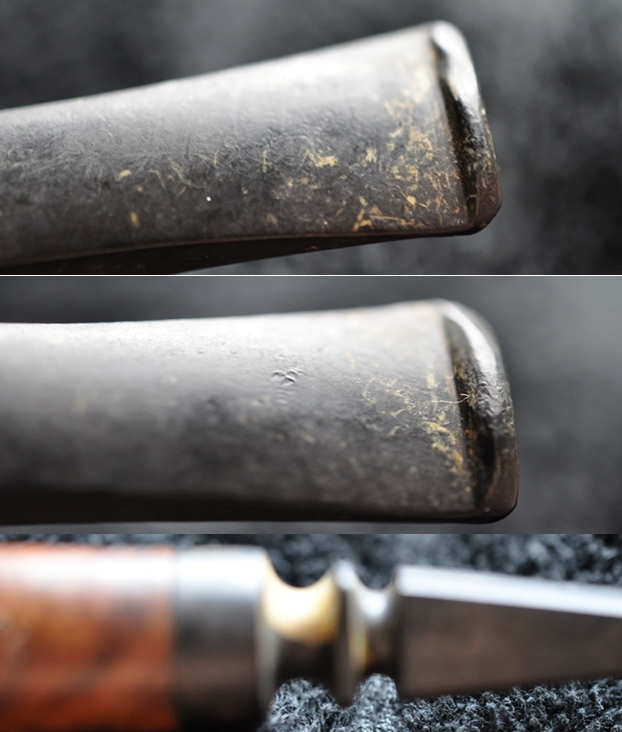
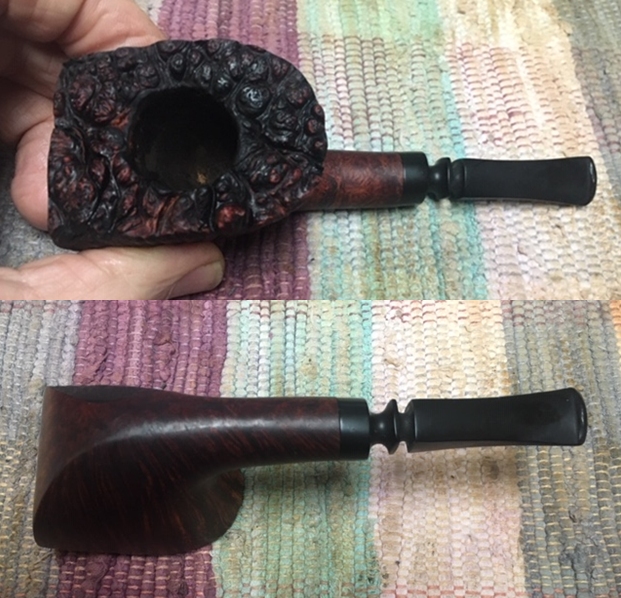
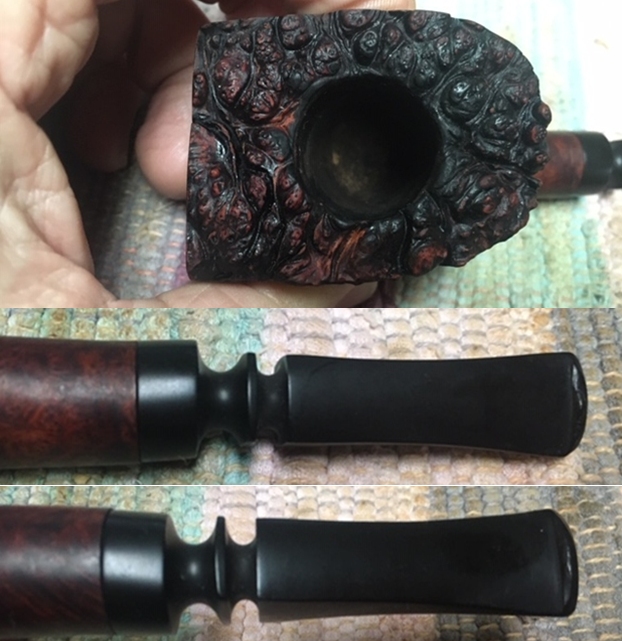
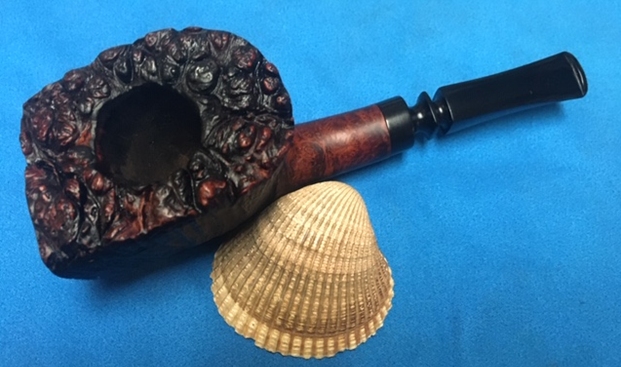
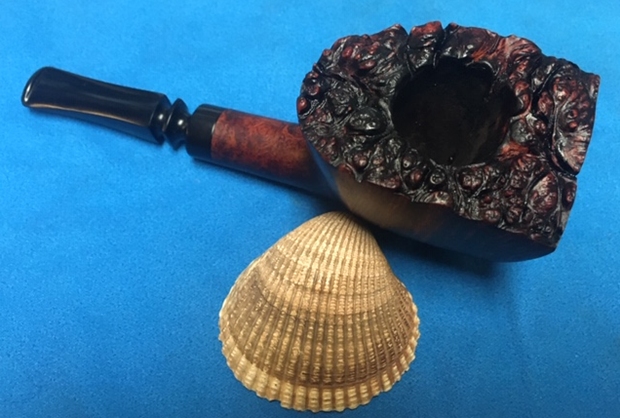
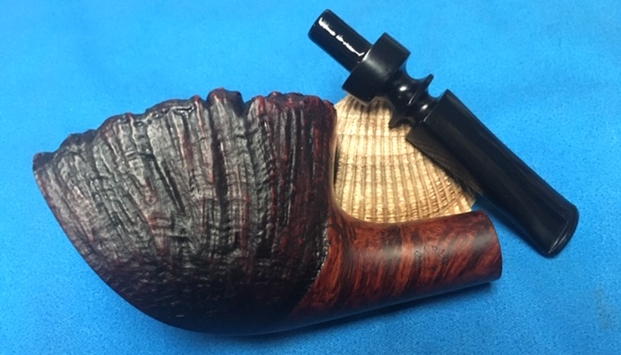
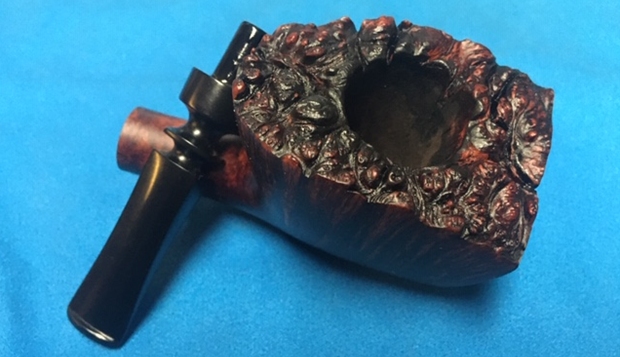
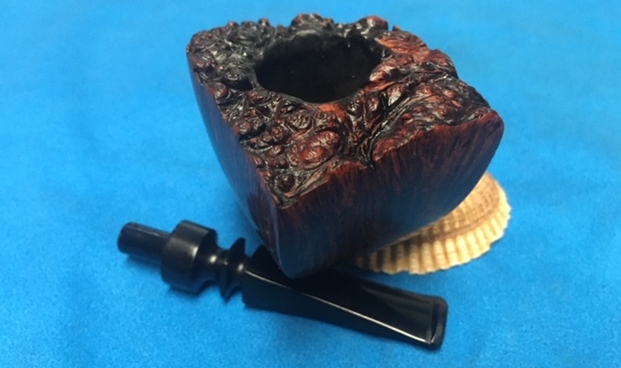
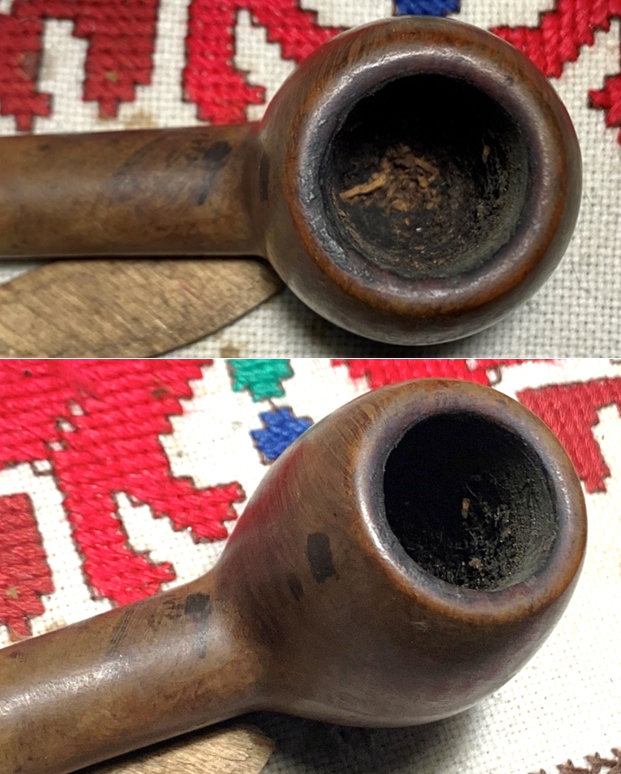
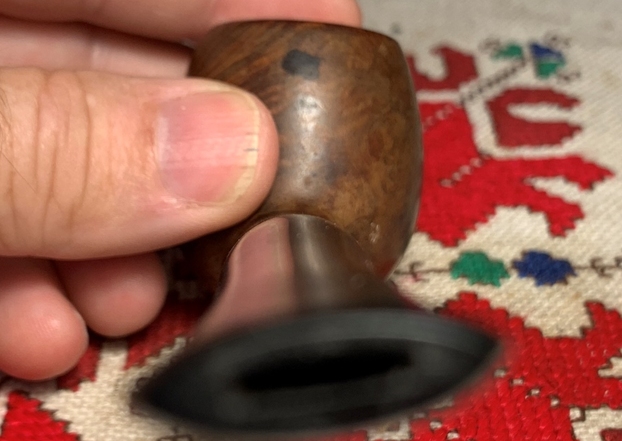
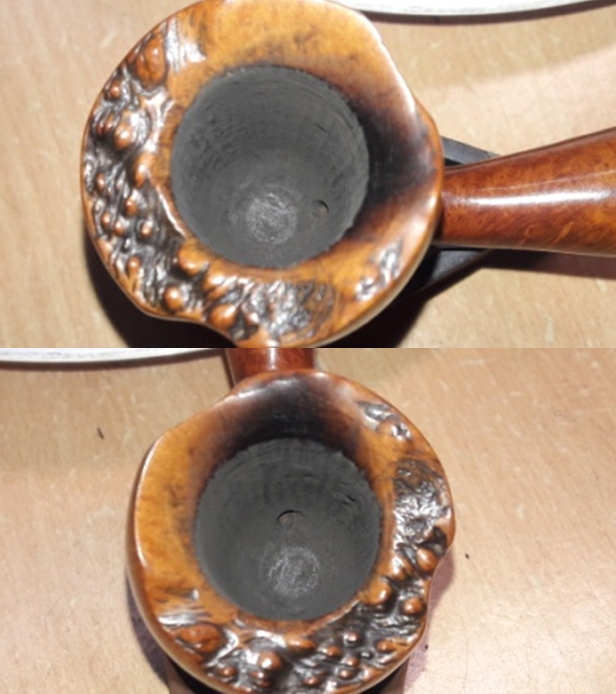
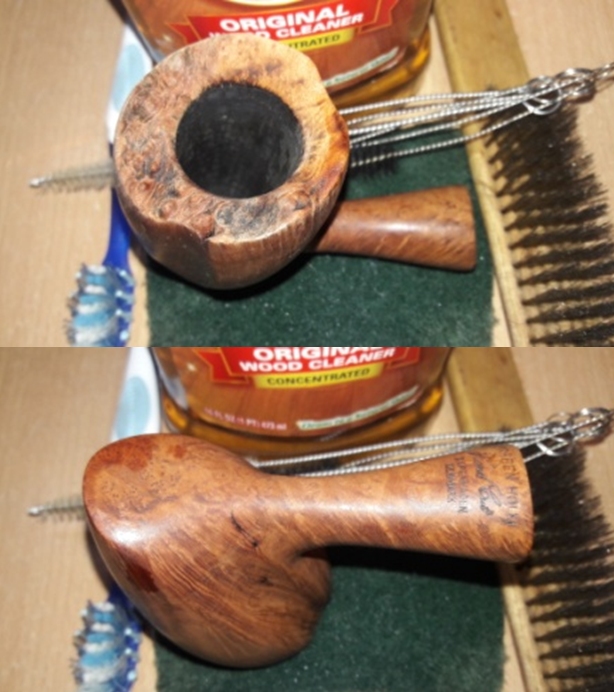
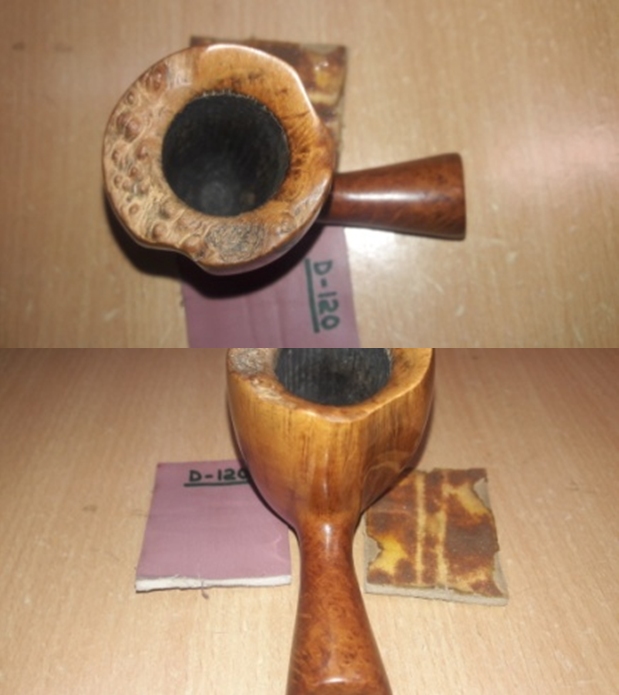
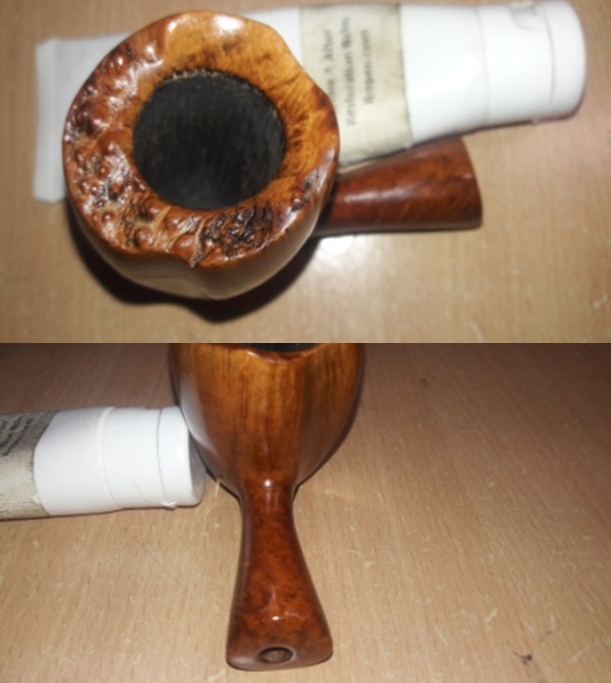
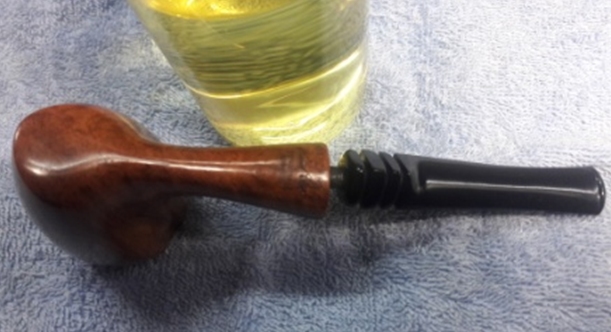
The first and foremost issue that I noticed and was aware of from the description given by the seller is that of the broken tenon. Most of the readers must be wondering as to the rational of buying a pipe, even a Preben Holm, with a broken tenon and it’s a logical question. However, there are two main reasons why I went in for this purchase; firstly my friend and guru, Steve had demonstrated how to replace a broken tenon and I was keen to try my hand at it and secondly was the economic consideration!! Pray tell me if it is possible to get a grade 7 early hand-cut Preben Holm from the 1960s at USD $65, including shipping!! Never, I say. Below are the pictures of the broken tenon stuck in to the mortise. This is going to be a challenging repair being my first tenon replacement. The chamber has a very thin layer of dry and hard cake with the slightly outward flared inner rim edge showing darkening in the 6 o’clock direction. The condition of the inner walls of the chamber can be checked and ascertained only after the cake has been taken down to the bare briar. However, I do not envisage any damage to the chamber walls. There is negligible lava overflow and debris embedded in the plateau of the rim top surface. It is my guess that this pipe suffered said catastrophic damage very early in its existence and had since been languishing in a box with the previous piper before he decided to get rid of it.
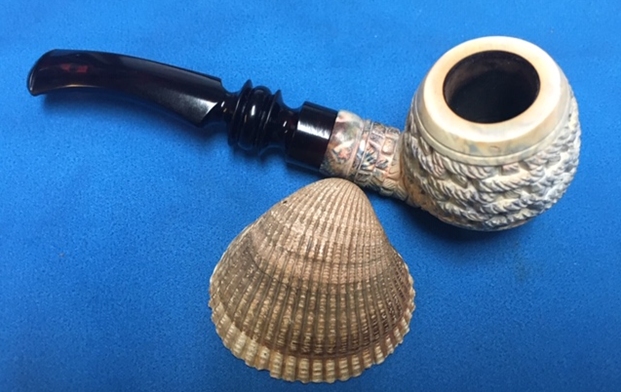
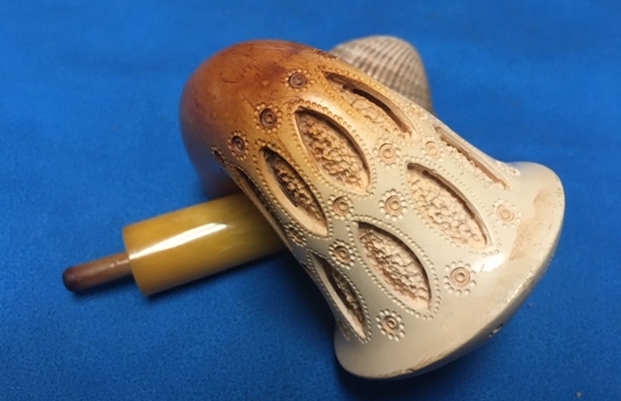
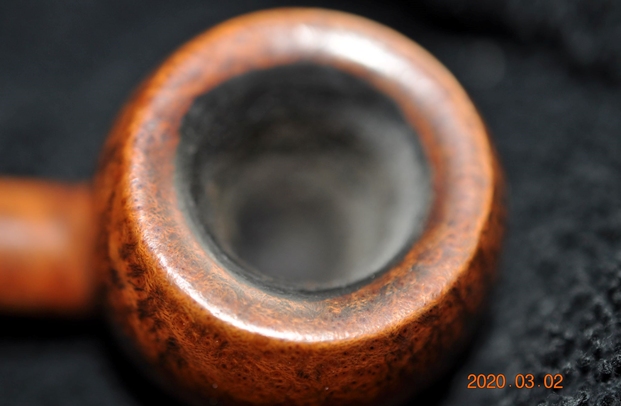
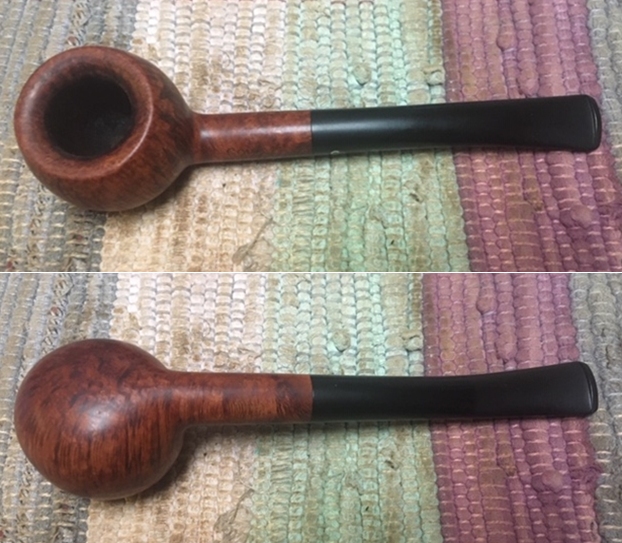
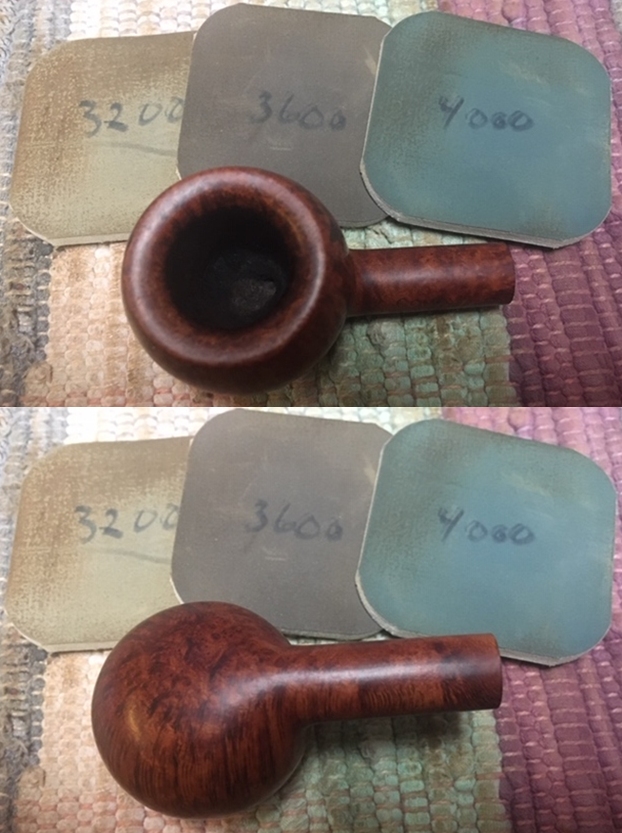
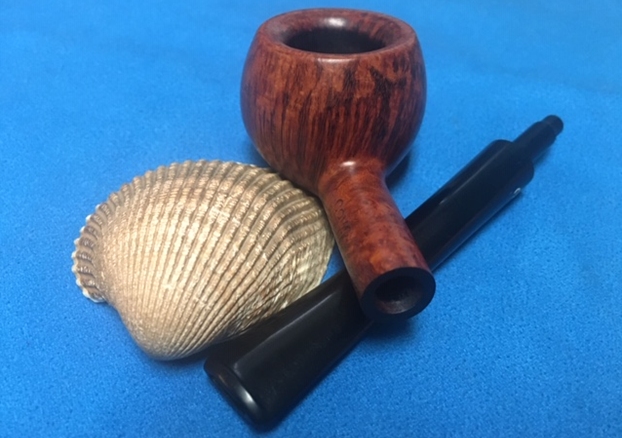
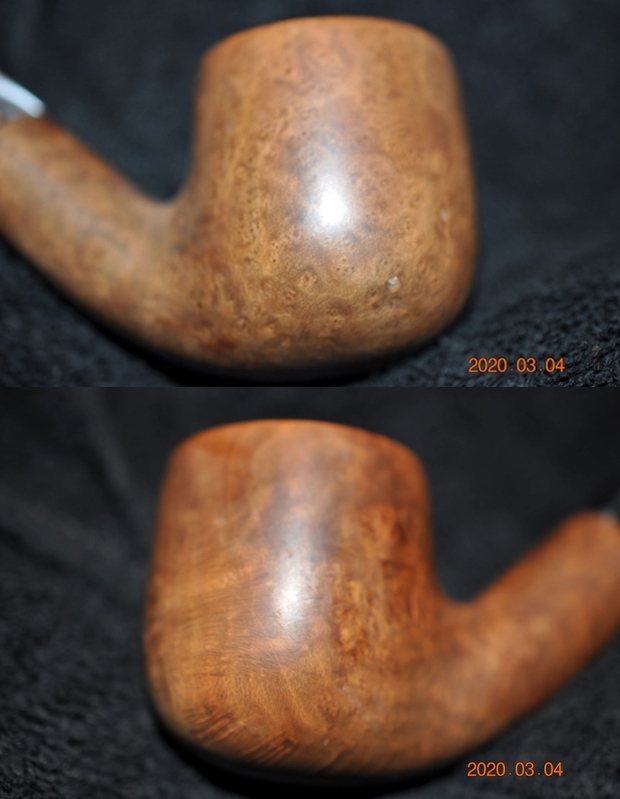
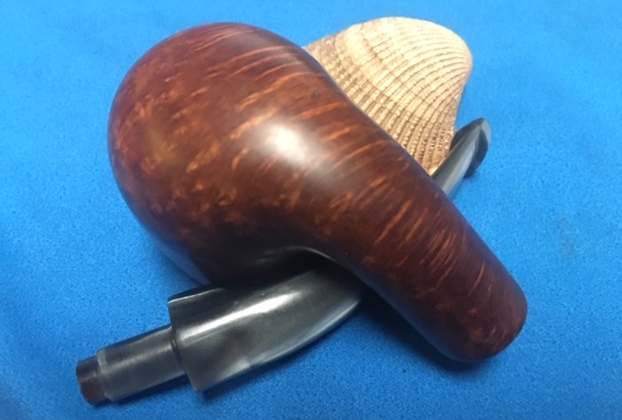
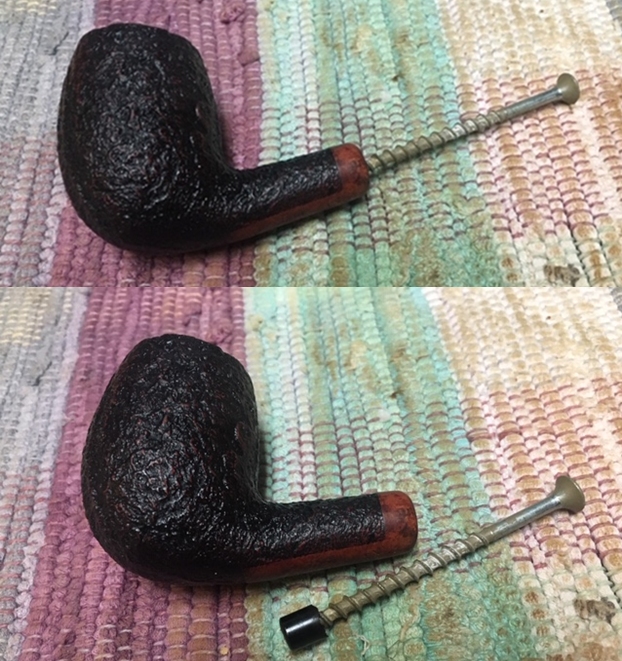
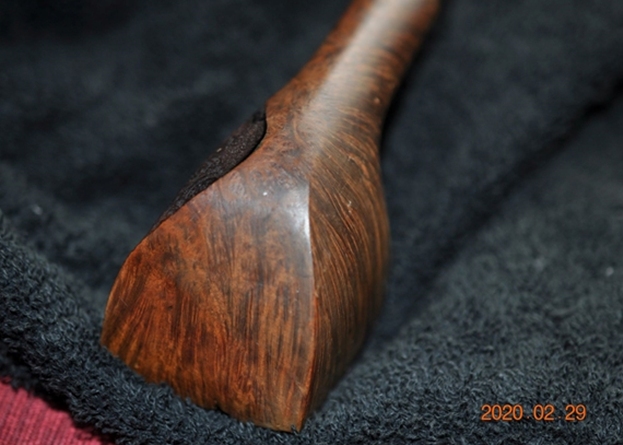
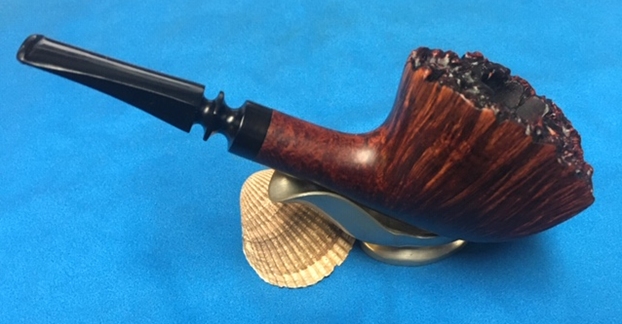
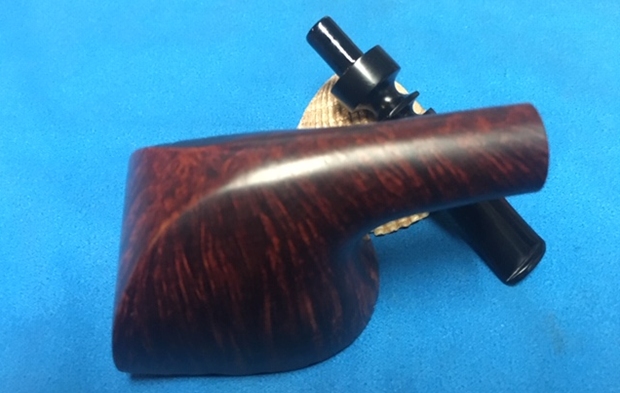
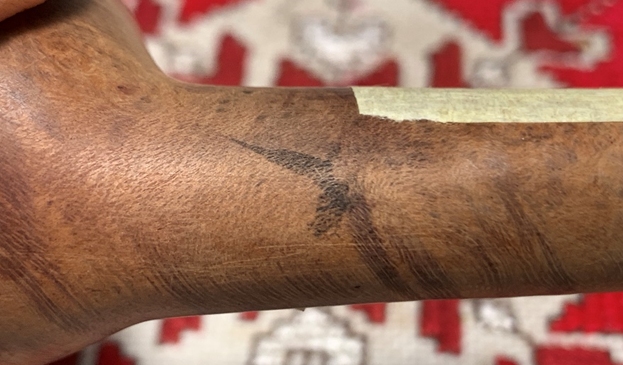
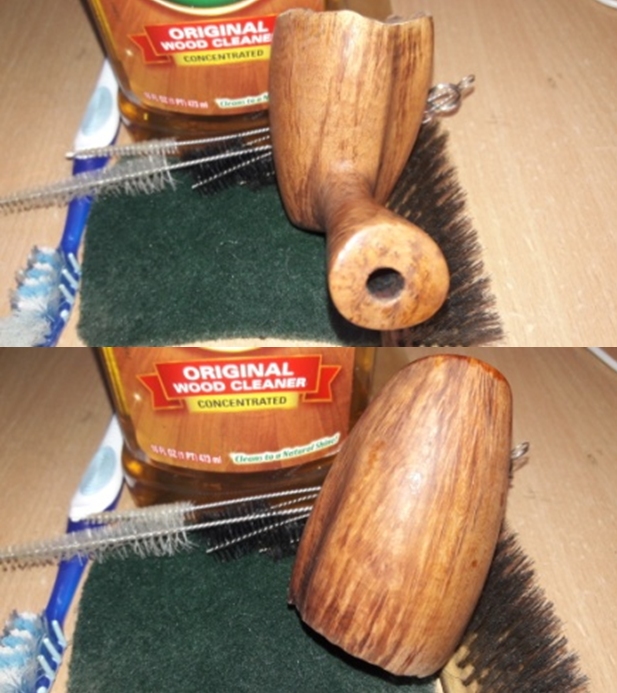
 The stummel boasts of beautiful straight grain all around and extends over the shank surface too!! The surface is relatively clean and without any fills save for a few very minor scratches that could have been caused during routine use. The slightly flared smooth end of the shank is clean. The foot of the stummel shows beautiful bird’s eye grains and is sans any damage. Overall, the stummel presents a sparingly used and a well-cared for pipe.
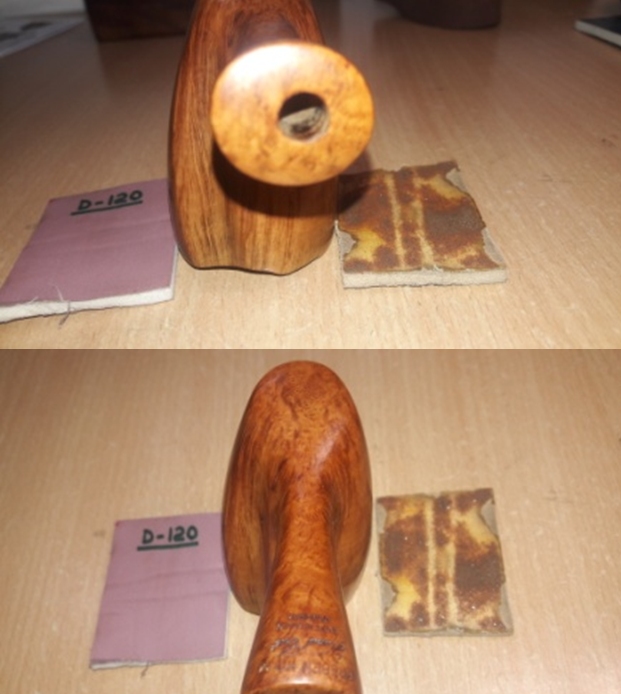
 The mortise has the broken tenon stuck in to it. However, given the condition of the chamber and the overall pristine appearance of the stummel, I think the mortise should be clean too!!
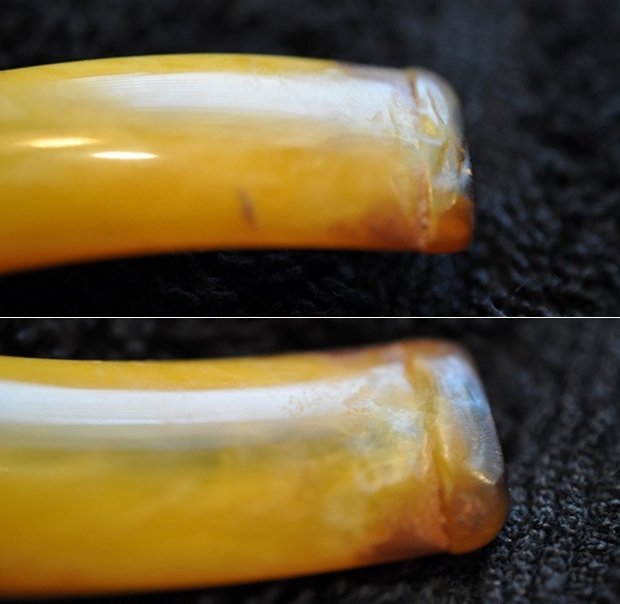
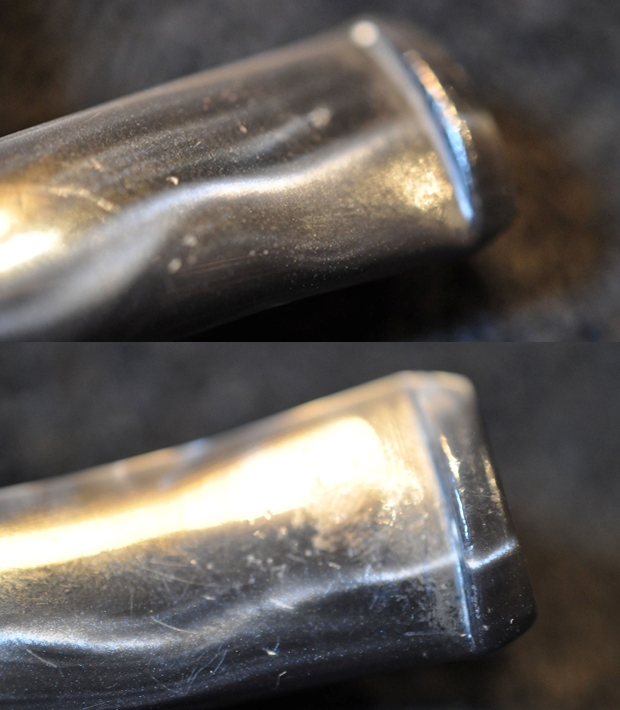
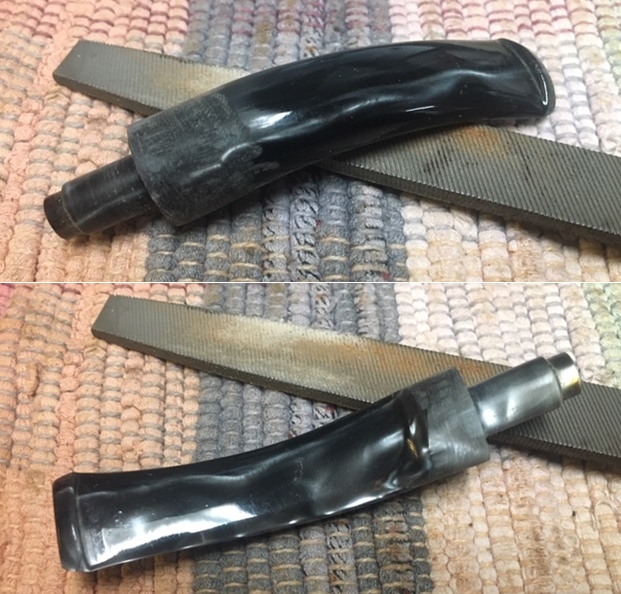
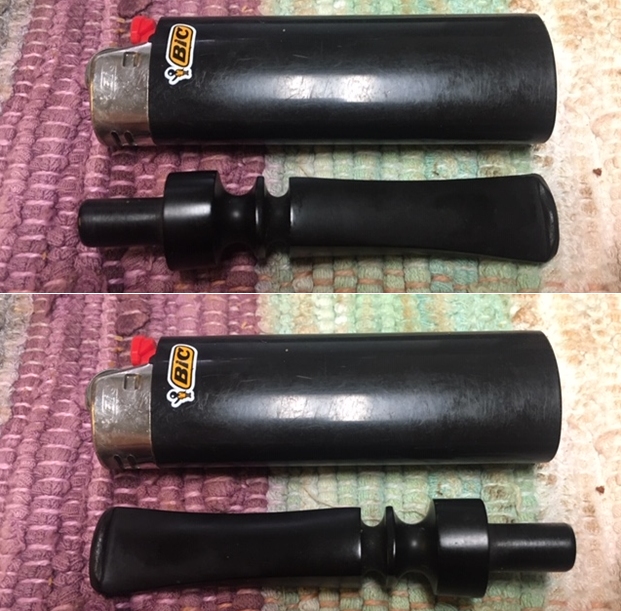
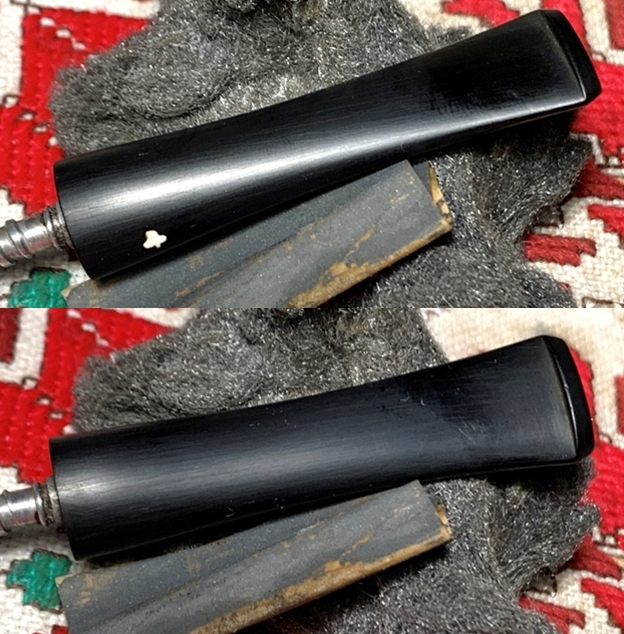
The fancy vulcanite stem shows traces of oxidation and is otherwise sans any major damage. The horizontal slot end of the stem is heavily oxidized to a dark brown coloration. The broken tenon end is jagged and sharp at the place where the tenon has snapped. The fancy stem, though it looks beautiful when black and shiny, is a bear to clean with all the dips and narrow gaps between the beads and rings etc. THE PROCESS
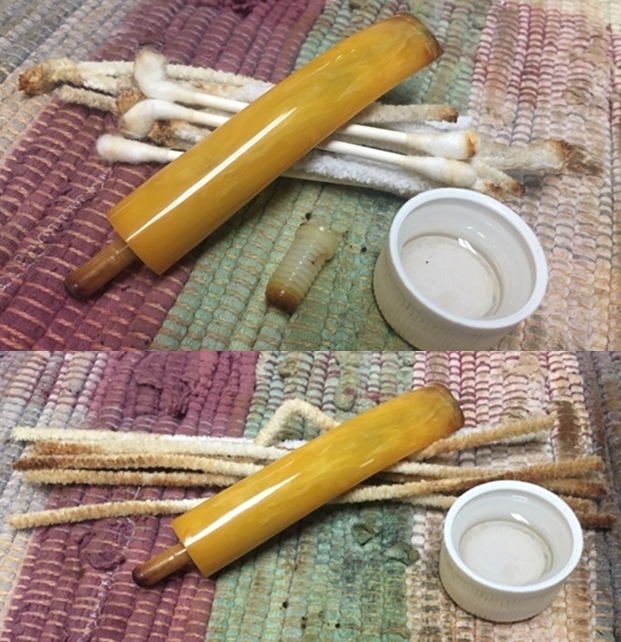
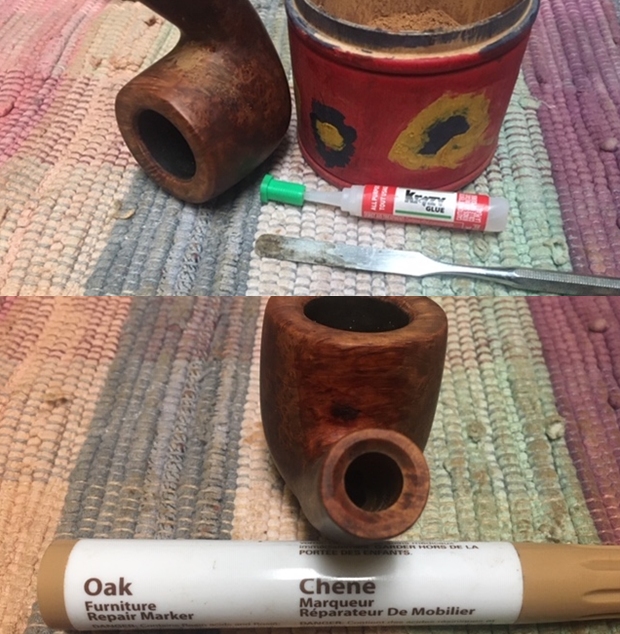
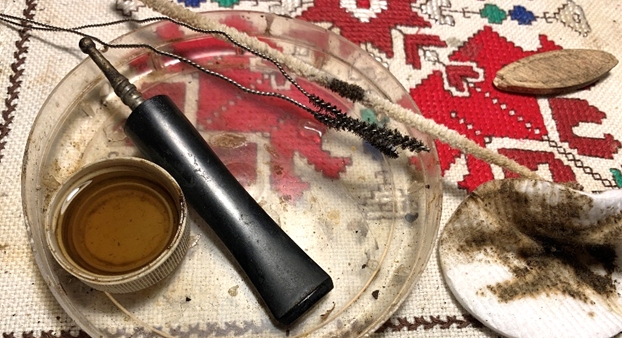
I began the process of refurbishing this pipe with cleaning the internals of the stem using pipe cleaners with isopropyl alcohol (99.9% pure) and dunking the stem in to “Before and After Deoxidizer” solution developed by my friend Mark Hoover. The solution helps to draw out heavy oxidation to the surface making its further removal a breeze, while the minor oxidation is eliminated to a very great extent. I usually dunk stems of 5-7 pipes that are in-line for restoration and this pipe is marked in green arrow. I generally allow the stems to soak in this solution overnight for the solution to do its work. With the stem soaking in the deoxidizer solution, I worked the stummel starting with reaming the chamber with my fabricated knife as the layer of cake was too thin and did not warrant the use of a reamer. It was at this stage that I realized that the pipe has been so sparingly smoked that what I was assuming to be a layer of cake, is in fact a layer of bowl coating!! The walls of the chamber are smooth and solid. I tried to wriggle out the broken tenon that was stuck in to the mortise. Lucky me, it came out without any resistance!! That’s a big relief.
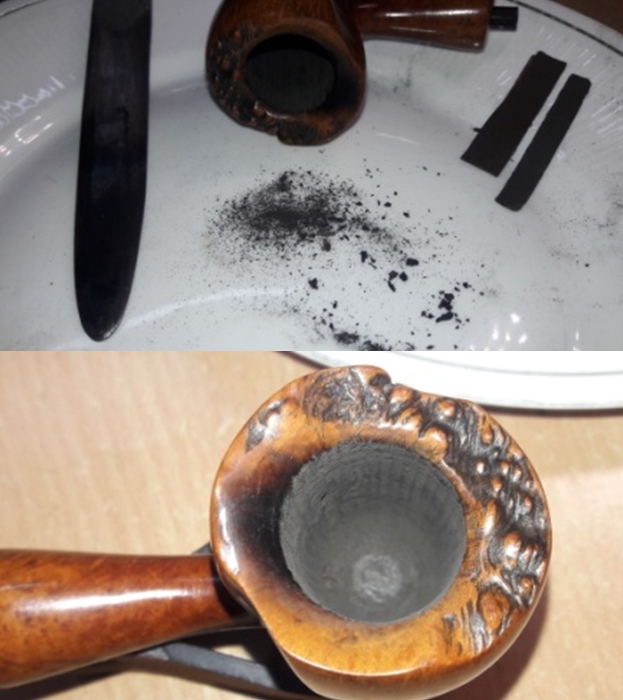
 Next, I cleaned the mortise with hard bristled and regular pipe cleaners dipped in isopropyl alcohol. I scrubbed the external surface of the bowl with undiluted Murphy’s oil soap and hard bristled tooth brush and dried it using paper towels and soft cotton cloth. I carefully cleaned the plateau rim top with a soft brass wire brush to remove the accumulated dirt and debris from the surface. Thereafter, I cleaned the mortise, plateau rim top and stummel surface with anti-oil dish washing soap on shank brush and tooth brush. The entire stummel, including the platue rim top, cleaned up nicely. I set the stummel aside to dry out naturally.
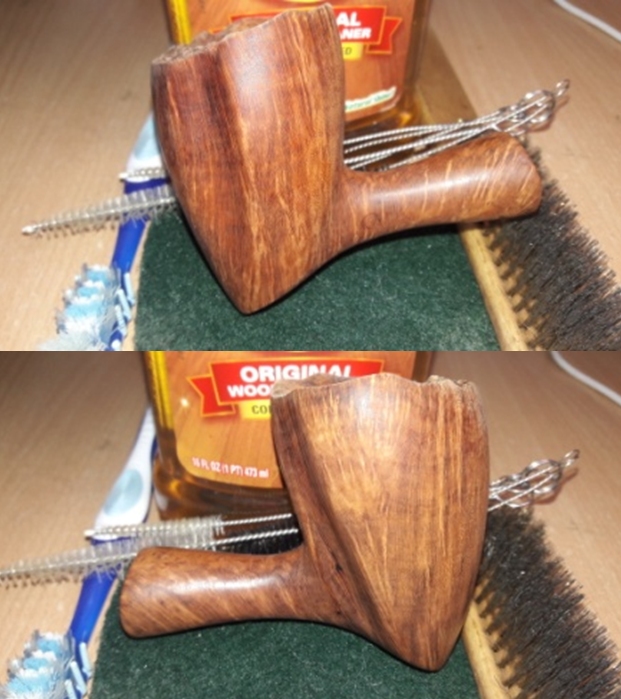
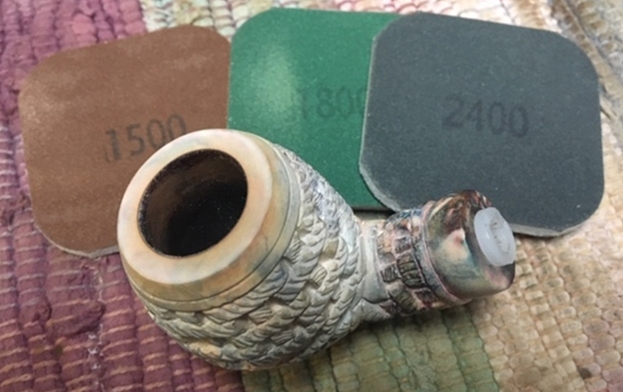
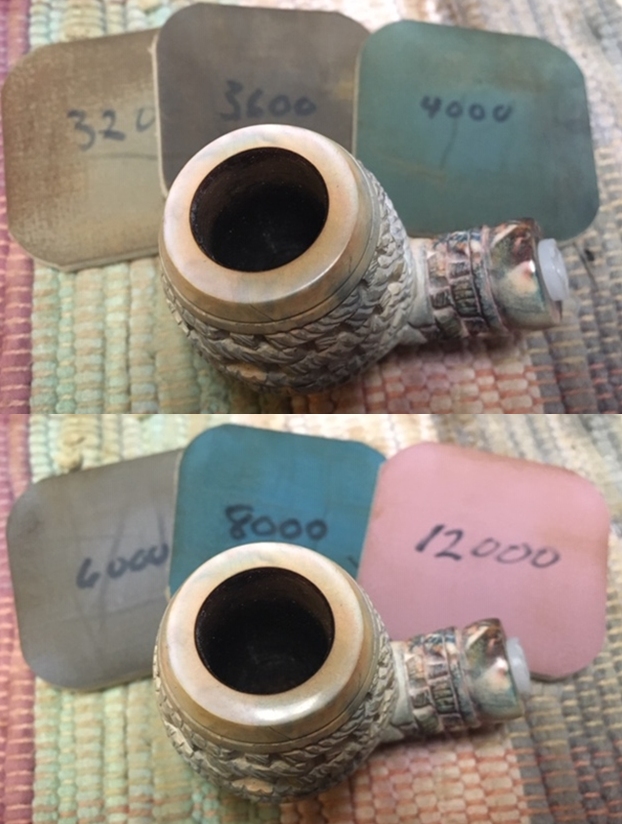
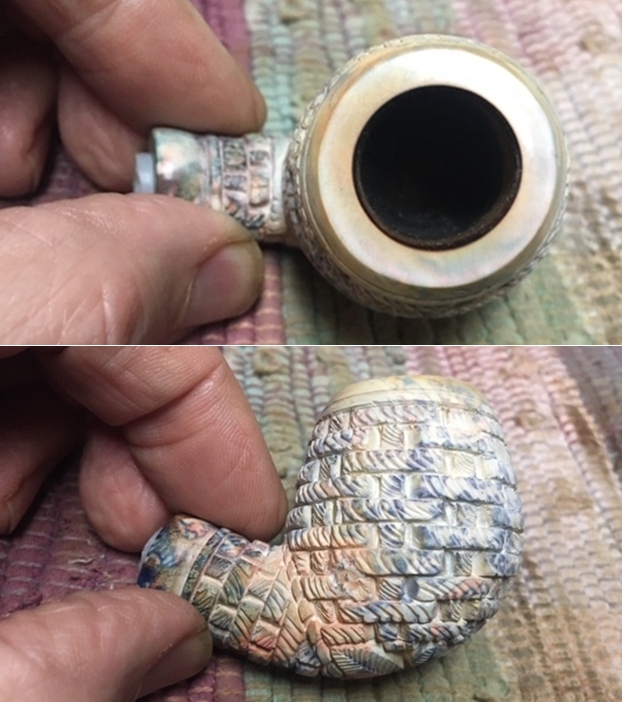
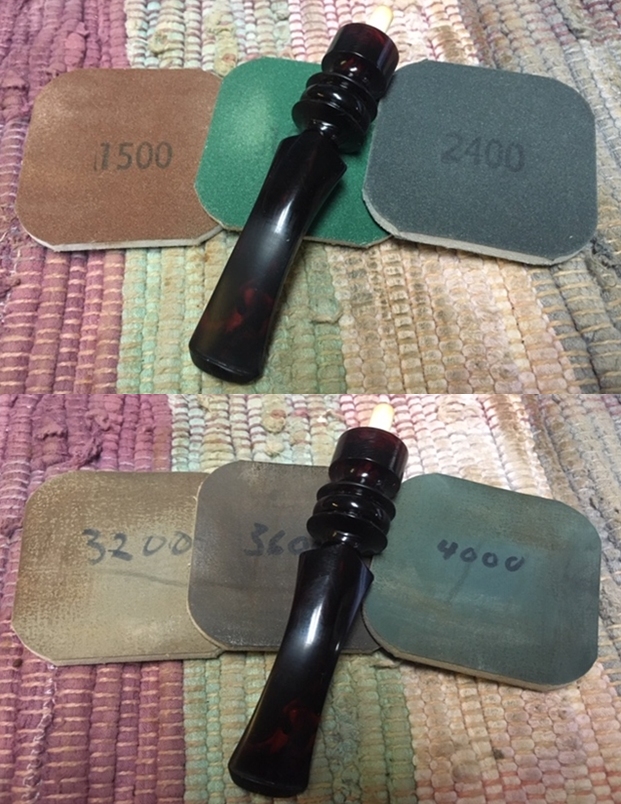
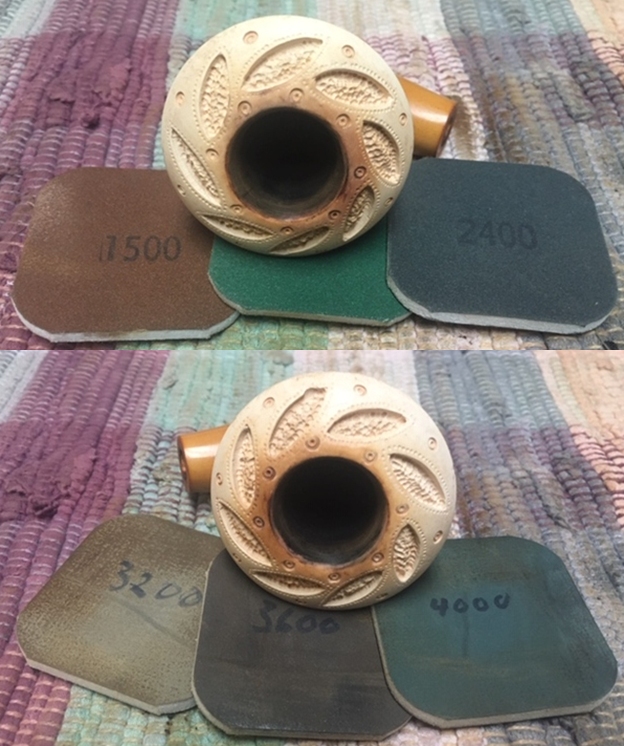
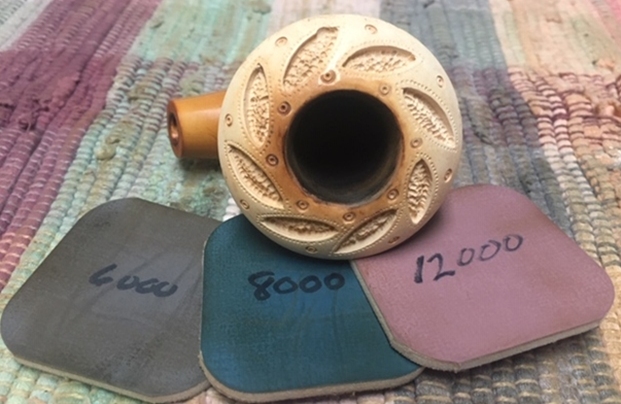
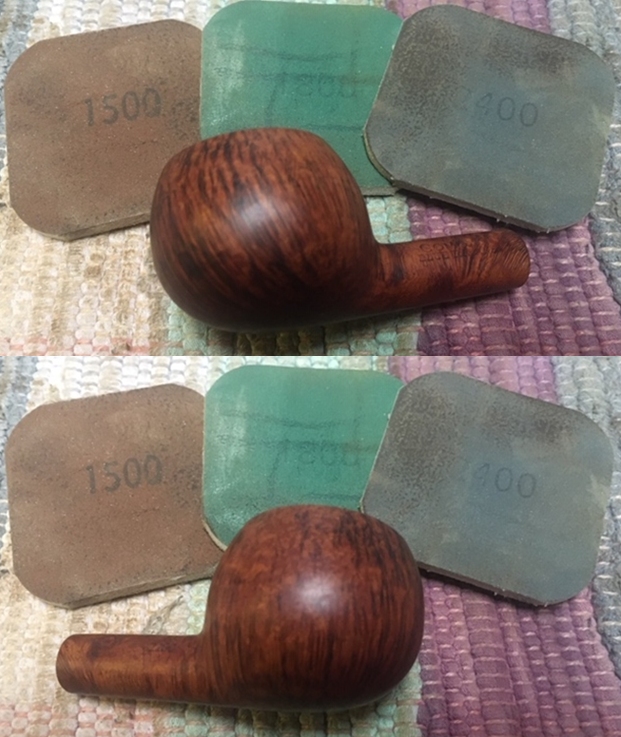
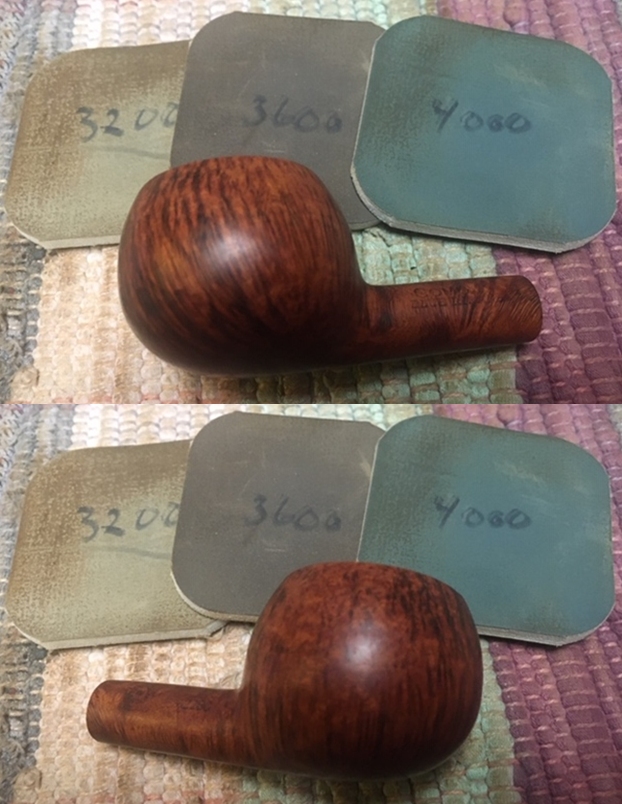
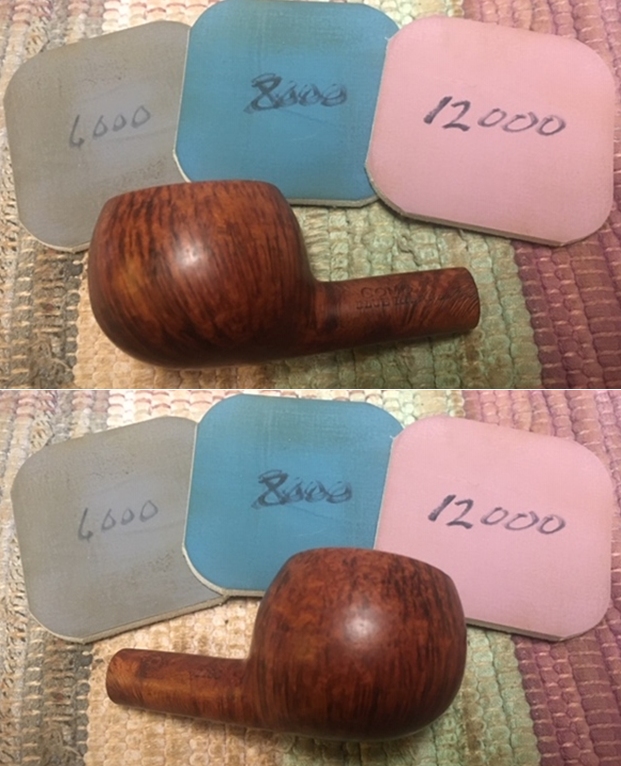
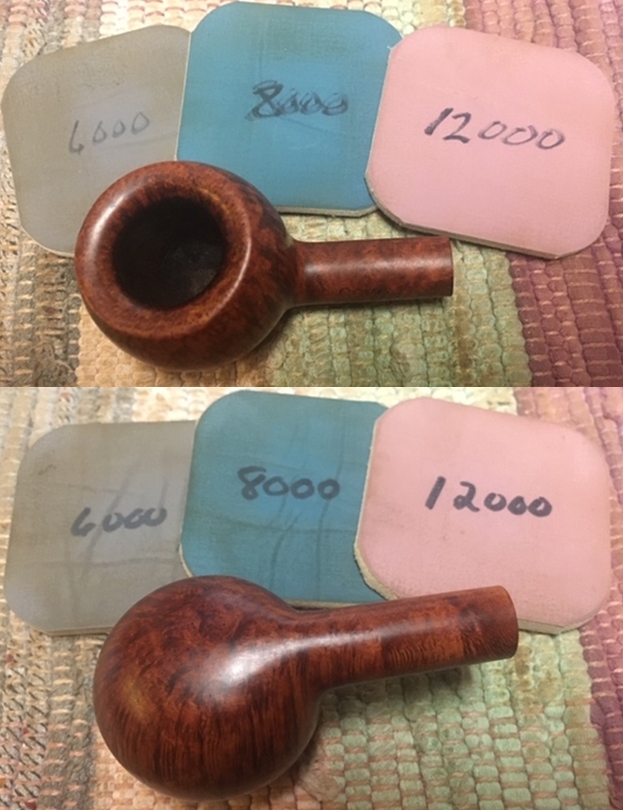
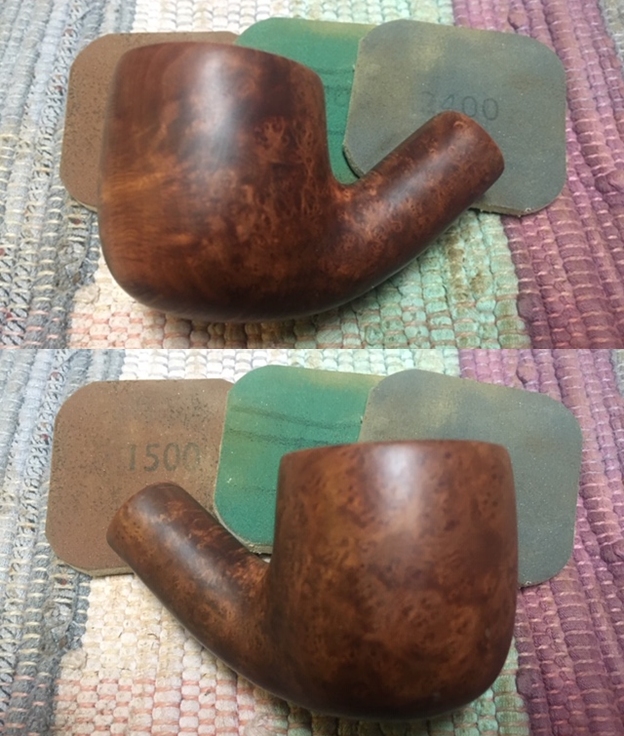
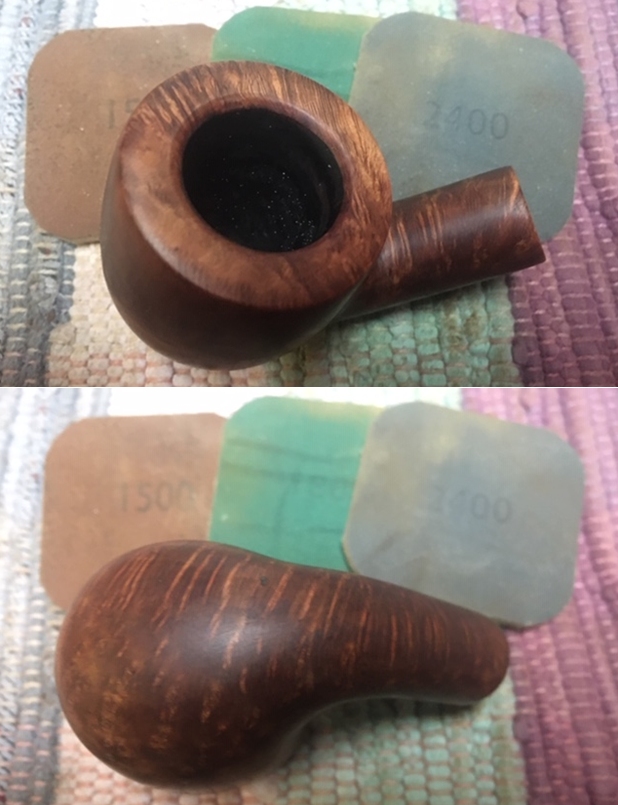
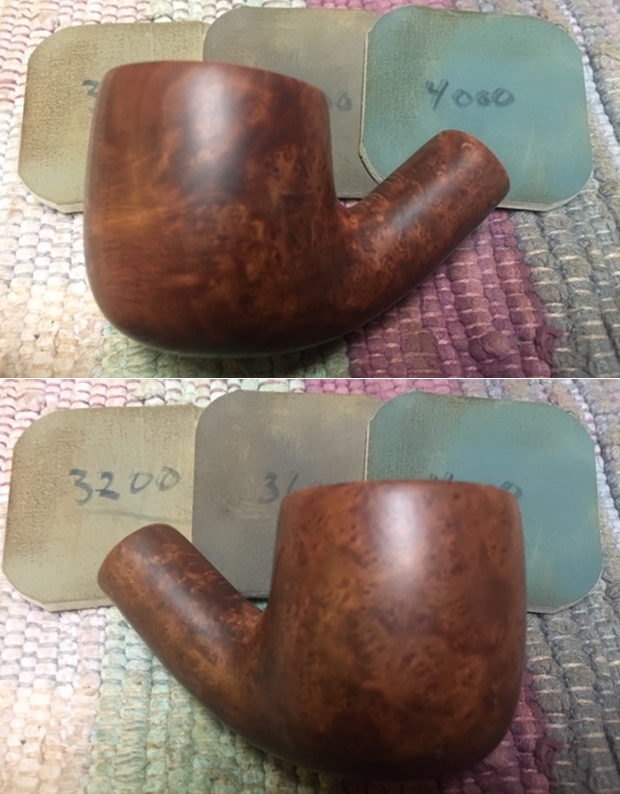
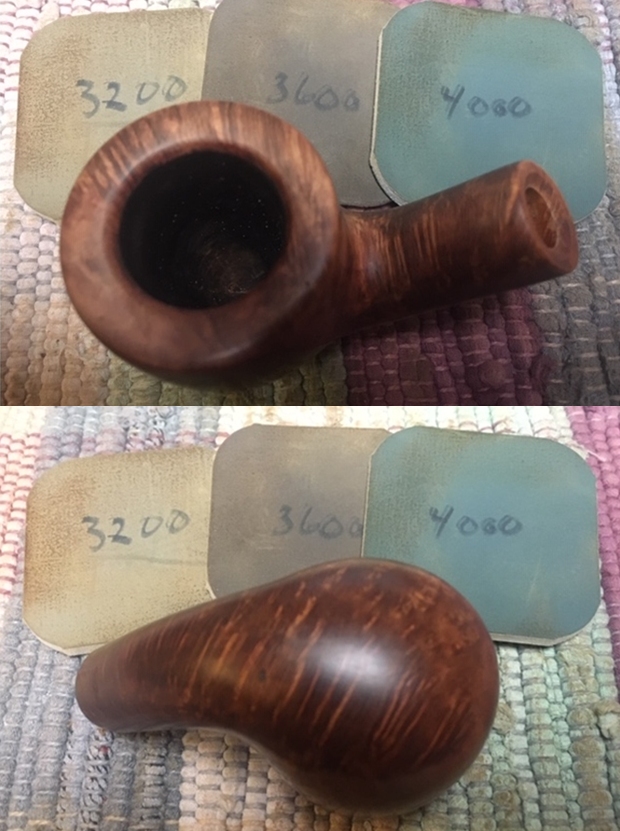
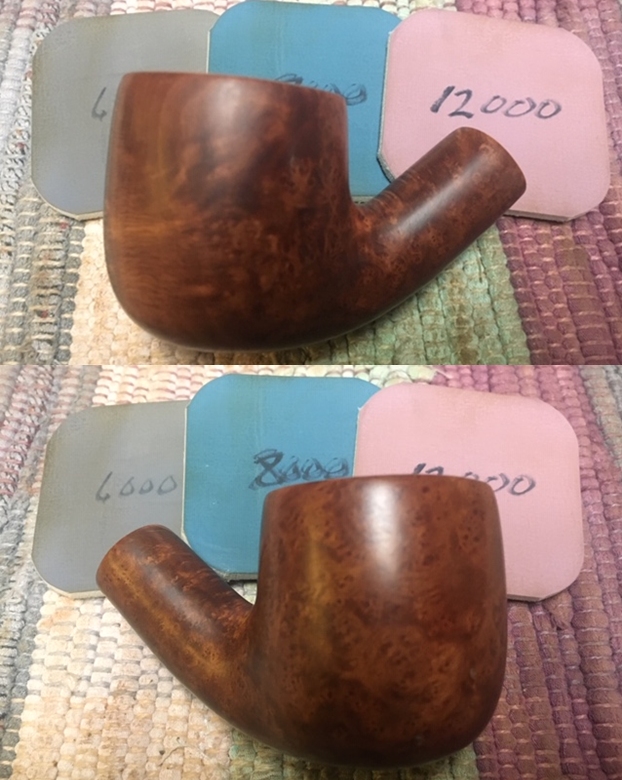
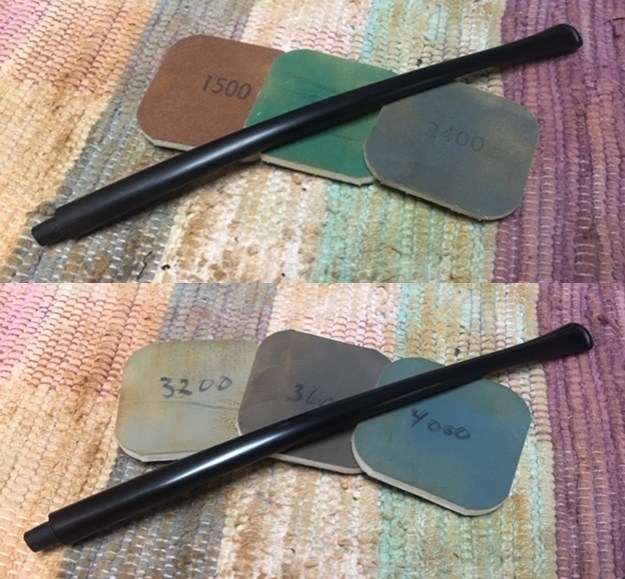
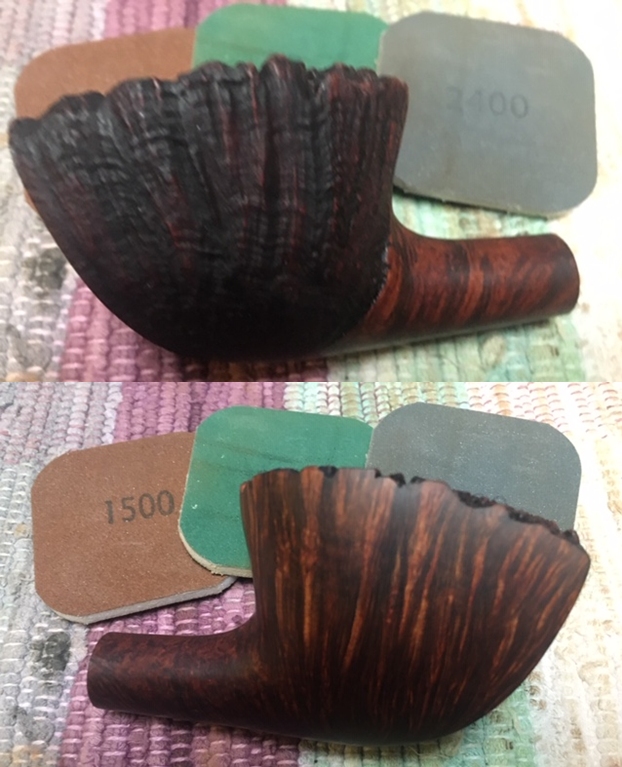
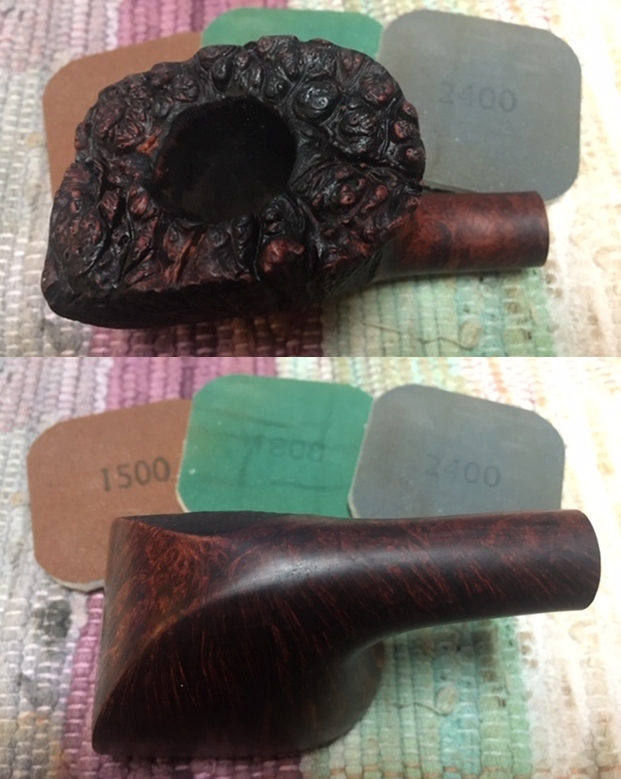
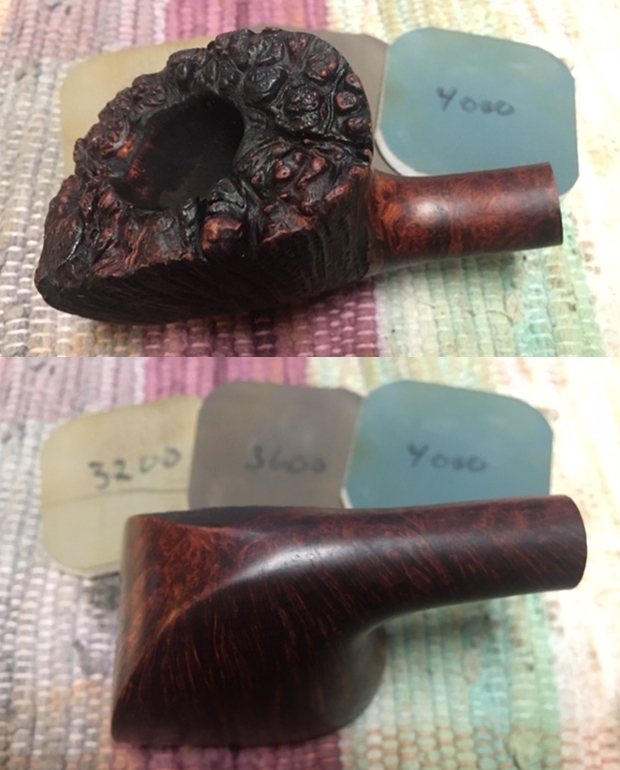
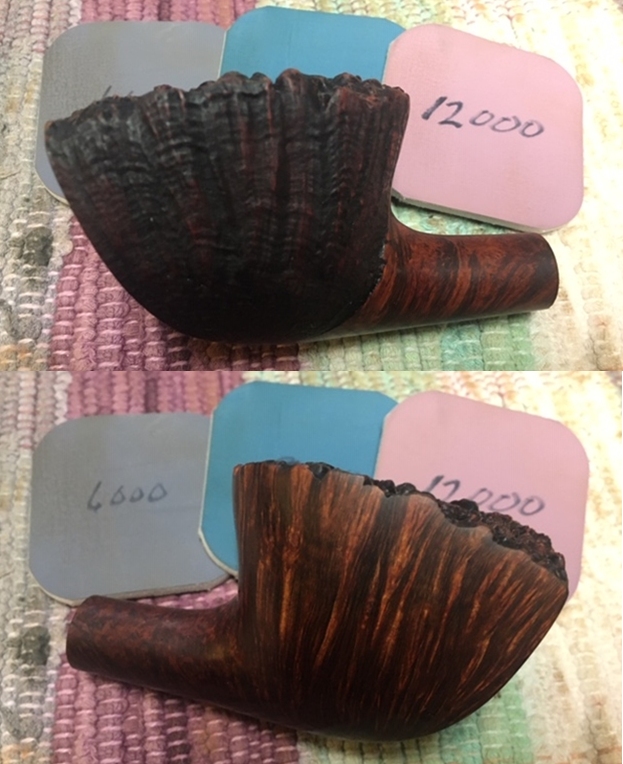
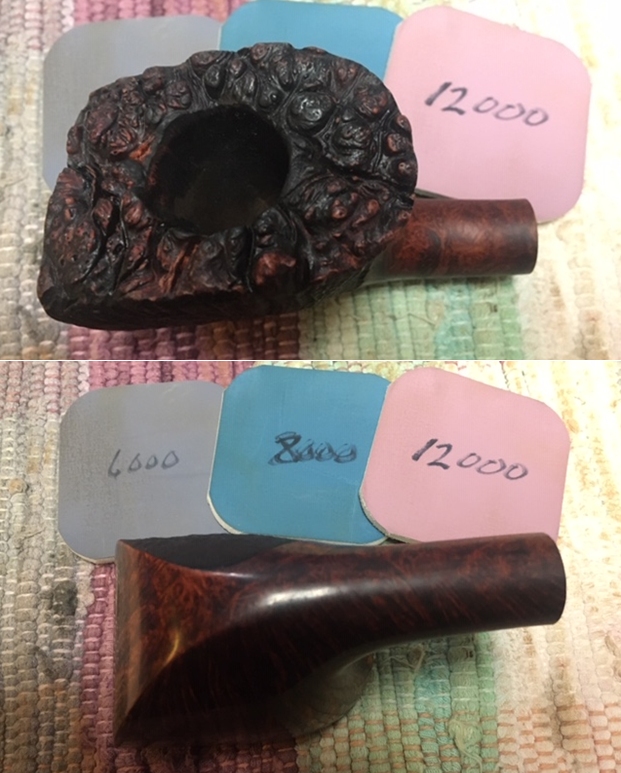
 Staying with the stummel restoration, I polished the stummel with micromesh pads, wet sanding with 1500 to 12000 pads. This time around, I did not repeat the mistake of polishing the plateau rim top as I had done with the PH # 3 earlier! I wiped the surface with a soft cloth at the end of the micromesh cycle. The stummel looks amazing with a deep shine and beautiful straight grains popping over the stummel surface.
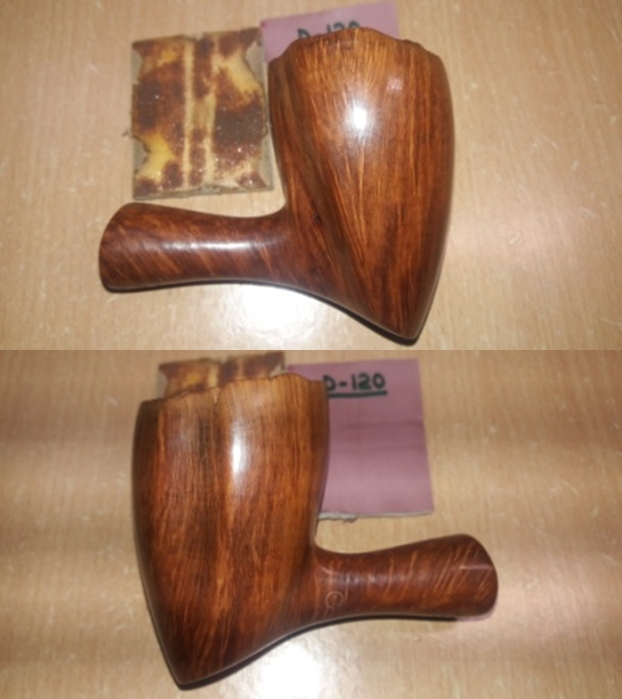

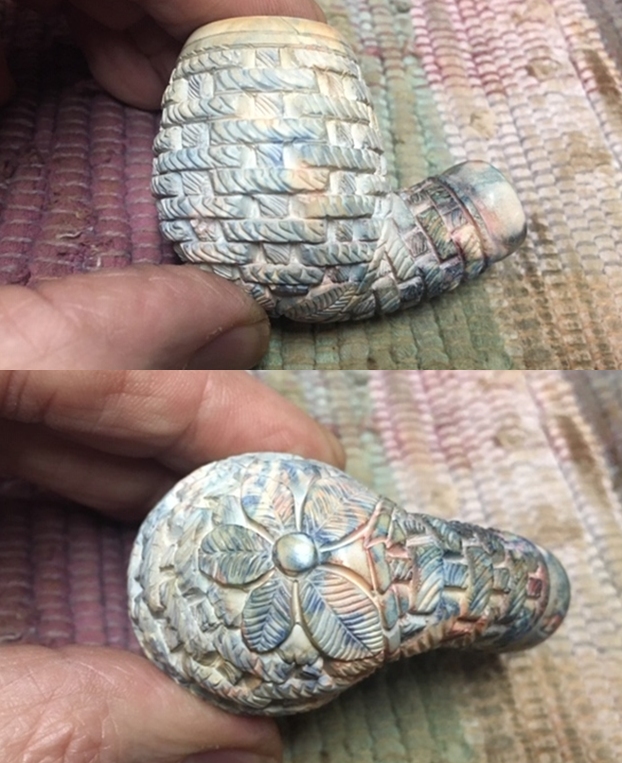
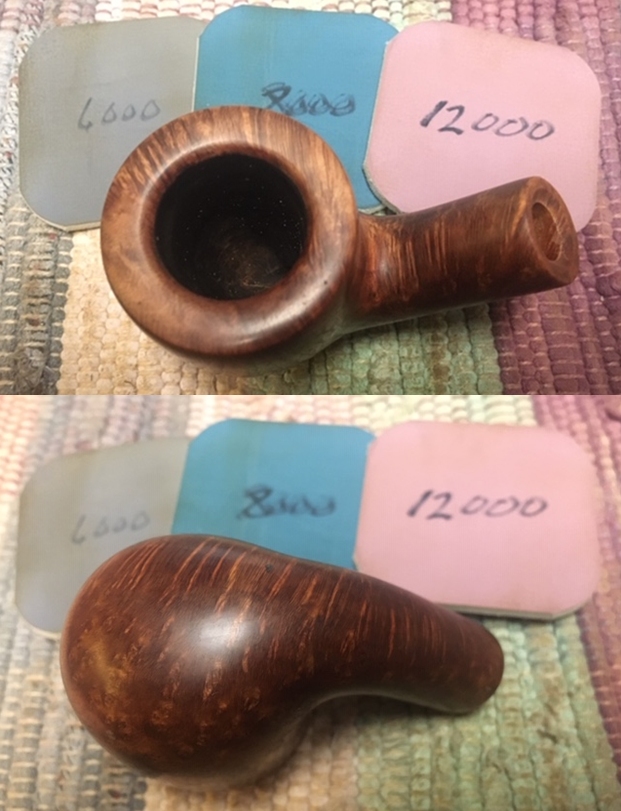
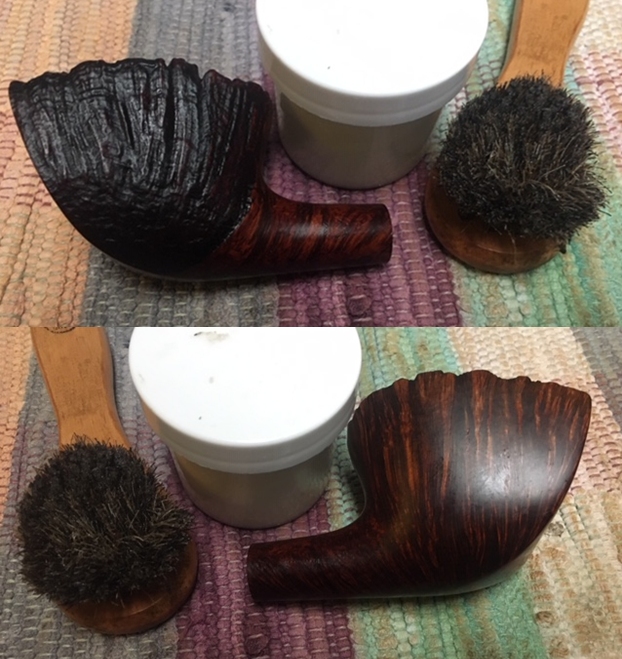
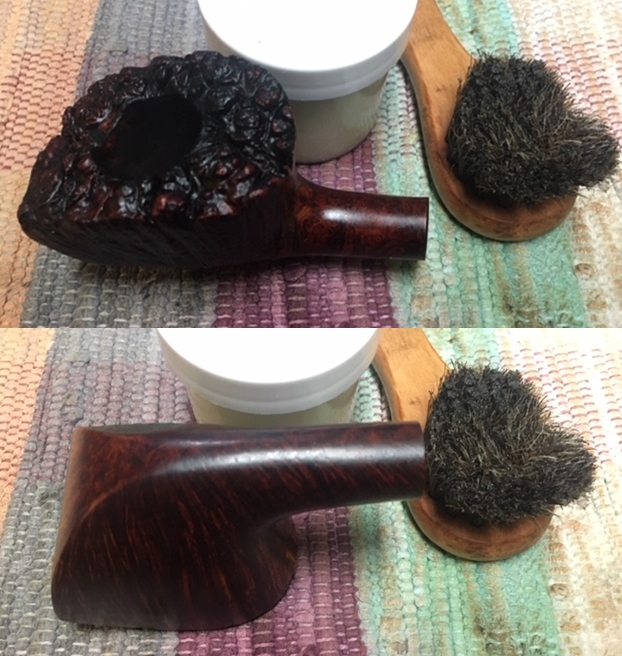
 I rubbed a small quantity of “Before and After Restoration Balm” in to briar. I rubbed this balm deep in to the nooks and crannies of the plateau rim top surface with my fingers and let it rest for a few minutes. The balm almost immediately works its magic and the briar now has a nice vibrant appearance with the dark brown hues of the grain contrasting with the rest of the stummel surface. I further buff it with a horse hair shoe brush.
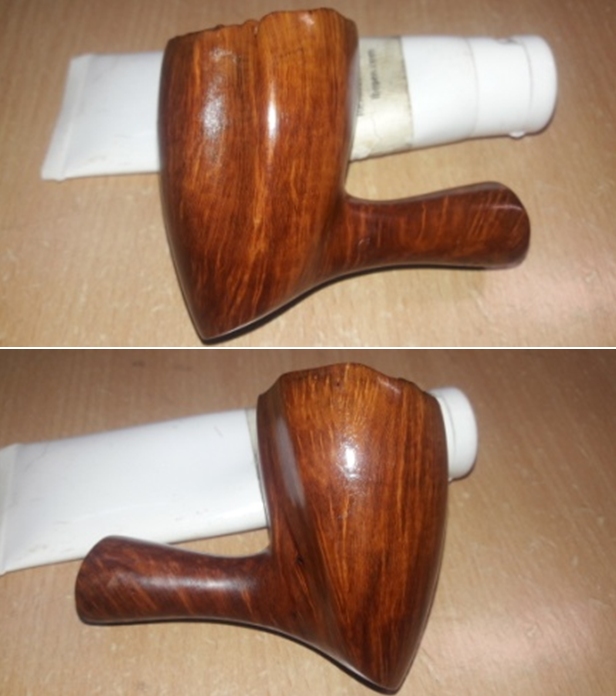
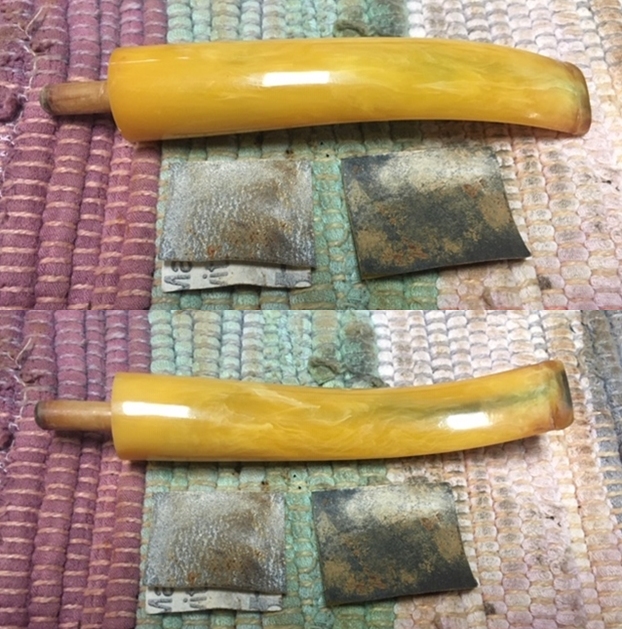
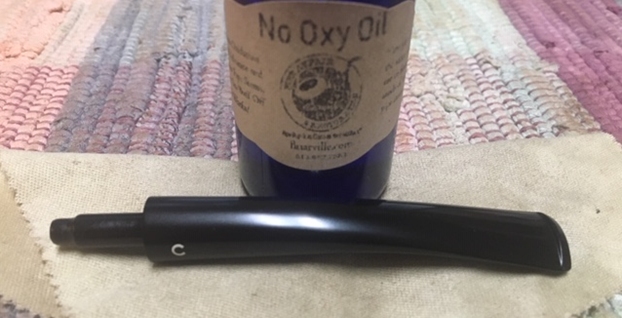
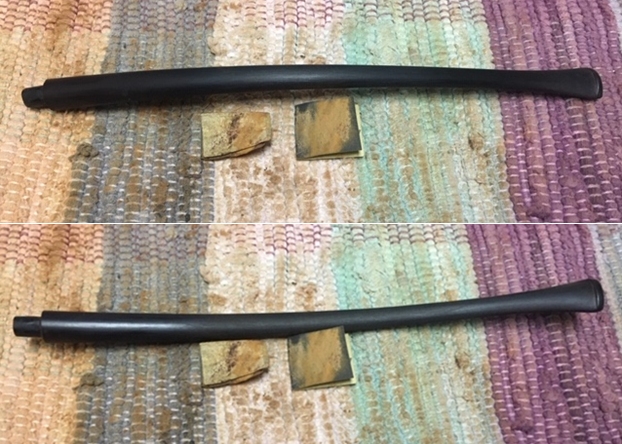
 As mentioned in the previous write up on refurbishing of pipe PH # 3, I had worked on all the stems that had been soaking in the deoxidizer solution overnight. I fished out all the stems and cleaned them under running warm water and scrubbed the raised oxidation from the stem surface using Scotch Brite pad. I further removed the oxidation by scrubbing the stems with 0000 grade steel wool and applied a little olive oil to rehydrate the stems and set them aside for the oil to be absorbed. Complete oxidation was removed on this stem by the process described above. Unfortunately, I did not click any pictures of these stems at this stage.
With this, I have now reached the most critical and challenging part of this restoration; replacing the broken tenon. While Steve, Dal and Jeff were here in India, Steve had replaced a tenon on a Preben Holm which had come to me with a broken tenon. I had minutely observed the procedure, made detailed notes and read the relevant blogs that Steve has written on rebornpipes.com.
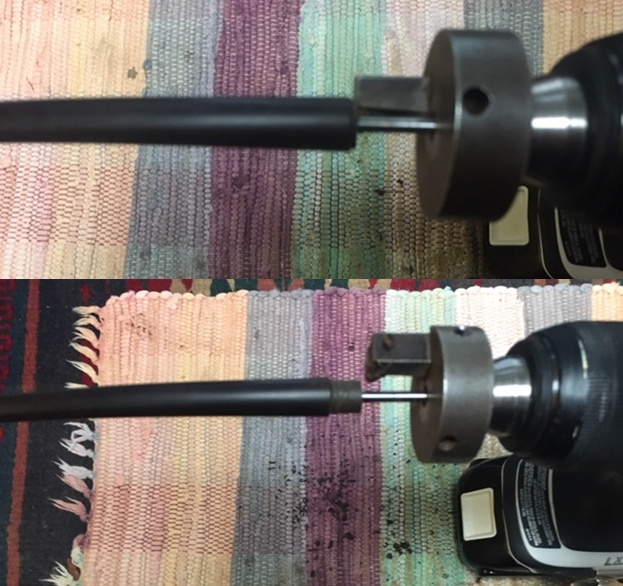
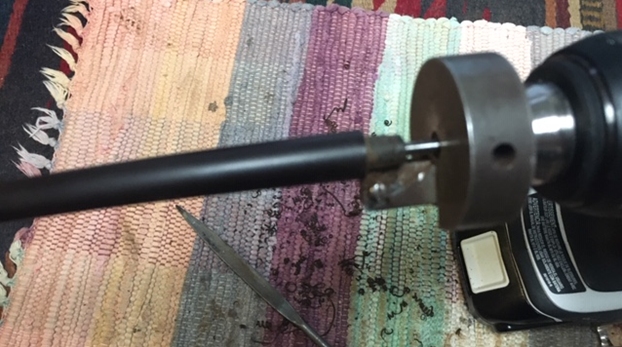
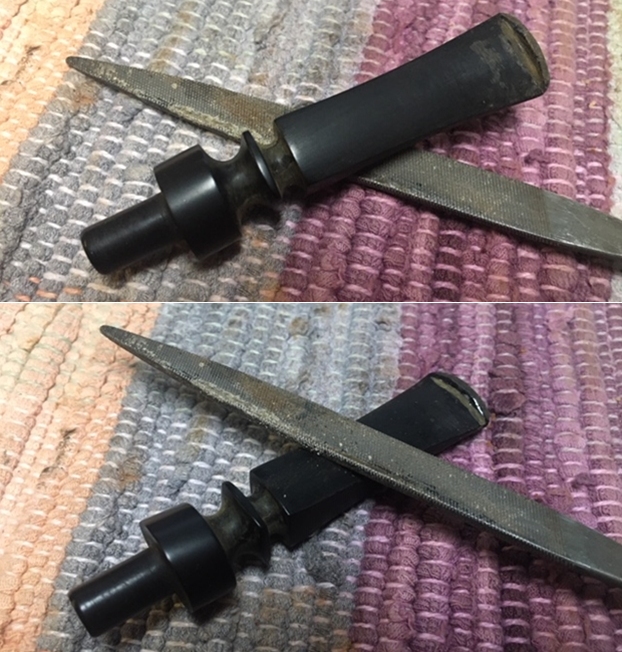
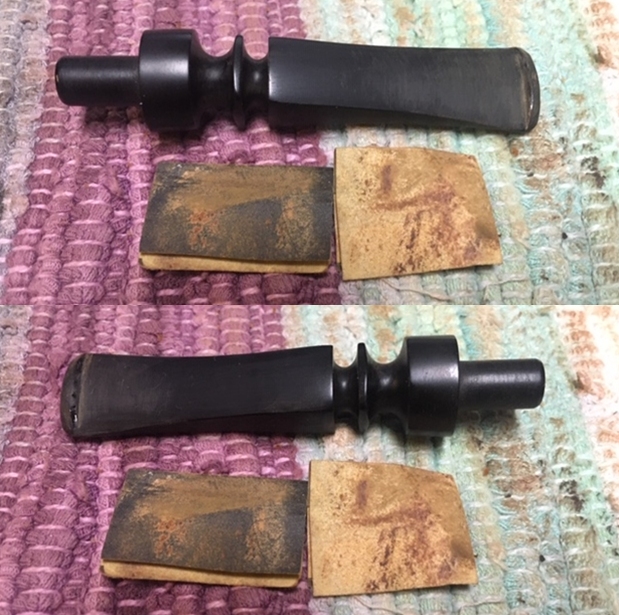
The process starts with sanding the broken tenon end of the stem till a smooth and even stem face is available for the new tenon. This step also reveals and opens up the stem airway for drilling to accommodate the new tenon. I did this by topping the tenon end of the stem face on a piece of 220 grit sandpaper till smooth. Next, I selected a Delrin tenon that was the closest fit in to the mortise. I mounted a sanding drum on to my hand held rotary tool and setting the speed at its lowest, I shaped the tenon to a perfect fit in to the mortise. I was very slow, deliberate and frequently checked the progress being made. Once I had achieved a snug fit, I kept the tenon aside and worked the stem.
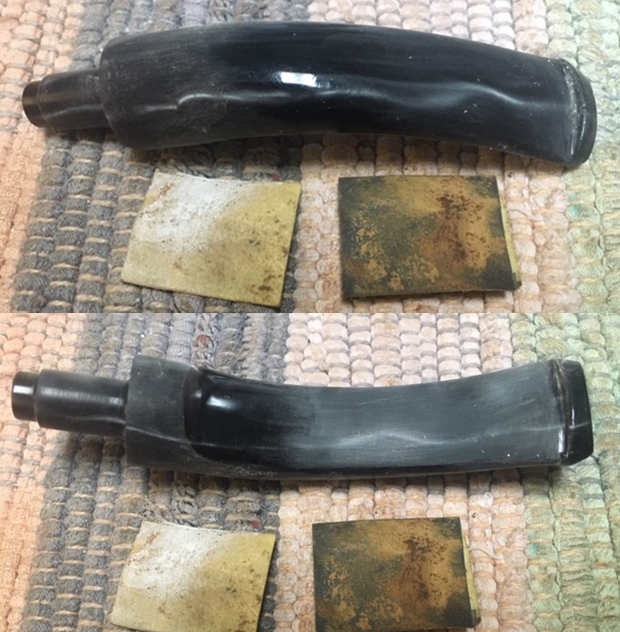
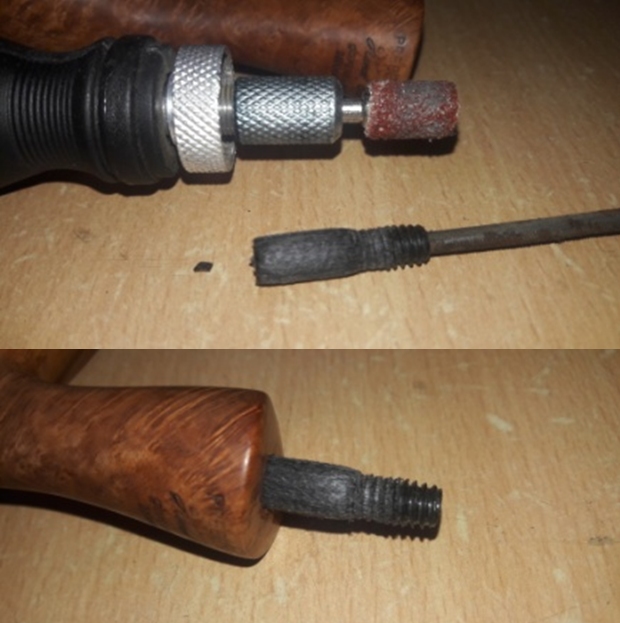 The one and most important aspect that has to be kept in mind while replacing a tenon is to keep the new tenon and stem airway straight and aligned. To ensure this, with a sharp knife I gave a slight inward bevel to the stem’s airway opening which will serve as a guide to the drill bit when drilling. I use the length of the end of the tenon to determine the depth of the drilling. I marked off this length with a rubber band wound tightly on each and every drill bit that I used. I started the drilling with a bit that was slightly larger than the existing airway. I proceed through a series of bits starting with a 3 mm bit until I had drilled the airway with the final bit of 5.5 mm, the same size as the end of the replacement tenon that I had shaped earlier. I proceed with caution as I wanted to make sure that I kept the airway straight for a good fit of the new tenon.
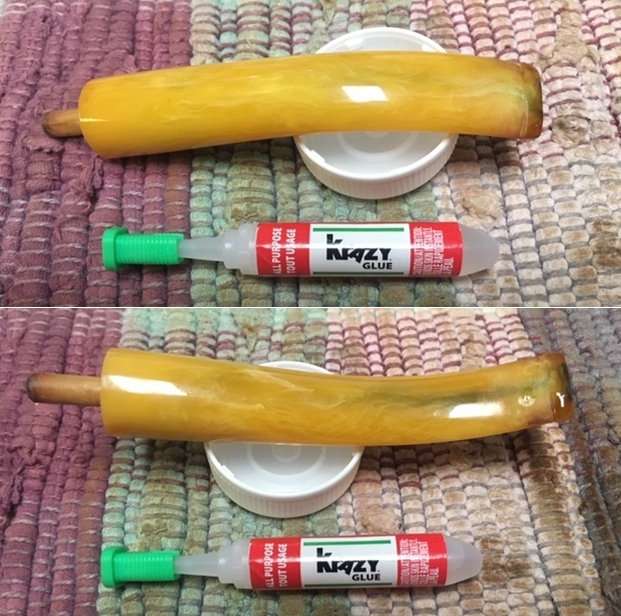
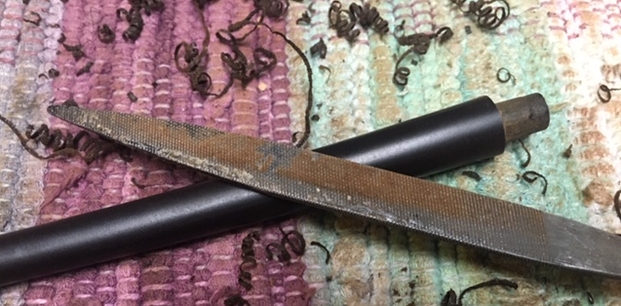
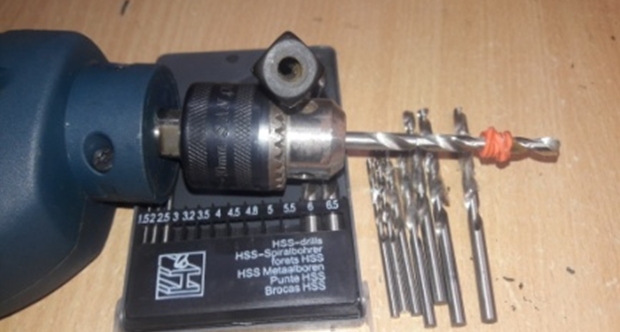 I used a file to knock off the threads on the tenon end just enough to pressure fit it in place in the stem. I carefully checked the alignment to make sure the tenon was straight on the stem before setting it aside to cure. I subjected the stem with the replaced tenon to the pipe cleaner test. The pipe cleaner passed through the air way smoothly and without any obstruction. Once satisfied that the alignment is perfect, I put some super glue on the tenon end and pressed it into the airway and set it aside to cure. I am very pleased with my first attempt at a tenon replacement.
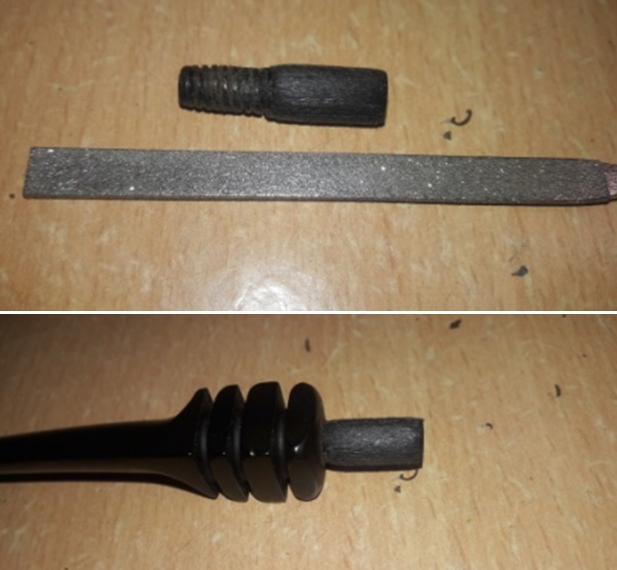

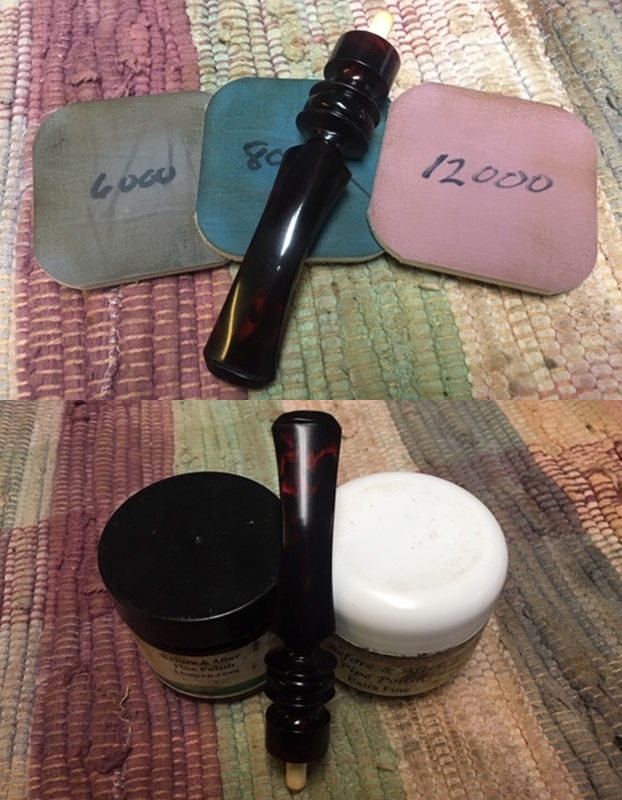
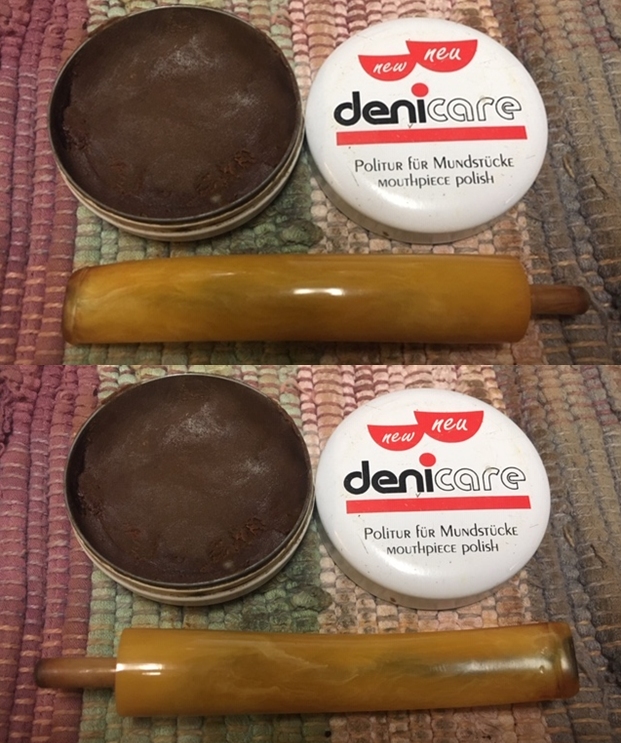
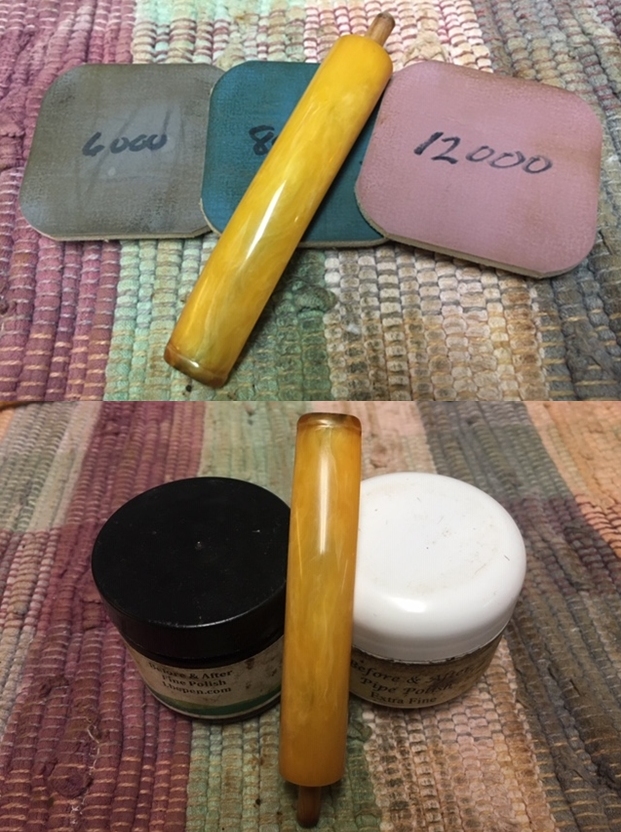
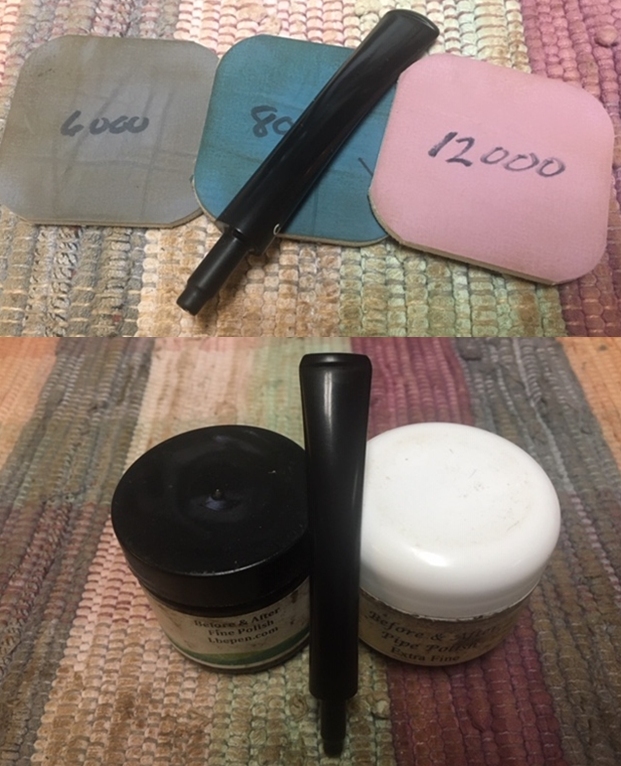
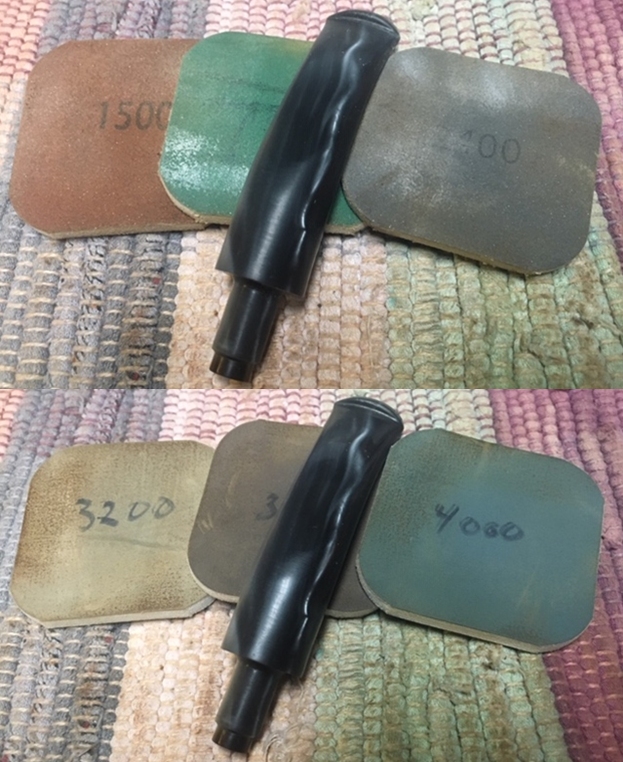
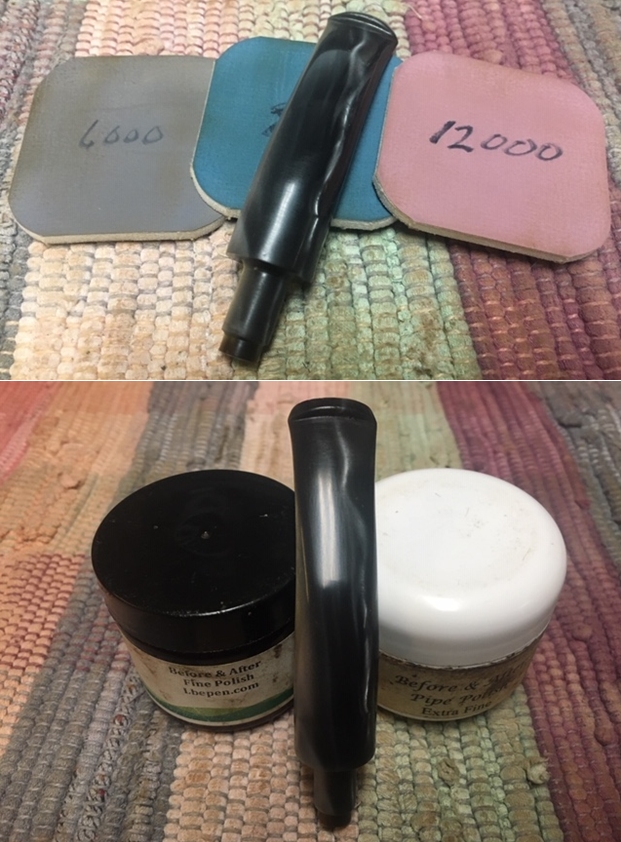
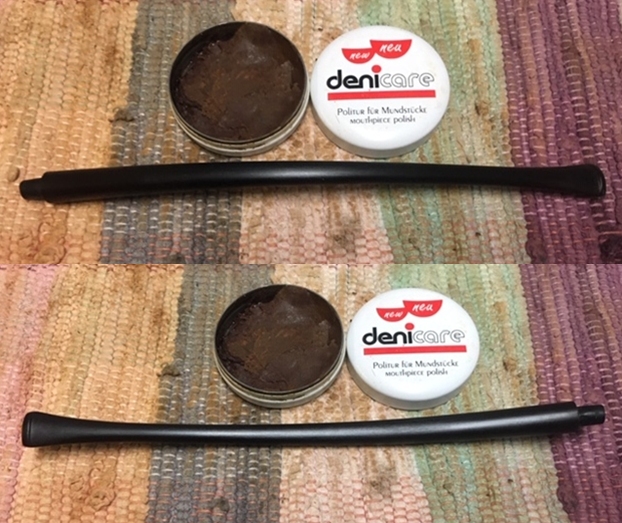
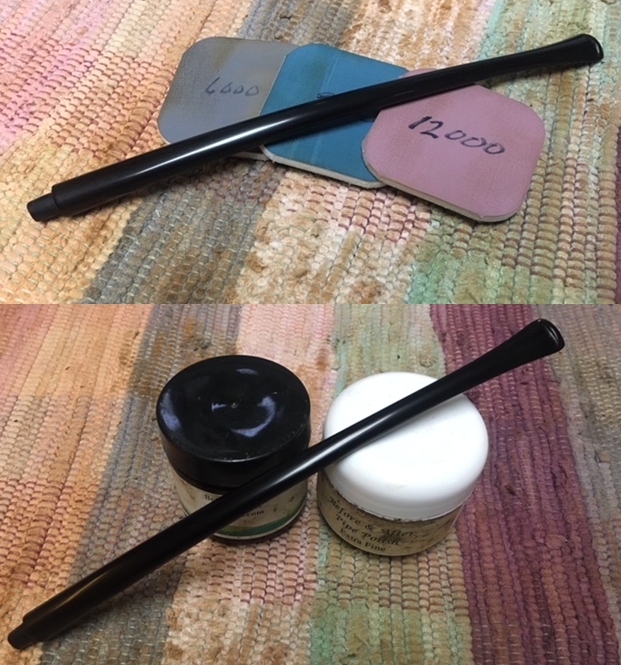
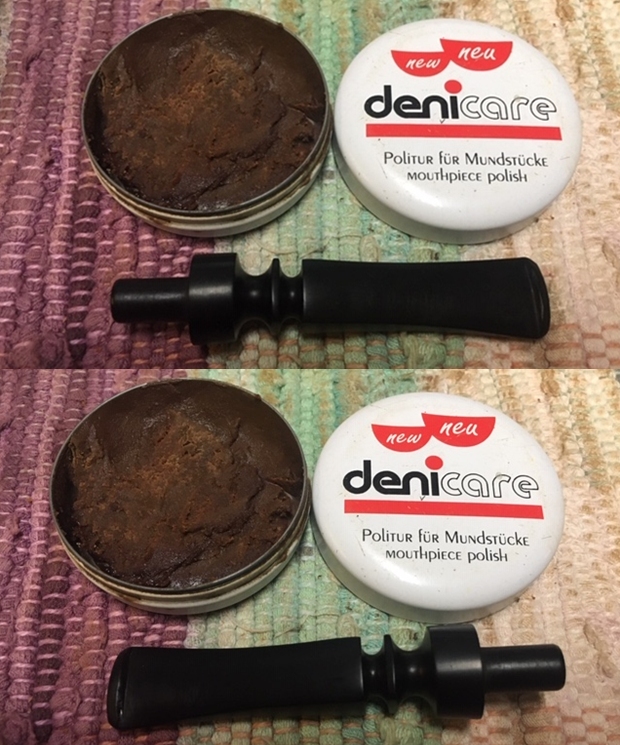
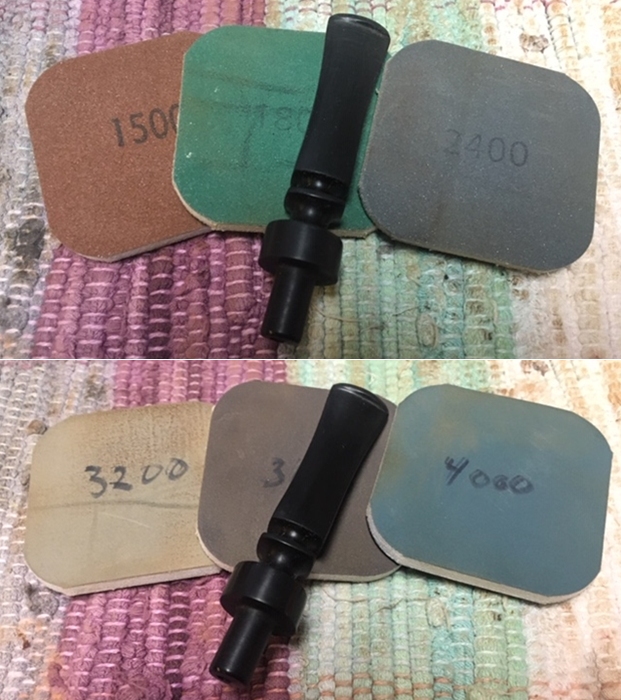
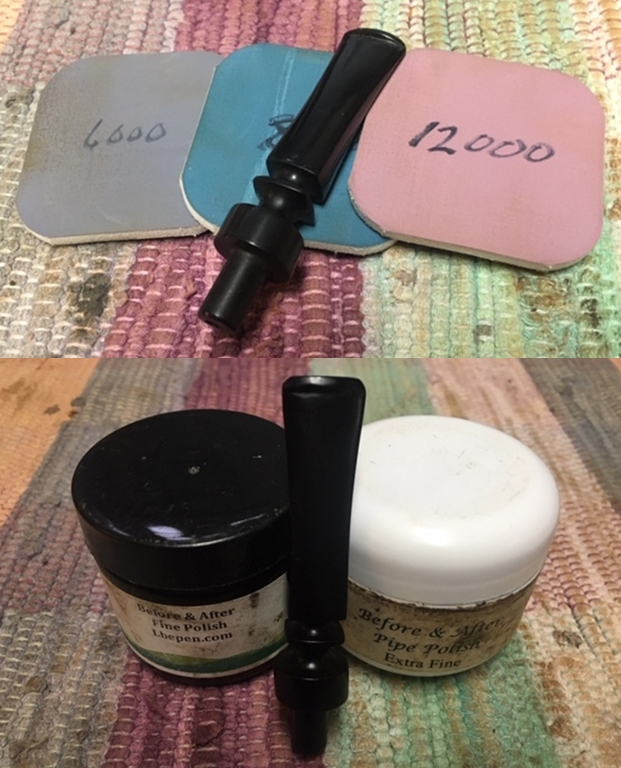
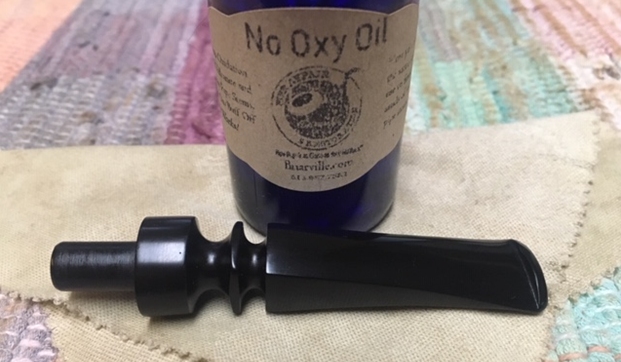
 I further sand the stem with 600 and 800 grit sand paper and wiped the stem with cotton pad dipped in alcohol to remove the resultant dust and rubbed some extra virgin olive oil in to the stem and set it aside to be absorbed in to stem. I polished the stem with micromesh pads, wet sanding with 1500 to 12000 grit pads. I rubbed a little extra virgin olive oil in to the stem at the end of the micromesh pads polishing cycle. I completed the polishing regime of the stem by rubbing a small quantity of Extra Fine Stem polish developed by my friend Mark Hoover, and giving it a final polish with a soft cotton cloth. The stem is now nice, smooth and shiny.
 To apply the finishing touches, I first mount a cotton cloth buffing wheel on to my hand held rotary tool and apply a coat of Blue Diamond to the stummel and the stem to polish out the minor scratches.
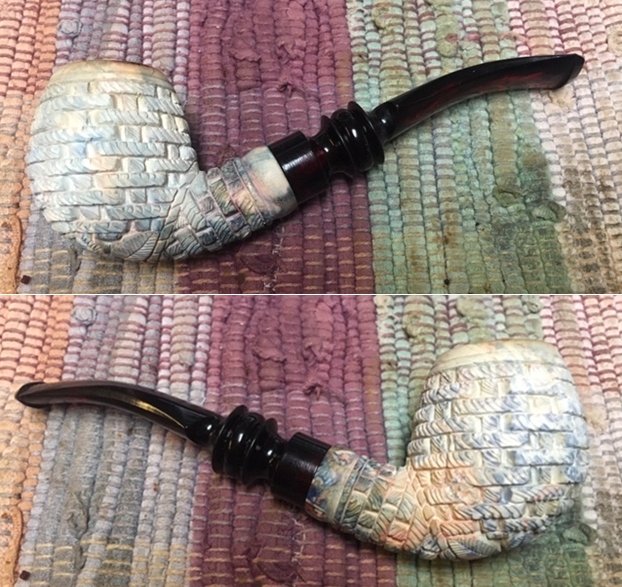
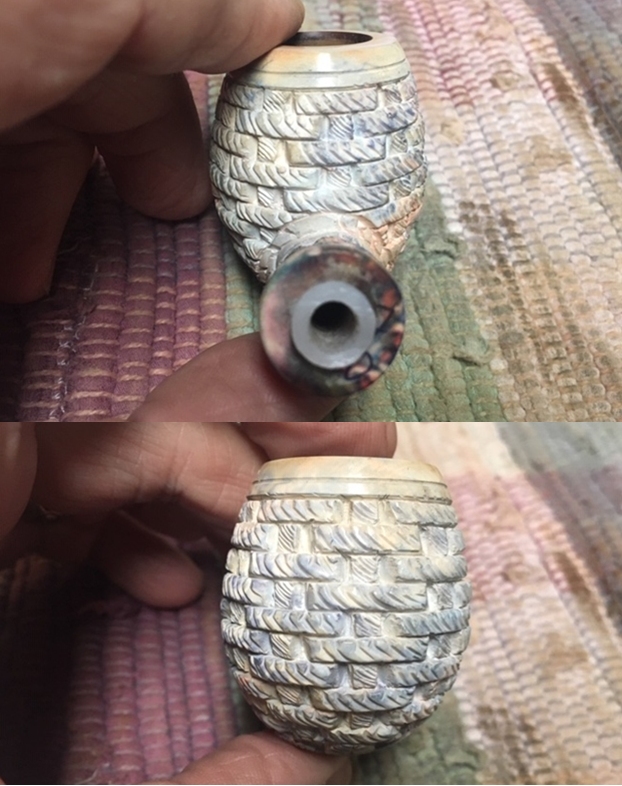
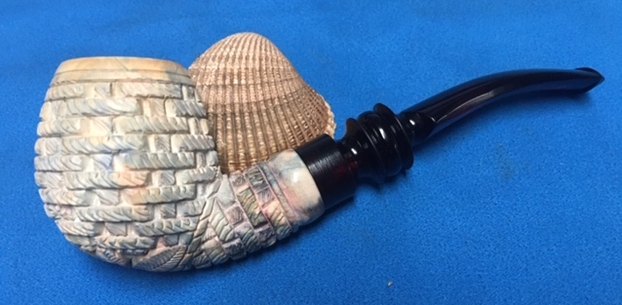
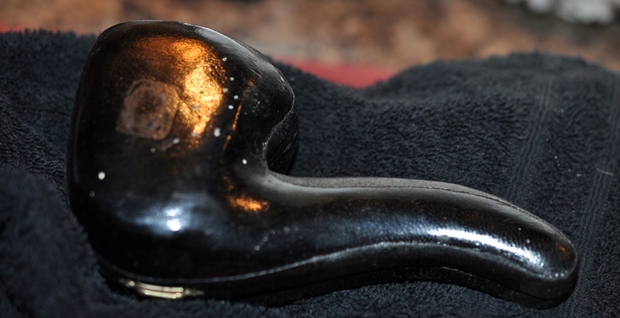
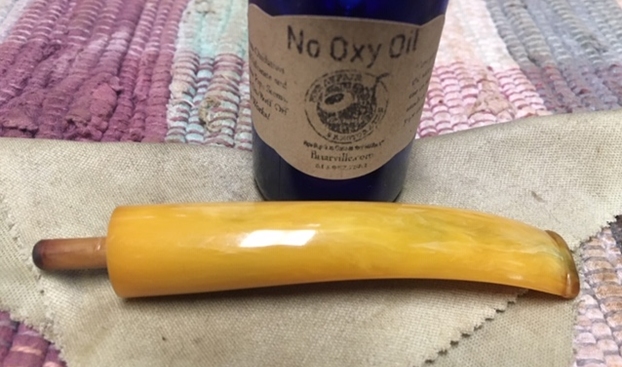
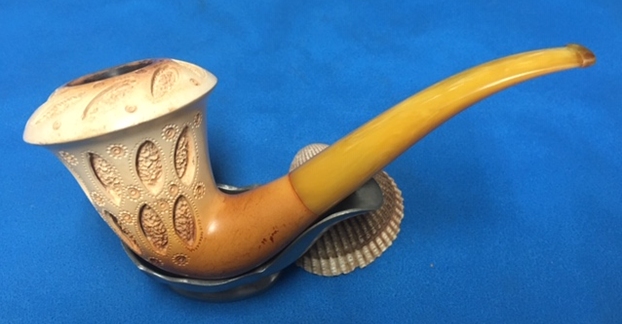
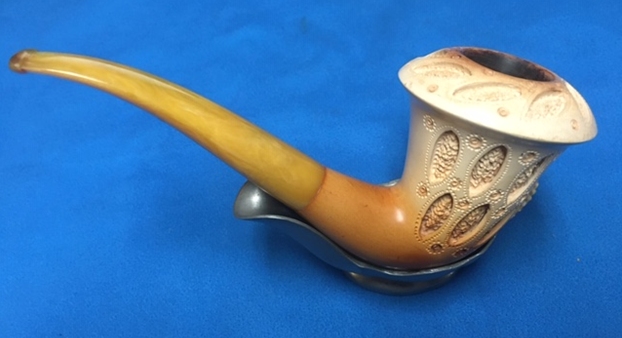
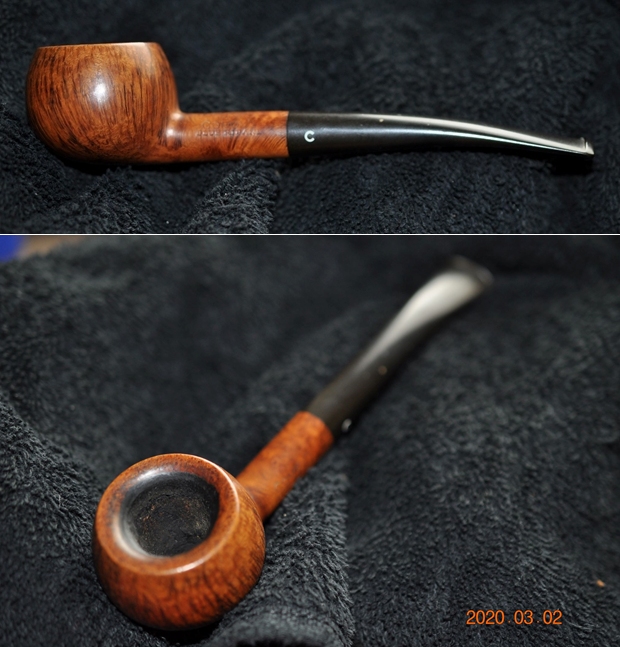
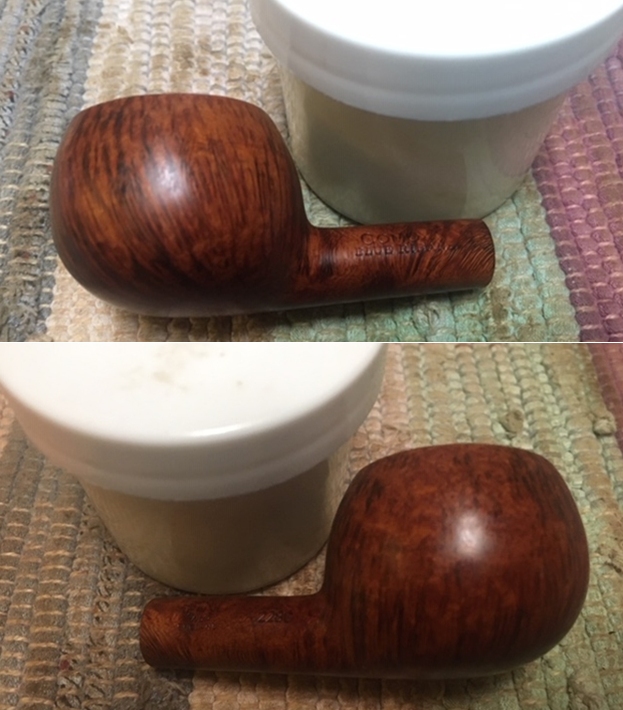
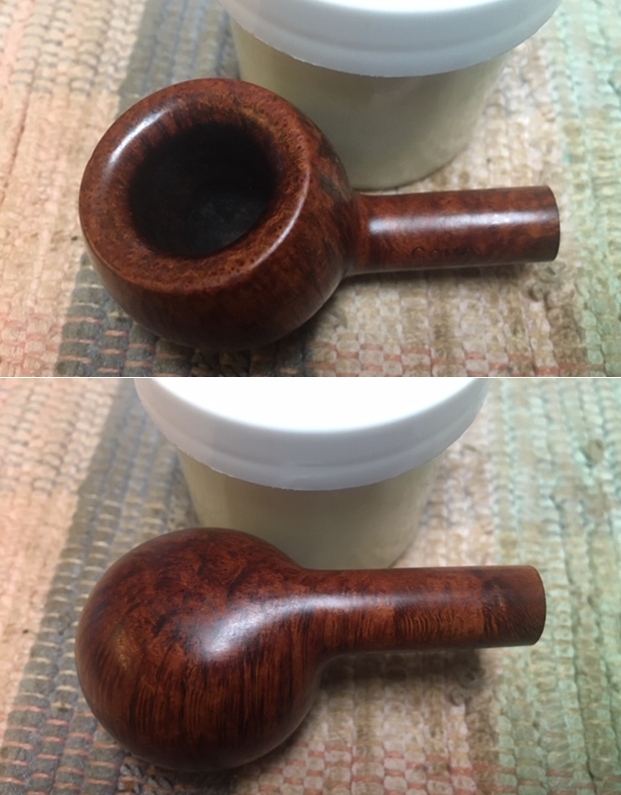
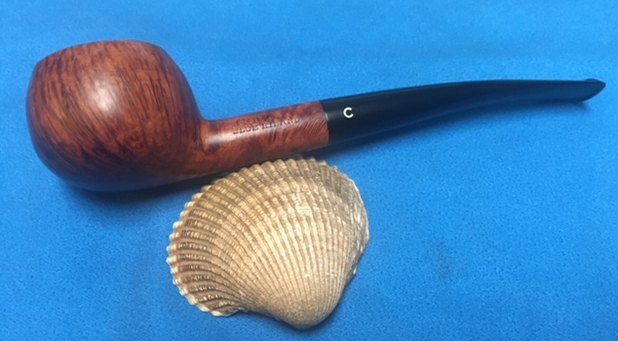
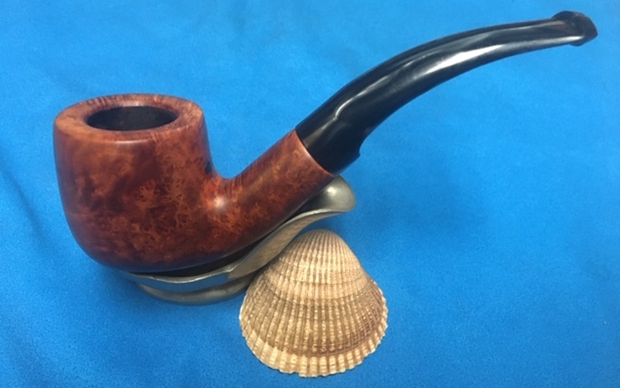
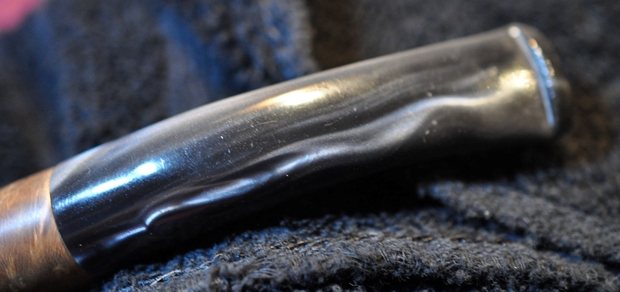
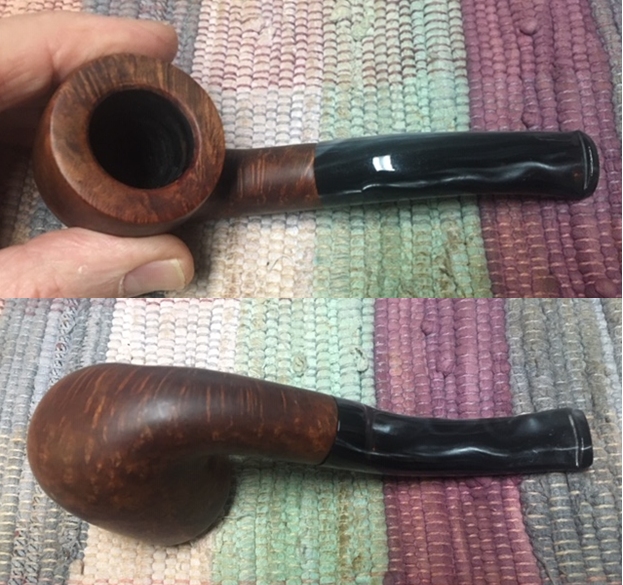
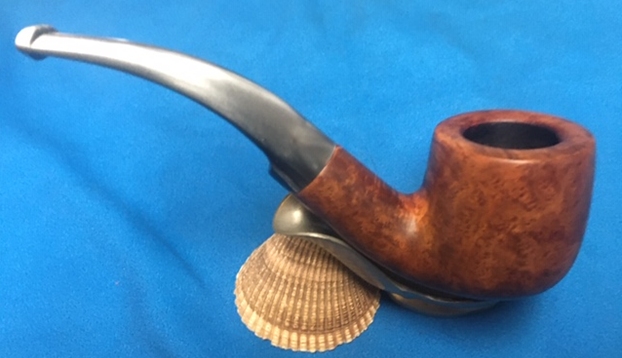
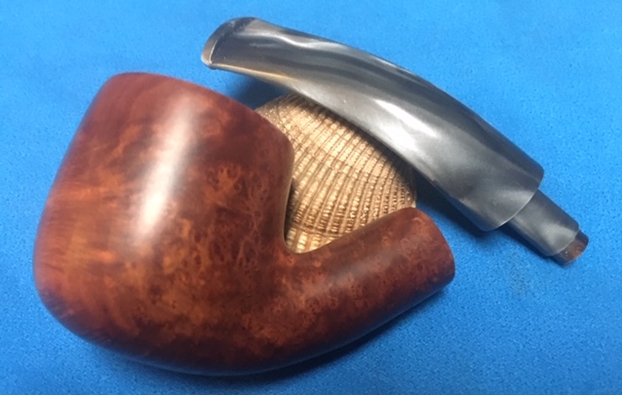
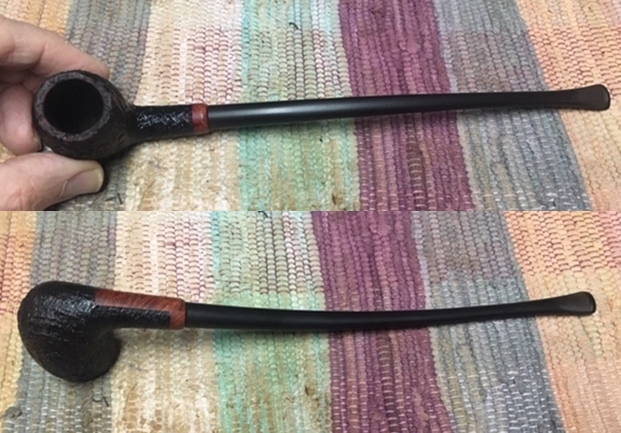
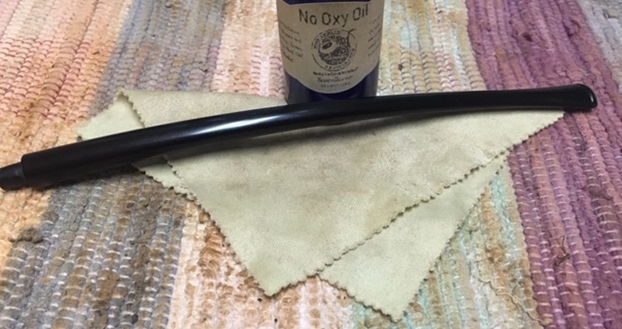
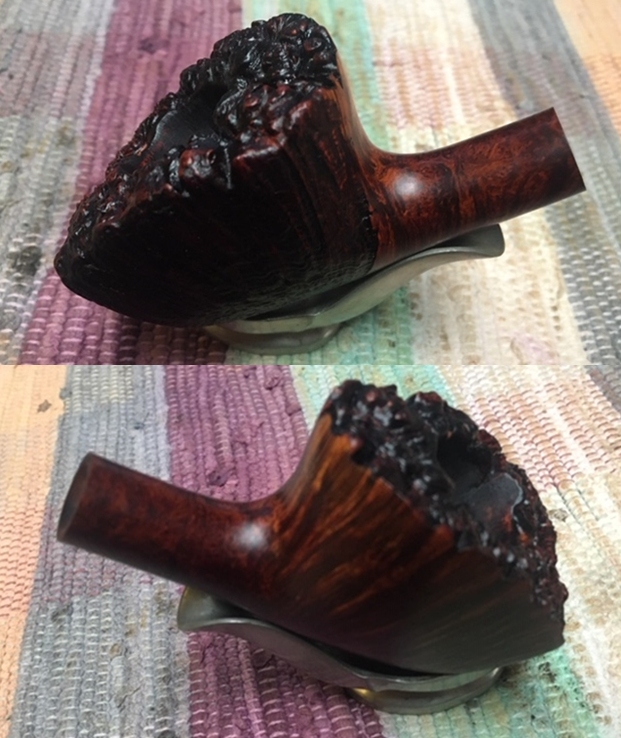
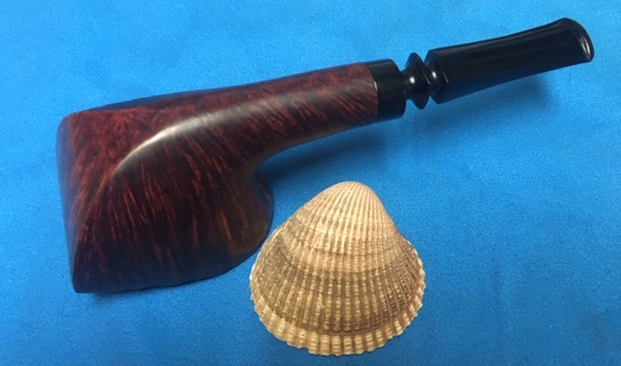
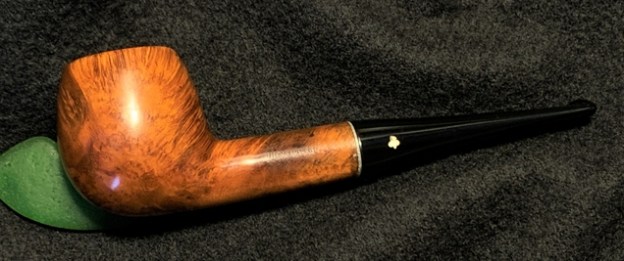
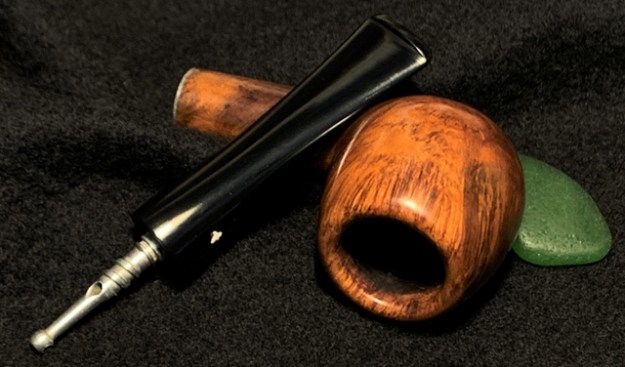
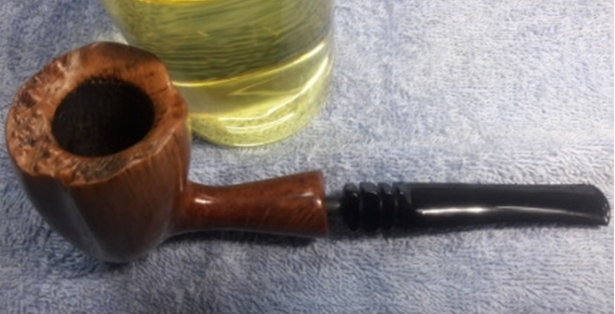
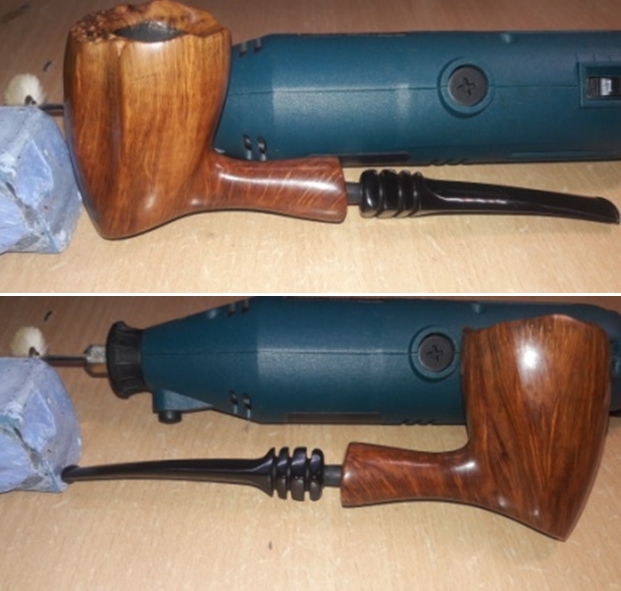 With a cotton buffing wheel that I use for carnauba wax, I apply a coat of carnauba wax to the stummel and stem and continue to work on it till the complete coat of wax has been polished out. I mount a clean cotton cloth buffing wheel and give the entire pipe a once over buff. I finish the restoration by giving the entire pipe a rigorous hand buffing using a microfiber cloth to deepen the shine further. The finished pipe is shown below.
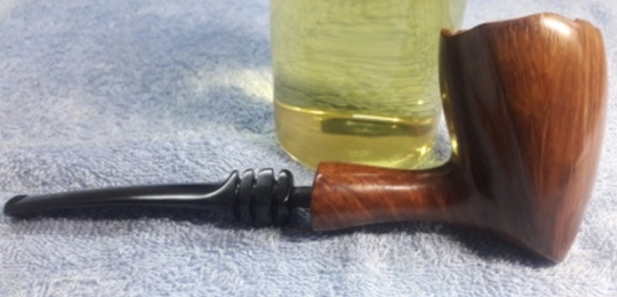


 P.S. – First things first; tenon replacement, now that I have personally worked on it, is definitely not a very difficult procedure. All it takes is a lot of patience and I strongly recommend that before attempting it, one should go through as many write ups on tenon replacement as possible. Steve has some nice, simple and informative step by step write ups on this procedure which is strongly recommended.
I am really fortunate to be in the process of learning the nuances of pipe restoration and cannot thank Steve enough for his support and guidance.
I wish to thank Mr. Roland Borchers and Mr. Borman who have explained the numbering system followed on Preben Holm pipes and also on dating these pipes for the larger good of our fraternity.
Thanks for your patience and looking forward to inputs about the write up. Cheers…