Blog by Steve Laug
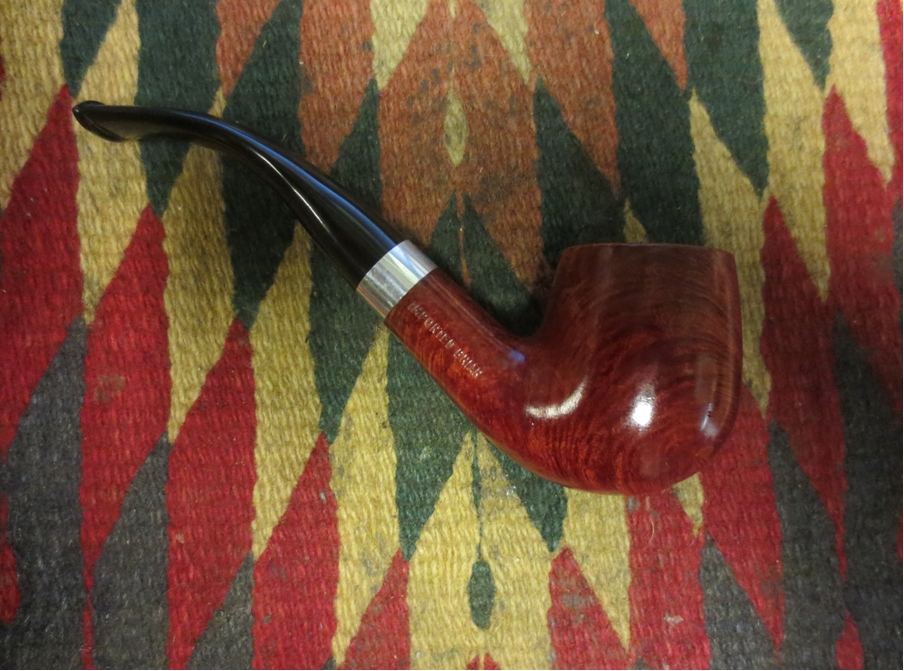
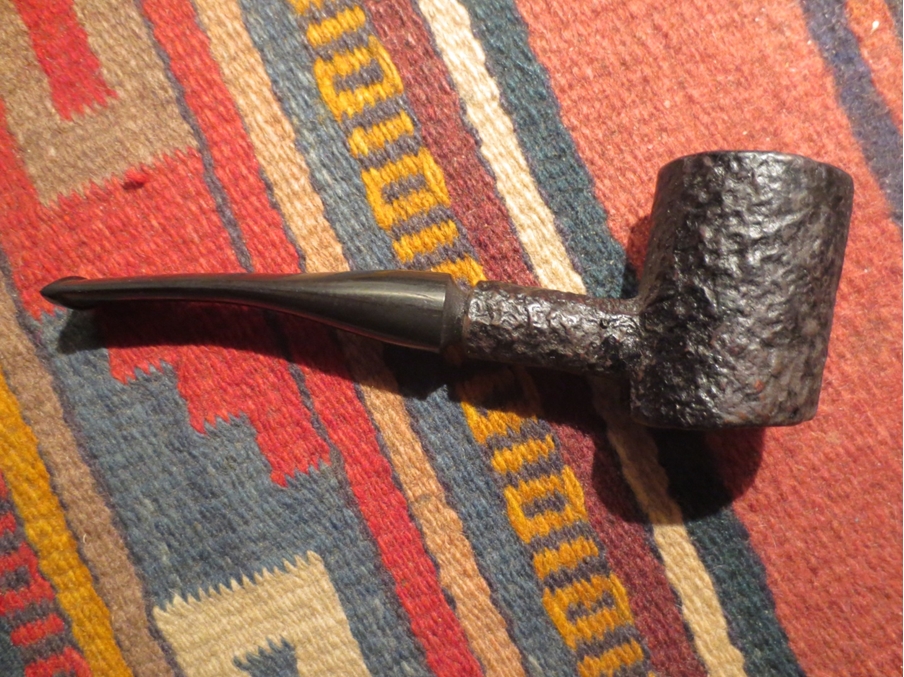
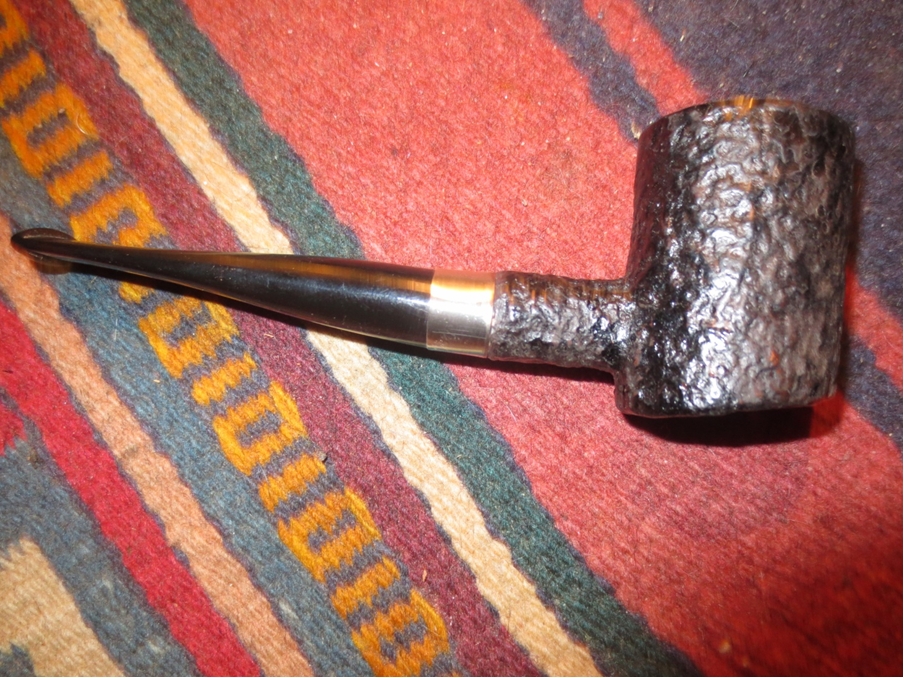
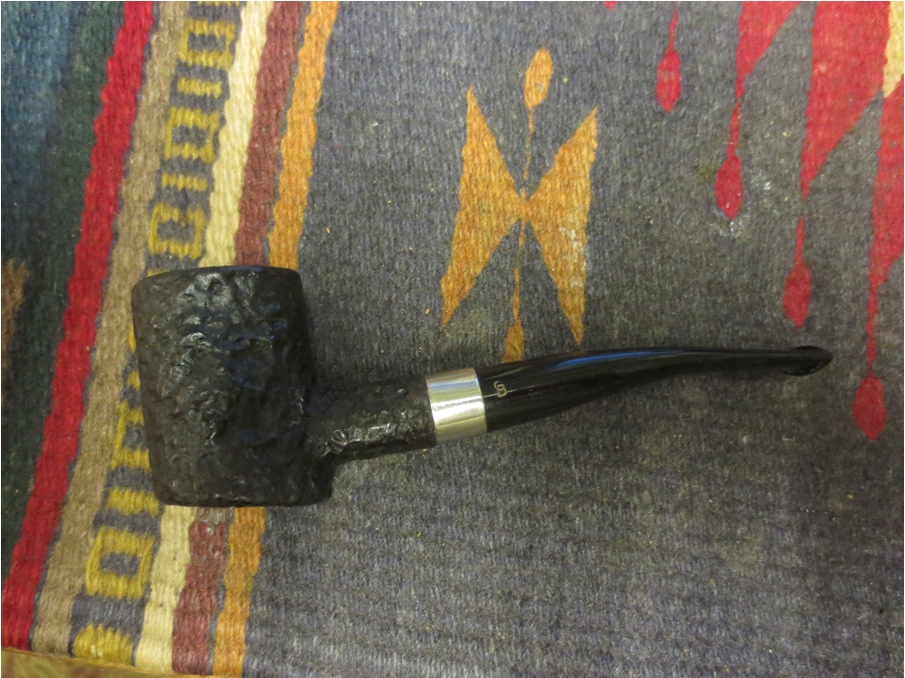
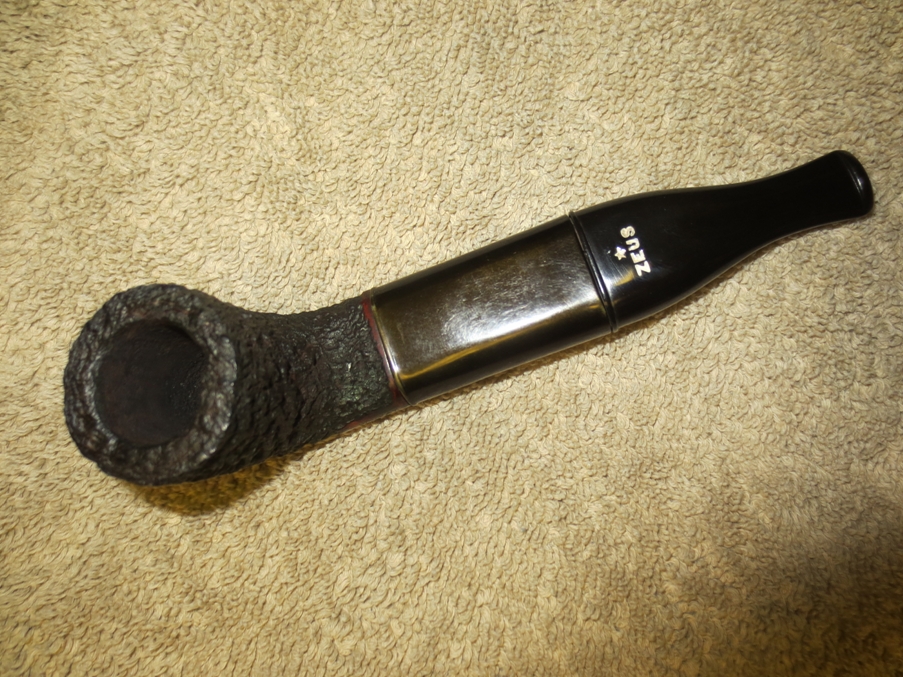
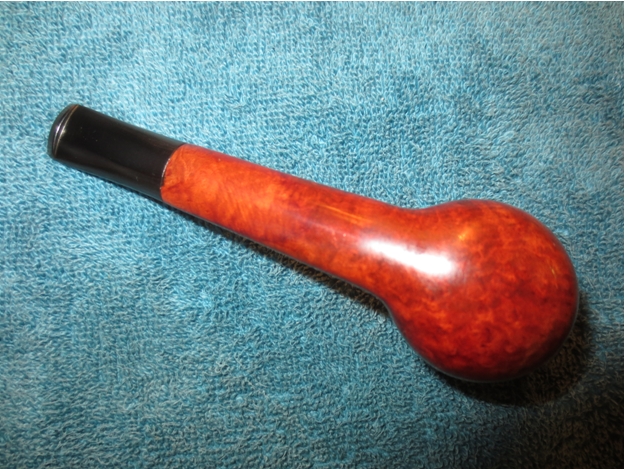
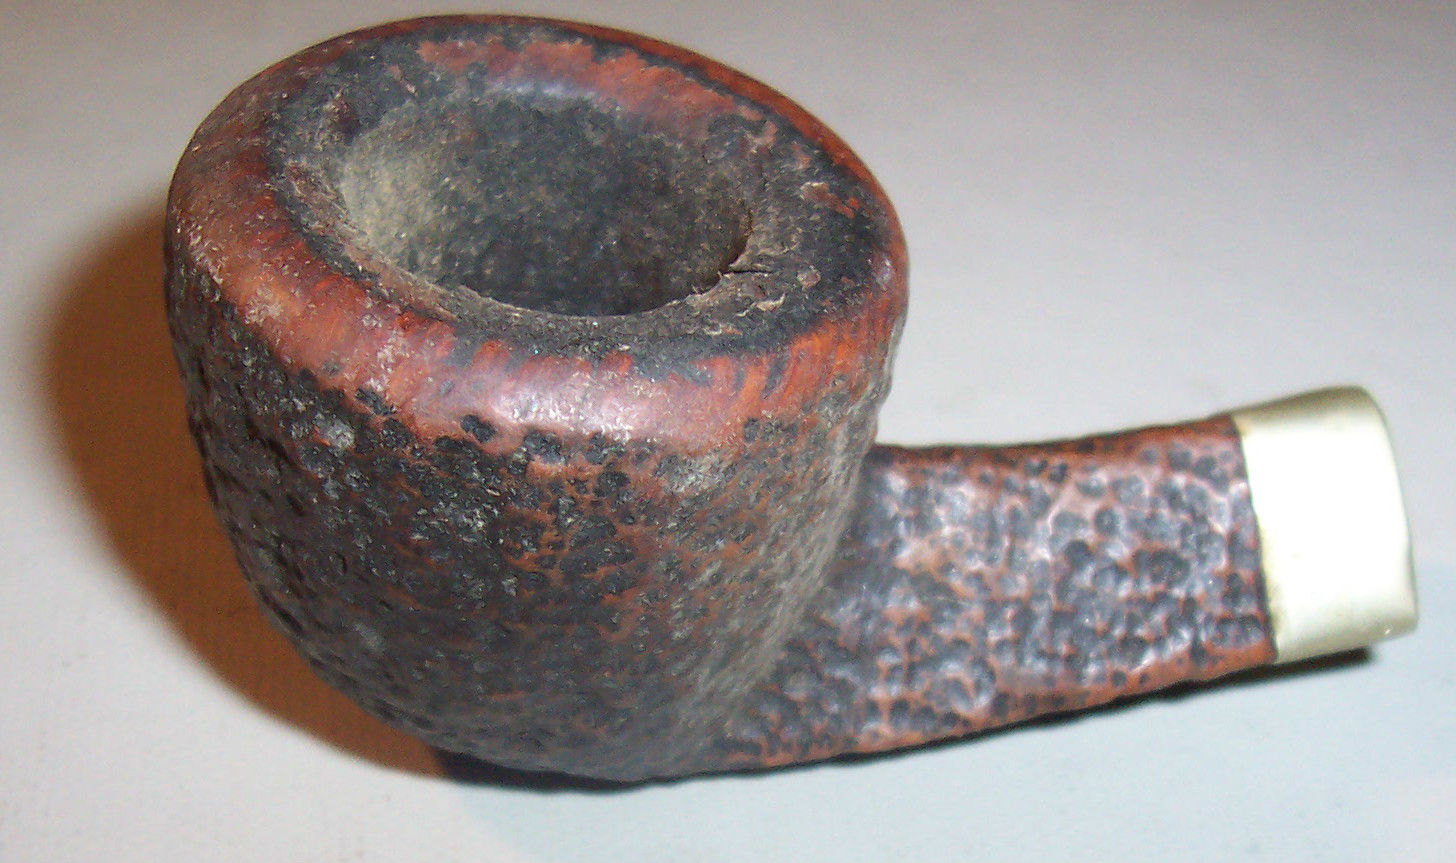
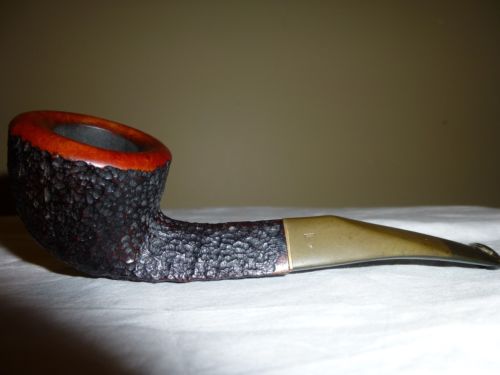
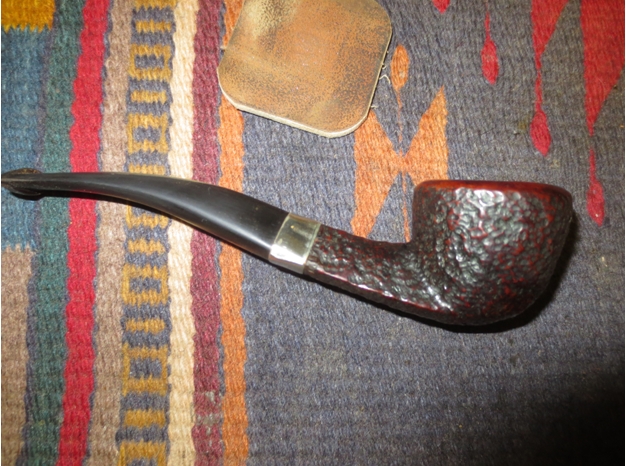
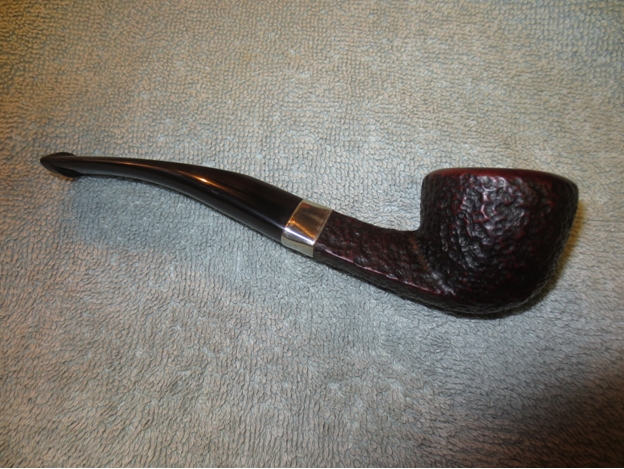
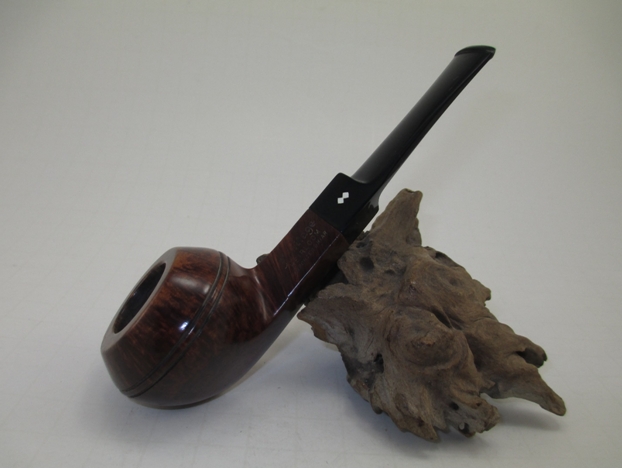
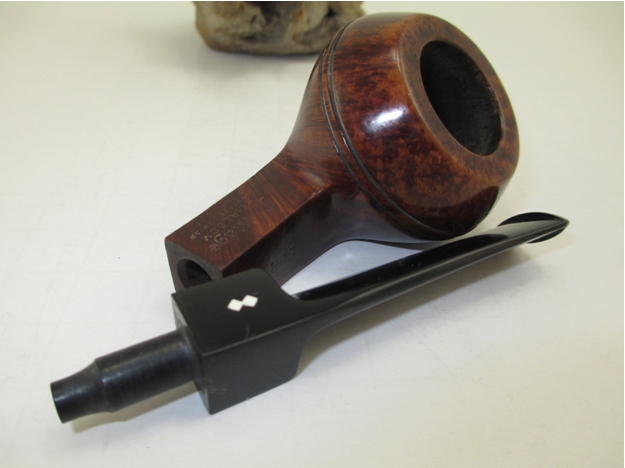
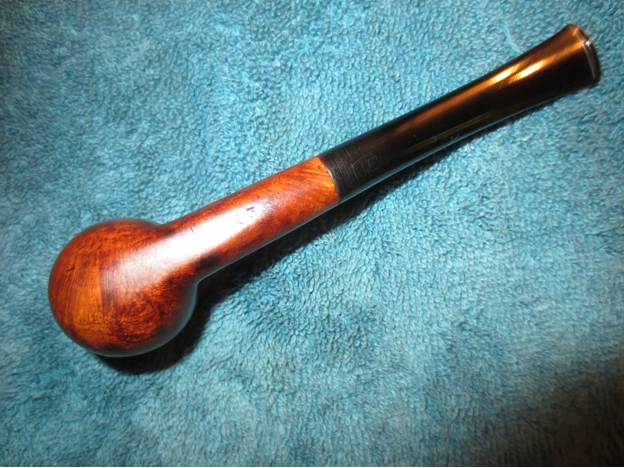
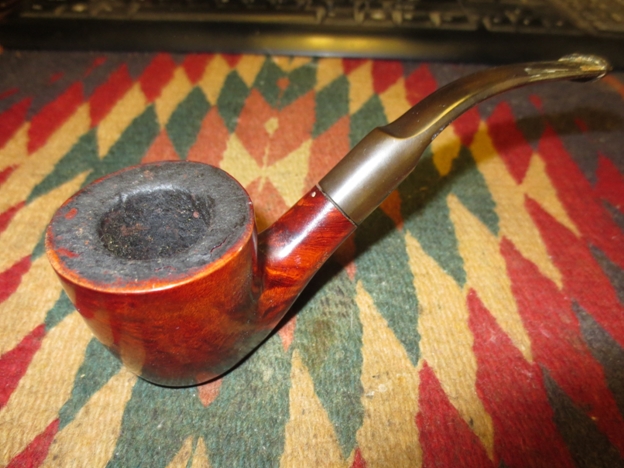
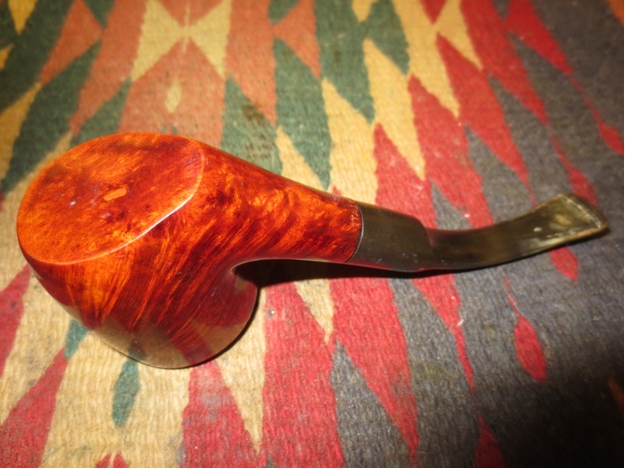
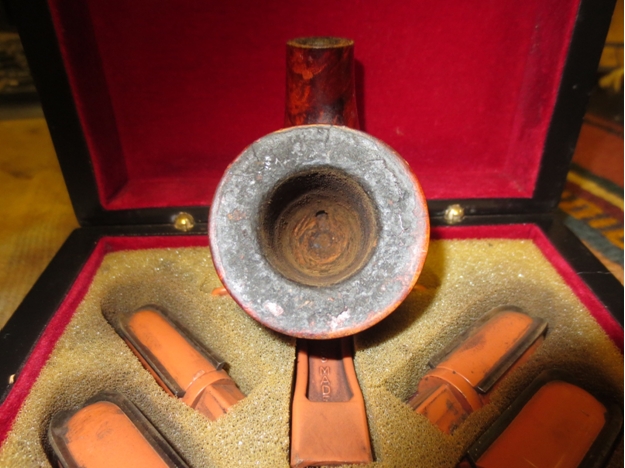
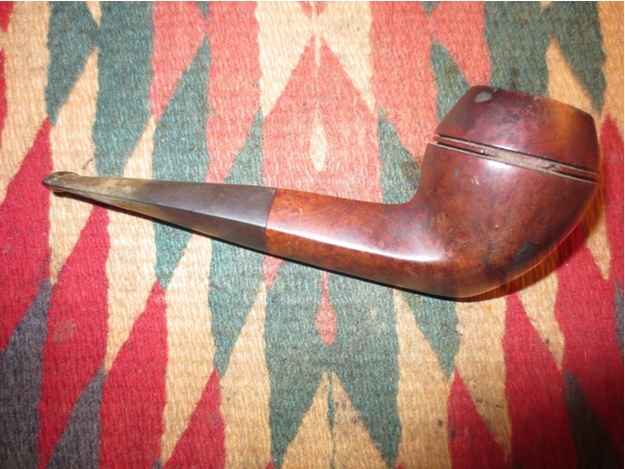
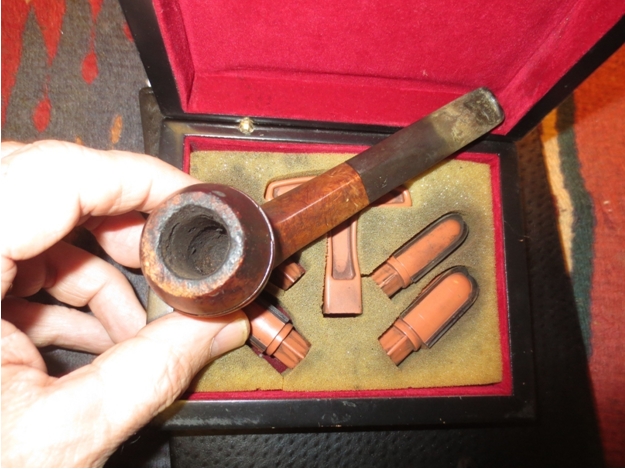
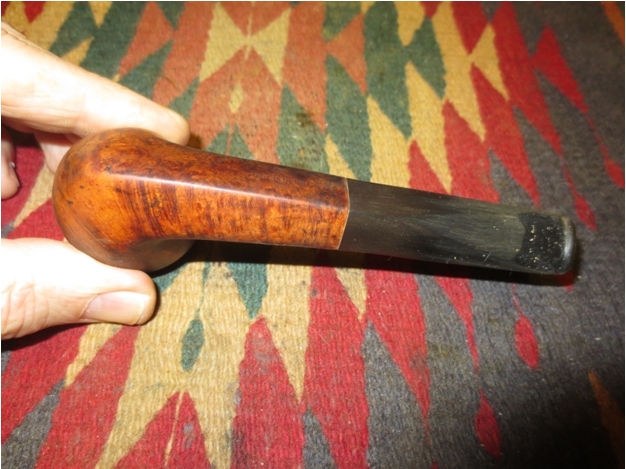
The morning of May 9th started as any other one does for me – a coffee and a plan. I got up early and roused the troops. We loaded the car and headed to the US to get to the border crossing before the long lines began. We were at our destination in Bellingham, Washington by a little after 8:00 AM. We had breakfast with the ladies in my family, dropped them off for a few hours of shopping and then did a few errands before heading to the “Junque” shops when they opened at 10:00 AM. I walked through the first shop and found a small no name pipe that was in very rough shape and decided to leave it behind. I went to the second shop and went through all of the cabinets and finally came to the one belonging to a seller that usually had something interesting in her cabinet. That is where I saw the oddly shaped rusticated briar pipe that was stamped ZEUS on the stem. The seller unlocked the cabinet and I took the pipe in hand and examined it. The stem came out easily and I could see the odd spikes at the end of the metal shank. It was an oddity that I had not seen before so I had to have it. I know it sound lame, but this find made my morning. I had found an unknown to me, odd-shaped system pipe and the pipe hunt had been successful.
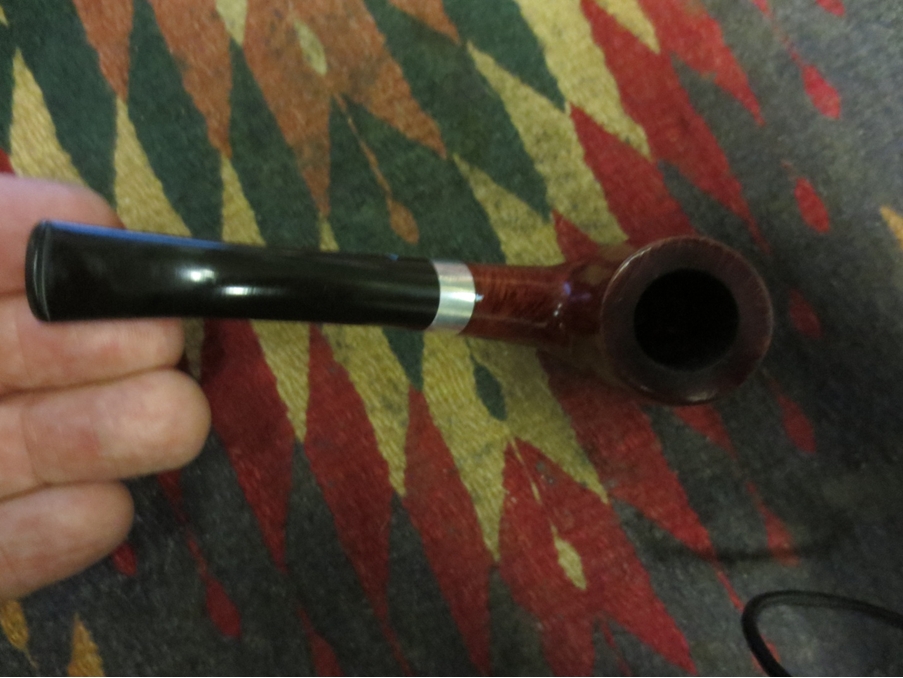
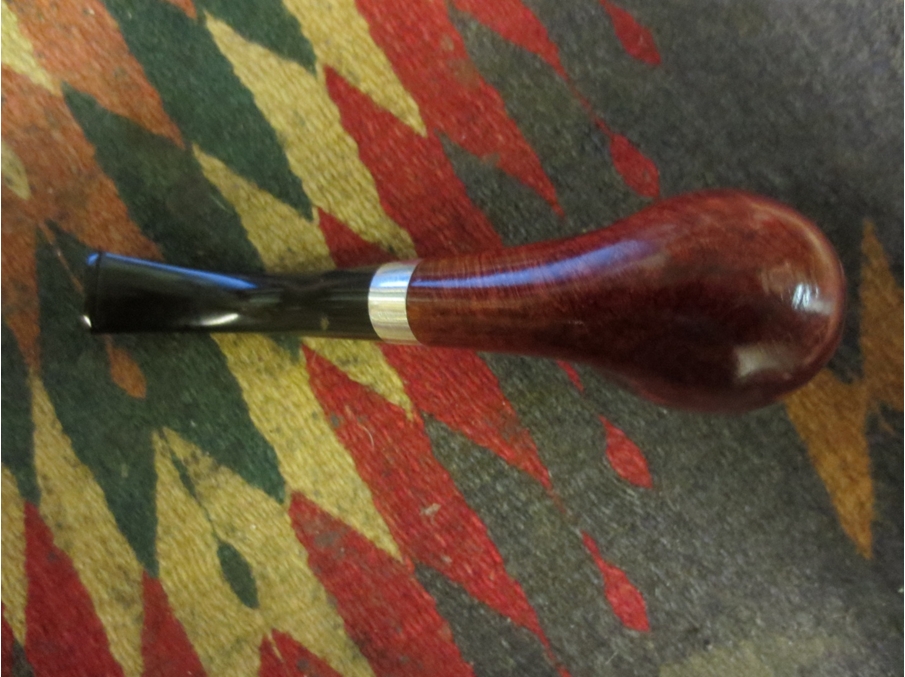
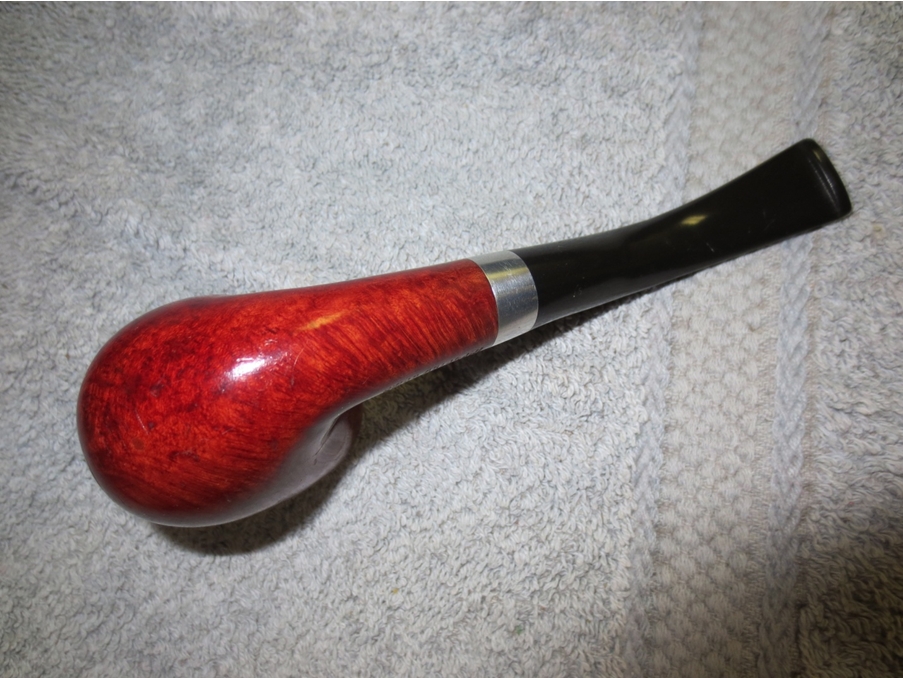
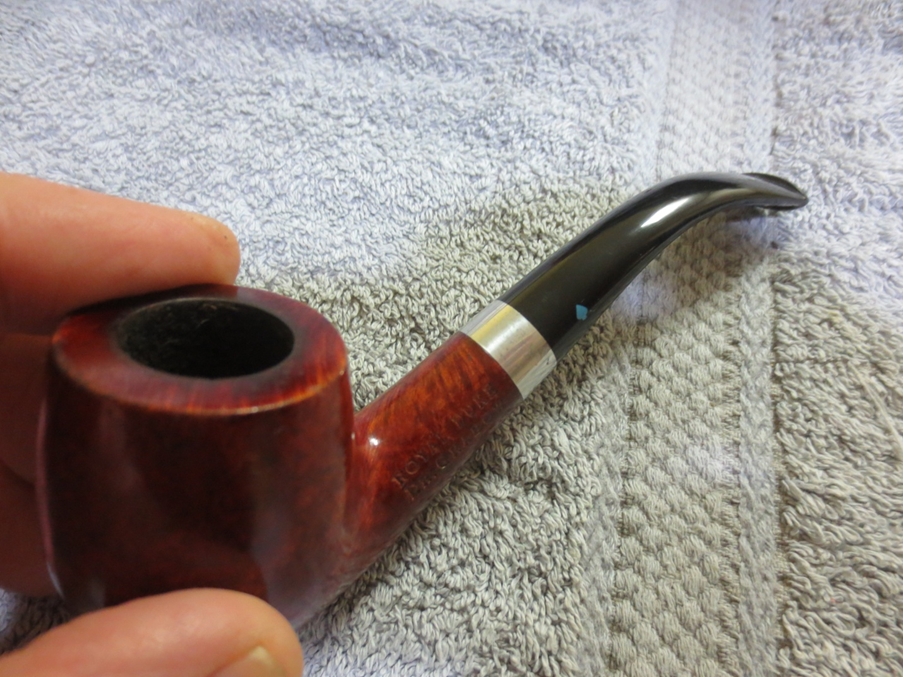
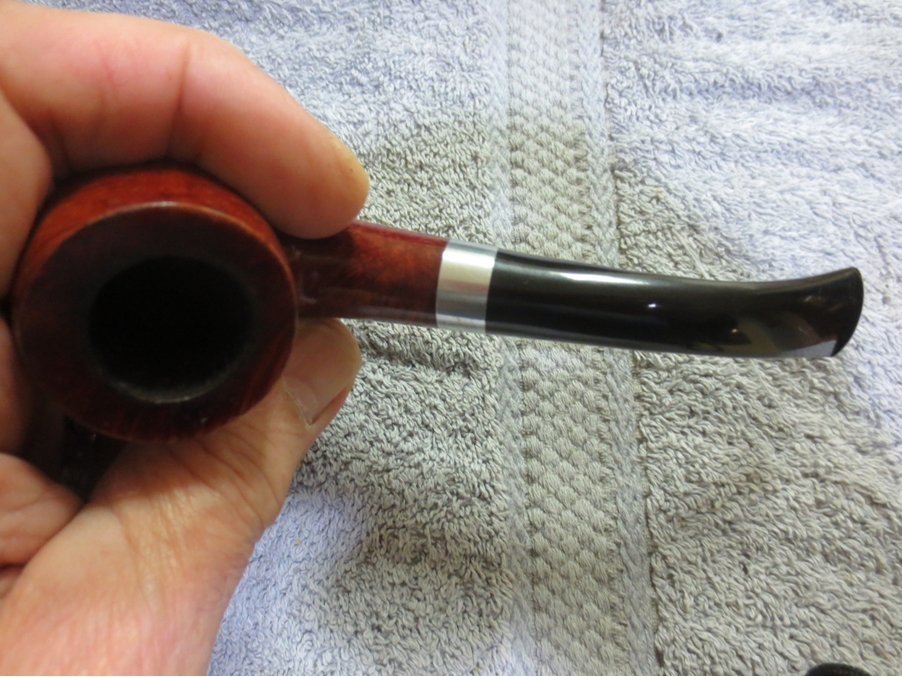
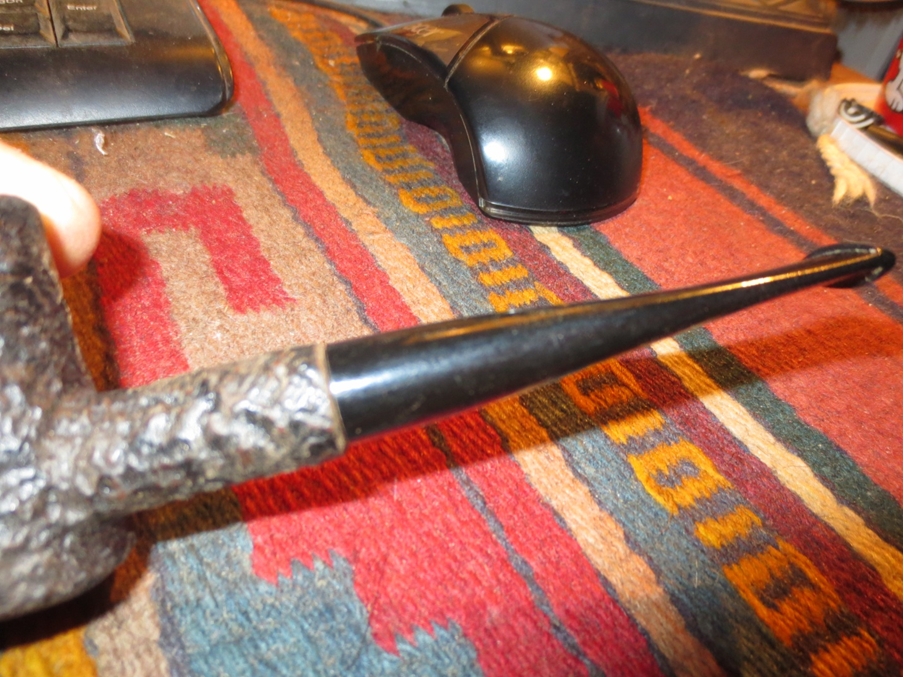
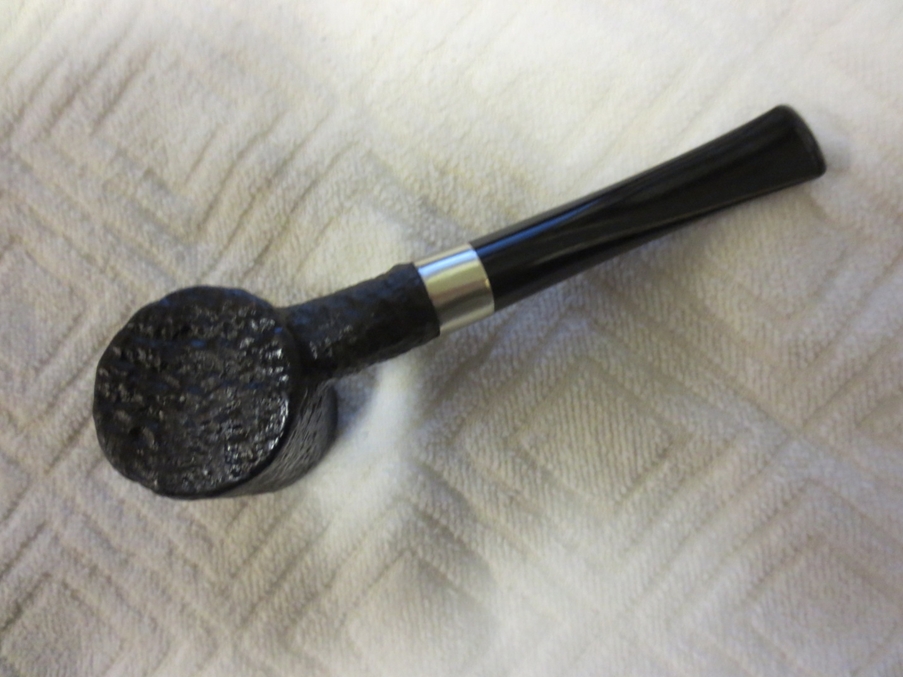
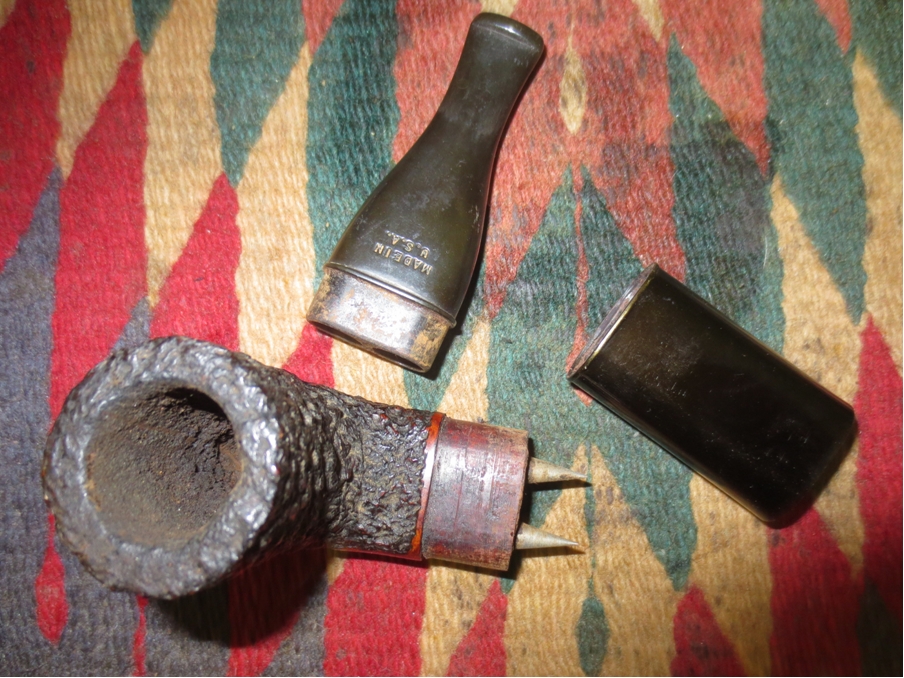
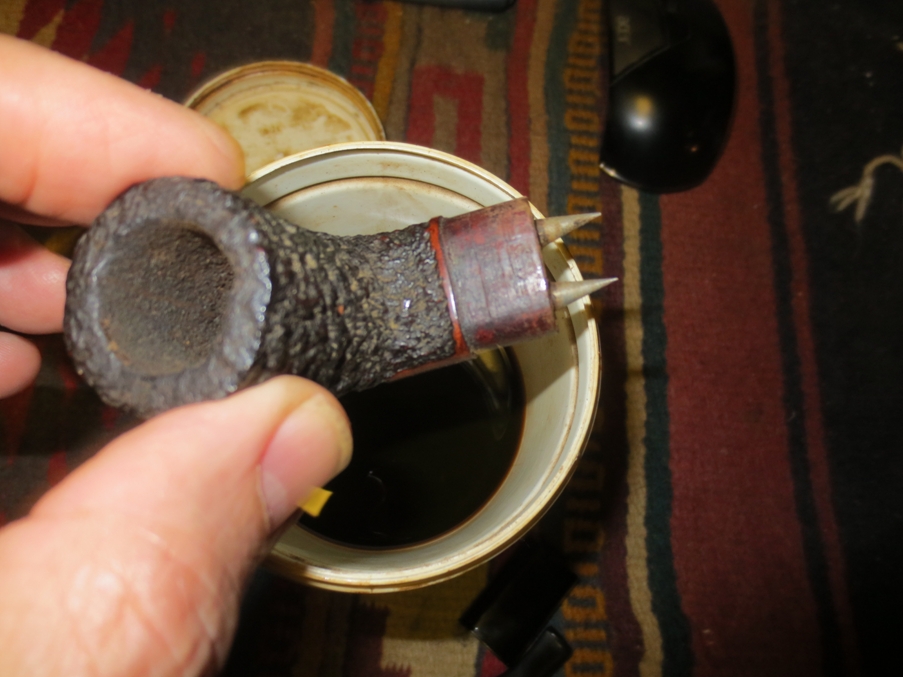
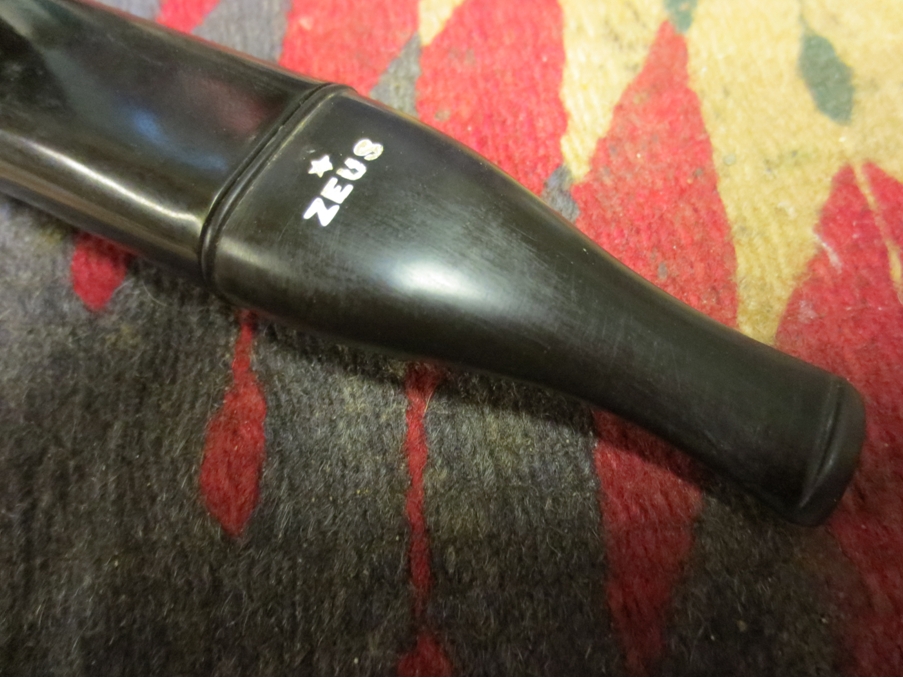
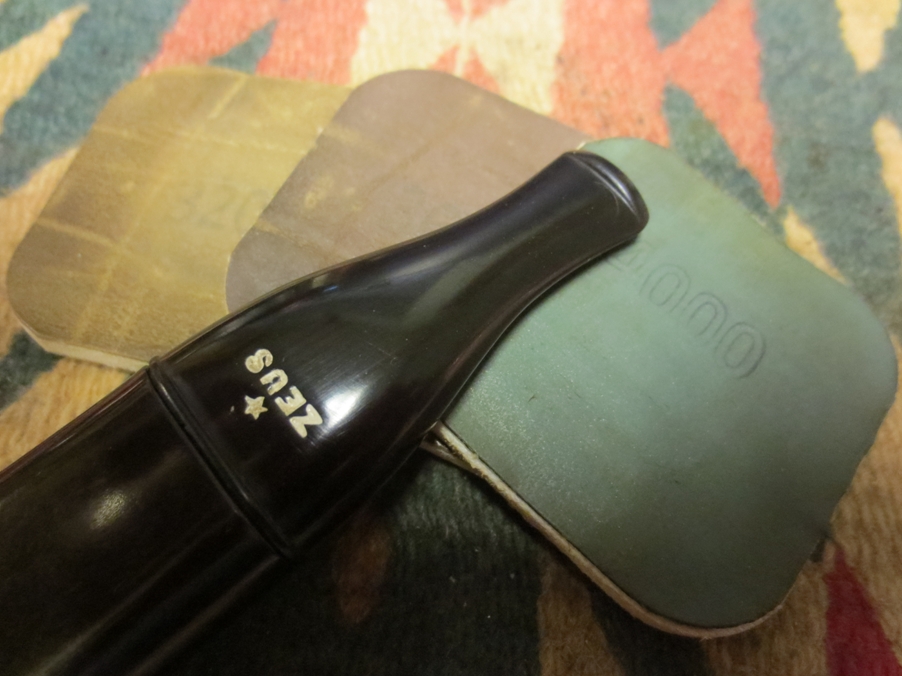
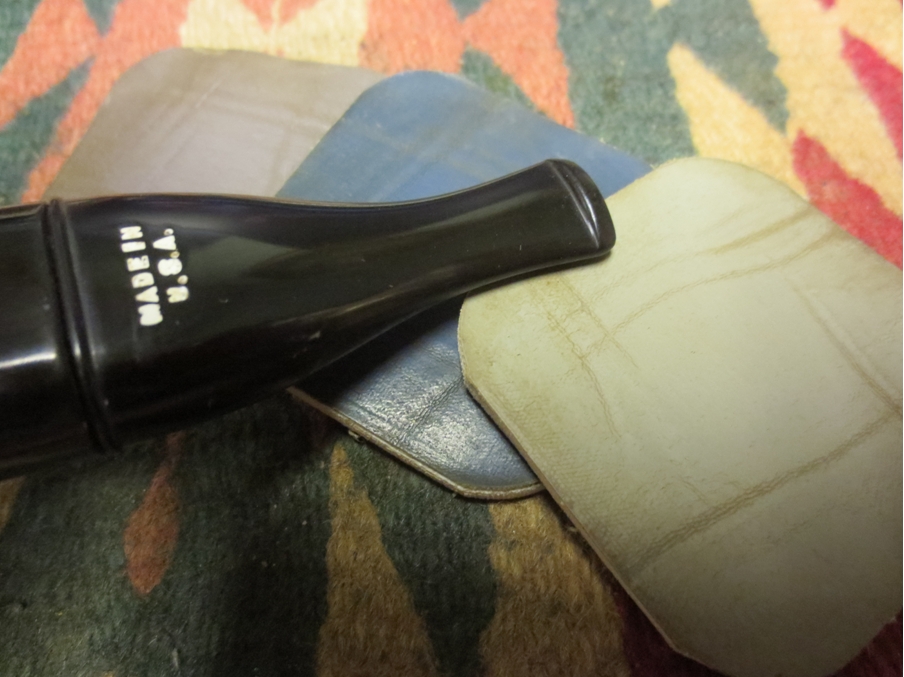
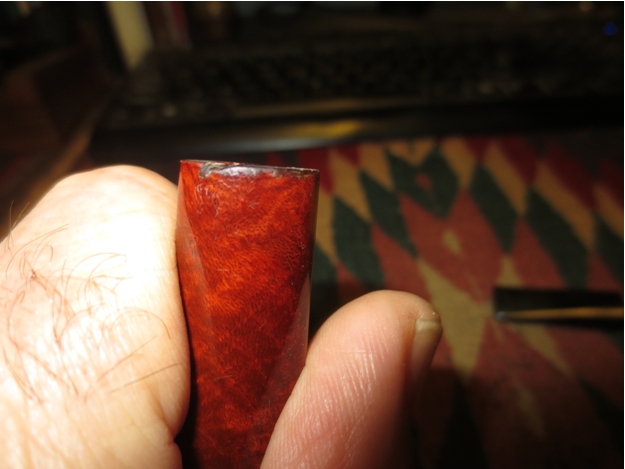
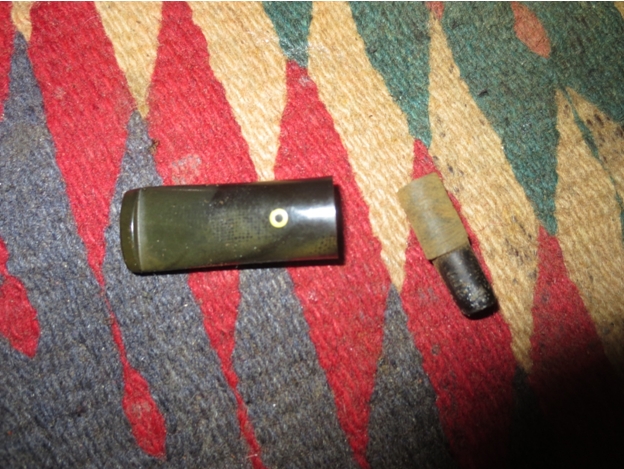
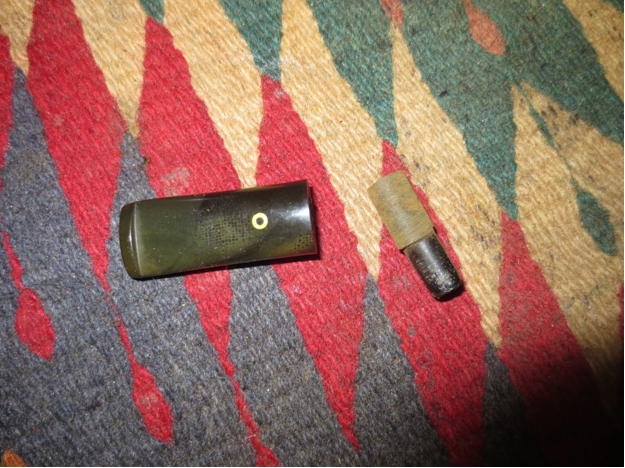
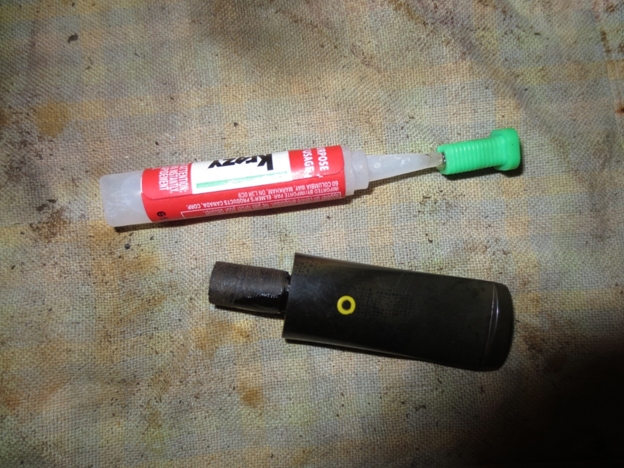
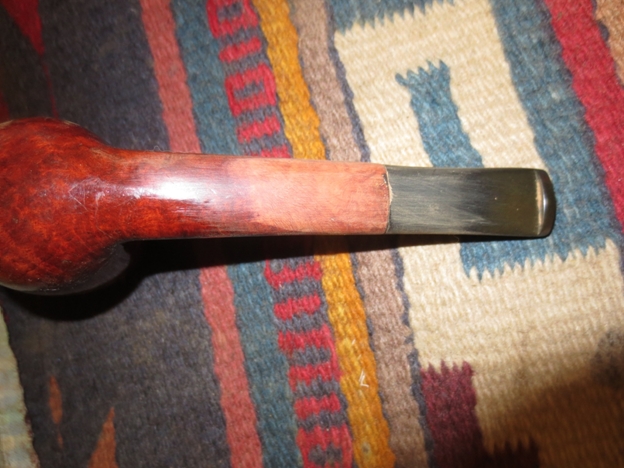
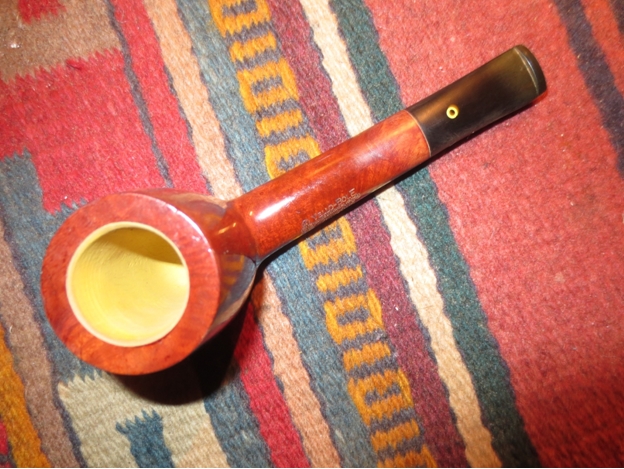
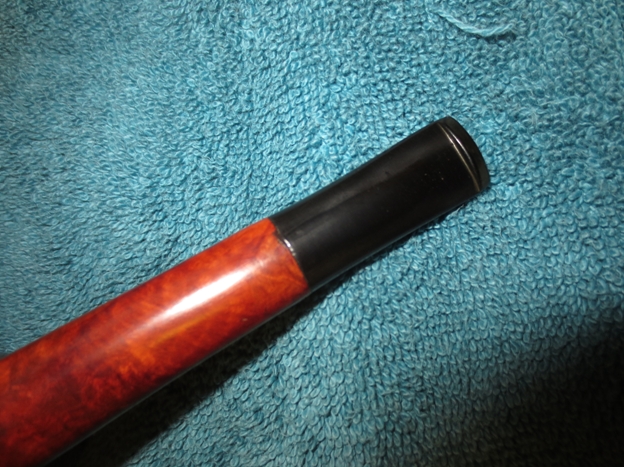
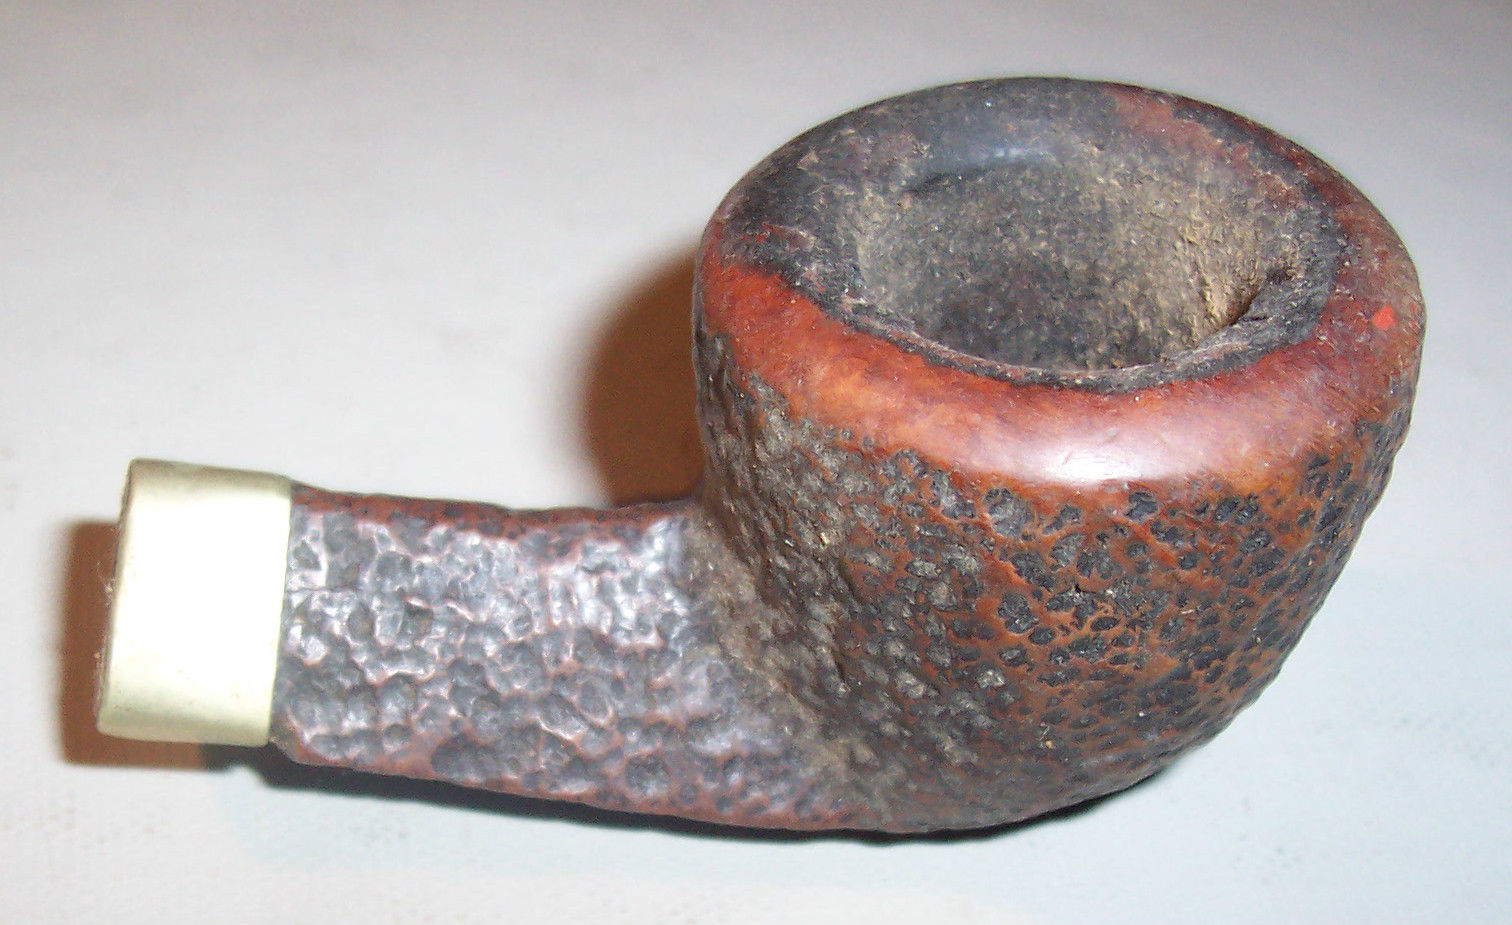
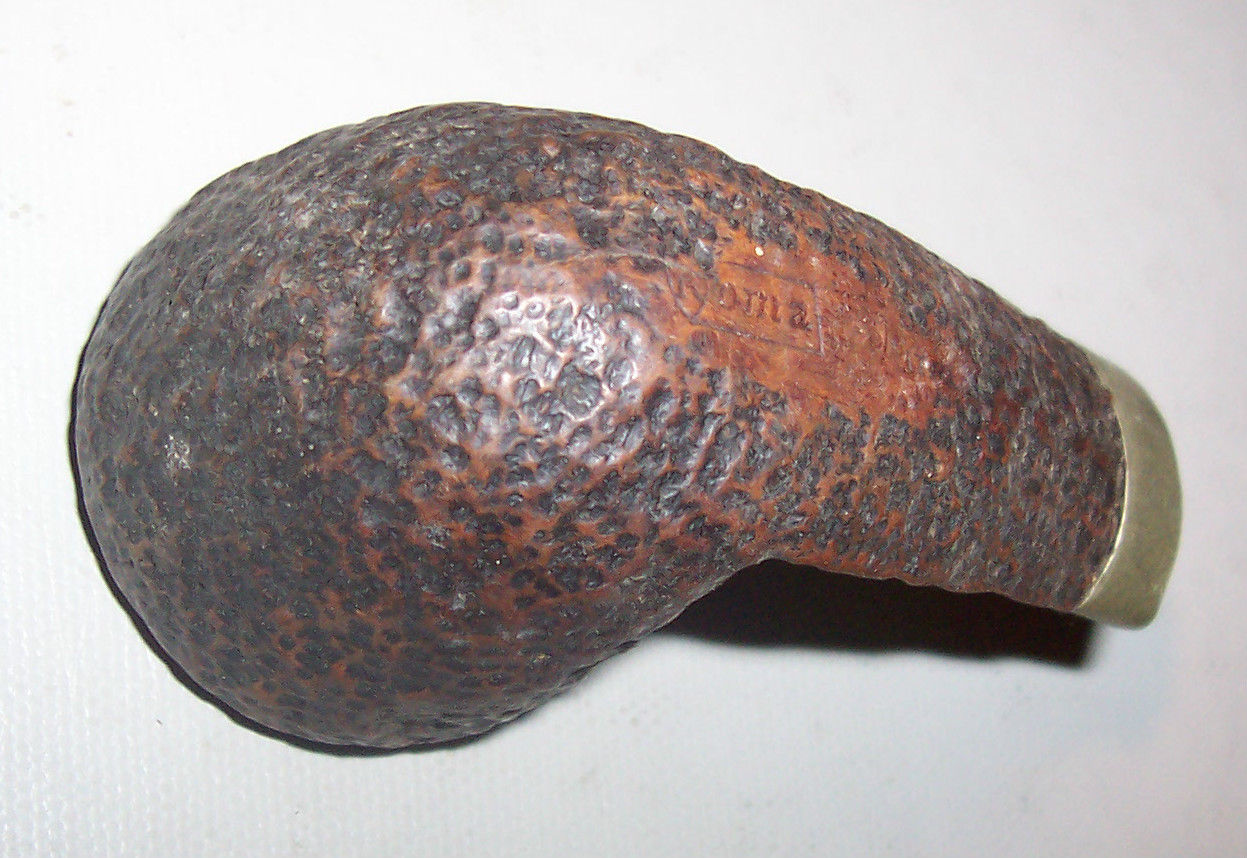
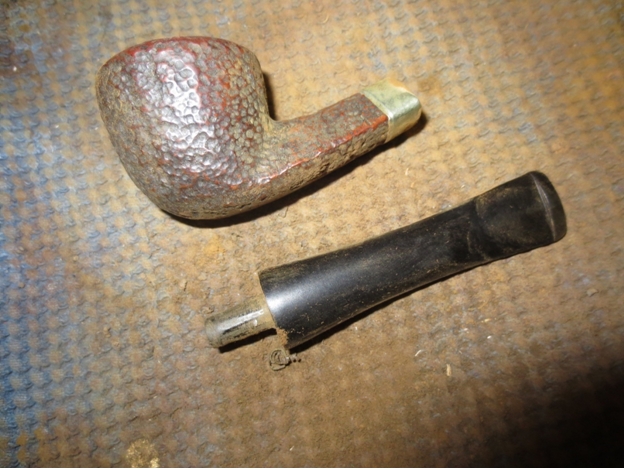
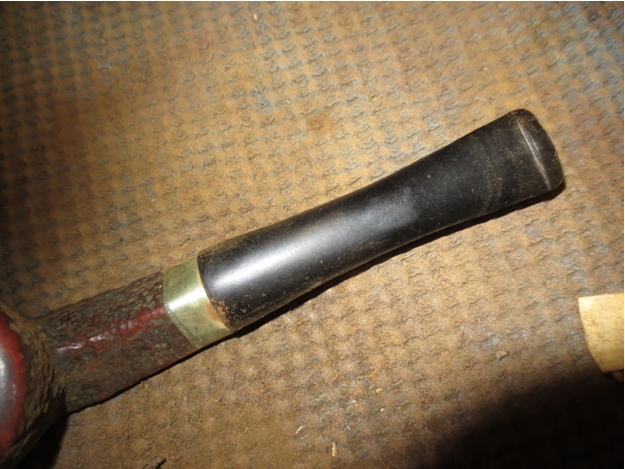
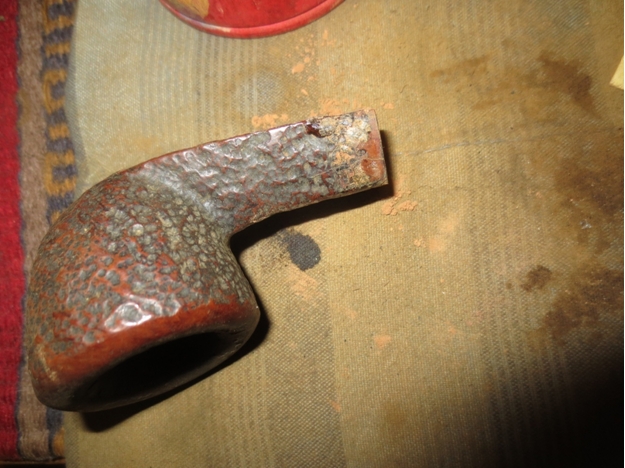
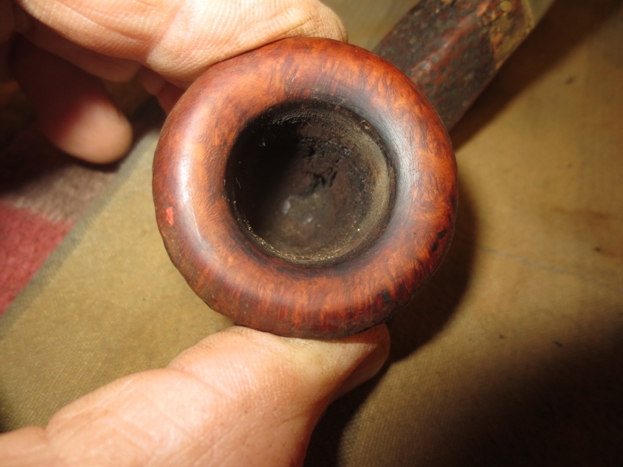
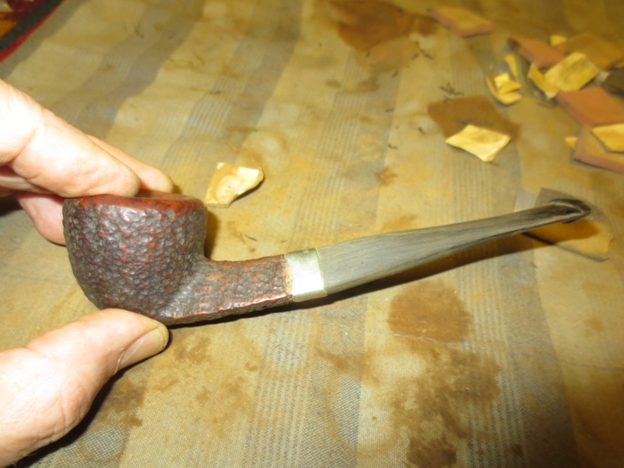
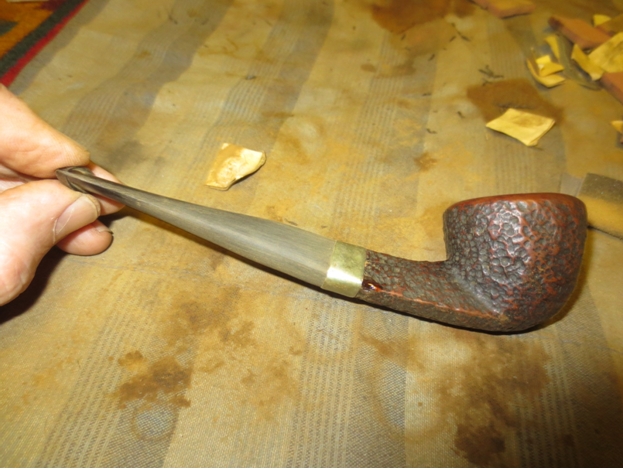
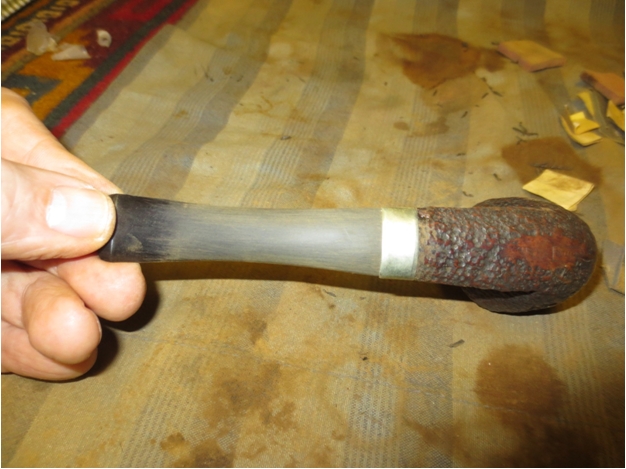
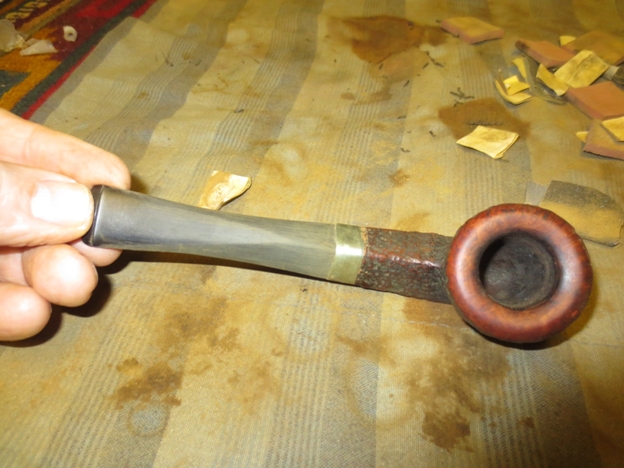
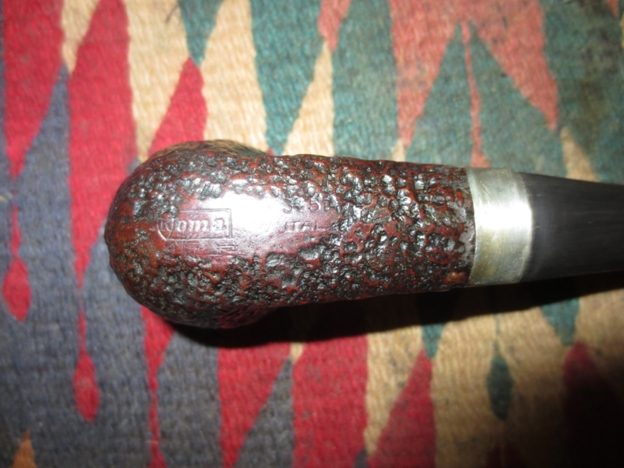
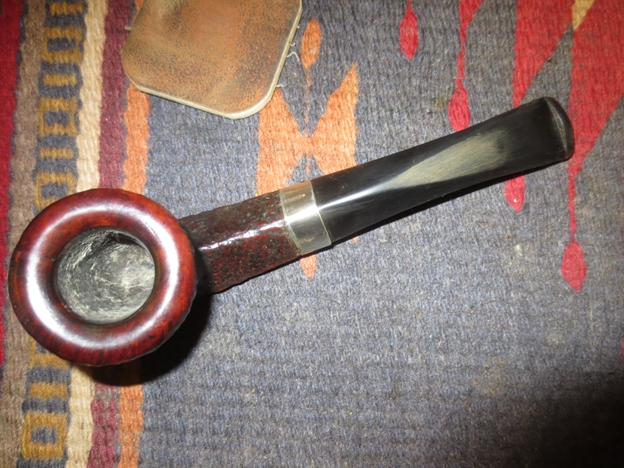
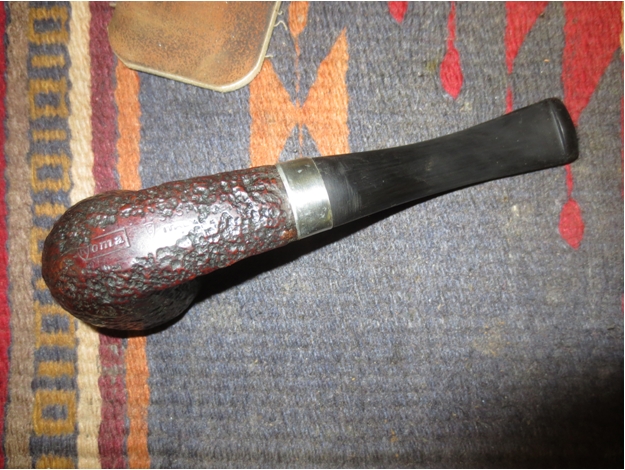
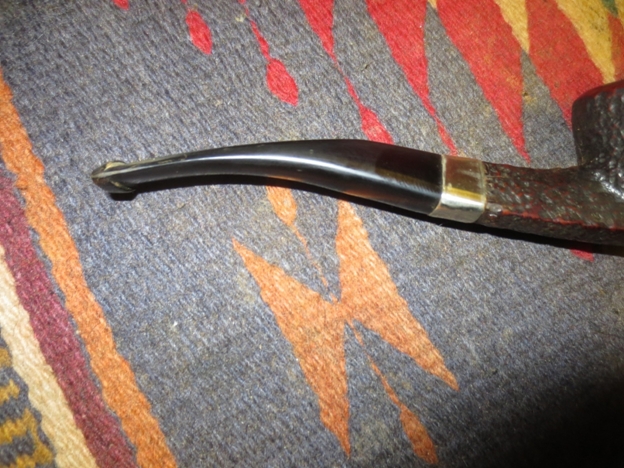
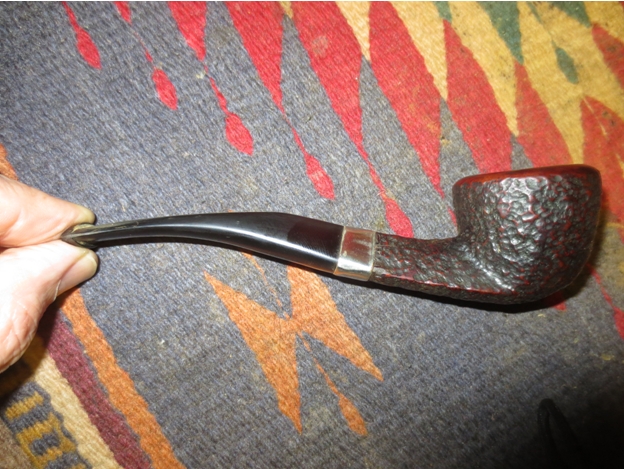
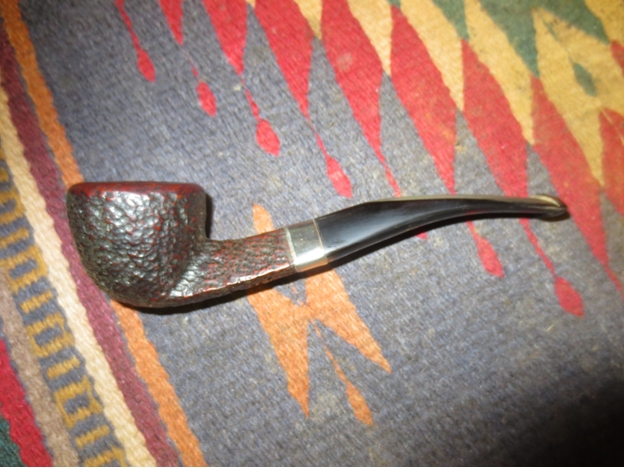
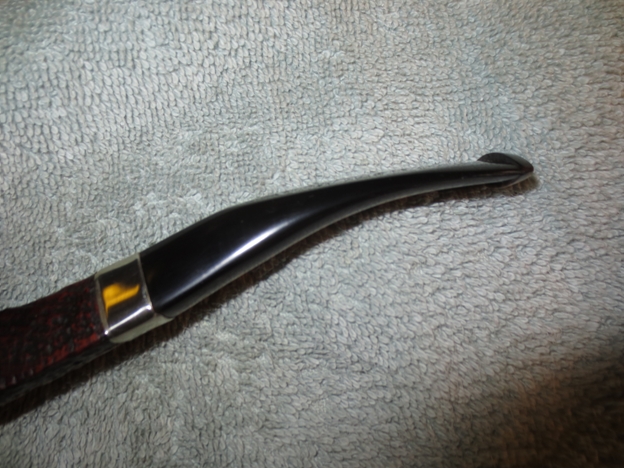
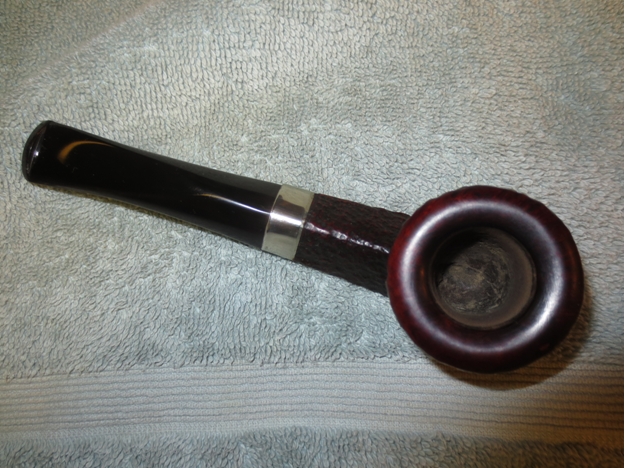
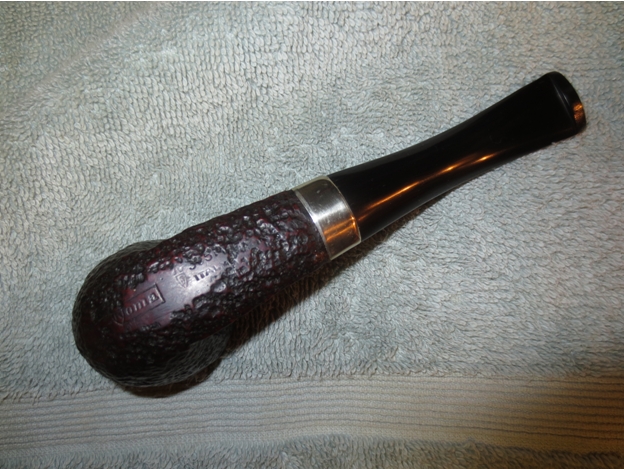
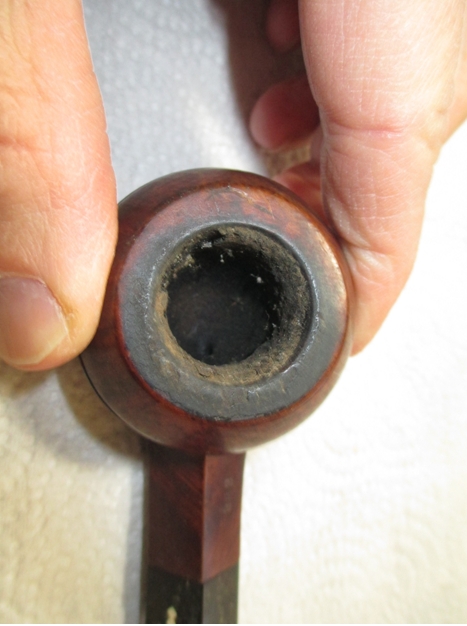
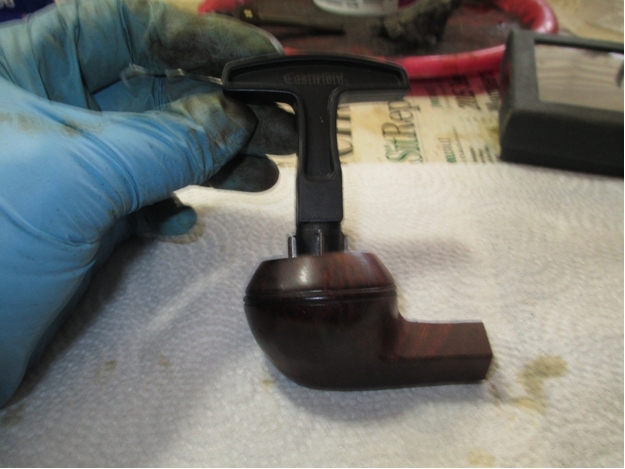
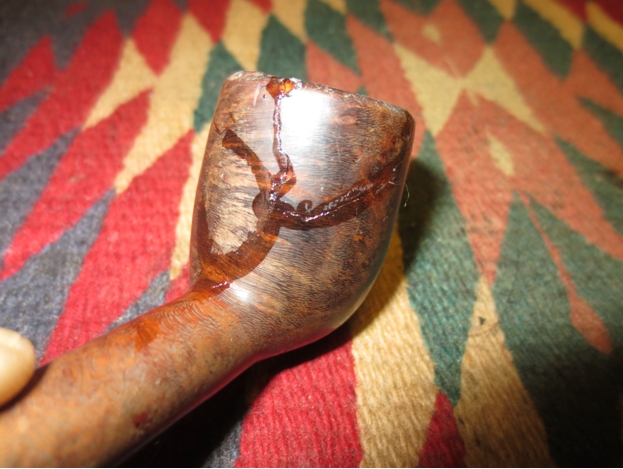
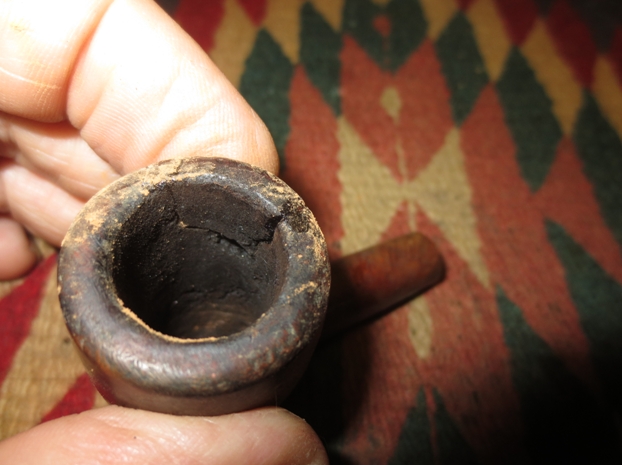
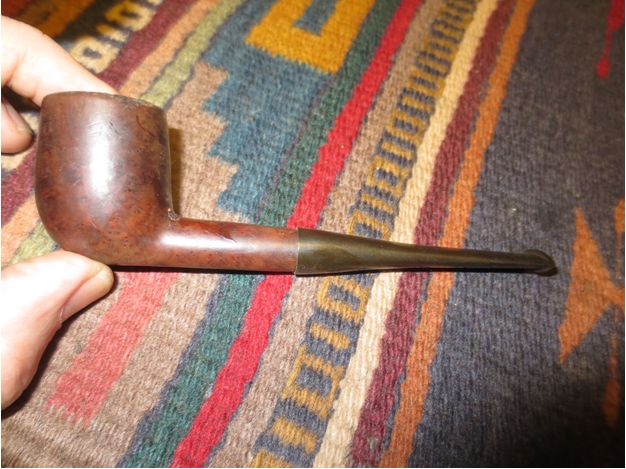
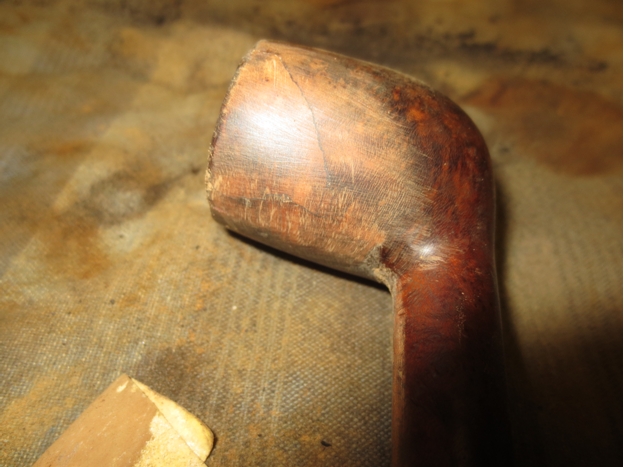
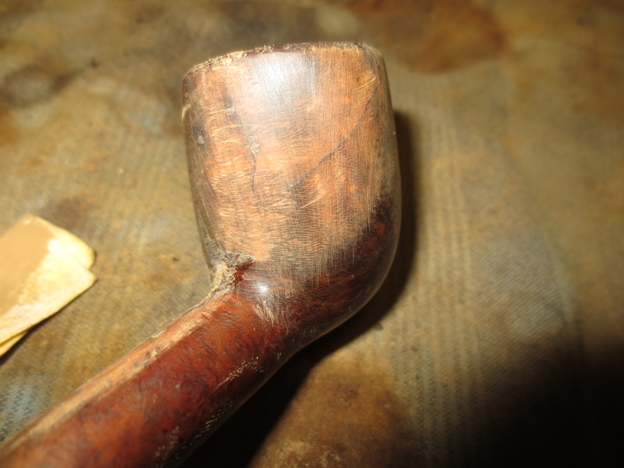
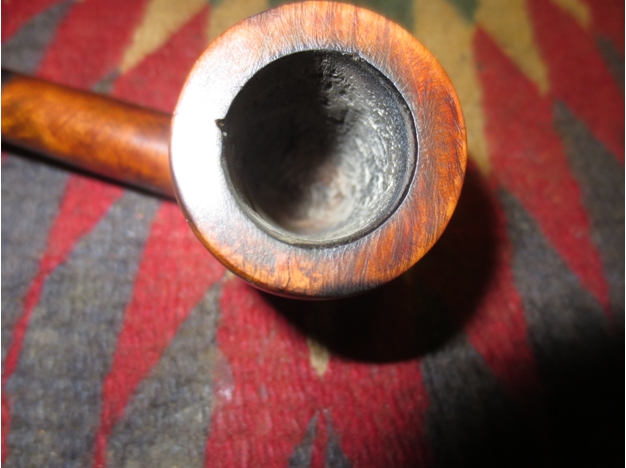
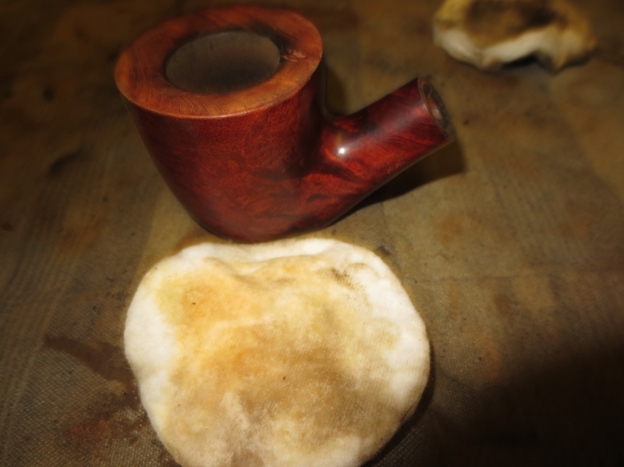
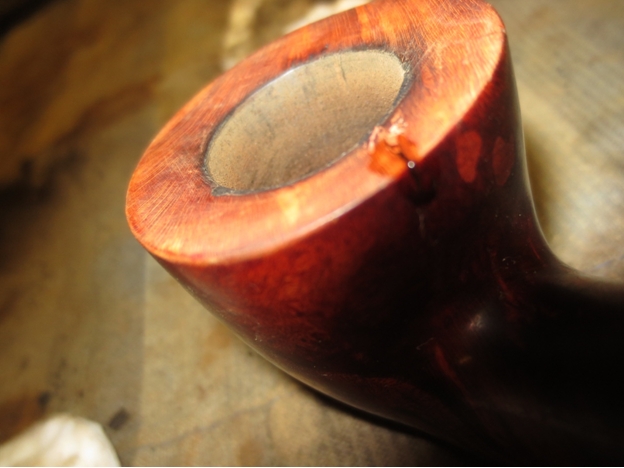
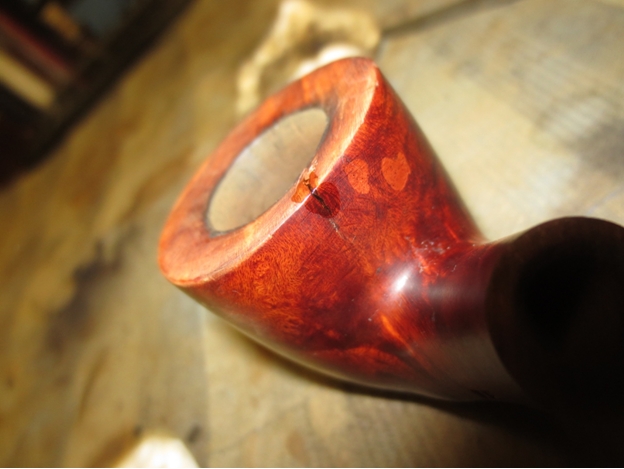
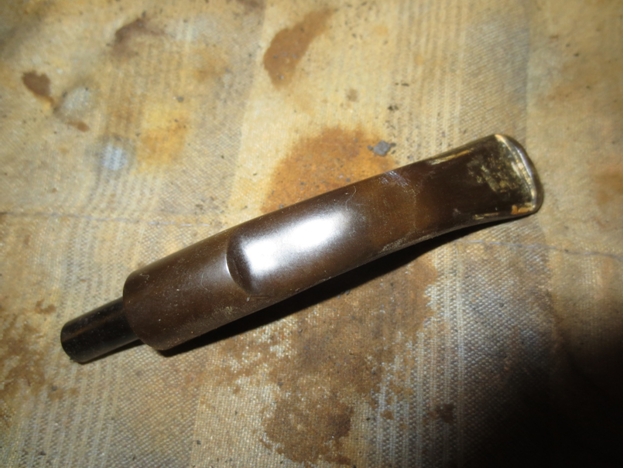
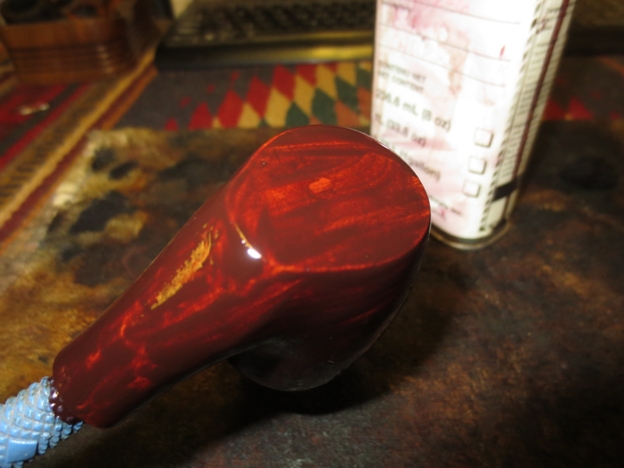
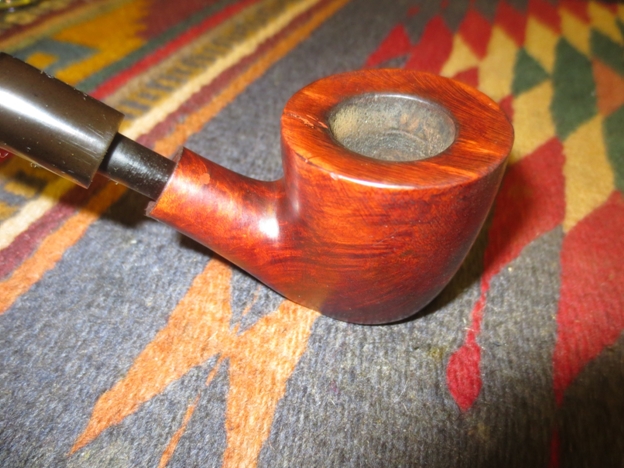
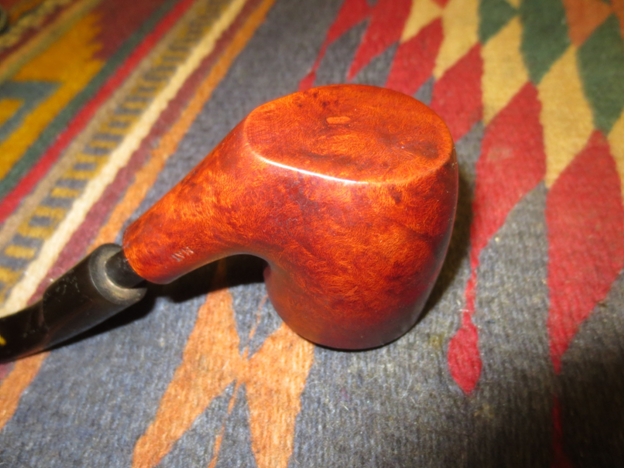
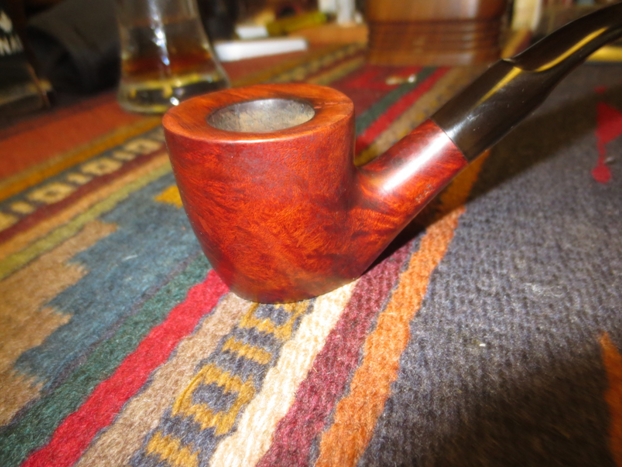
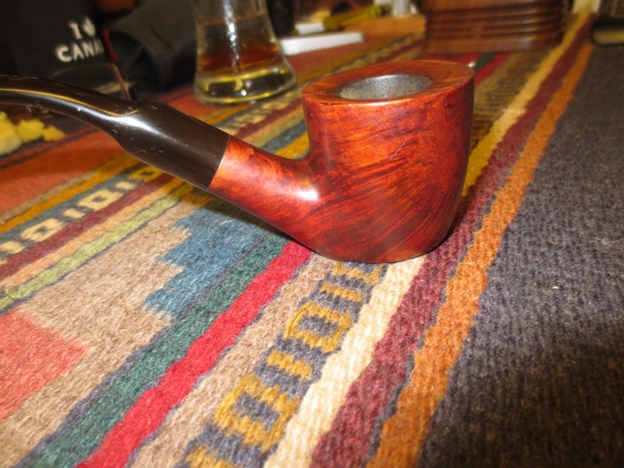
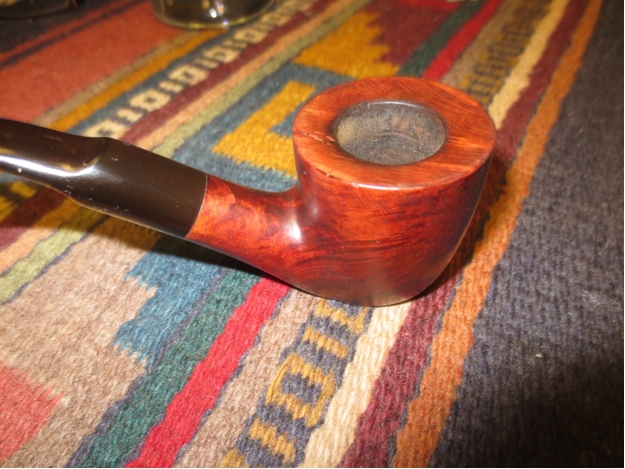
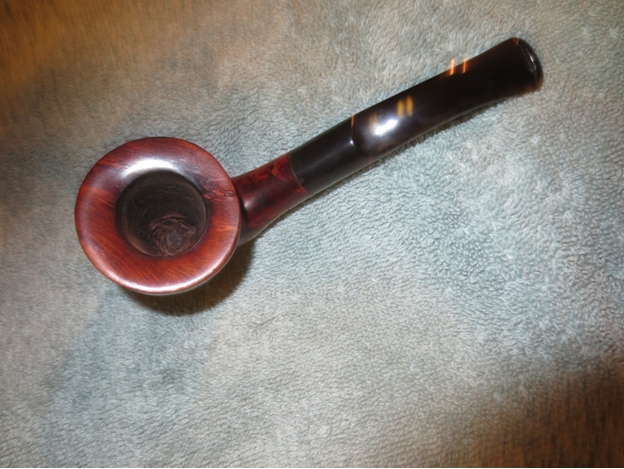
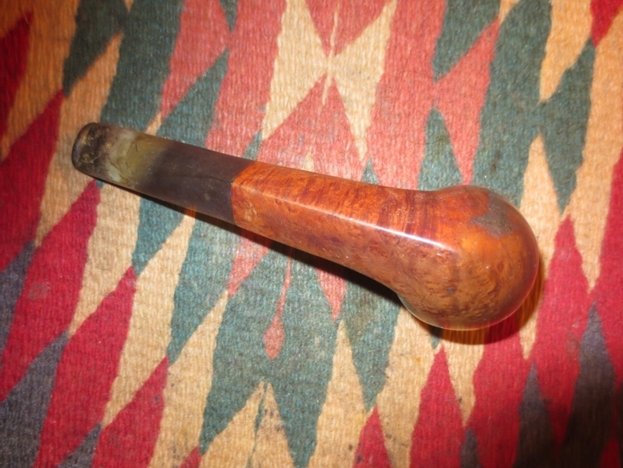
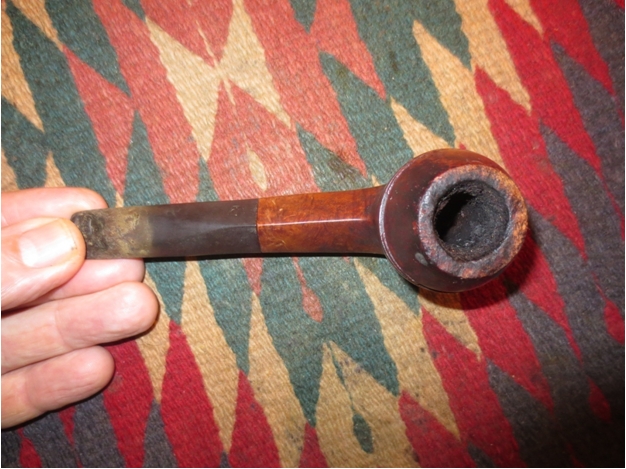
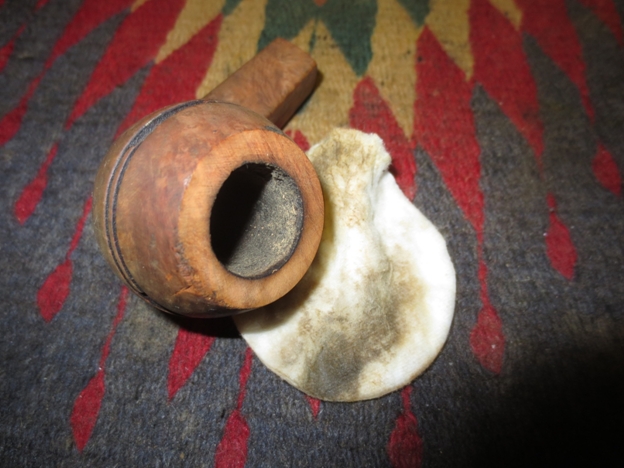
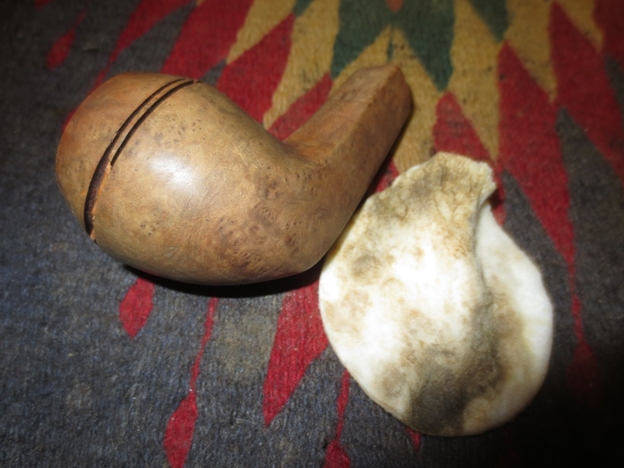
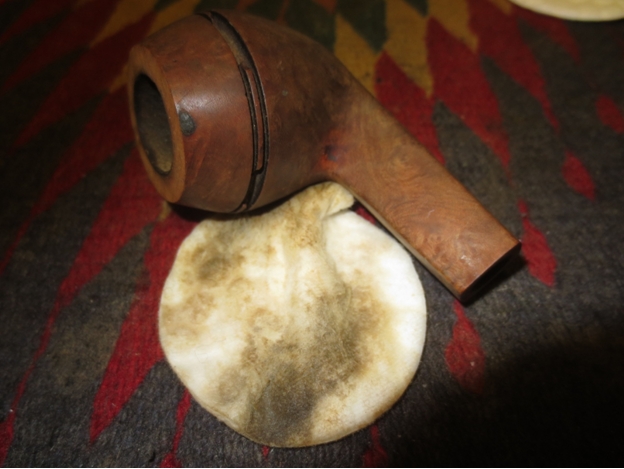
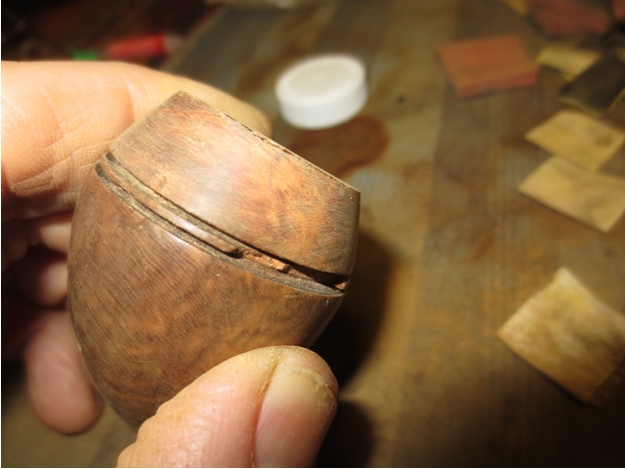
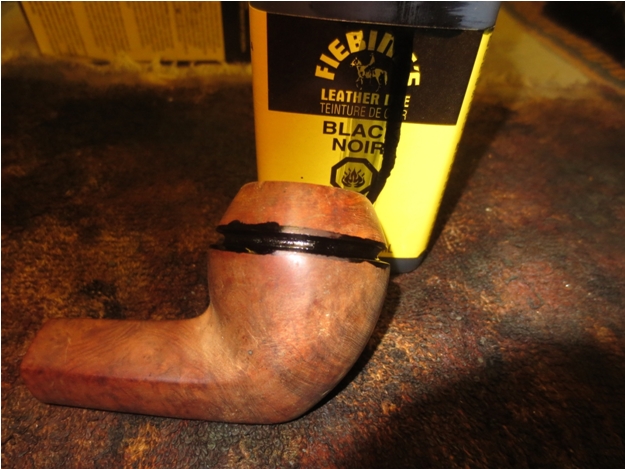
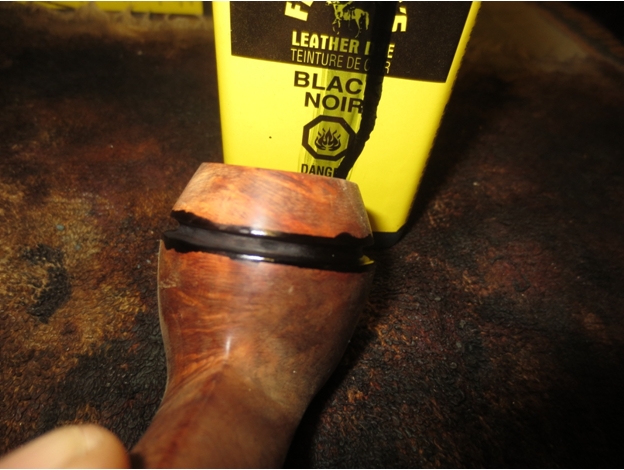
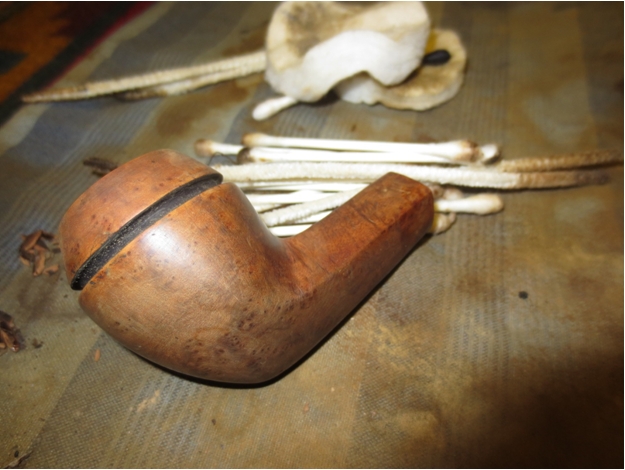
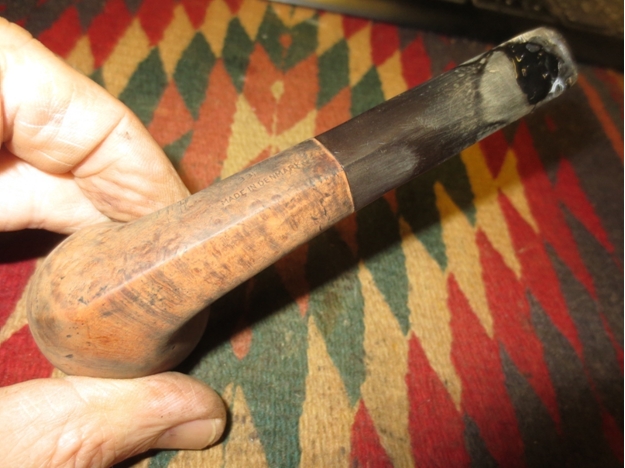
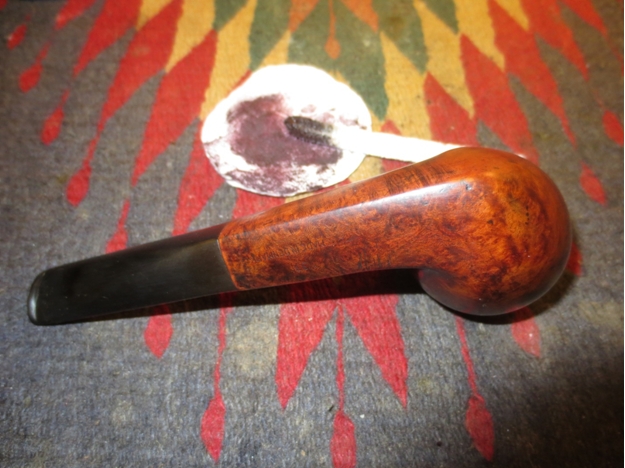
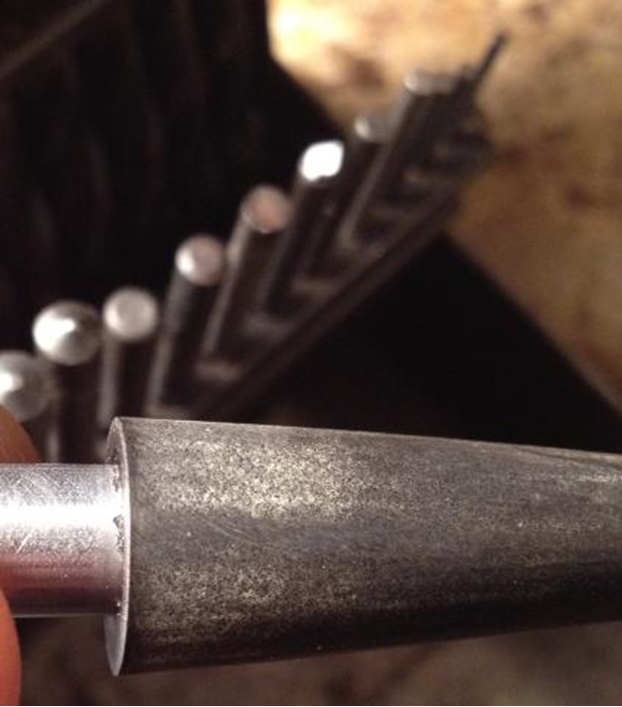
The pipe is not large. The bowl is about a group 3 size and has a very wide shank. It extends for about an inch before it is joined by a metal oval tube. The tube was in great shape with no scratches and only minimal dents. An oddly shaped stem fit in the end of the metal tube. The stem bore a star with the words ZEUS stamped under it on top of the stem. On the underside it was stamped Made in U.S.A. There is a patent stamp on the short briar shank in a smooth patch on the left side. It reads U.S. Patent over 2,158,897. When I returned home I took it to the work table and took these photos.
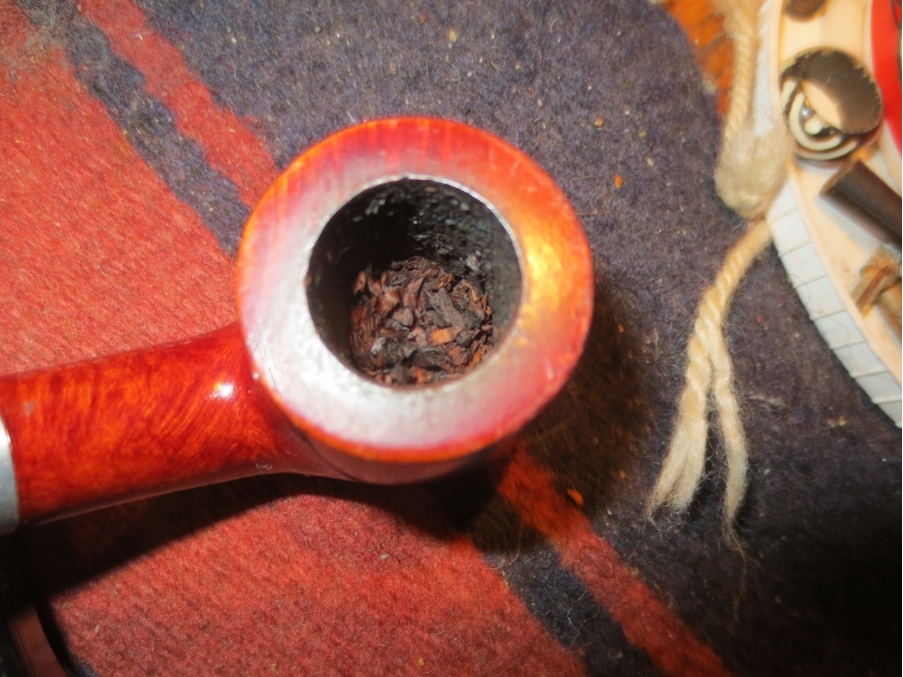
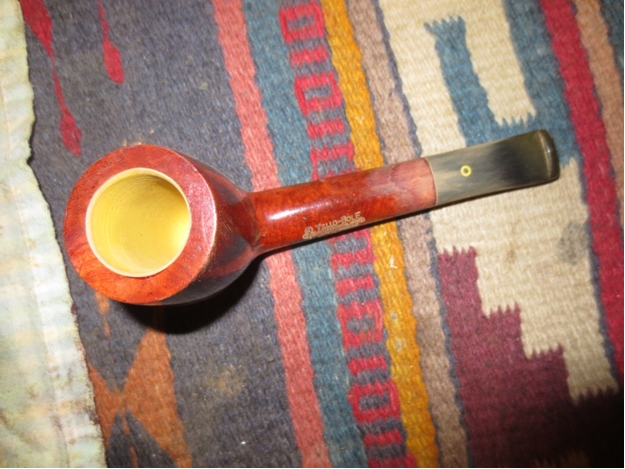
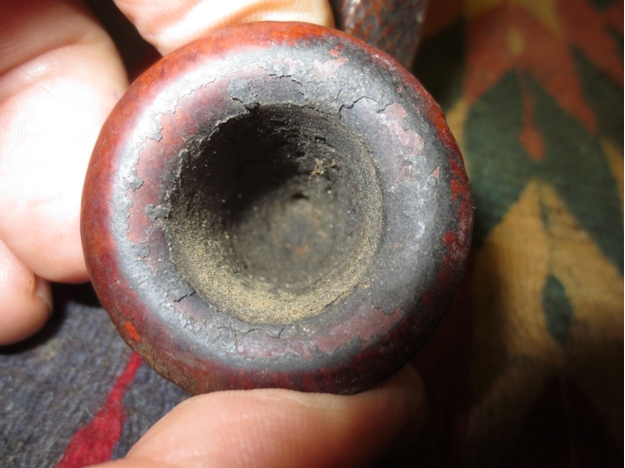
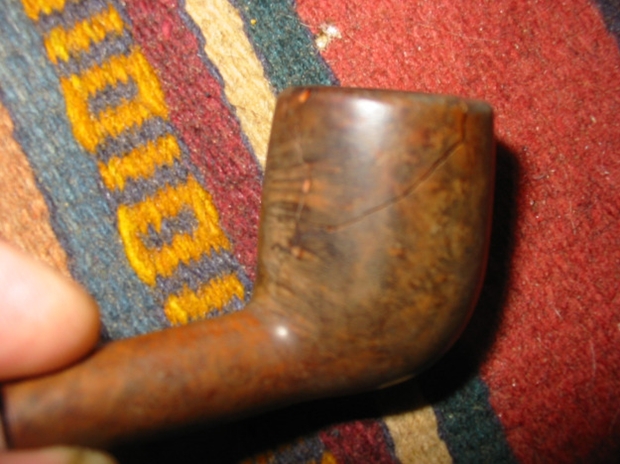
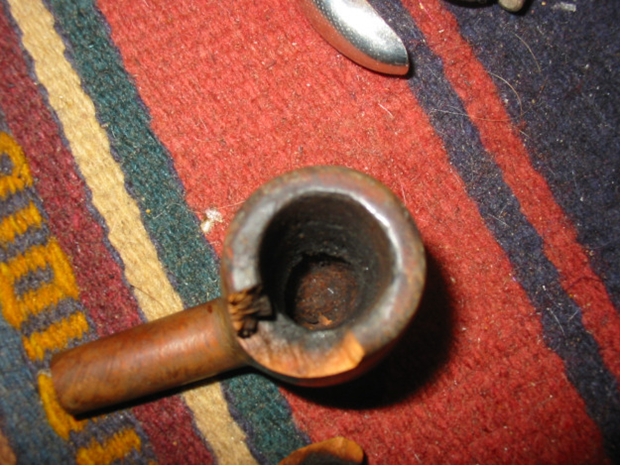
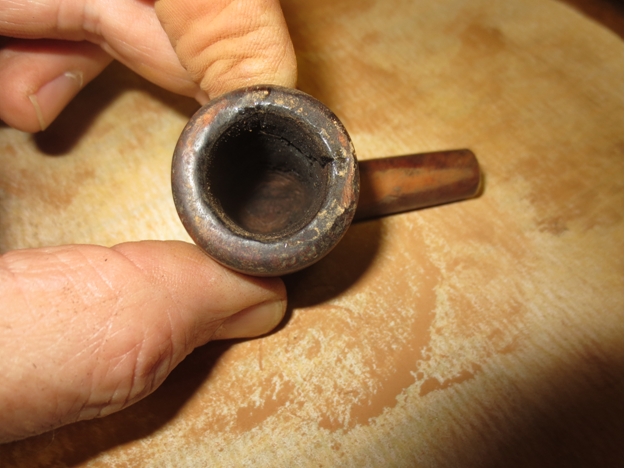
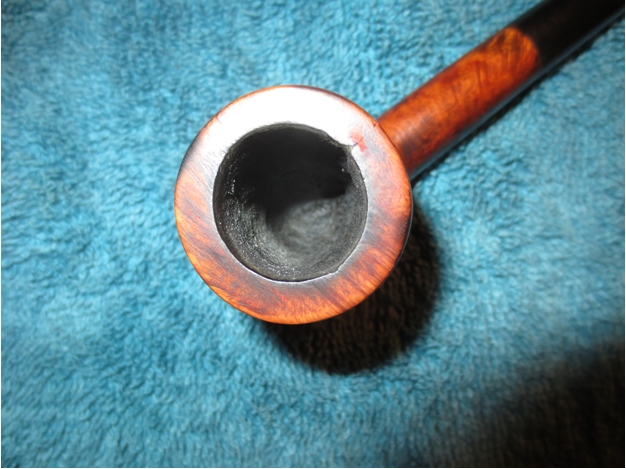
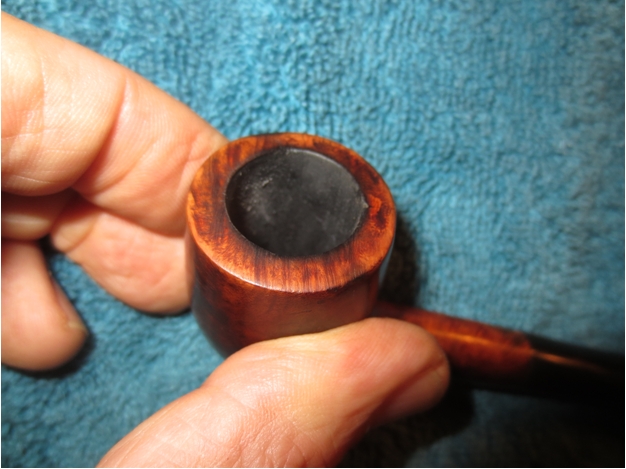
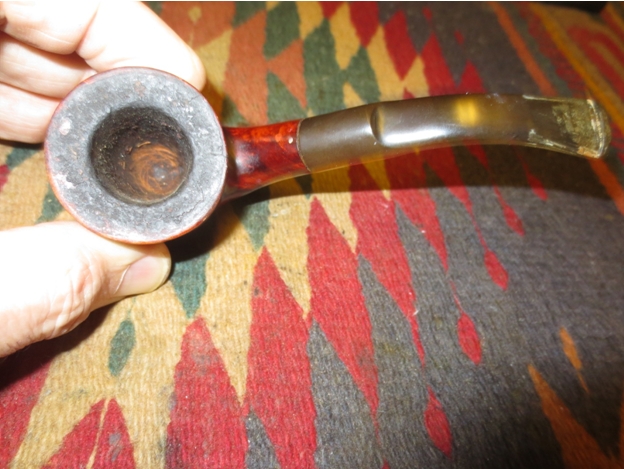
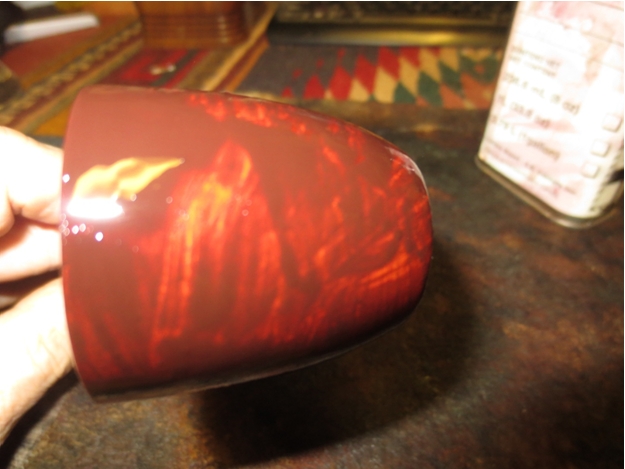
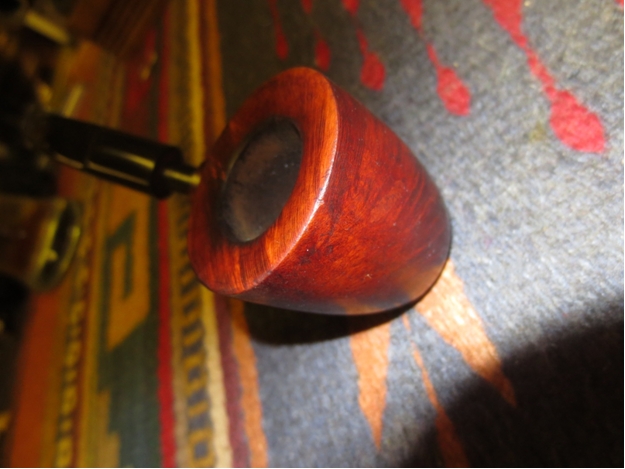
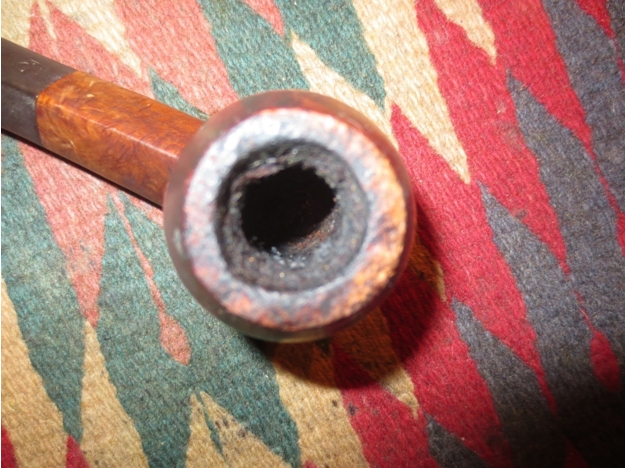
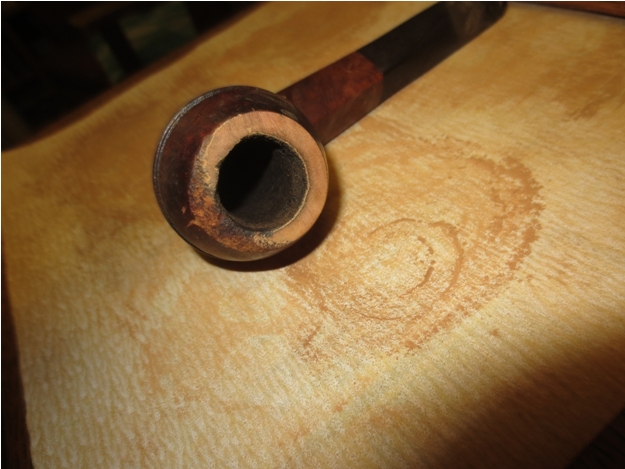
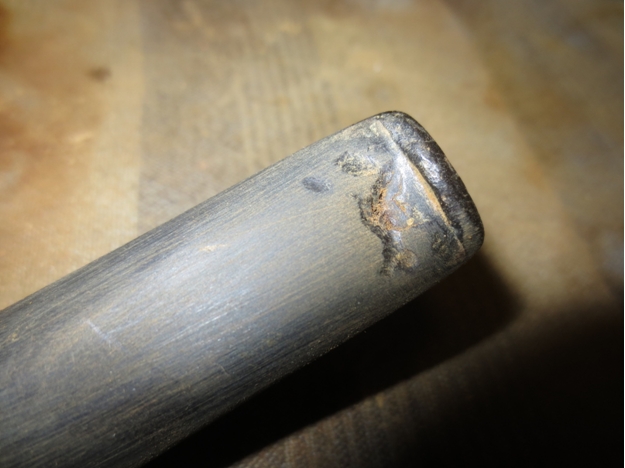
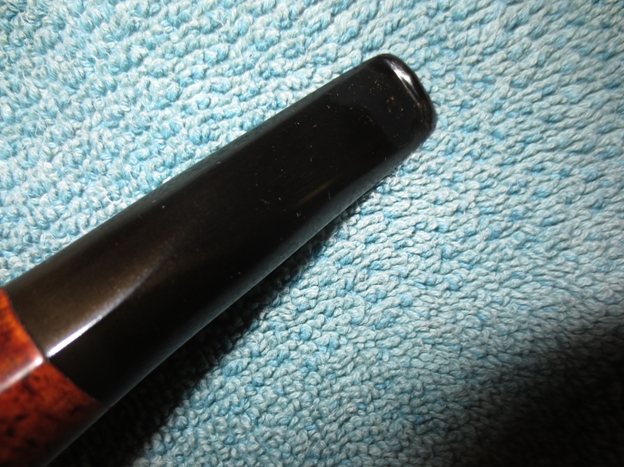
The pipe appears to be in great shape. There is minor oxidation on the stem but no tooth marks. The metal tube had sticky glue areas that seemed to come from a label that had been stuck to the metal. I sure wish that they would not use these labels to mark pipes. The briar bowl exterior is very dirty with dust and grime pressed deeply into the rustication. There was a thick build up of tars and oils in the rustication of the rim. There was a crumbling thick cake in the bowl with the cake on the bottom portion of the bowl being much thicker. The airway was dirty as well and I had trouble getting a pipe cleaner through from the stem. It would be interesting to take this old timer apart.

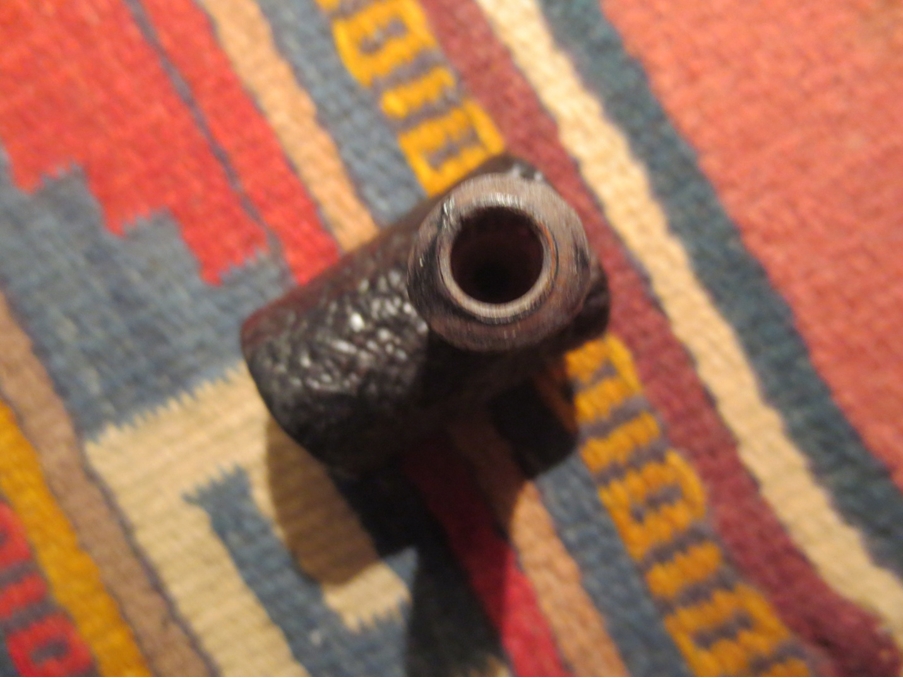
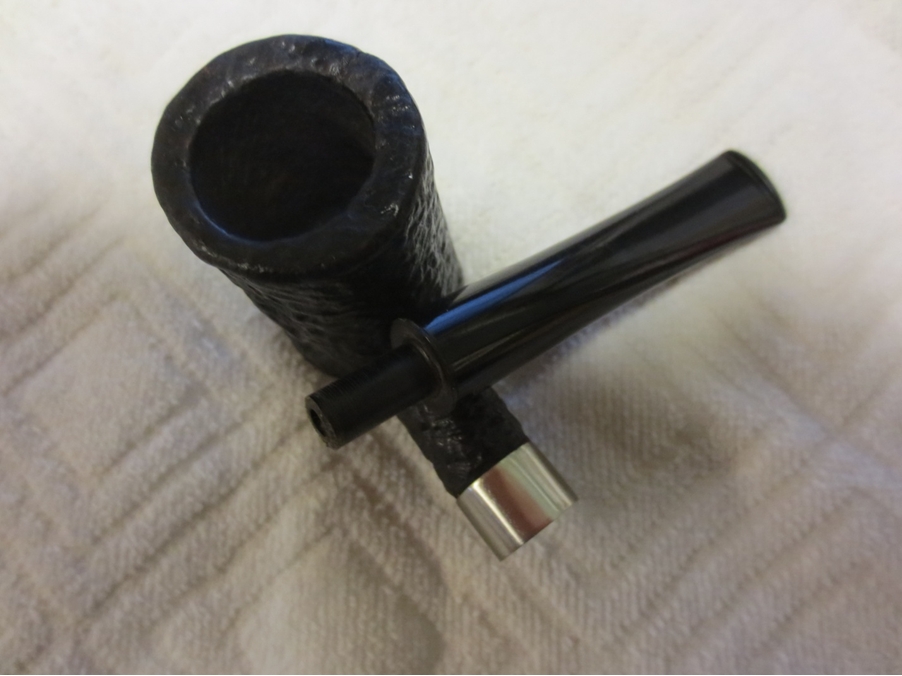
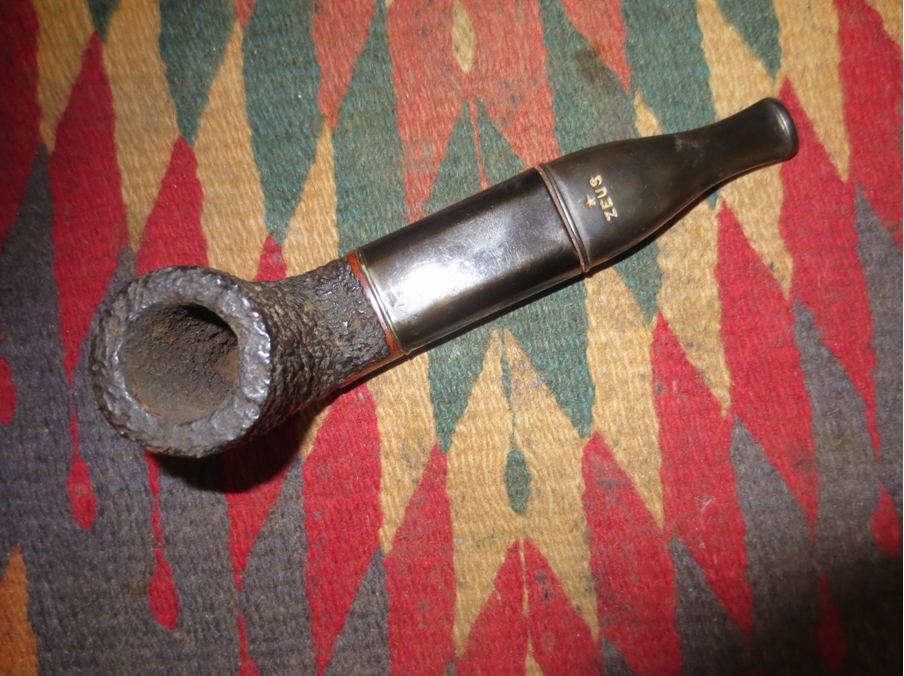
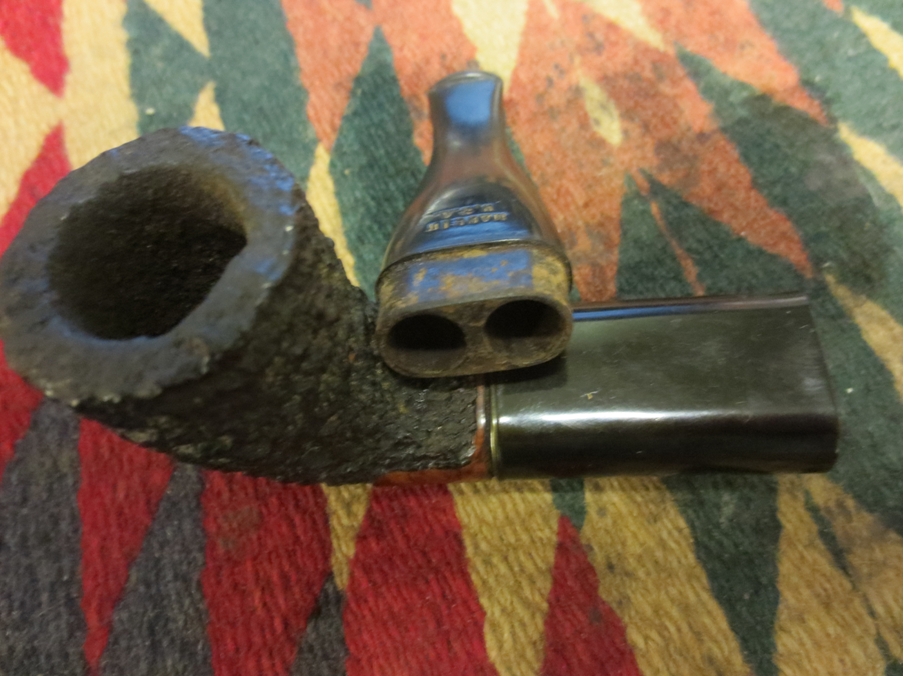
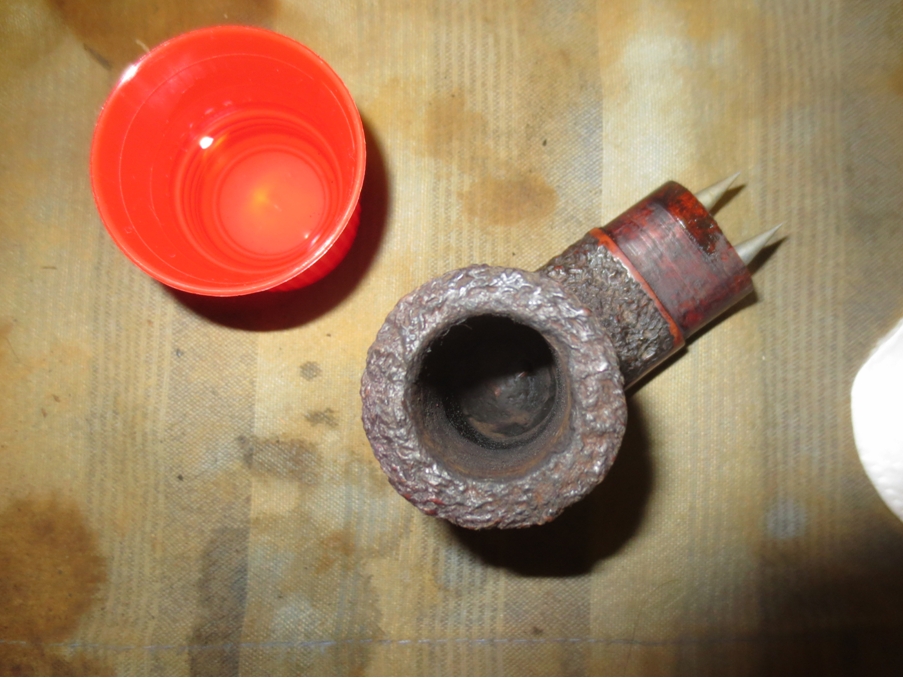
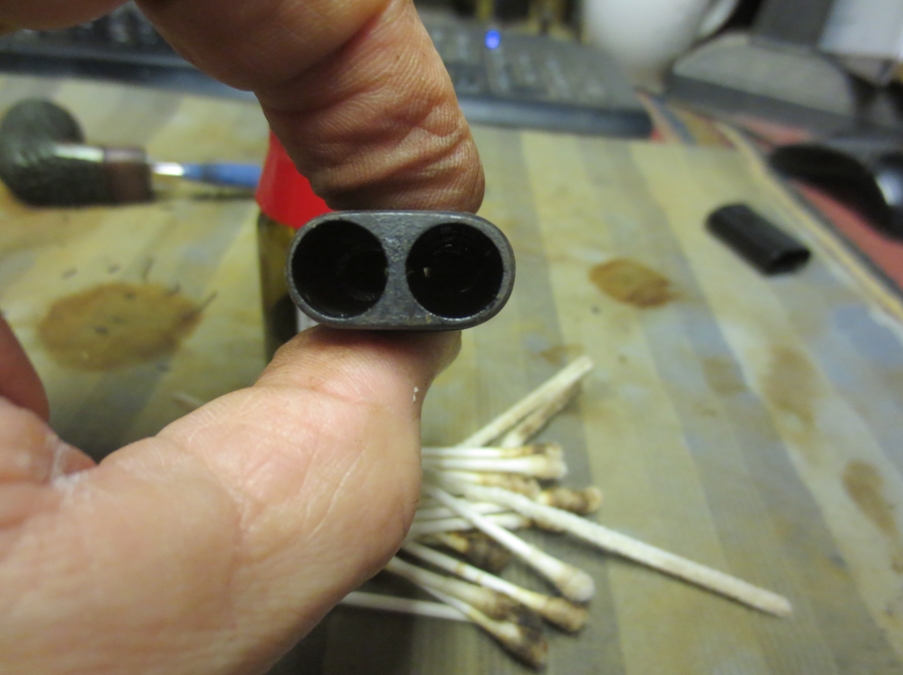
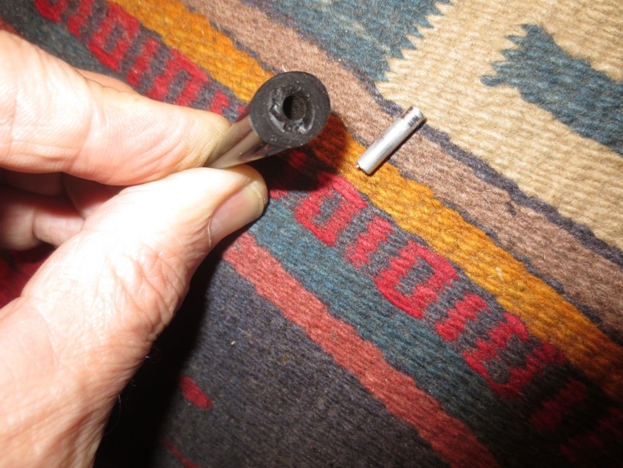
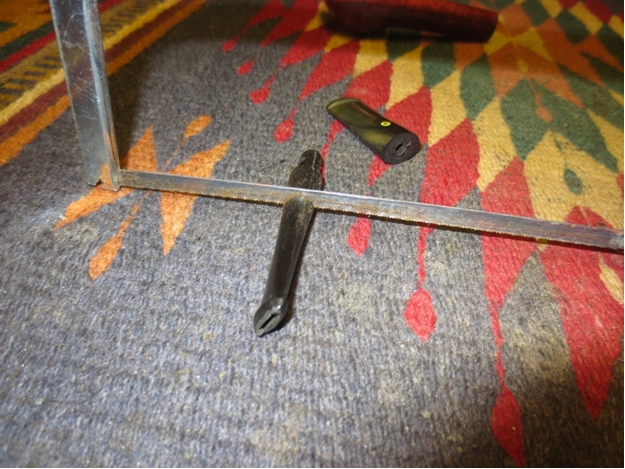
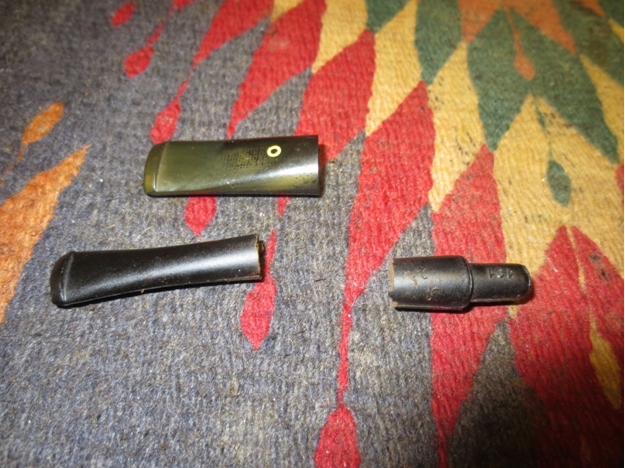
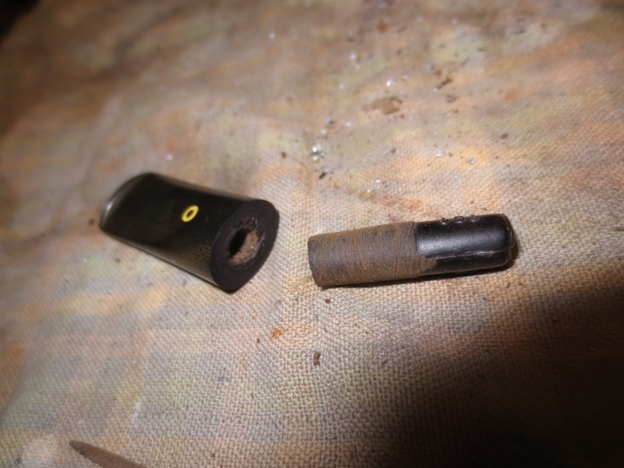
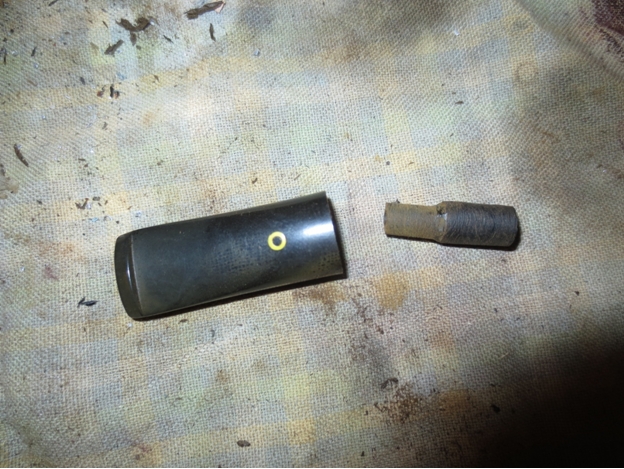
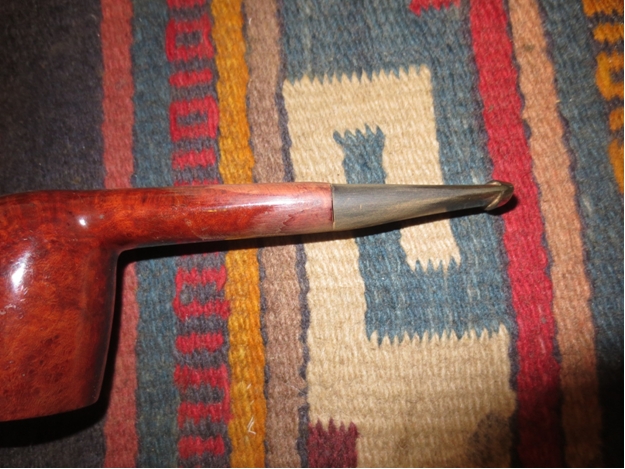
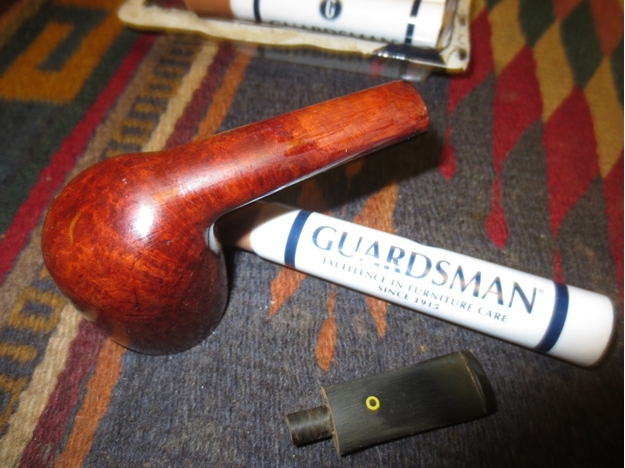
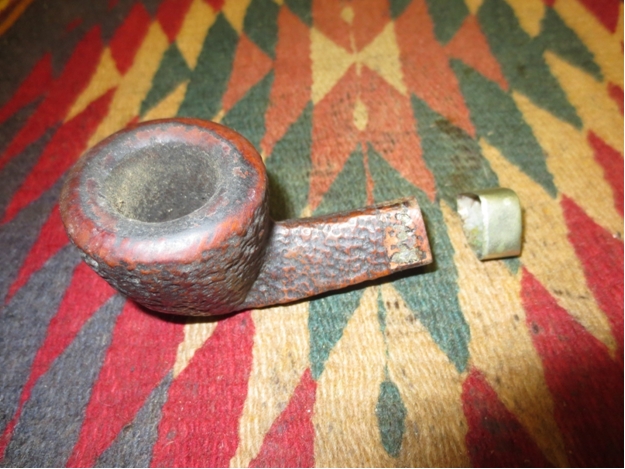
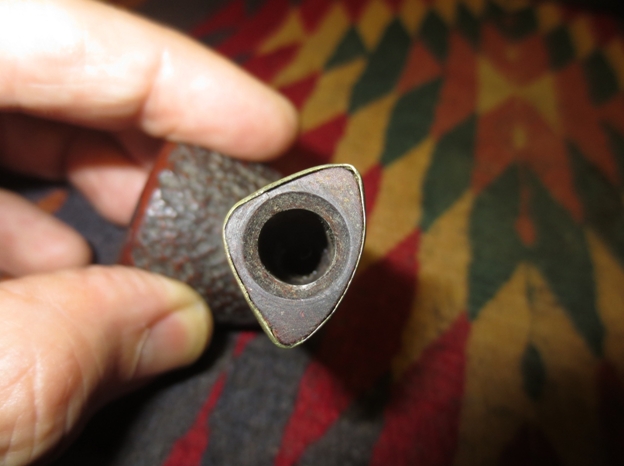
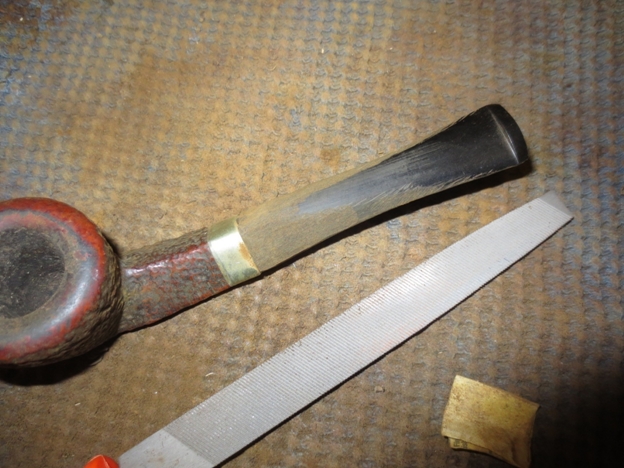
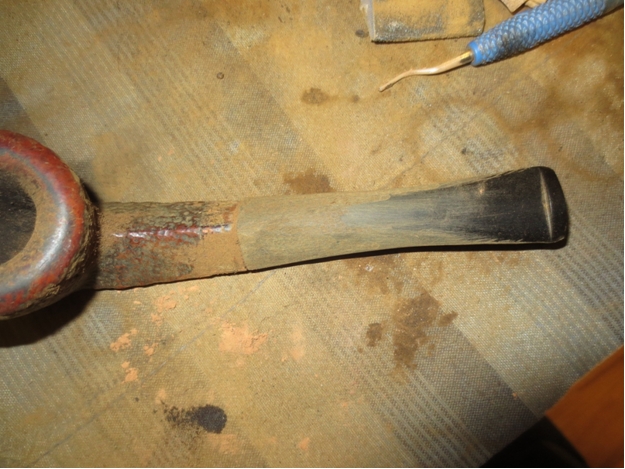
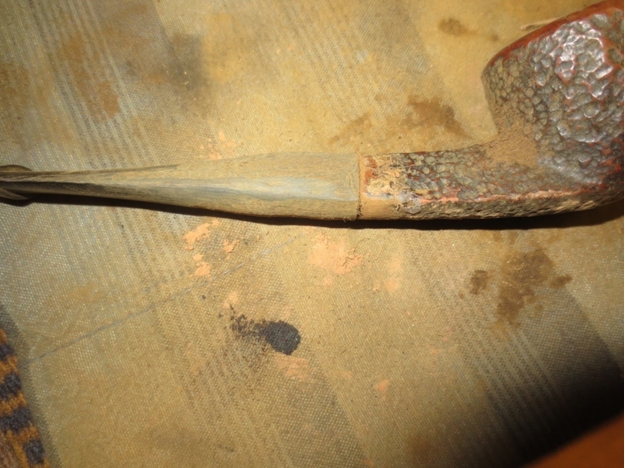
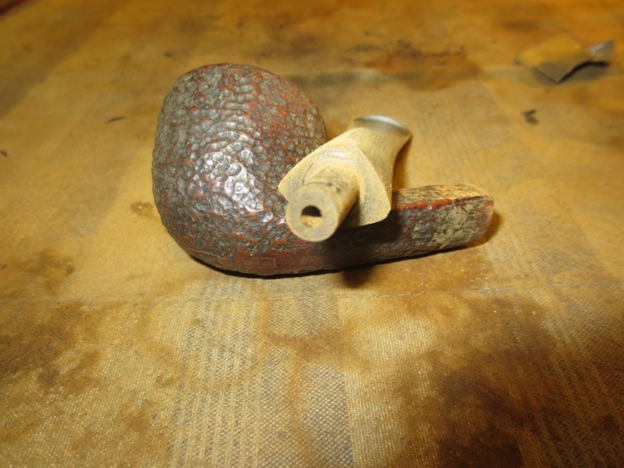
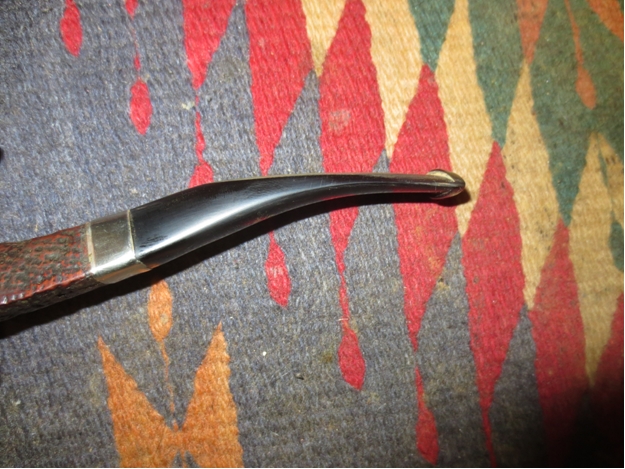
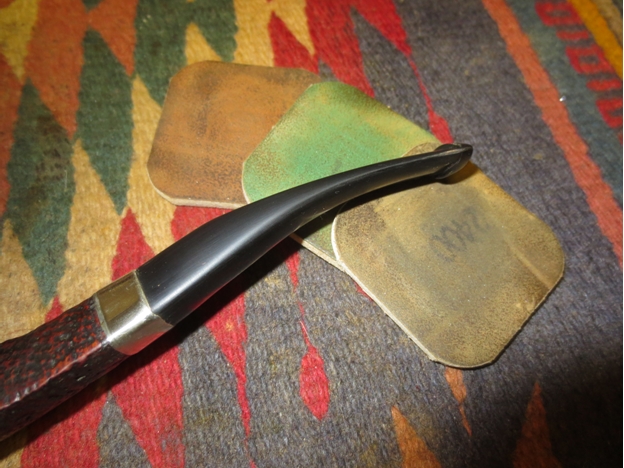
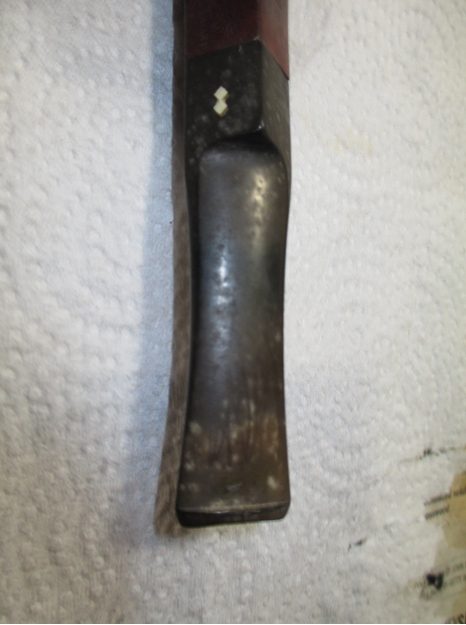
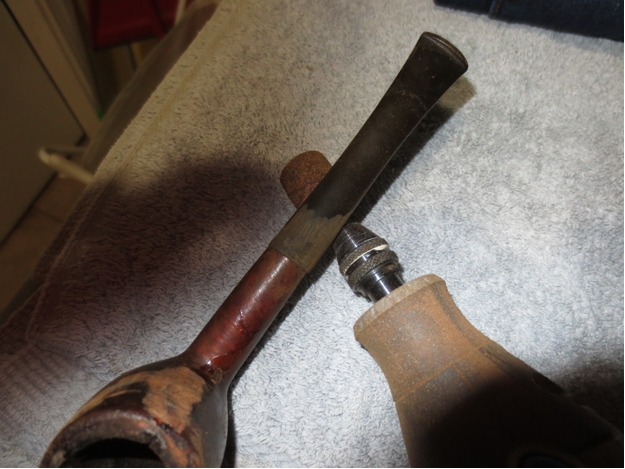
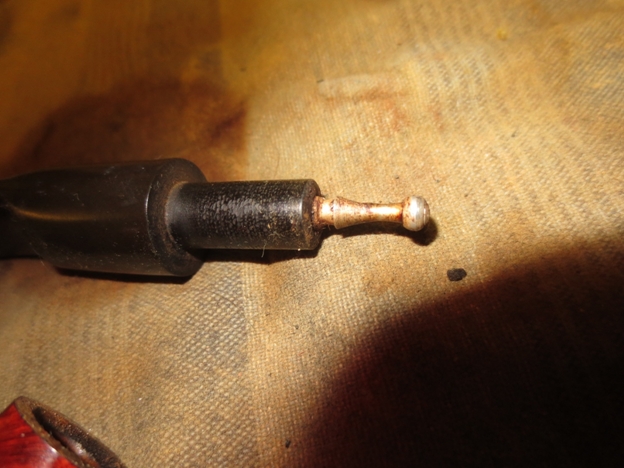
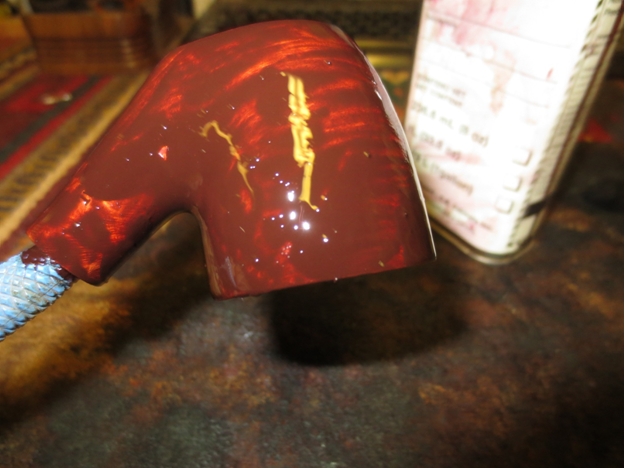
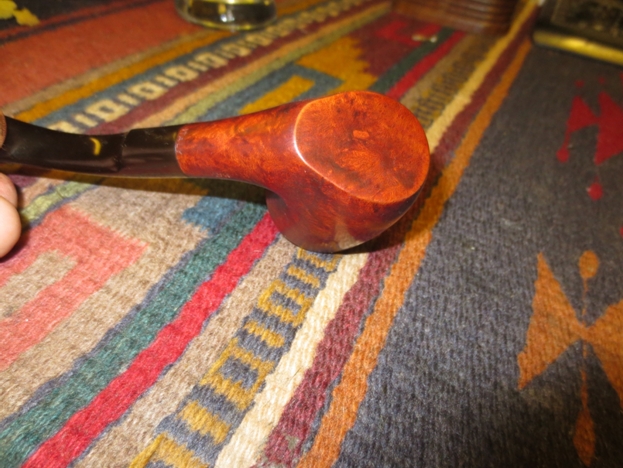
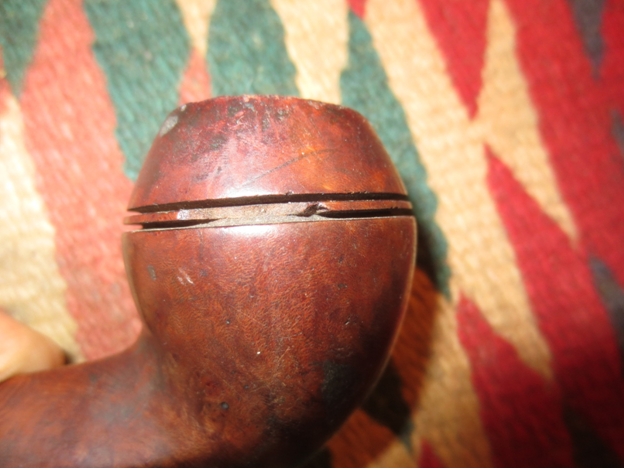
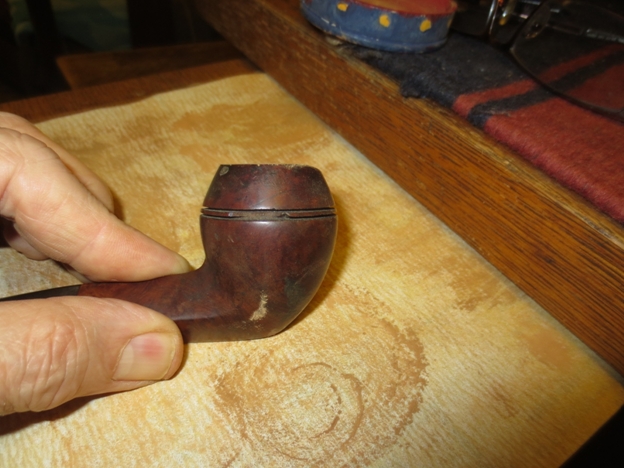
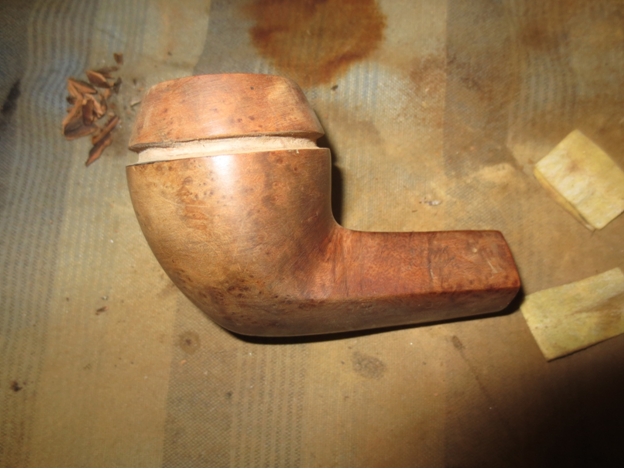
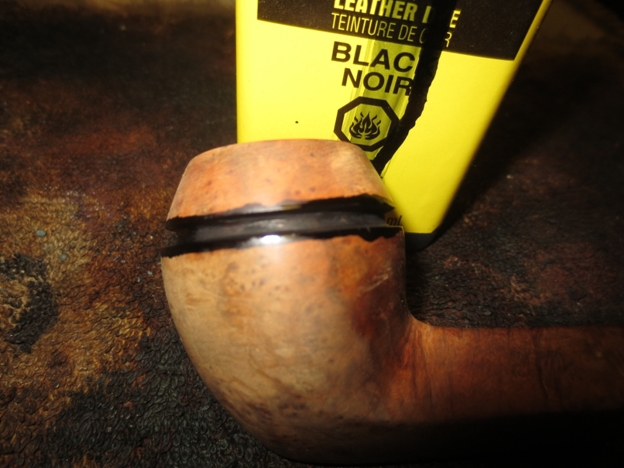
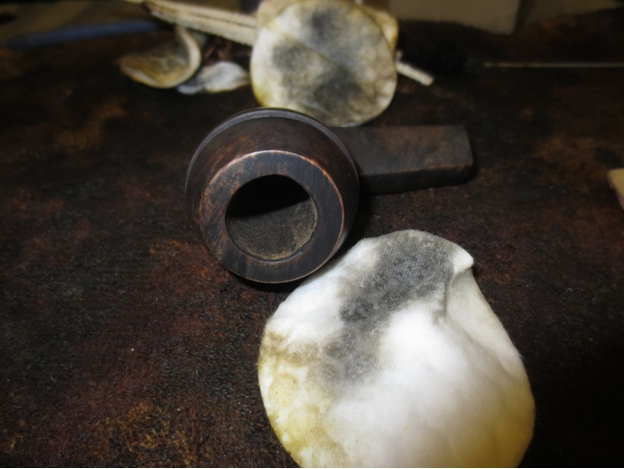
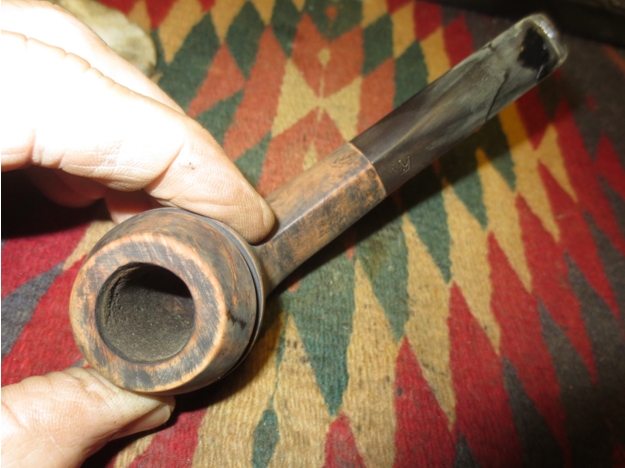
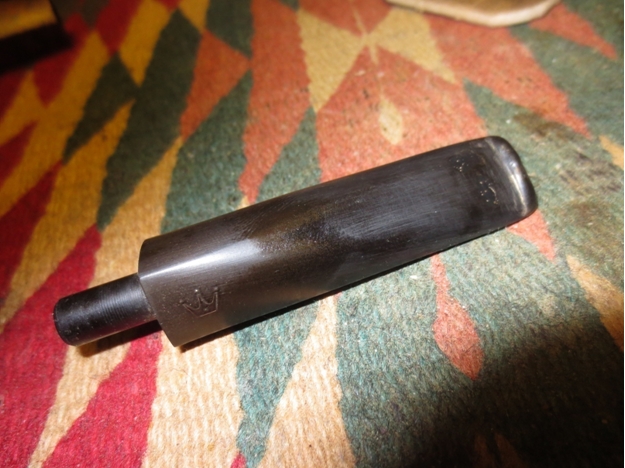
 I removed the stem from the shank and took the following photo. It was a twin bore stem that moved toward a single airway in the thinner portion. It formed a Y. The twin bores were quite large as can be seen in the photo. It made me wonder what I was dealing with.
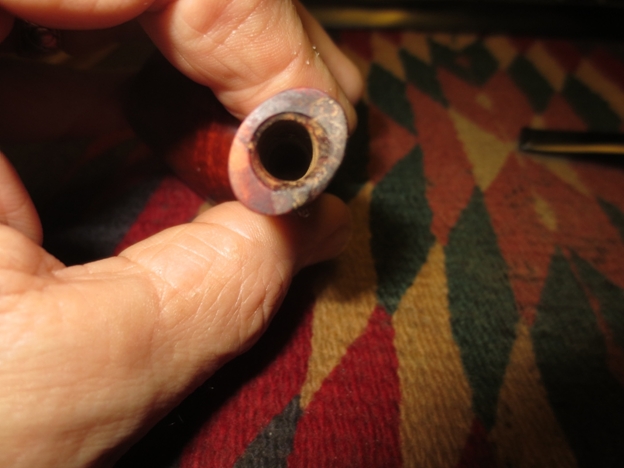
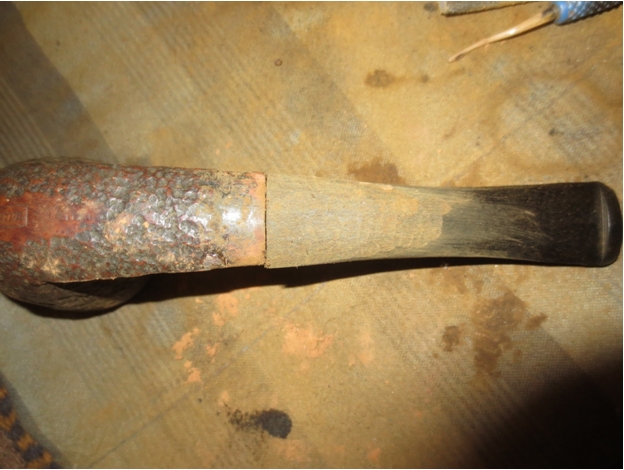
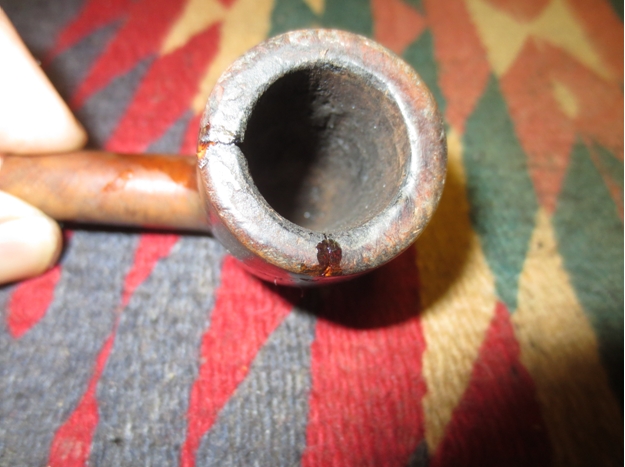
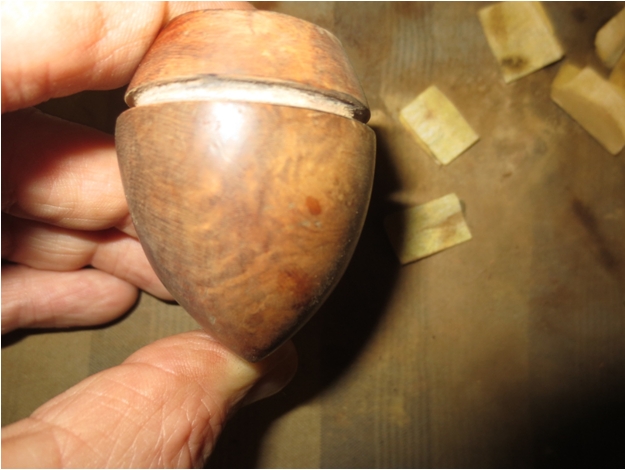
 The metal tube portion of the shank was also removable and only took a little finagling to get it to come free. It was pressed into place and formed a fairly tight seal. Once it was free the end of the briar shank was visible. It had two imposing metal spikes and an airway entering from the bowl in the middle between them.
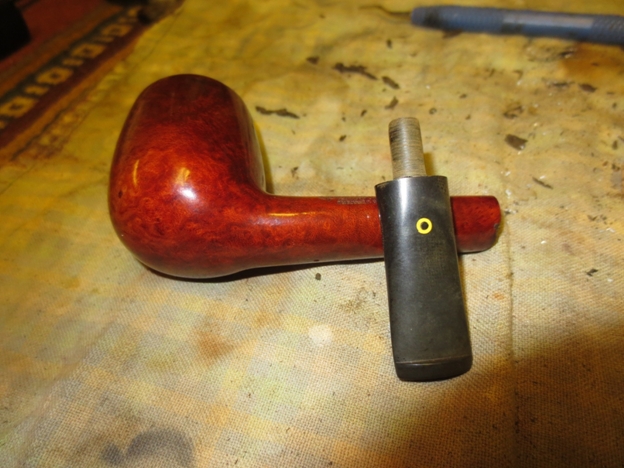
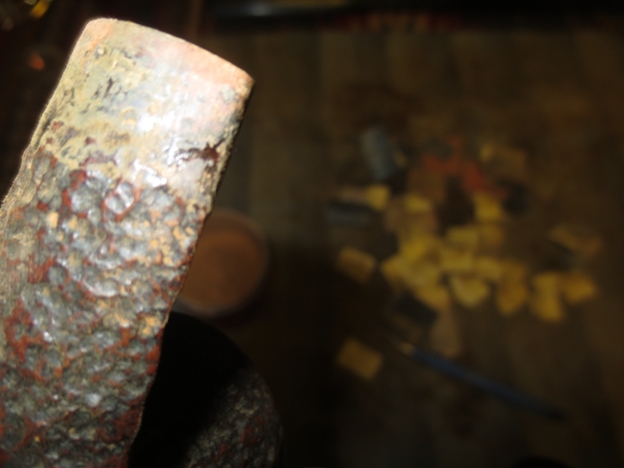

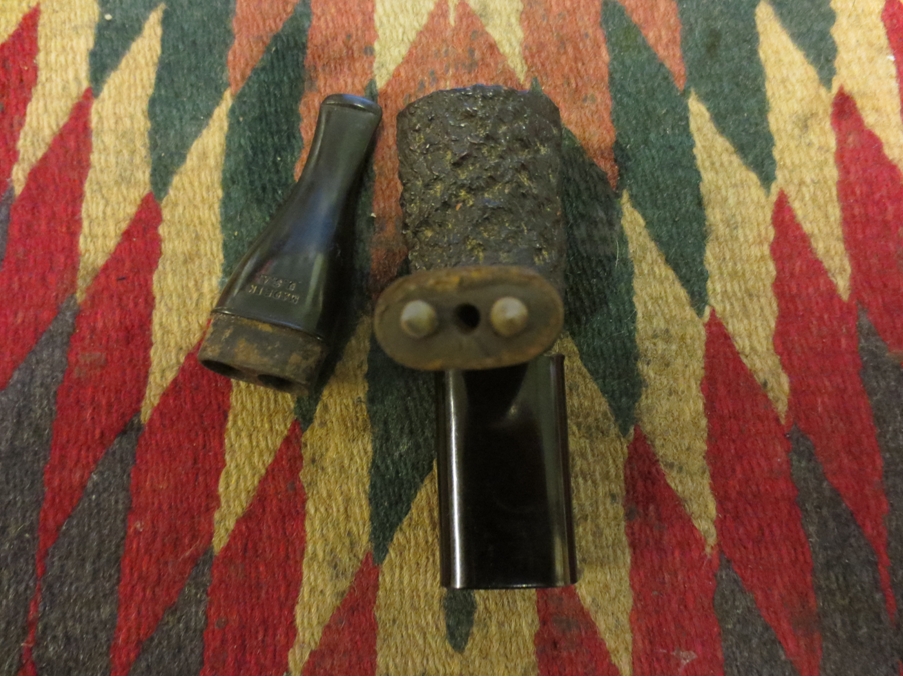
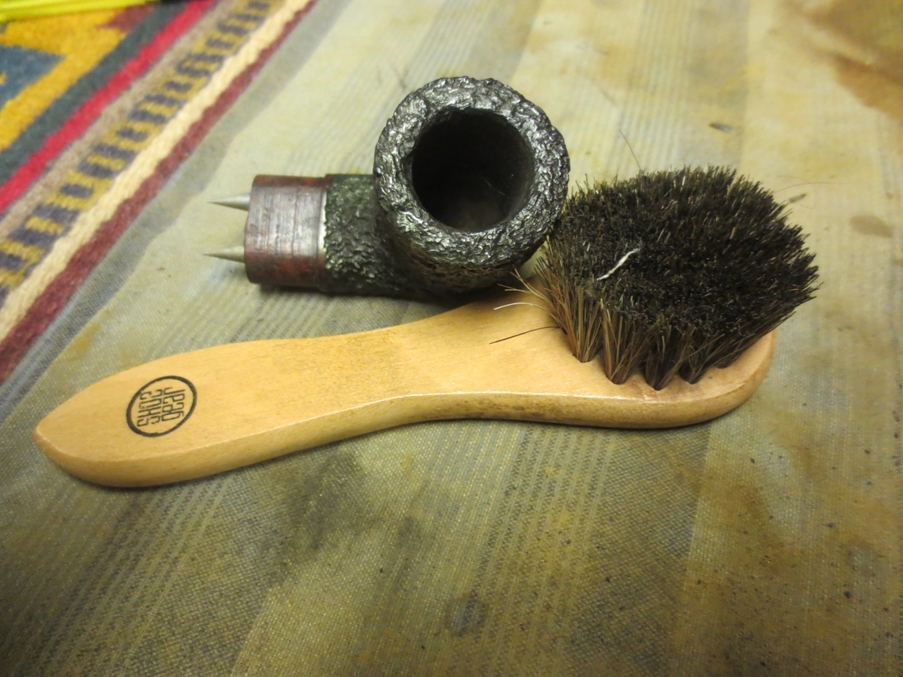
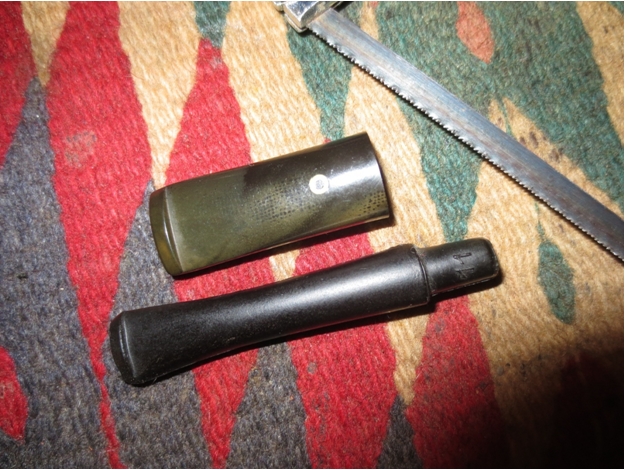
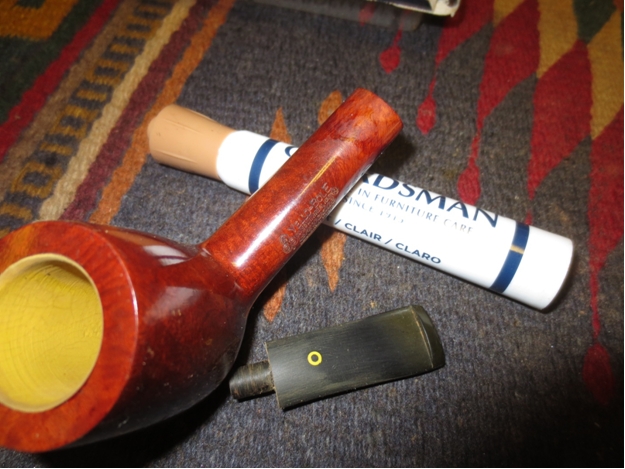
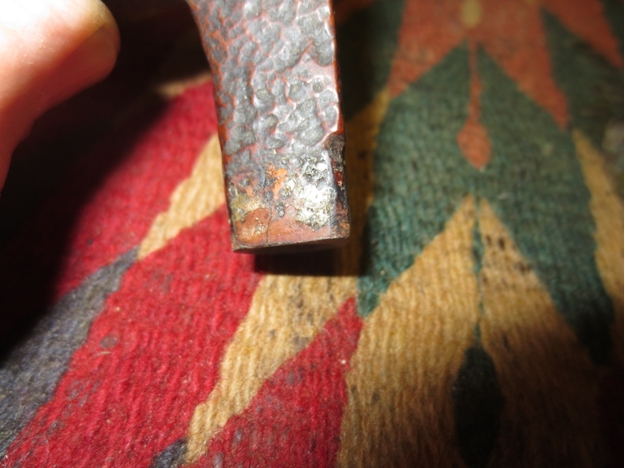
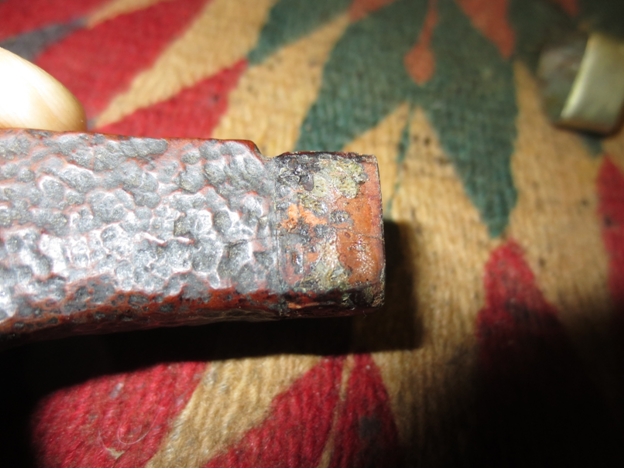
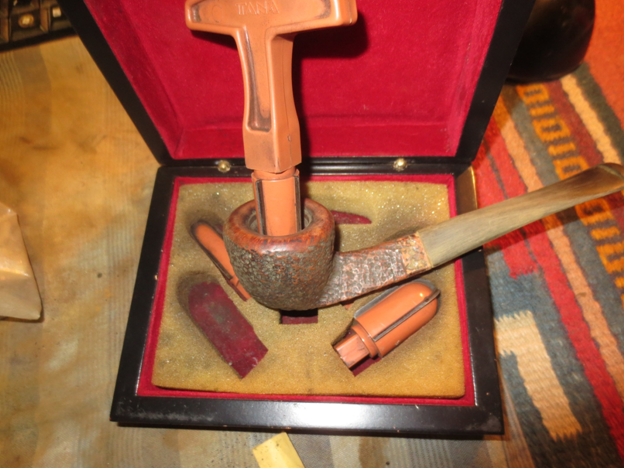
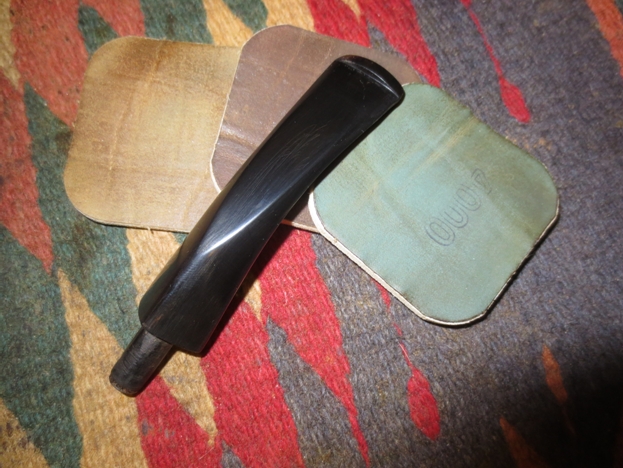
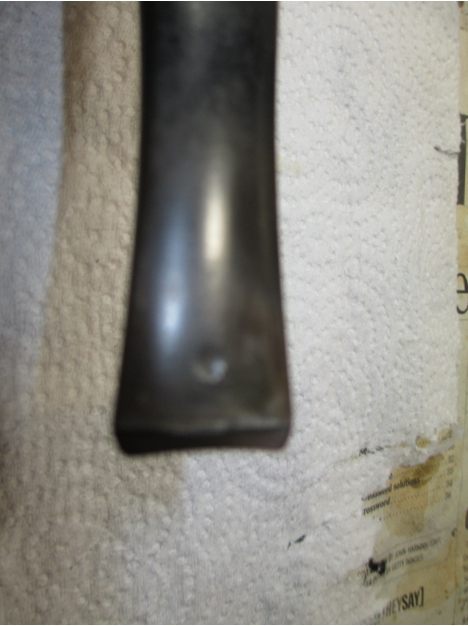
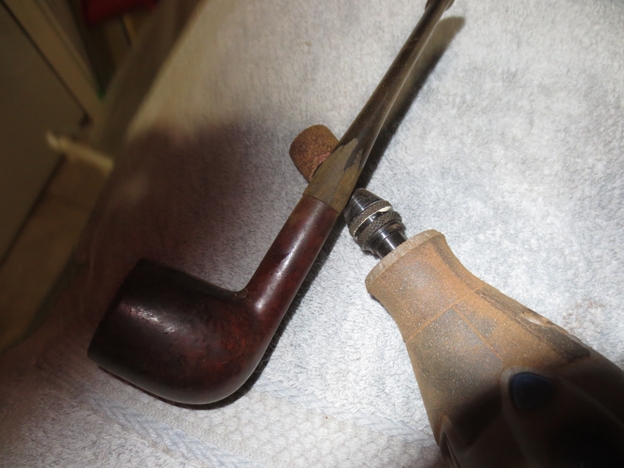
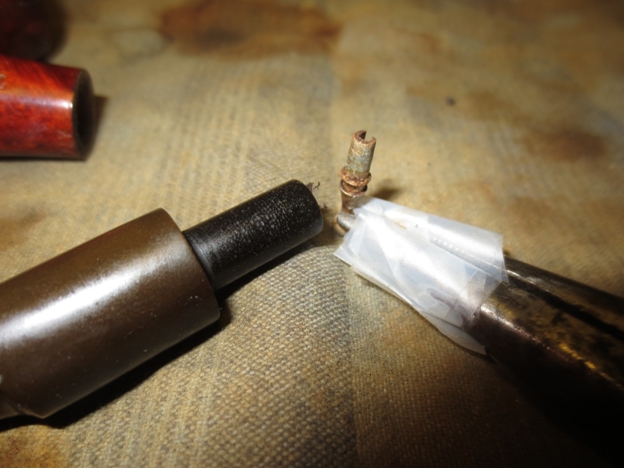
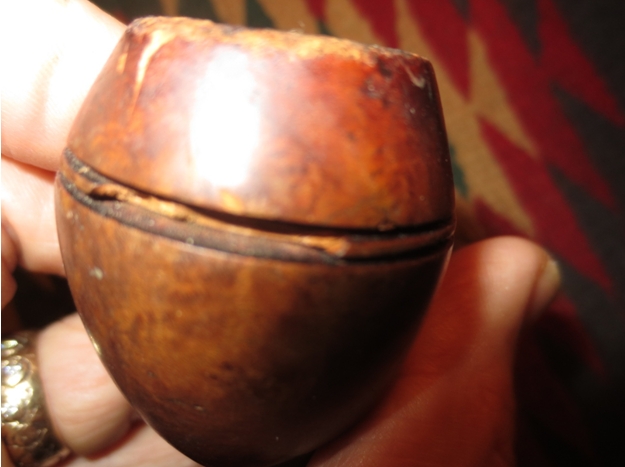
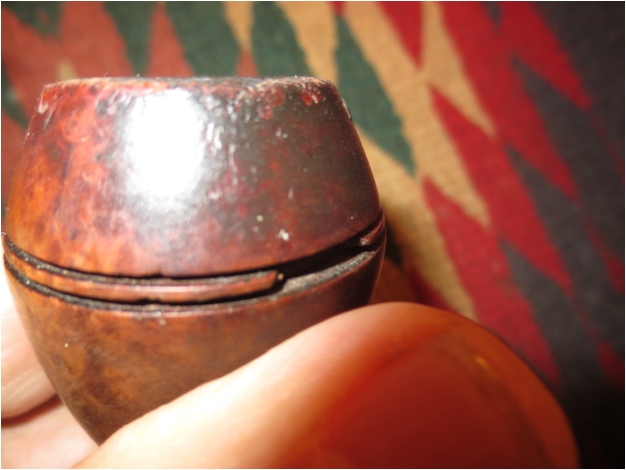
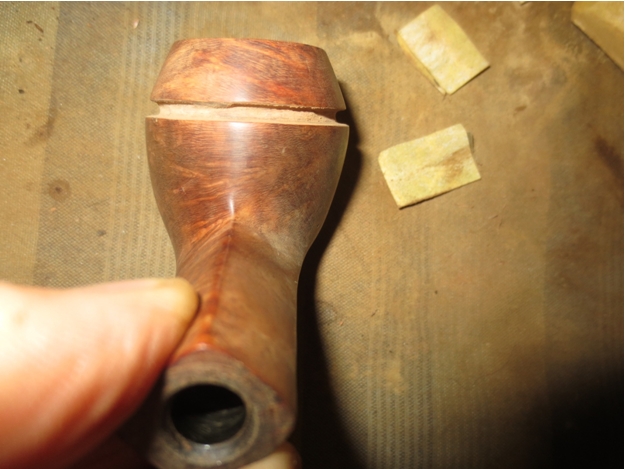
 I took another photo of the three parts standing on end. You can see that the metal tube forms a chamber for the smoke and serves as the mortise area for the twin bore stem. The mystery to me at this point was the purpose of the spikes. It seemed likely to me that some sort of filter system was spiked on the points and extended from them into the twin holes in the stem. They would lie parallel to each other in the metal shank and the smoke would swirl around them in the chamber. I began to wonder if I was missing some key parts of this pipe. Were those parts lost somewhere along the way and what must they have looked like? Those were some of the questions that went through my mind at this point.
 I knew that the patent number on the shank would give me some help with this. I could search the US Patent site and possibly find the drawings and original proposal for the pipe that the inventor submitted for patent. But before I did that I did a quick search on Google for the ZEUS pipe. Of course the PipePhil site came up and there I found the following information. There were two photos of the pipe – one disassembled and one assembled. The stamping was identical to the one I had as was the patent number on both shanks.
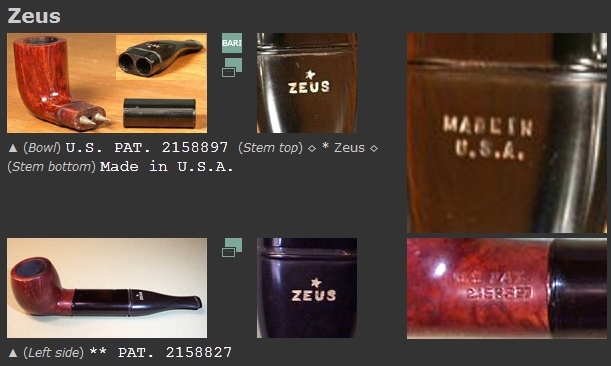 There was also a short line to the right of the photo that gave me the quick answer to what I had assumed about the pipe. The spikes and the chamber as well as the twin bore had a clear purpose and I was not missing any parts. The ZEUS pipe was designed to hold 2 halves of a cigarette to act as filters. The spike held them in place and the twin cigarettes extended into the mouth piece. The smoke would swirl around them and the tars and moisture would be absorbed in the cigarettes.
There was also a link to MODERN MECHANIX Magazine dated November, 1939 that was an advertisement for the pipe and gave a simple diagram of the interior of the pipe with the cigarettes in place. The advertisement text is interesting in spelling out the pipe designer’s intention for the design of the pipe. It claims that 80% of the nicotine is removed by this new pipe design. The ad says that smoke drawn from the pipe passes through the two cigarettes which act as filters to absorb the nicotine.
I love finding these old inventive pipes that were designed to deliver what at the time was a smoother, cooler, healthier smoke. This was one of the most unique designs that I have seen.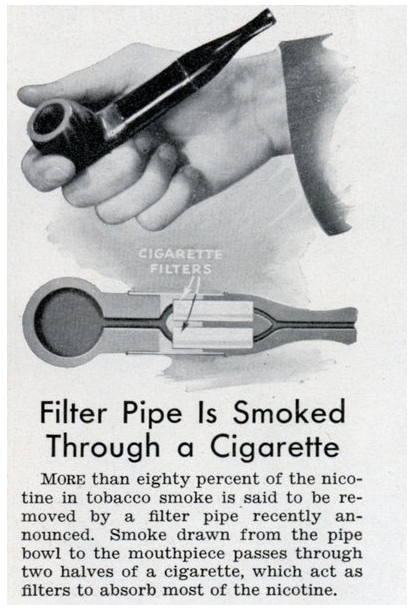 From there I turned to the patent number on the side of the shank. I went to the US Patent website and did a numerical search for the patent number. Here is the link to the number search portion of the patent website: http://patft.uspto.gov/netahtml/PTO/srchnum.htm
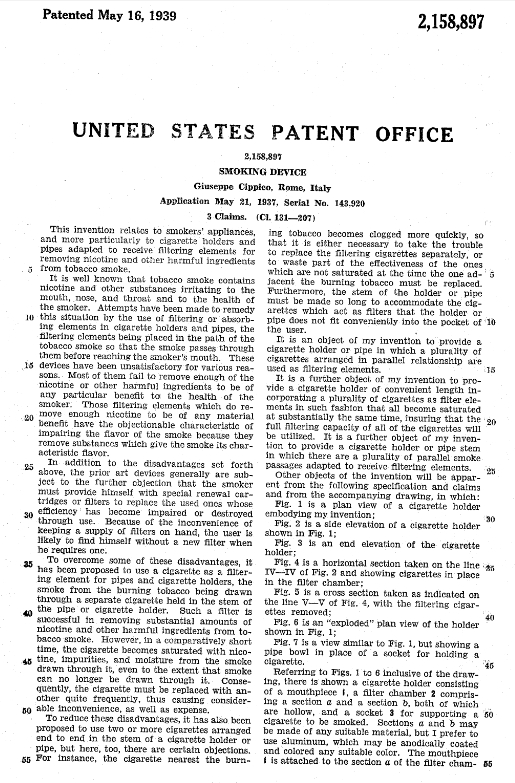
  I entered the patent number 2,158,897 and was immediately given a three page scan of the documents on the site for that number. I have included all three pages below. The first page is a series of conceptual drawings of the device. The second and third pages are the details linked to the Figure numbers in the drawings. It was filed May 21, 1937 by a G. Cippico in the category of Smoking Device. G. Cippico is later shown to be Giuseppe Cippico, Inventor from Rome, Italy. The patent was granted on May 16, 1939 almost two years later. These old Patent details are always an interesting read to me. The theory of how the pipe would work is spelled out and the rationale for it being a new and better pipe is detailed.
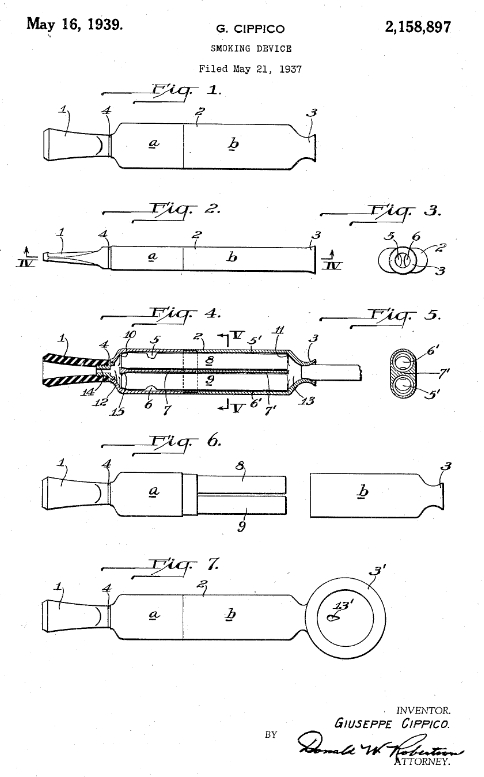
 I put this information on two of the pipe forums that I frequent to see if I could garner any further information. I was particularly looking for the US manufacturer of the pipe. On Smokers Forum I received a response from Chris Chopin (flatticus). He included another advertisement from Life Magazine that he found.
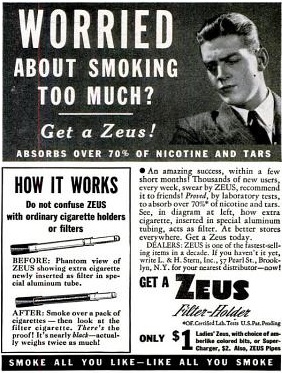 The advertisement is for a ZEUS Cigarrete holder that claims to absorb over 70% of the nicotine and tars. It also says in small print at the bottom of the ad under the $1 Ladies Zeus with choice of amberlike colored bits that there are also ZEUS pipes. The ad says that ZEUS is made by L. & H. Stern, Inc., 57 Pearl Street, Brooklyn, N.Y. With that it appears that the pipes were made in the US by LH Stern Inc.
Chris also writes; “There are ads from Stern for the Zeus filter in 1938 in Life Magazine (several times that year), Collier’s Illustrated Weekly, and Time. They start in March and April of 1938 with the filter noted as “A New Way to Smoke”. Then nothing for 8 full years. Not a single ad or mention of any kind I can find past December of 1938 except for a mention in the Rocky Mountain Medical Journal that may not be an ad.”
“Then, in 1946, ads show up in Popular Science, Popular Mechanics, The Rotarian, Newsweek, all over the place, advertising that the Zeus Filter Holder is back, now in aluminum. All but one of the 1938 ads say “Also Zeus Pipes” and not a single one of the 1946 ads does.”
“It’s an assumption, of course, but this makes me think that for some reason the Zeus pipes had a very short life, and you may have one of very few they made.”
Thanks for the advertisement and information Chris. Your post gave me some needed information on the brand and confirmed what I had already found from my own digging. It appears I found a bit of a rarity in this old pipe.
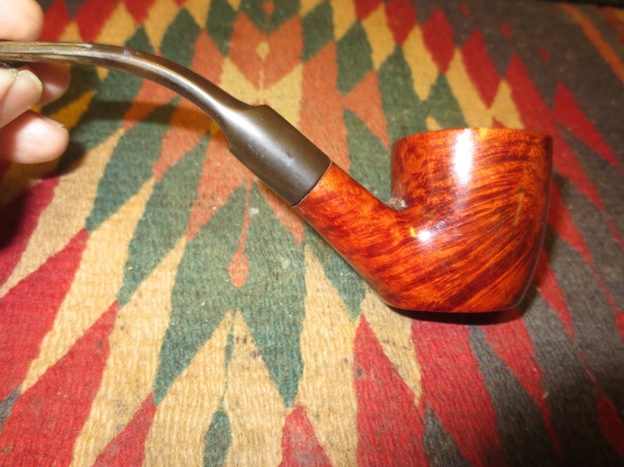
Armed with these details and a bit of historical background it was time to clean up the pipe and bring it back to pristine condition.
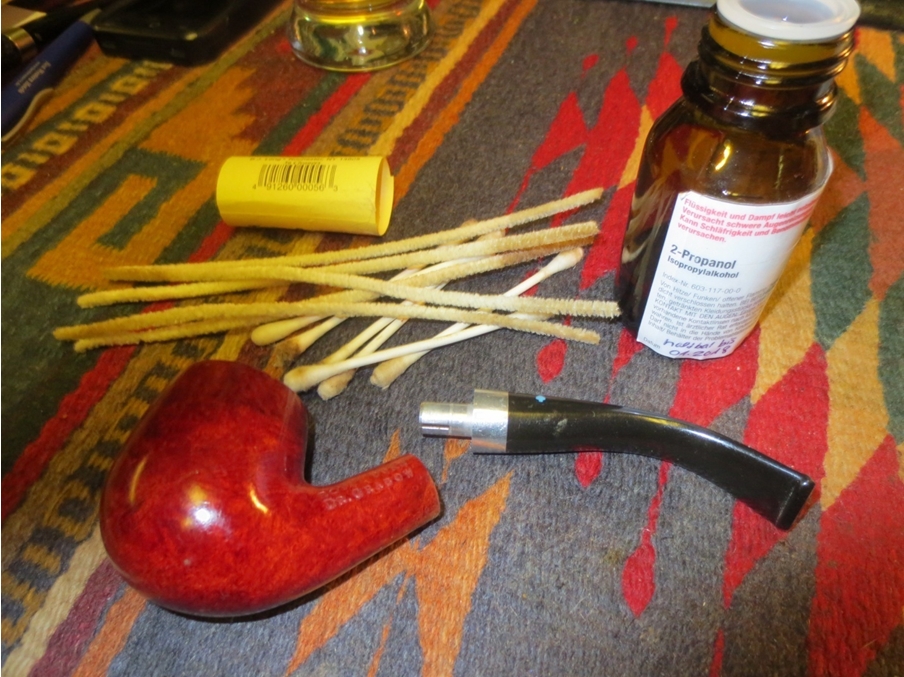
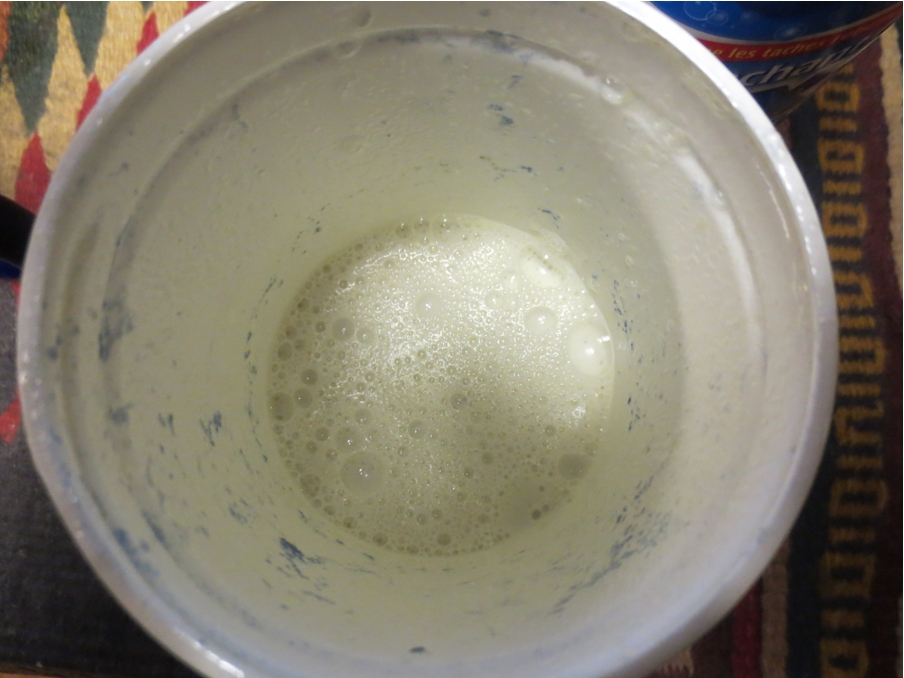
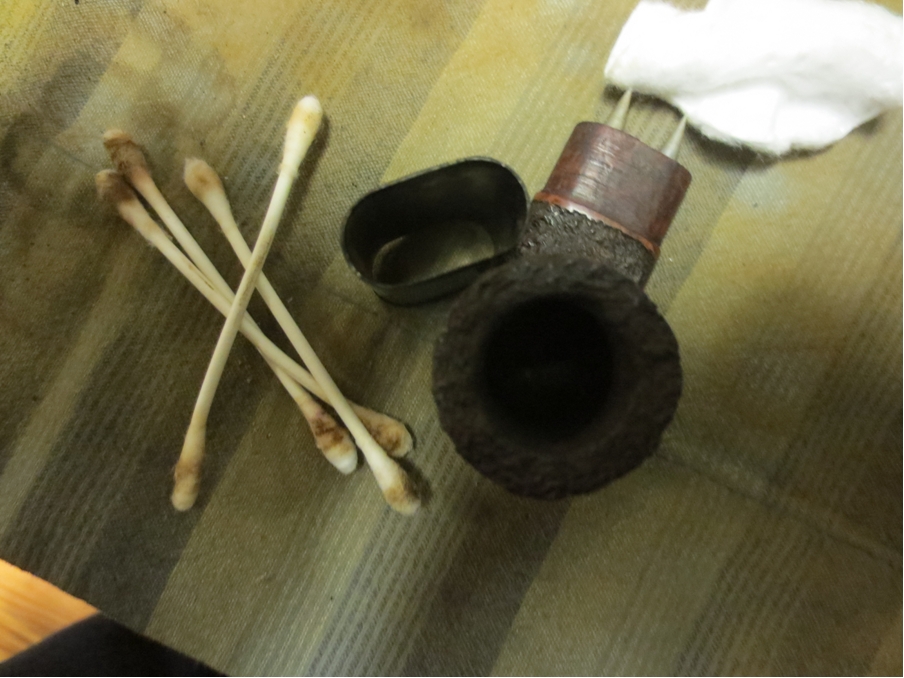
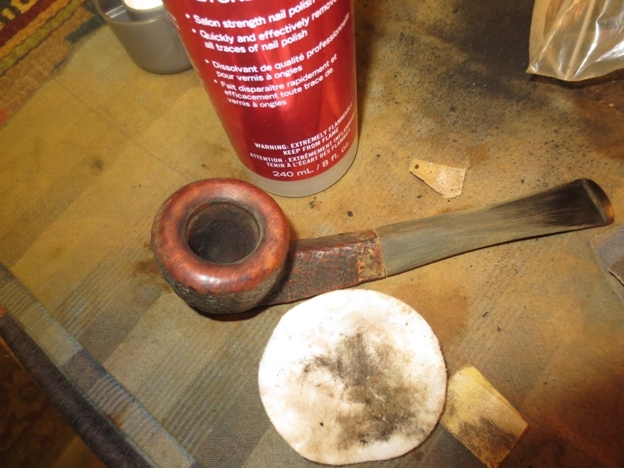
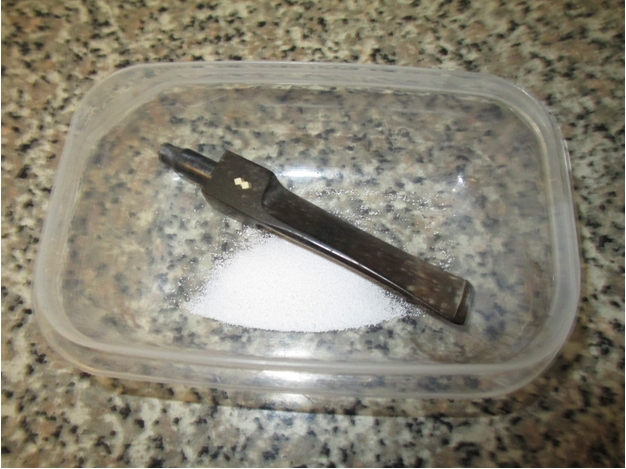
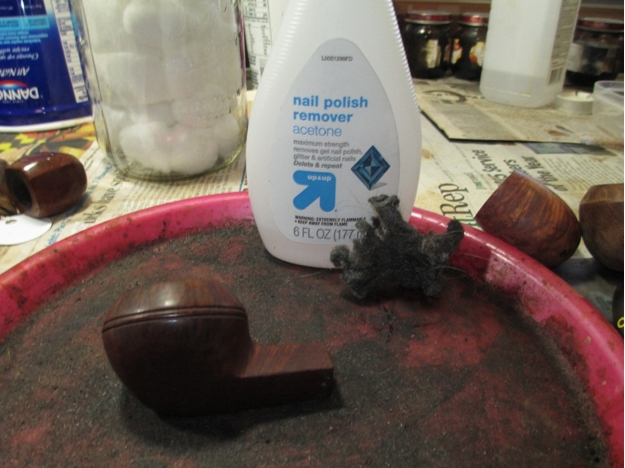
I took the pipe apart and put the bowl into an alcohol bath to soak and soften the cake before I ream and clean it. I put the stem and barrel in an Oxyclean bath to soak and raise the oxidation and start the sanitizing process.
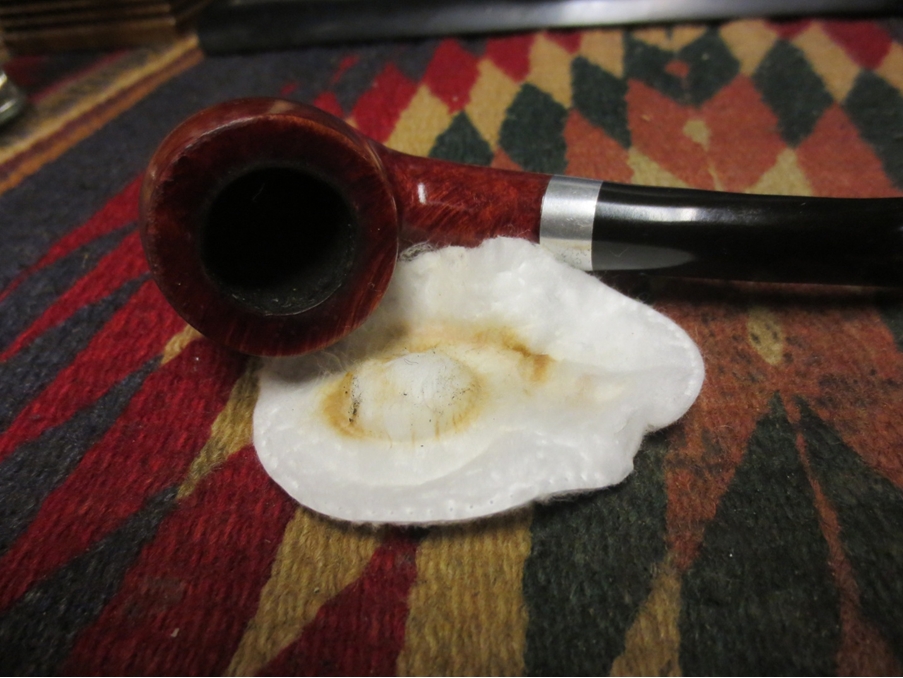
 When I took the stummel out of the alcohol bath after it has soaked for three hours I scrubbed it with a soft bristle brass tire brush to clean out the debris from the rustication. I scrubbed the top of the rim to remove the tarry buildup from that surface. I wiped the surface down with isopropyl alcohol on a cotton pad to remove the dust on the finish.
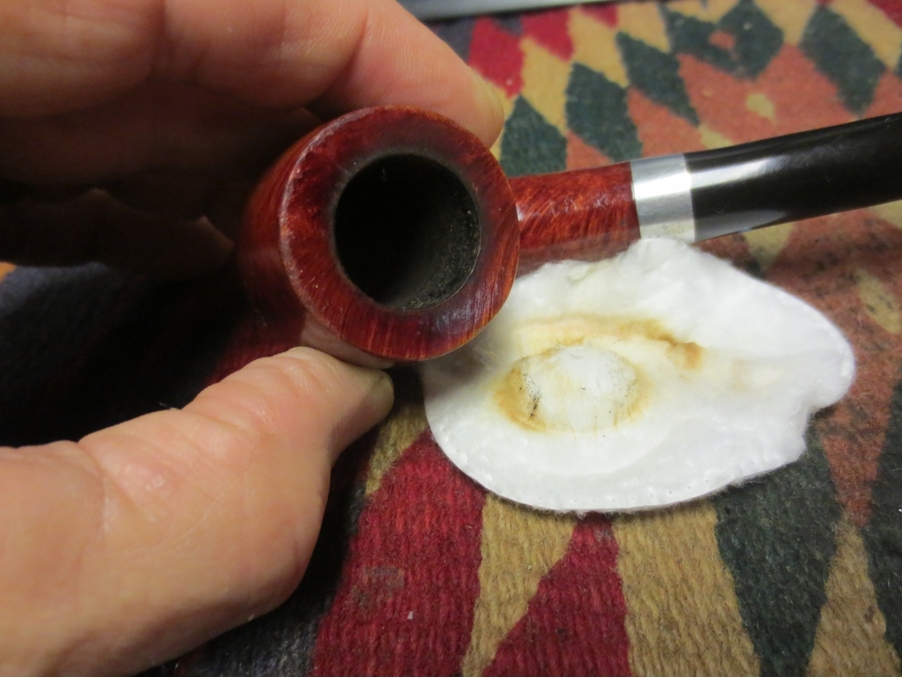
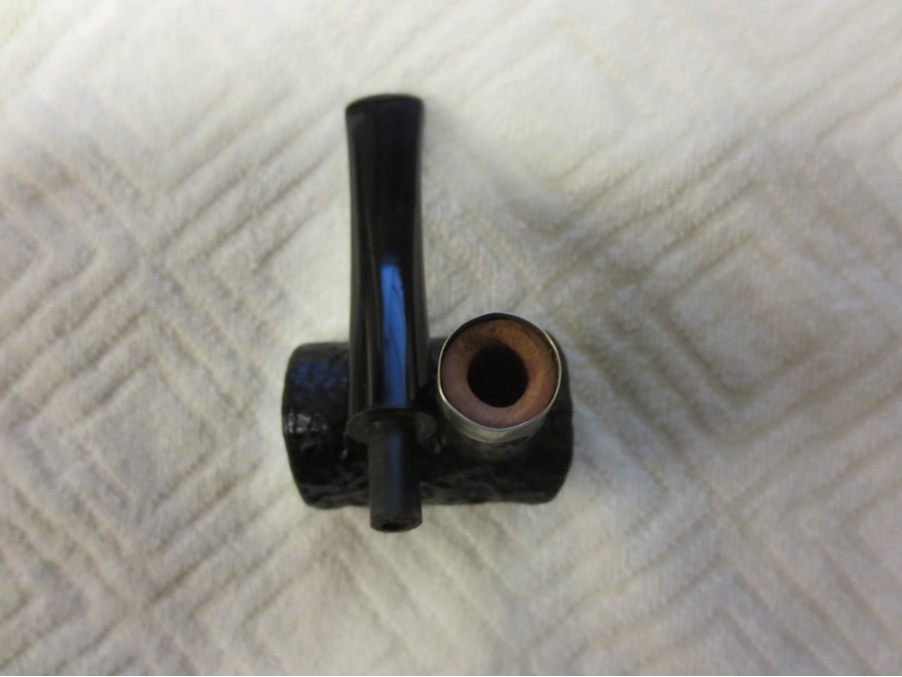
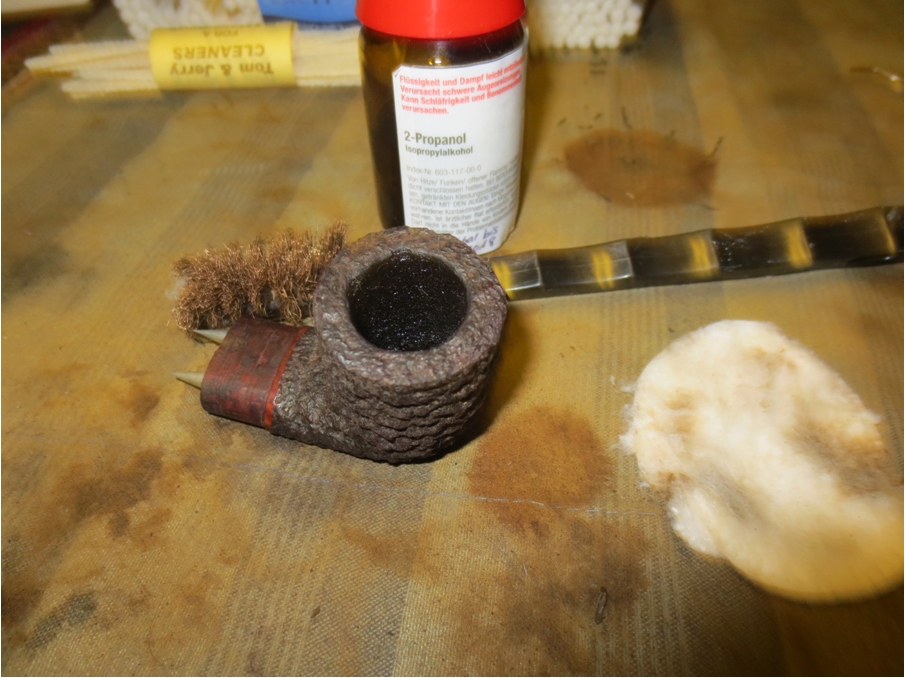
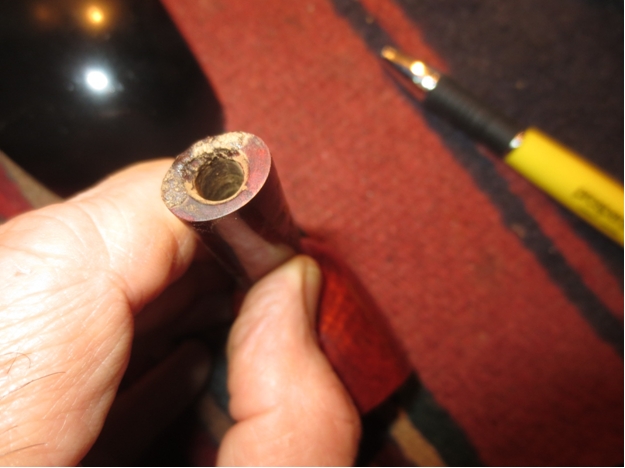
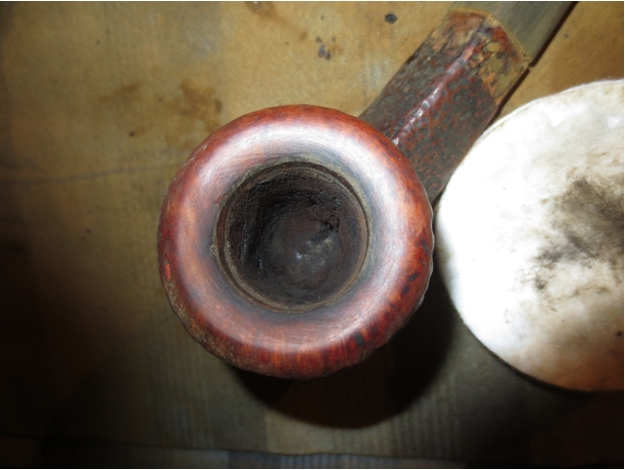
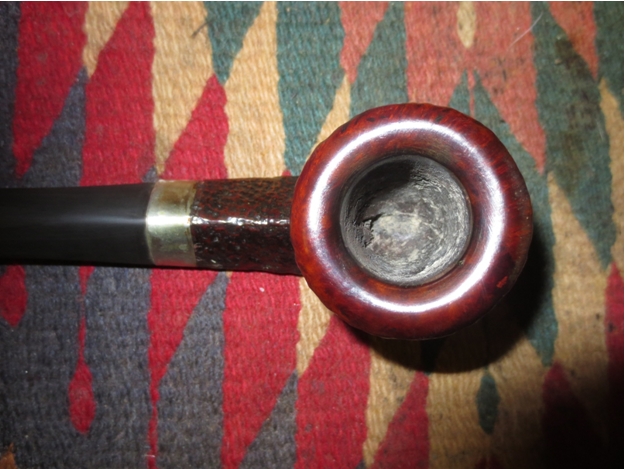
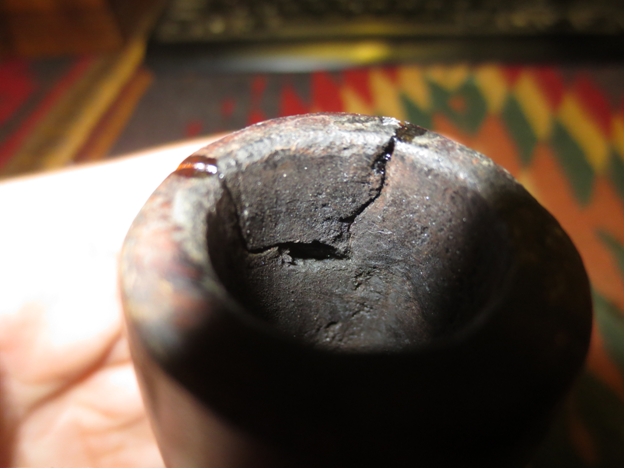
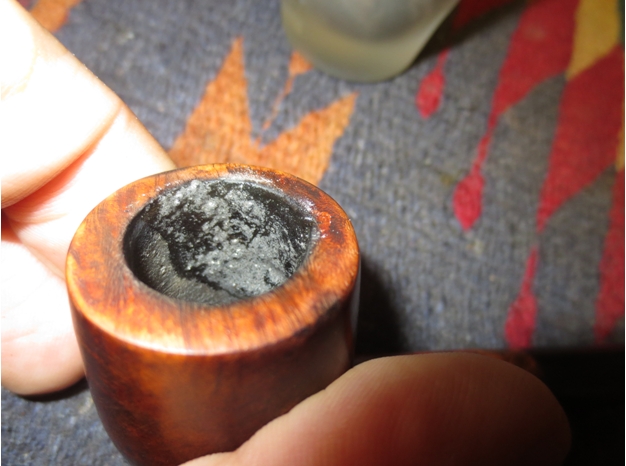
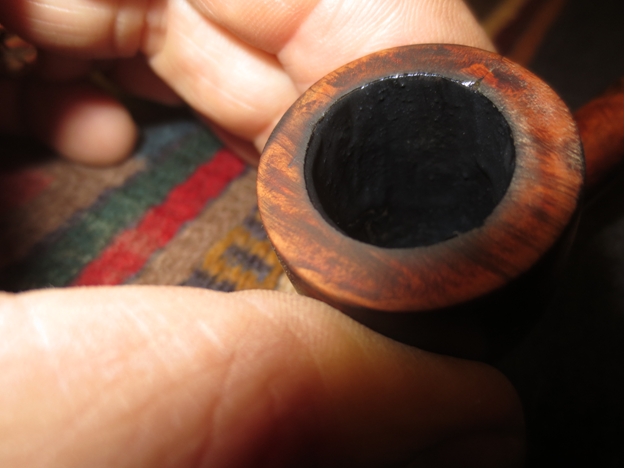
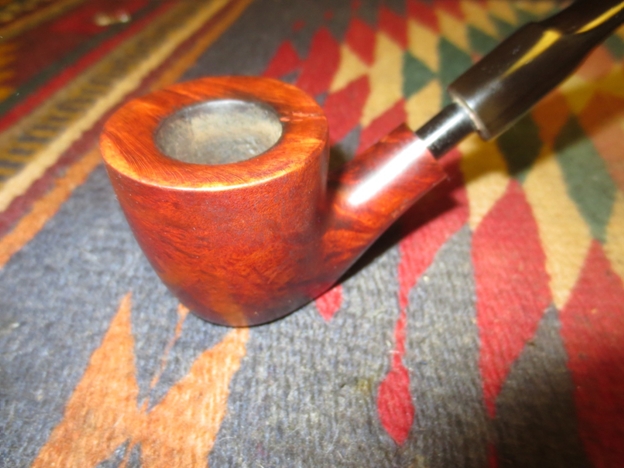
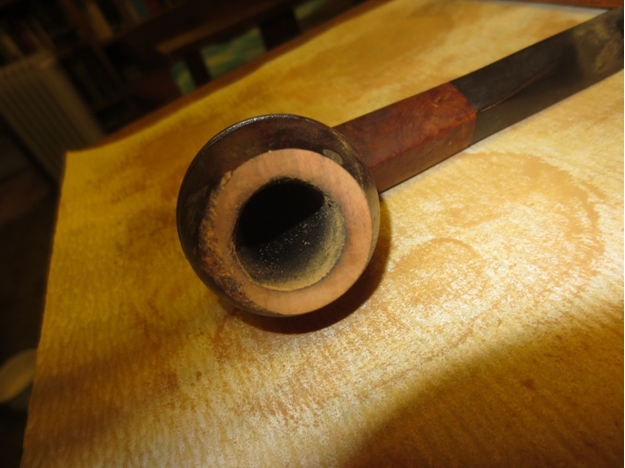
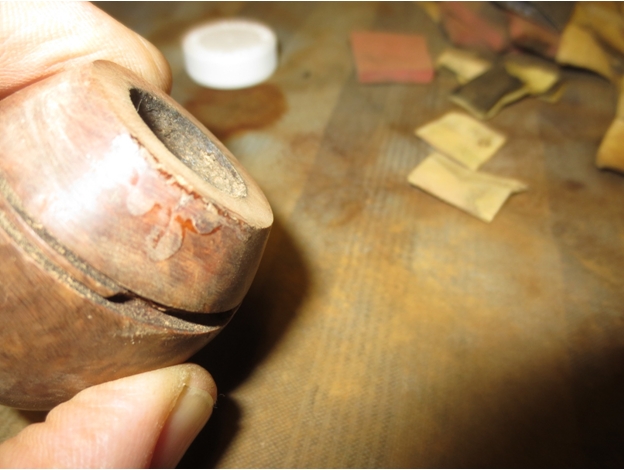
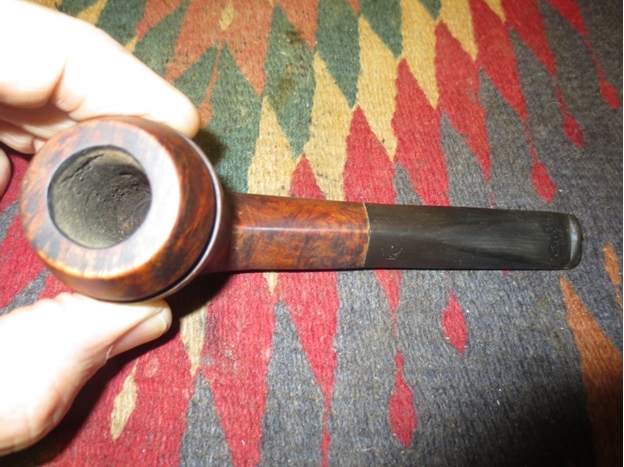
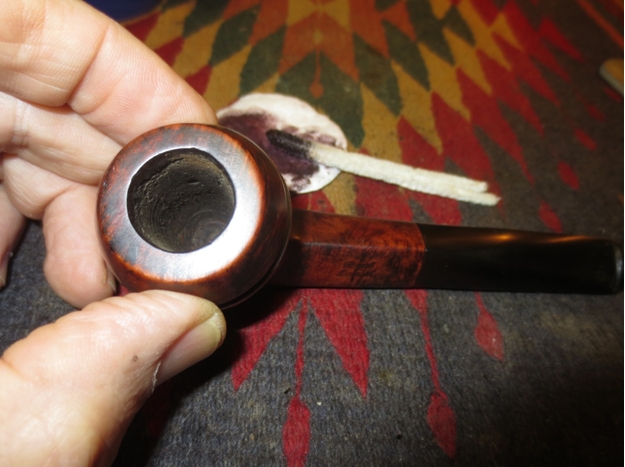
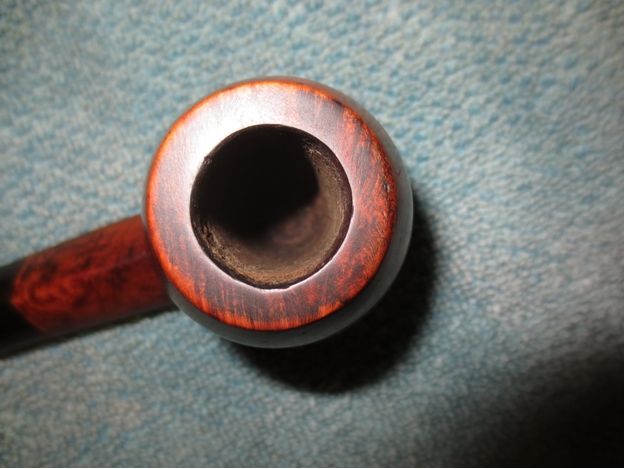
 I reamed the bowl with a PipNet Reamer using the smallest cutting head. It was still slightly too big to get to the bottom of the bowl. I used a small sharp pen knife to work on the cake on the bowl bottom and sides.
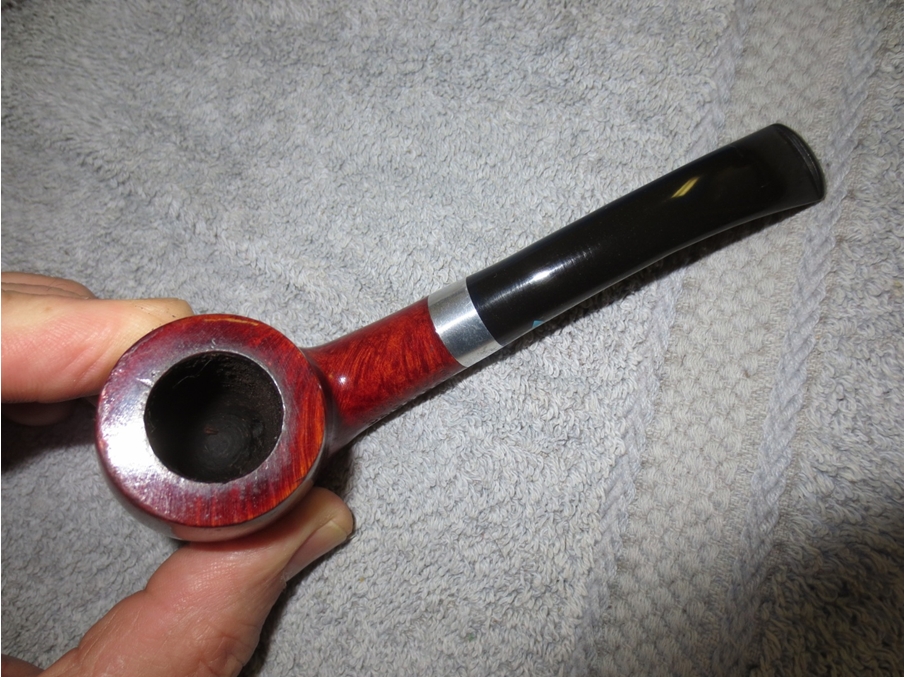
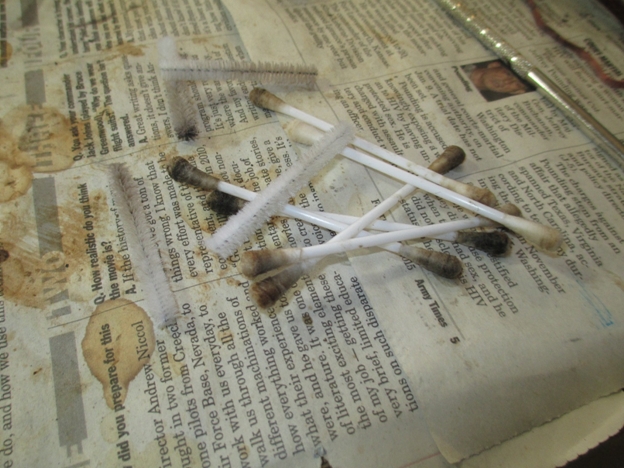
 I wiped out the bowl with isopropyl alcohol on cotton swabs to remove the carbon that the knife and reamer let behind. The reamed bowl is shown in the photo below.
 I used the cotton swabs and alcohol to clean out the airway in the shank and to clean up the two points of metal on each side. I scrubbed down the briar surface that the metal tube slid over. I also scrubbed the metal tube out on the inside with alcohol. I used the sharp pen knife to scrape the inside of the tube and then rinsed it with alcohol.
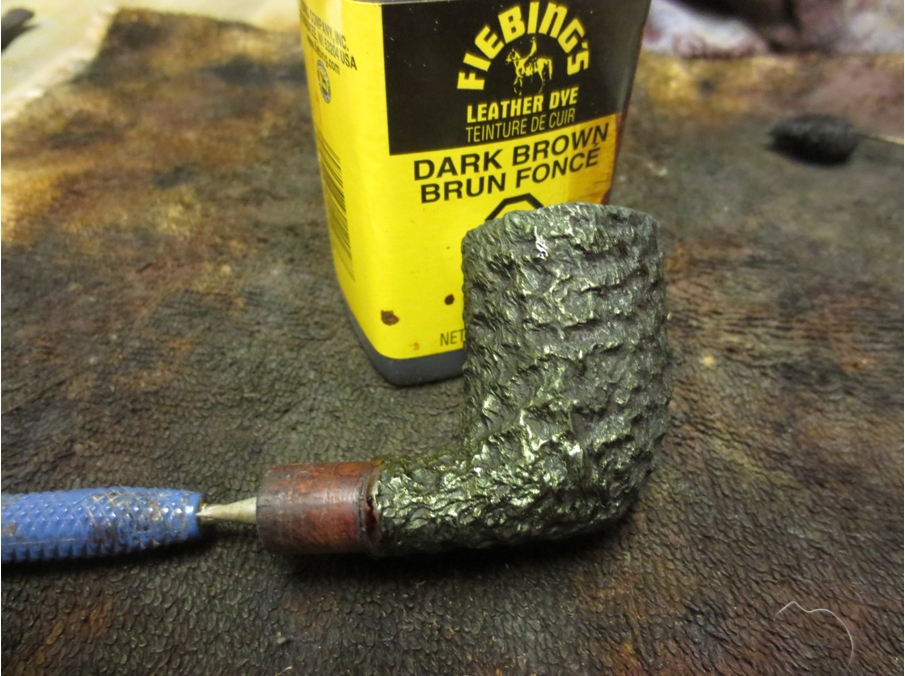
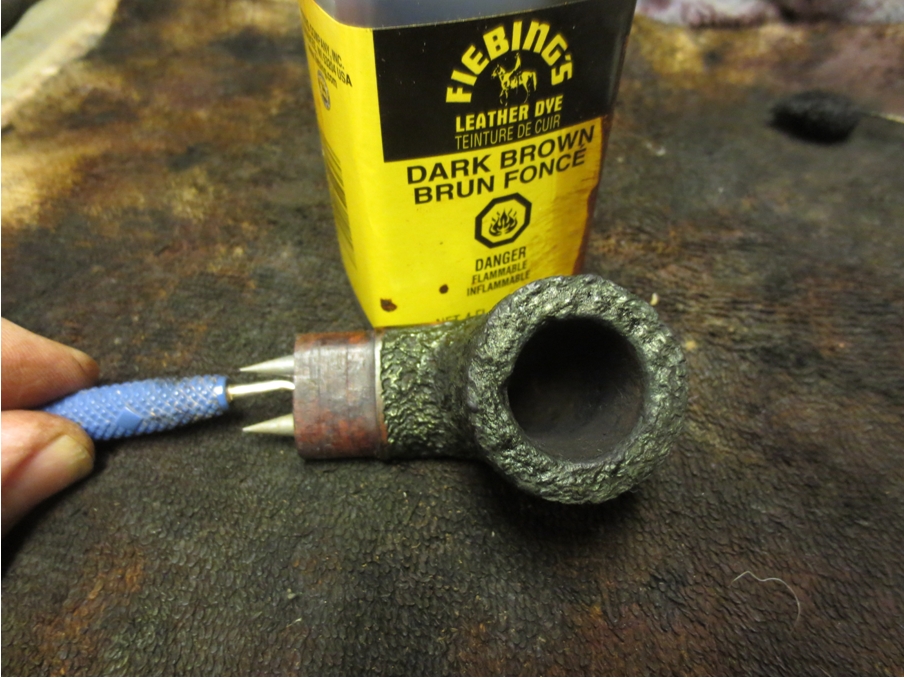
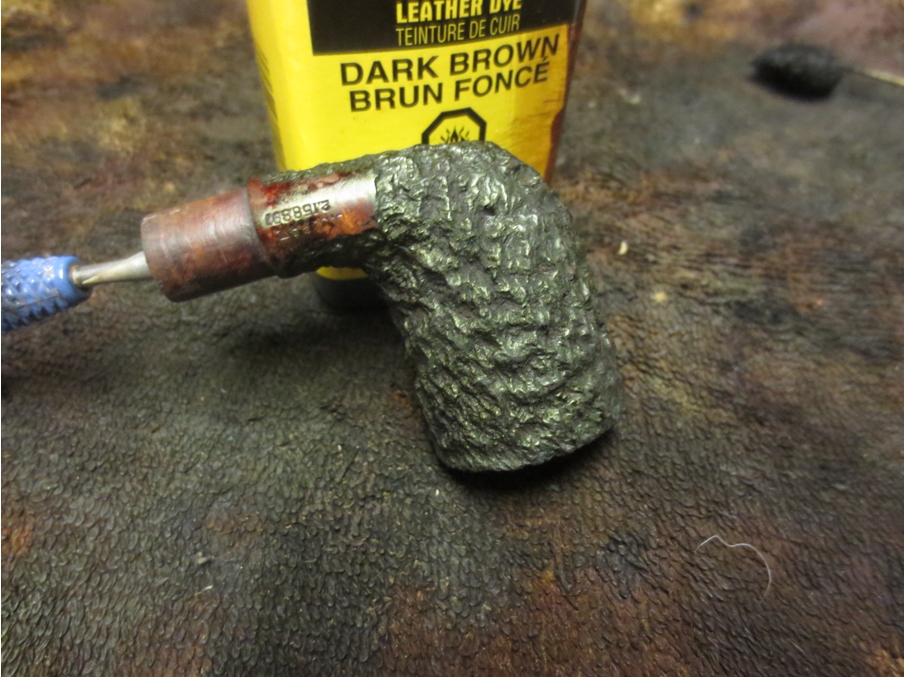
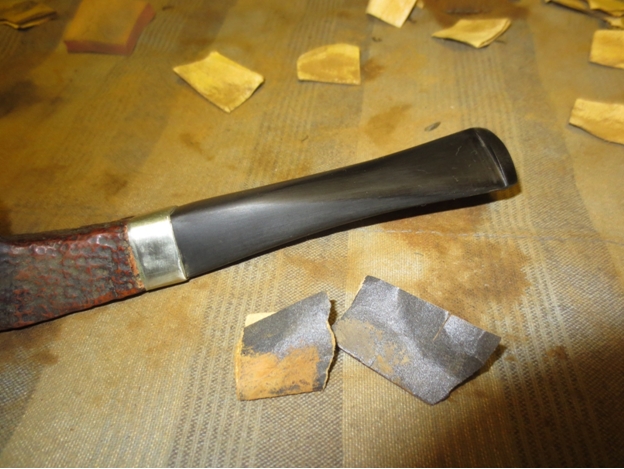
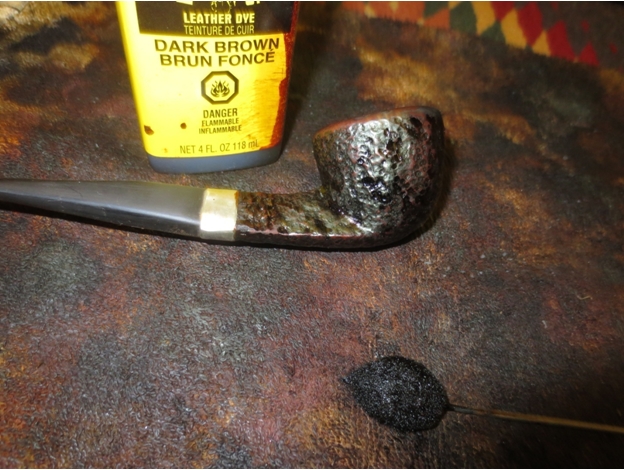
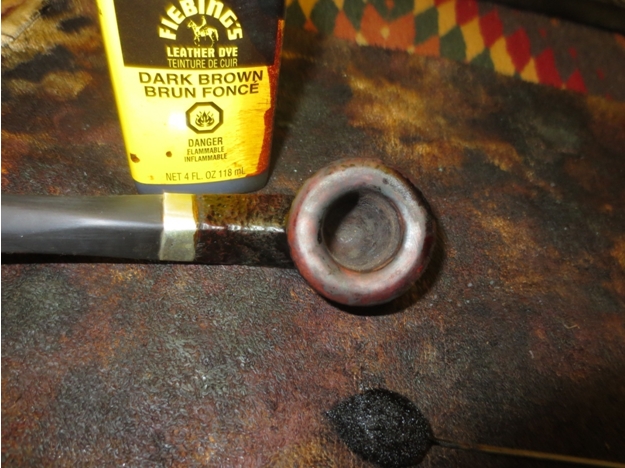
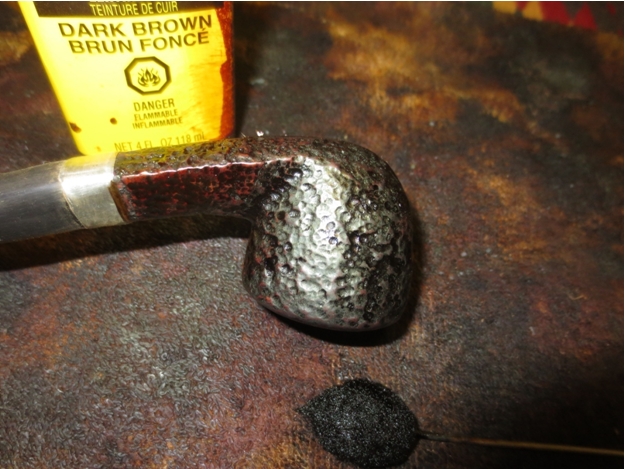
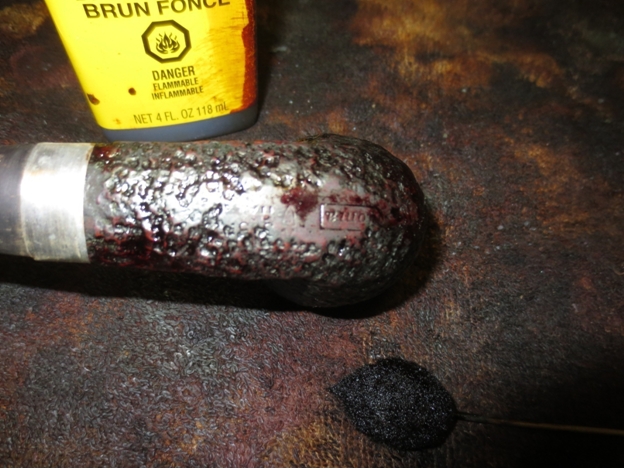
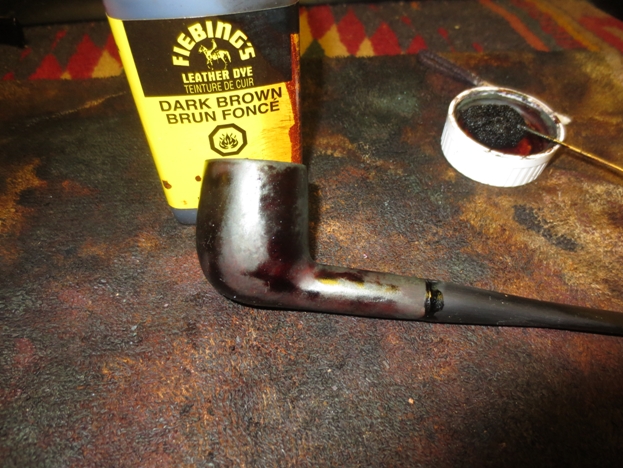
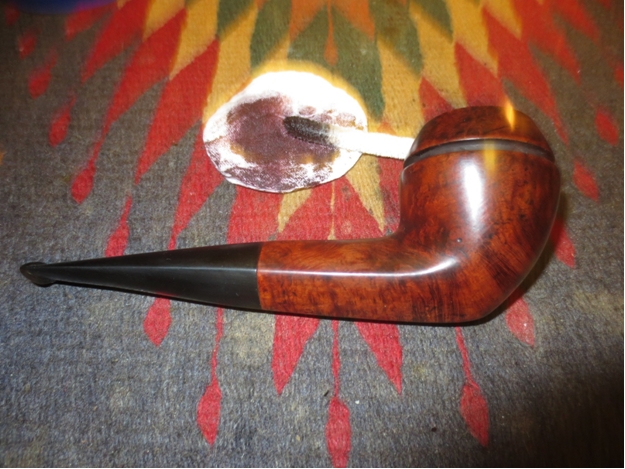
 I inserted the dental pick in the airway to use as a handle and restained the stummel with a dark brown aniline stain. I flamed it and repeated the process until the coverage was even.

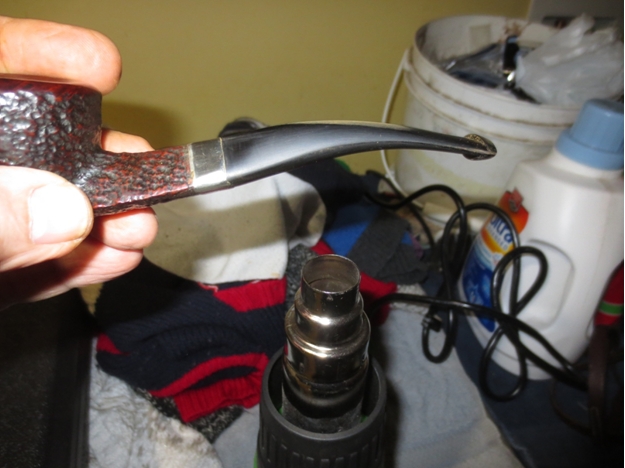
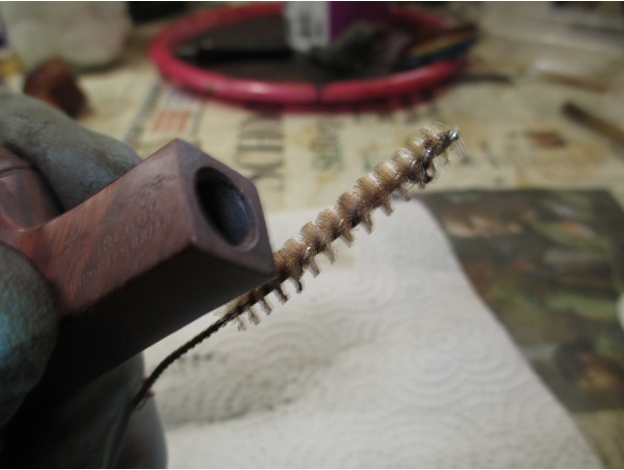
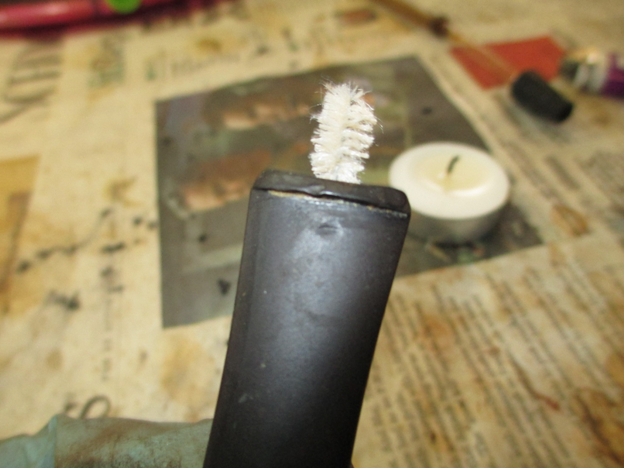
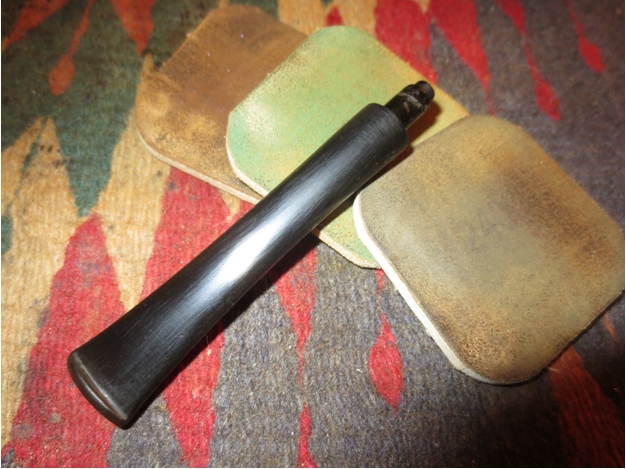
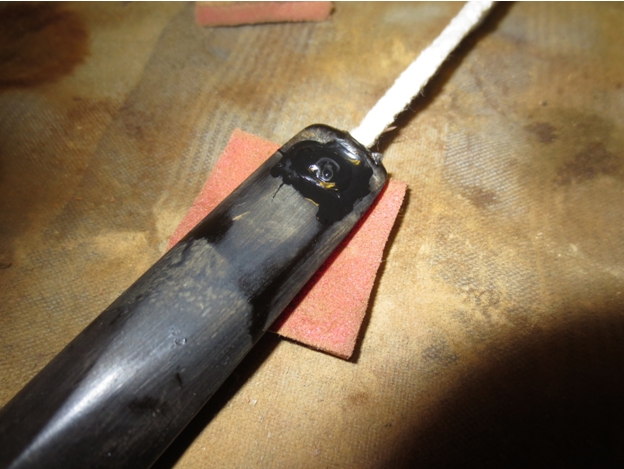
 I set the bowl aside to dry and worked on the stem. I had dried it off when I removed it and the tube from the Oxyclean bath but still needed to do some work to clean out the airways. I used pipe cleaners, cotton swabs and isopropyl alcohol to clean out the stem airways.
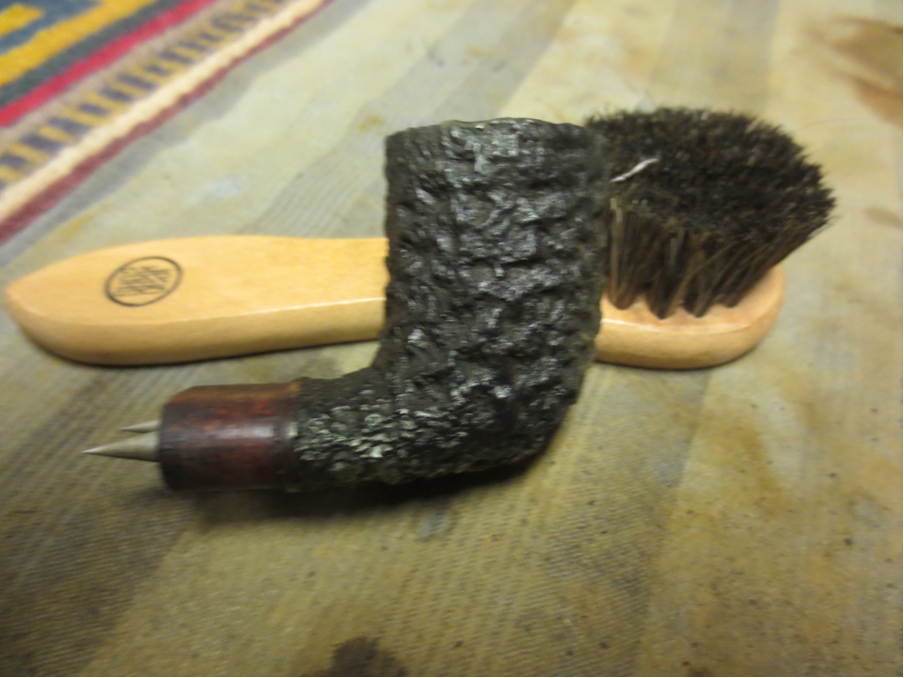
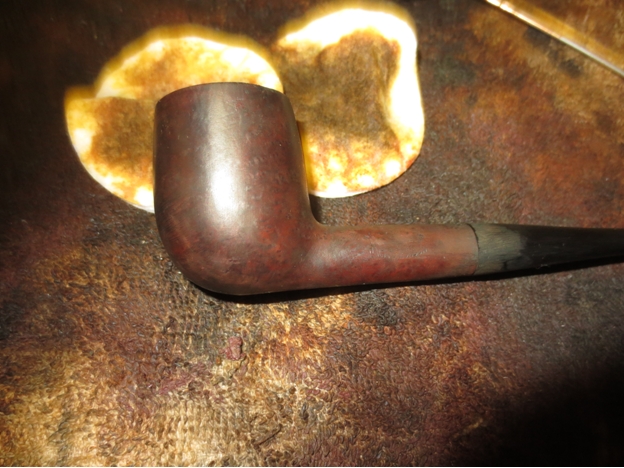
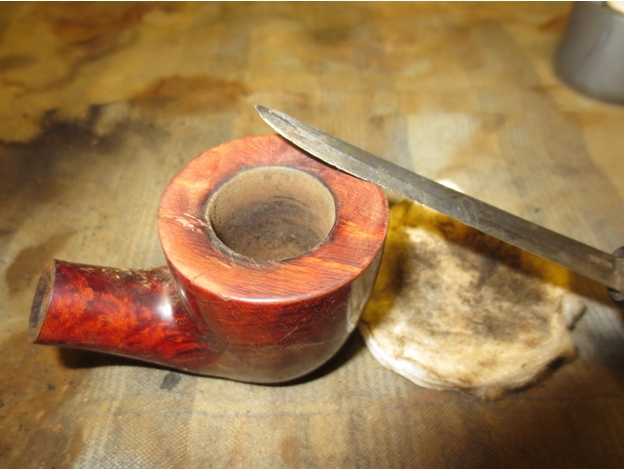
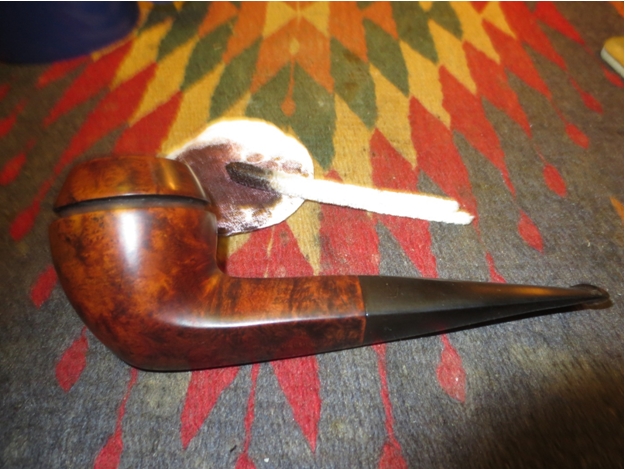
 I hand buffed the bowl with a shoe brush to smooth out the stain and to raise a shine on the briar.


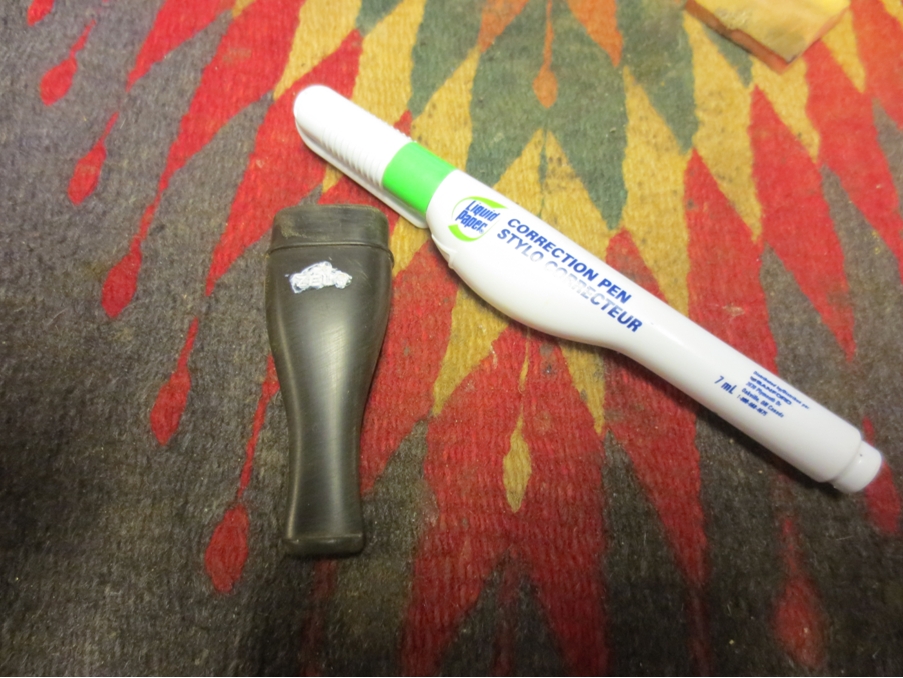
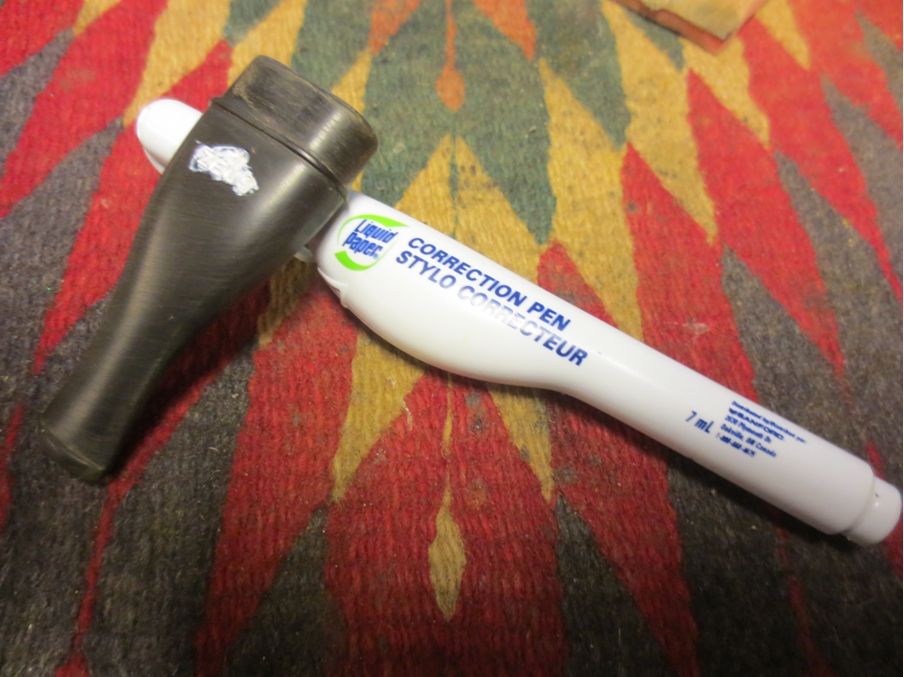
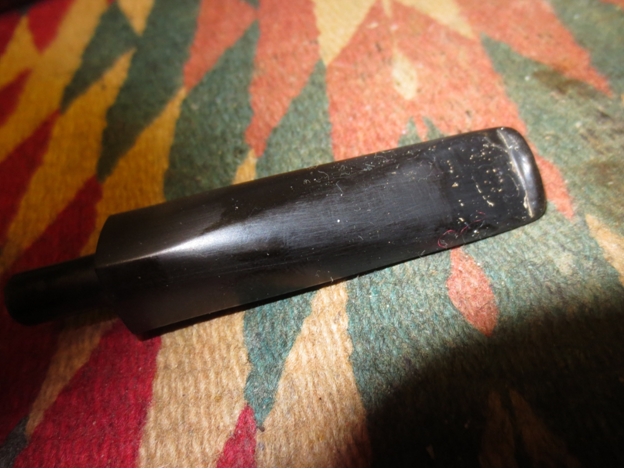
 The Oxyclean had removed some of the white in the stamping on both sides of the stem so I cleaned off the surface of the stem and then used a correction pen to reapply the white to the stamping on both sides of the stem.
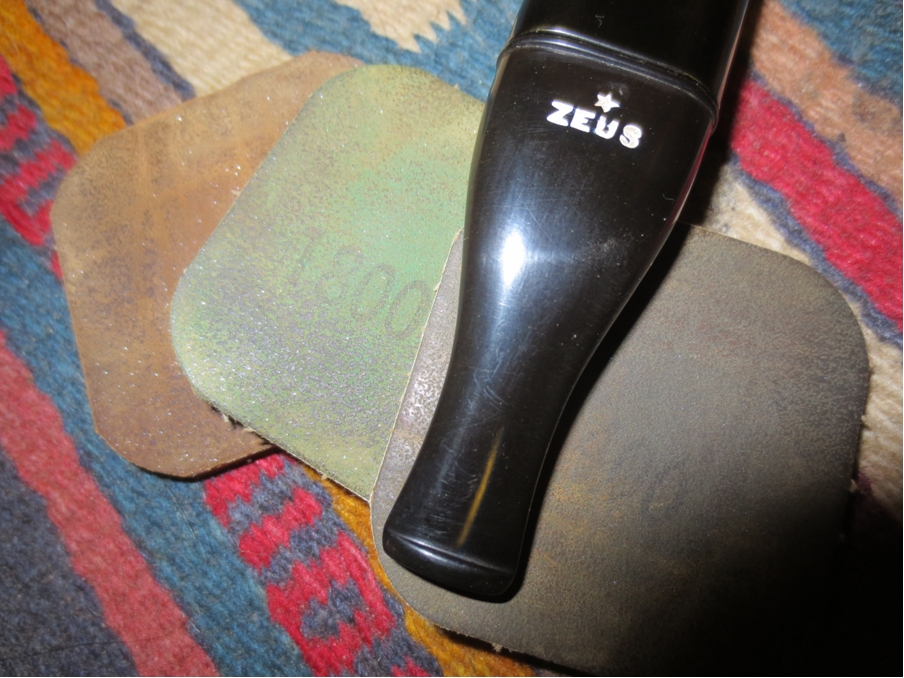
 When it was dry I sanded it with a fine grit sanding sponge to remove the excess white material and to polish the stem.
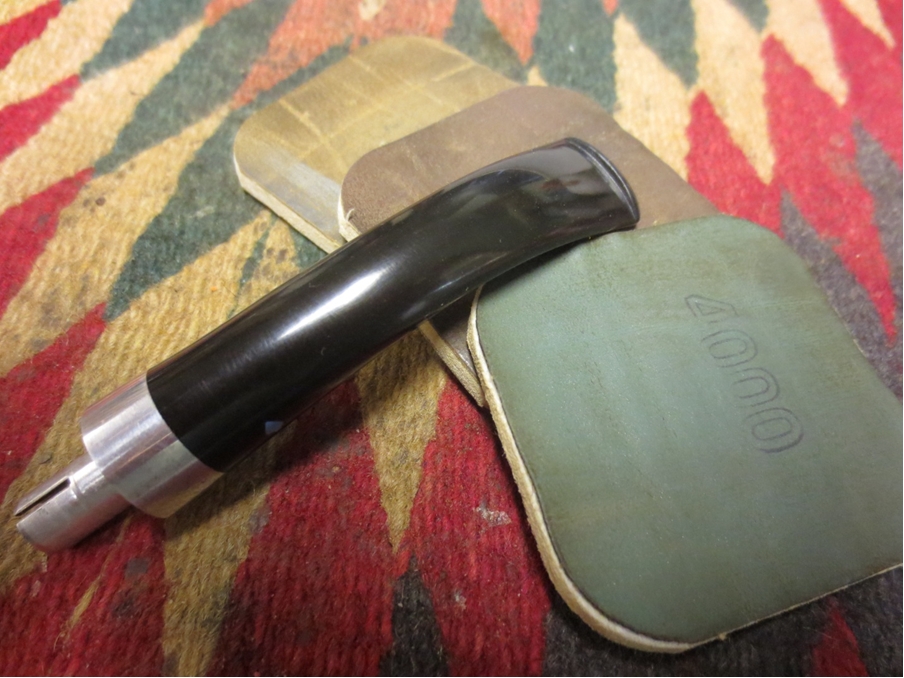
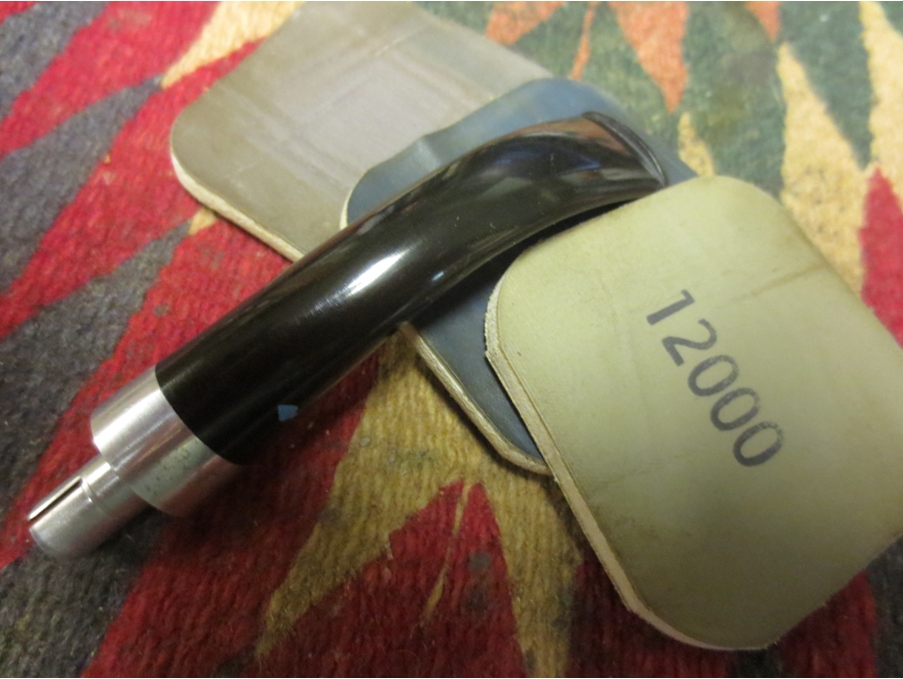
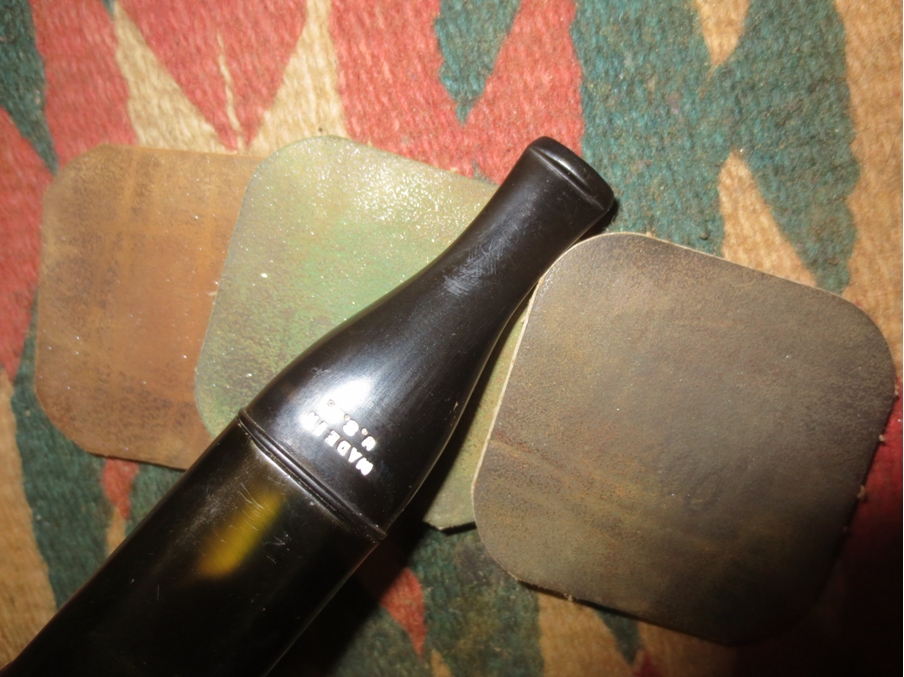
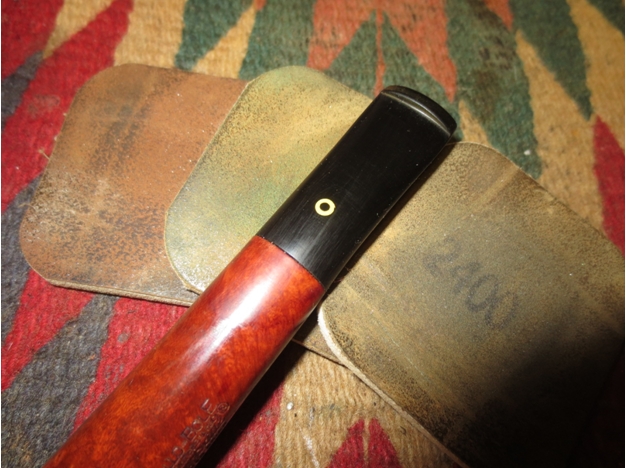
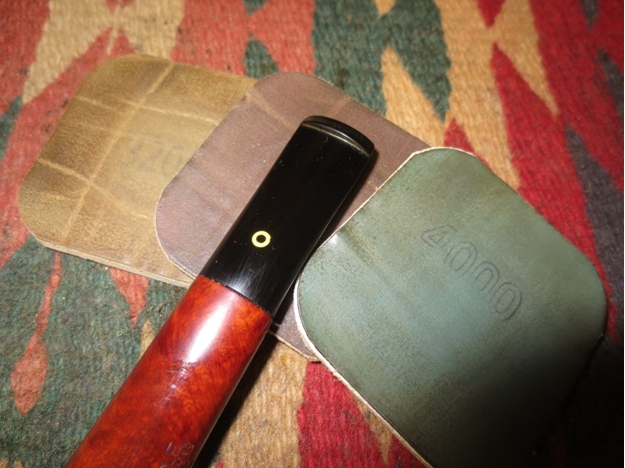
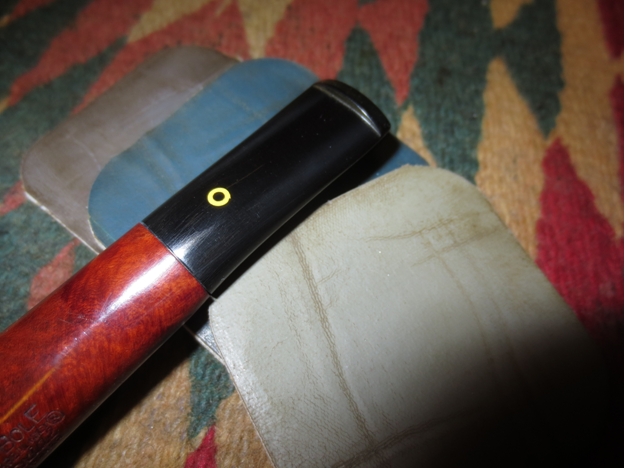
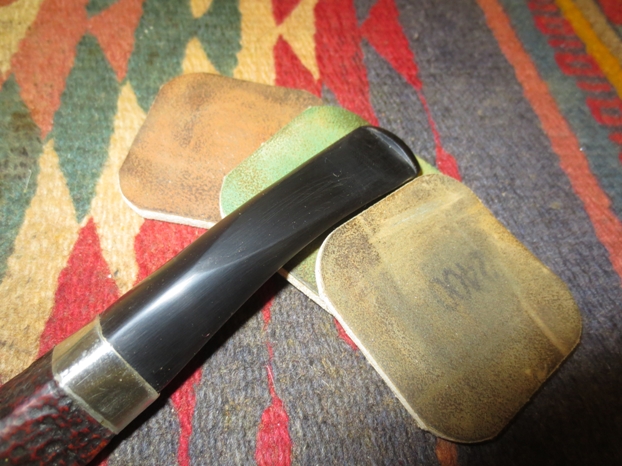
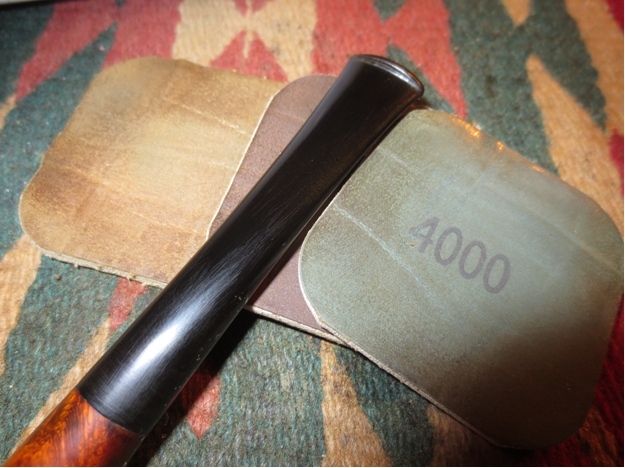
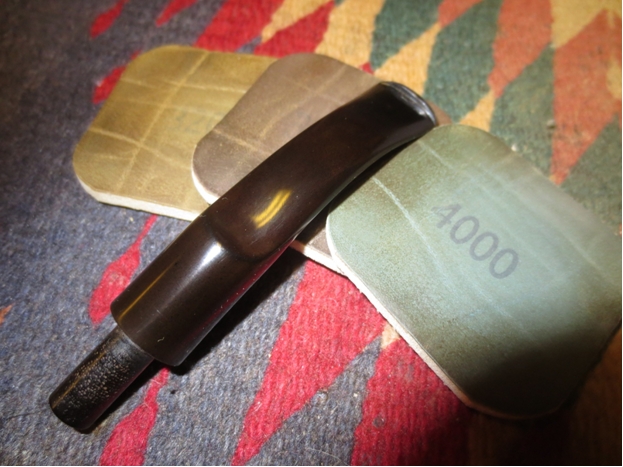
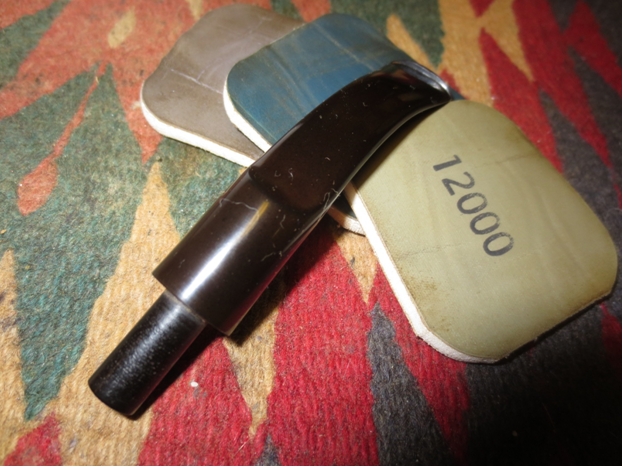
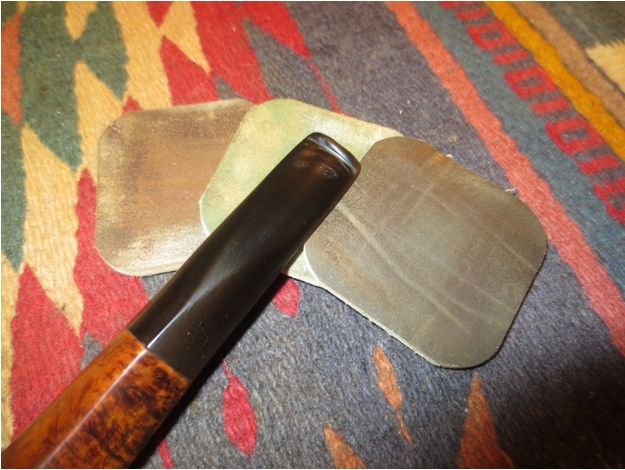
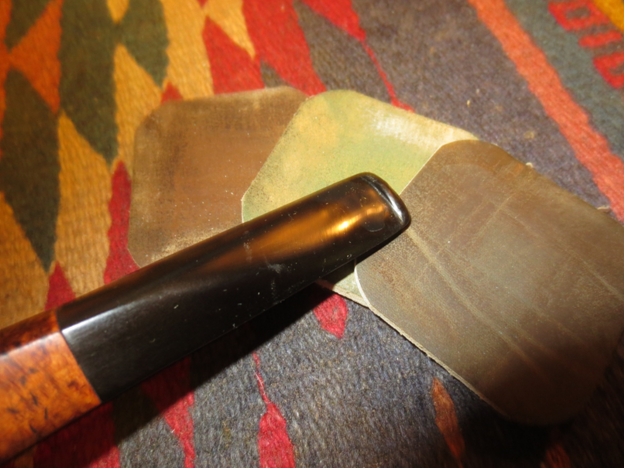
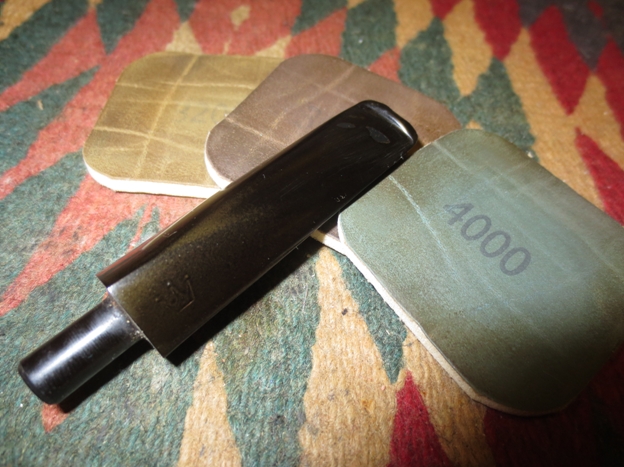
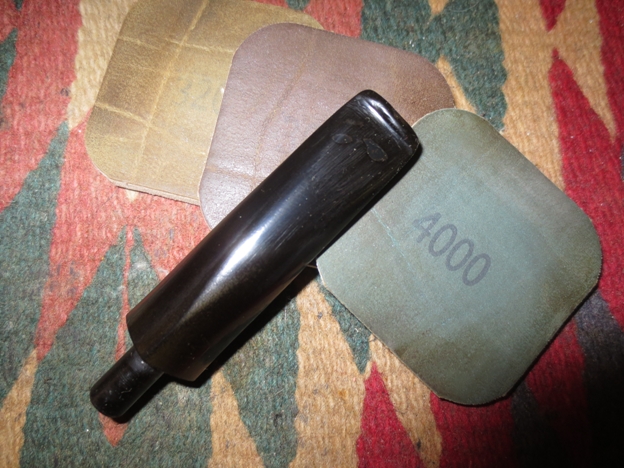
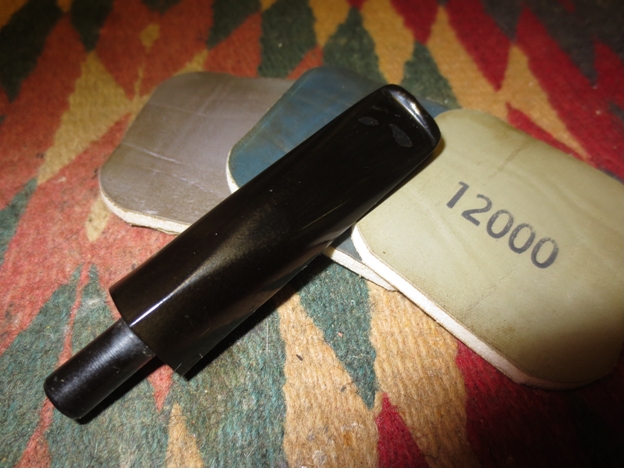
 With the stamping repaired I worked on the stem with micromesh sanding pads. I wet sanded with 1500-2400 grit pads and dry sanded with 3200-12,000 grit pads. I buffed the stem after the wet sanding with red Tripoli and then rubbed it down with Obsidian Oil before going on to the higher grit pads.


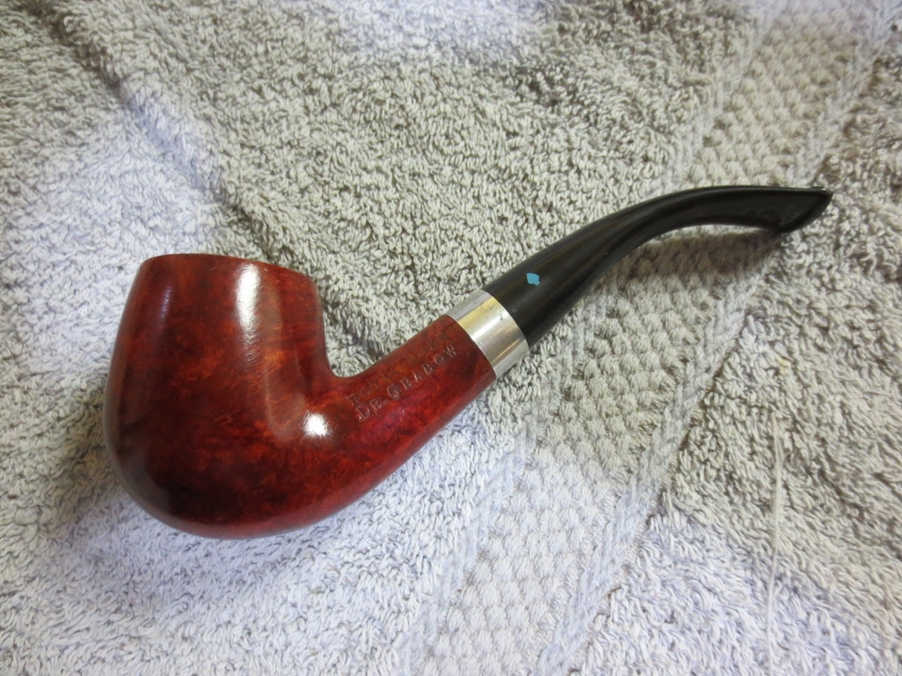
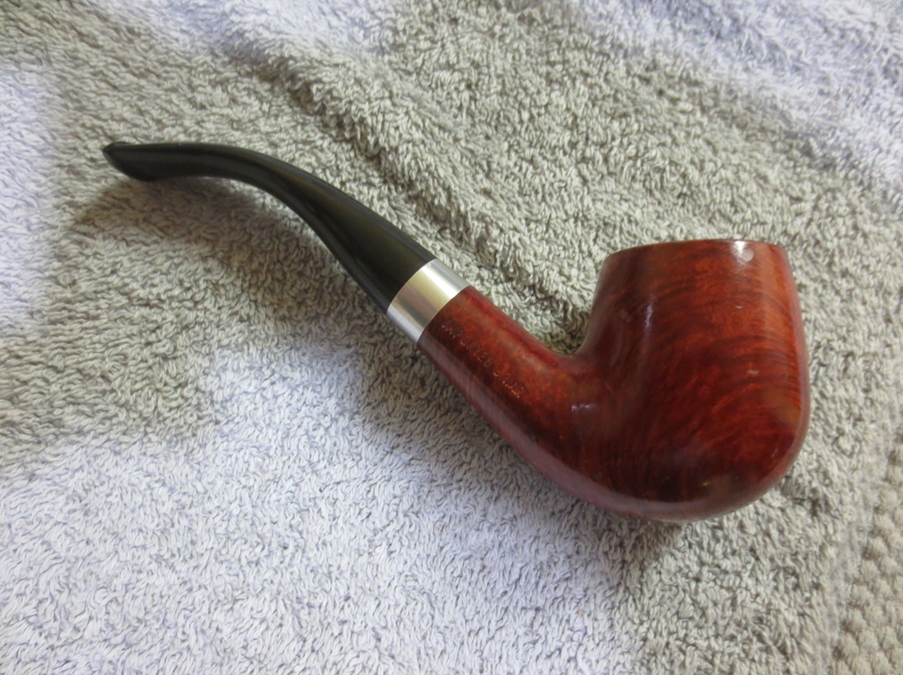
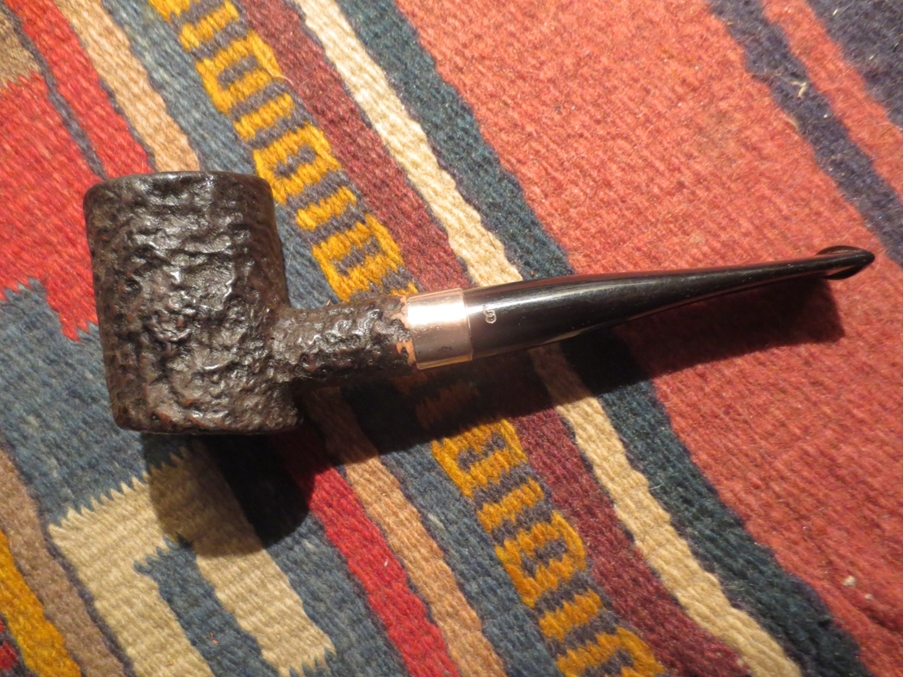
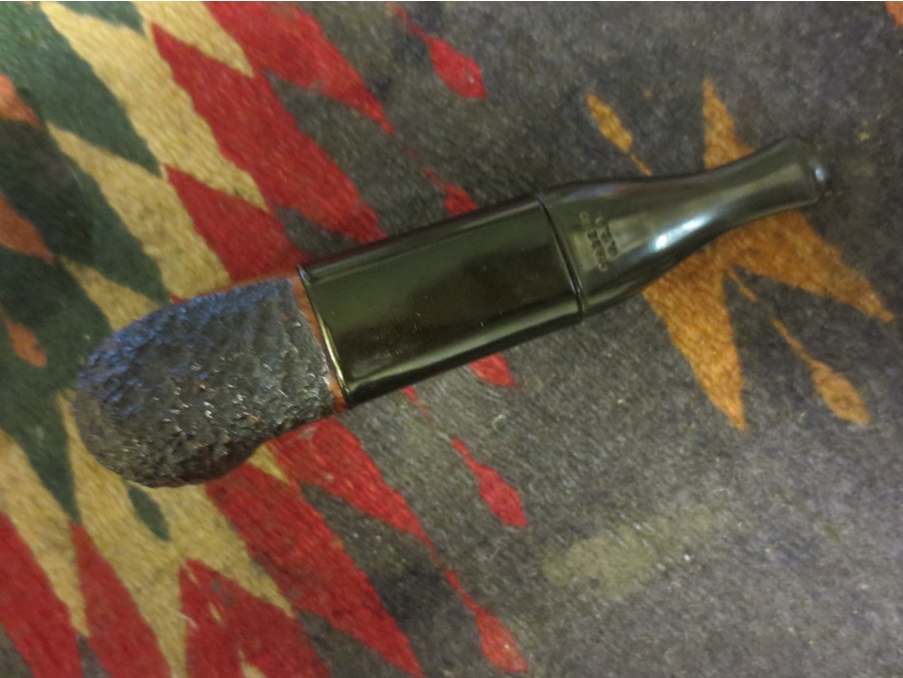
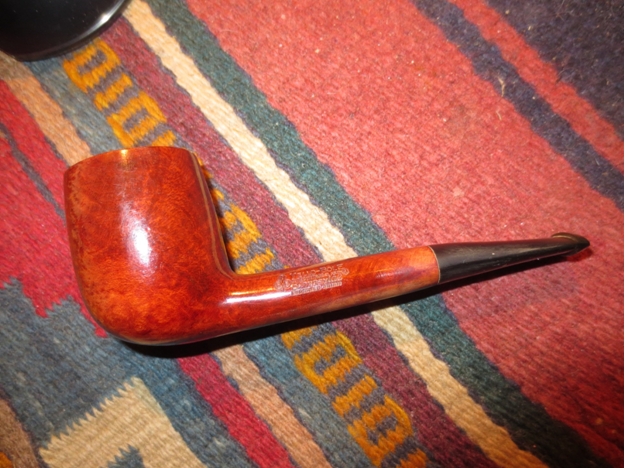
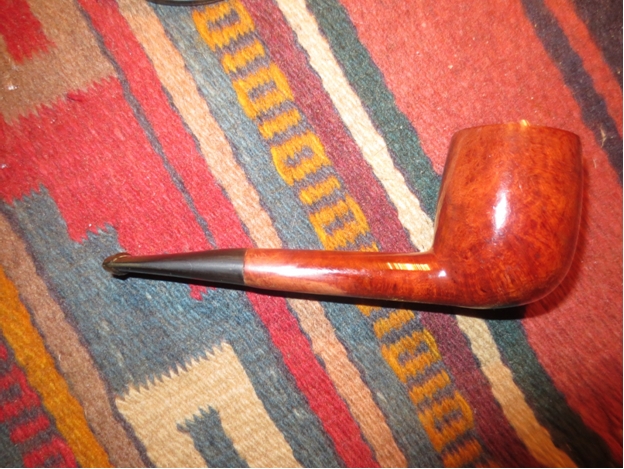
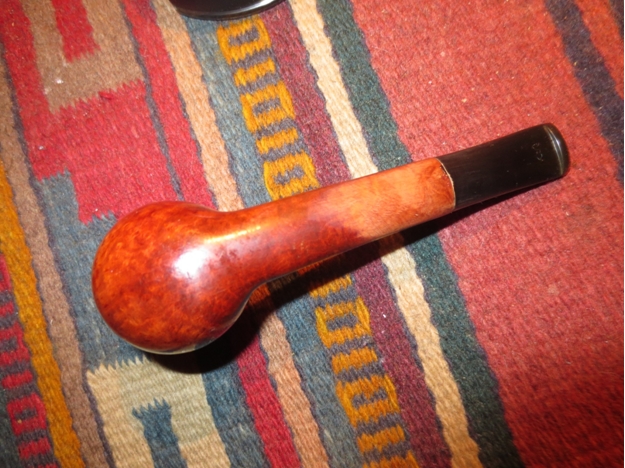
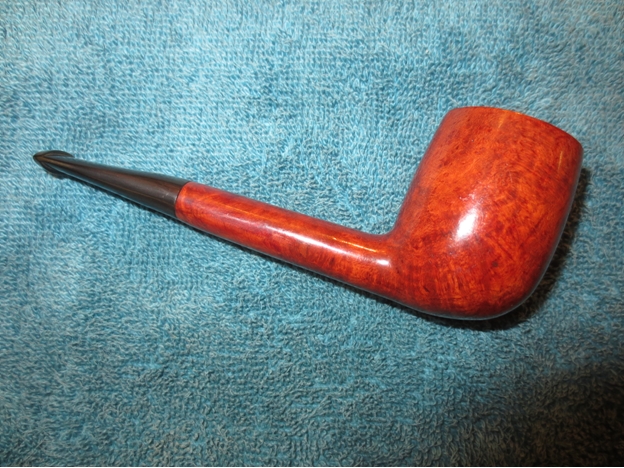
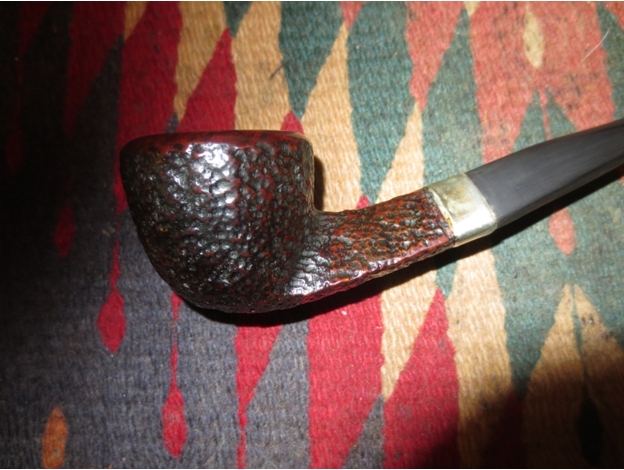
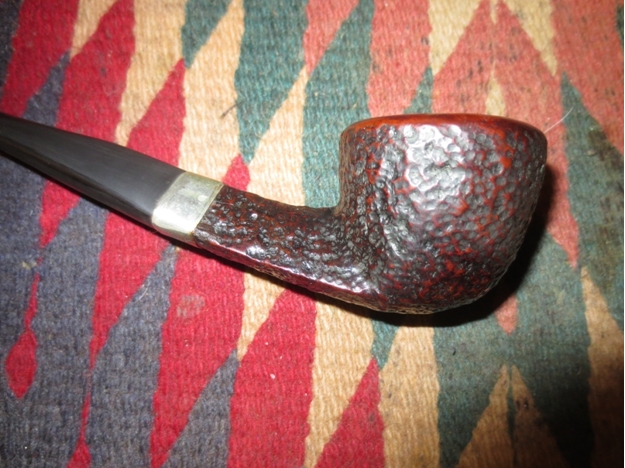
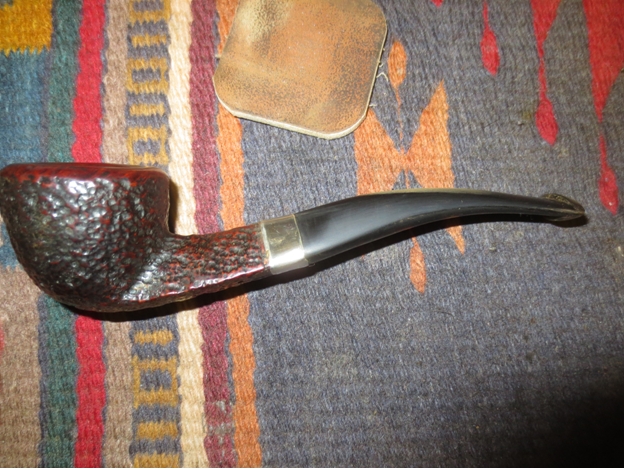
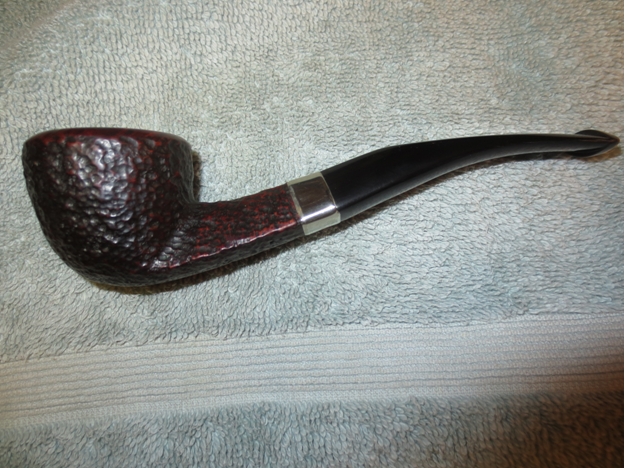
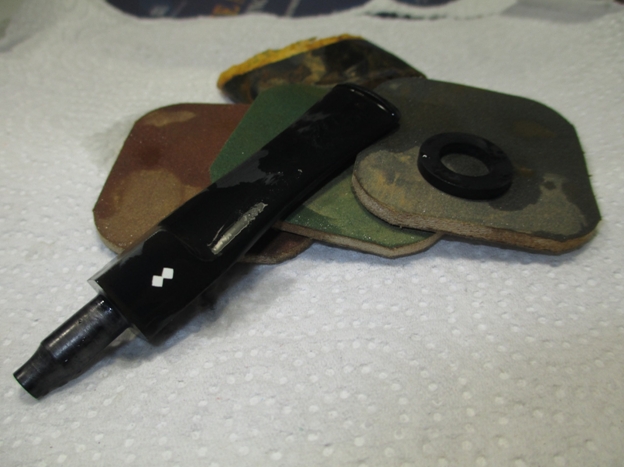
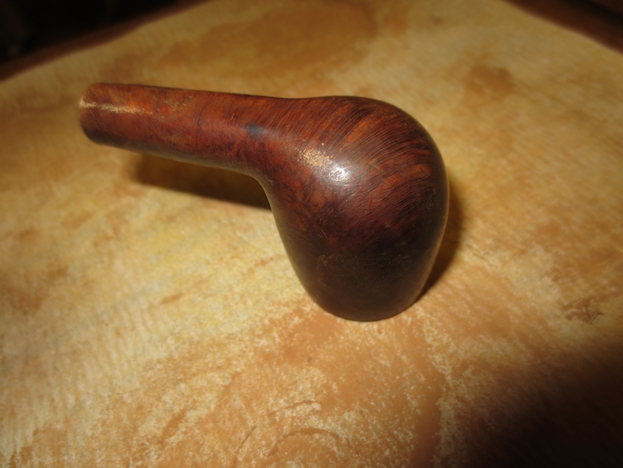
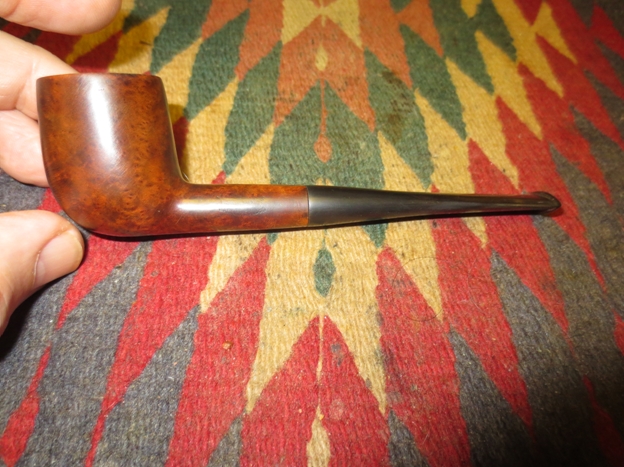
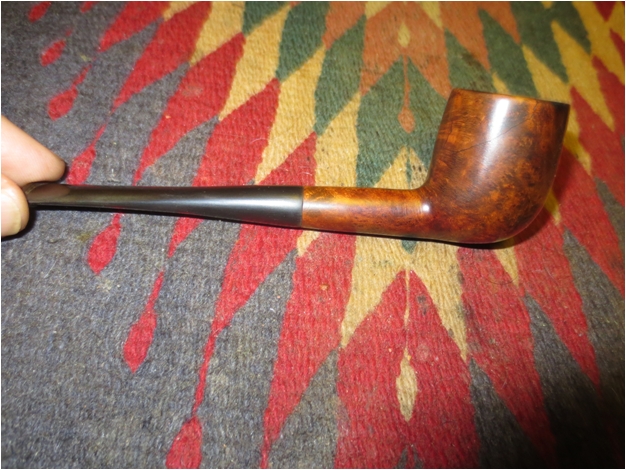
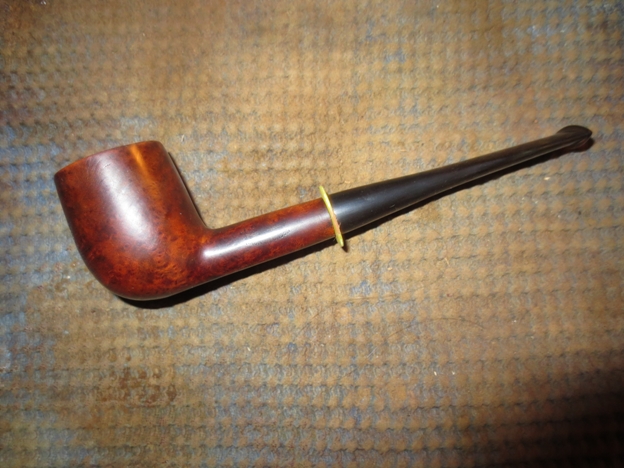
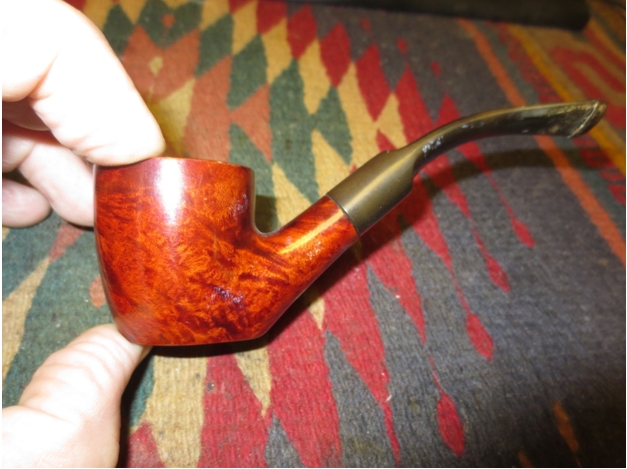
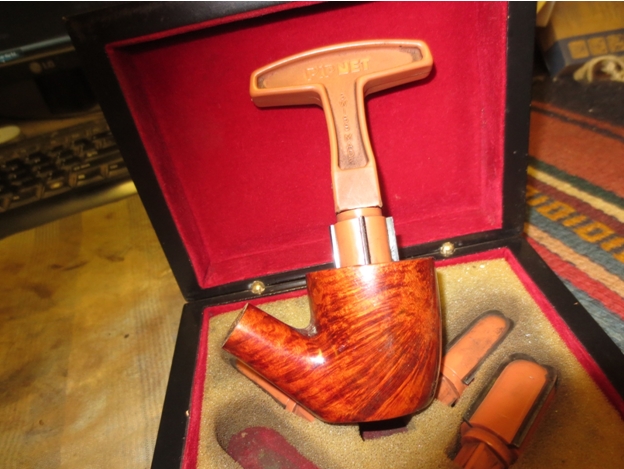
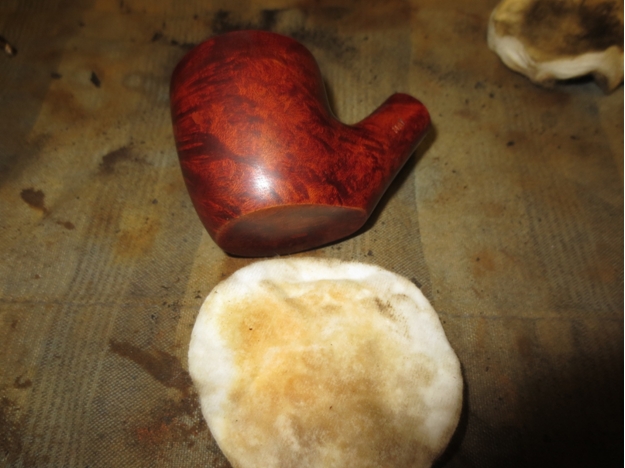
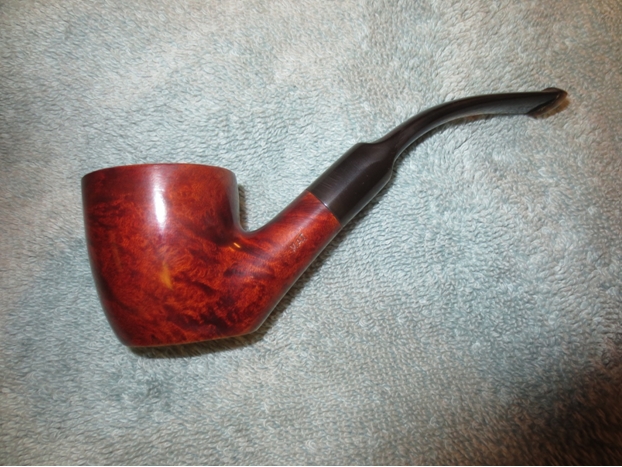
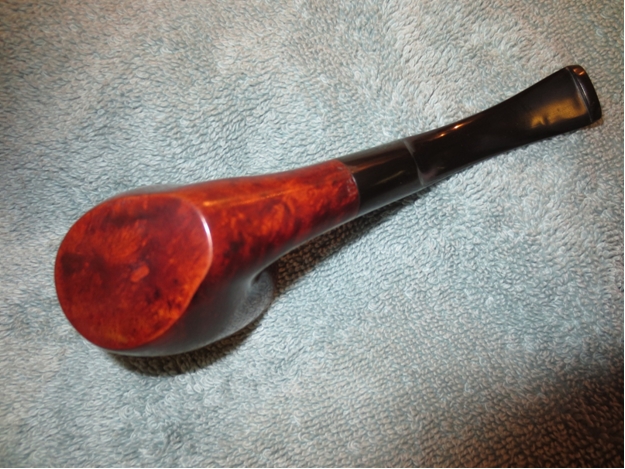
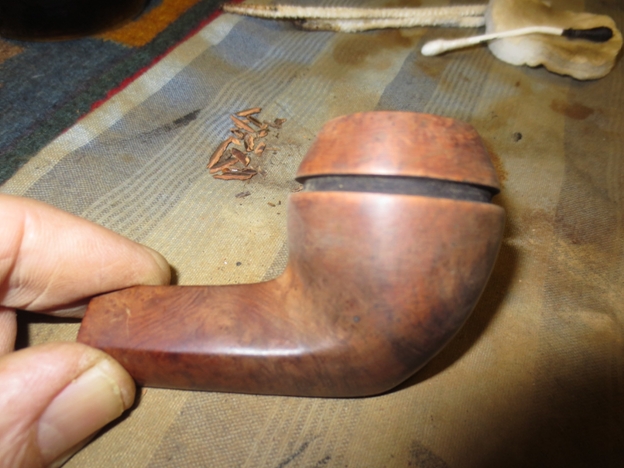
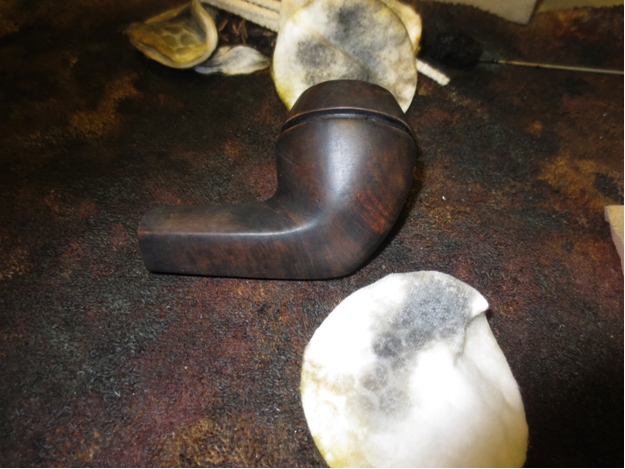
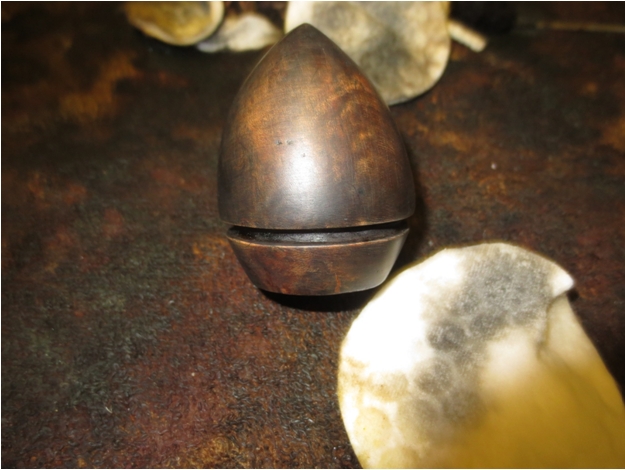
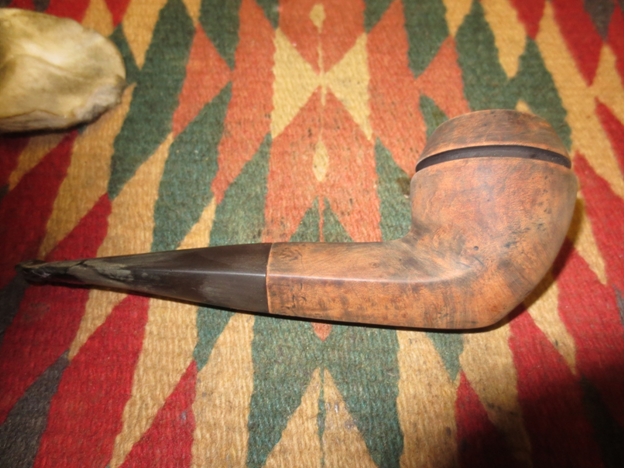
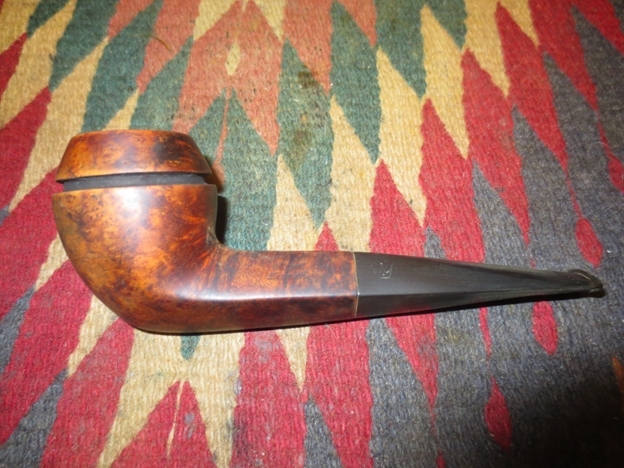
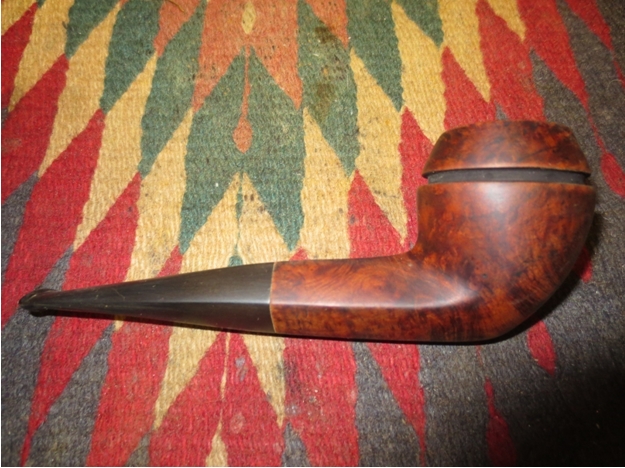
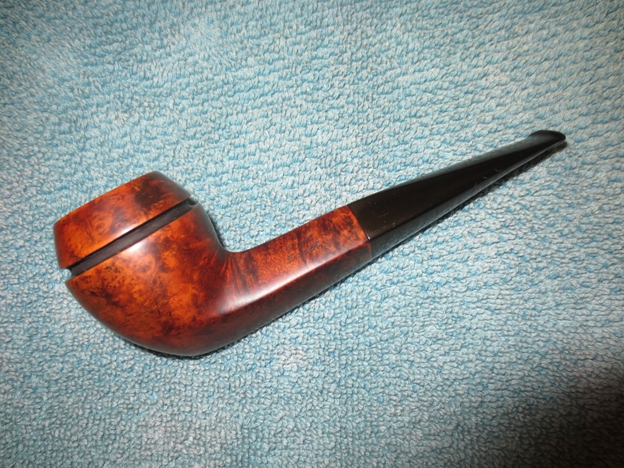
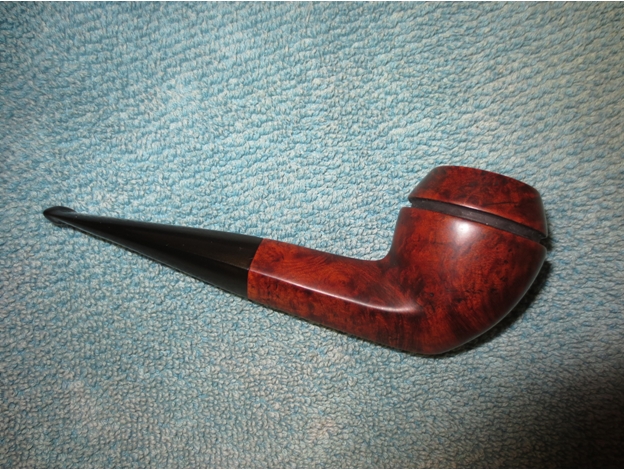
 When I had finished with the micromesh pads I buffed the stem with Blue Diamond Plastic polish on the buffing wheel and then gave the stem several coats of carnauba wax. I buffed the stem and bowl with a clean flannel buff to give a clean shine and finish the pipe. The completed pipe is shown in the photos below. It turned out really well and it will go in my display cupboard. I think one day I will have to light it up and see how it smokes but to do that I will need to find a couple of cigarettes to use as filters.


 Thanks for looking at this unusual piece of tobacciana. It will join other odd pipes that I have found over the years that bear witness to the ongoing and ever-present search for the perfect smoke.
 First step is to pick the necessary drill bit…the smallest possible where the spade barely fits on the flat end. If you’re using a current day spade from the factory, the bit size is 9/64″.
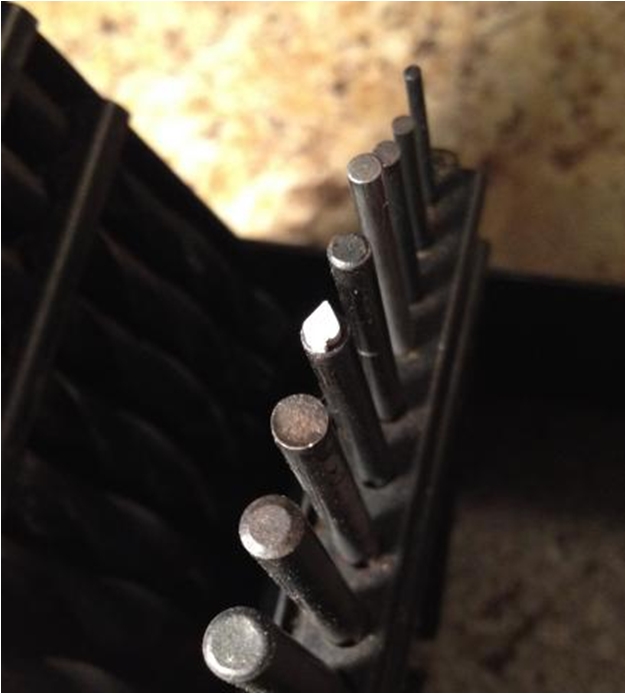 I pick the spade location and pilot a smaller hole, about half the size of the intended hole.
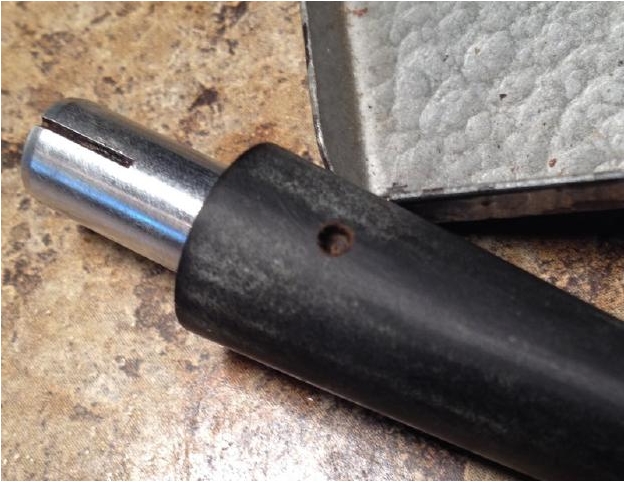 I drill the hole just deep enough so that the spade barely fits in, while also being shallow enough to leave maybe 1/4 or more of the thickness of the spade sticking out. Reason why in next step.
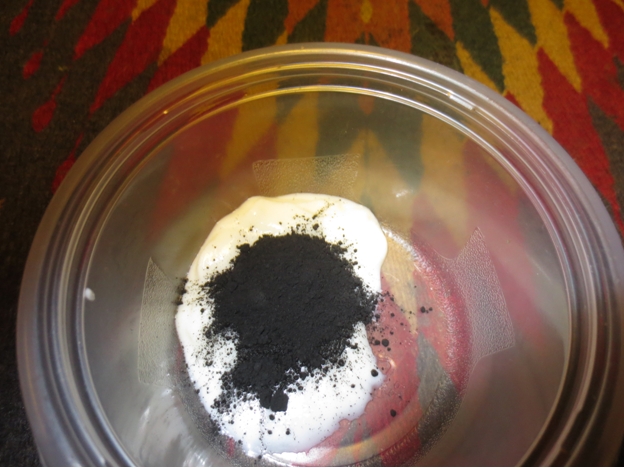
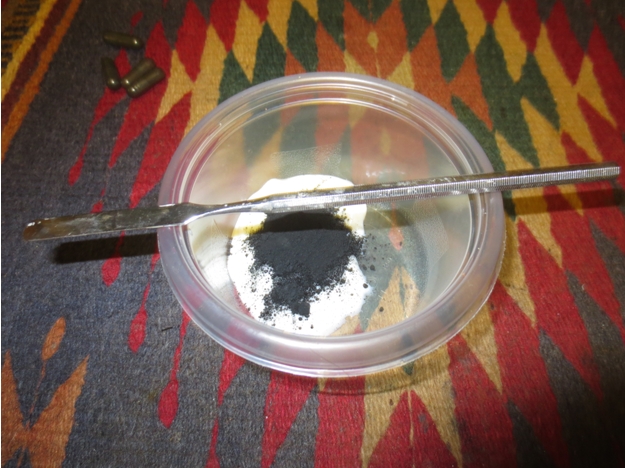
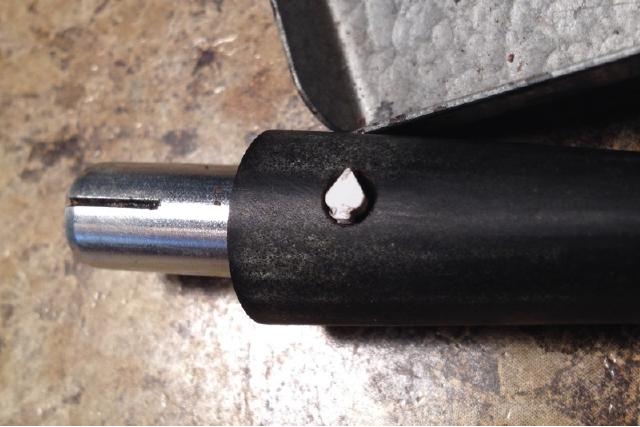 I mix activated charcoal and Gorilla brand CA (Cyanoacrylate) super glue to a consistency just thicker than honey. Fill the hole with the glue/charcoal mixture, and then carefully press the spade in. The reason I leave some of the spade sticking out in the previous step is so that when I insert it into the glue, I can still see at least part of the surface of the spade so that I can make sure it’s oriented right, and also, to assure it won’t be in too deep. If the hole is too deep, it’ll be difficult to keep the spade from sinking into the glue…it will get covered up, may become incorrectly oriented (without you knowing), and at least some of the spade may end up lower than the surface of the stem when you’re done. Take it from me after messing up on a couple. Also…both sides of a spade are flat when they’re made. So…at least the corners of the spade need to be higher than the surface of the stem, so that when you file and sand it, it will be rounded with the contour of the stem, with none of the spade concave.
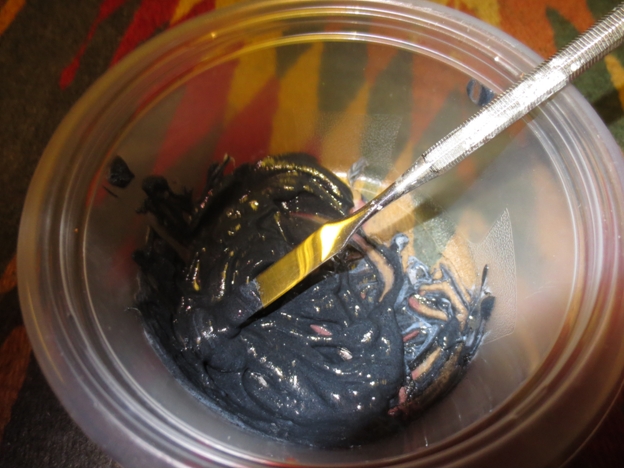
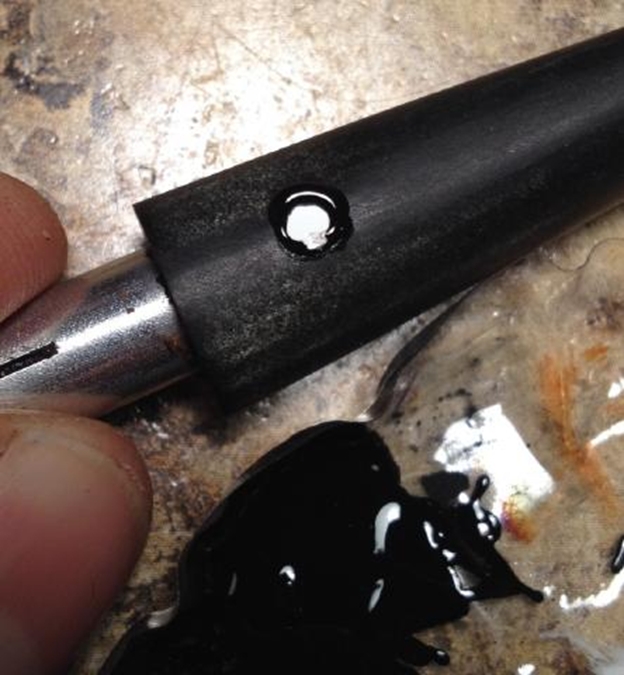 I take a toothpick and press the glue carefully, all the way around the spade in an attempt to eliminate any pockets of air. It ends up covering the edge of the spade.
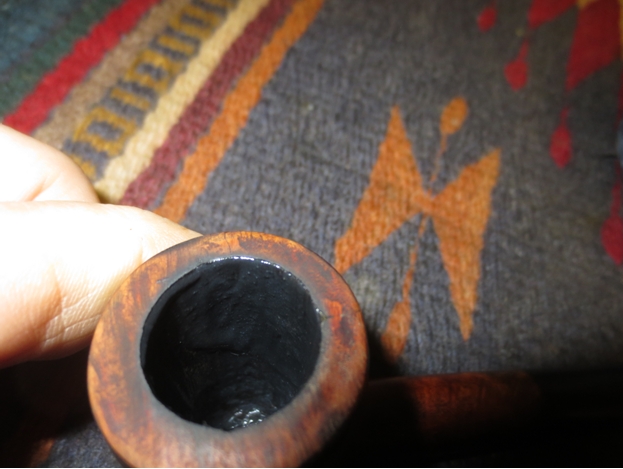
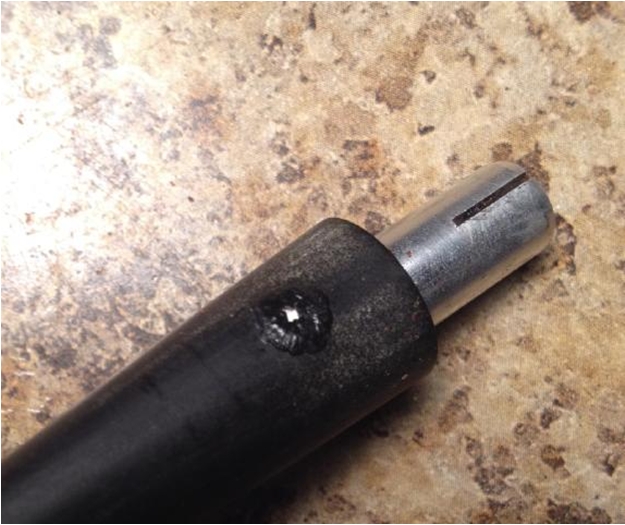 Once it dries hard (maybe an hour), I use a small smooth file to shape the hardened glue and the surface of the spade down to the surface of the stem.
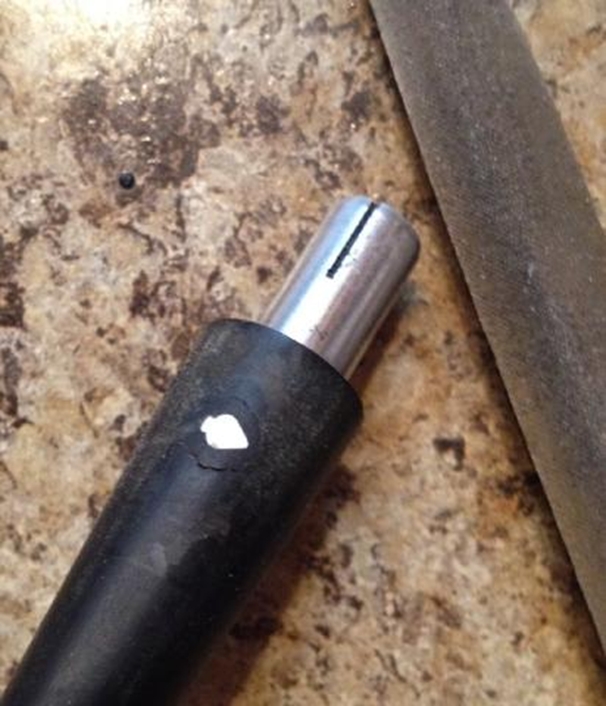 Here it is after filing and sanding, pre-buff.
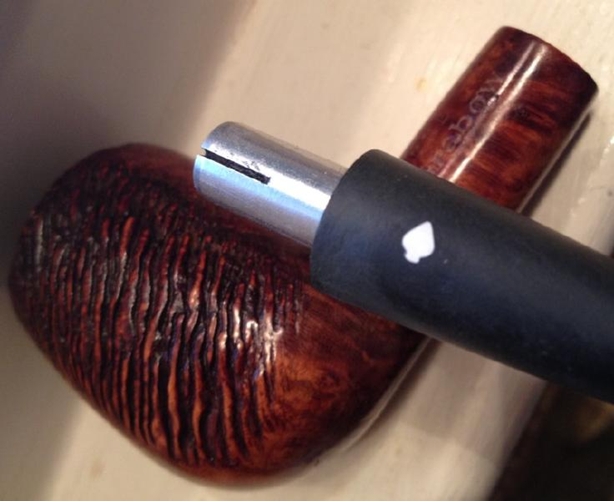
 Here is the material – briar dust (not super fine) and Gorilla CA.
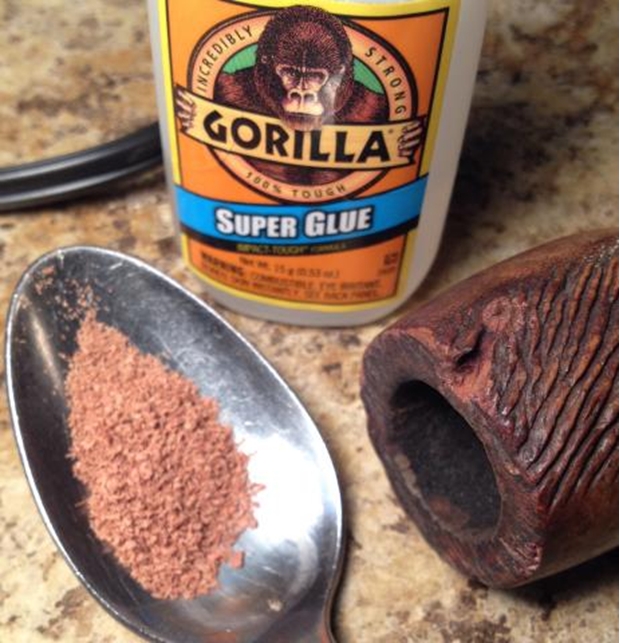 Cover the surface of the hole to be filled with glue. If it’s a pocket, I fill the pocket…because I’ll be essentially pressing the briar shavings into the glue, and it will then dry rather quickly.
 I sprinkle briar into the glue, and I carefully push the shavings into the glue using a toothpick…being careful to not simply push the glue out of the cavity.
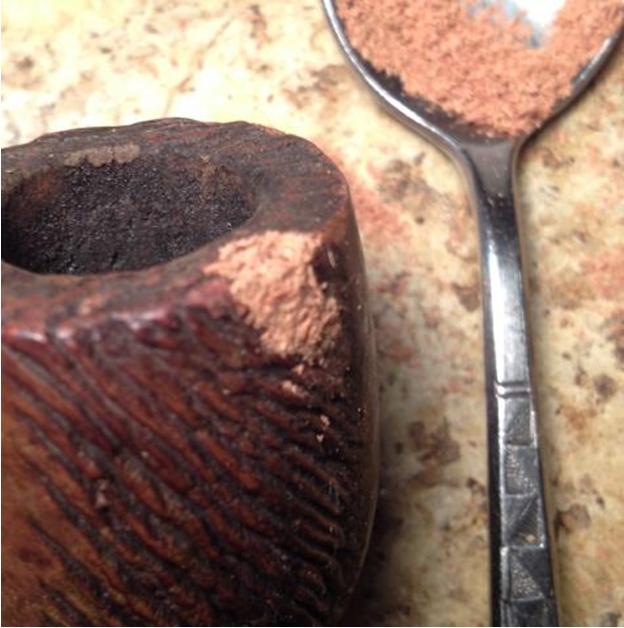 I then lay another coat of glue on top of the repair, then sprinkle more briar on top. This time, I use my fingers to press in on the dry layer of shavings…pressing gently into the repair, shaping it. As needed, I drop more shavings on top, so as to not glue my fingers to the repair. The repairs I’ve done have been taking 2 to 3 layers like this…with the last layer being pressed in more firmly. You can feel the glue hardening up. Once it’s hard, I wait just a few minutes, then it’s time for the filing – to shape the repair to the proper height and contour.
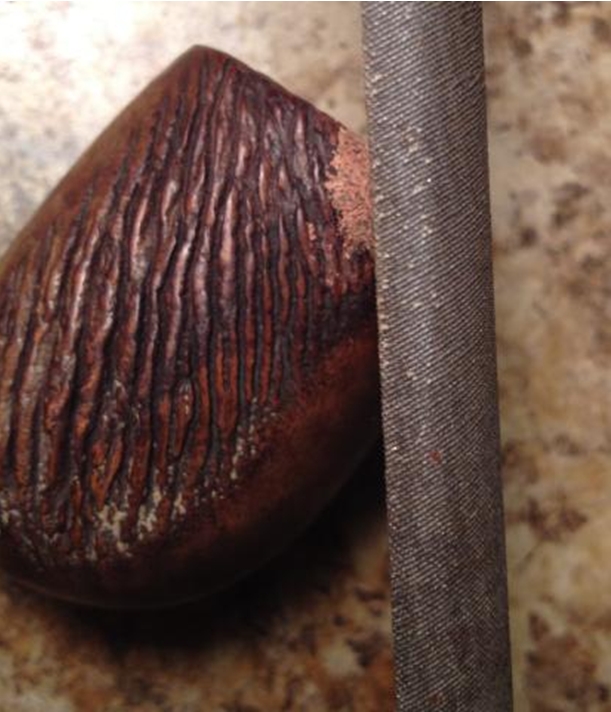 Once filed to shape, time for some ‘fake’ wire carving…done with a Dremel and a dental bur I got from Ozark.
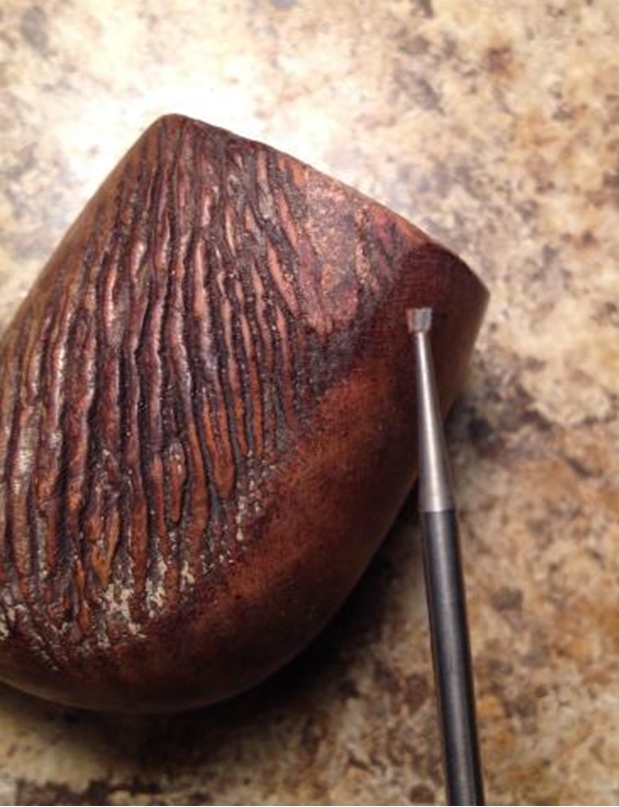 Here it is after Dremel effect and some light sanding.
 Here it is after some dark brown stain in the wire carving, drying, then more light sanding to remove the stain from the higher parts of the wire carving.
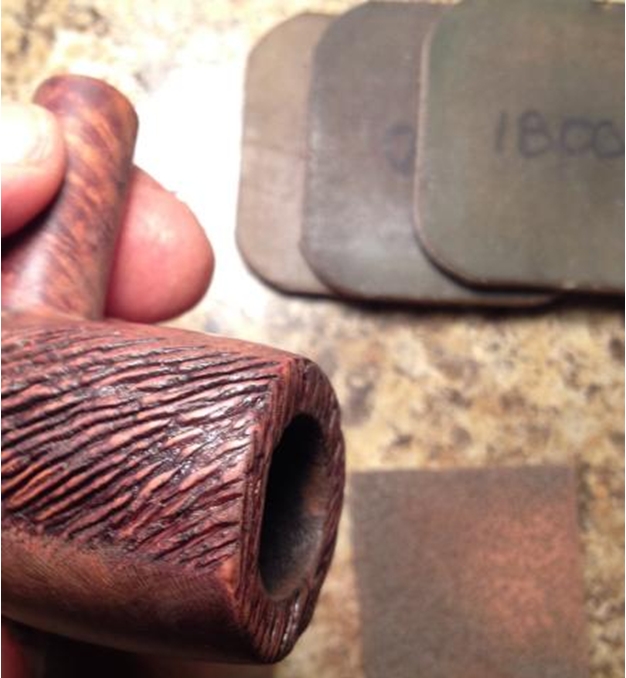 Followed by higher grit dry sanding, then micromesh sanding 1500 – 3200. Already had a decent finish, but then buffed with Carnauba.
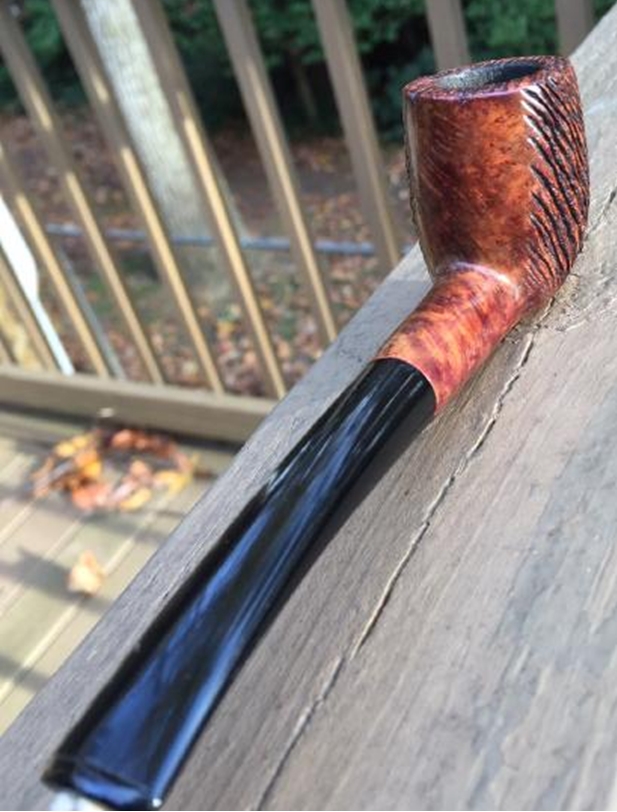
 This is a straight billiard pipe. I like a slight curve in the stem, so I added that.
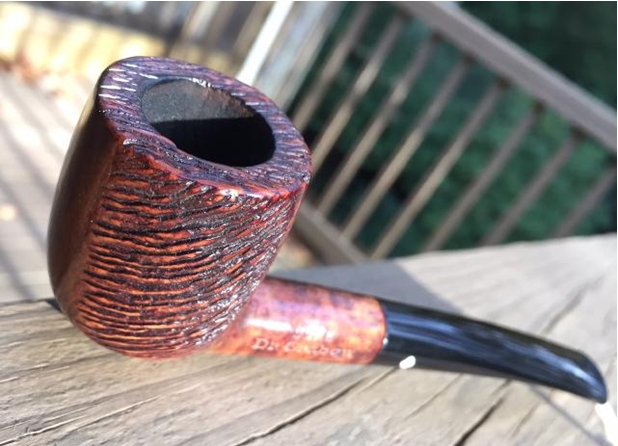
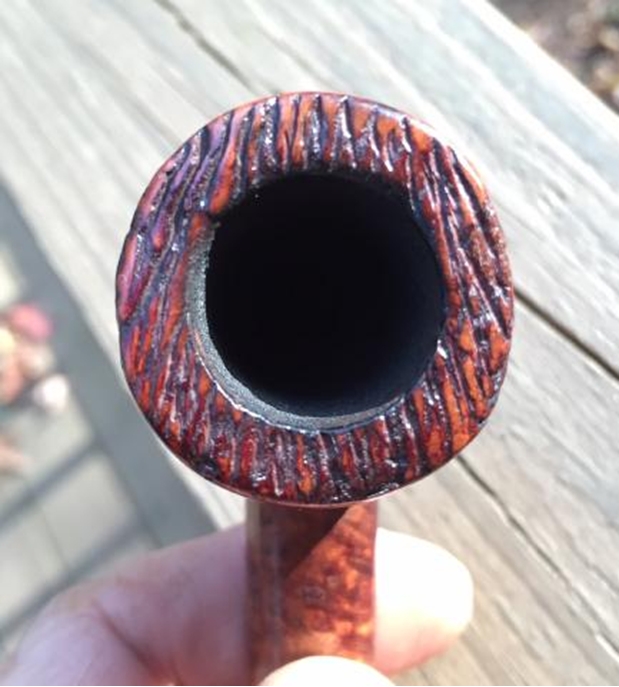 The upper right corner in this pic is where the missing chunk was.
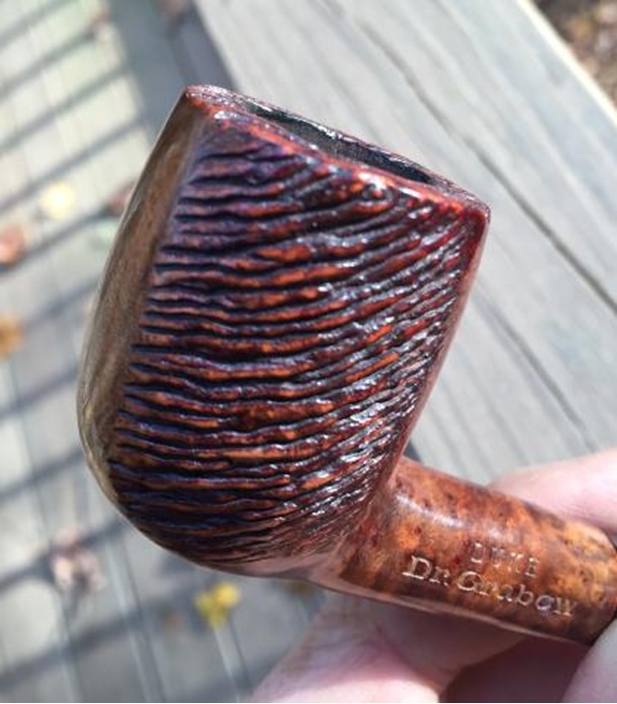
 One last detail. One or two of these partially wire carved pipes have surfaced, and someone asked earlier if the wire carving was done, and then parts of the bowl sanded down. Nope. You can see that the smooth parts of the bowl are at the same level as the highest parts of the wire carving…so the wire carving was done here on 2 sides and then just the rim.